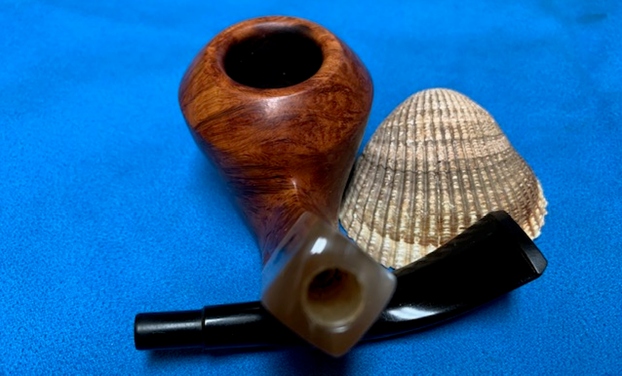
Blog by Paresh
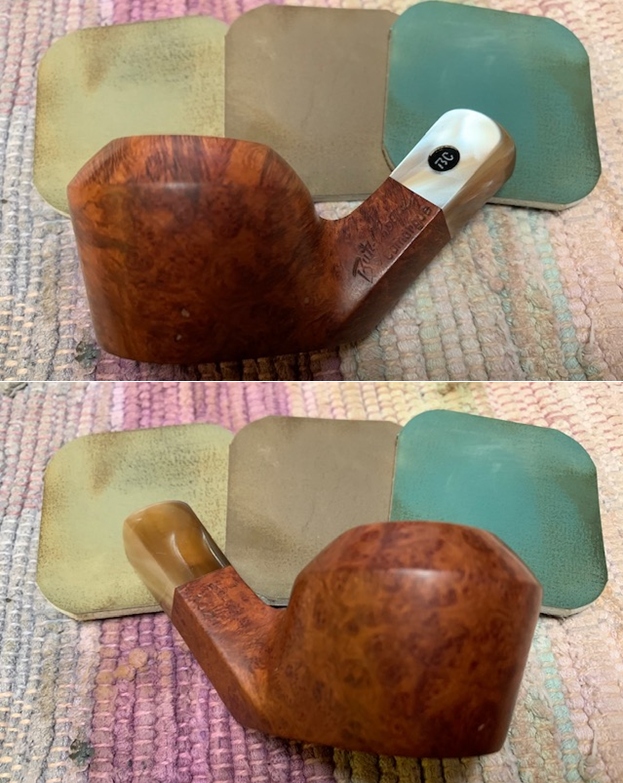
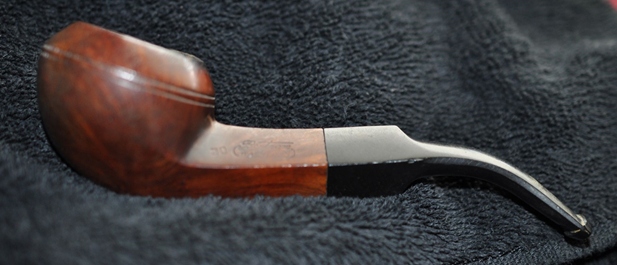
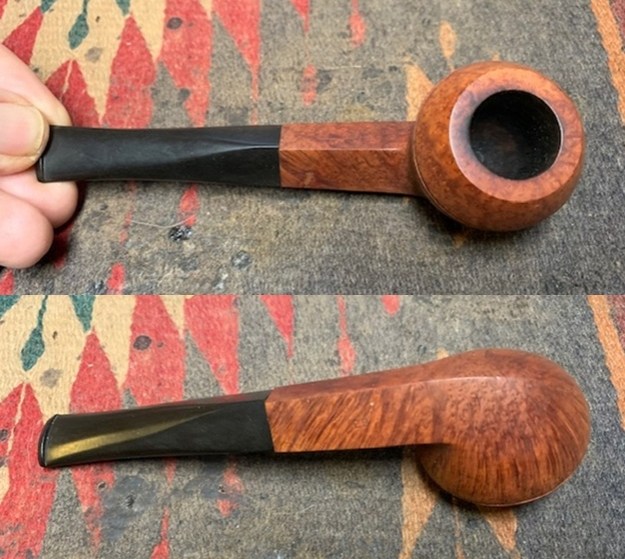
Over the last few years that I have been on eBay, I have had mixed experiences about buying pipes. After a few trial and errors and dealing with various sellers on eBay, I have shortlisted a few sellers who have consistently and flawlessly been delivering pipes to me and over the years a bonding has developed between us. The best part about these sellers is the description of the condition of the pipe that is up for sale/ auction. One such seller is a French gentleman who always has unique French pipes up for sale in his store. The next pipe that got my attention is a beautiful bent billiard with a horn stem that came to me from this seller last year.
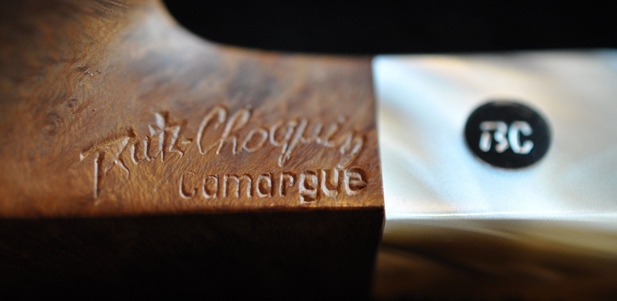
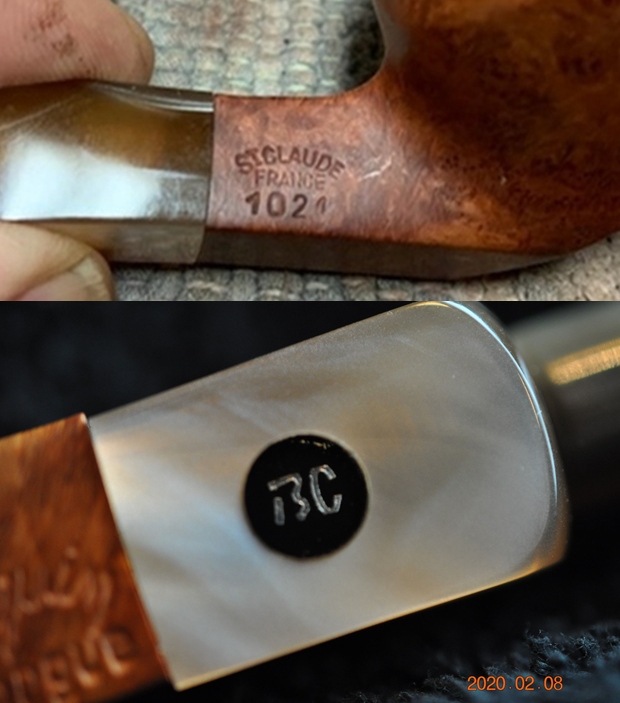
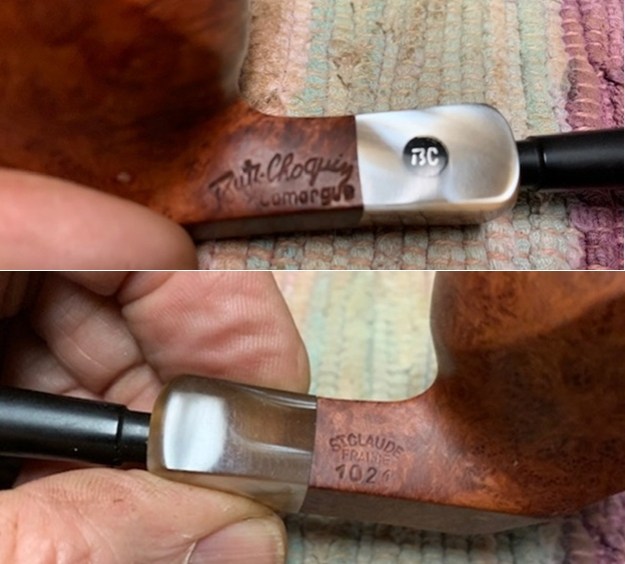
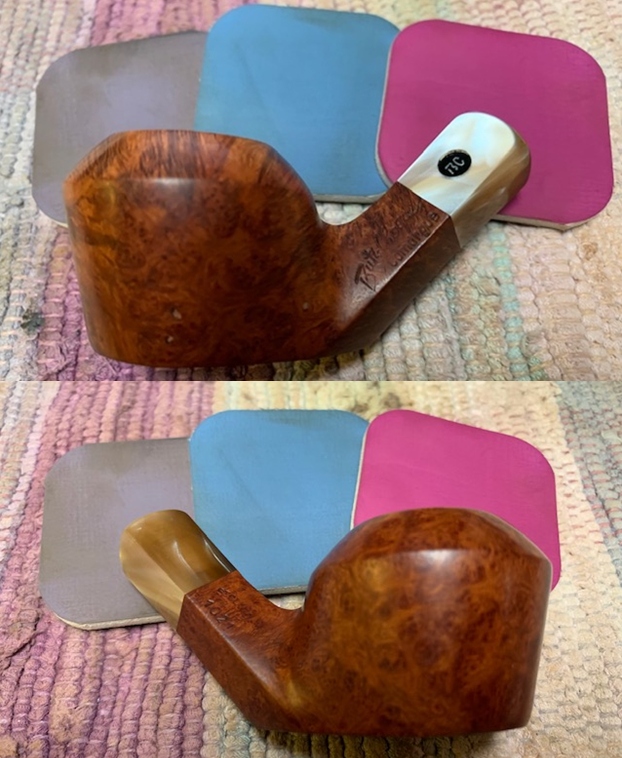
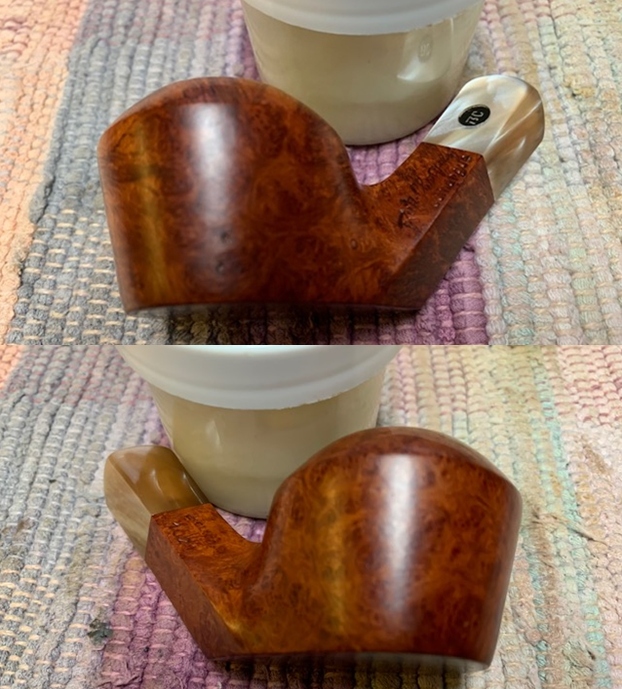
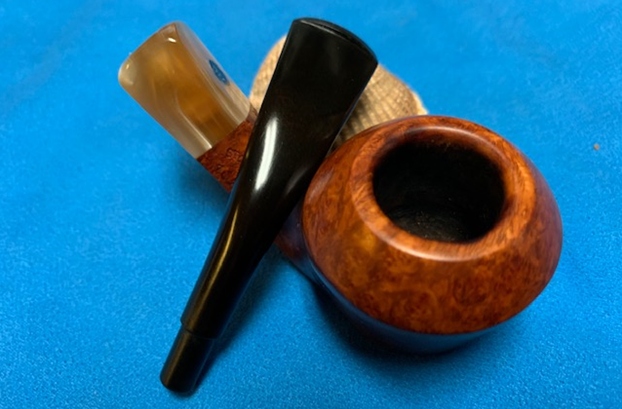
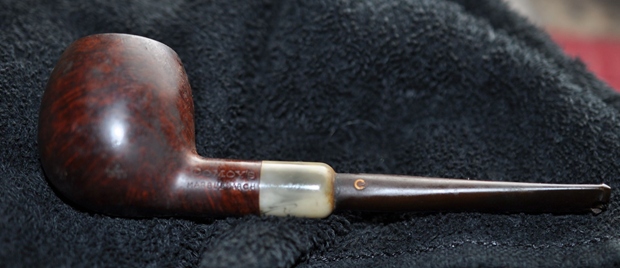
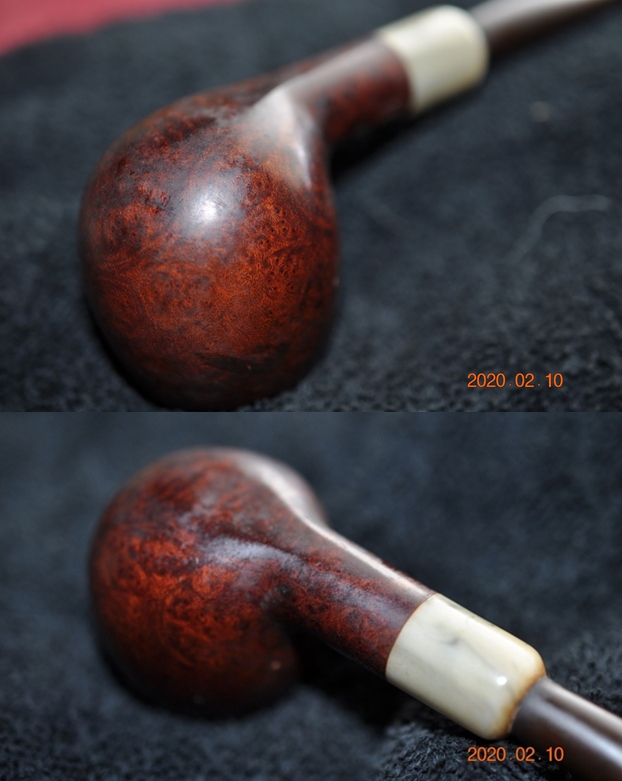
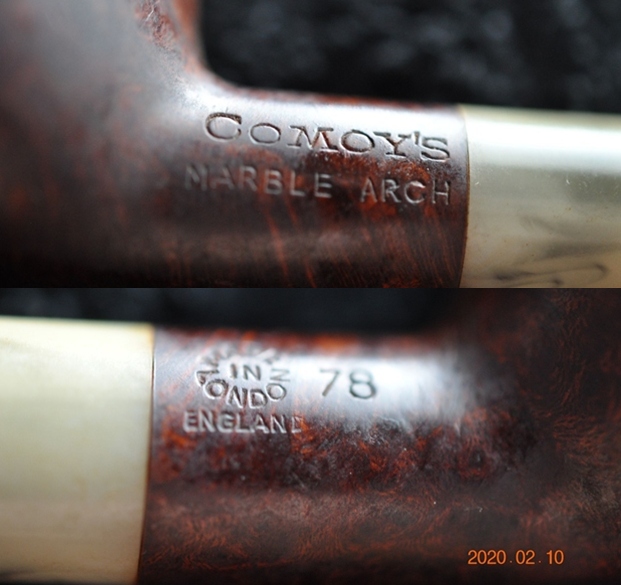
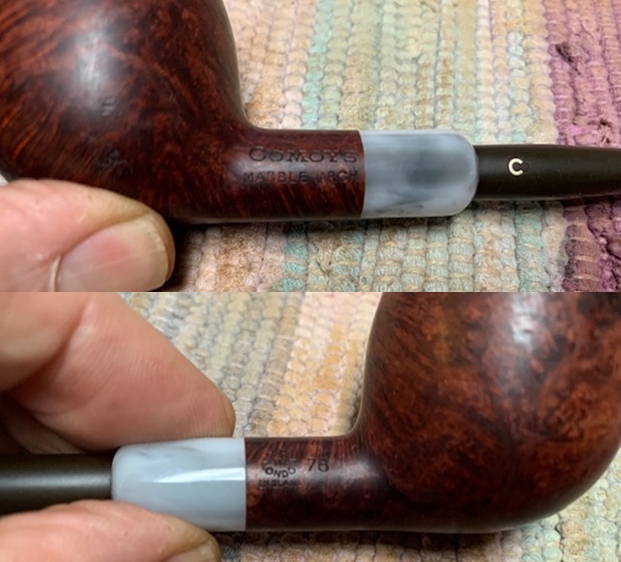
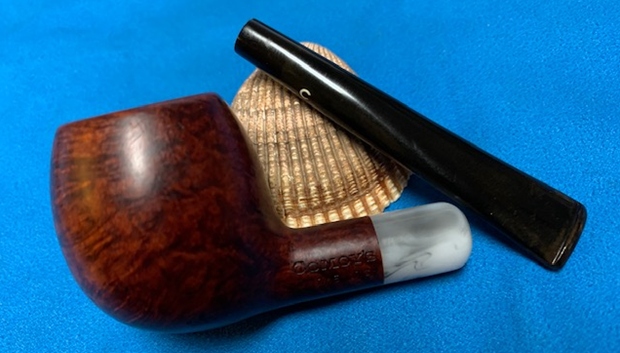
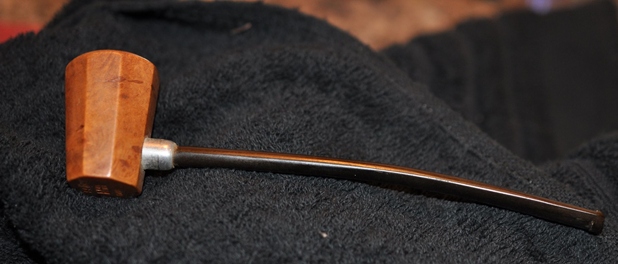
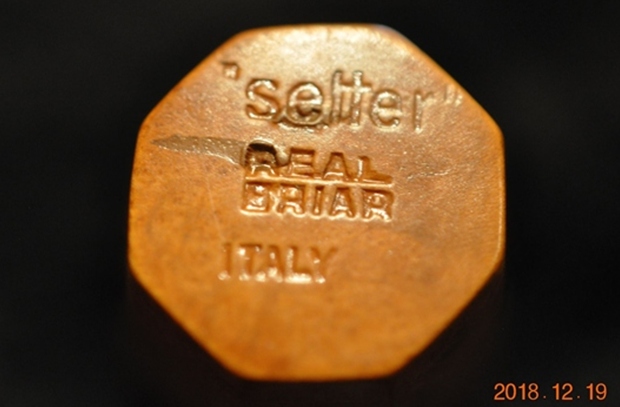
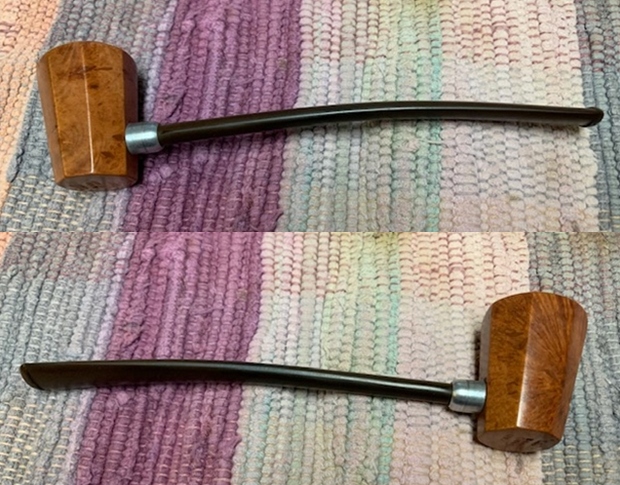
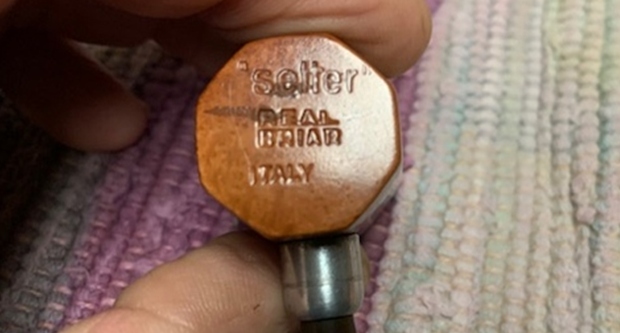
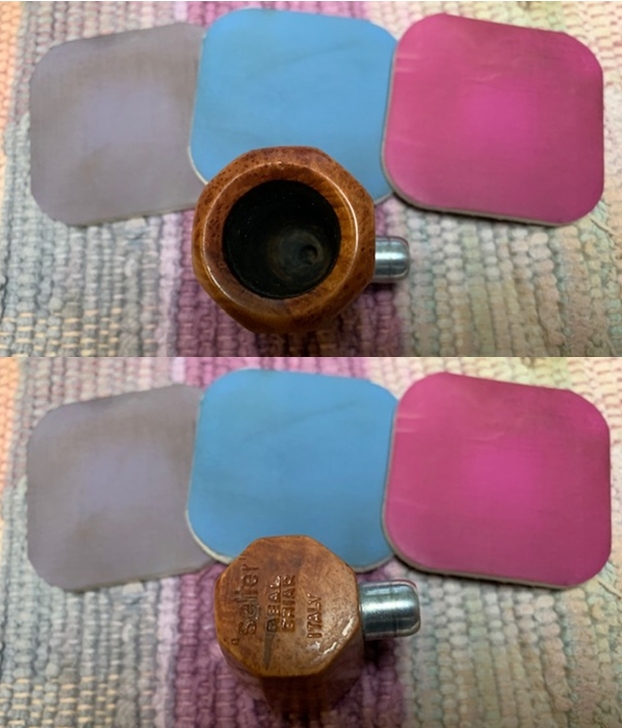
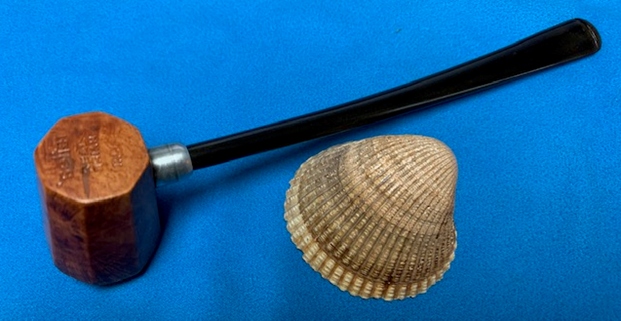
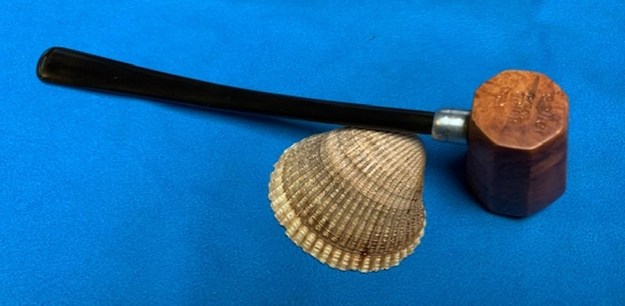
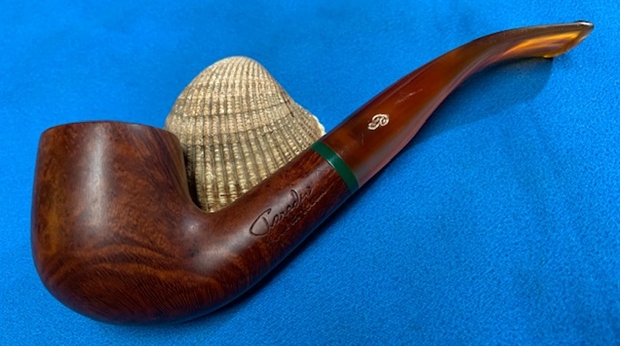
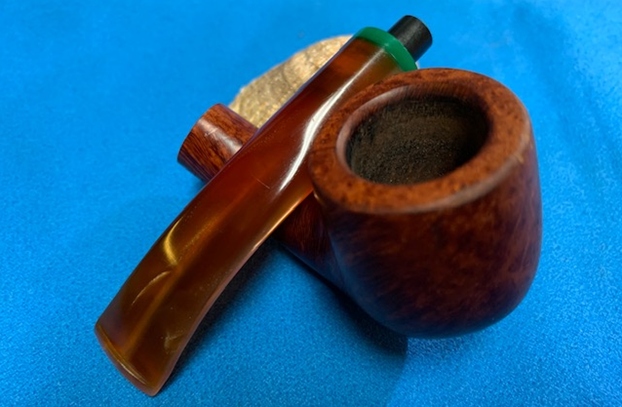
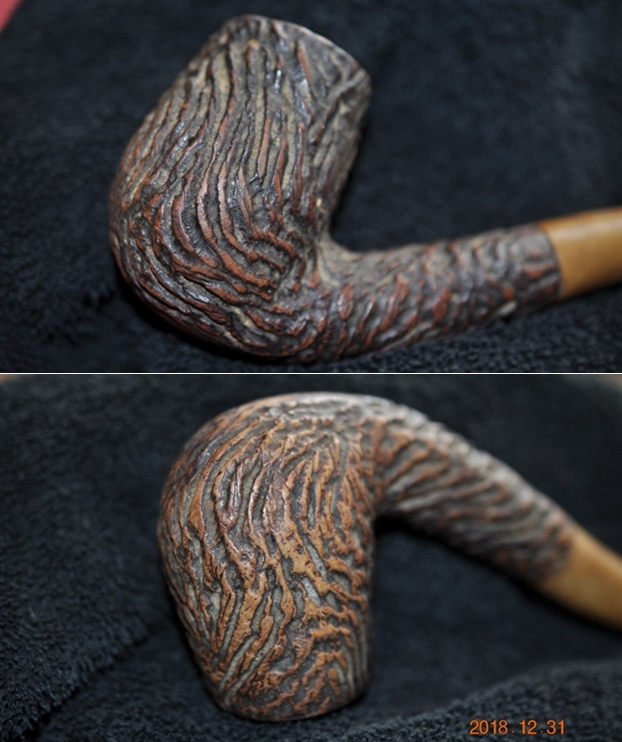
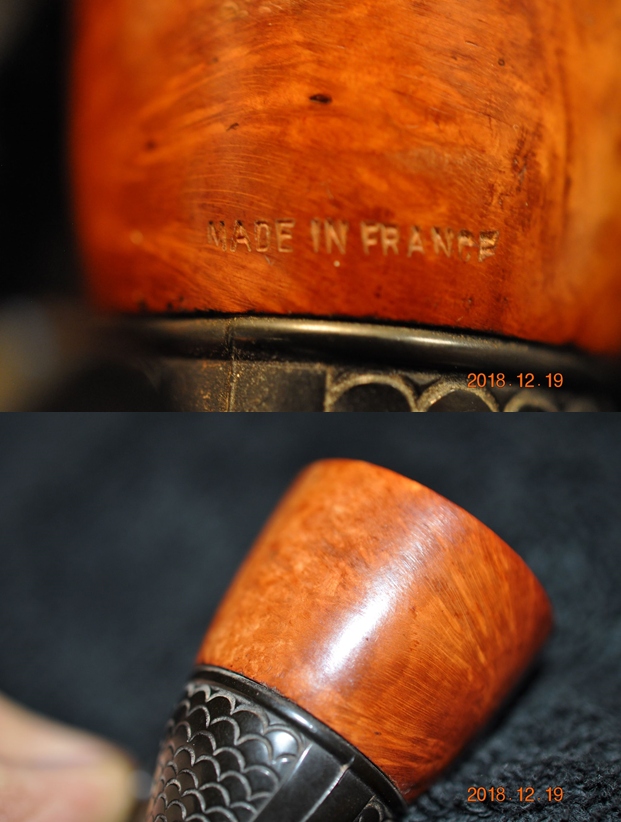
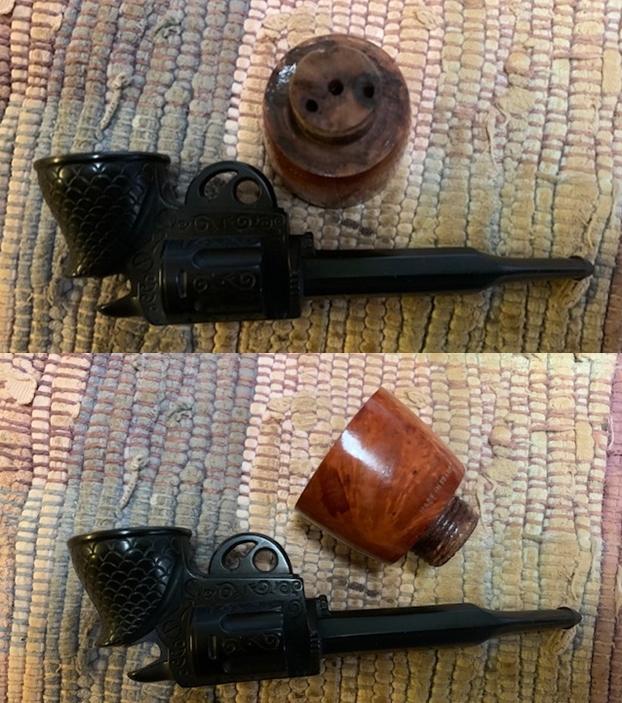
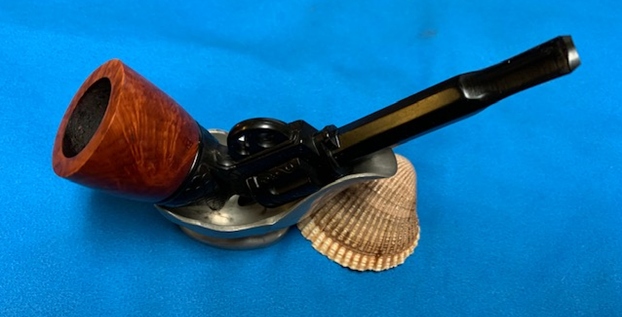
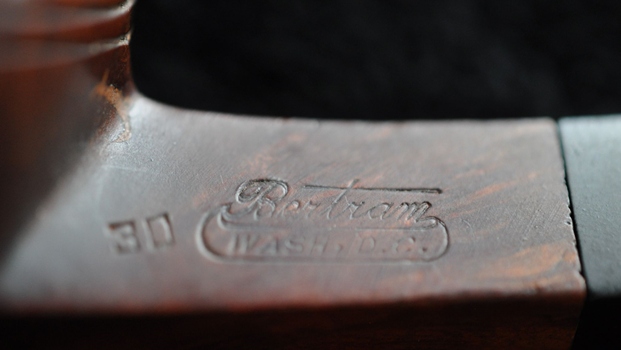
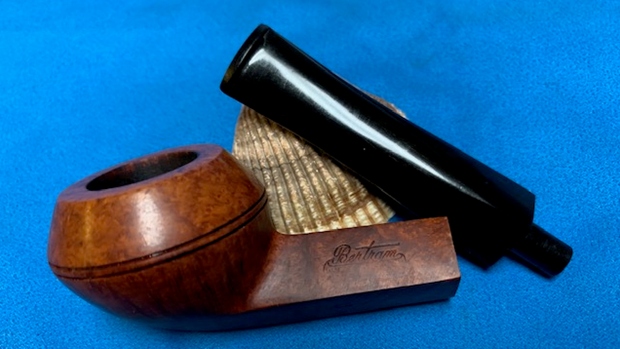
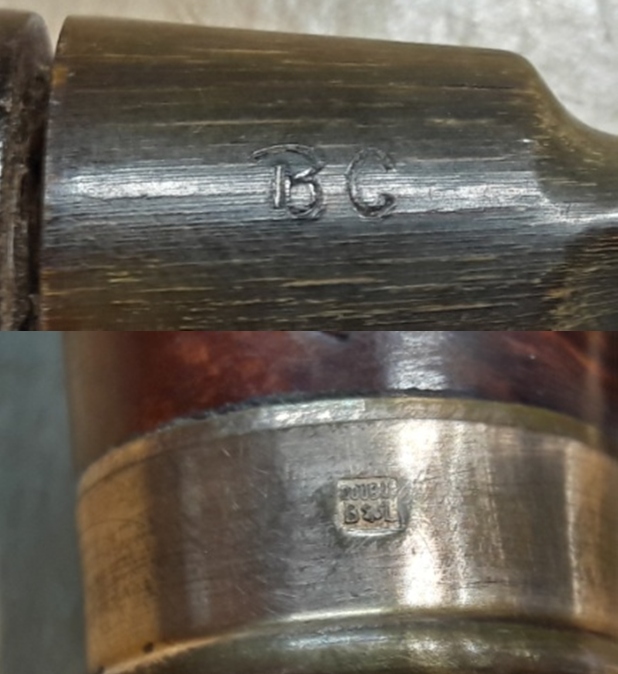
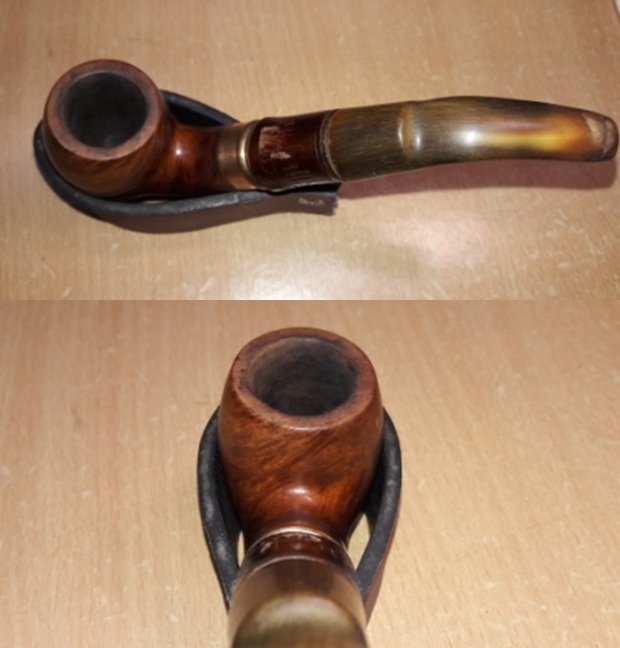
The pipe is a large bowled bent billiards with brass shank end band with a dark brown cherry wood (?) shank extension and a horn stem. The pipe is stamped on the left side of the shank as “BUTZ- CHOQUIN” in an arch over “A” over “METZ” in an inverted arch, all in block capital letters. The bottom of the shank bears the stamp “No 2” at the shank end just below the brass band. The horn saddle stem has the logo “B C” stamped in to the left side of the saddle. The brass band is stamped as “DOUBLE” over “B” followed by four leaf clover followed by letter “L”. The entire stamping on the brass band is within a shield cartouche. An interesting piece of information that I learned is that the Four Leaf Clover is a symbol of GOOD LUCK!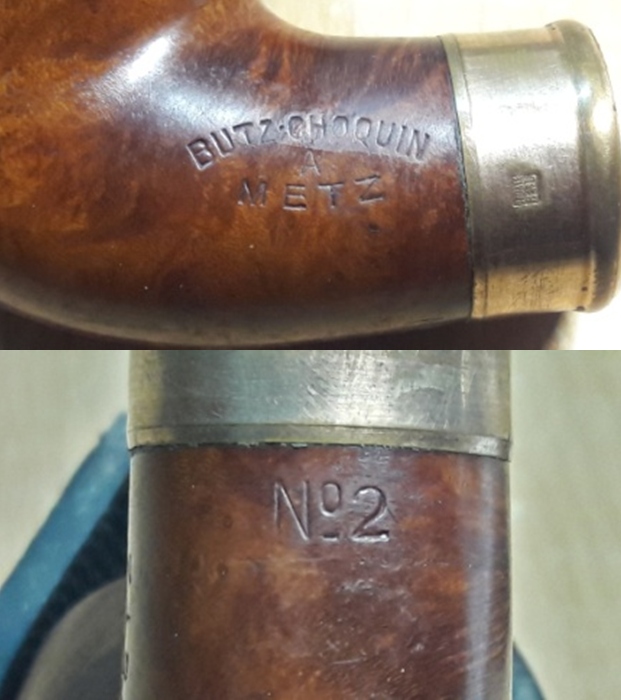
 Nearly two years ago I had worked on another inherited CHOQUIN A METZ with an Albatross wing bone shank extension and horn stem. The pipe had silver adornments at the shank end and tenon end of the horn stem. Here is the link to the write up;
https://rebornpipes.com/2018/11/17/a-challenging-restoration-of-vintage-era-first-choquin-a-metz/#comments
I had researched the pipe and the brand then and also recollect the overwhelming response to the queries that I had posted on pipe restorers group on FB. The similarity in the stampings was proof enough for me to be convinced that the pipe currently on my work table is from the early 1900s. But I was desirous of trying to narrow down to an exact period.
I searched pipedia.org to see if it contained the details that I sought. The site has very scant information about the brand with lots of pictures, but what is available makes it an interesting read and I quote;
“The pipe, from Metz to Saint-Claude. Jean-Baptiste Choquin of Metz started out as a tobacconist. This enterprise was prosperous; he had several employees. Among those, there was a certain Gustave Butz who was its first workman and who became his son-in-law by marrying Choquin’s daughter Marie in 1858.
In 1858 Jean-Baptiste Choquin created, in collaboration with Gustave Butz, the Choquin pipe. This bent pipe with a flat-bottomed bowl was finished with an albatross-bone mouthpiece, fixed with silver rings. (The above describes the CHOQUIN A METZ pipe I had worked on earlier dating it to 1858)
In 1858, still in Metz, Gustave Butz built an establishment for the manufacture of the Choquin pipe which took the name of Butz-Choquin. In 1951, the Berrod-Regad company bought the trademark, continuing manufacture until 2002. Departing from Metz, the workshop was relocated to Saint-Claude, then also called “the world capital of the briar pipe,” under the Berrod-Regad group. The Berrod-Regad group would go on to completely rebuild the network of representatives until finally entering the export market in 1960 and has since won several prizes, as well as the Gold Cup of French good taste.
In a few years, the brand’s collection increased from ten to seventy series. 135 years after it was founded, the pipe is still well-known not only in France but throughout the world. In 2002, the Berrod family, wishing to preserve manufacture of pipes in Saint-Claude, handed over the company to Fabien Guichon, a native of the area, who will continue to develop the brand during the 21st century.”
From the above reading, this pipe is pre-1951 when Berrod- Regad purchased the trademark and relocated the workshop to Saint- Claude. The stampings of A METZ is the proof pointing towards pre-1951, the birth town of Butz- Choquin pipes. Secondly, the horn stem and cherrywood shank extension narrows down the dating to be pre-1920 since thereafter, vulcanite and other stem materials gained popularity and preference over bone/ horn stem. Thus, I think the pipe dates from somewhere 1910s to 1920.
I have reproduced some snippets of information about Cherry wood for those readers not familiar with this wood (like me of course!)
GENERAL DESCRIPTION
The heartwood of cherry varies from rich red to reddish brown and will darken with age and on exposure to light. In contrast, the sapwood is creamy white. The wood has a straight-grain, a fine, uniform, satiny and smooth texture, and naturally may contain brown pith flecks and small gum pockets.
WORKING PROPERTIES
Cherry is easy to machine, nails and glues well, and when sanded and stained, it produces an excellent, smooth finish. It dries fairly quickly with moderately high shrinkage, but dimensionally is stable after kiln-drying.
PHYSICAL PROPERTIES
Cherry is of medium density with good bending properties, has low stiffness, and medium strength and shock resistance.
AVAILABILITY
Readily available.
MAIN USES
Fine furniture and cabinet making, moulding and millwork, kitchen cabinets, paneling, flooring, doors, boat interiors, musical instruments, turnings, and carvings.
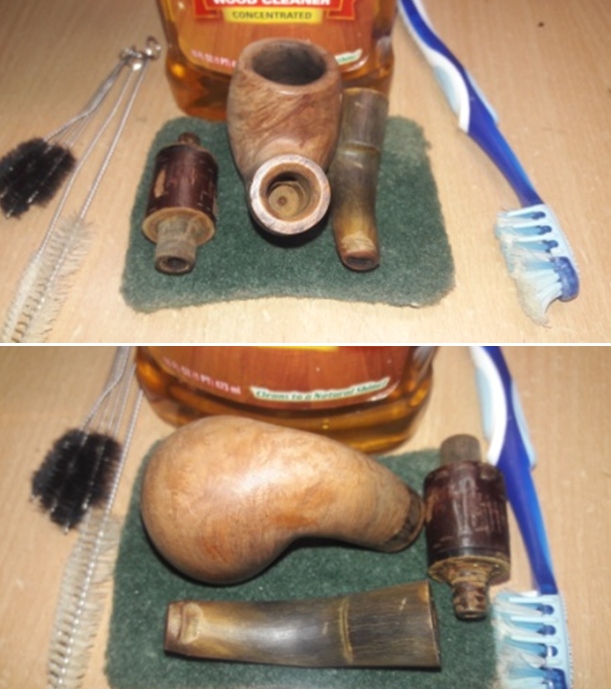
Initial Visual Inspection
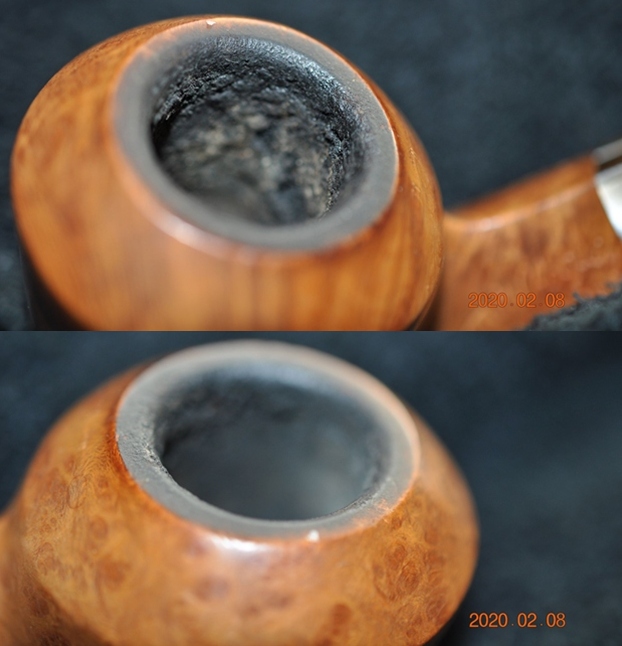
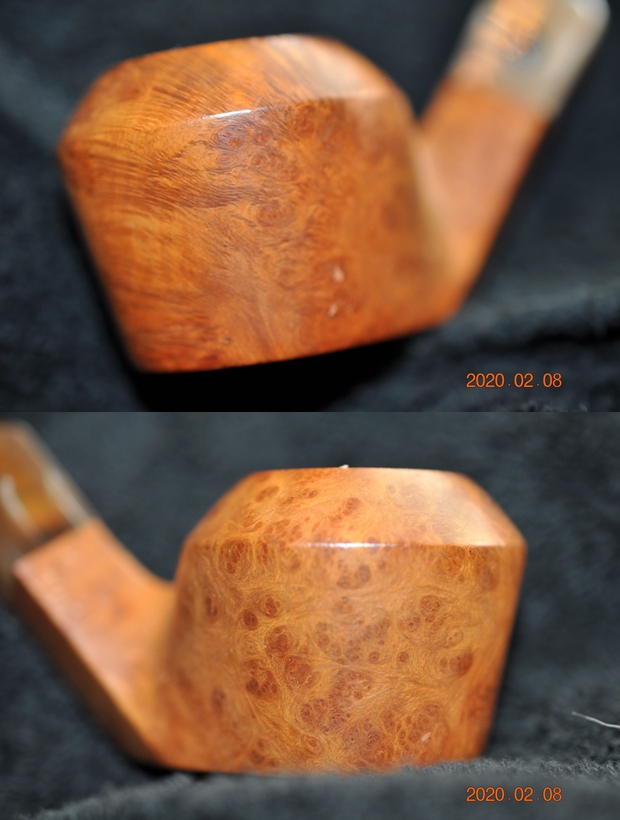
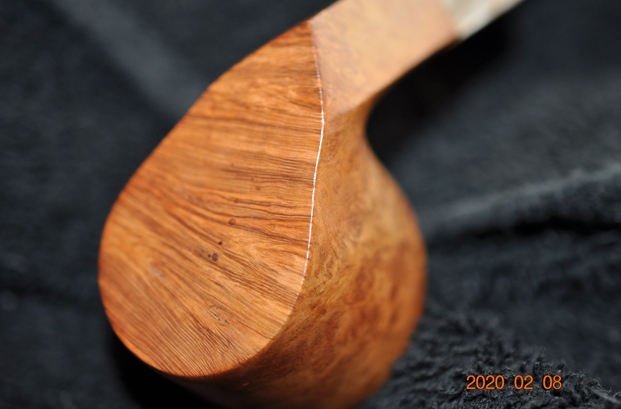
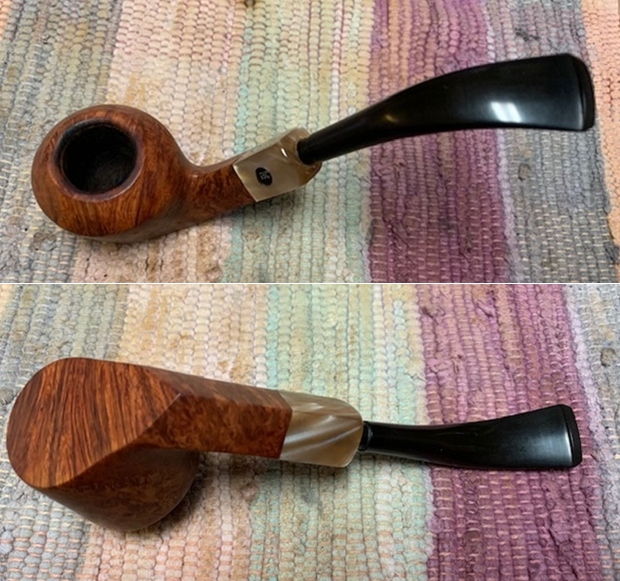
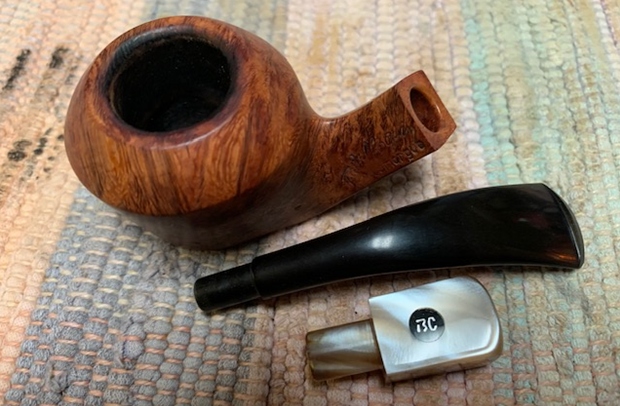
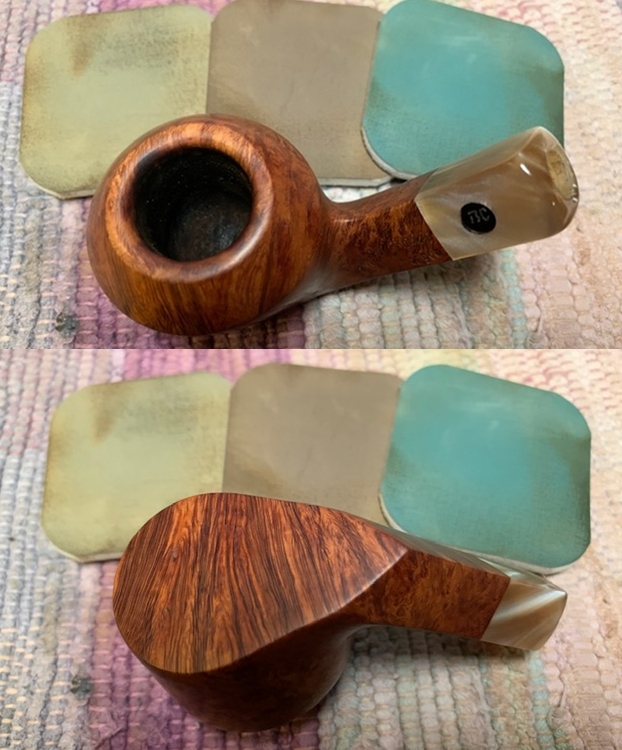
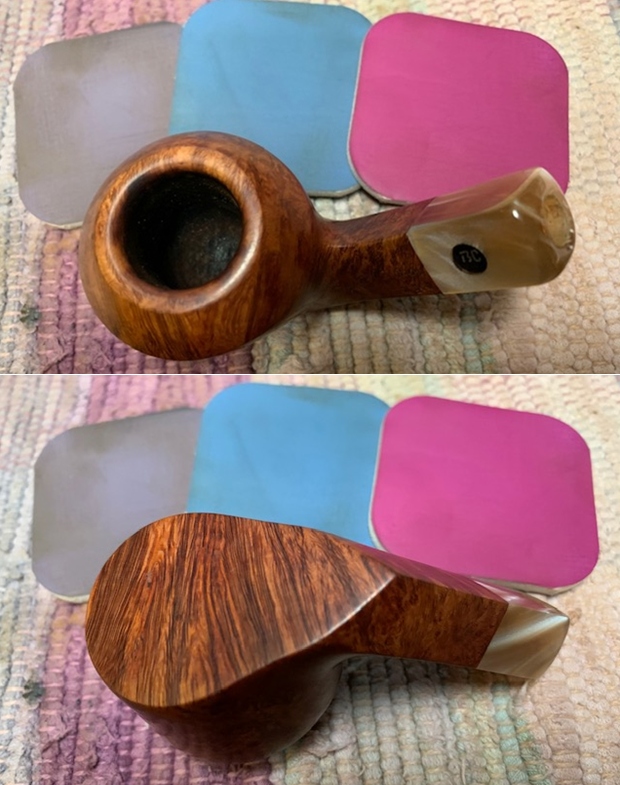
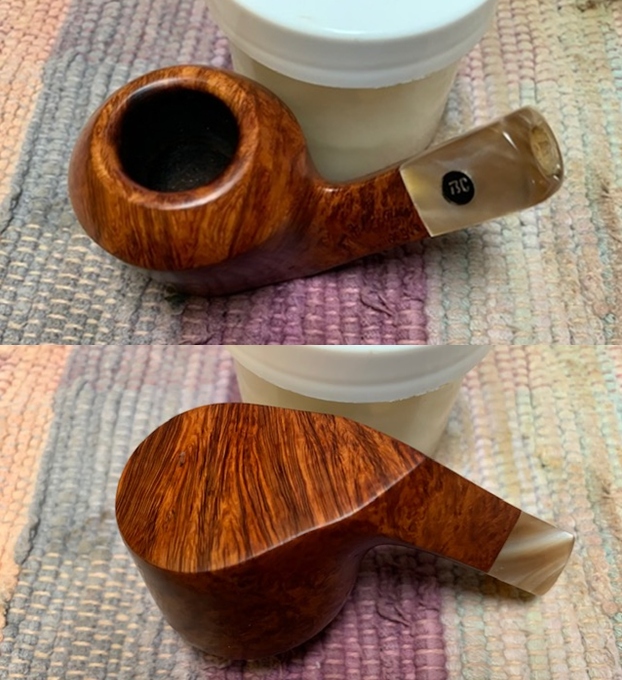
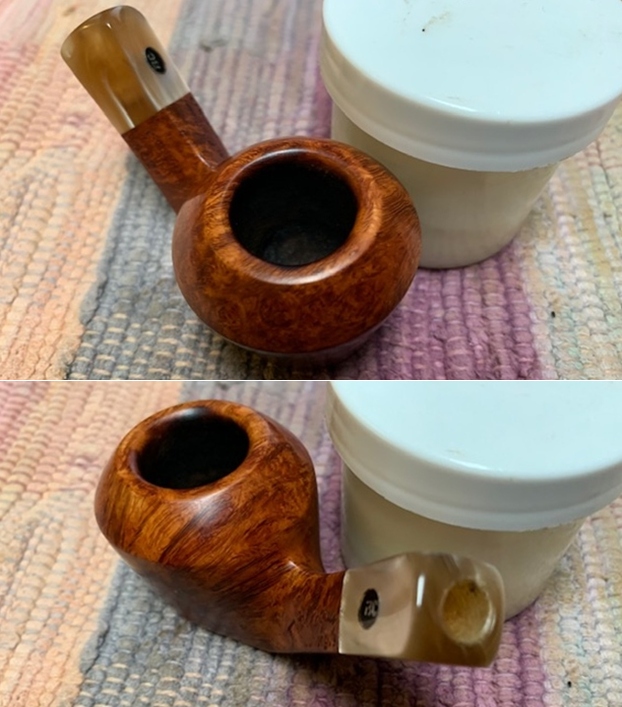
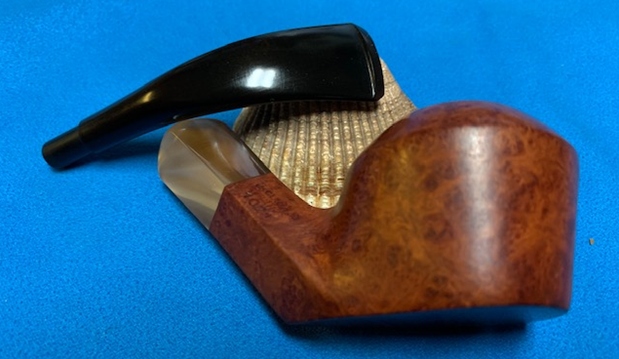
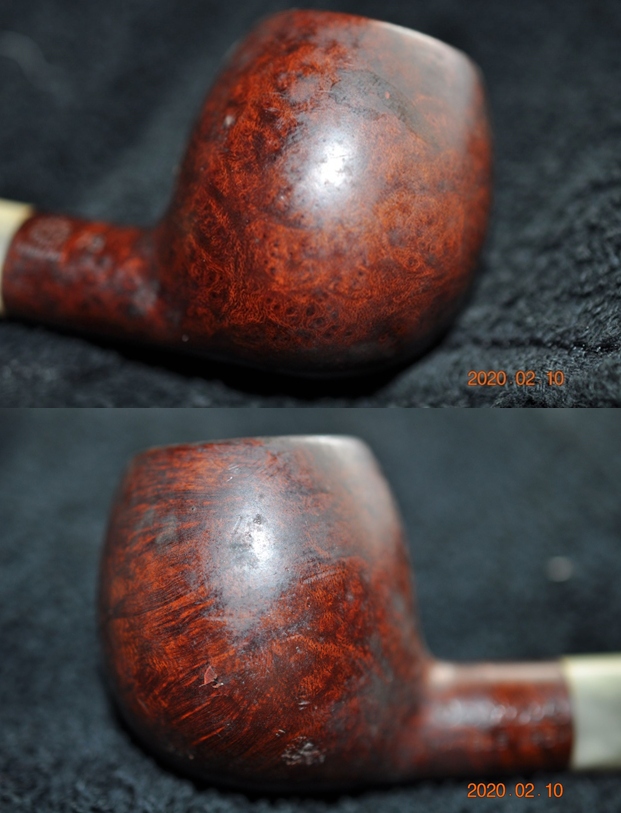
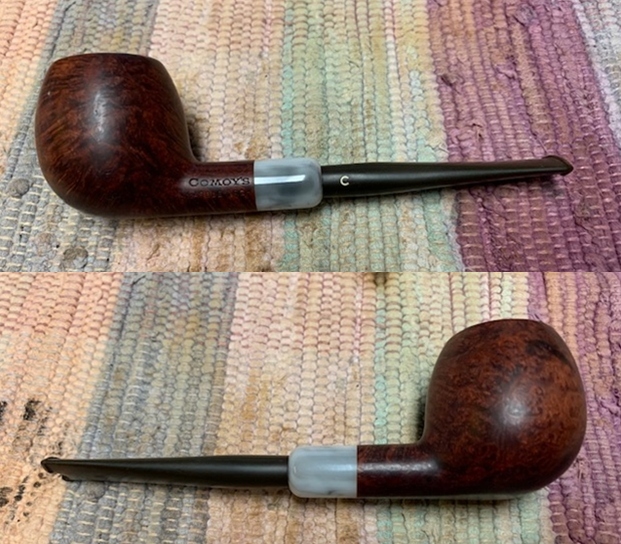
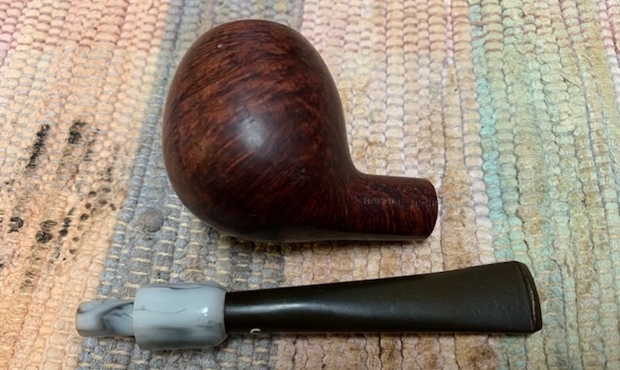
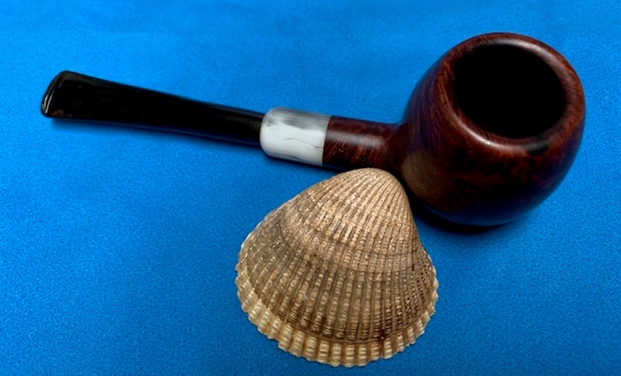
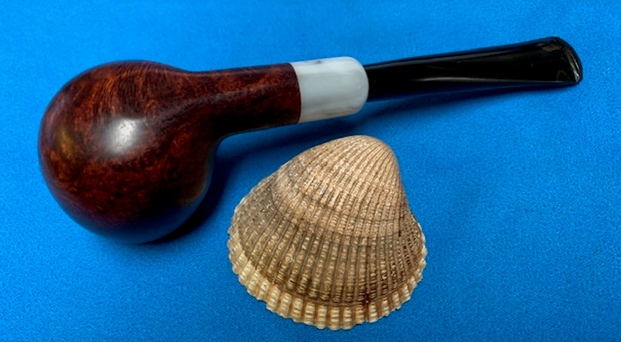
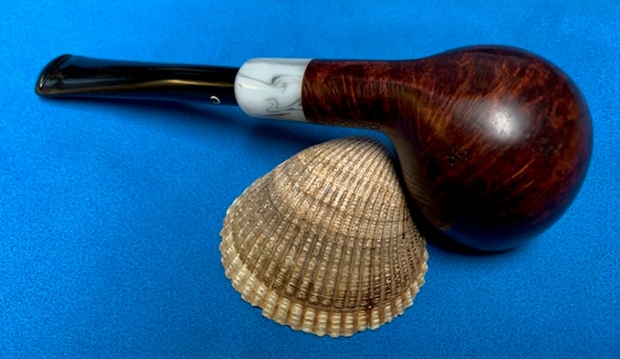
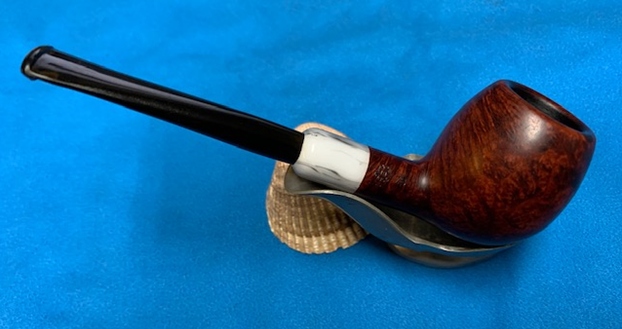
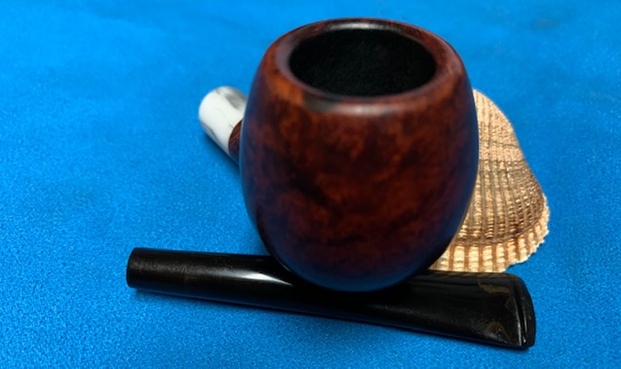
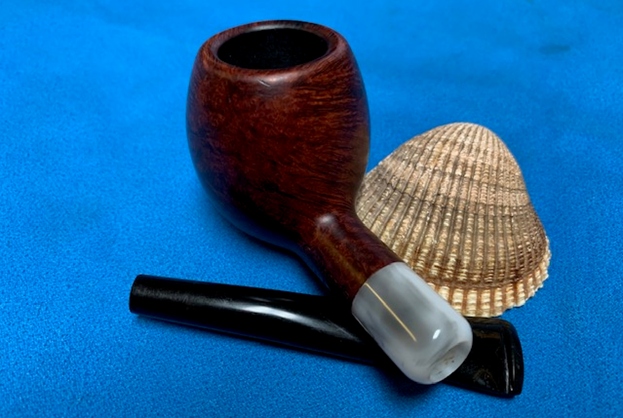
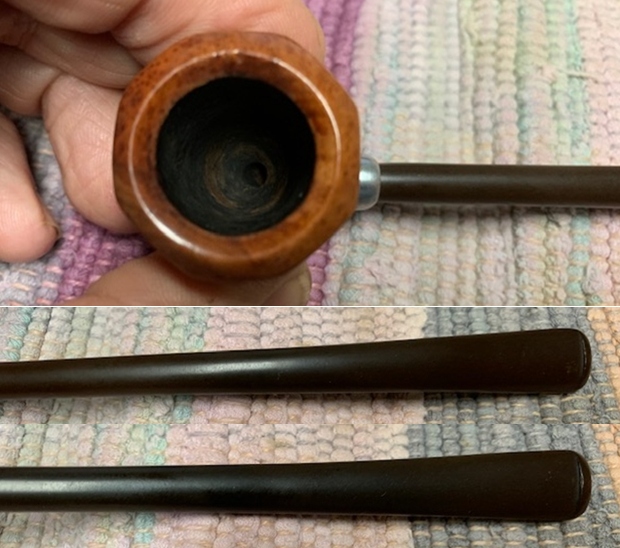
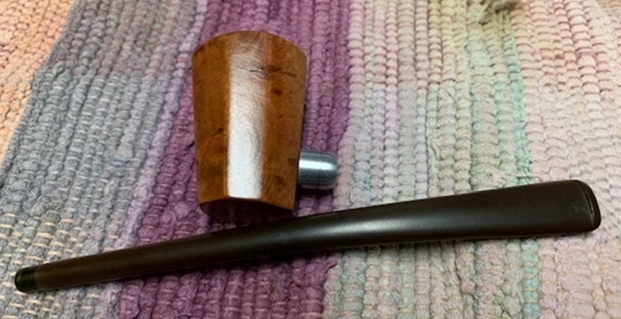
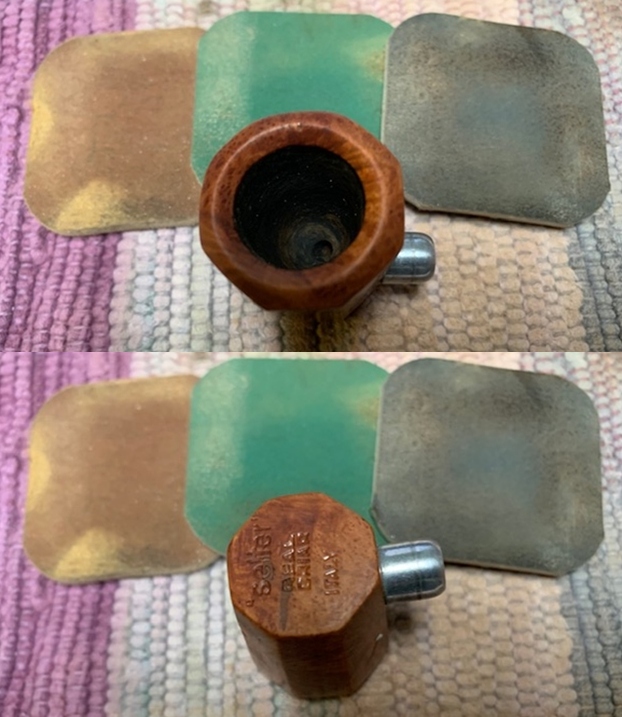
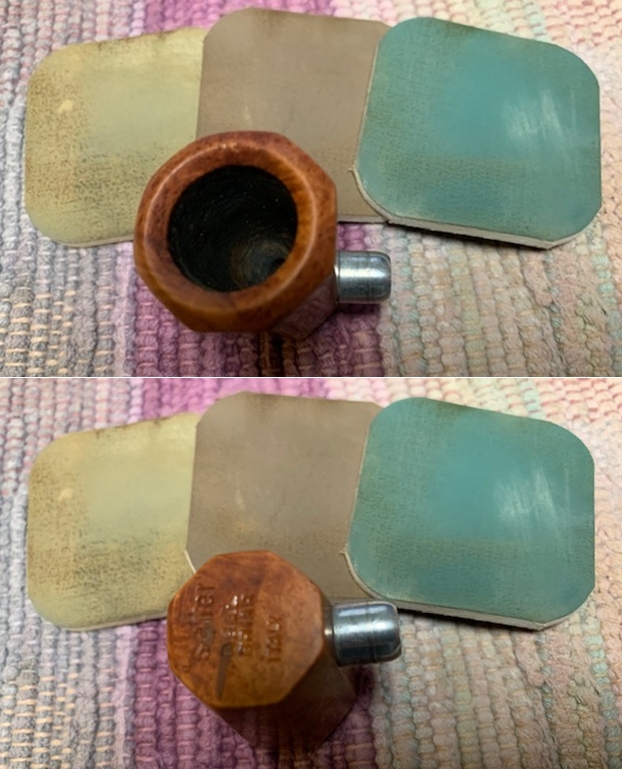
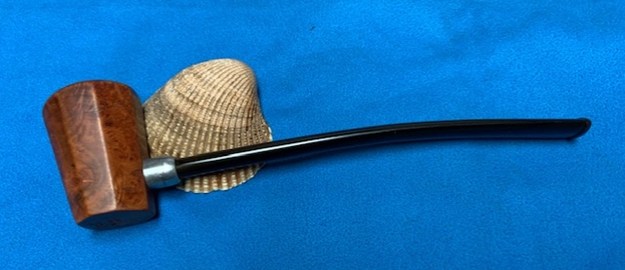
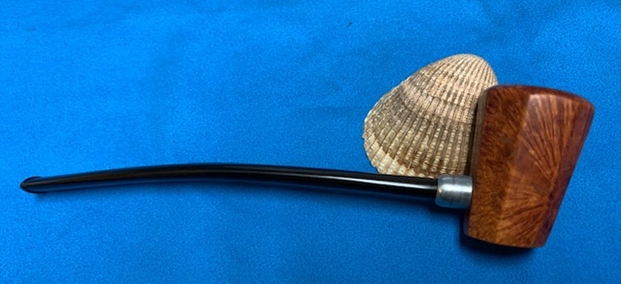
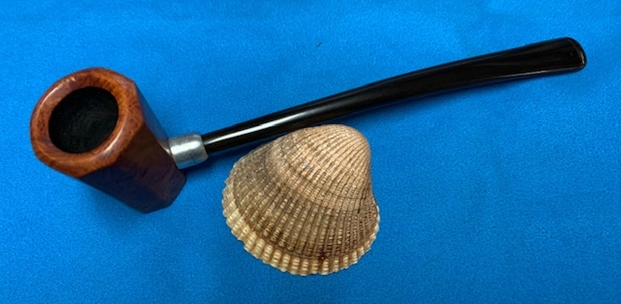
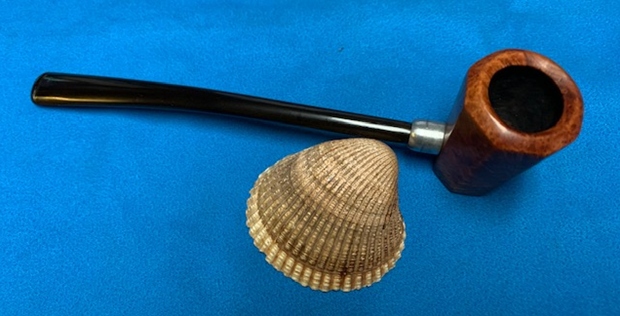
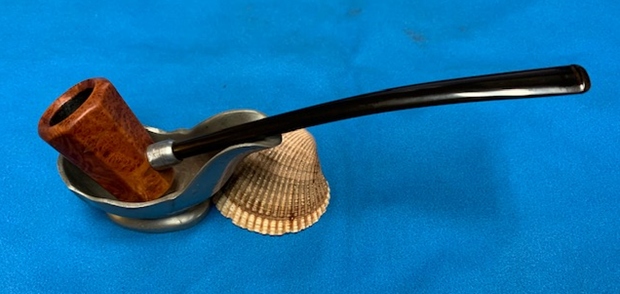
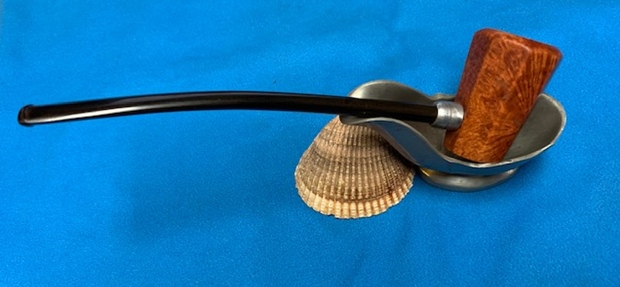
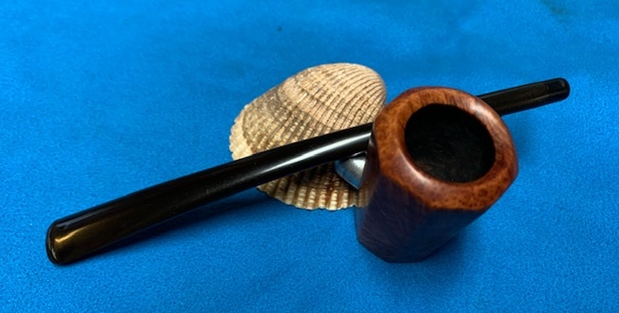
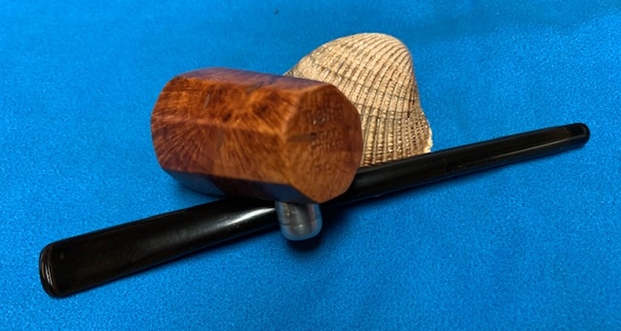
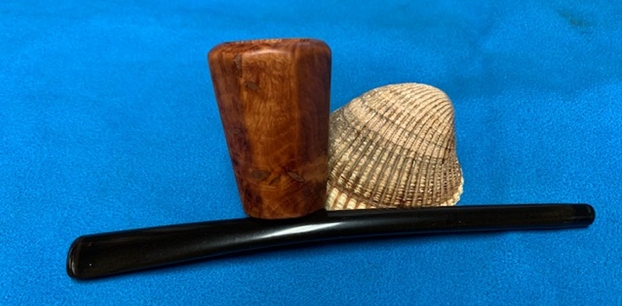
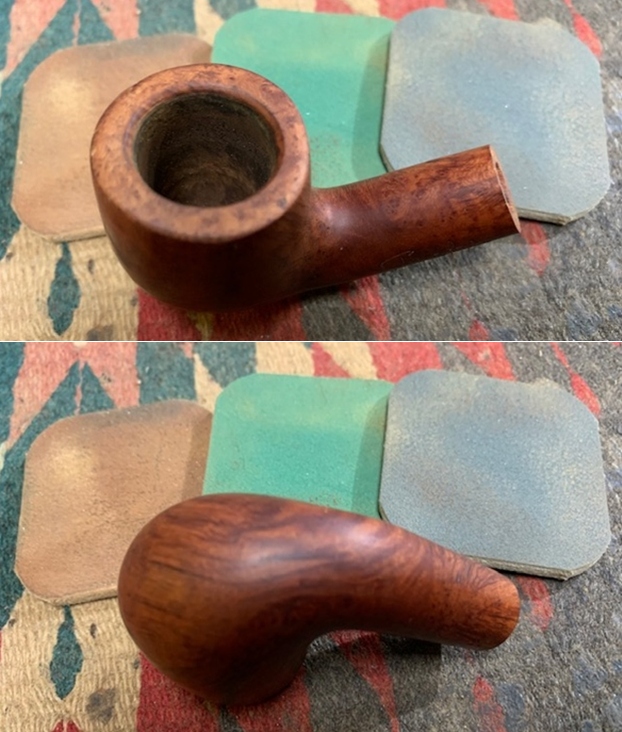
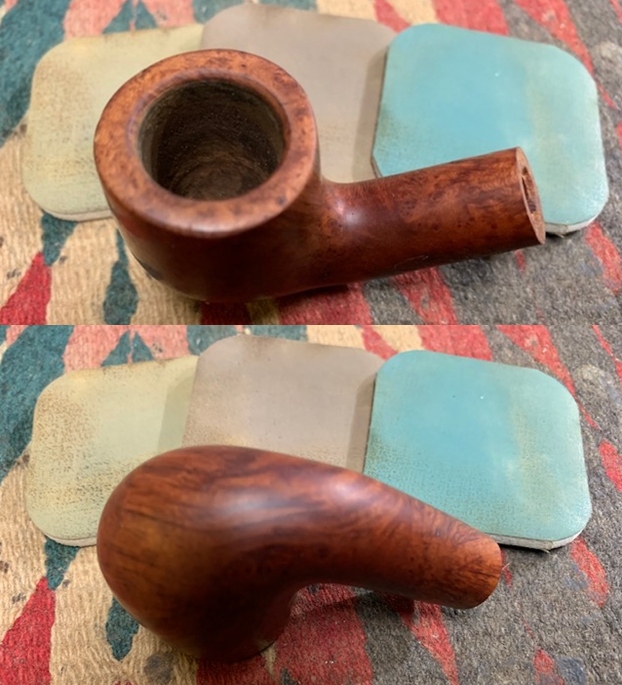
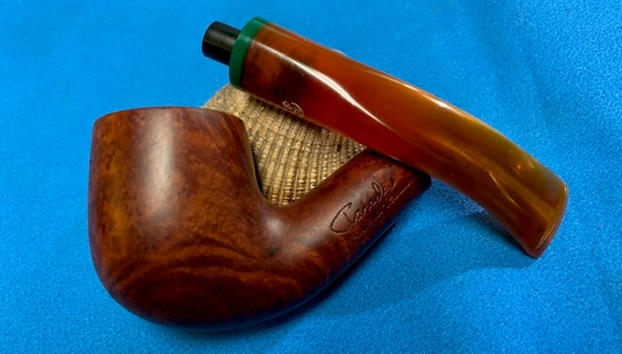
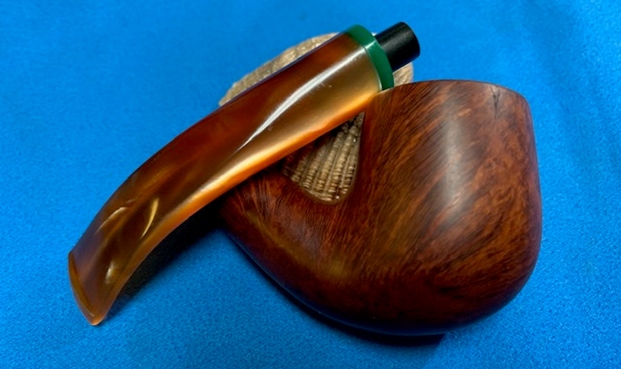
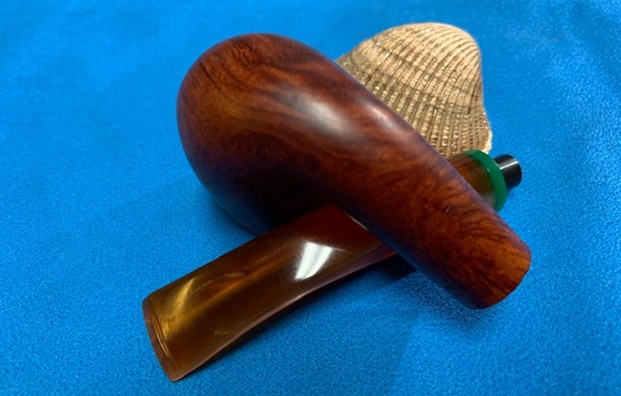
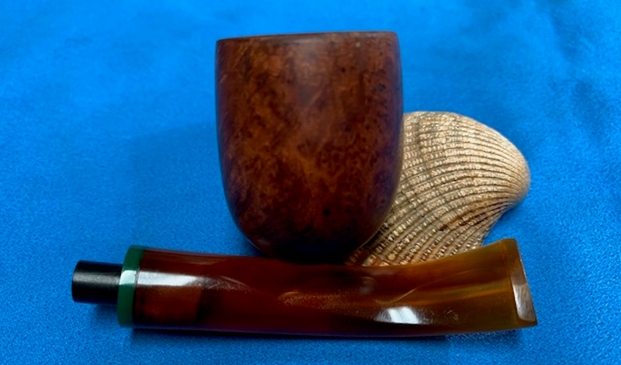
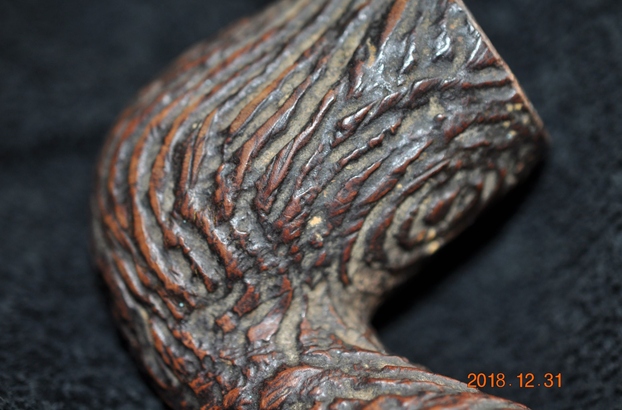
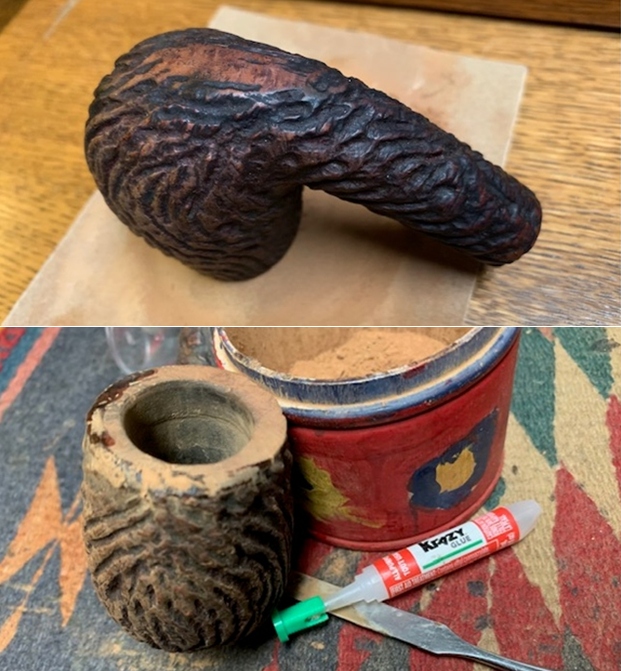
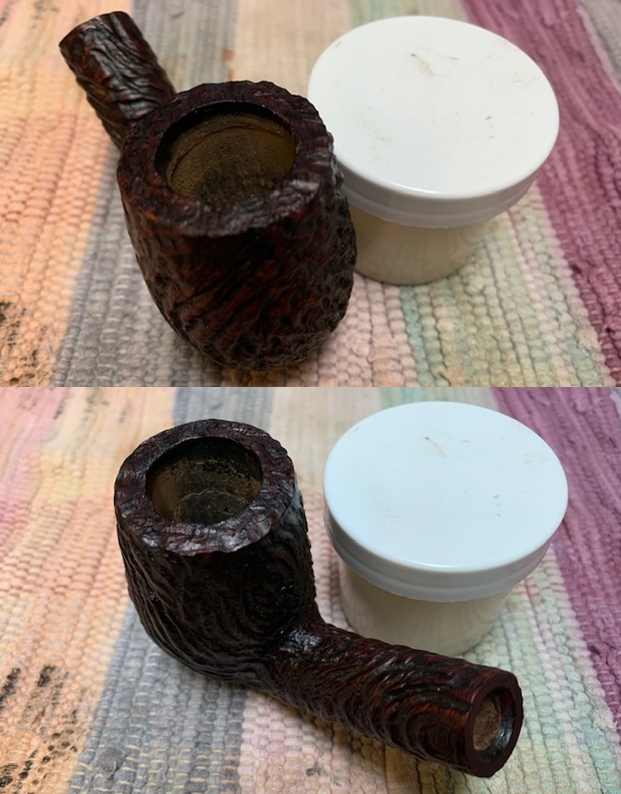
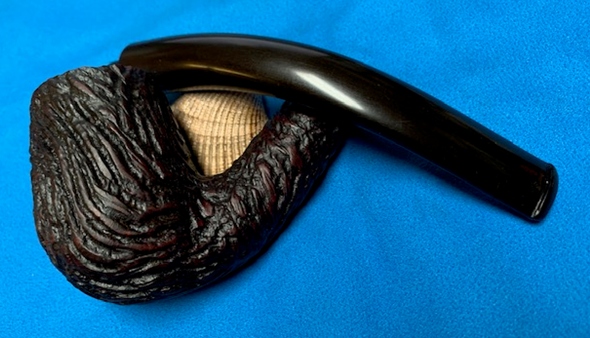
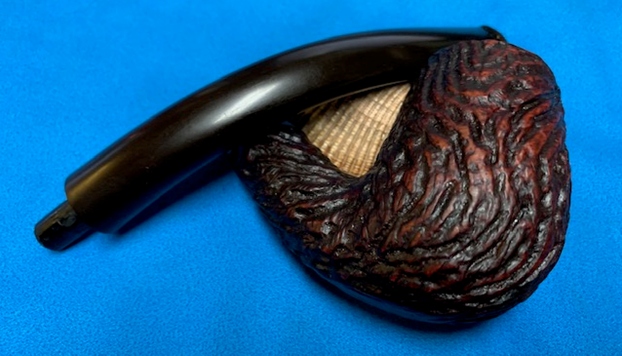
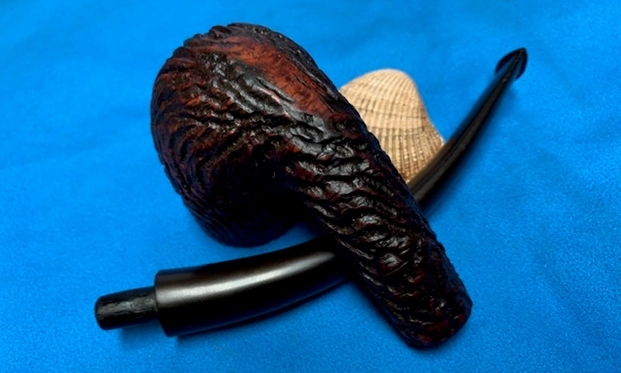
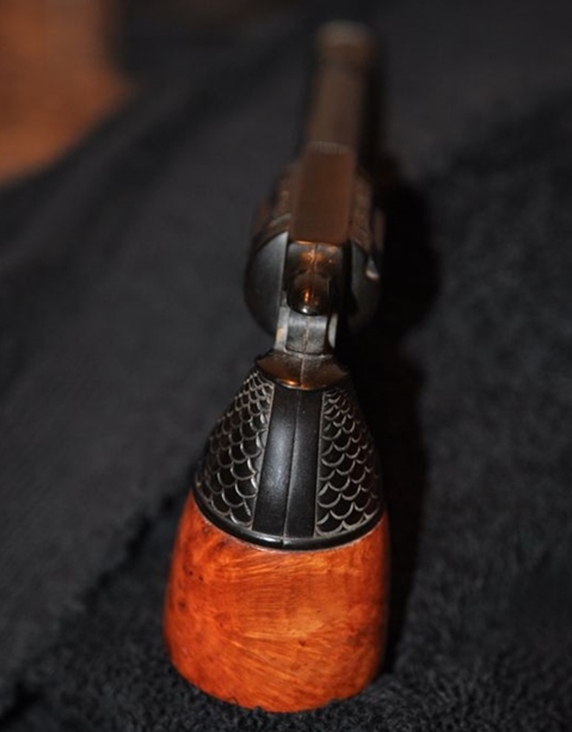
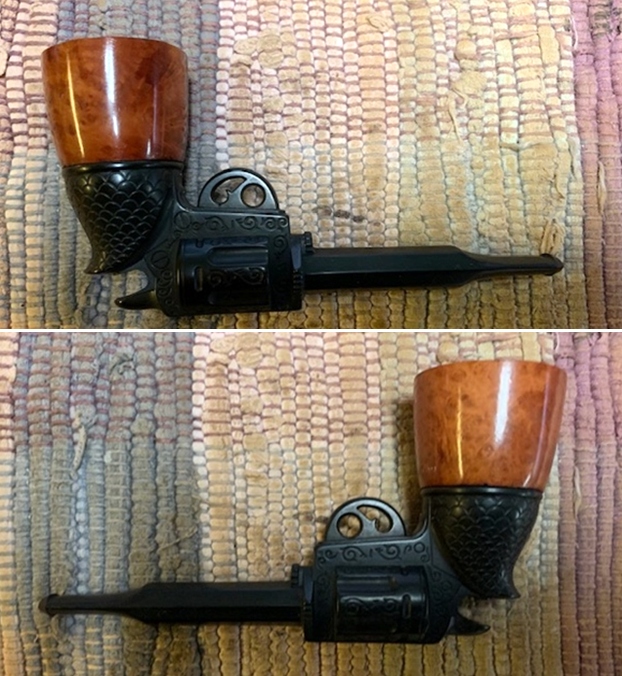
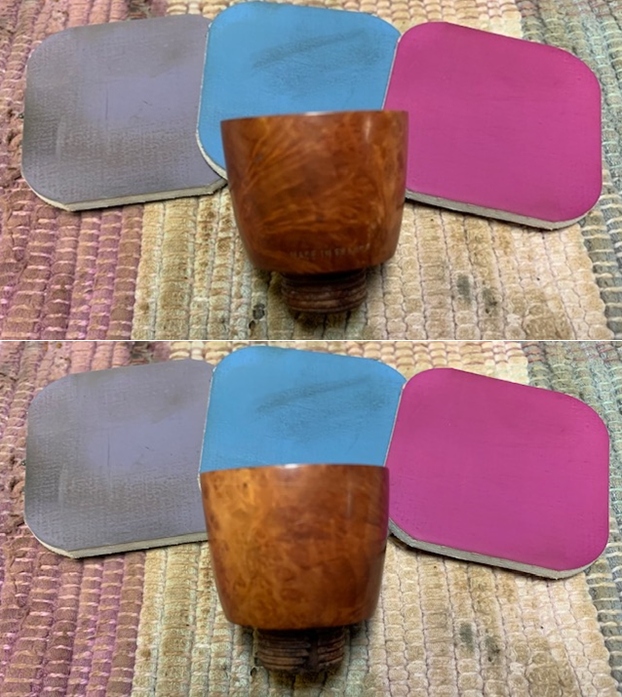
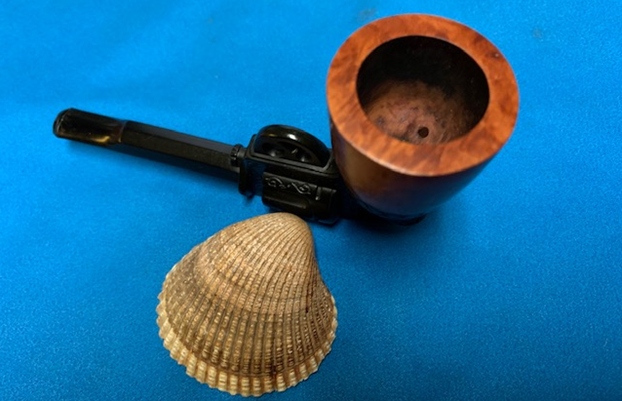
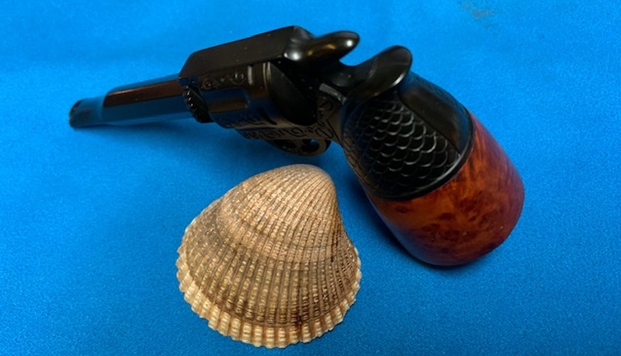
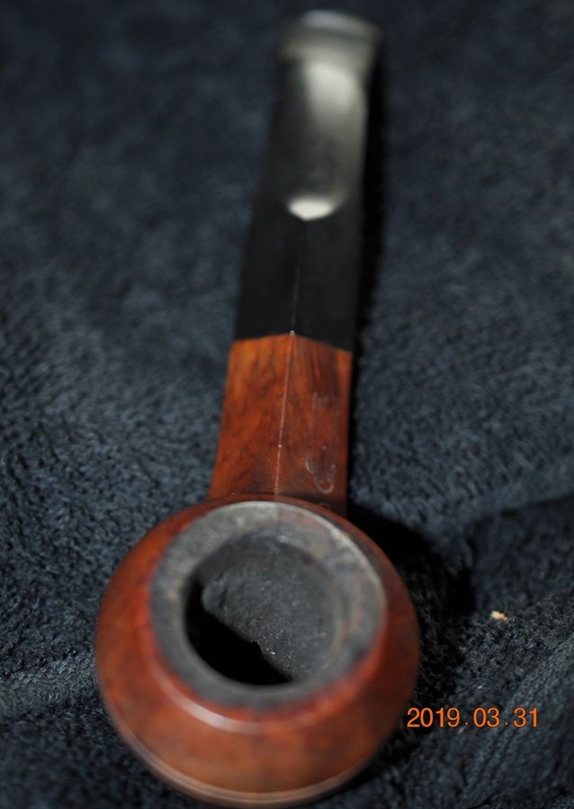
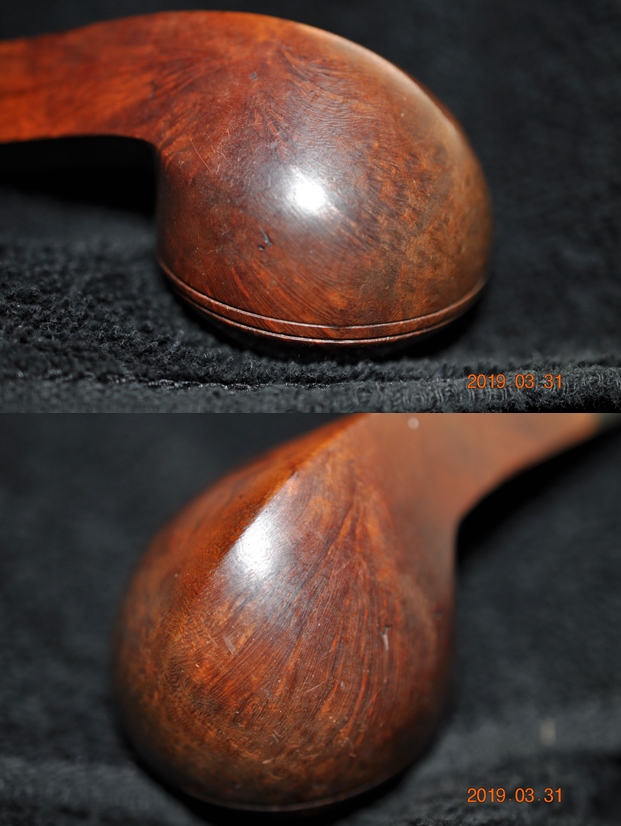
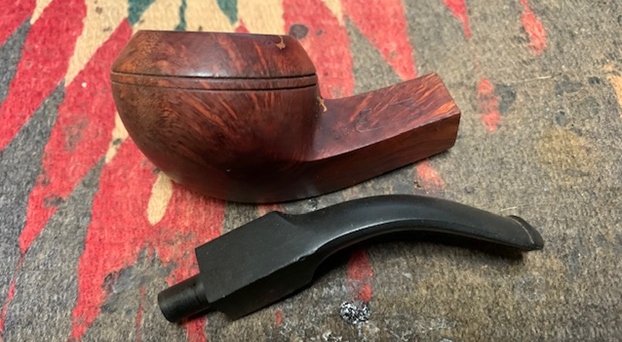
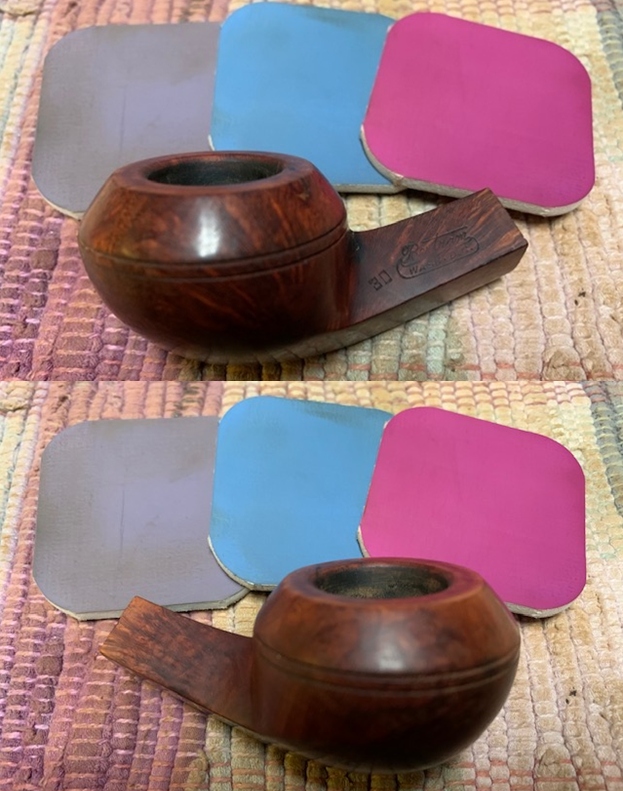
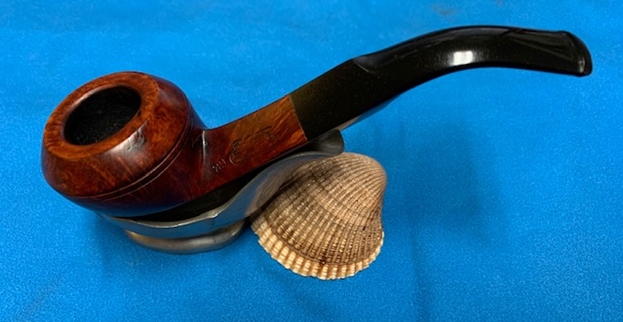
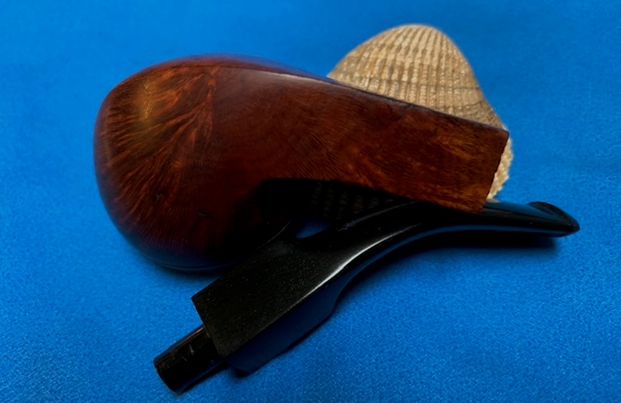
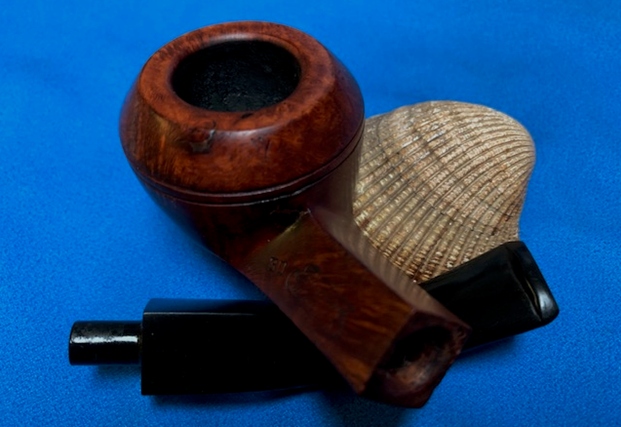
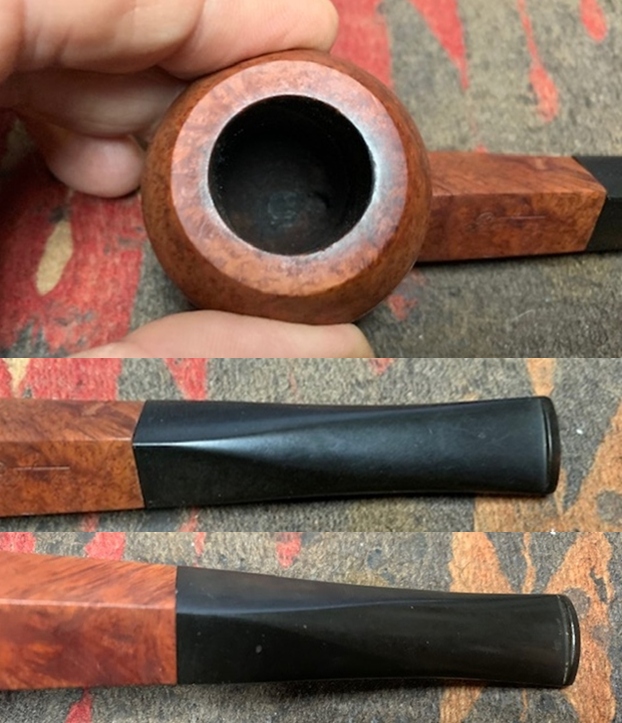
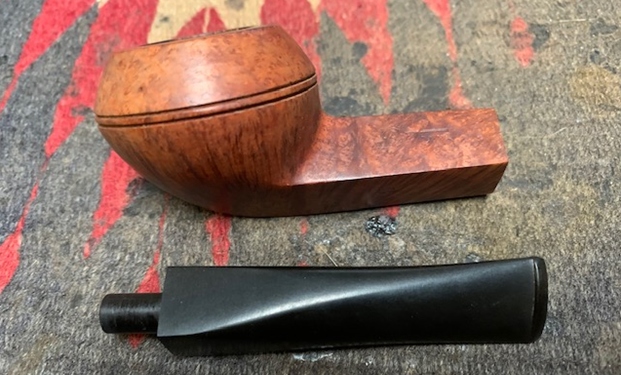
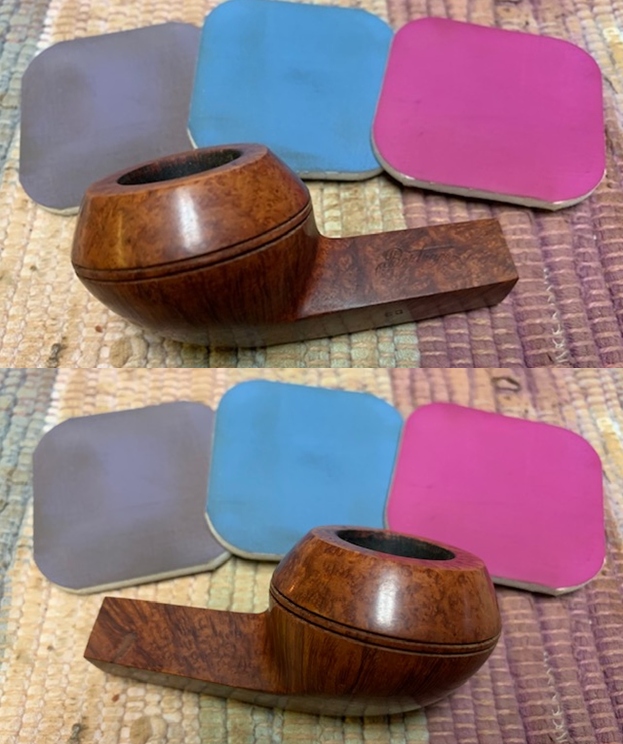
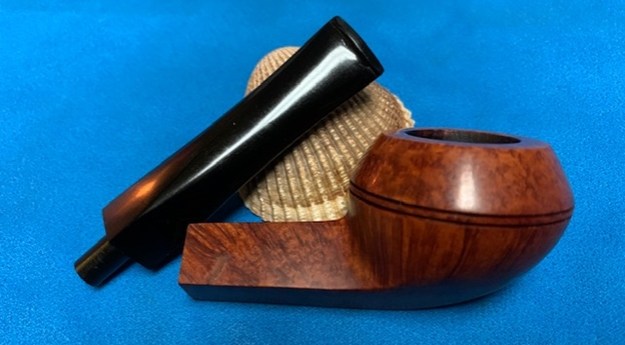
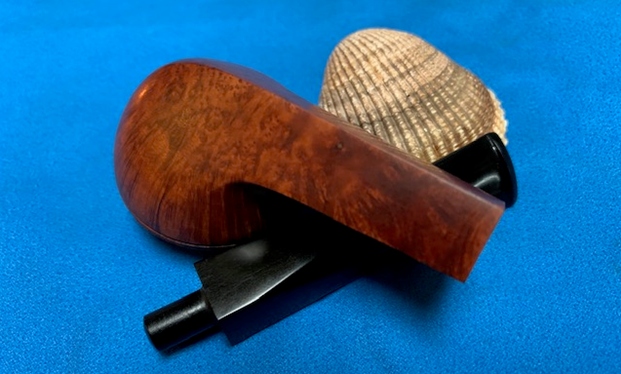
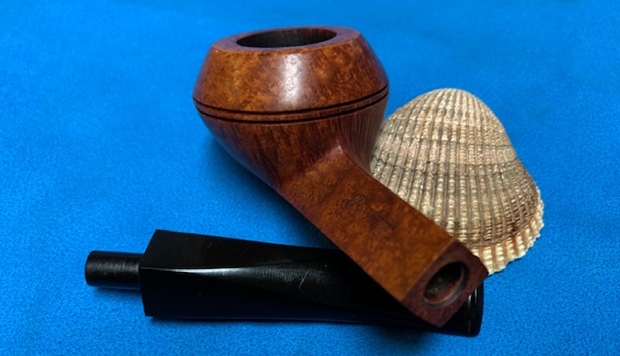
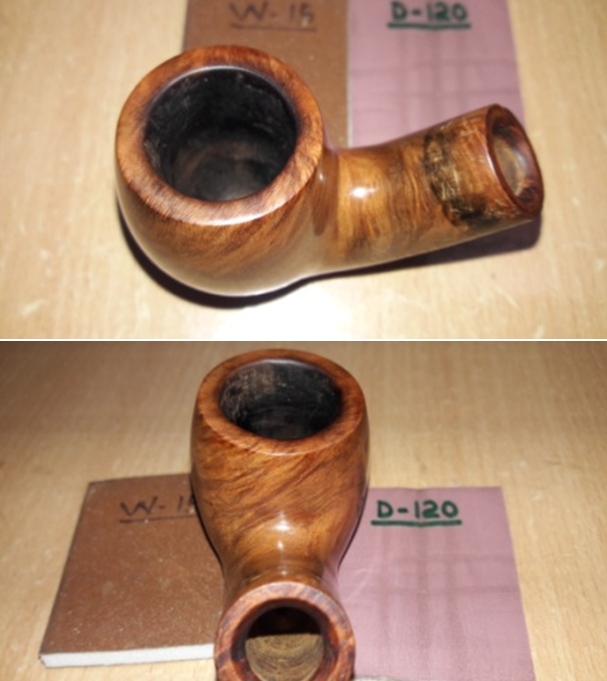
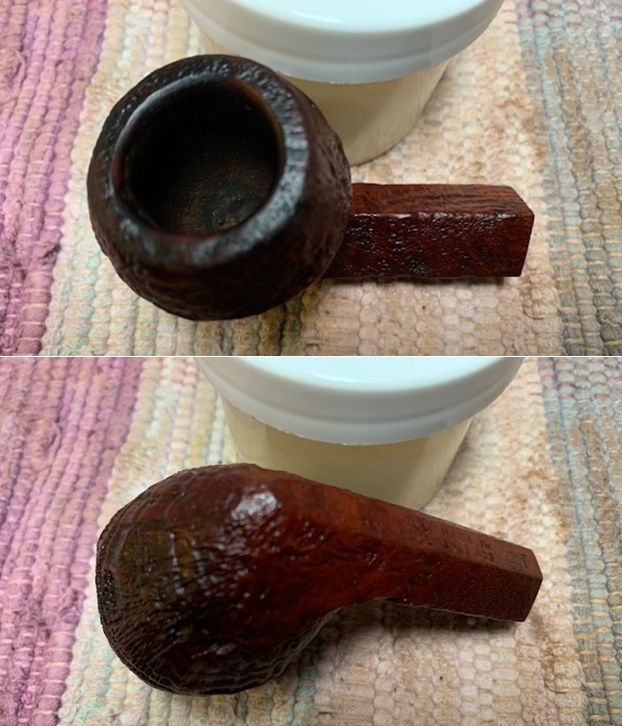
This is a three piece Butz- Choquin pipe with a briar stummel, a Cherry wood shank extension and a horn stem. The first thing noticed was the fit of the shank extension in to the stummel (marked with blue arrows) and that of the screw in tenon end of the shank extension in to the stem (marked with red arrows) was not flush and seamless. The stummel shows some nice mixed straight and cross grains all across. The stummel had dirt and grime accumulated over the surface giving it a dull and lifeless look. One fill is visible on the right side in the stummel surface. The pipe, as it sits on my work table, is shown below.
 Detailed Visual Inspection
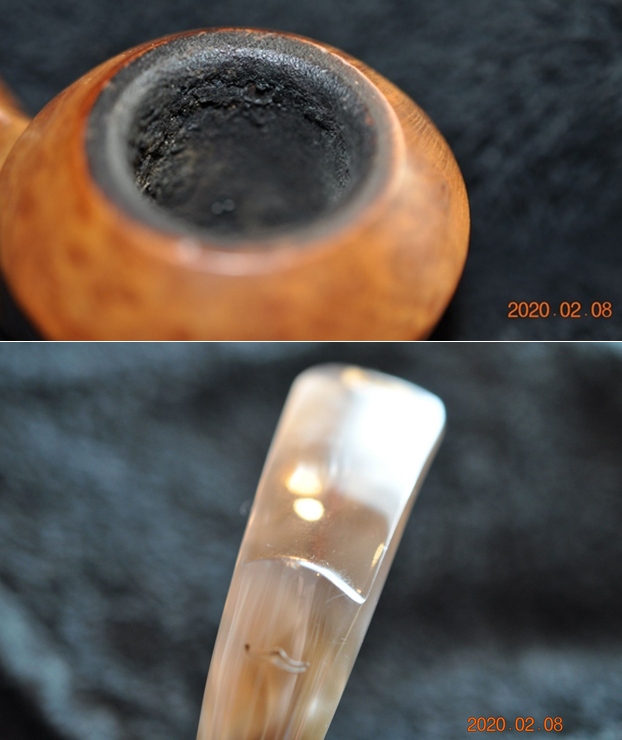
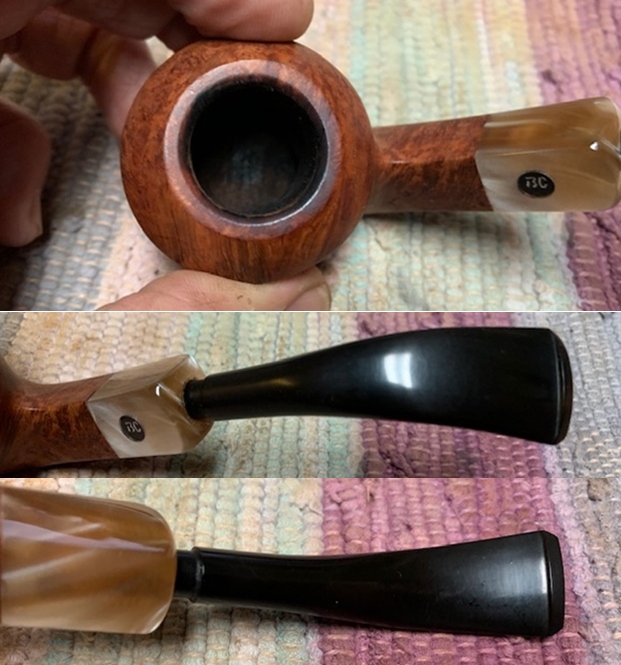
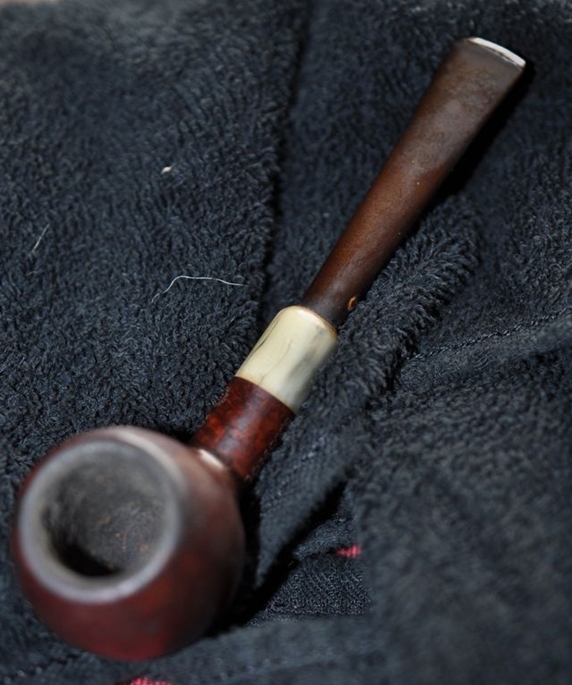
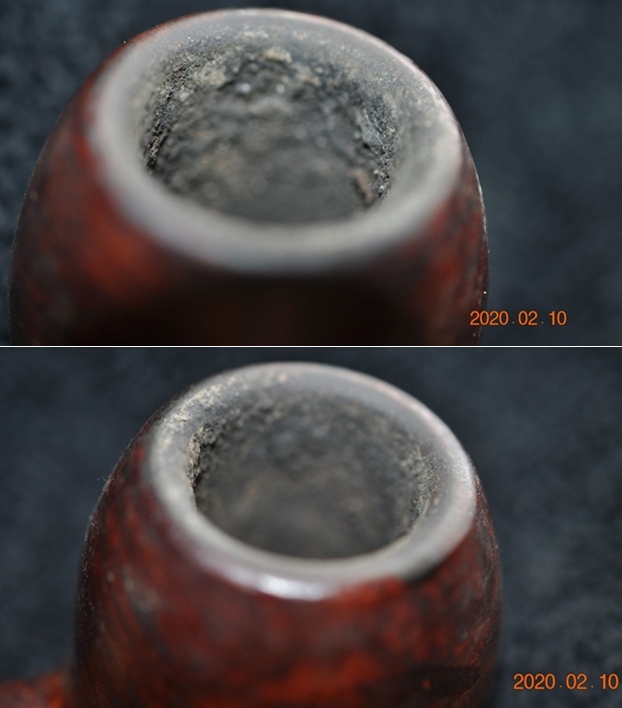
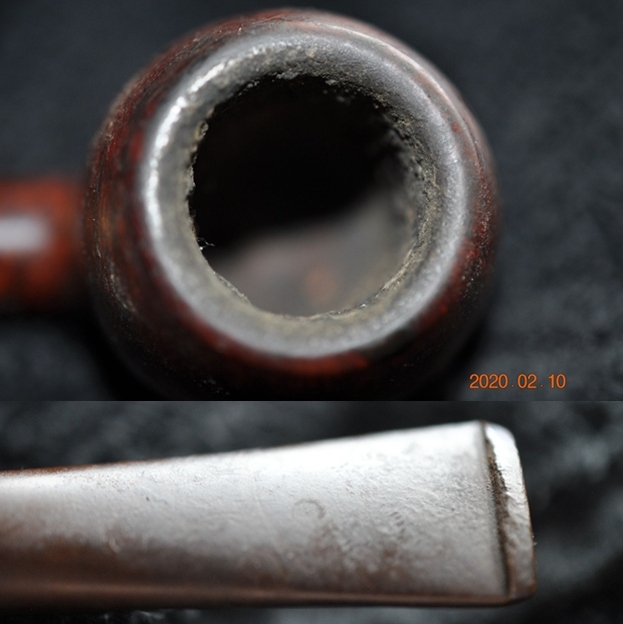
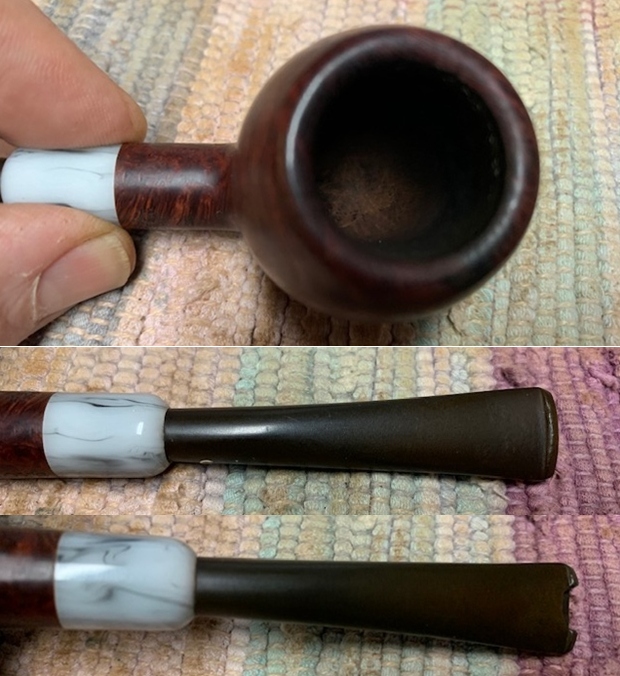
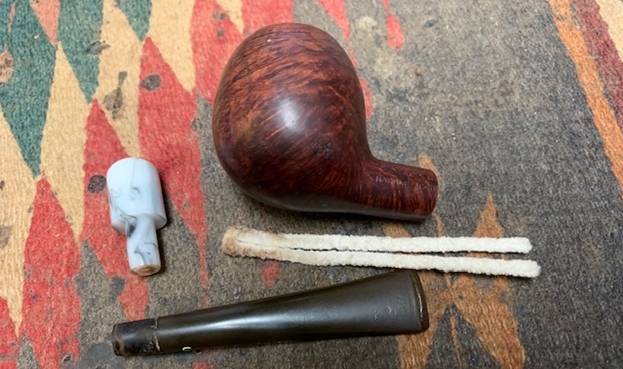
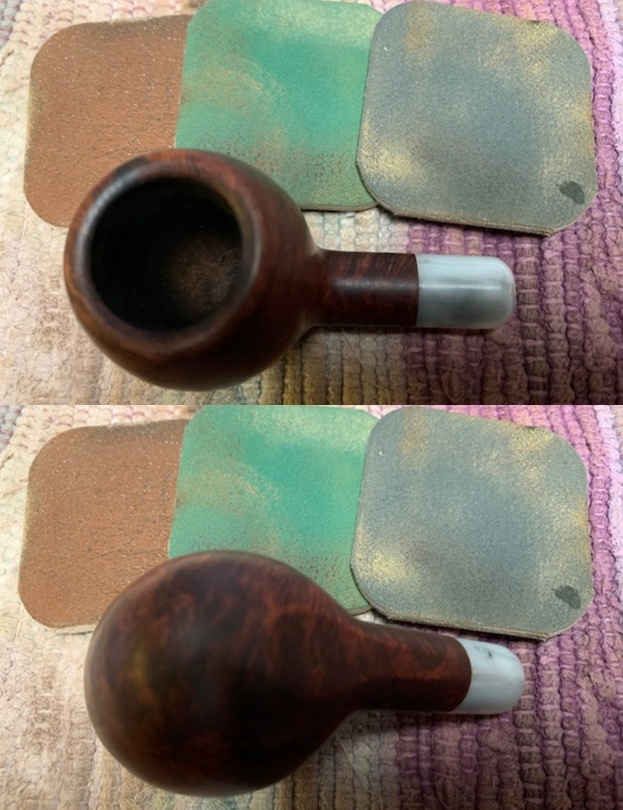
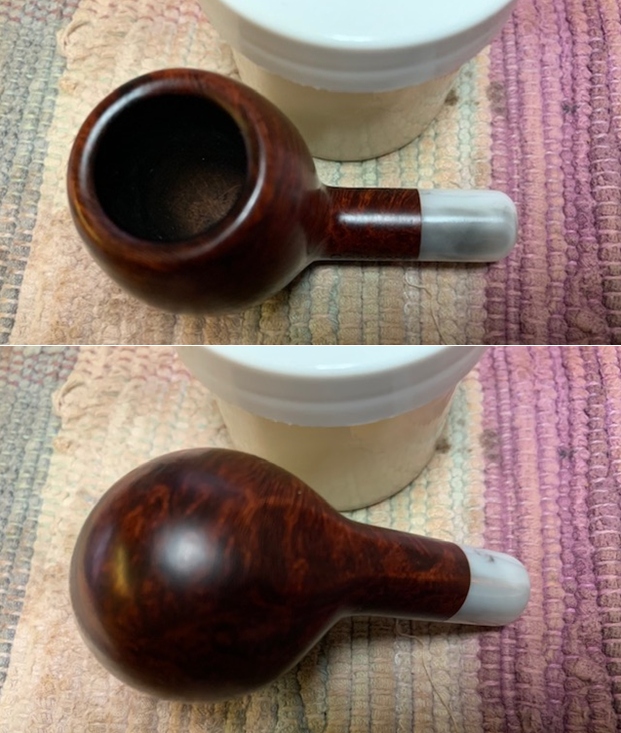
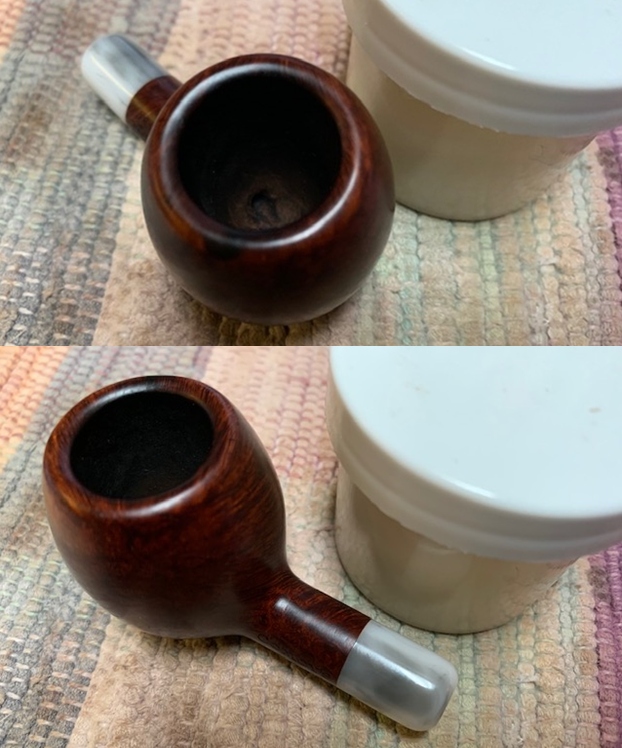
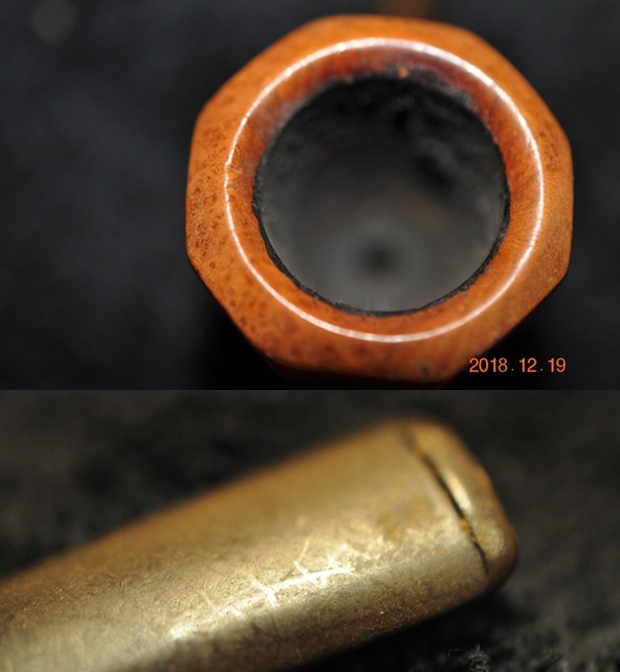
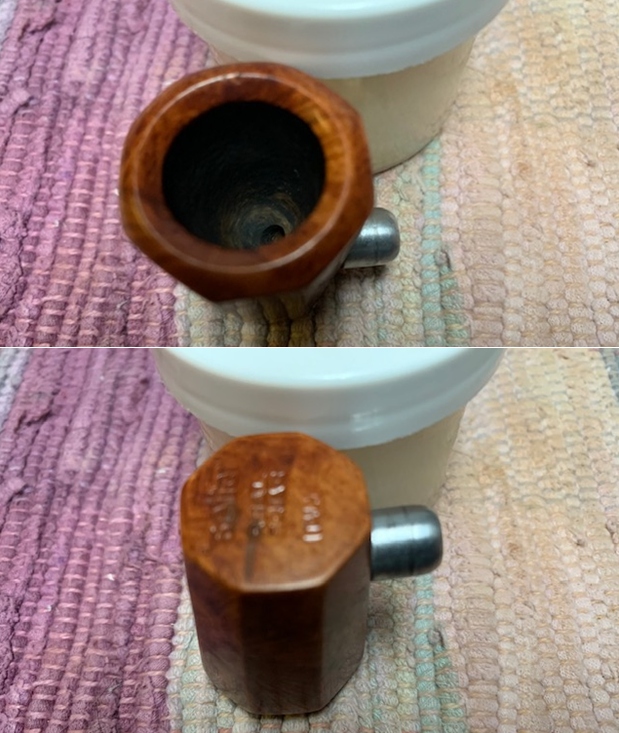
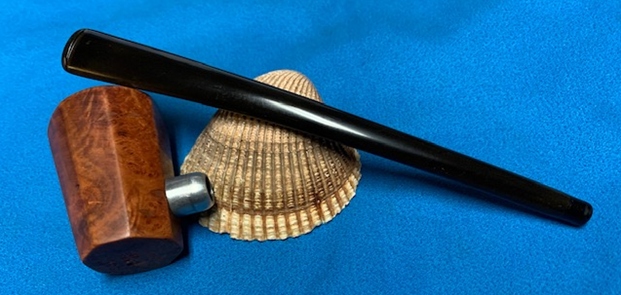
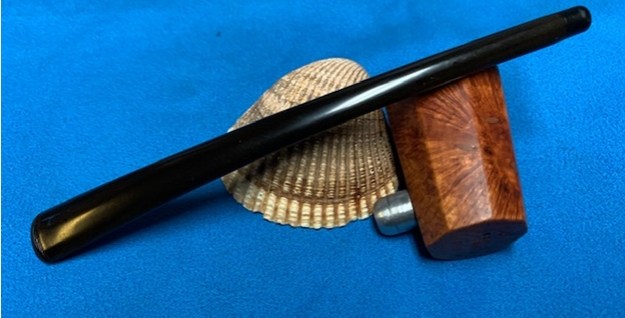
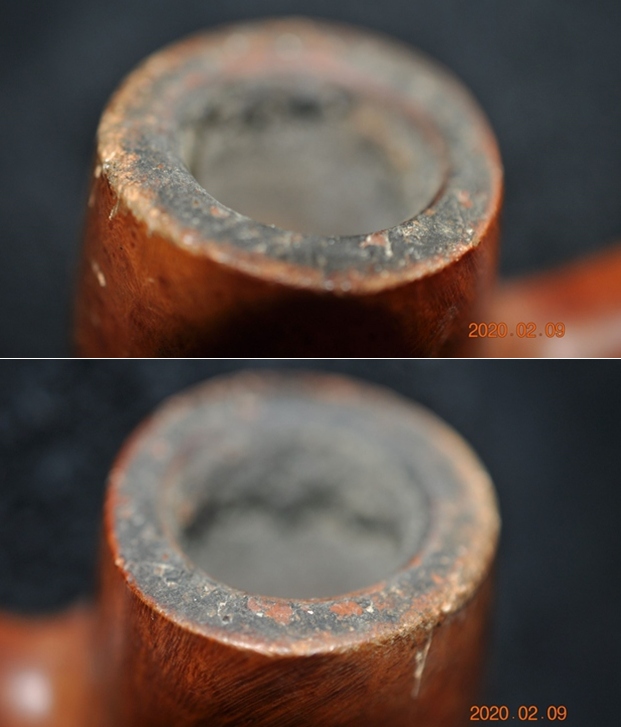
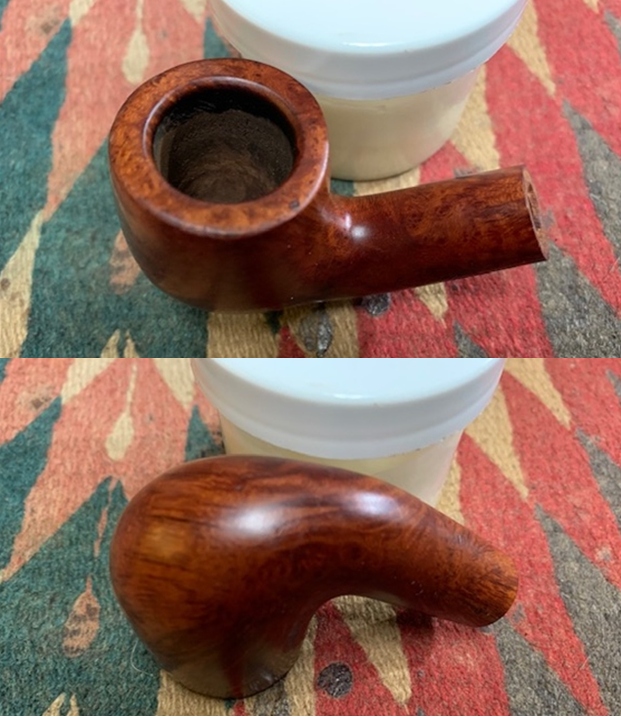
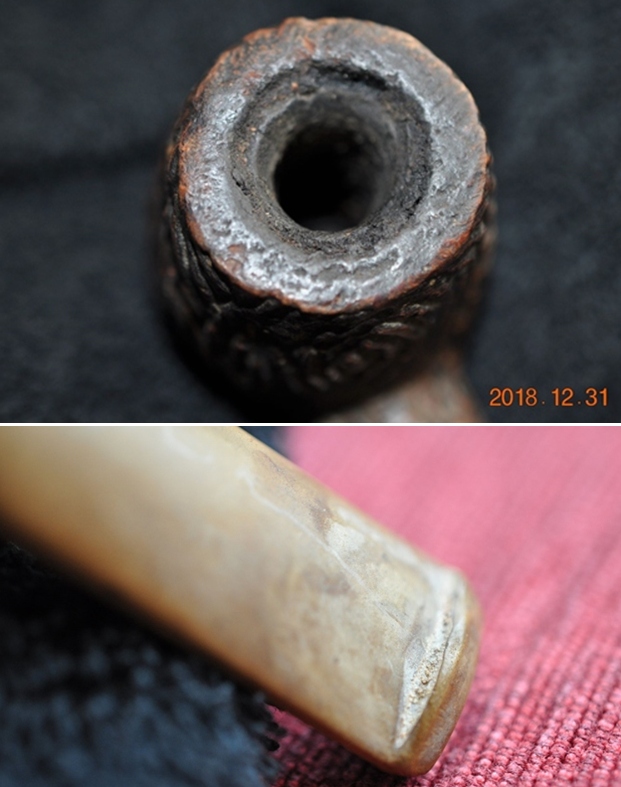
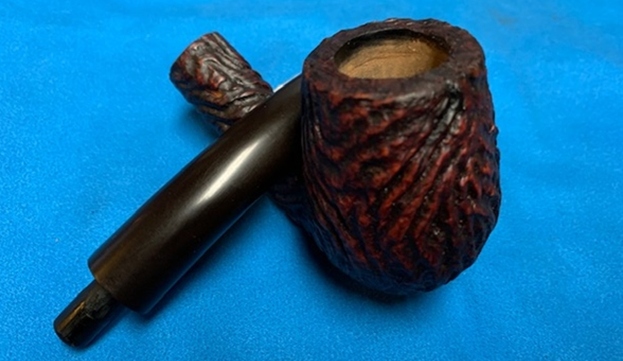
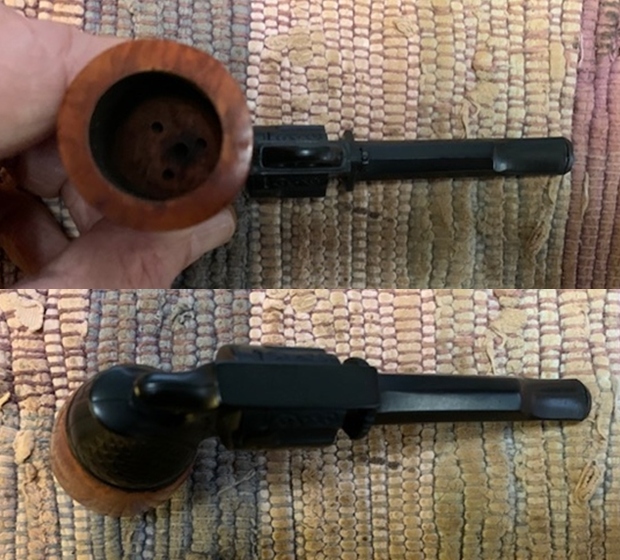
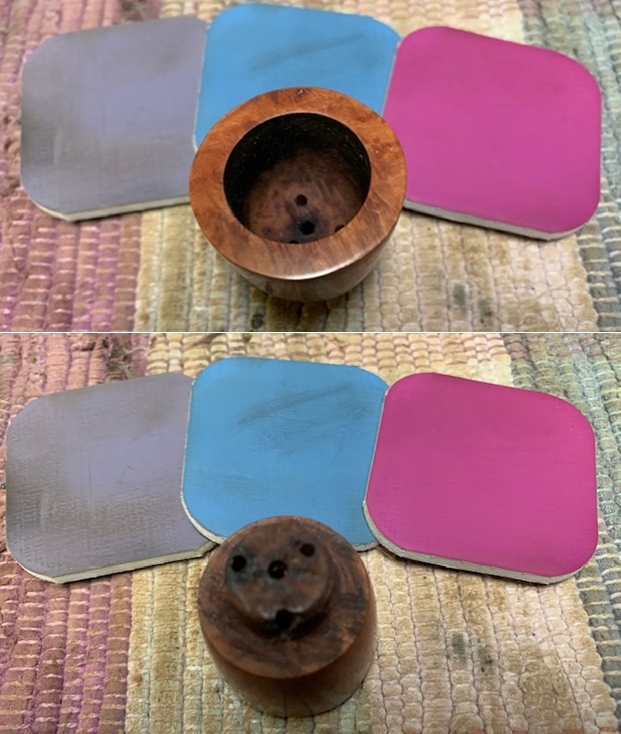
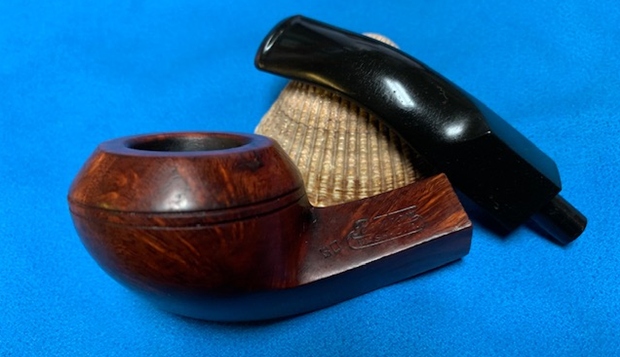
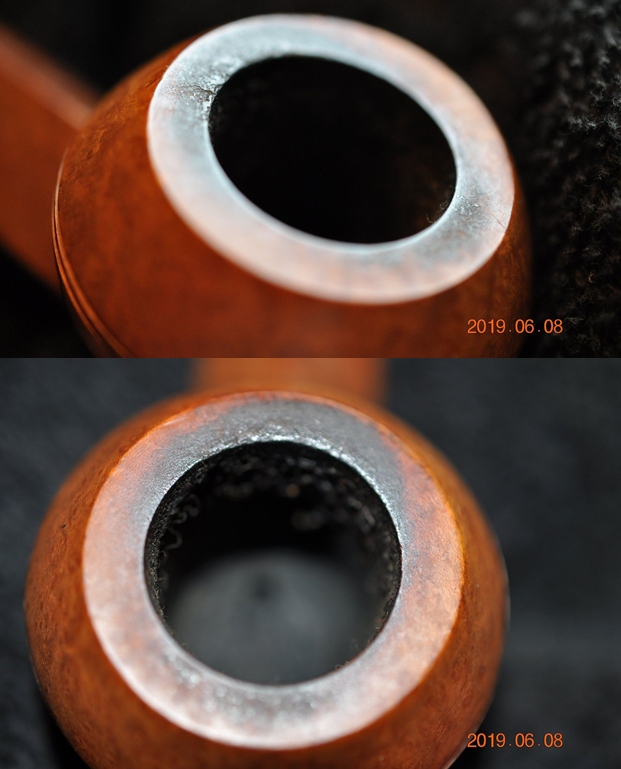
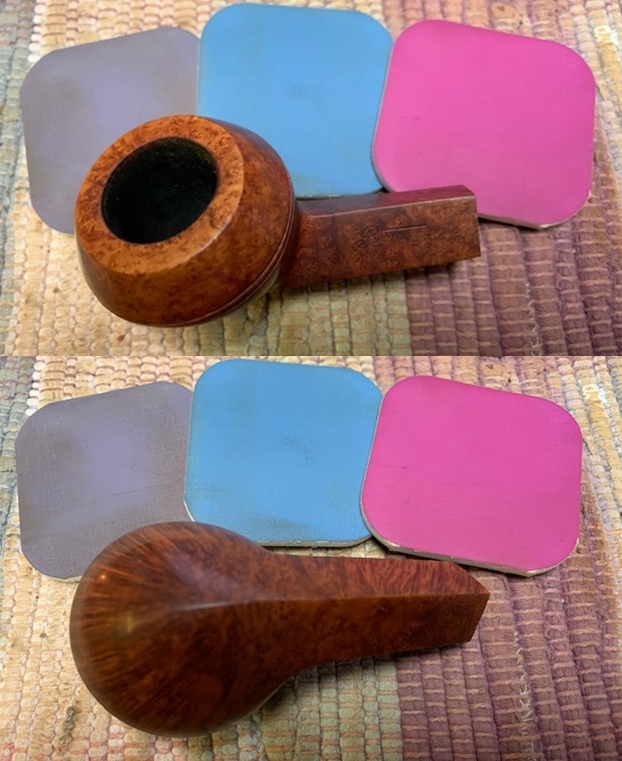
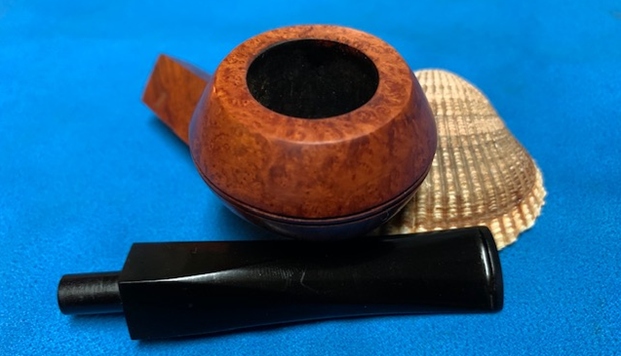
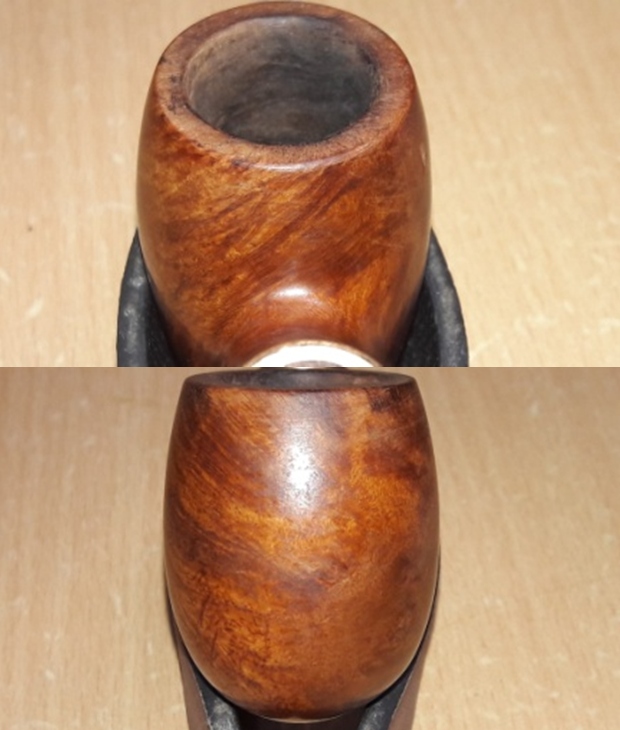
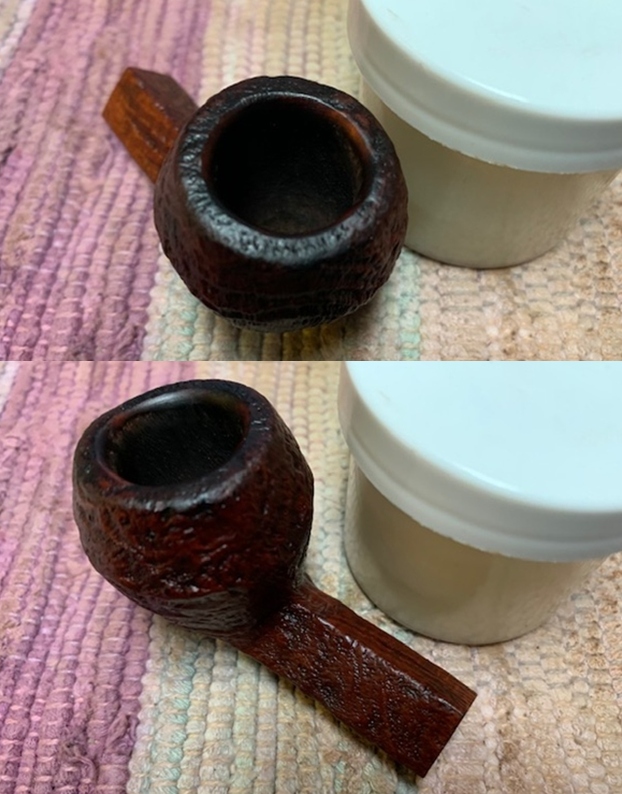
As observed earlier, the pipe has three parts, the briar stummel, a tapered Cherry wood shank extension and lastly a horn stem. Each of these three parts will be inspected and addressed separately. The chamber has a thin even layer of cake in the chamber. The chamber walls shows signs of being gouged with some sharp serrated tool that may have been used for reaming. The rim top surface is without any serious damage, save for some minor dents. The inner rim edge has been made uneven by reaming with a knife and appears slightly darkened at the front and rear of the stummel. However, the outer edge has a few very minor dents and dings. The old smells from the tobacco are overwhelming. The gouges to the walls are most probably limited over the surface of the thin layer of cake and should be eliminated once the cake is completely reamed out. The issues of minor dents/ dings over the rim top and darkened inner rim edges will be addressed by topping. Cleaning of the chamber should reduce these old ghosting smells.
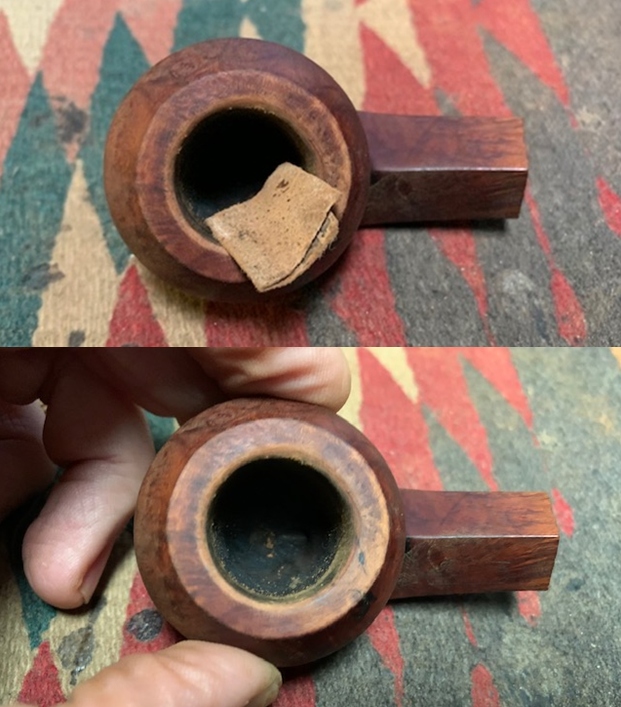
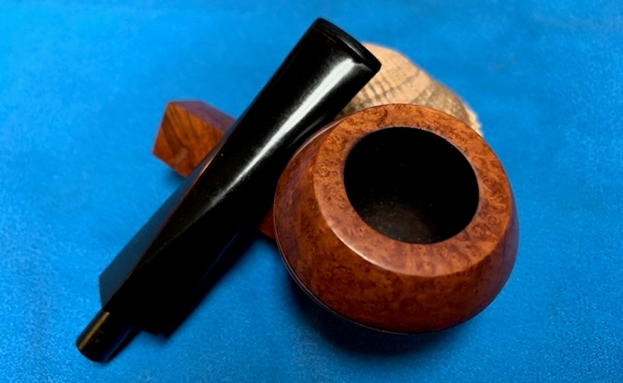
 The stummel surface has a thin coat of lacquer that has peeled off from the surface at a number of places. The stummel, with some beautiful scattered mix of straight and cross grains over the entire surface, has dirt and grime ground in to it over the years. However, these grains are hidden under all the dirt and grime. The stummel has one large fill in the briar on the right side (encircled in pastel blue) and a number of minor scratches all over the surface. Once the stummel surface has been thoroughly cleaned, the beautiful grains over the surface should be easily appreciable. I shall refresh the single fill with a mix of briar dust and superglue. Sanding the surface with a piece of 220 grit sandpaper will address the issue of scratches and also completely eliminate the lacquer coating.
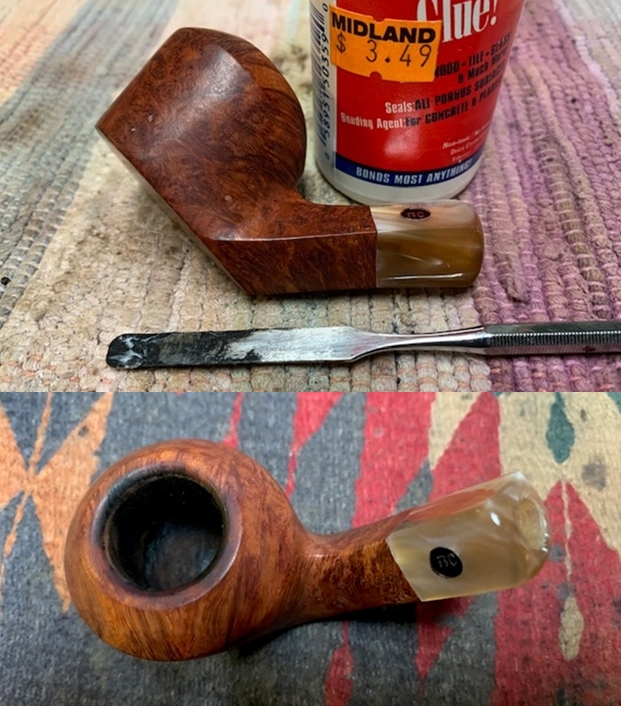
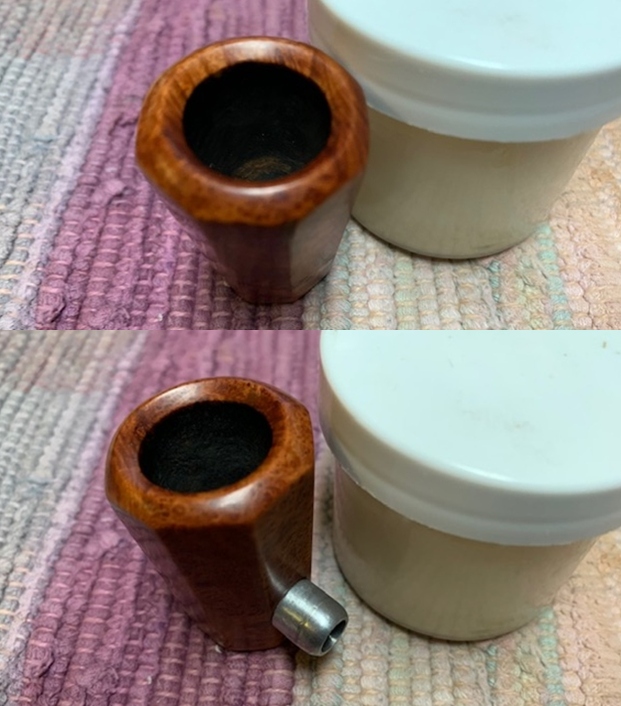
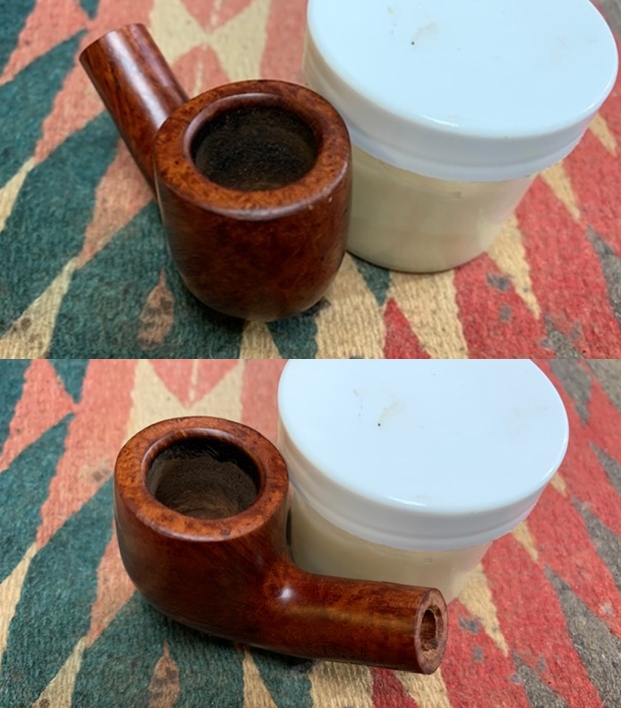
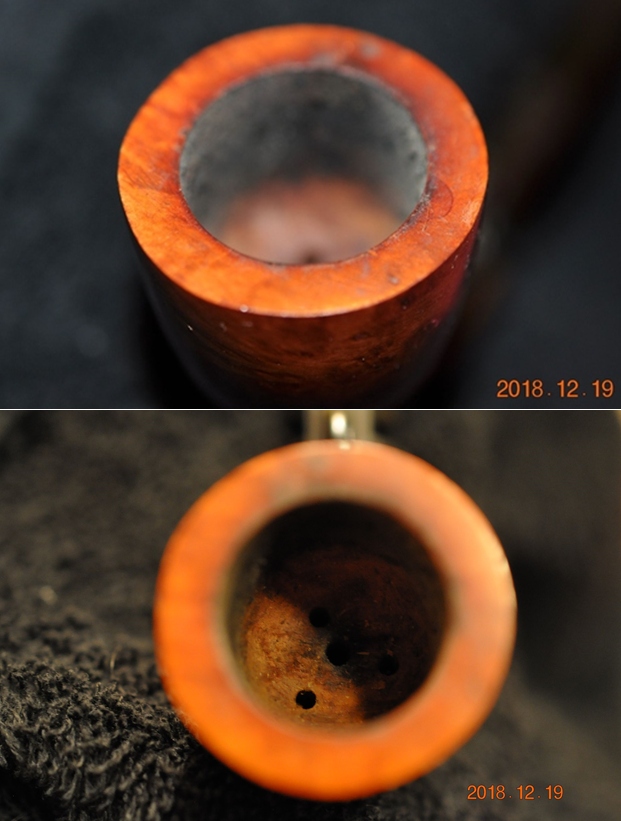
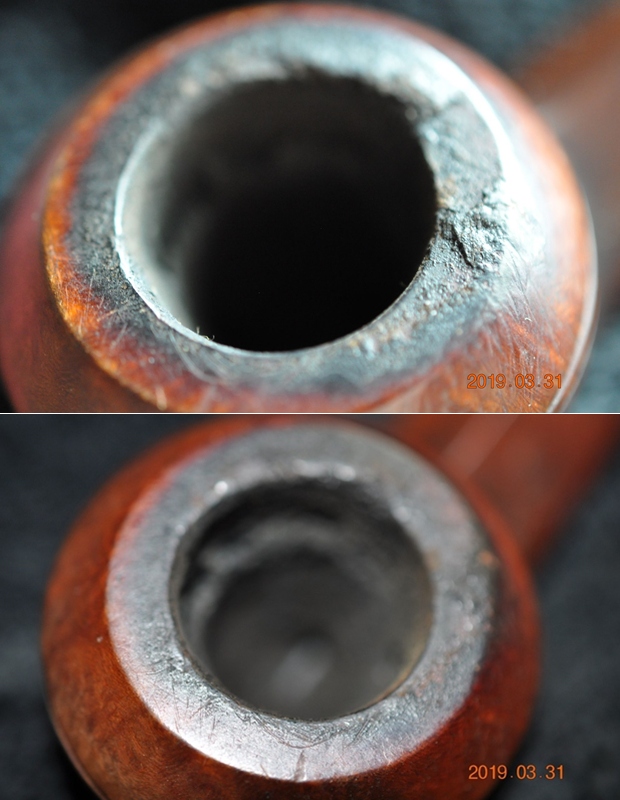
 The draught hole opening in to the mortise is drilled above the end wall of the mortise, forming a sump/ well for accumulating the oils and tars, thus providing a dry smoke. This sump is dirty with accumulation of old oils and tars. The draught hole is also clogged making the draw hard and laborious. The cleaning of the sump will necessitate resorting to salt and alcohol treatment. Once this process is completed, the ghosting should be completely eliminated.
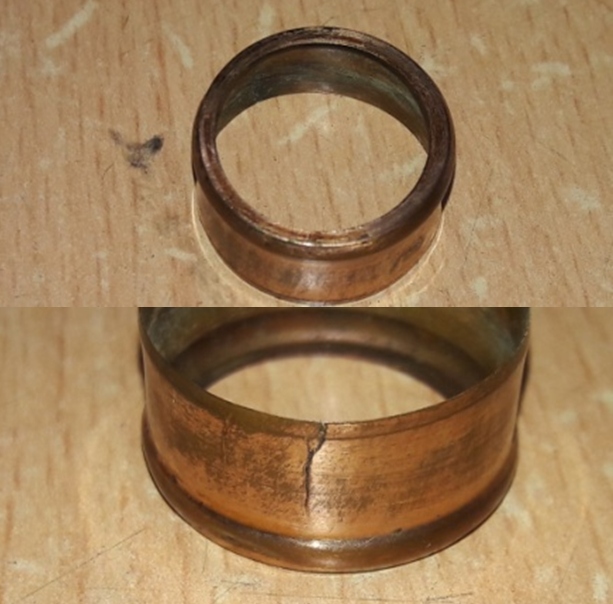
 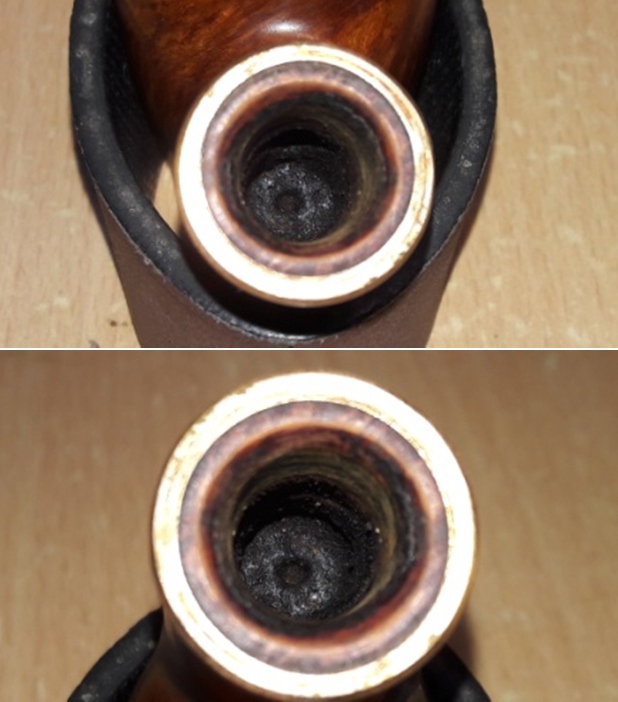 The brass shank end band came off easily. The band is completely oxidized from inside as well as outside with signs of corrosion over the inside surface. The band is cracked at one place. There is nothing much I can do about the crack in the band other than stabilize it with superglue. Maybe a weld could be a permanent solution, but neither do I have the expertise nor the equipment to execute such metal repairs. I shall polish the brass band to a nice shine and this will add some nice bling to the overall appearance of the pipe.
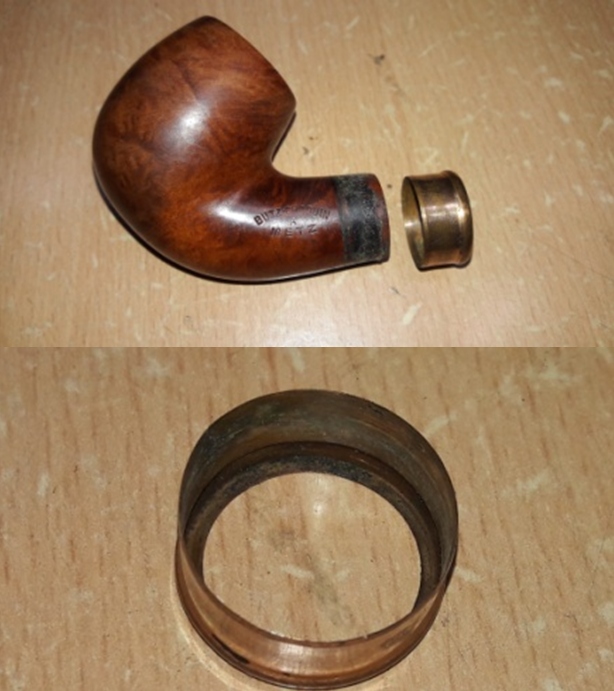
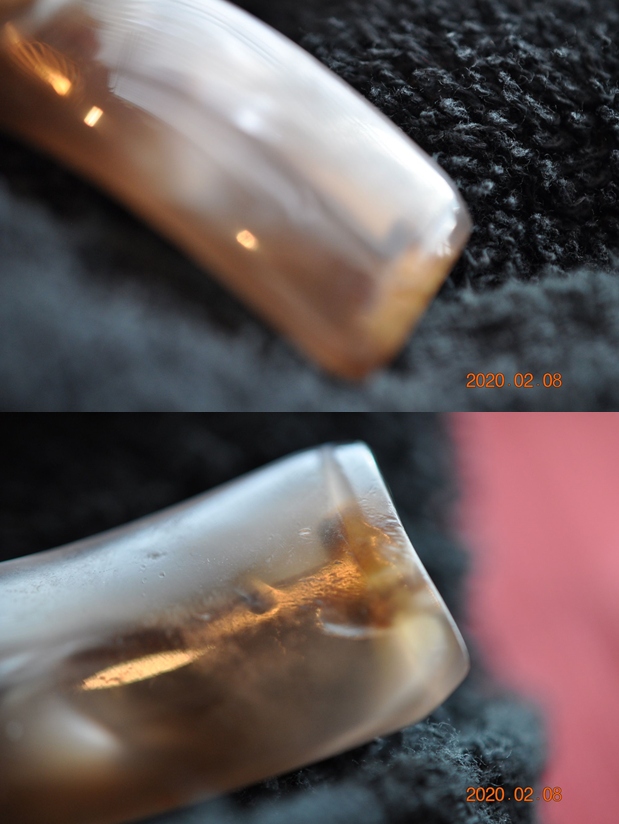
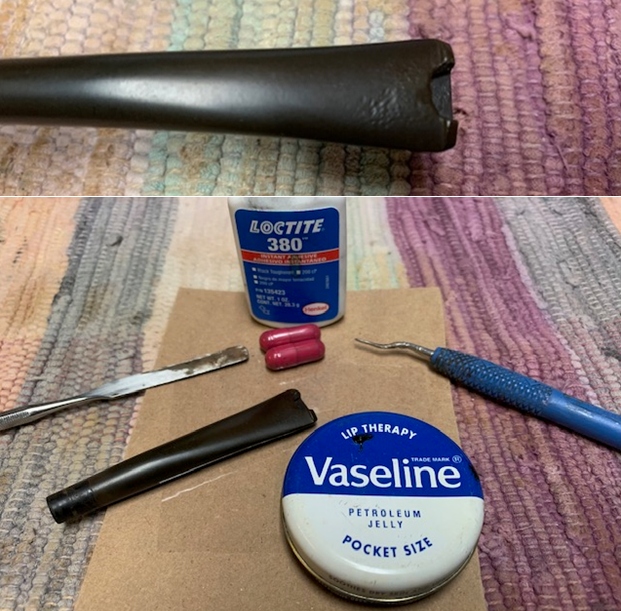
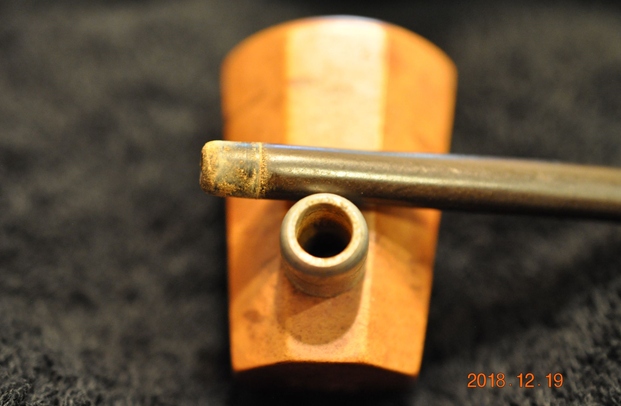
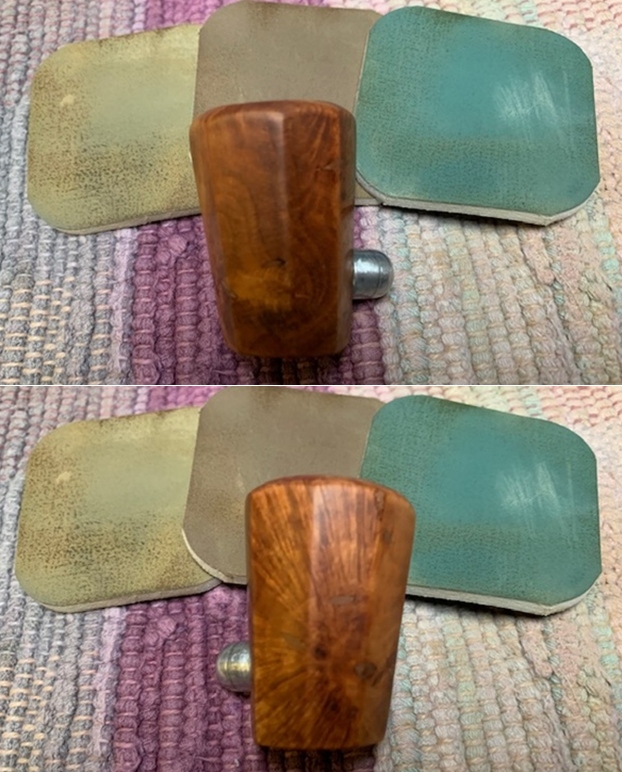
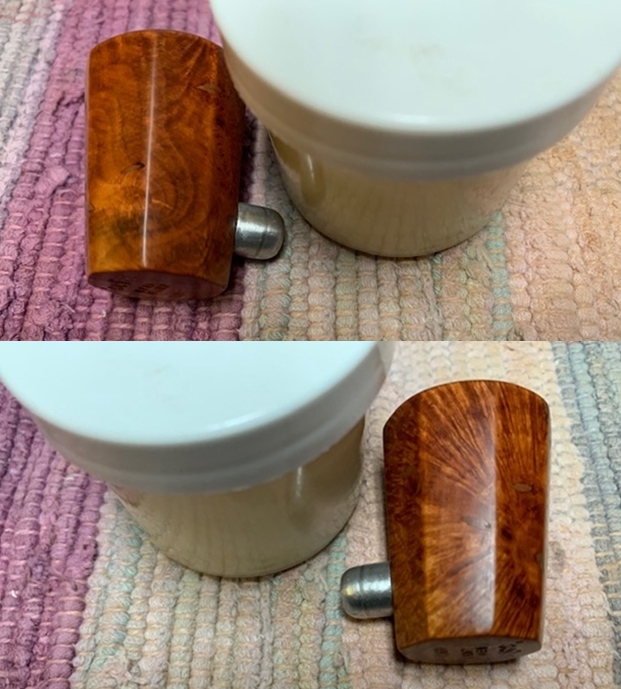
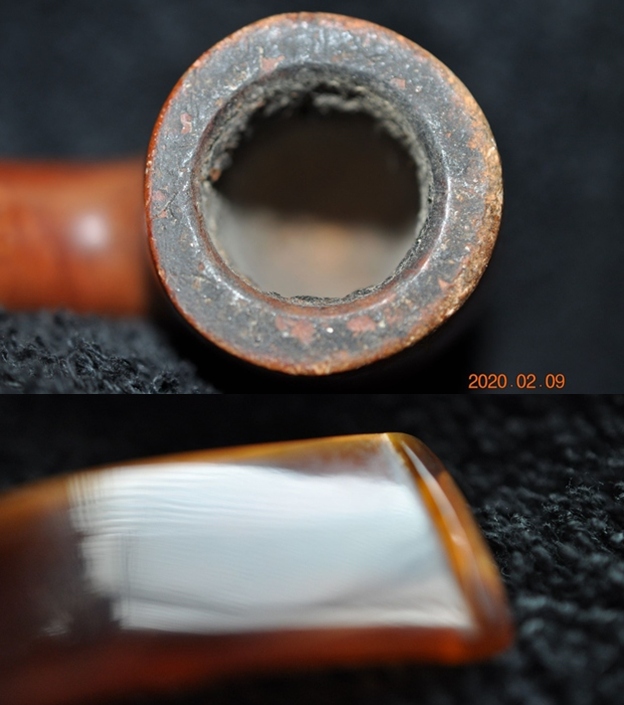
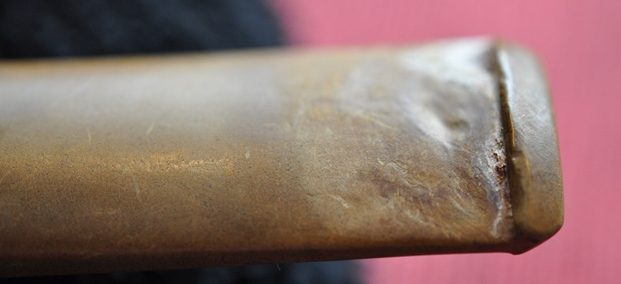
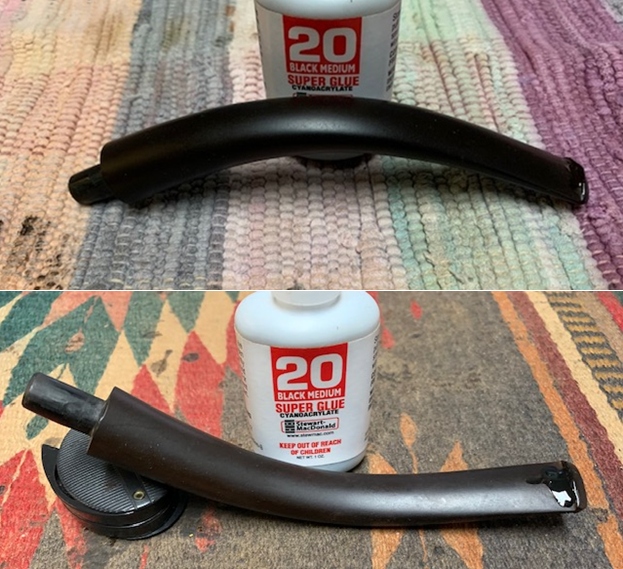
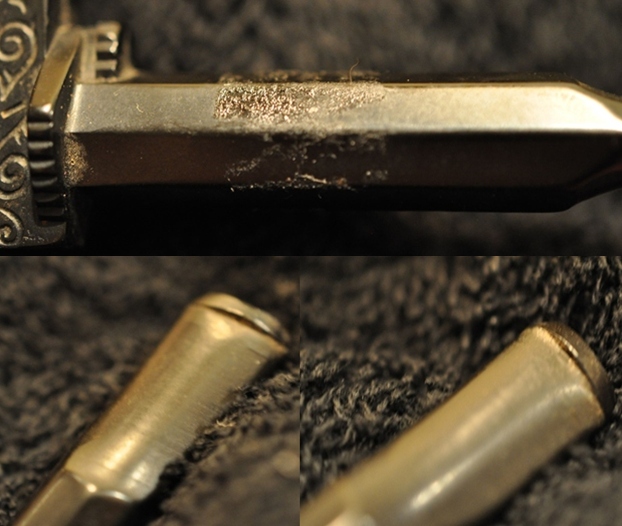
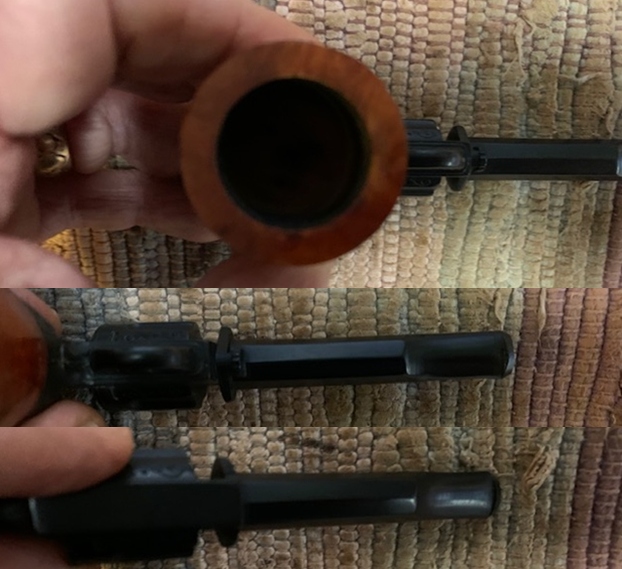
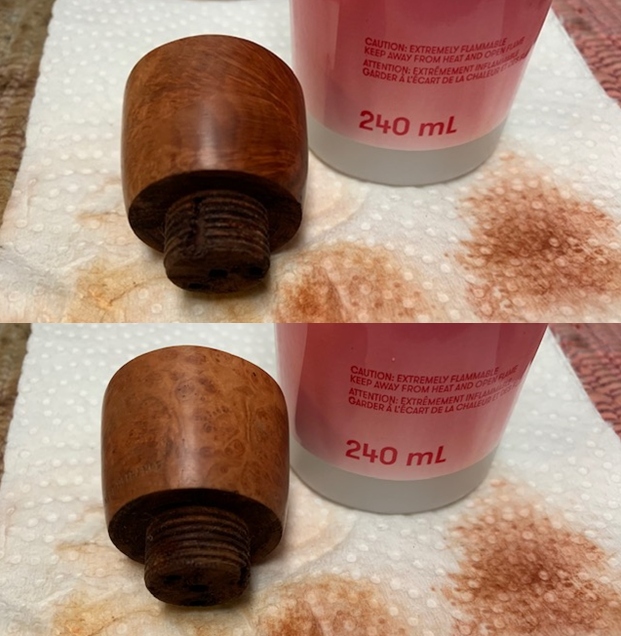
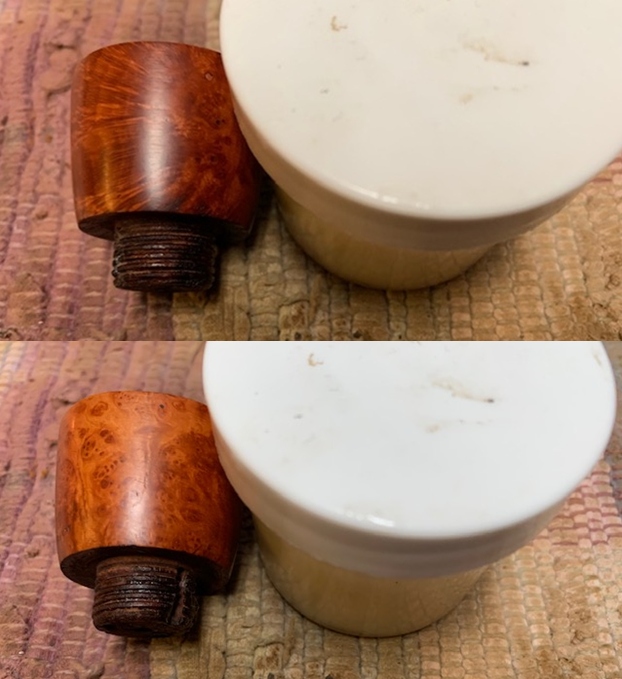
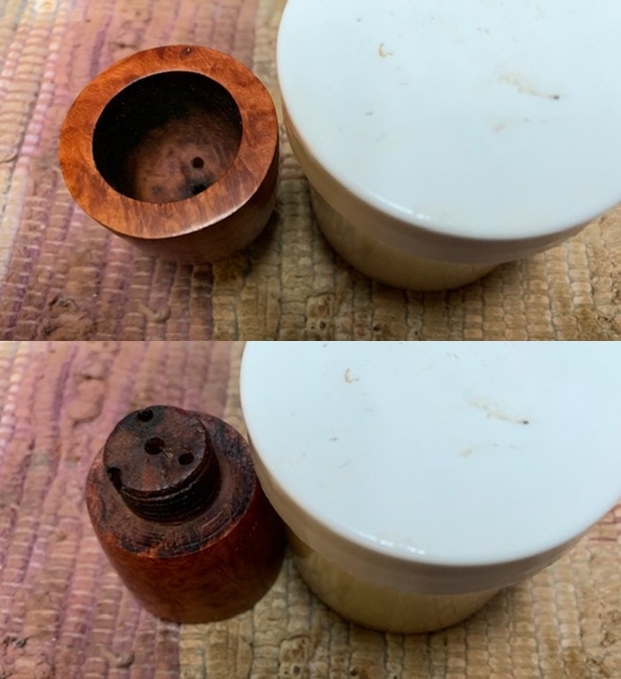
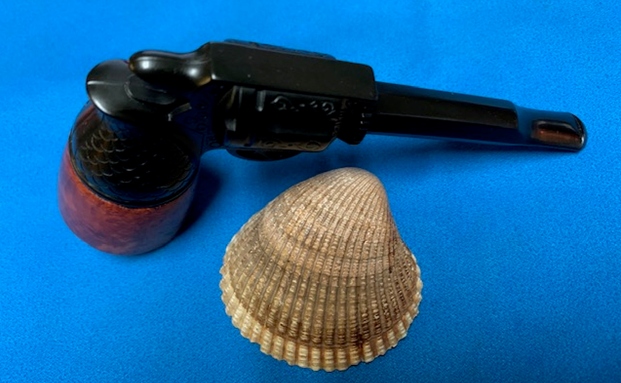
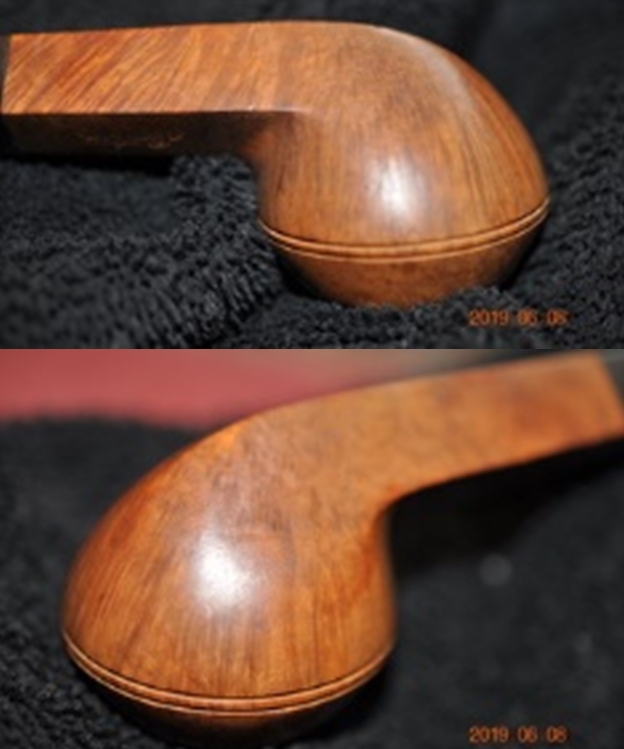
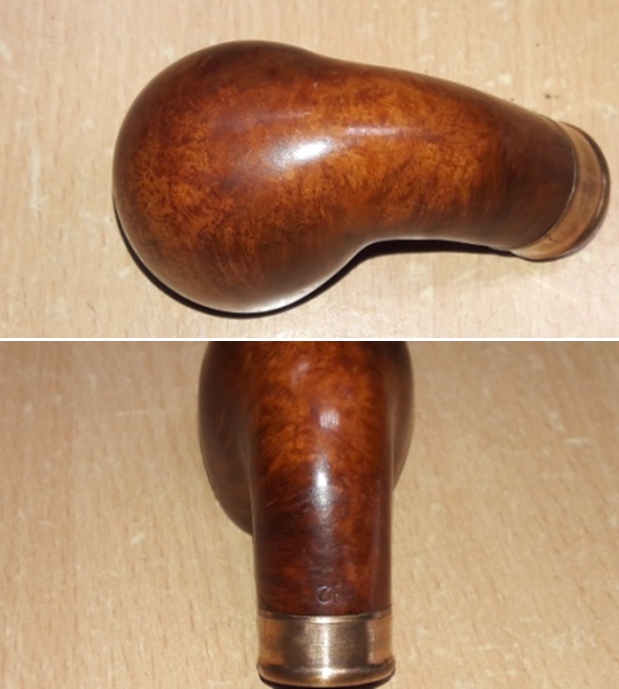
 The tapered Cherry wood shank extension still has the bark intact over the surface. The cherry wood extension is a nice reddish brown colored piece that has taken on darker hues with age (remember the property of a cherry wood that I have mentioned above?). This bark has been chipped in a few places exposing the light colored inner surface. The tenon end of this extension has a prominent groove (marked with yellow arrows) that suggest the presence of a band at the end that had come loose over a period of time and is now lost. The threaded tenon end of this extension has worn off threads (indicated with blue arrows) while the extension that fits in to the shank has cracked surface (marked with pastel blue arrows). The threaded stem end tenon is tapered and shows heavy accumulation dried glue and debris at the base. This, most likely, is the reason for the gap between the horn stem and the shank extension when fitted. The shank end tenon has a inner tube that provides the required rigidity and protection to the tenon. Both ends of the shank extensions are covered in dried oils, tars and gunk. I shall fabricate and fix a brass band over the shank extension at the stem end. Once the brass band is in place and the dried glue and debris from the base of the stem end of the tenon is cleaned, the seating of the stem over the cherry wood shank extension would be flush and seamless (I hope so!!). The issue of worn out threads can be addressed in two ways; firstly coat the tenon with clear nail polish which, while being a temporary solution, has the advantage of being able to take on grooves matching the stem and making for a better fit. The second option is of using CA superglue coating which is a more permanent solution but, I guess, will make for a push- pull type of fit between the shank extension and the horn stem when the glue hardens. I shall decide on the best course of action whence I reach that stage in restoration.
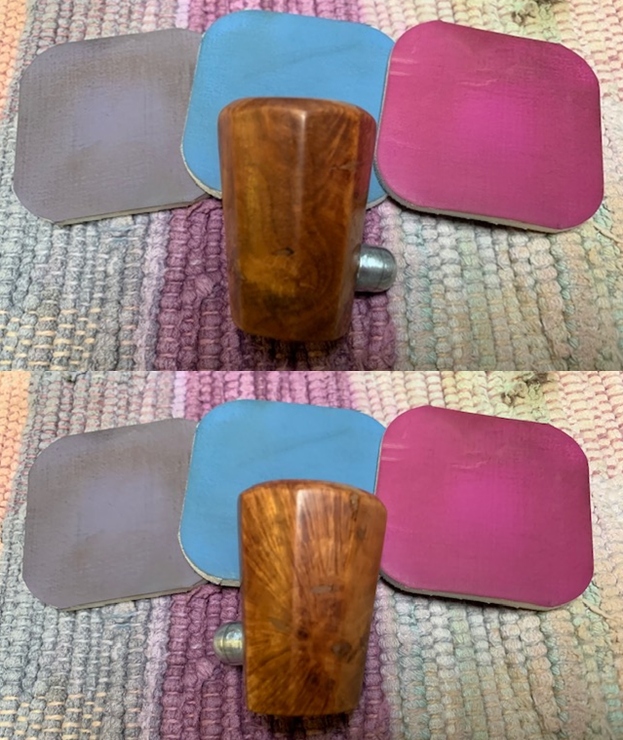
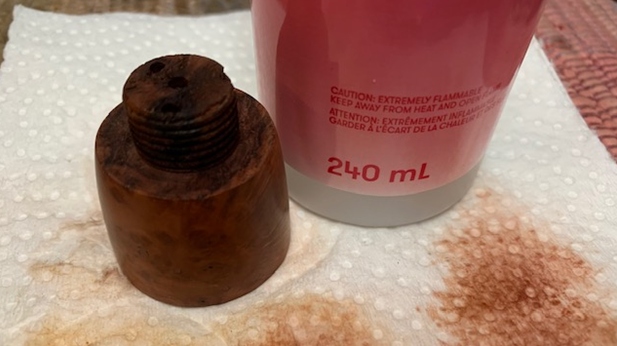
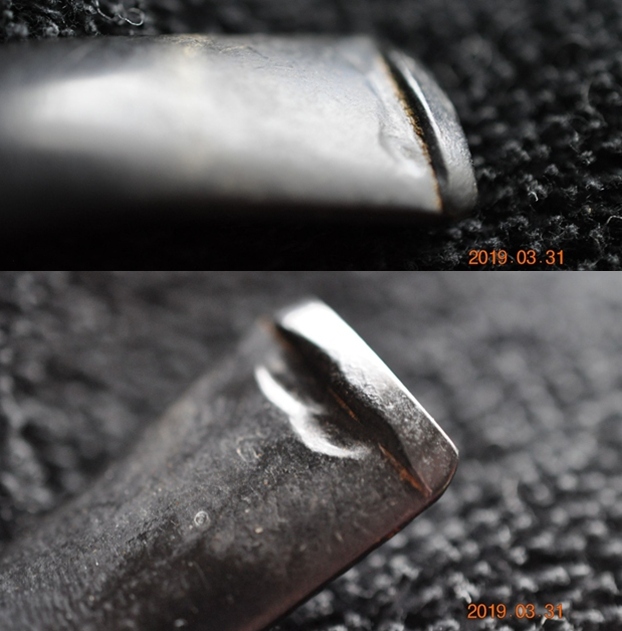
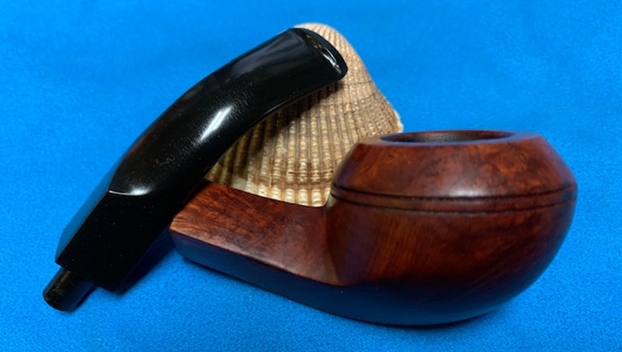
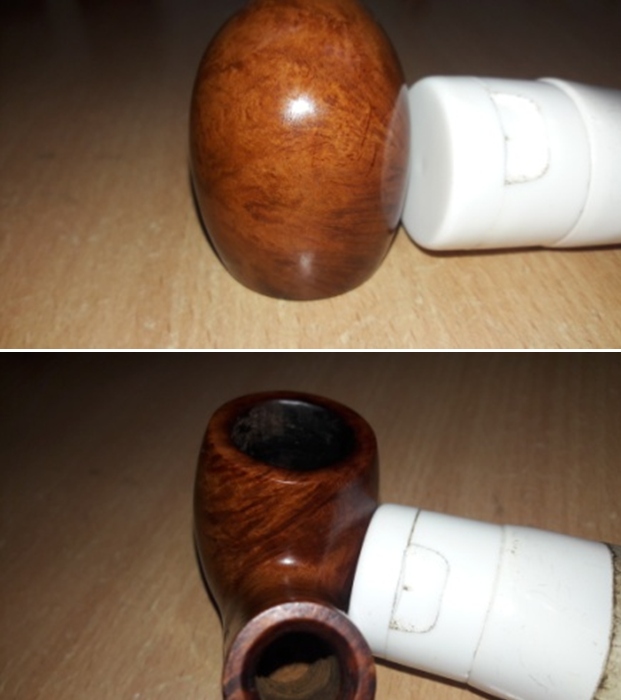
  The stem is a beautiful tapered saddle stem that is made from horn. The dark and light fibrous striations contrast beautifully all along the stem surface. The stem is bone dry and dirty. There is a deep tooth indentation on either surface of the stem in the bite zone. The button edges on either surface are slightly worn out with a few bite marks. The oval horizontal slot is completely clogged with accumulated oils and tars. The threaded saddle end too shows accumulated gunk. The insides of the saddle stem are lined with a thick felt lining (indicated with violet arrows) that was put in place to snugly hold the worn out tenon of the shank extension in place. This too could be a contributory factor for the incorrect seating of the stem over the cherry wood shank extension. The major challenge in this project will be to ensure a correctly aligned and flushed seating of all the parts in to each other to improve the aesthetics and functionality of the pipe. The thick felt lining needs to be removed as it is unhygienic and most importantly, it was not supposed to be there in the first place!! The horn stem, once cleaned and polished and hydrated will look stunning to say the least with the contrasting dark and light cretin fibers making for a visual treat.
  The Process
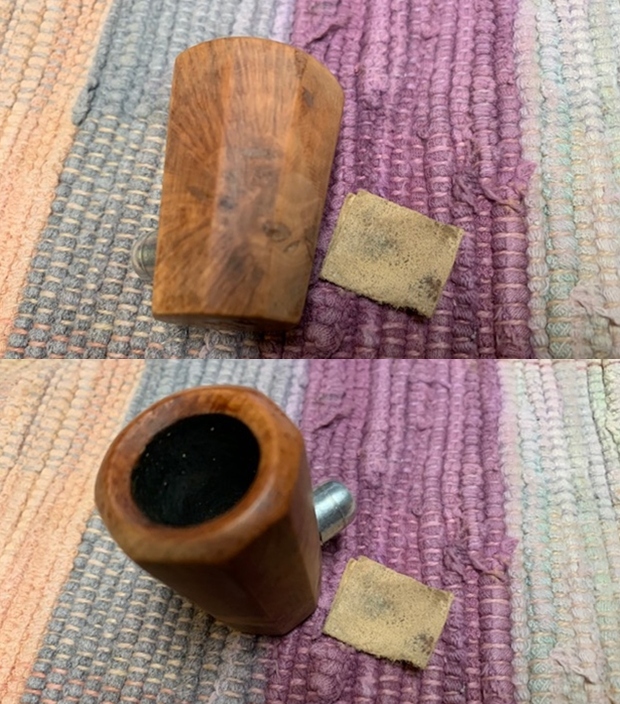
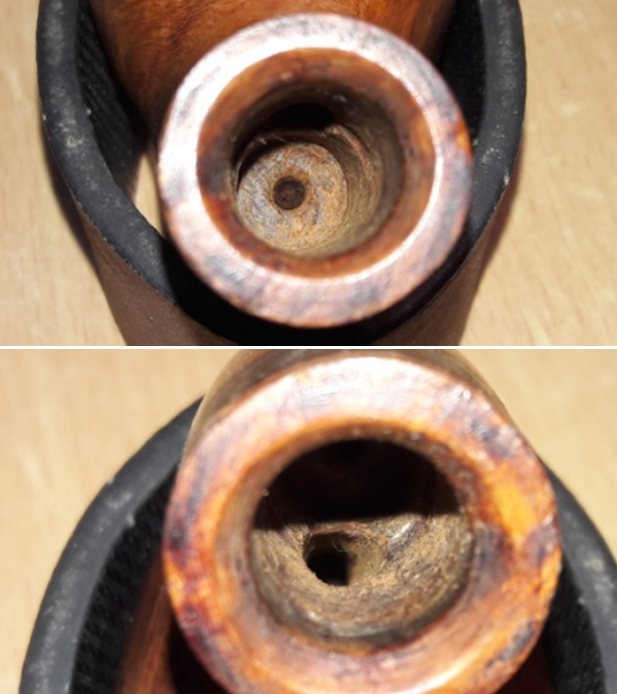
I started this project by reaming the chamber, with size 3 head of PipNet reamer. With my fabricated knife, I removed the cake from areas where the reamer head could not reach. I used a 180 grit sand paper, pinched between my thumb and forefinger, to sand the inner walls of the chamber. Once I had reached the bare briar, I wiped the chamber with a cotton pad dipped in isopropyl alcohol. This removed all the residual carbon dust presenting the walls for my inspection. The ghosting is still significant and I think more than the chamber, it the gunk in the sump and mortise that is the main culprit for the old smells. The chamber wall are in pristine condition save for some minor scratches that still remain from the old reaming. The draught hole appears slightly widened and extended forming a small channel to the foot of the chamber, likely caused due to enthusiastic use of pipe cleaner by the previous piper. These issues are superfluous, cosmetic and inconsequential to the overall functionality. The chamber wall and foot are all solid with another century of smoking pleasures left in it. 
 I followed up the cleaning of the chamber with that of the shank internals. Using my fabricated knife and dental tools, I first scrapped out as much of the accumulated dried crud from the sump and walls of the mortise as was possible. I further cleaned the mortise with q-tips and isopropyl alcohol. Using hard and regular pipe cleaners and alcohol, I cleaned the shank internals and the airway. A number of pipe cleaners later, the shank internals are somewhat clean however, the draw is nice, smooth and even. Traces of old oils and tars can be seen at the end of the mortise and at the base of the sump. The ghosting is still pretty strong and would necessitate using more invasive methods to eliminate these old smells.
 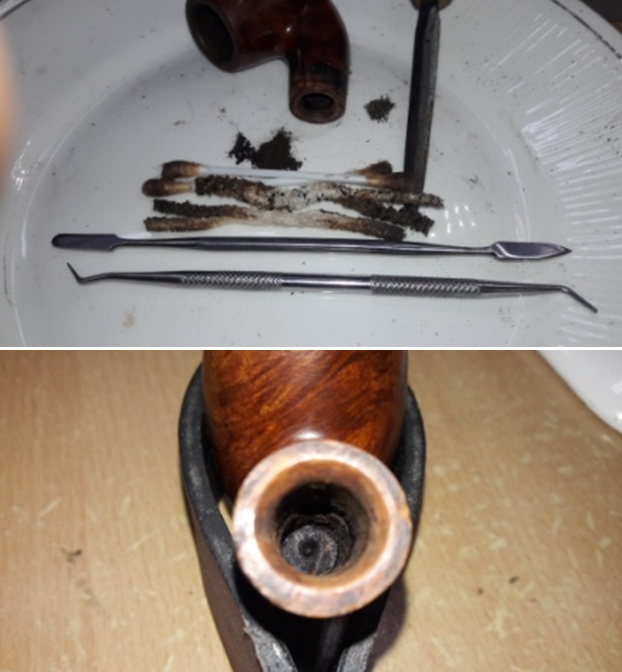 Before subjecting the stummel to salt and alcohol bath, I decided to clean the external stummel surface to remove the thin coat of lacquer and the dried glue from the shank end. I wiped the surface with pure acetone on a cotton swab. Though the lacquer coat is completely removed, the dried glue did not give way.
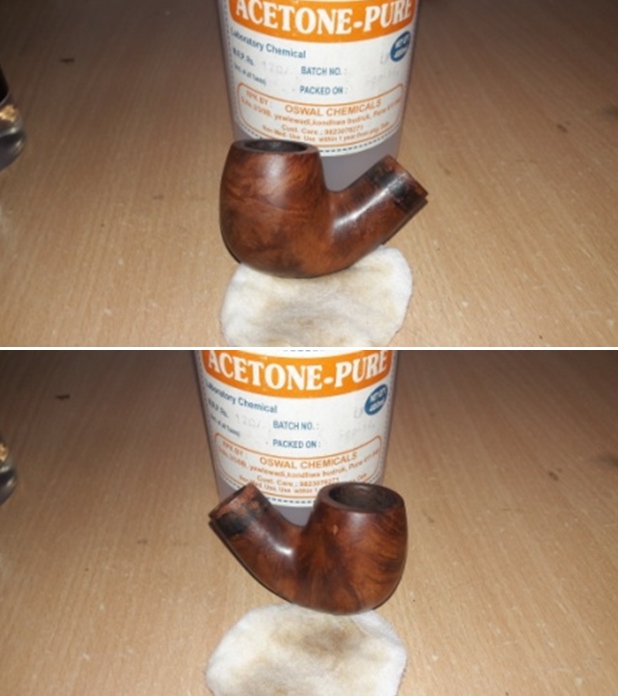
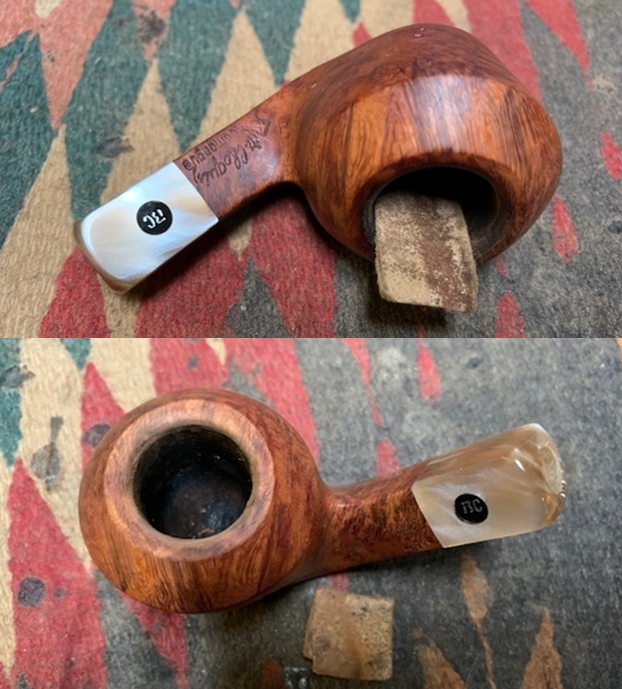
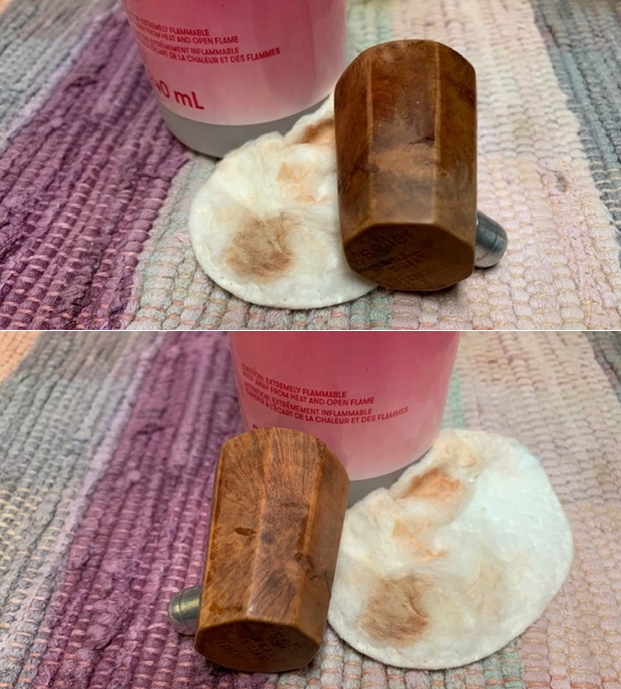
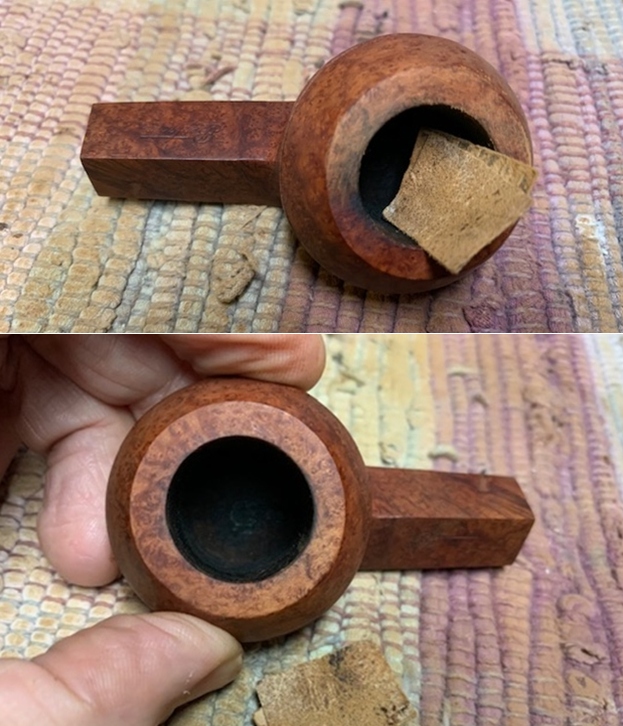
 The ghost smells in the chamber were still quite strong and hence I decided to address this issue. To eliminate the ghost smells from the pipe, I decided to treat it with salt and alcohol. I use a cotton ball which is an at par substitute to the kosher salt as I have realized over the last few years. I draw out a wick from the cotton and along with a folded regular pipe cleaner; insert it into the mortise and through the draught hole into the chamber. Thereafter, I pack the chamber with cotton balls to about quarter of an inch below the rim’s inner edge. I soak the cotton balls with isopropyl alcohol up to the brim. About half an hour later, the level of alcohol goes down, having been absorbed by the cotton. I top it up once again and set it aside overnight. By next morning, the cotton and alcohol has drawn out all the remaining oils and tars from the chamber and mortise, fulfilling its intended task. I removed the cotton balls and scraped out all the loosened tars and gunk from the sump. However, the airway and the draught hole was a different story. For the love of money, I couldn’t get a folded pipe cleaner in through the airway. The moistened gunk was so hard and tightly packed that I also had to use a drill tool from the Kleen Reem reamer tool to dislodge the gunk from within the air way. The chamber now smells clean and fresh. I set the stummel to dry out naturally.
 With the bowl internals clean, I move to clean the exterior of the stummel. I used a hard bristled tooth brush, Scotch Brite pad and Murphy’s Oil soap to scrub the stummel, horn stem and the cherry wood shank extension. After the scrub with oil soap, I washed the stummel, stem and shank extension under running warm water with anti oil dish washing detergent till the surface was clean and dried it using paper towels and soft cotton cloth. I simultaneously cleaned the internals of the shank, shank extension and stem, with the detergent and hard bristled shank brush and set the all the three parts aside to dry out naturally. The stummel surface has cleaned up nicely with the beautiful grain patterns on full display.
 Next, I removed the old fills from the stummel surface with a sharp dental tool. I cleaned the gouged out spots with cotton swab and alcohol in preparation for a fresh fill. Using the layering method, I filled the gouged out spots with CA superglue and briar dust. I always ensure that the fill is above the rest of the stummel surface. This helps in subsequent sanding and blending in of the fills with rest of the surrounding surface. I set the stummel aside for the fills to cure.
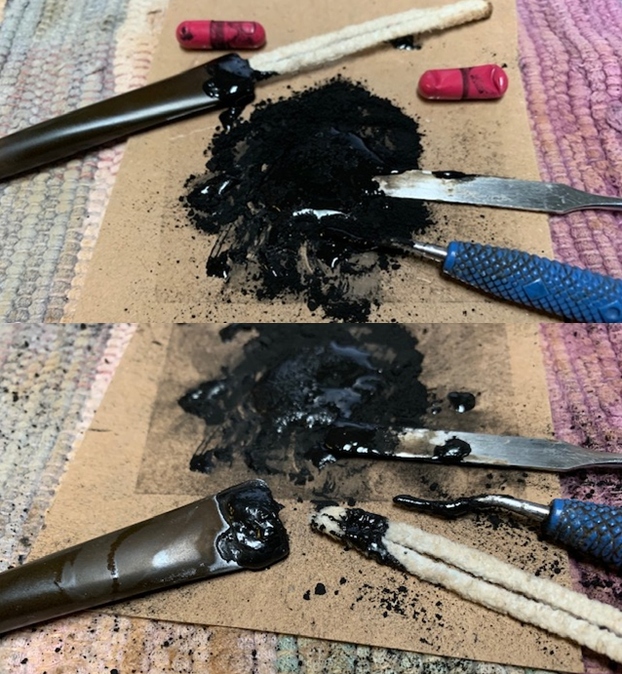
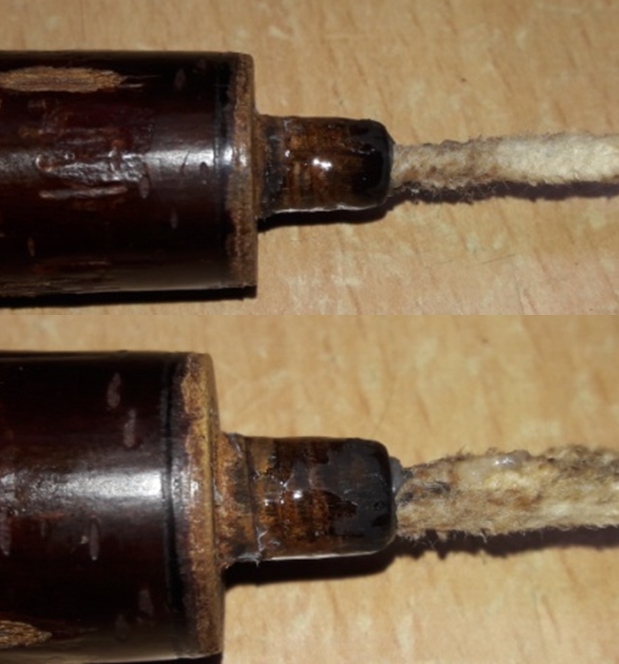
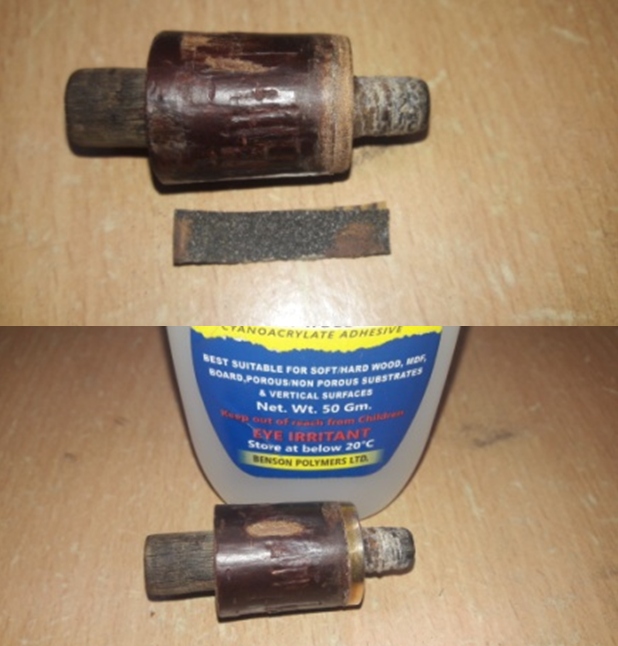
 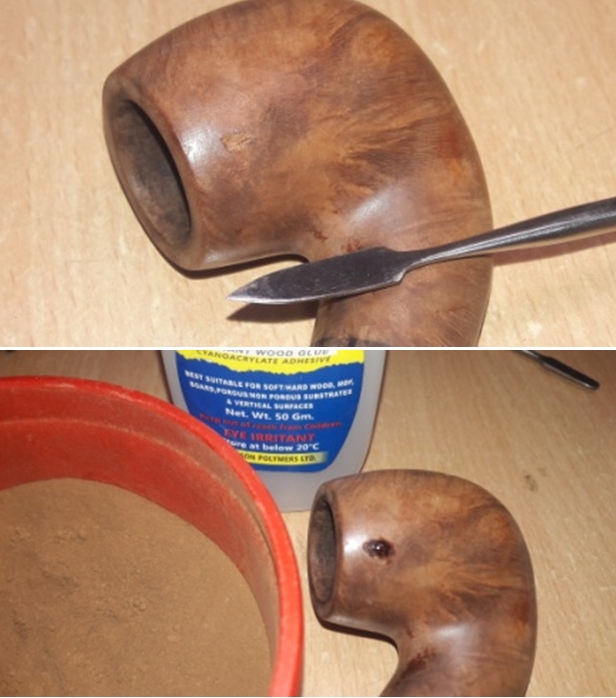 While the stummel fill was curing, I tackled the issues with the cherry wood shank extension. I begin with cleaning and removing all the dried glue and debris from the base of stem end tenon of the shank extension using dental tools and sharp knife. I scrapped out all the dried glue and pieces of the felt lining from the tenon and wiped it with cotton swabs and alcohol. However, hidden beneath all the dried glue and debris was a crack that ran the entire length of the tenon (indicated with yellow arrows). Close scrutiny of the crack assured me that the crack, though deep, did not extend to the inner wall of the tenon. I shall stabilize the crack first by filling it with thin CA superglue (for deeper spread) and further strengthen it with a coat of medium CA superglue. In fact, I decided to coat the entire tenon with superglue to provide a protective coat over the tenon surface.
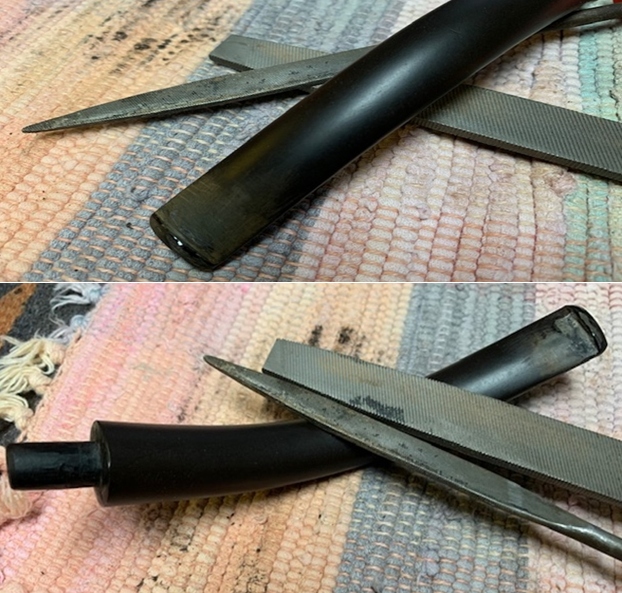
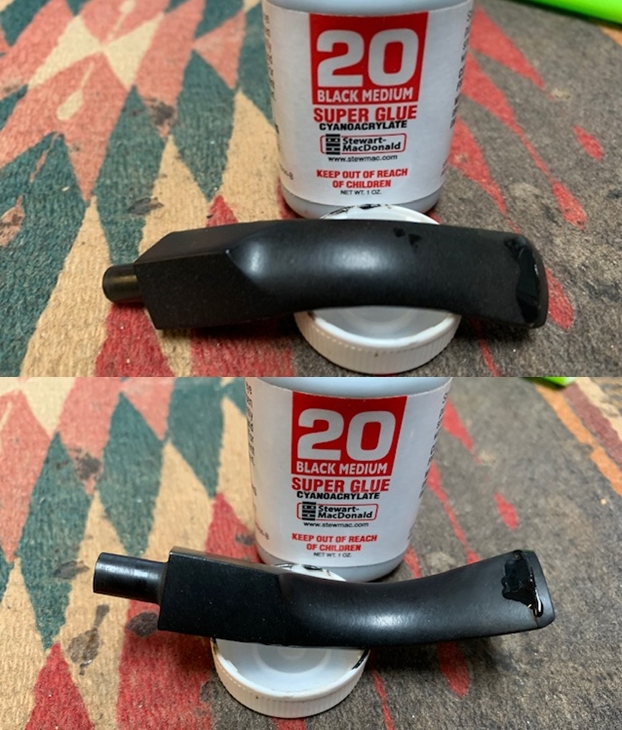
 I further cleaned the tenon with a Scotch Brite pad and dish washing soap in preparation of coating it with superglue. The stem end tenon cleaned up nicely. Just to be on the safer side, I insert an old pipe cleaner smeared with petroleum jelly in to the tenon. This will prevent clogging of the tenon airway in the event that the superglue percolated inside the airway. I filled the crack with thin CA superglue and once that had cured, I coated the entire tenon with a thin layer of medium CA superglue. I set the shank extension aside for the glue to harden.
 Next, I worked on the horn stem and cleaned out all the old felt cloth lining and gunk from the threaded saddle portion of the horn stem. I further cleaned the stem internals and insides of the saddle with pipe cleaners, q- tips and isopropyl alcohol. The threads in the saddle are nice and deep and would help in creating matching threads over the superglue coated tenon in the shank extension.
 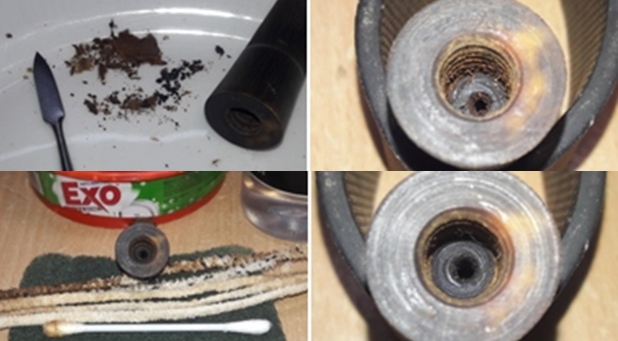 Continuing with the stem repairs, I filled the deep tooth indentation in the bite zone on the upper stem surface with clear medium CA superglue. Once the fill had hardened sufficiently, I similarly filled the tooth indentation in the lower stem surface. I set the stem aside for the fills to cure.
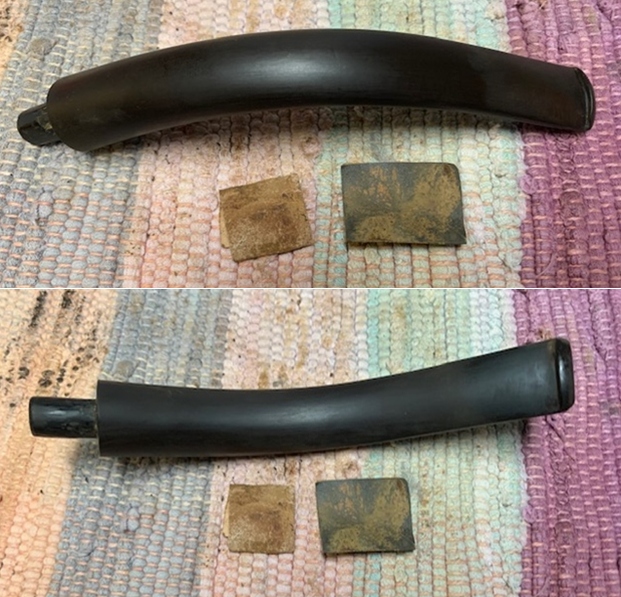
  By this time, the superglue coat over the tenon of the shank extension had completely cured and I could continue with working on the shank extension. I decided to attach the missing brass band at the stem end of the shank extension. I rummaged through the various bands that I have and found one that was a near match with the size of the stem end of the shank extension. I tried a rough fit and realized that the band was a tad smaller than the shank extension face and also the band was larger than the groove in the shank extension surface. I addressed these issues by sanding down the shank extension end to match the band size and sanding down the band to a size that would fit the groove. I have had a terrible experience of using a sanding drum on my hand held rotary tool once and since then I have been doing such band modifications by manually sanding it on a piece of 150 grit sand paper. I fixed the modified band to the shank extension using superglue. The aesthetics of the pipe has been transformed completely by this addition and I am very pleased with the appearance of the shank extension at this point.
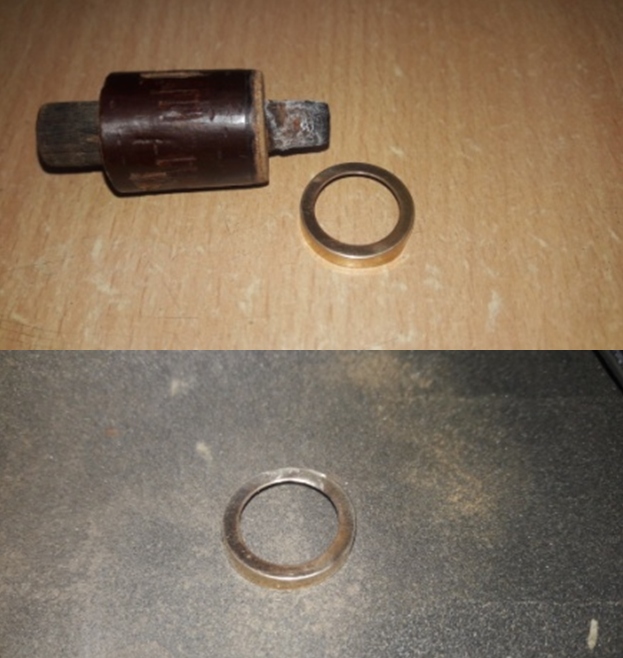
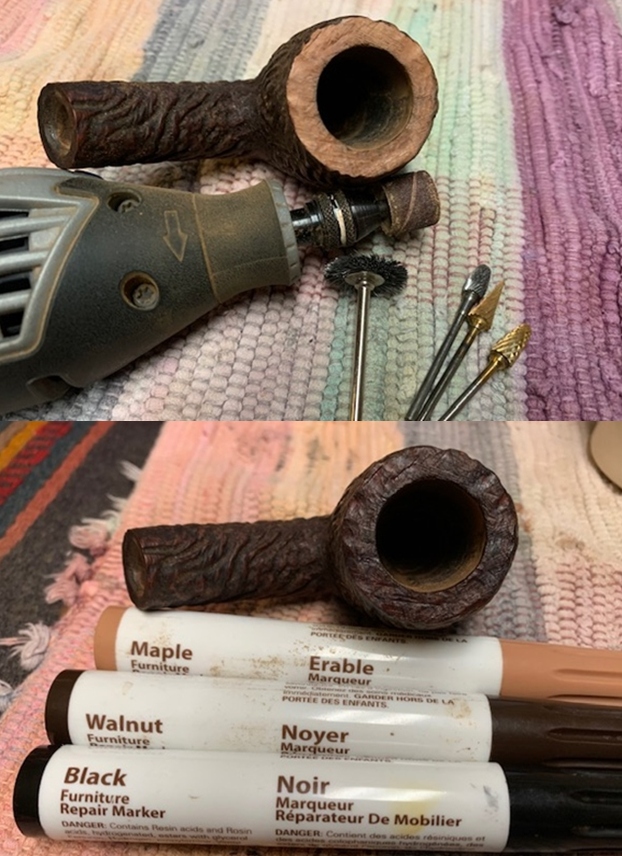
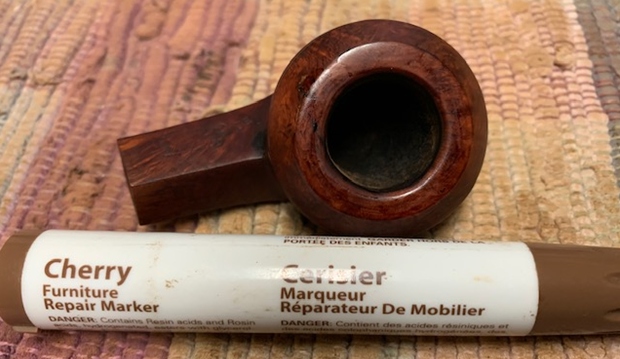
 Next, I addressed the issue of the exposed lighter hued surface in the shank extension caused due to chipped bark from the surface. I stained the lighter surface with a Mahogany stain pen followed by a coat with black sharpie pen. I applied the coat alternatively in layers till I achieved a perfect blend with the rest of the shank extension surface.
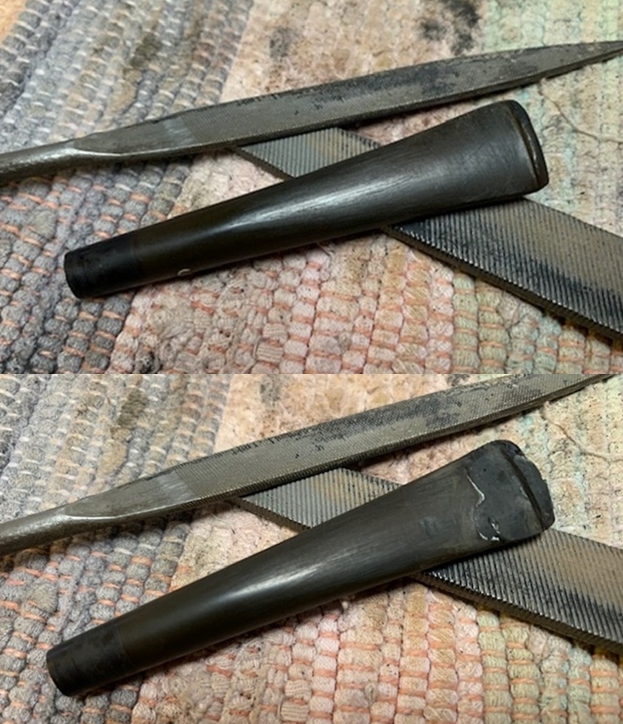
 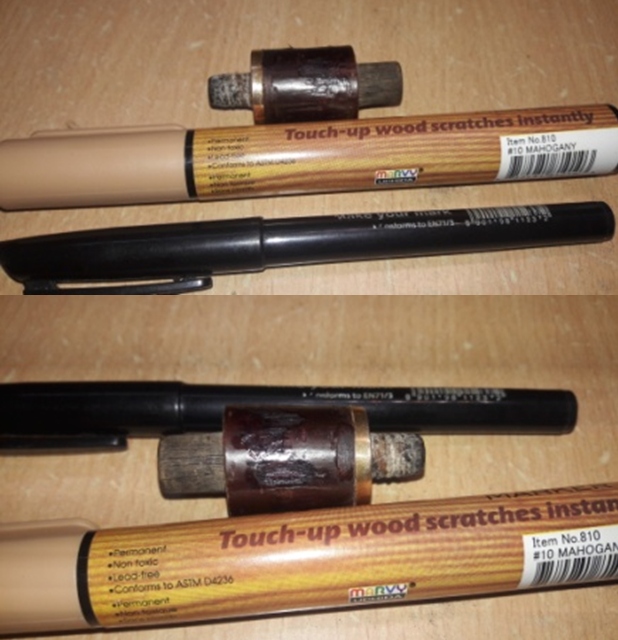 With the stem repairs being set aside for curing and the shank extension repairs completed, it was time to work on the stummel again. The stummel fill has cured completely at this point in time. With a flat head needle file I sand the fill and achieved a rough match with the rest of the stummel surface. To achieve a perfect blending in of the fill I sand the entire stummel surface with a folded piece of 220 grit sand paper. The minor scratches that were observed at the bottom surface of the shank were also addressed by this sanding. The fill has blended in nicely and further polishing with micromesh pads should further mask this fill and sanding marks left behind by the abrasive 220 grit sand paper.
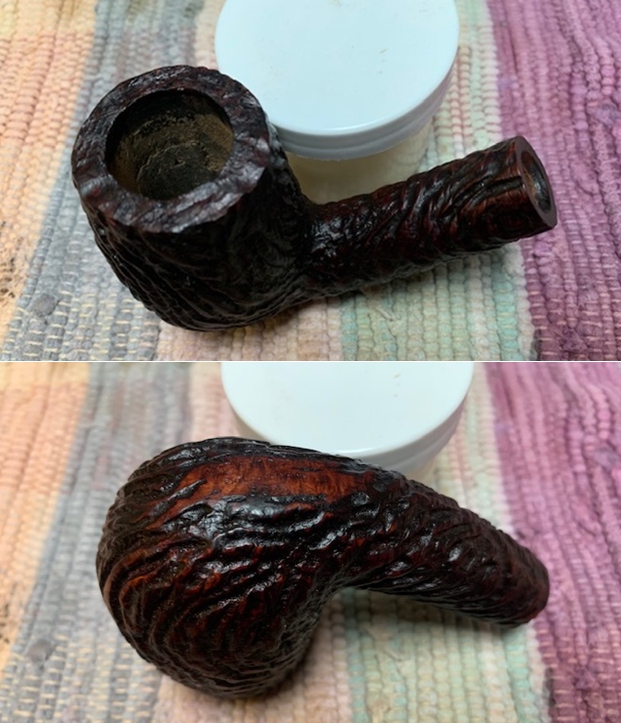
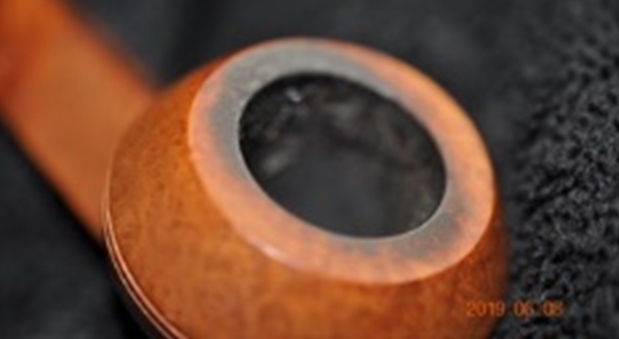
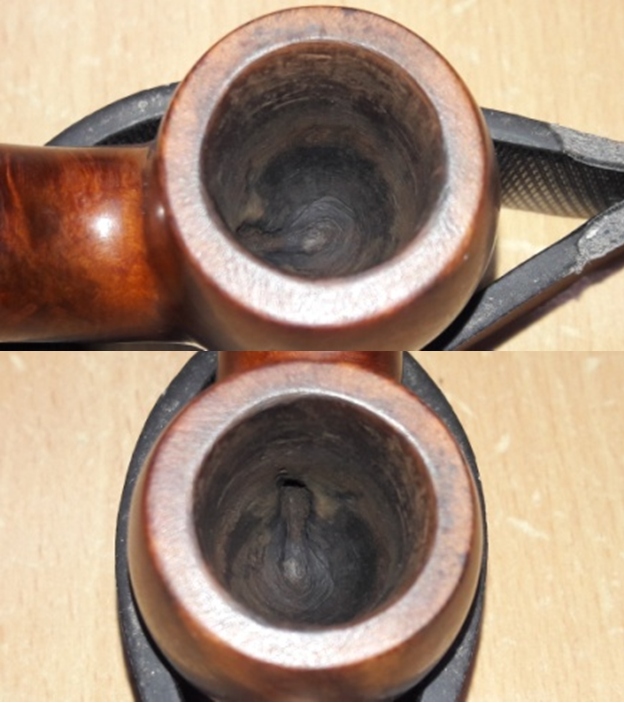
 However, I am not very happy with the appearance of the rim top surface at this stage of restoration process. The rim top appears darkened all around and suspected charring in 2 o’clock and 9 o’clock directions (encircled in yellow). To address these issues, I topped the rim on a piece of 220 grit sandpaper, checking frequently for the progress being made. Once I was satisfied that the issues have been addressed, I wiped the rim top with a moist cloth to remove the sanding dust. I am happy with the appearance of the rim top after topping.
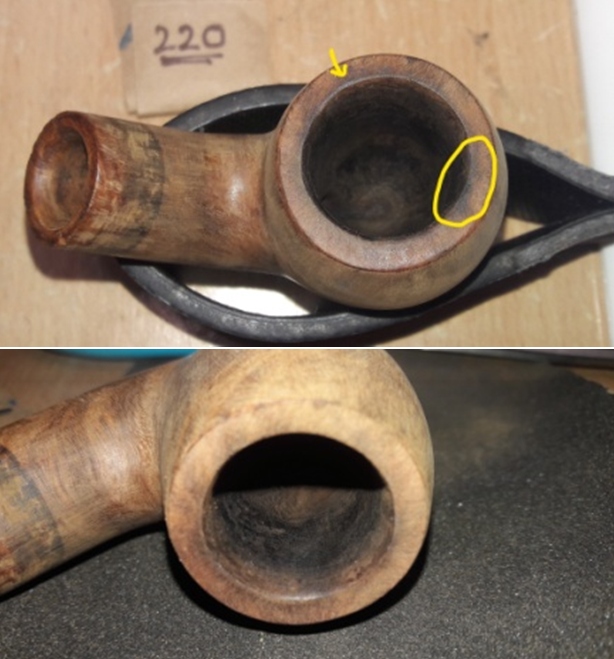
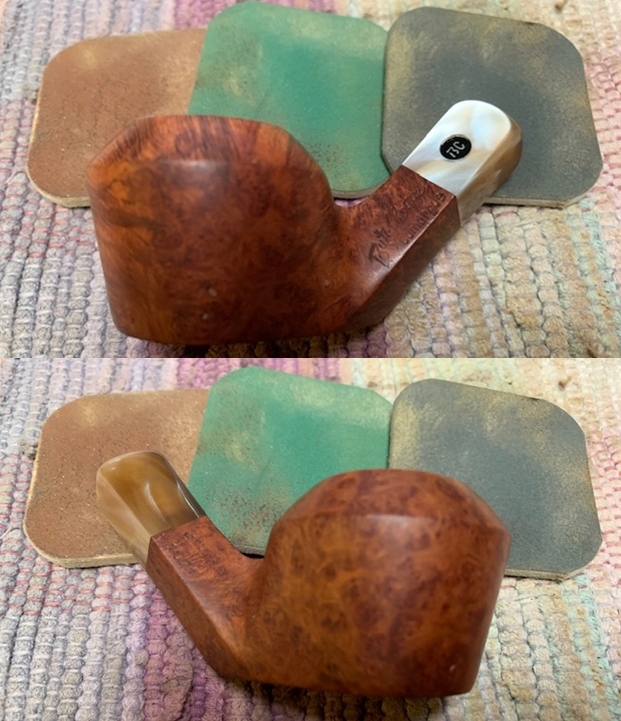
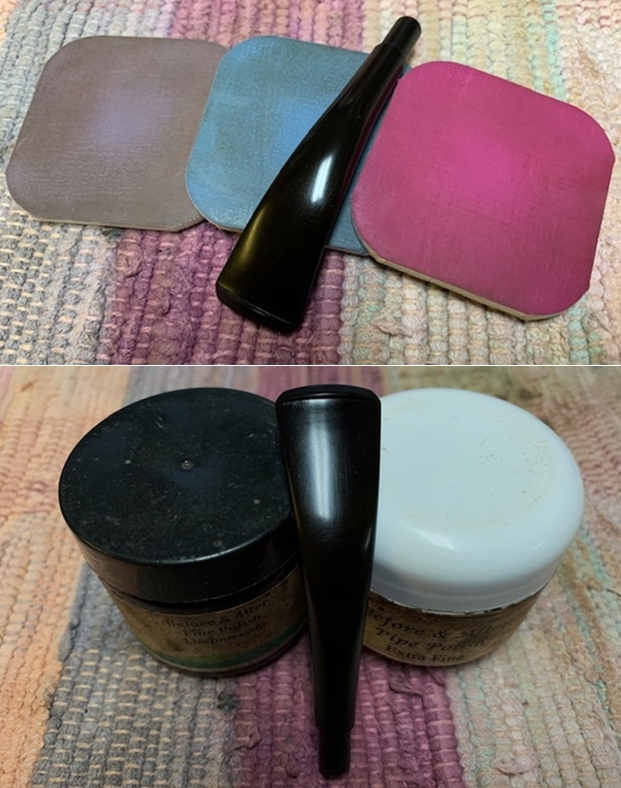
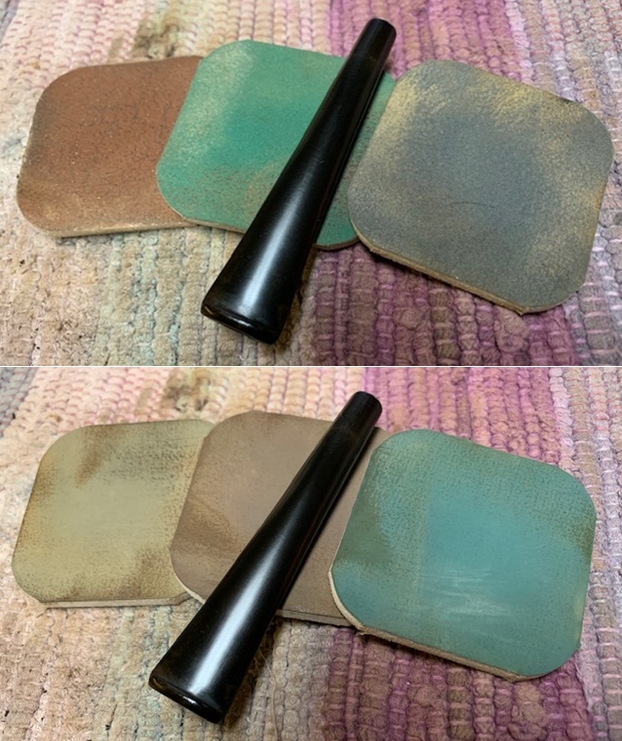
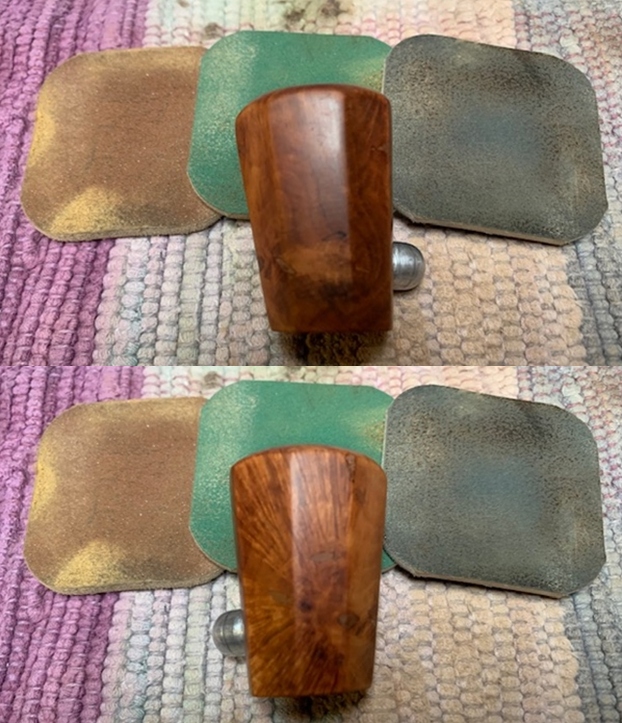
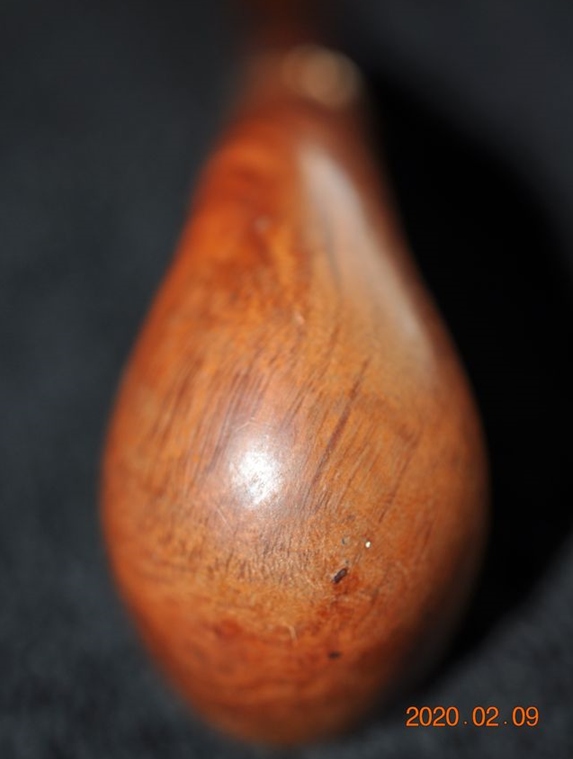
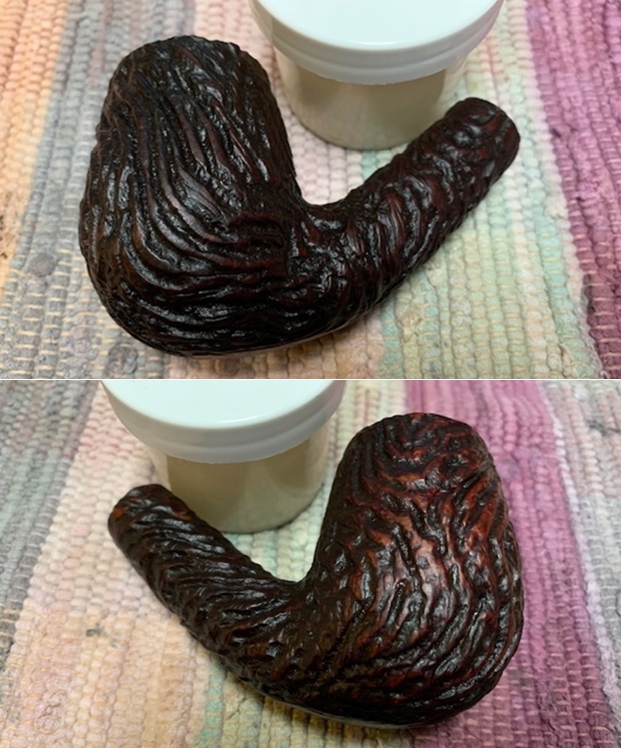
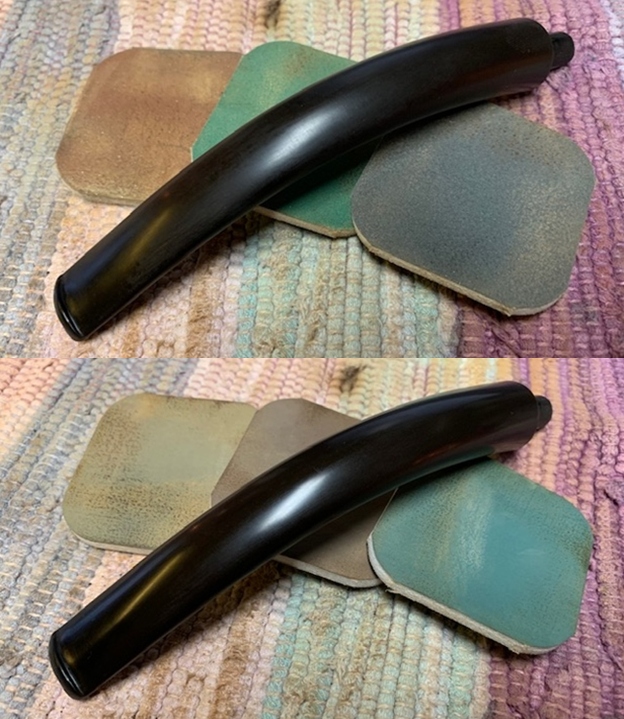
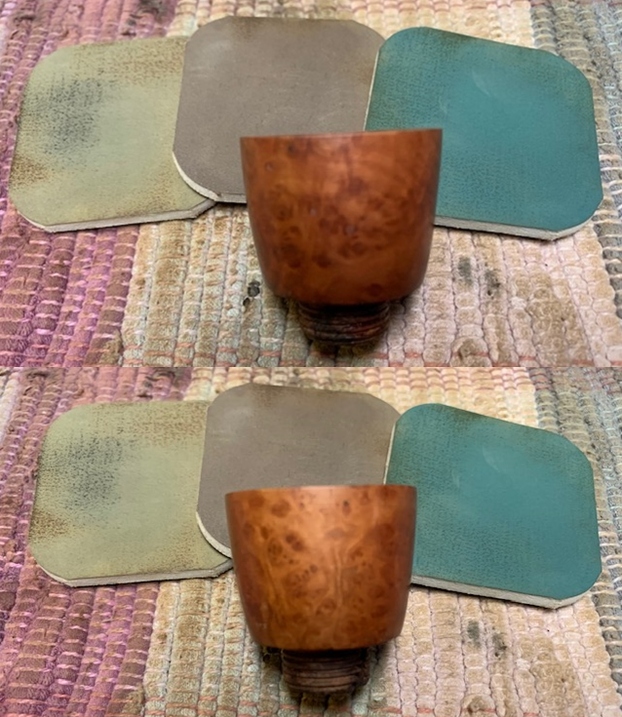
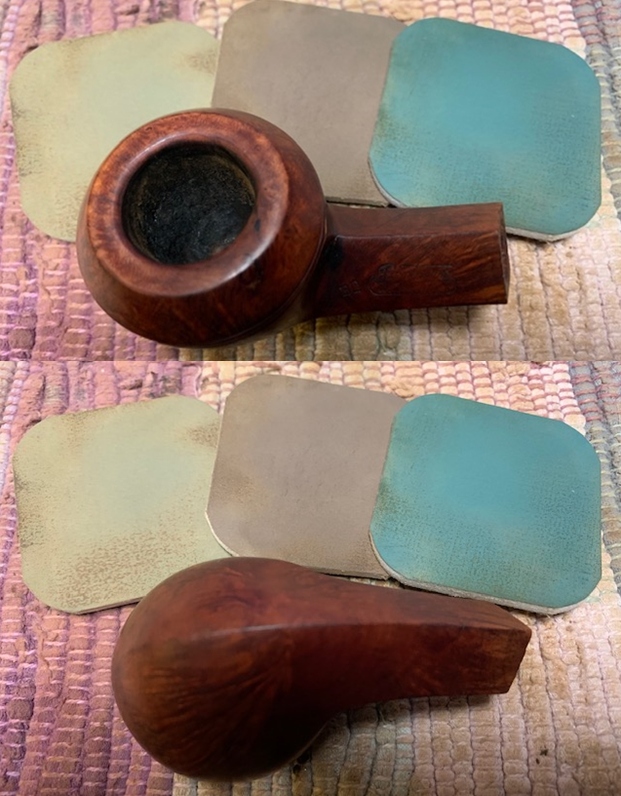
 To bring a nice shine and eliminate the scratch marks left behind by the abrasive sandpaper, I wet sand the entire stummel with 1500 to 12000 grit micromesh pads, wiping frequently with a moist cloth to check the progress. I really like the looks of the stummel at this point in restoration. The grains and the clean simple lines of this piece of briar is really appreciable.
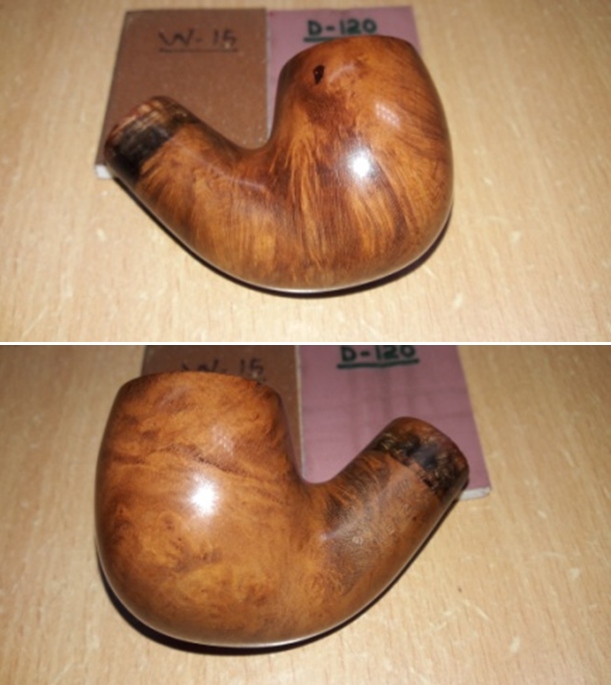
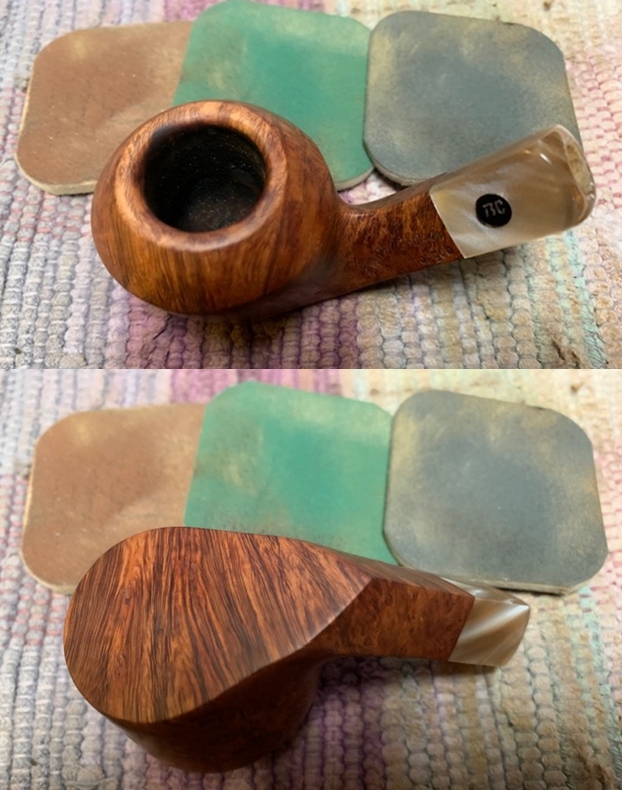
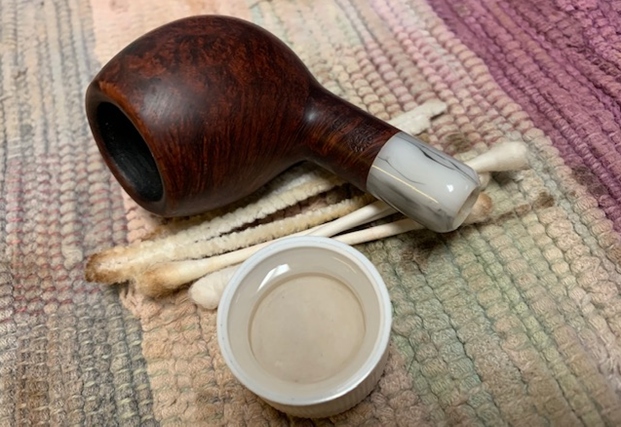
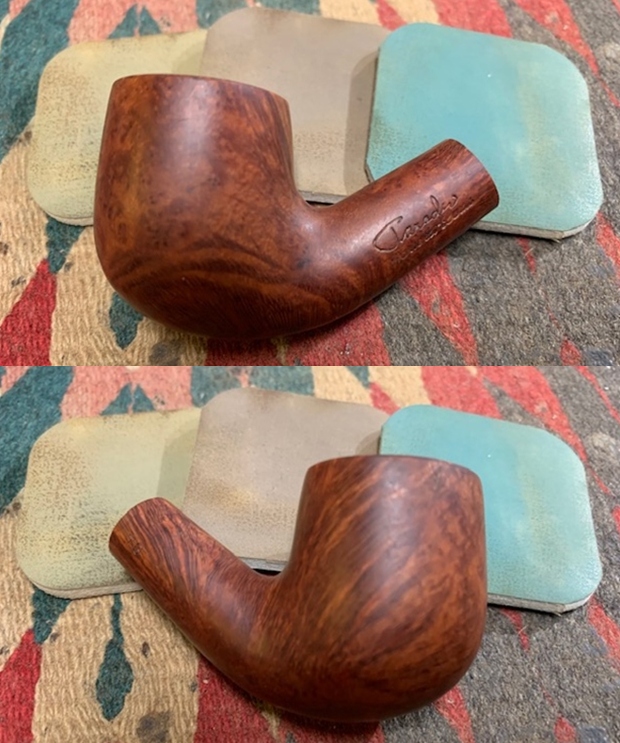
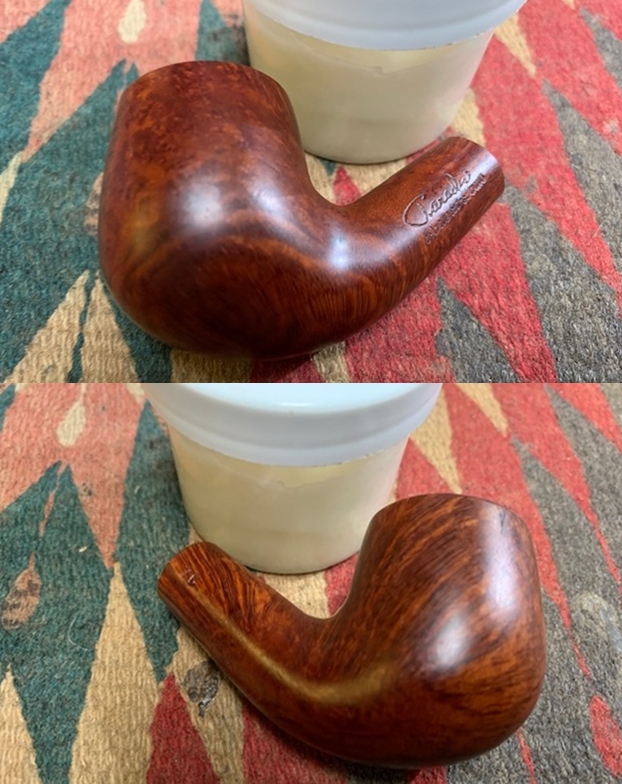
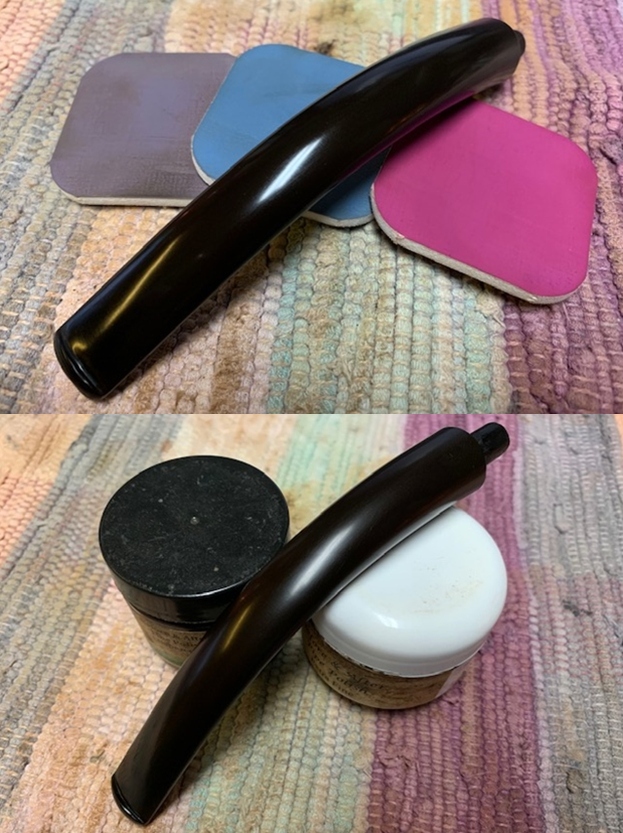
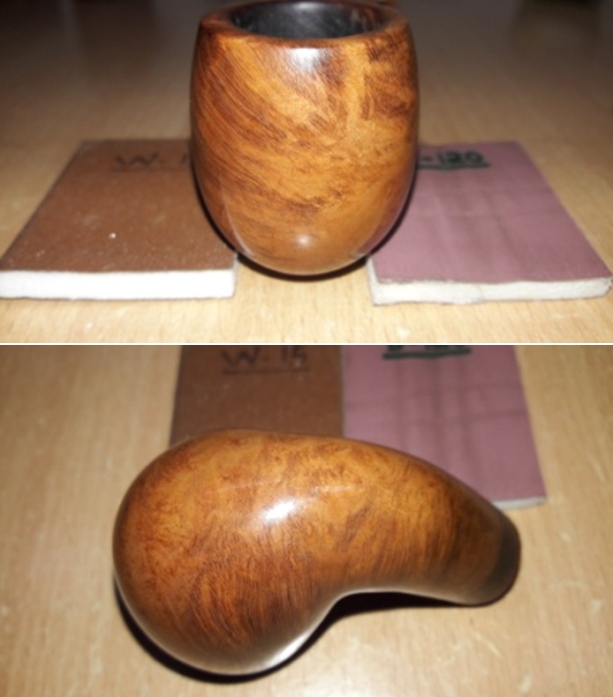 Next, I rubbed a small quantity of “Before and After Restoration Balm” deep in to the briar and the cherry wood extension with my finger tips and let it rest for a few minutes. The balm almost immediately works its magic and the briar now has a nice vibrant appearance with the beautiful grain patterns displayed in their complete splendor. The stains that I had applied to the shank extension have perfectly blended with the rest of the cherry wood surface and look amazing in its rich dark reddish brown color. I further buffed it with a horse hair brush. The contrast of the dark browns of the grains with the natural patina of the rest of the stummel adds an interesting dimension to the appearance of the stummel.
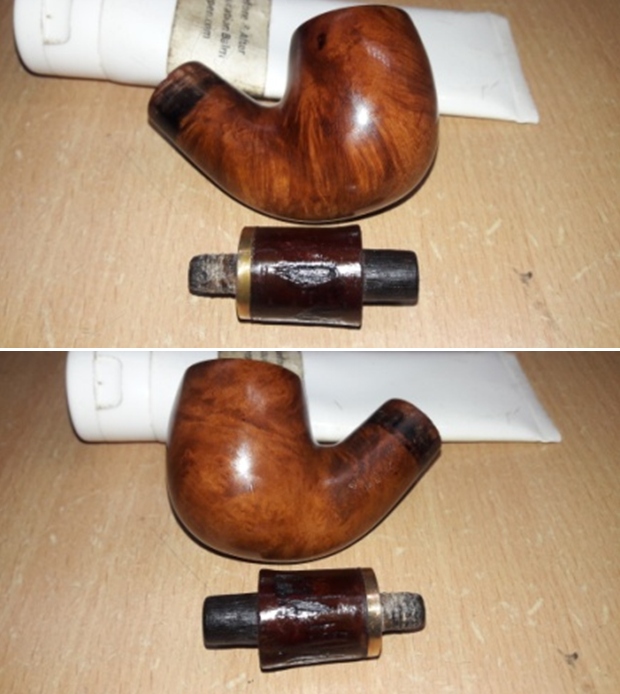
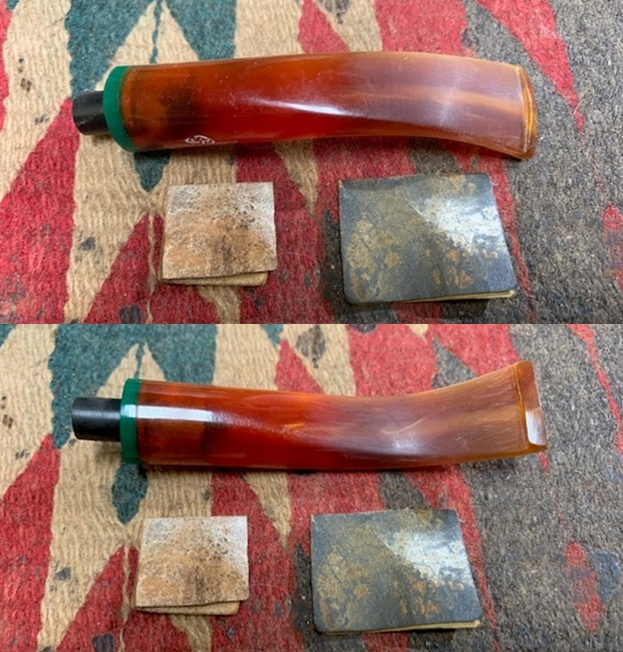
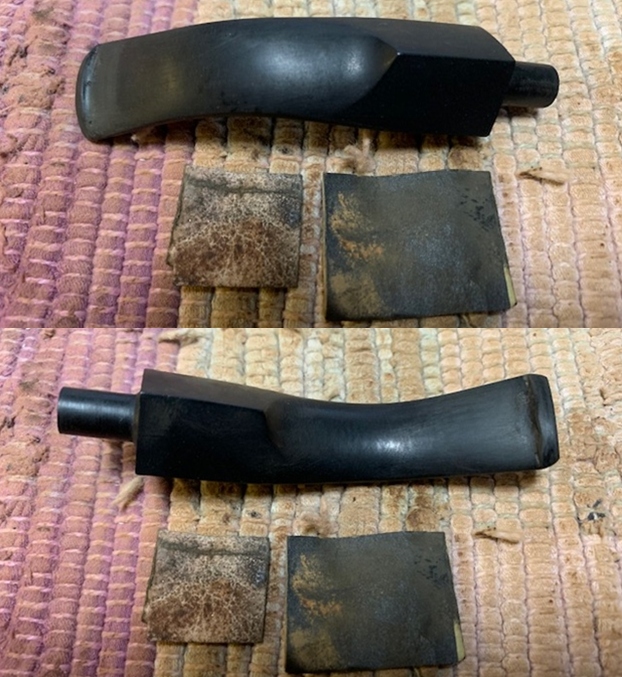
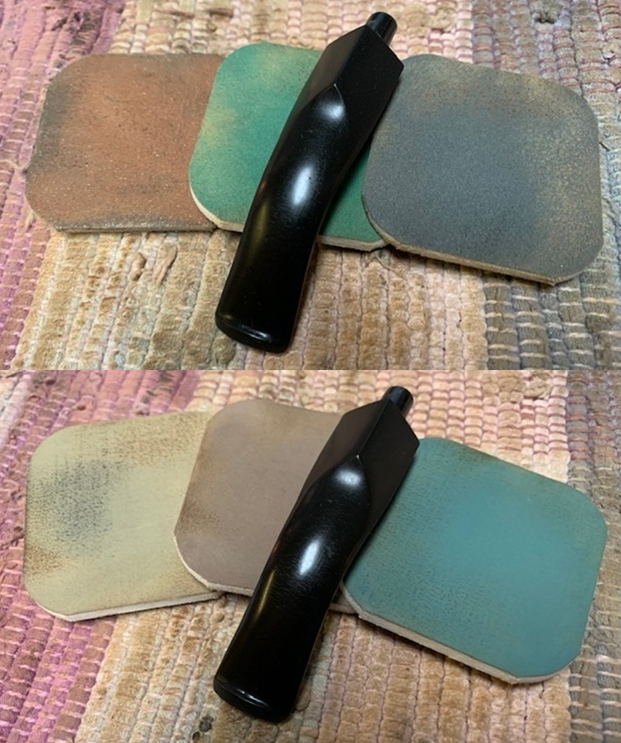
 With the stummel completed save for the final wax polish, I turned my attention back to the stem which had been set aside for the fills to cure. Using a flat head needle file, I sand the fills to achieve a rough match with the rest of the stem surface and followed it up by sanding the fills with a 220 grit sandpaper to achieve a perfect blend. The stem repairs looked good till the time I clicked pictures of the stem at this point. I was horrified when I saw the pictures as staring back at me on the lower stem surface were air pockets and that is every pipe restorer’s nightmare!! I cleaned out the old fill and applied another coat of CA superglue. Once the glue had cured completely, I repeated the entire process of filing and sanding as described above. However, the end results were the same with air pockets still presenting themselves in all their ugliness. I had repeated the entire process of refill, curing, filing and sanding two more times with the same results!! I have to accept this fact, live with it and move ahead with polishing the stem with micromesh pads.
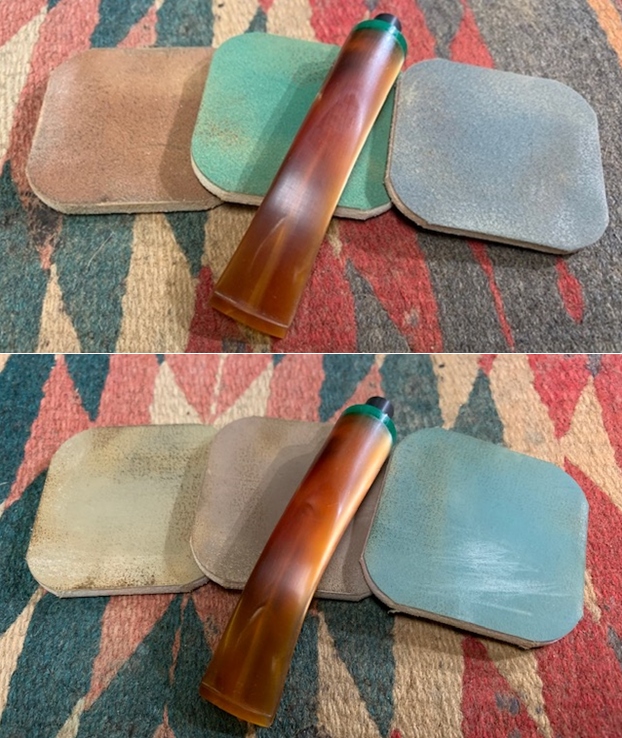
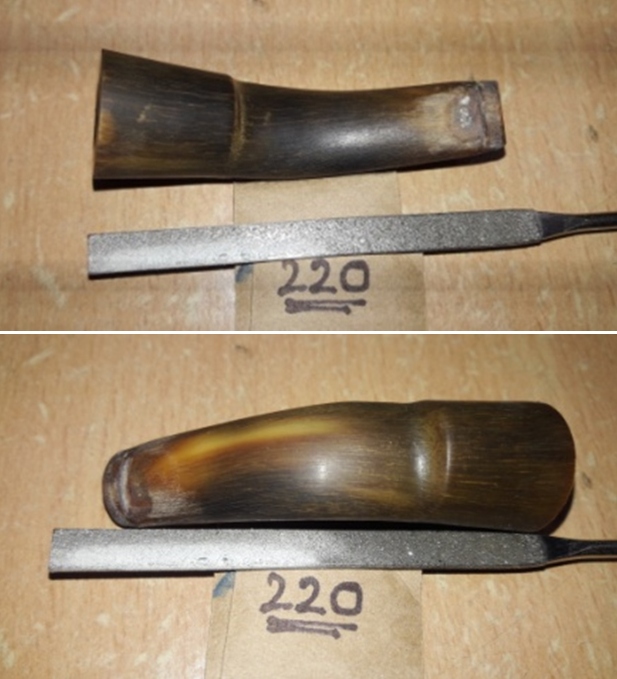 To bring a deep shine to the horn stem, I went through the complete set of micromesh pads, wet sanding with 1500 to 12000 grit pads. I wiped the stem with moist cloth after each pad and rubbed it down with Extra Virgin Olive oil to rejuvenate the horn.
 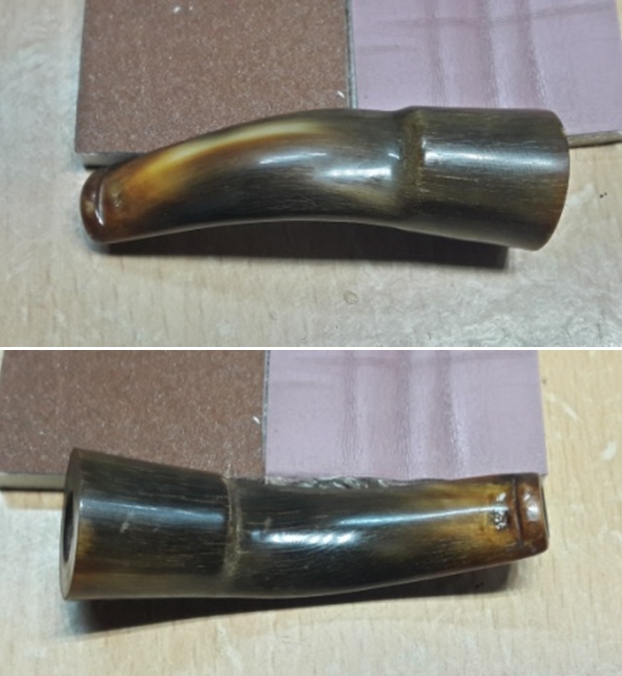 I polished the brass band at the shank end with Colgate tooth powder and it really amazes me at the shine it imparts to the metal ring. I reattached the sterling silver band to the shank end using superglue taking care that the band was firmly pressed in place. The crack in the band was also stabilized with the superglue.
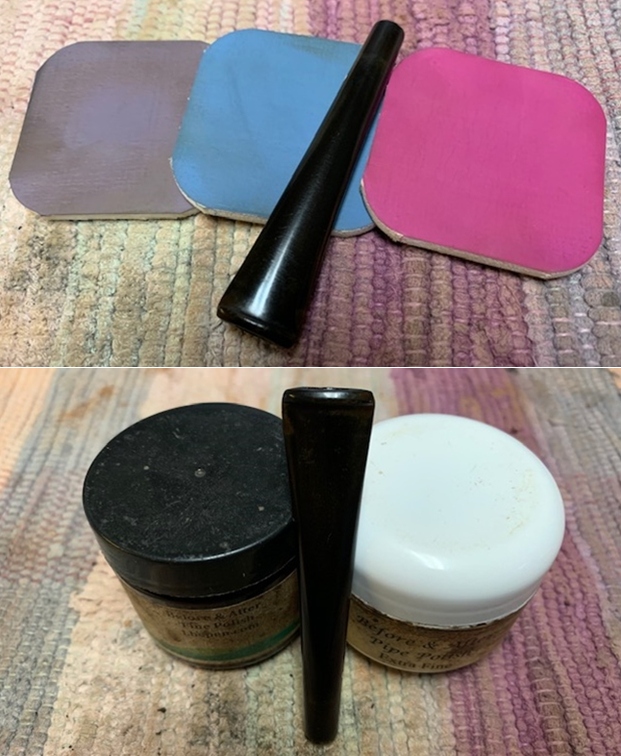
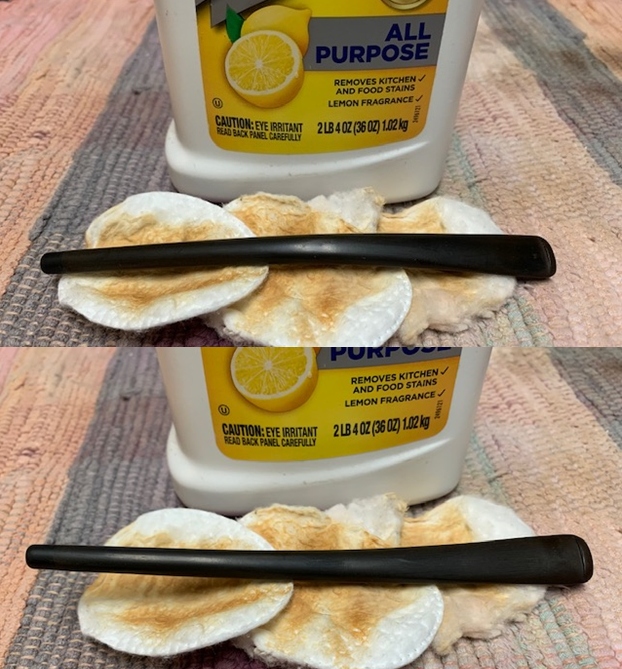
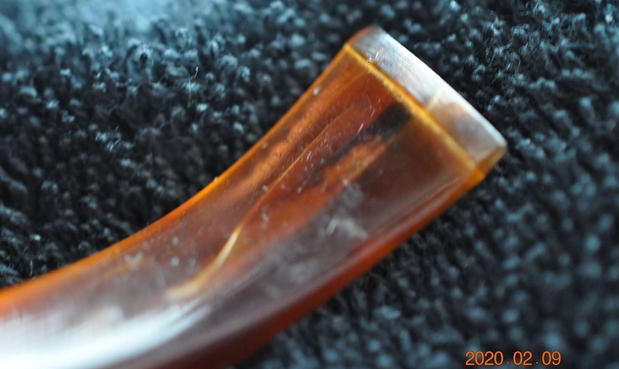
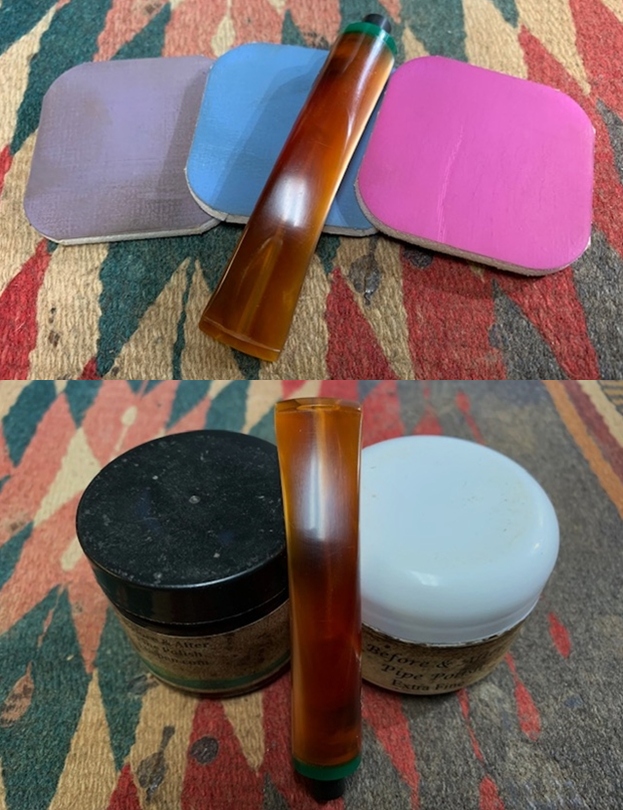
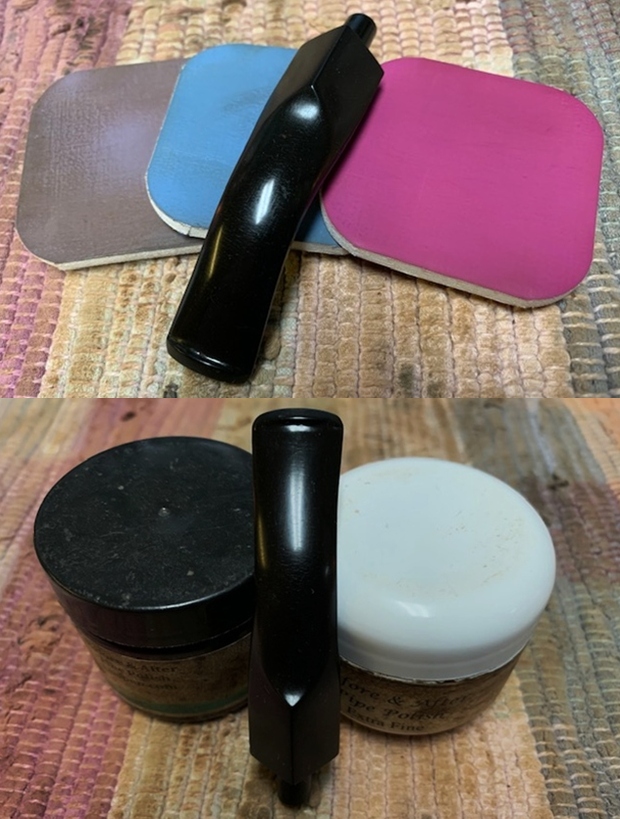
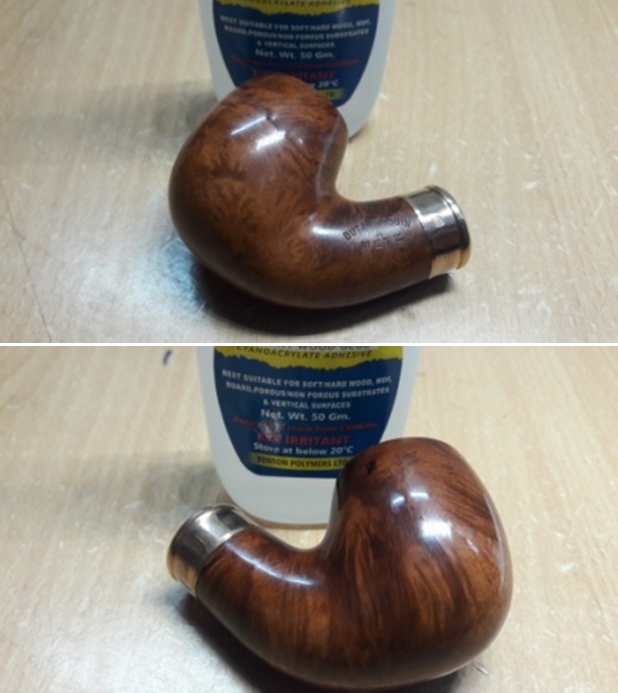 To refresh the stem logo, I coat the stem logo with white correction ink and let it dry out completely while I polished the pipe with Blue Diamond. Once the ink had dried out, with a toothpick, I gently removed the excess ink from the surrounding surface.
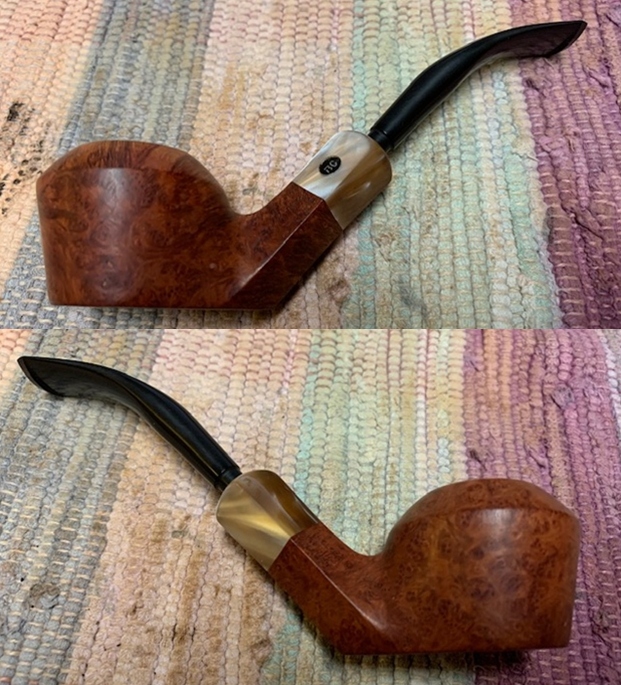
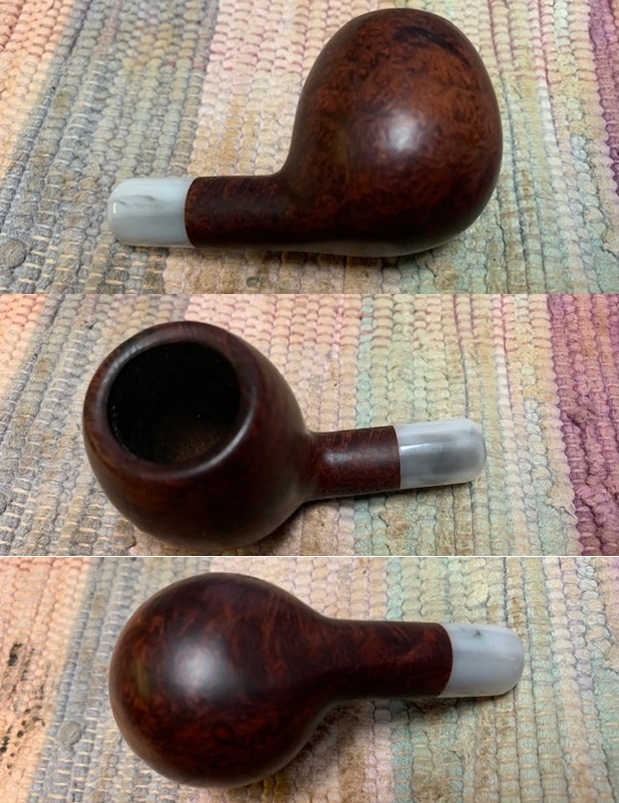
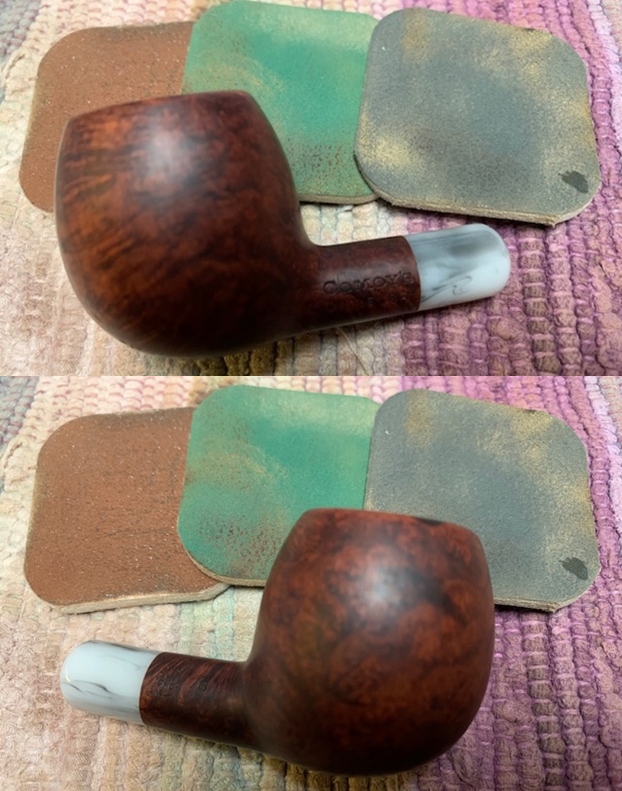
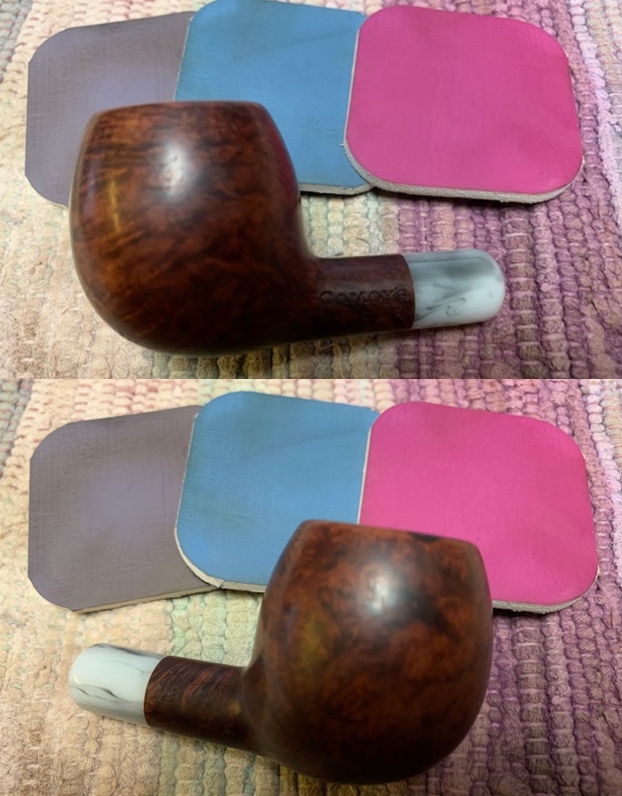
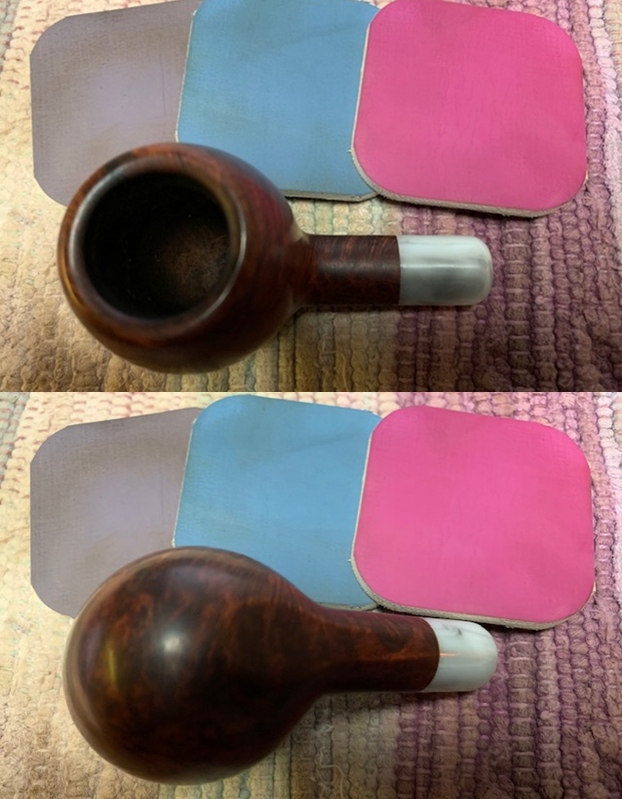
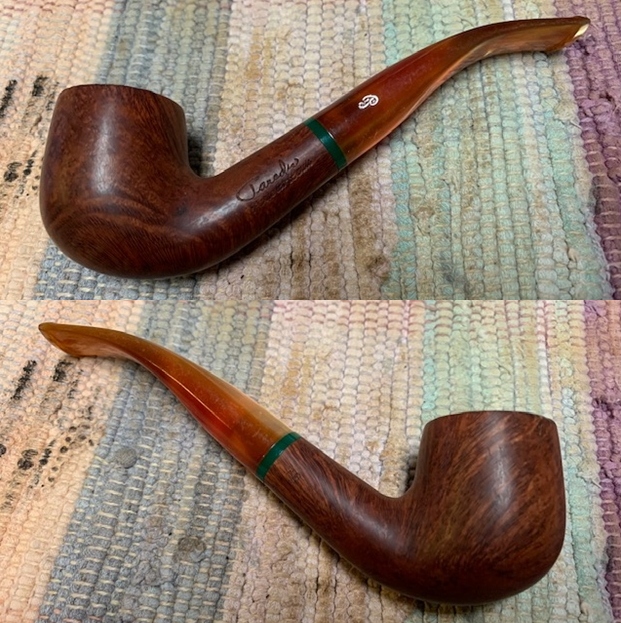
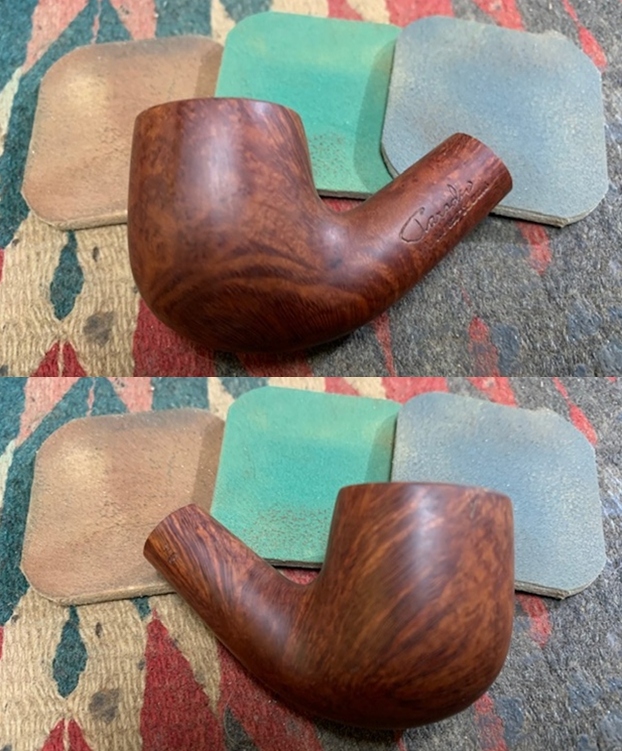
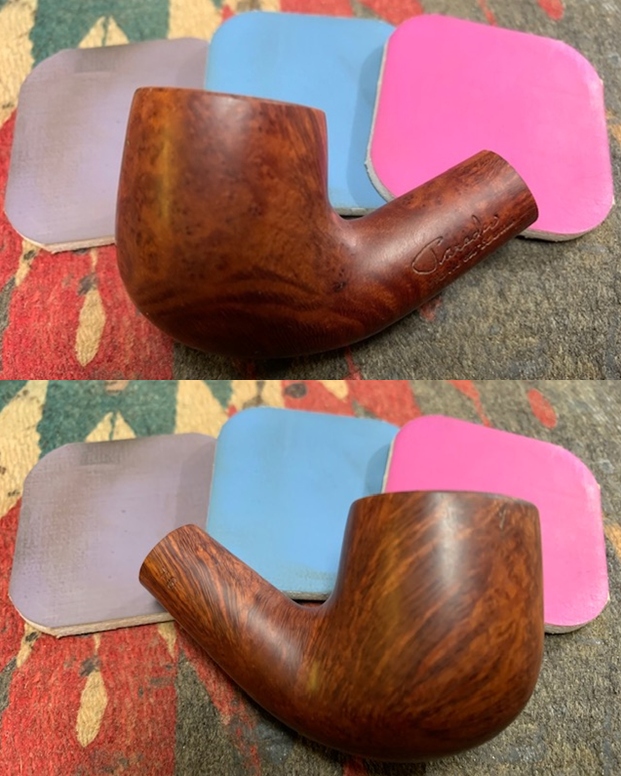
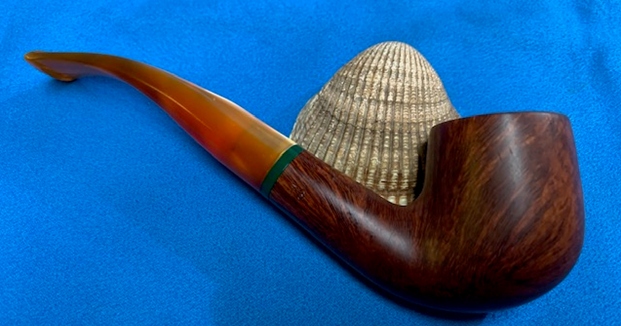
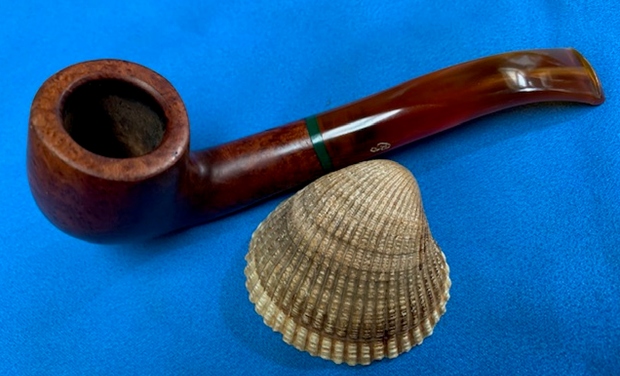
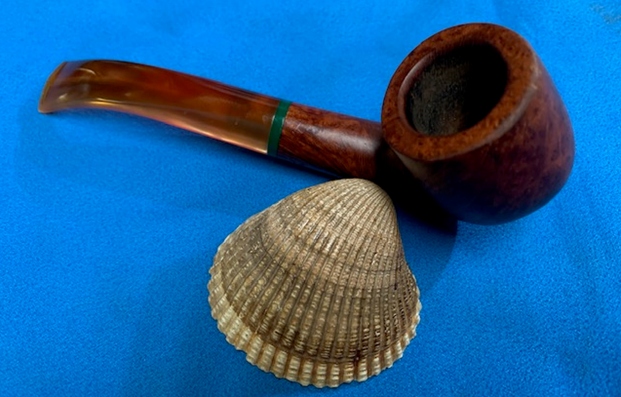
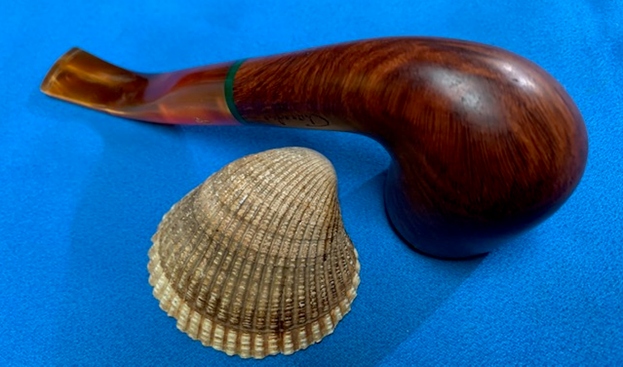
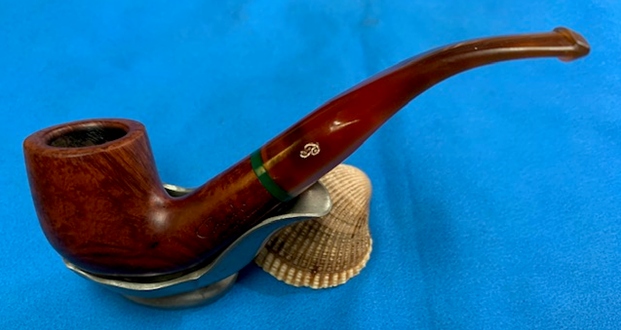
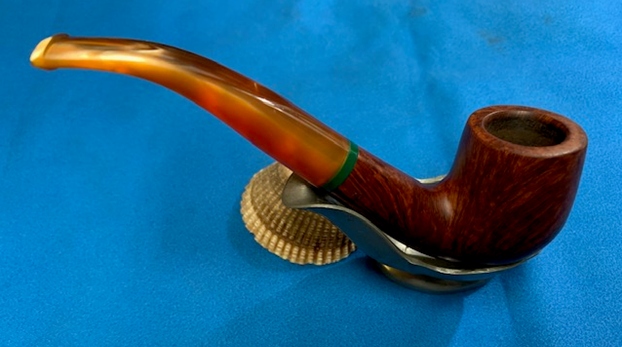
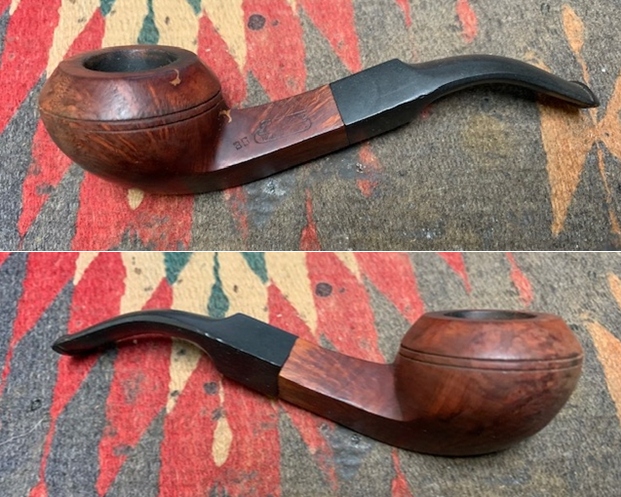
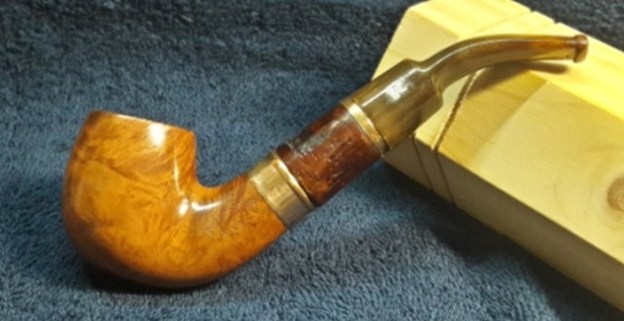
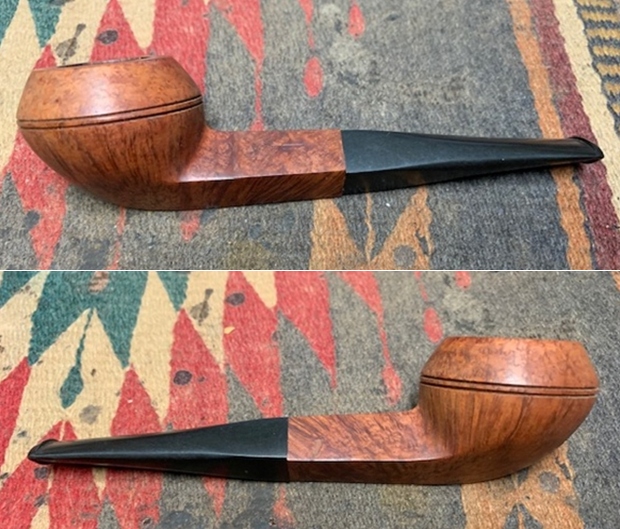
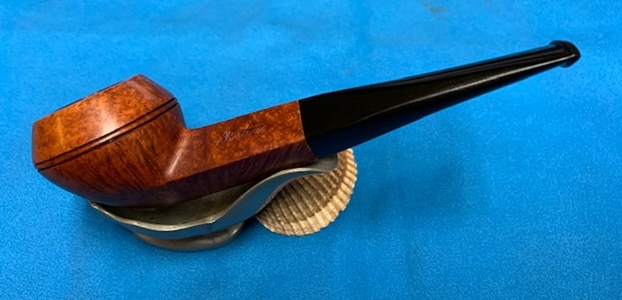
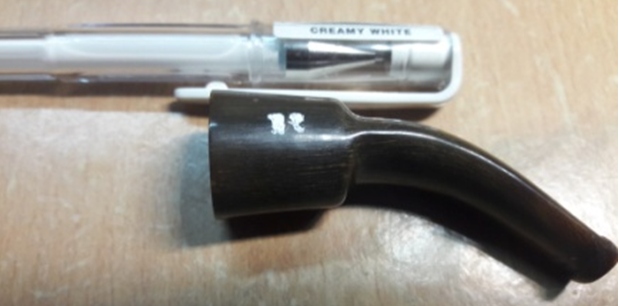 To apply the finishing touches, I mount a cotton cloth buffing wheel on to my hand held rotary tool and apply a coat of Blue Diamond to the stem to polish out the minor scratches. With a cotton buffing wheel that I use for carnauba wax, I apply a coat of carnauba wax to the stummel and stem and continued to work on it till the complete coat of wax had been polished out. I mount a clean cotton cloth buffing wheel and gave the entire pipe a once over buff. I finished the restoration by giving the entire pipe a rigorous hand buffing using a microfiber cloth to deepen the shine further. The finished pipe is shown below.
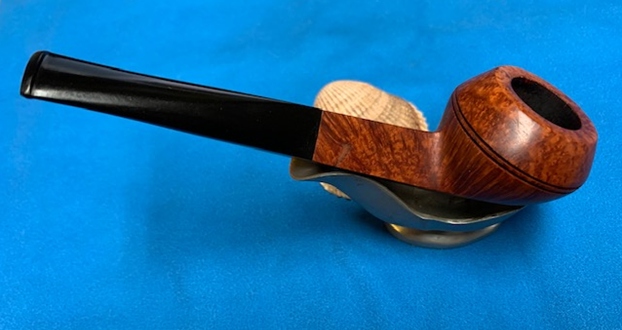


 P.S. The coat of superglue that I had applied to the stem end tenon of the shank extension had matching threads cut in to it when I tried to seat the tenon in to the threaded saddle of the stem. However, it’s only at a particular angle that the seating of the horn stem over the shank extension is flush. It does need more tweaking, but as per my mantra “LESS IS MORE”, I shall let it be for now as the attachment of all the pipe parts in to each other is snug and solid. Maybe a few years down the line, I may address the issues of air pockets and the seating of the stem…
Thank you for your valuable time in reading through these penned processes and my thoughts. Always praying for the health and well-being of readers of rebornpipes and their loved ones. Cheers!!
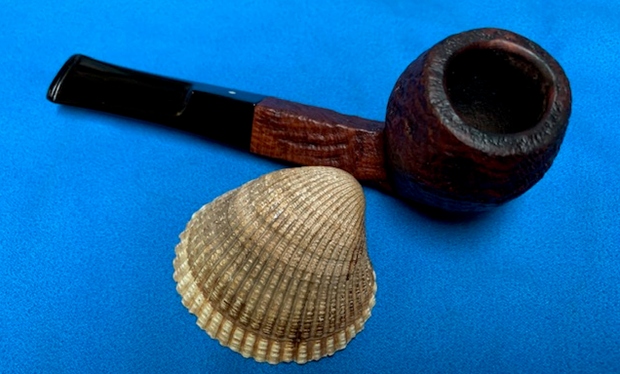
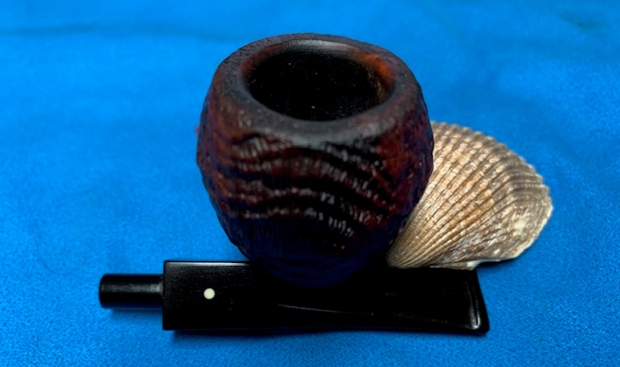
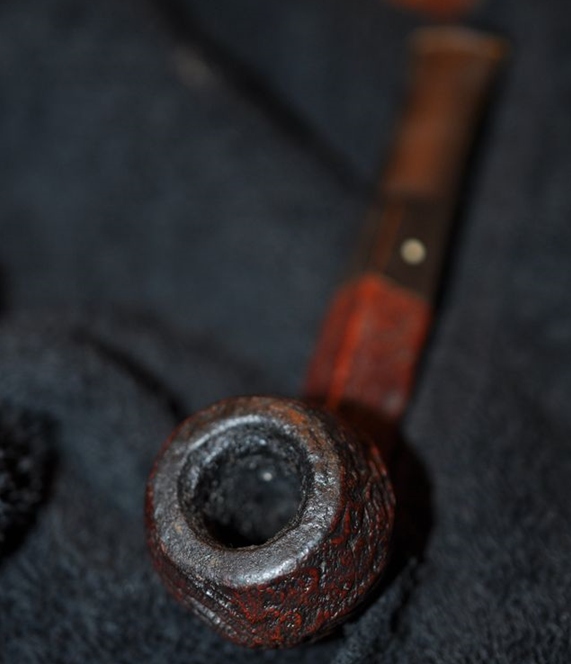 He took photos of the bowl and rim top to show the thickness of the cake and the lava overflow. The photos of the stem show the light oxidation and tooth marks and chatter on the surface on both sides.
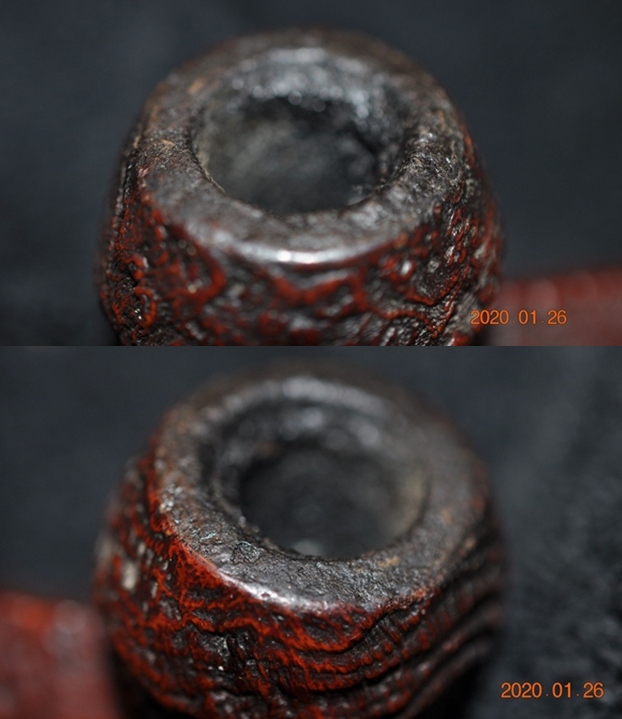

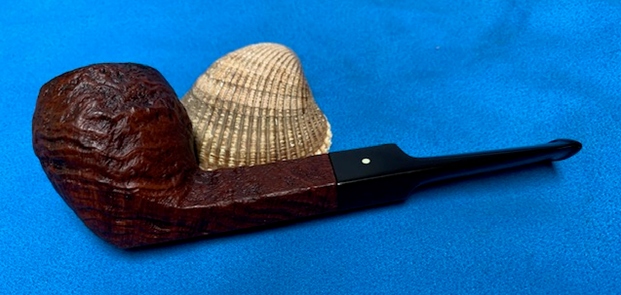
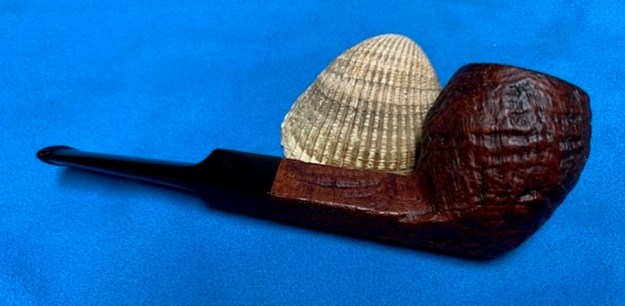
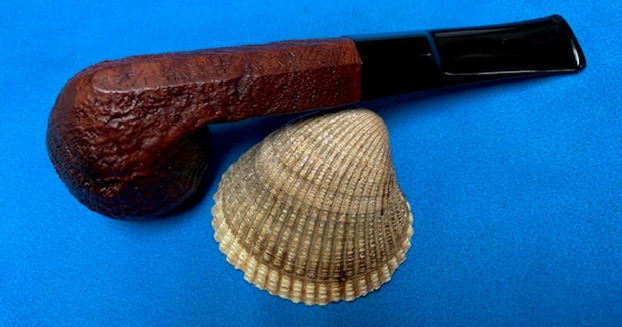
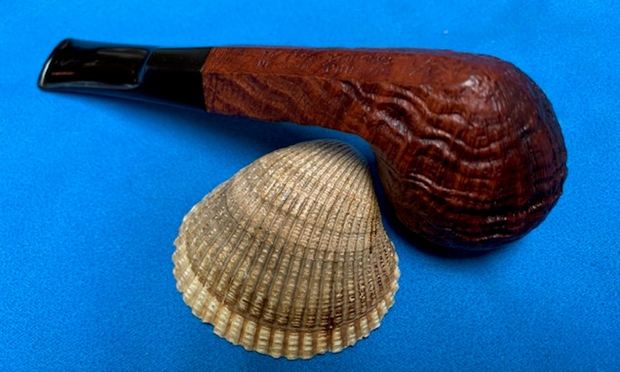
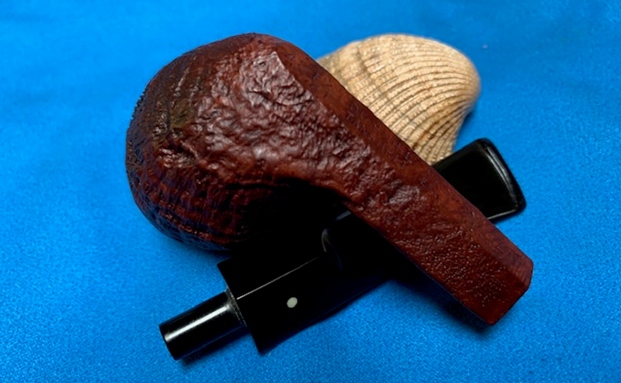
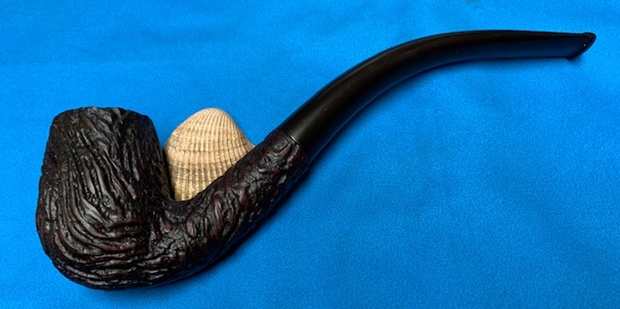
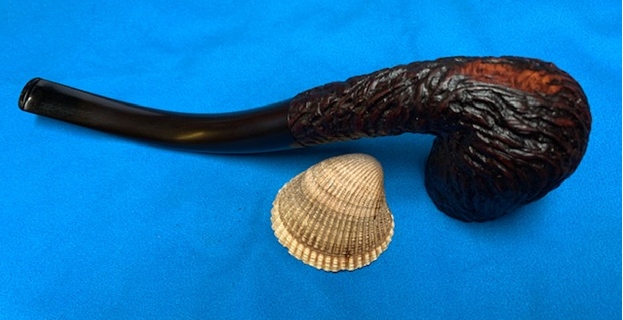
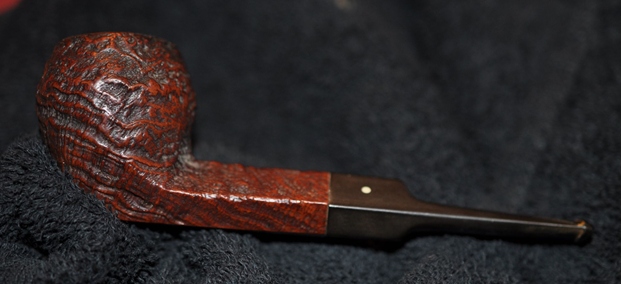
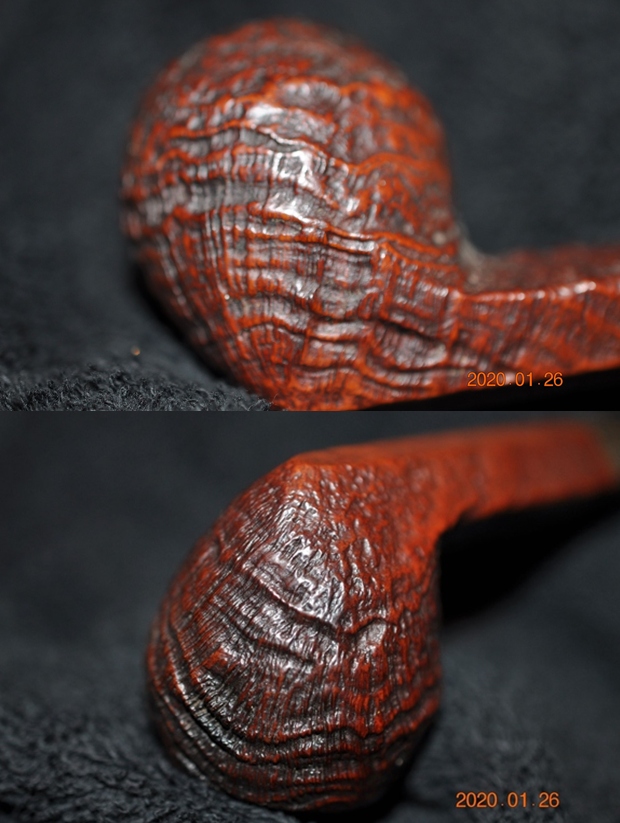
 The photos of the sides and heel of the bowl show the deep sandblast grain on the pipe. It is a beauty under the grime and dust.
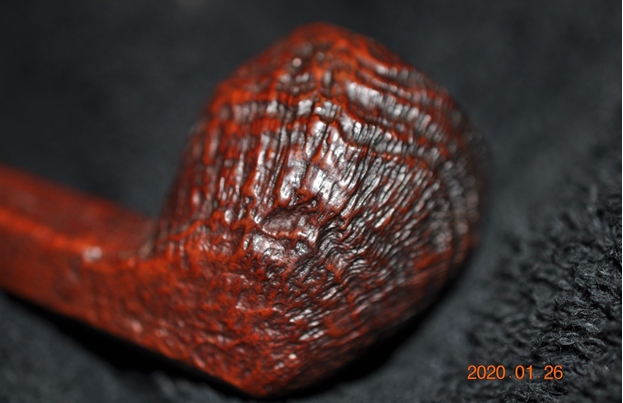
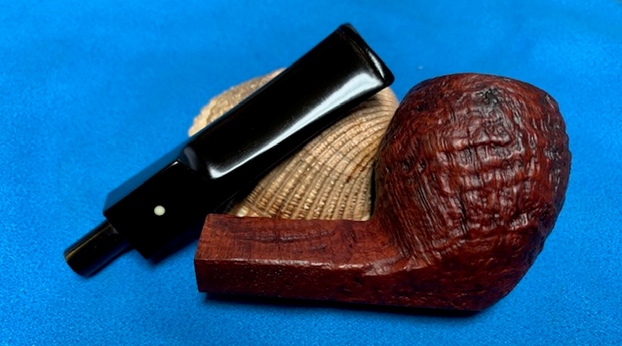
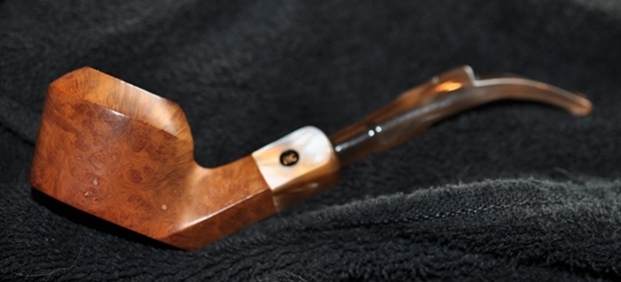
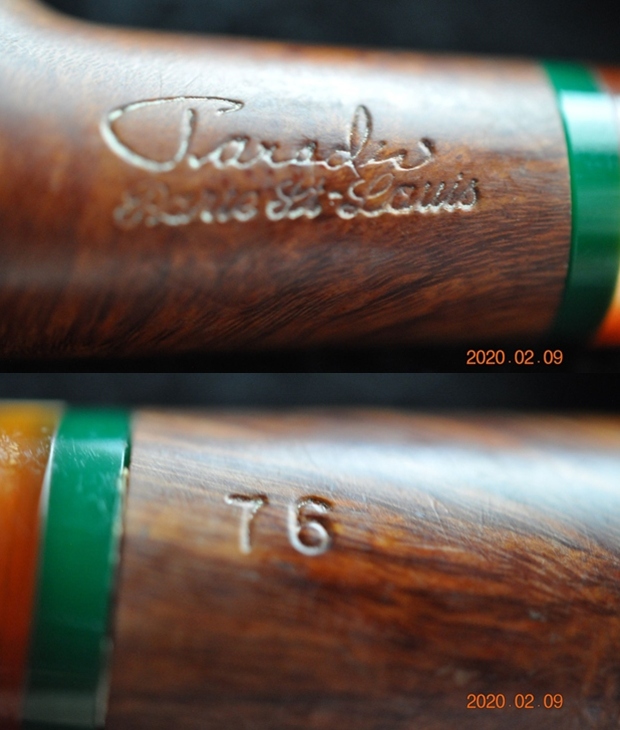
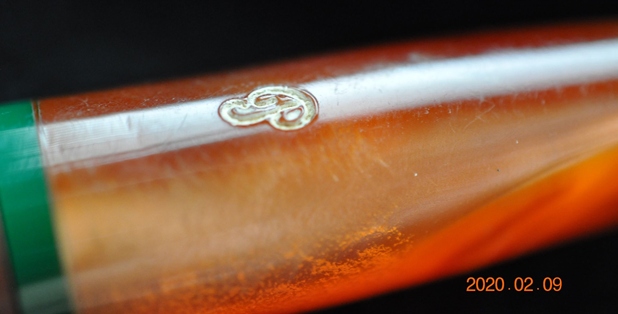
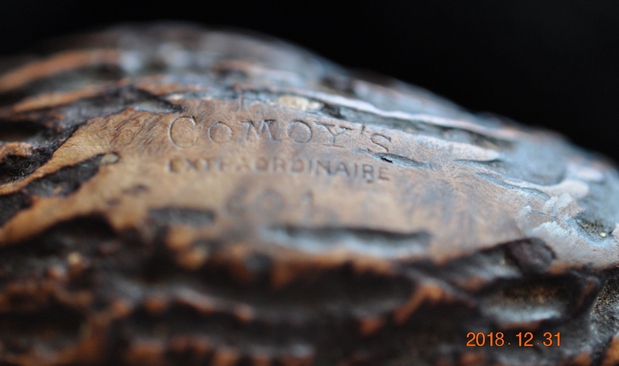
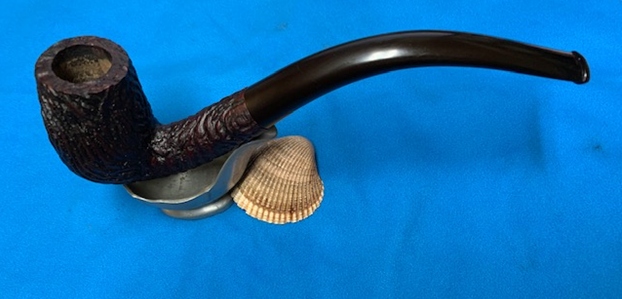
 The stamping on the underside of the shank is shown in the photo below. It looks very good and readable. It reads as noted and explained above. The third photo shows the white spot on the stem.
 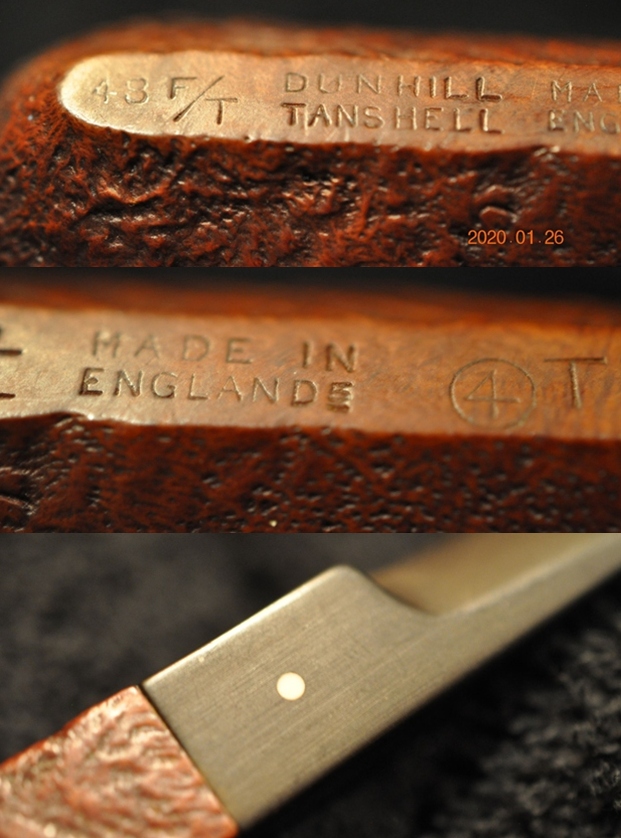 I turned to Pipedia’s section on Dunhill Tanshell Pipes to get a bit of background on the Duhill finishes (https://pipedia.org/wiki/Dunhill#Root_Briar). I quote:
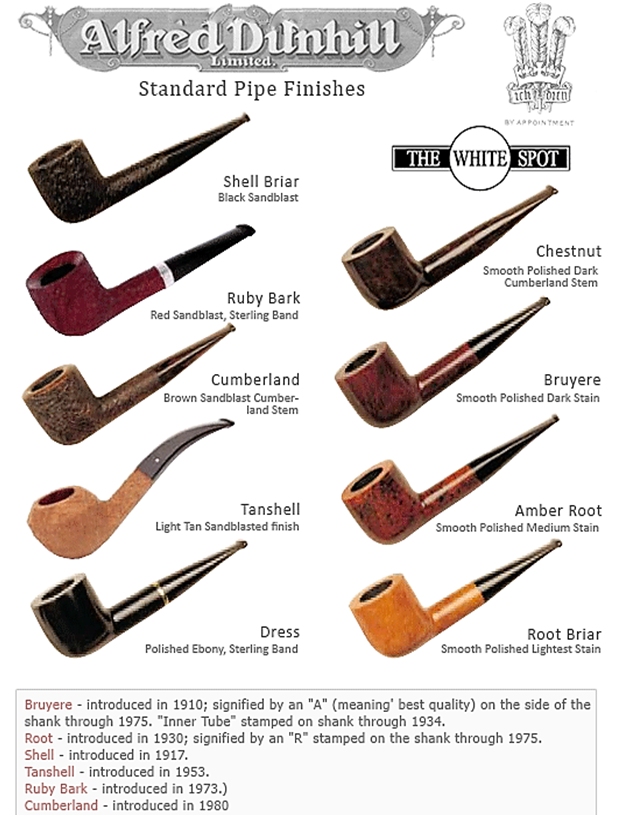 I turned to Pipephil’s dating guide to show how I arrived at the date of manufacture for this pipe (http://www.pipephil.eu/logos/en/dunhill/cledat-en1a.html). I am including the chart that is provided there for the dating a pipe. I have drawn a red box around the section. Since the pipe I am working on has a smaller raise 5 it points to the 1950+ suffix line on the chart below.
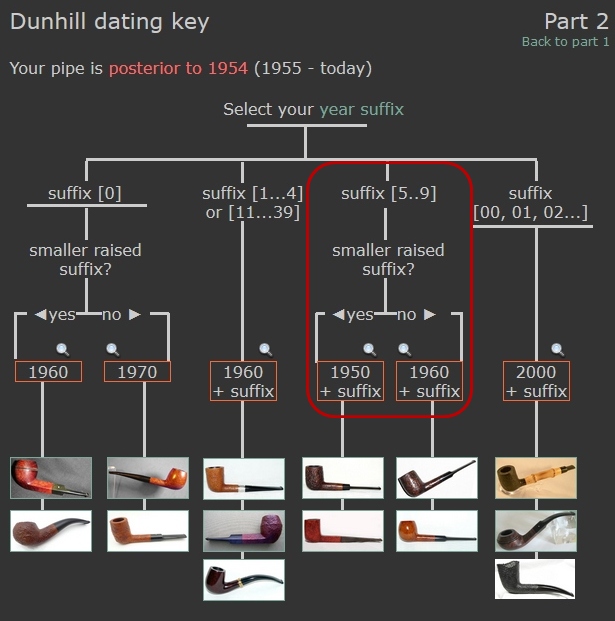 I turned to work on the pipe itself. Jeff had carried out his usual thorough cleanup of the pipe. He had reamed it with a PipNet reamer to remove the cake and cleaned the reaming up with a Savinelli Fitsall Pipe Knife. He scrubbed the internals of the bowl and stem with alcohol, cotton swabs and pipe cleaners. He scrubbed the externals with undiluted Murphy’s Oil Soap and rinsed the bowl off with running water. He soaked the stem in Before & After Deoxidizer and once it had soaked rinsed it off with warm water to remove the residual solution. He dried it off and rubbed it down to remove any oxidation that was still on the stem. The pipe looked very clean when I received it.
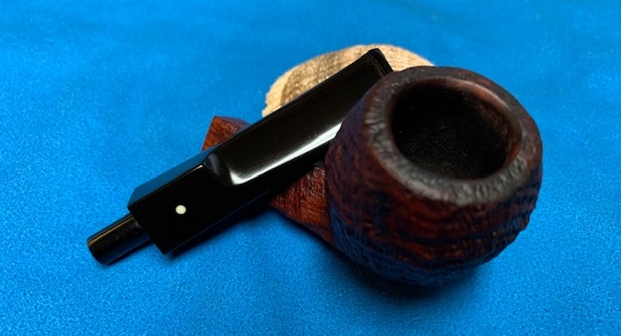
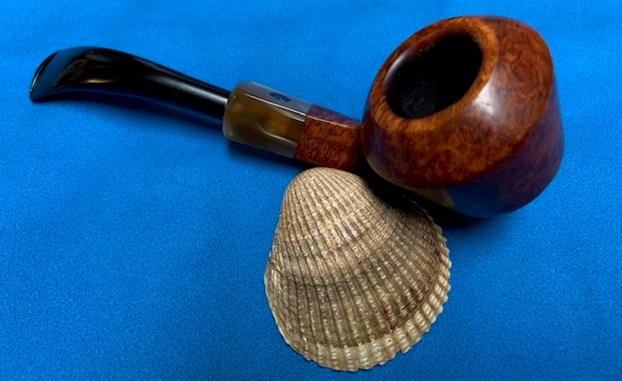
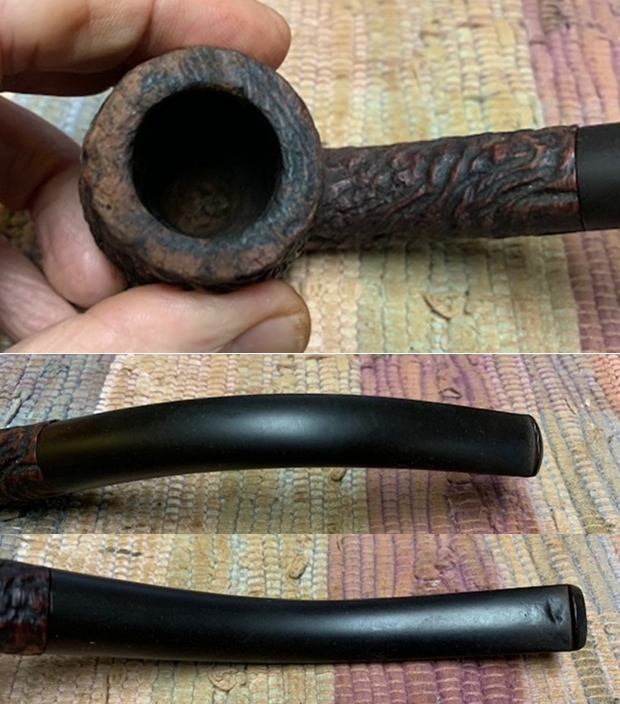
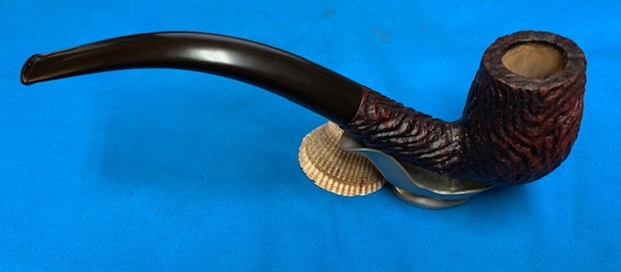
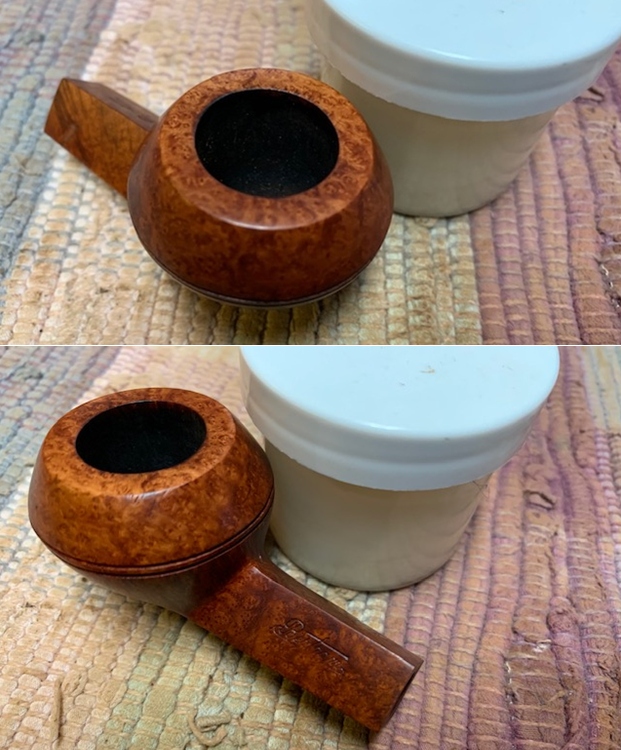
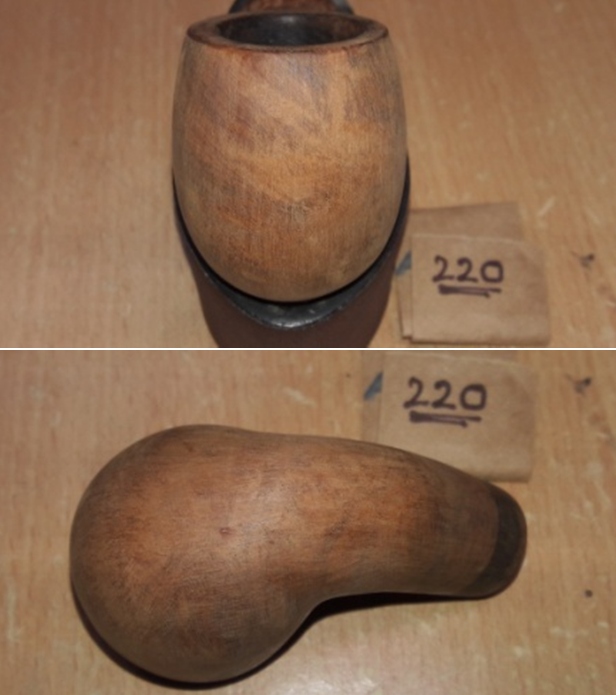
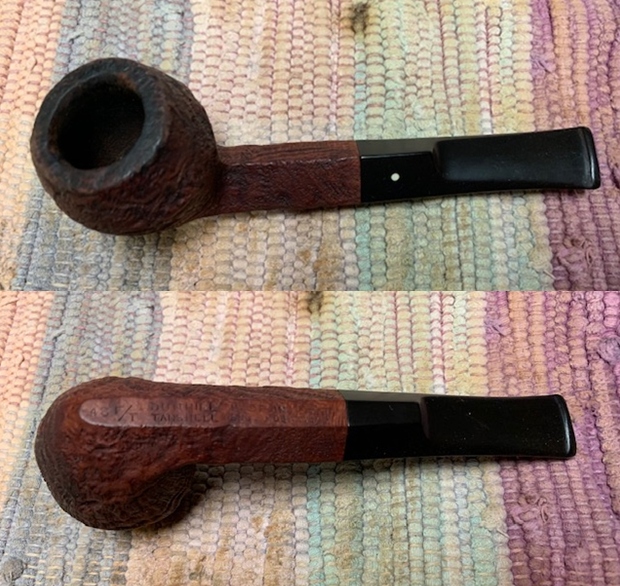 I took a photo of the rim top to show the condition. You can see the damage on the inner edge on the left front. It is roughened and chipped and out of round. The saddle stem came out looking quite good. There are light tooth marks and chatter on both sides near the button.
 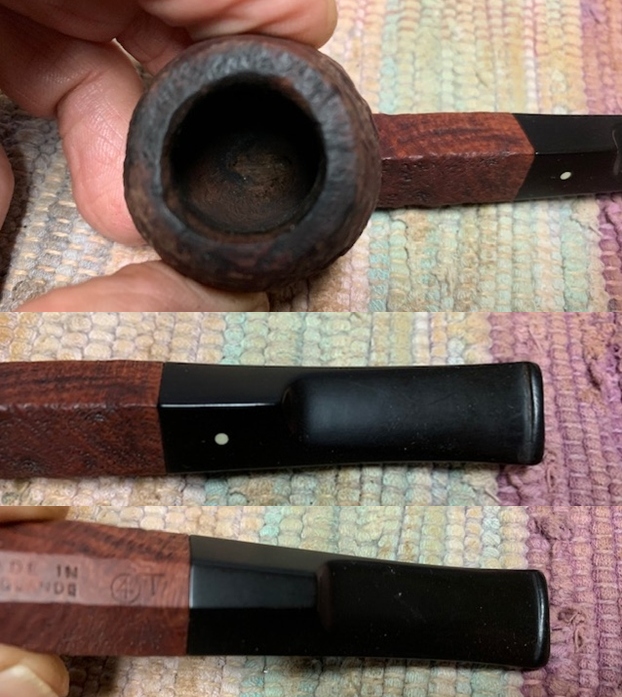 I took a photo of the underside of the shank to show the stamping. It is clear and readable with some faint spots.
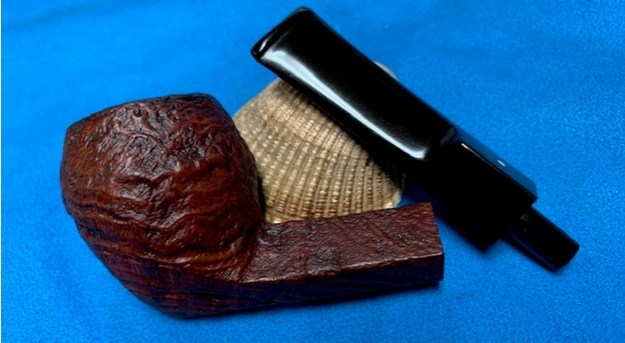
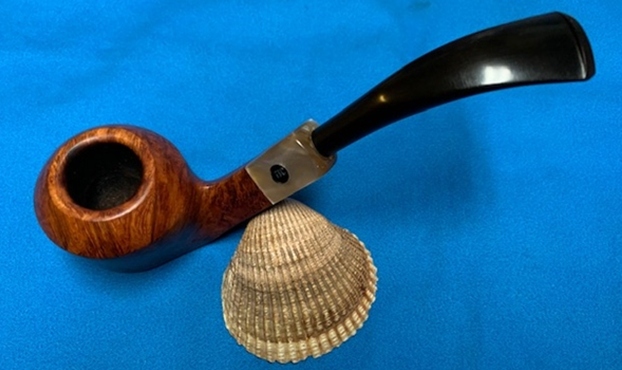
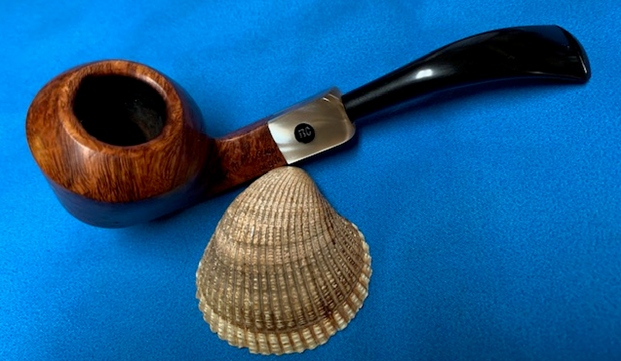
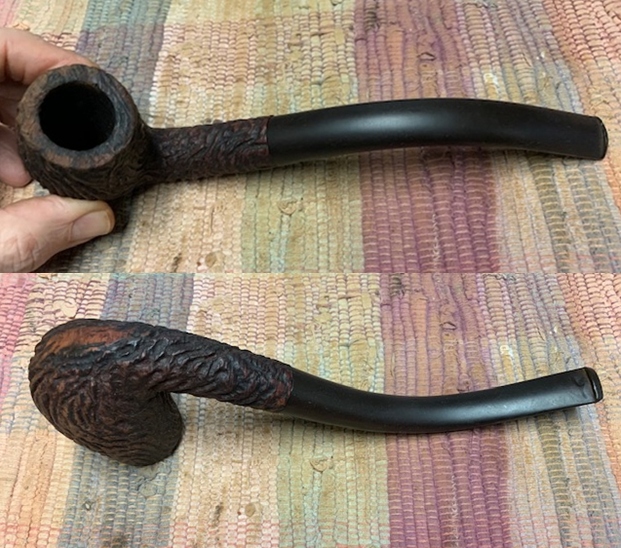
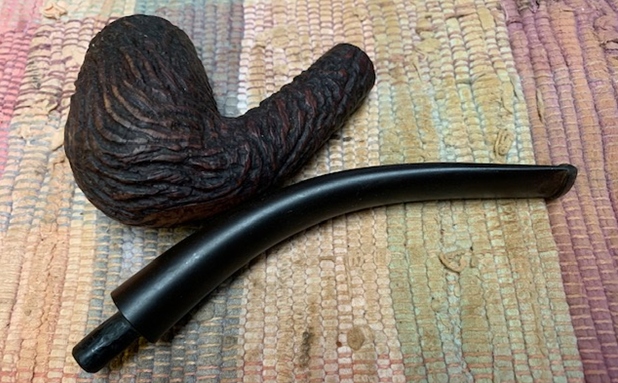
 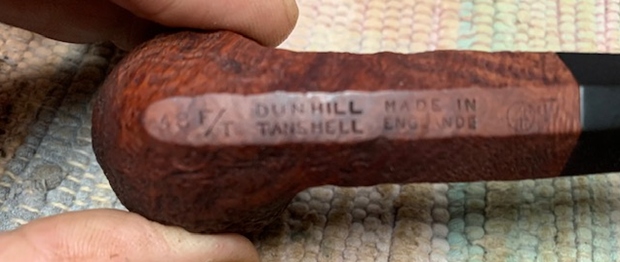 I removed the stem from the shank and took a photo of the pipe parts to show what I was working with. It is a nice looking pipe.
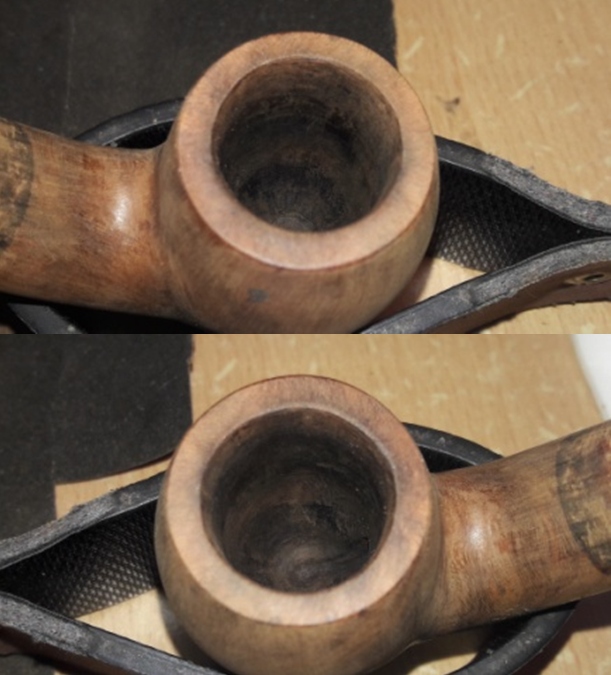
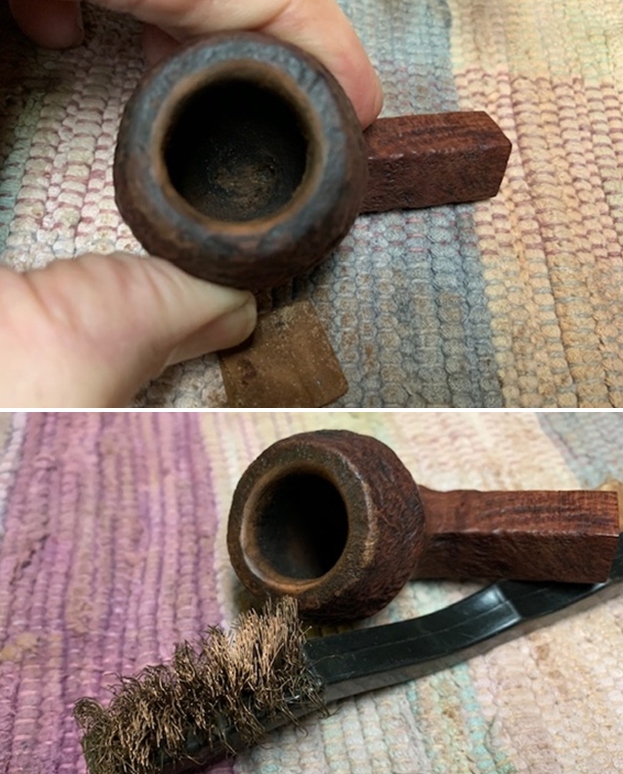
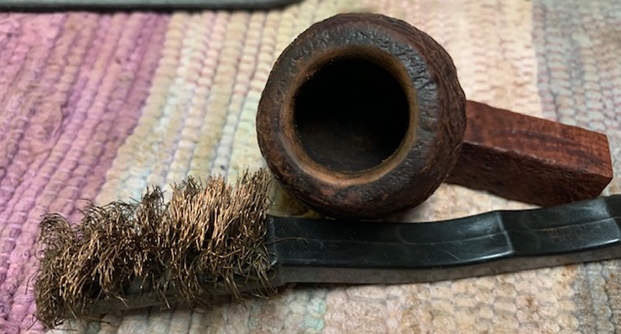
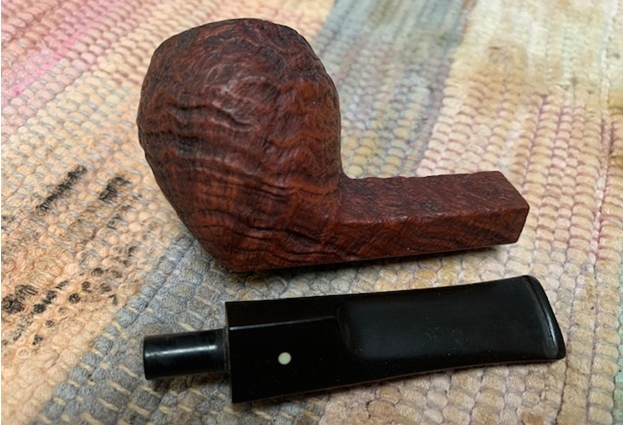 I decided to start the restoration on this one by working on the damage to the inner edge of the rim. I used a folded piece of 220 grit sandpaper to give the inner edge of the rim a slight bevel to bring it back into round. While the finished rim edge is not perfect it is far better. I used a brass bristle tire brush to clean up the darkening on the rim top and clean up the sandblast portion.
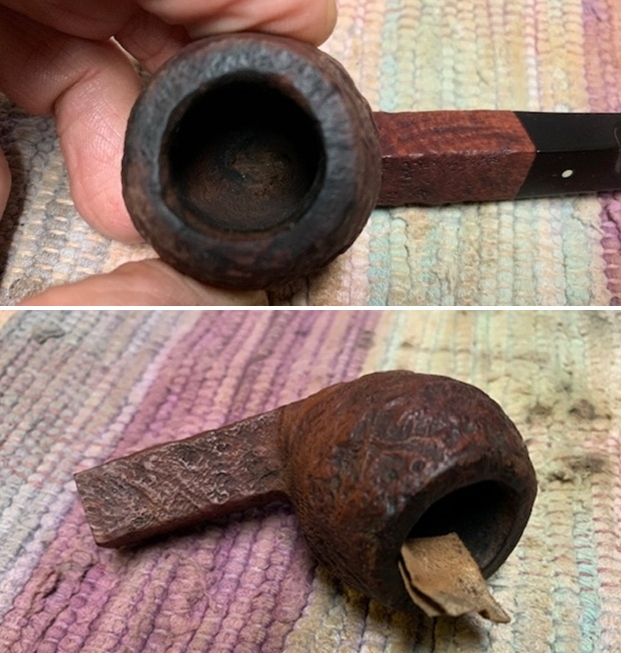
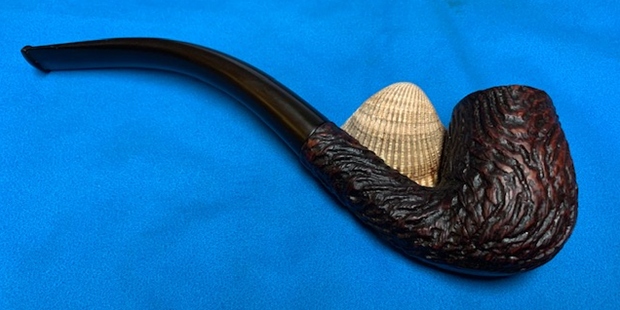
 With the repair completed I rubbed the briar down with Before & After Restoration Balm. I worked it into the briar with my fingertips and a horsehair shoe brush to work it into the nooks and crannies of the sandblast finish. The product works to clean, enliven and preserve the briar. I let it sit for 15 minutes while I worked on the stem. After the time passed I buffed it with a cotton cloth to deepen the shine. The briar really comes alive with the balm.
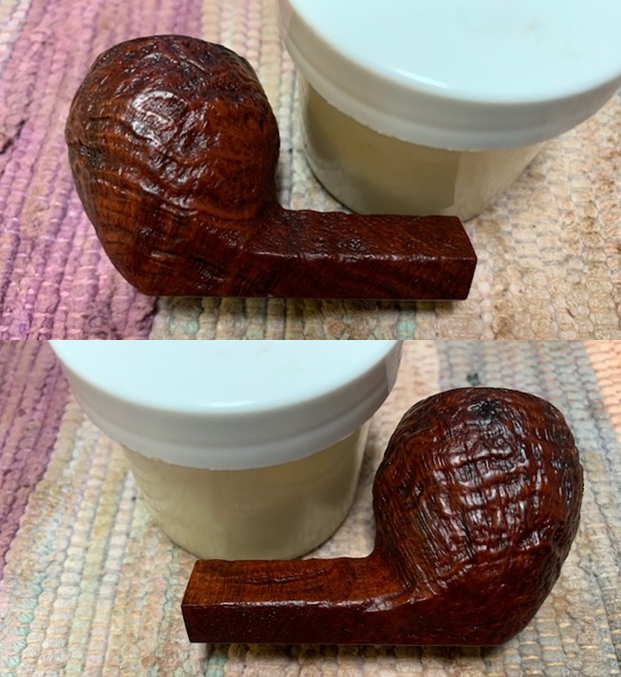
 I set the bowl aside and turned my attention to the stem. I “painted” the tooth marks on the stem to lift them up. I was able to lift them to the point that I would be able to polish out those that remained with micromesh pads.
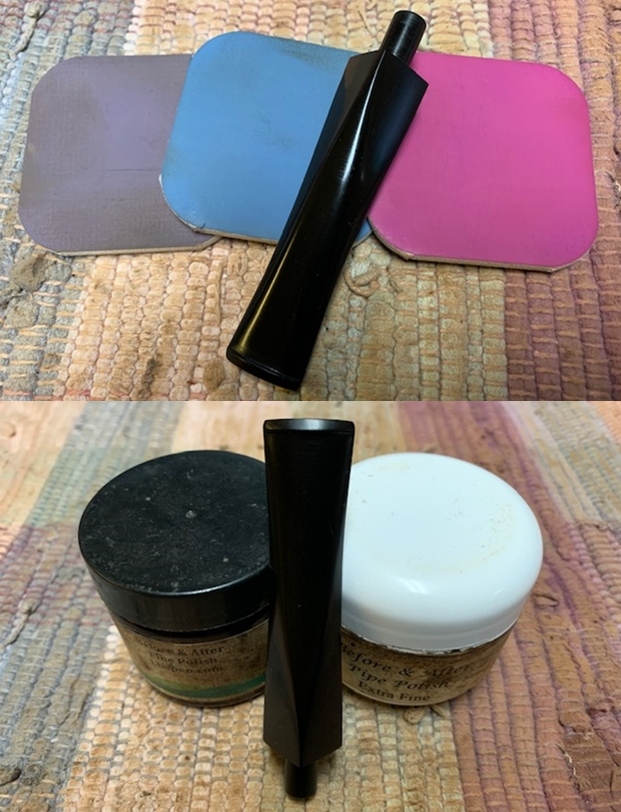
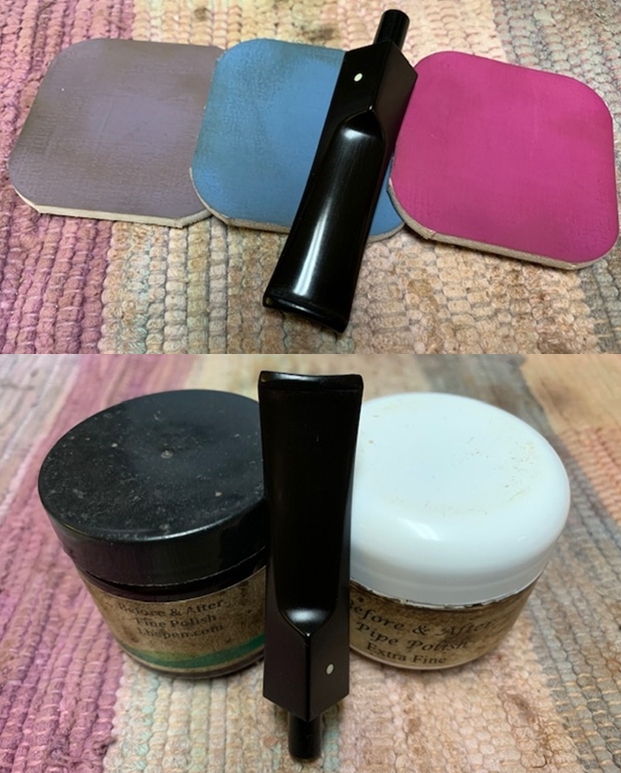
 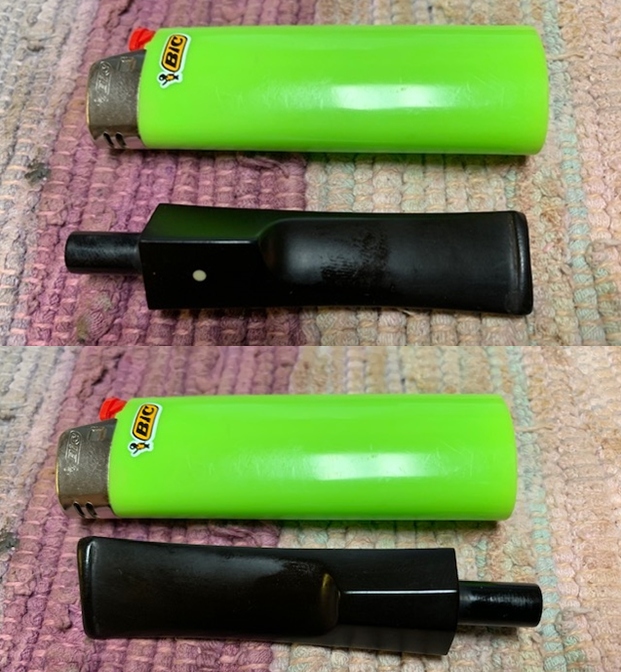 I polished the vulcanite with micromesh sanding pads – 1500-12000 grit pads. I wiped it down with Obsidian Oil after each sanding pad. I used Before & After Pipe Polish – both Fine and Extra Fine to further polish the stem.
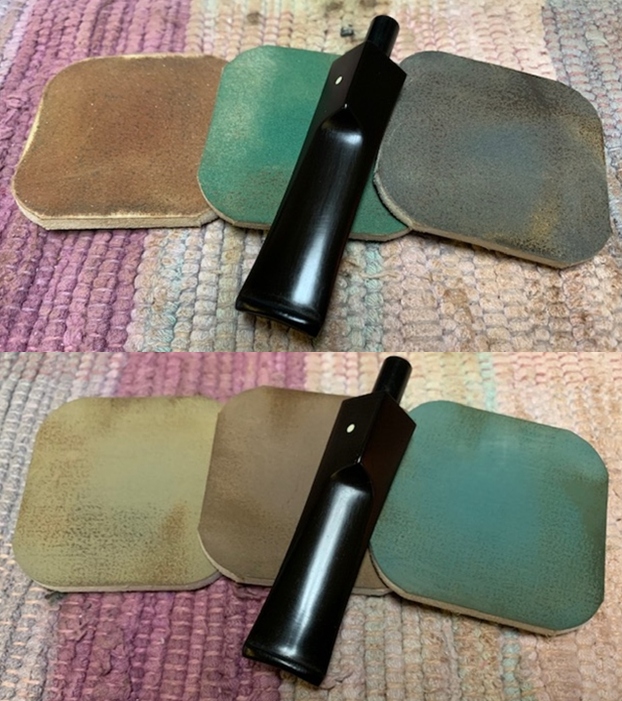
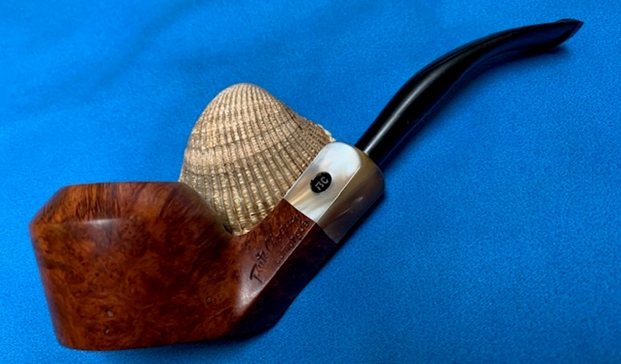
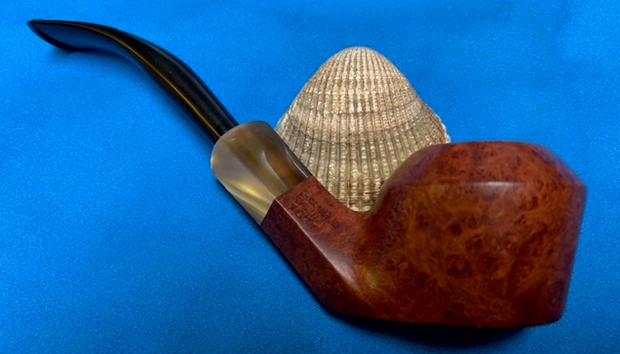
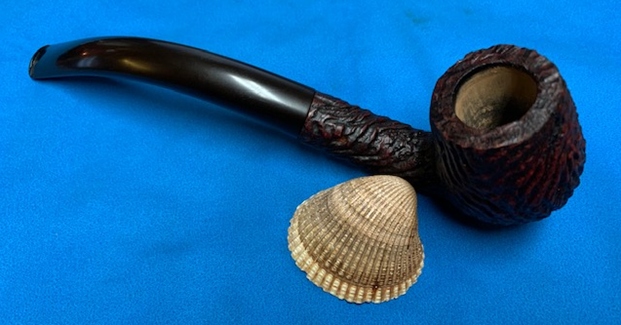
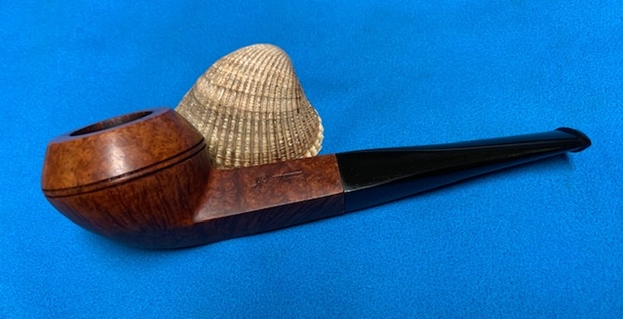
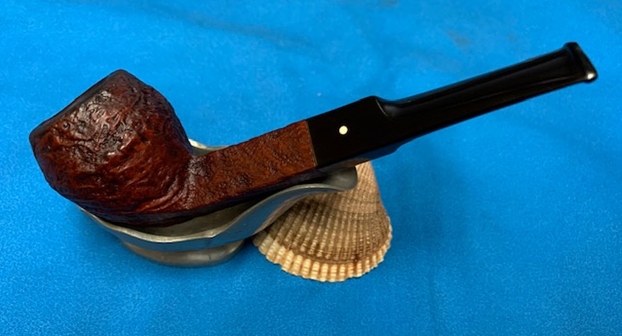
 This Dunhill 48F/T Tanshell Bulldog is a beautiful sandblast with the unique Sandblast finish made in 1955. It is a great looking pipe that came out looking very good. The Tanshell finish has a great rugged sandblast that Dunhill specialized in making. The finish on the pipe is in excellent condition. The oils off the smoker’s hands and the tan stain on the bowl works well to highlight the grain. The polished black vulcanite saddle stem adds to the mix. With the dust gone from the finish and the bowl it was a beauty and is eye-catching. I put the stem back on the bowl and buffed the pipe with Blue Diamond on the buffing wheel being careful to not buff the stamping. I gave the bowl multiple coats of Conservator’s Wax and the stem multiple coats of carnauba wax on the buffing wheel and followed that by buffing it with a clean buffing pad. I hand buffed the pipe with a microfiber cloth to deepen the shine. The finished 48 F/T Tanshell Briar Bulldog is quite nice and feels great in the hand. Give the finished pipe a look in the photos below. I can only tell you that like the other pipes I am working that it is much prettier in person than the photos capture. The dimensions of the pipe are Length: 5 inches, Height: 1 ¾ inches, Outside diameter of the bowl: 1 ¼ inches, Chamber diameter: ¾ of an inch. The weight of the pipe is 29grams/1.02oz. Thanks for walking through the restoration with me as I worked over another beautiful pipe. Remember we are not pipe owners; we are pipemen and women who hold our pipes in trust until they pass on into the trust of the next generation.