Tag Archives: shaping a stem

Rejuvenating and Repairing a Whitehall Dublin


Blog by Steve Laug

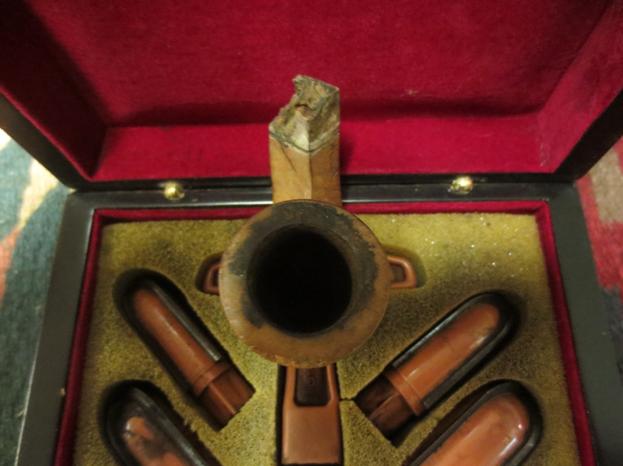
This old Whitehall pipe came to me from the antique shop in Victor, Idaho, a small town on the way to Jackson Hole, Wyoming. On a recent trip to Idaho my brother and his family and my daughters and I visited Jackson Hole. On the way home, we stopped in Victor to stretch our legs and wander a bit. I went into the antique shop and struck up a conversation with the owner. Eventually a tin of five pipes and some parts came out from under the counter. I bought all of them. They traveled back to Vancouver with me and will one day all be refurbished.

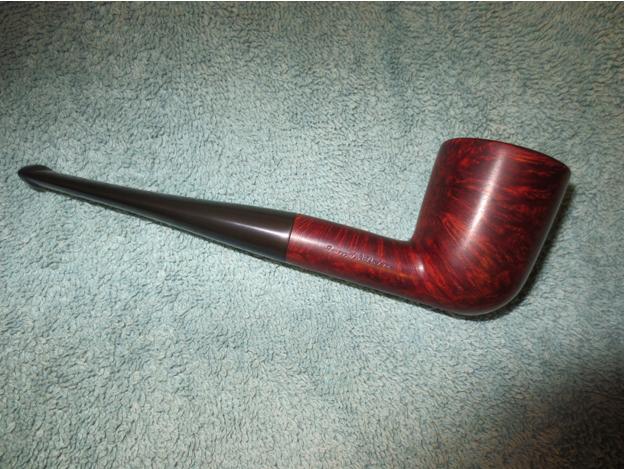
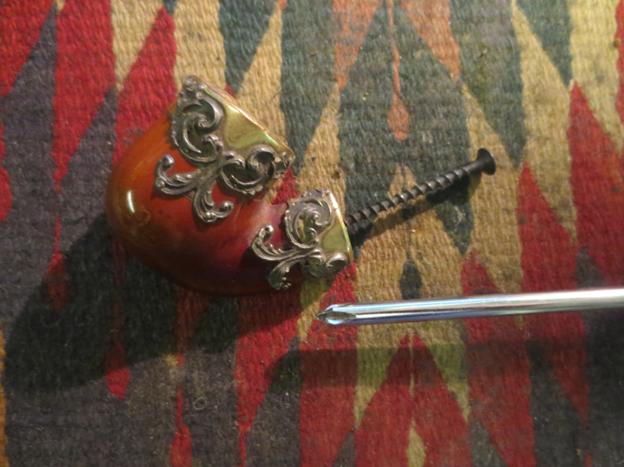
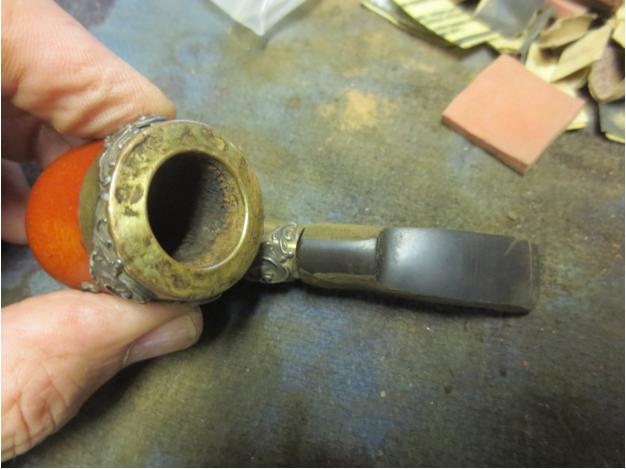
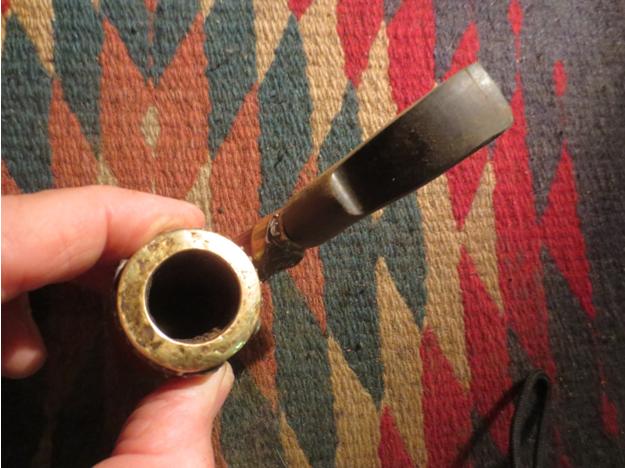
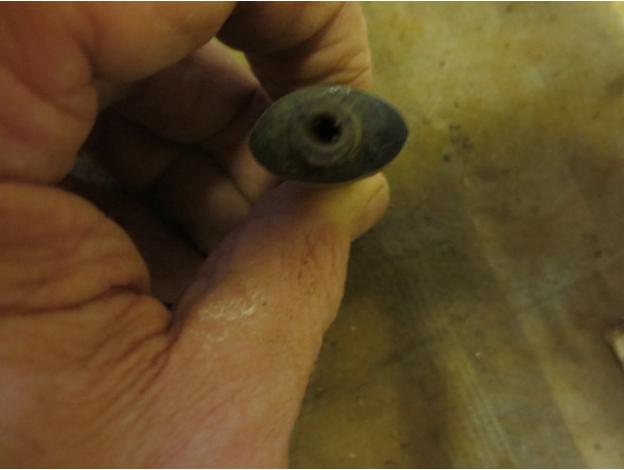
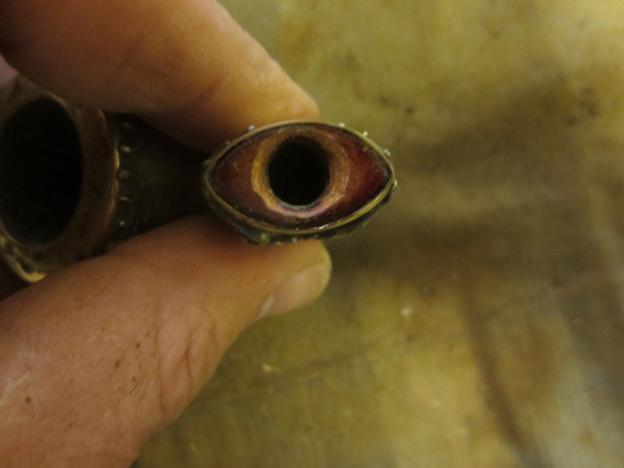
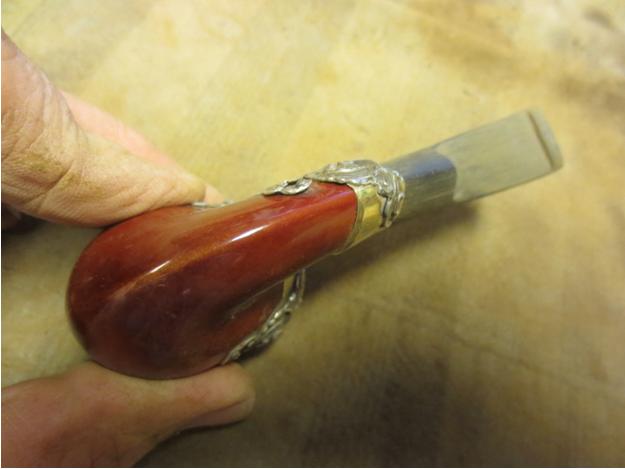
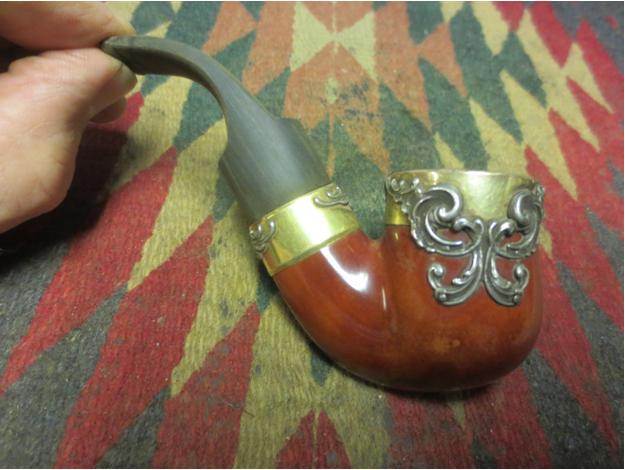
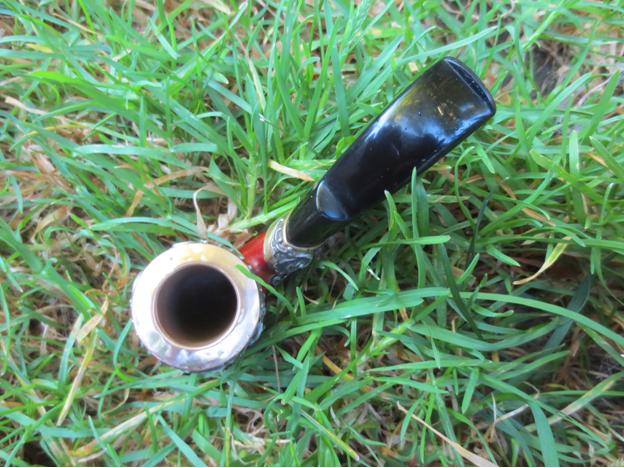
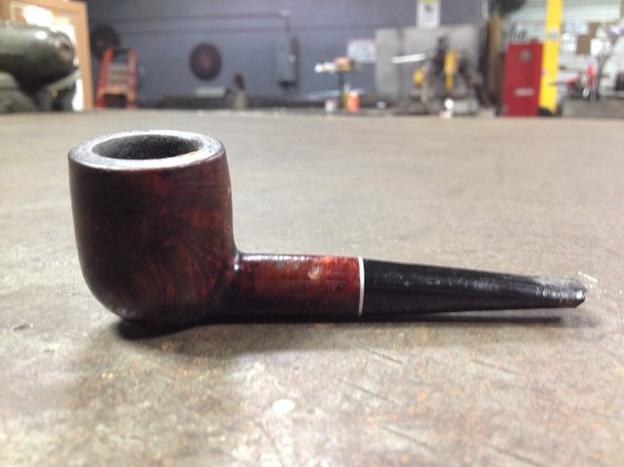
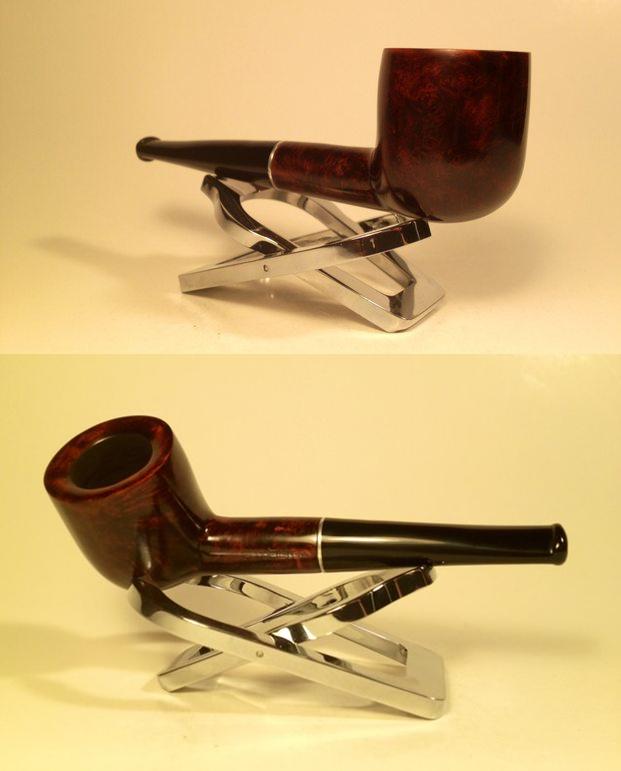
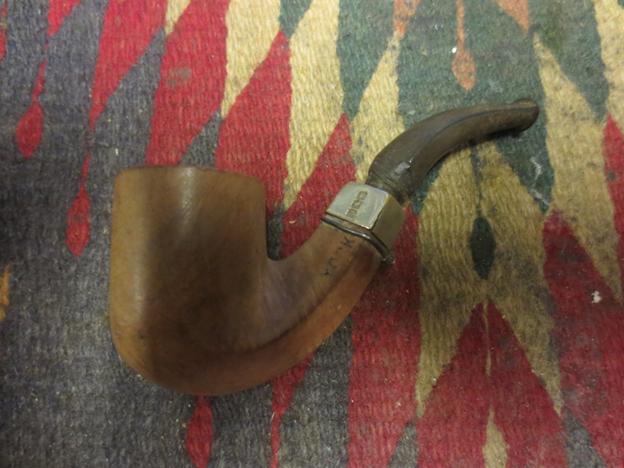
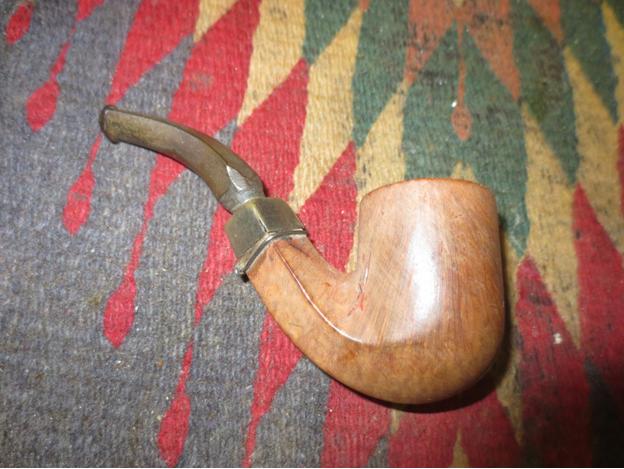
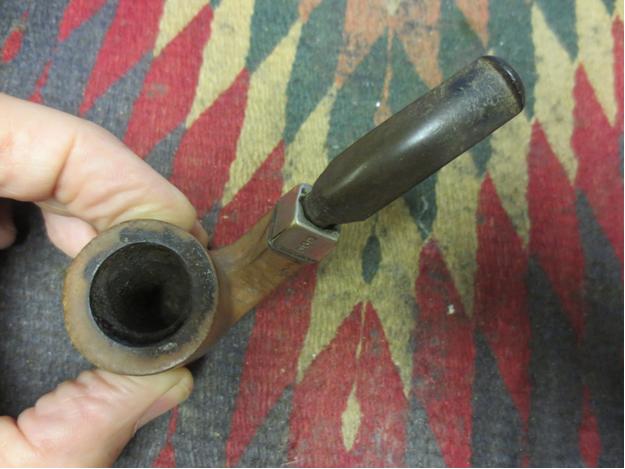
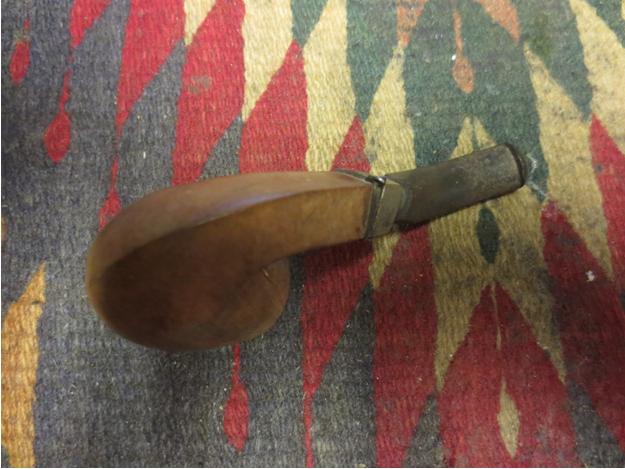
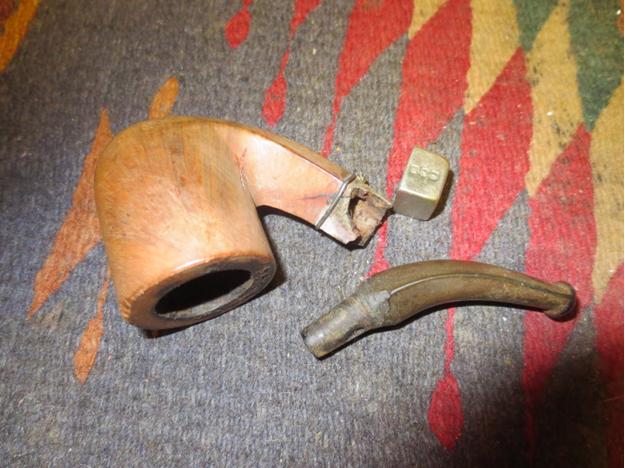
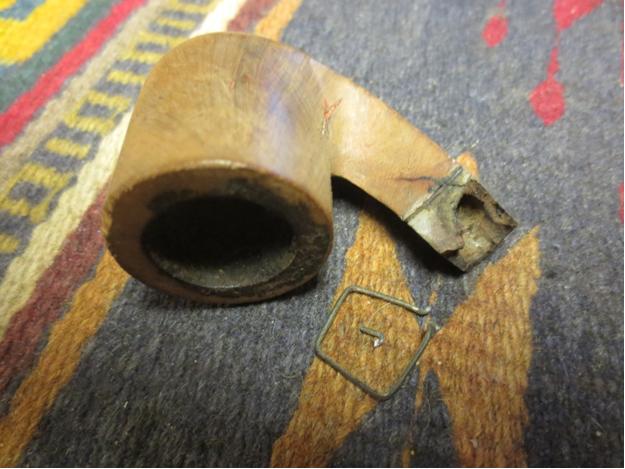
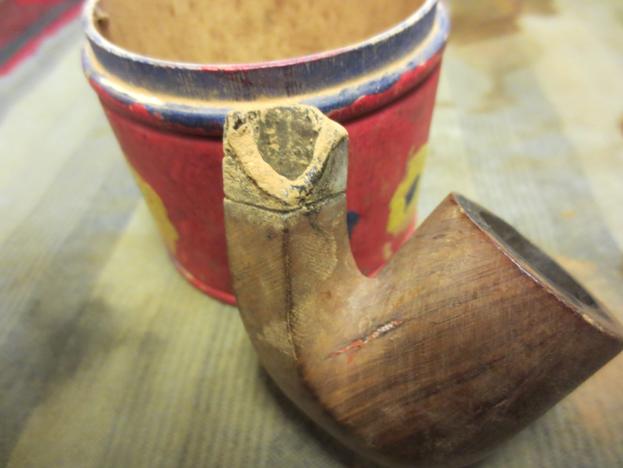
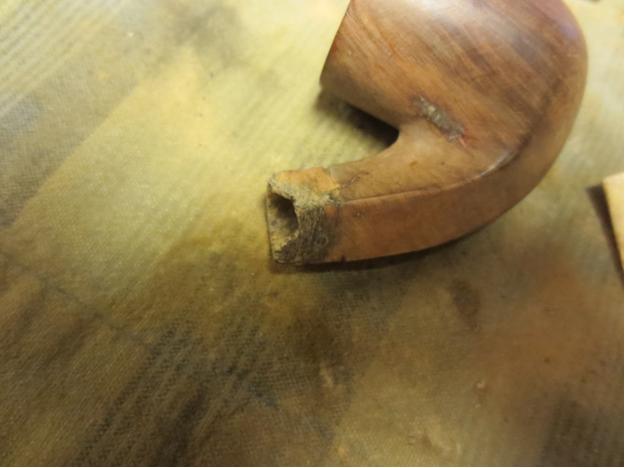
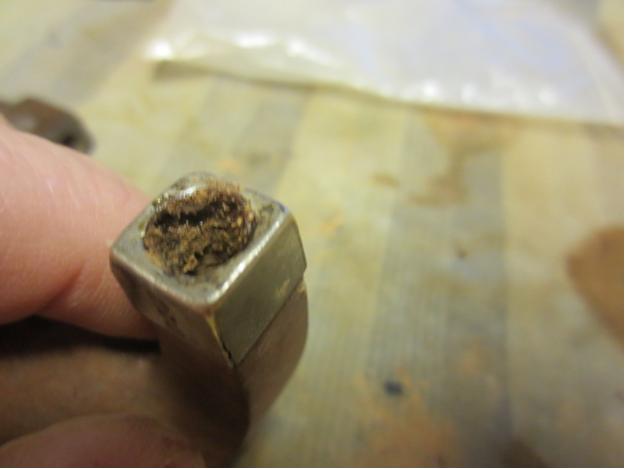
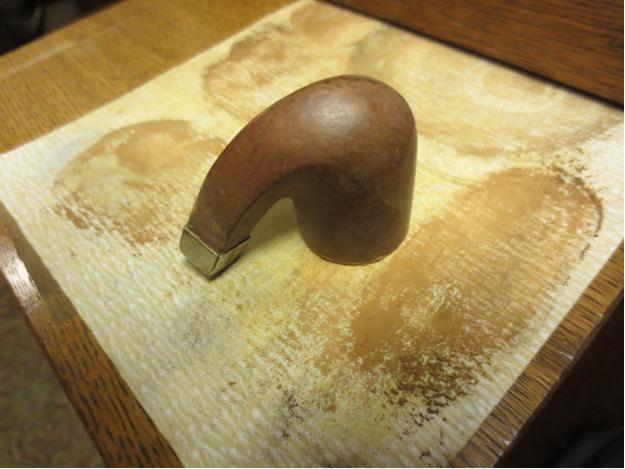
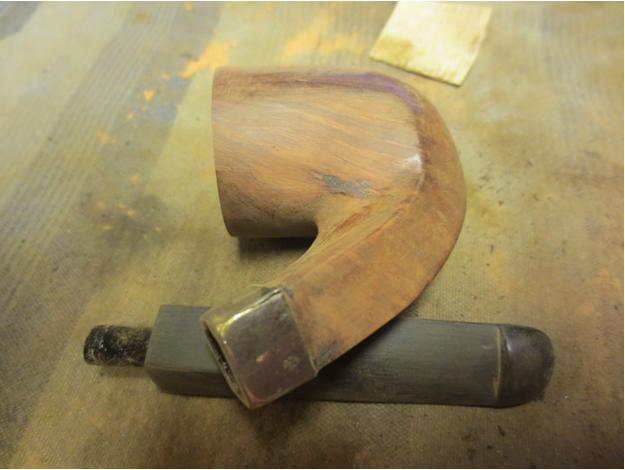
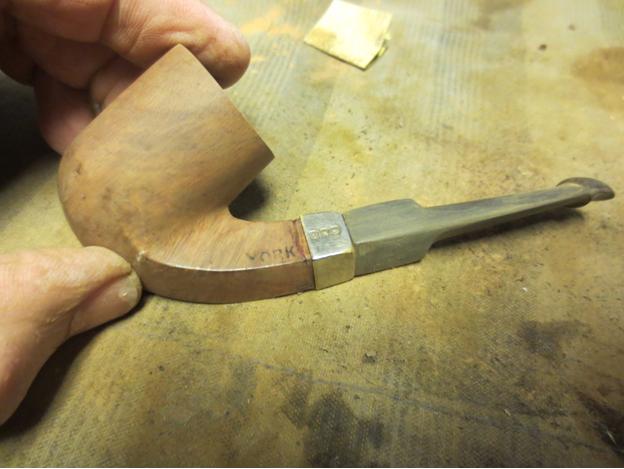
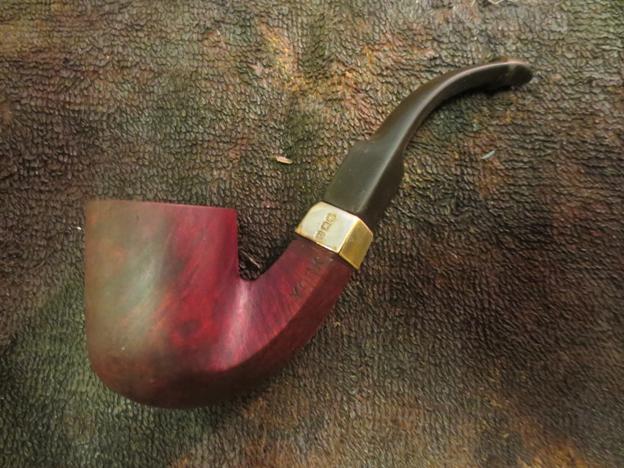
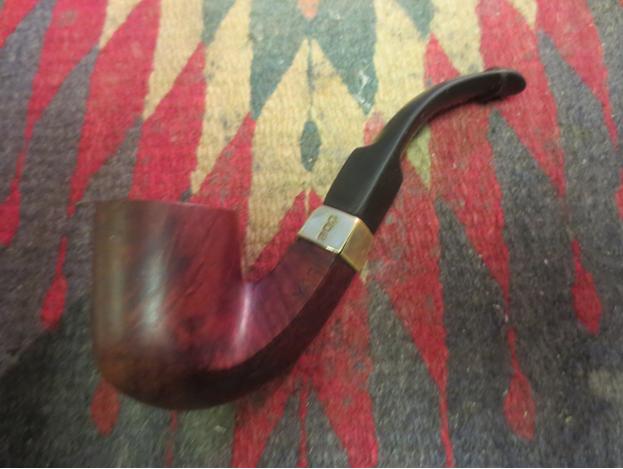
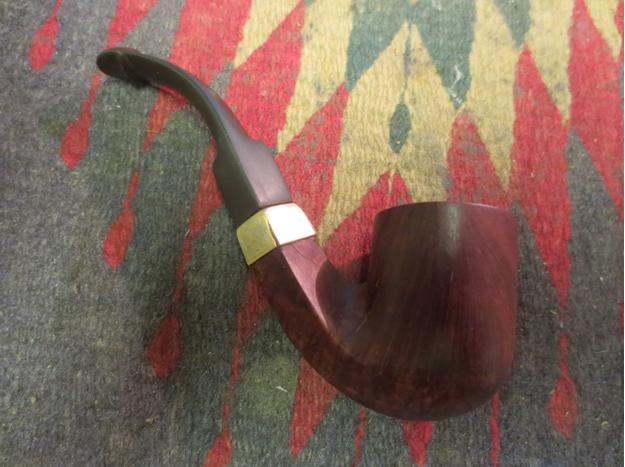
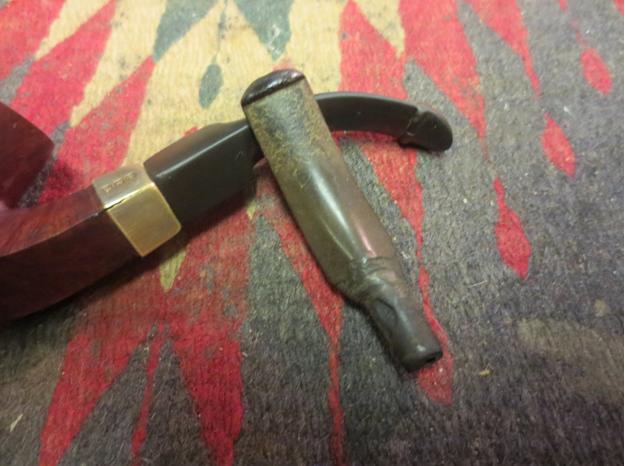
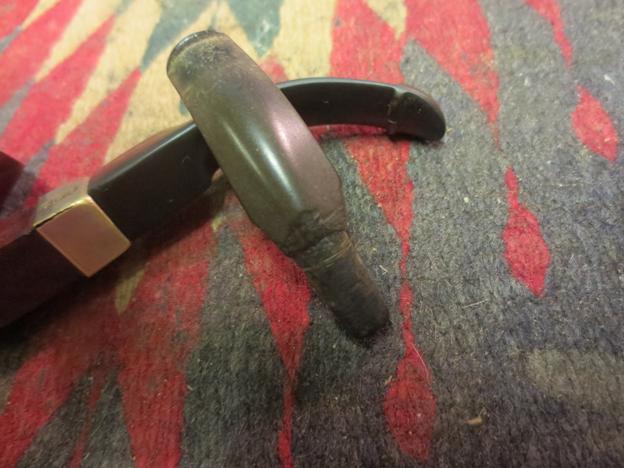
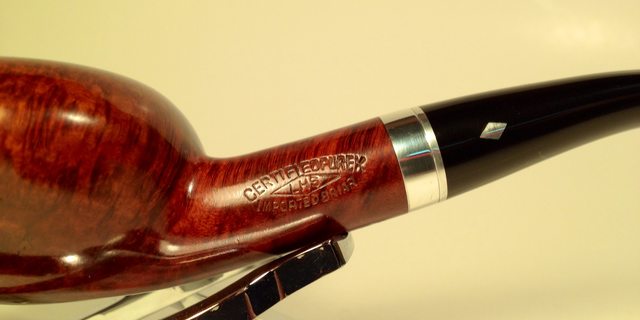
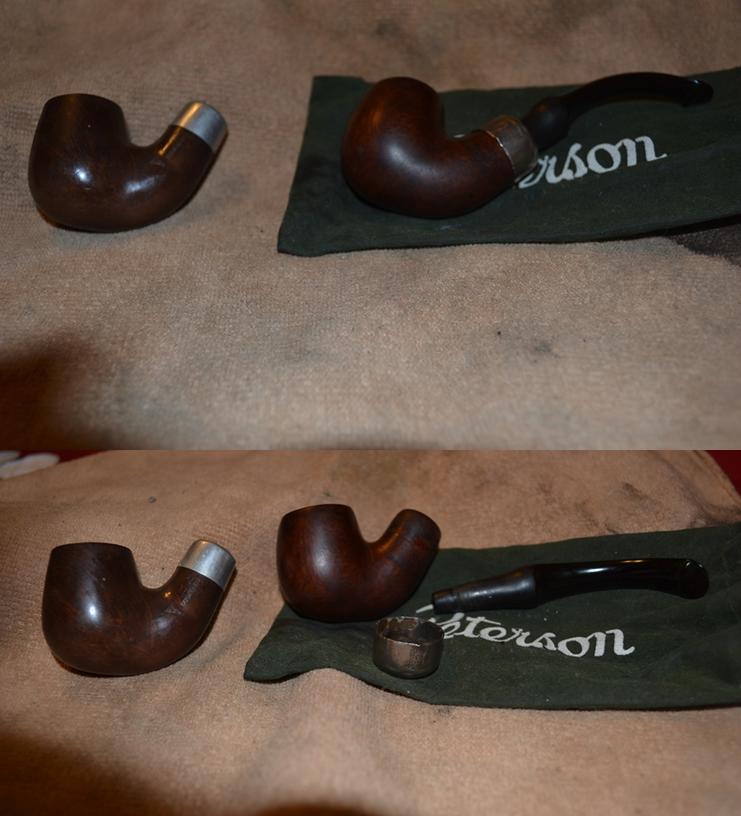
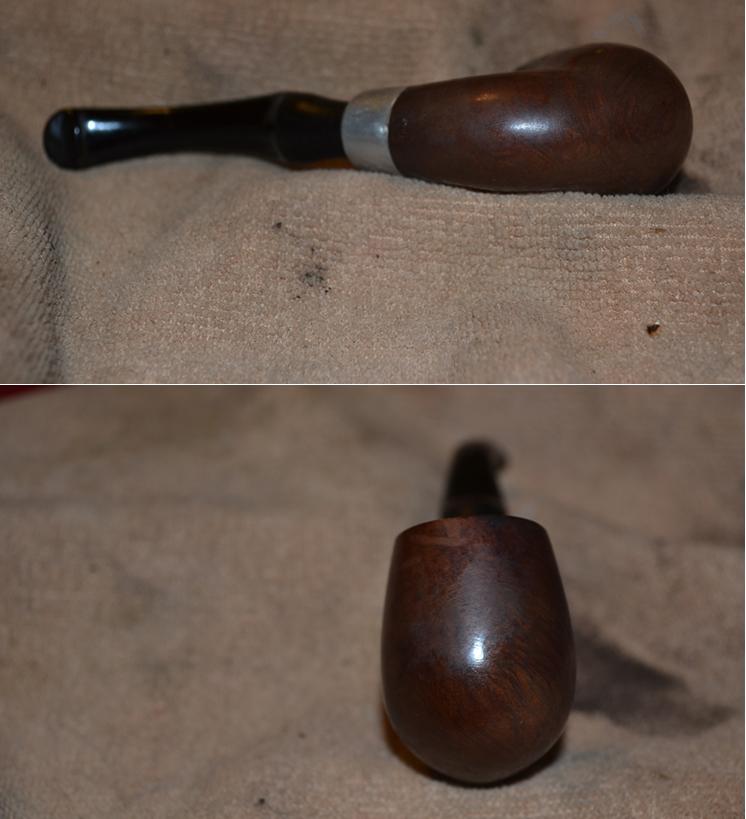
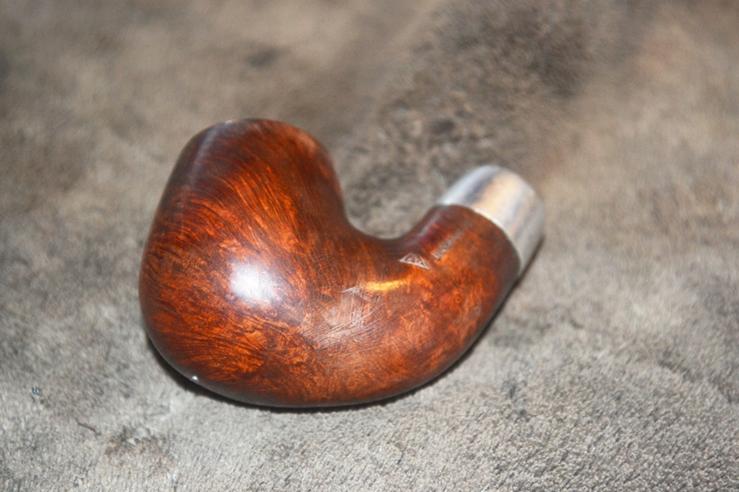
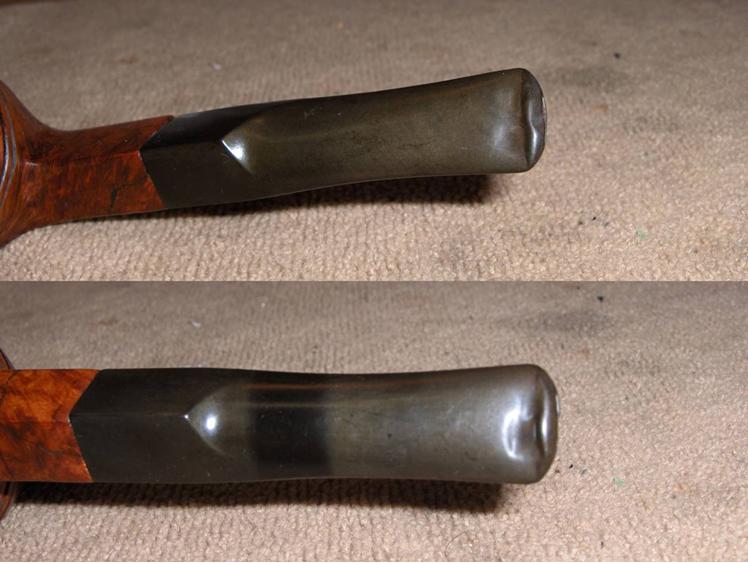
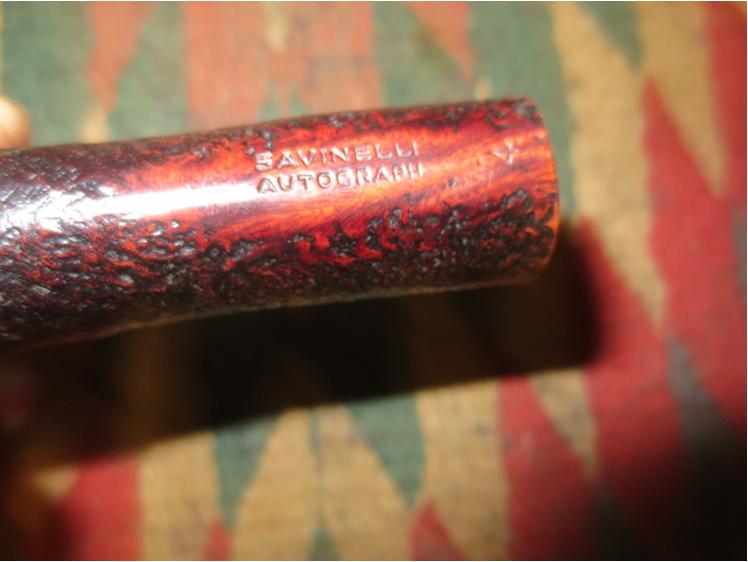
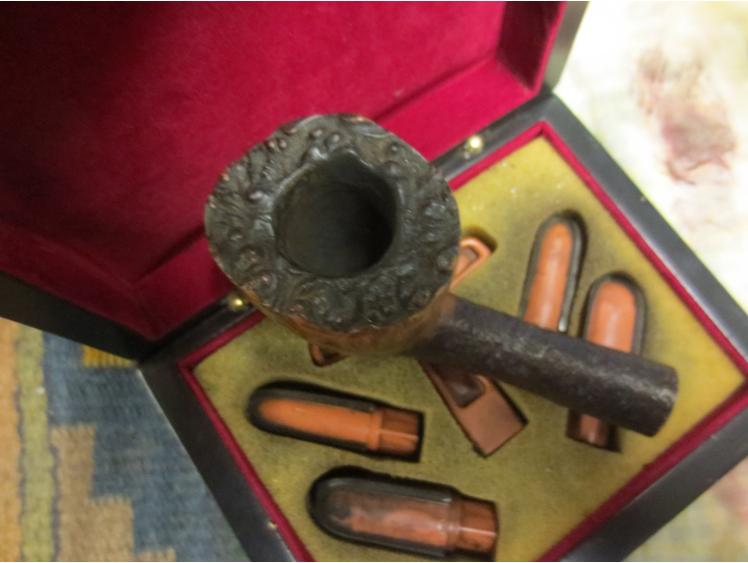
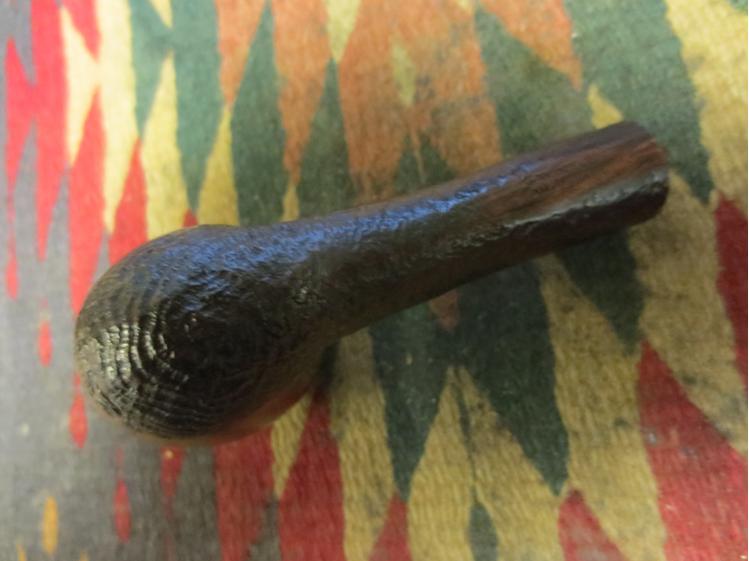
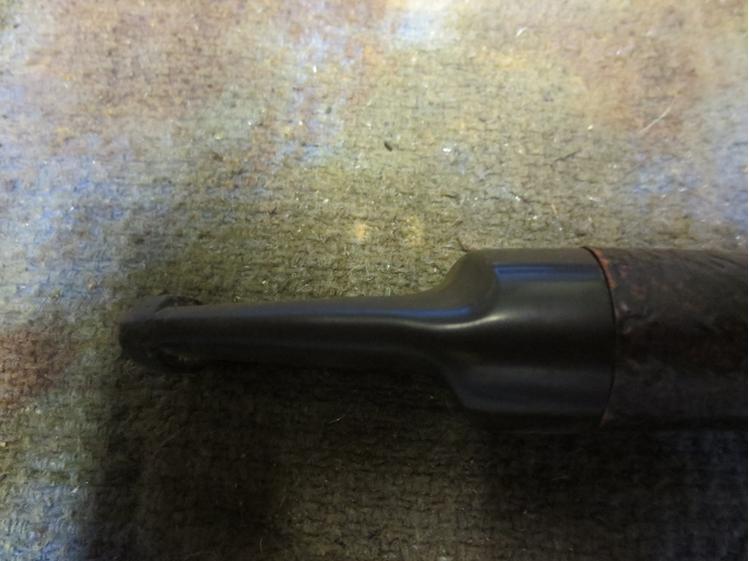
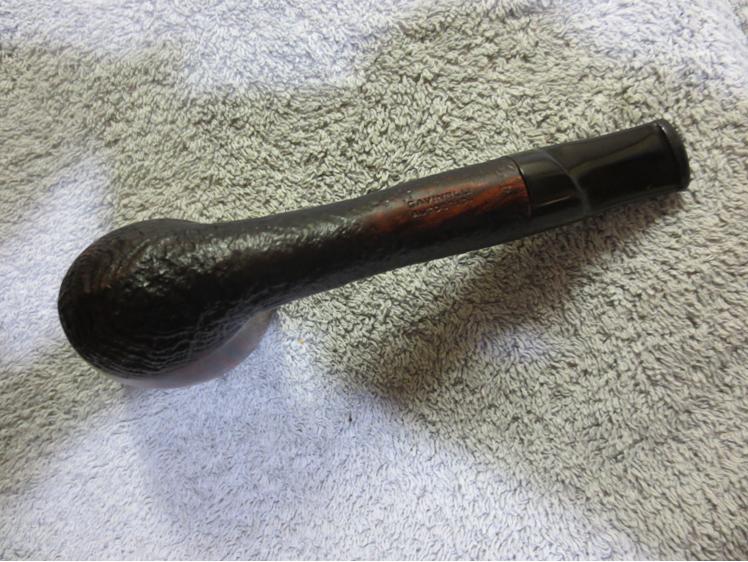
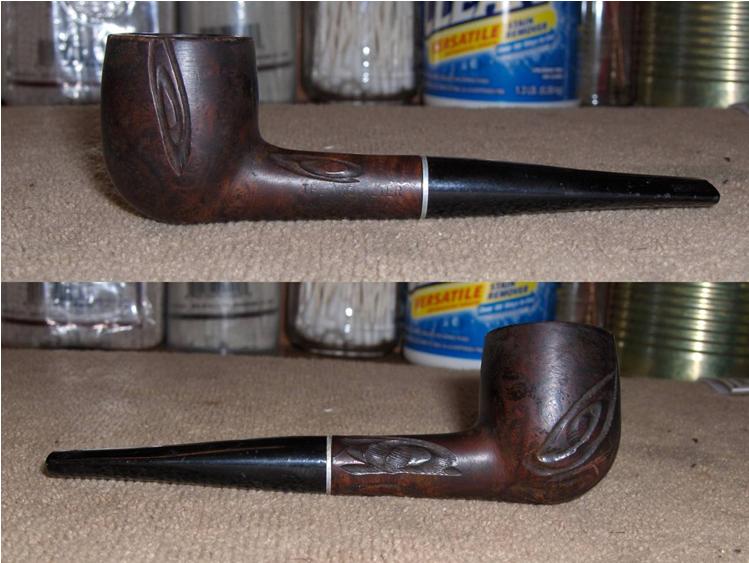
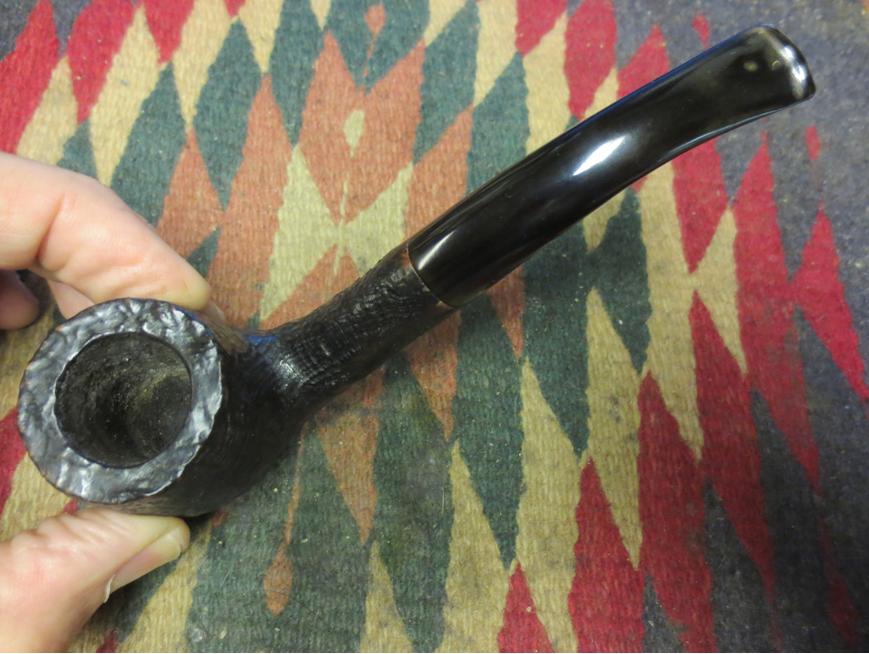
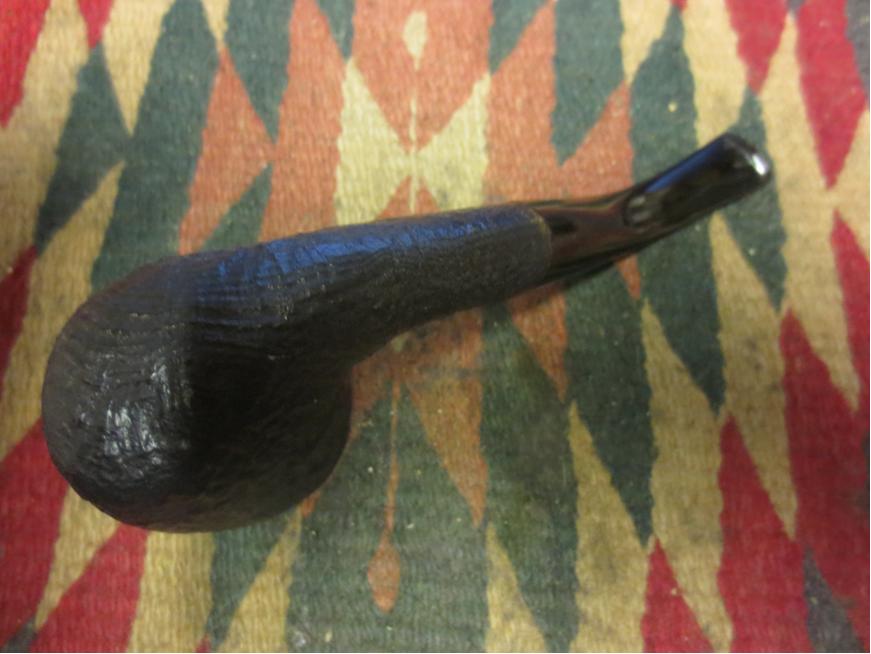
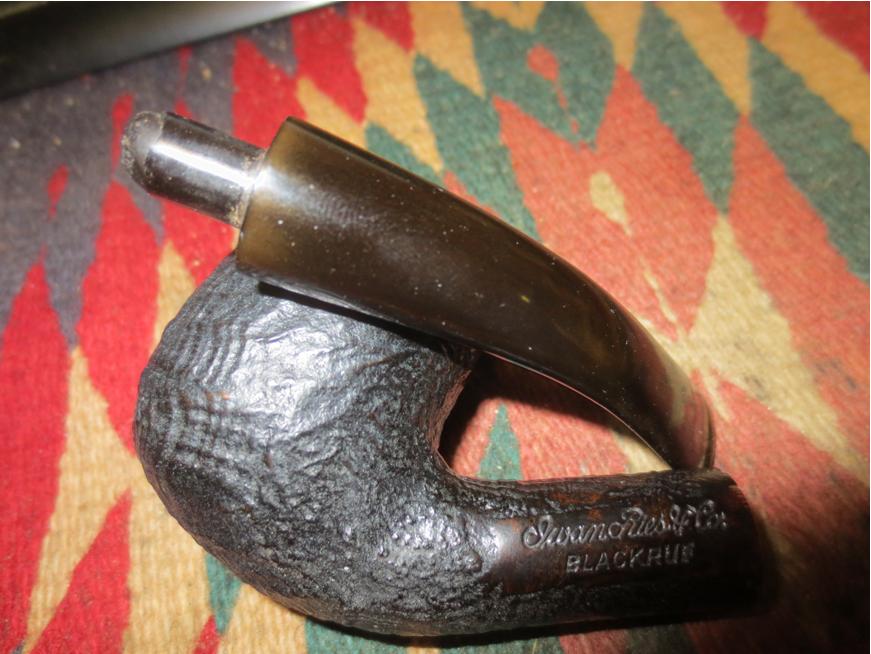
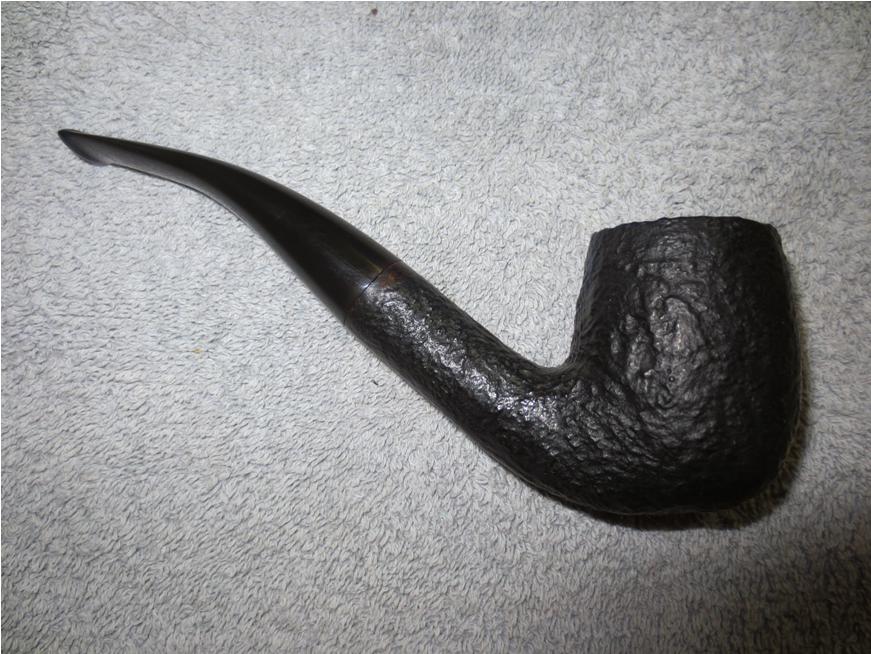
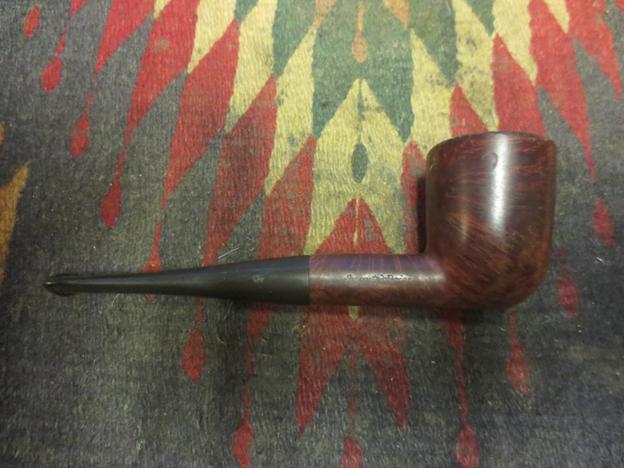
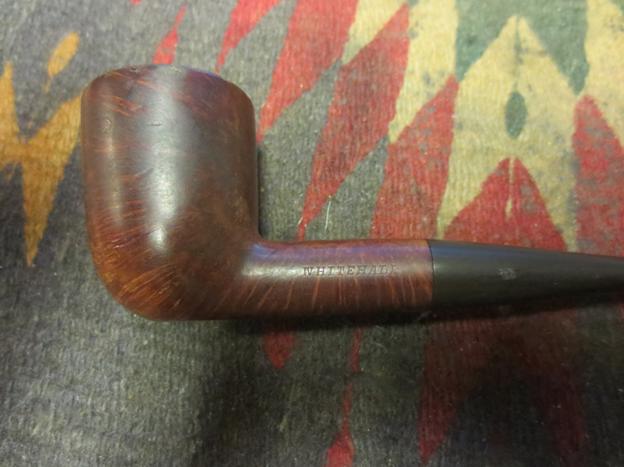
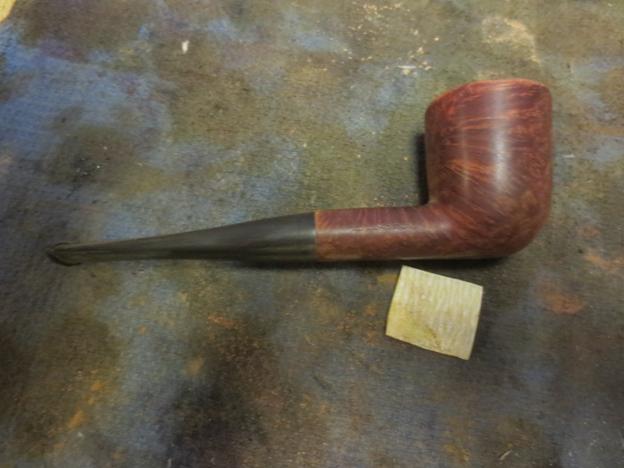
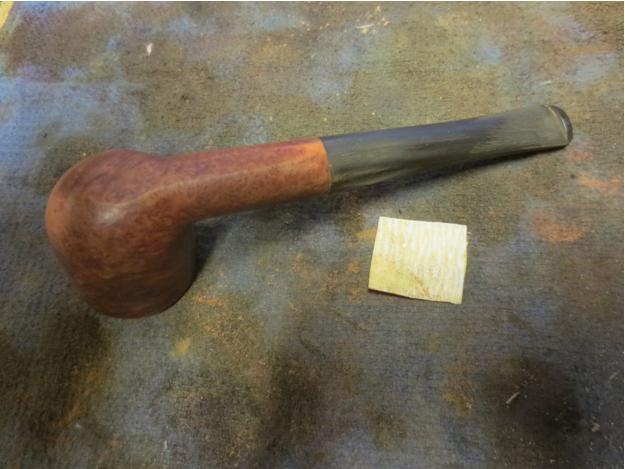
This Dublin shaped pipe is stamped Whitehall on the left side of the shank – though the stamping is faint. On the right side it is stamped Imported Briar (also faint). It has a flat bottom and sits well on that. The finish was very worn but was a rich oxblood colour under the grime. The bowl sides have some great cross grain. There were some small fills near the top of the bowl on the left side. The rim was damaged on the outer edge and very caked from the bowl over the rim top. The inner edge of the rim was still round and did not show signs of damage under the thick cake. The stem appeared to be a poor fit but as I looked at it I realized that it was upside down. The flattened bottom of the bowl had not been continued on the stem so it sat wrong.Dublin1

Dublin2

Dublin3

Dublin4 
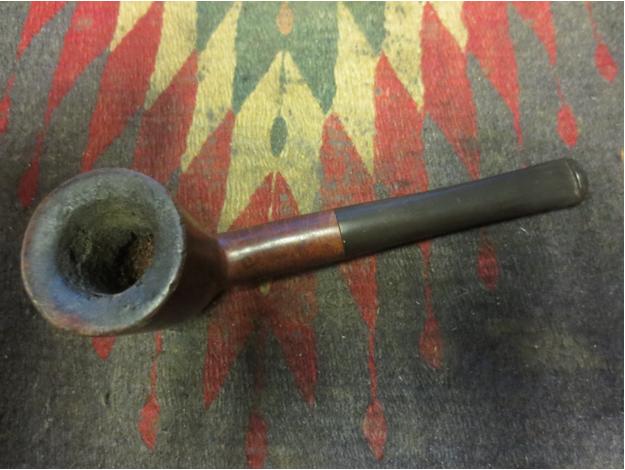
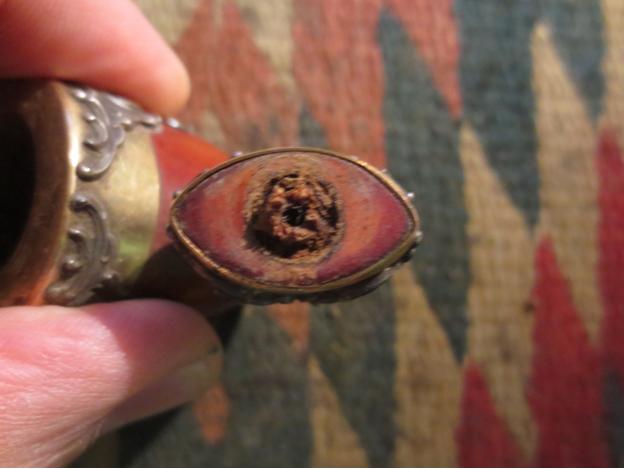
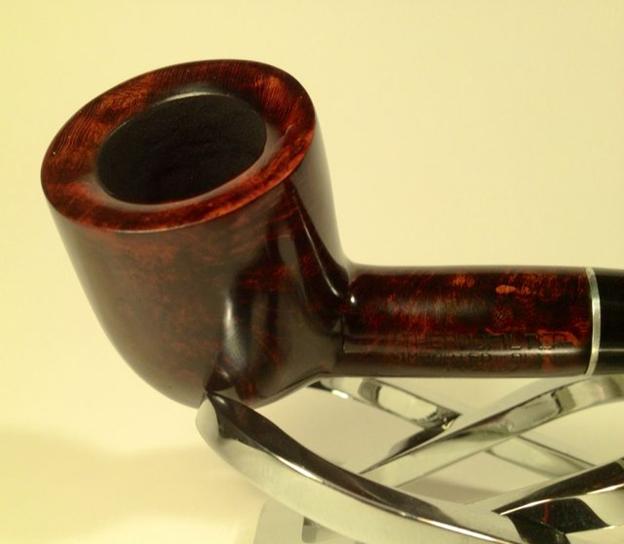
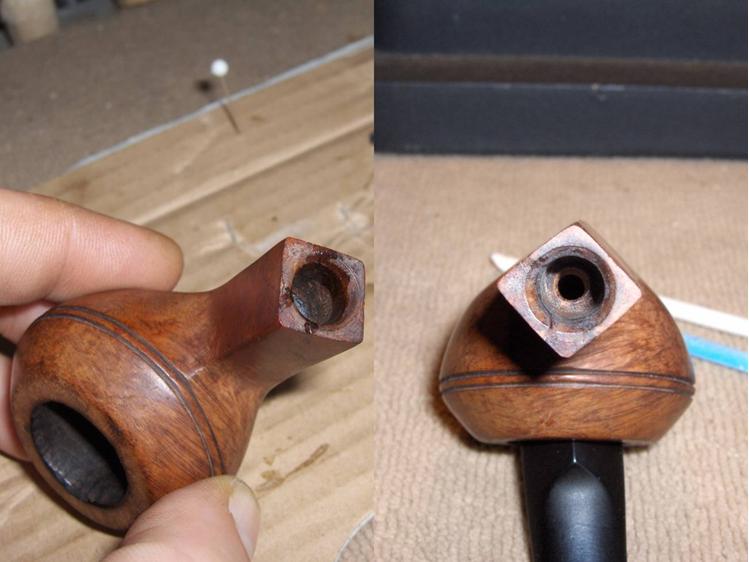
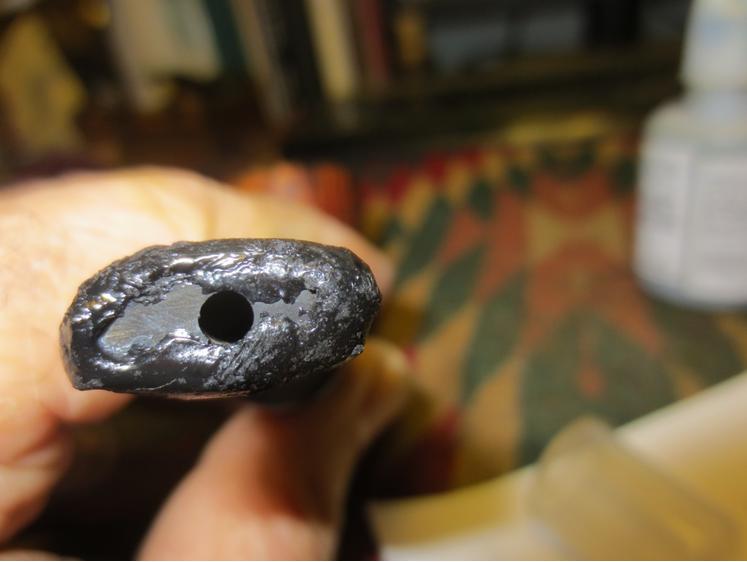
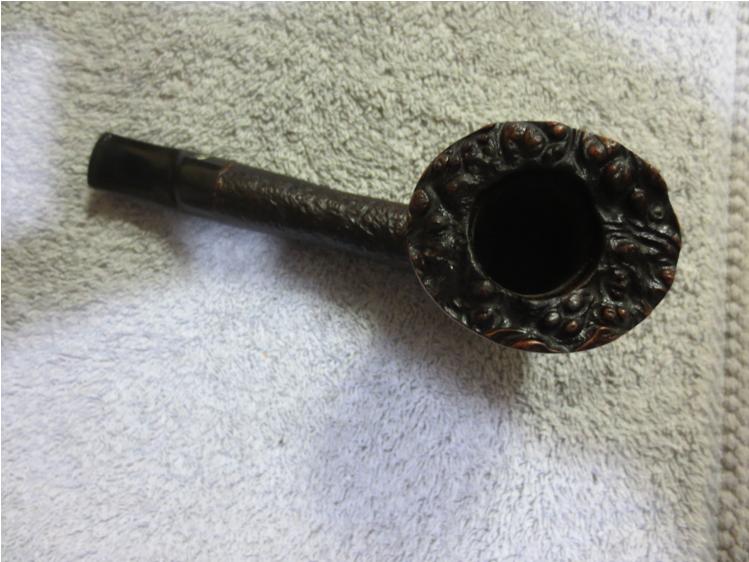
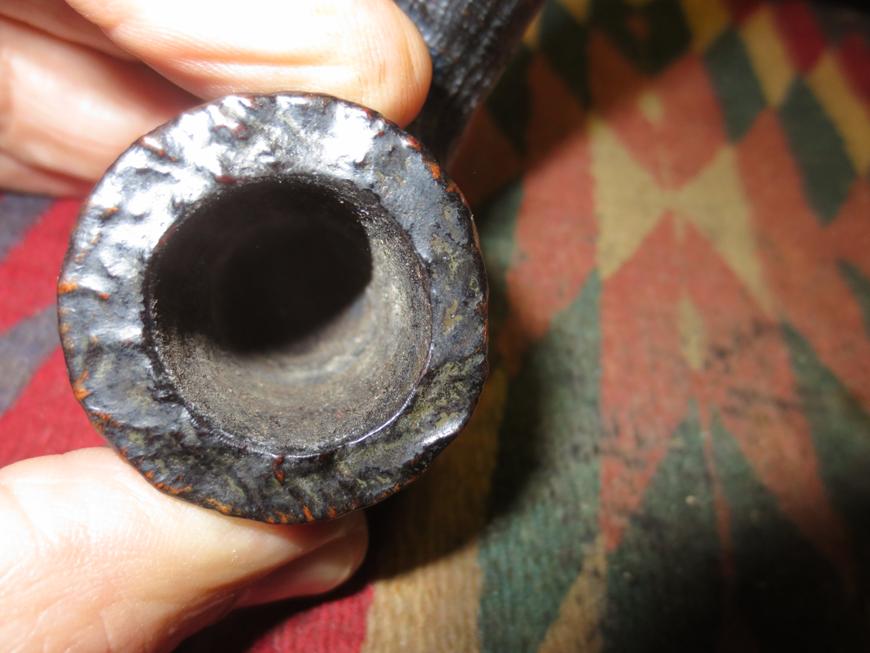
I took some close-up photos of the rim and sides of the bowl. The rim photo shows the tarry buildup and the side photos show the stamping.Dublin5

Dublin6

Dublin7 
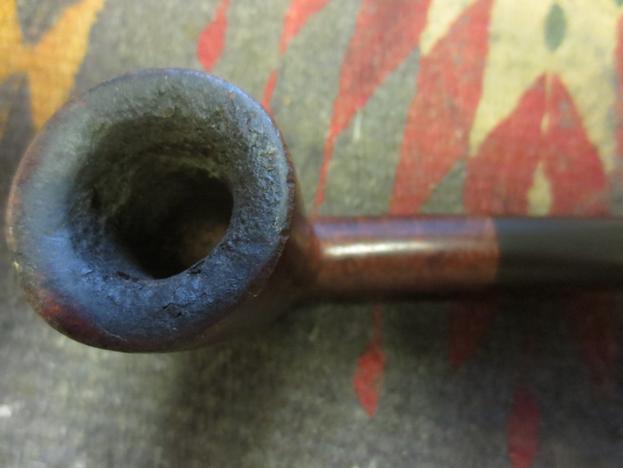
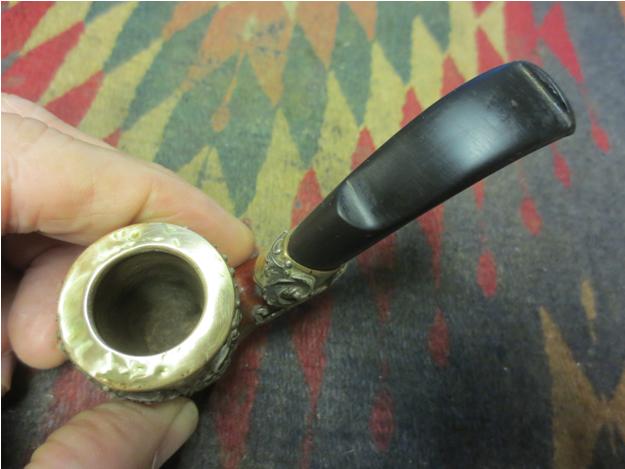
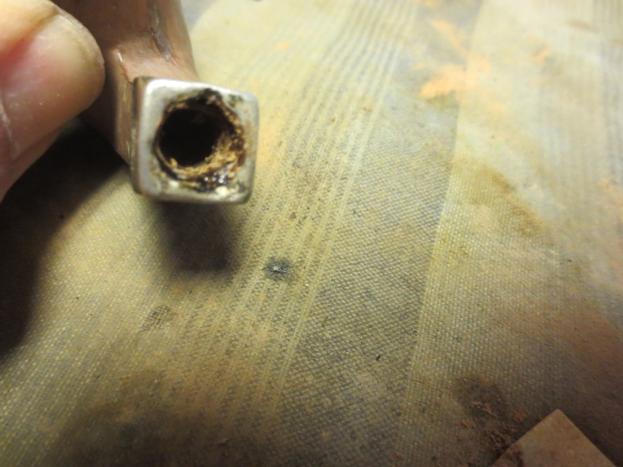
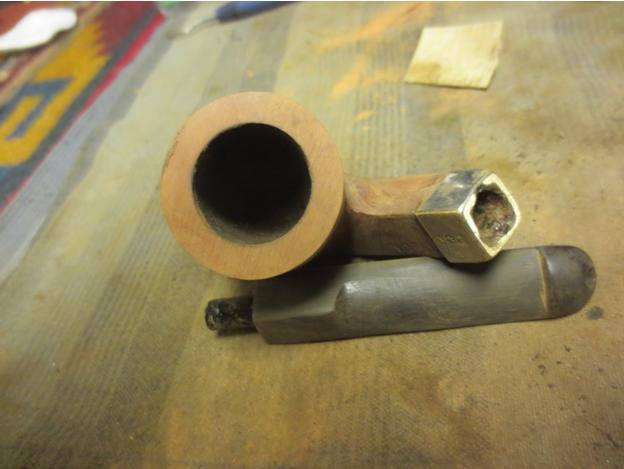
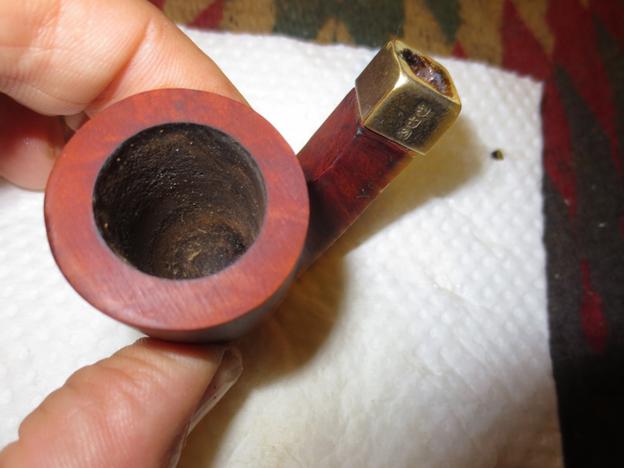
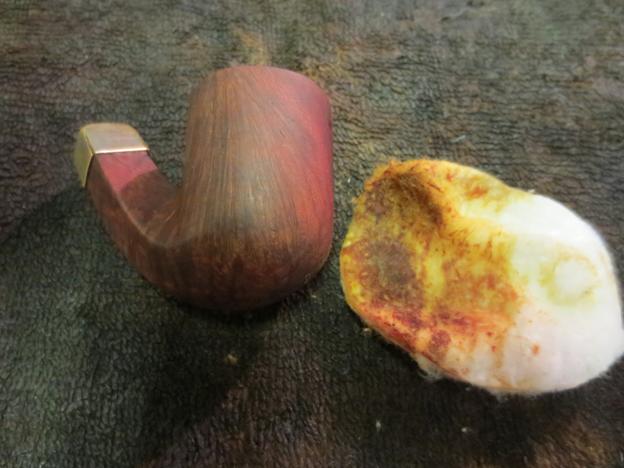
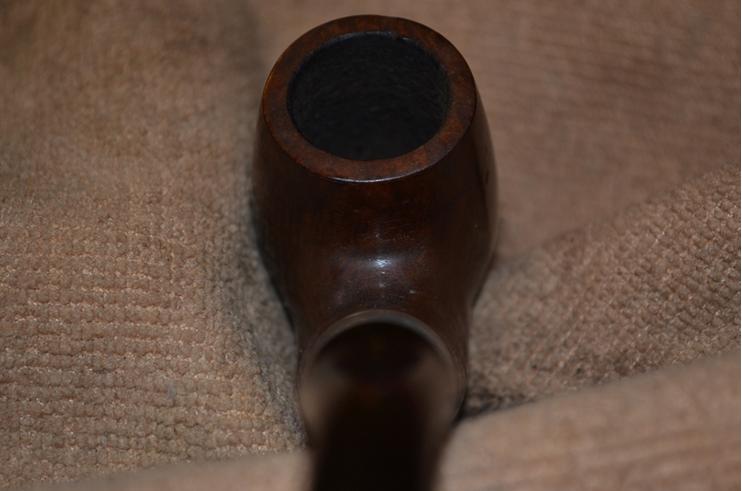
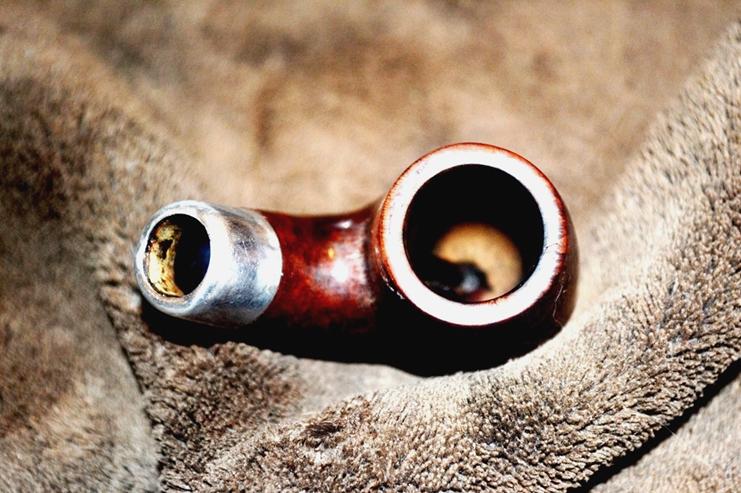
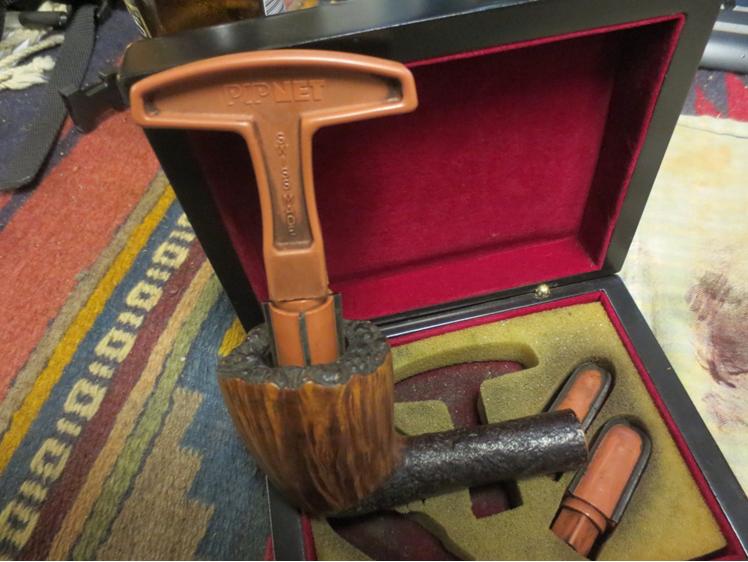
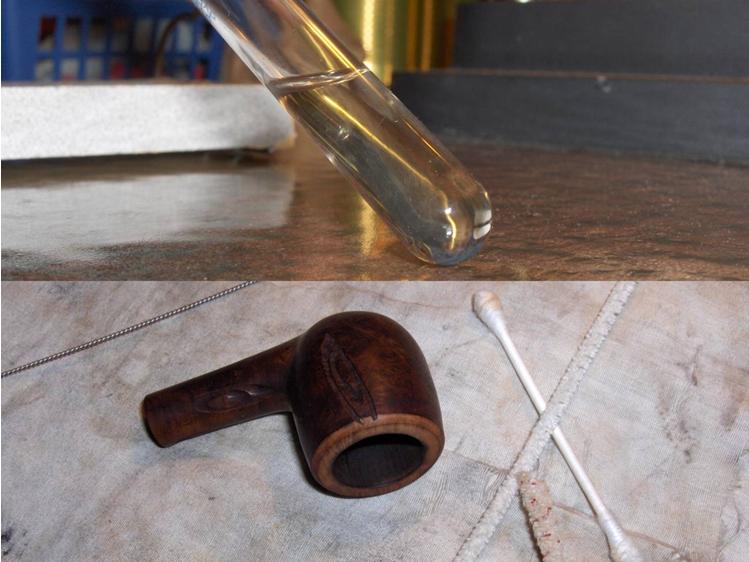
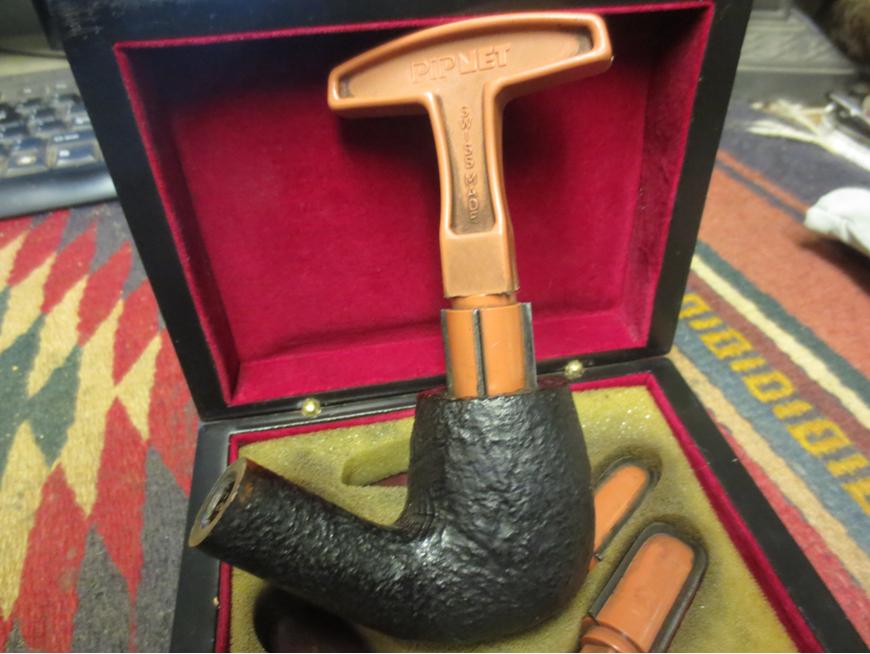
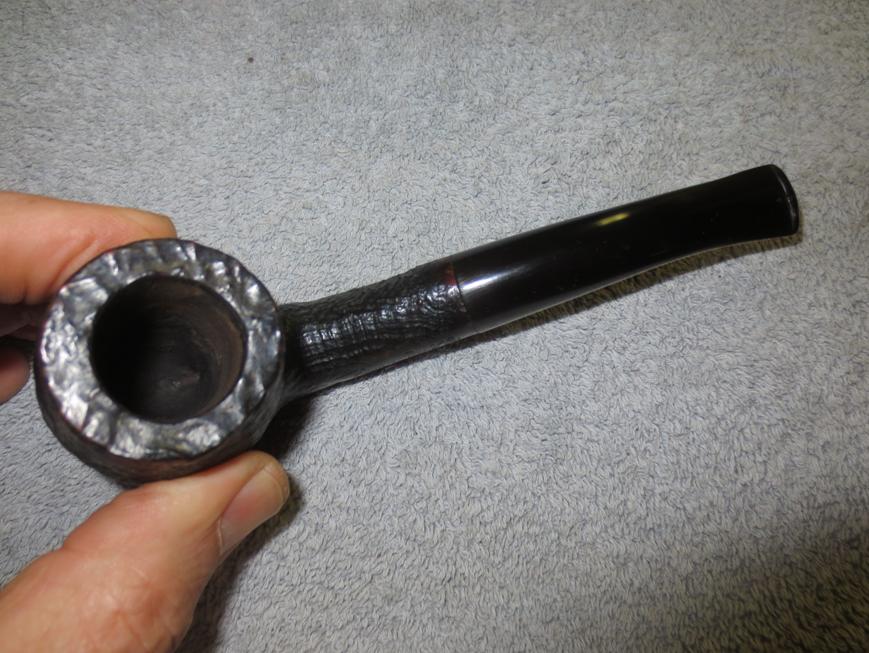
I generally ream the bowl when I start a clean up to remove the cake so I can examine the pipe thoroughly to check for inside wall damage and potential issues. I reamed it with a PipNet reamer and took the cake back to bare briar.Dublin8 
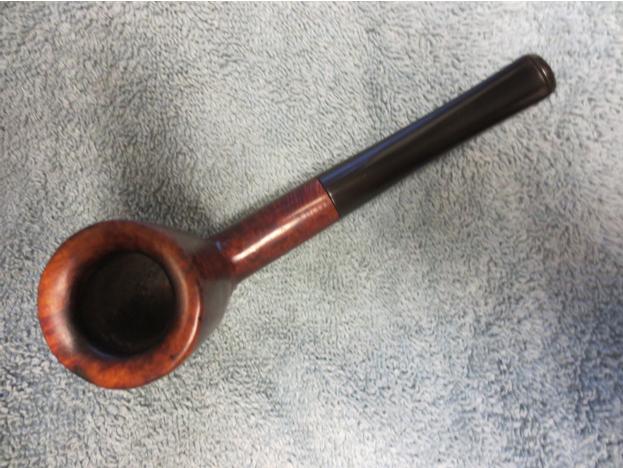
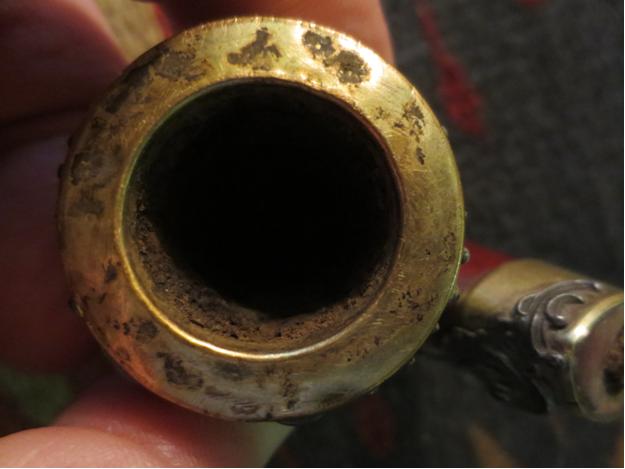
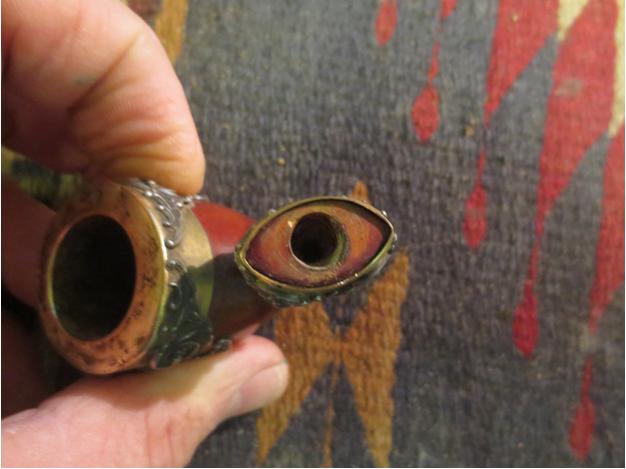
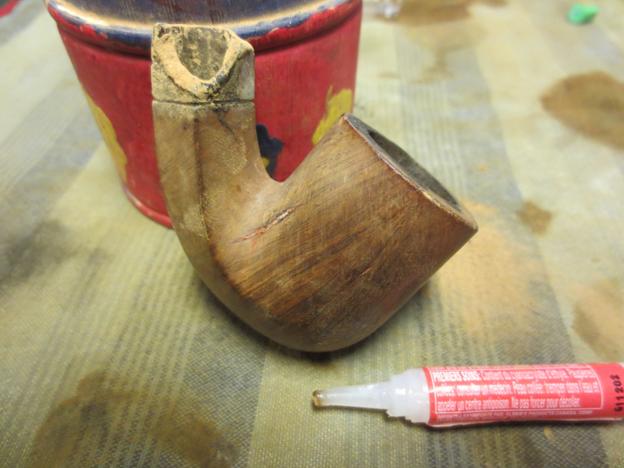
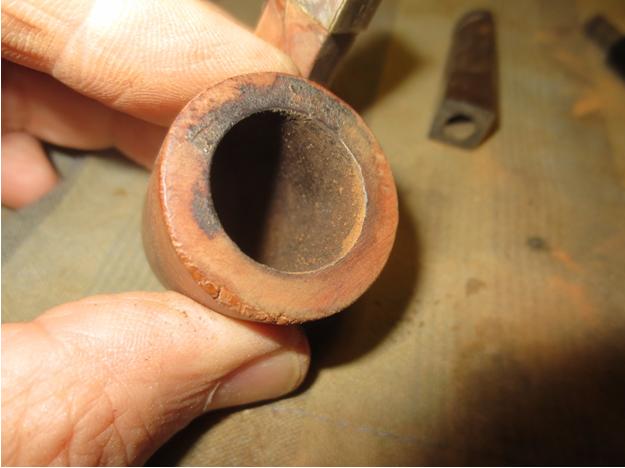
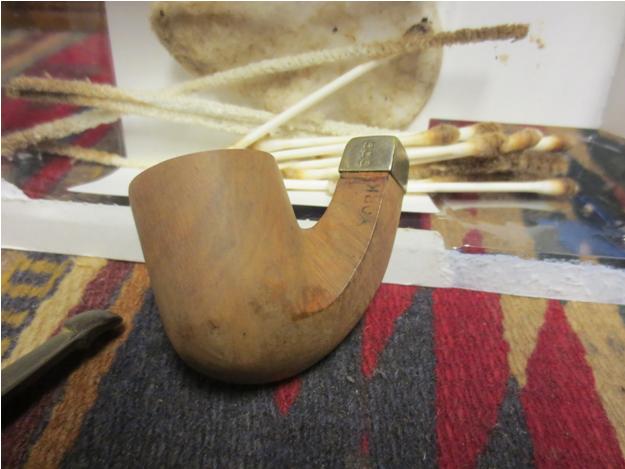
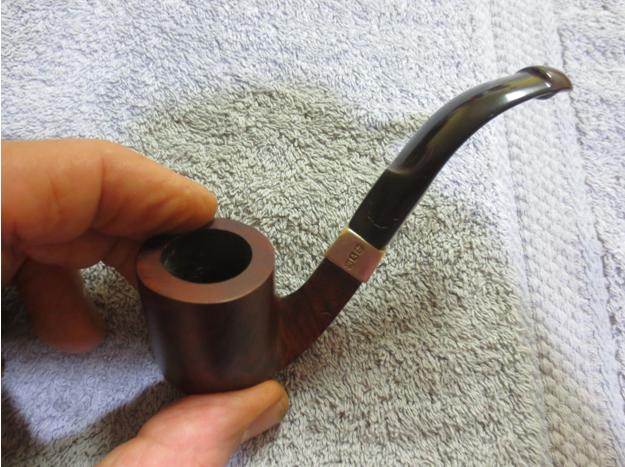
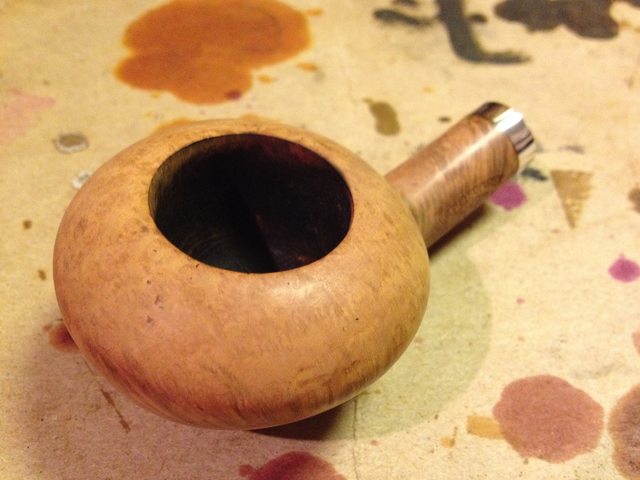
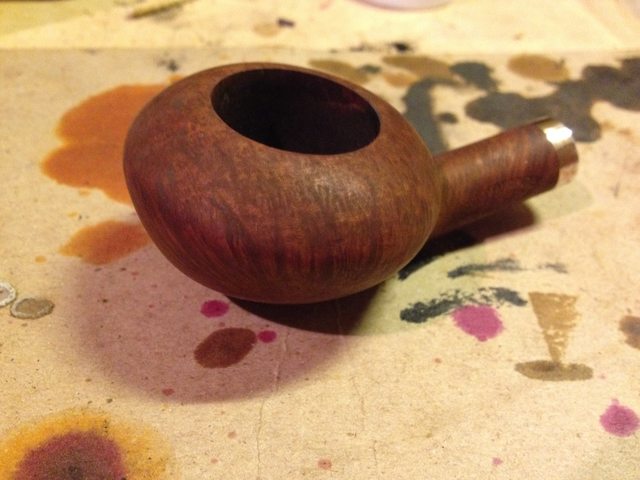
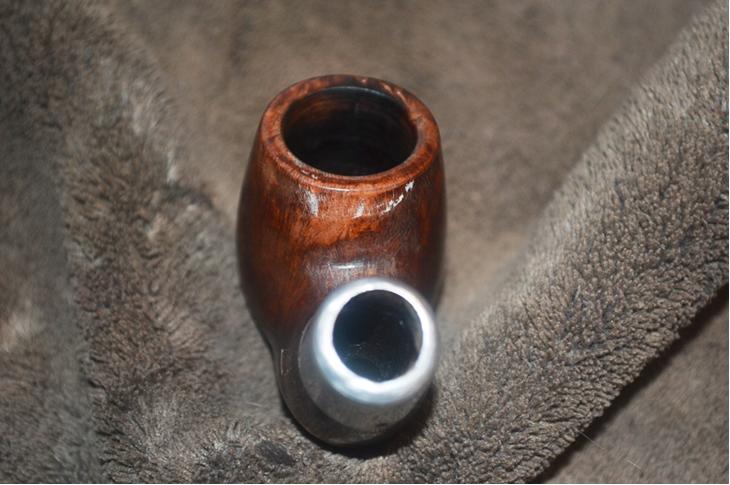
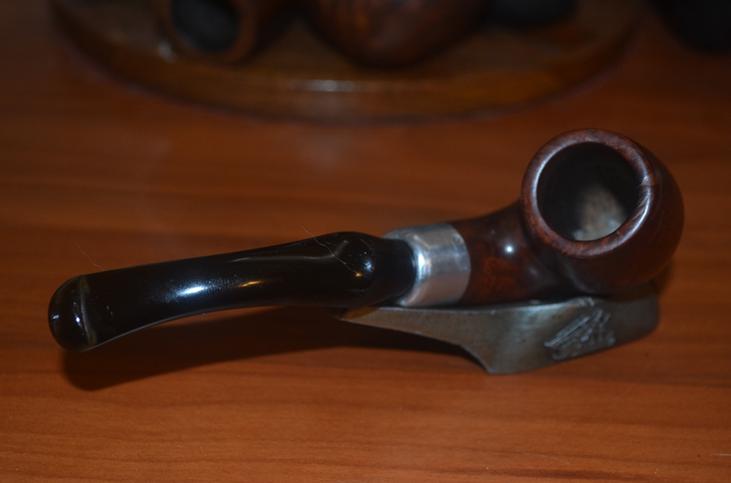
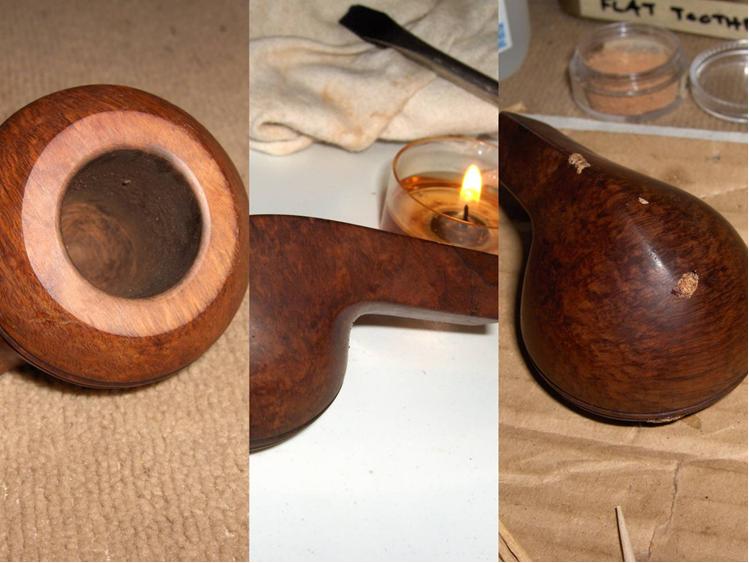
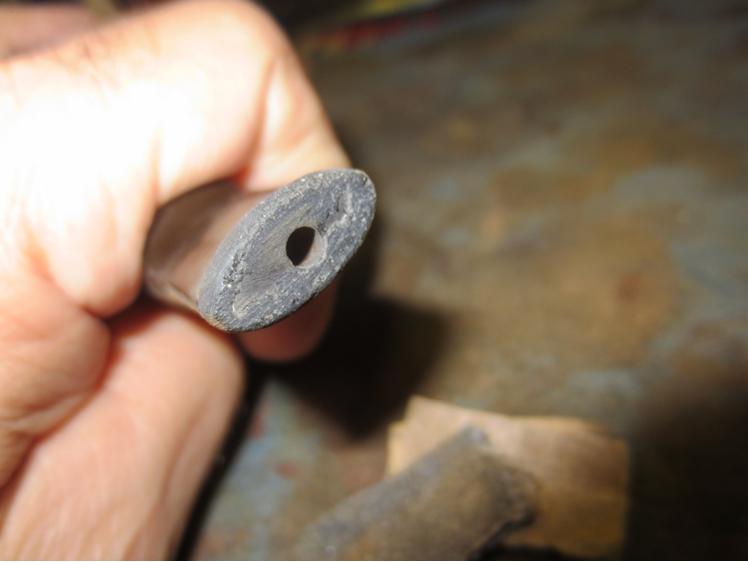
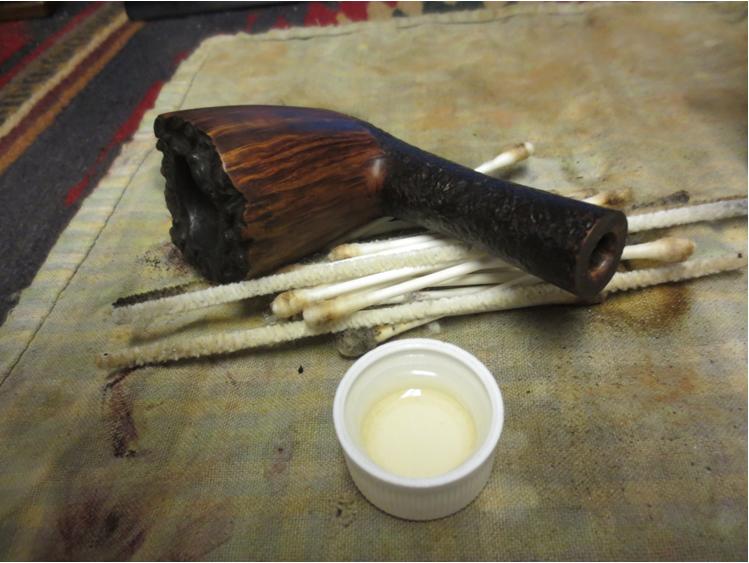
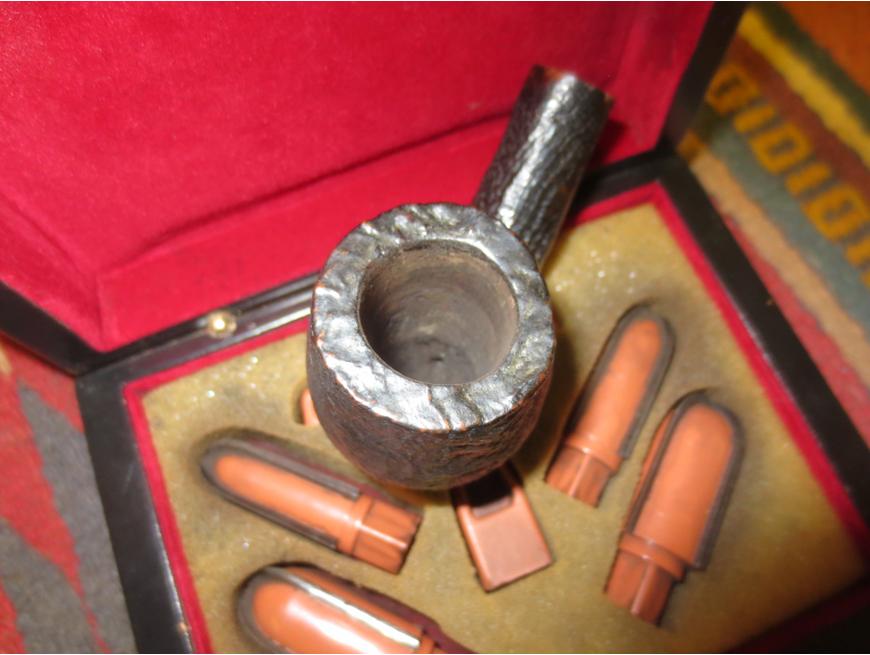
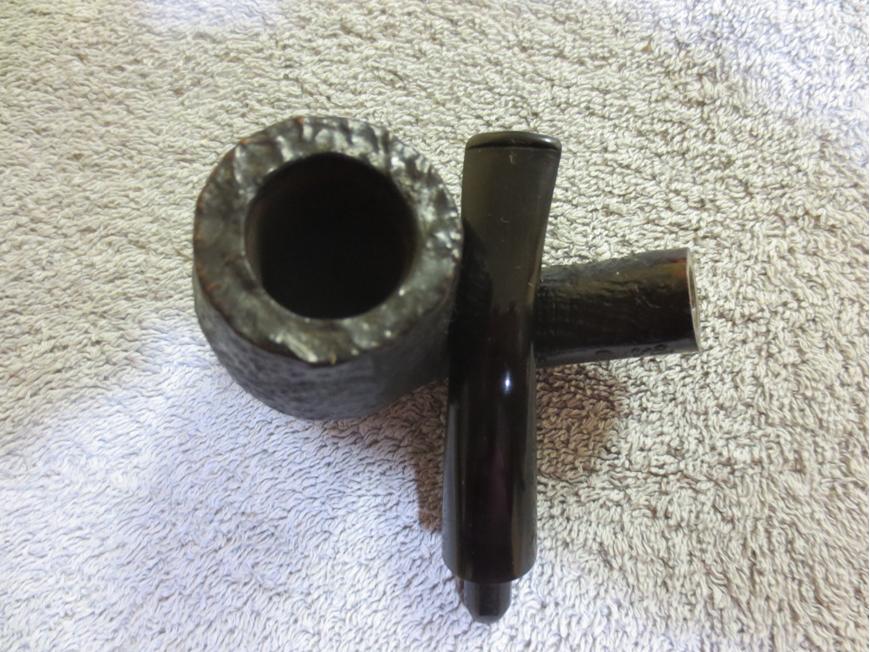
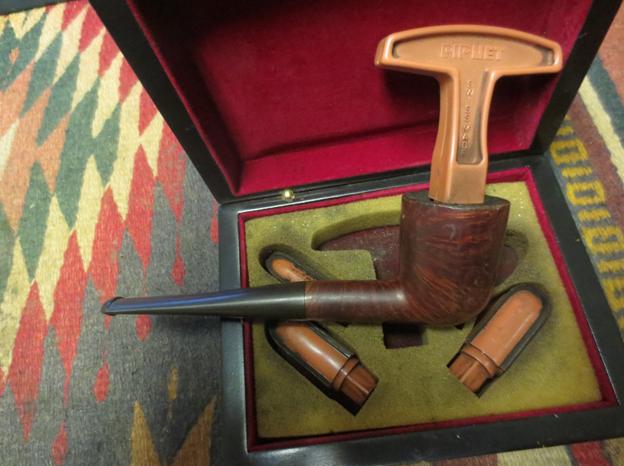
While I was at it I scrubbed the rim with alcohol and cotton pads to remove some of the tars. I had to use a sharp blade to gently scrape away the thick coat of tars while I was scrubbing. The photo below shows the initial cleanup of the rim and newly reamed bowl.Dublin9 
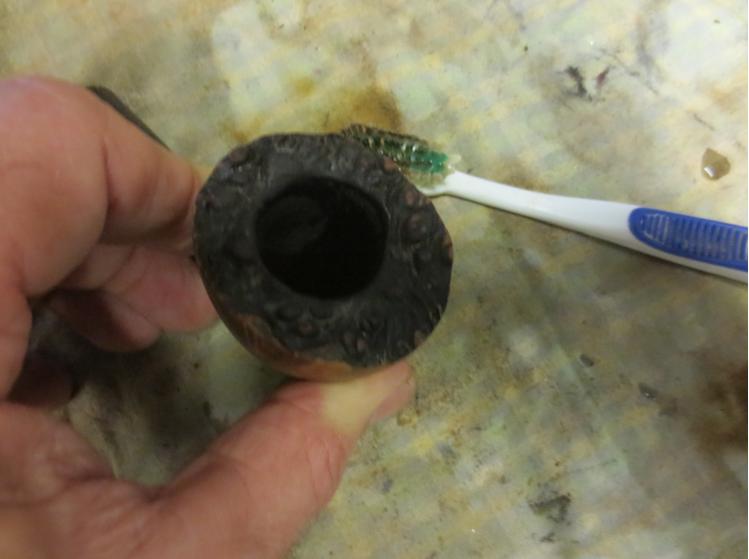
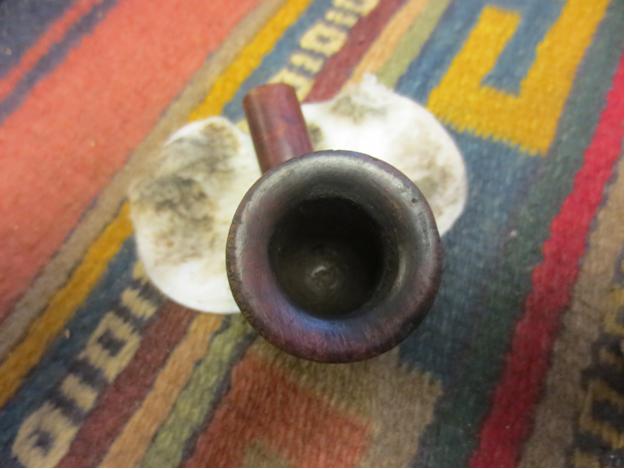
I sanded the rim with 220 grit sandpaper to further remove the tars and to minimize the outer edge damage. There was a burn mark on the front left of the rim that I was able to reduce but not remove altogether.Dublin10 
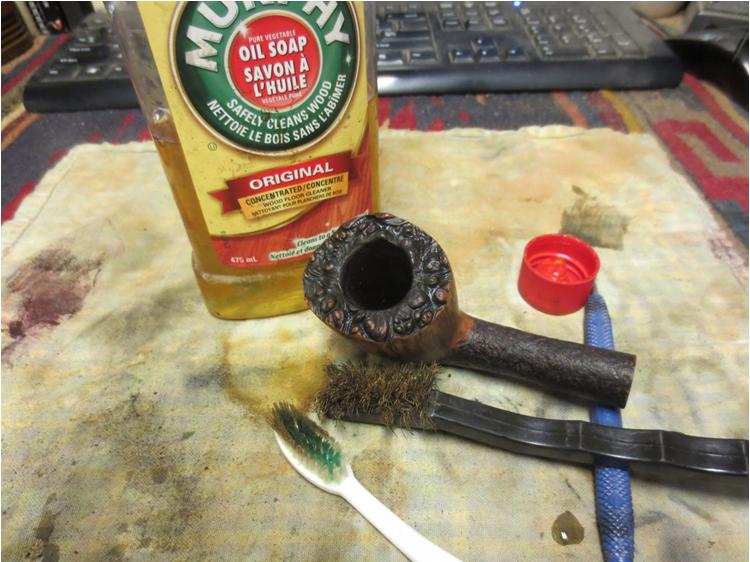
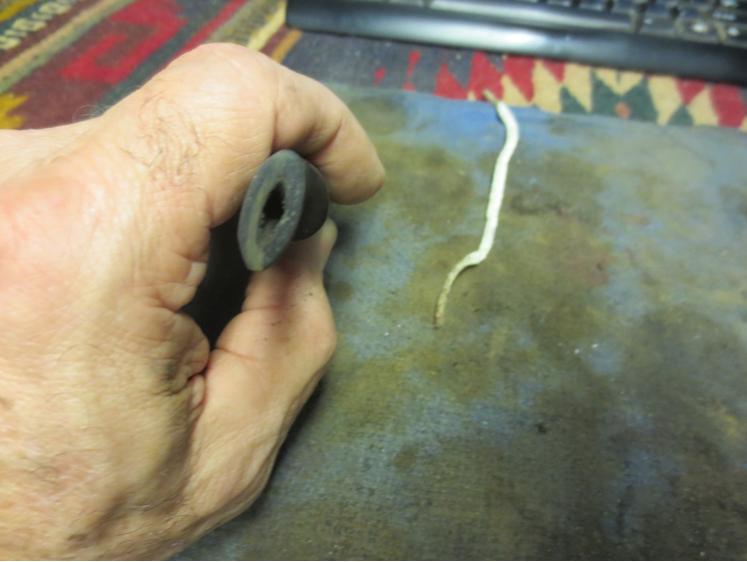
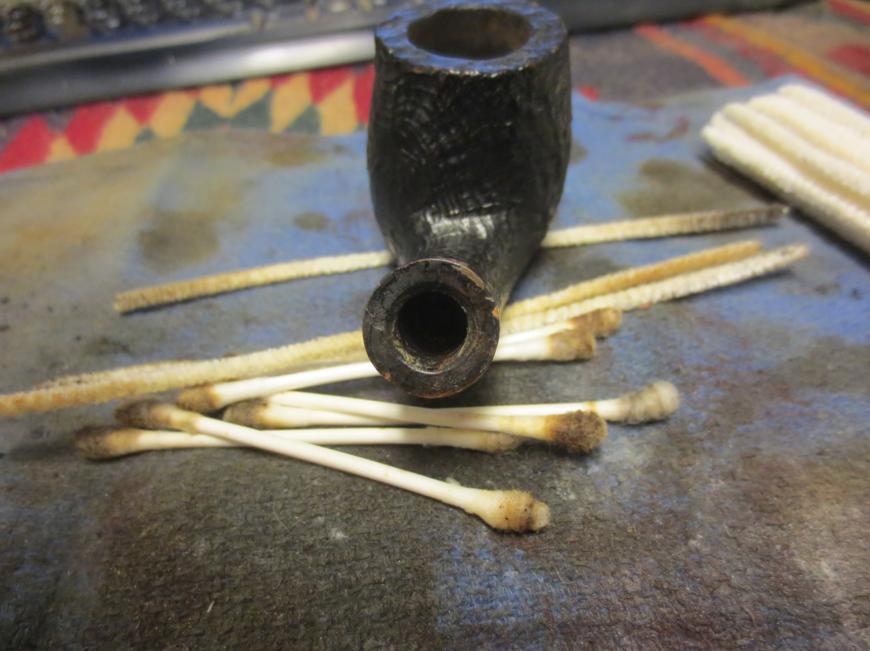
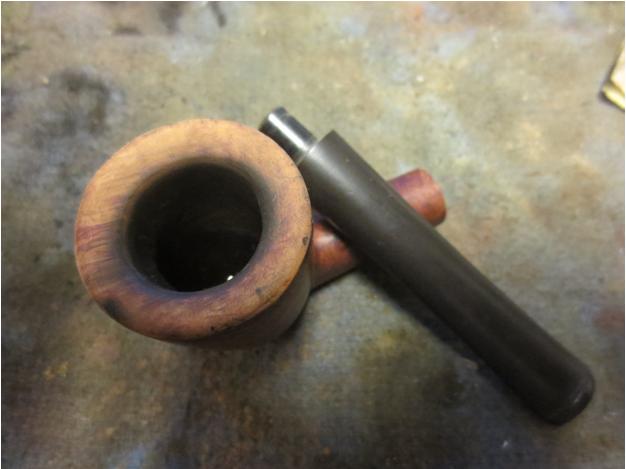
I scrubbed out the shank and the bowl with alcohol, cotton swabs and pipe cleaners.Dublin11 
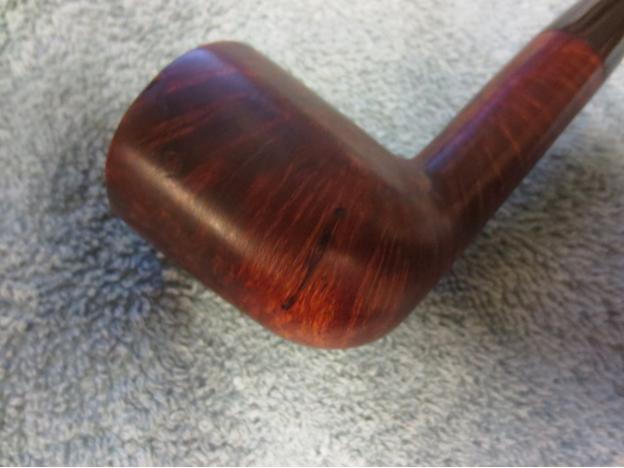
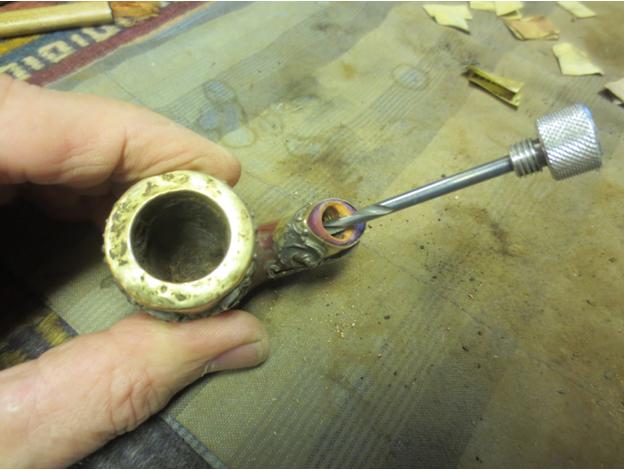
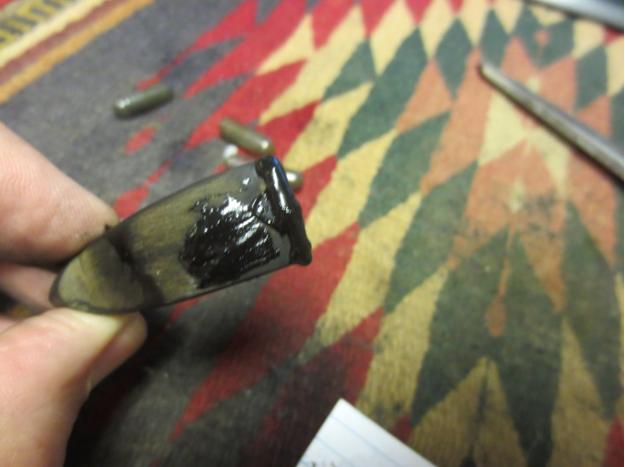
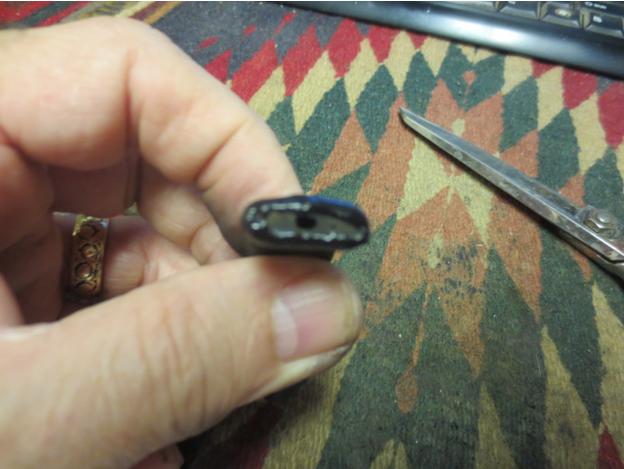
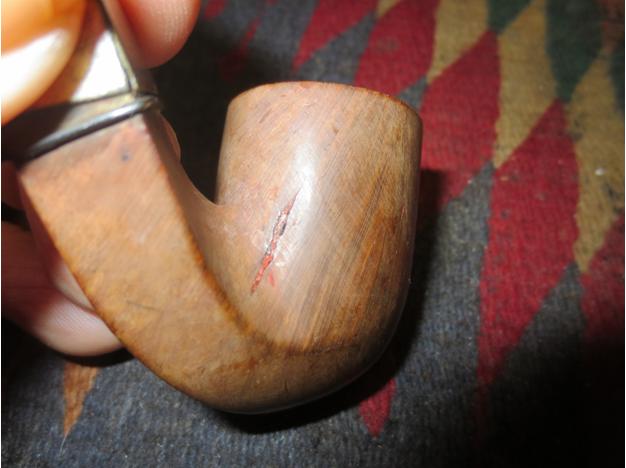
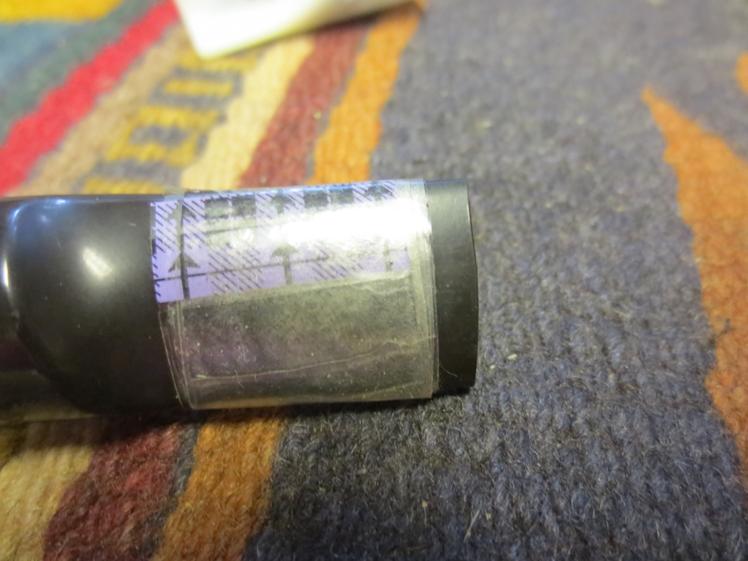
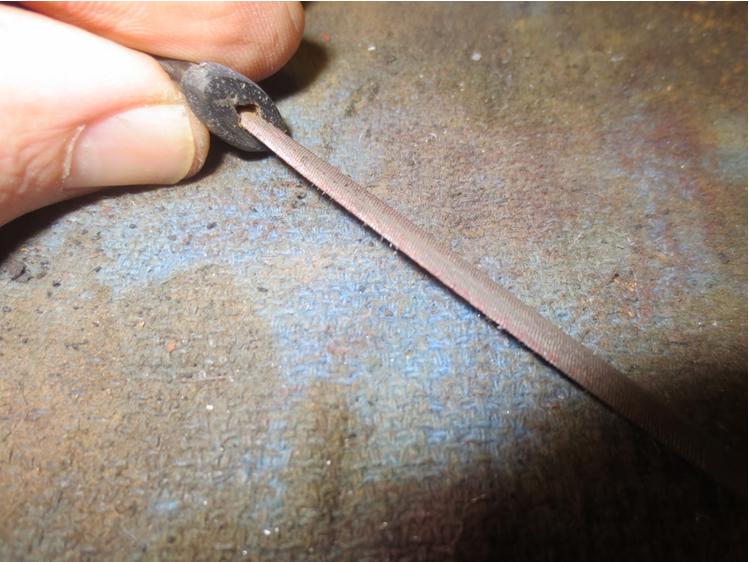
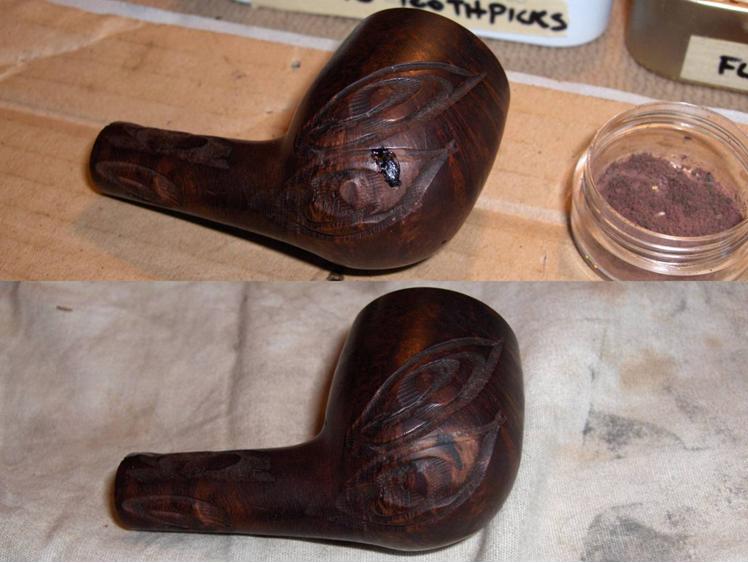
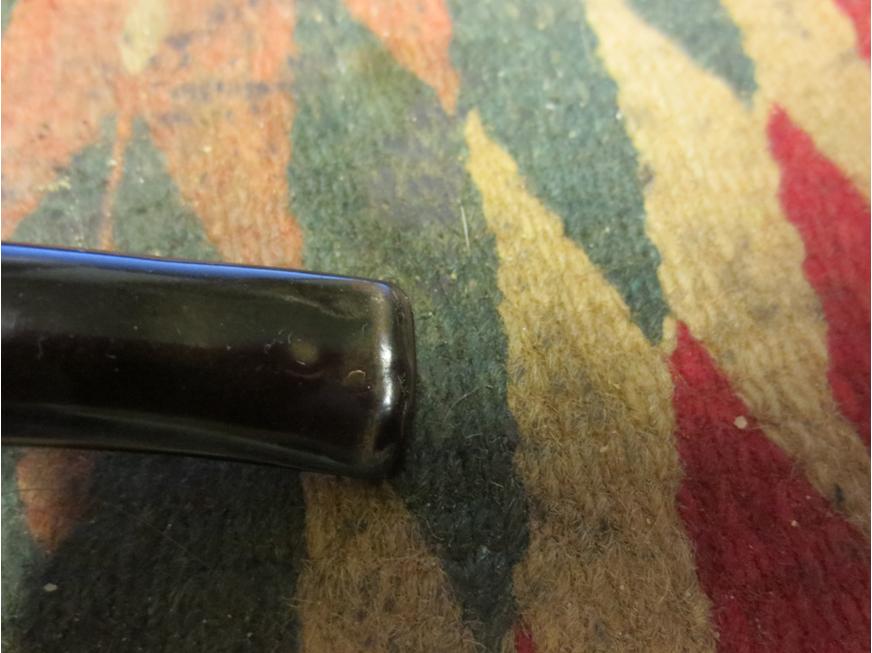
I wiped down the exterior with alcohol and cotton pads to remove the finish and to clean it up. In doing so I found that there was a small shallow crack/flaw toward the bottom of the bowl on the left side. In the photo below the dental pick is at the close end of the crack and the dark spot is the far end.Dublin12 
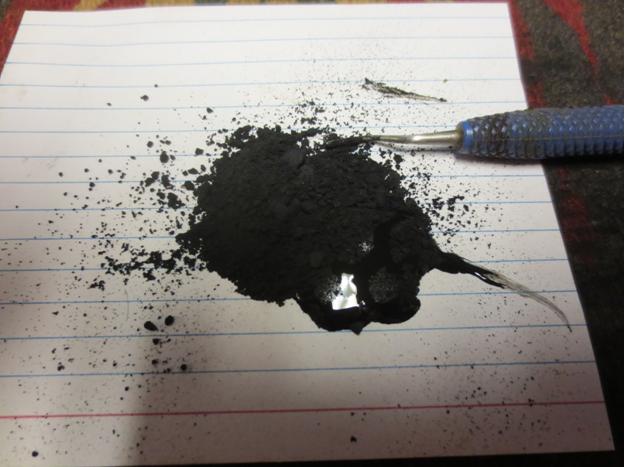
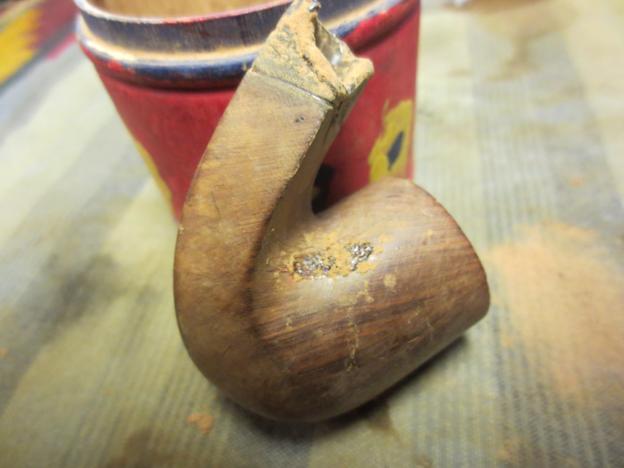
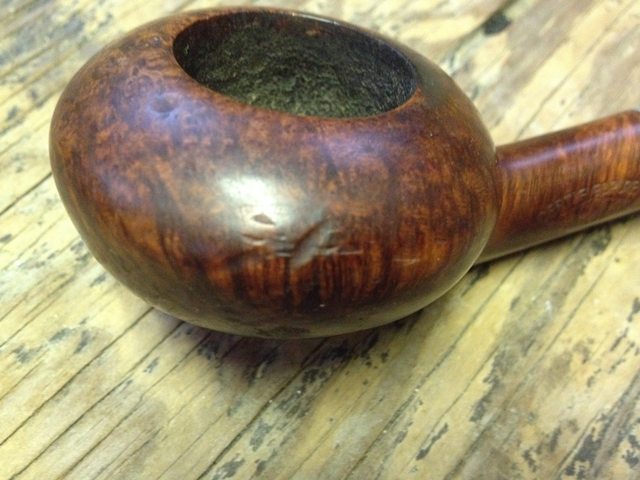
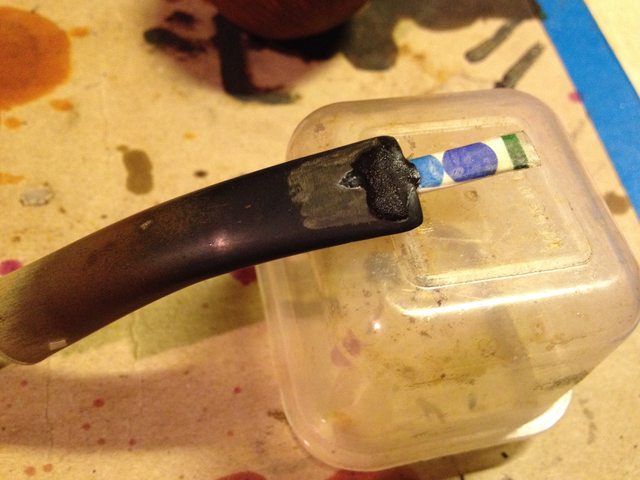
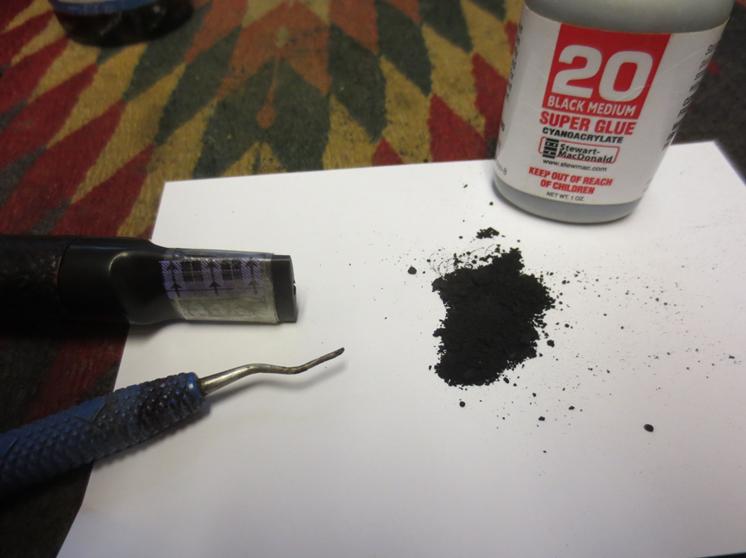
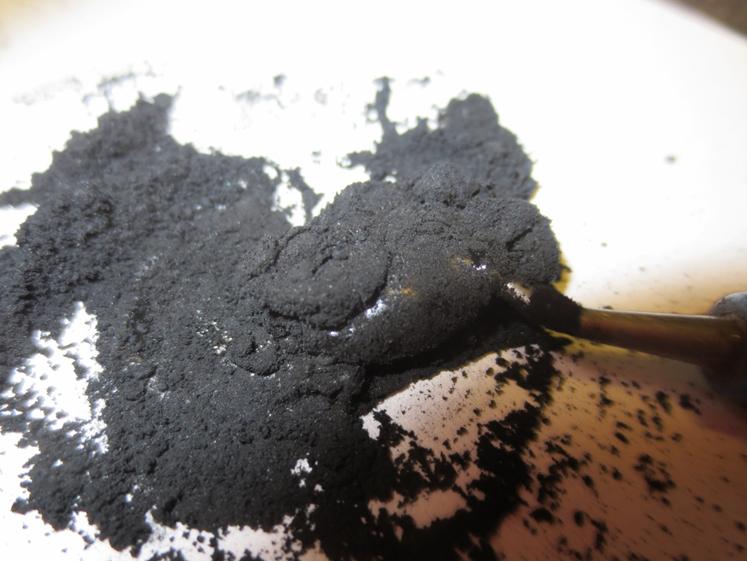
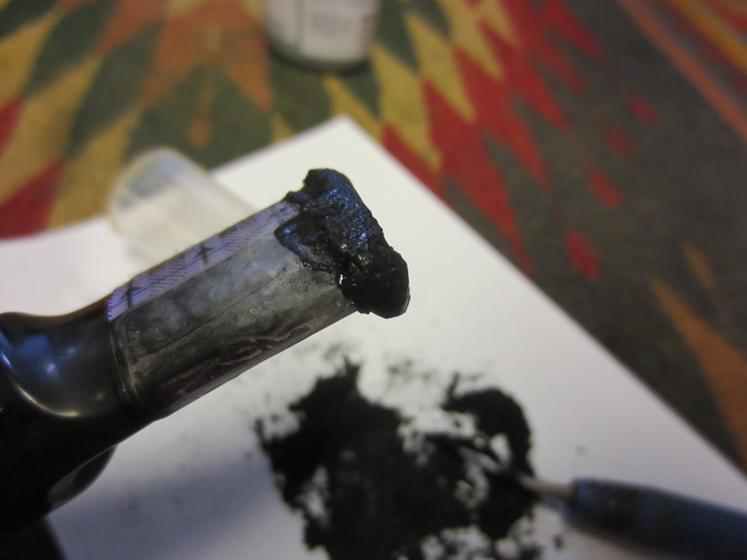
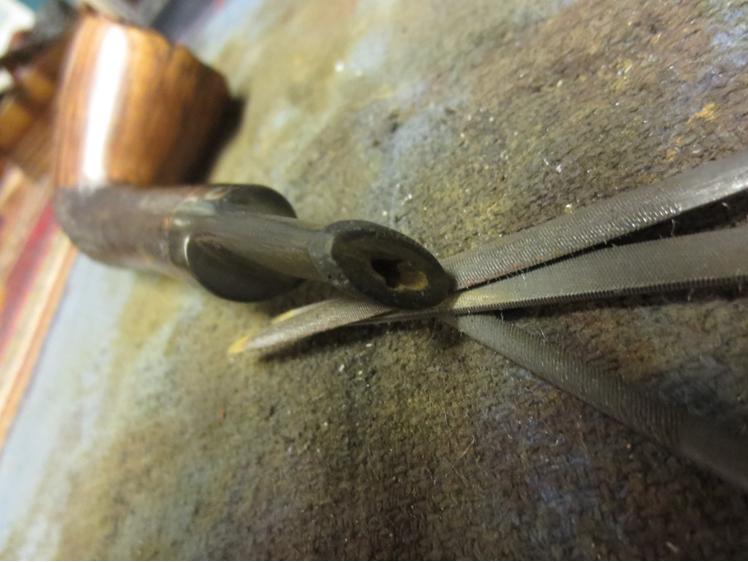
I picked out the crack with the dental pick, drilled two small holes – one on each end of the crack to stop it from going further. Interestingly this crack followed the pattern of the grain on the side of the bowl. Once I had it cleaned out I wiped it down with alcohol a final time. I pressed briar dust into the crack, dripped super glue into it and then pressed more briar dust on top of the glue. The photo below shows the repaired crack. Fortunately the crack was not deep and did not affect the interior of the bowl. It did not go all the way through and appeared to be more of a flaw in the briar than damage.Dublin13 I sanded the repair with 220 grit sandpaper to remove the excess patch and blend it into the surface of the briar. I sanded it with a medium and a fine grit sanding sponge to remove the scratches in the briar and feather out the surface. I sanded the entire bowl and rim with the same sanding sponges and sandpapers.Dublin14 
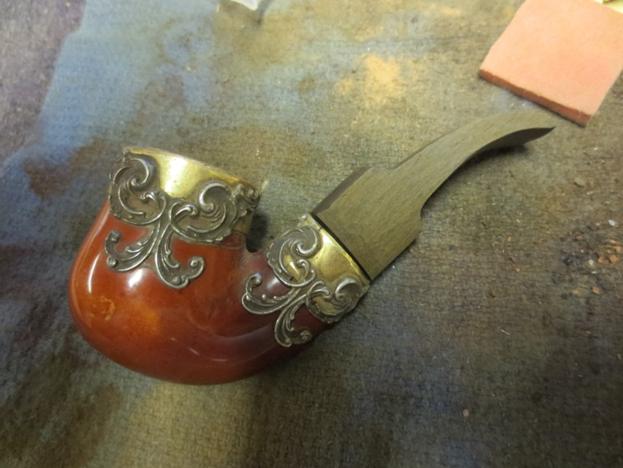
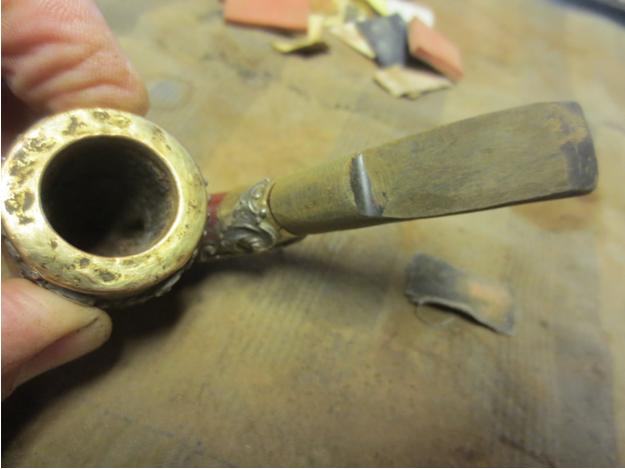
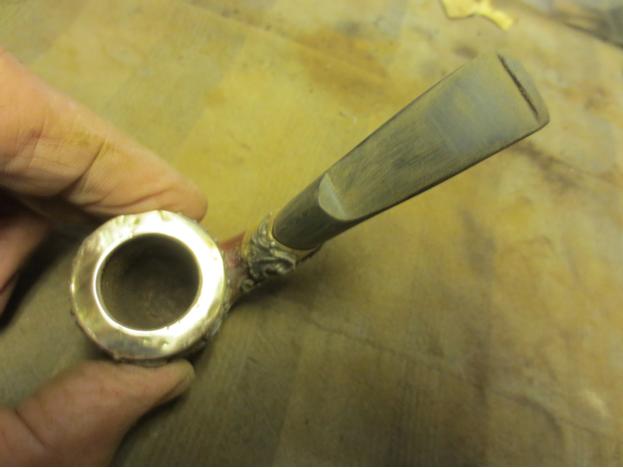
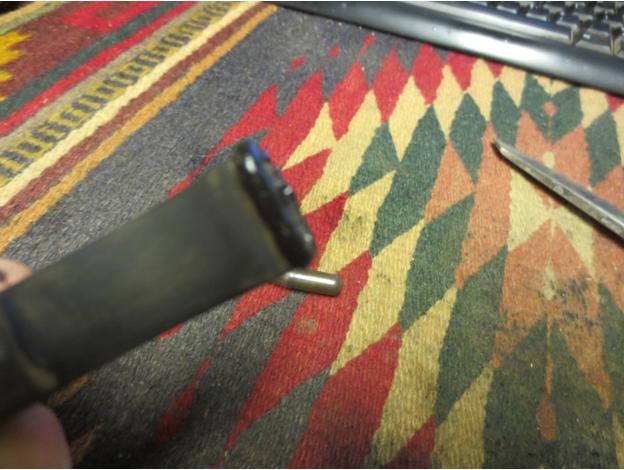
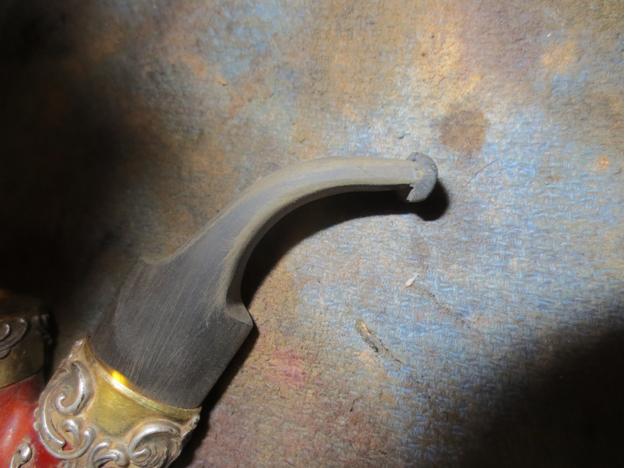
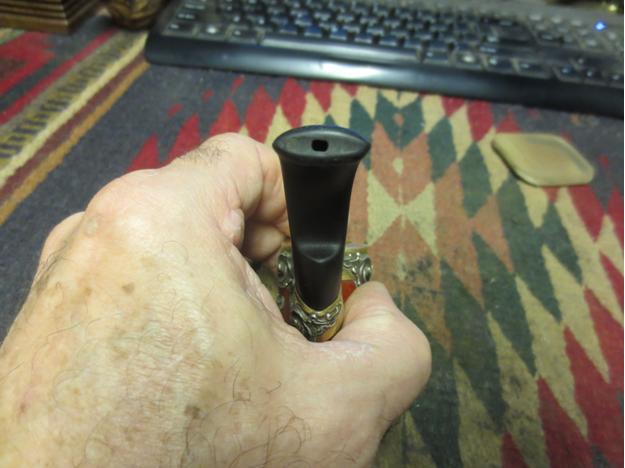
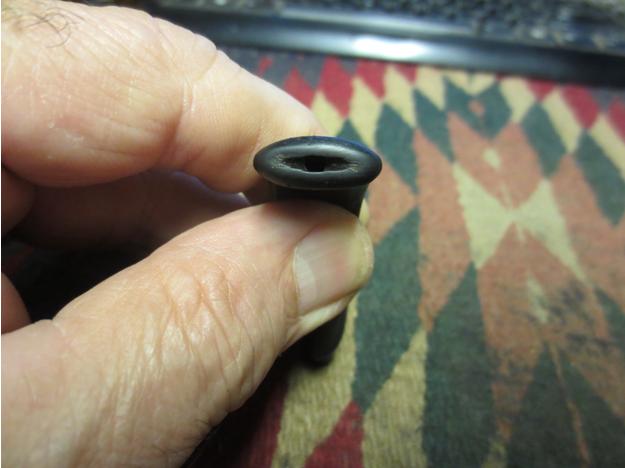
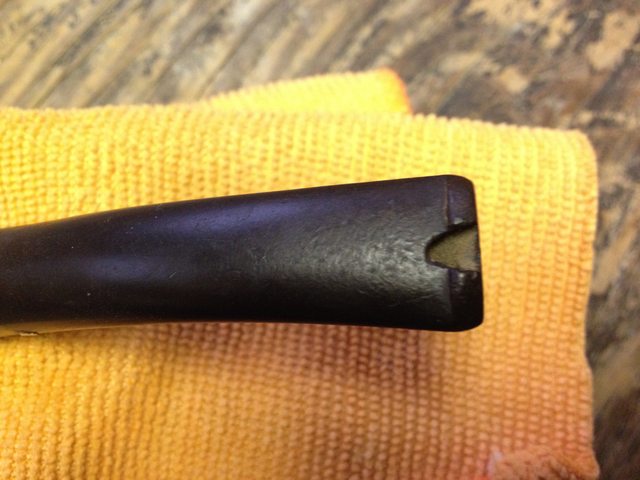
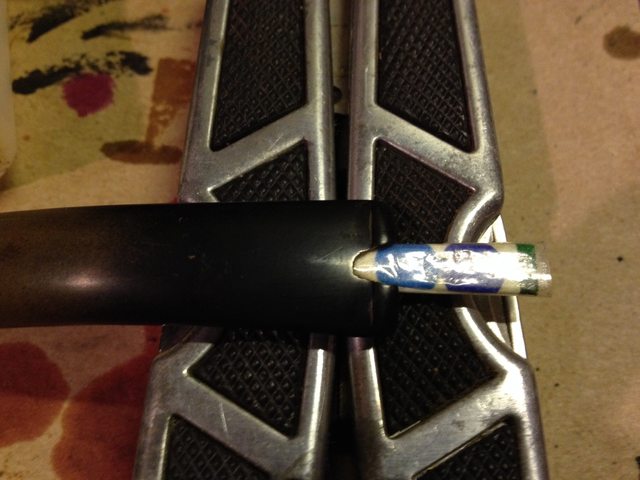
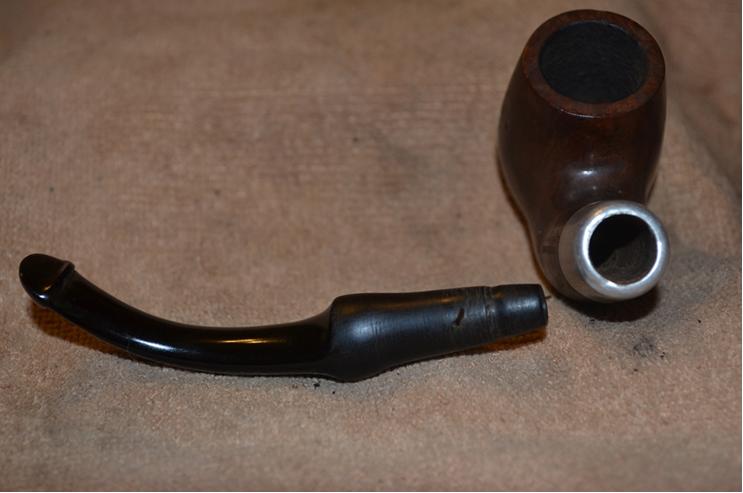
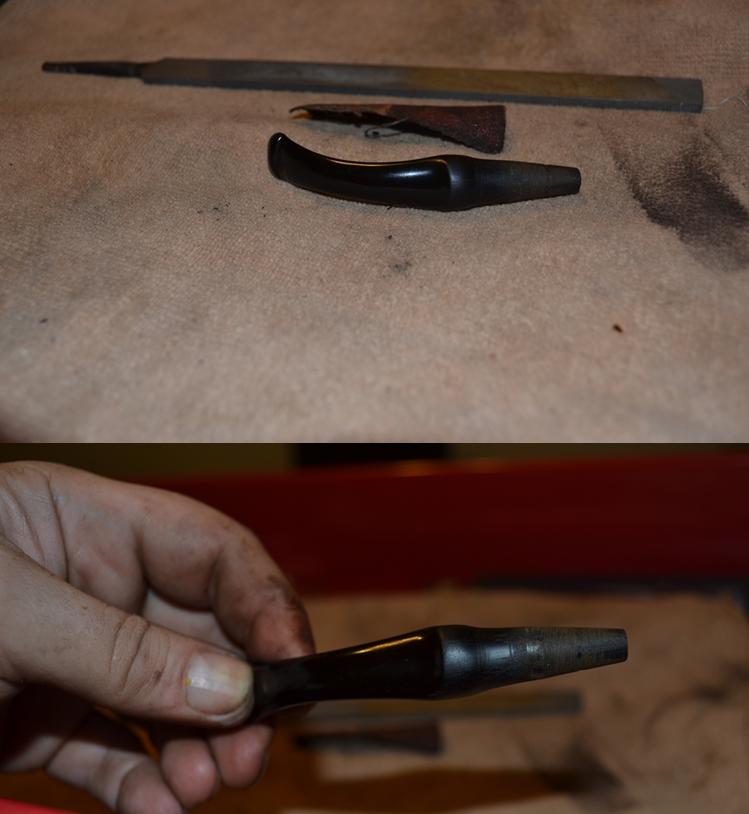
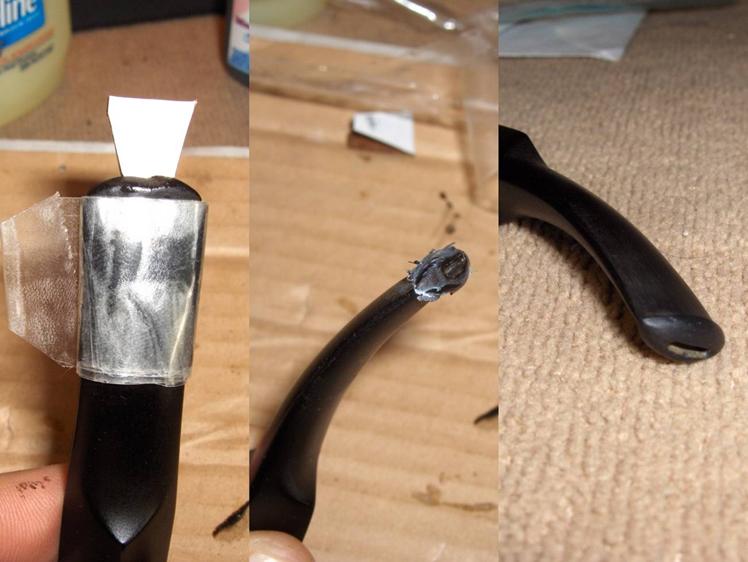
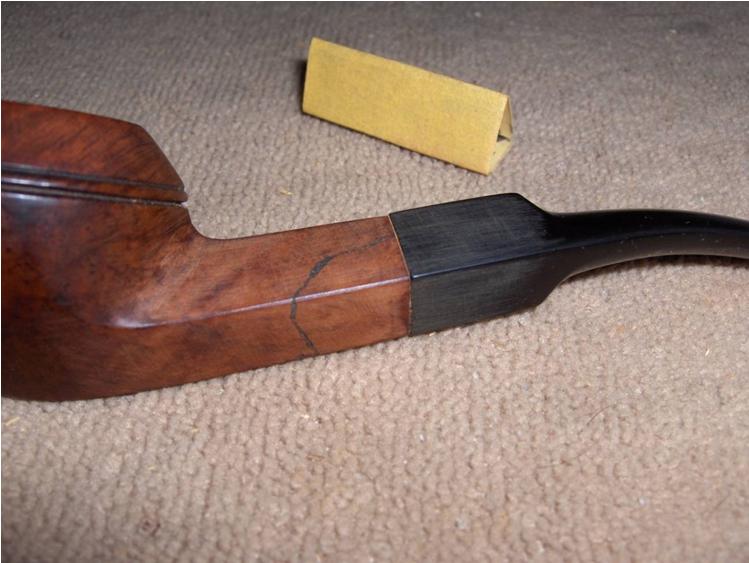
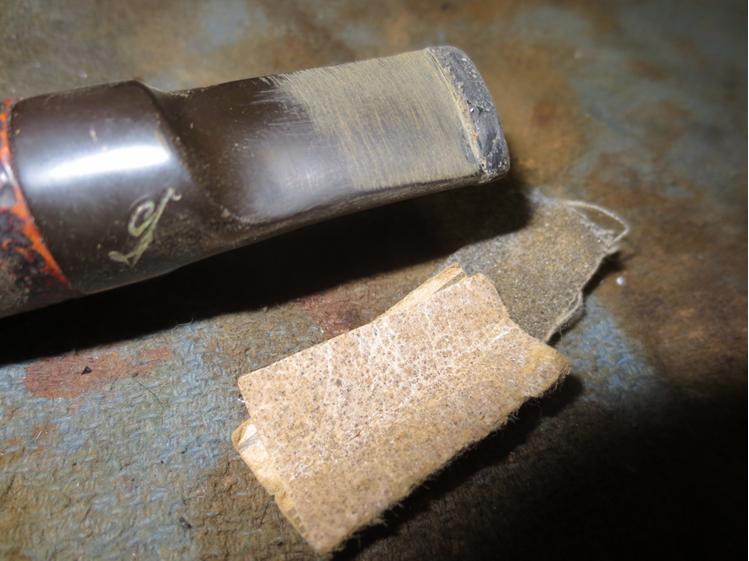
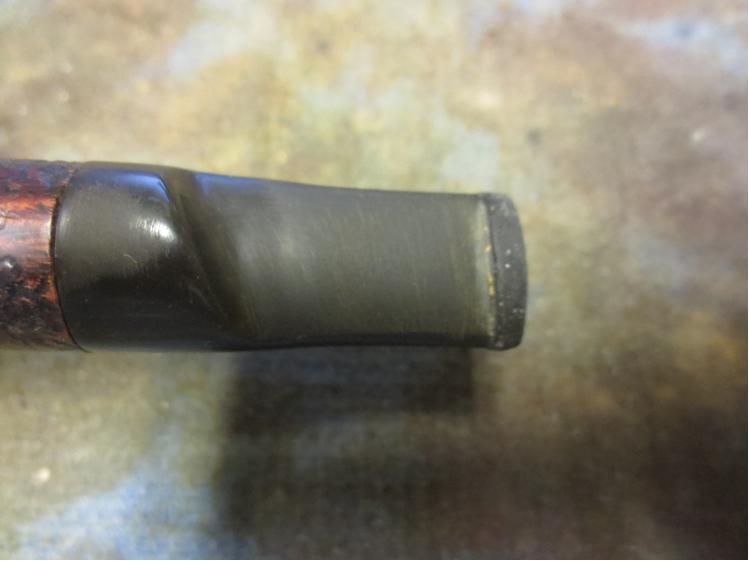
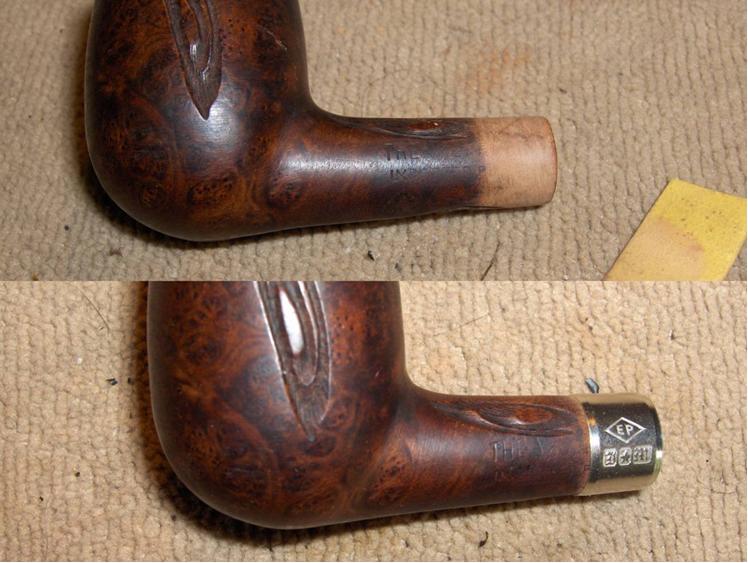
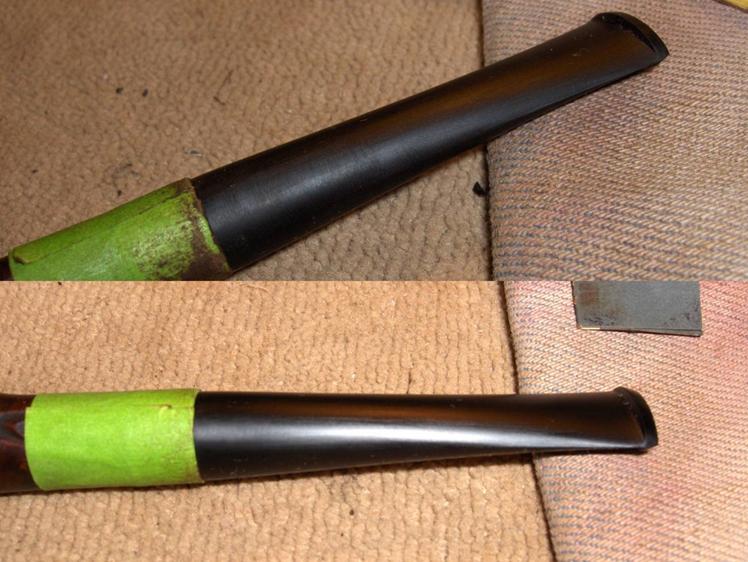
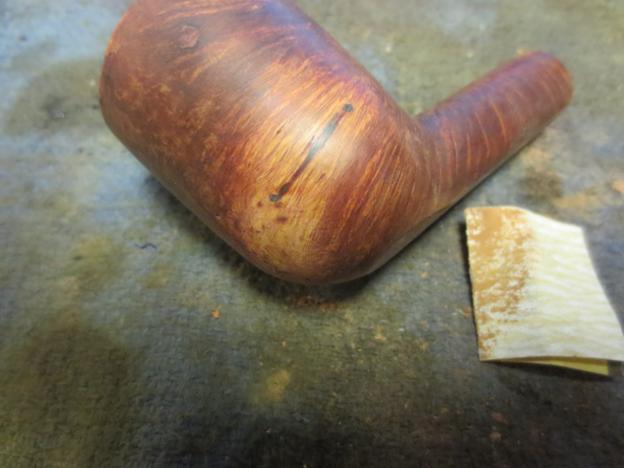
I aligned the stem and sanded it with 220 grit sandpaper to smooth out the rough surface and then flatten the bottom to match the bottom of the shank.Dublin15

Dublin16

Dublin17

Dublin18 
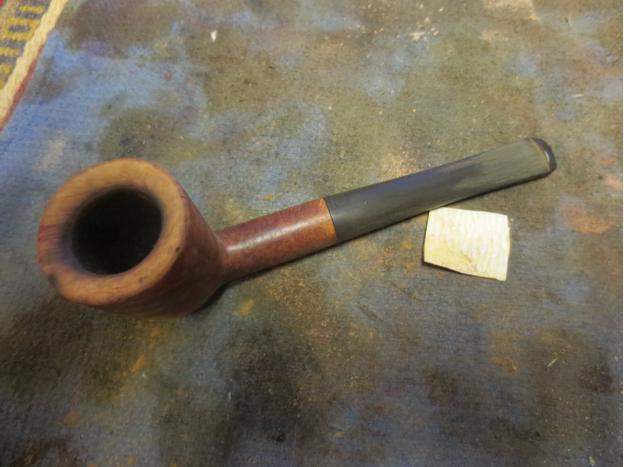
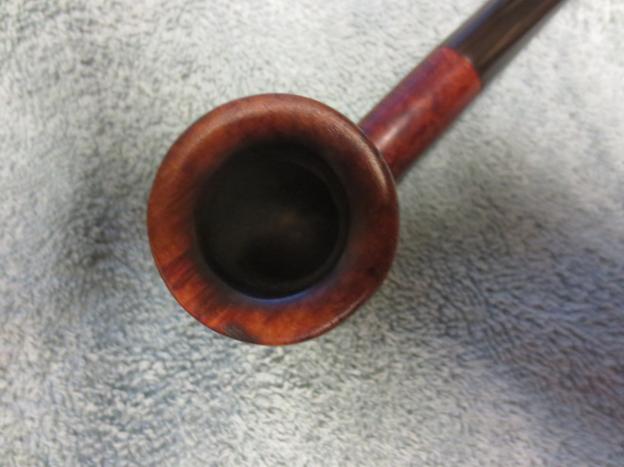
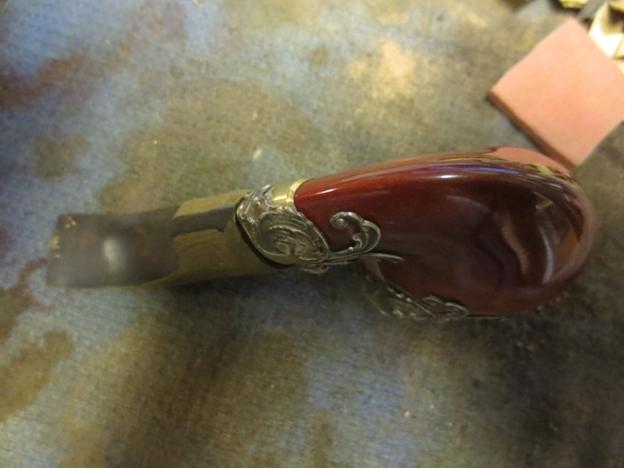
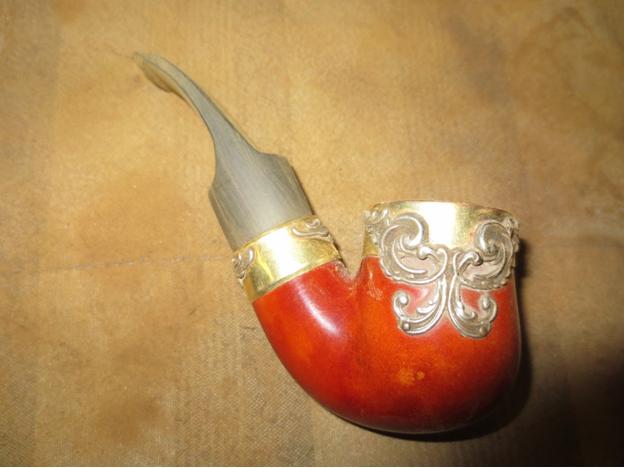
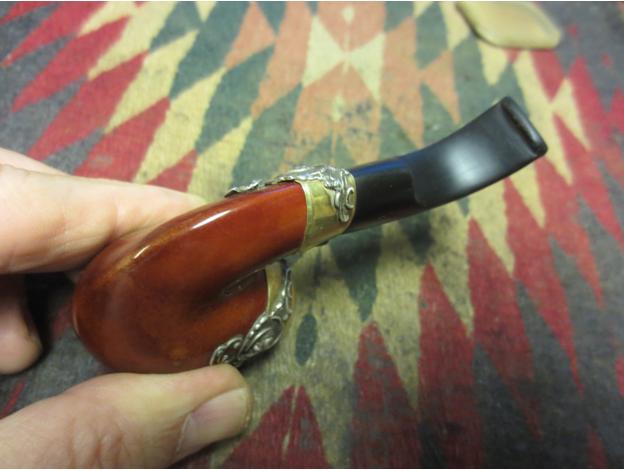
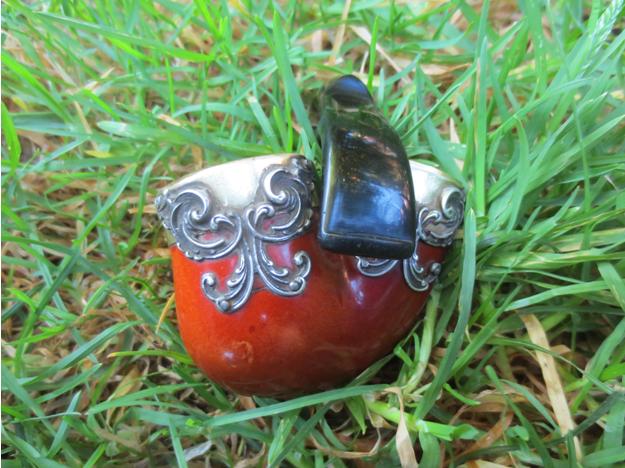
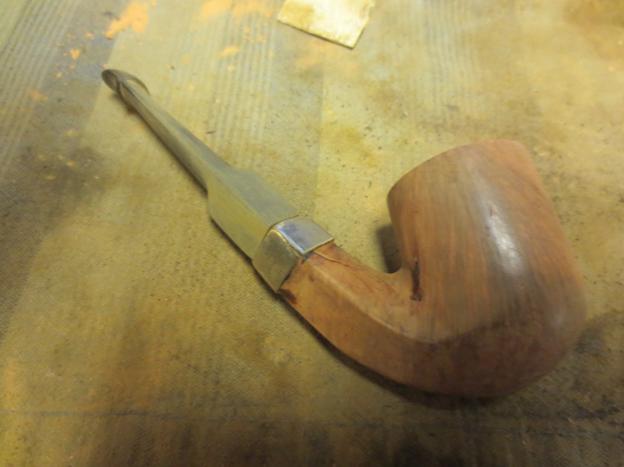
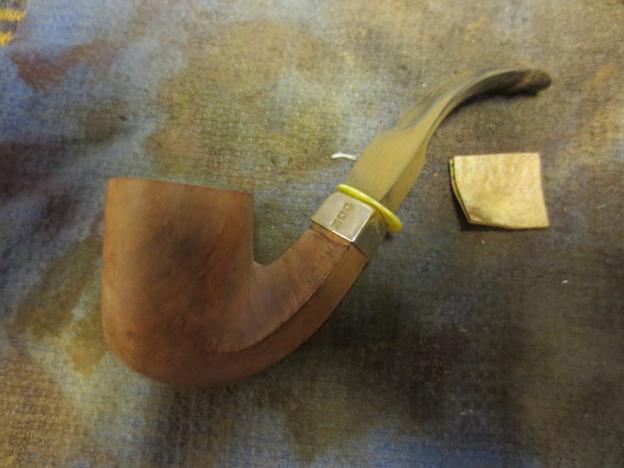
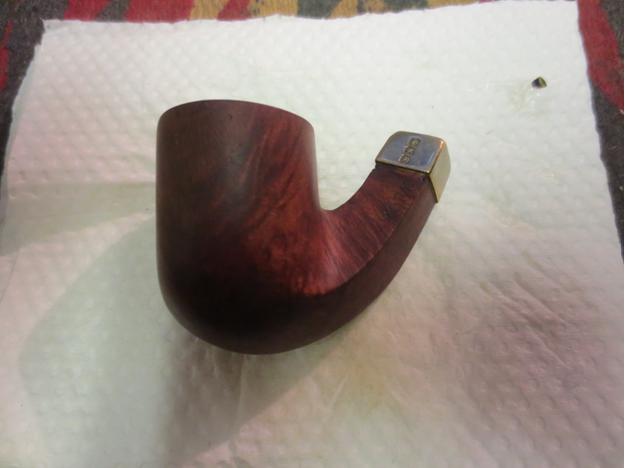
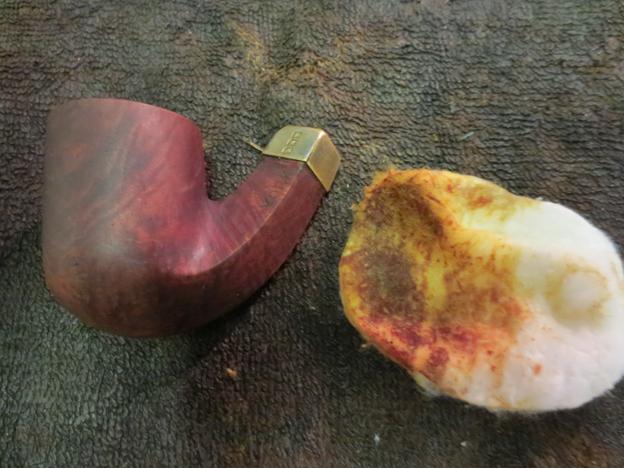
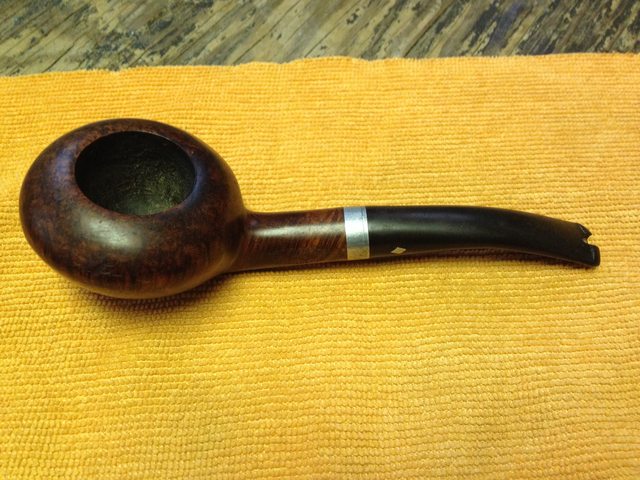
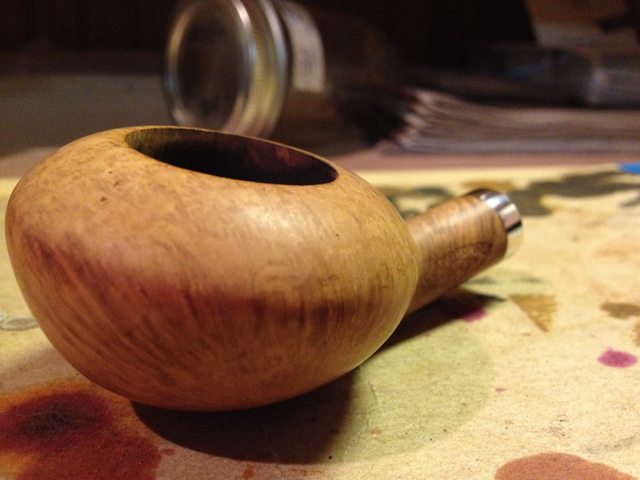
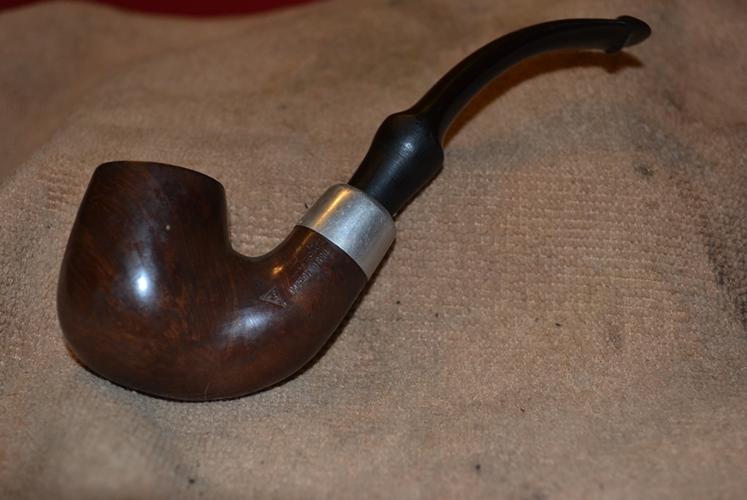
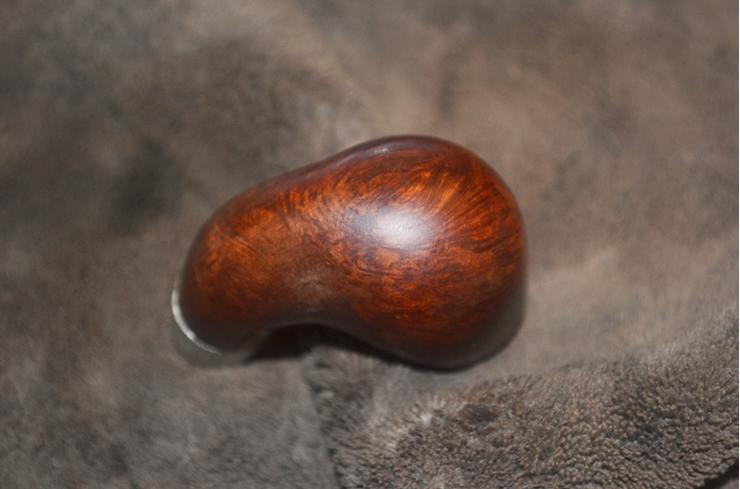
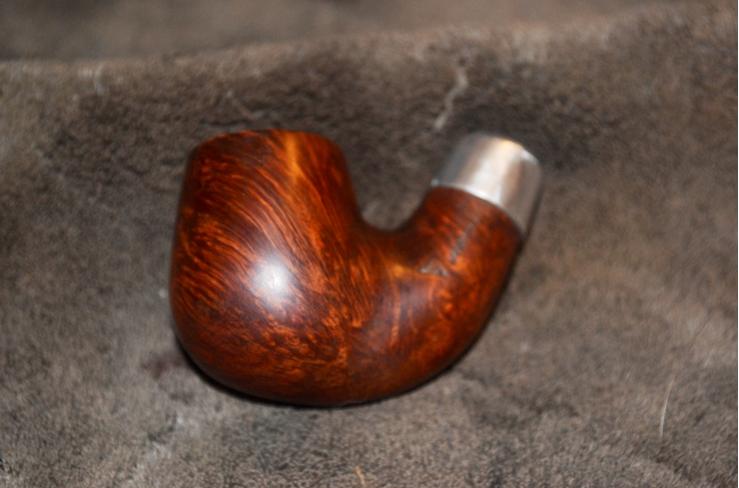
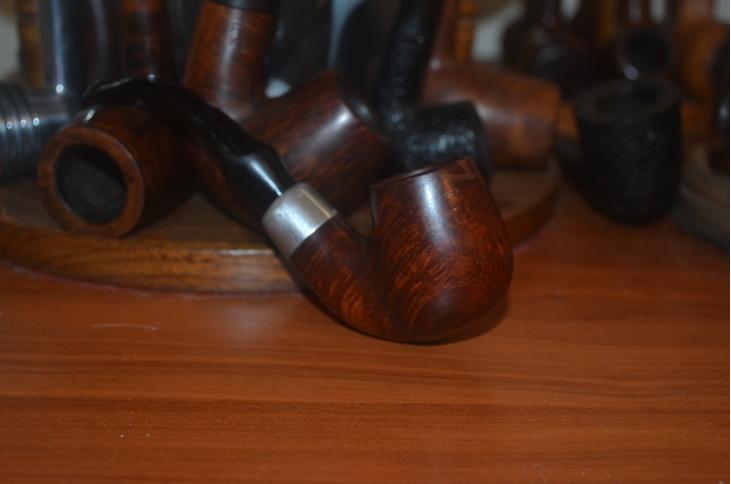
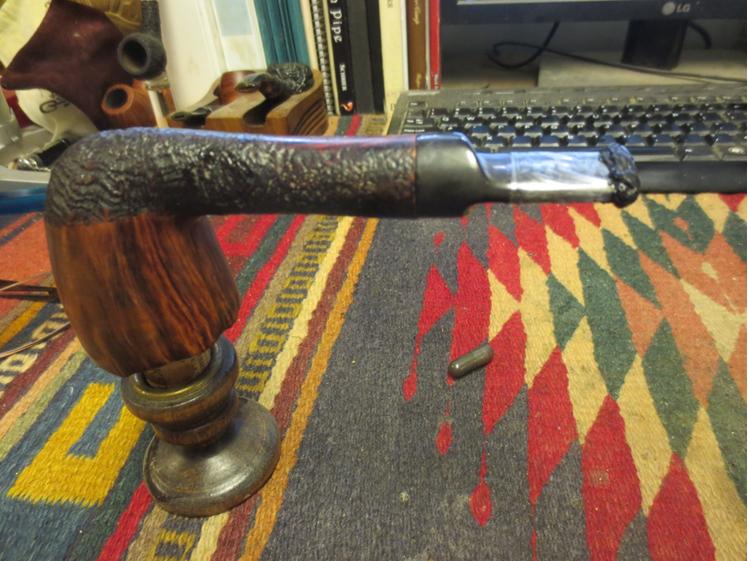
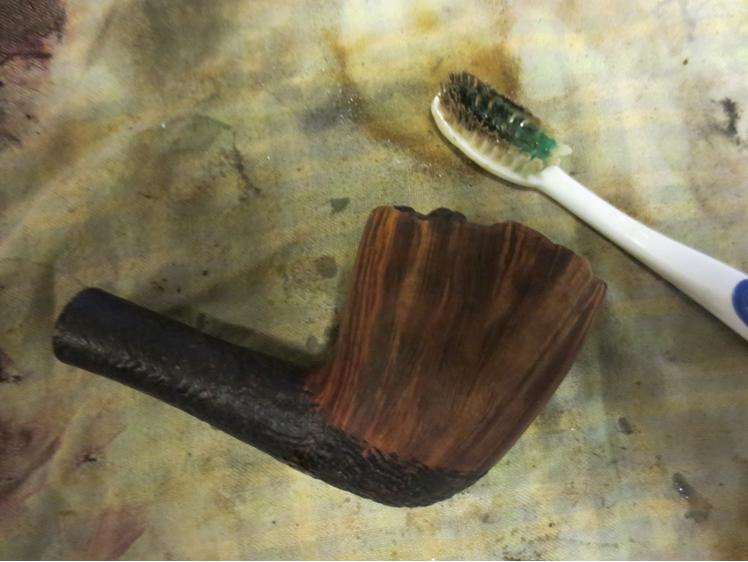
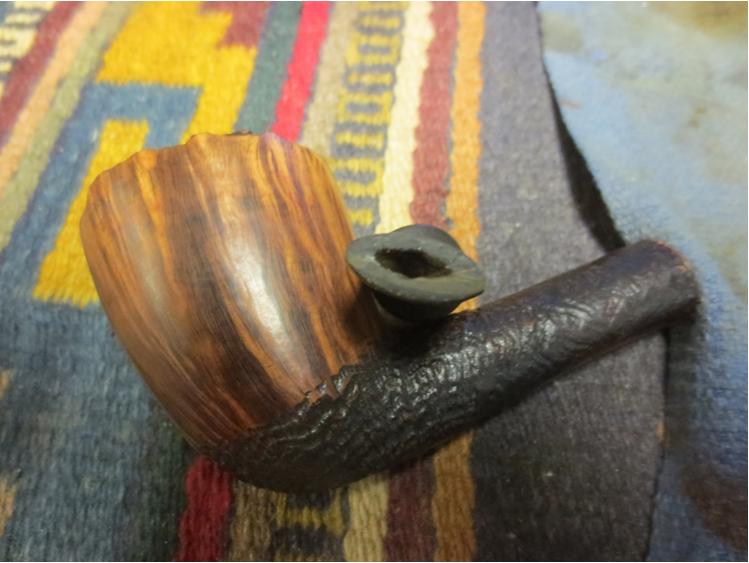
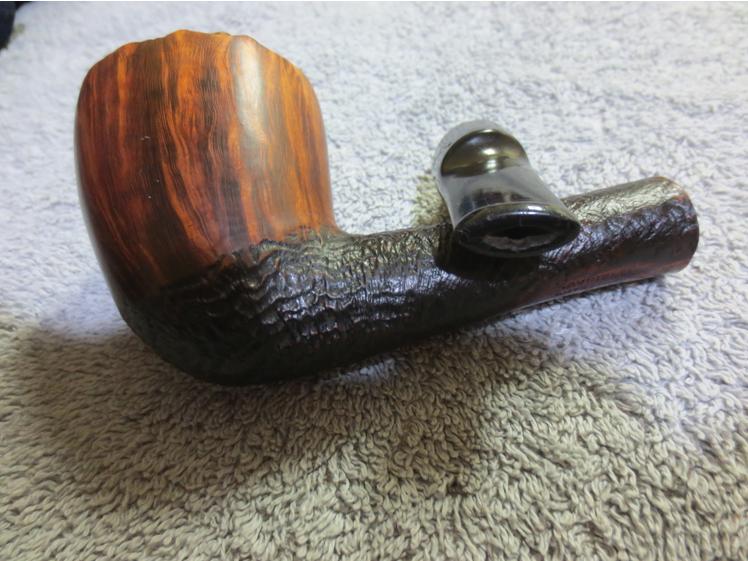
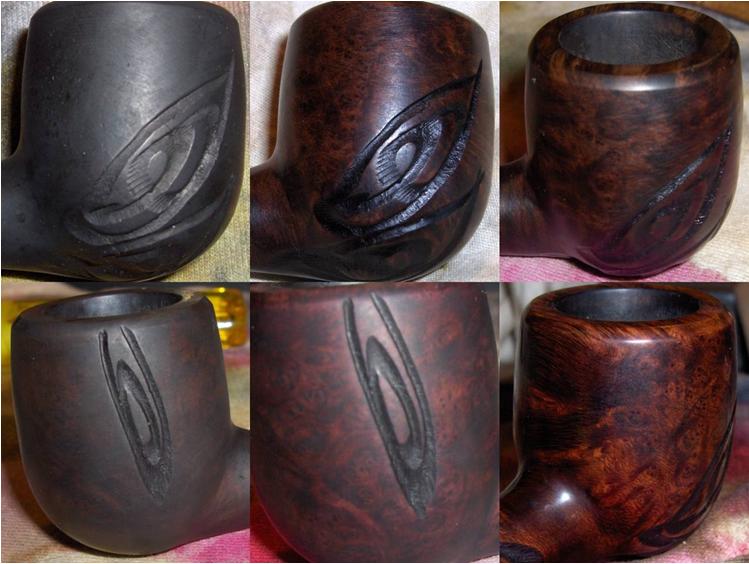
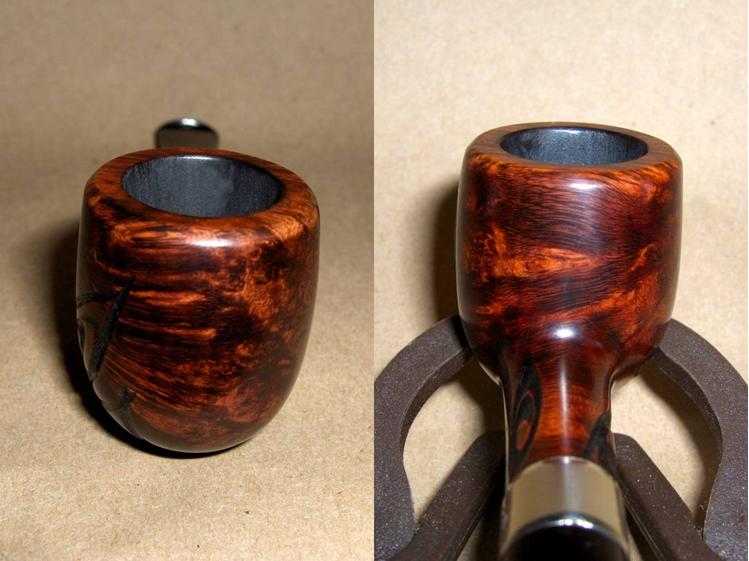
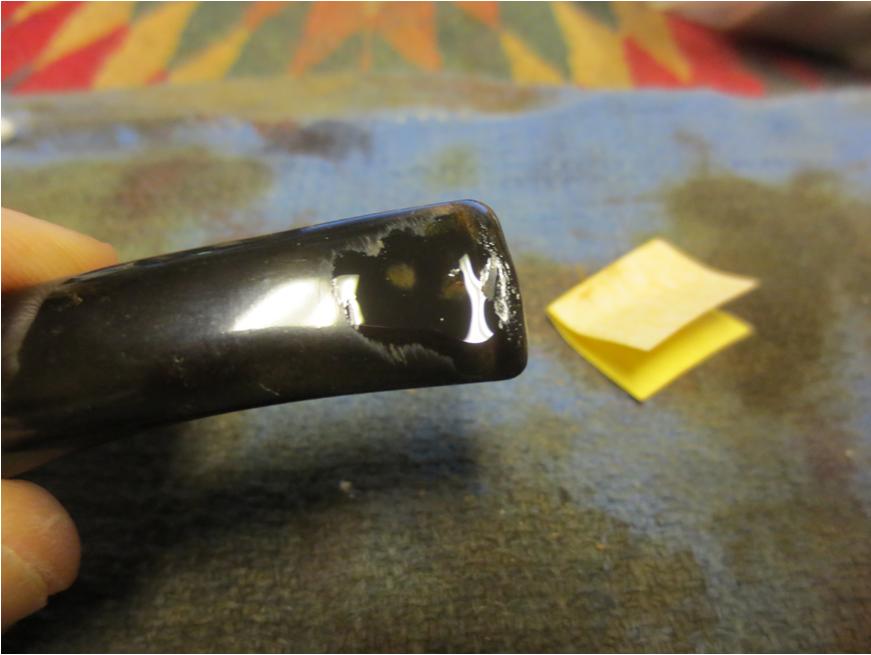
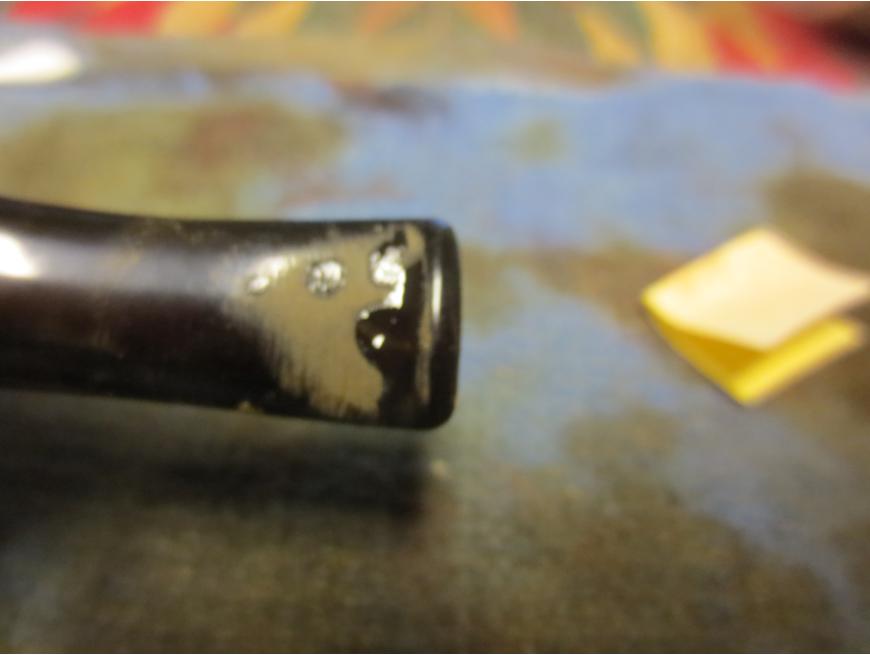
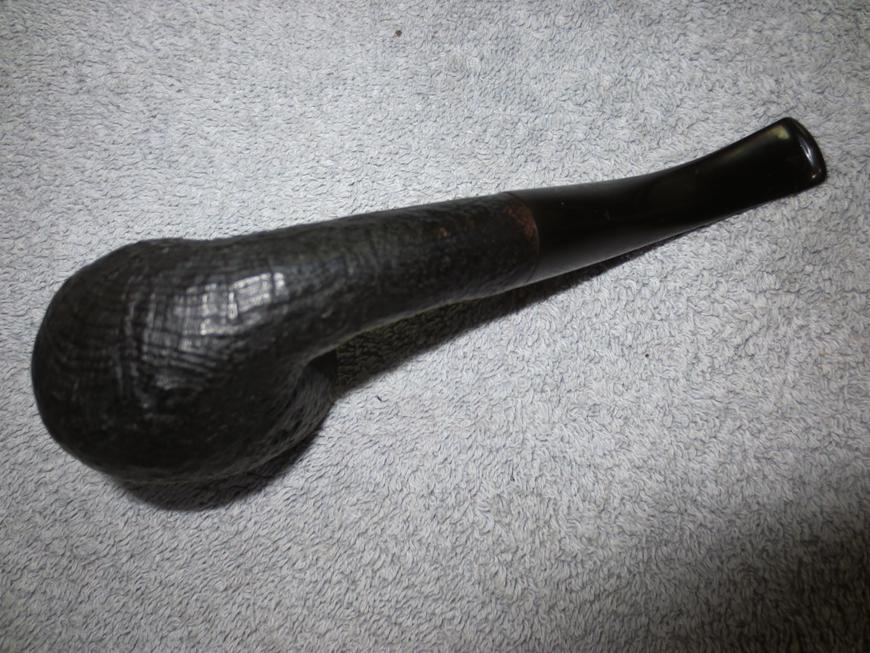
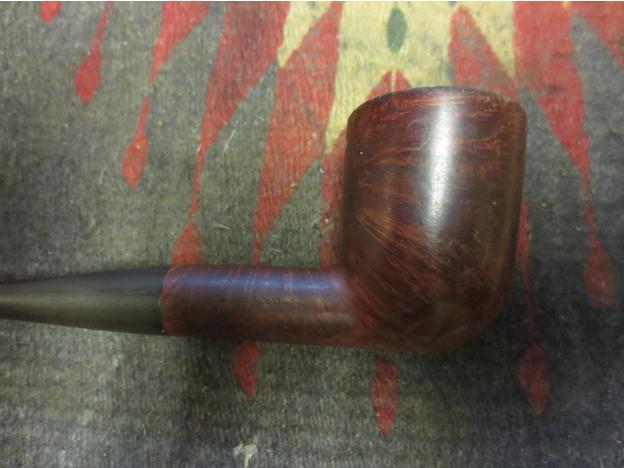
I wiped down the bowl with alcohol and then stained it with an oxblood alcohol based stain. I put the stain on heavy around the sanded areas on the shank and the bowl repair. I also darkened those areas with a dark brown stain pen following the pattern of the grain. I lightly buffed the pipe by hand and took the pictures below to show how the newly stained pipe looked at this point.Dublin19

Dublin20

Dublin21

Dublin22 
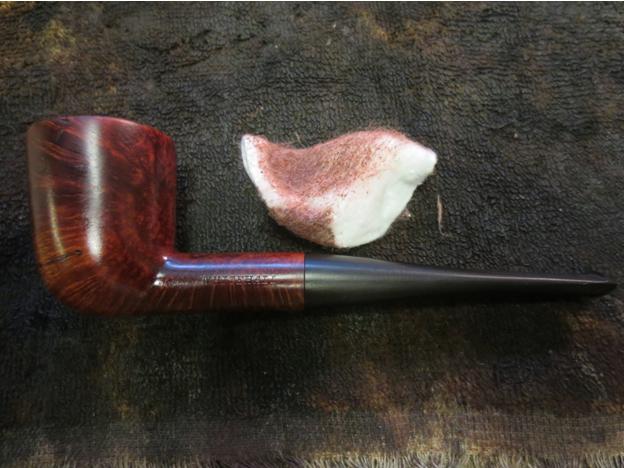
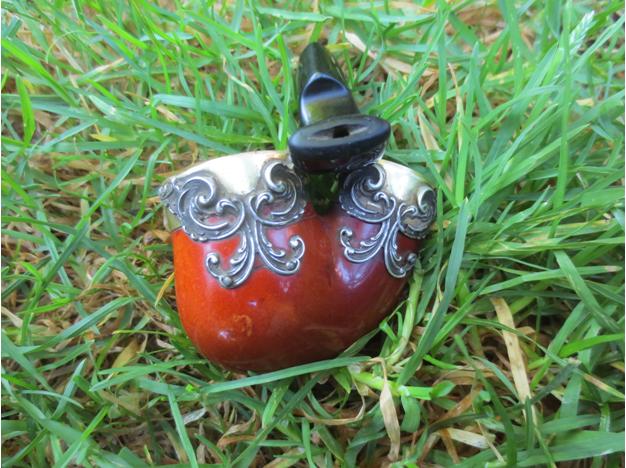
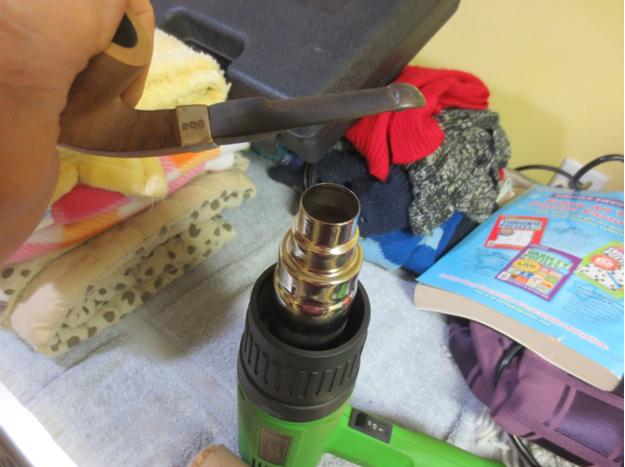
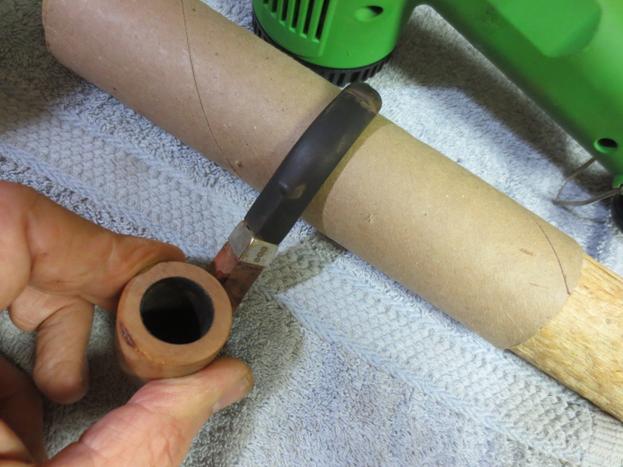
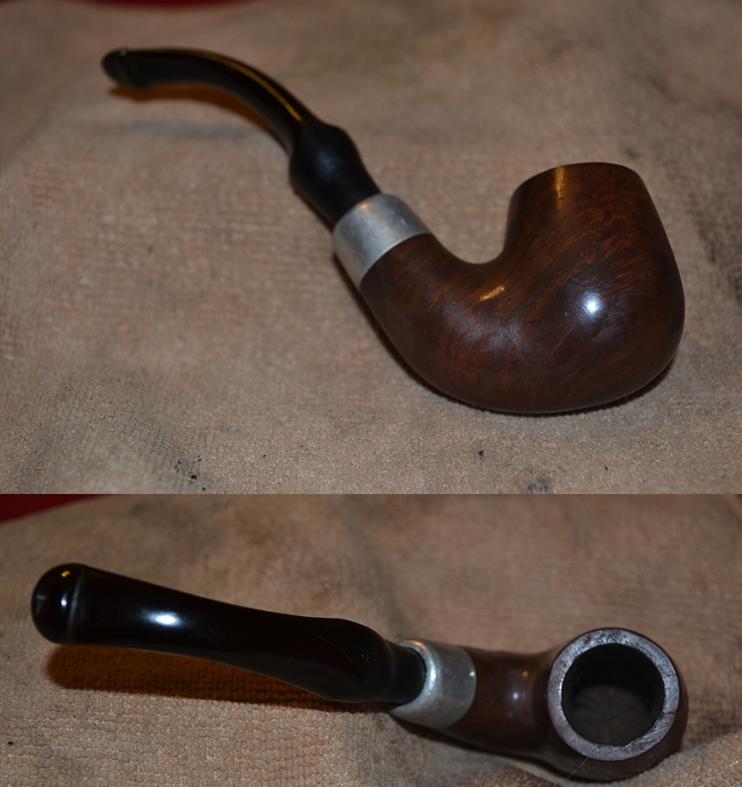
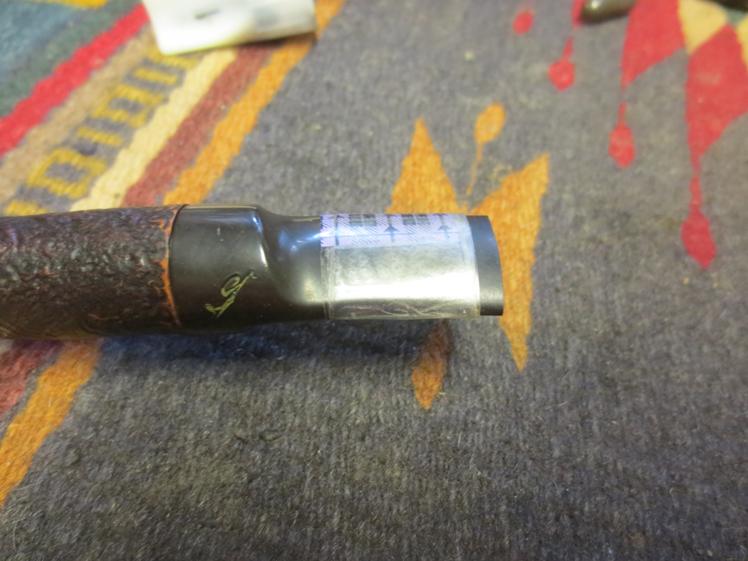
I darkened the rim with the stain pen and gave it another top coat of the oxblood stain. I flamed it and buffed it lightly.Dublin23 
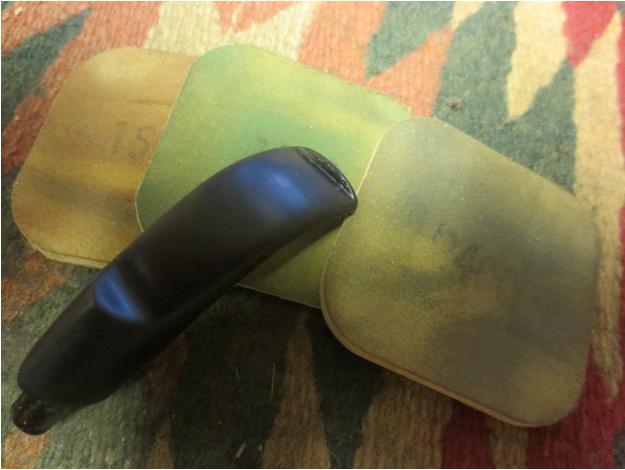
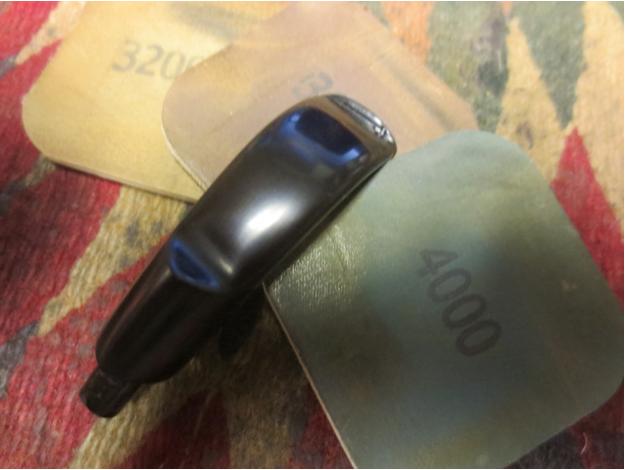
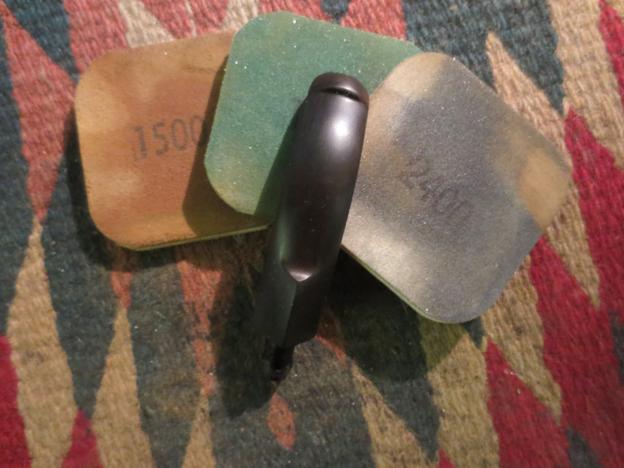
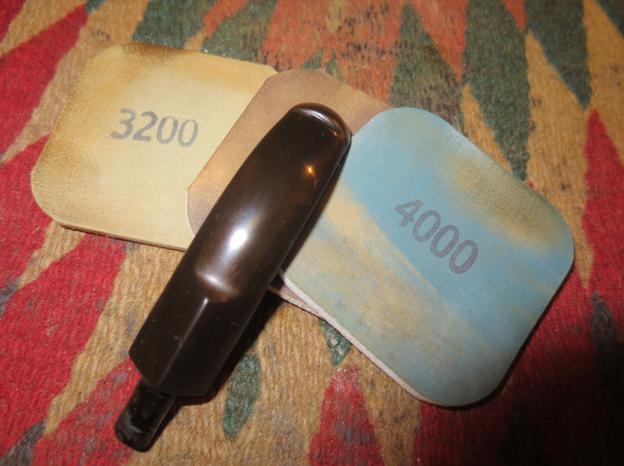
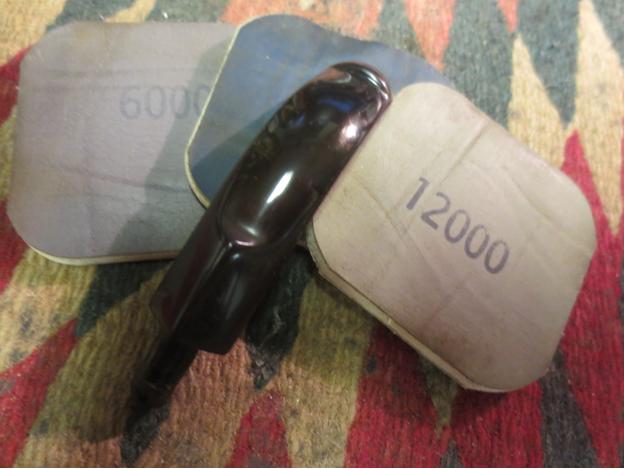
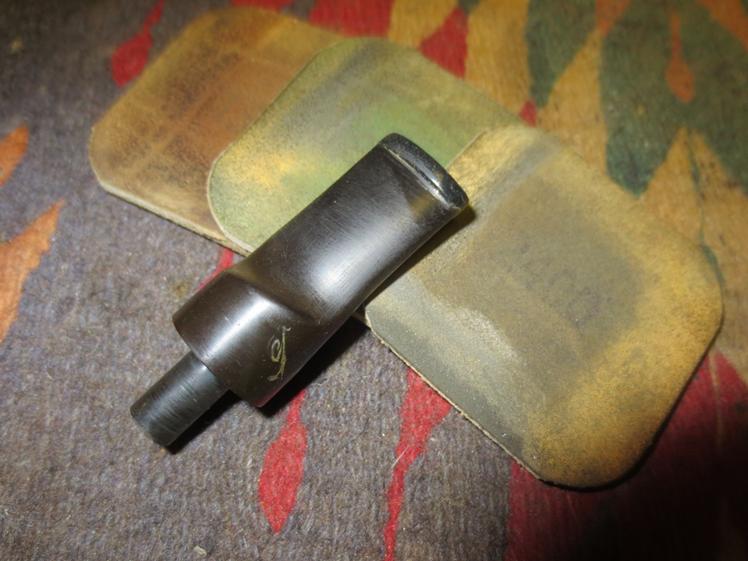
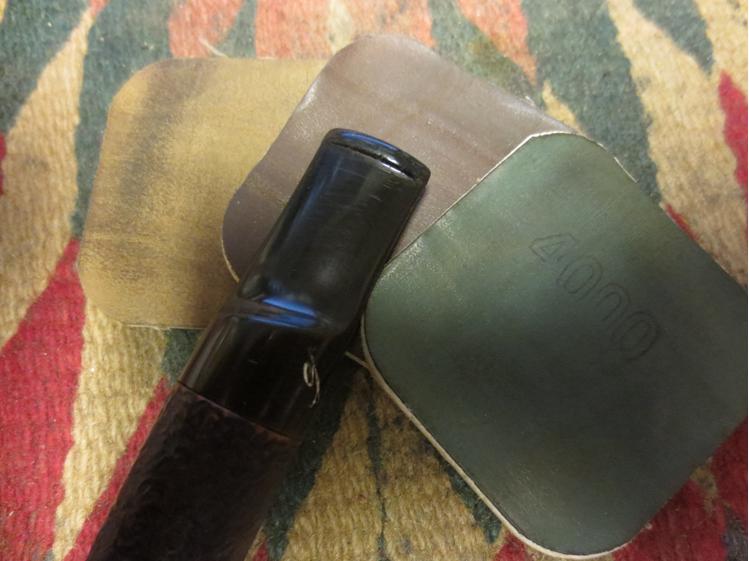
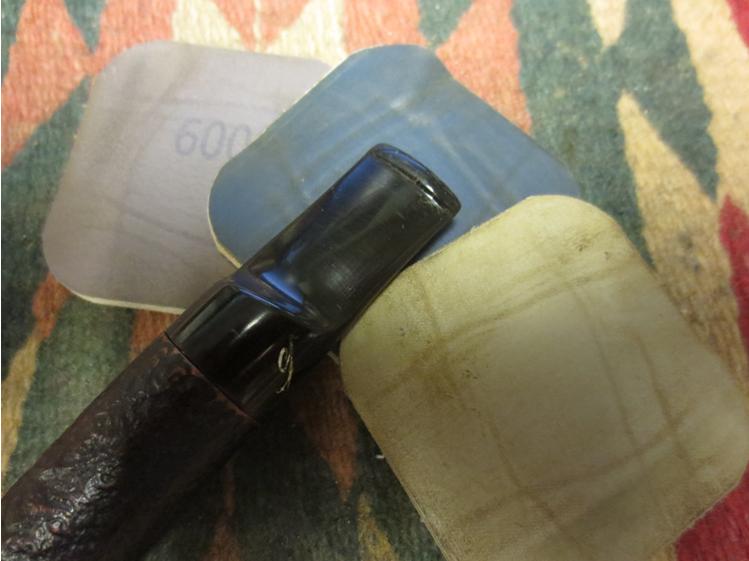
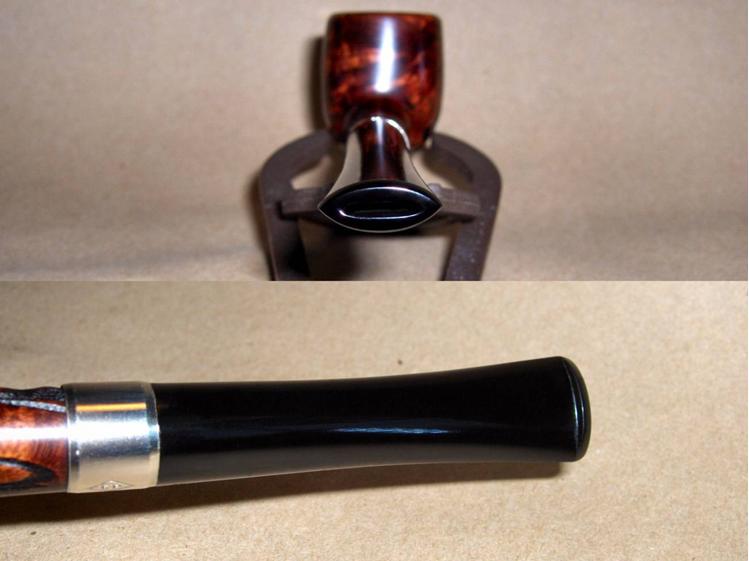
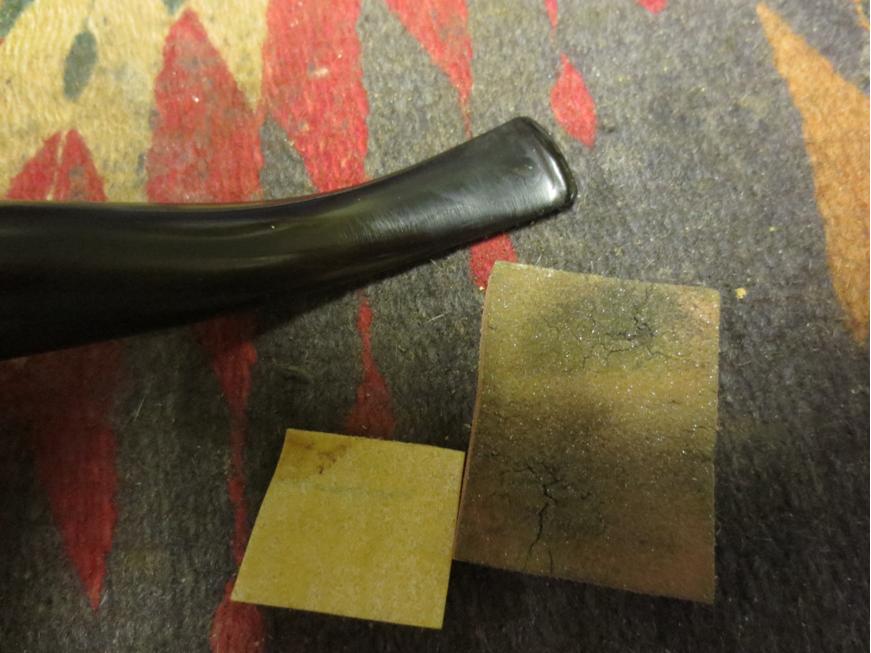
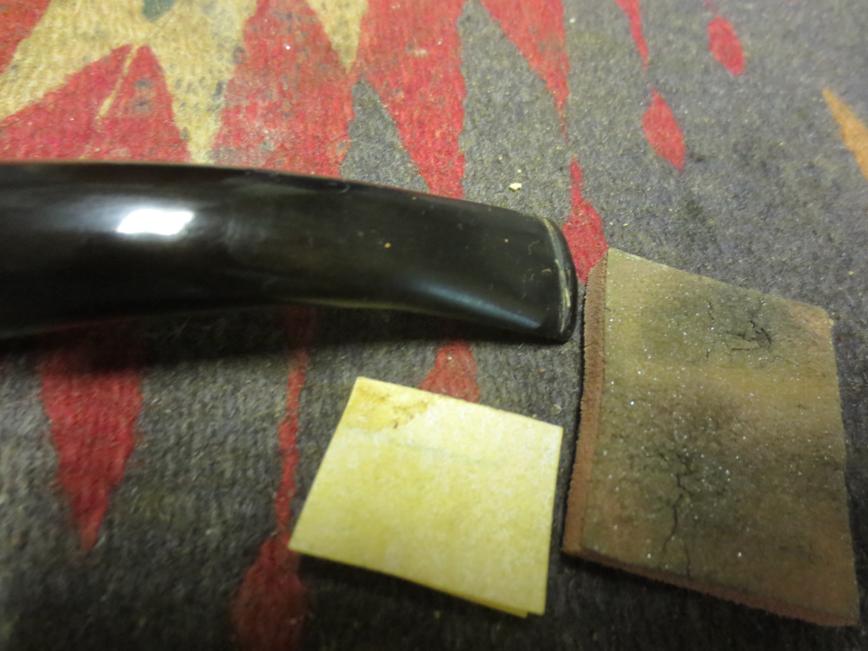
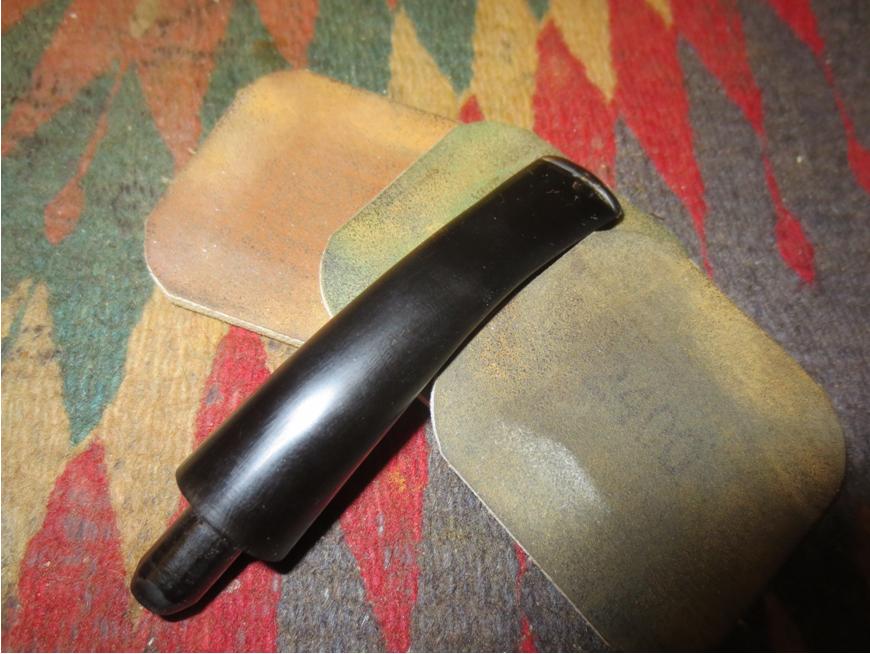
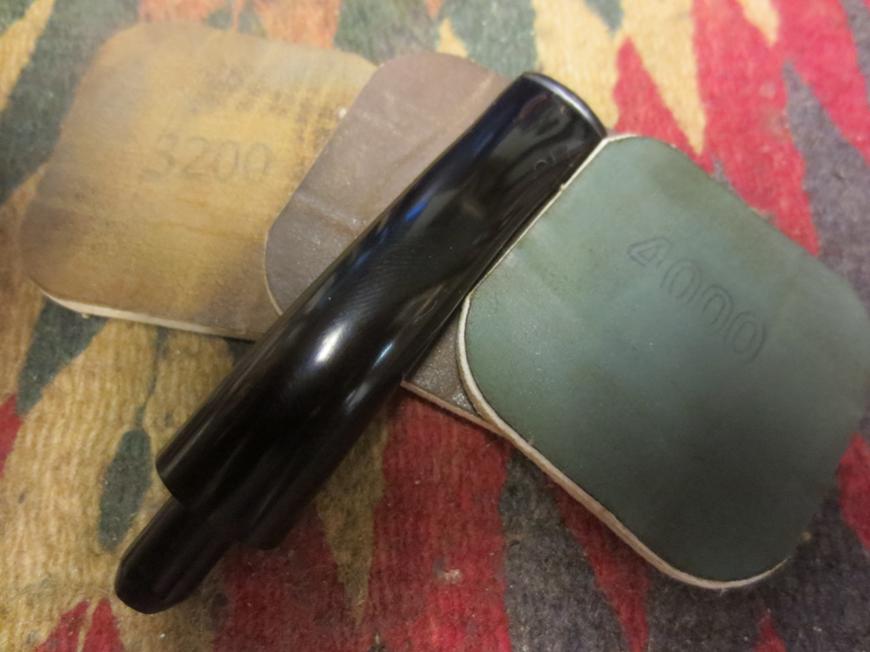
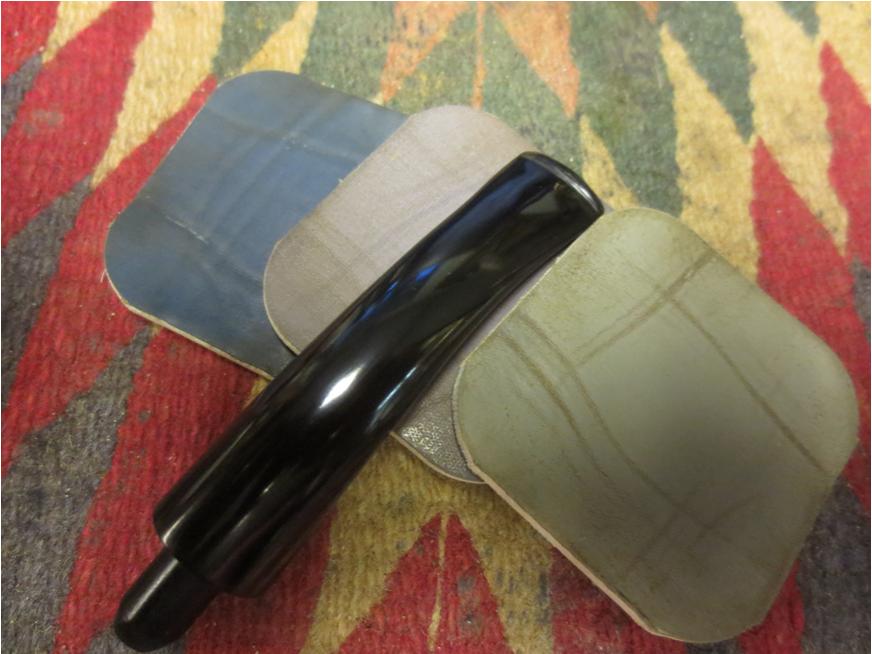
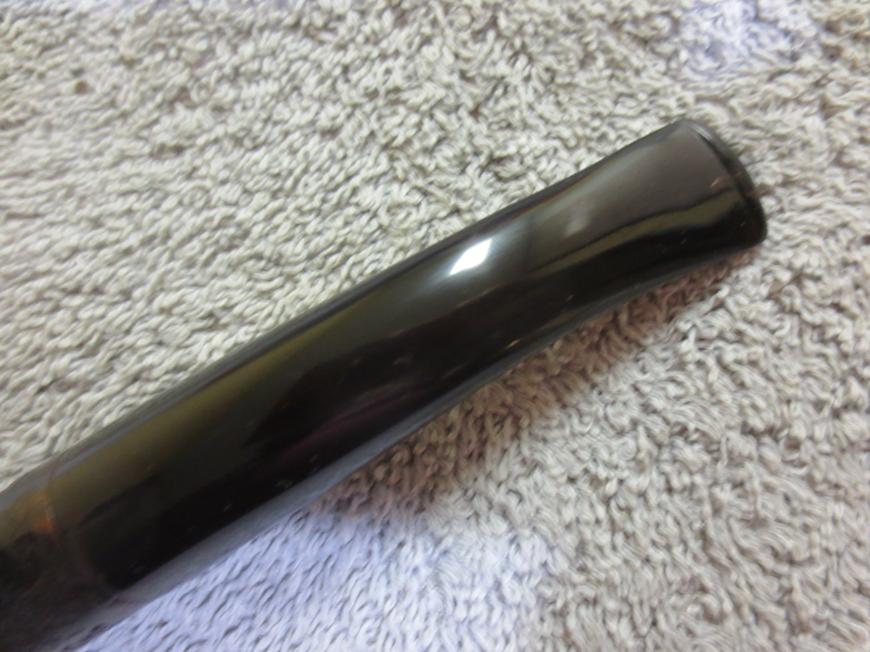
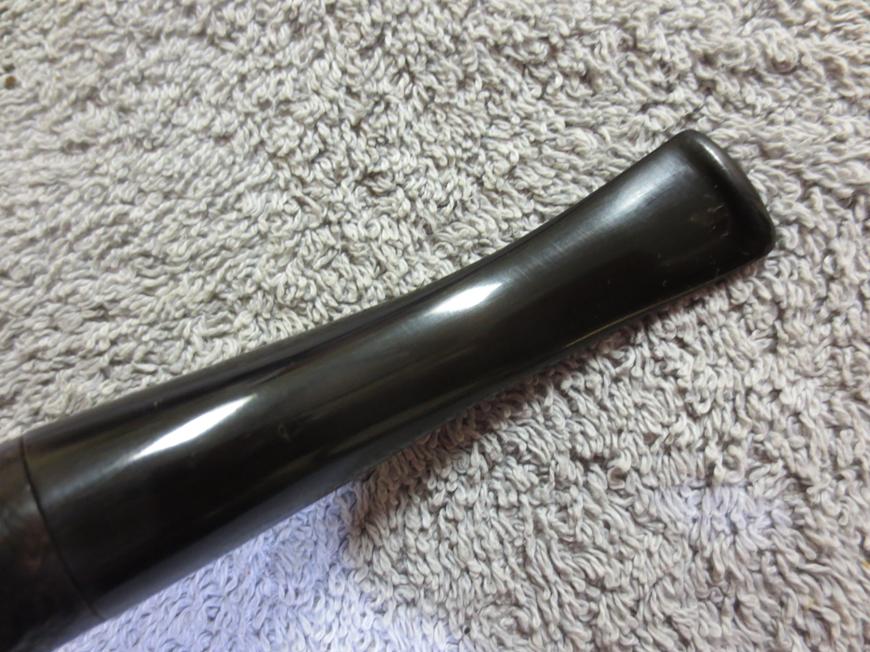
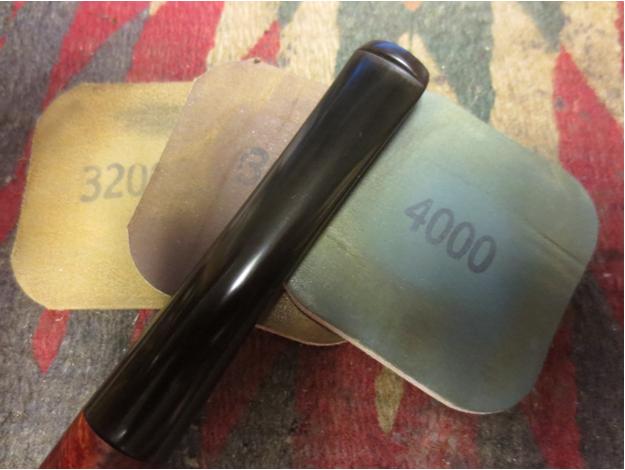
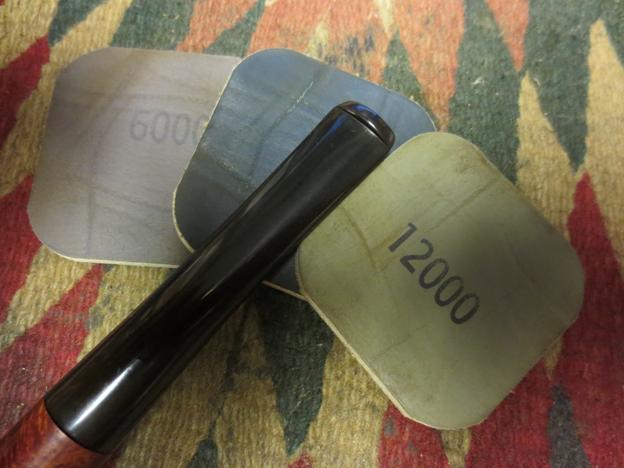
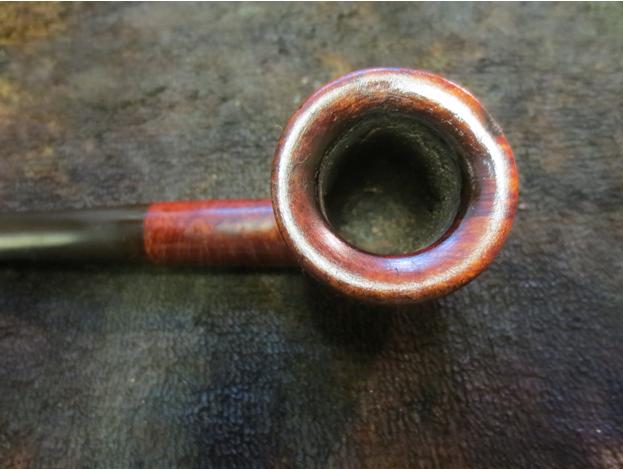
With the bowl finished I worked on the stem. I wet sanded it 1500-2400 grit micromesh sanding pads. I rubbed it down with Obsidian Oil. I continued by dry sanding it with 3200-4000 grit pads, rubbed it down again with oil and then finished by dry sanding with 6000-12000 grit pads. I gave it a final coat of Obsidian Oil and let it dry.Dublin24

Dublin25

Dublin26 
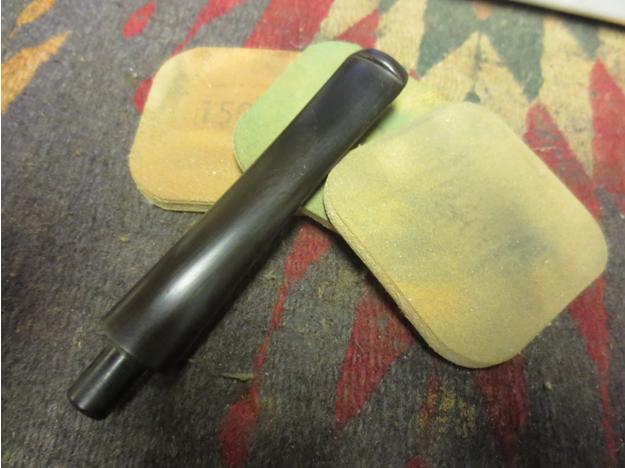
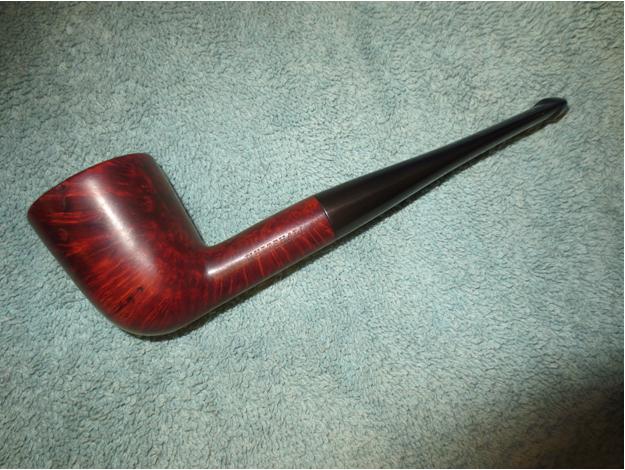
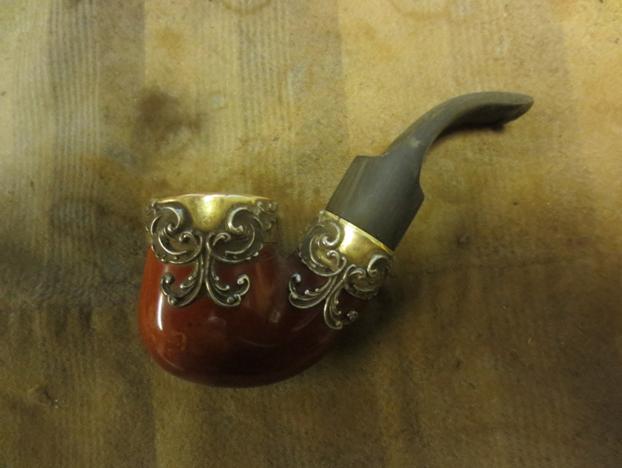
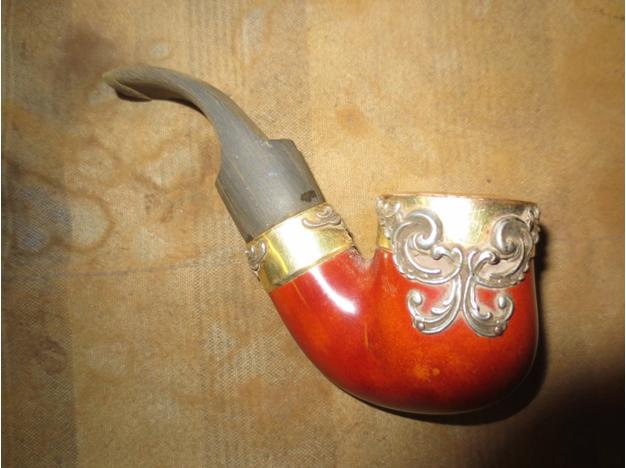
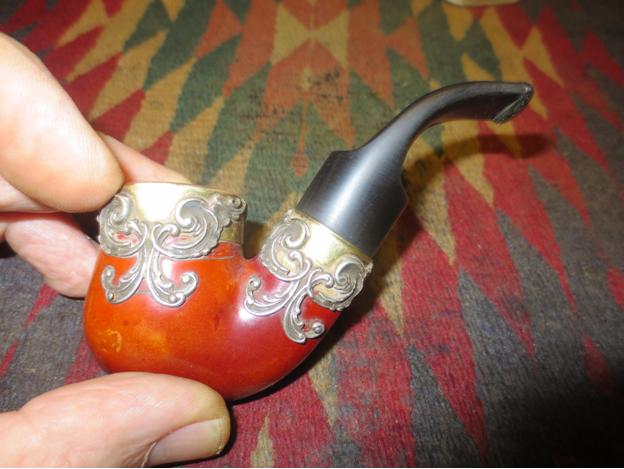
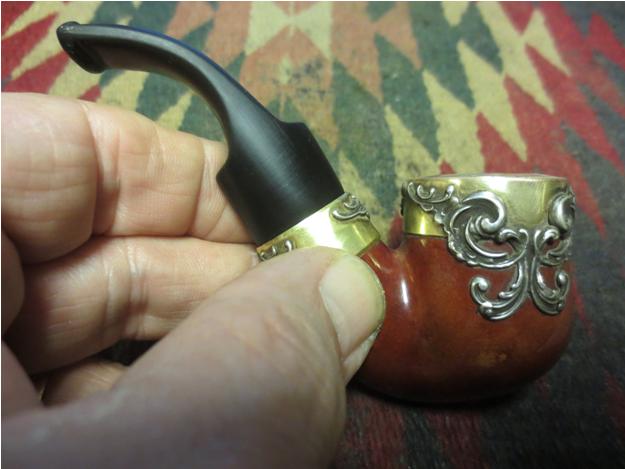
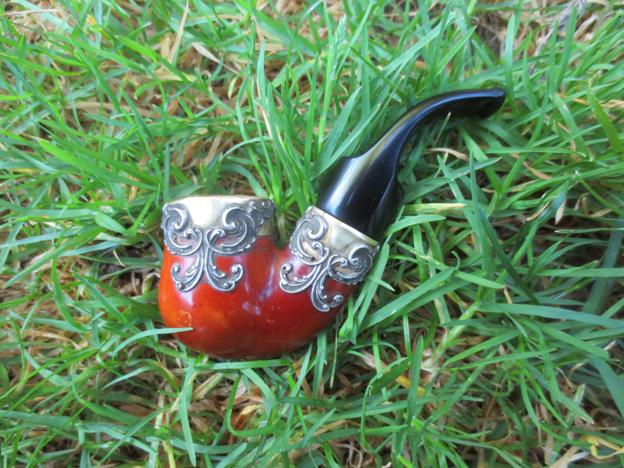
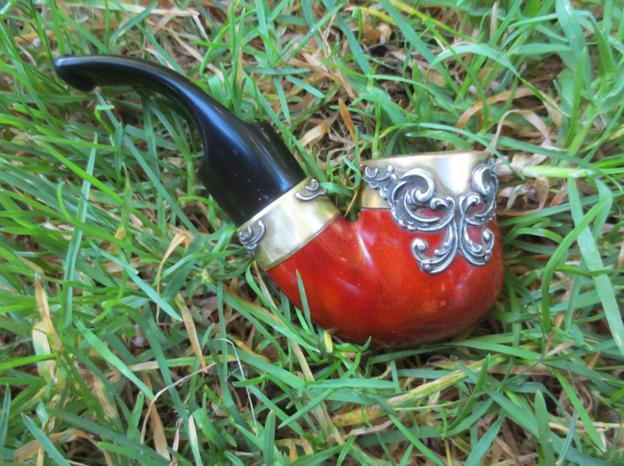
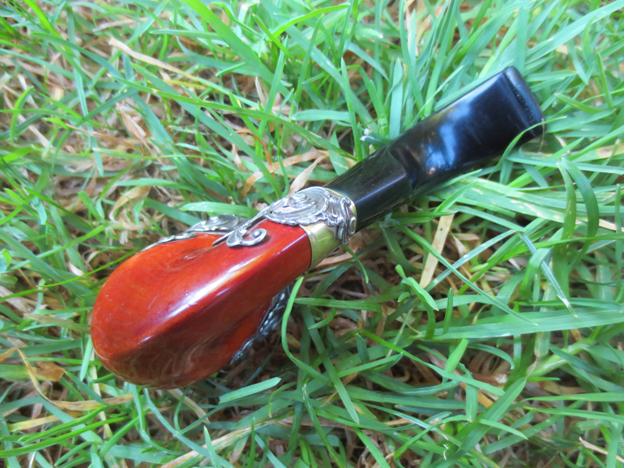
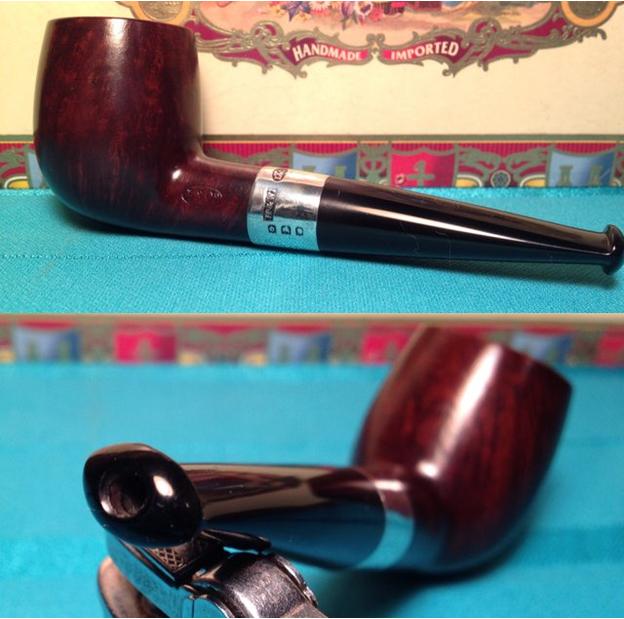
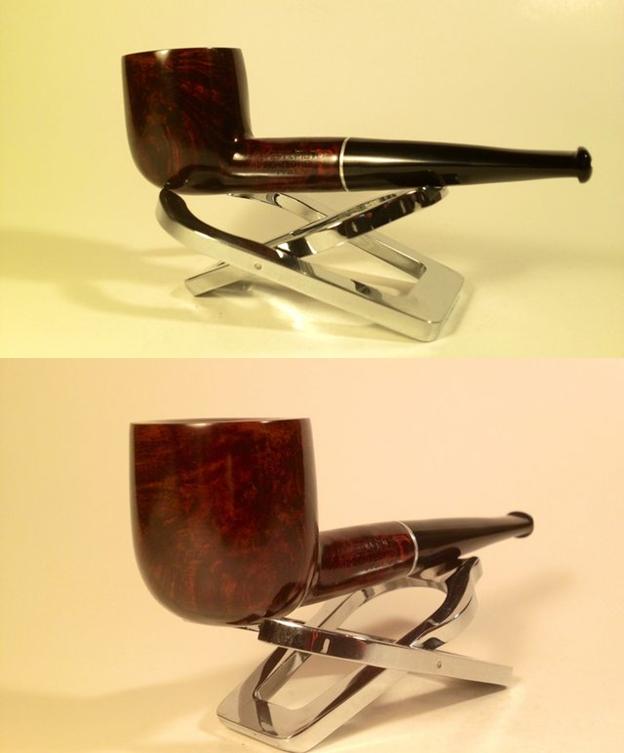
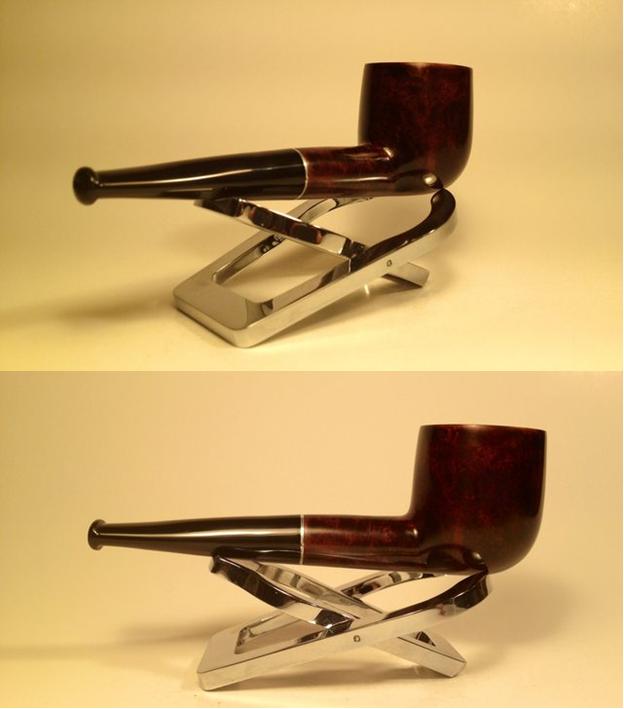
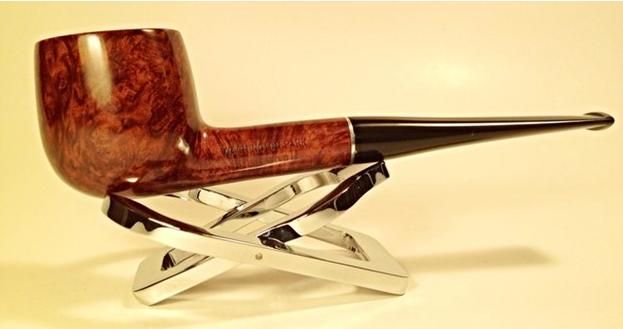
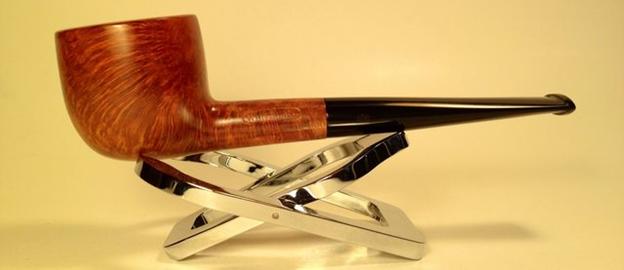
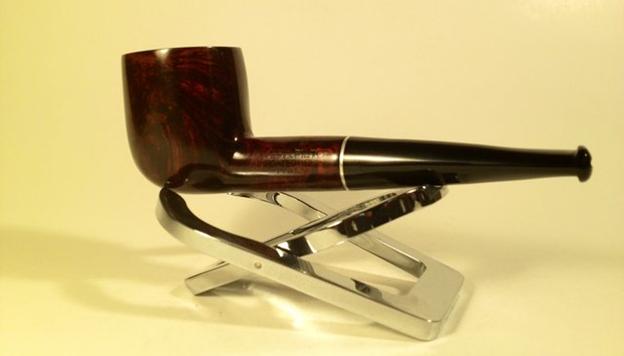
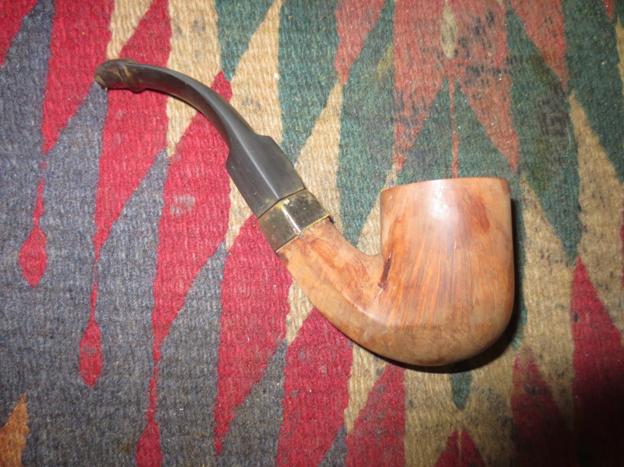
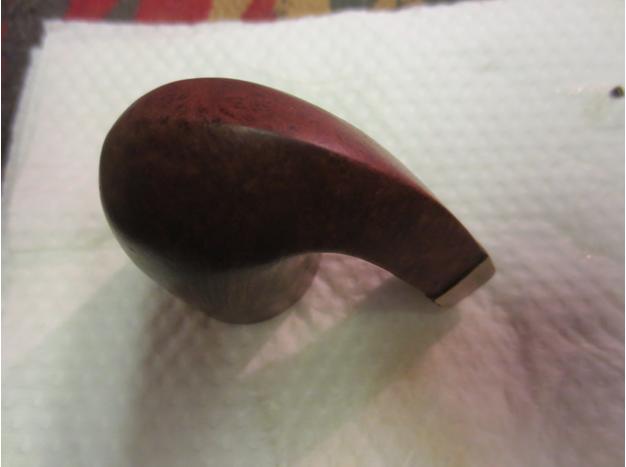
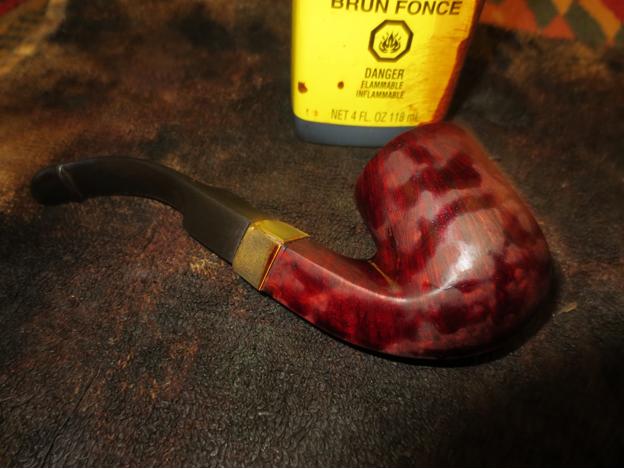
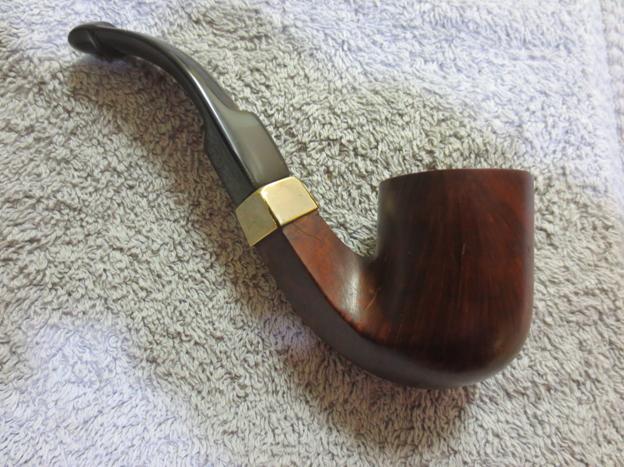
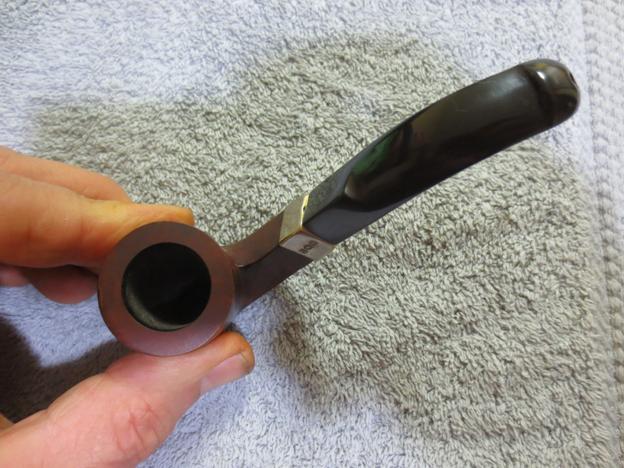
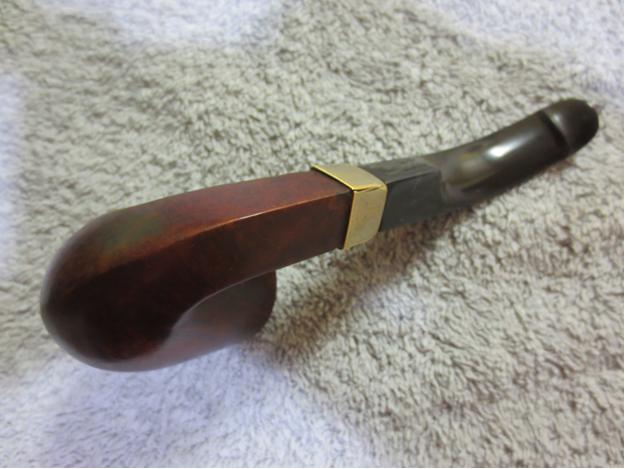
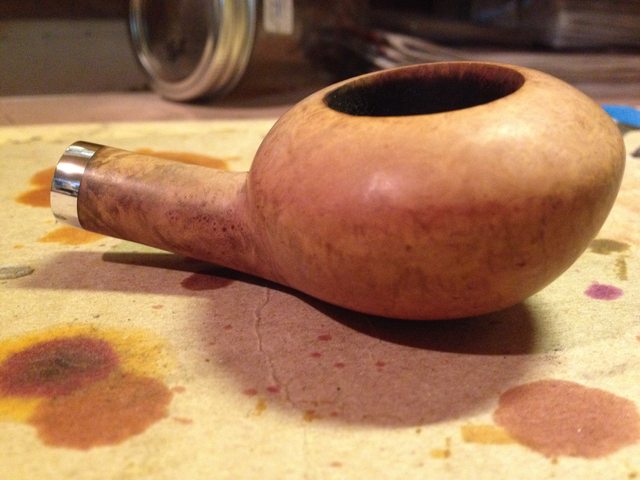
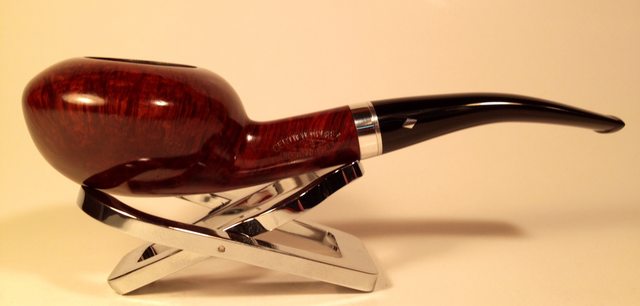
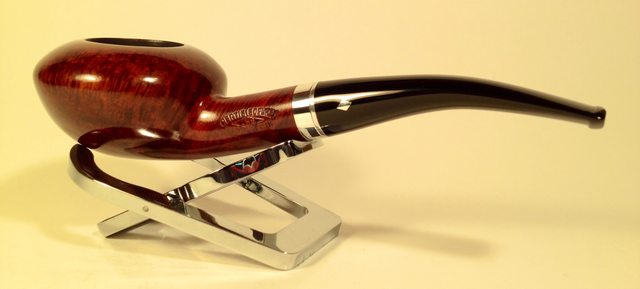
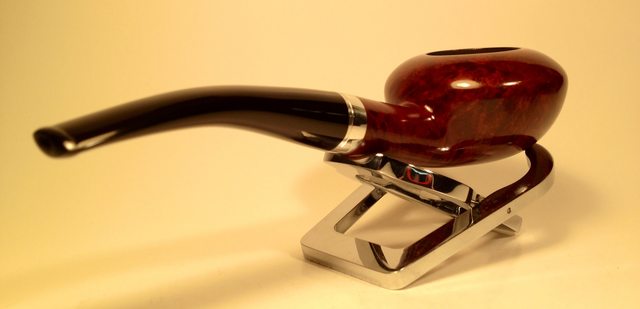
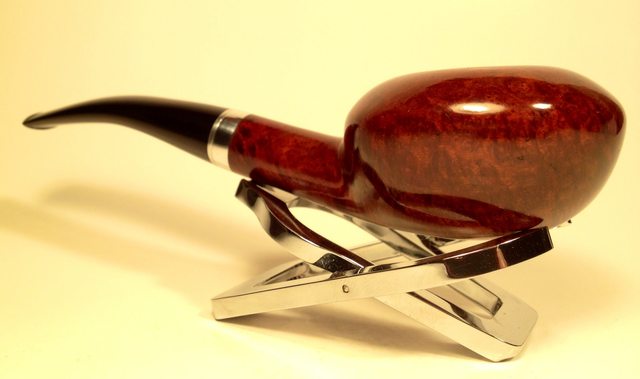
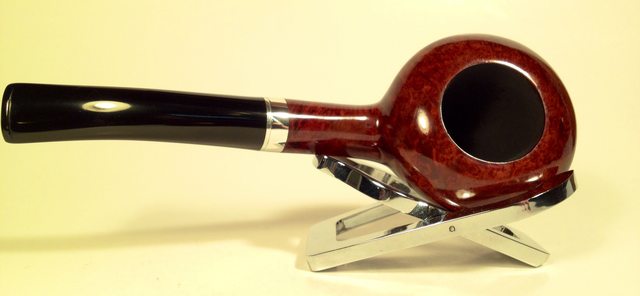
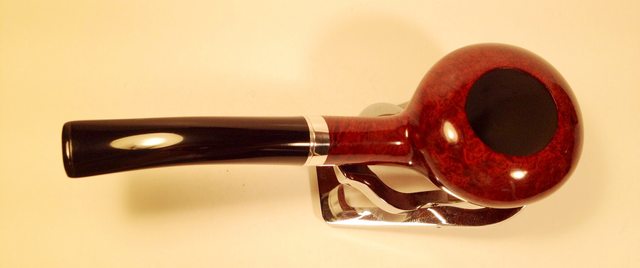
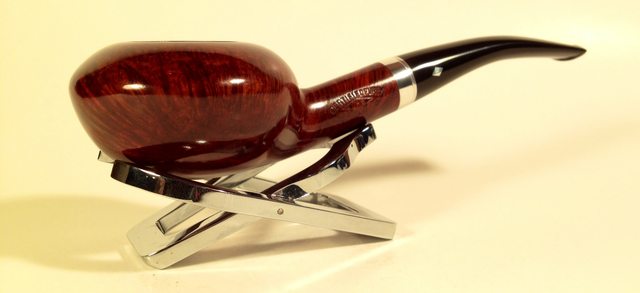
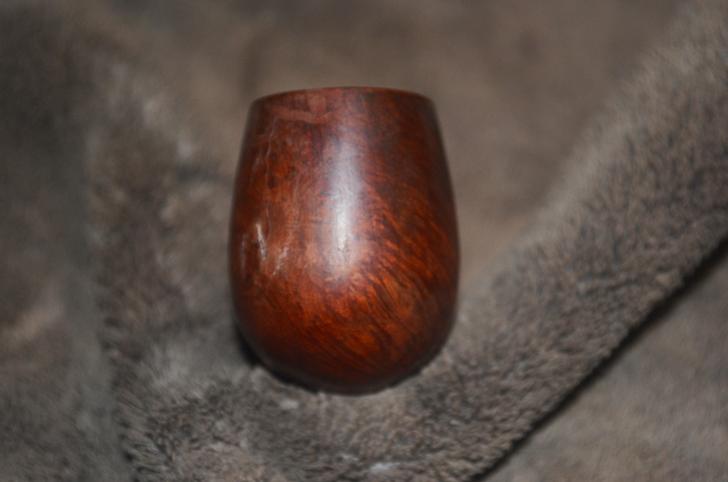
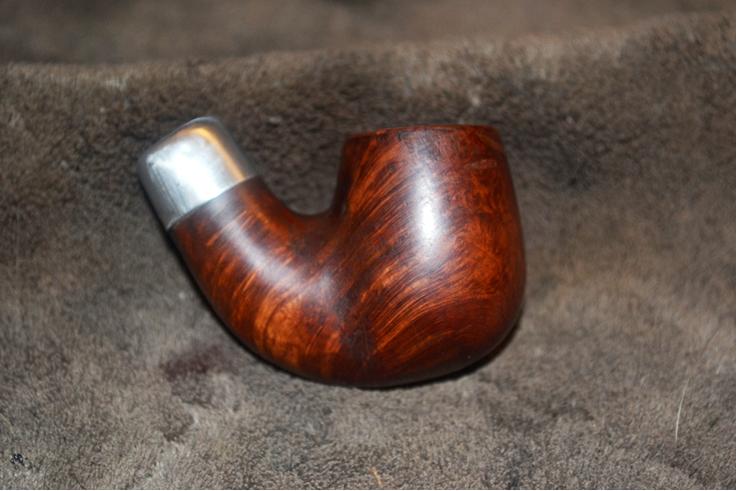
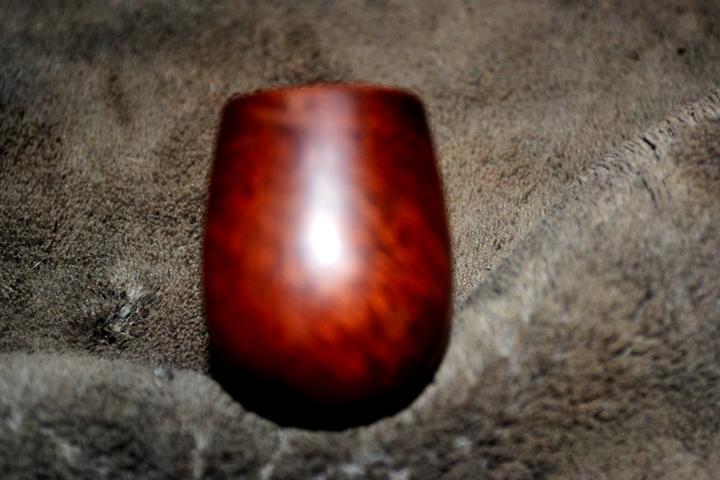
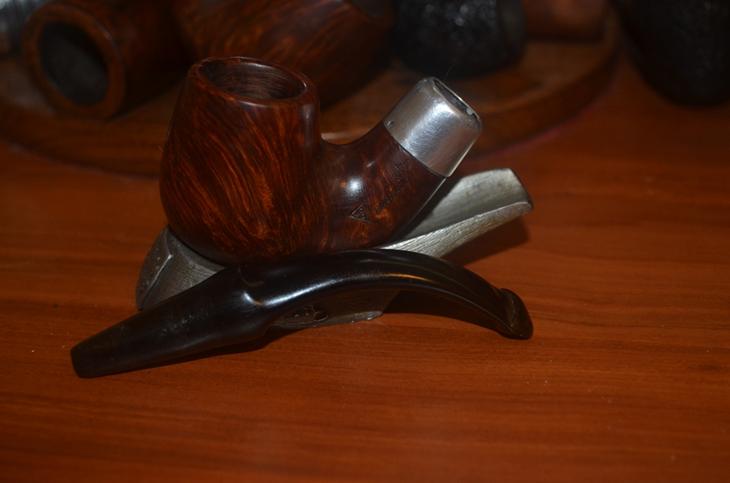
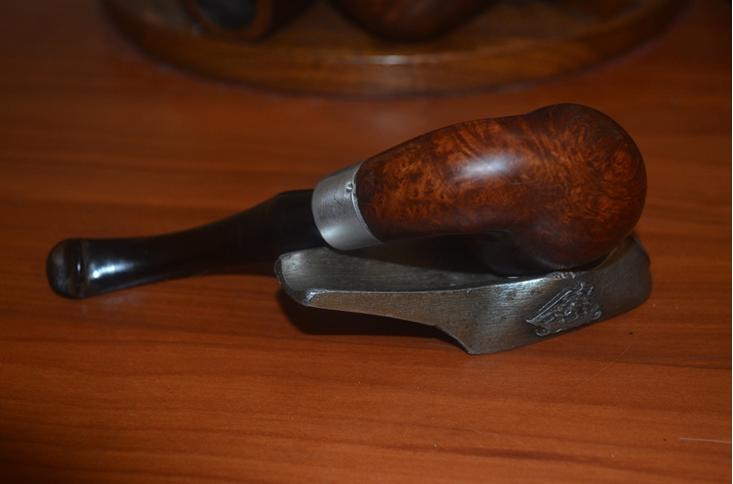
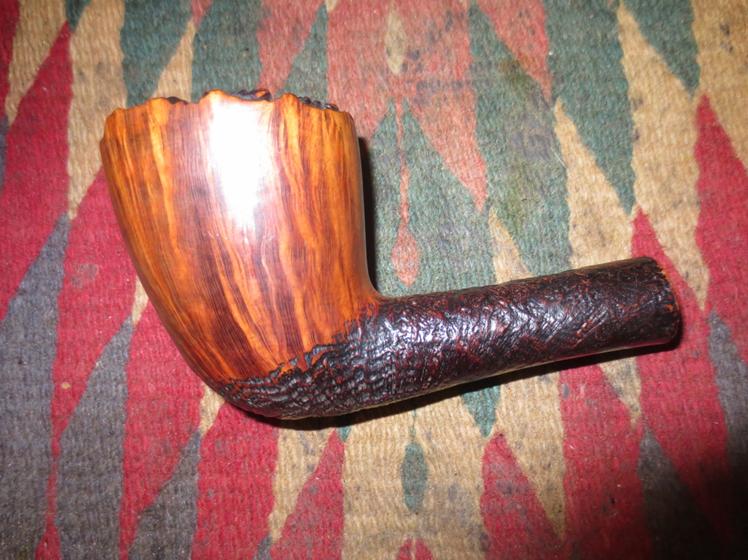
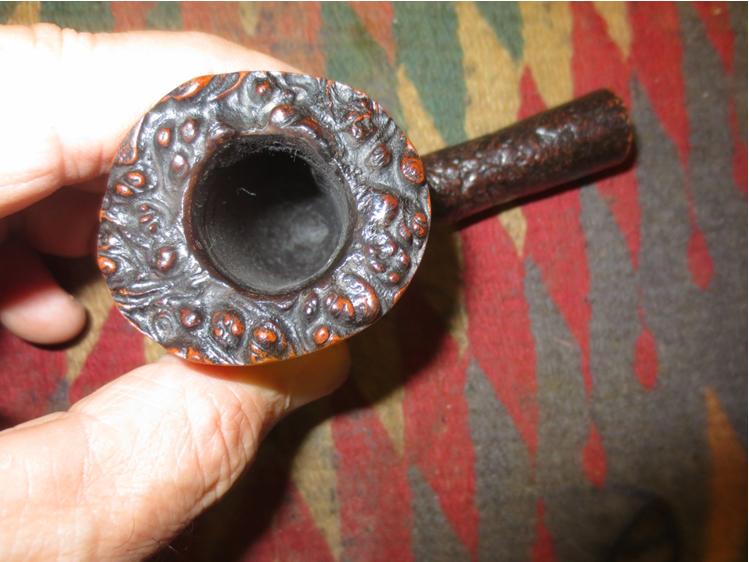
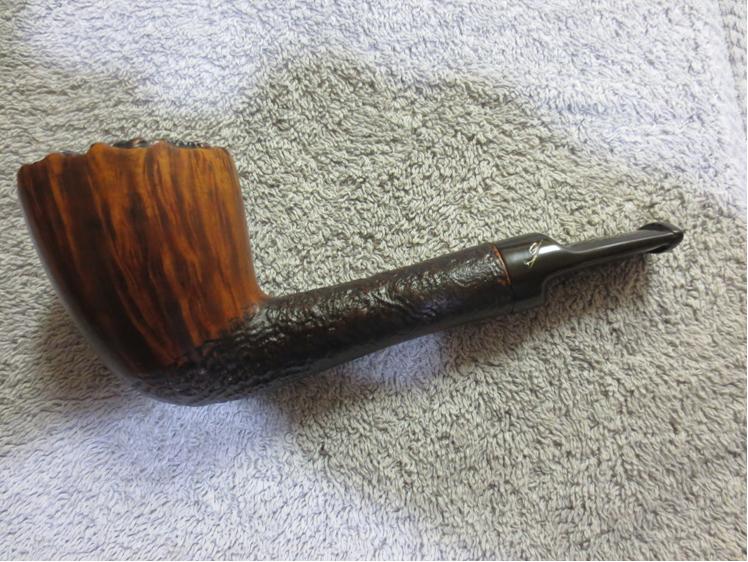
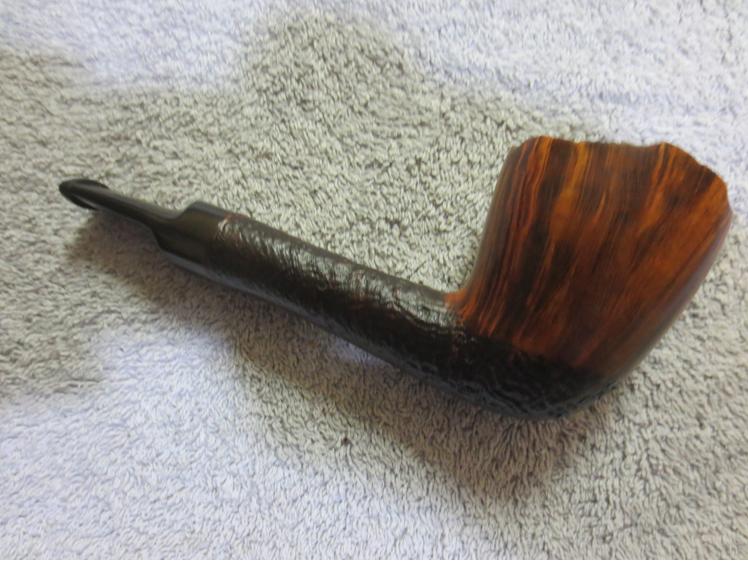
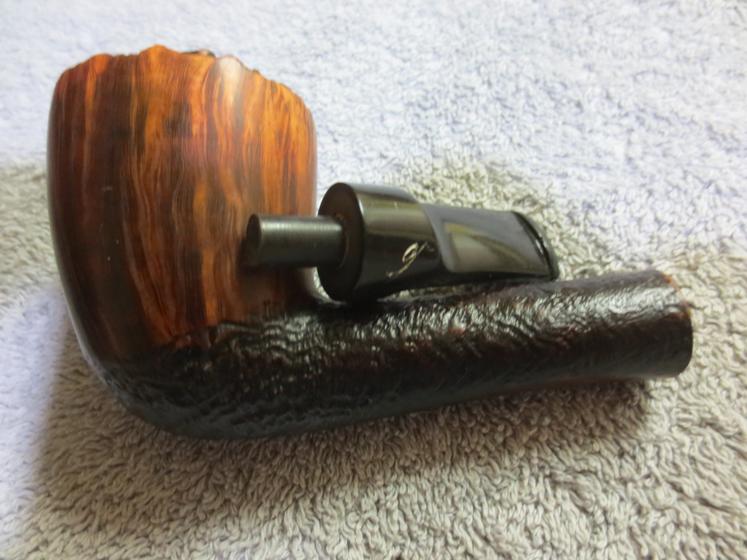
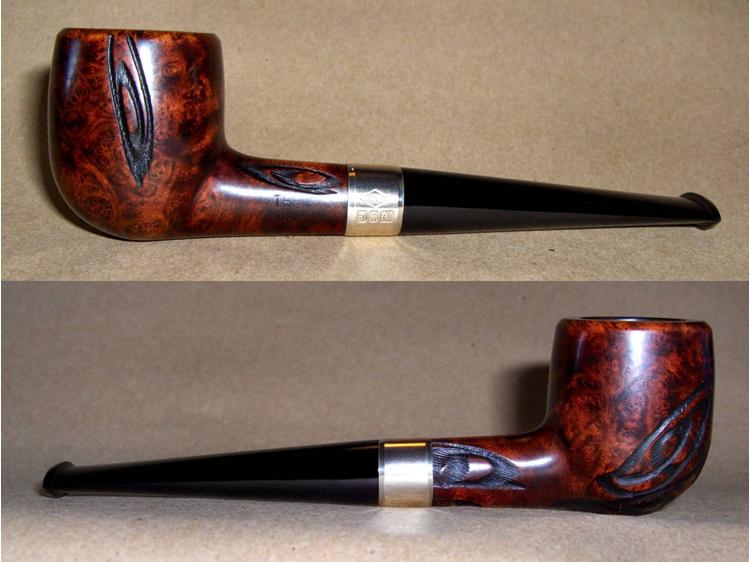
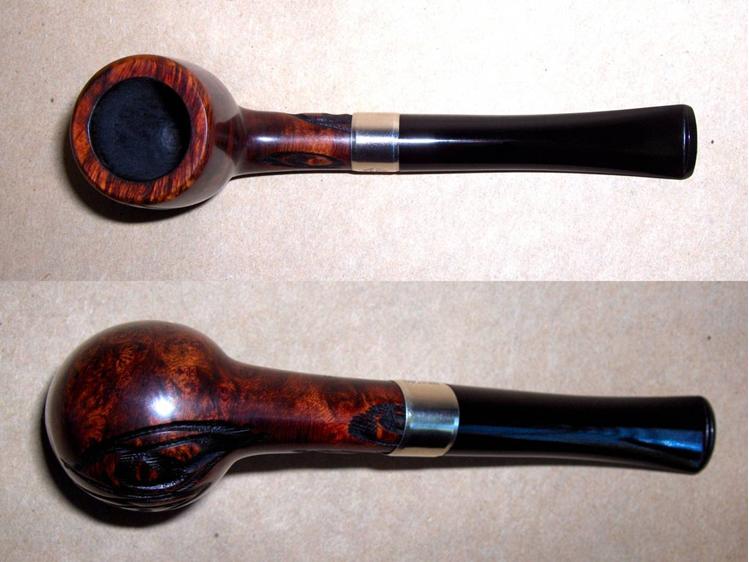
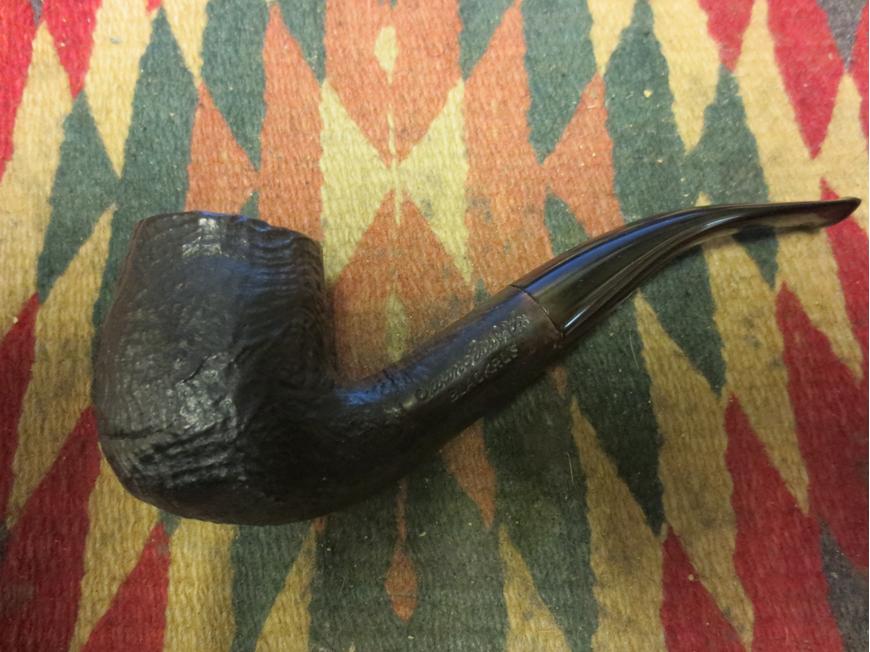
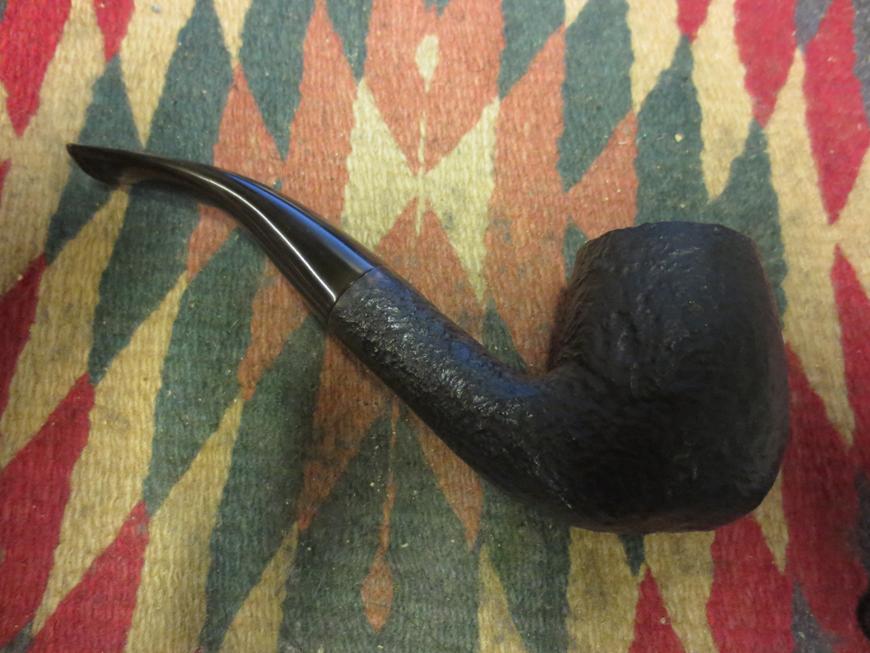
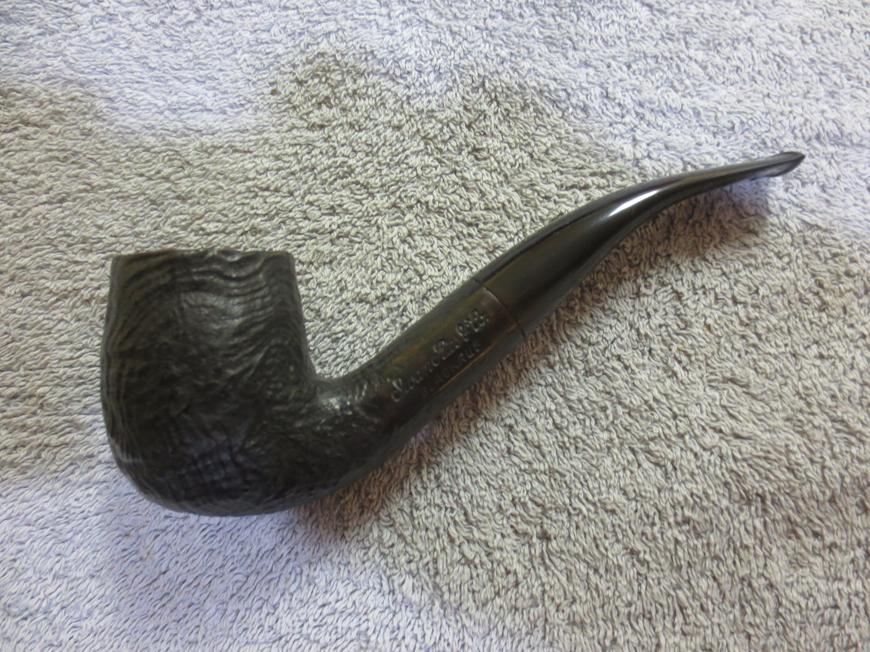
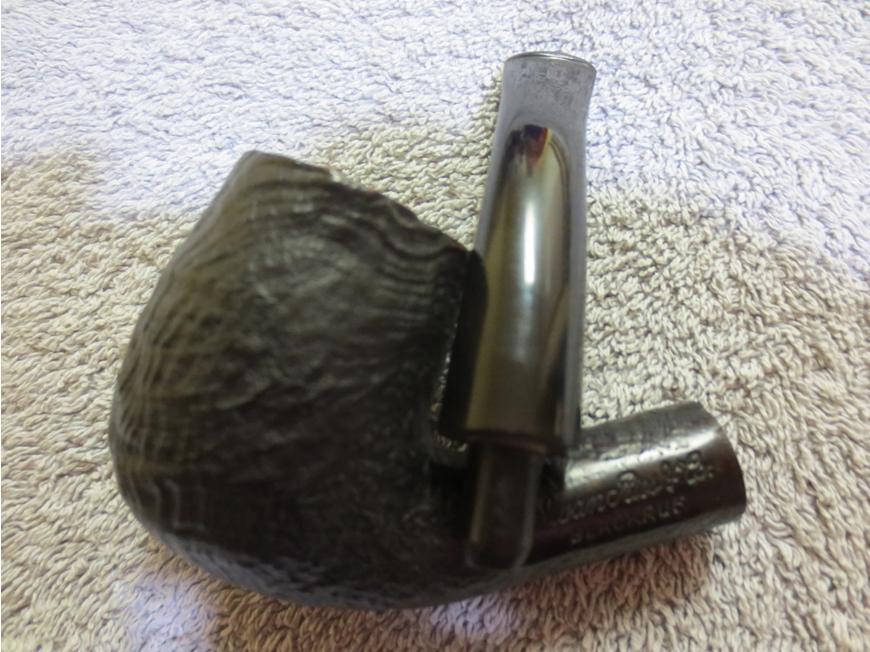
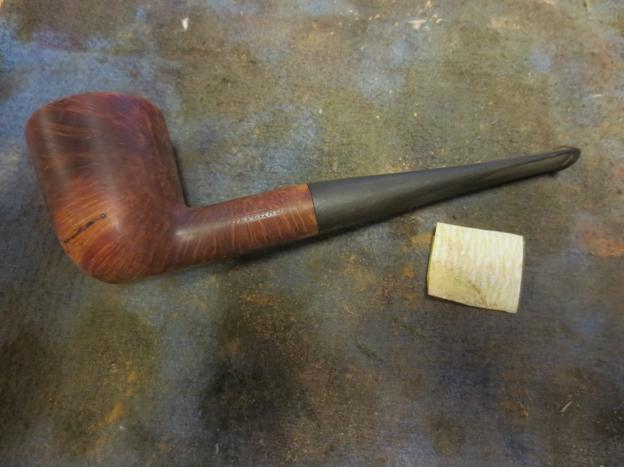
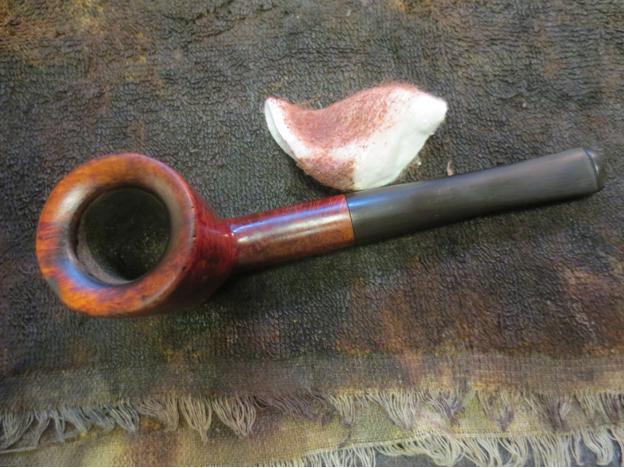
I buffed the bowl and stem with Blue Diamond on the buffing wheel, gave it multiple coats of carnauba wax and then buffed it with a clean flannel buff. I brought it back to the work table and then hand buffed it with a microfibre cloth. The finished pipe is shown below. It looks better than it did when I started, in my opinion. The rich oxblood colour helps to hide the repair and the burn mark on the rim. It should be a great smoking pipe if the amount of cake buildup that was there when I started is any indication. It should continue to provide great service to whoever ends up with it in their pipe rotation. Thanks for looking.Dublin27

Dublin28

Dublin29

Dublin30

Dublin31

Dublin32

Restoring and restemming an old Meerschaum Pipe


Blog by Steve Laug

When I purchased the German Folk art meerschaum at the antique mall in Idaho Falls I also got a little meerschaum bowl with lots of brass bling around the rim and the end of the shank. It had a broken bone tenon in the shank that was hopelessly corroded and not removable by normal methods. It appeared to have been glued in place with epoxy. The pipe had an oval shank and I figured that if I could get it cleaned up it would be a neat looking keepsake. It would definitely be a pocket pipe but I had a vision for it. The first photo is a bit blurry but it gives you an idea about the look of the old pipe. There was a lot of dust and debris in the filigree work and the decorative band at the end of the shank was loose because of a broken nail on the left side.Meer1

Meer2

Meer3 The next two photos show the damage to the rim and the broken tenon in the shank. The rim damage was significant enough to look bad but I would not be able to remove the cap without breaking the meerschaum bowl so I would need to remedy that in a different way. In the second photo you can see the broken tenon and how it appears to be glued into the shank.Meer4

Meer5 I tried my normal method for pulling stuck tenons but this one would not even budge. It was stuck in the shank.Meer6 So I had to drill it out of the shank. This is trickier than it looks. I never power the drill on. I set it up and use it as a stationary base. I hand twist the shank onto the bit. I start with a bit about the size of the airway and work my way up until I have the entire old bone tenon out of the shank.Meer7

Meer8 I had a damaged round stubby stem from a GBD 9438 that I picked up somewhere. The button was gone and the stem had been cut off. Since the oval shank was vertical I needed a stem with a similar dimension from top to bottom. The GBD stem was perfect. I took off the excess vulcanite with the Dremel and sanding drum and roughly shaped it to fit. There would be more – a lot more – sanding that would have to happen but the shape was there. I would also need to build a new button and thin down the thickness of the stem but overall you can see the shape.Meer9

Meer10

Meer11

Meer12 More shaping with the Dremel. I wanted the stem to have a thin oval shape at the shank and then flare out toward the end. I would cut the new button so I wanted a smooth taper back toward it.Meer13 With the Dremel work done it was time to hand shape the stem with sandpaper. I sanded it with coarse emery cloth and then refined it with 180 grit sandpaper. The lion’s share of the work was done with 220 grit sandpaper.Meer14

Meer15

Meer16 The oval of the stem finally matches the oval of the shank. The tenon fits snugly. More sanding will need to be done so that the new stem sits in the band tightly against the shank end.Meer17

Meer18 On a whim I blew air into the airway on the shank and it was plugged. When I drilled out the mortise the debris obviously clogged the airway from the shank to the bowl. I used the drill bit that comes with the KleenReem reamer I have to open the airway and push the debris into the bowl. It did not take much and the airway was clear and open.Meer19 I used needle files and flat files to recut a new button on the stem and to smooth out the taper from the saddle backward. The next photos show the newly cut button. The stem is quite thin at this point so a deep button cannot be cut deep enough.Meer20

Meer21 The bend in the stem was insufficient for the pipe to sit correctly in the mouth so it would need to be carefully bent to more of an angle.Meer22 I heated the stem with a heat gun until the vulcanite was soft and then bent it to the correct angle.Meer23 The newly bent stem is shown in the next series of photos. It matches the angle of the bottom of the bowl.Meer24

Meer25 There are some spots on the stem in the photo below that look like a hole – it is not it is a damp spot from cooling the stem to set the bend. I sanded the rim with a medium grit sanding sponge and also with a fine grit sponge to clean up some of the high spots on the rim cap. In the photo below you can see the improvement.Meer26 I cleaned the grooves in all the filigree adornments on the rim and the shank using cotton swabs and alcohol. The photo below shows the cleaned bling and the meer spots between the bling. The pipe is coming along.Meer27 To make the end of the stem thicker and give me more material to work with to shape the button I built it up with a mixture of black super glue and charcoal powder. I mixed it to a paste and used a dental pick to shape and build up the edges of the button.Meer28

Meer29 The next three photos show the stem after I have built up the material for the new button. I set the stem aside to cure for the day while I headed off to work.Meer30

Meer31

Meer32 I used a file and sandpaper to begin shaping the new button. It was going to take a lot of sanding but the new button was beginning to take shape.Meer33

Meer34 I sanded the stem with a medium and a fine grit sanding sponge to shape the button and smooth out the stem.Meer35

Meer36

Meer37

Meer38 At this point in the process I was still debating the final shape of the airway in the button. My original intent was to make an orific button styled after the era of the pipe. However, the more I worked on it the more I was thinking of making the stem more modern era and leave the bowl old era. The combination would be a wedding of old and new!Meer39 For the time being I put that decision on hold and worked on polishing the stem. I wet sanded it with 1500-2400 grit micromesh sanding pads and then rubbed it down with Obsidian Oil. While the oil was still wet I dry sanded the stem with 3200-4000 grit micromesh pads. I again rubbed it down with oil after the 4000 grit pad was used. I dry sanded with 6000-12000 grit pads and then gave it a final coat of Obsidian Oil. I let it dry before buffing.Meer40

Meer41

Meer42 I finally made the decision to flare the slot in the stem. I figured it makes it clear that this is a replacement stem if nothing else does. I like the wedding of old and new in this pipe and it one I plan on keeping so I made it the way I like it. The photo below shows the slot before I did the final sanding with sandpapers and micromesh to clean up the file marks and fine tune the slot. The finished slot can be seen in the final pictures.Meer43 I buffed the stem with Blue Diamond and gave it multiple coats of carnauba wax. I buffed it with a clean flannel buff and then finished with a hand buff with a microfibre cloth to give depth to the shine. The finished pipe is shown in the photos below. I am looking forward to giving this one an inaugural smoke soon. The draw is very open and the airflow uninterrupted. The pipe should last long after I have passed it on to the next pipeman to care for.Meer44

Meer45

Meer46

Meer47

Meer48

Meer49 Thanks for looking.

Whitehall Thermofilter Rebuild


Blog by Dave Gossett

This pipe was part of an estate lot I received a few weeks ago. Borderline firewood. I was just going to throw it in the pipe parts box but decided to make it my nightshift project at work. It passes the time and keeps me awake.

I have American and English made Whitehall’s but this one is stamped Italy, so It would make a nice addition to the Whitehall collection if it came out looking presentable.

I initially planned to use this pipe for practice and try my hand at beveling a rim, so I didn’t take very many pictures of the rebuild.

It had several fills and deep gashes in the briar, and the button on the stem was completely MIA.Dave1

Dave2

Dave3 I started off with some aggressive sanding of the briar with 200 grit. This pipe lost some serious weight. It couldn’t get any worse so I went for broke and sanded down past the fills and gashes working around the stampings until I had a smooth stummel.

Next I gave my first rim beveling a shot. Using a rolled piece of 200 grit angled at 45 degrees, I turned the bowl slowly with one hand while sanding with the other. After trying this, I now have a new found respect for carvers that shape pipes by hand. I stopped frequently and eyeballed the rim closely to make sure it was symmetrical.

After I was content with the shape I worked my way up the grit ladder until it was smooth as babies butt.

The briar was starting to look pretty good. If I couldn’t save the original stem I would have found a substitute. The Thermofilter was similar in size and shape as my old 1919 old Loewe & Co. pipe with an antique rounded button that was popular at the turn of the century, so I modeled the stem rebuild after the Loewe.Dave4

Dave5 This is the biggest stem rebuild I’ve tried so far. This recipe is great for fixing tooth holes or small missing portions. Only time will tell if an addition this large will hold up. Here is the link of how I rebuild stems if anyone wants the details.

http://pipesmagazine.com/forums/topic/how-to-fix-tooth-holes-in-stems
I piled on the mix and filed it about five times before I found the shape I was going for.Dave6

Dave7

Dave8

Dave9

Dave10 American WhitehallDave11 English WhitehallDave12 Italian WhitehallDave13 It would be interesting to know how many other countries accompanied the Whitehall name.

Repairing and Restemming a York (KBB) Diamond Shank Bent Billiard


Blog by Steve Laug

When I was traveling in Idaho my brother and I took the family for a trip to Jackson Hole, Wyoming. On the way we stopped in a little town called Victor, Idaho. There was an antique shop there in the town and I found four more old pipes. The first of these reminded me of an old WDC Diamond shank billiard that I have. This one was stamped YORK on the left side of the shank and from research it may have been made by KBB. It was in rough shape. The shank had been cracked and repaired with glue and a piece of twisted wire. The stem obviously had a broken tenon and the previous owner had carved it down to fit in the shank anyway. The bowl had a thick cake and the finish was gone. The rim was damaged on the front outer edge and there was some tar on the rim.York1

York2

York3

York4 On the right side of the bowl near the shank junction there was a pink putty fill that was coming out. Most of the putty had fallen out of the briar. This would need to be repaired.York5 When I got back home I took the pipe out of the bag to have a look. The silver end cap had some hallmarks but they were the faux hallmarks that I have found on older American made pipes to give them a touch of class. All four edges of the band were split. I removed the stem and looked inside the mortise and could see that a major part of the briar was missing on the right side of the shank under the cap. With little effort I removed the cap and sure enough a huge chunk was missing out of the briar. In fact the whole right side under the cap was gone. There was a small crack that had been repaired earlier. There was a small hole in the shank to stop the crack and the crack was glued and clamped with the wire. This was going to take a bit of work to bring it back from the brink of destruction. York6 I clipped the wire with a pair of wire cutters so that I could work on repairing the broken portion of the shank. This repair would take some careful and time consuming work to rebuild the missing portion of briar.York7 I reamed the bowl to clean out the thick cake. It was crumbling so I wanted it removed so that the repair of the shank would be less dirty. I use a PipNet reamer to take the cake back to the bare briar.York8

York9 The first step in rebuilding the broken area was to clean up the damaged ends of the remaining briar. Once it was clean I put clear super glue on the raw edge of the broken spot and tamped the end into some briar dust. I repeated the process until the edge was repaired as much as possible with this method.York10

York11 During the process I also picked out the broken putty fill and replaced it with briar dust and super glue.York12 I sanded the flat surface of each of the four sides of the diamond shank smooth with 220 grit sandpaper until the cap slid easily over the shank. I also faced the end of the shank on the topping board.York13

York14 The next step in the process of rebuilding the shank and the mortise was a little more difficult than the briar dust and super glue rebuild. It involved working on the internals of the shank. I glued the end cap in place with wood glue and clamped it in place to take care of small splits in the edges of the metal cap. Once that dried and set, I mixed white wood glue with briar dust to make putty. I tamped the mixture into the remaining areas of the shank with a dental pick and dental spatula until the area was filled solid looking once again. The next two photos show the rough repair on the inside of the mortise and shank. The broken area is gone! The holes are filled in and the repair is complete. Once the glue set I would have to clean up the mortise and make the walls smooth. The edges of the metal cap, looking at it from the end are damaged and I will not be able to repair them.York15

York16 While the shank repair cured I worked on the rim. There was a thick tar build up that was like rock on the back edge and the front edge of the rim had been knocked against something hard and was rough.York17 I decided to top the bowl to remove the rock hard tar and also minimize the damage to the front of the bowl. I used a topping board with 220 grit sandpaper and worked the rim against the sandpaper until the damage was minimized. Once I had it smoothed out I put some briar dust and super glue on the remaining divot on the front edge of the bowl as a fill. When it dried I sanded it smooth and lightly topped the rim once more to even out the repair with the rest of the rim. (That picture will be shown shortly.)York18 The stem that came with the bowl was damaged beyond repair. It had been repeatedly been cut off by the previous owner and hacked at until it fit in the damaged tenon. It was not a stem I would use again on this pipe. I went through my can of stems and found a faux p-lip stem – the airway came out the end of the button rather than on the top. It was old enough to work on this pipe and with some modification I thought it would look just right. The problem was that it did not have a tenon. When I found it the tenon was missing and the end of the stem had been drilled out to receive a replacement tenon. I am currently out of Delrin tenons so I used a thin vulcanite stem as the sacrificial tenon. I glued the tenon on the donor stem in place in the diamond shaped stem with super glue and then cut off the stem with a hacksaw. I left a piece of vulcanite that was longer than necessary so that I could work it to a proper fit in the repaired shank.York19

York20 The next photo shows the repaired stem and tenon and the topped bowl before I put the two parts together. I used a Dremel to remove the excess material on the new tenon and shortened it to the depth of the mortise in the shank.York21 The next photo shows the repaired fill on the bowl side with another photo of the new stem.York22 Once the shank repair was dry I used a needle file to clean up the rough areas and smooth out the inside of the mortise. I gave it several more coats of glue and briar dust to buildup the areas that had shrunk as the glue dried. I continued to work it with the files and sandpaper until the fit was correct. I cleaned out the airway to the bowl and the inside of the mortise with alcohol, cotton swabs and pipe cleaners in preparation for putting the new stem in place.York23 The next two photos show the newly fit stem. There was still work to do to fine tune the flow of the diamond stem sides to match the flow of the diamond shank but the look is clear at this point in the process.York24

York25 I sanded the stem with 220 grit sandpaper and with a medium and a fine grit sanding sponge to fine tune the fit. When I had it the way I wanted, it was time to bend the stem. I used my heat gun to do the work. In this case I quickly set it up on the dryer in our laundry room (shh don’t tell my wife I did this) and heated the stem. I bent it over an old rolling pin that I use for this purpose until the bend in the stem matched the curve of the bottom of the bowl. I set the bend by holding the stem under cool running water.York26

York27 The next two photos show the newly bent stem and give an idea of how it will look with the pipe once it is finished.York28

York29 With the easiest part of fitting a stem completed I went on to do the laborious and tedious part of sanding and more sanding to get the fit just right. To do this without rounding the edges of the stem at the shank stem junction I use a plastic washer placed between the two areas. I sanded the stem with 220 grit sandpaper to smooth out the transition and make the angles square (or at least as square as possible on these old pipes where every side has a different angle and width).York30 When I had the fit of the stem correct it was time to polish it. I wet sanded with 1500-2400 grit micromesh sanding pads and rubbed the stem down with Obsidian Oil.York31 I needed a break from the stem work so I turned my attention to the bowl. I rubbed it down with a light coat of olive oil to highlight the grain. I took a few photos to show what it looked like at this point. It is certainly looking far different than it did when I started working on it. There is a deep richness in the red tones of the briar.York32

York33

York34

York35 I decided to highlight those tones with a dark brown aniline stain thinned by 50% with some isopropyl alcohol. I applied it and flamed it to set it in the grain.York36 I hand buffed it with a cotton cloth to get an idea of the coverage. It was still too dark to my liking so I would need to address that.York37

York38 I wiped the bowl down with some acetone on a cotton pad to remove some of the stain and make the grain show through better.York39

York40 I buffed the bowl with White Diamond and then gave it the first of many coats of carnauba. I don’t know about you but by this point in a long refurbishment I get a bit anxious to see what I have accomplished. It always seems that it is going to go on forever so I rewarded myself by putting the stem in place and taking a few photos to see what I had achieved.York41

York42 For comparison purposes I took the next two photos of the pipe with the old stem next to the new one. You can see how badly hacked the vulcanite was from the previous owners salvage work on his broken pipe. The pipe is beginning to look like a very different pipe than when I started. That always encourages me!York43

York44 Now it was time to finish up with this long project and get the stem done. I dry sanded it with 3200-4000 grit micromesh sanding pads and then rubbed it down with Obsidian Oil once again. I then dry sanded it with 6000-12000 grit pads and gave it a final coat of oil and let it soak into the vulcanite.York45

York46 I buffed the stem and bowl with Blue Diamond and then gave them both multiple coats of carnauba wax. I buffed them with a clean soft flannel buff to raise the shine and then hand buffed the pipe with a microfibre cloth to finish. The completed pipe is shown below. It has come a long way from the pipe I started on this morning. I had a quiet day at home and between reading and napping finished the work on this old timer. From what I can find out in my research and from Who Made That Pipe, the pipe may well be from the old KBB pipe works. Thanks for looking.York47

York48

York49

York50

York51

York52

A Restored LHS Certified Purex #95 Squashed Tomato


Blog by Dave Gossett

A pipe shape this elegant deserves a better name than squashed tomato. I received this pipe looking more like a bruised tomato. It was beat up and chewed up. An LHS this shape doesn’t pop up very often so I was happy to accept the pipe in any condition.dPk6umBl

Dave2

Dave3

Dave4 I started off with the routine internal cleaning of the pipe with alcohol, pipe cleaners, and shank brush.

Next I began to work out the dents by heating a butter knife with a propane torch and pressing it firmly to the dented areas with a damp rag between the two. This generates steam and lifts the dents out of the briar. This may have to be done several times to the same area depending how bad the dents are.

After steaming, I sanded the scratches from the rest of the briar, smoothed out the bowl chamber, prepping it for the carbon coating, gave it a light alcohol scrub with 0000 steel wool to remove the leftover patchy original finish, and finally, masked off the shank and polished the aluminum.Dave5

Dave6

Dave7 Next up is the stem rebuild.Dave8 A tight fitting plug/form for the air way and bit is made from cardboard wrapped in clear tape.

Here is a picture of all the materials used for the stem rebuild.

Cyanoacrylate glue (medium viscosity), activated charcoal. Dave9 I use disposable things for mixing and application process. 25% charcoal/75% glue mixed thoroughly is the recipe. I mix it in bottle caps, and use a q-tip stem with a small scoop/spoon cut into the end to apply to the repair site.

The repair site needs to be scored and cleaned before the mix is applied.Dave10 Once the material has cured, the tape covered cardboard plug is easily removed. Using a needle file I reshaped the button and then wet sanded the stem.

Back to briar.
Now that it has been steamed, sanded, and had the old stain removed, I applied a custom color mix of Fiebings, consisting of dark brown, a hint of orange, and a bit of oxblood, thinned a bit with alcohol.Dave11

Dave12 I always like seeing the color transformation from the dry stained tint to the very different shade it becomes after the carnauba wax is applied.

The final step in the restoration after waxing is the carbon bowl coating. It’s a very simple detail to make an old estate pipe look fresh again. Maple syrup and activated charcoal. After the bowl chamber is clean and smooth, lightly coat the bowl chamber with maple syrup, then fill the bowl to the top with the charcoal. Leave it for one hour or more then dump the bowl and blow through the shank to remove the excess. Next is the hard part. Don’t touch it for 5 days. It takes 3-5 days for it to harden and cure. I usually give it a week just to be sure. Once it has set up, it’s as tough as a Savinelli carbon coating and looks just as good. The pipe will have the familiar slightly bitter taste of a brand new pipe, but it doesn’t last nearly as long. After you smoke a bowl or two it goes away. Dave13

Dave14

Dave15

Dave16

Dave17

Dave18

Dave19

Dave20

WDC Wellington Bent System – Restoring a Mainstay Pipe of the Celebrated Maker


Guest Blog by Robert M. Boughton
Member, North American Society of Pipe Collectors
http://www.naspc.org
http://www.roadrunnerpipes.com
http://about.me/boughtonrobert
Photos © the Author

Bruno Antony: Each fellow does the other fellow’s murder. Then there is nothing to connect them. The one who had the motive isn’t there. Each fellow murders a total stranger. Like you do my murder and I do yours…For example, your wife, my father. Criss-cross.
― from “Strangers on a Train” (1951), directed by Alfred Hitchcock, screenplay by Raymond Chandler and Czenzi Ormonde, starring Farley Granger and Robert Walker [Bruno]

INTRODUCTION
The movie was one of Hitchcock’s greatest and a favorite of mine. How could it not be, with the legendary detective novelist Raymond Chandler as the top word-man? But this is not a blog about swapping murders. It does concern the swapping of a bit, however, or to be more accurate, the removal of one from a basic Peterson’s System Standard in my collection of pipes awaiting more extreme repair, and which won’t be missed before it can be mended, to use for the William Demuth Co. Wellington System Billiard.

But first, let’s play Find the Pipe in the Lot.Robert1 No doubt you have spotted it without trouble, or will soon deduce the answer from following photos.

Now for the criss-cross: watch as the bit, at first loose but in place in the shank of the Peterson’s Standard System to the right in photo one, without warning falling to the trademark green sleeve along with the battered band in photo two. Look long enough, and I guarantee you’ll see the moment of selfless sacrifice for the blighted, bit-less predicament of the once proud, near-twin WDC close by. And then, in photo three – the miraculous transplant to the WDC after the donated organ has embraced its new host body, at least tentatively.Robert2

Robert3 A few words concerning the William Demuth Co. are in order, for those not familiar with its illustrious history. Demuth (1835-1911) entered the U.S. as an emigrant from Germany with no money when he was 16 and worked a number of odd jobs. His break came when he attained the position of clerk for a tobacco products trade company. Demuth founded his own company in Brooklyn, New York in 1862, two years into the Civil War, when he was only 27.

Success was rapid, leading to friendships with such prominent figures as James A. Garfield. [Garfield was inaugurated as the twentieth U.S. president in 1881 after winning by the narrowest popular vote margin in history, a mere 9,464 ballots, but with an extra 59 Electoral College votes. He served only four months before he was gunned down by a single shot aimed by Charles Julius Guiteau, an American lawyer denied an ambassadorship to France(evidently for good cause, as shooting the president on July 2, four months into his term, was not very diplomatic). Although Garfield lingered for about two and a half months, the assassin’s bullet caused the blood poisoning to which he succumbed. Guiteau was hanged several days short of a year after the ultimate assassination.]

At the Presidential Inauguration, Demuth presented Garfield with two meerschaum pipes, one in Garfield’s image and the other in the new First Lady’s. The friendship of the two men led to Demuth’s commissioning of a partial presidential line of pipes. But the linchpin WDC pipe was the Wellington, which lasted beyond the company’s own lifetime. Having become a subsidiary of S.M. Frank & Co. in 1937, WDC continued until the final day of 1972. The Wellington, however, was still offered in Frank’s catalog until 1976 and even had a brief reprise in the mid-1980s by way of consumer-direct sales.

Here are two other Wellington’s, the first courtesy of pipephil.eu and the second from pipedia.org.Robert4 RESTORATION Robert5

Robert6

Robert7

Robert8 In a sentence, this restoration was more about the stem than anything else. I had decided to go with a perfect replacement from a Peterson’s Standard System pipe in my personal collection. Then, when I donned my Dollar Store 3.75X glasses for a “final” close inspection, I cringed at the sight of the faint black outline of the Peterson’s P, shown below, now filled in with a white china marker.Robert9 Note the correct shape of this bit from lip to tenon. My next brainstorm was to sand off the P, and in fact set out to do so when I came to my senses. What can I say? Sometimes I have the stupidest ideas. And so I opted to let the buck stop here and repair the bit I took off of the Peterson’s System Standard shown in the criss-cross photos of the Introduction. That System Standard needs serious work, also; not only a new, genuine bit but a replacement matching band. I will tackle that one when I have the new bit and band and am up to speed on the process of banding.

With a happy glow of contentment in the pit of my belly, I replaced the above bit, with the P filled in at last, on its rightful pipe in the stand-up, two sided bookshelf with doors where I store most of my collection, and opted to proceed with this restoration by doing the long, tedious work of applying layers of black Super Glue to build up the thinner, bottom section of the bit that lacks a tenon. As a result, while the rest of the Wellington has been finished for about ten days, the old bit, mangled by some wannabe pipe fixer, took days of patient layering, sanding and micro-meshing each phase, then polishing on the buffers, and was only completed moments ago.

I started the bit on its way, which I knew would take some days, by filing it to a uniform tapering roundness and sanding with 150- and 320-grit paper before micro-meshing from 1500-4000.Robert10

Robert11 After that I gave the entire surface of the bit below the bulge the first of four thick coats of black Super Glue. Aware of the risk, I then stripped the old finish with as short as possible of an Everclear soak.Robert12

Robert13

Robert14

Robert15

Robert16

Robert17 Leaving the bowl and shank for about 10 minutes in the alcohol and time enough to dry, I reamed and sanded the chamber to the smoothness of a chamois cloth and retorted the pipe using the bit from my own Peterson’s System Standard. Starting with super fine 0000 steel wool, then micromesh every step from 1500-4000, the wood and steel band had a nice natural sheen.Robert18

Robert19

Robert20

Robert21

Robert22

Robert23 Without stain, using the natural rich color of the briar, I prepared the bowl and shank for the coming test to see if the bit worked out, the likelihood of which I had doubts, by buffing it with white Tripoli, White Diamond and two coats of carnauba, using the plain cloth buffer between each, of course.

The following days seemed to drag with each successive layer of black Super Glue and the long drying time followed by sanding with 200-grit paper and micro-meshing up the scale each time. But in the end, the result was worth the time and effort, considerable and somewhat unnerving as they were.Robert24

Robert25

Robert26

Robert27

Robert28

Robert29

Robert30

Robert31 CONCLUSION
Again, this battle was far more about trying to recover an available bit, so that it would fit and lock in the shank, rather than any problems I faced with the bowl and shank. As the bit was when I received the Pete System Standard with which it came, well, the bit was the tip of the iceberg with that future project. In fact, my friend and mentor, Chuck, recommended that I send it to someone he knows in Denver – not so much because the task was beyond my skills but that it was what he would do if he needed a new Peterson’s bent system pipe stem with the right measurements as well as a replacement band of the appropriate type. I was fortunate with the WDC in that it called for a bit designed after the Pete System variety.

Of course I would have preferred to place a perfect, like-new bit in this great WDC Wellington, but the personal reward came in finding out that I could take what I had and make it work.

I think I’ll do the same with the estate Peterson’s Standard System that gave its bit for this pipe, after I’ve received the new parts in the mail.

Midterm Exam #4: Re-Refurbishing an Unknown Bulldog


Blog by Anthony Cook

It’s time for the fourth and final midterm exam! This one is an “unknown” bent bulldog that I picked up from eBay. I snagged it because I liked the shape and it was cheap. What I didn’t know at the time, but became immediately apparent when the pipe arrived, was that the end of the shank had been shattered into at least three pieces and glued back together. There was no stamping on the pipe, but I don’t think that was always the case. It was likely sacrificed during the shank repair. The repair is fairly obvious in my photos below, but I assure you that it was not nearly so in the seller’s. The right combination of lighting and angles can cover up a multitude of sins, folks. Caveat emptor.

The exposed cracks weren’t the worst part of the story though. The repair did as much damage to the pipe as the crack did. An alarming amount of material had been taken off while sanding out the excess glue. It’s difficult to see in the photos, because from any one angle everything looked correct. However, if you held the pipe in hand and rolled it around you would notice that no two faces on the shank were equal. The shank was no longer a diamond shape; it was a trapezium. The repairman hadn’t paid much attention to keeping the surfaces level either. So, there was a subtle undulation to the line of the shank as it went from thick to thin and back again several times along its length. There was also very little effort made to blend the repaired area into the rest of the pipe, and several shallow “steps” were visible where the two surfaces met. There was at least an attempt to match up the stem to the shank, but that only gave the stem the same odd angles and even they didn’t quite match up to the ones on the shank. All in all, it was a bit of a travesty. Here are a few photos taken just after it arrived.Anthony1

Anthony2

Anthony3 That was all far more than my tender, noobie hands could handle at the time. So, I cleaned the internals of the pipe and put it away for later, but not before adding a bit of bend to the stem that it seemed to have lost over time.
I’ve finished up work on all the rest of the pipes in that first batch. So, this week it was time to put a collar on that dog and turn in my final midterm.

I started (or restarted I should say) by dropping the stummel into an alcohol bath for a couple of hours to soften any coating that might be on the pipe. I had quite a surprise when I removed it later on. It looked fine when it was fresh from the bath, but a hazy, white glaze began to form on the surface as it dried. I hadn’t seen anything like this before and I’ll admit to a brief moment of panic. I assumed that this was probably the result of some type of coating reacting to the alcohol. So, I wiped the stummel down with acetone taking extra care around the shank repair, since acetone will break down superglue. That did the trick and the stummel cleaned up nicely.Anthony4 I set up the retort to see if I could remove any more tar buildup from the pipe. I flushed the shank about 10 times with boiling alcohol before allowing the pipe to cool. I noticed that the vial appeared to be losing a lot of liquid during the retort. The cotton wasn’t discolored. So, it wasn’t gassing out through the bowl. It really had me scratching my head until I saw a spot of moisture on the shank when I was removing the retort. For some reason, it wasn’t sealing well at the mortise and I’d need to look into that before I went much further.Anthony5 I gave the pipe a post-retort scrub of the stem and shank, and then inspected the crack repair for gaps. The surface of the glue joints looked airtight, but I noticed that the glue hadn’t penetrated very deep. The joints left shallow fissures inside the mortise and along the shank face. I used a small pushpin to place a little super-thin CA glue directly into the fissures, and then used a toothpick to apply a thin layer of the CA around the end of the mortise to create a seal inside as well as out.

When the glue was dry, I sanded out the interior patches with sanding needles and a piece of 400-grit sandpaper wrapped around a small dowel. I refaced the shank on my topping surface in a manner similar to how I would top a bowl (pressing lightly into the paper and using a circular motion). The following pictures show the patches when fresh and after they had been sanded out. You can also get some idea of the irregularities in the shank by comparing the differences in the face angles and wall thickness around the mortise.Anthony6 After that, I reattached the stem and ran a retort through it again to test for leaks. The outside of the stem and shank stayed dry as a bone through the whole process. So, I began addressing the pipe’s cosmetic issues.

I lightly topped the bowl and chamfered the inner rim to remove the scratches and dings. Then, I steamed a few dents out of the finish by pressing a screwdriver that had been heated over a tea candle into a wet cloth placed over the dents. Finally, I used CA glue and briar dust to patch a few, small gouges and missing fills and sanded them out with 220-grit and 320-grit sandpaper.Anthony7 While I worked on the stummel, the stem had been soaking in an Oxyclean bath. I removed it and scrubbed it down with a Magic Eraser to remove any oxidation. I used black CA glue to fill the tooth dents on the top and bottom of the stem. Once that had dried I sanded it down with 220-grit paper.Anthony8 The stem button needed to be rebuilt since it was worn and dented. I wrapped several layers of clear tape around the stem just below the button to create a form to make a crisp edge and also inserted a Vaseline smeared wedge of cardboard into the slot to seal it. Then, I applied thick, black CA glue in several layers to the end of the stem to begin building the new button. It wasn’t a pretty thing to look at when I removed the tape, but the edge was sharp and there was enough material to work with. I trimmed away the glue artifacts created by the tape molding with an X-Acto blade and rough-shaped the new button with 220-grit paper.Anthony9 Once the button started taking shape, it was time to do something about the other end of the stem and also the deformity of the shank. This was the part of the exam that I had not been looking forward to. Up to this point, everything had been the equivalent to multiple-choice or fill-in-the-blank questions. There were a couple of challenges, but nothing too rough. The next part was more like the essay section.

After a lot of thought, I finally decided that there just wasn’t enough material left around the stem to square everything back up. So, I thought I’d try some trickery of my own. If I couldn’t make everything right, maybe I could use a little more finesse and subtlety than the original repairman did to make it at least look “righter”. If ya can’t beat ‘em, join ‘em.

I used 220-grit sandpaper to start carefully nudging the edges of the shank and stem saddle this way and that to give them an appearance of alignment. All the while I paid special attention to keep the faces as level and even as I could. There was very little technical skill involved. I was basically just freehanding. Once I had corrected the lines as much as I could, I began blending the reworked areas into the rest of the pipe with 320-grit. The photo below shows the progress somewhere early in the reshaping phase. Honestly, I was at this for a while and kind of lost myself in the middle of it. So, I didn’t get many photos.Anthony10 When I was as satisfied as I was likely to be with the shape of the shank and saddle, I went back to work on the rest of the stem to finish it up. I continued shaping the button with 320-grit and 400-grit paper. Then, I smoothed the entire surface by lightly sanding with 600-grit and 1200-grit paper. Finally, I polished the stem with micro-mesh pads 1500-12000.Anthony11 The stem work was wrapped up. So, it was time to do the same for the stummel. The off-kilter shape of the shank made it difficult to find a band that would fit well. It took three attempts before I found one that would work. I used a method for shaping a round band for the diamond shank similar to what Steve has previously written about here, but it took quite a bit of reworking to get it to conform to the now strange dimensions of the shank. I’m still not quite happy with how it fits, but I’m not sure what I could have done differently.Anthony12 There was nothing left to do at that point but to address the finish of the stummel. I wanted the final color to be close to the original but a little darker to help hide the bit of crack repair that was still visible. I heated the stummel over the heat gun to open the grain and then applied Fiebing’s black dye to the stummel. I then sanded down the surface with 400-grit paper to remove the remaining scratches and most of the black stain, except for what had set in the grain and recesses of the rings. Next, I applied a mahogany stain before sanding with 600-grit and 1200-grit paper. I took the stummel to the buffer and gave it a quick Tripoli buff, and then applied a final stain of British Tan.

The stummel was polished with micro-mesh pads starting with 3600-grit and working through to 12000-grit. I then buffed the entire pipe with white diamond compound and gave it several coats of carnauba wax to finish it up.

I leaned back in my chair and checked the clock on the wall. There were only minutes to go and most of the other seats were already empty. I had to admit that this was really as good as it was going to get. So, with a sigh, I stood up from my chair, gathered my exam materials, and delivered them to the desk at the front of the room…Anthony13

Anthony14

Anthony15

Anthony16

Building a New Button on the Cut off Stem of a Savinelli Autograph 4


Blog by Steve Laug

I decided to tackle another button rebuild. A friend brought over a cut off Savinelli Autograph long shank plateau Dublin that he had picked up. The shank was stamped Savinelli Autograph 4 on the underside and there was a signature stamp on the stem.Auto1 I have no idea how the stem got cut off but my guess would be that someone removed the damaged part of the stem and button and then saw how close to the surface the airway was and decided to abort the mission of cutting a new button on the stem. I have been working with developing my mixture of medium viscosity black cyanoacrylate glue and charcoal powder to rebuild/craft new buttons. I have used it on quite a few repairs of my own and on a few for friends. It definitely dries harder than the glue by itself and seems to be very strong once it has cured. I thought this pipe would be a good candidate for that process.Auto2 I wrapped the end of the stem with a band of cellophane tape to make a straight edge to work against for the glue and charcoal powder mixture. It works to keep a semi-straight edge but I find it is more of a guide than anything else. It gives me an edge to work with when I build up the layers of patch material.Auto3

Auto4 I mixed a batch of glue and charcoal powder on a card that I use for that purpose. That way when I have finished the mix and repair I can fold the card and throw it away without getting the glue all over the place.Auto5 I stirred the powder and glue together with a dental pick until I had a thick paste mixture that was still workable.Auto6 I applied it to the end of the cut off stem with the dental pick and shaped it roughly to match the kind of button shape I was aiming for when finished.Auto7

Auto8 I put the pipe on a cork and candle stick holder that I use for drying bowls when I stain them or stems when I have done this kind of repair and set it aside to cure for two days. This kind of patch is a long haul project. It is not a quick repair. If you start reshaping the button too soon the repair breaks off in chunks that are still soft underneath the surface. So, having learned that I left it alone and did other work while the days passed.Auto9 After two days of curing the repair was solid all the way through. I would still need to be careful as the longer it cured the harder it would become. I used emery cloth and 180 grit sandpaper to shape the button into an oval and to face the end of the button. You can see in the photo below how much more material there was to work with now in terms of shaping the airway and the slot in the button thanks to the build-up of material.Auto10

Auto11 I worked over the edge of the button with the sand paper as well to clean up the sharp edge next to the blade of the stem. I moved on to sand with 220 grit sandpaper and also with a medium and a fine grit sanding sponge to further define the new button and to clean up the scratches.Auto12 After the initial shaping and sanding I put the stem to the side to cure longer and addressed the bowl and shank. I reamed the bowl with a PipNet reamer and took the cake back to a very thin layer.Auto13

Auto14 I cleaned the interior of the airway and mortise with pipe cleaners, cotton swabs and isopropyl alcohol until they were clean.Auto15 I scrubbed the bowl and the plateau rim with a tooth brush and Murphy’s Oil Soap to clean off the grime and dirt in the plateau and the sandblast shank.Auto16

Auto17 I scrubbed the plateau with a brass tire brush to dig out the built up tars and oils that had clogged the crevices in the finish there.Auto18 I put my thumb in the bowl and carefully rinsed off the soap with cool running water. I dried the bowl with a cotton rag and took the next series of photos to show what the bowl looked like clean.Auto19

Auto20

Auto21

Auto22 The next day I decided to work on the slot in the button and open it up with a flare to create a Y shape. I used needle files to work on the airway. The next series of photos show the files and the progress of opening the airway.Auto23

Auto24

Auto25 With the airway/slot roughed in it was time to continue shaping the button and the face of the slot. I sanded it with 220 grit sandpaper to refined the shape and to smooth out the end of the stem.Auto26

Auto27

Auto28 I used a folded piece of sandpaper to smooth out the interior of the slot and further shape it. The photo below shows the state of the slot and the shape of the button.Auto29 With the shaping completed it was time to work on fine sanding of the stem and new button. The charcoal bits in the mixture are hard and coarse and need to be refined with fine sanding. I worked over the stem and button with micromesh sanding pads, wet sanding with 1500-2400 grit pads to remove the majority of the coarseness. It is only this first step in the process of polishing the stem but it is amazing to see the transformation as I work through the various grits of micromesh. I rubbed the stem down with Obsidian Oil when I had finished with the 2400 grit pad. I will still need to refine the inner edge of the button with files but the overall shape of the stem and button are clearly visible.Auto30

Auto31 I wet sanded the stem with the 2400 grit micromesh until I had minimized the scratches and polished the button. I then rubbed it down with another coat of Obsidian Oil and then sanded it with 3200-4000 grit micromesh pads. I gave it another coat of oil and then sanded it with 6000-12,000 grit pads. I gave it a final coat of oil and let it dry.Auto32

Auto33 I buffed the stem and the bowl with Blue Diamond and then lightly buffed the blast with the same. I gave it multiple coats of carnauba wax and buffed it with a clean flannel buffing pad to raise the shine. The finished pipe is shown below. The new button looks like it belongs. The shape of the slot is open and it accepts a pipe cleaner with ease. It should provide years of service to the pipeman who is holding it in trust. He should enjoy smoking it with much more ease. Thanks for having a look!Auto34

Auto35

Auto36

Auto37

Auto38

Auto39

Midterm Exam #3: Restemming a Thermofilter Billiard


Blog by Anthony Cook

I’m turning in my third midterm exam today. This one is based on an old Thermofilter pipe. I’ve made plenty of mistakes while fumbling my way through the learning process of pipe restoration, but one of my biggest and earliest blunders was inflicted on this poor pipe.

Thermofilter seems to be one of those nearly forgotten brands that nevertheless still pops up on eBay on a fairly frequent basis. The best information that I can dig up on it comes from a comment that “emo” posted on the Dr. Grabow Collector’s Forum:

Thermofilter was made in Italy by Fratelli Rossi in Varese. Started about 1964 and continued till about 73/74. It was imported and sold by Mastercraft…. to, best I recall, Whitehall Products Co. in Wheeling WV… Division of CULBRO.

We had several “left over” and closed them out for $3.98 over a year or two… not as Thermofilter, but simply as a filter pipe, even though they were stamped Thermofilter. Pretty cheap stuff…

The pipe in my possession is a small billiard with carved rustication. The center letters of the stamping are very worn and faint, but there’s enough there to make out “THERMOFILTER” over “IMPORTED BRIAR” on the left side of the shank. The stem did not have any markings and the bit end had been hacked off. Below are some photos of the pipe that I took shortly after its arrival.Anthony1

Anthony2 You may have noticed that I used past tense when mentioning the stem above. That’s because I dissolved the original, plastic stem from the inside out. Yes, you read that right. When I was running alcohol dampened pipe cleaners through the stem to clean it out, the first couple came out covered with the thickest, blackest, and stickiest goo that I had ever encountered and I surmised that I was working on some serious tar build-up. I was surprised to find that the amount goo wasn’t diminishing as I worked, but actually appeared to be increasing. Eventually, I noticed that the bore of the airway seemed larger than I had originally thought it was. That’s when I realized the horrible truth. The alcohol on the cleaners was causing the cheap, plastic material of the stem to break down and it was disintegrating from the inside out. You can see for yourself in the comparison photos below.Anthony3 You’d think that I would have noticed it earlier, but I honestly wasn’t paying attention to the diameter of the airway. I mean, who thinks that their stem is just going to dissolve, right?

In any case, I didn’t have any extra stems to replace the original with. So, I tossed the poor, mutilated stem into the trash and dropped the stummel back into the box. It’s been wasting away in there for the past several months. For my third midterm exam, I decided to pull it out to see if I could do right by this old pipe, try some new things, and correct my past mistakes.

I started by giving the stummel an alcohol bath and wiping it down with acetone. This removed the lacquer coat and much of the old stain. It also revealed some really nice grain between the areas of carved rustication. Then, I topped the bowl with 220-grit and 320-grit papers. I used the same grits to rough out a chamfer around the rim to remove the gouges along the edge.Anthony4 Even though the pipe had been hand cleaned before being boxed up, I wanted to do a retort since I didn’t have one at the time. So, I placed the original, aluminum tenon into the mortise and attached the retort tube directly to that. I flushed the boiling alcohol through the shank 8-10 times before setting the pipe aside to cool, and then I dumped the amber-colored alcohol and repeated the process. After the second flush, the alcohol remained nearly clear and I was satisfied that the retort had done all that it could do. I gave the shank a final scrub using a few pipe cleaners, cotton swabs, and a shank brush and considered the pipe to be clean as it was going to get.Anthony5 The stummel had a few fills that needed to be dealt with. It also had a small, surface crack at the end of the shank that did not penetrate into the mortise. I had wondered about using black CA glue for fills for a while. When I saw Al’s work on the Chelsea pipe I knew that I had to give it a try. After picking the fill material out, I applied a bit of glue into the pits and crack with a round toothpick, and then packed in a little pre-stained briar dust that I had left over the Rogers pipe that I posted earlier. I repeated this until I had a good patch built up above the surface. When the glue was dry, I sanded it down with 220 and 320-grit paper. I also used a round, tapered needle file and 240/320-grit sanding needles to smooth and shape a patch inside the carved rustication.Anthony6 Once the fills and crack were repaired, it was time to do something about the stem. I had picked up a grab-bag batch of pre-made stems a short while earlier. I sifted through them until I found a decent match. I decided to trim the tenon rather refitting the old, aluminum one. So, I cut off the stepped end of the tenon with a Dremel, and then trimmed the tenon with the tenon turning tool chucked into the drill press. The tool was new to me and the first image in the picture below shows the result of my first cut. My speed was off and I didn’t take it up far enough to face it properly. No worries though, because it was still too large and the subsequent trims went much better.Anthony7 After each turn of the tenon, I tested the fit by inserting it partially into the shank. When I thought I was getting very close, I attempted to insert the stem a bit farther and heard a sharp “snap”. It was the unmistakable sound of the shank cracking. It seems that the surface crack that I had thought was insignificant had suddenly become significant.

To repair the crack, I smeared petroleum jelly over the tenon and inserted it into the mortise to spread the crack open. Then, I applied CA glue (clear, not black this time) into the crack and removed the stem to allow the crack to close. I squeezed the shank tightly together with my fingers for a couple of minutes until the glue had set.Anthony8 I wasn’t going to do anything more with the stem until I added some support to the shank. I considered trimming down the original, aluminum tenon to use an internal splint, but decided against it. Since the new crack had run longer than the length of the tenon. So, I decided to band the shank.

I had some trouble finding a band that would fit properly. A 13mm would slide most of the way up the shank easily, but a 12.5mm band wouldn’t even start over the end. So, using the 13mm as a guide, I marked off an area that was the width of the band and sanded it down until the 12.5mm band would just barely slide onto the shank. Then I held the band attached to the stummel over a heat gun to expand it. In less than a minute it had expanded enough that I could push the band the remaining distance up the shank by pressing the end into a soft cloth on a hard surface.Anthony9 With the band in place, I could continue working on the tenon. I continued to slightly reduce the diameter of the tenon with 220-grit, 320-grit, and 400-grit paper until the stem was held tightly in place but easily removed.

The stem was already a pretty close match to the width of the stummel but it needed some refinement and the artifacts from the mold needed to be removed. I kept the stem attached to the stummel and wrapped a strip of painters tape around the band to keep from dragging fine metal shavings into the vulcanite (which dulls it). Then, I began shaping the stem and removing the extra material with sandpaper and sanding sticks. I began roughing it with 220-grit and 320-grit (results in first picture below) and refined it with 400-grit and 600-grit (results in second picture below).Anthony10 I used a set of needle files and sanding needles to open the slot and funnel it. This was my first time trying my hand at this and I’m going to need some more practice because the results were rough. I also funneled the tenon to remove the whistle when the stem was drawn on. Finally, I lightly sanded the entire stem with 1200-grit paper before polishing with micro-mesh pads 1500-12000. The final stem, along with a whole lot of lint, can be seen in the bottom image below.Anthony11 Between the large areas of carved rustication (blech!) on the stummel there was some really nice grain. I can appreciate straight grain for its rarity, but I love a good bird’s eye. When it’s stained well, it has a depth that’s almost like looking at an x-ray of the briar. So, I wanted to do everything that I could to accent that grain and take your eyes away from the ugly, carved, tobacco leaf swirls.

Three main stains were used to achieve the final look of the pipe; black to accent the grain, mahogany to give the overall tone, and ox blood at the end to add a bit of vibrancy. The first two colors were mixed at a 3:1 ratio of isopropyl alcohol to stain. The final color was mixed as a thin wash that I just eyeballed. The stummel was sanded between each staining; starting with 400-grit after black, 600-grit after mahogany, and 1200-grit after the ox blood wash, and then a micro-mesh polish 1500-12000. I also did a lot of grain massaging between each stain using a variety of tools including liner brushes and markers and inks and dyes of a few different colors. You can see how the staining progressed from start to finish in the pictures below.Anthony12 When the staining was complete, I reattached the stem and buffed the entire pipe with White Diamond, gave it several layers of carnauba wax, and added a bowl coating to the well worn chamber. Here’s the pipe that I’m turning in for my third exam.Anthony13

Anthony14

Anthony15

Anthony16 Thanks for looking!

NEPAL PROJECT PIPE SALE 12 – Restoring an Iwan Ries Blackruf Bent Billiard


Blog by Steve Laug

This is the twelfth pipe from the box of pipes that I was gifted by a good friend of mine with the instructed purpose of cleaning them up and selling them with all of the proceeds going to the aid of earthquake victims in Nepal. Once again all funds raised will all go to the SA Foundation, and organization that has worked in Nepal for over 15 years helping provide recovery, housing and job training for women who are victims of sexual exploitation and trafficking. The ongoing earthquakes (over 300) that continue to shake Nepal have left much in ruins. The SA Foundation Project there was able to find new housing for the women and help with staff as well. Every dollar raised from the sale of these pipes will go to the work in Nepal.

This one is Iwan Ries & Co. Blackruf, or sandblast billiard. It is stamped very clearly on the left side of the shank, Iwan Ries & Co. over Blackruf. There are no other stampings on the pipe. The finish is in the best shape of all of the pipes in this lot that I have worked on. The sandblast is not deep and the finish is a mix of blasted birdseye and swirls. That makes it an interesting blast. The exterior of the bowl is not round as the blast removed a lot of the wood near the top left edge of the pipe. It is still nice and thick but is out of round. The bowl needed a light reaming and the shank and airway were dirty. The rim was very clean and the inner edge is sharp and undamaged. The stem was oxidized and had tooth marks on the top and underside near the button. Most of the oxidation was on both ends of the stem. The stem was also slightly twisted from the bend back to that it did not sit correctly. The button on the top side was quite thin and worn down and the sharp edges on both the top and bottom had been smoothed out. The tenon was unique to me in that it was rounded at the end. Once it was cleaned up and repaired this would be a beautiful looking pipe.Black1

Black2

Black3

Black4 I took some close-up pictures of the rim and the stem to show how they looked when I brought them to the work table.Black5

Black6

Black7 The next photo shows the rounded end of the tenon, the oxidation on the stem and also the dusty buildup on the bowl in the grooves of the sandblast.Black8 I reamed the bowl back to a thin cake with a PipNet reamer. There was a lot of tobacco debris in the bowl, stuck to the sides that needed to be removed and the cake was uneven so I wanted to even it out and make it easier to rebuild the new cake.Black9

Black10 I scrubbed out the mortise and the airway to the bowl with pipe cleaners, cotton swabs and alcohol. It took quite a bit of scrubbing to get them clean and to remove the “crud” (technical term) that had collected there over the years. I used a thin, sharp knife to scrape out the thick ridge of “gunk” (another technical term) in the mortise.Black11 I cleaned out the stem with pipe cleaners and alcohol and also sanded the surface of the dents with 220 grit sandpaper and then wiped it down with alcohol to prepare it for the repairs. I filled the deep dents/tooth marks with clear superglue and let them dry (one side at a time). On the top side I also built up the button edge to give it some additional thickness.Black12

Black13 Once the glue had dried I used a needle file to redefine the sharp edge of the button against the surface of the stem. I sanded the patches with 220 grit sandpaper until they were even with the surface of the stem so that they blended in better.Black14 I sanded the repairs with a medium and a fine grit sanding sponge to reduce the scratches on the surface.Black15

Black16 I wanted to rebend the stem to take out the twist in the end. I set up a heat gun and heated the stem so that it would go back to its original shape. That is one of the things I love about vulcanite – is that it seems to have “memory” and returns to the shape it was before bending or twisting. It took some time to heat and straighten it out.Black17 A secondary benefit of heating the stem is that it smooths out all of the scratches and gives the stem a mat look. I rebent it over an old rolling pin to get a straight bend. I held it in the bend while I cooled it with running water.Black18 I polished it micromesh sanding pads – wet sanding with 1500-2400 grit pads and rubbing it down with Obsidian Oil when I finished this first set. I dry sanded with 3200-4000 grit pads and rubbed it down with oil again when I finished that set. Finally I dry sanded it with 6000-12,000 grit pads and gave it a final coat of Obsidian Oil and set it aside to dry.Black19

Black20

Black21 I buffed it with Blue Diamond Plastic Polish on the wheel to give a deep shine and to remove any final scratches.Black22

Black23 I buffed the bowl lightly with Blue Diamond and the stem once again before giving them both a coat of carnauba wax. I gave the bowl a light coat so as not to fill in the grooves and repeated several more coats on the stem. The finished pipe is shown below. It is ready for the next pipeman who will enjoy smoking this beauty.Black24

Black25

Black26

Black27

Black28

Black29 This Iwan Ries Blackruf bent billiard is quite a large pipe, basically a Group 4/5 in Dunhill terms. The shallow mixed grain blast makes it interesting to look at and the feel of it in the hand will make it quite tactile when heated up and smoked. The stain is a combination of dark browns and black that gives it a multidimensional look. It should make someone a great addition. If you are interested in this pipe email me with an offer at slaug@uniserve.com and we can discuss it. The entirety of the sale price will go to the Nepal project. I will pay the postage so that does not get taken off the proceeds. If you are interested in reading about the SA Foundation you can look at their website at http://www.safoundation.com.

Thanks for looking.