Tag Archives: sanding a stem

Restoring an Astor Belge


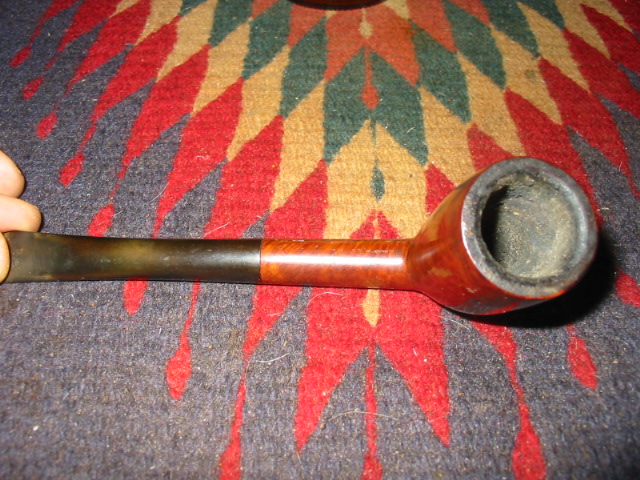
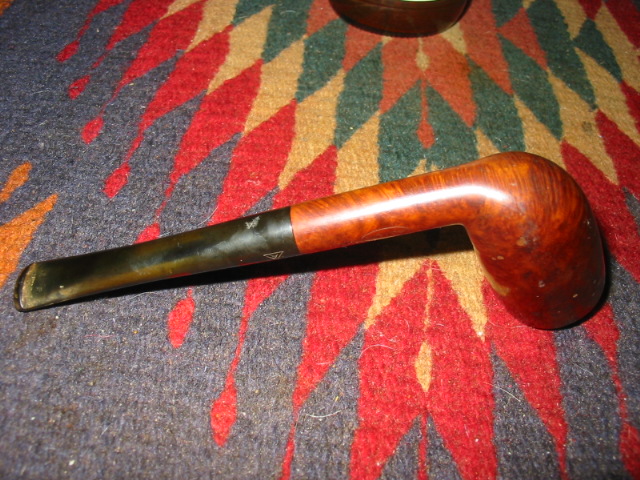
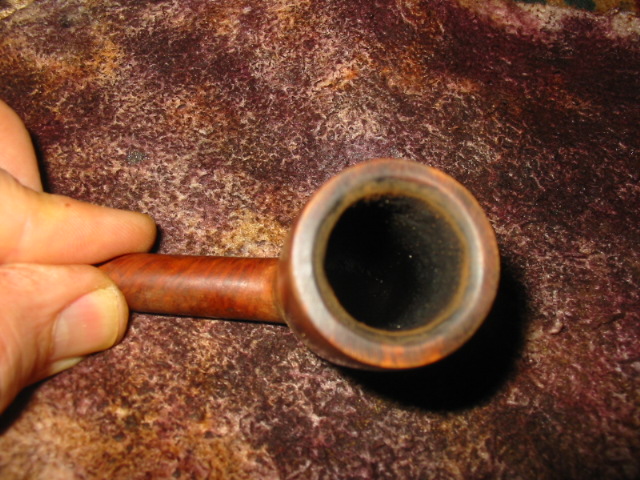
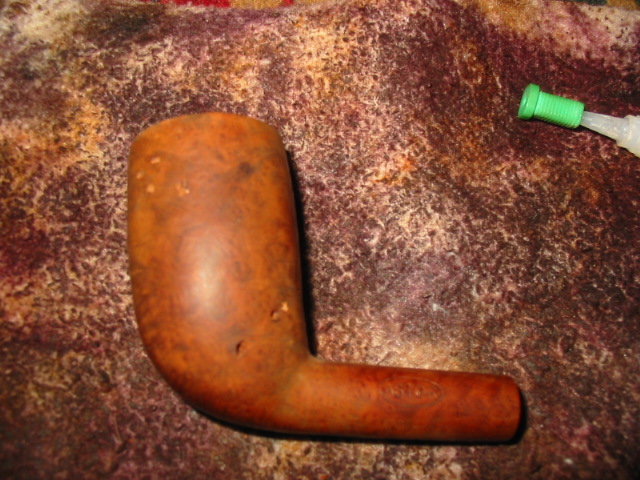
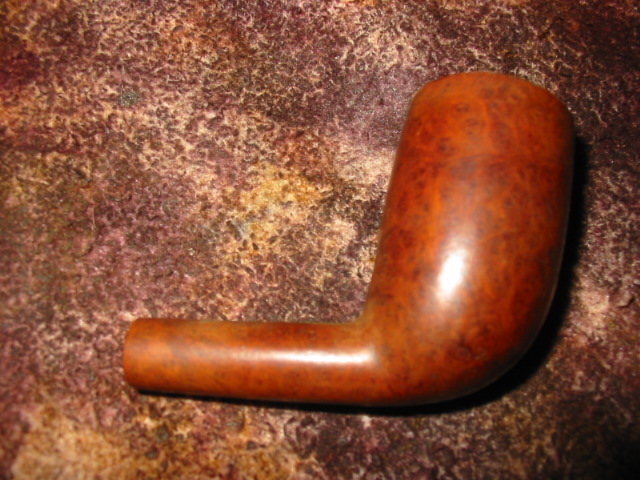
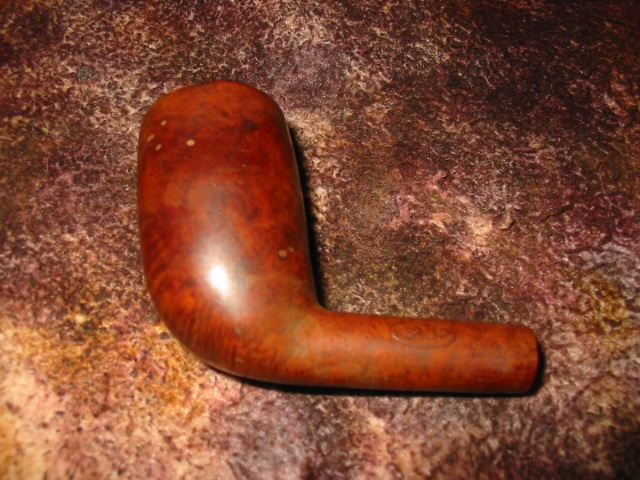
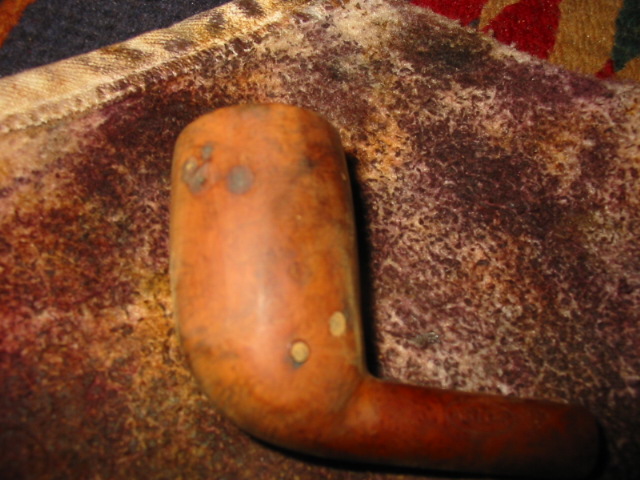
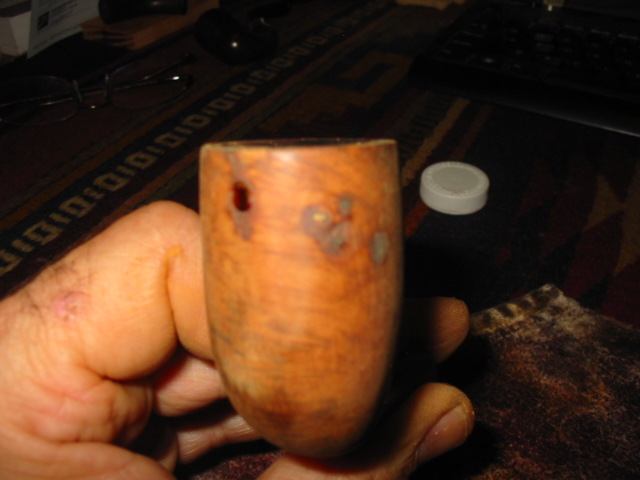
This was one of the pipes I picked up recently on a trip to the US. It is a small Astor Belge shape which is one of my favourite shapes of pipes. Astor pipes were made by Comoy as a second line of pipes. From the number of fills on this one it can easily be seen why it is a second. It is a shame as it also has some amazing cross grain on the front and back and some beautiful birdseye among the fills on both sides. The extent of the birdseye grain can be seen in the second photo below.

ImageImageImageImage

The pipe was dirty but really in pretty good shape for its age. I reamed the bowl and cleaned the bowl and shank with Isopropyl alcohol (99%) to remove the tars and oils from the inside. Then I dropped the stem in some oxyclean to soak and wiped the bowl down with acetone (fingernail polish remover) to remove the finish. I dropped the bowl in the alcohol bath for awhile to give it a good soak and worked on several others for awhile.

After an hour in the bath, I removed the bowl and dried it off. The next series of three photos show the pipe after removal from the bath. I used micromesh 1500 grit sanding pads to remove the grime and tar from the rim and the inside bevelled edge. It took a bit of work to smooth this out and keep the angles the same all the way around. The third photo below shows the finished bevel and the top after quite a bit of sanding. The top took a bit more sanding with the micromesh to remove the darkening as it was on the surface and not too deep into the briar.
ImageImageImage

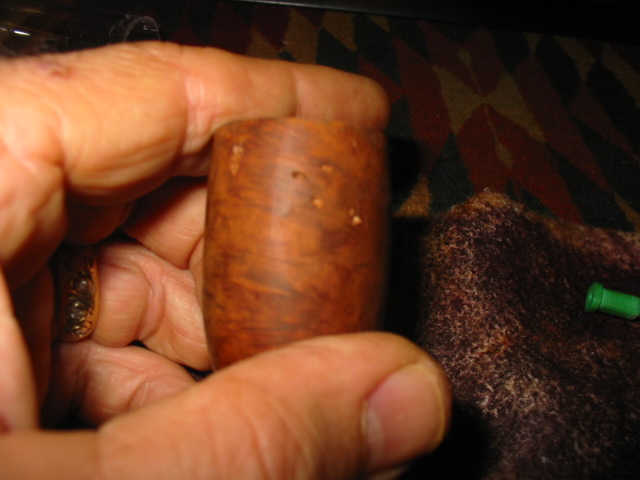
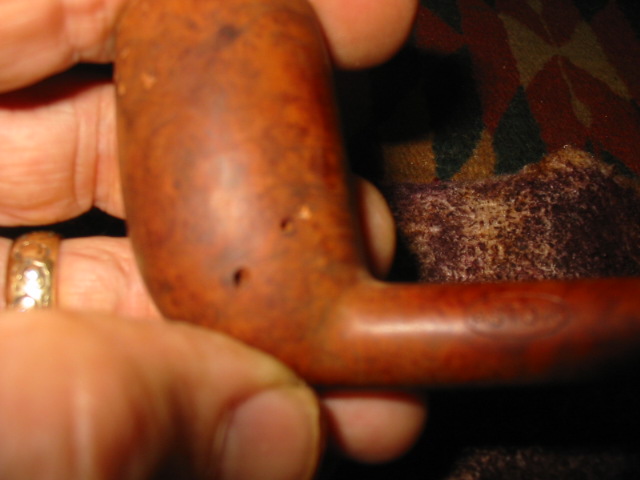
At that point I decided to remove the fills from the bowl as I personally dislike the pink putty fills that are often used on these old timers. I used the dental pick to remove the as can be seen in the next series of three photos. They were all pretty deep and would need to be repaired. After picking out the fill I wipe the bowl down with a soft cloth and Isopropyl alcohol to clean the surface of any remaining bits of putty. When they are clean and dry I fill them with briar dust that I have saved for this purpose.
ImageImageImage

After filling them with briar dust I drip the super glue/krazy glue into the dust and it dries almost instantly. The next three photos show the newly filled holes at various stages of the repair. The first photo shows the dust and super glue in the bottom holes before I sanded them. The top holes in the photo have been sanded a bit to smooth them out but are not finished. The second photo of the front of the bowl shows both the sanded ones and a newly filled hole with the super glue patch before it dried. The final photo in this series of three shows all the holes filled and the initial sanding completed.
ImageImageImage

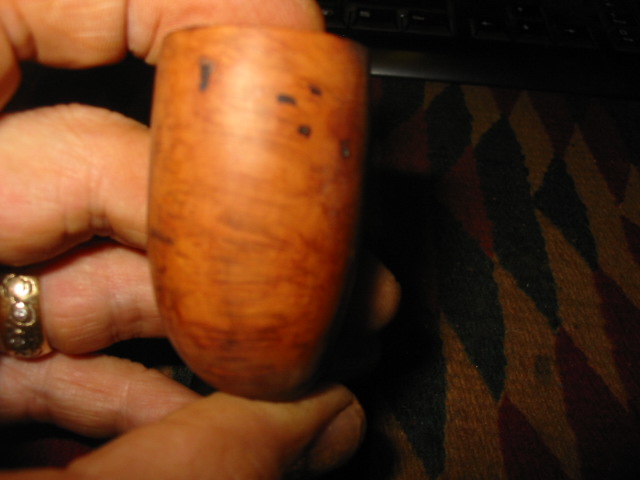
The next two photos sow the holes patched and sanded smooth. The super glue and briar dust turned black in this case. This does not always happen but it did this time. I have no explanation for that in this case but they do look better than the previous pink fills. I have also learned that they can be hidden a bit with a dark understain. In this case I decided to stain the entire bowl with black aniline stain for a first coat. I flamed the stain and when it dried I took the pipe to the buffer and buffed the entire bowl with Tripoli to remove the excess stain and leave the black in the grain and around the fills. You can also use black permanent marker to build the grain pattern around the fills to help hide them though I did not use that method on this pipe. I then sanded the bowl with the 1500 and 1800 grit micromesh pads to remove more of the overstain. I washed the bowl down several times with acetone to also lighten the black. Once it was at the saturation I wanted it was ready for the overcoat of stain.

ImageImage

I decided to use oxblood coloured aniline stain for the finish coat on this one. I wiped it on and then wiped it off before it dried to get good coverage I repeated that several times and finally gave it a full coat and flamed the stain to set it. When it was dry I took it to the buffer and buffed it with Tripoli and White Diamond to give the final coat a real shine.

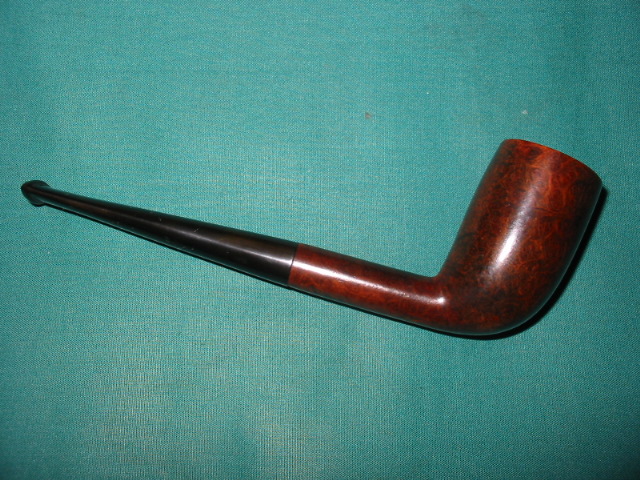
I finished the stem with my usual regimen of micromesh pads from 1500-6000 before putting it back on the bowl and buffing the pipe with White Diamond. I coated the stem with several coatings of Obsidian Oil and then gave the whole pipe multiple coats of carnauba wax to finish. The pictures below show the finished pipe. Though the fills are still visible they are diminished in their overall presence in the pipe. They no longer stand out in the finish. I personally love the depth of colour that this old Belge has with the new stains.

ImageImageImage

Edwards Contour or Criterion Restoration


I found this old Edwards pipe while I was visiting a small community in Washington in the US. My wife and I were away for our 36th wedding anniversary and always love visiting second hand shops and antique malls. We must have visited a dozen or more shops on that trip. This older Edwards pipe was in the last shop we visited. It was an interesting shape and intrigued my eye. I made an offer for it and it soon became mine.

Once I got home I decided to refurbish it as one of the first I dealt with. I am not sure of the name of the particular Edwards line this one came from but on one of the online forums someone thought that it belonged to either the Contour or Criterion line. He had pointed out that the lines were carved in France but the only sign of that was that the word France was usually stamped on the underside of the stem. However, on this one there was no stamping on the stem – no France or other name, just smooth brown oxidation. The stem also had tooth marks on the top near the button and a very prominent dent on the underside of the stem near the button. The finish on the pipe was dirty but in great shape. There were no dents or scratches and the pipe seemed to have been well cared for. Edwards did not stain their pipes as is evidenced by the natural finish on this one. The rim was probably the most potentially problematic area on the pipe. It was tarred, caked and possibly charred on the bevel inward.

ImageImageImageImage

I reamed the bowl and cleaned the inside of the bowl and the shank. I wiped down the entire pipe with undiluted Murphy’s Oil soap on a cotton pad and removed the grime and old waxes. I scrubbed the bevelled rim with the oil soap as well to remove the tars and the surface carbons. I used some 1500 and 1800 grit micromesh to remove the rest of the tars and bring it back to a smooth surface. I was pleased to see that there was not any charring or burn to the surface of the rim and once cleaned it looked pristine. The pipe has not been stained but had a natural finish so I buffed and polished the rim and the rest of the surface of the pipe to get the shine back. While I was at the buffer I also buffed the stem with Tripoli to break up the oxidation and then took it back to my work table. At the table I used nail polishing sticks (these are fingernail polishing stick and come with micromesh sandpaper on a foam stick) to sand out the bite marks on the top and underside of the stem. I worked with the 1500-6000 grit micromesh pads to polish the stem and remove the remaining oxidation. A folded pad worked well to sand in the grooves of the stem to give even that area a clean glow. I coated it with Obsidian Oil and once it was dry I buffed the entirety with several coats of carnauba wax.
ImageImageImageImage

A WDC Milano Hesson Guard Reworked


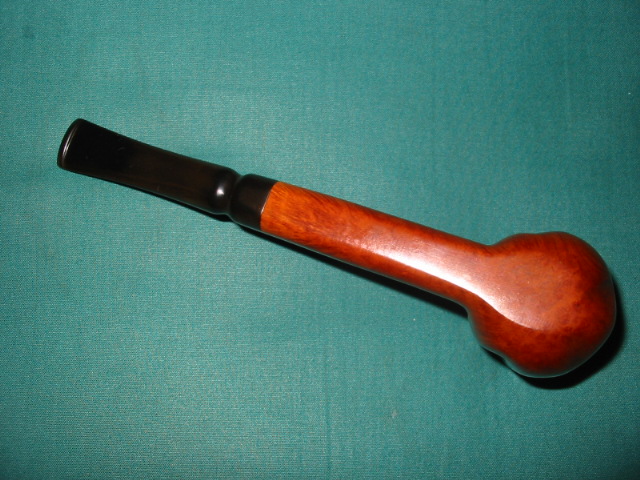
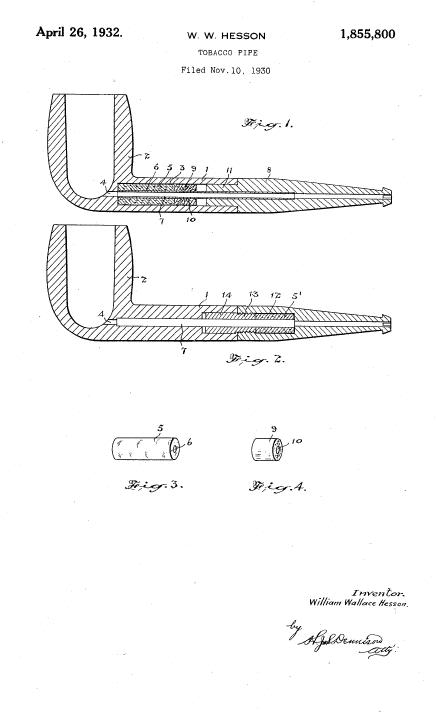
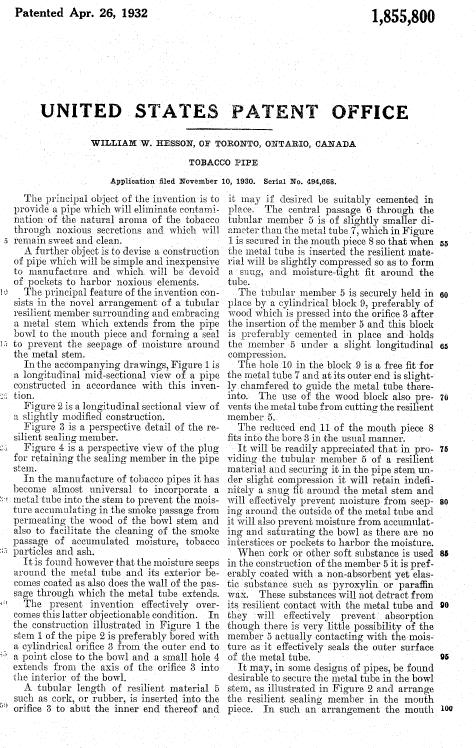
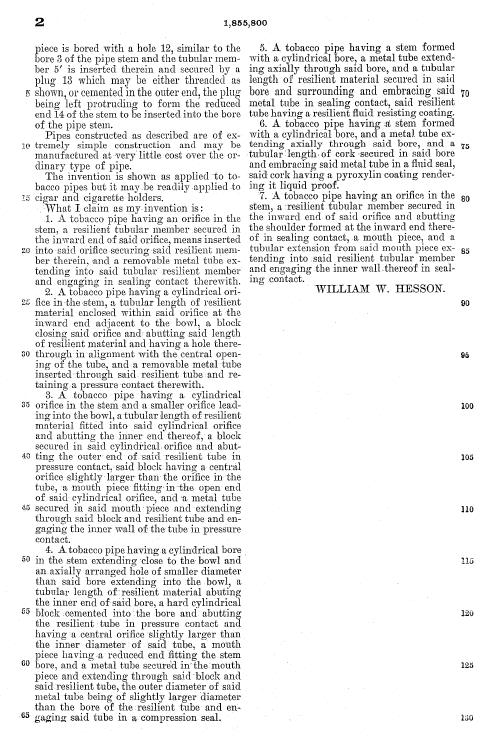
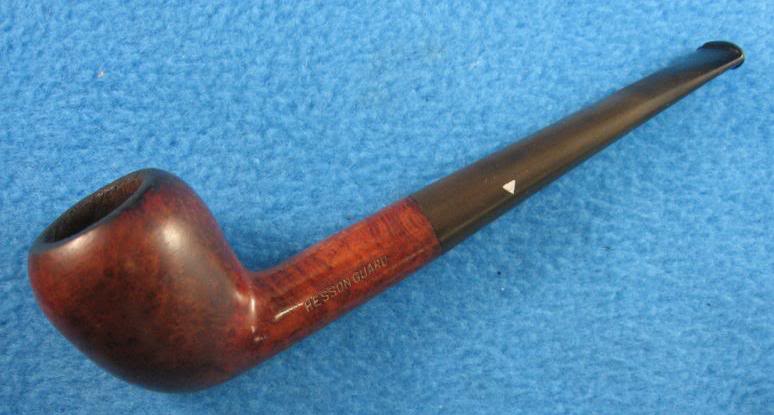
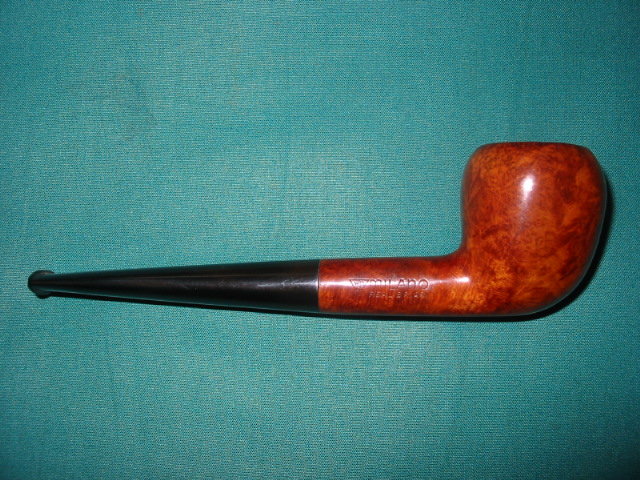
I just worked over this old timer – A WDC Milano Hesson Guard. In order to know more about the pipe I was working on I searched for information regarding the patent number stamped on the pipe and went to the US Patent site where I found documentation. The patent was filed for it in 1932. It is an early example of the pipe. It is in the acorn shape. It has the patent number stamped on it as well as the other WDC labels. The triangle on the stem is silver or steel inlay. For me this is a part of the mystery of unpacking the history and life of the brand and mark. I always like to know as much of the back story as I can find on any of the pipes I refurbish. Patent numbers stamped on the pipe provide a means of ferretting out information on the design and the particular part of the pipe that is patented. I have included the patent site information on the pipe for your reading pleasure. At least to me this part is fascinating information.
ImageImageImage

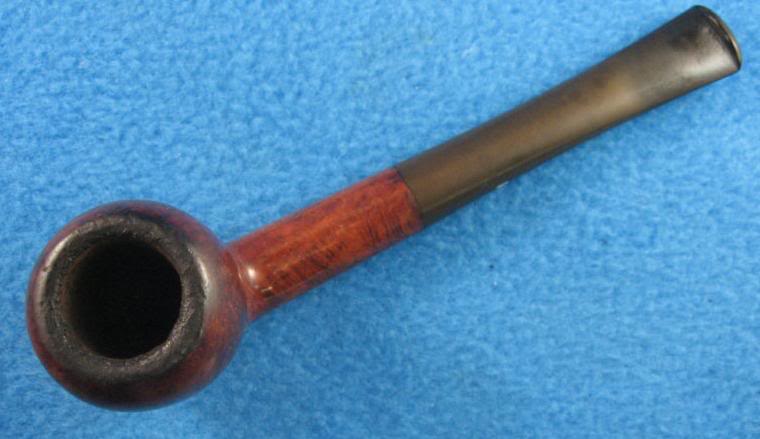
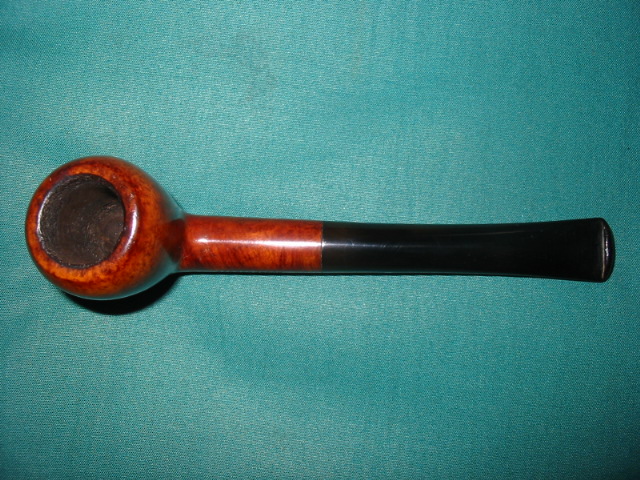
The pipe was caked with a crumbly thick cake that pretty much filled the bowl when I picked it up. I reamed it out to field dress the pipe. I generally do this with most of the pipes I bring home for renewal. It keeps the mess of the carbon from the cake outside and away from my work desk. In the photos below you can see that the finish was pretty dirty with a lot of hand oils and grease ground into the bowl surface. The rim was caked and tarred and it looked like it was damaged. The finish was worn and the stain faded in many places on the bowl sides. The stem was oxidized and had some bubbles in the surface along the button – the bubbles are visible near the button in the second photo below.

ImageImage

I scrubbed the exterior of the pipe with Murphy’s Oil soap, undiluted. I wipe it on with a cotton cloth and immediately wipe it off. Others have said that it removes the stain if left to long and it does indeed do that. But I have found it unsurpassed in quickly removing grime and grease if rubbed on and rubbed off quickly. I worked on the rim as well with a soft bristle tooth brush and the oil soap to remove the buildup. Once that was done I put it in the alcohol bath and removed the finish that was on it. It seemed to have had some built up waxes and also some kind of varnish coat over the stain. It came off with a bit of elbow grease after soaking. I decided to not stain this pipe as the briar looked great as it was. I just sanded it with the micromesh pads to polish it and remove the surface scratches. Then I took it to the buffer to give it a buff with White Diamond.

I worked on the stem while the bowl soaked in the bath. I soaked it in the Oxyclean mixture for a while to soften the oxidation. I dried it and buffed it with Tripoli to remove the surface oxidation. I sanded it with 240 grit sandpaper to get the deeper oxidation. I also had to lift a few tooth marks from the underside of the stem near the button. I used the heat gun to do that. The bubble on the top of the stem also was heated to try to smooth it out. It was evidently not a blister but a bump from teeth. It went back in place with the heat. I sanded the remaining signs of bite with 240 grit sandpaper and then 400 and 600 grit wet dry and water. I finished it with the normal regimen of 1500-6000 grit micromesh pads to polish. I put it back on the bowl and then gave the entirety a buff with White Diamond to polish it and finished the restoration with several coats of carnauba wax.

ImageImageImage

Restored a Comoy’s Tradition from the 50’s


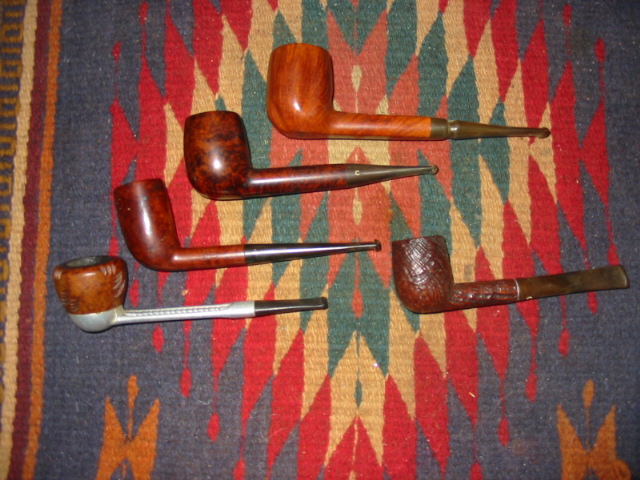
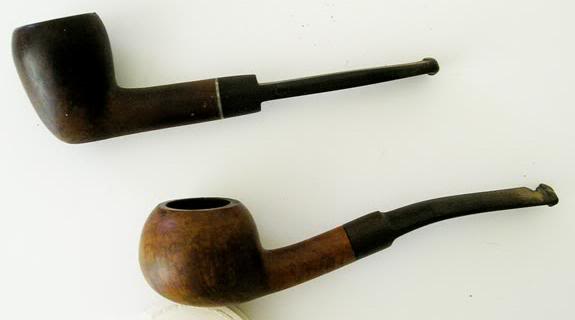
I have been looking for a Comoy’s pipe in the higher grades since I read a thread on Smokers Forums on the various grades of Comoy’s. On my anniversary trip to the States I came across a nice Tradition at an antique store. With a little bit of haggling the pipe and three others became mine (in the picture below the top pipe is an older Edwards that I picked up the next day at a different shop).

Please forgive the blurry pictures in the next foursome, I was too hurried to get at the clean up and restoration and did not focus them well. They are clear enough to see that the finish was in pretty good shape. The bowl was thickly caked and the rim was gummed up and looked to be dented. The stem was clean but oxidized and had tooth marks on the top of the stem near the button and on the underside in a matching pattern. I did a bit of field dressing to the pipe last evening while we were at the hotel, cleaned the stem and the inside of the shank with Isopropyl alcohol and also sanded the stem with a piece of 240 grit sand paper and some micromesh pads I had in my bag. (I know – it was my anniversary but I had thrown my book bag in from work and when I opened it I found the sanding disks. I have them in the bag when I have a break at work and want to get outside and have a pipe and work on one I have with me.) My wife was occupied with talking to the kids on the phone and looking through her purchases from the days shopping. So I had about an hour to do a bit of work!

I wiped down the top of the bowl with some Murphy’s Oil Soap (undiluted) on a cotton facial cleansing pad I picked up in the US. I had read about that on a post by Alan (Castana on SF) and they work very well. I applied the soap and removed it three times to soften and remove the grime. Once it was gone I found that the rim itself was pretty pristine. Just a little bit of wear on the chamfering on the right front. I reamed and cleaned the bowl and shank. I also used the micromesh pads (1500 and 1800 grit) on the rim and then restained the rim only with a dark brown aniline stain, wiped on and buffed off to match the bowl.

I worked on the stem next. It had bite marks on the top and bottom side near the button. I heated the stem and raised them as far as I could with heat then sanded out the remaining marks. To sand them I used 240 grit sandpaper first then used a fingernail sanding board that I picked up at Walmart this afternoon before coming home. It is pictured below in several of the pictures with the stem. It worked extremely well to remove the remaining tooth marks in the stem. I cleaned the oxidation with micromesh pads (1500-6000 grit) and put it back on the pipe to give it a buff with some Tripoli before returning to finish the polishing with the micromesh pads. I gave the stem a coat of Obsidian Oil and let it soak in before taking the whole pipe to the buffer to buff it lightly with White Diamond and several coats of carnauba wax.

Here is the finished pipe. I have been researching the stamping on this one. I found out that the stamping dates it to the early 1950’s. It is stamped in a circle with “Made” at the top, “In” in the middle and “London” at the bottom with “England in a straight line beneath. From the Derek Green’s History of Comoy’s Article I quote: “I believe this stamp was first used in the export drive in the early 1950’s and I have not seen any pre WW11 Comoy’s stamped in this way”.
http://www.derek-green.com/comoy_history03.htm

New Life for a Yello Bole Canadian


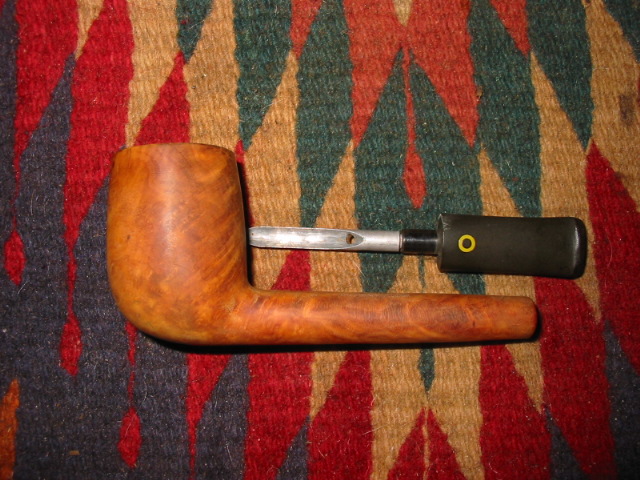
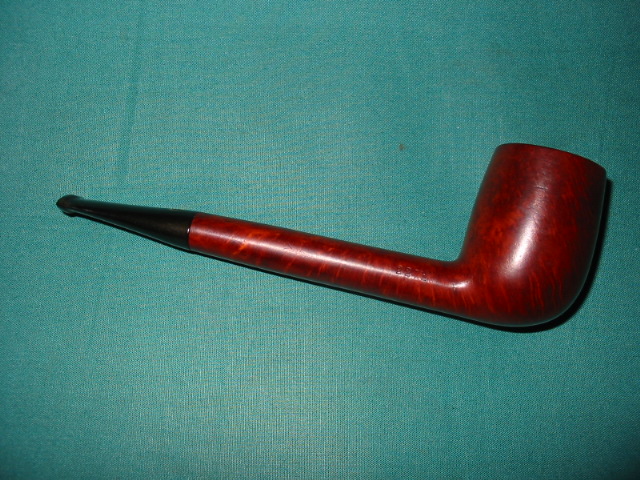
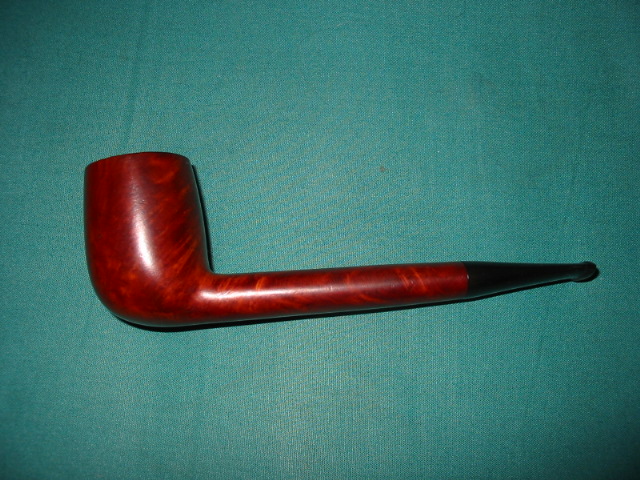
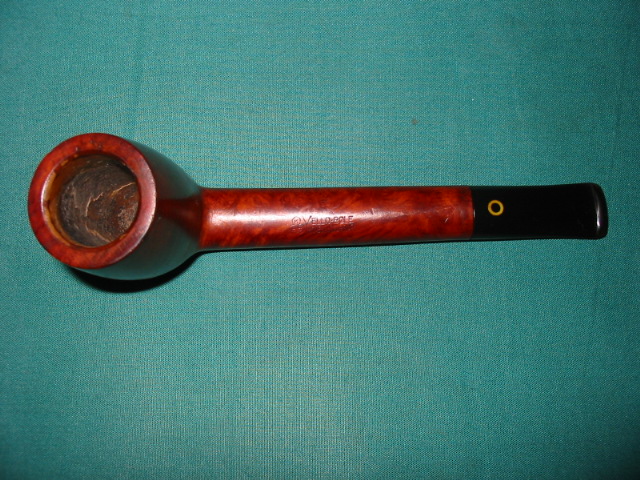
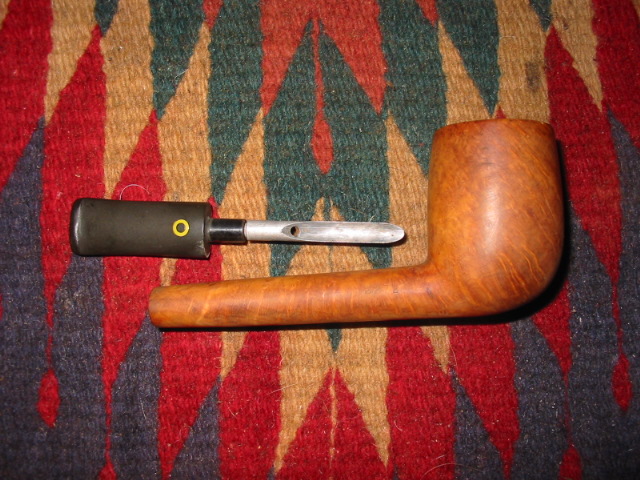
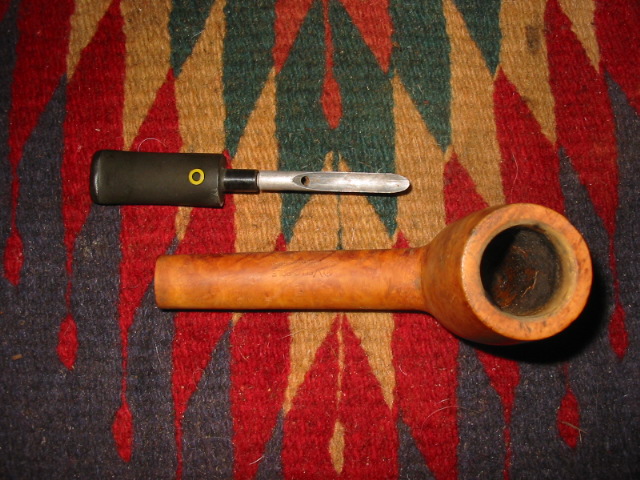
On a recent trip to the US to visit my parents I also visited several antique malls in their city. I have three that I usually have on my list when I go there. The one I want to focus on in this post is in an old grain elevator and has three floors of many “antiques” which always surprise me because many are the same age as I am!  Anyway, on the second floor I found a booth with two pipe racks containing over a dozen older pipes. Most were junk in that they had cracked bowls and broken shanks etc. But also in the midst of it was this old Yello Bole Canadian. It had some beautiful briar in it. Yello Bole is the grade down the line for KayWoodie, or so I am told. Pipes that don’t make the grade for KW will often be stamped with the Yello Bole brand. This one was stamped KBB in a cloverleaf on the top of the shank and next to it Yello Bole over honey cured, over imported briar. The stem has the yellow circle inlaid in the vulcanite. If memory serves me correctly this is one of the older pipes in the line.

ImageImage

The bowl was in pretty clean shape. The yellow coating was still visible in the bowl and the bottom half of the bowl was very clean with just a bit of darkening to the yellow coating. The rim was dirty and dented. There were tars on the rim and some deep scratches to go along with the dents. The bowl however, was still round, it had not been ruined by a reamer going a muck. The stem was oxidized and was slightly brown. There was light tooth chatter but no dents on the surface of the stem. The overall finish of the pipe had light spots and dark spots where the finish seems to have been exposed to light or was wiped down and finish removed. There was no over coat of varnish or of lacquer just solid clean briar with a spotty stain.

ImageImage

I broke the pipe down as seen in the pictures below. The stinger apparatus can be seen in the pictures. It is an aluminum shovel like contraption with the hole near the tenon and a long shovel like extension that extends through most of the shank. I cleaned out the bowl with an alcohol scrub on cotton swabs and cleaned out the shank with a shank brush, bristle pipe cleaners and fluffy pipe cleaners and alcohol. When they came out clean I worked on the outside of the bowl. I used cotton balls and acetone to wipe down the outside of the bowl and shank. I wanted to remove the rest of the finish so that I could prepare it for restaining. I applied the acetone until the bowl was free of the stain and finish. The pictures below show the cleaned surface of the bowl. I also used the acetone and some 400 and 600 wet dry sandpaper to clean the top of the bowl and rim. A folded piece of sand paper was used on the inner edge of the rim to clean the beveled edge. Before I stained the pipe I decided to clean and polish the stem. I used the Bic lighter method mentioned in an earlier blog post to get rid of the oxidation. In the pictures below the stem has the majority of the oxidation removed using that method. I then used 400 and 600 grit wet dry sandpaper with water and my usual list of micromesh pads from 1500-6000 grit to polish the stem.

ImageImageImage

Once the stem was cleaned and polished by hand I inserted it into the bowl and used it to hold the pipe while I restained it. I used a medium brown aniline stain on this pipe to approximate the original stain and to highlight the grain. I applied it with the dauber that came with the stain and then flamed it to set the stain. I then took it to the buffer and buffed it with Tripoli to remove some of the opacity of the medium brown stain and bring the grain to life. Once that was done it was buffed with White Diamond. Both the stem and the bowl were buffed. Care should be exercised in the buffing process to not obliterate the stamping. I use a light touch when buffing around the stamping. The four pictures below show the finished pipe – ready to load with a favourite tobacco and enjoy!

ImageImageImageImage


The Everyman Pipe from the 1920’s Era


Blog by Steve Laug

This featherweight cutty shaped pipe came from the 1920’s or earlier. I bought it in a lot of that era pipes on EBay and it arrived as pictured below. It is stamped The Everyman Pipe on the left side of the shank and Made in England in a Circle and shape number 195 on the right. When this arrived in the package of the other old timers it was pretty grimy. The bowl needed serious cleaning and the rim was dented and had rough spots. It needed to be topped as steaming it would not raise the broken spots that came from tapping it out. When the surface of the wood is actually broken and not just dented steaming will not raise the grain significantly and the only repair I know is to sand it off and make it smooth and crisp again. The challenge then is to match the stain so the bowl and rim blend.

I reamed and cleaned the bowl and the airway in the shank. The pipe cleaners came out very dark and tarry at the beginning. I decided to use a drill bit the same size as the airway to clean out the gunk before going back to the pipe cleaners. I use a T handle to turn the bit into the shank by hand to remove the tars and open the airway again. I finished cleaning the shank with fluffy pipe cleaners and isopropyl alcohol until they came out clean. I wiped down the bowl with acetone to remove the old wax and the grime from the bowl and then used my topping method – a hard, flat board and an anchored piece of 240 grit sandpaper – and topped the rim. (I have since learned from someone that a good way of doing it is to anchor the sandpaper on a Masonite clipboard and sand the rim that way. It works great.)

Image

The stem needed the most work as it was a round tube of vulcanite. I wonder if it was not made to be like a clay tavern pipe. The previous owner had notched the top of the stem to make it easier to hold with his teeth and keep it from rolling. The notch was a fairly deep V cut that was only on the top of the stem. I used needle files to cut a new button on it and then my Dremel with a sanding drum to taper the stem back to the button. The original had a slight bend in the stem so I left that. The button I shaped for the stem is rounded and crowned to fit the orific airhole like those found on pipes of a similar age. After cutting the button and shaping it, the stem needed a lot of sanding to remove the scratches and oxidation. I used 240 grit sandpaper on the entirety to clean up the deeper scratches and remove the oxidation. I then progressed through the wet dry sandpapers and the micromesh pads until I had a good smooth finish on the stem and a good clean button.

Image

I set the stem aside and restained the rim and bowl to match what appeared to be the original colour of the pipe. I used an oxblood undercoat and a dark brown top coat to get the richness of the original finish. I coated the stem with Obsidian Oil and then inserted it in the shank. Once it was dry I took the pipe to the buffer and used the White Diamond to give it a final buff before giving it several coats of carnauba wax.

The pictures below show the finished pipe with its newly shaped and polished stem:

ImageImageImageImage

Barling Garnet Grain Small Bent Billiard 2034 Given New Life


Blog by Steve Laug

I picked up this little Barling (transition era pipe so the Barling stamping is missing the “s” and is a script) in a lot I bought on EBay. It had a broken stem that was also chewed through on the end and not repairable. The tenon was still in the shank and was exceptionally tight. I put the bowl in the freezer for about 30 minutes and then used a screw to remove the broken piece from the shank. The key here is to not screw in the screw too much or you can crack the shank. I was able to easily pull it out as can be seen in picture 3. The finish on the bowl was rough on the top with tars and some denting. The sides of the bowl also had some denting. I cleaned the top of the bowl and removed the tars. I steamed the dents out of the top and bowl sides.

ImageImageImage

I wiped down the bowl with acetone to remove the grime and the waxes that were on the finish. When I had finished I inspected the shank area because the drilling was off a bit in the shank and the walls were thin near the top left. There were small hairline cracks that went through several places and spidered up to about a 1/8 inch into the length of the shank. I glued those and pressure fit a nickel band on the shank.

I turned the tenon on a recycled stem I had here and fit it on the pipe. I used my Dremel to remove the excess material where the diameter of the stem was greater than that of the pipe. I kept the broken stem near at hand to match the diameter, the flow of the stem and the shape. I used it as a bit of a template to shape the new stem. The three pictures below show the process of shaping the stem from Dremel to hand sanding with 240 grit sandpaper.

ImageImageImage

In the picture below I have finished the initial shaping with the sandpaper and have a good fit. You will notice the lightening of the shank below the band – that is part of the process of sanding to fit the band to the shank. I place the original stem below the pipe in the picture for comparison sake. It is a bit thinner in profile than the new one in this photo. I continued to sand the stem with 400 and 600 grit wet dry sandpaper and water to remove the remaining scratches and grooves that the 240 grit sandpaper left. Once I had them removed I proceeded to use the micromesh pads – 1500, 1800 and 2400 grit to sand the stem smooth. When I finished with those I buffed the stem with Tripoli and White Diamond and finished by returning to the micromesh pads -3200, 4000 and 6000 to polish it. One more trip to the buffer with White Diamond finished the polishing. I gave the stem a coat of Obsidian Oil and removed it and set it aside. It was time to work on the finish of the bowl.

Image

I used an oxblood aniline stain to match the stain to the original Garnet Grain colour. I have done this in the past and compared it to a very nice original Garnet Grain and the colour is a perfect match. Before staining I polished the bowl with the 3200 and 4000 micromesh pads avoiding the stamping on the pipe. I applied the stain with a cotton swab and then wiped it off, applied and wiped it off until I got the colour I wanted. I then flamed it and set it aside to dry. Once it was dry I put the stem on it and took it to the buffer and gave it a buff with White Diamond and carnauba wax.

In the first picture below I put the original stem in to show the damage to the underside near the button. I also put a 1 cent piece, a penny in to give perspective on the size of this diminutive billiard. I am very pleased with the overall look of the pipe. The finish came out as a perfect match to the original Garnet Grain colour.

ImageImageImageImage

Giving New Life to a Barling’s 2729 Fancy Bent Dublin from 1962


I picked up this old Barling’s shape 2729 in a lot I bought on EBay. From what I could find out about it on the internet it came out in 1962. You can see from the pictures the state it was in when it arrived. It was the kind of challenge I like to work on in these old estate pipes. There is a deep satisfaction in bringing them back to life and restoring them to a spot on the pipe rack and the weekly rotation. The finish was gone, though in the grooves of the blast there was some darker brown/red stain. The blast was obscured on the sides and rim by the grime that filled the valleys in it. The rim was intact and not beat up at all – just incredible dirty. The bowl had been lightly reamed and was still round!! The stem was well chewed with deep dents on the edges of the stem and deep dents in the top and bottom. There were also holes chewed through the stem on both the top and bottom as well. The oxidation was very heavy and deep. The Barling’s Cross was all but gone on the stem but under a bright light it was faintly visible so the stem was clearly the original.

ImageImageImage

I took the stem off the pipe to work on and placed the bowl in my alcohol bath for overnight. Before submerging it in the bath I wet it with alcohol and scrubbed it with a small brass tire brush that is readily available at most Wal-Mart stores or online through Amazon. I find that the soft brass does not damage the ridges and valleys on the blast finish but really loosens the grime when used with Isopropyl alcohol. I generally dip the bowl and then scrub it before leaving it to soak. When I remove it from the bath I scrub it once again and wash off the bowl with some fresh alcohol to remove any residual grime. Once the bowl was dry it was utterly lacking any finish. It was ready to restain. I set it aside and turned my attention to the stem.

Image

The stem was a mess on this pipe as I mentioned above. Below are four pictures of it after I soaked it in Oxyclean to soften the oxidation on the surface. The pictures show how reddish brown that oxidation was when I started. I sanded the surface to highlight the bite marks and holes in the stem. The stem was badly chewed and could have been a candidate for replacement but it was an original Barling’s stem so I wanted to see if I could save it and reuse it. I cleaned the surface and picked the grit and grime out of the holes with a dental pick. I washed the surface down with Isopropyl to give a good clean surface. The button was virtually chewed away and there was a fair sized hole on the underside of the stem. The tooth marks were very deep and there was not much to work with in lifting them with heat. This made them a candidate for a patch with black super glue.

ImageImageImageImage

The picture below shows the top of the stem with the black super glue fill in the bite marks and holes. The idea is to slowly fill them and build up the surface of the stem. I also continued to fill them until there was a good slope from the stem surface to the top of the button. Once it was dry my plan was to use needle files to recut the button.

Image

The next picture shows the glue after it has dried and I have done the initial sanding to smooth out the surface of the stem. I still have not recut the button at this point.

Image

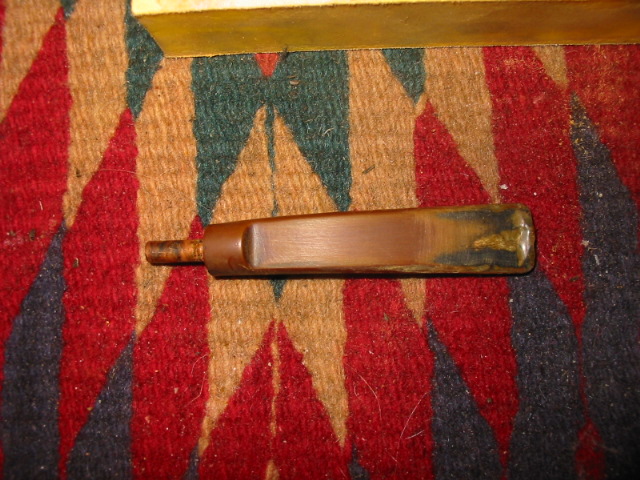
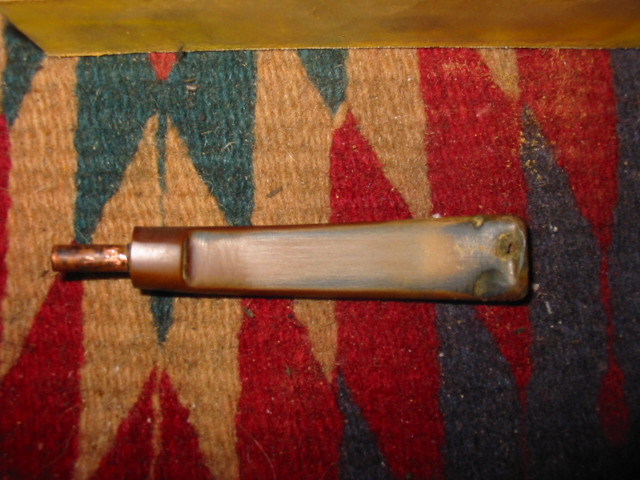
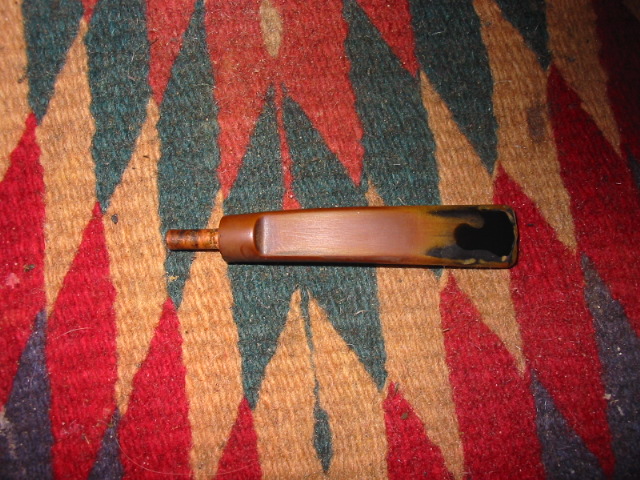
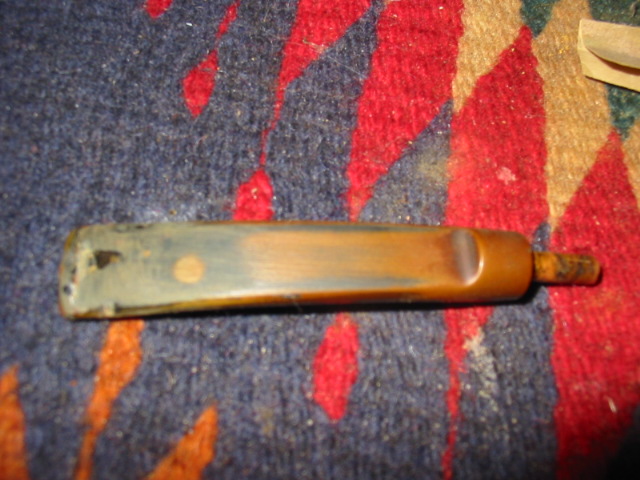
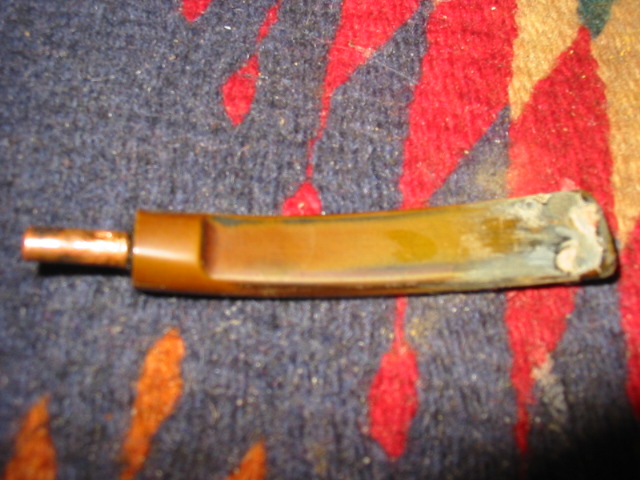
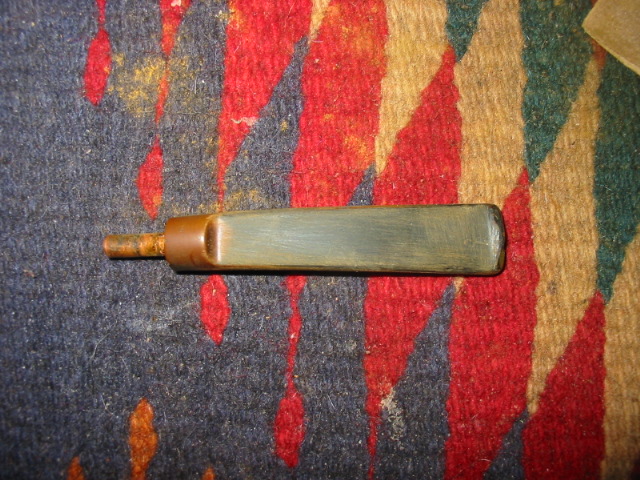
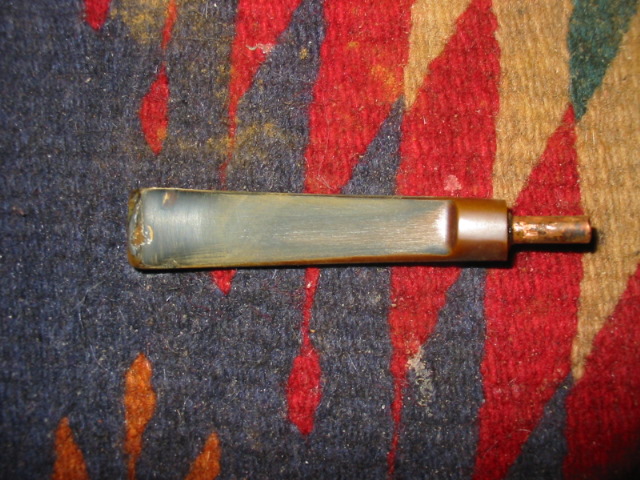
The picture below shows the underside of the stem after the glue has dried and I have done the initial sanding on the stem. It is still pretty rough but the holes are filled and the button is built up. Note in this picture the very visible copper tenon on the stem. The previous owner must have broken the tenon and had it replace with this thin copper tubing. The tenon is very delicate on this stem so the copper is actually an interesting fix in terms of durability. I have never seen a repair like that. The tubing was scored and inserted into the stem and held with an epoxy. After the soak in Oxyclean it was loose so I removed it, cleaned it and since it was a good tight fitting tenon/mortise union so I decided to reuse it. It is a wonder that he did not put a copper band around the button end of the stem as well to repair the bite through and tooth marks.

Image

The next two pictures show the stem after sanding the stem surface smooth with 240 grit sandpaper. My purpose in using that grit is to get a clean surface to work with as I move to rework the button on the top and bottom of the stem. I had yet to work on the saddle of the stem in these pictures. I will often save that until the rest is finished.ImageImage

I failed to take pictures of recutting the button on the stem but you can see the new button in the finished pictures below. I cut and shaped it with a flat needle file and a wedge needle file. I like the clean angles of a new button so I was aiming for that with just a little wear to match the age of the pipe. I finished the sanding and polishing of the stem using 400 and 600 grit wet dry sandpaper and then used the normal list of micromesh sanding pads from 1500-6000 grit. I keep a bowl of water close by to dip both the paper and the pads in as I sand as I find it more effective in removing the scratches and remaining oxidation. Once the stem was finished I put it on the pipe bowl and gave it a buff with Tripoli and White Diamond to get a good sheen to the surface. I never buff a stem apart from a pipe as I do not want to damage the stem shank junction by rounding the clean edge of the stem. Once I finished I set it aside and went back to restain the bowl.

I did a bit of research (that is a part of the process I really like) to find out about the original finish and colour of stain used on this particular pipe. I learned that it was more of a reddish tone and really wanted to get close to that reddish brown colour on the finished pipe. I used some oxblood stain and a bit of medium brown stain (both aniline stains) and gave the bowl a coat of the brown first and then flamed it and buffed it. After that I gave it a coat of the oxblood stain and flamed it. I reinserted the stem and took it to the buffer and with a light touch buffed it with Tripoli and White Diamond. I did not want to soften the ridges of the blast but wanted to buff it enough to get a contrast in the stain.

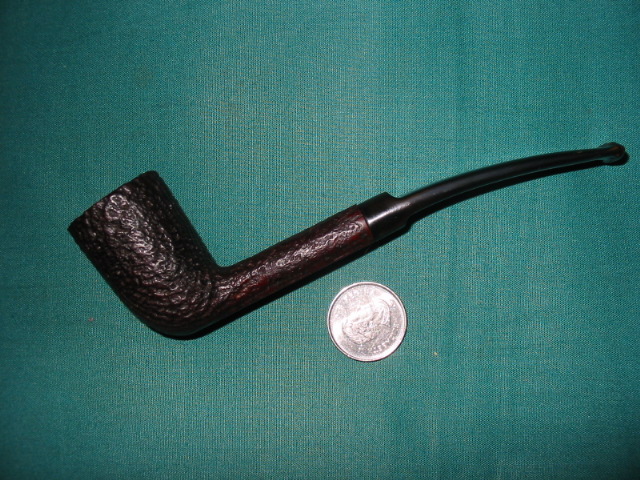
I used some Obsidian Oil on the stem and then Halcyon II wax on the bowl. Once they dried I hand buffed the stem and the bowl with a soft cotton cloth. I added a coat of wax to the stem when it was finished as well. In the pictures below you can have a look at the finished pipe. I took pictures with a .10 cent piece/dime below the pipe to give an idea of the size. It is a dainty little pipe with a pencil shank. I hope to smoke it this week end and enjoy a nice bowl of aged 5100 in it.

ImageImageImageImage

Replacing a screw mount stem


I have always wondered how to replace screw mount tenons without drilling out the mortise. I have done that before and it works well but I wanted to try to create a new screw mount stem using the existing tenon. I have learned from repairing overturned stems that you can heat the tenon and adjust its fit so I figured heating it and removing it would work much the same. So for the subject of the experiment I decided to tackle refurbishing an old Whitehall pipe I had here.

The Whitehall had a screw mount stem with a stinger attachment. The stinger was removable leaving about a half inch of tenon that I could work with. The stem had a huge hole on the underside of the stem near the button and was not a candidate for a stem patch. It would work perfect for the plan.

I heated the metal tenon with my heat gun until I could loosen it from the stem. I used a pair of needle nose pliers after wrapping the tenon with a cotton cloth to protect the threads. With a minimal effort of wiggling the tenon it came out very easily. Once it was removed I cleaned it thoroughly with pipe cleaners, alcohol and steel wool.

I then matched the length of the existing tenonless stem with my stem blanks until I had one that was roughly the same length and thickness. I used my Dremel to cut off the precast tenon until it was close to the flat surface of the stem. I then used the flat board with sandpaper attached (like I do when topping a bowl) to sand the surface flush. Care must be exercised to keep the stem vertical or the surface will quickly get an angle. I smooth that surface with wet dry sandpaper 40 and 600 grit and finished it with the micromesh pads.

Once completed smoothing the end of the stem I used a series of drill bits to work my way up to 1/4 inch diameter hole that the tenon insert required. I have learned the hard way that to start with the size I want can often cause the stem to break in my hands. So because of that I progress through the series of bits until it is the correct size. Before gluing the insert in place I screwed it into the shank and put the stem on so that it was correctly aligned. I did not want to have an overturned or under-turned stem when I was finished. I marked the insert with a black marker so that I would know which side was the top and then unscrewed it from the shank. I coated the insert end with some epoxy (like I do when inserting Delrin tenons in to the stem) and pressure fit it into the stem with the mark on the top side of the fitting. It was a perfect fit. The superglue dries quickly so I checked the fit on the stem again to make sure it still aligned. It did!!

I used my Dremel to shape the diameter of the stem until it was a close fit and then finished the fit with sand papers and micromesh. When I had it smooth and shiny I buffed it with Tripoli, White Diamond and finally several coats of carnauba wax. I then used my heat gun to bend the stem to the right angle for this bent pipe. I cooled it under cold water and then polished and buffed it again.

The bowl had been cleaned and scrubbed to remove the grime and build-up of the years with Murphy’s Oil Soap and a soft bristle tooth brush. Once it was clean I gave a light coat of medium brown stain and then waxed it with Halcyon II wax.

Here is the finished pipe:

ImageImageImage

Refurbed Breezewood Acorn


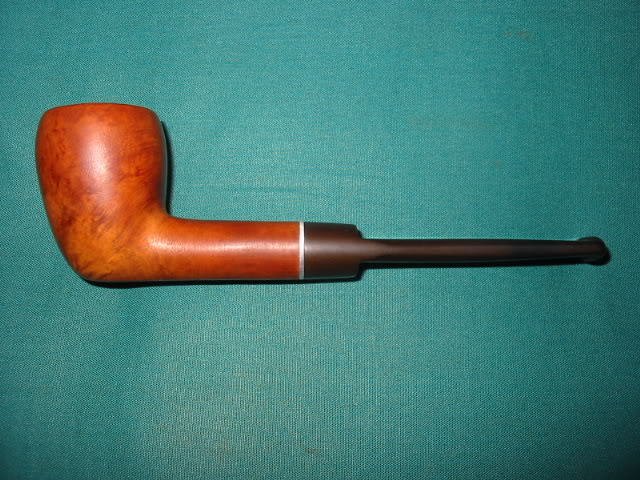
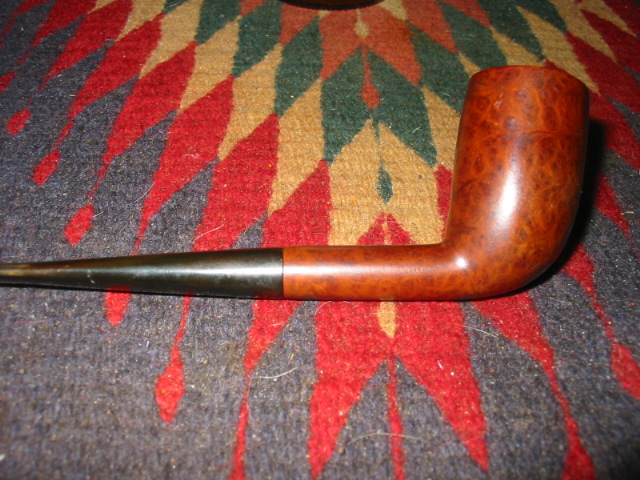
I picked this old timer up in the ebay purchase that included the Bertrams author. It was almost black it was so dirty. It is incredibly light weight. Once I got the grime off I could see a wee bit of the stamping left and it read Breezewood. I reamed and cleaned the inside. The stem is a screw mount like the old Kaywoodies. It has been clipped of stinger contraption but it is a good open draw. I cleaned the stem and used the micromesh sanding disks on it. The bowl was soaked in an alcohol bath to remove the finish and grime and then sanded with 220, 400, 600 sand paper and then micromesh 1800, 2400, and 4000 grit pads. Here are the before and after shots. Below the pictures I have posted a write up of the history of Breezewood pipes by the late Mike Leverette (a friend and historian of things pipe).

The pipe is pictured in the top photo below of the two pipes.

Image

Here is a series of photos of the refurbished pipe.

Image

ImageImageImage

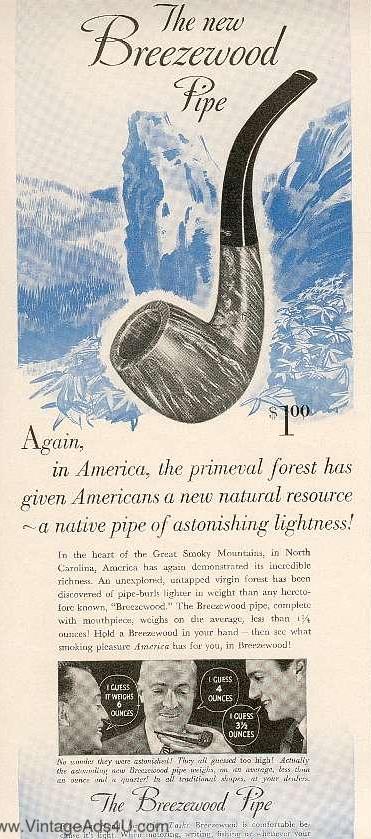
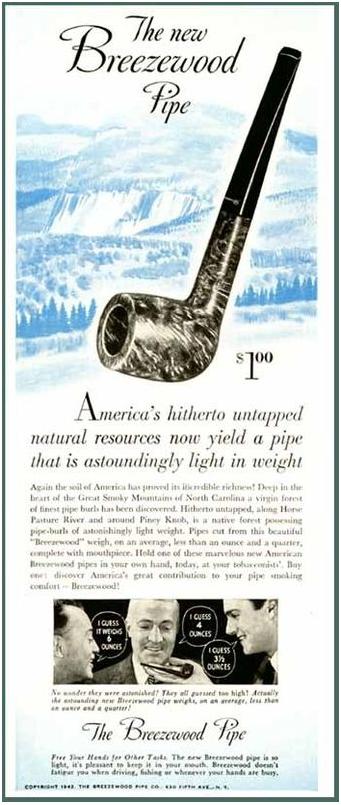
Here are some informational ads on Breezewood pipes

ImageImage

I wanted to include this brief article by Mike Leverette as it gives background history that is not commonly known or available regarding these early alternatives to briar that came out during the war years.

“There were at least three pipe brands made from the Mountain Laurel; Trapwell, Breezewood and Custombilt. Trapwell pipes were made by D & P Pipe Works beginning on or before 1943. D & P Pipe Works, owned by D. P. Levitas (Ross 2005), began making pipes in 1938 (Wilczak and Colwell 1997) probably in New York City but relocated to Sparta, Alleghany County, North Carolina in 1943 (Sparta/Alleghany CoC 2006), in order to be closer to the huge population of Mountain Laurel in the area. Later, this company changed their name to Sparta Pipe Works and still later to Sparta Industries. I have one Trapwell World’s Best Briar pipe in my collection, a small billiard, and here again; it is a great little smoker. World’s Best Briar was their marketing ploy for Mountain Laurel. Trapwell’s ‘trap’ is a highly complicated condensing system when compared to most regular metal condensers. After the war, Trapwell pipes were made from regular briar wood, or “imported briar” until their demise.

According to a 1942 Life magazine advertisement, Breezewood pipes were made by The Breezewood Pipe Company, located at 630 Fifth Avenue, New York City, though Wilczak and Colwell state the Breezewood pipes were made by Kaufmann Brothers & Bondy (KB&B) beginning in 1941 (Wilczak and Colwell 1997). The Breezewood Pipe Company may have been a subsidiary of KB&B. To quote the 1942 Life magazine advertisement; “There, deep in the Great Smoky Mountains, they found it – found an uncharted virgin forest of burls, great old burls that had been growing there uncounted years. And from these old burls, pipes of astonishing lightness of weight are made – their name: Breezewood.”

At the present time, this is all I have been able to find on the history of Breezewood pipes. Here again, the one Breezewood pipe, a small billiard, I have in my collection is a great little smoker. I am not overly fond of metal condensers and this Breezewood pipe has a simple tube condenser similar to Dunhill’s “inner tube”.