Blog by Steve Laug
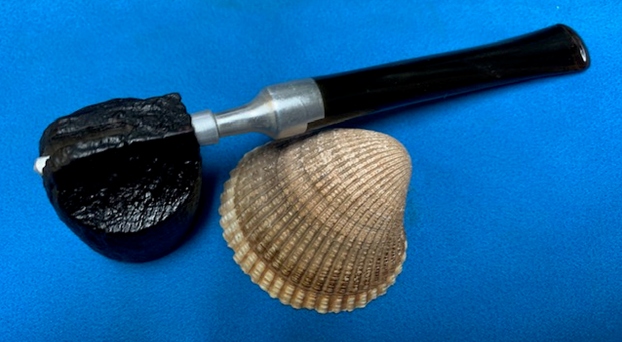
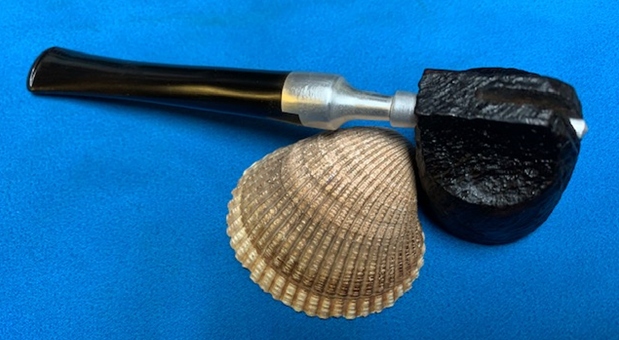
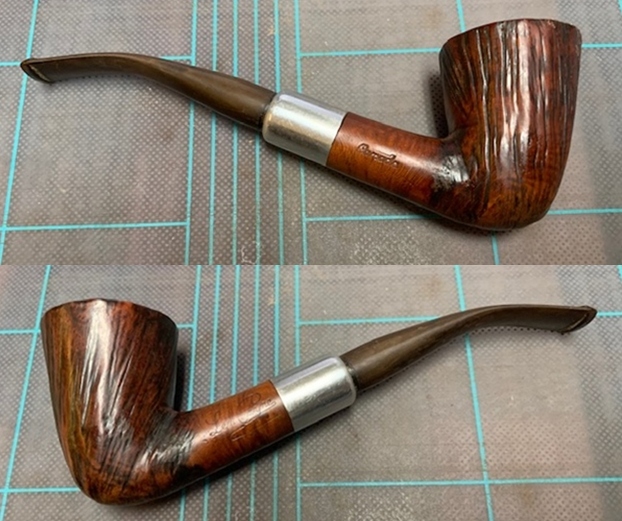
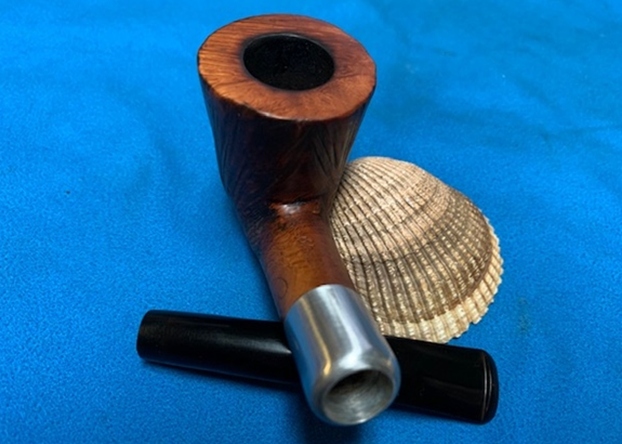
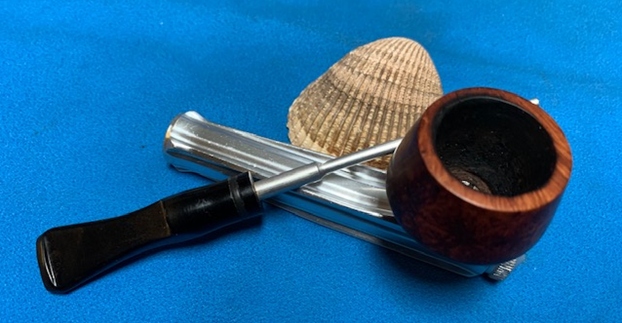
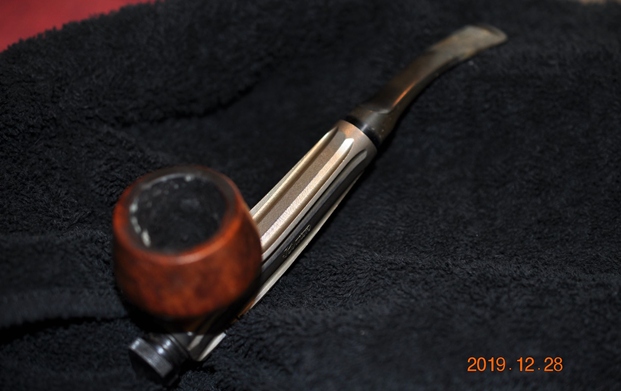
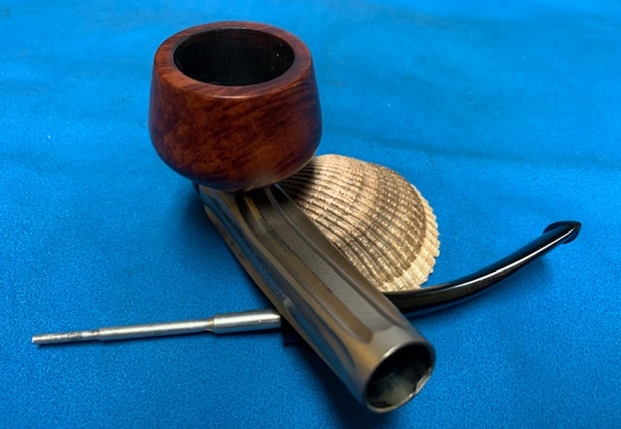
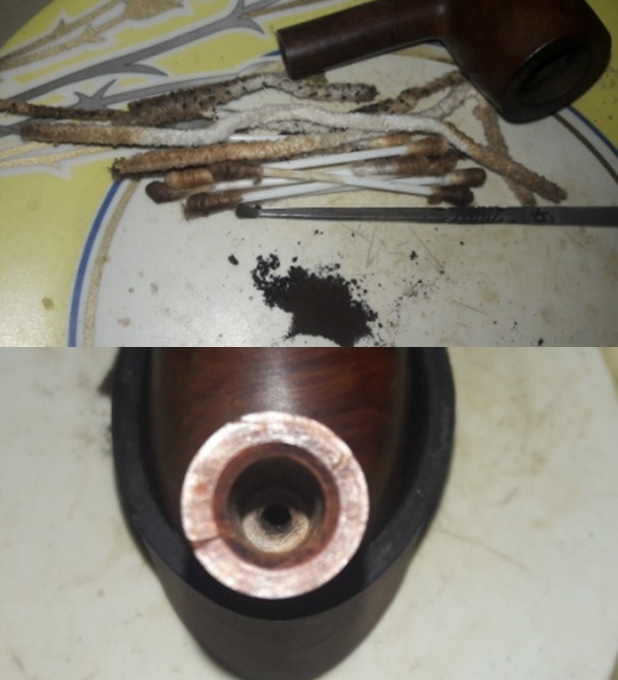
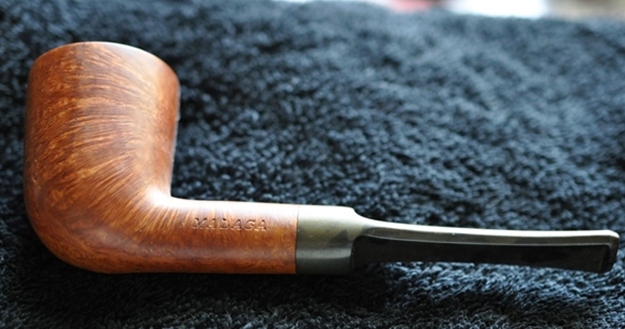
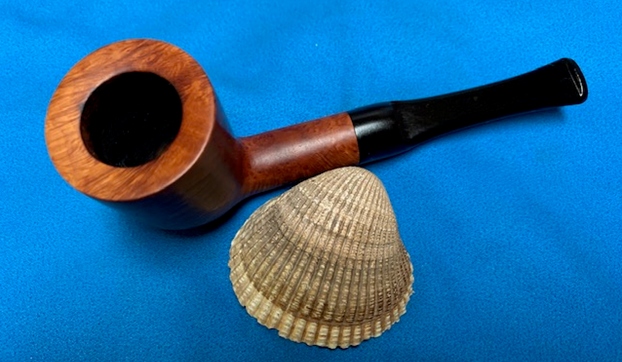
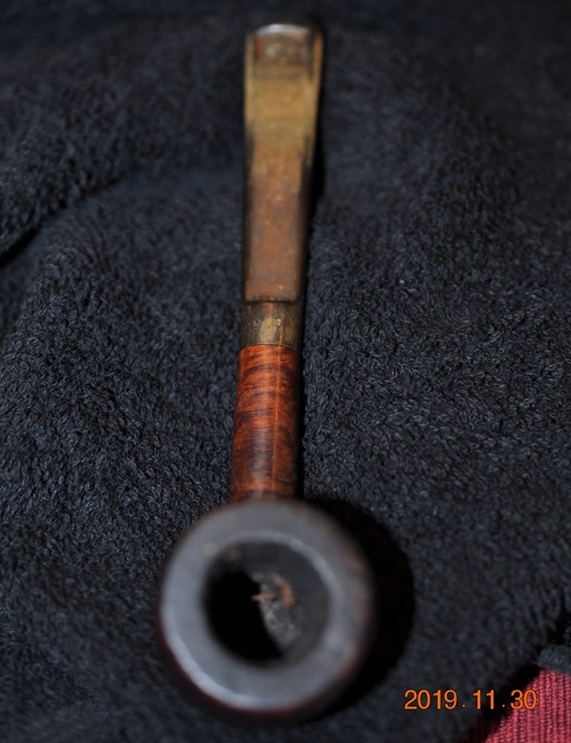
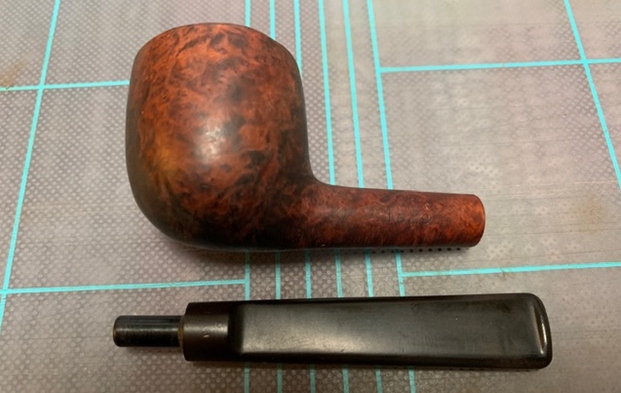
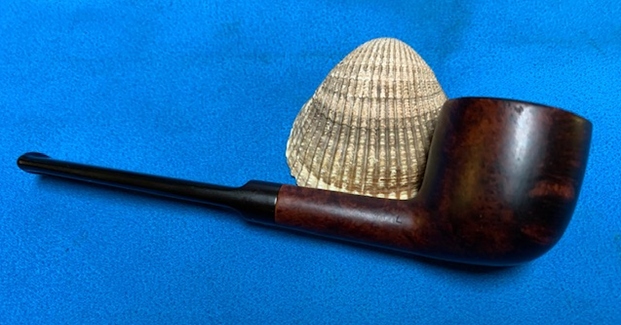
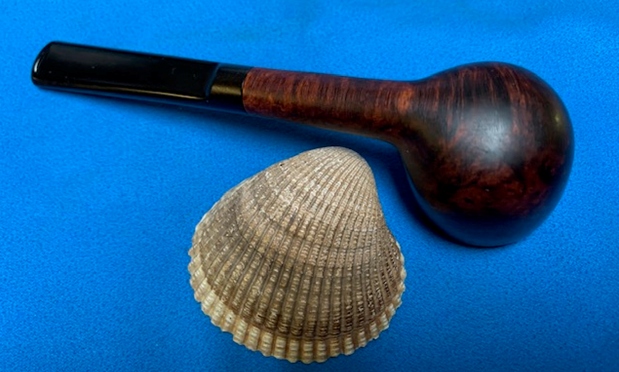
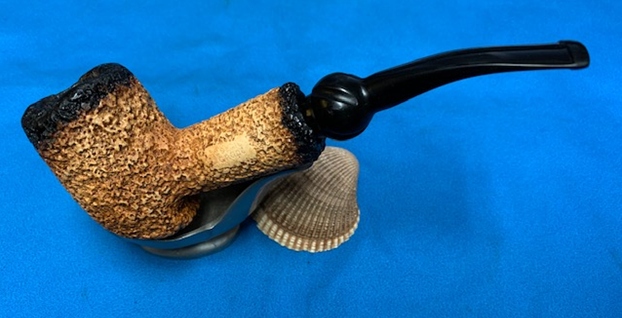
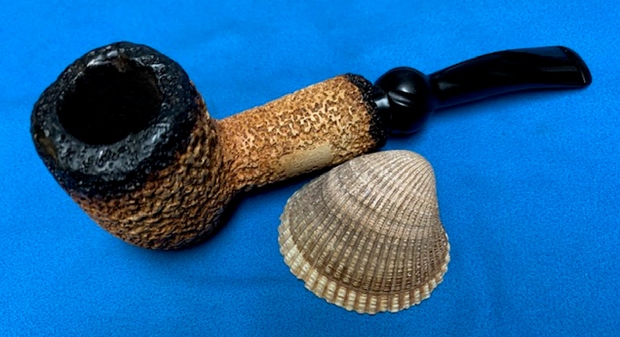
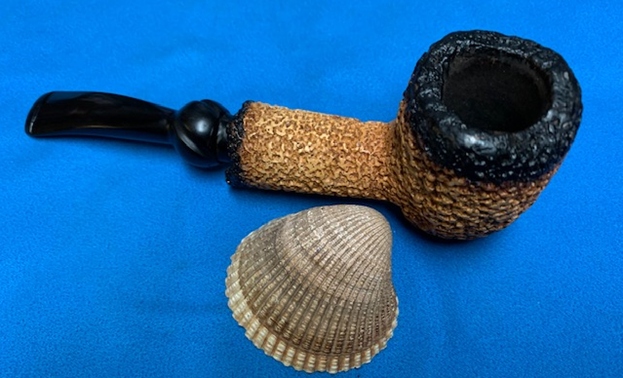
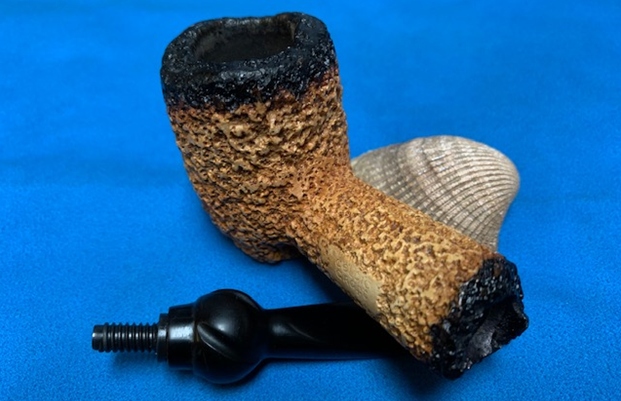
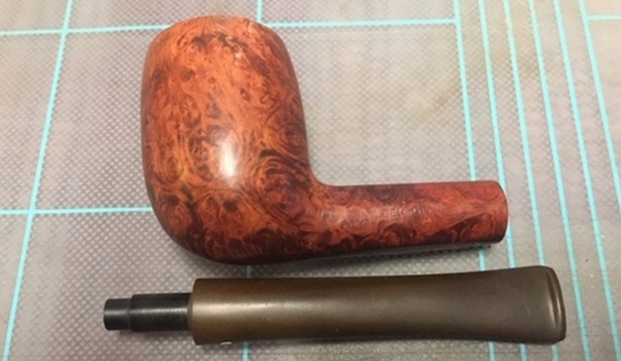
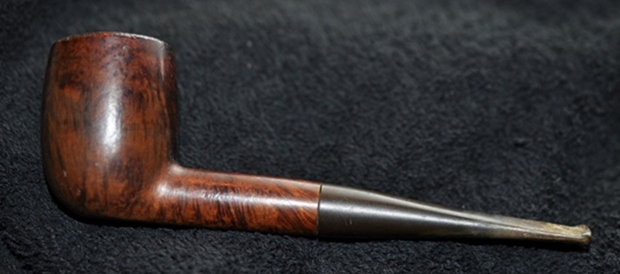
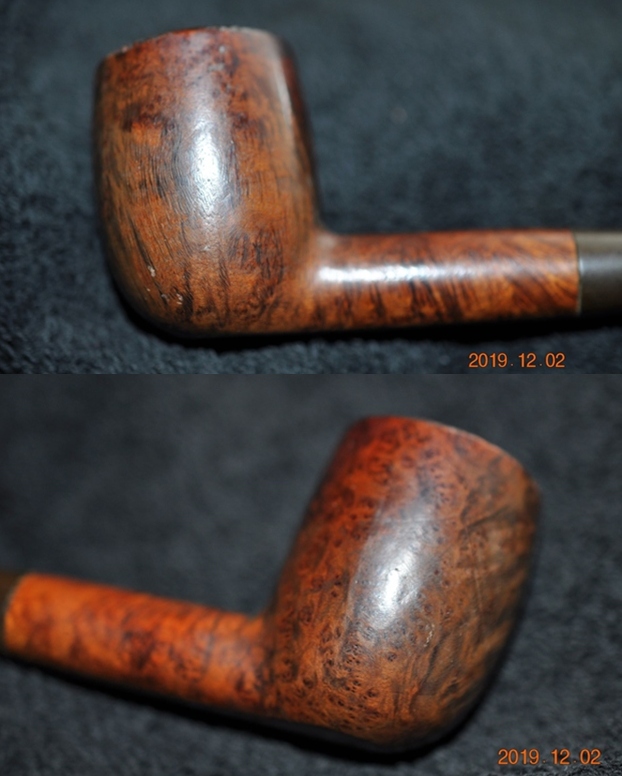
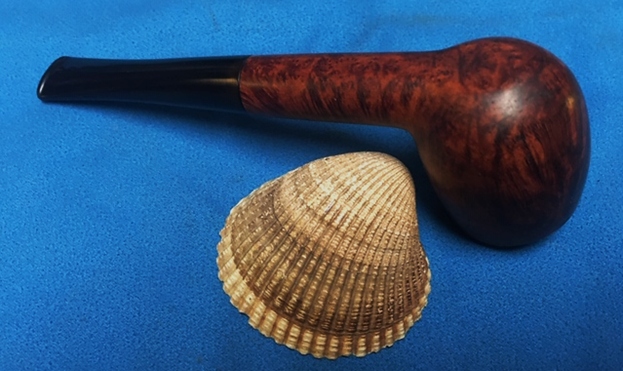
After reading Paresh’s blog on his restoration of an Ornsby pipe I decided to work on the one I have in my queue. While his was a smooth finished bowl mine is a very nice black sandblast finished pipe. I had it in my box here since 2018 so it was about time to work on it. The pipe is a uniquely designed system pipe with a spear like stem that inserts into the base of the bowl. The finish is a rugged sandblast that shows some around the sides of the bowl and rim. The carver did a great job utilizing the block of briar to maximize the grain. There was a thick cake in the bowl and lava overflow that fills in the sandblast rim top. The exterior of the briar was dusty with grime ground into the briar. The vulcanite taper stem and metal insert is a single unit. There is an interlocked OP on the top of the stem just behind the metal portion. The stem is lightly oxidized and has light tooth marks and chatter on both sides. The stem was in good condition under the grime. Jeff took the photos below to tell the story and give a glimpse of the pipe before his cleanup.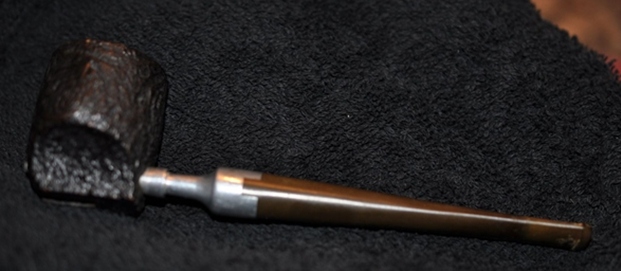
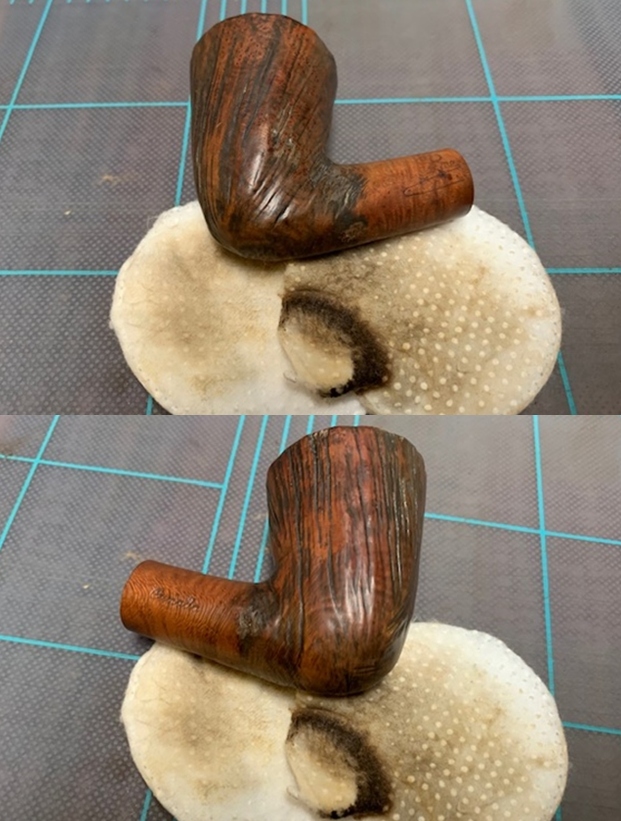
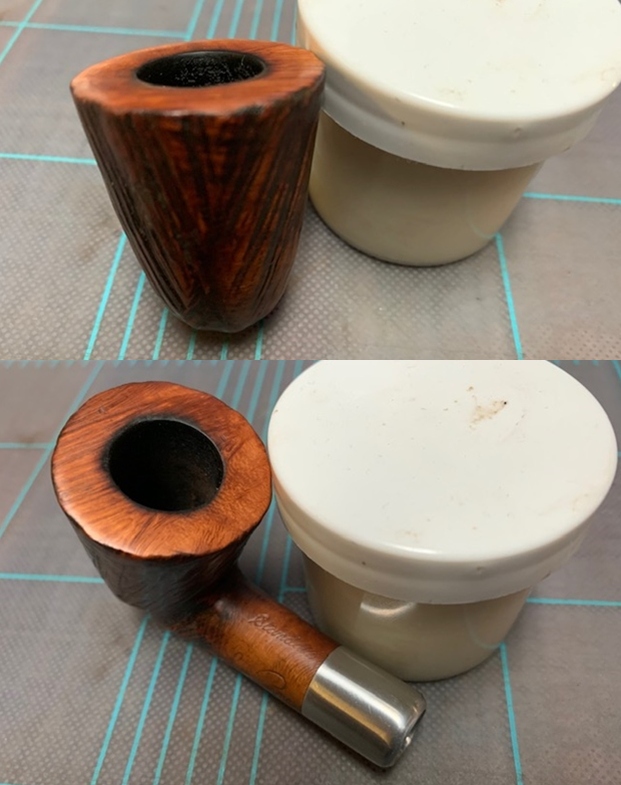
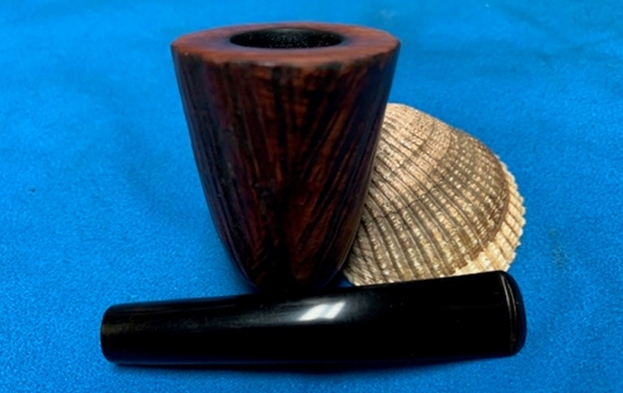
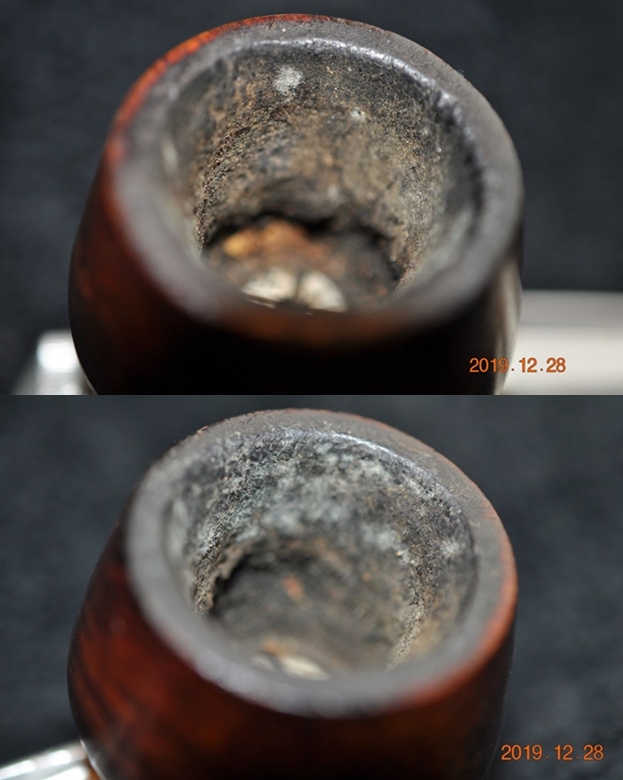
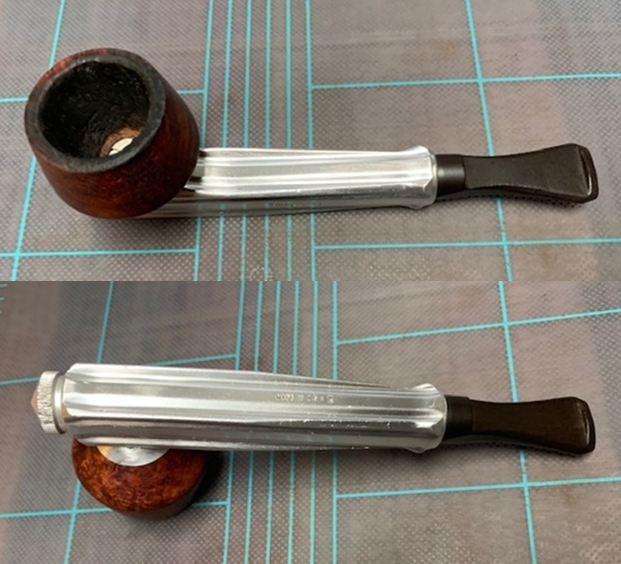
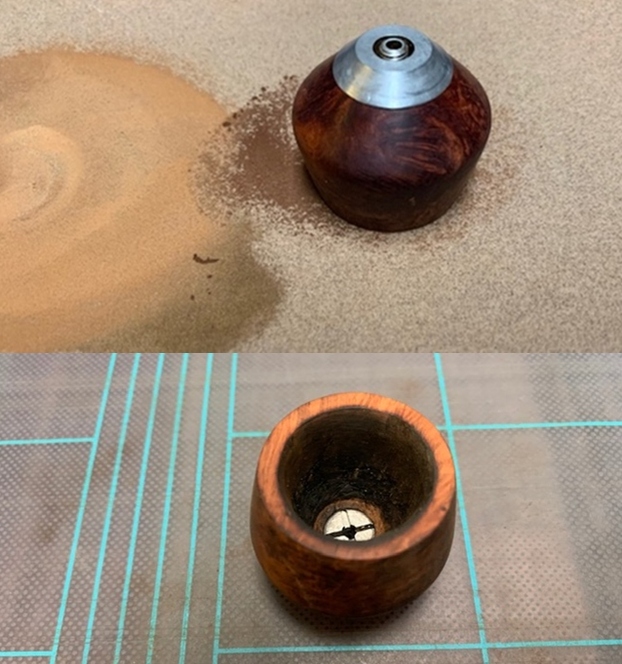
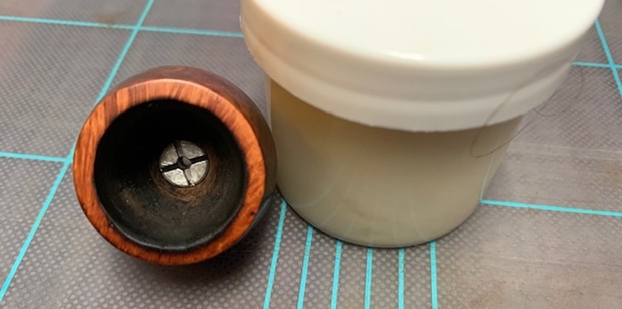
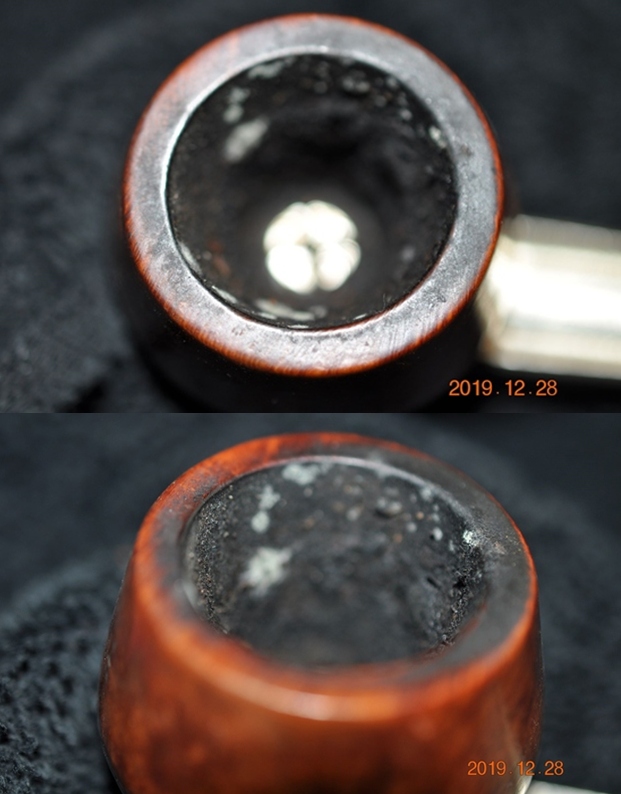
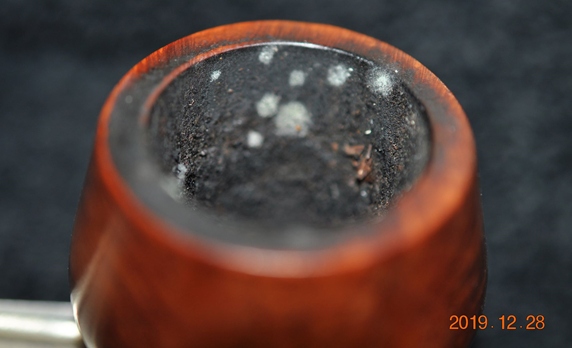
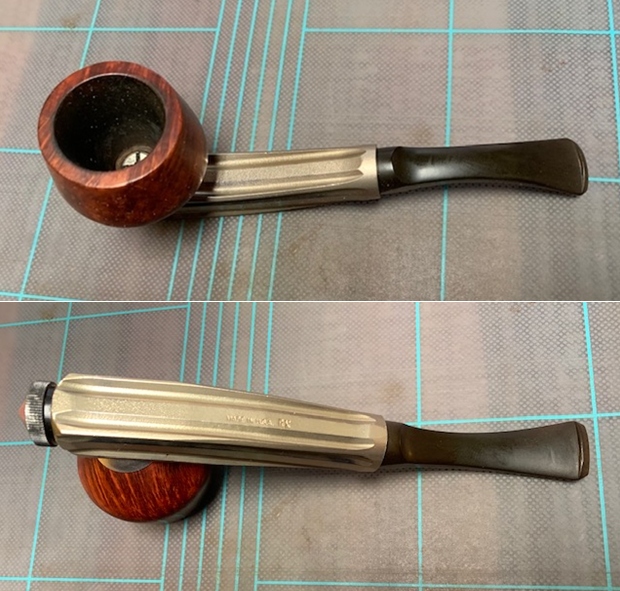
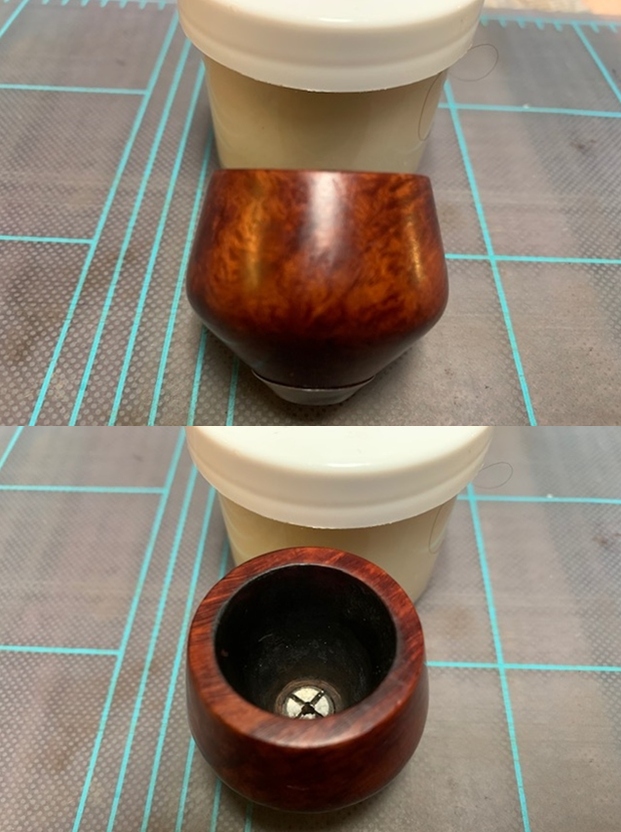
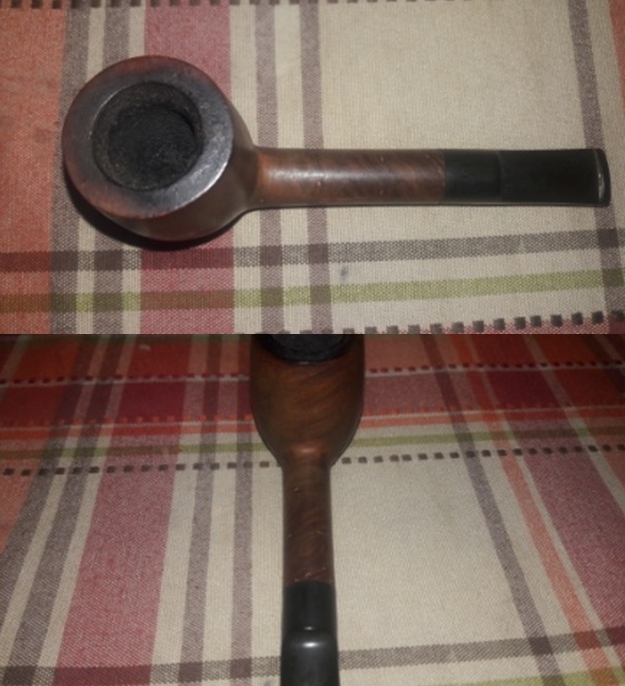
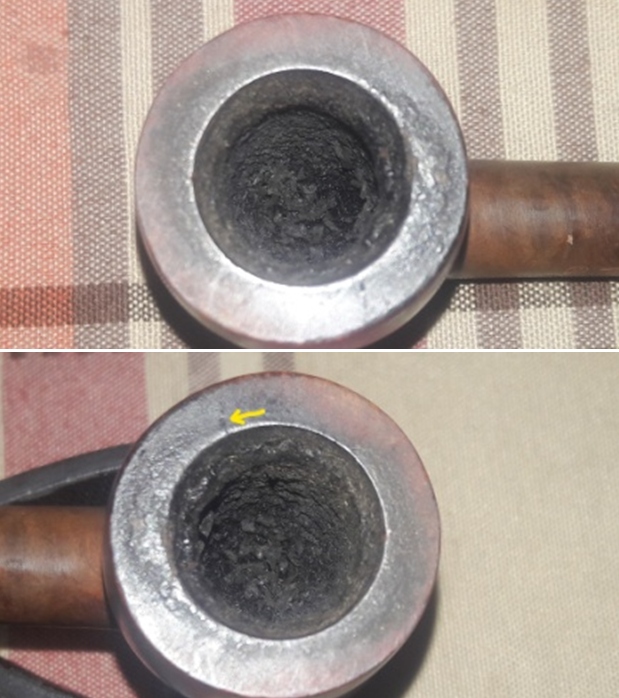
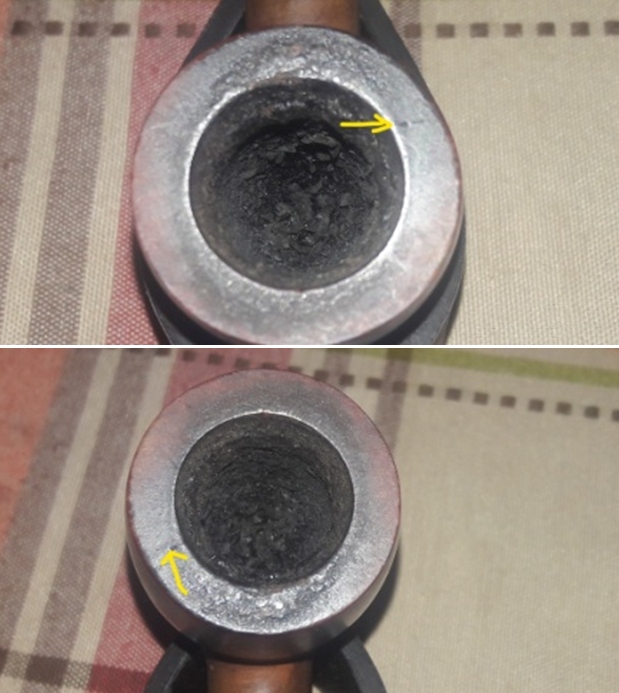
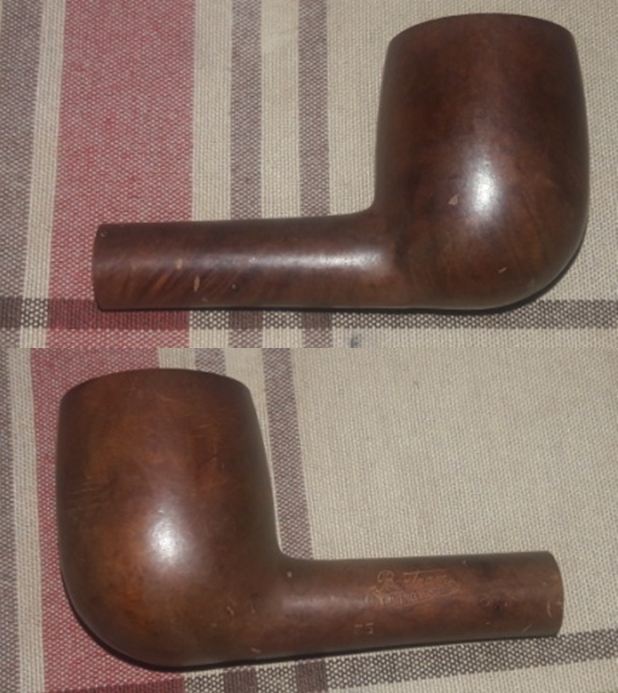
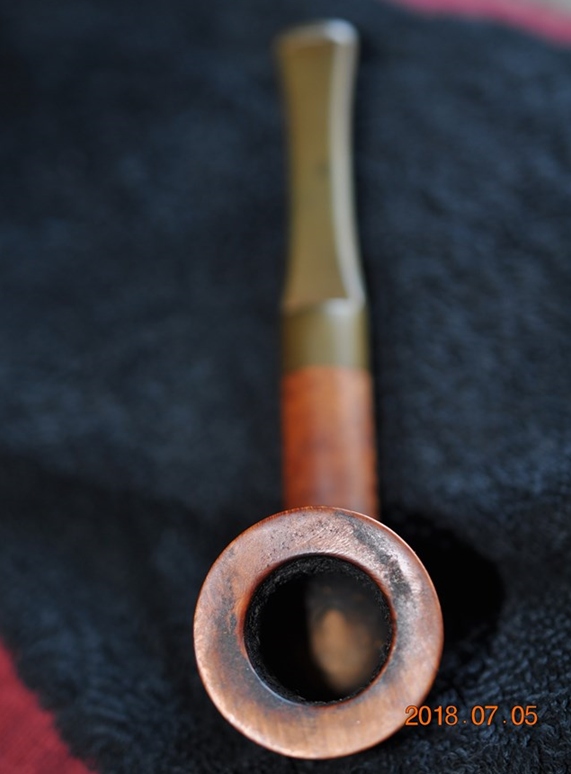
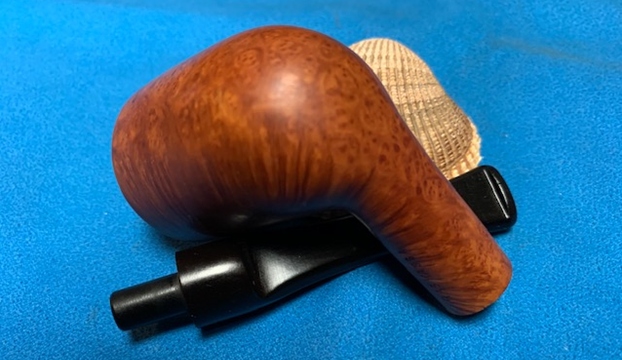
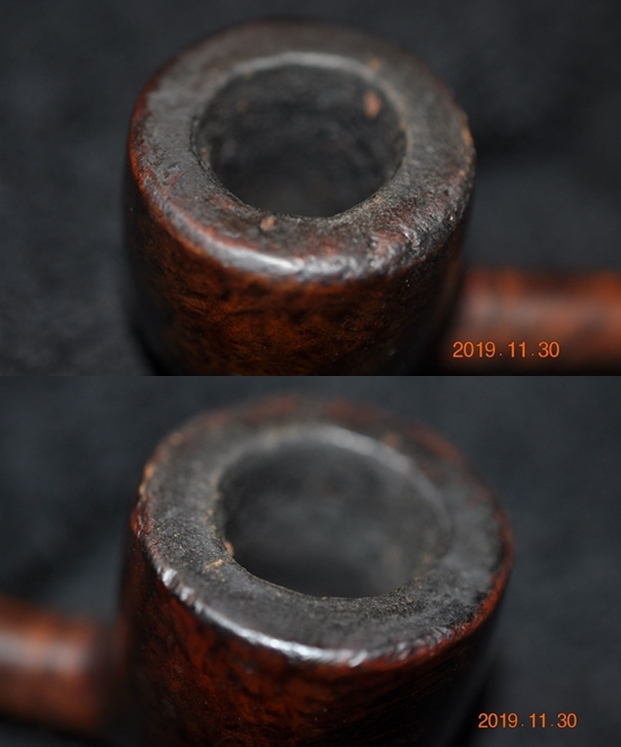
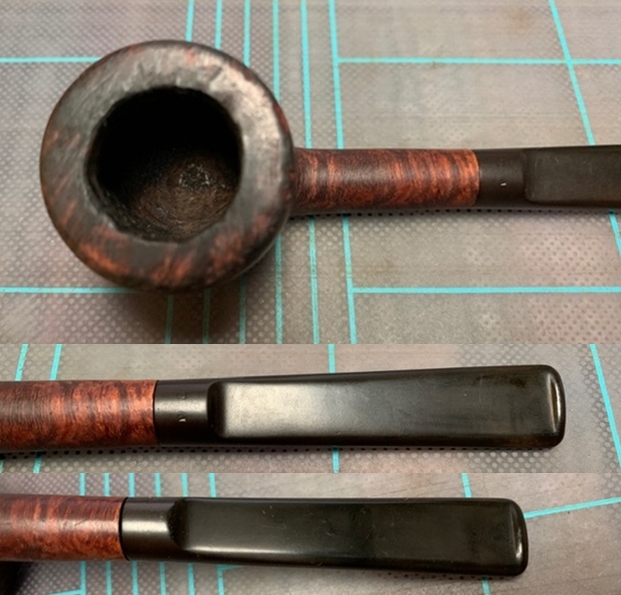
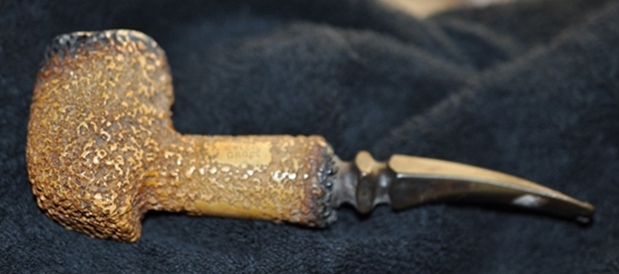
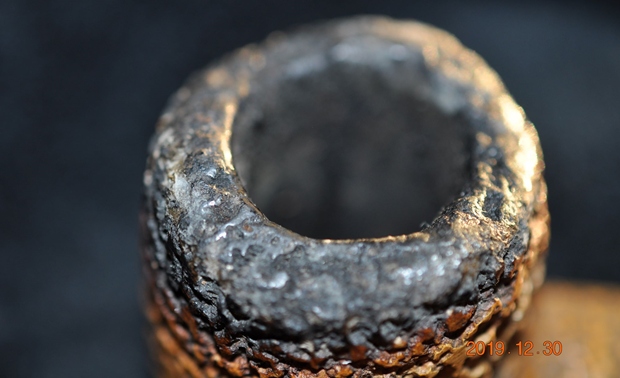
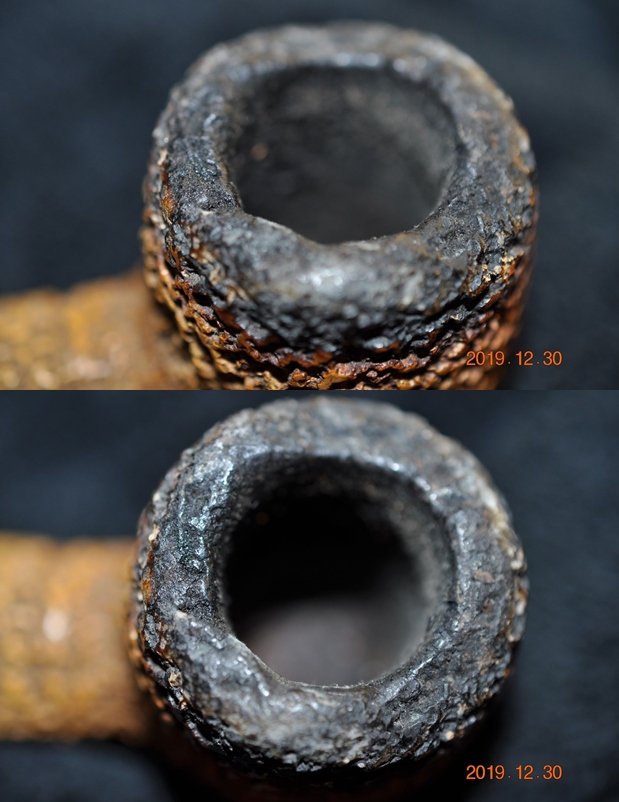
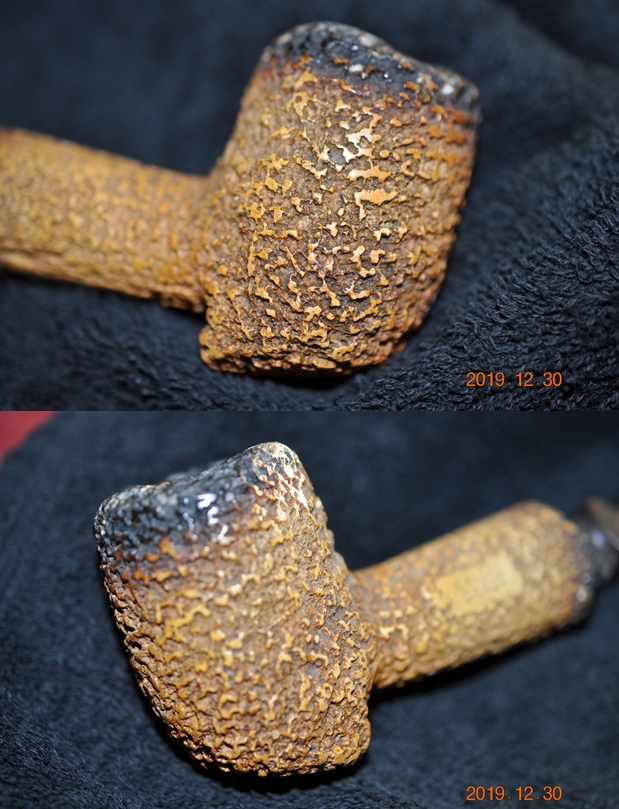
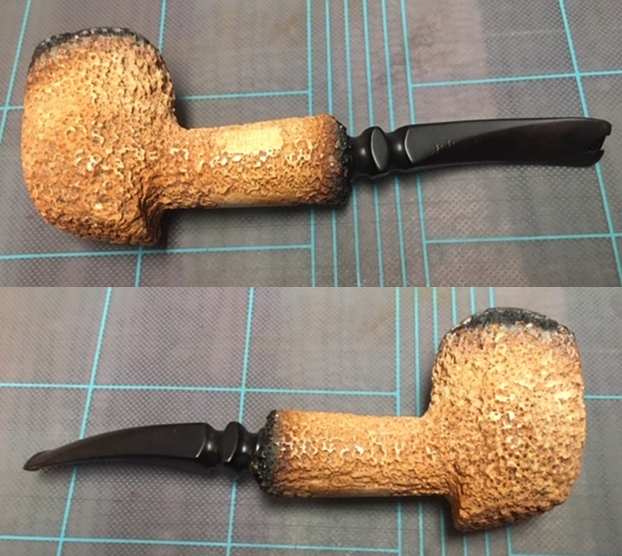
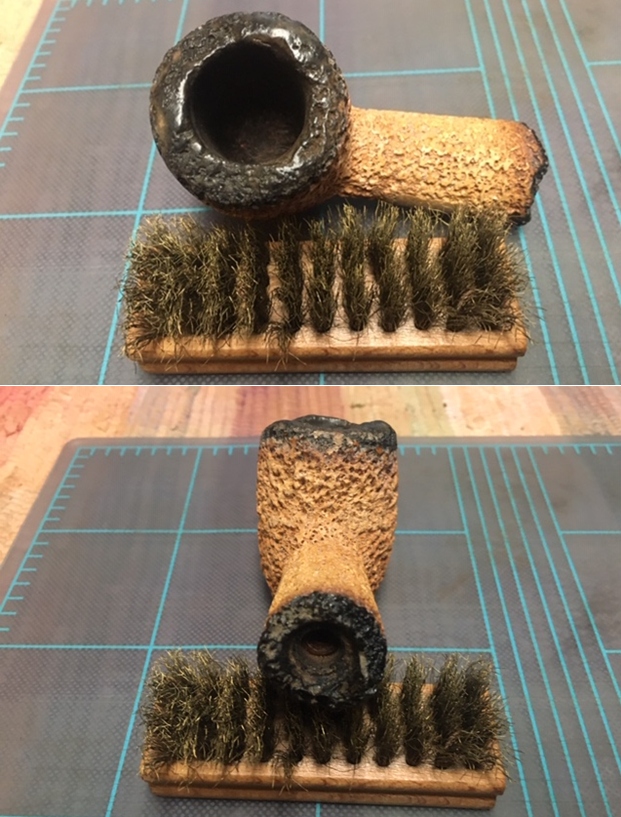
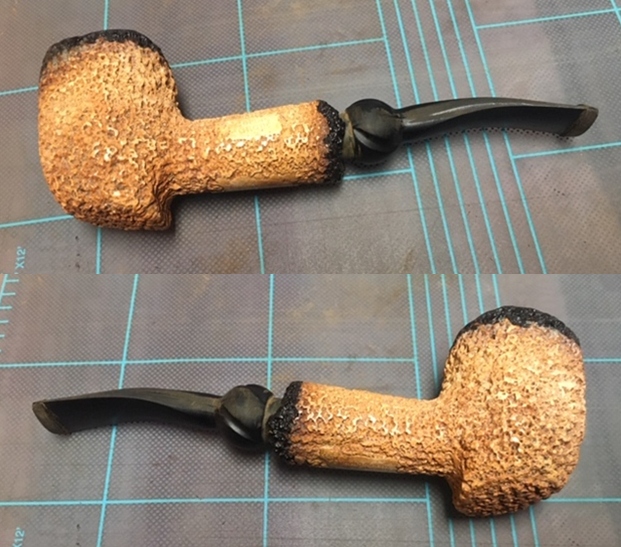
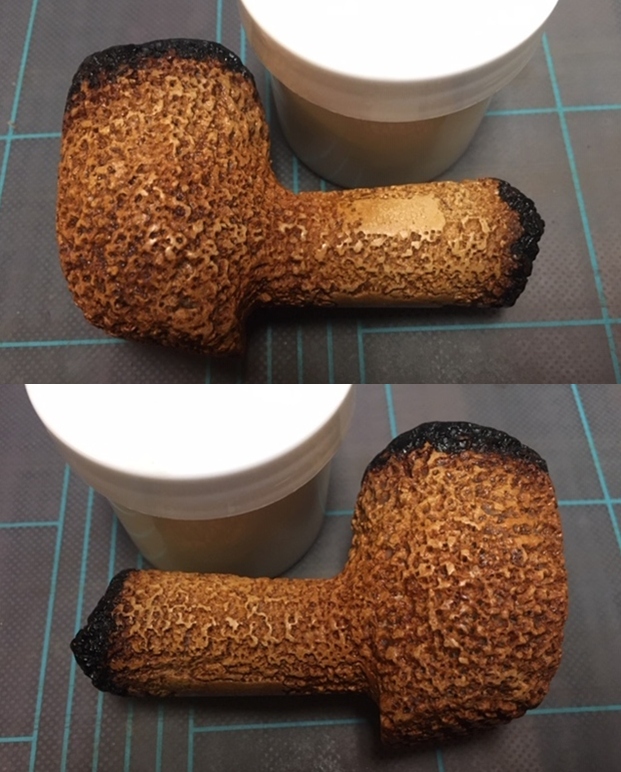
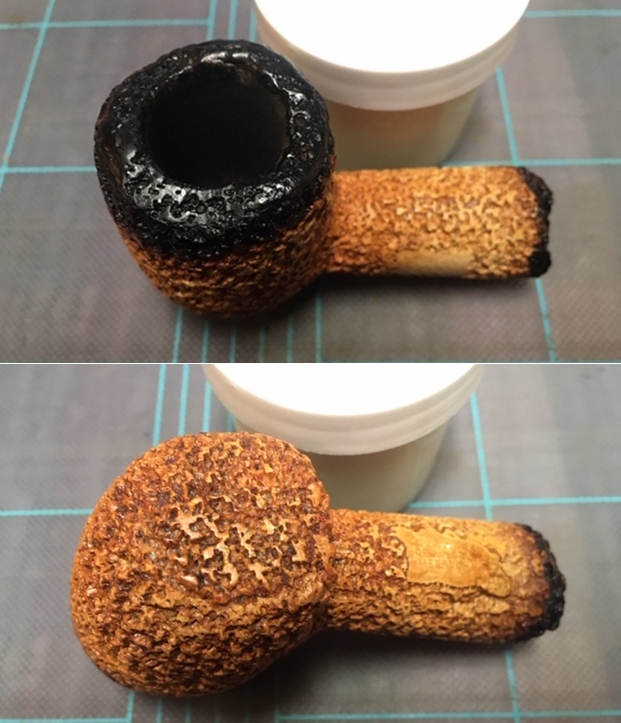
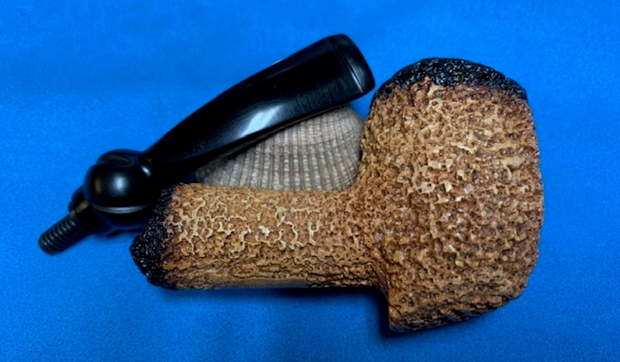
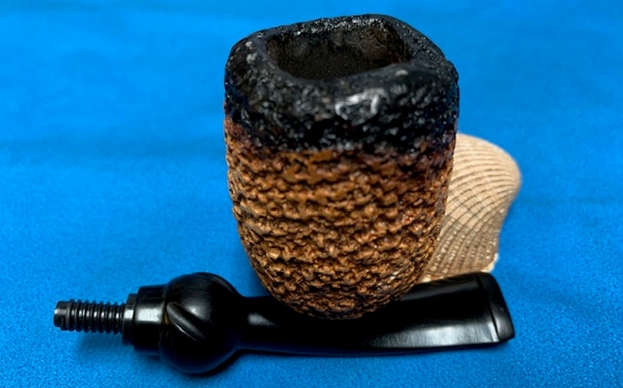
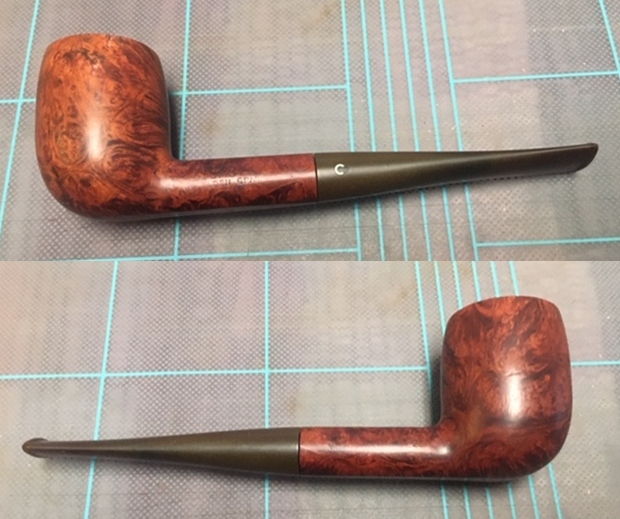
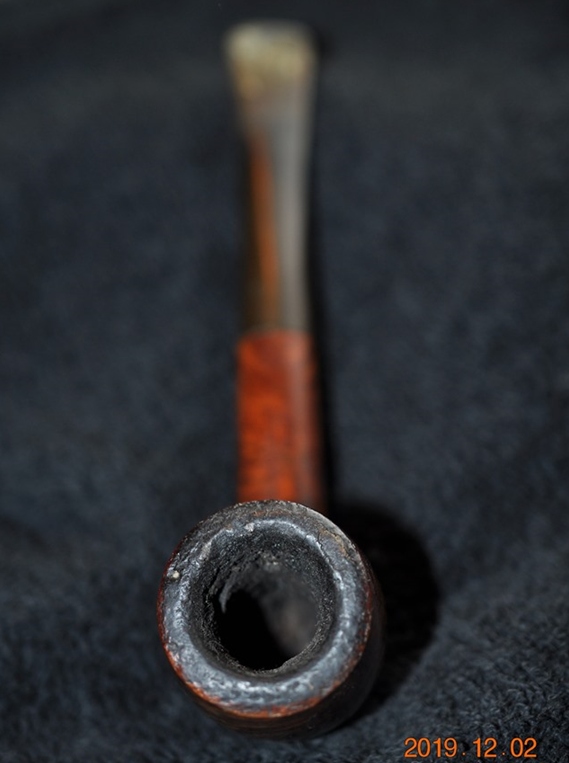
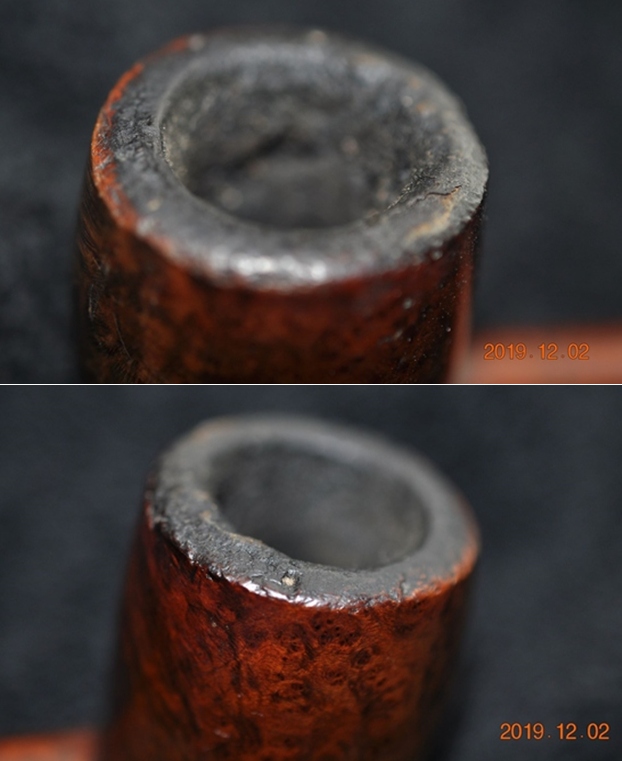
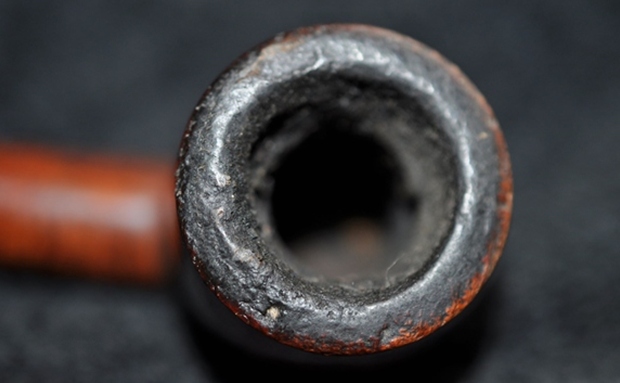
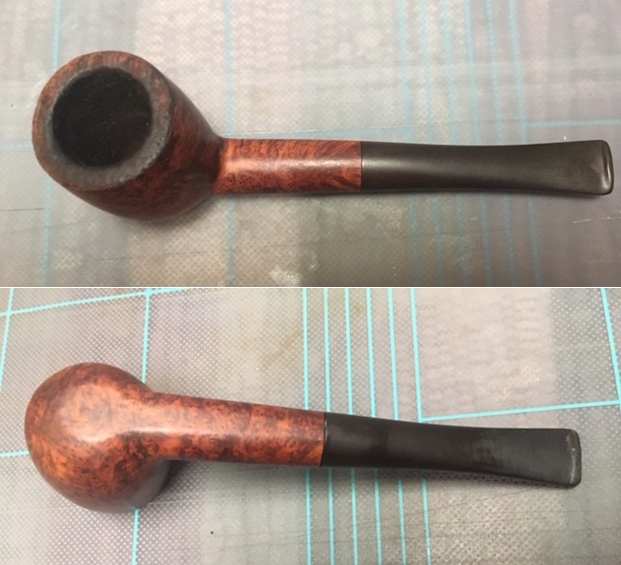
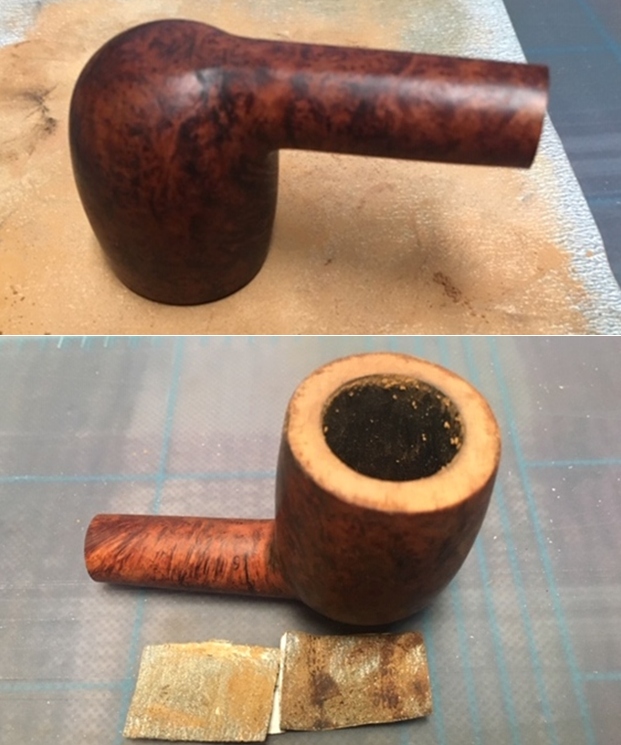
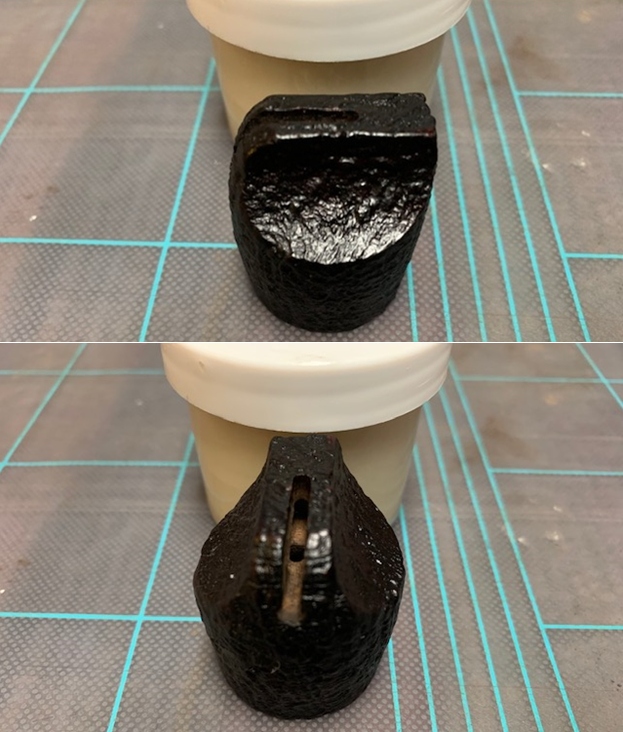
 The exterior of the pipe was very dirty – grime and grit ground in from years of use and sitting. The rim top was covered with grime and there was a coat of lava that overflowed the bowl. There was a thick, hard cake in the bowl.
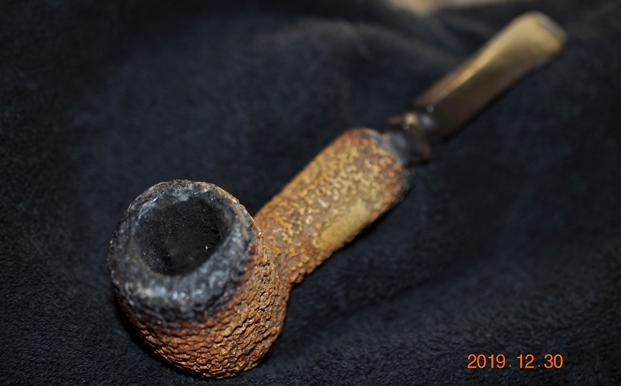
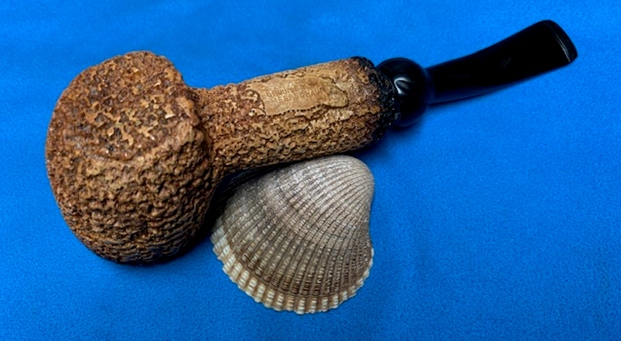
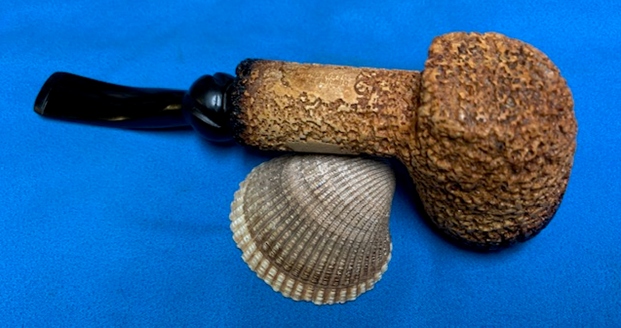
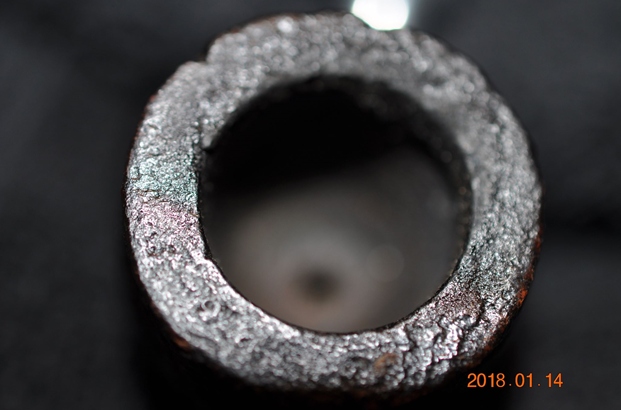 Jeff took photos of the sides and the heel of the bowl to give a better feel for the condition of the bowl.
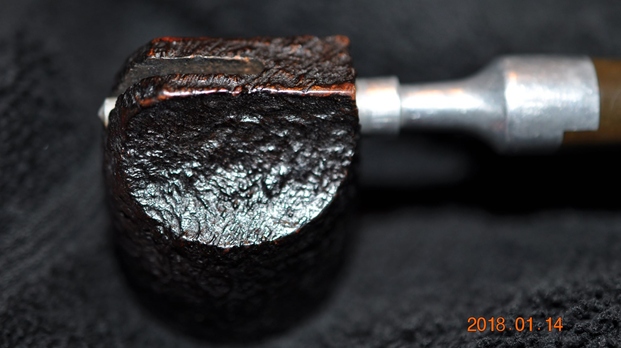
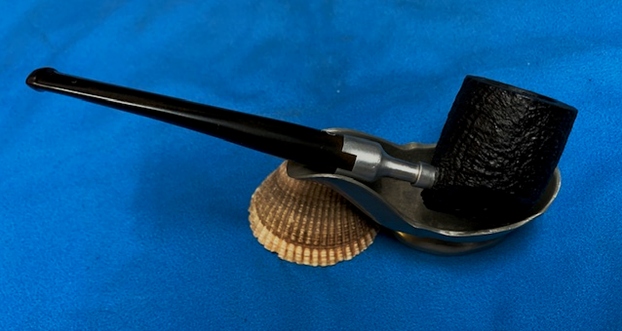
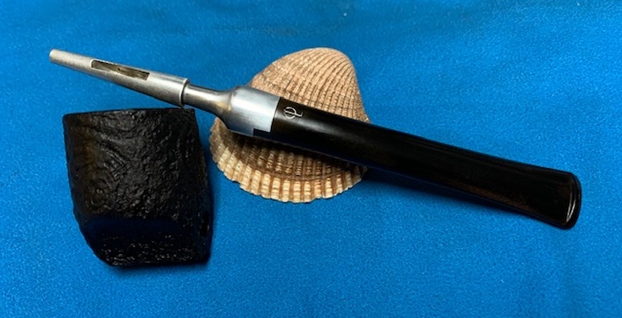
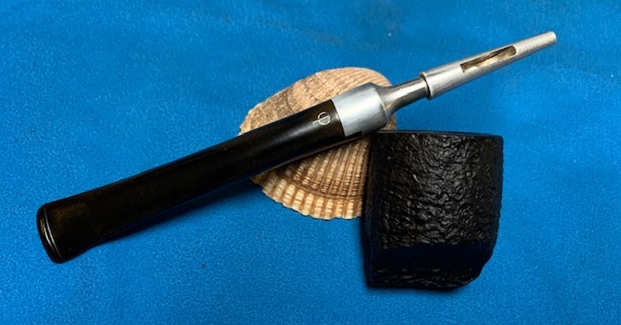
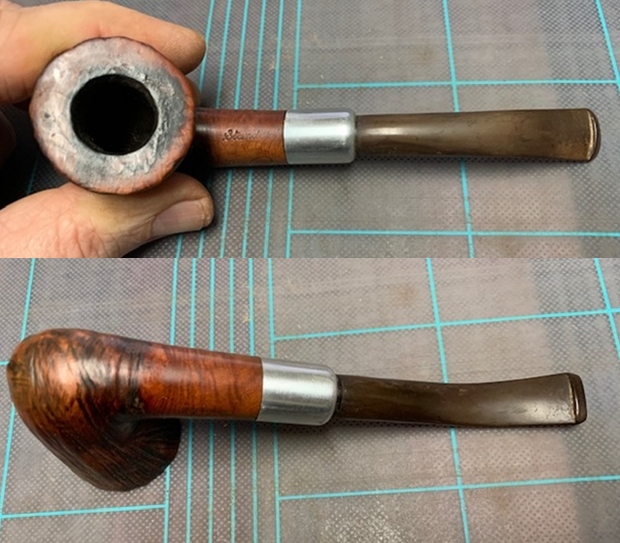
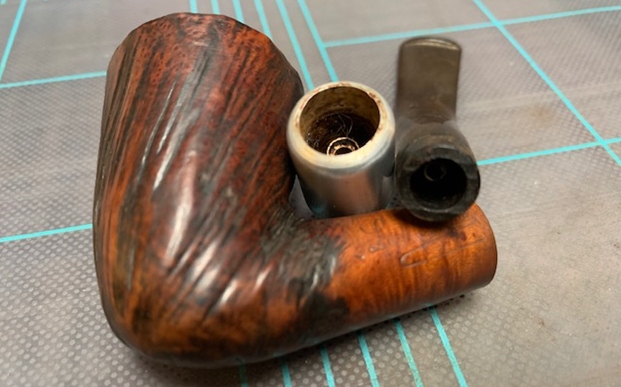
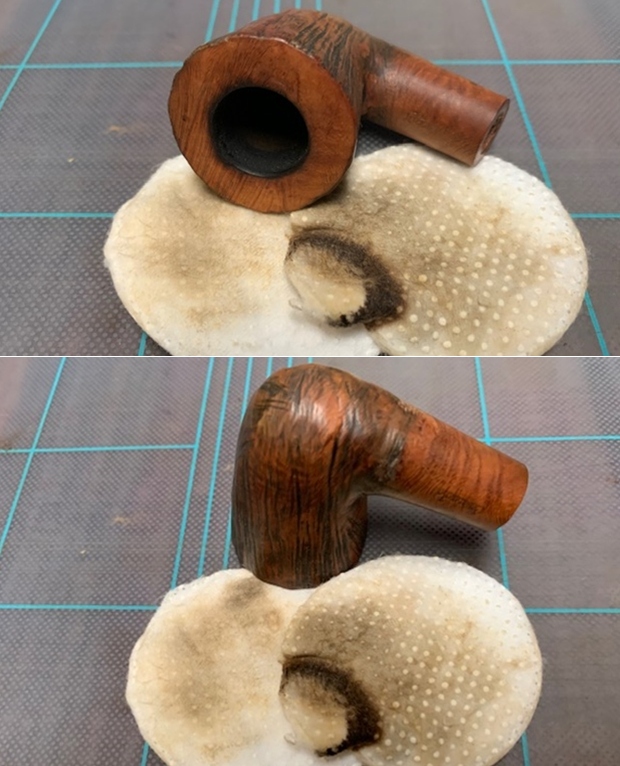
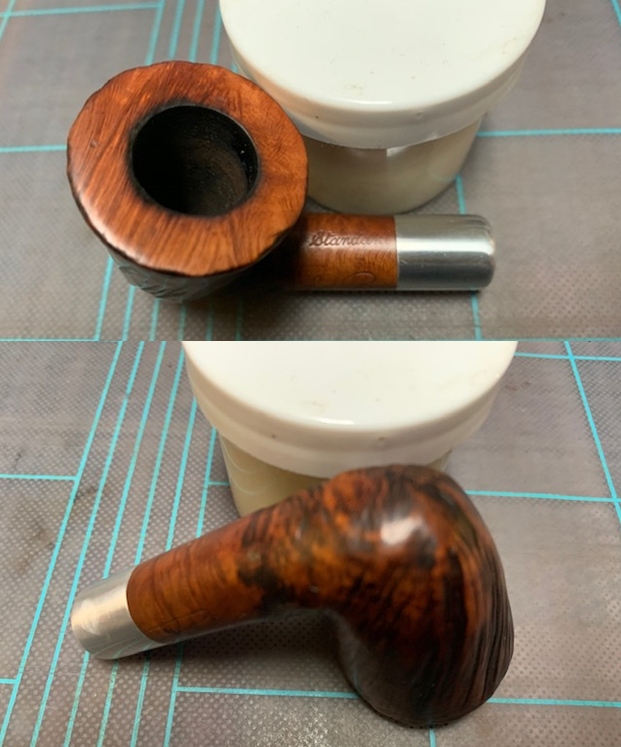
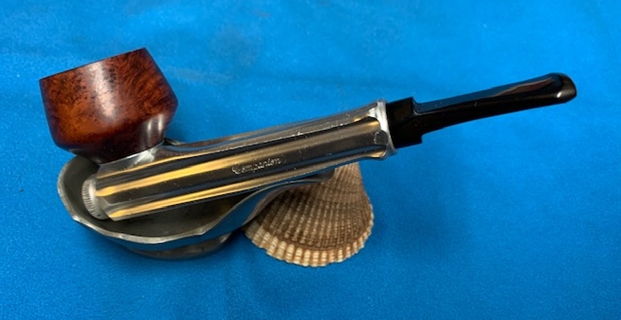
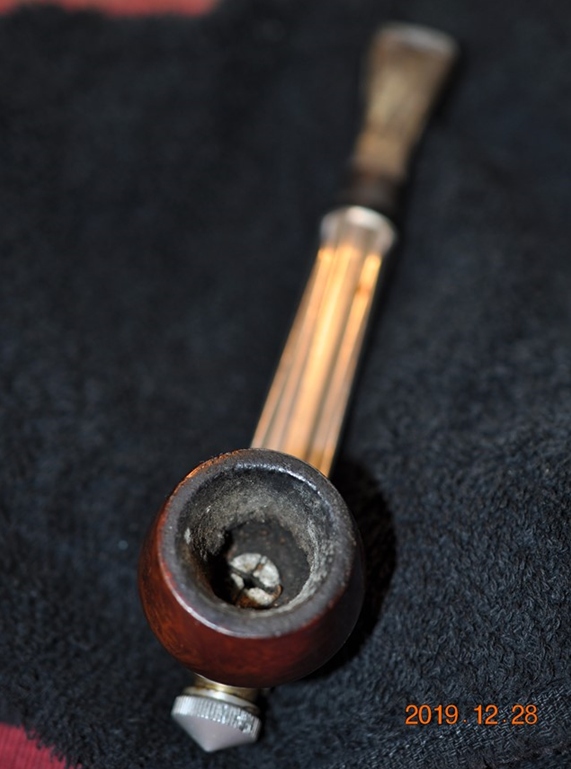
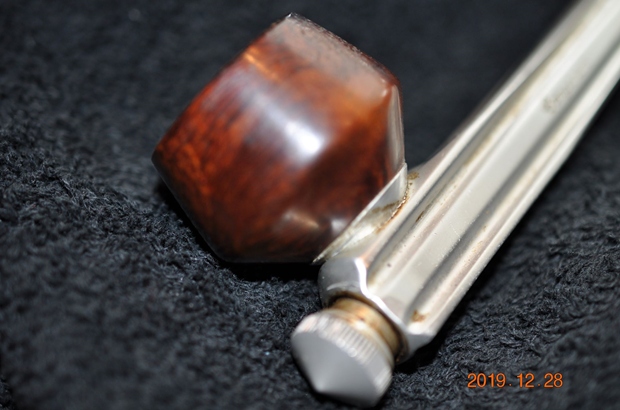
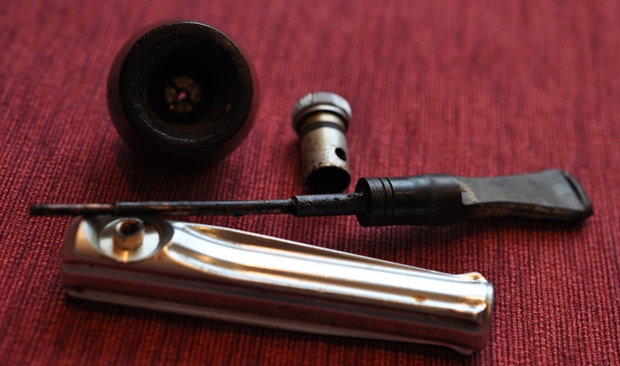
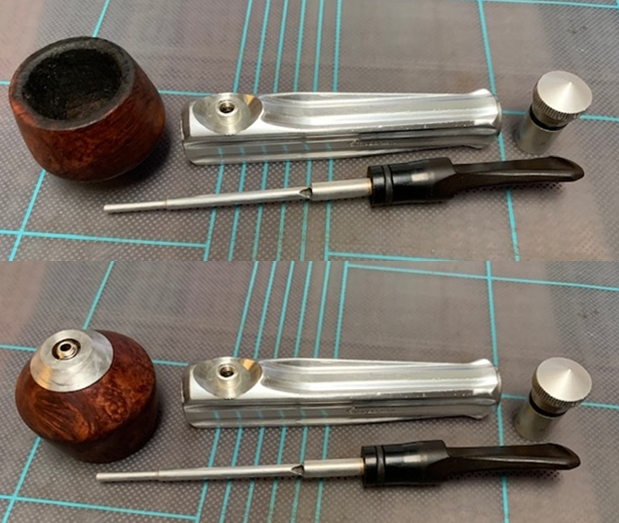
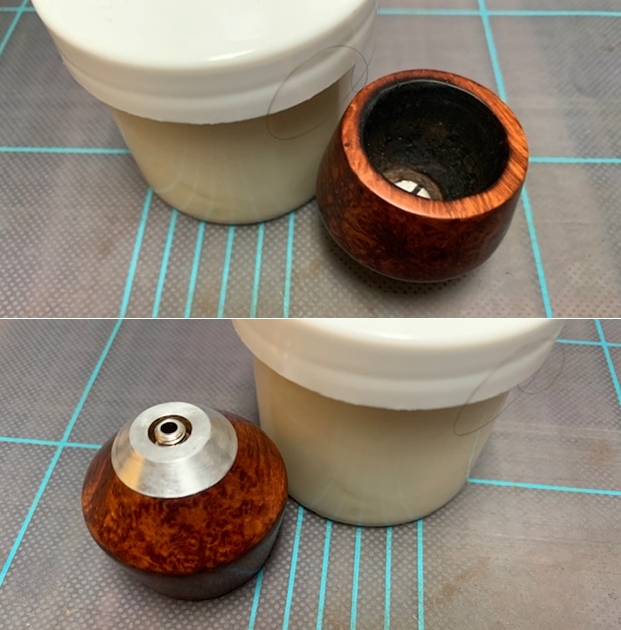
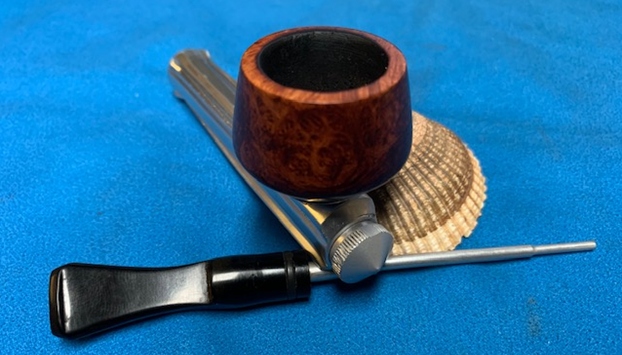
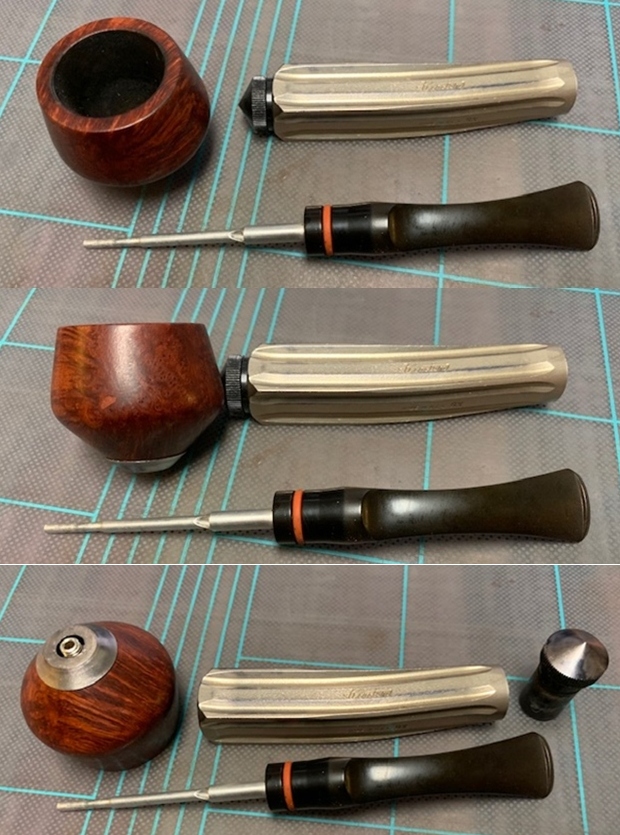
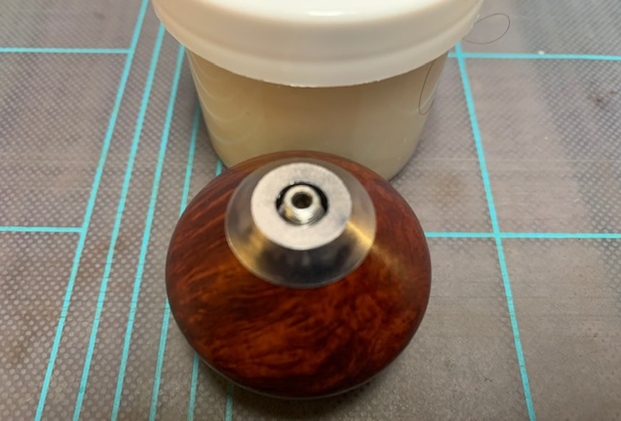
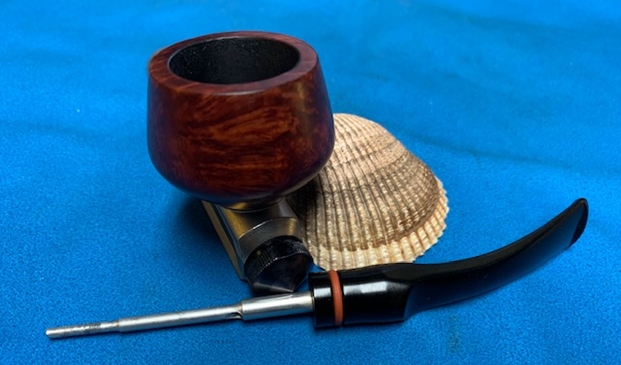
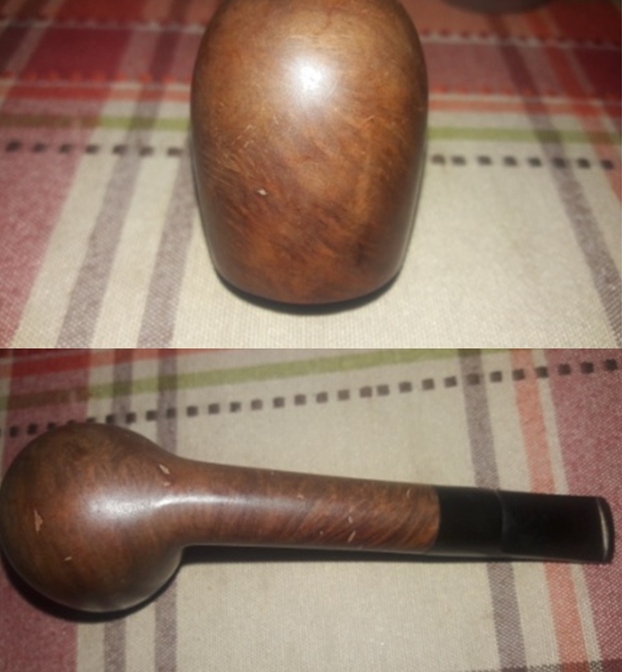
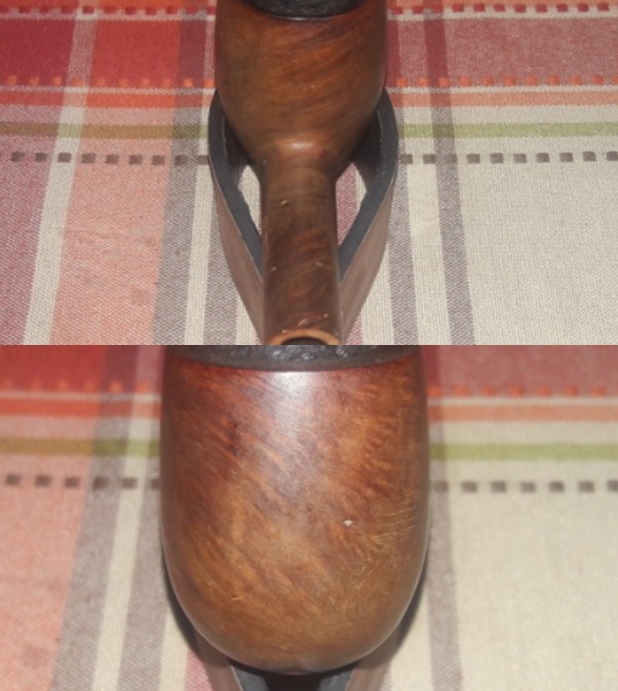
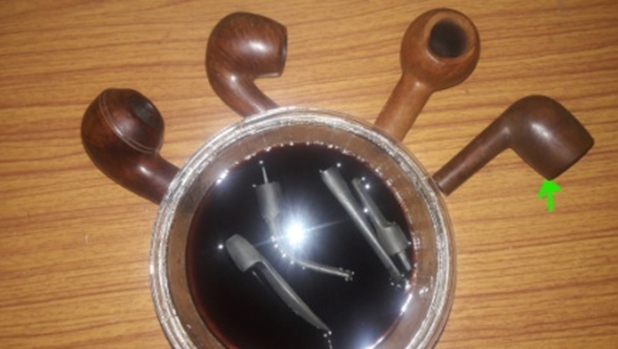
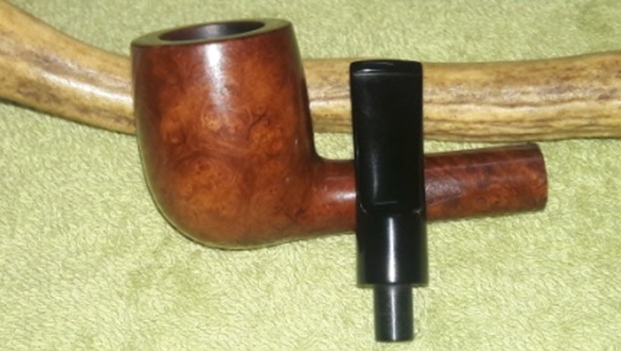
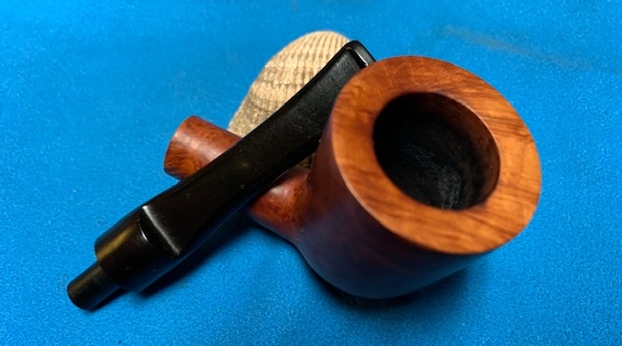
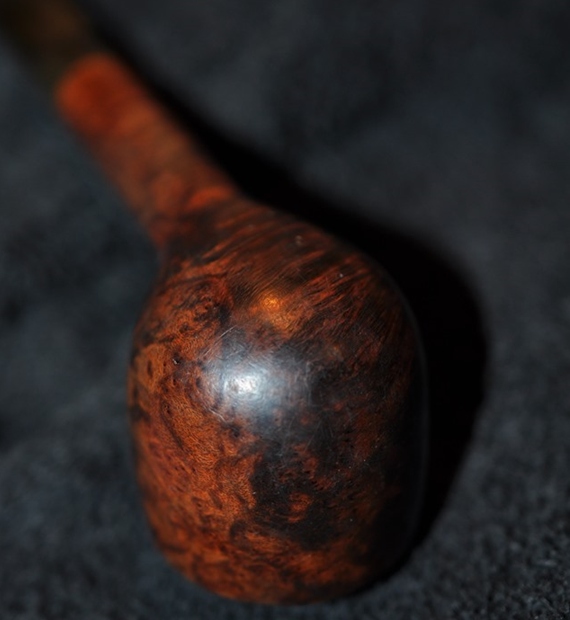
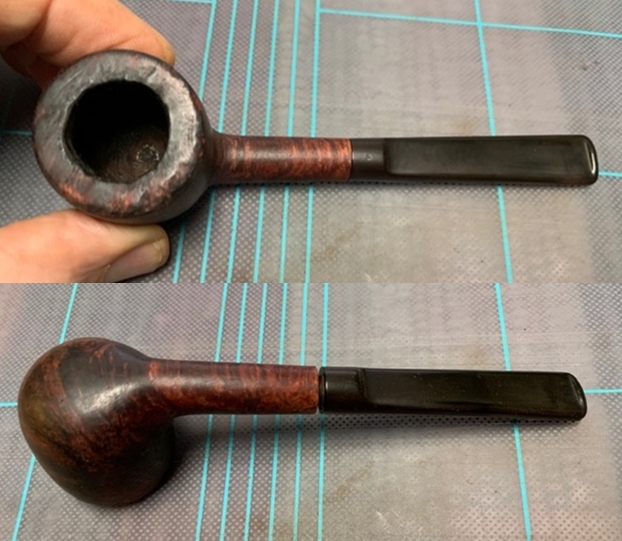
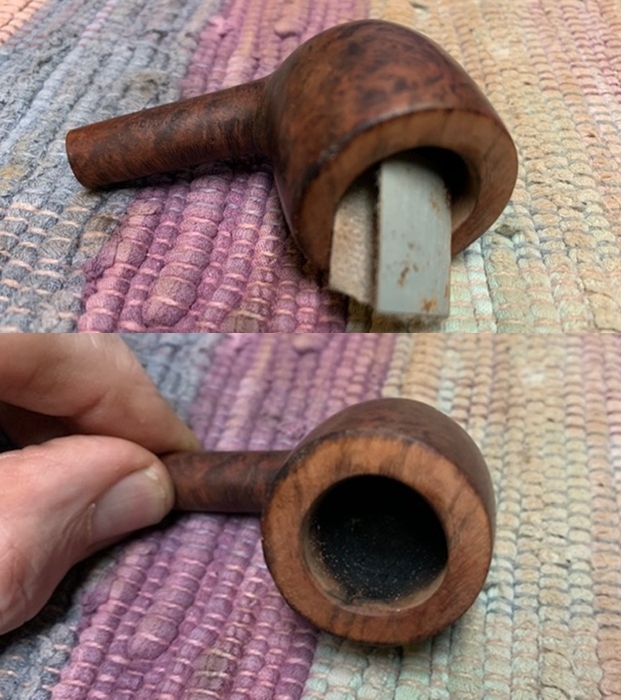
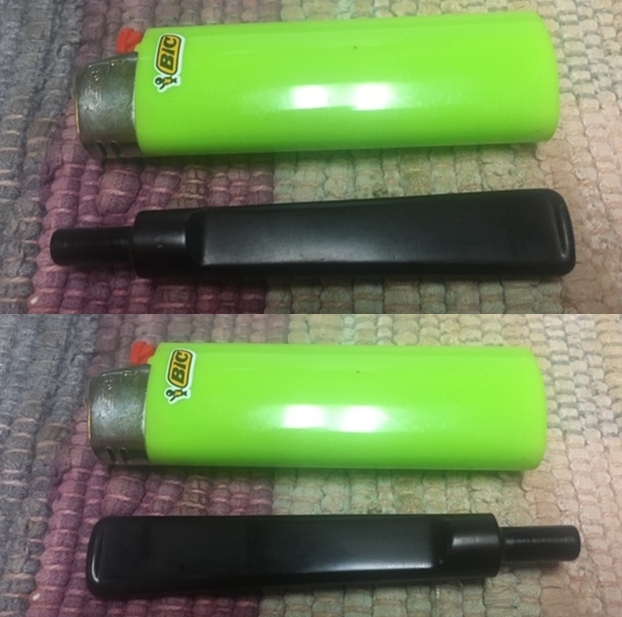
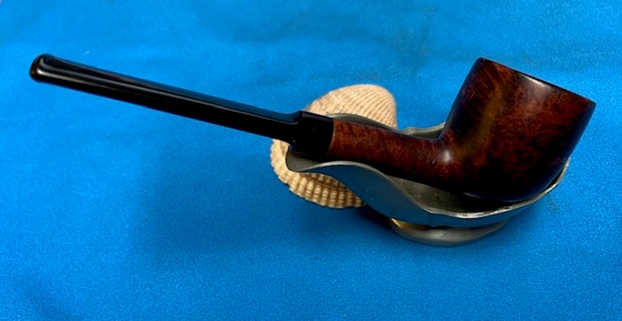
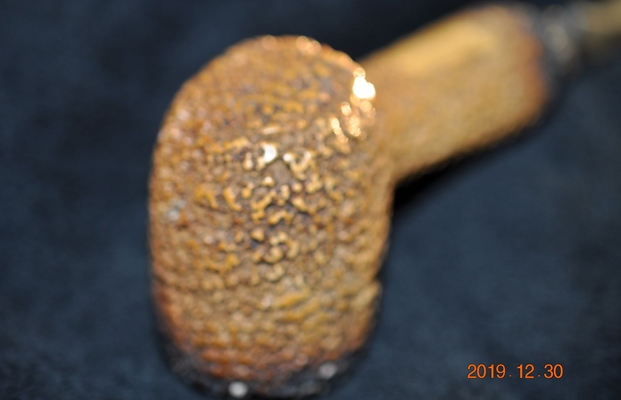
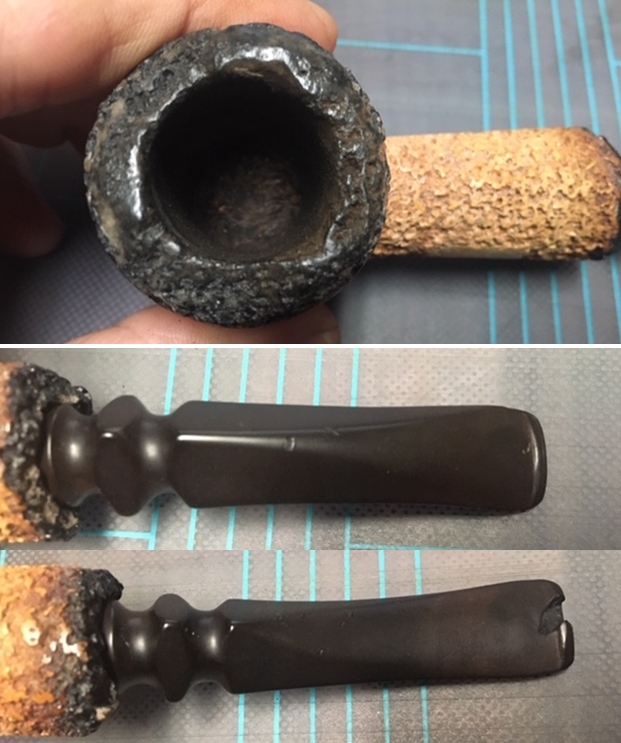
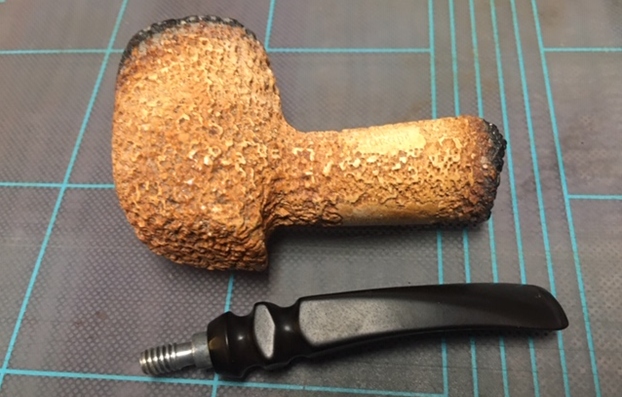
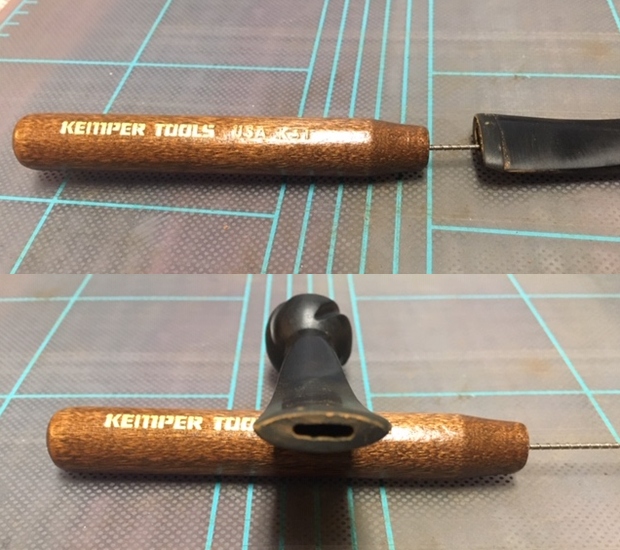
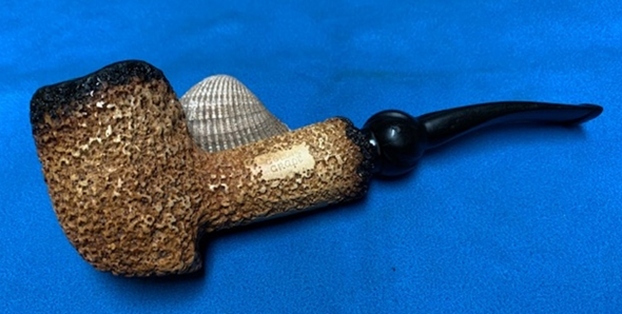
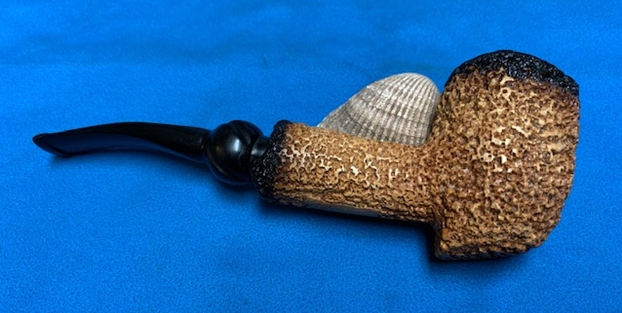
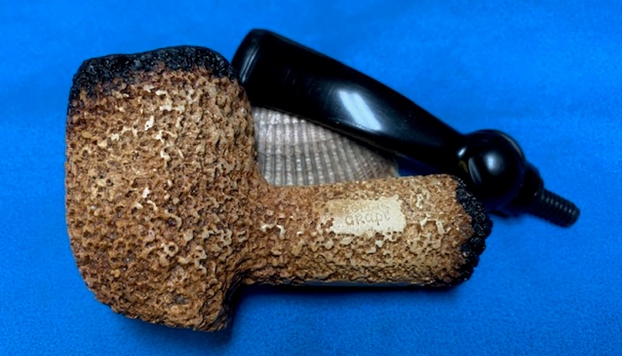
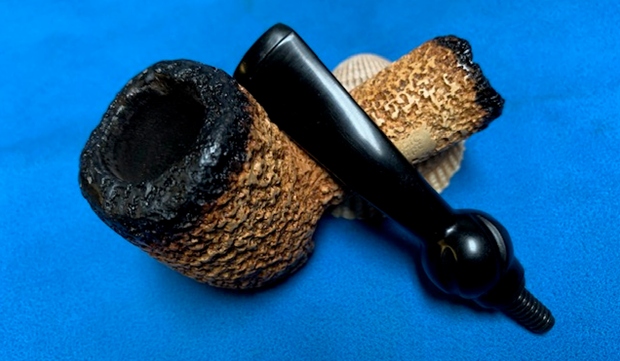
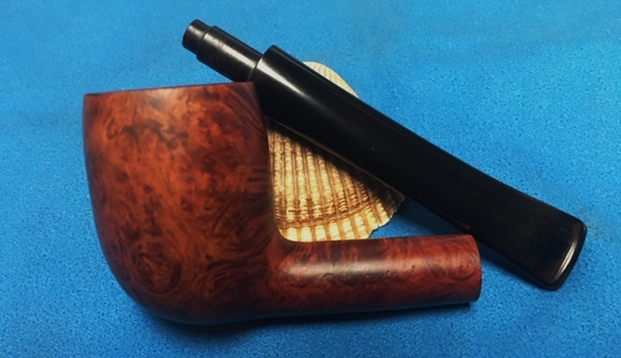
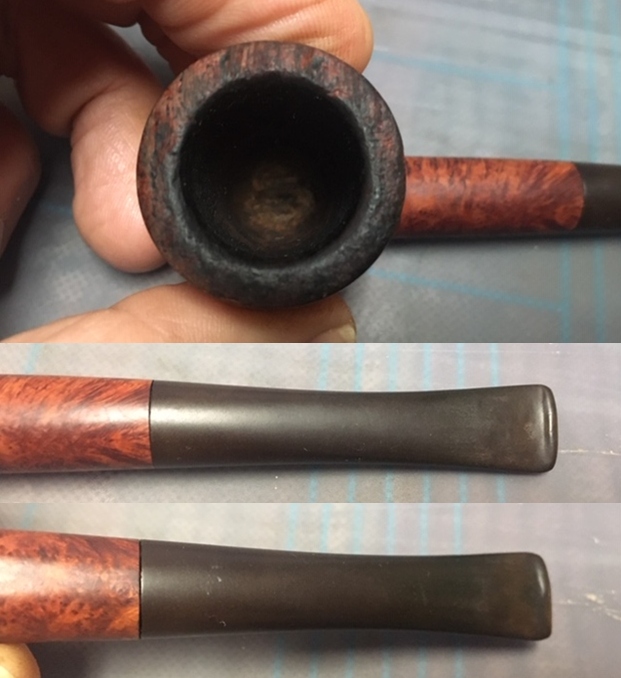
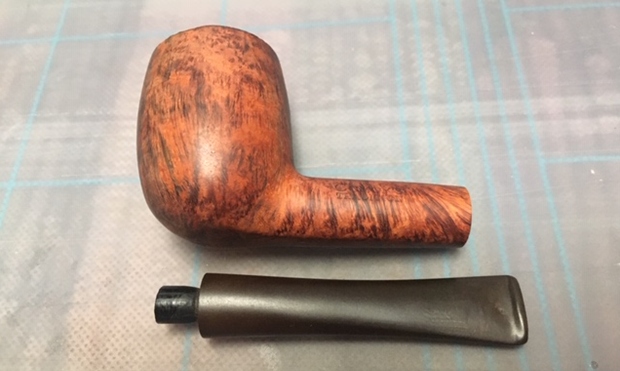
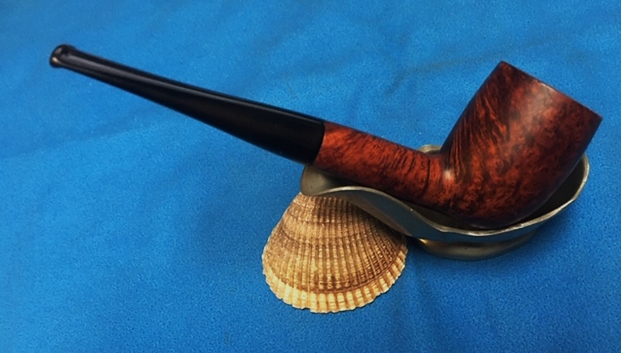
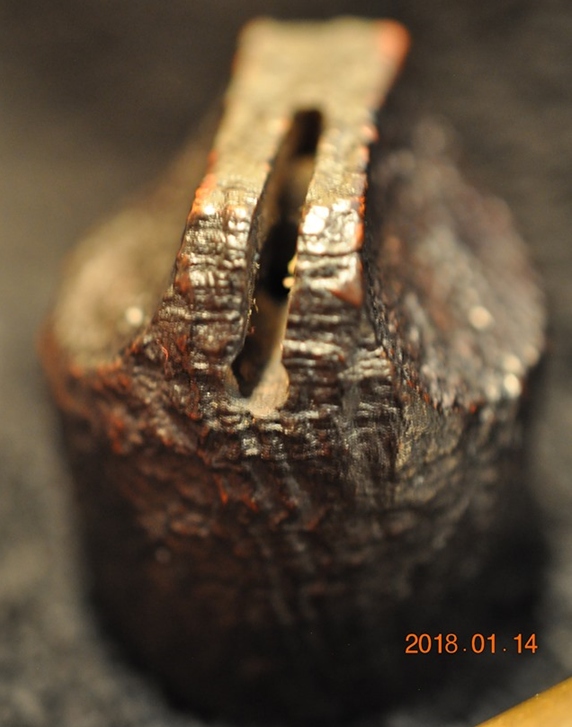
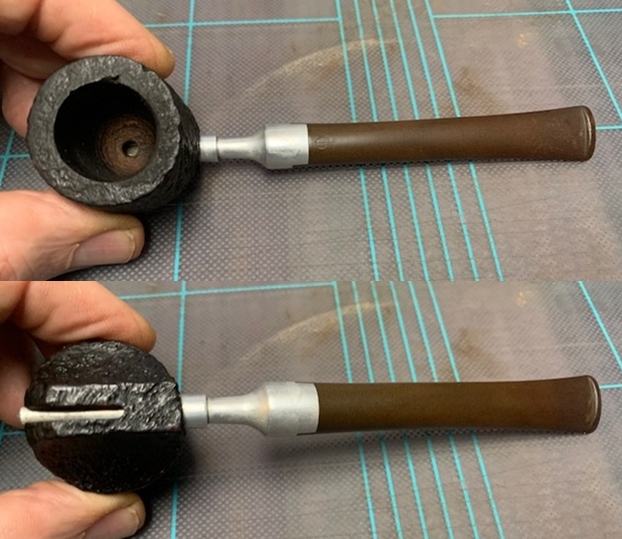
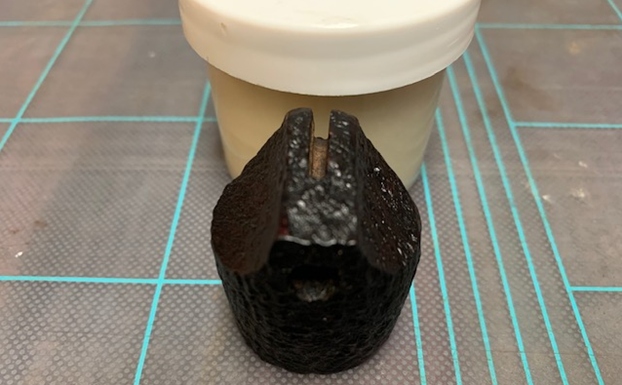
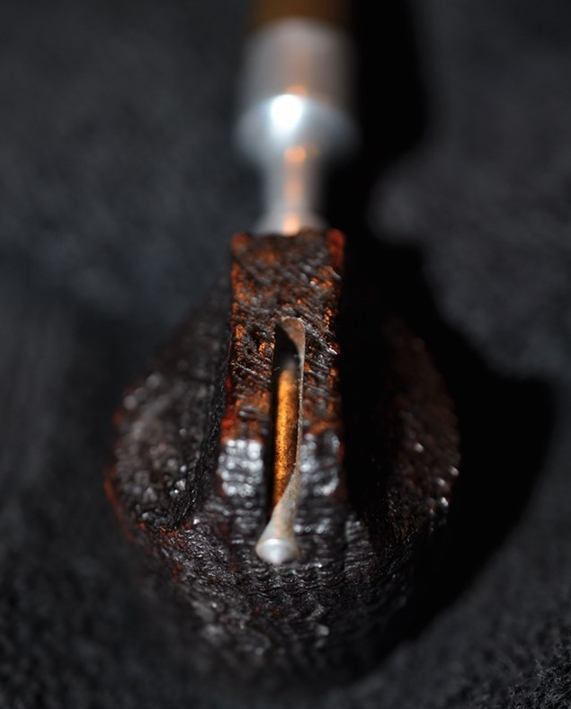 He took photos of the bowl and stem taken apart. The sandblast finish is rugged and looks great under the grime in the sandblast. The second photo below shows the hole in the back side of the base. The third photo shows the slot on the heel of the bowl with a hole in the bottom of the bowl.
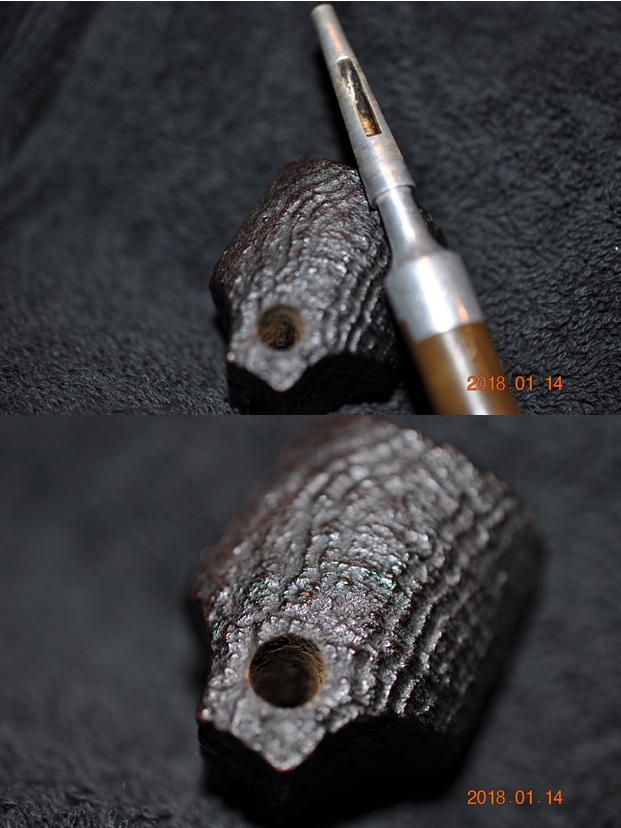
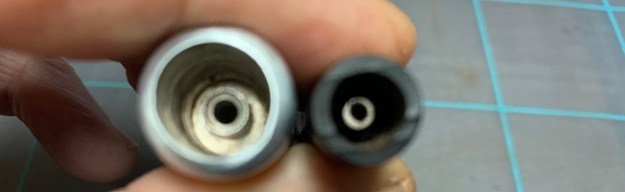
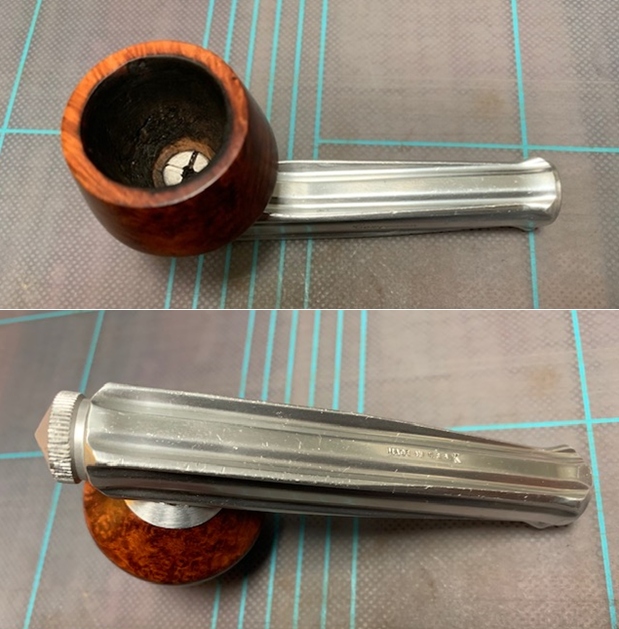
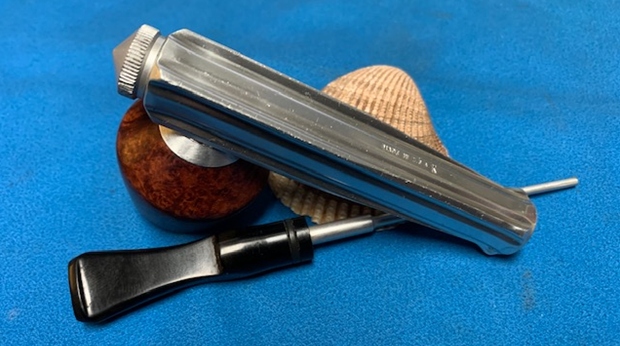
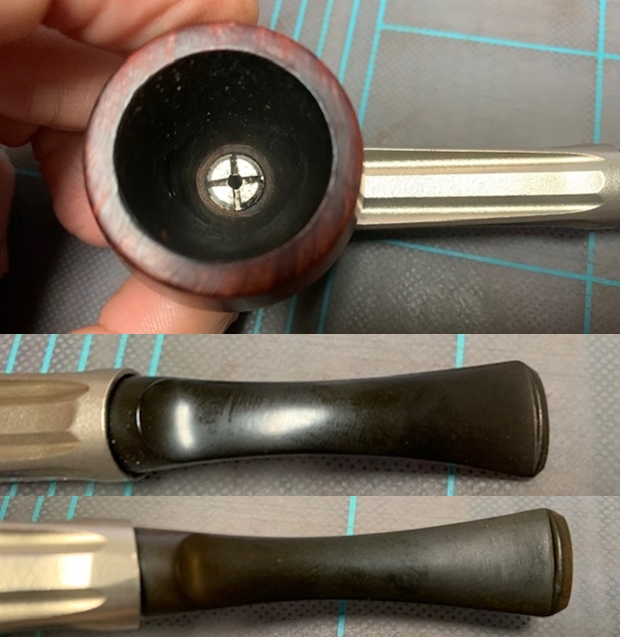
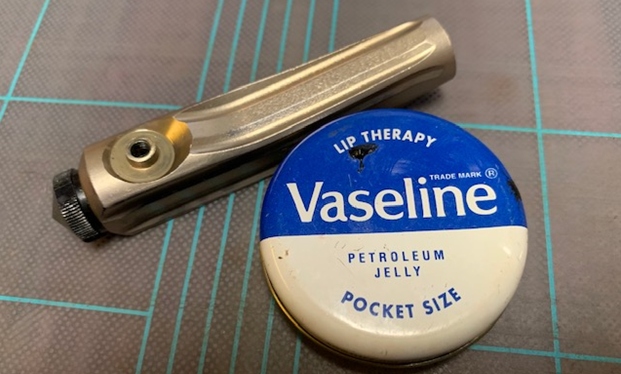
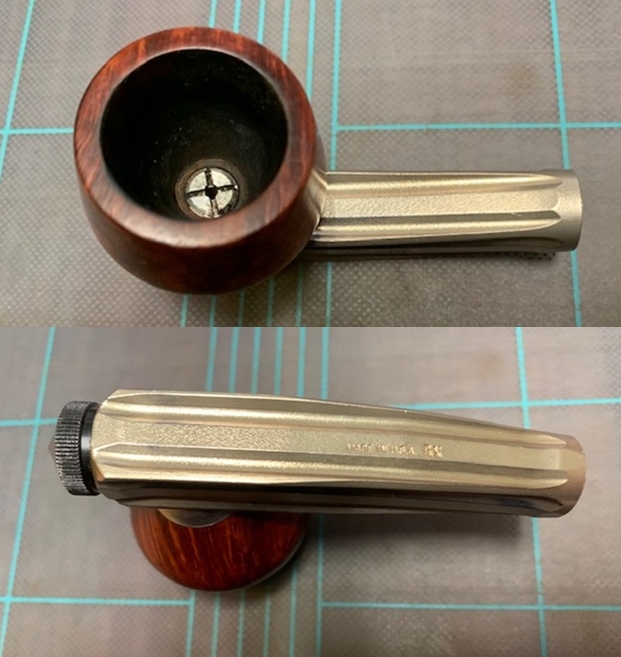
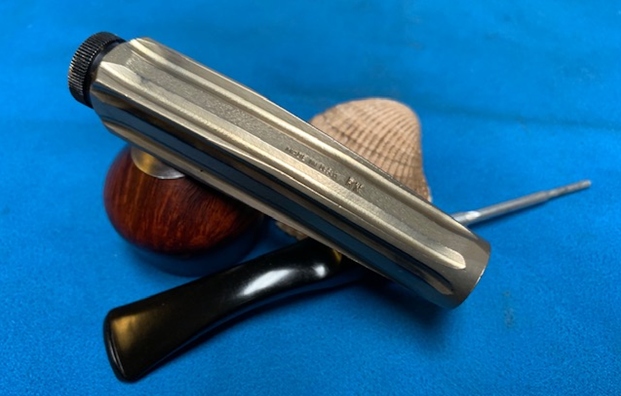
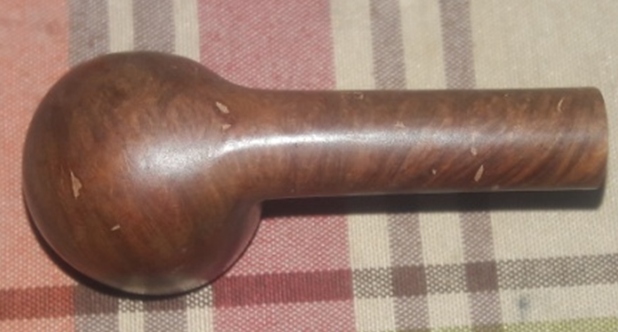
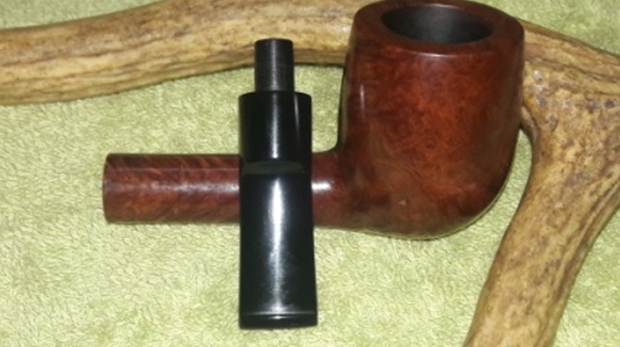
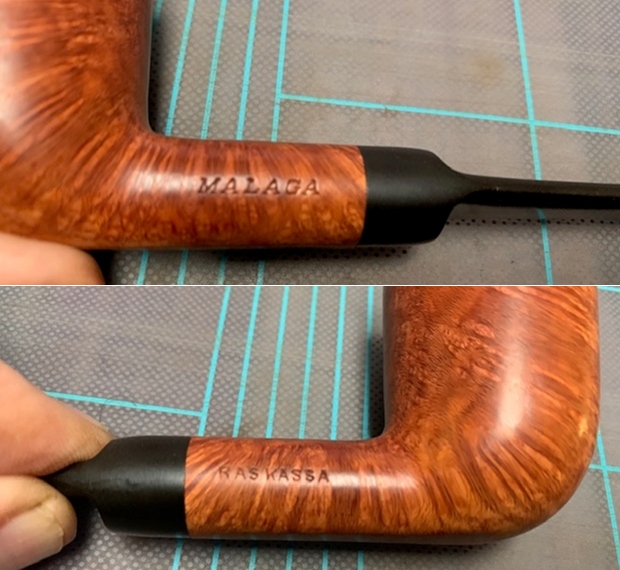
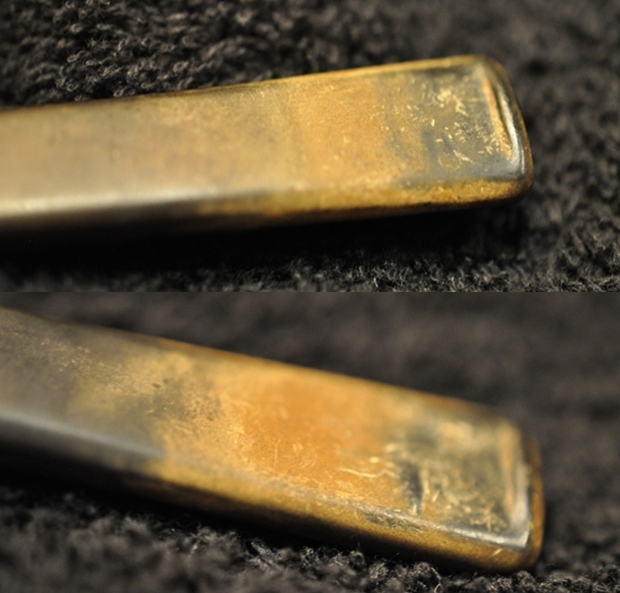
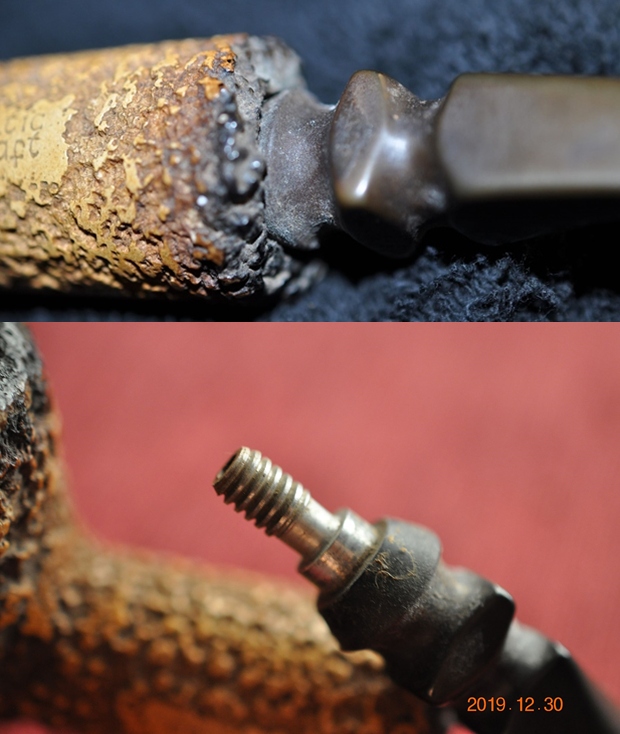
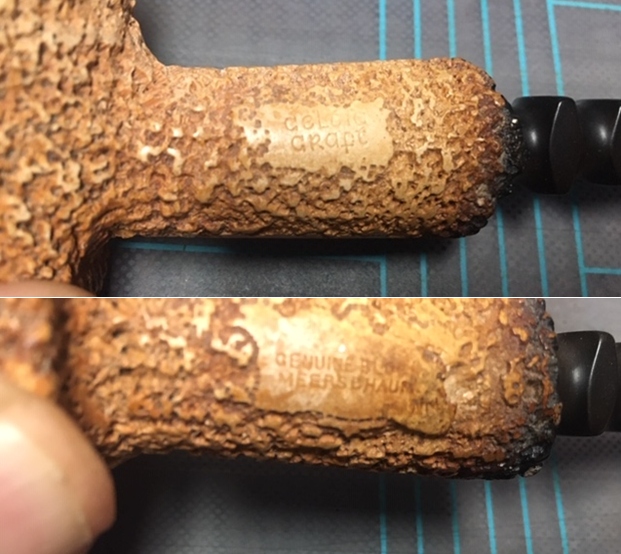
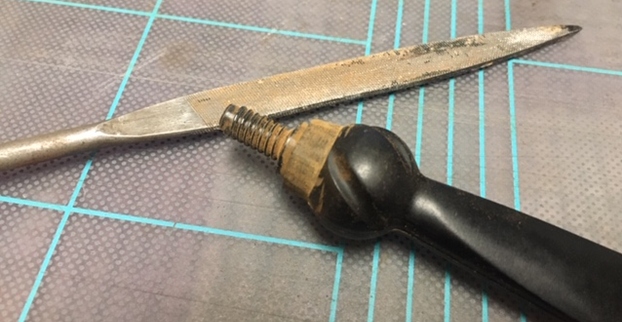
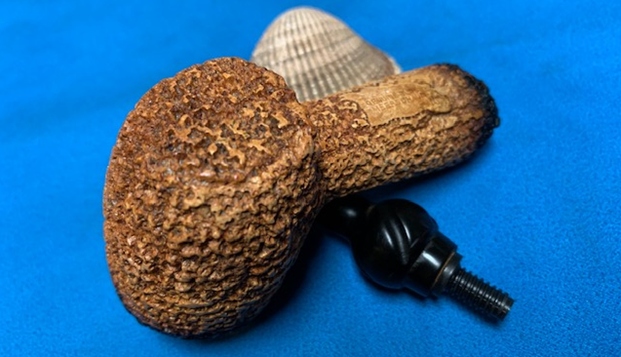
 The next two photos show the spear like stem end with a slot that matches the hole in the bottom of the bowl. You can see the tars and oils in the slot and on the aluminum end.
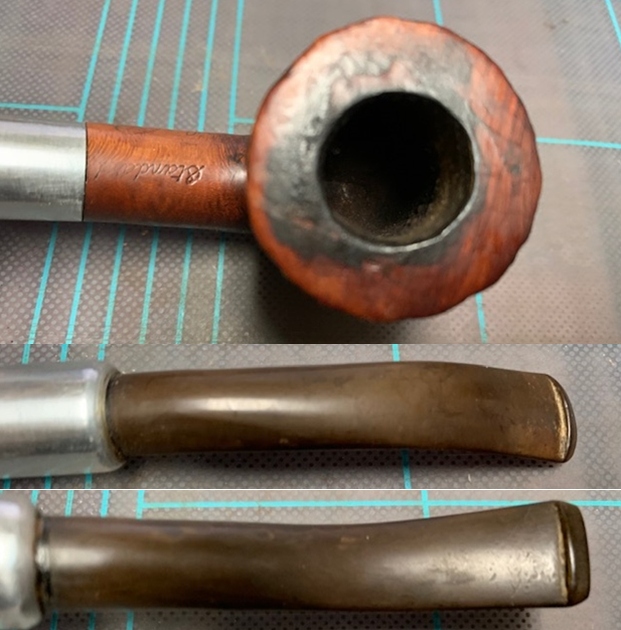
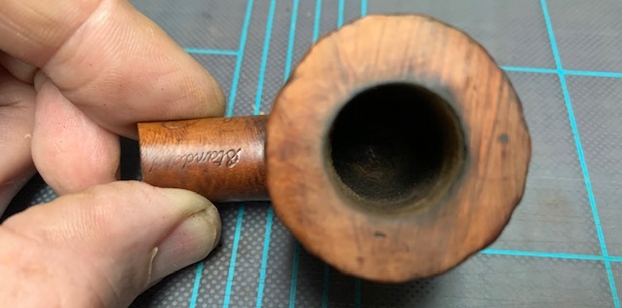
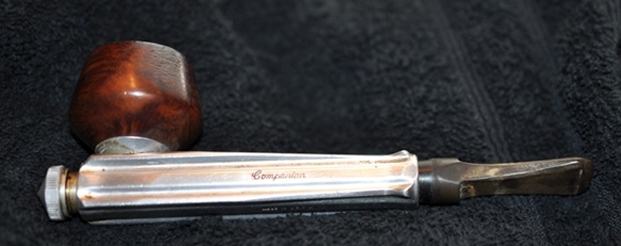
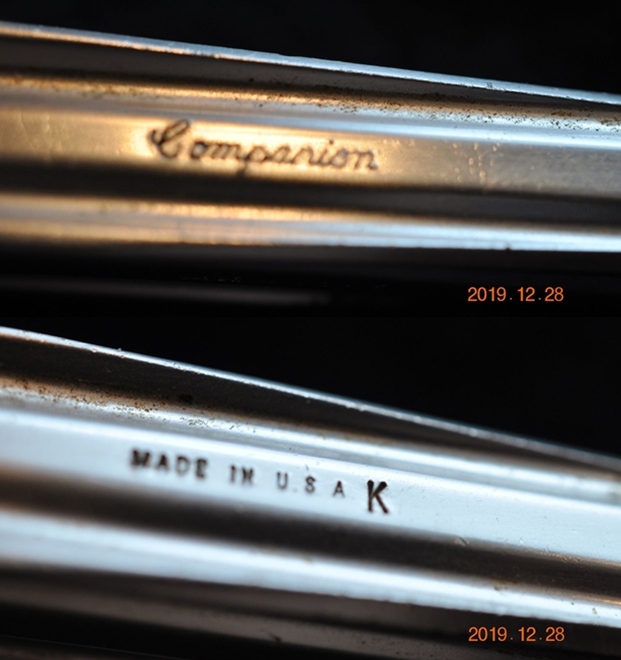
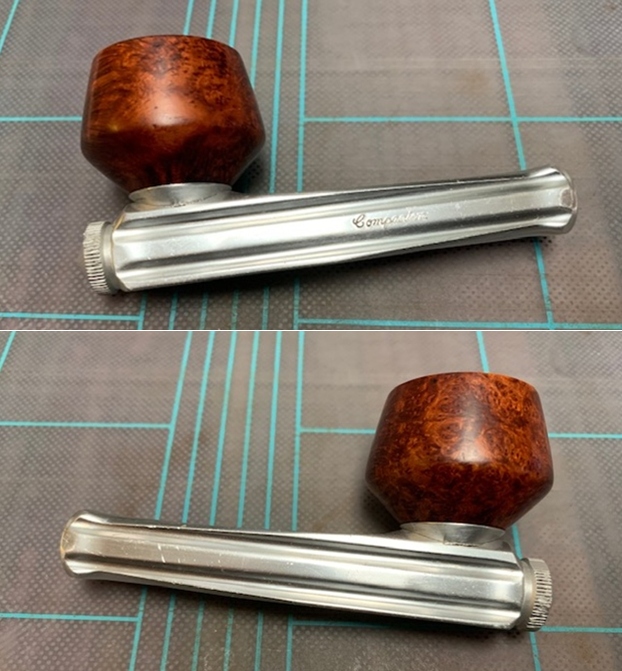
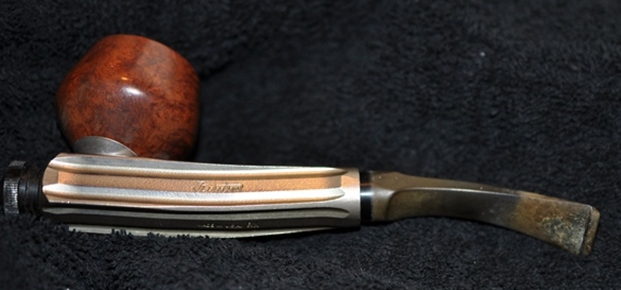
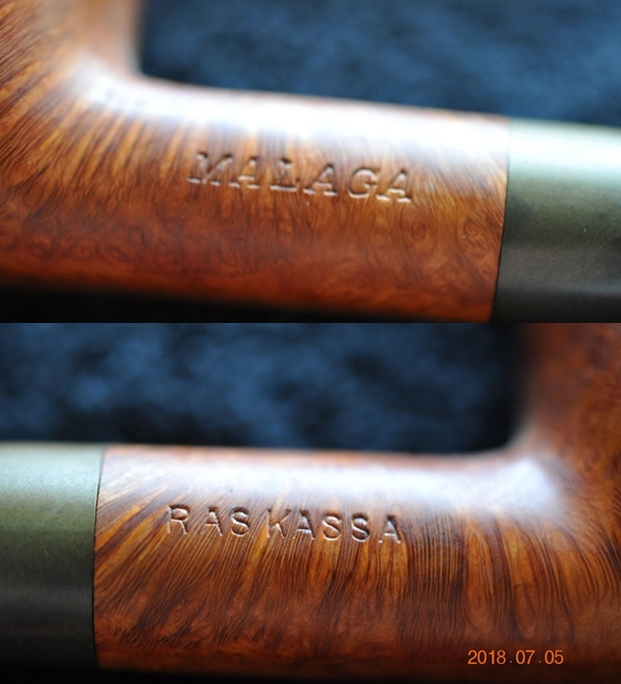
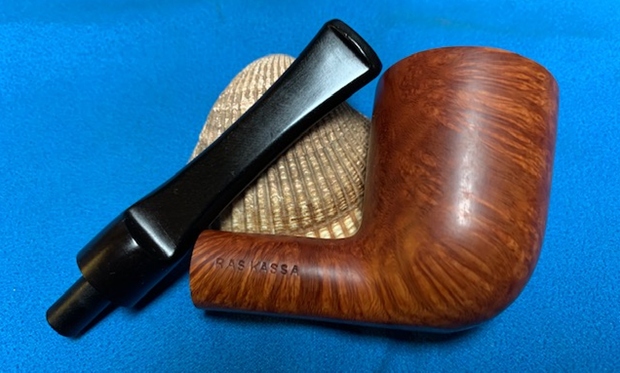
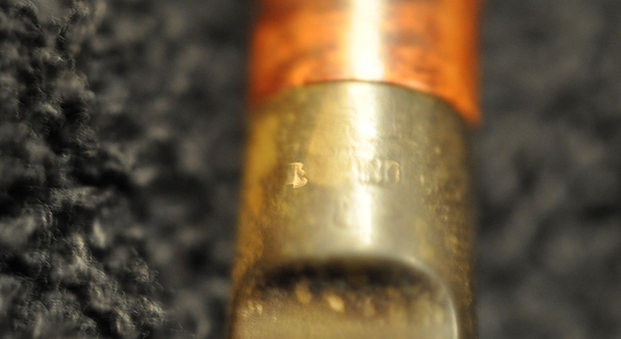
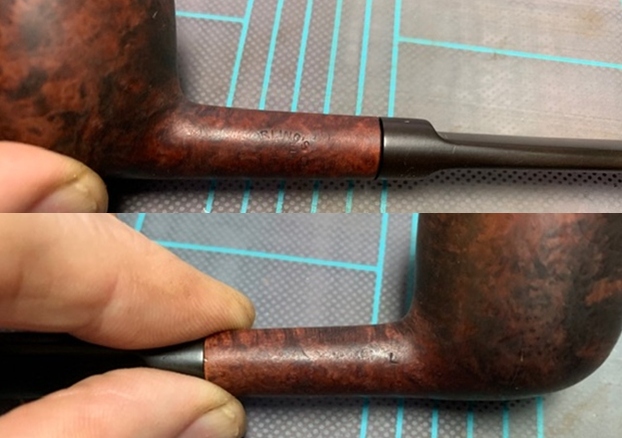
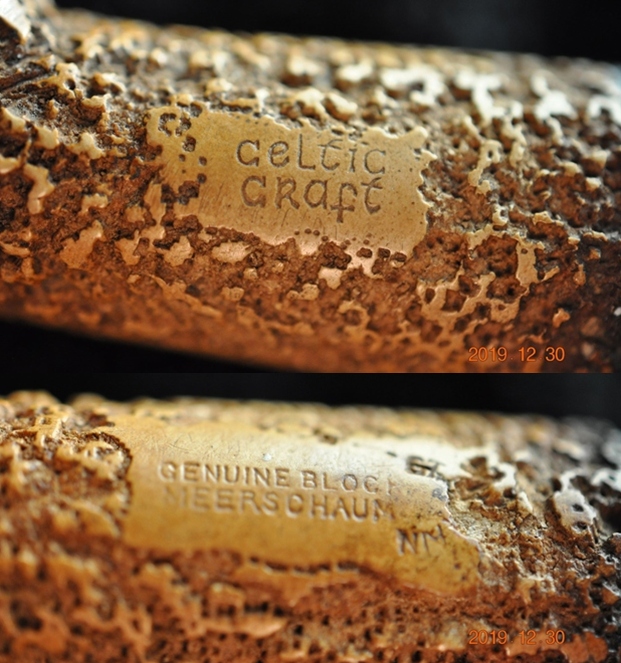
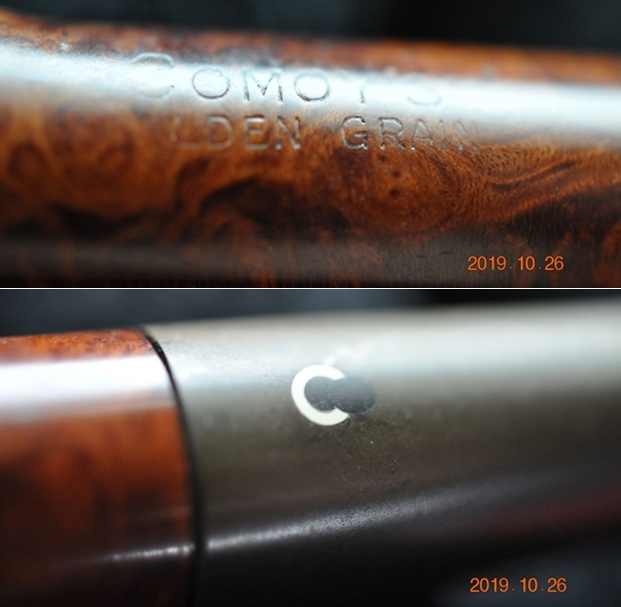
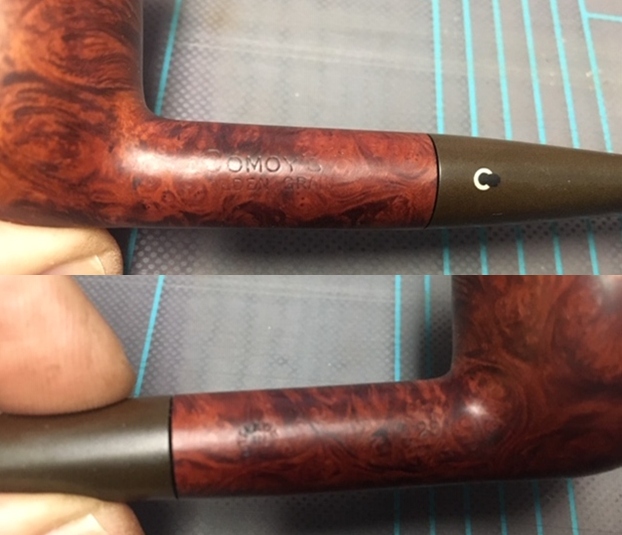
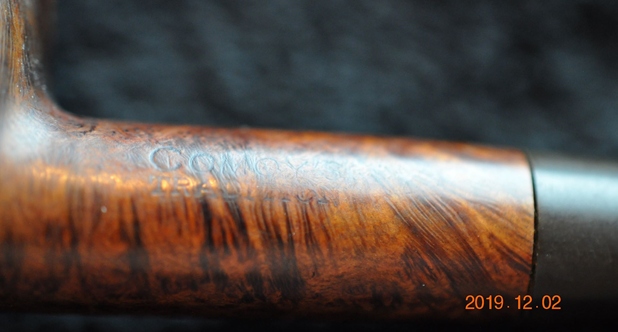
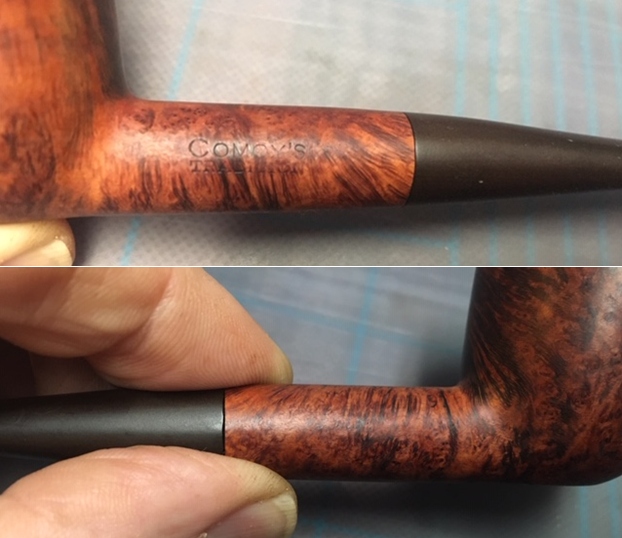
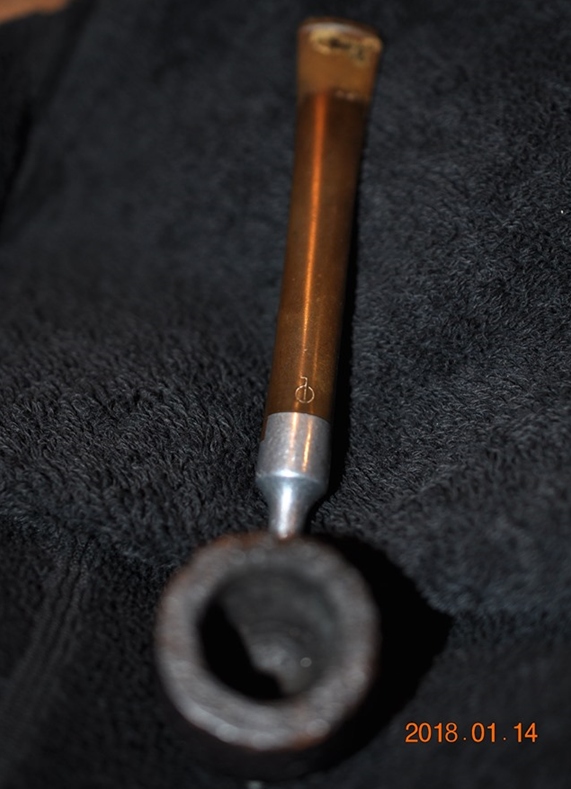
  The next photo shows the stamping on the topside of the stem and it is very readable. It reads as noted above.
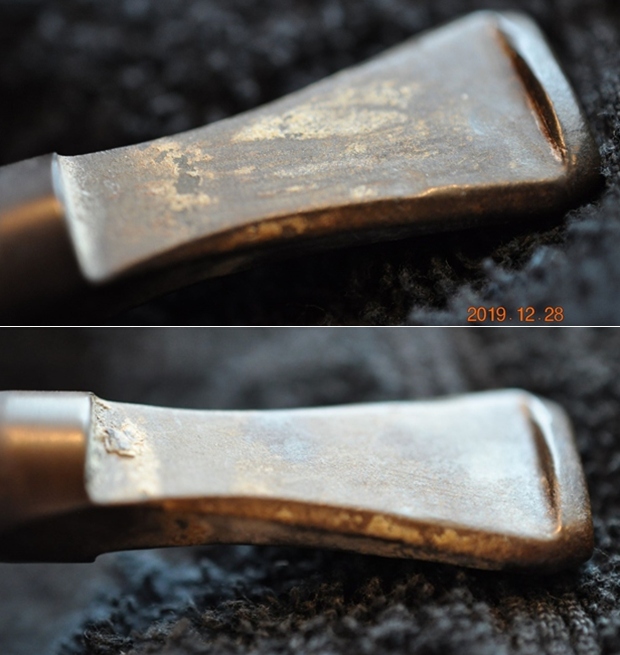
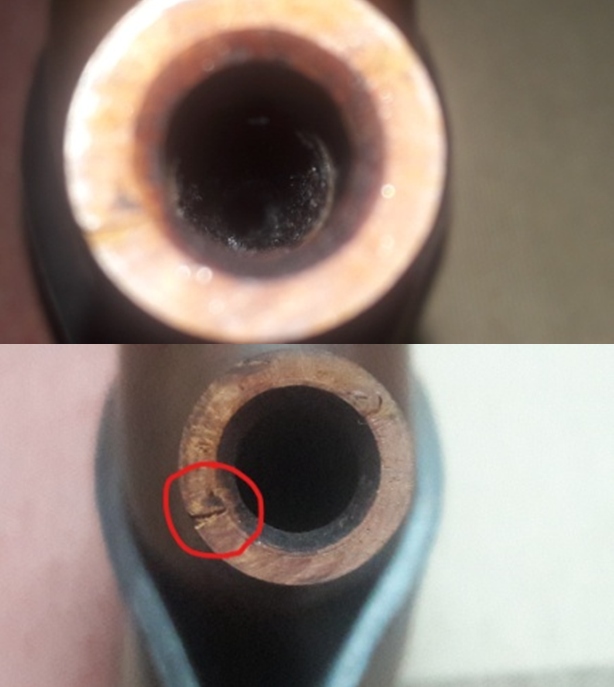
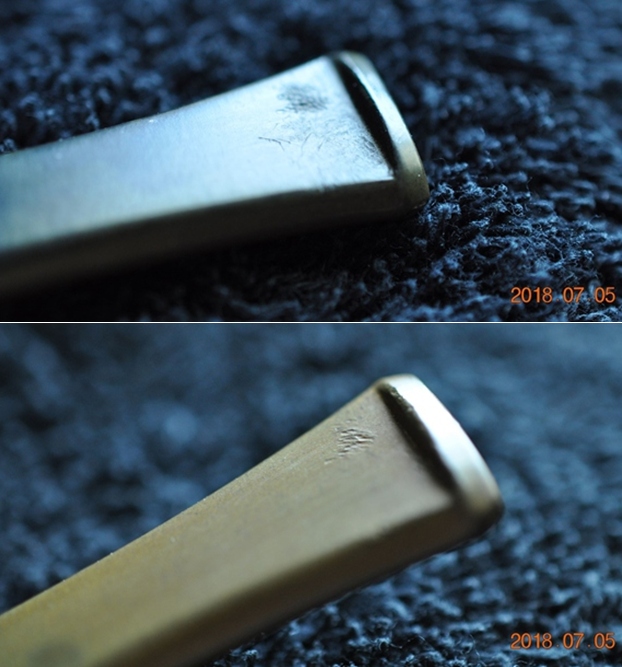
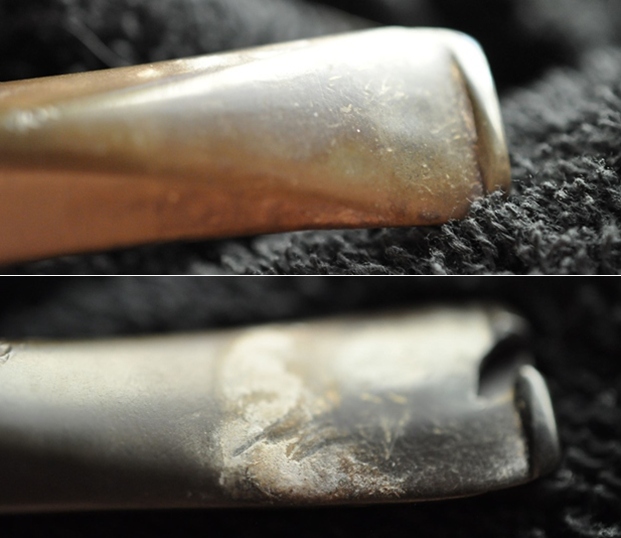
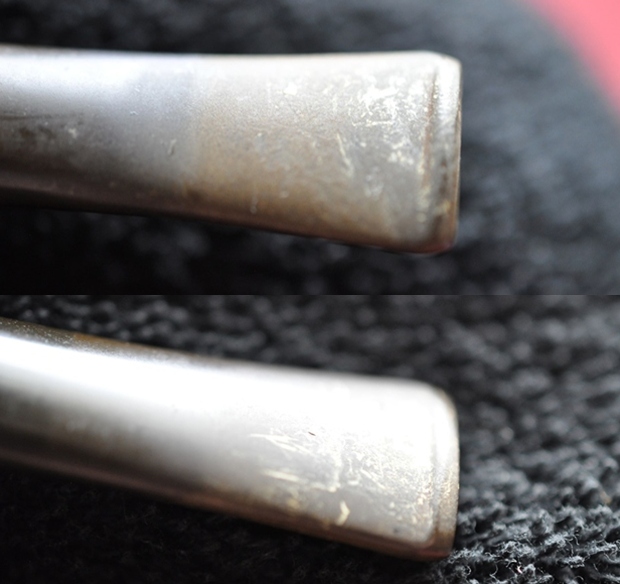
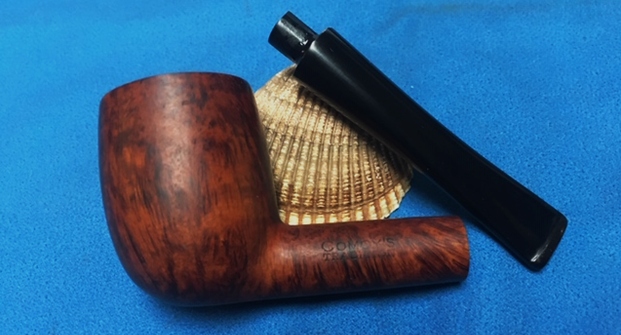
 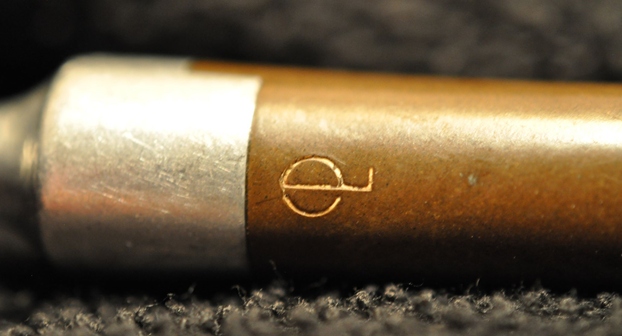 The stem was dirty and oxidized and had tooth chatter and marks on both sides ahead of the button.
 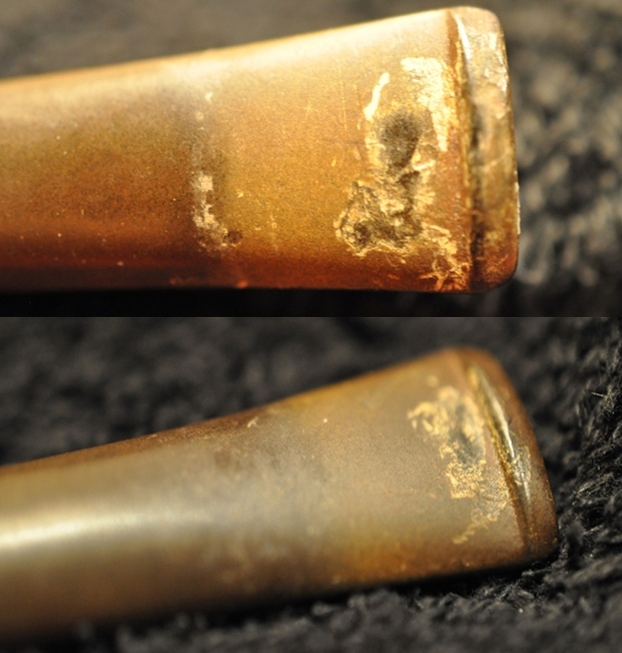 When I read Paresh’s blog on the Ornsby pipe that he worked on I remembered that I had one of them in my “to do” box. I went looking for the pipe and once I found it decided to work on it. I reread Paresh’s interesting blog for the background information that he had found on the brand. https://rebornpipes.com/2020/06/17/a-difficult-to-identify-but-simple-restoration-of-ornsby-pipe/ I quote the information below.
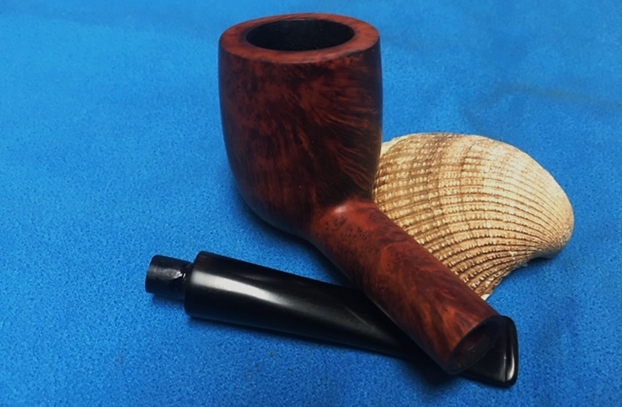
Lack of Maker’s stampings and COM stamp made research of this pipe very difficult. There was no point visiting rebornpipes.com as I did not have any name to search for. Similarly, visiting pipedia.org would not help as I did not have COM stamp to follow. Finally I turned to pipephil.eu and searched the Logos with a geometrical pattern and Logos with miscellaneous symbols sections. Again I came up with nothing matching the stem logo on the pipe in front of me. As a last resort, I just typed “pictures of unusual tobacco pipes” in to the Google search bar and there before me were a plethora of pictures. As I was scrolling through these images, after a couple of hours, I finally found a picture that was an exact replica of the pipe on my work table. A click on to this image took me to the site smokingmetals.co.uk. Here is the link to the web page; http://www.smokingmetal.co.uk/pipe.php?page=106.
From the read I understood that this design was a part of the piper’s eternal quest for a cool and dry smoke. I reproduce a part of the information that should provide the readers with an insight in to the designer of the pipe and the Company that manufactured these pipes.
Invented by Chief Marine Officer, William Edward Ornsby in an attempt to create a cooler smoke and a dry bowl. Marketed by the Ornsby Pipe Company Ltd, Pennywell, Sunderland, Tyne & Wear, England, predominately in the North of England, this pipe is virtually a stem direct to bowl.
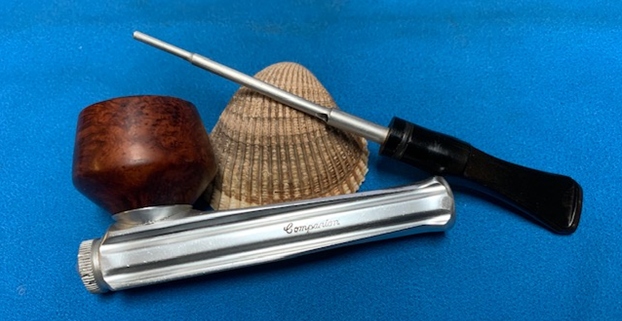
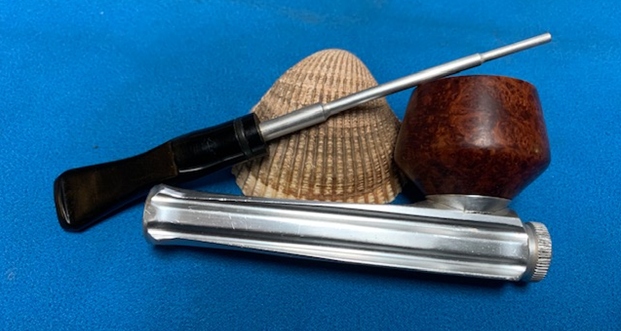
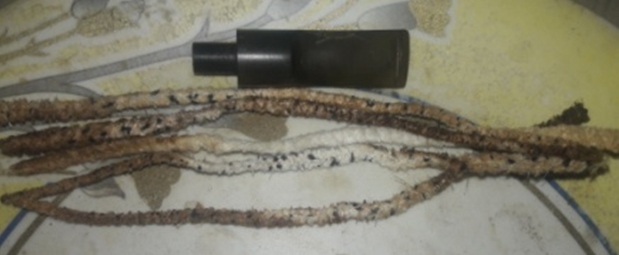
The push fit stem/bit can be rotated to clear any shreds of tobacco that may be blocking the airway. A half turn of the stem will cut any trapped leaf in the airway and a quick blow will eject the offending particle. As the centre photo shows, the metal part of the stem goes right through the bowl. The packaging was also unusual in that it was a tube.
The pipe came with two choices of stem, straight or curved and there was a choice of six bowls: Natural, Brown Sandblast, Black Sandblast, Smooth Mahogany Finish, Deep Cut Horizontal Carved or the Deep Cut Vertical Carved.
Overall length 5 3/4 inches (146 m/m)
My thanks to Richard Adamek for the following:
“ORNSBY PIPE COMPANY LIMITED At an Extraordinary General Meeting of the Members of the above-named Company, duly convened, and held at 7 Benton Terrace, Sandyford Road, Newcastle-upon-Tyne, on 27th October 1980, the following Extraordinary Resolution was duly passed:
“That it has been proved to the satisfaction of this Meeting that the Company cannot, by reason of its liabilities, continue its business, and that it is advisable to wind up the same, and accordingly that the Company be wound up voluntarily and that Brian Leslie Wilson, of Wilson Johnson, 7 Benton Terrace, Sandyford Road, Newcastle-upon-Tyne, be and he is hereby nominated Liquidator for the purposes of the winding-up.”
(803) Brian Dobinson, Director”
Richard also found the patent number… US patent 242261 of 1976
Thus from the above, it is now established that the pipe that I am dealing with is an ORNSBY with a Natural smooth finish and a straight vulcanite stem. The pipe was awarded a US Patent in 1976 and the company was liquidated in 1980. This places the pipe in between the period from 1970s to 1980 making it 40 plus years old!!
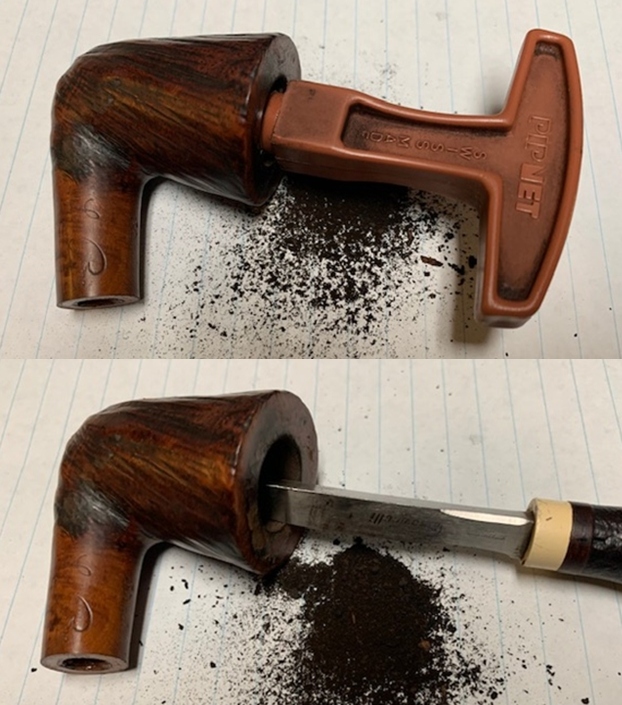
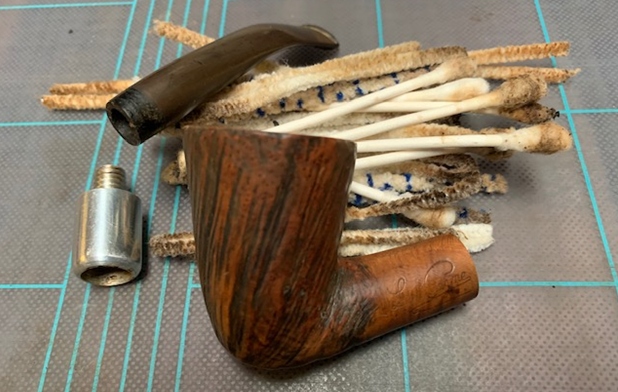
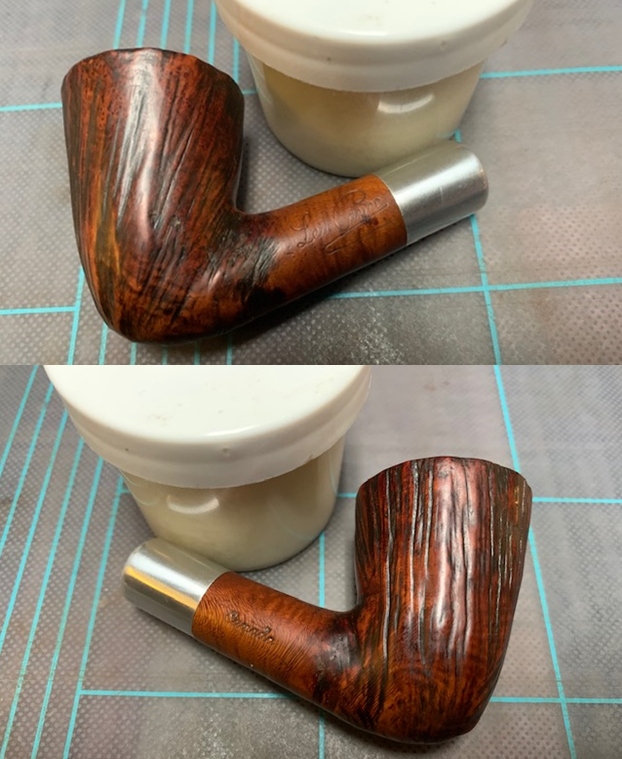
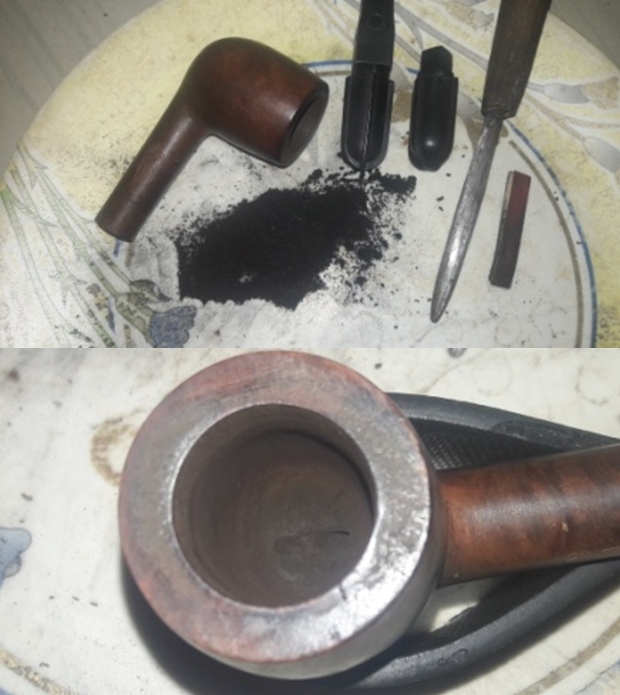
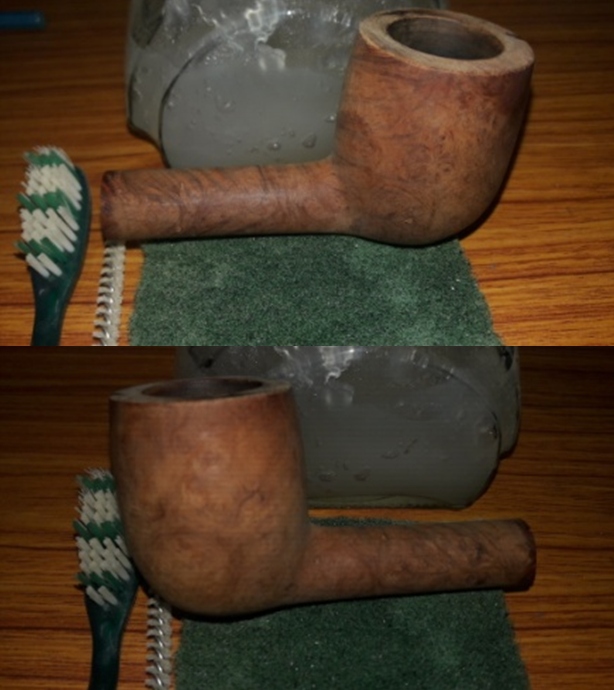
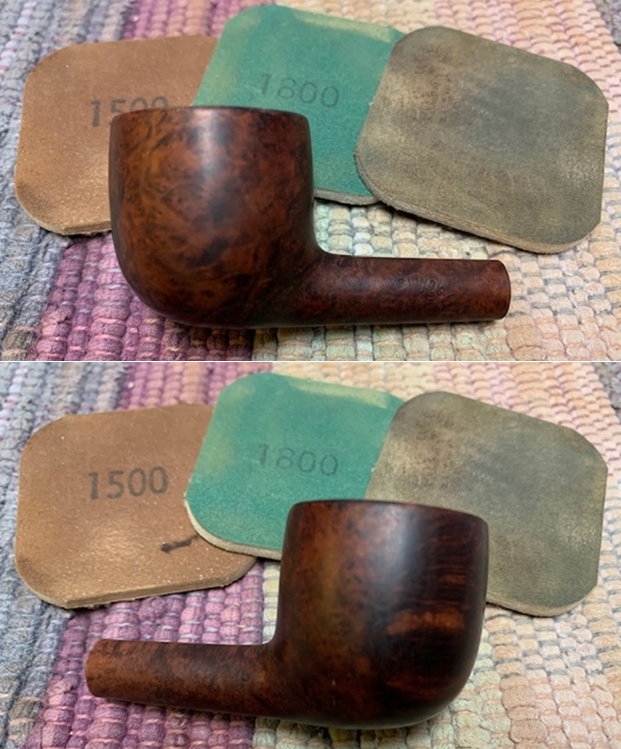
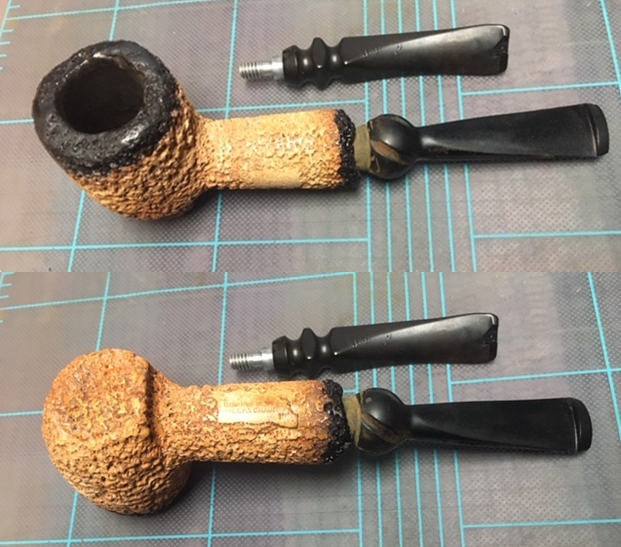
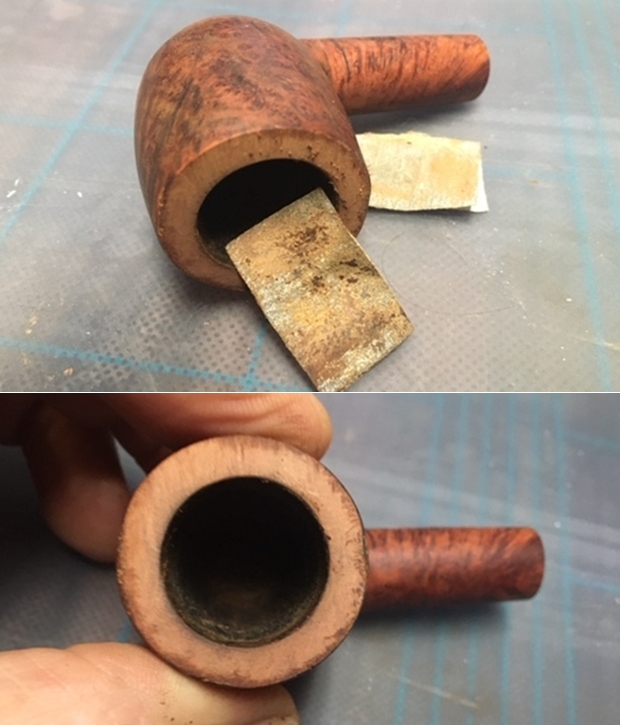
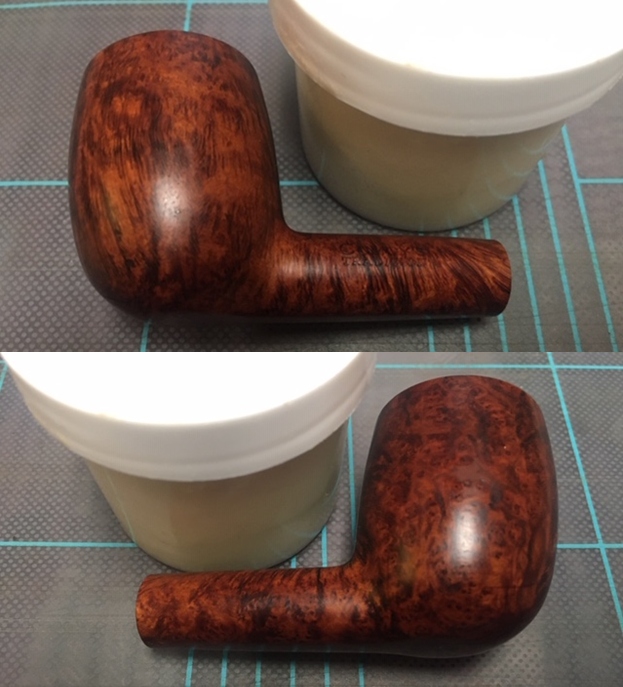
Jeff cleaned the pipe with his usual penchant for thoroughness that I really appreciate. Once he finished he shipped it back to me. He reamed it with a PipNet pipe reamer and cleaned up the reaming with a Savinelli Fitsall Pipe Knife. He scrubbed out the internals with alcohol, pipe cleaners and cotton swabs until the pipe was clean. He scrubbed the exterior of the bowl with Murphy’s Oil Soap and a tooth brush to remove the grime and grit on the briar and the lava on the rim top. The finish looks very good with good looking grain around the bowl and shank. Jeff soaked the stem in Before & After Deoxidizer to remove the oxidation on the rubber. When the pipe arrived here in Vancouver for the second stop of its restoration tour it looked a lot better. I took photos before I started my part of the work. 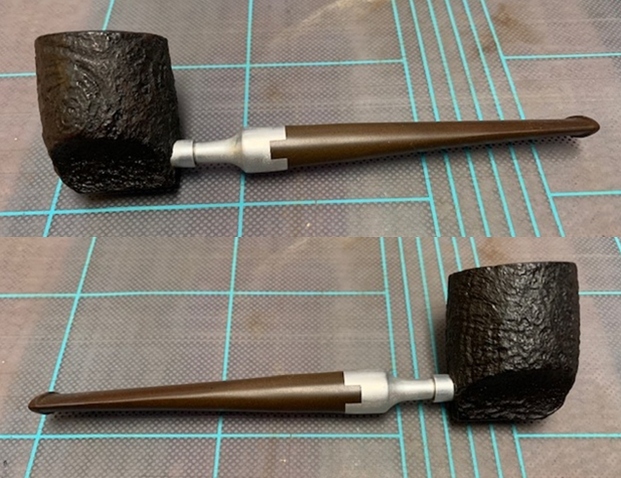
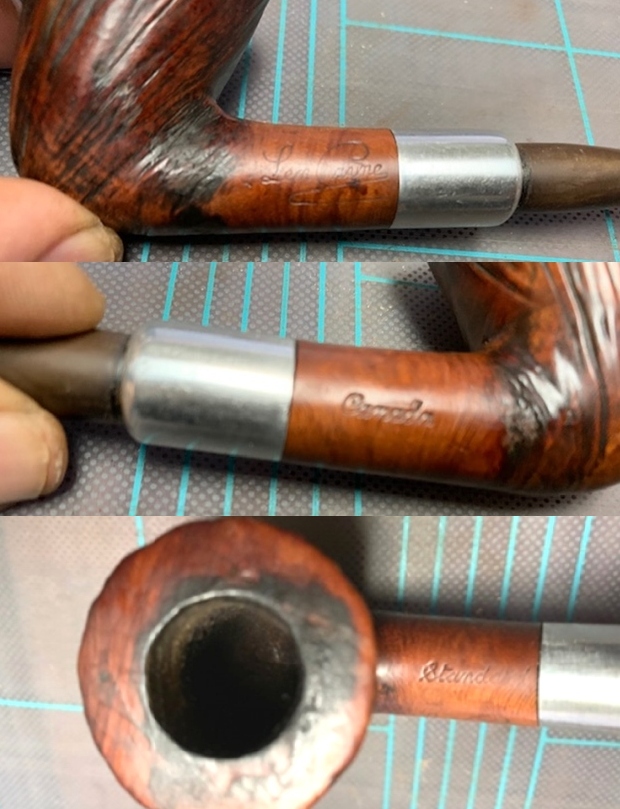
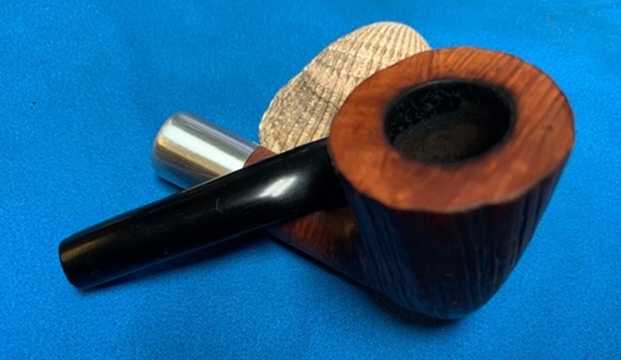
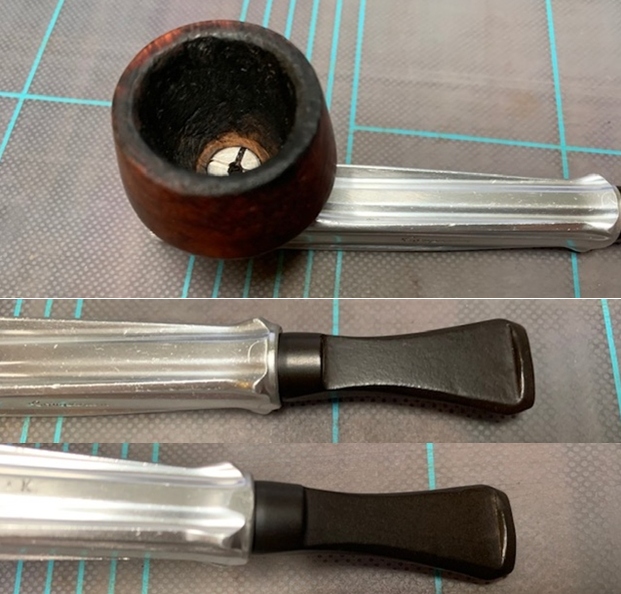
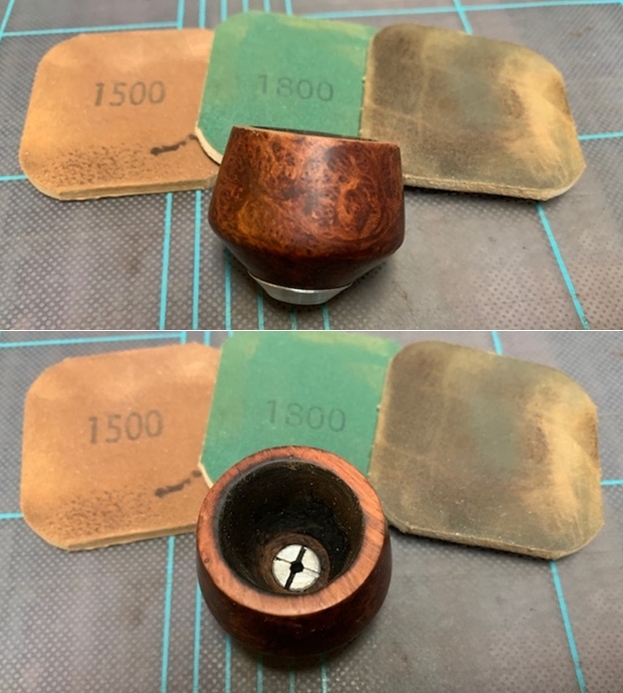
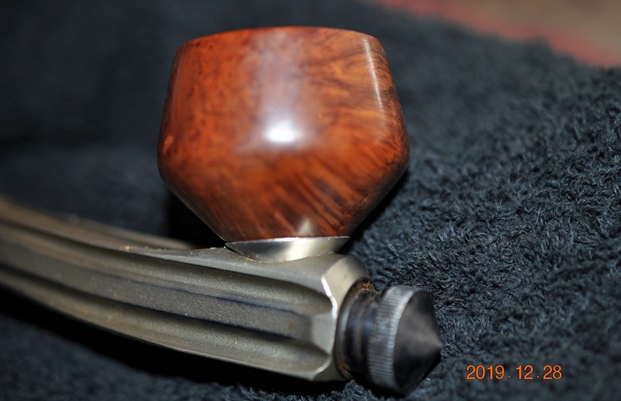
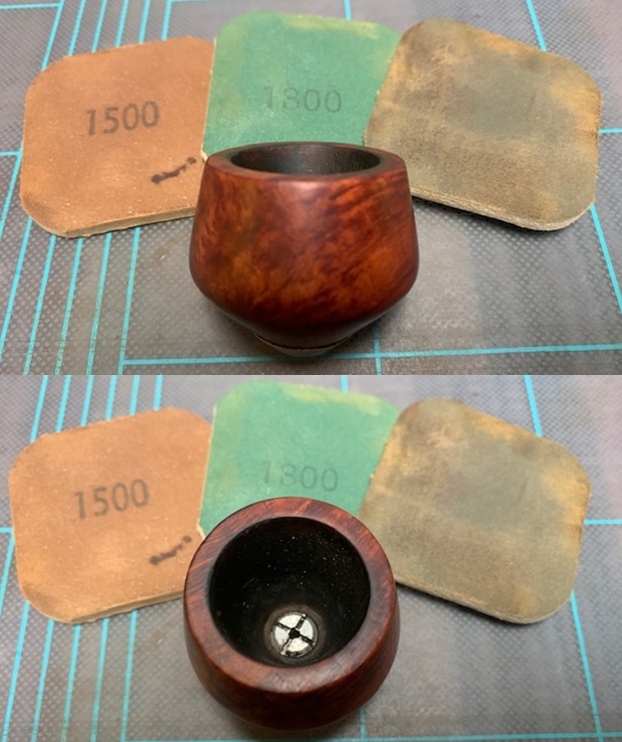
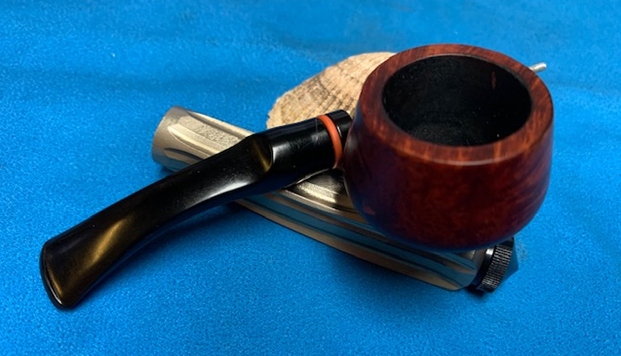
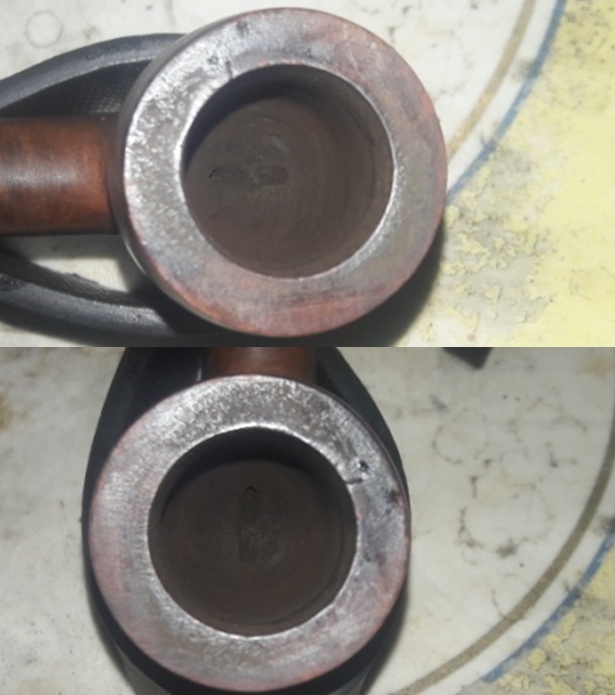
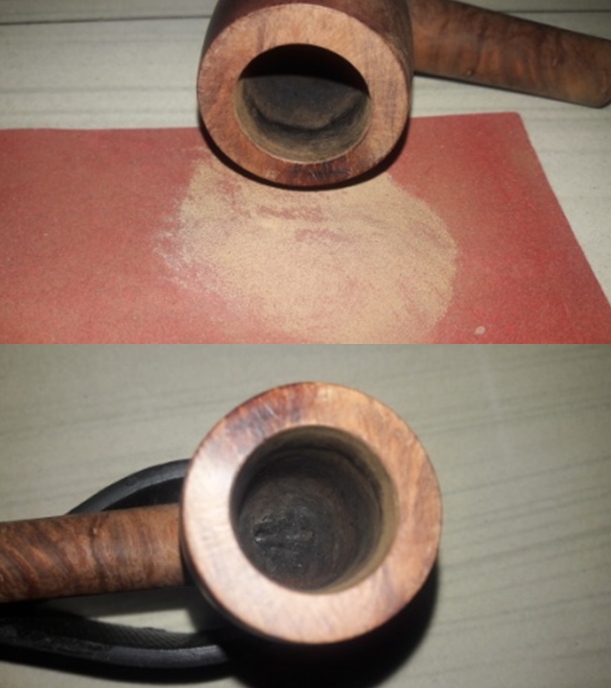
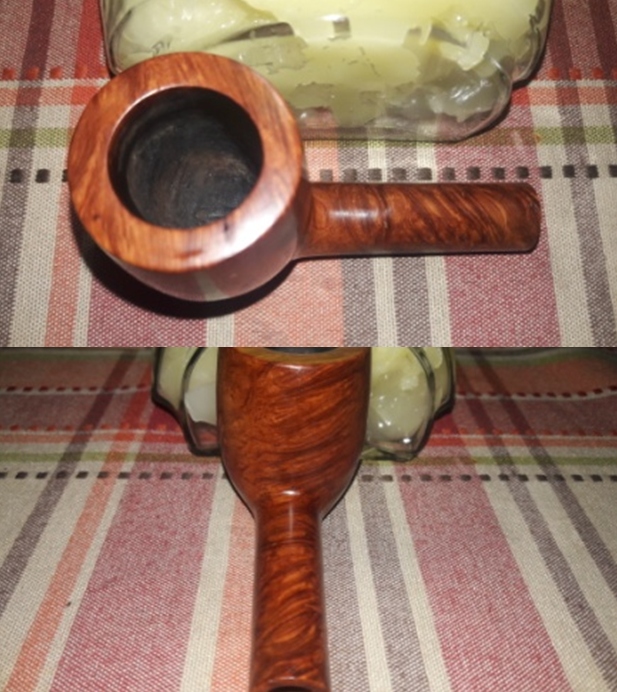
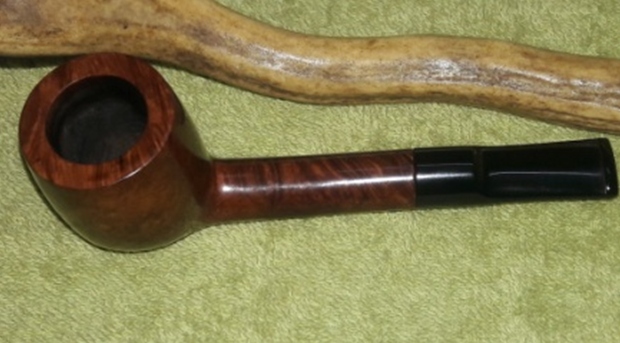
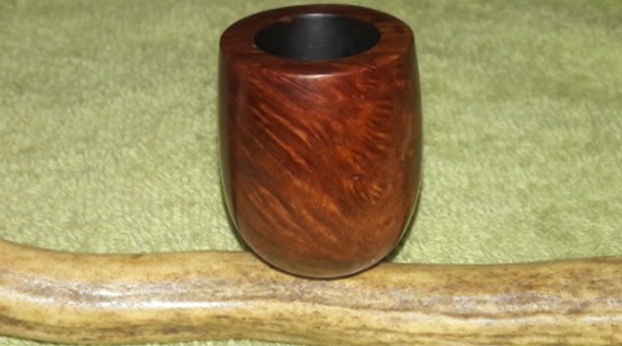
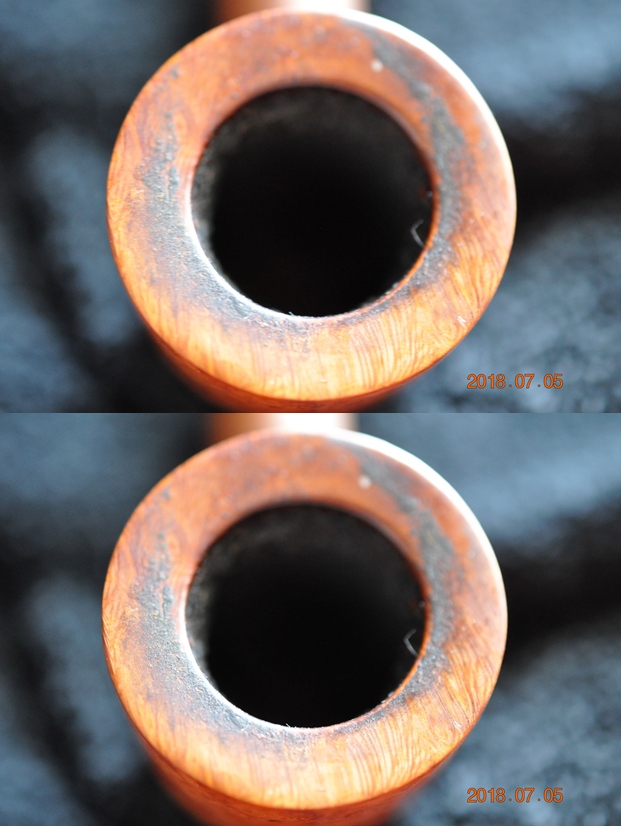
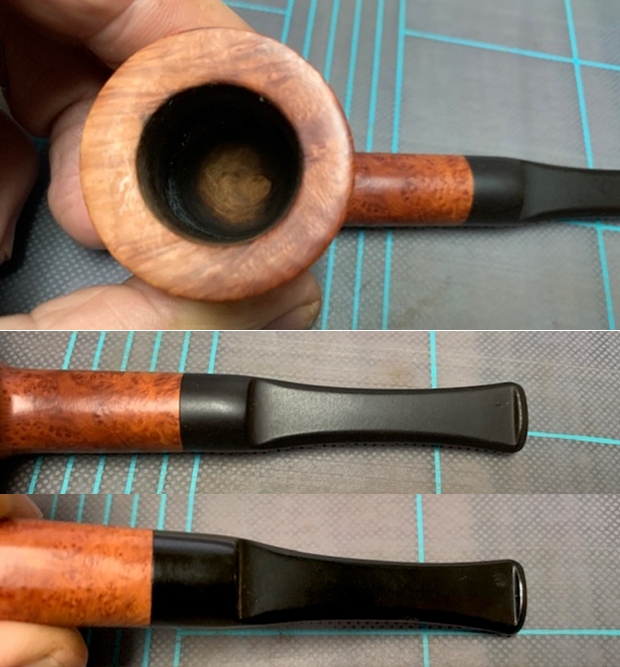
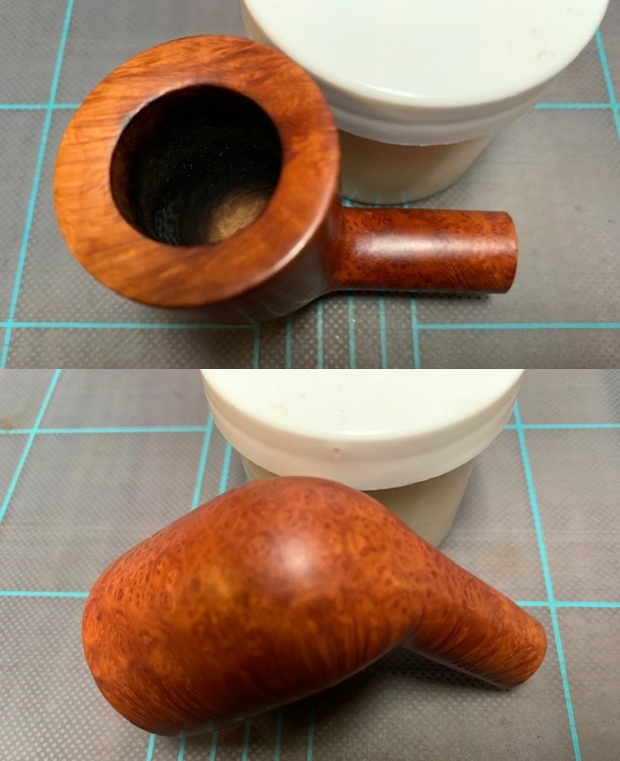
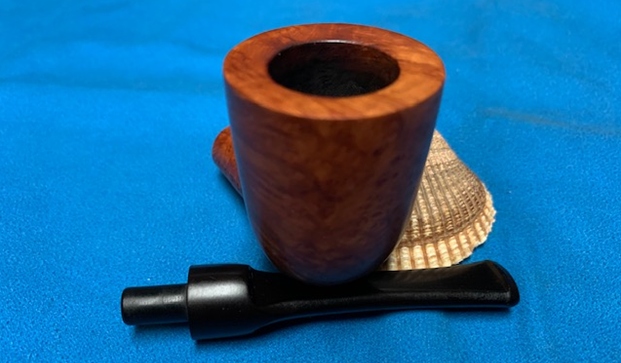
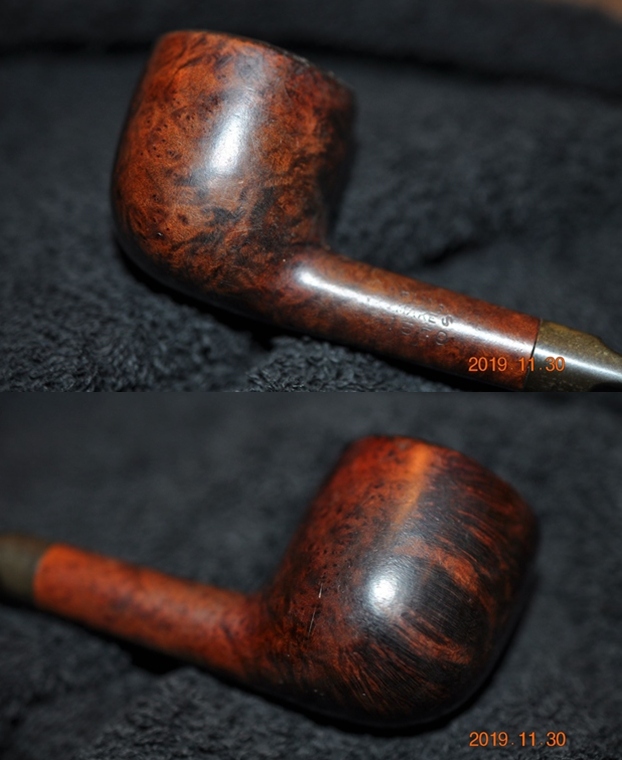
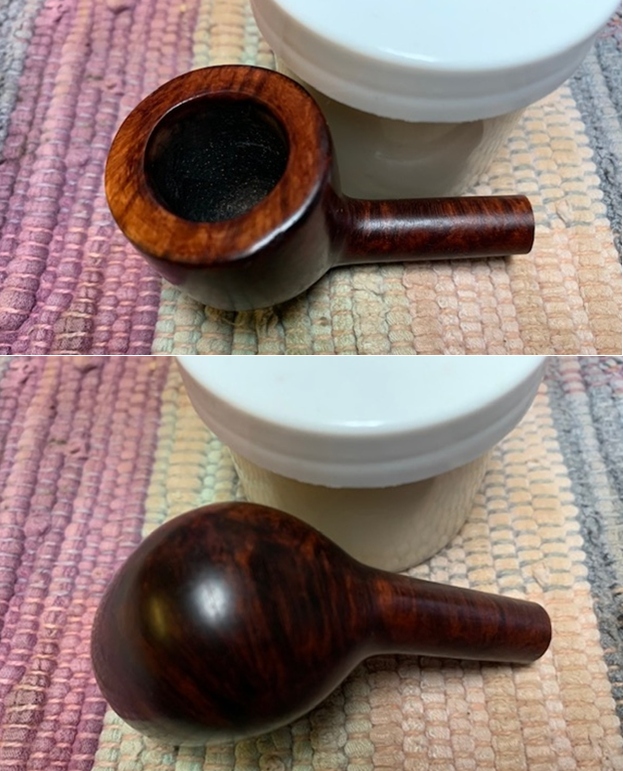
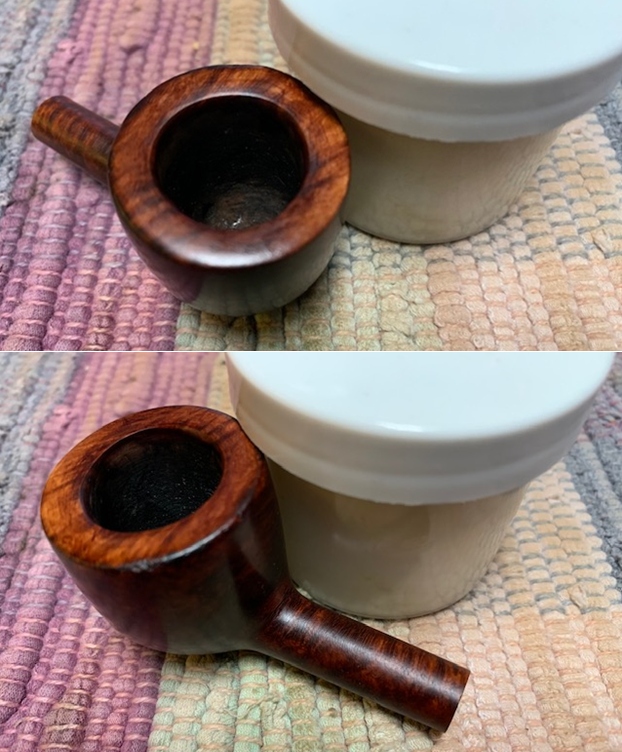
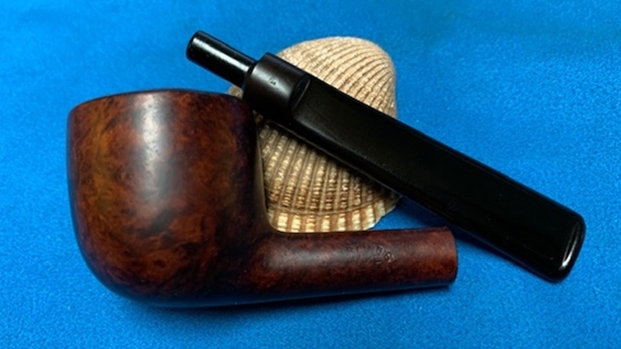
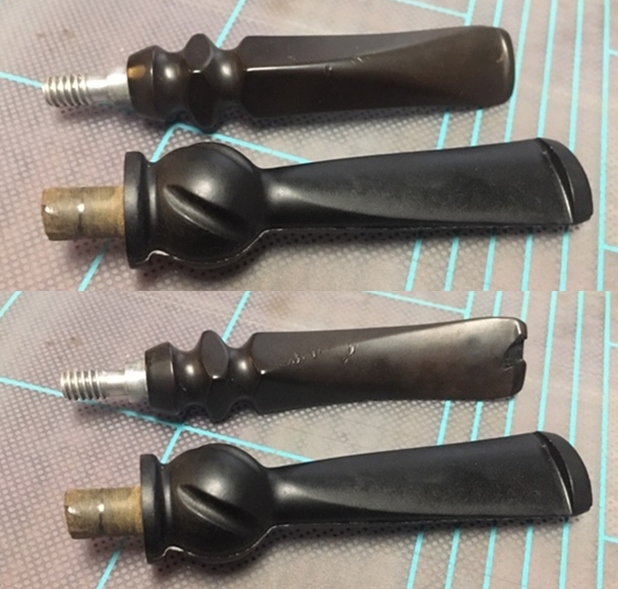
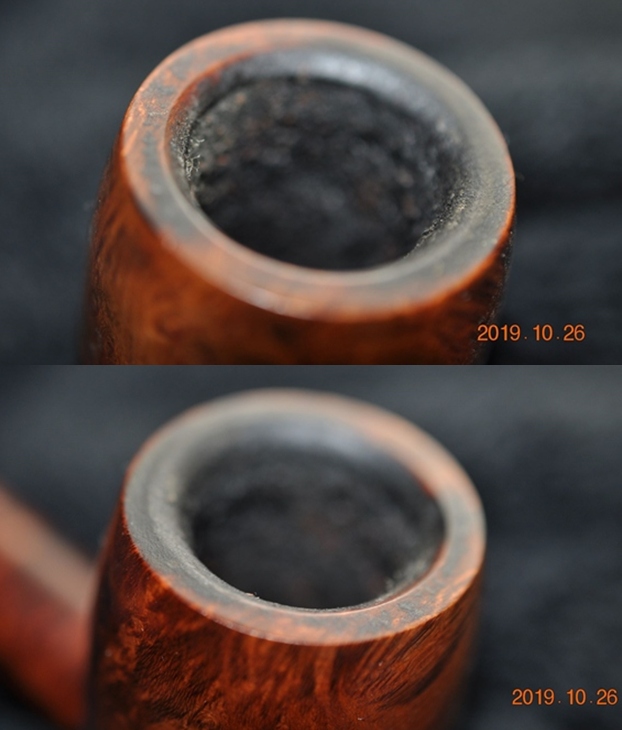
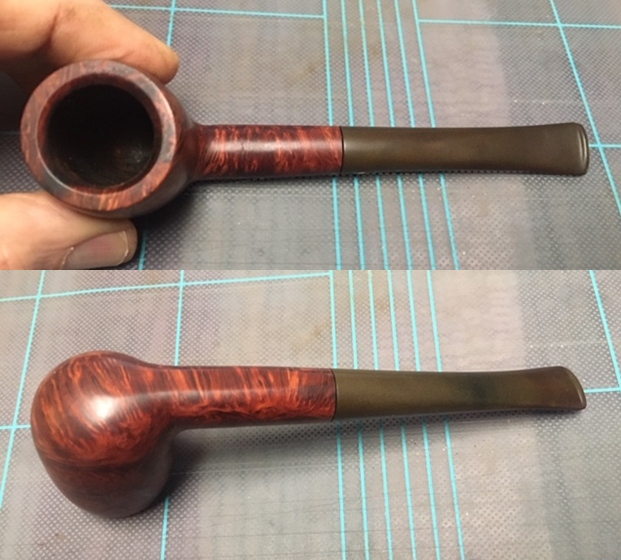
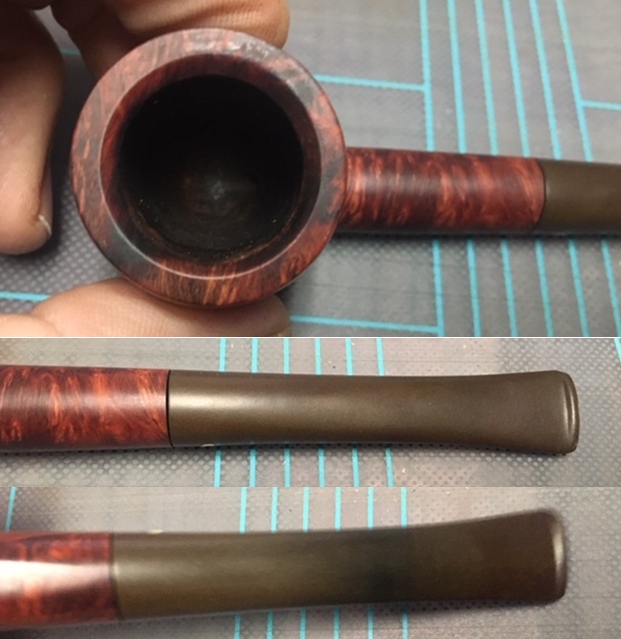
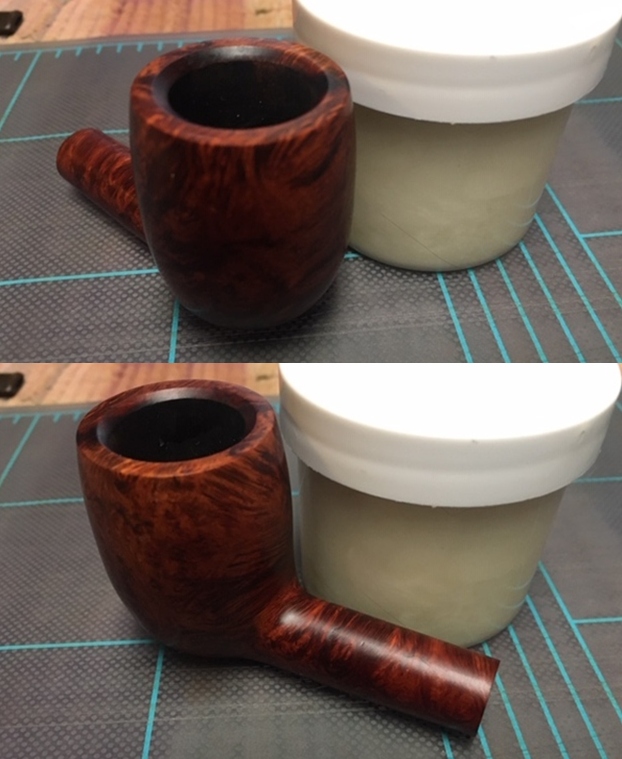
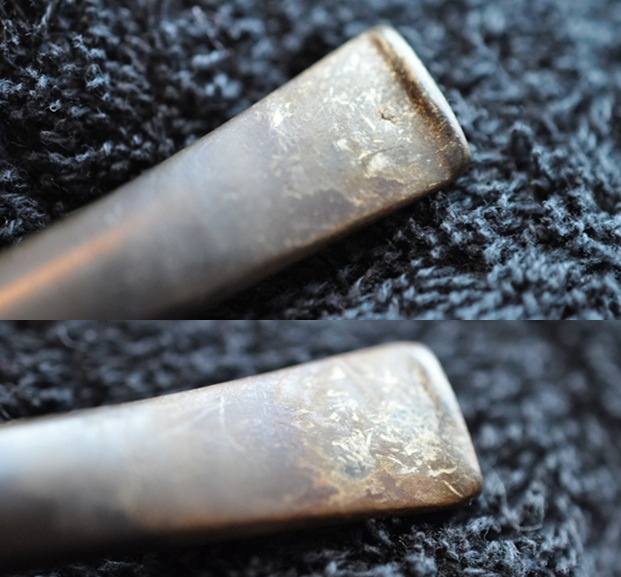
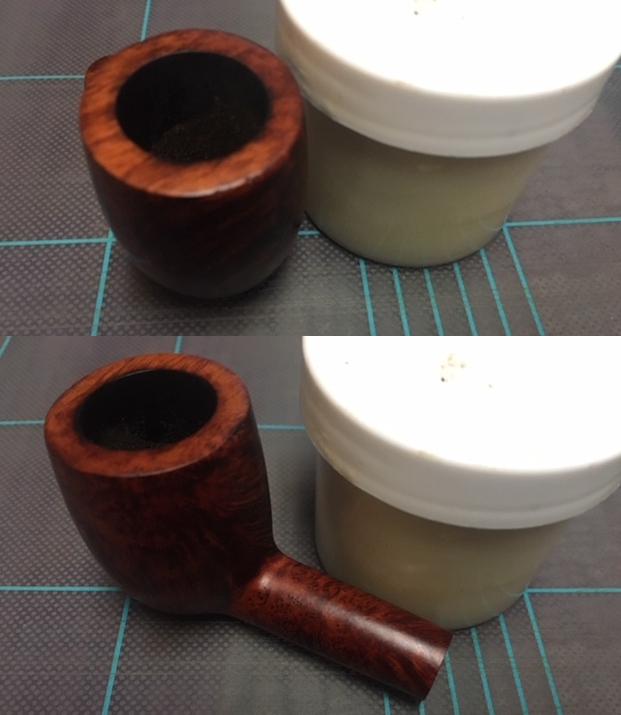
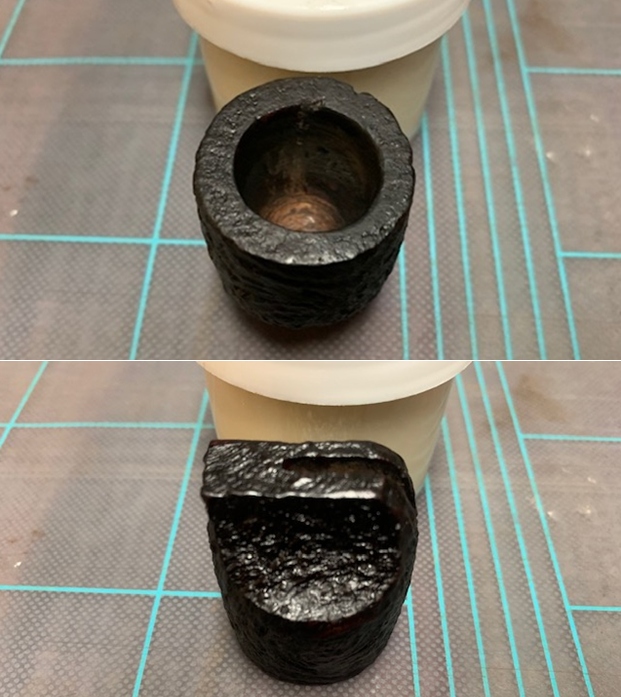
 I took some close up photos of the rim top and also of the stem surface. I wanted to show what cleaned bowl and rim top looked like. The rim top and edges are in excellent condition. There is one deep nick that could well be a sandblast. I also took close up photos of the stem to show the light tooth marks on the stem surface.
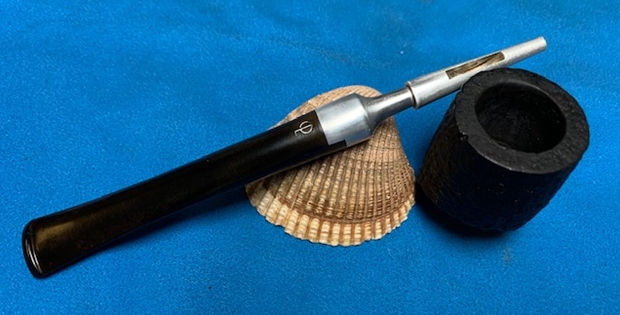
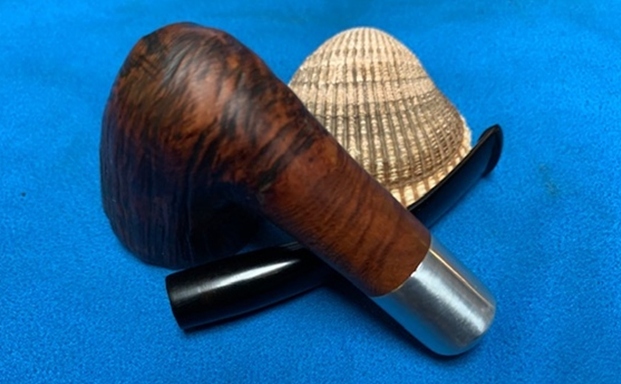
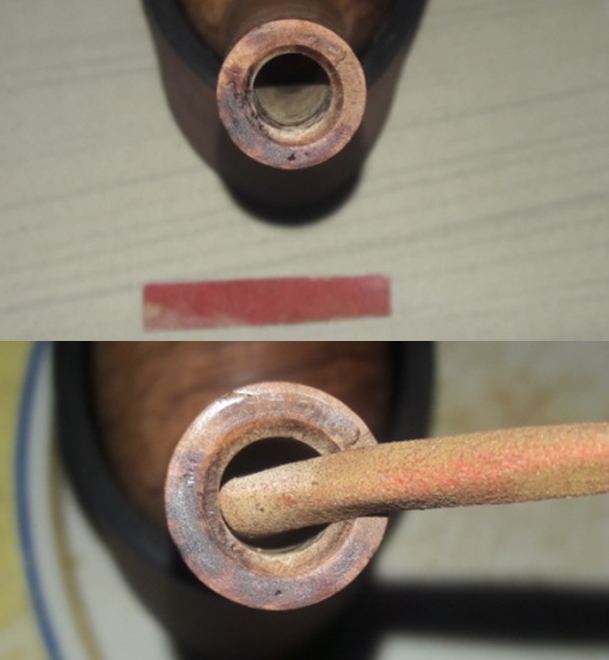
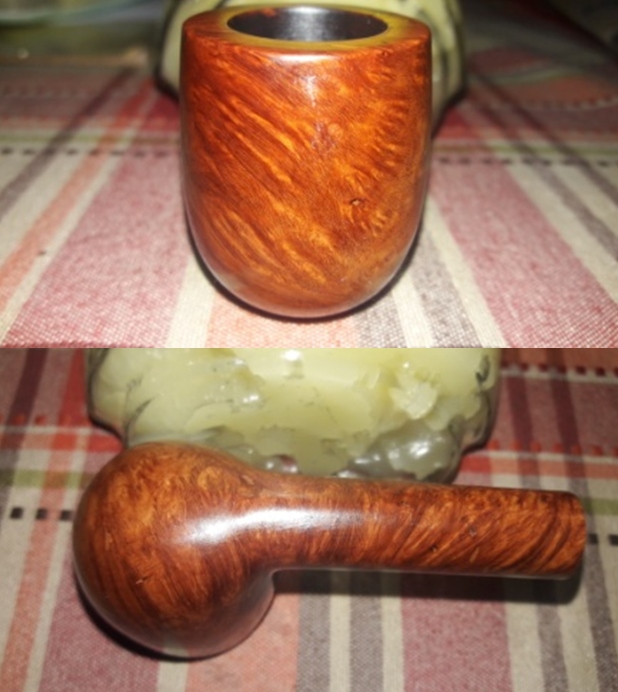
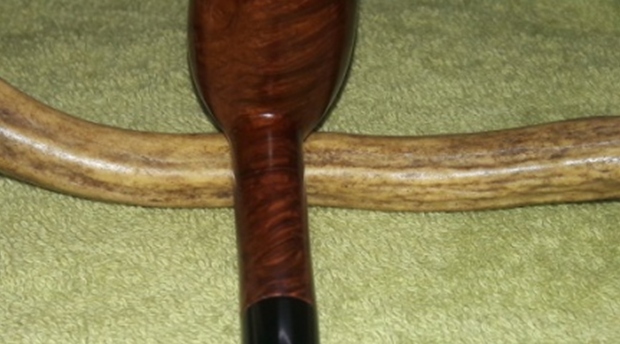
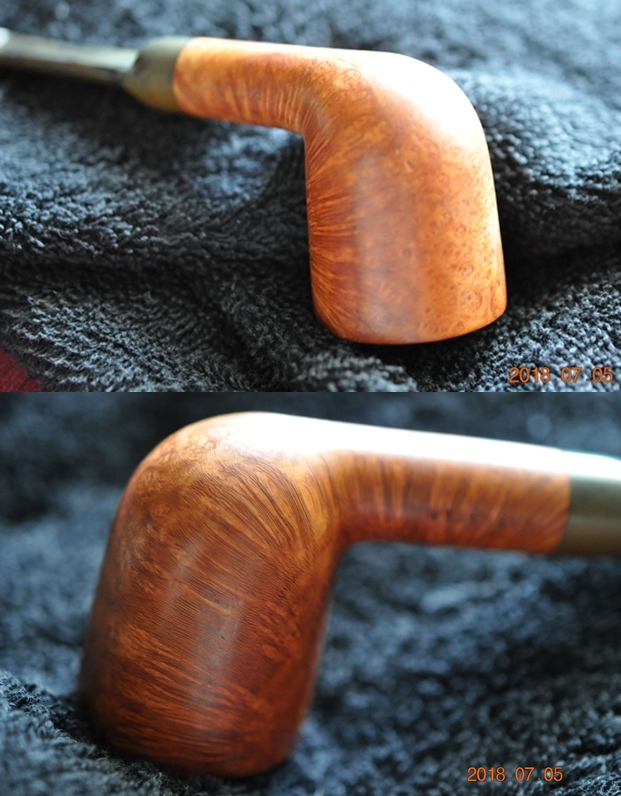
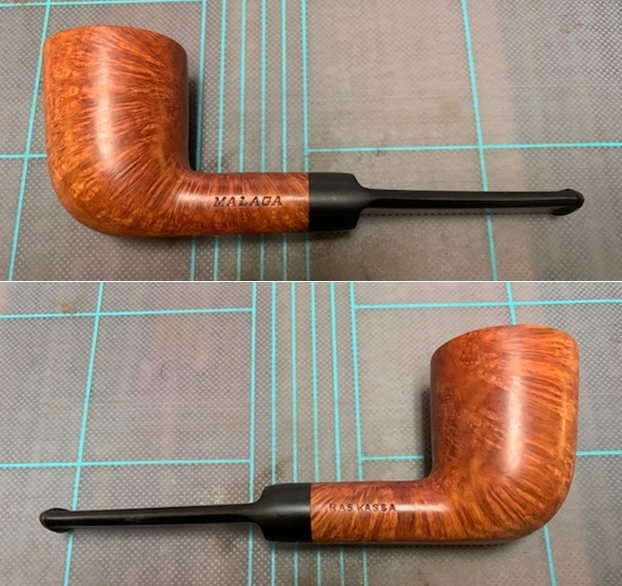
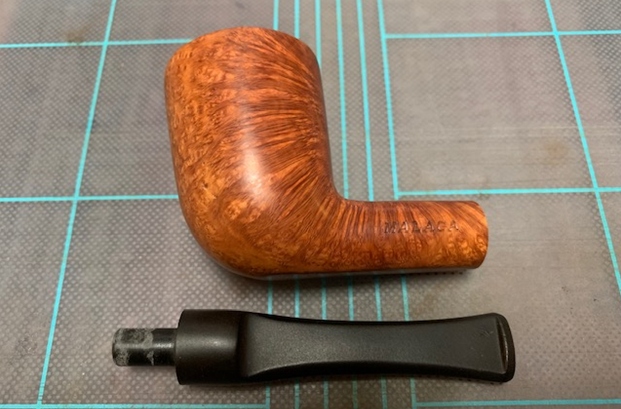
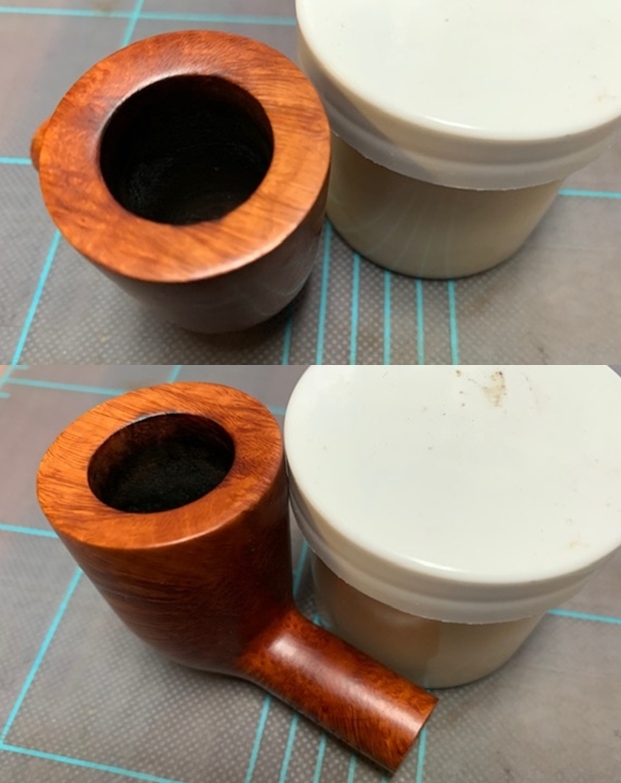
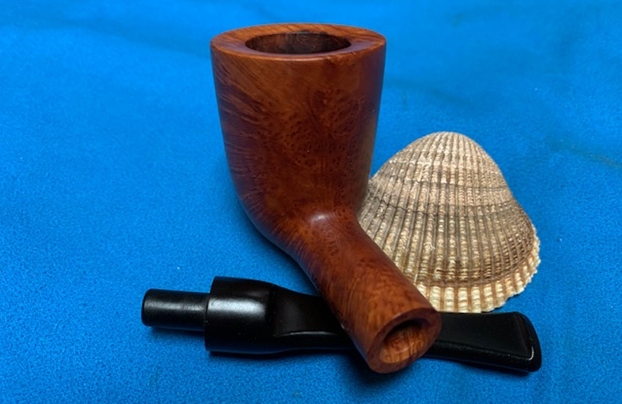
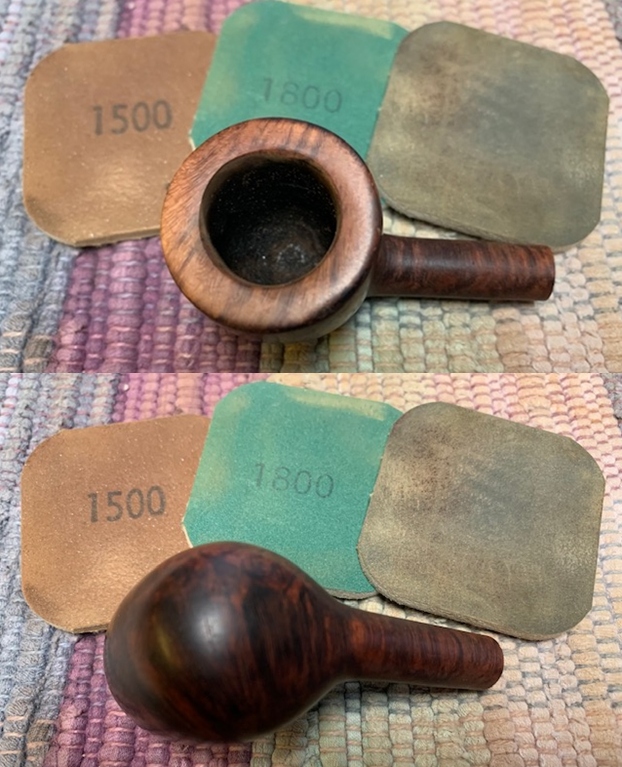
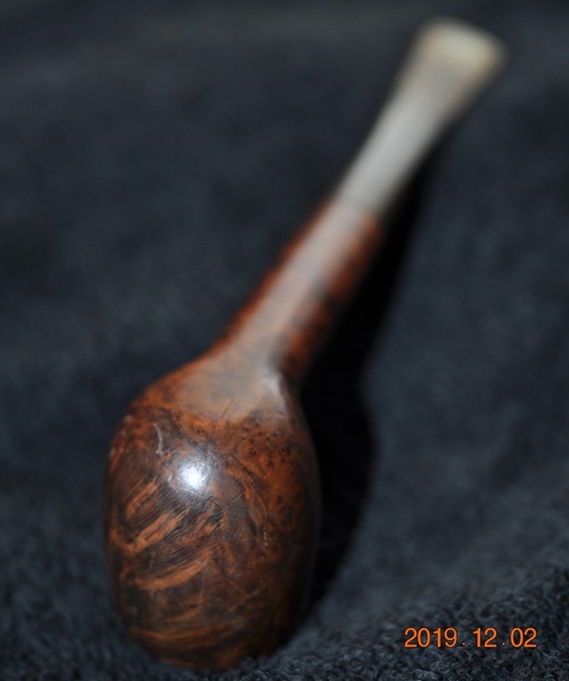
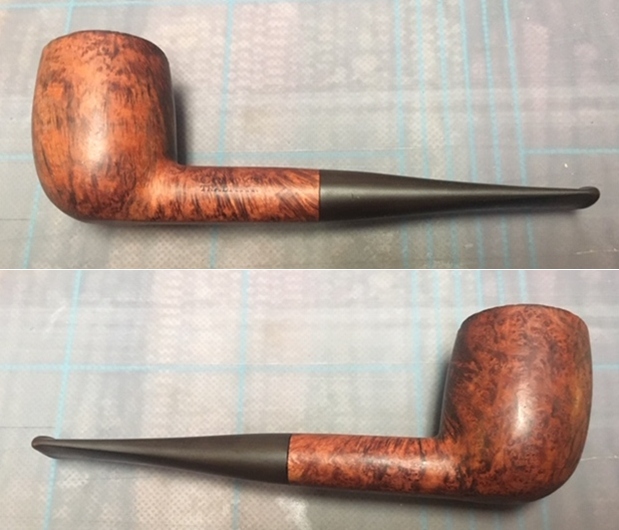
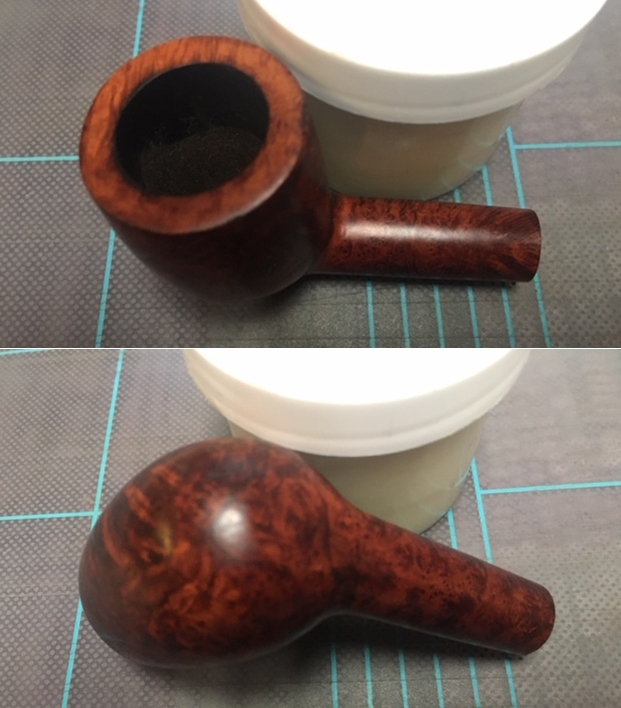
 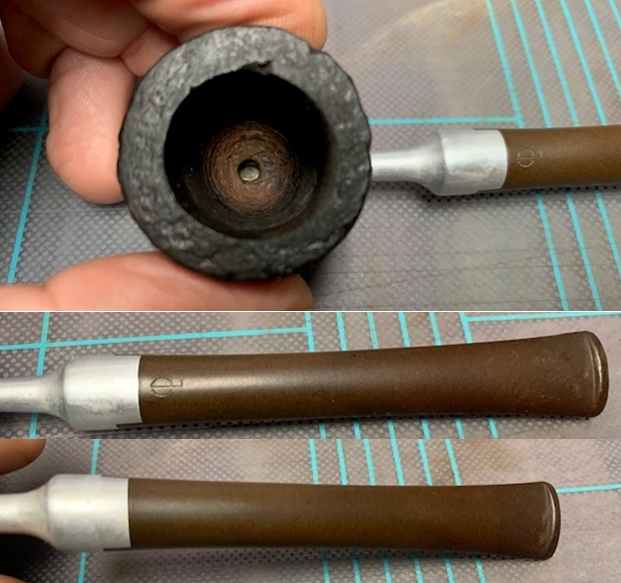 I removed the stem for the shank and took a photo of the bowl and stem to give a picture of what it looked like. You can see scratches in the stem surface.
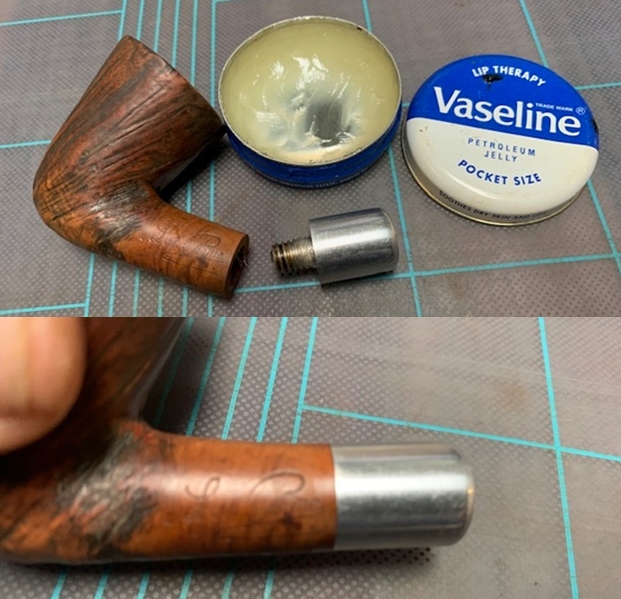
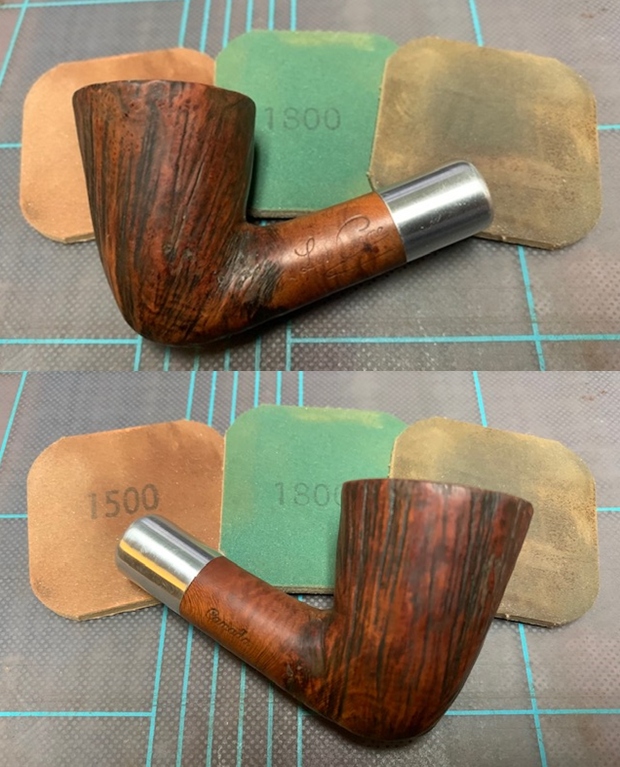
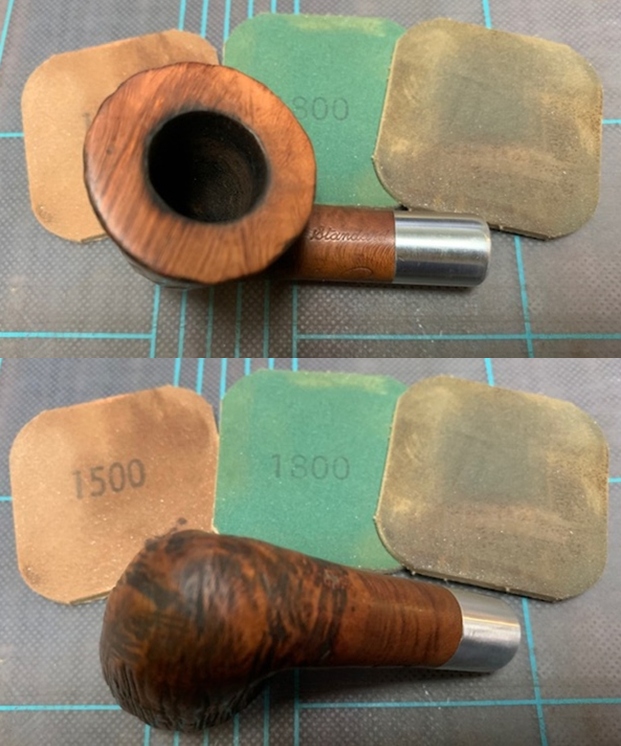
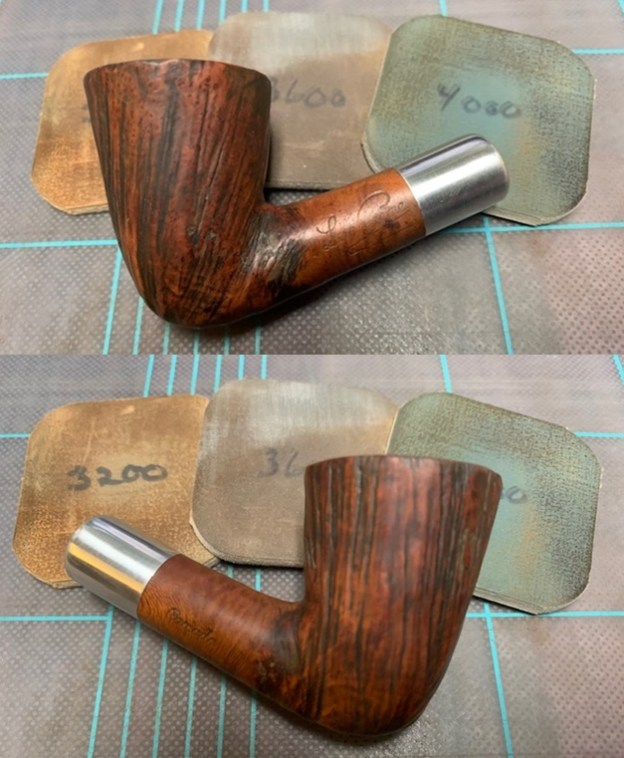
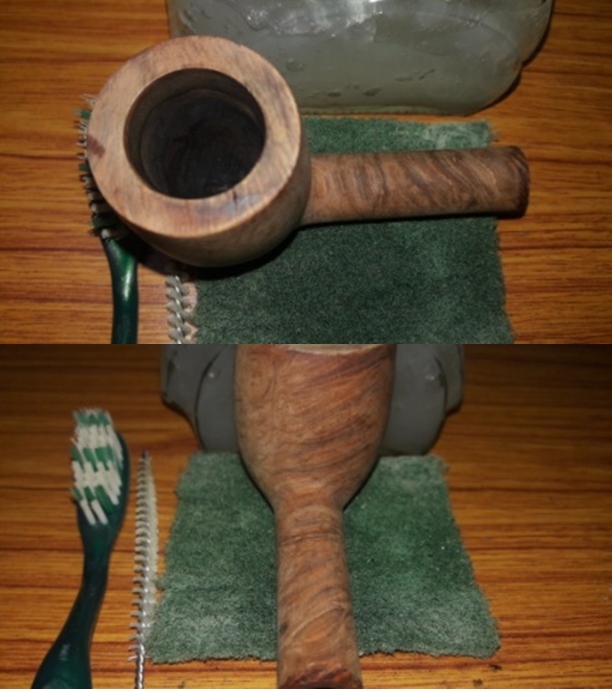
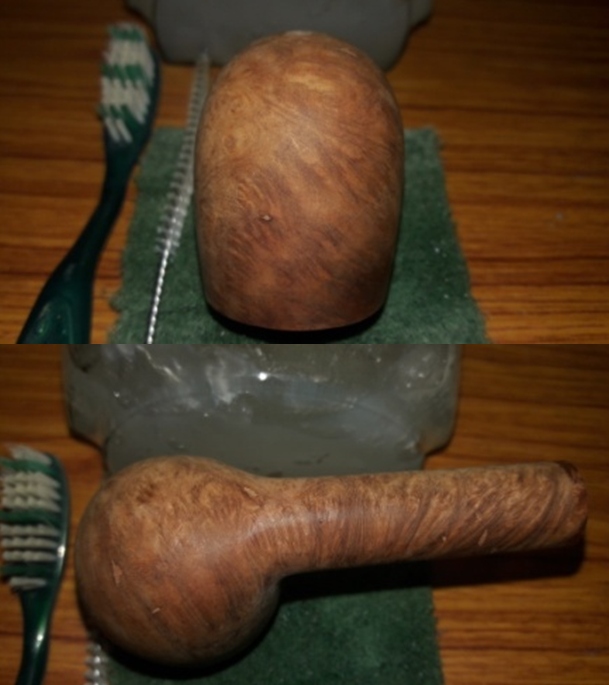
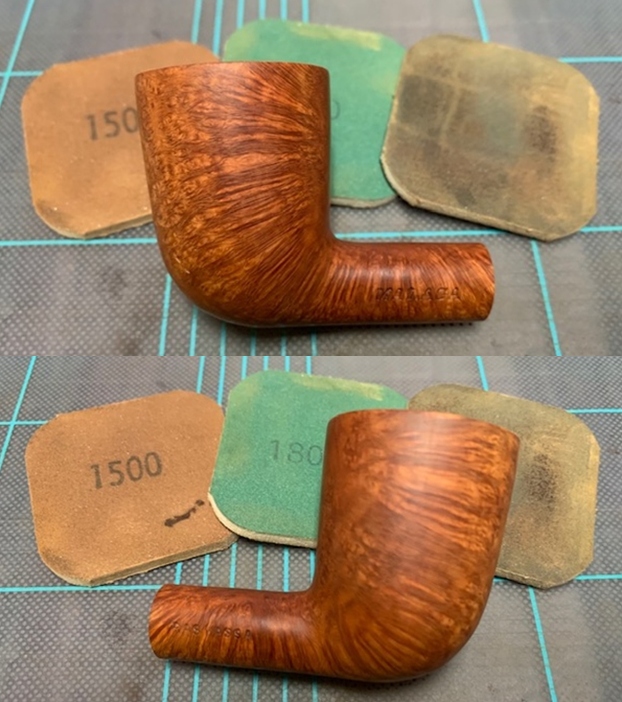
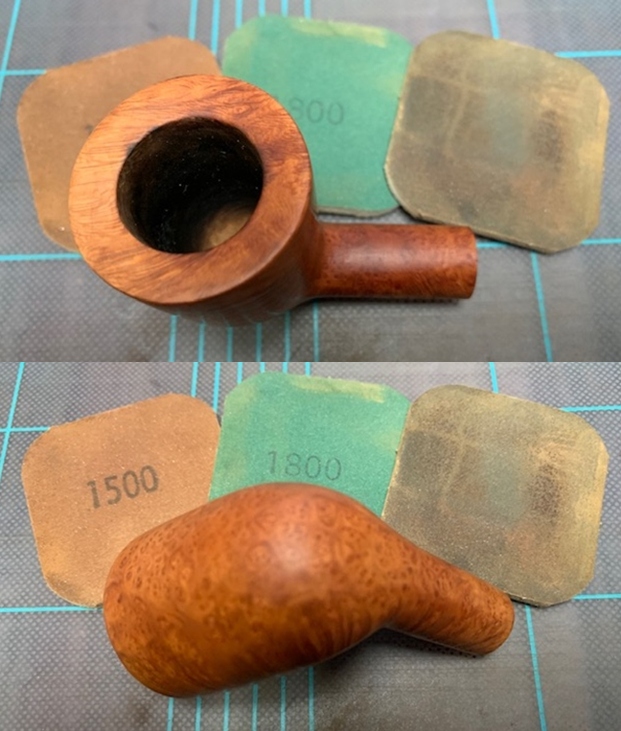
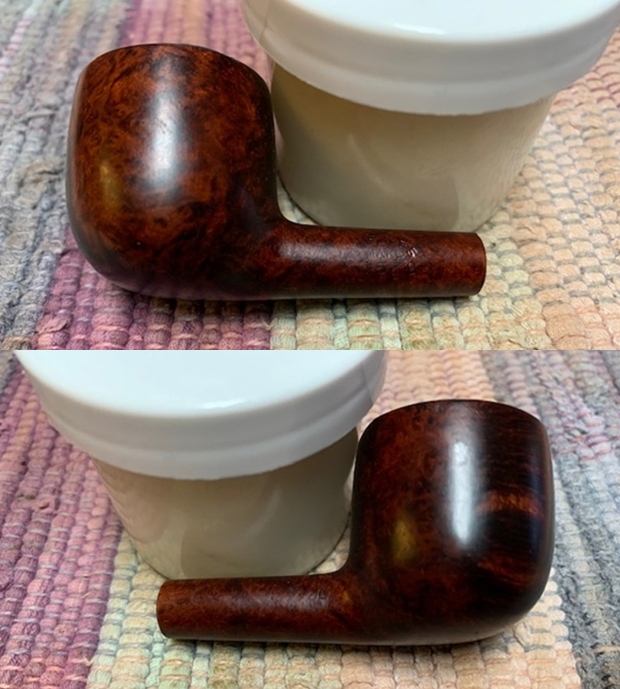
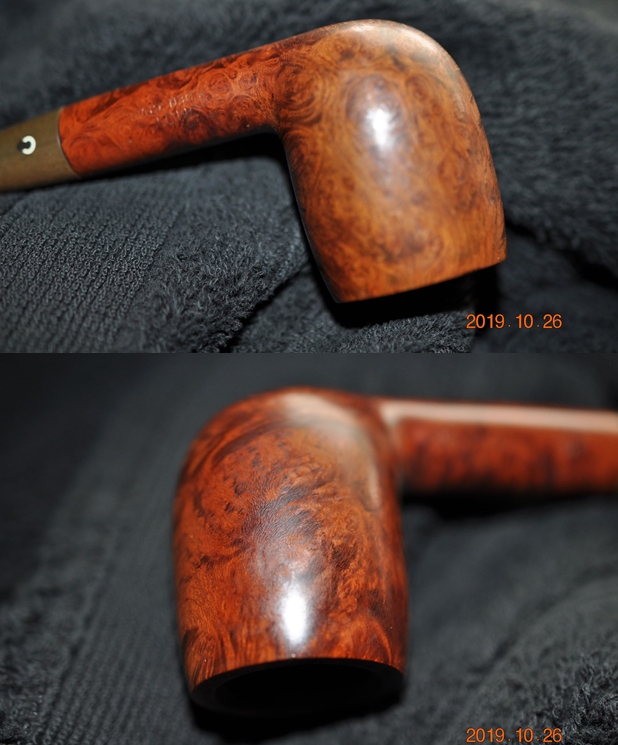
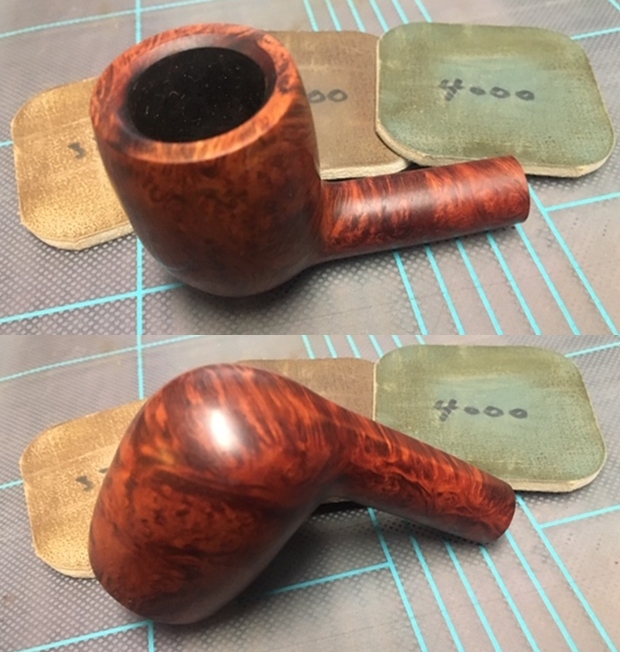
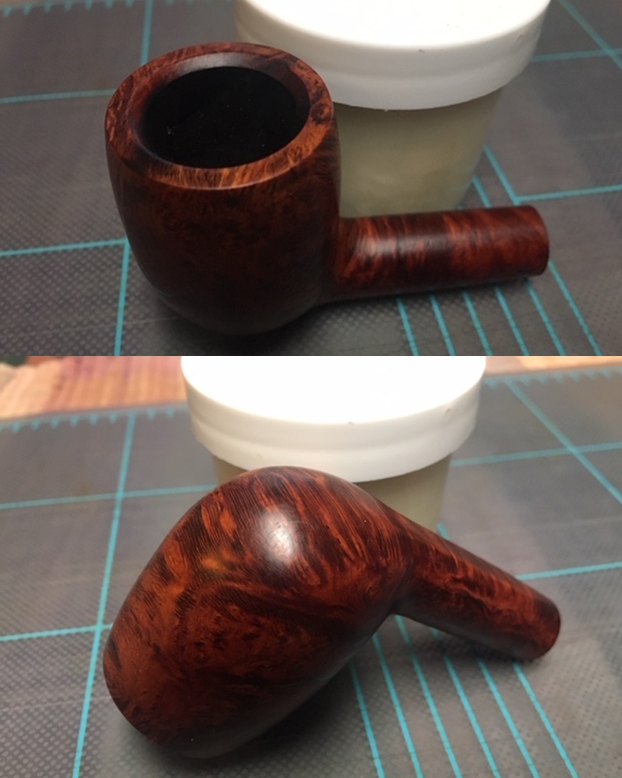
 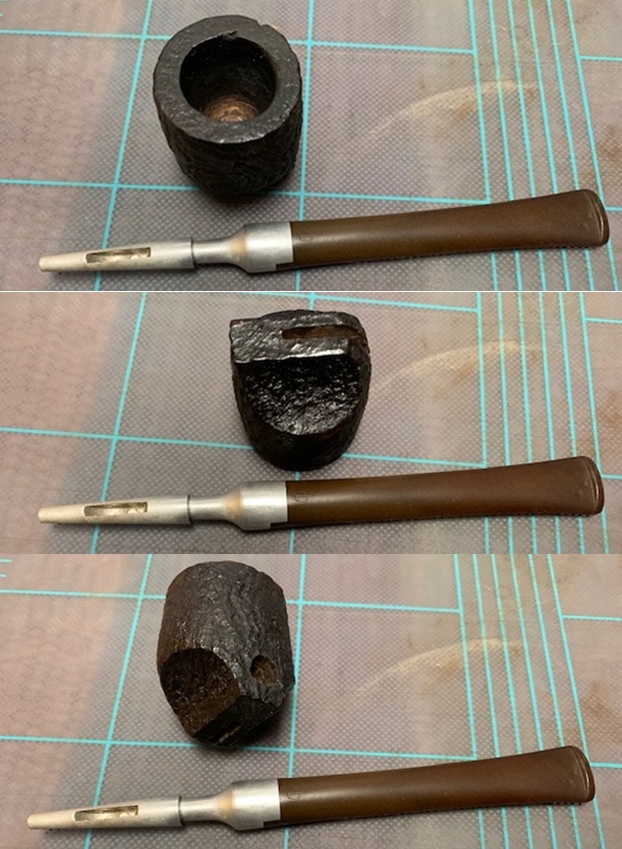 Now, on to my part of the restoration of this Ornsby System pipe. I decided to start by rubbing the bowl down with Before & After Restoration Balm. I worked it into the surface of the bowl sides and shank with my fingertips to clean, enliven and protect it. I let the balm sit for a little while and then buffed with a cotton cloth to raise the shine.
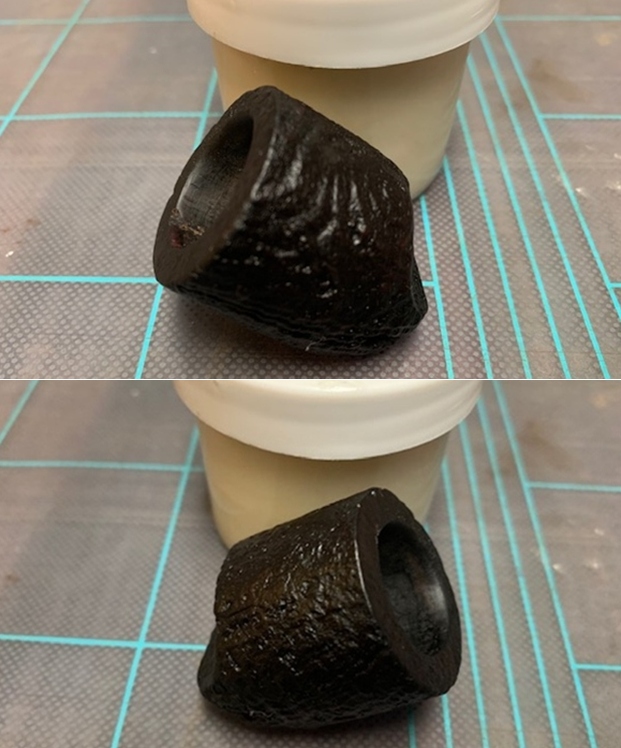
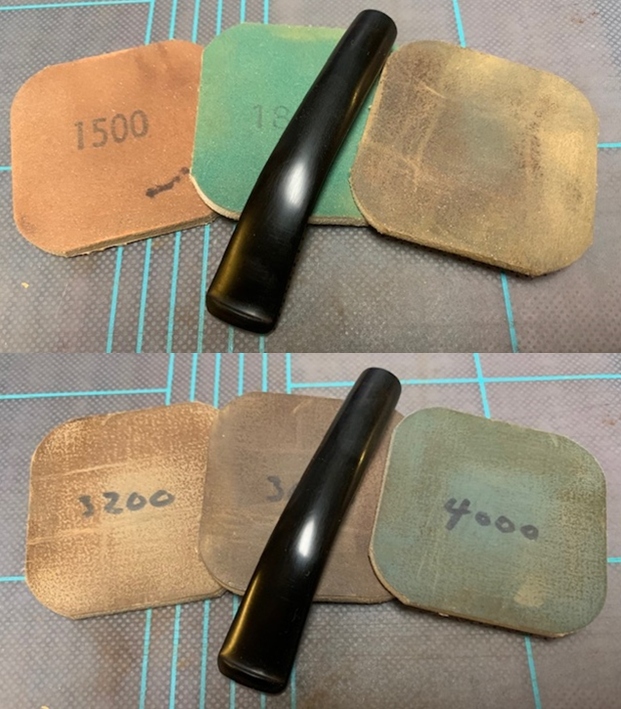
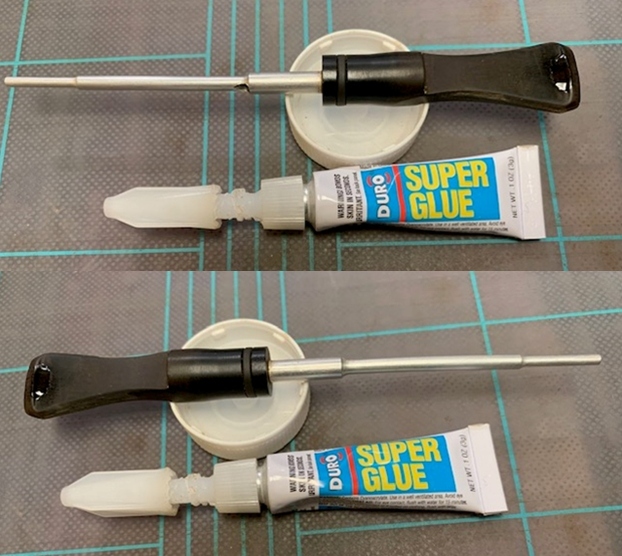
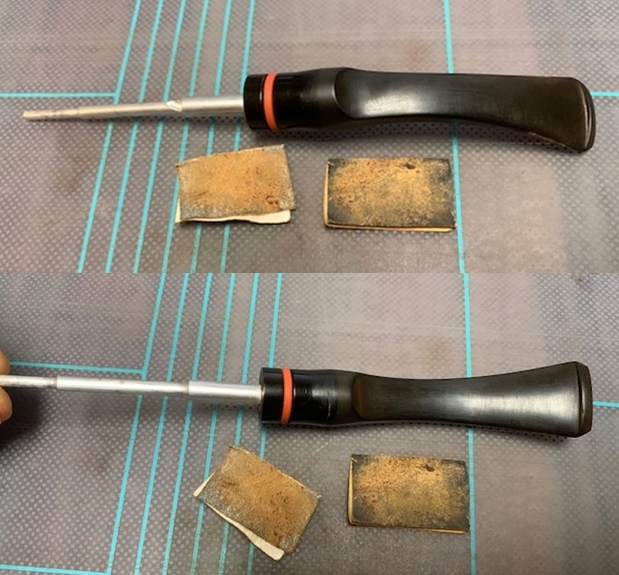
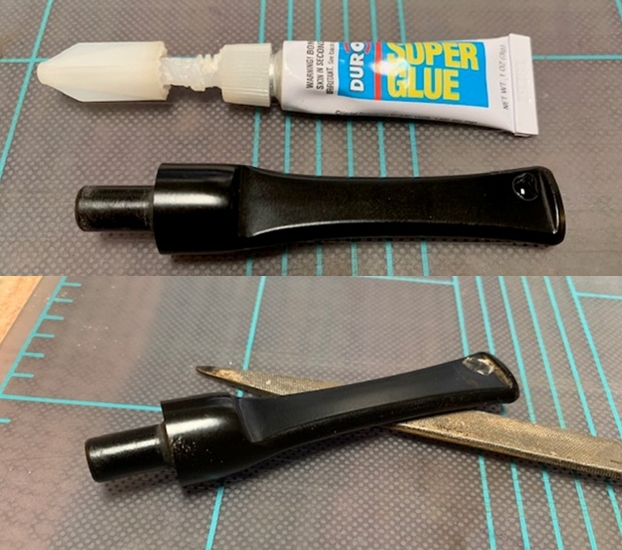
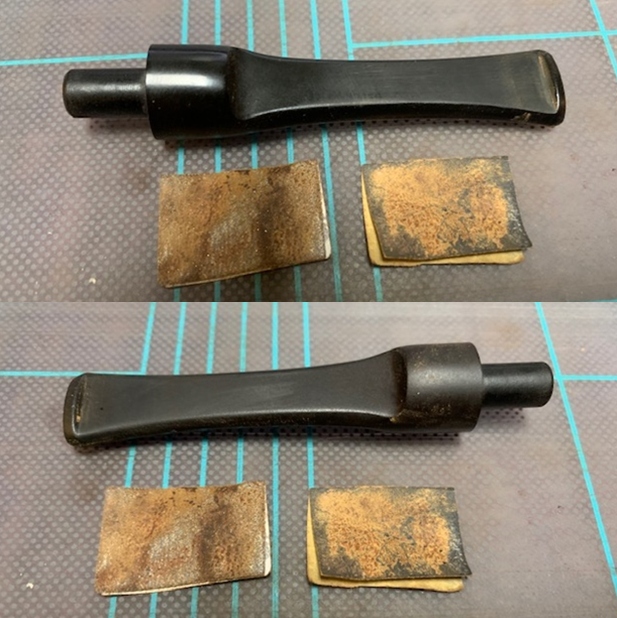
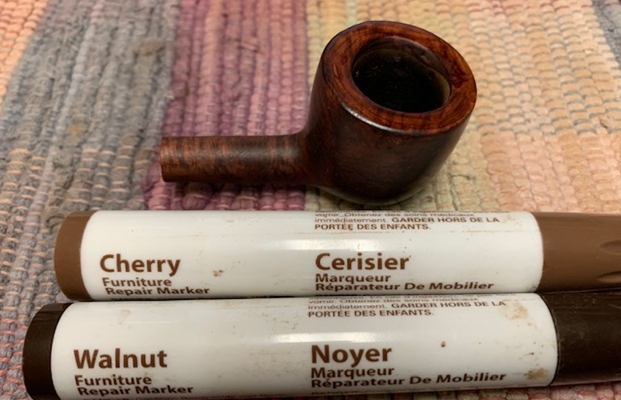
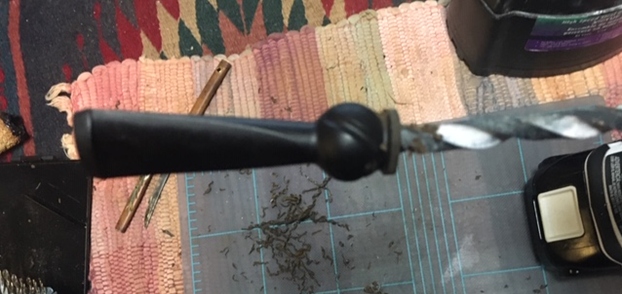
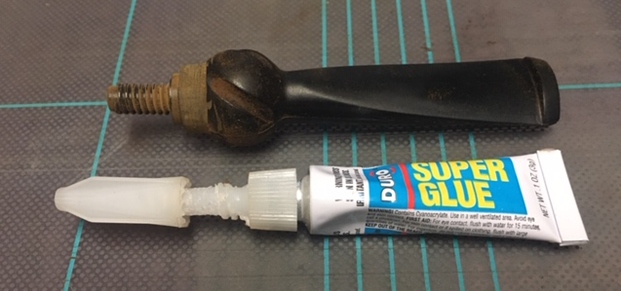
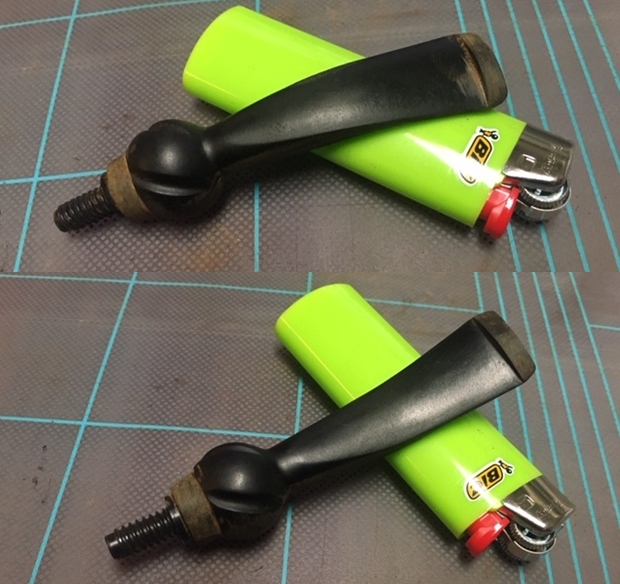
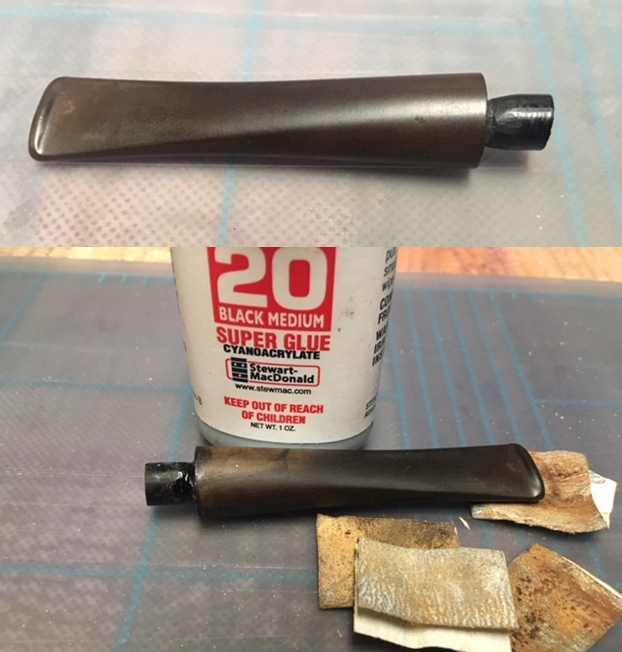
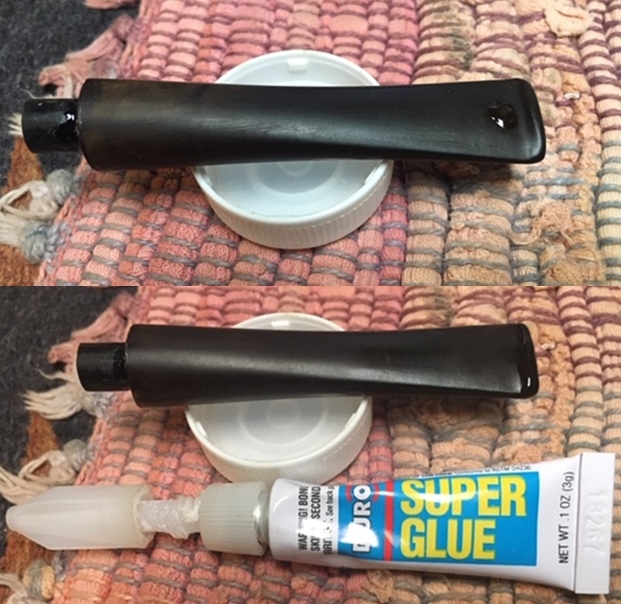
 I set the bowl aside and turned my attention to the stem. I filled in the remaining tooth mark with clear super glue. Once it cured I smoothed out the surface of the repair with a needle file.
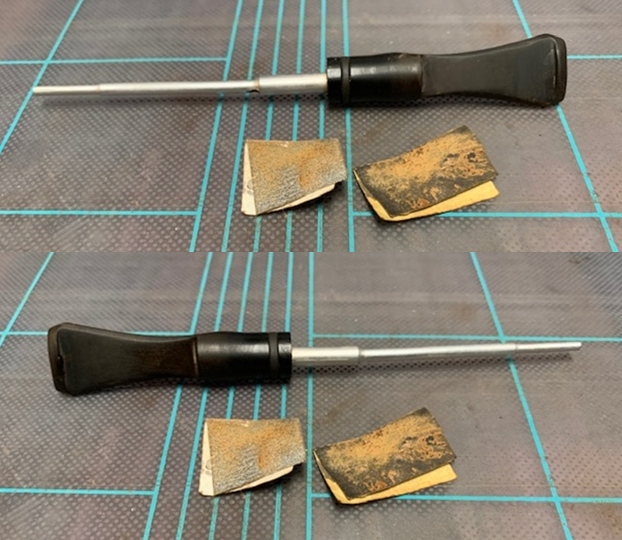
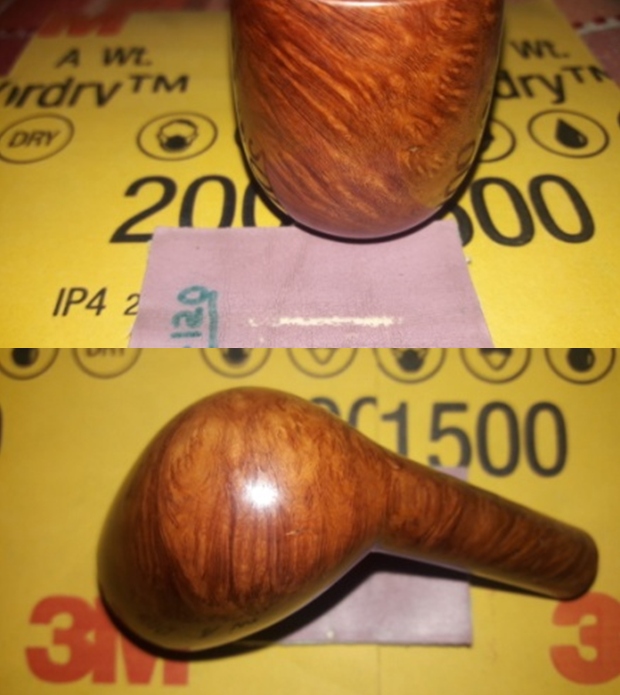
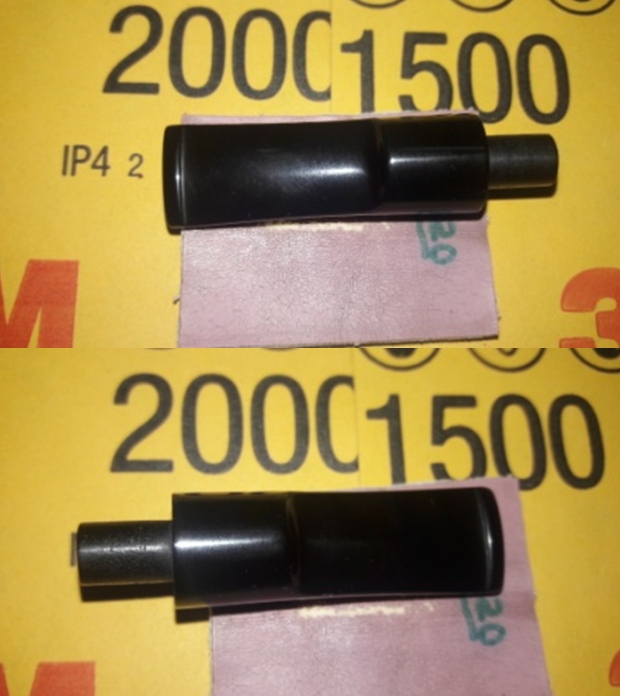
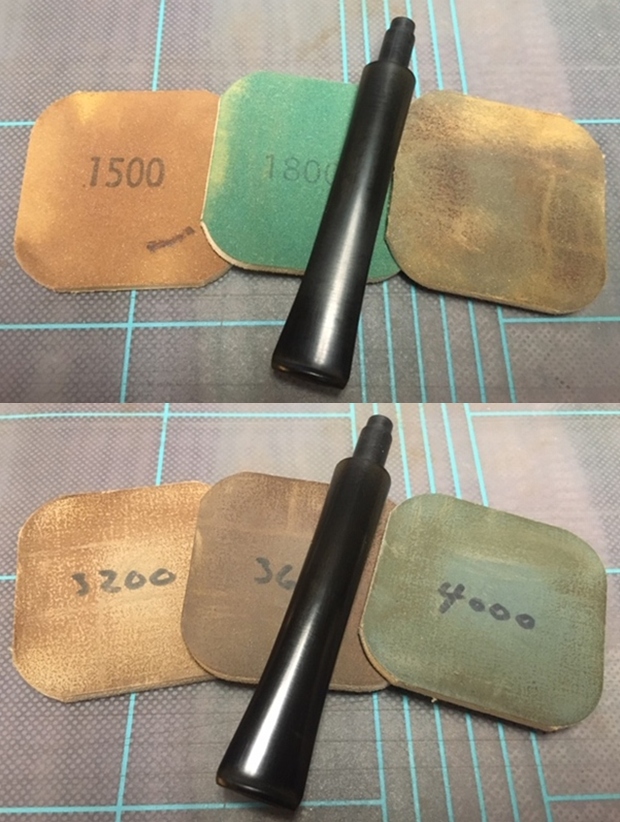
 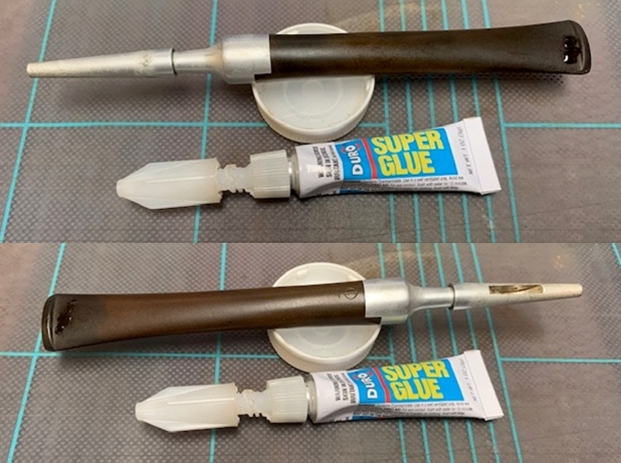 I sanded out the repair with 220 grit sandpaper to blend it into the surface of the surrounding vulcanite. I started polishing the stem with 400 grit wet dry sandpaper.
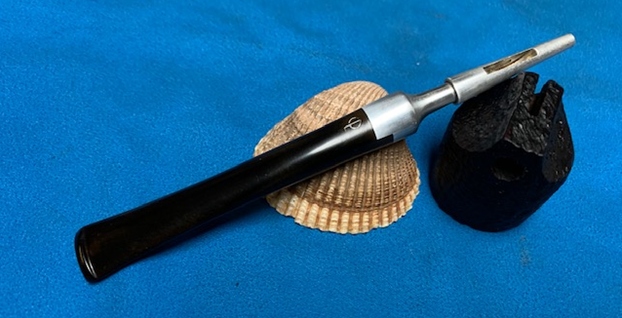
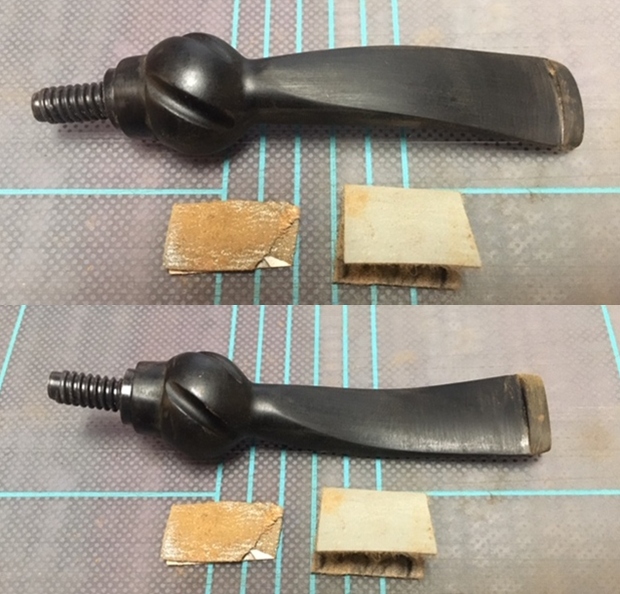
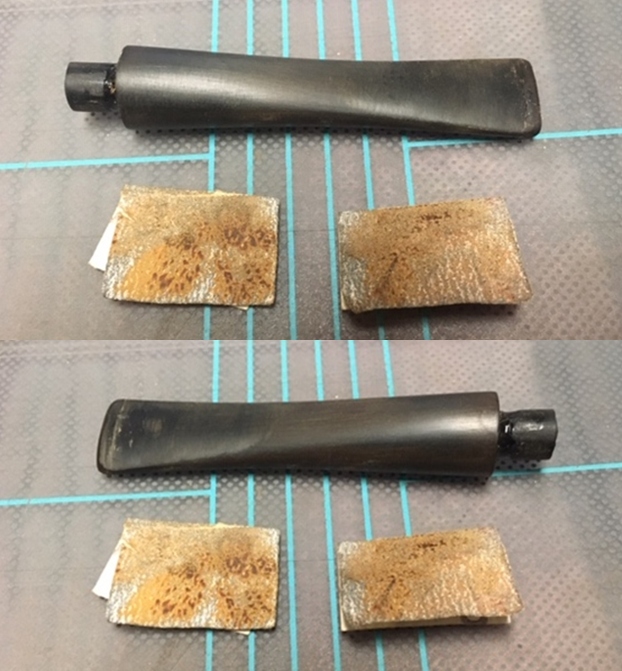
 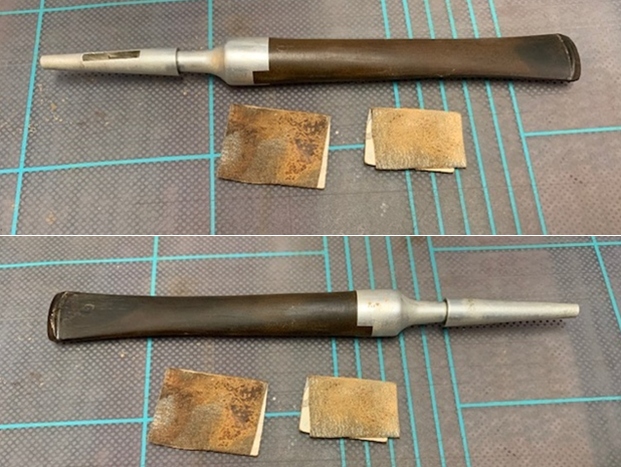 I decided to touch up the OP stamp on the top of the stem using Papermate Liquid Paper. Once the repair cured I scraped it off with a tooth pick and the white remained in the stamp. It looks very good at this point.
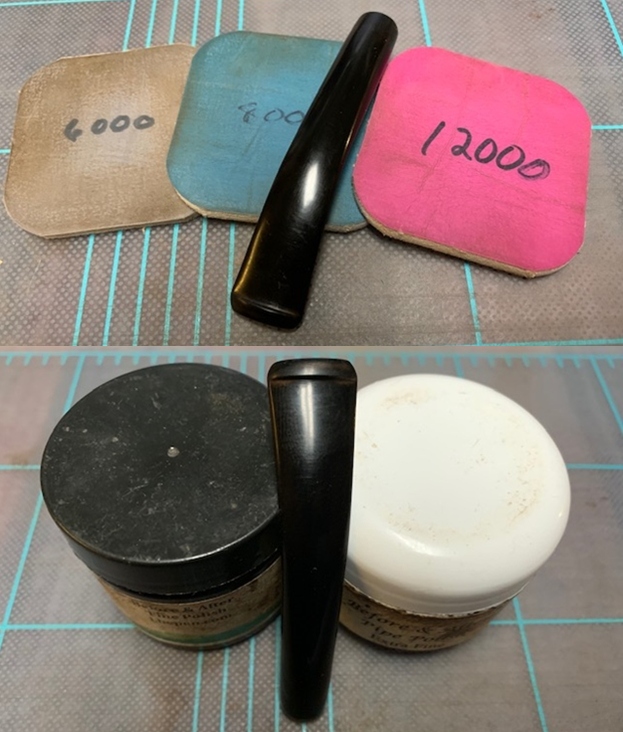
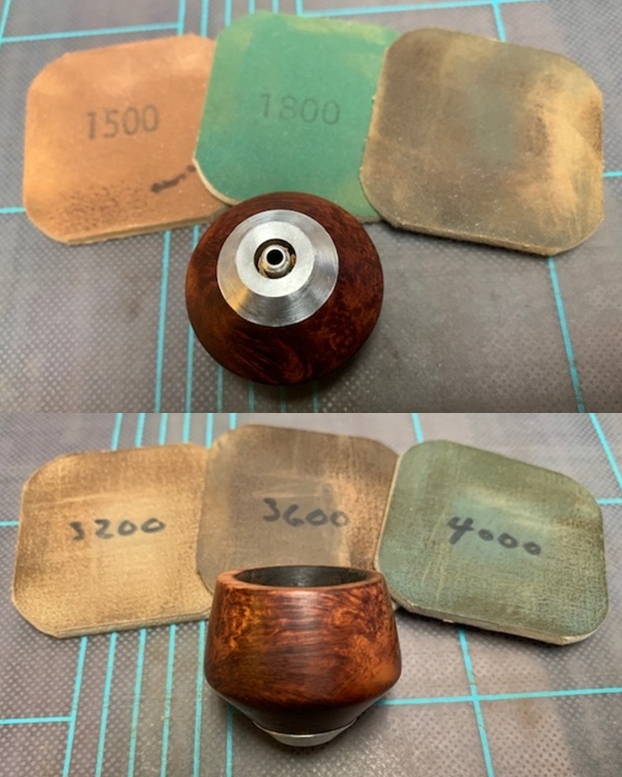
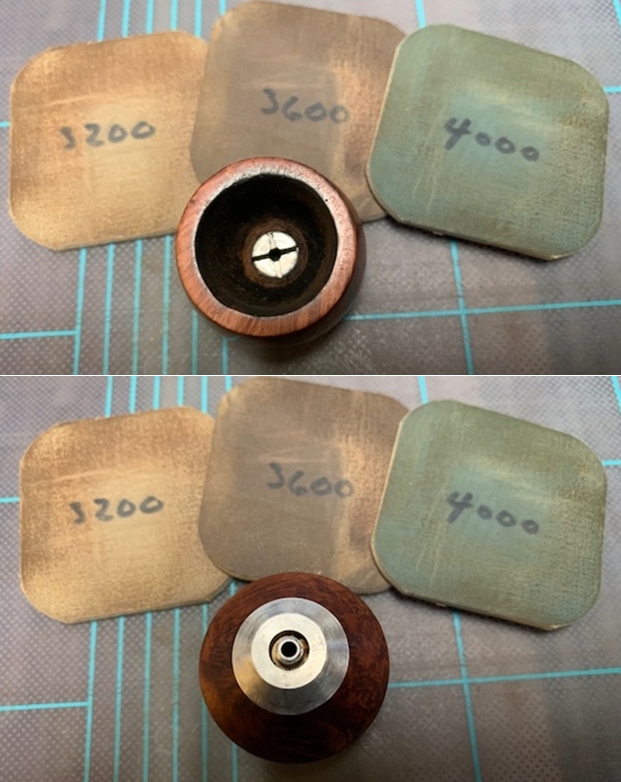
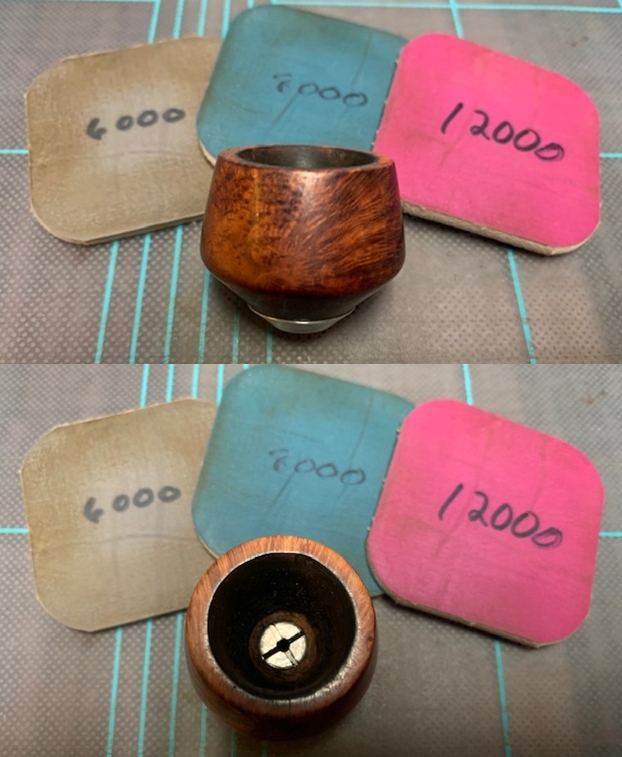
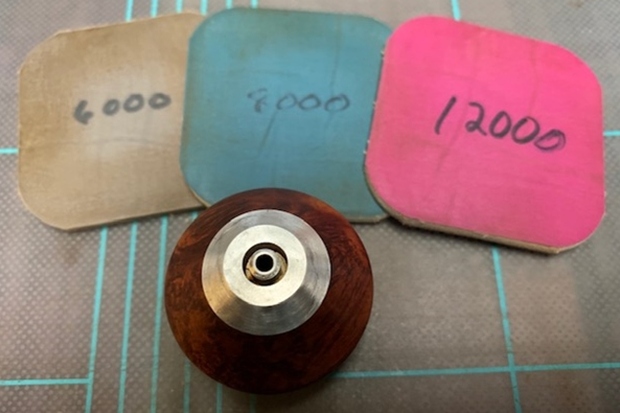
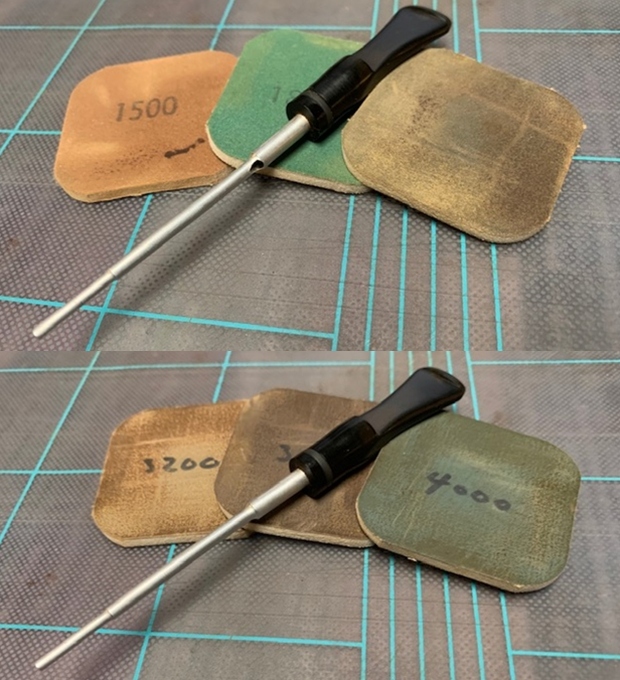
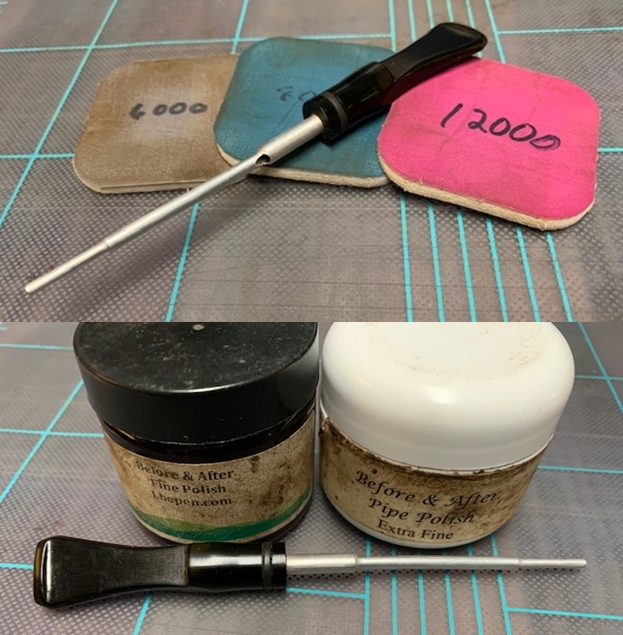
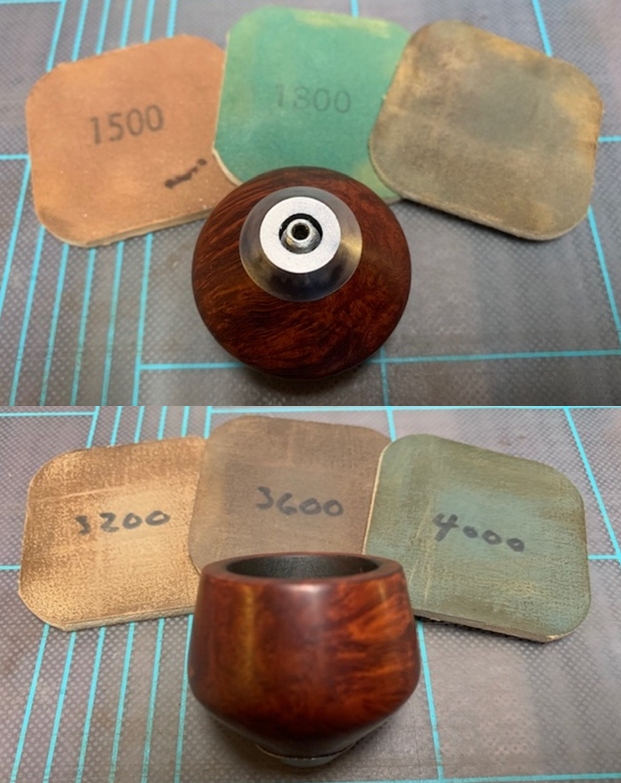
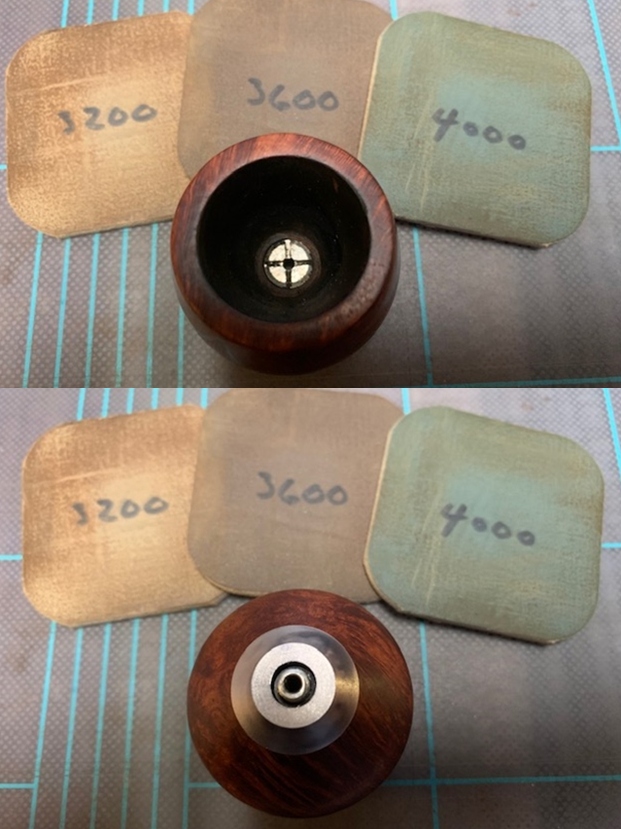
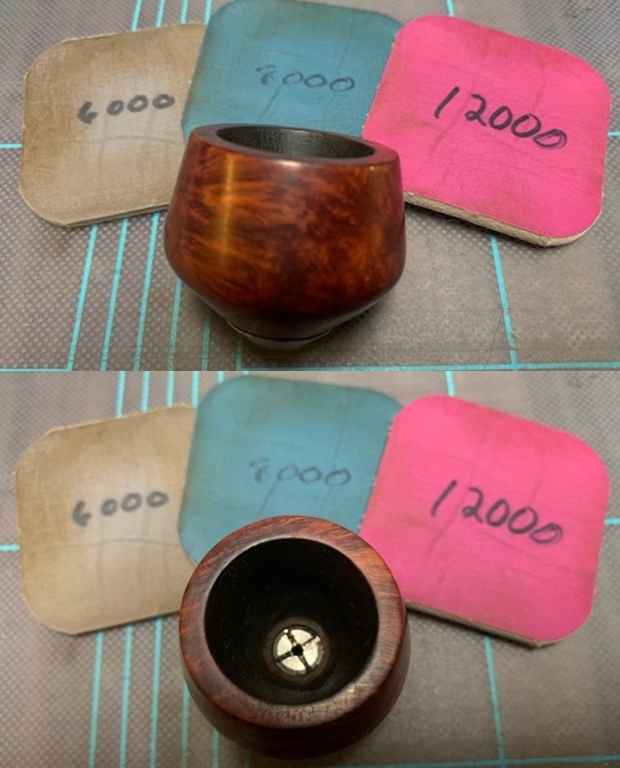
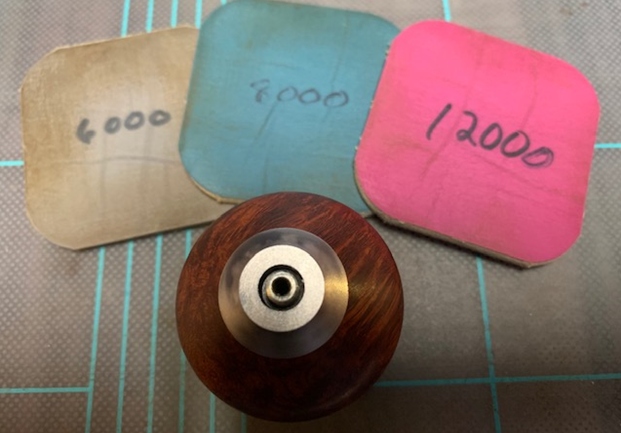
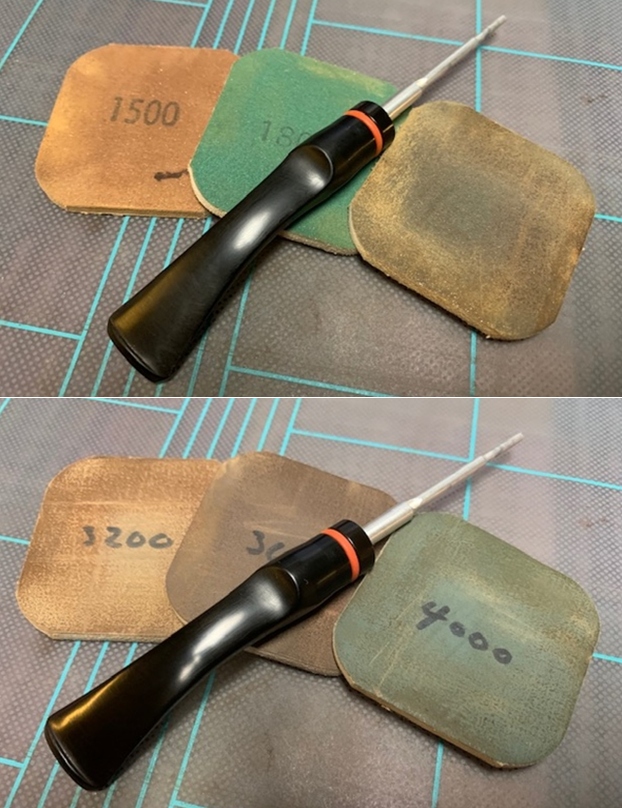
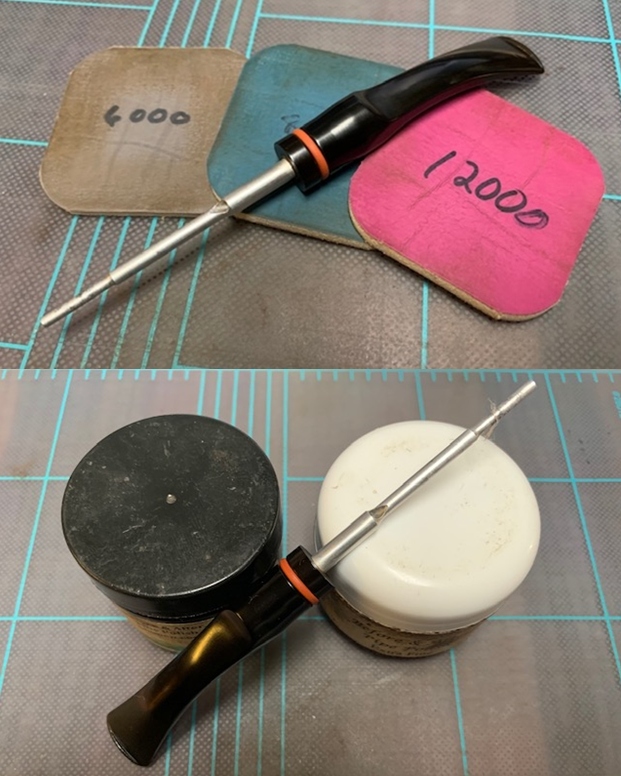
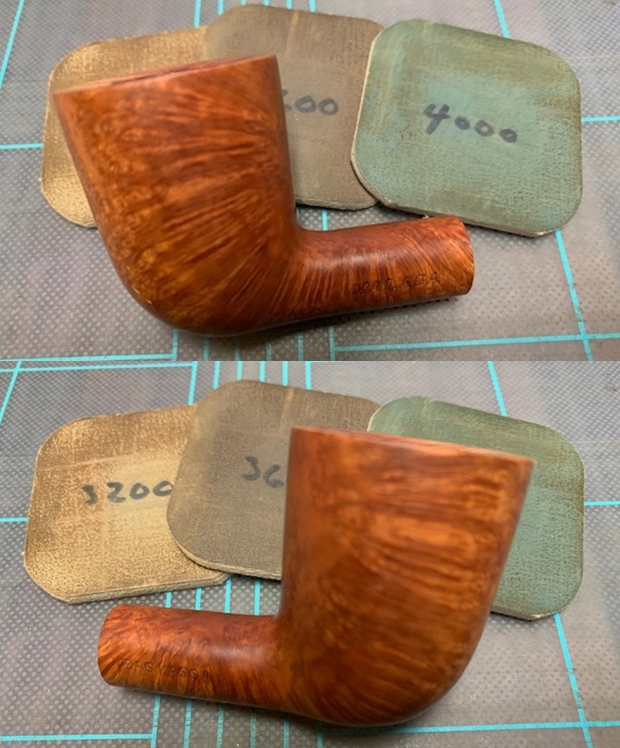
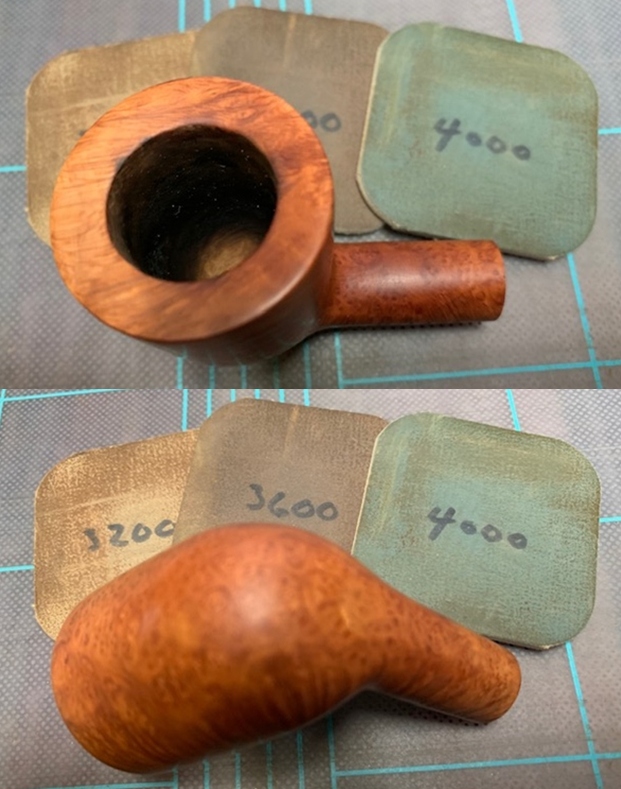
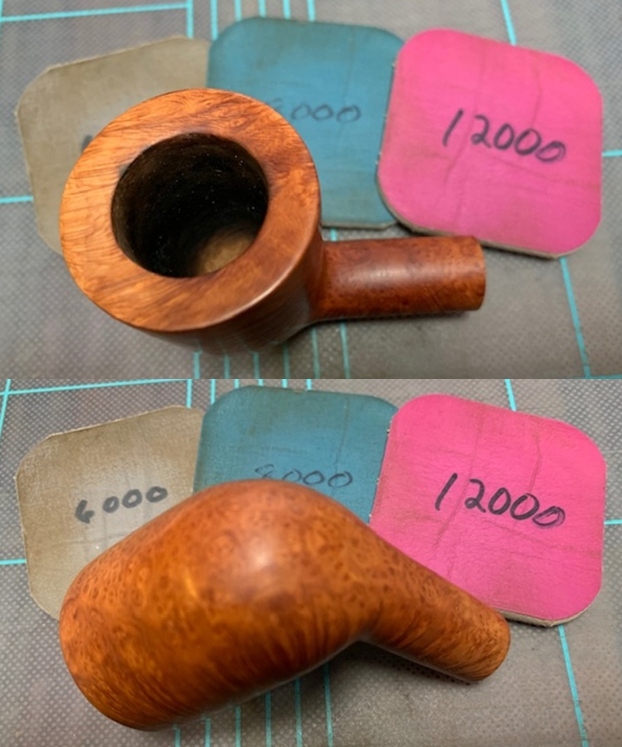
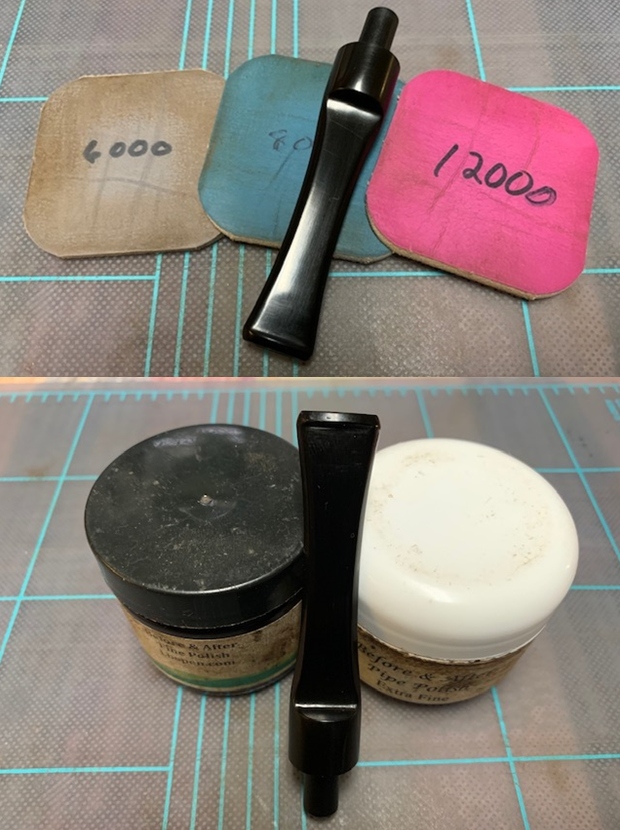
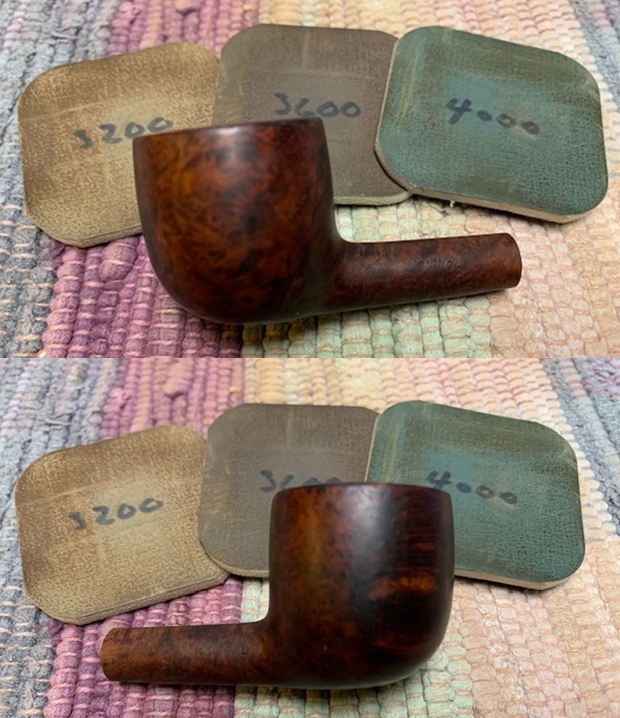
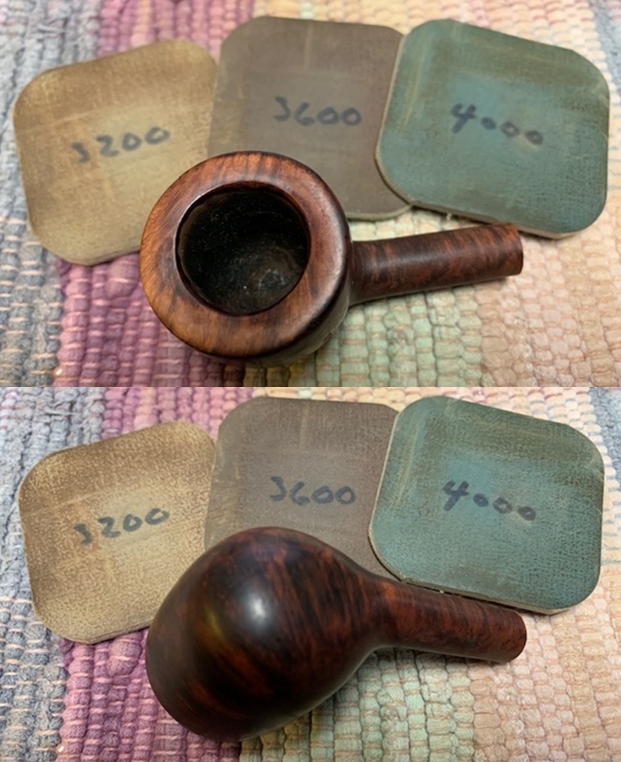
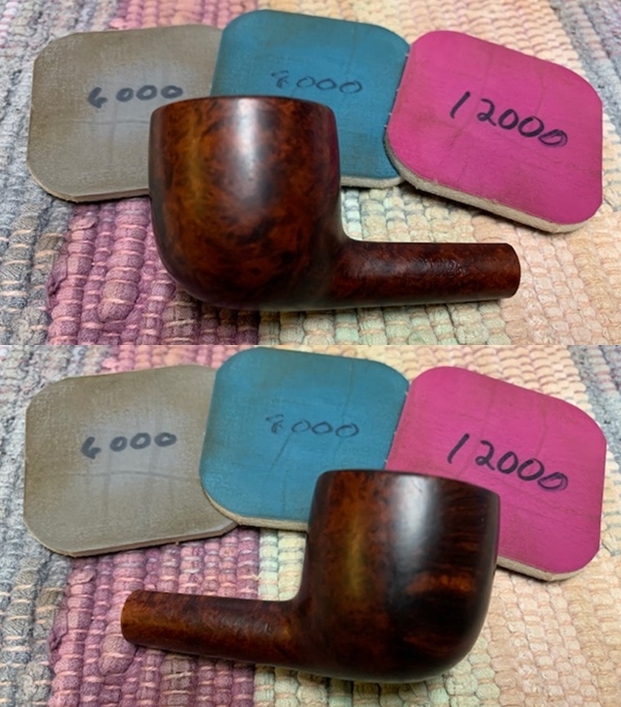
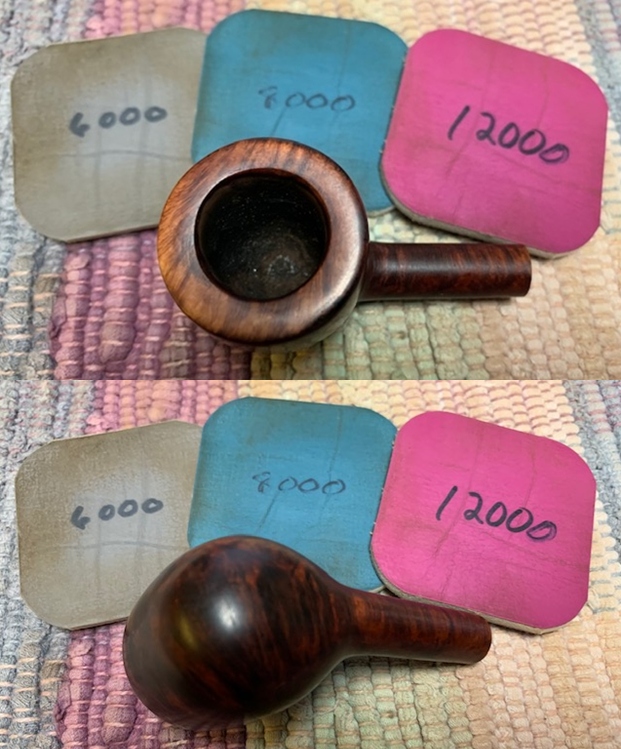
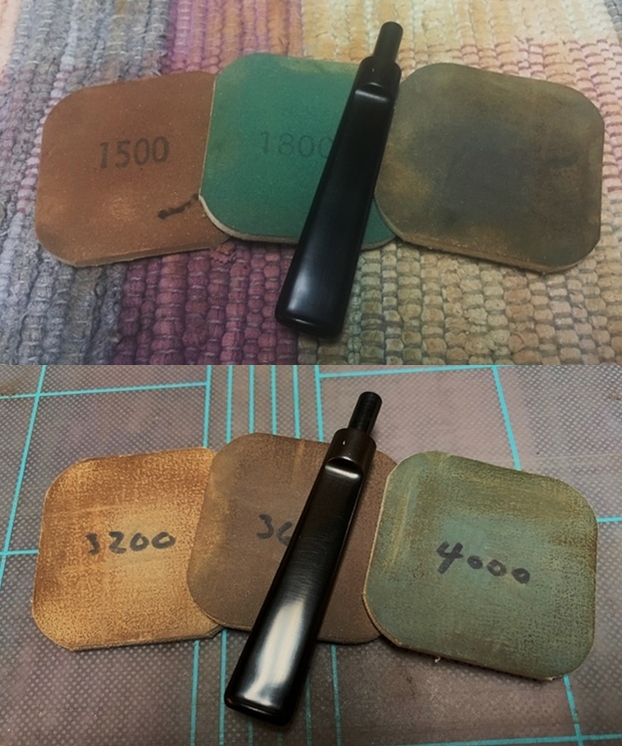
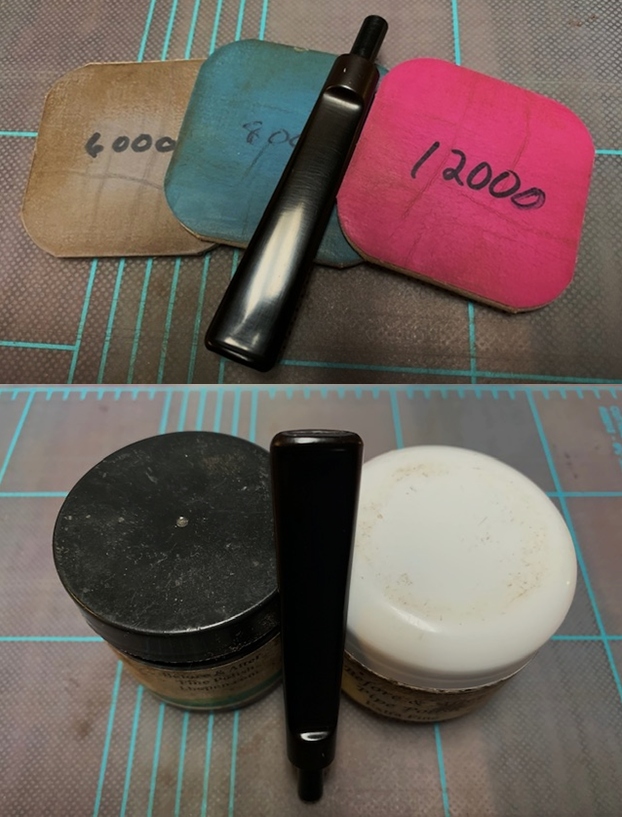
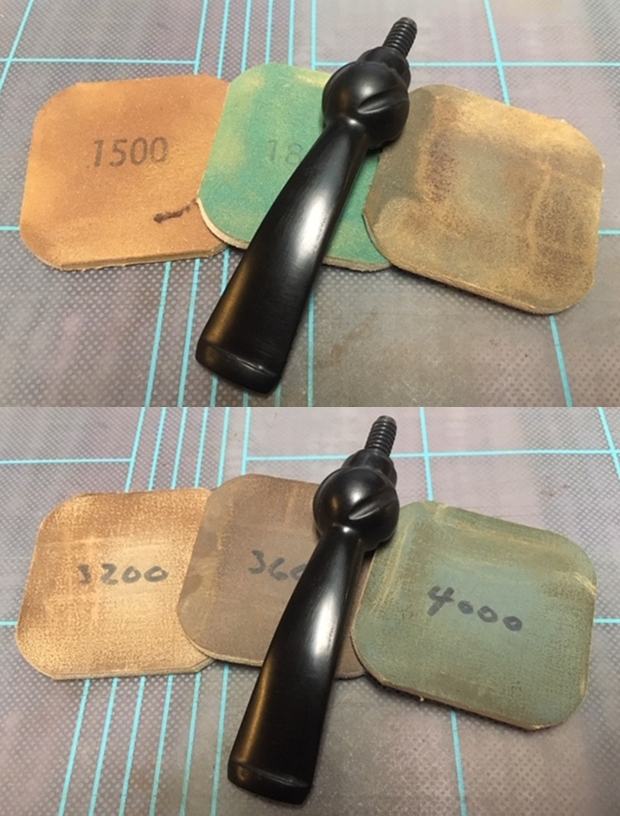
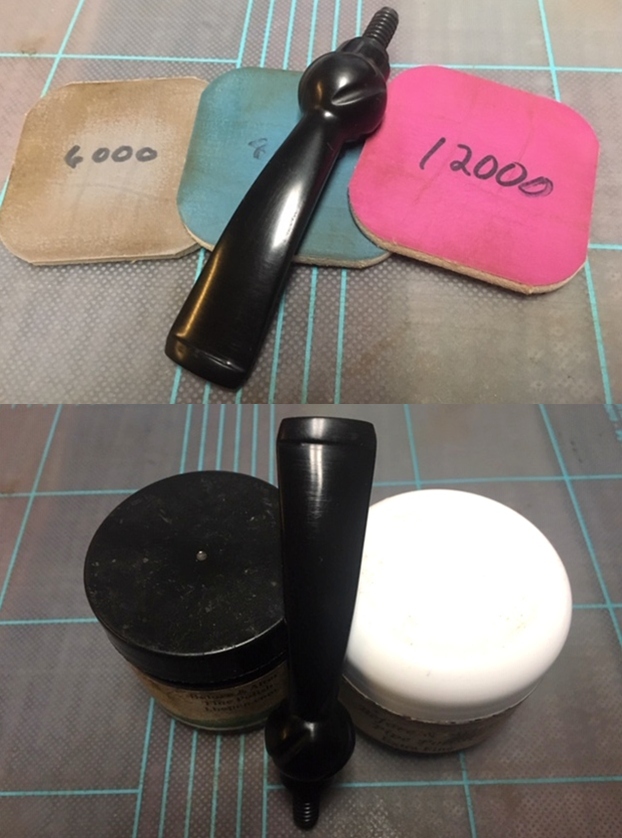
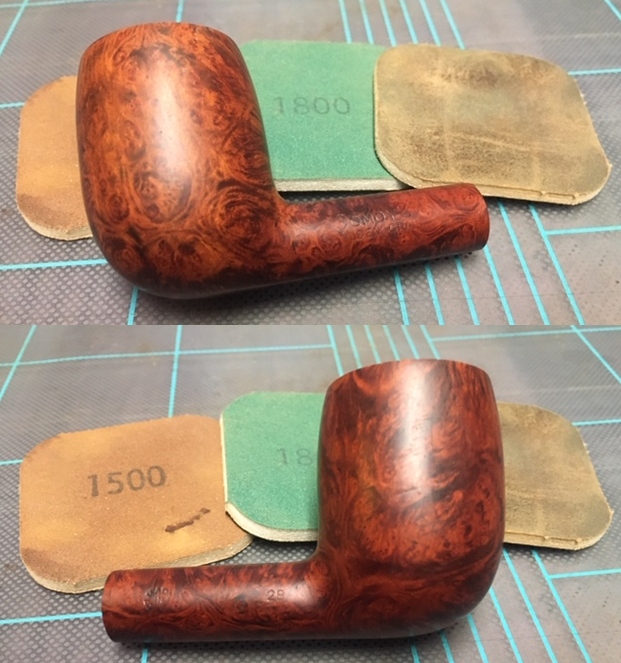
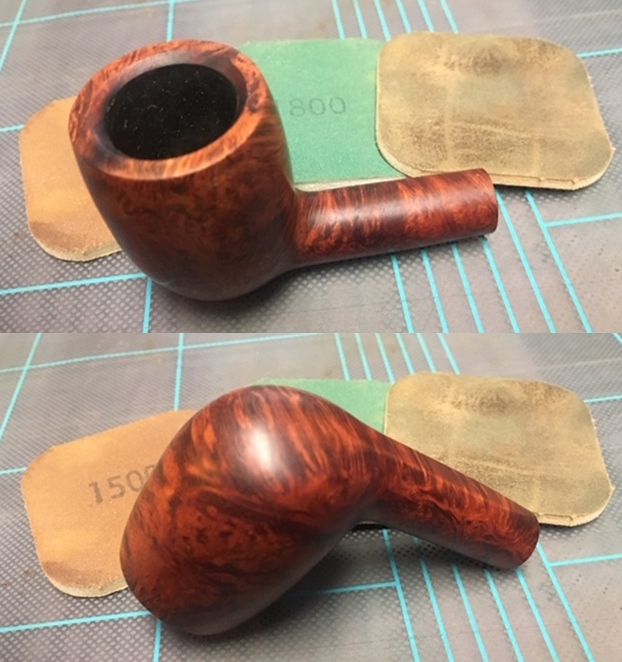
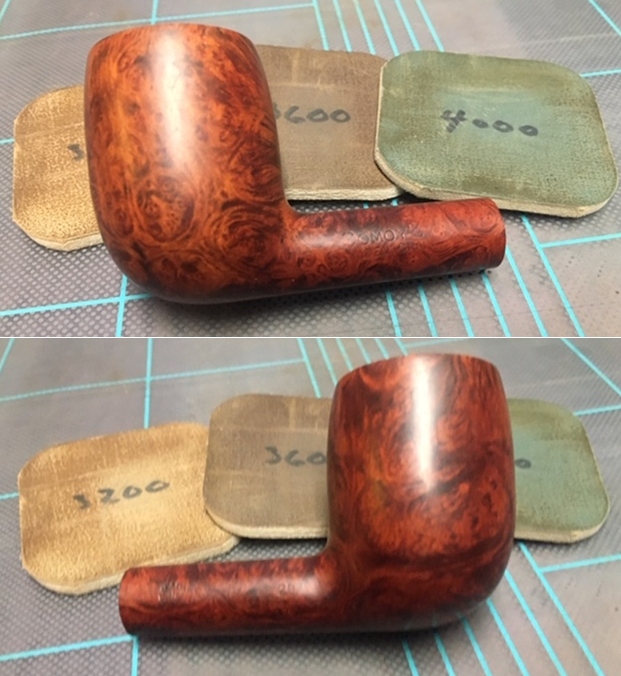
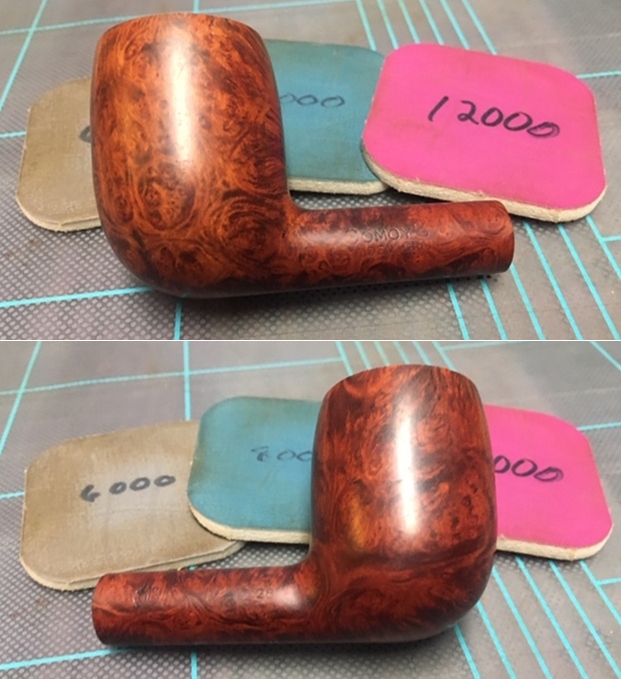
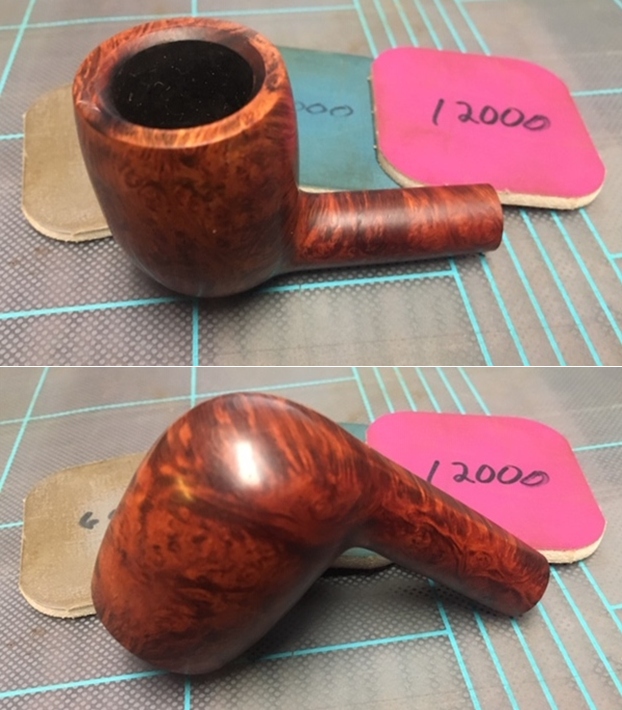
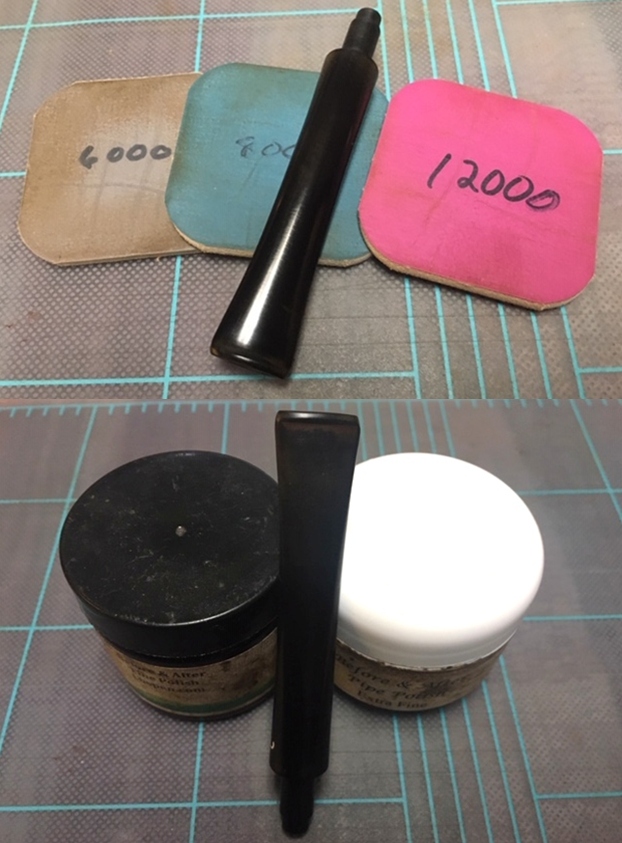
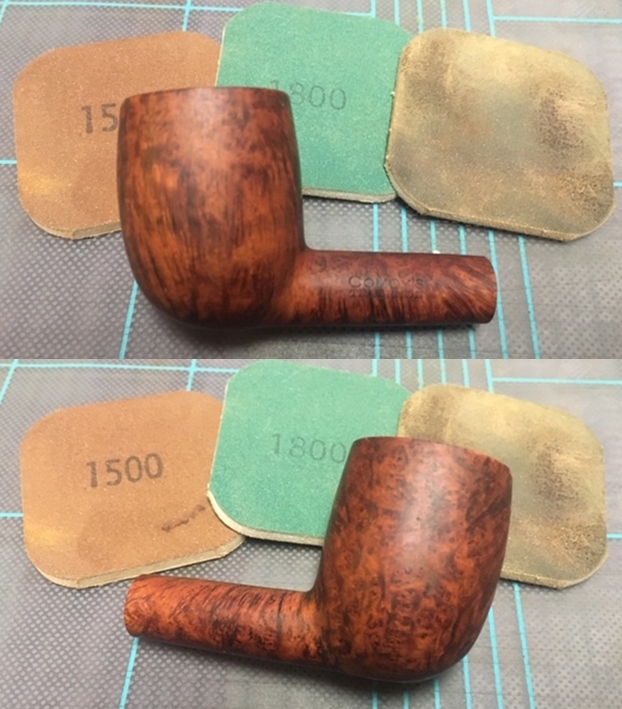
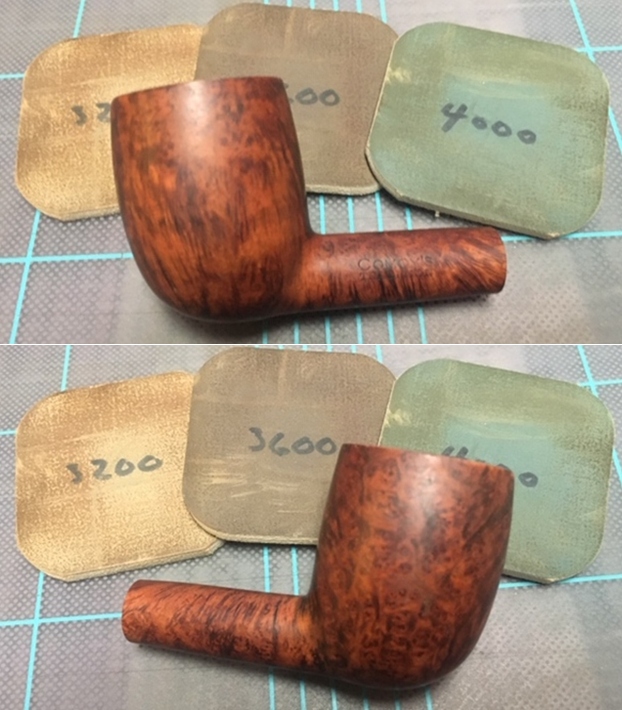
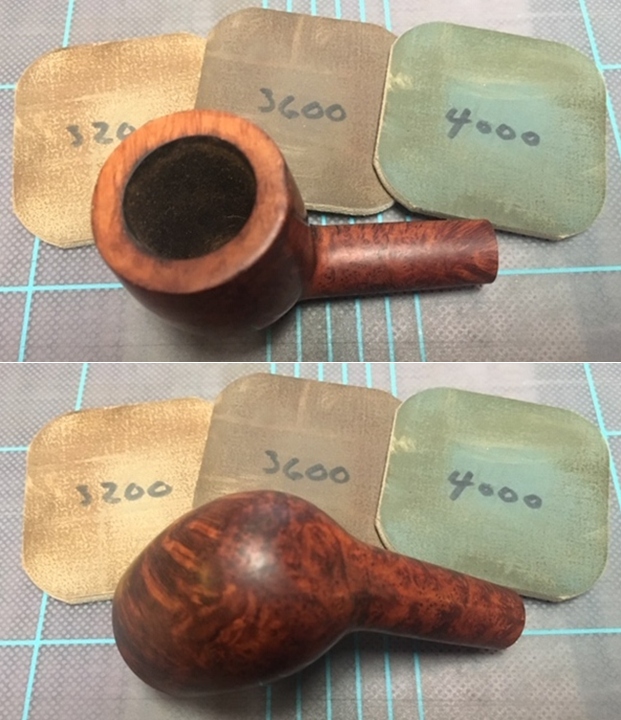
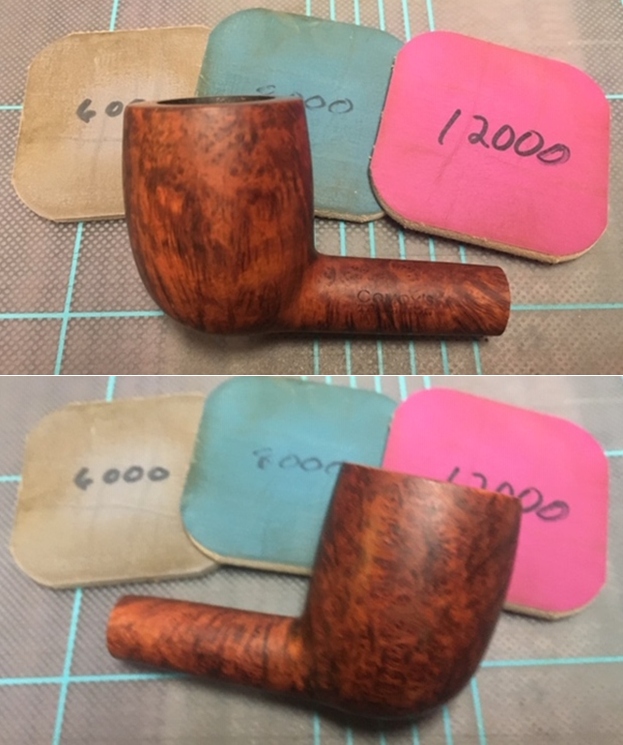
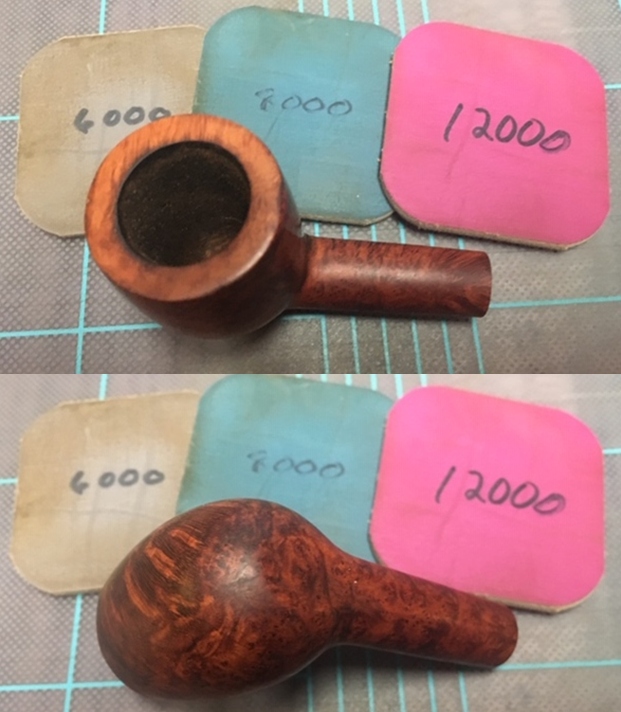
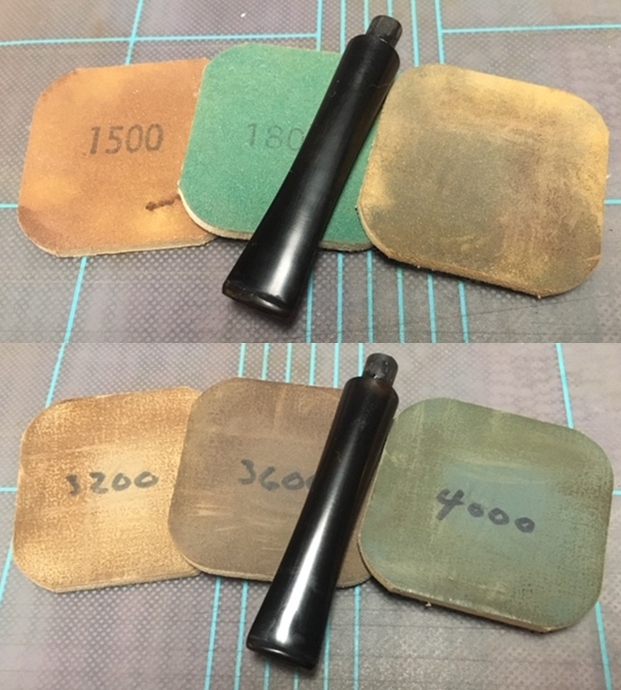
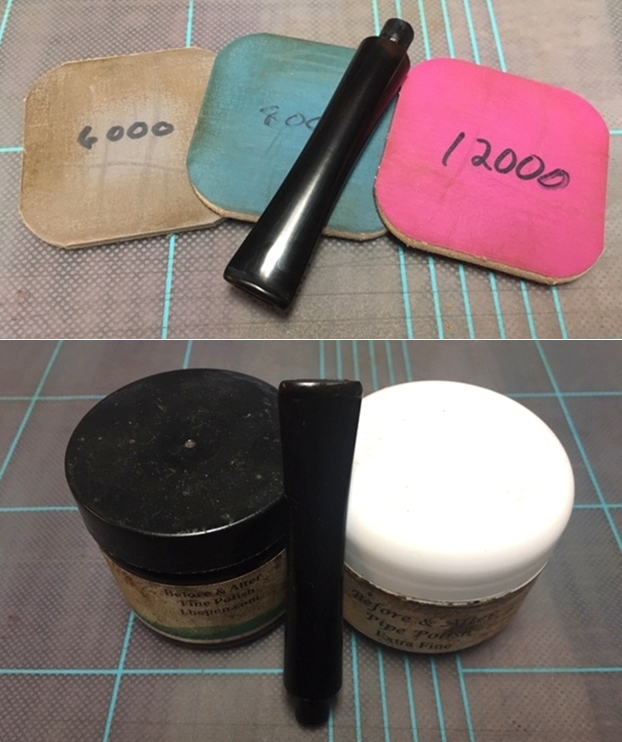
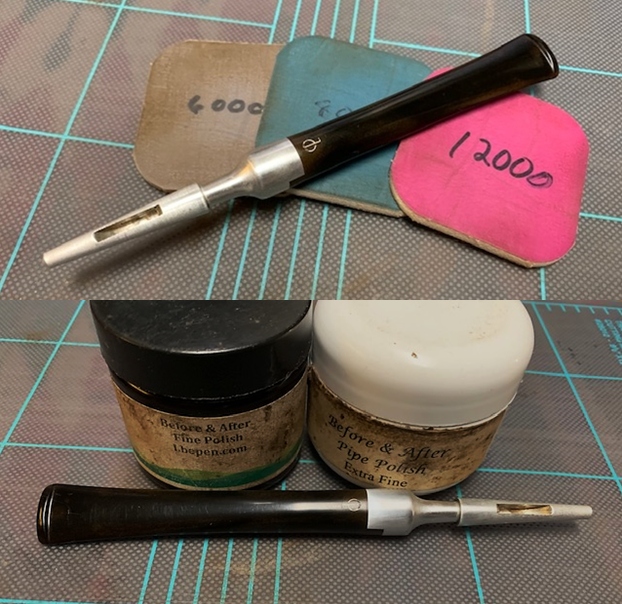
 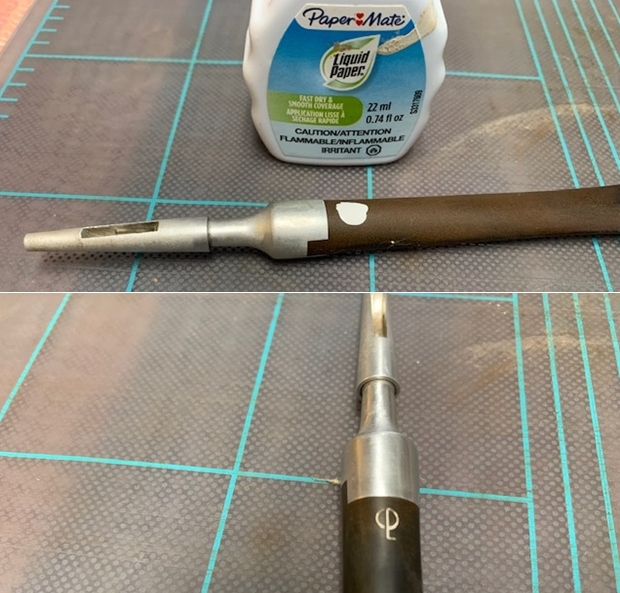 I polished the vulcanite with micromesh sanding pads – 1500-12000 grit pads. I wiped it down with a damp cloth after each sanding pad. I used Before & After Pipe Polish – both Fine and Extra Fine to further polish the stem.
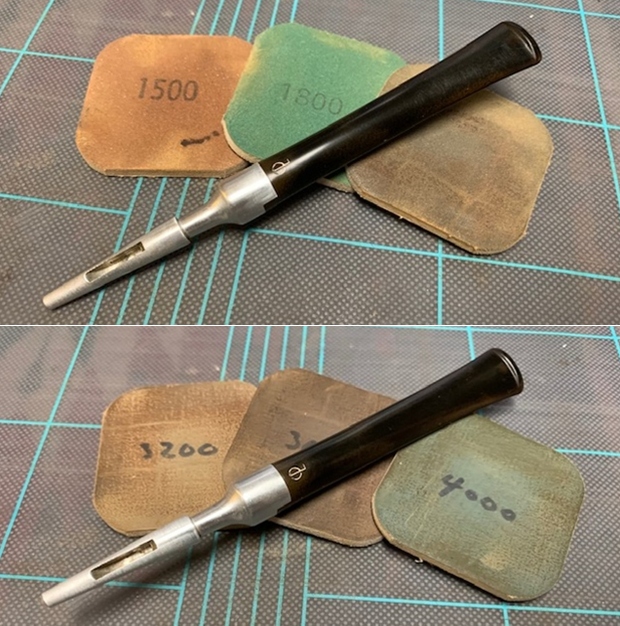
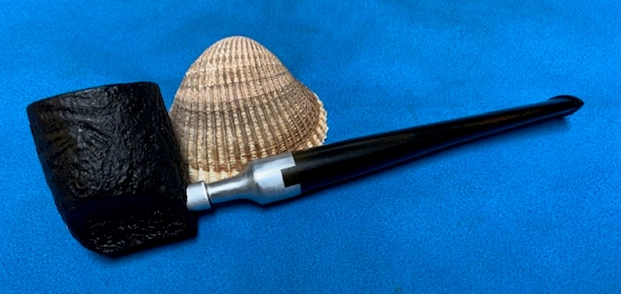
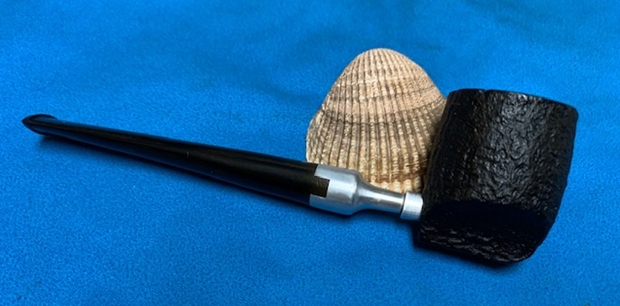
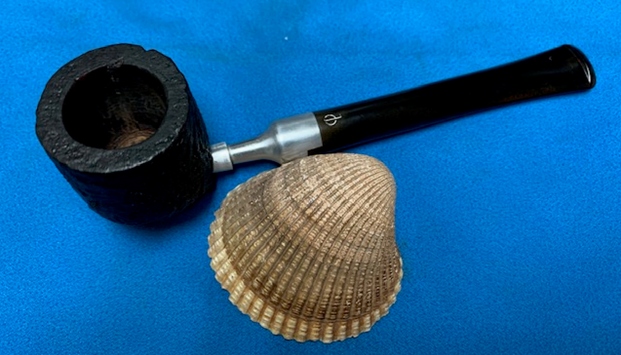
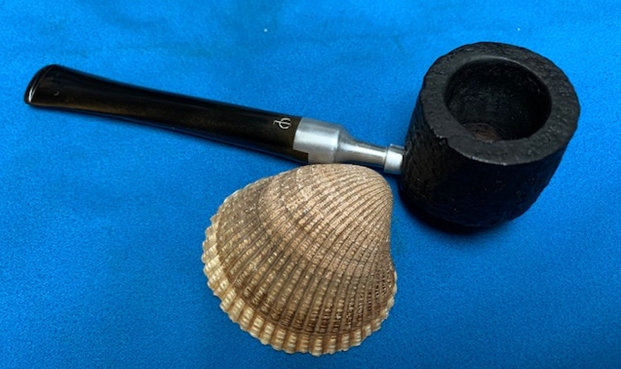
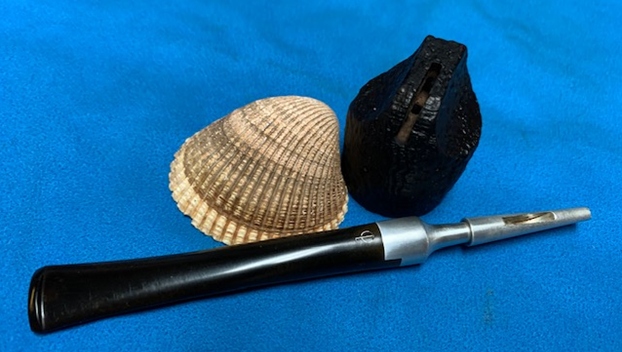
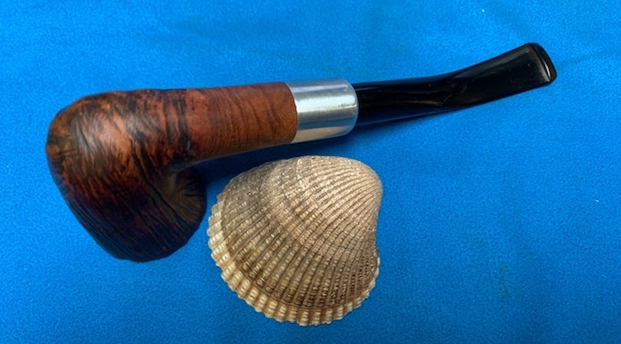
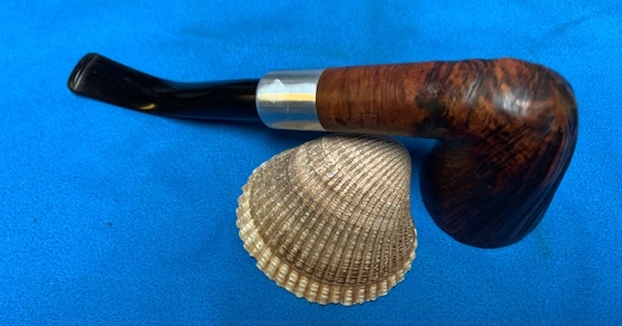
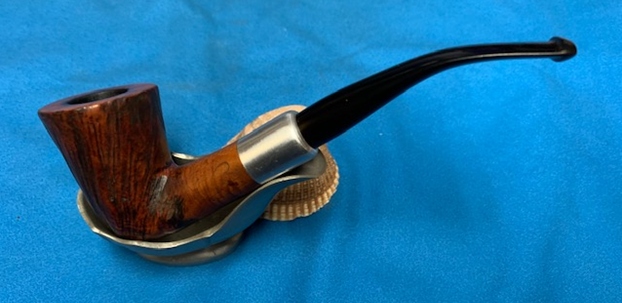
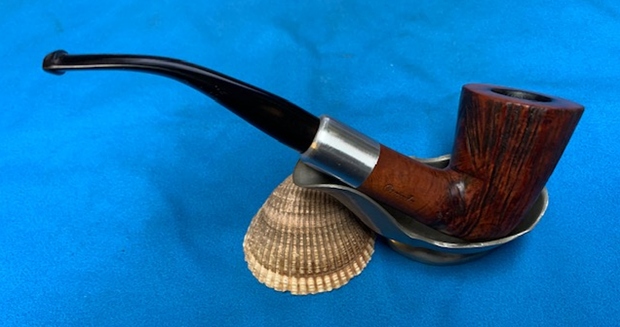
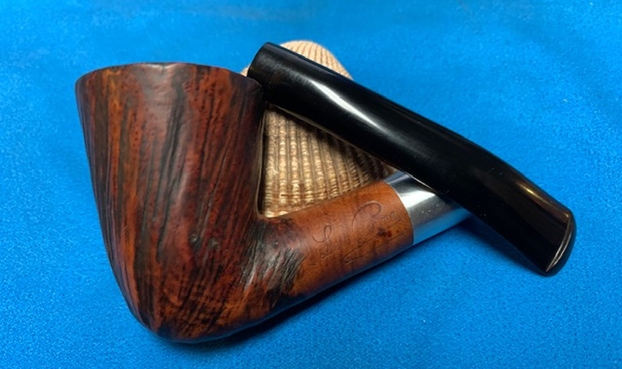
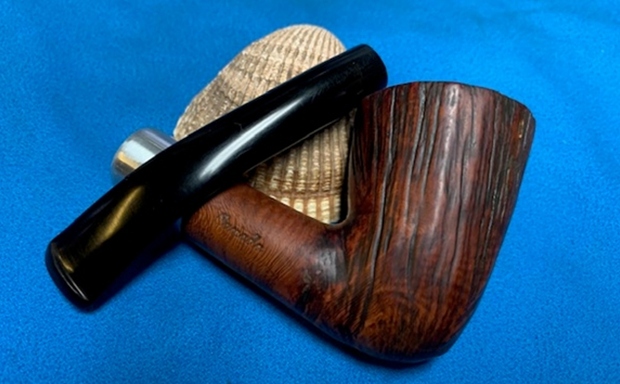
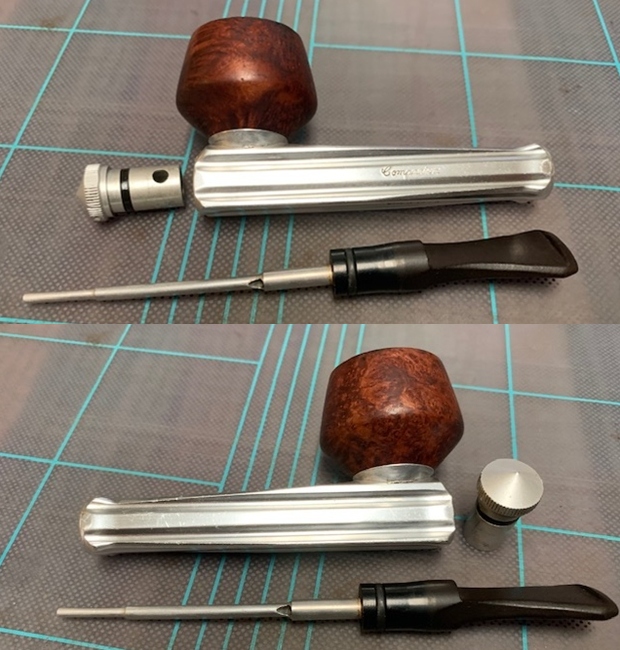
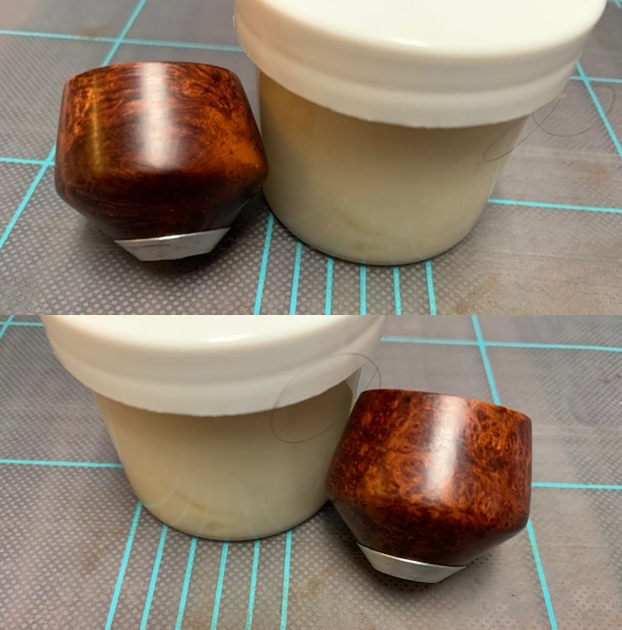
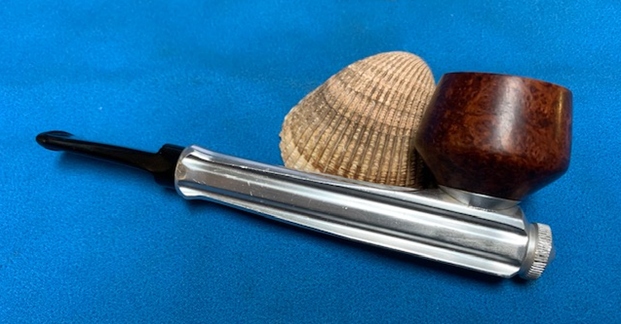
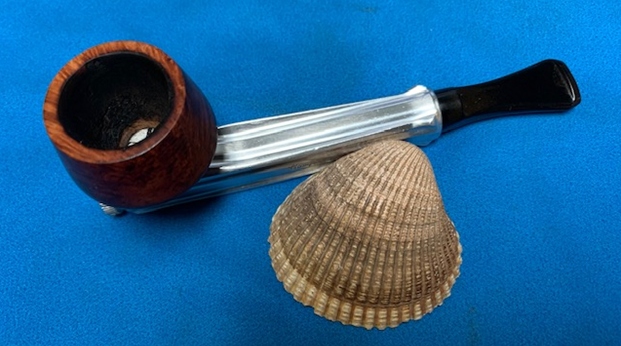
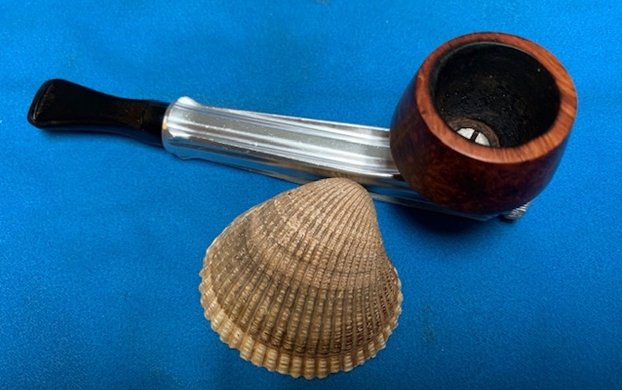
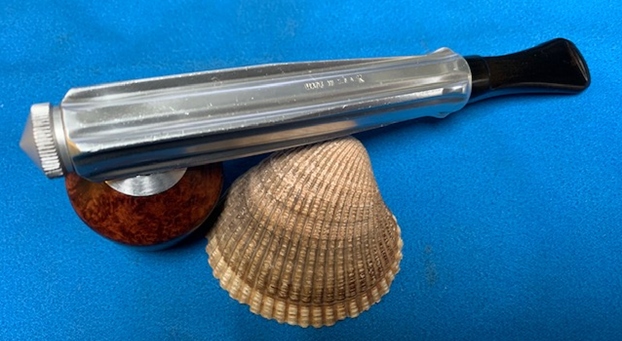
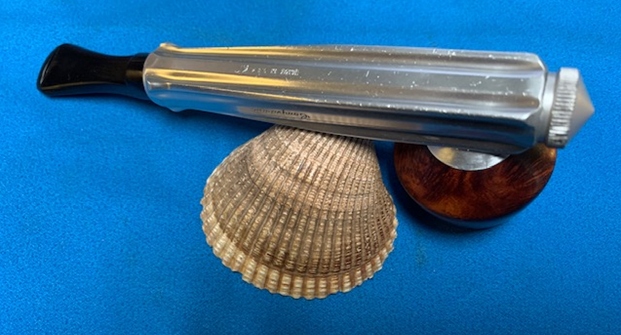
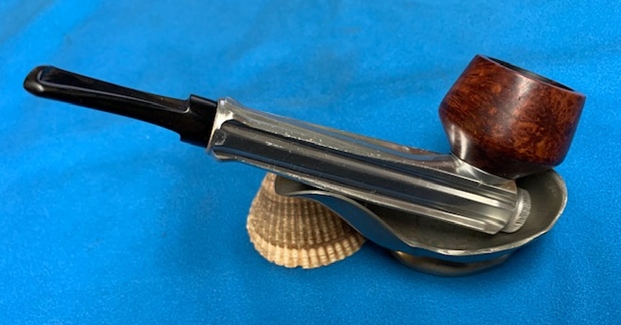
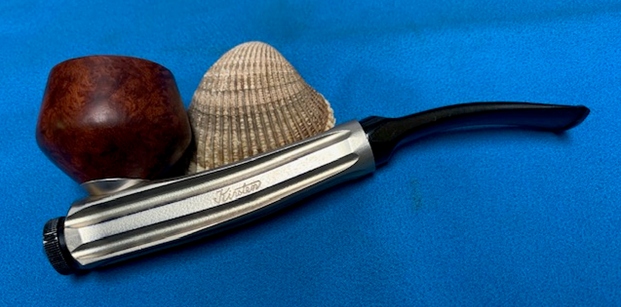
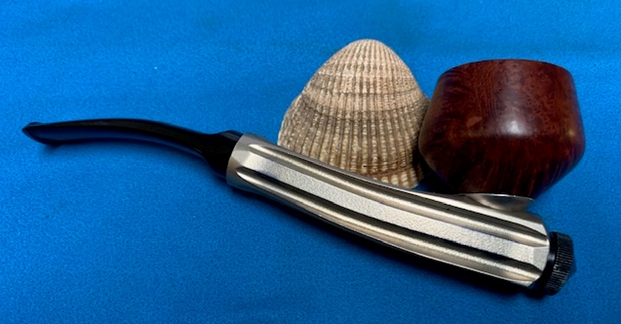
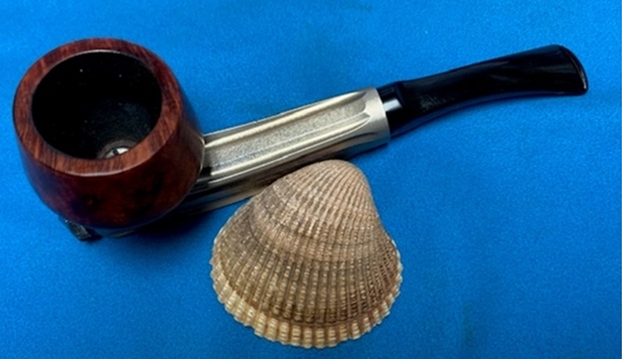
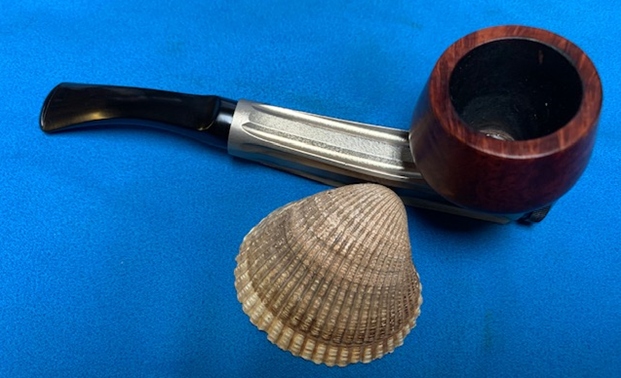
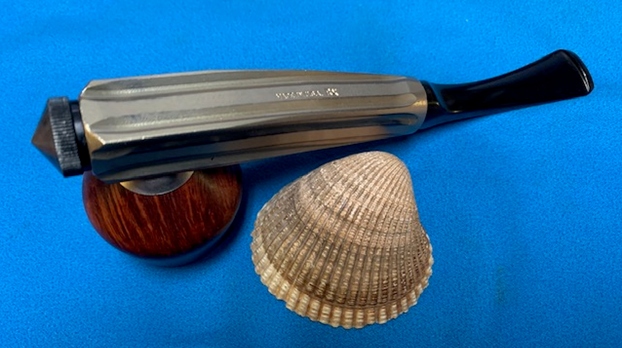
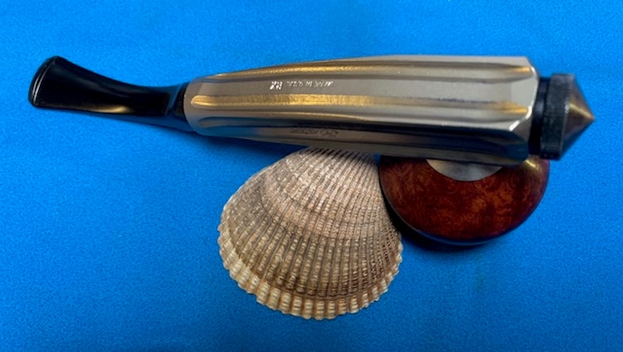
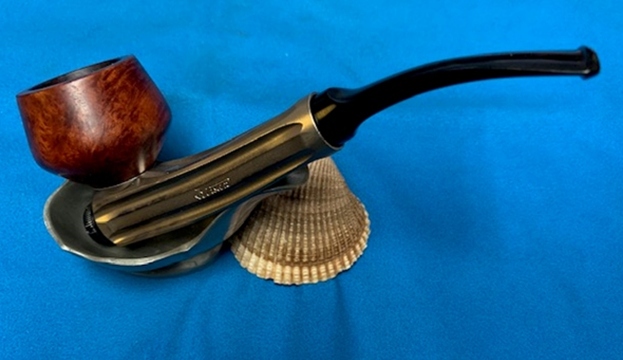
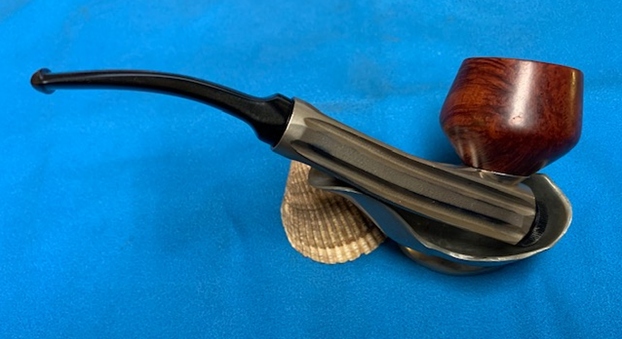
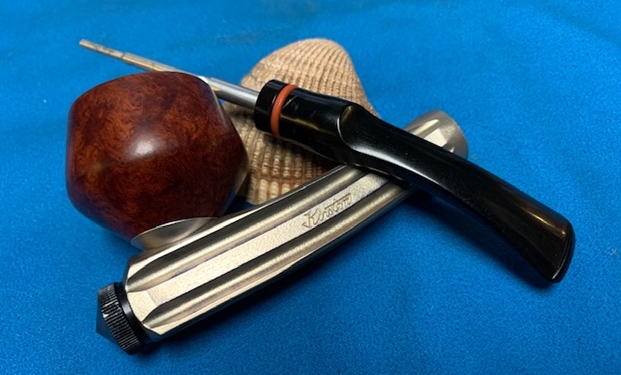
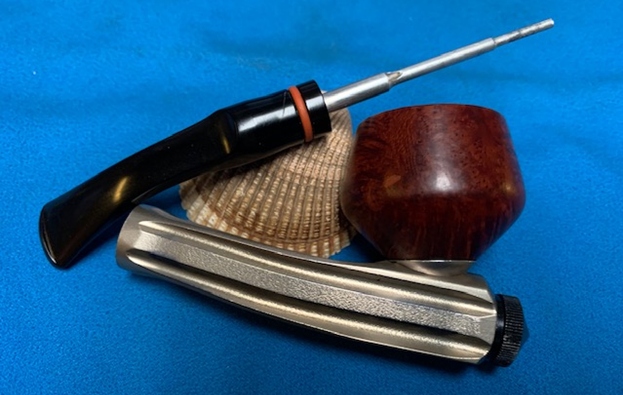
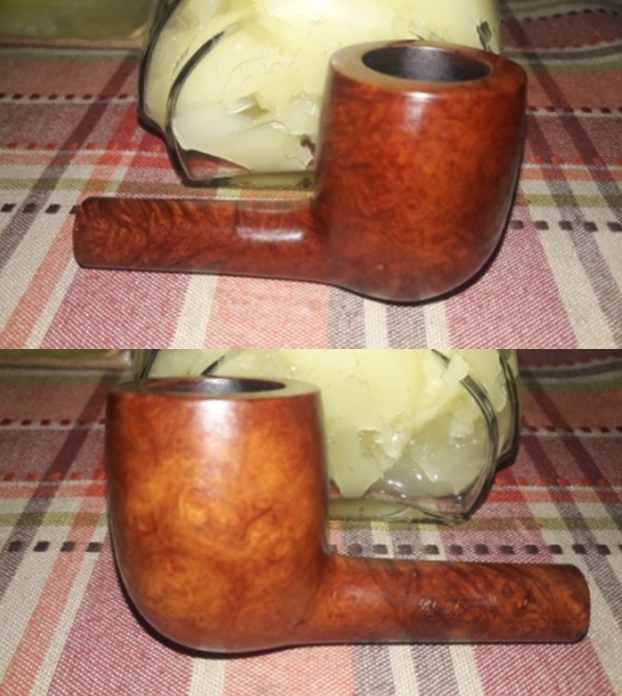
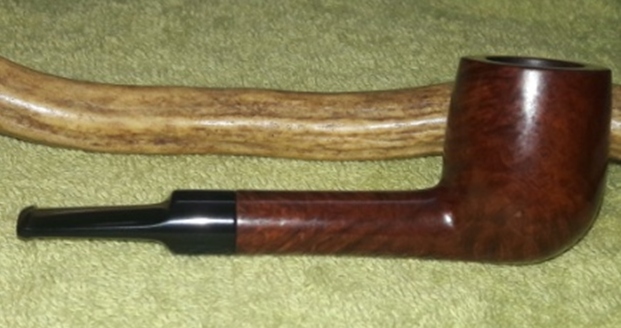
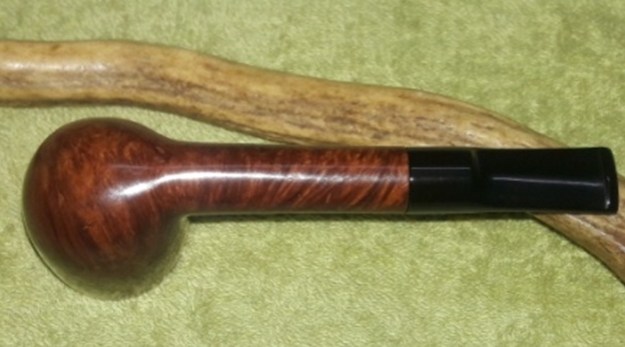
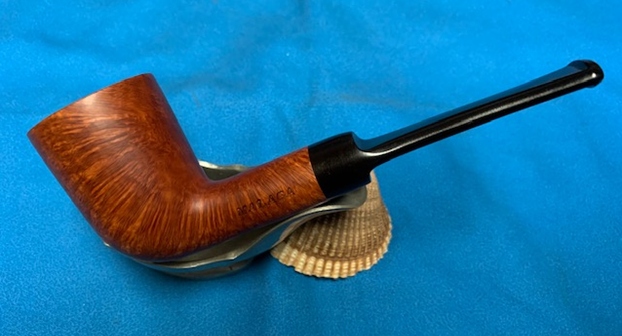
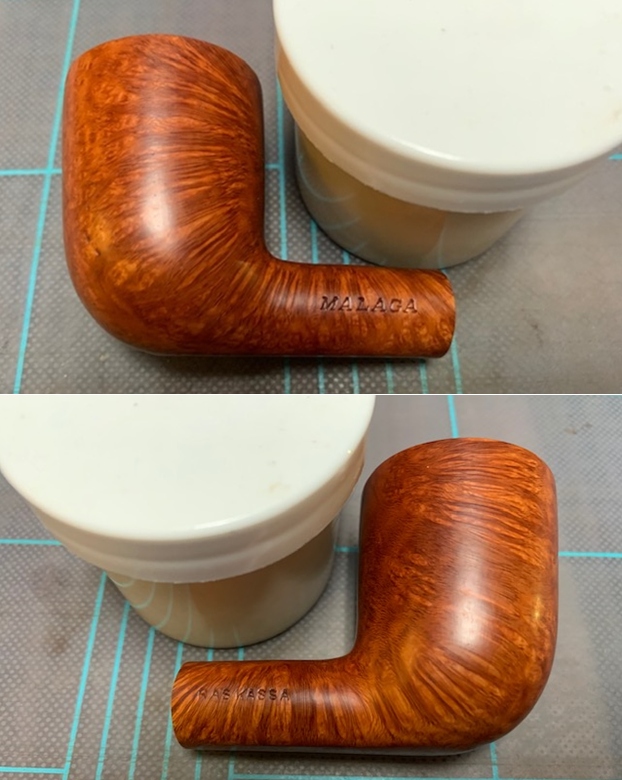
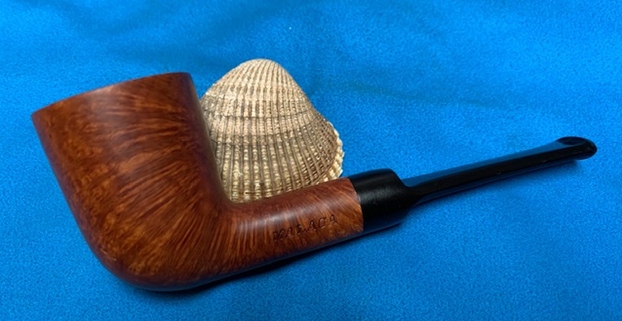
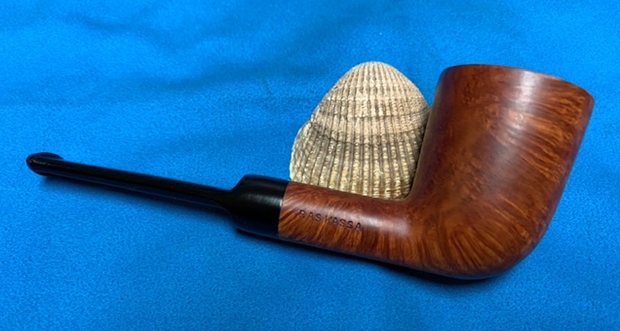
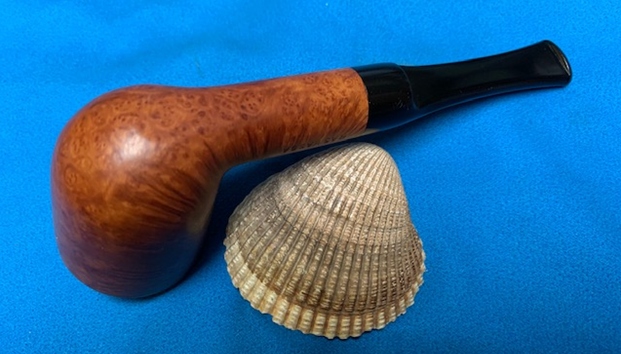
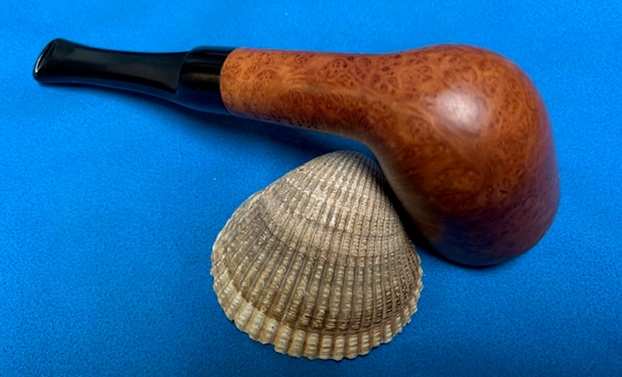
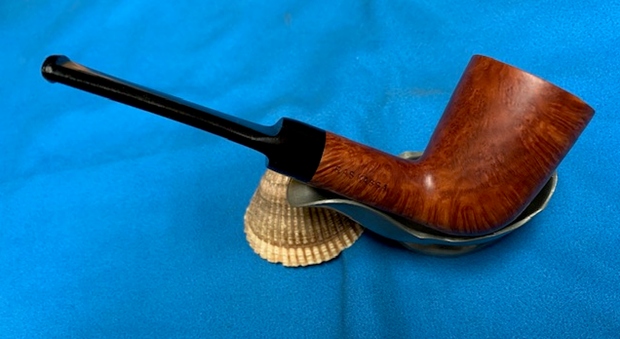
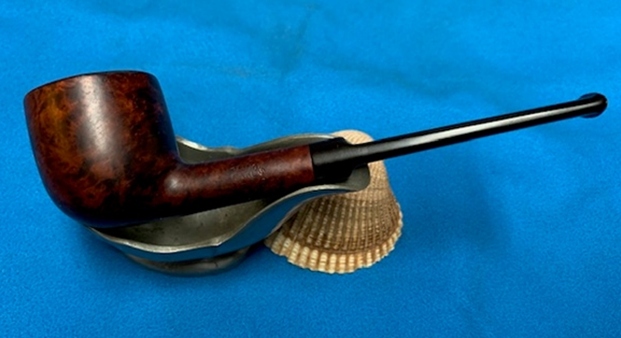
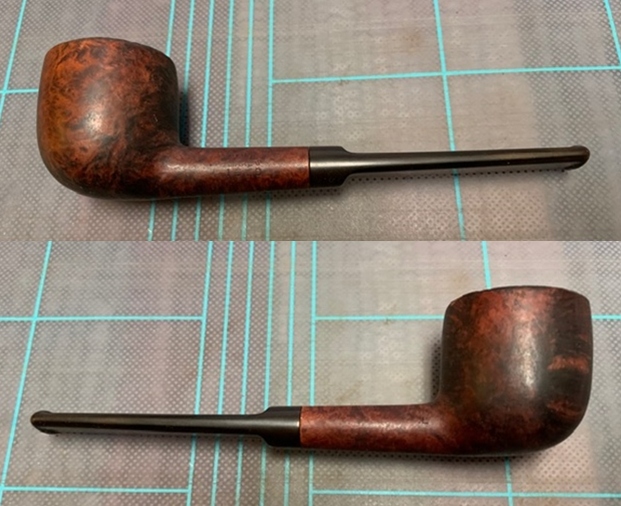
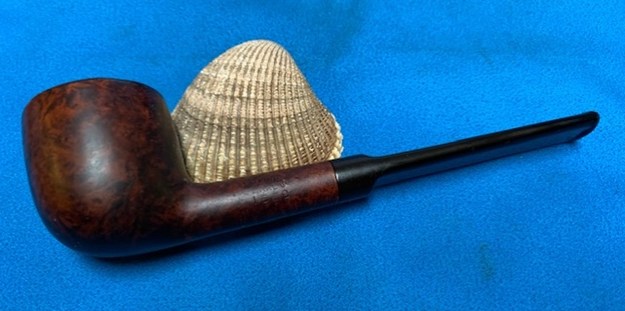
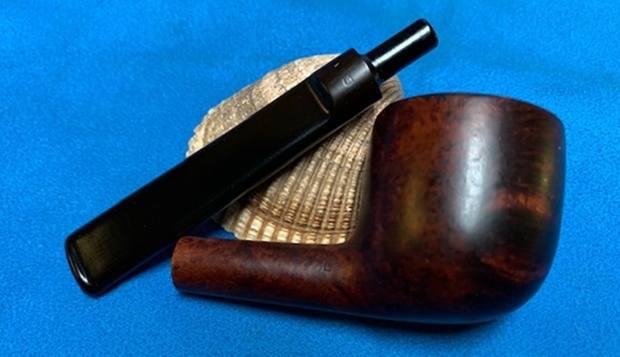
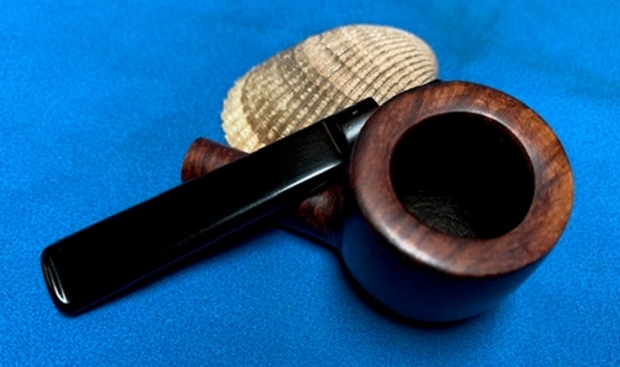
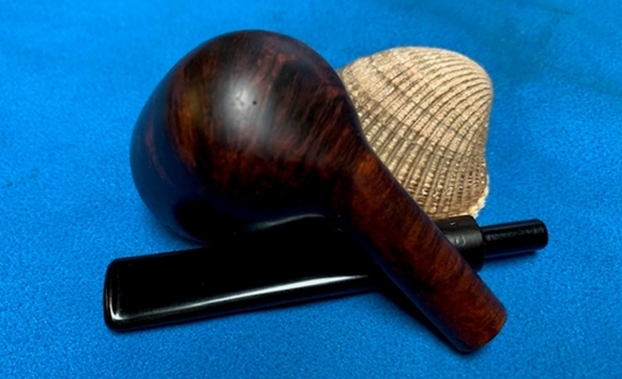
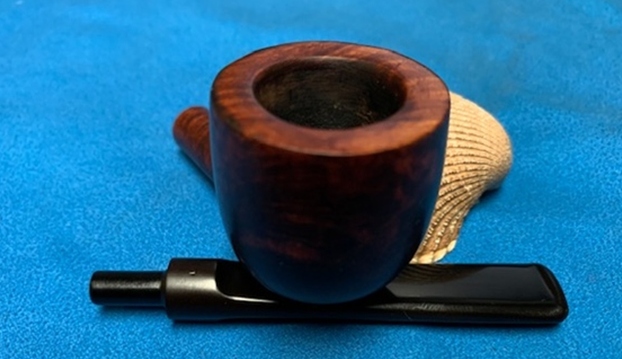
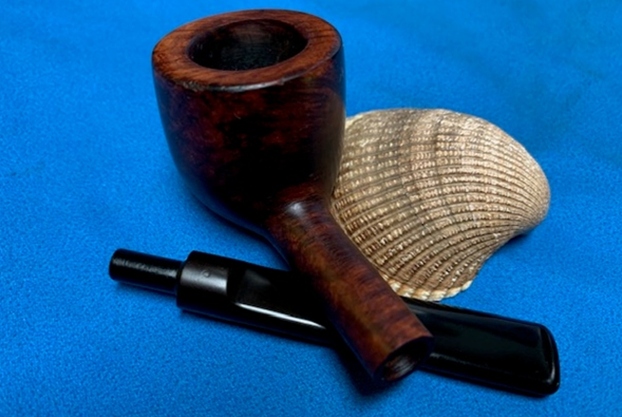
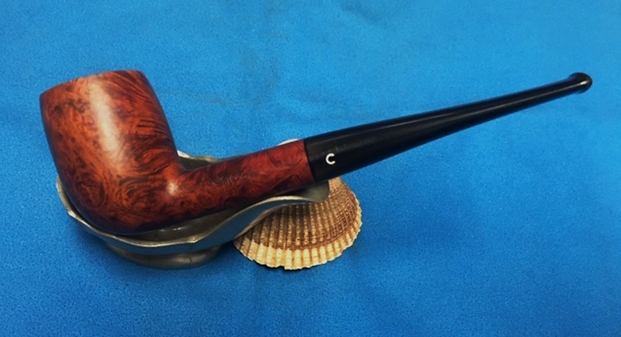
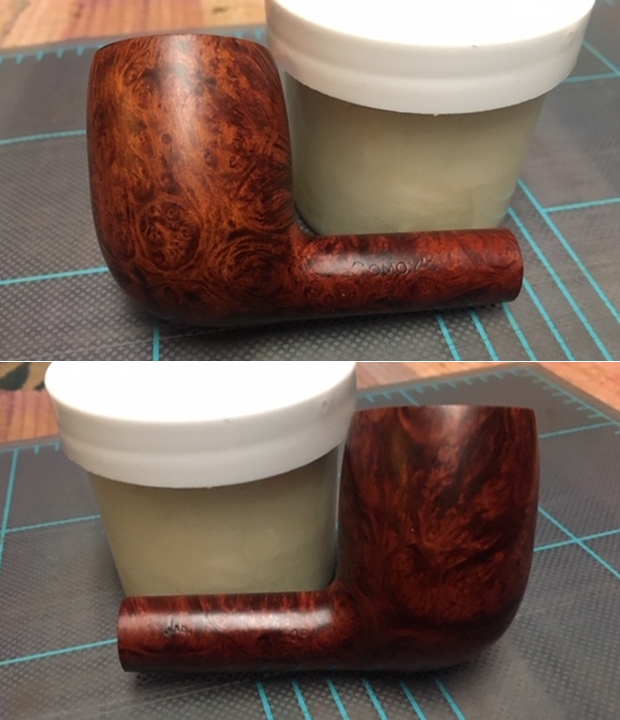
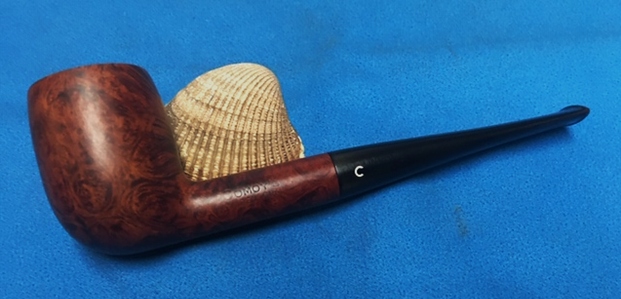
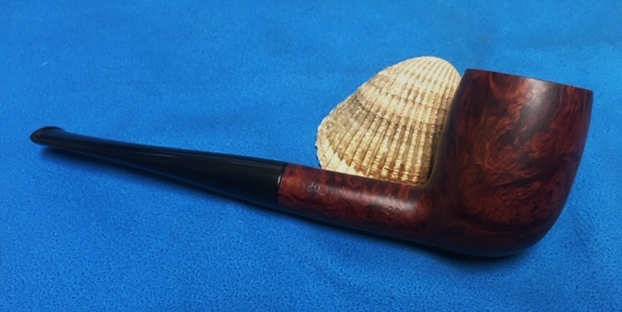
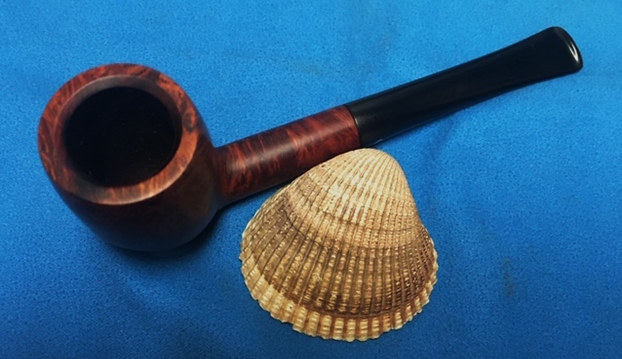
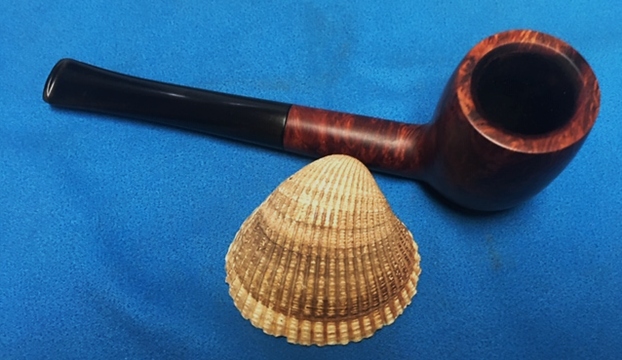
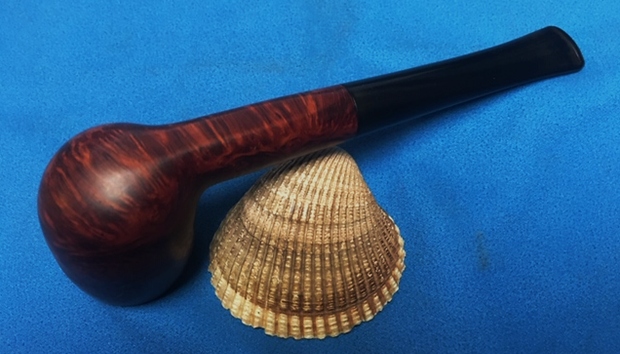
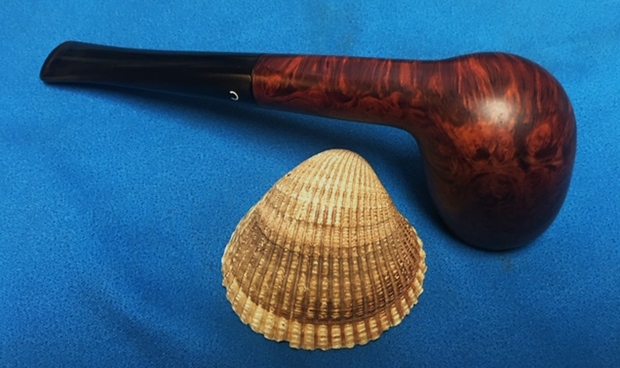
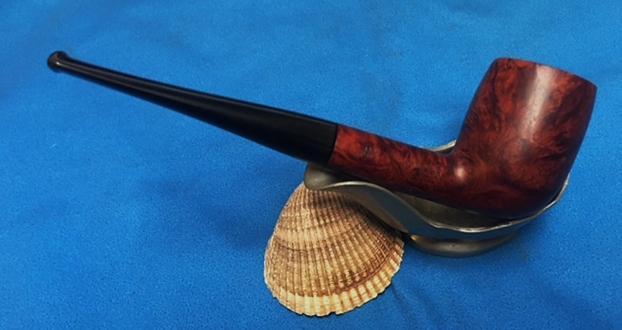
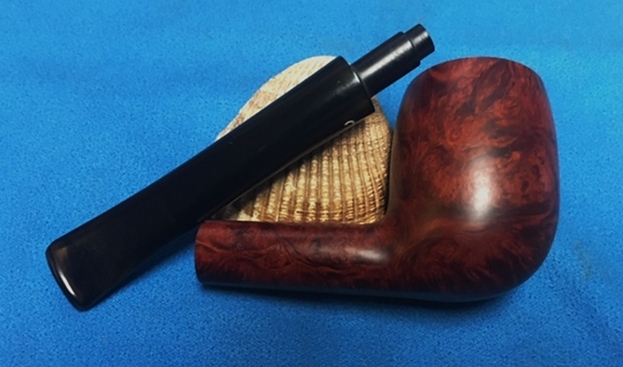
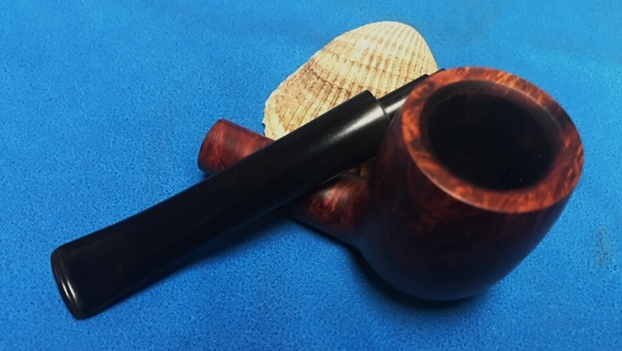
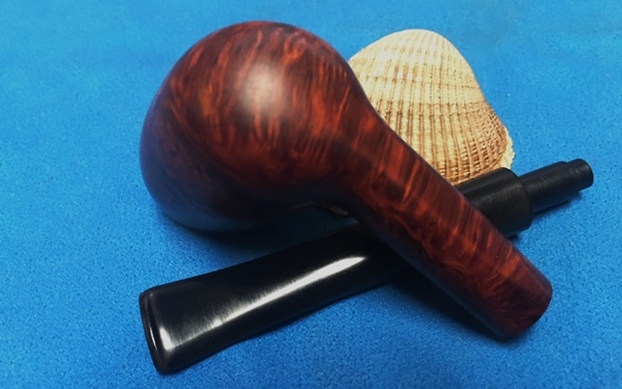
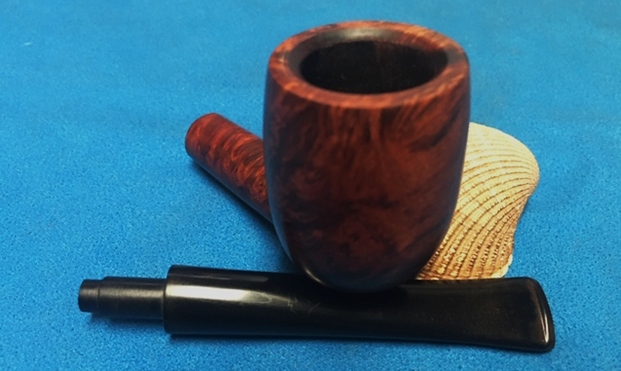
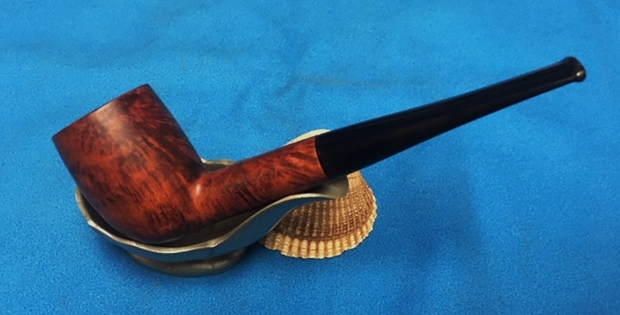
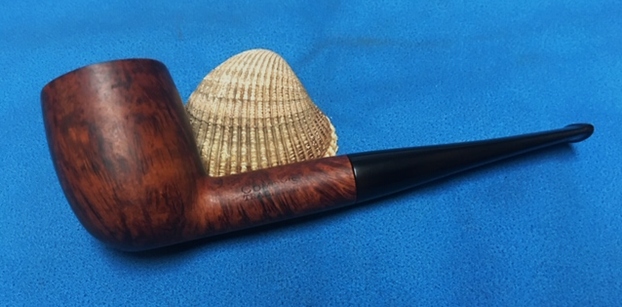
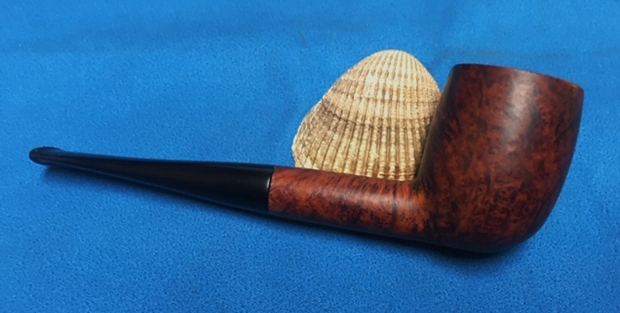
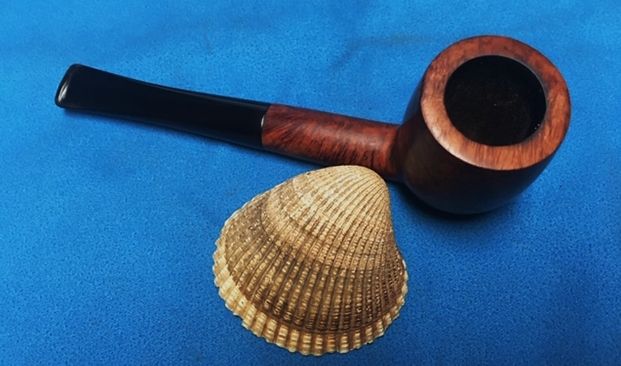
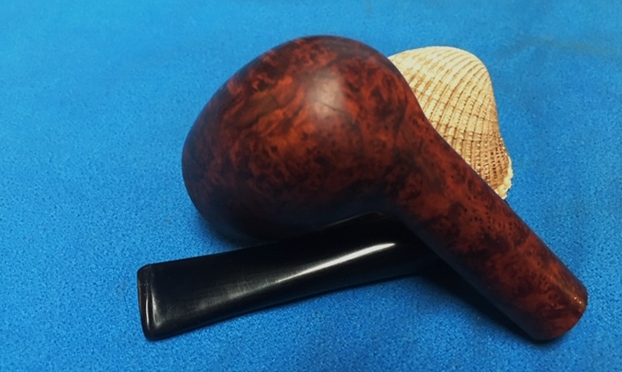
 This Ornsby System pipe is a beauty and it cleaned up very well. The finish on the pipe is in excellent condition and works well with the polished aluminum and vulcanite saddle stem. I buffed the bowl and the spear like stem with Blue Diamond on the buffing wheel using a light touch on the briar. I gave the bowl and stem multiple coats of carnauba wax on the buffing wheel and followed that by buffing the entire pipe with a clean buffing pad. I hand buffed the pipe with a microfiber cloth to deepen the shine. The finished Ornsby pipe is a great looking pipe that looks almost new. The flow of the sandblast around the bowl and the shape contribute to beautiful look of this pipe. It fits nicely in the hand and feels great. Give the finished pipe a look in the photos below. The dimensions of the pipe are Length: 5 ½ inches, Height: 1 ½ inches, Outside diameter of the bowl: 1 ¼ inches, Chamber diameter: ¾ of an inch. This pipe will be added to my own collection of pipes from the “ongoing hunt for the perfect smoke”. I look forward to enjoying it. Thanks for reading this blog and my reflections on the pipe while I worked on it. This was an interesting estate to bring back to life.