Blog by Steve Laug
This is the last one of Mark’s uncle’s pipes and when I finish this one the lot of seven are complete and ready to go back to him. This last one is another Kaywoodie. I have repeatedly written how much I am enjoying working on these pipes for Mark. For me an important part of the restoration project is to know the history behind the pipe I am working on. When I find out the story it really adds another dimension to the pipe repair or restoration work.
I have finished six of the seven pipes that Mark sent me and have written about them. As I have worked on each pipe the pipeman who originally owned these pipes was with me through Mark’s story of his life. The links to the blog on each pipe is listed below if you want to read about the work on each of them.
- The Ropp Cherrywood De Luxe (https://rebornpipes.com/2018/01/17/cleaning-and-restoring-a-ropp-cherrywood-de-luxe-805/)
- The Doodler (https://rebornpipes.com/2018/01/19/restoring-a-beautiful-the-doodler-bullmoose/)
- A newer three hole stinger Kaywoodie Super Grain Billiard S-L (https://rebornpipes.com/2018/01/21/restoring-marks-uncles-third-pipe-a-kaywoodie-super-grain-s-l-billiard/)
- a Savinelli Churchwarden (https://rebornpipes.com/2018/01/22/restoring-marks-uncles-savinelli-churchwarden-aged-briar-2002/).
- A Tally Ho 33 Pot made by Hardcastle’s (https://rebornpipes.com/2018/01/25/restoring-and-restemming-marks-uncles-5th-pipe-a-tally-ho-33-pot/)
- A Kaywoodie Signet Rhodesian/Round shank Bulldog https://rebornpipes.com/2018/01/27/reworking-marks-uncles-6th-pipe-a-kaywoodie-signet-rhodesian/
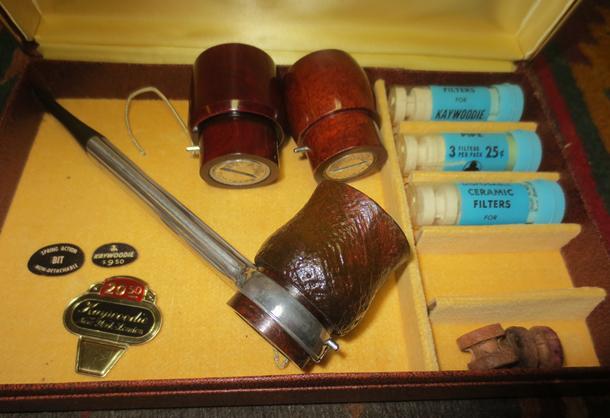
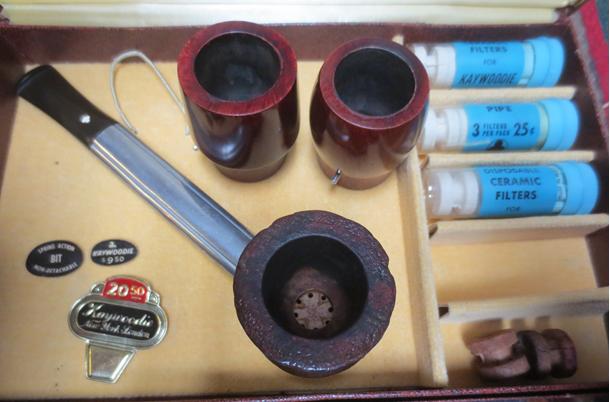
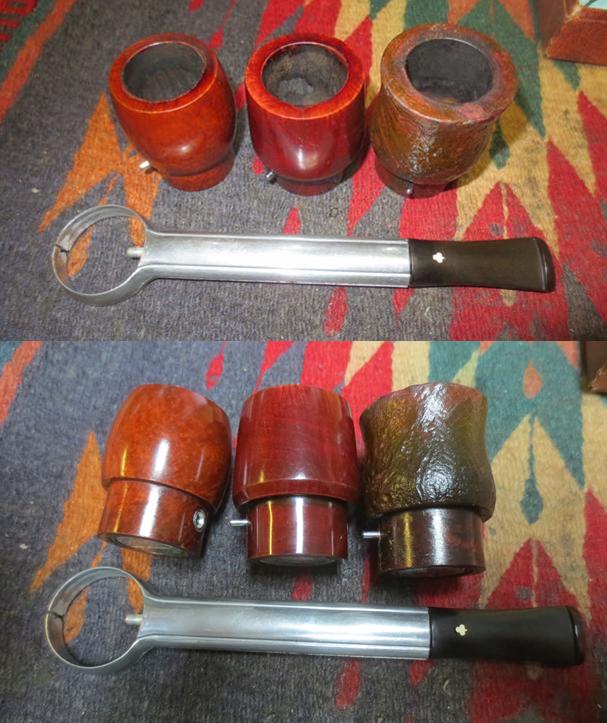
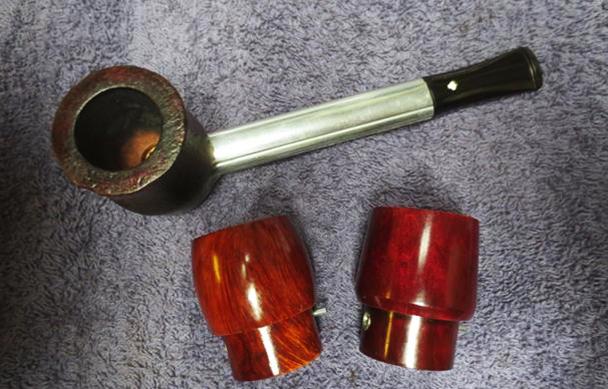
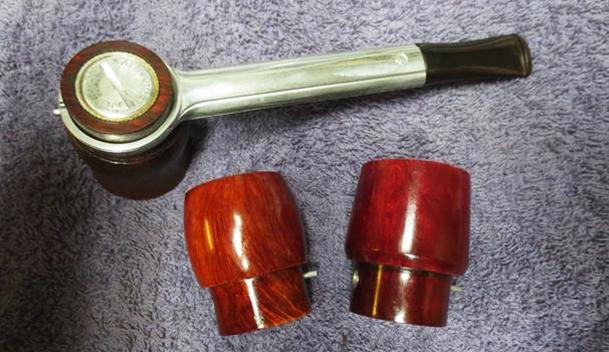
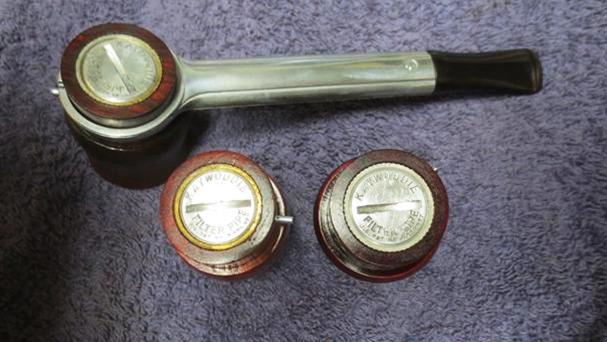
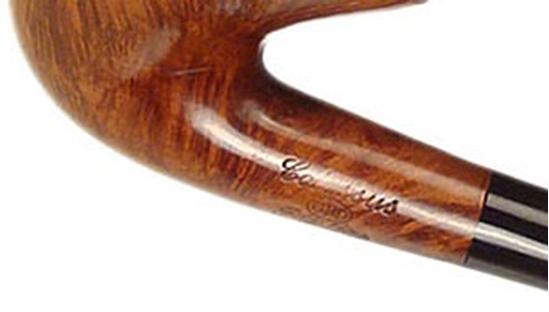
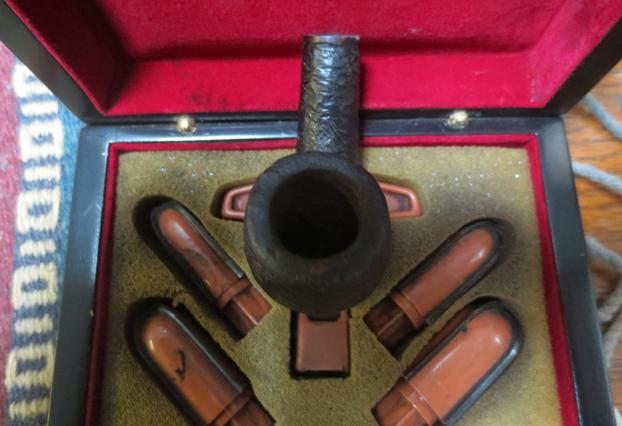
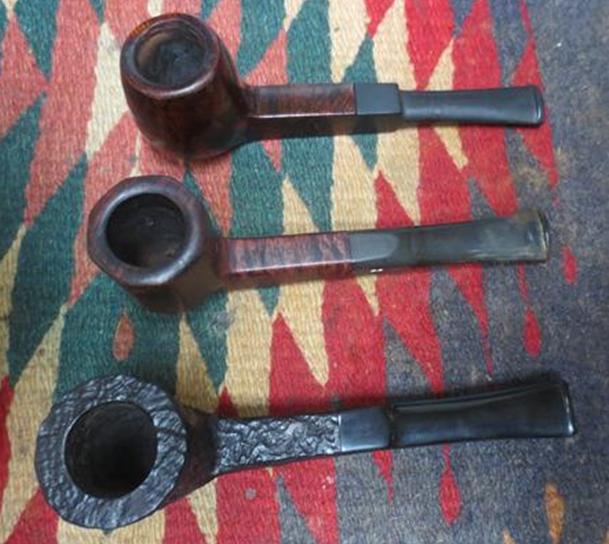
Here are some pictures of the pipes.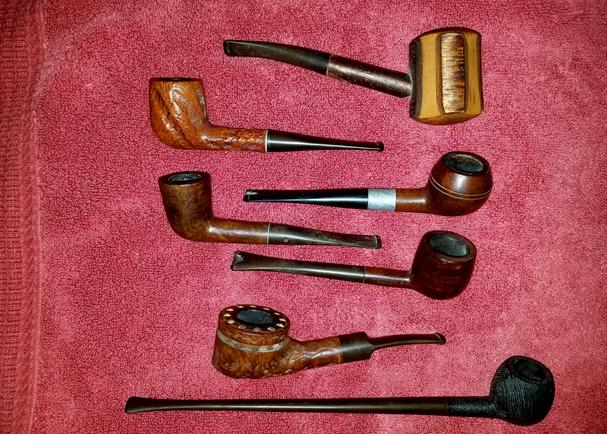 The pipe I am working on now is the fourth pipe down in the above photo and the fourth from the left in the photo below. It is a Dublin shaped pipe with a major piece missing from the button on the stem and the Kaywoodie logo missing from the stem.
 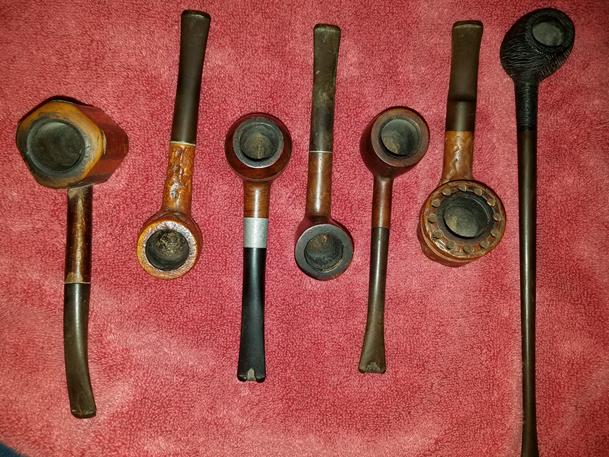 One last time I am going to include a bit of what Mark’s sent me about his uncle. I have included much of this in each of the past pipe restorations to give you a sense of the information that always in behind the desire to clean up and restore this set of old pipes. Mark wrote…
…My Uncle John, raised in an Appalachian Mountain family (think Hatfield and McCoy), was a large man with an affable personality – although this had limits and he could be quite formidable.
During WWII he left home and enlisted in the US Army where he was assigned to Patton’s 3rd Army as an ambulance driver. After Germany surrendered, he was transported back to the US on a converted ocean liner troop ship (I believe it was the Queen Mary). Upon reaching the US, his unit was immediately sequestered on a troop train for transport to the West Coast to be shipped to the Pacific for the invasion of Japan. About half way across the country (possibly somewhere in Texas), the train stopped and the troops informed that Japan had capitulated – WWII was over.
Before the Korean War began, my uncle re-enlisted in the US Air Force. He as assigned to a Photo Mapping unit as an Aircraft Mechanic. He worked his way up to Crew Chief and served in Photo Mapping until he medically retired in the mid 60’s due to heart problems.
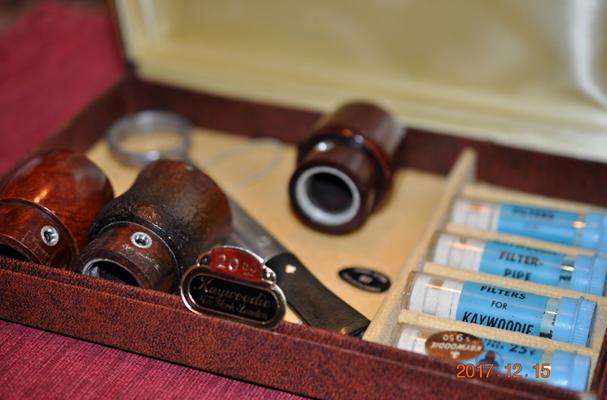
Being part of an Air Force family, I did not get to spend much time with my uncle while growing up. However, I was able to stay a couple of summers with him at his West Palm Beach home while in my teens. On a desk in his Florida Room sat collection of old used pipes in a walnut pipe rack / humidor combo (very similar the Decatur Industries 6 pipe Rack and humidor combination shown in the rebornpipes store). There were a couple of packages of old dried up commercial brand tobacco in the humidor – one was cherry, I think. I never saw my uncle smoke and never discussed the pipes with him, but I was intrigued by the pipe collection. They were old, dirty, and well used – some with chewed through stems. Obviously, the pipes had been smoked by a devoted pipe enthusiast. As a young boy, I loved the smell of pipe tobacco, which you could occasionally smell in public way back then. I started smoking an occasional pipe in college. When my uncle passed away a few years later, I asked for his pipe collection and have stored it away since then. The pipes are just as I received them some thirty years ago.
While I will never know for sure, I believe my uncle purchased the pipes in various PX’s and smoked them while an Air Crew Member. The PX’s would have sold common commercially available pipe brands at a good price, nothing too expensive or exotic – consistent with the pipes in my uncle’s collection. As a Photo Mapping Air Crew Member / Chief my uncle traveled the world extensively, and was stationed at many bases – including “permanent” stations in West Palm Beach, Warner Robins, and Goose Bay Labrador, to name a few. Smoking a pipe would have been a relaxing way to spend a few monotonous hours on the flight line or in the air. After his heart problems, he must have given up pipe smoking and the pipes sat unused thereafter. If the bowls look like they were recently scraped, it would have been over fifty years ago, most likely with a Case hardware store folding knife. If dirty, it is due to sitting for many years in the back room. If well used and chewed it is due to many hours of smoking enjoyment.
I’m looking forward to seeing my Uncle John’s pipes in restored condition. I know they are not “collectors” items, but they bring back priceless memories of my uncle and the times we spent together sharing “war stories”…
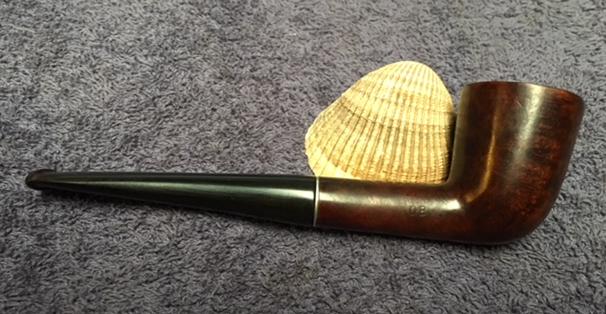
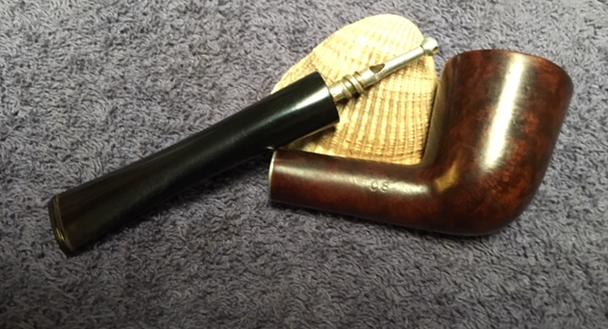
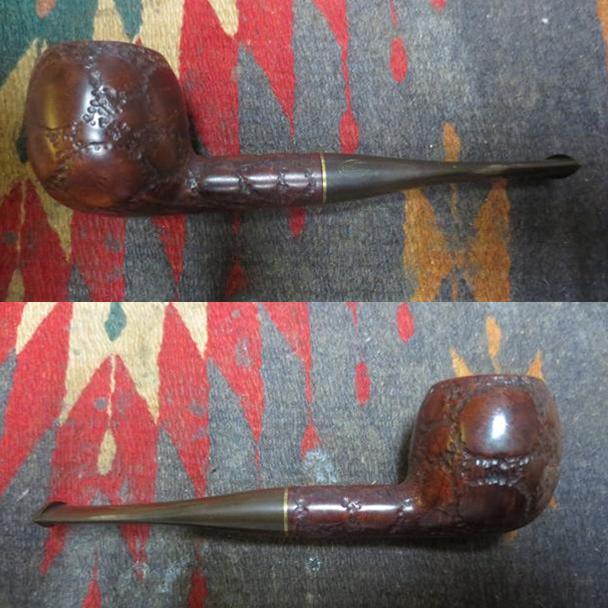
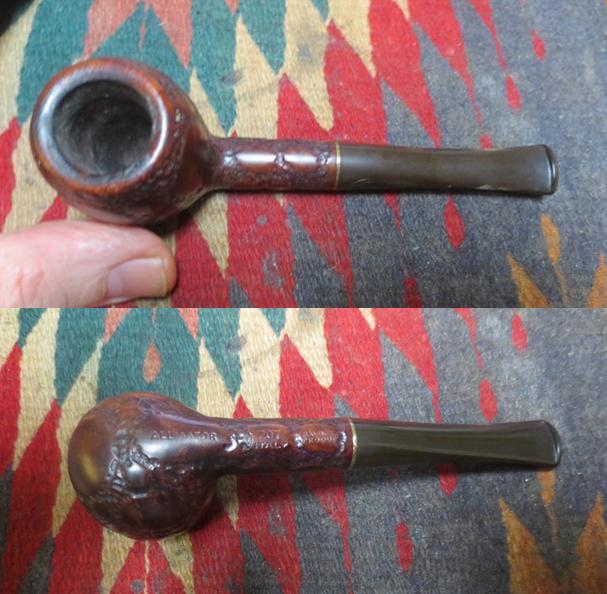
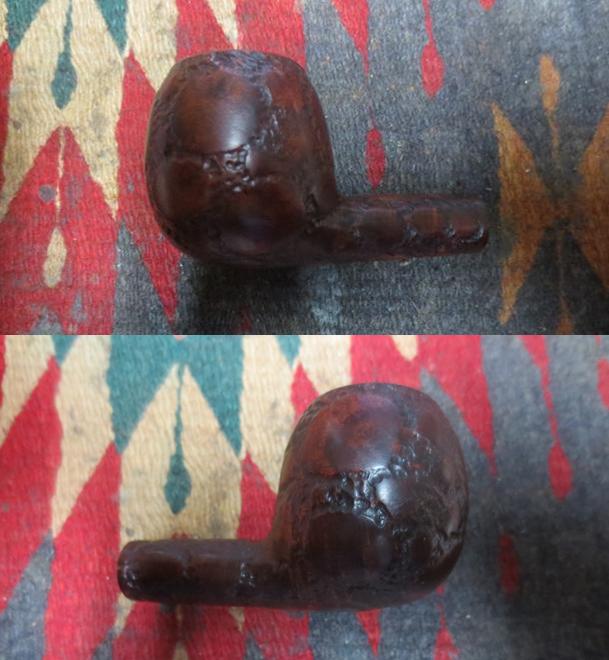
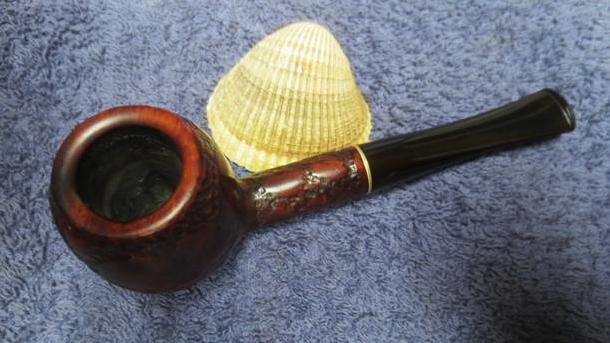
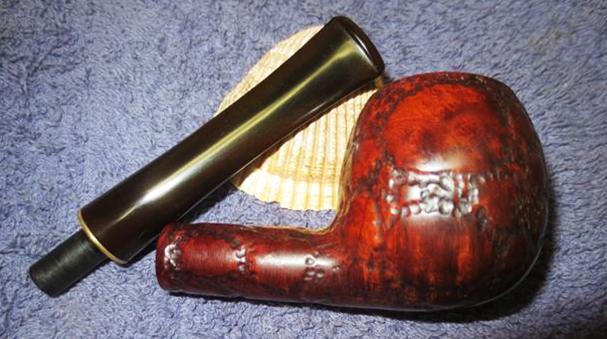
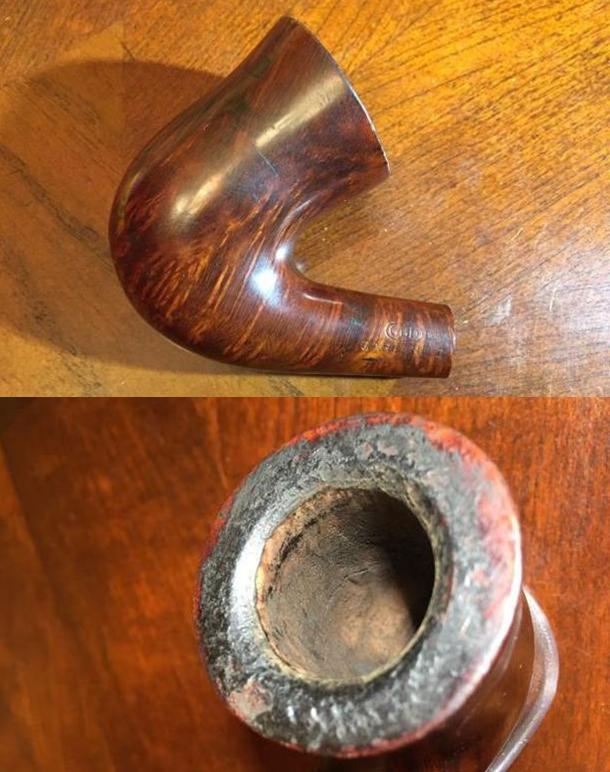
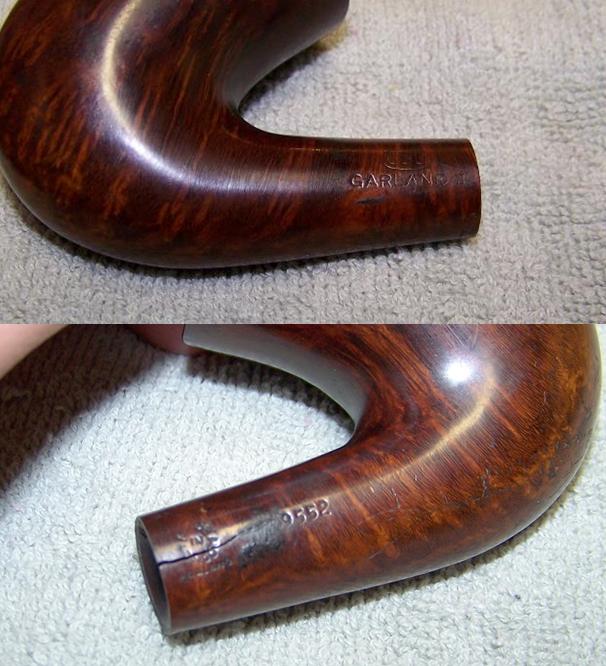
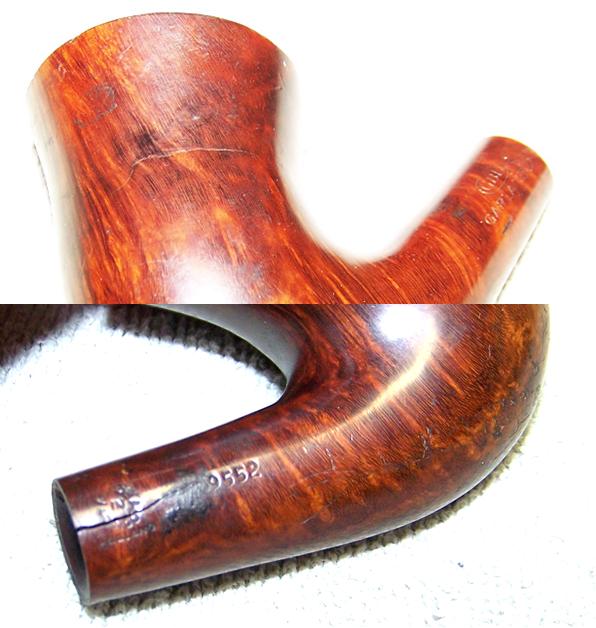
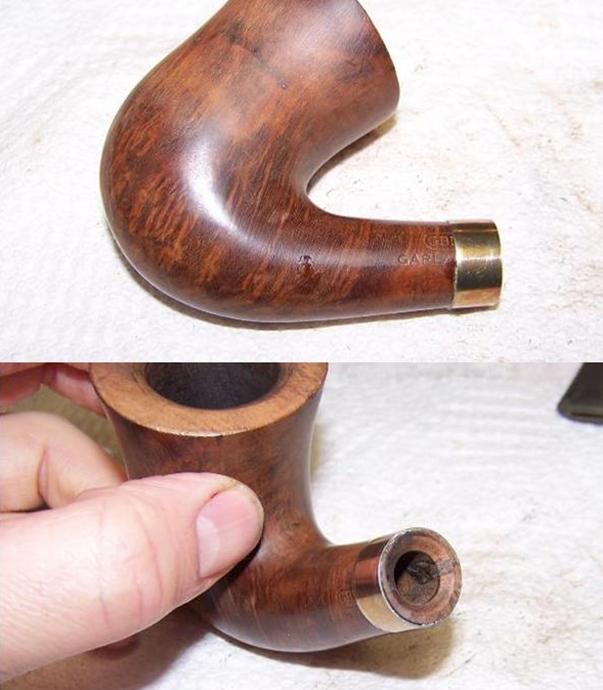
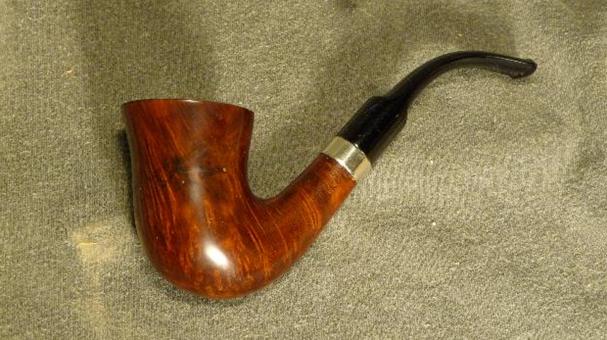
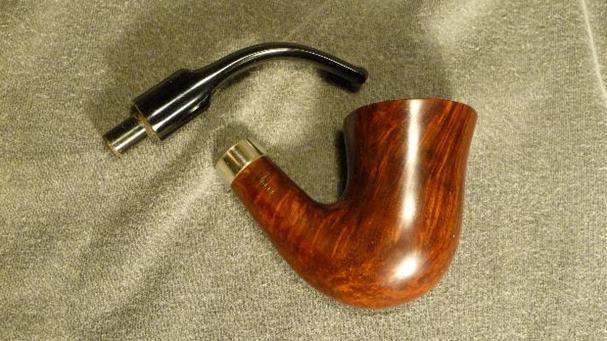
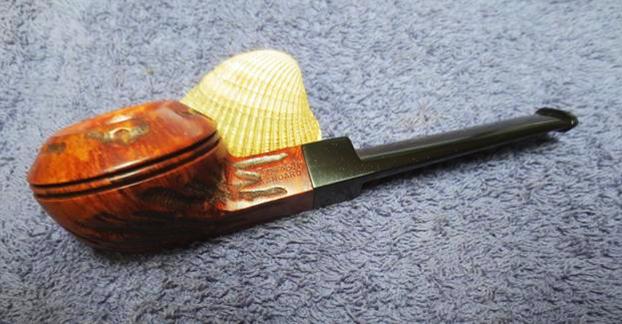
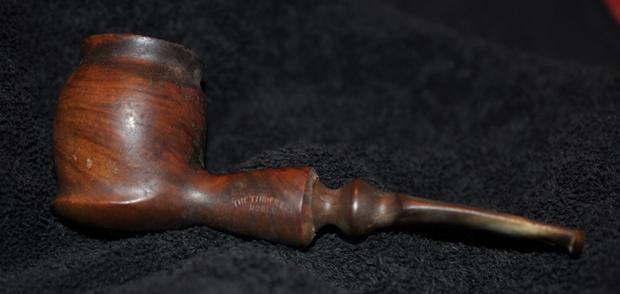
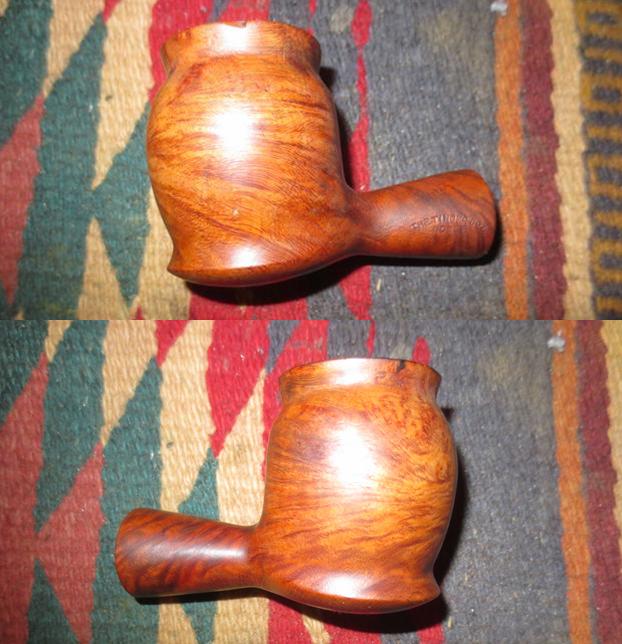
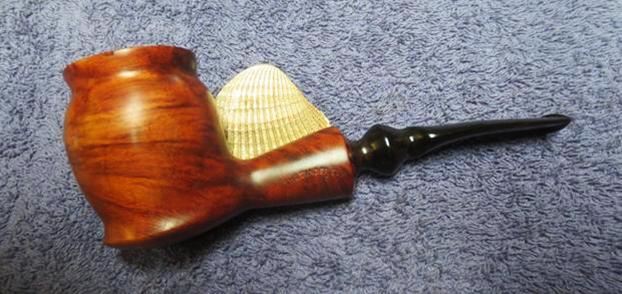
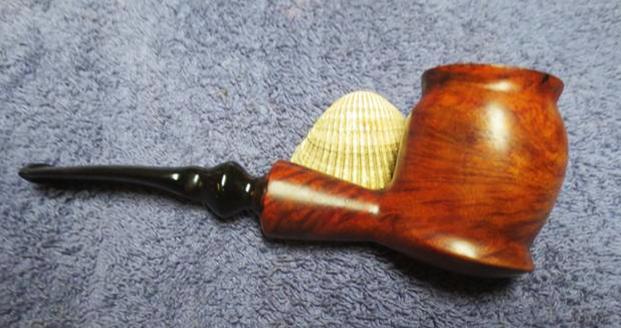
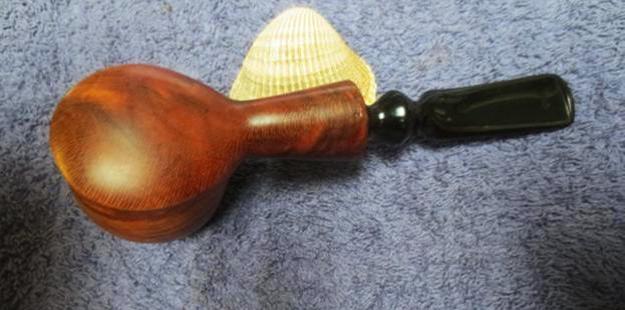
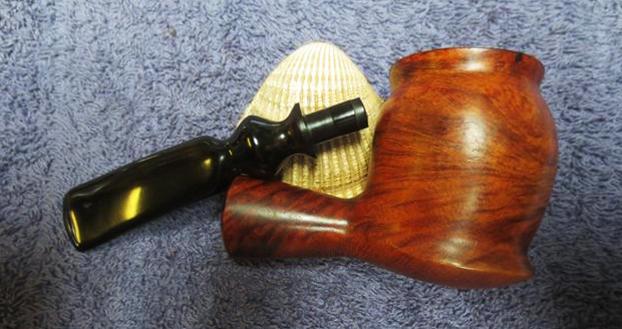
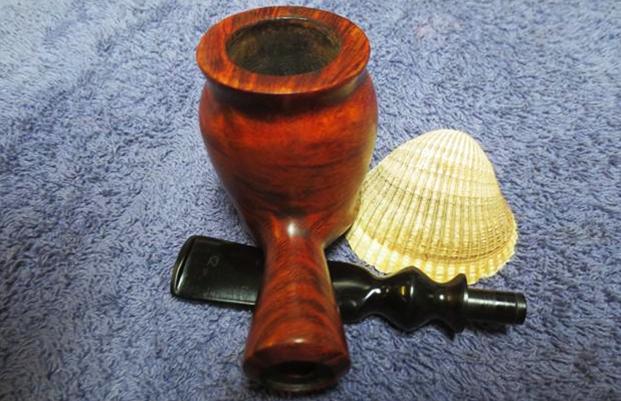
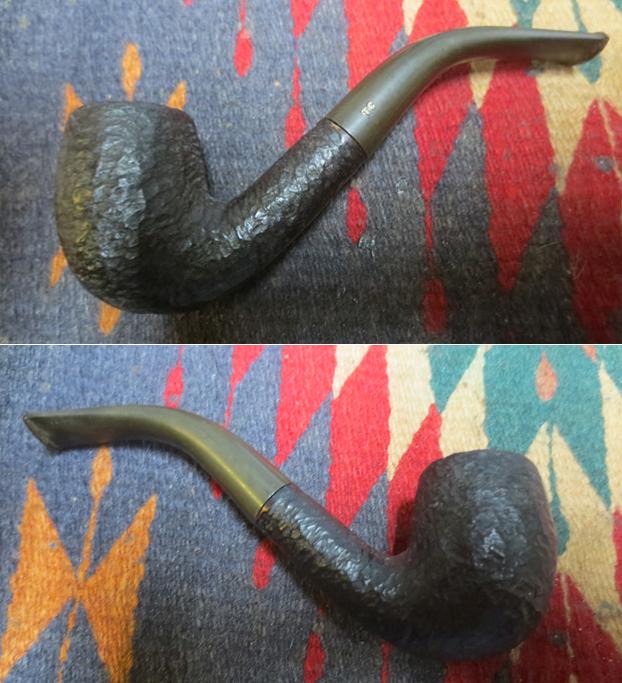
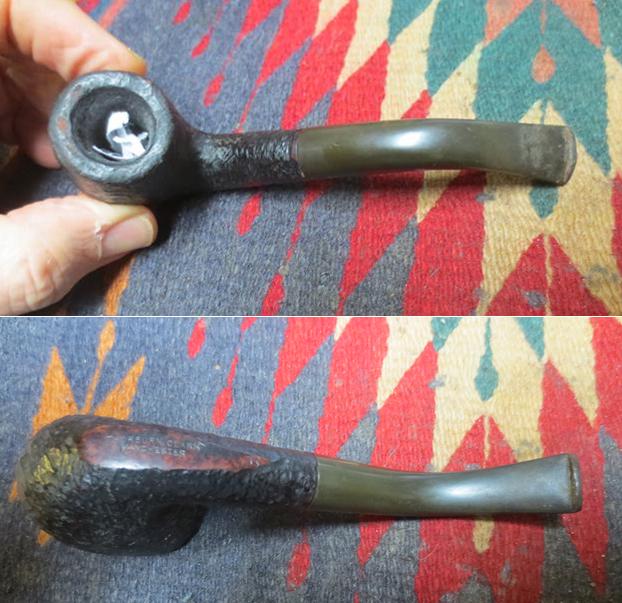
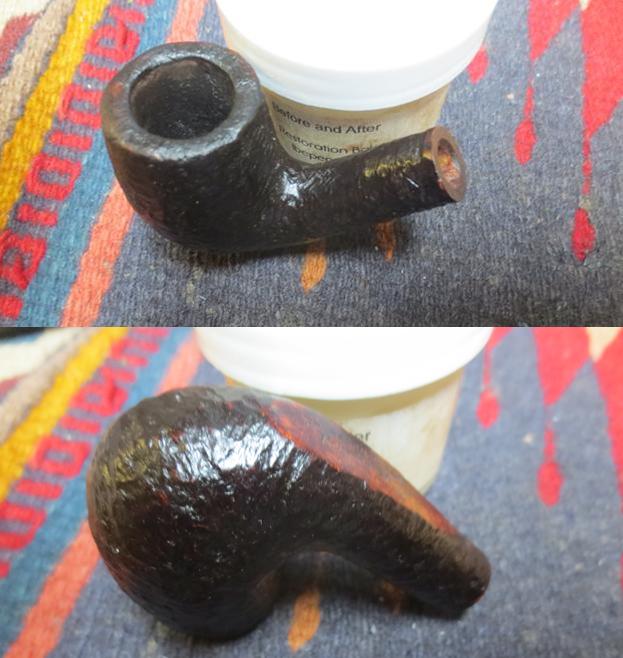
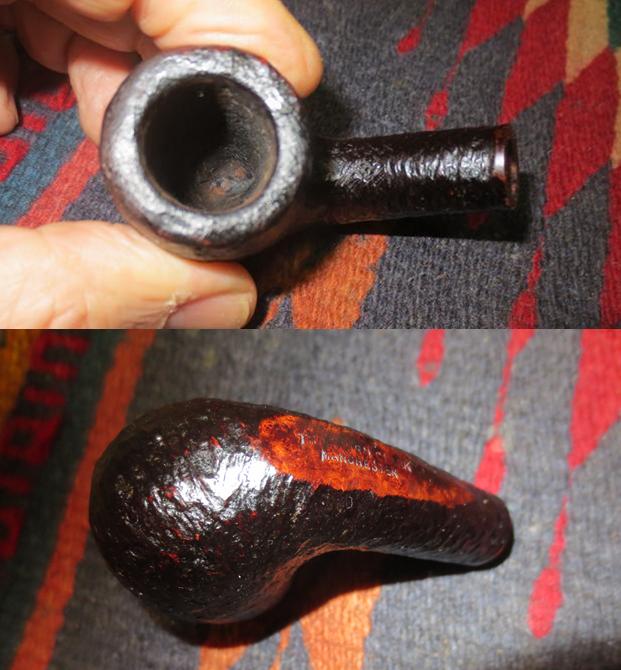
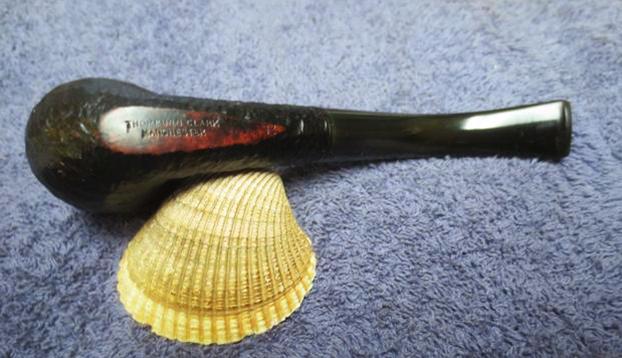
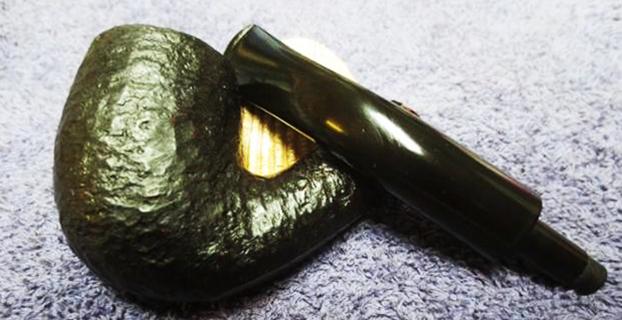
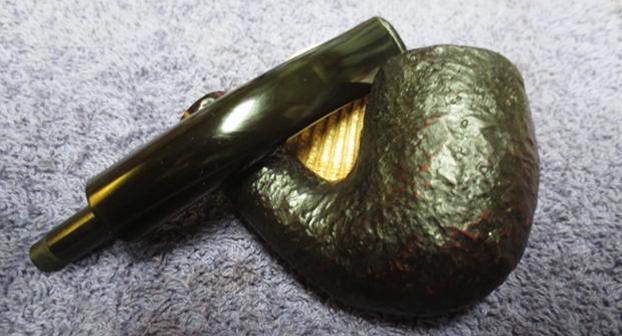
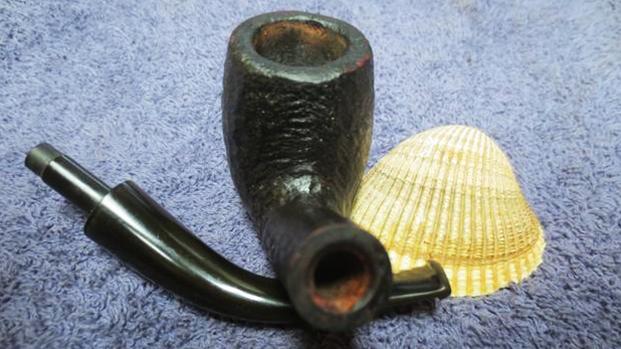
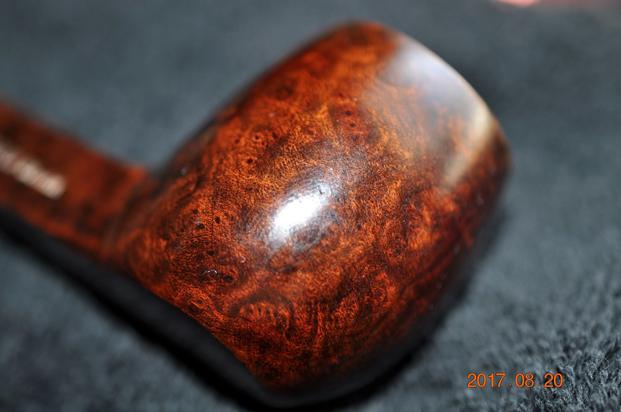
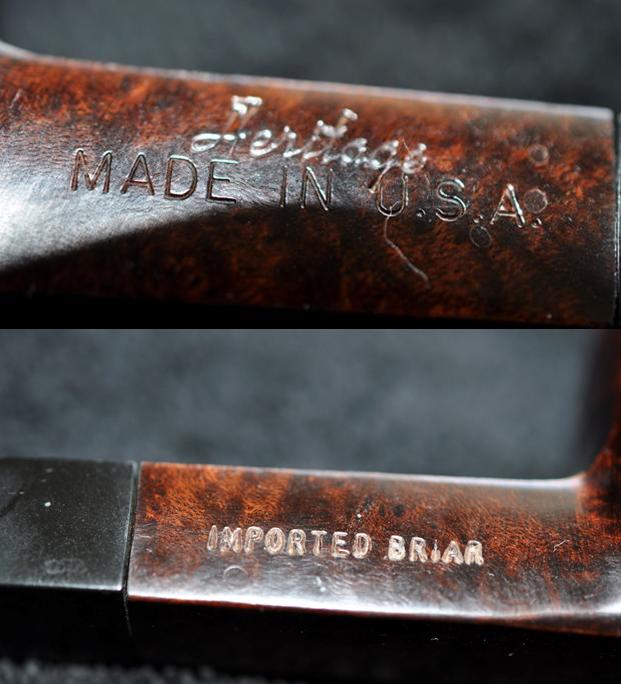
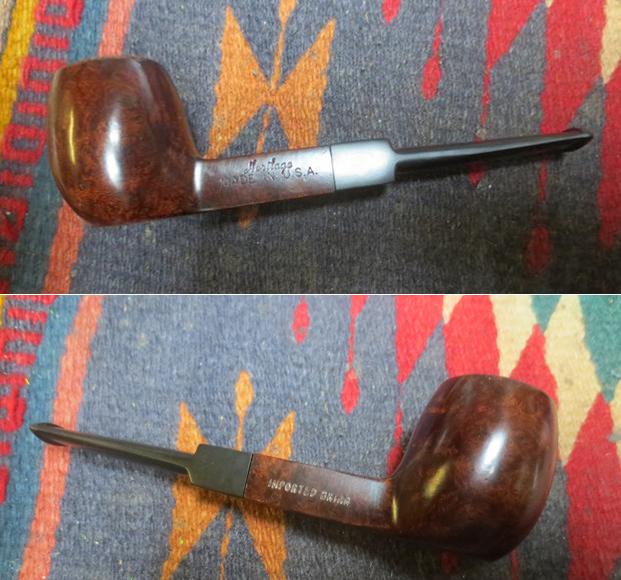
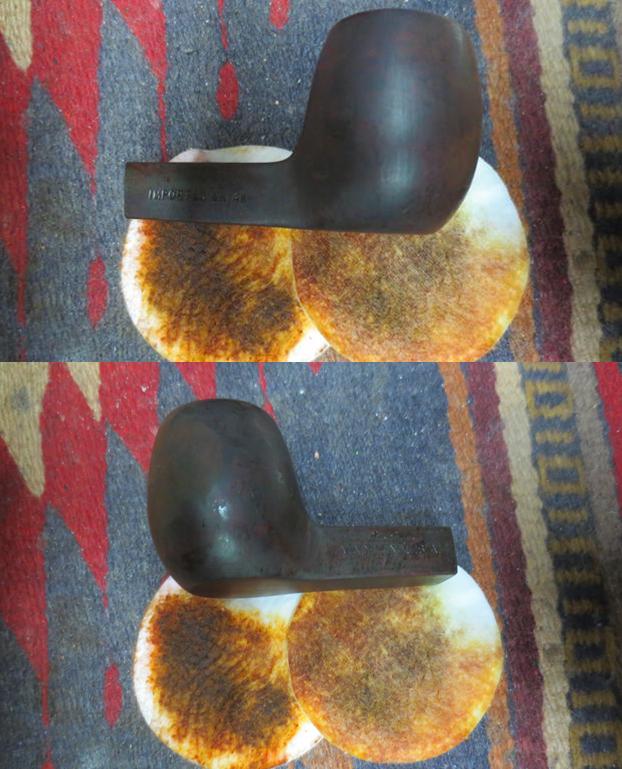
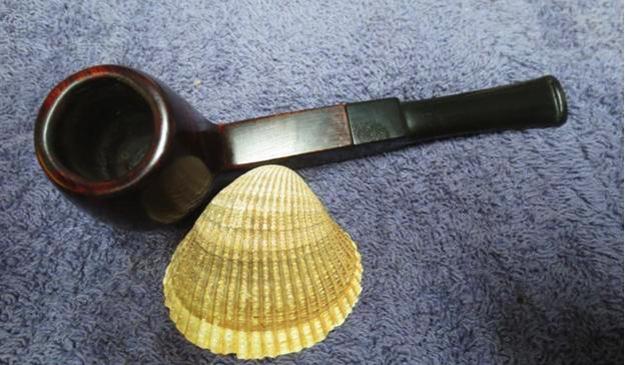
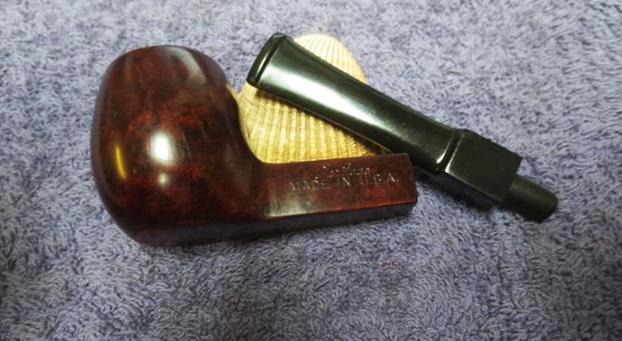
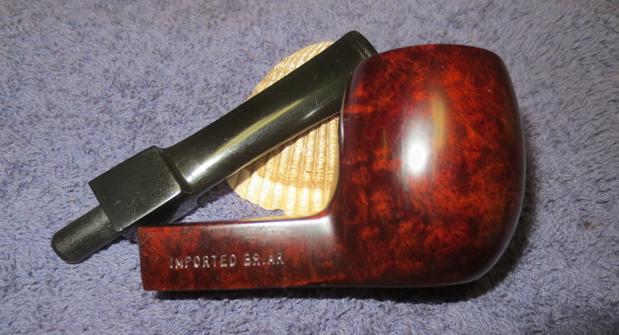
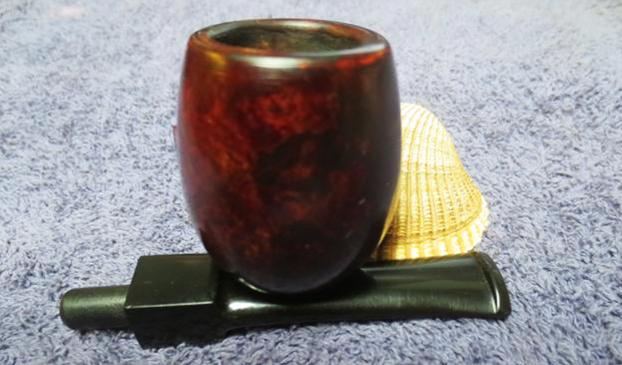
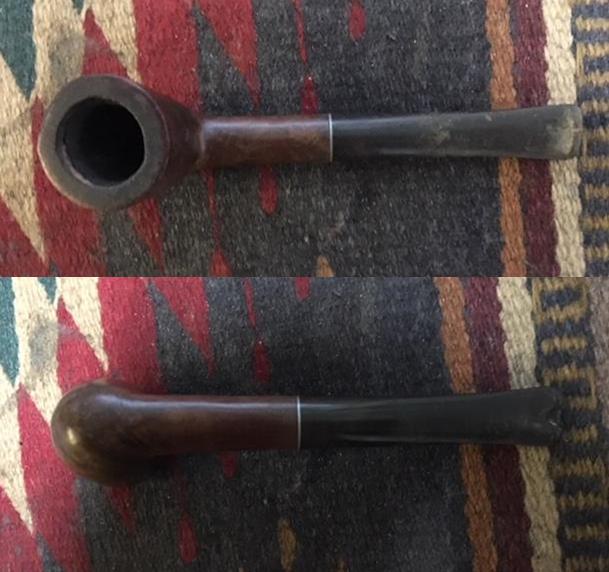
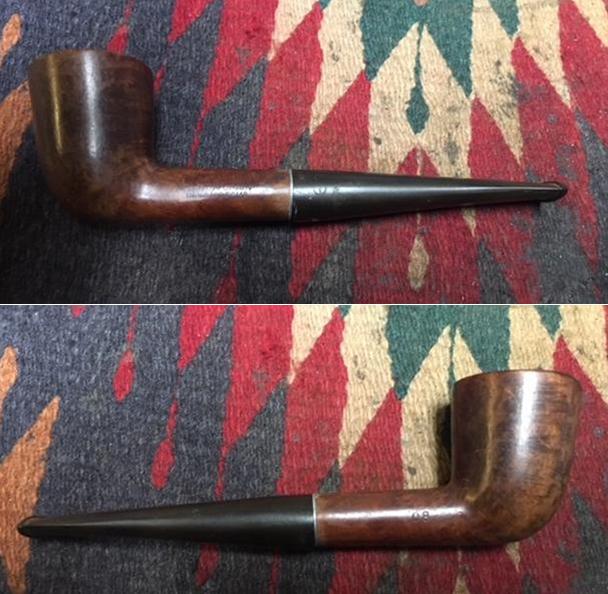
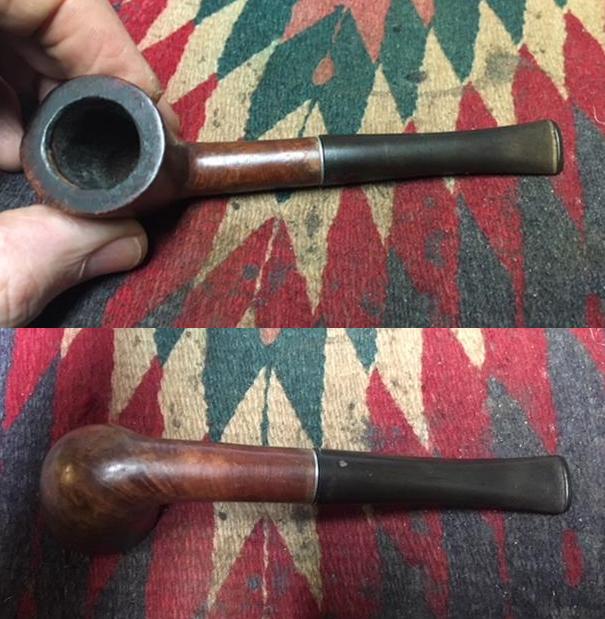
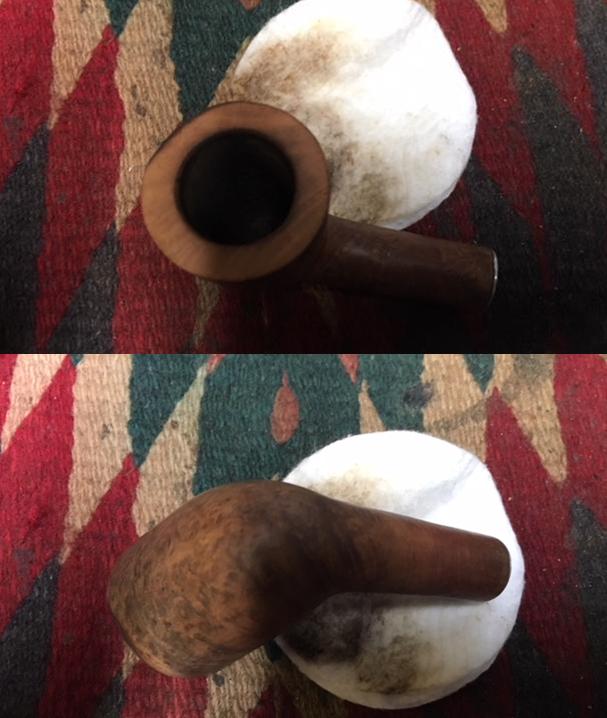
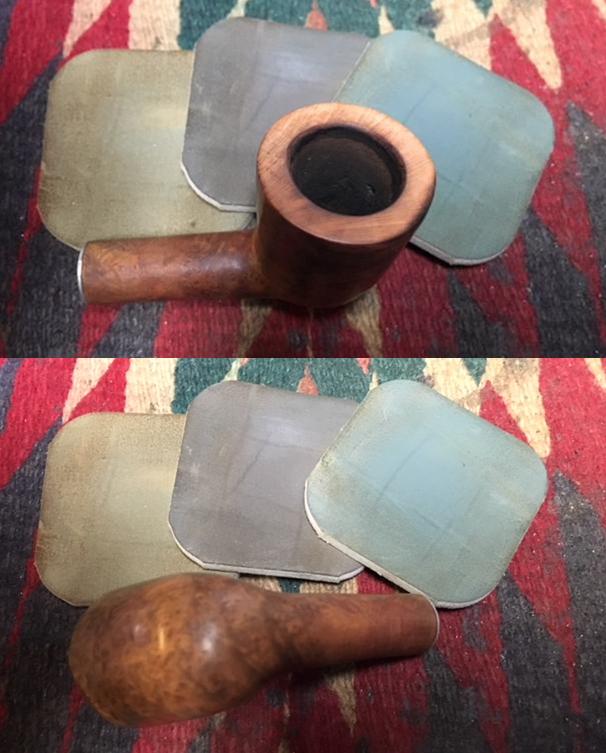
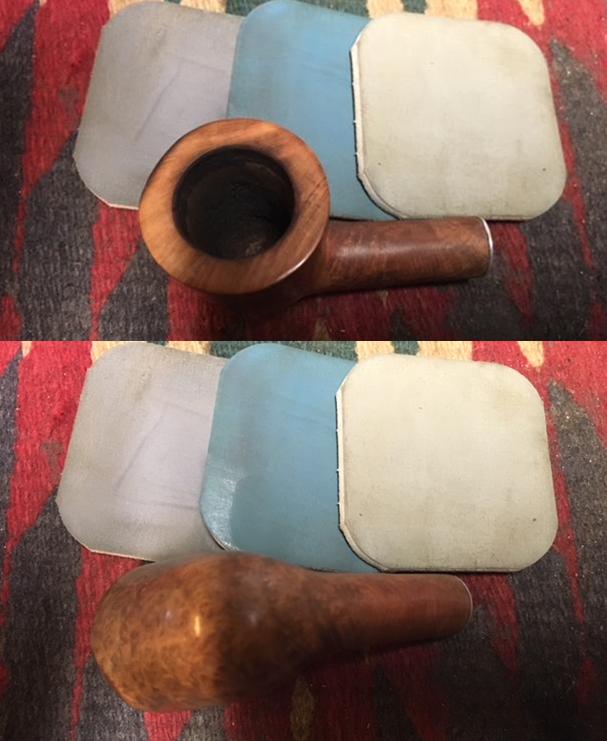
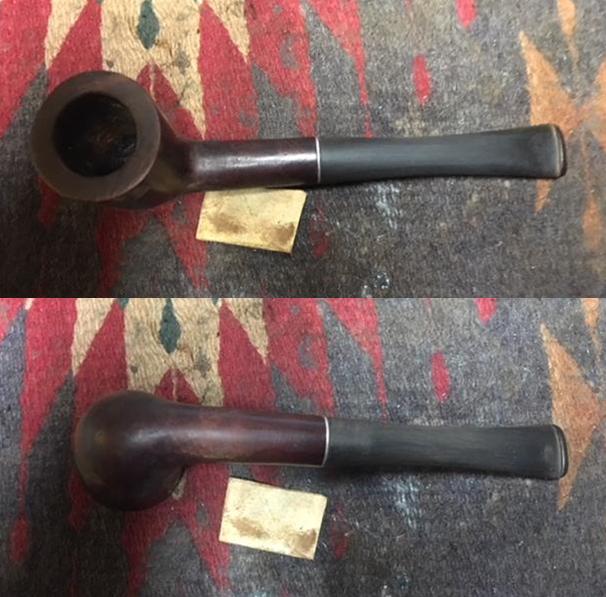
With the old pipeman almost standing over my work table, I turned my attention to the last of his pipes – a Kaywoodie Custom Grain Dublin shaped pipe. The pipe was stamped on the left side of the shank with the word Kaywoodie over Custom Grain over Imported Briar. On the right side of the shank is the shape number 08. I wrote about the various shape numbers of Kaywoodie and Yello-Bole pipe on the blog. I include that link now if you would like to have a look. https://rebornpipes.wordpress.com/wp-admin/post.php?post=39480&action=edit. I am also including the portion of the chart on the blog that shows the shape number of this old pipe and the years it was produced. I have boxed the shape number in red for quick reference. 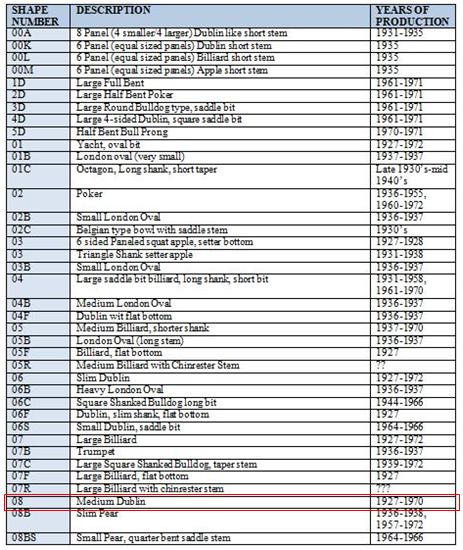 The exterior of the pipe was dirty and grimy with a few small dents in the sides of the bowl. The rim top was dirty and had some tar and lava overflowing the inside of the bowl. The right front of the bowl had burn damage where it looked like Mark’s uncle had repeatedly lit his pipe. The bowl itself did not have a thick cake but there was a still a thin cake in the bowl. The pipe looked like it had been reamed not too long before the last bowls were smoked. Overall the finish was in the worst condition of all of the pipes in this lot. It was dirty and dusty. The stem was oxidized and there was a large chunk of the vulcanite missing on the top end of the stem where it had been chewed through or broken off. The logo was missing from the inset on the left side of the stem. I took photos of the pipe before I started restoring it.
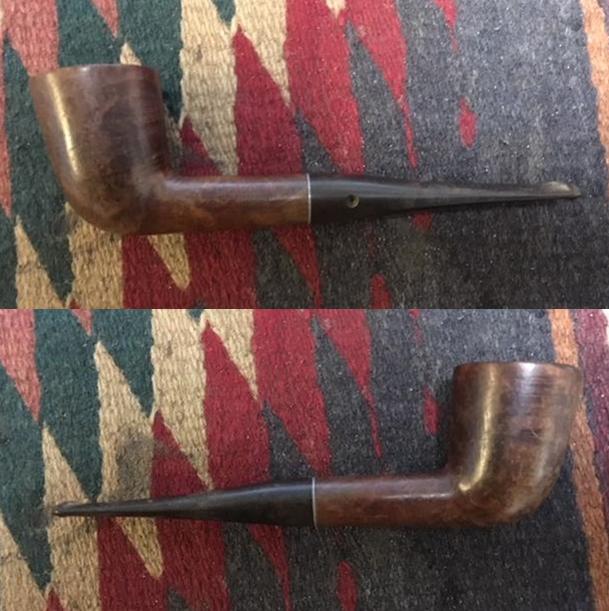
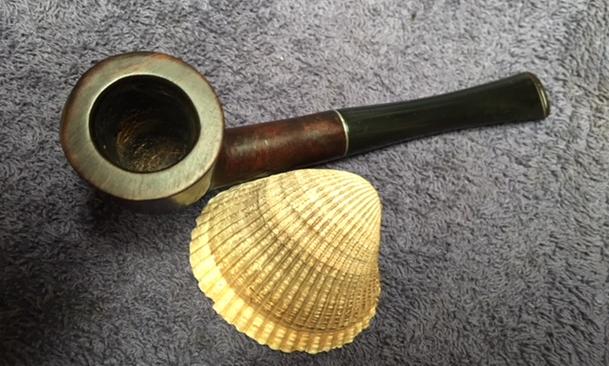
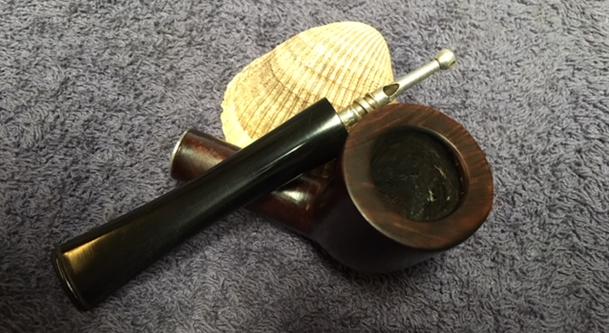
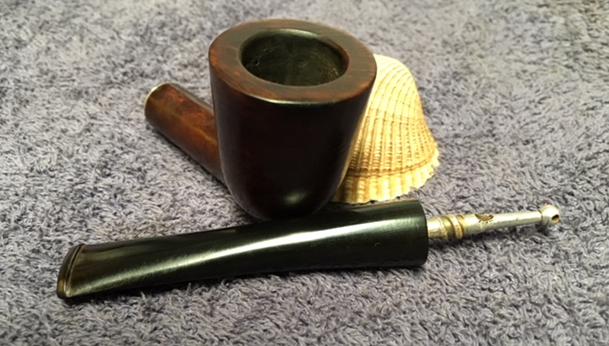
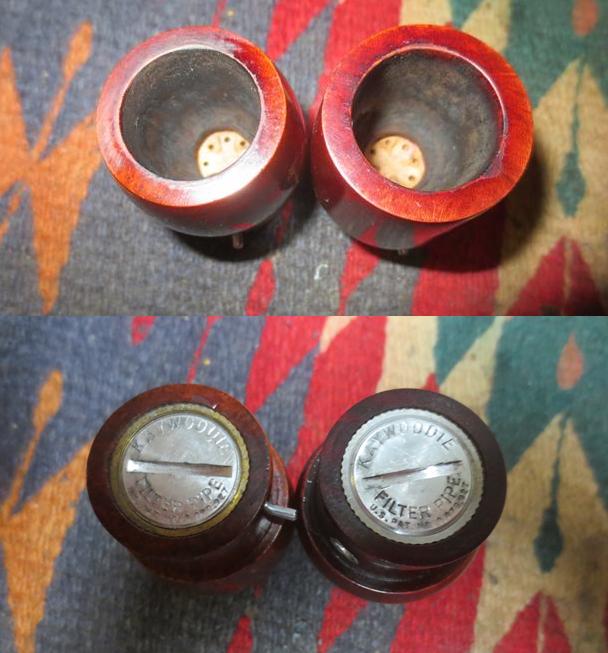
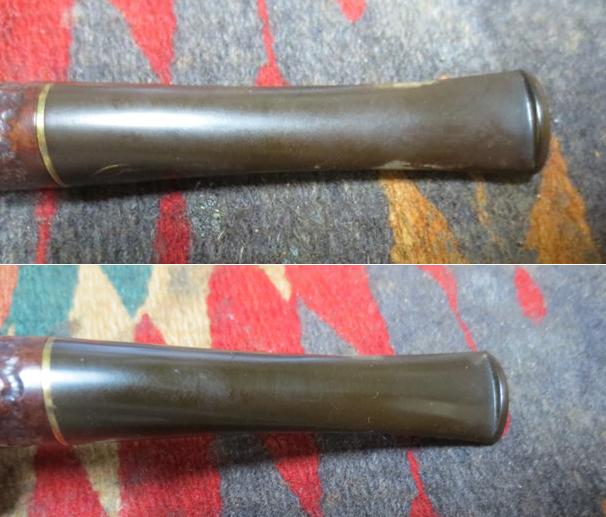
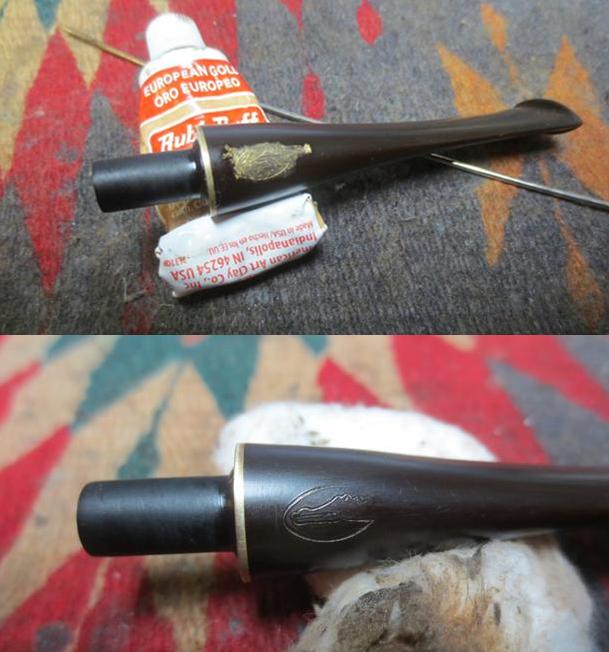
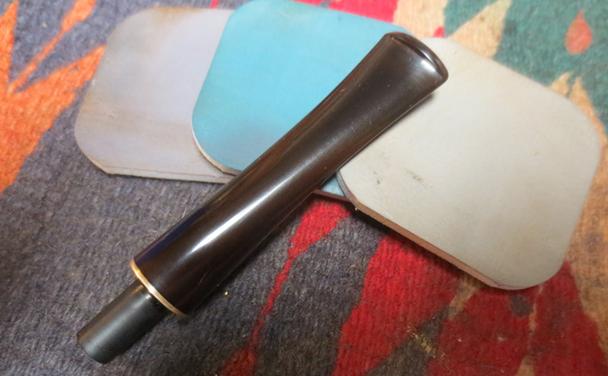
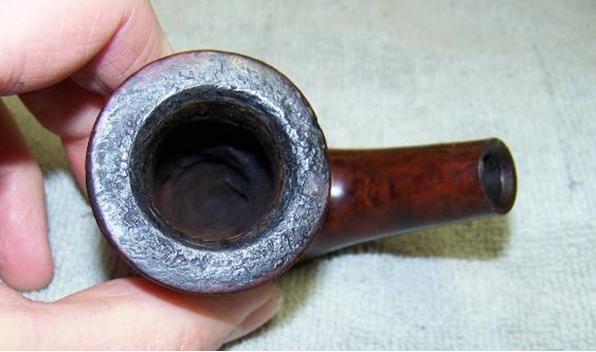
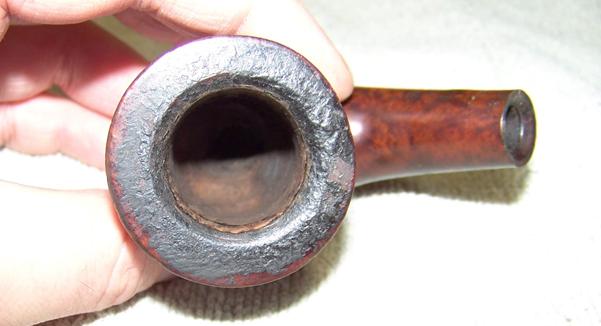
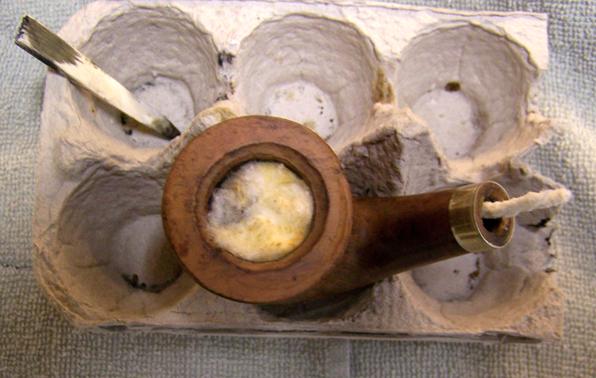
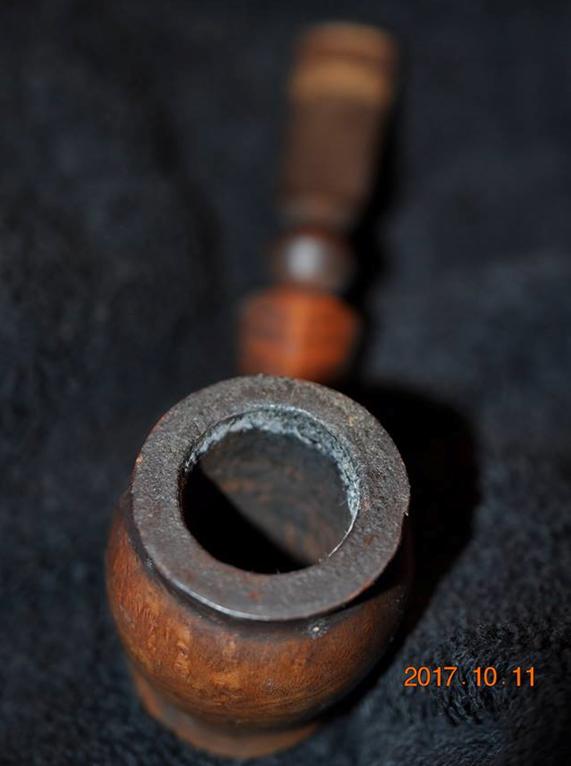
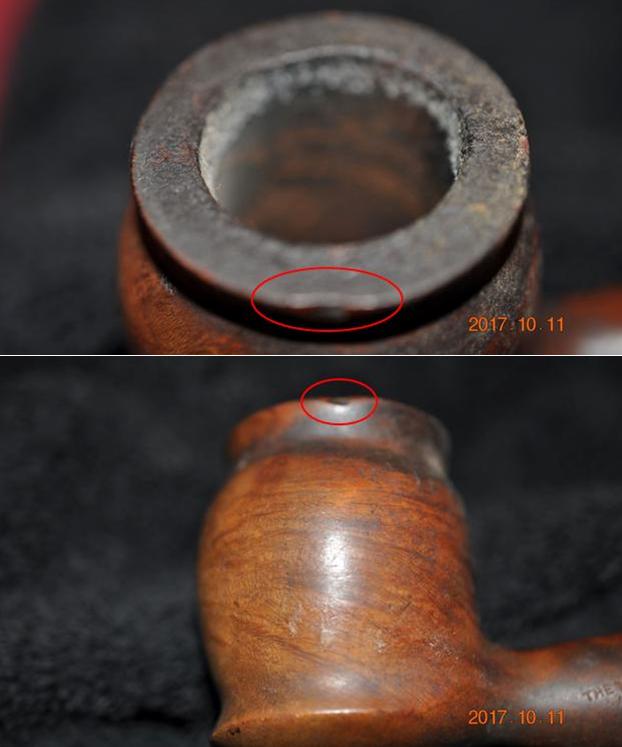
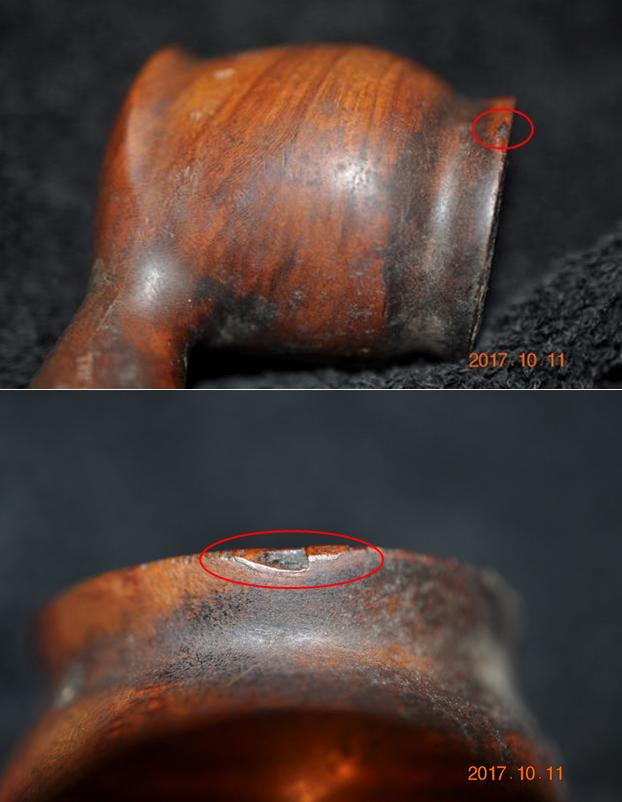
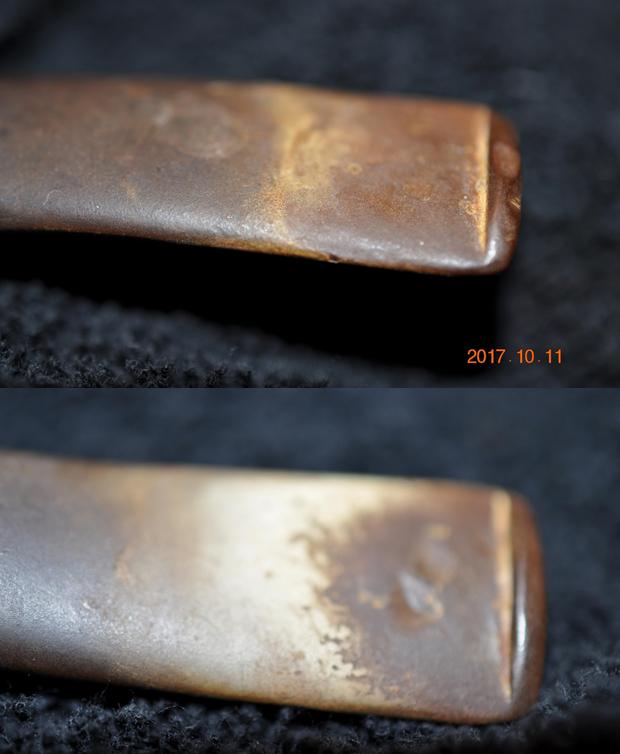
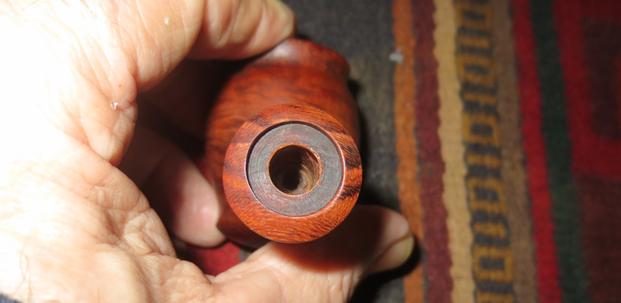
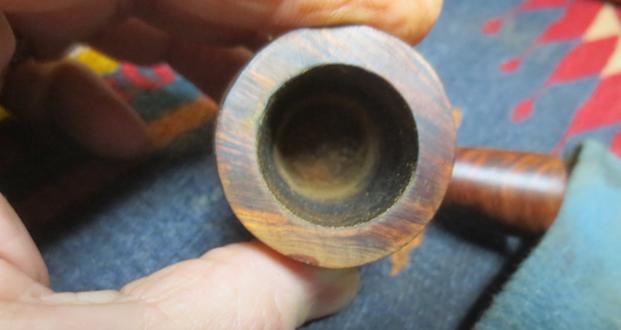
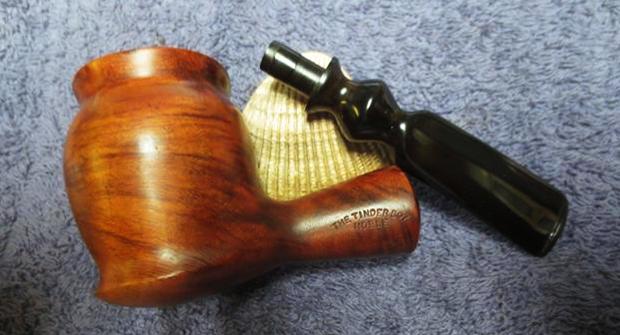
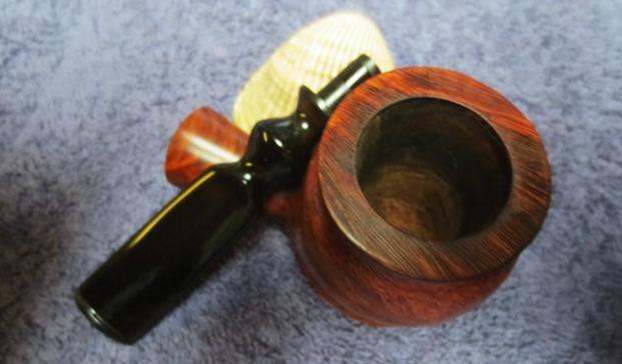
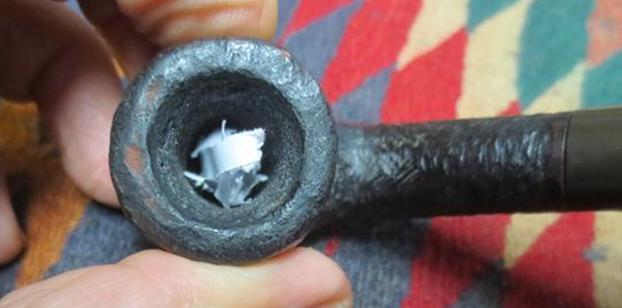
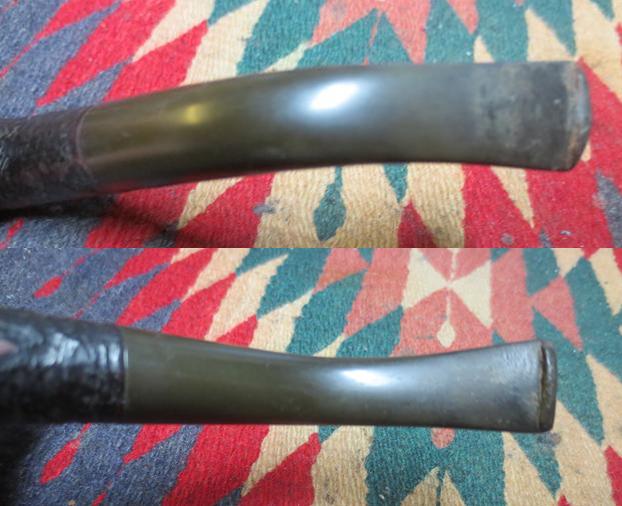
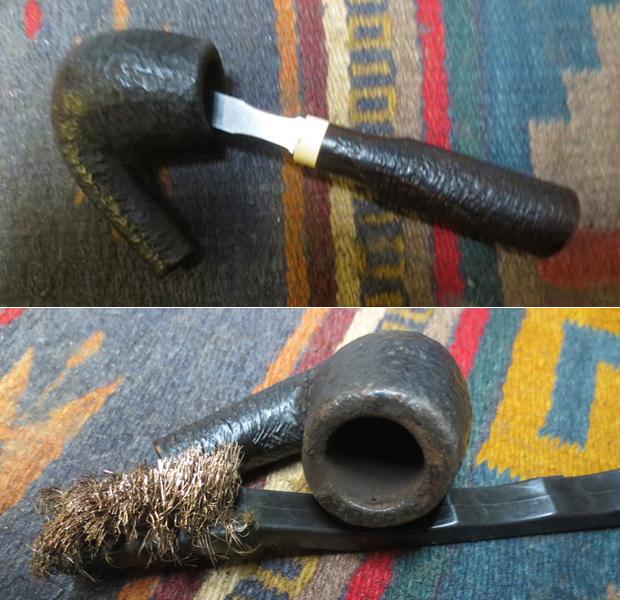
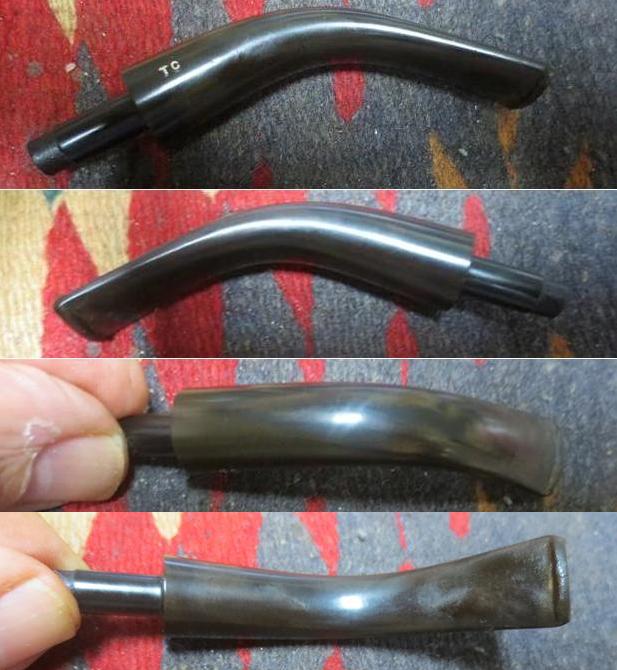
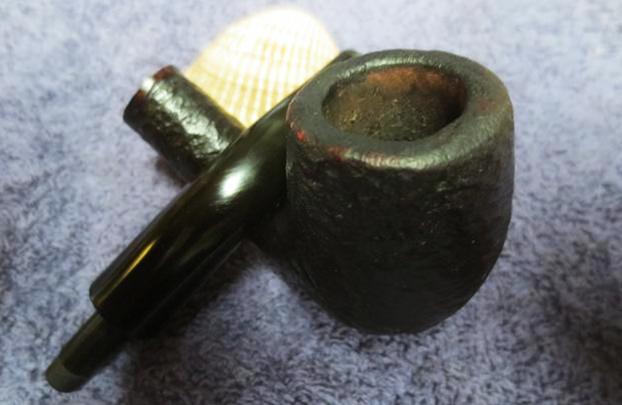
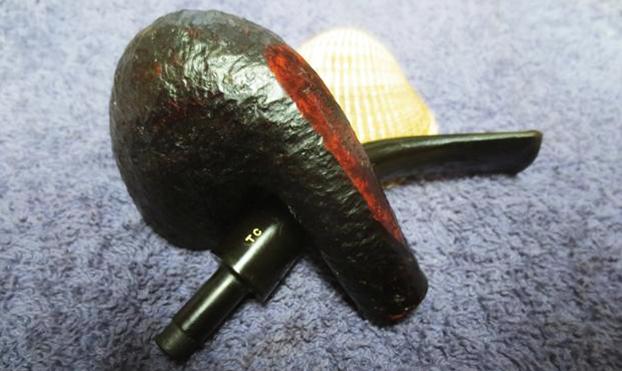
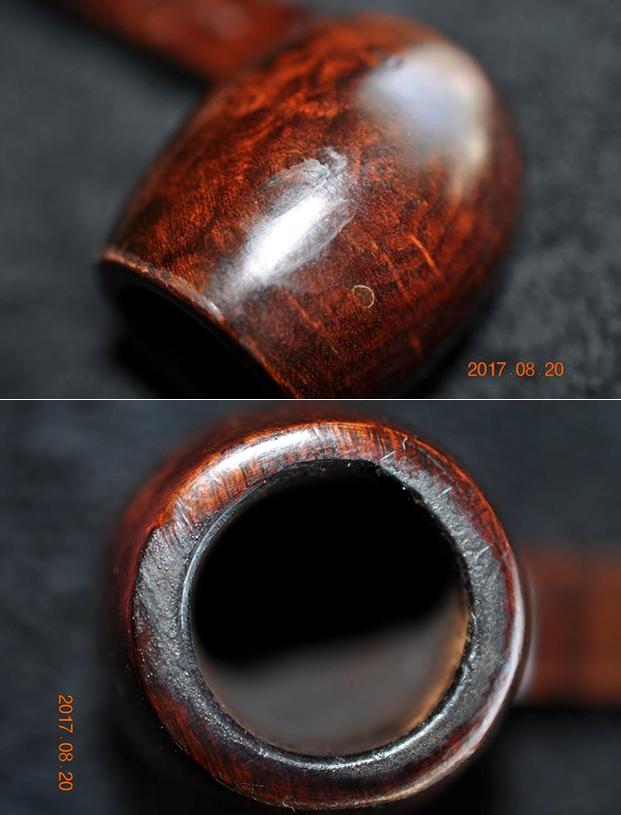
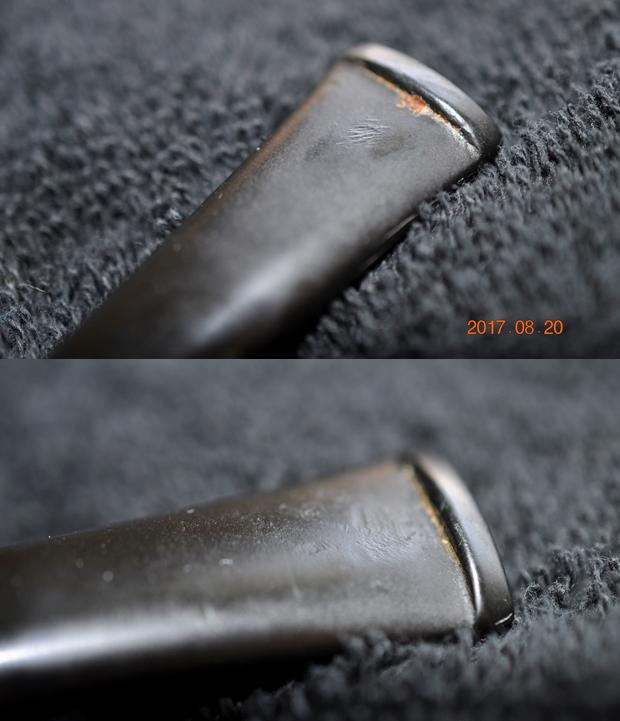
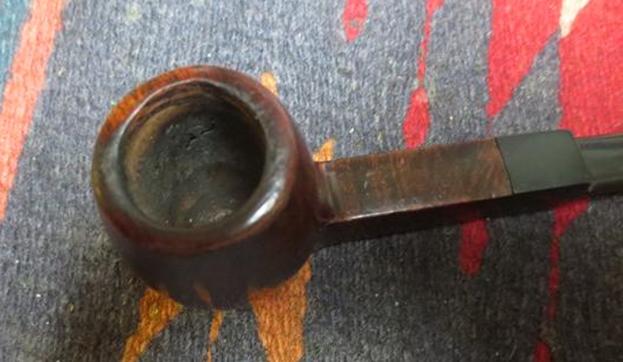
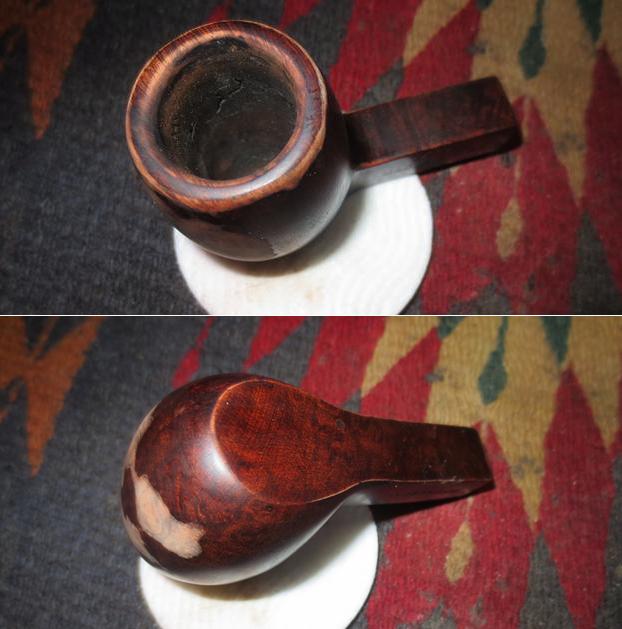
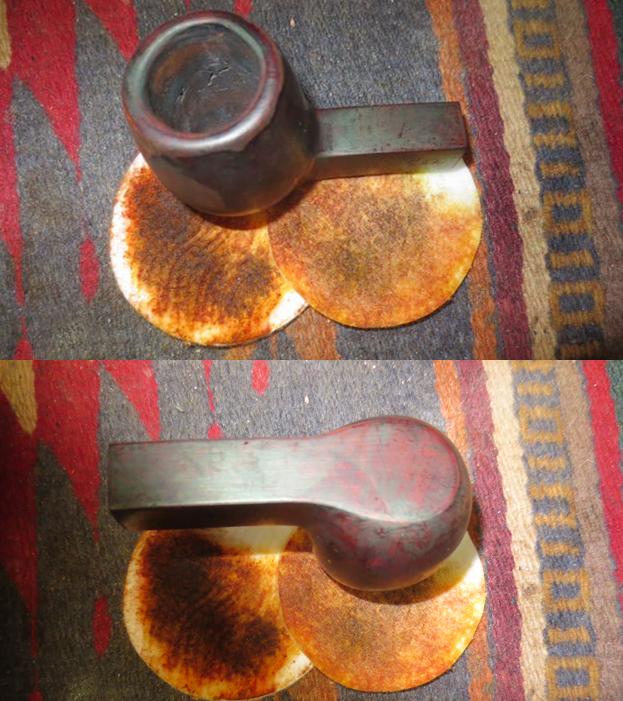
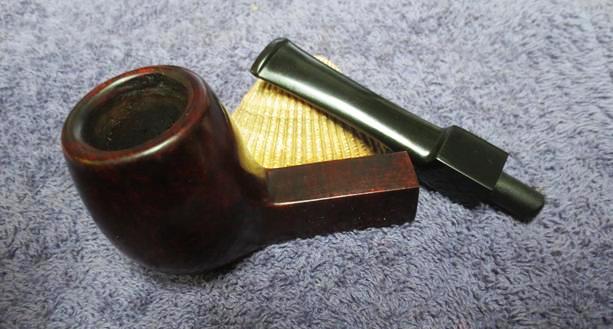
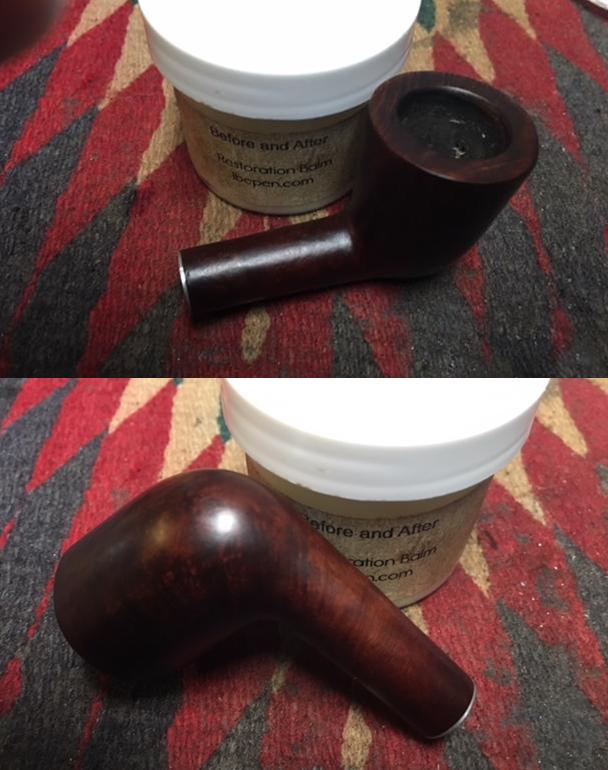
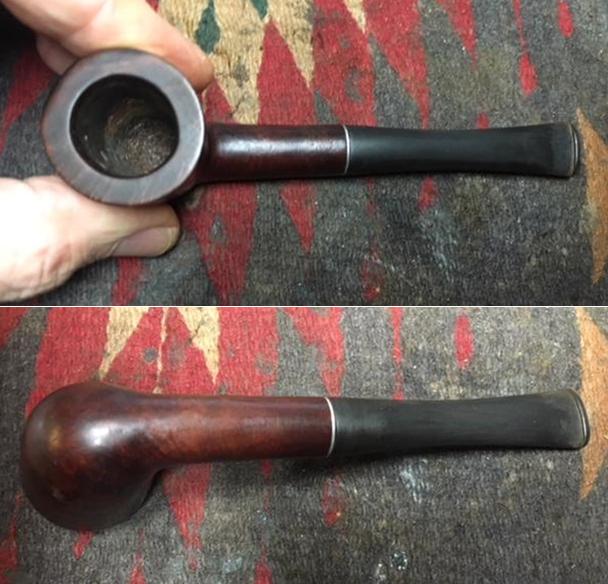
 I took a close up photo of the rim top to show the remnants of cake in the bowl and the lava buildup on the rim top. I took the photo at a bit of a different angle to show some of the damage to the rim top. The inner and outer edges were in rough shape. The front right outer edge was very worn. I have circled it in red to highlight it in the poor photo below. The top of the rim was also spotty and had tars and lava as well as nicks and scratches. I took some close up photos of the stem to show the size of the missing vulcanite chunk near the button on the underside. The oxidized metal three hole stinger on the stem needed polishing but otherwise it looked good.
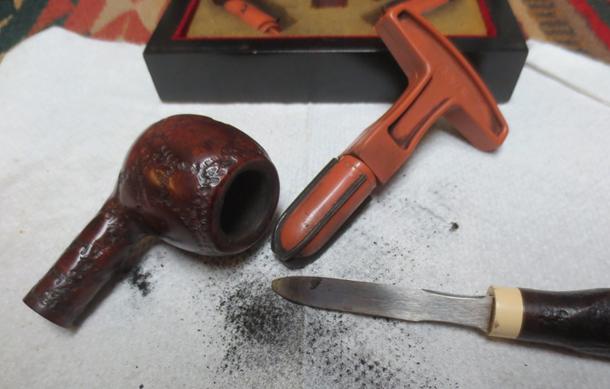
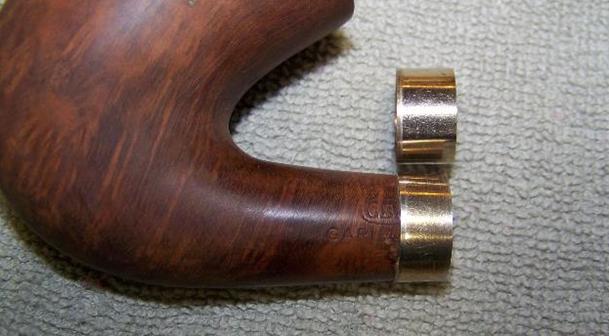
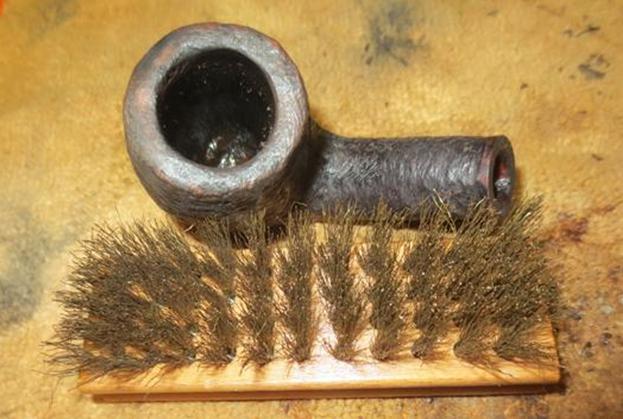
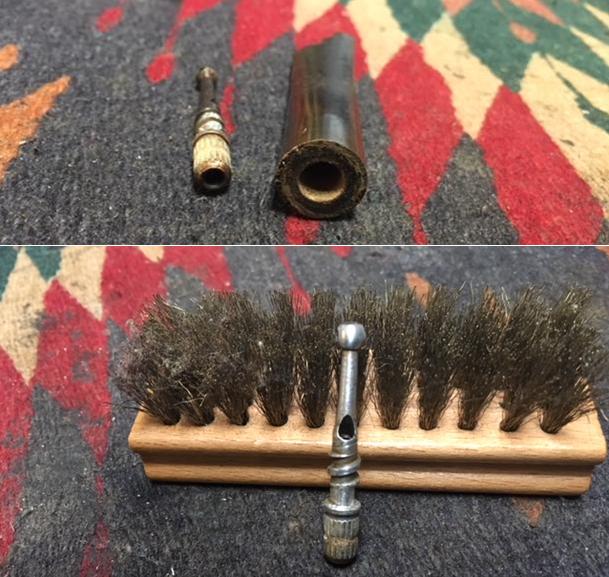
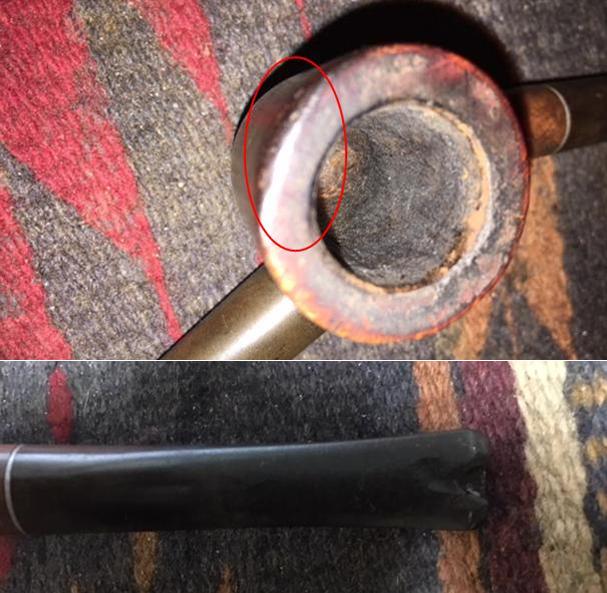 Since the stem was not only chomped on the underside but in examining it I found it was also cracked. I went through my can of stems and found one that was close to the same diameter and length. I had a decision to make – drill out the mortise to receive a push stem or transfer the stinger from the damaged stem and fitting it to the new stem. I chose the latter. I heated the tenon with a lighter while holding it with a pair of pliers. It did not take too long for the glue to heat up enough for me to turn the stem off of the stinger. I used a brass bristle brush to polish off the tars and oils that had hardened on the stinger.
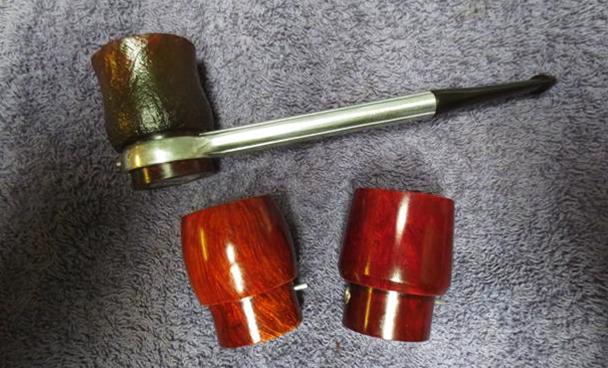
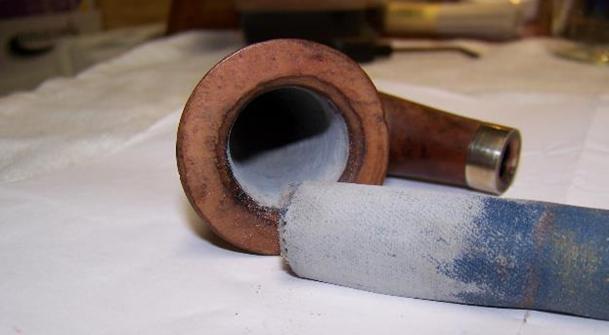
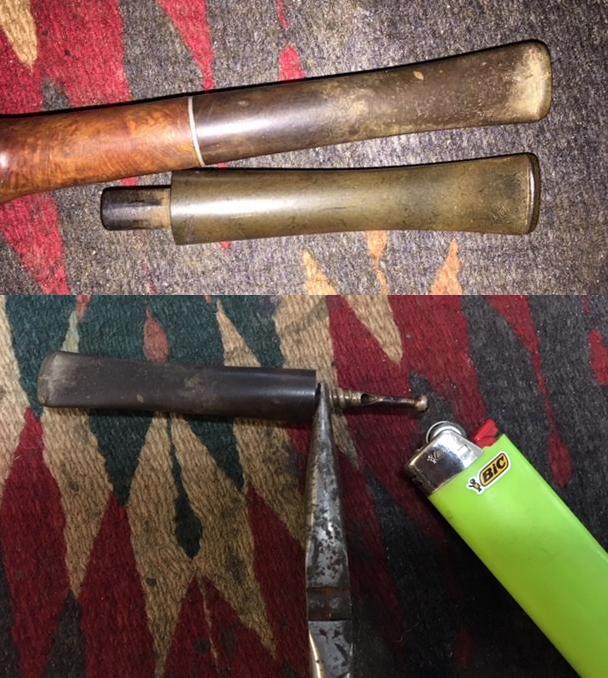
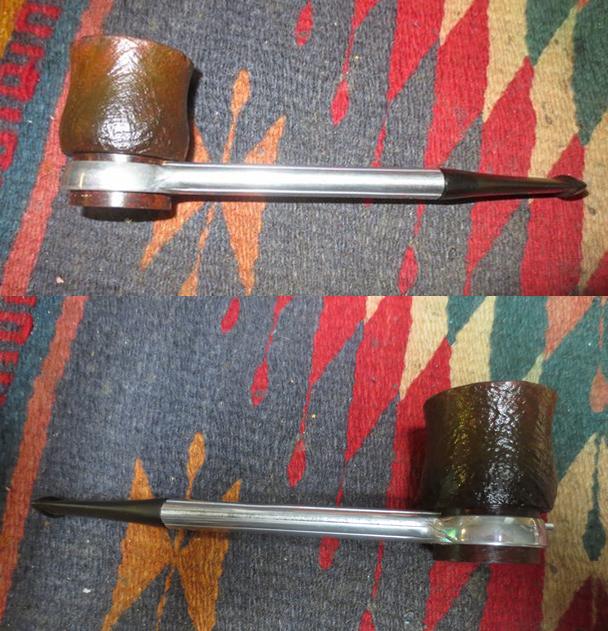
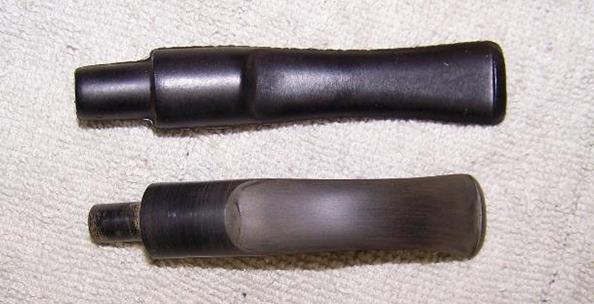
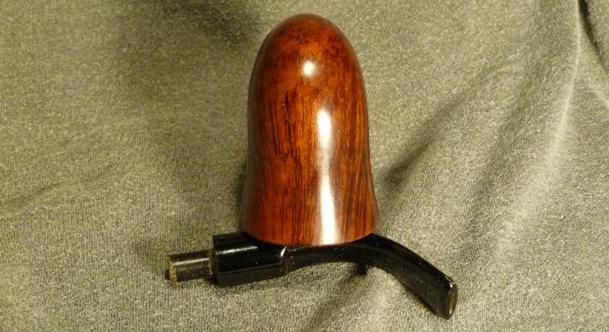
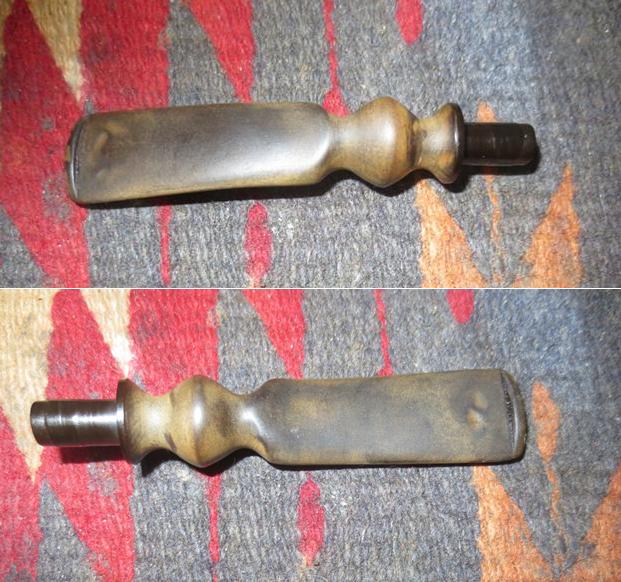
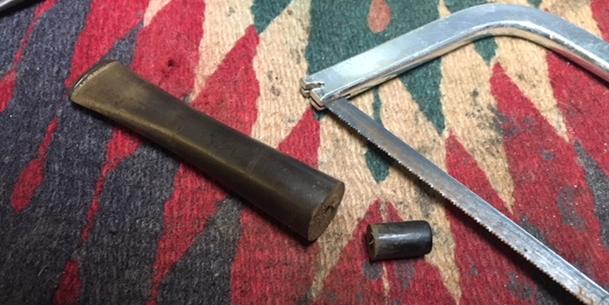
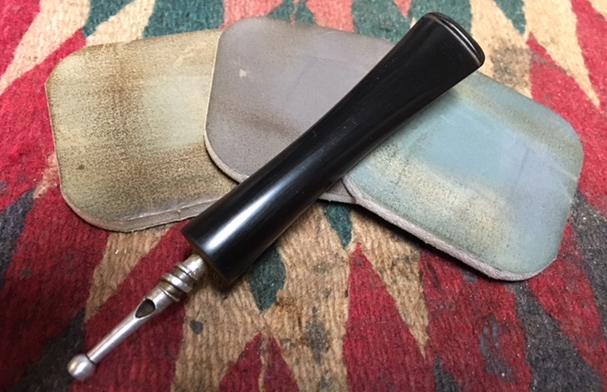
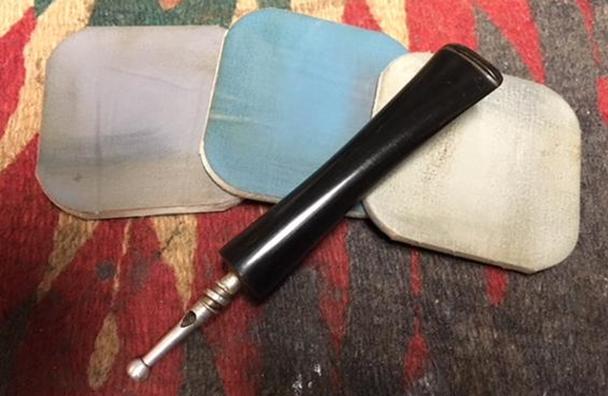
 With the stinger removed it was time to work on the new stem to make it ready to take the stinger. Notice that the crack in original stem gave way in the first photo. The first thing that had to go on the new stem was the tenon. I cut it off with a hack saw as close to the end of the stem as possible. Once the tenon was gone I faced the end of the stem on the topping board to smooth out any rough or high spots that remained. I wanted a flush fit against the shank of the pipe.
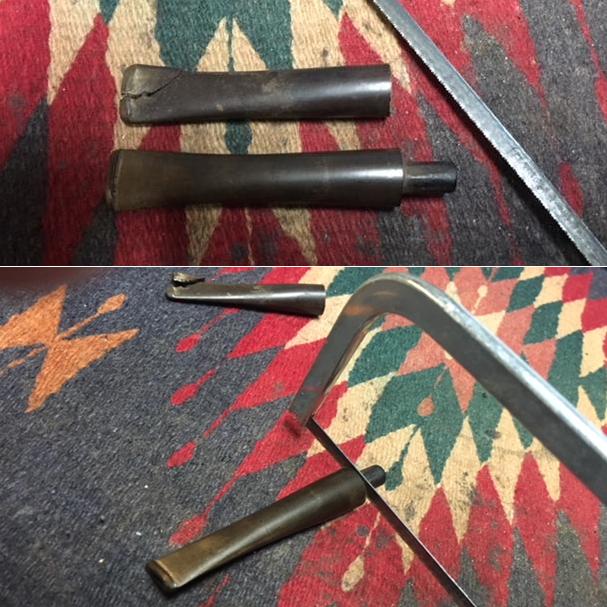
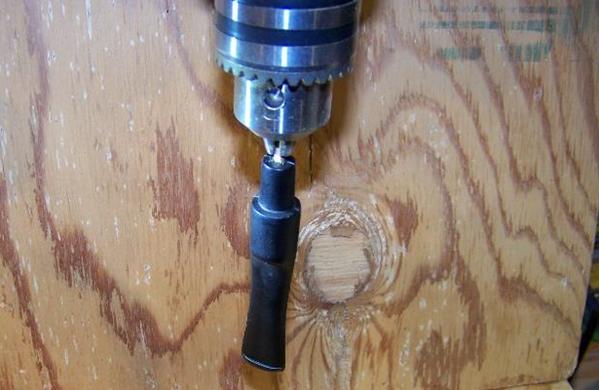
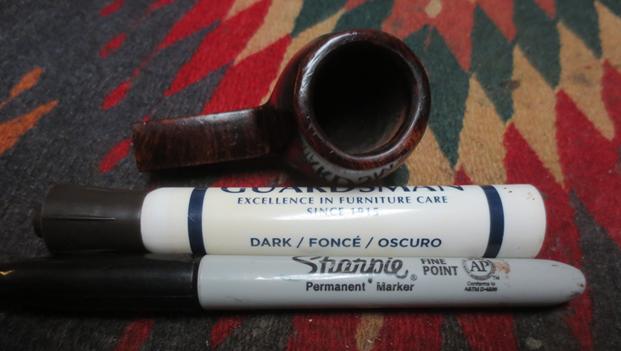
 Once the tenon was gone I needed to drill the airway open to receive the stinger apparatus. The base of the stinger had a diameter of ¼ inch but I did not start drilling with that. I started with a bit slightly larger than the airway in the stem and worked my way up. I marked the bit with a permanent marker so that I would not drill too deep. I used a cordless drill at slow speed. To pull the bit out I reversed the drill and let it work it out slowly. This leaves a clean wall on the inside of the new stem.
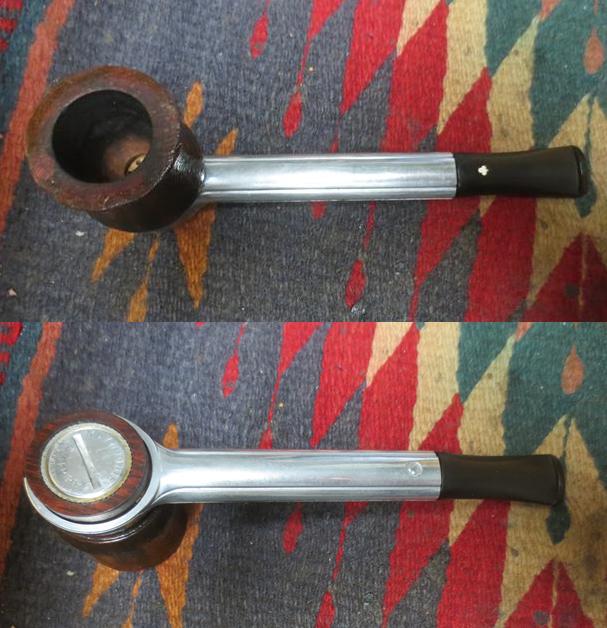
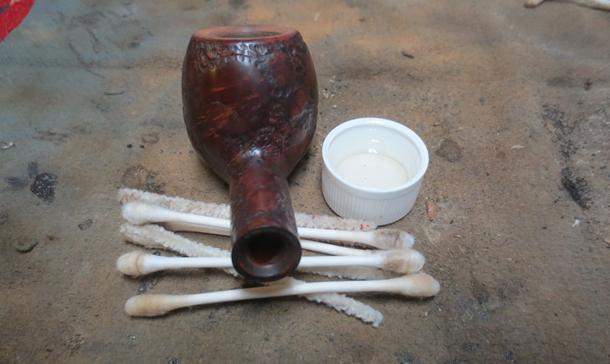
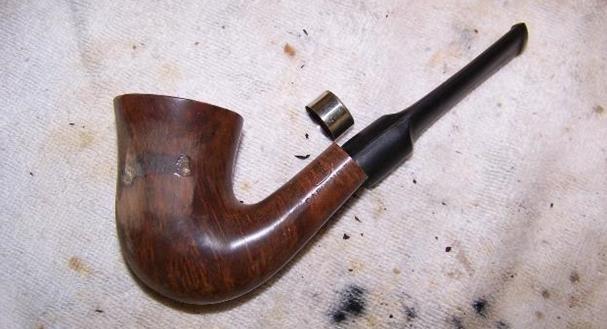
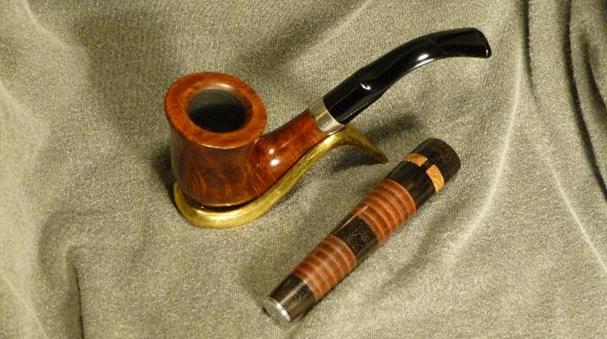
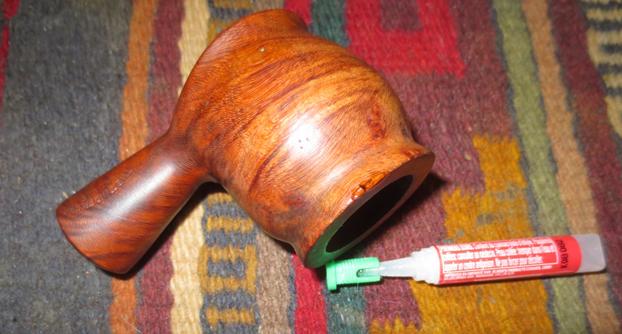
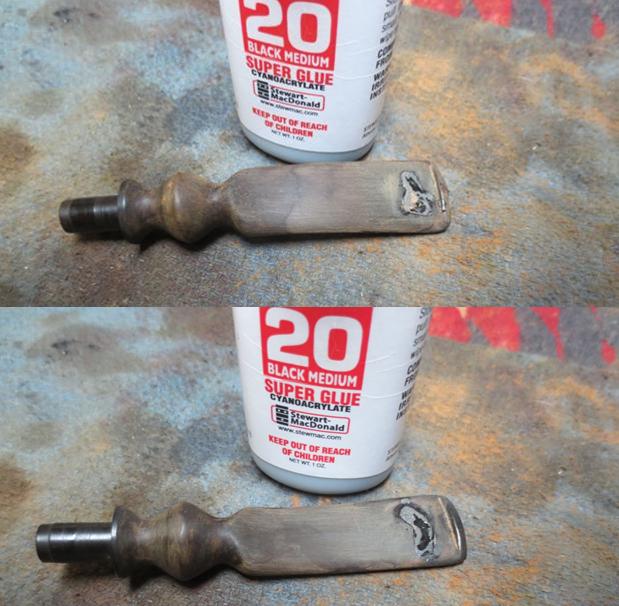
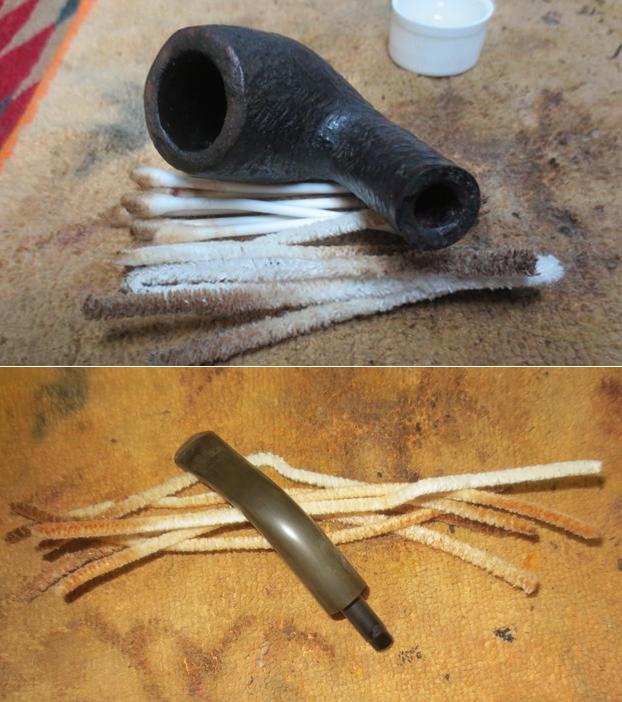
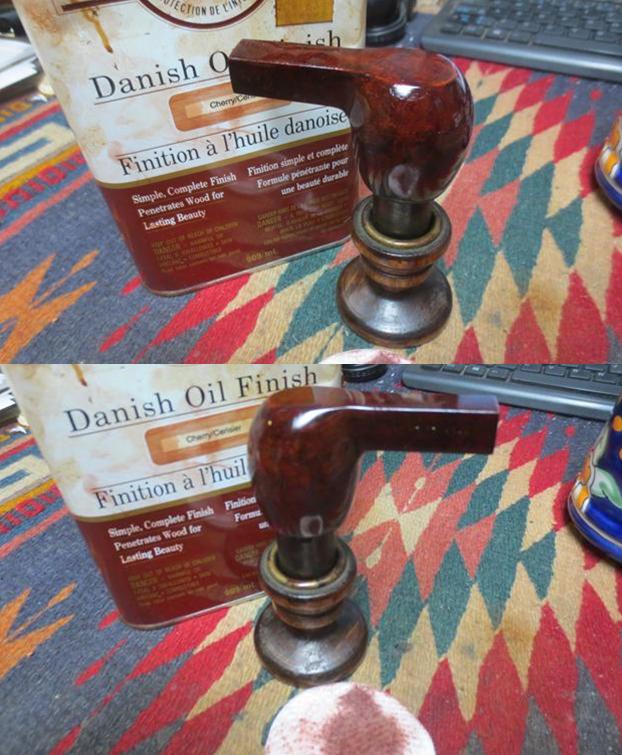
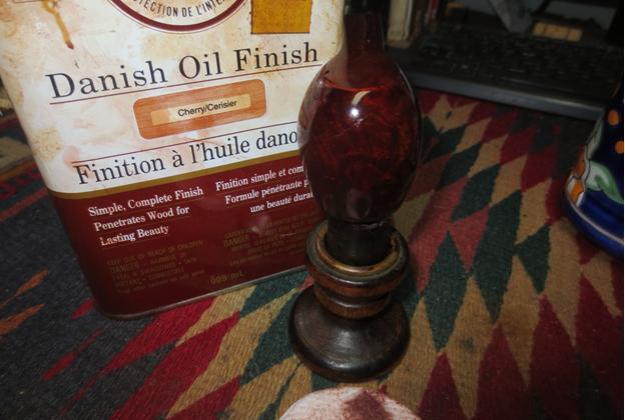
 I cleaned out the new hole with cotton swabs and alcohol to remove all of the dust from drilling. I blew air through the stem to dry it out. I swabbed it with a clean and dry cotton swab. I lined the stinger upright with the hole on top and glued it in place with all-purpose glue. While it was still soft I threaded it into the shank and lined everything up so that it would dry straight. I set it aside and worked on something else while the glue dried. I took photos of the pipe to show the new stem in place after the glue dried.
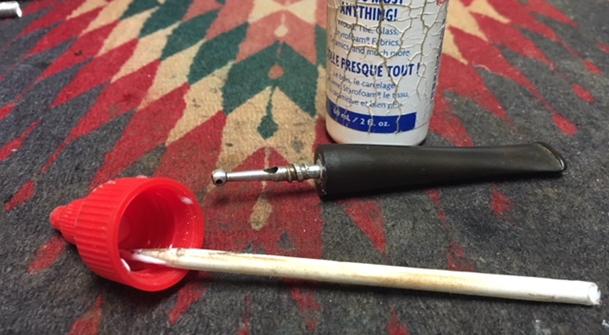
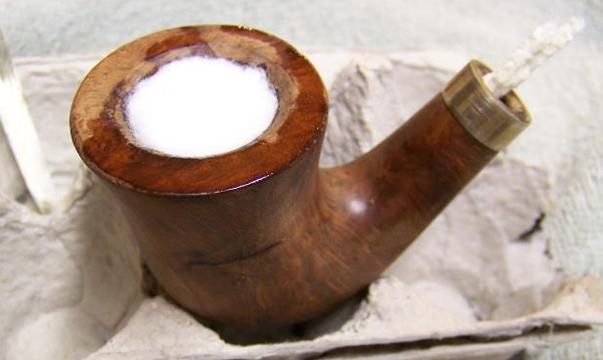
 After the glue in the stem had set I removed the bowl from the stem and worked on it. It needed a lot of work. I wiped the bowl down with acetone on cotton pads to remove the remnants of the finish. Once I had the briar cleaned off I topped the bowl on the topping board with 220 grit sandpaper. I wanted to minimize the damage from the burn on the right front. I could not take it down to remove all of the burn without compromising the shape. I worked until it was less visible and then called it quits.
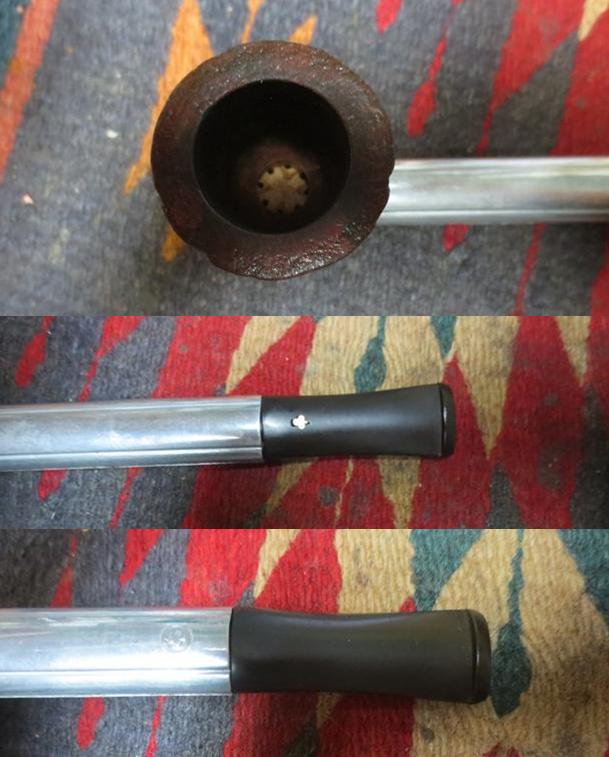
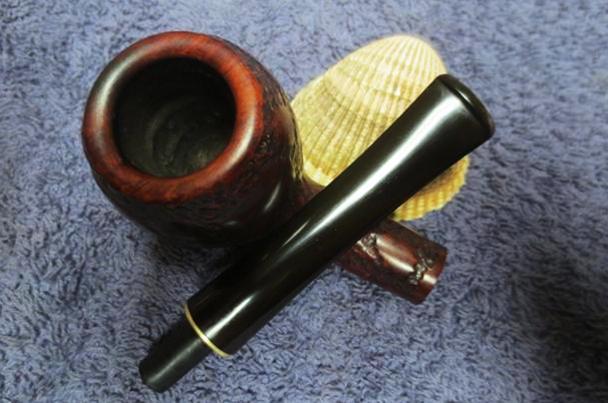
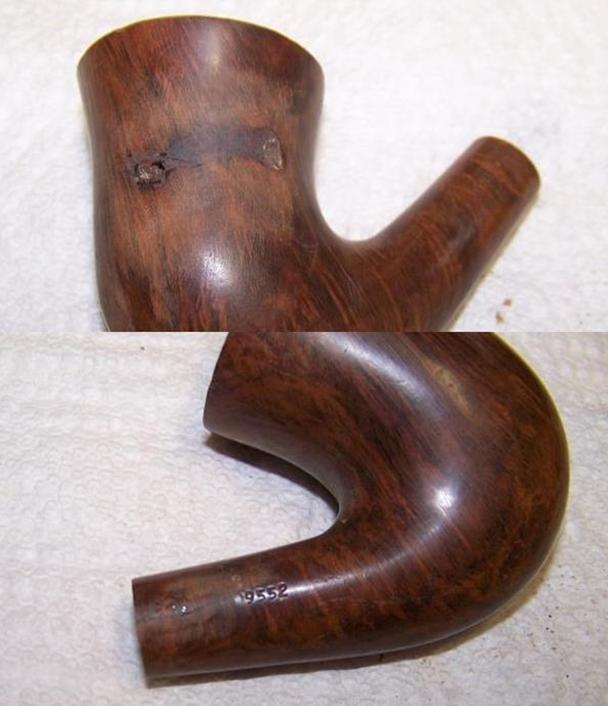
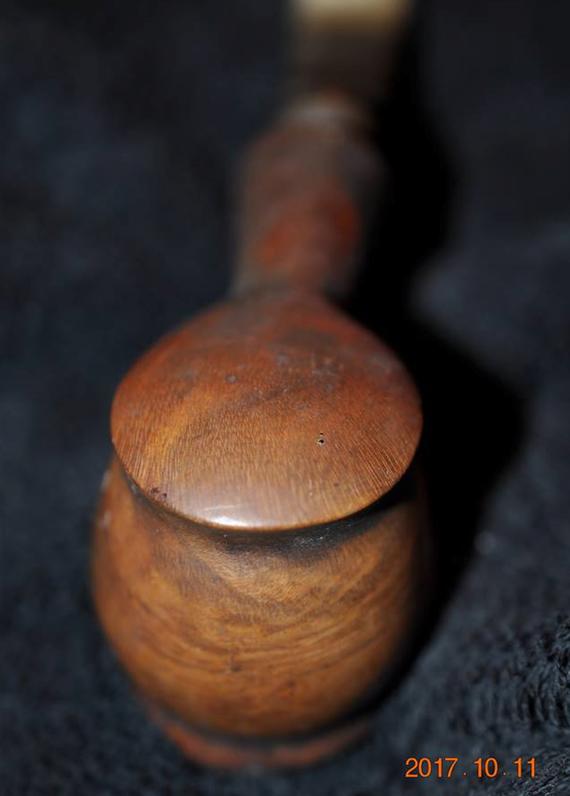
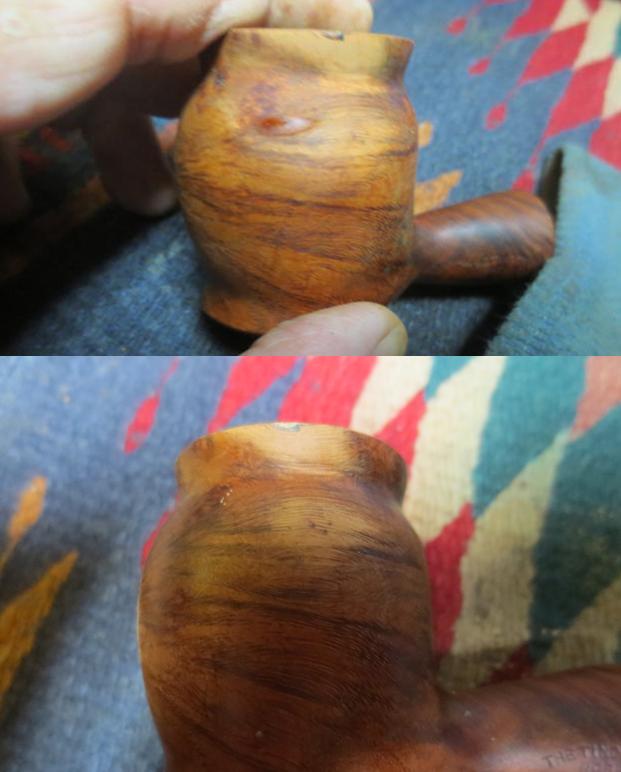
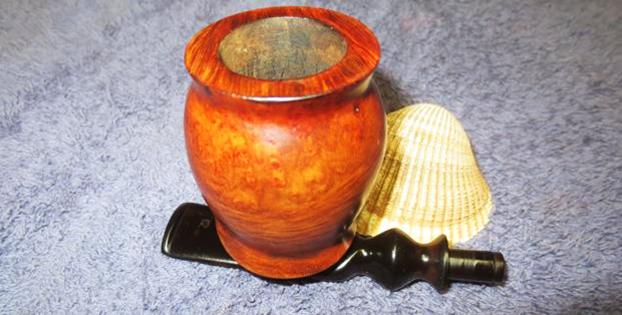
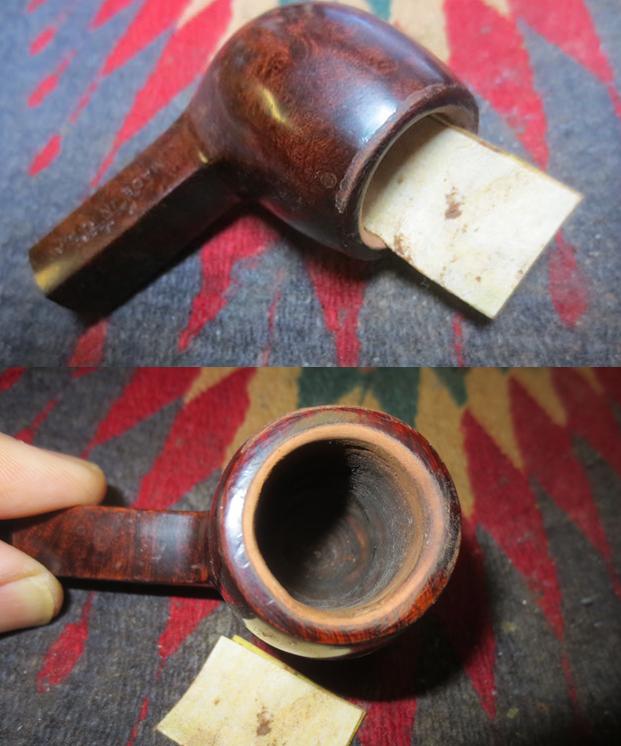
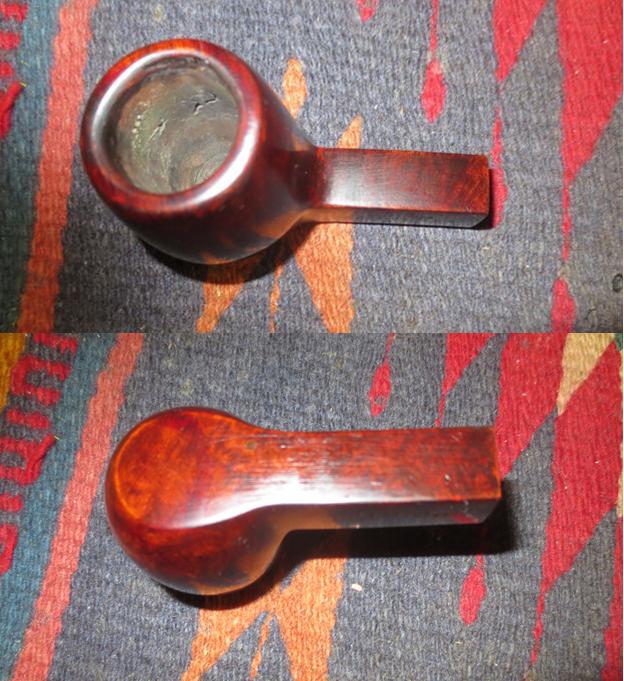
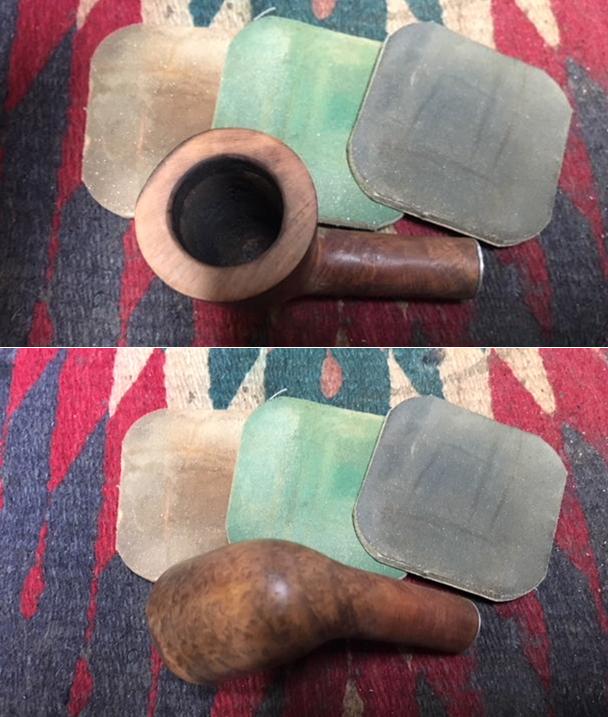
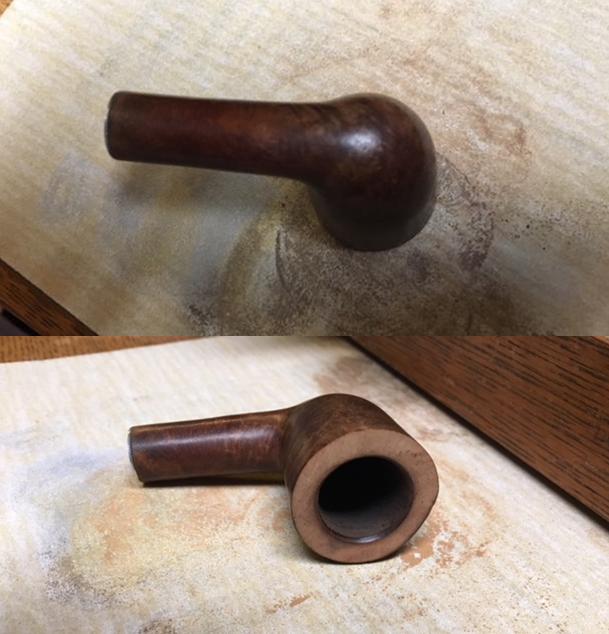 The bowl was out of round and the inner edge of the bowl was damaged. I worked it over with a folded piece of sandpaper to minimize the damage and bring it back to round. I also worked on the outer edge of the rim to smooth it out as well. The second photo below shows the cleaned up rims – both inner and outer.
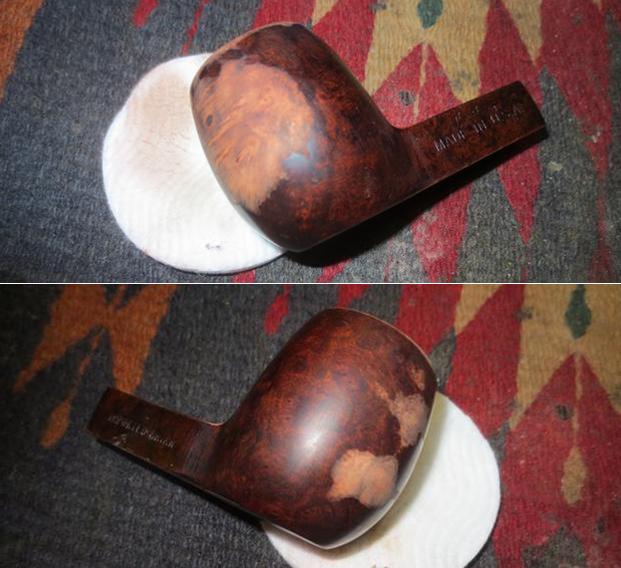
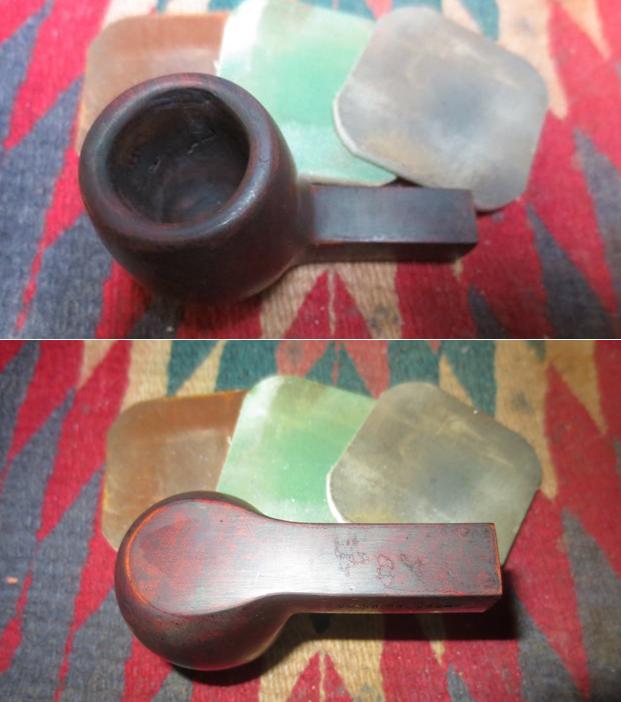
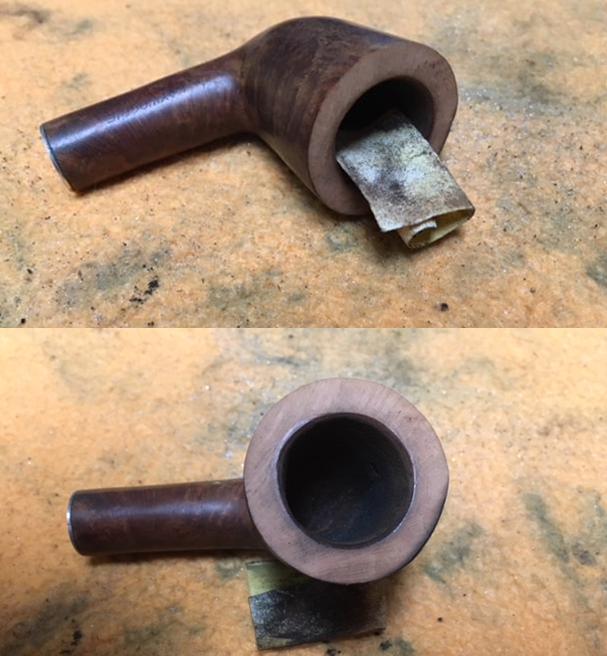 I wiped the bowl down again with acetone on a cotton pad to remove the rest of the finish and clean up the briar. I took photos of the bowl at this point to show its condition.
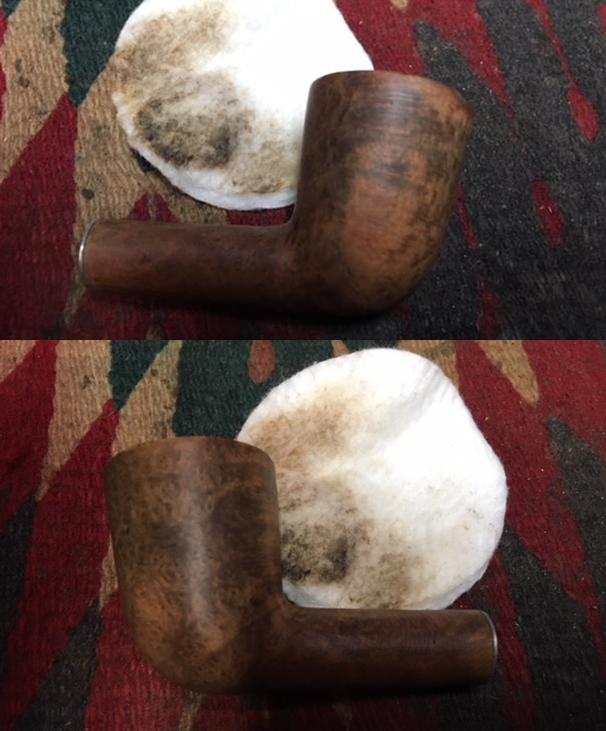
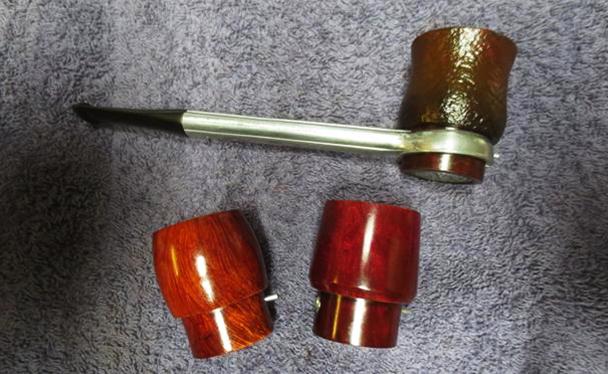
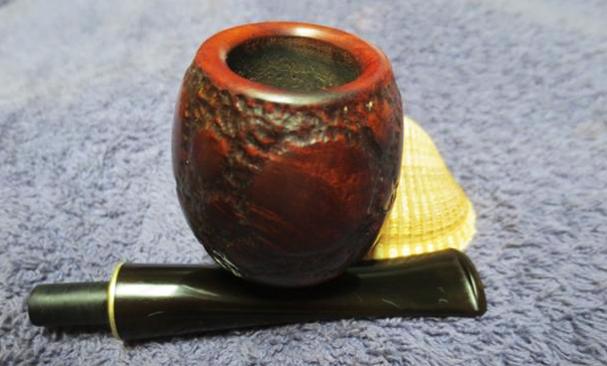
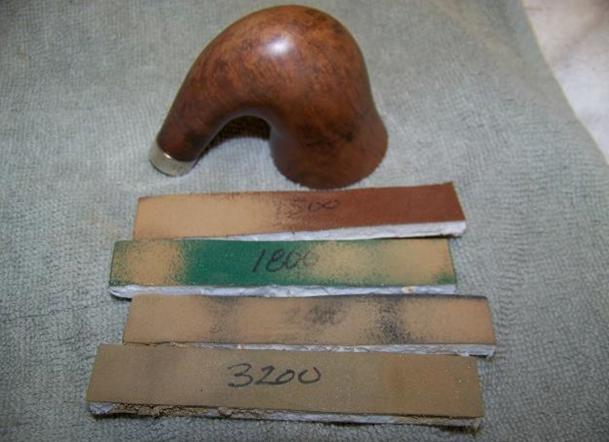
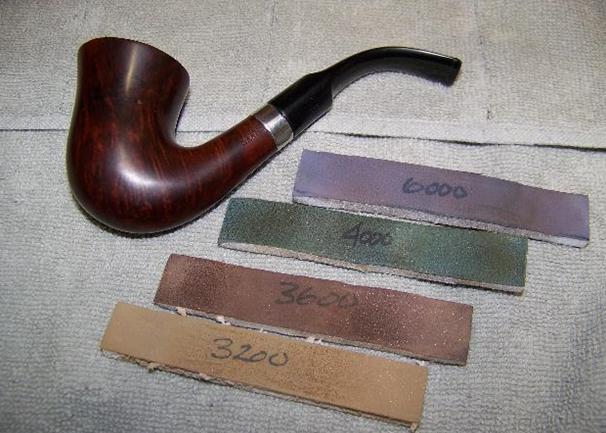
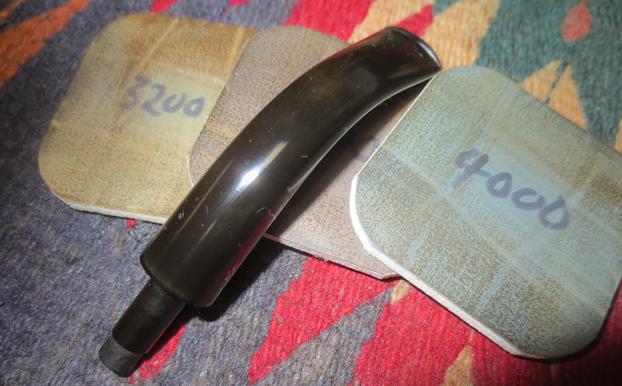
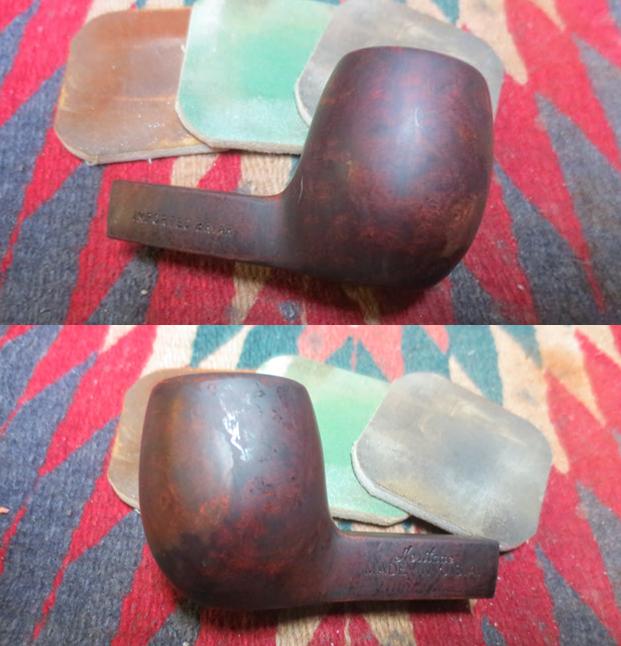
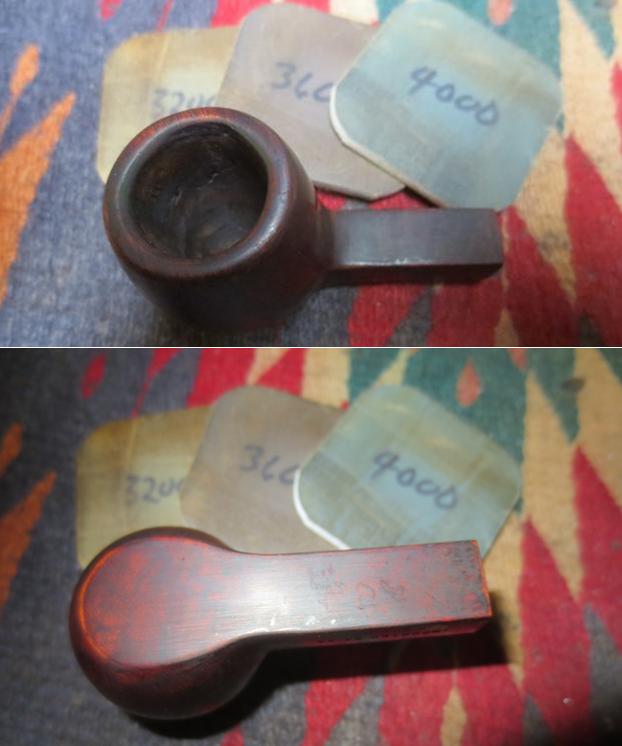
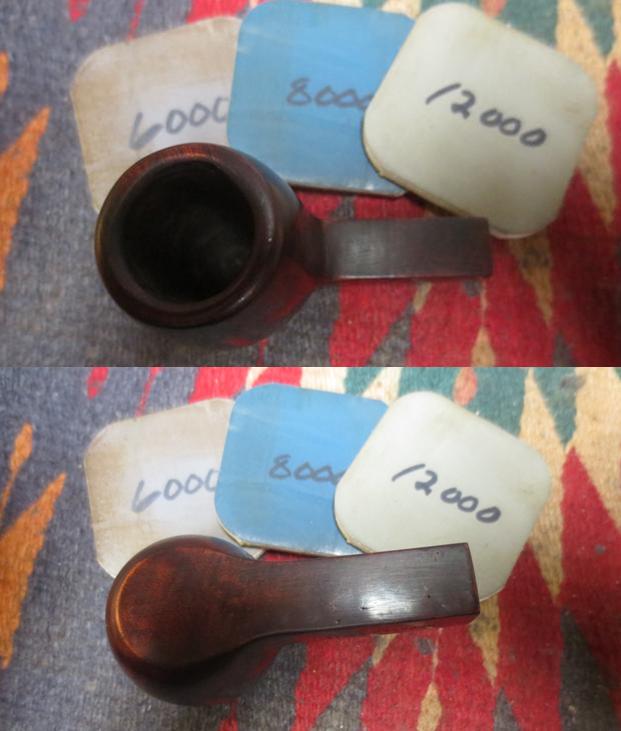
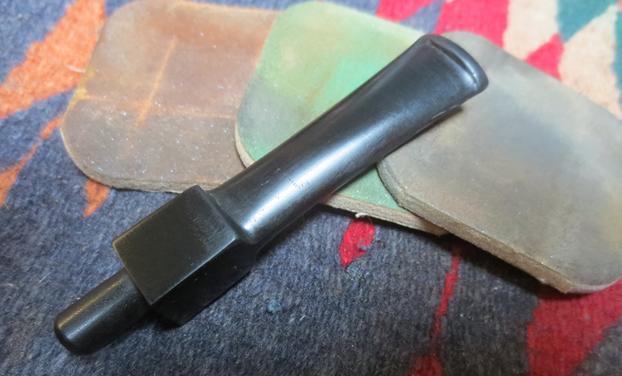
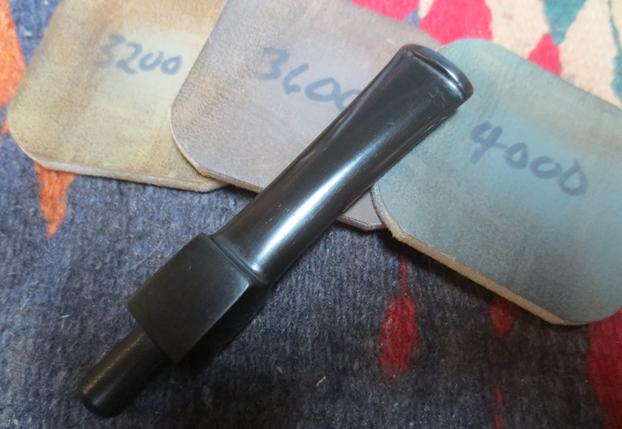
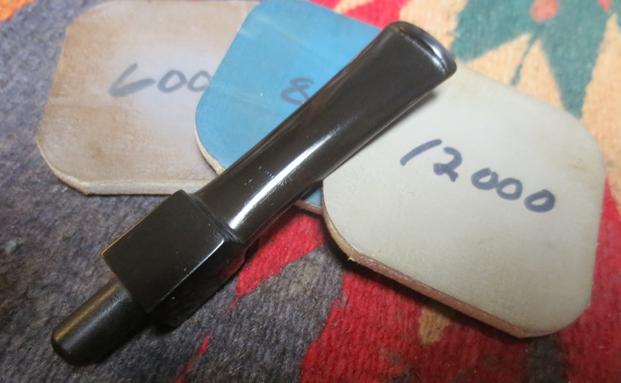
 I polished the bowl with micromesh sanding pads – wet sanding it with 1500-2400 grit pads and dry sanding with 3200-12000 grit pads. I wiped the bowl down after each pad with acetone to clean off the sanding dust. The photos show the progress of the polishing.
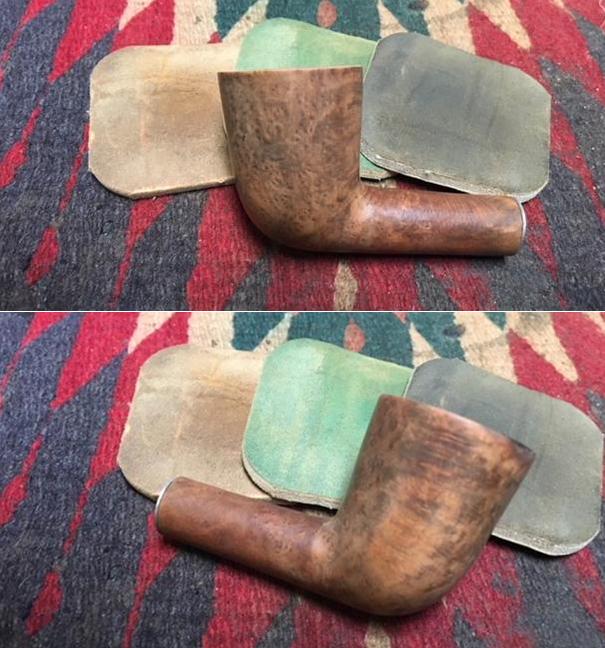

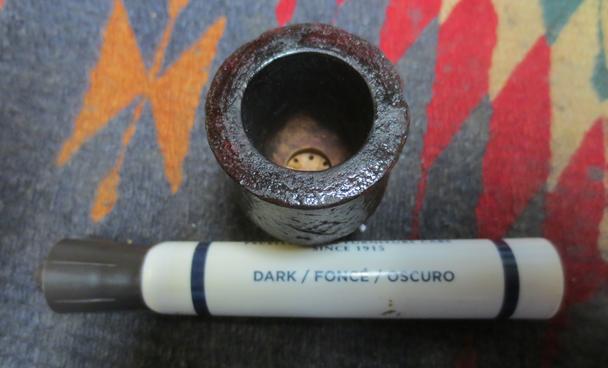
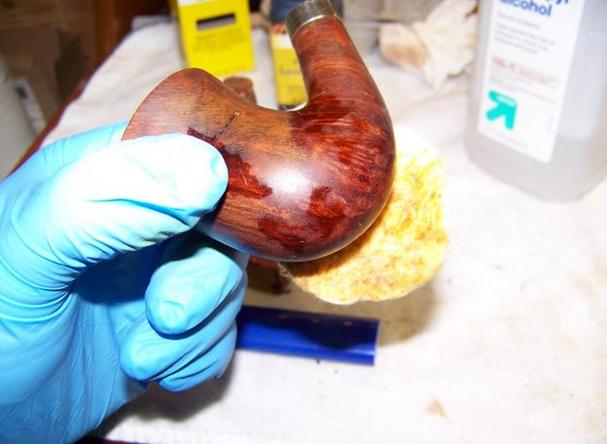
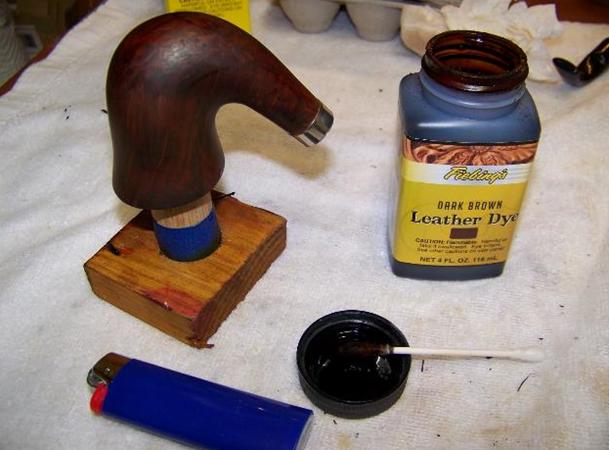
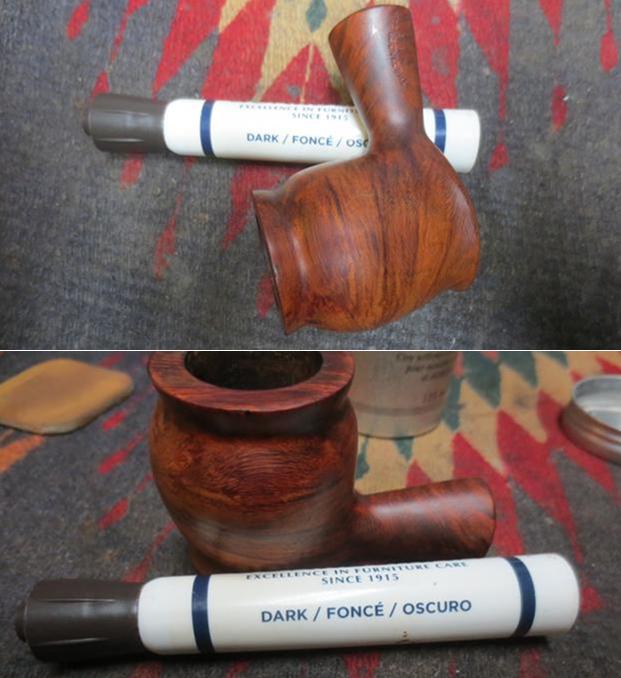
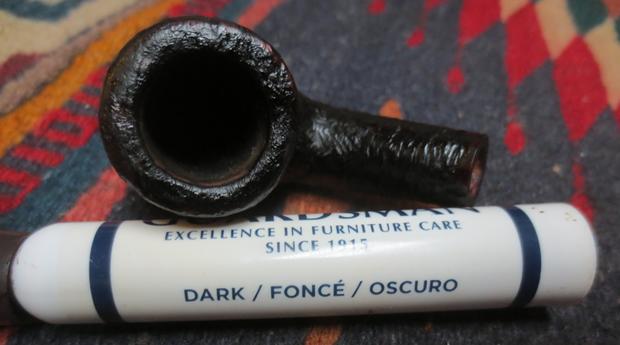
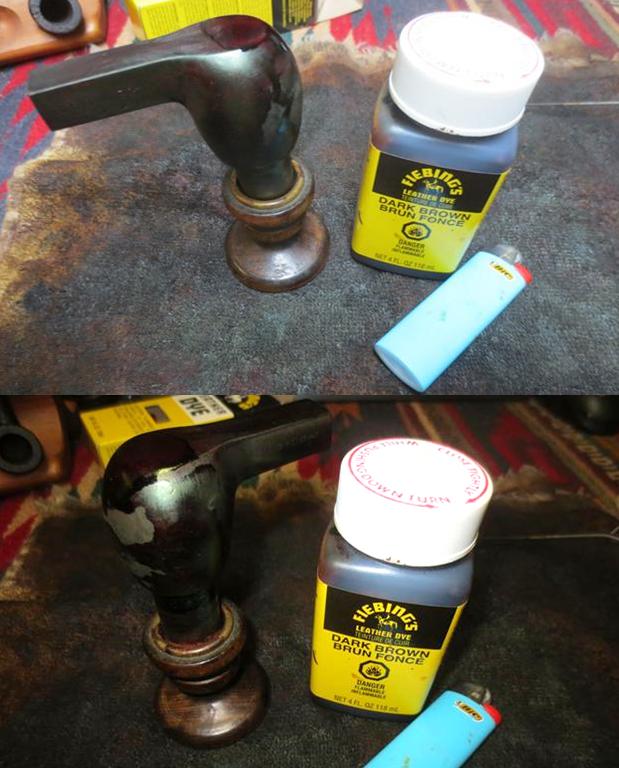
 I wiped the bowl down with alcohol and then stained it with a medium brown aniline stain. I flamed the stain to set it and repeated the process until the coverage was what I was looking for. I washed down the bowl with alcohol on a cotton pad to make the stain a bit more transparent. I wanted to blend in the burn mark and still leave the grain showing through.
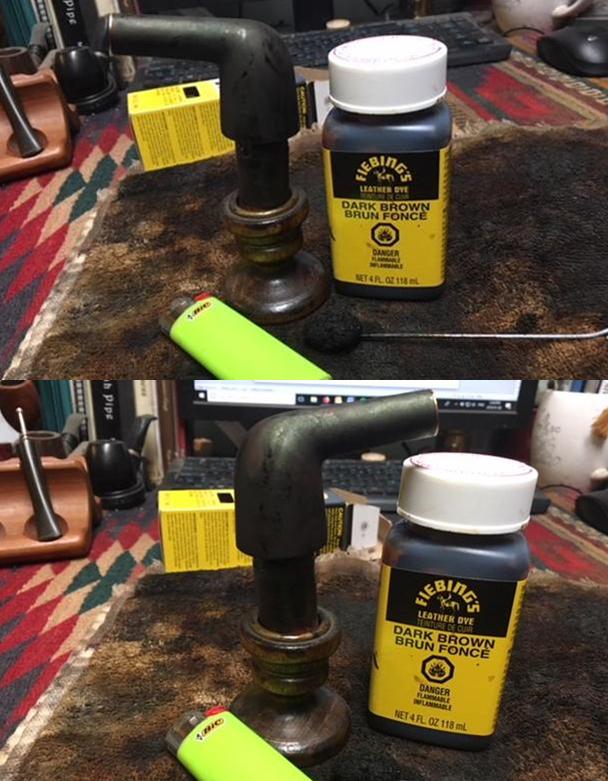
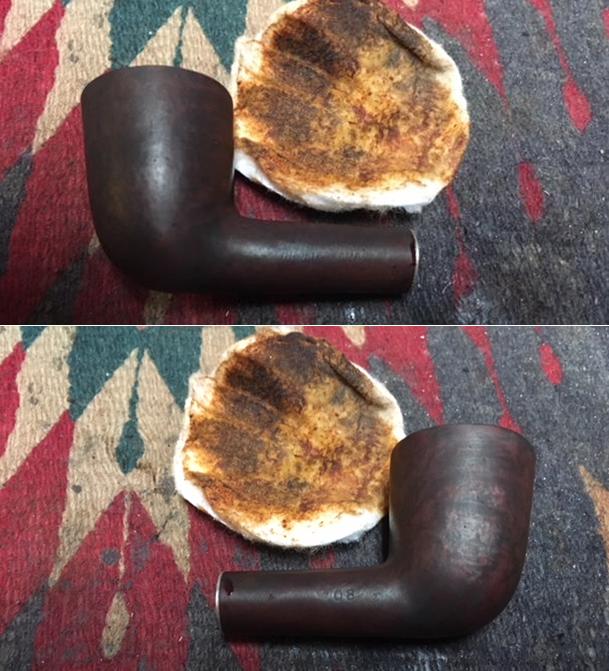
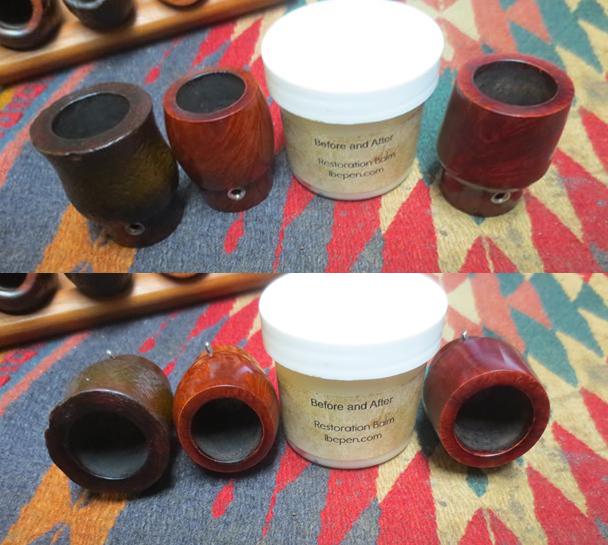
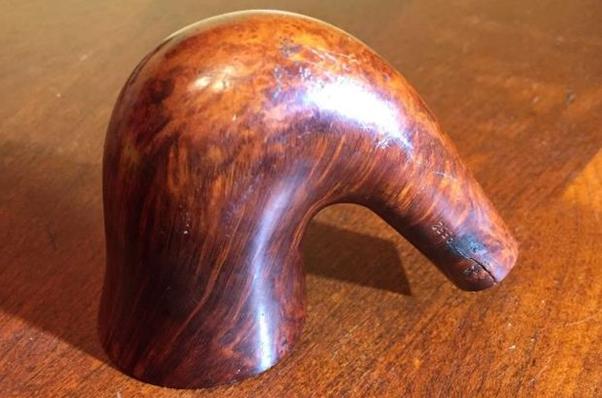
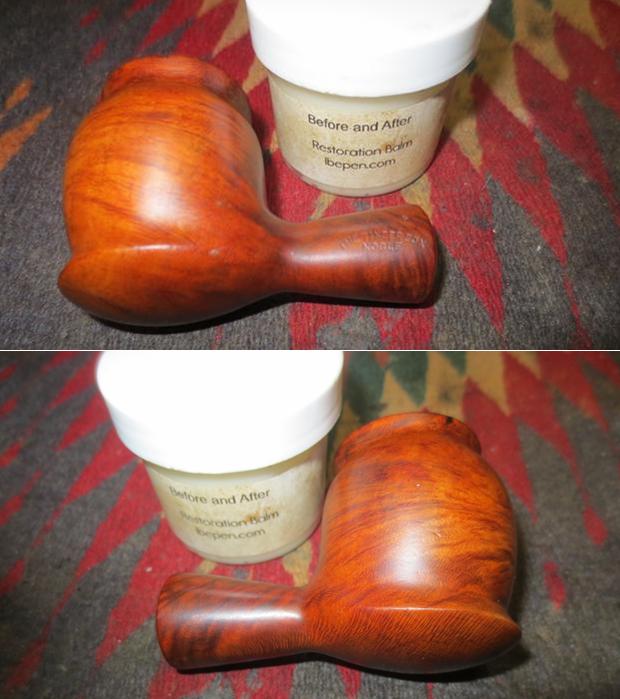
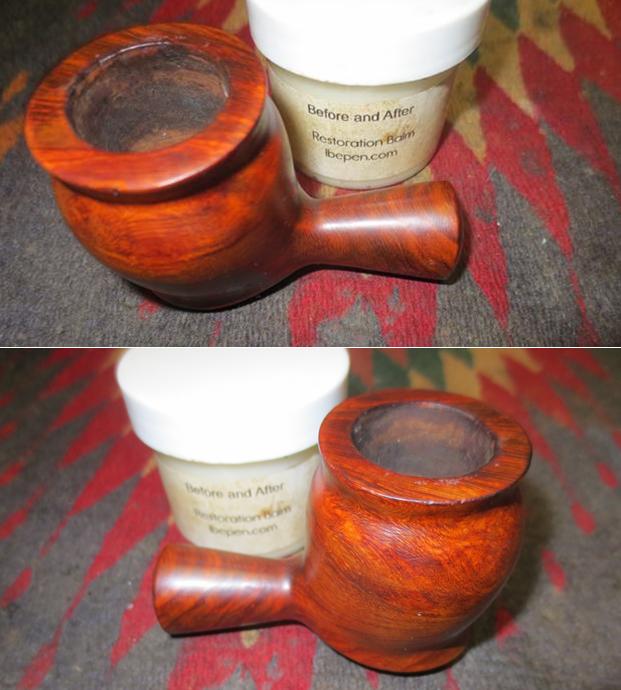
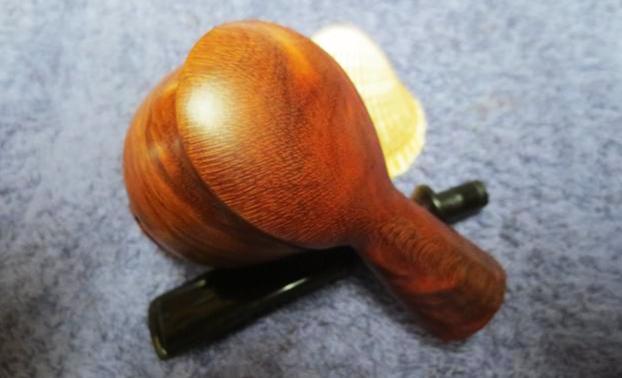
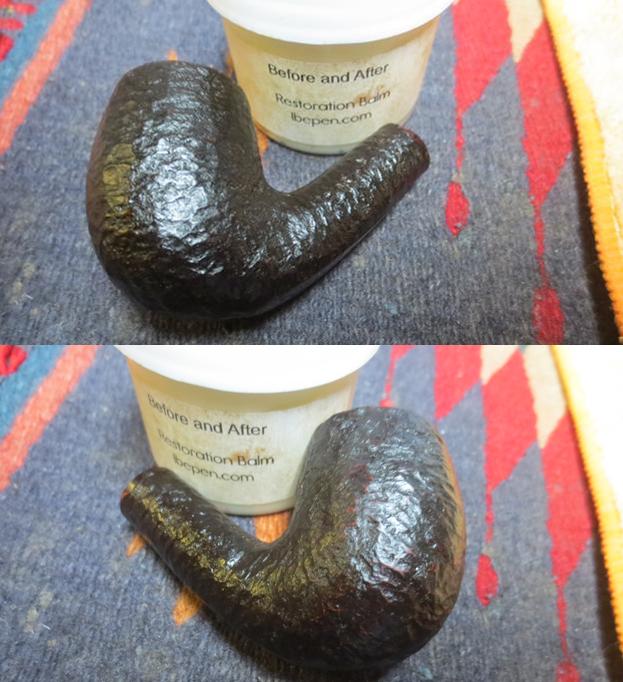
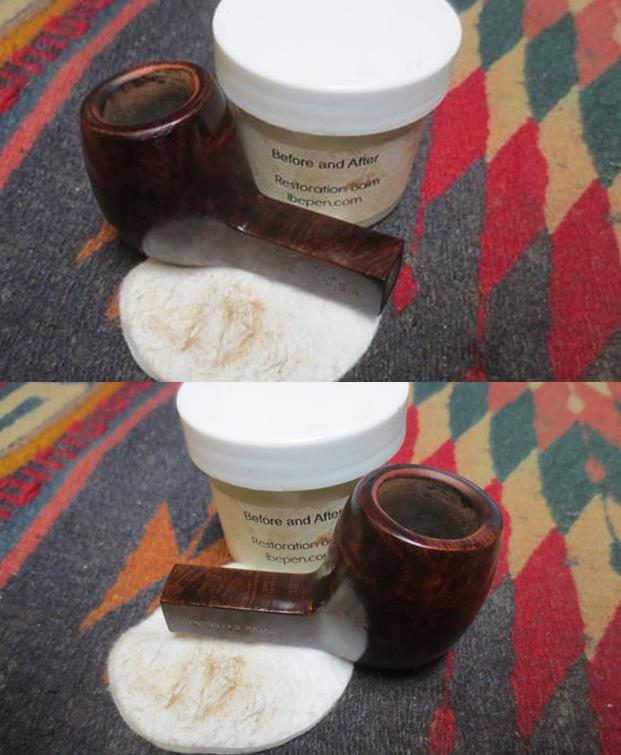
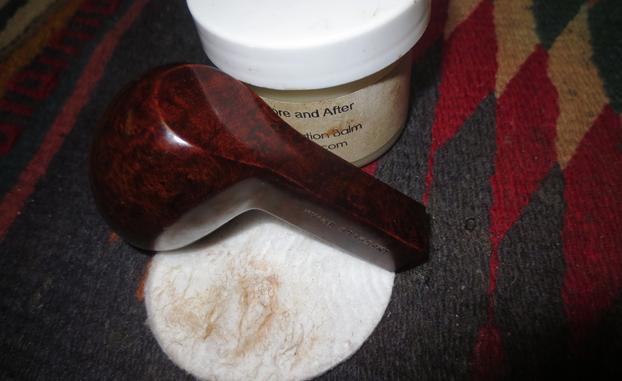
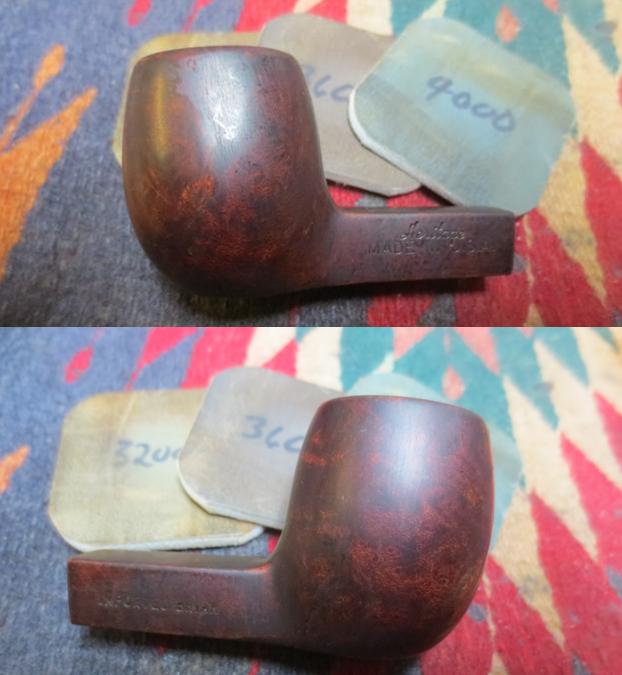
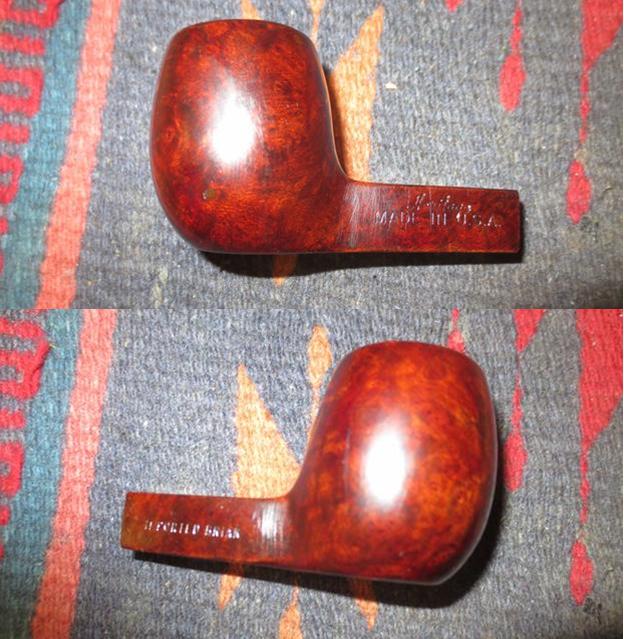
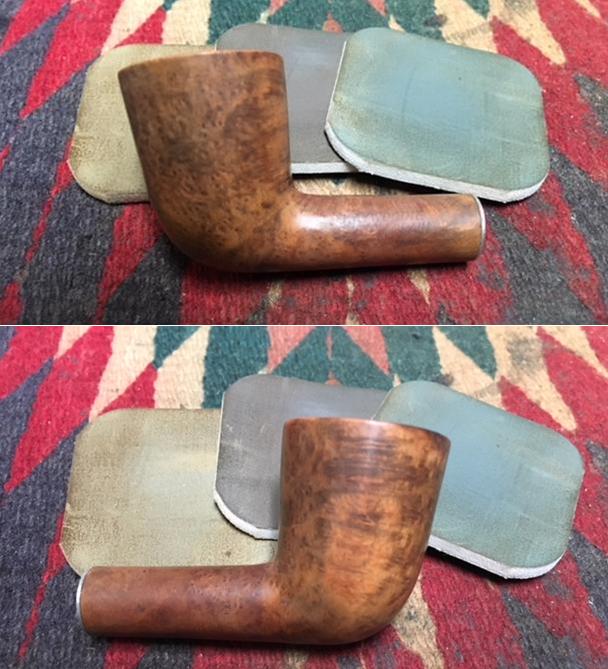
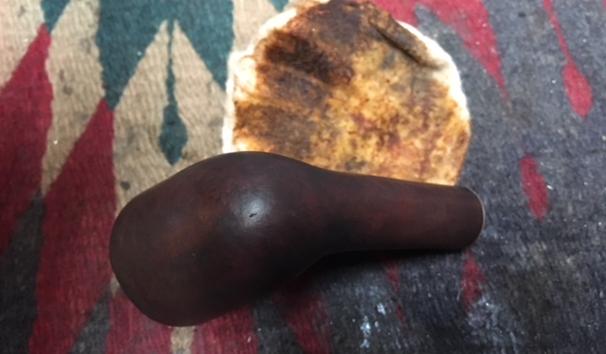 I worked some Before & After Restoration Balm into the surface of the briar with my finger tips to deep clean the finish, enliven and protect the wood. I worked the balm into the rim top and inner bevel of the rim to polish the cleaned up area. I let it sit for a few minutes and then buffed it with a cotton cloth. The grain in the wood came alive and there was a rich shine to the briar. I took some photos of the bowl at this point to mark the progress in the restoration.
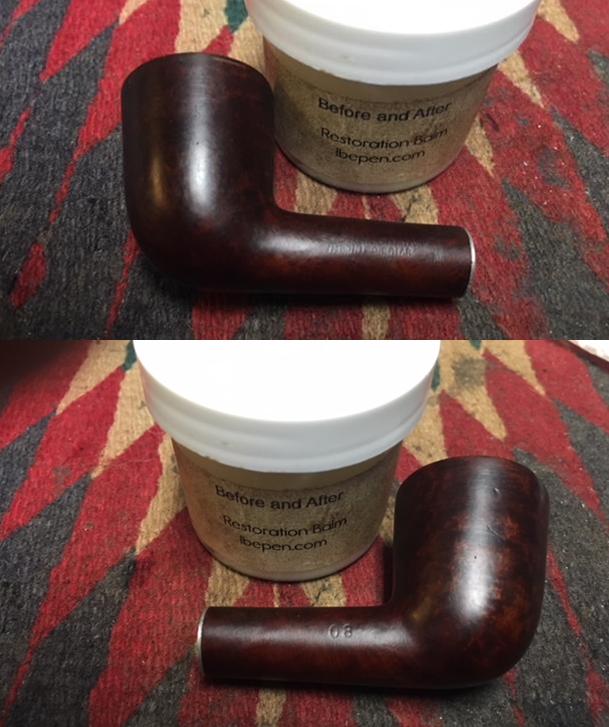
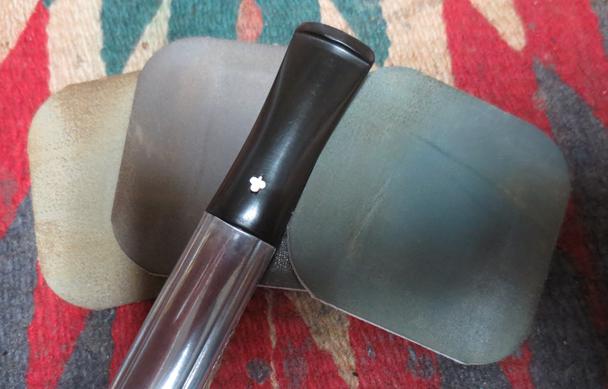
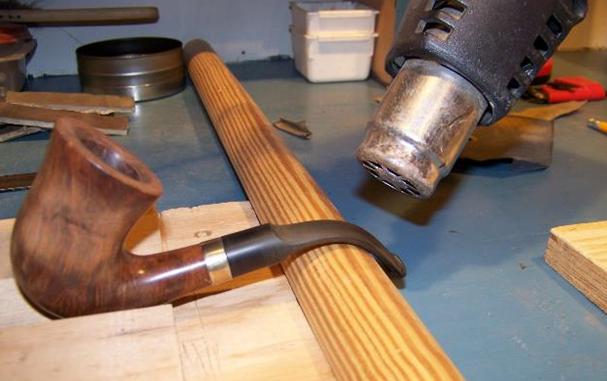
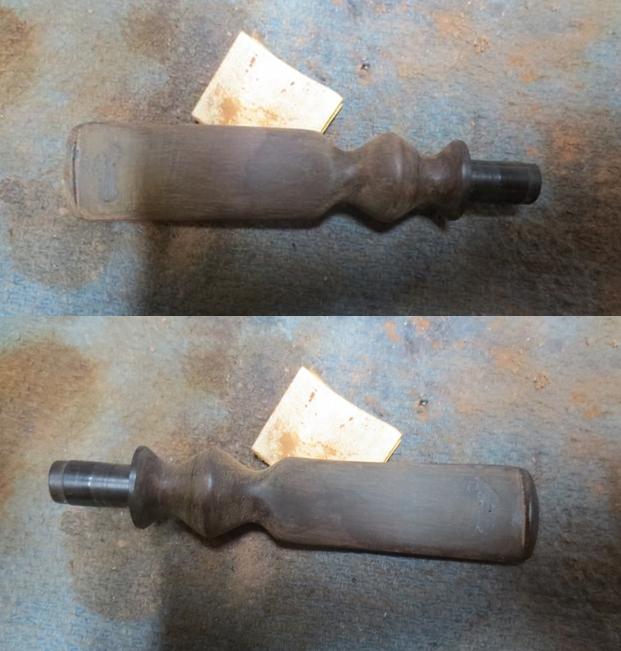
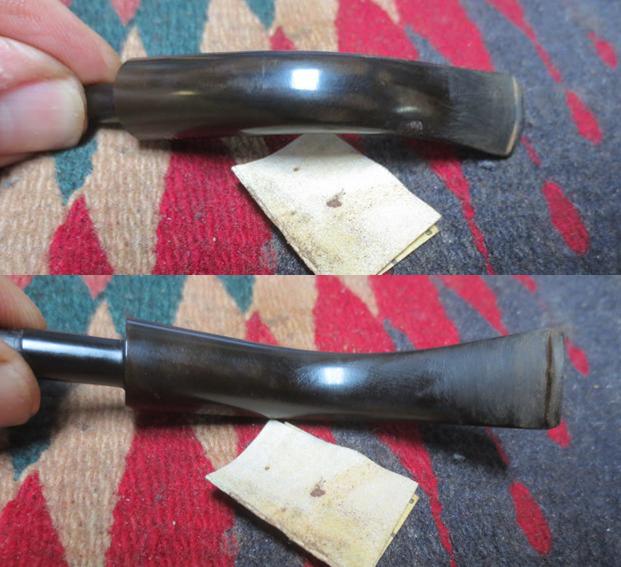
 I set the bowl aside and worked on fitting the stem to the shank. I repeatedly put it on the shank to check the diameter and clean up the fit. I worked on it with 180 grit sandpaper and 220 grti sandpaper to shape the stem to match the diameter of the shank all the way around. I wiped it down each time I finished sanding and then tried the fit. I repeated the process until the transition was smooth between the shank and the stem. It took a lot of sanding to get the fit correct but once it was there the stem was ready to polish with micromesh sanding pads.
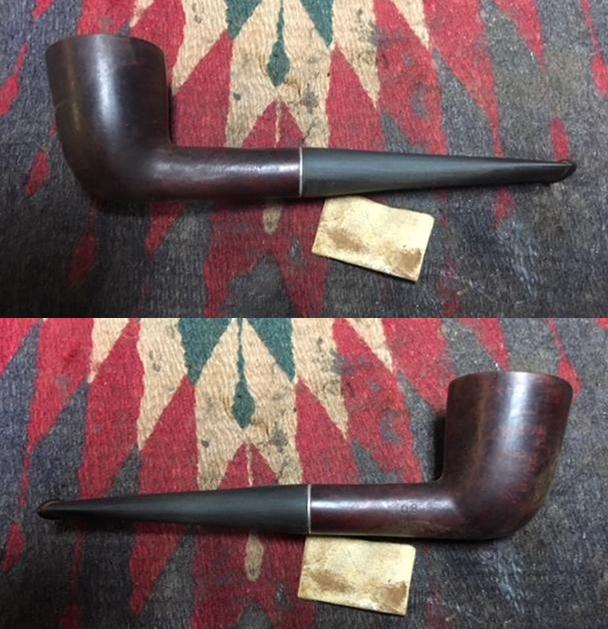
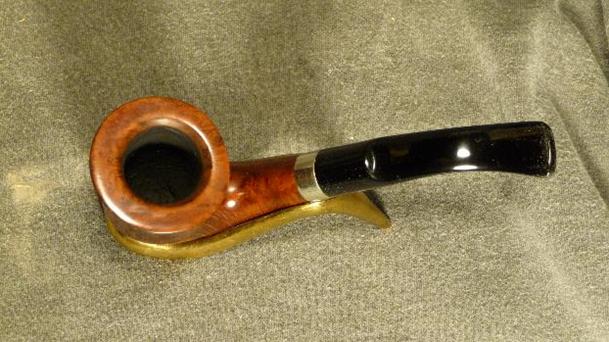
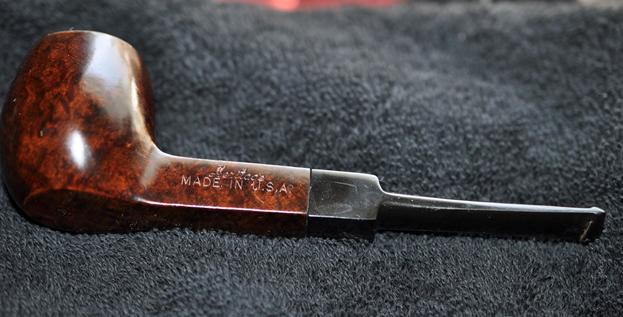
 I gave the bowl several coats of Conservator’s Wax to clean it and give it a light shine. I rubbed the stem down with Obsidian Oil to highlight what I needed to work on. I also wanted to get an idea of what the pipe was going to look like once it was finished.
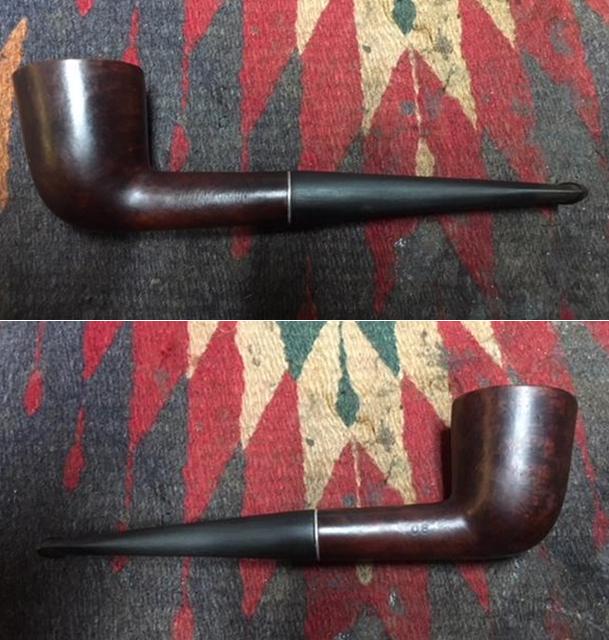
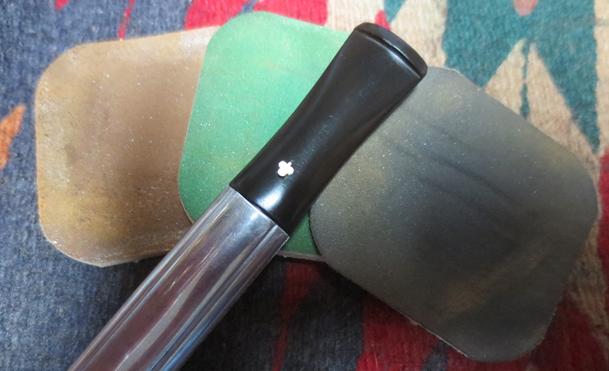
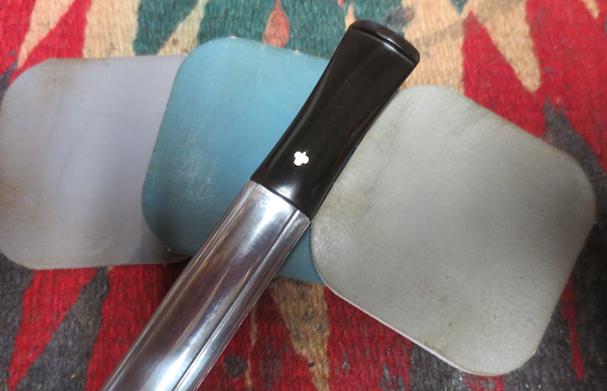
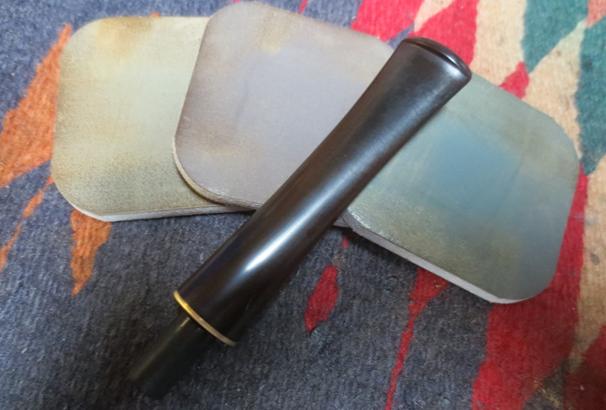
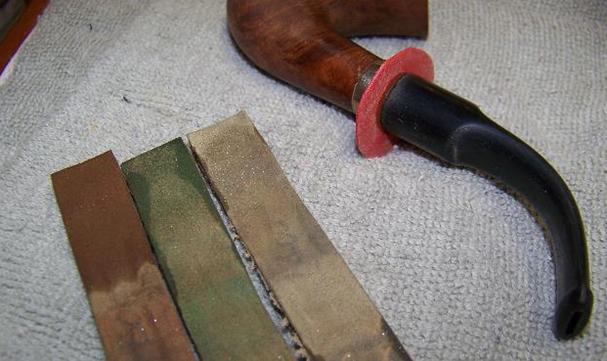
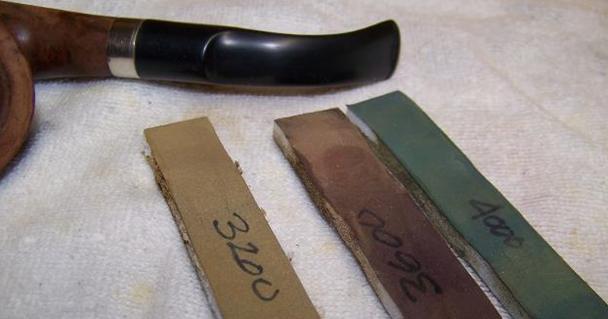
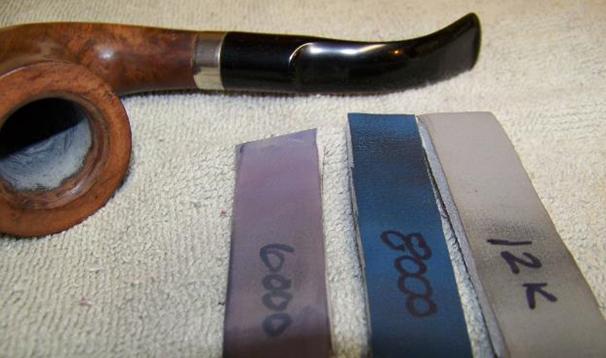
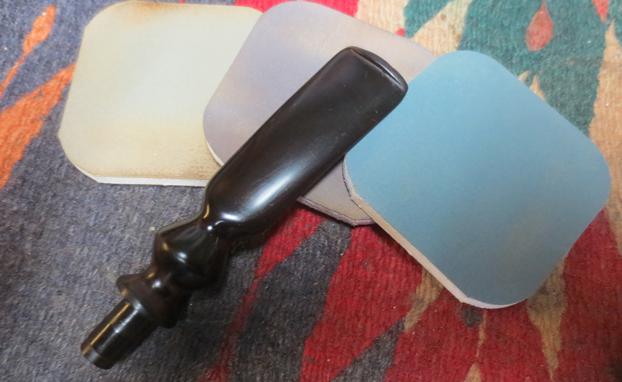
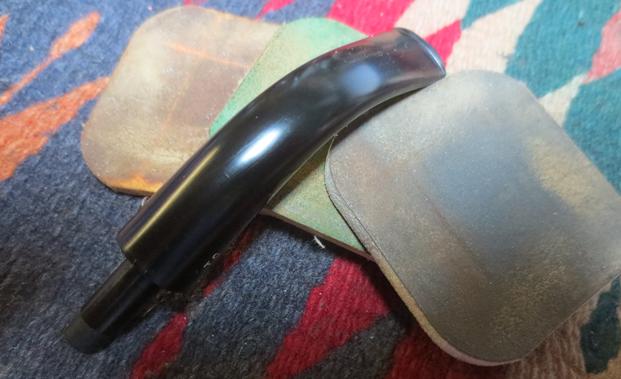
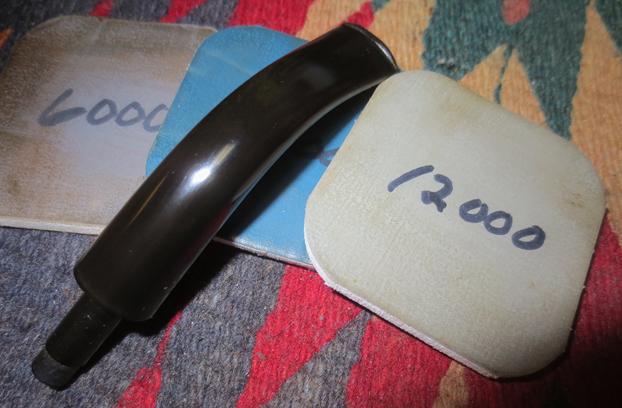
 I worked over the stem with micromesh sanding pads. I polished out the sanding scratches and marks from the reshaping work. I wet sanded it with 1500-2400 grit pads and dry sanded it with 3200-12000 grit pads and wiped it down with Obsidian Oil after each one. When I finished with the 12000 grit pad I gave it a final coat of oil and let it dry.
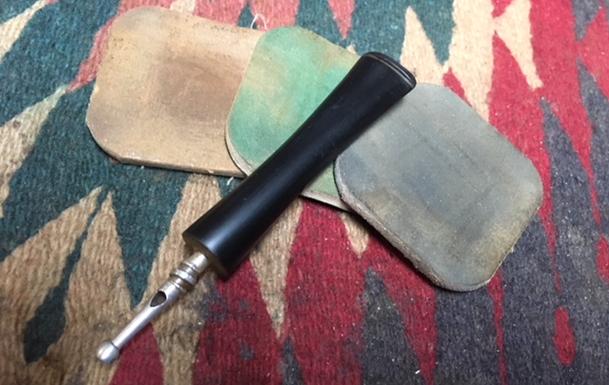
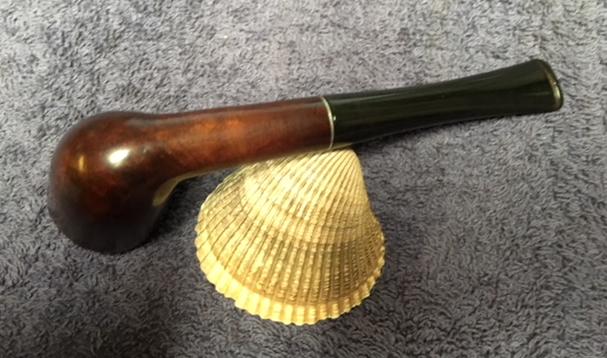
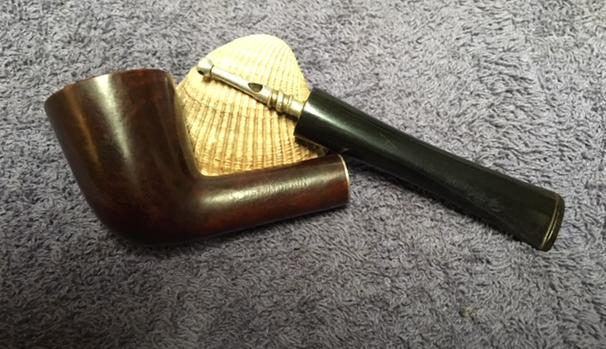
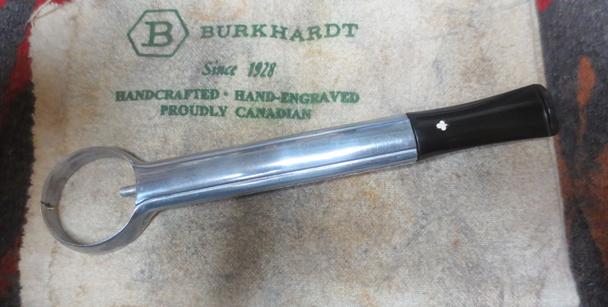
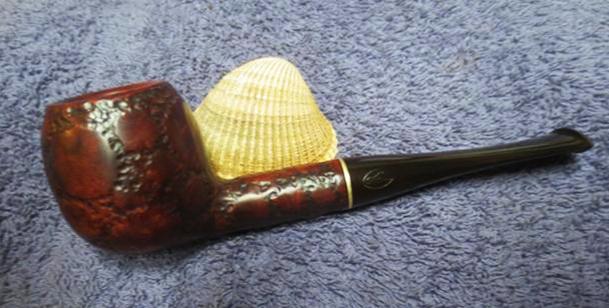
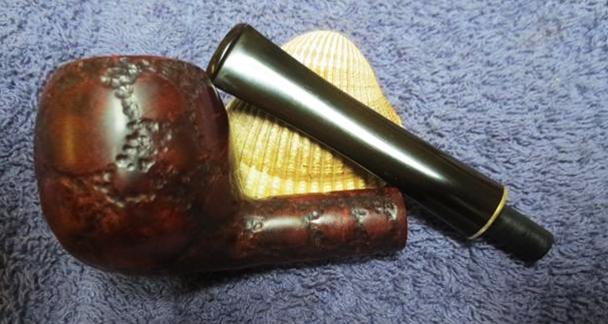
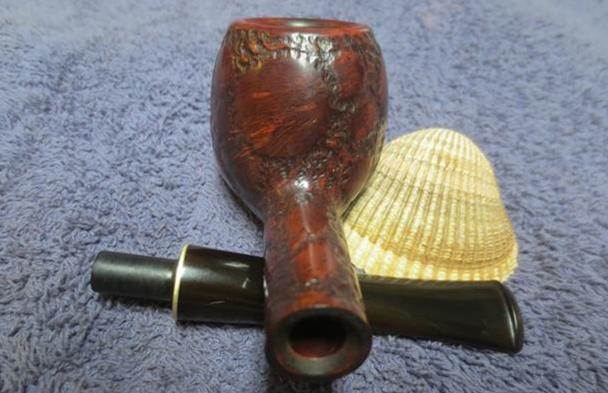
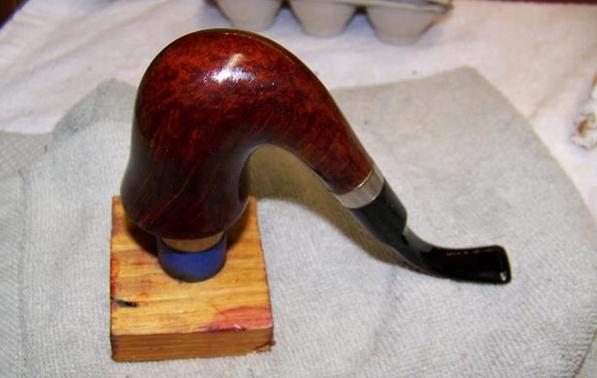
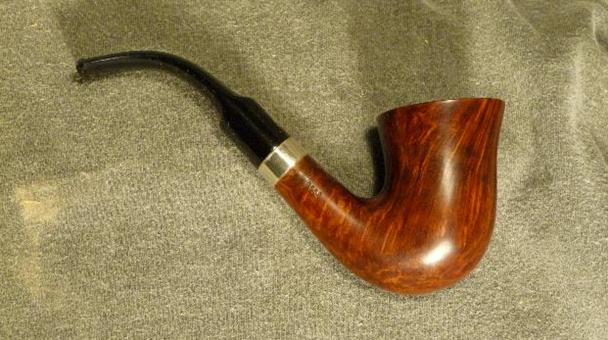
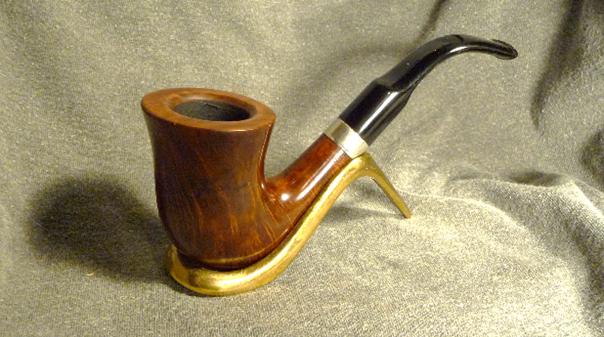
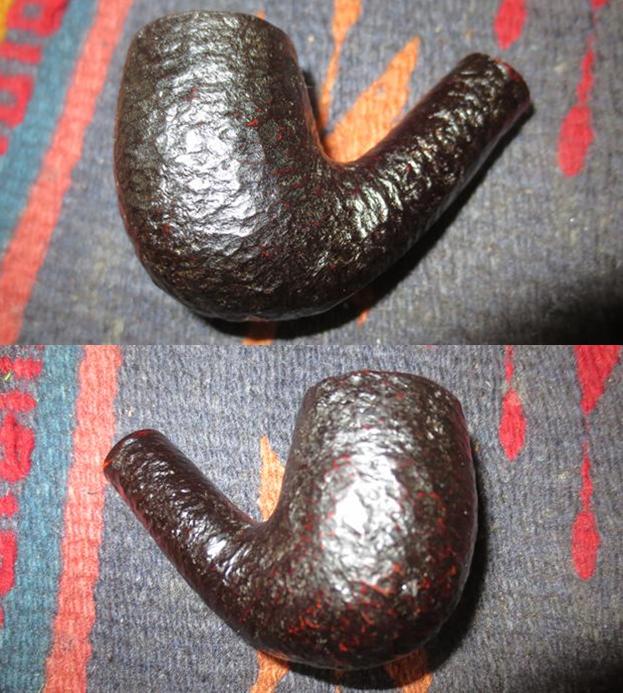
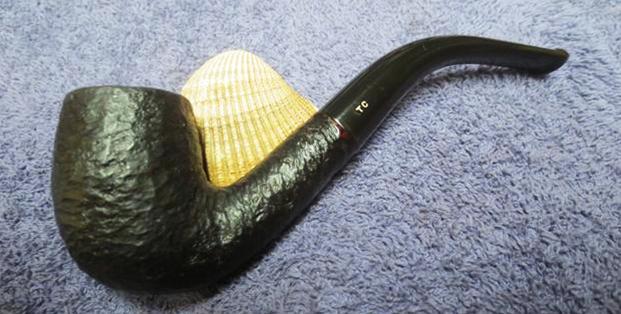
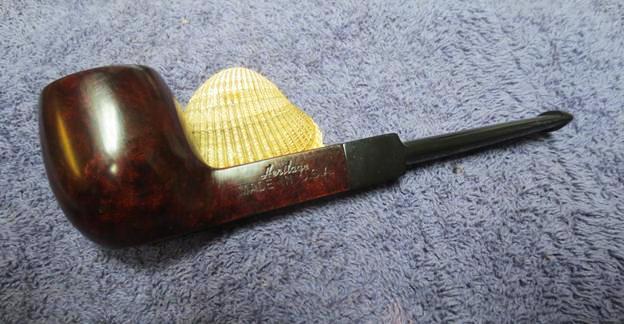
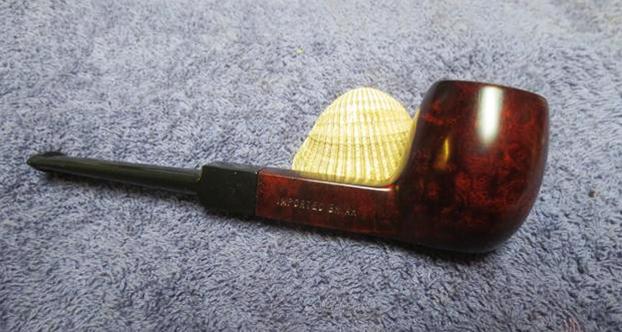
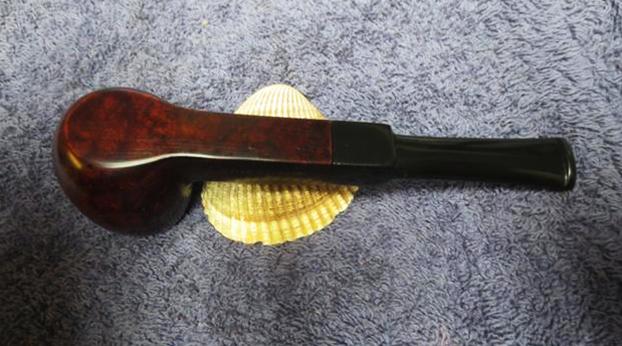
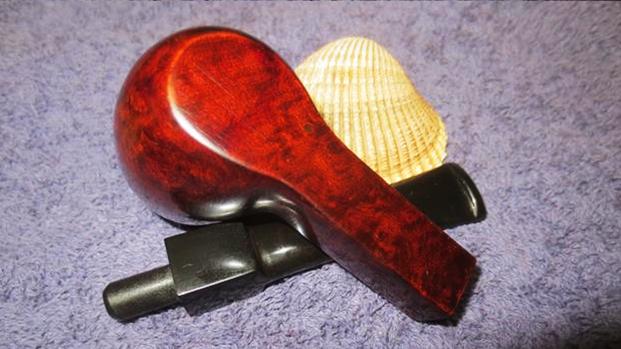
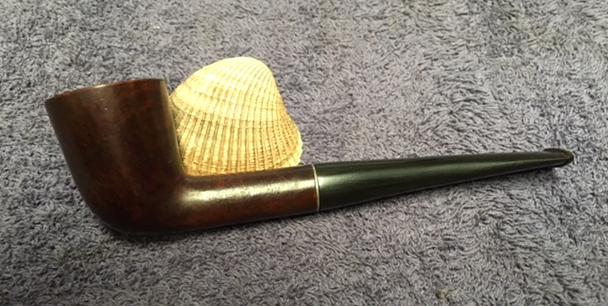
 With the stem replaced and polished I put it back on the pipe and buffed the entire pipe again with Blue Diamond polish on the buffing wheel. I carefully buffed the new button with a light touch so as not to damage it. I gave the entire pipe several coats of carnauba wax and buffed it with a clean buffing pad to raise the shine. I hand buffed it with a microfibre cloth to raise the shine. The new stem and the original stem looked good to me and the bend was just right. The bowl polished up pretty nicely. The finished pipe is shown with the original stem in the photos below. This is the final pipe – number seven of Mark’s uncle’s pipes. Now I just need to pack these up as well as he did when he sent them to me and get them out to him. I am looking forward to what he will think once he has them in hand. Thanks for walking through these seven restorations with me. I am thinking Mark’s uncle would be proud of his pipe and glad that his nephew is carrying on the pipeman’s trust with them. Cheers.