Blog by Dal Stanton
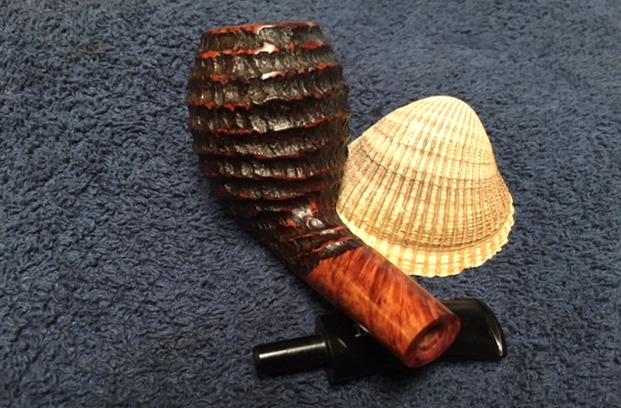
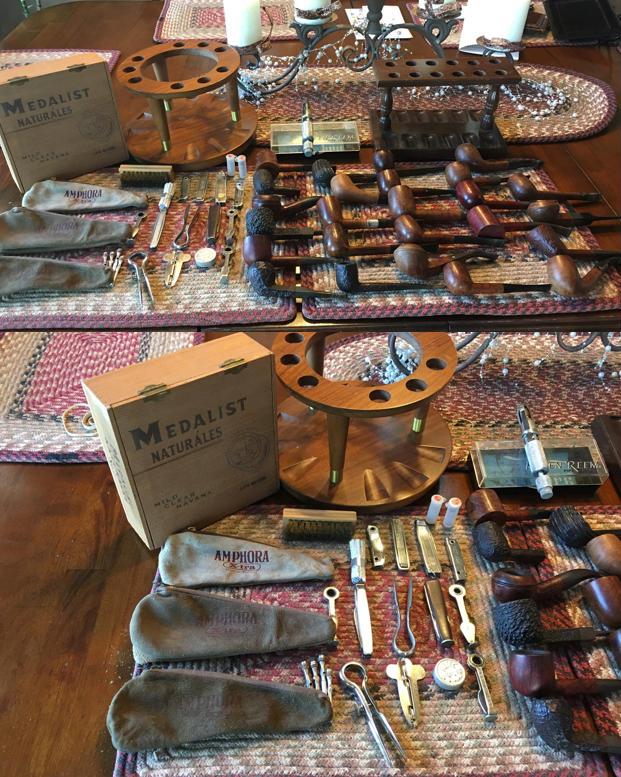
With all pipe man honesty, what could I do? What would you do if faced with this staring at you on the eBay auction block? J. Peretti Co., all, looking back at me! – the pipe name that I had unintentionally started collecting and liking a lot. The seller was from Everett, Massachusetts, near Boston’s L. J. Peretti Co. Tobacconist, second oldest Tobacconist in the US. Even though Peretti Tobacconist is more known for their 1000s of custom blends of tobacco which I have enjoyed (see below presents from last Christmas from my daughter-in-law!), they have also produced pipes over the years bearing the Peretti name. It became obvious to me that this seller had Peretti estate pipes which had belonged to a pipe man who loved Peretti pipes, and I was attracted to the Lot for all the Peretti shapes that I do not yet have in my collection. The massive amount of briar jumping out at me also caught my eye – oh my, Oom Pauls, and some sitters that were borderline Oom Pauls with strong ¾ bent stems and the quint essential long, tight, tall bowls. Also, in the Lot I saw a large, graceful Bent Egg, a Calabash, a gentle Half Bent Billiard and a huge, colossus of a Billiard! I was happy to bring this Peretti Lot of 10 back with me to Bulgaria destined for the worktable.
  My enjoyment of Peretti pipes started Christmas of 2016 with our family gathering in Denver. My son, Josiah, secured a proud, square shank Billiard bearing the Peretti stamp and an amputated stem from the Armadillo Antique Mall. I found it under the Christmas tree with Josiah’s encouragement, ‘Dad, I know you can do something with it!’ And I did. I cannibalized another stem and spliced it on the existing stem – I wanted to save the Peretti ‘P’ stem stamp at all cost! This stout square shanked Billiard is a good smoker and a regular friend in my rotation!
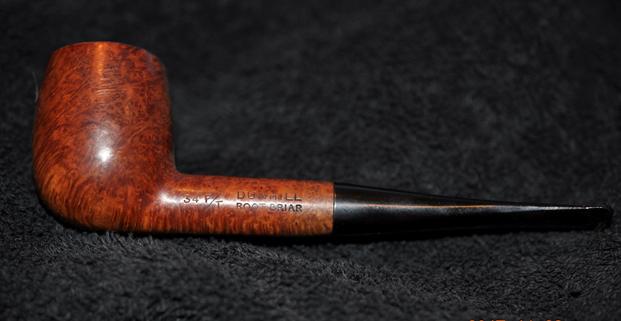
 Doing research for the Peretti Christmas gift stem splice restoration (See: LINK), introduced me to the Peretti name which I was surprised to discover is not an Italian pipe name, as I originally assumed! The family originally came from the southern slopes of the Swiss Alps which would have much Italian influence, just to the south. I discovered the beginning of a significant story of Americana pipe history with the establishment of the L. J. Peretti Company of Boston in 1870 (Pipedia citing: Pipes, Artisans and Trademarks, by José Manuel Lopes), the second oldest tobacco shop in the US, second only to Iwan Ries & Co. of Chicago established in 1857 (See: Link). Going to the Peretti shop in Boston is on my bucket list where blends are still hand mixed and I’ve read that you can take your pipe and try some blends out before purchasing. Not bad.
 My second Peretti found me serendipitously in Oslo, Norway, as I, along with a few other colleagues met to take in the European Biathlon finals (that’s skiing and shooting!). Jon gave me a very sharp looking square shanked Rhodesian, also bearing the name, Peretti. He said he wasn’t using it anymore and I welcomed this Peretti into the fold. I now had what I started calling, the Peretti Brothers. Here is the restoration of the Peretti Rhodesian.
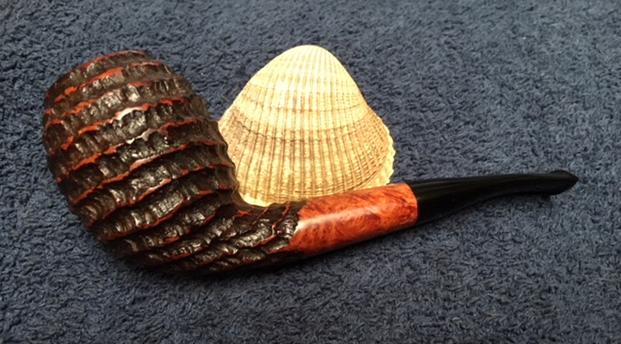
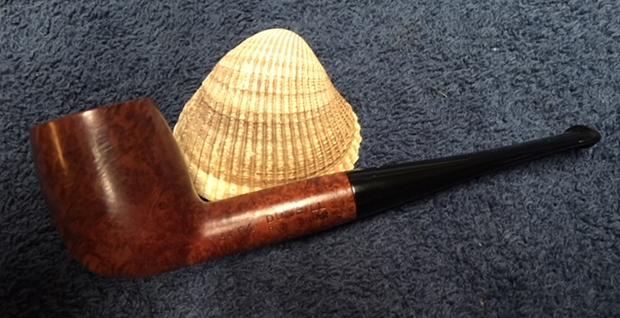
 In the Peretti Lot of 10, I’ve already restored the Large Bent Egg and added it to my collection of Perettis. It is a stunning pipe and fits the palm amply and nicely! When smoking this pipe, I’ve warded off random hawkers trying to barter him away from me! I’ve remained strong.
 I have been looking forward to tackling the Oom Pauls for some time. I will add one to my collection, and the others are up for adoption and will benefit a good and worthy effort, the Daughters of Bulgaria, helping women and girls (and their children) who have been trafficked and sexually exploited. As I approach restoring the Oom Pauls, there is no doubt as to the popularity of this shape and that everyone wants to have at least one in their collection. In Pipedia, Bill Burney’s description of the Oom Party is helpful:
 He also describes that the Oom Paul is always a full bent, with a large tobacco chamber and relatively heavy. Yet, because of the way it hangs, it is a comfortable hands-free pipe. To me, the attraction to the Oom Paul is the solid, massive merger between the bowl and shank – it creates a hefty presence in the palm and it hangs from the mouth great with the full bent style.
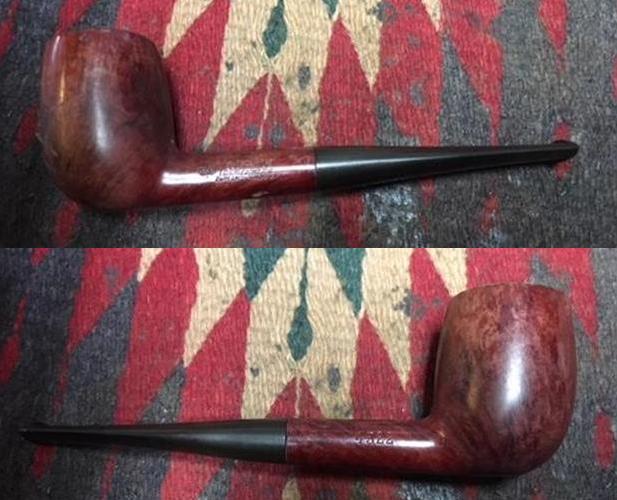
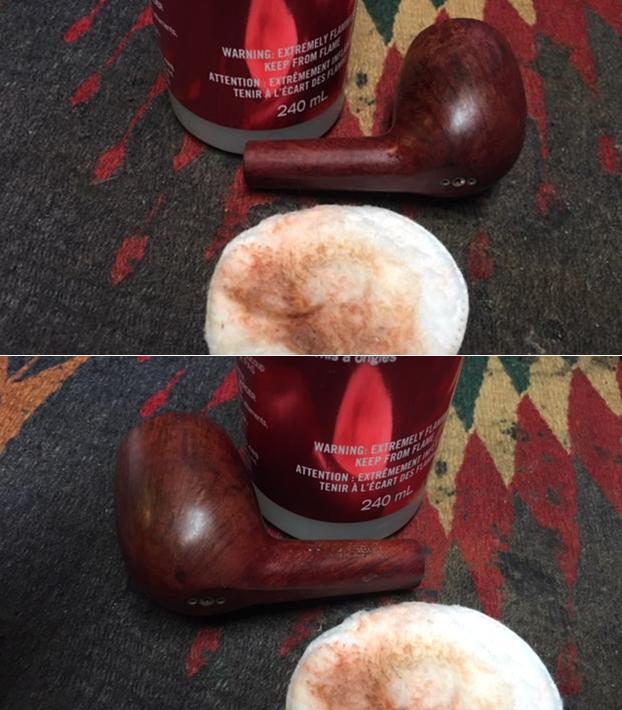
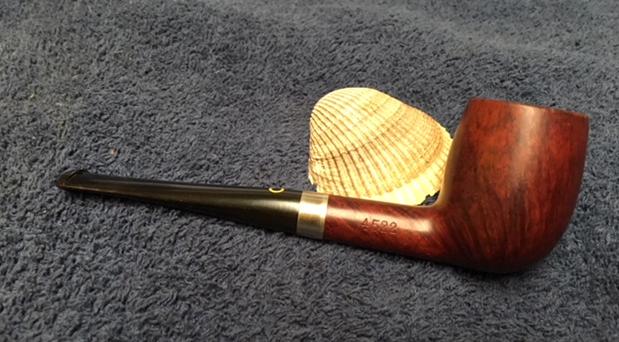
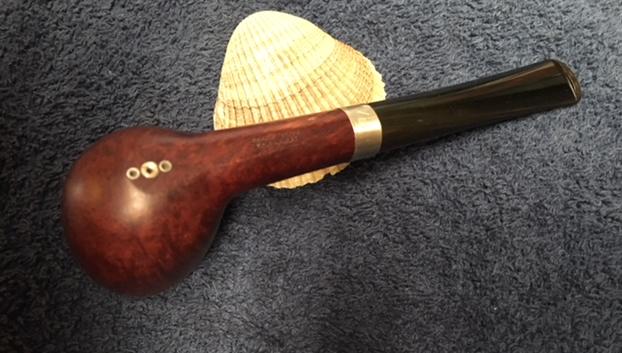
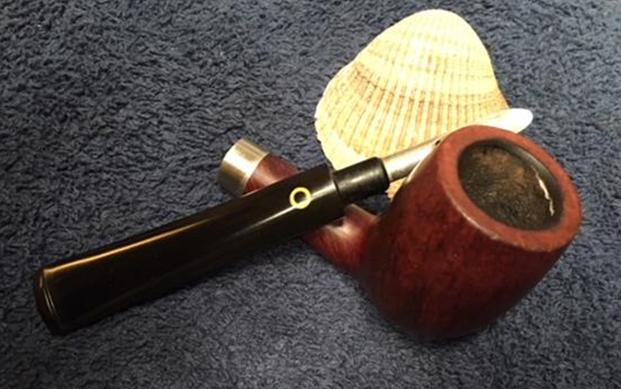
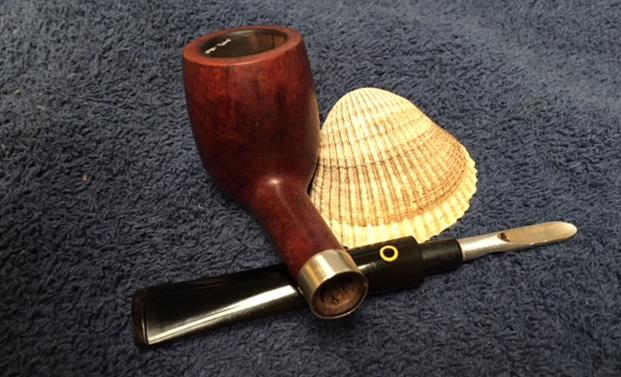
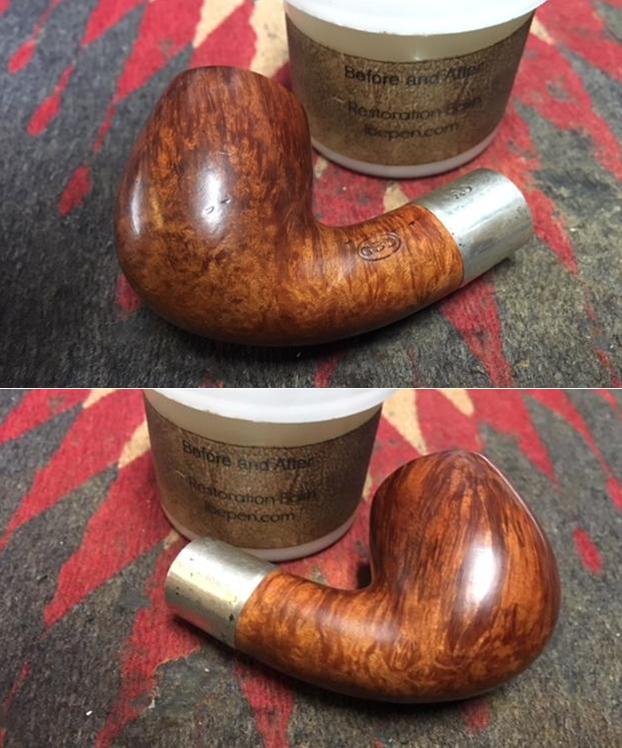
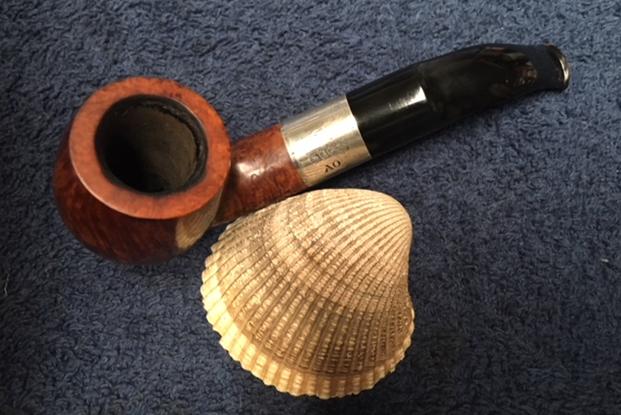
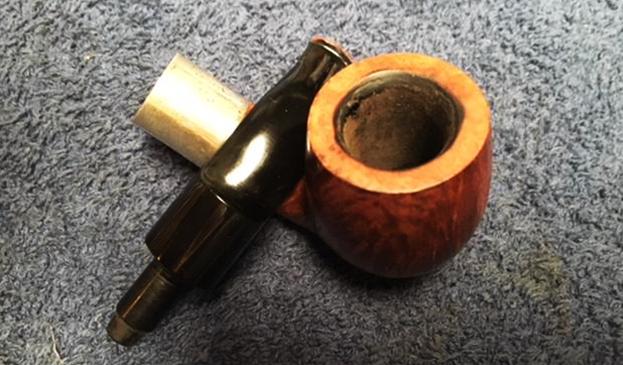
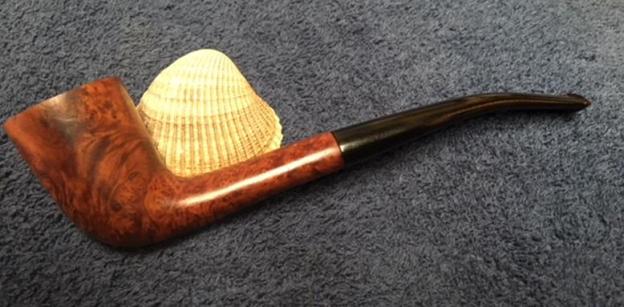
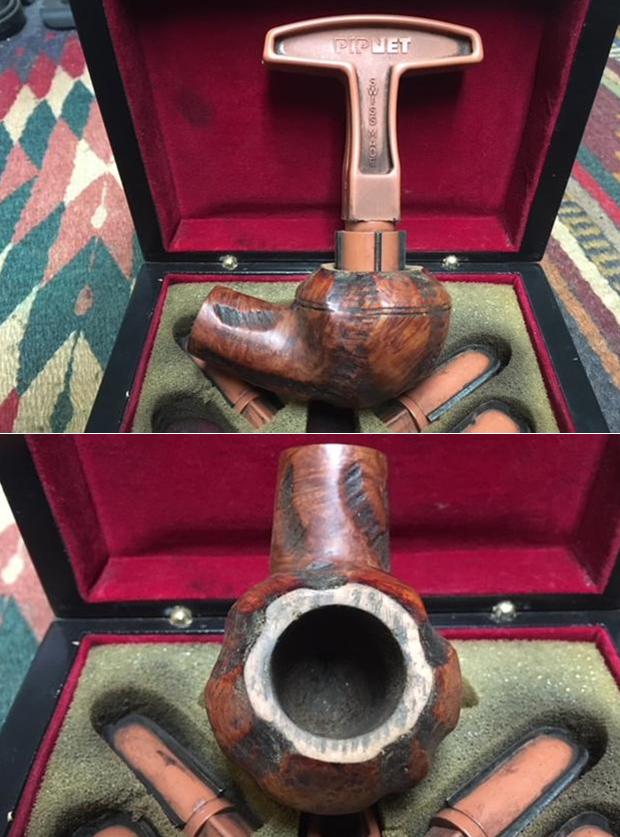
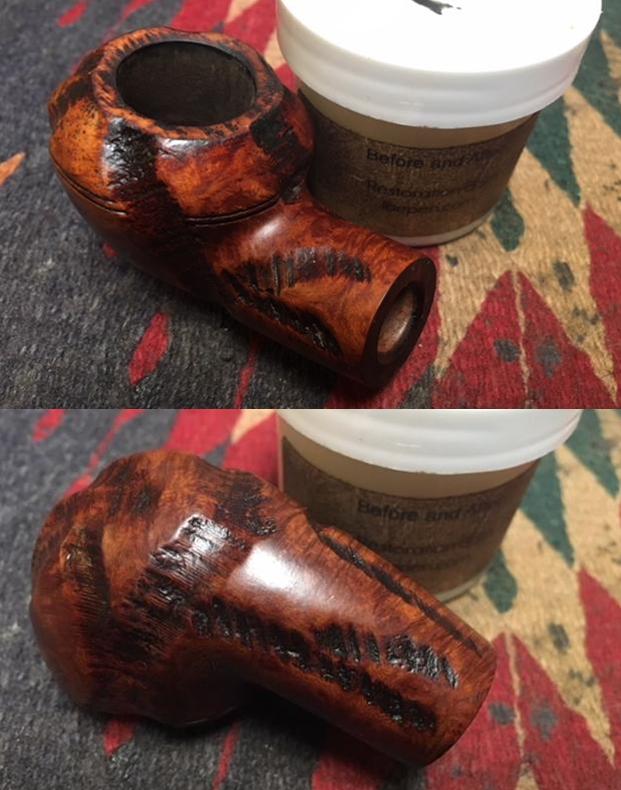
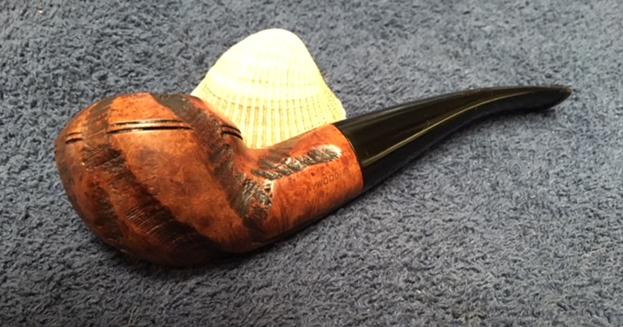
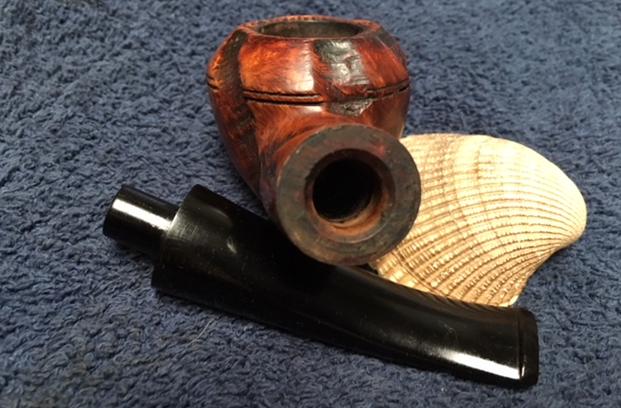
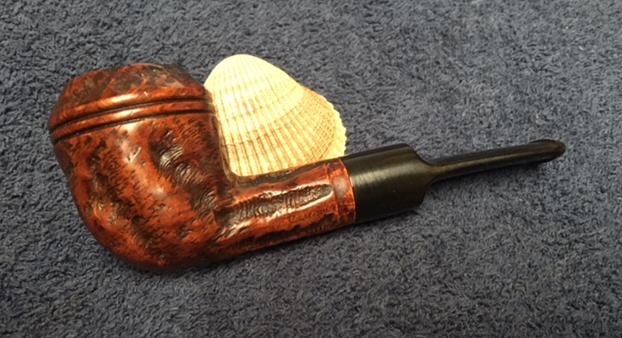
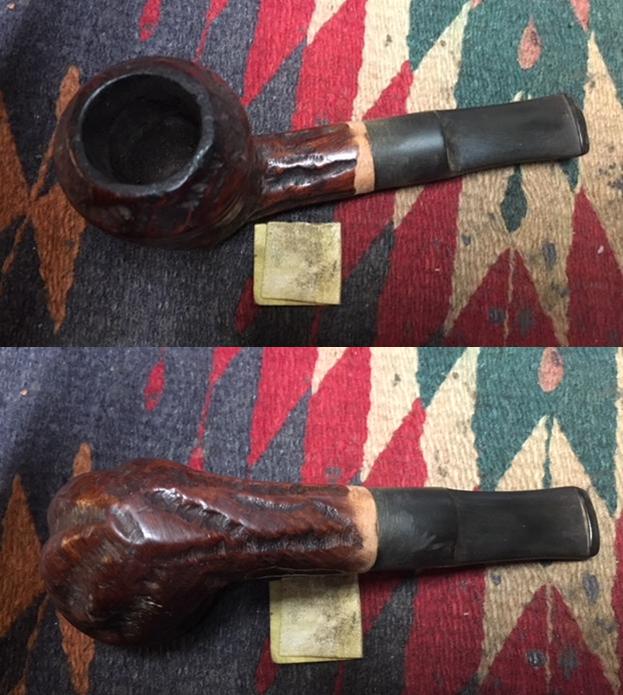
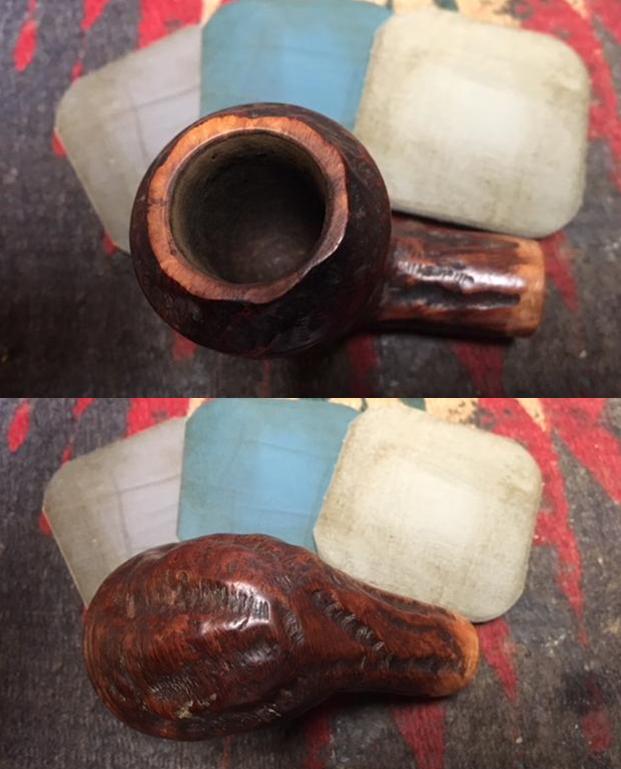
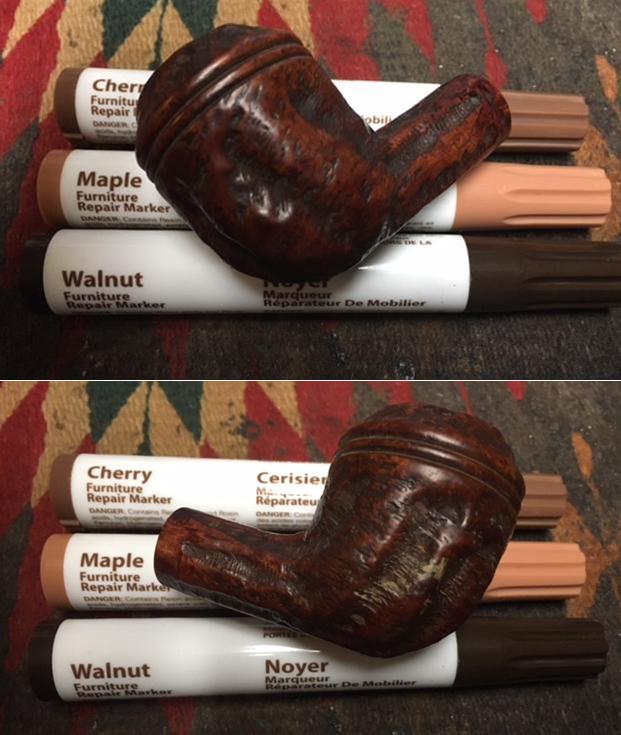
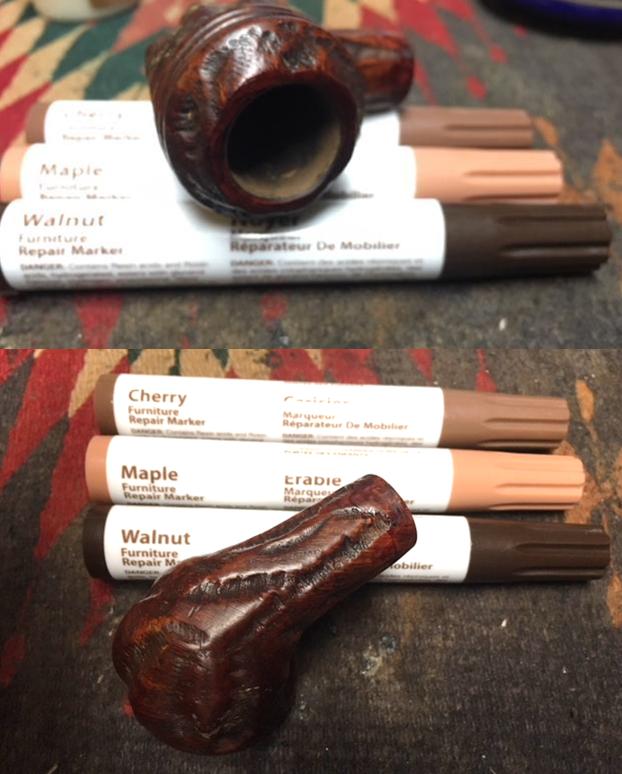
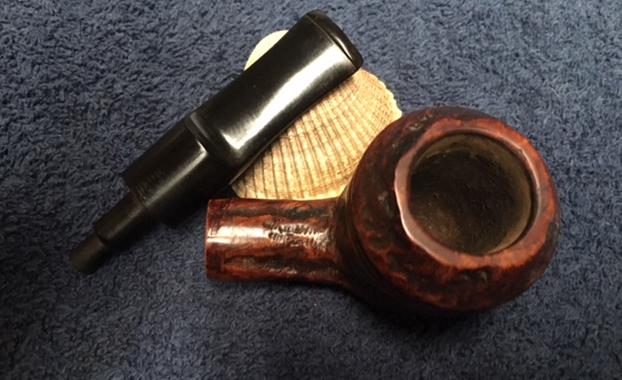
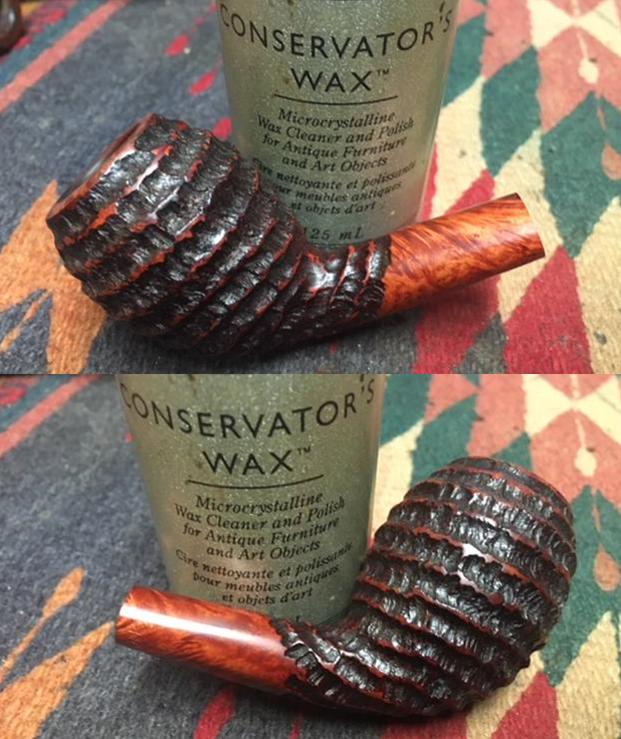
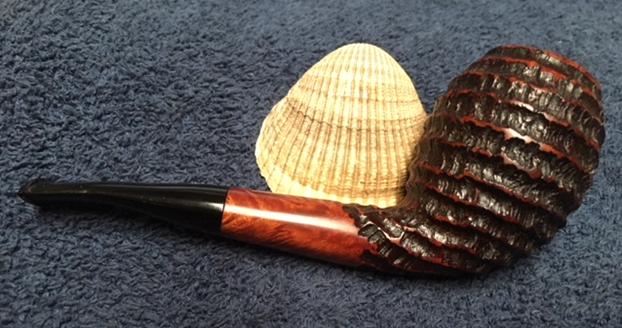
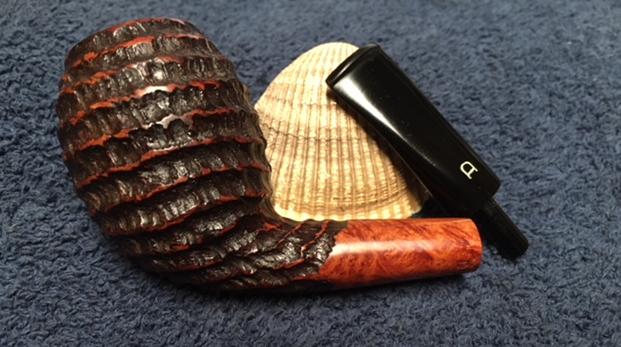
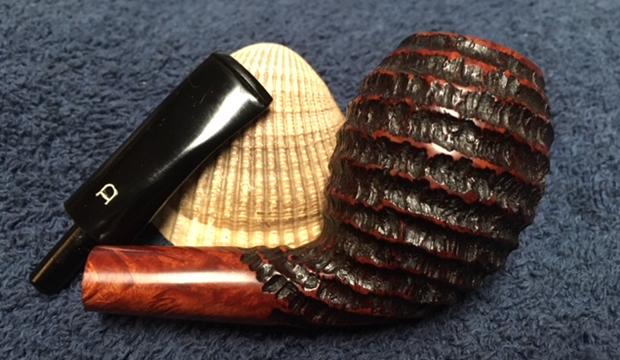
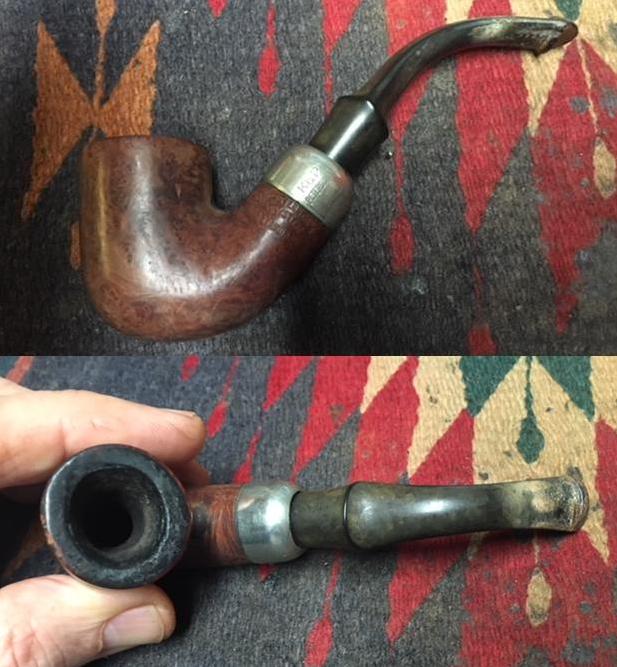
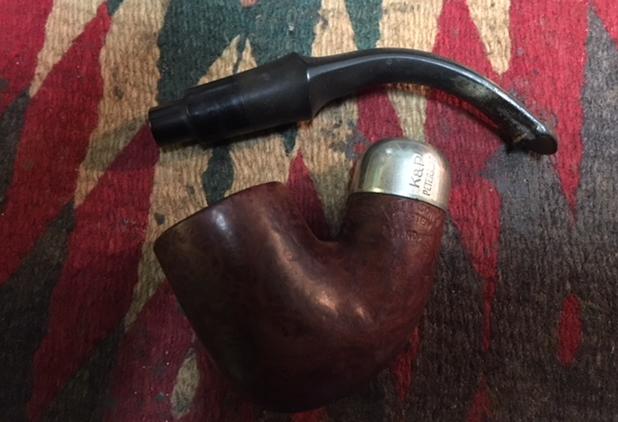
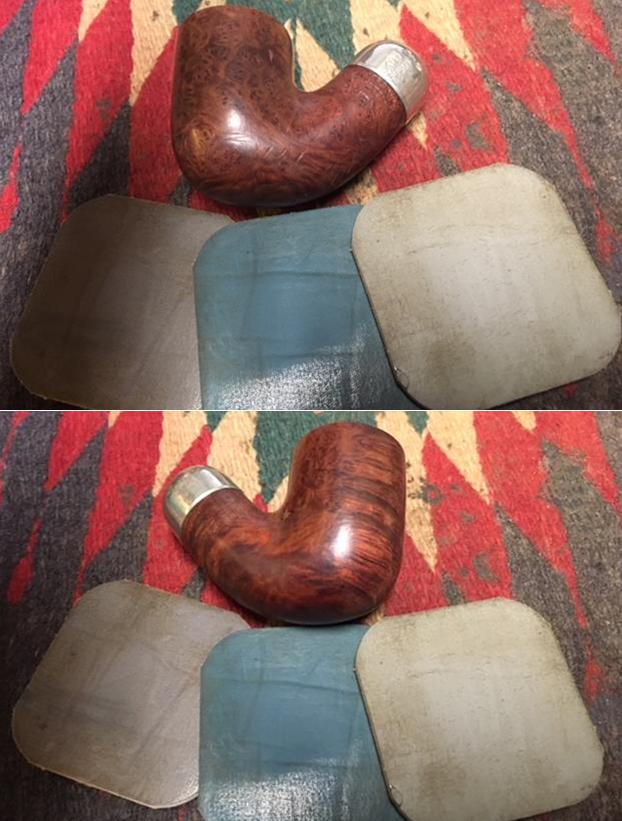
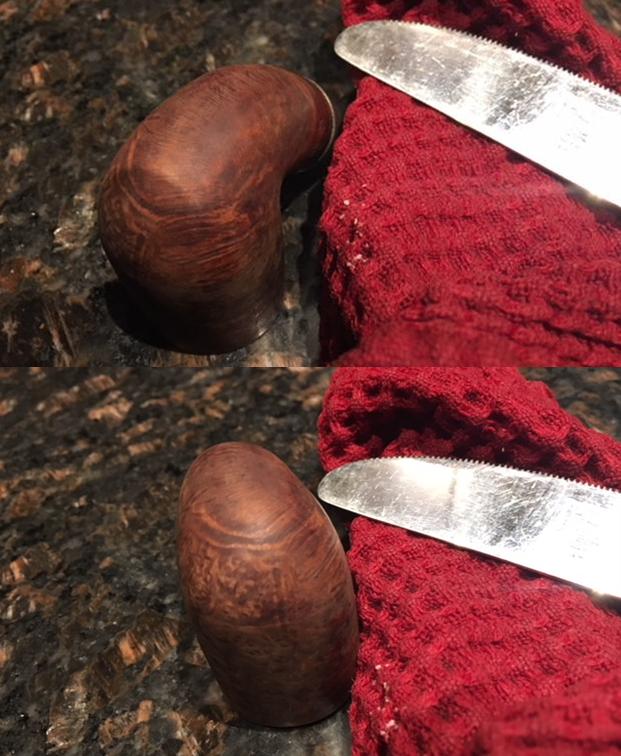
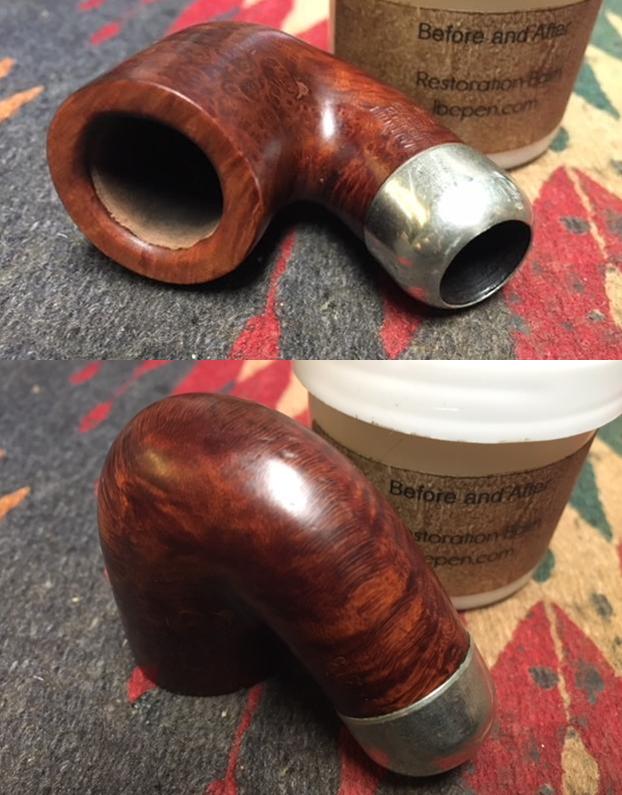
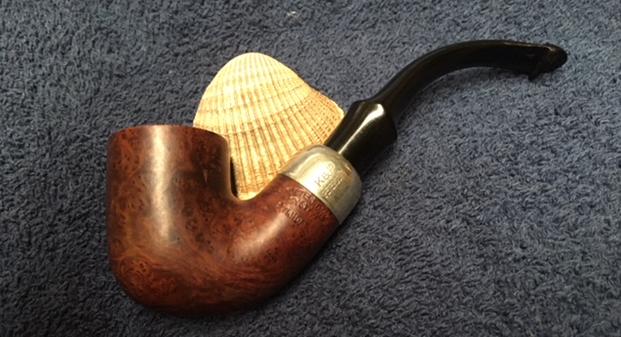
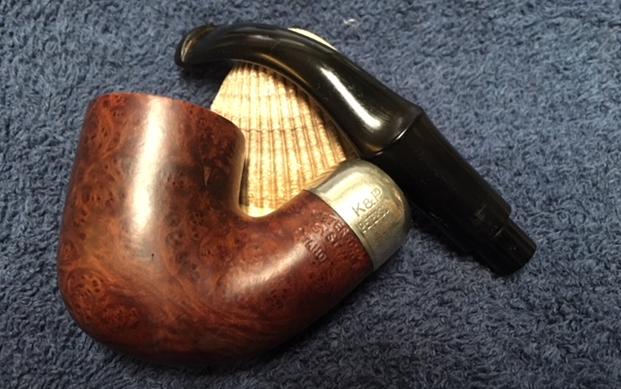
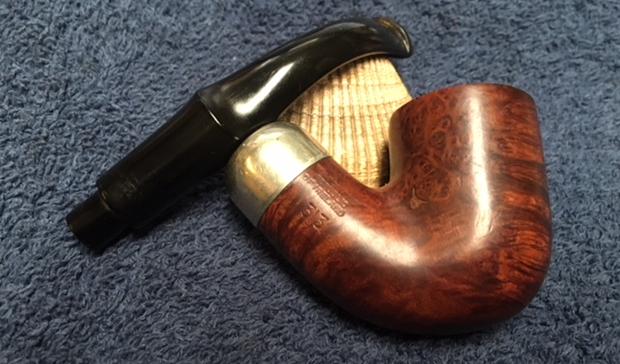
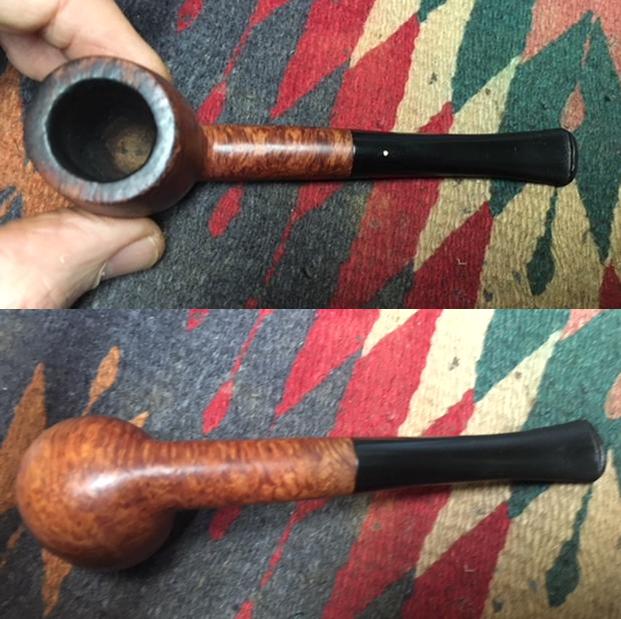
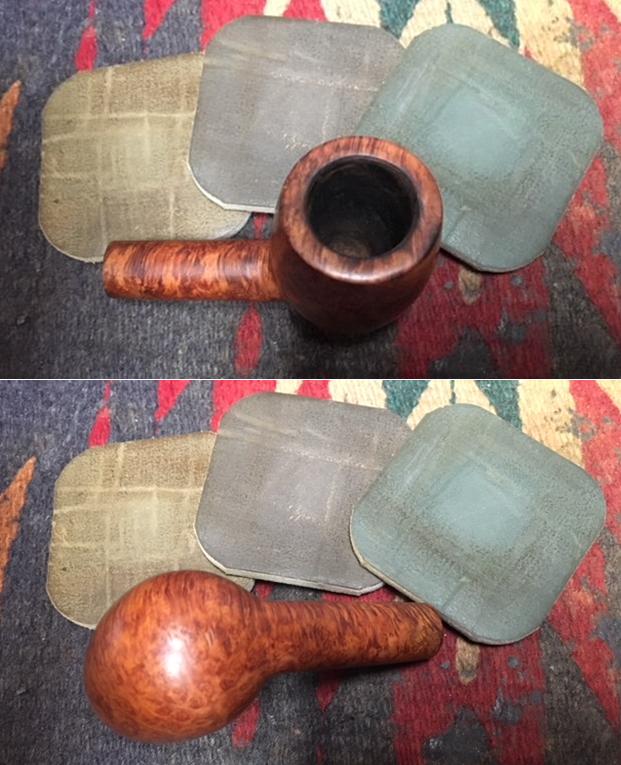
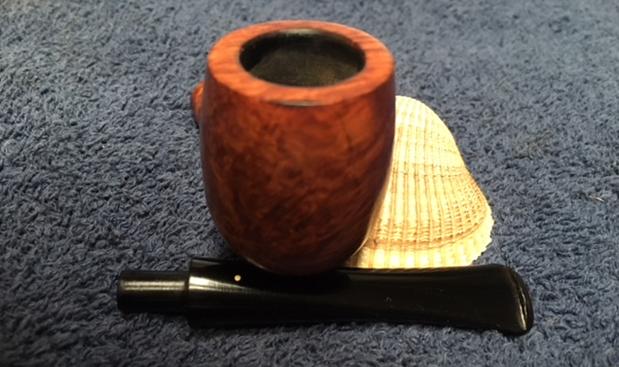
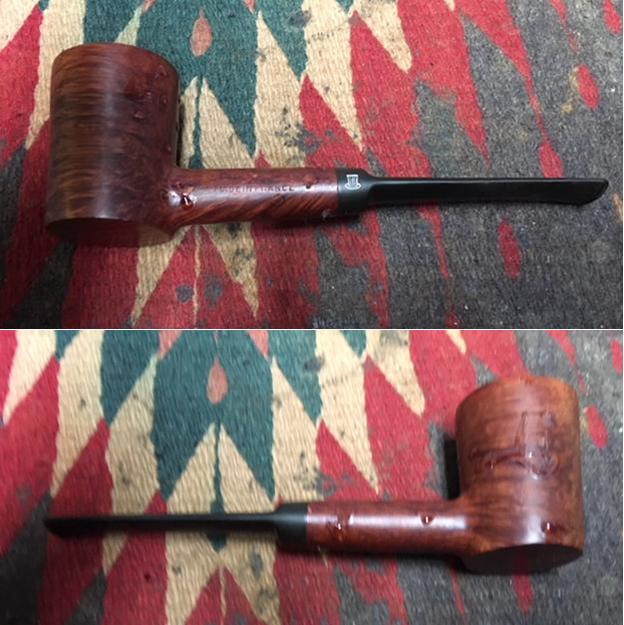
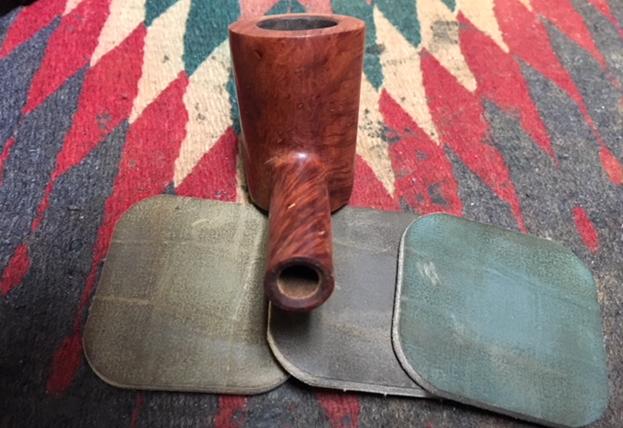
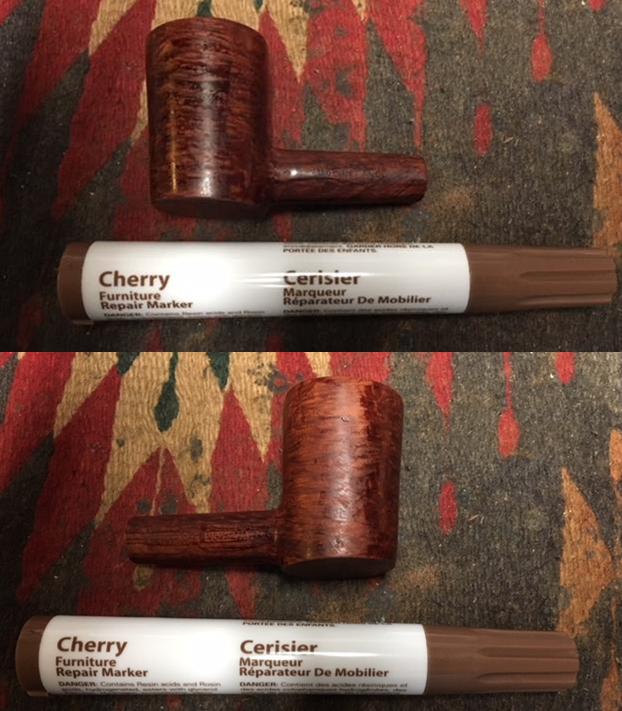
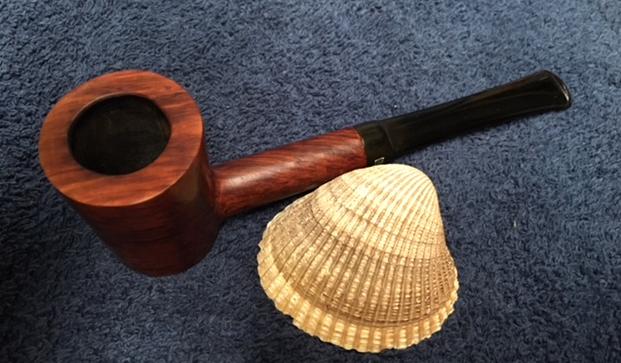
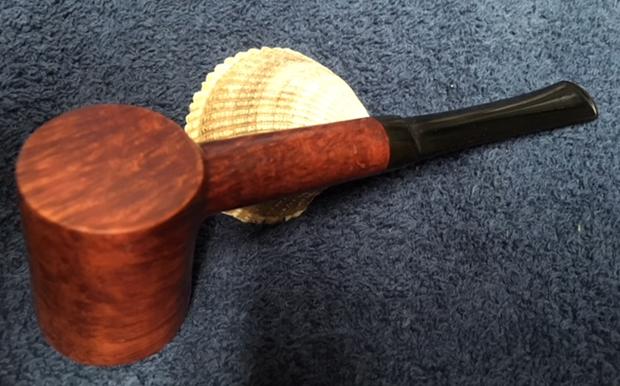
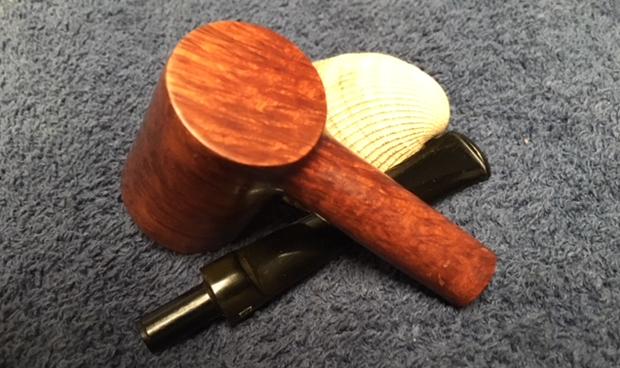
I will attempt something I’ve never done before as I approach the restoration of the Oom Pauls, I’m going to tackle 2 at once – first, the Oom Paul that I’ve chosen to add to my collection and the first Oom Paul that will go in the Pipe Steward Store where a new steward will be sought! To keep things straight and abbreviated, my Oom Paul will be ‘MOP’ and the available Oom Paul will be ‘OP’! I want to use MOP to test the overall approach to the hue of the Oom Paul stummels, which I want to keep as close to the original Peretti scheme as much as possible. The pictures below were numbered so that I wouldn’t mix them up while in the ‘Help Me!’ basket. Here first, is MOP:

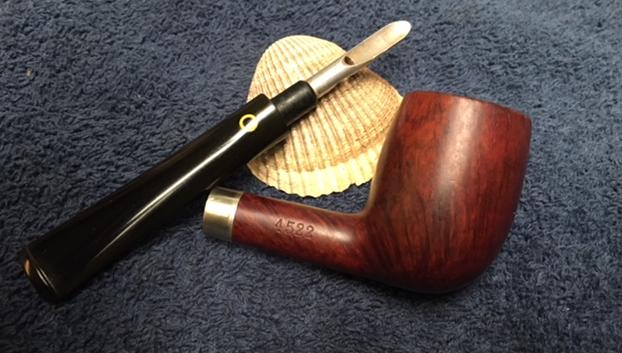
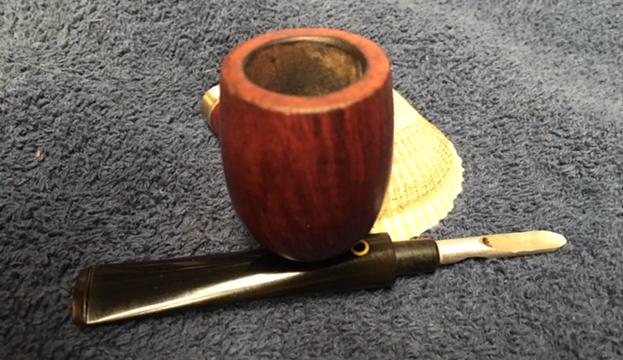
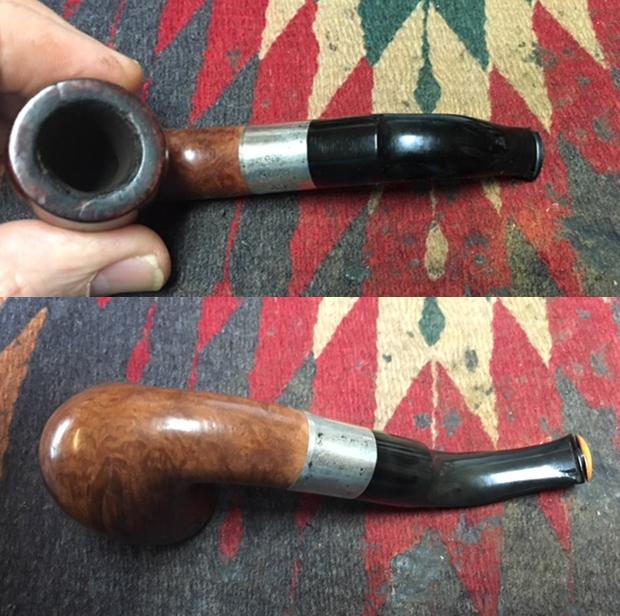
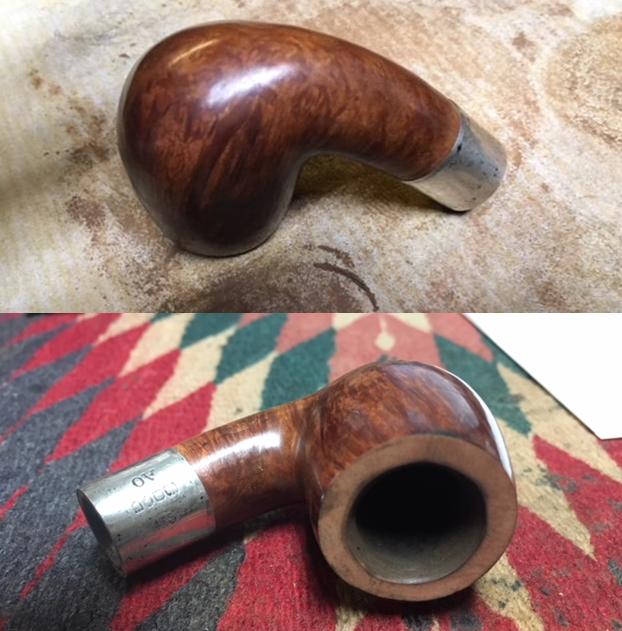
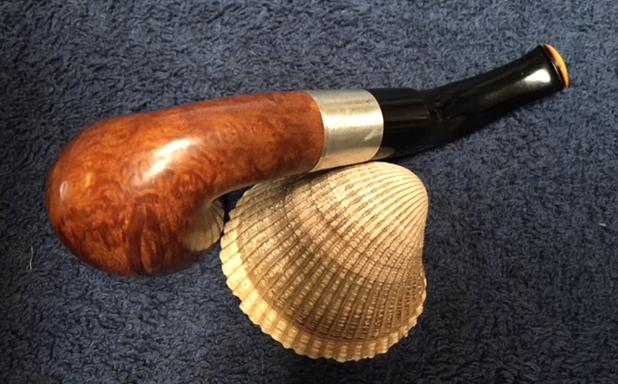
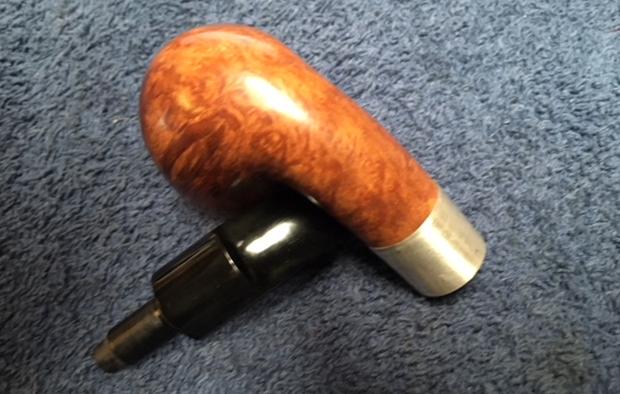
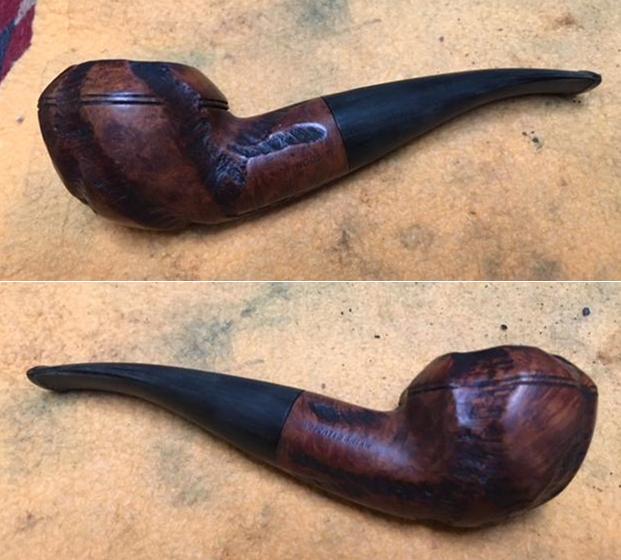
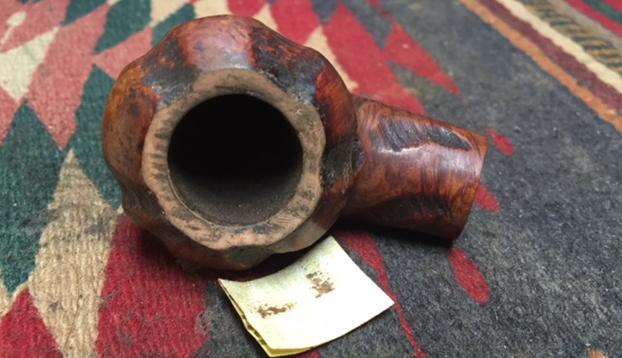
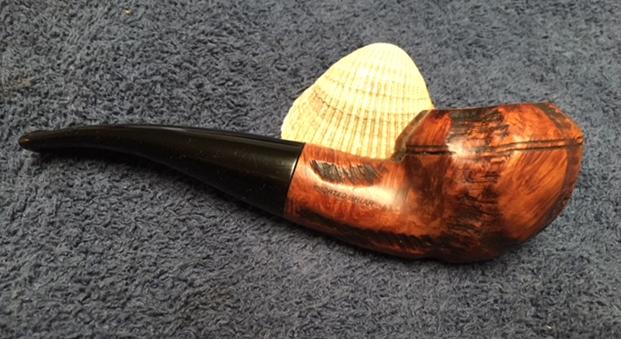
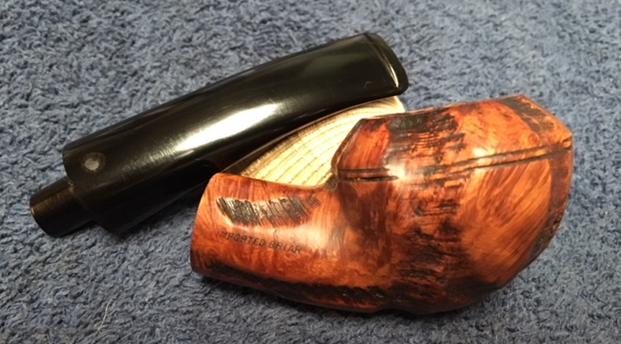
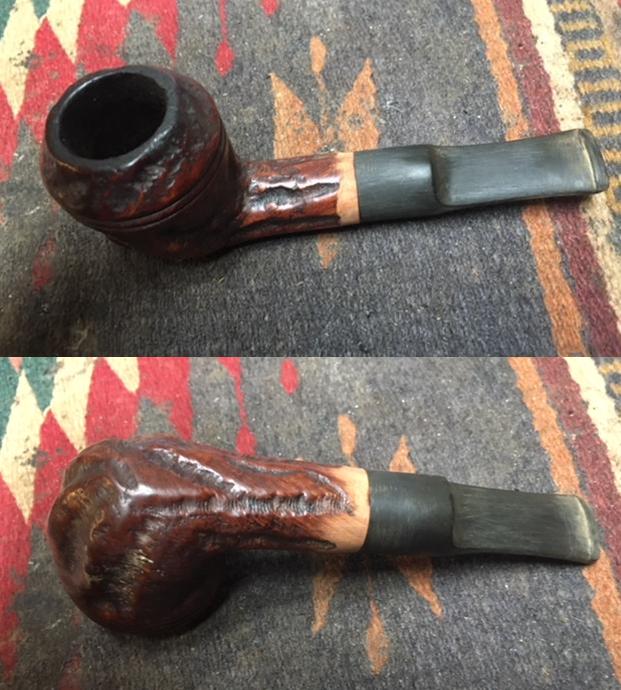
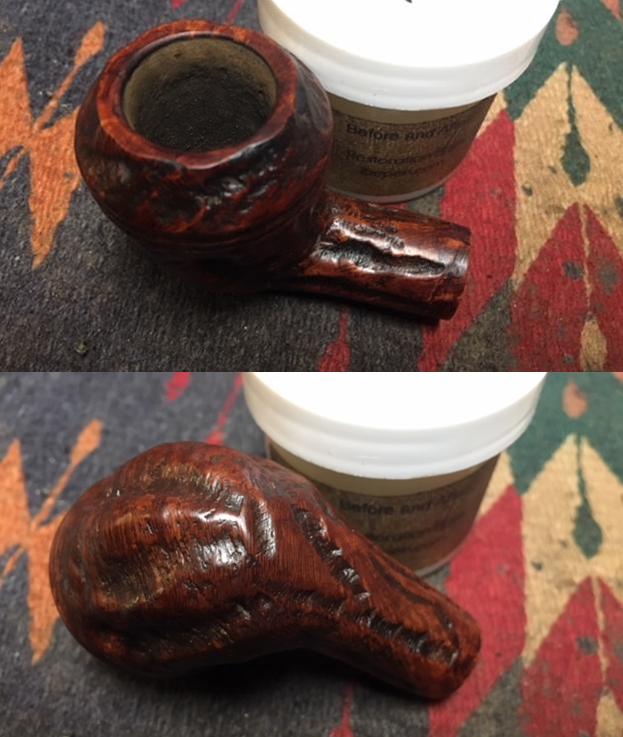
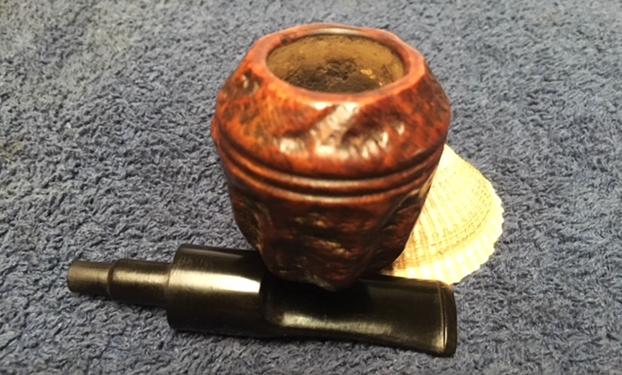
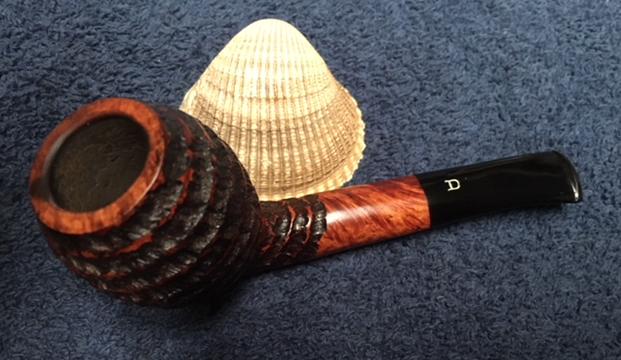
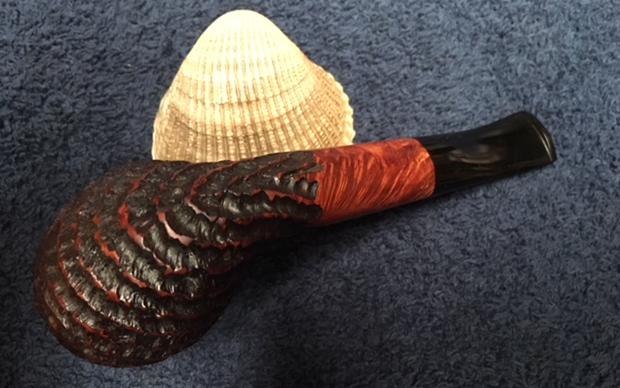
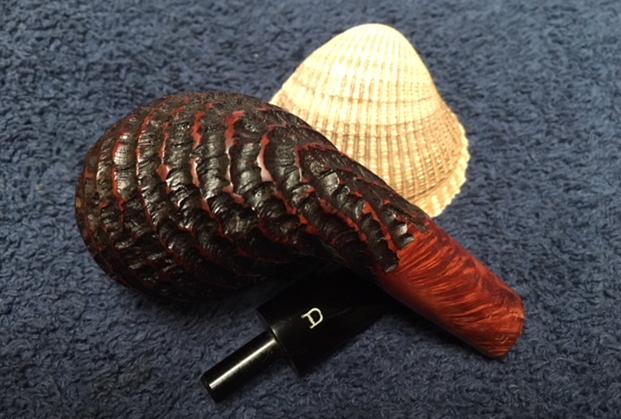
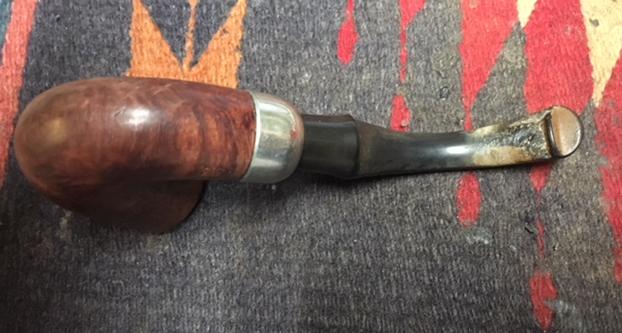
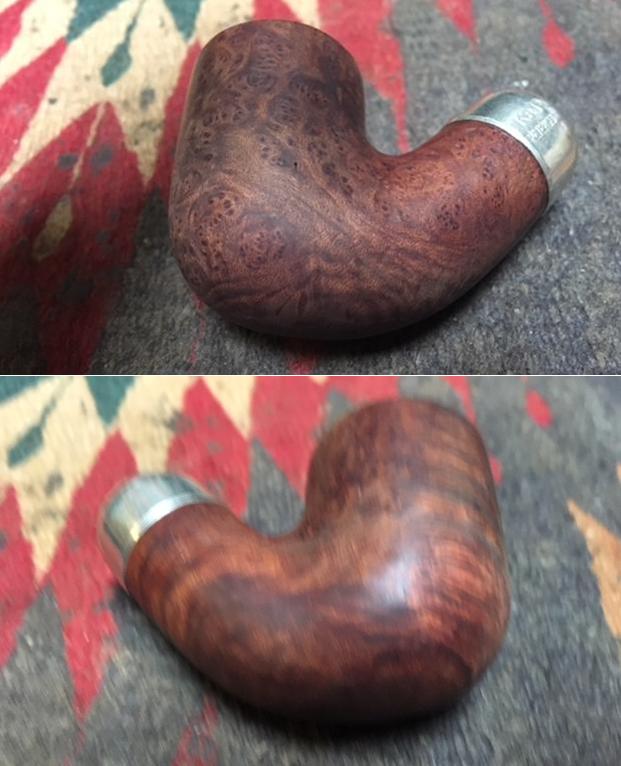
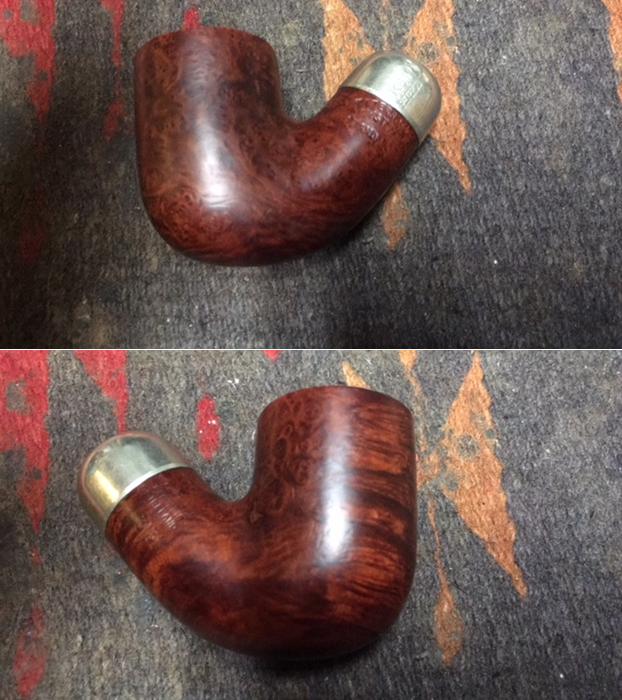
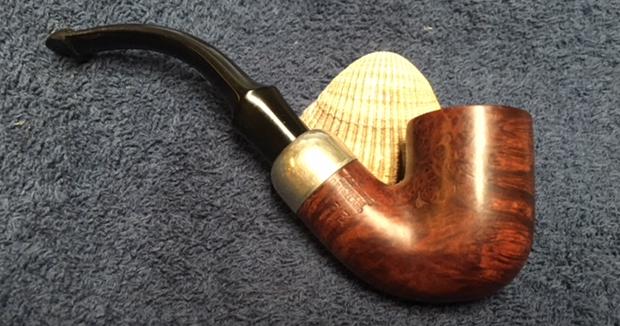
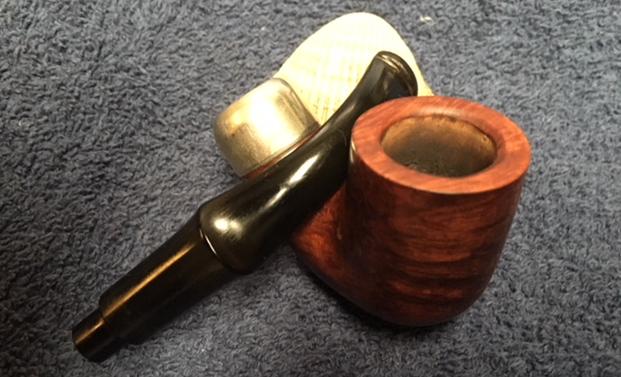
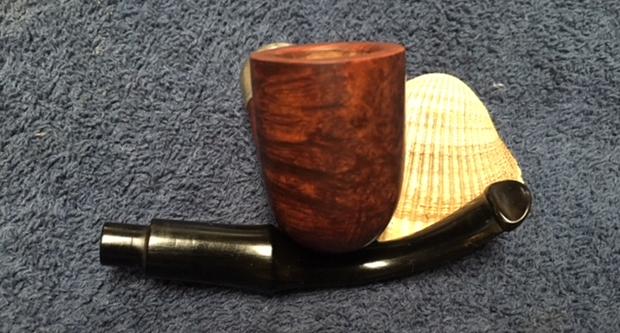
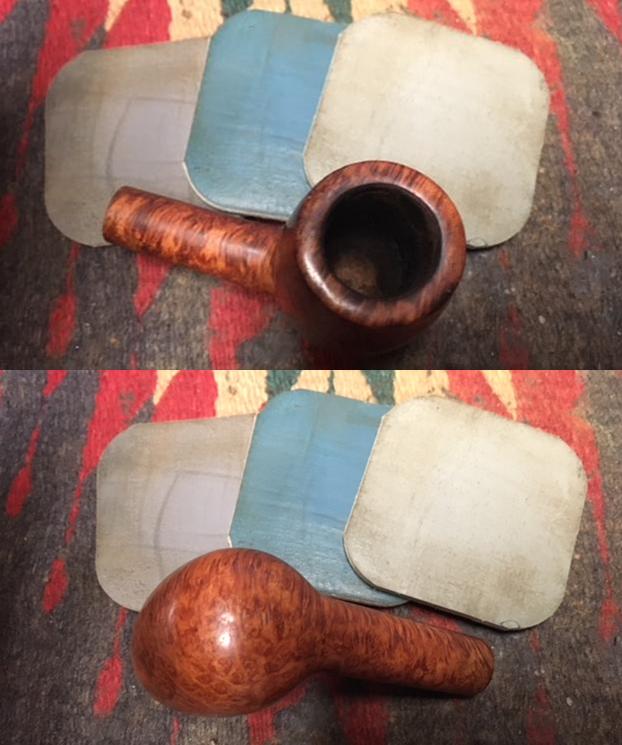
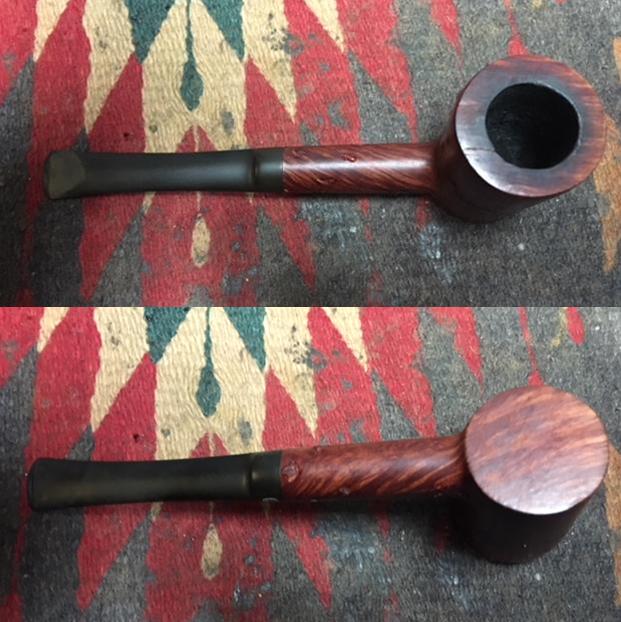
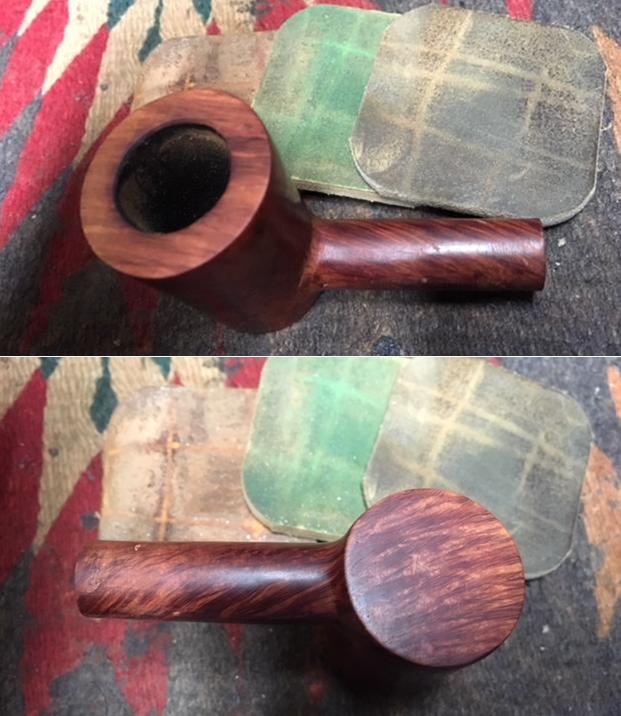
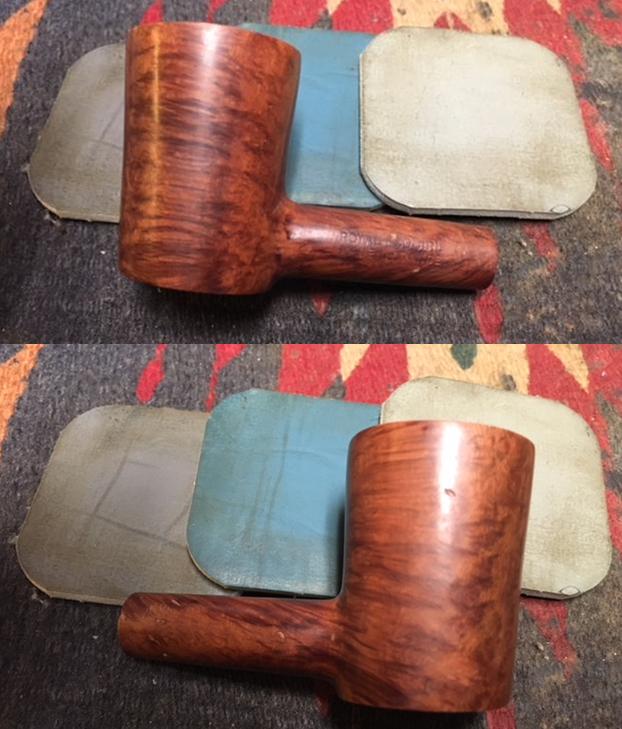
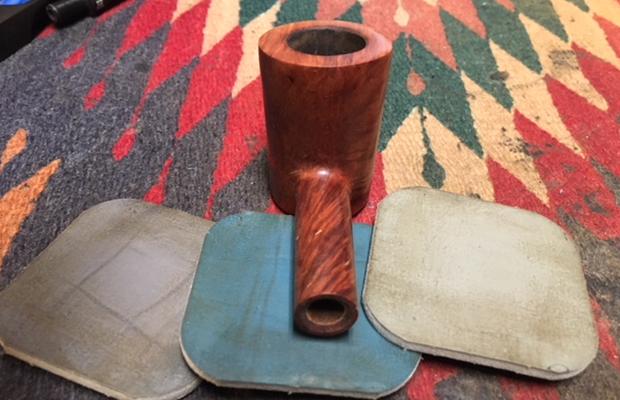
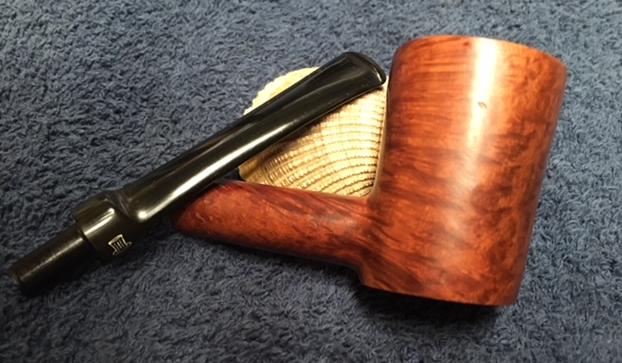
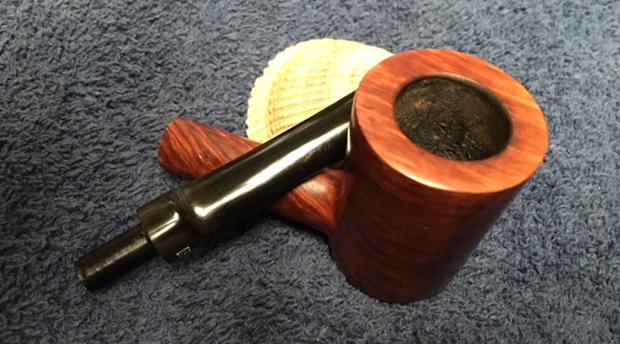
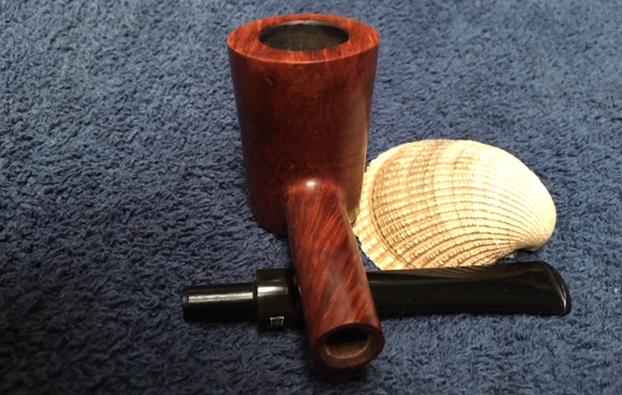
 And now, OP showing beautiful horizontal grain that I think is eye catching on the large Oom Paul stummel:


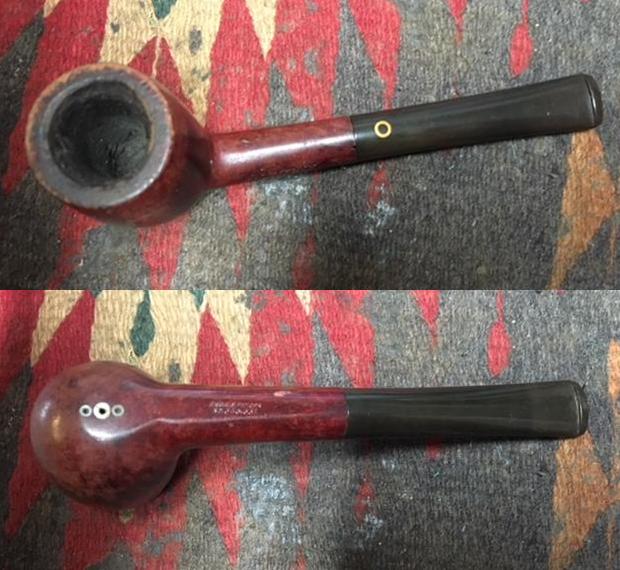
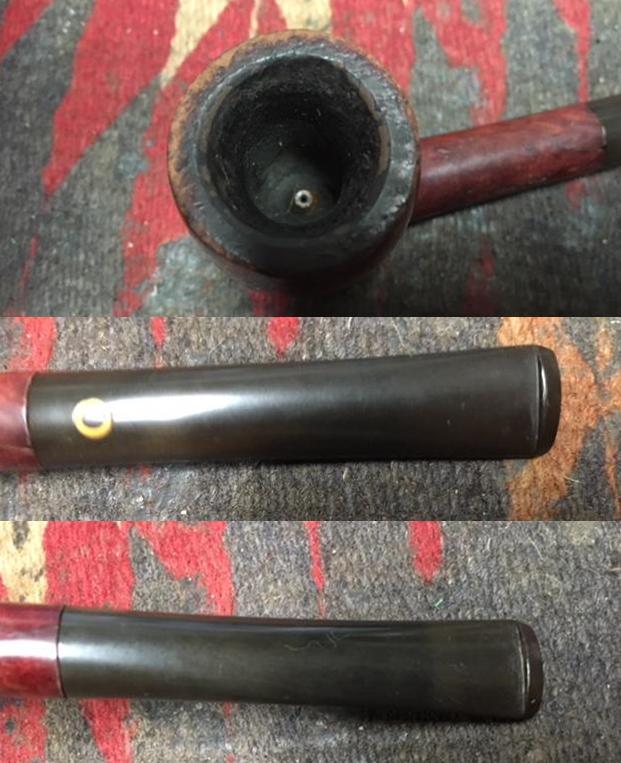
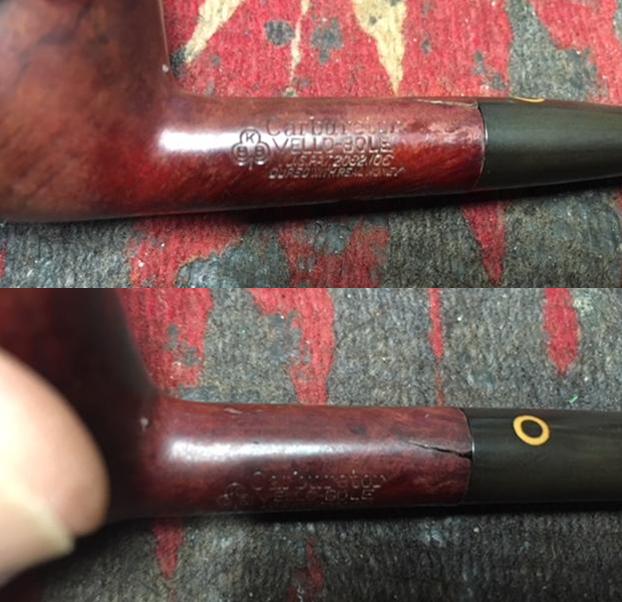
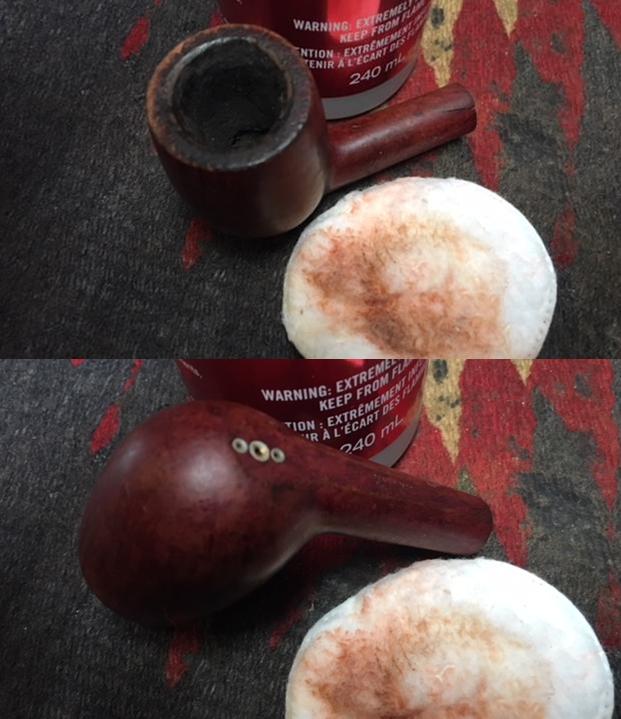
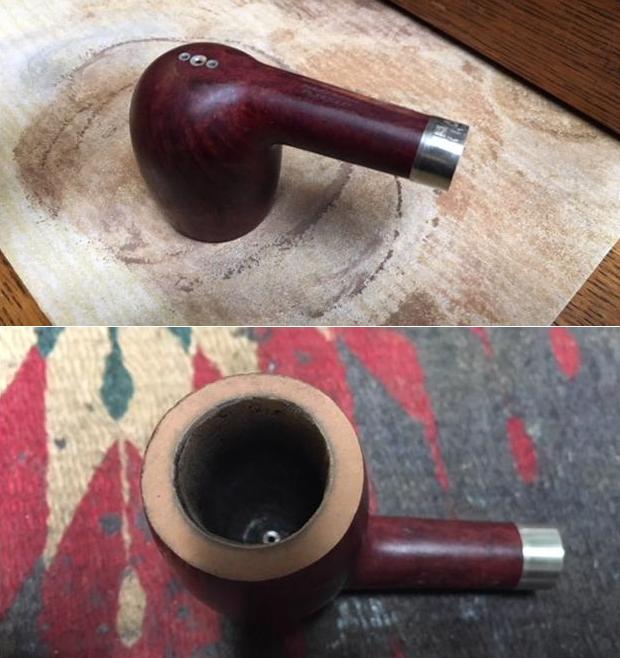
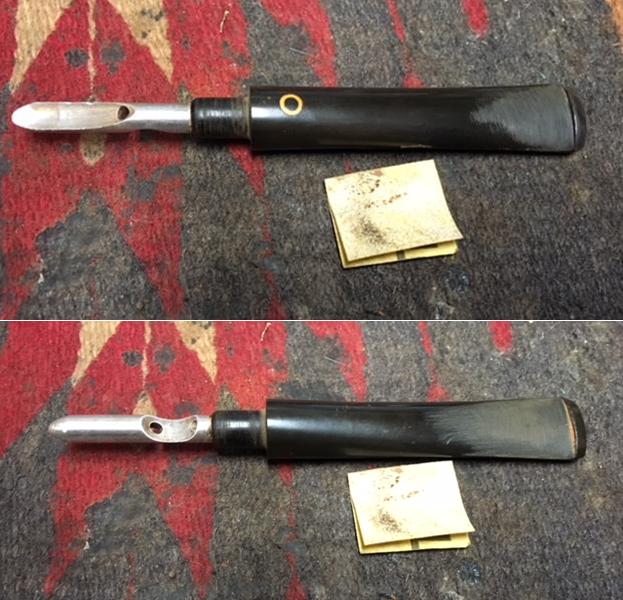
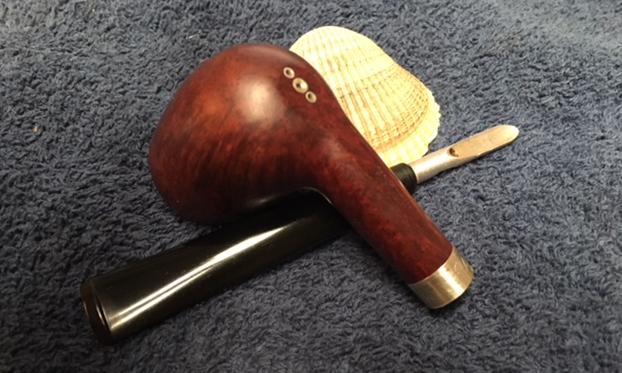
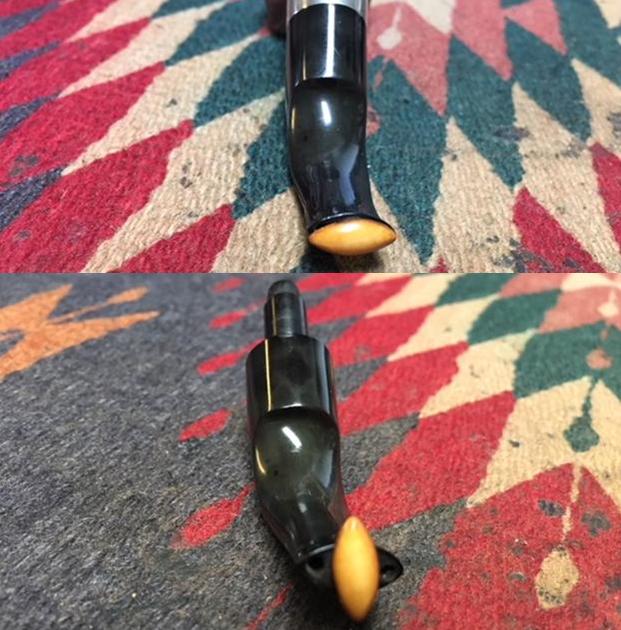
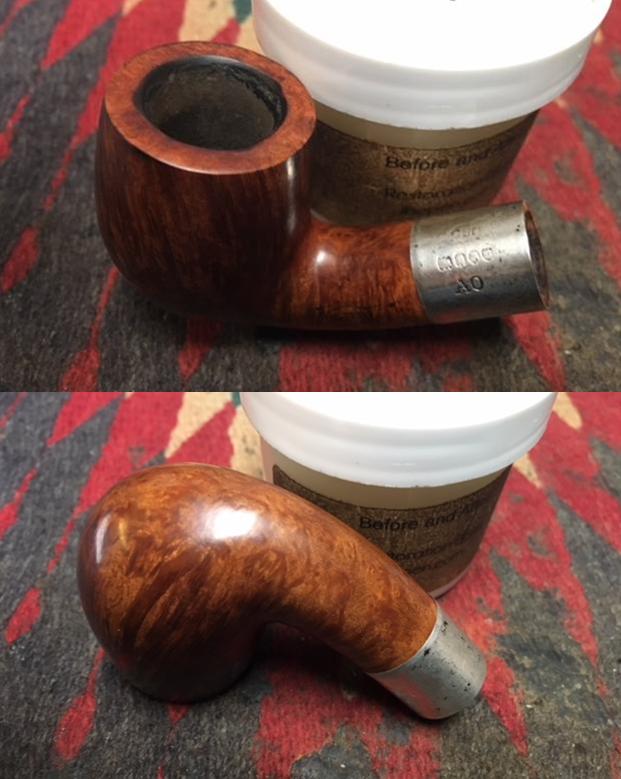
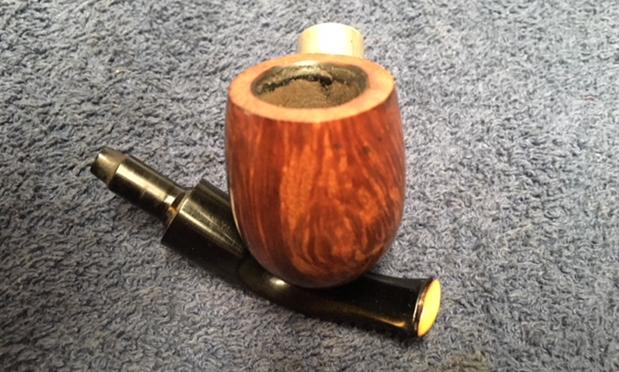
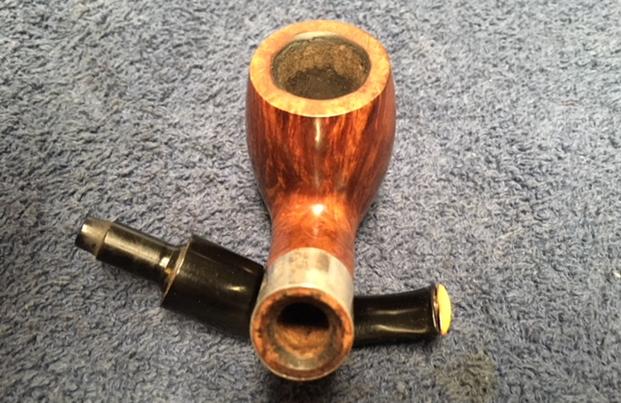
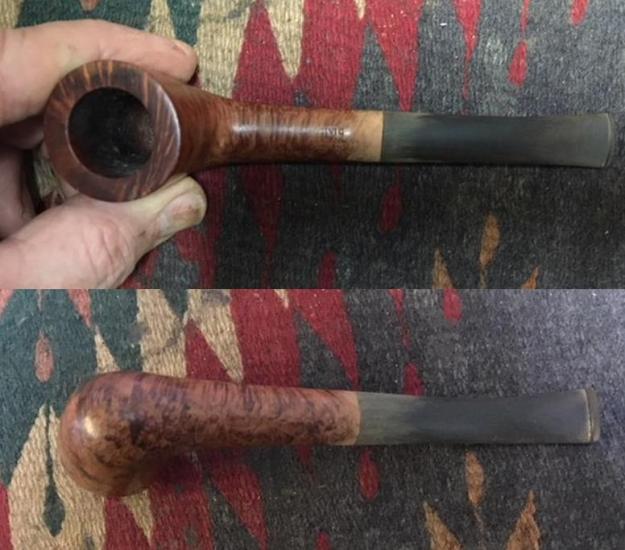
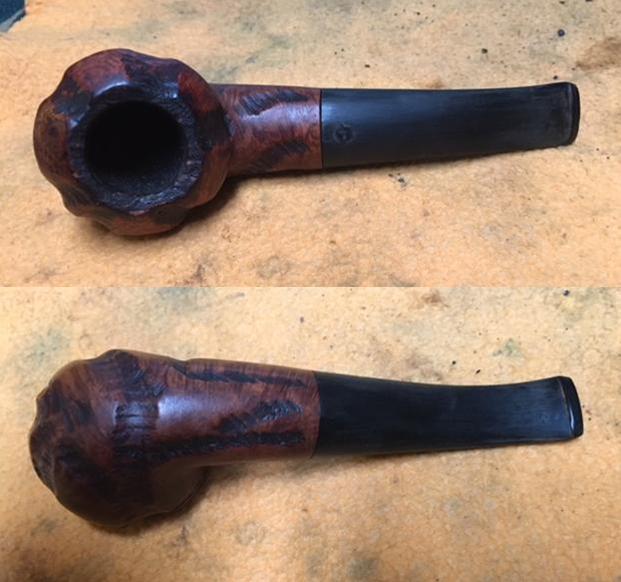
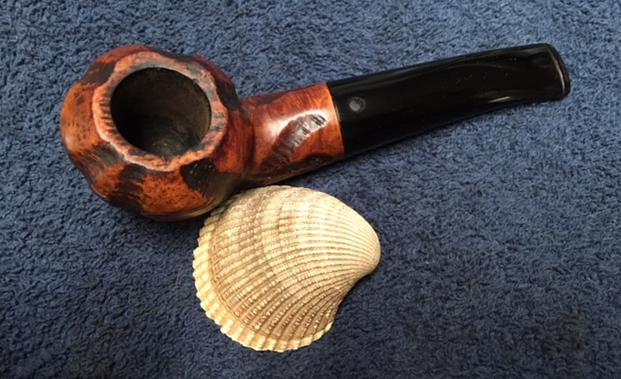
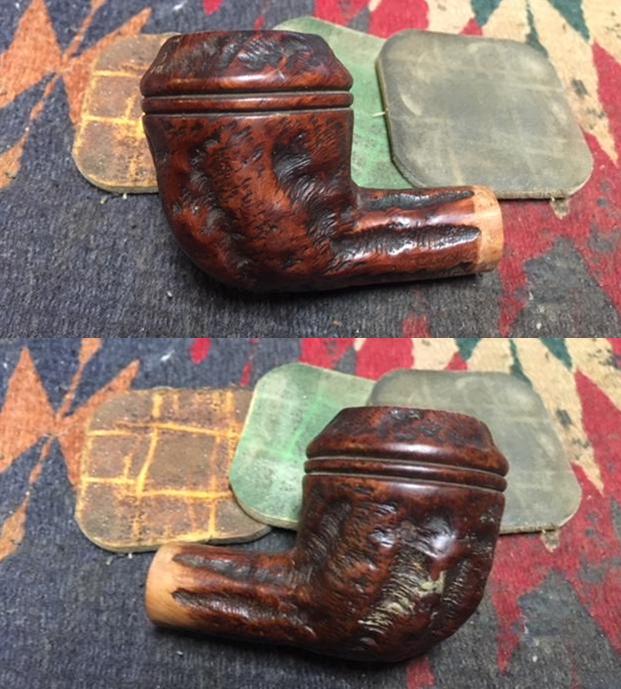
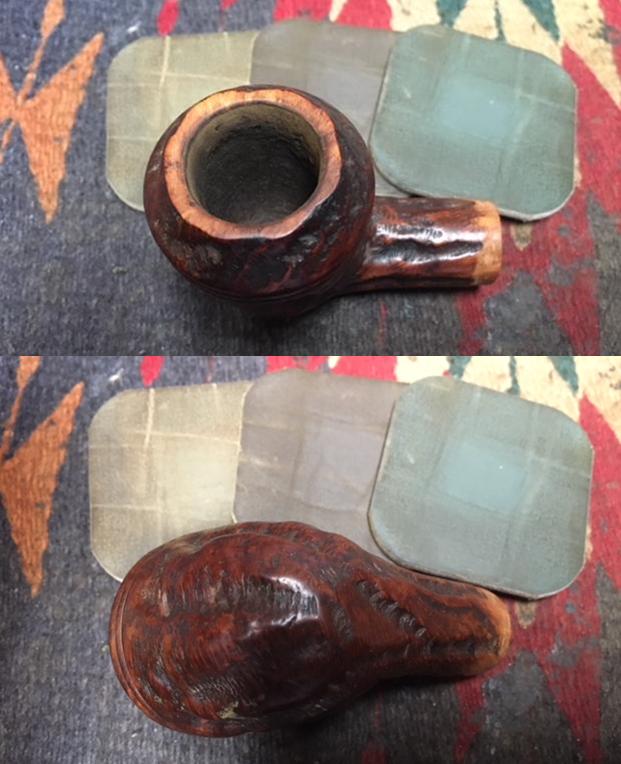
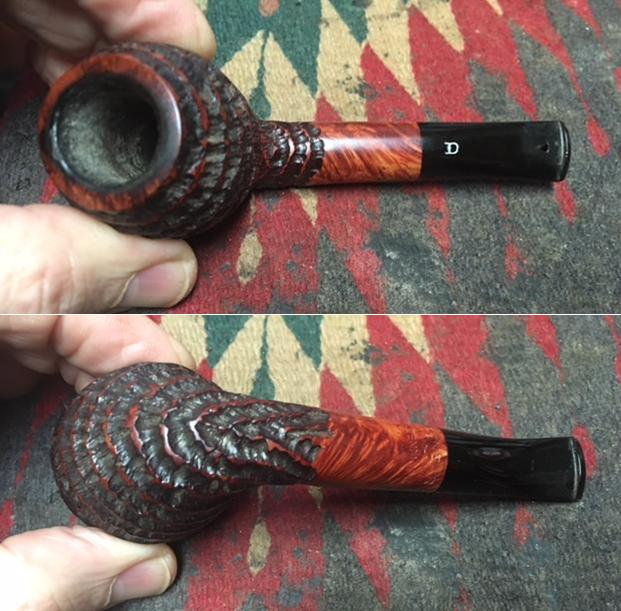
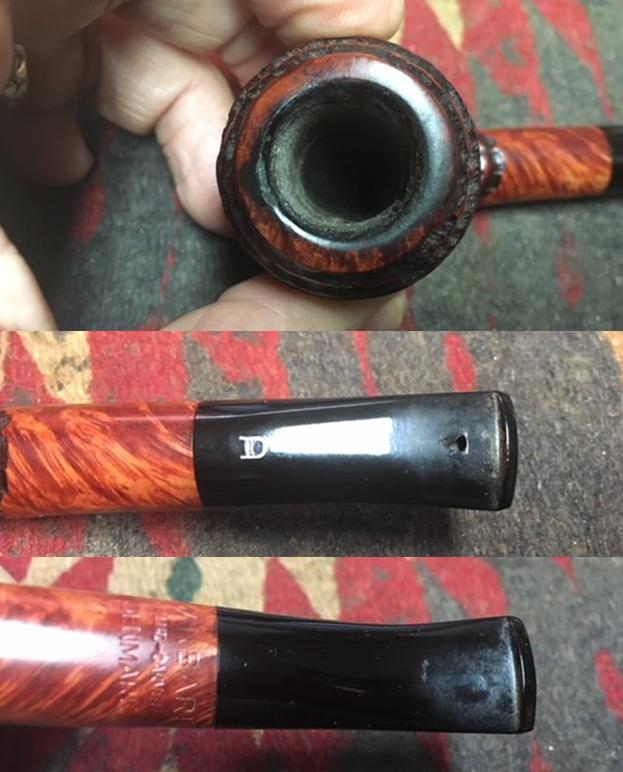
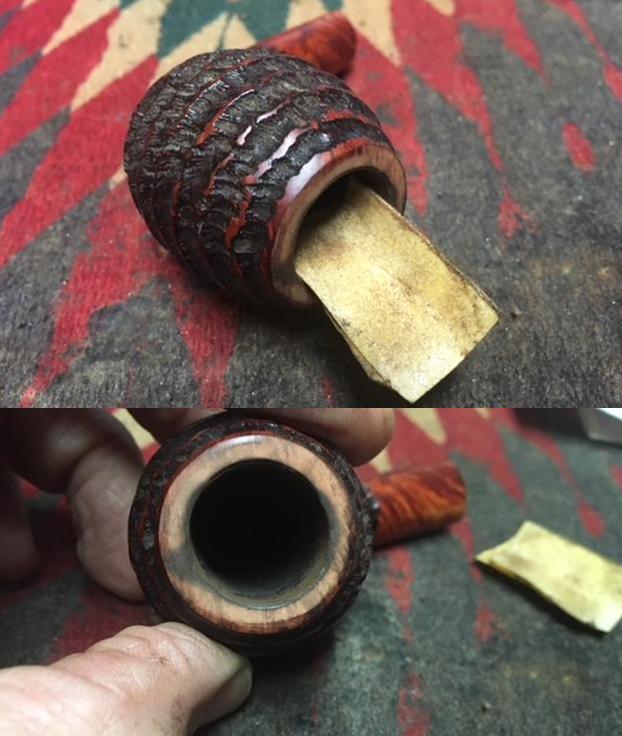
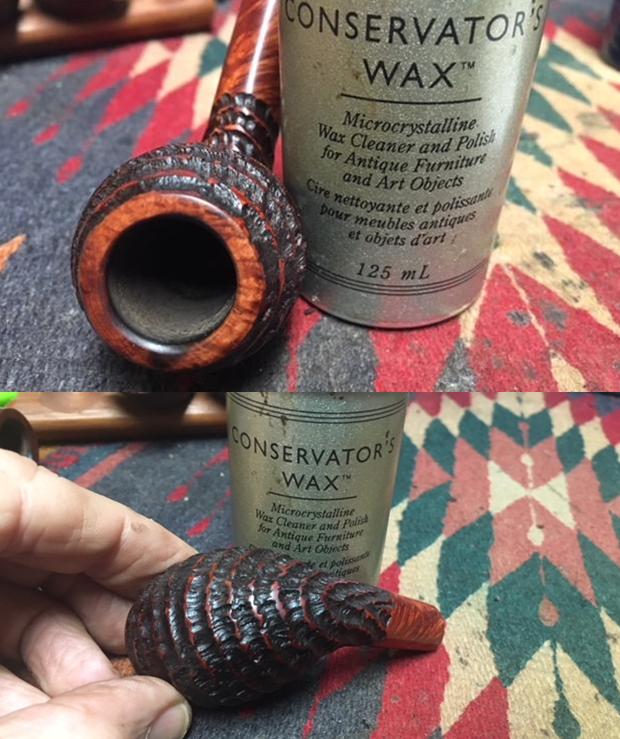
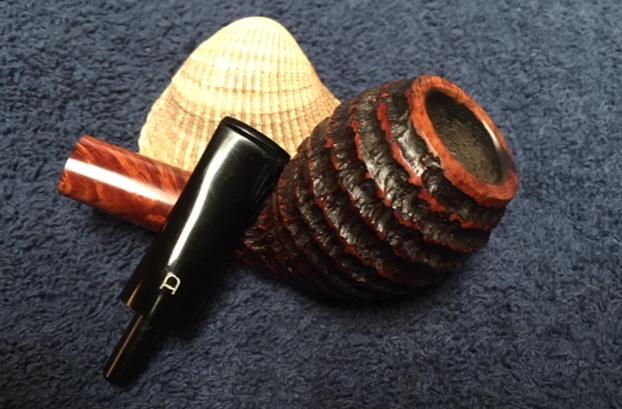
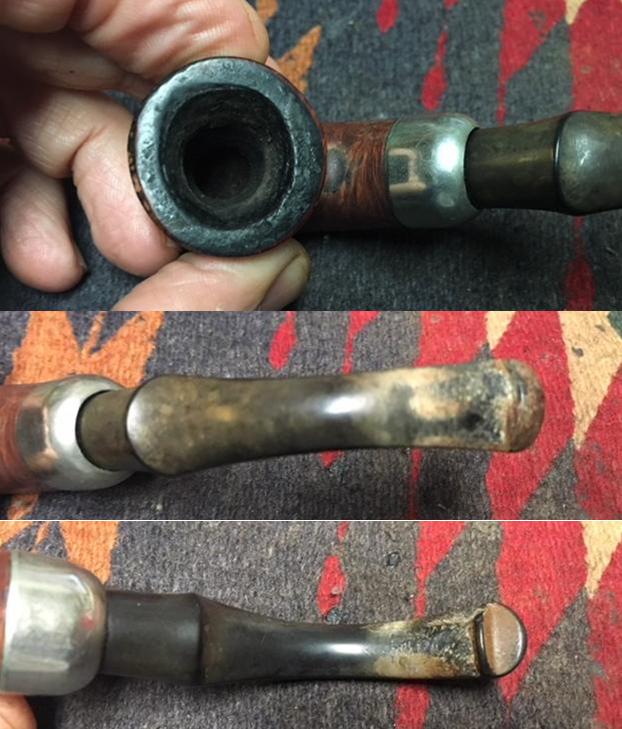
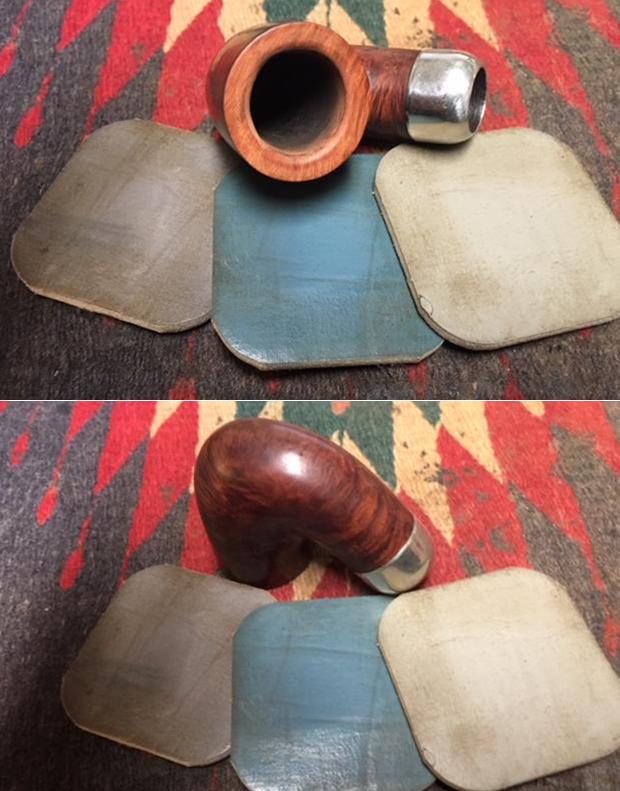
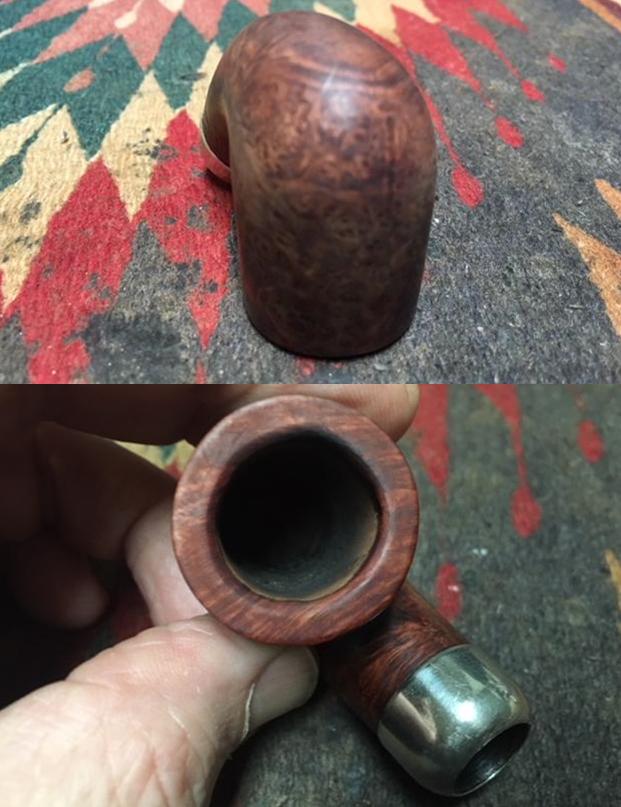
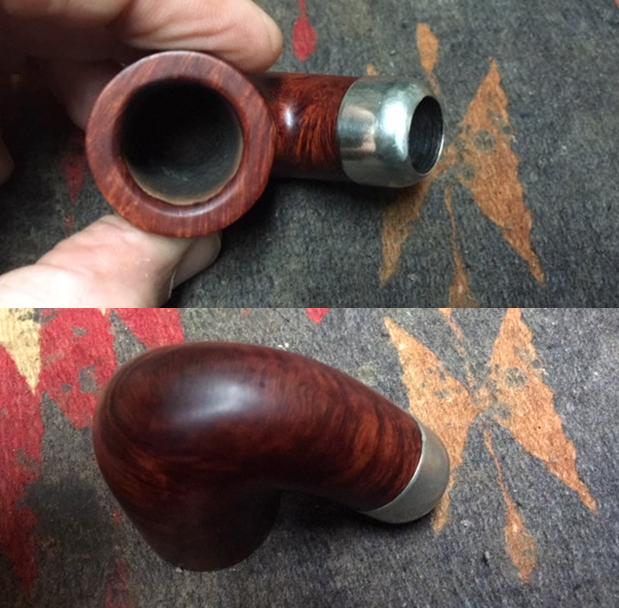
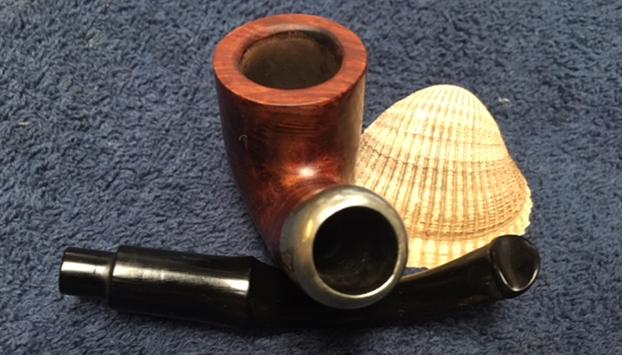
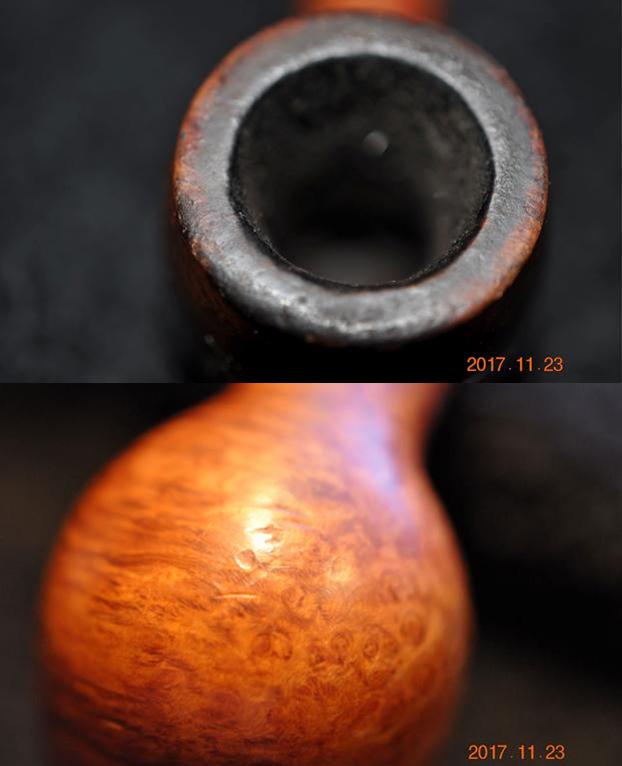
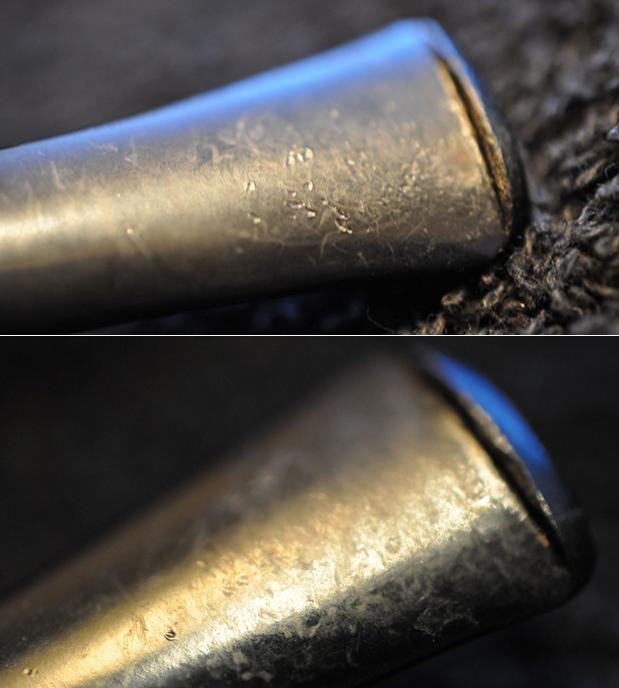
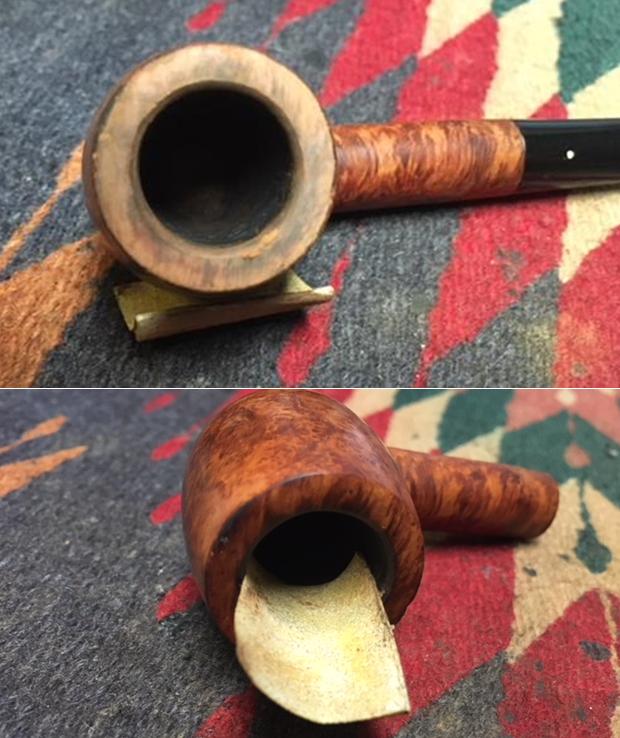
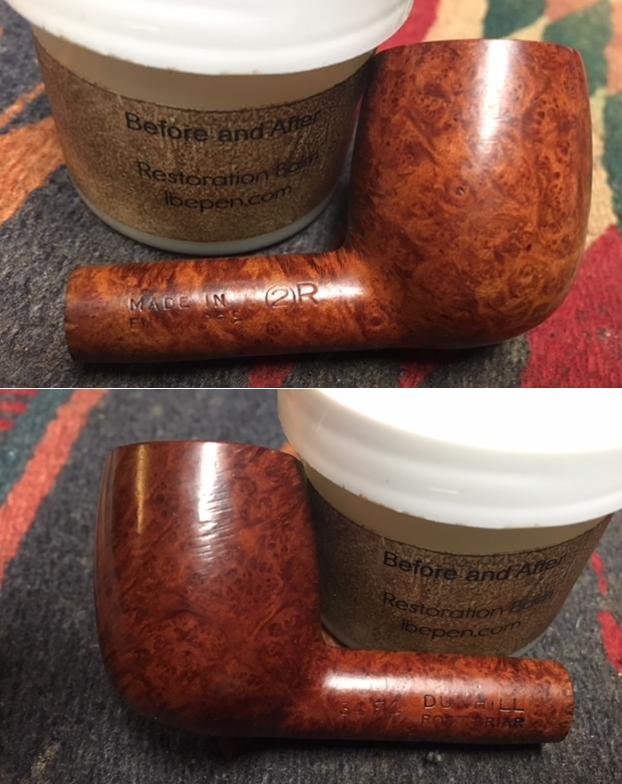
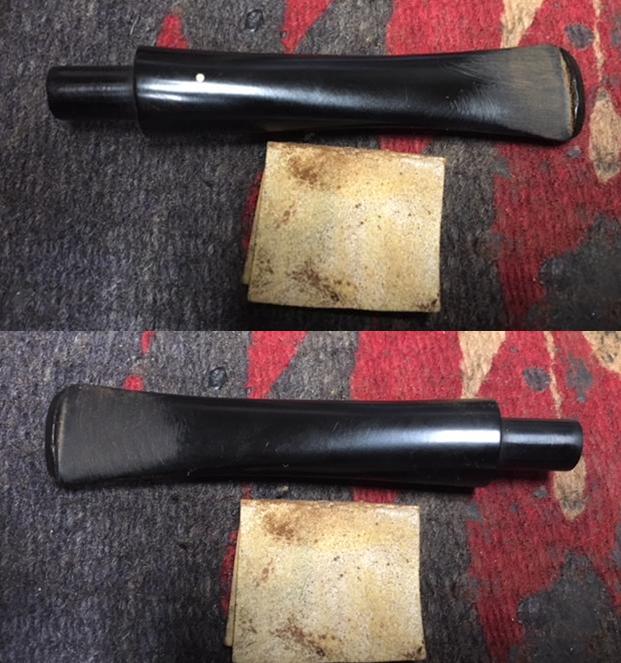
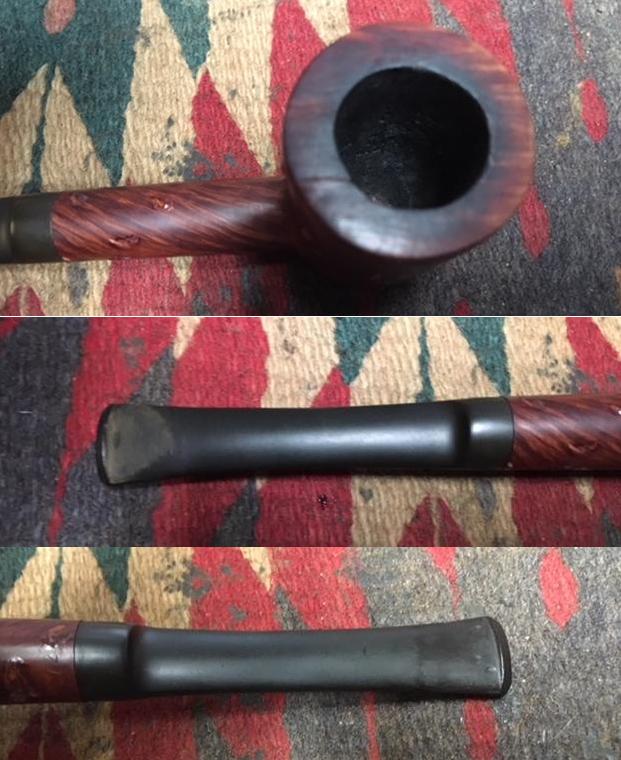
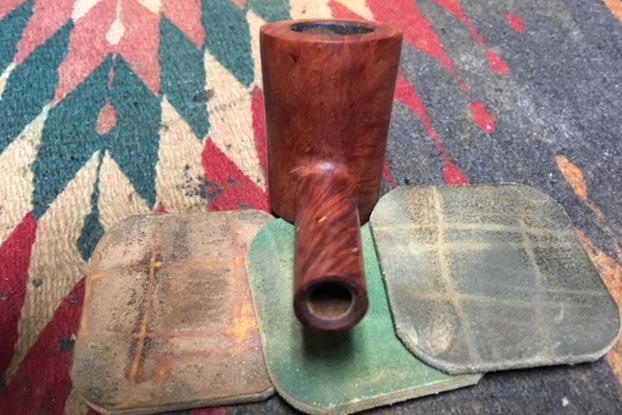
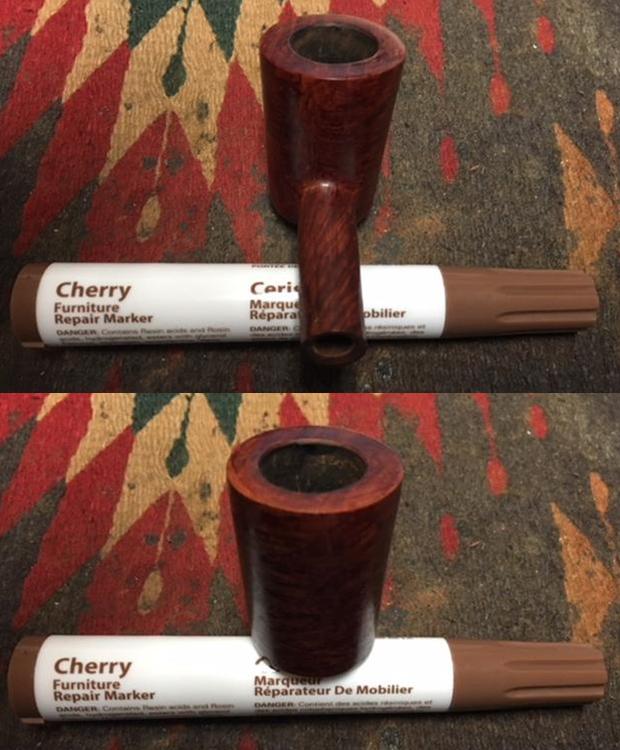
 The forensics of all the pipes of the Peretti Lot of 10, show similarities of condition and areas of need, which point to all 10 having had a common steward. MOP and OP both have thick cake in the long Oom Paul chamber which has run over the rim with crusty lava flow. Both pipes show deterioration on the right side of the rim where the lighting of the tobacco was faithfully administered. Both show consistent, tooth chatter and dents on the upper and lower bit – attesting to the great hands-free ‘hanging’ capacity of an Oom Paul but without using a bit guard! MOP’s stem is severely oxidized, and OP’s is lightly showing oxidation. MOP enjoys the only stem marking of all the Oom Pauls – the Peretti ‘P’ is crisp but in need of refreshing. I notice that OP’s stem is not snug against the shank and as I rub my finger over the transition from shank to the saddle stem, there is a slight hang of the stem over the shank. On the stummel heel of OP I see a cut in the briar from some trauma. I detect a microscopic hairline crack running from the end of the cut toward the shank (on top in the second picture below), a few millimeters. This needs to be addressed. I take some pictures to show the stem seating and cut on OP.
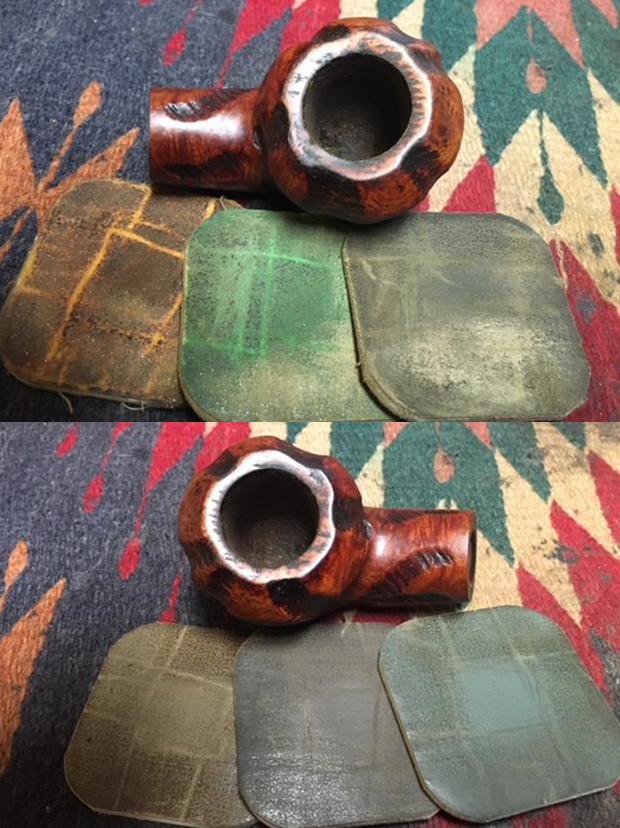
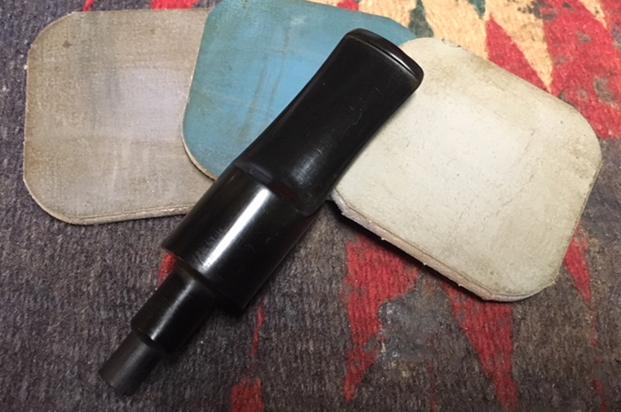
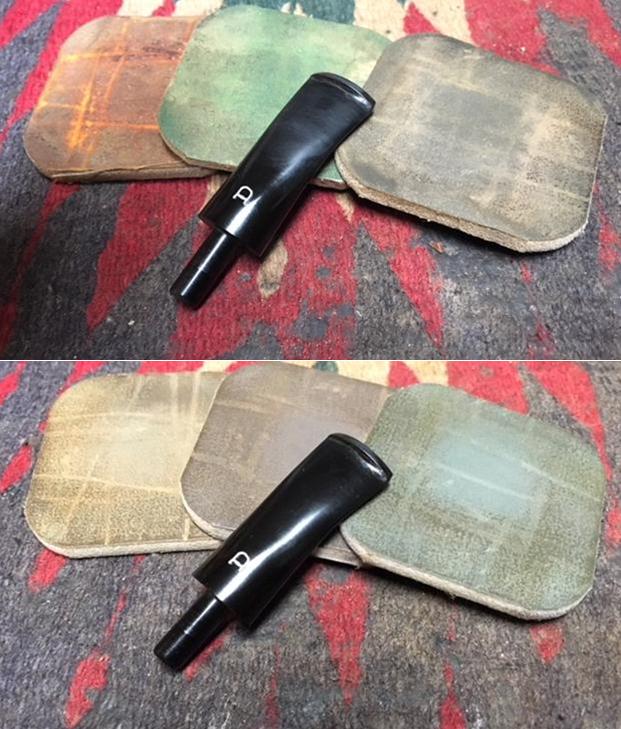
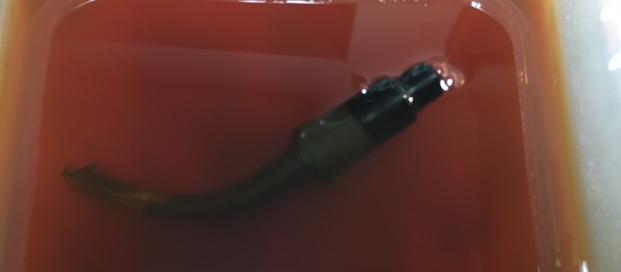
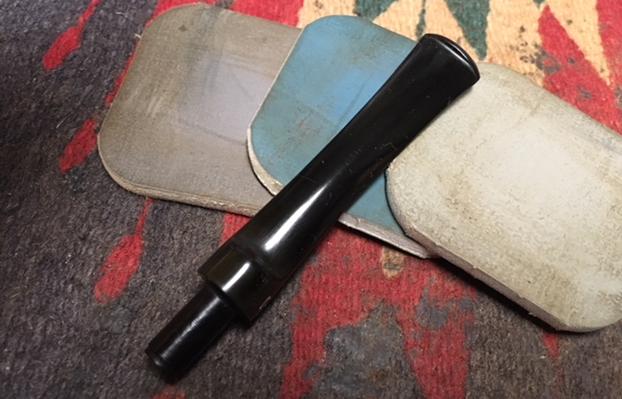
 On my last restoration of an Meer lined Italian Croc Skin Zulu, which has arrived in Edinburgh, Scotland, to meet his new steward, I tested the Before & After Deoxidizer and both of the stems of MOP and OP were among the volunteers for testing. From pictures above, MOP’s ‘P’ stamped stem shows significant oxidation, while OP is in good shape. Before & After is also supposed to be stem stamp friendly – which proved to be true. The stems of Mop and OP are below – of the larger stems in the first picture below, the first and third. After cleaning each stem with pipe cleaners dipped in isopropyl 95%, I placed all the stems in the Before & After Deoxidizer keeping them in order!
 I left them in the soak overnight, though the directions do not require that long. One at a time, I removed them from the Deoxidizer and wiped each with a cotton pad with mineral water (in Bulgaria, its light paraffin oil) buffing each with the cotton pad until all the solution was removed and the residue oxidation. I am pleased with how the product works.
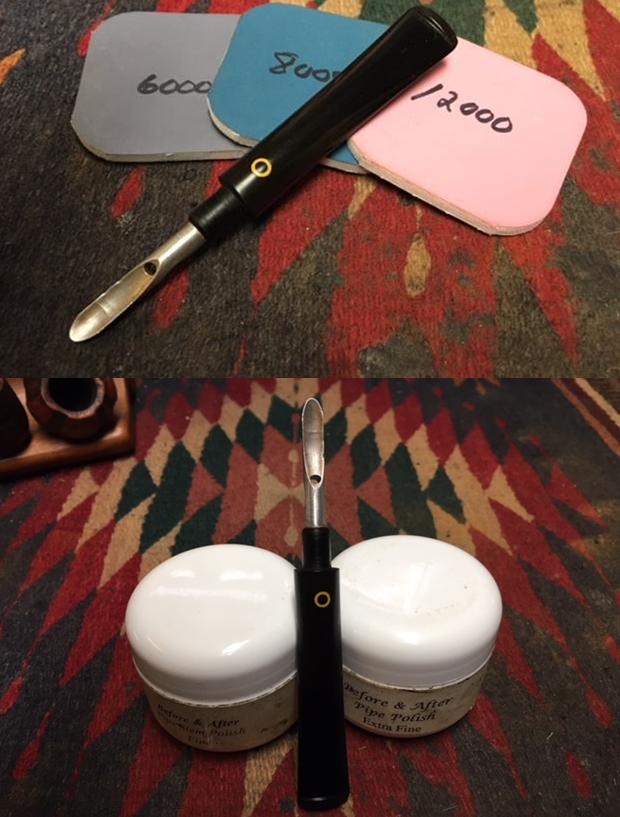
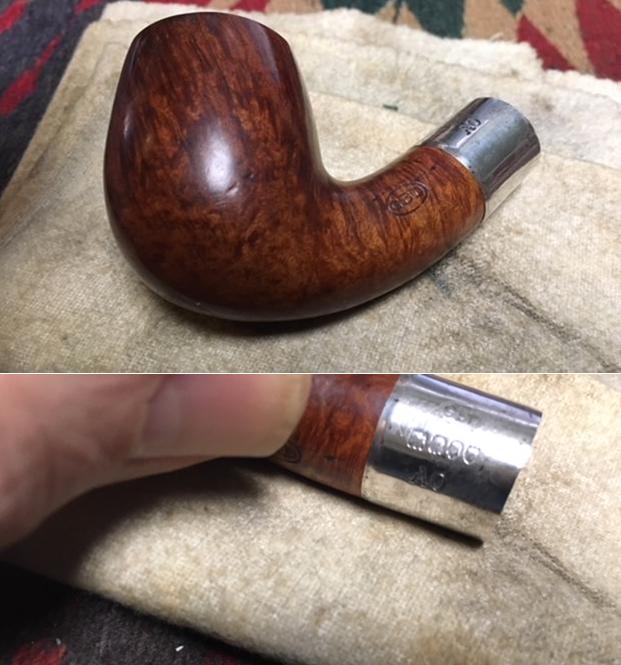
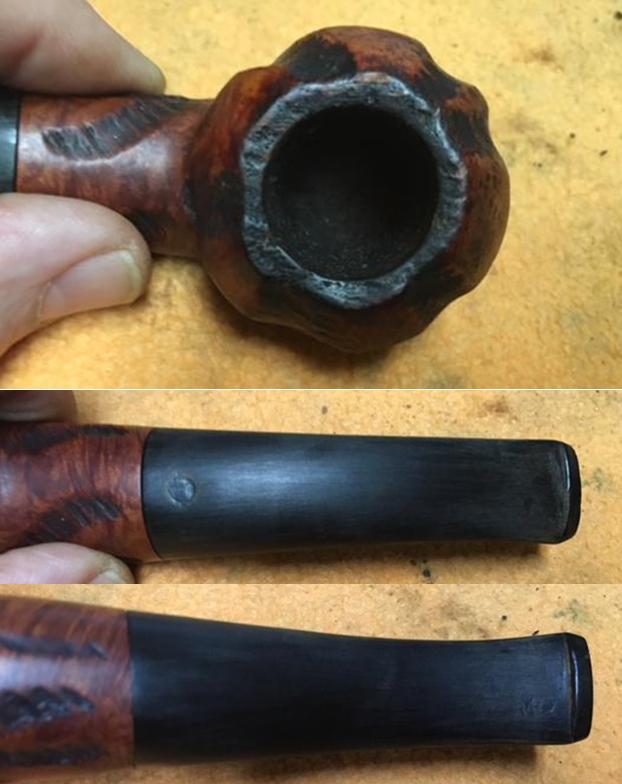
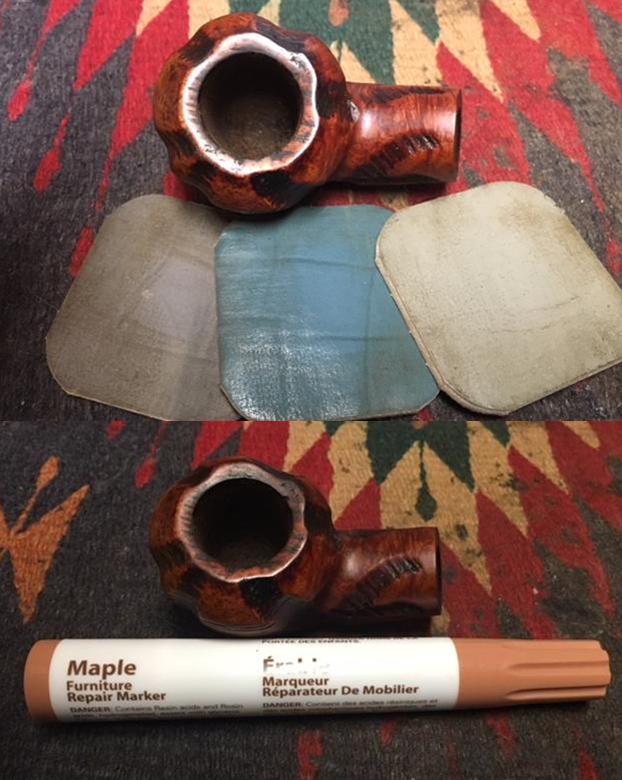
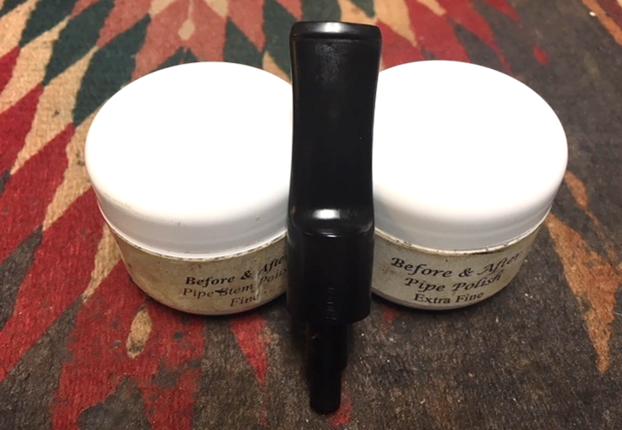
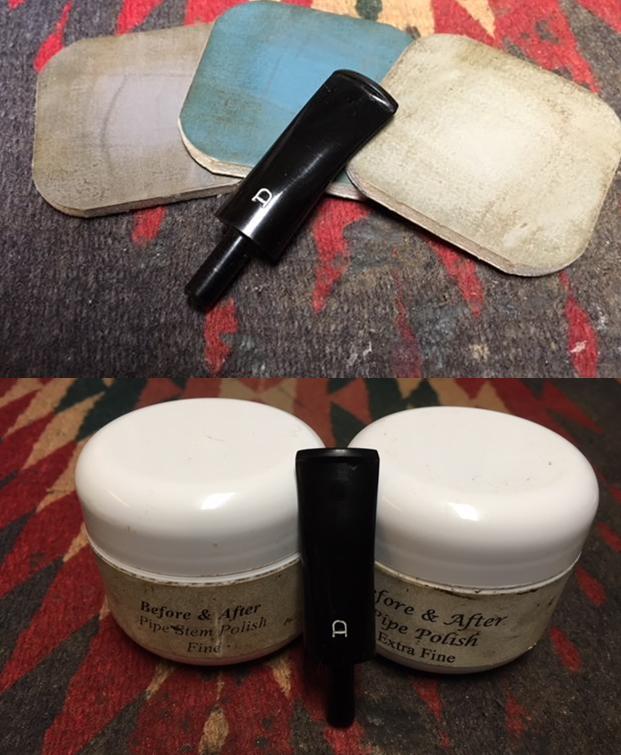
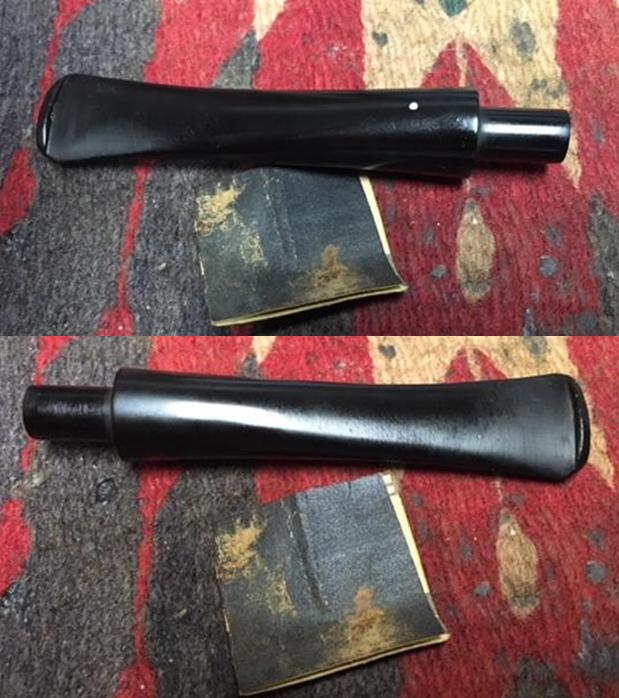
 I am especially pleased to see how the Peretti ‘P’ cleaned up and rejuvenated on MOP! The Before & After Deoxidizer is advertised to be nice to stem stamping and it seems to be the case! A before and after picture.
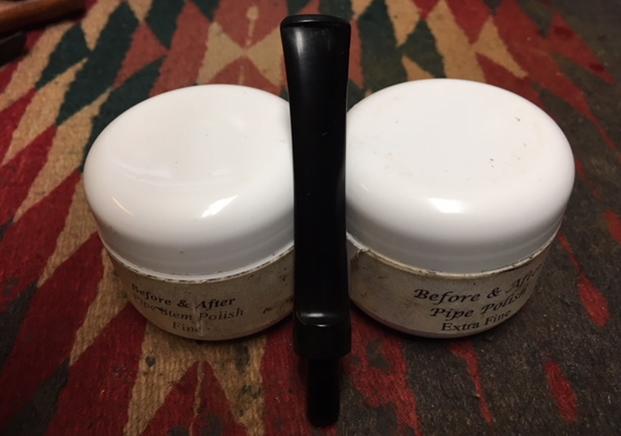
 I then applied Before & After Fine Polish and then Extra Fine Polish. I put a small amount on my finger and worked it into the vulcanite. As I work it in, the vulcanite absorbs it. The results are good causing the vulcanite to look rejuvenated.
 I do the same for OP’s stem. It’s looking very nice as well!
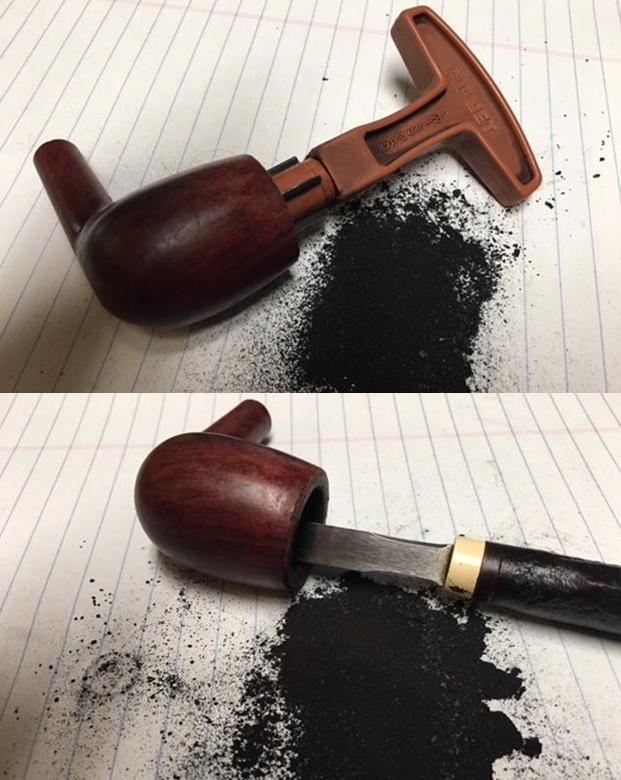
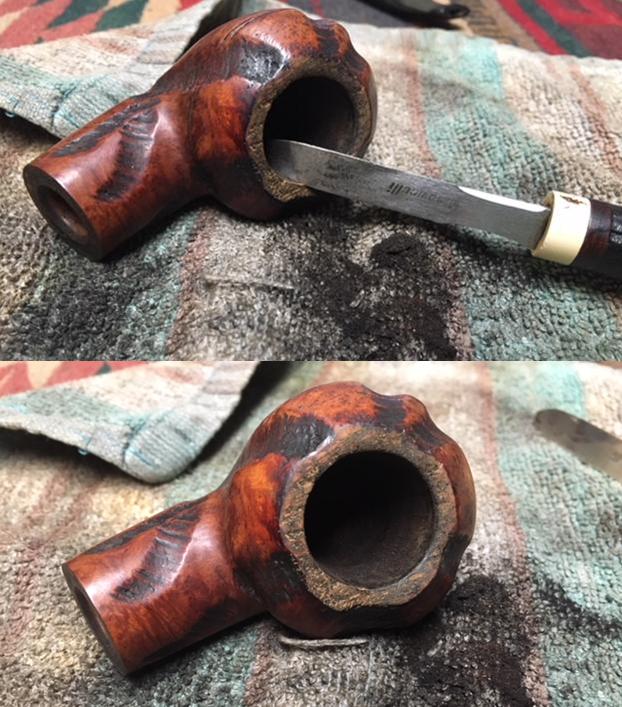
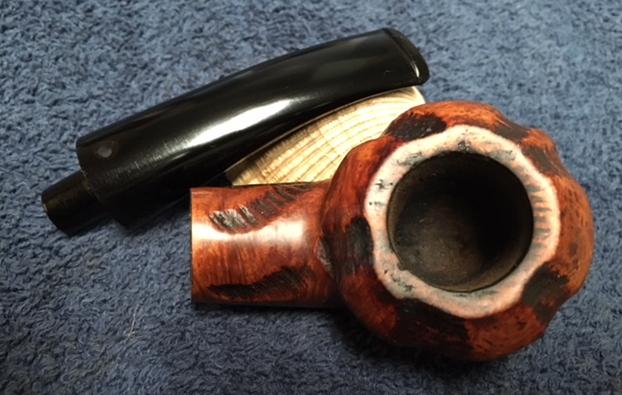
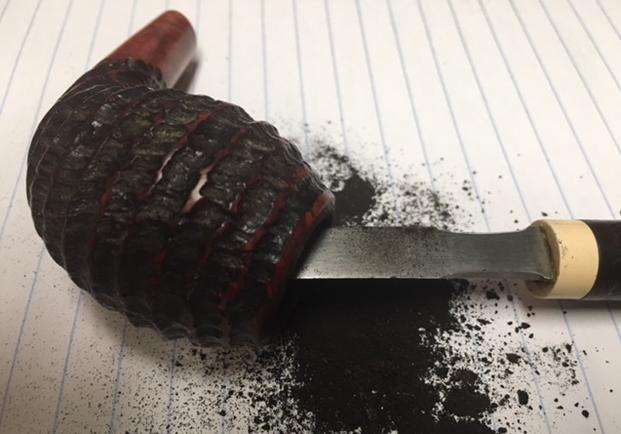
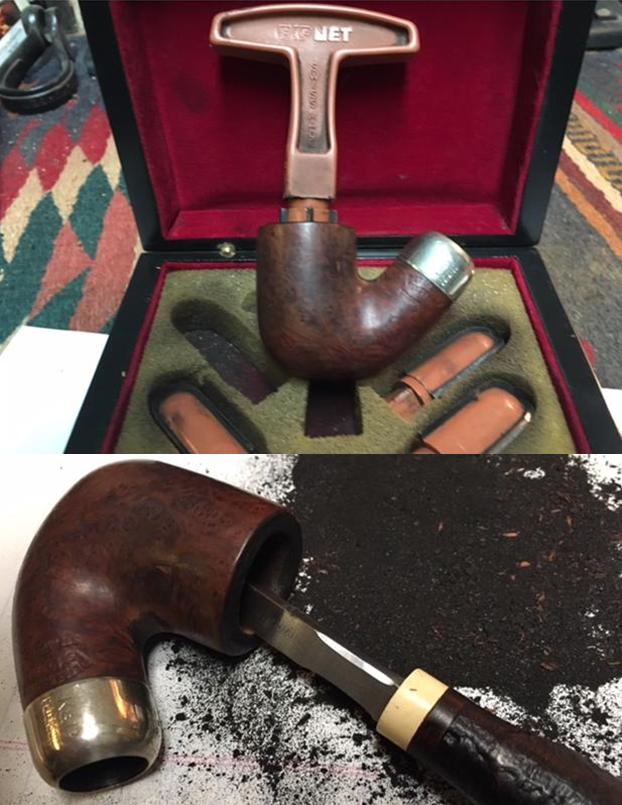
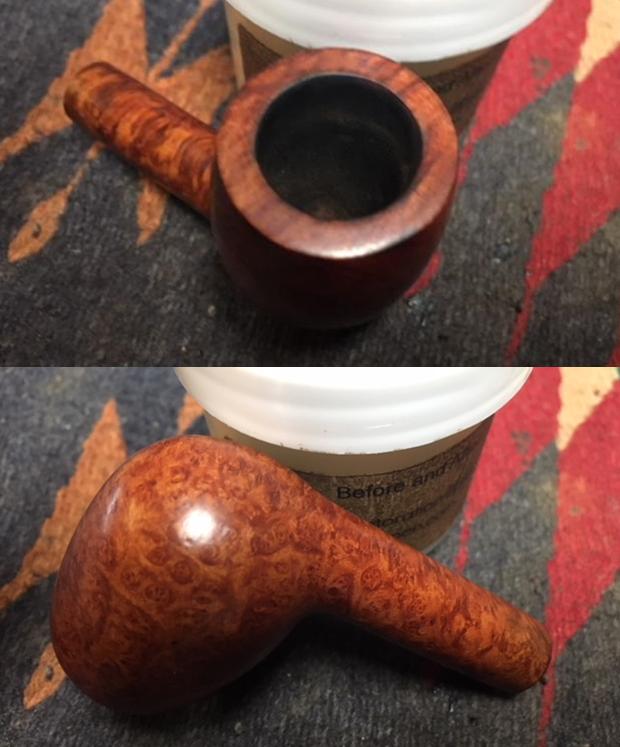
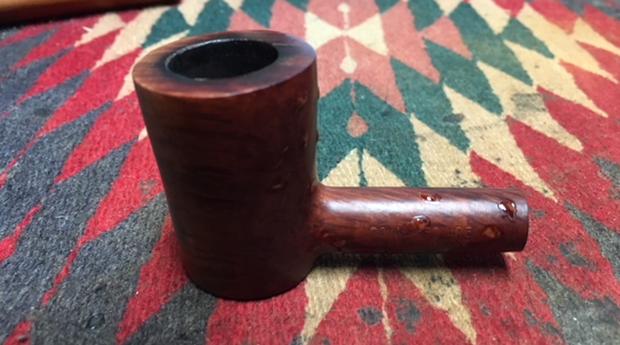
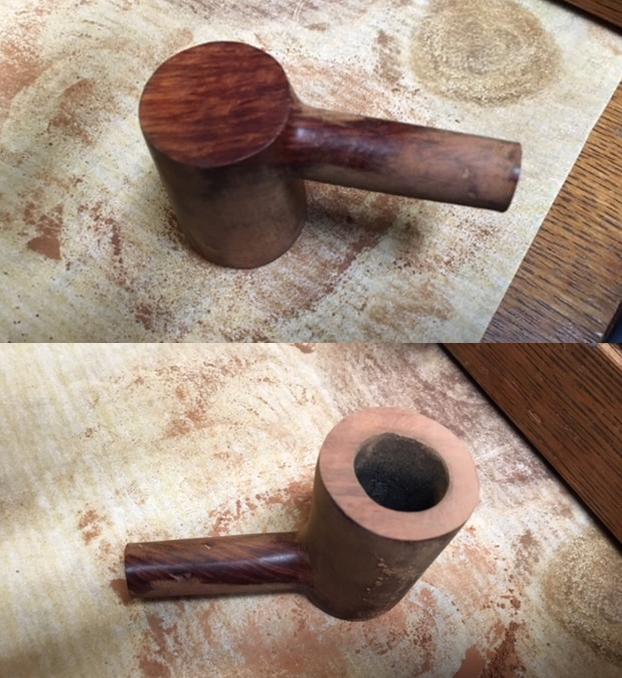
 I now turn to the stummels. The first thing for both stummels is to clean the internals, starting with reaming the deep Oom Paul chambers. Before I can determine the condition of the chamber walls the cake will be removed down to the briar. Using the Pipnet Reaming Kit, I start with the smallest blade, then working to the larger. I start with MOP and take a closer picture of the rim and chamber. It’s thick and crusty. I use 3 of the 4 blades available to remove the carbon cake. I then scrape more of the chamber wall with the Savinelli Fitsall tool and finish with wrapping a piece of 240 grit paper around a Sharpie pen and sand the chamber. I wet a cotton pad with alcohol and wipe the chamber clean of carbon dust. The chamber looks great – solid, no cracks or fissures. Pictures of MOPS:

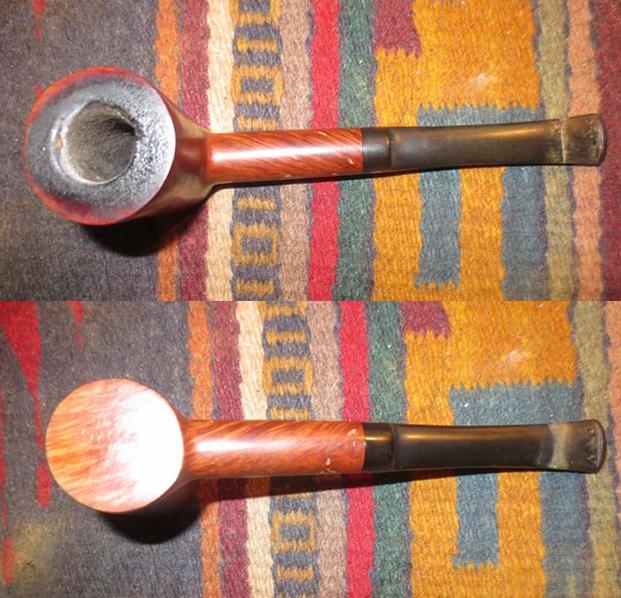
 I do the same with OPs. I take a starting picture, ream with 3 of the 4 blades in the Pipnet Kit. I fine tune with the Savinelli Fitsall tool, sand the chamber with 240 grit paper and wipe the chamber clean of carbon dust. The chamber wall looks good as well. What I do see is what I noted earlier. The rim on the right side was burned by the lighting of the tobacco and the scorched briar has eroded on that side.

 Now, to clean the external briar stummel and rim. Starting with MOP, I use undiluted Murphys Oil Soap with a cotton pad to scrub the surface and rim. I also use a brass brush to work on the thick cake on the rim. With my Winchester pen knife, I carefully scrape the old scorched lava crust on the rim. The stummel of MOP cleaned up nicely and no fills are detected. The challenge will be to clean up the internal rim, removing all the scorched briar in a way that doesn’t remove a lot of good briar. Pictures of MOP showing the progress:

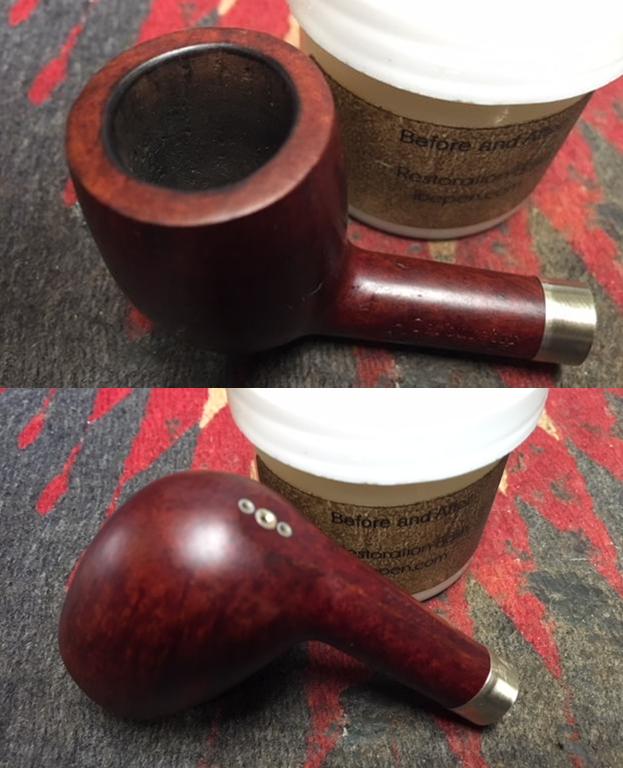
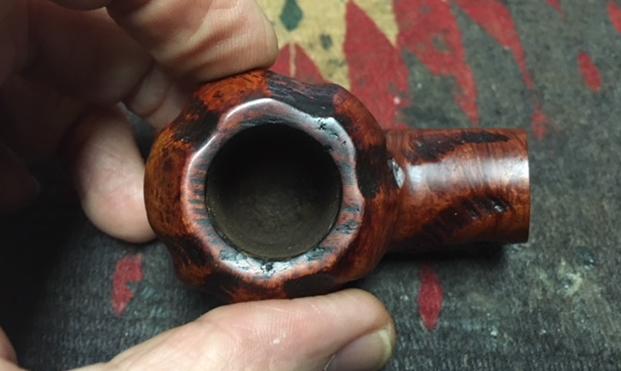
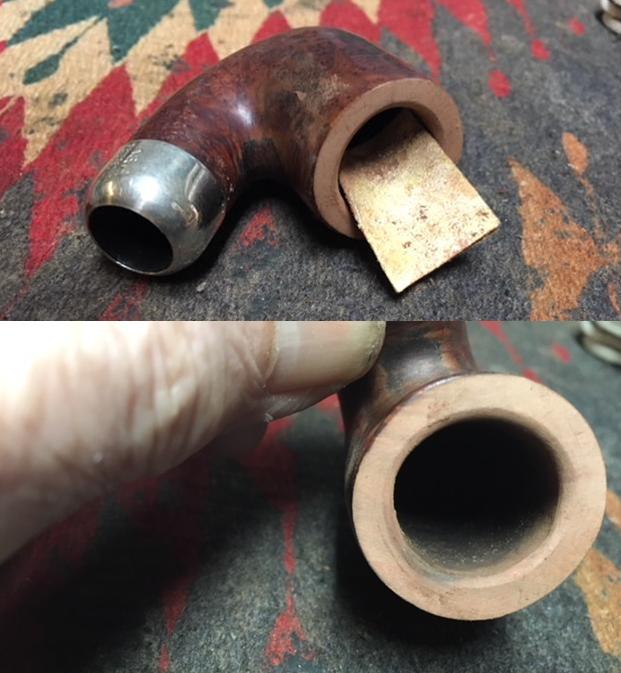
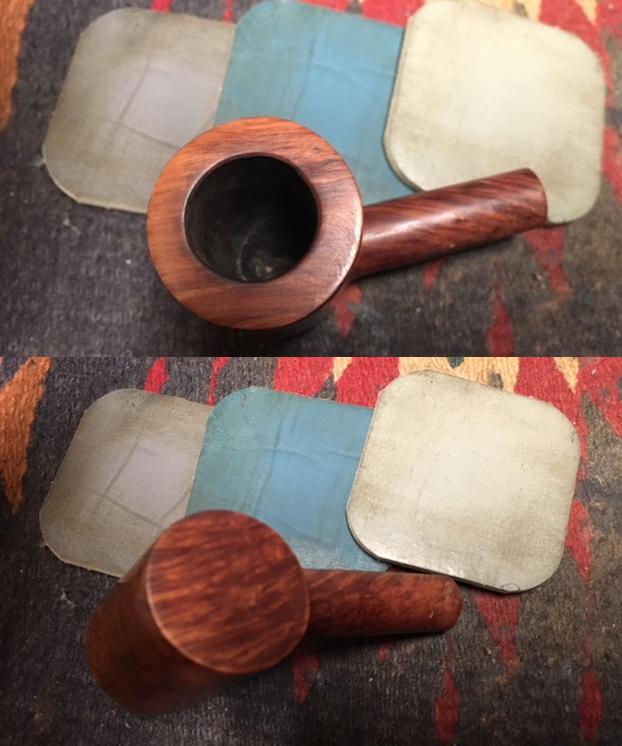
 Now, to clean the externals of OP with Murphys Oil Soap in the same way with the same tools. The grime is stiff, and I also use a bristled tooth brush to reach into the full bent shank area which is the beauty of an Oom Paul, but a pain to clean. Again, after employing a brass brush on the thick lava flow on the rim, I carefully scrape using my pin knife to remove the crust, utilizing a fingernail here and there. I then rinse OP in cool tap water and take a closer look at the stummel. The stummel of OP cleaned up well. Like my Oom Paul, the internal rim on OP needs to be cleaned of charred briar down to healthy wood. I take a picture showing the start and then the cleaned stummel of OP.
 It was going so well until it wasn’t! I see what no one restoring a pipe wants to see! With difficulty I see a crack in the shank nestled in the armpit of the bend, where it’s difficult to clean. With a magnifying glass I can see it better. It runs from the very joint of the bend where bowl and shank meet, up the shank about ¾ of the way, but does not run to the top of the shank. This strikes me as strange. Most shank cracks are caused by improperly mounting or dismounting the stem and mortise, putting pressure on the thin briar at the junction and the briar gives way and cracks. These cracks usually start from the top of the shank and run down toward the bowl. What I’m looking at with OP is that it originates at the elbow of the bend and moves upwardly toward the top of the shank, where the stem is mounted. My first thought is that this is good news! It means that the integrity of the shank is still in place at the most vulnerable point – where shank and stem meet. Yet, however this crack originated, it can continue to creep up the shank if nothing is done to arrest it. With the magnifying glass I carefully check around the shank and mortise opening to see if there is another crack lurking, but I see nothing. Here are the pictures of the crack discovery on OP.

 As I have done in the past to get more input on a challenge, with his wealth of experience shared on Rebornpipes, I send these pictures off to Steve to see what he has to say! OP has two projects so far catalogued for the stummel – the cut on the heel and now this crack on the lower shank. I then turn to completing the cleaning of the internals of both stummels. Using isopropyl 95%, I employ cotton buds, pipe cleaners to clean the mortise and airway. I also use a bristled shank brush down the airway which does a good job breaking up the tars and oils. With the design of the drilling for the full bent Oom Paul design, the initial mortise drill going down the shank forms a trap where gunk collects. Then, the angled airway drilling runs off the initial mortise chamber down to airhole. To dig gunk out of the trap, I also use a dental spatula to scrape the mortise walls and trap area. All went well for both my Oom Paul and OP. The pictures show the results.
 I want to address the rim issues before moving on. Both stummels’ rims have scorching issues around the internal lip. With MOP (remember, My Oom Paul), it is engineered slightly different from OP and is a bit smaller. I pull out the topping board to remove a bit of the rim top to clean up as much as I can. MOP’s full bent shank barely fits on top of the board without touching. OP’s shank extends beyond the plane of the rim, that will be a bit more challenging to top but not impossible. I take a picture of MOP and then take it to the topping board with a sheet of 240 grit paper on it. I had noticed before that the shank and the plane of the rim were not perpendicular – the rim plane has a left leaning tilt, but I’m not worrying about that – I think. To correct it would need too much briar to be removed.
 The more that I look at the rim plane tilt, the more I realize that it will drive me crazy when I’m smoking this guy down the road and wondering why I didn’t correct it! Since, it IS my Oom Paul, I decide to trade some briar for a bit of sanity. I start sanding the high right side of the rim down to bring the plane and shank into closer perpendicular alignment. I use a flat needle file as well as a miniature sanding block to do this.

 With the rim in closer alignment with the shank, I first cut an internal bevel with a coarse 120 grit paper rolled up tightly. I pinch the roll over the internal rim with my thumb and remove the charred briar and start shaping the internal lip. I follow this with 240, 320 and then 600 papers. Because the rim’s width is not consistent around its circumference, I also introduce a gentle rounding bevel to the external edge of the rim. This has the effect of making the rim look more balanced and softer, hiding some of the problems with dimension. I am very pleased with the look of the repaired rim. The pictures show the progress! I suppose some briar for a bit of sanity was a good trade!
 With MOP’s rim work finished for now, I turn to OP’s rim. The last steward was very consistent in his practices – especially lighting his tobacco. Again, the left side of the rim has taken the brunt of the flame which was pulled down over the side of the rim. Pipe ladies and gentlemen, light tobacco ABOVE the chamber – not over the side!! The charring here needs to be removed to uncover healthy briar, but it will leave, as before, an imbalance in the width of the rim. As with MOP, I take a picture at the beginning to mark the progress and to show the charred area. I then take the topping board with 240 grit paper and lightly top it on the side of the board – the full bent shank is extending beyond the plane of the rim. After 240, I use 600 on the board. Thankfully, OM’s rim is in closer perpendicular alignment than was MOP’s.

 After looking at the picture immediately above, I decide to take more top off to regain a precious few millimeters of rim width to help balance the appearance. I use a miniature sanding block to sand down the surface to build up the left rim width. I find the sanding block useful when I need to ‘steer’ the rim in a certain direction. I still have a flat surface, but with pressure can strategically leverage the sanding. I then take the stummel back to the board with 240 and then 600 to level the rim. I think this helped to regain some rim width, but the imbalance is still evident but less so.
  Now, cutting a bevel as I did before with MOP, on the internal and external rim edges helps round and blend the appearance. I use 120 grit to do the major shaping then 240, 320, and 600. It’s as good as I can manage without taking a lot more off the top to even out the rim width. It does work, and I move on to the next challenge.
 I had written to Steve earlier to get input on how to approach the crack I discovered in OP’s shank. His response came with a picture. I already knew that I needed to drill a counter creep hole at the top of the crack where it was obviously creeping. Steve said that a counter creep hole was needed at the bottom as well – in the bend itself. It will be a bit of a challenge with the angle and drilling, but I think possible. The holes at the end of the cracks arrests the expansion of the crack. Steve’s picture follows:
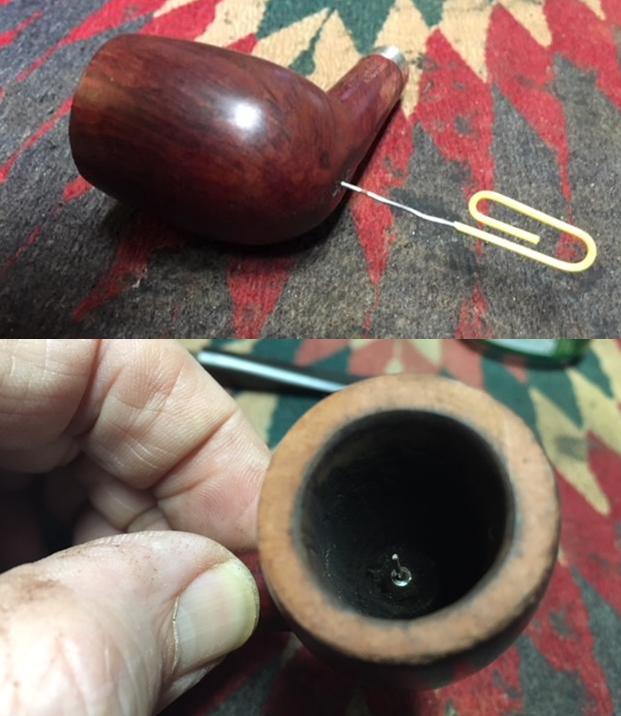
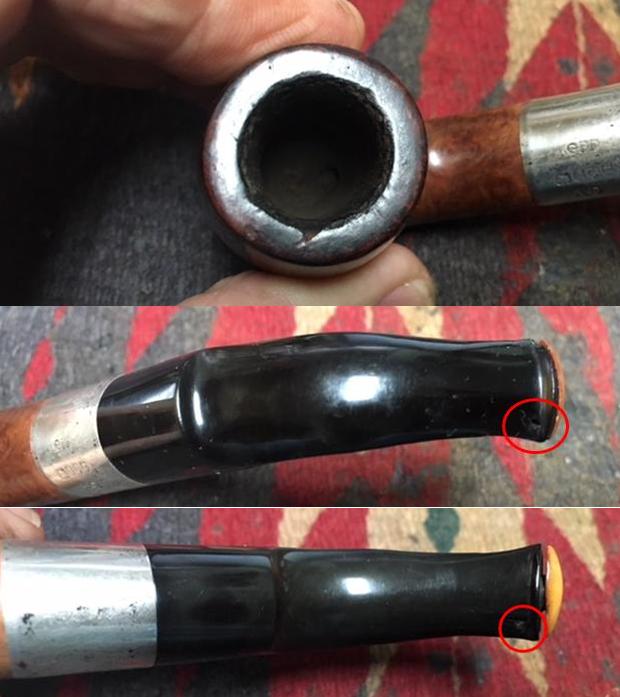
 The other challenge that I’ll attack at the same time is on the cut and creeping crack on the heel of OP’s stummel. This injury will also need drilling at each end to arrest any growth in the crack or cut. As Steve did for me, I’ve circled the points where drilling is needed. I needed a magnifying glass to see the cracks accurately.
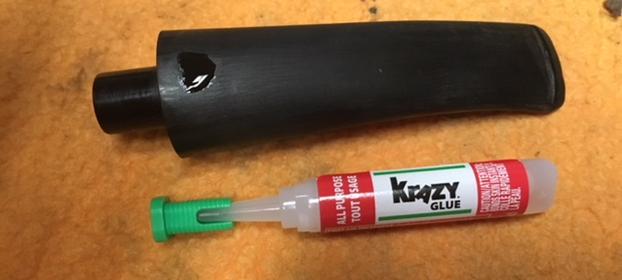
 I use the Dremel for these drillings mounted with a 1mm drill bit. The great thing working with the Dremel is its flexibility. The bad thing about using the Dremel, is its flexibility! In my workspace on the 10th floor of a former Communist block apartment building, I don’t have much room. So, the Dremel does everything for me, almost! One of these days I will find a universal mounting system that will allow me to strap the tool in so that I can make precision movements, like this drilling project, which is more difficult in the handheld mode. In the drilling of the holes, one does not want to break through the briar to the inner chamber or mortise! The hole depth only needs to be 2 or so mm. I start with the cut on the heel, the easier of the two projects. To guide my drilling, with the use of the magnifying glass, I use the sharp point of a needle file to press a guide hole into the briar. I then follow with drilling the shank crack holes. The pictures show the results which turn out well despite my handheld approach!

 Now to apply patch material. Again, I start with the heel repair. Using a toothpick to guide, I apply a drop of thin Hot Stuff CA glue directly into the cut. I want the glue to sink deeply into the fracture to sure things up. I sprinkle some briar dust on it. After this, on an index card, I mix a little briar dust with Hot Stuff Special T CA glue – a bit thicker. This forms a briar dust putty that I mix and apply to the 3 holes I drilled. I build a mound with the briar dust putty, that after cured, provides thorough coverage over the entire repair area that will be sanded down and blended.
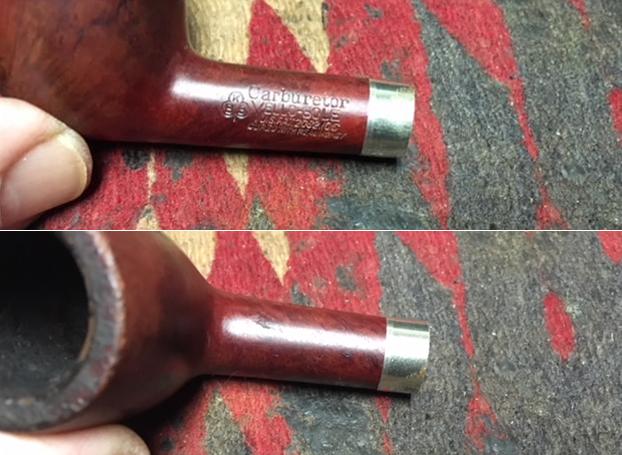
 After about 45 minutes, the heel patch has set up enough for me to work on the shank crack. Just to be on the safe side, I mask the sides of the shank to protect from CA glue accidentally running down the sides. I am especially protective of the L J Peretti Co. stamping. As before, I place a line of thin CA glue along the crack to seep in and fill the open areas in the fracture. Then, I mix another batch of briar dust putty using thicker CA glue and apply this on the holes and over the full length of the crack. A toothpick acts a trowel. It’s time to go to bed so I’ll leave the patches to cure overnight. The pictures show the patch progress on OP’s restoration.
 The next morning the patches have cured thoroughly and I’m ready to start filing down the patch mounds beginning with a flat edged needle file. I’ll work down the mound starting first with the heel patch. The key is to ride the patch mound down as far as possible with the file then switch to sand paper which will be less intrusive to the healthy briar around the patch. When I near the briar surface with the file, I reduce the pressure I’m exerting on the file. When down close to the briar surface, I switch to 240 grade sanding paper, again, keeping the sanding on the patch material to remove the excess patch from the briar leaving only the fills. The patch looks good. I will blend later. The pictures show the progress with OP.

 After nearly a week in Athens, Greece, attending a conference and doing some pipe hunting, I return to Sofia and to my worktable where the shank patch and sanding are waiting for me. It will be a bit more of a challenge. Not only because of where the crack patch is located, but because sanding in the area will impact the end of the shank, potentially affecting the stem union. I noted before that I wasn’t satisfied the seating of the stem. There were small gaps showing between shank base and the stem. I also could feel lips where the shank and the saddle stem were not flush. My plan is to address these issues as I sand down the shank crack patch. I start first with a flat and a rounded needle file to work down the patch. I progress to the crook of the bend and file with a round needle file.

 When I’m close to the surface with the needle files, I then switch to 240 grade sanding paper to remove more patch material down to the briar. Then I follow using 600 grade paper to smooth out the coarser sanding scratches and to blend.
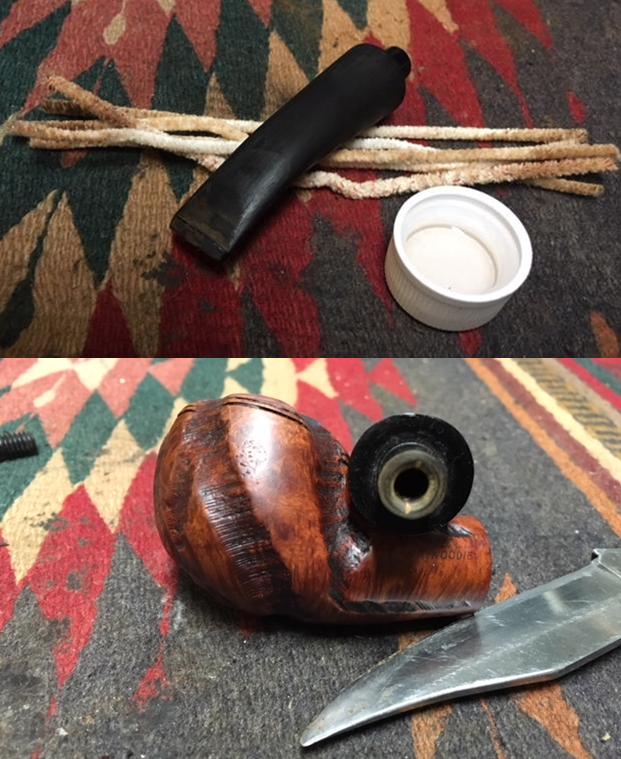
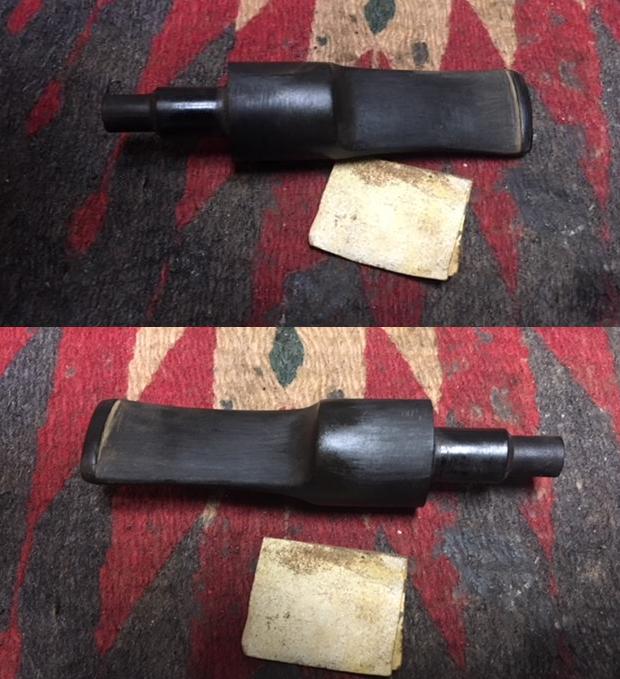
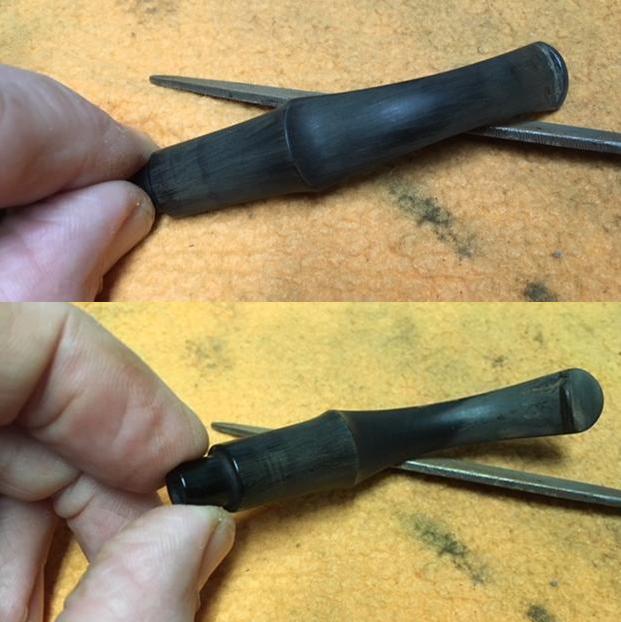
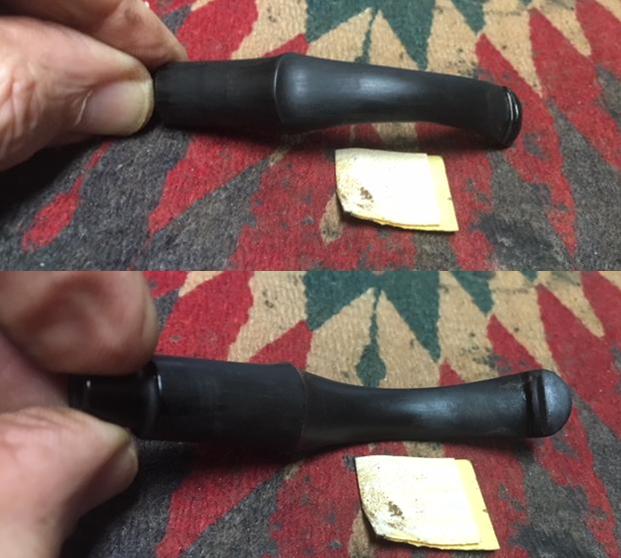
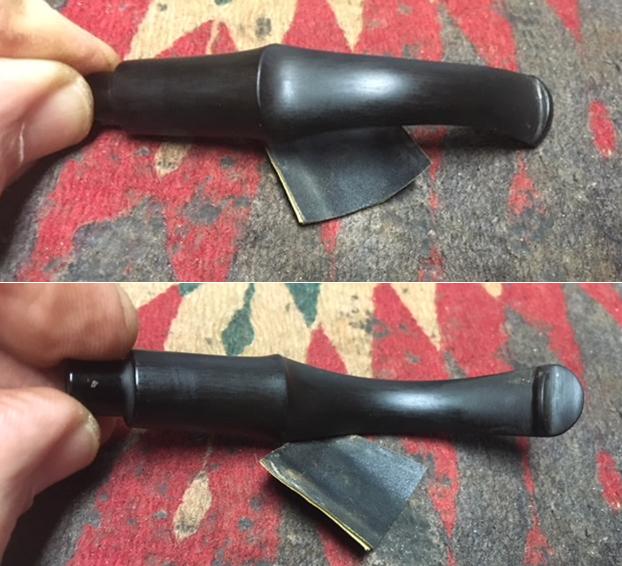
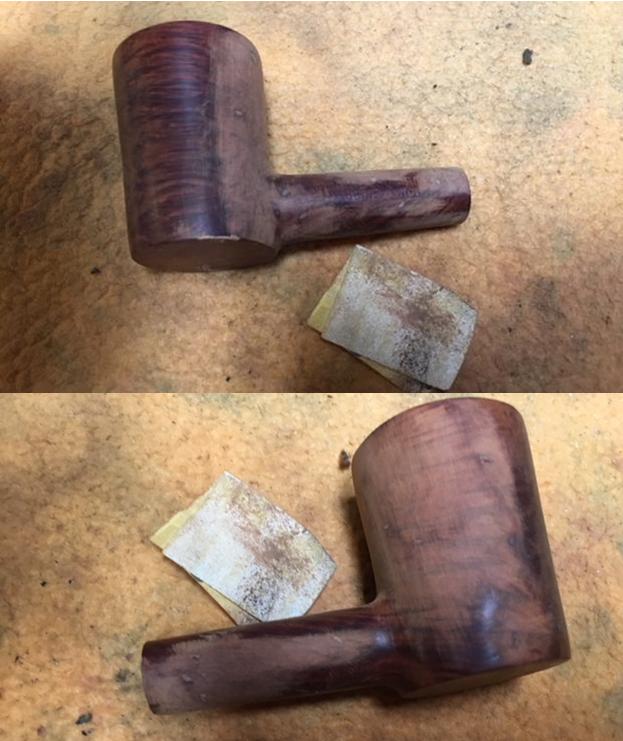
 While I’m sanding in the shank area, I work on the stem/shank alignment. I previously noticed that there was ‘daylight’ between the contact point between the shank and stem. As much as possible, I want a seamless fit between the shank and the stem. I notice also that the vulcanite on the end of the stem is not smooth which might be contributing to the stem’s fitting issues. I decide to ‘top’ the stem at the tenon base using a piece of wood with a hole to accommodate the tenon. I place a piece of 240 grade sanding paper over the topping board also with a tenon hole, insert the stem and rotate it. This enables the smoothing of the vulcanite at the tenon base and hopefully, achieve a tighter, more true contact point between stem and shank.
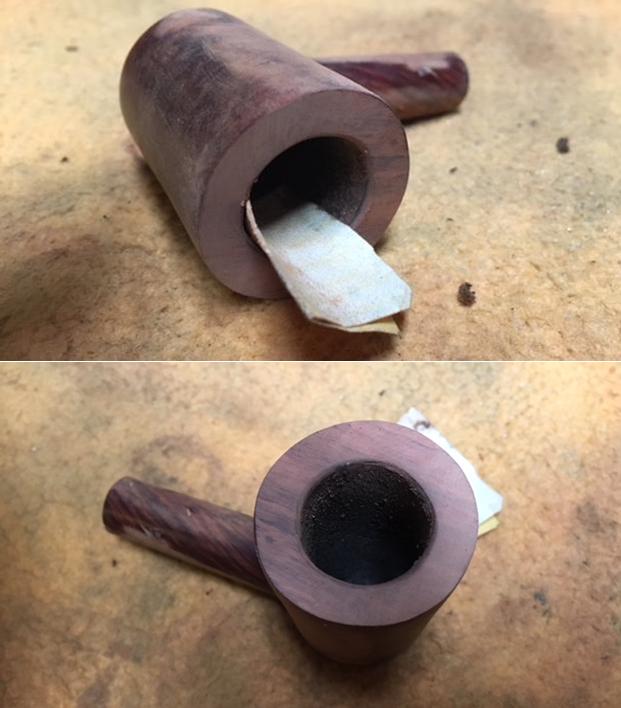
 That does the job partially – the stem is snugger, but I still see a bit of daylight through the right side of where the shank and stem meet. To address this, I need to remove the high spot on the left side of the junction to achieve a better seating of the stem in the shank. I use a piece of 320 grade sanding paper folded and inserted between the shank and stem over the high spot and sand down the area. I saw this method used by Charles Lemon on Dad’s Pipes to help improve the stem connection. This does the job very well and after working the sanding paper around the high area, the stem contact looks better.
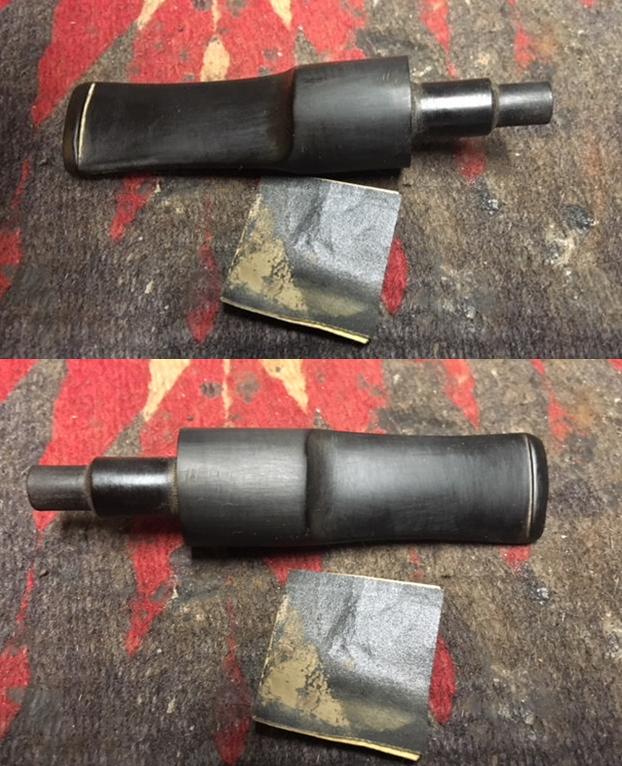
 Finally, I want to smooth out the lip that is caused by an overhang of the stem which I can detect by rubbing my finger over the shank and stem junction. On the lower shank/stem the stem is a bit over the shank. I use 240 grit paper to sand the lip down so that there is no lip between stem and shank. After sanding down the area, the fit of the stem is much better all around. I like it!
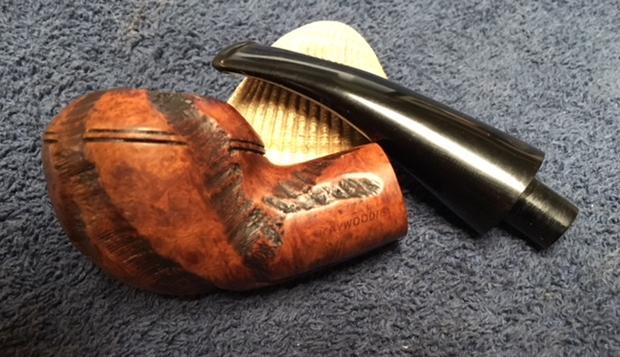
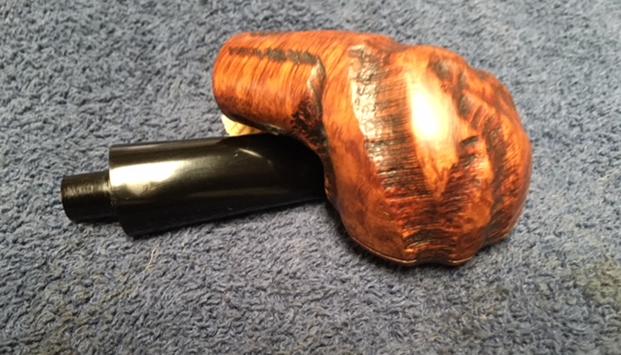
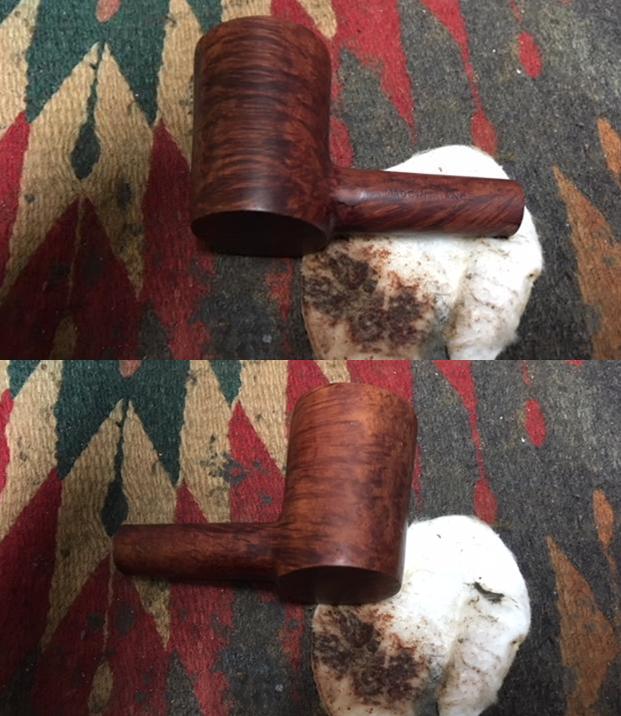
 With the major stummel repair projects completed, I rejoin stems with the stummels of MOP and OM and look. As I work I’m admiring the briar on these larger Oom Paul bowls. MOP is dominated by bird’s eye pattern with lateral grain on the bow of the stummel. While OM has striking horizontal flame grain tying both shank and bowl and culminates at the bow of the stummel with bird’s eye. Very nice. What I love about Oom Pauls is the ample briar real estate on display!
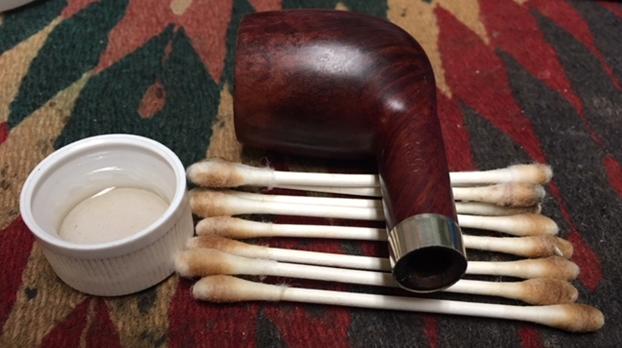
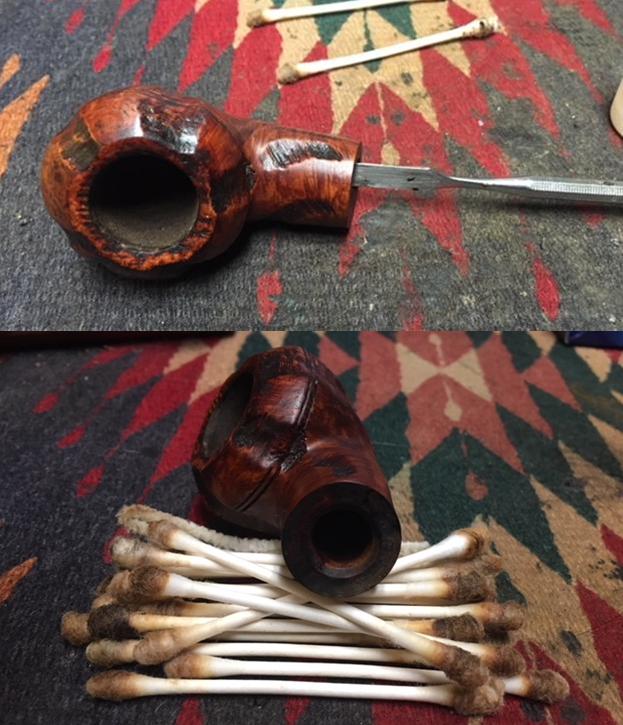
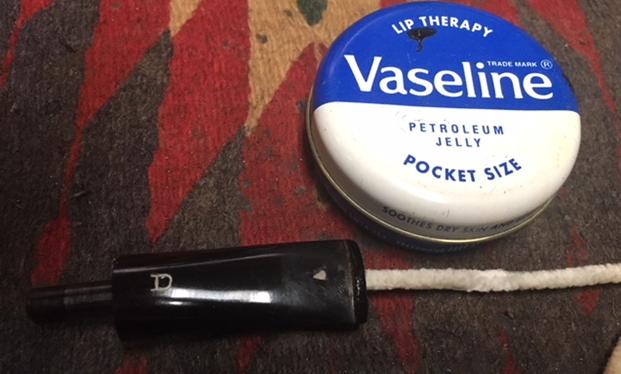
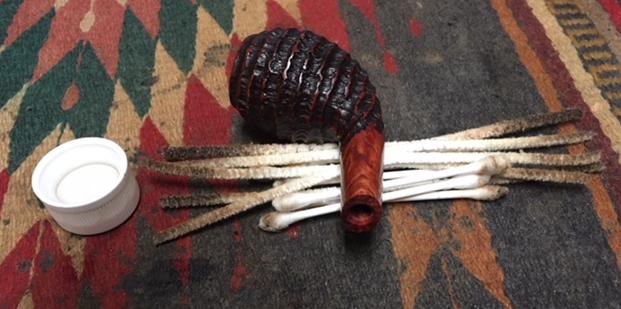
 Before I switch my focus to the stems, while I think about the next steps for the bowl restorations, I decide to augment the internal cleaning of the stummels using a kosher salt and alcohol soak. For both MOP and OP I fill the bowls with kosher salt. I then pull and stretch cotton balls to form ‘wicks’ that I stuff down the mortise of each stummel. The cotton wicks act to draw out the oils and tars left behind. This method also helps to freshen the briar for a fresher taste for the new steward. Placing each stummel in an egg crate for stability, with a large eye dropper I fill each bowl with isopropyl 95% and wait a few minutes and top it off again. It takes a good bit! I then set the bowls aside for several hours to allow the salt and alcohol to do their work.
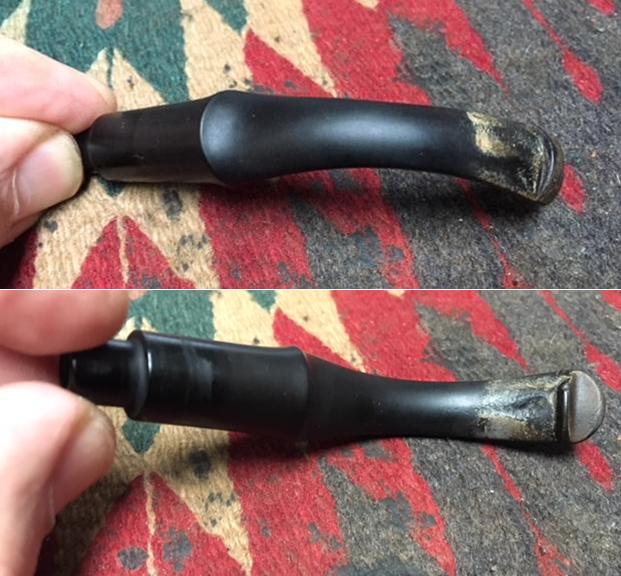
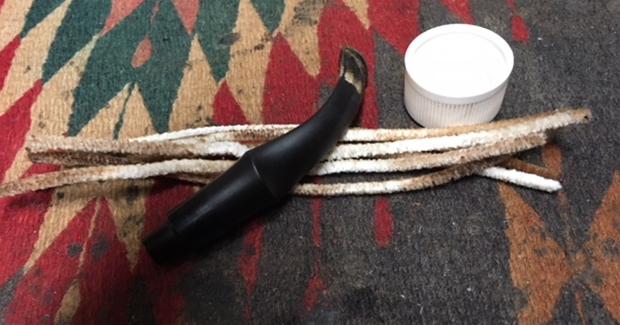
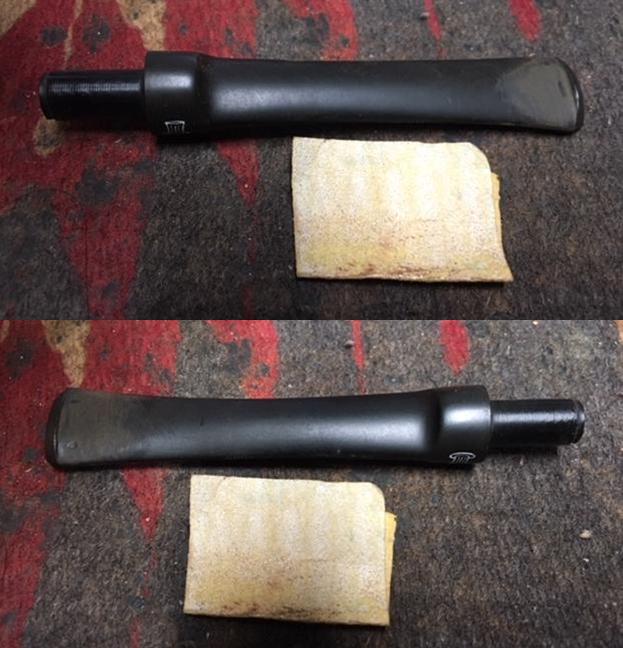
 Turning to the stems, I start with My Oom Paul. I take a close-up of the upper and lower bit area of MOP. The former steward of these Oom Pauls was a clencher. The good news is that he didn’t chew on the button too much – it’s in good shape. With the dents and chatter, I start by using a flame to heat and expand the dents as much as possible. I use a cheap Bic lighter. This does raise and soften the dents. The before and after of upper and then lower bit pictures follow.
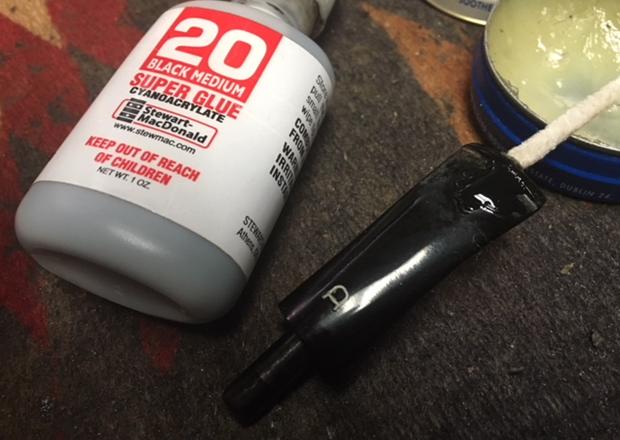
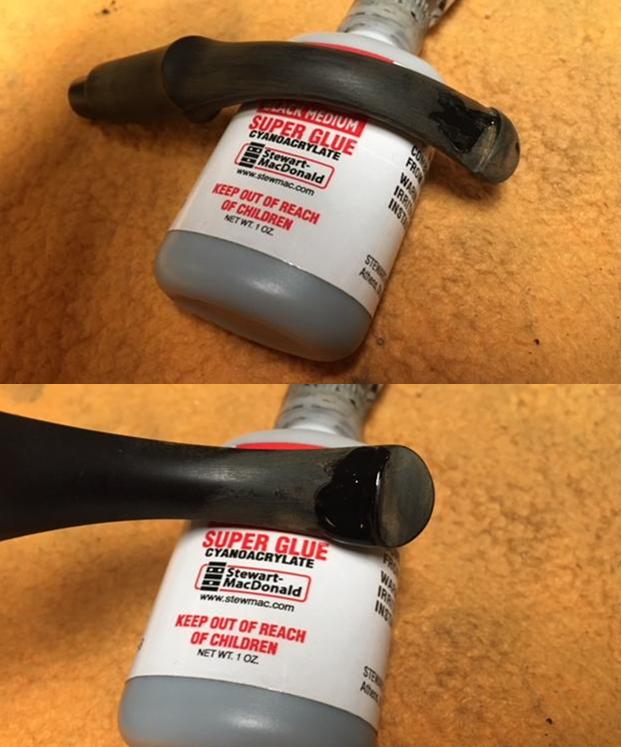
 Using 240 grit sanding paper, I sand out the dents and chatter. I also use a flat needle file to re-establish a crisp button. After sanding, I’m able to identify the remaining dents that need to be filled. One dent on the upper bit with also a small indentation on the button needs attention. On the lower, two areas need more attention on the bit and a bite on the button. Using cotton pads, I clean the upper and lower bit area with alcohol before applying drops of Starbond Black Medium KE – 150 CA glue to the problem areas on the lower bit. I will wait an hour or so before turning the bit to apply Black CA glue on the upper bit.

 After the Black CA cures, I work the patches down on the lower and upper bit with a flat needle file then fine tune with 240 grit paper.
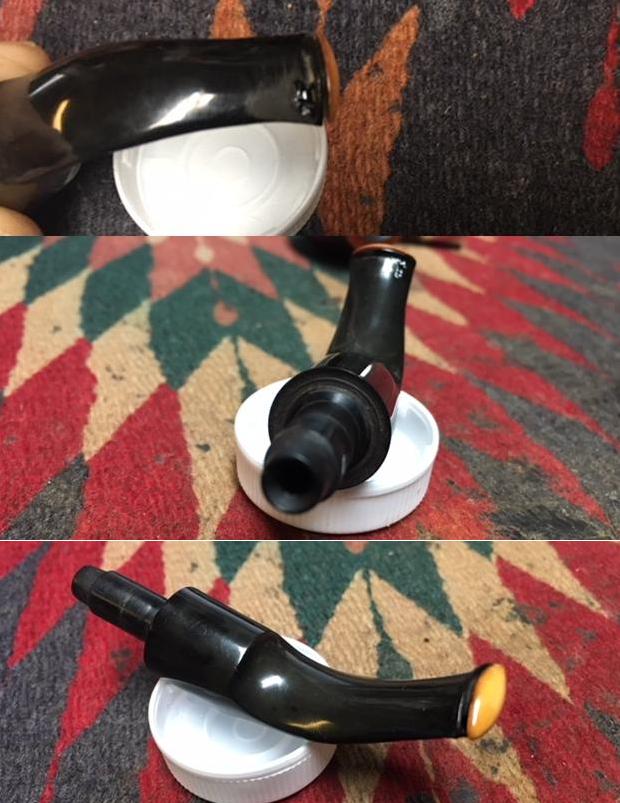
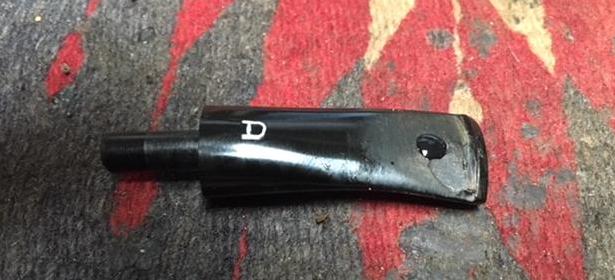
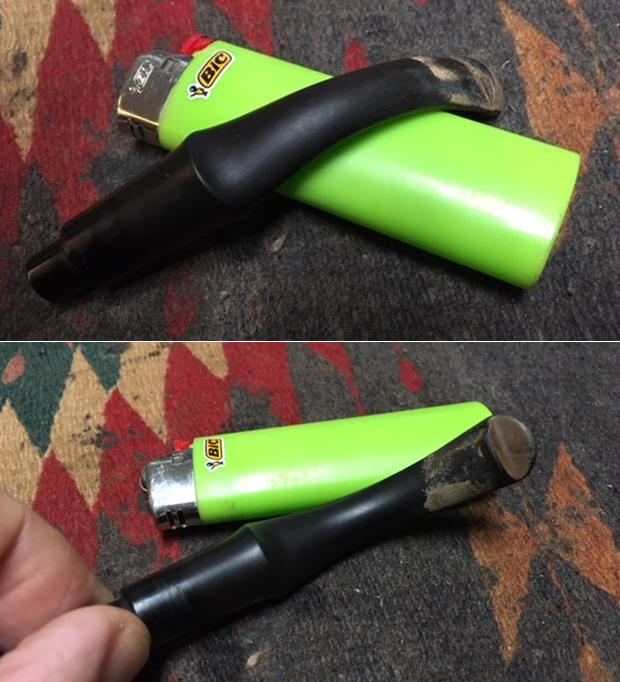
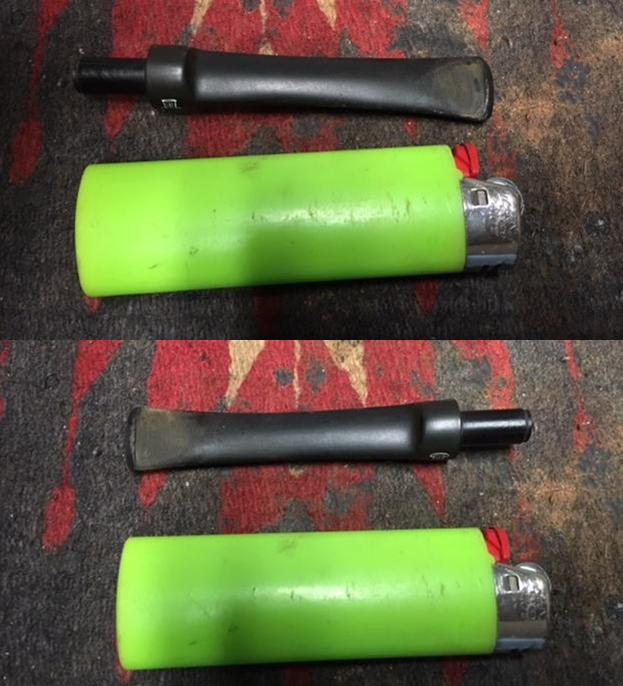
 Now, turning to OP’s stem, I take close-ups of the upper and lower bit area to show the starting point. Again, as with MOP, the tooth dents are on both sides. I paint the bit with fire from a Bic lighter to expand the vulcanite and raise the tooth dents. As before, the heating did raise the dents so that sanding becomes more effective. Before and after pictures of the heating for upper bit and then lower bit.
 As before, using 240 grit sanding paper I sand out as much as possible the dents on the bit and button. I also use a flat needle file to define the button lips more. That worked out well. All the dents sanded out except for one small area on the lower bit. No patch is necessary on the top. After cleaning the area with alcohol, I apply a drop of Black Medium CA Glue to the spot. I set OP’s stem aside for a few hours for the patch to cure. When cured I sand the patch with 240 grit paper. The pictures show the progress with the OP’s stem.
 Looking back at the stummels, the kosher salt/alcohol soak did the job. The salt and wicks have discolored indicating that the tars and oils have been drawn out. I remove the salt, wipe the bowls out with paper towel assuring that all the salt is removed.
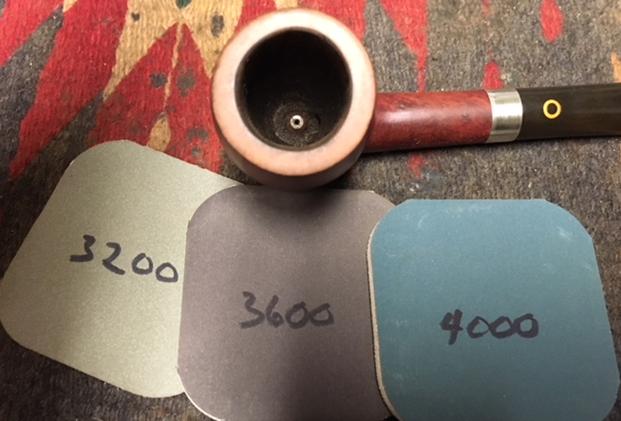
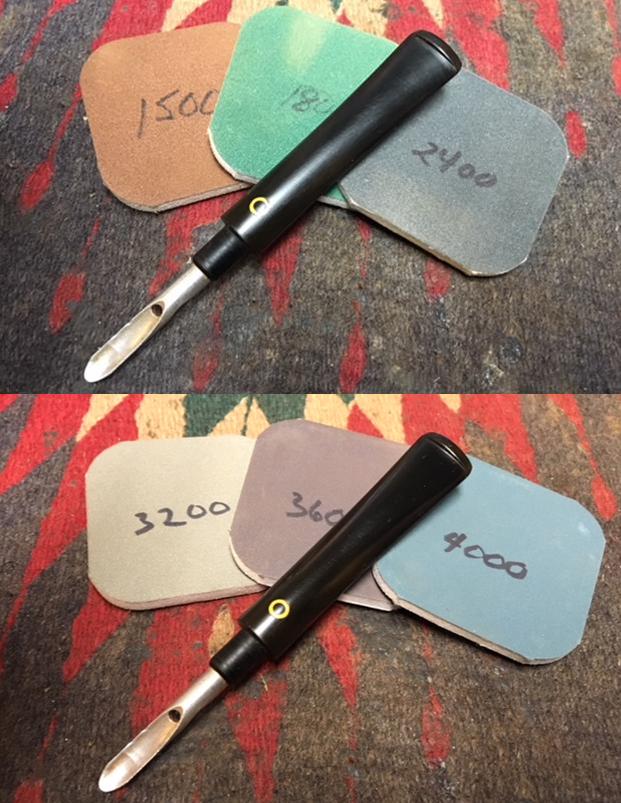
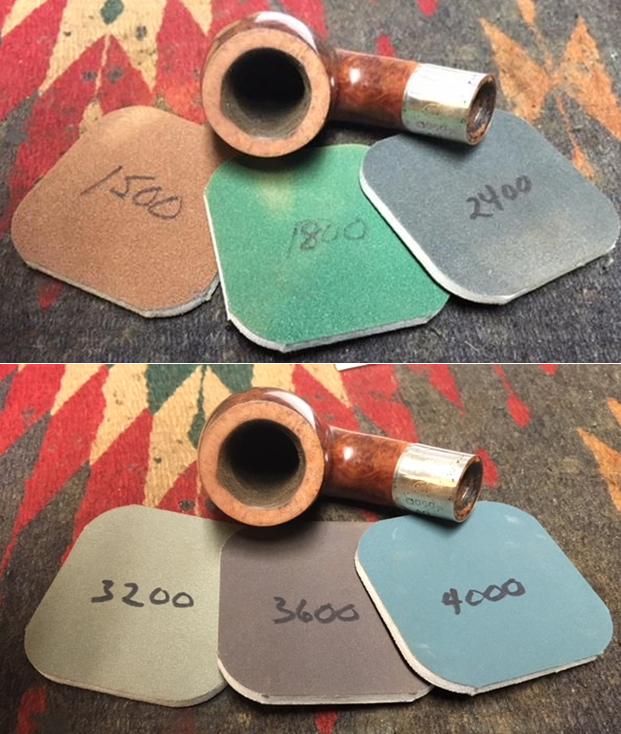
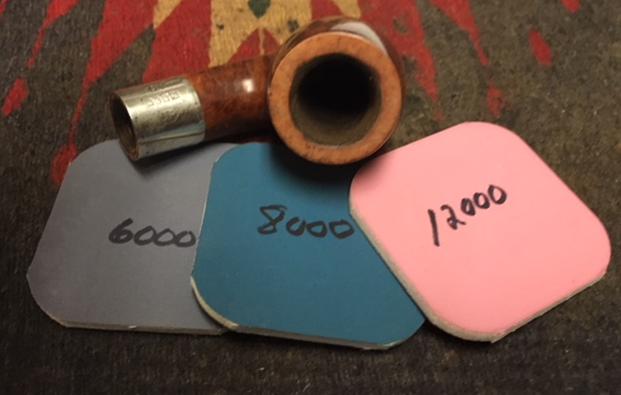
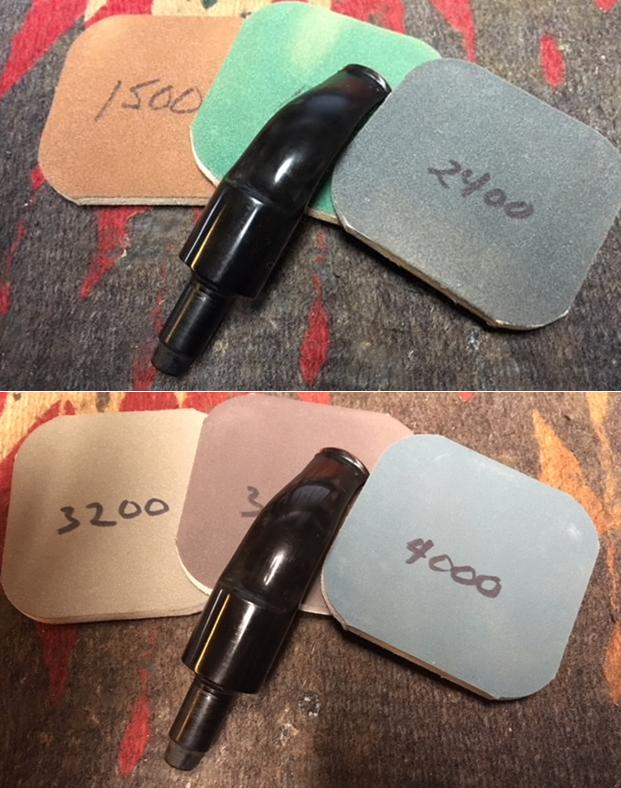
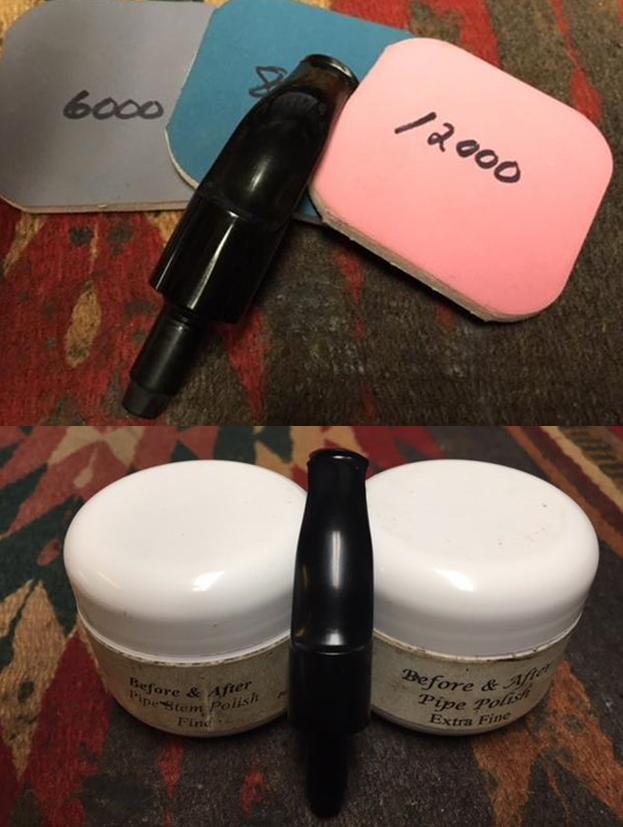
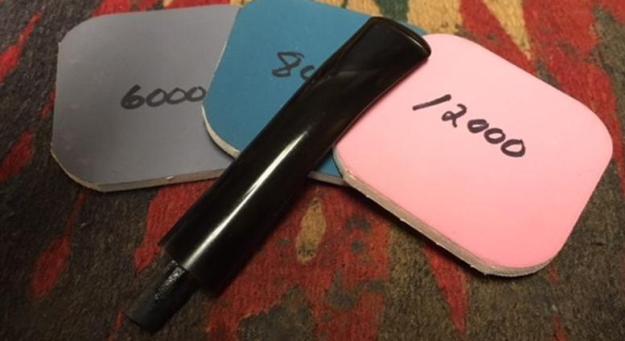
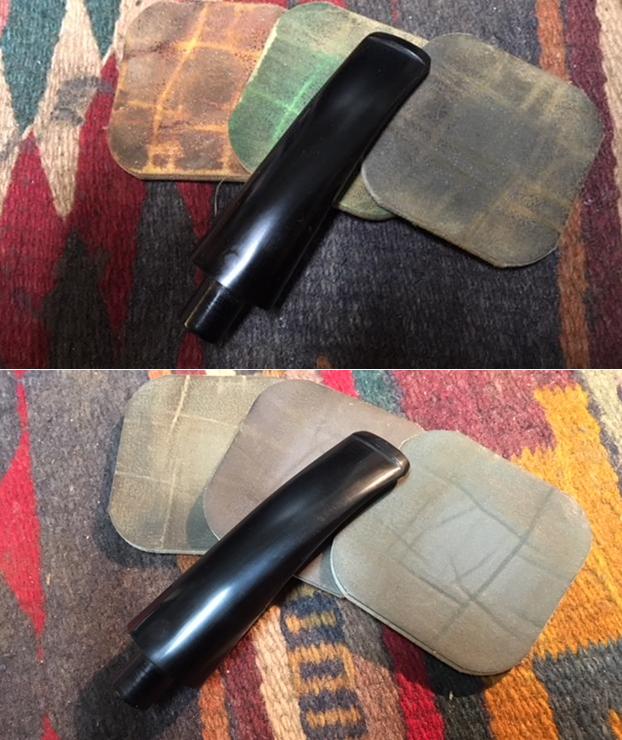
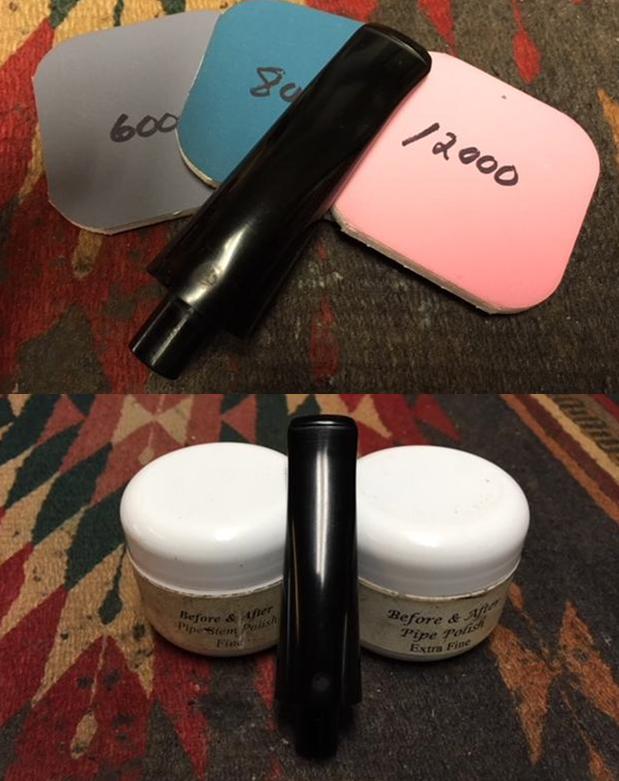
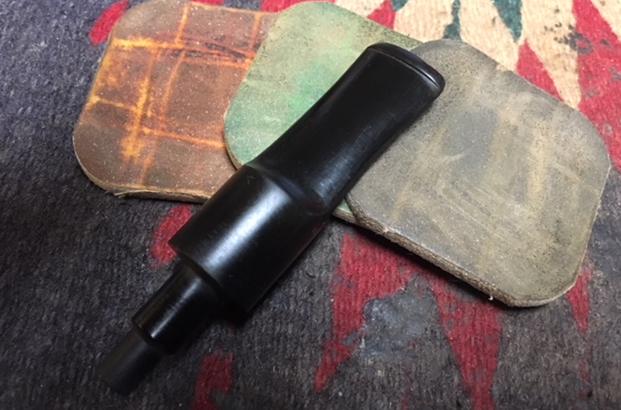
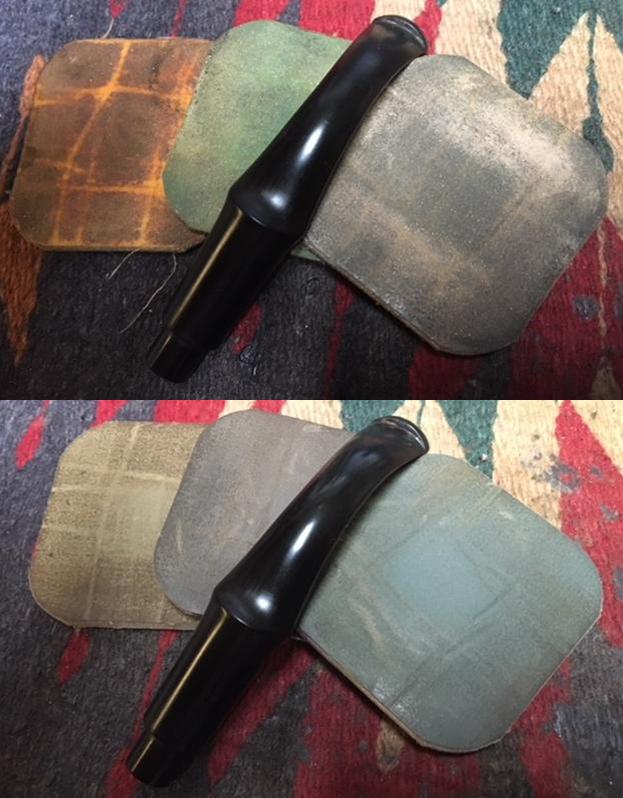
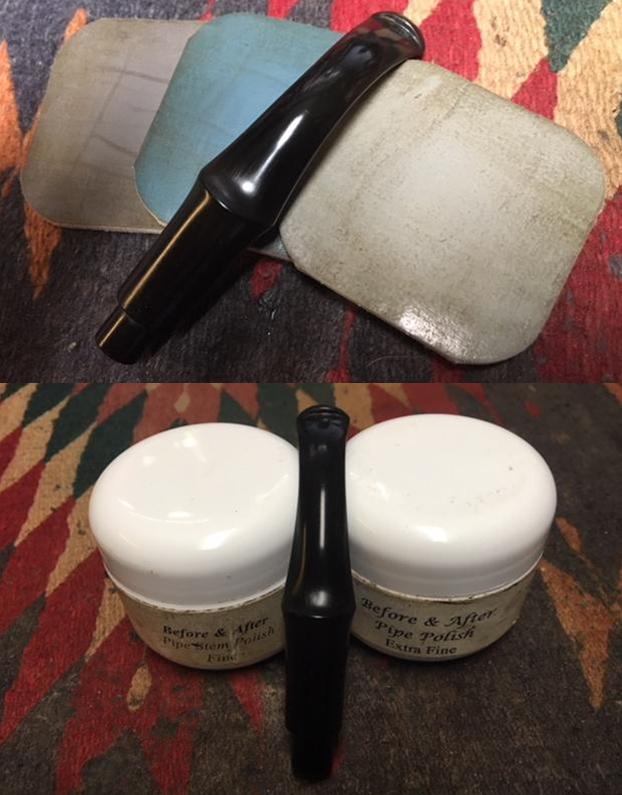
  For the sake of abbreviation in this long blog, both stems proceed through the finishing process. I use 600 grade paper to erase the 240 grade sanding and then buff up the stems using 0000 grade steel wool. From here, I take the stems through the full process of 9 micromesh pads from 1500 to 12000, wet sanding 1500 to 2400 then dry sanding with 3200 to 4000 and then 6000 to 12000. Between each set of three I applied Obsidian Oil to enrich the vulcanite. The results are good. The Peretti ‘P’ stamped on my Oom Paul looks great.
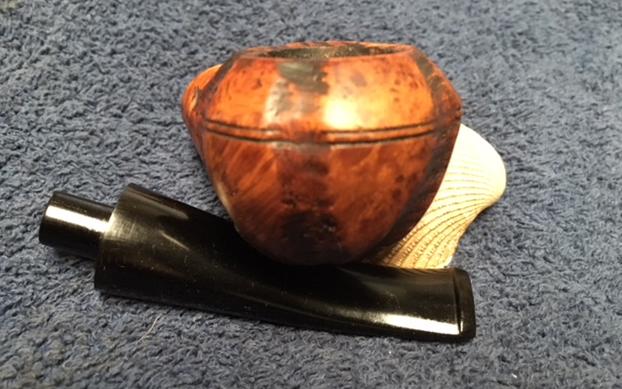
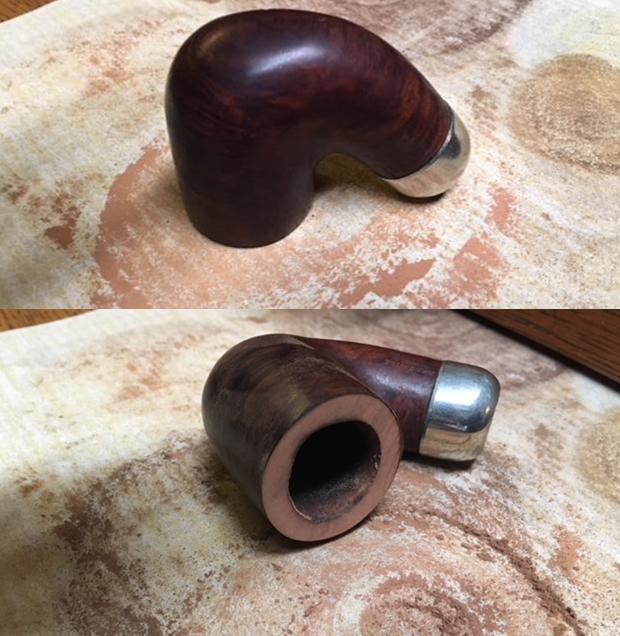
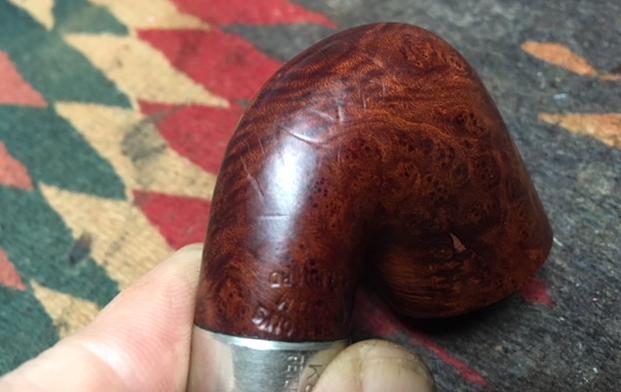
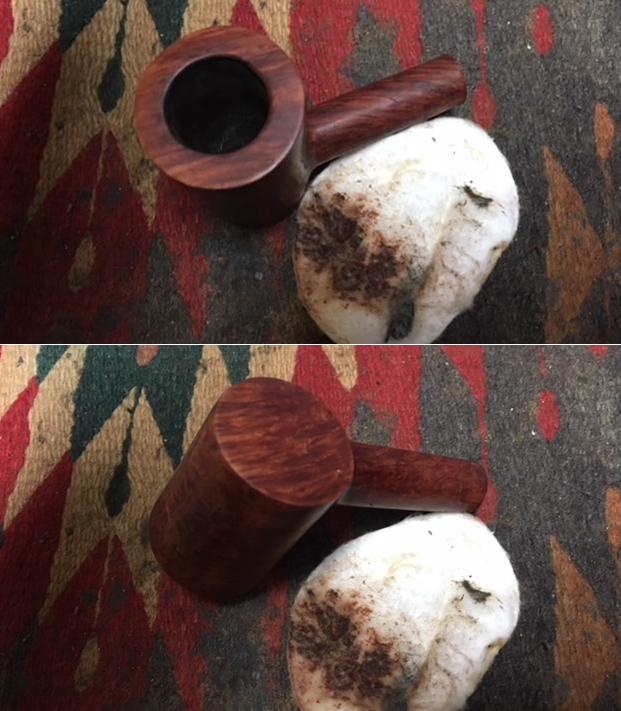
 Now to the stummels. I begin with MOP. I start with taking a few pictures to take in the great looking bird’s eye grain. I love the wide expanse of the briar on the Oom Paul stummel – it goes on and on. To remove the nicks and minor scratches on the briar surface I use sanding sponges progressing from coarser, medium, and then, light.
 I follow the sponge sanding by doing a full regimen of micromesh pad sanding. Using 1500 to 2400, I wet sand, then with the remaining pads, 3200 to 12000 I dry sand. This process brings out the grain very nicely and I’m liking what I see!

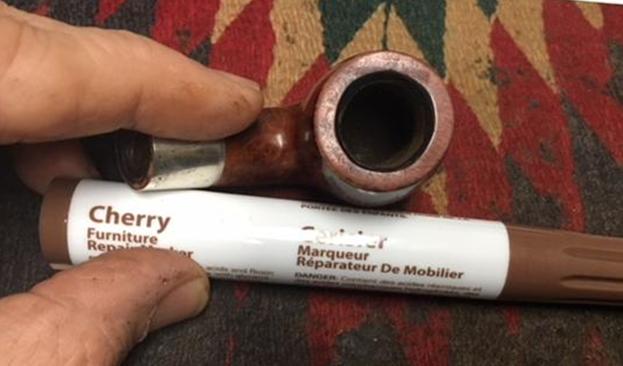
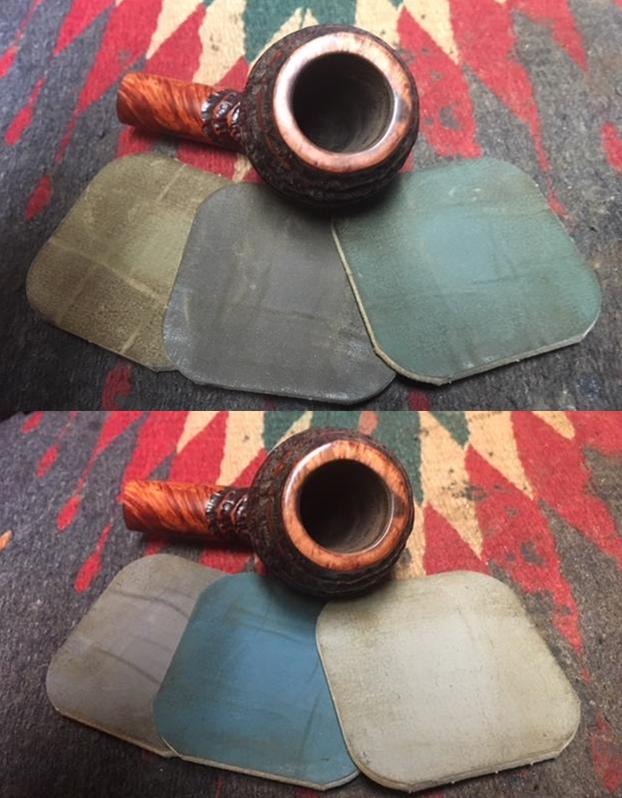
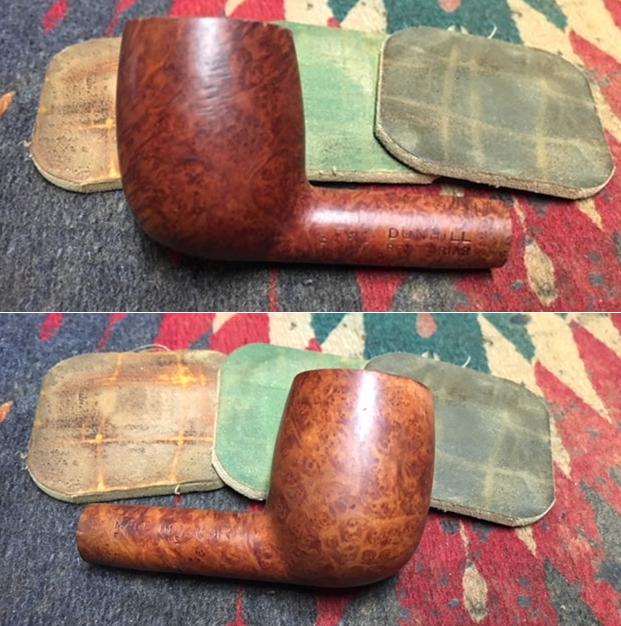
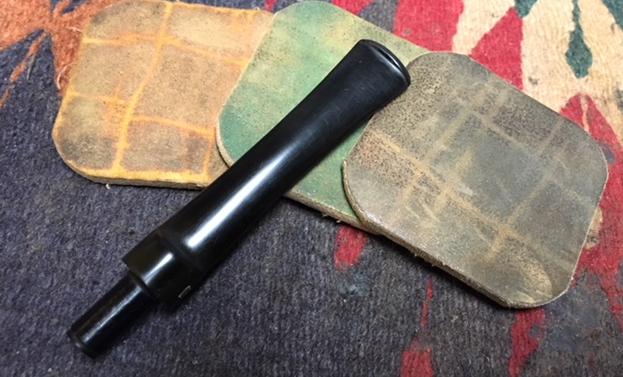
 As I now look to the OP stummel, I’ve been going back and forth as to what to do with this stage of the process. OP has two crack/cut repairs to blend into the finished coloring of the bowl. It also has many normal nicks and scratches which need to be addressed. I want to keep both L J Peretti pipes as close to the color scheme as possible, but to provide some blending cover for the cut/crack patches, I will need to darken the color some for OP. Even so, I know that most likely, patches will still be detectable but much subdued. My thinking now is waffling between staining my Oom Paul with a new color of Fiebing’s leather dye I brought back from the US – Saddle Tan Pro Dye. I tested it on a raw piece of wood and I like the results. The other approach I want to test is simply using Before and After Briar Balm or as it’s called on the label, ‘Hard Rubber Balm’. Steve recommended this approach to me in lieu of stain. With waffling completed, I will use the Briar Balm on MOP first to see how it turns out. Then, for OP, which needs more blending activity, I’ll use the Saddle Tan dye.
  With this decided, I take a few more close-ups of OP to mark the start. I begin preparing the briar surface using sanding sponges – from coarser, to medium, and to fine to clean the surface of scratches and nicks. Throughout, I am careful to guard the L. J. Peretti Co. nomenclature on the shank.

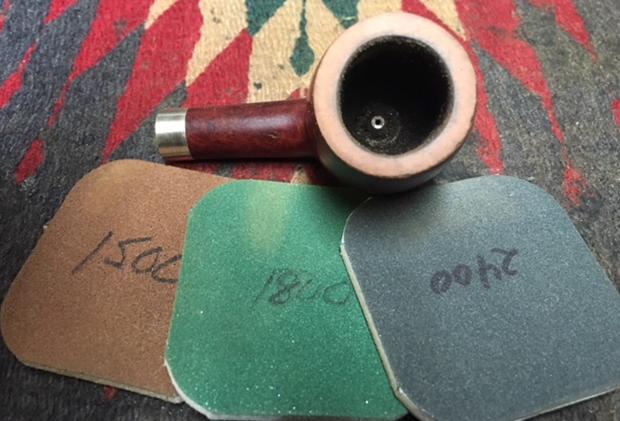
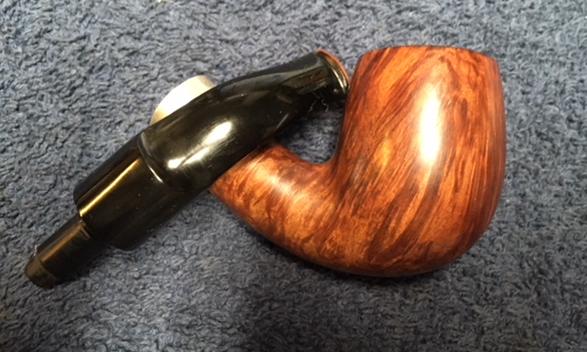
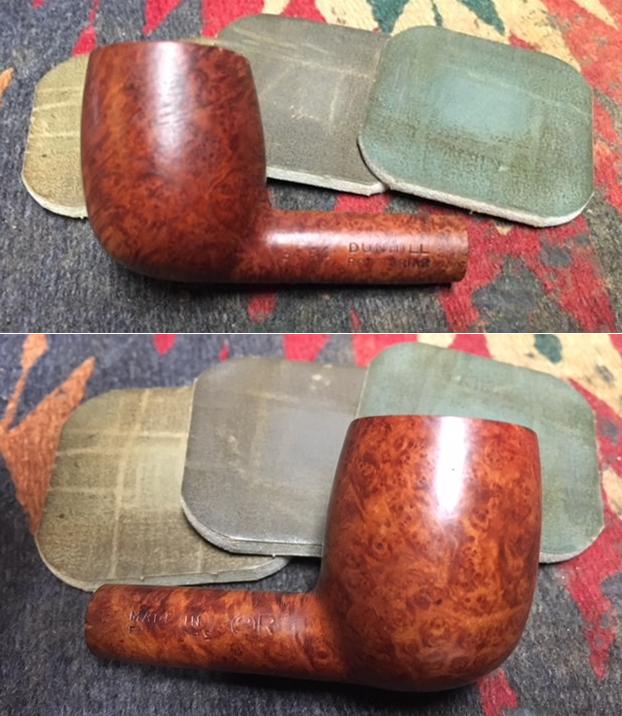
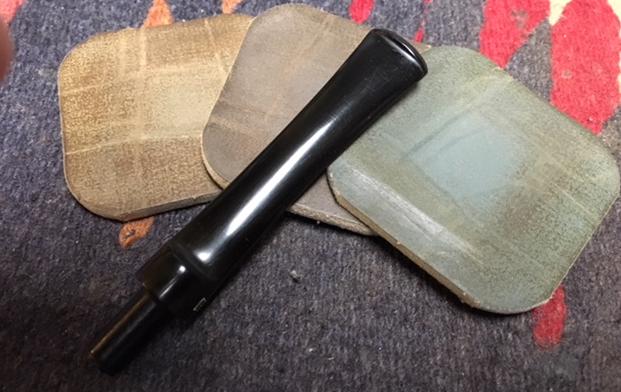
 As with My Oom Paul, I use micromesh pads following the sponge sanding. I wet sand using pads 1500 to 2400, then dry sand from 3200 to 12000. I record the progress after each set of 3. I love this phase of the process. The micromesh pads do a great job bringing out the fine detail of the grain. The OP has a distinctive lateral, horizontal flame grain that spans the bowl and full bent shank. It culminates in the front with bird’s eye grain – the perpendicular view of the horizontal flow of grain. Very nice. The pictures capture a bit of what I’m seeing emerge with OP.

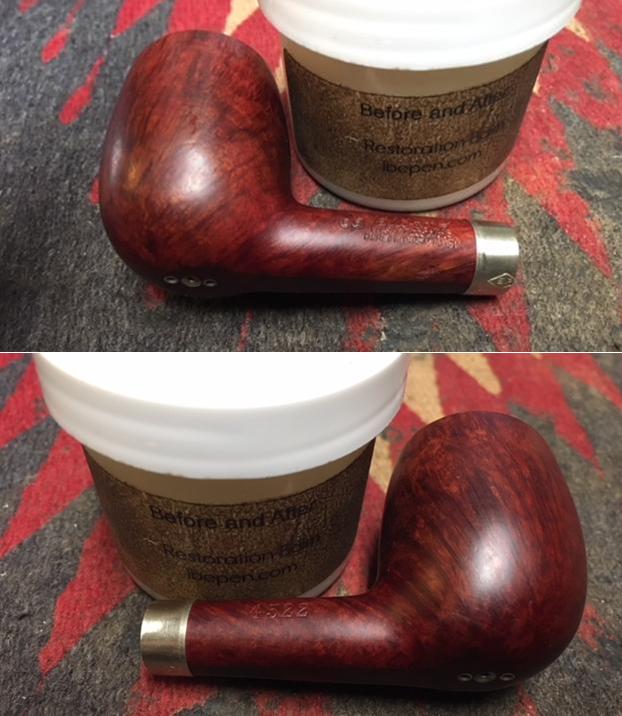
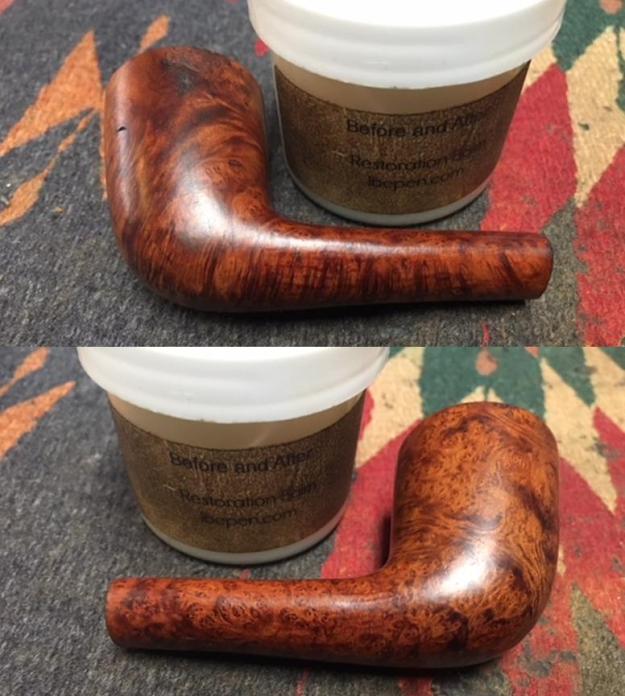
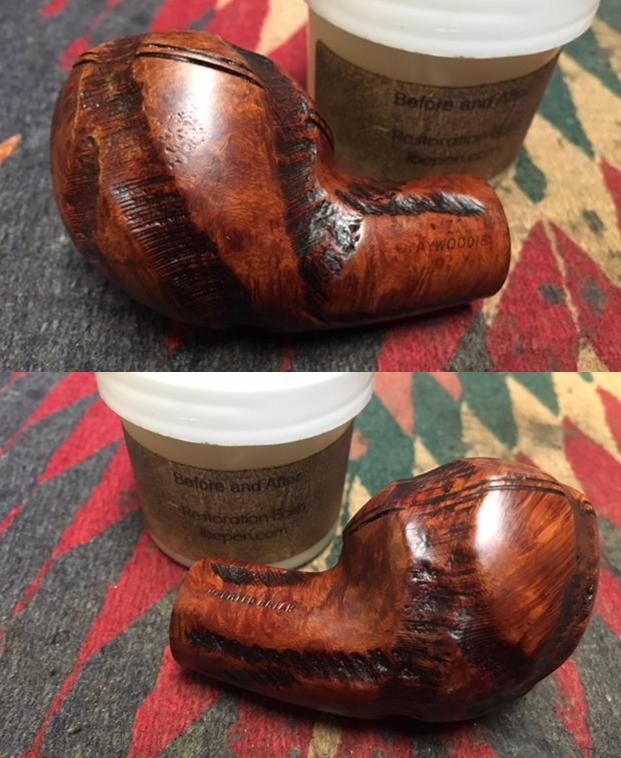
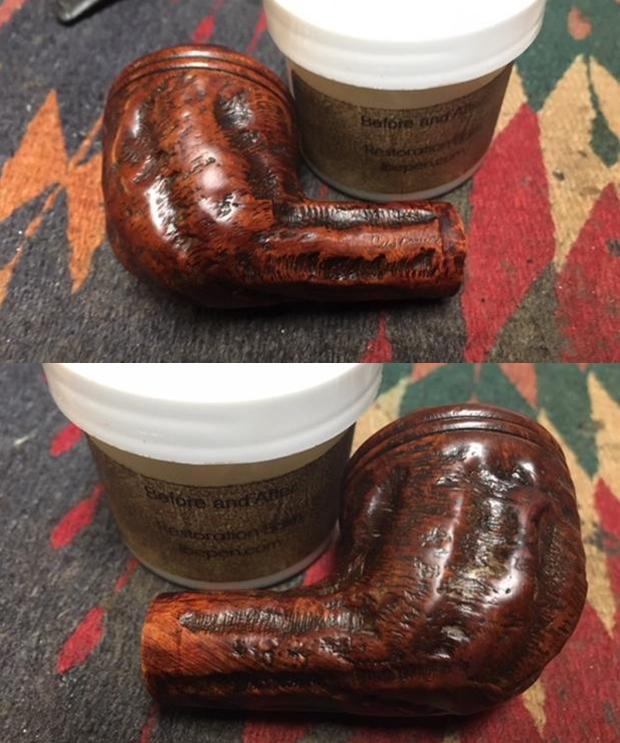
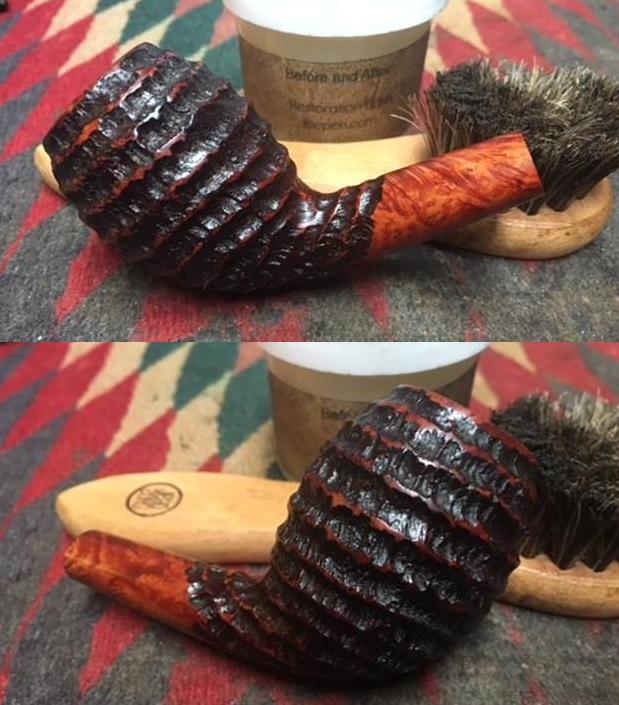
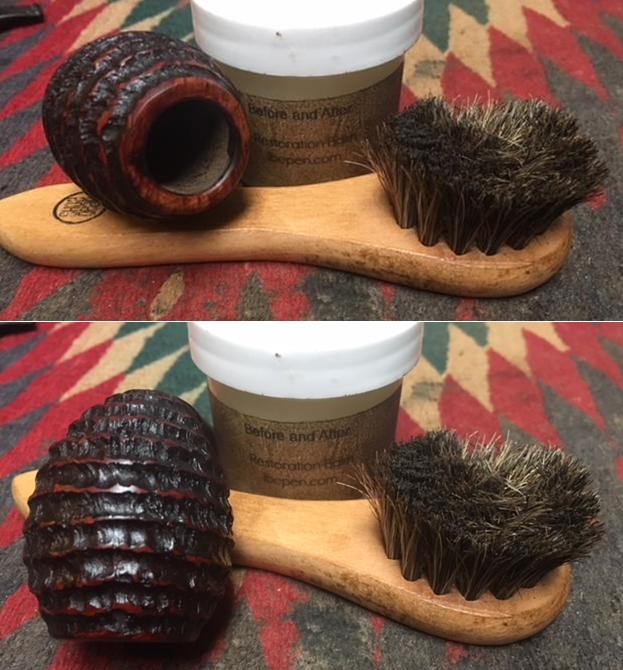
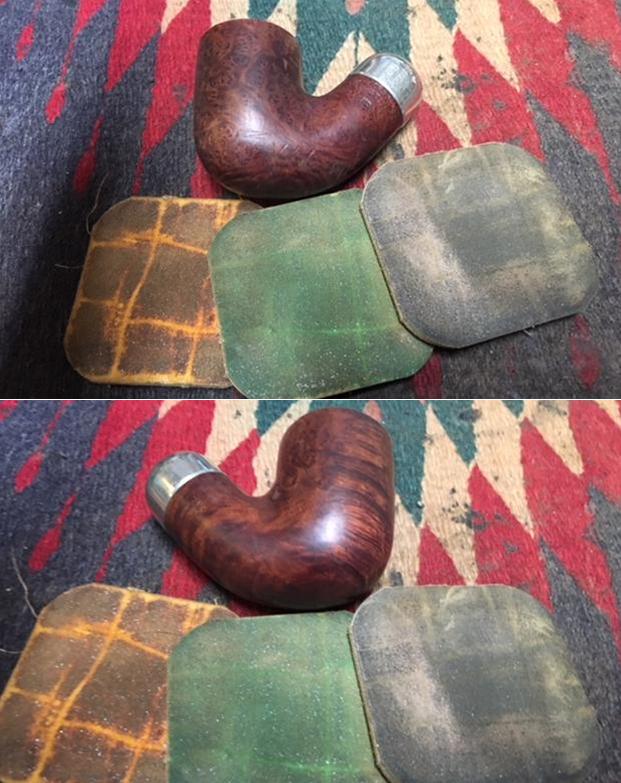
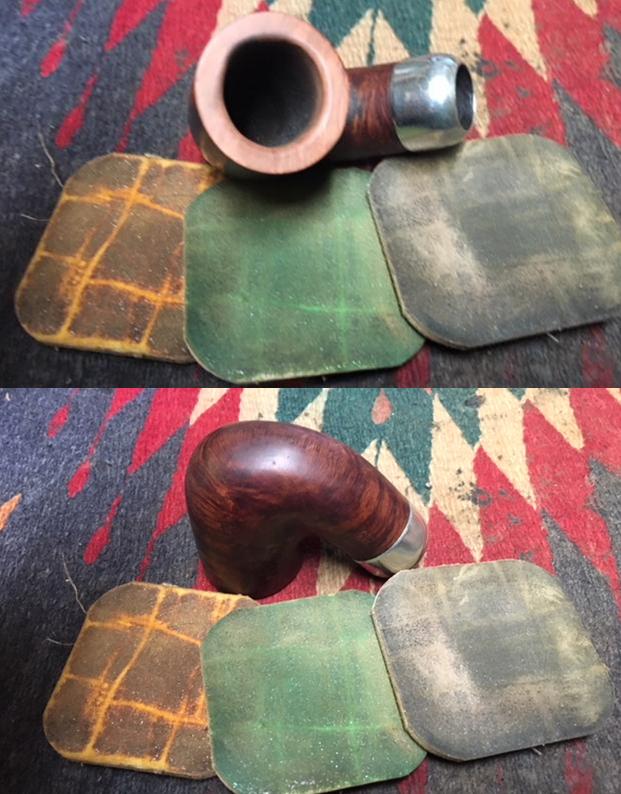
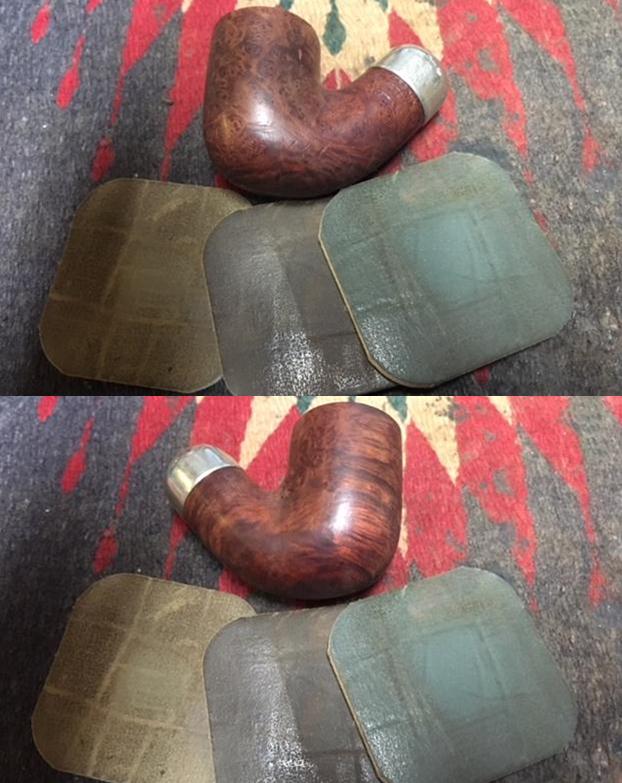
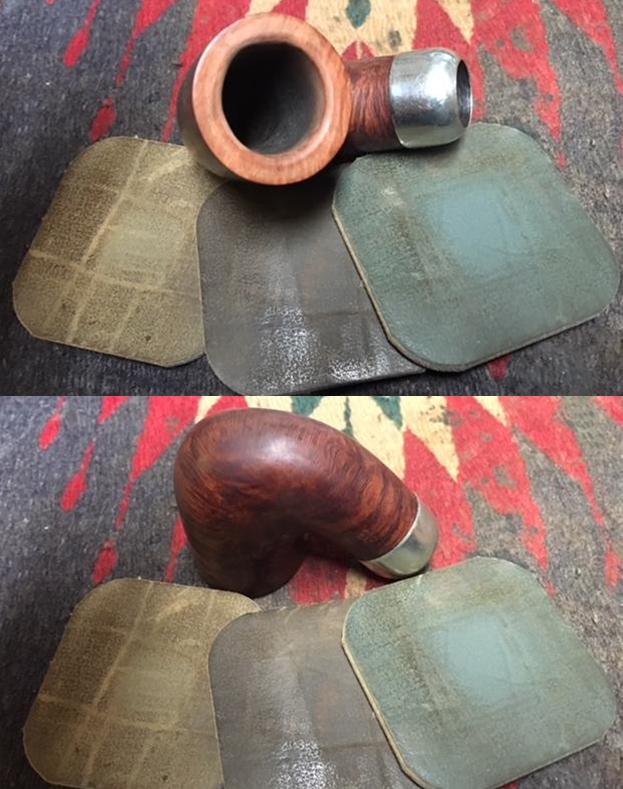
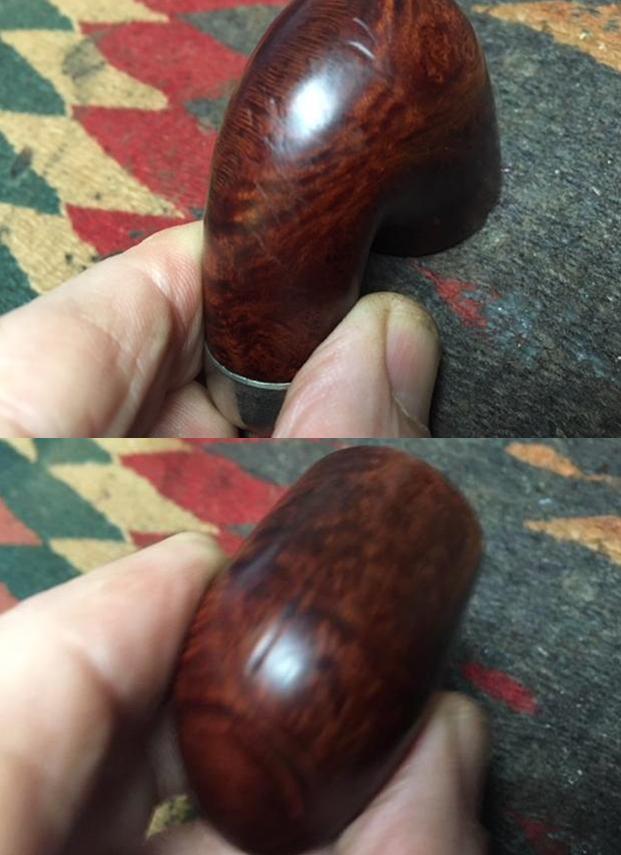
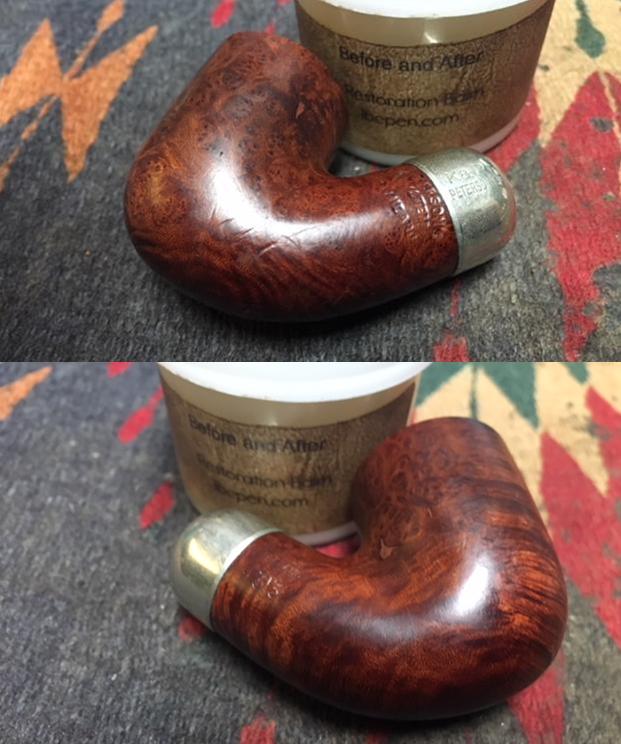
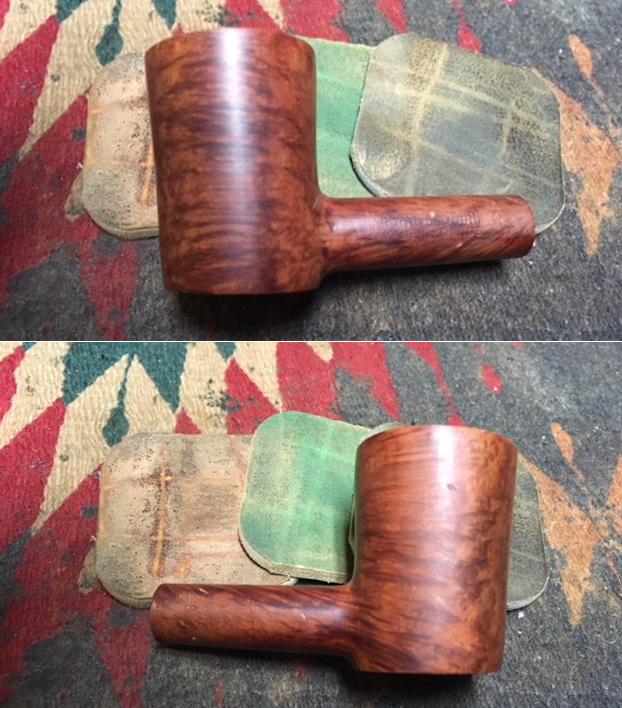
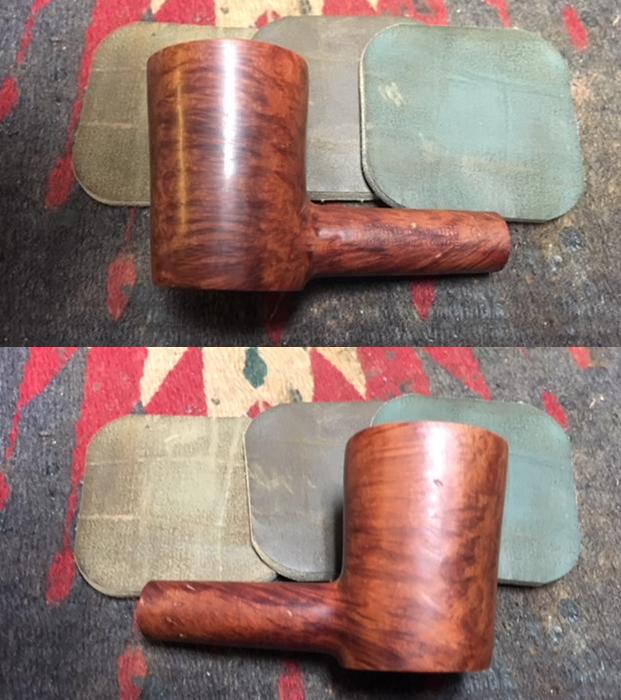
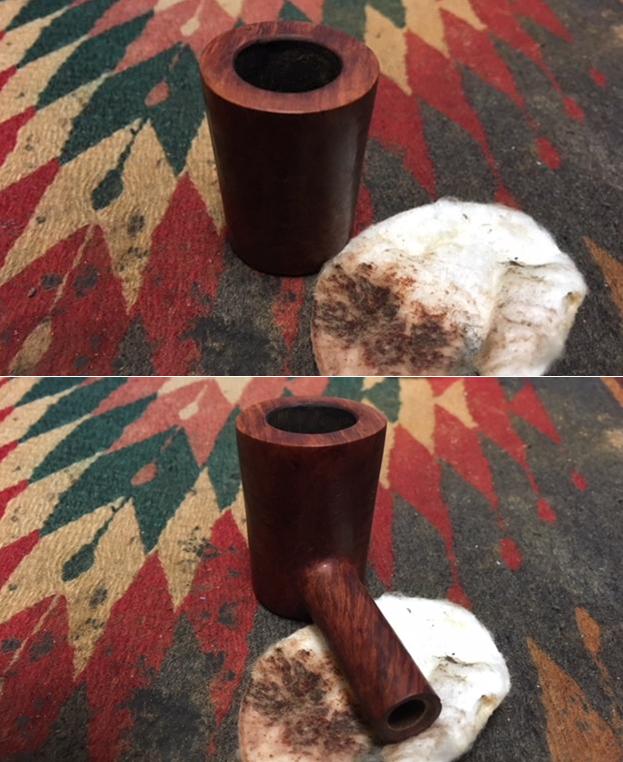
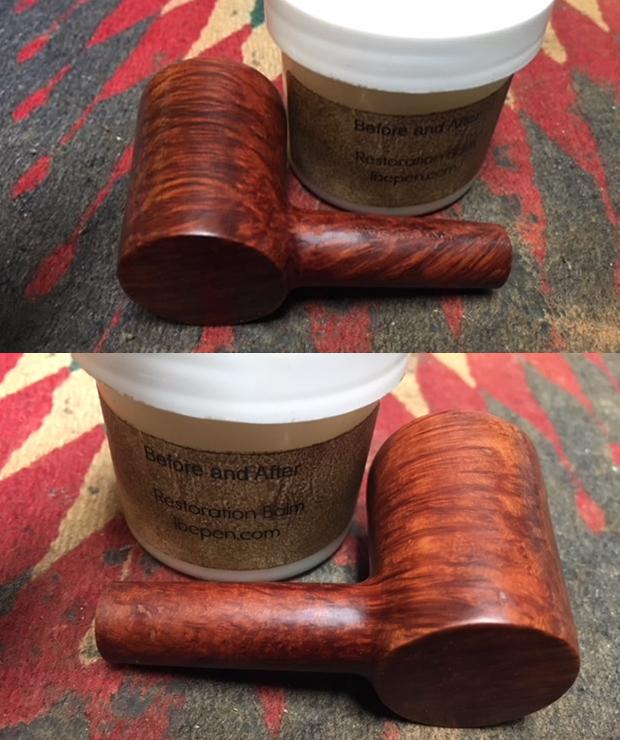
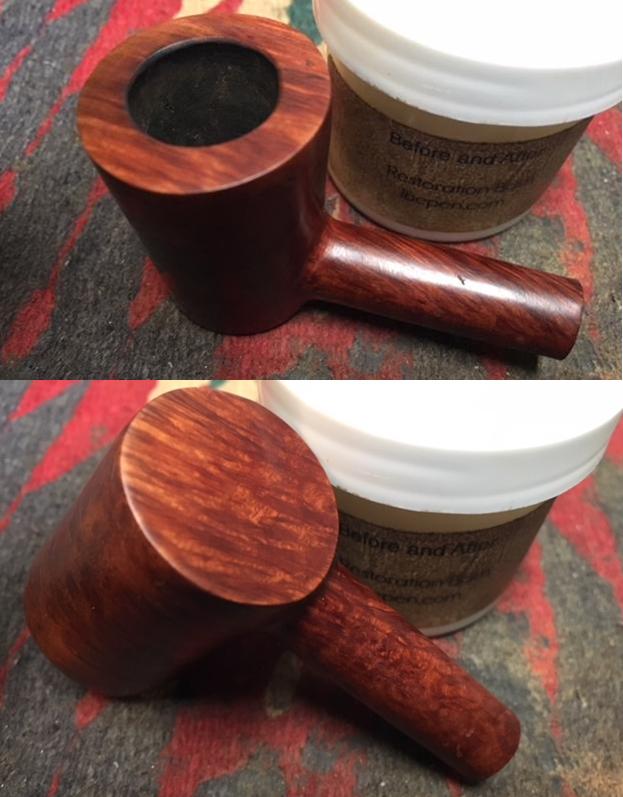
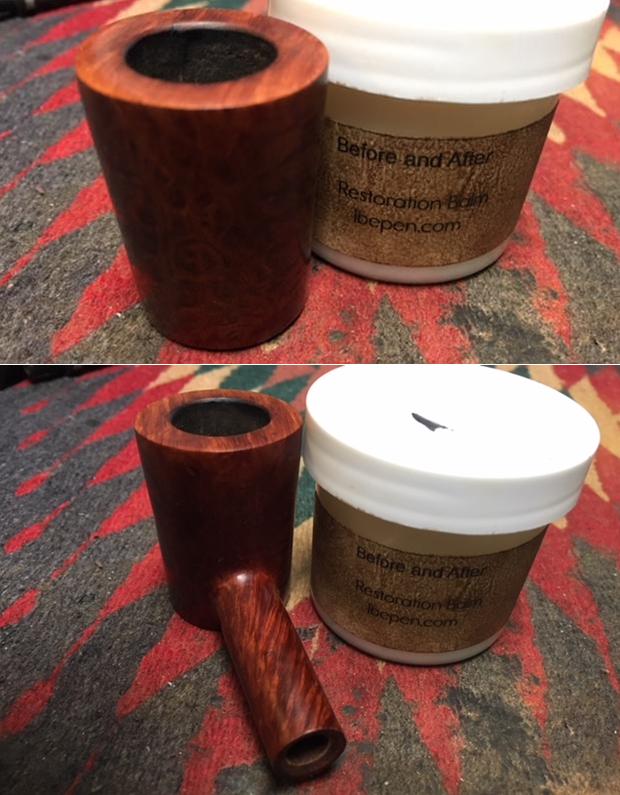
 Now testing time. I will apply the Before and After Briar Balm to MOP – My Oom Paul, to see how the briar absorbs and reacts. I’ve seen Steve apply the balm to several pipes he’s restored on Reborn Pipes with very nice results. The process is easy. Apply balm to the briar and work it in with your fingers. I take a picture of each side of the stummel to show the starting point. I put some balm on my fingers and I work it in. The balm is loose and oily when it first begins but as it is worked in, it thickens as it is absorbed into the briar. After applying the balm, I wait about 10 minutes and wipe/buff the stummel with a clean cotton cloth. The difference is noticeable – the briar has a deeper, richer appearance. I like it! I take two ‘after’ pictures to compare. The first picture is the right side of the bowl and the second, left. Before the balm is on the left and after application, is on the right. The pictures speak for themselves.
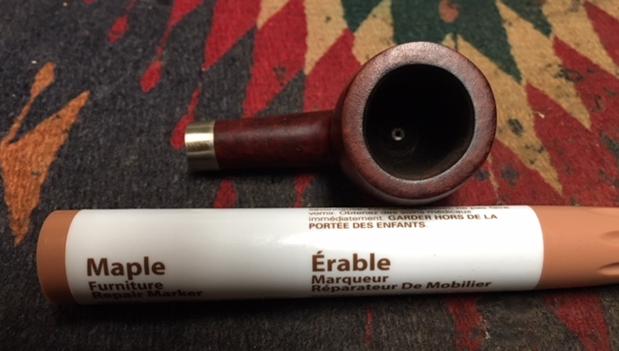
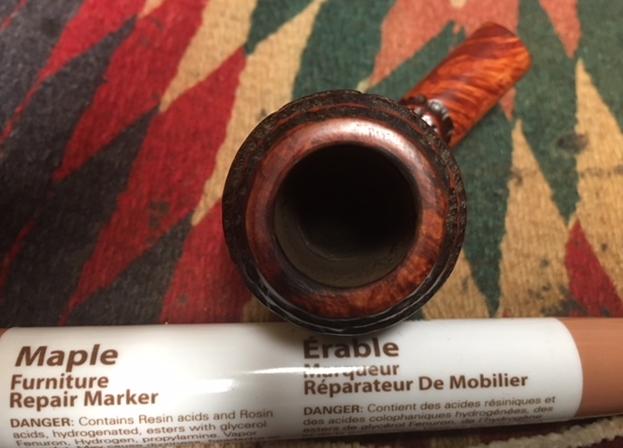
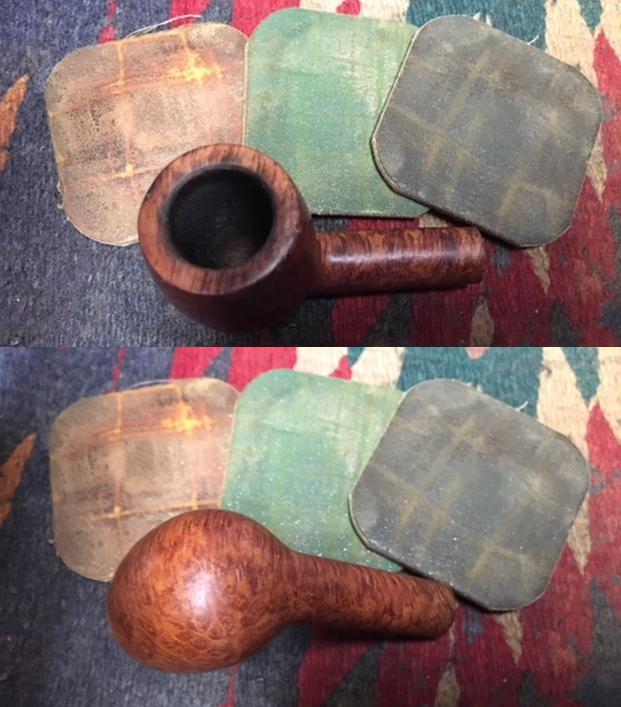
 Now, turning to OM, I will apply Fiebing’s Saddle Tan Pro Dye. I first wipe the bowl down with alcohol to make sure it is free of dust and dirt. I insert a cork into the shank to serve as a handle and heat up the stummel using an air gun to expand the briar making it more receptive to the dye. Then, I thoroughly apply the aniline based Saddle Tan dye to the stummel with a pipe cleaner and then flame the wet dye which immediately burns off the alcohol setting the pigment into the briar. I repeat the process and flaming and set the stummel aside to rest overnight allowing the dye to set. The good thing about aniline dye is that I can use alcohol on a cotton pad to wipe the stummel later to lighten the hue if I choose. Another day has come to an end.
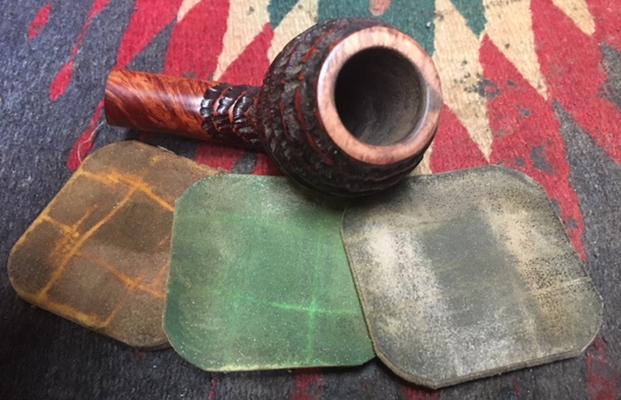
 Early the next morning before heading out to another full day of work, I’m anxious to ‘unwrap’ OP’s bowl that rested through the night. I take a picture of the ‘rested’ stummel. Using the Dremel, set to the lowest speed, I mount a felt buffing wheel dedicated to applying Red Tripoli compound. After purging the wheel to soften it and clean it, I methodically work the wheel around the stummel ‘unwrapping’ the fired dye revealing the briar surface. I do not apply a lot of pressure on the felt wheel but allow the fine abrasive nature of the Tripoli compound, speed of the Dremel and the felt wheel to do the work. Since the felt buffing wheel is not flexible, I mount a cotton cloth wheel with Tripoli to reach into the crook of the shank’s bend. I take a picture of the ‘unwrapping’ with the Tripoli compound to give an idea of what I’m seeing.
 At this point, I yoke both Oom Paul stummels together in the process. I reunite stems to both and after mounting a cotton cloth buffing wheel, I leave the Dremel’s speed the same slowest setting, and apply Blue Diamond compound to both stummels and stems. When I finish, I buff each with a felt cloth to remove the compound dust from the pipes in preparation for the wax. I mount a dedicated cotton cloth buffing wheel on the Dremel, increase the speed to about 40% and apply carnauba wax to both MOP and OP, stem and stummel. After applying several coats of carnauba to each pipe, to finish I give both a good buffing from a micromesh cloth to deepen the shine more.
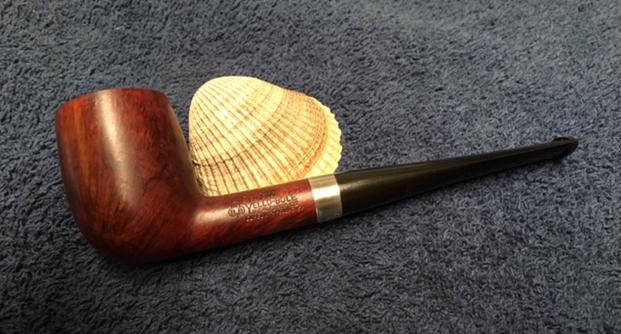
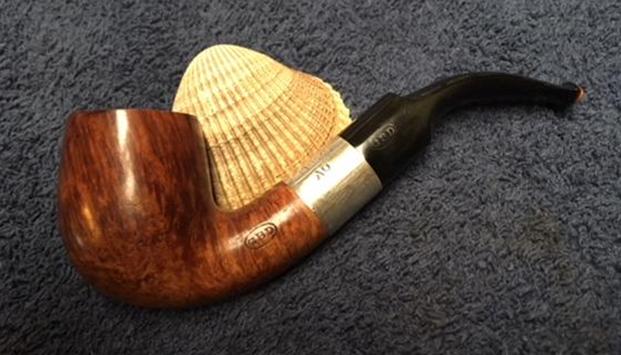
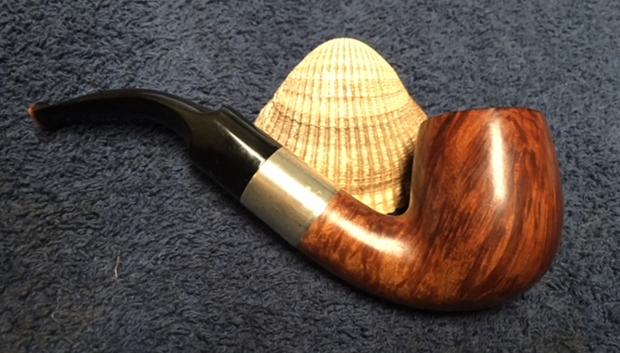
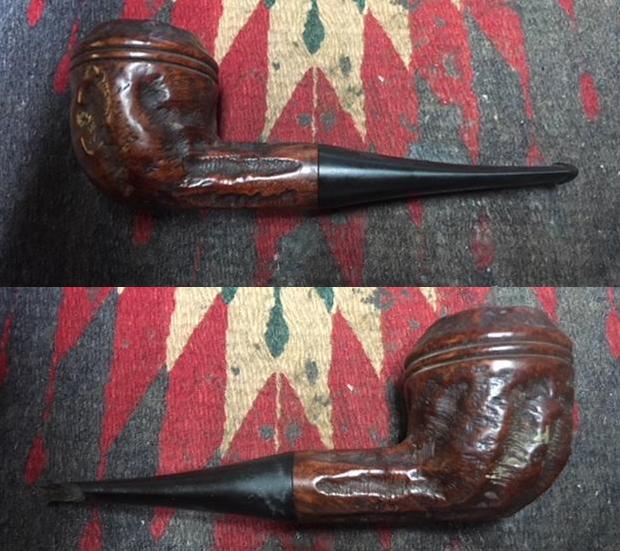
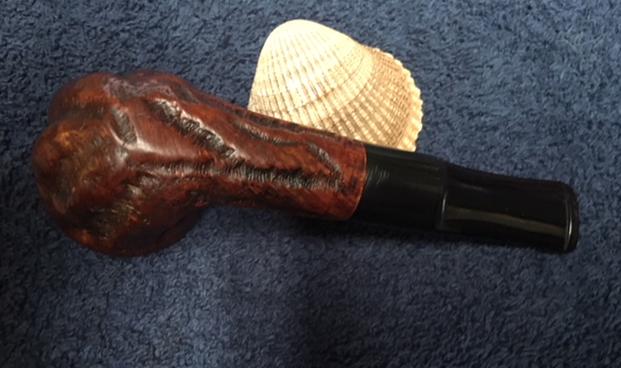
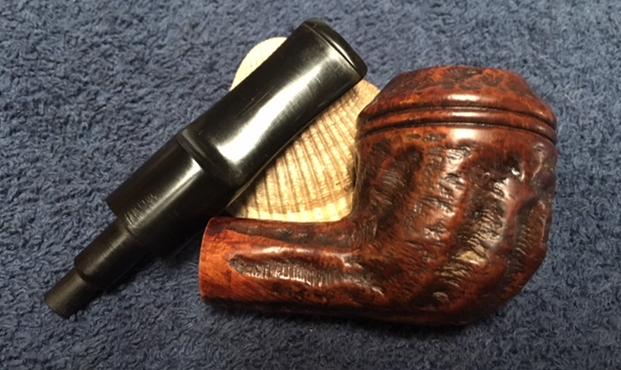
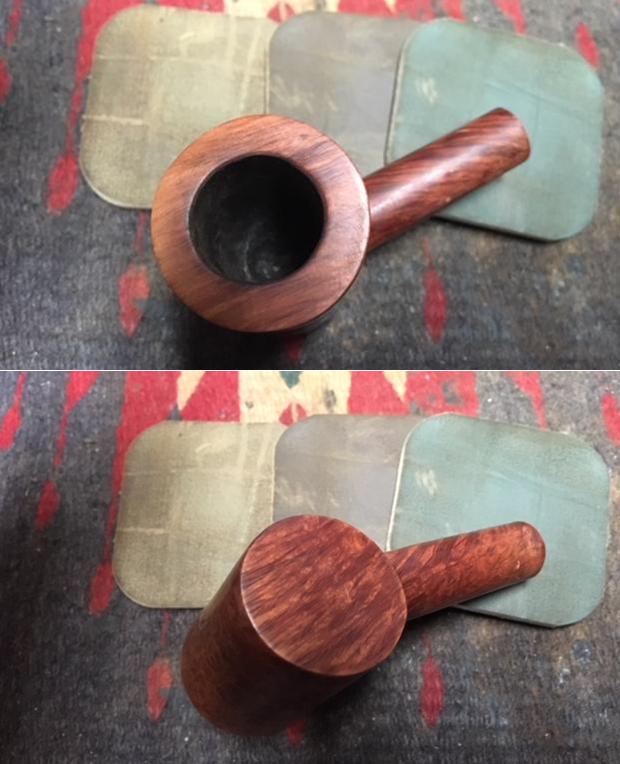
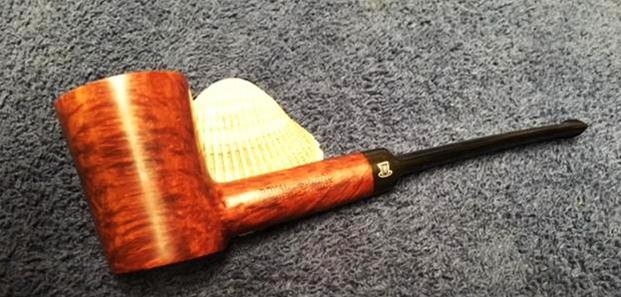
These two Oom Pauls provided some challenges in their restorations, but I am pleased with the results! After this I don’t believe I will do another ‘double restoration’ write-up – too much! The grain on both Oom Pauls is striking. My Oom Paul’s finish came out well using Before and After Briar Balm and the grain is dominated by a large orchard of bird’s eye pattern. I look forward to his inaugural smoke as I add him to my growing L. J. Peretti Co. collection.
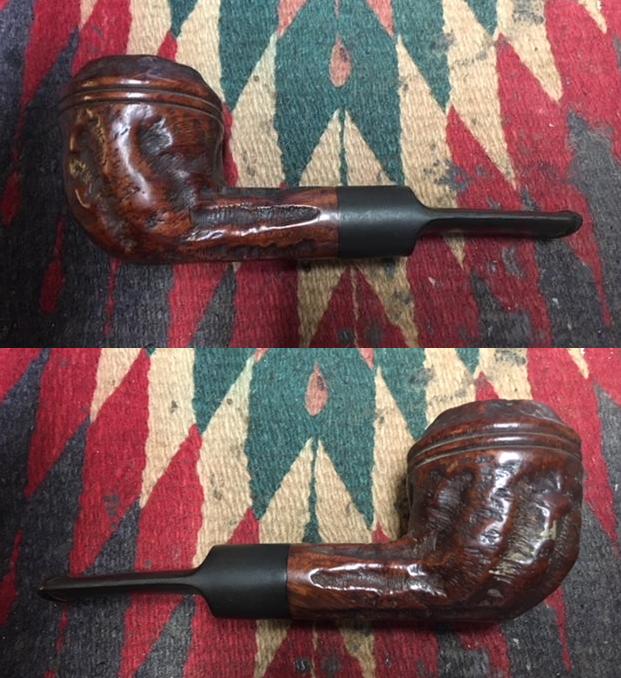
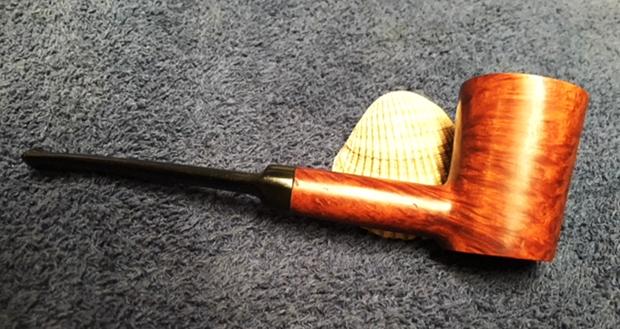
The Oom Paul heading to The Pipe Steward Store had some challenges with cracks and cuts, and loving abuse from his former steward whose practice of lighting over the edge of the rim presented some hurdles. The Saddle Tan finish looks great – it has masked the cut repair on the heel but not fully hidden – he takes some signs of his past life war wounds into the future! But OH MY, the lateral flame grain flowing through the stummel from the full bent shank to the front of the bowl culminating with a sprinkling of bird’s eye is striking and a beautiful example of God’s handiwork! He’s bigger than my Oom Paul with the length (in full bent position) is 6 inches, height of the bowl: 2 ½ inches, rim width: 1 ½ inches, chamber width: 15/16 inches, chamber depth: 2 1/8 inches. He is ready for a new steward and the adoption of this Oom Paul will benefit the Daughters of Bulgaria, our work with women and girls (along with their children!) who have been trafficked and sexually exploited. The pictures following start with MOP and OP together, two pictures of MOP happily heading to my rack, and then the remaining pictures of the Oom Paul heading to The Pipe Steward Store! They turned out to be a handsome pair of dudes! Thanks for joining me!