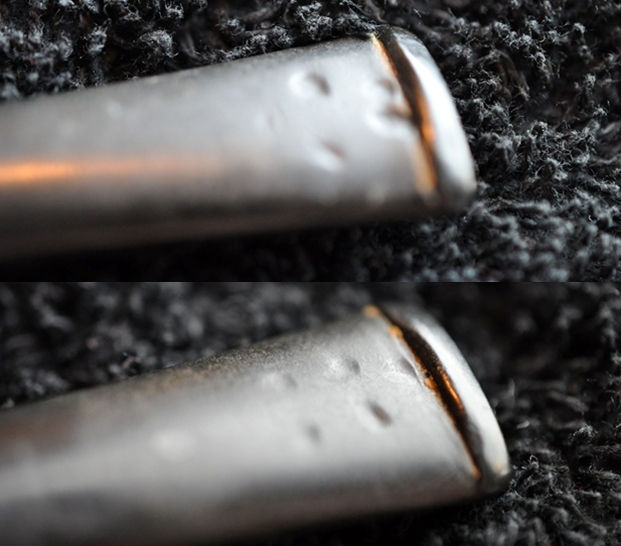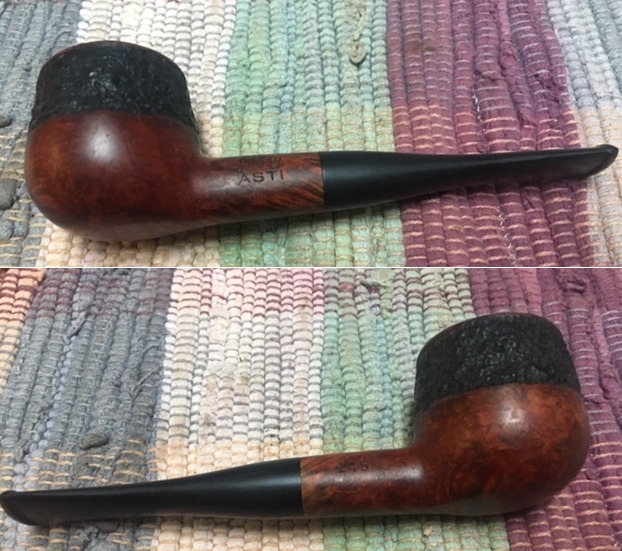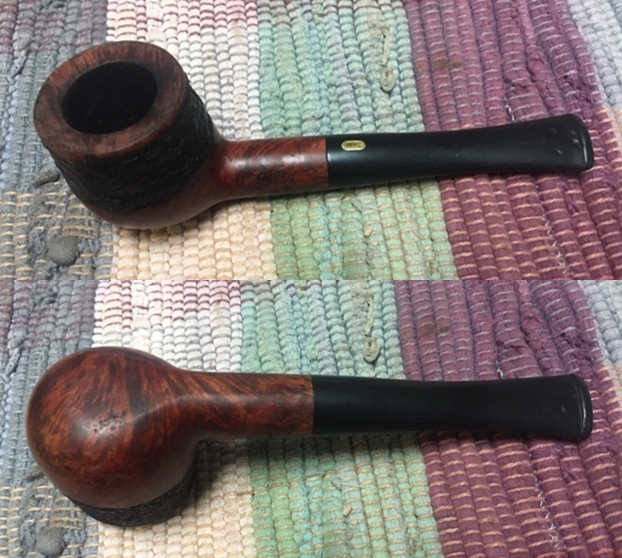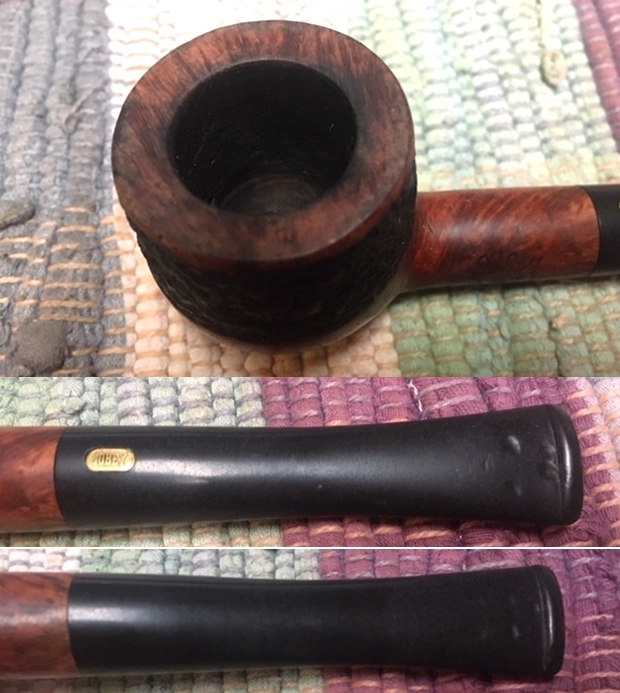
Tag Archives: repairing tooth marks

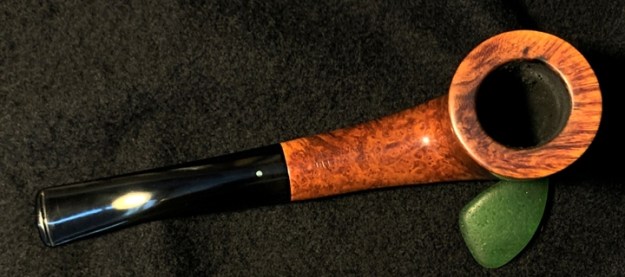
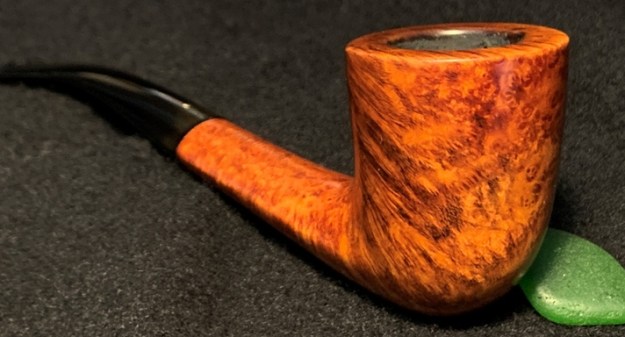
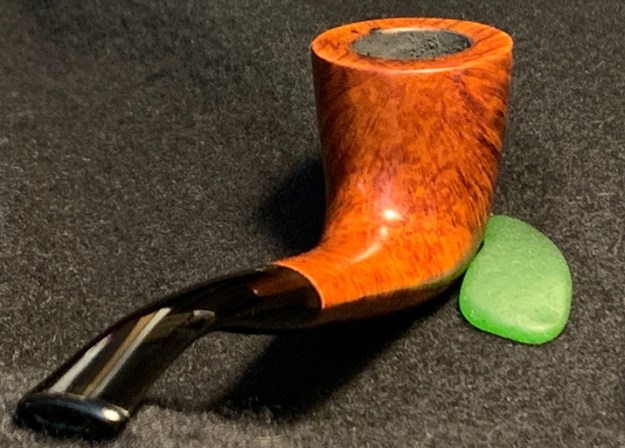
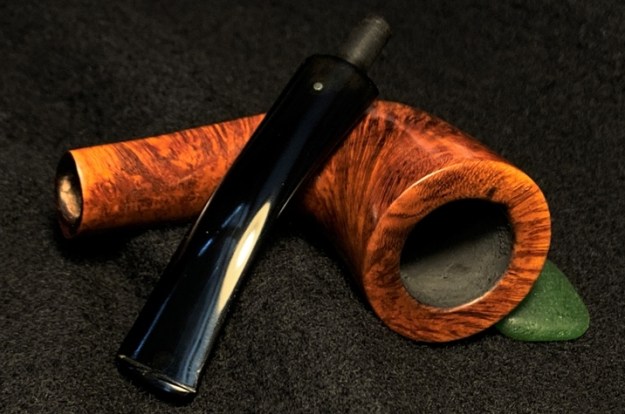
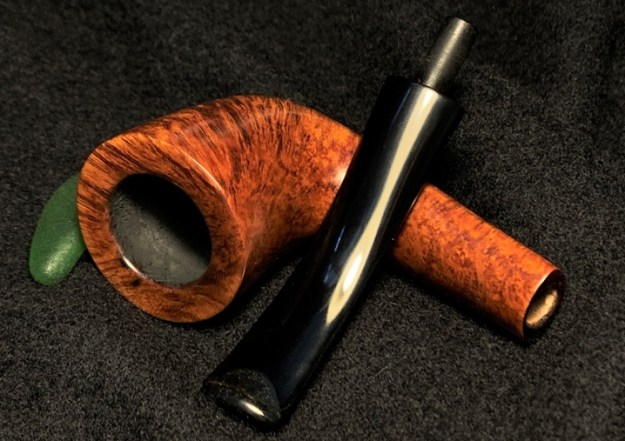
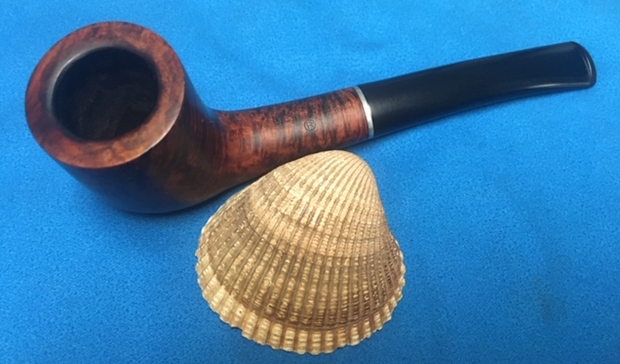
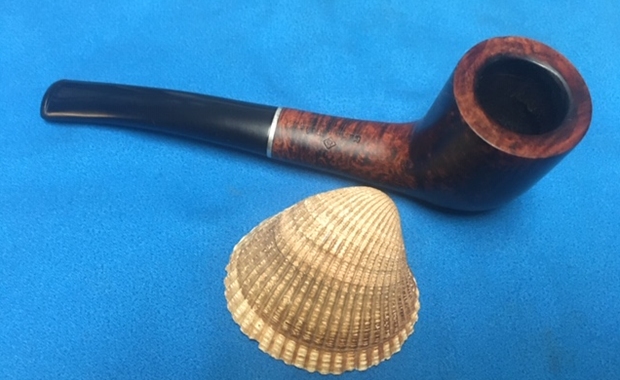
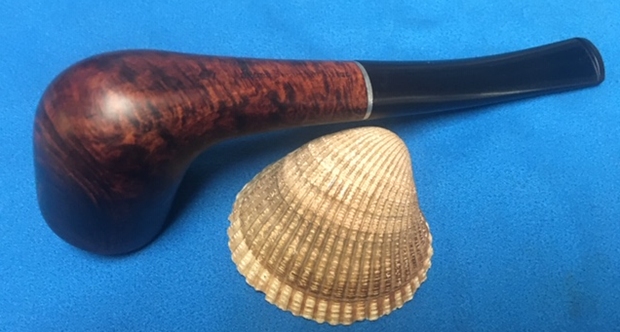
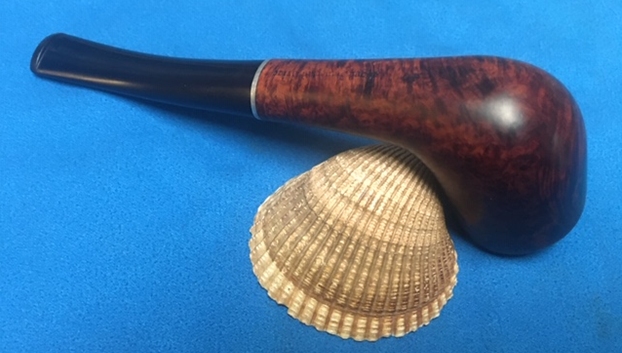
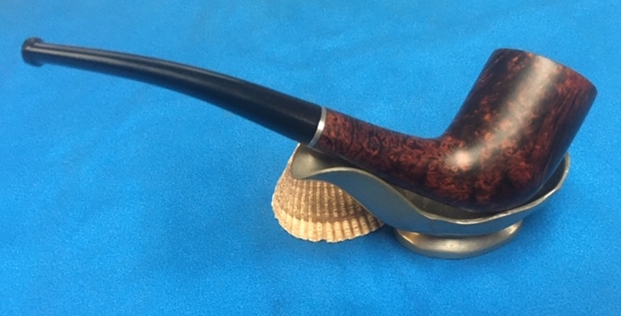
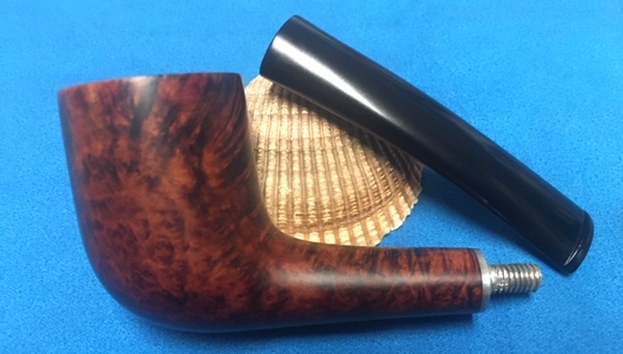
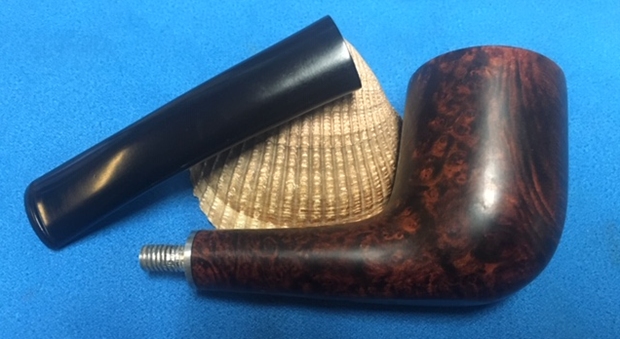
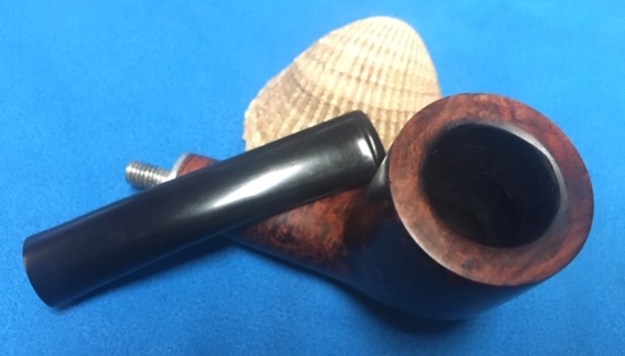
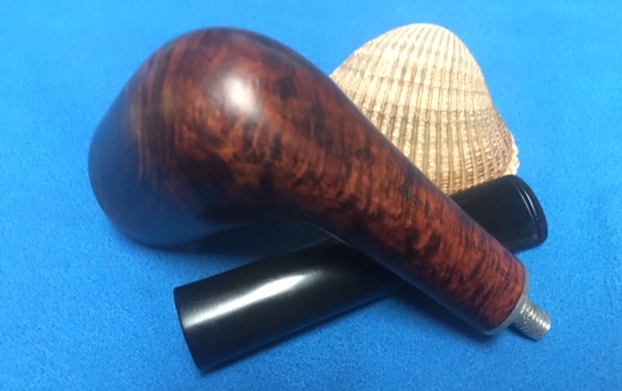
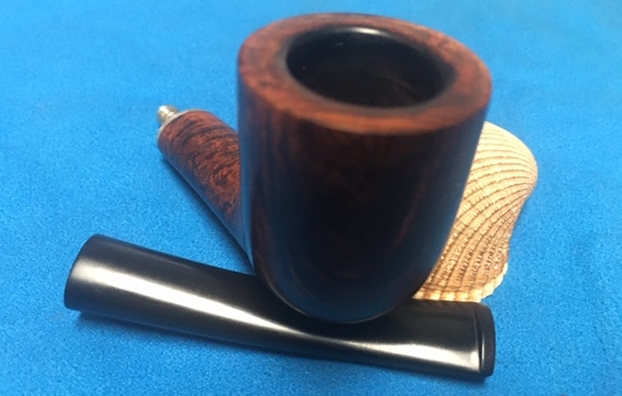
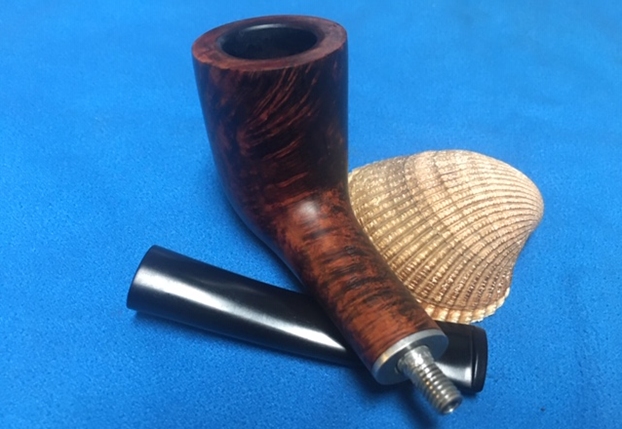
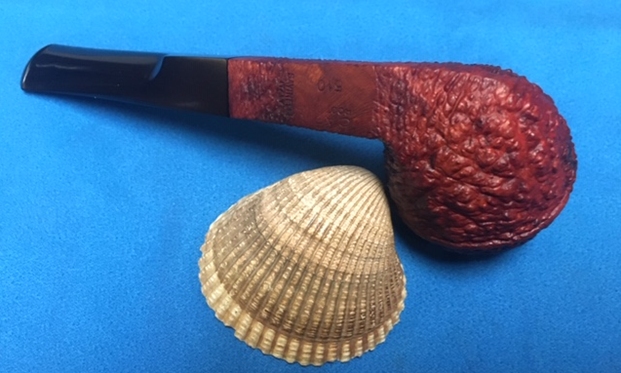
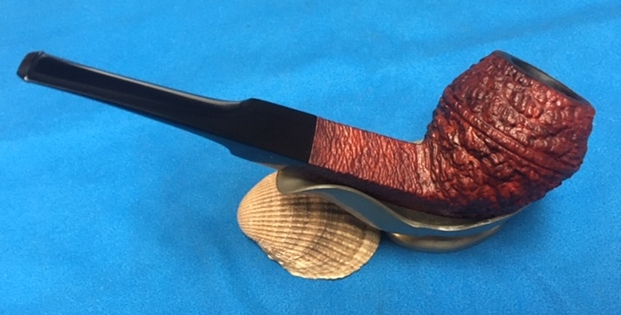
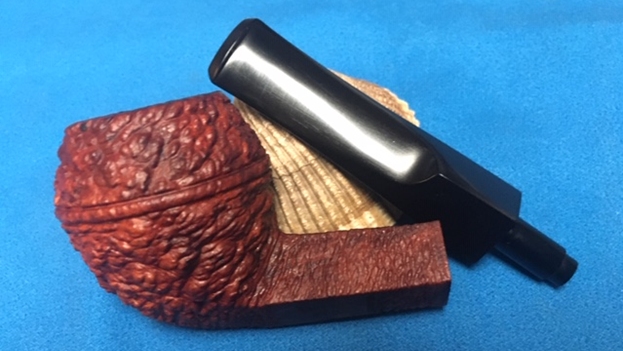
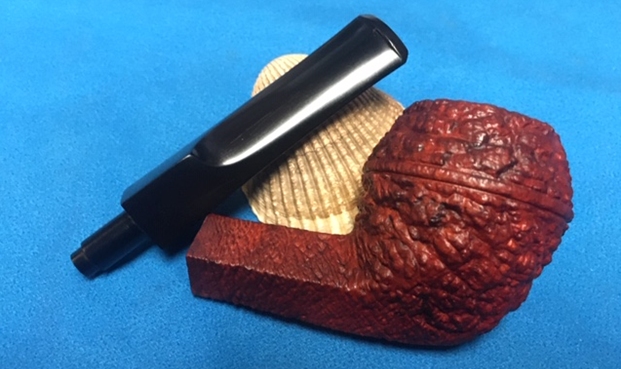
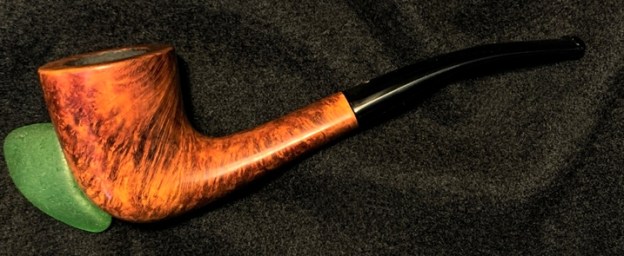
A Gift for My Good Friend in India – An Italian Savinelli Punto Oro 413KS Woodstock


Blog by Dal Stanton

As I begin this restoration, my mind is replaying the plethora of experiences that were shaped and riveted into my memory of my visit last year to India.  Not many ‘good’ experiences in life can be described as ‘life changing’.  These kinds of changes are usually reserved for the difficult times – like now, as the world is navigating a pandemic that creates confusion and uncertainty about life and the future.  Yet, Paresh’s invitation to me, along with the rebornpipes’ trust, Steve and Jeff Laug, to visit his home and family was an experience that was life changing for me.  It wasn’t just the sights and sounds of a different cultural context or the different foods the pallet experienced tasting Indian cuisine.  What was so profoundly and wonderfully life changing was the depth of loving hospitality Paresh and his wife, Abha, provided to us during the visit.  Meeting and enjoying his family, along with their two daughters, Mudra and Pavni, was truly an experience that will walk with me in the life I continue to enjoy by God’s grace.  Of course, I cannot fail to mention the ‘reason’ for our travels where West met East!  Paresh asked that we collaborate in the restoration of one of his heirloom pipes, an unbelievably fun and enriching experience that produced this story, perhaps my favorite:  West Meets East in India to Restore a Grandson’s Treasure – an 1846 BBB!  How does an Italian Savinelli Punto Oro heading to India enter this story?  It has to do with an Italian American L. J. Peretti pipe that I noticed in India – basking nonchalantly among the historic pipes of Paresh’s unbelievable heirloom collection he received from his grandfather.  The Peretti that got my attention was not from his grandfather’s collection, but a pipe that Paresh had acquired himself.  Since doing my first restoration of a L. J. Peretti, I have become somewhat of a collector of these blue collar ‘shop pipes’ from the second oldest tobacconist shop located in downtown Boston.  I had never seen a Peretti Cutty shape before and hence, the Savinelli Punto Oro makes his debut on the stage.One of the great things about ‘Pipedom’s’ smaller subset, pipe restorers, is that it is special and an honor to have pipes in your personal collection that have come from other restorers who you’ve learned from and appreciated.  I have pipes in my rotation from Steve, who introduced me to the world of pipe restoration and is a good friend who has visited me here in Sofia and I’ve had the privilege of visiting his home terrain, Vancouver.  When I enjoy fellowship with one of his pipes with my favorite blend stoked in the bowl, the relationship is always the focus of the reflection during those paused moments.  I managed to secure one very special pipe for my collection from Charles Lemon of Dad’sPipes, who I’ve also learned much from in his restorations and appreciated that his health has allowed him to come back from hiatus.
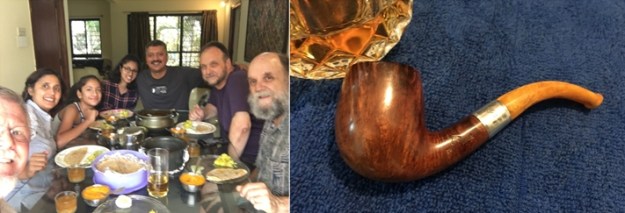
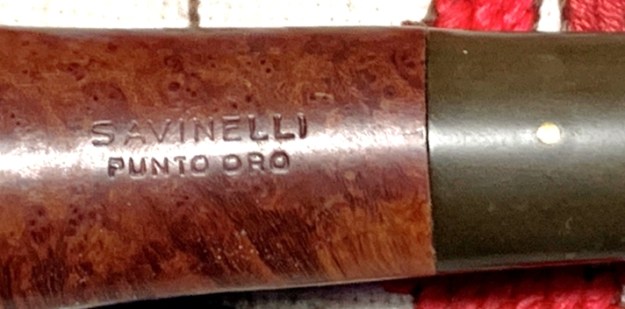
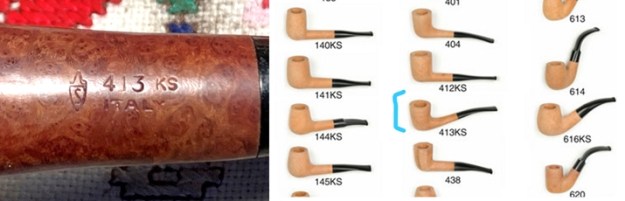
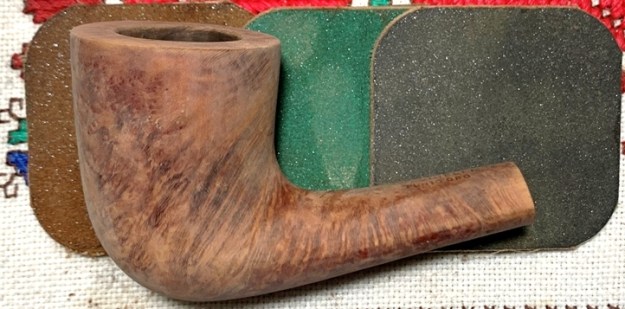
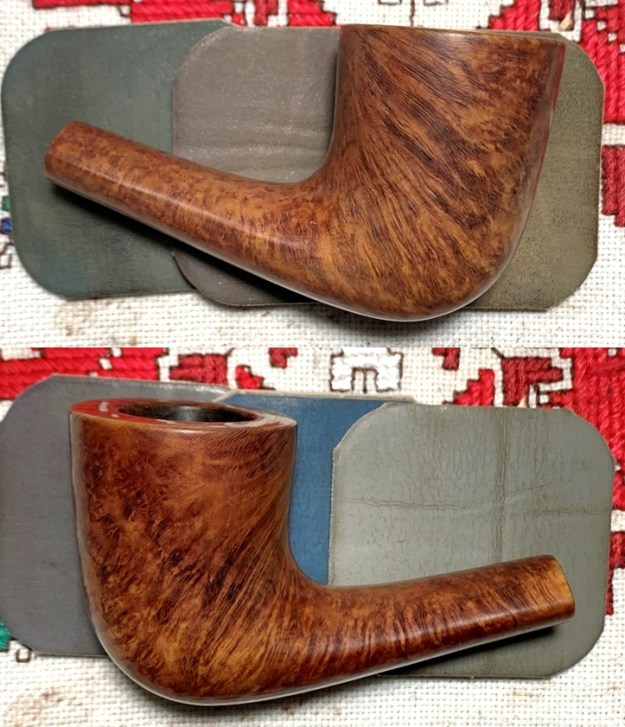
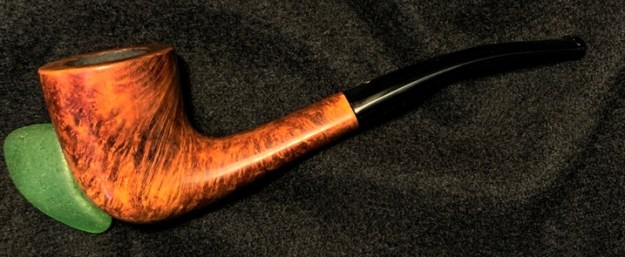
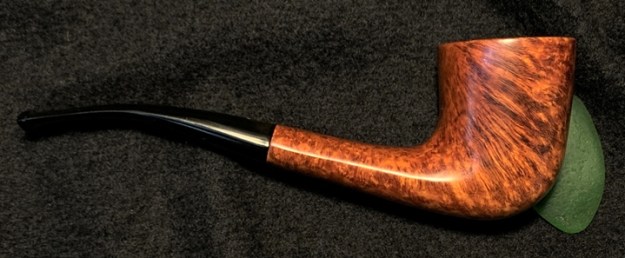
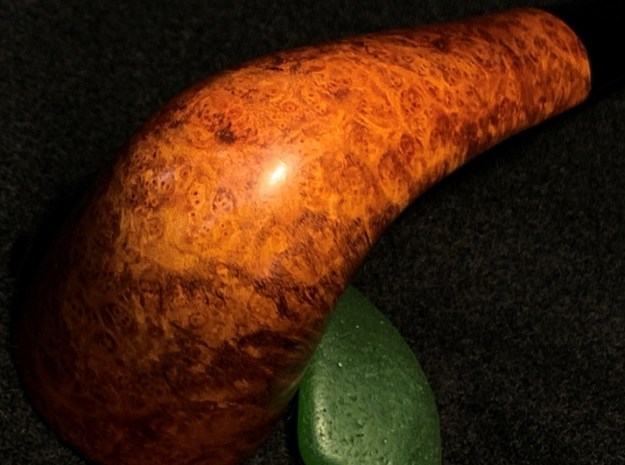
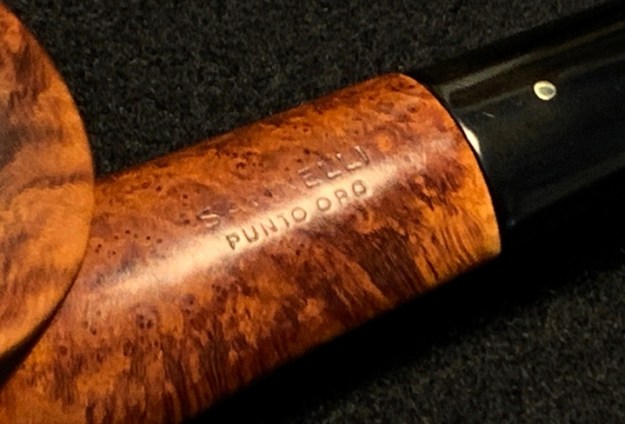
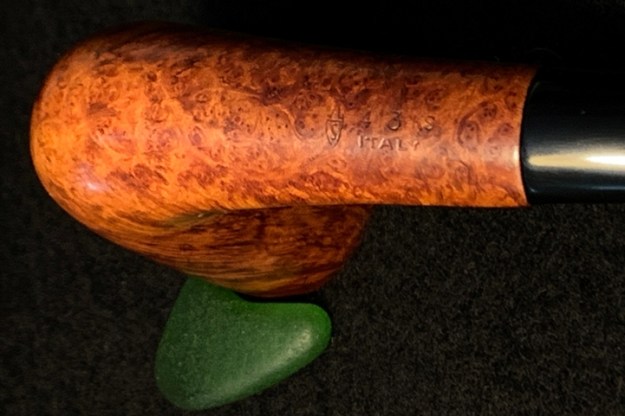
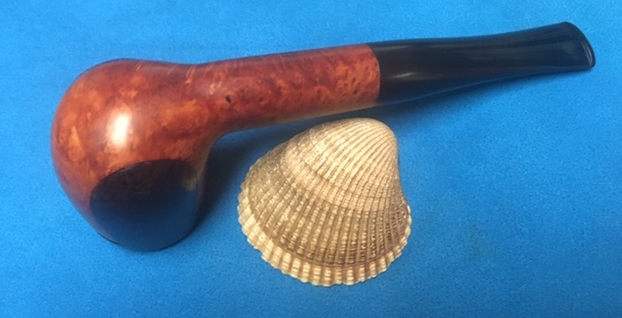
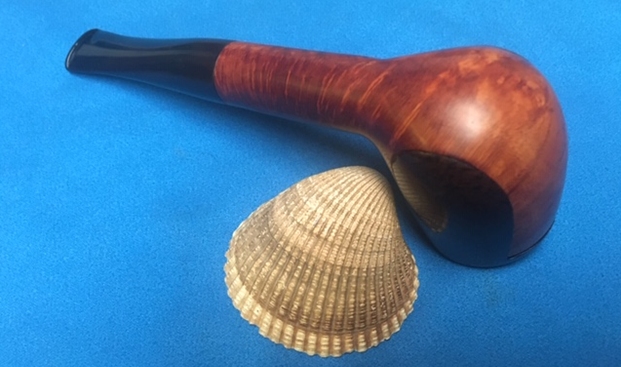
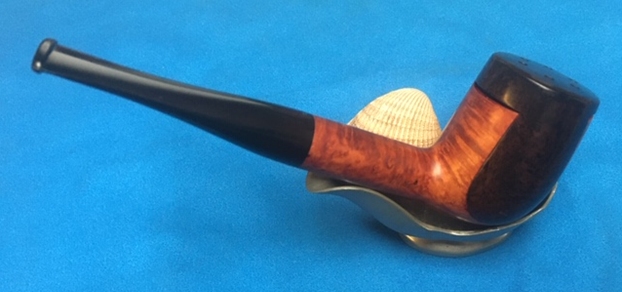
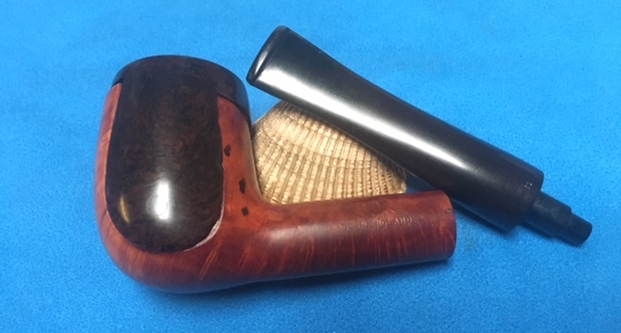
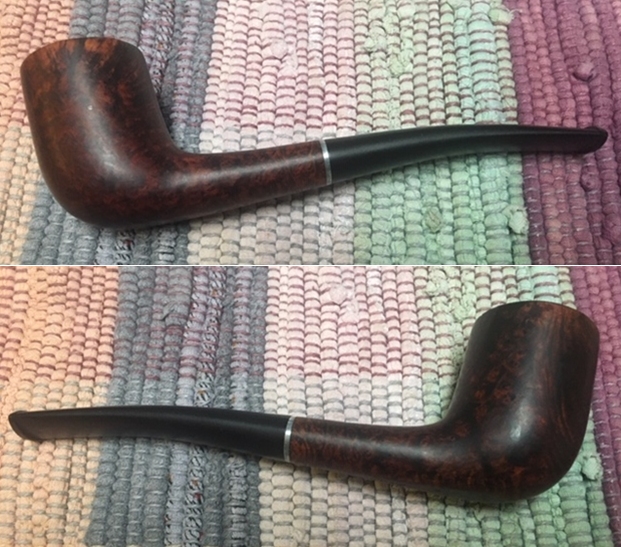
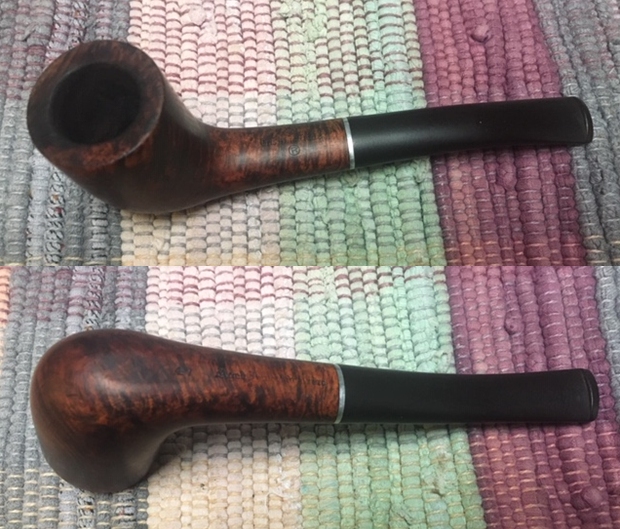
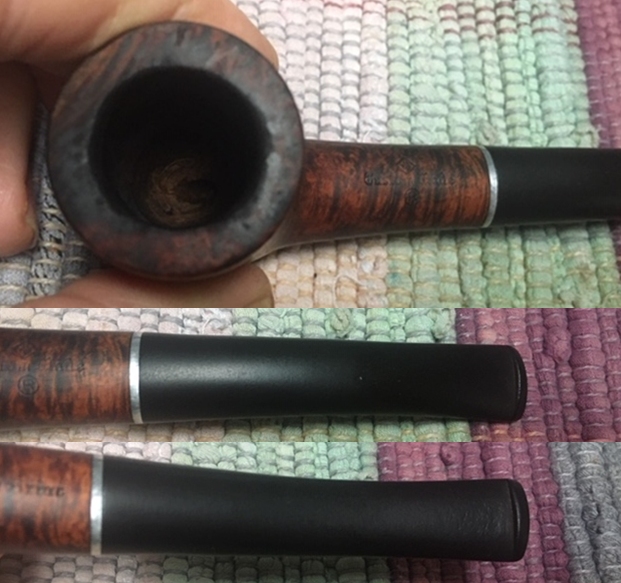
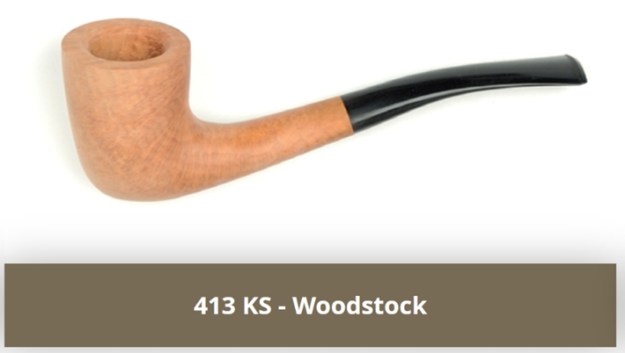
When Paresh became aware of my attraction to his L. J. Peretti Cutty, the accord we ratified between us was to do a reciprocal gifting from our personal collections.  Paresh gifted me his Peretti Cutty which I brought home to Bulgaria from India.  After getting back to Bulgaria, I chose a pipe from my personal collection for him.  The special pipe I chose for Paresh was a Savinelli Punto Oro that was in my personal restoration queue – for a LONG time.  The problem of restoring pipes primarily for others is that sometimes it’s difficult to work on your own trove of treasures!  When I saw the Punto Oro on German eBay located in Bühl, I was drawn by the elegant lines of this Savinelli offering. The shape is unique with the Dublin-esque bowl, but not quite.  In my initially assessment of the pipe, I was calling it an oval shank, slightly Bent Billiard – but not quite. The shank was not actually a true oval but a compressed oval – an American football or rugby ball shape.  The unique shape created a lined definition running down the sides of the shank transitioning into and through the stem – flow and balance!  With so much attention on focused the shape, the fact of the striking fire grain showcased throughout the pipe – was reminiscent for me of a tiger’s fur, flowing even through the shank composition.  This only added frosting on this Savinelli Punto Oro cake!  Very nice! Unfortunately, it has taken me a few years to get to this beautiful pipe, but it was waiting.  It was patiently waiting in the ‘Help Me!’ basket and when it came to mind as a comparable reciprocal gift for Paresh, his debut on the worktable became a reality.  Here are more pictures of a very nice Savinelli Punto Oro yet having some daunting issues. The nomenclature is on the upper shank and it reads, SAVINELLI [over] PUNTO ORO, (Gold Point).  ‘Gold Point’ may also be referencing the single gold point brass dot embedded on the upper stem panel.The lower panel section is stamped with the encased ‘S’ in Savinelli’s well known and recognized symbol.  The Savinelli symbol is to the left of the shape number, 413KS [over] the COM, ITALY.  The shape is found in the Savinelli shapes chart found in the Pipedia article on Savinelli,  but the chart offers no names for the shapes, only numbers.  This 413 is designated as a ‘King Size’ by the KS.   Whatever the shape is, I like it!Not satisfied with my lack of definition on what to call this shape, I sent a note off to Steve asking for his opinion – Calabash, Dublin, fancy Billiard?  Steve’s response settled the question directing me to Savinelli’s website – my first thought, why didn’t I think of that?  In the Savinelli line up of shapes or models, the 413KS is described as a Woodstock (pictured below).  Nice!  Bill Burney’s description of the Woodstock in his Pipedia shapes discussion is helpful and includes all the variations I was contemplating!
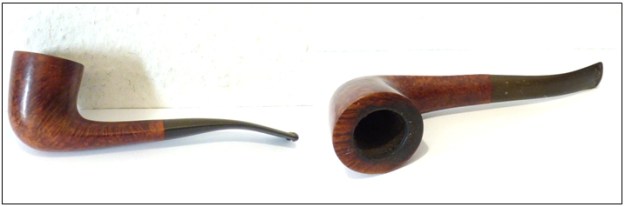
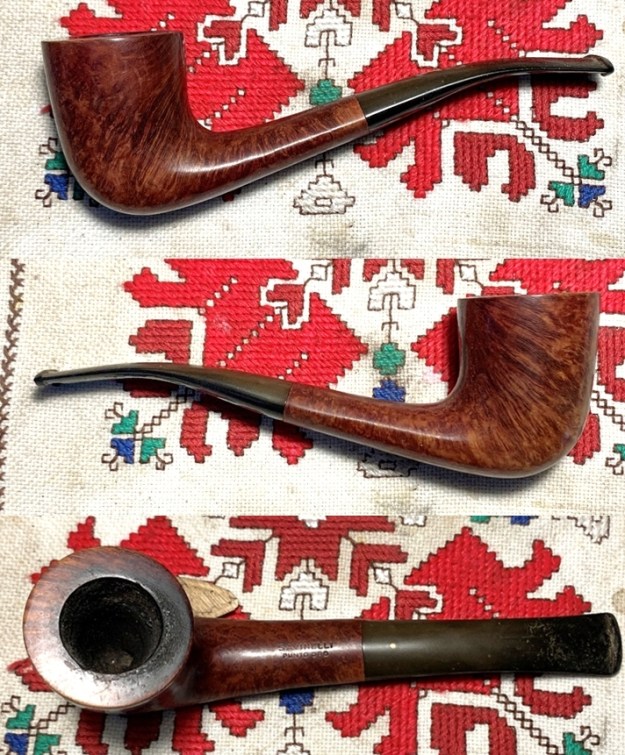
Zulu/Woodstock – The Zulu shape combines the canted bowl of the Dublin with an 1/8 bent stem.  The shape is sometimes referred to as a Woodstock, Yacht or Yachtsman.  The gentle bend makes the pipe more comfortable to hold in the teeth than a straight pipe.  This popular style is made by most pipemakers and is widely available on the estate market.My first restoration with the Italian name of Savinelli stamped on the pipe was a Tortuga, which was a very sharp looking pipe.  During that initial exposure to the name Savinelli, I learned that before and after WW II, when Italian pipe production was known more for volume than for quality, and not considered by many in the same league with other European pipe makers, Achille Savinelli Jr.’s ambition took shape to make Savinelli one of the premier names in pipe making today.  This clip from the Pipedia Savinelli article summarizes this well:
Savinelli Pipes began production in 1948 and, although the pipes were of a superior quality and unique in their aesthetic, the brand wasn’t an immediate success. Few new brands are. It takes time for the public to catch on. Retailers were skeptical of placing Italian pipes alongside their best sellers from England or France, and customers, in turn, were hesitant to purchase a Savinelli over pipes by already established, foreign brands. Achille Jr. stood by his product, however; he knew it was only a matter of time before the world realized that these pipes were of a far superior quality, capable of competing with even the most well-established pipe manufacturers in the world. As it turns out, he was right. In less than a year, Savinelli pipes gained prestige in markets all across the world—heralded for their delicate balance of innovation and tradition, of form and function. Savinelli pipes were placed alongside the likes of Dunhill and Comoy’s in tobacconists from the United States to Europe, and, in time, this exposure modified Italy’s reputation; it was not only the premier exporter of briar, but now a premium source of fine briar pipes.
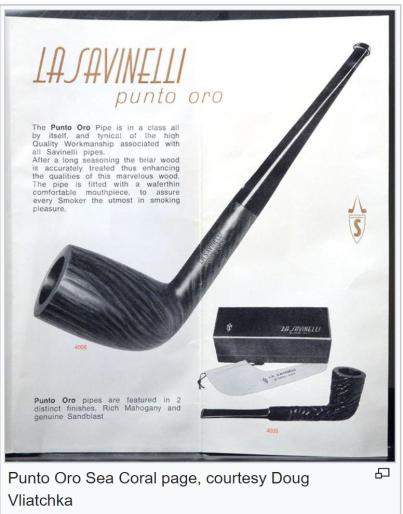
The Punto Oro line is considered a top shelf Savinelli offering.  When I first acquired this pipe, wishing to know more especially about the Punto Oro line, I emailed rebornpipes contributor, Al Jones, for his input.  His response was helpful.

Dal:

I’m sorry to say that I have very little expertise in the Savinelli world, save the Guibileo d’Oro or Autograph lines (and only cursory in those).

Here’s an interesting thread about that line on the Pipesmagazine.com forums (I’m a moderator there) http://pipesmagazine.com/forums/topic/opinions-sought-savinelli-punto-oro.  Older ones, like yours appears to be, were a pretty high grade, from what I can gather. 

If your stem is vulcanite and non-filter, it should have been made before 1981 (looks that way to me).   In ’81, they switched to filter pipes.

I’ll look forward to your restoration!

Al

The thread from PipesMagazine.com Forum was helpful.  The general impression from the thread was that the older Punto Oro pipes were on the upper shelves of Savinelli offerings, just under the Guibileo D’Oro and older Autographs.  The Punto Oro catalog ad on Pipedia describes the quality of this Savinelli line and the processes involved in the producing the quality finish.  I found interesting that the ad describes the two finishes available with the Punto Oro line – “Rich Mahogany and genuine Sandblast”.  With the smooth surfaces, the hue is mahogany – the pipe on my table fits this described hue with flare!

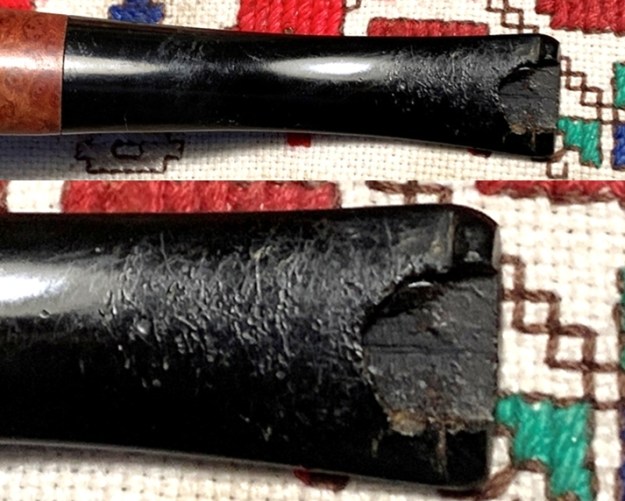
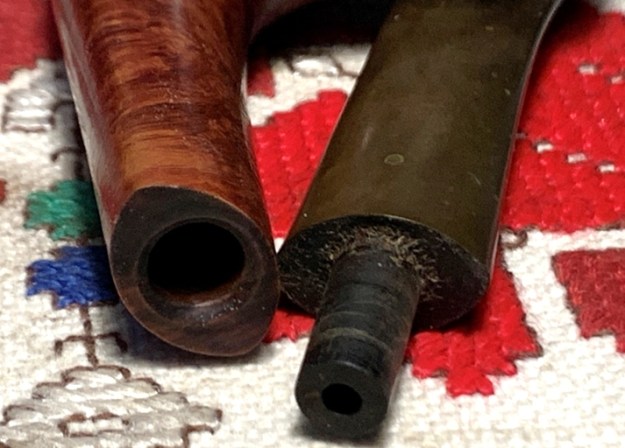
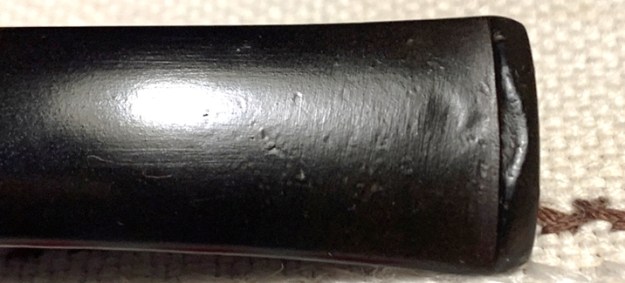
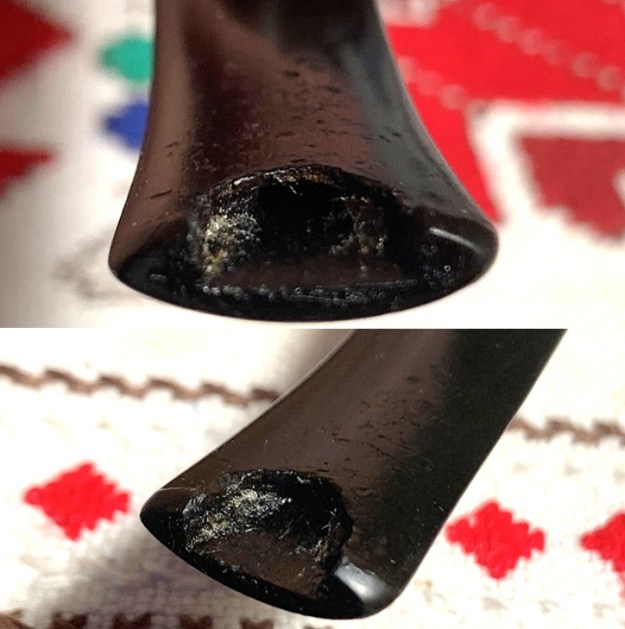
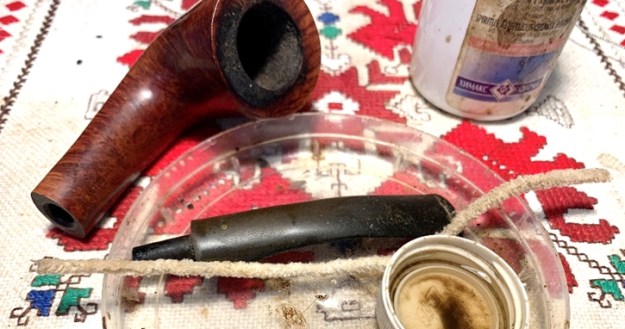
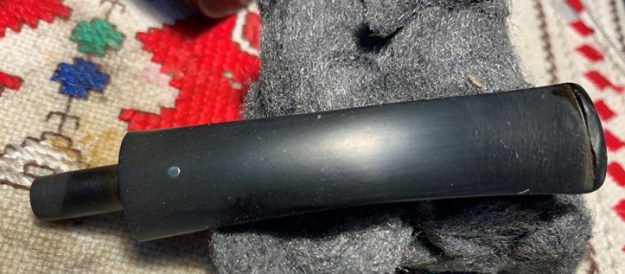
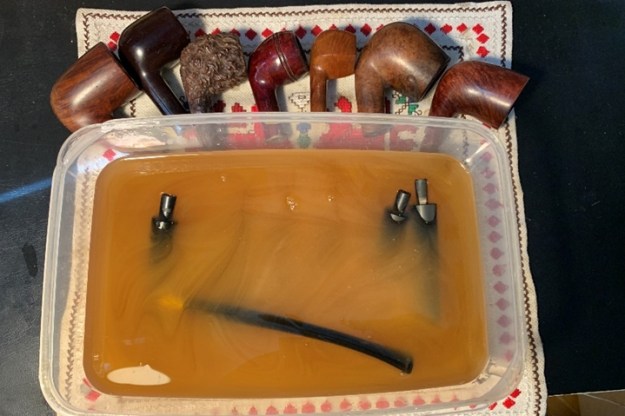
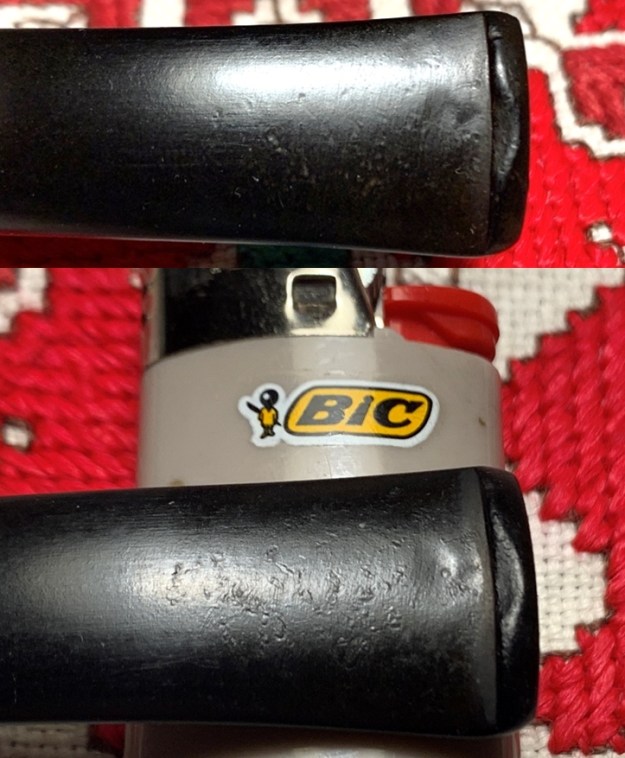
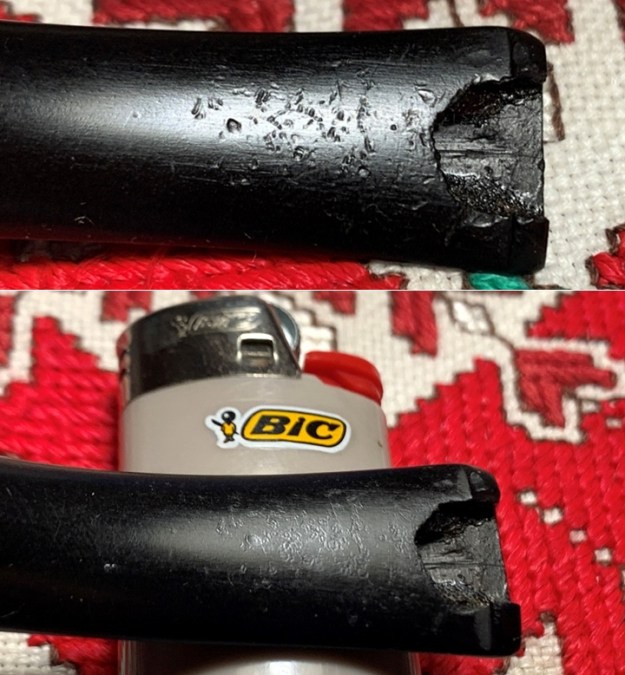
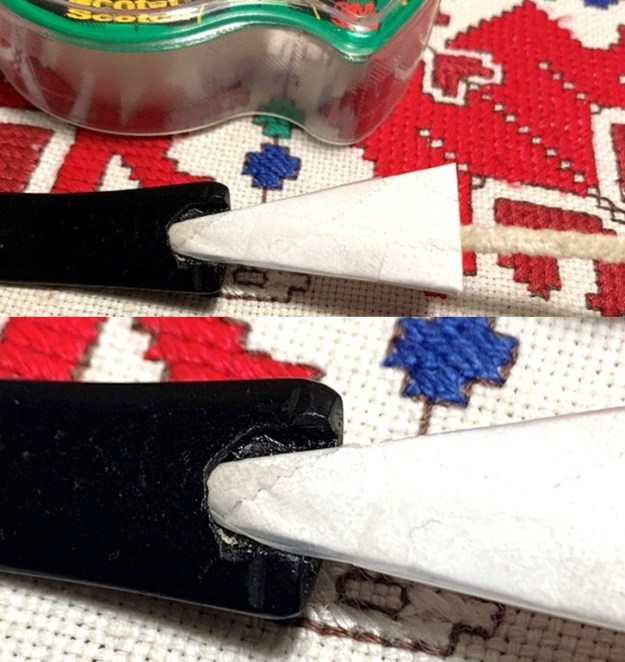
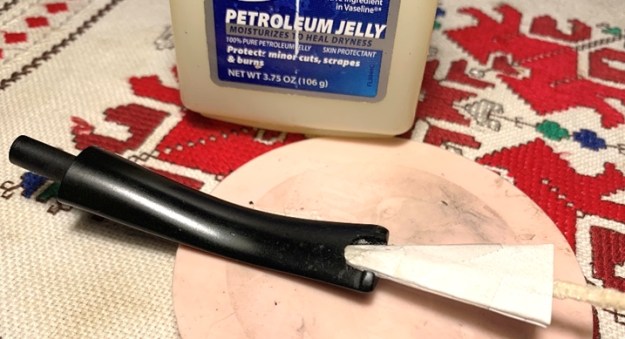
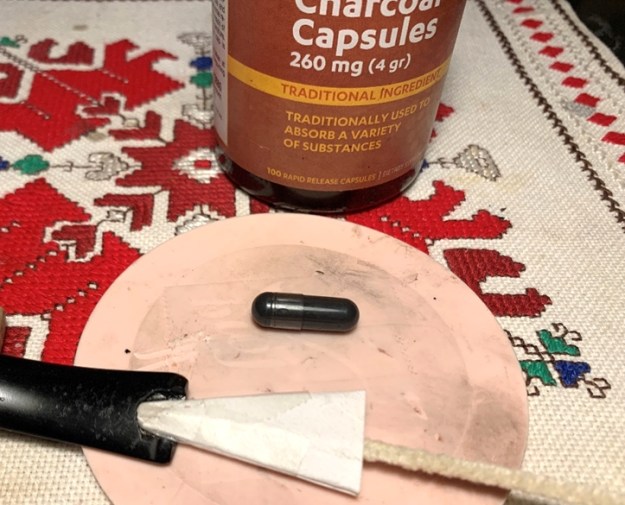
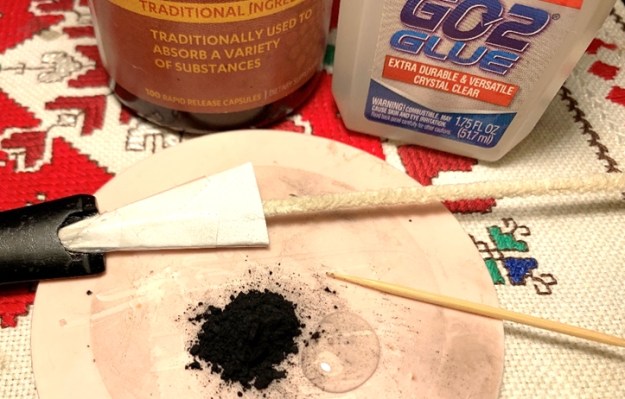
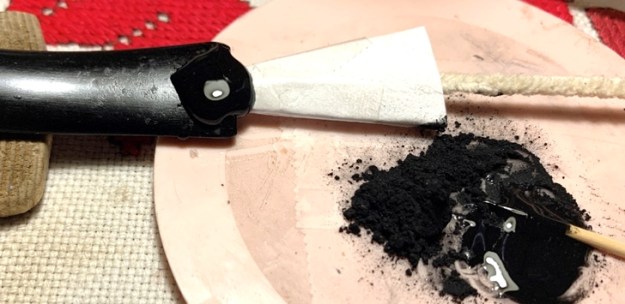
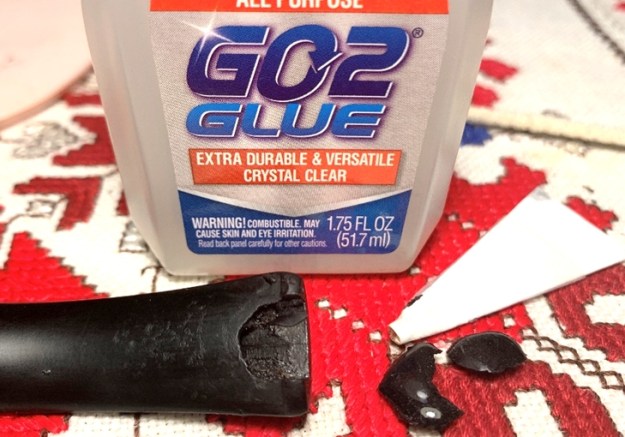
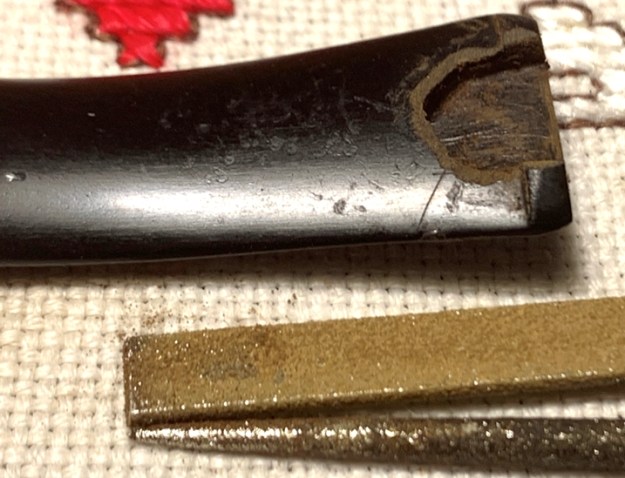
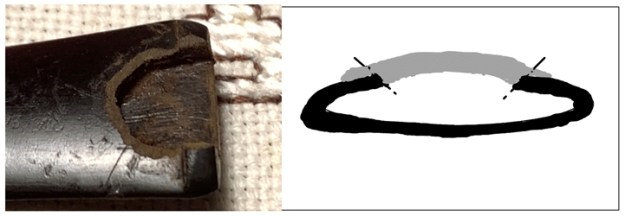
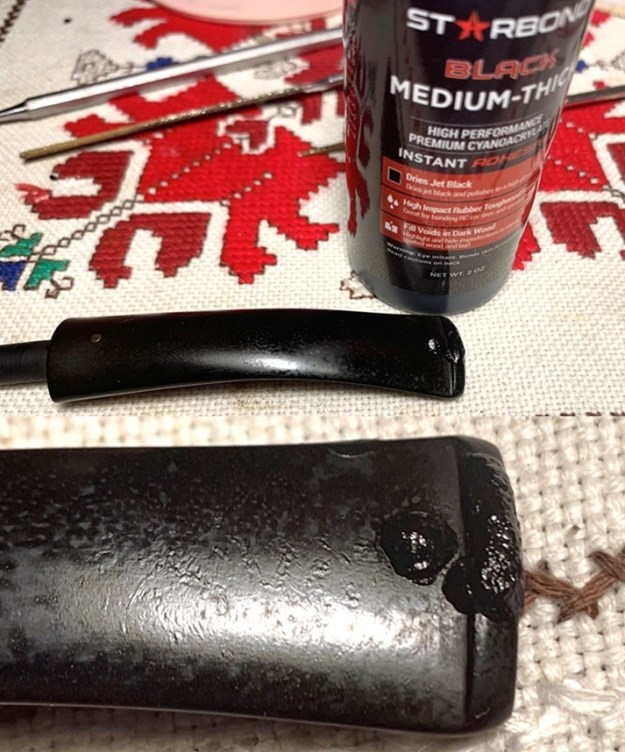
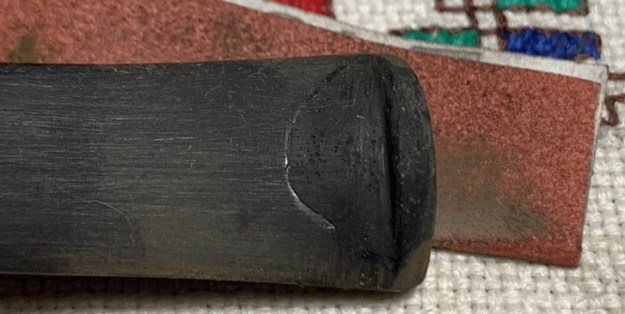
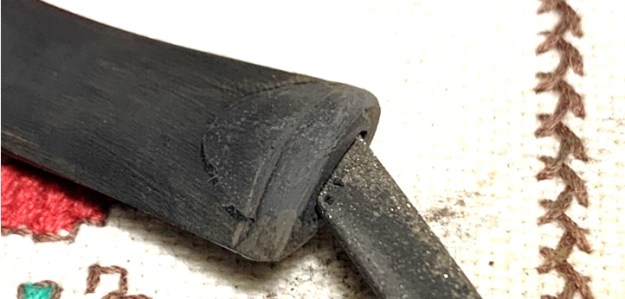
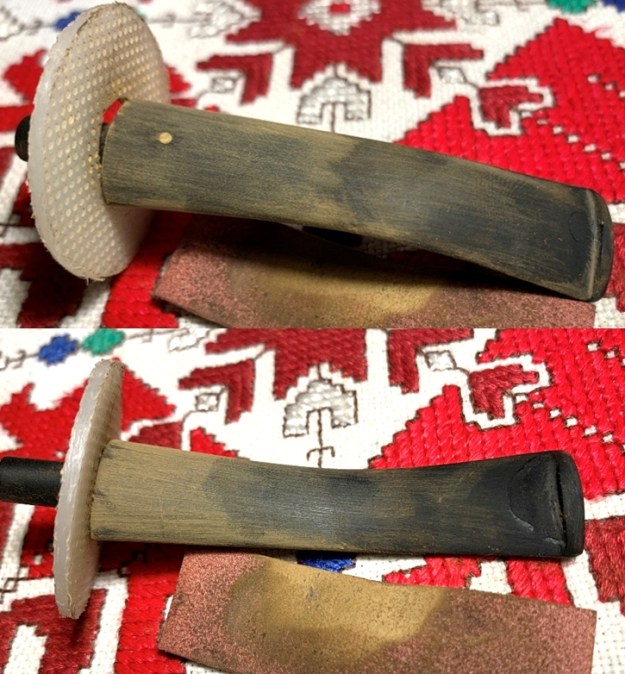
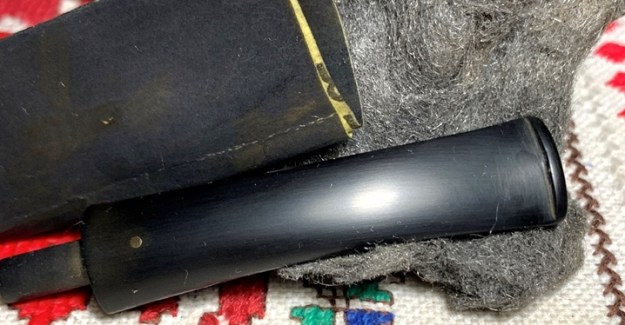
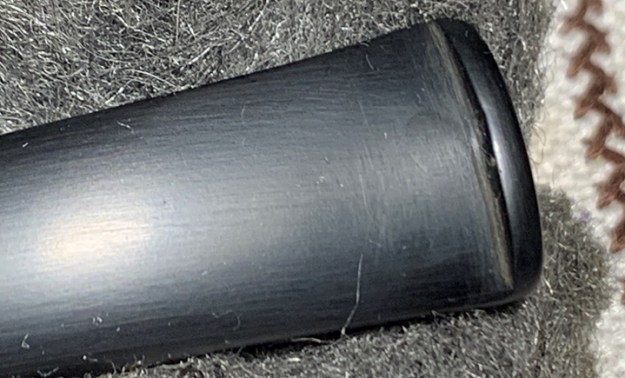
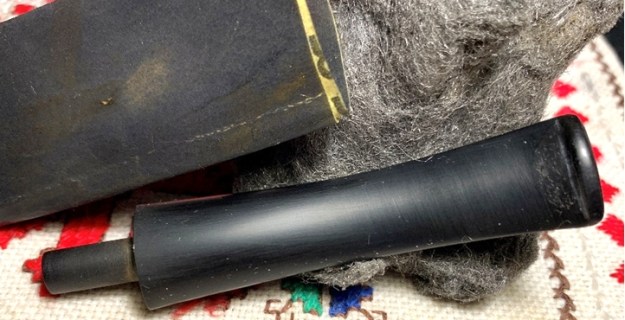
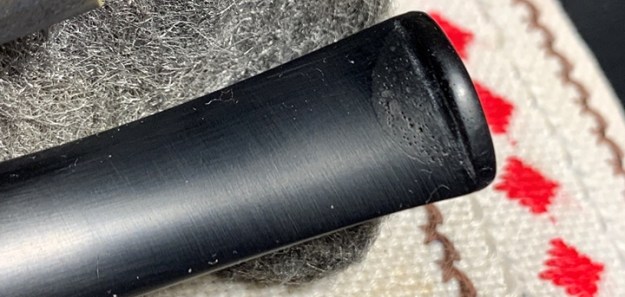
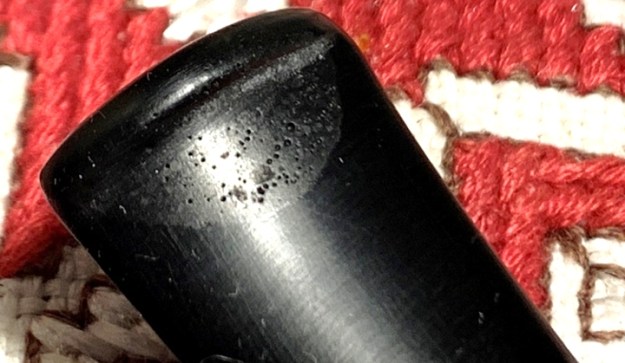
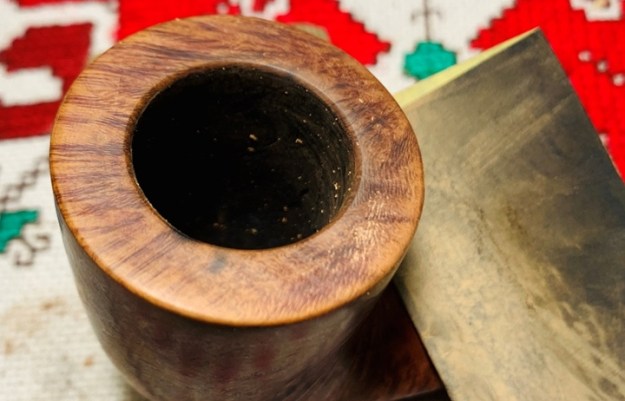
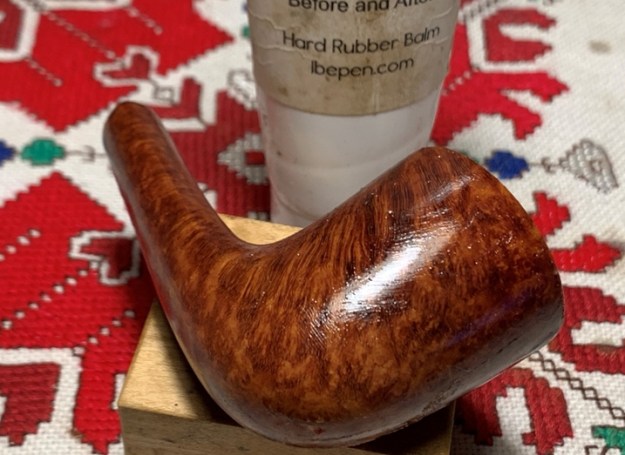
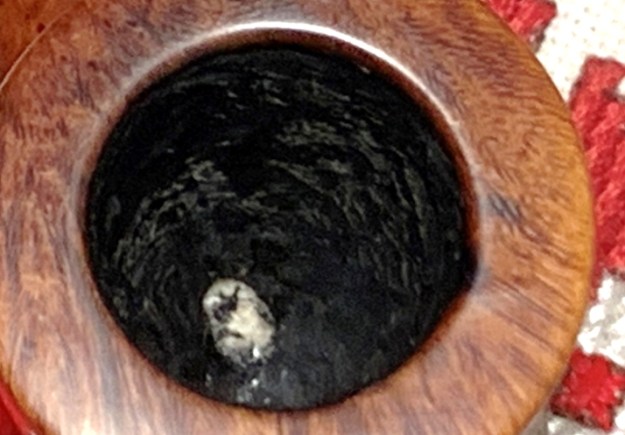
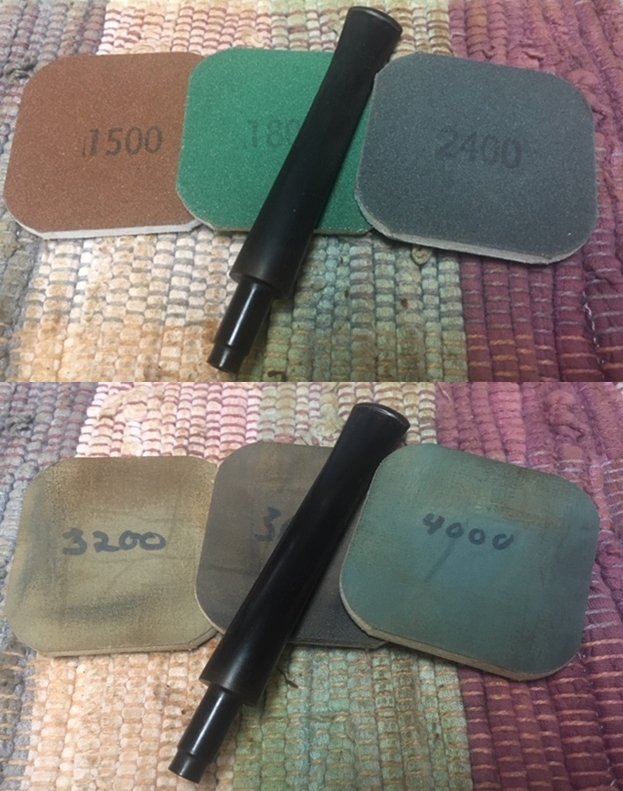
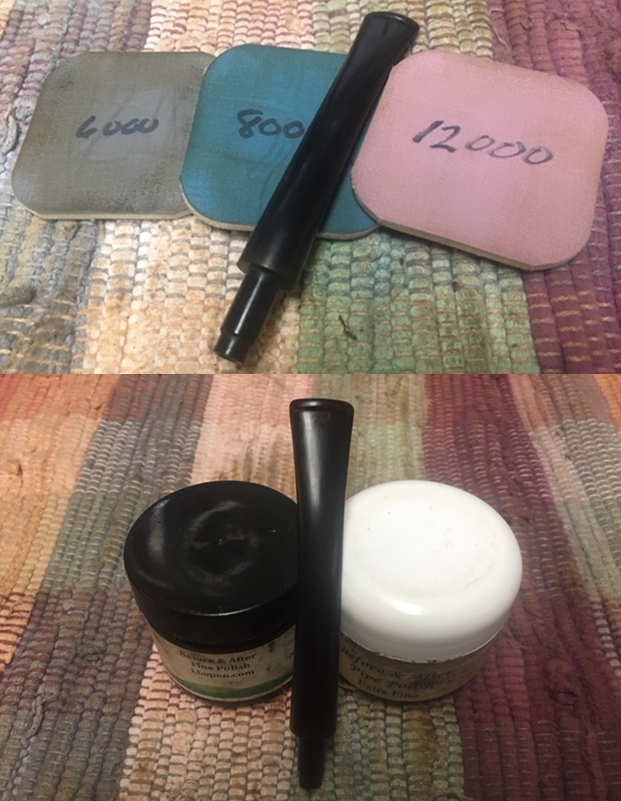
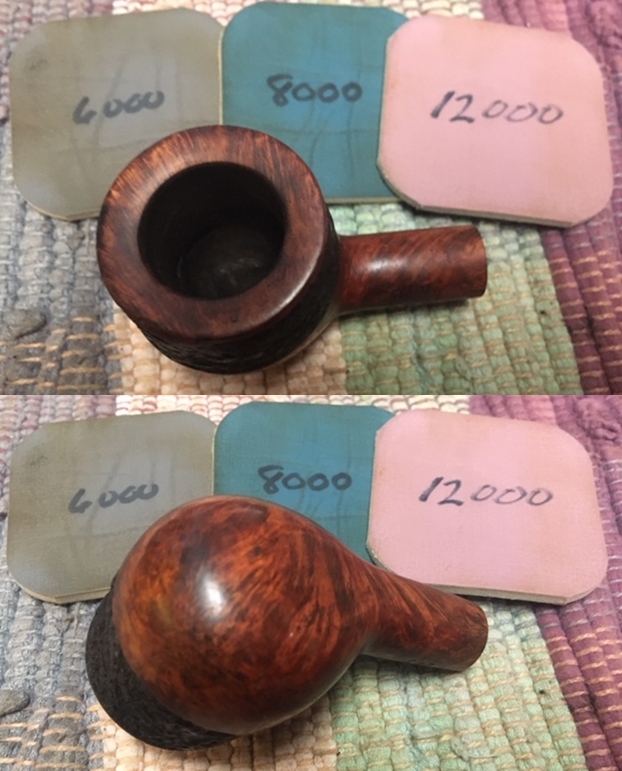
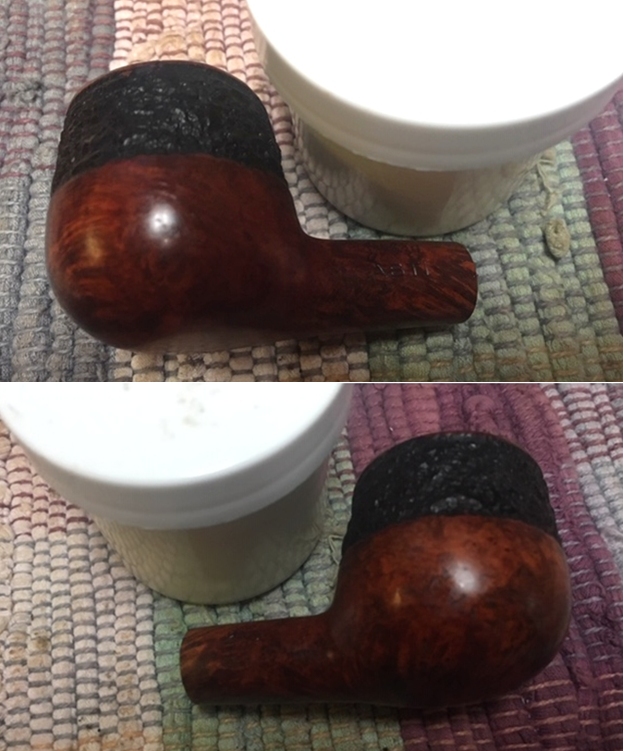
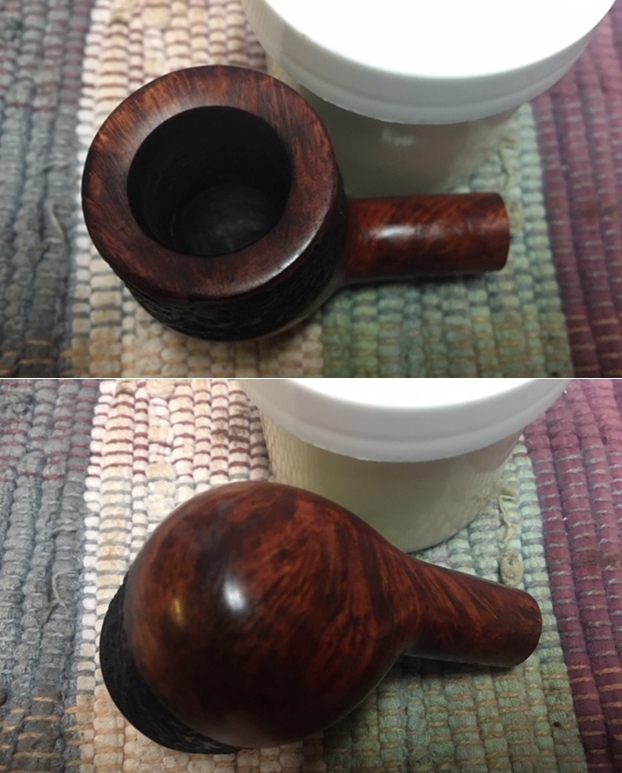
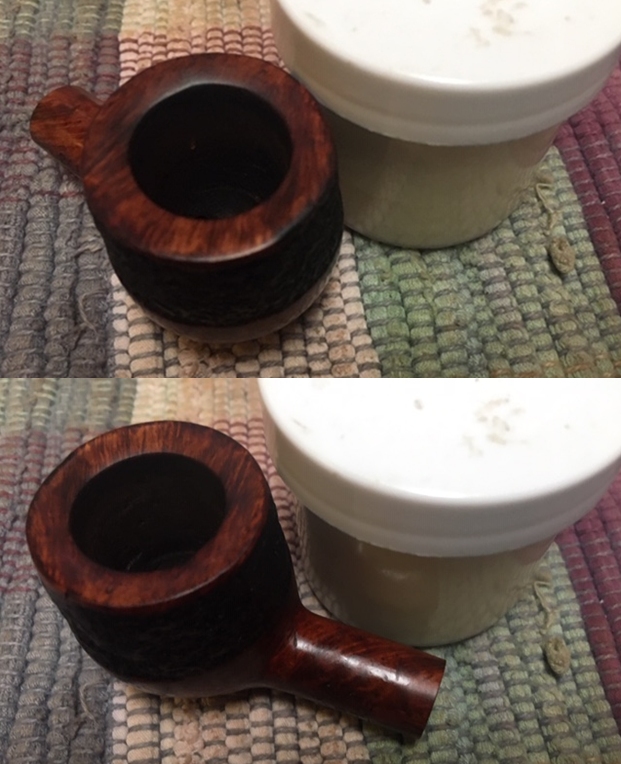
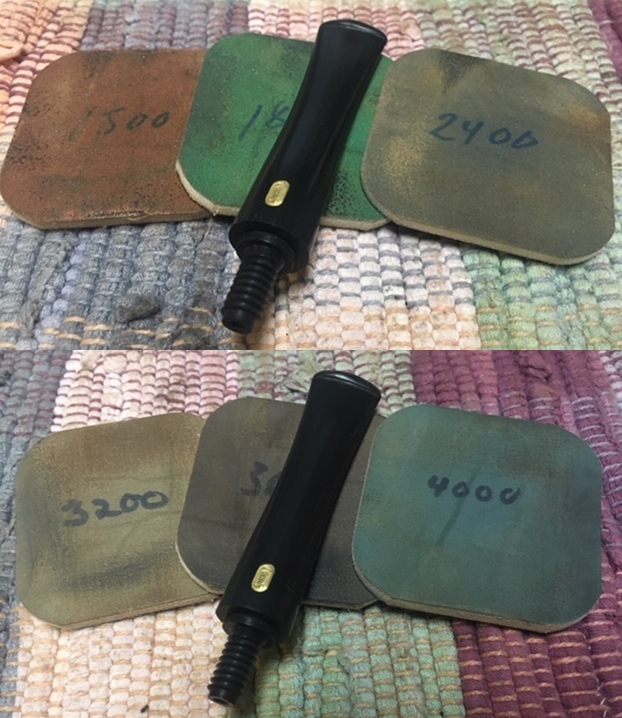
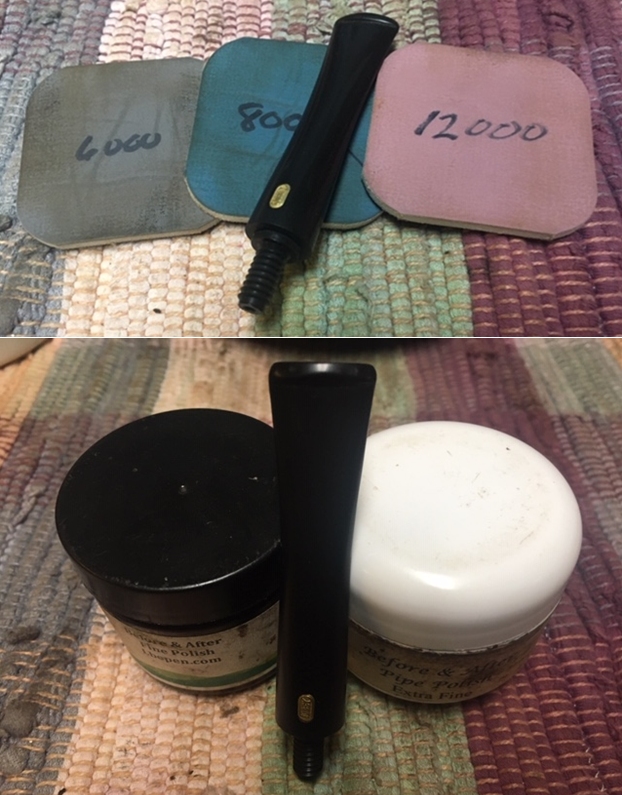
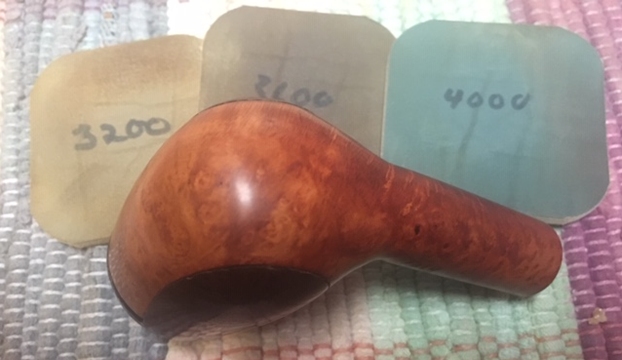
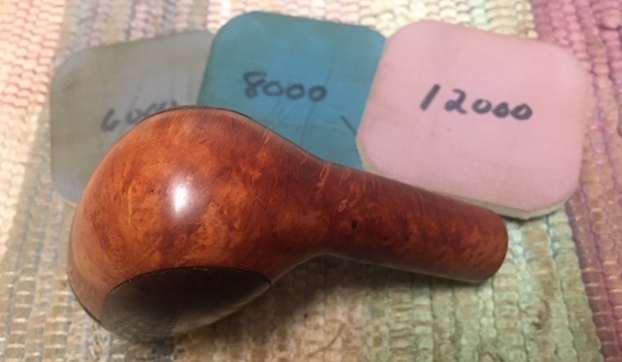
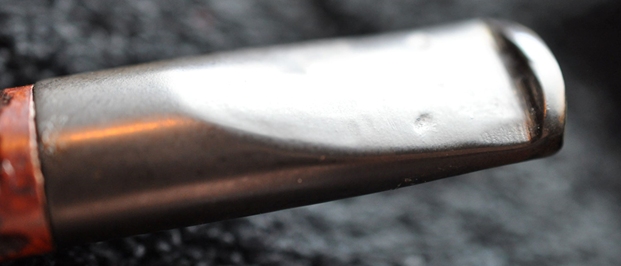
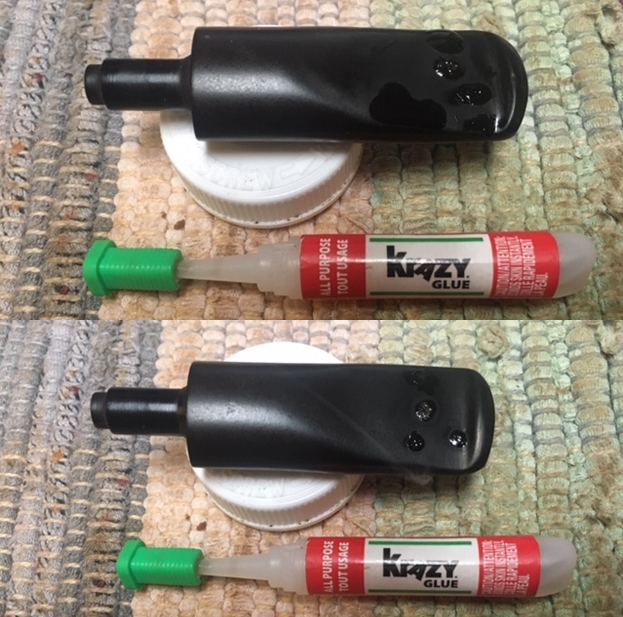
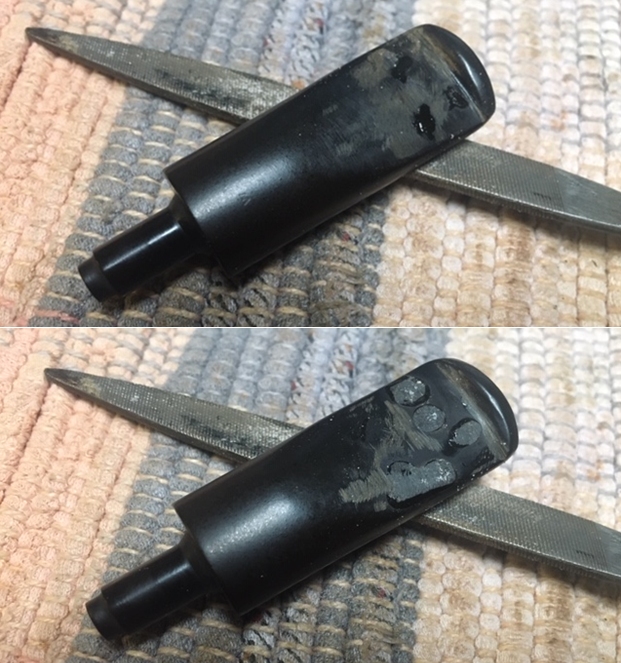
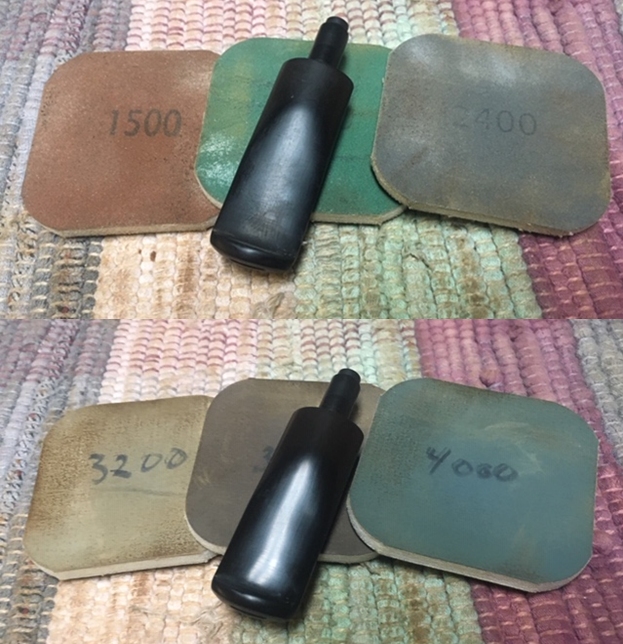
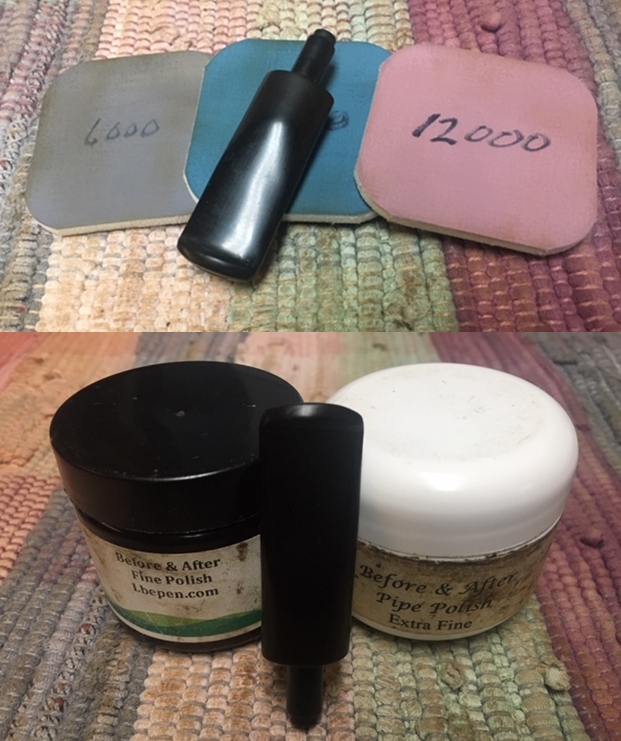
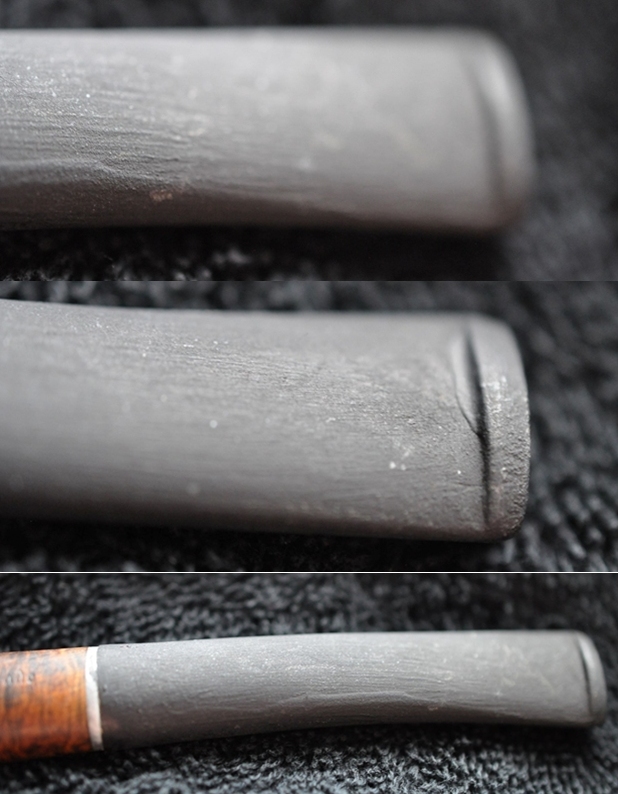
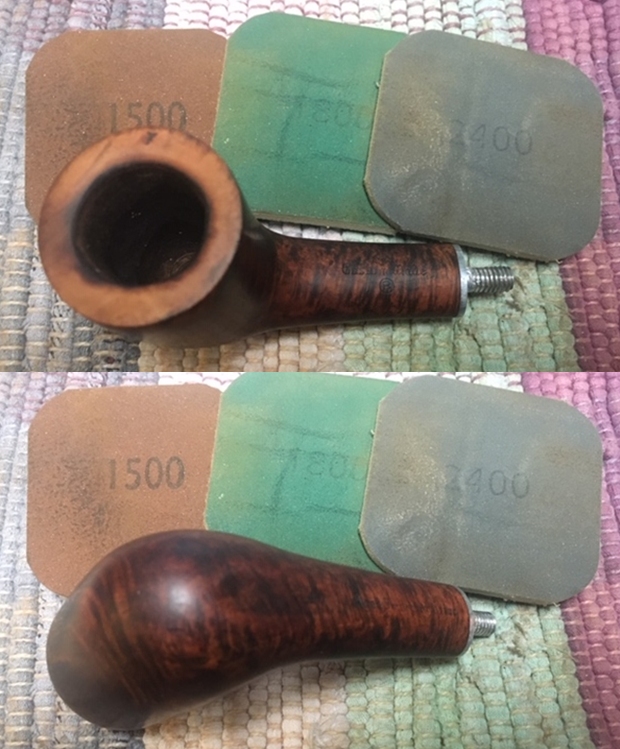
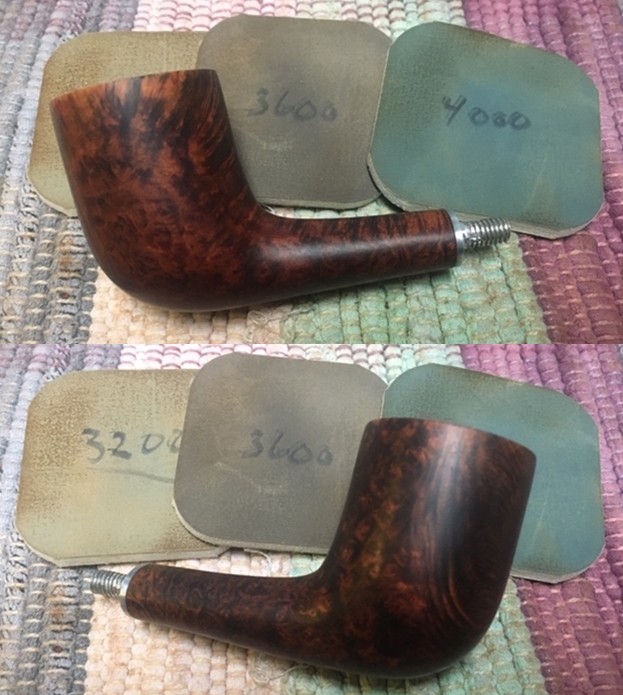
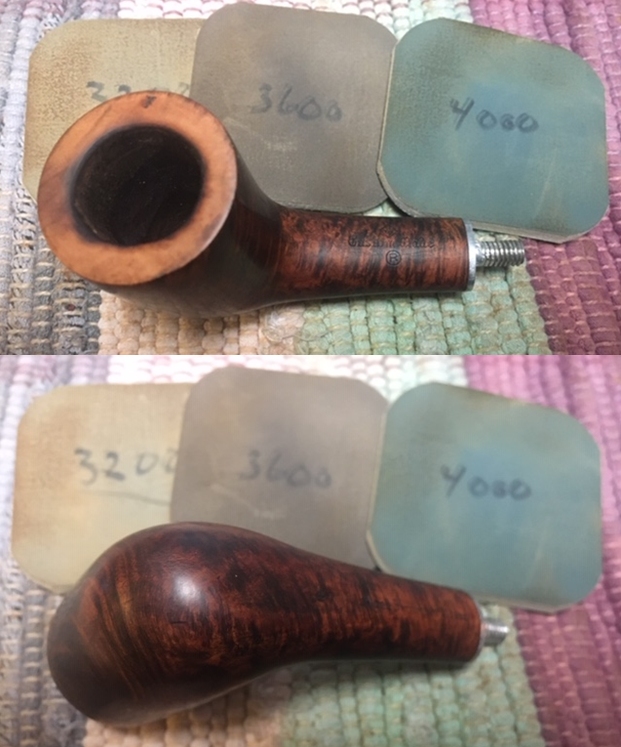
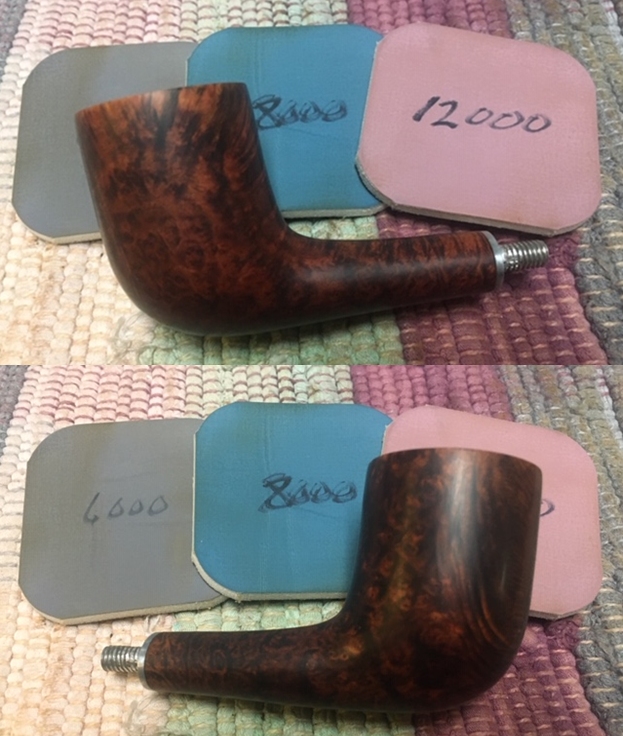
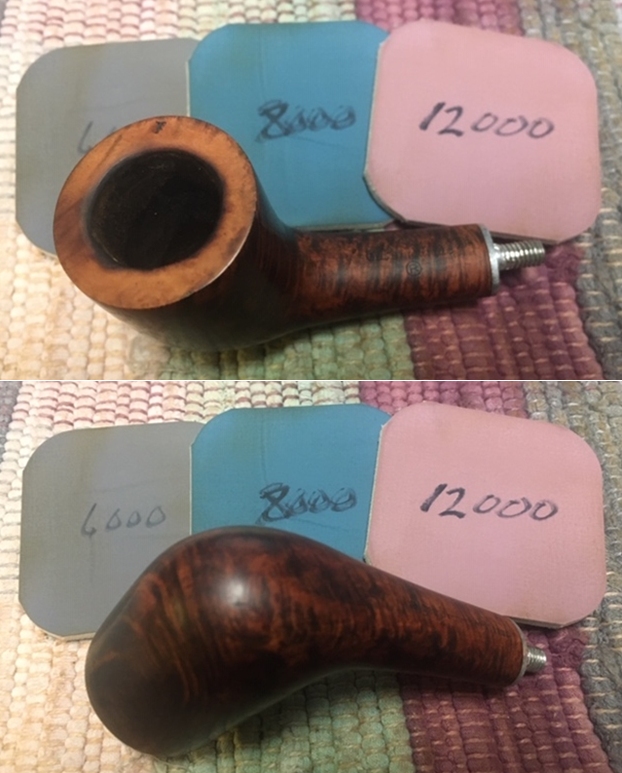
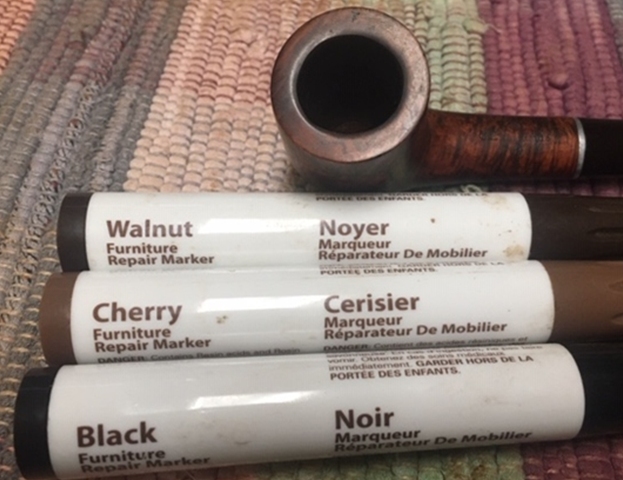
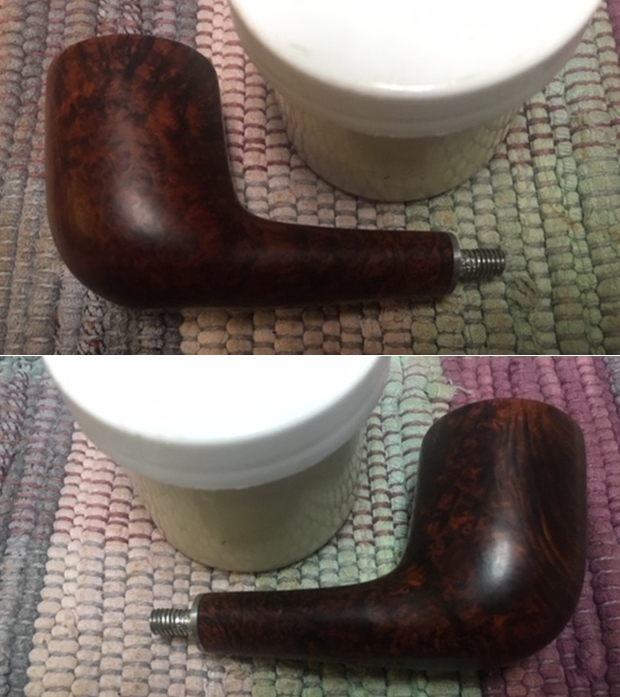
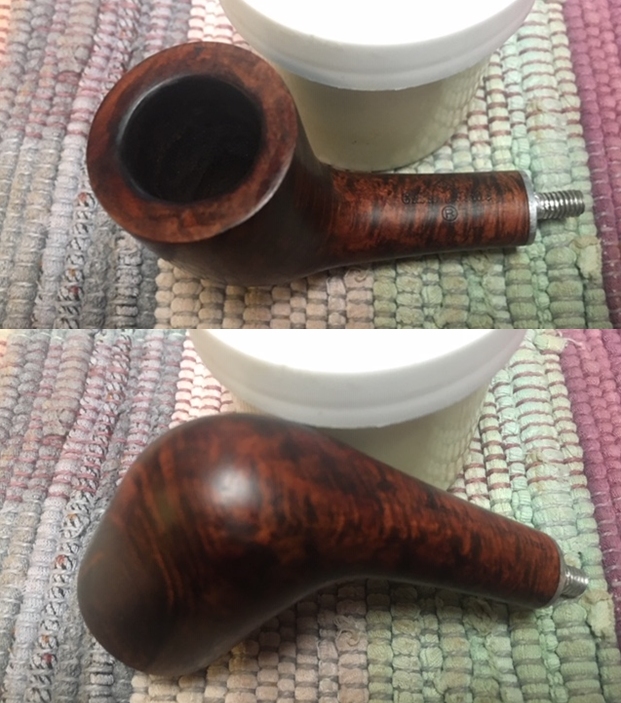
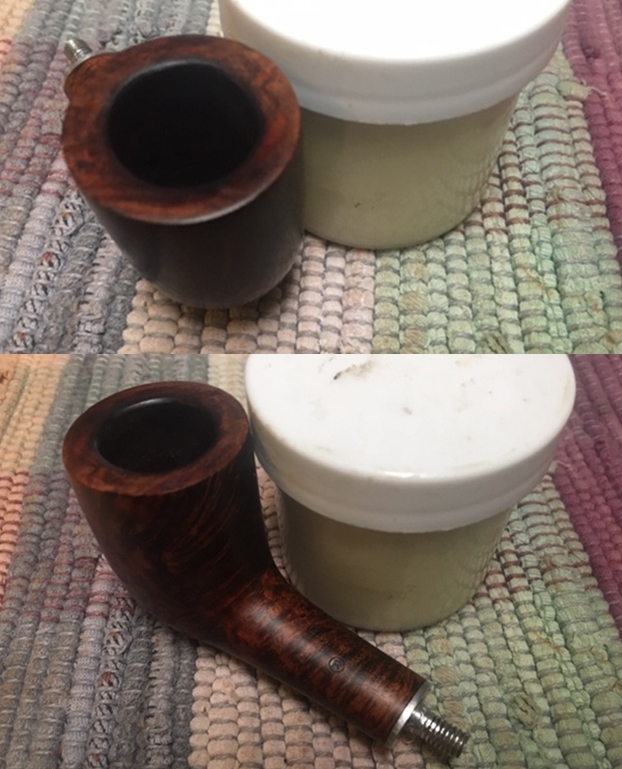
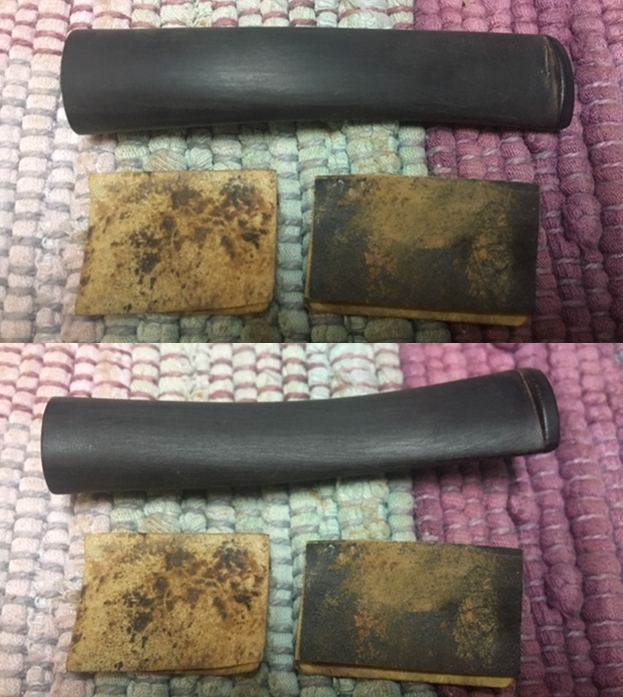
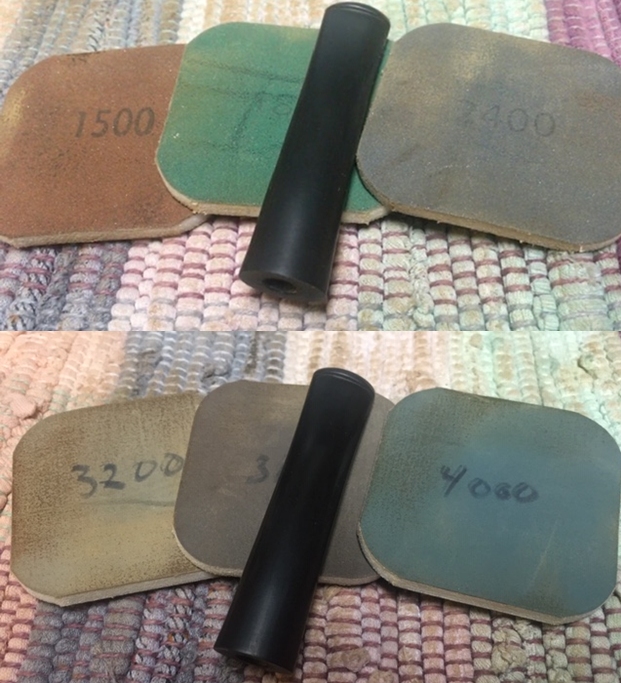
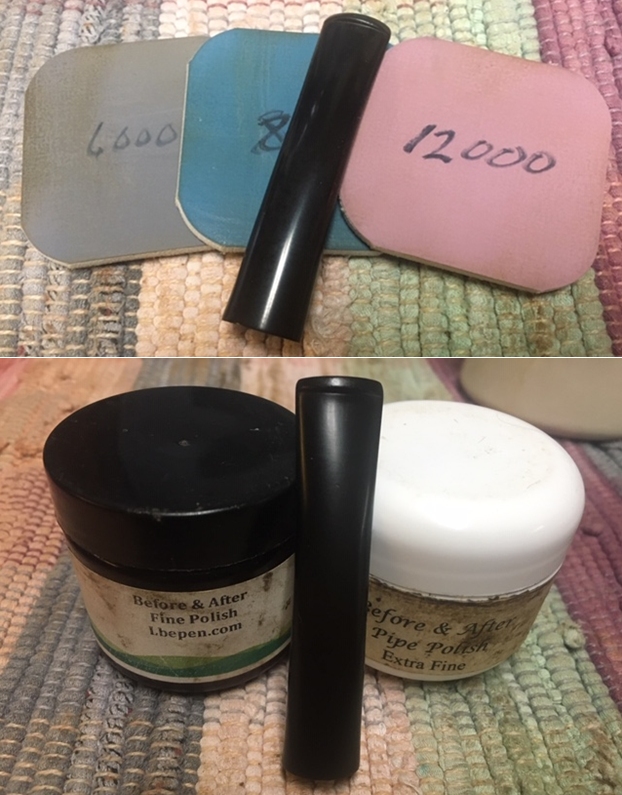
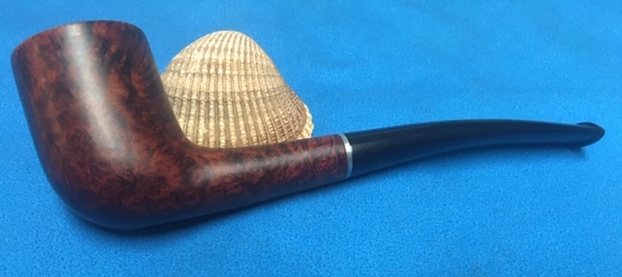
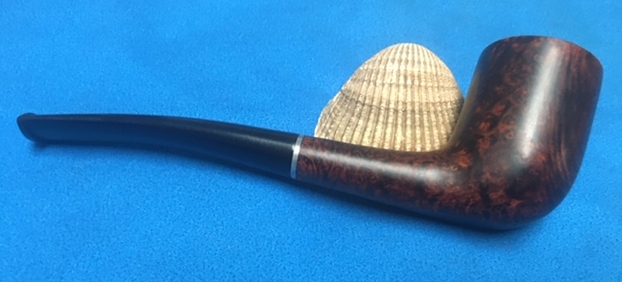
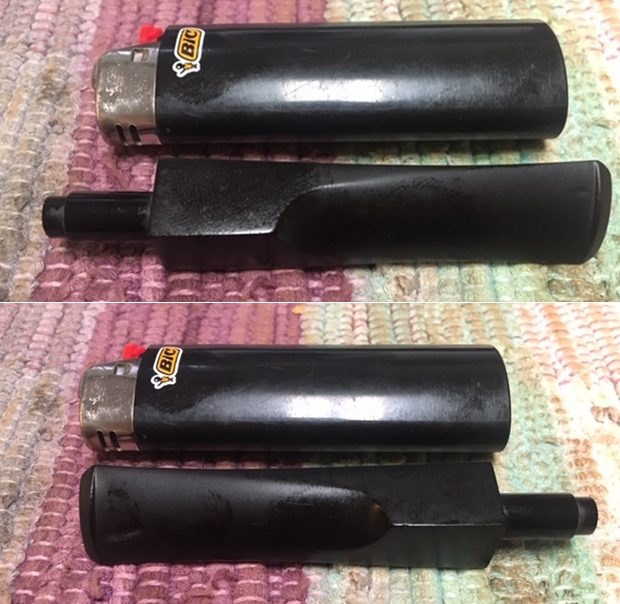
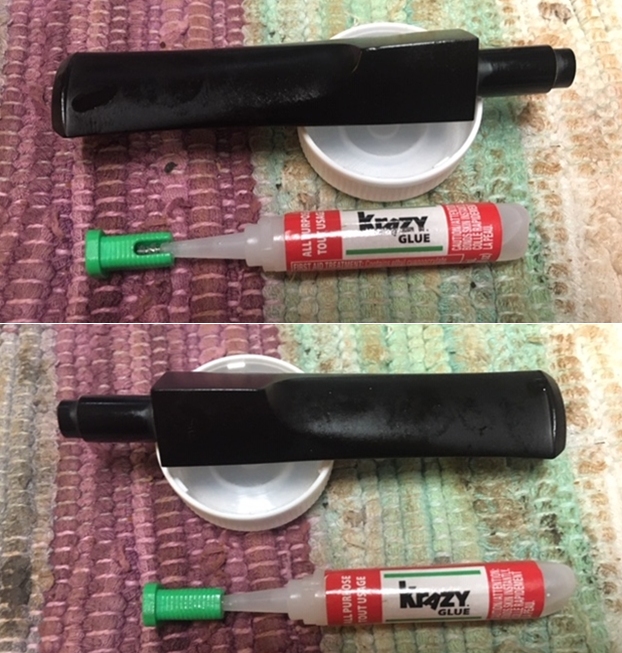
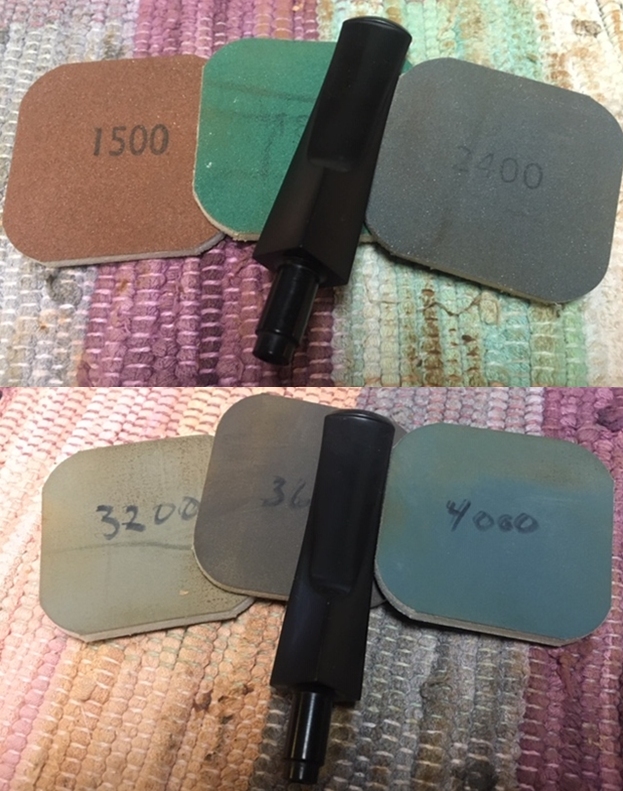
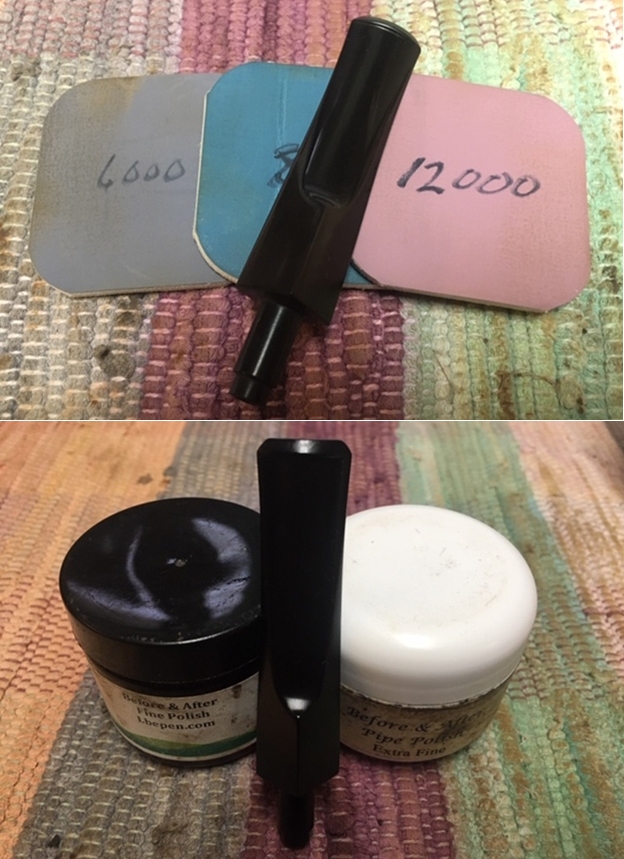
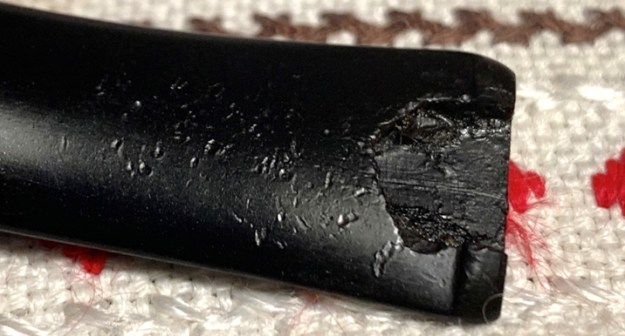
I like this pipe – a Woodstock (!) a lot and I think it will be a good addition Paresh’s collection although a lesser, humbler cousin in that collection to be sure!  Looking at the state of the Punto Oro’s condition, the briar landscape is beautiful – no issues that I can see.  The chamber has very light cake – the appropriate dime-width that is recommended.  I’ll remove it for the briar to have a fresh start and to inspect the chamber condition.  The rim reveals the lighting practices of the former steward – over the aft rim surface where it’s darkened and caked with crusted lava flow.  The picture below looks at the chamber and rim.The major issues with the restoration of this Punto Oro are with the stem.  The upper bit has tooth compressions on the bit and button.The lower bit is where all the fun is hiding!  The lower button has broken off and the break migrates down the stem – it will be no small button rebuild to address this moon crater!  There is also tooth chatter evident on the lower bit.  To restore the usefulness of this original Savinelli ‘Gold Point’ stem, which to me is critical, requires a button rebuild.  Rebuilds are never as strong as the original stem, of course, but I’m hopeful of building in some strength as I do this rebuild. I begin the restoration of this gift for Paresh by cleaning the Savinelli stem airway with a pipe cleaner wetted in isopropyl 95%.  It takes one cleaner to do the job.The oxidation on the stem is deep.  I use grade 000 steel wool with CIT, a product like SoftScrub, to work on the oxidation before putting it into the soak of Before & After Deoxidizer.  I like this product but when the oxidation is deep I’ve found that the soak alone is not sufficient to remove the oxidation.  The steel wool gives a head start for the Deoxidizer to break up the oxidation.The stem is then added to the soak of Before & After Deoxidizer along with several other pipes in the queue and their stems.  I let the stem soak for a few hours.When I fish out the stem after a few hours, I let the Deoxidizer fluid drain off the stem and I also squeegee the stem with my fingers.  Using a pipe cleaner wetted with isoproypl 95%, the airway is cleaned of the Deoxidizer.  I also wipe off raised oxidation from the stem with a cotton pad wetted with alcohol.  To help to rejuvenate the vulcanite stem, I also apply paraffin oil and set the stem aside to soak in the oil.Turning now to the stummel, I use the Pipnet Reaming Kit to begin the removal of carbon cake from the chamber.  After taking a picture showing the starting point, I use 3 of the 4 blade heads available in the kit. The chamber narrows at the bottom, consistent with a conical shape of the Woodstock crafted stummel.  I use the Kleen Reem Tool that more easily reaches to the floor of the tapered chamber.  The Savinelli Fitsall tool continues the scraping and finally the chamber is sanded with 240 grade paper wrapped around a Sharpie Pen.  After wiping the chamber with a cotton pad wetted with alcohol to clear the carbon dust, an inspection reveals heat veins in the chamber briar.  These are fissures that form from overheating the stummel.  The veins are not substantial enough to repair, but I will complete the restoration by applying a coating of yogurt and activated charcoal mixture to the chamber that will protect the chamber wall and encourage the formation of a protective cake. Switching now to the external briar surface, undiluted Murphy’s Oil soap is used with a cotton pad to scrub the stummel.  The thick, crusted area on the aft of the rim is stubborn.  With the solvent working, I also carefully scrape with my thumb nail, with the edge of my Winchester pocketknife, and with a brass wired brush.  After working on the scrubbing of the external briar surface, I then transfer the stummel to the kitchen sink and using warm water, I scrub the internal mortise and airway with shank brushes and anti-oil liquid dish soap.  After a thorough rinsing, I take a picture back on the worktable.  The stummel cleaned nicely, but the darkened area remains on the stummel’s rim.  I’ll continue to work on that with minor sanding later.I turn now to focus on the internal cleaning.  With only one cotton bud and one pipe cleaner wetted with isopropyl 95%, the fact of the internal cleaned condition is established.  Nice!With the stummel cleaning completed, I turn now to the stem.  The daunting aspect of the restoration is the button rebuild.  Before starting on this, I first focus on the tooth chatter and compressions on upper and lower bit.  I go in this order because the approach in rebuilding the button introduces the CA glue and activated charcoal patch which has a different composition from the vulcanite stem. Since I’m beginning with the heating method to erase as much as possible the chatter and compressions, this involves the heating and expanding of the vulcanite.  This is better done before the patch is applied in the button rebuild.  Using a Bic lighter, I paint the upper and lower bit to heat the vulcanite and through heating the rubber compound expands to reclaim its original disposition – or closer to it.  After going through the painting procedure and comparing the before and after pictures, the heating method did not help a great deal with the composition of this vulcanite stem. It helped some, but not a great deal it seems to me.With pictures showing the starting point for the upper and lower bit, it’s interesting to me to see where the tooth chatter is on the lower bit.  It extends about a quarter of the way down the stem!  I think what this indicates is that a frustrated steward, after he crunched the button, refused to put one of his favorite pipes aside!  Just like in American baseball, he ‘choked up’ on the stem, to keep using his pipe even though the button had endured catastrophic failure.  Now I turn my attention to the button rebuilding procedure.  First, I fashion a cone that inserts into the airway having a pipe cleaner running through the cone into the airway.  The cone is covered with scotch tape and then petroleum jelly is put on the tape.  This helps the cone not to get stuck after the patch material is applied. The patch material is a mixture of activated charcoal that is in capsule form and CA glue.After placing the charcoal in a small pile from the capsule, the glue is placed in a small puddle next to it.  The toothpick is used to mix the charcoal and glue by gradually pulling charcoal into the CA glue while mixing.  As the charcoal is mixed in, the patch material thickens.  After it reaches the consistency like molasses, I apply the charcoal putty to the button using the toothpick as a trowel. I intentionally use a mixture that is a bit thinner at the beginning so that is will seep down around the cone filling in the open spaces.  This is important to create as much strength as possible in the rebuild.  I apply more than is needed to build a mound that will later be filed and sanded to shape the new button. After enough patch material has been applied, I put the stem aside overnight allowing the button build to cure.  The lights go out!Well, the next morning held some surprises!  When I examine the button rebuild, looking forward to starting the process of filing and shaping, I discover that the new CA glue that I used did not cure to a solid state!  The patch was reminiscent of a bite guard – pliable rubber.  With some tugging and peeling, the repair came off in two pieces….  Interestingly, nowhere that I can find on the labeling that this glue does not harden, unless the “Extra Durable and Versatile” on the front label implies this?The good news is that the cone was removed without trouble and is ready to go again for button rebuild patch attempt number two!  I’ll spare the reader of all the pictures to record this second process but will jump forward.  What I did do differently after examining the large area of the patch, was to better engineer and strengthen the resulting rebuild.  I carefully applied rounded and flat needle files to the edge of the break.  I filed to taper downwardly the edge toward the break. My thinking is that this small innovation perhaps will strengthen the patch by providing more of a shelf or footing upon which the patch material can rest.  It seems that this engineering would inherently provide better buttressing than a straight vertical edge drop.  I’m thinking also that this will help in the sanding and blending of the patch. The sketching below illustrates my thinking.  I also file and clean out the entire button cavity and clean it with a cotton pad wetted with isopropyl 95% in preparation for the new patch.  Before starting on the button patch, I decide to do a quick fill of the upper bit and button lip where there were compressions.  I use medium-thick black CA glue to do the filling.  To quicken the curing and to hold the patch in place I use an accelerator.The next pictures show the second finished button rebuild patch with the engineering changes beginning the curing process.After the second button rebuild patch is cured, using the flat needle file, the patch on the upper bit and button lip are filed down flush with the vulcanite stem surface.Switching to the underside, filing and shaping begin on the button rebuild.  I start with the slot facing to flatten it by removing the excess patch material.  Then, cutting the line shaping the button lip is next.Filing continues with the main bit patch and button shaping.  I’m careful to allow a rounded patch and not filing straight across horizontally.  This would weaken the patch – thinking of the difference between an arched bridge’s symmetry rather than that of a flat bridge’s.  Maintaining the patch thickness is critical to its strength.With the filing phase completed I transition to using 240 grade paper starting first on the upper bit and button lip fills.The 240 grade sanding fine tunes the button rebuild further. I’m careful not to sand too much on the patch and continue to round it to maintain thickness.  A slightly thicker lower button lip purchases some strength as well. I focus on sanding the seams of the patch so that they are flush with the vulcanite surface.  The patch is still rough but making progress!I use the flat needle file to shape and smooth the slot as well.  It’s almost a given that air pockets will emerge as the sanding continues to shape the button.A careful examination of this cross-section view of the slot facing shows the added buttressing effect of the earlier tapered filing.  Arrows help to show this.With the 240 grade sanding paper still in play, I sand the entire stem to remove any residual oxidation.  Deep oxidation always seems to appear during the fine sanding and polishing phases.  Sanding the stem with 240 now will hopefully address this as well as the remnants of tooth chatter remaining on the bit.  I use a plastic disk that I fabricated to be able to sand the stem facing without shouldering the edges.Next, I sand the entire stem by wet sanding with 600 grade paper and following this, 000 grade steel wool is applied.The upper bit and button repairs are looking great – the sanding is erasing the contours of the patch and blending nicely.Work on the lower stem side is a bit more of a challenge with the huge button rebuild patch material.  The stem is looking great, but the challenge is to blend the large patch area.Air pockets are the most common side effects of patching.  Air bubbles are trapped in the CA glue and activated charcoal as it is mixed and these air bubbles become visible as sanding dissects and reveal the pockets.The many microscopic air pockets are not easy to remove.  I use a clear acrylic nail polish to try to fill and erase the pockets.  CA glue can be used to do the same. I use the brush provided by the nail polish and I paint over the pockets almost covering the entire patch.  I let it dry and repeat the process for a second coating.After the acrylic polish cures, I apply 000 steel wool to the patch and the picture below shows the results.  The nail polish does an amazing job but there remain some pockets.  These are very small and I’m doubtful that more coating will erase them.  I’m satisfied now with leaving them and moving on!  They remain as a testament to the catastrophic button failure and this noble attempt to recommission this beautiful Savinelli Punto Oro Woodstock!  Moving on!I move on to applying the full regimen of micromesh pads to the Woodstock stem.  I begin with wet sanding using pads 1500 to 2400 and follow by dry sanding with pads 3200 to 4000 and 6000 to 12000.  Between each set of 3 pads, Obsidian Oil is applied to condition the stem and to protect it from oxidizing.  The stem is looking great. With the stem sanding completed, looking now to the stummel, I focus first in cleaning up the rim.  There remains darkened briar from the lava flow earlier cleaned on the aft quadrant of the rim.  The inner rim edge is also darkened at places with the normal nicks from wear and tear.  The outer edge of the rim is also with some normal nicks and dents – all very small. To clean the rim, I first start by using 240 sanding paper and doing a very light inner and outer rim bevel – just enough to clean the edge of the rim.  After this, I also use the 240 paper to lightly ‘feather sand’ the aft part of the rim to clean the darkened surface.  I run the sandpaper lightly around the full rim plane surface to clean the briar, not to remove it.I follow the same procedure with the rim edges and the rim plane with 600 grade sanding paper.  The rim is shaping up very nicely.Next, I use micromesh pads to do fine sanding on the Savinelli Gold Point stummel.  I begin by wet sanding with pads 1500 to 2400 and then dry sanding with pads 3200 to 4000 and 6000 to 120000.  The fine sanding brings out the grain and restores the mahogany finish for which the Punto Oro line is known.  Very nice indeed! To deepen the natural hues of the briar, Mark Hoover’s Before & After Restoration Balm (www.ibepen.com) does a great job.  I put some of the Balm on my finger and work it into the briar surface.  The Balm begins with a cream consistency and then thickens into a waxy consistency as it is worked into the stummel.  After working the Balm thoroughly into the surface, I put the stummel aside for about 20 to 30 minutes as the Balm is absorbed into the briar.  The picture below was during this period.  Afterwards, I wipe off the Balm with a cloth dedicated to this, and then the stummel is buffed up using a microfiber cloth.  The stem also is a beneficiary of Before & After Fine Polish and Extra Fine Polish.  The polish helps further to condition the vulcanite and to rid the stem of oxidation.  Starting with the B&A Fine Polish, I work the black oily liquid into the stem – the liquid has a gritty texture.  Afterwards, I let the stem absorb the polish for 15 minutes and then wipe the excess off with a paper towel.  I follow by applying the Extra Fine Polish in the same manner.  Again after 15 or so minutes, the excess is wiped off and the stem is buffed with a microfiber cloth.Now, the homestretch.  After reuniting stem and stummel and mounting a cloth buffing wheel to the Dremel setting it at about 40% full power, Blue Diamond compound, a fine abrasive, is applied to the pipe.  After this, the pipe is wiped down with a felt cloth to clean it of compound dust before application of the wax.  Next, after mounting another cotton cloth buffing wheel onto the Dremel at the same speed, carnauba wax is applied to the pipe.  Following the wax application, the pipe is given a vigorous hand buffing to further raise the shine.
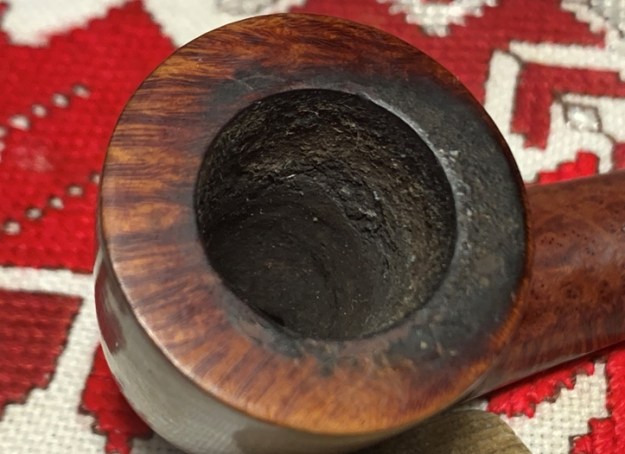
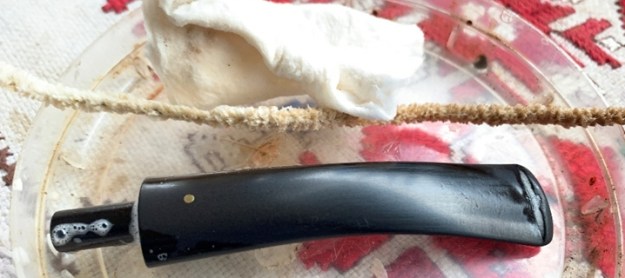
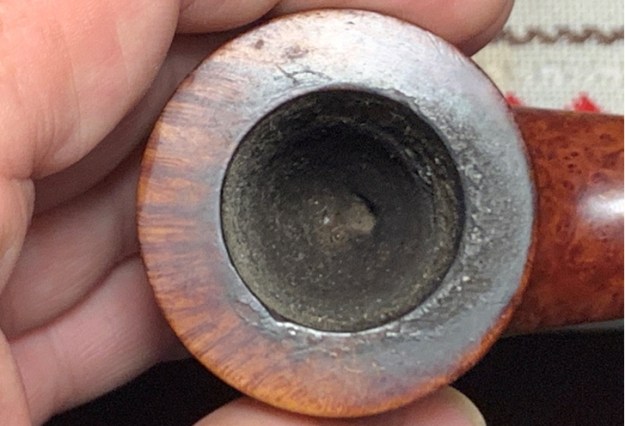
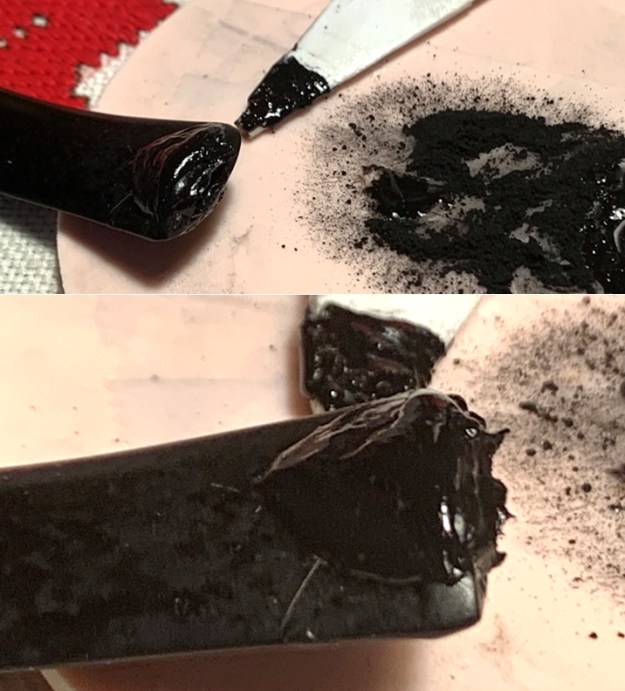
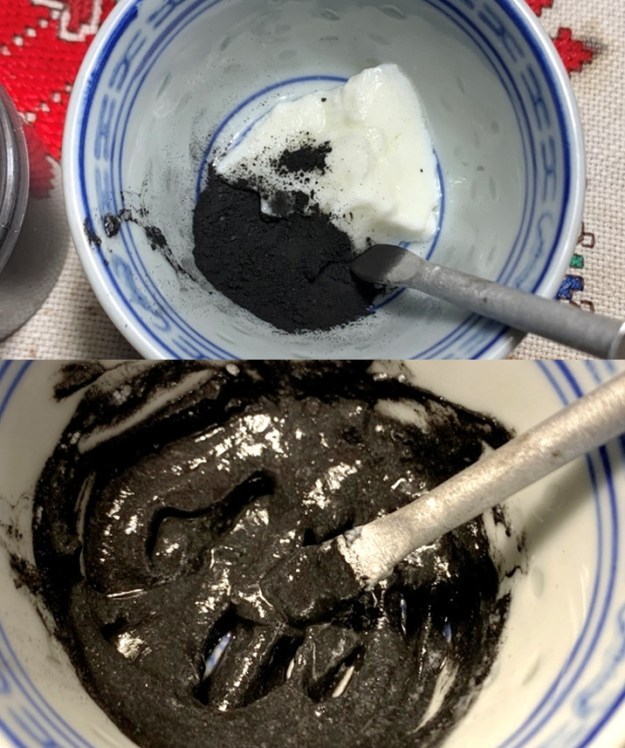
After the buffing, one project came to mind that I had almost forgotten.  Earlier, after inspecting the chamber and finding some heating veins, I had decided to apply a coating of natural yogurt and activated charcoal powder mixture to the chamber wall.  This mixture, after applied to the chamber, hardens into a protective layer to help protect the briar as well as encourage the formation of a protective cake.  I mix some charcoal powder with a small amount of natural yogurt.After the yogurt and charcoal are mixed and is somewhat thickened – not running but with the consistency of mud, and after inserting a pipe cleaner to keep the draft hole cleared, I use the pipe nail and spread the ‘mud’ over the chamber wall.  After it is covered, since it is late, I put the pipe aside to allow the mud to dry through the night and the lights go out!The next morning, after applying the pipe mud mixture to the chamber, I give the pipe one more rigorous hand buffing to raise the shine and my gift to Paresh is complete.

The button rebuild was, without doubt, the most technically demanding part of the restoration of this striking Savinelli Punto Oro Woodstock.  The grain is beautiful, and I am especially drawn to the Woodstock shape with the lines guiding the eyes down the sides of the pipe, taking in the movement of grain and shape.  I’m thankful for my L. J. Peretti Cutty that I received from Paresh when I was in India.  I have yet to put the Cutty into service here in Bulgaria – it has been waiting for my gift to Paresh to make it to India.  It still needs to be refreshed and a little polishing work, and my plan and hope is that Paresh and I will share our first bowls together with our gifted pipes to each other, perhaps not in person, but via video conferencing, today’s miracle bringing people together throughout our ever shrinking world.  After the pandemic issues are behind us, I’ll be mailing the Savinelli Punto Oro Woodstock to India.  Thank you for the Peretti Cutty, my friend!

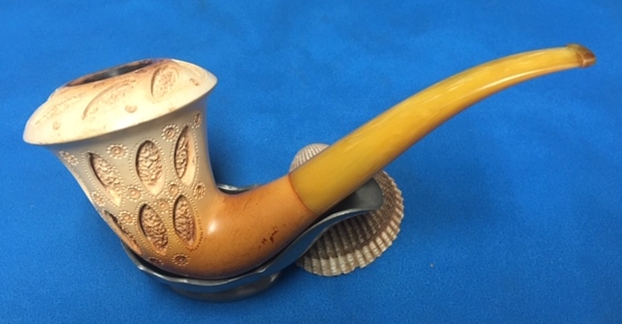
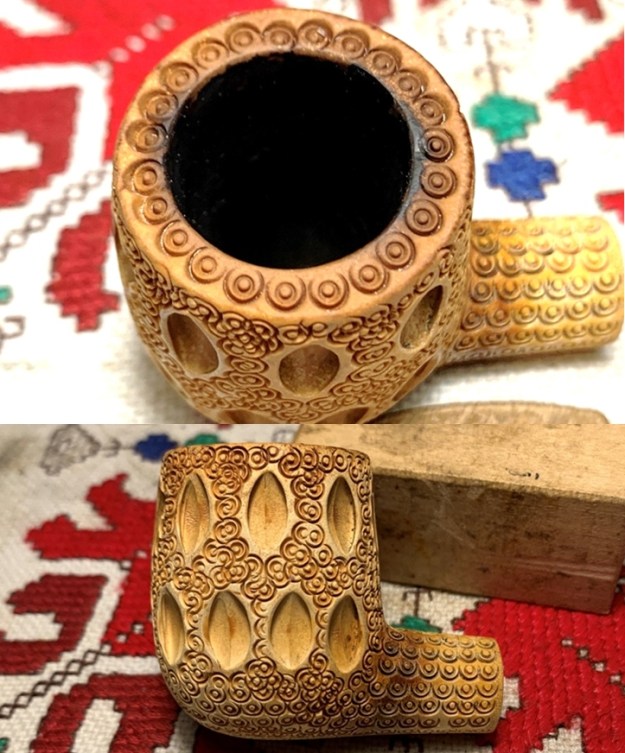
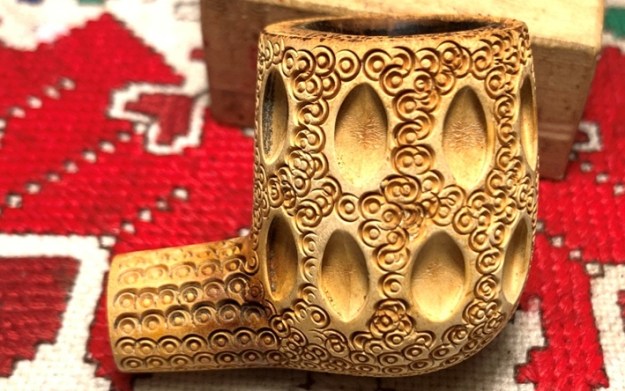
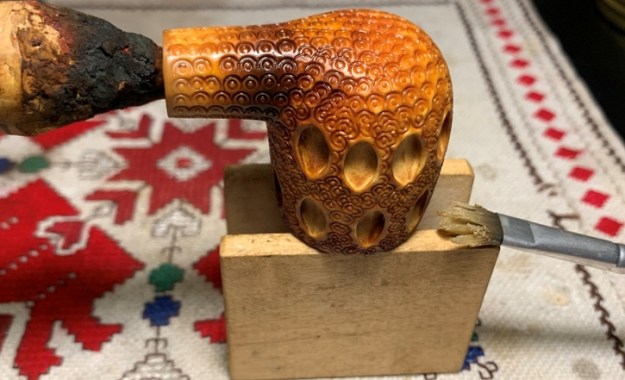
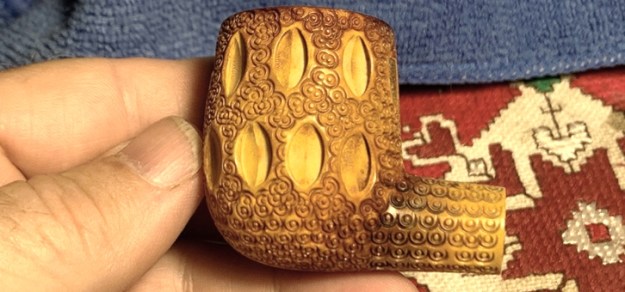
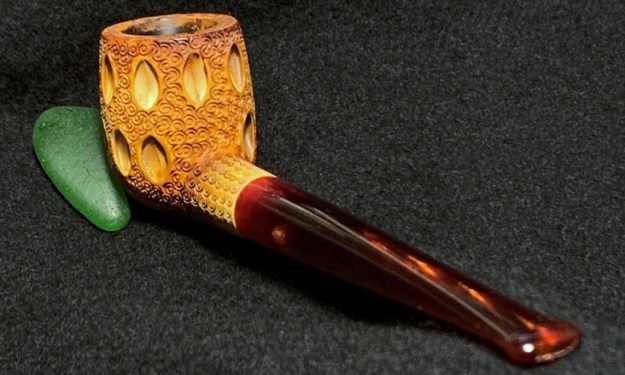
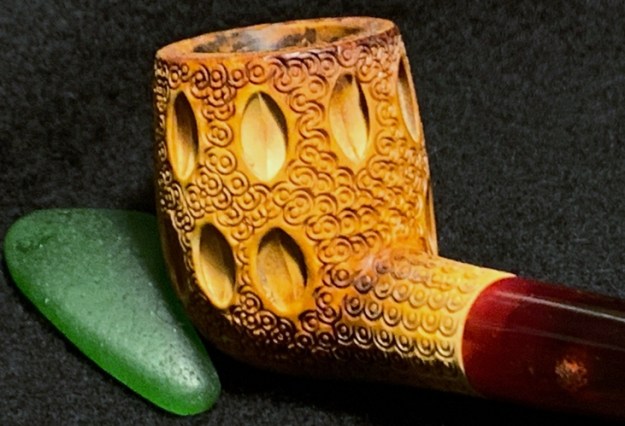
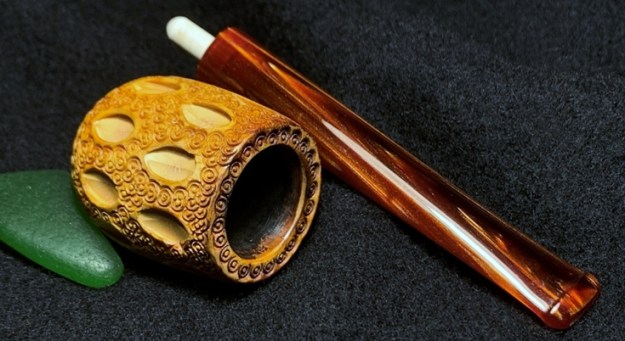
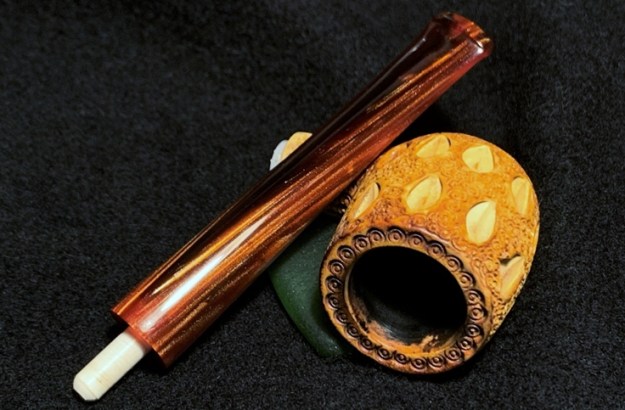
A Beautiful Lattice Meerschaum Lay Underneath the Thick Cake and Lava


Blog by Steve Laug

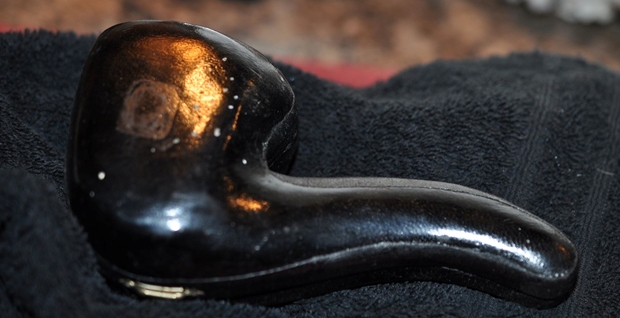
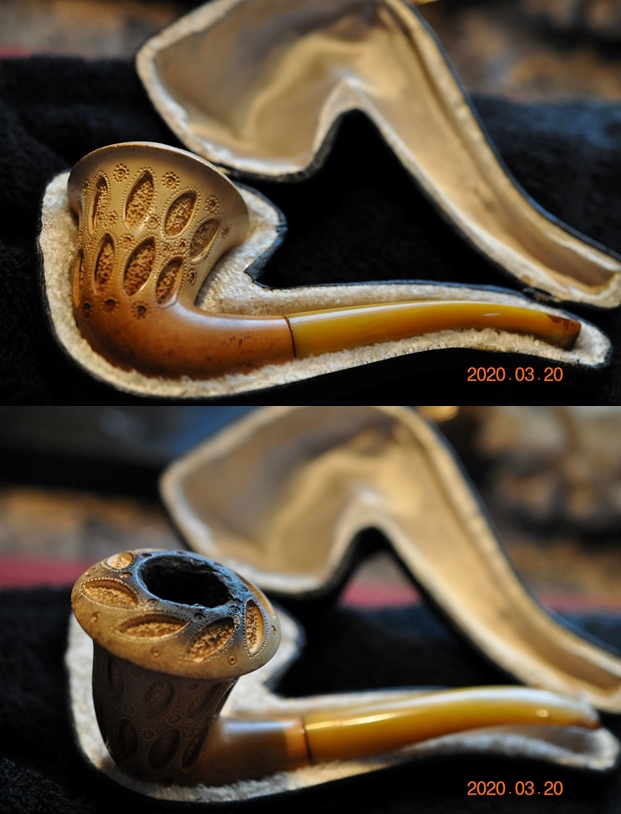
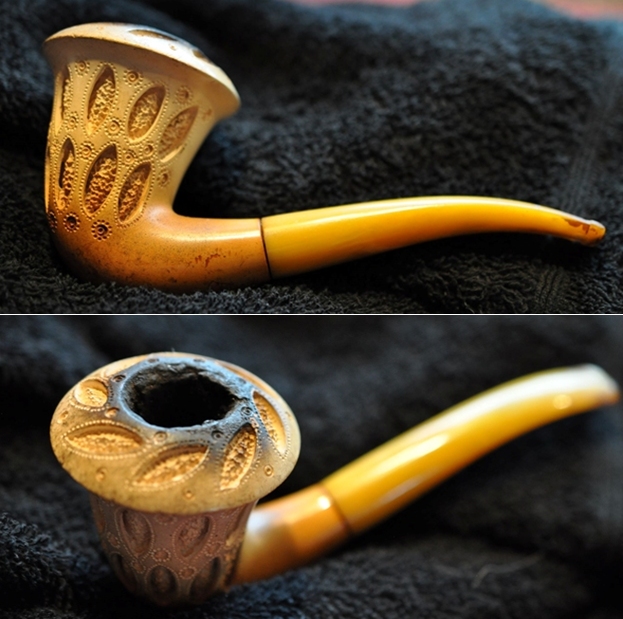
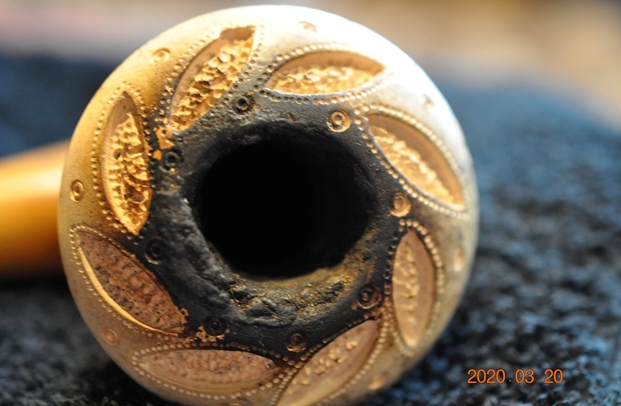
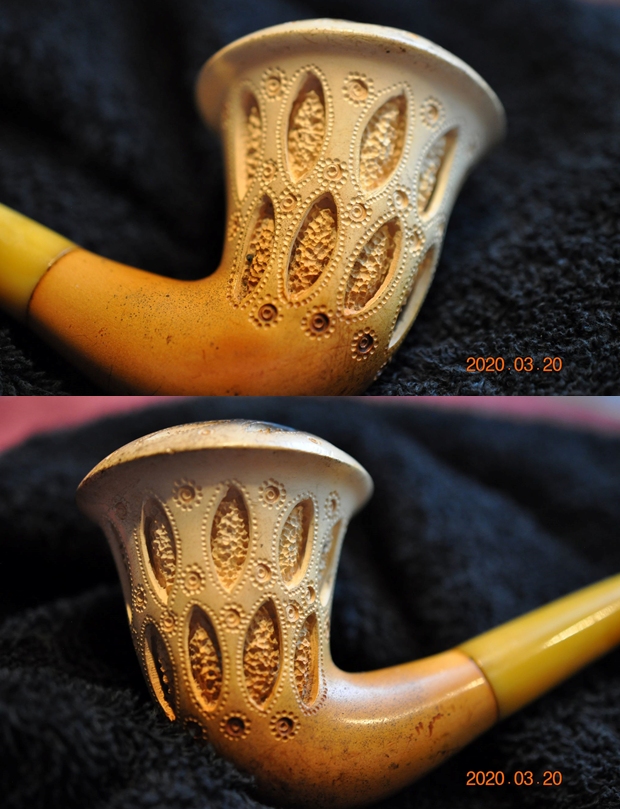
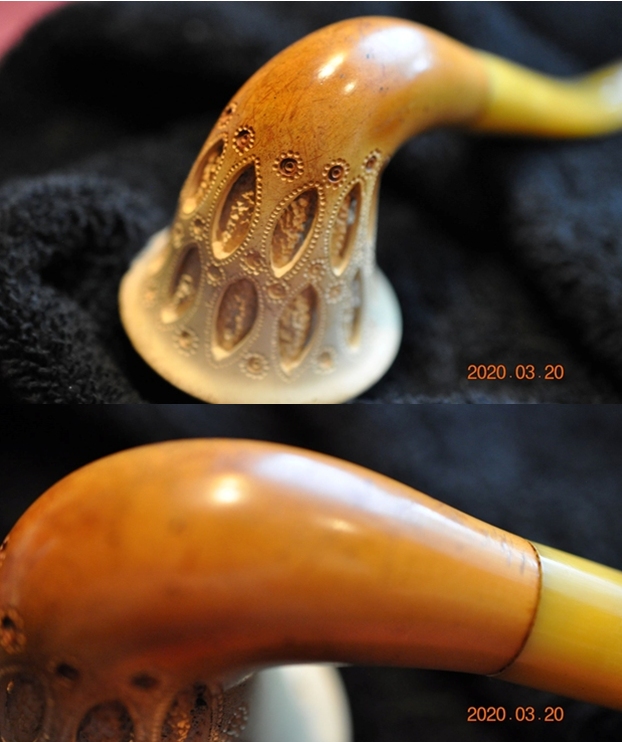
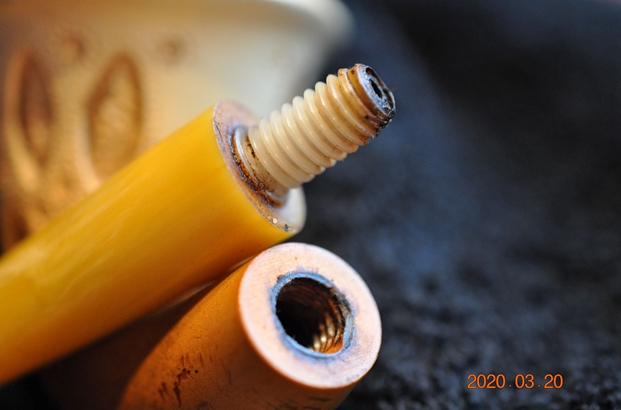
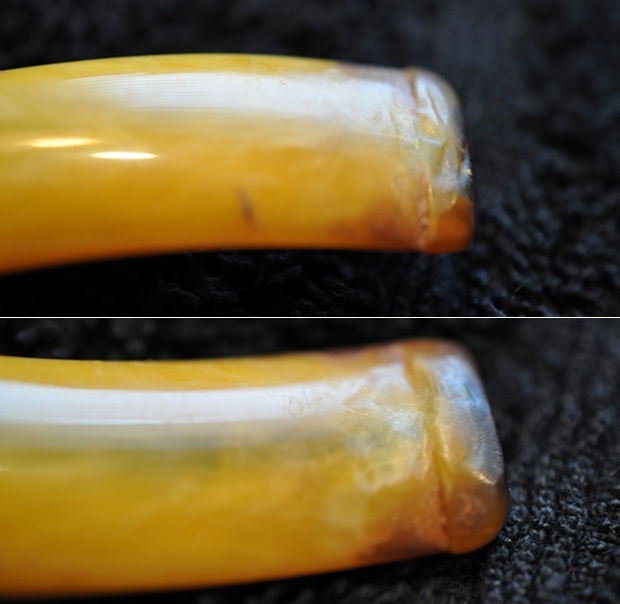
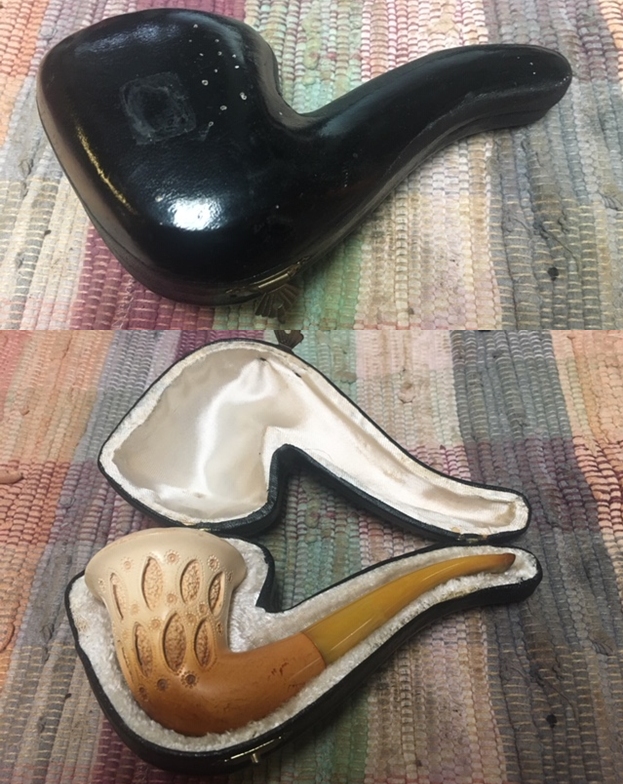
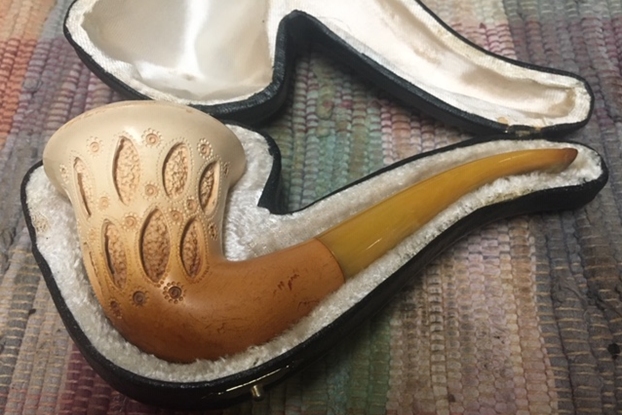
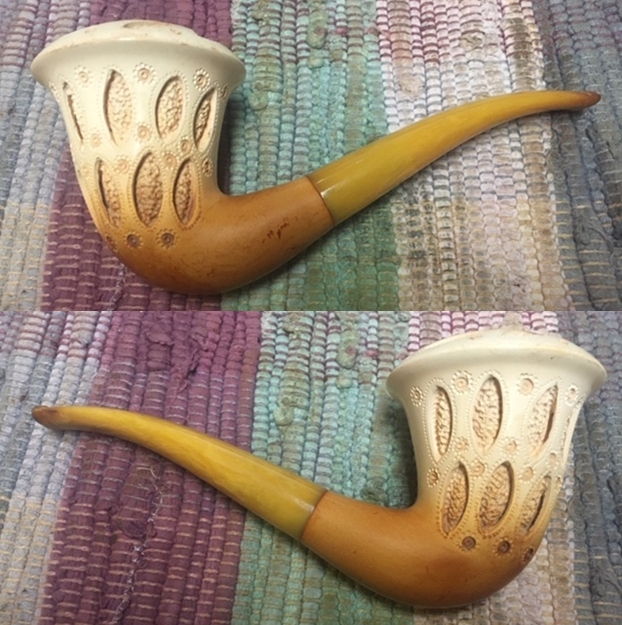
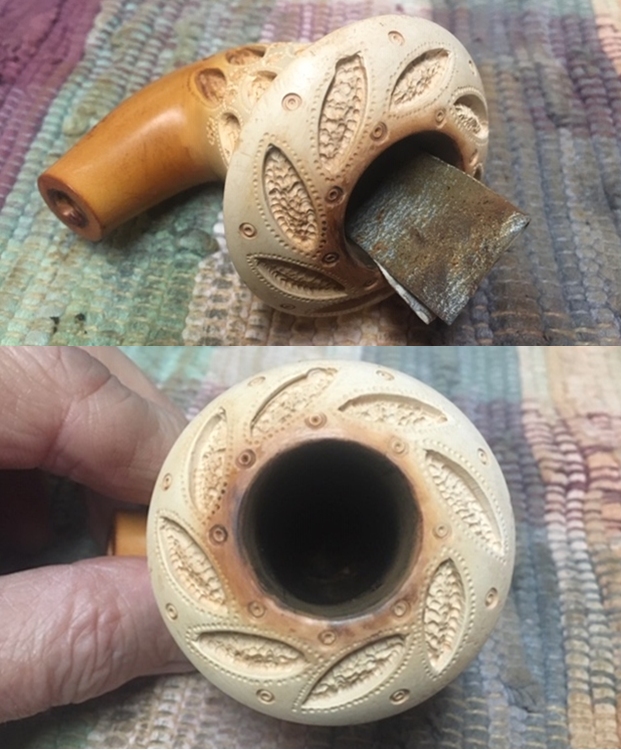
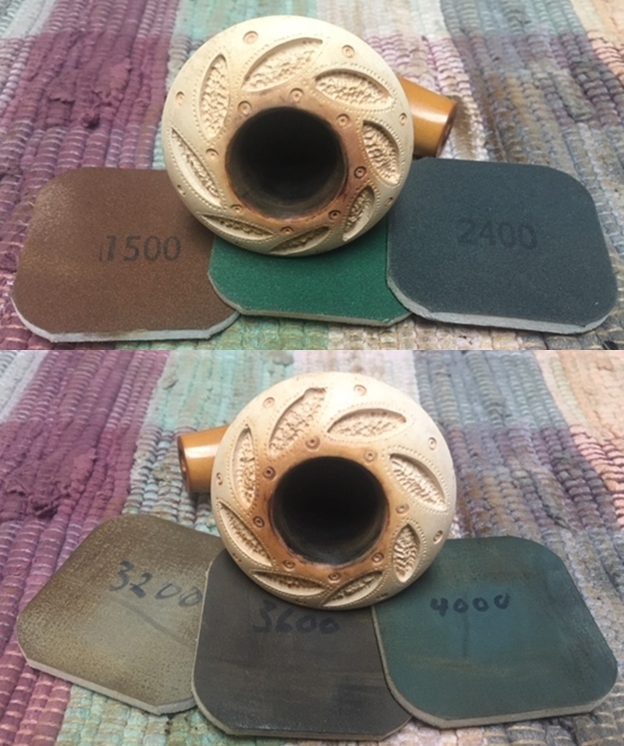
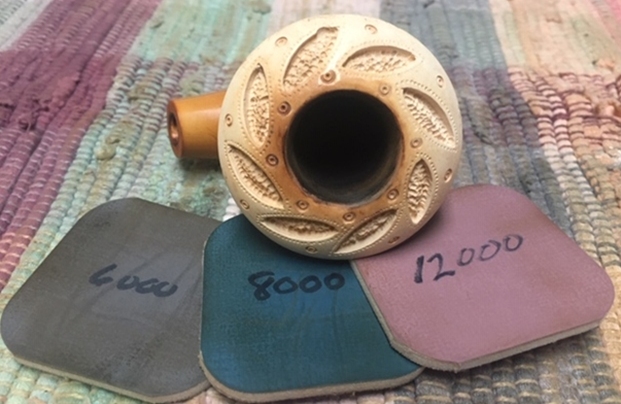
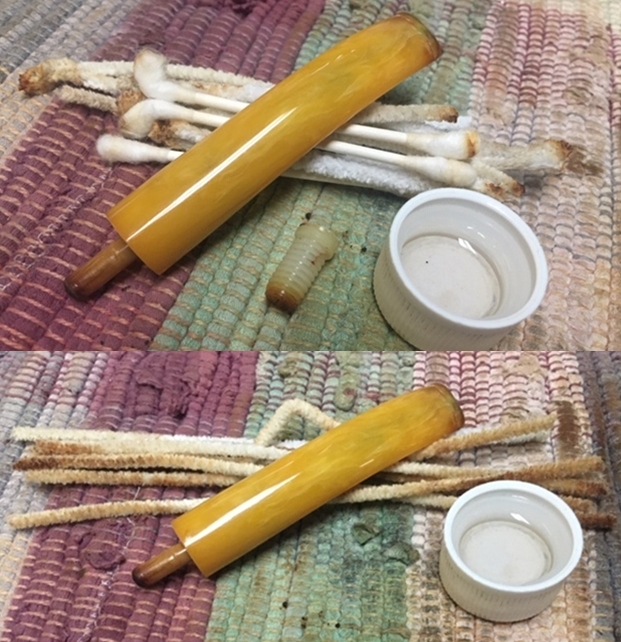
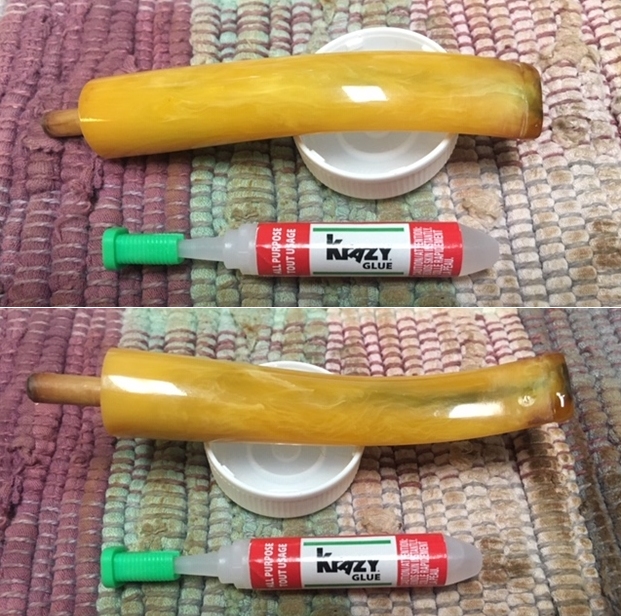
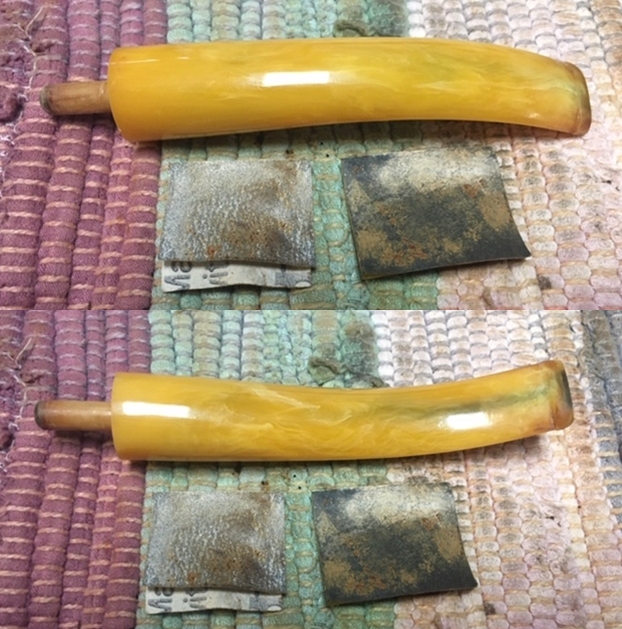
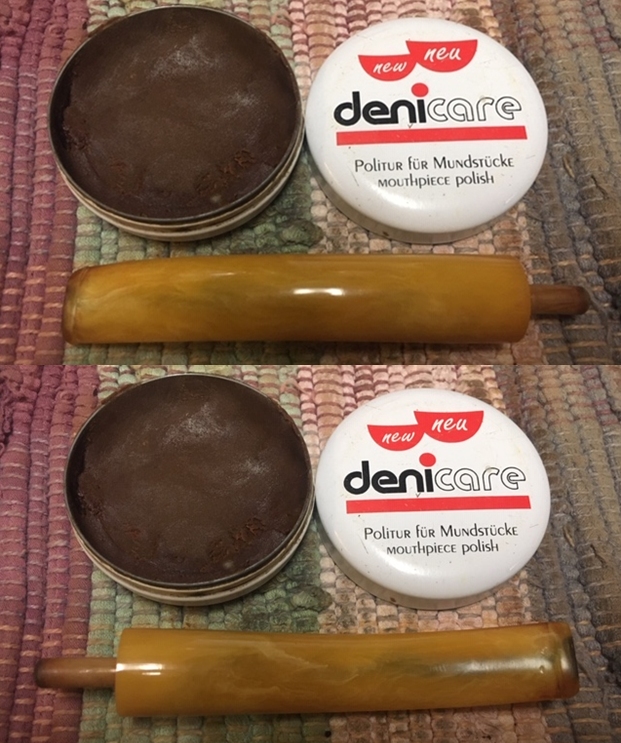
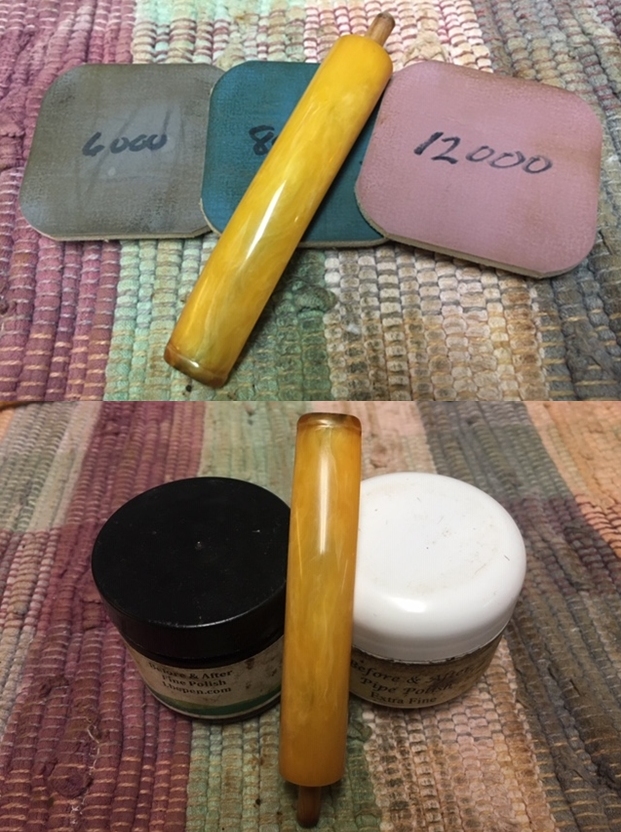
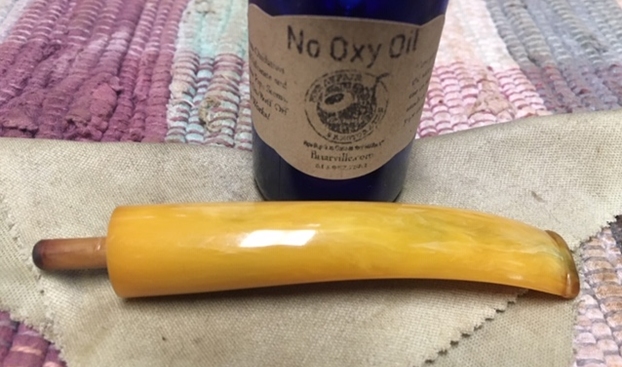
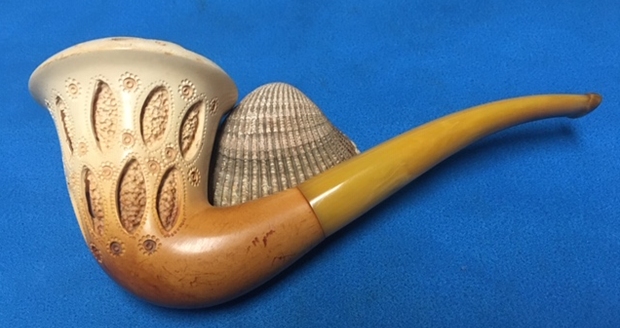
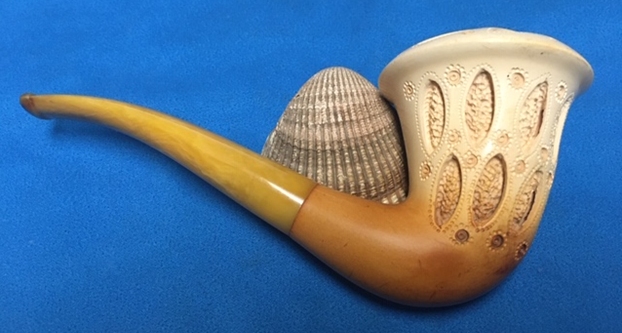
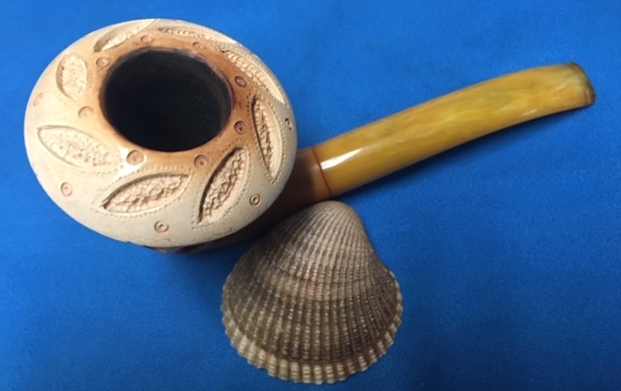
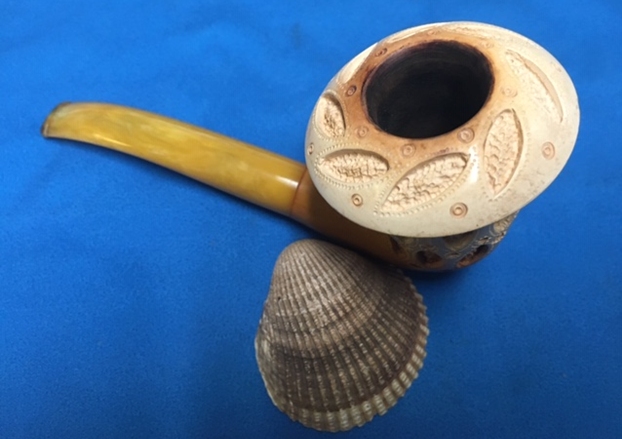
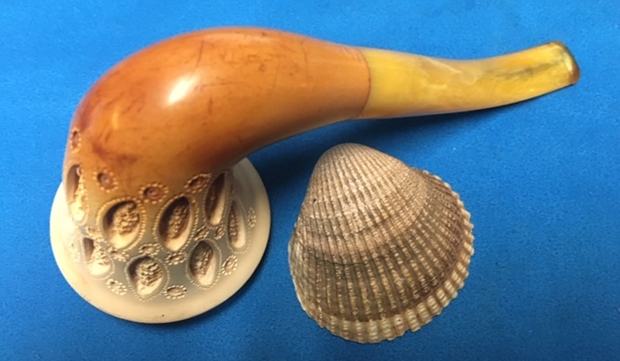
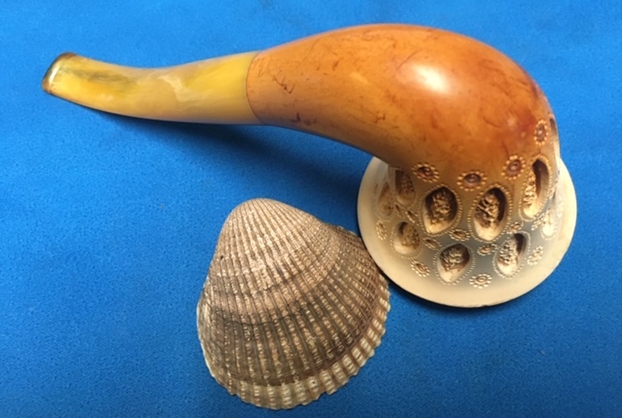
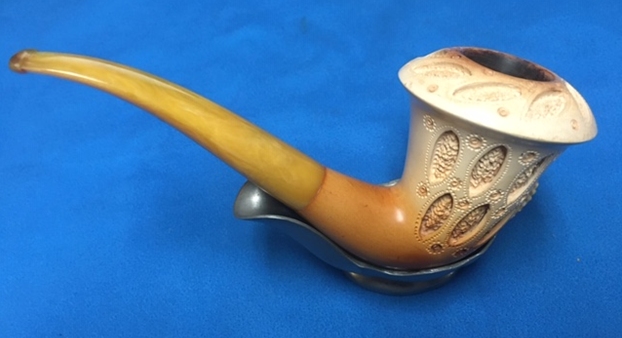
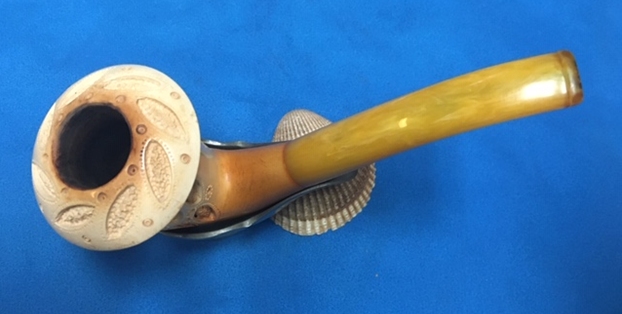
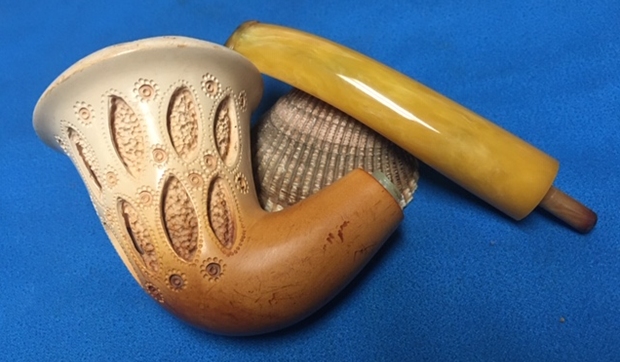
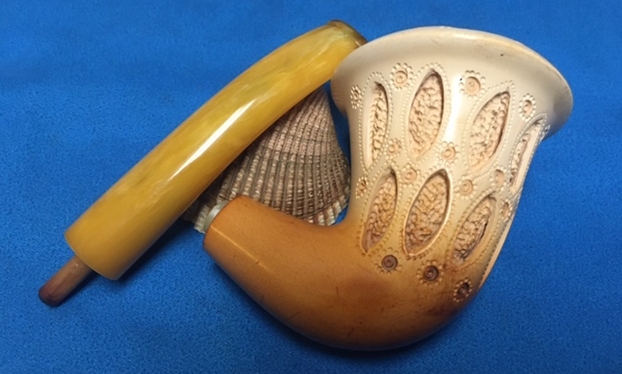
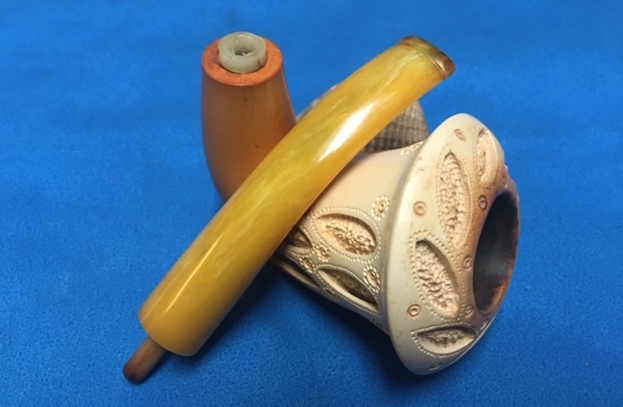
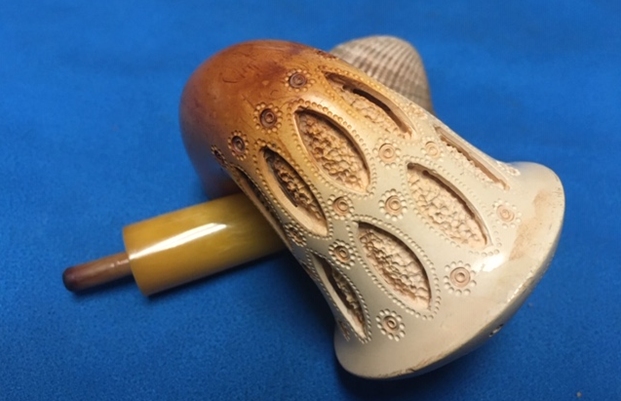
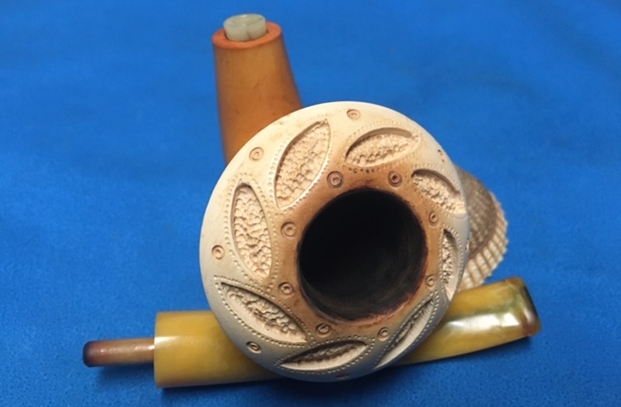
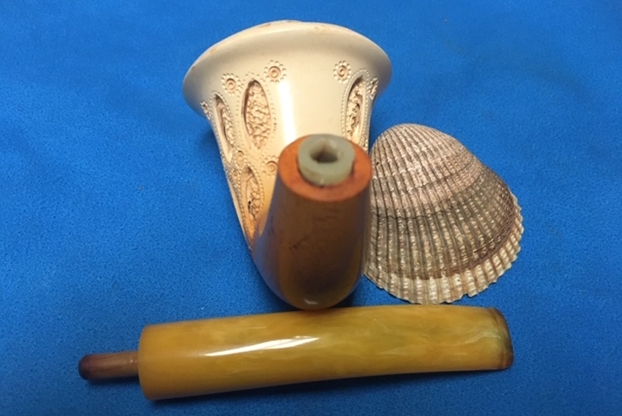
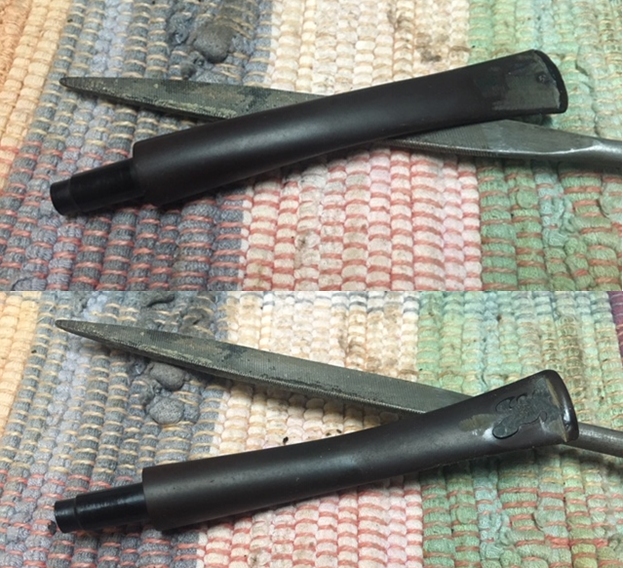
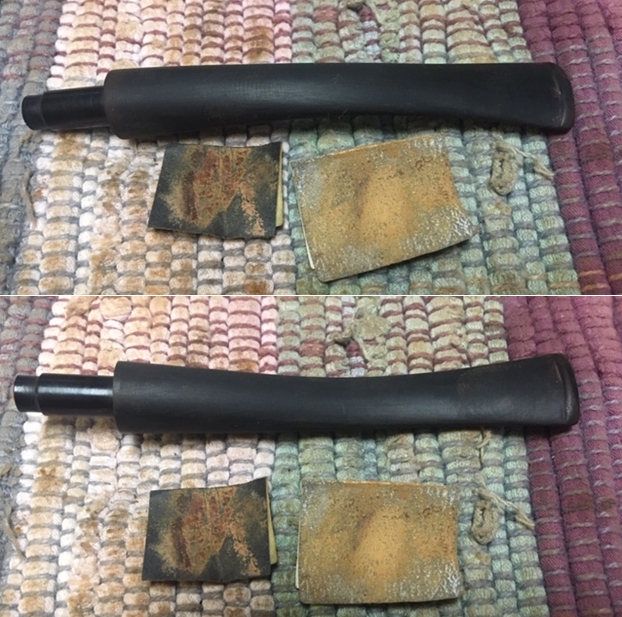
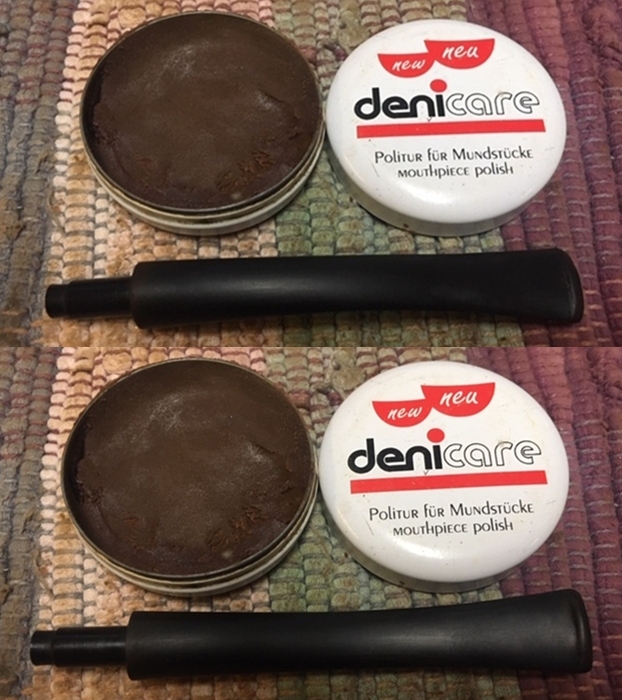
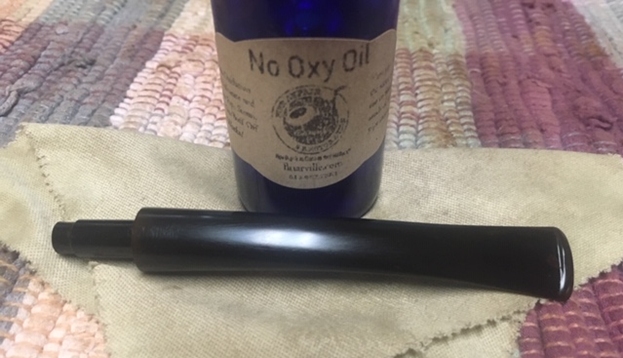
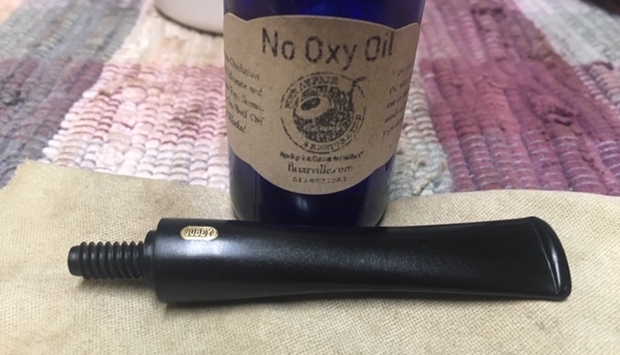
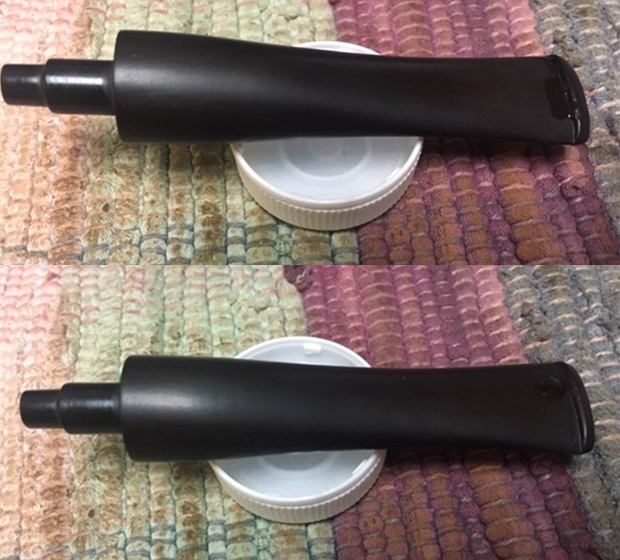
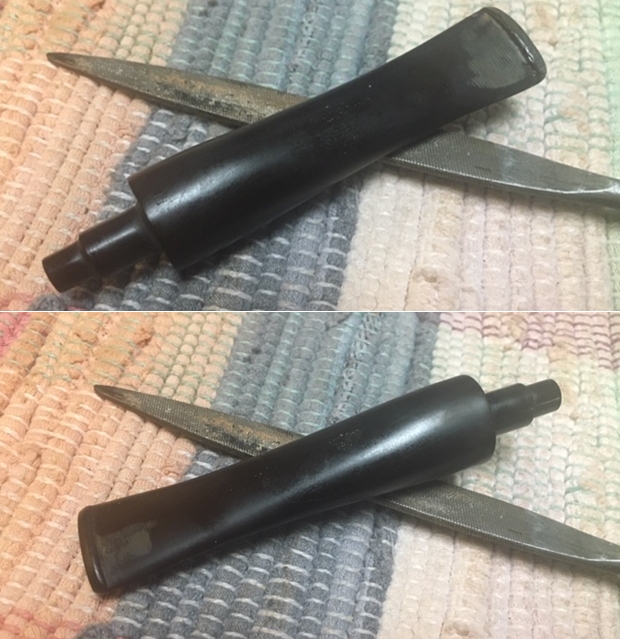
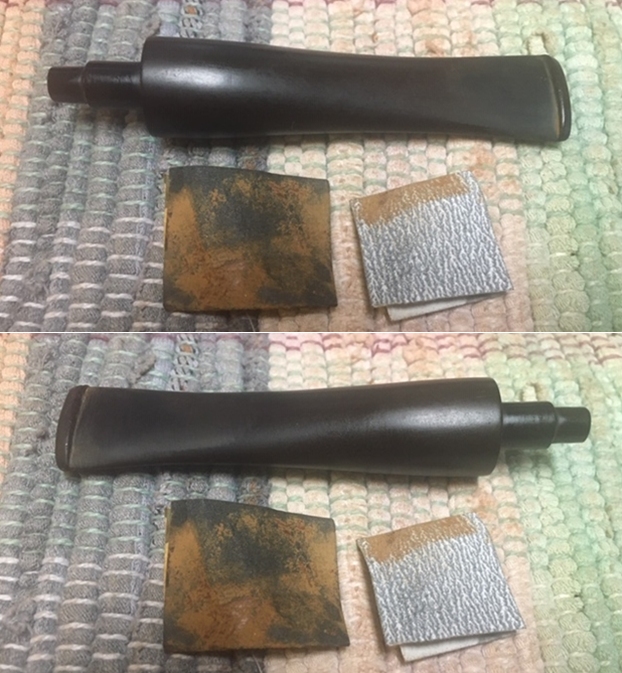
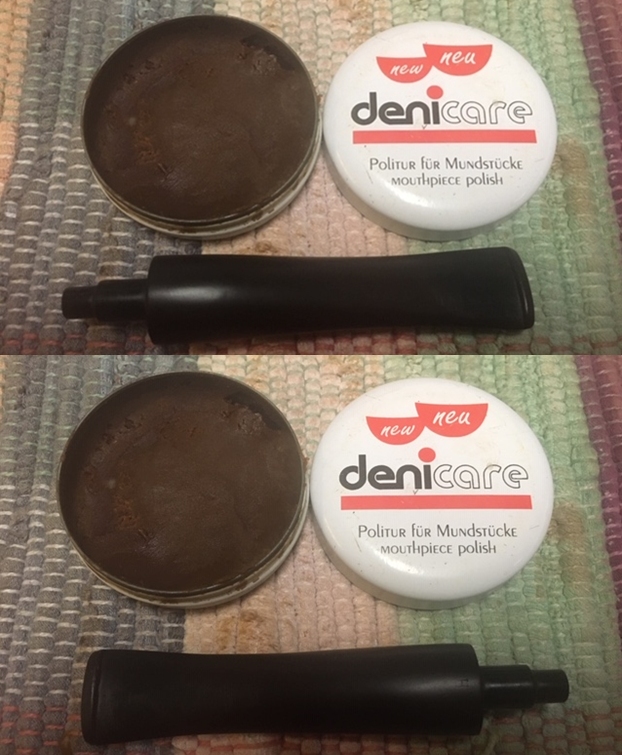
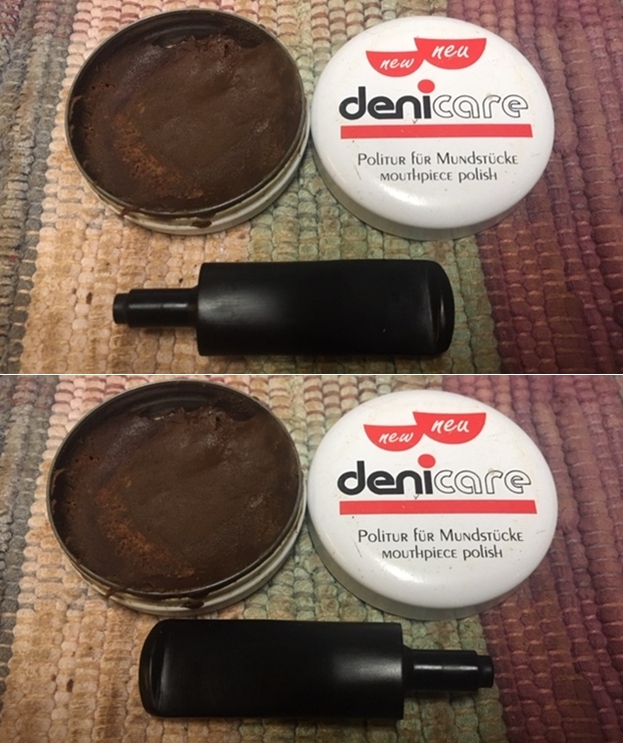
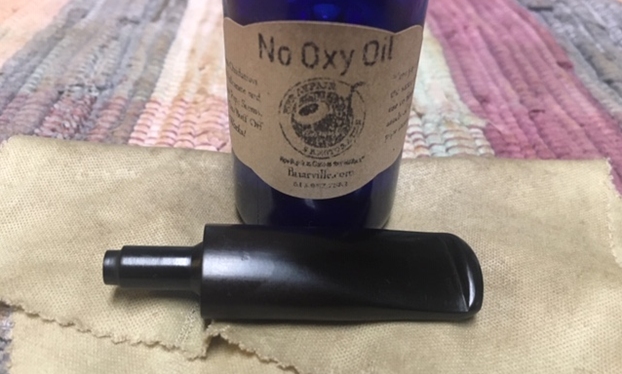
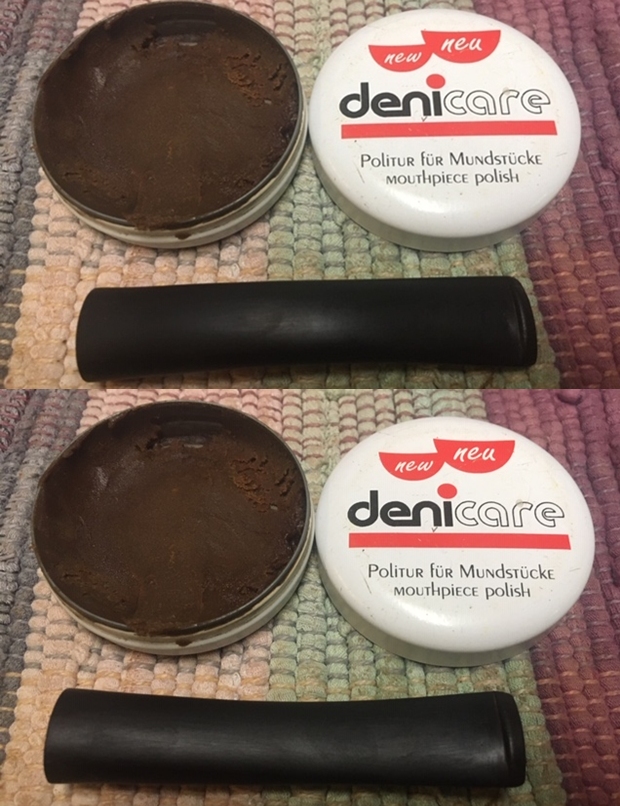
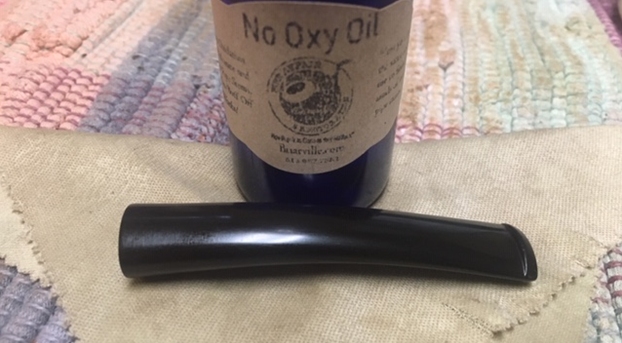
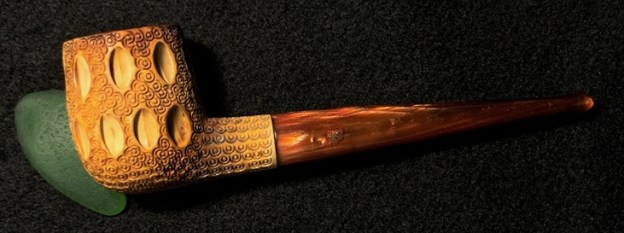
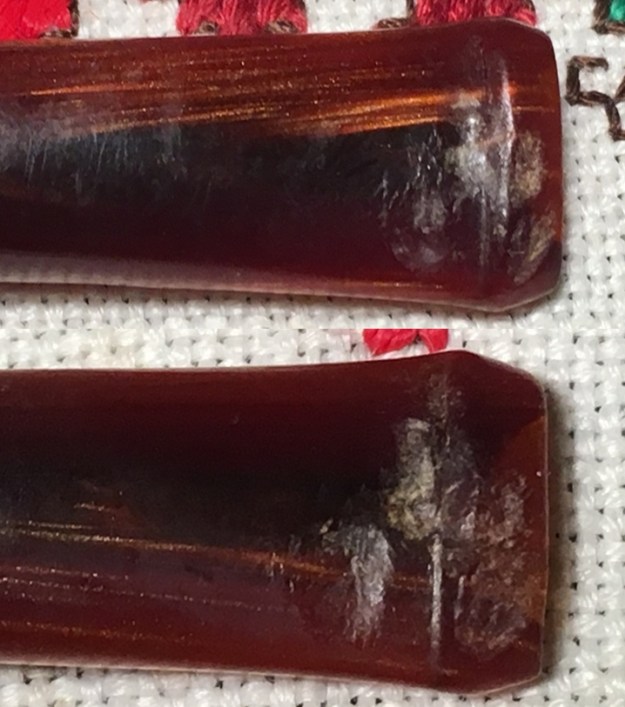
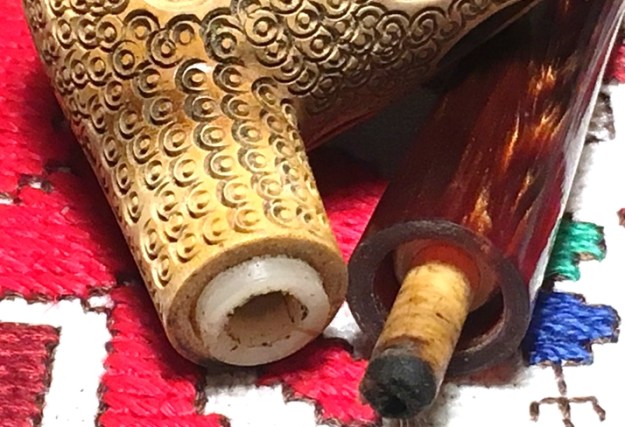
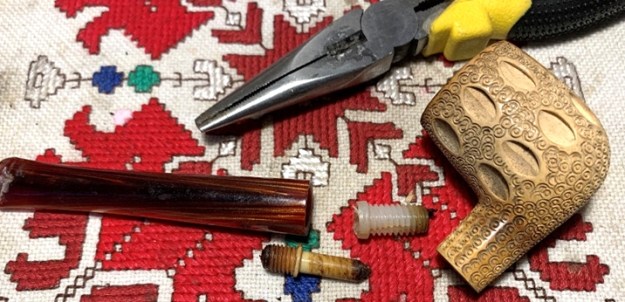
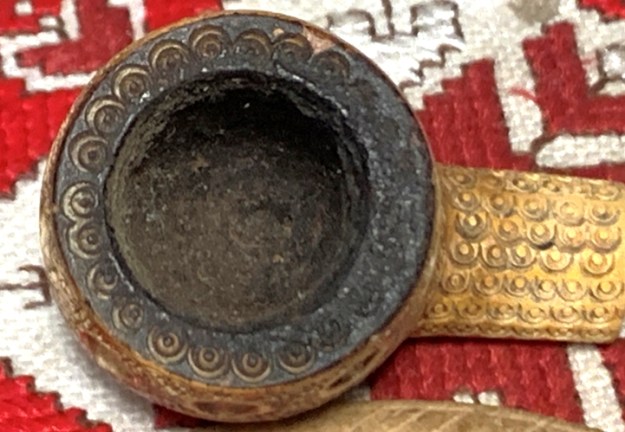
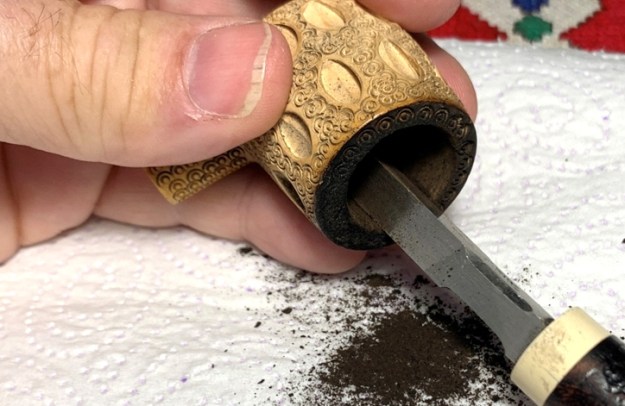
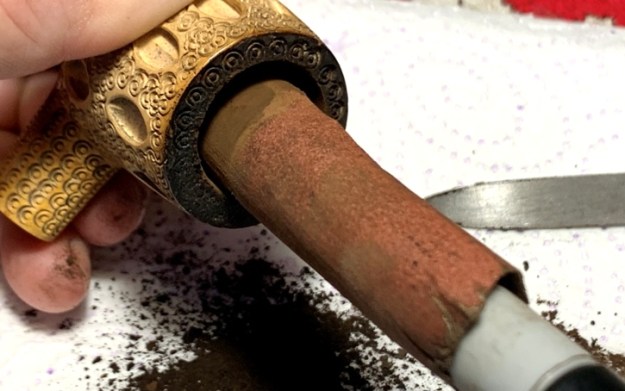
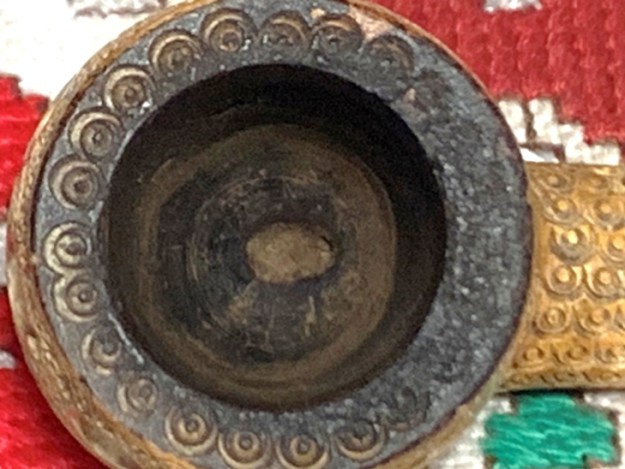
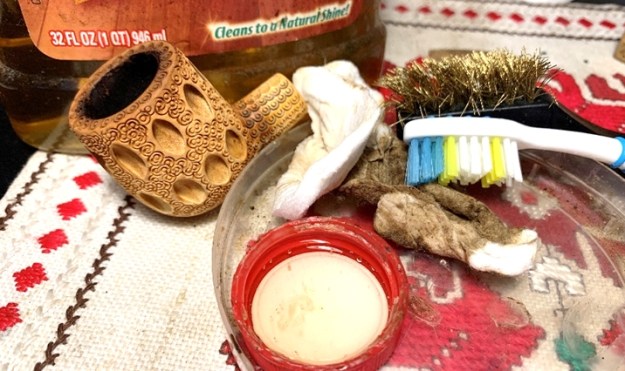
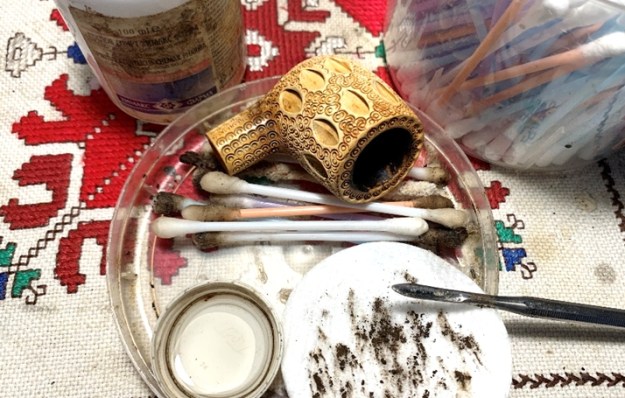
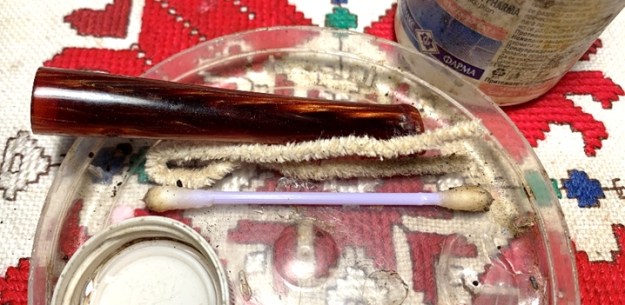
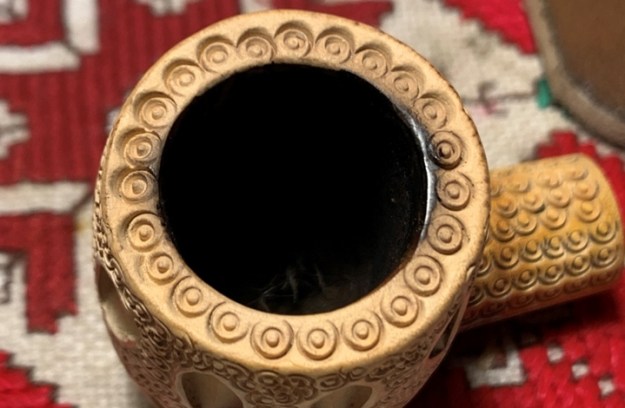
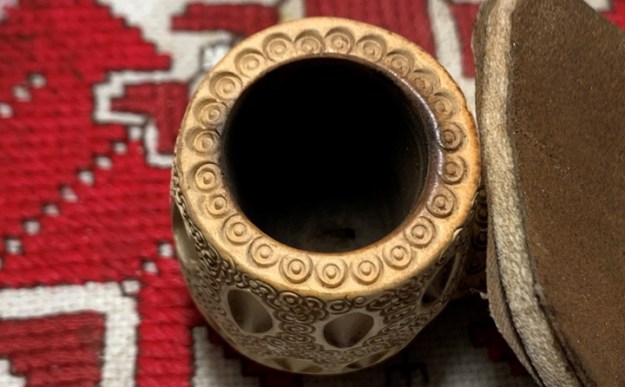
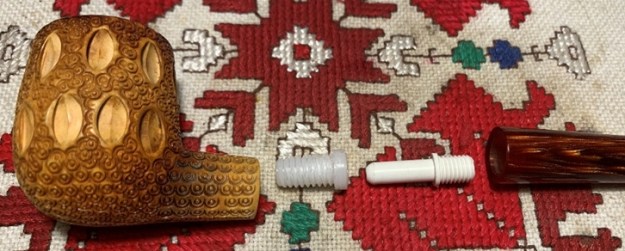
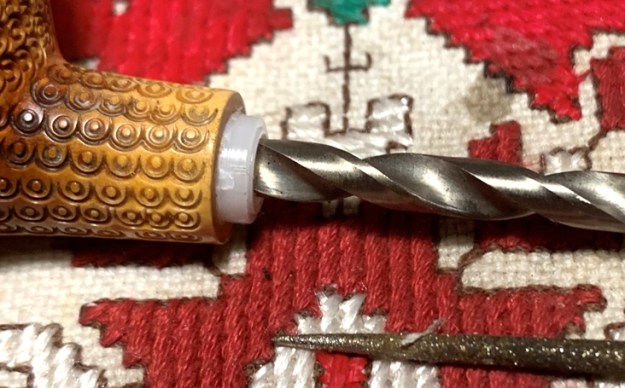
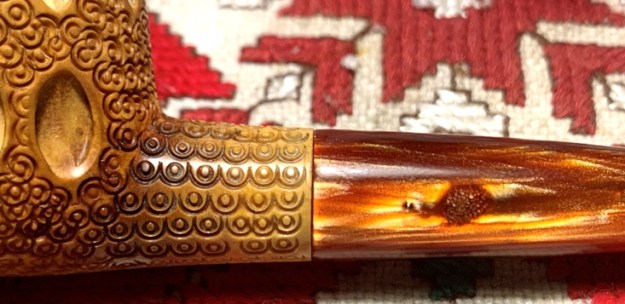
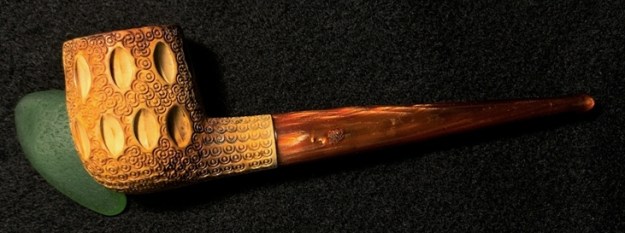
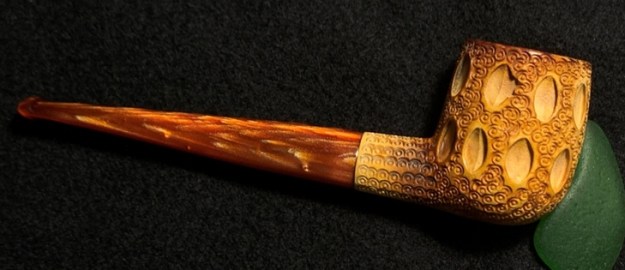
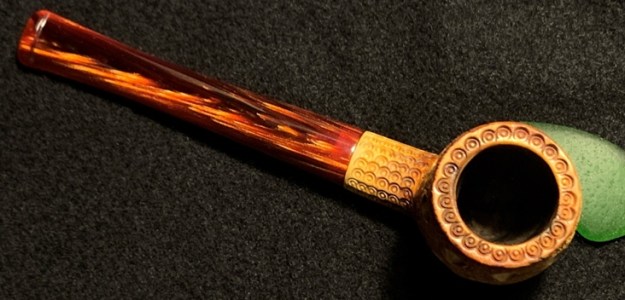
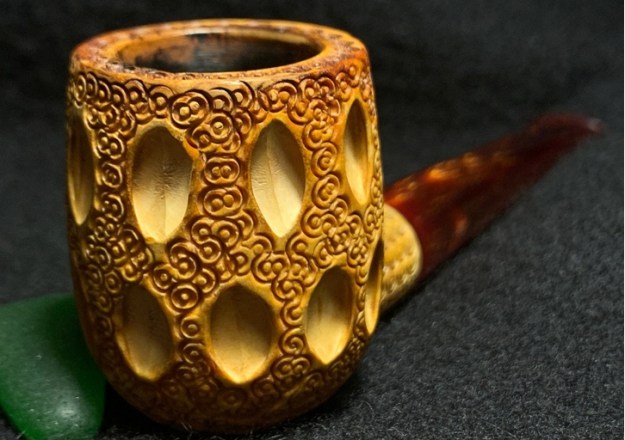
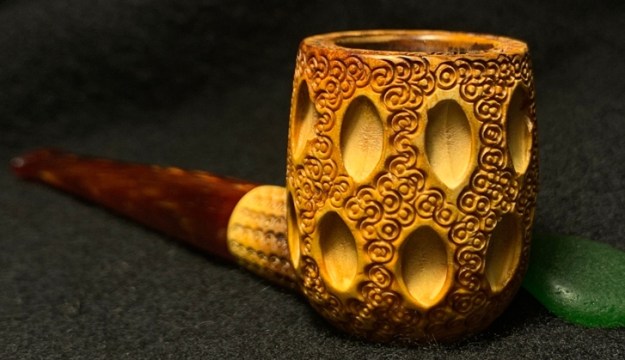
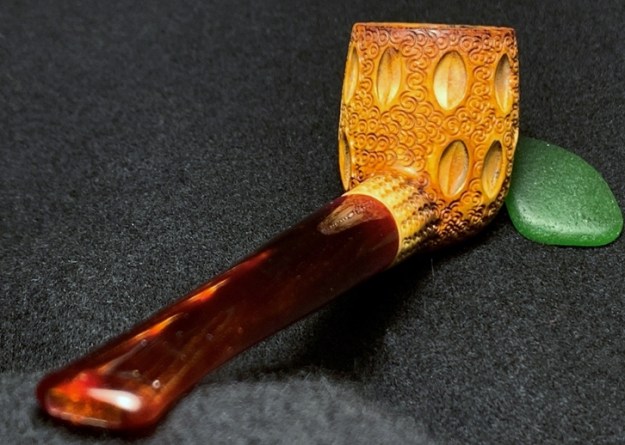
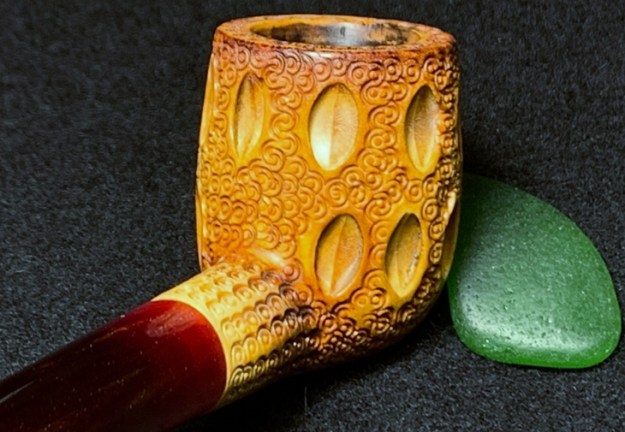
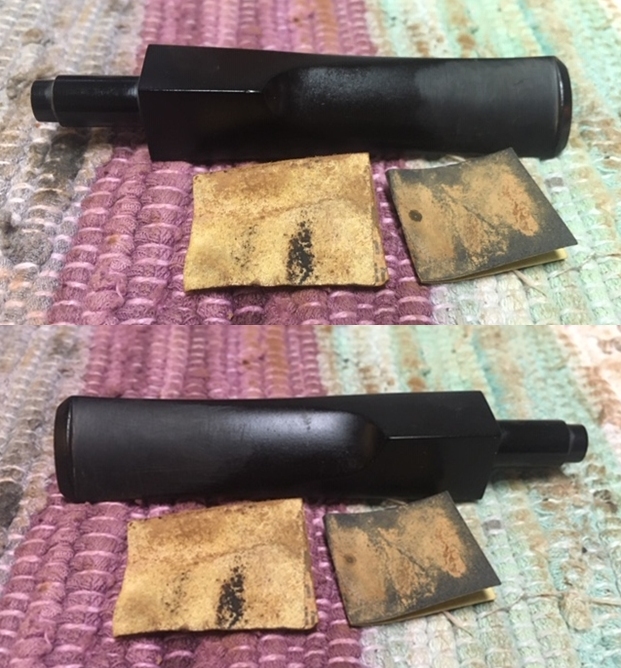
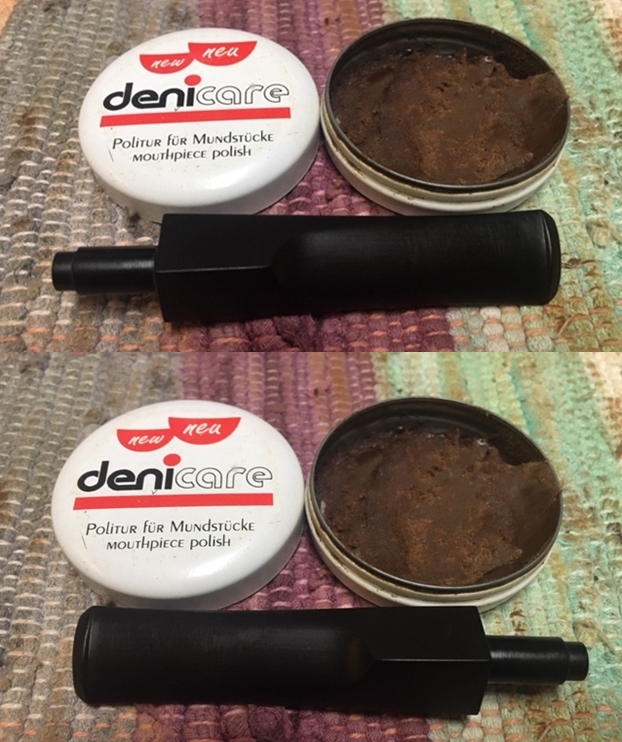
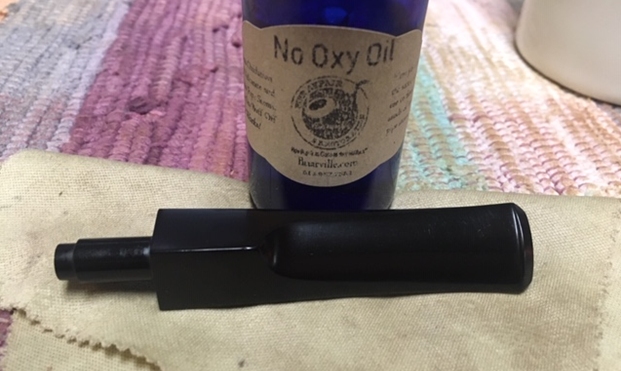
Jeff picked up this Calabash Lattice Meerschaum with an acrylic stem from somewhere on his travels. It came in a black vinyl covered case lined with Satin in the cover and white fur in the lower portion of the case. The case appeared to have had a sticker on the cover that was long gone. There were no identifying marks in the case or on the pipe itself. It has a brass clasp on the front and brass hinges on the back. It was obviously custom made for this pipe.Jeff opened the case and this was the meerschaum pipe that was inside. It was a nice looking lattice carved calabash bowl that had begun to take on some nice colour. The base and shank were almost amber coloured. The exterior of the bowl was very dirty and had tars and oils ground into the finish. Looking at the top of the bowl you can see how much lava had overflowed onto the rim top. It had filled in most of the fine carvings in the top of the rim around the inner edges of the bowl. I am sure once it was out of the case it would become clear how dirty it really was.Jeff took it out of the case to have a better look at the condition of the pipe. It was a beautifully shaped calabash with lots of promise. It looked like it would cleanup really well and look great when finished. The meerschaum was developing some really nice colour around the lower part of the bowl and shank. Jeff took a close-up photo of the bowl and rim top. There was a very thick cake in the bowl that was hard and uneven.  There was thick overflowing lava coming up from the cake over the rim top and filling in the tiny spot and carving on the rim.Jeff took photos of the sides and heel of the bowl to show the carving and colour around the bowl. Jeff took the stem off the shank and took a photo. It appears to be a threaded tenon that screwed into the shank. The first sign of another possibility for me was the thin lip around the end of the tenon. I would know more about that once I had it in hand. The shank end and the tenon were filthy with oils and tars. The internals of the pipe were in as bad a condition as the inside of the bowl and airway.Jeff took photos of the stem to show the general condition of the stem shape. The curve is graceful and the curve great. The photo shows the profile of the stem. He took photos of the top and underside of the stem to show the damage and bite marks on both sides near the button and on the surface of the button itself. It almost looked like it had been wrapped in tape. Having seen the before pictures on this pipe I did not know what to expect when I unpacked the most recent box Jeff sent to me. The pipe was present in the box and I took it out of the box with a bit of fear and trepidation at the amount of work that would await me when I removed it from the case. I put the case on my desk and opened it to see what was there. I opened the case and took a photo of the pipe inside.I was astonished to see how clean the pipe was. The bowl nicely coloured – Jeff had lost none of the patina in clean-up process. Now it was time to take it out of the case and have a look at it up close and personal.Jeff had done an incredible job in cleaning up this meerschaum. He had carefully reamed the bowl with a Savinelli Fitsall Pipe Knife, scraping away the thick cake on the walls of the bowl. He also scraped the thick lava on the rim top. He scrubbed the exterior of the bowl with Murphy’s Oil Soap and a tooth brush to remove the grime on the bowl and rim. He cleaned out the interior of the bowl and shank with pipe cleaners, cotton swabs and alcohol until they came out clean. The rim top looked incredible when you compare it with where it started. There is some slight darkening on the inside edge of the bowl and a dark spot on the back topside. He cleaned the stem with Soft Scrub to remove the grime on the exterior and cleaned out the airway with alcohol, cotton swabs and pipe cleaners. To show how clean the rim top and stem really was I took a close-up photo of the rim. The bowl was clean and cake free. The rim top is quite clean and the inner edge of the bowl has all of the lava removed. The stem looks better with the tape removed. The stem looks very good. There are a few deep tooth marks in the surface and the button edge is thin and blackened.I unscrewed the stem from the bowl and took photos of the parts. The tenon appeared to be threaded but I was not sure of that. I would need to do a bit more work on it to be sure.I examined the tenon and decided to unscrew it from the stem. I locked a pair of pliers on the tenon and twisted it to unscrew it. As I did this the friction was not like threads, rather it was like a friction fit. Then it dawned on me what I was dealing with. The threaded portion was the female part of the push tenon that was normally anchored in the shank of the pipe. I pulled it free of the push tenon itself and took a photo of the parts. I breathed a sigh of relief as this was by far an easier repair to make. I would clean up the female portion and anchor it in the shank them clean up the push tenon and that part of the repair would be finished.I set the parts of the stem and push tenon assembly aside and turned my attention to the bowl itself. I cleaned up the inner edge of the bowl with a folded piece of 220 grit sandpaper.I polished the rim top with micromesh sanding pads – wet sanding with 1500-12000 grit pads to remove the blackened spots on the rim top and clean up the top. I wiped it down with a damp cloth to remove the sanding dust. The top looked considerably better. With the rim top cleaned up I turned my attention to the shank and the stem. Once I had removed threaded insert from the stem it opened up an area underneath that was filled with a lot of tars and oils. I cleaned out that area with pipe cleaners, swabs and alcohol. I cleaned up the inside of the shank and the mortise insert at the same time. I was able to get all of the grime removed. I then turned to the stem where there were also some tars and oils still in the airway and in the slot so I cleaned them as well.With everything cleaned it was time to reconstruct the push tenon system. I coated the threads on the mortise insert with all-purpose white glue and threaded the insert into the mortise. I wiped off the excess glue that came out as the insert seated in the shank. I set the bowl aside to let the glue cure and turned my attention to the stem. I started by using a topping board to remove the thin darkened edge of the button. It was quite thick to start with so I knew that to remove a little would not do damage but actually would make the stem stronger.I used a clear CA (Krazy) glue to fill in the deep tooth marks on both the top and underside of the stem as well as to build up the surface of the button to thicken it and smooth out the tooth damage.I reshaped the button surface and smoothed out the repairs with a folded piece of 220 grit sandpaper. I started the polishing with a folded piece of 400 grit wet dry sandpaper.I rubbed the stem down with Denicare Mouthpiece Polish. It is a gritty, red paste with the consistency of red Tripoli. I find that it works well to polish out scratches and light marks in the surface of the stem. I polished it off with a cotton pad to raise the shine.I polished the stem with micromesh sanding pads – dry sanding with 1500-12000 grit sanding pads. I wiped it down after each sanding pad with a cloth containing some Obsidian Oil. I finished polishing it with Before & After Pipe Stem Polish – both Fine and Extra Fine and buffed it off with a cotton cloth. I gave it a coat of Briarville’s No Oxy Oil to preserve and protect it. I put the bowl and stem back together again and buffed it with a microfiber cloth to raise the shine on the meerschaum and the acrylic stem. The buffing also removes minute scratches in the two materials and adds depth to the shine. I gave the stem several coats of carnauba wax and the bowl multiple coats of Clapham’s Beeswax Polish. The Beeswax Polish is a soft wax that I can apply with a soft cotton pad and buff with a microfiber cloth. The pipe was alive now and looked great to me. It has a great feel in the hand that is very tactile and the patina should develop more deeply as the pipe is smoked. The finished pipe is shown in the photos below. The dimensions of the pipe are Length: 6 inches, Height: 2 ¾ inches, Outside diameter of the bowl: 2 ¼ inches, Chamber diameter: 7/8 of an inch. This Lattice Meerschaum Calabash is a beauty that has great patina already. It should only deepen with time. It should make someone a great pipe. It is one that will be on the rebornpipes store very soon. If you are interested let me know. Thanks for reading this blog and my reflections on the pipe while I worked on it.

Restoring Jennifer’s Dad’s Savinelli Capri 313KS Root Briar Prince


Blog by Steve Laug

I decided to work on another of Jennifer’s Dad’s pipes. For the next pipe from the estate of George Rex Leghorn I have chosen a Savinelli Prince shaped pipe. You may not have read about this estate before, so I will retell the story. I received an email from Jennifer who is a little older than I am about whether I would be interested in her Dad’s pipes. My brother Jeff and I have been picking up a few estates here and there, so I was interested. Here is the catch – she did not want to sell them to me but to give them to me to clean up, restore and resell. The only requirement she had was that we give a portion of the sales of the pipes to a charity serving women and children. We talked about the organization I work for that deals with trafficking and sexual exploitation of women and their children and she decided that would be a great way to carry on the charitable aspect of her Dad’s character. With some great conversation back and forth she sent the pipes to Jeff and he started the cleanup process on them. Once he had finished cleaning them all he sent them to me to do my work on them.

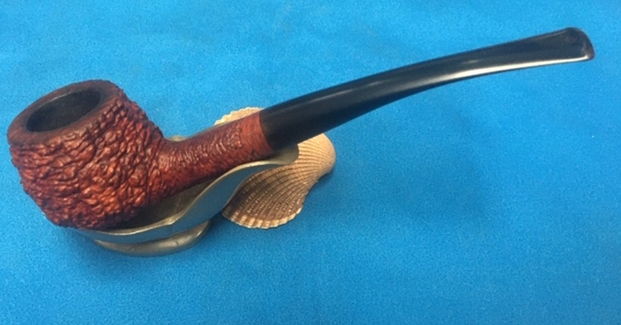
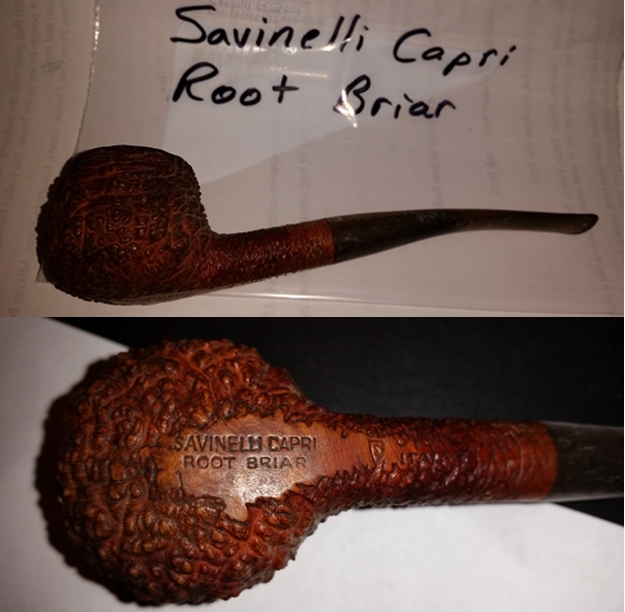
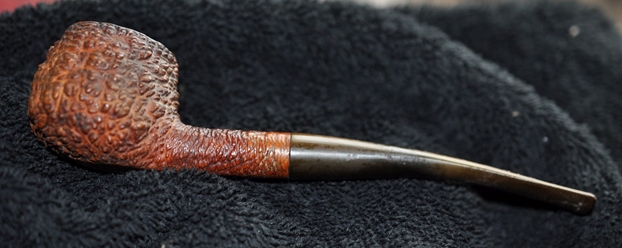
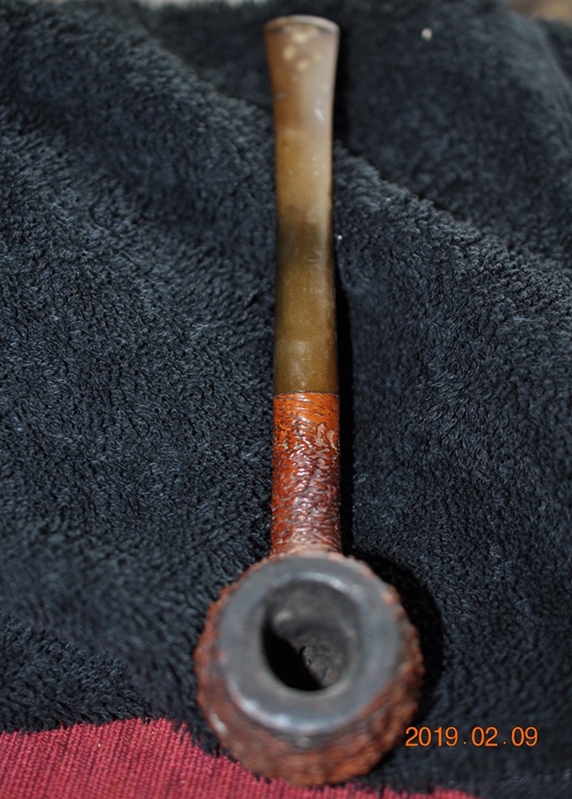
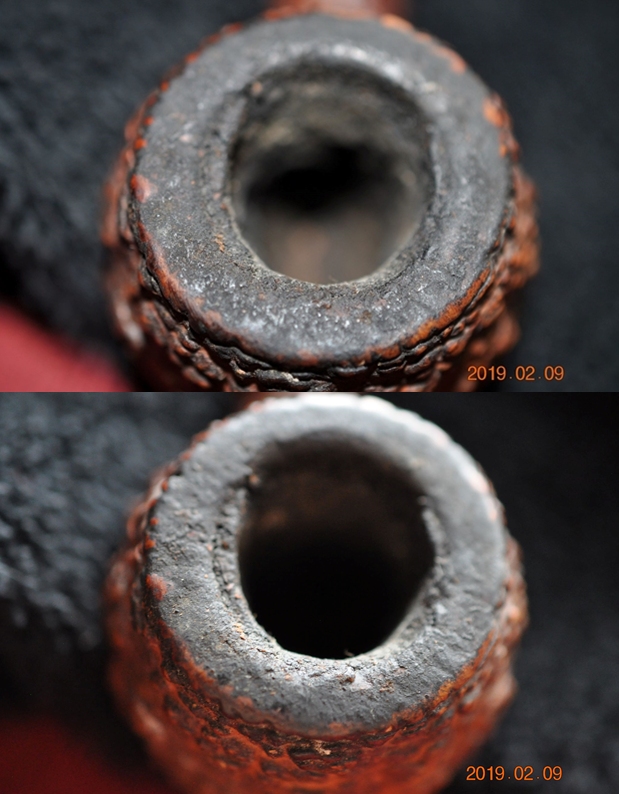
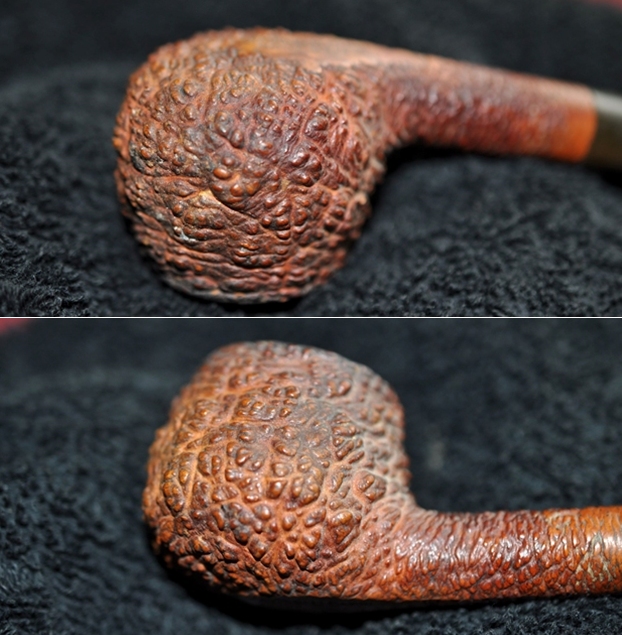
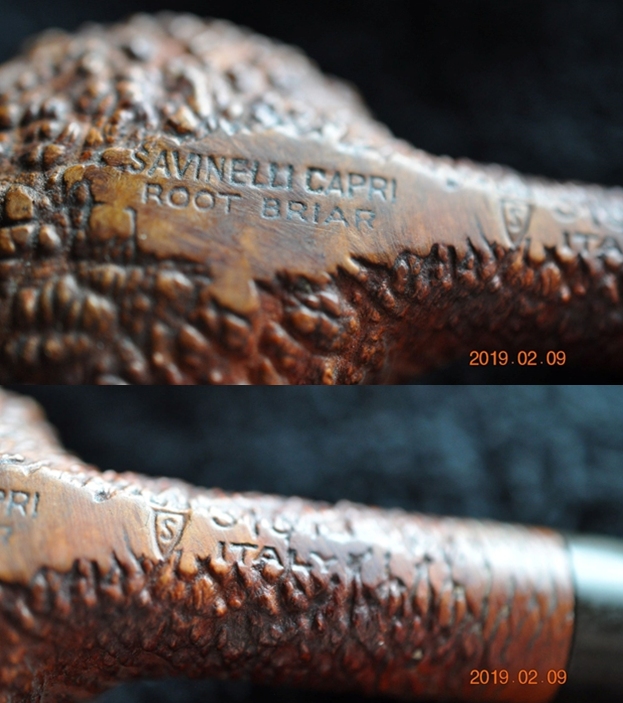
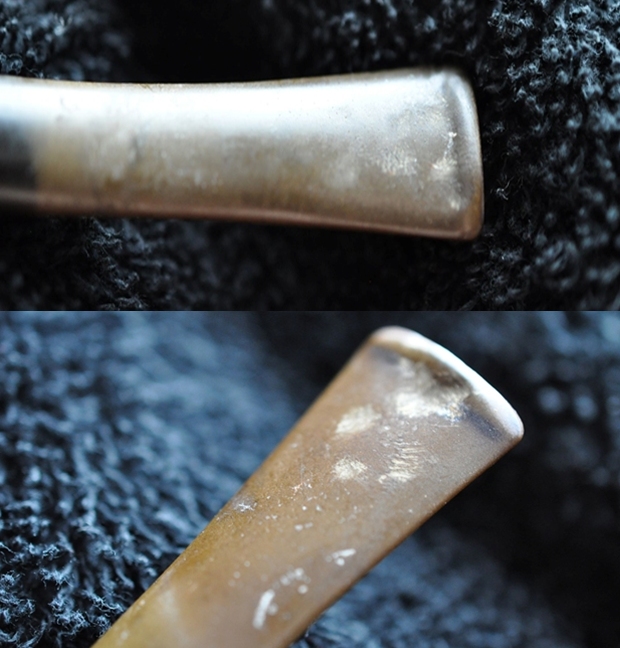
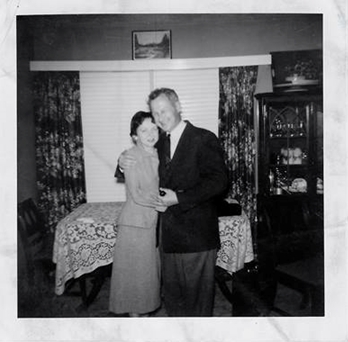
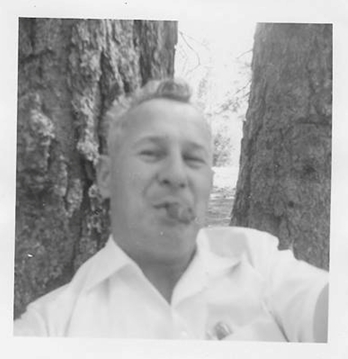
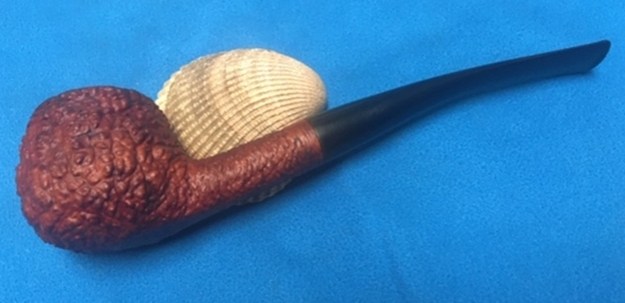
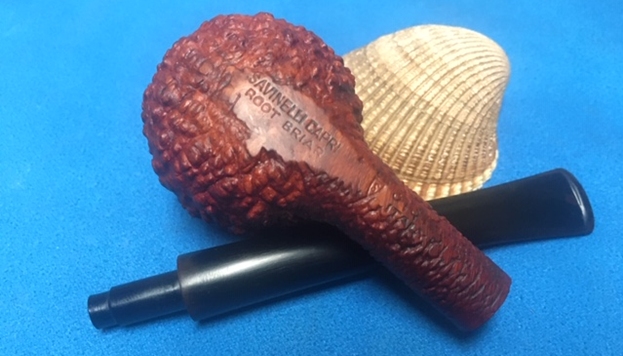
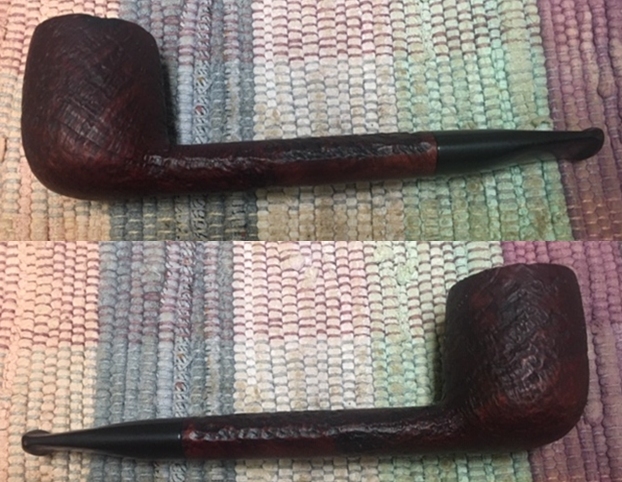
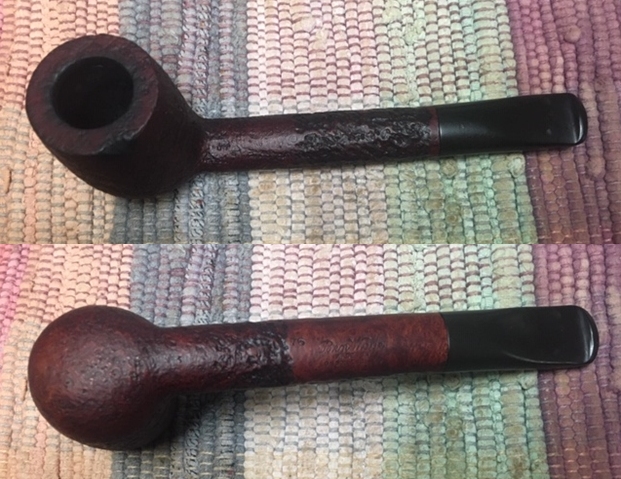
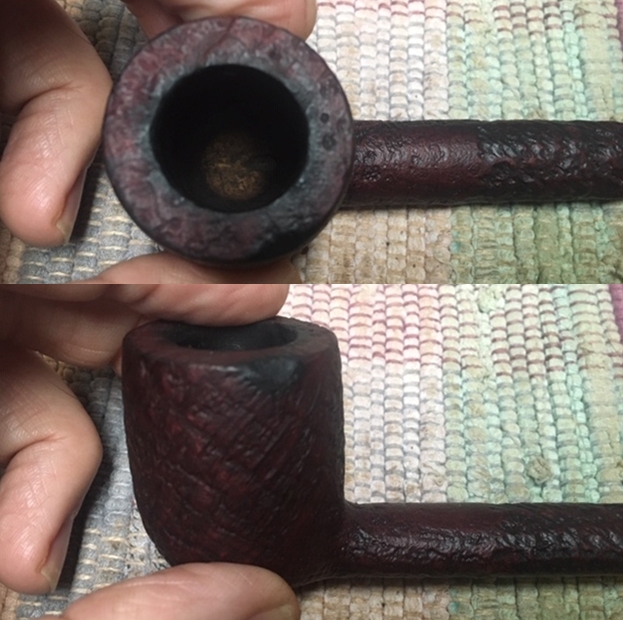
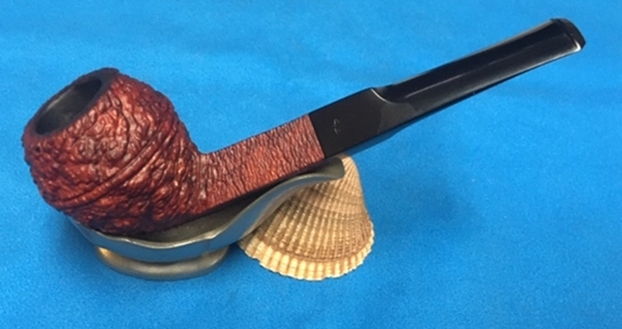
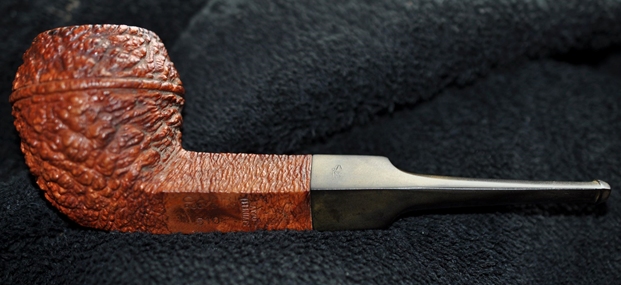
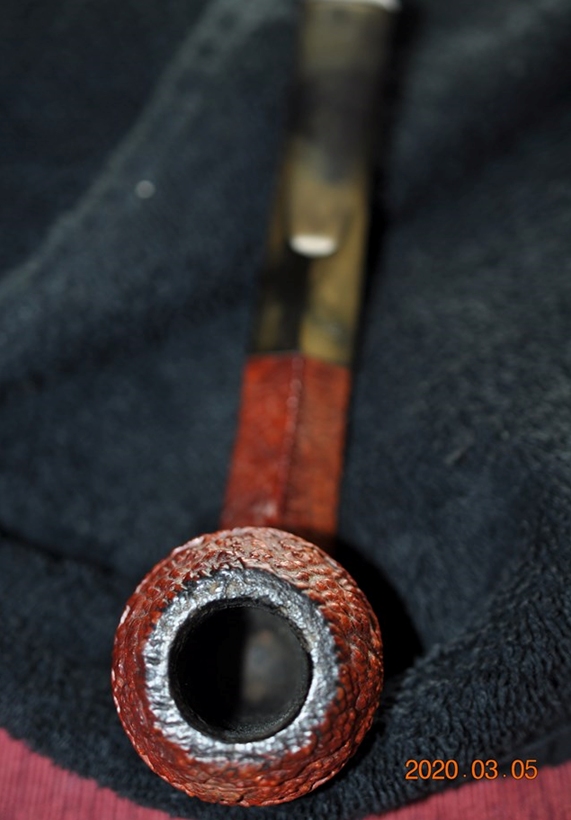
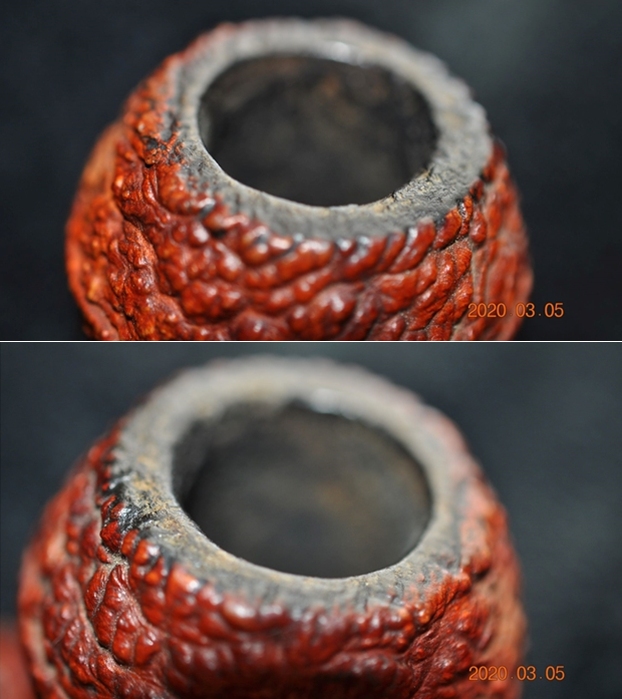
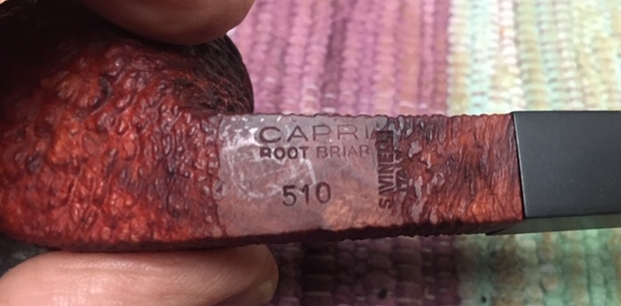
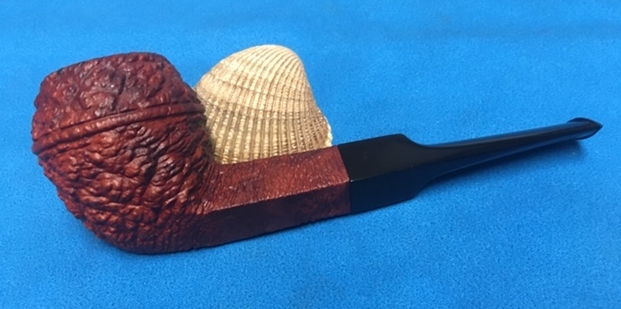
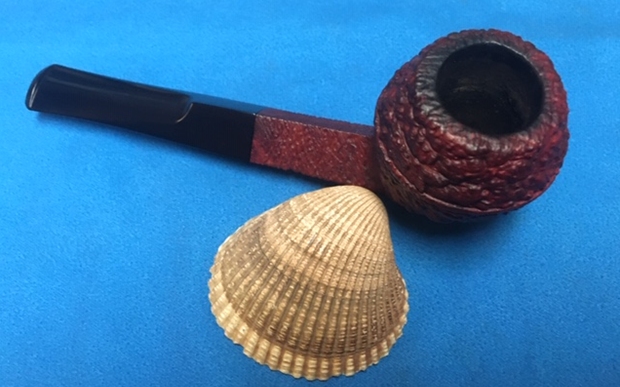
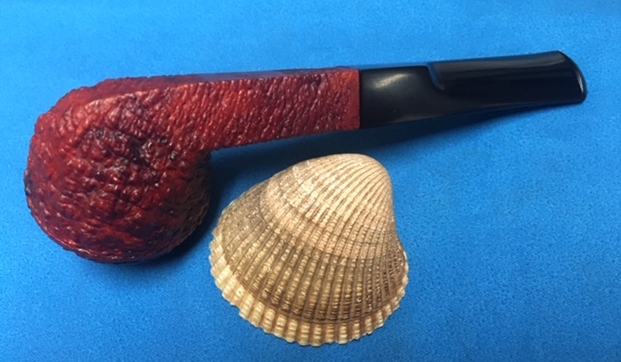
The pipe on the table is stamped on the underside of the bowl and shank on a smooth panel. On the heel of the bowl it is stamped Savinelli Capri over Root Briar. That is followed by The Savinelli “S” shield and Italy and the shape number that looks like 313KS but it hard to read as it is stamped in the rustication. The pipe has a Sea Rock or coral style rustication that I really like. The finish was very dirty, making it hard to see beyond that to the nice grain underneath that. There was a thick cake in the bowl and it had overflowed with lava onto the rim top. It was hard to know at this point the condition of the rim edges. The pipe was a dirty and tired looking old pipe. The stem was badly oxidized and there were George’s usual tooth marks and chatter on both sides just ahead of the button. It had been sitting in boxes for a lot of years and it was time to move ahead with the restoration. Jennifer took photos of the pipes she was sending. I have included the photos of this pipe below. When the box arrived from Jennifer, Jeff opened it and took photos of each pipe before he started his cleanup work on them. This pipe was another real mess but since it bore a coral finish which I like I could see some promise under all of the grime of the years. The shape was a Prince with the normal slightly bent stem. The briar appeared to be in good condition underneath the grime. The pipe really was covered with the grime and oils on the bowl sides from George’s hands. It left the finish looking mottled and dark on the high points. The bowl had a thick cake that had hardened with time. The lava overflow on the rim top filled in the rustication on the rim top. It was very thick but it could very well have protected the edges of the rim from damage. We won’t know what is under it until Jeff had cleaned it off. The stem was oxidized and there were deep tooth marks on both sides just ahead of the button. Jeff took photos of the pipe before he started working on it. I include those below.  Jeff took photos of the bowl and rim top to show the cake in the bowl and the lava build up on the rim top and dust and grime on the bowl. It was thick and hard but hopefully it had protected the rim and edges from damage. The lava coat looks horrible but it points to a well-used, favourite smoking pipe. Judging from the condition of George’s pipe I think it can be assumed that he was rarely without a pipe and that he seriously enjoyed smoking them. This was no exception. Jeff took a photo of the sides and heel of the bowl to show the condition of the finish – the grime and grit all over the sides and bottom of the bowl. The rustication is deep and dirty but it is interesting. This is a very tactile finish and one that I enjoy. Jeff took two photos of the stamping on the underside of the shank to capture all of it. It is very clear and readable other than the shape number 313KS which is in the rustication itself.    Jeff took photos of the top and underside of the stem showing the scratching, oxidation and tooth marks on the stem surface and button. The tooth marks are quite deep on both sides of the stem. Before I get on to cleaning up the pipe I thought I would once again include the tribute that Jennifer wrote to her Dad for the blog. She also sent some photos and an article that her Dad wrote for Jeff and me to be able to get a feel for him. I have included those below. Note in each of them that he is holding a pipe in his left hand. I asked her to also send me an email with a brief tribute to her Dad. Here is her tribute from an email to me.

Steve, I want to thank you again for accepting my dad’s pipes.  They were so much a part of my dad’s life that I could not simply discard them. But as his daughter, I was not about to take up smoking them either. *laughing* I think my dad would like knowing that they will bring pleasure to others.  I know that I do.

I’m not sure what to say about his pipes. I always remember Daddy smoking pipes and cigars.

First a bit about my dad. Though my father, George Rex Leghorn, was American (growing up in Alaska), he managed to join the Canadian Army at the beginning of WWII, but in doing so lost his American citizenship.  He was fortunate to meet a Canadian recruiting officer who told him the alphabet began with “A” and ended with “Zed” not “Zee”, and also told him to say that he was born in a specific town that had all its records destroyed in a fire.  When the US joined the war my dad, and thousands of other Americans who had made the same choice*(see the link below for the article), were given the opportunity to transfer to the US military, and regain their citizenship.

After WWII, my dad, earned his degree at the University of California Berkeley and became a metallurgist. There is even a bit about him on the internet.

He loved taking the family out for a drive, and he smoked his cigars on those trips. (As a child, those were troubling times for my stomach.)

I most remember my father relaxing in his favorite chair with a science fiction book in one hand and a pipe in the other… Sir Walter Raleigh being his favorite tobacco… and the pipes themselves remind me of him in that contented way.  If I interrupted his repose, he’d look up, with a smile on his face, to answer me.

It seemed he smoked his Briarwood pipes the most, though he had others.  At the time, it was only the Briarwood I knew by name because of its distinctive rough shaped bowl.  And it was the Anderson Free Hand Burl Briar, made in Israel, which I chose for his birthday one year, because I thought he might like that particular texture in his hand.

At least two of his pipes, he inherited from his son-in-law, Joe Marino, a retired medical laboratory researcher (my sister Lesley’s late husband)… the long stemmed Jarl (made in Denmark), and the large, white-bowled, Sherlock Holmes style pipe.  I believe Joe had others that went to my dad, but Lesley was only sure about those two.

The Buescher, corncob pipe my older sister Lesley bought for Daddy while on one of her travels around the States.

A note on the spelling of my sister’s name…

My dad met my mother, Regina, during WWII and they married in Omagh, Ireland.  My mother was English and in the military herself.  The English spelling of Lesley is feminine, and Leslie masculine, in the UK… just the opposite of here in the United States.  I guess my mom won out when it came to the spelling of the name…

This pipe was a real mess just like the other ones in the collection. I was curious to see what it would look like when I unpack it. I was surprised at how good it looked. He reamed it with a PipNet pipe reamer and cleaned up the reaming with a Savinelli Fitsall Pipe Knife. He scrubbed out the internals with alcohol, pipe cleaners and cotton swabs until the pipe was clean. He scrubbed the exterior of the bowl with Murphy’s Oil Soap and a tooth brush to remove the grime and grit on the briar and the lava on the rim top. The finish on the bowl looked really good when I got it. The rim top looked much better and the inner and outer edges were looking good. Jeff had cleaned the internals and scrubbed the exterior of the stem and soaked them in Before & After Deoxidizer bath to remove the oxidation. The stem looked very good other than the deep tooth marks and chatter in the surface. When the pipe arrived here in Vancouver for the second stop of its restoration tour it looked very good. I took several photos of the pipe from the side and then got called away and did not finish taking photos. Here is what I have.   I forgot to take photos of the condition of the rim top and stem and when I came back to work on the pipe I just jumped in to do the restoration. I decided to clean up the darkening and smoothing of the rim top first. I used a brass bristle brush to work over the surface of the briar. When I was finished it looked better.     I worked some Before & After Restoration Balm into the finish of the bowl and the rim top and shank with my fingertips and a horsehair shoebrush to clean, enliven and protect it. I find that the balm really makes the briar come alive again. The contrasts in the layers of stain and the separate finishes really made the grain stand out. I let the balm sit for a little while and then buffed with a cotton cloth to raise the shine. The bowl really looks good at this point. I set the bowl aside and turned to the stem. I filled in the deep tooth marks with black super glue. I built up the edge of the button at the same time. I set it aside to dry. Once the repairs had cured I used a needle file to re-cut a sharp edge on the button on both sides and to flatten the repaired areas.  I sanded the stem to remove the oxidation that was on the surface and to smooth out the repaired areas. I used a folded piece of 220 grit sandpaper and a piece of 400 grit wet dry sandpaper. At this point the stem is looking better and the tooth marks are gone.  I rubbed the stem down with Denicare Mouthpiece Polish and a cotton pad to remove remnants of oxidation and to further blend in the sanding. The stem was showing some promise at this point in the process. I polished the stem with micromesh sanding pads – wet sanding it with 1500-12000 grit pads. I polished it further with Before & After Pipe Stem Polish – both fine and extra fine. I finished by wiping it down with Briarville’s No Oxy Oil and buffing it to a shine. Once again I am the part of the restoration that I always look forward to – the moment when all the pieces are put back together. I put the pipe back together and lightly buffed the bowl with Blue Diamond. I buffed the stem with a heavier touch with Blue Diamond on the buffing wheel. I gave the bowl multiple coats of Conservator’s Wax and the stem multiple coats of carnauba wax. I buffed the pipe with a clean buffing pad to raise the shine. I hand buffed it with a microfiber cloth to deepen the shine. It is fun to see what the polished bowl looks like with the combination of rustication and smooth finishes. The black vulcanite stem stands out as a shiny black contrast to the colours of the bowl. This little Capri Prince must have been a fine smoking pipe judging from the condition it was when we received it from Jennifer. Have a look at it with the photos below. The dimensions are Length: 6 inches, Height: 1 ¼ inches, Outside diameter of the bowl: 1 ¼ inches, Chamber diameter: ¾ of an inch. This is one that will go on the rebornpipes online store shortly. If you want to carry on the pipe trust of George Rex Leghorn let me know. Thank you Jennifer for trusting us with his pipes. Thanks to each of you who are reading this blog. Remember we are not pipe owners; we are pipemen and women who hold our pipes in trust until they pass on into the trust of the next generation.

Restoring Jennifer’s Dad’s Jobey Asti 245 Pot


Blog by Steve Laug

I decided to change things up a bit and work on another of Jennifer’s Dad’s pipes. For the next pipe from the estate of George Rex Leghorn I have chosen a Pot shaped pipe. You may not have read about this estate before, so I will retell the story. I received an email from Jennifer who is a little older than my 64+ (65 now – sheesh, I forget how old I am) years about whether I would be interested in her Dad’s pipes. My brother Jeff and I have been picking up a few estates here and there, so I was interested. Here is the catch – she did not want to sell them to me but to give them to me to clean up, restore and resell. The only requirement she had was that we give a portion of the sales of the pipes to a charity serving women and children. We talked about the organization I work for that deals with trafficking and sexual exploitation of women and their children and she decided that would be a great way to carry on the charitable aspect of her Dad’s character. With some great conversation back and forth she sent the pipes to Jeff and he started the cleanup process on them. Once he had finished cleaning them all he sent them to me to do my work on them.

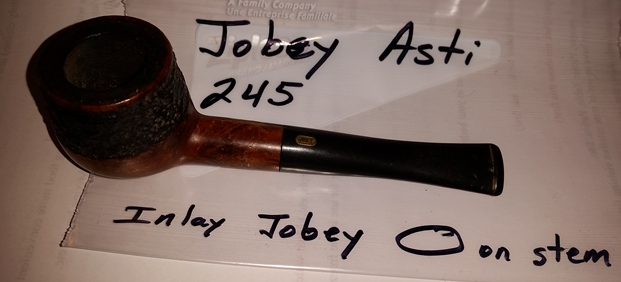
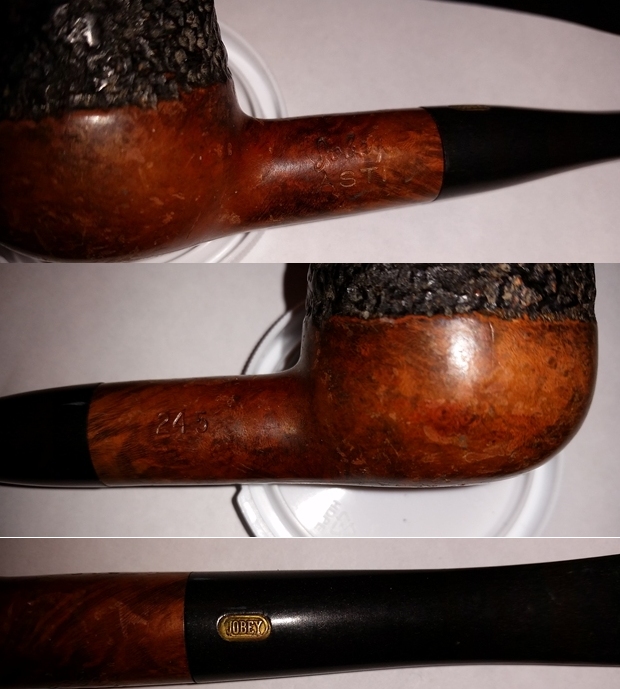
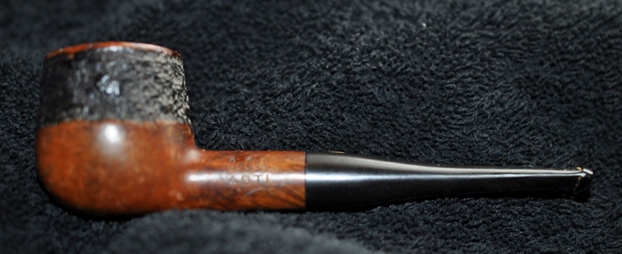
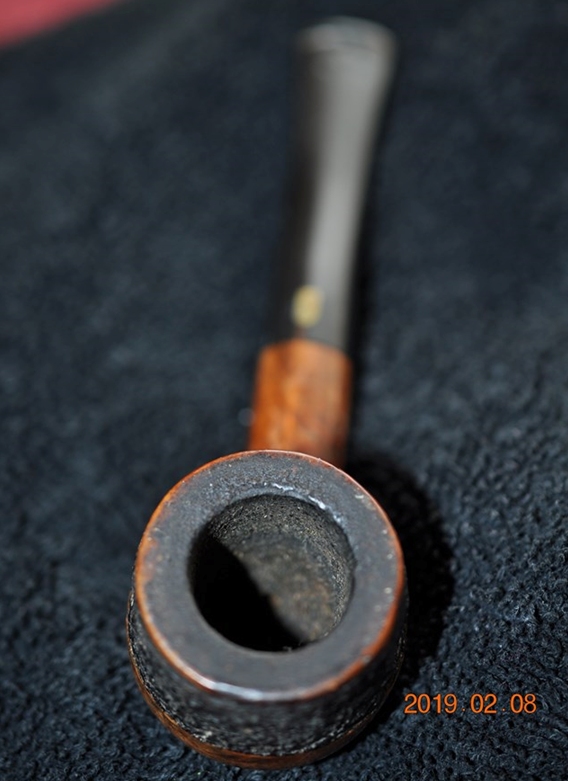
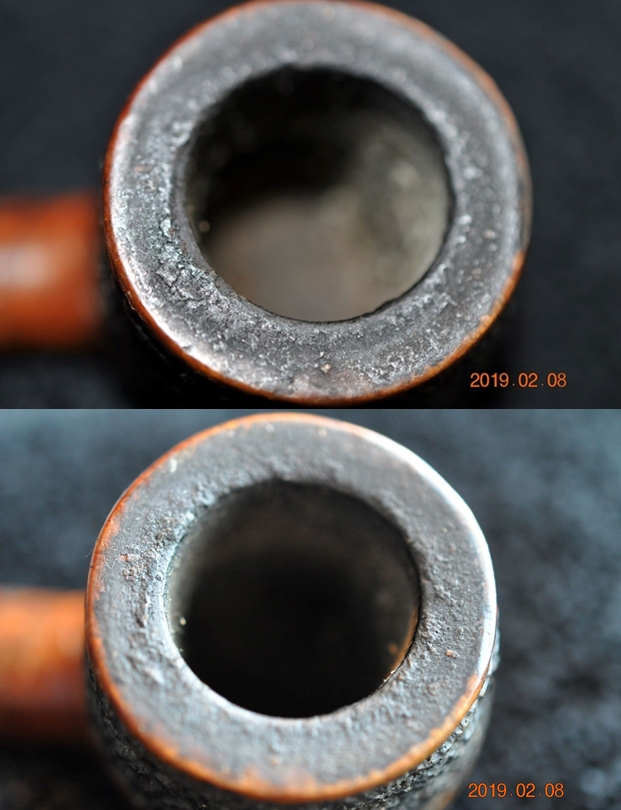
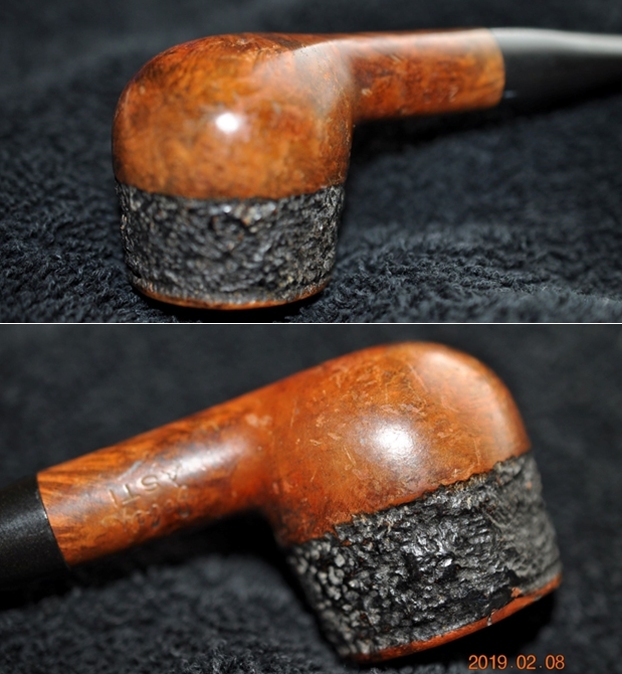
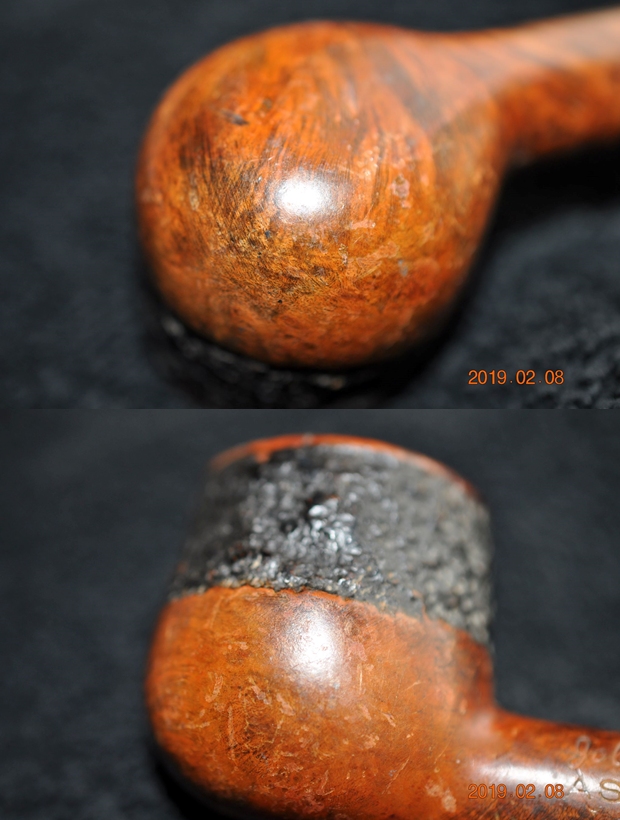
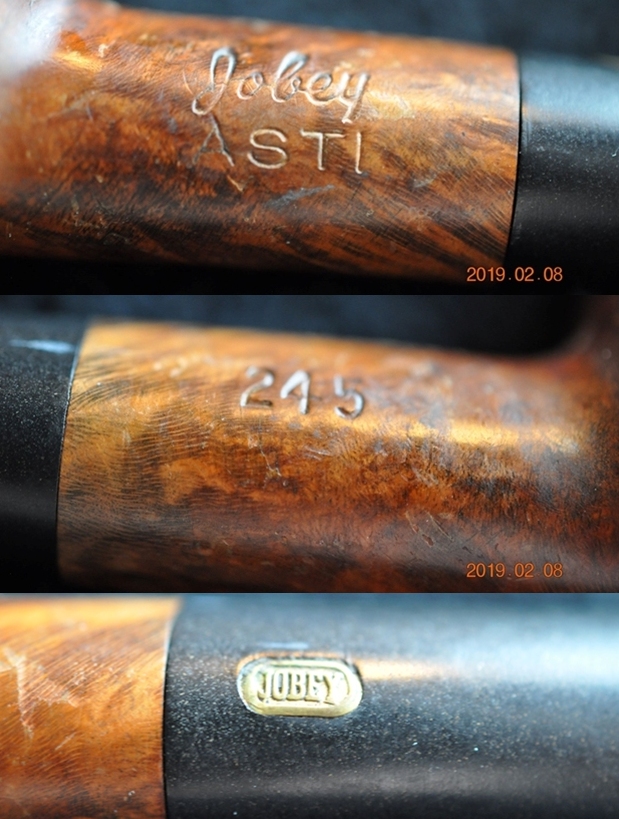
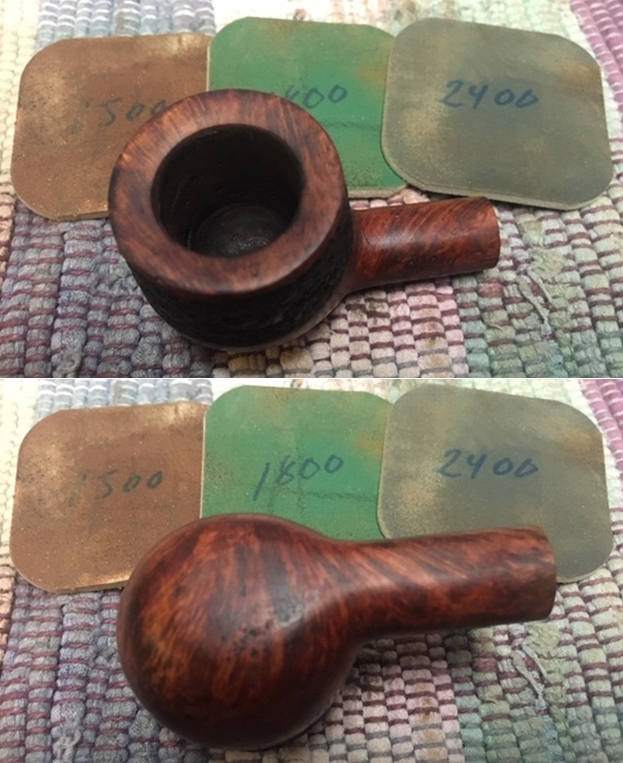
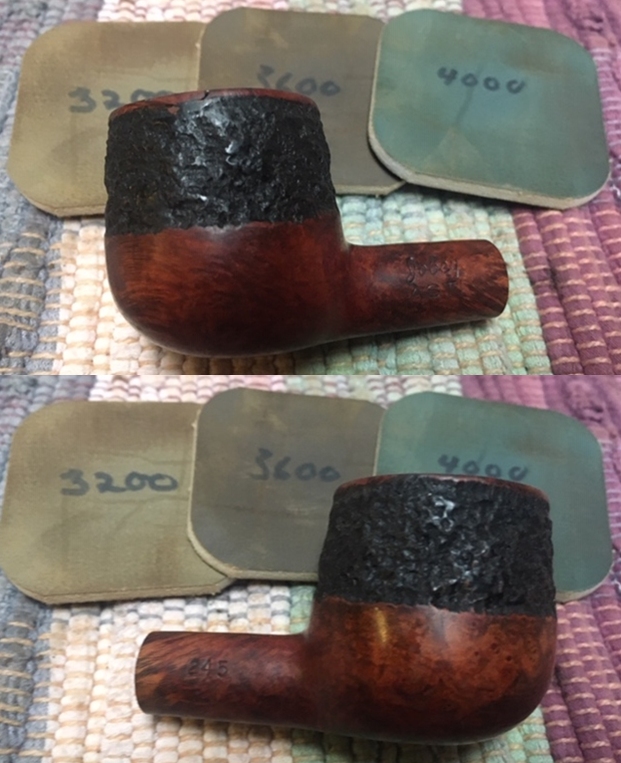
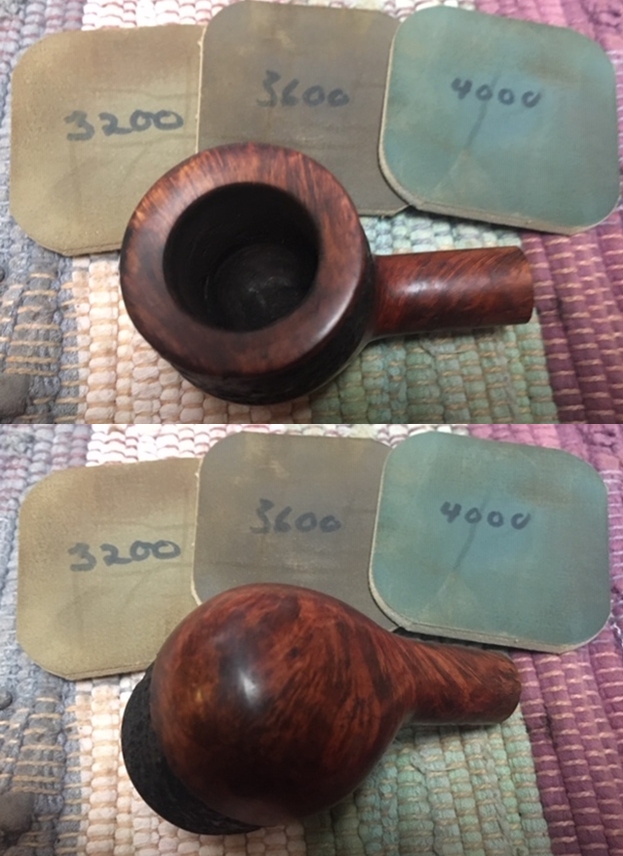
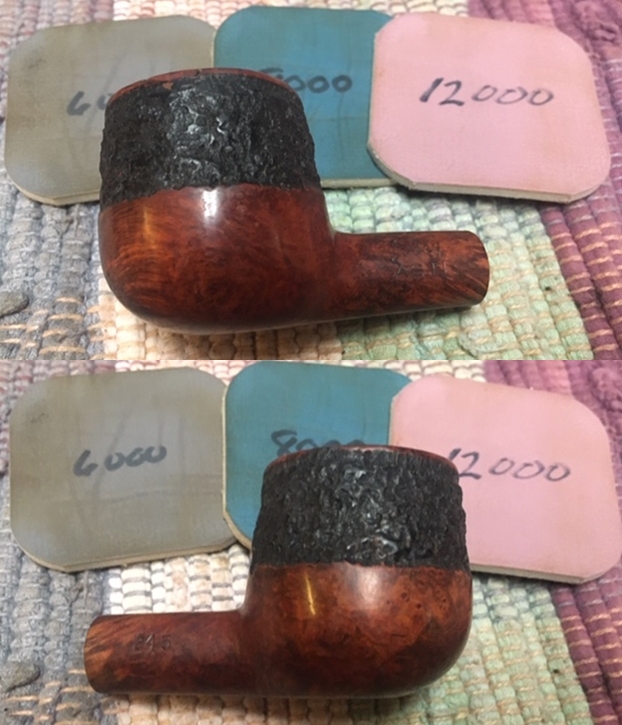
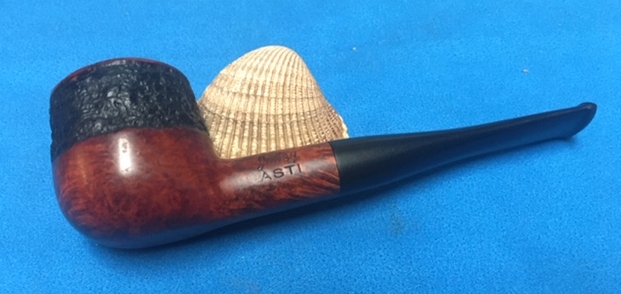
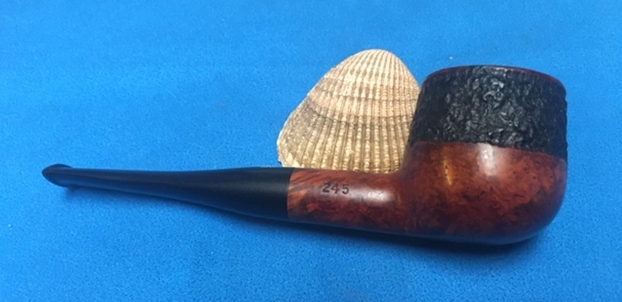
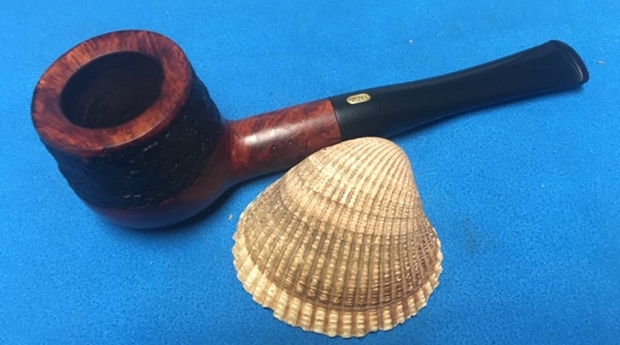
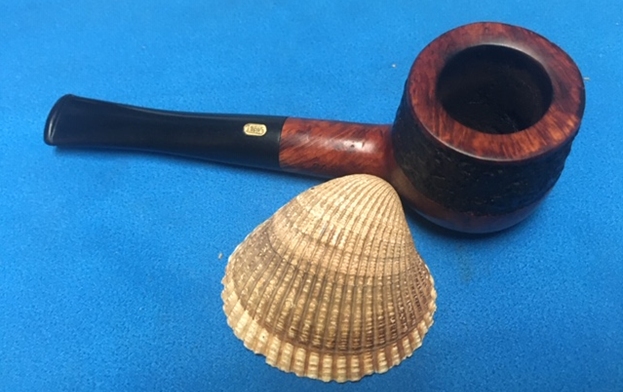
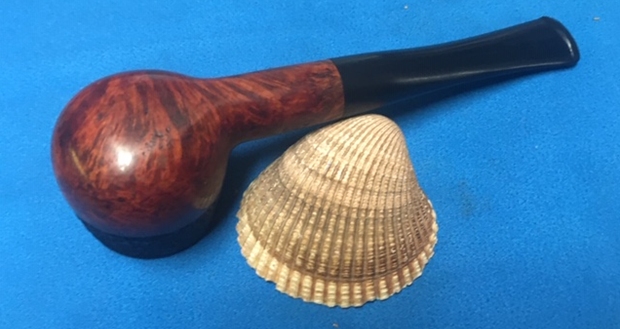
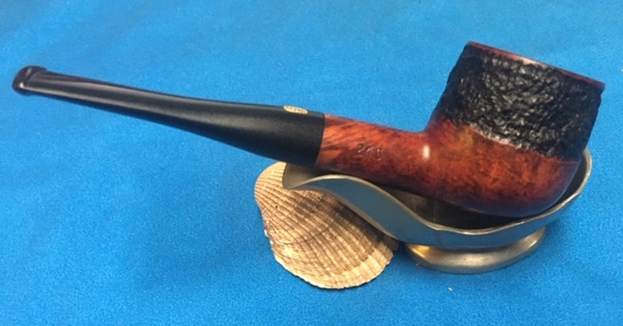
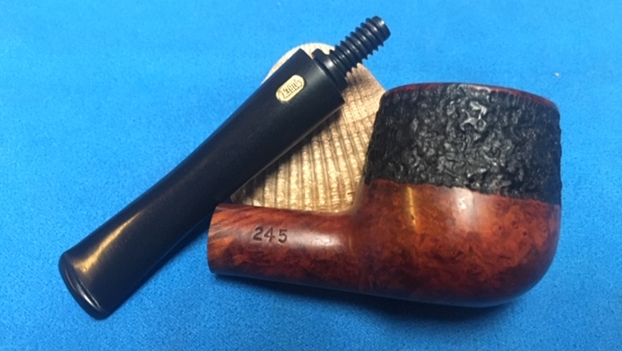
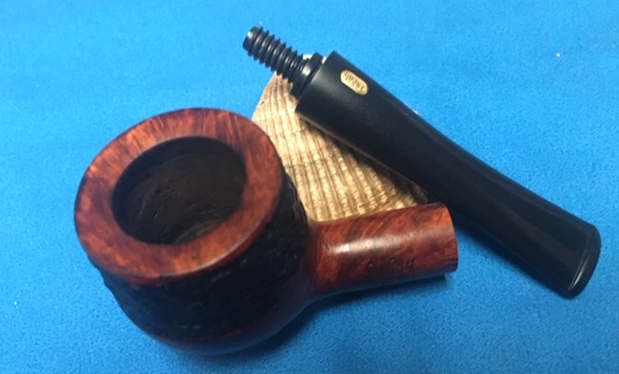
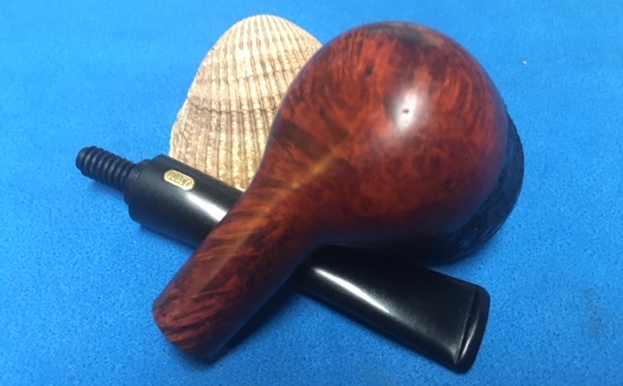
The pipe on the table is stamped on the left side of the shank Jobey over Asti. On the right side is the shape number 245. The tapered stem bears an inlaid brass Jobey oval. The pipe has an interesting mixed finish – smooth lower bowl and shank with a band of rustication and a smooth inwardly beveled rim top. The finish was very dirty, making it hard to see beyond that to the nice grain underneath that. There was a thick cake in the bowl and it had overflowed with lava onto the rim top. It was hard to know at this point the condition of the rim edges. The pipe was a dirty and tired looking old pipe. The stem was badly oxidized and there were George’s usual tooth marks and chatter on both sides just ahead of the button. It had been sitting in boxes for a lot of years and it was time to move ahead with the restoration. Jennifer took photos of the pipes she was sending. I have included the photos of this pipe below. When the box arrived from Jennifer, Jeff opened it and took photos of each pipe before he started his cleanup work on them. This pipe was a real mess but showed some promise under all of the grime of the years. The shape was a pot with the mixed finish as noted above and visible in the photo below. The briar appeared to be in good condition underneath the grime. The finish was spotty and seemed to be peeling which indicated to me that there was some sort of varnish or shellac coat on top of the finish. The pipe really was covered with the grime and oils on the bowl sides from George’s hands. The bowl had a thick cake that had hardened with time. The lava overflow on the rim top filled in much of the beveled rim top. It was very thick but it could very well have protected the rim from damage. We won’t know what is under it until Jeff had cleaned it off. The stem was oxidized and there were deep tooth marks on both sides just ahead of the button. Jeff took photos of the pipe before he started working on it. I include those below.  Jeff took photos of the bowl and rim top to show the cake in the bowl and the lava build up on the rim top and dust and grime on the bowl. It was thick and hard but hopefully it had protected the rim and edges from damage. The lava coat looks horrible but it points to a well-used, favourite smoking pipe. George must have enjoyed this old timer a lot judging from the condition of the pipe.   Jeff took a photo of the side and heel of the bowl to show the condition of the finish – the grime and grit all over the sides and bottom of the bowl. The rustication around the midbowl is deep and dirty but it is interesting.  The peeling varnish/shellac coat is also visible in the photos. Jeff took a photo of the stamping on the left and right sides of the shank. It is very clear and readable. On the left it reads Jobey Asti and on the right it reads 245. The top of the tapered stem has a brass inlaid Jobey oval logo.Jeff took photos of the top and underside of the stem showing the scratching, oxidation and tooth marks on the stem surface and button. The tooth marks are quite deep on both sides of the stem. I turned to Pipephil’s site for a quick review of the brand (http://www.pipephil.eu/logos/en/logo-j3.html). I quote a section of the post on the Jobey brand: These pipes are made in St Claude (France) by Butz-Choquin (Berrod-Regad group) since 1987. Before this date some were manufactured in England and Denmark (Jobey Dansk).

I turned then to Pipedia to gather further information regarding the brand and quote the first part of the article (https://pipedia.org/wiki/Jobey).

English – American – Danish – French… Sadly, solid information about Jobey is scant…

Probably established in England around 1920(?) the brand hiked into the USA later. In the course of time owner, distributor and manufacturer changed repeatedly. As far as is known the following companies have been involved with the brand:

George Yale Pipes & Tobacco, New York (1942)

Norwalk Pipe Co., New York (1949)

Arlington Briar Pipes Corp., Brooklyn (when?)

Hollco International, New York (1969).

Weber Pipe Co., Jersey City, NJ (1970’s)

The Tinder Box, (1970’s – 80’s).

Throughout decades Jobey pipes were mainly sold in the USA, Canada and England but remained almost unknown in continental Europe. The bulk of Jobeys was predominantly made according to classical patterns and mainly in the lower to middle price range. The predominant judgment of the pipe smokers reads: “A well-made pipe for the price.” So there is hardly anything very special or exciting about Jobey pipes although a flyer from ca. 1970 assures: “The briar root Jobey insists upon for its peer of pipes is left untouched to grow, harden and sweeten for 100 years. […] Jobey uses only the heart of this century old briar and only one out of 500 bowls turned measures up to the rigid Jobey specifications.” 99.80% of cull… that makes the layman marveling!

Before I get on to cleaning up the pipe I thought I would once again include the tribute that Jennifer wrote to her Dad for the blog. She also sent some photos and an article that her Dad wrote for Jeff and me to be able to get a feel for him. I have included those below. Note in each of them that he is holding a pipe in his left hand. I asked her to also send me an email with a brief tribute to her Dad. Here is her tribute from an email to me.

Steve, I want to thank you again for accepting my dad’s pipes.  They were so much a part of my dad’s life that I could not simply discard them. But as his daughter, I was not about to take up smoking them either. *laughing* I think my dad would like knowing that they will bring pleasure to others.  I know that I do.

I’m not sure what to say about his pipes. I always remember Daddy smoking pipes and cigars.

First a bit about my dad. Though my father, George Rex Leghorn, was American (growing up in Alaska), he managed to join the Canadian Army at the beginning of WWII, but in doing so lost his American citizenship.  He was fortunate to meet a Canadian recruiting officer who told him the alphabet began with “A” and ended with “Zed” not “Zee”, and also told him to say that he was born in a specific town that had all its records destroyed in a fire.  When the US joined the war my dad, and thousands of other Americans who had made the same choice*(see the link below for the article), were given the opportunity to transfer to the US military, and regain their citizenship.

After WWII, my dad, earned his degree at the University of California Berkeley and became a metallurgist. There is even a bit about him on the internet.

He loved taking the family out for a drive, and he smoked his cigars on those trips. (As a child, those were troubling times for my stomach.)

I most remember my father relaxing in his favorite chair with a science fiction book in one hand and a pipe in the other… Sir Walter Raleigh being his favorite tobacco… and the pipes themselves remind me of him in that contented way.  If I interrupted his repose, he’d look up, with a smile on his face, to answer me.

It seemed he smoked his Briarwood pipes the most, though he had others.  At the time, it was only the Briarwood I knew by name because of its distinctive rough shaped bowl.  And it was the Anderson Free Hand Burl Briar, made in Israel, which I chose for his birthday one year, because I thought he might like that particular texture in his hand.

At least two of his pipes, he inherited from his son-in-law, Joe Marino, a retired medical laboratory researcher (my sister Lesley’s late husband)… the long stemmed Jarl (made in Denmark), and the large, white-bowled, Sherlock Holmes style pipe.  I believe Joe had others that went to my dad, but Lesley was only sure about those two.

The Buescher, corncob pipe my older sister Lesley bought for Daddy while on one of her travels around the States.

A note on the spelling of my sister’s name…

My dad met my mother, Regina, during WWII and they married in Omagh, Ireland.  My mother was English and in the military herself.  The English spelling of Lesley is feminine, and Leslie masculine, in the UK… just the opposite of here in the United States.  I guess my mom won out when it came to the spelling of the name…

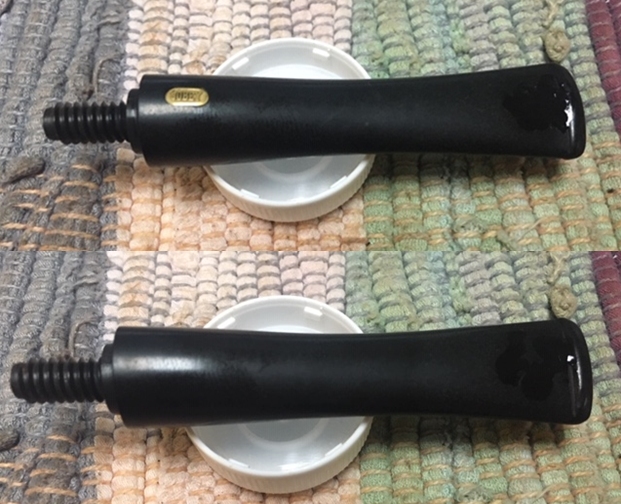
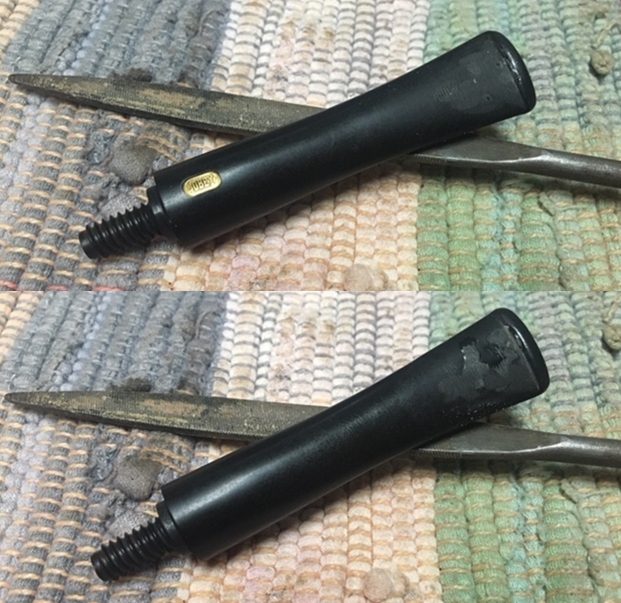
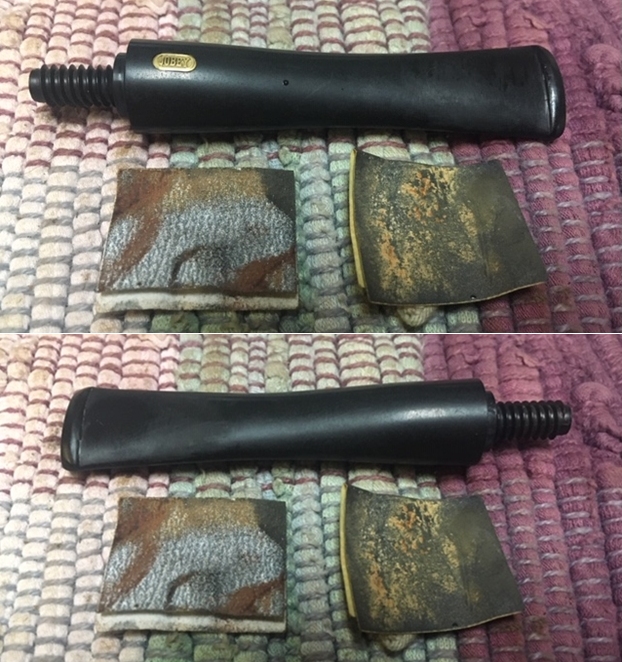
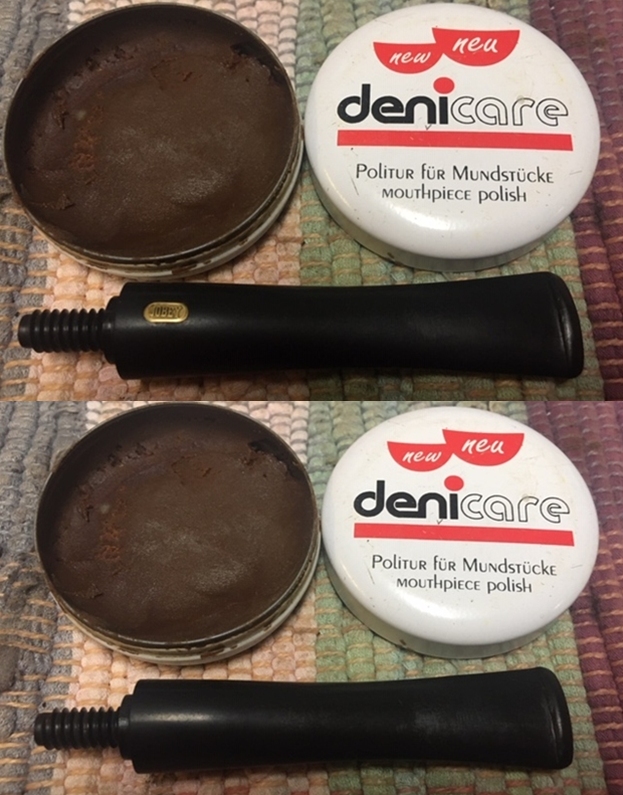
This pipe was a real mess just like the other ones in the collection. I was curious to see what it would look like when I unpack it. I was surprised at how good it looked. He reamed it with a PipNet pipe reamer and cleaned up the reaming with a Savinelli Fitsall Pipe Knife. He scrubbed out the internals with alcohol, pipe cleaners and cotton swabs until the pipe was clean. He scrubbed the exterior of the bowl with Murphy’s Oil Soap and a tooth brush to remove the grime and grit on the briar and the lava on the rim top. The finish on the bowl looked really good when I got it. The rim top looked much better and the inner and outer edges were looking good. Jeff had cleaned the internals and scrubbed the exterior of the stem and soaked them in Before & After Deoxidizer bath to remove the oxidation. The stem looked very good other than the deep tooth marks and chatter in the surface. When the pipe arrived here in Vancouver for the second stop of its restoration tour it looked very good. I took photos of the pipe before I started my part of the restoration. I took photos of the bowl and rim top to show how well it had cleaned up. The edges and top were very clean and in excellent condition. There was some darkening on the inner edge but it was still round. The rim top had some light nicks and dents. The stem had some deep tooth marks just ahead of the button.The stem was held in the shank with the Jobey link connector. I is pressed into the stem and threads into the shank. It makes it easily replaceable and also easy to align.I decided to clean up the darkening on the inner edge of the rim top and the dents and nicks on the top itself. I used a folded piece of 220 grit sandpaper to remove the damage and 400 grit wet dry sandpaper to smooth out the sanding. I was happy with the overall look. The finish will show as I polish the pipe with micromesh pad shortly.  I polished the briar with micromesh sanding pads – wetsanding it with 1500-12000 grit sanding pads. I wiped it down with a damp cloth after each sanding pad. It looked better after each pad and the top blended into the colour of the rest of the bowl without staining. I worked some Before & After Restoration Balm into the finish of the bowl and the rim top and shank with my fingertips and a horsehair shoebrush to clean, enliven and protect it. I find that the balm really makes the briar come alive again. The contrasts in the layers of stain and the separate finishes really made the grain stand out. I let the balm sit for a little while and then buffed with a cotton cloth to raise the shine. The bowl really looks good at this point.   I set the bowl aside and turned to the stem. I filled in the deep tooth marks with clear super glue. I built up the edge of the button at the same time. I set it aside to dry. Once the repairs had cured I used a needle file to cut a sharp edge on the button on both sides and to flatten the repaired areas. I sanded the stem to remove the oxidation that was on the surface and to smooth out the repaired areas. I used a folded piece of 220 grit sandpaper and a piece of 400 grit wet dry sandpaper. At this point the stem is looking better and the tooth marks are gone.  I rubbed the stem down with Denicare Mouthpiece Polish and a cotton pad to remove remnants of oxidation and to further blend in the sanding. The stem was showing some promise at this point in the process. I polished the stem with micromesh sanding pads – wet sanding it with 1500-12000 grit pads. I polished it further with Before & After Pipe Stem Polish – both fine and extra fine. I finished by wiping it down with Briarville’s No Oxy Oil and buffing it to a shine. Once again I am the part of the restoration that I always look forward to – the moment when all the pieces are put back together. I put the pipe back together and buffed the bowl and stem with Blue Diamond on the buffing wheel. I gave the bowl multiple coats of Conservator’s Wax and the stem multiple coats of carnauba wax. I buffed the pipe with a clean buffing pad to raise the shine. I hand buffed it with a microfiber cloth to deepen the shine. It is fun to see what the polished bowl looks like with the combination of rustication and smooth finishes. The black vulcanite stem stands out as a shiny black contrast to the colours of the bowl. While this is not one of my favourite finishes as it seems busy to me, it came out looking good. It is a light weight pipe that could be clenched and smoked while doing other things. It must have been a fine smoking pipe judging from the condition it was when we received it from Jennifer. Have a look at it with the photos below. The dimensions are Length: 5 ¼ inches, Height: 1 ½ inches, Outside diameter of the bowl: 1 ½ inches, Chamber diameter: ¾ of an inch. This is one that will go on the rebornpipes online store shortly. If you want to carry on the pipe trust of George Rex Leghorn let me know. Thank you Jennifer for trusting us with his pipes. Thanks to each of you who are reading this blog. Remember we are not pipe owners; we are pipemen and women who hold our pipes in trust until they pass on into the trust of the next generation.


Restoring an Orlik H182 Hurricane Billiard


Blog by Steve Laug

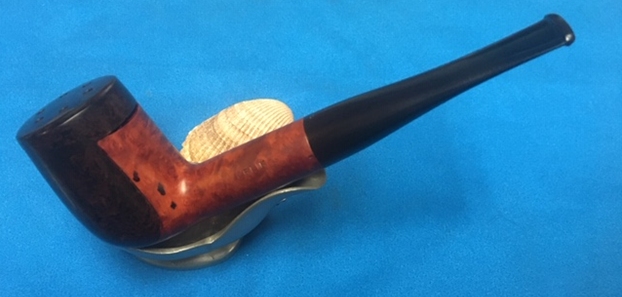
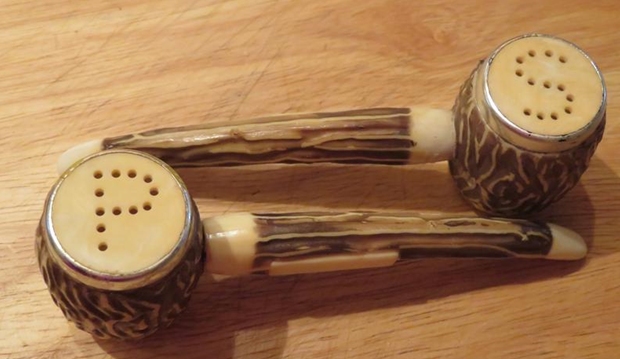
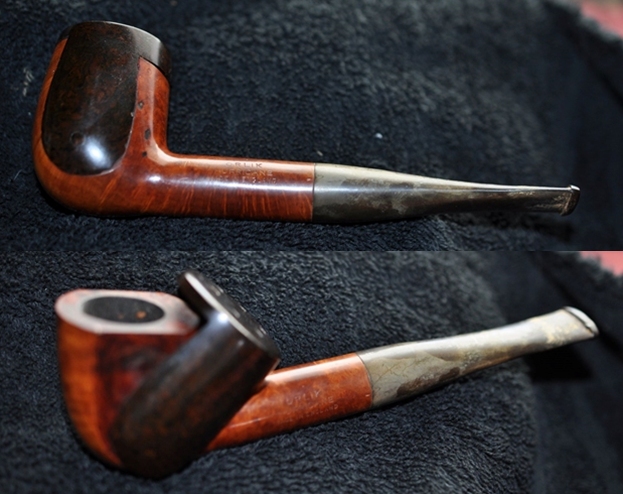
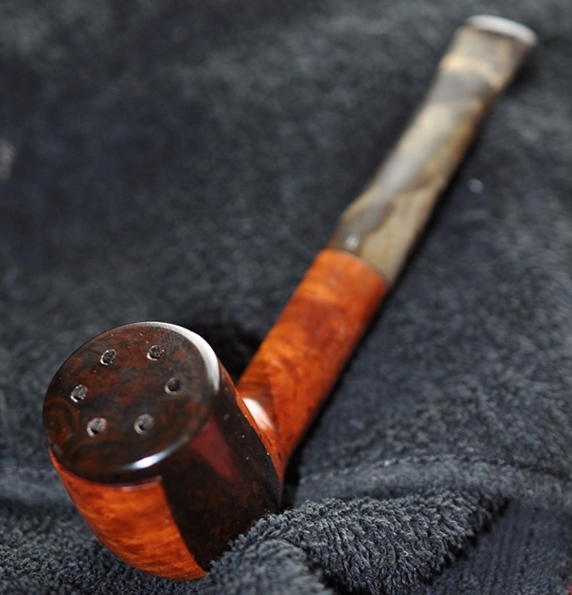
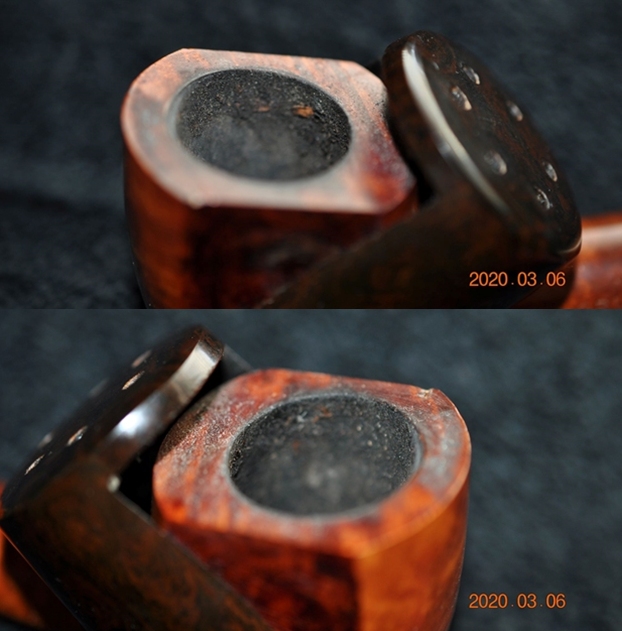
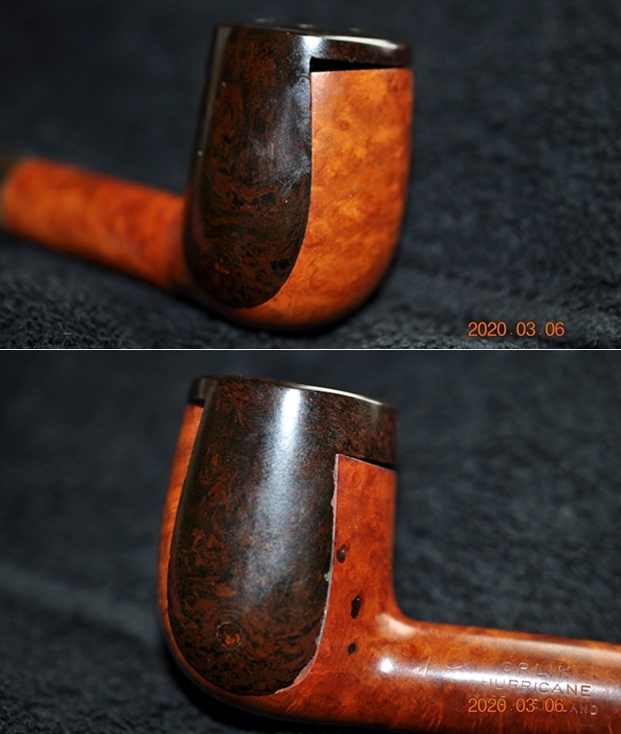
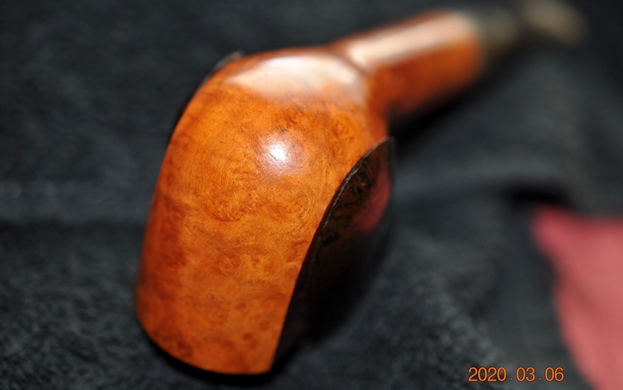
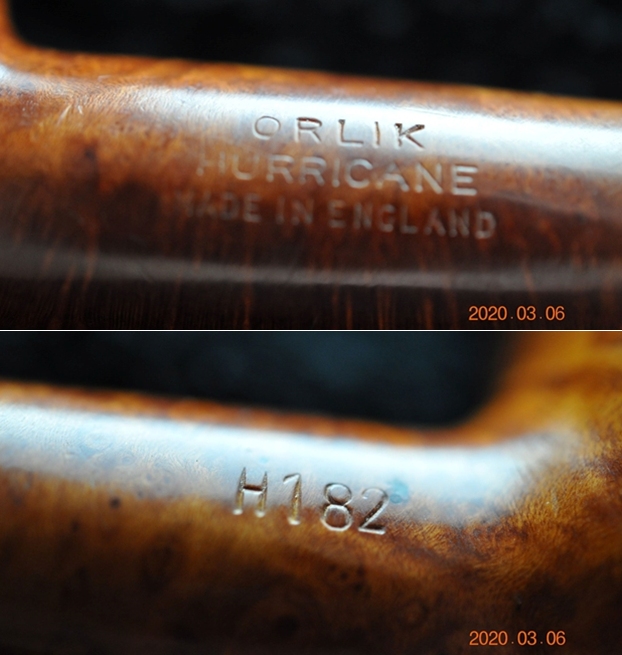
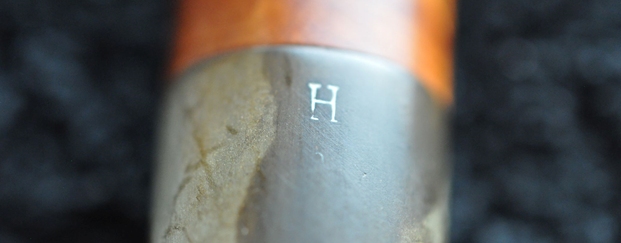
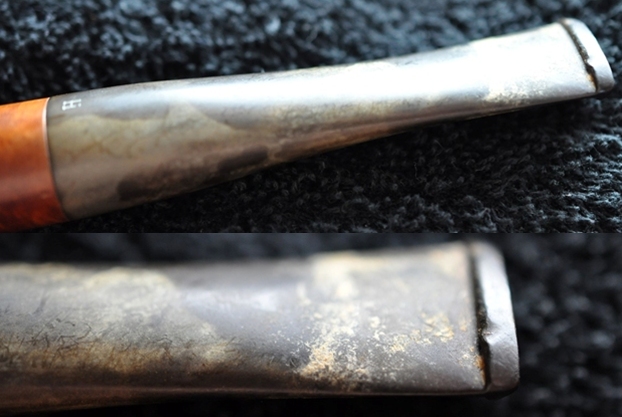
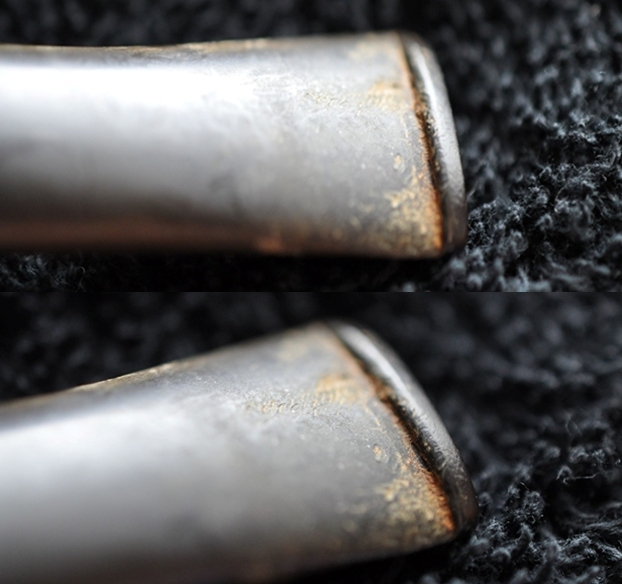
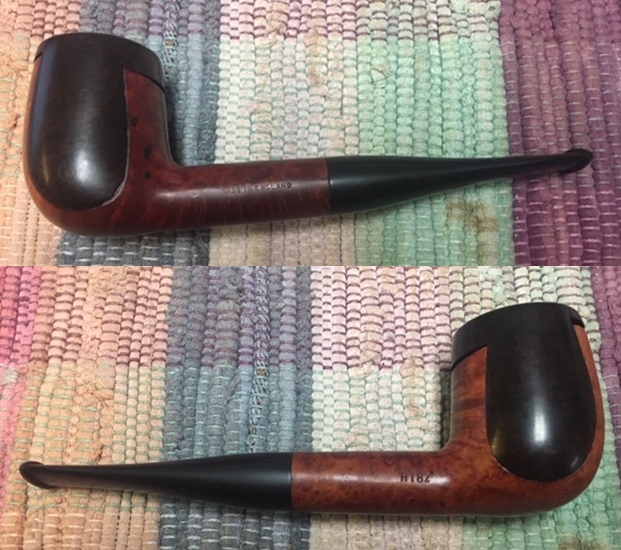
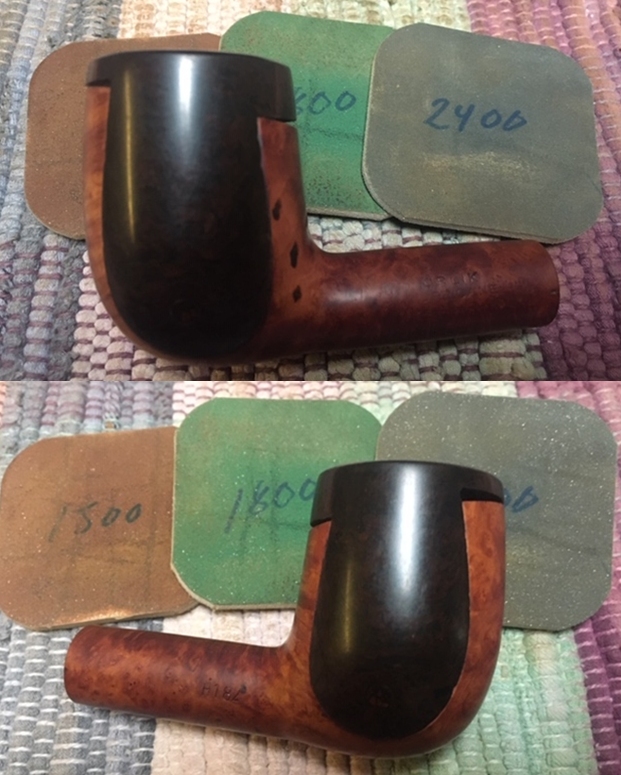
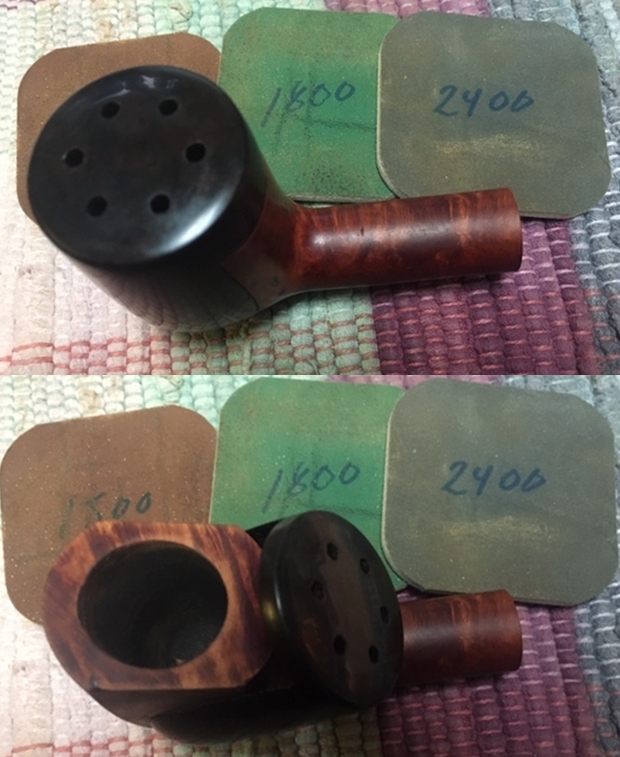
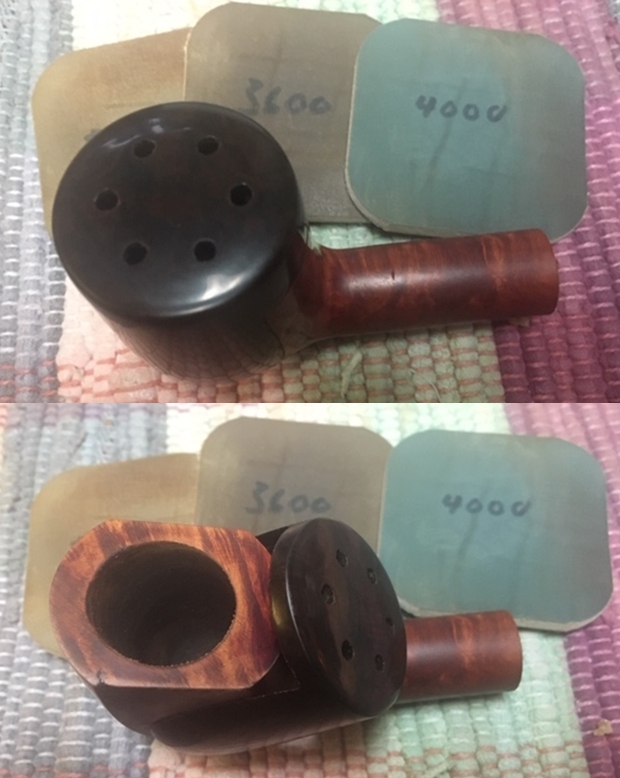
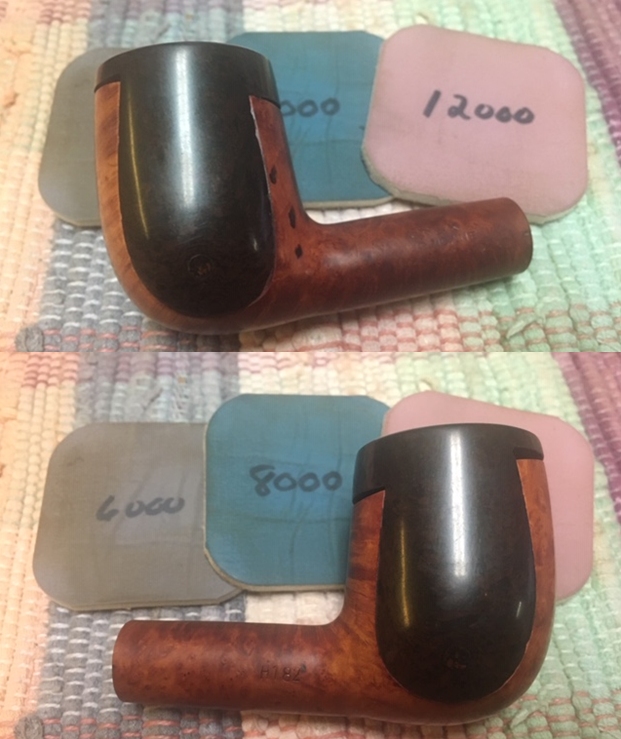
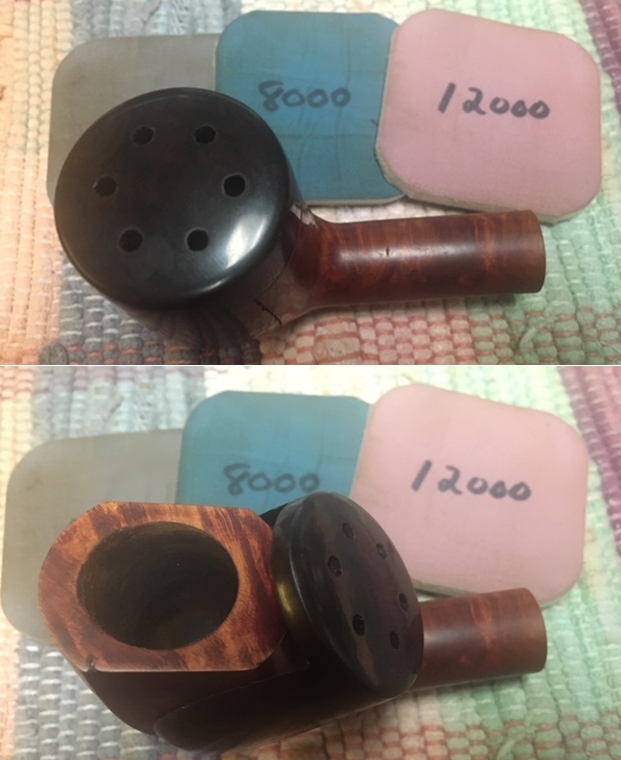
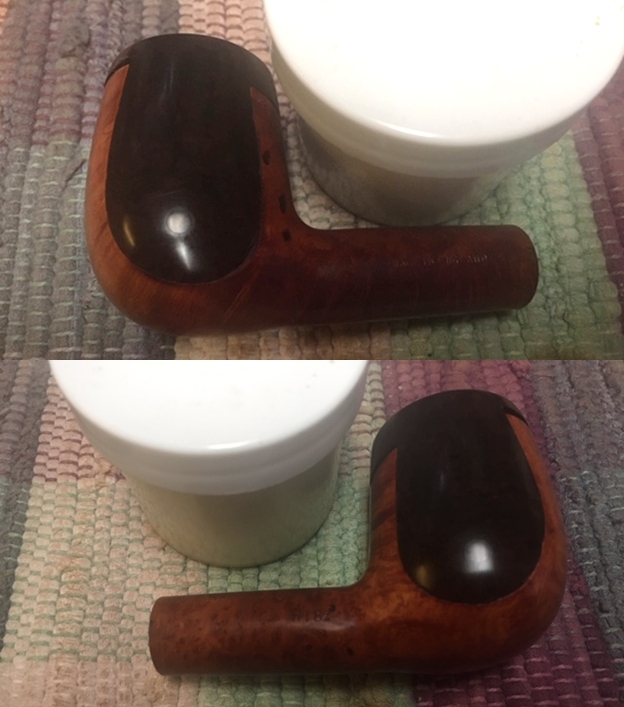
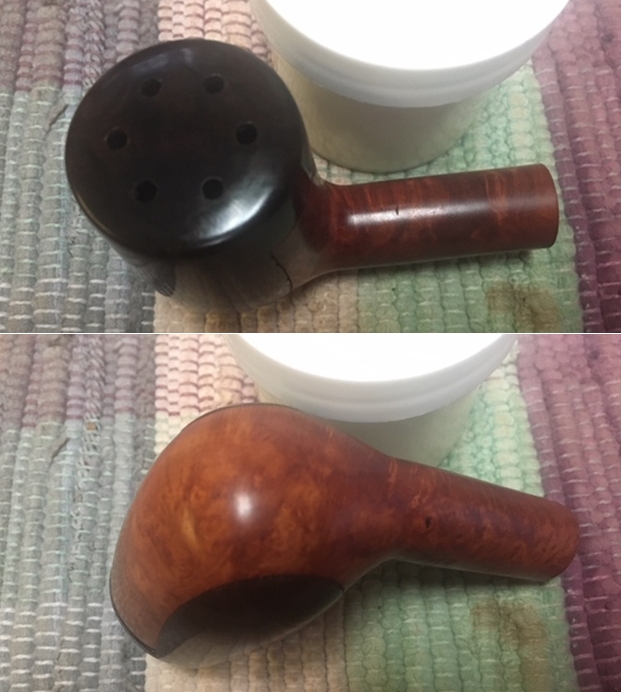
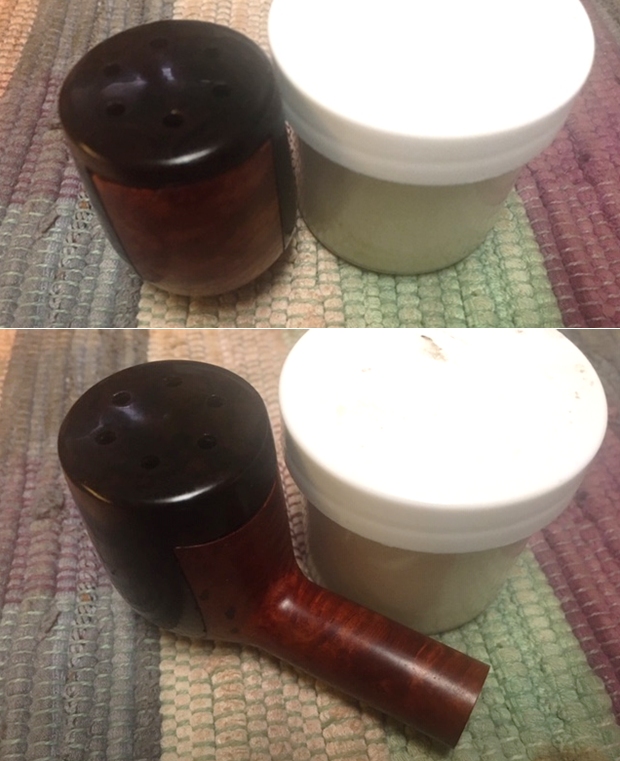
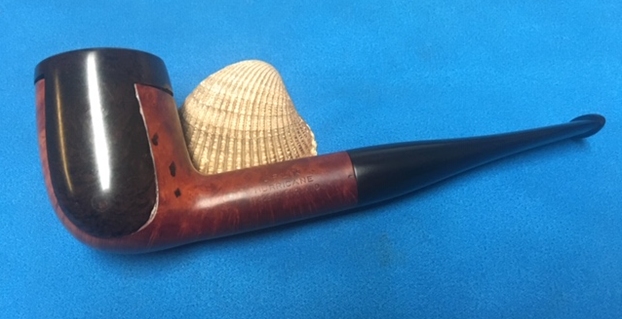
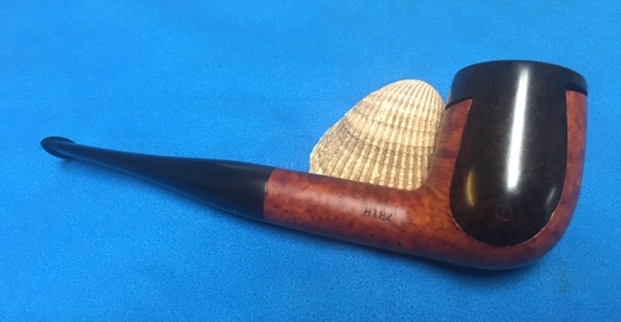
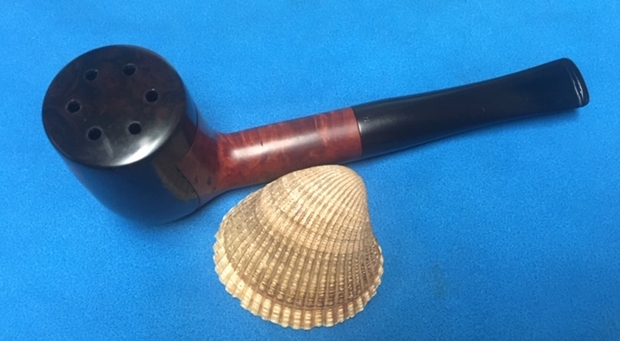
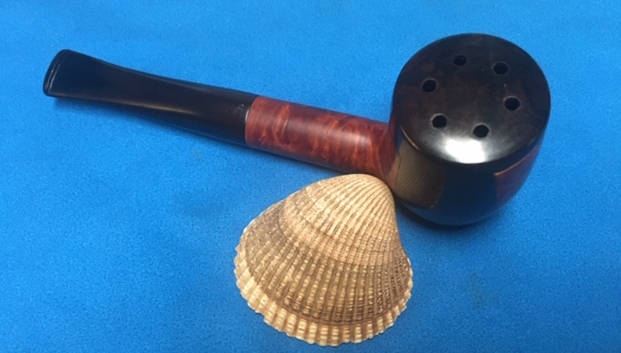
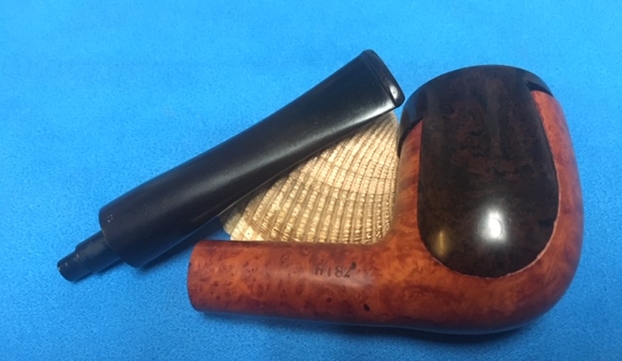
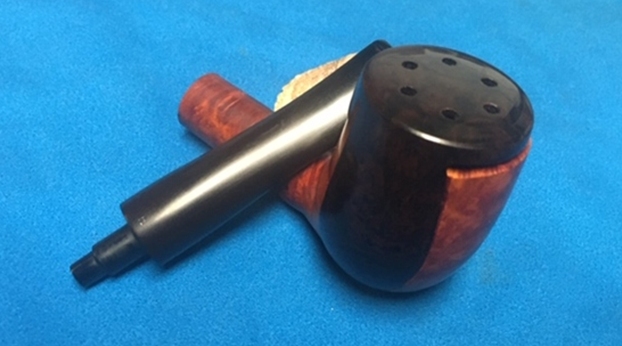
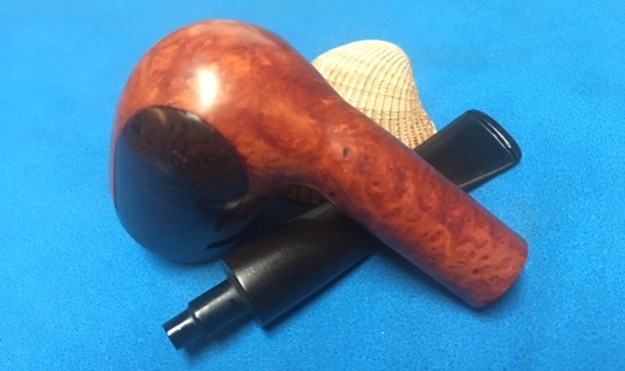
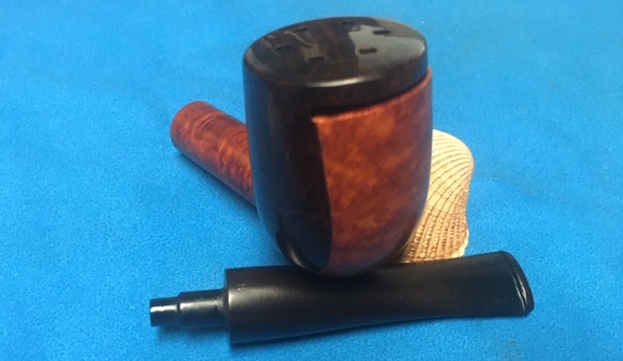
I have worked on a few Hurricane pipes in the past so I was familiar with the brand on the work table next. This one is stamped Orlik Hurricane over Made in England on the left side of the shank and the shape number H182 is stamped on the right side of the shank. The one I did most recently was a Hurricane Lovat (https://rebornpipes.com/2019/07/13/new-life-for-a-hurricane-standard-lovat/). This one was different in that it was a smooth finished pipe. I also was stamped Orlik. There was some great grain around the bowl but there were also some fills on the left of the bowl near the flip cap. The Hurricane pipes always remind me of these Salt and Pepper shaker pipes that were the bread and butter of most tourist spots in the US. In the recesses of my memory it seems like we had a set from Yellowstone National Park…but Jeff may correct my memory. Whatever the case this is what comes to my mind when I see the Hurricane pipes.Now to the pipe at hand. The rim top under the cap was very dirty with lava overflow and there was a thick cake in the bowl. The finish was dirty with sticky spots on the bowl sides and shank. The Bakelite cover on the bowl had some small chips along the edges. With the cap opened the sides of the bowl were also very dirty. The airholes in the top of the cap were also filled in with tars and oils. The stem was heavily oxidized and there were tooth marks on both sides near the button. It was a dirty pipe. Jeff took photos of the pipe before he started to clean it. He took some photos of the rim top with the cover tip back and with it in place to show the general condition of the pipe. You can see the cake in the bowl and the lava on the rim in the photos. He followed those with photos of the cap in place. You can see the fills on the left side of the bowl along the cap edge. The final photo of this set shows the heel of the bowl and the grain that is visible there. He also took some photos of the stamping on both sides of the shank. They are clear and readable. There was also an H on the stem top that is faint but hopefully salvageable. The next series of photos give a clearer picture of the condition of the stem. The first photo below shows the full length and profile of the heavily oxidized and stained vulcanite stem. The second photos shows the calcification on the stem ahead of the button. The next two photos show the surface of the top and underside of the stem. You can see the light tooth marks and chatter both on the button surface and on the blade itself.

I am including the link to the last Hurricane pipe I worked on. Give the blog a read if you are interested (https://rebornpipes.com/2019/07/13/new-life-for-a-hurricane-standard-lovat/). I am quoting from the background information to the brand that I included in that blog. I also darkened a portion of the quote that pertains to the Orlik pipe I am working on now.

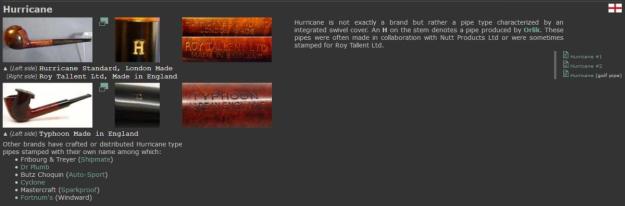
I looked up the Hurricane Standard pipe on the Pipephil Site to see what I could find out about the maker (http://www.pipephil.eu/logos/en/logo-h4.html). I quote in full the information included in the sidebar of the listing.

Hurricane is not exactly a brand but rather a pipe type characterized by an integrated swivel cover. An H on the stem denotes a pipe produced by Orlik. These pipes were often made in collaboration with Nutt Products Ltd or were sometimes stamped for Roy Tallent Ltd.

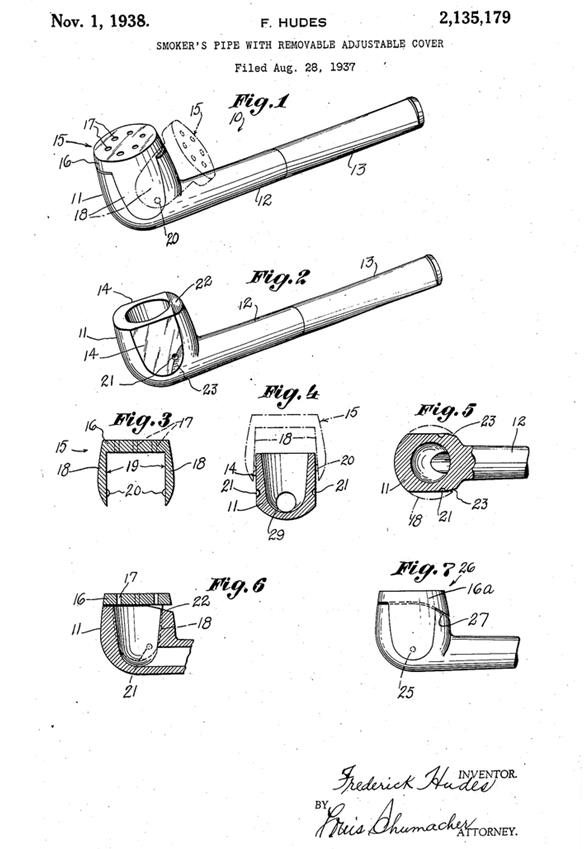
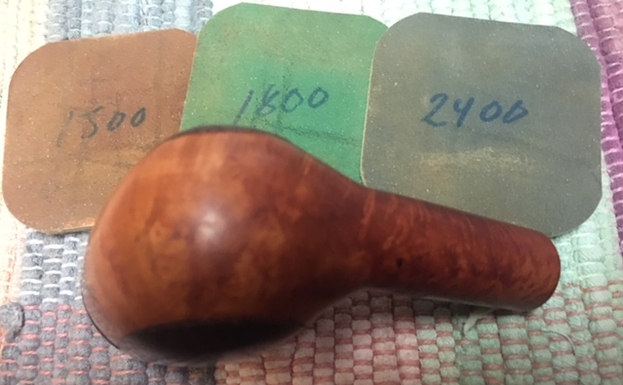
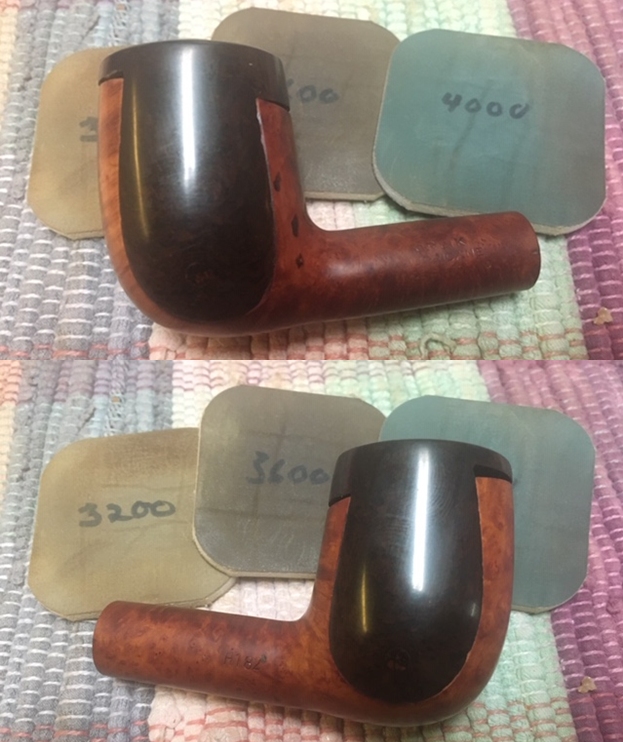
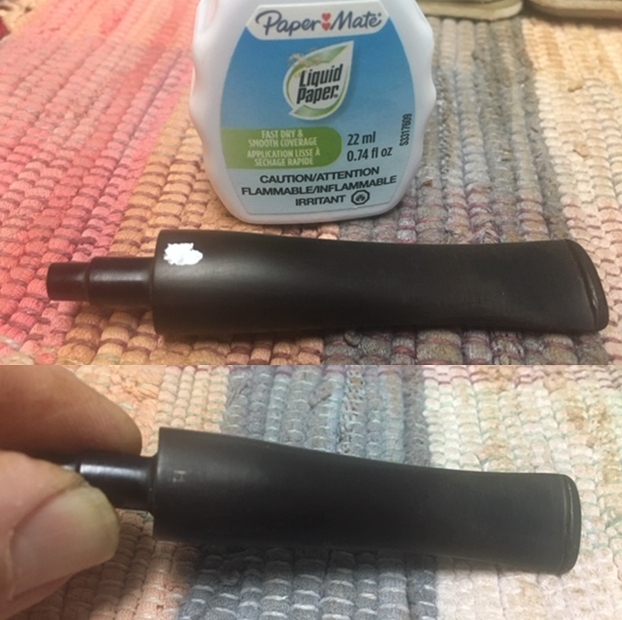
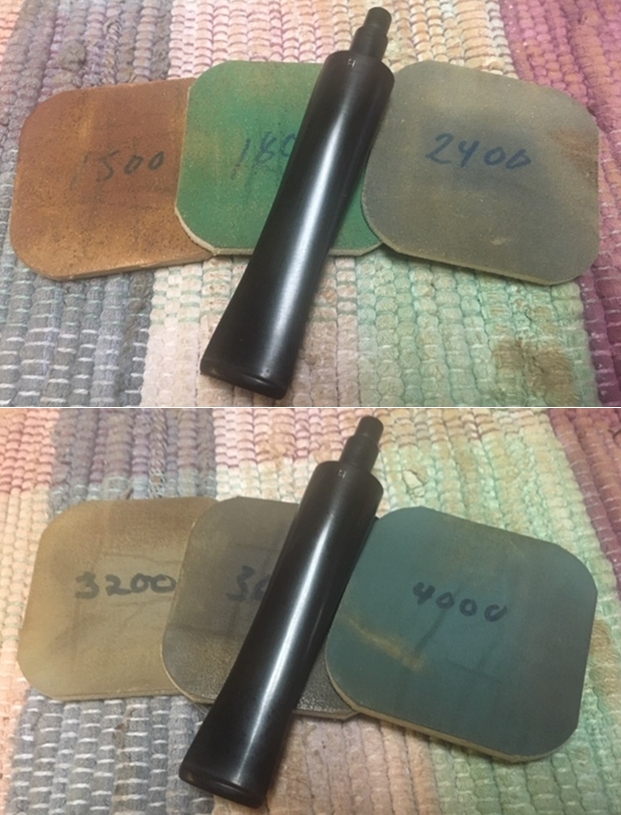
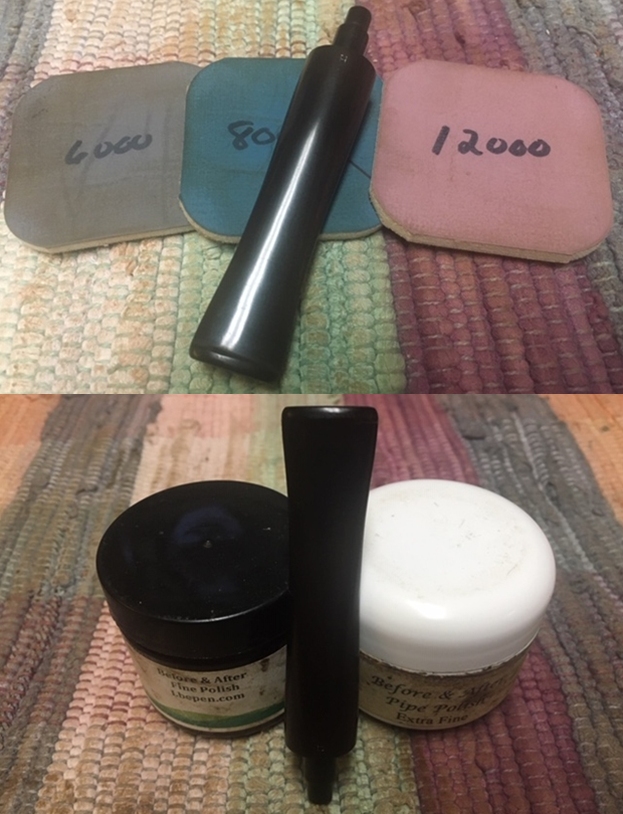
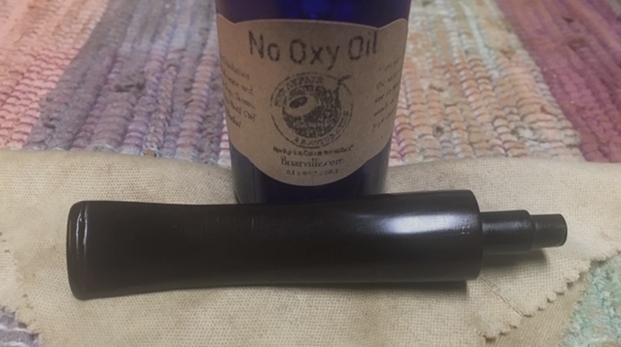
I include a screen capture of the listing from Pipephil as well. Note the various brands that made a Hurricane pipe with the same style or similar style wind cap. Note also that the one I have is made by Roy Tallent Ltd. of Old Bond Street. It bears the same H stamp on the top of the saddle stem as the pipes in the photo below.From that link I did a bit of search for the Fortnum brand. I found a listing for the brand on Pipedia. It said: Fortnum & Mason, the famed London department store in operation since 1707, has among countless other products sold its own line of pipes. One of the most notable was Fortnum’s Windward, a “Hurricane” type pipe with a built in swiveling windcap. The pipe was made following the design of Frederick Hudes, who received a patent for the pipe in the U.S. numbered 2135179 in 1938 (https://pipedia.org/wiki/Fortnum_%26_Mason). I have included the Patent drawings below. Armed with that information I moved forward to work on the pipe itself and see what I had to do with it. It had come back looking amazingly clean. Even the stem looked like new other than a few deep tooth marks. The Bakelite rim cap looked very good. I was impressed. Jeff had done his normal thorough clean up – reaming, scrubbing, soaking and the result was evident in the pipe when I unpacked it. I took photos of the pipe before I started my work on it. I took some photos of the rim top with the cap in place and with it tipped back. The rim top and bowl looked very good. The cake and lava overflow were gone and the Bakelite was very clean. The close up photos of the stem show that it is a much cleaner and better looking stem. There are some small deep tooth marks on both sides just ahead of the button and one mark on the top side of the button itself. To begin my part of the restoration work I decided to smooth out the three fills on the left side of the bowl near the edge of the flip cap. They are shown in the first photo below as three blackened dots running vertically along the cap. There rough to the touch and bumpy feeling. I sanded them smooth with a folded piece of 220 grit sandpaper and blended them into the surface. They still stick out but at least they are smooth!I decided to polish the briar and the Bakelite flip cap with micromesh sanding pads – wet sanding with 1500-12000 grit pads. I wiped the bowl and cape down after each pad with a damp cloth. The bowl begins to shine with the transition to each new pad. After the final polishing pad it looks great. I worked some Before & After Restoration Balm into the surface of the briar with my fingertips to clean, enliven and protect it. I also rubbed it into the Bakelite cap. I let the balm sit for a little while and then buffed with a cotton cloth to raise the shine. The photos show the bowl at this point in the restoration process. I set the bowl aside and turned my attention to the stem. The stem was very clean so I filled in the tooth marks and built up the button with clear super glue and set it aside to cure. Once it had cured I flattened out the repairs and sharpened the edge of the button with a needle file. I sanded out the tooth chatter and blended in the repairs with 220 grit sandpaper and started to polish it with a folded piece of 400 wet dry sandpaper. Once it was finished it was smooth.I used some Denicare Mouthpiece Polish that I have in my kit to start polishing out some of the scratches and remaining oxidation on the stem. I rubbed it in with a cotton pad and my finger tip and buffed it off with a cotton pad.The H stamp on the stem was quite faint but I thought that I might be able to get a bit of it to show. I put some Liquid Paper in the faint marks on the top of the stem and let them dry. I scraped off the excess and you can see the faint H in the second photo. While it is not perfect it is at least visible.I polished the stem with micromesh sanding pads – wet sanding with 1500-12000 grit sanding pads. I wiped it down after each sanding pad with some Obsidian Oil. I finished polishing it with Before & After Pipe Stem Polish – both Fine and Extra Fine and buffed it off with a cotton cloth. I gave it a coat of Briarville’s No Oxy Oil to preserve and protect the stem. This is a Hurricane Billiard with the Orlik stamp on the shank is a real beauty with a tapered black vulcanite stem. It has a great look and feel. I polished stem and the bowl with Blue Diamond polish on the buffing wheel. I gave the bowl, the Bakelite flip cap and the stem multiple coats of carnauba wax. I buffed the pipe with a clean buffing pad to raise the shine. I hand buffed it with a microfiber cloth to deepen the shine. The pipe polished up pretty nicely. The rich combination of browns of the briar and dark brown of the Bakelite took on life with the buffing. The rich colour of the briar works well with the polished vulcanite stem. I like the grain and finished look of this Hurricane pipe. Have a look at it with the photos below. The shape, finish and flow of the pipe and stem are very well done. The dimensions are Length: 6 inches, Height: 2 inches, Outside diameter of the bowl: 1 ¼ inches, Chamber diameter: ¾ of an inch. This English made Hurricane pipe is a unique piece of pipe history. Thanks for walking through the restoration with me as I worked over another beautiful pipe. This one will be going on the rebornpipes store in the English Pipe Making Companies section shortly if you would like to add it to your collection. Thanks for your time.

Cosmetic Repairs and Restoration of a Jobey Dansk 3 Freehand


Blog by Steve Laug

My brother Jeff picked up this interesting looking freehand pipe on one of his adventures pipe hunting. It had really nice grain and plateau on the top of the rim and on the end of the shank. There were rusticated spots on the right side of the bowl and shank as well as the heel of the bowl. There was something familiar about the style of carving that reminded me of other Danish Freehand pipes I have worked on. I seemed to remember that Jobey Dansk pipes were carved by Karl Erik. The finish on this pipe was dirty with dust and lava on the plateau top. The bowl was lined with a thick cake. There was thick dust in the rustication around the bowl and shank as well as the plateau on the shank end. The smooth finish was also dirty and dull looking. There was a crack on the left side of the bowl that did not go through to the bowl. It was a cosmetic crack. In looking at the photos you can also see a small cosmetic crack on the back of the bowl on the right side. The stem is a turned fancy turned acrylic stem. The fit of the stem to the shank was snug. There were tooth marks on both sides of the stem at the button and on the smooth parts of the button on both sides. Otherwise it was a very clean stem. Jeff took of the pipe to show the overall condition of the bowl and stem. He took close up photos of the bowl and rim top from different angles to show the condition of the plateau finish. You can see the lava and build up on the rim top and the lava flowing over the inner edge of the bowl onto the plateau. It is hard to know if there is damage or if the lava protected it. The bowl has a thick cake that lining the walls and overflowing into lava. He took photos of the sides and heel of the bowl to show the lay of the grain and the rustication around the pipe. It is a nice piece of briar. The top of the bowl is craggy and rugged looking. Unique! The shank end is also a unique mix of plateau and smooth. You will also see the cosmetic cracks in the photos. I will highlight those and include closer looks at the two of them. I took some closer photos of the  the cracks in the bowl. The first shows the one on the left side of the bowl and the second is of the right rear side of the bowl. Neither were deep or went through to the inside of the rim or bowl.Jeff took a photo of the stamping on the underside of the shank to capture it. It was clear and read Jobey Dansk at the top followed by a large number 3.. Under that it read Handmade in Denmark.The next two photos show the surface of the top and underside of the acrylic stem. You can see the tooth marks and damage both on the button surface and on the blade itself. The third photo shows flow of the stem as a whole. I wanted to look at who had carved the Jobey Dansk line to confirm some suspicions I had about it. I had a feeling that the pipes were carved by a Danish carver known as Karl Erik. I looked up the Jobey listing on Pipedia (https://pipedia.org/wiki/Jobey) and found the following information. I quote a portion of the article that is pertinent as follows.

English – American – Danish – French… Information about the brand Jobey are only to be found in form of smithereens…

Probably established in England around 1920(?) the brand hiked into the USA later. In the course of time owner, distributor and manufacturer changed repeatedly. As far as known:
George Yale Pipes & Tobacco, New York (1942)
Norwalk Pipe Co., New York (1949)
Arlington Briar Pipes Corp., Brooklyn (when?)
Hollco International, New York (1969).
Weber Pipe Co., Jersey City, NJ (1970’s)
The Tinder Box, (1970’s – 80’s).

 Throughout decades Jobey pipes were mainly sold in the USA, Canada and England but remained almost unknown in continental Europe. The bulk of Jobeys was predominantly made according to classical patterns and mainly in the lower to middle price range. The predominant judgment of the pipe smokers reads: “A well-made pipe for the price.” So there is hardly anything very special or exciting about Jobey pipes although a flyer from ca. 1970 assures: “The briar root Jobey insists upon for its peer of pipes is left untouched to grow, harden and sweeten for 100 years. […]Jobey uses only the heart of this century old briar and only one out of 500 bowls turned measures up to the rigid Jobey specifications.” 99.80% of cull… that makes the layman marveling!

From that information, my suspicions were confirmed. The pipe that I was working on was carved by Karl Erik Ottendahl. There were some similarities to the Karl Erik pipes that I have worked on in the past. The dating of the pipe line in the 70s fits well with the pipe I have in hand. I took some photos of the pipe before I started my part of the restoration. I took some photos of the rim top and stem to show the condition of them both when it arrived. Overall it looked good. There is some darkening and damage to the inner edge of the bowl. The stem had some deep tooth marks ahead of the button and on the button surface on both sides.I took some photos of the cracks on the side and back of the bowl. I circled them in red so they are easily identifiable in the photos below. Keep in mind that neither of them are deep or go through into the bowl. They do not show up on the rim to either. This leads me to believe they are cosmetic.To begin my part of the restoration work I decided to clean out some more of the grooves in the plateau with a brass bristle wire brush. Once I had it cleaned out sanded the high spots with 220 grit sandpaper to differentiate the plateau from the valleys. With that finished I decided to address the cracks in the bowl. I put a microdrill bit in my Dremel and drilled small holes at the end of each of the cracks to stop them from spreading. The photos below show the pin holes. I have circled them so they are visible.I cleaned out the smalls cracks with a dental pick and probed to see how deep they both were. Fortunately they were both very shallow. The one on the back of the bowl was a hairline crack. I dribbled clear super glue (CA) in the crack and in the pinholes I had drilled then pressed briar dust into the holes and the cracks.Once the repairs had hardened (it takes about 5 minutes) I used a needle file to flatten out the repaired areas on the briar. I followed up on the filed areas with a folded piece of 220 grit sandpaper. I polished the bowl with micromesh sanding pads – wet sanding with 1500-12000 grit pads. I wiped the briar down after each pad with a damp cloth. The bowl is starting to look very good. With the polishing finished I used a Black stain pen to fill in the crevices of the plateau top and give some contrast to the smooth high spots. I like this look as it give the pipe a sense of dimensionality. I also stained the repaired areas with a Cherry stain pen to blend them into the surrounding briar. The colour was a good match to the rest of the bowl and really did a good job of blending the repairs. I worked some Before & After Restoration Balm into the surface of the briar with my fingertips and into the plateau rim top and shank end with a horsehair shoe brush to clean, enliven and protect it. I let the balm sit for a little while and then buffed with a cotton cloth to raise the shine. The photos show the bowl at this point in the restoration process. I set the bowl aside and turned my attention to the stem. The stem was very clean so I filled in the tooth marks and built up the button with clear super glue and set it aside to cure. Once it had cured I flattened out the repairs and sharpened the edge of the button with a needle file. I sanded out the tooth chatter and blended in the repairs with 220 grit sandpaper and started to polish it with a folded piece of 400 wet dry sandpaper. Once it was finished it was smooth.I used some Denicare Mouthpiece Polish that I have in my kit to start polishing out some of the scratches and remaining oxidation on the stem. I rubbed it in with a cotton pad and my finger tip and buffed it off with a cotton pad.I polished the stem with micromesh sanding pads – wet sanding with 1500-12000 grit sanding pads. I wiped it down after each sanding pad with some Obsidian Oil. I finished polishing it with Before & After Pipe Stem Polish – both Fine and Extra Fine and buffed it off with a cotton cloth. This is a beautiful Jobey Dansk Hand Made by Karl Erik with a fancy, turned, black acrylic stem. It has a great look and feel. The repairs to the bowl came out really well. If you look you can see them but they blend in well with the grain around the bowl. The shape fits well in the hand with the curve of the bowl and shank junction a perfect fit for the thumb around the bowl when held. I polished stem and the bowl with Blue Diamond polish on the buffing wheel. I gave the plateau on the rim top and shank end multiple coats of Conservator’s Wax. I gave the bowl and the stem multiple coats of carnauba wax. I buffed the pipe with a clean buffing pad to raise the shine. I hand buffed it with a microfiber cloth to deepen the shine. The pipe polished up pretty nicely. The rich combination of browns and black in the smooth finishes and the plateau areas took on life with the buffing. The rich colour of the briar works well with the polished acrylic stem. I like the grain and finished look of this Jobey Dansk pipe. Have a look at it with the photos below. The shape, finish and flow of the pipe and stem are very well done. The dimensions are Length: 6 ½ inches, Height: 2 ¼ inches, Outside diameter of the bowl: 1 ¾  wide x 2 ¼ inches long, Chamber diameter: ¾ of an inch. This Danish Freehand is a real beauty. Thanks for walking through the restoration with me as I worked over another beautiful pipe. This one will be going on the rebornpipes store in the Danish Pipe Making Companies section shortly if you would like to add it to your collection. Thanks for your time.

Repairing a Burned Rim Edge and Chewed Stem on an English Ben Wade 76 Canadian


Blog by Steve Laug

The next pipe on my table is nice sandblast thick shank Canadian. It is stamped on the underside of the shank with the Ben Wade over Made in London England. It also has the shape number 76 just ahead of the Ben Wade stamping. It has a nice sandblast finish that is in good shape under the dirt and even the rim top looks good. The inner edge of the rim is darkened but the bowl is in good shape. There was burn damage on the left outer edge and darkening on the inner edge of the bowl. There is a thick cake in the bowl and light lava build up on the rim top and inner edge. The taper vulcanite stem was oxidized and had some deep tooth marks and chatter on both sides ahead of the button. Jeff took these photos before he cleaned the pipe.He took photos of the rim top from various angles to give a clear picture of the condition of the bowl and rim. It is dirty but there is a light lava coat on the top and the rim edges have some darkening and buildup. There is also a deep burn mark on the left out edge toward the rear of the bowl. Jeff also took a closer photo of the burned area on the outer edge of the rim. It is visible in the photo below.The sandblast finish around the sides and heel of the bowl is quite interesting and reveals some different underlying grain. The stamping on the underside of the shank is very readable as can be seen in the next photo.The next two photos show the deep tooth marks on the surface of the stem. They are actually quite high up the stem from the button. This pipeman had been a bit of a chomper. There is some wear on the edge of the button as well. The stem shows a great profile. I moved forward to work on the pipe itself and see what I had to do with it. It had come back amazingly clean. Jeff had done his normal thorough clean up – reaming, scrubbing, soaking and the result was evident in the pipe when I unpacked it. I took photos of the pipe before I started my work on it. I took some photos of the rim top to show the condition of the edges and the bowl. It looked very good. There is some darkening to the inner edge of the bowl. The second photo shows the damage from the burn on the left side of the rim top and side of the bowl. The stem had some deep tooth marks ahead of the button on both sides. The bowl was going to be straightforward to work on so I started with it. The burned spot on the left side of the bowl edge needed to be addressed. Since the bowl was clean I wiped off the damaged spot with alcohol on a cotton pad. I dried it of with a cloth. I then filled it in with layers of super glue and briar dust – repeating the process until the surface of the rim top and the side of the bowl were even. When the repair had cured I sanded it with a folded piece of 220 grit sandpaper to blend it into the surrounding briar. I used a brass bristle brush to roughen up the surface of the rim top and side of the bowl. I worked it over to achieve a similar pattern to the surround sandblast. I stained the repaired area with a Mahogany stain pen and blended it into the surrounding stained briar. I am pretty happy with the match. At this point in the process the bowl definitely looks better.I worked some Before & After Restoration Balm into the briar with my fingertips. I let the balm sit on the briar for 10 minutes the buffed it off with a soft cloth. The balm enlivens, enriches and protects the briar while giving it a deep glow. I set the bowl aside and turned my attention to the stem. The stem was very clean so I filled in the tooth marks with clear super glue and set it aside to cure. Once it had cured I flattened out the repairs and sharpened the edge of the button with a needle file. I sanded the stem with 220 grit sandpaper to blend in the repairs with the rest of the stem surface.  I started the polishing with 400 grit wet dry sandpaper.I polished the stem with Denicare Mouthpiece Polish. It is a gritty red paste (similar in grit to red Tripoli) that I rub on with my finger tips and work it into the surface of the stem and button and buff it off with a cotton pad. It gives me a bit of a head start on the polishing work.I polished the stem with micromesh sanding pads – wet sanding with 1500-12000 grit sanding pads. I wiped it down after each sanding pad with Obsidian Oil. I polished it with Before & After Pipe Stem Polish – both Fine and Extra Fine. I buffed the stem with a soft cloth to raise the shine. I wiped the stem down with Briarville’s No Oxy Oil to preserve and protect the stem surface. Ahhhh…once again I am at my favourite part of a restoration – finishing up a pipe! This Ben Wade English made Canadian 76 came out really well considering the issues with the burned area on the side of the bowl and rim when I started. I put the pipe back together and buffed it with Blue Diamond polish on the buffing wheel. I polished the bowl with multiple coats of Conservator’s Wax and the stem with multiple coats of carnauba wax. I buffed it with a clean buffing pad and with a hand buff with a microfibre cloth. The mix of colours and the buffing made the sandblast stand out when it was waxed. The mixed grain is quite stunning. Thick oval shank and taper stem stands out in great contrast to the briar. It is a nice looking pipe. Have a look at the photos below of the finished pipe. Its dimensions are Length: 6 ¼ inches, Height: 2 inches, Outside Diameter of the Bowl: 1 3/8 inches, Diameter of the Chamber: ¾ of an inch. The long shank Canadian feels great in the hand. This one will be going on the rebornpipes store later today. You can add it to your collection and carry on the trust. Let me know if you are interested in adding it. Thanks for your time.  

New Life for a Mystery BBB Custom Made Zulu


Blog by Steve Laug

The next pipe on my table is actually a strange one and a bit of a mystery to me. It is a nicely shaped and grained Zulu. The mystery does not come in the shape but in the composition of the pipe and the stamping on the shank. The stem is threaded onto an inset metal tenon that is a part of the spacer on the shank end. The tenon is unmovable and the stem screws onto it. I have never seen that on a British made BBB pipe. Then the stamping, other than the BBB Diamond on the topside of the shank looks like every other American made pipe of that time period. The stamping reads on the topside of the shank as follows: a BBB Diamond over Custom Made in a Germanic script and underneath that is R in a circle (there are pictures of the stamping below). On the underside of the shank it is stamped with the shape number 47 on the flat heel of the bowl followed by Aged Imported Briar in the same Germanic Script. The Imported Briar has always been a sign of an American Made pipe to me so therein laid the mystery. Is it really a BBB from England or is it another BBB brand that is American? I am hoping to demystify it a bit in the process of this restoration

It is a dirty pipe but has some great grain that the carver built the shape around. The finish is in good shape under the dirt and even the rim top looks good. The inner edge of the rim is darkened the bowl is out of round. There was burn damage to the inner edge. There is a thick cake in the bowl and a thick lava coat on the rim top. The rim top also appeared to have some pitting and nicks in the surface. The stem is pitted and oxidized. It has light tooth marks and chatter on both sides ahead of the button. Jeff took these photos before he cleaned the pipe.Jeff unscrewed the stem from the shank so that I could see the tenon set up and it is pretty clear that it was set in the shank.Jeff took photos of the rim top from various angles to give a clear picture of the condition of the bowl and rim. It is dirty but there is no lava coat on the top and the rim edges look very good. The grain around the sides and heel of the bowl is quite interesting. It is a combination of cross grain, swirled and birdseye grain. The stamping on both sides of the shank is very readable as can be seen in the next three photos.The stem shows pitting and oxidation on the surface as well as light tooth marks and chatter on both sides. There is some wear on the edge of the button as well. The stem shows a great profile.I looked through all of my resources for BBB pipes and could find nothing even remotely like this pipe. I looked on both Pipephil and Pipedia for other brands with similar stamping and again found nothing. Even with the lack of information it was time to get working on the pipe itself and see what I had to do with it. It had come back amazingly clean. Jeff had done his normal thorough clean up – reaming, scrubbing, soaking and the result was evident in the pipe when I unpacked it. I took photos of the pipe before I started my work on it. I took some photos of the rim top to show the condition of the edges and the bowl. It looked very good. The stem actually looked much better than I expected and the tooth chatter seemed to have disappeared. There were some light tooth marks just next to the button edge on both sides.I am including photos of the stamping to show how Jeff preserved it during the cleanup and it did not fade or show damage.I decided to address the damage to the rim top and inner edge first. I topped the bowl with 220 grit sandpaper on a hard topping board I use. I followed up by working over the inner edge of the rim with a folded piece of 220 grit sandpaper to give the edge a light bevel and minimize as much of the damage as I could. With the inner edge and top cleaned up the bowl looked significantly better. I polished the briar with micromesh sanding pads – wet sanding with 1500-12000 grit pads. I wiped the bowl down after each pad with a damp cloth to remove the dust.     I blended three stain pens together to get a match to the colour of the bowl – Walnut, Cherry and Black. The colour combination worked very well to make it look original. I worked some Before & After Restoration Balm into the briar with my fingertips. I let the balm sit on the briar for 10 minutes the buffed it off with a soft cloth. The balm enlivens, enriches and protects the briar while giving it a deep glow. I set the bowl aside and turned my attention to the stem. I sanded the stem with 220 grit sandpaper to remove the tooth marks and the remnants of oxidation especially in the saddle area. I started the polishing with 400 grit wet dry sandpaper.I polished the stem with Denicare Mouthpiece Polish. It is a gritty red paste (similar in grit to red Tripoli) that I rub on with my finger tips and work it into the surface of the stem and button and buff it off with a cotton pad. It gives me a bit of a head start on the polishing work.I polished the stem with micromesh sanding pads – wet sanding with 1500-12000 grit sanding pads. I wiped it down after each sanding pad with Obsidian Oil. I polished it with Before & After Pipe Stem Polish – both Fine and Extra Fine. I buffed the stem with a soft cloth to raise the shine. I wiped the stem down with Briarville’s No Oxy Oil to preserve and protect the stem surface. Once again I am at my favourite part of a restoration – finishing up a pipe! This BBB Custom Made Zulu came out really well considering the condition it was in when I started. I put the pipe back together and buffed it with Blue Diamond polish on the buffing wheel. I polished it with multiple coats of carnauba wax on both the bowl and stem. I buffed it with a clean buffing pad and with a hand buff with a microfibre cloth. The mix of colours and the buffing made the grain really pop once it was waxed. The cross grain, swirled and birdseye grain are quite stunning. The silver coloured spacer and the polished black vulcanite saddle stem stands out in great contrast to the briar. It is really a beautiful pipe. Have a look at the photos below of the finished pipe. Its dimensions are Length: 5 ½ inches, Height: 1 ¾ inches, Outside Diameter of the Bowl: 1¼ inches, Diameter of the Chamber: ¾ of an inch. The Mystery brand pipe is comfortable handful and feels great in the hand. This one will be going on the rebornpipes store later today. You can add it to your collection and carry on the trust. Let me know if you are interested in adding it. Thanks for your time.

Sprucing Up a Meerschaum Teardrop Lattice Billiard


Blog Dal Stanton

I just completed an Aldo Velani from what I’ve called the St. Louis Lot of 26 (See: Refreshing a Saucy Italian Aldo Velani Trio Bent Apple) and the next pipe in queue is also from this Lot.  The Meerschaum just above the giant Champion Churchwarden’s bowl is on the worktable now.  My son, Josiah found this lot in an antique shop in St. Louis where he was studying.  He sent me a text here in Bulgaria about his find with pictures.  We went in together to purchase the lot with the provision that my son’s part of the purchase would be for me to pick a pipe out of the lot as a Christmas present from him.  I chose the giant Champion Churchwarden!  Other pipe men and women have chosen other pipes from this lot of treasures which are posted in the online collection, For “Pipe Dreamers” Only! .This is where Jeremiah, from the state of California, saw the Meerschaum and commissioned him back when my wife and I were enjoying the Black Sea during our summer R&R.  I appreciate Jeremiah’s patience as his pipe worked up the queue!  Here are more pictures taking a closer look at the Meerschaum Teardrop Lattice Billiard. There are no markings on the pipe.  The size of the Billiard shape is Length 5 5/16 inches, Height 1 5/8 inches, Rim width 1 1/8 inches, Chamber width 3/4 inches, Chamber depth 1 3/8 inches. What is unique about this Meerschaum Teardrop Lattice design are the size of the tear drops, or the egg-shaped carvings – they are large.  The fine circular scallop carvings are in comparison, small and tight.  The Meer is set-up with a basic push/pull tenon which appears to have a crack in the mortise insert (pictured above).  The tenon insert is worn and discolored.  The pipe itself appears to be in great shape in need of cleaning.  The chamber has some carbon build up which is not needed or desired in a Meer chamber.  One of the great things about Meerschaums is that they do not need to rest between uses as with briars.  There is a bit of the coveted patina developing around the scalloped shank and climbing toward the back of the bowl.  This is good.  This brief description from Meerschaum.com that I’ve previously cited is helpful to understand the nature of Meerschaum:

Meerschaum is a very rare mineral, a kind of hard white clay. Light and porous structure of the pipe keeps the smoke cool and soft. The pipe itself is a natural filter which absorbs the nicotine. Because of this peculiarity, meerschaum pipes slowly change their colors to different tones of gold and dark brown. This adds an esthetic enjoyment to its great smoking pleasure. The longer a pipe is smoked the more valuable it becomes due to the color change. Today many old and rare meerschaums have found a permanent place in museums and private collections.

I begin the restoration of this Meerschaum by disassembling the component parts.  This helps with the cleaning.  I also plan to replace the push/pull tenon.  With the help of a pair of needle nose pliers, the push/pull components are easily removed.Taking the stummel in hand, the chamber has moderate carbon cake build up which will be removed.I don’t use the reaming kit with Meerschaum because it produces too much indiscriminate torque on the Meer chamber wall.  A more gentle and strategic approach is the use of the Savinelli Fitsall tool.  I’m able to scrape the chamber walls with the tool in a way that removes carbon buildup but is mindful of the Meerschaum.Following the wall scraping, the chamber wall is sanded with 240 grade paper wrapped around a Sharpie Pen.  This does a good job of removing the last vestiges of carbon build up.  A Meerschaum chamber does not need a cake protection like a briar chamber.An inspection of the chamber after cleaning looks good.  The Meer is still colored but it is clean and smooth to the touch.Cleaning the external surface of the Meerschaum starts with the rim which has lava caked on it, especially on the aft quadrant where most of the lighting occurred.  Using undiluted Murphy’s Oil Soap, I begin on the rim to soften and break up the lava without damaging the scalloped rim carvings.  I am patient to allow the solvents to break up the cake on the rim.  I also gently utilize a brass wired brush on the rim but most of the scrubbing is done with a bristled toothbrush.  I use the toothbrush to clean the rim as well as work into all the carvings of the bowl.  I take the bowl to the kitchen sink and continue cleaning with a cotton pad and toothbrush under warm water.  Not pictured is something I tried for the first time.  I have a Soft-Scrub product here in Bulgaria called CIT which has a gentle bleach and abrasion composition.  I put a small amount on a cotton pad and continue to work on the rim’s darkened condition.  After a thorough rinsing with warm water, the stummel returns to the worktable.I’m very pleased with the cleaning results. The stummel will lighten more because it’s still damp from the cleaning. The rim cleaned up very nicely.  One blackened area remains on the extreme edge of the aft rim quadrant.  Later, I may be able to clean this with very strategic sanding. The patina gathering at the bowl/shank crook remains through the cleaning. Moving now to cleaning the internals, I use cotton buds and pipe cleaners dipped in isopropyl 95%.  I also employ a small dental spoon to scrape the internal walls of old oils and tars.  The more excavated, the faster the cotton buds can clean.  In time the buds emerge in a lightened state and the job is completed.It took no time to dispatch the internal cleaning of the acrylic stem.Focusing now on the stem repairs, I like the brown tone acrylic.  It will clean up well.  The stem bit has significant biting damage to both upper and lower bit that will require patches from the start.  The button is damaged as well.  It appears this stem was the victim of mauling, not just biting.  There is also what appears to be a burn on the side of the stem – that’s the only thing I can think it would be. It is rough to the touch so sanding should help this blemish later.I use regular CA glue to fill the compressions on one side first.  An accelerator is also used to hold the glue in place and to quicken the curing process.After the CA glue cures, I use the flat needle file to remove the excess patch material and to shape and refresh the button lips – both upper and lower.  The first two pictures are the upper.Next the lower.Next, with the filing completed, I continue to sand with 240 grade paper on the upper and lower bit.From the bit, I also sand the entire stem and focus on the burn or blemish on the side of the stem.As I look at the mark on the side of the stem, I believe now it’s simply a blemish in the acrylic.  It is not just surface but seems to go deeper.  I can only sand it out as much as possible.After sanding with 240 paper, I transition to wet sanding the entire stem with 600 grade paper then the 000 grade steel wool fine tunes the acrylic stem – it’s looking great.Transitioning now to the full regimen of micromesh pads, I wet sand with pads 1500 to 2400 and follow with dry sanding with pads 3200 to 4000 and 6000 to 12000.  Between each set of 3 pads Obsidian Oil is applied.  I like the fire in this acrylic stem. I want to strategically sand the burn spot on the extreme back of the inner rim edge.  I use a very light 240 grade paper and follow with a dry 1500 micromesh pad.I think it looks good.  The darkness is not erased but it is reduced.  To enrich and encourage the coveted patina in the Meerschaum, the age-old approach is a beeswax treatment.  Using a hot air gun, the beeswax in the Mason jar is heated until it liquefies.  I also heat the Meer bowl with the gun and then apply the liquefied beeswax to the stummel – painting thoroughly all the nooks and crannies of the sculpting.  During the painting process, I have the hot air gun propped in such a way as to continue to blow hot air on the stummel as I’m painting it.  This helps to keep the wax thin and it is more easily absorbed into the porous Meerschaum.After the stummel is thoroughly coated in beeswax, I put it aside for the stummel to cool.After cooling, I buff the stummel with a microfiber cloth to remove excess wax and to raise the shine.  The Meerschaum literally drank in the beeswax!I decided earlier to replace the old push/pull tenon system with a new set.  The shank acrylic fitment and the stem tenon both screwed in with no problem. When I tried inserting the tenon into the shank receptor, the fit was very tight – too tight to fit without me being nervous about cracking something.  To remedy this, I hand turn a drill bit just a bit larger than the hole and it bores out a slightly more comfortable fit.  This works like a charm. With the stem and stummel reunited, after mounting a cotton cloth buffing wheel to the Dremel and set the speed at 40% full power and Blue Diamond compound is applied only to the acrylic stem.  Following the compound, after wiping the stem with a felt cloth to clean it of compound dust, the same procedure is followed with another cotton cloth buffing wheel and carnauba wax is applied to the acrylic stem.  After this, the entire Meerschaum Teardrop Lattice Billiard is hand buffed to raise the shine.
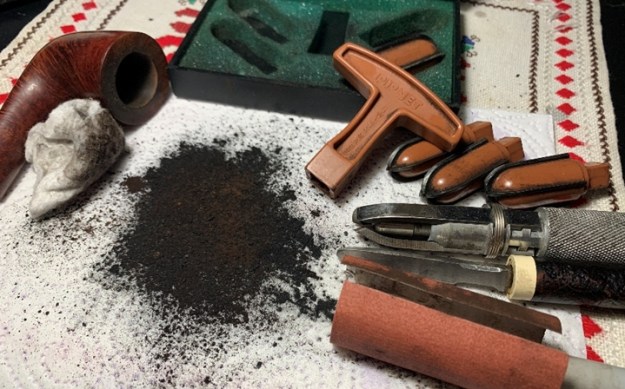
The design of this Meerschaum is a classic carvers’ template in this genre of pipe.  The patina on the Meerschaum has a good start with the honey honed hues which complement beautifully the fire waves of the acrylic stem.  Jeremiah wanted to add a Meerschaum to his growing collection, and he will have the first opportunity to add this Teardrop Lattice Billiard from The Pipe Steward Store benefiting the Daughters of Bulgaria – women and girls who have been trafficked and sexually exploited.  Thanks for joining me!
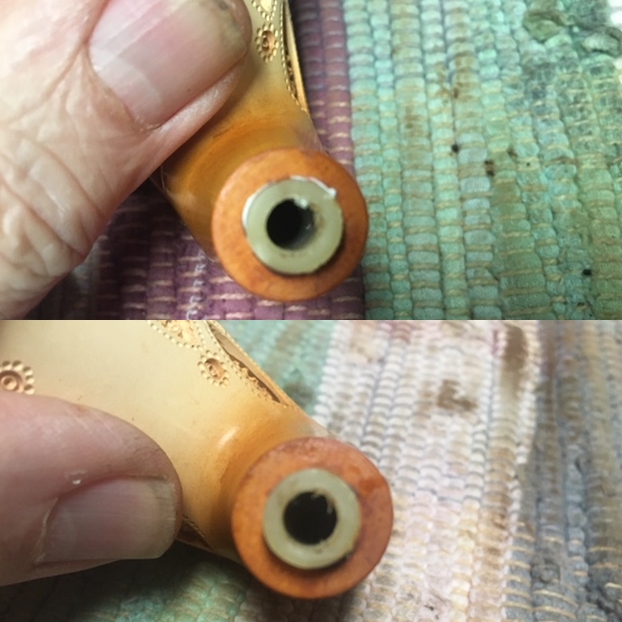
New Life for a Savinelli Capri Root Briar 510 Bulldog


Blog by Steve Laug

The next pipe on the work table is a Savinelli Capri Bulldog. This Capri Bulldog has a Sea Rock finish on the bowl and shank. There are twin rings separating the cap from the bowl. The diamond shank flows well into diamond saddle.  I really like this style of rustication and the tactile nature of the pipe in your hand. It only gets better as the briar is heated during a smoke. The pipe is stamped on a smooth panel on the left underside of the shank and reads Capri over Root Briar over the shape number 510. Next that is stamped Savinelli Italy. The rim top is rusticated and it is filled in with a lava overflow. It was hard to know what the inner edge looked like due to the cake and lava. There was a thick cake in the bowl. The pipe was dirty and dusty in all of the nooks and crannies of the rustication. The saddle stem was vulcanite and had tooth marks and chatter on both sides near the button. It was oxidized and had some calcification on the end. Jeff took some photos of the pipe to show the general condition of the pipe before he started his clean up. Jeff took some close-up photos of the rim top and bowl from various angles to show the overall condition. There is thick coat of lava in f the grooves and almost flattening the rustication. You can also see the cake in the bowl. It was a well loved pipe and smoked a lot by the previous pipe man. Jeff took some photos of the sides and heel of the bowl to show the condition of the finish on the pipe. The photos show the beautiful sea rock style rustication around the bowl. Under the dust and grime it was a nice looking bowl. I think it will be a beautiful bulldog pipe once it is restored. He took a photo of the stamping on the left underside of the shank. On the shank it was stamped Capri over Root Briar over the shape number 510. Running perpendicular to that it was stamped Savinelli over Italy.The next two photos show the top and underside of the stem. It is dirty and has calcification on both sides at the button. There is also some tooth chatter and some light tooth marks with some damage to the button edge. The third photo shows the flow of the stem and shank. You can also see a remnant of the Savinelli S Shield logo on the stem.I have always like the Savinelli Capri Root Briar finish so I was glad to be working on this one. When I received it Jeff had once again done an amazing job cleaning the pipe. He reamed it with a PipNet pipe reamer and got rid of the cake. He cleaned up the reaming with a Savinelli Fitsall Pipe Knife so that we could see the walls of the bowl and assess for damage. He cleaned the internals of the shank and stem with alcohol, pipe cleaners and alcohol. He scrubbed the exterior with undiluted Murphy’s Oil Soap and a tooth brush. He rinsed the pipe under warm water. He dried it off with a cloth and then let it air dry. The stem was scrubbed with Soft Scrub and soaked in Before & After Deoxidizer. It came out looking very good. The finish on the bowl and the rim top cleaned up beyond my expectations. I took pictures of the pipe to show how it looked when I unpacked it. I took a close up photo of the rim top to show how clean it was. Jeff had been able to remove the entire thick lava coat and the rim looked very good. The inner edge of the rim and the ridges and valleys of the plateau looked good. The stem looked good just some light tooth chatter and several deeper tooth marks on the button.Even the stamping cleaned up well and is still very clear and readable. Because the pipe was rusticated and so clean my work was pretty minimal. I cleaned up some of the darkening and smoothed out the inner edge of the rim with a folded piece of 220 grit sandpaper.I worked some Before & After Restoration Balm into the smooth briar with my fingertips and the plateau and sandblasted side with a horsehair shoe brush. The product is a great addition to the restoration work. It enlivens, enriches and protects the briar while giving it a deep glow. I appreciate Mark Hoover’s work in developing this product. I set the bowl aside and turned my attention to addressing the issues with the stem. I “painted” the tooth marks with the flame of a Bic lighter to try and raise them a bit. Remember vulcanite has “memory” and if the marks are not sharp edge the heat well raise them. In this case while they came up some on the blade there were still two deep marks. I filled in the remaining tooth marks on the button edge with clear CA glue and set the stem aside to dry.I sanded the surface of the stem with 220 grit sandpaper to further blend in the repairs. I started the polishing process with 400 grit wet dry sandpaper.I polished the stem with Denicare Mouthpiece Polish from a tin of it I have in the drawer here. It is a gritty red paste (similar in grit to red Tripoli) that I rub on with my finger tips and work it into the surface of the stem and button and buff it off with a cotton pad. It gives me a bit of a head start on the polishing work.I polished the stem with micromesh sanding pads – wet sanding with 1500-12000 grit sanding pads. I wiped it down after each sanding pad with Obsidian Oil. I polished it with Before & After Pipe Stem Polish – both Fine and Extra Fine. I buffed the stem with a soft cloth to raise the shine. I wiped the stem down with Briarville’s No Oxy Oil to preserve and protect the stem surface. I am on the homestretch with this Savinelli Made Capri Root Briar Bulldog 510! As always I am excited to finish a pipe that I am working on. I put the pipe back together and buffed it with Blue Diamond on the buffing wheel. I used a gentle touch to keep the polish from building up in the rustication of the bowl. I gave the bowl multiple coats of Conservator’s Wax and the stem multiple coats of carnauba wax. I buffed the pipe with a clean buffing pad and hand buffed it to raise the shine. It is fun to see what the polished bowl looks like along with the polished vulcanite stem. This Capri Bulldog is a nice looking pipe. It is quite comfortable in hand and should be so when smoking. It is quite light and well balanced. Have a look at it with the photos below. The dimensions are Length: 5 ½ inches, Height: 2 inches, Outside diameter of the bowl: 1 ¼ inches, Chamber diameter: ¾ of an inch. It is another beautiful pipe and one that will be on the rebornpipes store soon. You can find it in the section of Pipes by Italian Pipe Makers. If you are interested in adding it to your collection let me know. Thanks for walking through the restoration with me as I worked over this pipe. Thanks to each of you who are reading this blog.