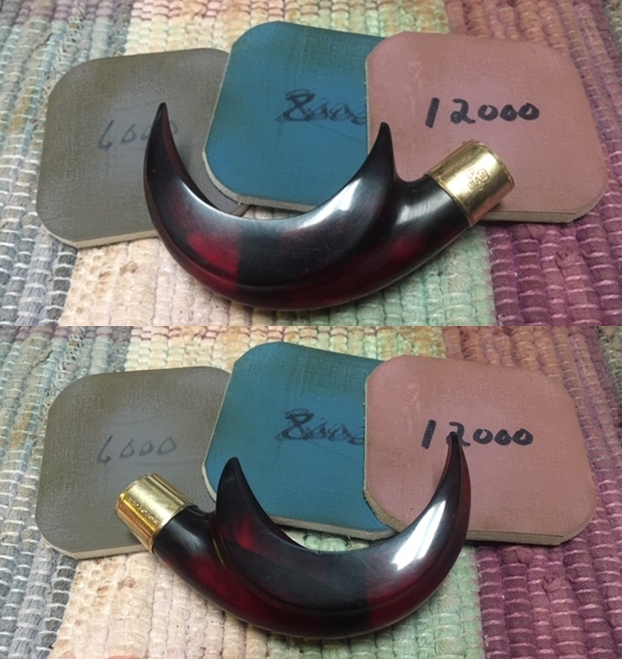
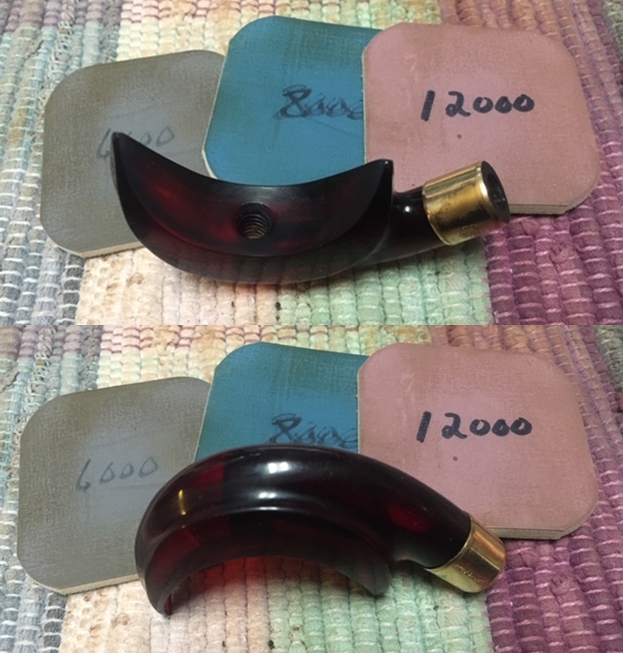
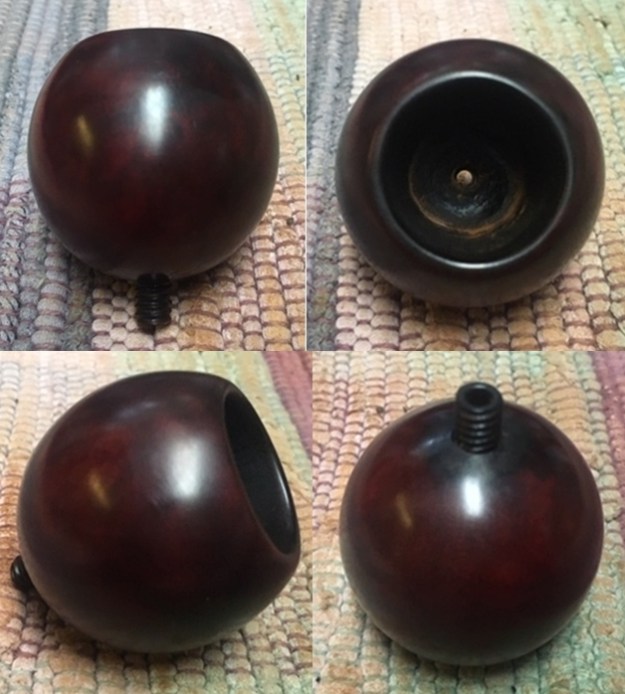
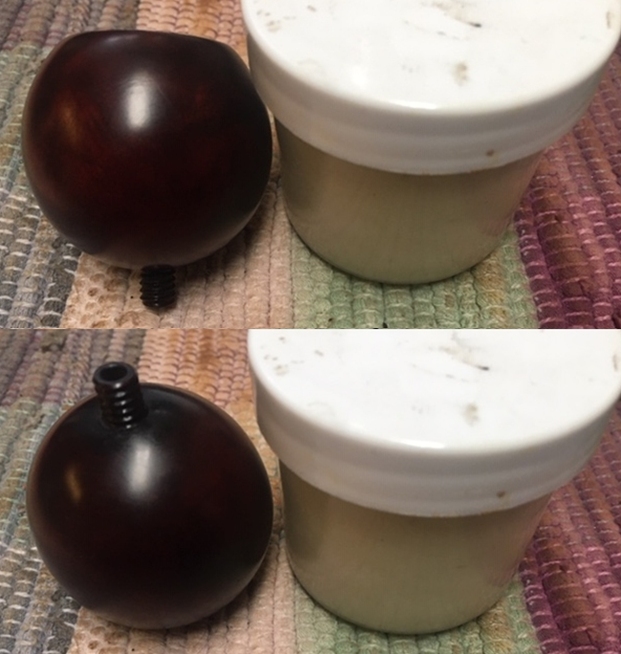
Tag Archives: repairing tooth marks

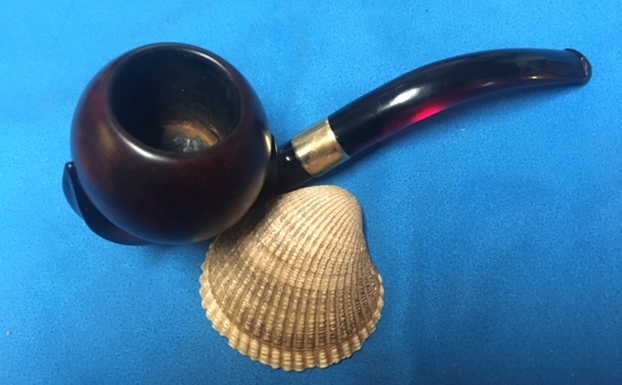
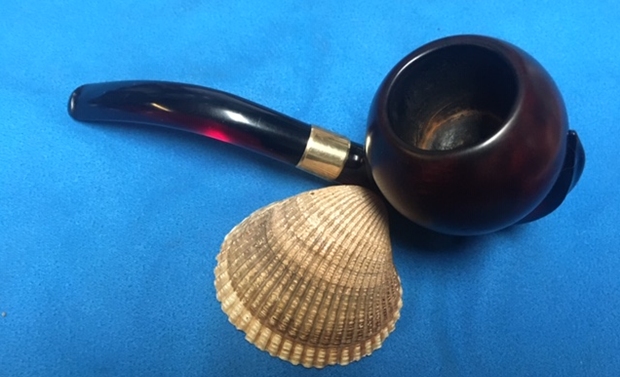
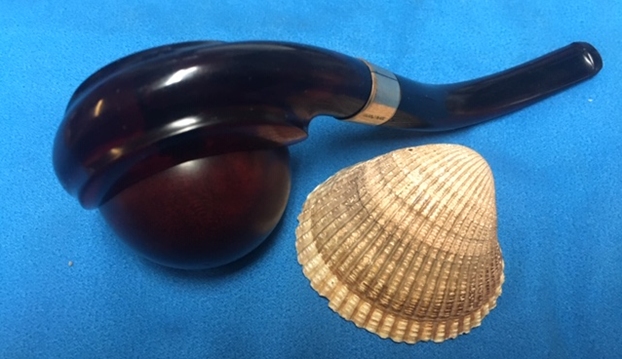
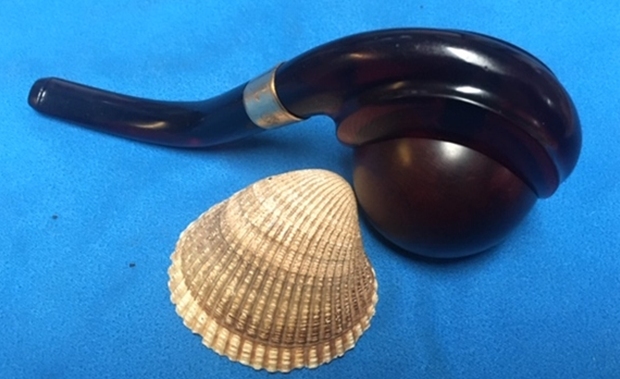
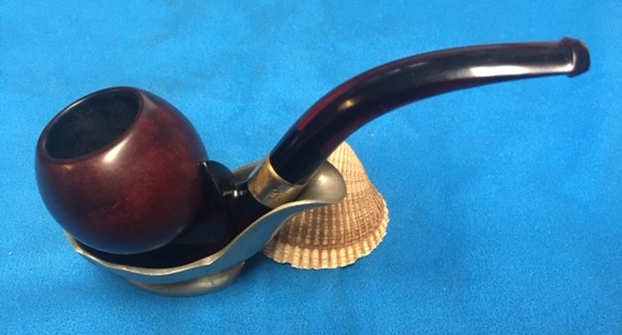
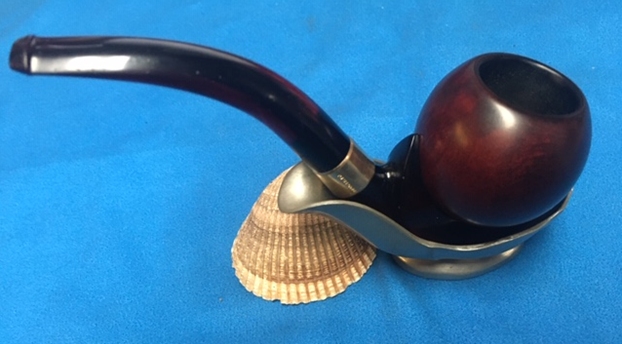
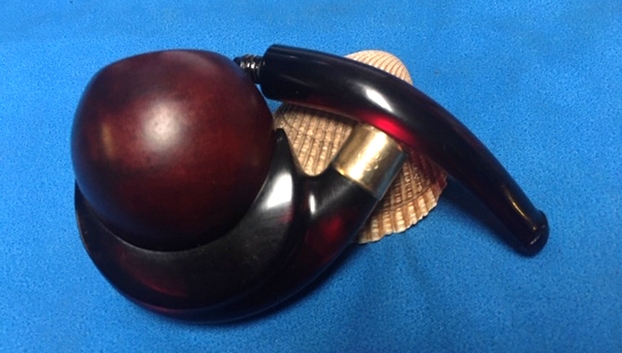
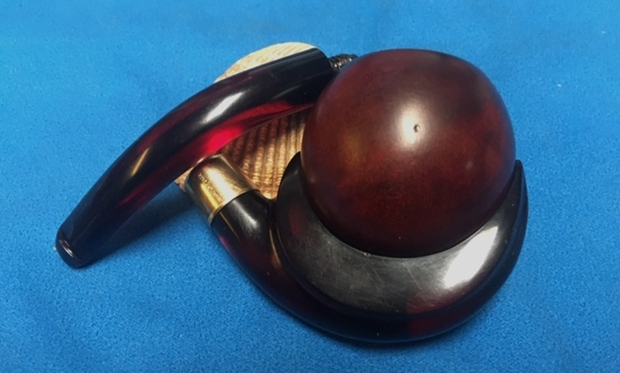
Beginning again – a KB&B Bakelite Blueline Cup and Ball Pipe


Blog by Steve Laug

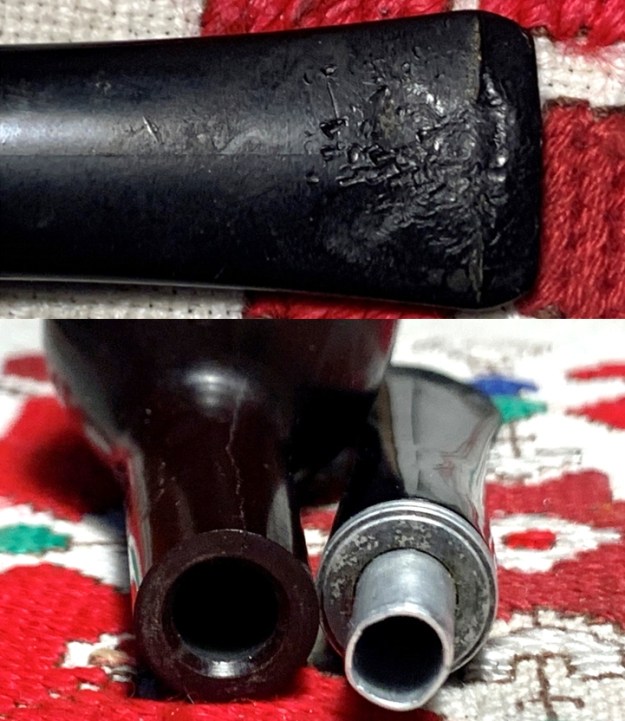
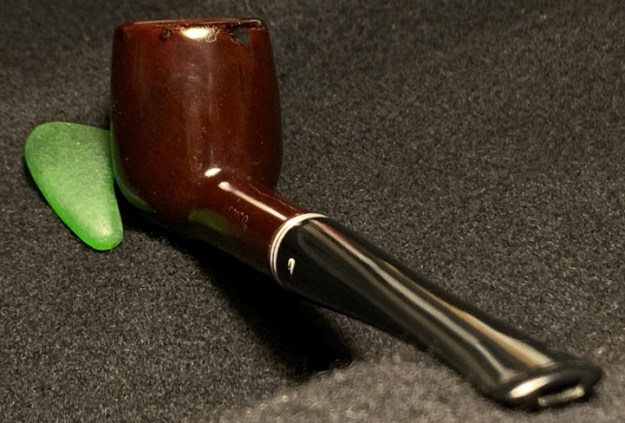
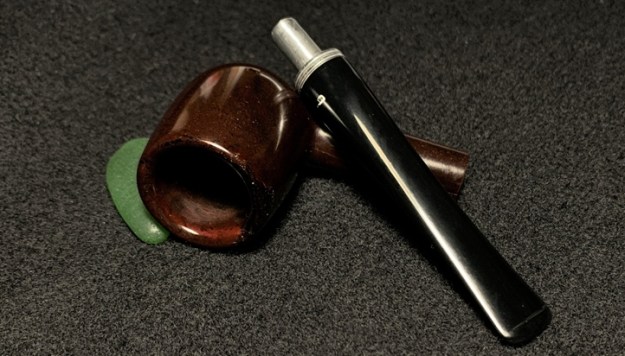
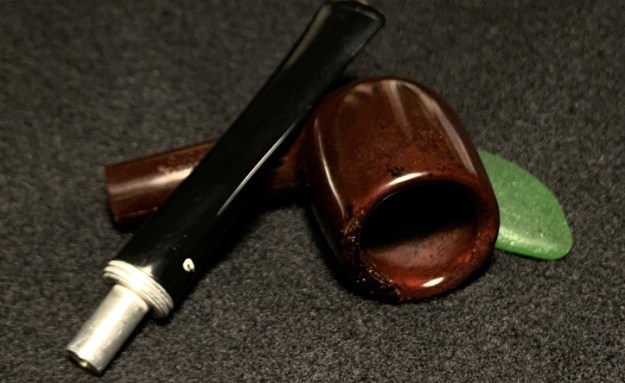
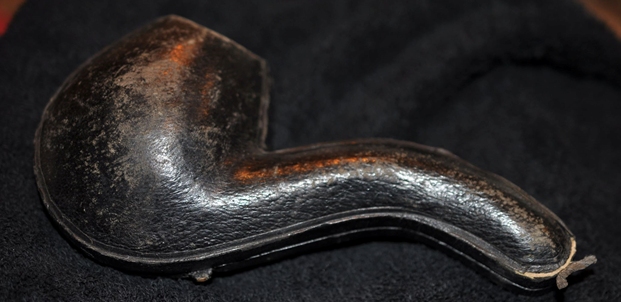
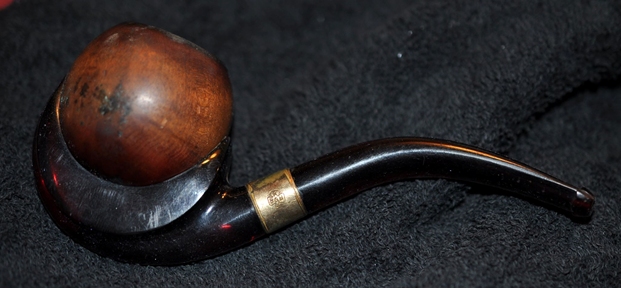
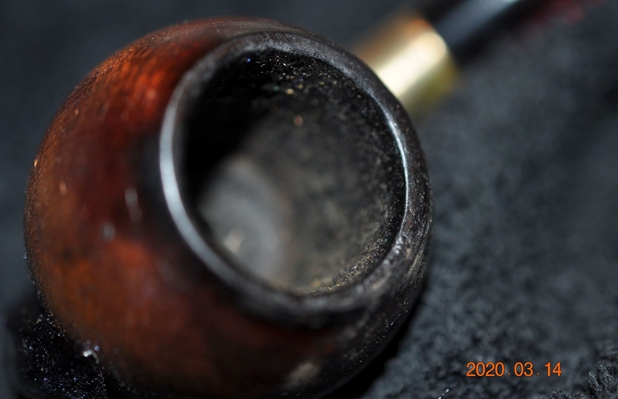
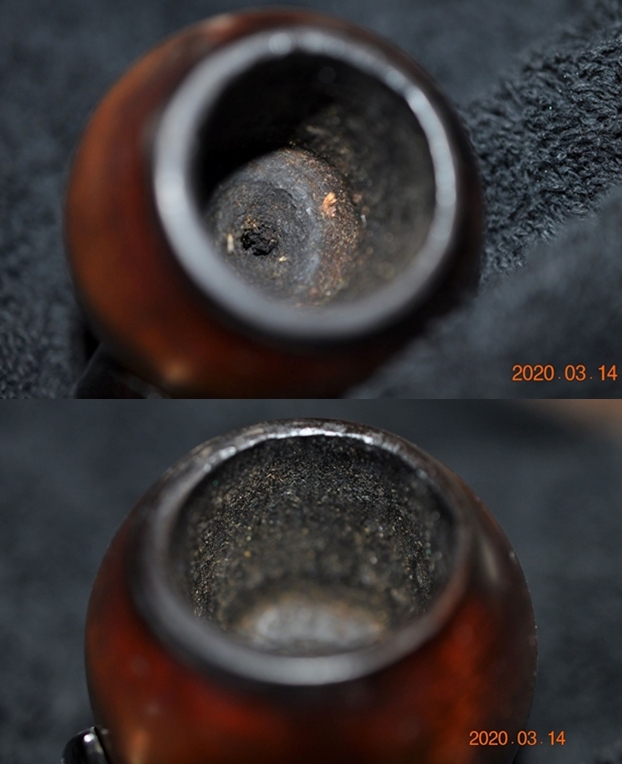
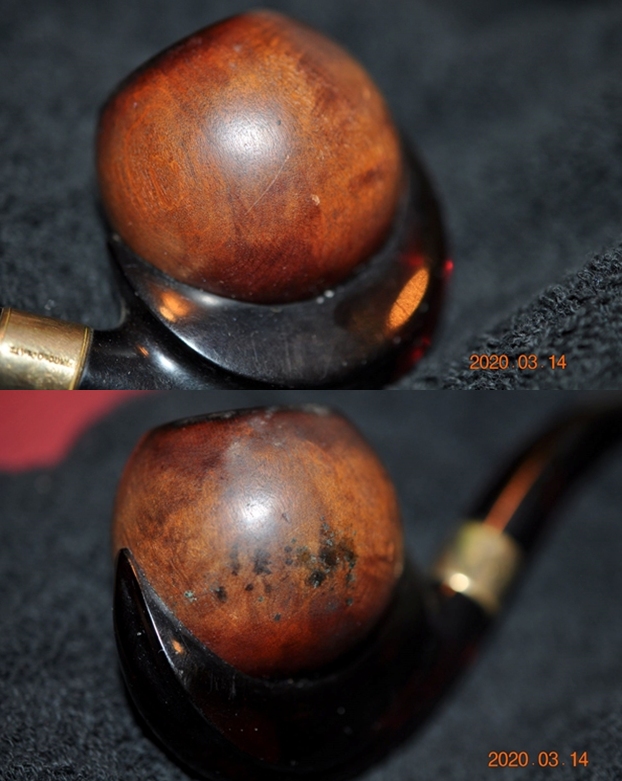
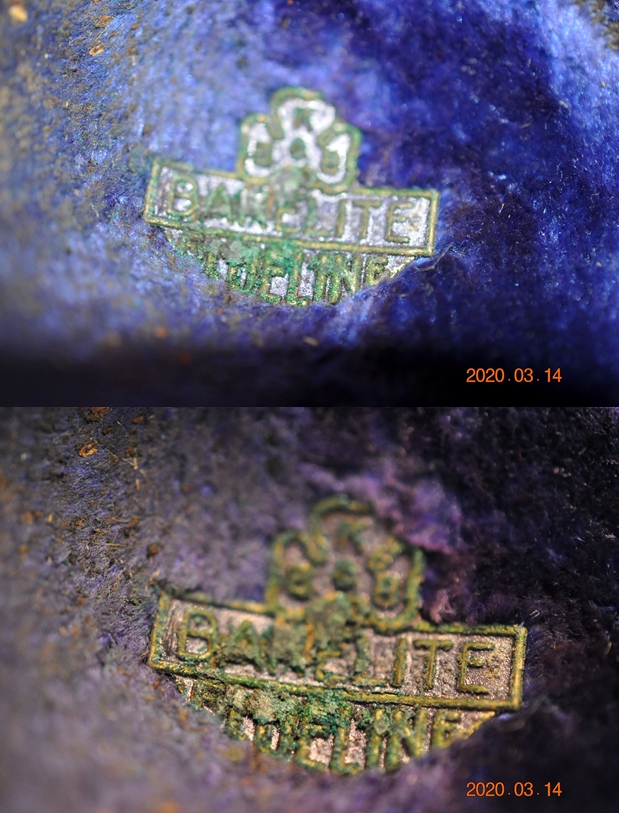
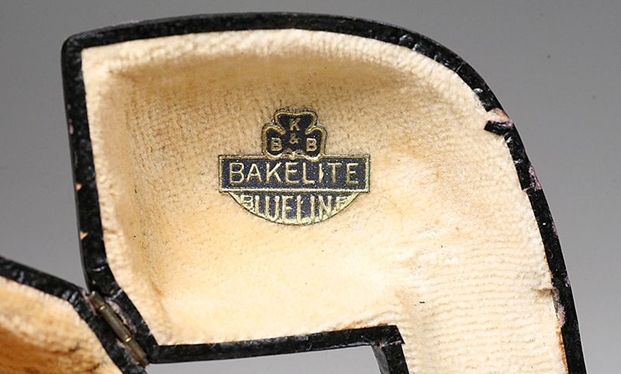
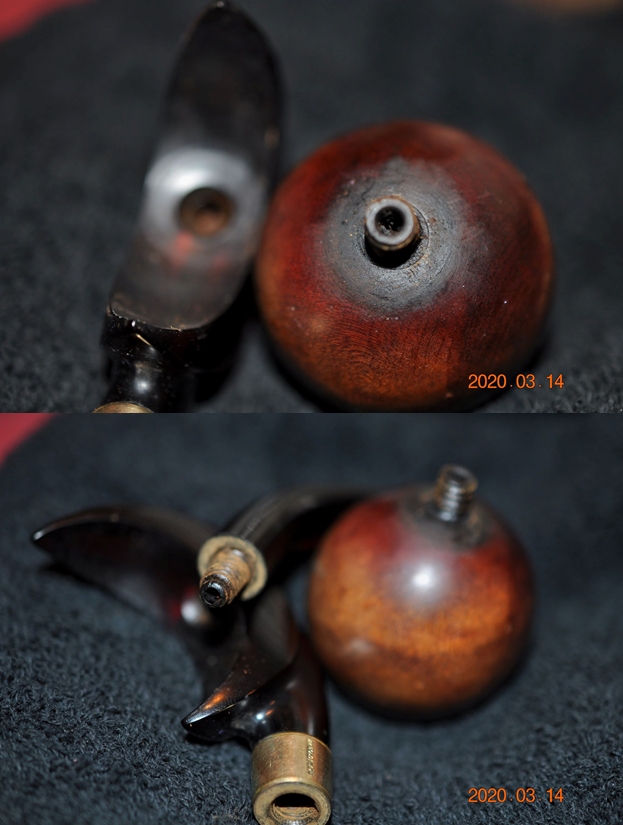
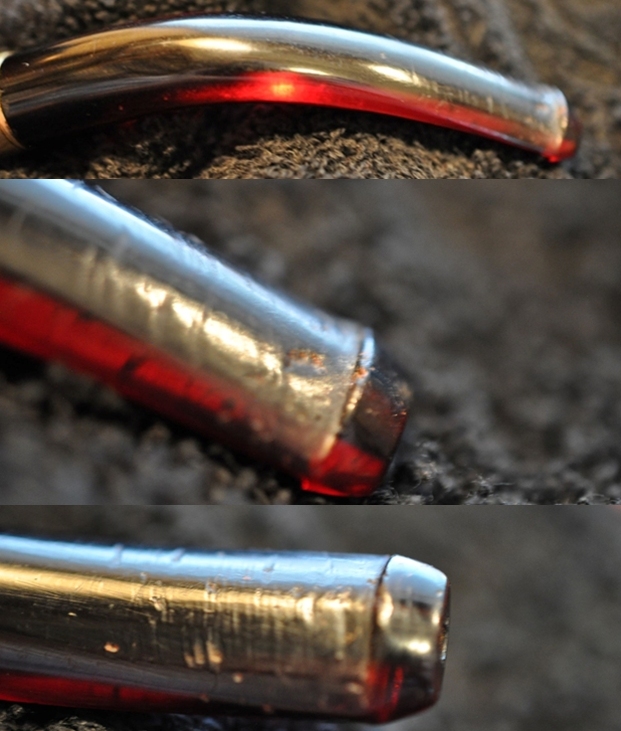
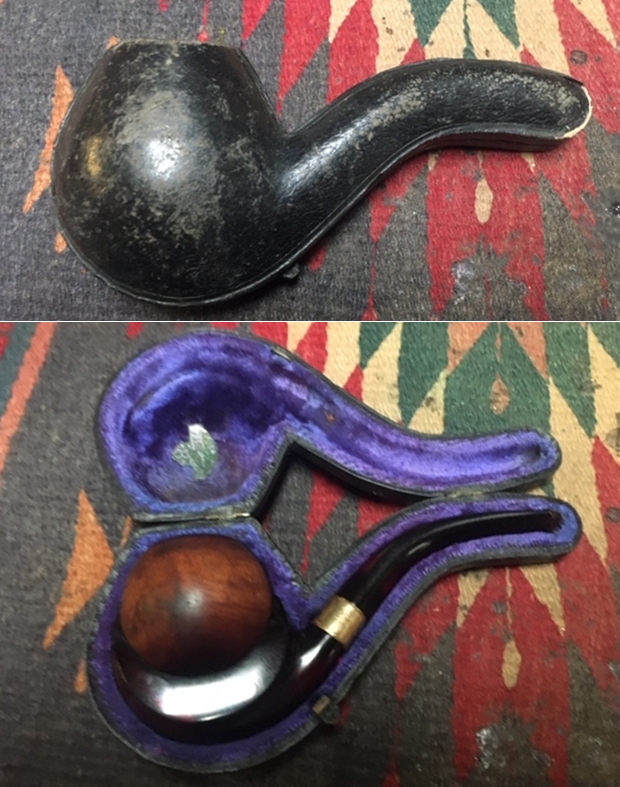
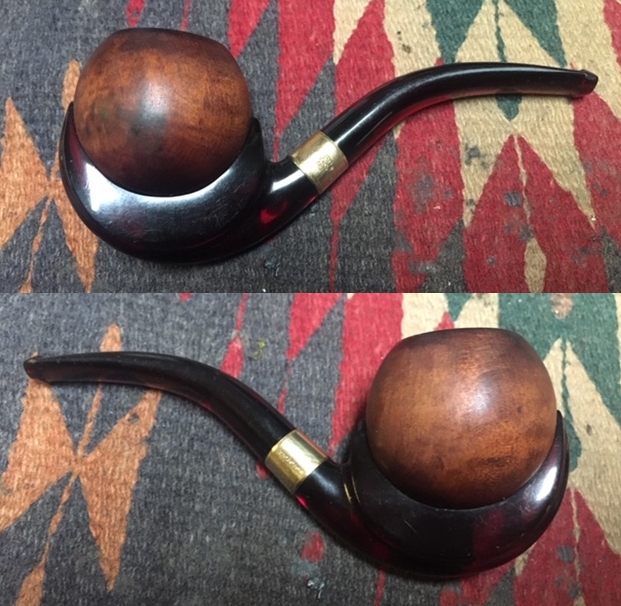
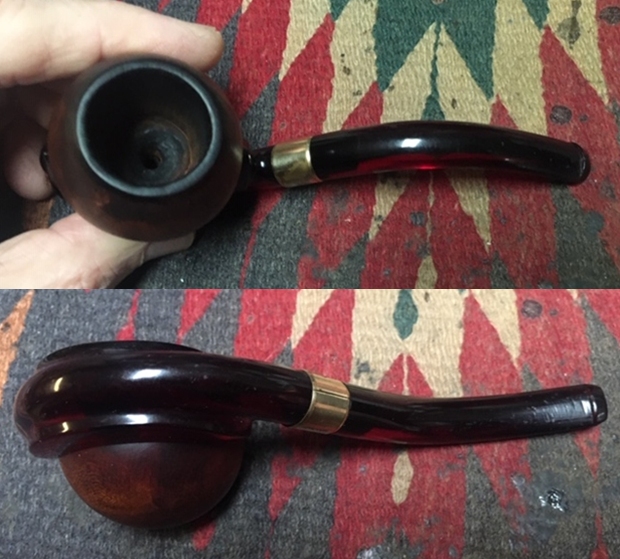
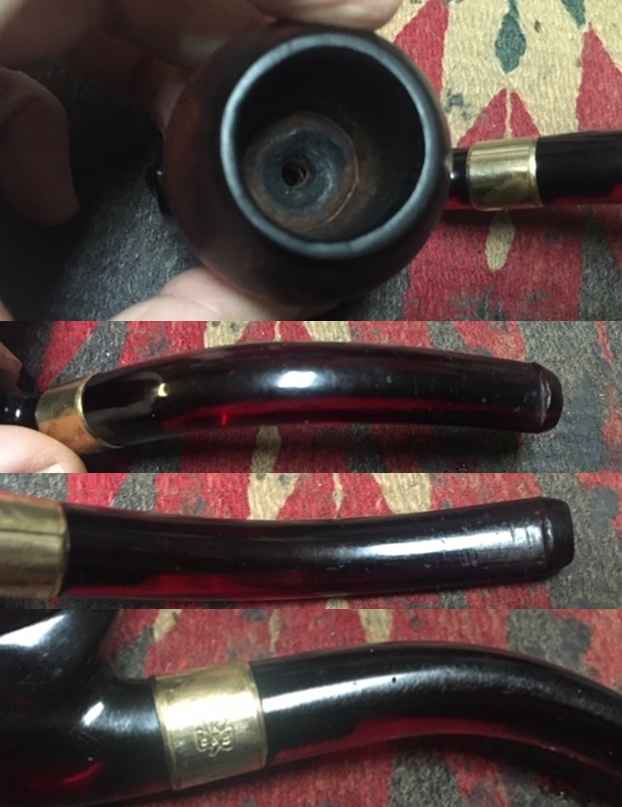
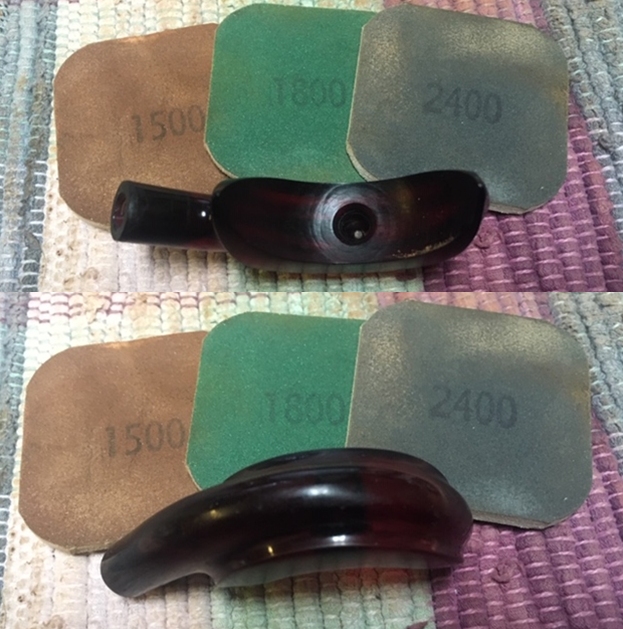
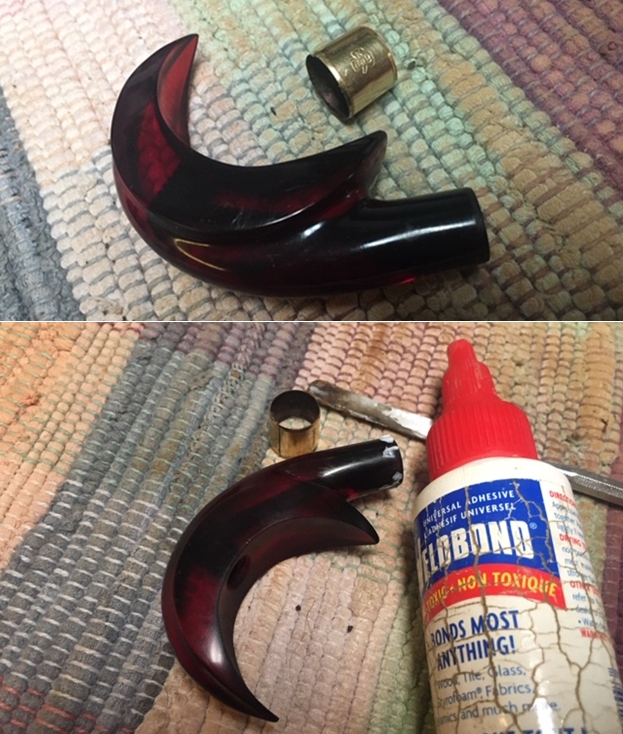
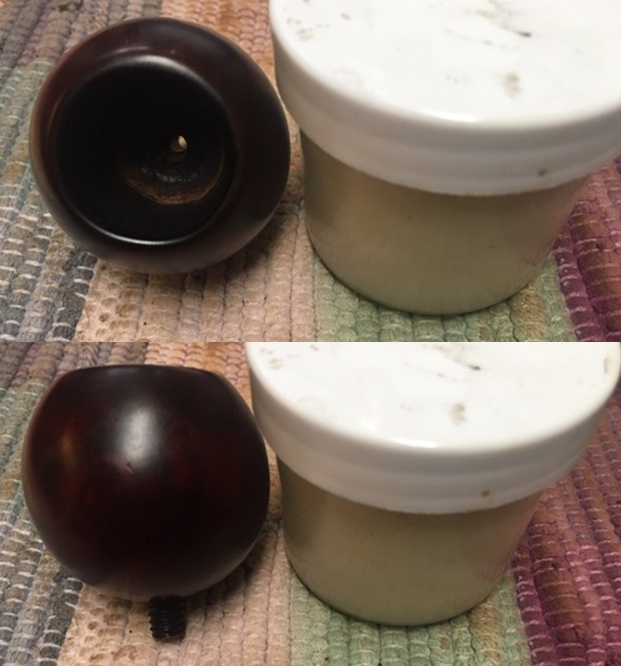
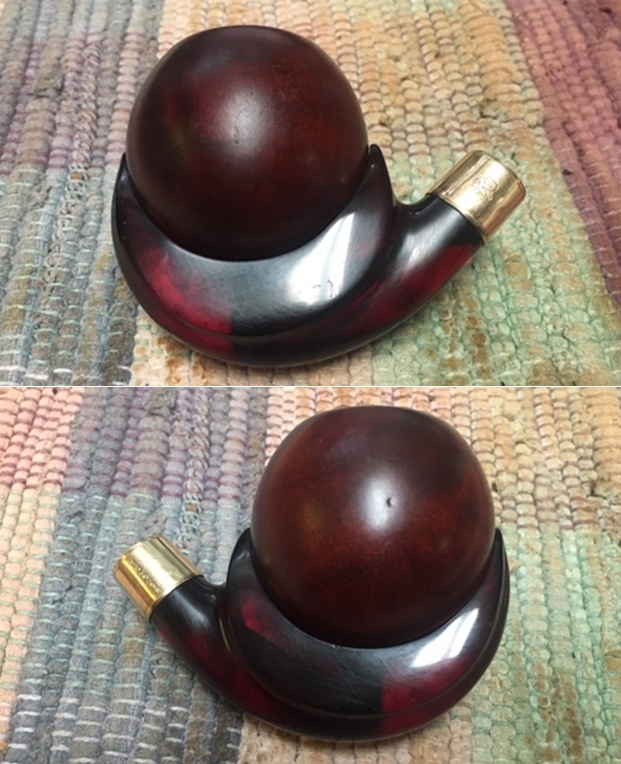
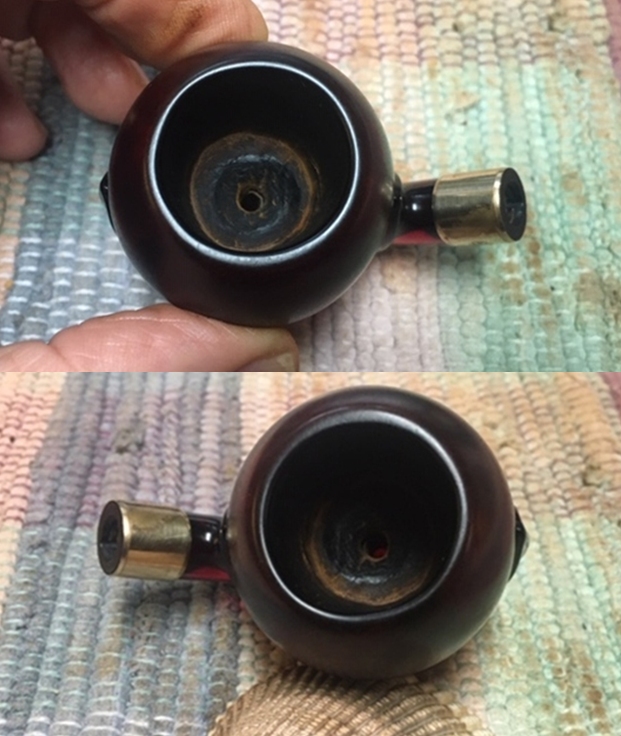
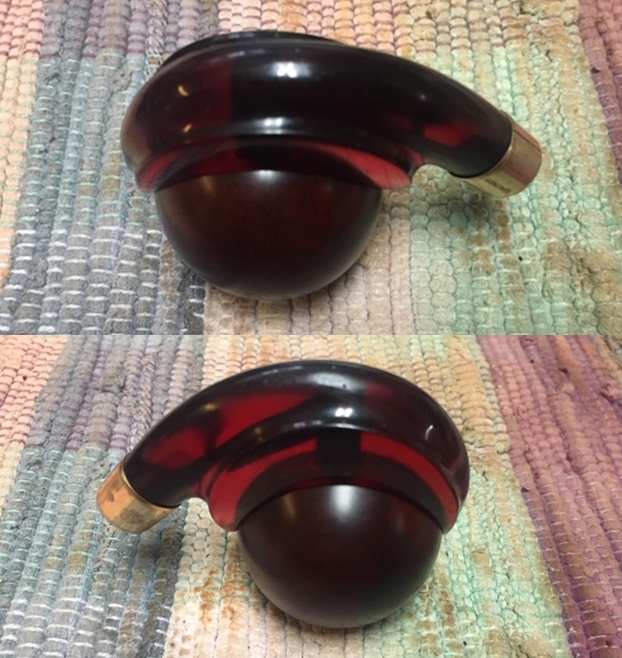
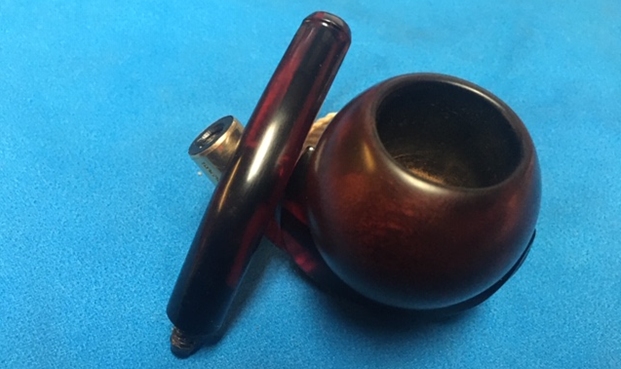
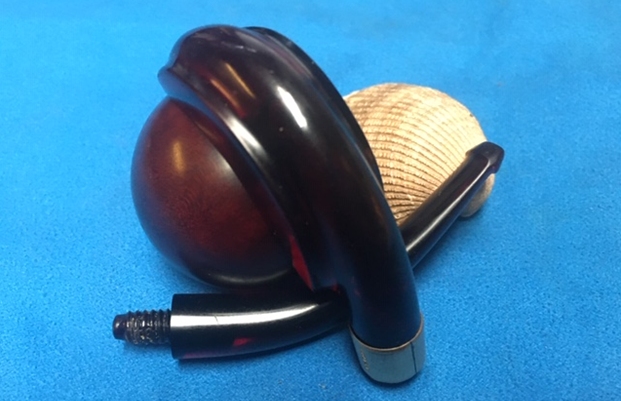
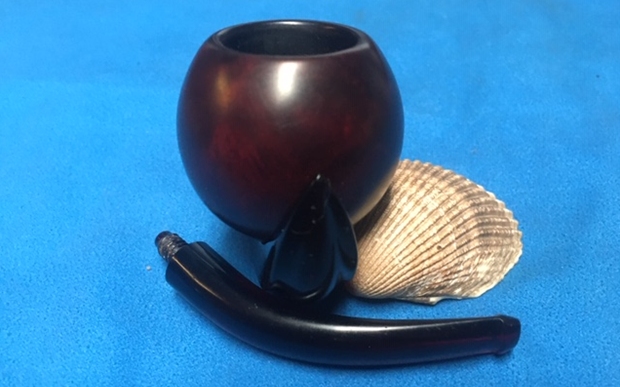
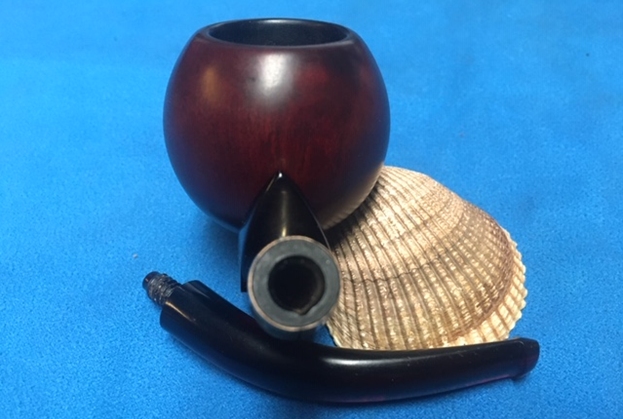
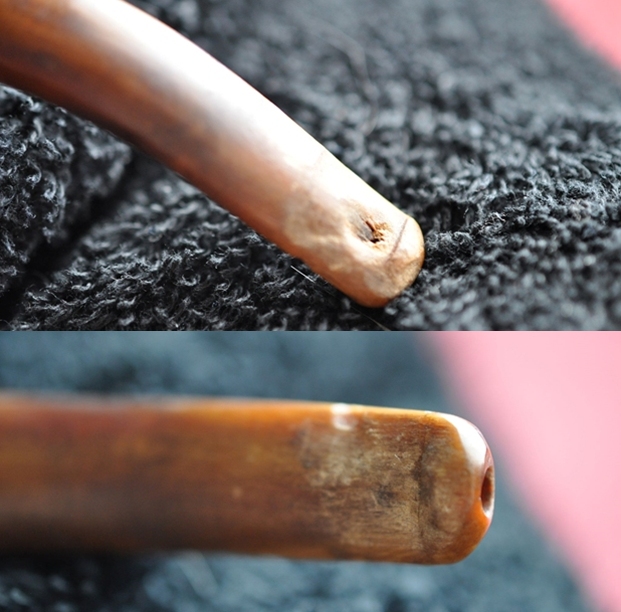
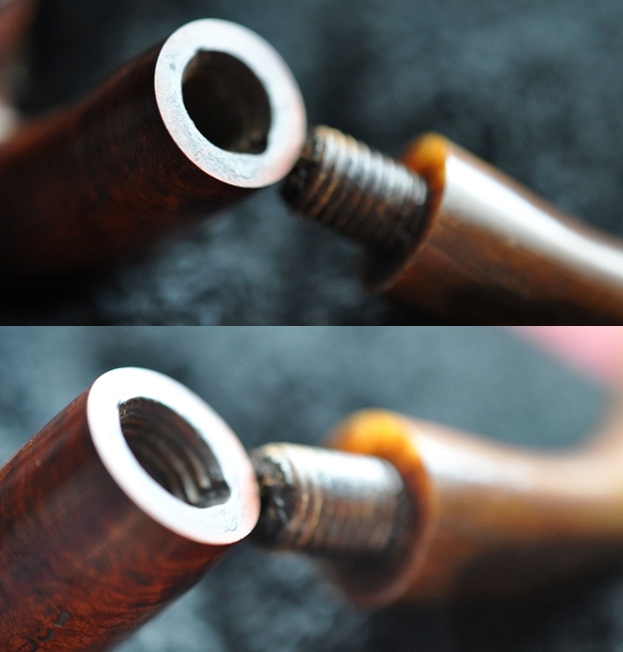
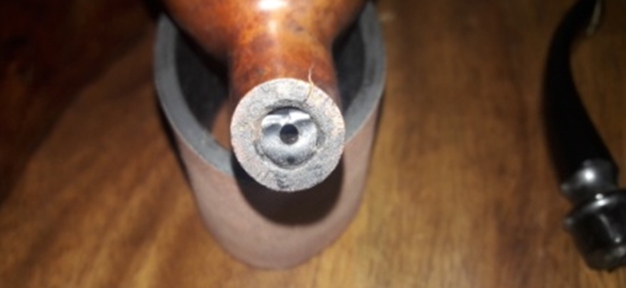
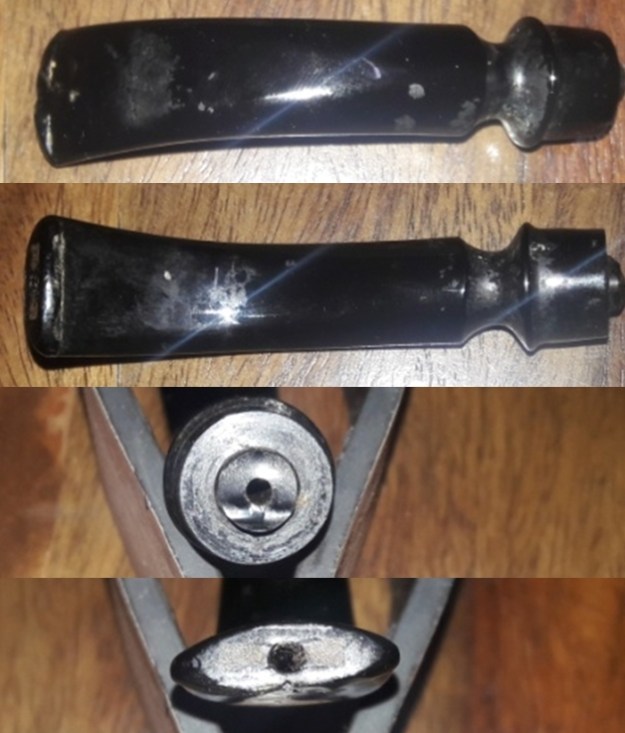
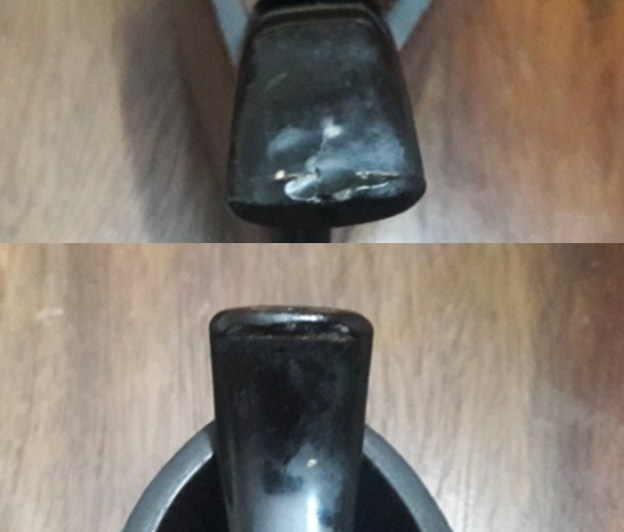
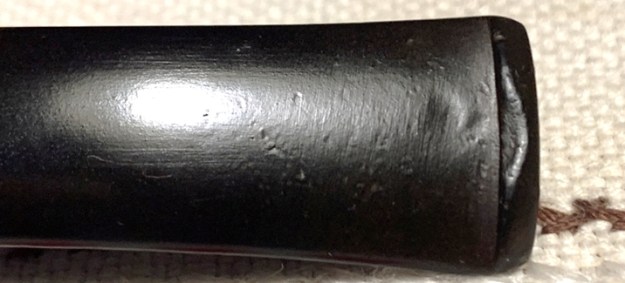
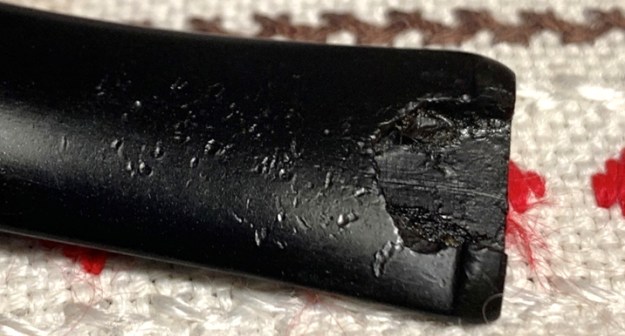
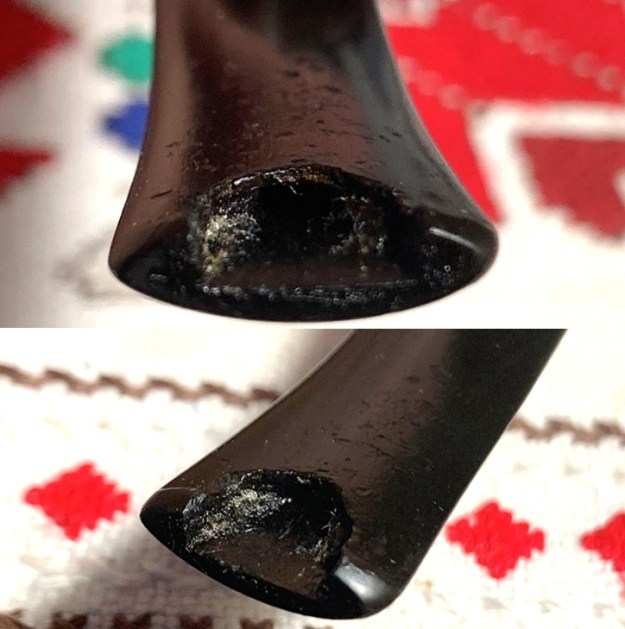
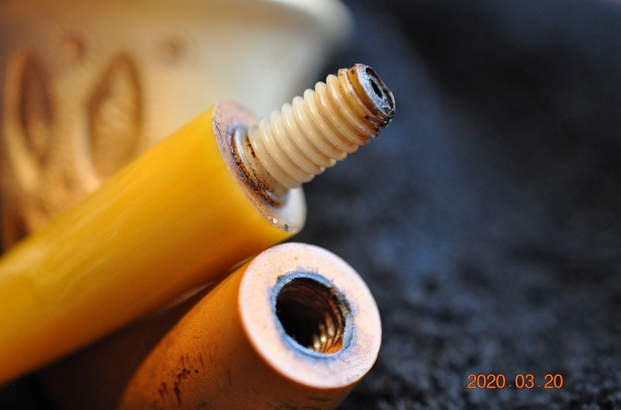
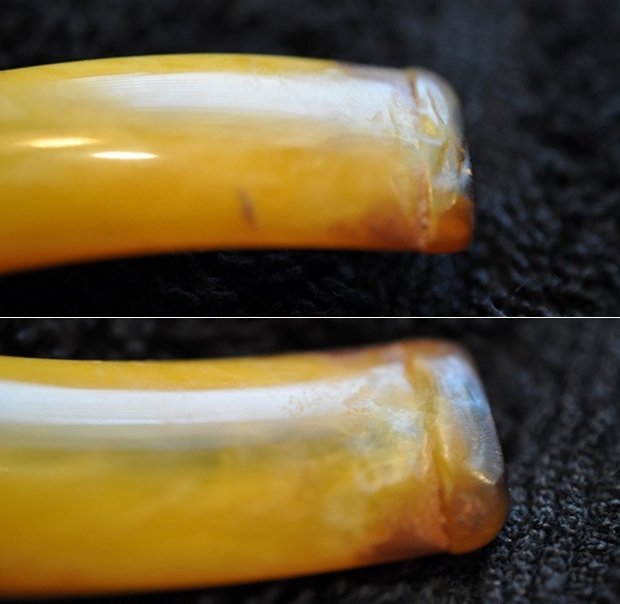
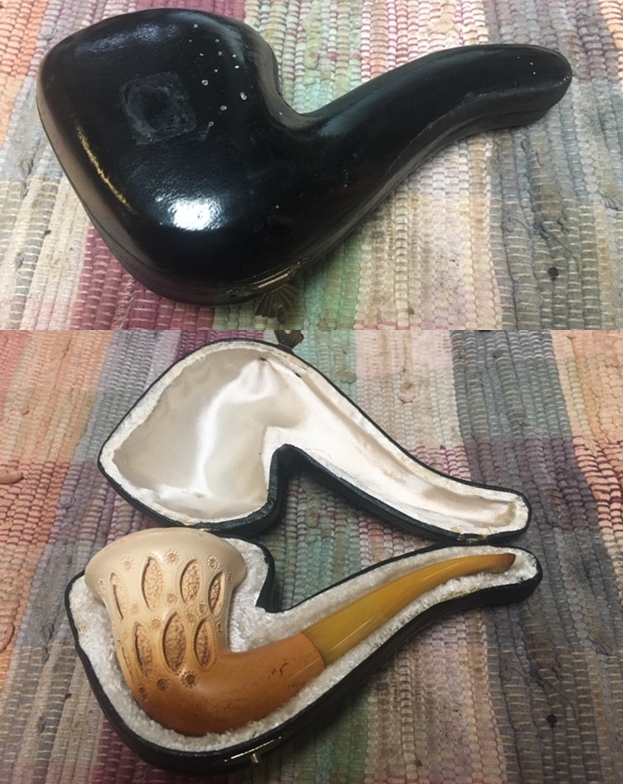
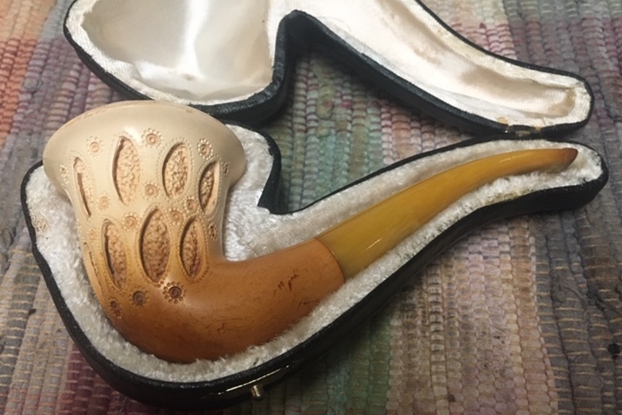
Jeff picked up this interesting Cup and Ball or Claw and Ball pipe somewhere along his hunts or in an auction. It is quite unique. I have worked on a lot of KB&B pipes but never one like this. It is stamp on the inside of the case with the KB&B Cloverleaf and Bakelite in the centre. Underneath it appears to read Blueline. The gold band on the shank end is also stamped with the KB&B Cloverleaf as well as what looks like 12K Gold Plate. Both the base of the pipe and the stem are Bakelite. The stem has a bone tenon that screws into the Bakelite shank. It came in a black leather covered case lined with blue velvet fabric. The only marking on the case was what I mentioned above. The case has a brass clasp on the front and brass hinges on the back. It was obviously custom made for this pipe.Jeff opened the case and this was what the pipe that was inside looked like. It was a very unique looking pipe that is for sure but it was also very dirty. The base, shank and stem were rich red coloured Bakelite. The exterior of the bowl was very dirty and had tars and oils ground into the finish and sticky spots on the finish. Looking at the top of the bowl you can see the cake and how much lava had overflowed onto the rim top. I am sure once it was out of the case it would become clear how dirty it really was.Jeff took it out of the case to have a better look at the condition of the pipe. It was a very interesting looking rendition of a Ball and Cup pipe – at least that is what I would call it. It looked like it would cleanup really well and look great when finished. The hardwood bowl (cherry or maple) had some colour from either being filthy or from age. Cleaning would reveal the facts! He took some close-up photos of the bowl and rim top. There was a very thick cake in the bowl that was hard and uneven and had lots of flakes of tobacco debris stuck to the walls. The lava overflowed down the outside of the ball on several sides. The edges of the bowl looked to be in pretty good condition at this point. Jeff took photos of the sides of the bowl to show the grain and condition of the finish around the bowl. These photos also lead me to conclude that the bowl is not briar… perhaps Cherry or Maple.In terms of stamping the only identifying marks on the pipe were those on the case on the gold band on the shank. Jeff captured those marks in the next set of photos. The logo on the inside lid of the case was worn and dirty so he included two photos of that. I also found a similar lid logo online and have included it as well for comparison sake. Jeff took photos of the KB&B Cloverleaf and the 12K Gold Plate stamp on the band.He took photos of the ball and the stem off the shank/base. The ball and the stem both are threaded and are screwed into the base. It was filthy with oils and tars. The internals of the pipe were in as bad a condition as the inside of the bowl and airway.Jeff took photos of the stem to show the general condition of the stem shape. The curve is graceful and the curve great. The photo shows the profile of the stem. He took photos of the top and underside of the stem to show the damage and bite and scratch marks on both sides up the stem from the button.I remembered that one of the contributors to rebornpipes, Troy Wilburn had done a lot of work on older KB&B pipes so I turned to one of his blogs on rebornpipes on a Blueline Billiard that he restored (https://rebornpipes.com/tag/kbb-blue-line-pipes-with-bakelite-stems/). As expected Troy had done a great job digging into the Blueline brand and potential dates. I quote from his blog the following sections.

I was thinking after some initial research that these pipes were from around 1910 – early 1920s. Seems it’s a little older than I thought. I got this info from a Kaywoodie and early KBB collector who has had several Blue Lines.

Your pipe is made by Kaufman Brothers and Bondy, or KB&B, which later (1915) created the Kaywoodie line we all know. But this pipe is Pre-Kaywoodie, as they were making pipes under the KB&B branding from about 1900 to 1914. Bakelite was invented in 1907, so this pipe was likely made from 1908 to 1914, as the Bakelite was quite the technological wonder of the time, and was used in many products (still in use today). These “Blue Line Bakelite” pipes are rare pieces, seldom seen.”

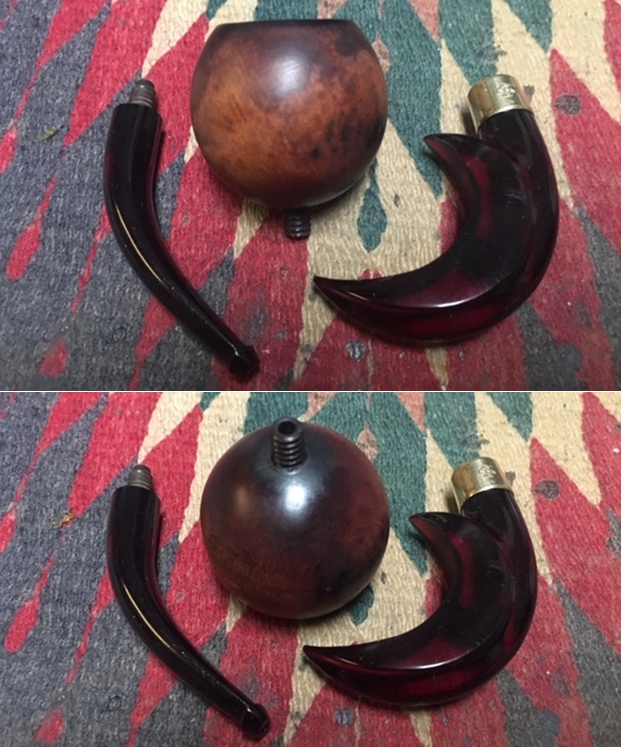
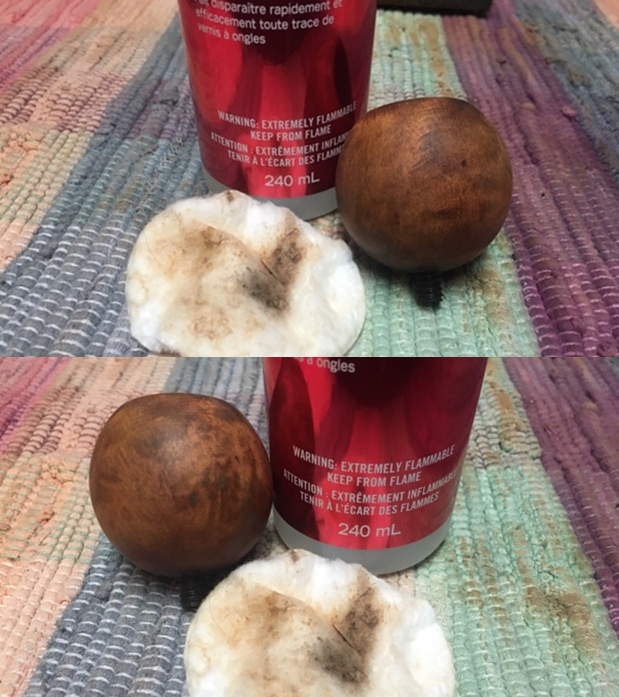
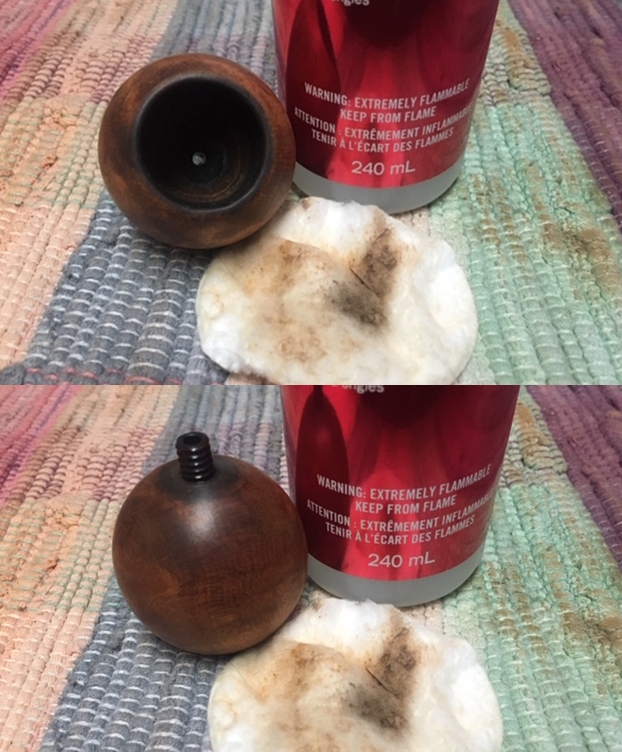
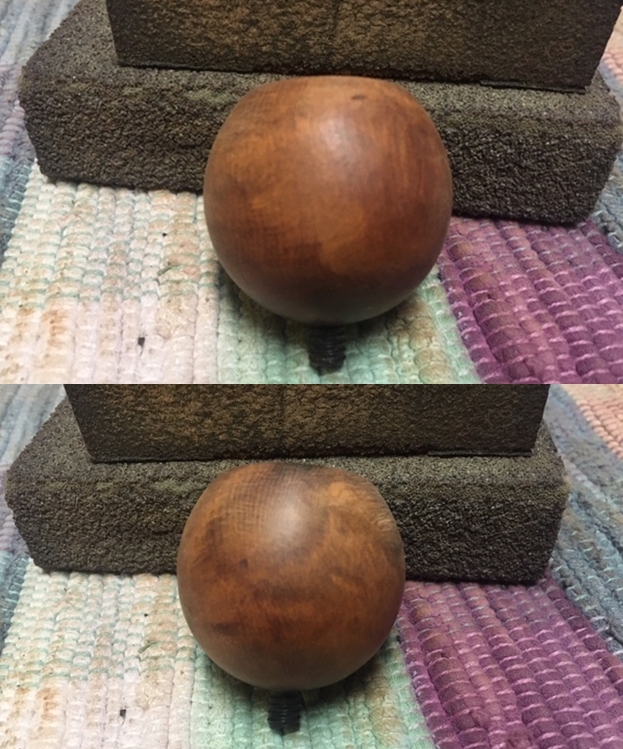
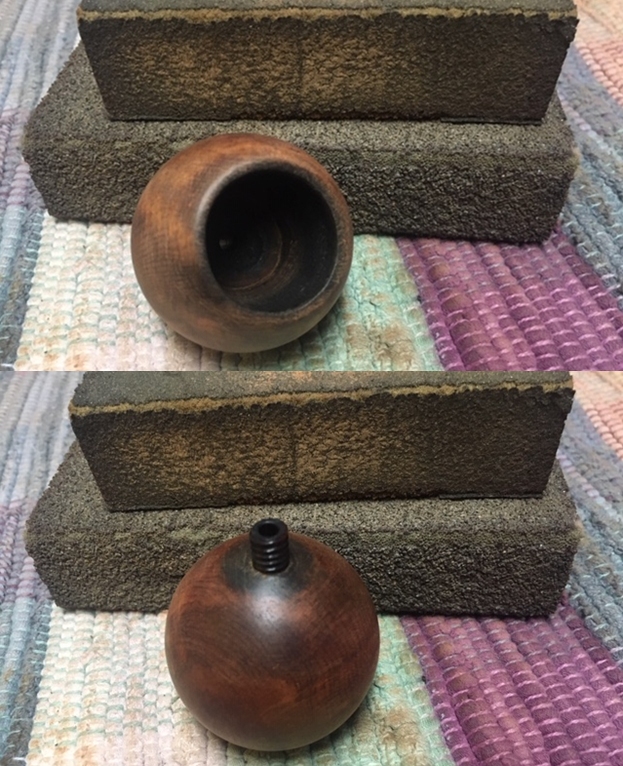
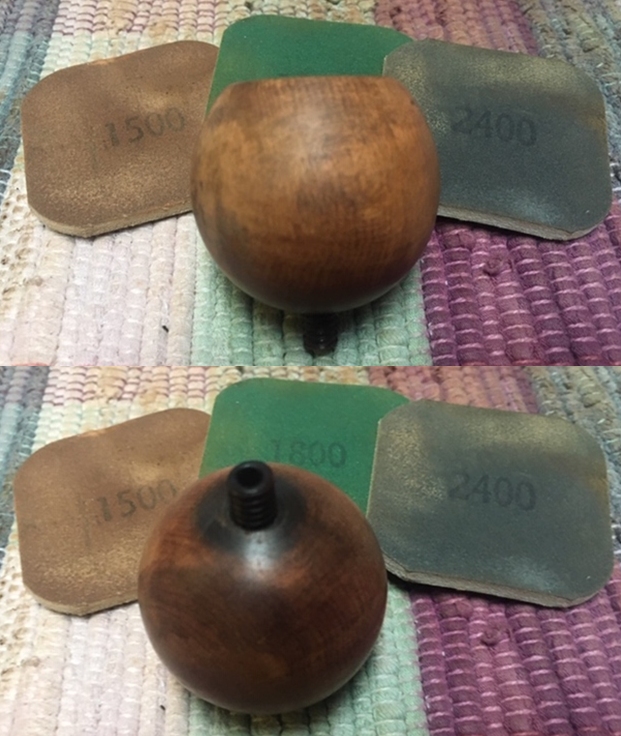
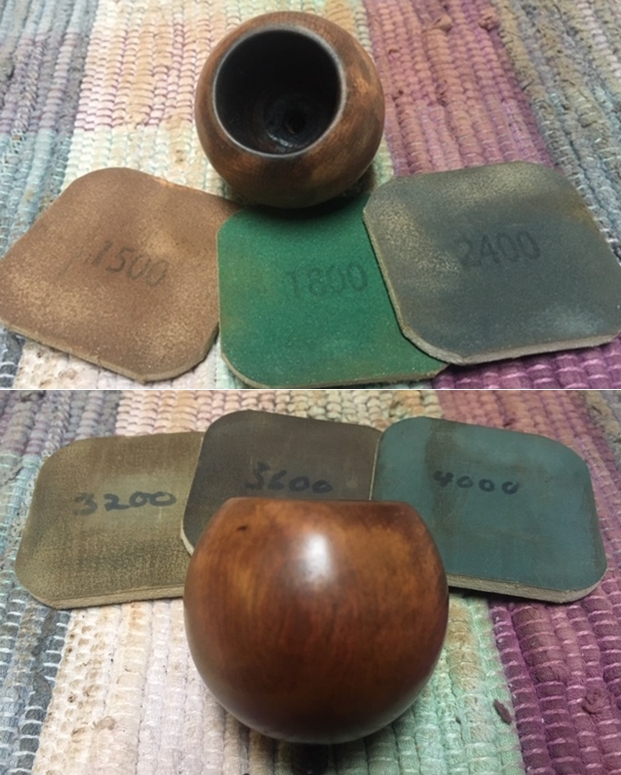
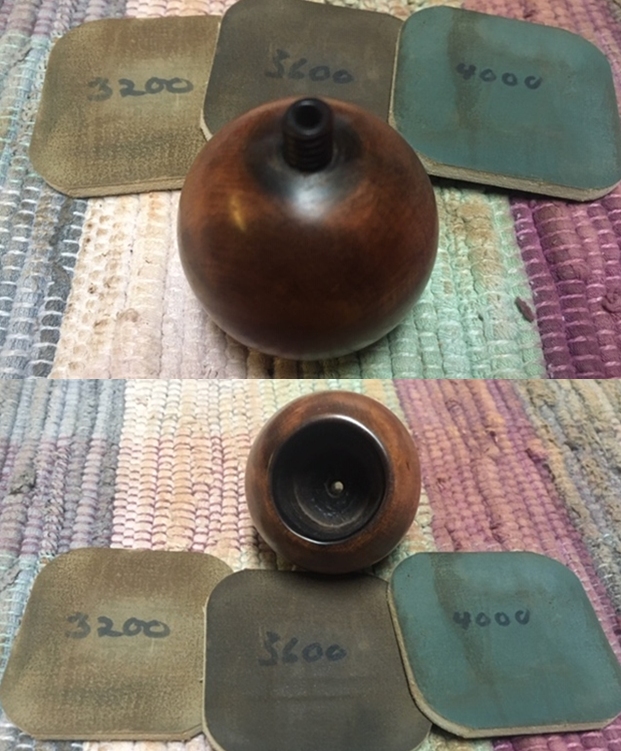
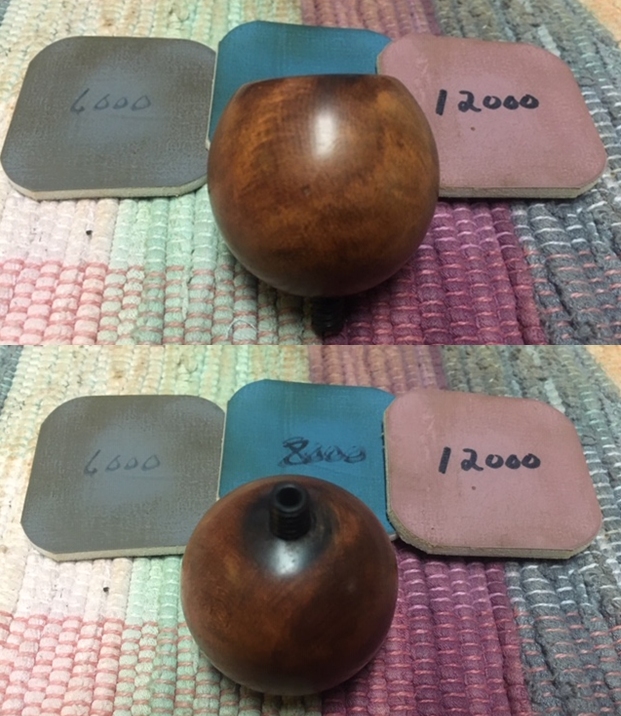
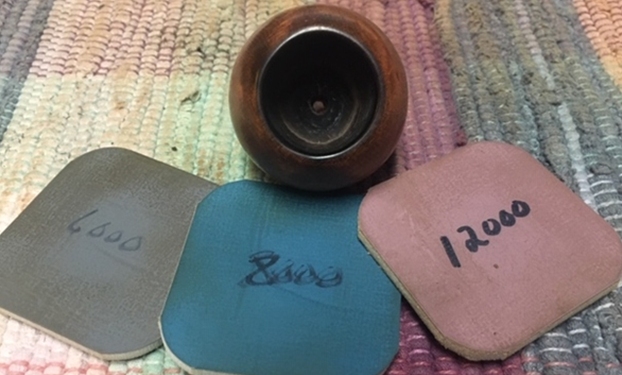
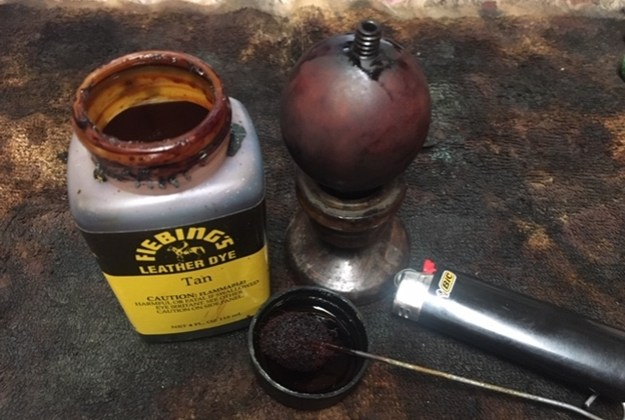
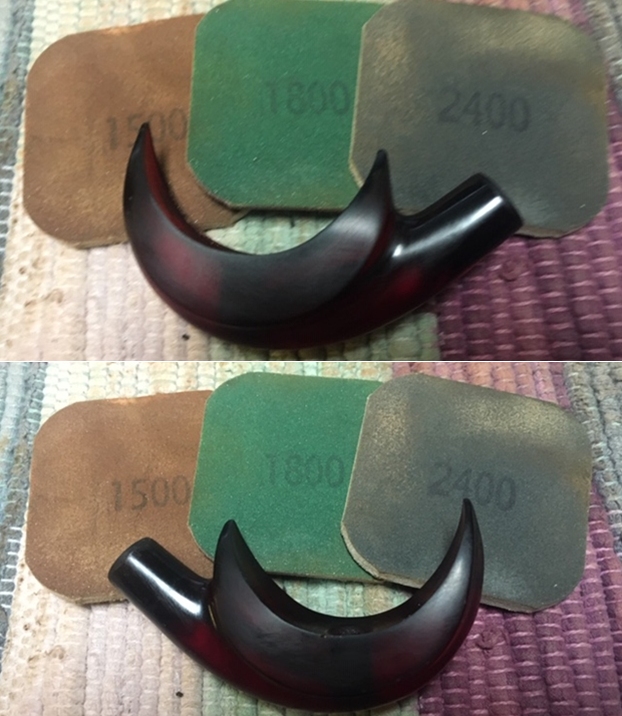
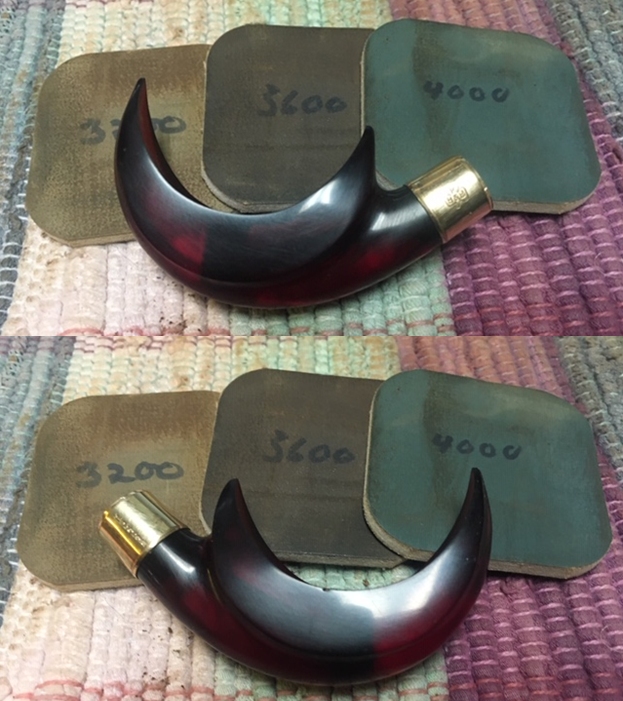
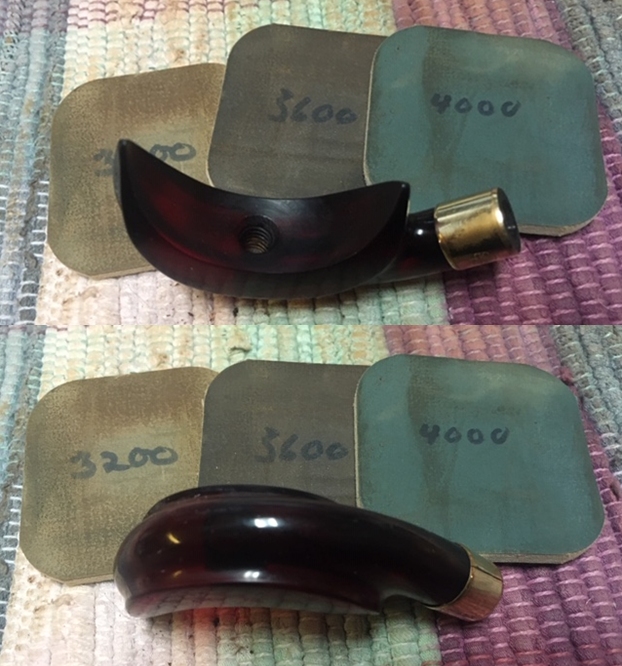
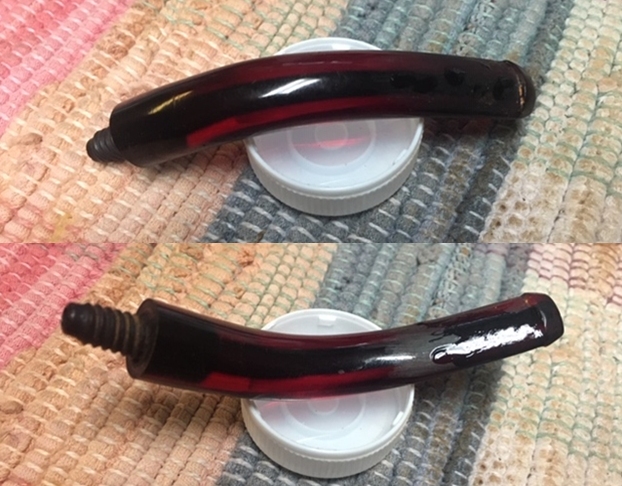
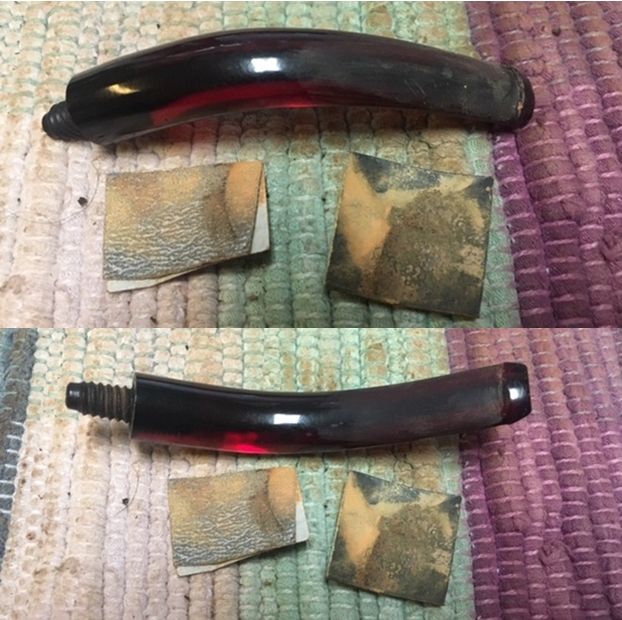
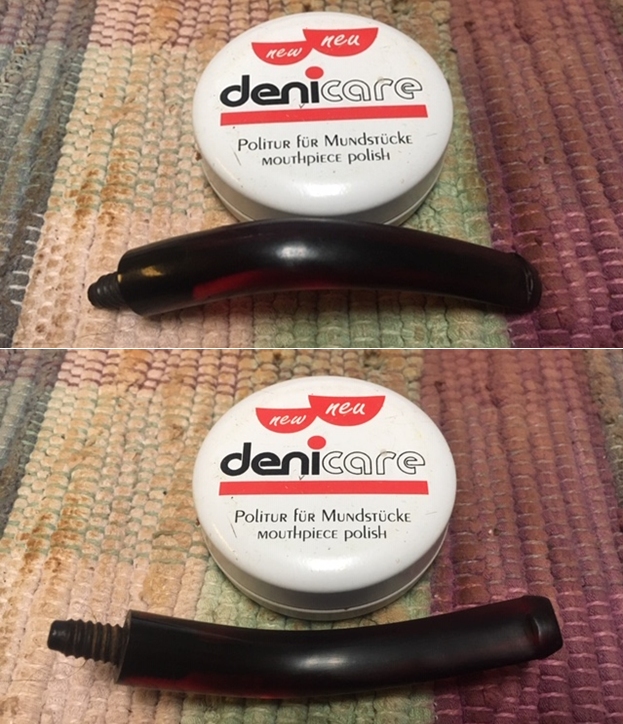
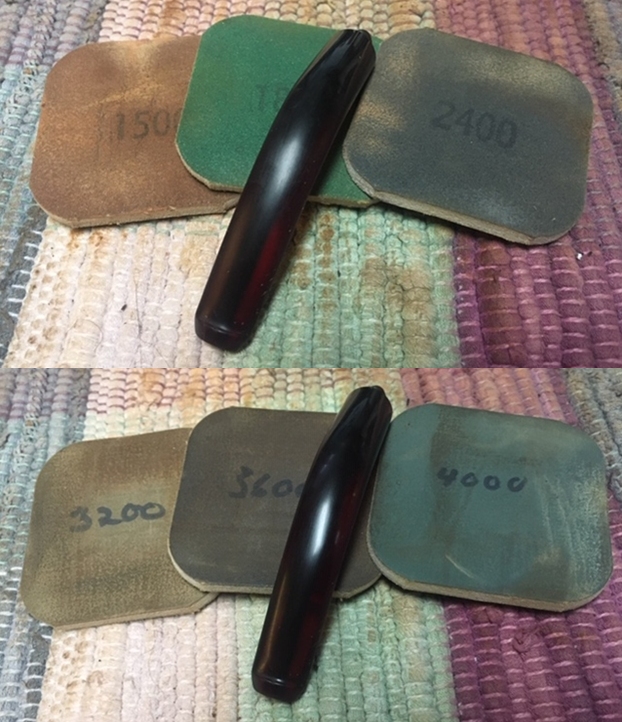
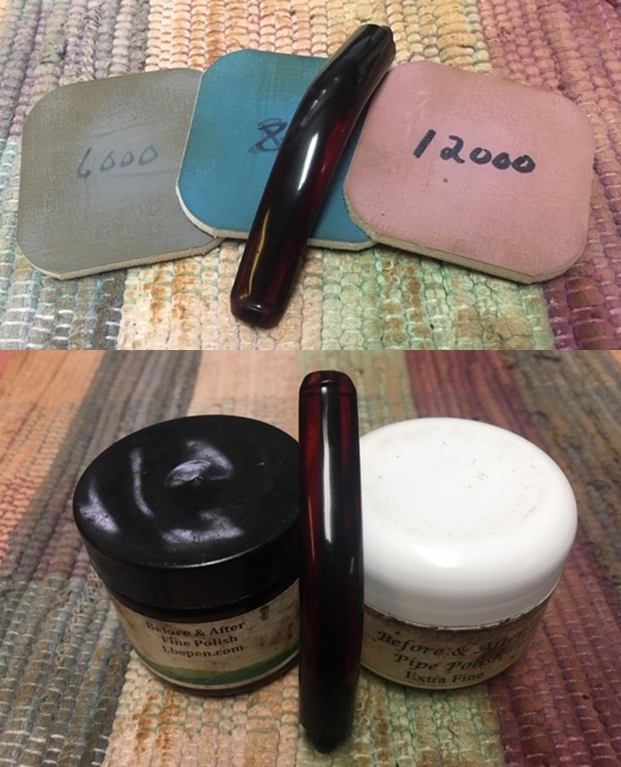
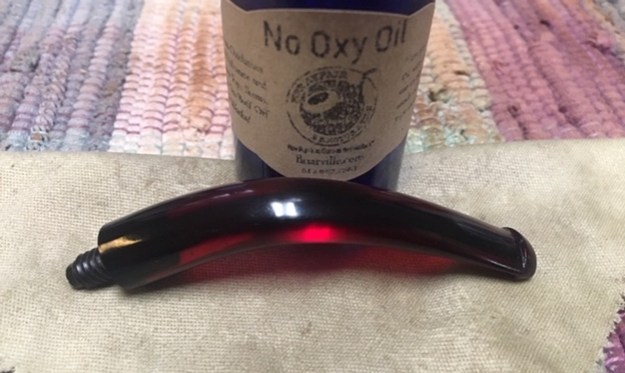
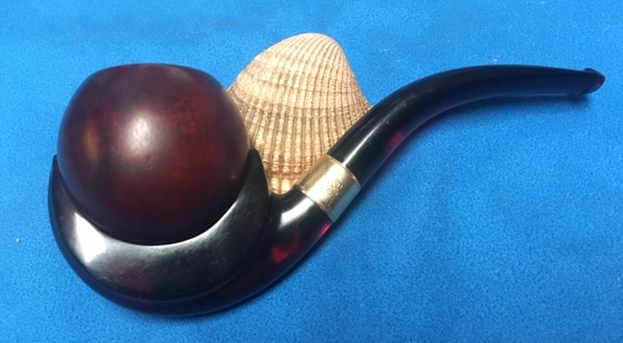
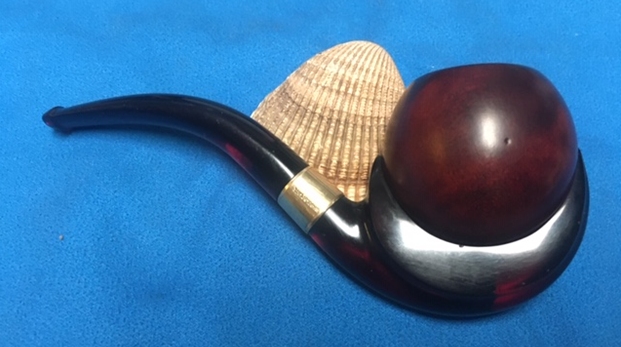
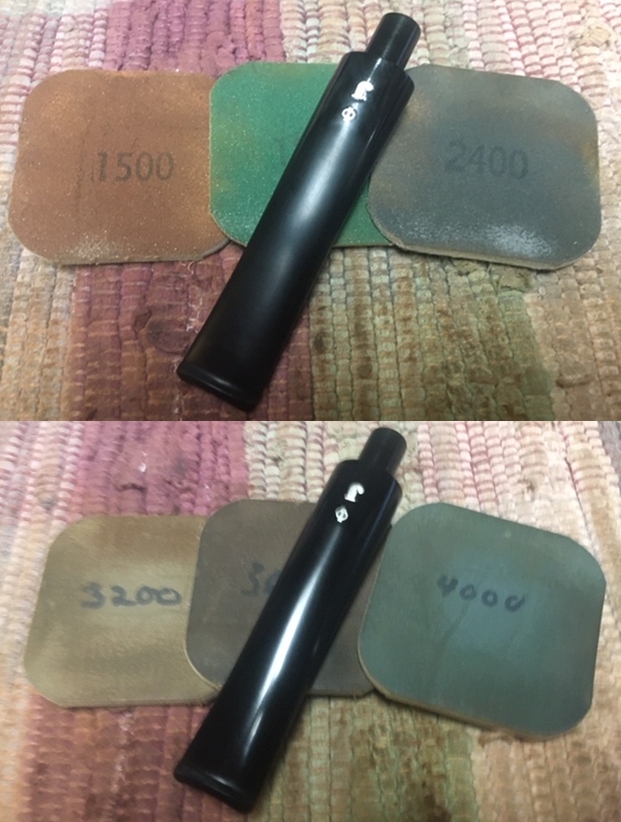
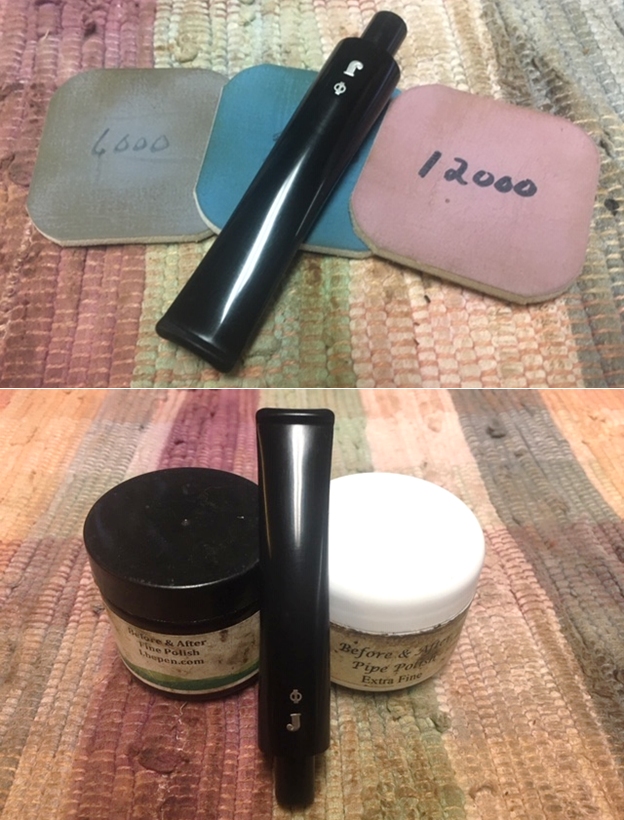
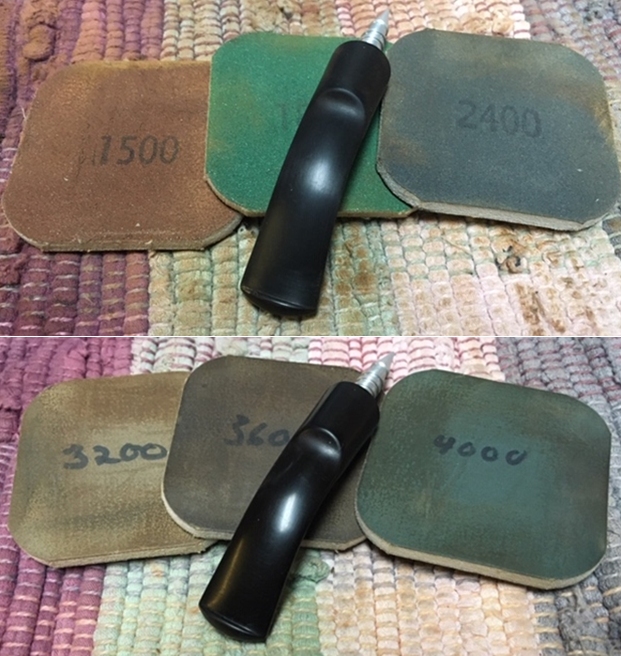
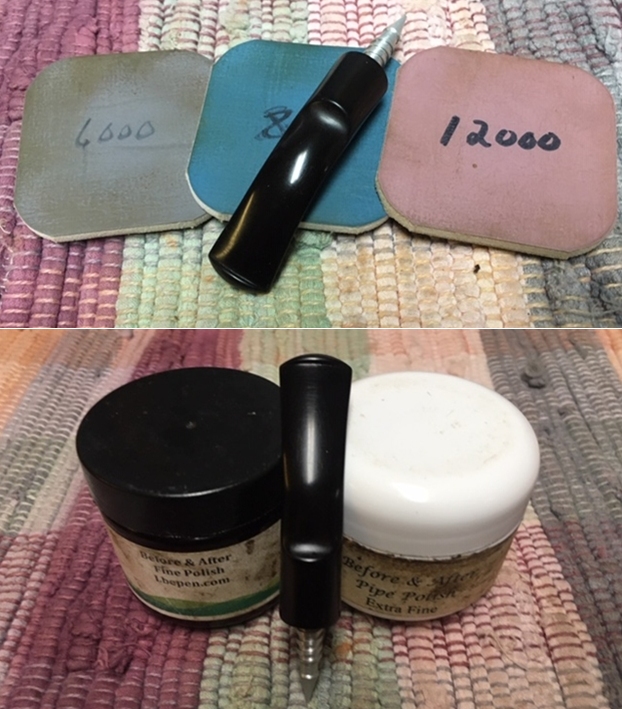
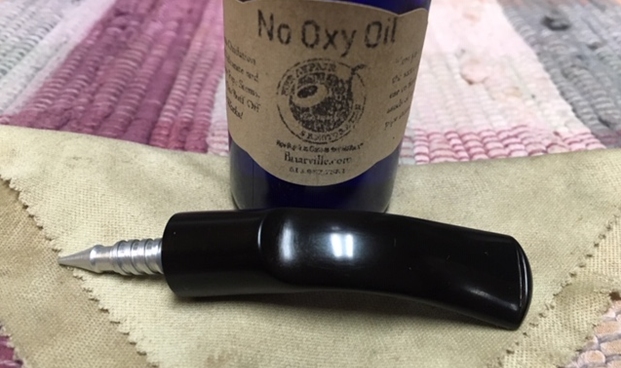
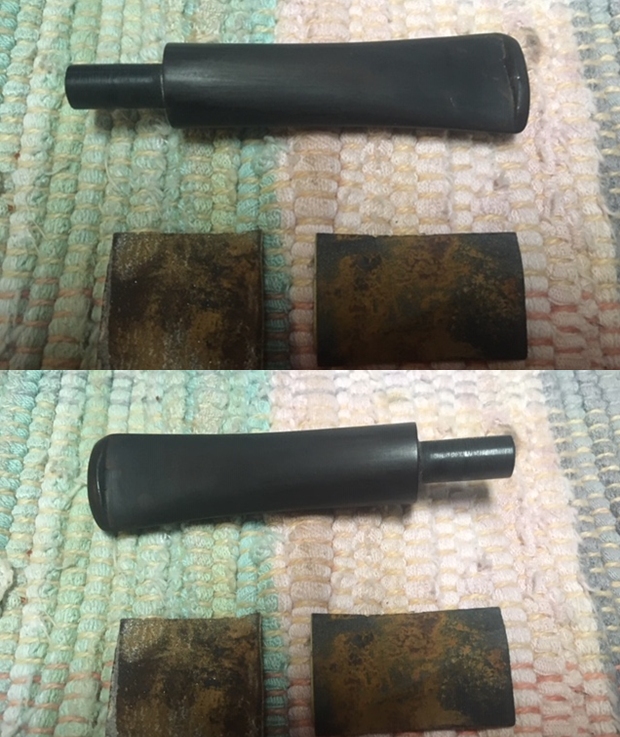
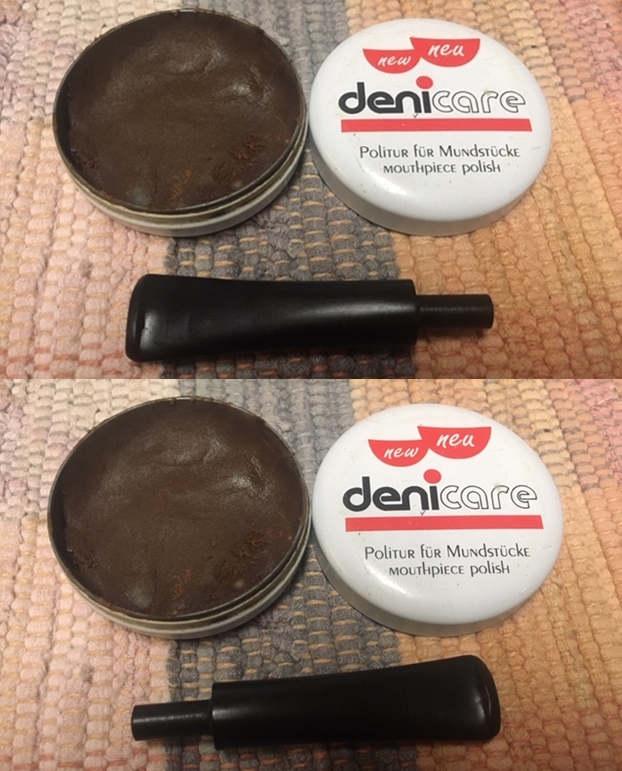
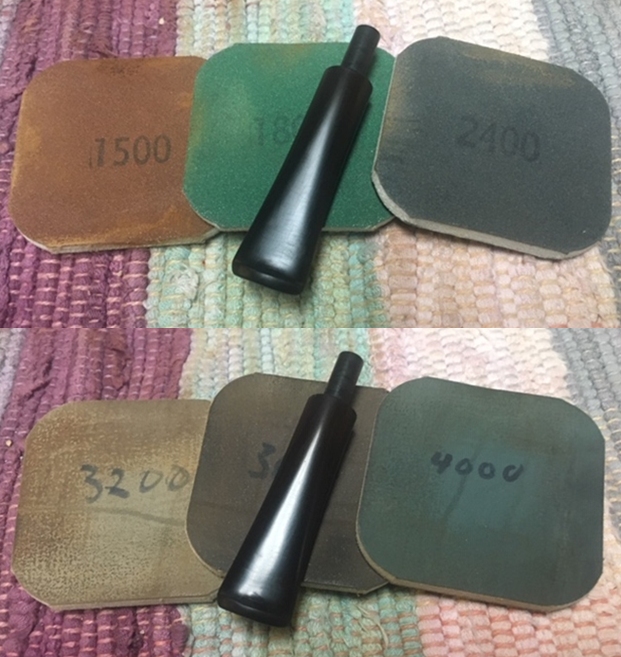
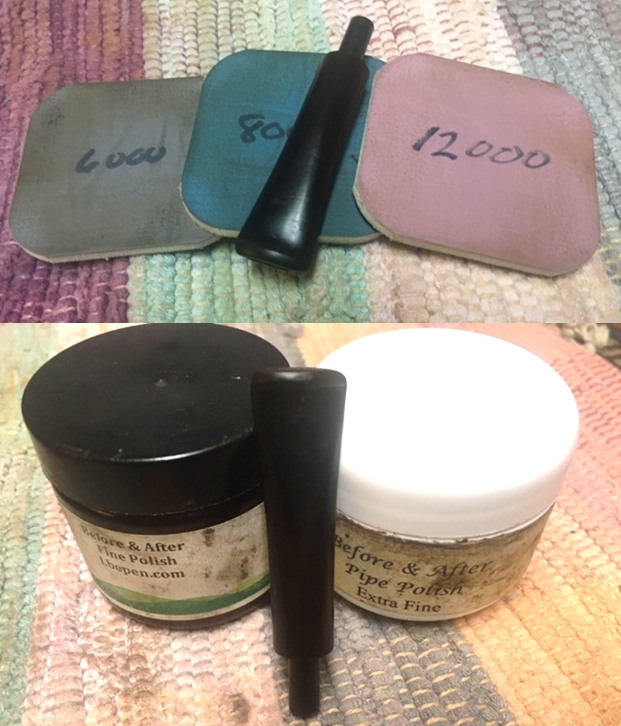
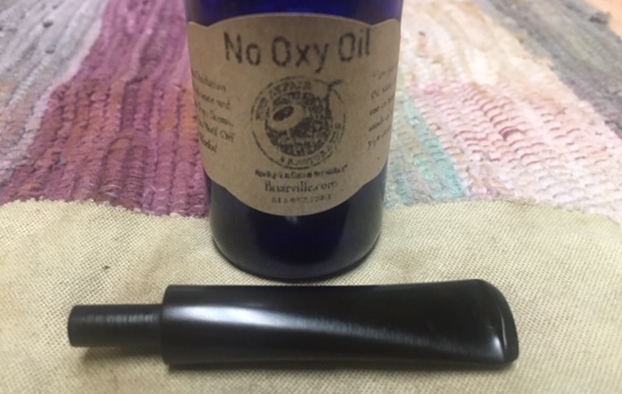
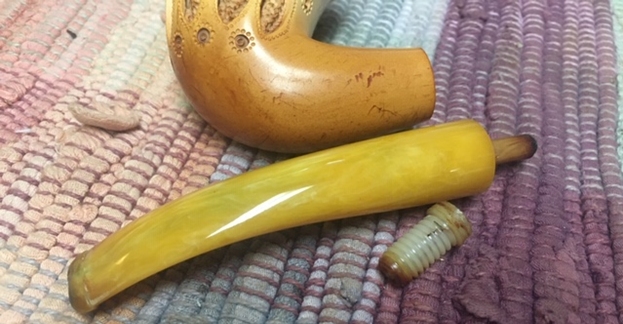
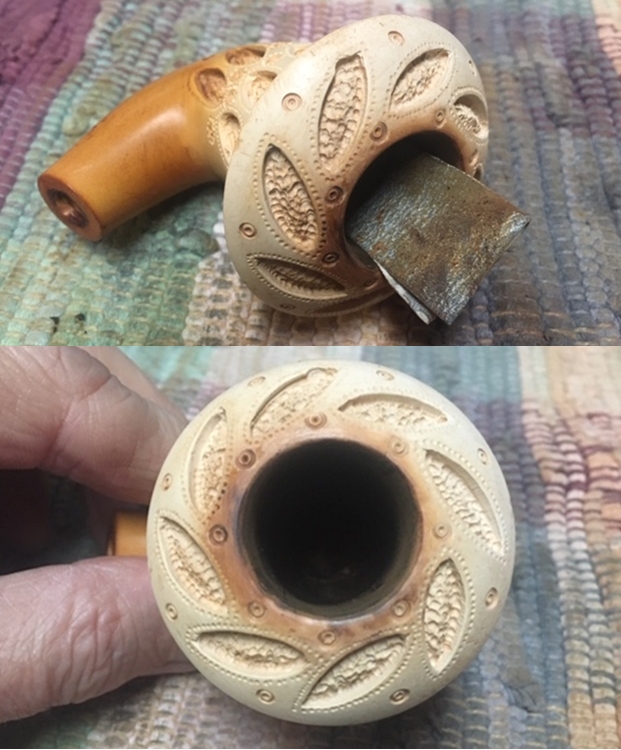
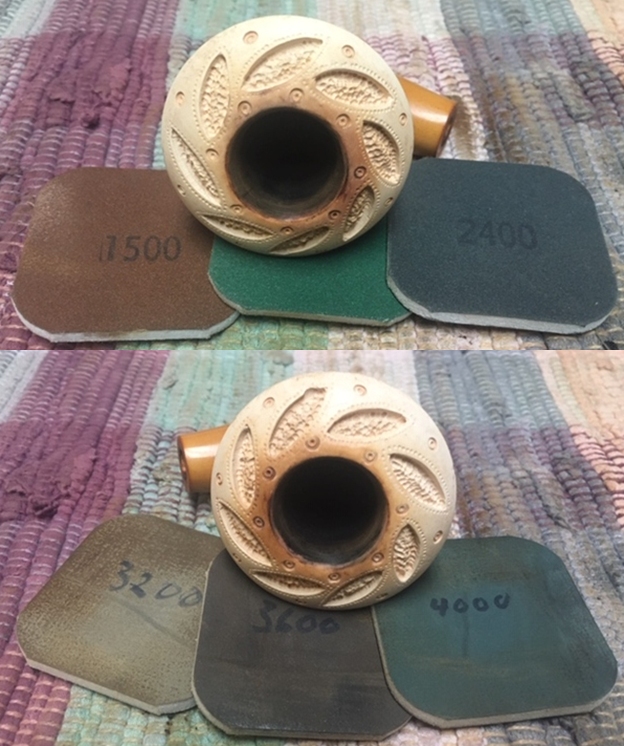
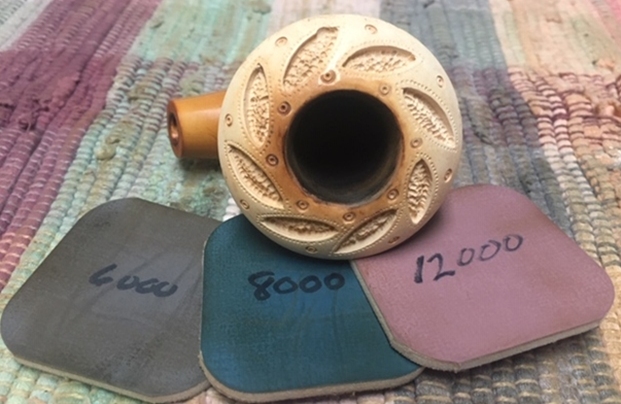
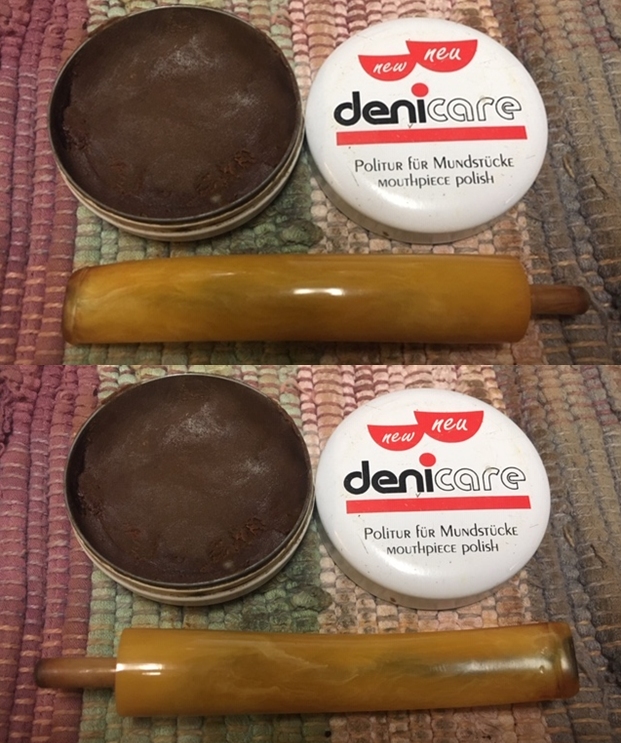
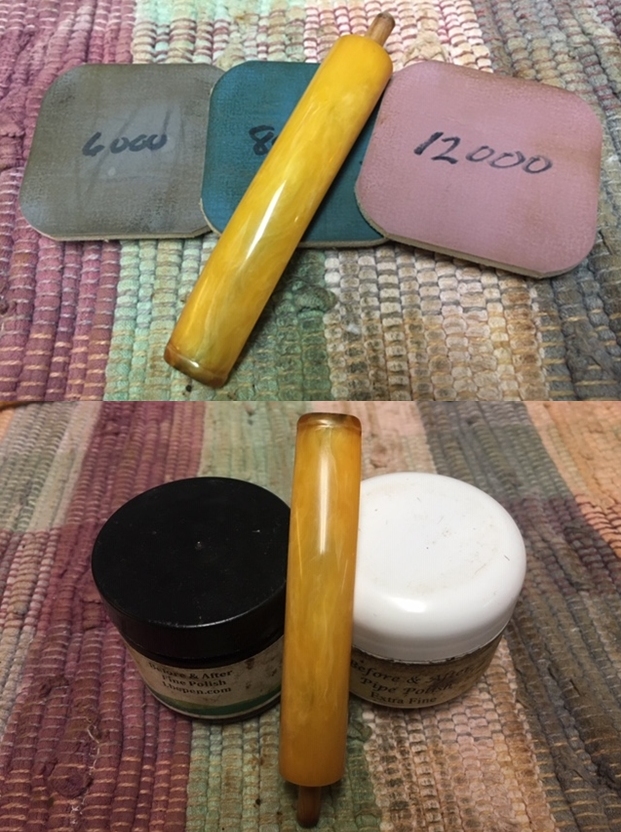
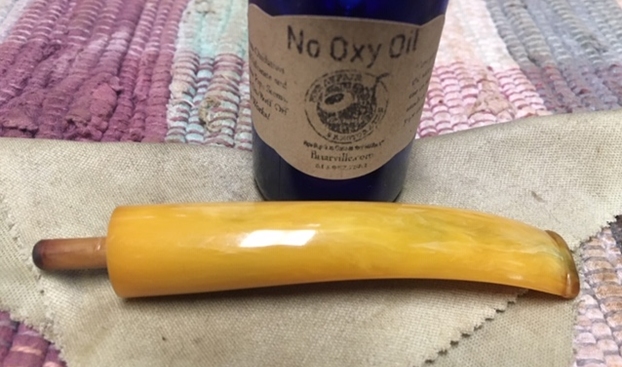
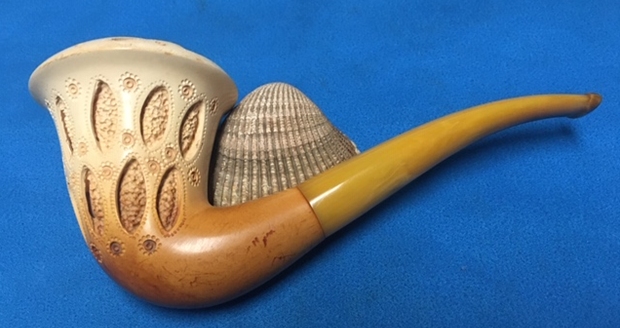
Having seen the before pictures on this pipe I was looking forward to what it would look like when I unpacked the most recent box Jeff sent to me. The pipe was present in the box and I took it out of the box to see what work awaited me when I removed it from the case. I put the case on my desk and opened it to see what was there. I opened the case and took a photo of the pipe inside.I was astonished to see how clean the pipe was. The bowl clean and the Bakelite base and stem looked very good. Even the gold band looked better. Now it was time to take it out of the case and have a look at it up close and personal. I took photos of the pipe as I saw it. Jeff had done an incredible job in cleaning up this pipe. He had reamed the bowl with a PipNet Pipe reamer and cleaned up the remaining debris with a Savinelli Fitsall Pipe Knife. He also scraped the thick lava on the rim top. He scrubbed the exterior of the bowl with Murphy’s Oil Soap and a tooth brush to remove the grime on the bowl and rim. He cleaned out the interior of the bowl base and stem with pipe cleaners, cotton swabs and alcohol until they came out clean. The rim top looked incredible when you compare it with where it started. There is some slight darkening on the inside edge of the bowl. He cleaned the base and stem with Soft Scrub to remove the grime on the exterior and cleaned out the airway with alcohol, cotton swabs and pipe cleaners. I included a photo of the KB&B Cloverleaf on the gold plated band.I unscrewed the bowl and the stem from the base and took photos of the parts. The bowl and stem both had threaded connectors. The bowl was metal and the stem was bone.I stripped the spotty finish off the bowl with acetone. I know for some this is a no-no for old pipes but honestly this finish was very rough. I would restain it as close to the original aniline as I could but there was damage that needed to remove the stain and finish to address. I followed that by sanding the bowl with a medium and a fine grit sanding sponge. The bowl was looking better and the dark spots turned out to be oils and not burn marks! Whew! I polished the bowl with micromesh sanding pads – dry sanding with 1500-12000 grit pads and wiping the bowl down after each pad with a damp cloth. Note the developing shine on the wood. I went through my various stains and chose a Tan aniline stain for the bowl. It is a nice coloured stain that is close to what was original and will give me some coverage over some of the dark spots on the sides of the bowl. I applied the stain and flamed it with a lighter. The flaming burns off the alcohol and sets the stain in the wood. I repeated the process until I was happy with the coverage.I set the bowl aside to let the stain cure and turned my attention to the base. The band was loose so I removed it for the first round of pads. I polished the Bakelite with micromesh sanding pads to remove the scratching and bring out a shine. I dry sanded with 1500-12000 grit pads and wiped it down with a cloth I use that has Obsidian Oil impregnated in the fibres. It works well to remove the dust. I paused the polishing to glue the gold band on the shank end. I put some white all-purpose glue on the Bakelite and pressed the band in place on the shank. I wiped the excess glue off with a damp cloth. I let the glue dry for a short time.When it had set I continued polishing with the micromesh pads. I set the base aside and went back to the bowl. I buffed out the newly stained bowl with Blue Diamond to bring out a shine. The colour is opaque enough to hide the dark spots and transparent enough to show some grain in the sunlight. I like it!I rubbed Before & After Restoration Balm into the wood with my fingertips to clean, enliven and preserve the newly stained bowl. I find that it adds a depth to the polish that I really have come to appreciate. All that remains at this point is to wax and polish the bowl. With the bowl and the base finished it was time to put them back together. I would still need to buff and wax both but the project was coming to an end. All that remained was to finish the stem work. I set the base and bowl aside and turned to address the issues with the stem. I used a clear CA glue to fill in the gouges across the stem from the button forward an inch on both sides. I also filled in the deep tooth marks on both at the same time.I smoothed out the repairs with a folded piece of 220 grit sandpaper. I started the polishing with a folded piece of 400 grit wet dry sandpaper.I rubbed the stem down with Denicare Mouthpiece Polish. It is a gritty, red paste with the consistency of red Tripoli. I find that it works well to polish out scratches and light marks in the surface of the stem. I polished it off with a cotton pad to raise the shine.I polished the stem with micromesh sanding pads – dry sanding with 1500-12000 grit sanding pads. I wiped it down after each sanding pad with a cloth containing some Obsidian Oil. I finished polishing it with Before & After Pipe Stem Polish – both Fine and Extra Fine and buffed it off with a cotton cloth. I gave it a coat of Briarville’s No Oxy Oil to preserve and protect it. I put the hardwood bowl and Bakelite Base stem back together again and carefully buffed it with Blue Diamond polish on the buffing wheel. I gave the bowl, base and stem multiple coats of Carnauba wax on the buffing wheel. I hand buffed the entirety of the pipe with a microfiber cloth. The pipe was alive now and looked great to me. It has a great feel in the hand that is very tactile and the colouring on the bowl should develop more deeply as the pipe is smoked. The finished pipe is shown in the photos below. The dimensions of the pipe are Length: 5 1/2 inches, Height: 2 1/4 inches, Outside diameter of the bowl: 1 1/4 inches, Chamber diameter: 7/8 of an inch. This older KB&B Blueline Cup and Ball pipe is a beauty and the Bakelite looks great with the newly stained bowl. It is one of those old timers that will be staying in my KB&B collection. It will be a great addition to my collection of old pipes. Thanks for reading this blog and my reflections on the pipe while I worked on it.

Operation Rescue – “My Dog Ate my Ser Jacopo L1 Billiard!”


Blog by Steve Laug

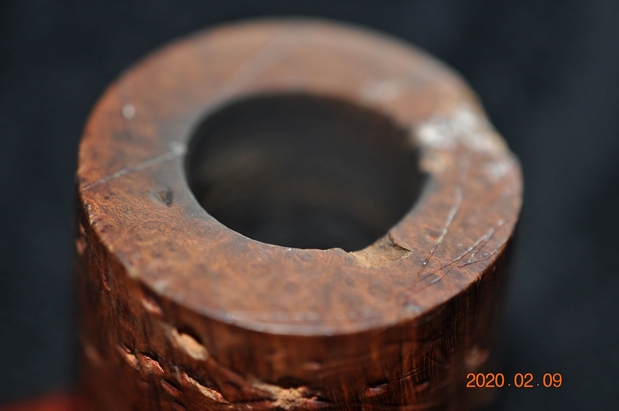
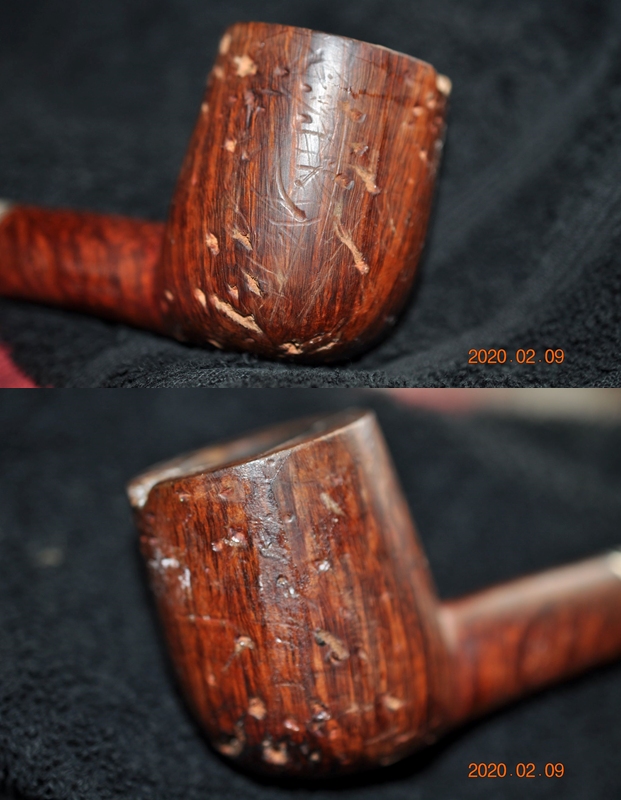
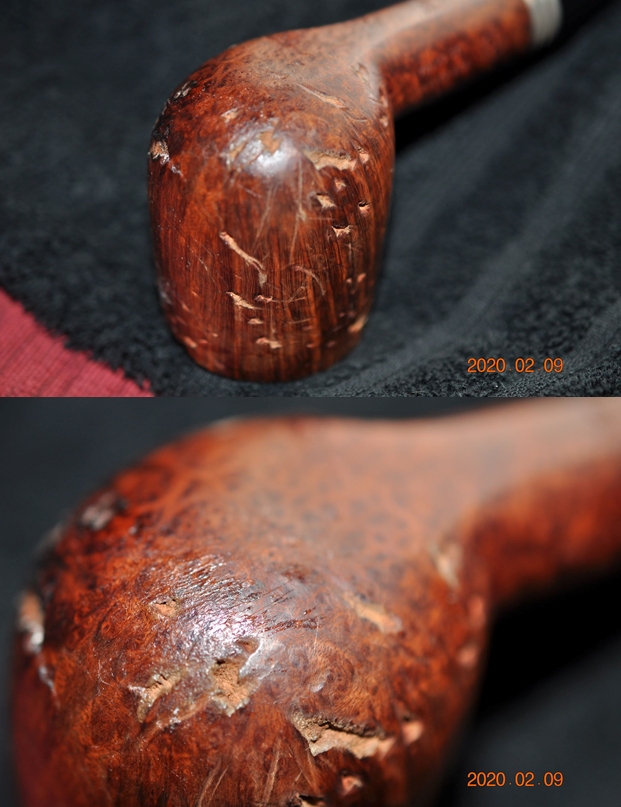
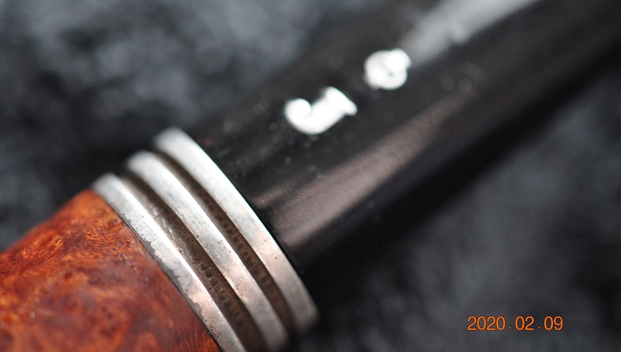
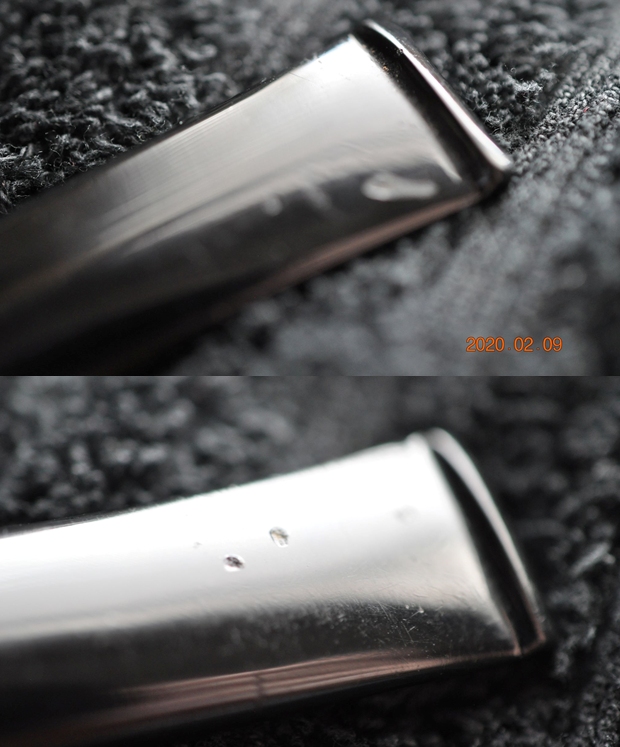
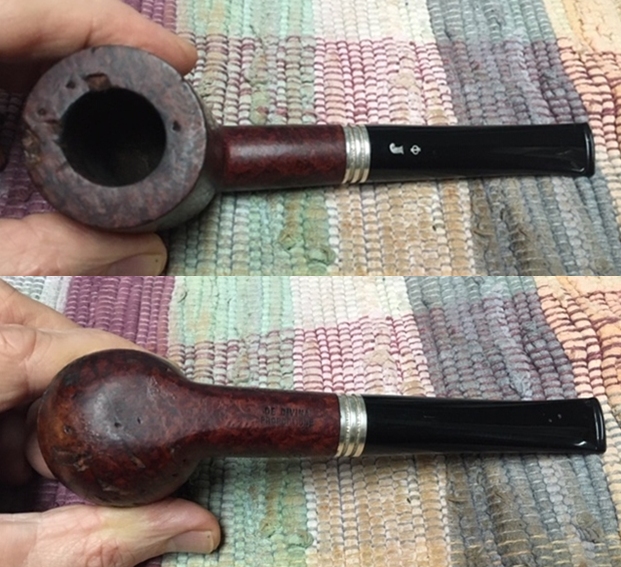
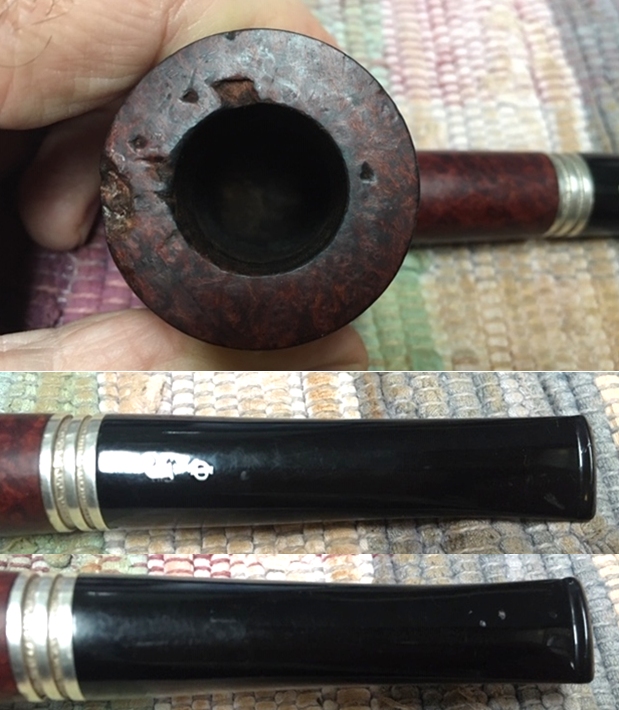
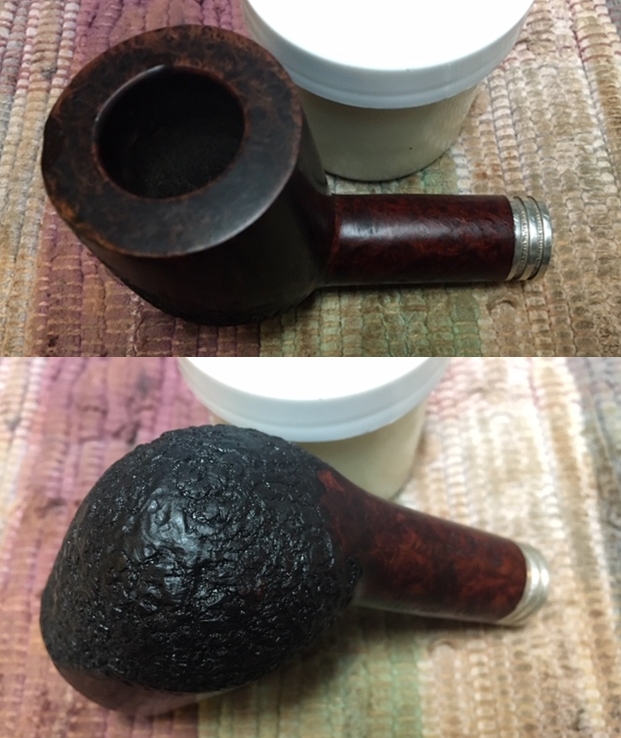
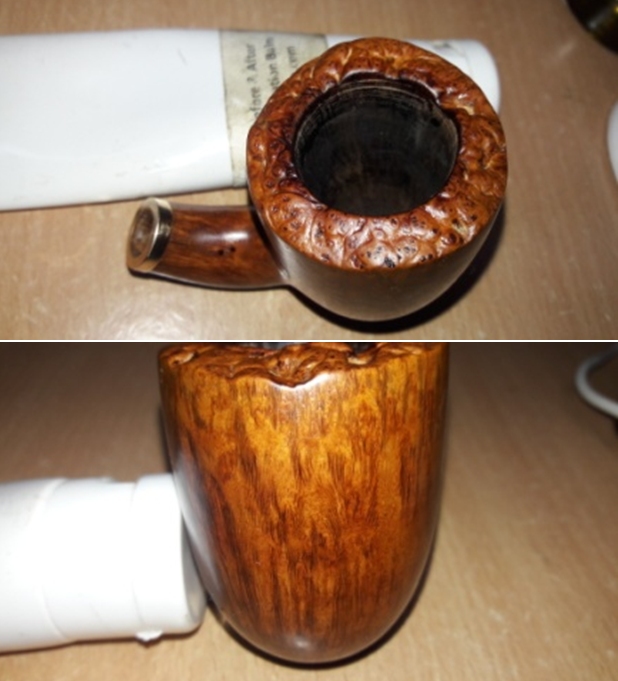
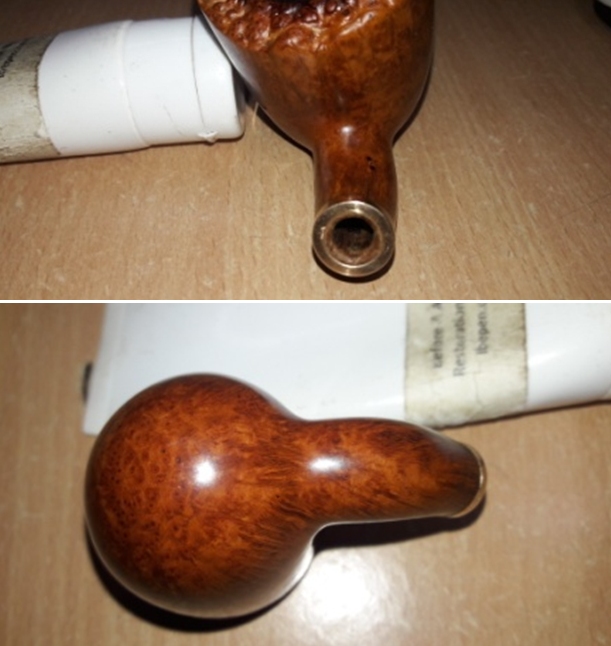
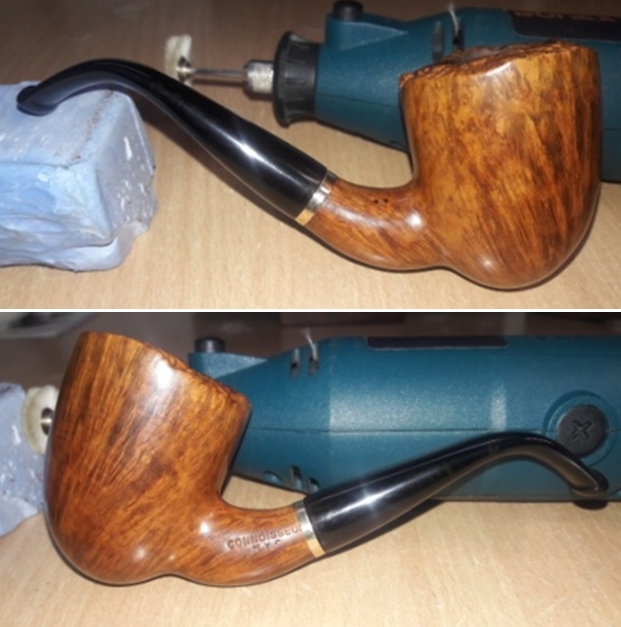
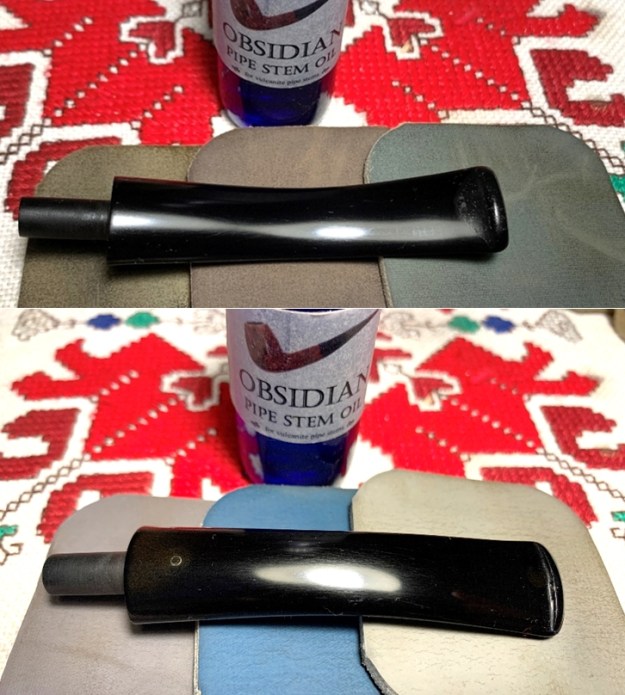
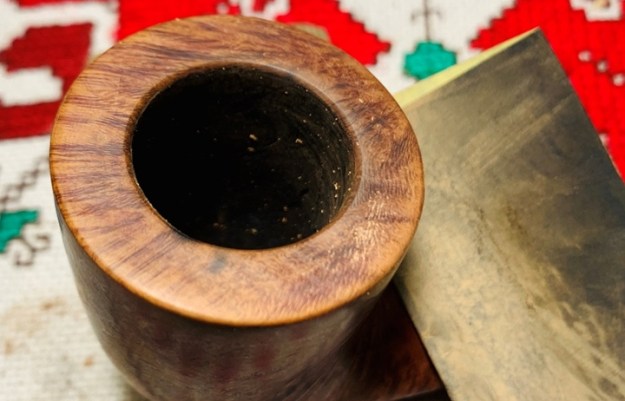
When Jeff showed me the next pipe on the table we went back and forth about buying it or just leaving it with the seller. It was a really nice Ser Jacopo L1 Billiard at some point in its life but that time had passed. It had literally become a chew toy for someone’s dog. The bowl was in very rough shape and had deep tooth gouges around the bowl with chunks of briar missing on the rim and top. The bowl was really damaged to the point of being questionable. The shank interestingly was free of bite marks and the stem had less bite marks than some of the stems I have worked on from pipemen who chew their stems. For me the question was whether or not I wanted to work on it. There was no doubt that the pipe would be a challenge but was it a challenge I wanted to take on. That was the question we weighed before moving ahead with the buy.

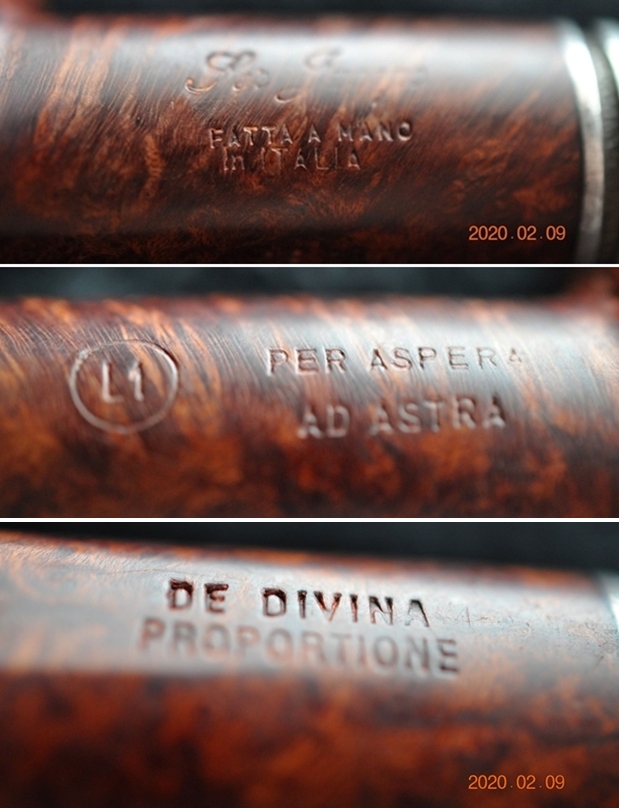
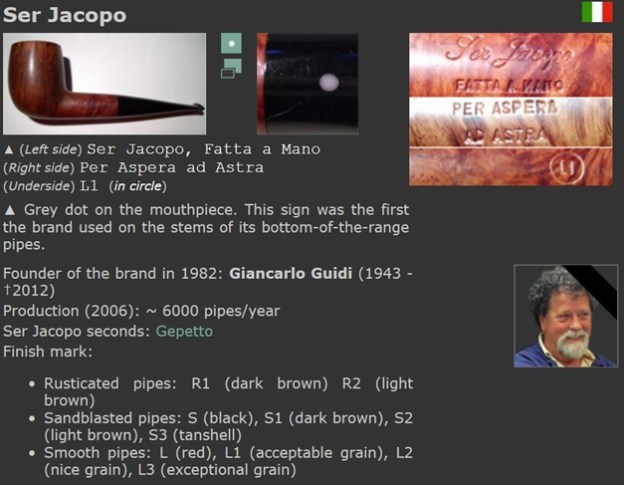
After spending time talking about it we decided to pick up the pipe and see what I could do with it. When Jeff got it the story became even sadder!  The bowl had amazing straight grain around the sides and it appeared to have been barely smoked. It looked as if maybe a bowl or two had been enjoyed before the dog got a hold of the pipe and did the massive damage that showed when we saw it. The bowl had some darkening but there was no cake in the bowl. It smelled smoky but otherwise was very clean. Jeff would still clean up the pipe before he sent it on to me that way I would be able to just pick it up and see what I could do with it. Jeff took the following photos before he started his cleanup work on the pipe. Just look at the damage! Oh my; the pipeman or woman must have just wept after the initial shock or anger when he or she saw the pipe dangling from the dog’s mouth. He took close-up photos of the bowl and rim top from various angles to capture the gnawing damage to the bowl and rim top edges. You can see the large bite marks and chunks of briar missing on both the inner and outer edges. The largest chunk is on the front of the bowl and the inner edges damage is on the right side. You can also see the damage to the sides of the bowl. Jeff took photos of the sides and heel of the bowl to show the both the extent of the damage to the bowl and the amazing grain around the bowl. It really is a shame that this poor pipe suffered this fate. Jeff took photos of the stamping on sides of the bowl. On the left side it reads Ser Jacopo over Fatta A Mano over In Italia. On the right side it reads L1 in a circle Per Aspera Ad Aspera. On De Divina Proportione. All the stampings are very readable and clear. He took a photo of the inlays on the tapered stem top. The silver J with an I and a circle. The next two photos show the top and underside of the stem. Notice the few tooth marks on both sides. It is not as bad as it could be. I wanted to know a bit more about the pipe in hand. I knew a little of the history of the brand but I wanted to understand the stamping on the shank sides and underside so I turned first to the Pipephil website (http://www.pipephil.eu/logos/en/logo-s5.html). Interestingly the first pipe they had a photo of was similar to the one that I had. It is stamped similarly on the left side of the shank with the Ser Jacopo over Fatta a Mano but the one I have also was stamped In Italia under that. The right side of mine is stamped with the L1 in a circle and the Per Aspera Ad Astra followed that. Mine also was stamped on the underside of the shank and read: De Divina Proportione. The one I am working on also had a band on the shank and the stem stamp was different as well. I also learned the L1 stamp stood for a pipe with acceptable grain. I have included a screen capture of the  pertinent information.Once I had that material digested a bit I turned to Pipedia to understand more about the stamping on the pipe (https://pipedia.org/wiki/Ser_Jacopo). I am including the information on that below. The standard nomenclature found on Ser Jacopo pipes is as follows: Ser Jacopo Fatta A Mano In Italia Per Aspera Ad Astra.

Fatta A Mano translates to “Made By Hand”. Per Aspera Ad Astra is a Latin phrase found on Ser Jacopo pipes and is the Ser Jacopo motto. It translates to “To the Stars Through Travails”, meaning that success comes through hard work. In the Summer 1997 Pipes and Tobaccos article Giancarlo Guidi translated this as “through a difficult way until the stars are reached”.

All that remained was to find out what the De Divina Proportione on the underside of the shank meant. I turned to wikipedia (https://en.wikipedia.org/wiki/Divina_proportione) for what I assumed referred to Divine Proportion or the Golden Ratio. I quote from there a good summary.

Divina proportione (15th century Italian for Divine proportion), later also called De divina proportione (converting the Italian title into a Latin one) is a book on mathematics written by Luca Pacioli and illustrated by Leonardo da Vinci, composed around 1498 in Milan and first printed in 1509.[1] Its subject was mathematical proportions (the title refers to the golden ratio) and their applications to geometry, to visual art through perspective, and to architecture. The clarity of the written material and Leonardo’s excellent diagrams helped the book to achieve an impact beyond mathematical circles, popularizing contemporary geometric concepts and images.

Now I had a clear idea of the meaning of the stamping. The Golden Ratio refers to the mathematical proportions of this particular pipe fitting that Ratio. It is seriously a beautiful pipe and now I am even sadder at the damage that was done. That motivates me to try to bring it back to some semblance of beauty.

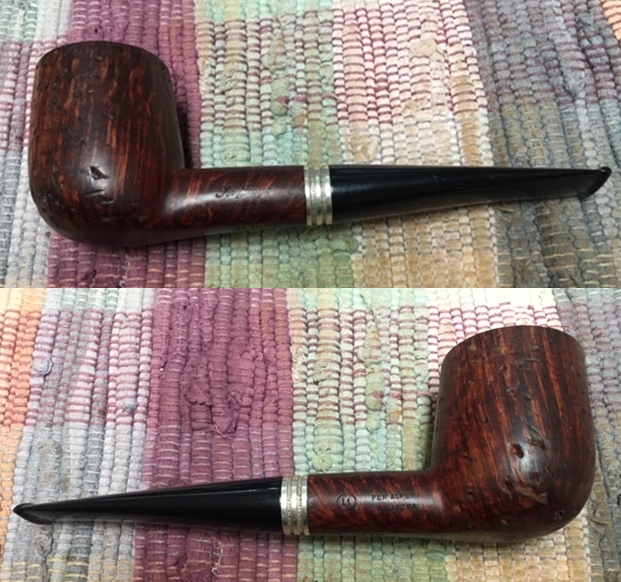
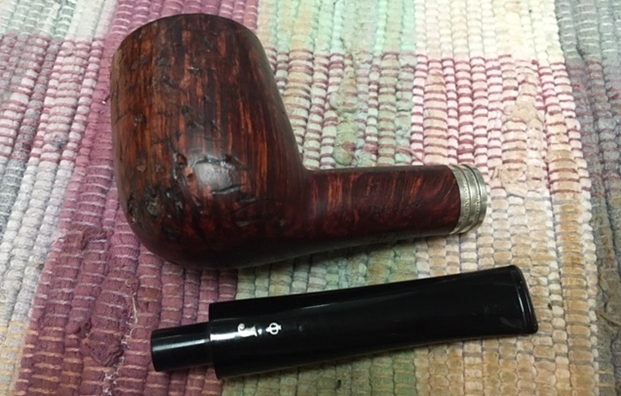
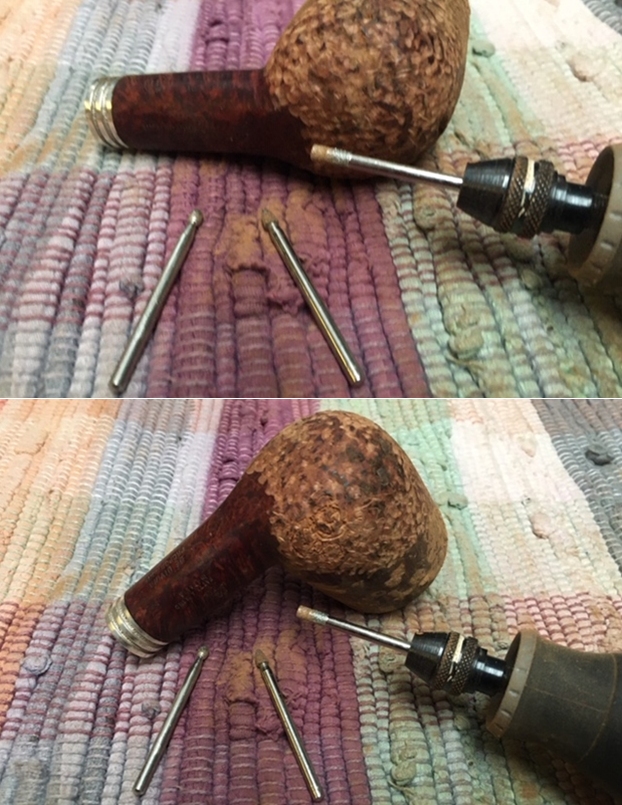
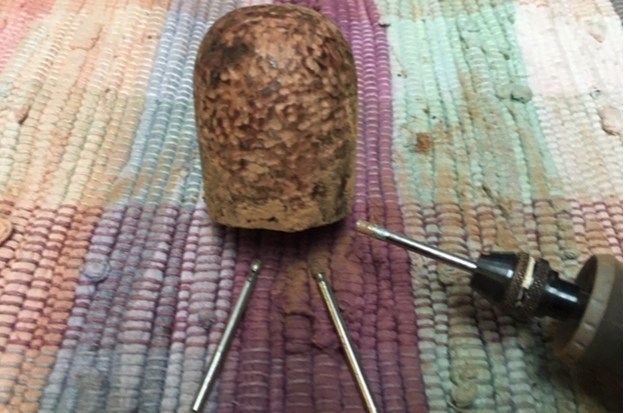
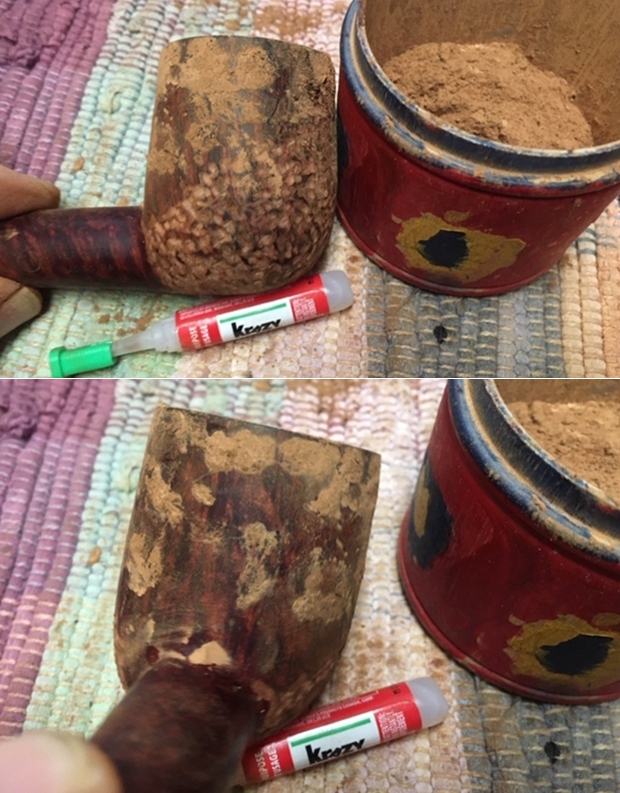
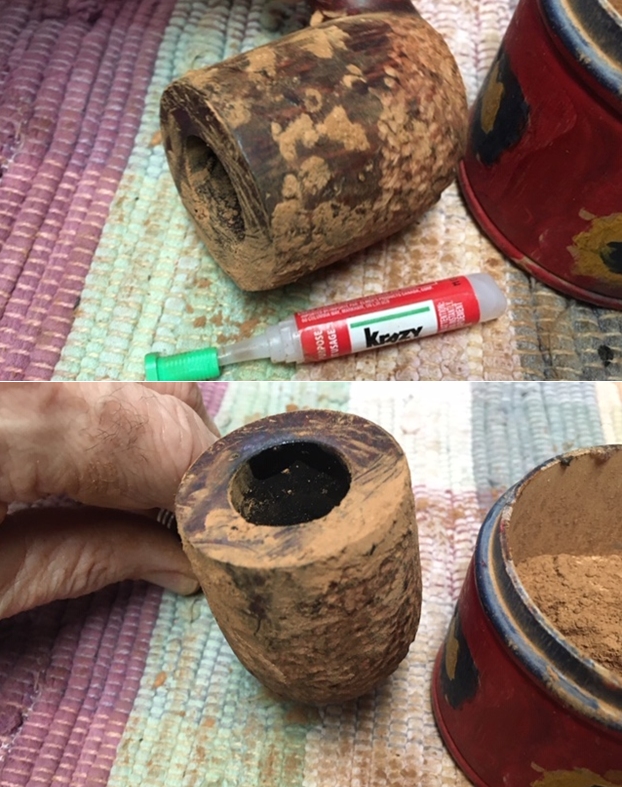
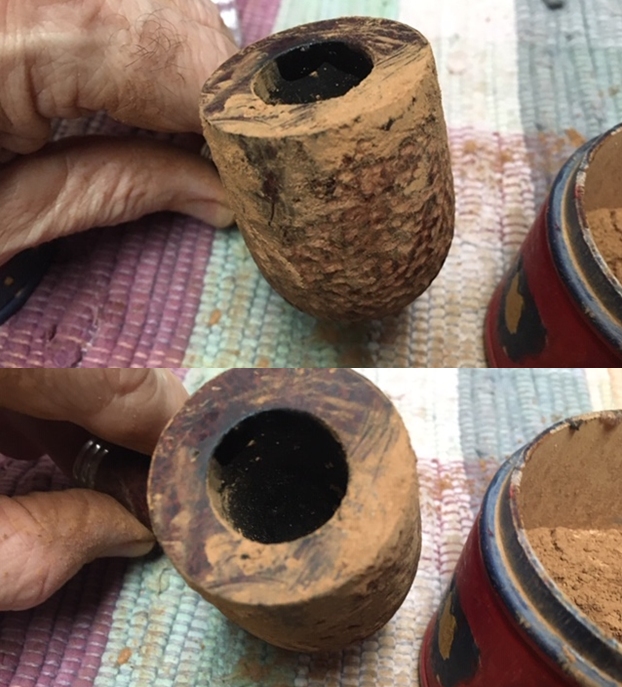
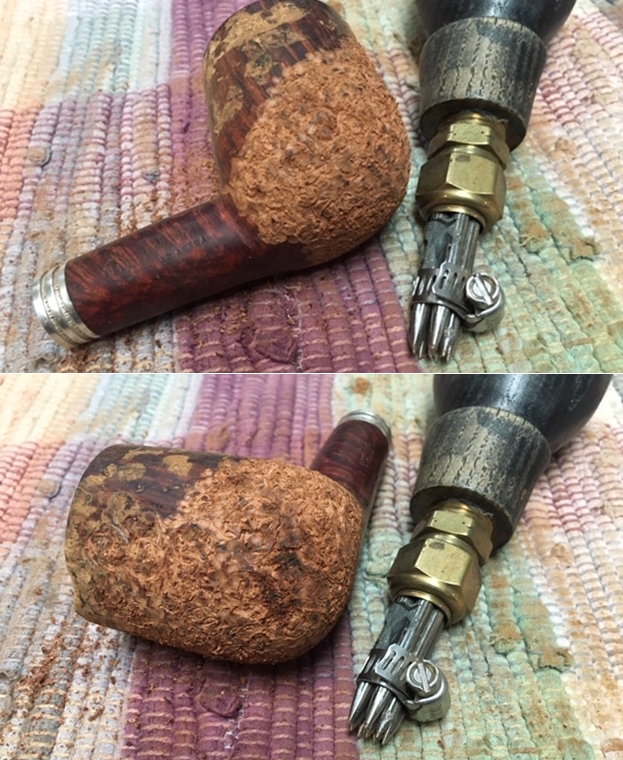
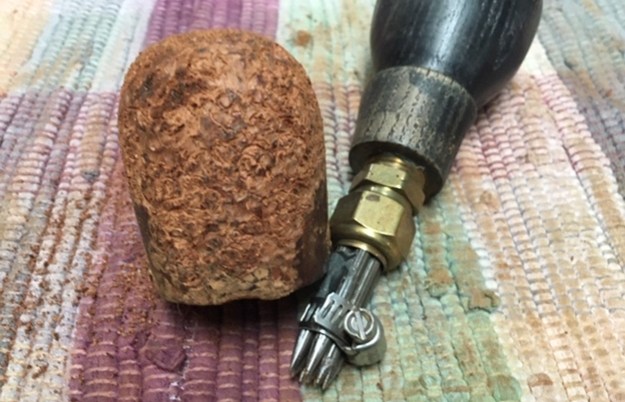
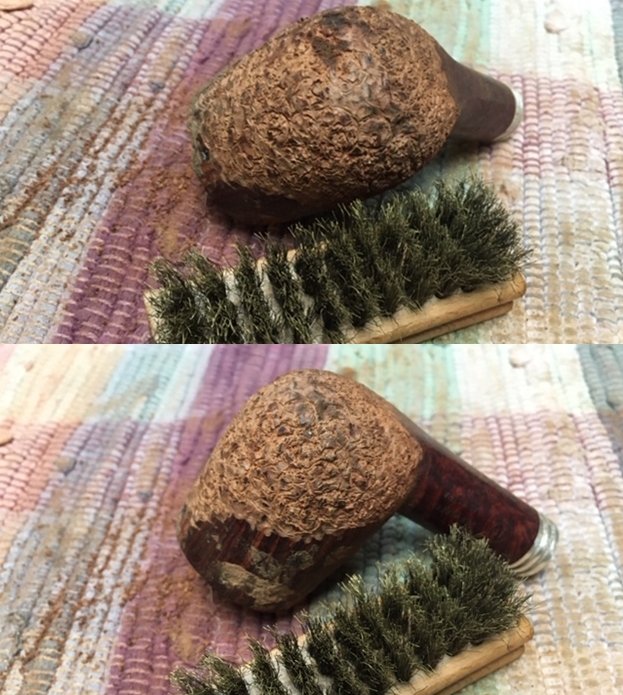
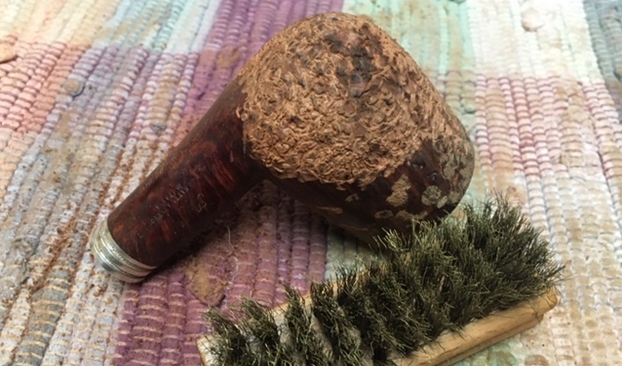
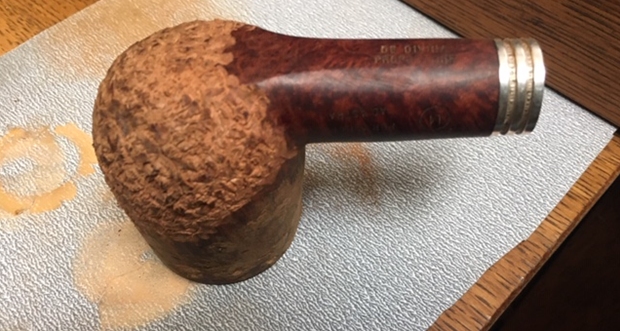
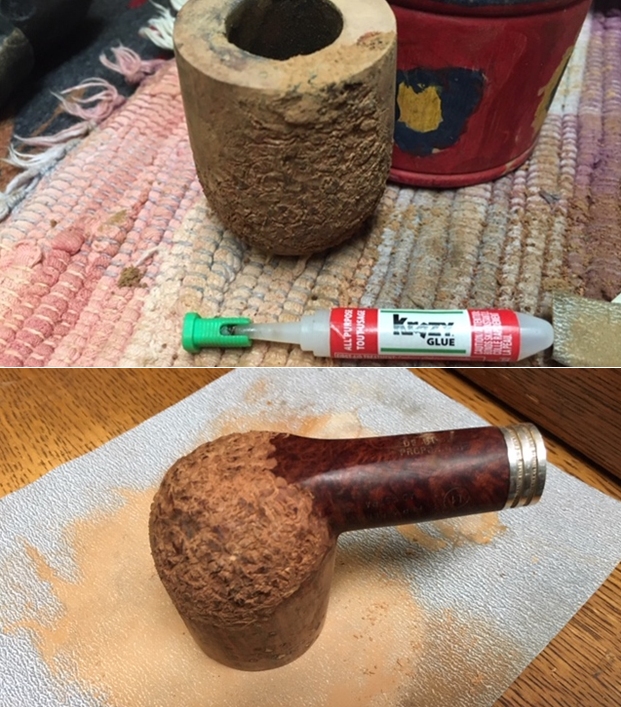
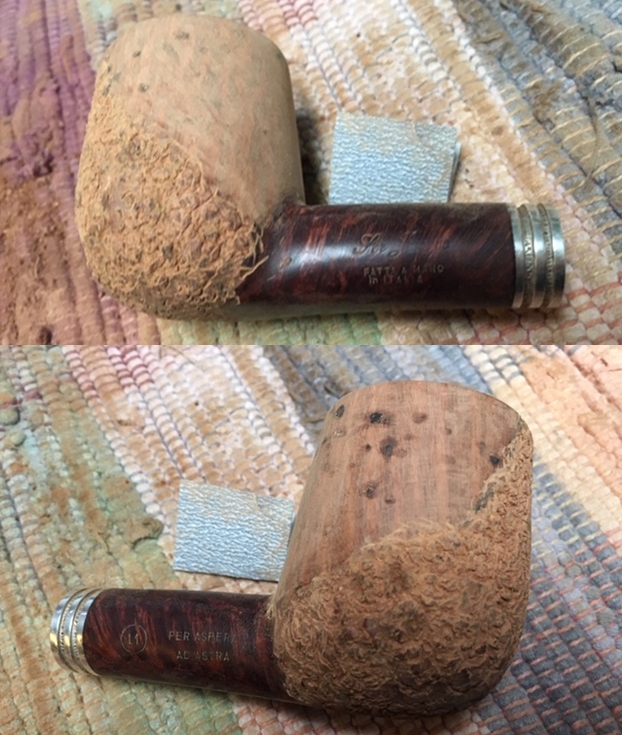
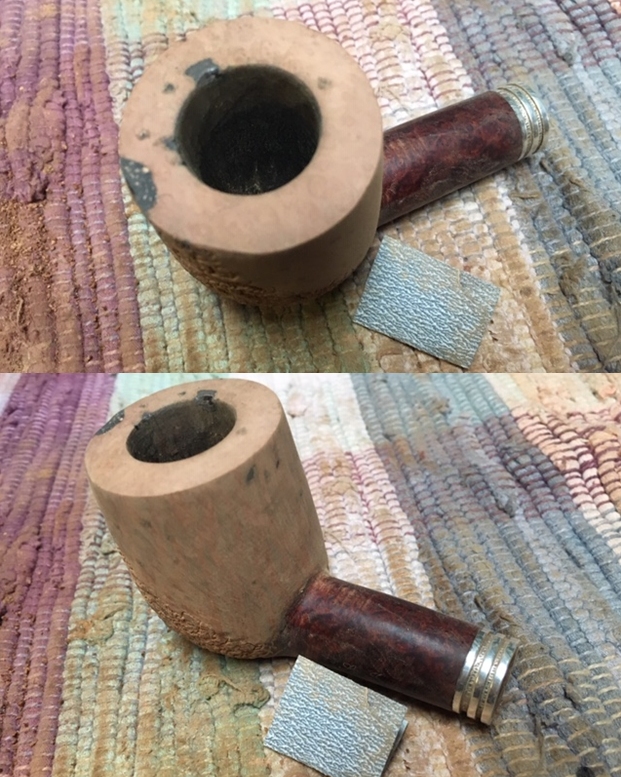
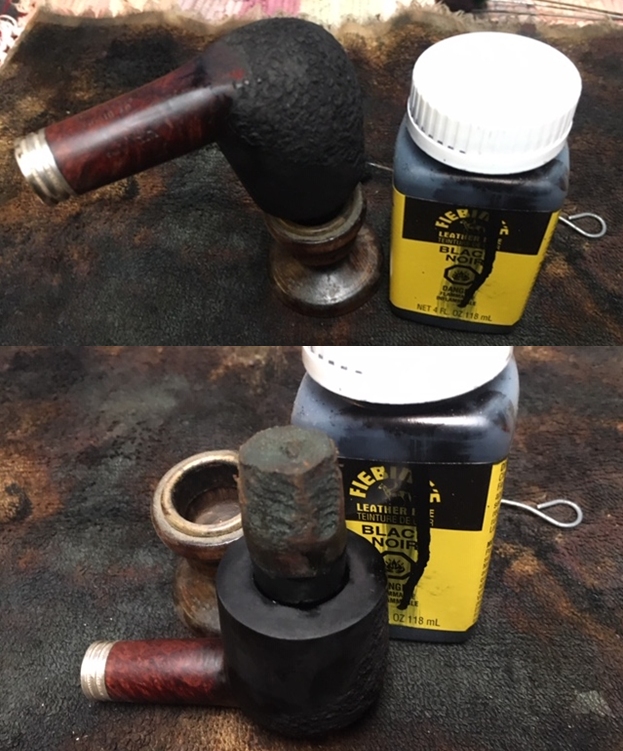
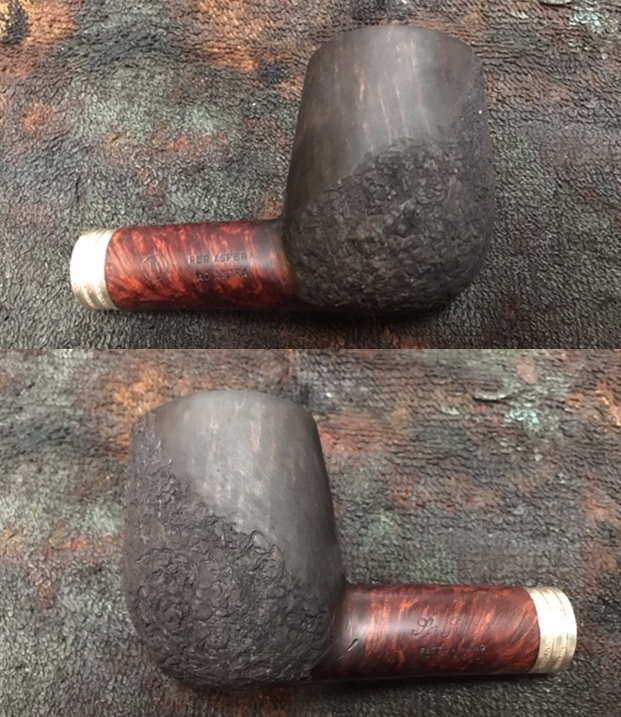
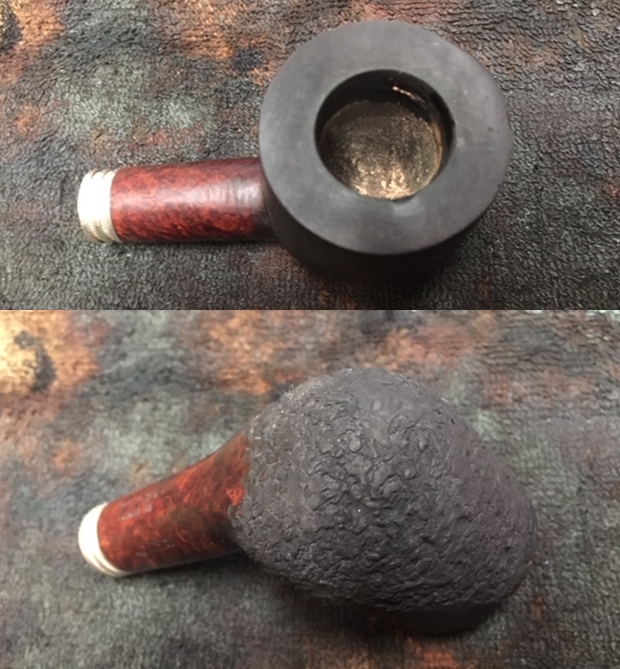
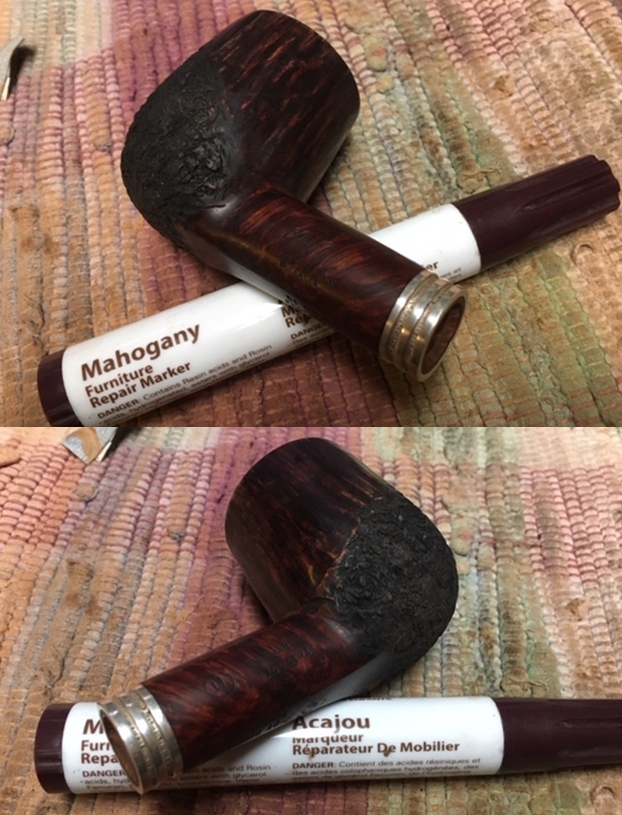
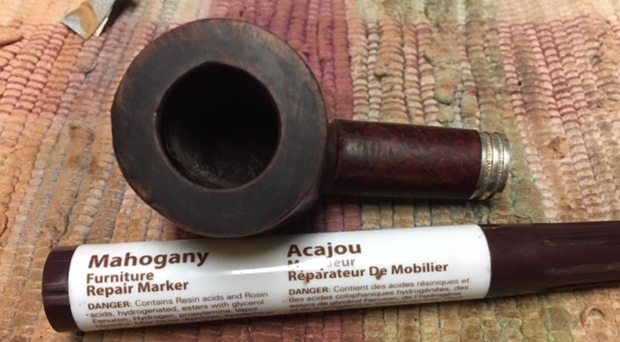
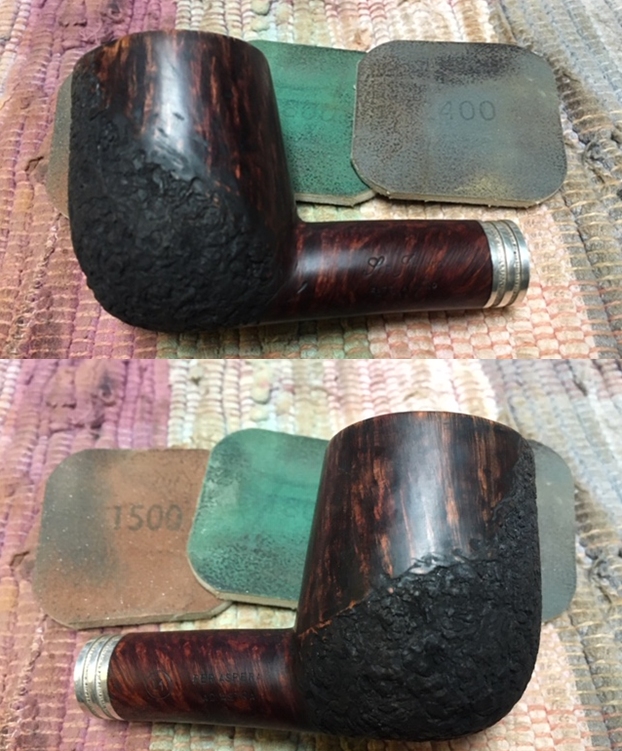
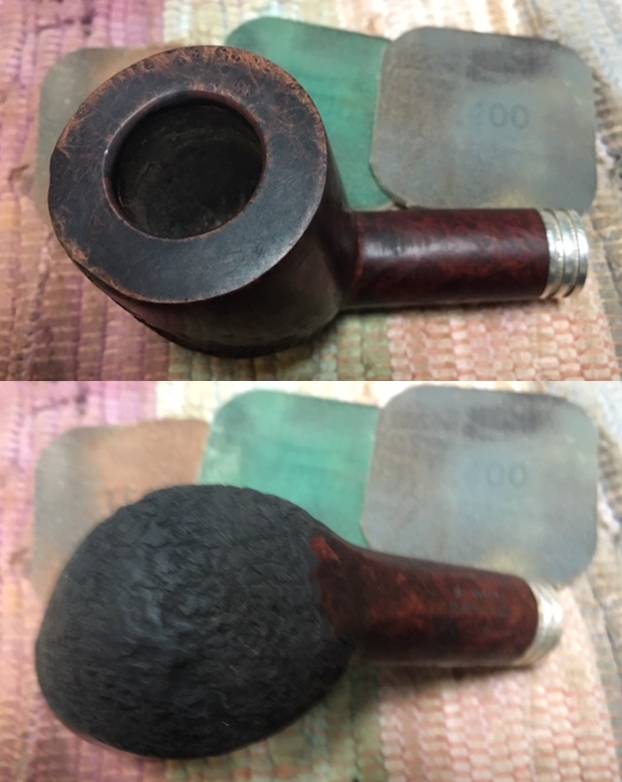
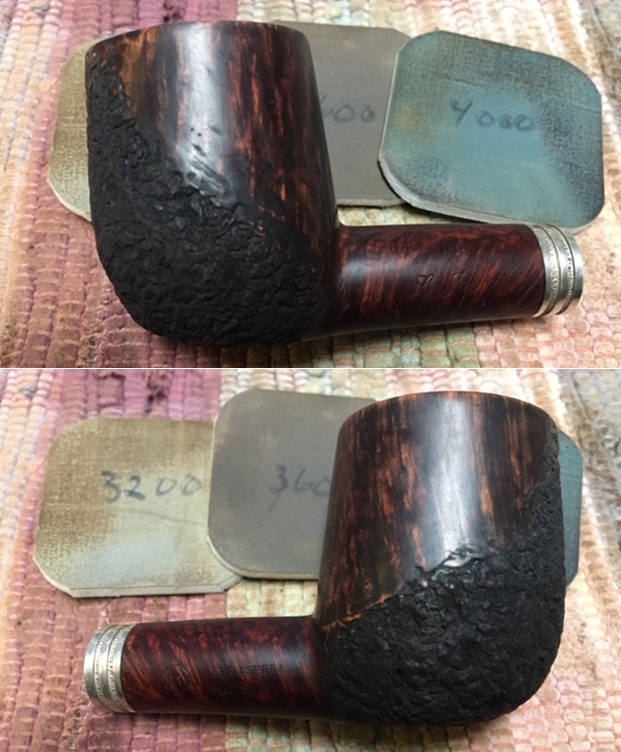
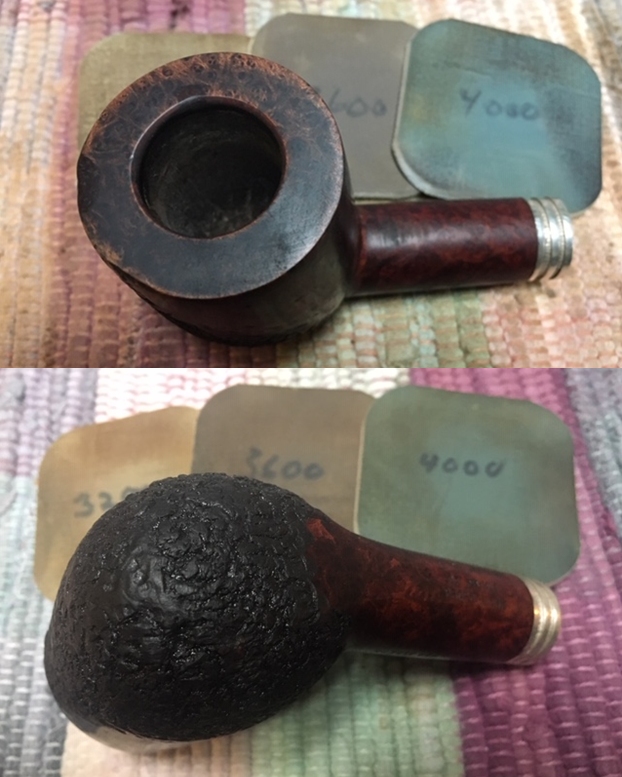
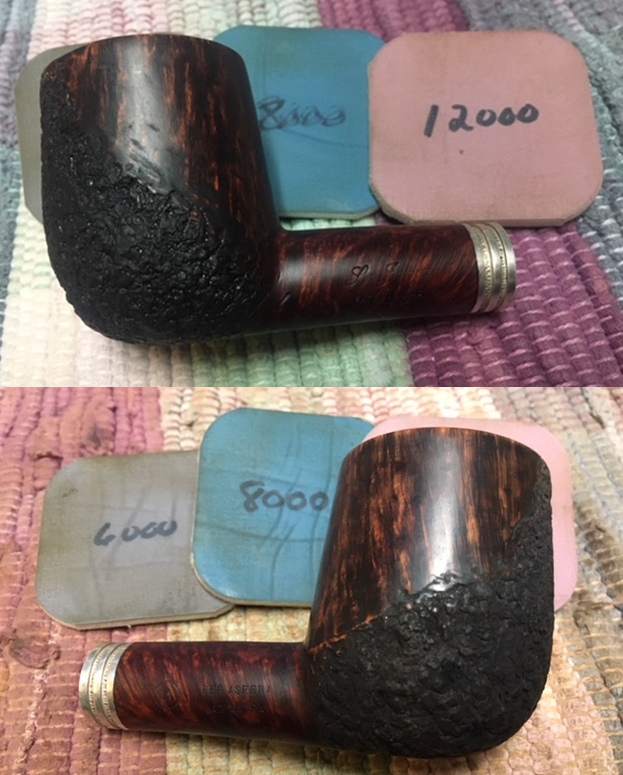
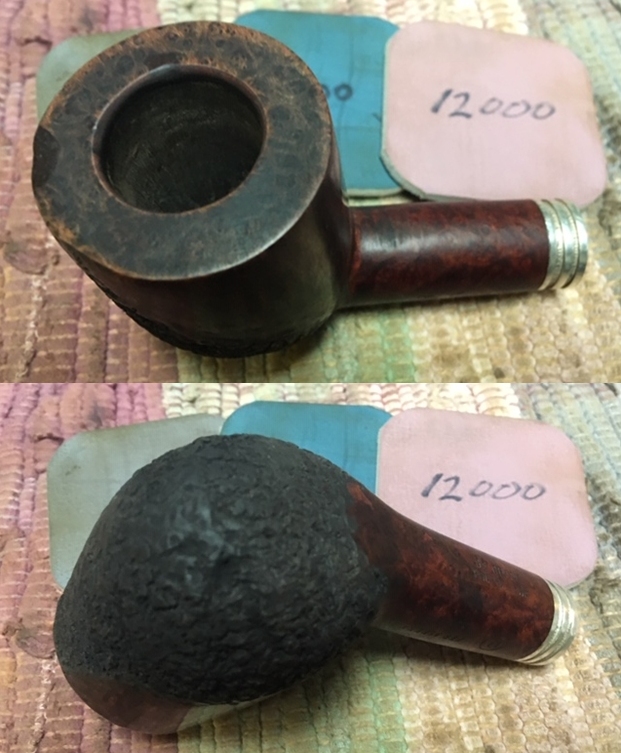
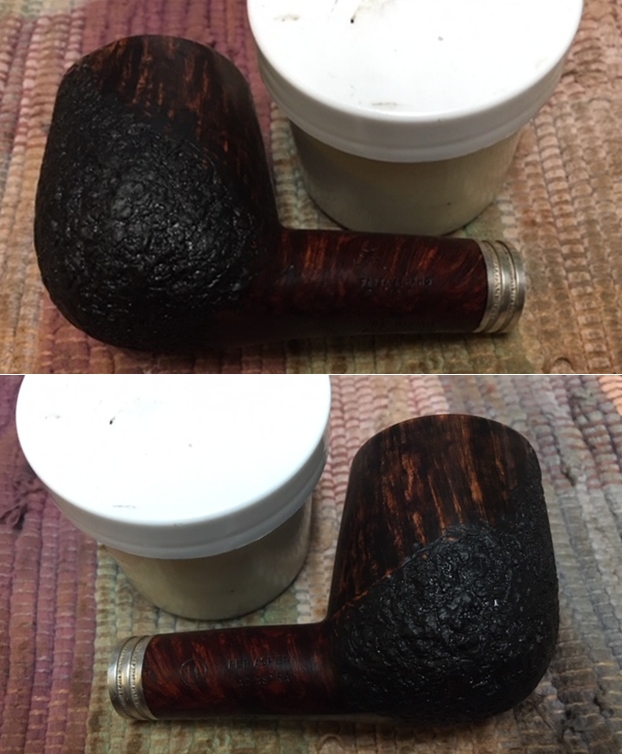
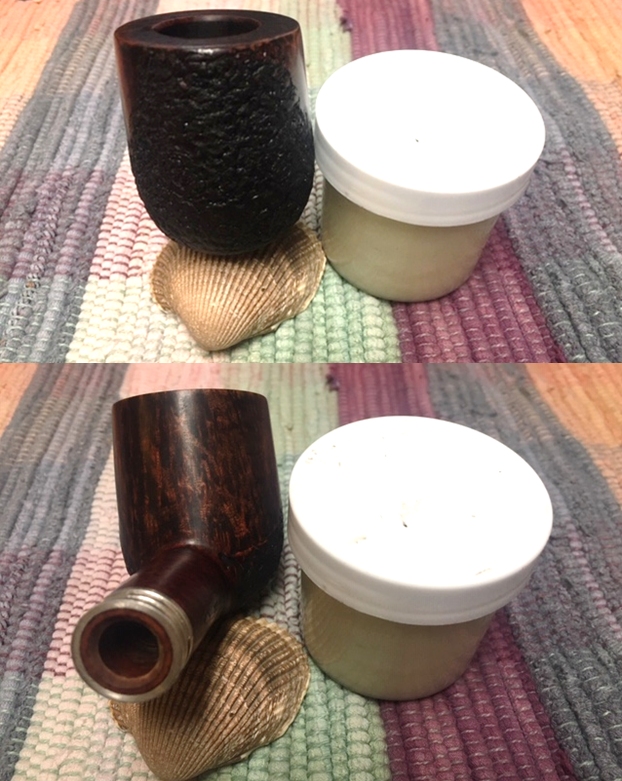
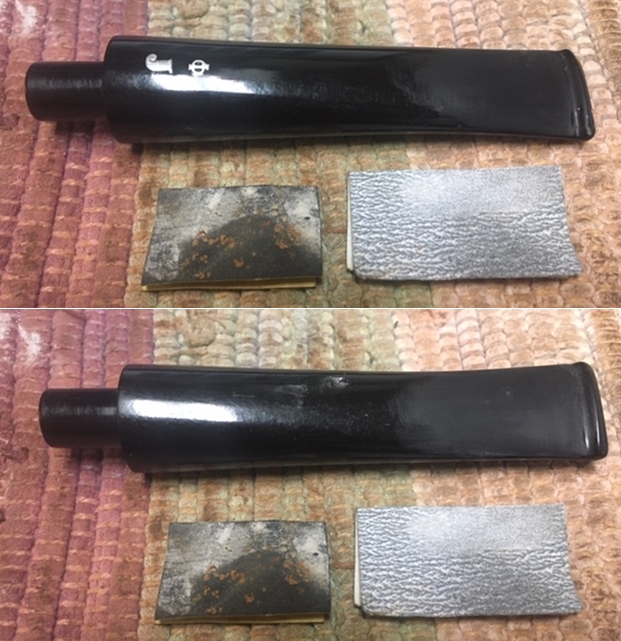
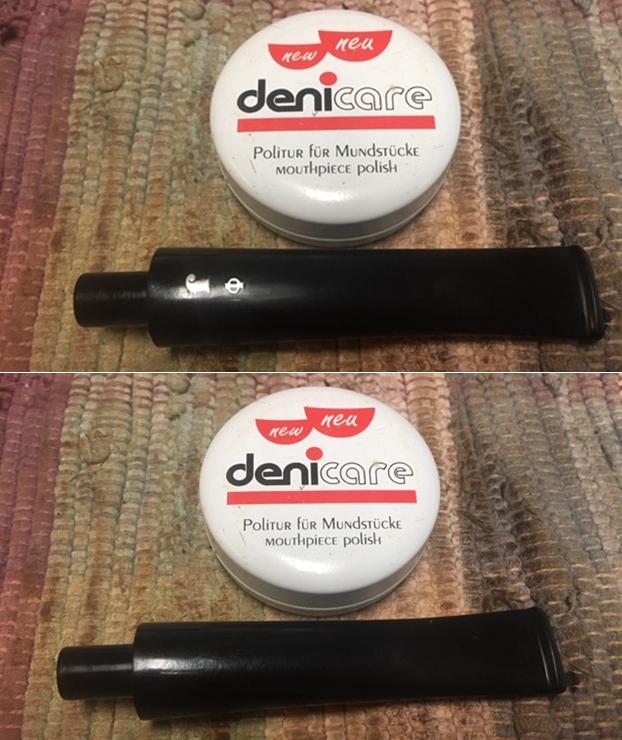
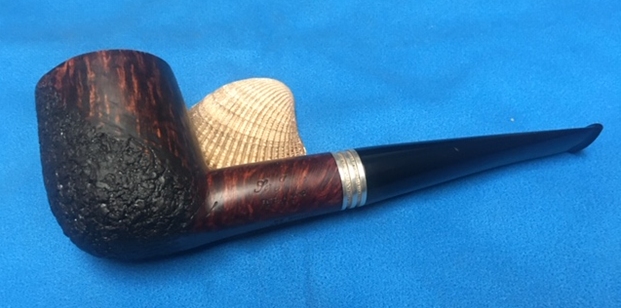
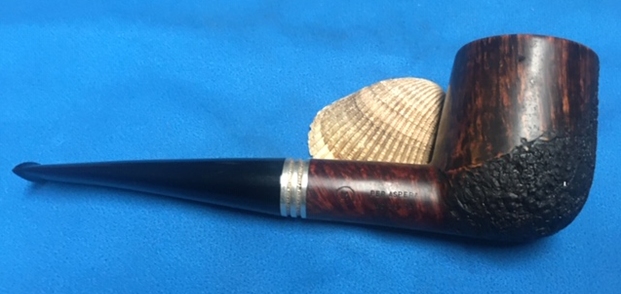
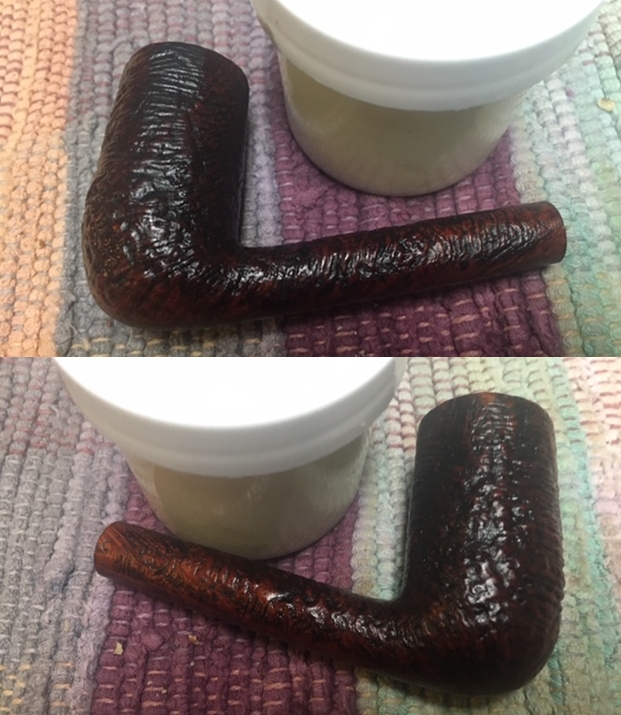
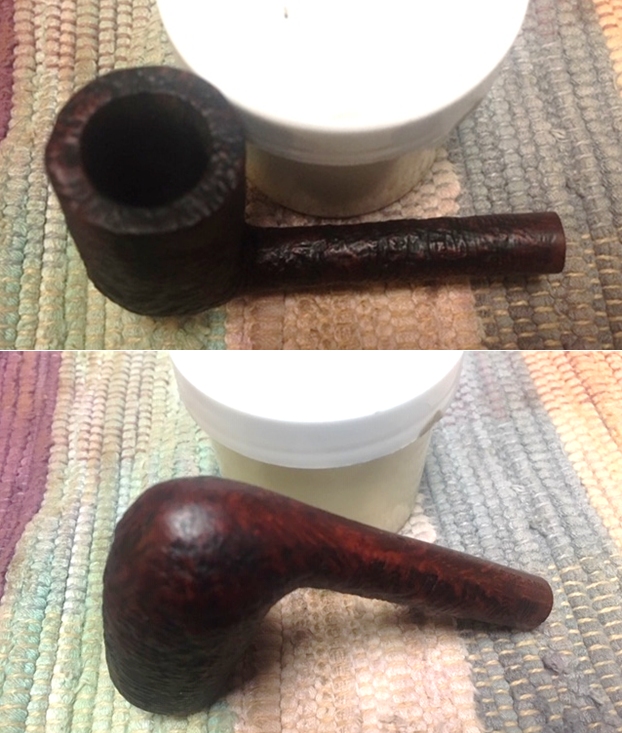
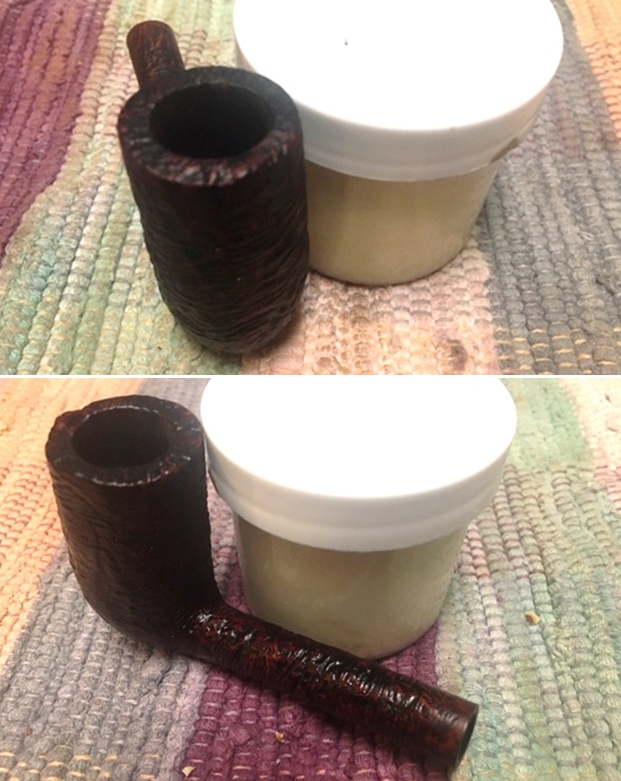
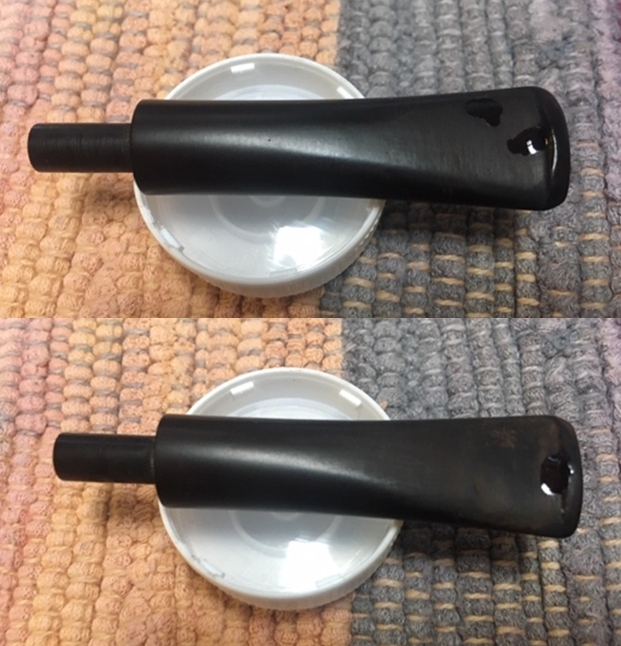
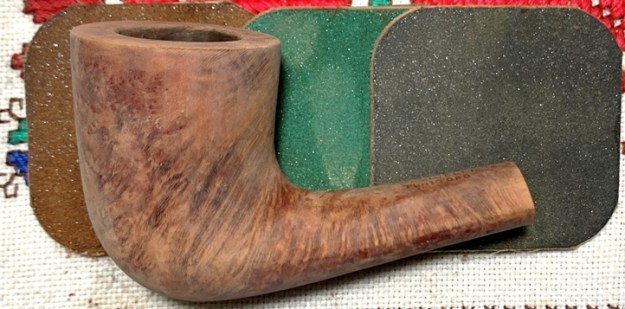
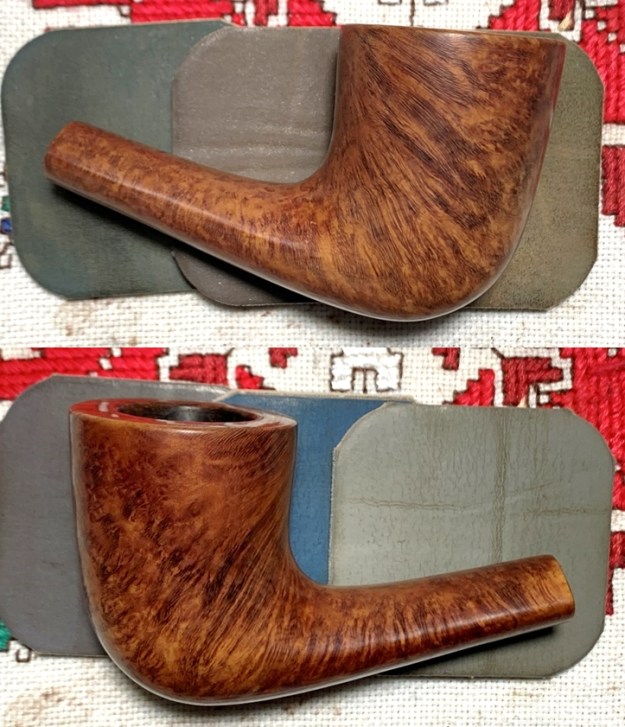
Now it was time to look at it up close and personal. Jeff had done an amazing job in removing all debris and bits of broken briar from the finish. He had done a quick reaming of the bowl with a Savinelli Fitsall Pipe Knife. He scrubbed the exterior of the bowl with Murphy’s Oil Soap and a tooth brush to remove the grime the grime and dirt on the finish so the pipe was clean – damaged but clean. He cleaned out the interior of the bowl and shank with pipe cleaners, cotton swabs and alcohol until they came out clean. The rim top looked quite daunting with the missing chunks of briar but it too was clean. He cleaned the stem with Soft Scrub to remove the grime on the exterior and cleaned out the airway with alcohol, cotton swabs and pipe cleaners. I took some photos of the pipe as I saw it when I brought it to the work table. To show how the rim top and stem looked at this point I took a close-up photo of the rim and stem. The bowl was clean and the damage to the inner edge and the rim top was very visible. It was a mess! The black acrylic stem was saved from major dog chomping. There are just a few tooth marks on both sides of the stem that could be addressed fairly easily.I removed the stem from the bowl and took photos of the parts. I chose the left side of the bowl as really both sides were equally damaged. This is truly a sad sight to see as the great grain on the bowl shows up nicely under the damage.I had been thinking about what to do with the finish since first seeing the photos. I had decided I would rusticate it but was undecided as to what extent I would go in the process. I wanted to retain the original shape and intent of the pipe while working out the damages. I started by using three different burrs on the Dremel – a ball, a cone and cylinder. Each one gives a slightly different finish. I worked them one after another to seek to blend in the tooth marks as much as possible. I also decided to rusticate the worst areas – the base and part way up each side of the bowl and the entire bowl front. The photos show this first step. I decided to let that rustication pattern sit with me for awhile and not add more to it. I just wanted to think about it for a  while. I decided then to patch the bite marks in the upper part of each side and the entire back of the bowl. I also wanted to repair as much of the rim top and edge damage as I could. I used clear super glue and briar dust to patch the many tooth marks around the bowl. The photos show the freckled sides. I built up the damaged front outer edge and the deep marks on the top of the rim with super glue and briar dust. These took some layering to do the job. I looked over the rustication some more and was not completely satisfied with the coverage of the existing rustication or the distance I came around the sides of the bowl. I decided to use a tool that a reader of rebornpipes made for me for rusticating. You can see it in the photos. It is essential a group nails bound together in a handle and with a clamp to give me multiple points to rusticate with. The way it works is to press it into the briar and twist it. You move across the briar until it is “randomly” covered. Once I was happy with the coverage I knock off the debris left behind with a brass bristly brush. I like to knock it down and smooth it out to give it an old leather like look to the rustication. I left the rustication and turned to address the damage to the rim top. I topped the rim with 220 grit sandpaper on the topping board. Once it was smoother and flatter I filled in the divots and holes in the rim top and edges with briar dust and super glue once more. Once I finished I topped it once more to smooth out the repaired areas.With that finished for the moment I turned to sanding the smooth portions of the bowl. I used my Dremel and sanding drum to flatten out the repaired areas first. I followed up by sanding them with 220 grit sandpaper. The photos below show the bowl at this point in the process. Note that there was no damage to the shank so I left it as is and would match the stain to that once I stained the repaired area. I was pretty happy with the way it was looking. I was ready to stain the undercoat on the bowl. I decided to use a black aniline stain for the rusticated part of the bowl and for the undercoat on the smooth sides and rim top. Black does a great job hiding the kind of repairs that I had to do with this briar. I applied the stain and flamed with a lighter. I repeated the process to ensure the coverage was thorough. I flamed it again and set it aside to dry while I had some dinner.I took photos of the bowl at this point to show the coverage of the black stain on the rustication and the undercoat on the smooth areas. After dinner I wiped down the smooth areas with isopropyl alcohol on a cotton pad to make them more transparent and show the grain. I then gave the smooth areas a coat of Mahogany stain using my stain pens to get into the transition areas and control the flow better. The combination of the black undercoat and the Mahogany matched the original shank colour! When that coat of stain had cured I polished the smooth portions of the bowl with micromesh sanding pads. One of the pains of this process is all the flaws show up in the initial sanding. You can see my repairs in some spots but hopefully they bill disappear a bit in the polishing. I was really happy with the right side of the bowl. The repairs virtually disappeared in the staining and sanding. I worked on the left side a little more. I sanded the offending areas of the transition with 400 grit wet dry sandpaper and restained the area. I worked through all of the micromesh pads another time on that area. I was happy with the finished looked at this point. I rubbed the finish down with Before & After Restoration Balm. I worked it into the smooth areas on the bowl and rim top with my fingertips and the rusticated areas with a horsehair shoe brush. The product cleans, protects and enlivens the briar. I let it sit for about 30 minutes and buffed it off with a cotton cloth. The photos below show the bowl at this point… it is a far cry from the dog eaten bowl that I started with — at least I think it is ;). I set the bowl aside and turned to the stem to address the issues that were on the top and underside. I filled in the tooth marks on the stem with clear super glue. I generally overfill them a bit so that it takes into account the shrinkage that occurs as the repair cures.Once the repairs had cured I sanded them smooth to start to blend them in with the surround acrylic of the stem. I sanded the repairs on both sides with a folded piece of 220 sandpaper and started polishing with 400 grit wet dry sandpaper.I rubbed the stem down with Denicare Mouthpiece Polish – a red gritty paste a lot like Tripoli to polish it after the 400 grit sandpaper. I rub it on with my fingertips and work it into the vulcanite and buff it off with a cloth. It does a great job before I polish it further with the micromesh pads.I polished the stem with micromesh sanding pads – dry sanding with 1500-12000 grit sanding pads. I wiped the stem down after each sanding pad with a cloth containing some Obsidian Oil. I finished polishing it with Before & After Pipe Stem Polish – both Fine and Extra Fine and buffed it off with a cotton cloth. The next steps in this restoration were ones that I have been looking forward to. I was glad to reunite the bowl and stem and see what the finished pipe looked like. I polished the silver with a jeweler’s cloth and buffed the bowl and the stem with Blue Diamond on the buffing wheel. I used a light touch on the rusticated portion as I did not want to fill in the rustication with the product. I gave the bowl multiple coats of Conservator’s Wax and the stem multiple coats of carnauba wax. I carefully buffed the entire pipe with a clean buffing pad to raise the shine. I finished buffing with a microfiber cloth to deepen the shine. The finished pipe looks a lot better than dog chewed pipe that I started with. I am happy with the finished look at this point. While the repairs to the smooth areas show a bit they are smooth. The leather like rustication works well with the finish on the bowl in my opinion. The finished Ser Jacopo L1 Billiard is shown in the photos below. The dimensions of the pipe are Length: 6 ½ inches, Height: 2 ¼ inches, Outside diameter of the bowl: 1 ½ inches, Chamber diameter: ¾ of an inch. This should be a great pipe once it is broken in. The rustication on the base and front give it a very tactile feel that should only be better as it heats up during a smoke. This one will go on the rebornpipes store shortly. If you are interested in it let me know. Thanks for reading this blog and my reflections on the pipe while I worked on it.


Bringing to Life a Unique Kaywoodie Natural Burl 33 – Another Legacy Pipe of a Great Grandfather


Blog by Dal Stanton

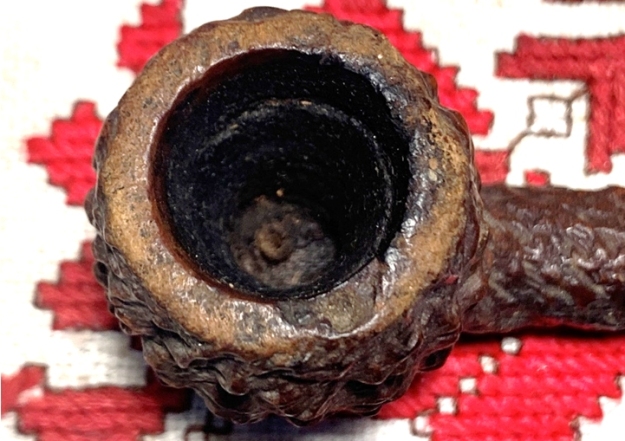
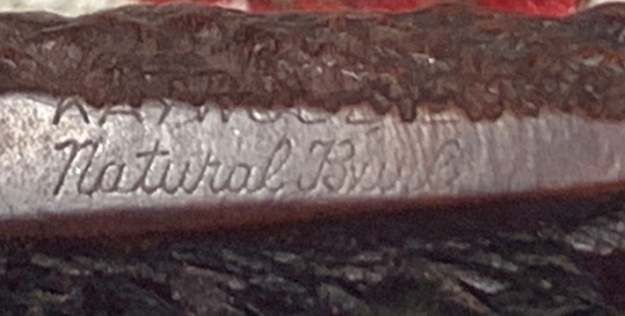
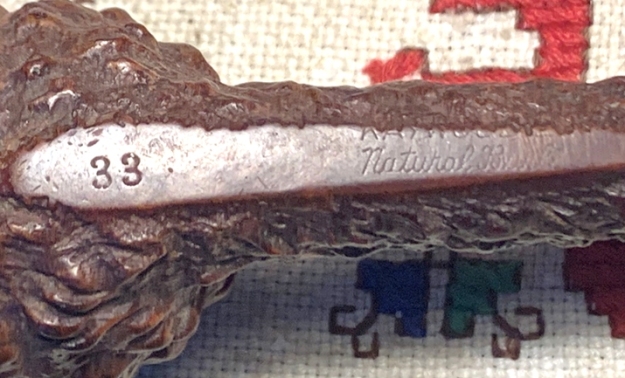
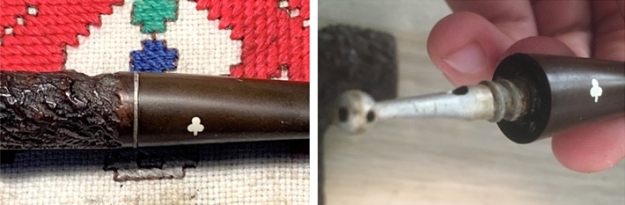
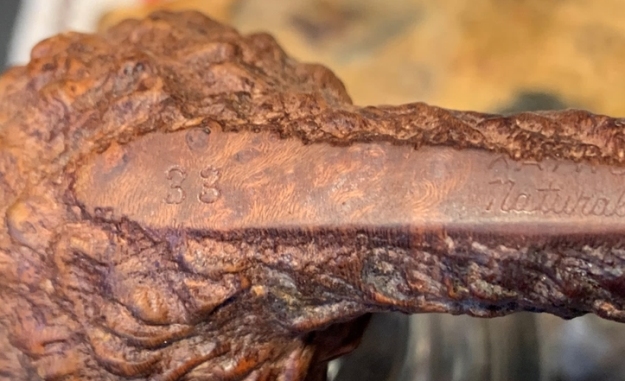
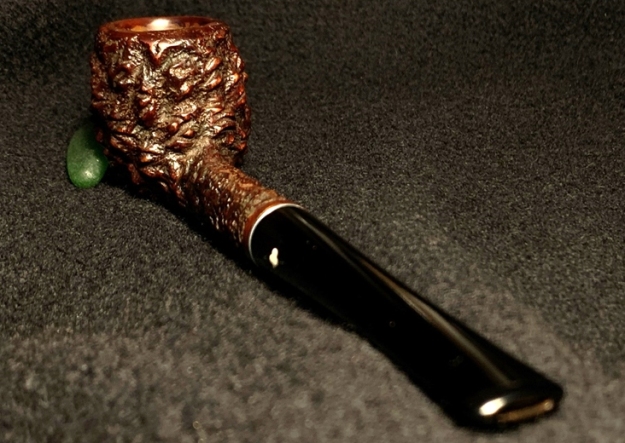
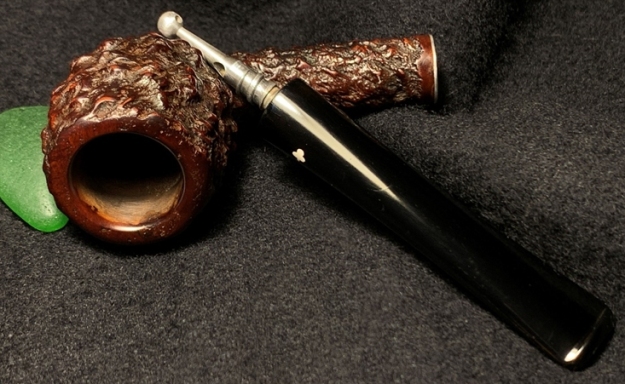
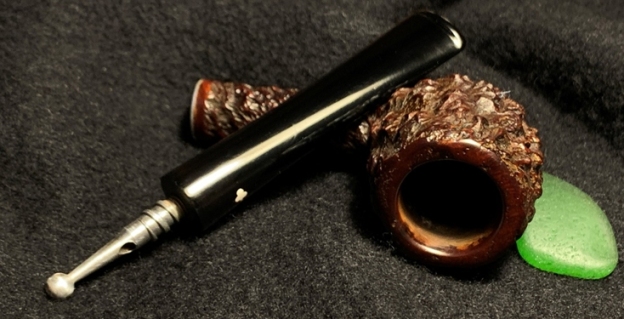
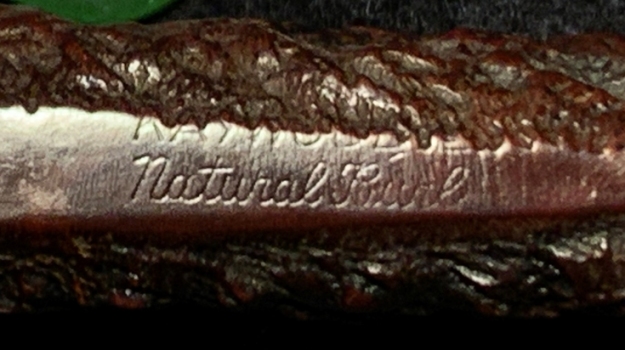
This is the second of 3 of Paw’s pipes that Joe sent to me from Athens, Greece, where he and his wife, Hannah, live and work.  Paw is Hannah’s great grandfather who left behind several pipes that Joe has asked me to restore for the family.  Paw, also known as, ‘2-Page Sam’ by those who knew him as a salesman of over 40 years of the tobacco giant, Brown & Williamson Tobacco, Corp, has a fascinating story that was described in an article in B&W’s company magazine that I included in the write up of Paw’s Medico Apollo Brylon, which I just completed that turned out well (See: Another Legacy Pipe of a Great-Grandfather: Challenges Working with ‘Brylon’ on a Medico Apollo).  Next, two Kaywoodies remain to be restored – a Kaywoodie “500” and the one on my worktable now, a Kaywoodie Natural Burl 33.  Here are pictures to take a closer look. The nomenclature is on the underside of the shank’s smooth briar panel with ‘KAYWOODIE’ (as most of it is not legible as the upper half of ‘Kaywoodie’ bleeds into the craggy rusticated landscape) [over] ‘Natural Burl’ in fancy cursive script. To the left of the nomenclature is stamped the Kaywoodie shape number of 33.  In Pipedia’s listings of Kaywoodie shape numbers, 33 is listed as: “Large apple, rounded top” that was used as a shape designator from 1937 to 1972.The dating indicators of this Kaywoodie are good.  The Natural Burl has a 4-holed stinger which were phased out at the end of the 1950s, though they still show up some in the 60s according to Pipephil.eu’s discussion about Kaywoodie’s stinger evolution.  The inlaid white shamrock also points to an earlier period.I found nothing specific in Pipedia or Pipephil.eu about Kaywoodie’s ‘Natural Burl’ line.  Expanding my search, I did find very helpful anecdotal information in a February, 2013, thread by ‘kwguy’ on a Kaywoodie discussion group on Tapatalk.com:

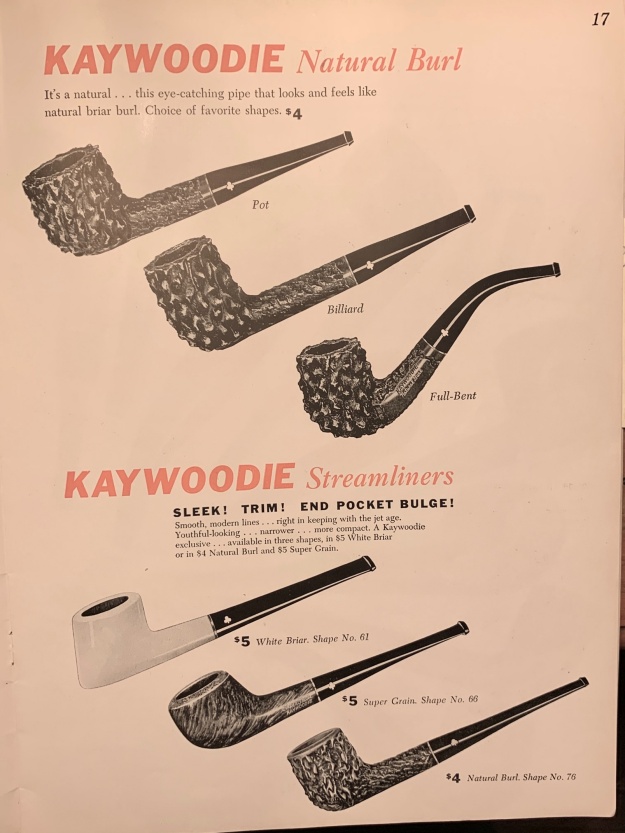
Natural Burls are in the catalogs from 1957 to 1962. They were $4.00 when they first came out and $5.00 by the time they were discontinued.  They were basically a stained version of the Coral White Briar, which also debuted in 1957.  The overall rough texture was described in the catalogs as having a rough texture like the outside of the burl.  The rough texture in theory would create more surface area for a cooler feeling bowl.  Carving of this type was done on bowls of less desirable grain and with excessive surface imperfections.  On the lower side of the quality scale, Natural Burls would have had the white cloverleaf.  There may have been the occasional higher grade pipe that was downgraded during production and hence would have the round logo, but I think you’ll mostly see them with the white logos.

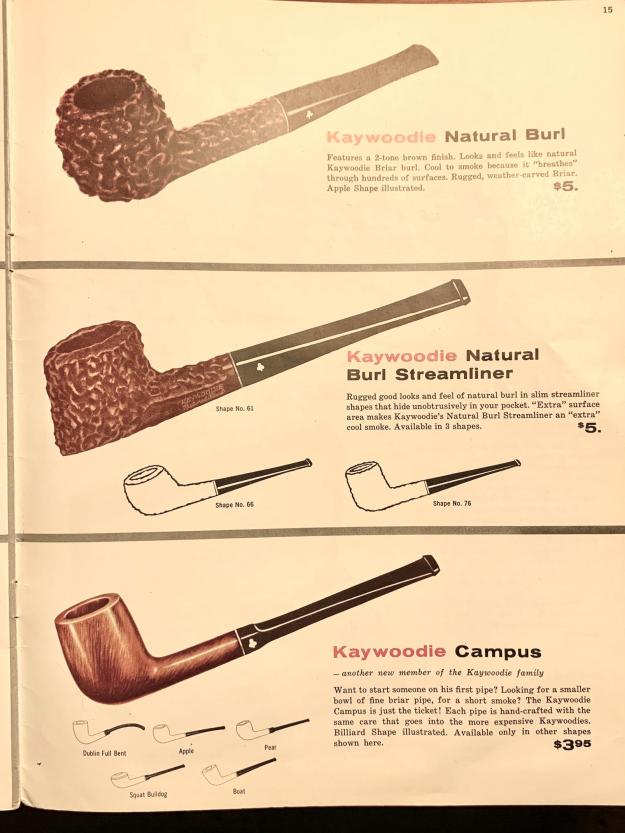
Based upon the information of this thread, the Natural Burl Apple before me dates from 1957 to 1962, when they were featured in Kaywoodie catalogs. I looked for a catalog during this period online, but unfortunately, I was unable to find one.  The rusticated or carved surface theoretically provides a cooler feeling bowl.  This pipe fits Sam’s low budget approach to his pipes.  When the Natural Burl Apple first hit the market, it was in a working man’s modest budget range, $4!  I’m hopeful that after I’ve completed working on Paw’s vintage Kaywoodie it will look like a million bucks!

The above thread from ‘kwguy’ also mentions that the ‘Natural Burl’ line was featured in Kaywoodie catalogs from 1957 to 1962.  There are Kaywoodie catalogs and adds referenced on Pipedia and the Chris Keene Directory of Pictures, but I could find nothing in these ‘go-to’ places for catalogs or listing between 57 and 62.  Emails to Steve and rebornpipes contributor, Al Jones, also came up empty.  However, Al encouraged me to reach out to Bill Feuerbach, the current president of S.M. Frank with Kaywoodie production in New York.  Al said that Bill had always been helpful and had seemed to enjoy providing info.  Nothing like going to the top of the pipe food chain!  I sent a note to Bill through the S.M. Frank website as well as to the ‘kwguy’ in the Natural Burl thread with the hope of getting a response and perhaps a historical Natural Burl add!

Al’s suggestion to me paid off!  In a few days I received a response from Bill Feuerbach, president of S.M. Frank since taking over the role from his father in 1990 as the fourth generation of Feuerbachs overseeing the company.  Bill’s note to me:

Dal 

I’d love to be able to help you out with that. I’ve looked through what I have at the shop and most of those catalogs are later 60’s to later 70’s.  I’m sure I’ll have those older catalogs from that range at home.  I’ll try and check tonight.

Best regards

Bill

After arriving home that night, Bill sent an additional note that he hadn’t found anything at his home and would redouble his efforts the following day at the shop to find the sought after ’57 to 62’ catalog pages.  Then, this note came in and the treasure hunt ended with success!

Dal

Success!!  I found the catalogs at home.  They were in a storage tub in the downstairs closet. Funny I don’t remember putting them there. It’s probably been 4 years since I referenced them. It is hell getting old, CRS is kicking in.

Anyway, I’ve attached three images from the 1958, 1960 and 1962 catalogs.  I was only using my phone to take pictures and it was difficult not to get any flash or glare.  Are they ok?  You can tell the year by the retail prices for the Natural Burl.

1958- $4.00

1960- $5.00

1962- $5.95

Let me know when you’ve posted this and the link. I’d like to take a look.  If you have any other questions let me know. If in the future you need other images from the catalogs, let me know.

Best regards

Bill

The images Bill sent were great depicting the Kaywoodie presentation of the Natural Burl line.  Both the 1960 and 1962 pages, second and third below, showcase the Large Apple on my worktable.  The pictures and descriptions are great helping to wrap Paw’s pipe in its historical context! I appreciated the help of Bill Feuerbach, president of the S. M. Frank Co. & Inc. based in New Windsor, New York.  The Frank website not only showcases the Kaywoodie, Yello-Bole and Medico brand lines, but has other interesting information as well.  In my email response to Bill, I offered to digitize the ‘treasure tubs’ of Kaywoodie catalogs and adds if I only lived a bit closer to his neighborhood!  Oh my….

As I was waiting for word from Bill before he found the catalogs, I reread the Pipedia article on the S.M Frank Co. and discovered at the bottom of the article a reference to Brian Levine’s interview of Bill on the Pipes Magazine Radio Show.  I tuned in to learn more about Bill and the Kaywoodie name.  I was interested to hear in the interview that not only is Bill the CEO of the company, but he is an accomplished freehand pipe maker himself, likes single malts and owns and enjoys pipes in his rotation other than Kaywoodies!  It was a great interview and I encourage readers to tune in too!

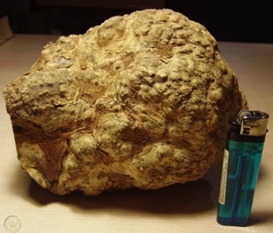
The name for this Kaywoodie series, ‘Natural Burl’, harkens back to a pipe’s origins – or at least its bowl.  The Natural Burl adds above from Bill describe the ‘rugged, weather-carved briar’ that breathes more because of the increased surface of the bowl.  Briar comes from a bush-like plant that grows in arid lands.  The Kaywoodie motif focuses on the rough state of the burl in its natural form sporting rusticated or carved bowls to emulate a natural harvested burl.  The burl is the base of the briar bush that is cut into blocks, each becoming the raw material for fashioning each unique bowl. I found this example online of the burl texture which looks very much like the pipe on my worktable! This interesting information was added about the process at the WorthPoint site:

The mother of briar is Erica Arborea, an evergreen bush / tree, that grows in all forests of the Mediterranean area, preferring acid soils (Cyprus, Greece, Italy, Spain, France, Portugal, Morocco, Algeria- these are the countries where it is found). The bush has a typical height of 3 – 12 feet. But not the visible parts are the wanted ones, the ball-like roots are the pipe makers desire. These are the raw material for the briar wood, which is cut in blocks (plateaux and ebauchons) by real specialists. After a long process of boiling them in clear water and drying periods, these briar blocks will be ready for the experienced hands of a pipe maker.

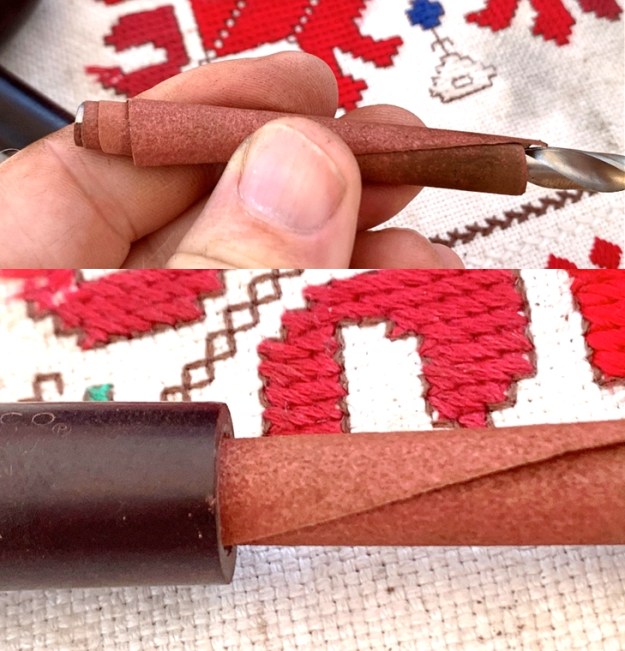
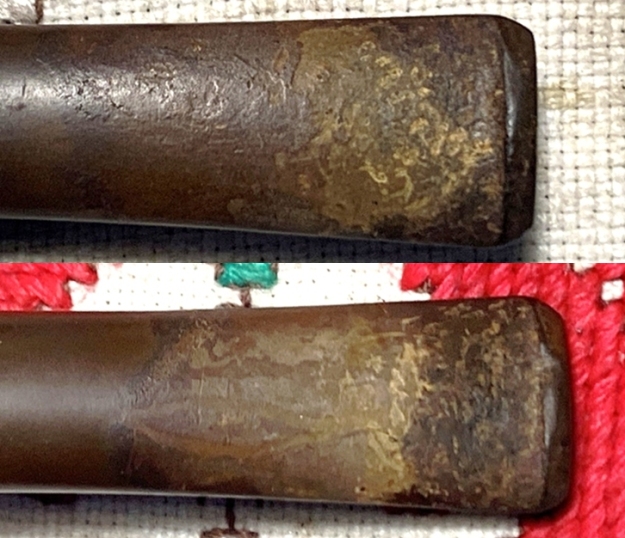
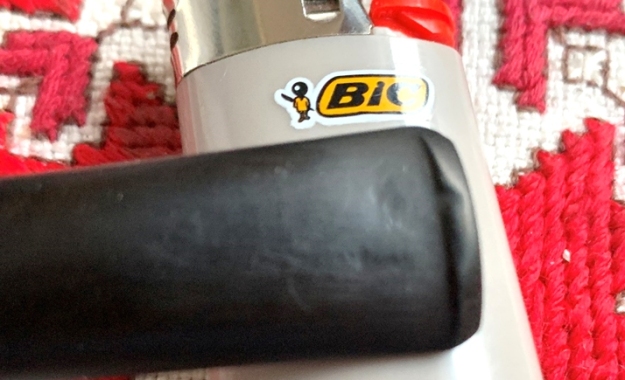
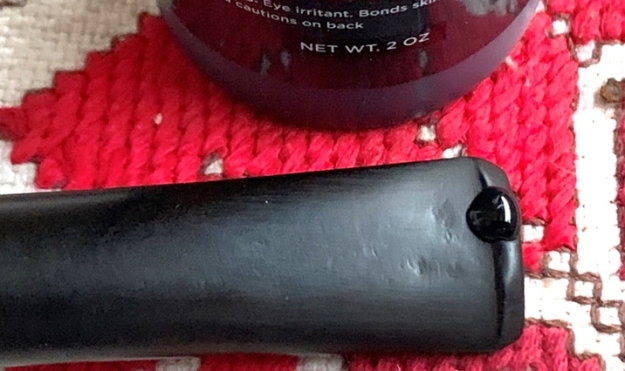
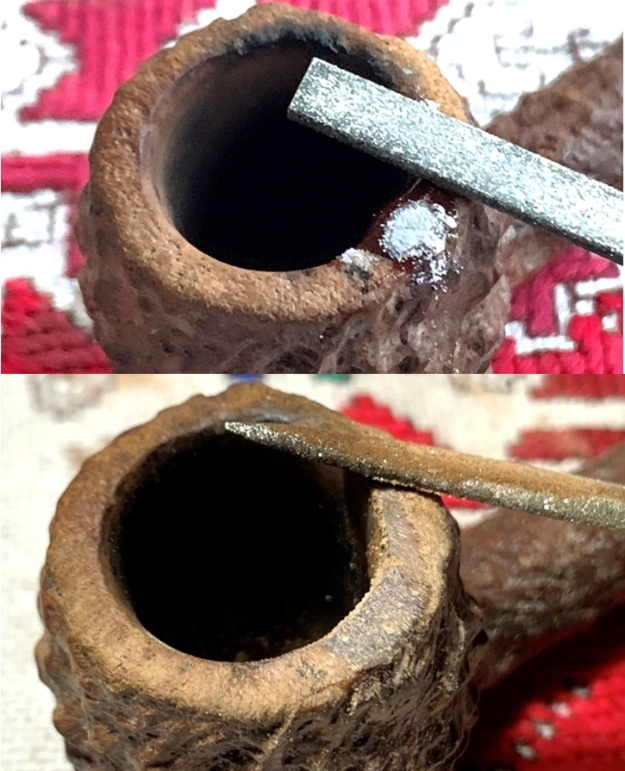
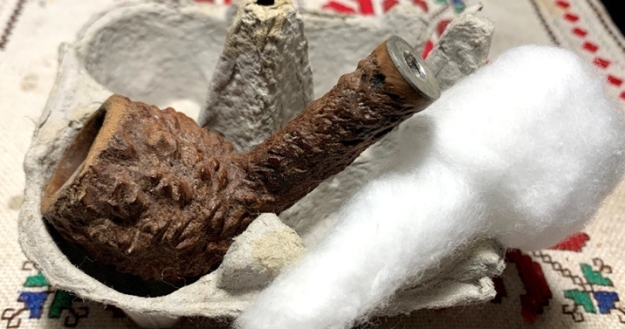
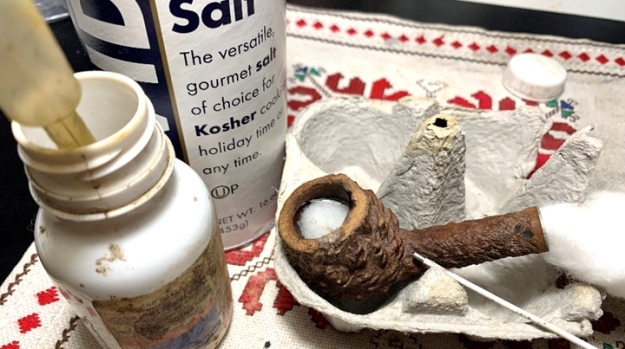
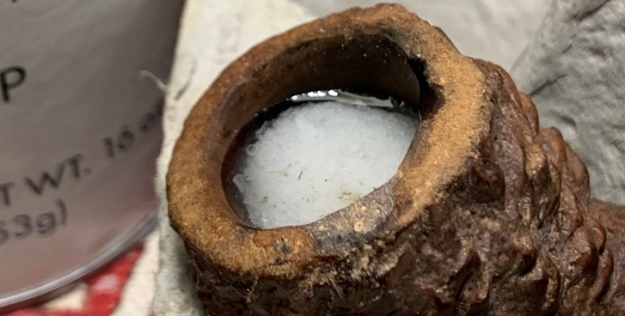
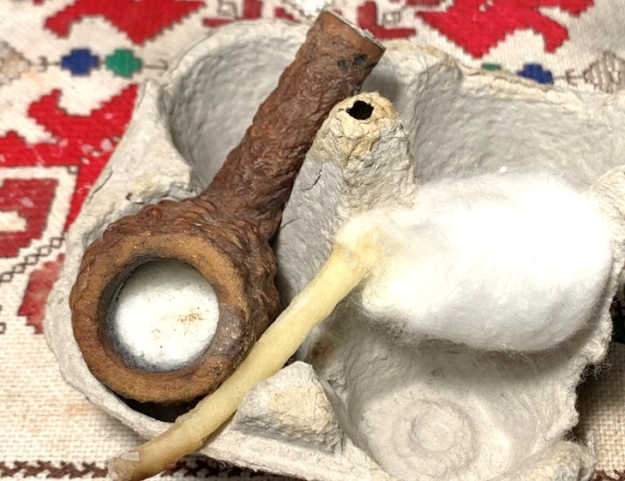
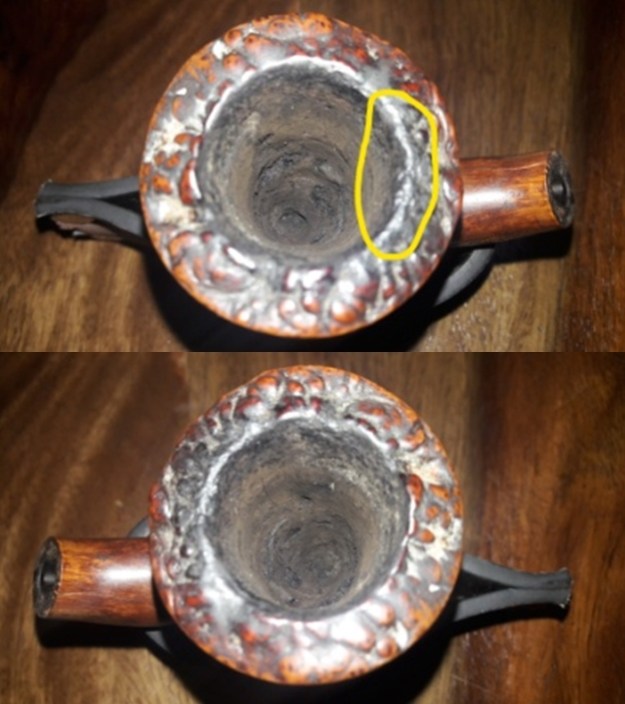
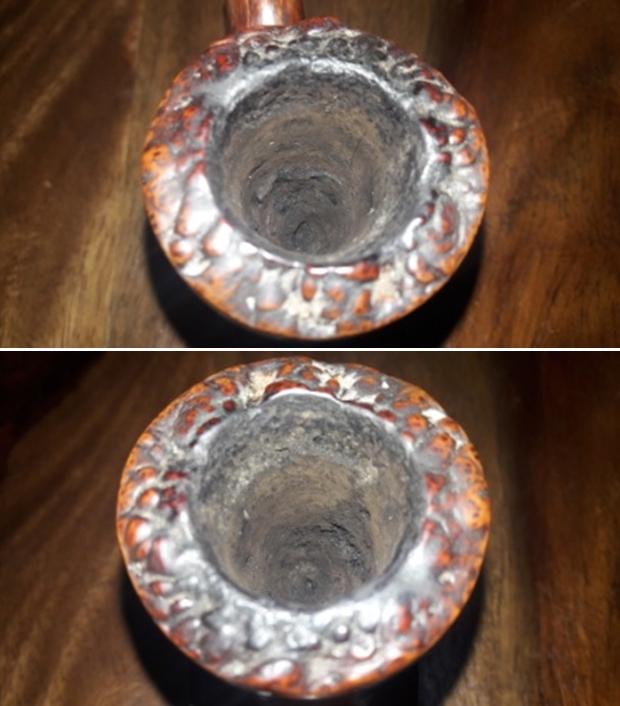
With a deepened understanding and appreciation for Paw’s Kaywoodie on my worktable, I look more closely at the issues it brings from its years of service. As one would expect, the craggy Burl bowl is full of grime.  The chamber has thickening cake as you go down toward the floor.  This needs to be cleaned out as well to inspect the chamber wall and to give the briar a fresh start. The rim has evidences of Sam’s penchant for knocking the stummel on the back side of the rim.  It is worn and tapers away from the chamber. The rim was fashioned to be somewhat rough complementing the craggy bowl motif, but there is a large chip or divot out of the rim that will need to be filled and then blended. The bowl itself, along with the rim, is faded and skinned up.  I suspect that the original finish bent toward a light brown, but it is now thin and will need refreshing with new dye to blend the rim and bowl.  The 1962 add above describes a ‘2-tone brown finish’ characterizing the ‘Natural Burl’ line.  This is helpful information that hints at the depth of the final finish.The stem is in rough shape.  The oxidation is thick and deep.  The bit has calcium caked on it and some lower tooth compressions – not as bad as I’ve seen on Paw’s previous pipes! The stem orientation is also over-clocked which is a normal phenomenon with Kaywoodie screw in stems that happens over years of use with repeated loosening and tightening.  This will need to be adjusted as well. I begin the restoration of Paw’s Kaywoodie Natural Burl Large Apple by addressing the severe oxidation in the stem.  Before placing the stem in a soak of Before & After Deoxidizer, I get a head-start on removing the oxidation by pre-sanding the stem.  I use both 240 grade sanding paper and 000 grade steel wool to sand the stem to remove as much oxidation and caked calcium as possible.  The nickel 4-hole stinger also is cleaned up with the steel wool.After the sanding, the stem joins other pipes in the queue in a soak of Before & After Deoxidizer. After a few hours, the Kaywoodie’s stem is extracted from the Deoxidizer and after draining, I squeegee the liquid off the stem with my fingers.  I then run a pipe cleaner wetted with isopropyl 95% through the airway to clear the Deoxidizer.  Using a cotton pad and alcohol, the stem is wiped to remove the raised oxidation resulting from the soak.After cleaning the stem, paraffin oil is applied to help condition the vulcanite.  I put the stem aside to absorb the oil.  The stem looks great compared to where it started. It’s cleaning up nicely.Next, I turn the attention to the stummel.  I begin by reaming the Kaywoodie’s chamber to remove the cake.  Using the Pipnet Reaming Kit, I use two of the four blade heads available in the Kit.  I don’t know how long this cake has been waiting to be removed, but it is as hard as a brick.  I’m careful not to force the blades beyond their torque endurance level – simply allowing the scraping action to wear away the brick cake.  When both blades do what they can, the Savinelli Fitsall Tool continues the scraping of the chamber walls. Finally, to remove the last remaining carbon remnants, a 240 grade sanding paper is wrapped around a Sharpie Pen to sand the chamber getting down to fresh briar. After wiping the chamber with a cotton pad wetted with alcohol, and inspection reveals a perfectly healthy chamber.  The picture on the 10th floor Man Cave balcony where I’m working, does not allow a very good picture of the chamber, but it looks good.  Moving on.Next, using undiluted Murphy’s Oil Soap, I go to work on the wonderfully craggy but grime-filled surface of the Natural Burl bowl.  I use a cotton pad a bit, but transfer to using a bristled toothbrush which gets into the nooks and crannies of the landscape much more effectively.Next, after transferring the bowl to the kitchen sink, I continue to clean the surface and use shank brushes and liquid anti-oil dish soap and warm water to work on the internals.  After rinsing thoroughly, back on the worktable I take some pictures of the results.  The cleaning has totally removed what was left of the old finish – not unexpected.  The cleaning reveals some white fills on the right side of the stummel which are fully embraced in the craggy landscape cover and seem to be solid after testing them with a sharp dental probe.Next, I focus again on the internal cleaning using pipe cleaners and cotton buds wetted with isopropyl 95%.  Cleaning Kaywoodie pipes tends not to be easy.  Working through the threaded metal shank facing makes access to the mortise difficult.  Along with pipe cleaners and buds, the full arsenal added the use of shank brushes, and a dental spoon to scrape the mortise walls.  After quite a bit of time and effort, the buds start to emerge lighter and a cease fire is called. I’ll continue the cleaning later with a kosher salt and alcohol soak to work through the night to further clean and freshen the internals of the Kaywoodie stummel.Turning now to the rim, the next step is to fill the divot, or perhaps, the crater on the rim.  I go along with the ‘rough’ motif of this Kaywoodie Natural Burl.  The rim is rough and the only repair I plan for the stummel is this divot.  The damage of Paw’s knocking will remain – it simply adds to the rough rustic look and will be a remembrance of Paw when it is put into service by the family.I place a small mound of briar dust on the mixing palette that I’ve covered with scotch tape for ease of cleaning.  Next to the briar dust a small amount of BCI Extra Thick CA glue is puddled.Using the toothpick, briar dust is pulled into the glue and mixed as it is added.  As more is added, the resulting briar dust putty thickens.  When it reaches the thickness of molasses, with the toothpick the putty is troweled to fill the rim divot.With the briar putty applied, I place the stummel aside for several hours for the putty to cure.Turning now to the stem, the upper bit is in good shape after the ‘pre-sanding’ that was done before putting the stem into the Deoxidizer.  The lower bit, pictured below, has some compressions and a button bite compression that need addressing.I start by using the heating method with a Bic lighter.  Using the flame of a Bic lighter, I paint the bit using a back and forth motion heating the vulcanite.  As the vulcanite heats, it also expands to regain the disposition of the stem before the compressions were made by Paw.  The picture below is after the heating and the process has helped the bit compressions so that only sanding should be needed to remove the damage.  However, the button is still in need of additional steps.To fill the button lip bite, after wiping the area with alcohol to clean it, I spot drop black CA glue on the compression and put the stem aside for the patch to cure.The patch on the rim is now ready for filing.  I use both the flat and half-rounded needle files to remove the excess putty and to shape the internal curve of the rim. I put a stop on sanding and further cleaning the rim because the hour is late, and through the night I want to use a kosher salt and alcohol soak to advance the cleaning of the internals of the stummel.  I first fashion a cotton ball into a ‘wick’ by pulling and twisting it.  It is then inserted down the mortise into the airway with the help of a stiff wire. The wick helps to draw out the latent residue of tars and oils.The bowl is then filled with kosher salt, which leaves no aftertaste as with regular iodized salt.  After placing it in the egg carton to keep it stable, I then fill the chamber with isopropyl 95% until it surfaces over the salt. After a few minutes, as the alcohol is drawn into the stummel, the alcohol is topped off and it is set aside to work through the night. The next morning, the salt and wick are slightly soiled which hopefully means that the internals are already clean from earlier. After dumping the expended salt and wiping the bowl with a paper towel, I blow through the mortise to make sure all the salt crystals have been dislodged. To make sure that the internals are clean, and nothing has been left behind after the soak, I use only one pipe cleaner and cotton bud as confirmation of the cleaning. Moving on.I return now to the rim.  I plan to apply a fresh color to the stummel and the only preparation for applying the new stain to the stummel is on the rim.  I plan to leave it in the rough motif of the Natural Burl line, but I want the rim cleaned.  I lightly sand the internal rim edge as well as lightly around the rough external rim edge as it transitions into the Burl landscape.  I’m looking for ‘rough’ and ‘rustic’ but ‘fresh’ to give this unique Kaywoodie a fresh start.I follow the 240 paper with 600 grade paper with the same approach – keep the rustic but refresh the rim.Before moving to the next step, I notice that the nickel shank facing after the cleaning had not been spruced up.  A quick revolution of 000 steel wool takes care of this.  This is the only bling this Kaywoodie has and I’m making the most of it!As I think about applying a fresh color to Paw’s Kaywoodie, I have only one picture of another Natural Burl online and it is no help in hinting at the original 2-toned brown coloring Kaywoodie used.  The best clue I have is on Paw’s pipe. The smooth briar panel on the underside of the shank holding the nomenclature holds a clue.  To guard the stamping on the panel I’ve not sanded it – only cleaned with the rest of the stummel.  I’m guessing that the coloring of the panel leans toward a light brown.  I’m thinking that Kaywoodie’s approach was straightforward with this less expensive line of pipes.  Yet, the craggy surface now is so dry and bare, showing pristine briar, that applying even a light brown dye will probably darken considerably as the thirsty briar drinks it in.Looking at the craggy landscape in the picture above brings the next question in my mind about applying a new finish.  My normal way of staining with aniline dye is to flame it to combust the alcohol which encourages a deeper embrace of the dye by the briar grain.  My normal follow-up to this is then to apply compounds to remove the crusting the combustion creates and to further shine the surface with the fine abrasives of Tripoli and Blue Diamond compounds.  The roughness of this stummel causes me to question my normal approach.  My concern is that if compounds are used on this craggy rough surface, I will forever be trying to clean out the compound residue lodged in the rough surface!  I think I can utilize buffing wheels on the Dremel without too much problem, but without compounds.  I decide in the end to apply a dye wash instead of flaming the dye because of this concern.

After wiping the stummel down with a cloth and alcohol to clean it the best I could, the stummel is heated with the hot air gun to open the briar.Then, with the use of a folded pipe cleaner, the surface is painted with Fiebing’s Light Brown Leather Dye.  I make sure the dye is getting into all the cracks, crevasses, nooks and crannies.  The rim also receives the dye.After the dye is applied, the stummel is set aside to rest for several hours before continuing with the next steps of finishing.  This ‘rest’ helps the new dye to stabilize in the briar.Turning back to the stem, the patch applied to the lower button lip is cured and I use a flat needle file to remove the excess patch material and to shape and refresh the button lip.  I also file the bit area to remove any residual tooth compression.Flipping over to the upper bit, I file residual compressions as well as refresh the button lip.  Refreshing the button lip is helpful to allow a better ‘hang’ grip of the pipe without biting and clenching, and extreme chewing!Continuing now with 240 grade sanding paper on the upper side, the file scratches are removed, and the button is smoothed further.  The same is done on the lower bit and to further blend the button patch.   I expand the 240 sanding to the entire stem to make sure that residual oxidation has been addressed. Following the 240 sanding, I wet sand the entire stem with 600 grade paper and follow with applying 000 steel wool. The nickel stinger is also a benefactor of the steel wool polishing again.Moving on, the full regimen of 9 micromesh pads are applied by first wet sanding with pads 1500 to 2400 and dry sanding with pads 3200 to 4000 and 6000 to 12000.  Between each set of 3 pads, Obsidian Oil is applied to condition the vulcanite and to guard against oxidation. I love the glossy pop of newly micromeshed vulcanite! I had observed earlier that the Kaywoodie screw in stem was over clocked a few degrees.  This happens over time with tightening and loosening.To correct this problem and to bring the stem back to an accurate orientation, a Bic lighter is used to heat the nickel 4-hole stinger.  Since the stinger is gripped by the vulcanite of the stem, the goal is to warm the stinger so that the vulcanite gripping the stinger heats and loosens its grip allowing the stinger to rotate. After heating the stinger, I quickly re-screw the stem into the threaded shank facing and when it tightens to the orientation pictured above, I continue to apply clockwise pressure and the heated vulcanite releases its grip and it allows me to turn the stem one full revolution to line it up correctly.  I had to heat the stinger twice as the first try did not loosen the grip.  After lining the stem orientation correctly, I leave the stem in place and as the vulcanite cools, the grip on the stinger is re-engaged holding the stem again in the proper orientation.Time to address the dyed stummel.  It has been resting for several hours to help stabilize the dye in the briar.I use a cotton pad wetted with alcohol to wipe down the dyed stummel.  I do this to remove excesses of dye on the surface and to lighten and blend the new dye.Next, I mount a cotton cloth buffing wheel onto the Dremel and simply buff the stummel.  I do not use any compounds so that the compound dust does not fowl up the surface getting lodged in the plethora of hiding places on the Burl surface causing me to have to clean it!  The Dremel is a great tool for getting into the nooks and crannies of the Natural Burl landscape. I’m able to rotate and move up and down ridges and to reach into crevasses.  The newly dyed surface responds well to the buffing wheel.  The coloring of the wheel shows that new dye is leeching out of the surface.  The more I’m able to remove now, less likely to come off on hands later!Next, I use the 1500 grade micromesh pad and lightly sand over the Burl surface.  The aim is to ‘scalp’ the peaks of the mountain tops on the craggy surface to lighten them.  The lightening of the peaks creates more contrast and depth definition to the landscape.  I follow the scalp sanding by running the Dremel’s buffing wheel over the surface again.  This, I believe, achieves the ‘2-toned’ look of Kaywoodie’s design for the ‘Natural Burl’ line.In the homestretch – next, I mount another buffing wheel onto the Dremel setting the speed at about 40% full power.  After reuniting the Kaywoodie’s stem and stummel, Blue Diamond compound is applied to the rim and smooth briar surface on the underside and end of the shank.  The compound is also applied to the stem.  After applying the Blue Diamond compound, the pipe is buffed with a felt cloth to remove the compound dust from the areas on the stummel and from the stem.  Next, another cotton cloth buffing wheel is mounted and set at the same speed and carnauba wax is applied to the entire pipe.  I’m careful to apply with a very light touch of wax to the Natural Burl surface not to allow wax to build up in the crannies.  Wax is applied to both stummel and stem and then the pipe receives a rigorous hand buffing with a microfiber cloth to raise the shine.

Wow!  I’m very pleased with how this Kaywoodie Natural Burl Apple shaped up.  The brown craggy finish is flecked with shade differences that give it a depth and warmth – a rustic knobby feel.  I always enjoy the contrast nuances that the coalescing of rough and smooth briar creates. The smooth briar underside and shank ring alongside of the Burl texture is nice.  I’m amazed that this pipe occupied the lower shelf on Kaywoodie’s offerings back in the day when Sam chose it and added it to his rotation of pipes.  The TLC it has received has enhanced the briar presentation with this unique Natural Burl finish. I appreciate the collaborative help from Bill Feurbach who even as the president of the S.M. Frank Co., was not hindered from helping with the recommissioning of this one vintage Kaywoodie – a pipe man at heart.  Thanks, Bill!  I like the Natural Burl a lot and I trust that Joe likes it too.  Paw’s Kaywoodie Natural Burl 33 – Large Apple, that was put into production in the mid-50s/early 60s, is a venerable 60-year-old(!), and is starting a new lifetime in the loving care and stewardship of Paw’s family.  Adding frosting to the Kaywoodie cake, Joe’s commissioning of this restoration of Paw’s Natural Burl also benefits the Daughters of Bulgaria – women and girls who have been trafficked and sexually exploited.  Thanks for joining me!

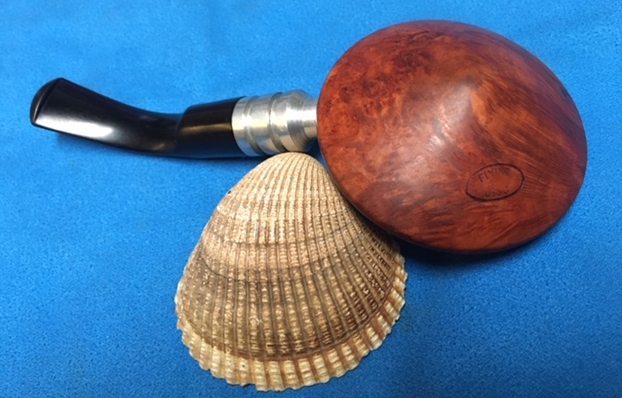
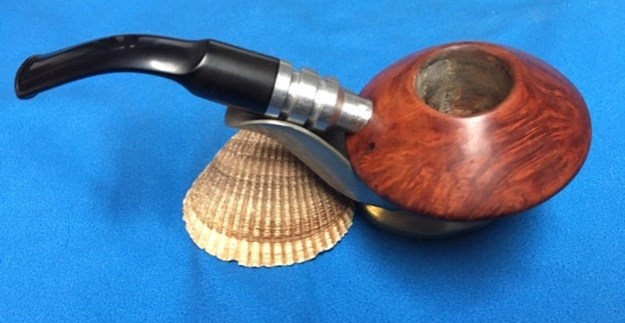
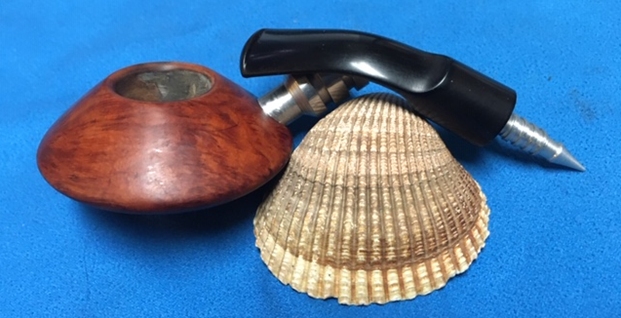
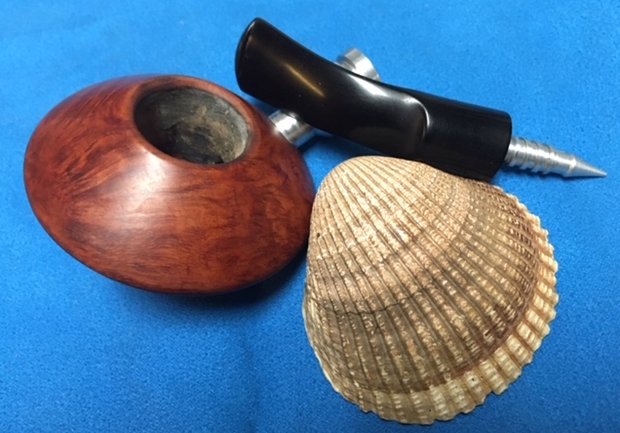
Next on the table – A Strange Saucer Shaped Pipe Stamped Flying Disc


Blog by Steve Laug

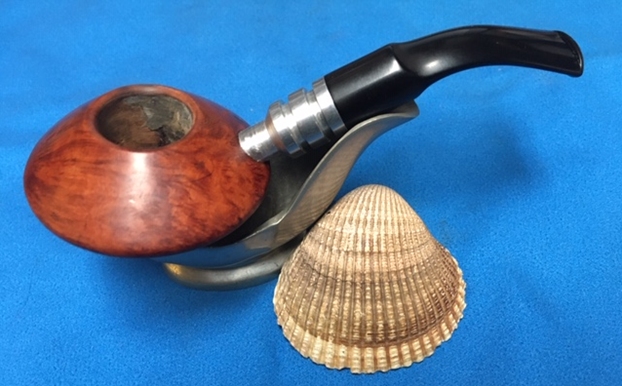
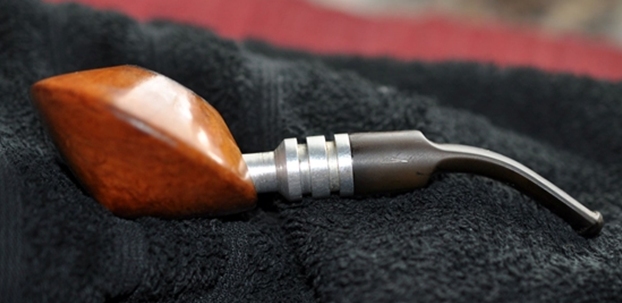
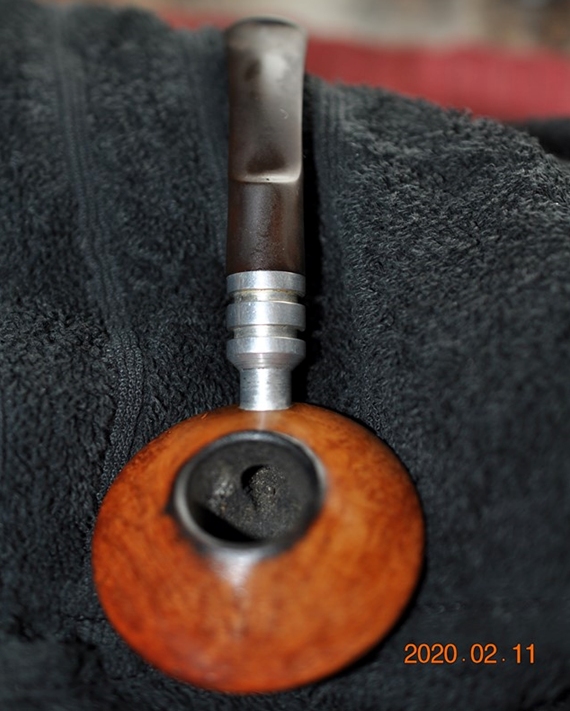
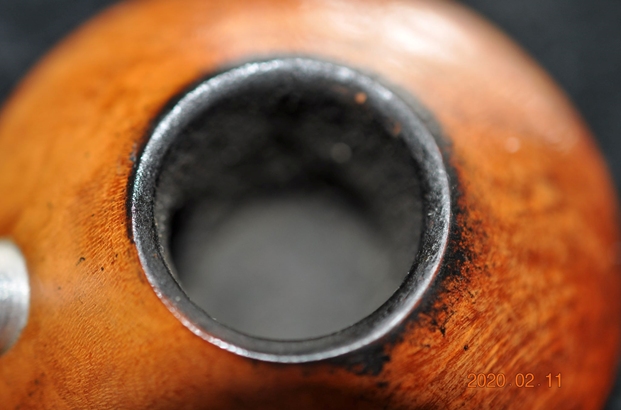
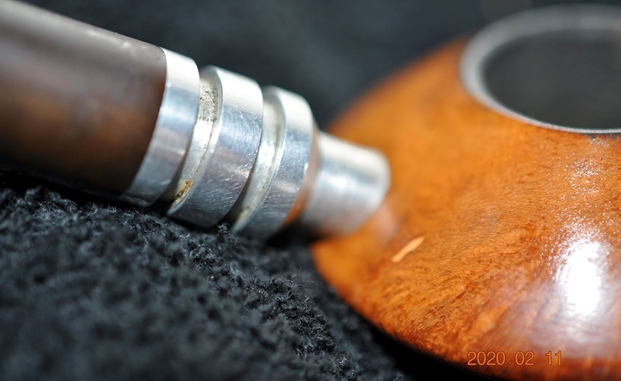
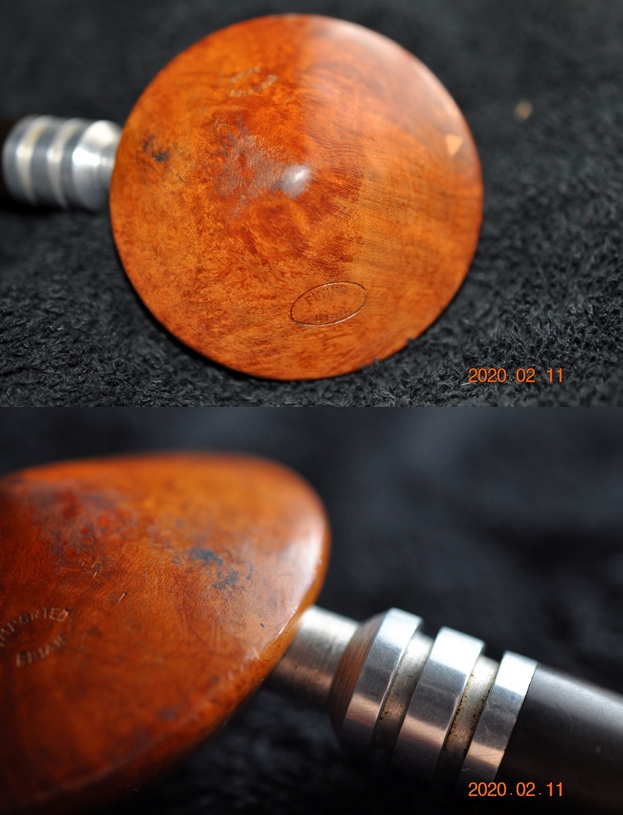
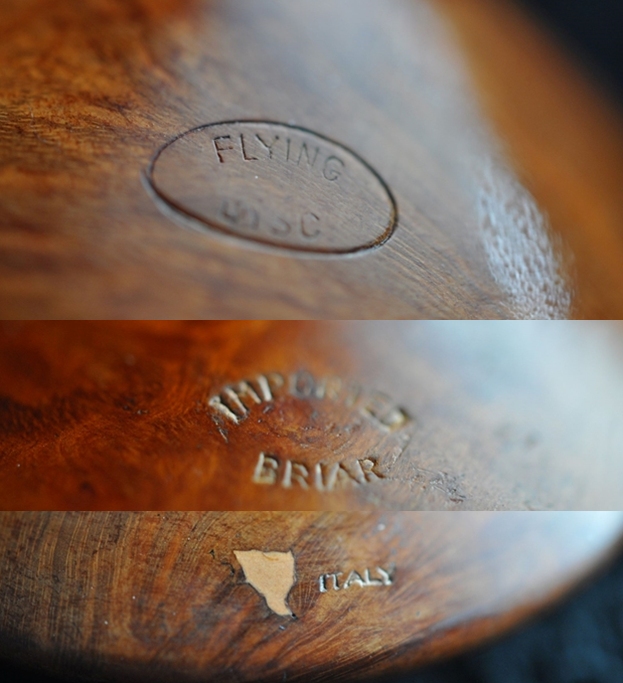
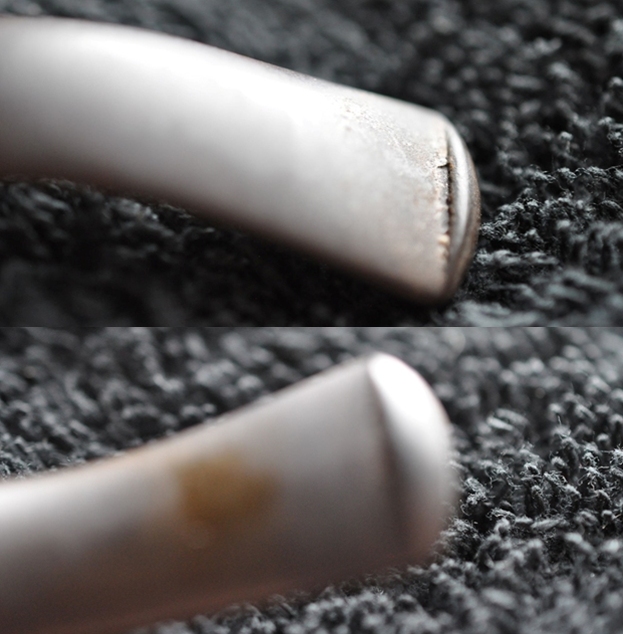
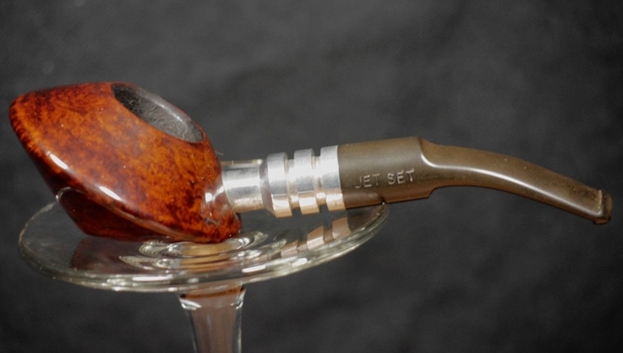
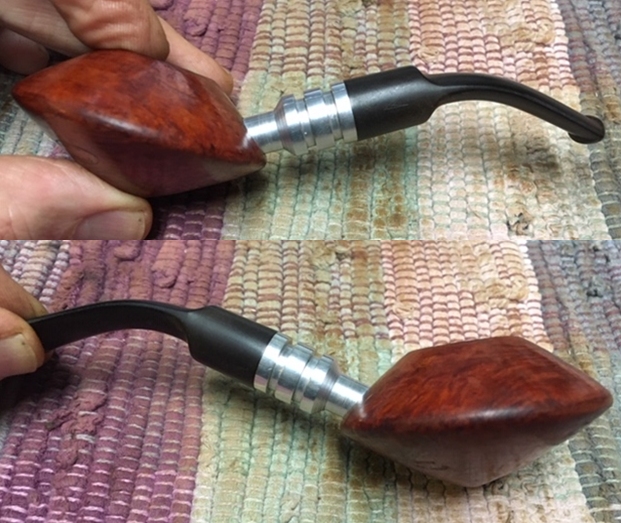
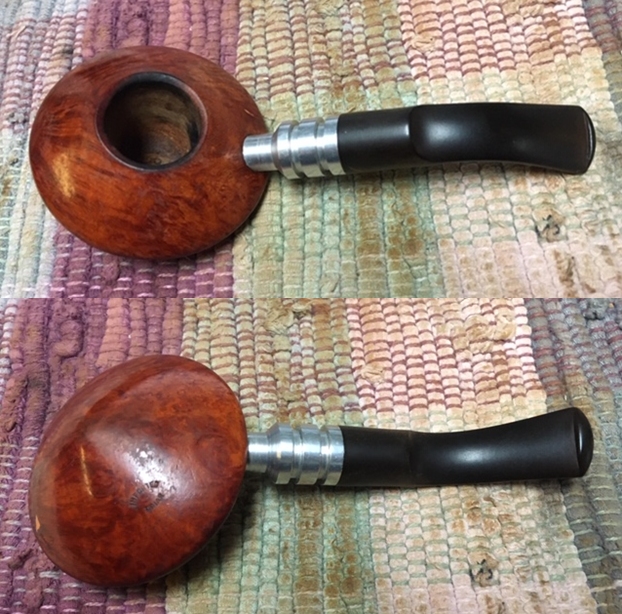
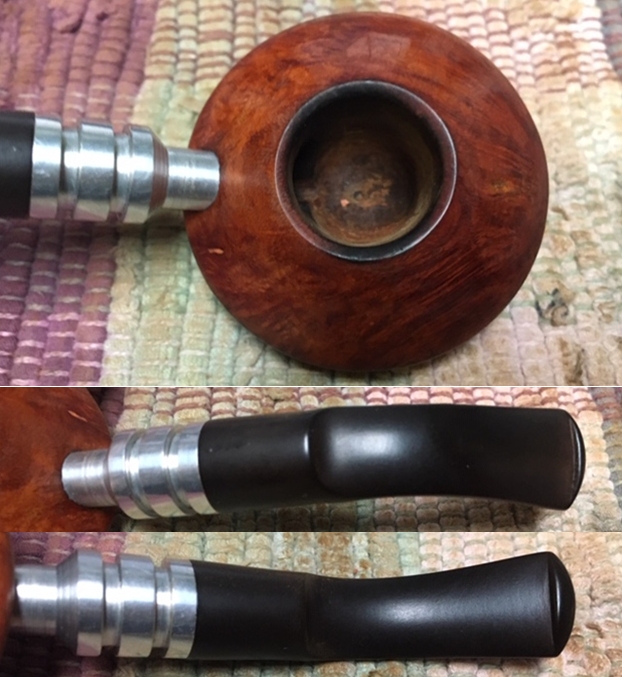
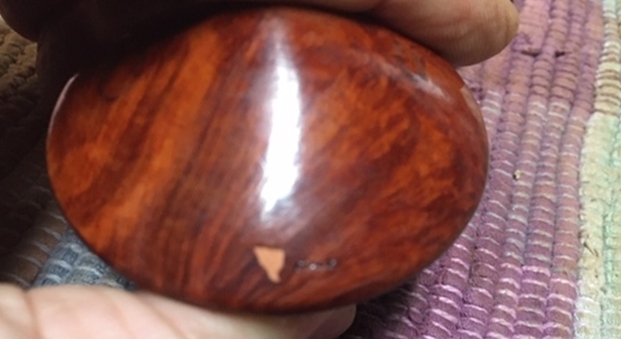
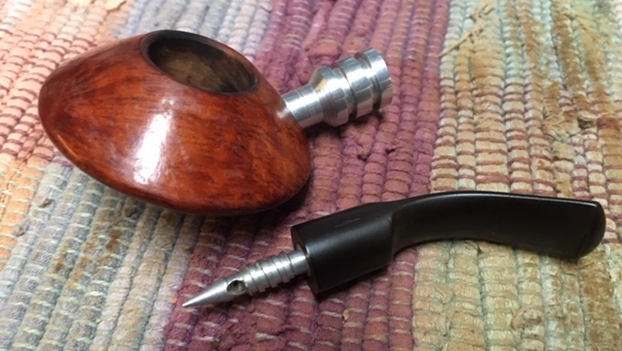
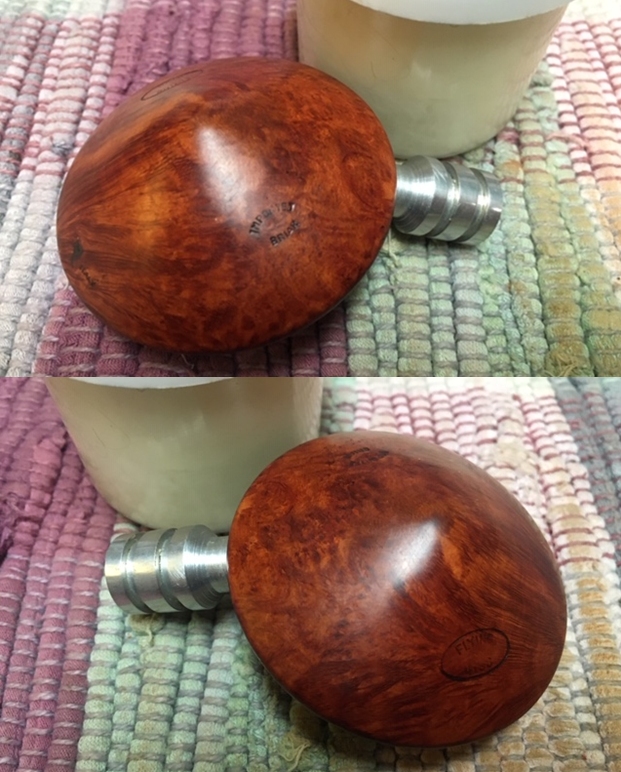
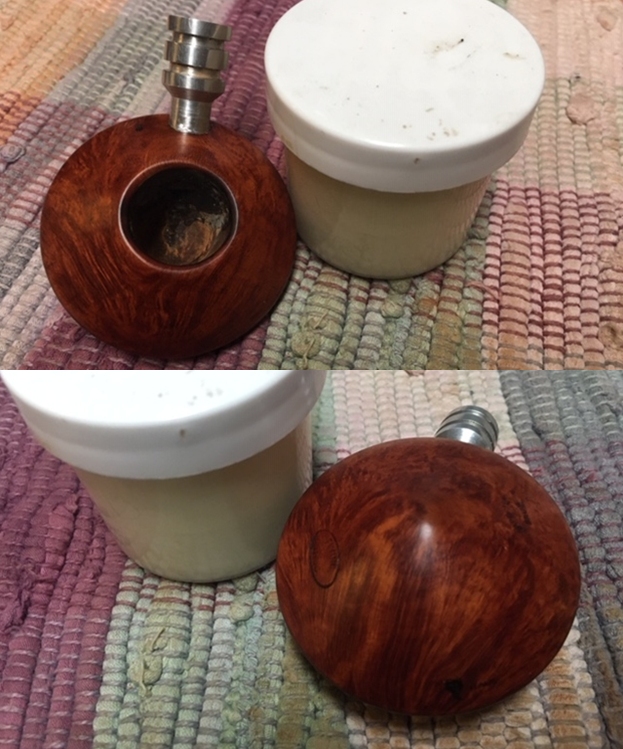
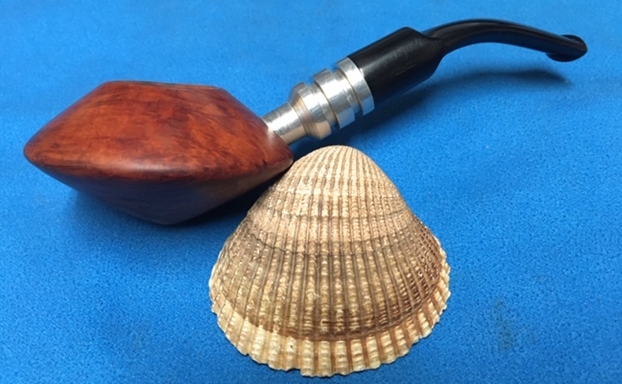
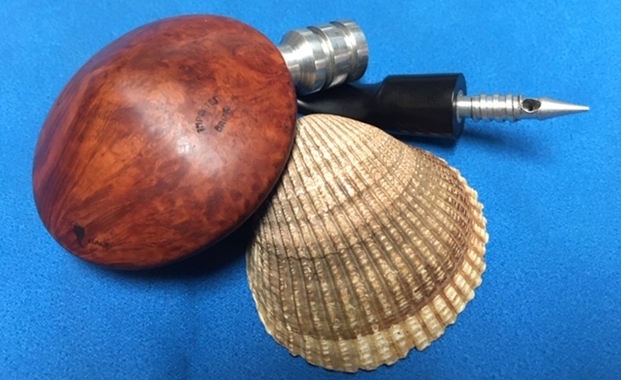
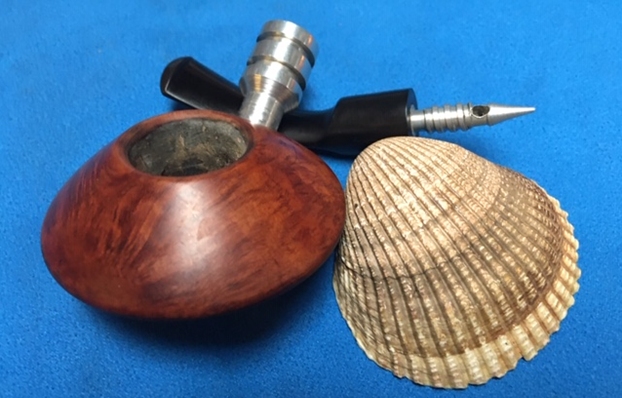
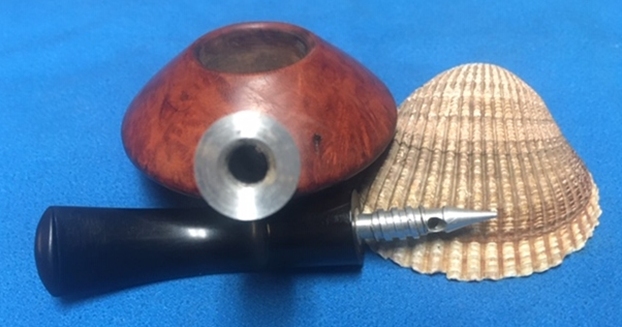
The next pipe on my worktable is a really different one! I am not sure where Jeff picked this one up but it is different. It is shaped like a little flying saucer. I have never seen one like this in all of my restorations. I have seen squashed Tomato shaped pipes that are almost disk shaped but nothing like this one. It has a pretty normal sized bowl on it and it was well smoked. The pipe had thick peeling varnish coat on the bowl that looked rough and there were a few fills around the bowl. It was another dirty pipe with a briar bowl, and aluminum stationary shank and screw in vulcanite stem. There was something uniquely charming about this strange little pipe. The bowl is heavily caked and the beveled rim has lava overflow and may have some damage. Hard to tell with the cake. There appears to be damage internally around the entrance of the airway into the bowl as it is a large cavern. The stamping on the heel of the bowl was interesting as it was all over the bowl. It read Flying Disc in an oval in one spot, Imported briar in another and next to a large fill it was stamped Italy. The vulcanite stem was oxidized and there was light tooth chatter on both sides near the button. It was also under turned and would not align properly in the shank. Jeff took the following photos before he started his cleanup work on the pipe. He took close-up photos of the bowl and rim top from various angles to capture the condition of the bowl and rim top edges. You can see the lava overflow and debris the edges of the bowl an on the rim top. You can see the thick cake in the bowl. This was a dirty pipe for sure but it must have been someone’s favorite judging from the condition of the bowl! Jeff took photos of the sides and heel of the bowl to show the grain around the bowl and the condition of the finish. You can see the peeling varnish as well as the fills in the photos. Jeff took a photo of the stamping on the heel of the bowl. You can see the various stamping clearly and they read as noted above. Note the large fill next to Italy is a pink putty.The next two photos show the top and underside of the stem. The oxidation, calcification and the light tooth chatter on both sides near the button are visible in the photos. I did a search on Pipephil and came up with nothing on the brand. I searched the brand online and came up with a link to a discussion on the pipe on Pipesmagazine forum. I am including that link and the original and concluding post (https://pipesmagazine.com/forums/threads/who-made-that-pipe.46221/). I am also including a photo of the pipe the questioner on the forum spoke of.…There are more than one of these flying disc shaped UFO pipes around. Some are stamped “Jet Set” on the left side of the vulcanized bit (see pic), & some have the Mastercraft logo there instead (pic from Pipephil). Jet Set is listed as one of the seconds for Mastercraft; Mastercraft being owned by Lane Ltd. On the bottom of the bowl stamped inside an oval is “Flying Disc”. Other stampings are “Italy” & “Imported Briar”…

…Lorenzo didn’t go into business as a brand until 1946. Using Google Translator (since I don’t speak French) the translation can sometimes be rough, but here is the confirmation that these Jet Pipe pipes were made by Lorenzo for Mastercraft:

“Both Jet Pipe pipes were manufactured by Lorenzo for the brand Mastercraft in the 60’s as well as pipes sparkless in this chapter pipes cigarette.”

It is pure speculation on my part then that Lorenzo either acquired Jet Pipe after making pipes for them or registered the name Jet Set and designed the Flying Disc pipe on their own for Mastercraft. Either way, Lorenzo is the maker of the Flying Disc pipe.

It became clear that the pipe had been made for Mastercraft in the US by Lorenzo. It probably was made in the 1960s. It reminded me of something from my childhood limited television cartoon watching – the Jetsons!

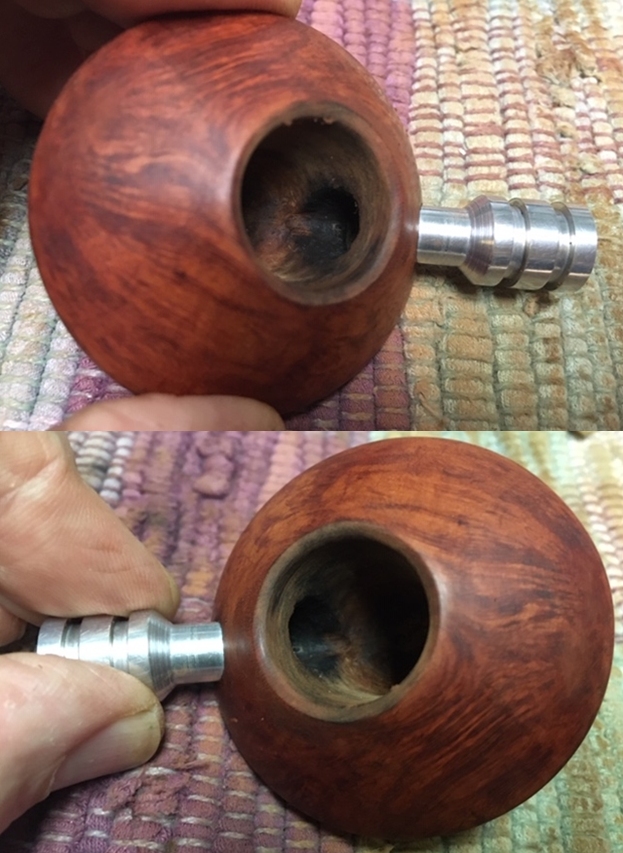
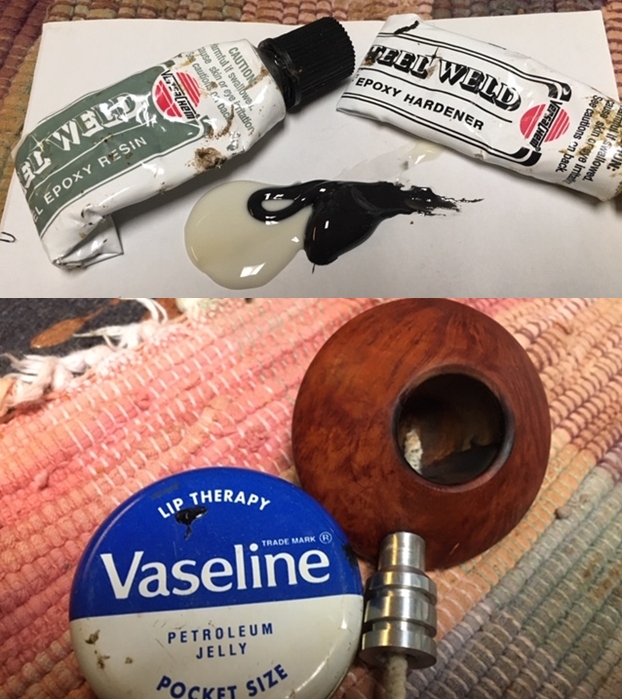
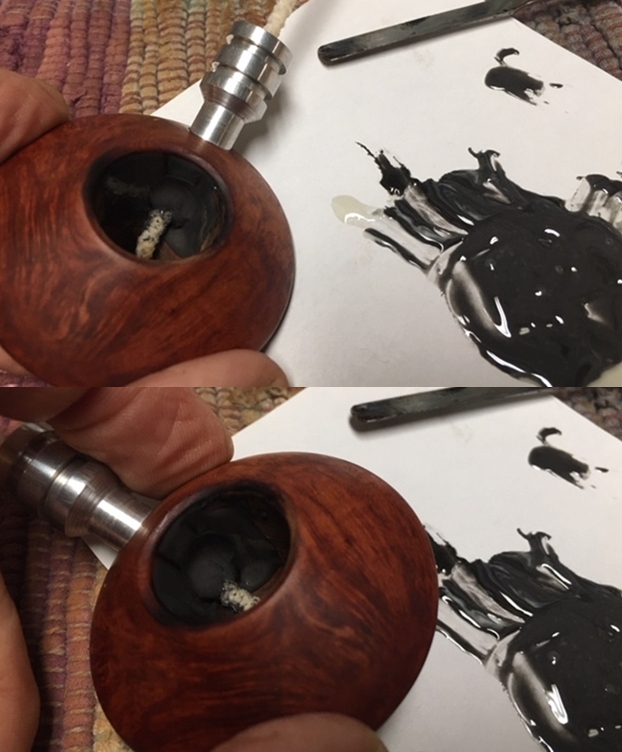
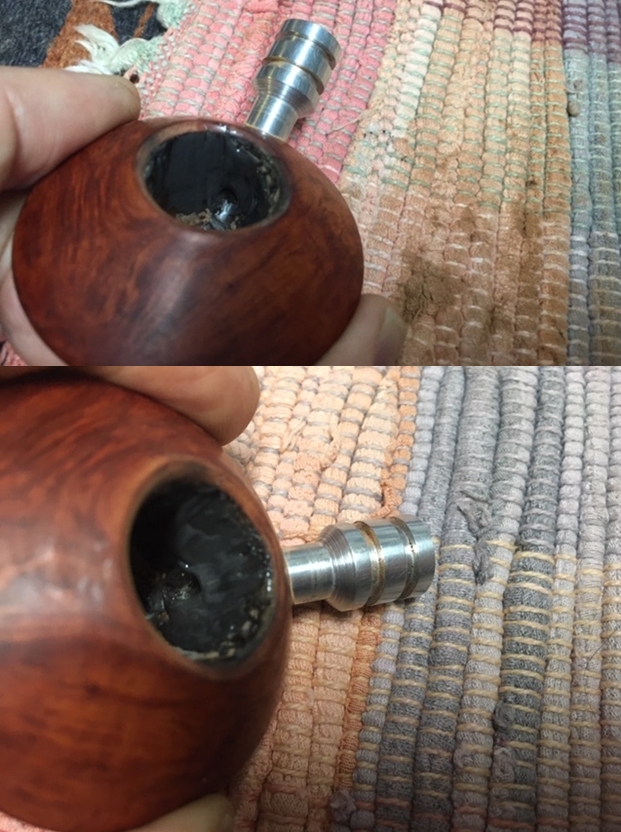
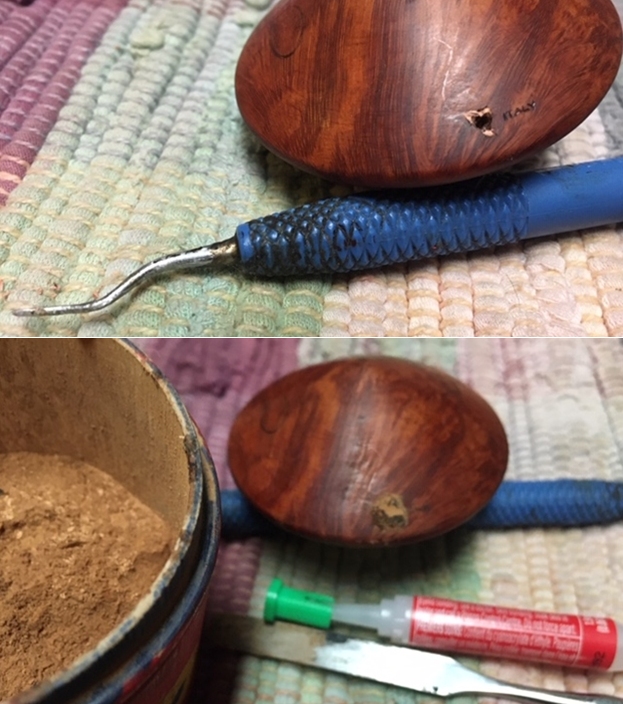
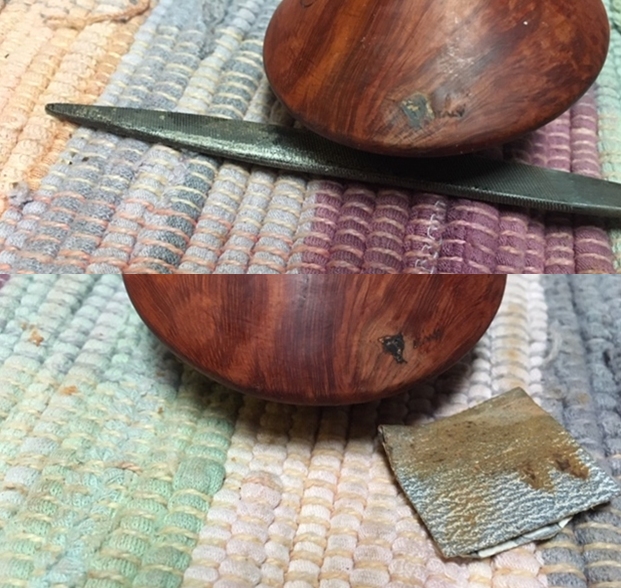
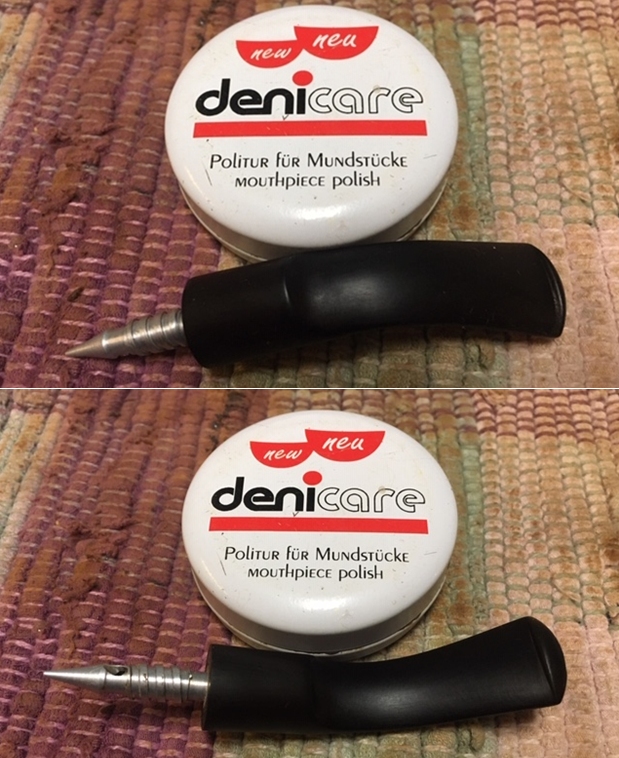
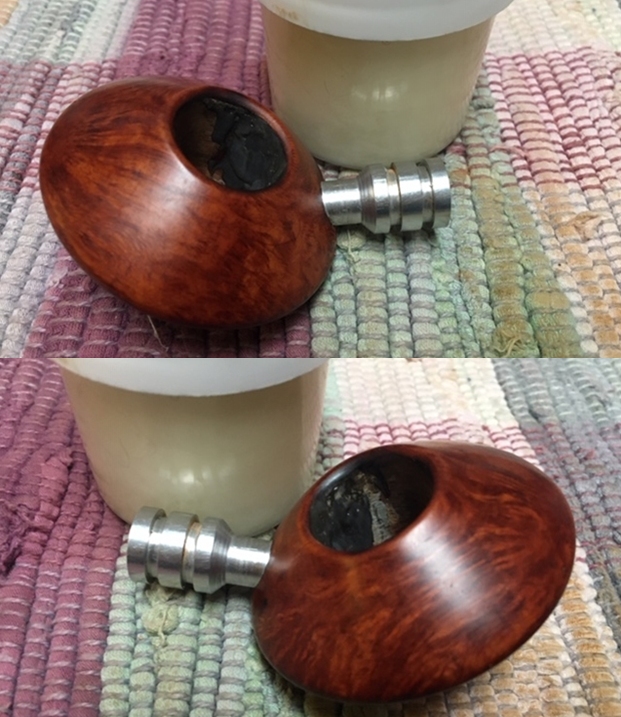
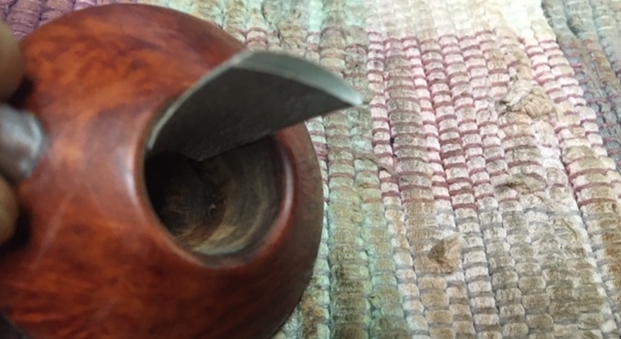
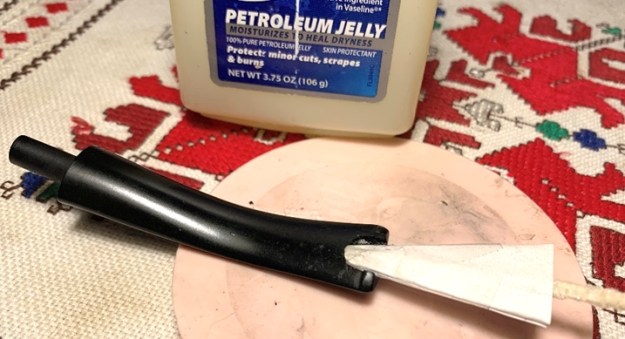
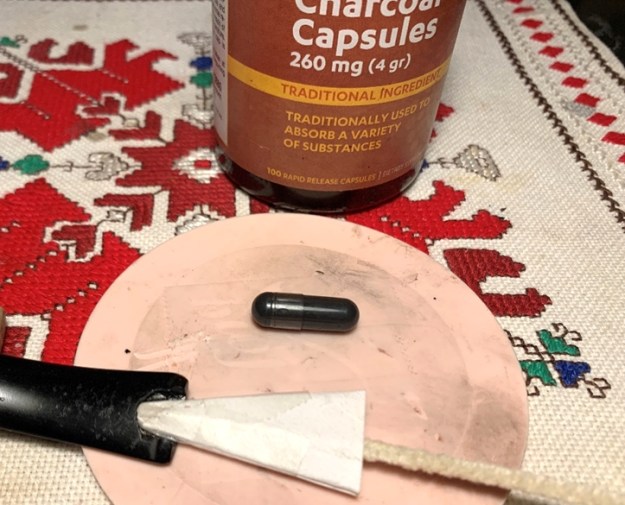
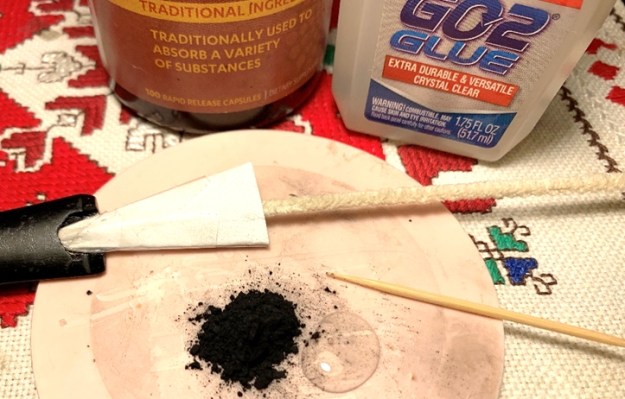
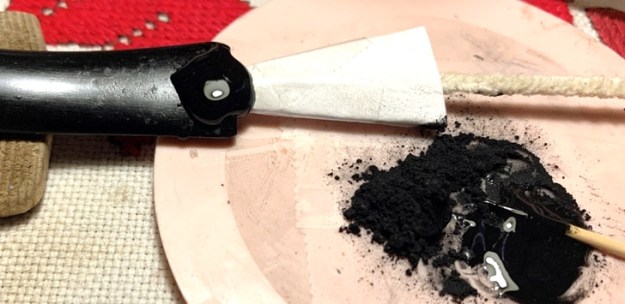
Now it was time to look at it up close and personal. Jeff had done an amazing job in removing all of the cake and the thick lava on the rim top. He had reamed the bowl with a PipNet Pipe Reamer and cleaned up the remnants with a Savinelli Fitsall Pipe Knife. He took the cake back to bare briar so we could check the walls for damage. He scrubbed the exterior of the bowl with Murphy’s Oil Soap and a tooth brush to remove the grime on the bowl and rim and was able to remove the lava and dirt. He cleaned out the interior of the bowl and shank with pipe cleaners, cotton swabs and alcohol until they came out clean. The rim top looked amazing when you compare it with what it looked like before he started. He cleaned the stem with Soft Scrub to remove the grime on the exterior and cleaned out the airway with alcohol, cotton swabs and pipe cleaners. I took some photos of the pipe as I saw it. To show how clean the rim top and stem really was I took a close-up photo of the rim and stem. The bowl was clean and cake free. The rim top is very clean with no residual lava in the sandblast finish. The inner edges of the rim show some darkening on the right and the left side. The black vulcanite stem looks cleaned up nicely. The surface had some light tooth marks but the button edge looked really good.I took photos of the stamping on the under side of the bowl. They are literally all around the bowl bottom. You can see that from the photos below. I removed the stem from the bowl and took photos of the parts. The “plumbing” on this pipe is quite unique. Look at the stinger apparatus that extends through the aluminum shank.Now it was time to start addressing issues with this pipe. I sanded the exterior of the bowl with 1500 grit micromesh sanding pads to remove the peeling varnish from the bowl. I worked on the rim edge a bit and paused as I examined the cavernous entry of airway into the bowl. It was badly burned and enlarged. I wonder if the metal stinger tip heated too much and burned the surrounding airway. I took two photos to try to capture the large cavernous opening.As I examined the area I had very few choices in terms of addressing the issue. I could carve and insert briar, glue it in place and hope that the burnout would not reoccur. The other option would be to build up the area with some JB Weld which dries inert and is basically burn proof and would preserve the airway area from further damage. I chose to use the JB Weld repair. I mixed a batch of the resin and hardener and inserted a Vaseline greased pipe cleaner in the airway so as not to close it off during the repair.I applied the mixture to the surface area around the pipe cleaner with a dental spatula. I pressed it into the cavernous pit. I knew that I would need to do this several times as it was a deep pit. I gave the first coat to the wall of the bowl and set the bowl aside overnight.This morning I filled in a few spots where the repair shrunk as it cured. The entrance to the bowl is now the size of a pipe cleaner. Once it has cured I will sand it smooth and even out the back of the bowl. I set the bowl aside and had some lunch!Once the repair had hardened to touch I worked on the underside of the bowl. There was a large pink fill next to the Italy stamp. It was damaged and hard so I picked it out with a dental pick and cleaned up the edges until all of it was gone. I wiped it out with a cotton swab and alcohol and then filled it in with a mix of clear super glue and briar dust. I know that Dal mixes the two into a putty and presses them in place. I have never succeeded in getting his putty mixture as it always hardens to quickly. Instead I layer the mix into the area to be filled. I start with glue, then briar dust pressed in with a dental spatula, then another layer of glue and some more dust. I finish it with a top layer of glue and let it dry.Once the repair has cured I used a needle file to flatten it as much as possible to the surface of the briar. I followed up by sanding it with a small corner of folded 220 grit sandpaper to blend it into the surrounding briar. Once it was smooth I buffed it lightly with 1500 grit micromesh and then stained it with  an Oak Stain pen to blend it into the bowl. At this point in the process I set the bowl aside for awhile to let the bowl cure some more and turned my attention to the stem. The first issue with the stem was the fact that it was under-turned almost a quarter turn. I removed the stem and heated the metal stinger with the flame of a Bic lighter. The heat softens the glue holding the stinger in the stem. After a few minutes I screwed the stem back in the shank and corrected the under-turned stem. Once I had it aligned I set it aside and let it cool off while in place.I moved on to addressing the remaining oxidation on the stem and the tooth chatter and marks. I sanded out the tooth marks on both sides of the stem with a folded piece of 220 sandpaper and sanded out the remaining oxidation. I started polishing with 400 grit wet dry sandpaper. I rubbed the stem down with Denicare Mouthpiece Polish – a red gritty paste a lot like Tripoli to polish it after the 400 grit sandpaper. I rub it on with my fingertips and work it into the vulcanite and buff it off with a cloth. It does a great job before I polish it further with the micromesh pads.I polished the stem with micromesh sanding pads – dry sanding with 1500-12000 grit sanding pads. I wiped the stem down after each sanding pad with a cloth containing some Obsidian Oil. I finished polishing it with Before & After Pipe Stem Polish – both Fine and Extra Fine and buffed it off with a cotton cloth. I gave it a final rub down with Briarville’s No Oxy Oil to preserve and protect the vulcanite stem. I set the stem aside and went back to work on the bowl. The bowl looked very good so I did not need to do any further work on it. I rubbed the bowl and shank down with Before & After Restoration Balm to deep clean the finish on the bowl and shank. The product works to clean, enliven and protect the briar. I worked it in with my fingers and with a horse hair shoe brush to get it into the deep nooks and crannies of the sandblast finish on the rim and bowl sides. I let it sit for 10 minutes to let it do its magic. I buffed it with a soft cloth. The briar really began to have a rich shine. I took some photos of the bowl at this point to mark the progress in the restoration. I sanded out the bowl with 220 grit sandpaper and a sanding drum on my Dremel to smooth out the walls on the bowl. With that finished the pipe was complete. I put the bowl and stem back together again and buffed the bowl and the stem with Blue Diamond on the buffing wheel. I gave the bowl and the stem several coats of carnauba wax. I carefully buffed the entire pipe with a clean buffing pad to raise the shine. I finished buffing with a microfiber cloth to deepen the shine. The finished pipe looks very good. The disc shaped pipe has a different feel in the hand. It is comfortable and light weight. The finished Flying Disc pipe is shown in the photos below. The dimensions of the pipe are Length: 5 inches, Height: 1 ½ inches, Outside diameter of the bowl: 2 ½ inches, Chamber diameter: ¾ of an inch. This unique looking Flying Disc/UFO pipe turned out very well. It should be a great pipe if the way it arrived to us was any indication. This one will go on the rebornpipes store shortly. If you are interested in it let me know. Thanks for reading this blog and my reflections on the pipe while I worked on it.

Another Legacy Pipe of a Great-Grandfather: Challenges Working with ‘Brylon’ on a Medico Apollo


Blog by Dal Stanton

It gave me a great sense of satisfaction when I received Joe’s response to reading and seeing the results of restoring the first of Paw’s pipes entrusted to me.   Joe and his wife, Hannah, who live in Athens, Greece, and are colleagues working in our organization, last year sent me a Kaywoodie “500” that I restored (See Link: Reclaiming Paw’s Kaywoodie “500” 04 Long Stem Billiard – A Great-Grandfather’s Legacy) as a gift for Hannah’s father, Ben, ‘Paw’s’ grandson.  The Kaywoodie was a special gift for Ben’s birthday.  Later, Joe wrote this letter:

Hello Dal,

My in-laws came to Athens to visit Hannah and I last month. I gave Ben the pipe. I showed him everything you wrote and documented about it. He absolutely LOVED how the pipe looked, and he was also deeply touched by the love, care, and respect you showed not just the pipe but his family. 

So many things you said in your blog triggered sentimental images for Ben about his grandfather, Sam Ellison. You called Sam (AKA Paw) a “knocker” and explained that based on some of the inner rim damage, that was from when Sam would knock out residual tobacco from the bowl, and Ben immediately could remember and visualize Sam doing that. 
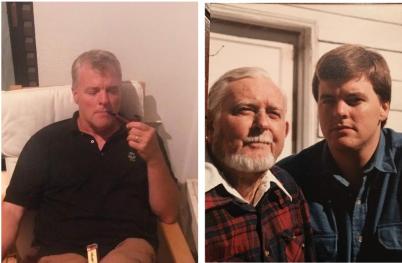
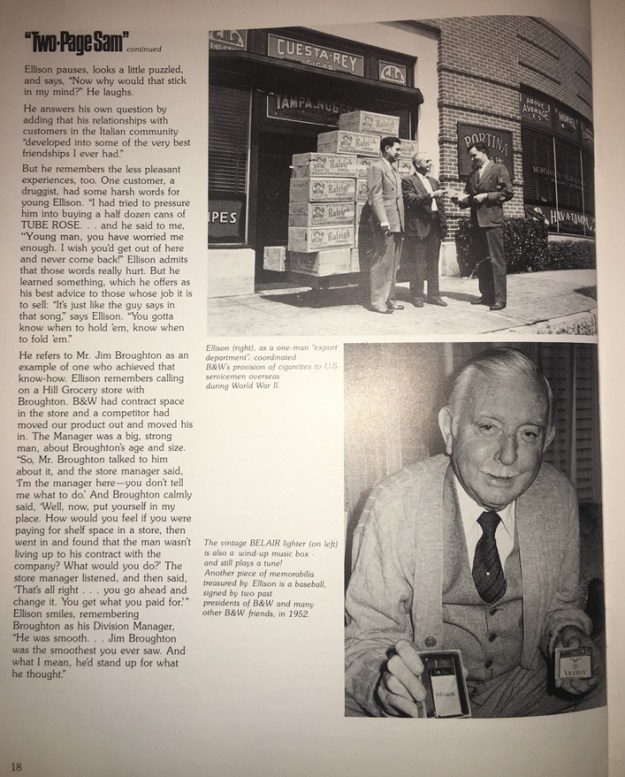
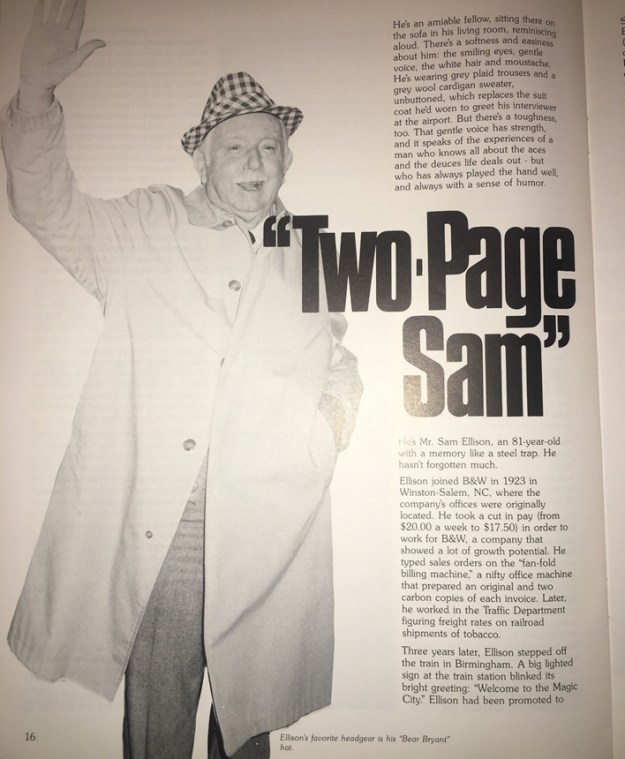
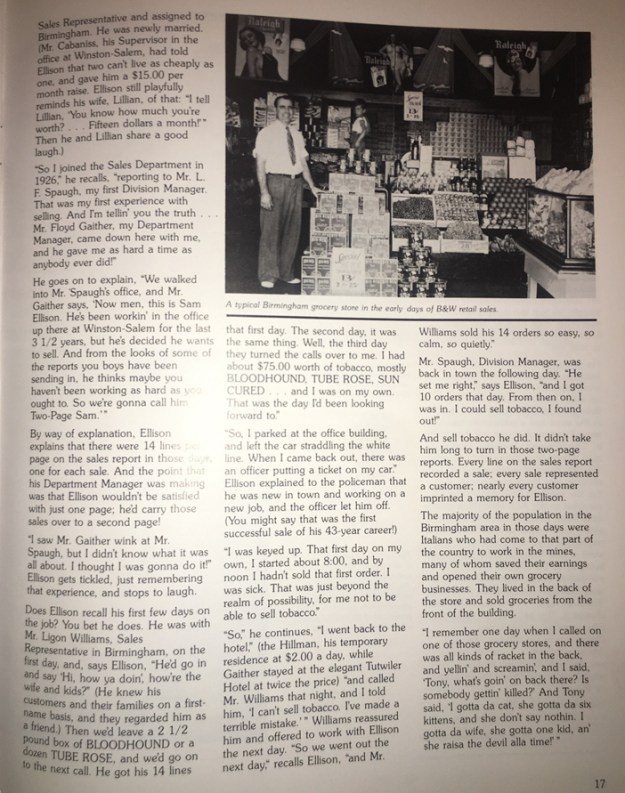
During Ben’s last few days in Athens, he lived in blissful nostalgia, thinking of Paw and sweet memories along with him. When Ben went back to Georgia, he went through the storage unit and found stacks of old pictures and articles. Unfortunately, he couldn’t find a picture of him smoking the pipe, but there are some pictures (that I will attach below) of Paw with some of his tobacco co-workers at Brown & Williamson Tobacco Corp, along with an article in the Brown & Williamson newsletter, “The Pipeline” about him called ‘Two page Sam’. 

Two pictures Joe included were of Ben, his father-in-law fellowshipping with Paw’s newly restored Kaywoodie “500” and reminiscing about his grandfather.  What I understood from Joe, was that Paw essentially was the one who raised Ben.  The other picture was Paw and Ben 45 years earlier….  This is why I love what I call my work, The Pipe Steward – pipes are passed on, but also the special memories those pipes uniquely bring with them are also passed on to the following generations.

What was also of great interest to me in Joe’s letter, not only was Paw a pipe man, but he was also a tobacco man –  not just a tobacco man, but a tobacco SALES man for the Brown & Williamson Tobacco, Corp. and sent clips of an article of this tobacco company’s magazine about Paw, or as the rest of the world new him, ‘Two-Page Sam’!  When doing a restoration (and I will get to that!) it doesn’t get better than this regarding the story a pipe tells.  Doing a little research, I find out that B&W would be considered a ‘Big Tobacco’ company and Wikipedia described the beginnings in the latter 1800s:
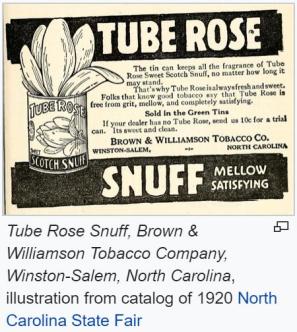
B&W was founded in Winston (today’s Winston-Salem), North Carolina, as a partnership of George T. Brown and his brother-in-law Robert Lynn Williamson, whose father was already operating two chewing tobacco manufacturing facilities.[3] Initially, the new partnership took over one of the elder Williamson’s factories.[4] In February 1894, the new company, calling itself Brown & Williamson, hired 30 workers and began manufacturing in a leased facility.

In 1927, the Brown and Williamson families sold the business to London-based British American Tobacco. The business was reorganized as the Brown & Williamson Tobacco Corporation. Manufacturing and distribution were expanded, and work on a new B&W factory in Louisville was begun.

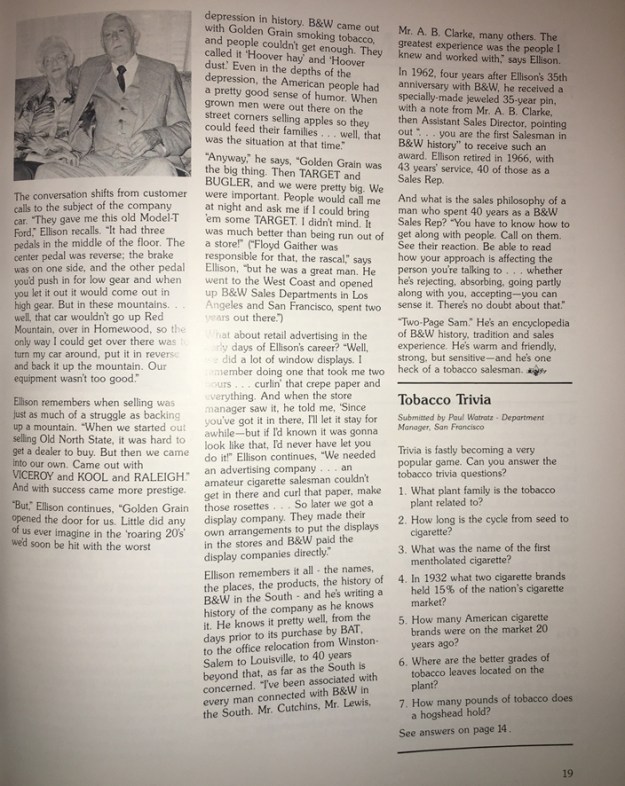
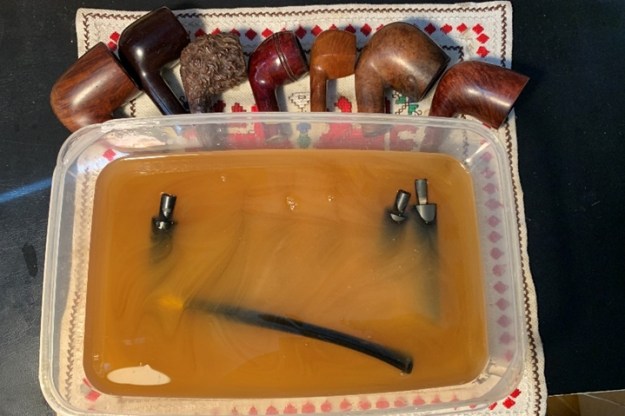
The Wiki article jumps a century from this earlier history to the 1990s which was a time rife with controversy regarding infamous ‘Big Tobacco’, congressional hearings, cover-ups and 60-Minutes TV pop-journalistic investigations – all low-hanging ripe story lines for a John Grisham novel and movie contracts!  As tantalizing as this later storyline was, I was drawn more to the story of ‘Two-Page Sam’, the article written about Paw’s life and relationships through the years that the Wiki article jumped over.  I include this story from the December 1984 article that Joe sent from B&W’s company magazine, ‘PIPELINE’.  The piece was subbed: “’Two-Page Sam’ – An 81-year old retiree, with a memory like a steel trap, about his 43-year career with B&W”. I enjoyed the read immensely as it not only tells of the life of Paw – aka, Two-Page Sam, but its portrayal of period perspectives revealing much about life and relationships when Sam started work for B&W in 1923 and later.  Enjoy! After the test run with Paw’s first pipe, Joe entrusted me with three more pipes to restore – two more Kaywoodies and a Medico.  Paw’s choice of pipes tells much about him!  One of the Kaywoodies is another of the “500” series, but this time, in addition to the long-shank Billiard from last time, a “500” Rhodesian is added.  Paw liked the “500”s – they are smaller pipes easier for hands-free fellowship (and chewed bits!) and work, as Sam went from vendor to vendor in his job selling tobaccos.  The other Kaywoodie is a Kaywoodie Natural Burl 33 – the finish is great!  Here is the lineup of Sam’s pipes that Joe sent:Along with the other Kaywoodie “500” its obvious that Sam stayed with American made pipes – pipes that would be considered ‘working men’s pipes’.  They are not high shelf purchases but would be found on many of the shelves of the tobacconists and ‘mom & pop’ stores he served through the years.  Affordable pipes that would be the kind a person who had known life through the Great Depression and Great Wars – as a child then as an adult – often called, the Great Generation.  With a deepening understanding of the man who was a steward of these pipes, I’m appreciative of the trust that Joe (and Hannah!) has placed in me to restore them as treasured family heirlooms.  What’s even better is that these restorations benefit the Daughters of Bulgaria – women and girls who have been trafficked and sexually exploited.
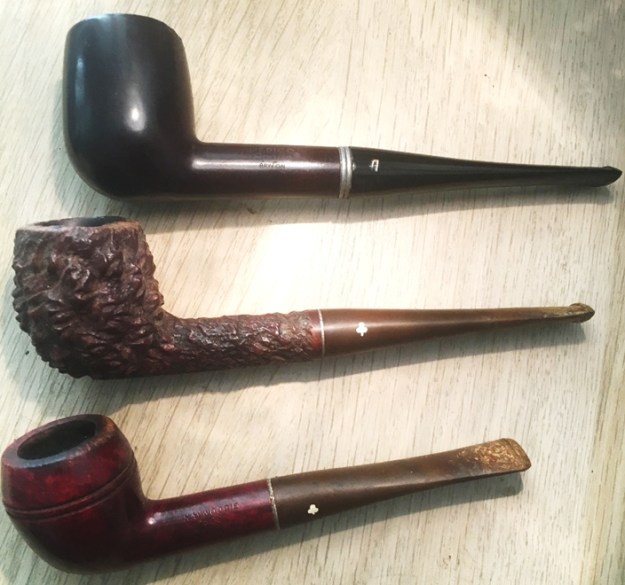
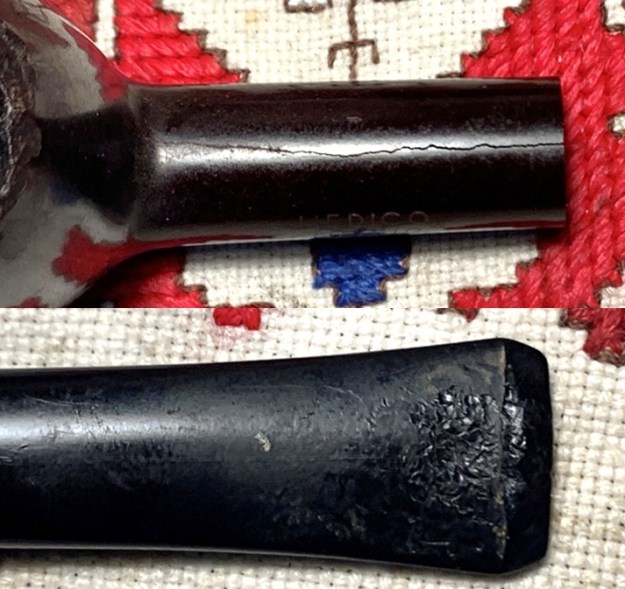
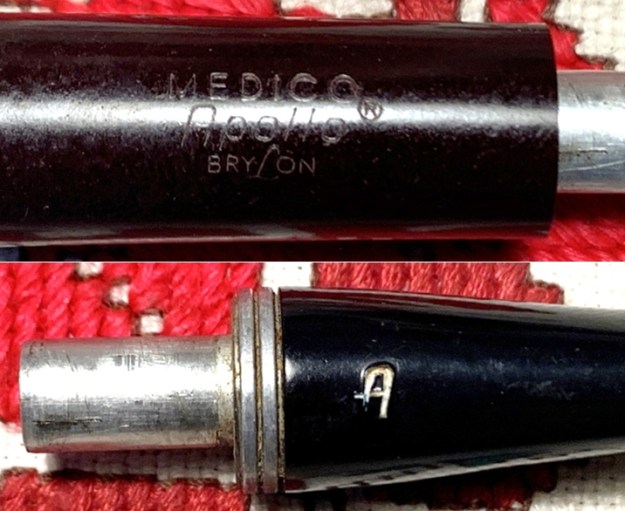
After looking over the pipes, I decided to start with the Medico Apollo Brylon – the most challenging.  With the Medico now on the worktable I take some pictures to get a closer look. The nomenclature found on left shank flank reads MEDICO [over] Apollo [over] Brylon (with circled ‘R’ for registered trademark).  The stem has a fancy, lopsided (or worn away) ‘A’ for Apollo pressed into the right side.During my communications with Joe about the conditions of the pipes he intended to send to me, I was assuming that this Medico was a briar that had dulled.  It wasn’t until I received the pipe and started to research the Apollo ‘Brylon’ line of Medico that I discovered the stummel was not made of briar but ‘Brylon’.  Pipephil.eu confirmed another Medico Apollo Brylon and the stem stamping but with no further information about the ‘line’ Brylon.Pipedia’s short introduction to the article about Medico provides this:
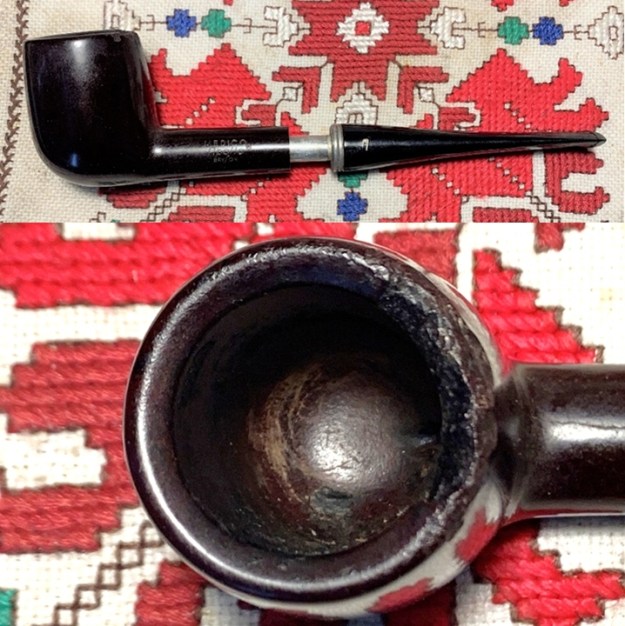
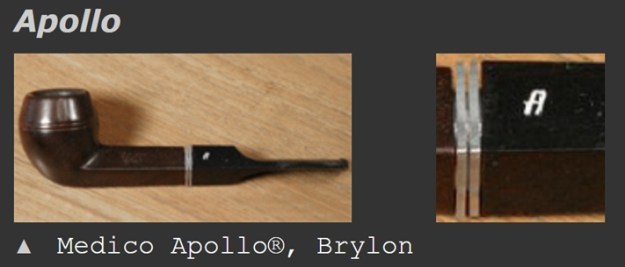
Medico was created in 1933, and is still produced by S.M. Frank. The brand is famous for its pipe filters, which were launched in the same year. Since 1966, some models have been made in Brylon, a synthetic material, and others in briar. The brand was also sold by the English company Cadogan and Oppenheimer Pipe.

I discovered very quickly that Brylon was not a line and that the Medico Apollo on the worktable was not briar!  In 1966, an innovation was introduced by S.M. Frank of fashioning bowls from a synthetic material.  At this point I’m thinking about Paw’s Apollo, whether I could repair it with the same procedures as with briars?  Rim?  Cracked shank? Blending repairs?  The same Pipedia article continued later with this additional interesting information about Brylon:

The company ended up buying some of their main competition in 1955. That year the Kaywoodie brands came under the S.M. Frank Company. The Medico brand continued production through this transition without many changes. The next big change for the brand came in the late 1960s. In 1966, the company developed a synthetic material that combined the traditional briar wood with resins. It is known as Brylon. At that time, all Medico pipes were made from imported briar wood. In order to keep production costs down, the company began offering some lines with Brylon. Today, that is still true…. In the Brylon, the line includes the Lancer, Apollo, Standard, Varsity, Conqueror, Medalist, Cavalier, and V.F.Q. As far as price, the briar wood pipes tend to be higher in cost than the Brylon ones. Courtesy TobaccoPipes.com
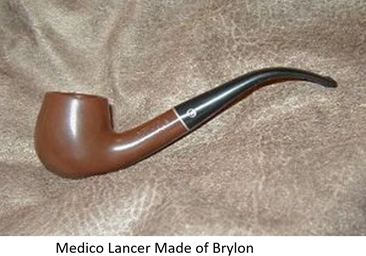
In another Pipedia discussion of various material and construction methods used in pipe production lines generally, Brylon is identified as a “High Temperature Resin with Wood Flour”:

In 1966, S.M. Frank developed a material called “Brylon” made of a high temperature resin combined with “wood flour”, which is pulverized wood of varying consistency. The pipes were cheaper and more durable, but heavier in the mouth and had a tendency to smoke hot and wet. They are still made today and favored by some for their inability to be burnt out or otherwise damaged without significant effort and the ease of cleaning the pipe. For more information see S.M. Frank.

Well, the unique characteristics of Brylon are becoming more evident.  They are less expensive, have differing smoking behaviors compared to their briar brethren and purportedly to be less susceptible to burning and damage compared to their briar brethren, BUT, (I love the qualifier!) “without significant effort”.  I guess Paw’s proclivities were with significant efforts by the looks of his Apollo!  Wow!  I wonder if Sam took the durability billing of S.M. Frank as a challenge 😊?

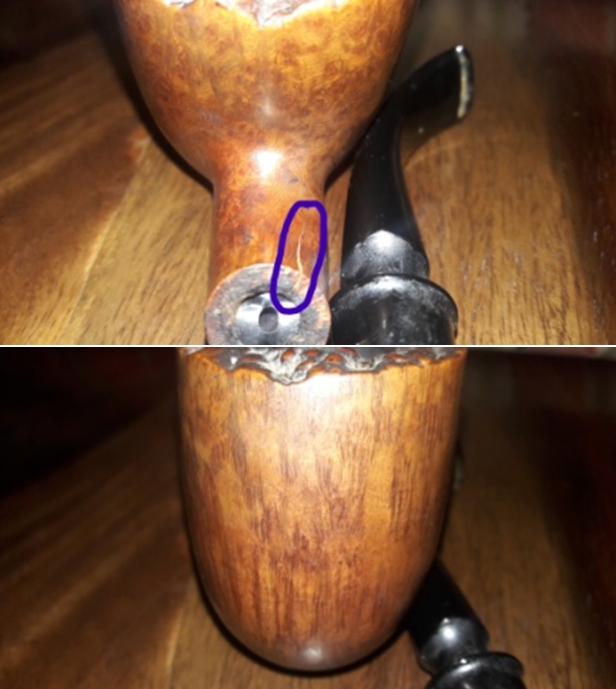
The question now is whether the issues of this Medico Apollo are addressed differently than my normal briar restoration protocols?  The significant issues start with the rim damage.  With the restoration of the first of Paw’s Kaywoodies, he seems to have been a habitual bowl ‘knocker’ with consistent damage to the aft quadrant of the rim.  Using the stem as a handle, Paw seems to have inverted the pipe and thumped the bowl on something hard enough to dislodge the ash and dottle – probably on his way hurriedly to the car after visiting a client, having secured his sale of B&W product line working toward ‘2-Page’ success, and speedily transitioning his mind and body to the next visit! I take a few pictures to show the aft rim damage.The shank also has a huge crack starting on the top of the shank running to the bowl crook.  When I communicated with Joe before receiving the pipe, he commented about the stem’s metal filter housing being out of round.  When I received the pipe, the stem and stummel were joined.  When I gingerly extracted the stem from the mortise, I could see how the nickel had been bent.  When I tried to rejoin the stem and stummel, the fit was so tight that I decided to leave things like they were.  I began to question whether the stem was the original for this stummel and forcing it had caused the cracked shank?  Yet, the stem does have the Apollo ‘A’ stamping – probably, just bent so much that the mortise no longer can accommodate it.The stem’s condition I believe is confirmation that ‘2-Page Sam’ often had the Apollo in a hands-free mode with it clenched between his teeth while he filled out his orders!  The chewing of the bit is evident with severe chatter and bite compression.  The oxidation appears to be minor.There also is a pit and dent mid-way on the stem’s underside which will need addressing.To begin the restoration of Paw’s Medico Apollo, I work on cleaning the internal airway with pipe cleaners wetted with isopropyl 95%.  While cleaning, I discover that the pipe cleaners are obstructed at the bit-end of the stem.  I also use a shank brush to push through.  The shank brush does push through but what becomes evident is that the chewing of the bit appears have closed the airway to such a point, the pipe cleaners are hindered from functioning.  This is a problem for keeping the airway fully cleaned.  I’ll need to address this issue as well.  When the airway is as clean as I’m able to get it, the stem is added to a soak of Before & After Deoxidizer along with other pipes in The Pipe Steward queue, along with Paw’s other 2 Kaywoodies.After a few hours, the Apollo stem is removed from the Deoxidizer and I squeegee the liquid off with my fingers then wipe the stem with cotton pads wetted with alcohol to remove the resulting raised oxidation.Following this, paraffin oil is applied to the stem to condition the vulcanite and I put the stem aside for the oil to be absorbed.Turning my attention now to the Brylon stummel, the questions I asked earlier about how to proceed with the repairs have been clarified in my mind.  It was helpful to find a blog on Dad’sPipes, What the Heck is Brylon?? – A Yello Bole Standard Panel Billiard, where Charles Lemon had previously had the same questions regarding working on Brylon!  Charles’ blog mainly was focused on cleaning and polishing issues and not with actual repairs to the Brylon – the rim and shank in this case.  My note to Charles describes my proposed working approach with Brylon:
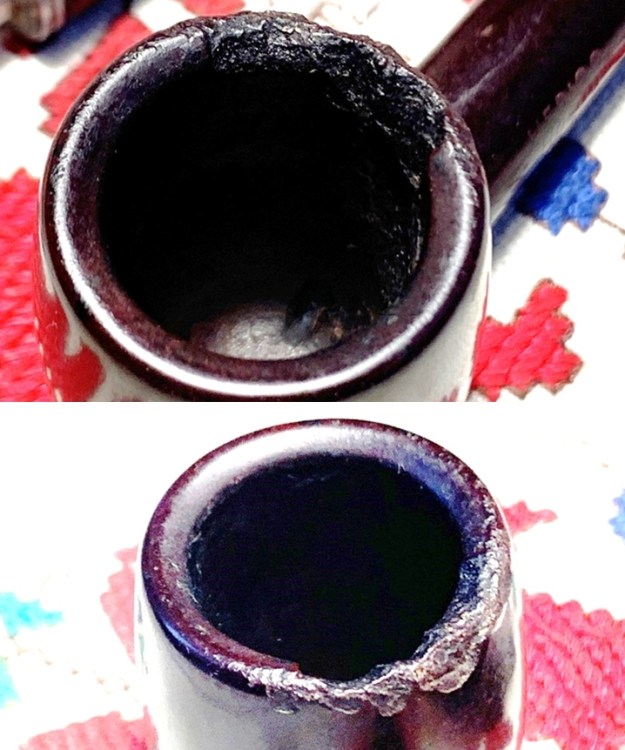
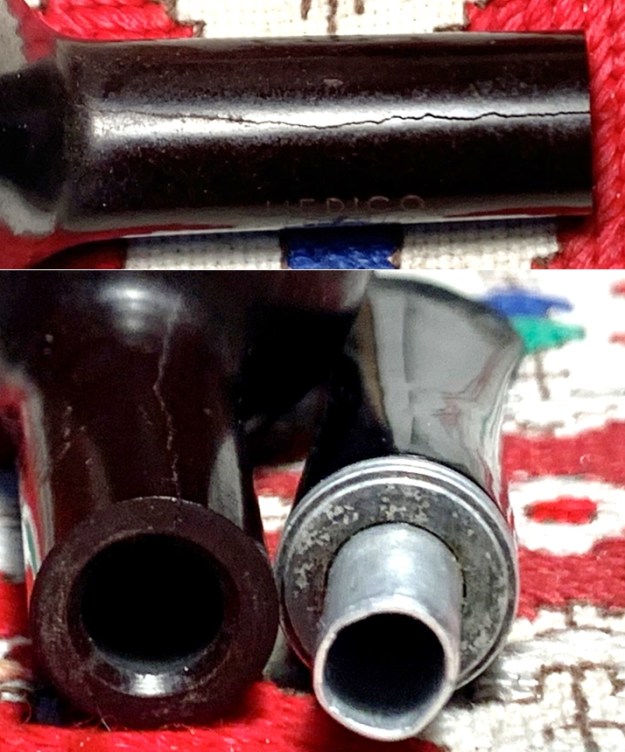
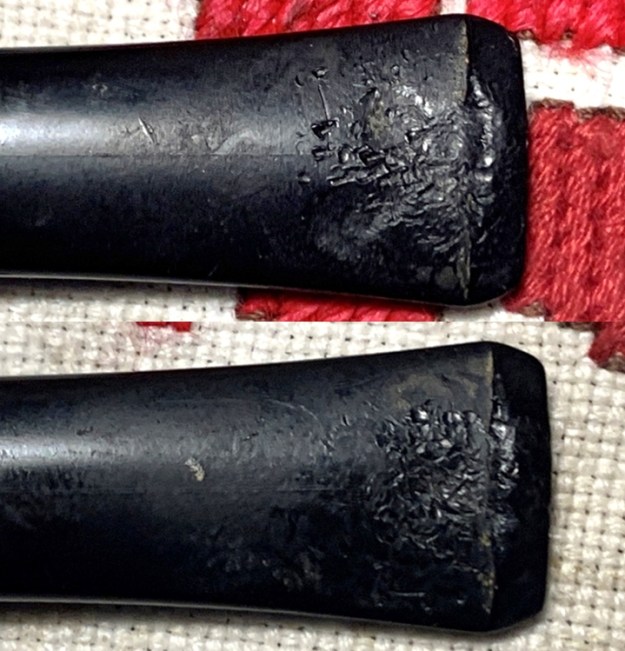
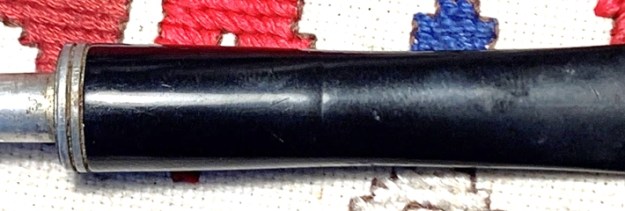
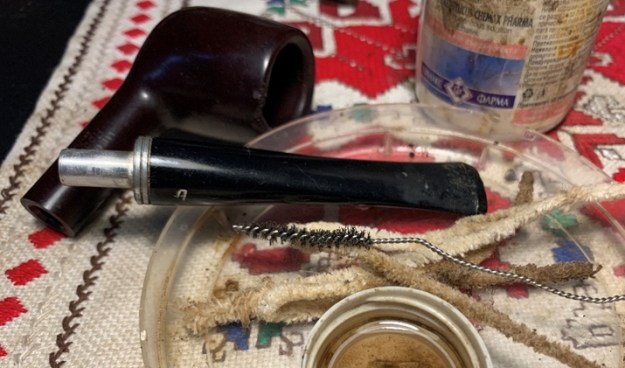
Charles, hope you and your family are well and staying clear of harm’s way during these difficult times. I read one of your blogs where you worked on Brylon. I’m working on a Medico Apollo Brylon that needs extensive rim work. I’ve attached a picture to give you an idea of the dark brown color. Of course, I’m thinking of briar dust and CA glue to do the patchwork. However, it will probably be lighter than the hue of this brown. Do you think adding a wee bit of dark brown aniline dye would work?  Do you have any best practices, beyond the blog I read 😊.  The default if patching doesn’t work is to top the stummel but that reduces the height.

Charles’ email reply came quickly: Hi Dal. Good to hear from you! I hope all is well with you and yours. I have not attempted to fill Brylon. To be honest I have avoided the stuff as there is limited resale value in it. I think you are right – briar dust will show paler against the brylon. Mixing in some dye may do the trick. If not, you can always top the bowl afterwards. Good luck with it. I’ll be interested to see the results!

Charles

Charles’ response was what I was hoping to hear regarding using a mixture of CA glue and briar dust, which is the main component of Brylon though briar is not specified as the wood component.  The issue is the coloring.  Fiebing’s Dark Brown Leather Dye, which is an aniline dye, I think might be a very close match, but I’ve never introduced dye to a CA glue before – what will it do?  The worst-case scenario is that the patch doesn’t work and I top the bowl, turning it into a Pot shape.  I’m thinking to first introduce just a small amount of the dark brown dye – a drop, to a puddle of CA glue and mix it thoroughly and see how the CA/dye mixture behaves.  Then, as with briar repairs, if the glue/dye mixture looks good, I’ll introduce briar dust and see what happens!  With this next day of quarantine in Bulgaria being beautiful, I work outside on my 10th floor Man Cave balcony.

The first two pictures are marking the start – looking at the inside of the rim and then the outside.After preparing my plastic mixing palette by covering it with some scotch tape to help in the cleaning later, I place a small mound of briar dust on the palette and next to it, a small puddle of BSI Extra Thick CA glue.Using an eye dropper, I place one drop of Fiebing’s Dark Brown Leather Dye in the middle of the CA puddle and it immediately expands through the puddle. Not able to take any additional intermediate pictures to chronicle the mixing – the clock starts ticking when the briar dust is introduced to the CA glue.  I used a toothpick to gradually pull briar dust into the CA/dye, mixing as I go. I noticed that the CA mixture thickened more rapidly than normal with the dye alone, but it didn’t solidify which was what I was concerned about.  When the mixing came to a point where the resulting putty was about the consistency of molasses, I troweled the putty to the rim to fully cover the damaged area. This picture shows the progress at this point and a bit of wind-blown briar dust on the Man Cave!I use an accelerator to hold the patch material to the rim – it did want to move a bit.  Examining the patch in the sunlight, I’m VERY pleased with the color.  It appears to be very, very close to the Brylon at this point in the process. With the same approach now as with briars, I start with the outer rim and file the patch mound down to near-flush with the Brylon surface. Before moving to the inside and top of the patch, I use 240 grade sanding paper on the external rim patch.  I’m anxious to see what it does.  As I sand, pockets do appear in the patch area in this rough state.Switching to the internal rim patch area, I mount a sanding drum to the Dremel and bring the patch down to flush.Carefully, I use the drum on the top as well. I do not want to be too aggressive by sanding below the plane of the rim with the more powerful mode of sanding. Following the sanding drum, continuing with 240 paper wrapped around a Sharpie Pen, the chamber is sanded to help blend the patch area and to clean the chamber.  Then 240 sanding paper is redeployed to fine tune the rim contours and to smooth the patch.  The color match is looking good but at this rough state, the patch area on the rim reveals the air pockets which I’ll work on masking in the later stages. Having reached this point in the repair on the rim, before doing more sanding to improve the rough patch area, I address the shank crack.  The question rolling around in my mind regarding Brylon is whether I should drill a counter-crack creep hole at the end of the crack?  The crack ends at the shank/bowl merger.  The two pictures show the crack and a closeup of the end of the crack.  Working on the Man Cave balcony, the best angle of sunlight to see the crack was in the flower box hanging over the edge of the balcony with signs of early spring sprouting in Bulgaria!Marking the end of the crack with an arrow, the crack has turned the vertical corner and is on the bowl side – just slightly.  Since this is the first time working on Brylon and I haven’t found others who have complied a list of ‘best practices’ working with Brylon, I decide to drill the hole to be on the safe side.  Earlier, I had decided not to reinsert the stem because it seemed that it was too tight and may have caused the crack.  I’m thinking that the best way to address the crack is first, to drill the counter-creep hole. Following this, carefully reinsert the tight stem and allow the nickel filter housing to expand the crack allowing thinner, regular CA glue to seep into the cavity assuring a stronger bond.  I’ll then remove the stem, closing the crack and hopefully removing the threat of the crack advancing.  I’ll be thinking about whether to use a band to protect the shank for future use.To prepare to drill, I use a sharp dental probe to create a guide hole for the drilling.  It took the use of a magnifying glass to identify the end of the crack.  Unfortunately, there was a bit of collateral damage, but nothing serious.  When I applied pressure to the dental probe to imprint the indentation for a guide, I discover the Brylon to be much harder than briar and with the additional pressure that was needed, the probe skidded off to scratch the stummel.  Ugh! – it will sand out later.Next, after mounting a 1mm drill bit onto the Dremel, I carefully drill a hole using the guide hole – a great help in keeping the hand-held drill bit from dancing around!  I’ve gotten better at drilling these holes freehand with the handheld Dremel extension – my main work tool.With the hole drilled, with fear and trembling I coax the filter housing into the mortise and as expected, the terribly tight fit helps expand the crack for a more effective application of CA glue.  I must be honest; I was bracing myself for the stummel to split, but thankfully it didn’t!  I will address the fit later after the shank is repaired and stabilized.With the crack expanded, a line of regular CA glue is run starting from the hole down the shank to the shank facing. After laying down the glue, the stem is extracted, and the crack again compresses with CA glue in the cavity.For some cosmetic help and to keep the glue in place, I sprinkled the glue line with briar dust. I put the stummel aside to allow the glue to cure.With the Brylon bowl on the sidelines, I turn my attention to the stem.  The first step will be to repair the chewed bit – Two-Page Sam’s trademark!  I take fresh starting pictures of the upper and lower bit to show the carnage.  After each of these, is the comparison picture after using the heating method to minimize the damage.  Using a Bic lighter the bit is painted with the flame heating the rubber and helping it to expand to regain some of its original disposition.  I think the heating definitely improved the minor chatter so that for the upper bit, sanding should be all that is needed with some filing to freshen the button. For the lower bit, again, chatter was minimized but patching will still be required for the compressions.Medium-Thick Black CA glue is used to do the fills.  After filling the deep compressions, I set the stem aside to allow the CA glue to cure.After the fills have cured, a flat needle file is used to file down the patch mounds and to shape and refresh the button.The upper bit also is the recipient of the filing to file out the more severe chatter and shape the button.After the filing, 240 grade paper is used to further smooth the upper and lower bit.  The repairs on the lower side are looking good. About mid-way on the lower side of the stem there is a dent and a divot.  I expand the 240 paper sanding to the entire stem to address these issues and to remove any oxidation hanging on.  I’m careful to guard the Apollo ‘A’ stamping from the sanding. Before going further with the fine sanding, I remembered that earlier that it was very difficult to clean the stem’s airway because the bit area was too compressed from Paw’s chewing the bit.  To address this, I start a new pipe cleaner down the airway while warming the bit with the hot air gun.  I warm it on the upper bit avoiding the fills that are on the lower bit.  I do this to avoid dislodging the fills which will not expand the same as the rubber.It works like a charm.  As the vulcanite warmed it becomes supple and I move the pipe cleaner gradually through the airway as the compressed area relaxes.  When the pipe cleaner is moving freely and normally, with the pipe cleaner remaining in the airway, I run the stem under cool tap water setting the expansion in the vulcanite airway.Next, the entire stem is wet sanded using 600 grade sanding paper followed by applying 000 grade steel wool as I normally do with briars. The nickel stem facing and filter housing also receive attention from the steel wool and clean up very nicely.Putting the stem aside, I focus on the shank repair.  The glue has cured, and I use 240 grade paper to clean away the excess patch material from the surface of the shank.  The half-rounded needle file helps to remove the thicker patch buildup at the crook of the shank and bowl.Charles Lemon’s blog on ‘Dad’s Pipes’ was helpful to know what to expect working on the sanding and polishing of Brylon – or, what NOT to expect.  He found that Brylon does not polish up like briar but remains somewhat speckled and a dulled finish.  With my repairs on the Brylon being more intrusive than Charles’ experience, my concern is for the overall blending of the surface.  Will the area of Brylon that has received more focused 240 sanding appear differently from the other areas in the end?  To avoid this, I decide to encourage overall blending beginning with wet sanding the entire bowl, including the patch, with 600 grade paper.  This is followed with applying 000 steel wool.  The following pictures show the result – a darkening of the Brylon finish and with the uniform blending that was my hope.  This result encourages me to continue the fine sanding on the Brylon surface but also to continue blending the patches.Before moving forward with sanding and polishing of either the stem or stummel, one more technical challenge has yet to be remedied: the fit of the stem into the mortise.  With the shank crack glued, the last thing I want to do is to crack it again!  The picture shows the irregular shaping of the nickel housing.  The starting place is to ‘re-round’ the housing.  I use needle-nose pliers to do this.  First, I heat the nickel with the hot air gun to encourage movement in the metal without splitting it.  After heated, with the closed needle-nose pliers inserted into the nickel housing, I slowly turn the stem and apply gentle pressure to coax the nickel into a more rounded orientation.  Patience is key! Not perfect, but much better.  I don’t want to put too much stress on the nickel, so I decide to stop.No surprise – I try a half-hearted attempt to engage the stem and stummel but fit remains too tight.  The next step is to relieve the internal mortise pressure. I find a drill bit small enough to accommodate being wrapped with 240 grade paper and able to navigate the mortise.  Once, I get the best fit, I sand the mortise and attempting to fit the stem as I go.  It becomes clear that the roundness, or lack therein, of the filter housing was continuing to cause problems with ‘high spots’ as I attempted to rejoin the stem.  After returning to the hot air gun and making further adjustments to the nickel housing, I achieved a round housing that fit BUT the adjustment now left the housing lose in the mortise…ugh.  The restoration nightmare – repairing a repair.The solution I decided on was to rebuild the internal mortise grip by painting the mortise with acrylic nail polish.  I paint the mortise walls with the small brush provided, wait for it to dry and then paint it again, adding an additional layer.  This was not part of the plan…After several revolutions of adding layers of acrylic polish, the grip in the mortise was restored.  A detour but moving forward!The full regimen of micromesh pads is applied to the stem starting by wet sanding with pads 1500 to 2400 followed by dry sanding with pads 3200 to 4000 and 6000 to 12000.  Between each set, Obsidian Oil is applied to condition the stem and protects it from developing oxidation.  The stem is looking good! I decide to run the Brylon stummel through the full micromesh battery as well.  I’m not sure it will enhance the shine much, but I want to continue the process of blending the entire stummel surface, including the rim patch.  Wet sanding begins with pads 1500 to 2400 and is followed by dry sanding with pads 3200 to 4000 and 6000 to 12000.  The results are good.  The surface did shine up and the color deepens. Before applying Blue Diamond compound, I want to apply some cosmetic touches.  The crack in the shank is visible as a lighter line.  The large rim patch is speckled as well.  Using a walnut colored dye stick, I apply it to the shank and to the rim with very nice results.  The dye helps the blending. Next, to continue with polishing, I apply Blue Diamond compound to the stem and stummel after mounting a cotton cloth buffing wheel to the Dremel with the speed set at about 40% full power.After completing the application of Blue Diamond, one more cosmetic project awaits attention before applying wax. The Apollo ‘A’ stamping needs refreshing.  I apply a small dab of white acrylic paint over the stamping.Then, with a cotton pad, I tamp the paint drawing off the excess paint leaving a thin layer of paint over the stamping which dries very quickly.Then, using a toothpick’s flat side, I lightly scrape over the stamping to remove the excess paint leaving behind the paint in the imprint.  The ‘A’ appears to be partially worn and the paint only hold where the imprint is deep enough.  It looks good!Finally, another cotton cloth buffing wheel is mounted onto the Dremel, set at the same speed, carnauba wax is applied to the entire pipe.  The Brylon doesn’t absorb like briar so the wax seems to only make a very superficial shining on the surface.  Because of this, very little wax was needed on the surface.After completing the wax application, the final step in the restoration of Paw’s Medico Apollo Brylon was to give it a rigorous hand buffing with a microfiber cloth to raise the shine.
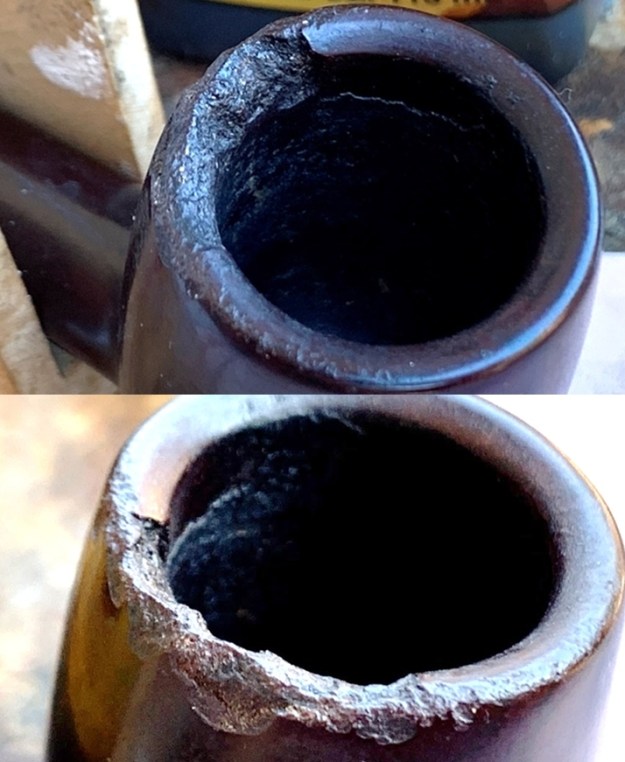
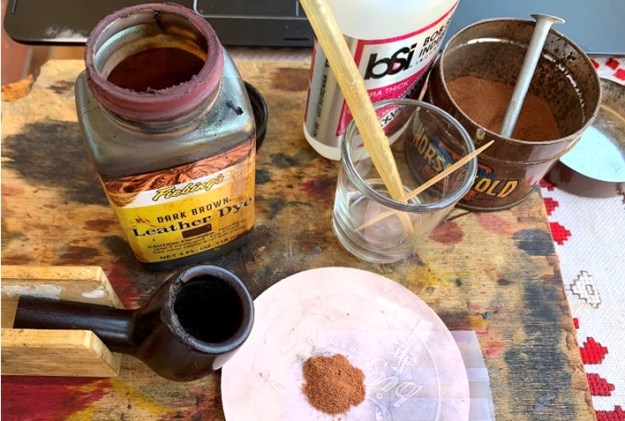
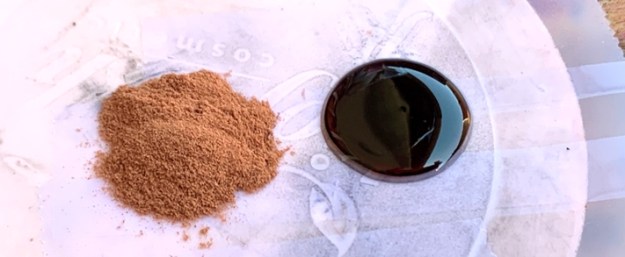
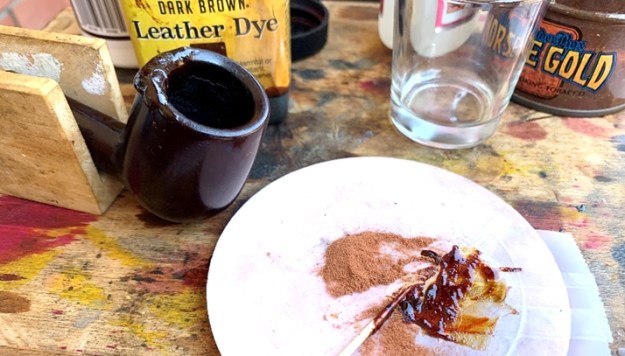
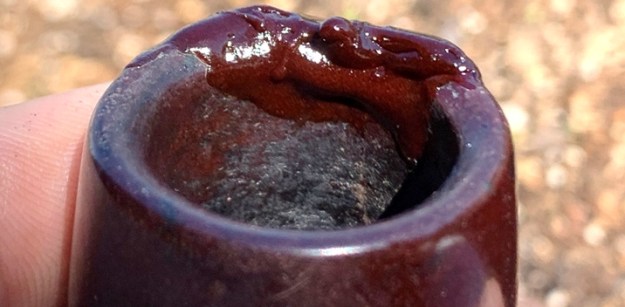
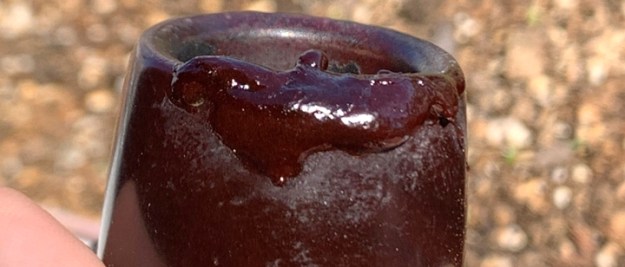
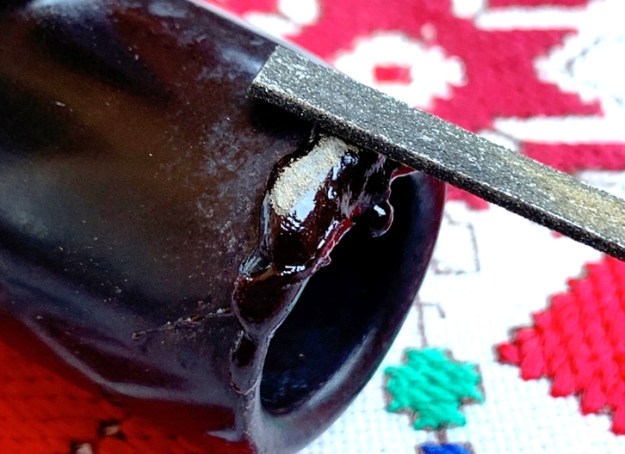
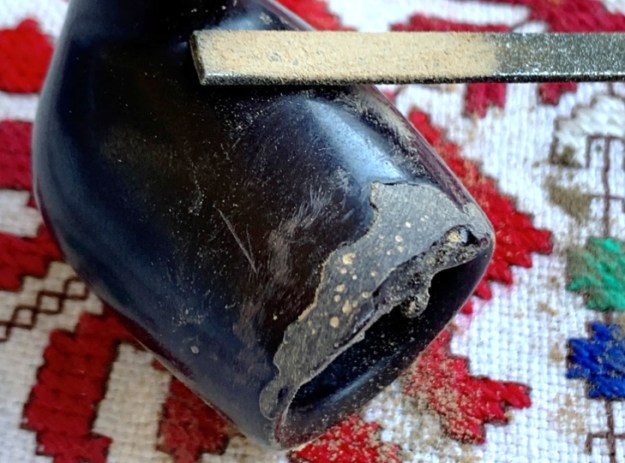
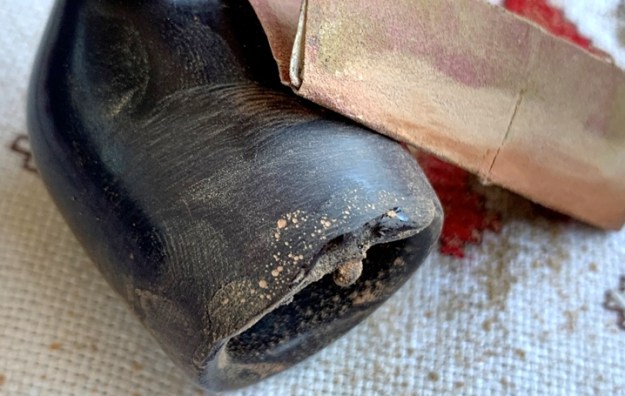
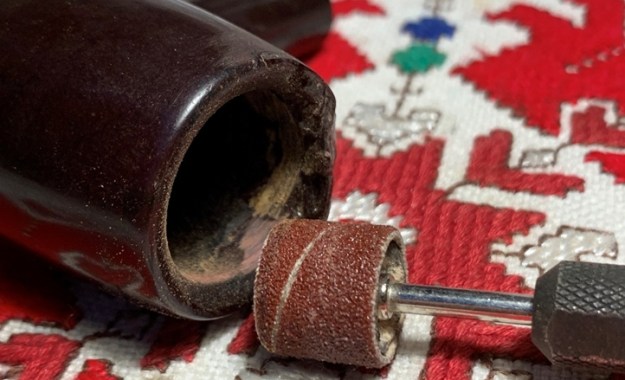
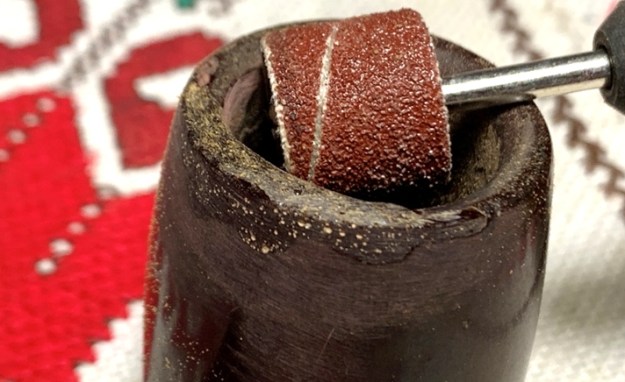
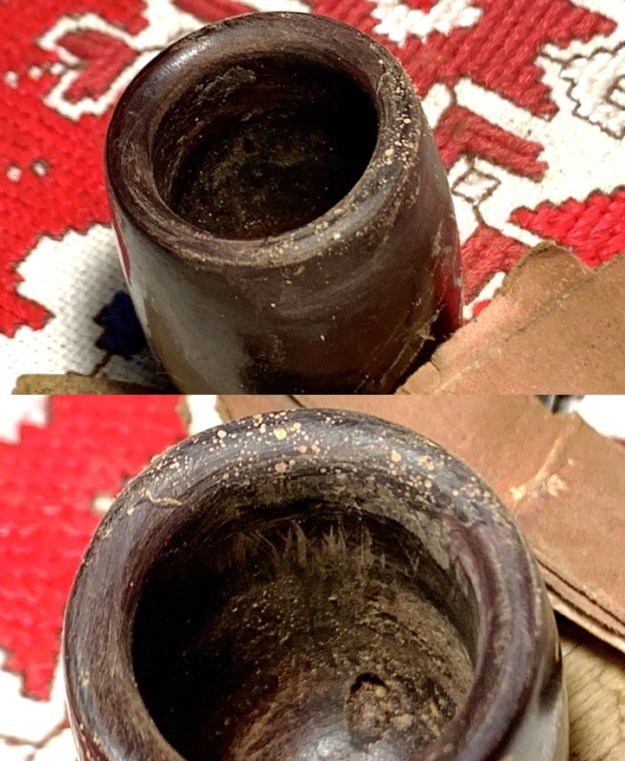
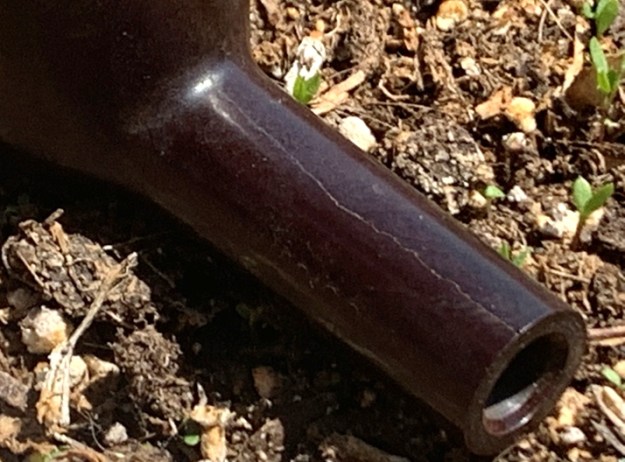
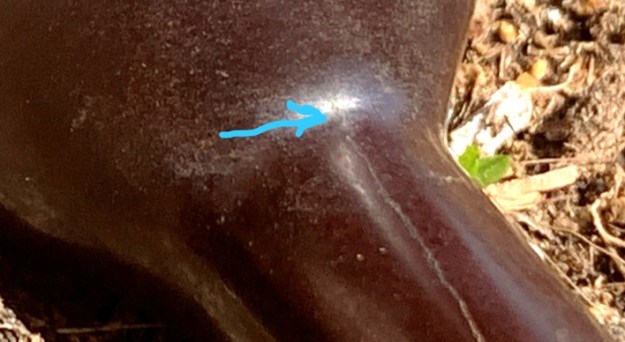
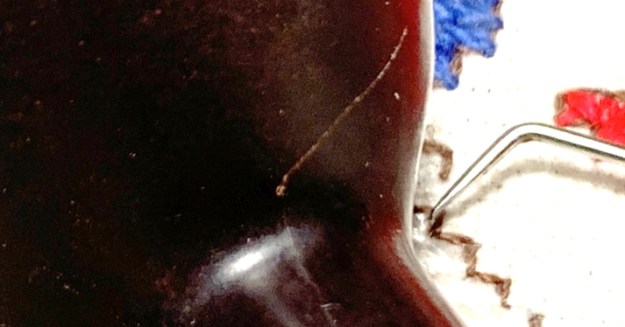
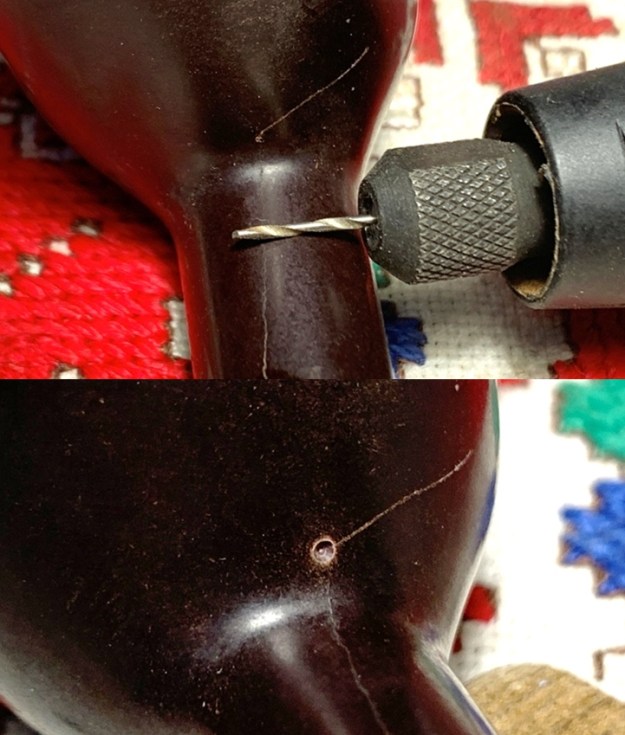
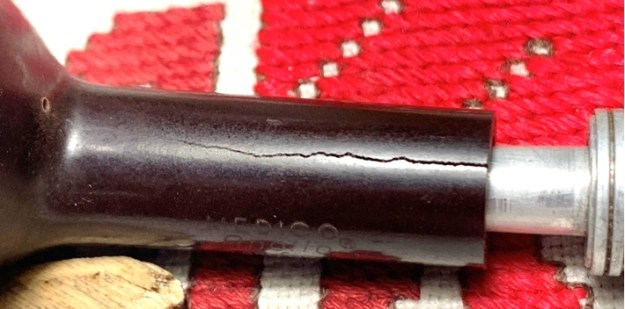
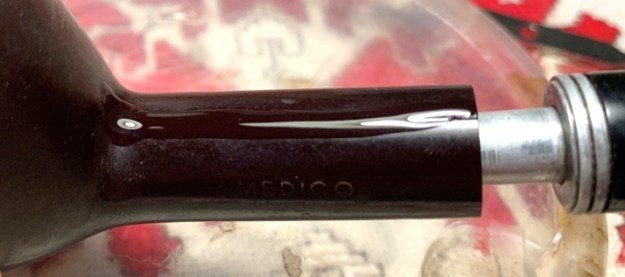
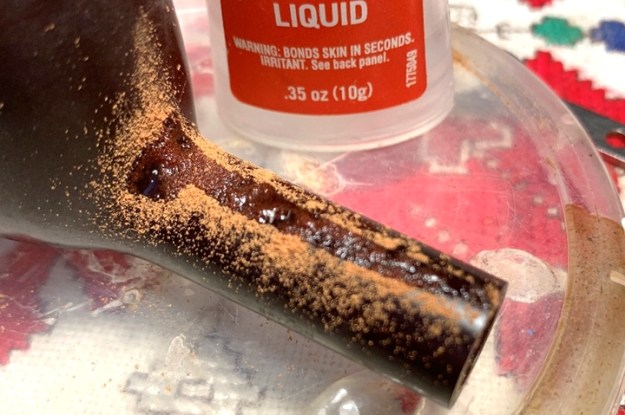
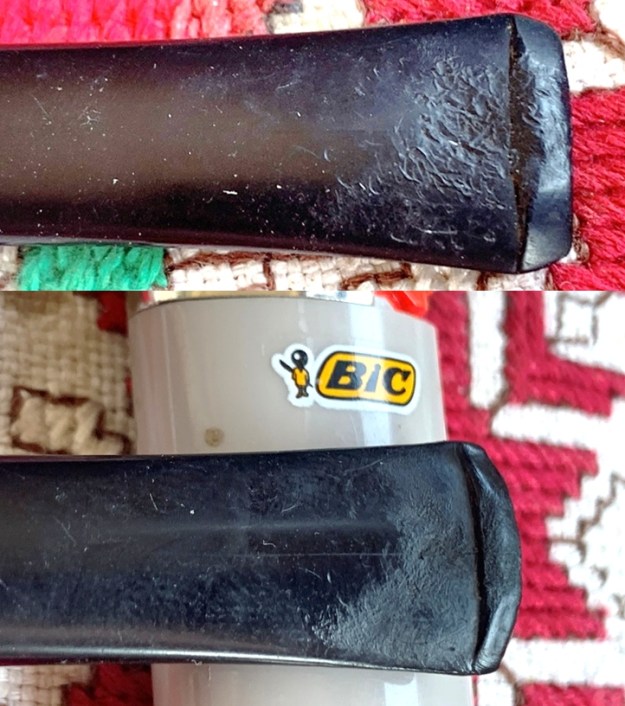
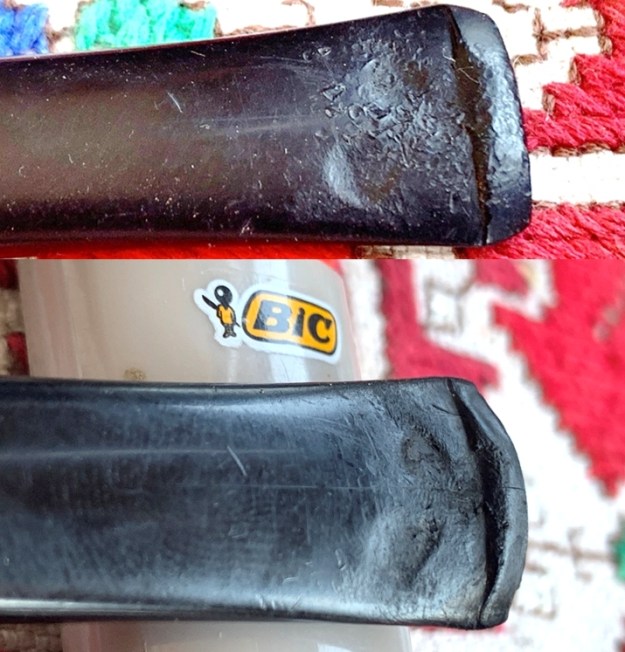
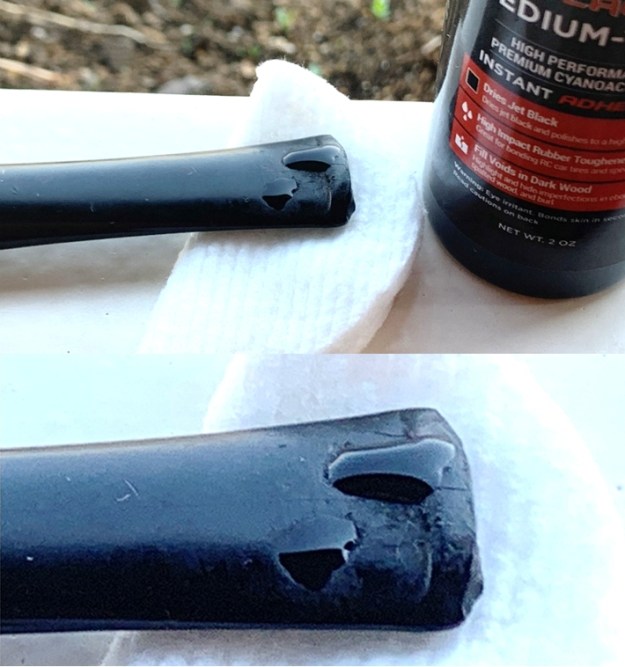
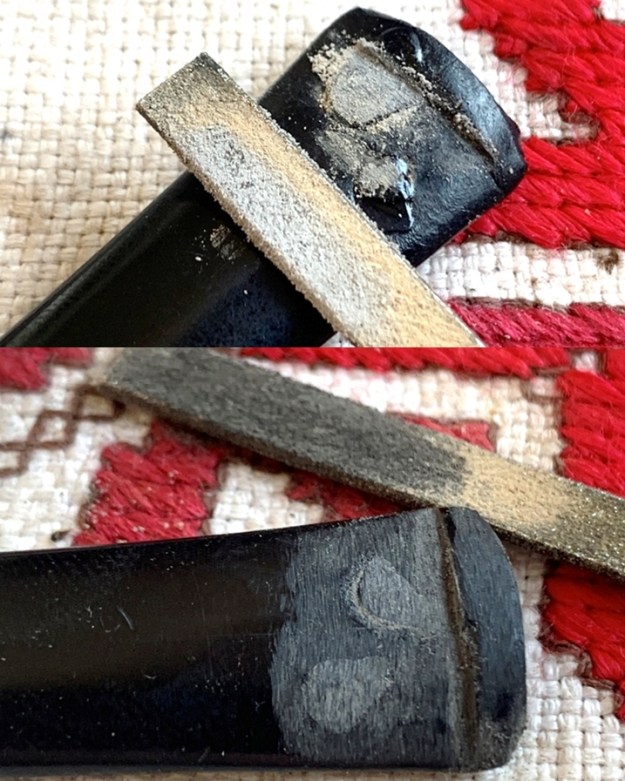
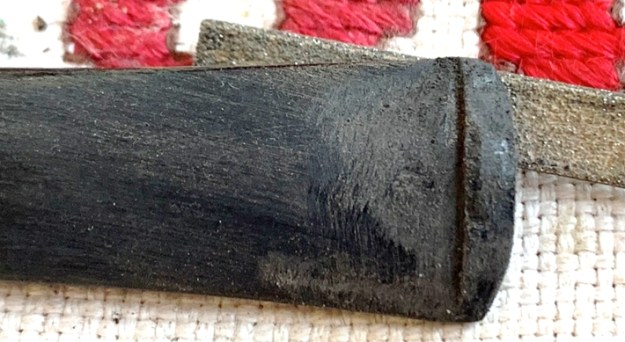
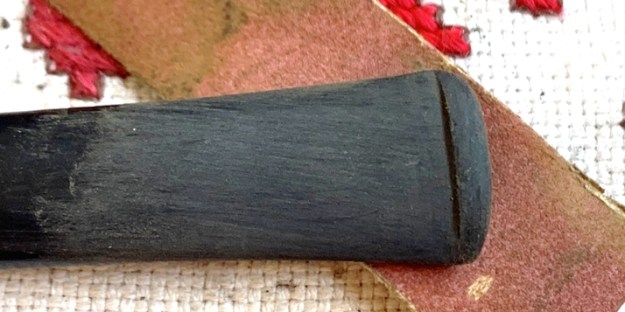
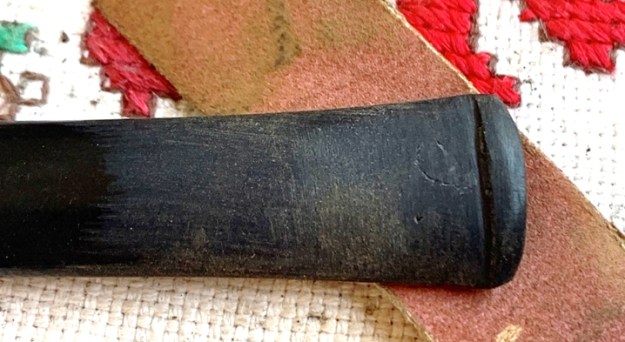
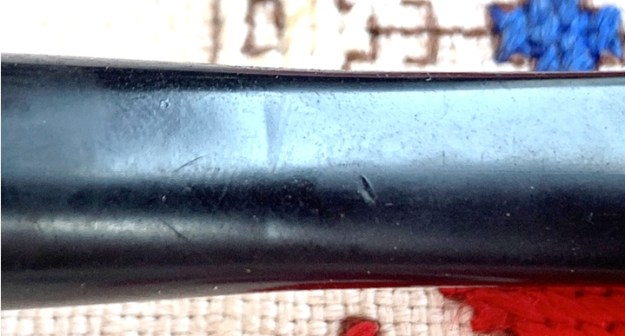
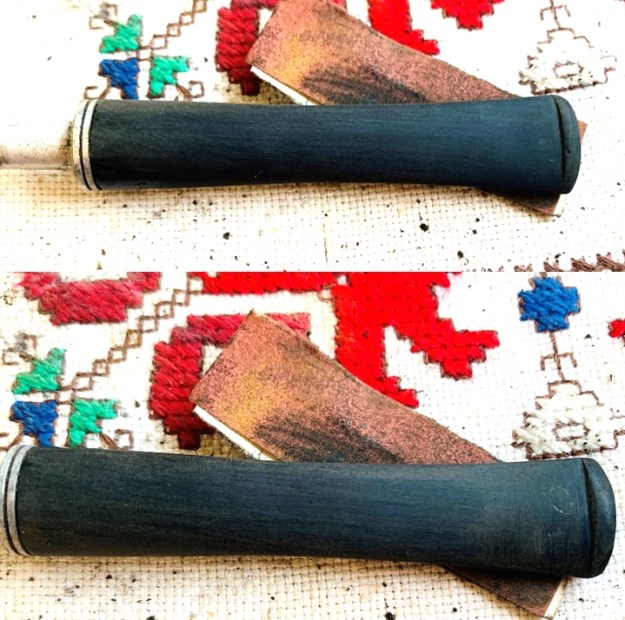
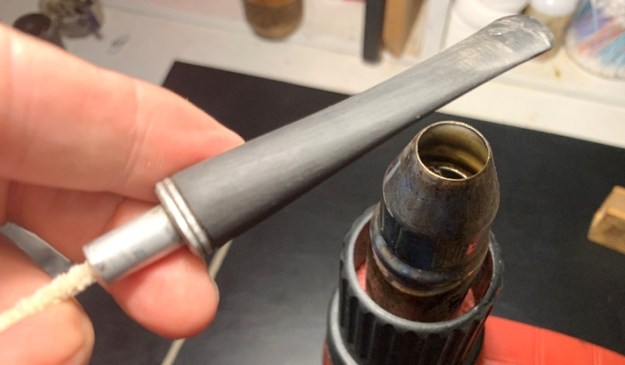
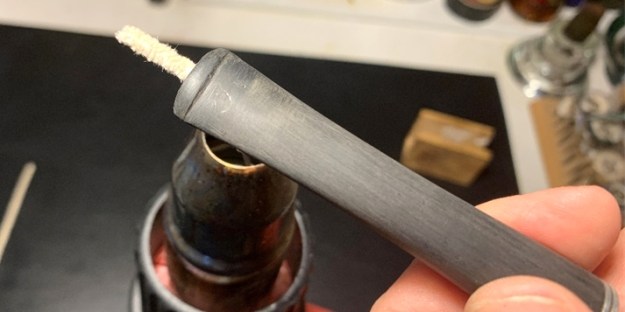
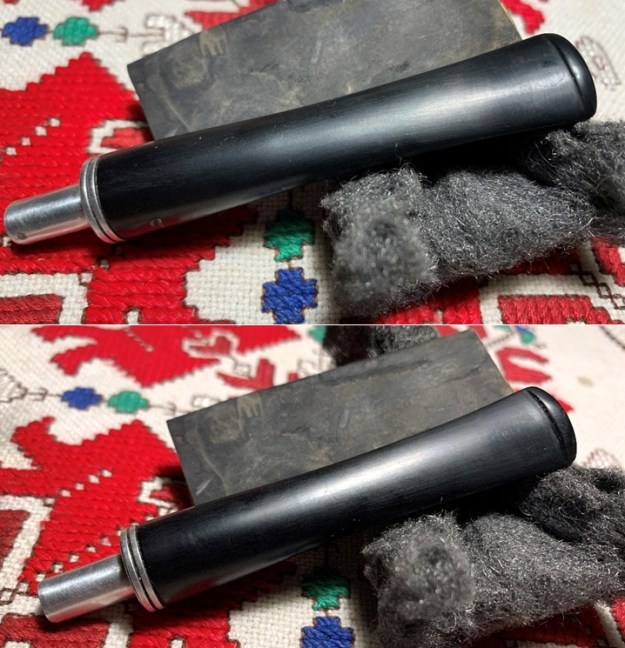
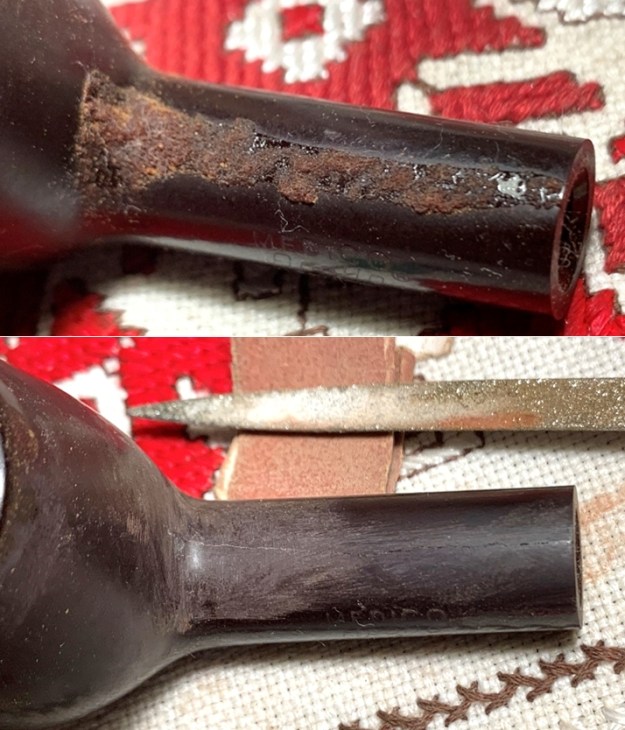
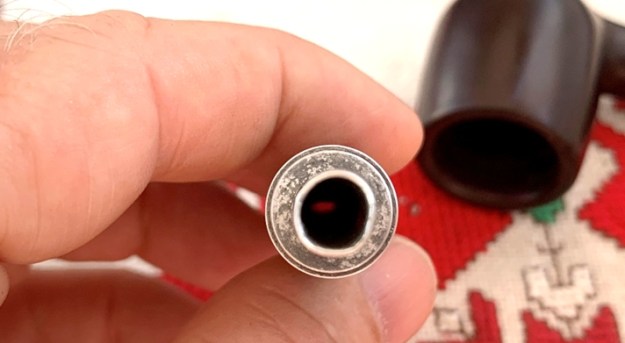
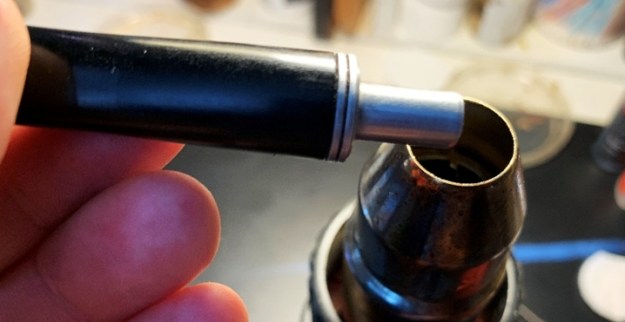
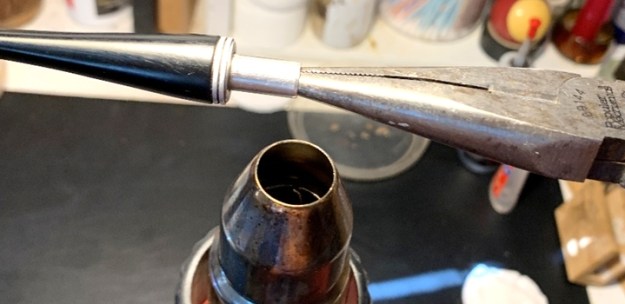
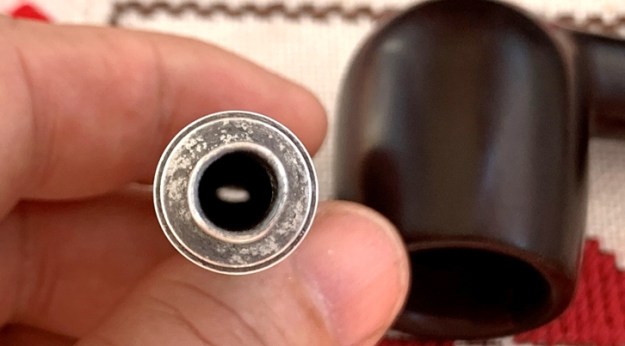
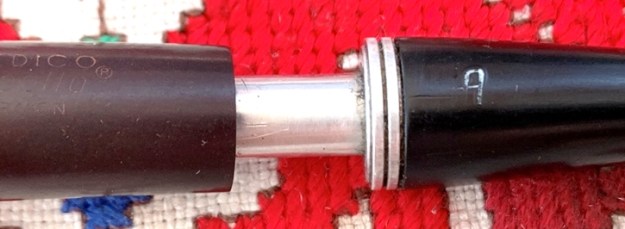
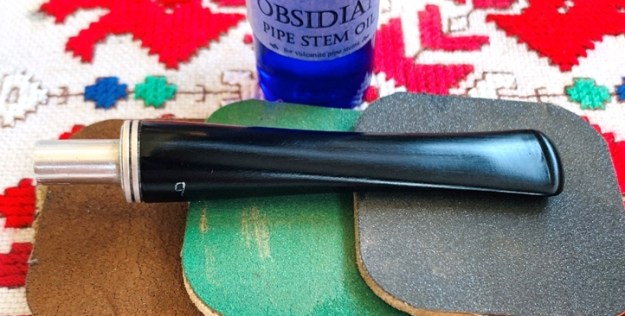
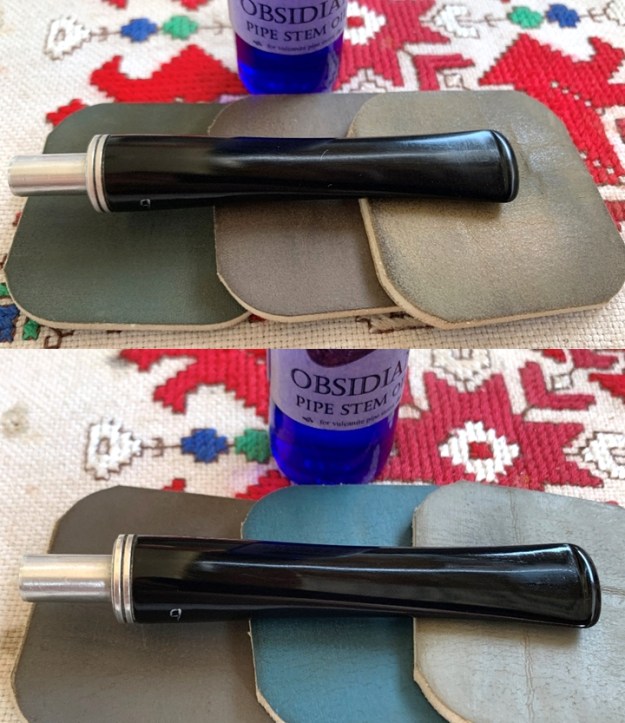
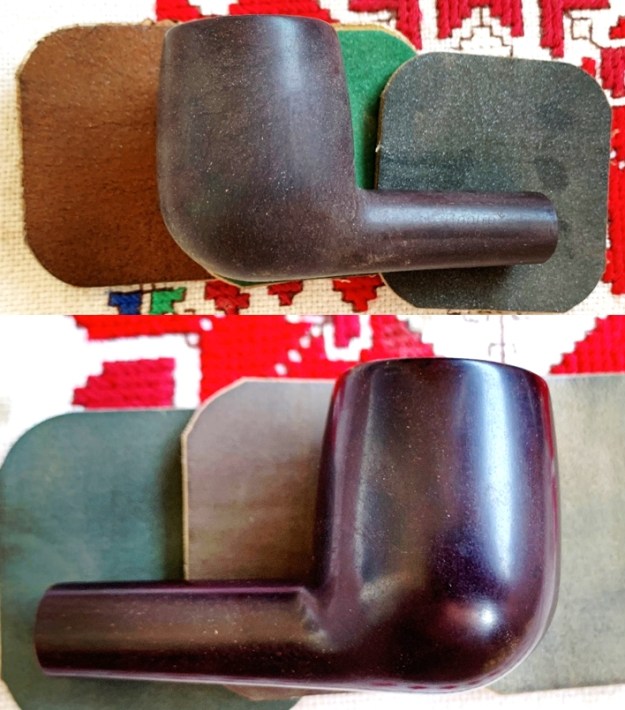
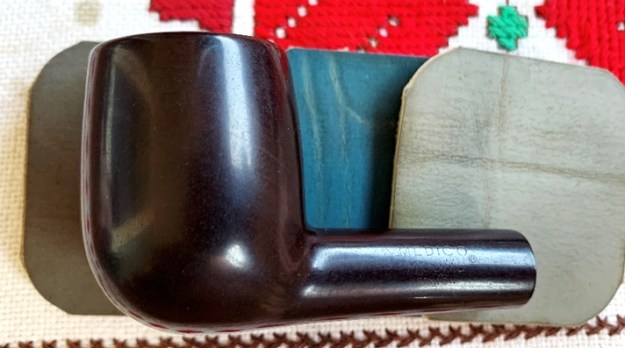
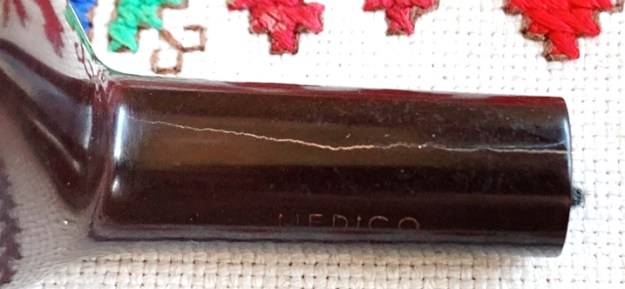
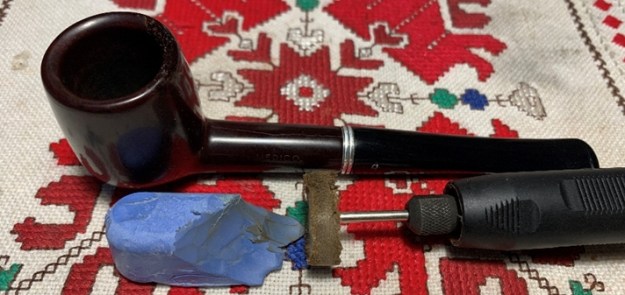
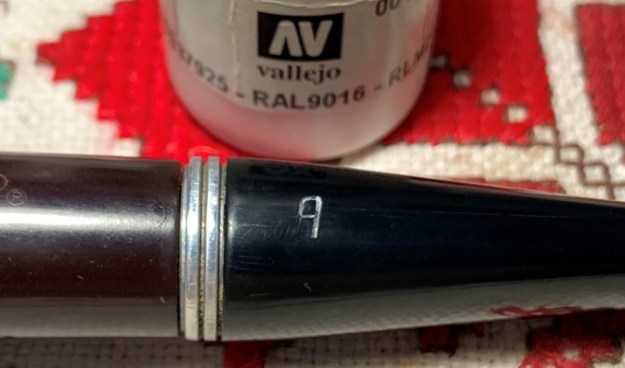
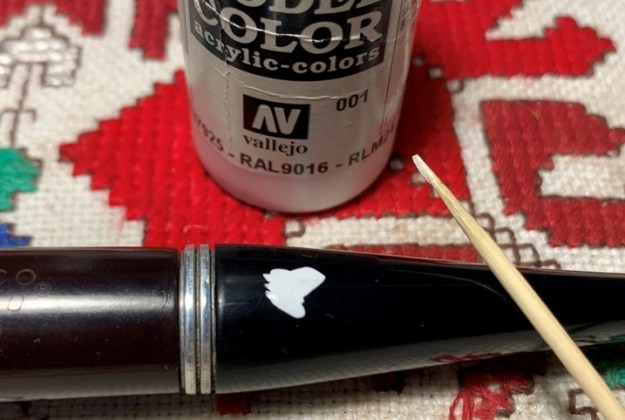
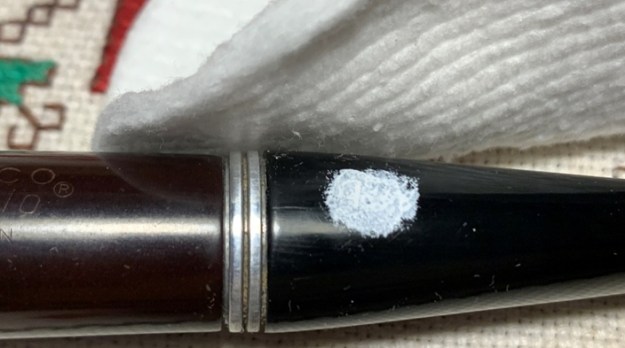
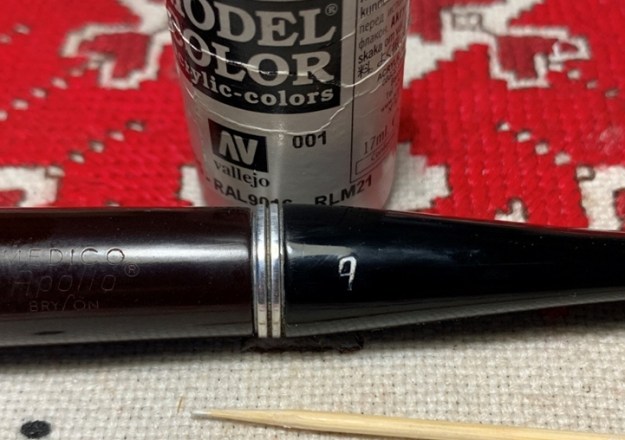
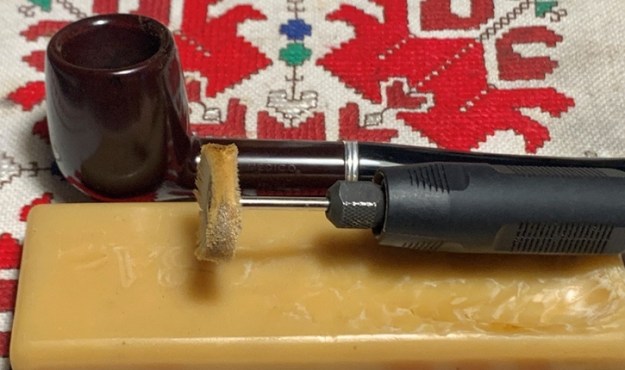
This restoration was a challenge but worth it!  Working with Brylon has unique challenges but it was good to learn more about how it behaves in case I have another S.M. Frank innovation come across my worktable!  The rim patch worked well but speckling remains as a reminder of Paw’s knocking activities!  In the end, this pipe of Paw’s legacy is ready to go again bringing with it the memories of the man called, ‘Two-Page Sam’ to be remembered and treasured by his family.  Thanks for joining me!
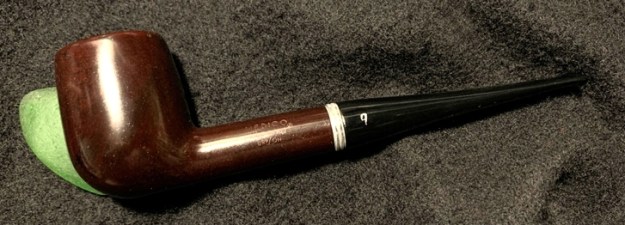
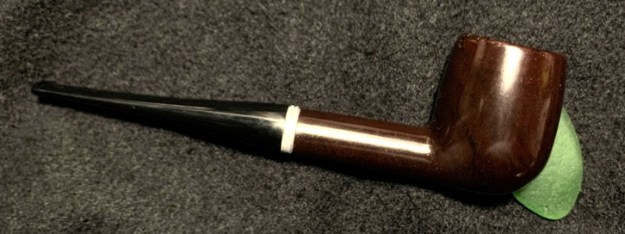
This is a restoration I have been waiting for – an HWB Modele Depose Figural Head


Blog by Steve Laug

The next pipe on the worktable is an incredibly detailed carved figural head that has a lot of character in the well carved features that Jeff picked up from an auction in the Midwest of the US. It has a tapered horn stem that has a threaded tenon that screw into the shank. The finish is smooth under the carved head and the shank and heel of the bowl. There appears to be some nice grain around the bowl. The curves of the shank and stem give the pipe a sense of true dignity. The pipe is stained with various hues of brown. The pipe is stamped with HWB in an oval followed by Modele Depose on the left side of the shank. There is no other stamping on the bowl or shank of the pipe. The pipe is far from being a collectible decorative piece and was obviously an earlier pipeman’s favourite smoker. The finish was very dirty and tired looking with a lot of grime and oils ground into the sides of the bowl. There was a thick cake in the bowl overflowing with tars onto the rim top. There is also some darkening on the inner edge of the rim top. There was repaired damage on the bill of the hat and there were also burn marks on the back corners of the heel of the bowl. The tapered horn stem is heavily damaged with a crack in the left side near the shank junction and both the top and underside of the first inch of stem is well chewed with a bite through on the top side. The button is worn down and the sharp edge all but flattened. Because of the uniqueness of this particular pipe Jeff took a lot of photos of the pipe before he started his cleanup work. Jeff took photos around the bowl from various angles to show the well done carving on this pipe. You can see in the first photo below the repair that had been done to the right side of the bill of the hat somewhere in the pipe’s journey. It was well done and solid. Look at the details in the carving. The fancy hat band on the hat with the triple lines on the front/back/sides that are carried over the rim top are an example. Note the cross medal on the front of the collar. Note the features of the hair on the head and the moustache. It is a well carved piece of briar. Jeff captured the condition of the rim top. It is hard to see but the triple lines on the outer edges continue across the rim of the bowl. You can see the cake in the bowl and the lava build up on the rim top. It was a well-loved and oft smoked pipe.Jeff also took a photo of the heel of the bowl. The briar is quite beautiful as you can see. The base or heel is spade shaped and flows from the shoulders of the bust above. The base is not flat but it can be balanced as a sitter. Quite a beauty. You can also see the flaw in the briar toward the front of the bowl. He also took photos of the stamping on the shank. It includes an HWB in an oval followed by the words Modele Depose. I have been unable thus far to find out any information on the HWB brand but I did a quick search of the translation of Modele Depose. I included that below

https://www.linguee.com/french-english/translation/mod%C3%A8le+d%C3%A9pos%C3%A9.html

Modèle Déposé noun, masculine it translates as registered design and less commonly as registered pattern.

This is the first clue that leads me to think that the pipe is French made. As I examine the pipe and get input there will be more clues.The next photos reveal the well-used condition of the horn stem. It was very dry and had a crack at the shank/stem junction as seen in the first photo. The second photo shows a long view of the stem and you can see the striations of the horn on the underside. The final two photos below show the chewed end of the stem just ahead of the button. On the top side of the stem there is a hole all the way through to the airway below. There is quite a bit of damage to the stem that will need to be addressed. For his final photos of the pipe before cleaning Jeff unscrewed the stem from the shank and took pictures. The photos show the condition of mortise and tenon. It actually looks to be in excellent condition.Before turning to my restoration of the pipe I decided to see if I could figure out who the figure depicted. Both Jeff and I wondered if it was not General Charles de Gaulle. I posted a query for help on the Facebook group – Tobacco Pipe Restorers and received a lot of responses. The options included General De Gaulle of France, Philippe Pétain (the Lion of Verdun) France, Marshal Joseph Jacques Césaire Joffre of France, Marshal Ferdinand Foch of France, Otto von Bismarck of Germany and even a suggestion that it was a Victorian Baseball player. I thank each of those who responded as each one took me closer to a solution.

Here is what I have learned so far:

  1. The figure is probably French and definitely military.
  2. The figure is from the period of or directly after World War I.
  3. The figure was a hero of some sort, a key figure that was commemorated by the carving.

That is what I know so far. That is progress. During the night I received a response from Aaron Comsia on Facebook Tobacco Pipe Restorers Group that noted the medal around the neck of the figure. He included the following photo of French medal matching the one on the figure’s neck. I have included that below.The medal was another clue further confirming a French connection of both the figure and the pipe. The stamping pointed to France and the Medal on the neck of the figure pointed to France. Now I knew that I could eliminate the German figures and the Baseball player. That left me with four options – General de Gaulle, General Philippe Pétain, Marshal Ferdinand Foch and finally Marshal Joseph Jacques Césaire Joffre. I decided to find photos of these figures (some I picked up on the web and others were shared by those from the group who put the person forth in response to my question). I will work through them in order and narrow the field further.

General Charles de Gaulle was the choice of three of four of the responders to my question for who people thought the figure represented. I found a younger and an older photo of General de Gaulle. Comparing these photos to the carved figural above I note some dissimilarities that take de Gaulle off the list. These include a longer narrower face, a smaller and thinner moustache and the large prominent nose. The carved figure had a rounder, fuller face and a thick moustache and a smaller nose. The hat is also different in these two photos and in others that I scanned on the web. I am as certain as I can be that the figure is not General Charles de Gaulle.

The second choice that came up more than once was General Philippe Pétain. He had been acknowledged as having saved the French Army in 1917 at Verdun. His exploits there earned the moniker ‘Lion of Verdun’. He was a prominent figure in French political and military history. During World War II he became part of the Viche Government (working with the Nazi’s in France). For many this would have made him a collaborator. Here are two photos of Pétain that I found online.Comparing these photos to the carved figural above I thought for some time that I had found the right historical character to match the pipe. Looking at the photo the hat is the same as the carved head. The nose and moustache are close for sure but there is some dissimilarity as well when I studied the face. The eyes on the photos are much closer set with the nose than on the figure. The jawline is also different in that the carved figure seems to have a more round chin and the upper jaw seem to extend over the lower much more than in the photos. Given those features and his connection to the Vichy Government I think I can rule out General Philippe Pétain personage of the carving. To be honest this was a hard one to let go of for me.

The third choice that came up several times was Marshal Ferdinand Foch. Marshal Foch was a noted French commander during World War I. One respondent on the group, Taeve Schaer commented that many carvers in St.Claude, France (they call themselves the cradle of pipemaking) did these pipes. Many of the carvings were of Marshal Foch. Several responders included the photo of Foch on the right. I found the second one and included them both here.Comparing these photos to the carved figural above I thought for some time that this was a good possibility. Taeve Schaer’s comment about many carved figural pipes of Marshal Foch were made in St. Claude. Looking at the photo the hat is the same as the hat on the carved head. The nose and moustache are close for sure but there is some dissimilarity as well when I studied the face. The drooping brows and eyes on the photos are different than those on the figure. The jawline is also different in that the carved figure seems to have a more round chin and the upper jaw seem to extend over the lower much more than in the photos. The cleft in the chin is also notably missing in the carving. The moustache is longer and more ragged than the cropped one on the carved figure. Given those features I think I can rule out Marshal Ferdinand Foch as the personage of the carving. This was easier to let go of than Pétain.

The fourth choice that came to me was that the figure was Marshal Joseph Joffre. Chris van Hilst suggested Joffre and included a photo of another carved figural pipe of Joffre from 1917. Marshal Joseph Jacques Césaire Joffre (12 January 1852 – 3 January 1931), was a French general who served as Commander-in-Chief of French forces on the Western Front from the start of World War I until the end of 1916. He is best known for regrouping the retreating allied armies to defeat the Germans at the strategically decisive First Battle of the Marne in September 1914.

I used the photo of the figural of Joffre and picture that I found online. I have included them both below. You can see the similarity between that figural and Joffre for sure. But did it match the figural that I was working on? I have included a frontal view of the figural I am working on below these two photos. What do you think?From my perspective the facial features match this choice the best. The jawline, the nose, the moustache, the set of the eyes and the hat as well as the medal on the chest of the figural and the picture of Joffre all point to the similarities between Joffre and the pipe that I have. I am convinced that the pipe is indeed Marshal Joseph Jacques Césaire Joffre. I am sure some of you will not be convinced but that is my logic.

I did some more reading about Joffre on Wikipedia (https://en.wikipedia.org/wiki/Joseph_Joffre). It included the previous information I included above but also the following:

…His political position waned after unsuccessful offensives in 1915, the German attack on Verdun in 1916, and the disappointing results of the Anglo-French offensive on the Somme in 1916. At the end of 1916 he was promoted to Marshal of France, the first such promotion under the Third Republic, and moved to an advisory role, from which he quickly resigned. Later in the war he led an important mission to the United States. His popularity led to his nickname Papa Joffre.

It makes good sense to me that a pipe carver in St. Claude with HWB would so beautifully capture the features of Papa Joffre. Now it was time to do my part of the restoration of this pipe. Jeff had done his usual thorough cleanup of the pipe. He had reamed it with a PipNet reamer and cleaned up the remnants with a Savinelli Fitsall reamer. He cleaned out the internals of the shank and stem with alcohol, cotton swabs and pipe cleaners. He carefully scrubbed the grime and oils off the surface of the briar with a tooth brush and undiluted Murphy’s Oil Soap. He rinsed it with warm water and dried it off with a soft towel. He set it aside to air dry before putting it back together. When he brought it to Oregon on a recent trip we made pre-COVID-19 I was stunned at how well it had cleaned up. I have wanted to work on it for a while now but somehow had mislaid it. I found it recently and brought it to the worktable. Here is what it looked like before I started. I took close-up photos of the bowl and rim top and stem to show how much better they looked. You can see the lines from the front, back and sides of the hat carried across the rim top. The briar is clean and quite beautiful to me. The issues with the pipe really involved the stem more than anything else. There was the split in the left side at the shank and the bit through and gnawing on the top and underside of the stem. The stem was really a mess and had been well used. That is where the lion’s share of my work would come.I took photos of the sides and front of the bowl to show the fine details of the carving now that it is cleaned up. The repair to the right front of the bill of the hat is also visible. It really is a well carved figural. I only wish I could find information on the initials HWB on the shank side. I took another photo of the stamping on the left shank side in hopes that it may register with a reader of the blog. I removed the stem from the shank and took a photo of the parts.Now it was time to start the restoration. I wanted to minimize the flaw on the right cheek. It appear to be damaged. I filled in with CA glue to lessen it slightly and feathered the edges with a corner of sandpaper. I used a folded piece of 220 grit sandpaper to smooth out and reduce the damage on the burned rear corners of the base. I touched up the repaired areas on the face, the heel edges and the bill of the hat with a mixture of Cherry, Maple and Mahogany stain pens. The three pens blended together to match the surround areas of the briar. I was happy with the look of the repairs.I worked some Before & After Restoration Balm into the surface of the briar with my fingertips and a horsehair shoe brush and q-tip to work it into the nooks and crannies of the carving. The product works to clean, enliven and protect the briar. I let the balm sit for ten minutes and then buffed the bowl with a cotton cloth to raise the shine. The photos show the carved bowl at this point in the restoration process. It almost looks oily at this point but that will soak into the briar as it sits while I work on the stem. I set the bowl aside at this point and moved on to address the issues with the stem. I cleaned out the crack on the left side of the stem and the chewed area on the underside of the stem and gave them both the first fill coat of clear CA glue. These were the straightforward repairs to the stem. I have found that clear super glue stabilizes the horn in damaged areas and binds split in the stem very well.The damage on the topside of the stem required more work. I greased a pipe cleaner with Vaseline and slid it into the airway in the stem. It plugged the bite through area on the top of the stem and would keep the glue from closing the airway. I put drops of super glue on the stem surface and after the first layer I removed the pipe cleaner. The bite through was sealed. I continued to layer on the glue repairs until the surface of the stem was even with the surrounding sound horn areas. I sprayed the area with an accelerator – and promptly was reminded why I did not do that normally! The glue dried WHITE… and it was ugly. I am not sure what the accelerator adds but what normally dries clear went white… now I had one more issue to address. I sanded the crack repair on the shank end of the stem with 220 grit sandpaper and was able to blend it in quite well. I filled in the very end of the crack with more glue. To remove as much of the whitening as I could I scraped the top file with a dental pick. I stained it with a maple stain pen and applied another coat of CA glue over the top of it. I added another layer of glue to the underside at the same time. The repair was looking better. You have to remember that the repair will always show at some level but to me darker is better than WHITE.Once the repair cured I used a needle file to redefine the sharp edge of the button and to flatten out the repair and begin to blend it into the surface of the stem. Ahhh… even though there is still a long way to go I feel like I am making some progress.I sanded out the repaired areas of the stem to blend them into the surrounding areas with a folded piece of 220 grit sandpaper. I started polishing the repairs with 400 grit wet dry sandpaper. The repair to the crack on the left topside of the stem looks very good and has blended in very well. The areas around the button look much better and with polishing will look even better. Progress is evident now.The stem was now ready to be polished. I use micromesh sanding pads to polish out the scratches in the horn. I find that wet sanding with 1500-12000 grit pads and wiping the stem down after each pad with Obsidian Oil enlivens and enriches the horn and a beautiful shine begins to appear that  really bursts forth with the last set of sanding pads. I polished it further with Mark Hoover’s Before & After Pipe Polish. I rub the Fine and Extra Fine polishes into the stem surface with my fingertips. I let it sit for a few moments and the buff the each polish off with a soft cotton cloth. I find that these polishes actually take the shine to another level. I finished my work on the stem by rubbing it down with a cloth impregnated with Obsidian Oil as it protects and enlivens the horn even more. I am pretty happy with the stem. It is highly functional and though far from what it was originally it looks really good to my eye. This has been an incredibly fun pipe to restore. The reading and history lessons learned in the process were great. The interactions with the various people on the Facebook Pipe Restorers Group were invaluable and enjoyable as well. It really was like having folks in my shop while I restored the pipe and I could ask questions. Thank you all!

Now I was at one of the best parts of restoration for me – putting it all back together again and seeing how the pipe looks. I put the stem on the shank and carefully buffed the pipe with a lightly loaded buffing wheel of Blue Diamond polish. I wanted to be careful to not fill in the fine details with the polish but I wanted to get the benefit of a buff. I gave the bowl and stem multiple coats of Conservator’s Wax and buffed it with a clean buffing pad. I hand buffed it with a microfiber cloth to deepen the shine. The pipe really has come alive and the figure is so well done that I have found myself just stopping and studying the handiwork of the unknown HWB carver. The dimensions of the pipe are probably helpful to give perspective now. The length from the tip of the hat bill to the end of the button is 6 ½ inches, the height from the top of the hat to the edge of the French medal 2 ½ inches. The outside diameter of the bowl is 1 ¾ inches long by 1 ½ inches wide. The diameter of the chamber is ¾ of an inch. The photos below of the finished pipe tell the finished story. Papa Joffre will not be leaving me anytime soon. Way too much enjoyment in just observing it and turning it over in my hands! I am looking forward to loading and enjoying a bowl. If you have read through the entirety of this blog I want to thank you for your time.


Restoring a Well Worn Dan Shape-Reformed 28 261 Sandblast Canted Chimney


Blog by Steve Laug

The next pipe on the worktable is an interestingly shaped pipe made by Pipe-Dan. It is a backward canted stack, tall and thin shank with a short lumberman style round vulcanite stem. The finish is an interesting mix of sandblast and rusticated. The bowl sides are horizontally rusticated and then sandblast over the top of the rustication. It gives the pipe a very unique finish. The rim top of the bowl bears the same combination of sandblast and rustication. The pipe is stained with black and various hues of brown. It truly is a beautiful finish. The pipe is stamped with a 28 on the heel of the bowl followed by 261. Next to that it is stamped DAN followed by Shape-Reformed. At the shank end it is stamped Pipe-Dan Copenhagen. The finish was very dirty and worn looking with a lot of grime and oils ground into the valleys and crevices of the blast. There was a thick cake in the bowl overflowing in lava filling in the rim top. The tapered vulcanite stem is heavily oxidized and had calcification over much carries on the twist of the shank. The stem looked very good. It is dirty with light tooth chatter on both sides near the button. Jeff took some photos of the pipe before he started his cleanup work. He took photos of the bowl and rim top to show their general condition. You can see the thick cake in the bowl. The cake and lava are so thick that it is not clear what the inner edge of the bowl looks like at this point. The lava also fills in the grooves and crevices in the finish of the rim top making it almost smooth. Jeff took some photos of the sides and heel of the bowl to give an idea of the unique finish that mixes sandblast and rustication giving the tall bowl a very tactile finish. You can also see the debris in the rustication around the bowl and rim. I cannot wait to see what it looks like once it is cleaned and polished. He took several photos of the stamping on the underside of the shank to capture it for me. It is clear and readable. It runs from the heel to the stem. It is 28 261 Dan Reformed-Shape followed by Pipe Dan Copenhagen. The vulcanite stem is a mess! It is heavily oxidized and there is calcification all over the stem from the button forward. There are also tooth marks and chatter on the stem on both sides. The button appears to be in good condition. The photos below show the condition of the stem.Before I started working on my part of the restoration I decided to do some research on the brand to see what I could learn. I turned first to PipePhil’s site to get a quick overview of the brand (http://www.pipephil.eu/logos/en/logo-p3.html). There found the following information. I am also including a screen capture of the pertinent section from the site.

Brand created in 1943. The shop (Danish name: Pibe-Dan) which closed in 1991 was run by H. Dan Christensen. He sometimes designed pipes but he is merely renowned for having helped young artisans like Tom Eltang, Preben Holm, Jes Phillip Vigen, Hans Hartmann…

Pipe-Dan let the pipe maker stamp his own name on a pipe along with the shop’s name.

There was one line on the page that stood out to me because it applied specifically to the pipe on the table today. I quote:

The line name “Shape-Reformed” means that a traditional shape had been redesigned.I turned then to Pipedia to get more history and background to the brand and potentially more information on the pipe (https://pipedia.org/wiki/Pibe-Dan). I quote the article in full as well I have included a photo from the site showing the storefront.

The House of Pibe-Dan was founded in Copenhagen in May, 1943, and was named for H. Dan-Christensen, nicknamed Pibe-Dan. Pibe-Dan (Pipe-Dan) unfortunately closed in 1991, but during the 48 years it was in business it was the ultimate place to find pipes by Danish masters.

Pibe-Dan would often let the pipemaker stamp his own name along with the company name… Pibe-Dan published its first catalog in the late 1950’s and, as was the case with W.O. Larsen, published it in English given their international customer base. While they sold pipes by Stanwell, Kriswill, Brakner and others, the classic pipe sold from Pibe-Dan was the Dan Shape-Reformed Pipe, which had a very tall vertical bowl, and were hand made of Corsican briar. Pibe-Dan claimed that the design was longer, drier, cooler and more even smoking. The Shape-Reformed was available in various lines including the Danois, Standard, Champion, Half Chimney and others.

At the same time, Pibe-Dan had a long history of also including pipes by Danish artisans in their catalog. Sixten Ivarsson’s Peewit, Oliphant, Ukulele and other shapes first appeared in Pibe-Dan’s catalog, and other artists who either began with or sold through Pibe-Dan include, among many others, Hans Hartmann, Gert Holbek, Sven Knudsen, Tom Eltang, Arne Nygaard, P. Holtorp, Poul Hansen, and Ph. Vigen, among others. The legendary Preben Holm sold pipes to the Pibe-Dan shop before his sixteenth birthday in 1963, and soon after was selling twenty to thirty pipes a week to the company, with Pibe-Dan setting the prices. This relationship continued until 1968.

From that information I learned that the line name “Shape-Reformed” means that a traditional shape had been redesigned. This shape was the classic pipe sold by the company. They described the pipe as having a very tall vertical bowl and hand made from Corsica briar. They claimed that the design was longer, drier, cooler and more even smoking. The Shape-Reformed was available in various lines.

Now I had a pretty good idea of how the pipe was stamped and made. With that information I moved forward to work on the pipe itself and see what I had to do with it. The bowl looked unbelievably good in light of where it started. The stem looked much better with just a few tooth marks on each side of the stem just ahead of the button. He had done his normal thorough clean up – reaming, scrubbing, soaking and the result was evident in the pipe when I unpacked it. I took photos of the pipe before I started my work on it. The shape and finish on this pipe is very unique.

Just a word of explanation… I was excited to get started on this one so I did a repair on the tooth marks on the stem. I put a spot of superglue on both sides to fill the damaged areas. Then I recalled I did not take any  before photos. I went back and took the ones that follow! I took some photos of the rim top and stem. The rim top and bowl looked very good. He was able to clean up the thick lava as well as the cake in the bowl. The bowl and rim top look very good at this point. The close up photos of the stem shows that is it very clean. Remember my disclaimer above that I already filled in the deep tooth marks on the stem surface.I removed the stem from the shank and took a photo of the pipe at this point. You can clearly see the condition, size and shape of the pipe.I worked some Before & After Restoration Balm into the surface of the briar with my fingertips. The product works to clean, enliven and protect the briar. I let the balm sit for about ten minutes and then buffed with a cotton cloth to raise the shine. The photos show the bowl at this point in the restoration process. I had taken photos of the stem earlier when I had filled in the deep nicks/tooth marks on the top and underside in my rush to get started. Here are some close up photos to show the repaired areas.   When the repairs had cured I sanded the stem with a folded piece of 220 grit sandpaper to blend them into the surface of the stem and started polishing with 400 grit wet dry sandpaper. I polished the stem with some Denicare Mouthpiece polish – a red gritty paste that feels a lot like Tripoli. It works well to polish out some of the scratches. I find that it does a great job preparing the stem for polishing with micromesh sanding pads.  I polished the stem with micromesh sanding pads – dry sanding with 1500-12000 grit sanding pads. I wiped it down after each sanding pad with a cloth containing some Obsidian Oil. I finished polishing it with Before & After Pipe Stem Polish – both Fine and Extra Fine and buffed it off with a cotton cloth. I wiped the stem down with a coat of Briarville’s No Oxy Oil to protect the rubber and slow down oxidation. Putting this pipe back together was rewarding. The change in condition and appearance was remarkable. I put the stem back on the bowl and buffed the pipe lightly with Blue Diamond on the buffing wheel. I carefully avoided the stamping on the shank during the process. I gave the bowl multiple coats of Conservator’s Wax and the stem multiple coats of carnauba wax on the buffing wheel and followed that by buffing it with a clean buffing pad on the buffer. I hand buffed the pipe with a microfiber cloth to deepen the shine. The finished pipe is quite beautiful and is a uniquely shaped Danish pipe. The finish on the bowl combines various methods and stains to give it a living and tactile nature. It is very well done. Give the finished pipe a look in the photos below. I can only tell you that it is much prettier in person than the photos capture. The dimensions of the pipe are Length: 5 ¼ inches, Height: 2 inches, Outside diameter of the bowl: 1 inch, Chamber diameter: 5/8 of an inch. This interesting Dan Shape-Reformed Stack is a great looking pipe in great condition. Thanks for walking through the restoration with me as I worked over another beautiful pipe. I will be adding it to the rebornpipes store soon. If you want to add it to your collection send me an email or a message! Thanks for your time.


Continuing My Practice on Tenon Replacement… Working on a Connoisseur, NYC Pipe


Blog by Paresh Deshpande

Any learning consists of three phases; first is being taught, second is practice and the third phase is mastering!! Continuing on my learning curve, I wanted to practice replacing broken tenons on pipes to make them smoke worthy again.

The pipe that I chose to practice on is a free hand that boasts of straight / flame grains all around the stummel with bird’s eyes on the heel of the bowl with a plateau rim top. It is stamped on the left of the shank as “CONNOISSEUR” over “N.Y.C.”. These stampings are crisp and easily readable. There is no other stamping seen on either the stummel or the stem. This is the first time that I am working on a Connoisseur and am keen to know more about this pipe brand, carver and also dating this pipe. As is my habit, the first site that I visit is rebornpipes where, over the years, it seems like Steve has chronicled almost all the pipes that were and are in existence. True enough, Steve has restored and researched a pipe from this maker. Here is the link for a detailed information on this pipe; https://rebornpipes.com/2015/05/23/restoring-an-ed-burak-connoisseur-tall-stack/

Further down the write up, he also gives out the dating methodology adopted by Ed Burak and the same is reproduced for immediate reference.

I also learned on Pipephil’s website (http://www.pipephil.eu/logos/en/about-en.html) that the stamping did indeed give some information that helped in identifying the period that a particular pipe was made. There I found that one may generally separate Connoisseur pipes’ date of manufacture into three periods.

From late 1960’s until 1974: no stampings
From 1974 until 1981: CONNOISSEUR over N.Y.C.
From 1981 on: CONNOISSEUR over N.Y.C. and Ed Burak’s signature.

Thus from the above information, it’s evident that this beautiful Connoisseur pipe in my hand is from the period 1974 to 1981!

INITIAL VISUAL INSPECTION
The first and foremost issue that I noticed and was aware of from the description given by the seller is that of the broken tenon. When I saw the pictures of this pipe for the first time, I had observed, apart from the most obvious broken tenon a number of other issues which presented a challenge of their own. The briar was natural and unstained. It had darkened slightly with age. This was how the pipe had reached me…discerning readers will easily make out other major issues that need to be addressed on this pipe. The chamber has a thick uneven layer of dry and hard cake with the inner rim edge showing darkening in 6 o’clock direction (marked in yellow). The condition of the inner walls of the chamber can be checked and ascertained only after the cake has been taken down to the bare briar. However, I do not envision any damage to the chamber walls. There is heavy lava overflow and debris embedded in the plateau of the rim top surface. The condition of the inner rim edge will be commented upon once the lava overflow has been removed. There are very strong and all pervading smells of old tobacco emanating from the chamber. Hopefully this issue should be addressed once the cake has been removed and the mortise is thoroughly cleaned. The stummel boasts of beautiful straight/flame grain all around and extend over the shank surface too!! The surface is covered in lava overflow, dirt and grime. The stummel briar is without a single fill and through all the dirt and grime, exudes a very high quality briar and craftsmanship. The foot of the stummel shows beautiful bird’s eye grains and is sans any damage. The slightly tapered end of the shank has the broken end of the tenon still embedded within. A prominent crack is visible over the shank on the right side. This pipe, in all probability, has suffered this catastrophic damage as a result of having fallen in stem down position. The mortise has the broken tenon stuck inside. I did try to wriggle it out with a screw driver, but the broken tenon wouldn’t budge. This will require more invasive technique. The heavy build up of cake in the chamber, dirty plateau rim top and the sorry condition of the stem all point towards a clogged mortise. This will be ascertained once the broken piece is removed from the shank end.The fancy stem has blobs of sticky oils and tars on both the surfaces as well as in between the nooks and crannies at the tenon end. There are significant tooth indentations on both the upper and lower buttons, to the extent that they would need to be rebuild completely. The slot just does not appear correct. It appears to be a orifice, but it is not a perfect round and  there are horizontal extensions on either side. Even this opening is clogged with old oils and tars. The broken tenon end of the stem is jagged and sharp at the place where the tenon has snapped. In my opinion, there is something which is not right about this stem. The quality of the stem is not something which is to be expected on a Connoisseur pipe. THE PROCESS
I began the process of refurbishing this pipe with cleaning the internals of the stem using pipe cleaners with isopropyl alcohol (99.9% pure) and dunking the stem in to “Before and After Deoxidizer” solution developed by my friend Mark Hoover. The solution helps to draw out heavy oxidation to the surface making its removal a breeze, while the minor oxidation is eliminated to a very great extent. I usually dunk stems of 5-7 pipes that are in-line for restoration and this pipe is marked in pastel blue arrow. I generally allow the stems to soak in this solution overnight for it to work its magic.With the stem soaking in the deoxidizer solution, I decided to remove the broken portion of the tenon from the shank. I select a drill bit that was slightly bigger than the tenon airway opening and mount it on my hand held drill. Very gently holding the drill absolutely straight, I give the drill machine a few forward turns. Once the drill bit is firmly embedded in to the broken tenon, I turn the drill machine in reverse. The reverse turns pull the broken end of the tenon out from the mortise. I breathe a sigh of relief as this is a very delicate step and a lot of things can go wrong if not executed with precision and patience. I further work the stummel, reaming the chamber with my PipNet reamer using head sizes 1 to 3. Using my fabricated knife, I further ream out the cake from places where the PipNet reamer could not reach and follow it with sanding the chamber walls with a 220 grit sand paper. I wipe the chamber with isopropyl alcohol and a cotton swab to remove all the carbon dust. This final cleaning of the chamber reveals a minor indentation in the wall opposite the draught hole, a result of over enthusiastic use of pipe cleaners to clean the mortise (marked in yellow semi- circle)!! Though not a major issue now, one will have to be careful with using pipe cleaners in future. Next, I clean the mortise with hard bristled and regular pipe cleaners dipped in isopropyl alcohol. I scrub the external surface of the bowl with undiluted Murphy’s oil soap and hard bristled tooth brush and dry it using paper towels and soft cotton cloth. I carefully clean the plateau rim top with a soft brass wire brush to remove the accumulated dirt and debris from the surface. Thereafter, I clean the mortise, plateau rim top and stummel surface with anti-oil dish washing soap on a shank brush and a tooth brush. The entire stummel, including the plateau rim top, cleans up nicely. I set the stummel aside to dry out naturally. The smells from the pipe, though reduced, are still very strong. Close observation of the stummel reveals the culprit to be the now moistened accumulated gunk in the mortise. Using my dental tools, I assiduously pick out and clean the mortise of all the gunk. I also clean the mortise with q-tips and alcohol. The amount of old grime that is scraped out from the mortise itself tells the story. The mortise is now clean and smells fresh.Moving ahead, I now address the crack that is seen on the right side of the shank, extending from the shank end to nearly half distance towards the stummel. Firstly, I clean off all the debris that is lodged in the crack using dental floss. The thin floss cleans the crack of all the dirt without widening it.I follow up this cleaning of the crack by marking the end points and turning points of the crack with a sharp dental pick. These marks help to guide the drill bit when drilling the counter hole. I take care that the drill is just sufficiently deep enough to arrest the further spread of the crack and not a through hole.I fill this crack with a mix of CA superglue and briar dust. To ensure a tight fill I clamp it down with pliers till the mix had cured, which by the way, is instantaneous!! Once the repair has cured for couple of hours, I sand it down with a flat needle file to achieve a rough match with the rest of the stummel surface. I fine tune the match with  220, 400 and 600 grit sand paper.To further stabilize the crack and prevent it from splitting again, I decide to place a band over the shank end. I select a band that is a tad bit smaller than the shank end diameter. When I place this band over the shank end, I realize that the last two letters of the stamping are being masked. I decide on grinding away the excess material from the band with my sanding drum mounted on a hand held rotary tool to a size which while being appropriate to stabilize the crack will not mask the stampings. The process is long and fraught with mistakes… The band has flown out of my hands a few times, since it can not withstand the stress of the sanding drum and is deformed , not to mention the time factor involved. However, through all these difficulties, I have prevailed to shape a band for the shank end. This is the pictorial depiction of the process and the result. Once I am satisfied with the fit, I heat the band with a heat gun in order to expand it and fix it over the shank end. I have avoided gluing it securely in place just in case I may have to revisit the entire process and go for a fresh band. Here is how the band fits over the shank end. Truth be told, I am not very confident that the band would be a success given the fitting of the band over the shank end. I set the stummel aside and decide to replace the tenon on the stem. I have explained in great detail the procedure that I have learnt and followed while replacing the tenon on a Preben Holm # 7 FH pipe. To avoid repetition of the process, I would request all to refer to the write up and other literature on the subject that is available on rebornpipes.

Given below are a series of sequential pictures explaining the procedure. Here I would also like to note that as I had mentioned earlier, the quality of the stem appeared circumspect and this was corroborated while drilling the stem air way to accommodate the new tenon. The plastic or some such low quality of the stem did pose a lot of resistance during the drilling and a straight drill was very difficult. However, my persistence has paid off and I am happy with the replaced tenon. Once the tenon is replaced, I try the fit of the stem in to the mortise. The fit though snug, reveals gaps and the seating of the stem in to the mortise is not flush. No amount of tweaking and minor adjustment by sanding of the tenon can ensure a flush seating. I feel that I have botched up the banding of the shank end and that is what has caused this issue. Here is how the seating appears after all the adjustments and tweaking. At this point in restoration, I shared pictures of this issue and then later in the day had a FaceTime chat with my Guru, Steve. Steve, with his vast experience and having worked on and researched a Connoisseur pipe before, immediately commented that the stem is not the right style for Connoisseur pipes and could be a replacement stem. I have another Connoisseur pipe (which awaits restoration) with a saddle stem in my collection and when the stem of this freehand was compared, it was no where near the quality that was seen on the other saddle stem. The pictures below show the difference in quality of the stem material and finish between the two pipes. Thereafter we discussed the shank band and he suggested to reband the shank end while going in for a completely new stem. Thereafter, we went through my can of spare stems and selected one that would be the best match for this pipe. Here are the pictures of the shortlisted stem. The slightly bent stem with all the calcification is the one that would replace the one that the pipe came with. The shortlisted stem, I am afraid, is not in the best of condition. The tapered slightly bent vulcanite stem is nearly the same length as the replaced one while being very thick at the tenon end. The quality of the re-replacement stem is very good. The stem is heavily oxidized with significant calcium deposition and deep tooth indentations in the bite zone on either surfaces of the stem. A couple of deep chips are seen along the seam on either sides as well as on the lower and upper surfaces of the stem. The button surfaces on either side has bite marks and the edges are equally damaged and deformed. The tenon and the horizontal slot shows heavy accumulation of oils, tars and gunk. All in all, the refurbishing and shaping of this stem presents a ton of effort and time.I begin the refurbishing and reshaping of the stem by first cleaning the stem, both internally and externally. With my fabricated knife and a paper cutter, I remove the entire calcium sediments from the bite zone. Using a dental tool, I dislodge all the dried oils and tars from the tenon and slot end. I clean the stem internals with pipe cleaners and shank brush dipped in isopropyl alcohol. I sand the entire stem surface with a folded piece of 150 grit sand paper to remove some oxidation as well as to even out some tooth chatter from the bite zone. Once the initial cleaning is done, I move ahead for shaping/sizing the stem. The tenon is too thick for the mortise and that is my start point. I mount a sanding drum on to my hand held rotary tool and sand the tenon till I achieve a rough fit in to the mortise. During the entire process, I frequently check the progress being made as I do not want to sand too much material from the tenon, making for a loose fit.I fine tune the fit of the tenon in to the mortise by hand sanding with flat head needle file and 180 grit followed by a 220 grit sand paper. The tenon attachment with the stem is shaped with a triangular needle file. I check the seating of the stem in to the mortise after I remove the shank band. The stem fit is nice and snug. Before I move to the final fit and shaping of the stem, I decide to reband the shank end. This time I select a band that was a snug fit as against a size smaller as I have done earlier. To reduce the thickness of the band, this time I manually sand it over a 150 grit sand paper instead of using my rotary tool and a sanding drum. It does take a long time, but the end result is much better. The last letter “R” has been masked, but I shall deal with it later (will I…?). I still have not glued the band in place, just to be on the safer side!!Now with the band in place, I move ahead with shaping and aligning the stem. The first thing that I proceed to do is to shave of the excess meat from the shoulders at the tenon end. Readers, when I say excess, please be aware that the word excess does not convey the quantum of excess… It  was hell of a lot of material to shave off!! I mount a 150 grit sanding drum on to the rotary tool and go to town sanding off the material from the shoulders of the stem. Once I have achieved a rough match, I use a flat head needle file to further match the fit. I progress to manual sanding with a 180 grit sand paper to fine tune the match. This is how the stem profile matches with the shank end of the stummel…not quite there but getting close. I feel that the mid region of the stem needs to be trimmed a bit and do so with a flat head needle file and a 180 grit sand paper. Here is where I have reached at this stage. Truth be told, eye balling the shape is not the easiest way to achieve the exact shape since I am always seeing it, shaping it and matching it. It’s something akin to optical illusion that I am experiencing. There is a bit of overhang at the shoulders of the stem and I need to shave off some more material from the area above it. Also a slight gap is seen at the lower end and on the left side of the stem that needs to be addressed. I decide to take a break from all the sanding of the stem and move on to shaping the stem to match the profile of the stummel. I insert a pipe cleaner through the stem’s air way to prevent it from collapsing once the stem is heated. I first straightened the stem by heating it with a heat gun. To impart the requisite bend, I try to adopt the technique that my friend, Dal Stanton of PipeSteward fame, uses and that is to draw a diagram marked with the plane of the stummel rim top, a parallel plane that is required, the present profile of the stem and thereafter, the exact place and shape of the bend that is needed. Well, it is an attempt that I made, but ended up eye balling the exact bend to be imparted. I heat the stem with my heat gun till the vulcanite becomes pliable and gives it the necessary bend. I hold it in place till the stem had cooled down a bit and thereafter, hold the stem under cold water for the bend to set. The next issue that is addressed is of the stem repairs. I insert a triangle shaped index card covered in transparent tape in to the slot. The tape prevents the mix of superglue and charcoal from sticking to the index card. I mix superglue and activated charcoal powder and generously apply it over the bite zone, including over the button. I also fill the couple of deep chips along the seam on either sides as well as on the lower and upper surfaces of the stem with the charcoal mix and set it aside to cure. Once the mix has cured, I remove the index card from the slot. While the stem fill is set aside to cure, I polish the stummel with micromesh pads, wet sanding with 1500 to 12000 pads. This time around, I do not repeat the mistake of polishing the plateau rim top as I had done with the PH # 3 earlier! I wipe the surface with a soft cloth at the end of the micromesh cycle. The stummel looks amazing with a deep shine and beautiful straight grains popping over the stummel surface. I rub a small quantity of “Before and After Restoration Balm” in to the briar. I rub this balm deep in to the nooks and crannies of the plateau rim top surface with my fingers and let it rest for a few minutes. The balm almost immediately works its magic and the briar now has a nice vibrant appearance with the dark brown hues of the grain contrasting with the rest of the stummel surface. I further buff it with a horse hair shoe brush. The appearance of the stummel at this stage motivates me further to complete this project at the earliest. I set the stummel aside and all that remains was to shape, align and polish the stem! Now motivated with the appearance of the stummel, I turn my attention to the stem repair. The fills have cured nicely and I move ahead and began the process of filing and shaping the button end with a flat head needle file. At this stage, I get in touch with Steve on Face Time and discuss the progress on the stem. He suggests that a slightly sharper bend to the stem from near the bite zone would accentuate the shape and flow of the shank with that of the stem. He also suggests that the profile of the stem near the shoulder and mid region needs to be more slender. So, it is back to heating the end of the stem with the heat gun and giving it the desired bend, of course, eyeballing it to the desired shape!As discussed with Steve, with a flat needle file, I shave off some more vulcanite from the shoulder and the mid region of the stem. I further sand the stem with 220, 320, 400, 600, 800 grit sand papers and finally with 0000 grade steel wool. I wipe the stem with a cotton pad dipped in alcohol to remove the resultant dust and rub some extra virgin olive oil onto the stem and set it aside to be absorbed.I polish the stem with micromesh pads, wet sanding with 1500 to 12000 grit pads. I rub a little extra virgin olive oil in to the stem at the end of the micromesh pads polishing cycle. I complete the polishing regime of the stem by rubbing a small quantity of Extra Fine Stem polish developed by my friend Mark Hoover, and giving it a final polish with a soft cotton cloth. The stem is now nice, smooth and shiny.To apply the finishing touches, I first mount a cotton cloth buffing wheel on to my hand held rotary tool and apply a coat of Blue Diamond to the stummel and the stem to polish out the minor scratches. Boy, am I glad to finally have reached the home run stretch to complete this project!! I shared these images with Steve for his comment. He suggested that the shoulder overhang needs to be reduced and under belly to be straightened out more.Well, here I was back with a flat needle file and 220 grit sand papers as against carnauba wax and rotary tool!! I again diligently worked on these issues, frequently checking for progress being made. Once I am satisfied that the shoulder overhangs and under belly issues have been resolved, I check the seating of the stem in to the mortise. The seating is canted backwards. I address this issue by heating the tenon and slightly pushing it upwards (that is, in the opposite direction). I check the seating and am quite pleased by the overall appearance of the stem and its seating. Thereafter, I go through the entire regime of sanding and polishing as explained above. At the end of the micromesh pads, I complete the polishing regime of the stem by rubbing a small quantity of Extra Fine Stem polish developed by my friend Mark Hoover, and giving it a final polish with a soft cotton cloth. The stem is now nice, smooth and shiny. With a cotton buffing wheel that I use for carnauba wax, I apply a coat of carnauba wax to the stummel and stem and continue to work on it till the complete coat of wax is polished out. I mount a clean cotton cloth buffing wheel and give the entire pipe a once over buff. I finish the restoration by giving the entire pipe a rigorous hand buffing using a microfiber cloth to deepen the shine further. The finished pipe is shown below. P.S. – This project was more tedious than I had anticipated, mostly because of my own faults and errors in judgement.  But then, isn’t this the fun part of being of the learning curve? I shall be avoiding the following in my future restorations:

(a) Using a band that is a tad smaller then the shank end diameter. I would rather use a band that has a snug and perfect fit over the shank end.

(b) Using a rotary tool with a sanding drum to get the band to the desired size. It’s better, safer and precise to manually sand the band on a sand paper.

(c) Clamping the shank end after filling a crack. I am not sure, but I think that the clamping down may have caused a slight deformation that had caused me such grief with the seating of the stem.

(d) Less reliance on “eye balling” for sizing and shaping…need to get on with hunting for a “PIMO TENON TURNING TOOL” and a set of “VERNIER CALIPERS”.

I am really fortunate to be in the process of learning the nuances of pipe restoration and cannot thank Steve enough for his support and guidance.

Thanks for your patience and looking forward to input about the write up. Cheers…

A Gift for My Good Friend in India – An Italian Savinelli Punto Oro 413KS Woodstock


Blog by Dal Stanton

As I begin this restoration, my mind is replaying the plethora of experiences that were shaped and riveted into my memory of my visit last year to India.  Not many ‘good’ experiences in life can be described as ‘life changing’.  These kinds of changes are usually reserved for the difficult times – like now, as the world is navigating a pandemic that creates confusion and uncertainty about life and the future.  Yet, Paresh’s invitation to me, along with the rebornpipes’ trust, Steve and Jeff Laug, to visit his home and family was an experience that was life changing for me.  It wasn’t just the sights and sounds of a different cultural context or the different foods the pallet experienced tasting Indian cuisine.  What was so profoundly and wonderfully life changing was the depth of loving hospitality Paresh and his wife, Abha, provided to us during the visit.  Meeting and enjoying his family, along with their two daughters, Mudra and Pavni, was truly an experience that will walk with me in the life I continue to enjoy by God’s grace.  Of course, I cannot fail to mention the ‘reason’ for our travels where West met East!  Paresh asked that we collaborate in the restoration of one of his heirloom pipes, an unbelievably fun and enriching experience that produced this story, perhaps my favorite:  West Meets East in India to Restore a Grandson’s Treasure – an 1846 BBBHow does an Italian Savinelli Punto Oro heading to India enter this story?  It has to do with an Italian American L. J. Peretti pipe that I noticed in India – basking nonchalantly among the historic pipes of Paresh’s unbelievable heirloom collection he received from his grandfather.  The Peretti that got my attention was not from his grandfather’s collection, but a pipe that Paresh had acquired himself.  Since doing my first restoration of a L. J. Peretti, I have become somewhat of a collector of these blue collar ‘shop pipes’ from the second oldest tobacconist shop located in downtown Boston.  I had never seen a Peretti Cutty shape before and hence, the Savinelli Punto Oro makes his debut on the stage.One of the great things about ‘Pipedom’s’ smaller subset, pipe restorers, is that it is special and an honor to have pipes in your personal collection that have come from other restorers who you’ve learned from and appreciated.  I have pipes in my rotation from Steve, who introduced me to the world of pipe restoration and is a good friend who has visited me here in Sofia and I’ve had the privilege of visiting his home terrain, Vancouver.  When I enjoy fellowship with one of his pipes with my favorite blend stoked in the bowl, the relationship is always the focus of the reflection during those paused moments.  I managed to secure one very special pipe for my collection from Charles Lemon of Dad’sPipes, who I’ve also learned much from in his restorations and appreciated that his health has allowed him to come back from hiatus.

When Paresh became aware of my attraction to his L. J. Peretti Cutty, the accord we ratified between us was to do a reciprocal gifting from our personal collections.  Paresh gifted me his Peretti Cutty which I brought home to Bulgaria from India.  After getting back to Bulgaria, I chose a pipe from my personal collection for him.  The special pipe I chose for Paresh was a Savinelli Punto Oro that was in my personal restoration queue – for a LONG time.  The problem of restoring pipes primarily for others is that sometimes it’s difficult to work on your own trove of treasures!  When I saw the Punto Oro on German eBay located in Bühl, I was drawn by the elegant lines of this Savinelli offering. The shape is unique with the Dublin-esque bowl, but not quite.  In my initially assessment of the pipe, I was calling it an oval shank, slightly Bent Billiard – but not quite. The shank was not actually a true oval but a compressed oval – an American football or rugby ball shape.  The unique shape created a lined definition running down the sides of the shank transitioning into and through the stem – flow and balance!  With so much attention on focused the shape, the fact of the striking fire grain showcased throughout the pipe – was reminiscent for me of a tiger’s fur, flowing even through the shank composition.  This only added frosting on this Savinelli Punto Oro cake!  Very nice! Unfortunately, it has taken me a few years to get to this beautiful pipe, but it was waiting.  It was patiently waiting in the ‘Help Me!’ basket and when it came to mind as a comparable reciprocal gift for Paresh, his debut on the worktable became a reality.  Here are more pictures of a very nice Savinelli Punto Oro yet having some daunting issues. The nomenclature is on the upper shank and it reads, SAVINELLI [over] PUNTO ORO, (Gold Point).  ‘Gold Point’ may also be referencing the single gold point brass dot embedded on the upper stem panel.The lower panel section is stamped with the encased ‘S’ in Savinelli’s well known and recognized symbol.  The Savinelli symbol is to the left of the shape number, 413KS [over] the COM, ITALY.  The shape is found in the Savinelli shapes chart found in the Pipedia article on Savinelli,  but the chart offers no names for the shapes, only numbers.  This 413 is designated as a ‘King Size’ by the KS.   Whatever the shape is, I like it!Not satisfied with my lack of definition on what to call this shape, I sent a note off to Steve asking for his opinion – Calabash, Dublin, fancy Billiard?  Steve’s response settled the question directing me to Savinelli’s website – my first thought, why didn’t I think of that?  In the Savinelli line up of shapes or models, the 413KS is described as a Woodstock (pictured below).  Nice!  Bill Burney’s description of the Woodstock in his Pipedia shapes discussion is helpful and includes all the variations I was contemplating!

Zulu/Woodstock – The Zulu shape combines the canted bowl of the Dublin with an 1/8 bent stem.  The shape is sometimes referred to as a Woodstock, Yacht or Yachtsman.  The gentle bend makes the pipe more comfortable to hold in the teeth than a straight pipe.  This popular style is made by most pipemakers and is widely available on the estate market.My first restoration with the Italian name of Savinelli stamped on the pipe was a Tortuga, which was a very sharp looking pipe.  During that initial exposure to the name Savinelli, I learned that before and after WW II, when Italian pipe production was known more for volume than for quality, and not considered by many in the same league with other European pipe makers, Achille Savinelli Jr.’s ambition took shape to make Savinelli one of the premier names in pipe making today.  This clip from the Pipedia Savinelli article summarizes this well:

Savinelli Pipes began production in 1948 and, although the pipes were of a superior quality and unique in their aesthetic, the brand wasn’t an immediate success. Few new brands are. It takes time for the public to catch on. Retailers were skeptical of placing Italian pipes alongside their best sellers from England or France, and customers, in turn, were hesitant to purchase a Savinelli over pipes by already established, foreign brands. Achille Jr. stood by his product, however; he knew it was only a matter of time before the world realized that these pipes were of a far superior quality, capable of competing with even the most well-established pipe manufacturers in the world. As it turns out, he was right. In less than a year, Savinelli pipes gained prestige in markets all across the world—heralded for their delicate balance of innovation and tradition, of form and function. Savinelli pipes were placed alongside the likes of Dunhill and Comoy’s in tobacconists from the United States to Europe, and, in time, this exposure modified Italy’s reputation; it was not only the premier exporter of briar, but now a premium source of fine briar pipes.

The Punto Oro line is considered a top shelf Savinelli offering.  When I first acquired this pipe, wishing to know more especially about the Punto Oro line, I emailed rebornpipes contributor, Al Jones, for his input.  His response was helpful.

Dal:

I’m sorry to say that I have very little expertise in the Savinelli world, save the Guibileo d’Oro or Autograph lines (and only cursory in those).

Here’s an interesting thread about that line on the Pipesmagazine.com forums (I’m a moderator there) http://pipesmagazine.com/forums/topic/opinions-sought-savinelli-punto-oro.  Older ones, like yours appears to be, were a pretty high grade, from what I can gather. 

If your stem is vulcanite and non-filter, it should have been made before 1981 (looks that way to me).   In ’81, they switched to filter pipes.

I’ll look forward to your restoration!

Al

The thread from PipesMagazine.com Forum was helpful.  The general impression from the thread was that the older Punto Oro pipes were on the upper shelves of Savinelli offerings, just under the Guibileo D’Oro and older Autographs.  The Punto Oro catalog ad on Pipedia describes the quality of this Savinelli line and the processes involved in the producing the quality finish.  I found interesting that the ad describes the two finishes available with the Punto Oro line – “Rich Mahogany and genuine Sandblast”.  With the smooth surfaces, the hue is mahogany – the pipe on my table fits this described hue with flare!

I like this pipe – a Woodstock (!) a lot and I think it will be a good addition Paresh’s collection although a lesser, humbler cousin in that collection to be sure!  Looking at the state of the Punto Oro’s condition, the briar landscape is beautiful – no issues that I can see.  The chamber has very light cake – the appropriate dime-width that is recommended.  I’ll remove it for the briar to have a fresh start and to inspect the chamber condition.  The rim reveals the lighting practices of the former steward – over the aft rim surface where it’s darkened and caked with crusted lava flow.  The picture below looks at the chamber and rim.The major issues with the restoration of this Punto Oro are with the stem.  The upper bit has tooth compressions on the bit and button.The lower bit is where all the fun is hiding!  The lower button has broken off and the break migrates down the stem – it will be no small button rebuild to address this moon crater!  There is also tooth chatter evident on the lower bit.  To restore the usefulness of this original Savinelli ‘Gold Point’ stem, which to me is critical, requires a button rebuild.  Rebuilds are never as strong as the original stem, of course, but I’m hopeful of building in some strength as I do this rebuild. I begin the restoration of this gift for Paresh by cleaning the Savinelli stem airway with a pipe cleaner wetted in isopropyl 95%.  It takes one cleaner to do the job.The oxidation on the stem is deep.  I use grade 000 steel wool with CIT, a product like SoftScrub, to work on the oxidation before putting it into the soak of Before & After Deoxidizer.  I like this product but when the oxidation is deep I’ve found that the soak alone is not sufficient to remove the oxidation.  The steel wool gives a head start for the Deoxidizer to break up the oxidation.The stem is then added to the soak of Before & After Deoxidizer along with several other pipes in the queue and their stems.  I let the stem soak for a few hours.When I fish out the stem after a few hours, I let the Deoxidizer fluid drain off the stem and I also squeegee the stem with my fingers.  Using a pipe cleaner wetted with isoproypl 95%, the airway is cleaned of the Deoxidizer.  I also wipe off raised oxidation from the stem with a cotton pad wetted with alcohol.  To help to rejuvenate the vulcanite stem, I also apply paraffin oil and set the stem aside to soak in the oil.Turning now to the stummel, I use the Pipnet Reaming Kit to begin the removal of carbon cake from the chamber.  After taking a picture showing the starting point, I use 3 of the 4 blade heads available in the kit. The chamber narrows at the bottom, consistent with a conical shape of the Woodstock crafted stummel.  I use the Kleen Reem Tool that more easily reaches to the floor of the tapered chamber.  The Savinelli Fitsall tool continues the scraping and finally the chamber is sanded with 240 grade paper wrapped around a Sharpie Pen.  After wiping the chamber with a cotton pad wetted with alcohol to clear the carbon dust, an inspection reveals heat veins in the chamber briar.  These are fissures that form from overheating the stummel.  The veins are not substantial enough to repair, but I will complete the restoration by applying a coating of yogurt and activated charcoal mixture to the chamber that will protect the chamber wall and encourage the formation of a protective cake. Switching now to the external briar surface, undiluted Murphy’s Oil soap is used with a cotton pad to scrub the stummel.  The thick, crusted area on the aft of the rim is stubborn.  With the solvent working, I also carefully scrape with my thumb nail, with the edge of my Winchester pocketknife, and with a brass wired brush.  After working on the scrubbing of the external briar surface, I then transfer the stummel to the kitchen sink and using warm water, I scrub the internal mortise and airway with shank brushes and anti-oil liquid dish soap.  After a thorough rinsing, I take a picture back on the worktable.  The stummel cleaned nicely, but the darkened area remains on the stummel’s rim.  I’ll continue to work on that with minor sanding later.I turn now to focus on the internal cleaning.  With only one cotton bud and one pipe cleaner wetted with isopropyl 95%, the fact of the internal cleaned condition is established.  Nice!With the stummel cleaning completed, I turn now to the stem.  The daunting aspect of the restoration is the button rebuild.  Before starting on this, I first focus on the tooth chatter and compressions on upper and lower bit.  I go in this order because the approach in rebuilding the button introduces the CA glue and activated charcoal patch which has a different composition from the vulcanite stem. Since I’m beginning with the heating method to erase as much as possible the chatter and compressions, this involves the heating and expanding of the vulcanite.  This is better done before the patch is applied in the button rebuild.  Using a Bic lighter, I paint the upper and lower bit to heat the vulcanite and through heating the rubber compound expands to reclaim its original disposition – or closer to it.  After going through the painting procedure and comparing the before and after pictures, the heating method did not help a great deal with the composition of this vulcanite stem. It helped some, but not a great deal it seems to me.With pictures showing the starting point for the upper and lower bit, it’s interesting to me to see where the tooth chatter is on the lower bit.  It extends about a quarter of the way down the stem!  I think what this indicates is that a frustrated steward, after he crunched the button, refused to put one of his favorite pipes aside!  Just like in American baseball, he ‘choked up’ on the stem, to keep using his pipe even though the button had endured catastrophic failure.  Now I turn my attention to the button rebuilding procedure.  First, I fashion a cone that inserts into the airway having a pipe cleaner running through the cone into the airway.  The cone is covered with scotch tape and then petroleum jelly is put on the tape.  This helps the cone not to get stuck after the patch material is applied. The patch material is a mixture of activated charcoal that is in capsule form and CA glue.After placing the charcoal in a small pile from the capsule, the glue is placed in a small puddle next to it.  The toothpick is used to mix the charcoal and glue by gradually pulling charcoal into the CA glue while mixing.  As the charcoal is mixed in, the patch material thickens.  After it reaches the consistency like molasses, I apply the charcoal putty to the button using the toothpick as a trowel. I intentionally use a mixture that is a bit thinner at the beginning so that is will seep down around the cone filling in the open spaces.  This is important to create as much strength as possible in the rebuild.  I apply more than is needed to build a mound that will later be filed and sanded to shape the new button. After enough patch material has been applied, I put the stem aside overnight allowing the button build to cure.  The lights go out!Well, the next morning held some surprises!  When I examine the button rebuild, looking forward to starting the process of filing and shaping, I discover that the new CA glue that I used did not cure to a solid state!  The patch was reminiscent of a bite guard – pliable rubber.  With some tugging and peeling, the repair came off in two pieces….  Interestingly, nowhere that I can find on the labeling that this glue does not harden, unless the “Extra Durable and Versatile” on the front label implies this?The good news is that the cone was removed without trouble and is ready to go again for button rebuild patch attempt number two!  I’ll spare the reader of all the pictures to record this second process but will jump forward.  What I did do differently after examining the large area of the patch, was to better engineer and strengthen the resulting rebuild.  I carefully applied rounded and flat needle files to the edge of the break.  I filed to taper downwardly the edge toward the break. My thinking is that this small innovation perhaps will strengthen the patch by providing more of a shelf or footing upon which the patch material can rest.  It seems that this engineering would inherently provide better buttressing than a straight vertical edge drop.  I’m thinking also that this will help in the sanding and blending of the patch. The sketching below illustrates my thinking.  I also file and clean out the entire button cavity and clean it with a cotton pad wetted with isopropyl 95% in preparation for the new patch.  Before starting on the button patch, I decide to do a quick fill of the upper bit and button lip where there were compressions.  I use medium-thick black CA glue to do the filling.  To quicken the curing and to hold the patch in place I use an accelerator.The next pictures show the second finished button rebuild patch with the engineering changes beginning the curing process.After the second button rebuild patch is cured, using the flat needle file, the patch on the upper bit and button lip are filed down flush with the vulcanite stem surface.Switching to the underside, filing and shaping begin on the button rebuild.  I start with the slot facing to flatten it by removing the excess patch material.  Then, cutting the line shaping the button lip is next.Filing continues with the main bit patch and button shaping.  I’m careful to allow a rounded patch and not filing straight across horizontally.  This would weaken the patch – thinking of the difference between an arched bridge’s symmetry rather than that of a flat bridge’s.  Maintaining the patch thickness is critical to its strength.With the filing phase completed I transition to using 240 grade paper starting first on the upper bit and button lip fills.The 240 grade sanding fine tunes the button rebuild further. I’m careful not to sand too much on the patch and continue to round it to maintain thickness.  A slightly thicker lower button lip purchases some strength as well. I focus on sanding the seams of the patch so that they are flush with the vulcanite surface.  The patch is still rough but making progress!I use the flat needle file to shape and smooth the slot as well.  It’s almost a given that air pockets will emerge as the sanding continues to shape the button.A careful examination of this cross-section view of the slot facing shows the added buttressing effect of the earlier tapered filing.  Arrows help to show this.With the 240 grade sanding paper still in play, I sand the entire stem to remove any residual oxidation.  Deep oxidation always seems to appear during the fine sanding and polishing phases.  Sanding the stem with 240 now will hopefully address this as well as the remnants of tooth chatter remaining on the bit.  I use a plastic disk that I fabricated to be able to sand the stem facing without shouldering the edges.Next, I sand the entire stem by wet sanding with 600 grade paper and following this, 000 grade steel wool is applied.The upper bit and button repairs are looking great – the sanding is erasing the contours of the patch and blending nicely.Work on the lower stem side is a bit more of a challenge with the huge button rebuild patch material.  The stem is looking great, but the challenge is to blend the large patch area.Air pockets are the most common side effects of patching.  Air bubbles are trapped in the CA glue and activated charcoal as it is mixed and these air bubbles become visible as sanding dissects and reveal the pockets.The many microscopic air pockets are not easy to remove.  I use a clear acrylic nail polish to try to fill and erase the pockets.  CA glue can be used to do the same. I use the brush provided by the nail polish and I paint over the pockets almost covering the entire patch.  I let it dry and repeat the process for a second coating.After the acrylic polish cures, I apply 000 steel wool to the patch and the picture below shows the results.  The nail polish does an amazing job but there remain some pockets.  These are very small and I’m doubtful that more coating will erase them.  I’m satisfied now with leaving them and moving on!  They remain as a testament to the catastrophic button failure and this noble attempt to recommission this beautiful Savinelli Punto Oro Woodstock!  Moving on!I move on to applying the full regimen of micromesh pads to the Woodstock stem.  I begin with wet sanding using pads 1500 to 2400 and follow by dry sanding with pads 3200 to 4000 and 6000 to 12000.  Between each set of 3 pads, Obsidian Oil is applied to condition the stem and to protect it from oxidizing.  The stem is looking great. With the stem sanding completed, looking now to the stummel, I focus first in cleaning up the rim.  There remains darkened briar from the lava flow earlier cleaned on the aft quadrant of the rim.  The inner rim edge is also darkened at places with the normal nicks from wear and tear.  The outer edge of the rim is also with some normal nicks and dents – all very small. To clean the rim, I first start by using 240 sanding paper and doing a very light inner and outer rim bevel – just enough to clean the edge of the rim.  After this, I also use the 240 paper to lightly ‘feather sand’ the aft part of the rim to clean the darkened surface.  I run the sandpaper lightly around the full rim plane surface to clean the briar, not to remove it.I follow the same procedure with the rim edges and the rim plane with 600 grade sanding paper.  The rim is shaping up very nicely.Next, I use micromesh pads to do fine sanding on the Savinelli Gold Point stummel.  I begin by wet sanding with pads 1500 to 2400 and then dry sanding with pads 3200 to 4000 and 6000 to 120000.  The fine sanding brings out the grain and restores the mahogany finish for which the Punto Oro line is known.  Very nice indeed! To deepen the natural hues of the briar, Mark Hoover’s Before & After Restoration Balm (www.ibepen.com) does a great job.  I put some of the Balm on my finger and work it into the briar surface.  The Balm begins with a cream consistency and then thickens into a waxy consistency as it is worked into the stummel.  After working the Balm thoroughly into the surface, I put the stummel aside for about 20 to 30 minutes as the Balm is absorbed into the briar.  The picture below was during this period.  Afterwards, I wipe off the Balm with a cloth dedicated to this, and then the stummel is buffed up using a microfiber cloth.  The stem also is a beneficiary of Before & After Fine Polish and Extra Fine Polish.  The polish helps further to condition the vulcanite and to rid the stem of oxidation.  Starting with the B&A Fine Polish, I work the black oily liquid into the stem – the liquid has a gritty texture.  Afterwards, I let the stem absorb the polish for 15 minutes and then wipe the excess off with a paper towel.  I follow by applying the Extra Fine Polish in the same manner.  Again after 15 or so minutes, the excess is wiped off and the stem is buffed with a microfiber cloth.Now, the homestretch.  After reuniting stem and stummel and mounting a cloth buffing wheel to the Dremel setting it at about 40% full power, Blue Diamond compound, a fine abrasive, is applied to the pipe.  After this, the pipe is wiped down with a felt cloth to clean it of compound dust before application of the wax.  Next, after mounting another cotton cloth buffing wheel onto the Dremel at the same speed, carnauba wax is applied to the pipe.  Following the wax application, the pipe is given a vigorous hand buffing to further raise the shine.

After the buffing, one project came to mind that I had almost forgotten.  Earlier, after inspecting the chamber and finding some heating veins, I had decided to apply a coating of natural yogurt and activated charcoal powder mixture to the chamber wall.  This mixture, after applied to the chamber, hardens into a protective layer to help protect the briar as well as encourage the formation of a protective cake.  I mix some charcoal powder with a small amount of natural yogurt.After the yogurt and charcoal are mixed and is somewhat thickened – not running but with the consistency of mud, and after inserting a pipe cleaner to keep the draft hole cleared, I use the pipe nail and spread the ‘mud’ over the chamber wall.  After it is covered, since it is late, I put the pipe aside to allow the mud to dry through the night and the lights go out!The next morning, after applying the pipe mud mixture to the chamber, I give the pipe one more rigorous hand buffing to raise the shine and my gift to Paresh is complete.

The button rebuild was, without doubt, the most technically demanding part of the restoration of this striking Savinelli Punto Oro Woodstock.  The grain is beautiful, and I am especially drawn to the Woodstock shape with the lines guiding the eyes down the sides of the pipe, taking in the movement of grain and shape.  I’m thankful for my L. J. Peretti Cutty that I received from Paresh when I was in India.  I have yet to put the Cutty into service here in Bulgaria – it has been waiting for my gift to Paresh to make it to India.  It still needs to be refreshed and a little polishing work, and my plan and hope is that Paresh and I will share our first bowls together with our gifted pipes to each other, perhaps not in person, but via video conferencing, today’s miracle bringing people together throughout our ever shrinking world.  After the pandemic issues are behind us, I’ll be mailing the Savinelli Punto Oro Woodstock to India.  Thank you for the Peretti Cutty, my friend!

A Beautiful Lattice Meerschaum Lay Underneath the Thick Cake and Lava


Blog by Steve Laug

Jeff picked up this Calabash Lattice Meerschaum with an acrylic stem from somewhere on his travels. It came in a black vinyl covered case lined with Satin in the cover and white fur in the lower portion of the case. The case appeared to have had a sticker on the cover that was long gone. There were no identifying marks in the case or on the pipe itself. It has a brass clasp on the front and brass hinges on the back. It was obviously custom made for this pipe.Jeff opened the case and this was the meerschaum pipe that was inside. It was a nice looking lattice carved calabash bowl that had begun to take on some nice colour. The base and shank were almost amber coloured. The exterior of the bowl was very dirty and had tars and oils ground into the finish. Looking at the top of the bowl you can see how much lava had overflowed onto the rim top. It had filled in most of the fine carvings in the top of the rim around the inner edges of the bowl. I am sure once it was out of the case it would become clear how dirty it really was.Jeff took it out of the case to have a better look at the condition of the pipe. It was a beautifully shaped calabash with lots of promise. It looked like it would cleanup really well and look great when finished. The meerschaum was developing some really nice colour around the lower part of the bowl and shank. Jeff took a close-up photo of the bowl and rim top. There was a very thick cake in the bowl that was hard and uneven.  There was thick overflowing lava coming up from the cake over the rim top and filling in the tiny spot and carving on the rim.Jeff took photos of the sides and heel of the bowl to show the carving and colour around the bowl. Jeff took the stem off the shank and took a photo. It appears to be a threaded tenon that screwed into the shank. The first sign of another possibility for me was the thin lip around the end of the tenon. I would know more about that once I had it in hand. The shank end and the tenon were filthy with oils and tars. The internals of the pipe were in as bad a condition as the inside of the bowl and airway.Jeff took photos of the stem to show the general condition of the stem shape. The curve is graceful and the curve great. The photo shows the profile of the stem. He took photos of the top and underside of the stem to show the damage and bite marks on both sides near the button and on the surface of the button itself. It almost looked like it had been wrapped in tape. Having seen the before pictures on this pipe I did not know what to expect when I unpacked the most recent box Jeff sent to me. The pipe was present in the box and I took it out of the box with a bit of fear and trepidation at the amount of work that would await me when I removed it from the case. I put the case on my desk and opened it to see what was there. I opened the case and took a photo of the pipe inside.I was astonished to see how clean the pipe was. The bowl nicely coloured – Jeff had lost none of the patina in clean-up process. Now it was time to take it out of the case and have a look at it up close and personal.Jeff had done an incredible job in cleaning up this meerschaum. He had carefully reamed the bowl with a Savinelli Fitsall Pipe Knife, scraping away the thick cake on the walls of the bowl. He also scraped the thick lava on the rim top. He scrubbed the exterior of the bowl with Murphy’s Oil Soap and a tooth brush to remove the grime on the bowl and rim. He cleaned out the interior of the bowl and shank with pipe cleaners, cotton swabs and alcohol until they came out clean. The rim top looked incredible when you compare it with where it started. There is some slight darkening on the inside edge of the bowl and a dark spot on the back topside. He cleaned the stem with Soft Scrub to remove the grime on the exterior and cleaned out the airway with alcohol, cotton swabs and pipe cleaners. To show how clean the rim top and stem really was I took a close-up photo of the rim. The bowl was clean and cake free. The rim top is quite clean and the inner edge of the bowl has all of the lava removed. The stem looks better with the tape removed. The stem looks very good. There are a few deep tooth marks in the surface and the button edge is thin and blackened.I unscrewed the stem from the bowl and took photos of the parts. The tenon appeared to be threaded but I was not sure of that. I would need to do a bit more work on it to be sure.I examined the tenon and decided to unscrew it from the stem. I locked a pair of pliers on the tenon and twisted it to unscrew it. As I did this the friction was not like threads, rather it was like a friction fit. Then it dawned on me what I was dealing with. The threaded portion was the female part of the push tenon that was normally anchored in the shank of the pipe. I pulled it free of the push tenon itself and took a photo of the parts. I breathed a sigh of relief as this was by far an easier repair to make. I would clean up the female portion and anchor it in the shank them clean up the push tenon and that part of the repair would be finished.I set the parts of the stem and push tenon assembly aside and turned my attention to the bowl itself. I cleaned up the inner edge of the bowl with a folded piece of 220 grit sandpaper.I polished the rim top with micromesh sanding pads – wet sanding with 1500-12000 grit pads to remove the blackened spots on the rim top and clean up the top. I wiped it down with a damp cloth to remove the sanding dust. The top looked considerably better. With the rim top cleaned up I turned my attention to the shank and the stem. Once I had removed threaded insert from the stem it opened up an area underneath that was filled with a lot of tars and oils. I cleaned out that area with pipe cleaners, swabs and alcohol. I cleaned up the inside of the shank and the mortise insert at the same time. I was able to get all of the grime removed. I then turned to the stem where there were also some tars and oils still in the airway and in the slot so I cleaned them as well.With everything cleaned it was time to reconstruct the push tenon system. I coated the threads on the mortise insert with all-purpose white glue and threaded the insert into the mortise. I wiped off the excess glue that came out as the insert seated in the shank. I set the bowl aside to let the glue cure and turned my attention to the stem. I started by using a topping board to remove the thin darkened edge of the button. It was quite thick to start with so I knew that to remove a little would not do damage but actually would make the stem stronger.I used a clear CA (Krazy) glue to fill in the deep tooth marks on both the top and underside of the stem as well as to build up the surface of the button to thicken it and smooth out the tooth damage.I reshaped the button surface and smoothed out the repairs with a folded piece of 220 grit sandpaper. I started the polishing with a folded piece of 400 grit wet dry sandpaper.I rubbed the stem down with Denicare Mouthpiece Polish. It is a gritty, red paste with the consistency of red Tripoli. I find that it works well to polish out scratches and light marks in the surface of the stem. I polished it off with a cotton pad to raise the shine.I polished the stem with micromesh sanding pads – dry sanding with 1500-12000 grit sanding pads. I wiped it down after each sanding pad with a cloth containing some Obsidian Oil. I finished polishing it with Before & After Pipe Stem Polish – both Fine and Extra Fine and buffed it off with a cotton cloth. I gave it a coat of Briarville’s No Oxy Oil to preserve and protect it. I put the bowl and stem back together again and buffed it with a microfiber cloth to raise the shine on the meerschaum and the acrylic stem. The buffing also removes minute scratches in the two materials and adds depth to the shine. I gave the stem several coats of carnauba wax and the bowl multiple coats of Clapham’s Beeswax Polish. The Beeswax Polish is a soft wax that I can apply with a soft cotton pad and buff with a microfiber cloth. The pipe was alive now and looked great to me. It has a great feel in the hand that is very tactile and the patina should develop more deeply as the pipe is smoked. The finished pipe is shown in the photos below. The dimensions of the pipe are Length: 6 inches, Height: 2 ¾ inches, Outside diameter of the bowl: 2 ¼ inches, Chamber diameter: 7/8 of an inch. This Lattice Meerschaum Calabash is a beauty that has great patina already. It should only deepen with time. It should make someone a great pipe. It is one that will be on the rebornpipes store very soon. If you are interested let me know. Thanks for reading this blog and my reflections on the pipe while I worked on it.