Tag Archives: removing tooth marks

Restoring a Ben Wade Danish Hand Model Free Hand 400


Blog by Steve Laug

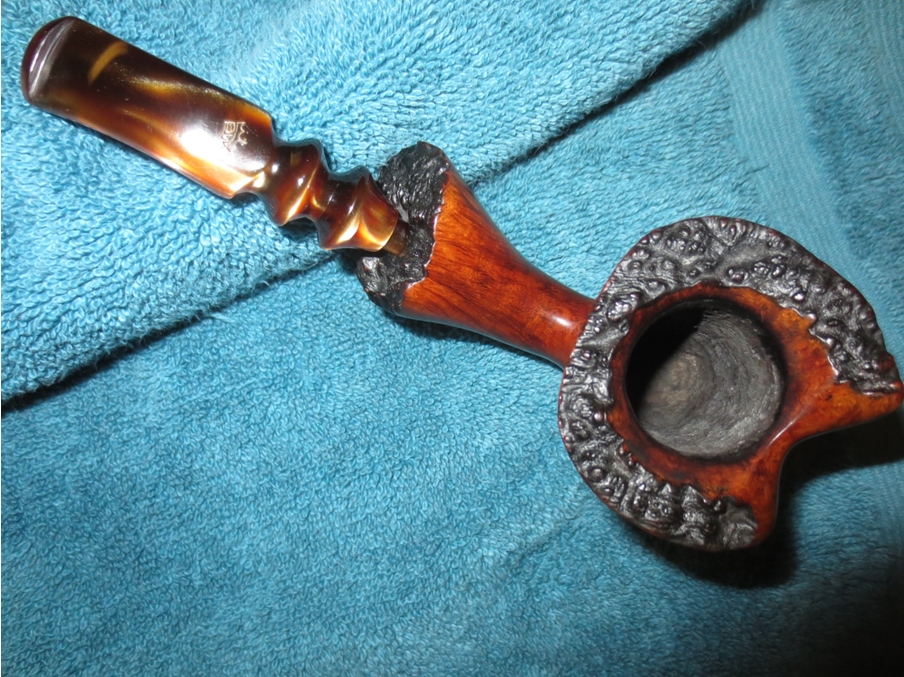
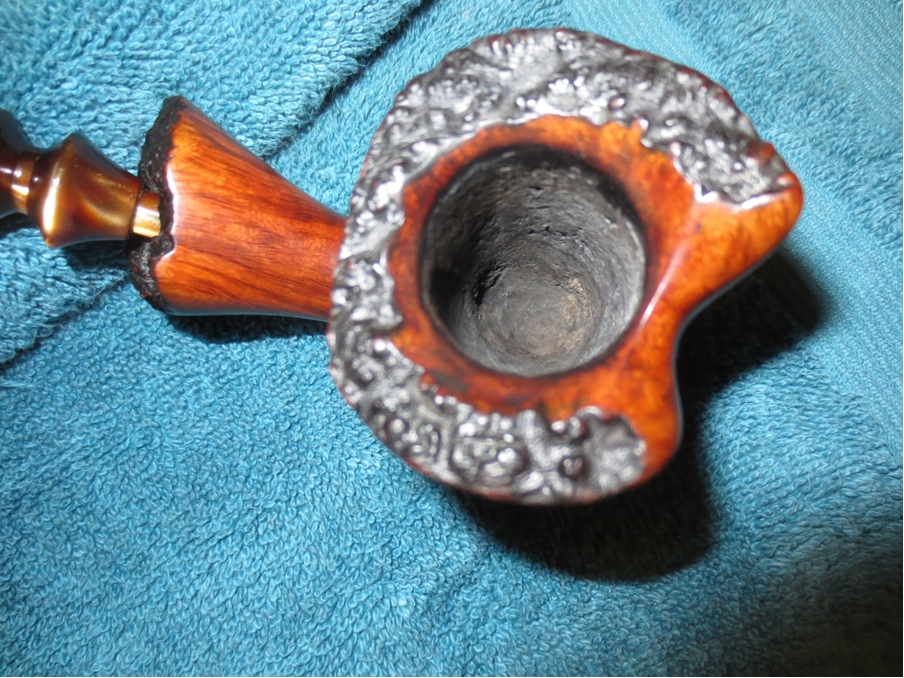
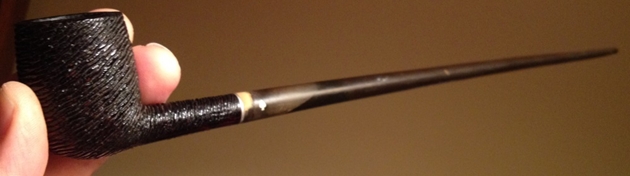
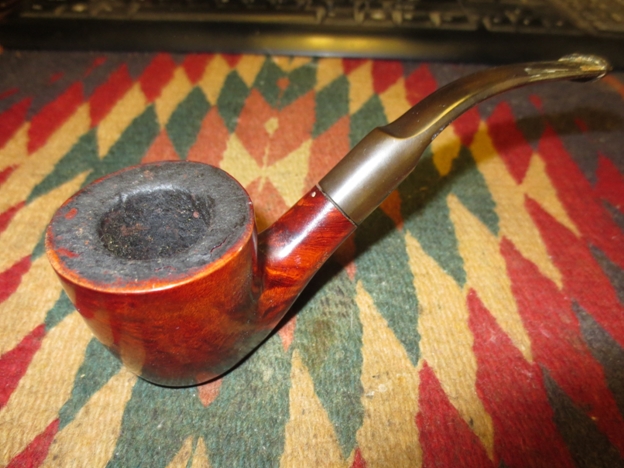
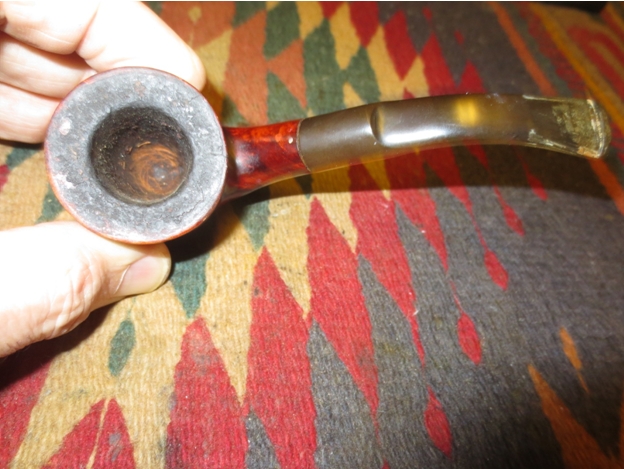
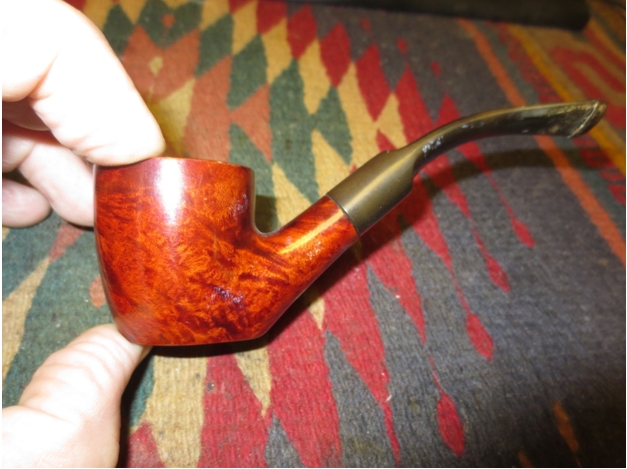
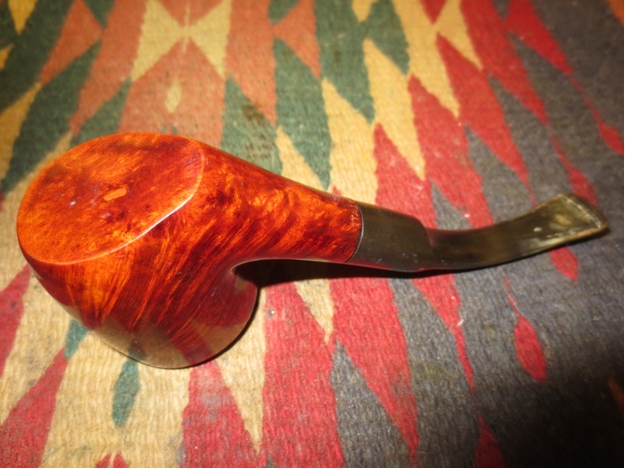
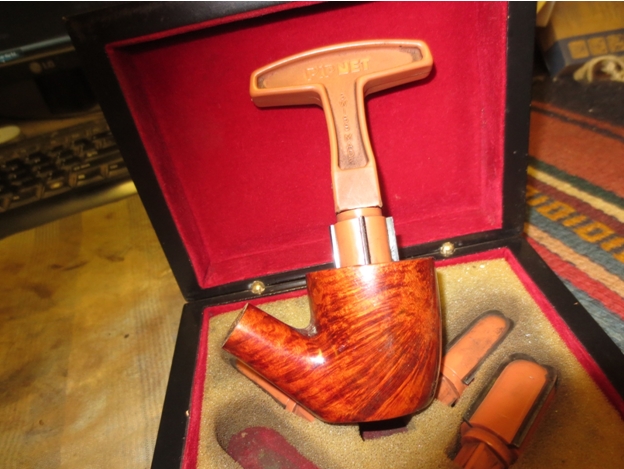
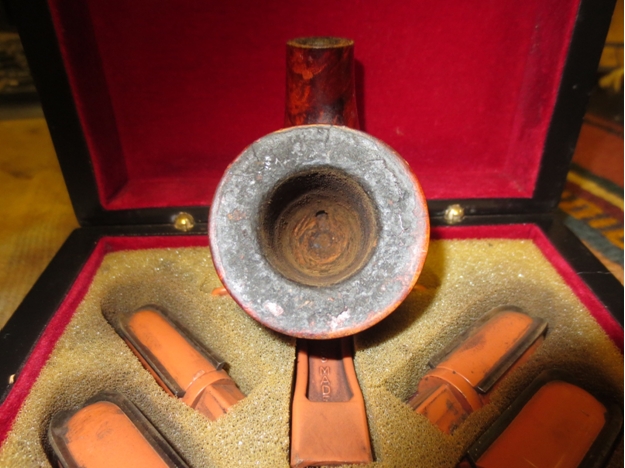
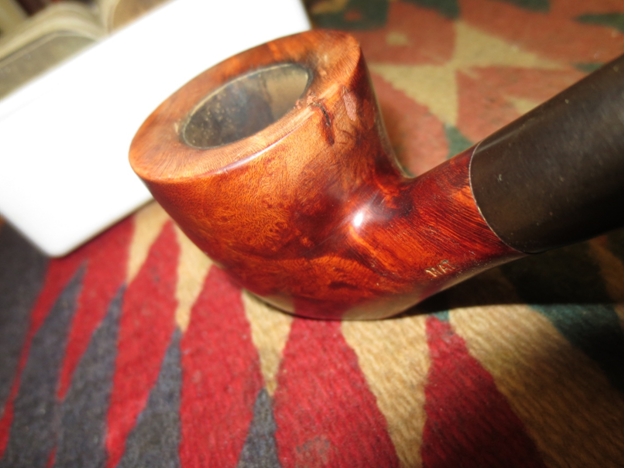
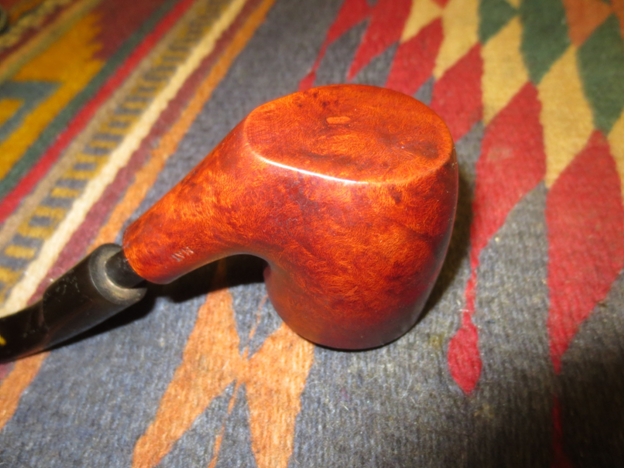
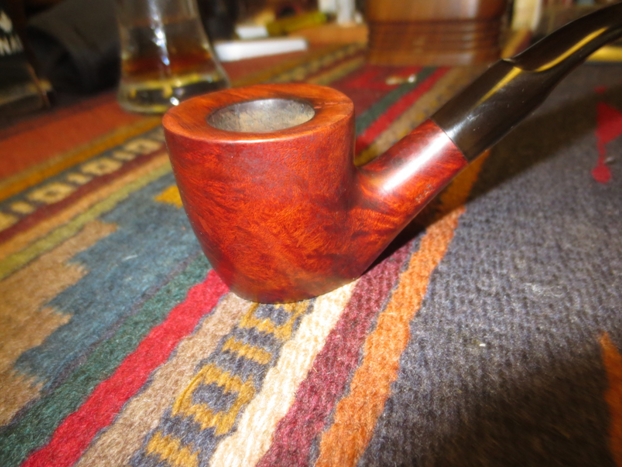
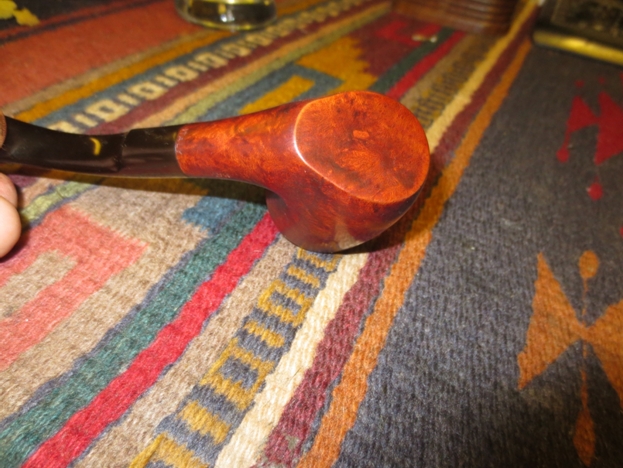
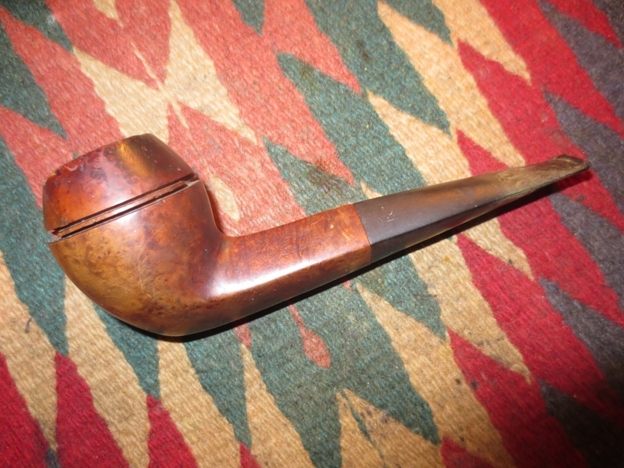
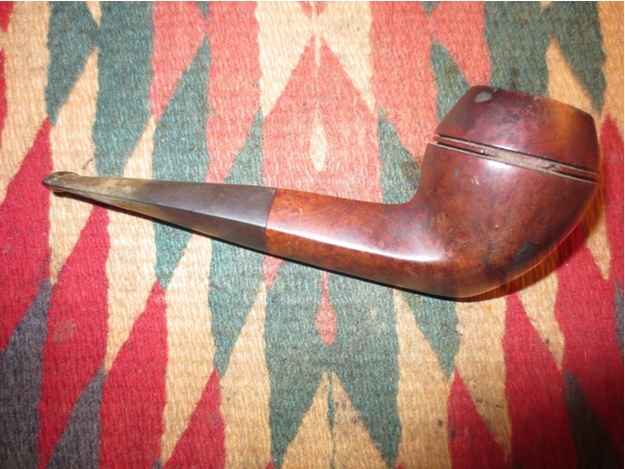
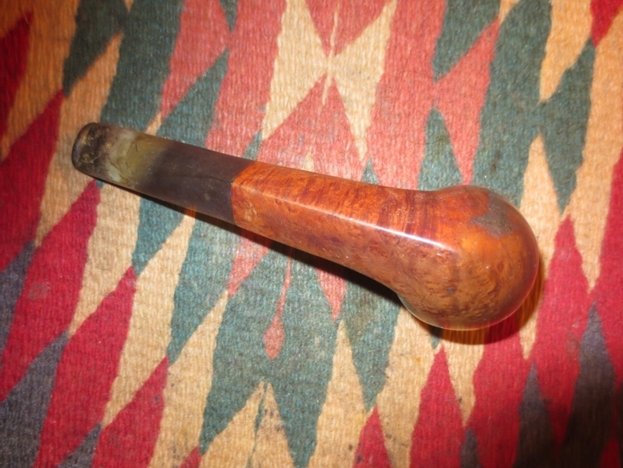
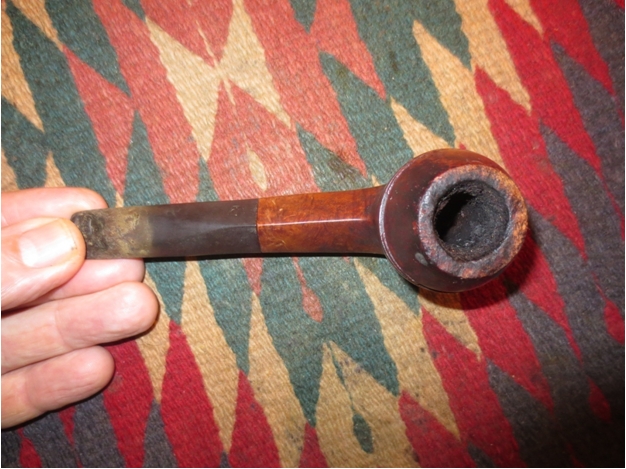
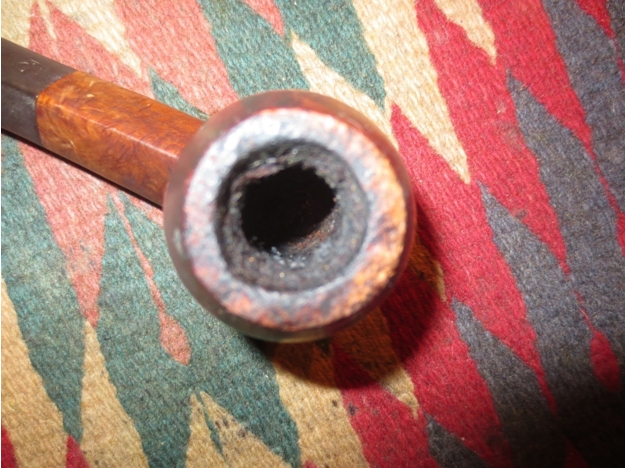
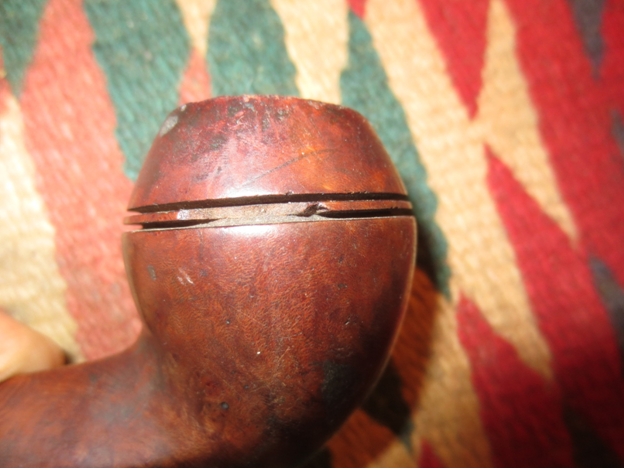
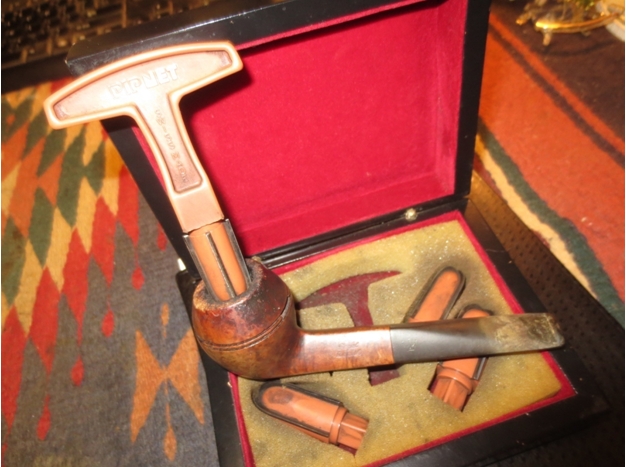
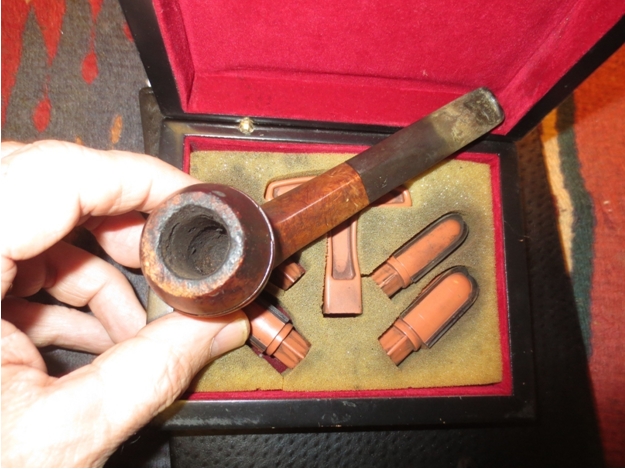
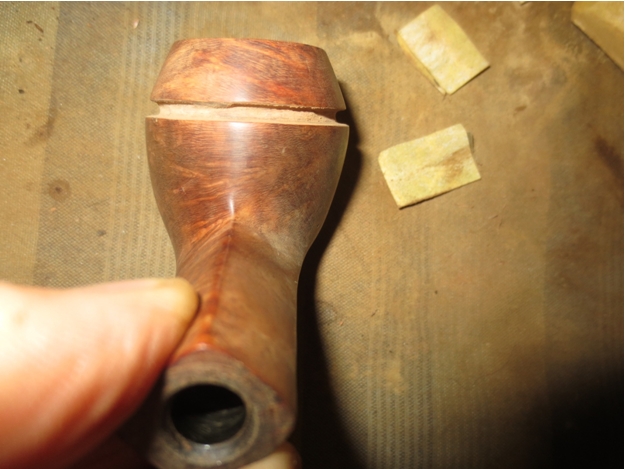
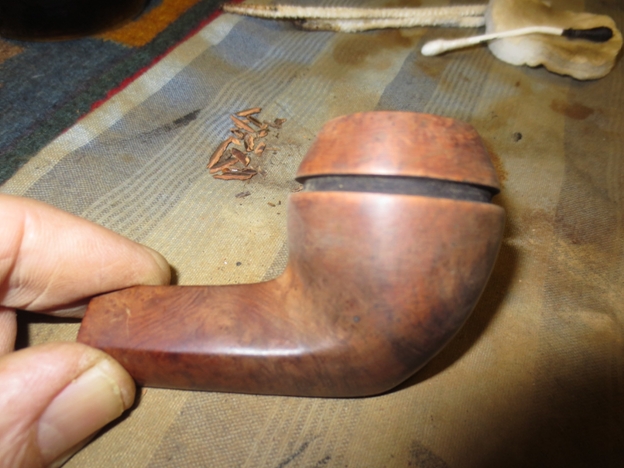
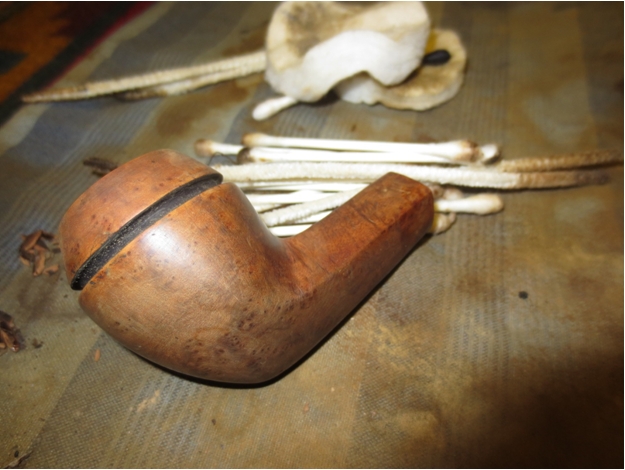
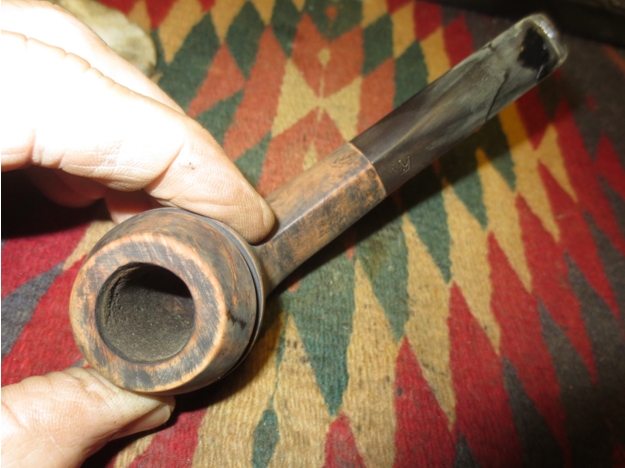
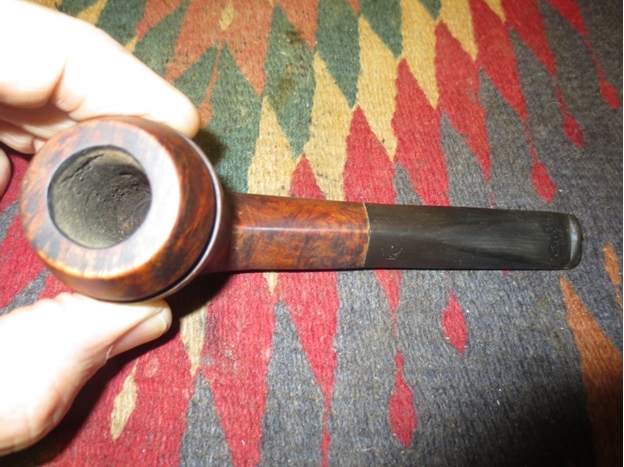
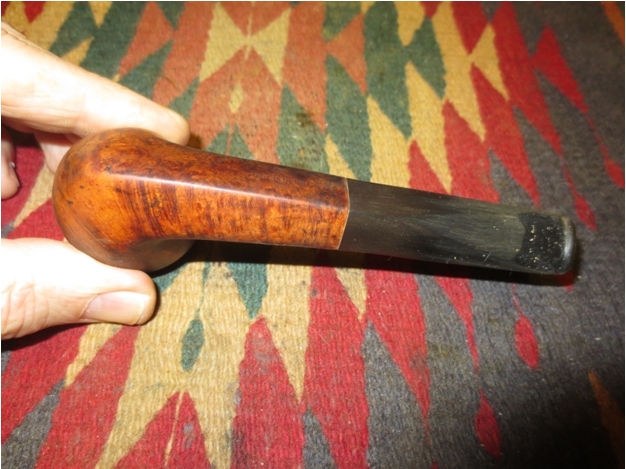
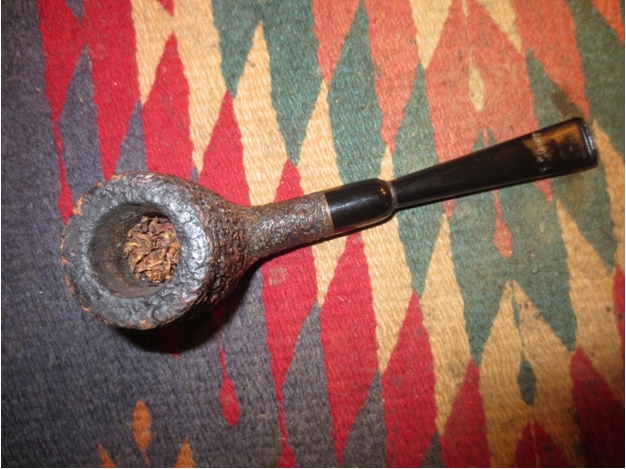
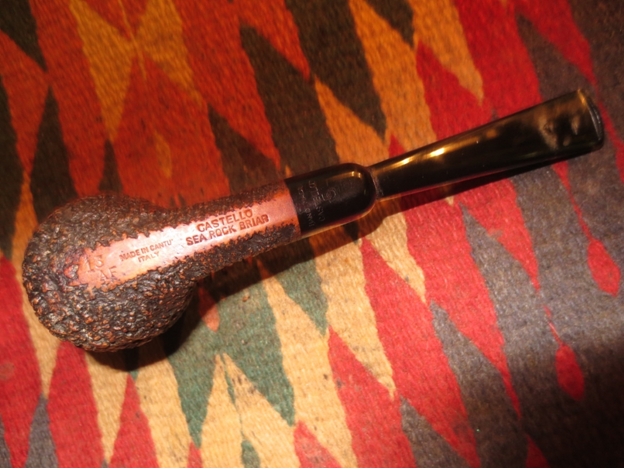
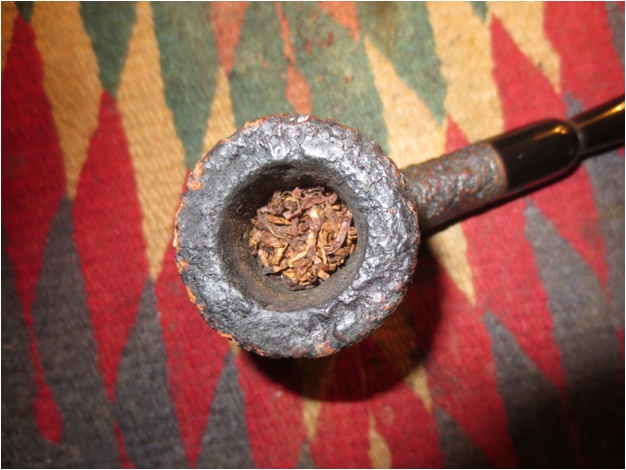
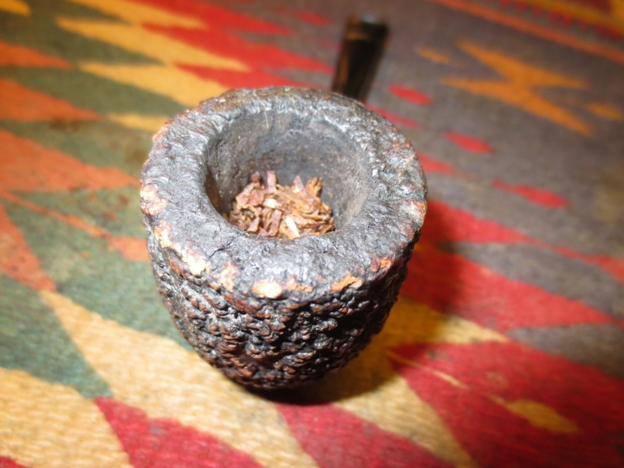
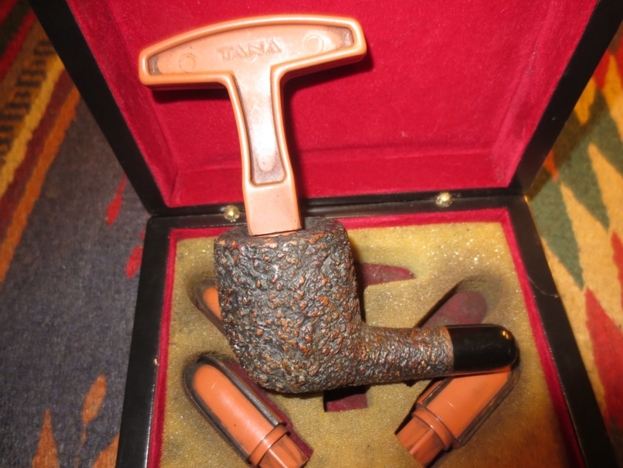
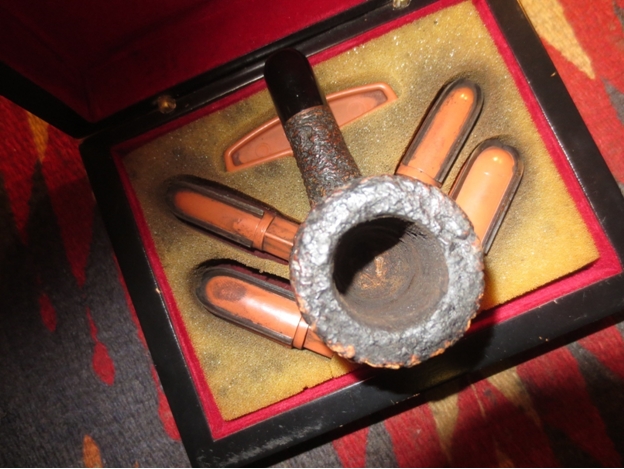
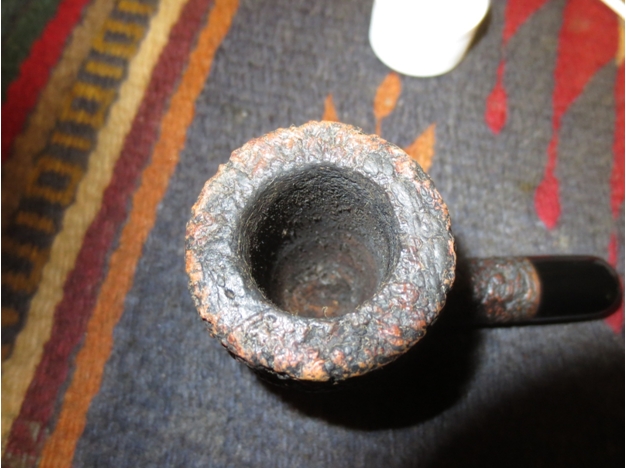
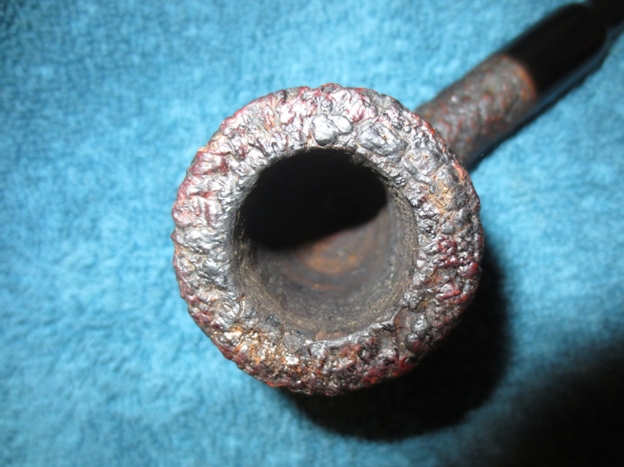
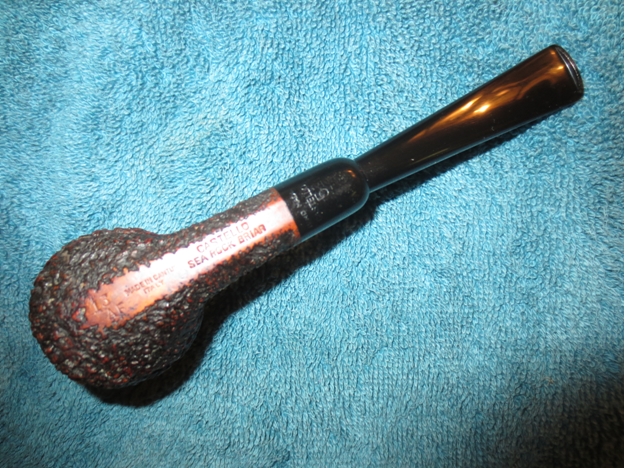
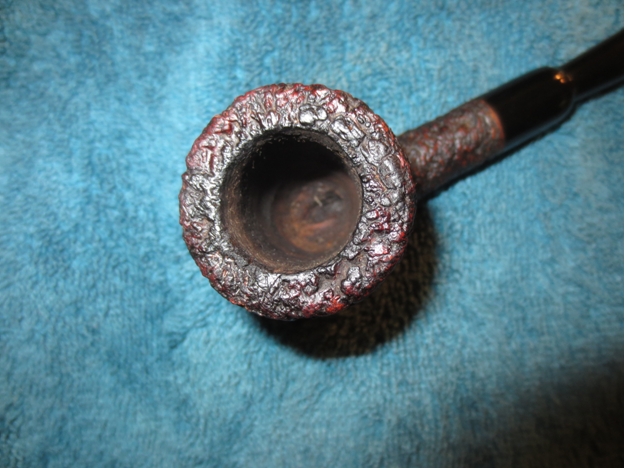
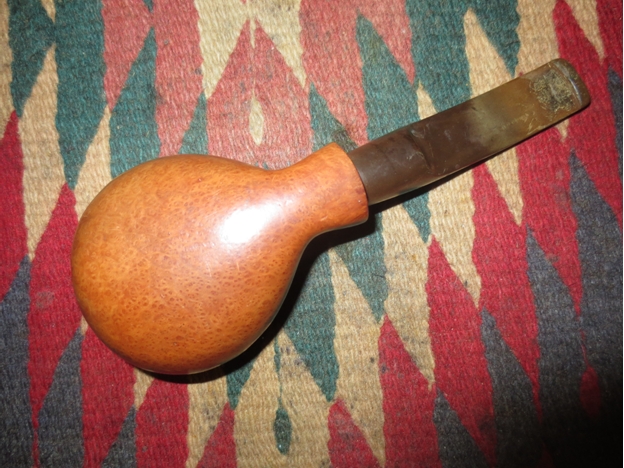
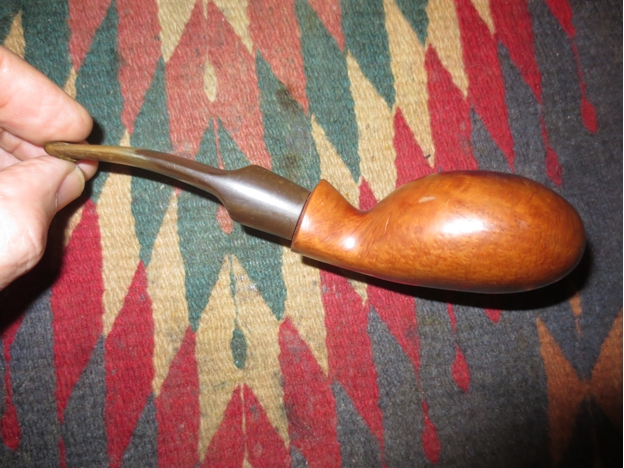
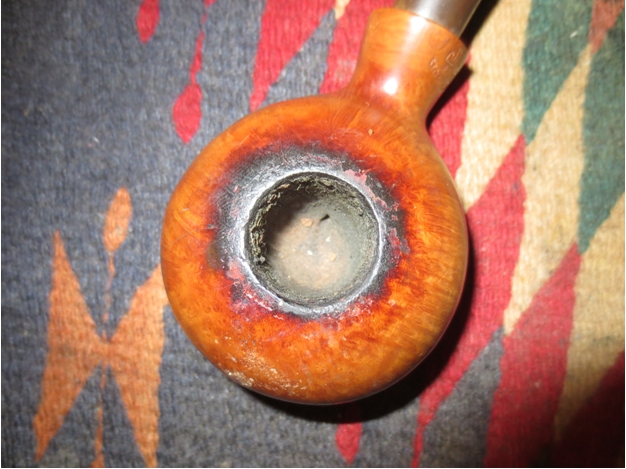
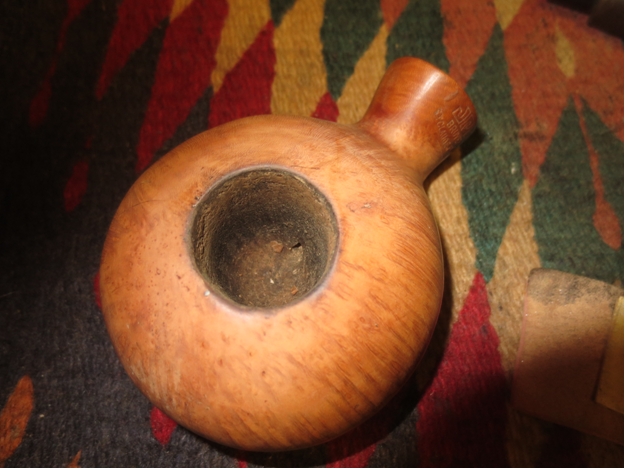
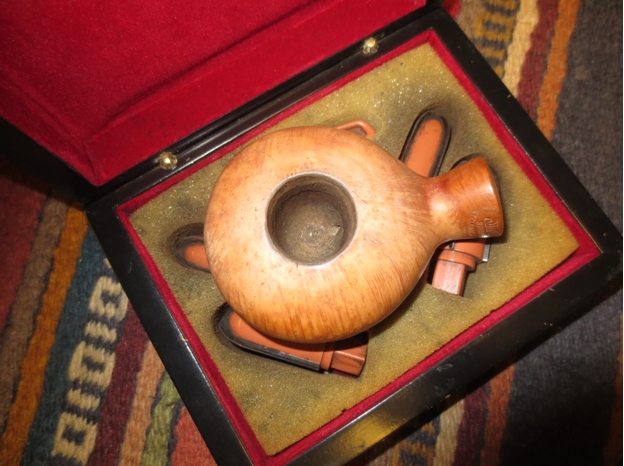
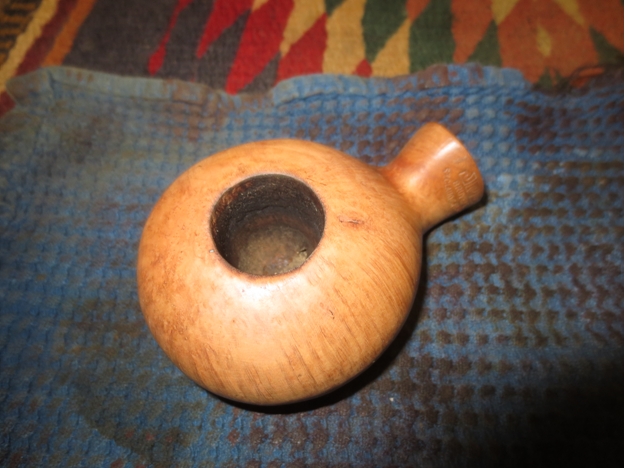
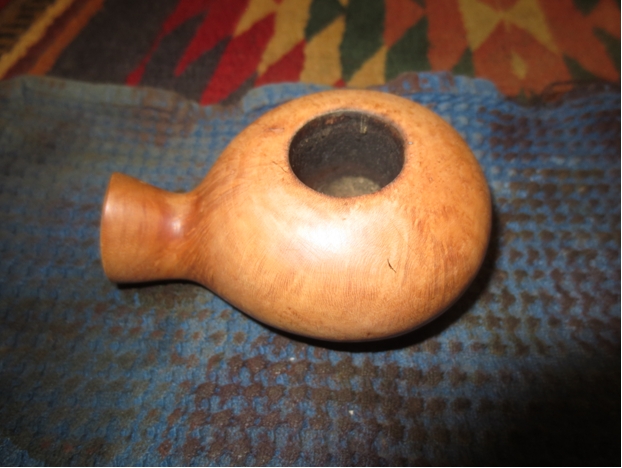
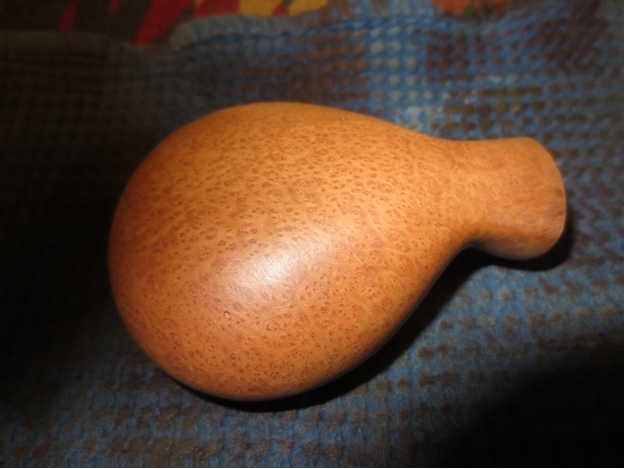
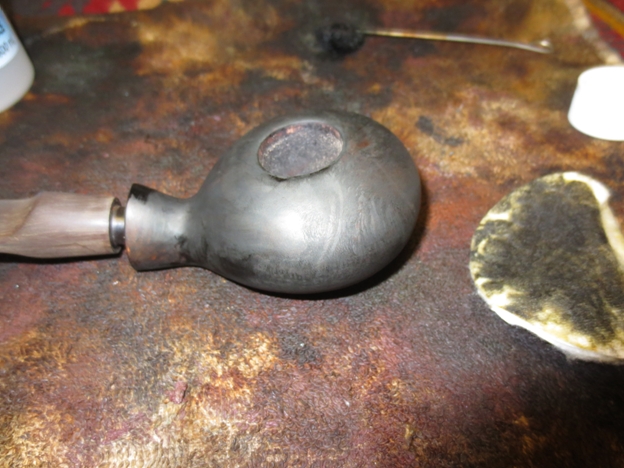
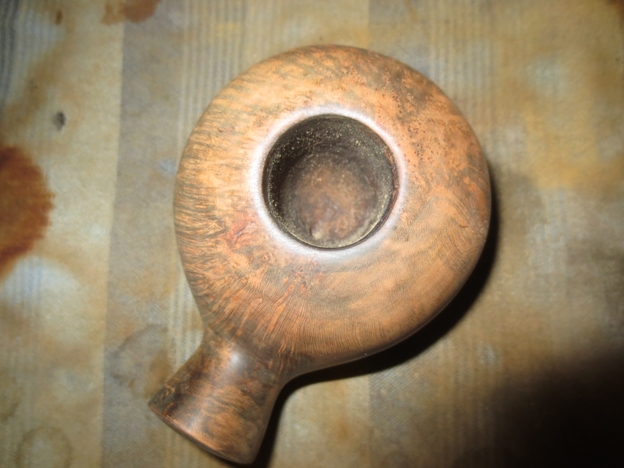
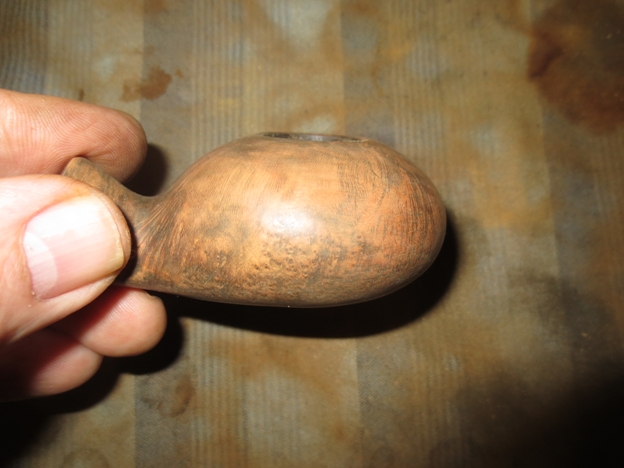
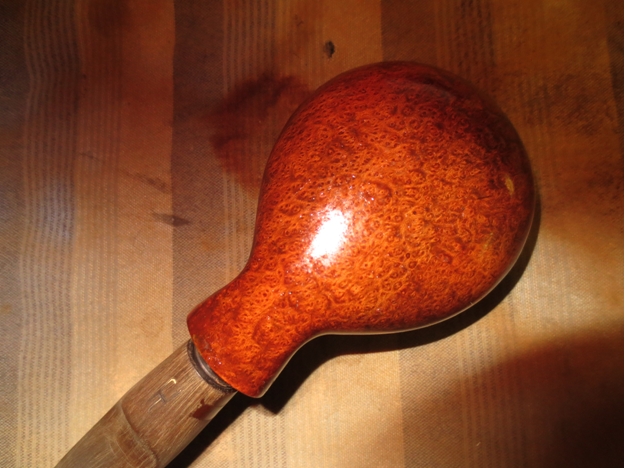
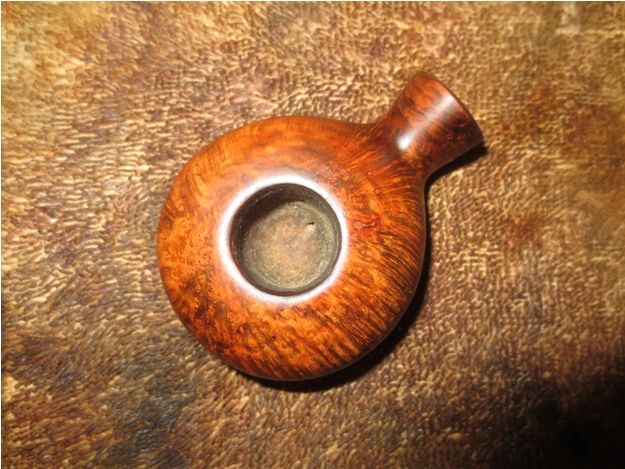
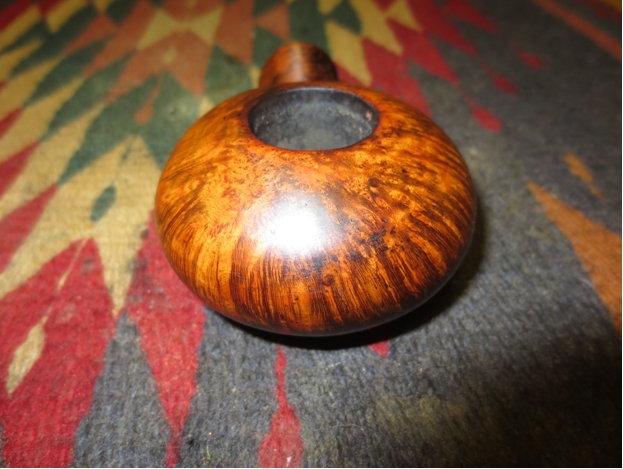
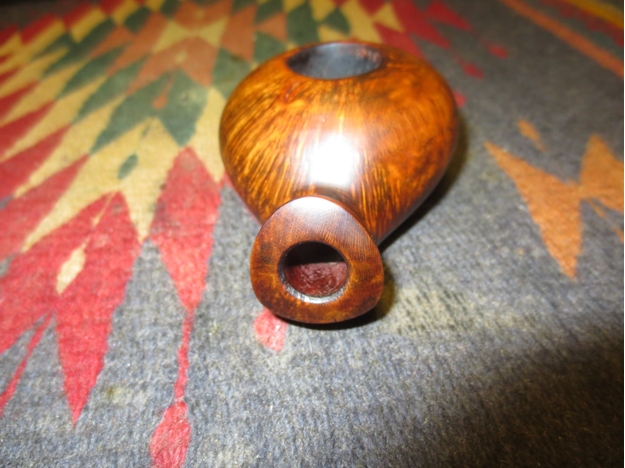
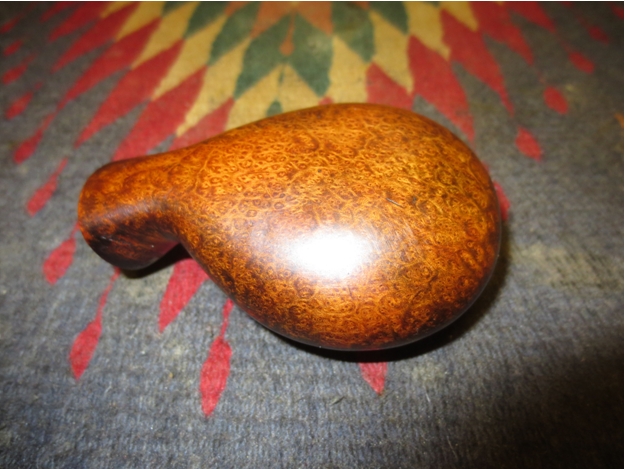
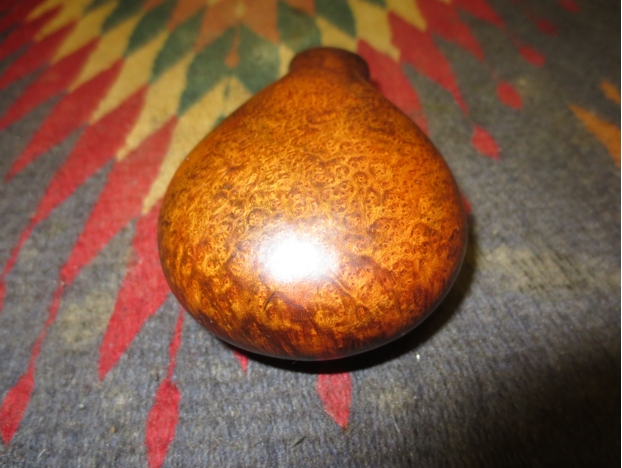
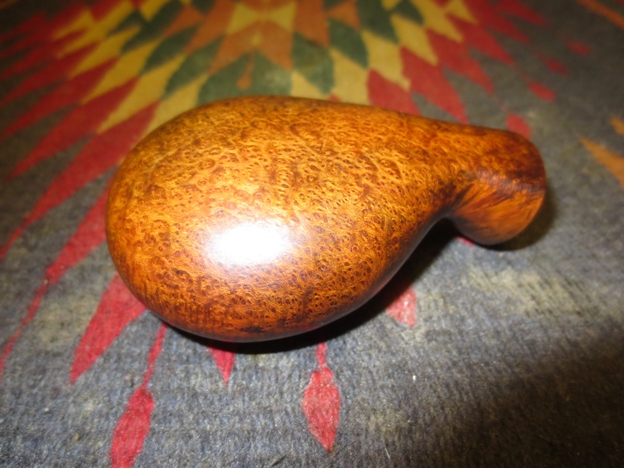
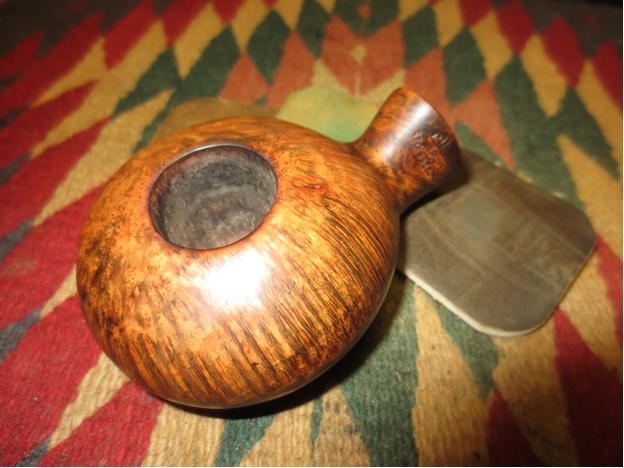
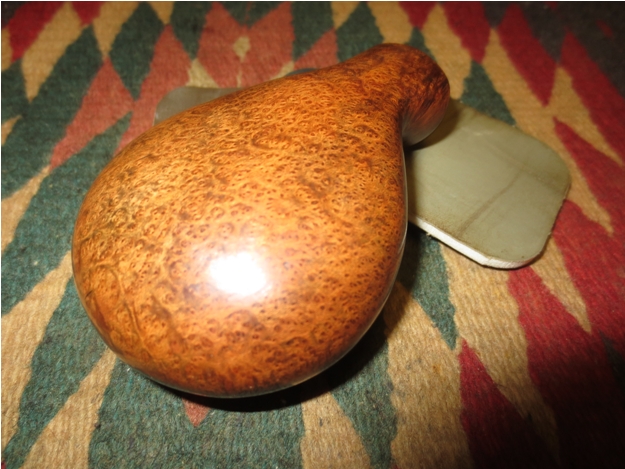
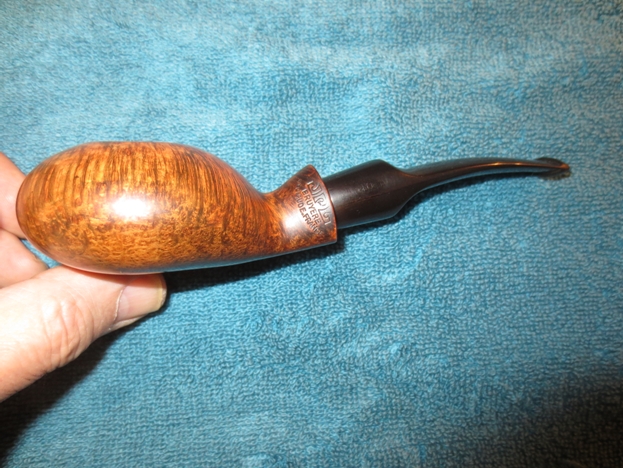
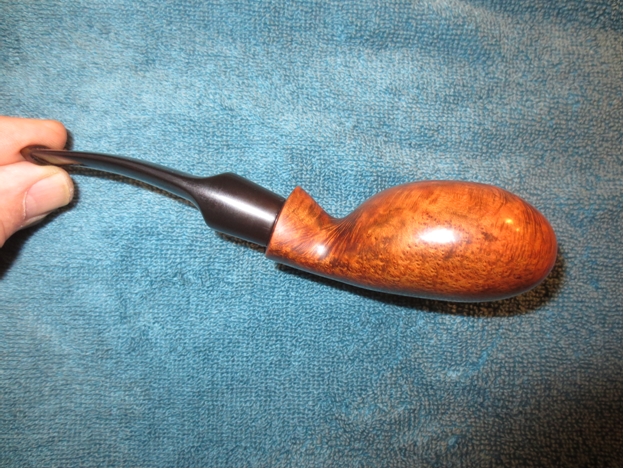
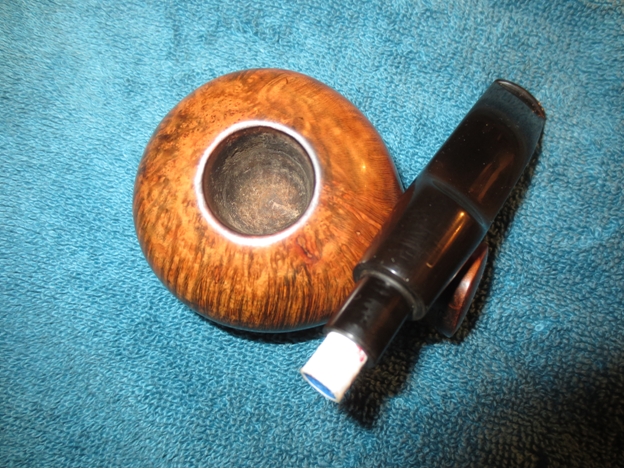
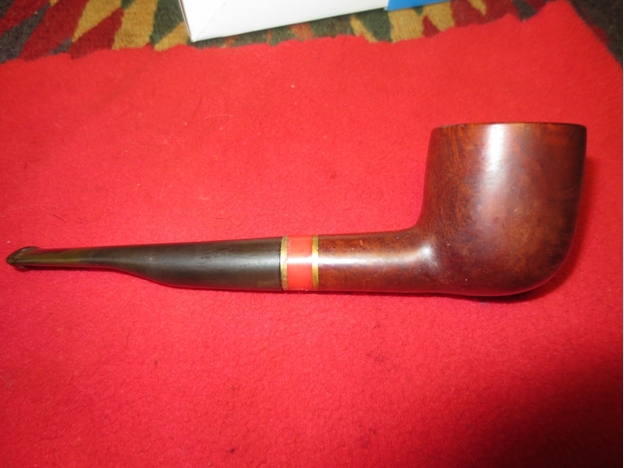
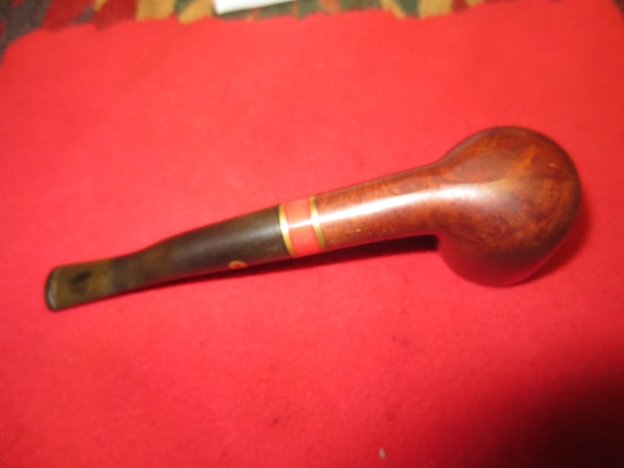
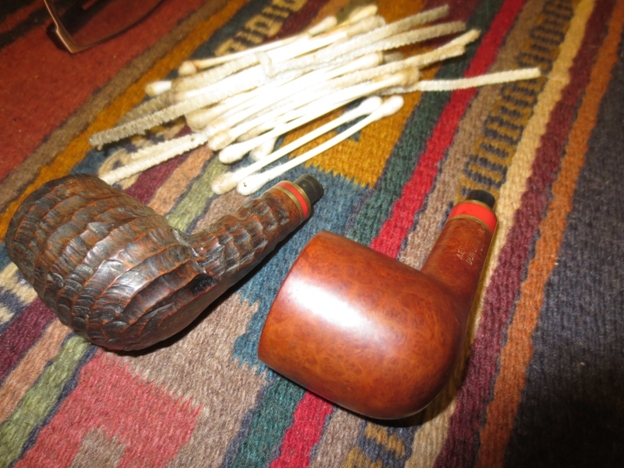
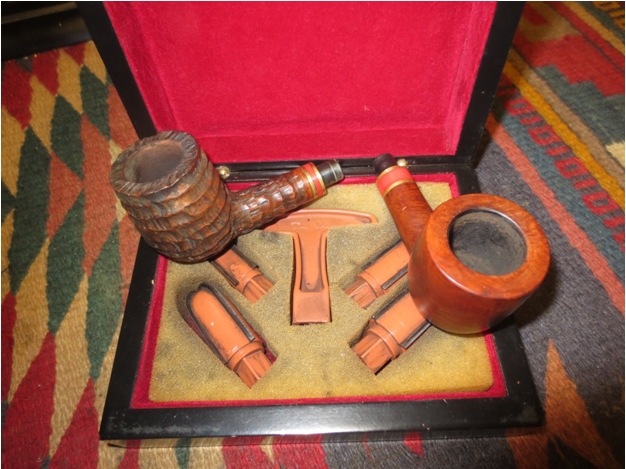
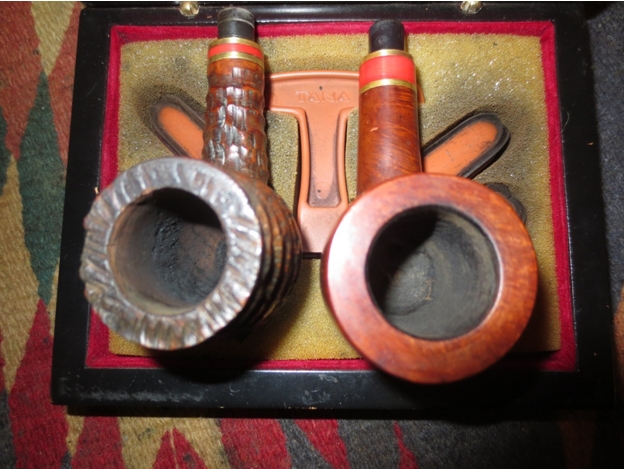
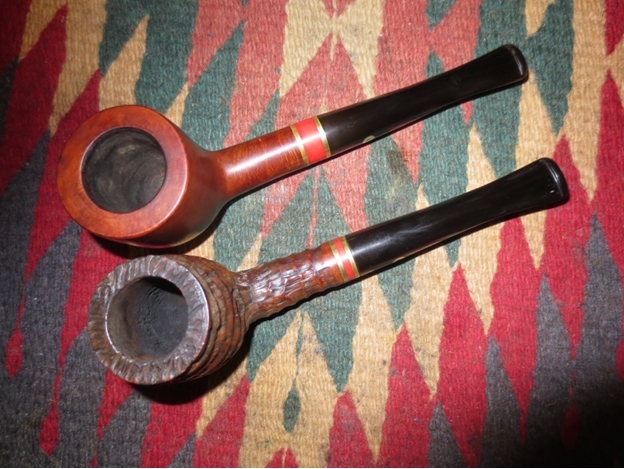
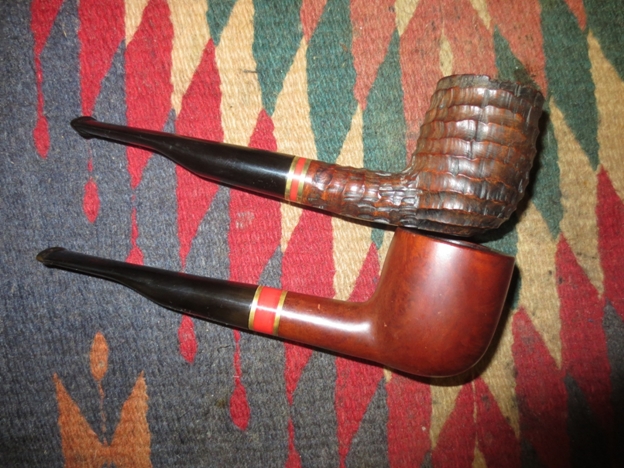
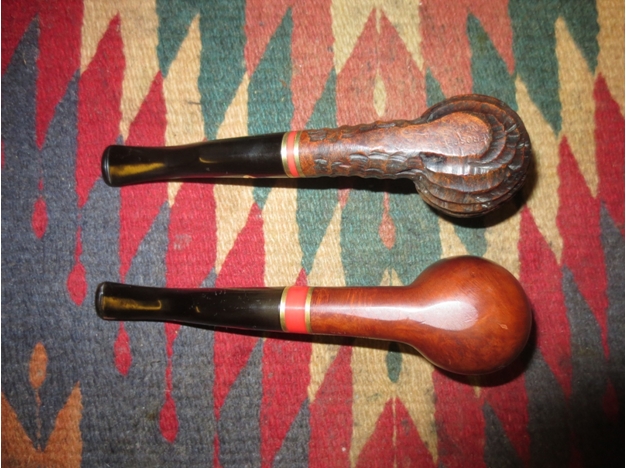
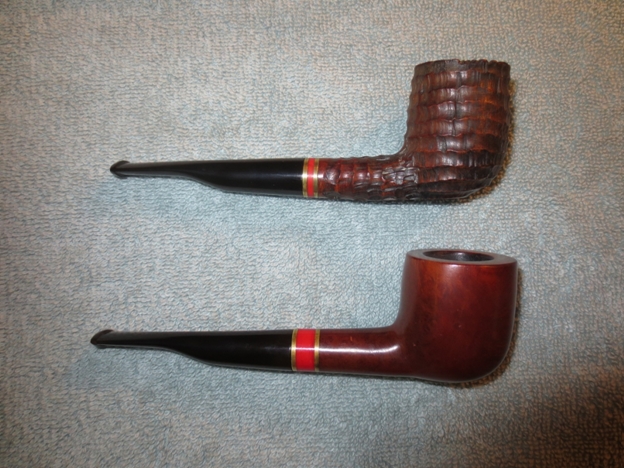
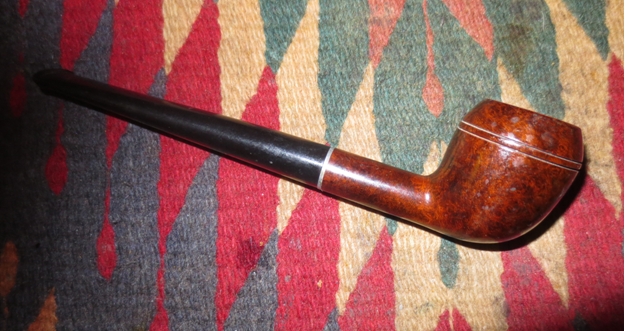
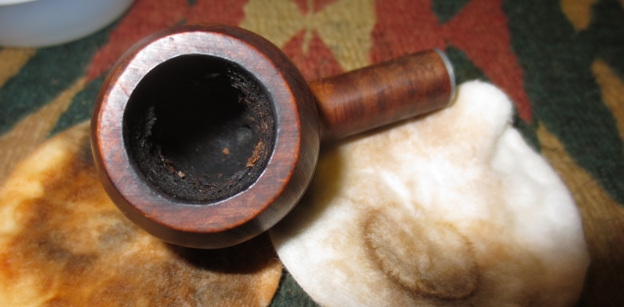
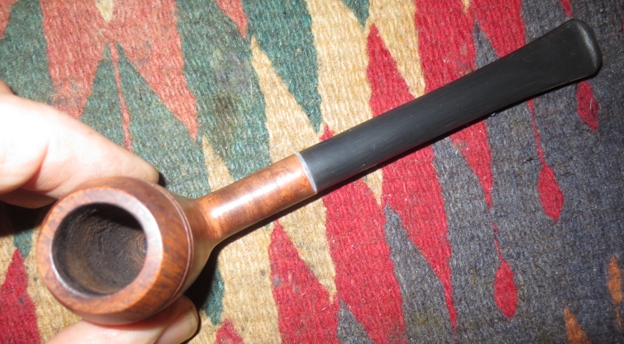
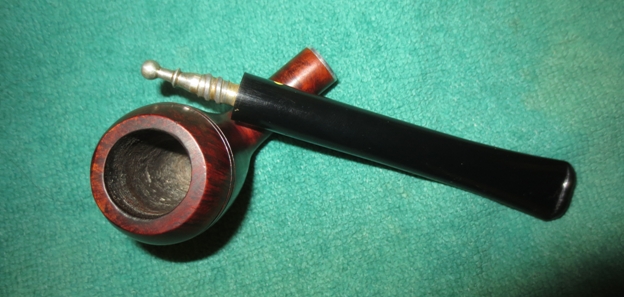
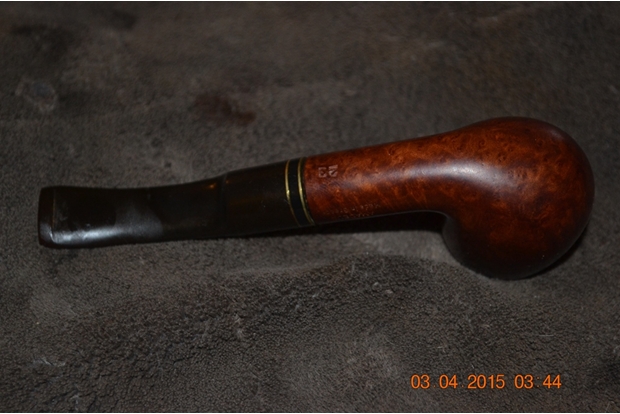
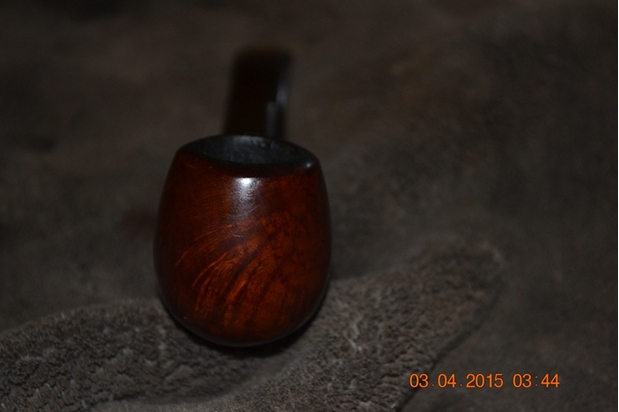
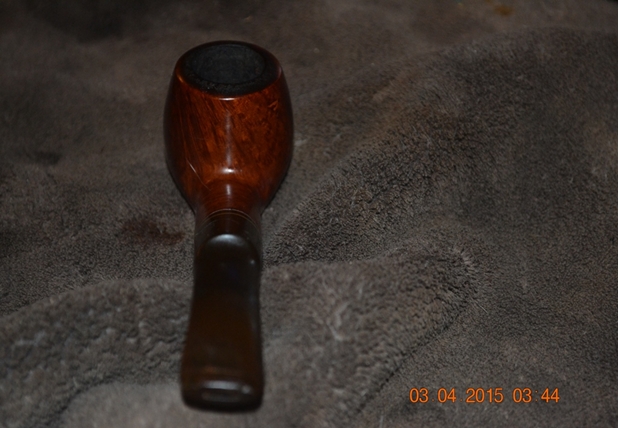
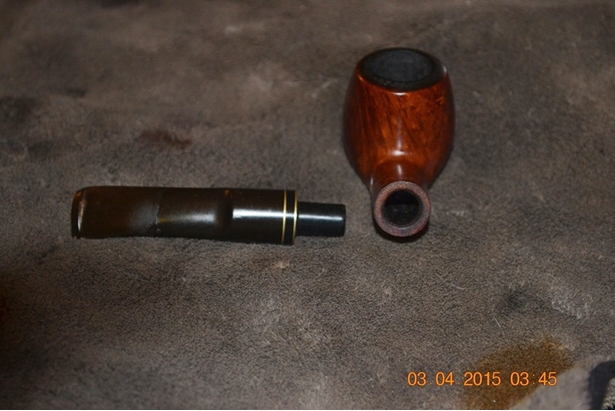
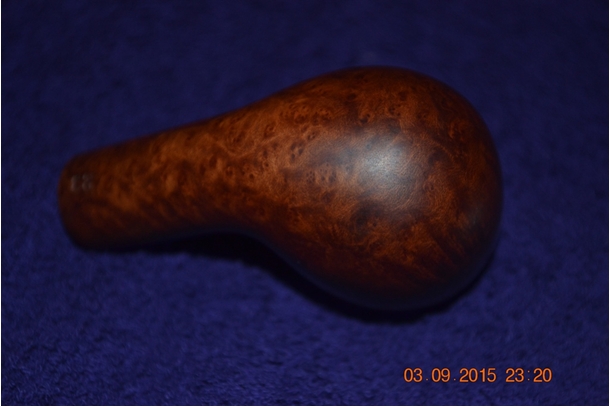
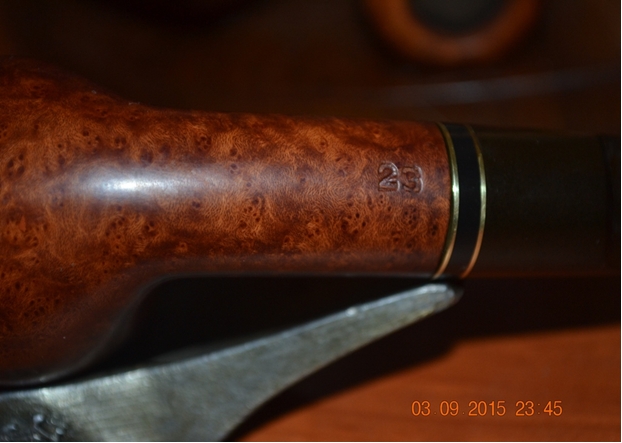
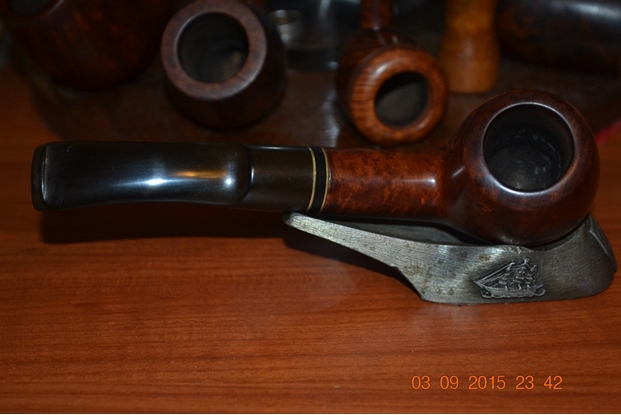
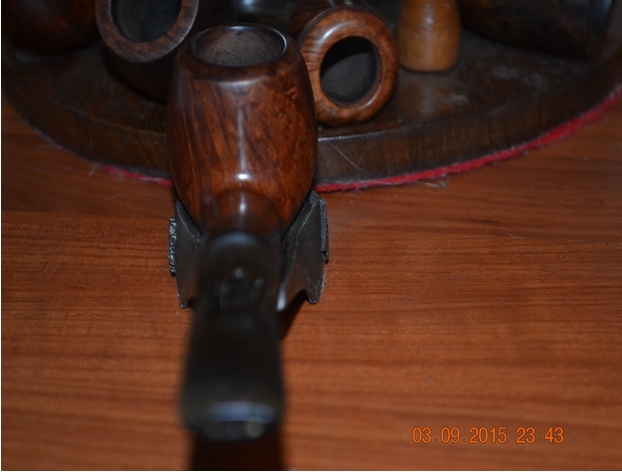
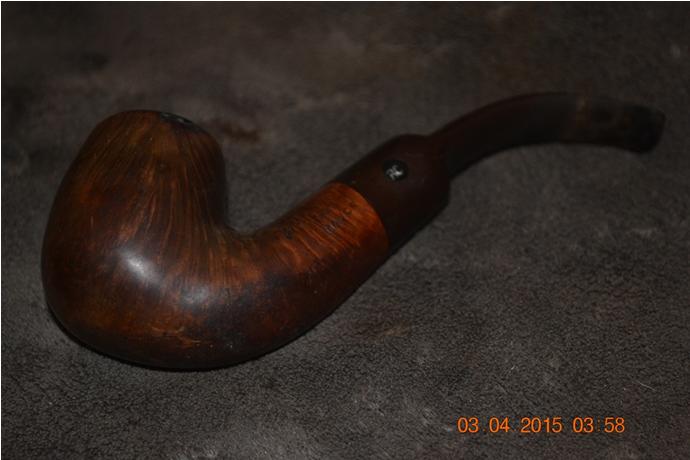
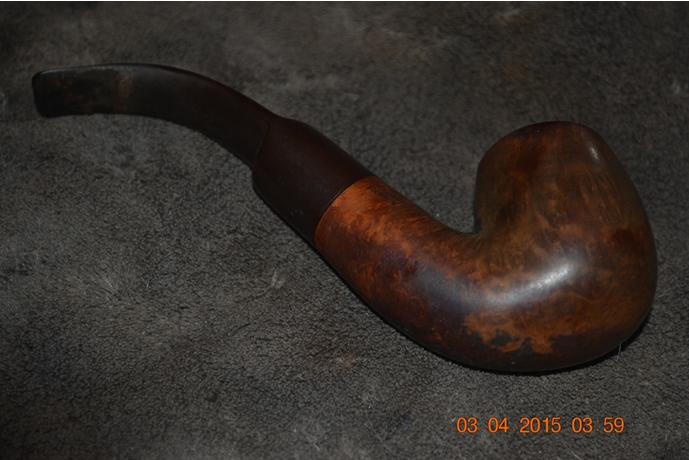
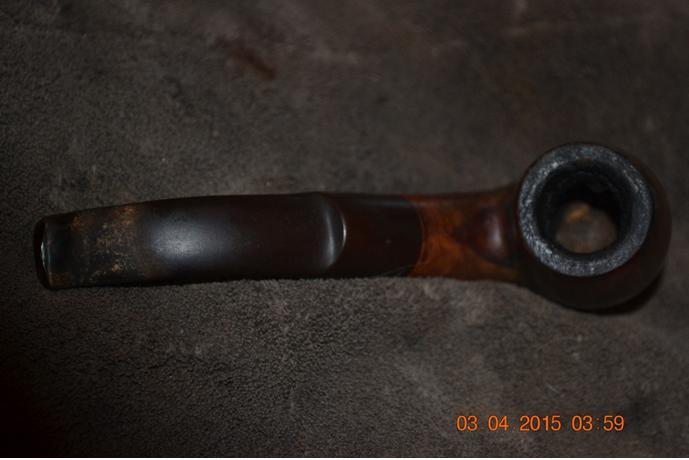
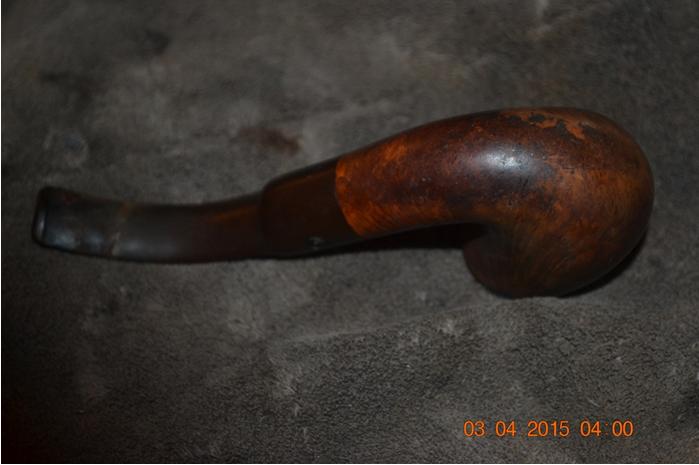
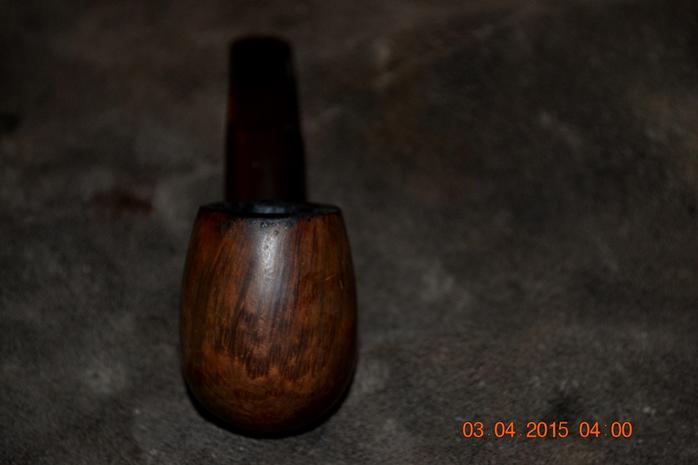
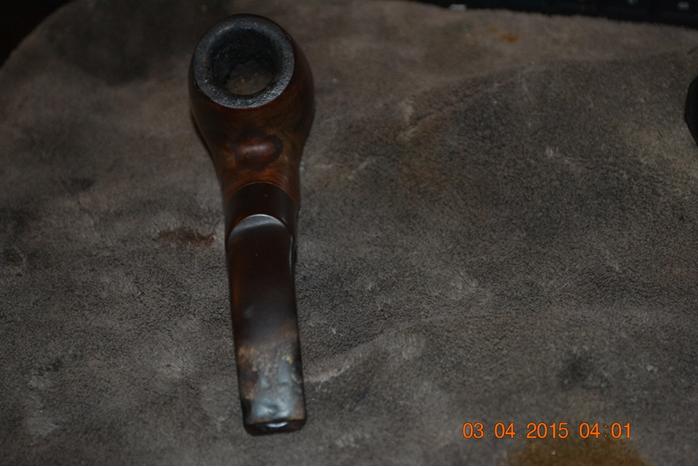
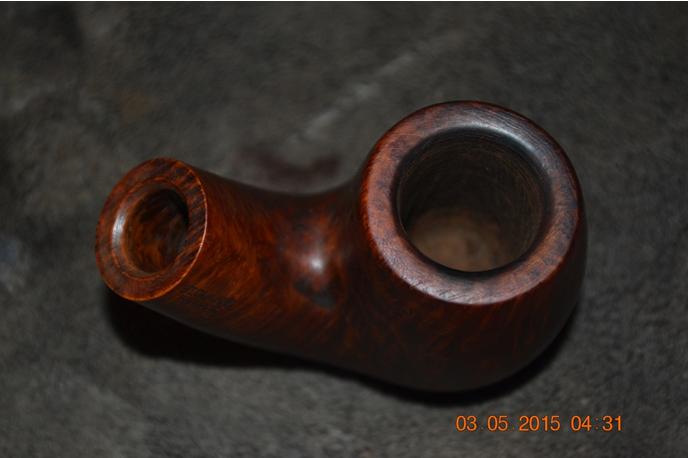
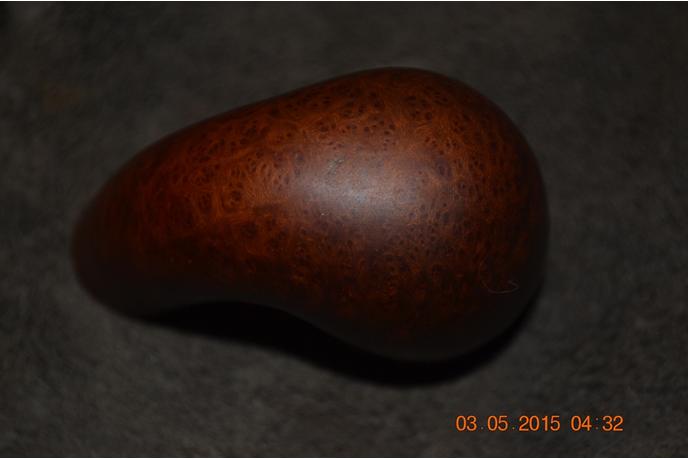
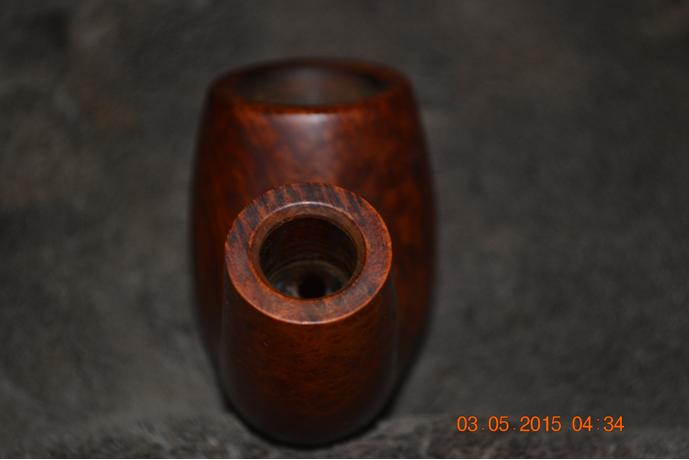
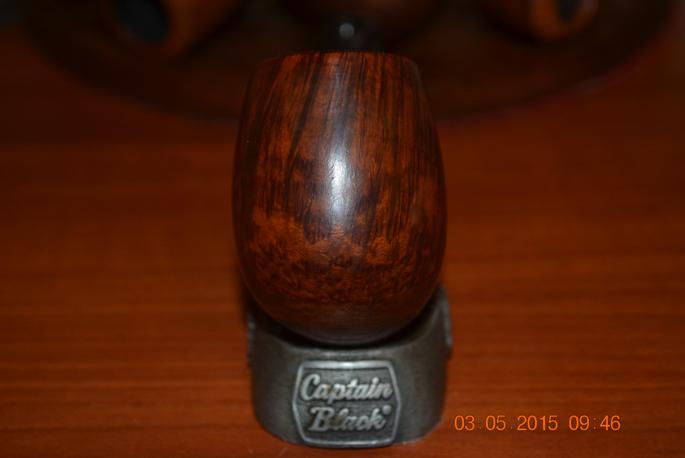
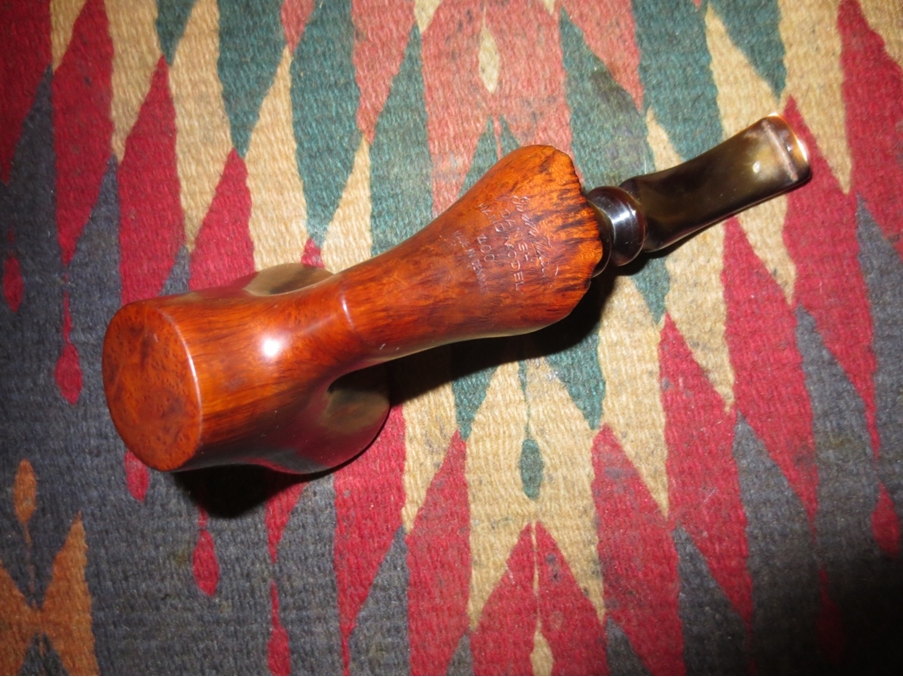
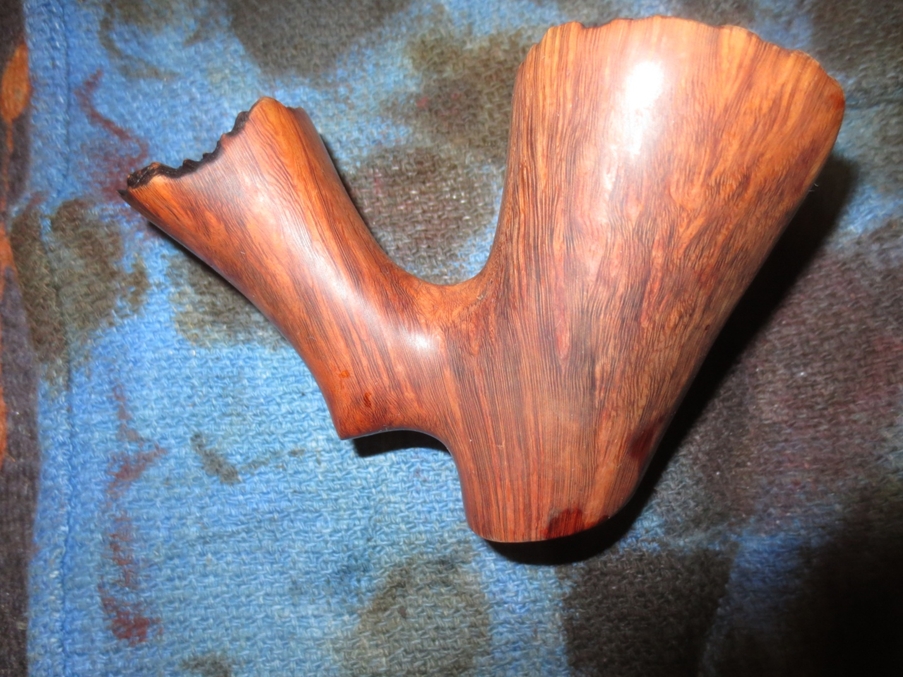
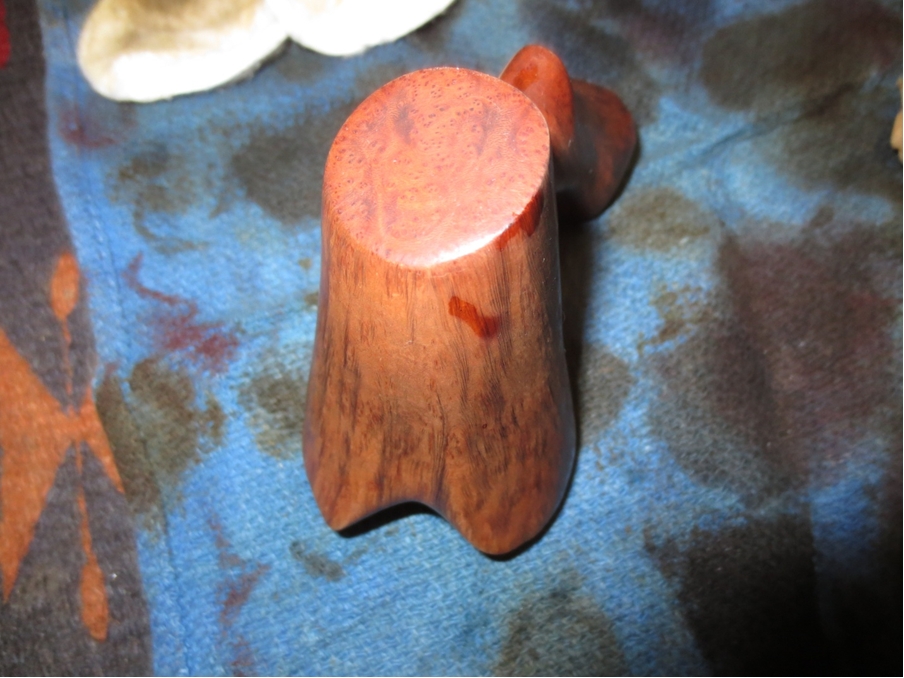
The latest pipe that I have on the work table was a beautifully grained Ben Wade Danish Hand Model 400 free hand. It has some amazing flame and straight grain all the way around the bowl. The flat bottom of the bowl has some great birdseye grain. There is plateau on the top of the bowl and on the end of the shank. There appeared to be a smooth inner rim that had been covered with tars and oils. The plateau on the rim was oily and tarry. The valleys were basically filled in and the rough beauty of plateau was hidden under the grime. The smooth bowl sides were dirty with dark spots where hand oil and grime had been rubbed into the finish. Fortunately there were not any dents or scratches on the briar.Ben1

Ben2 
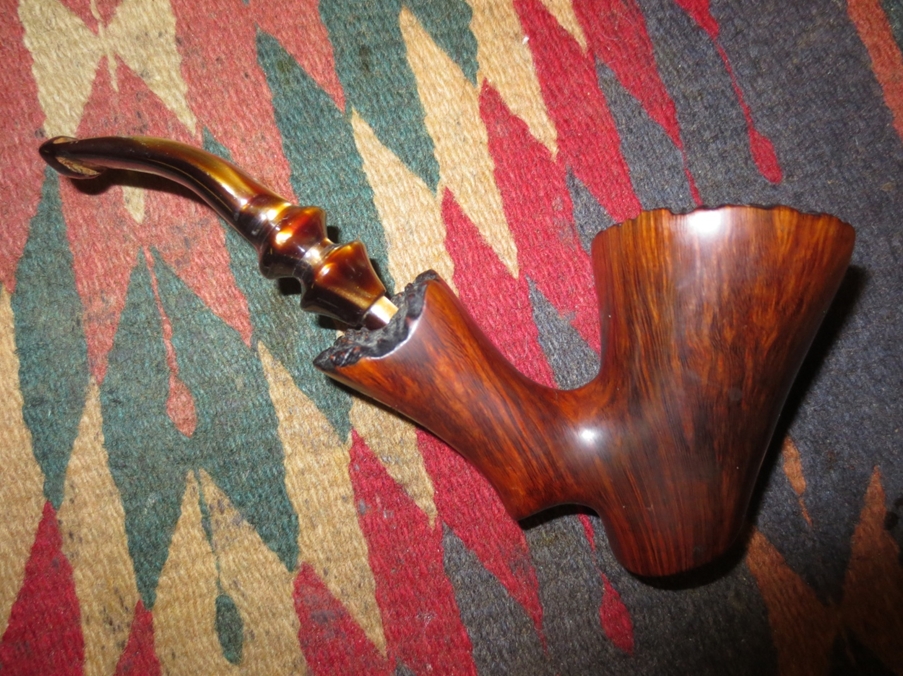
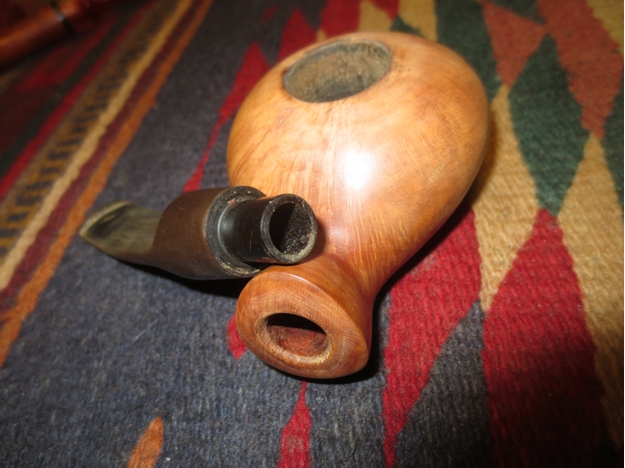
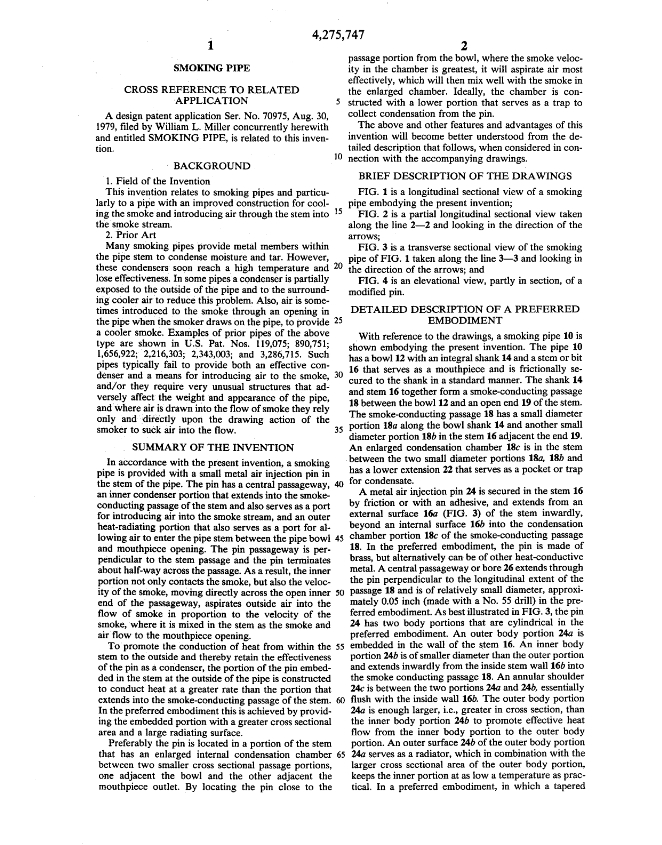
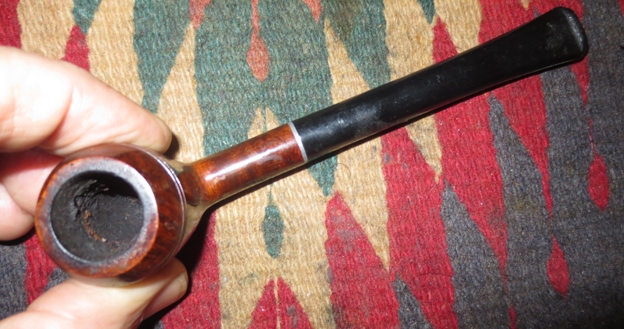
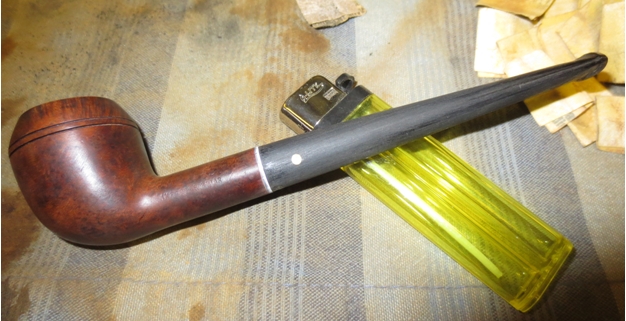
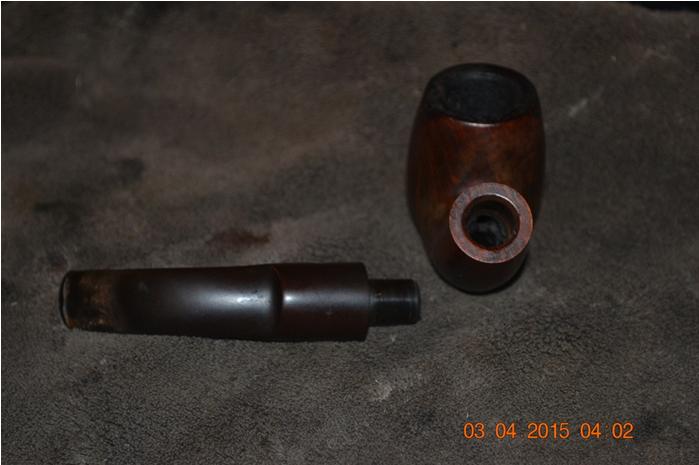
The stem was Lucite and quite thick. There were tooth marks on the top and underside of the stem near the button and there was some calcification on the stem top next to the button. The airway in the stem was partially closed off and there was not much airflow being drawn through the stem. The shank airway was also closed partially with oils and tars. The bowl had been reamed before it came to me and was quite clean.Ben3

Ben4 
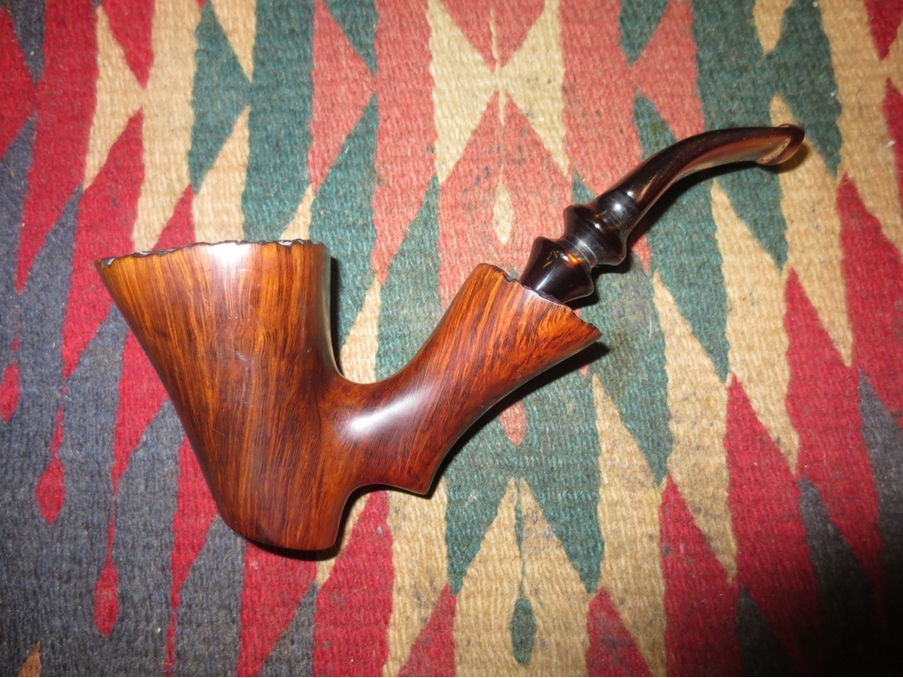
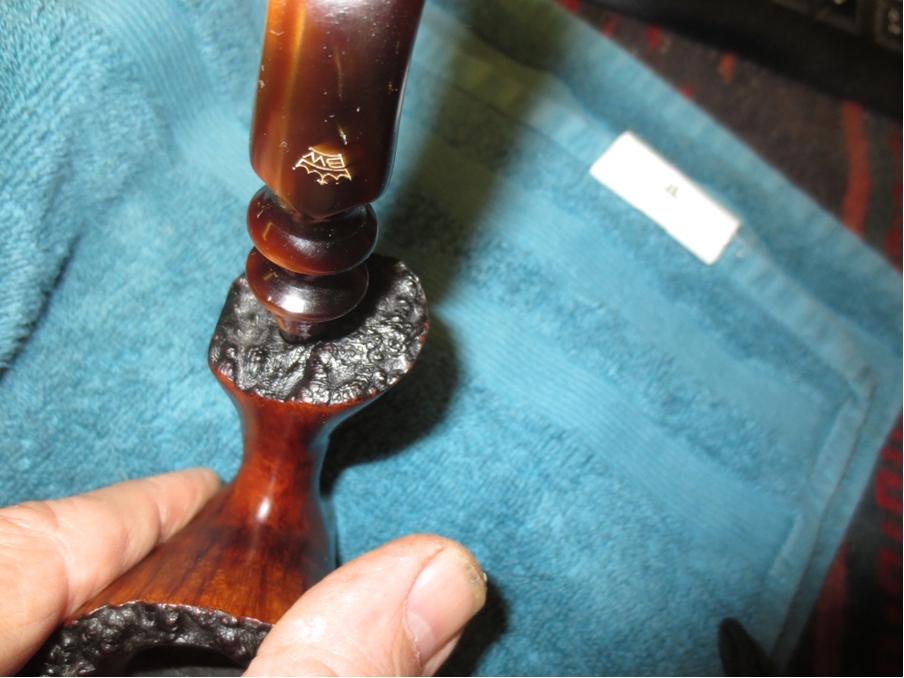
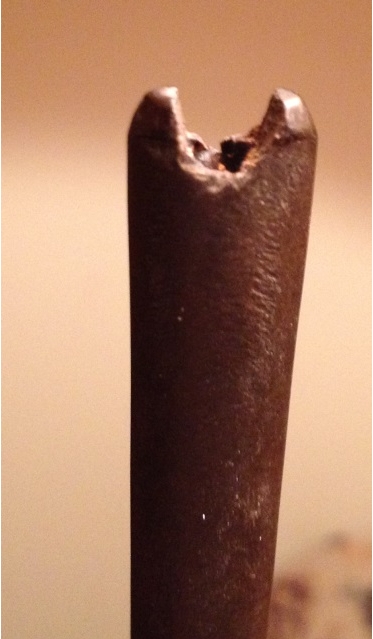
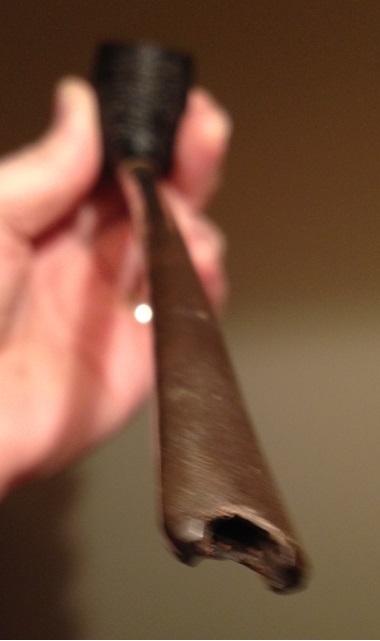
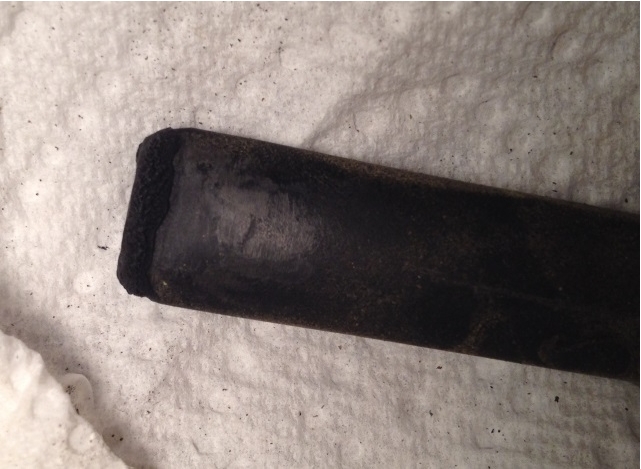
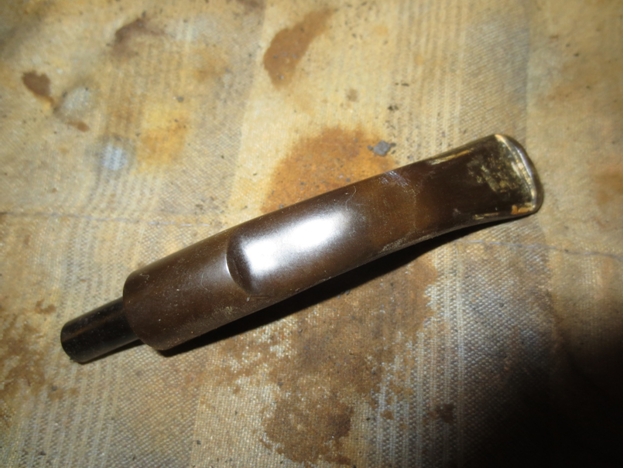
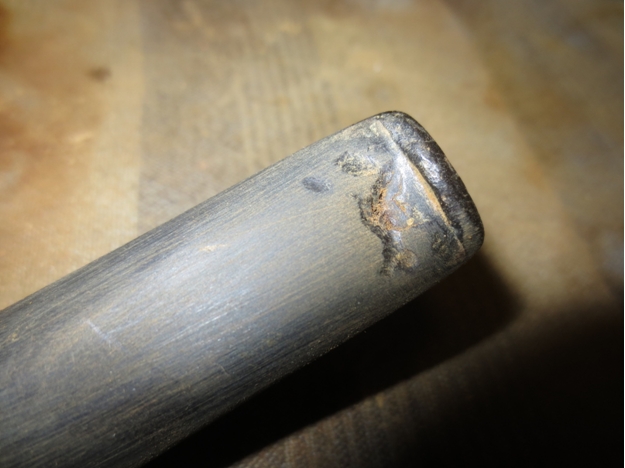
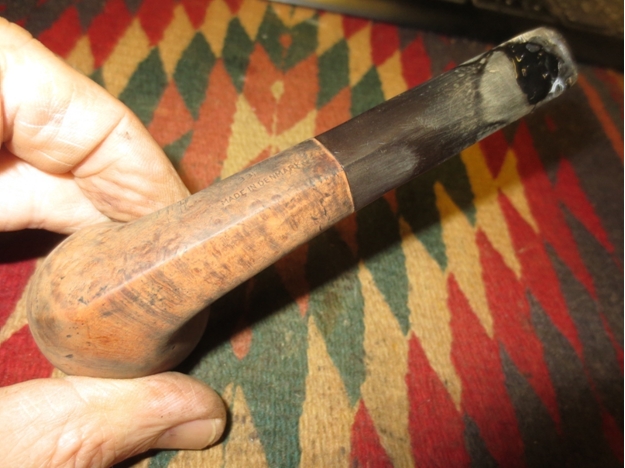
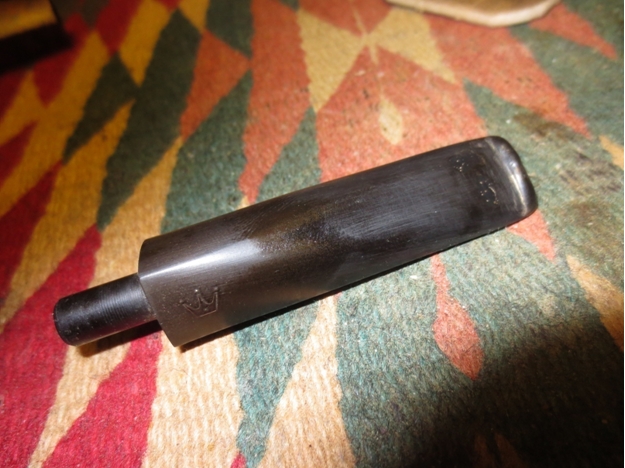
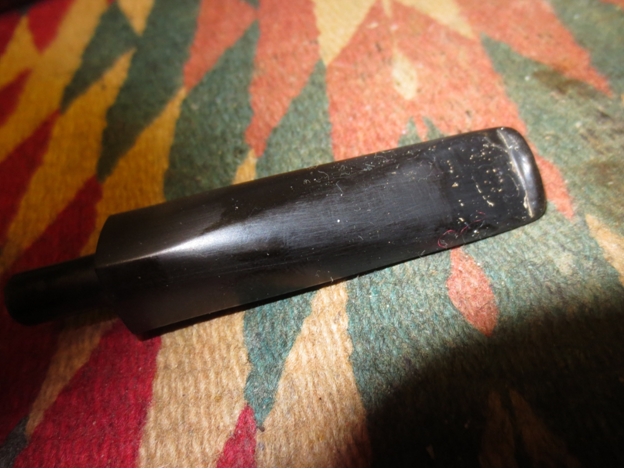
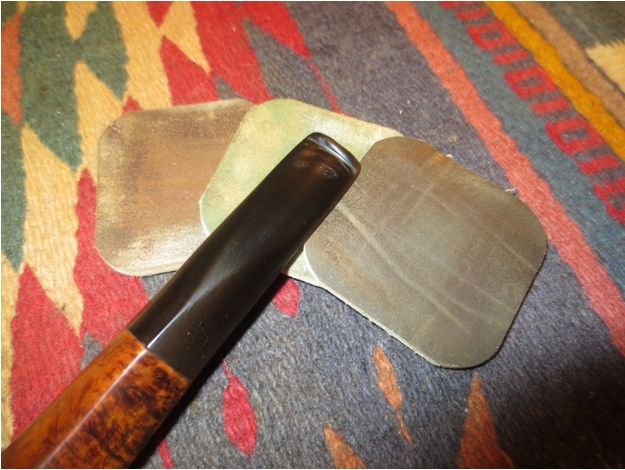
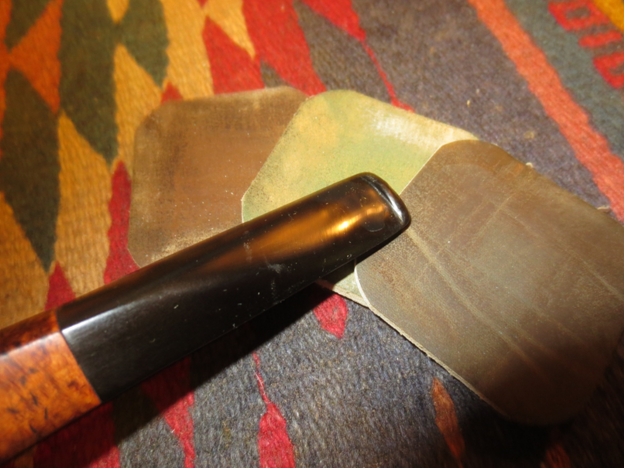
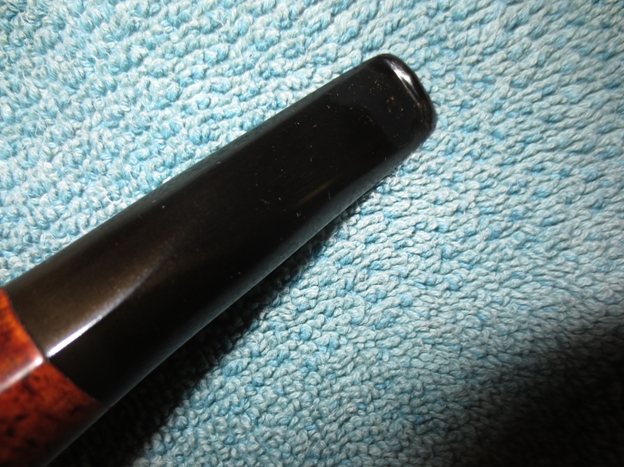
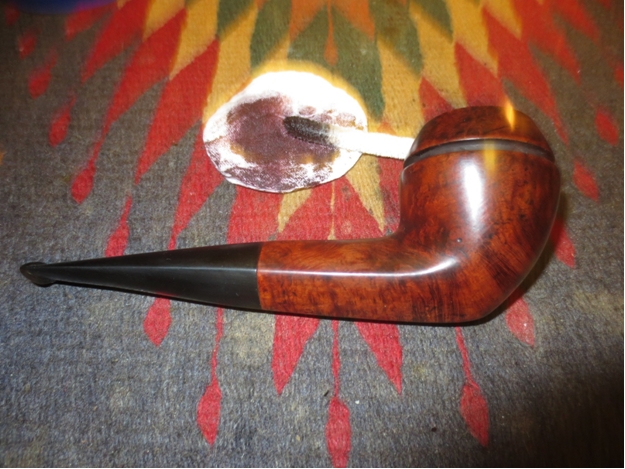
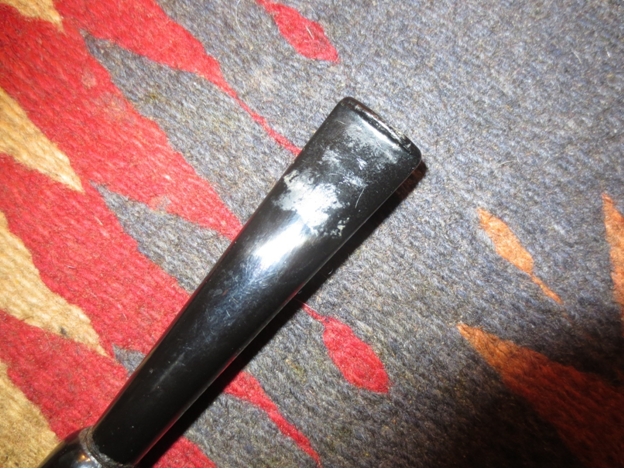
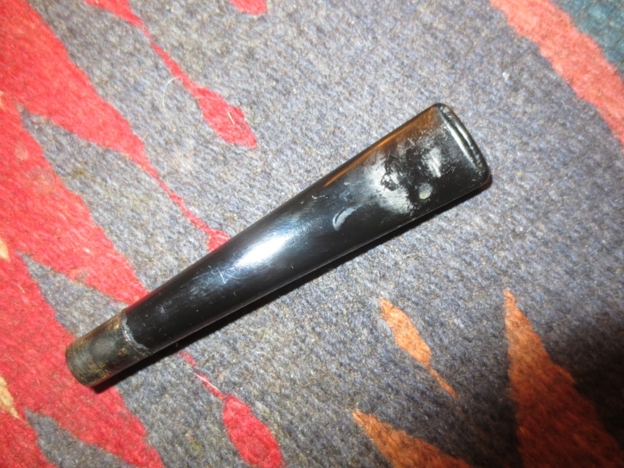
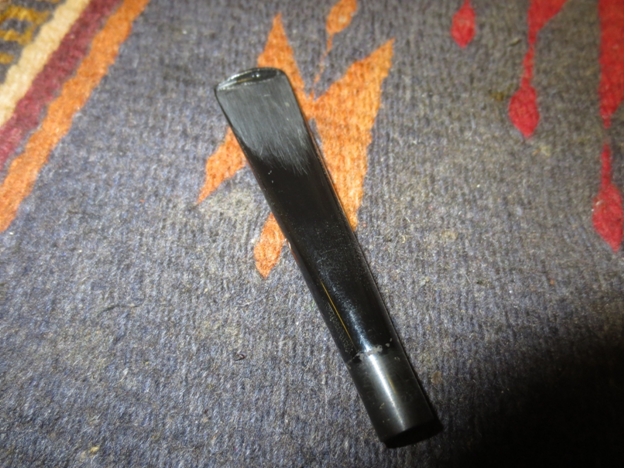
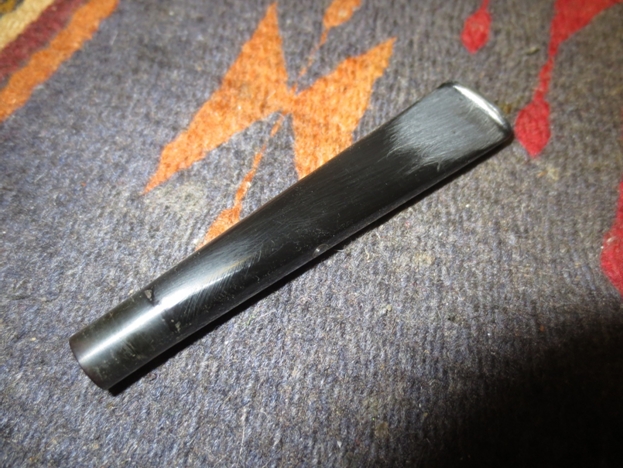
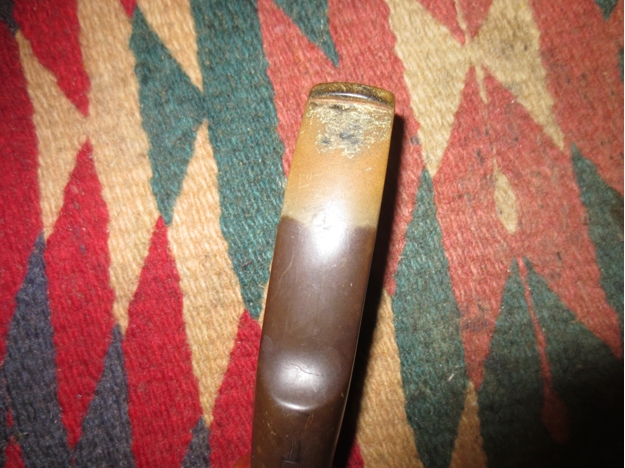
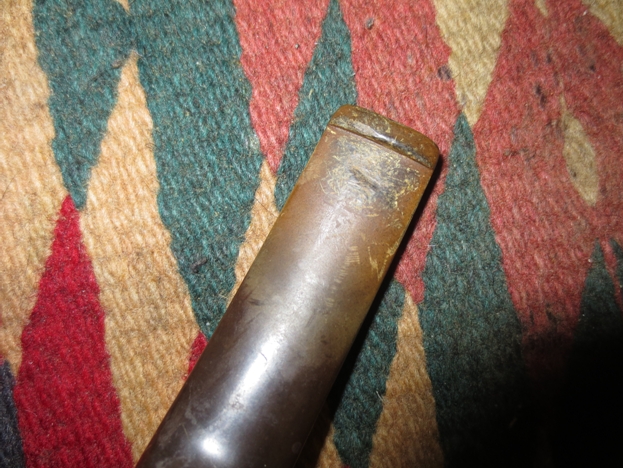
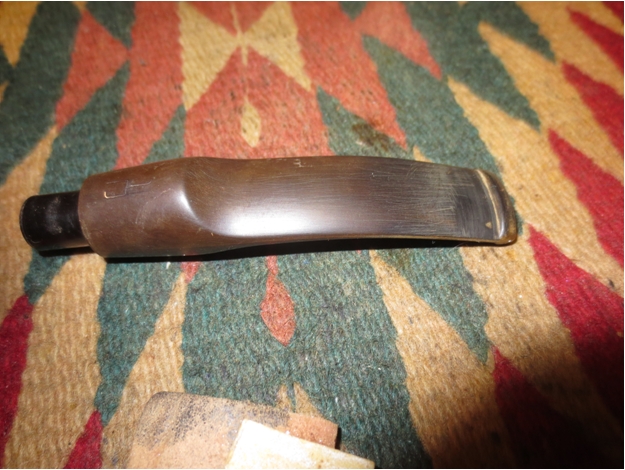
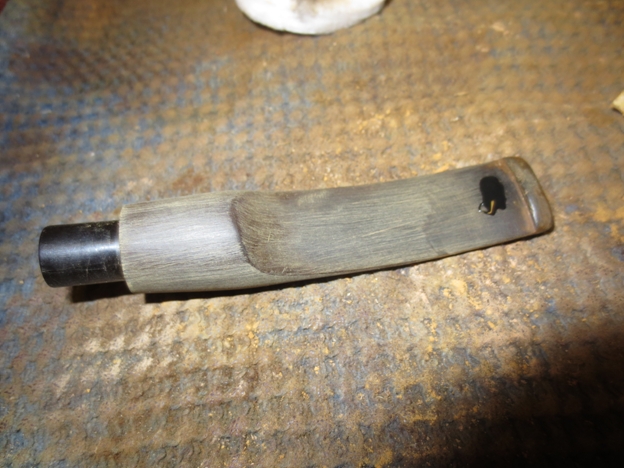
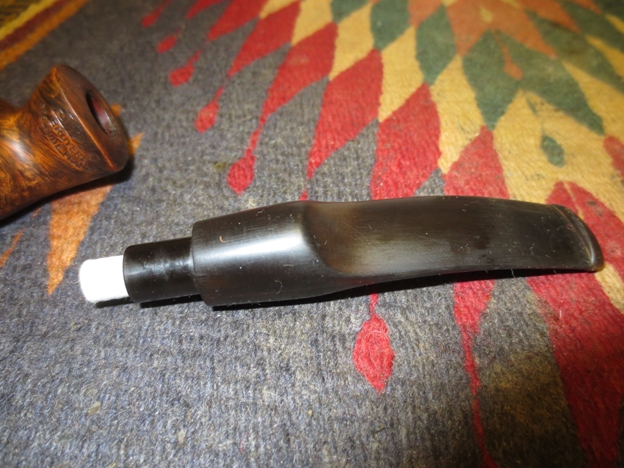
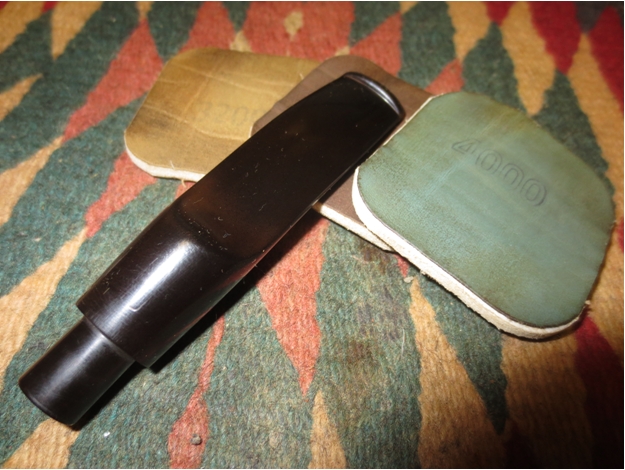
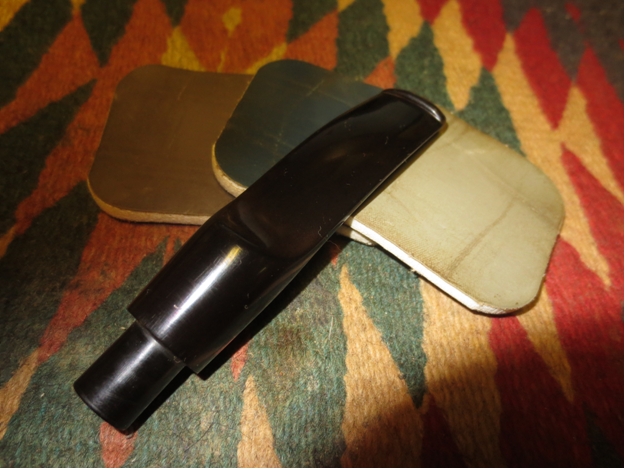
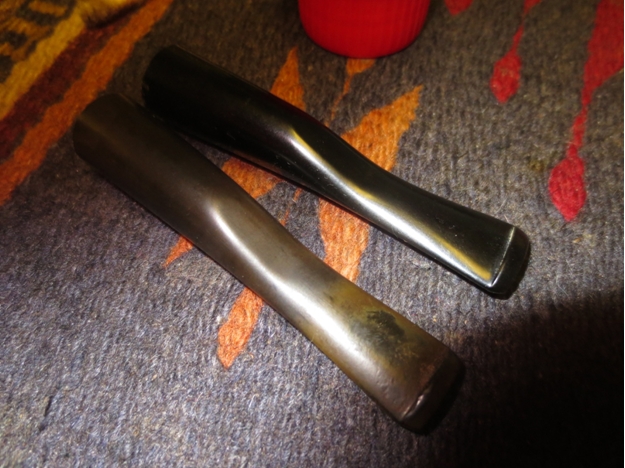
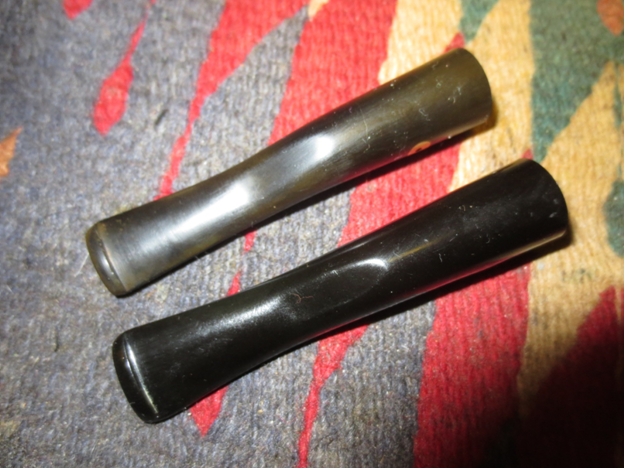
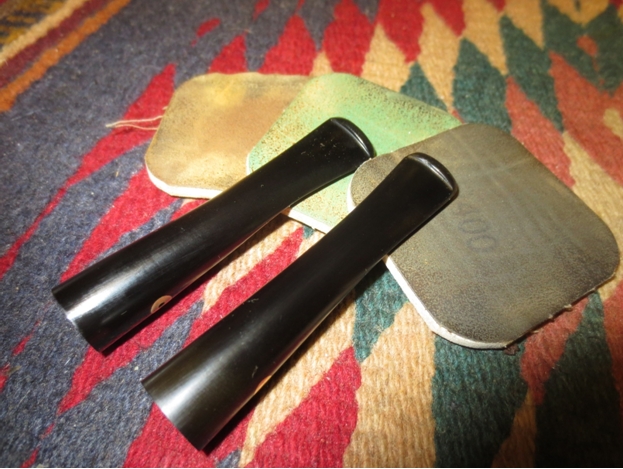
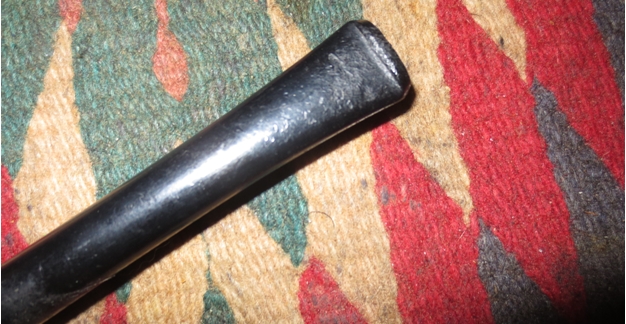
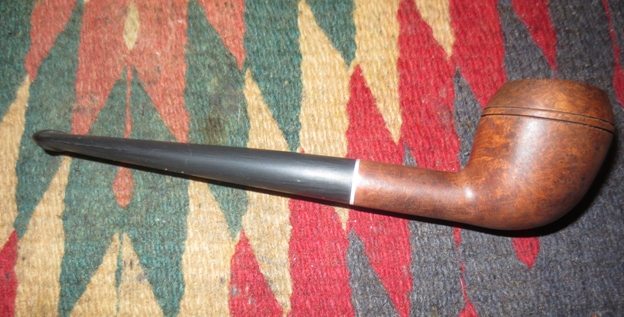
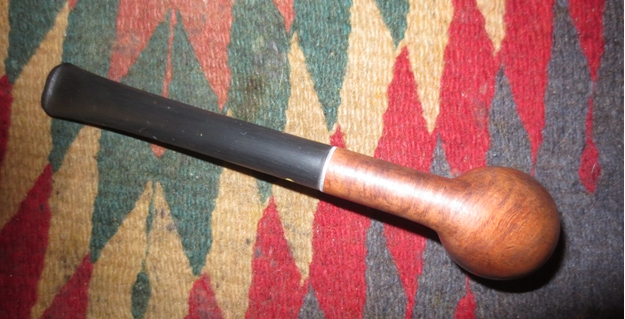
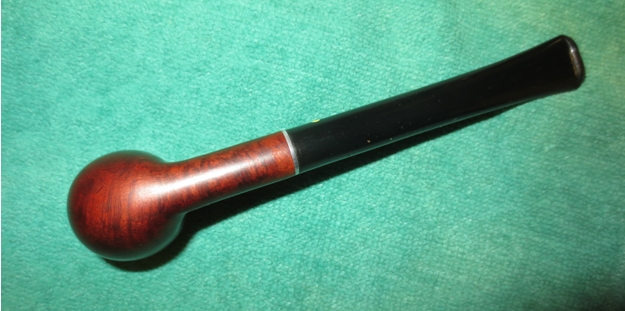
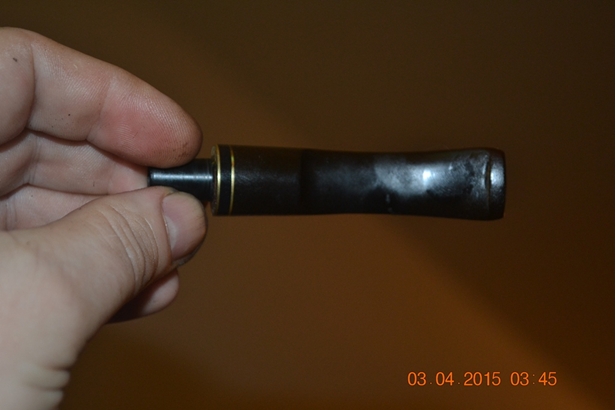
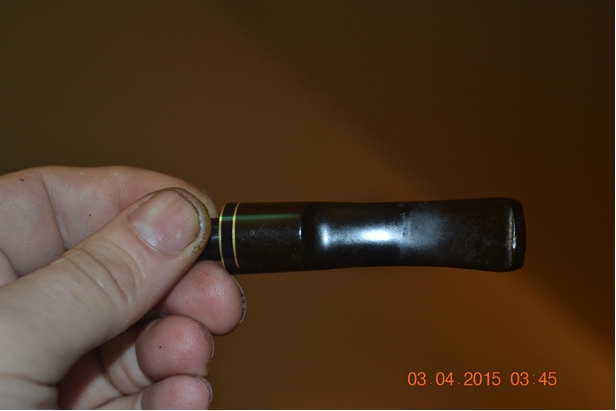
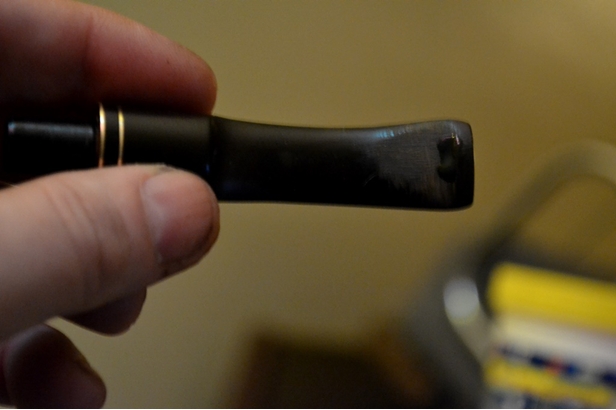
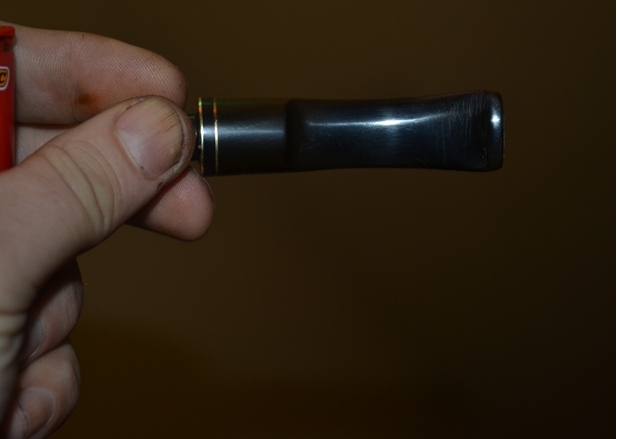
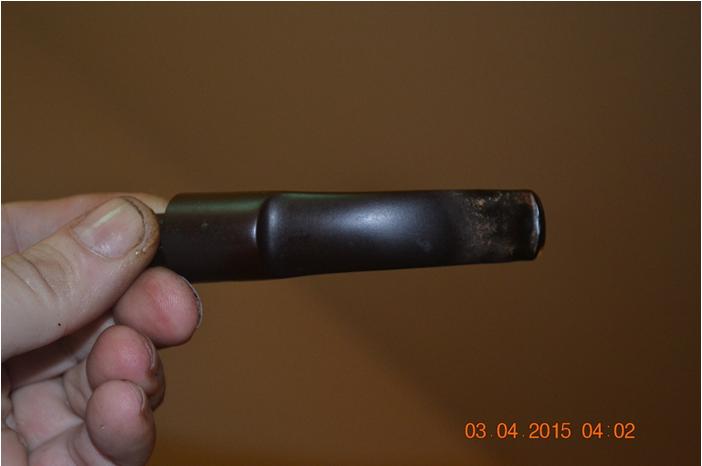
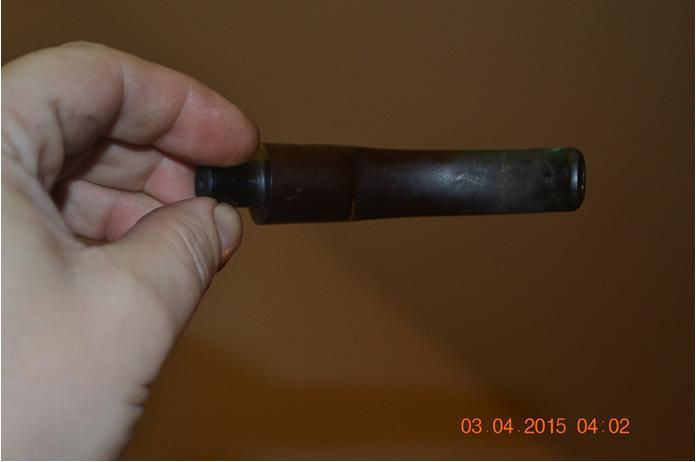
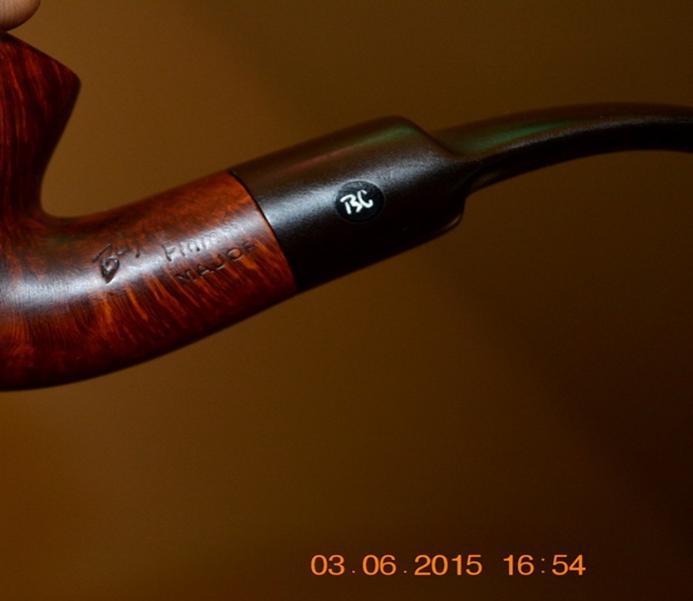
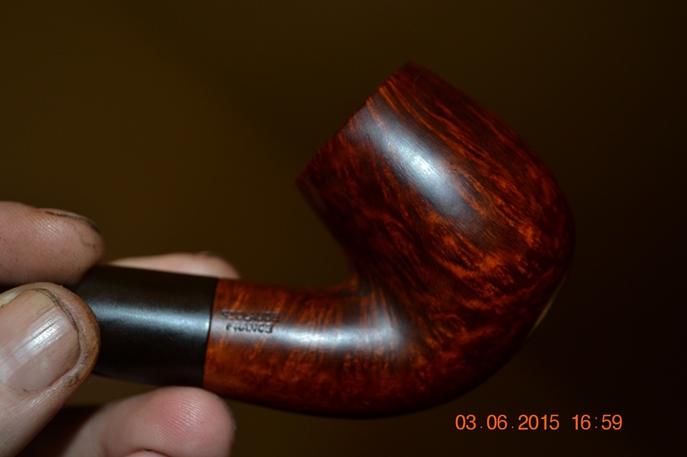
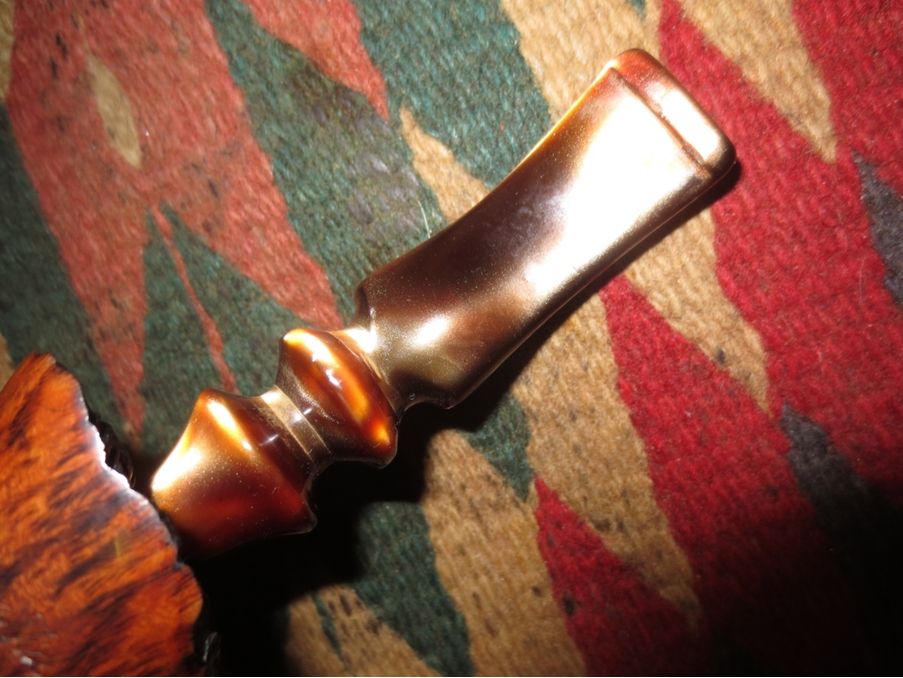
The next two photos are close up pictures of the stem and the bite marks. The first shows the calcification next to the button and the slight damage to the inside button edge. The tooth mark is visible just ahead of the white line on the stem. The stem was also lack luster and the shine was gone. The second photo shows the underside of the stem. It was slightly wavy like it had been pushed to heavily into the buffing wheel. There was a small tooth mark in the same spot as on the upper side of the stem.Ben5

Ben6 
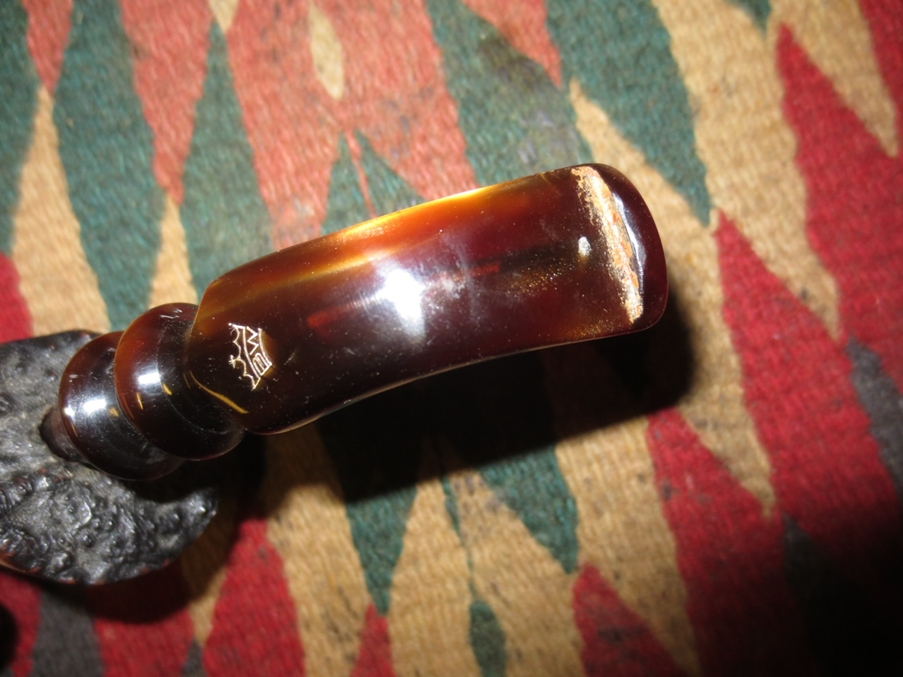
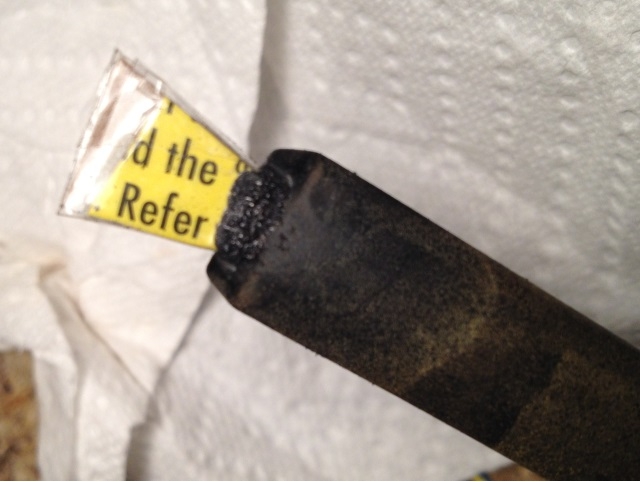
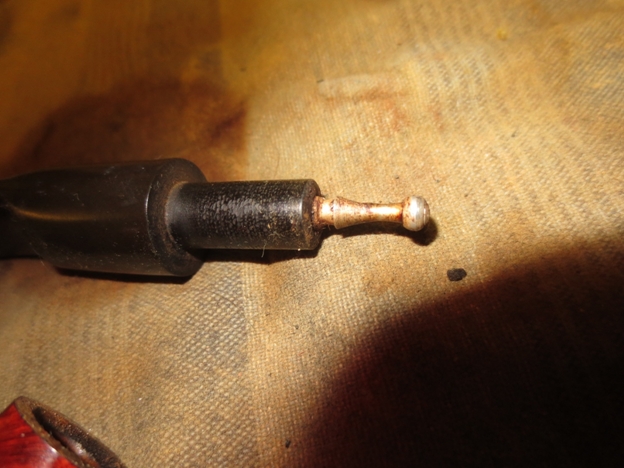
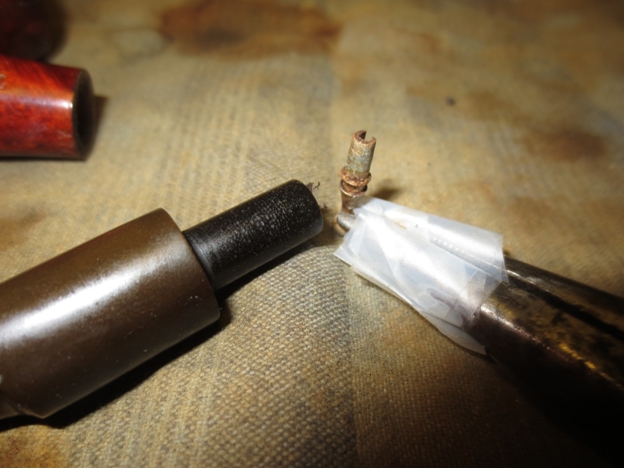
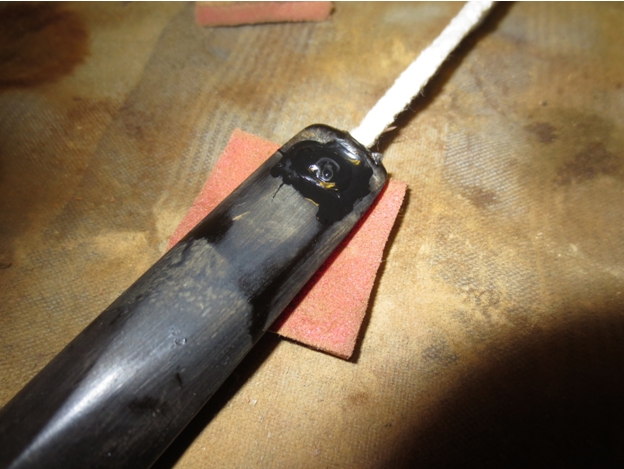
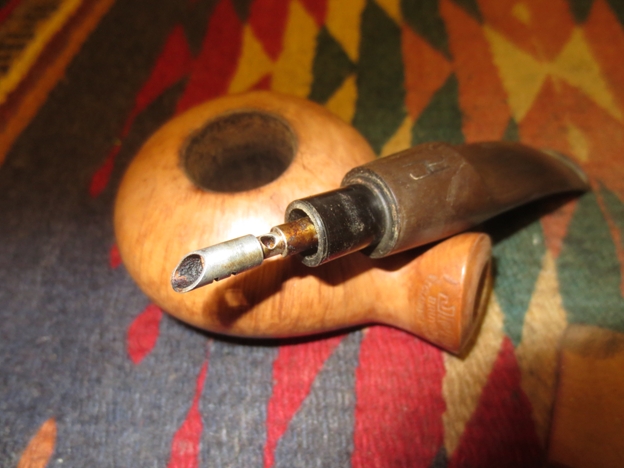
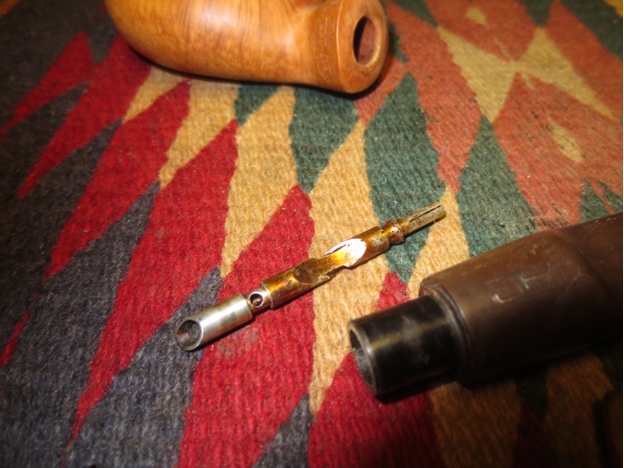
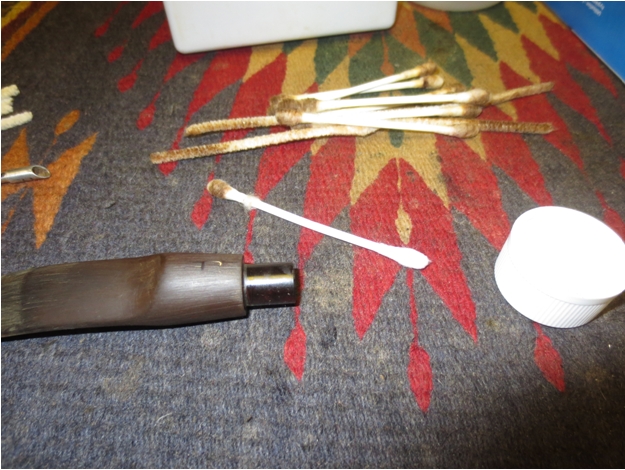
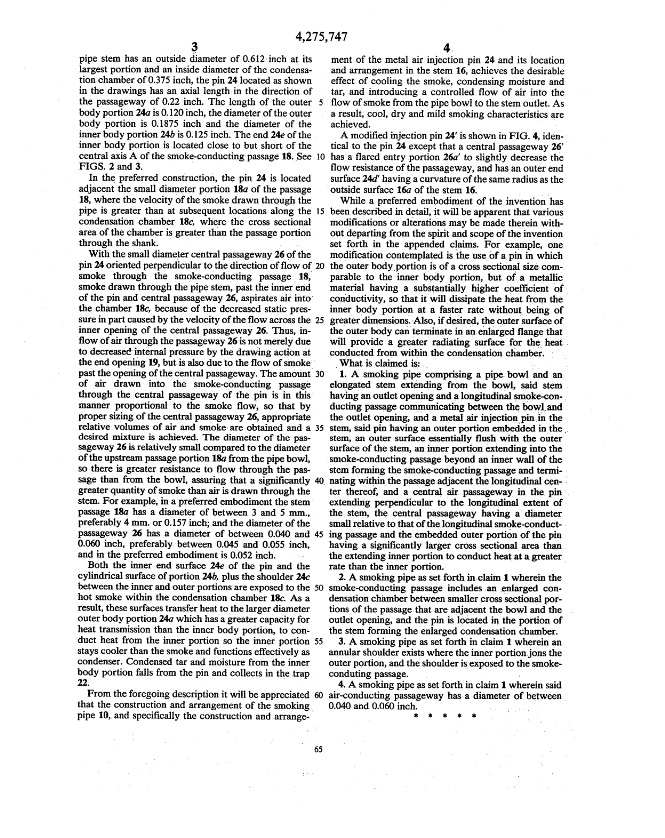
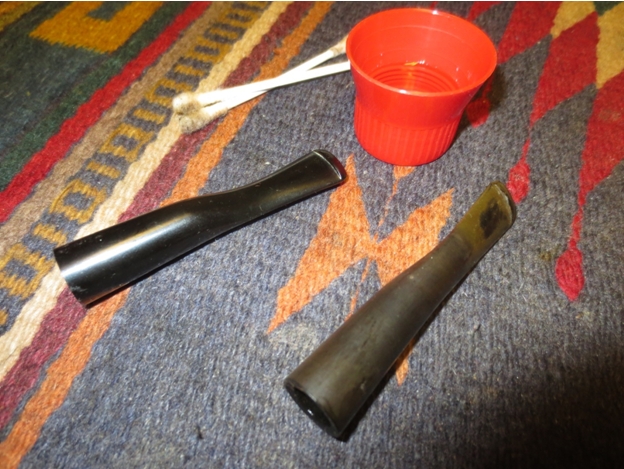
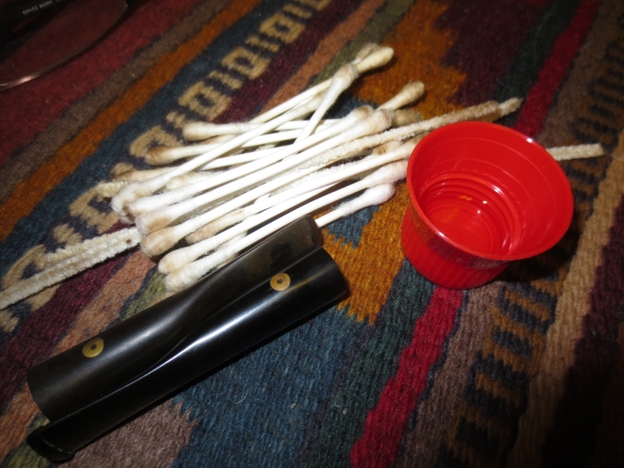
I decided to address the issues with the stem first. I used a straightened paper clip bent to the angle of the stem to push through the airway. Pushing from the slot I was unable to get the wire through the airway. I pushed it through from the tenon and a large chunk of tars and pipe cleaner detritus came out of the button. I worked the wire around in the airway to clean the sides and remove any other build up. It appeared to be at the bend in the stem. I then used pipe cleaners and cotton swabs and isopropyl alcohol to clean out the airway and remove the remaining tars and oils in the stem and tenon.

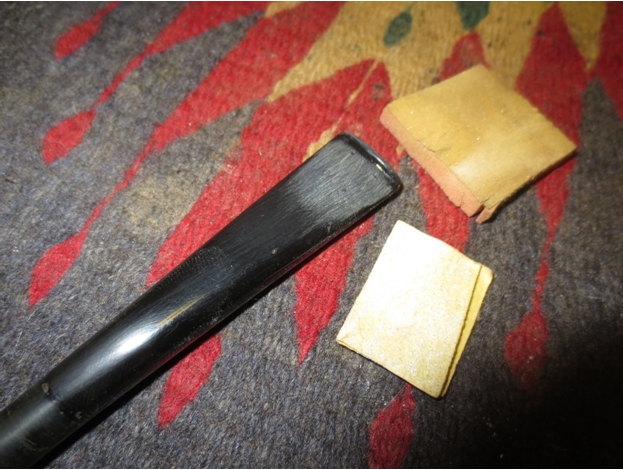
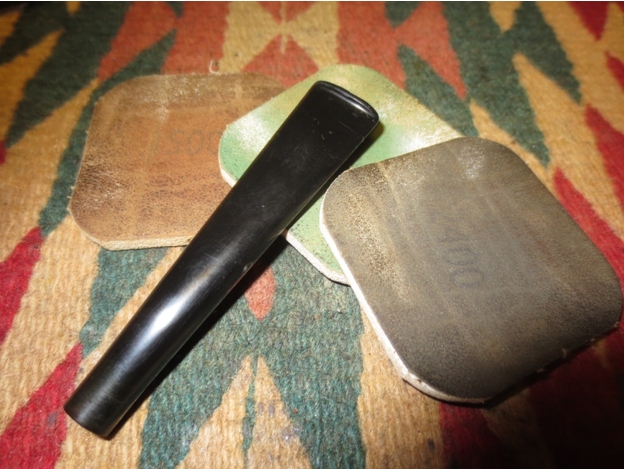
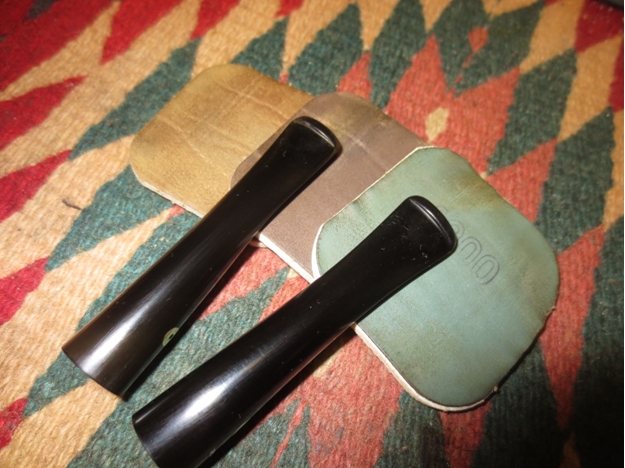
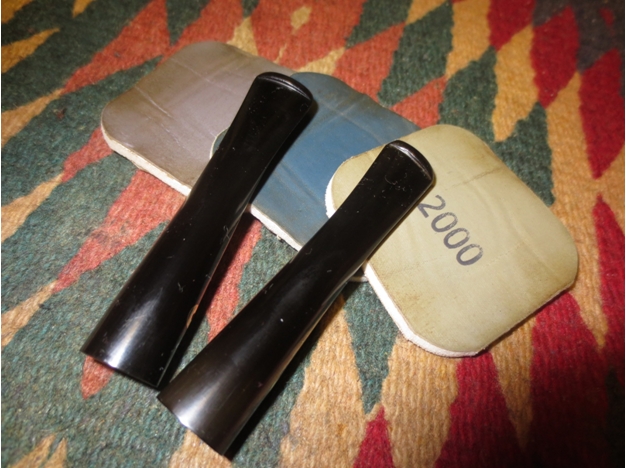
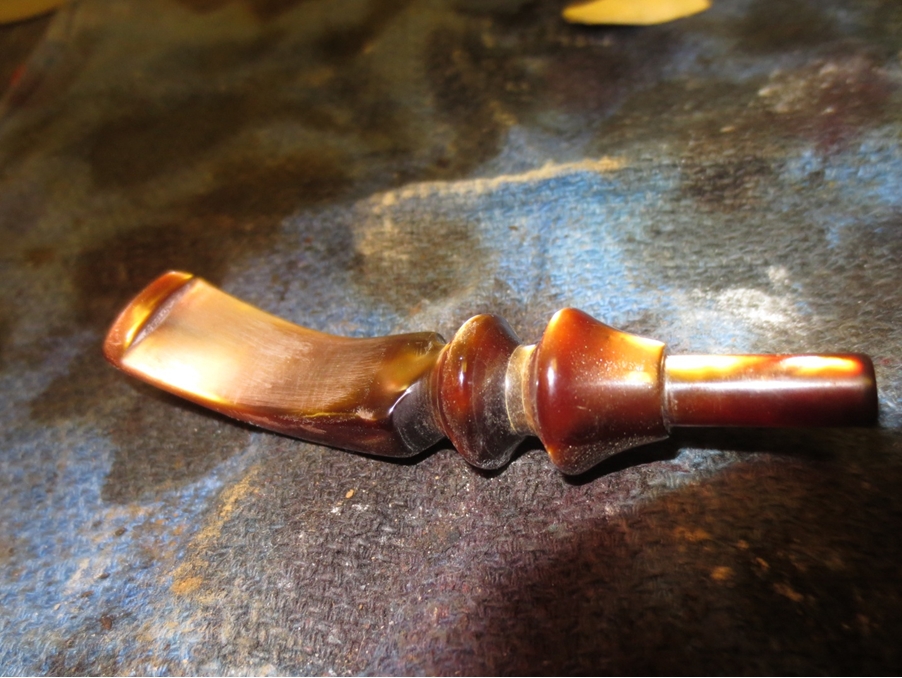
I sanded the tooth marks on the topside and underside of the stem with 220 grit sandpaper until I had removed the damaged area. I also wanted to thin the thick Lucite slightly as there was plenty of material to work with. I sanded with a medium and a fine grit sanding sponge to remove the scratches and see if I had removed the mark. It took repeated sanding with the three grits of sanding material to remove the remnants of the tooth marks.Ben7

Ben8

Ben9 
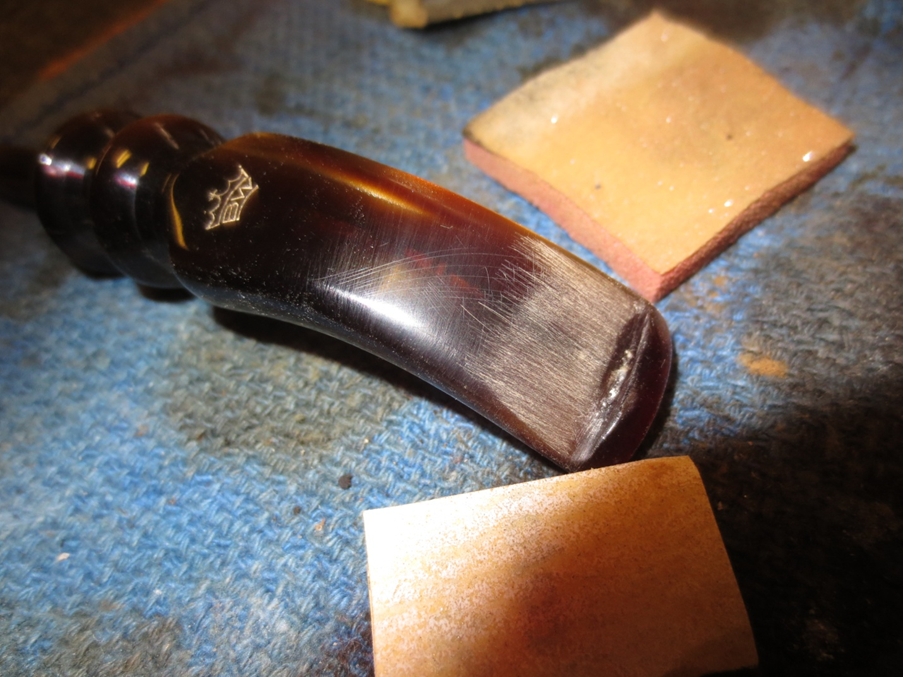
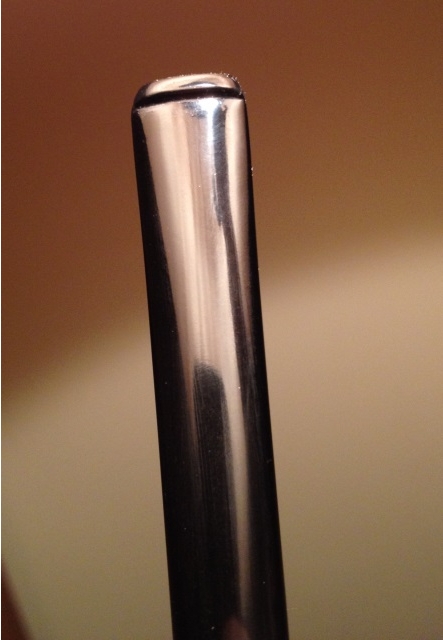
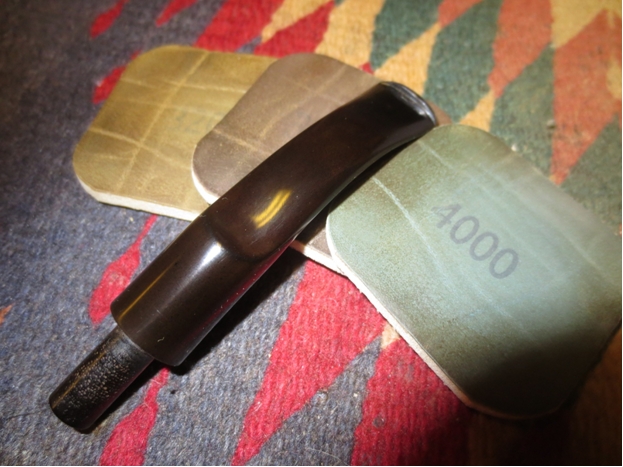
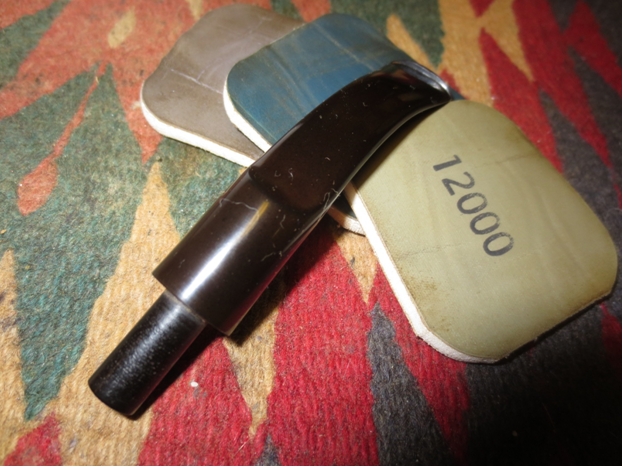
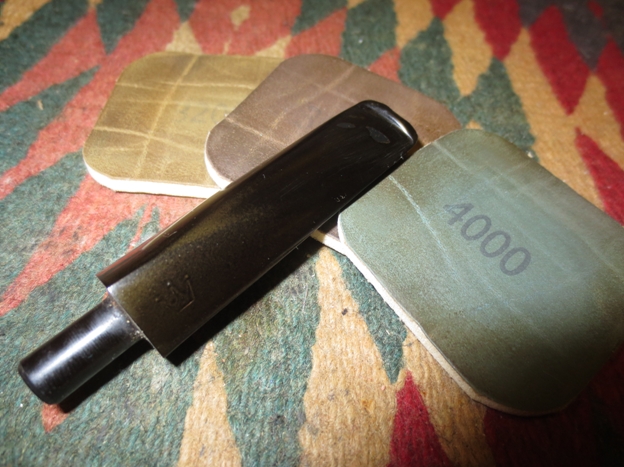
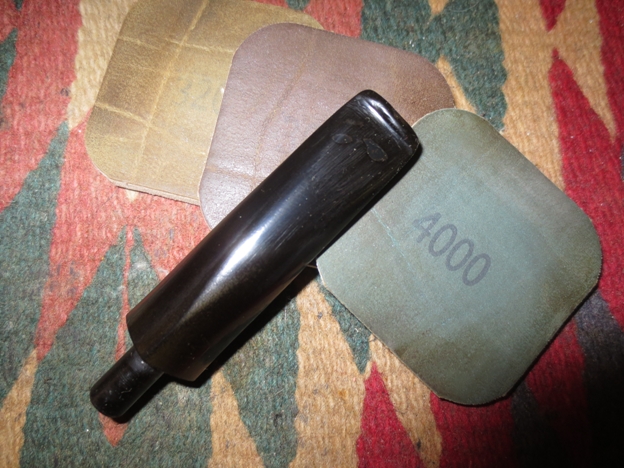
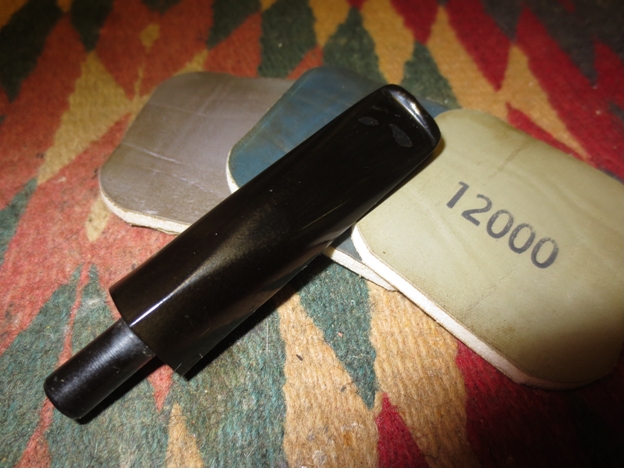
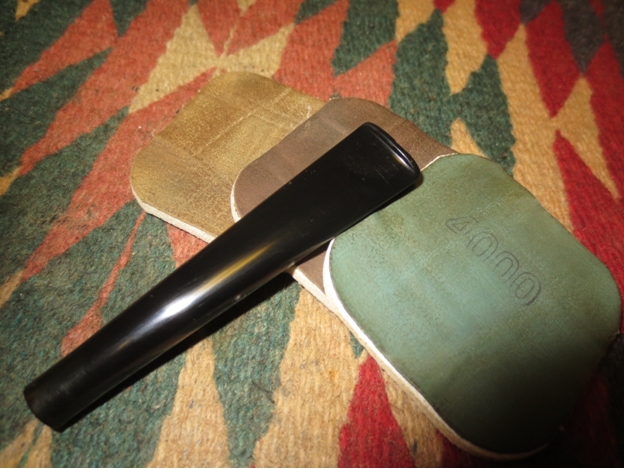
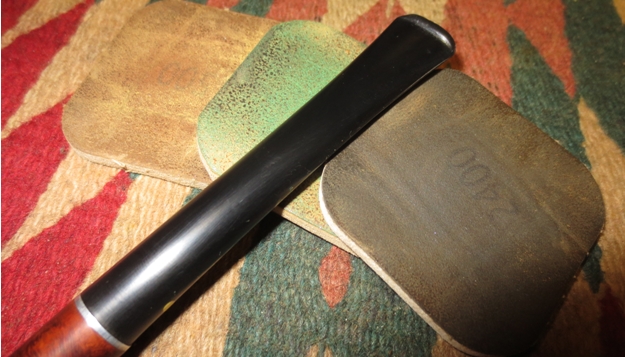
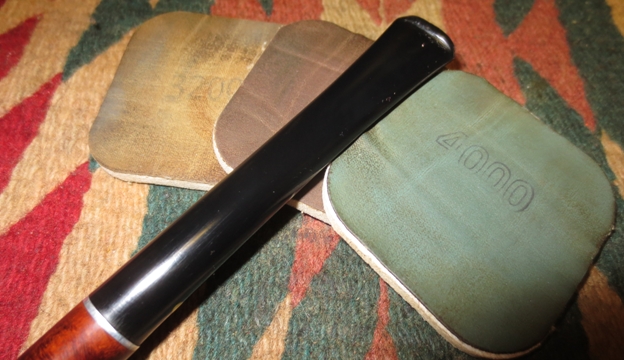
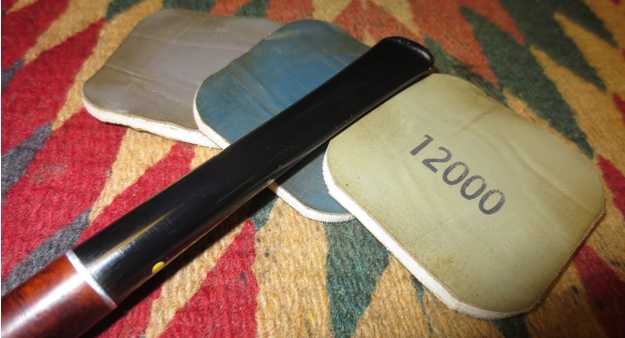
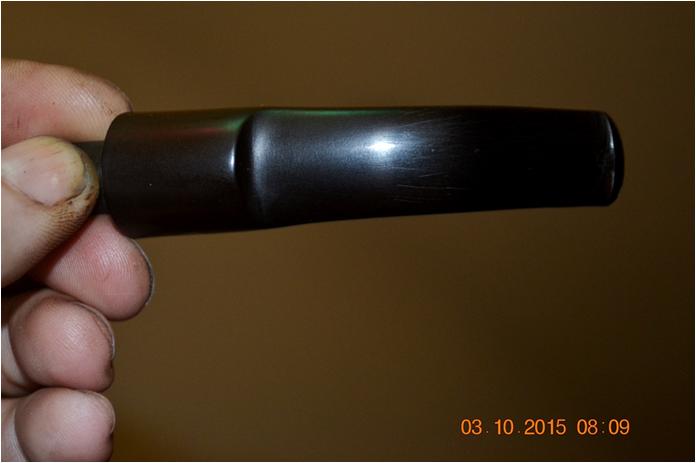
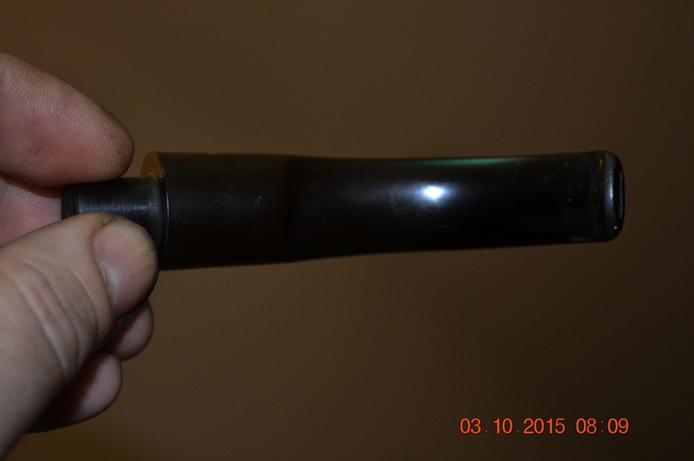
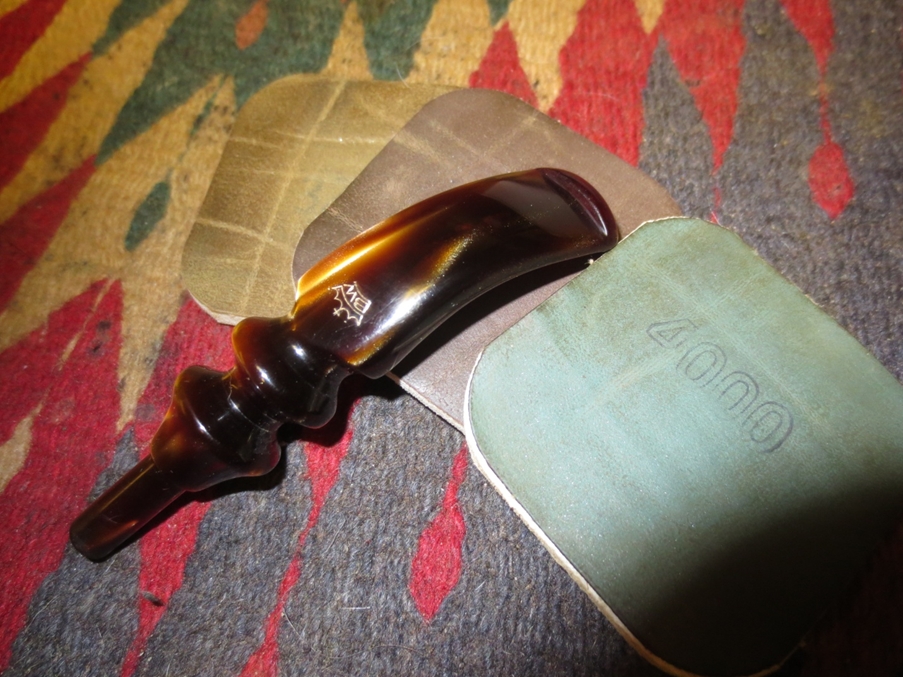
I continued to sand with the fine grit sanding sponge to minimize the scratches and then sanded the stem with 600 grit wet dry sandpaper. Once I had finished with the sandpaper I used micromesh sanding pads. I wet sanded with 1500-2400 grit sanding pads and dry sanded with 3200-12,000 grit pads. I rubbed the stem down with Obsidian Oil between the grits in order to provide the medium for the micromesh to cut better. When I finished I buffed the stem with Blue Diamond plastic polish on the buffing wheel and then gave it several coats of carnauba wax.Ben10

Ben11

Ben12 
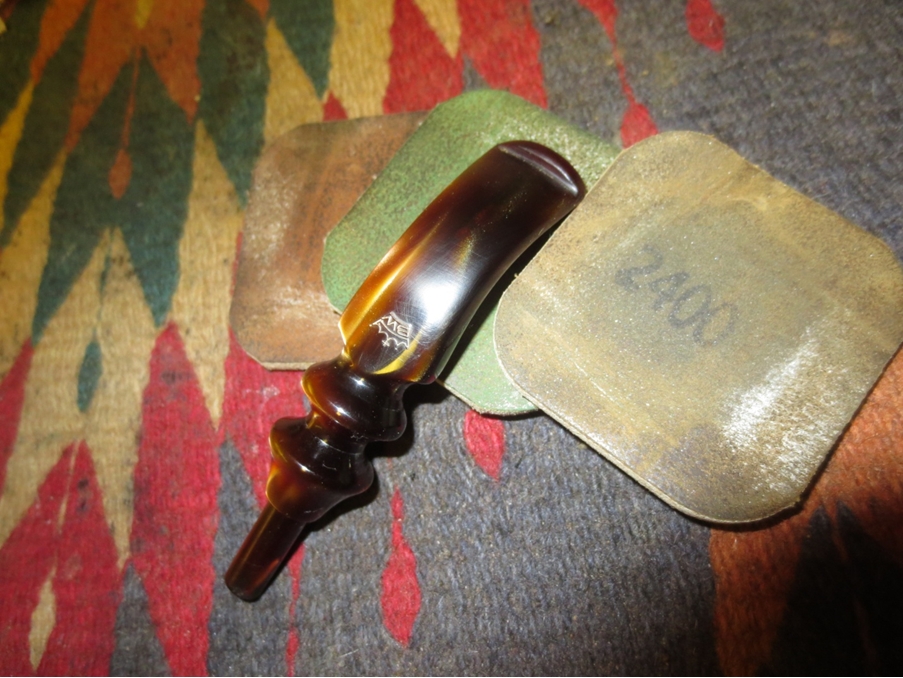
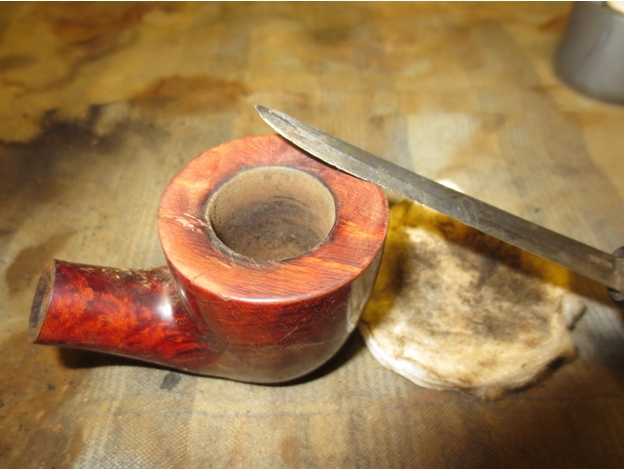
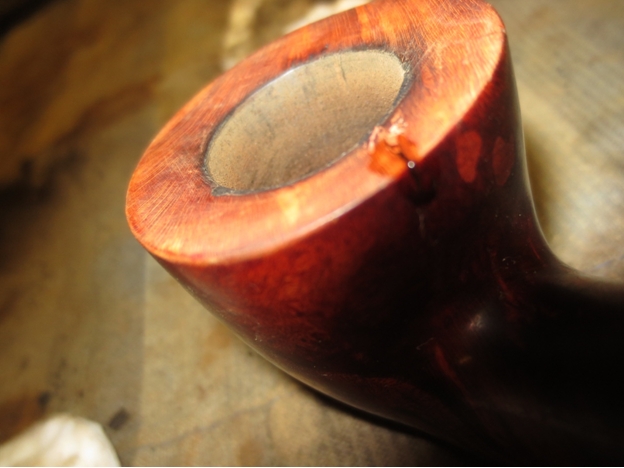
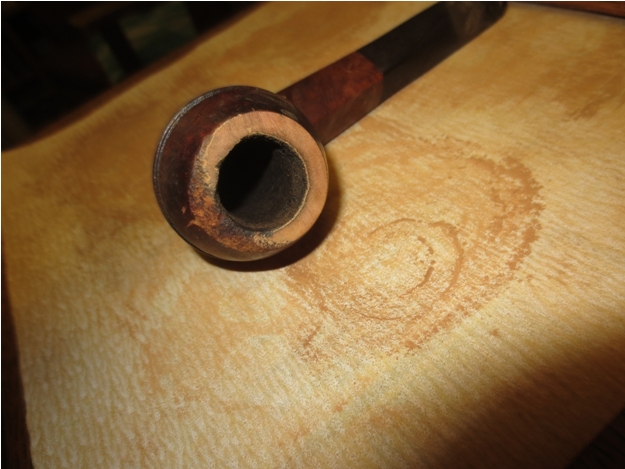
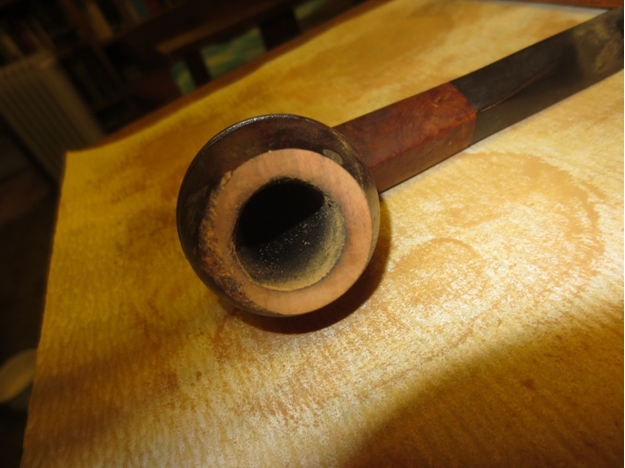
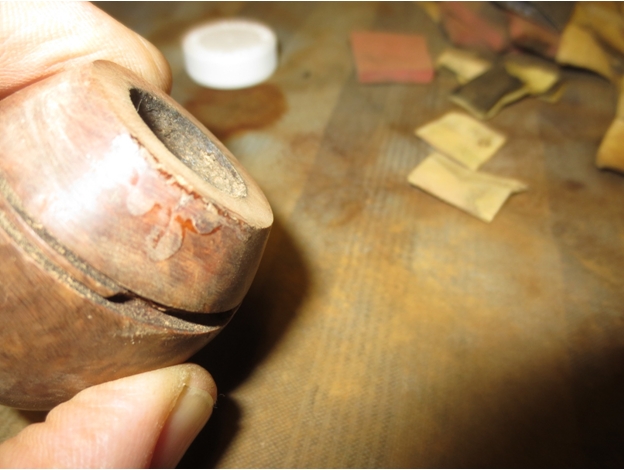
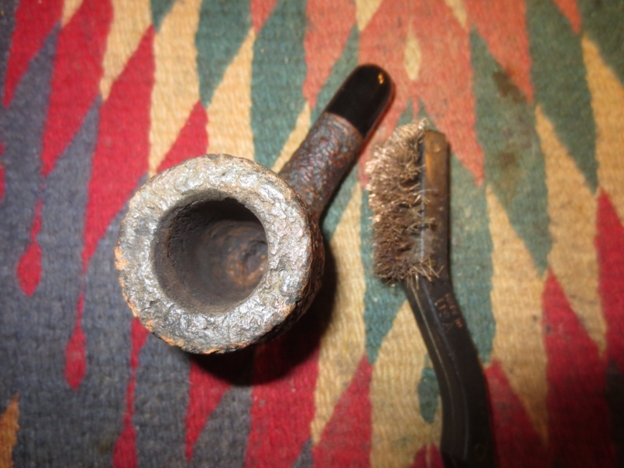
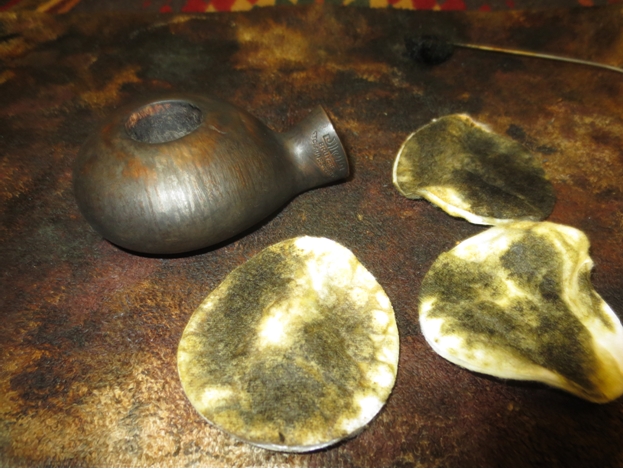
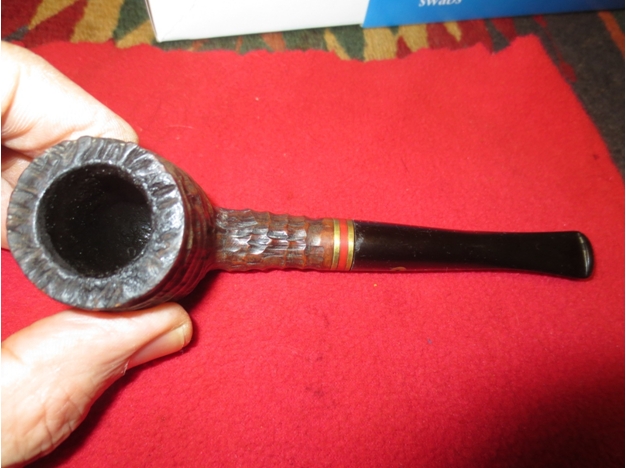
I set aside the stem so that I could work on the bowl. When the bowl was finished I would buff the two parts together and also give them another coat of wax. I used a soft bristle brass white wall brush to work on the buildup on the rim and plateau. It was quite thick on the inner edge of the rim. I have learned over time that the tar coat really protects the briar underneath. Once I had removed the tars I would see that.Ben13 
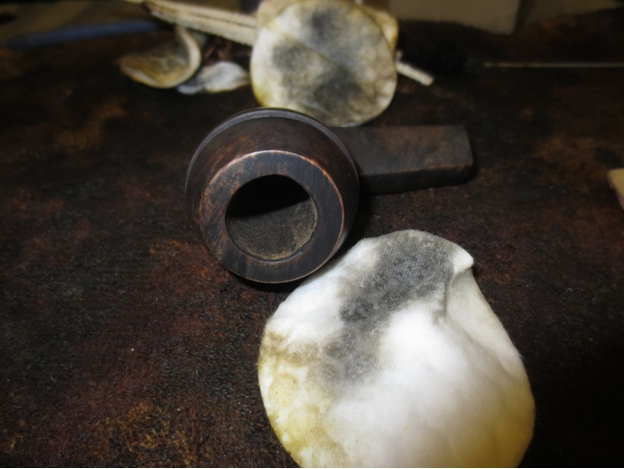
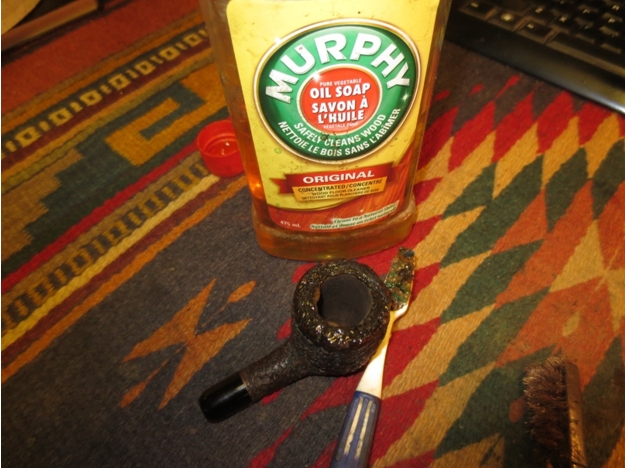
I scrubbed the exterior of the bowl with Murphy’s Oil Soap to remove the grime and oils that were all over the surface. I used cotton pads to scrub the bowl.Ben14 
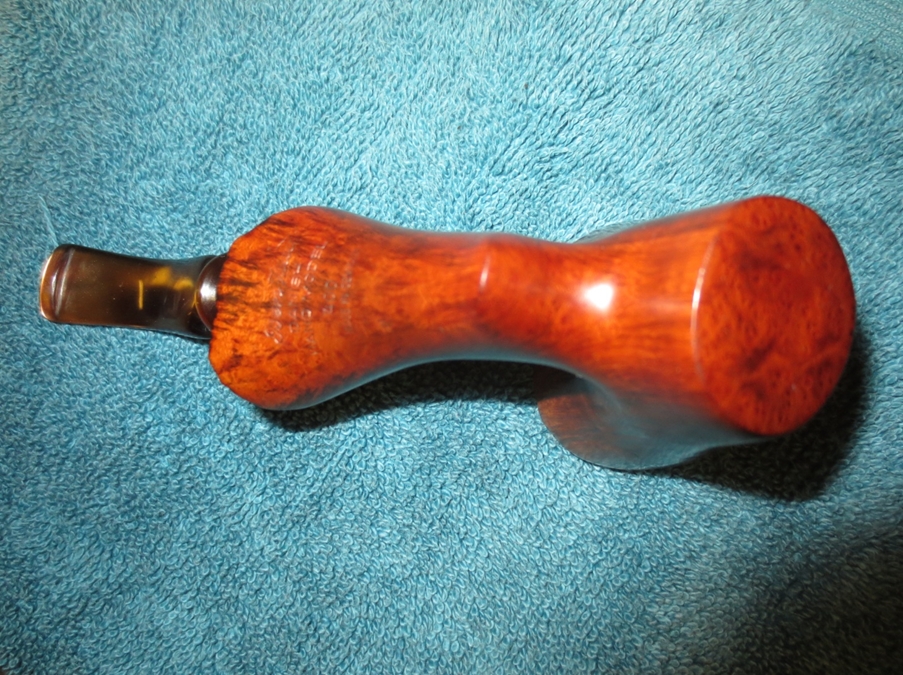
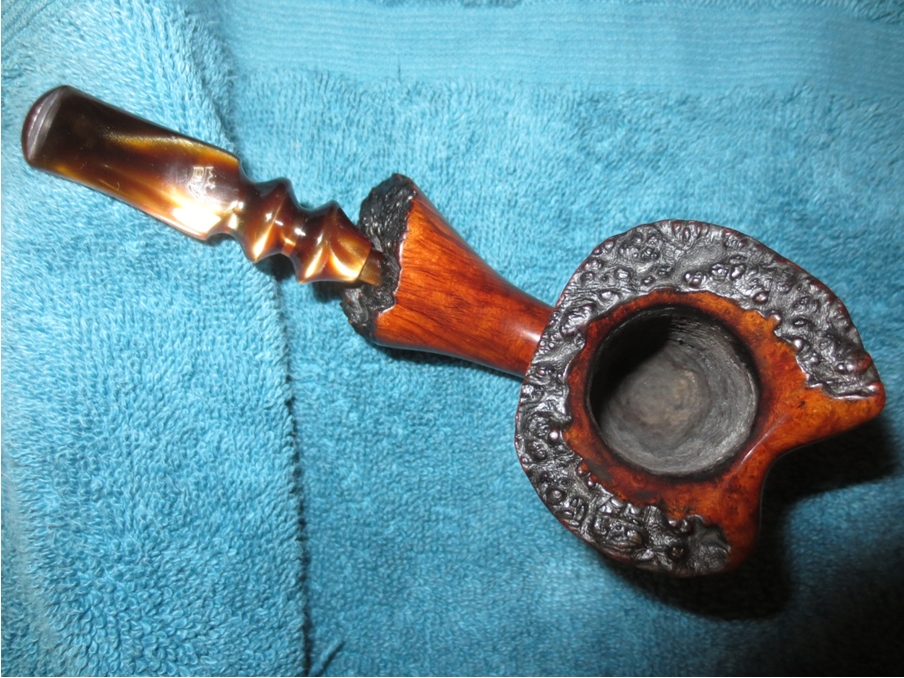
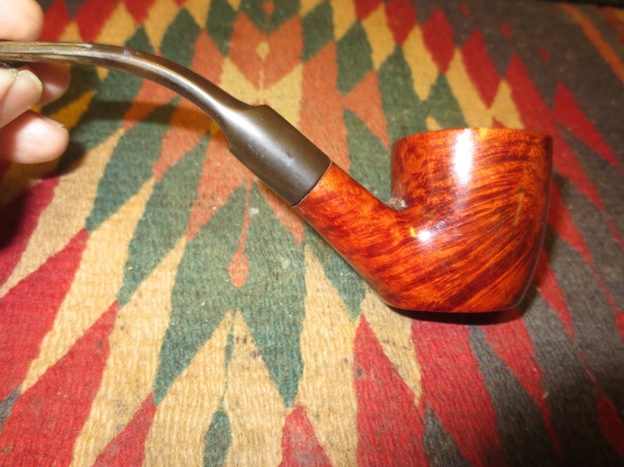
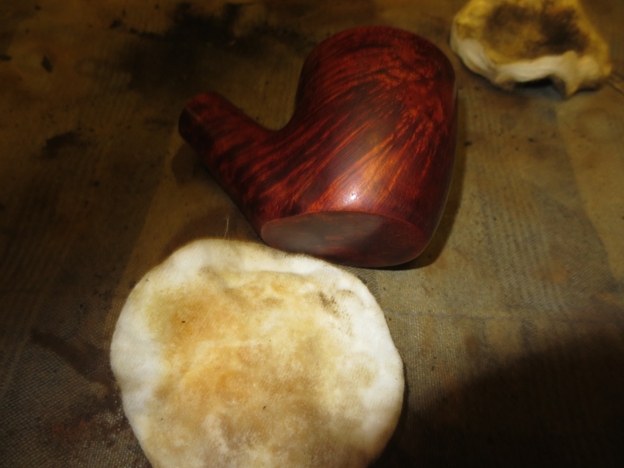
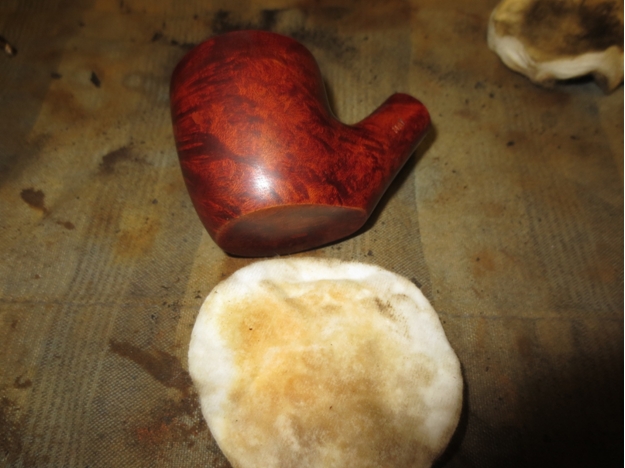
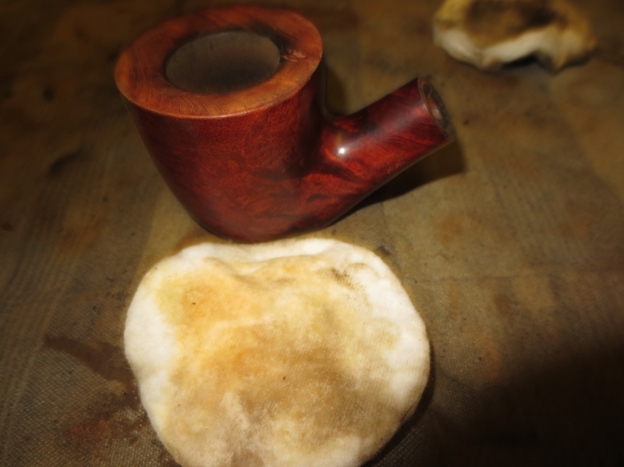
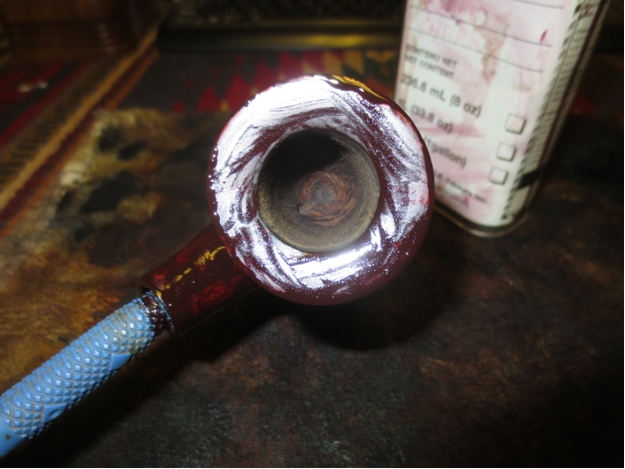
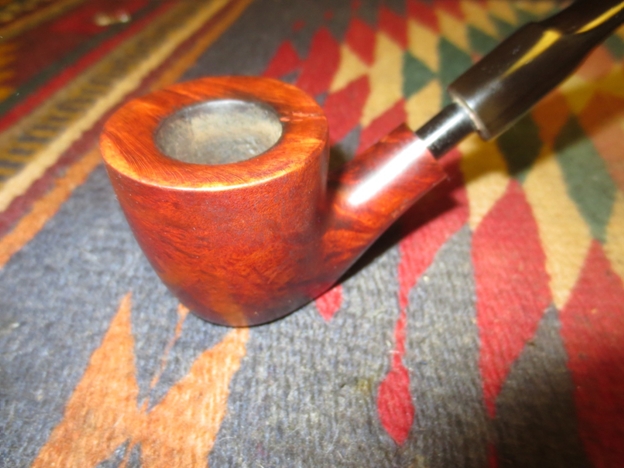
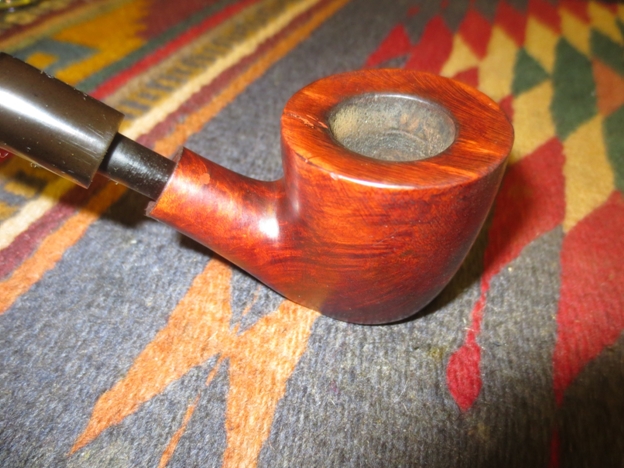
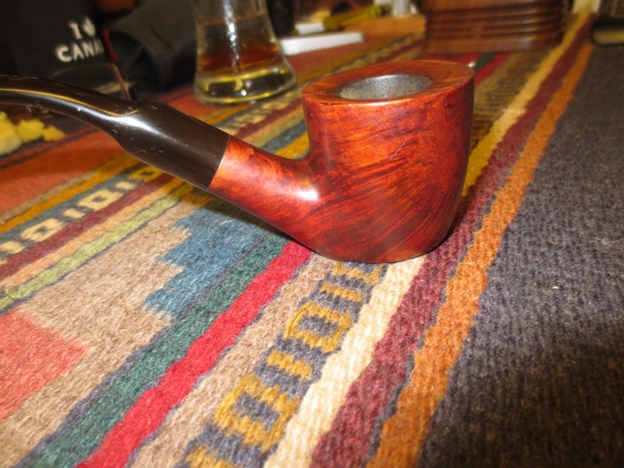
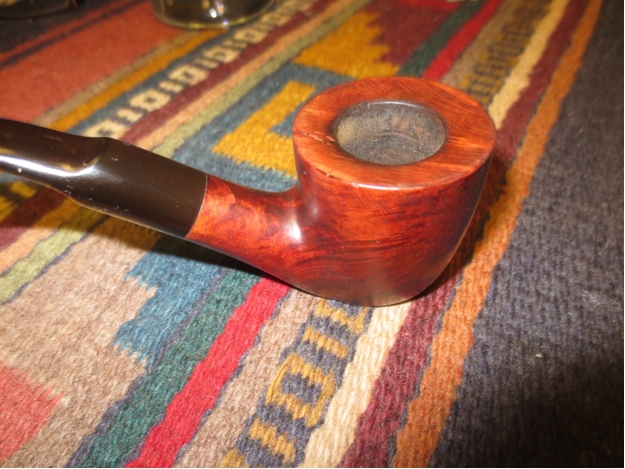
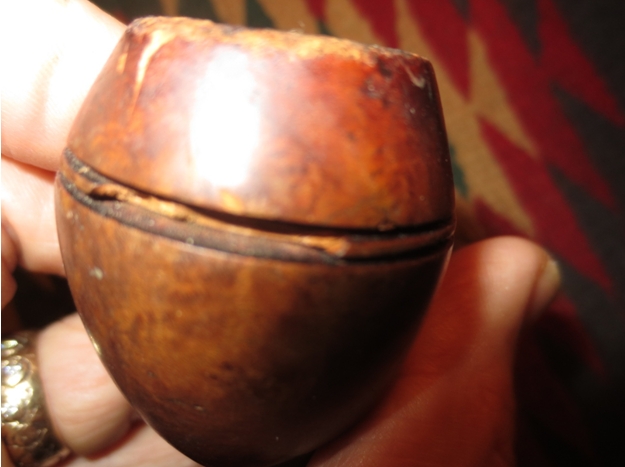
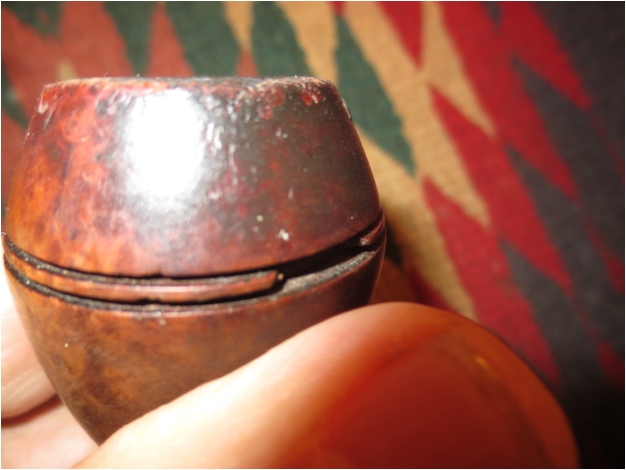
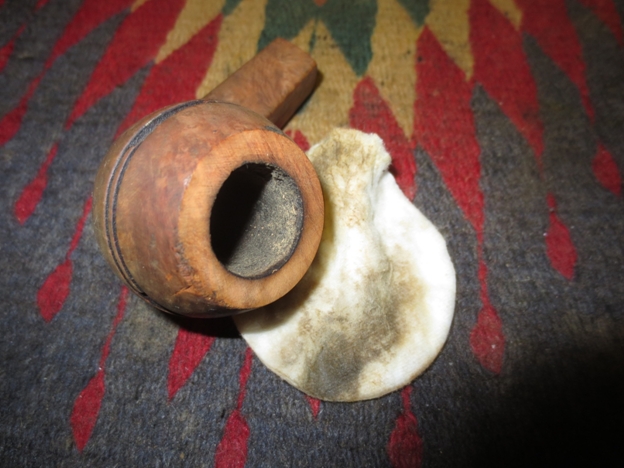
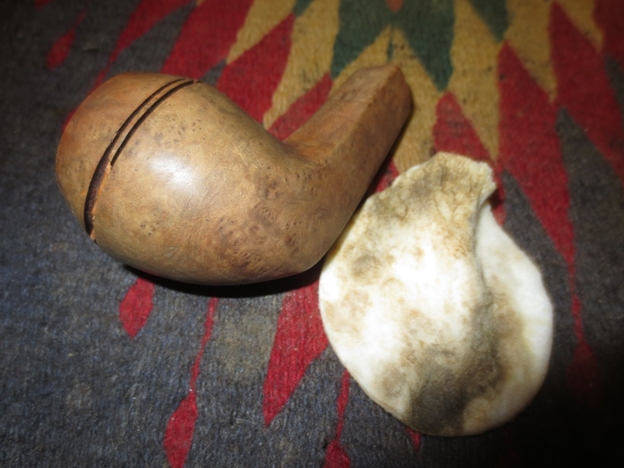
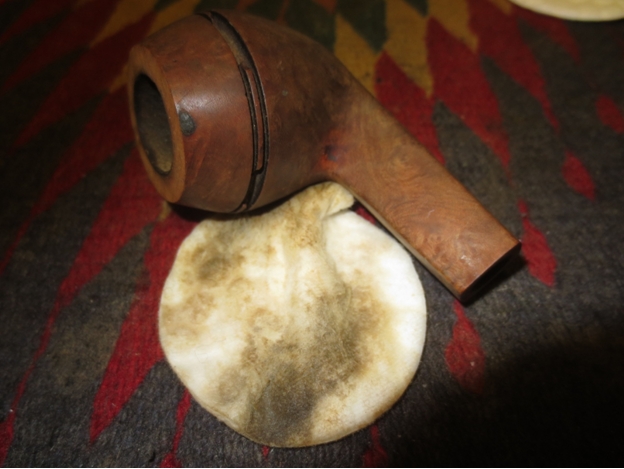
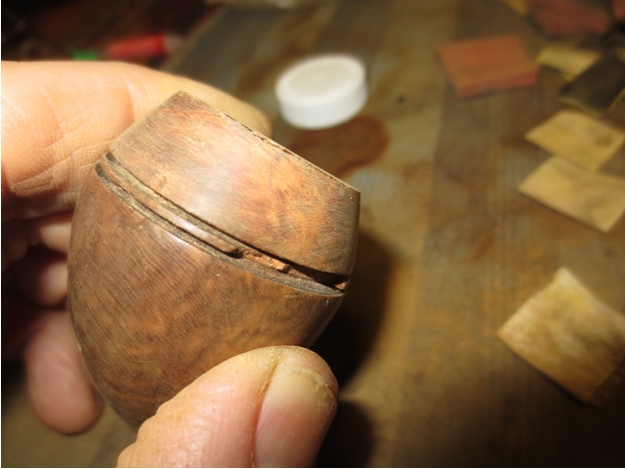
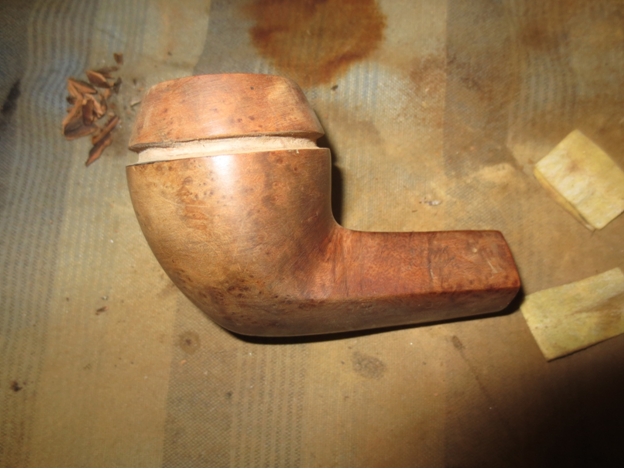
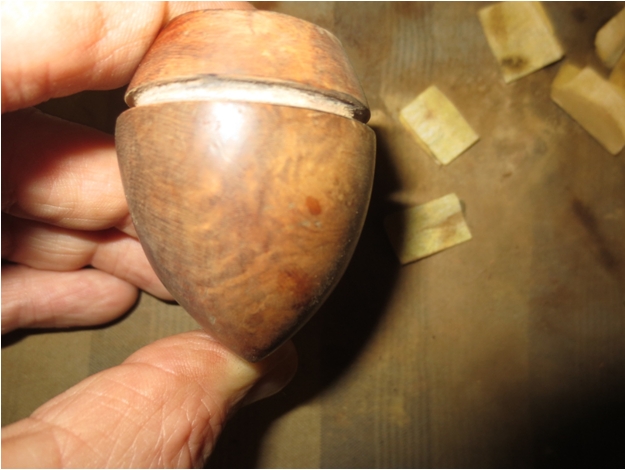
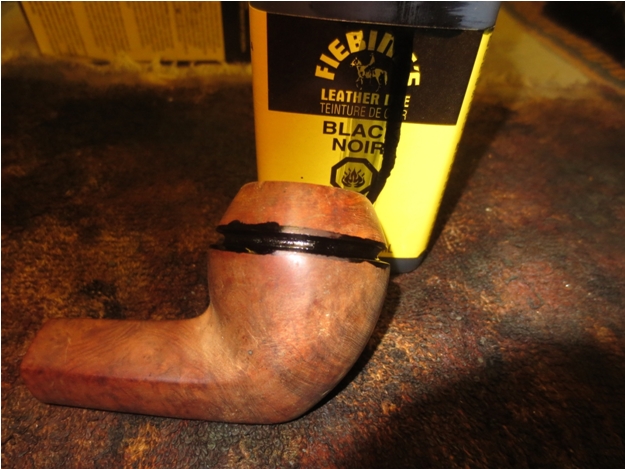
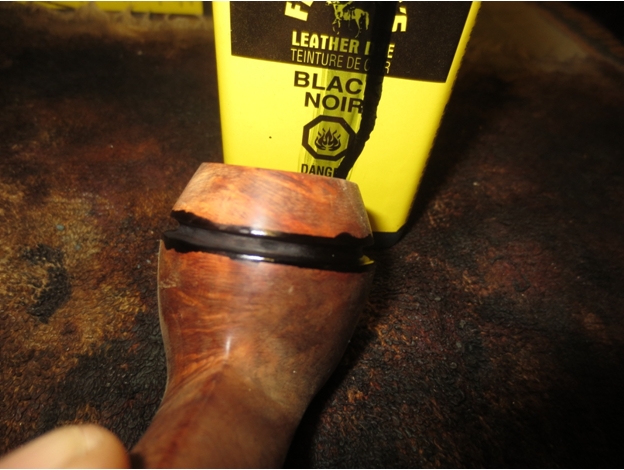
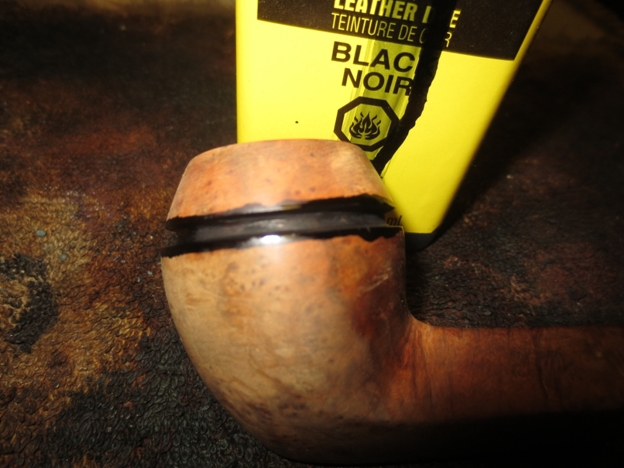
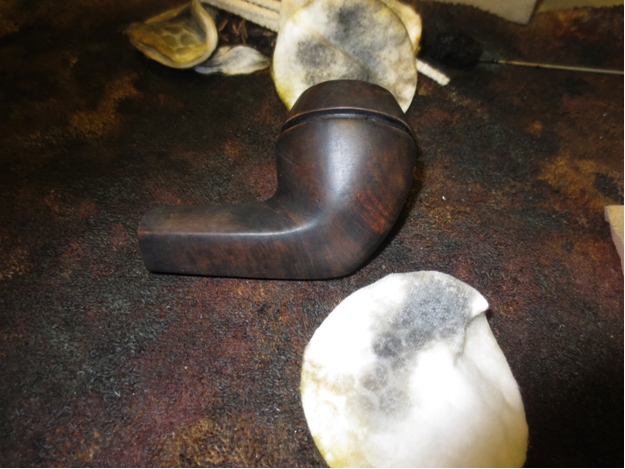
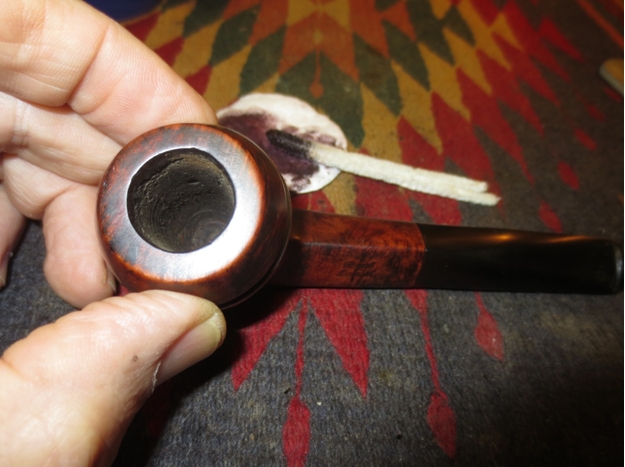
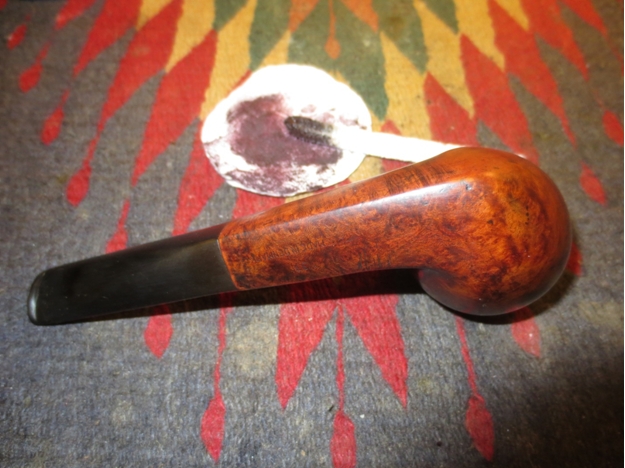
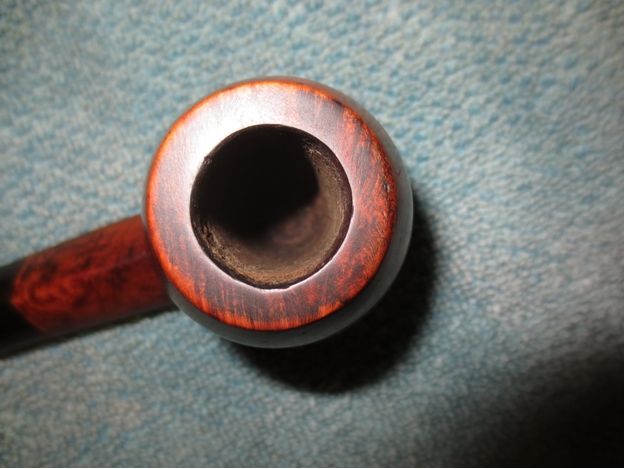
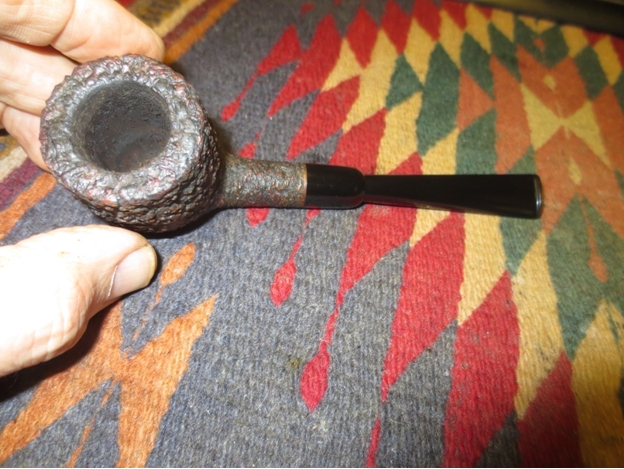
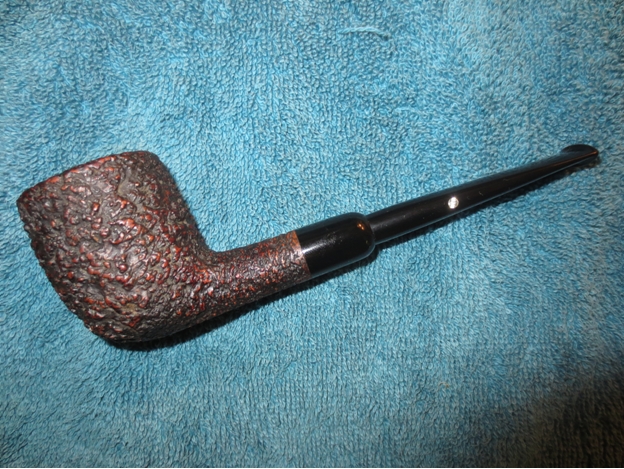
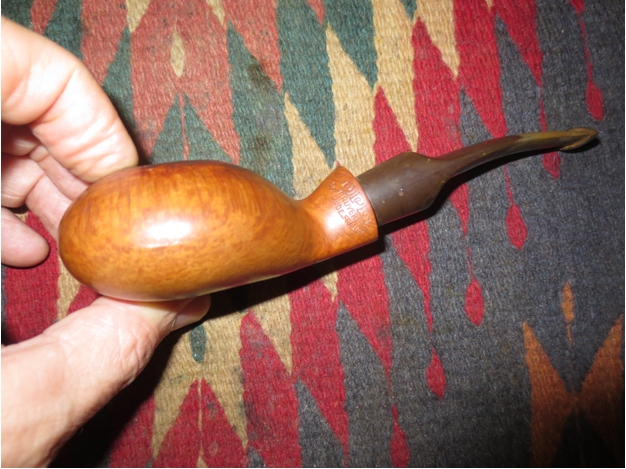
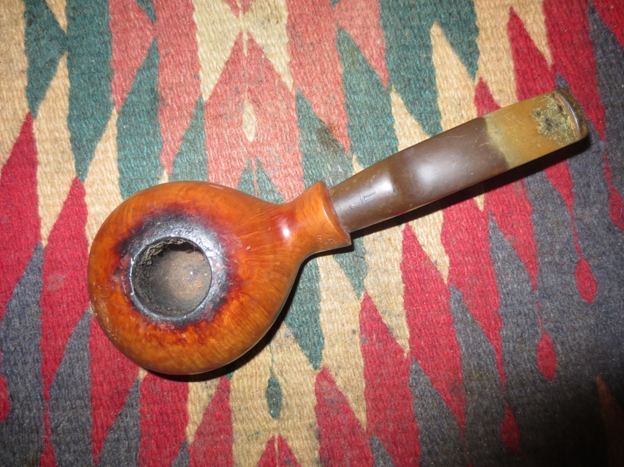
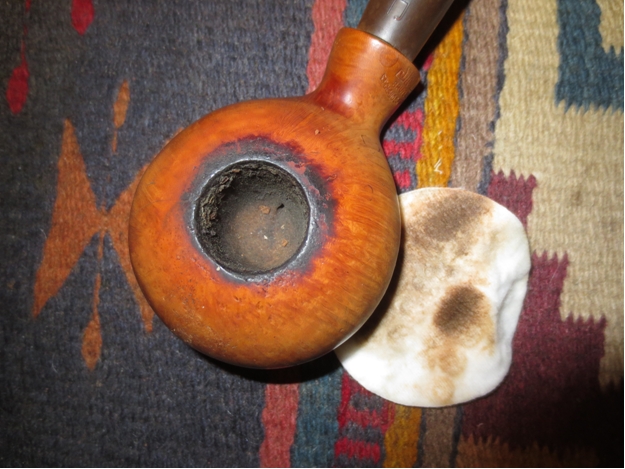
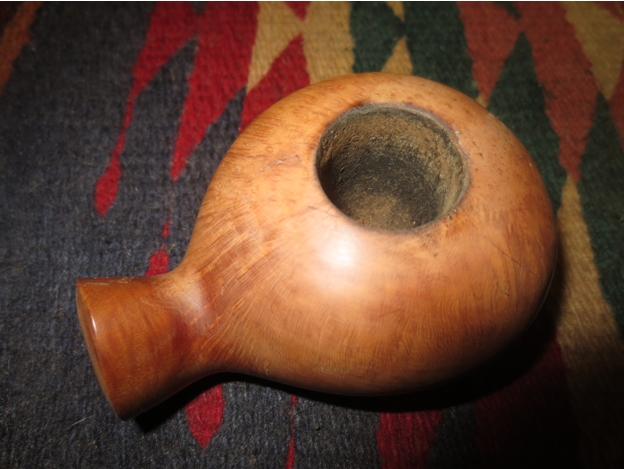
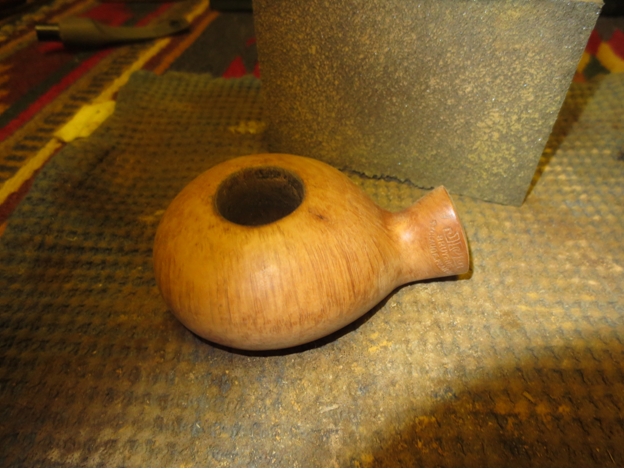
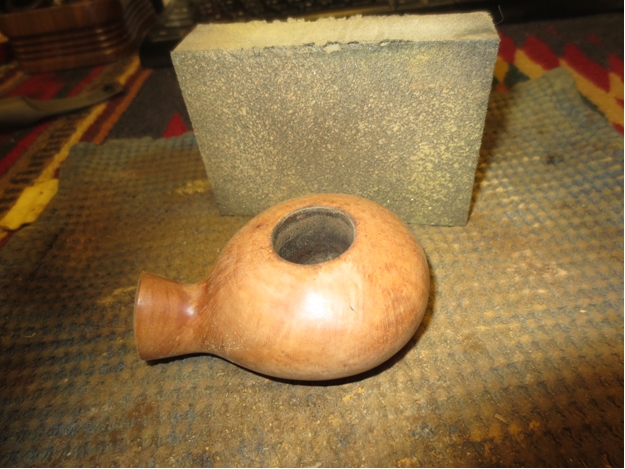
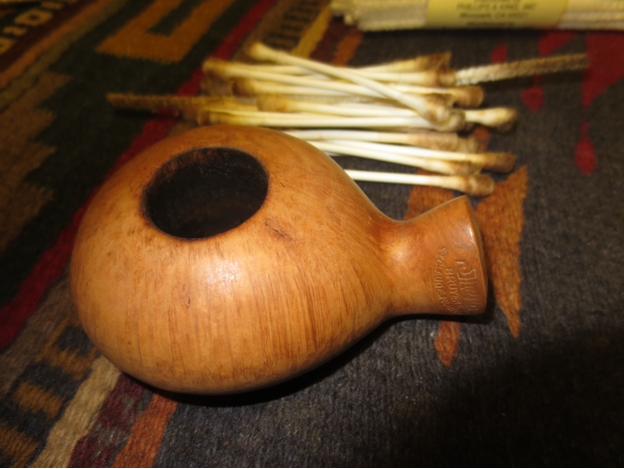
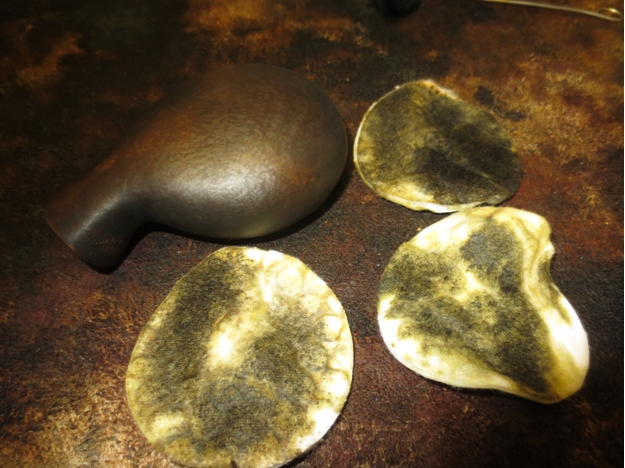
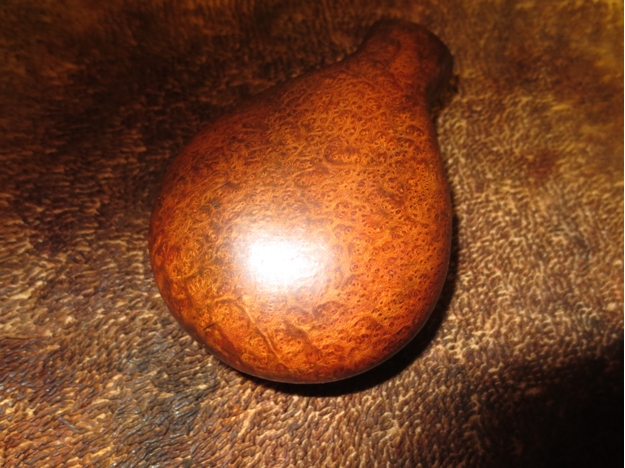
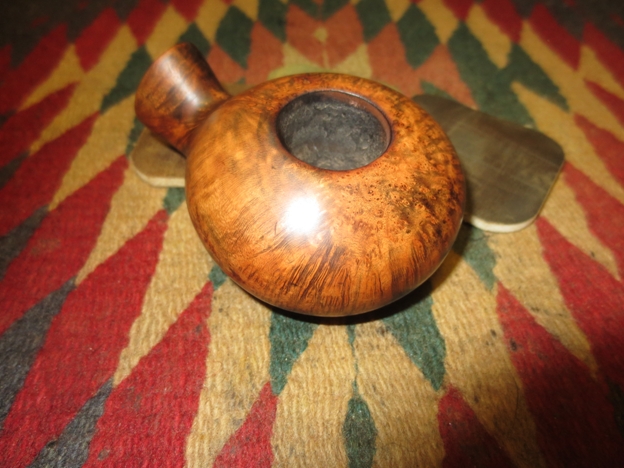
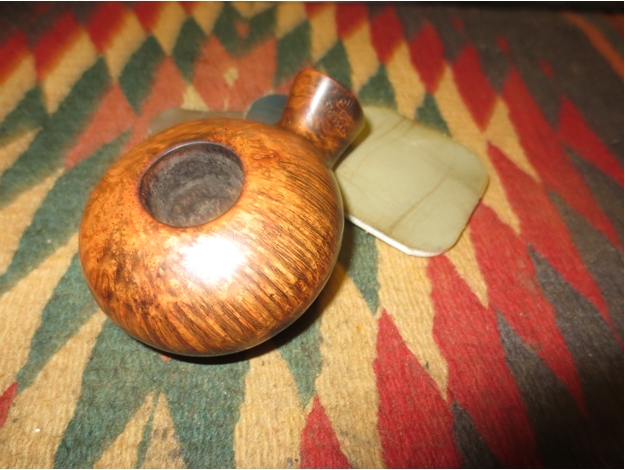
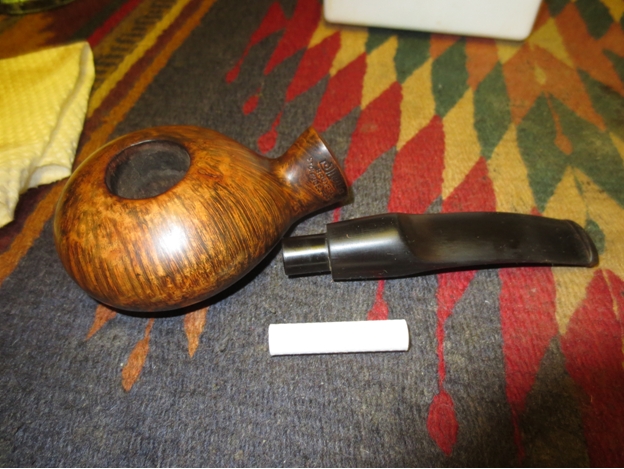
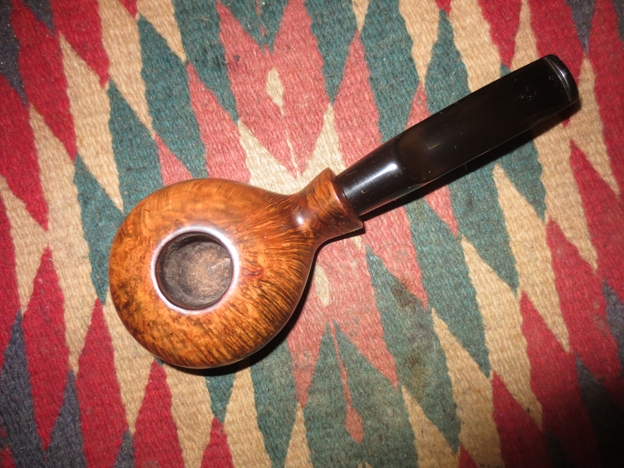
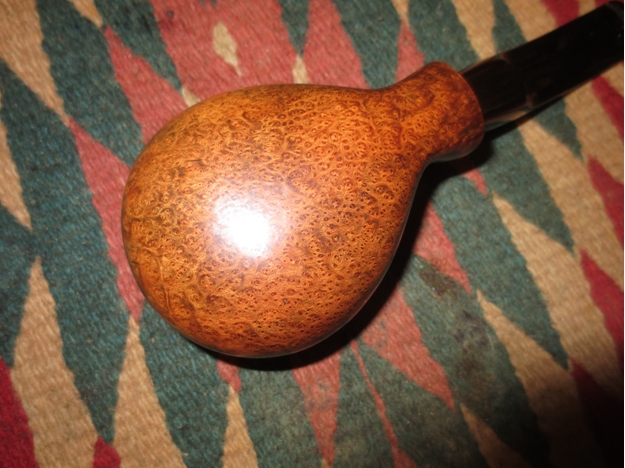
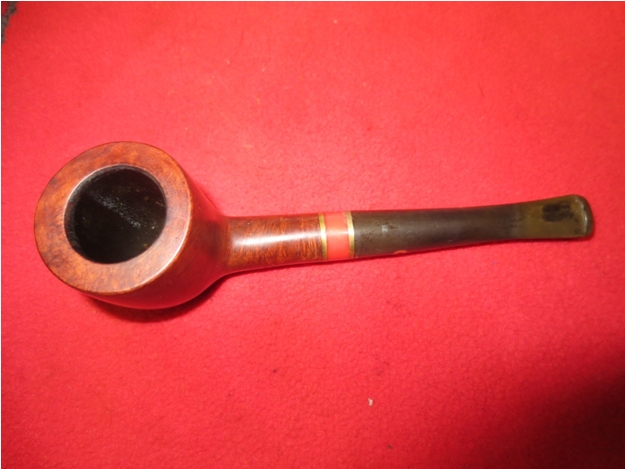
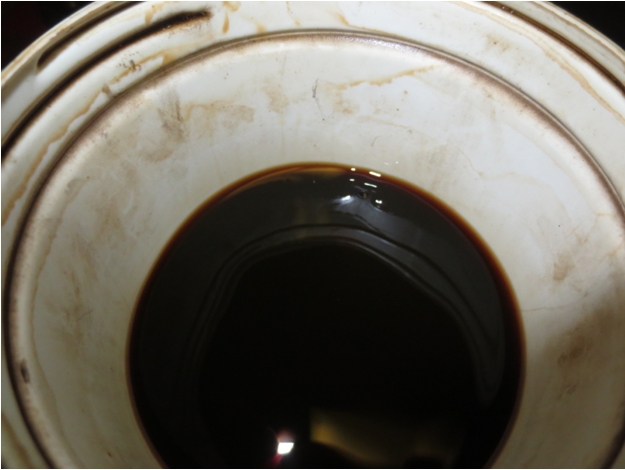
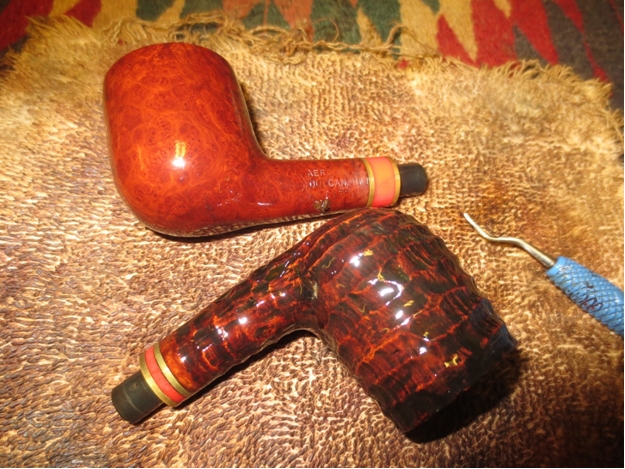
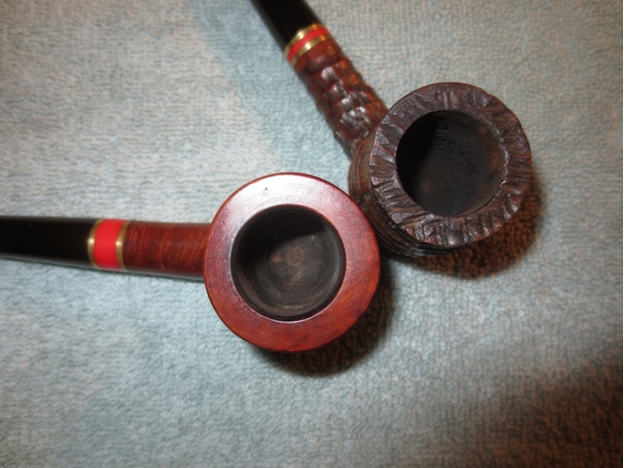
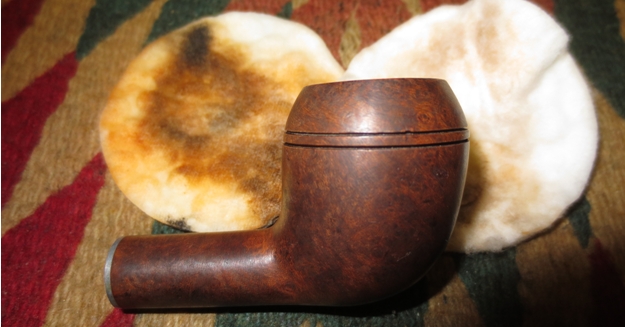
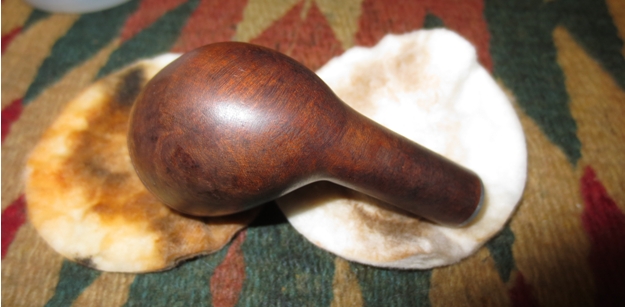
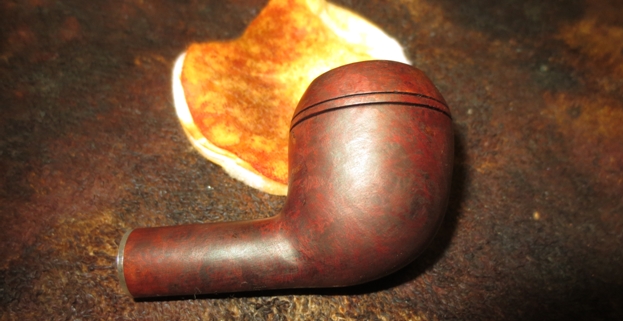
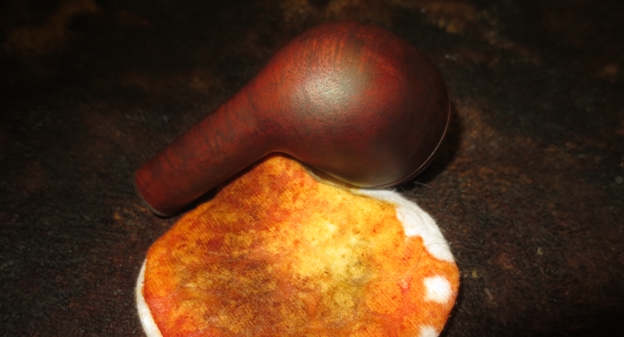
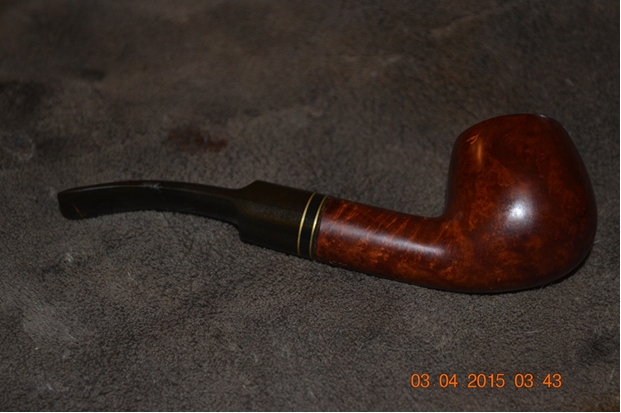
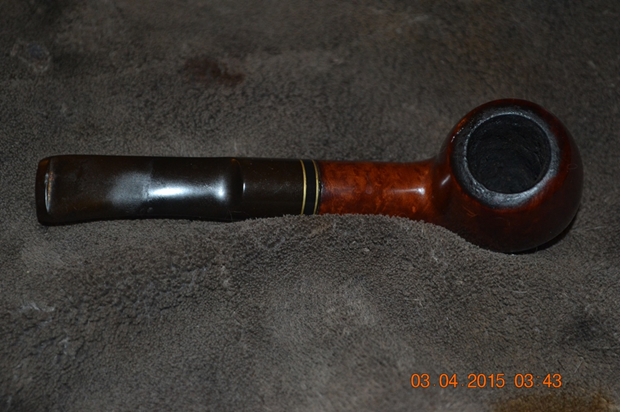
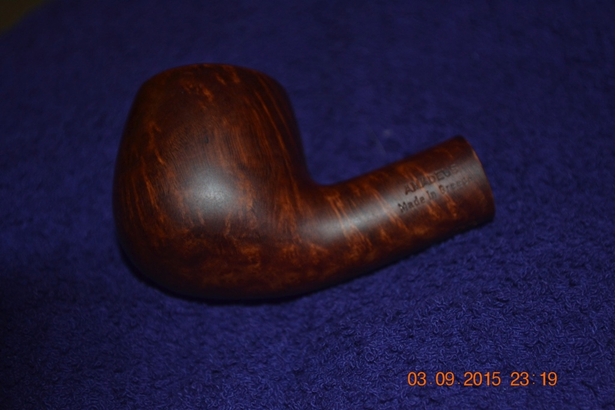
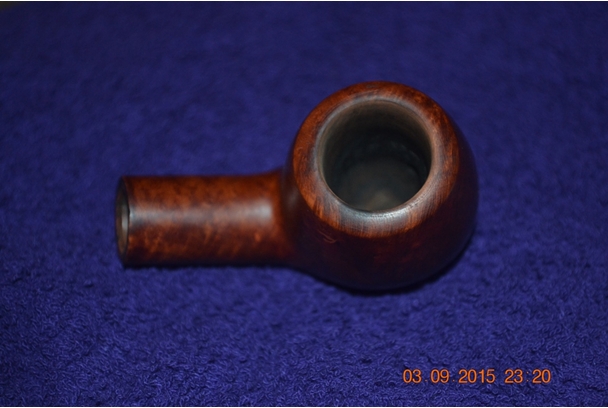
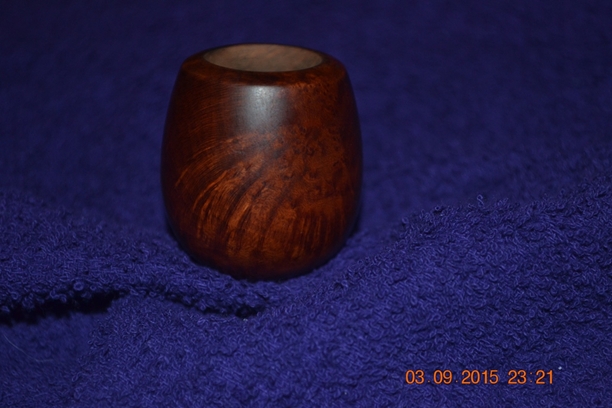
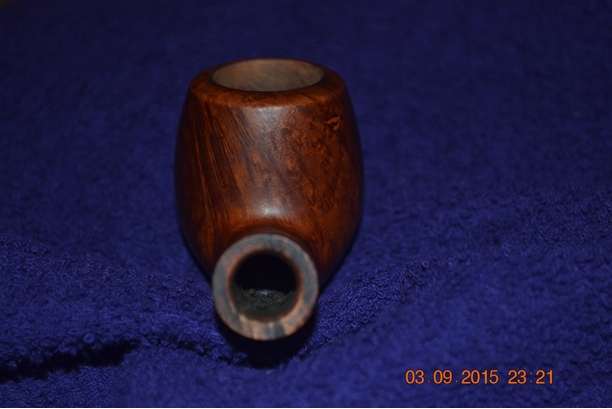
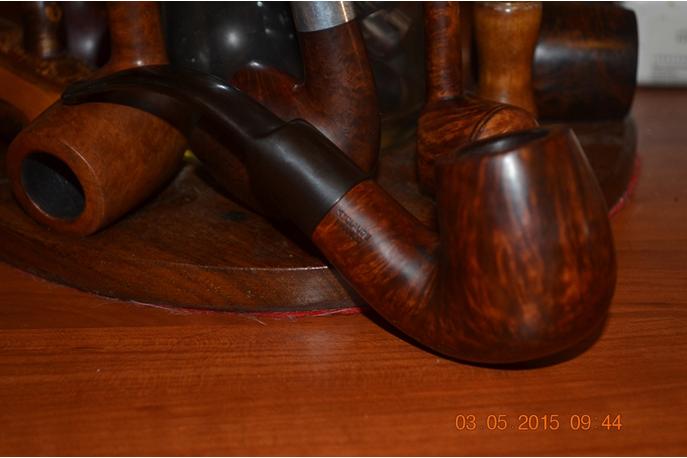
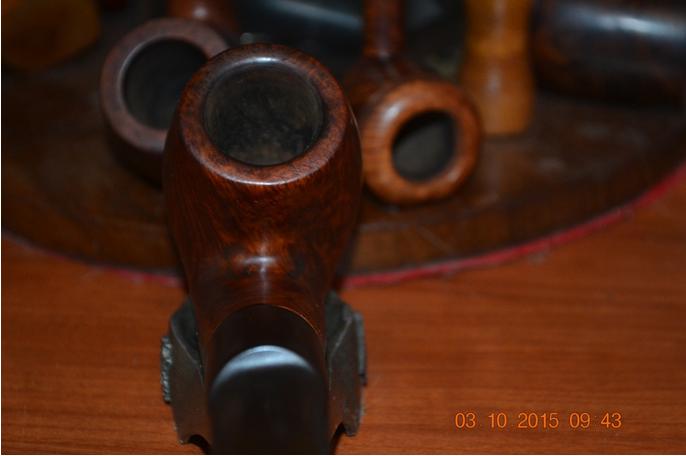
Once I had removed the grime I washed the exterior of the bowl with running water to remove the soap. The photos below show the clean bowl of the pipe.Ben15

Ben16

Ben17

Ben18 
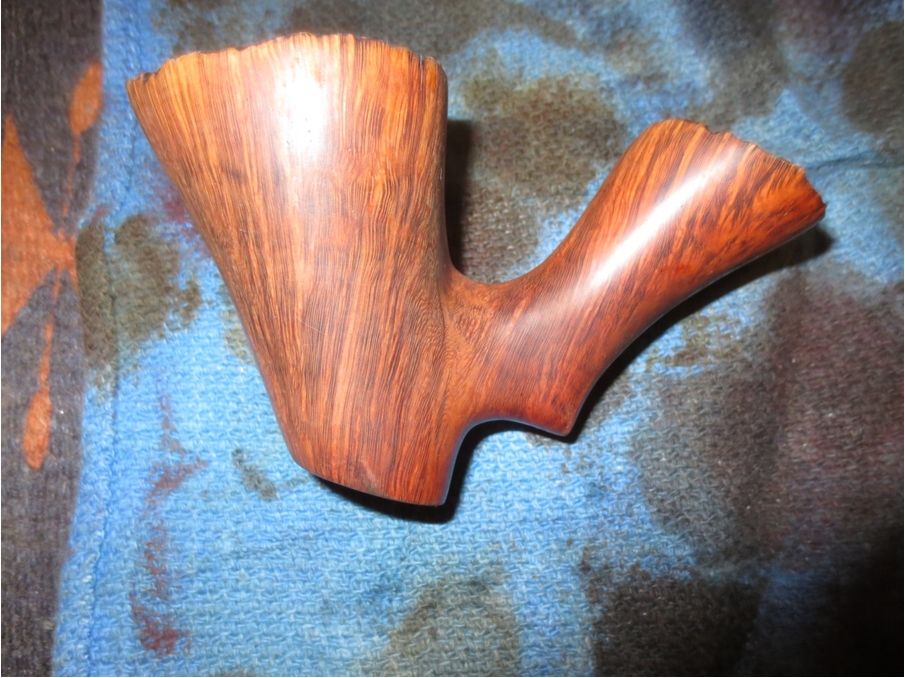
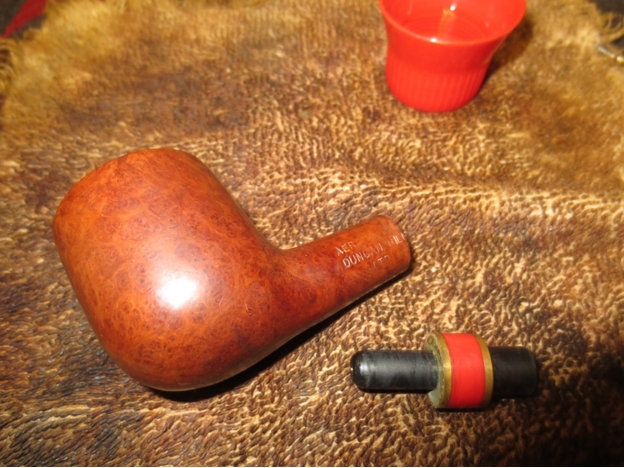
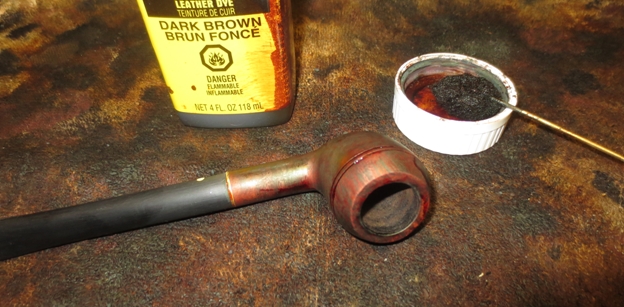
I cleaned out the shank with pipe cleaners, cotton swabs and alcohol. I wiped down the plateau with alcohol on a cotton pad to remove any remaining dust in preparation for staining.Ben21 
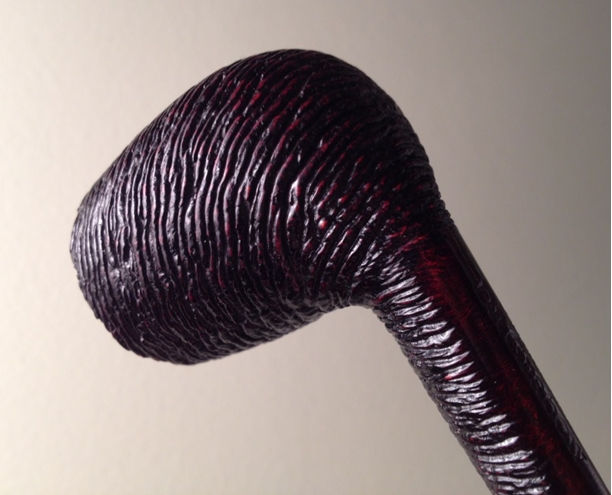
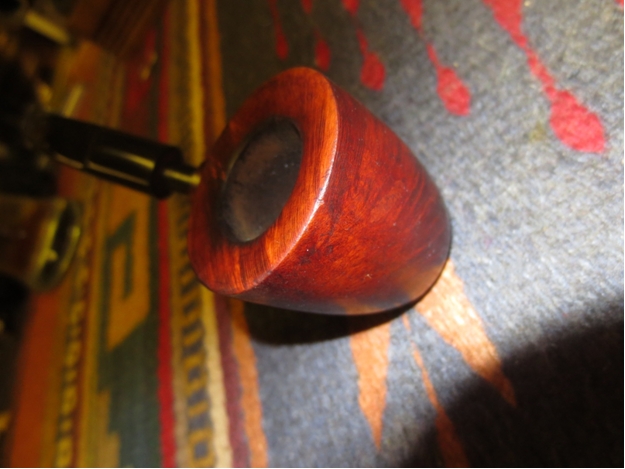
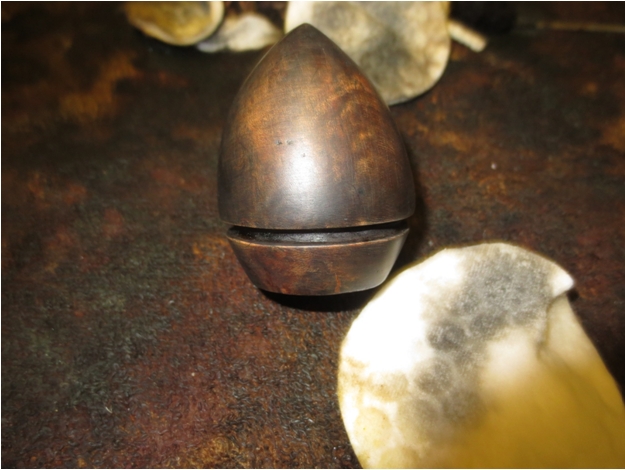
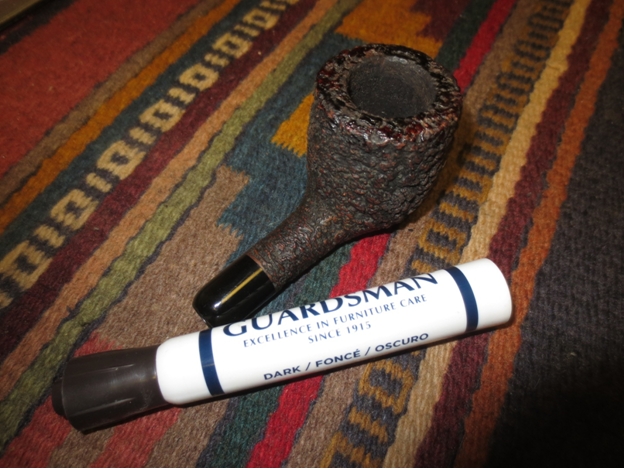
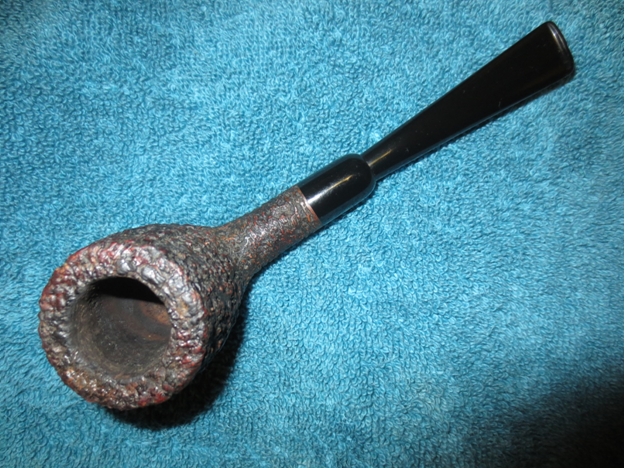
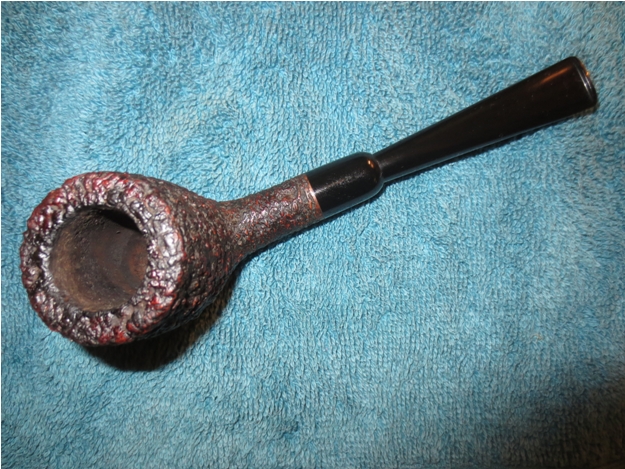
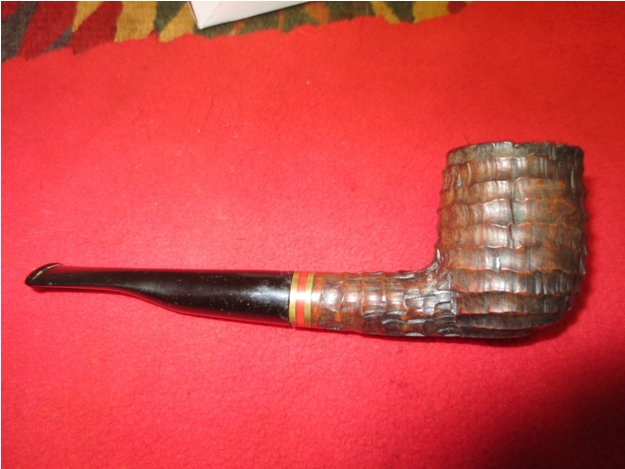
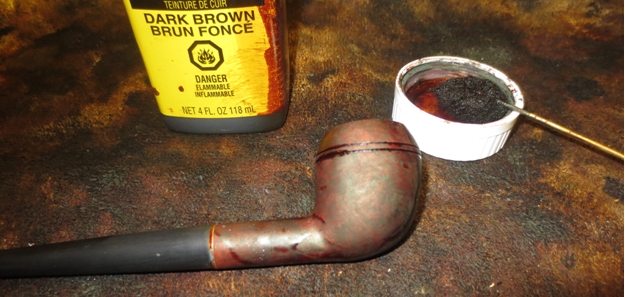
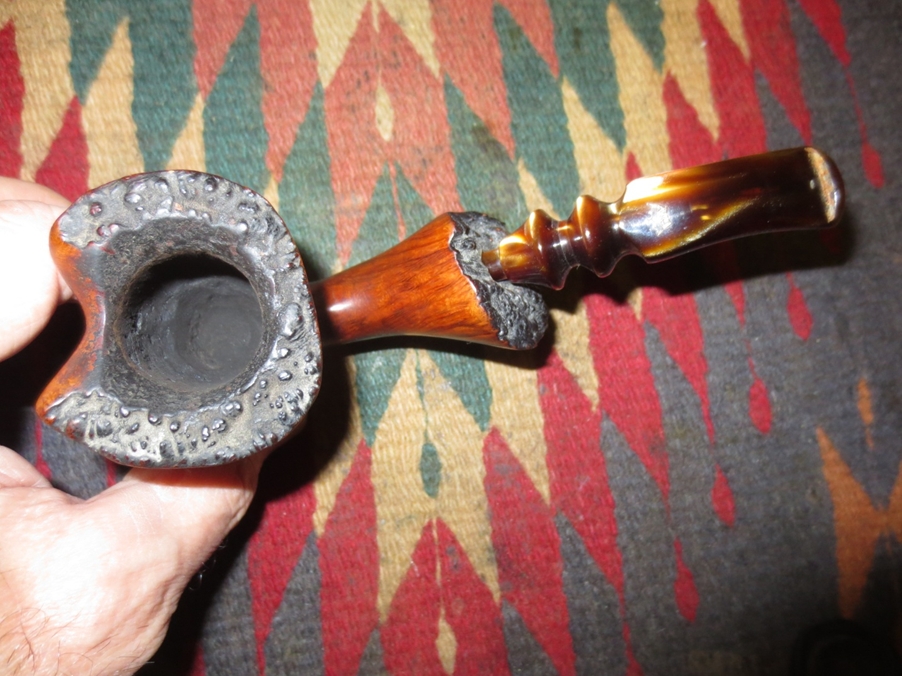
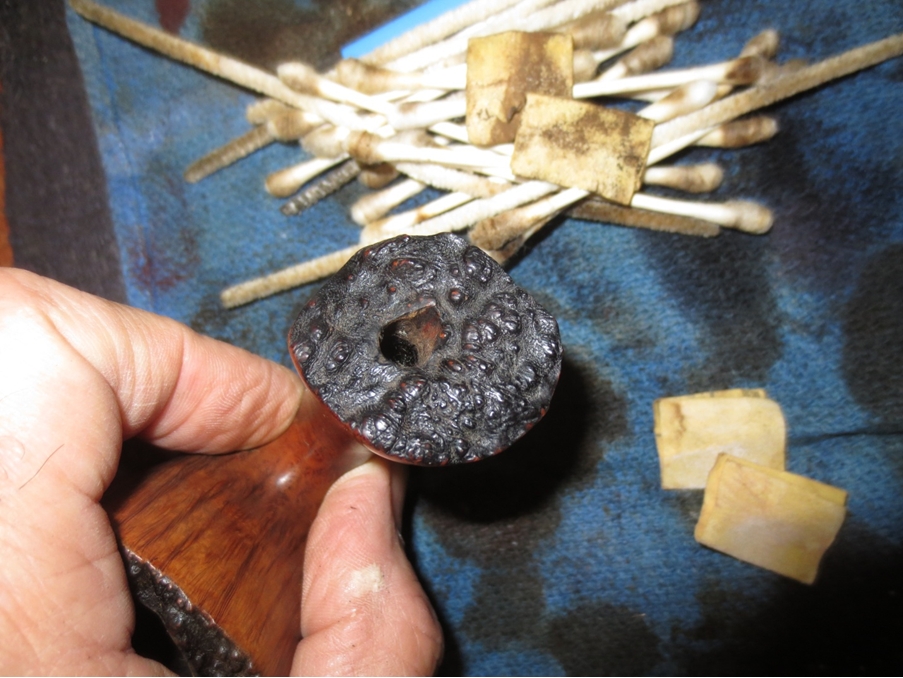
I stained all of the plateau areas with a black aniline stain and flamed it. I repeated the process until the coverage was thorough. When it had dried I hand buffed the plateau with a shoe brush until the high points shone and the valleys were slightly darker.Ben22 
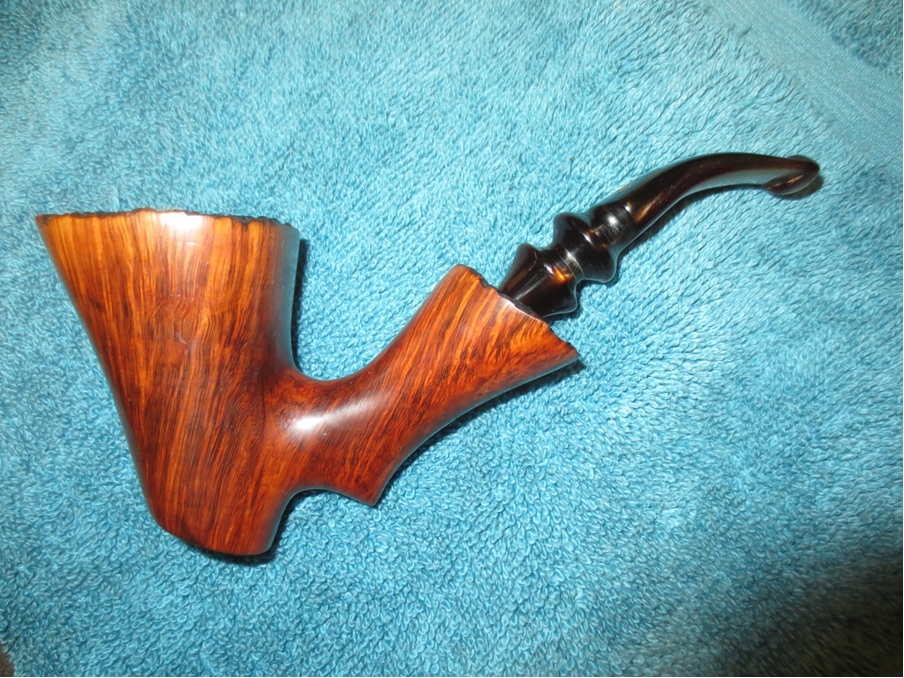
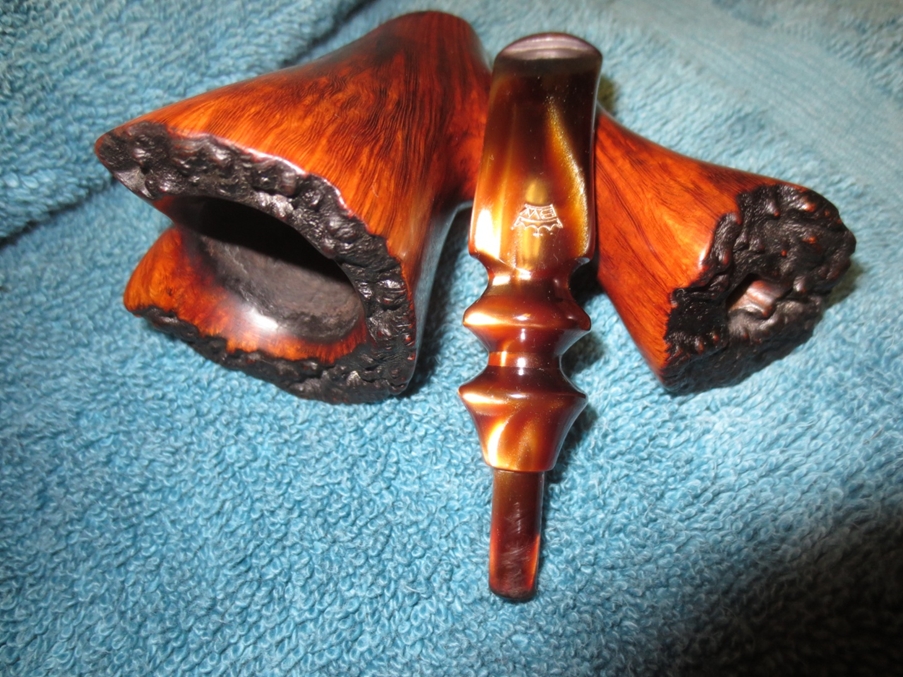
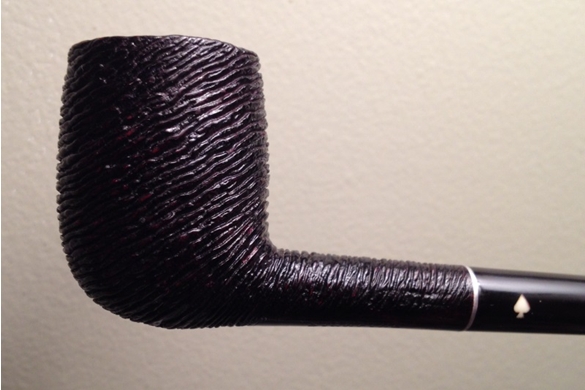
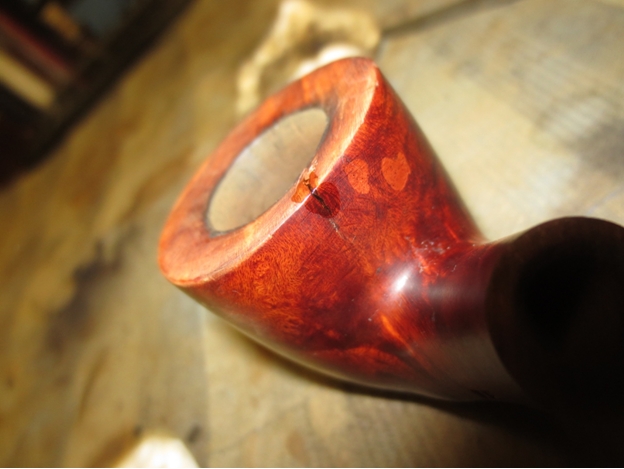
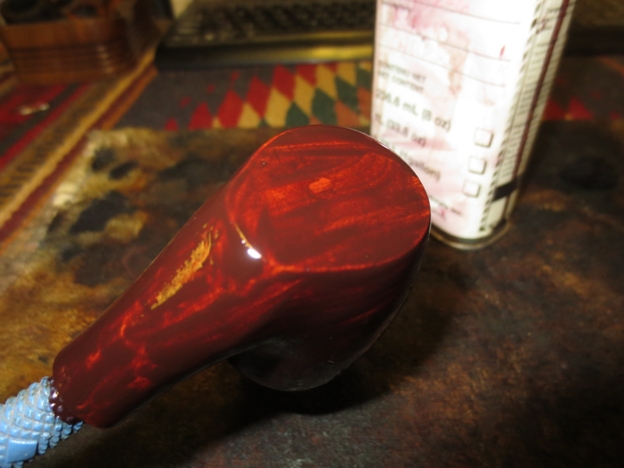
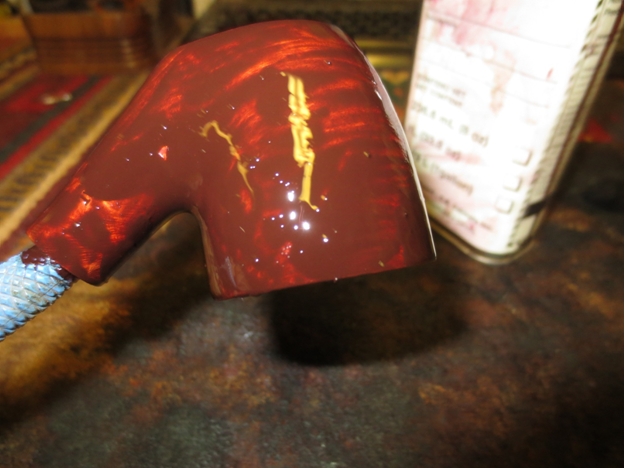
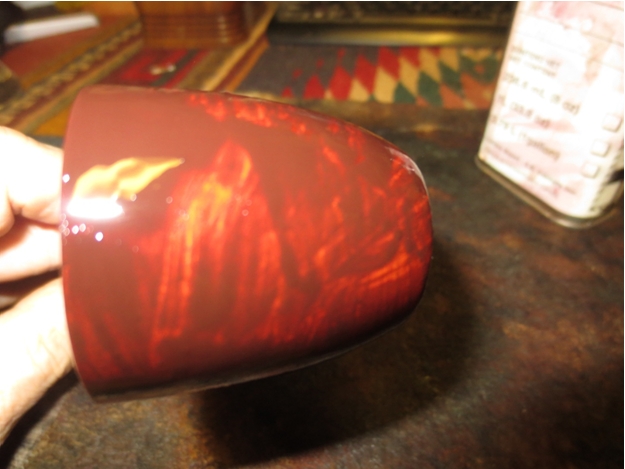
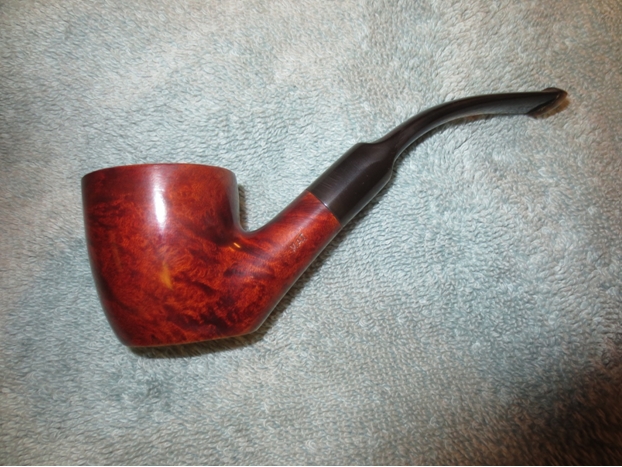
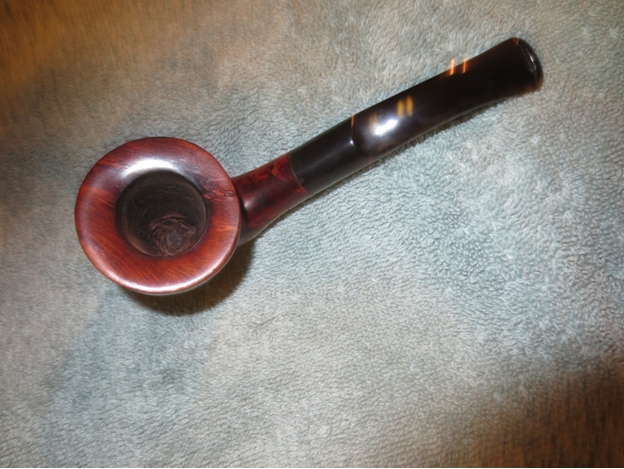
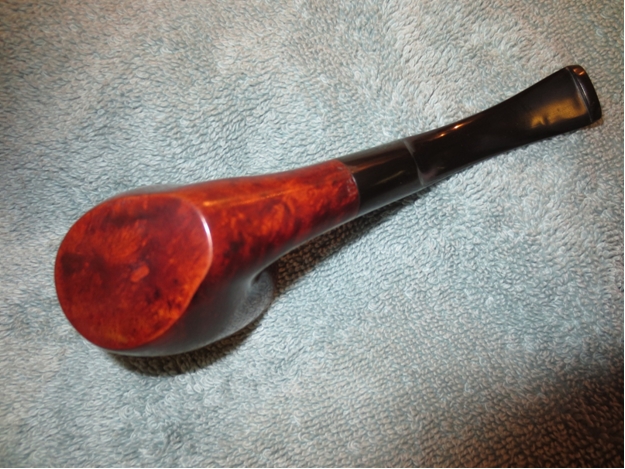
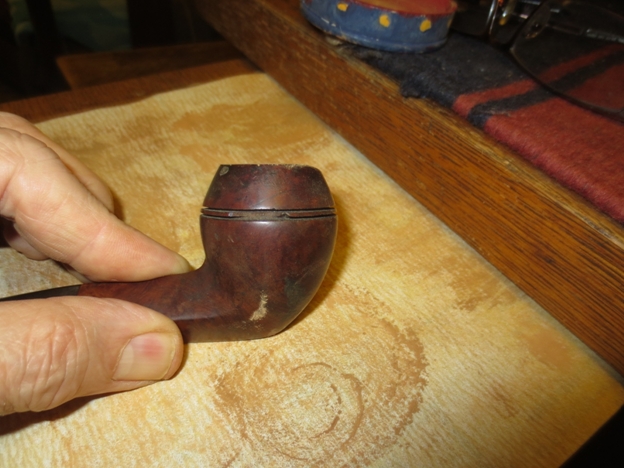
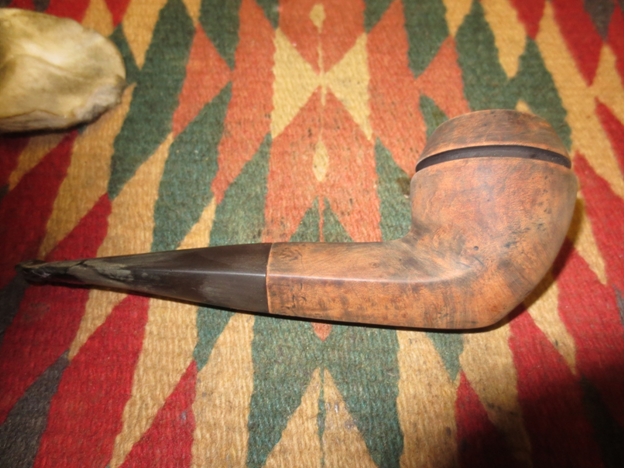
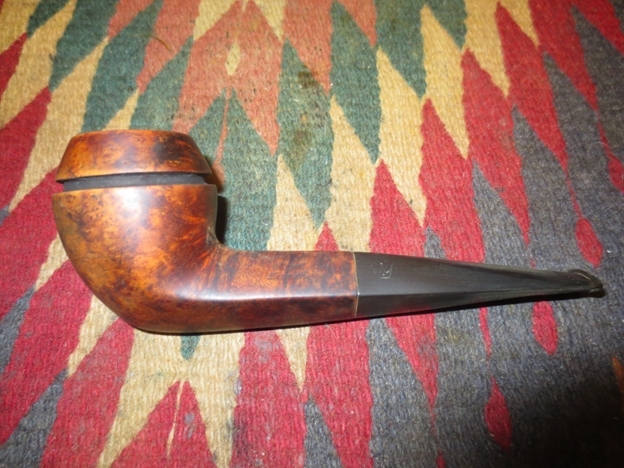
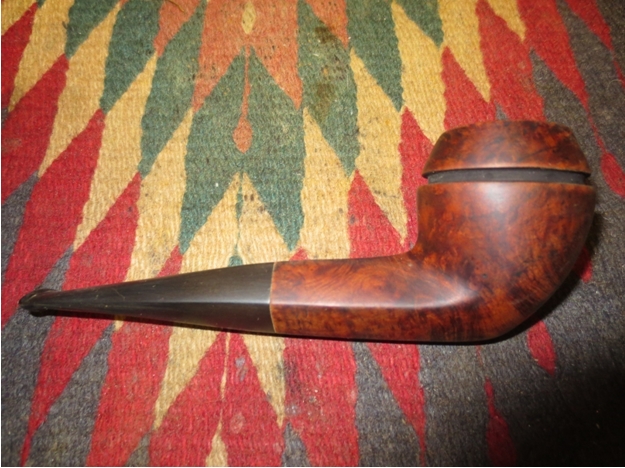
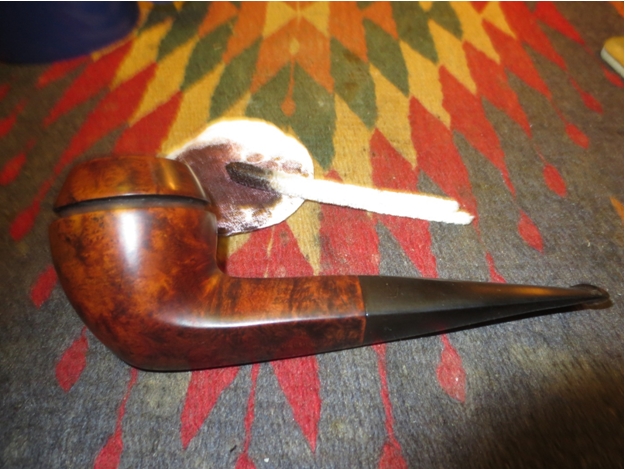
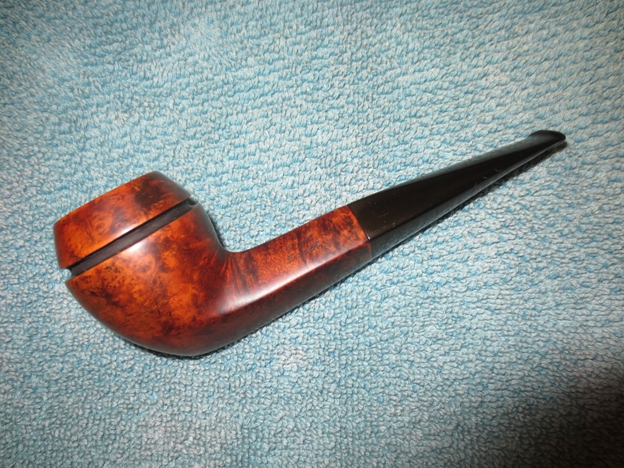
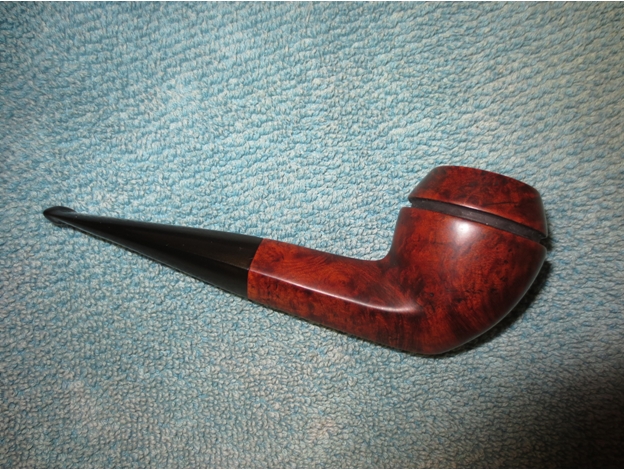
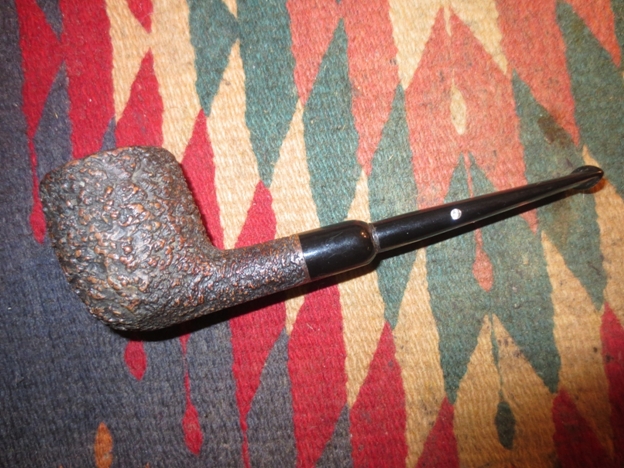
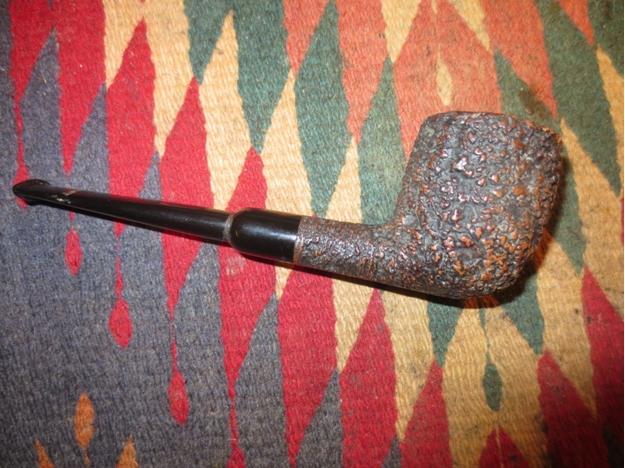
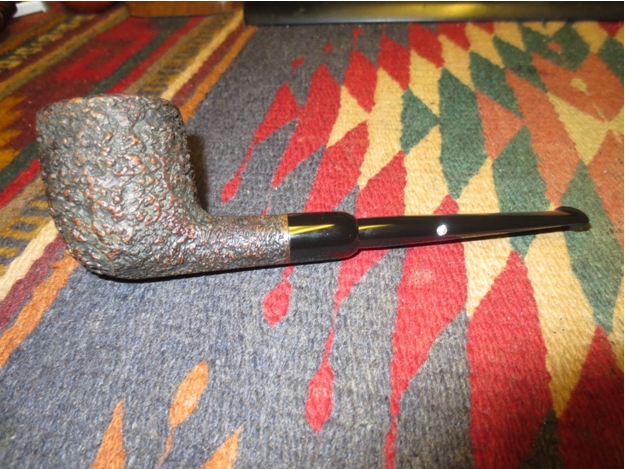
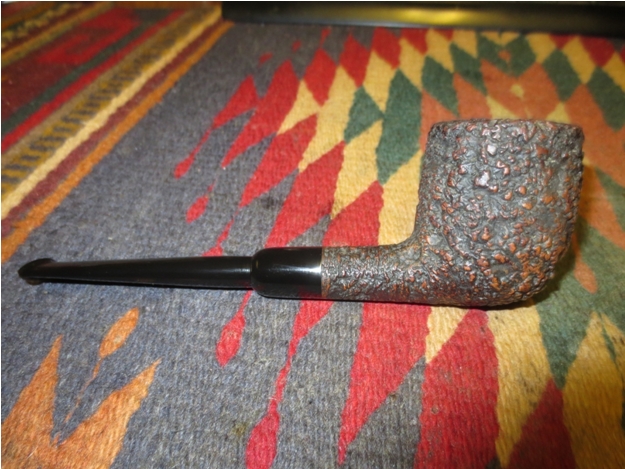
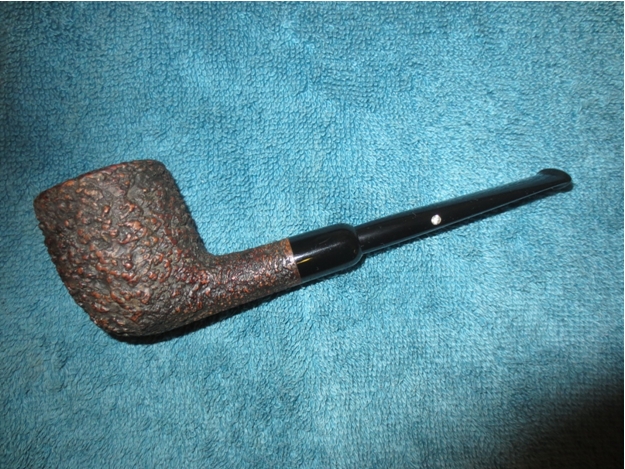
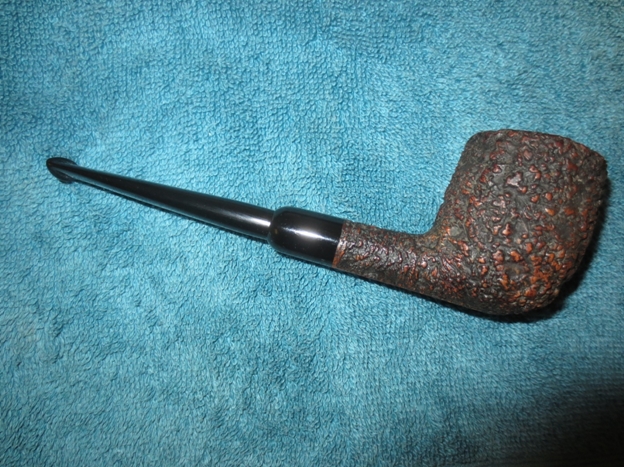
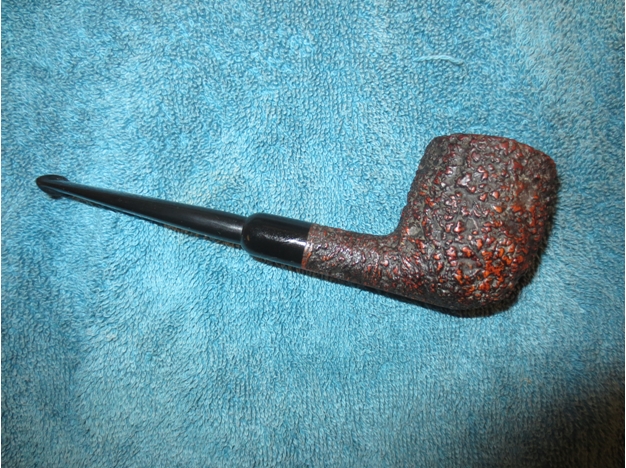
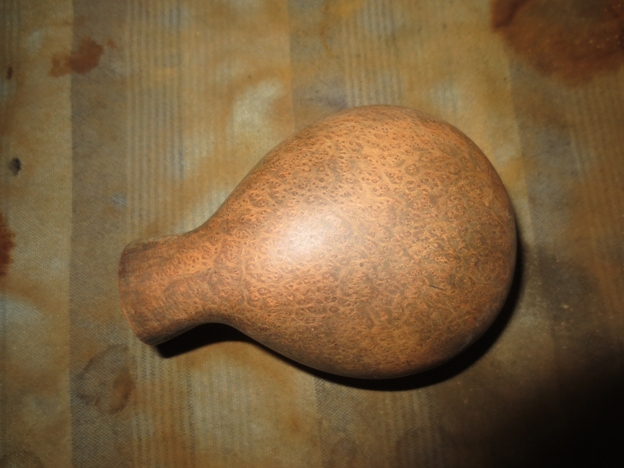
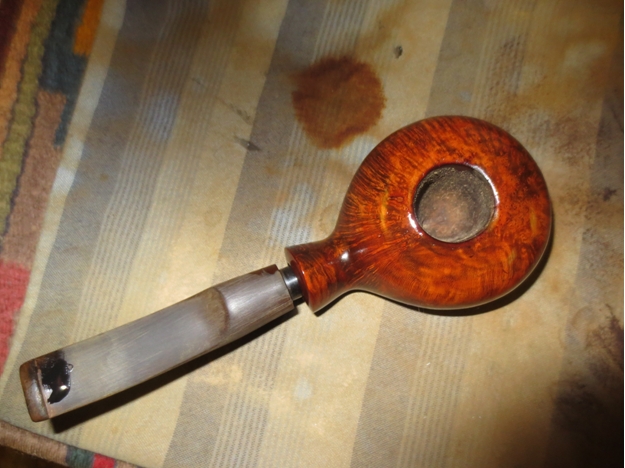
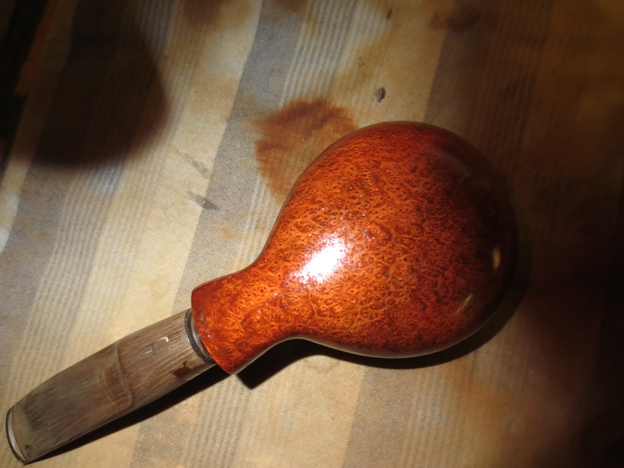
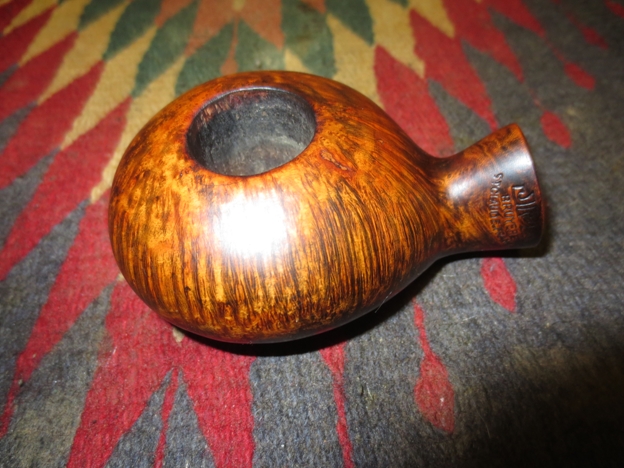
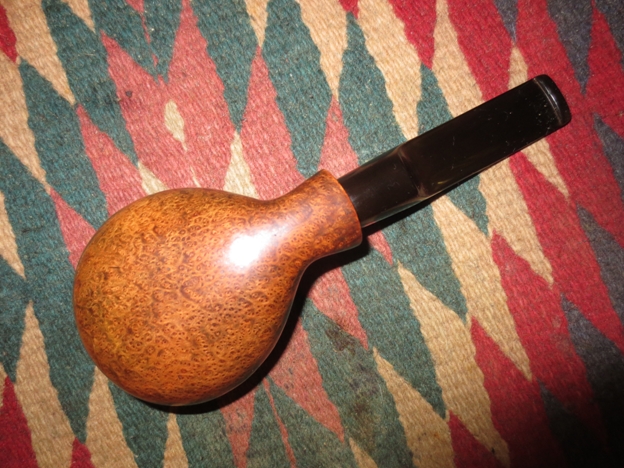
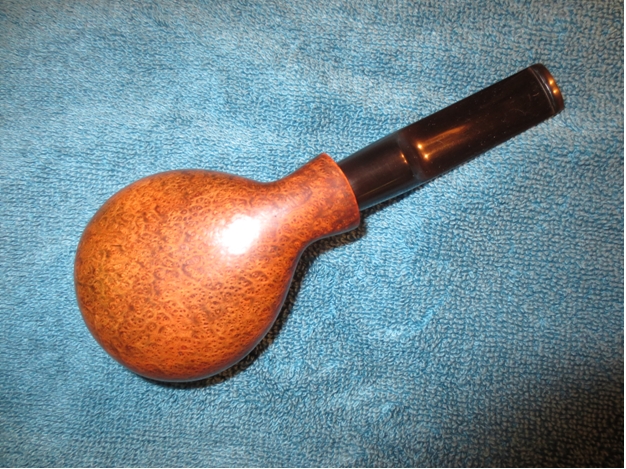
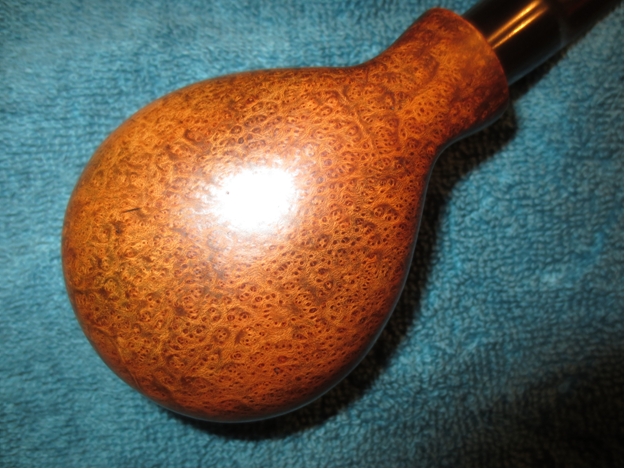
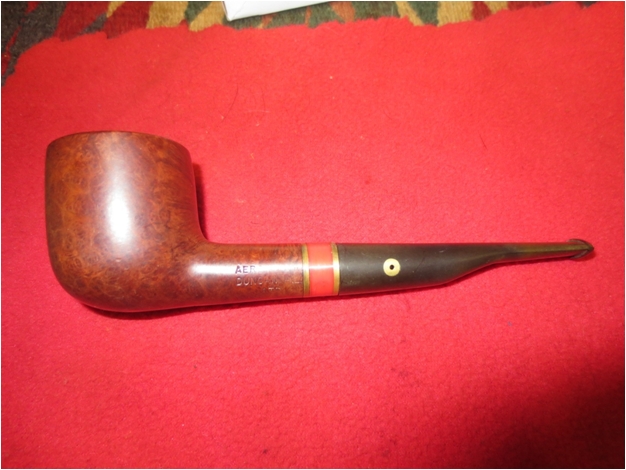
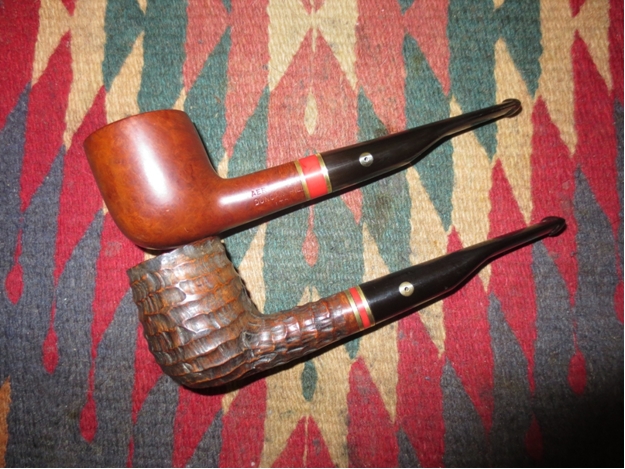
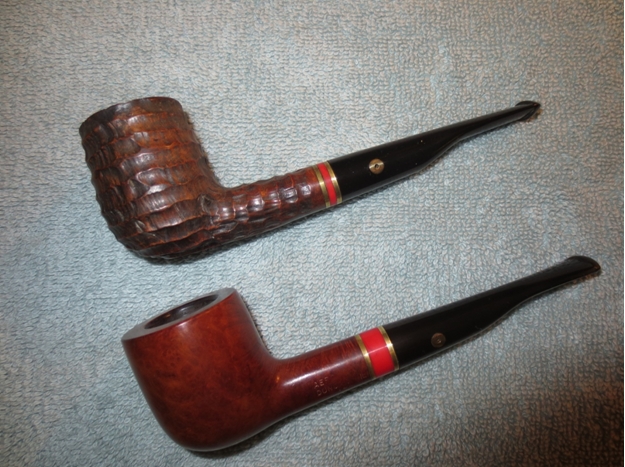
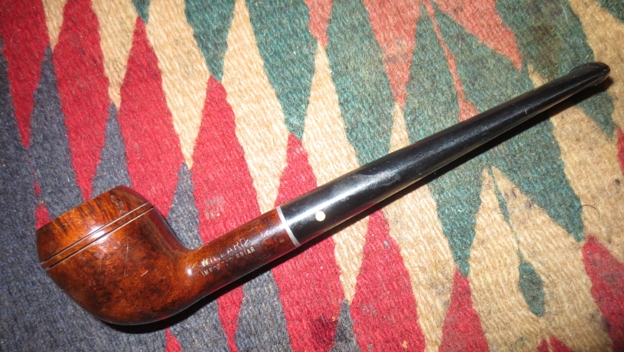
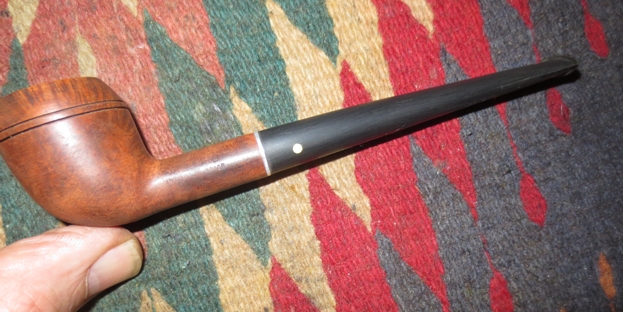
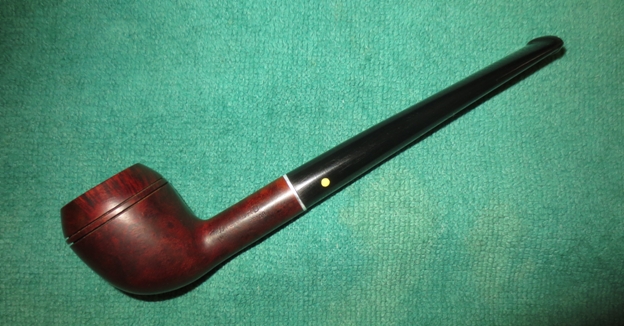
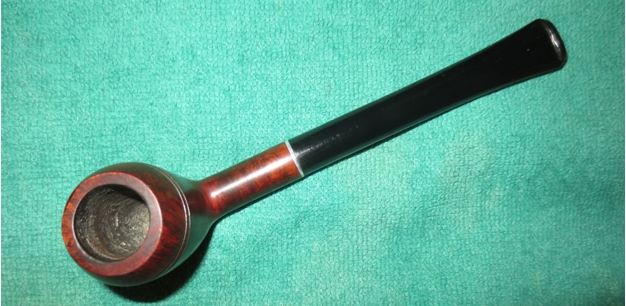
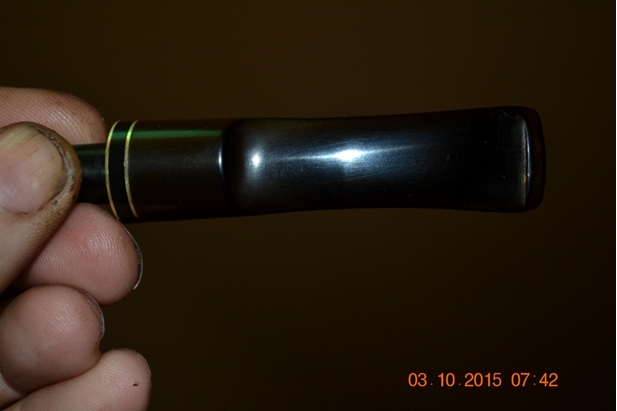
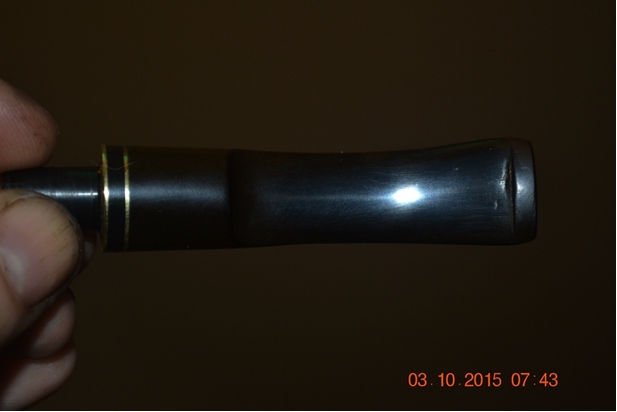
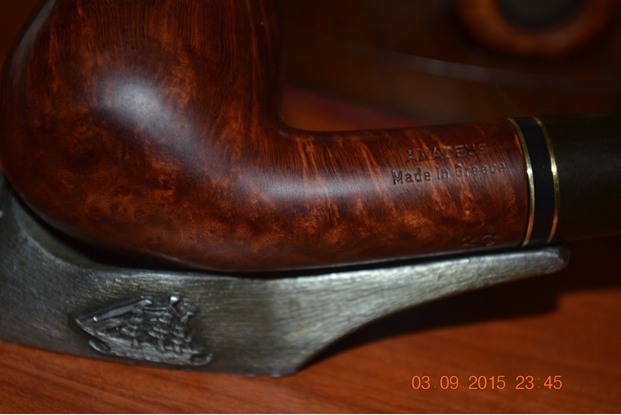
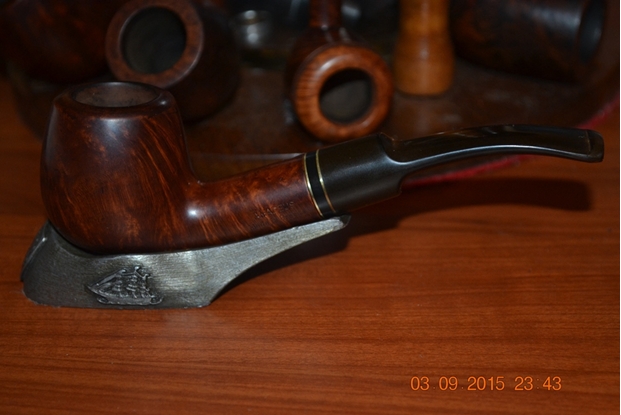
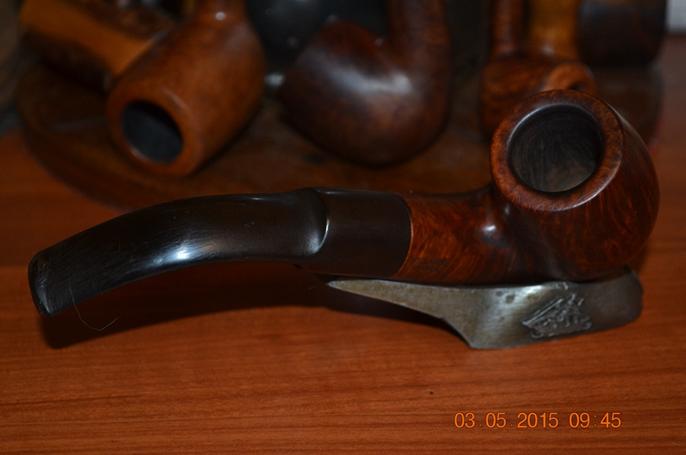
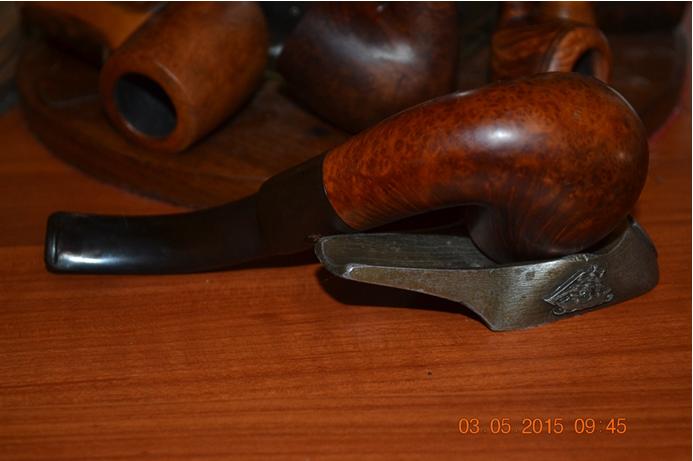
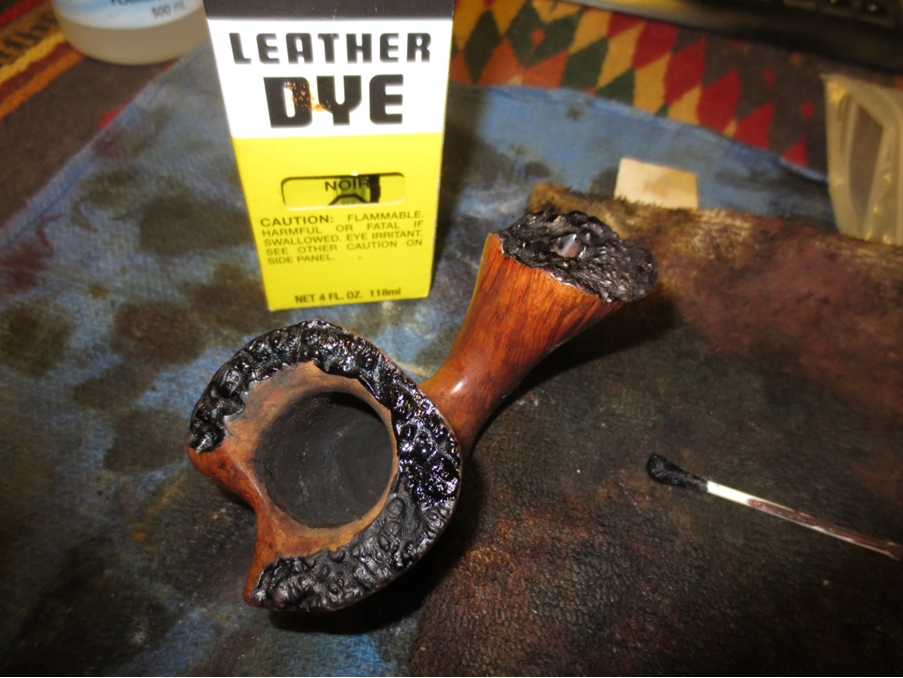
I buffed the pipe and stem with Blue Diamond and then gave the bowl multiple coats of carnauba wax. I finished by buffing it with a clean flannel buff to raise the shine on the bowl and stem. The finished pipe is shown in the photos below. Thanks for looking.Ben23

Ben24

Ben25

Ben26

Ben27

Ben28

Ben29

Ben30

Ben31

Using Charcoal & Cyanoacrylate glue to do a Stem Repair on a Dr. Grabow Starfire Churchwarden


Blog by Joe Mansueto -“JoeMan” (Dr. Grabow Collectors Forum)

Joe sent me the following email and an attached link for the article that follows. He has done some excellent work and I have followed it on Pipe Smokers Forums and also on the Dr. Grabow Collectors Forum. It is a pleasure to be able to post his work here on rebornpipes. Welcome and thank you Joe.

“Steve – I’ve looked in on your blog a number of times. Thanks for posting some really good information, and featuring the work of other guys in the field. One of the things I learned here which I had not done before was the use of Plaster of Paris to mend cracked / broken meer-lined bowls. That was helpful…and I think that was one of your own posts. I’d been looking for a better solution…thanks.”

“I’m not looking to get published so much as I’m happy to help other guys with refurb processes. I learned a LOT of things from others who’ve been at it for many years more than I, and have also developed a few of my own techniques…as I’m sure most of us have! Cleaning out gunk…refitting a stem…rusticating….topping a bowl…staining…refinishing…de-oxidizing stems…repairing chips…etc…these are all things I do on a regular basis. Recently, I took my hand to making pipes, and made 2 of them during a stay-home vacation…came out pretty good! But, I see myself primarily as a refurb guy…I really enjoy making an old broken-down relic of a pipe gleam again. If I were to count, I suppose I’ve refurbished most of a thousand pipes over the last 4 years. No…I don’t have 1,000 pipes…most have gone to others by way of sale, trade or gift. I suppose I do have 200 pipes in my collection however.”

“One of the things that most refurb guys seem to struggle with most is chewed / eaten stems. Those nasty tooth indentations…or worse yet…missing chunks from the button. I’ve heard of guys using super-glue, heat, JB Weld, vulcanite dust & glue, and other mad-scientist approaches. There are many good approaches to repairing a stem. The most effective approach I’ve personally found is Cyanoacrylate and activated charcoal. Ed James (AKA Ozark Southpaw online) is just about the best talent I’ve seen in all-things pipes. He too learned from others over many years, but what an innovator this gentleman is. I visited his shop when I was on the road over 2 years ago, and I’ve learned a lot from him. One of his own experiments a few years ago was mixing CA with activated charcoal and comparing the result with other repairs. It was a great discovery, and at the time he did it and shared it on the forum, I’d not seen anyone else doing it that way. I’m not saying it’s the ‘best method’…because you know how some pipe guys can get into struggles over their method being best…but I’ve personally not seen anything more successful. Ed James has not done too many of these CA/charcoal repairs himself…but once he discovered, tested and shared it, I took it and ran with it. Do with this info as you please or nothing at all…but here is one example of the process…”

“At the time of that Starfire churchwarden refurb, I had done a couple hundred stem repairs. Since the time of that refurb, I’ve surely done a couple hundred more, and have tweaked my own process here and there. I’ve done some of these repairs on pipes for myself, but more for pipes which I’ve then sold, as well as others who bring them to me. This one served as a good example, since it was one of the worst cases that I documented. Most of those I’ve done, I’ve not documented at all.” – Joe Mansueto “JoeMan” (Dr. Grabow Collectors Forum)

Here is Joe’s blog:

Just recently got this pipe from Sam (DG forum name SamCoffeeMan – hasn’t been here in a while) along with the Grabow Unique. When I expressed interest in it…Sam said that he’d “cut off 1/2” of the stem, and file out a new button. I said…nnnooooo…leave it original and I’ll fix it.

I am sure the stem is original to the pipe. The stem is identical to the stem on my Linkman Grabow 6033, it is perfectly registered, and the wire carving is that of an ‘early’ Starfire, as you’ll see below. That said, this was surely among the last of the churchwardens to leave the Grabow factory.
Joe1 The previous owner should have had a sandwich instead of smoking this pipe…Joe2

Joe3 This can be fixed!

Bleach soak first, then an isopropyl alcohol scrub of the surgery site to assure the CA will stick best.

The form I used is 2 thicknesses of cereal box cardboard, cut to the shape of the tapered slot opening, wrapped in shiny packing tape. Since both sides of the button were nearly identically eaten, there was nothing to keep the form properly seated. So, I taped the form to a pipe cleaner and pulled it into place as tight as I could, then centered it top to bottom…if that makes sense.Joe4 CA mixed with activated charcoal, applied in multiple layers…Joe6

Joe7 Using a needle file to shape between layers…Joe7 Just about done shaping, ready for multiple-stage wet sanding…Joe8 Buffing…done.Joe9

Joe10 Some of you will know which shape number this medium billiard would be. Bowl height is nearly 1 3/4″, ID is 3/4. Overall length is 11 3/4″.Joe11 This is an older Starfire for sure. It’s got the very deep wire carving which is continuous over the entire pipe as I believe Tom pointed out about Belvedere.Joe12

Joe13 This was originally posted on The Dr. Grabows Collectors Forum. Here is the link: http://drgrabows.myfreeforum.org/sutra87253.php#87253

Rejuvenating an Italian Sitter stamped MAT


Blog by Steve Laug

I am finally working on the last of the pipes that I picked up on craigslist – a sitter that is stamped MAT and Italy. It was my least favourite shape in the lot. I left it to the very end to work on. It is shown in the photo below in the middle of the left column.craig5 It was a bit of a mess. The stem was stuck in the shank and was oxidized. It also had some tooth chatter. Once again there was the calcification on the stem that comes when a softie is left in place on the stem. The bowl had a shiny varnish finish but that was dulled with a lot of tars and oils. The rim was caked with a very hard, thick coat of tars and oil – lava over flow from the bowl. The bowl itself was caked. There were quite a few fills in the bowl on bottom and on the back side of the bowl near the shank. There was also an area of fills on the top of the rim and a small crack that had been filled on the back side of the bowl near the rim.Mat1

Mat2

Mat3

Mat4

Mat5 I put the pipe in the freezer for an hour to loosen the stem. After an hour of cooling I was able to twist the stem out of the shank. I was a little surprised to find a very short – ½ inch stinger in the end of the tenon.Mat6

Mat7 I heated the stinger with a lighter and then twisted it out of the tenon with a pair of pliers on which I had wrapped tape around the jaws. This tape prevented the jaws from damaging the aluminum stinger.Mat8 I set the stem aside and reamed the bowl with a PipNet reamer. I used three of the four cutting heads to remove the cake from the bowl. With the small crack on the back edge of the bowl I wanted to expose the interior of the bowl and check out the interior for cracks.Mat9

Mat10 To remove the hard lava from the rim I used a sharp blade pressed flat against the rim to scrape away the buildup. I scraped and then wiped it down with alcohol to soften the tars. I continue until I had removed the cake. In doing so I found that just above the crack on the back of the bowl was an area of several small fills that were on the rim.Mat11 I scrubbed the surface of the bowl with acetone on cotton pads to remove the varnish that was on the finish. I wanted to get underneath that finish so that I could do a repair on the small crack and also get to the surface of the briar. I personally do not like the thick varnish coats that are on some pipes.Mat12

Mat13

Mat14

Mat15

Mat16 I cleaned out the small crack with a dental pick and alcohol. I drilled a tiny hole at the bottom of the crack to stop it from spreading. Once it was clean I stuffed briar dust into the crack and then dripped some super glue on to the rim and the side of the bowl to fill in the crack.Mat17

Mat18 I sanded the rim and the repaired area with 220 grit sandpaper and then with a medium and a fine grit sanding sponge to smooth out the surface. I cleaned out the shank and the stem with pipe cleaners, cotton swabs and alcohol.Mat19

Mat20 I sanded the stem with 220 grit sandpaper to remove the tooth chatter and light tooth marks. I also sanded it to remove the oxidation. I followed that by sanding with a medium and a fine grit sanding sponge.Mat21

Mat22 I buffed the stem with red Tripoli to break through the oxidation. I sanded the stem with micromesh sanding pads – wet sanding with 1500-2400 grit pads.Mat23 I rubbed the stem down with Obsidian Oil and then buffed it a second time. I dry sanded with 3200-12,000 grit micromesh sanding pads.Mat24

Mat25 I used some dark cherry stain that I had on hand – this stain is a water based stain and matched the colour of the original bowl. I applied the stain with a folded pipe cleaner and once I had covered the bowl I let it sit for a few moments before wiping it off.Mat26

Mat27

Mat28

Mat29

Mat30 I wiped down the pipe with a cotton cloth to remove the excess stain and give it a light hand buff.Mat31

Mat32

Mat33

Mat34

Mat35

Mat36

Mat37

Mat38 I buffed the pipe and stem on the buffing wheel using pads charged with red Tripoli and with Blue Diamond. I gave the pipe multiple coats of carnauba wax and then buffed it with a clean flannel buffing pad to give it a shine. The finished pipe is shown below.Mat39

Mat40

Mat41

Mat42

Saving a Pipe – Restoring a Royal Danish 33 Bulldog that had seen better days.


Blog by Steve Laug

I am in the midst of a particularly labour intensive restoration of a Royal Danish 33 Bulldog. It was in very rough shape but having met the old timer who it originally belonged to I decided to make the extra effort to bring it back to life. It was obviously a favourite pipe of his and he as much as said so. I think it was the only one of the lot that he felt bad about letting go of when he sold me the lot. Often I will take time to read some of my favourite blogs during lunch break at work or even when I come home to help me unwind from a long day. I read before I pick up a pipe to work on or restore and find that it helps focus my attention. Yesterday at lunch I came across an article by Alan Chestnutt on his blog on his website Reborn Briar Estate Pipes that really resonated with what I was feeling as I worked on the particular pipe. He called the work he does as a pipe restorer – “saving the pipes”. I think that is a particularly poignant description of the work on this Royal Danish 33 Bulldog that I picked up in the lot from craigslist. It is shown in the first photo below at the bottom middle of the photo. In the second photo it is in the right hand column at the bottom of the photo.craig5

craig6 The old timer was a well loved pipe and obviously a good smoking pipe. It was in rough shape. In fact it was in the roughest shape of the lot. The photos below show the state of the pipe when I brought it to the work table. The finish was rough and dirty with lots of scratches and dents in it. The rim was shot. The front side was worn down from beating out dottle when the smoke was finished. The drop from the height at the back of the bowl to the height at the front was over ¼ inch and the surface was chewed up. The outer edge of the bowl on the front was obliterated. The rim surface was beat up as well. There were thick marks of tar or oil on the sides of the bowl and rim that were sticky. The bowl was heavily caked. The double ring around the bowl was damaged. Over ½ of the briar between the rings was broken and missing. The stem was oxidized and chewed. The topside of the stem had deep dents near the button that went up almost a half an inch. On the underside the tooth marks were even deeper and there was a hole in the stem where it had been gnawed through. Around the stem was calcification that is common pipes that have had a softie bit on the stem. I think the old timer who had this pipe slipped the softie bit over the damage so he could keep smoking his favourite pipe.Dan1

Dan2

Dan3

Dan4 The next series of photos show the thickness of the cake, the extent of the damage to the rim and the missing pieces of the briar between the double rings around the cap of the bowl.Dan5

Dan6

Dan7

Dan8 I reamed the bowl with a PipNet reamer starting with the smallest cutting head and working up to a head that was almost the same diameter as the bowl. I took the cake back to a very thin layer on the bowl.Dan9

Dan10 I decided to sacrifice some of the height of the bowl to give back some dignity to the tired bowl. I topped the bowl in stages on a topping board. The back side of the rim was significantly higher than the front of the bowl so I started by leveling out the bowl height all the way around the bowl. I brought the back side down to the same height as the damaged portion.Dan11

Dan12

Dan13 Once the height was even all the way around the bowl it was time to work on the front edge damage. At this point in the topping process I pressed the bowl down on the topping board with even pressure front and back and moved it on the sand paper in a circular motion.Dan14 I continued sanding until the damage on the front top of the rim was minimized. There was still damage on the front of the bowl that would need to be addressed to smooth out the damage to the bowl. I wiped the bowl down with acetone on a cotton pad to remove the sticky oils and tars spots on the bowl sides. I also cleaned up the damaged area on the front of the bowl so that I could repair it.Dan15

Dan16

Dan17 I dripped some super glue into the damaged surface and then pressed briar dust into the glue. I then gave it a top coat of super glue as well. In the photo below you can see the repaired edge and the repair to the gouges and damage on the bowl front. Dan18 I sanded the repaired area with 220 grit sandpaper and then with a medium and a fine grit sanding sponge to blend the repair into the surface of the briar. The next photo shows the same spot on the bowl after sanding the repair. The second photo below shows the top view of the rim repair. The dark/shiny edge at the bottom of the photo is the super glue repair.Dan19

Dan20 I tried to fill in the damaged briar between the double rings around the bowl. I filled in the areas with briar dust and super glue but when I tried to re-score the two lines the fills fell out of the ring. After several failed attempts to build up the centre I finally decided to remove the centre from between the two rings. I used a sharp knife to lift out the centre portion all the way around the bowl. With that gone I used a folded piece of 220 grit sandpaper to sand the surface smooth in the groove. I also sanded it with the sanding sponges to remove the scratching.Dan21

Dan22

Dan23

Dan24 I decided to stain the groove to highlight it rather than hide it. I used a black aniline stain and applied it, flamed it and repeated the process until I had the coverage in the groove that I wanted.Dan25

Dan26

Dan27 I sanded the bowl sides around the groove to remove the spillage of the stain. I worked on the bowl until the black was confined to the groove and the top and bottom edges. The more I sanded the bowl the more I liked the grain that I was seeing come through. There was some great flame grain, birdseye and mixed grain on the bowl and shank.Dan28

Dan29

Dan30

Dan31 I decided to do a contrast stain on the rest of the bowl to highlight the grain and contrast with the black stain in the groove. I heated the briar and stained it with a black aniline stain. I applied it and flamed it, and repeated it a second time. Once it was dry to touch I wiped the bowl down with alcohol and then with acetone on cotton pads to remove the black stain from the surface of the briar and leave it in the grain.Dan32

Dan33

Dan34

Dan35 I set the bowl aside to dry for awhile so I could work on the damage to the stem. I sanded the stem with 220 grit sandpaper to remove the oxidation and to clean up the calcification around the damaged areas of the top and underside of the stem.Dan36

Dan37 I wiped the stem down with alcohol to clean the surface of the stem so I could apply the superglue patch. I used a dental pick to remove debris and damage vulcanite. I greased a pipe cleaner with Vaseline and inserted it in the button underneath the hole in the stem. I built up the area around the hole with black super glue. I sprayed it with an accelerator to allow me to add a second and third coat to the repair to the hole. I then flipped the stem and repaired the deep tooth marks on the top of the stem. I filled them and also sprayed them with the accelerator.Dan38

Dan39 Once the stem patch was dry to touch I put the stem back in place on the bowl and sanded the bowl with a medium and a fine grit sanding sponge to remove more of the black stain. I also used a fine grit sanding block. The next four photos show the bowl with the black removed and the grain patterns highlighted.Dan40

Dan41

Dan42

Dan43 I set the pipe aside for the night and let the stem repairs cure over night. In the morning I sanded the patched areas with 220 grit sandpaper and with a medium and fine grit sanding sponge. I rubbed the bowl down with a light coat of olive oil to see what contrast would look like. I really liked the overall look of the bowl with the contrast. Seeing this I knew what contrast stain colour I would use on the next stain coat.Dan44

Dan45

Dan46

Dan47 There were still small pits in the patches on the top and bottom repairs. I find that when I use an accelerator the spray causes these bubbles that once dry pop and leave pits in the surface of the finish. I sanded the stem surface some more with 220 grit sandpaper to smooth it out and then added another coat of black super glue. When it dried I sanded it again to bring it smooth. In the next two photos you can still see some small pits in the finish.Dan48

Dan49 I repeated the process of filling in the pits and then finished by using some clear super glue which dries more quickly and brushing it over the pitted areas on the stem. Once I had that done I sanded the stem with micromesh sanding pads. I wet sanded with 1500-2400 grit pads. The surface was significantly smoother but the patches still showed through the finish.Dan50

Dan51 I dry sanded with 3200-4000 grit micromesh pads and rubbed the stem down with Obsidian Oil. Once it dried I repeated the sanding with the same pads. The patches are still visible but are gradually blending into the surface of the vulcanite.Dan52

Dan53 I buffed the stem with red Tripoli to remove the scratches in the rubber and to further blend the patches. I then took it back to the work table and dry sanded it with 6000, 8000 and 12,000 grit micromesh pads. I rubbed it down with another coat of Obsidian Oil and set it aside until it was absorbed.Dan54 I rubbed the stem down with Scratch X2.0 to polish the scratches. It is a plastic polish and blemish remover that is used on acrylic/plastic headlamps. It worked wonders in removing the remaining scratches in rubber stem material. I then buffed the stem with Blue Diamond on the buffing wheel and gave it several coats of carnauba wax. I buffed it with a clean flannel buff to raise the shine shown in the next two photos.Dan55

Dan56 After finishing the stem it was time to give the bowl its contrast coat of stain. I used an oxblood aniline stain. I applied it with a folded pipe cleaner to keep it out of the groove around the bowl. I flamed it, reapplied it to the briar and flamed it again.Dan57

Dan58

Dan59

Dan60 I buffed the stem and bowl with Blue Diamond and then gave the entire pipe several more coats of carnauba wax. I buffed the pipe with a clean flannel buff. The finished pipe is shown below. I think that Alan Chestnutt’s definition of the restoration process as Saving the Pipe accurately describes the work that went into restoring this beauty. The finished pipe ready to fire up and be enjoyed for many more years to come.Dan61

Dan62

Dan63

Dan64

Dan65

One of the surprises found in the craigslist lot – A Castello Sea Rock 15AF


Blog by Steve Laug

One of the surprises in the craigslist lot I purchased was a Castello Sea Rock 15FA military mount billiard. When I saw the photos in the seller’s advertisement I only saw a rusticated billiard and in the way it laid in the pipe rack it was unclear it was a military mount or a Castello. When I got it home and looked at the assortment I was surprised to see that it was indeed a Castello Sea Rock. It is shown in the photo below – the third pipe down on the right side.craig5 I think this must have been a pipe the seller loved as it was well smoked. There was still a bowl of tobacco unlit in the depths of the bowl. The cake was quite uneven but was thick around the top of the bowl. The rim was overflowing with tars and oils to the point that it had clogged the rustication on the top. It was higher in some places than others from the buildup. The outer edges of the rim were knocked about to the degree that it was work and there were scratches and stain missing from the edges. The stem was dirty on the end like it had sported a softie bit and had some calcification on it. There were also tooth marks on the topside and underside of the stem near the button. The button itself had some damage and scratches. The tenon end was also covered with a buildup of calcium on the end around the insert in the end cap.Cas1 The stem had the “diamond” inset on the side that showed that it was originally made for the North American Market. I did a bit of research and found some information on the stem logo. I quote: “American logo’d Castello pipes use a small round “Diamond” (referred to and looking like, but it is NOT actually a diamond) inlaid into the mouthpiece. This was originally done so that the standard Castello white bar logo did not conflict with another brand and logo that was sold by Wally Frank called the “White Bar Pipe” (in the 1950’s).” I also found that “The SEA ROCK [Carved Black or dark brown] is the lowest grade of the Castello line and is the most common in the USA. Sea Rocks are produced by taking a smooth bowl that has not been “final finished” and surface carving the finish with tools. This “carved” finish is then evened out using a steel wire brush, stained and then waxed.” This information was found and condensed from the PCCA Castello Grade & Style Guide – by Robert C. Hamlin (c) 1988, 1992, 1994.Cas2

Cas3

Cas4 The two photos below show the buildup on the rim more closely. The thick tars and oils over flowed on the top of the rim. You can see that the rustication is buried under the lava.Cas5

Cas6 The next two close up photos show the stem with the bite marks on the top and the bottom side and the calcification on the surface of the stem. In the second photo there is also buildup around the insert end of the stem.Cas7

Cas8 I reamed back the cake to bare wood to remove the uneven surface with a PipNet reamer. I started with the second cutting head and finished with the third cutting head.Cas9

Cas10 I used a brass wire brush and a dental pick to work on the tars on the rim. I scrubbed it and then used a tooth brush to put Murphy’s Oil Soap on the rim. It softened the tars enough that I scrubbed it again with the wire brush and picked at it with the dental pick. I rinsed off the soap with running water and then dried the bowl.Cas11

Cas12

Cas13

Cas14 I restained the worn areas on the top of the rim and the outer edges with a Guardsman Stain pen. I used the dark stain pen as it matched the rest of the bowl. Once I had touched up the stain I rubbed the top of the rim with a cotton cloth to blend the stain into the rest of the rim colour.Cas15

Cas16 I sanded the stem with 220 grit sandpaper to remove the tooth chatter and the tooth marks. I also sanded the stem to remove the calcification. I then sanded it with a medium and fine grit sanding sponge to reduce the scratching.Cas17

Cas18

Cas19 I sanded the stem with micromesh sanding pads. I wet sanded with 1500-2400 grit pads and dry sanded with 3200-12,000 grit pads. I rubbed the stem down with Obsidian Oil between each set of three pads.Cas20

Cas21

Cas22 I also polished the edges of the end cap to remove the worn areas on the surface. I fit the stem back into the shank and hand polished the stem with a cotton polishing cloth. I gave the bowl a coat of Halcyon II wax and buffed it with a shoe brush. The photos below show the pipe after the buff with the brush.Cas23

Cas24

Cas25

Cas26 The next close up photo shows the stamping on the pipe. It is stamped CASTELLO over SEA ROCK BRIAR on the flat portion of the shank bottom. To the left of that stamping it reads MADE IN CANTU over ITALY and to the left of it is the number 15 over AF. The end cap is also stamped HAND MADE over CASTELLO over 5.Cas27 The next series of photos shows the finished pipe. I lightly buffed it with a soft flannel buffing pad. It raised the shine on the briar. I buffed the stem with Blue Diamond and then gave the stem several coats of carnauba wax. I buffed the entire pipe lightly with the clean soft buff.Cas28

Cas29

Cas30

Cas31

Cas32 After looking at the finished photos I decided to give it a light rubdown with olive oil. I wanted to enliven the finish and what better way than to add some Italian Olive Oil to and Italian briar.Castello1

Castello2

Castello3

Castello4

Castello5

ADDENDUM: I wrote this while wondering about the 15 AF stamping. I knew that the 15 was the shape stamp but the AF threw me for a loop. I posted on both Smokers Forums and Pipe Smokers Unlimited Forum and asked for help. Many offered suggestions. Several said to write Mike Glukler of Briarblues so I did that. Mike replied fairly quickly that he had no idea about the mystery stamp but sent it on to Marco at Novelli, and Castello collector Dave Peterson. Dave replied that he believes that it stands for Army Fitment. He went on to say that the newer army fit pipes that he has have the letter (SC) size designation and have no AF suffix so he assumes the AF stamp was discontinued in the early 60’s. He also said he would check with some others. So it seems I have a tentative answer regarding the stamping.

ADDENDUM 2: Bill on Pipe Smokers Unlimited wrote to Castello and asked them what the stamping meant. He posted their response this morning:

“Steve here is the Castello response and I think you will be quite pleased and surprised.

Dear Customer,
thank you for your inquiry,
the number stands for the shape 15, the billiard. Then “A” stands for
“amici” = friends, “F” stands for flock.
That is a pipe given to friends (read “not for sale”) with a flock. I
hope it helps.”

You got to love the pipesmoking community and the wealth of information available to us if we ask.

JPL Tomato restored and given a new look


Blog by Steve Laug

When I first saw the pipe lot on craigslist Vancouver the pipe that caught my eye was the squashed tomato that is shown in the photo below on the top right. I had no idea who the make was but it was obviously a large pipe and a unique shape that made me want to know more. It is actually the pipe that pushed me to make the phone call to the seller. I have a Rad Davis that is similarly shaped but nowhere near as large.craig5 When I got to the seller’s home and looked at the pipe I could see that it was stamped JPL over Bruyere over St. Claude France on the shank. The pipe was well smoked. The finish was pretty well dried out – I think originally it had been an oil finish over the natural briar and that was gone and in its place was a lot of grime. The top of the bowl was in the roughest shape. It had a thick coat of tar/oil that I call lava flowing over the rim. The bowl had a cake that was hard and there were remnants of tobacco stuck in the walls and bottom of the bowl. The top also had what looked like road rash on the front. There were many pin prick nicks and dents that made me think that the pipe had been dropped on concrete. The redeeming feature was that the briar had some stunning flame grain around the sides and top portion of the bowl and featured great birdseye grain on the bottom. The stem was oxidized and there were two deep tooth marks on the top and bottom sides of the stem near the button. There was also a lot of tooth chatter and it looked as if the stem had been covered at one time with a softie bit.JPL1

JPL2

JPL3

JPL4 I took the next series of three photos to show the damage to the top of the bowl and the tooth marks in the stem.JPL5

JPL6

JPL7 I was unfamiliar with the stamping on the pipe as I had not seen it before. Once Googled it on the web I found that JPL stood for Jean Pierre Lacroix. That was a name I was familiar with in previous reading on St. Claude pipe making families. I looked on Pipedia and found the following information:

“Lacroix Pipes have a rich history of pipe making tradition and the brand was started in 1962. Eugine Lacroix began making pipes for the Delacour factory in the 19th century; his sons founded their own factory in 1921. Two of the grandsons (including Jean) continued on in the business, but parted ways and struck out on their own in 1962. At that time, Jean set up Jean Lacroix pipes, coincidentally in the old Delacour building his grandfather started in 85 years prior. Today, Jean Lacroix, Chacom, Jeantet, and Vuillard are all pieces of the larger Cuty-Fort Enterprises, and Jean is actively involved with the prestigious Confrerie des Maitres-Pipiers de Saint-Claude. Jean still makes pipes; his spectacular freehands are known throughout the world. The model named “Nizza” De Luxe is made by him with scripted stamp showing his name (hard to read!). Jean Pierre Lacroix sometimes marked Maitre Pipier a Saint-Claude.” Quoted from Pipedia http://pipedia.org/wiki/Lacroix

More information is available on PipePhil’s website. http://www.pipephil.eu/logos/en/infos/lacroix-en.html#split

I began cleaning up the pipe by scrubbing the rim with acetone on a cotton pad. Since the pipe was unfinished and was so dirty I used acetone rather than alcohol. I scrubbed the bowl top until I had removed all of the tars and oils. I also wiped down the remainder of the bowl to remove the oils and dirt from the years of being held in the hand.JPL8 Once I had the bowl top cleaned I removed the stem to see what I was dealing with. I found that the stem and the shank was drilled for a 9MM filter but that somewhere along the way someone had inserted an ill fitting stinger apparatus in the tenon. It was pressed in place deep in the tenon and there was a lot of wiggle room around it. It did not extend very far into the shank and as such the shank was filthy. The first photo below shows the stinger in place. The second shows the length of the stinger once I removed it from the tenon.JPL9

JPL10

JPL11 I sanded the bowl with 220 grit sandpaper to remove the damage on the top of the bowl. I sanded until I had removed the road rash on the front edge and the damage to the back of the bowl. I sanded it further with a medium and fine grit sanding sponge to minimize the scratches left behind by the sandpaper.JPL12

JPL13 While I had the sandpaper out I also sanded the tooth chatter and tooth marks on the stem. You can see that after sanding I still had a fairly large tooth dent on the underside of the stem and a small one on the top near the left edge.JPL14

JPL15 I reamed the bowl with a PipNet reamer starting with the largest cutting head that would fit and working my way up to the largest head in the set. I took the cake back completely to leave the bare briar exposed and ready to build a new cake of my liking.JPL16

JPL17 I did some more sanding on the stem and was able to remove the damage from the top side near the button completely. The mark on the underside was still deep. I cleaned the surface of the stem with alcohol and picked the tooth mark clean with a dental pick. I filled it with black super glue and set it aside to dry.JPL18 I sanded the bowl with a medium and a fine grit sanding block and worked over the damaged area on the top front and some of the more minor damage on the sides and back of the bowl. I sanded it and then wiped it clean with isopropyl alcohol on a cotton pad. After wiping it down the grain really began to show. The final photo in this series shows the birdseye on the bottom of the bowl.JPL19

JPL20

JPL21

JPL22

JPL23 I scrubbed out the shank of the pipe with pipe cleaners, cotton swabs and isopropyl alcohol until it was clean and the swabs came back white. I may well use a retort on it later but at this point I stopped with the swabs.JPL24 I sanded the bowl with micromesh sanding pads – wet sanding with 1500-2400 grit pads in preparation for staining the bowl.JPL25 Though the pipe was originally unstained when it was made I decided to use a contrast stain to highlight the beautiful grain on the bowl. I heated the briar and then applied several coats of black aniline stain. I flamed the stain to set it in the grain. I wiped the briar down with alcohol on cotton pads to remove the topcoat of black stain.JPL26

JPL27

JPL28 I took the pipe to the buffer and buffed it with red Tripoli to further remove the topcoat of stain. I sanded it with a medium grit sanding sponge and the fine grit sanding block.JPL29

JPL30

JPL31

JPL32 Once I had the surface stain removed and the remaining black stain highlighted the grain I wiped the bowl down a final time with alcohol and prepared to stain it with the contrast stain. I decided to use a rich mahogany aniline stain for the contrast coat. I applied the stain and then flamed it to set it in the briar.JPL33

JPL34

JPL35 When it had dried I buffed it with White Diamond and took the following photos to show where it stood at this point in the process.JPL36

JPL37 The grain really stood out on the pipe at this point. I still needed to sand it with micromesh to develop a richer sheen.JPL38

JPL39

JPL40

JPL41

JPL42

JPL43

JPL44 I wet sanded the bowl with 1500-2400 grit micromesh sanding pads.JPL45

JPL46 I dry sanded with 3200-12,000 grit micromesh sanding pads.JPL47

JPL48

JPL49

JPL50 After sanding with the 12,000 grit micromesh pad I buffed the bowl with Blue Diamond on the buffing wheel and then gave it a coat of carnauba wax. I buffed it with a soft flannel buffing pad to raise the shine. I set the bowl aside and went to work on the stem. I cleaned out the 9MM tenon with alcohol and cotton swabs and pipe cleaners. I worked until the stem was clean.JPL51

JPL52 I sanded the stem with a medium grit sanding sponge and then rubbed it down with Obsidian Oil. I had a box of 9MM filters so I took one out of the box to try in the stem. It fit well and made the draw less open.JPL53

JPL54 I wet sanded the stem with 1500-2400 grit micromesh sanding pads and then buffed the stem with red Tripoli to remove the stubborn oxidation. I resanded it with the micromesh before moving on and dry sanding with 3200-12,000 grit sanding pads. I rubbed the stem down with Obsidian Oil between each set of three pads. After sanding with the 12,000 grit pad I buffed the stem with Blue Diamond and polished until the stem shone. I then gave it a coat of carnauba wax and buffed it with a soft flannel buff.JPL55

JPL56

JPL57 I put the stem back on the pipe and buffed the whole pipe with carnauba wax. I gave it multiple coats of wax and then a final buff with a soft flannel buffing pad.JPL58

JPL59

JPL60 The finished pipe is shown in the photos below. I really like the new look that the contrast stain gives the pipe. The colour makes the grain pop and stand out very well.JPL61

JPL62

JPL63

JPL64

JPL65

JPL66

JPL67

JPL68

A Rebirth for a pair of Duncan Hill Aerosphere Pipes


Blog by Steve Laug

The last pair of pipes needing refurbishing from my gift box was a pair of Duncan Hill Aerosphere pipes – one a smooth pot and the other a rusticated billiard. I have had quite a few Duncan Hill pipes over the years and sold some, restemmed others without the reverse tenon system and really never paid much attention to them. The pot was a nice piece of briar and actually quite clean. The finish was in good shape though dirty. The inserted reverse tenon was loose and would need to be repaired. The bowl was dirty and had some pieces of tobacco attached to the walls of the bowl. The rim was in great shape. The stem was oxidized and the round brass carburetor hole was plugged. There was minimal tooth chatter on the stem and no bite marks that would need to be repaired. The stamping was slightly worn in the middle but it still clearly read Aerosphere over Duncan Hill over Ltd.Aero1 The rusticated billiard was also fairly clean though there was dried wax stuck in the grooves of the rustication. The rim top was quite dirty with tars and oils built up and filling in the rustication. The bowl had a light cake and tobacco leaf stuck on the bowl sides. The finish was workable but dirty. The stem was in better shape than the one on the pot. It was dirty and had sticky tape remnants on the top but there was little oxidation and no tooth chatter. The carburetor on this one was also clogged and the stem was loose on the reverse tenon. It was stamped with the same stamping as the smooth pot but on a smooth band on the bottom of the shank.Aero2

Aero3

Aero4

Aero5

Aero6

Aero7

Aero8 I removed the stems and put the bowls in my alcohol bath to soak for a while. While they were soaking I wanted to do a bit of research on the brand and see what I could discover about it. I was curious to look for patent information and old advertisements to see if I could discover the marketing schemes that made this quite a prolific seller over the years.Aero9 I Googled Duncan Hill Aerosphere and the first bit I found was from a Google group for ASP. There I found the following quote. I have the reference link placed at the end of the quote if you want to follow up on the information: “The Duncan Hill Aerosphere smoking system (U.S. patent #4,275,747) utilizes the same principle of physics as the manometer. The Aerosphere, visible as the brass pin on the side of the mouthpiece, brings a scientifically measured amount of air into the stem with each puff. The control of the amount of air and the velocity of the air produces two effects that result in superior smoking pipe performance.” https://groups.google.com/forum/#!topic/alt.smokers.pipes/GUxdN5Dus4Q

I also found a link to an advertisement for the brand featuring the designer in Popular Mechanics Magazine, February 1980, pg. 31 on Google books. Here is the link:
https://books.google.ca/books?id=m9UDAAAAMBAJ&pg=PA31&lpg=PA31&dq=Duncan+Hill+Aerosphere+Pipes&source=bl&ots=tR4egGI0ig&sig=XeACE0-Vh19-1JNcA0kAgS87kRI&hl=en&sa=X&ei=p1QbVbPTEpLvoATEpoLoCQ&ved=0CBwQ6AEwADgU#v=onepage&q=Duncan%20Hill%20Aerosphere%20Pipes&f=false Aero10 Next is an advertisement from Popular Mechanics Magazine, September 1982, pg. 216 on google books. Here is the link. https://books.google.ca/books?id=f9kDAAAAMBAJ&pg=PA216&lpg=PA216&dq=Duncan+Hill+Aerosphere+Pipes&source=bl&ots=fsZtVqD0z9&sig=Kl3wI-76NJqpFxAg8SPndnnWyqM&hl=en&sa=X&ei=owEcVdGGKdj9oQSD_4L4Bw&ved=0CCgQ6AEwAjgo#v=onepage&q=Duncan%20Hill%20Aerosphere%20Pipes&f=false Aero11 Finally using the patent number in the ASP quote I was able to find the patent documents for the pipe on the US Patent Office site. I have included the documents from the US Patent Office here. There are four pages – 2 of drawings and two of description.Aero12

Aero13

Aero14

Aero15 I love finding this old information and reading about the persistent search for the dryer cooler smoking pipe that has led to many creative solutions. It lends some colour to the work of my refurbishing to be able to read about the design ideas and the inventors themselves as I work on the pipes. Armed with new information I worked on the stems while the bowls were soaking in the alcohol bath. I cleaned the inside and outside of the stems with 99% isopropyl alcohol on cotton swabs and pipe cleaners. It took some scrubbing to clean out the grime built up around the interior of the carburetor insert in the stem and in the second chamber below the airway in the stem. The tars and oils were built up in there but far less so than I would have expected on these pipes from the 1980s.Aero16

Aero17

Aero18

Aero19

Aero20

Aero21 With the stems cleaned and the carburetor air hole opened in both of them with a dental pick it was time to take the bowls out of the alcohol bath and begin to work on them.Aero22 I dried off the bowls and pulled the loose reverse tenon out of the shank of the pot. I cleaned the shank with alcohol, cotton swabs and pipe cleaners then pressed the loose piece back in place. Once the alcohol evaporated the fit was tight. I cleaned the shanks on both pipes until the pipe cleaners and swabs came out white.Aero23

Aero24

Aero25 By the time I finished cleaning out the shanks the bowls had dried enough to ream them with the PipNet reamer. I cut back the cake in the billiard to the bare wood and cleaned up the light cake in the pot.Aero26 In the photo below the wall of the billiard on the left looks damaged. I used a slightly larger reaming head and took back the remaining cake until the wood was clean and solid.Aero27 Then it was time to work on the stems. I did a rough sand with 220 grit sandpaper to remove the sticky build up on the darker of the stems and to break up the oxidation on the other one. I followed that by sanding them both with a medium and fine grit sanding sponge.Aero28

Aero29 I put them on the pipes to have a look at the progress of the restoration.Aero30 I buffed the stems with red Tripoli and worked on the stubborn oxidation on the one stem. I then buffed it with White Diamond. I took them back to the work table and sanded them with micromesh sanding pads – wet sanding with 1500-2400 grit pads and dry sanding with 3200-12,000 grit pads. Aero31

Aero32

Aero33 I rubbed the stems down with Obsidian Oil and when it had been absorbed I buffed the stems with Blue Diamond plastic polish. The oxidation still showed on the one stem so I started again and sanded it with the medium and fine grit stem and repeated the process through the micromesh and buffing until I had conquered the oxidation.Aero34

Aero35

Aero36

Aero37 I buffed the stems with Blue Diamond once again and gave them multiple coats of carnauba wax. I buffed the smooth bowl with carnauba and a soft flannel buff. I stained the rusticated bowl with dark brown aniline stain diluted 1:2 with isopropyl alcohol and then buffed it with White Diamond. I finished that pipe with several coats of Halcyon II wax. The finished pipes are shown in the photos below.Aero38

Aero39

Aero40

Aero41

Aero42

Restoring a Willard Imported Briar Rhodesian


Blog by Steve Laug

I am finally finishing up the final pipes in the box of gift pipes. This one is a little long stemmed Willard Rhodesian. It is stamped Willard over Imported Briar. It was in pretty good nick. The finish was worn and peeling in some places. There were scratches in the surface of the briar on the sides of the bowl. The bowl was lightly caked with remnants of tobacco clinging to the walls of the bowl. The stem was chewed but no deep marks were in the surface. The stem is that odd nylon like material that was on pipes of this era. It had a threaded tenon and a short stinger that was pretty clean as well. The stem was clean on the inside as was the shank of the pipe. The stem was slightly over turned and had some damage to the nylon of the upper portion of the stem.Willard1

Willard2

Willard3

Willard4 The next two photos show the tooth damage to the top and underside of the stem near the button.Willard5

Willard6 I decided to remove the spotty and peeling finish first. I wiped it down with acetone on cotton pads until the varnish coat was removed. To my surprise there were no visible fills in this piece of briar. The wood actually had some nice grain under the varnish coat.Willard7

Willard8

Willard9

Willard10 I sanded the stem with 220 grit sandpaper to remove the damage on the surface and the tooth marks on the top and underside near the button. I heated the stinger with a lighter to soften the glue so that I could correct the over turned stem. Once it was softened I put it in the mortise and turned it clockwise until it lined up with the bowl properly. I let it cool and harden once again before removing it from the shank.Willard11 I scraped out the slight cake and remnants of tobacco with a pen knife taking it back to bare wood so that a new cake could be built up by the next pipe man.Willard12 I sanded the bowl and the stem with a medium and fine grit sanding sponge to remove the scratches left behind by the sandpaper and then put it back on the pipe and took the next set of photos.Willard13

Willard14

Willard15

Willard16 I stained the bowl with a dark brown aniline stain mixed with two parts alcohol to thin it down and lighten it. I applied it and then flamed it with a lighter to set the stain. I reapplied the stain and flamed it again.Willard17

Willard18 Once the stain dried I wiped the bowl down with alcohol on a cotton pad to even out the stain coat and to make it more transparent.Willard19

Willard20

Willard21

Willard22 I put the stem back on the shank and sanded it with micromesh sanding pads to polish it. I wet sanded with 1500-2400 grit pads and dry sanded with 3200-12,000 grit pads. I rubbed it down with Obsidian Oil between each set of three pads and then again the final time. I did not buff the stem with the buffer as I find that the nylon stems do not do well with the heat of the buffer. I applied some Paragon Wax to the stem and hand buffed it with a shoe brush.Willard23

Willard24

Willard25 I buffed the bowl with White Diamond and Blue Diamond on the buffing wheel and then gave it multiple coats of carnauba wax. The finished pipe is shown in the photos below. It is ready for a long life of delivering a decent smoke to whomever’s rack it ends up gracing. It is a pretty little Rhodesian that looks great.Willard26

Willard27

Willard28

Willard29

Willard30

For the Love of an Amadeus Half-Bent Brandy


Guest Blog by Robert M. Boughton
Member, North American Society of Pipe Collectors
http://www.naspc.org
http://www.roadrunnerpipes.com
http://about.me/boughtonrobert
Photos © the Author

“According to Diotima, Love is not a god at all, but is rather a spirit that mediates between people and the objects of their desire. Love is neither wise nor beautiful, but is rather the desire for wisdom and beauty.”
― Plato (429?–347 BCE), Athenian philosopher, in “Symposium,” 360 BCE

INTRODUCTION
Amadeus may be known best as the 1984 feature film that won eight Academy Awards and was titled after the fourth given (or in this case, chosen) name of the latter 18th century Austrian composer, more often shortened to Mozart. Christened Johannes Chrystosomus Wolfgangus Theophilis Mozart, the often inebriated genius preferred the Latin translation of Theophilis – Greek for “lover of God” – which is Amadeus, derived from amare, to love, and Deus, God. The name also happens to be a Greek pipe brand founded in 1975 by eight artisans.

The half-bent brandy I obtained as part of a multi-pipe estate lot last year is a mid-level example of an Achaki-Amadeus S.A. briar. The company’s products range in price new from $50 on sale to $320 at the regular rate. They are all made of high quality Mediterranean briar, and the Greek company is among the primary suppliers of that variety of wood to other makers including Stanwell, Vauen, Tsuge and the late Bjarne Nielsen of Denmark.

This Amadeus arrived in much better than usual shape except for the chamber and rim and some minor wear of the stem.AM1

Am2

AM3

Am4

Am5

Am6

AM7 THE RESTORATION
I was eager to start a OxiClean bath on the stem. Knowing the stem hole as well as the outer area would benefit from a good soak for about a half-hour, I suspected that some of the chatter I could see in line with the lower lip would require more than that and even some sanding before micro-meshing.Am8

Am9 In the meantime, I had no trouble removing the little bit of blackening of the rim with easy rubbing using super fine steel wool, and the mild buildup of carbon in the chamber with a 19mm reamer followed by 150-grit paper and finished to silky smoothness with 320-grit.

Although the top of the stem was good after the soak, rinse and a wet micromesh work-over – building a grade at a time from 1500-4000 – the bottom, after the same treatment, indeed needed more work.AM10

Am11 And so I removed a little more of the chatter with 200-grit paper and applied some Black Super Glue.Am12

Am13 My work so far was easy, but being the glass-half-empty sort I was prepared to discover serious accreted grime when I commended the stage of clearing the mortise and shank with a wire-handled cleaner dipped in Everclear. But my luck continued. After a few passes that met no resistance and resulted in minor darkness of the cleaner, I decided with a rare sense of admiration that the previous owner had enjoyed the Amadeus brandy for some time and taken appropriate care of it. Reattaching the stem, I retorted the pipe with a mere two Pyrex test tubes of boiled alcohol.

As has been the case in many of my restorations so far, I was curious with the shade of the stain that I considered to be over-dark. To my way of thinking, as long as a careful visual analysis reveals no hidden reason for the extra obscuring, the clearer the grain, the better. And so, again with the utmost gentleness, I used a small piece of steel wool to lighten the briar and worked my way up the micromesh scale.Am14

Am15

Am16

Am17

Am18

AM19 For those of you with more discerning eyes, the pieces of crud visible with enlargement of the last photo, showing the shank opening, resulted from a final impulsive sanding of the chamber. Rest assured none of it remained after I noticed and gave it a good blow.

The two pieces of the pipe were ready for buffing. I used red and white Tripoli and White Diamond on the stem (big surprise) and white Tripoli, White Diamond and three coats of carnauba on the wood.Am20

Am21

Am22

Am23

Am24

Am25

Am26 CONCLUSION
There were no big problems with this restoration; no special problems to report or whine about; no particular distinction of the Amadeus itself, except for its very fine craftsmanship and, to me, less common country of manufacture. Still, it is a real beauty, an opinion I expressed in an email to Achaki-Amadeus to date the crafting of the pipe. Excepting the general pleasure of the simple but effective restoration, in fact, the most exciting aspect of the process came after the fact, when I received a response from one of the brand’s owners:

This is a line we used to make some good ten years ago. If you are in the USA it was imported in the country four years ago.

I hope I helped.

Thank you for your kind words.

Best regards

Makis Minetos

Please visit my blog:

http://www.acutabovebriar4.blogspot.com

The French Girl with the Fuzzy Identity


Guest Blog by Robert M. Boughton
Member, North American Society of Pipe Collectors
http://www.naspc.org
http://www.roadrunnerpipes.com
http://about.me/boughtonrobert
Photos © the Author

“The problem with putting two and two together is that sometimes you get four, and sometimes you get twenty-two.”
― Dashiell Hammett (1894-1961), U.S. author who re-invented and popularized the hard-boiled private investigator genre, in “The Thin Man” (1934)

INTRODUCTION
I take great solace from life’s frequent misadventures through activities that nevertheless focus on the same causes of grief: reading a good book, realistic or fantastic; writing news articles, blogs, letters to the editor and my own versions of literature; photographing street life, landscapes, nature and the occasional spot news event; drafting, filing and arguing civil actions in courts of law when I too frequently encounter those who would do me harm through ignorance or the misperception that I lack understanding of that study of knowledge, and researching and at times investigating anything and everything. But when I need to retreat all the way into the pleasure centers of my brain, I have only my local tobacconist and pipe acquisition disorder on which to fall back, and on the great majority of my P.A.D. attacks for almost a year now I can at least blame my small but expanding online business of refurbishing or restoring estate pipes for sale. Yet even that endeavor involves research and background checks.

Other than the classic but elegant shape and crafting of the Butz-Choquin bent billiard I scored a few months ago in an estate lot with several lesser gems – including a unique red Kaywoodie lumberman that was, for the most part, sandblasted, but with two natural rings around the billiard bowl and matching sitter bottom and ferrule – the obvious challenge of restoring the shapely French pipe to her original fine condition was a definite attraction. Except for the BC logo clear on the left side of the stem and the overall haggard appearance, I had no idea what I was getting. When the lot arrived, I searched for the BC, but when I found her the nomenclature was so fuzzy I could make out little more of the brand stamp on the left shank than the distinctive cursive B. Of the name itself, I saw two lines, the top beginning with a definite F and the bottom a clear word: MAJOR.

This may sound like plenty to go by, but my browser search suggested multiple possibilities for Butz-Choquin matches starting with F. There was the Formula, Formula Noir, Fait Main and filter, all of which I ruled out. And so I added an L and found Flamme, Flamme Extra, Flamme Standard, Flash and Fleuron. Then I tried Flamme Major and, seeing no suggestions, just Major. That excavated a site with images for BC Major Pipes, among which I saw a similar although straight stem specimen.Butz1 Therefore I returned to the full Butz-Choquin Flamme Major search and completed it, confirming that indeed was what I had.

THE RESTORATION
Butz2

Butz3

Butz4

Butz5

Butz6

Butz7

Butz8 I recently started making several basic changes in my pattern of restoration S.O.P. First, I now begin with an OxiClean stem wash as it can go on in the background, so to speak, while I do other tasks. I’ve also found it really works, although not with the comprehensive results sworn to in the site I found for its basic instructions, including the consistent lack of need for additional work such as sanding and on occasion using Black Super Glue for deep fills. Sometimes after washing with OxiClean and warm water, rubbing out the excess discoloration with a cloth and micro-meshing, the result is a perfect stem ready for the wheel. More often than not, however, I need to sand out scratches that are exposed. Such was the case with this stem. But the practice serves its purpose, to clean the stem inside and out and make the job of producing a shinier end product far easier.

Before
Butz9

Butz10
Ready for buffing:Butz11

Butz12 The second new habit is working on the rim and chamber and scraping out the major buildup of old tobacco and its related substances from the shank with a wire cleaner rinsed over and over in Everclear. All of these can be completed during the OxiClean wash. Third, I now retort every pipe at this stage.

All of these stages of the process completed, I turned to the bowl and shank, which showed the wear and tear of age. Tell me about it! After washing the briar with purified water, I used a piece of super fine steel wool to lighten the all-too-often over-dark original finish, shine the wood and make the grain show with more clarity. The wood was in very good condition with no pits, dings or scratches worth mentioning, and the slight appearance of discoloring in areas disappeared. I did a full micromesh workup with 1500, 1800, 2400, 3200, 3600 and 4000.

By the end of the restoration, the nomenclature somehow was much clearer.Butz13

Butz14

Butz15

Butz16

Butz17The time was right for the final buffing, and so I repaired from the comfort of the living room for the prep work to the workroom for finishing. The stem, as usual, I gave a nice shine with red Tripoli and White Diamond. The briar I buffed with white Tripoli, White Diamond, and a few coats of carnauba.Butz18

Butz19

Butz20

Butz21

Butz22

Butz23

Butz24

Butz25CONCLUSION
I think the most notable achievement of this restoration is that for the first time I was able to sand the chamber until it was baby smooth and like-new. I accomplished this by reaming and then sanding with 150-grit paper as usual but followed those steps with a second sanding using 320-grit paper.

All in all, I am happy with the outcome and will, of course, be sorry to let this one get away from me.