Tag Archives: removing oxidation

This one was a labour of love – A Custombilt Bullmoose


Blog by Steve Laug

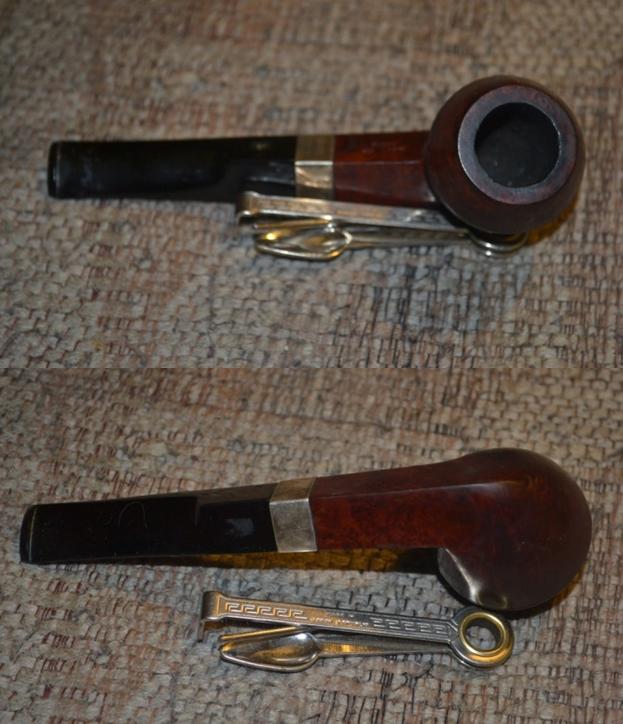
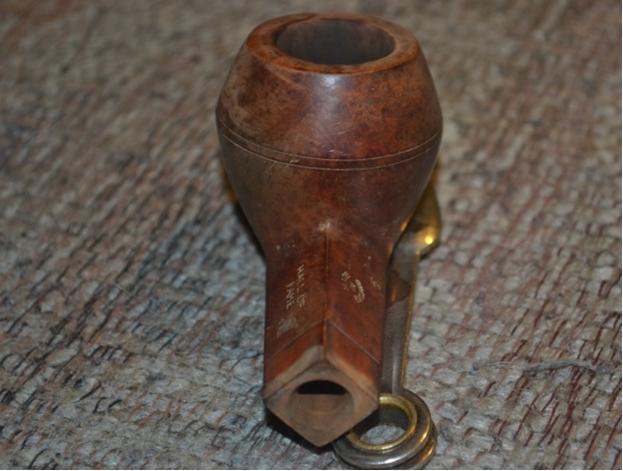
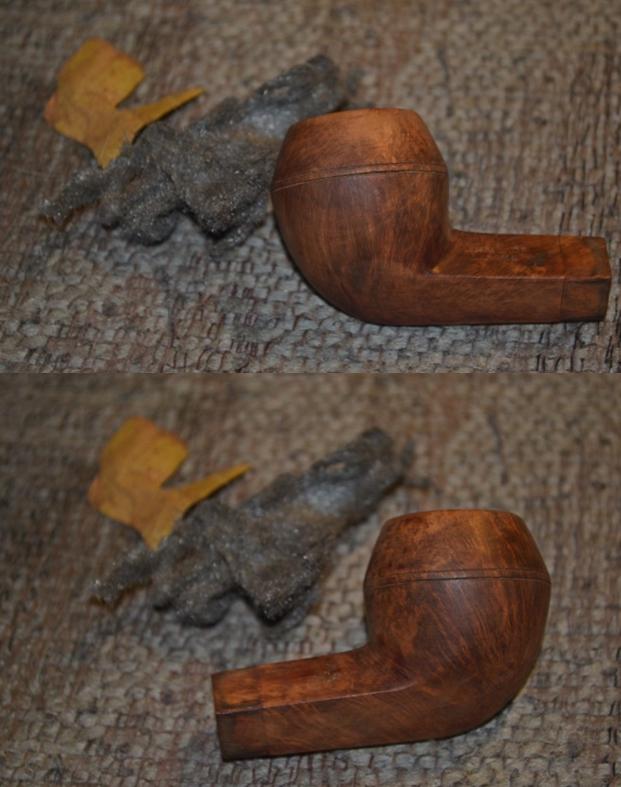
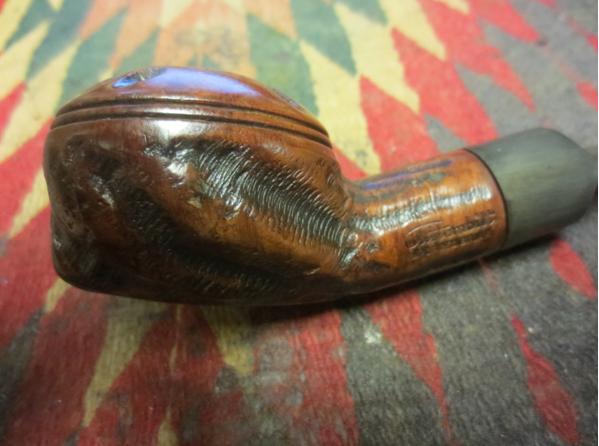
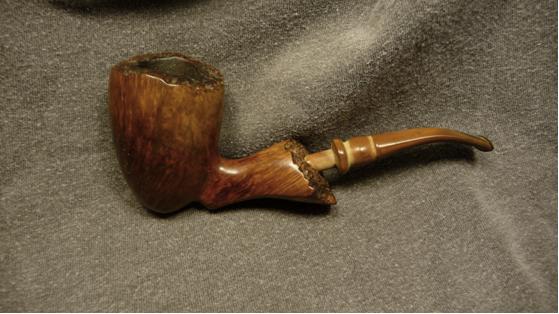
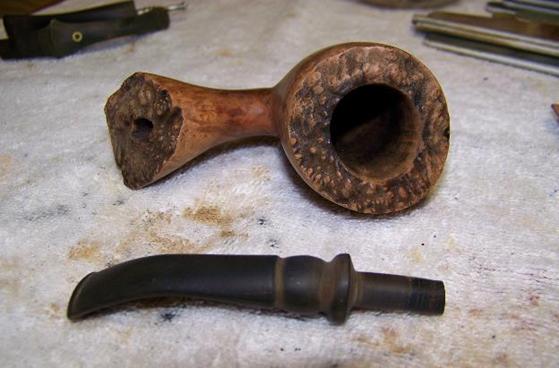
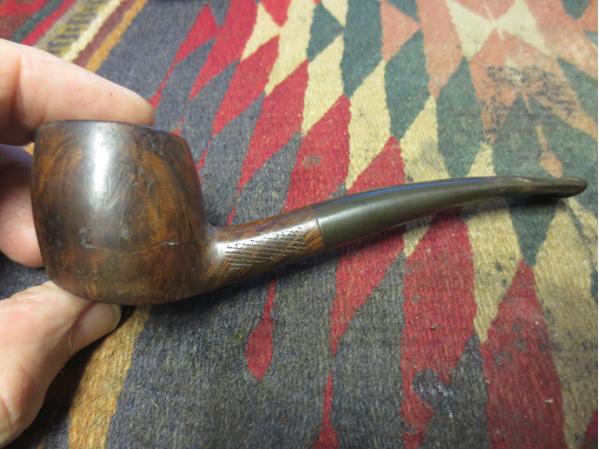
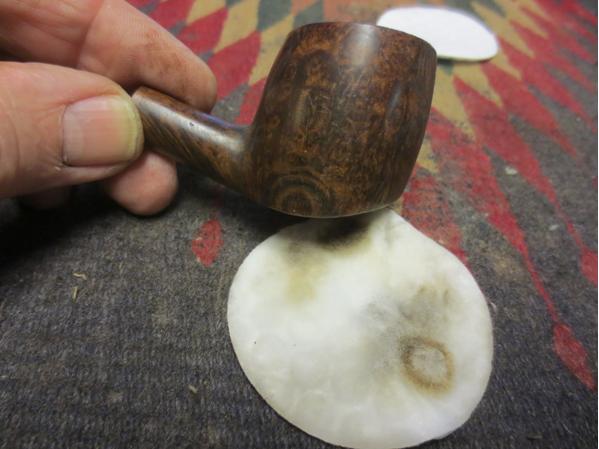
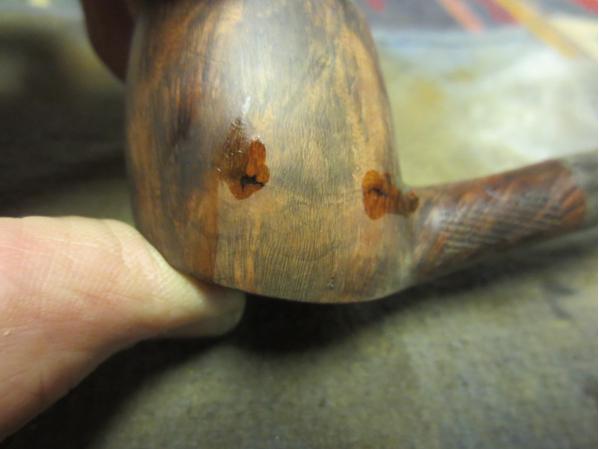
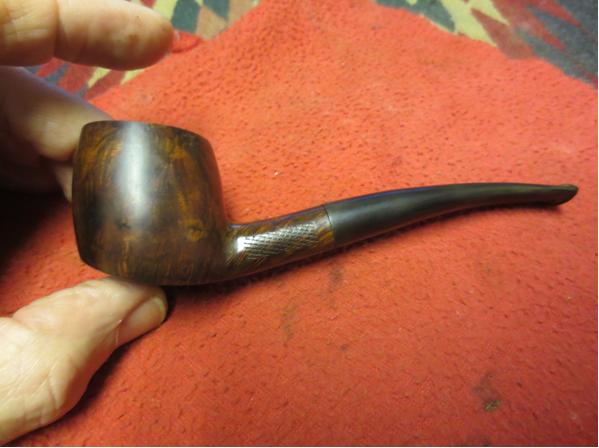
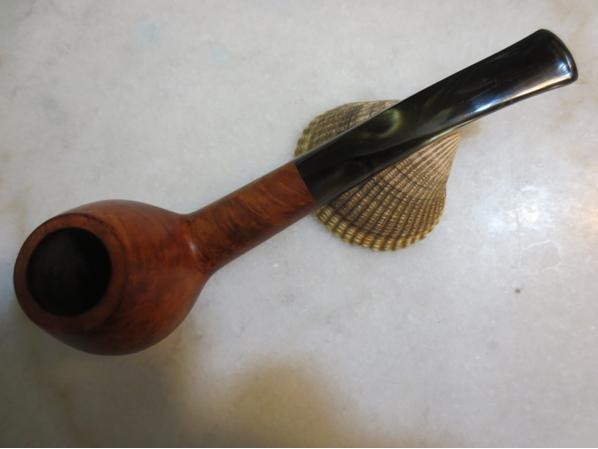
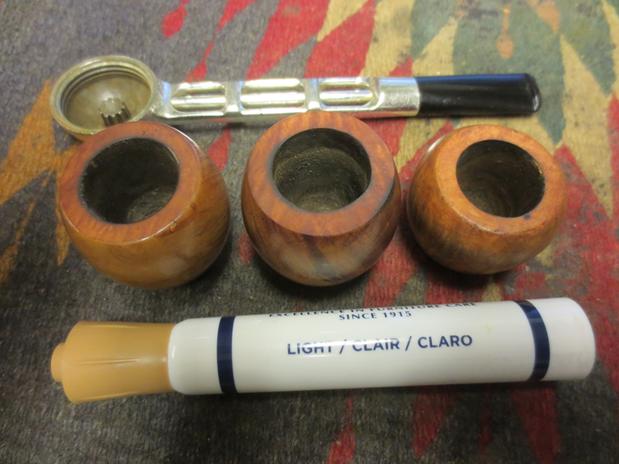
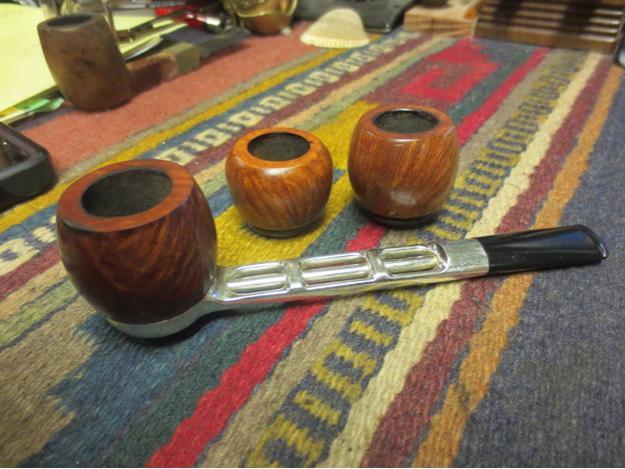
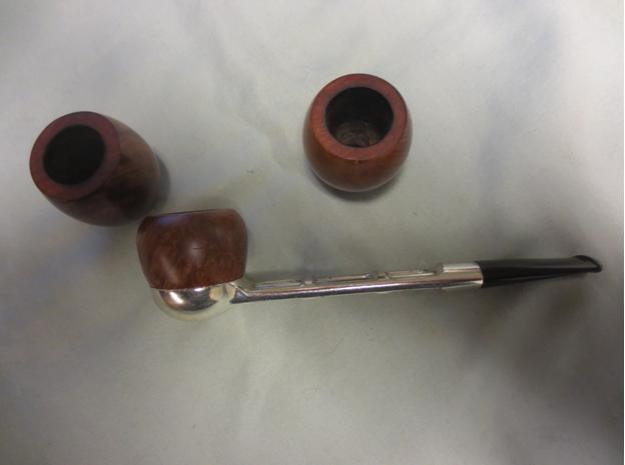
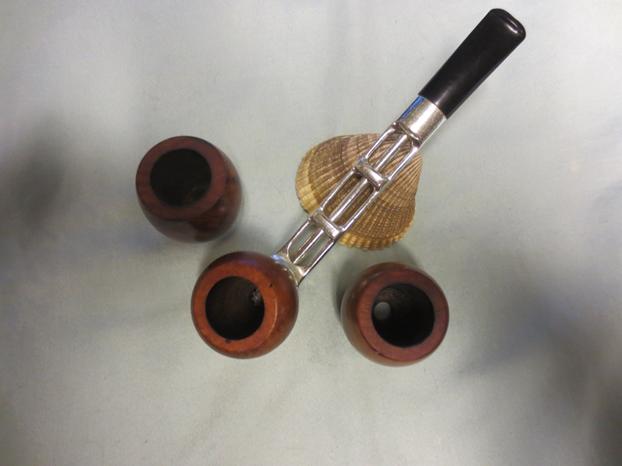
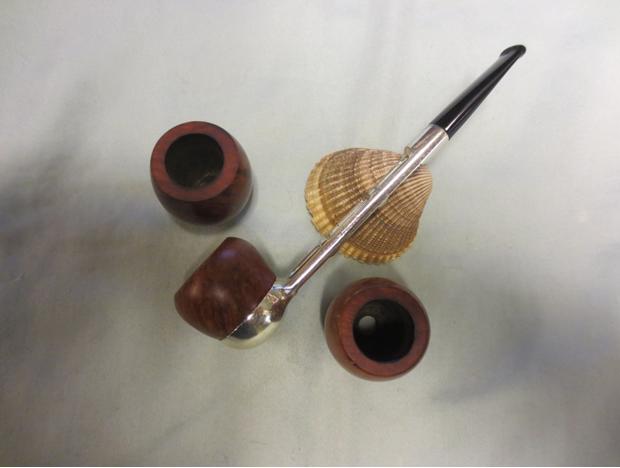
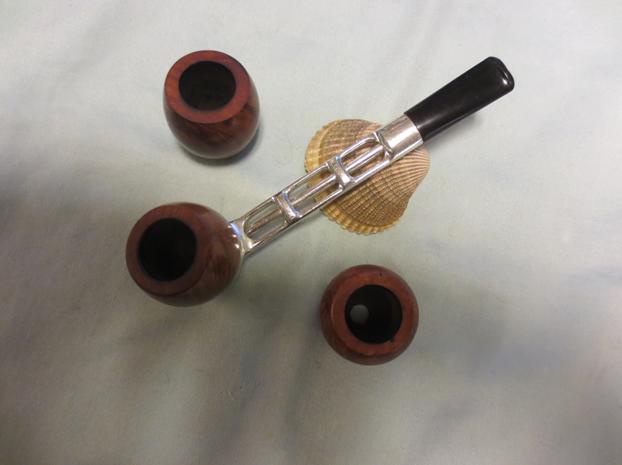
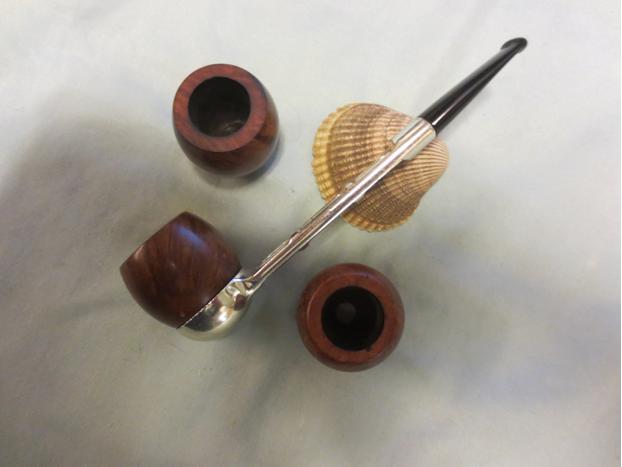
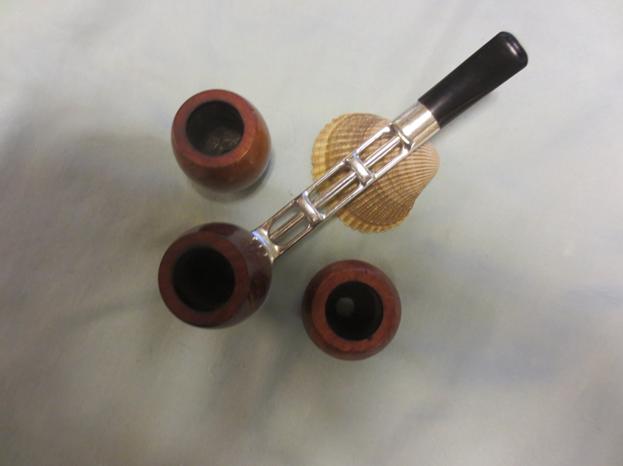
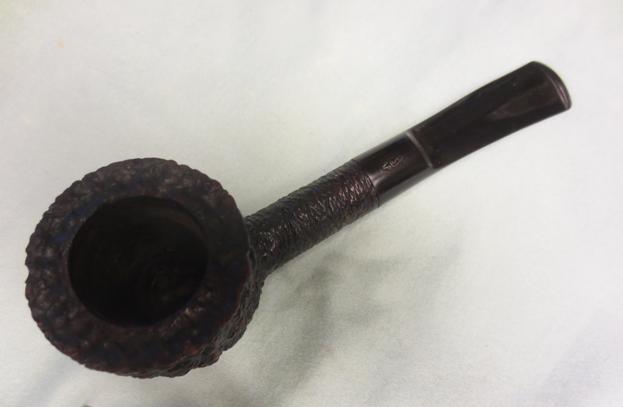
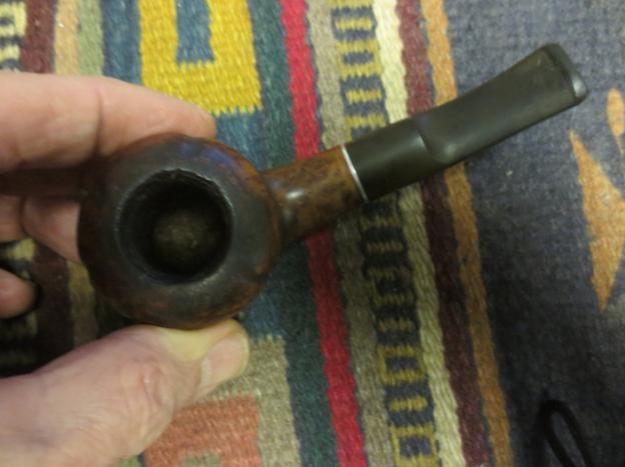
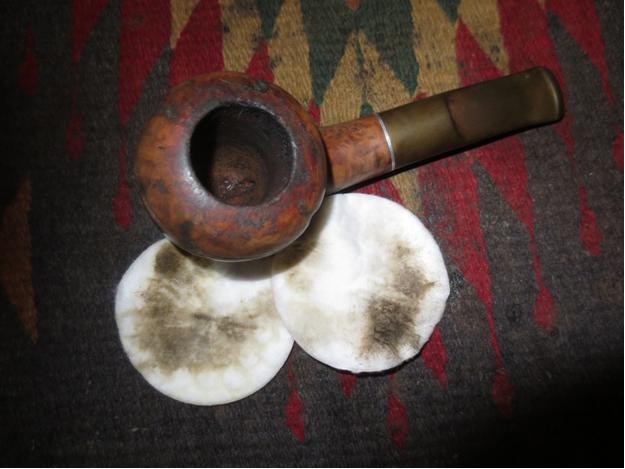
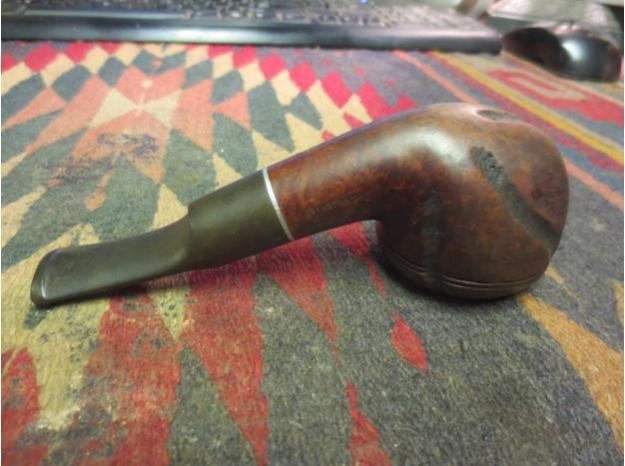
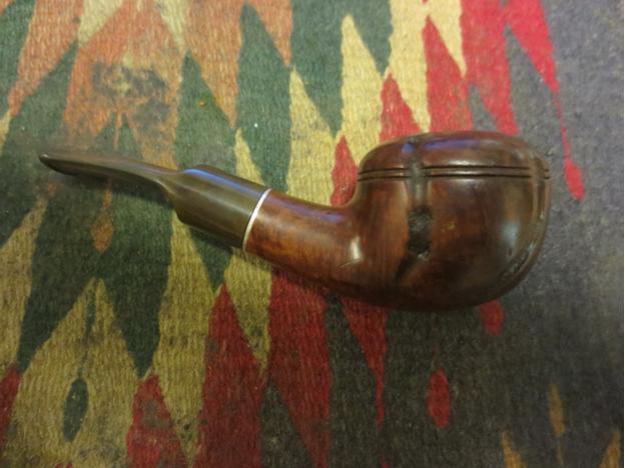
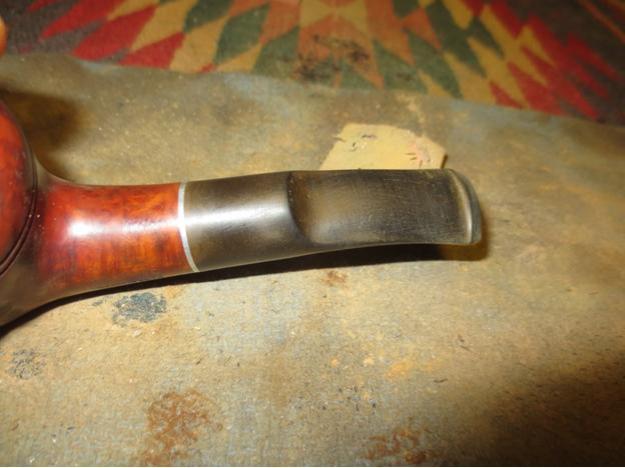
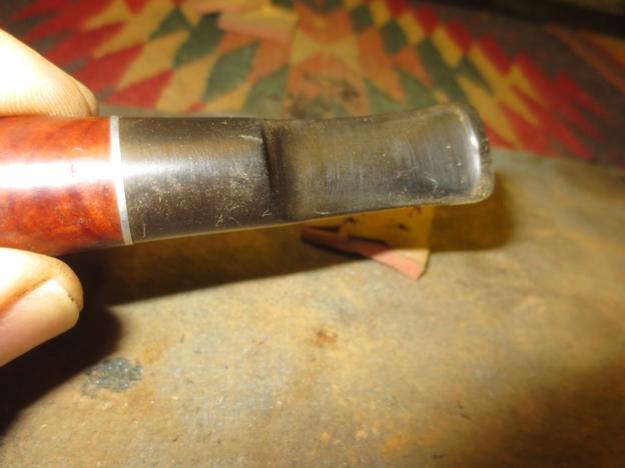
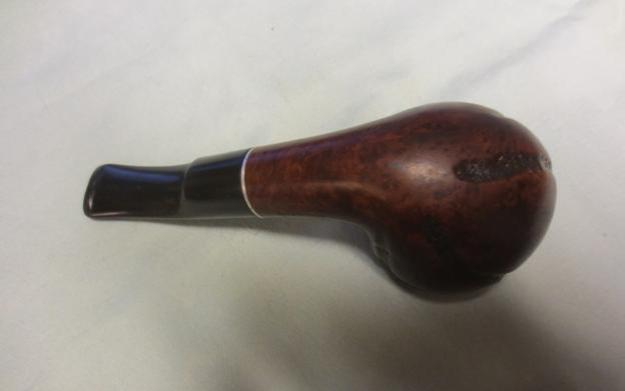
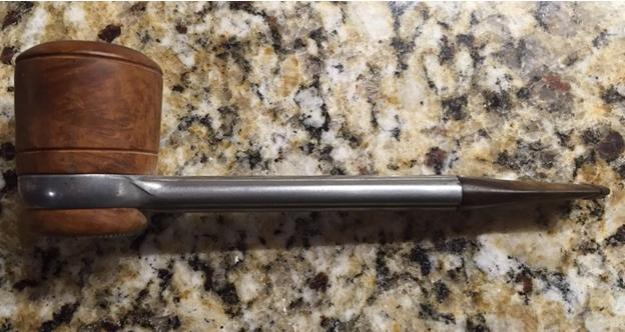
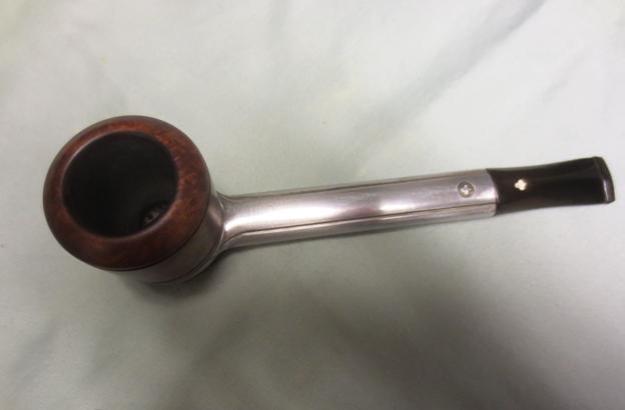
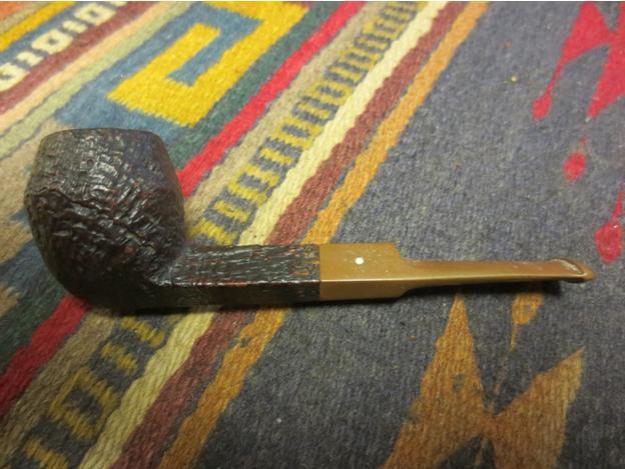
My brother sent me a pipe that is a shape I have had two previous times and always sold or gifted. It is a Bullmoose or a Scoop shape. Tracy Mincer did a great job with this shape and it is one I have never seen repeated as chunky as he did them. This one was stamped on the right side of the shank with the words Custombilt over Imported Briar.CB1 
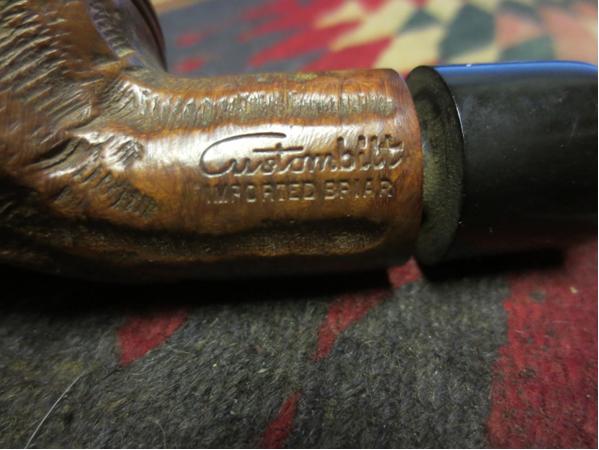
The pipe was solid but dirty. The stem would not push into the shank and the grooves and trails in the briar were dusty. The bowl had a thin, uneven cake in it and the lava overflowed slightly onto the rim leaving a thin coat of tars and oils. There were some dings and dents in the smooth parts of the pipe and the finish was worn. There were some fills in the grooves that showed through the worn finish. Overall it was in good shape. The stem had tooth chatter on the top and bottom sides with a few deeper tooth marks near the button. The photos below show what the pipe looked like when I started working on it.CB2CB3CB4CB5 
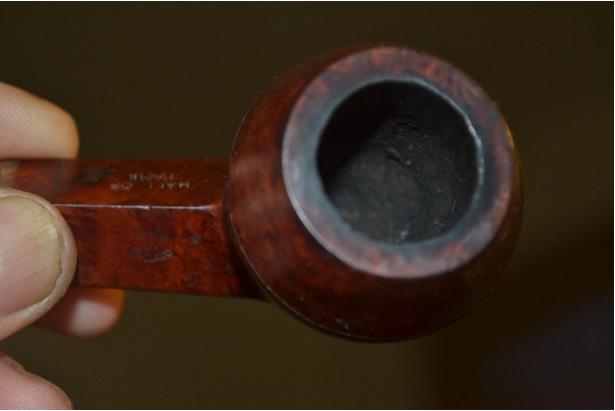
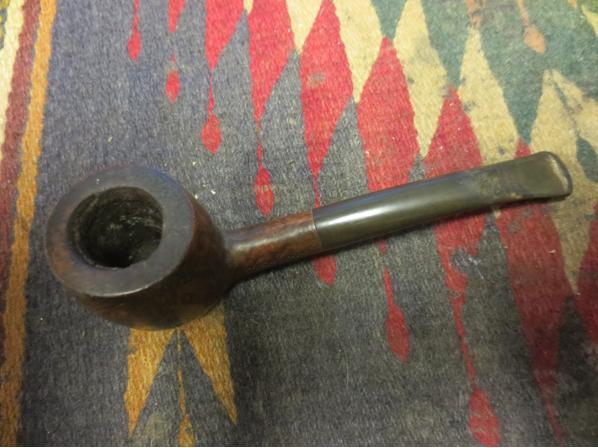
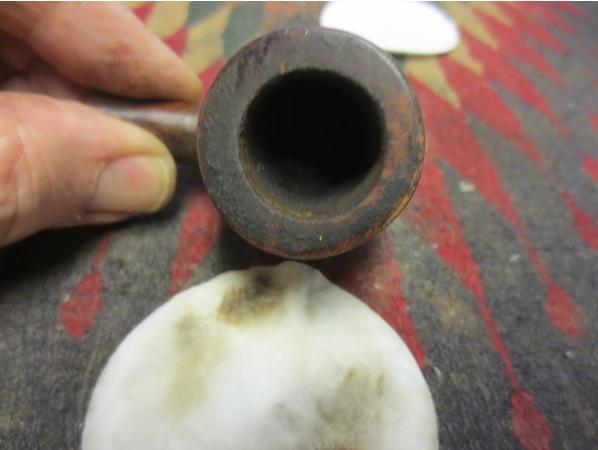
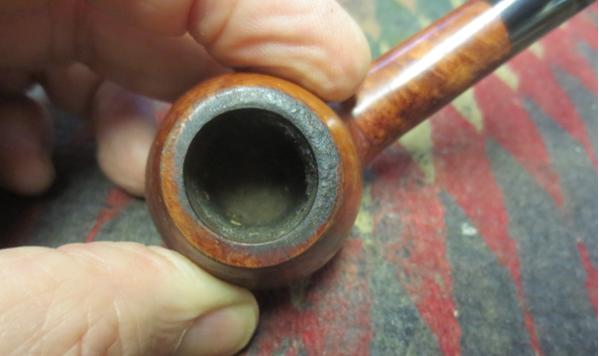
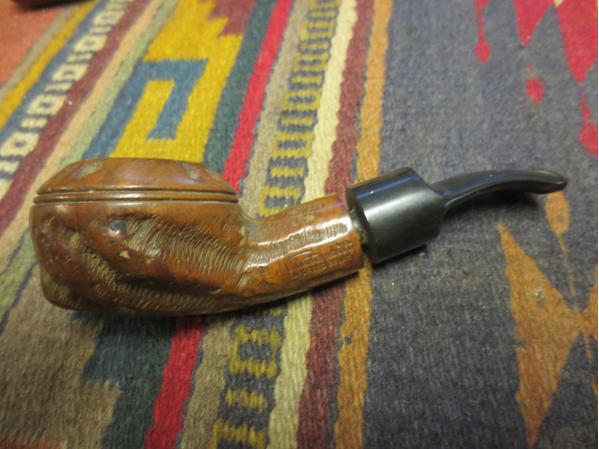
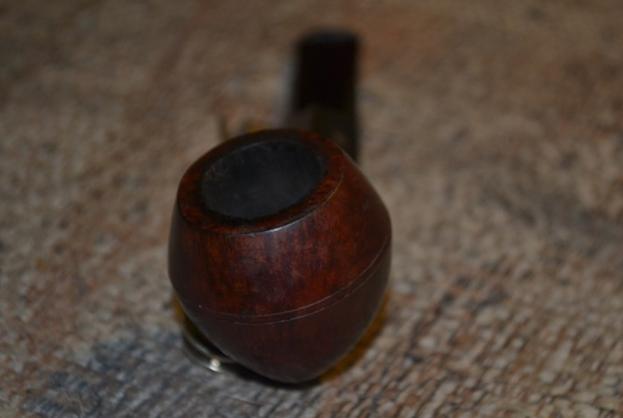
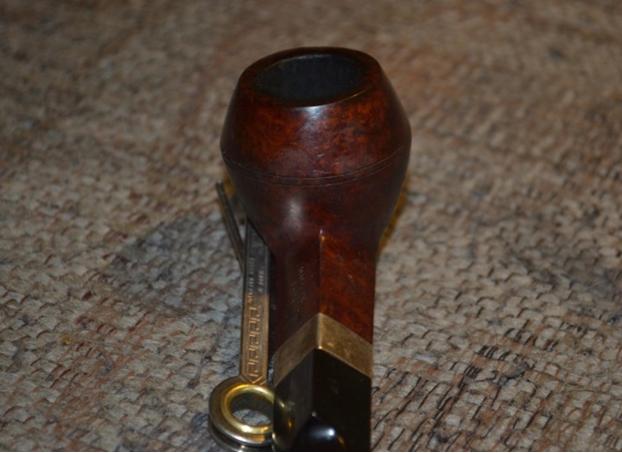
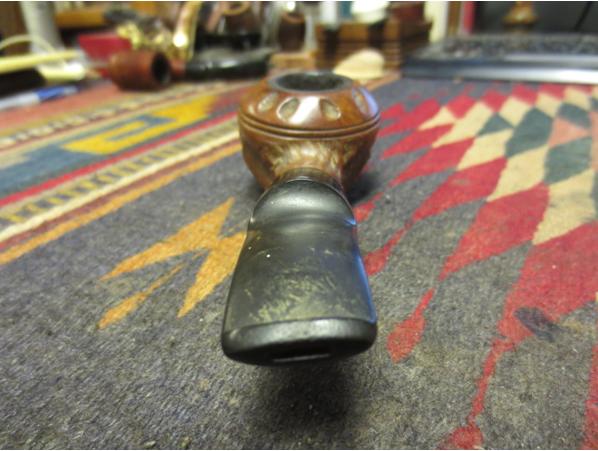
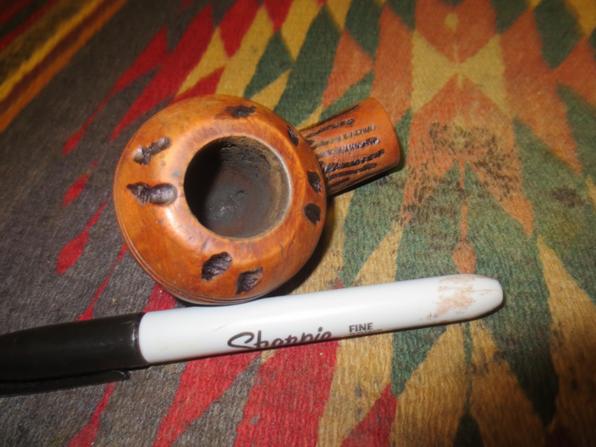
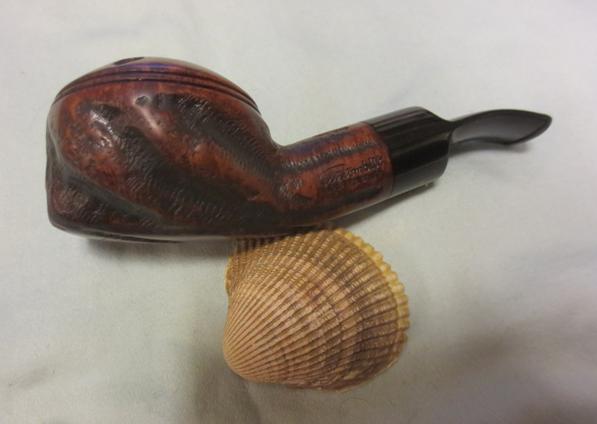
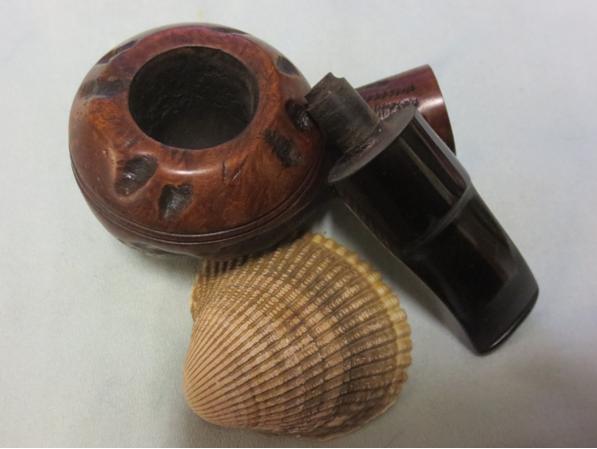
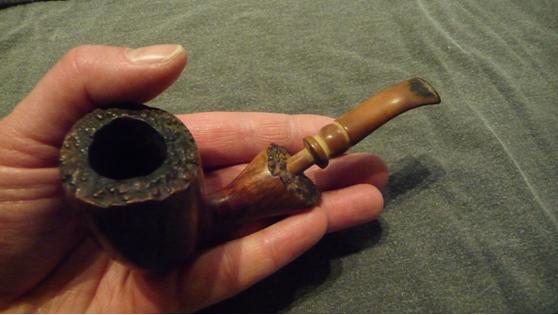
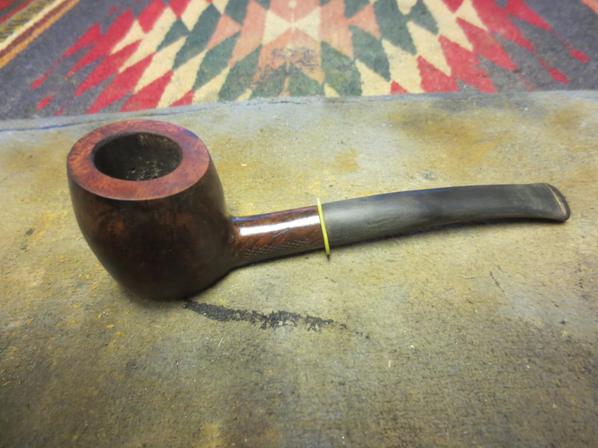
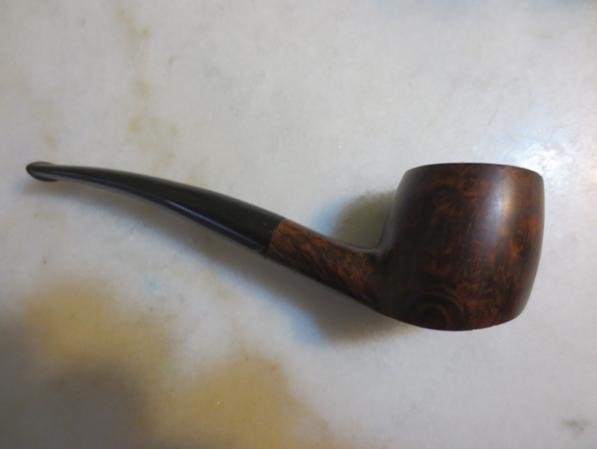
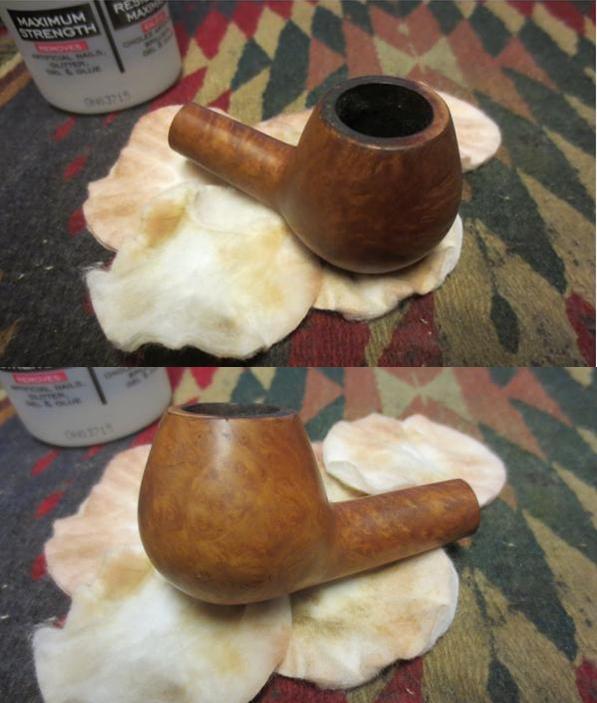
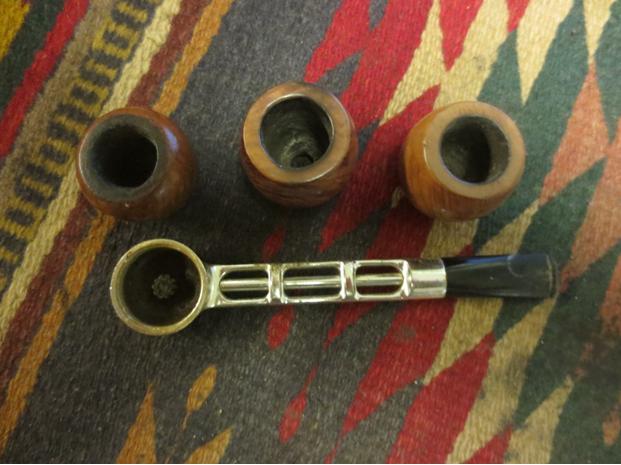
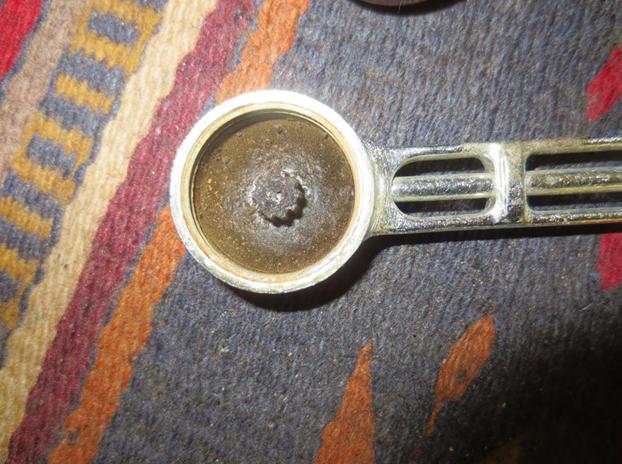
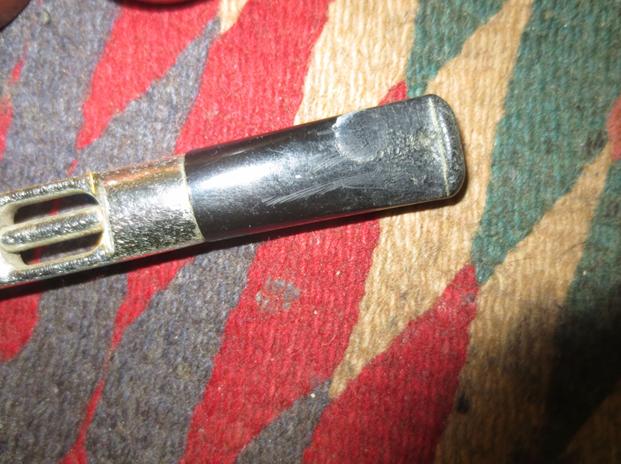
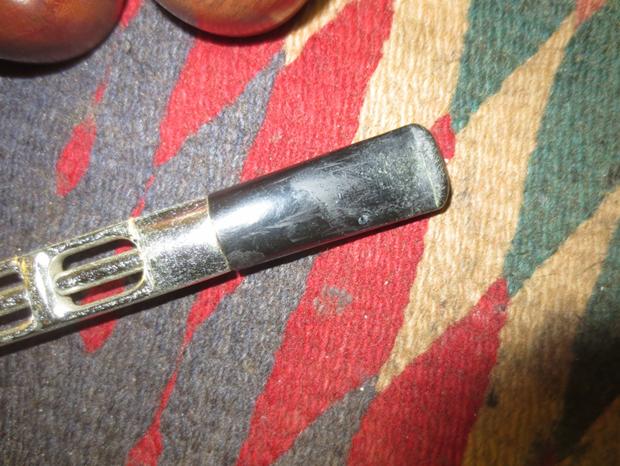
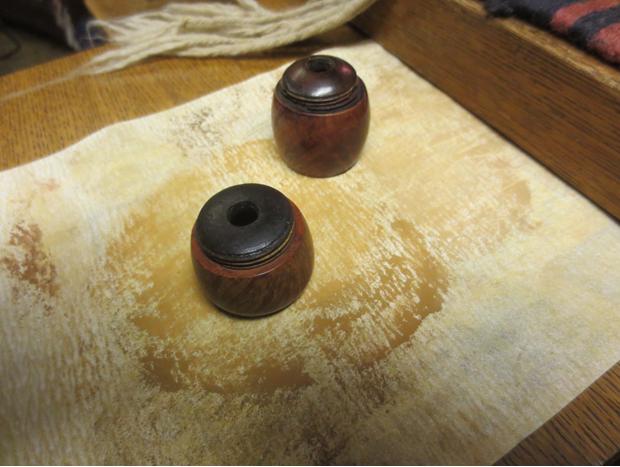
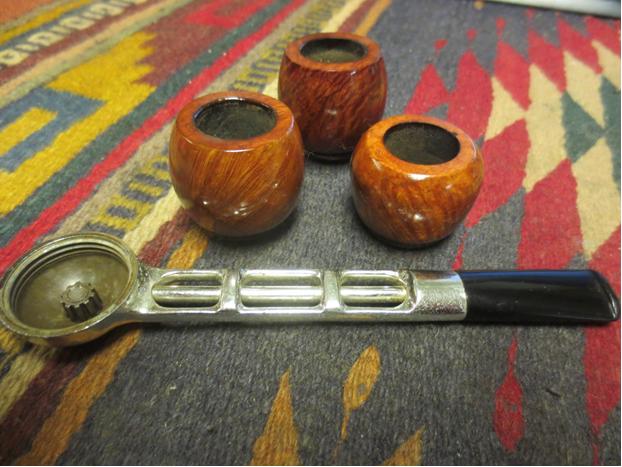
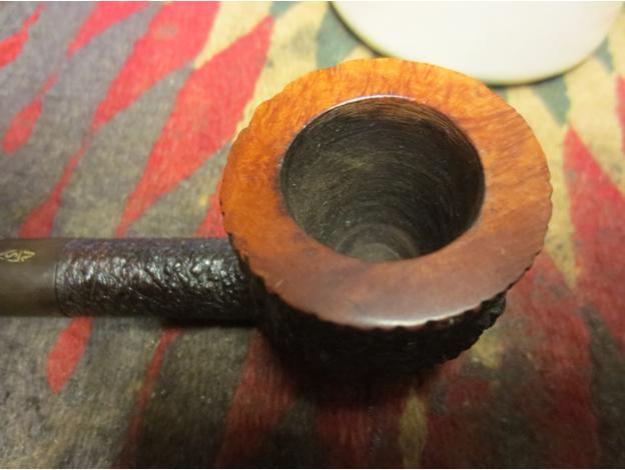
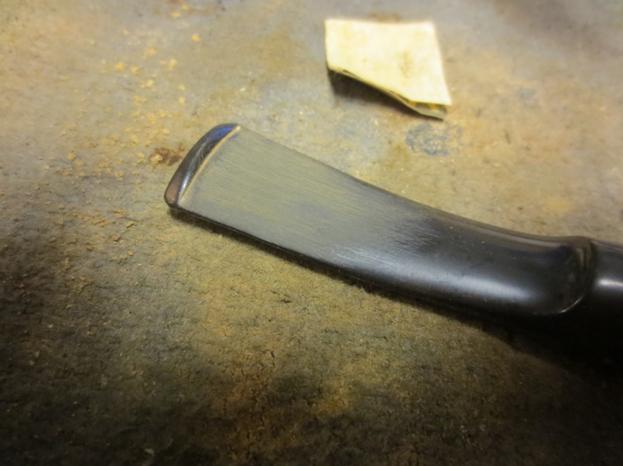
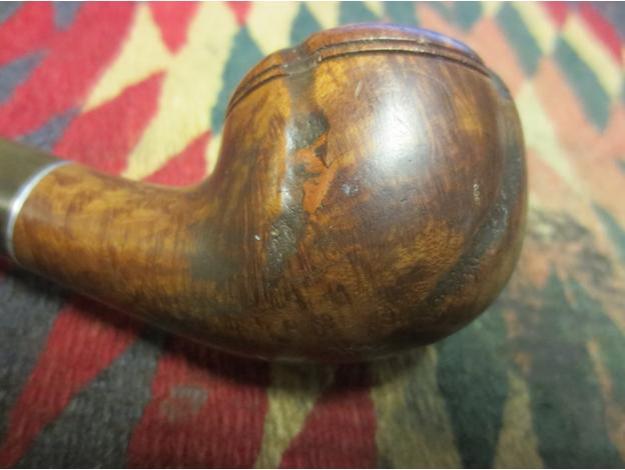
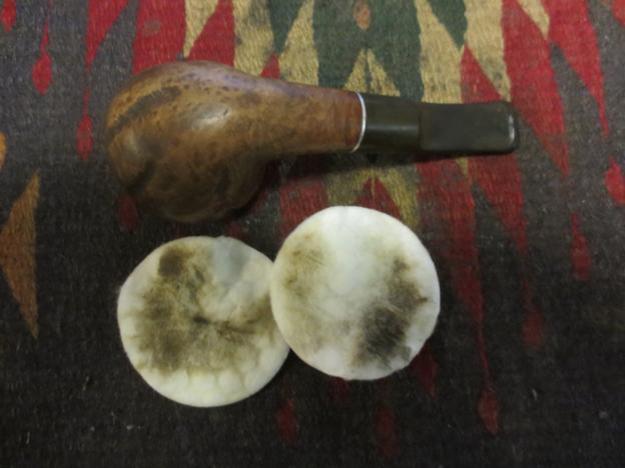
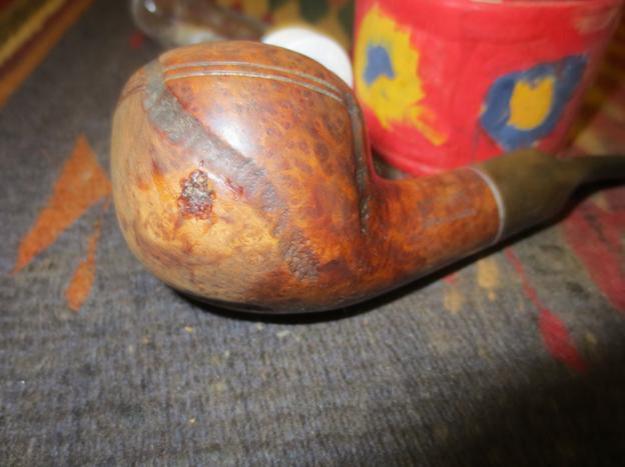
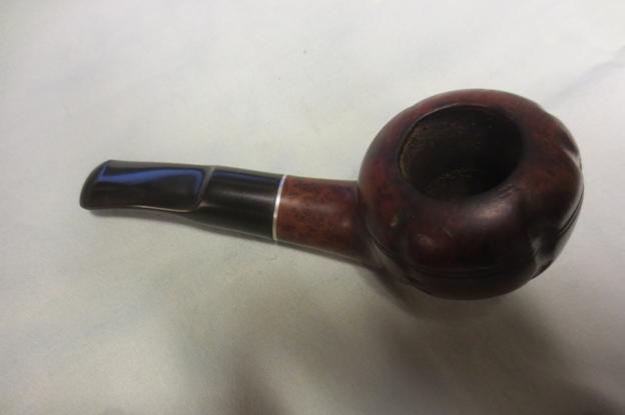
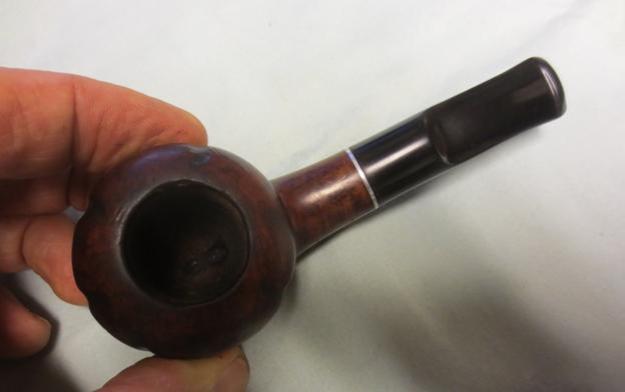
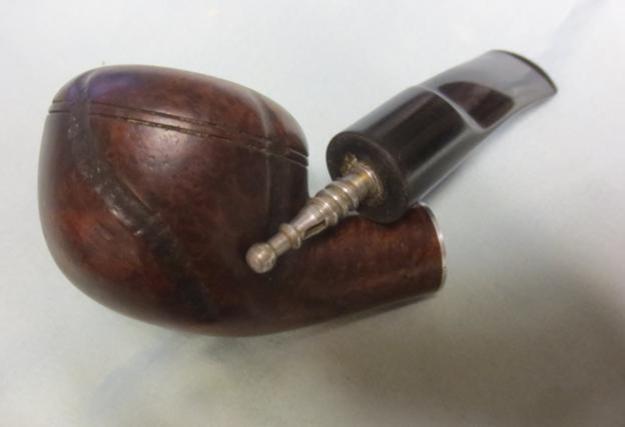
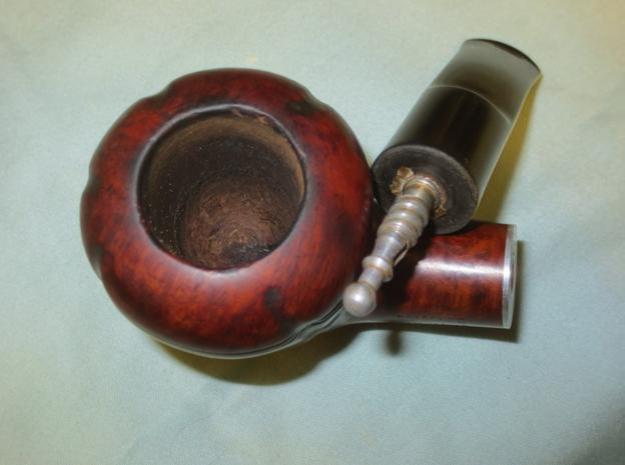
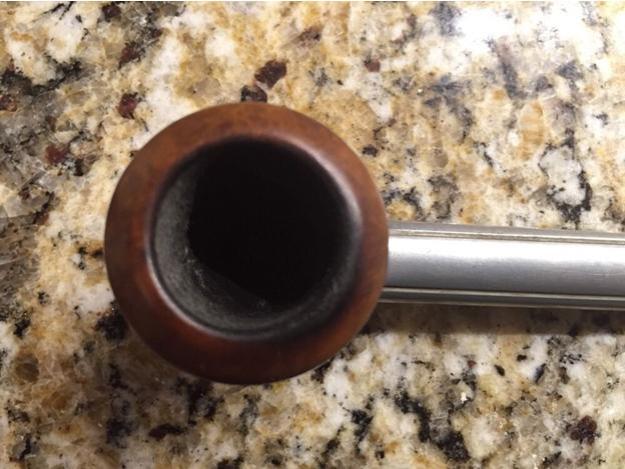
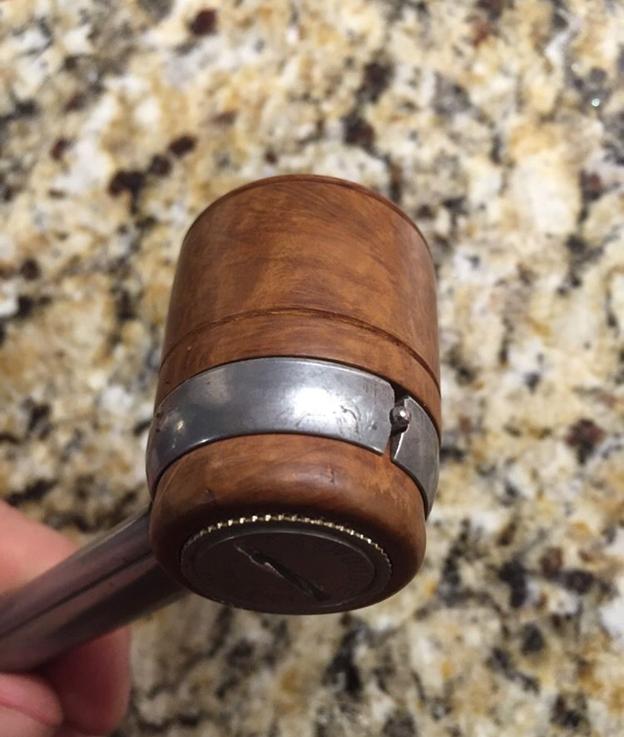
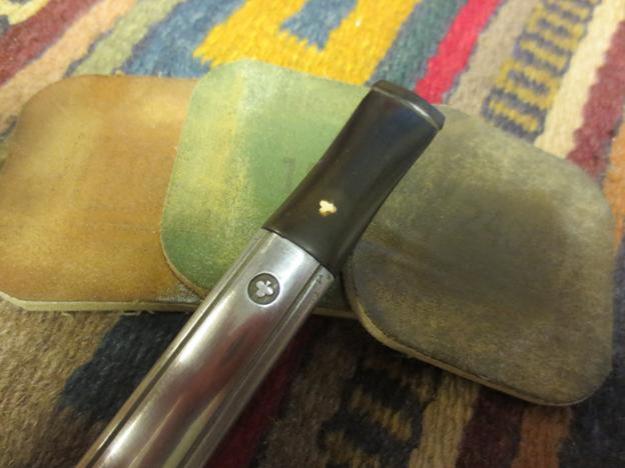
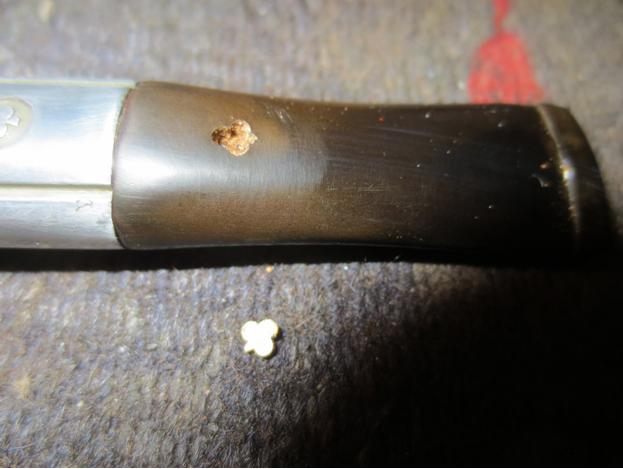
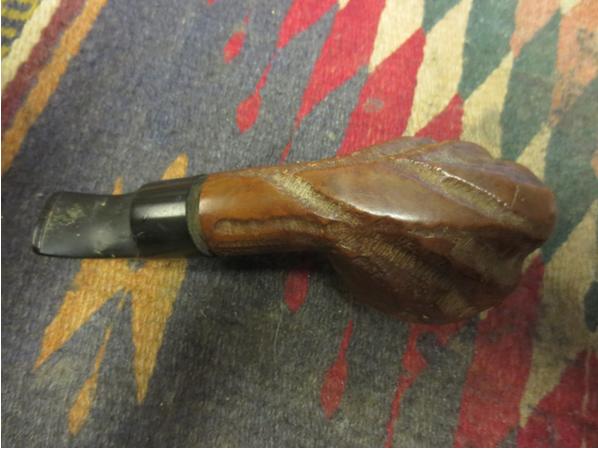
I took a few close-up photos of the bowl rim, front and back views and the stem to show what I had to deal with in the restoration of this one.CB6CB7CB8CB9CB10 
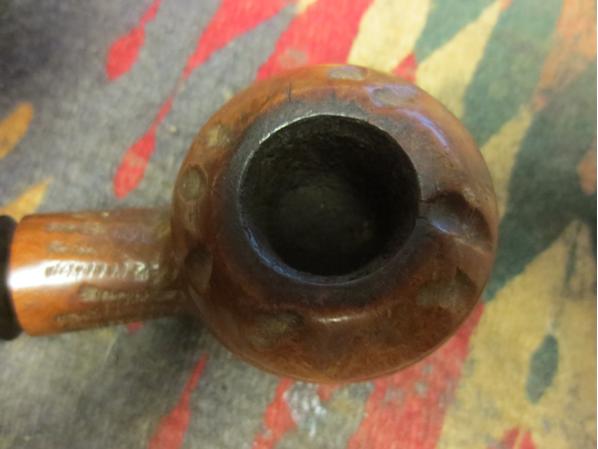
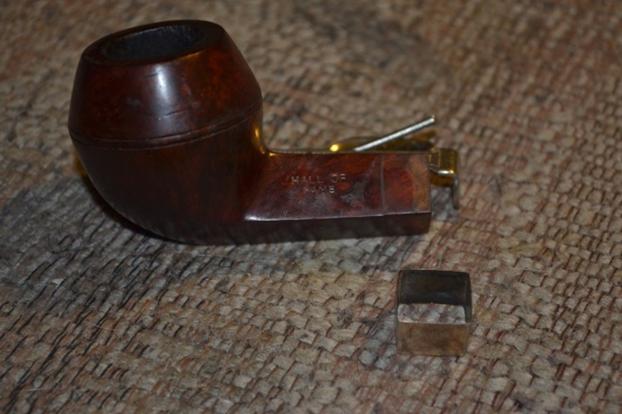
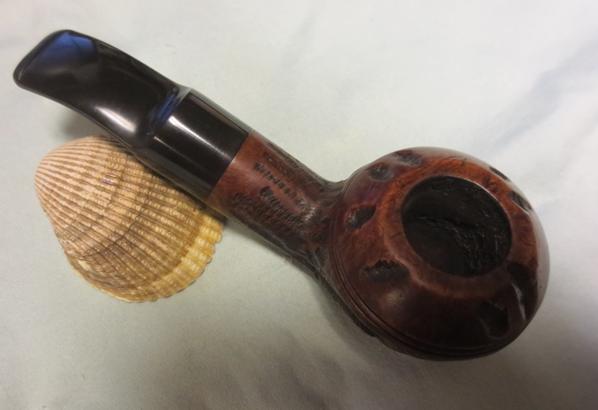
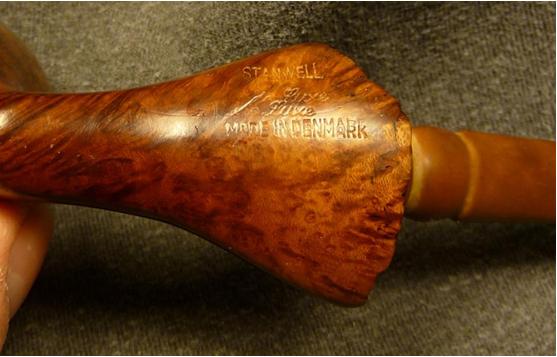
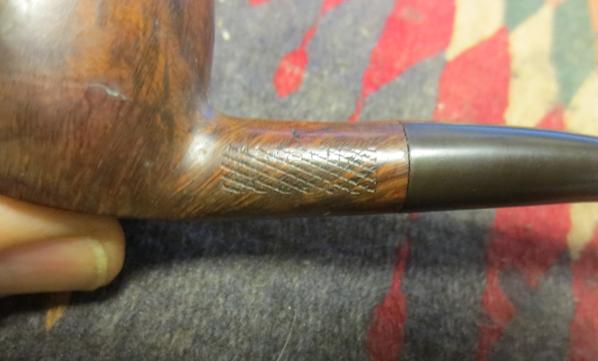
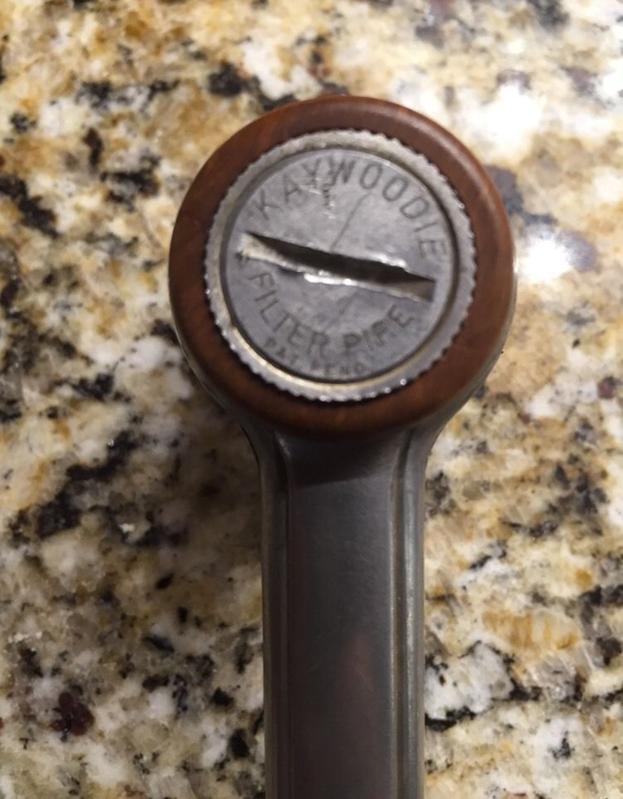
The stamping gave me a bit of information on the date of the pipe. The one word Custombilt stamping rather than the Custom-Bilt stamping would help to pin down the date a bit. I decided to pause a few moments and do a bit of reading to help narrow down the date. I looked on one of my go to resources – Pipedia.org. I also have Bill Unger’s book but it is packed away at the moment and this article on pipedia quotes extensively from the book. Here is the link to the article: https://pipedia.org/wiki/Custom-Bilt

Under the heading, Custom-Bilt History is the following information.

“The book (Bill Unger’s Book, my comment) opens up with an intriguing statement that unfortunately is never fully followed up: Before beginning this history, I need to emphasize an important fact and to ask the reader to keep it firmly. Spelling-Custom-Bilt, Custombilt, and other variations-is extremely important to the various aspects of the following discussions. It was not, however, important to many people in the company’s early days. [Emphasis mine] {Page 9}.”

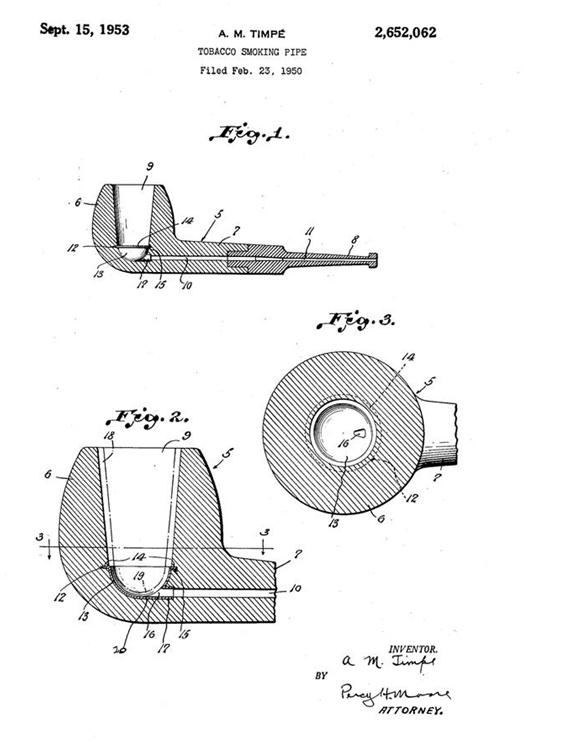
“Tracy Mincer started the original Custom-Bilt pipes it appears in 1934. Bill meticulously details the start of the Company, how it was financed, the changes in the original ownership, how the company distributed its product, the manufacturing process, certain patented items, and other interesting stuff… In 1946, the name was changed to Custombilt after Mincer began an association with Eugene J. Rich, Inc. (my emphasis). There were some big changes in advertising and distribution. The slogan “AS INDIVIDUAL AS A THUMBPRINT” began at this time as well.”

“In the early 1950’s, Tracy Mincer developed severe financial problems that caused him to stop making the Custombilt, and he lost the name. In 1953, Leonard Rodgers bought the company and emphasized tobacco pouches and butane lighters. (However, it appears Mincer was working on his new pipe, the Doodler.) In 1968, Rodgers sold the Company to Consolidated Cigars. In the early 1970s, Wally Frank Co. bought the Custombilt trademark and began to produce their version of the pipe in 1974 or 1975. Hollco Rohr owned the Weber pipe factory, located in New Jersey, and produced the Custombilt pipes there. In 1987, the pipes were made out of the Butz-Choquin factory (France) and then Mexico until the late 1990s. Currently, the Custombilt name is owned by Tobacalera of Spain.”

From this information I am pretty sure my pipe is made after the change in 1946 and before Tracy Mincer lost the name in the early 1950s. It has the characteristic Mincer like rustication patterns and shape. It could very well be from the Rich era of the brand.

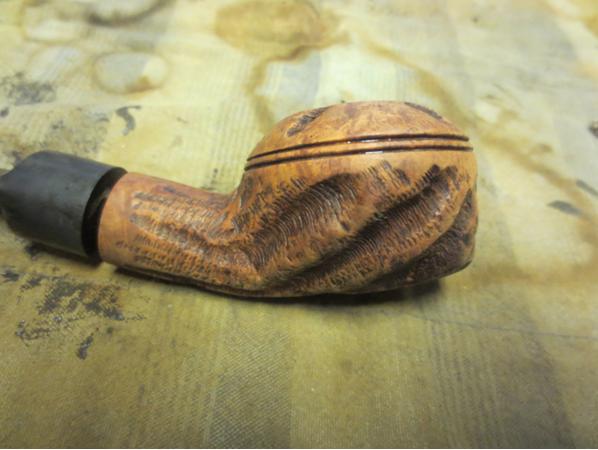
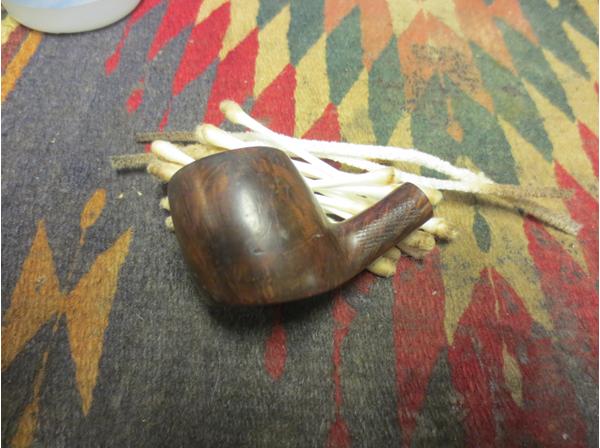
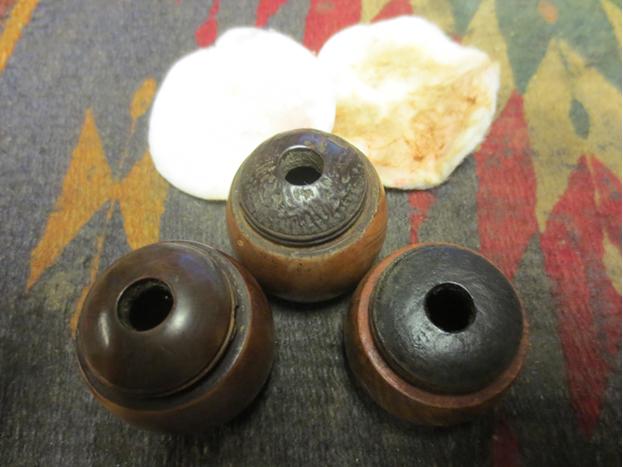
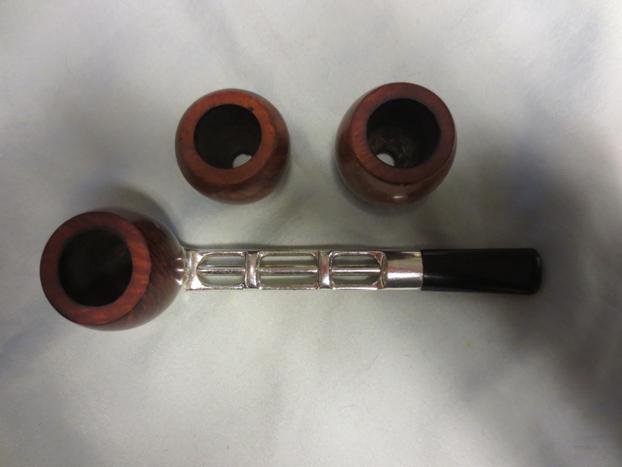
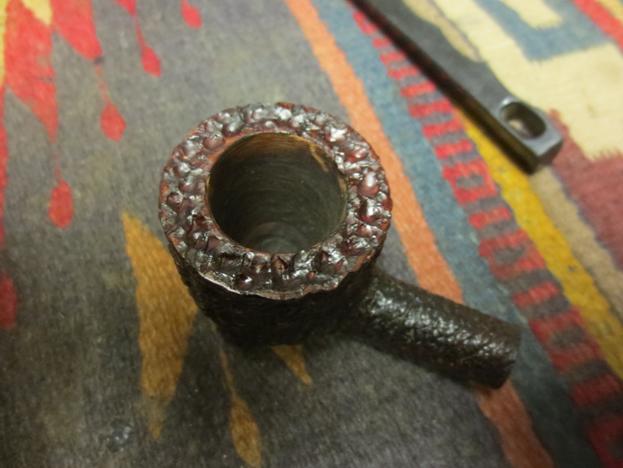
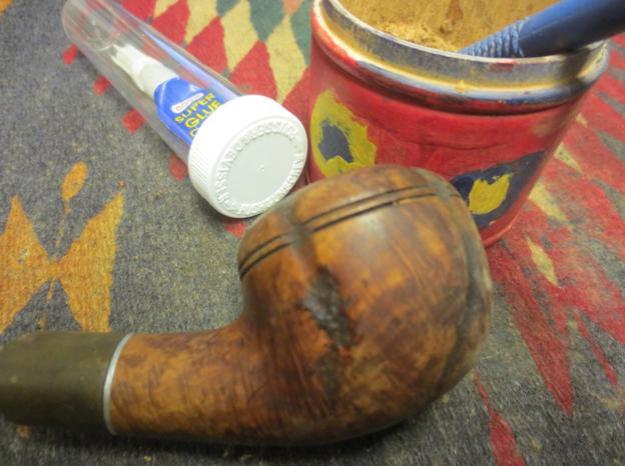
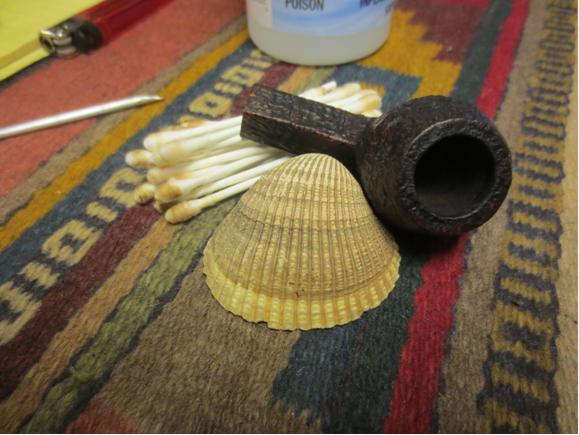
I went to work cleaning up this old timer. I scrubbed the bowl with a toothbrush and Murphy’s Oil Soap. I was able to clean out the rustication and the grooves with this method. I rinsed the bowl under warm water to remove the soap and the grime. The first picture shows the soap on the bowl and the second through the fifth picture that follows show the cleaned and dried bowl. You can see the putty fills in the grooves. Fortunately all of them were in the grooves and not in the smooth portion of the bowl.CB11 cb12 cb13 CB14 CB15
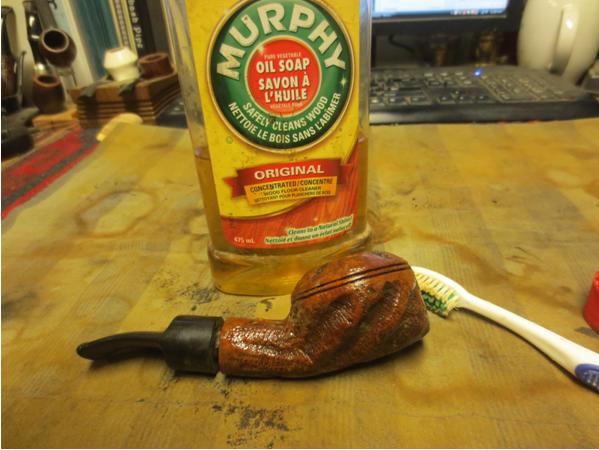
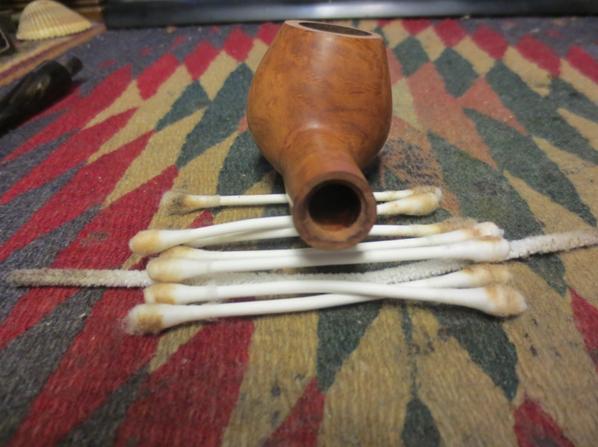
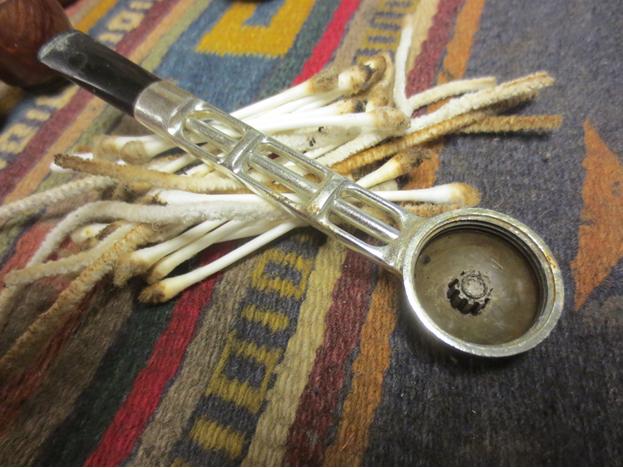
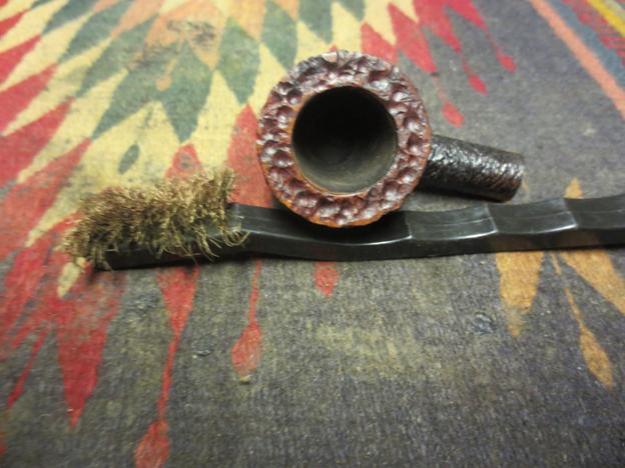
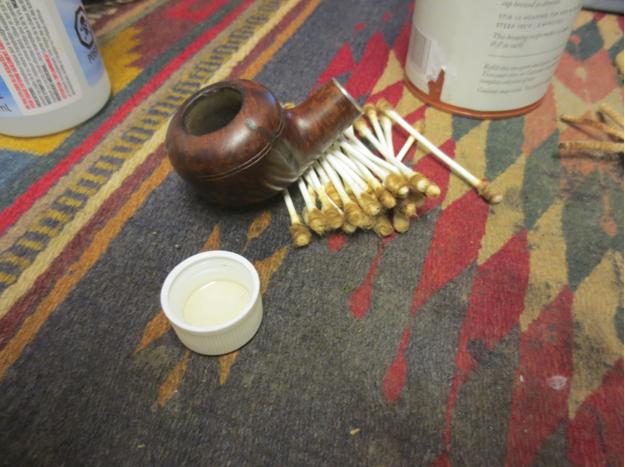
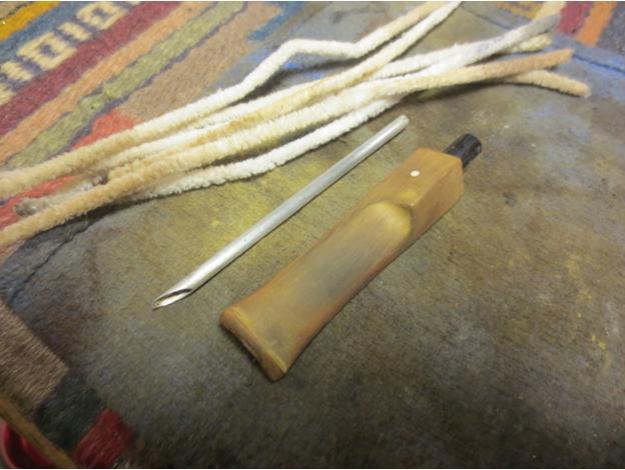
I scrubbed out the airway in the shank, mortise and stem with alcohol, pipe cleaners and cotton swabs until they came out clean. I thought about using the retort but chose not to on this pipe as it smells sweet and clean.CB16 CB17
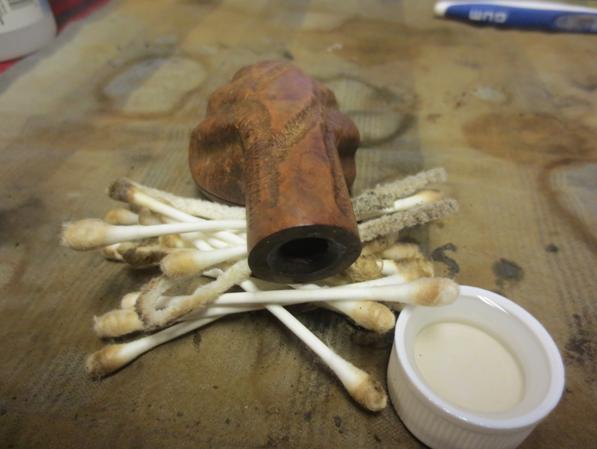
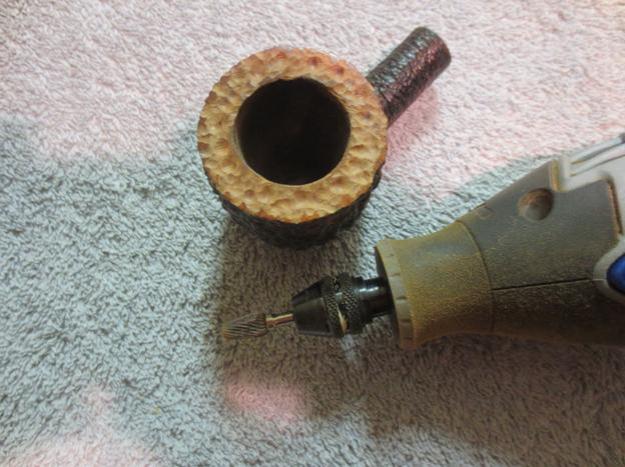
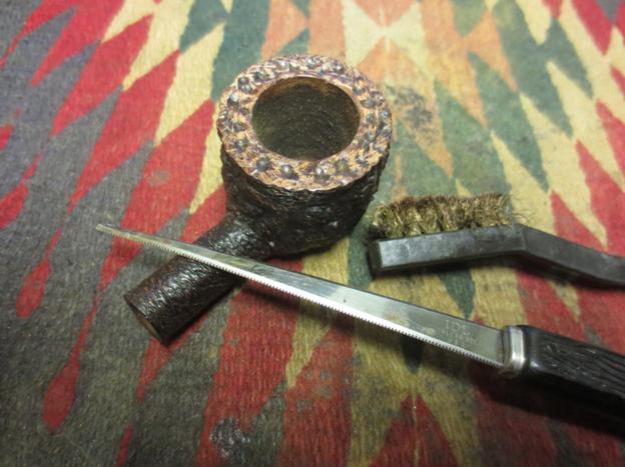
To clean up the scratches and lava on the rim of the bowl I used a medium grit sanding sponge and “topped” the bowl on it. I find that this sponge removes the grime and leaves the rim intact with no briar removed. I worked it on the sponge until it was clean and then used a cotton swab and alcohol to clean up what remained.CB18 CB19
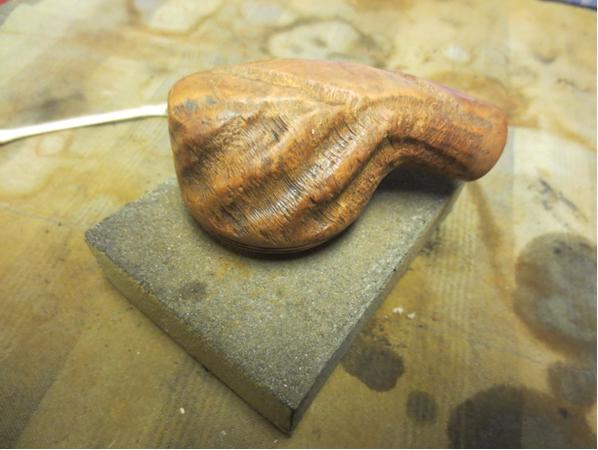
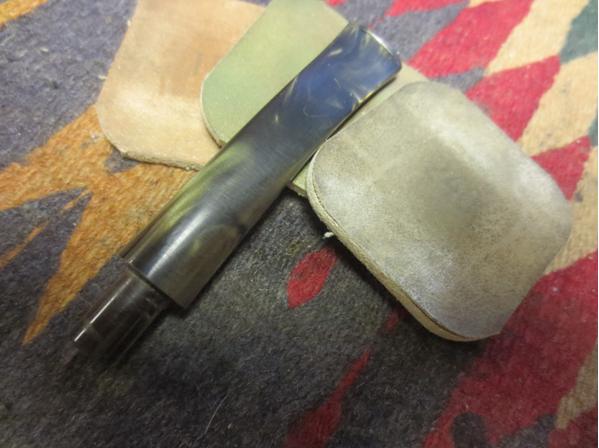
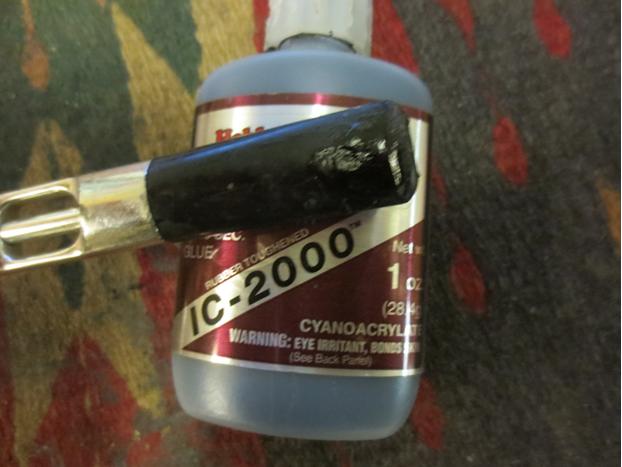
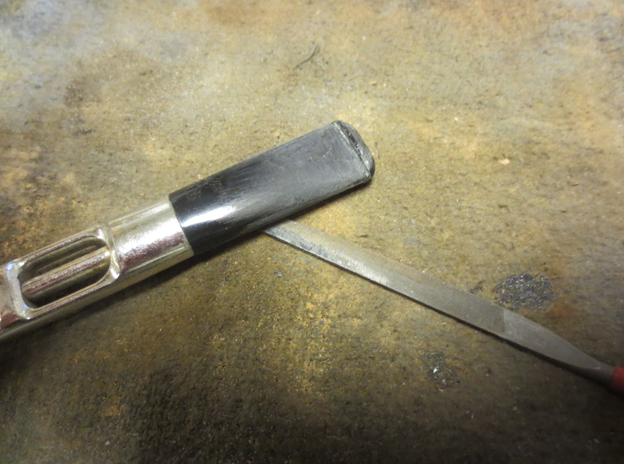
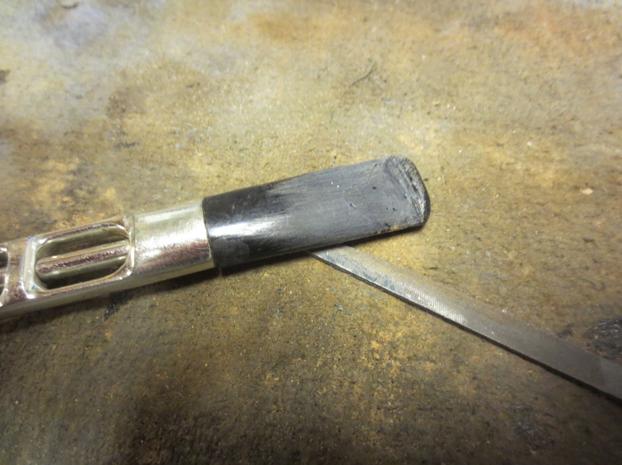
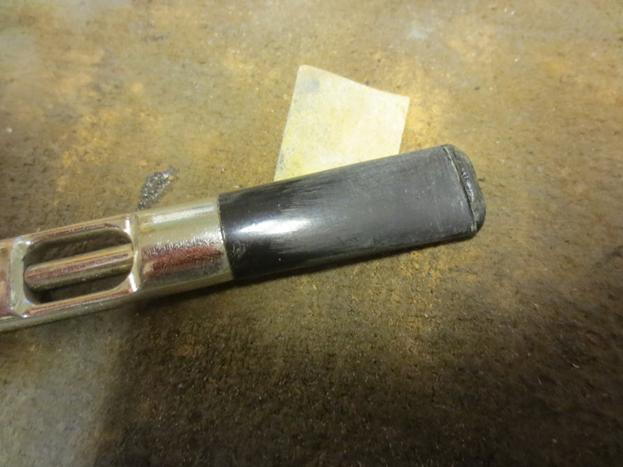
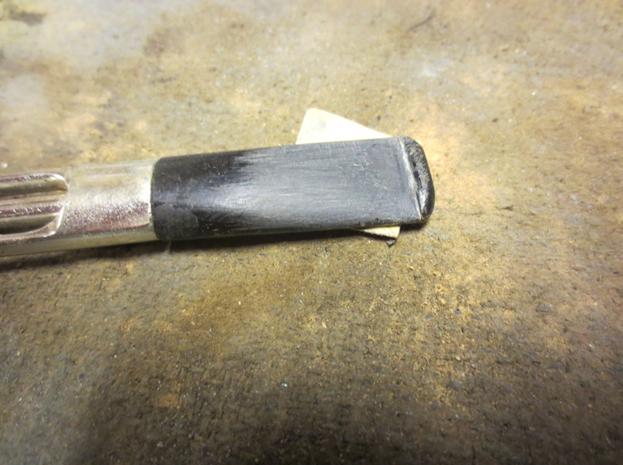
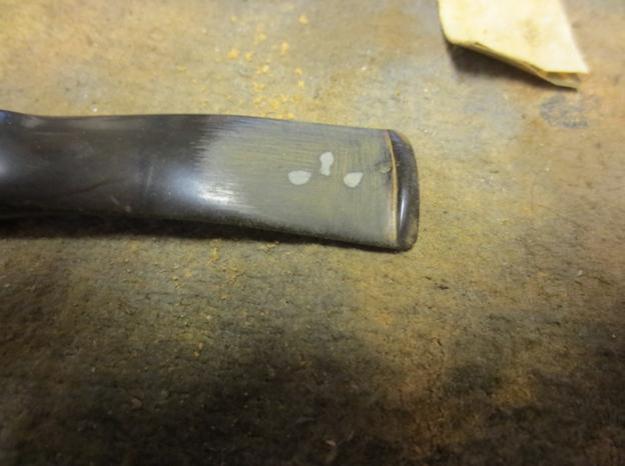
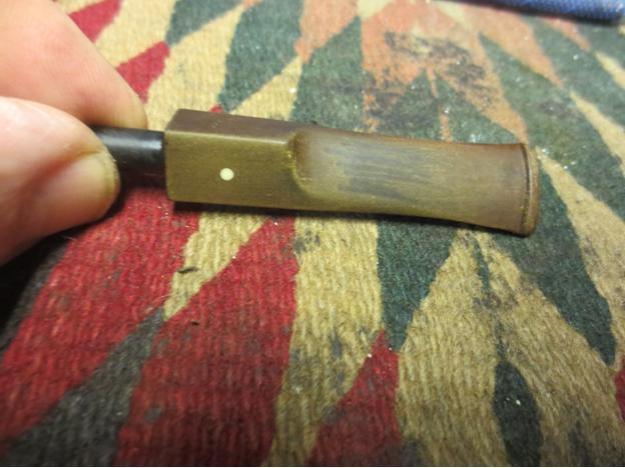
I sanded the stem with 220 grit sandpaper to remove the tooth chatter and deeper tooth marks as well as the small gouges and oxidation on the vulcanite.CB20 CB21
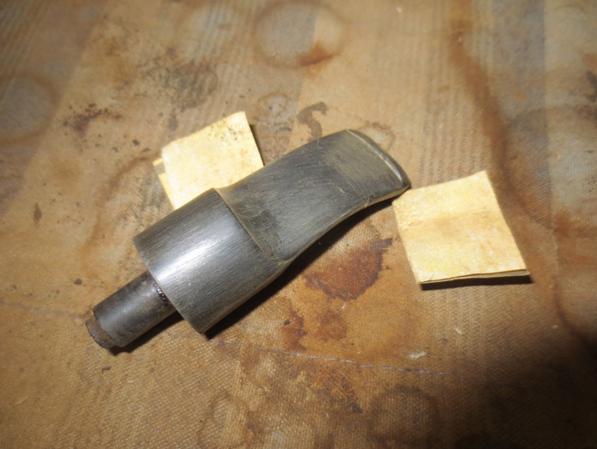
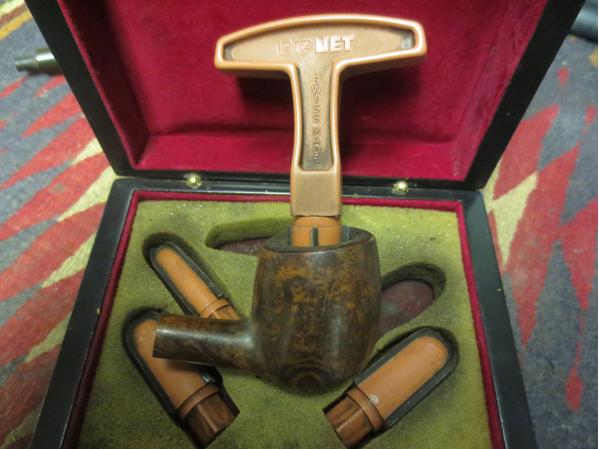
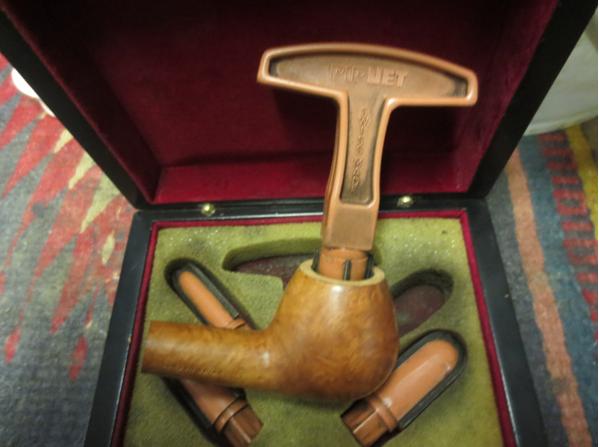
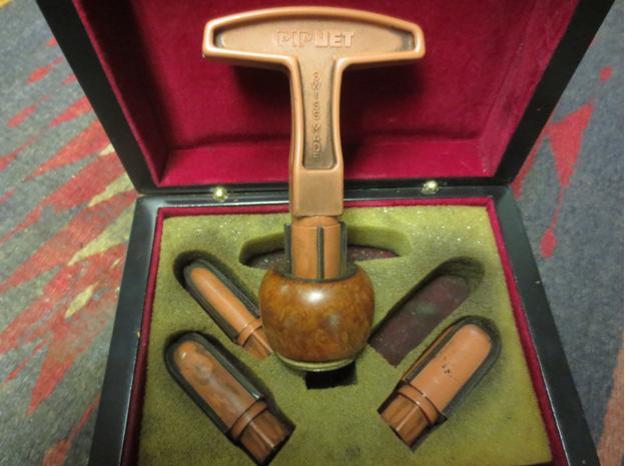
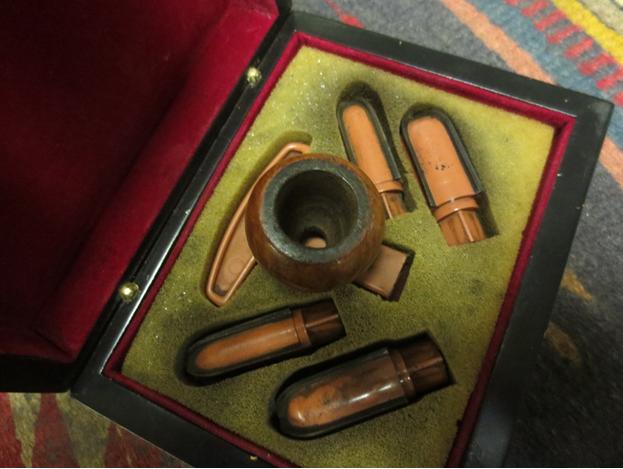
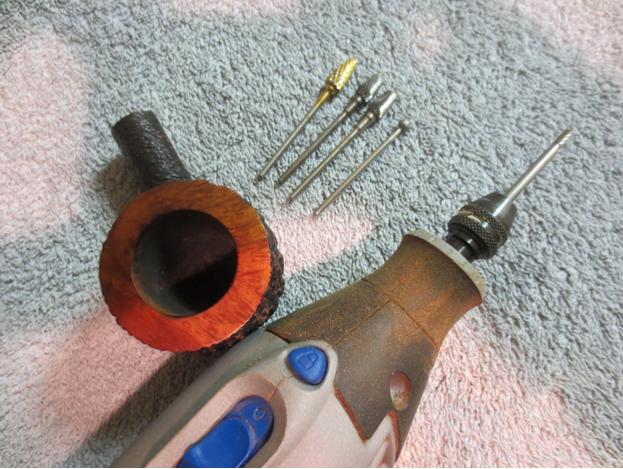
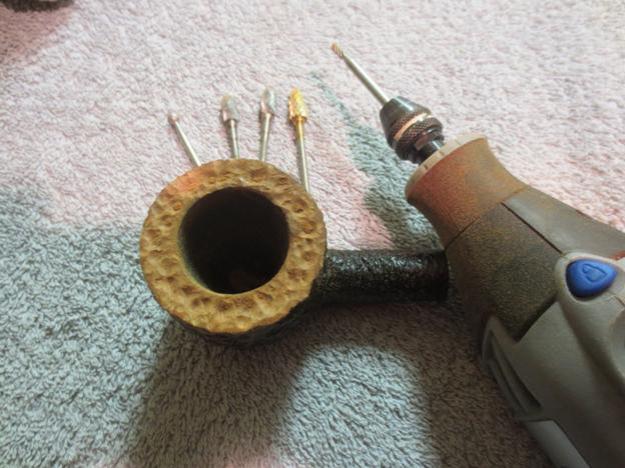
With the internals of the shank and mortise cleaned I was able to put the stem back in place. I reamed the bowl with a PipNet pipe reamer and took the cake back to briar.CB22 CB23
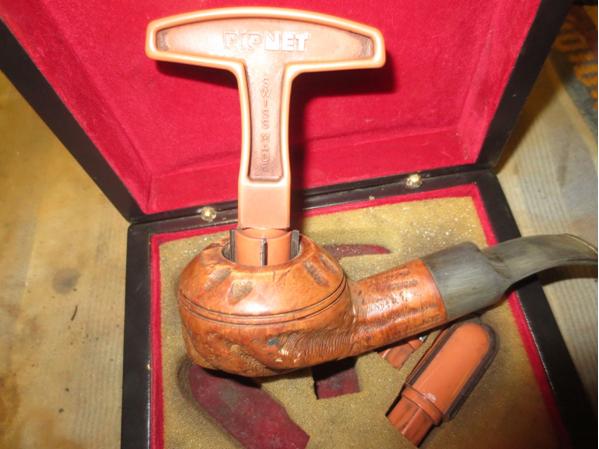
I used a Black Sharpie Permanent Marker to stain the rustication patterns on the bowl and shank. Once I finished with that I wiped the bowl down with alcohol to soften the black and prepare the surface for the contrast stain.CB24 CB25 CB26 CB27 CB28 CB29 cB30
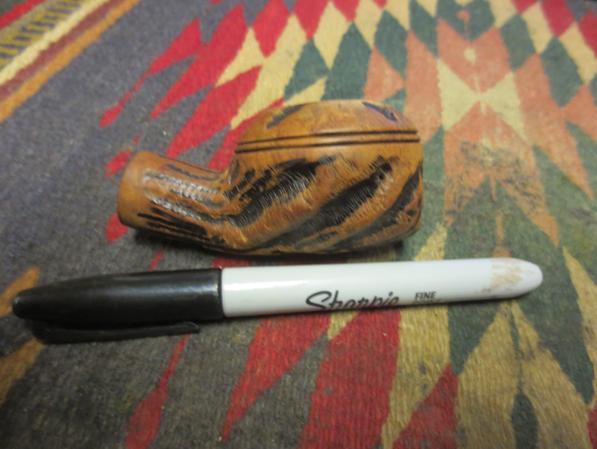
I warmed the briar with a blow dryer and then stained it with Feibings Dark Brown that I had thinned with alcohol 1:1. I applied the stain and then flamed it with a lighter to set it. I repeated the process until I got good coverage.CB31 CB32 CB33 CB34
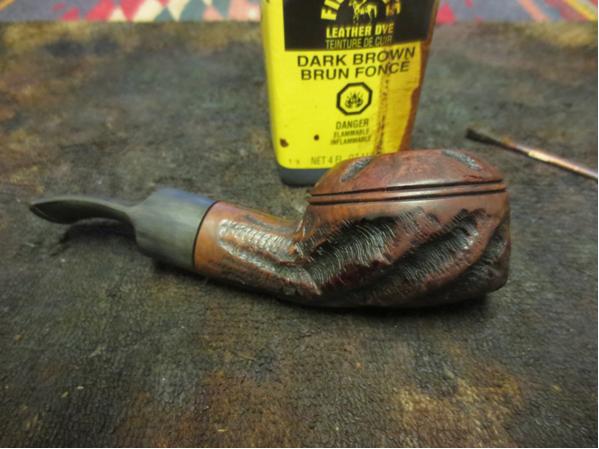
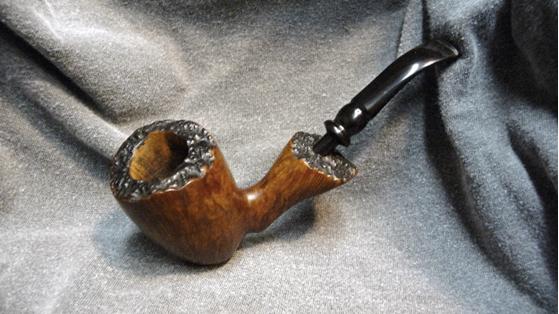
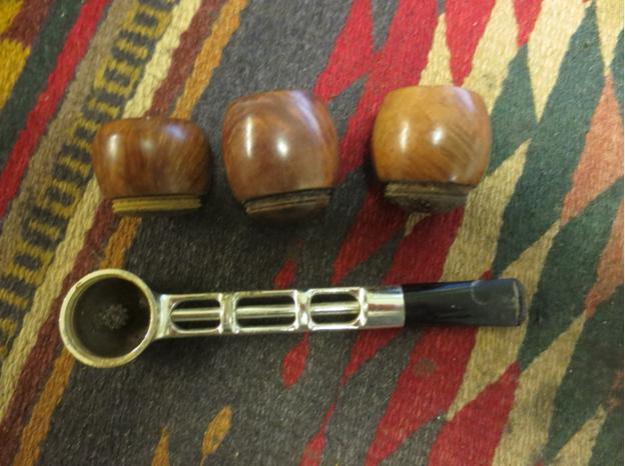
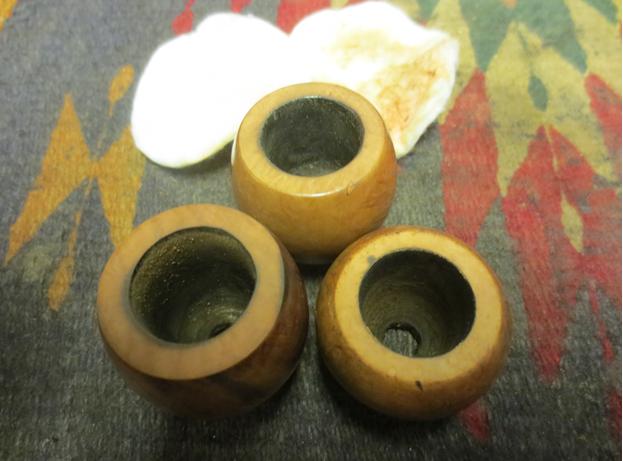
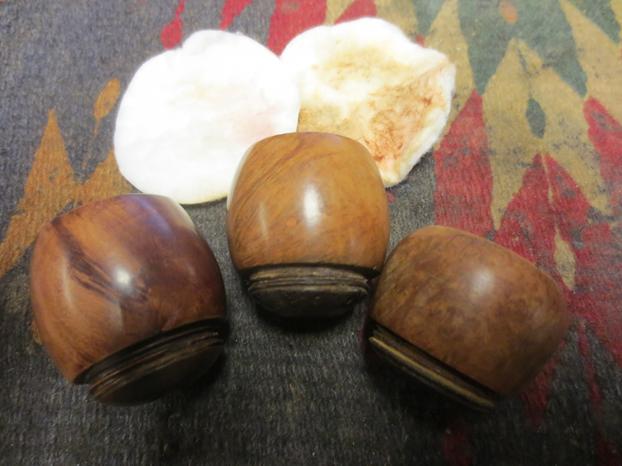
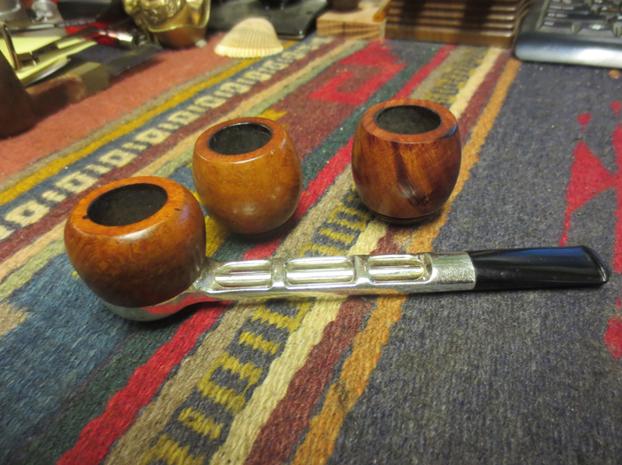
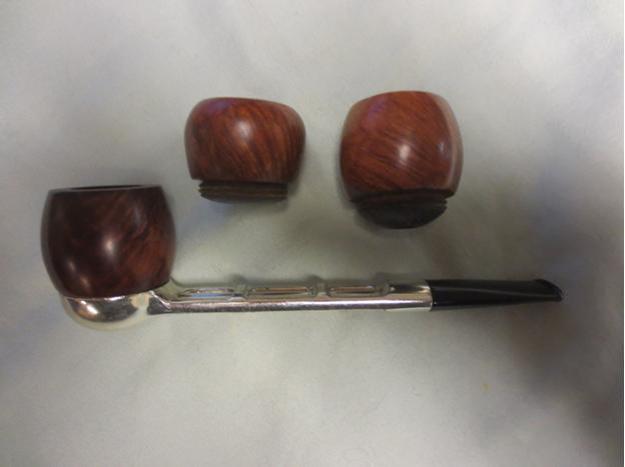
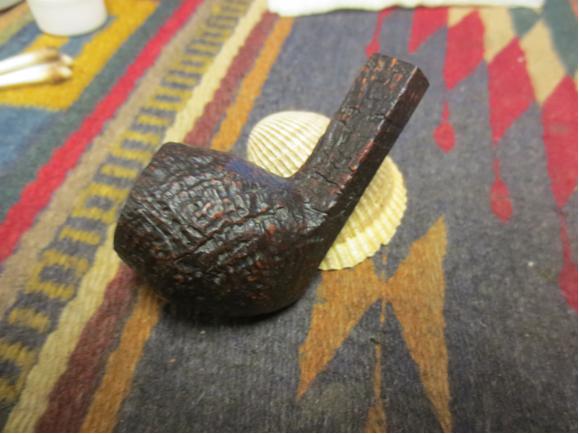
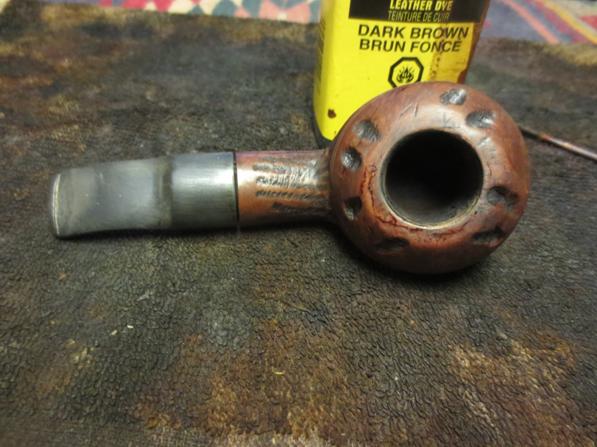
I buffed the pipe with Blue Diamond on the wheel to give it a shine and even out the stain coat. The next photos show the bowl at this point in the process. The contrast of the dark in the grooves with the brown really gives the briar a bit of pop.CB35 CB36 CB37 CB38
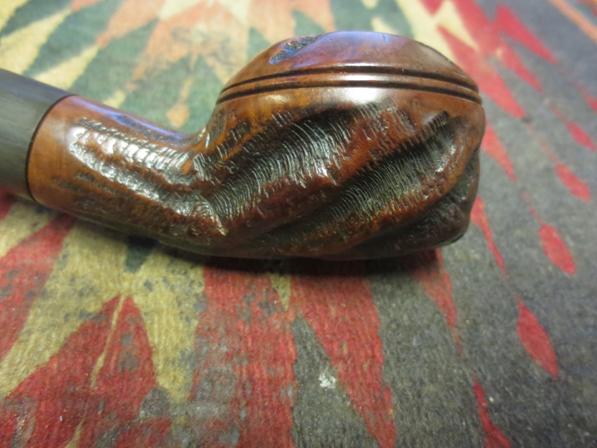
I was careful with buffing around the stamping as I did not want to damage the pristine stamping on this pipe.CB39
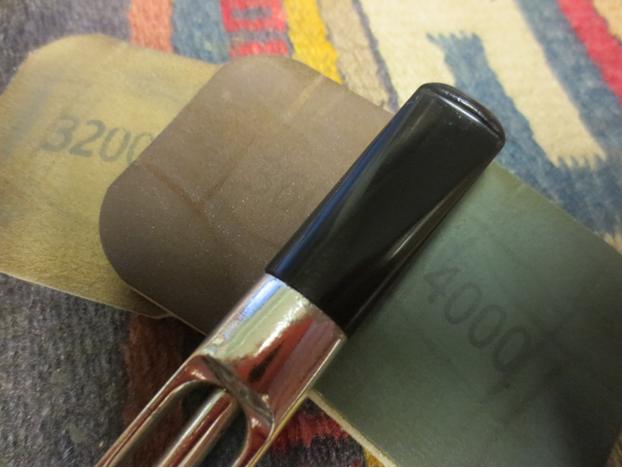
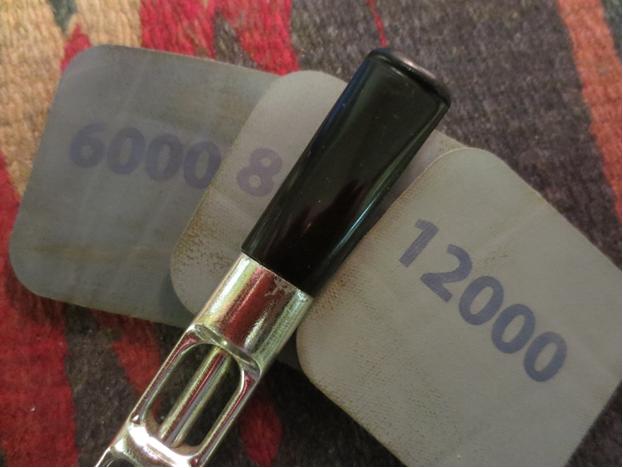
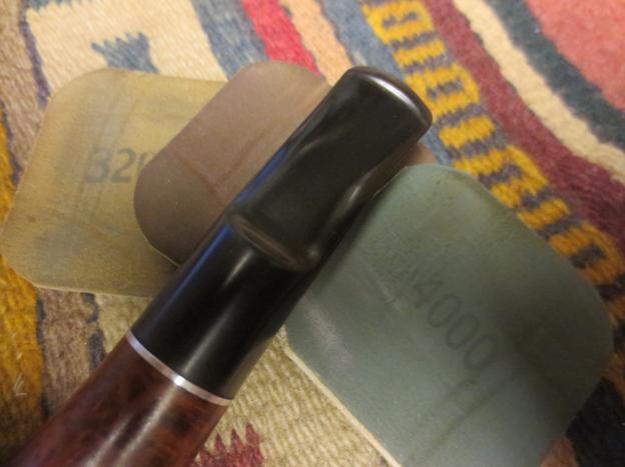
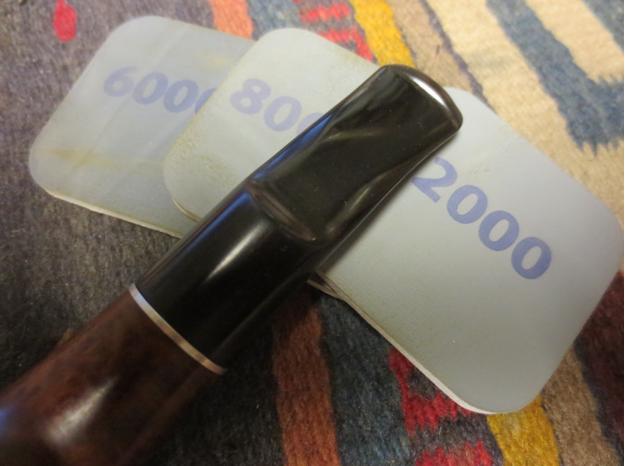
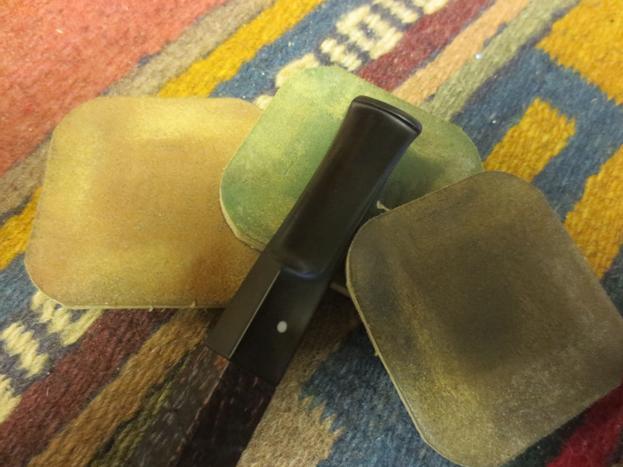
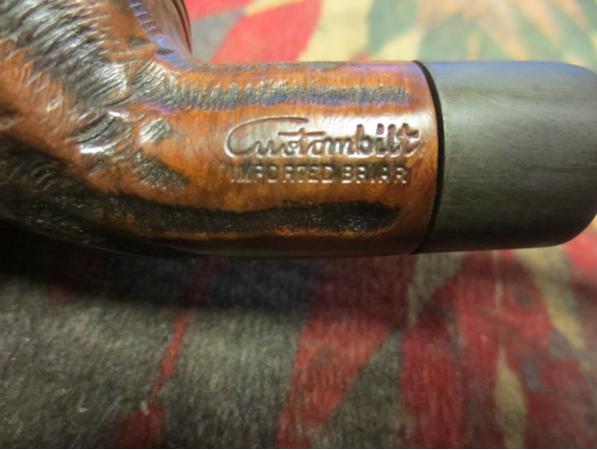
With the bowl done I turned my attention to the stem. I wet sanded with 1500-2400 grit micromesh sanding pads until the majority of the scratches left behind by the sandpaper were gone. I rubbed the stem down with Obsidian Oil. I dry sanded it with 3200-4000 grit micromesh pads and gave it another coat of oil. I finished by sanding it with the 6000-12000 grit micromesh pads and giving it a final coat of oil. I set it aside to dry while I worked on another pipe.CB40 CB41 CB42
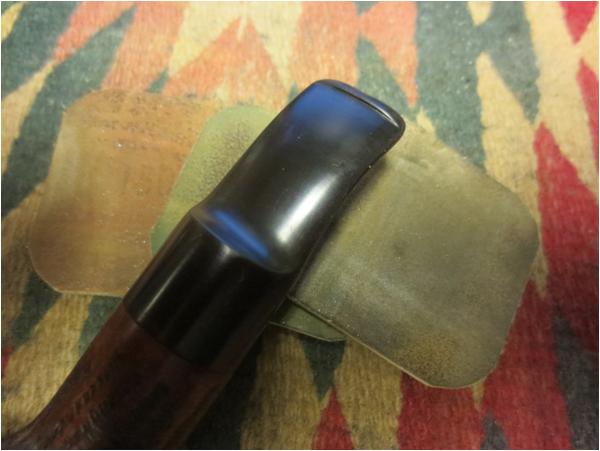
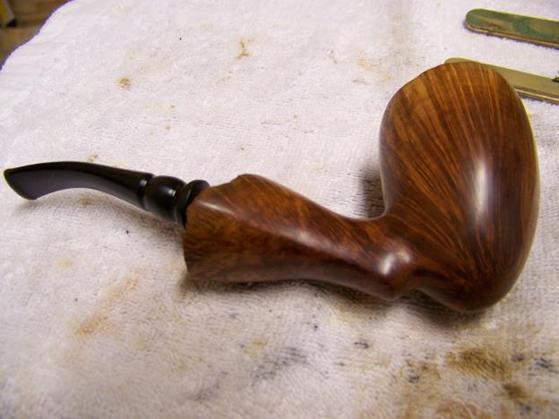
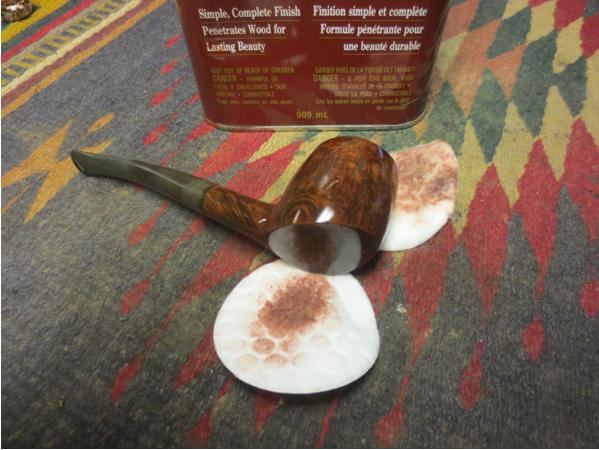
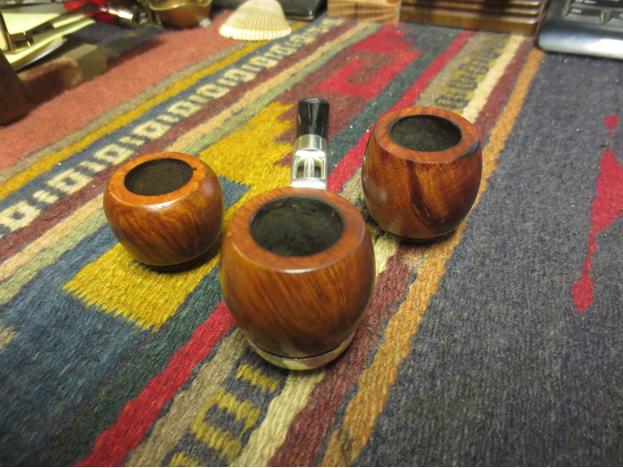
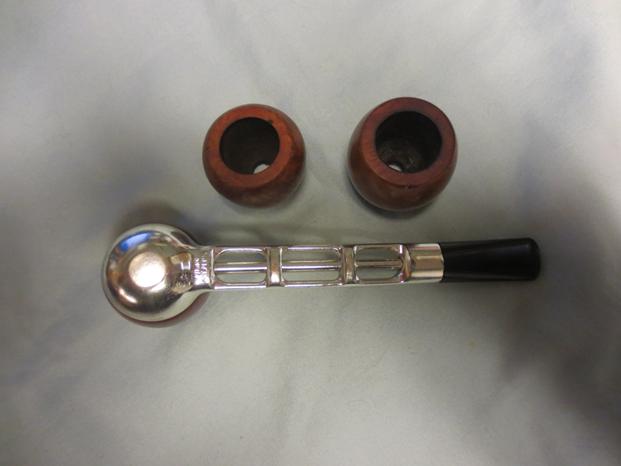
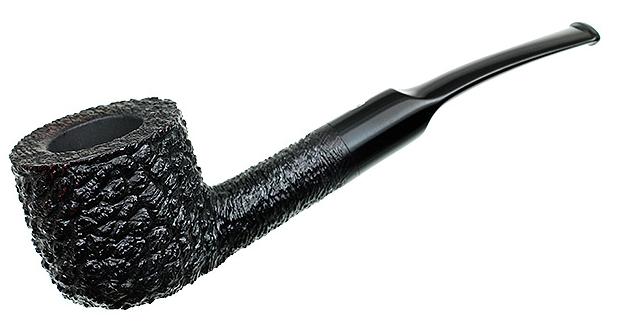
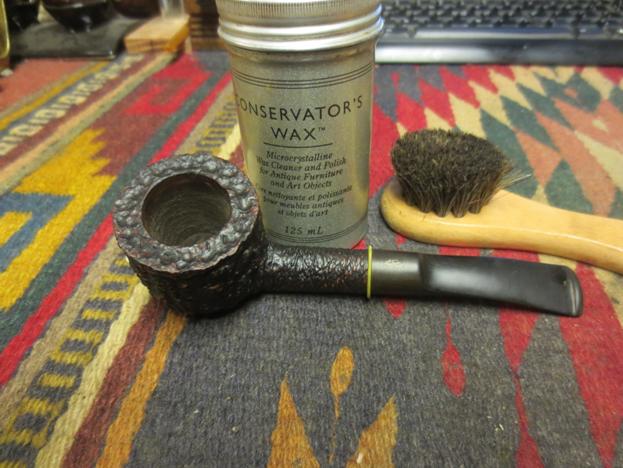
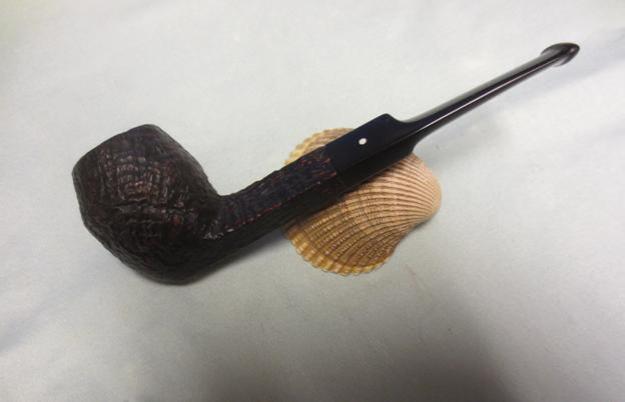
I buffed the pipe with Blue Diamond to raise the shine and then gave the stem multiple coats of carnauba wax. I gave the bowl several coats of Conservator’s Wax and then buffed both the bowl and stem with a clean flannel buff. I hand buffed the pipe with a microfibre cloth to deepen the shine. The finished pipe is shown in the photos below. I love the finished look of this old timer and the feel of the hefty bowl in the hand. In my opinion it turned out to be a beautiful pipe. Thanks for looking.
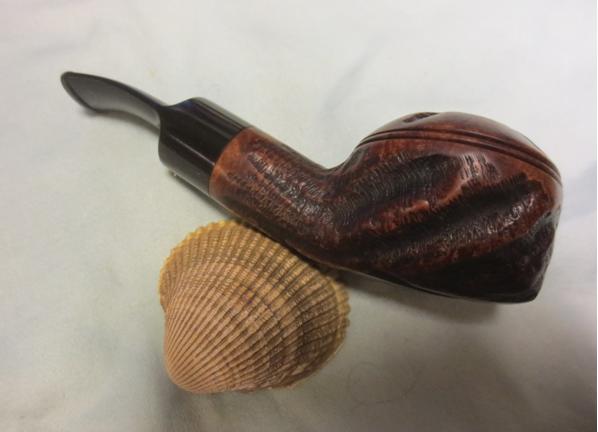
CB43 CB44 CB45 CB46 CB47 cb48

Simple Restoration of a Stanwell Freehand


Blog by Aaron Henson – 2/20/16

I have had my eye on this pipe for several months. It has been languishing in a local antique shop since last summer and was priced as if it were fully restored. To my surprise it was still there at the end of January and the shop had lowered the price. I talked with the owner for a while and eventually got his rock bottom price (which was my top end price). After all, it is a beautiful piece of briar.Stan1

Stan2 This is big pipe: the chamber is 7/8” (22 mm) diameter and 1¾” (45 mm) deep and the walls are more than 3/8” (10mm) thick.Stan3 Inspecting the pipe I did not find much wrong. The stem was heavily oxidized and had very little tooth chatter. The briar was free from dent, gouges and the like. A few minor scratches and the worn stain was all that needed to be addressed. And there was only a light cake in the bowl. As for markings, there were none on the stem and some double markings on the bottom of the shank. It read STANWELL over de Luxe (double stamped) over MADE IN DENMARK (also double stamped). From what I could find, I estimate this pipe was made sometime in the 1970’s. If anyone can date it better please let me know.Stan4 I set the stem to soak in an Oxyclean solution and began working on the stummel. I cleaned the outside of the briar with a tooth brush and Murphy’s oil soap, rinsing with water then quickly drying with a paper towel. I repeated the process on the plateaux several times. Next I reamed the chamber back to bare wood and inspected the internals. Then the internals of the shank cleaned up easily with cotton swaps and bristled pipe cleaners.

All-in-all, other than a micro crack on the outer surface, the briar was in great shape. There was one long scratch near the stamping but I didn’t want to touch that and risk damaging the stamps. I wanted a very smooth finish so I sanded the outside of the pipe with 1500 – 3200 micromesh pads and set it aside.Stan5

Stan6 Returning to the stem, I scrubbed off the oxidation with a green pad and scrubbed the airway with a series of alcohol soaked pipe cleaners – bristled then soft. The tooth chatter was raised with heat from a lighter and the deepest tooth mark was filled with black superglue. When cured, the stem was sanded and polished with 1500 – 12000 micromesh pads. I wet sand with the first six pads and dry polish with the last three. A little mineral oil between sets of three pads seems to help too.Stan7

Stan8 Next the pipe was assembled and taken to the alcohol retort. Even thought I had scrubbed the internals thoroughly, it took 3 test tubes of Everclear until I no longer smell the ghosts of the previous owner’s tobacco.Stan9 In my research of the Stanwell pipes, I found that Stanwell used a walnut stain. This was consistent with the remnants of stain that I found on this pipe and I wanted to restore the original look. I began by applying and undiluted Feibing’s dark brown. After it set I realized that Feibing’s brown dye have too much of a red base and it was not direction I wanted to go.

I wiped as much off as I could with an alcohol soaked cotton pad and sanded the surface with the 2400 micromesh pad again to remove a bit more. Returning to my local Tandy Leather, I searched for a walnut stain. After looking at stain samples on leather (which responds much differently than briar) I placed my bets on Eco-Flo’s Bison Brown. This time the results were much more like what I had seen in pictures of similar Stanwell pipes. I applied the stain at full strength and flamed it. After the second coat dried I wiped the excess off with an alcohol soaked pad.

With the smooth surfaces done I stained the plateaux with Feibing’s black dye. Once it dried, I wiped the entire wipe down with mineral oil then set it aside to soak in. It was two days later that I found time to return and take the pipe to the buffing station. I buffed the entire pipe with red diamond then applied three coats of carnauba.

Thanks for reading and I would like to hear your comments.Stan10

Stan11

Stan12

Stan13

Restoring an Interesting Older XXXX’d out Sitter


Blog by Steve Laug

When my brother Jeff sent me the photos of this pipe I could see what had attracted him to purchasing it. The unique sitter shape with the angled bottom, the interesting grain patterns and the clean though oxidized stem all pointed to a pipe that would clean up very well. The stamping on the left side of the shank was XXXX’d out so he could not read it to see who had made the pipe. There was something about it however, that niggled at my memory and the shape had a quintessential British made pipe look. When it arrived I examined it under a bright light and was able to make out the stamping under the XXX’s. It read MAJESTIC over Danish Crown. From research on the web I found that the brand was made by Ben Wade in England.Ben1 In person the pipe was quite nice. There were scratches and nicks in the bowl that would need some work. On the left side toward the bottom of the bowl were two marks joined by a line. At first glance it looked like a crack but it was not. There were two flaws in the briar and a long horizontal scratch in the surface of the briar. Even if it had been a crack the two flaws stopped it from spreading so it was not a problem.Ben2

Ben3 There was beautiful grain on the sides and bottom of the bowl. The dirty rim promised some interesting grain underneath the tars and lava build up. The outer edge of the rim had damage on the front and the rear. It had been tapped out on something solid and had rounded and damaged the edge. The inner edge looked good though the crumbling cake would need to be reamed to know for sure.Ben4

Ben5

Ben6 I reamed the bowl with the PipNet reamer and completely removed the cake. I wanted to clean up the inner edge of the rim and check the bowl walls for cracks or damage. (In the top view photo you can see the rounding on the front and back outer edges of the rim.)Ben7

Ben8 I cleaned out the airways from button to bowl with pipe cleaners, cotton swabs and alcohol. I used a dental pick to clean out the slot.Ben9

Ben10 I scrubbed the exterior of the bowl with acetone on cotton pads to remove the grime and the damaged finish.Ben11

Ben12

Ben13 I scrubbed the rim and then used the topping board to remove the damaged top of the rim. A light topping took the surface down and sharpened the edges on the front and back side of the bowl.Ben14

Ben15

Ben16 I used the dental pick to clean up the line and the two end points that marked the bowl on the left side. I used clear super glue to fill in the flaws and the groove in the line.Ben17 I sanded the repairs to the bowl until the surface was smooth. I sanded it and the rim with micromesh sanding pads 1500-6000 grit. I used a black marker and a dark brown stain pen to prepare the bowl for staining. I decided to use a Cherry Stain and Danish Oil on the briar on this one. It would highlight the grain and make it shine.Ben18

Ben19

Ben20

Ben21 I laid the pipe aside to dry over night. In the morning I buffed it with some Blue Diamond and then gave it a coat of carnauba wax. I buffed it with a flannel buffing pad and then took the next photos.Ben22

Ben23

Ben24

Ben25 The stem still needed attention. I sanded it with 220 grit sandpaper to remove the nicks and deep oxidation in the vulcanite. I followed that by wet sanding it with 1500-2400 grit micromesh sanding pads and rubbing it down with Obsidian Oil. I dry sanded with 3200-4000 grit pads and repeated the oil. I finished by dry sanding it with 6000-12000 grit pads and gave it a final coat of oil. I set it aside to let the oil soak into the vulcanite.Ben26

Ben27

Ben28

Ben29 I buffed the pipe with Blue Diamond and then gave it several coats of carnauba wax. I buffed it with a clean buffing pad and then with a microfibre cloth. The finished pipe is shown in the photos below. The unusual shape and the unique grain on the briar really stand out with the finish I chose. The slight bend to the stem gives it a jaunty look. The stem is too heavy for the bowl to sit flat on the angled base but it balances on the point.Ben30

Ben31

Ben32

Ben33

Ben34

Ben35

Ben36

Ben37 Thanks for looking.

Didn’t Break a Sweat Cleaning this London Briar Brandy


Blog by Steve Laug

My brother sent me this nice brandy shaped pipe. It has a Lucite stem that is a swirled black and olive or brown depending on the light. The bowl was in good shape with a light cake and some rim lava. There was a scratch on the left top of the rim top. The finish had a coat of varnish over the briar and it was cloudy and dirty. The stem had some tooth chatter and was dull. Otherwise the pipe was in very good shape. The only stamping on it is LONDON BRIAR on the right side of the shank.

I had not seen the stamping London Briars before so I did some hunting on the web for the brand and found that the brand was made by/for Gauntleys of Nottingham. They sold new for £31.95 Here is the link to their site: https://cigars.gauntleys.com/uk/offer/gauntleys-london-briar-pipes

I quote directly from the site:
Gauntleys London Briar Pipes – Our London Briar pipes have become very popular since we introduced them just a few months ago. Each is made from selected second briar blocks from one of the country’s largest and most respected pipe makers.

If the briar was flawless these pipes would sell for over £250. These are from briar with small flaws in the grain or needing small amounts of filler so are great value. The briar is some of the finest in the world and can be up to 80 years old.

Each pipe is hand made in a range of classic English shapes and comes in a number of finishes from Smooth Brown to Black (Shell Briar) Sandblasted.

If you are looking for a first pipe or something to use around the house or garden the Gauntleys London Briars are very affordable and smoke like an entry level premium briar. Each pipe comes boxed with a silk bag.

Here is the state of the pipe when I brought it to the worktable today. There is not a fill or a flaw that I can find in the briar. It is a light weight and clean pipe.Gaunt1 I took a close up photo of the rim top to show the build up and scratches.Gaunt2 I scrubbed the bowl with acetone on cotton pads to remove the varnish coat. There was some nice grain under the varnish coat.Gaunt3

Gaunt4 I lightly topped the bowl to remove the scratches and the lava.Gaunt5 The cake was uneven so I reamed it back to the briar to facilitate the building of an even cake.Gaunt6

Gaunt7 I cleaned out the shank, mortise and airway with alcohol, pipe cleaners and cotton swabs until the pipe cleaners and cotton swabs came out clean. I scrubbed out the airway and the slot in the stem at the same time.Gaunt8

Gaunt9 I used a light brown stain pen to stain the rim to match the bowl.Gaunt10 I sanded the stem with 1500-2400 grit micromesh sanding pads and then wiped it down. I continued to sand it with 3200-12000 grit micromesh to polish it.Gaunt11

Gaunt12

Gaunt13 I buffed the pipe and stem with Blue Diamond on the wheel and then gave them multiple coats of carnauba wax. I buffed it with a clean flannel buff and then hand buffed it with a microfiber cloth. The finished pipe is shown in the photos below.Gaunt14

Gaunt15

Gaunt16

Gaunt17

Gaunt18

Gaunt19

Gaunt20

Gaunt21

A Sparkling Metallic Dr. Grabow Viking with Three Bowls


Blog by Steve Laug

This older Dr. Grabow Viking came to me as a gift from a Facebook friend. He gave it to me along with some other pipes for me to enjoy restoring. This one is stamped next to the heel of the metal base – Viking Pat. Pend. The metal is sparkling metallic silver. It has flecks throughout the paint that make it sparkle and shine. When it came it was together in a plastic sandwich bag. The base unit was tired and dirty. The bowl on the base was caked with an over flow of lava onto the rim. The other two bowls had been reamed and cleaned. The finishes on all three were dirty and dull. The rims on all three bowls show damage from burns or being knocked out on a hard surface. When I removed the bowl the interior of the base was caked with the thick lacquer of the juices of tobacco as it burns. It looked to me like it had not been cleaned in a long time and the black thick oils had hardened like rock in the base. The airway was clogged with debris. The stem had collapsed from being bitten on. The tooth marks were deep but did not go through into the airway. The sharp edge of the button was worn almost smooth. I was not able to push a pipe cleaner through the airway from the button or from the airway in the bottom of the base.

G1G2G3

I took a few close-up photos. The first shows the inside of the base and the build up there. The second and third show the bite marks on the stem. The second photo shows the top of the stem and the bite mark on that surface, though not looking bad in the photo, collapsed the airway and made it impossible for a pipe cleaner to pass through. The fourth photo below shows the stamping on the bottom of the base.G4G5G6G7

I scrubbed out the inside of the base with pipe cleaners, cotton swabs and alcohol. I also used a brass bristle brush. I opened the slot and airway in the stem with a flat needle file. I inserted the needle file and pushed the indentation on the top of the stem upward to clear the airway. It took a lot of fiddling with the file to open the slot completely. I cleaned the airway and stem with pipe cleaners and alcohol.

G8

I repaired the tooth marks with black super glue and set the pipe aside for the evening to allow the glue to cure. I have not had good luck with this kind of fill using the accelerator as it tends to cause air bubbles in the dried glue.

G9G10

I reamed the cake in the one bowl with a Pipnet reamer and took the cake back to bare briar.

G11G12

In the morning I sanded the repairs on the stem with 220 grit sandpaper to smooth the surface of the repair and blend it with the stem. I used a needle file to sharpen the edges on the button.

G13G14G15G17

Once I had the surface smooth I sanded the stem with micromesh sanding pads. I wet sanded the stem with 1500-2400 grit pads and then rubbed it down with Obsidian Oil. I dry sanded the stem with 3200-4000 grit pads and gave it another coat of oil. I finished dry sanding it with 6000-12000 grit pads and gave it a final coat of Obsidian Oil. I set it aside to dry.

G18G19G20

With the base finished I set it aside and turned my attention to the bowls. I topped all three bowls on the topping board. The short bowl that I reamed had some dents and rim damage. The other two had burn marks and rounded edges that needed to be cleaned up.

G21G22

I wiped the bowls down with acetone on cotton pads to remove the finish and the grime.

G23G24

I stained all three rims with the light brown stain pen for the first coat. I then gave all three bowls several coats of Cherry stain Danish Oil and buffed them to a shine.

G25G26G27G28G29

I finished the restoration by buffing the bowls with Blue Diamond and then giving the bowls and the stem several coats of carnauba wax. I buffed the whole pipe with a clean buff and then with a microfibre cloth to raise the shine. The finished pipe is shown in the photos below. Each photo shows a different angle and includes the base with all of the bowls in place.

G30G31G32G33G34G35G36G37G38G39

Putting the Rusticated Rim back on a Savinelli Capri 121 Pot


Blog by Steve Laug

One of the gift pipes received from a friend when I repaired his pipe was a beautiful little Savinelli Capri 121 Pot. I love the finish on the Capris. There is something about the rusticated finish that adds a tactile dimension to the pipe that I thoroughly appreciate. This pipe was no exception. The finish on the bowl was in excellent condition though at some point in its life it had been topped. The typical rustication on the rim surface had been sanded smooth and the rim had been stained with a reddish brown stain. The internals of the pipe were very clean. The bowl had been reamed and the airway in the mortise was spotless. The stamping on the bottom of the shank was sharp and legible – it reads Savinelli Capri over Root Briar and the Savinelli shield and next to that the shape #121 over Italy.

The stem had seen better days but it was still repairable. It was oxidized and the gold stamping was faint on top of the saddle. There were tooth marks on the top and the bottom of the stem. The ones on top had been repaired and filled with a white looking epoxy. It was hard and smooth but it was white and it looked really bad with the brown oxidation on the stem. These would need to be removed and repaired when I worked on the stem. The tooth marks on the underside of the stem were not as deep and could easily be remedied by sanding the stem. The inside of the stem was also very clean. I took the following photos when I brought the pipe to the work table.Capri1

Capri2

Capri3

Capri4 I took some close-up photos of the rim and the stem to show the condition of both. The topping job on the rim actually was very well done. The refinish on it was impeccable – no scratches or grooves, just a clean smooth surface. The stem shows the story I mentioned above. The top side view shows the repairs and the underside view shows the dents.Capri5

Capri6

Capri7 Taking care of the dents on the underside of the stem was an easy matter. They were not too deep so I sanded the stem with 220 grit sandpaper and they disappeared.Capri8 The top of the stem was another matter. I wanted to remove the white repairs. I sanded the stem until they were four distinct repairs. Then I used the dental pick to pick away at the white epoxy repair until it was pitted and gave me a new divot to work with. I used some black super glue to refill the divots and cover the white that had been present before.Capri9

Capri10 I sprayed the glue with an accelerator and then sanded the repair with 220 grit sandpaper to blend it into the surface of the stem. In the next photo you can see that the white no longer was visible. The trick would be to keep it that way!Capri11

Capri12 Now it was time to address the rim. I was not sure about rusticating it because it actually looked quite fine the way it was. I went online and found a photo of a Capri that was the same shape and the rim was rusticated. I liked the look of the rim blending into the finish of the bowl. The decision was made. Now I had to work to get a similar look.Capri13 took out my Dremel and my assortment of burrs. I was pretty certain that I would use them all in the process of rusticating the rim with a deep and pebbled look.Capri14 I started with a simple cylindrical burr to carve some random swirls across the rim. I did this lightly at first and then deepened them. At this point I kept to the middle of the rim as I had ideas about rusticating the edges a little differently.Capri15 I followed that by using the ball burr to deepen the swirls and work on the inner and outer edges of the rim. At this point the surface was beginning to look good. But too me it was not rustic enough for the Capri finish on the bowl – it was too tame looking.Capri16 I used cone burr next with a cross hatch pattern to randomize the pattern even more and deepen the grooves in the surface and edges.Capri17 I next moved onto another cone burr with a spiral pattern and continued to work on the rim pattern. It was getting close to the point I was aiming for.Capri18 I used the last cone burr that had a swirl pattern in the opposite direction and went over the rim again to further accent the roughness.Capri19 I used the cylindrical burr to cut some of the lines between the divots and edges of the bowl and make it more craggy looking.Capri20 At this point in the process I was finished with the burrs and I put a coat of medium brown stain on the high points in the rustication using a stain pen. I followed that up with using a black Sharpie pen to fill in the divots and low spots on the rustication.Capri21

Capri22 I scrubbed the newly stained rim with a brass bristle brush to knock off some of the high spots and get a more burnished look like the bowl sides. I still was not happy with the stain so I used the sharpie again to darken the low spots and grooves. I then restained the rim with the dark brown stain pen. The colour was very close to the sides of the bowl.Capri23

Capri24

Capri25 I could have probably stopped there but I did not. I studied the photo of the rim above and noted that there were some striations or cuts in the surface of the rim that connected all the rustication and gave it a distressed look. I have a serrated edge letter opener here that I thought might work to give me more of that look. I cut the surface from every direction with the edge of the letter opener and carved and hacked it to distress it. I used the brass brush once again and then recut the rim with the opener.Capri26 I restained the rim with the black Sharpie and the dark brown pen. And then gave it a light buff on the wheel with Blue Diamond. I say light because if I had pressed any harder the polishing material would have gone into the grooves and made a mess. The rim looked good to me. The finish was done and all that remained was to wax it with some Conservator’s Wax.Capri27 I gave the bowl and rim several coats of Conservator’s Wax (works like Halcyon II on rusticated finishes) and buffed it with a shoe brush to polish and give a shine. I wet sanded the stem with 1500-2400 grit micromesh pads to begin the polishing process. It was tricky around the stamp on the shank so I had to work carefully with the pad to get as much of the oxidation as possible.Capri28

Capri29 I buffed the stem with White Diamond to further polish it and then sanded it with 4000 grit wet dry sandpaper to really work on the oxidation at the shank. It is a finicky part of the process because of the weak stamping. I rubbed the stem down with Obsidian Oil and then progressed to 3200-4000 grit micromesh pads. Another coat of oil preceded the final sanding with 6000-12000 grit pads. I gave the stem a final coat of oil and set it aside to dry.Capri30

Capri31 I buffed the pipe with a shoe brush and then with a microfibre cloth. I gave it several more coats of the Conservator’s Wax and polished it to a shine. I buffed the stem with Blue Diamond and gave it several coats of carnauba to protect it and then buffed the stem with a clean buff to raise the shine. I hand buffed the entirety one final time with a shoe brush and then took the finished photos below. This was a fun project. You can see that the white stem repairs have disappeared and the rustication on the rim fits the overall look of the pipe far better than the smooth finish that was there before. Thanks for looking. Capri32

Capri33

Capri34

Capri35

Capri36

Capri37

Breathing New Life into a Briarlee Scoop


Blog by Steve Laug

My brother Jeff and I were looking through Ebay and came upon this old Briarlee Scoop. The stem was badly overturned as these old pipes had a threaded metal tenon and shank insert. This one was turned upside down. Something about these 1960s era chunky pipes grabs my attention. They are very Minceresque, strongly resembling Custombilts. They have anice vintage look. Briarlee pipes were made by the Arlington Pipe Company.

I wanted to refresh my memory of the brand since it had been a while since I had worked on an Arlington made pipe. I checked my usual sources and found that Pipedia had some quick and helpful reminders for me https://pipedia.org/wiki/Arlington. The next photo came from that site and is a great advertisement for the brand.Briar1 I quote from Pipedia: “Arlington Briar Pipes Corporation was founded in 1919 in Brooklyn, New York, and produced the Arlington, Briarlee, Firethorn, Krona and Olde London brands among dozens of others, primarily acting as a subcontractor making pipes to be sold under other brand names. Among others, in the 1950’s, Arlington turned pipes for the famed Wilke Pipe Shop in New York City. The corporation was dissolved by the State of New York as inactive on December 6, 1978. Arlington Briar Pipe Corporation, located at 200 Kosciusko Street, Brooklyn, New York, registered only a single brand trademark, the Arlington brand, the trademark for which was applied for on November 13, 1962 and granted on February 25, 1964. Jack Kaye, of Arlington Briar, was also granted a patent for a combined mirror and stand in 1967.”

Pipedia also quotes José Manuel Lopes, Pipes Artisans and Trademarks; “Arlington is a North American brand that belonged to Arlington Briar Pipes Corp., Brooklyn, New York, founded in 1919. In the 1940s, Ludwig Rosenberger gave the company new life, and it continued until the 70s. His son, Mel Rosenberger, has recently launched the DiMonte brand. Jack Uhle was also linked to Arlington.” Arlington, as far as known, mainly operated as a sub-contractor for other brands. The Jobey pipes are said to be made by Arlington at an unknown point of time. Arlington’s own pipes are seldom seen.”

Now I had the information in hand and I started to work on this pipe. The next set of photos was the ones that the EBay seller posted. They give a good reference point for the state of the pipe.Briar2

Briar3

Briar4

Briar5 When it arrived I brought it to the work table and took my own set of photos. The overturned stem makes the pipe look awkward.Briar6

Briar7

Briar8

Briar9 I unscrewed the stem and heated the stinger and tenon with a lighter until the glue softened in the stem. Once it was warm the stem was quite easy to turn and align.Briar10 I took the next two close-up photos to show the size of the pink putty fills on both the right and left side of the bowl. These pink fills would have to go as they are very hard to stain or mask.Briar11

Briar12 I reamed the bowl with a PipNet reamer using the largest cutting head. I was able to ream back the cake to briar and at the same time clean up the inner edge of the rim. The edge was not as damaged as I thought it might have been.Briar13

Briar14 I cleaned the surface of the bowl with acetone on cotton pads to remove the finish and the grime. I scrubbed the lava on the rim to see if I could remove it.Briar15Briar16Briar17Briar18

I lightly sanded the rim to remove the hard tars on the surface while not scratching or damaging the bowl. I also sanded the inner edge of the rim to clean up the rough edges.

Briar19

I removed the pink putty fills with a dental pick and refilled them with briar dust and clear super glue.

Briar20Briar21

I sanded the repairs smooth and then used a black Sharpie permanent marker to stain the grooves on the sides and top of the bowl.

Briar22Briar23Briar24

I stained the bowl with a dark brown aniline stain for a top coat to contrast with the black trails in the briar.

Briar25Briar26

I buffed the bowl with White Diamond to give it a shine and get a feel for the coverage of the stains.

Briar27Briar28

Now it was time to work on the stem. I sanded the stem with 220 grit sand paper to remove the tooth chatter and bite marks on the underside near the button. I followed up by sanding with a medium grit sanding sponge.

Briar29Briar30

The inside of the shank was a mess as is often the case with these pipes with metal mortise fitments. It took a lot of scrubbing before I could remove the oils. The pile of cotton swabs is about half of what I used to clean out the shank. Cleaning the stem was a challenge as the stinger was not removable. I fit pipe cleaners through the slot in the stinger and drew them through the airway in the stem until it was clean. I scrubbed the stinger with alcohol and a brass bristle brush to remove the hardened tars that had collected and dried there. I wet sanded the stem with 1500-2400 grit micromesh pads but forgot to take a picture of the stem after the sanding. The effect of that sanding can be seen in the second photo below.

Briar31Briar32

With the internals clean I polished the stem with micromesh sanding pads. I dry sanded with 3200-4000 grit pads and then rubbed the stem down with Obsidian Oil. I continued sanding with 6000-12000 grit pads and gave the stem a final coat of oil and set it aside to dry.

Briar33Briar34

I buffed the bowl and stem with Blue Diamond on the wheel and then gave them both multiple coats of carnauba wax. I buffed them with a clean flannel buff and then hand buffed them with a microfibre cloth to raise the shine in the briar and the stem. The finished pipe is shown in the photos below. The old warrior is ready for ongoing service. Once again, thanks for looking.

Briar35Briar36Briar37Briar38Briar39Briar40Briar41


It was A Kaywoodie Metal Pipe that I had never seen before


Blog by Steve Laug

My brother, Jeff has caught the pipe hunting bug and that is a great thing for me. It won’t kill him and he won’t suffer too much harm from it unless he gets carried away and gets in trouble with the wife. But it is good news for me. It means that with him we can cover twice the ground looking for old pipes than I used to do by myself. It also means that he comes on things that I have never seen. He is in the US and I am in Canada and we have different stomping grounds for our hunt other than the odd time we are in the same place. I don’t remember if we found this one while we were looking at eBay together using Facetime or if it was a find on a hunt. But it does not really matter as we got it. It is an old Kaywoodie the style of which I have never seen before. The base unit is the typical long metal shank but rather than a cup the bowl threads into this one has a ring on the end. It is split on the end of the bowl and goes around the base of the bowl. When I first looked at it I was hooked. I wanted to see it and work on it. The thing that caught my eye was the unusual look of the pipe. I wanted to see how the bowl was held in the ring.Filter1

Filter2

Filter3

Filter4 The pipe was in pretty decent shape from the photos. The stem had the usual tooth chatter and oxidation around the button. The Kaywoodie club emblem on the stem looked rough. The embossed emblem in the aluminum shank was really clean. The entire base unit was oxidized but clean. The briar also was very clean. There was some darkening and lava on the back edge of hte rim and a thin cake in the bowl but no inner or outer edge rim damage.Filter5 The base plate was stamped Kaywoodie Filter Pipe Pat. Pend and there was a slot in the bowl. It appeared that someone had tried to use a screwdriver to turn the base plate and damaged it. To me the slot looks like it was made for a coin to turn the base.Filter6 The next photo shows the pin on the front of the briar bowl and the split in the ring of the base unit. To me it is hard to figure out how the bowl is to be removed.Filter7 While my brother had it in hand in the states looking it over and trying to figure out how to remove the bowl I did a quick search and found the pipe on the Smoking Metal site (http://www.smokingmetal.co.uk/pipe.php?page=132). The site had the following information and pictures that I have copied to use here. The first paragraph gave me the information I was searching for on how to remove the bowl. I read it to my brother and he tried it and bowl came free. He showed me the pieces on Facetime. I was fascinated.

“Many of these wrecked by folk not realising how the bowl is released. Pulling the bit out of the stem and twisting half turn in either direction releases the retaining pin and allows the bowl to come free of the stem. The lower and right hand adverts are from October 1962 Flying Magazine
The pipes were $6.95, bowls @ $3.50 and 3 filters were 25 cents.”

“In the base of the bowl is a screw cap which when undone releases a ceramic filter. These filters came in plastic tubes containing three filters. As with all metal pipes, frequent cleaning is advisable to prevent any screws from becoming irretrievably sealed into pipe. The filters are at times available on eBay, but I have been told by Rob that soaking in alcohol (Everclear or IPA) can extend their life.”

The second photo below of the bowls and the third photo of the boxed set also come from the Smoking Metals website. In the photo of the bowls you can see the clay filter piece that sits in the bottom of the bowl. It is shaped like a flattened spool and there are holes in the top of the spool as well as a stamped Kaywoodie Club emblem. The bottom of the spool is indented and sits in the metal threaded base cap. In the third photo you can see how the filters were sold in plastic tubes that held three filters and sold for $.25.

Given all of information found in these photos I could not wait until the pipe arrived in Canada and I could take it apart and clean it up.Filter8

Filter9

Filter10 When the pipe arrived I took the bowl off per the above instructions and it worked quite simply. I could easily see why the Smoking Metal website said that many of the pipes were damaged by improperly removing the bowl. Fortunately this one was not damaged by me. The metal base plate was solidly stuck in place and I read above that the clay filter was not damaged by alcohol so I dropped the bowl in an alcohol bath and let it sit all morning while I finished up some repairs I was doing. I took it out this afternoon and dried it off with a cotton cloth. The grime on the finish was gone and the bowl was clean. The lava on the rim was softened so I could work on it with more ease. It looked like I would not have to top the bowl to remove the lava. That is always a good thing. The rim edge was also not charred or burned which was a bonus as well.Filter11

Filter12

Filter13

Filter14

Filter15 I decided to take the bowl apart before working on cleaning it up. I inserted a quarter in the slot in the bottom plate and twisted it both directions until it came loose. Then I unscrewed it and took out the clay filter. The inside of the base and cap were thick with tars. The clay filter was black and goopy.Filter16

Filter17

Filter18

Filter19 I cleaned out the bottom half of the bowl, the filter and the base cap with alcohol and cotton swabs. I picked the threads clean with a dental pick and then scrubbed them with the cotton swabs. I scrubbed the clay filter and used the pick to clean out the holes in the top of the spool and also the build up on the middle and bottom of the spool. I wiped it down with alcohol and cotton swabs.Filter20

Filter21 I wiped down the outside of the bowl with alcohol and cleaned out the air hole on the side of the bowl. I used 0000 steel wool to scrub the inside of the base cap.Filter22 With the bottom half of the bowl cleaned I reamed the top half of the bowl with a PipNet reamer. I took the cake back to bare wood.Filter23

Filter24 I scrubbed the rim clean with cotton pads and saliva and was able to remove the lava build up. I sanded it lightly with a 3200 grit micromesh sanding pad and brought some shine to the rim.Filter25

Filter26 I set the bowl aside and went to work on the metal base and vulcanite stem. I cleaned out the interior of the shank and stem with pipe cleaners and alcohol. The stem is spring loaded and cannot be removed from the base without potential damage so I ran many pipe cleaners through to clean out the tars and oils.Filter27

Filter28 I sanded the stem to remove the oxidation and the tooth chatter. I used 220 grit sandpaper to break through the surface and then a medium grit sanding sponge.Filter29

Filter30 I rubbed down the stem with Obsidian Oil and then put the pipe back together. I dropped the filter into the bottom of the bowl with the holes upward, lubricated the threads on the bottom cap with Vaseline and screwed it in place. I pulled the stem back and turned it to retract the aluminum tube into the shank and dropped the bowl in place. I let the stem reseat and the tube entered the bowl. The bowl was anchored in place. Now I had a bit of a handle on the pipe while I worked over the stem with micromesh sanding pads.Filter31

Filter32

Filter33

Filter34 I started wet sanding with 1500-2400 grit micromesh pads and quickly found that the club logo was just pieces in the indent in the stem. It was broken and not complete. The ragged look that I had noted earlier was the grit and grim holding the broken logo in place.Filter35 I cleaned out the old pieces of logo with a dental pick and blew out the dust. I had a broken Kaywoodie stem with a club logo the same size as this one so I carefully liberated it from the broken stem for use on this one (it visible at the bottom of the first photo) I cleaned out the indent on the stem with air and then put some all purpose glue in the hole with the end of the dental pick. I pressed the new logo into the hole with the rounded handle of a dental spatula. The new logo looked good and it was smooth when you ran a finger over that area of the stem.Filter36

Filter37 I reworked the stem with the 1500-2400 grit micromesh, this time dry sanding it. There was no need to wet sand it again. I was careful while sanding around the newly set logo so as not to risk lifting it from the stem. I rubbed the stem down with Obsidian Oil and then dry sanded with 3200-4000 grit micromesh pads. The stem was beginning to take on a shine. I continued to polish it with 6000-12000 grit pads and gave it a final wipe down with Obsidian Oil. I let it dry.Filter38

Filter39 I gave the stem several coats of Conservator’s Wax and hand buffed the stem by hand so as not to damage to the logo. I also hand buffed the bowl and metal base by hand with the wax and then rubbed it down with a microfiber cloth to finish the shine. The finished pipe is shown in the photos below. I really like the looks and mechanics of this old Kaywoodie. It is a pleasure to add it to my collection of metal pipes.Filter40

Filter41

Filter42

Filter43

Just when I had given up on finding a great pipe this happens – but not to me


Blog by Steve Laug

It has been a long time since I found a pipe of this caliber in a thrift shop of antique mall. It seems that the finds of earlier times are fewer and farther apart. Then something like what I am about to tell you happens – in this case happens to someone else. It creates in me a renewed passion for the hunt.

It is not too often that the pipes that others find set loose a twinge of jealousy in me but this one certainly did. It was one of my favourite shapes and he virtually stole it in terms of price. It was found by a pipeman on Vancouver Island. He found it in a local thrift/antique shop and paid $15 Canadian for it. For the Americans reading this our Canadian dollar is worth about 65 cents US. That is why I said that he stole the pipe, paying a whopping $9.75 US. He sent me a message on Facebook Messenger and asked if I would clean up the pipe for him and restore it. He sent me a photo that did not begin to tell the story of this beautiful little dog. We talked via Messenger and discussed the pipe. He sent it to me and I received it earlier this week.

It is a beautiful Shell Briar Bulldog. The bowl had a thick cake and was dirty on the outside. The finish looked undamaged by scratches and dents and merely bore a thick coat of dust and grime. The rim was in excellent shape – both inner and outer edges were undamaged. The stem was the worst part of the pipe – it was extremely oxidized and had a deep oxidation and also a very gritty feel in the hand. It almost felt like sand was stuck to the surface of the rubber. There were tooth marks on the top side of the stem and on the underside. There was a sticky spot on the top of the stem where there must have been a price tag at one point. The button and the slot were both undamaged and would clean up easily. There was an inner tube in the stem and shank of the pipe. It ran from the end of the tenon to the bottom of the bowl. These were made originally to facilitate keeping the airway clean. This one had a few oxidized spots on the surface of the aluminum and also was stained with tars and oils on the inside.

It was stamped on the flat underside of the bowl and shank as follows: On the bottom of the bowl it was stamped 148F/T which told me the shape number and the style of the stem – a fish tail. After that almost mid-shank it was stamped Dunhill Shell Briar. Next to that it was stamped Made in England7 0. From my read of the stamping the underlined 7 is added to the date 1960 which would make this pipe a 1967 pipe (http://www.pipephil.eu/logos/en/dunhill/shellbriar1.html). I am not sure of the meaning of the 0 that sits between the underlined 7 and the Circle 3 S. I do know that the circle three tells me that this pipe is a Group 3 sized pipe and the S gives the finish which in this case is a Shell.

The next set of five photos show what the pipe looked like when it arrived at my work table.Dunhill1

Dunhill2

Dunhill3

Dunhill4

Dunhill5 I studied the pipe for a while before proceeding with my usual clean up. I shook of the remnants of pipe envy and congratulated the finder. I began by reaming the pipe with a PipNet Reamer. The bowl, being a Group 3 size would only take the smallest cutting head of the reamer. I took the cake back as close as possible to bare wood with the reamer. I had to finish the reaming with a small pen knife and removed the ridges and remnants of cake that are visible in the second photo below.Dunhill6

Dunhill7 After I finished the reaming with the pen knife I used a brass bristle tire brush to clean up the finish on the top of the rim. I find that the soft brass bristles clean out the stubborn lava without doing damage to the blast/rustication finish on the rim. They also do not damage either the inner or outer edge of the rim.Dunhill8 I scrubbed the bowl with Murphy’s Oil Soap and a tooth brush to remove the detritus that had collected in the crevices of the finish. I rinsed the bowl with running water and dried it off with a towel.Dunhill9 I cleaned out the airway in the slot and stem with pipe cleaners and alcohol and cleaned out the inner tube the same way. I scrubbed the exterior of the inner tube with 0000 steel wool. The oxidation on the stem was deep and concentrated. It really was a mess.Dunhill10 To try to soften the oxidation and bring it to the surface I mixed a batch of OxyClean and dropped the stem in the mixture to soak overnight and worked on the bowl. I rubbed the bowl down with a light coat of olive oil and then buffed it with a shoe brush. I gave it several coats of Halcyon II wax and rebuffed with the shoe brush.Dunhill11

Dunhill12

Dunhill13

Dunhill14 I cleaned out the shank and the mortise with alcohol, cotton swabs and pipe cleaners. Thanks to the inner tube it was not nearly as black and grimy as many of the older pipes that I clean up.Dunhill15 In the morning I took the stem out of the Oxyclean bath and dried it off with a coarse cotton towel. The oxidation had softened considerably and I was able to scrape a little away with a fingernail (that is a “secret” test I use to see if it ready to come out of the soak).Dunhill16

Dunhill17

Dunhill18 I sanded it with 220 grit sandpaper to remove the oxidation and then with a medium and a fine grit sanding sponge. The oxidation was stubborn on this stem. It took a lot of work to get it out of the edges and curve of the saddle. Once I cut through the oxidation on the rough spots I moved on to sanding the stem with micromesh sanding pads. I wet sanded the stem with 1500-2400 grit pads and then rubbed the stem down with Obsidian Oil. I dry sanded it with 3200-4000 grit pads and gave it another coat of oil. I finished by sanding with 6000-12000 grit pads and gave it a final coat of Obsidian Oil. I let the oil dry.Dunhill19

Dunhill20

Dunhill21 I buffed the pipe and stem with Blue Diamond on the wheel. I buffed the bowl with a light touch to make sure that I did not get the buffing compound in the crevices of the blast. I buffed the stem with a little heavier touch and then gave the stem multiple coats of carnauba wax. I gave the bowl several coats of Halcyon II wax and buffed it with a shoe brush. I rubbed the bowl and stem down with a microfibre cloth for the final shine. It is now packed and on its way home to the lucky gent who found it. I have a renewed passion to take up the hunt for more pipes. Perhaps it will be my turn to find a treasure like this. Thanks for looking.Dunhill22

Dunhill23

Dunhill24

Dunhill25

Dunhill26

Dunhill27

12647990_10156469550400557_62413239_nI received this photo last night of the pipeman who found this Dunhill. The mail delivered the pipe to him yesterday and he loaded it up and enjoyed a smoke. I don’t often get to see this end of the story! Thanks Ryan.


Celebrating the Re-Opening of My Store with a Restoration


Guest Blog by Robert M. Boughton
Member, International Society of Codgers
Member, North American Society of Pipe Collectors
http://www.naspc.org
http://www.roadrunnerpipesnm.biz
http://about.me/boughtonrobert
Photos © the Author

“The people like to be humbugged.”
“Unless a man enters upon the vocation intended for him by nature, and best suited to his peculiar genius, he cannot succeed.”
“Nobody ever lost a dollar by underestimating the taste of the American public.”
“The noblest art is that of making others happy”

― Phineas Taylor Barnum (1810-1891), U.S. showman, businessman, politician, celebrated hoaxer and founder of the Barnum & Bailey Circus

INTRODUCTION
P.T. Barnum was a man of contradictions, as the quotes above suggest, making him an obvious two-time Republican candidate for state legislator in the Connecticut General Assembly, both of which races (at different periods of his eventful life) were successful. Business, however, was always his first love, and by the age of 12, in Bethel, Connecticut, he earned enough money selling snacks and homemade cherry rum to buy his own livestock. By 21, he owned a general store and a newspaper called “The Herald of Freedom,” and ran a small lottery.

The Greatest Showman on Earth, who insisted his customers were willing participants in his obvious pranks and hoaxes, never said the line most attributed to him: “There’s a sucker born every minute.” Hence the first quote above. Barnum’s fame began with the 1835 purchase of a blind slave named Joice Heth, whom he advertised, in one of his greatest hoaxes, as being 161 years old and the one-time nurse of George Washington. During her tour of New York City and New England, throngs of gawkers paid to hear the old woman spin tale of “dear little George.” To heighten the already wild frenzy around Heth, Barnum later spread the rumor that she was, in fact, an automaton manipulated by ventriloquists. At Heth’s autopsy in 1837 – to which Barnum sold tickets – medical examiners determined that she was probably 80 at the oldest.

Despite his purchase of a slave, to whom he no doubt gave far better treatment than her former owners, as a legislator in later years Barnum was a strong advocate of equal rights for African-Americans. And likewise, giving up all liquor, including the cherry rum that started his long run in business, Barnum became a devout supporter of the Temperance Movement and remained committed to it until he died.

Other than Heth, three of Barnum’s best-known “exhibits” were a child dwarf he called General Tom Thumb, who was even granted a royal audience by England’s Queen Victoria; the Fejee Mermaid [see “The X Files,” S2, E20, “Humbug”], or the top half of a dead monkey sewn to the lower part of a fish, and his giant, six-ton African elephant named Jumbo, which was bought under wide protest from the London Zoölogical Society and led to the adjective jumbo, or large.

There are far too many more titillating examples of Barnum’s contradictory exploits and far too little space to go into any of them here, but you get the point. At least I hope you do. In a market-driven economy, advertising, publicity and flair are everything, and they form the unabashed purpose of this blog: to celebrate the grand re-opening of my online pipe restoration and sales business with the latest addition to its stock.

The selection has diminished in size during the past few months that the webstore was down, due both to continuing sales the old-fashioned way – hand-to-hand – and a plethora of personal issues, including moving again and several pressing legal matters in which I am prevailing through appeals despite being up against real attorneys, that have until recently eaten away at the time I prefer to devote to pipe work.

As the Steve Miller Band might have sung had they been writing of my better spent daily life:

This here’s a story about Bobby Mike and his stew,
One young lover with nothin’ better to do
Than sit around the house, smoke his pipes, and watch the tube
And here is what happened when he decided to cut loose….

With no further ado, I am pleased to call out in a booming voice, though it be in written words, “La-dies and gen-tle-men, who are children of all ages, welcome to the greatest, most amazing, daring, thrilling and spectacular show on Earth! The circus known round the world as pipe restoration! And now…in the Center Ring…turn your eyes toward the wonderful and awe-inspiring silver-banded bulldog ! All the way from England, measuring an astonishing six inches in length and a 6/8” x 5-1/4” chamber diameter, and called the Atwood Hall of Fame Natural #5, of the world-renowned Comoy’s family!”

RESTORATION
Rob1

Rob2

Rob3

Rob4

Rob6

Rob7

Rob8 Sixty-three years after it was made and, my intuition tells me, loved by a single owner, there are numerous signs of wear and tear. Still, scratches on almost every inch of the stummel and bit, not to mention a few outright dings, are the pith of the blemishes, not counting the almost inevitable loose sterling silver band. These flaws are negligible considering the venerable pipe’s age and obvious regularity of use. Even the band – which, given the thinness of the inherently fragile material itself, invites heavy tarnish, bending and total obliteration of any hallmarks or stampings – was almost pristine, and is once more, still showing showing the single word of its substance, STERLING, and by more careful examination three hallmarks – something I can’t make out following by a T and a 5. Here is the first page of the original (and apparently only) Atwood U.S. Patent, showing the same design of the Hall of Fame 1953 Brandy.

AtwoodAtwood pipes came with “a permanent aluminum cup at the base of the chamber, with a bore hole.” [http://www.pipephil.eu/logos/en/logo-a9.html] The cup and bore hole, after cleaning, indeed are intact.

Although, by virtue of Atwood being a Comoy’s second, I was not over-concerned with the possibility of finding fills in the wood if I were forced to strip the original polish and stain, but I nevertheless took every measure I could conceive to avoid that step. At worst, I was convinced, the reason for the oppressive stain was to hide unfortunate grain. As will be shown, this proved to be the case.

I began by removing almost all of the rim burn with concerted rubbing using 2400 and 3200 micromesh freshly cleaned by a long soak in purified water.Rob9 An unsuccessful but still incomplete attempt to fix the remaining rim burn and scratching led me to an acceptance at that point of the fact that, though I might otherwise rid the rim of the remaining char, the remaining scratches, not just on the rim but everywhere else on the stummel, were sufficient to necessitate a low enough grit of sandpaper to take it down to bare wood. Having learned that sandpapering the entire wooden surface of a pipe can and often does lead to more problems, I chose the more efficient and reparable measure of an Everclear bath.Rob10

Rob11

Rob12

Rob13

Rob14 The Everclear was a complete success in revealing that there were, indeed, no fills, but even finer scratches than even my minute examination of the briar beforehand, using a jeweler’s magnifier headset, had caused me to suspect could exist. And so I tried the superfine 0000 steel wool first, which at least took off the rest of the old artificial color and some of the less pernicious scratches. But 200-grit paper was unavoidable, in careful spot sanding, to banish the rest of the marks and pocks, followed by another soft buffing with the steel wool.Rob15

Rob16

Rob17 The next steps seemed to be an easy crank or two of a 21mm reamer in the chamber followed by 320-grit and 500-grit paper, and a retort.Rob18

Rob19

Rob20 The retort required two test tubes full of Everclear, but only because of the way the first tube-full always seems to remain in the pipe’s inner bowels after a few boils. At any rate, immediately following the retort, I ran a bristly cleaner through the bit’s air hole, which came out remarkably light, and used both ends of a fluffy pipe cleaner on the inner shank to soak up the wet residue of various accretions still in the shank. I removed the cotton ball from the chamber and swabbed it thoroughly with small white cotton gun cleaning cloths. Then I finished the chamber with a final wipe using 500 paper and more thin cotton swabs soaked in Everclear. The chamber was silky smooth.

“This pipe is clean!” I said to myself, out loud in fact, thinking of the tiny lady of “Poltergeist” fame, who sought out and did her best to dispel dead but still malicious souls.Rob21 At last, I turned my attention to the bit. It was in pretty good shape, but notice the bad scratch in the second photo below.Rob22 Every micromesh pad I have, still damp after the soaking from which I removed them some time earlier, was employed to make the bit shine again.Rob23

Rob24 The distinctive A for Atwood was perfectly ingrained and intact. I had made the rounded top of the bulldog bowl lighter than the rest of the stummel on purpose, and as the time for re-staining had come, I chose Fiebing’s Brown leather stain for the top and Lincoln Medium Brown (darker) for the rest.Rob25 Applying the Fiebing’s with care to the top, I flamed it with my Bic, then did the same to the rest of the stummel with the Lincoln.Rob26 After a short sit to cool off (both the wood and me), I gently buffed the whole surface with 3000 and 6000 micromesh.Rob27

Rob28

Rob29

Rob30

Rob31

Rob32 The final step before buffing was re-attaching the band to the shank, mindful of placing the STERLING/SILVER stamp in small letters on the upper left side, where it had been.Rob33 Oh, glorious moment! The time was nigh to retire to my office, wherein rests my electric buffers. Observing the clock on the wall, which told me it was already 2 a.m., I considered the neighbors opposite that side of the apartment and, understanding the way my building is laid out, realized they would hear nothing from their bedroom. I used the customary red and White Tripoli on the bit, with the clean buffer between each, and white Tripoli, White Diamond and carnauba on the stummel, again separating each with the clean buffer. For the band, I used a very fast turn on the clean buffer.Rob34

Rob35

Rob36

Rob37

Rob38

Rob39
SOURCES
http://www.history.com/news/10-things-you-may-not-know-about-p-t-barnum
http://www.azlyrics.com/lyrics/stevemillerband/takethemoneyandrun.html
https://en.wikipedia.org/wiki/Ringmaster_(circus)

UPCOMING RESTORES
Rob40

Rob41

Rob42Rob43Rob44