Robert M. Boughton
Member, International Society of Codgers
Member, North American Society of Pipe Collectors
Member, Facebook Gentlemen’s Pipe Smoking Society
http://www.roadrunnerpipes21.biz (under construction)
http://about.me/boughtonrobert
Photos © the Author except as noted
Wisely and slow. They stumble that run fast.
— William Shakespeare (1564-1616), English playwright and poet, in Romeo and Juliet, Act. 2, Sc. 3
INTRODUCTION
Let me begin by apologizing in advance for the end results of this over-fast cleaning job I insisted on undertaking, at no charge, for a schizophrenic friend. Now, having admitted I was a party to the injustice perpetrated against a certain meerschaum pipe with potential for a far more beautiful future, I must beg mitigating circumstances that in this case call for an affirmative defense, which shall be made apparent.
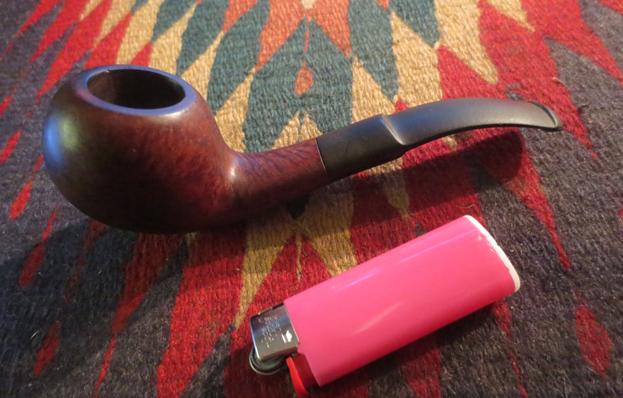
My friend, Fred (not his real name), who can by no means be described as an aficionado of pipes, on several occasions remarked that his father used to collect them. I noted the past tense in my mind while keeping my mouth shut, as my own father often urged me to do. A couple of months ago I sold Fred a Guildhall London Pipe straight pot (a Comoy’s second) for $10. He was so excited by my box of restored pipes, the way a kid looks through a store window at a shiny toy he wants, that I could not help myself. I also happened to need gas or I might have had to walk home. But the deal was not all about money; I had a nice no-name that would have left my challenged friend, and almost anyone else, just as happy.
Still, to my perception, the Guildhall suited him better, and when he asked for my advice I replied in good faith. I put considerable work into making that vintage pipe shine again. Looking back at the two-year-old blog, I see where I now could remove the tooth chatter altogether. Still, compared to the horror with which I started, the straight pot was like new.
 And so, the stories I started hearing from my guileless friend were disturbing. You see, the anti-psychotic cocktail some head-shrinker prescribed to Fred caused permanent tics and muscle spasms, as well as other occasional unpleasant side effects.
That easy observation explained, at least to me, Fred’s blunt disclosure one day that he bit off the mouthpiece. Despite my sincere offer to seek out a replacement for the bitten bit, Fred declined with vehemence, insisting that it worked just fine even though he had some trouble keeping it between his lips. With that mental image, I confess to having some difficulty keeping a straight face. Somehow I managed to sit back and return his wide-eyed gaze with a clinical stare any psychoanalyst would envy (irony intended).
Then, not long after the bite reflex account, Fred blurted to me that he had lost the remainder of the bit. It had just disappeared while he was vacuuming and was nowhere to be found. He said he looked everywhere for the gnawed scrap of Vulcanite – my description, not his – and that it had vanished without a trace. When I asked if he checked the vacuum bag, the look on his face was unnerving, but my considerable first-hand experience dealing with schizophrenics, some in my own family, served me well once more. Fred’s eyes narrowed, perhaps seeking to discern if I were as crazy as he or only joking. My relief when he at last grinned, his entire expression returning to its normal manic happy face, was intense. He never answered my question.
And so I pressed on, bent on sparking a connection between two or more of his synapses, by asking if he remembered where he was when he last saw the pipe whole, meaning more or less.
“It was right there,” he said as his arm pointed off into thin air, having an apparent vision of the place he meant that I was sure I would never share. But he continued, thank God. Part of me needed to know. This, no doubt, is where the offhand claim that insanity is contagious comes from. “It was right there, on the shelf, where I always put it. I remember I took the stem out and put both parts there on the shelf, in case one of them fell or something, they wouldn’t both get broke.”
I had to give a genuine nod of my head to that logic. My senses returning, I assured Fred the bit had to be there, somewhere, that it didn’t get up and walk out the door. He gave me a good smile at that. I advised Fred to keep looking everywhere the bit could not possibly be. I even tried to explain the famous Sherlock Holmes maxim from “The Sign of Four” and suggested a few possibilities, including the refrigerator and freezer. When that look started to reappear, I changed the subject, as I will do again now.
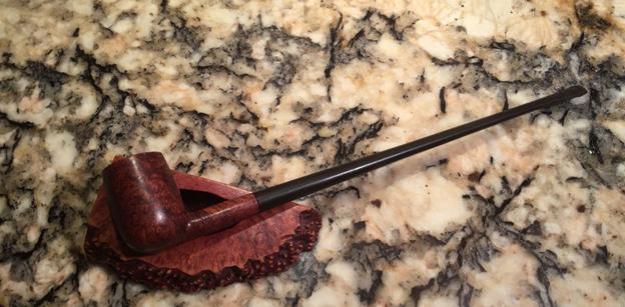
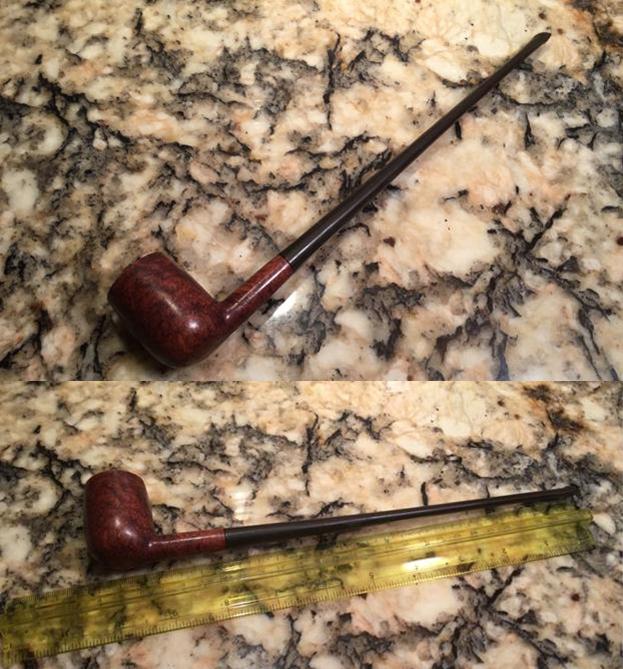
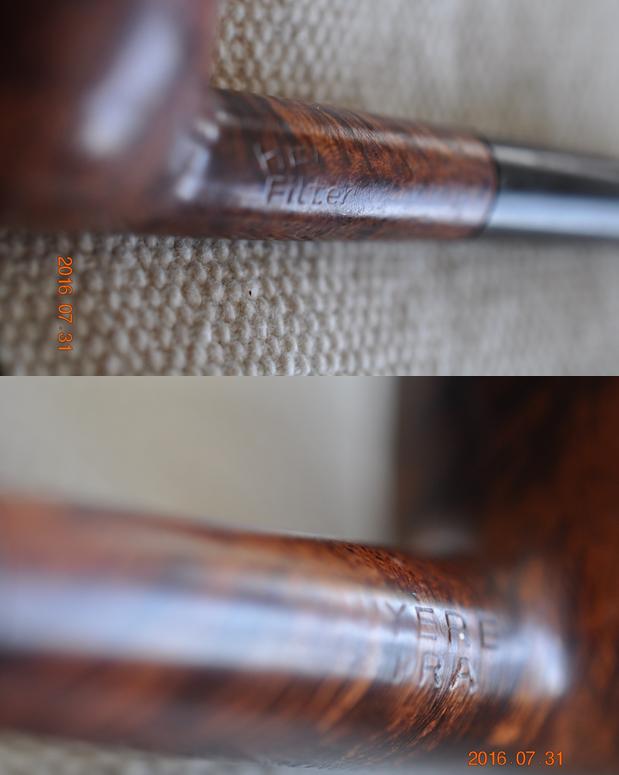
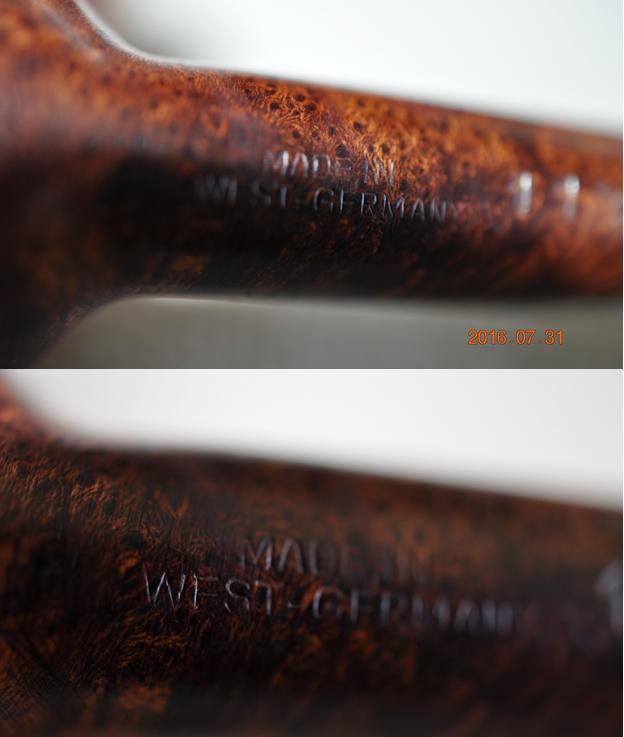
The long and short of it is that Fred’s dad did have an impressive collection of pipes, until he passed away at an advanced age of non-tobacco-related reasons. At that point, the collection was distributed according to the man’s final wishes. Fred’s share included three and a half very nice pieces: an uncommon rustic Dublin Everyman stummel, being another Comoy’s second related to Fred’s Guildhall; a Thompson cherry wood, both the shape and material, from the Elbert Gubbels stable; an easy bent Author, stamped on the bottom of the shank Made in London above England, and after at least an hour of scrutiny through my jeweler’s magnifier lenses, the shape number 140; and the amazing meerschaum to which this account will soon come. [I was sure the unknown #140 was another Comoy’s until I sniffed it out online, listed as a Masta Author. Masta was an English maker founded about 1900 that was bought by Parker-Hardcastle in 1967.]
And now I will explain the slight problem. Fred was happy to let me take the Everyman stummel, Thompson and Masta the night he showed them to me, with my promise to pay him an amount upon which we agreed. He was, however, obdurate, as only someone with schizophrenia can be, in his apparent lack of trust in my able care to take the meerschaum pipe home with me where I could give it the attention it so needed. His mind was set like the steel trap my own used to be. He was in earnest, would not equivocate or retreat a single inch, to paraphrase the American abolitionist William Lloyd Garrison. If only I could have explained that quote to Fred, I might have made him understand the extreme hard place he put me in.
Fred, to make it clear, did not care if I left the pipe in the filthy, scratched condition it was in. It was the single gift from his beloved father that he had – with very good taste and judgment – chosen to keep for his own, and he was not about to let it out of his sight. As a result, my only option was to perform a half-assed crash job on the meerschaum, with its ample smoothness, spare but intricate carving and lovely patina, right there at the club (not for pipe smokers but also not against them) where we sat beside each other. And he had a bus to catch in a little more than an hour. I fixed that by offering him a ride home.
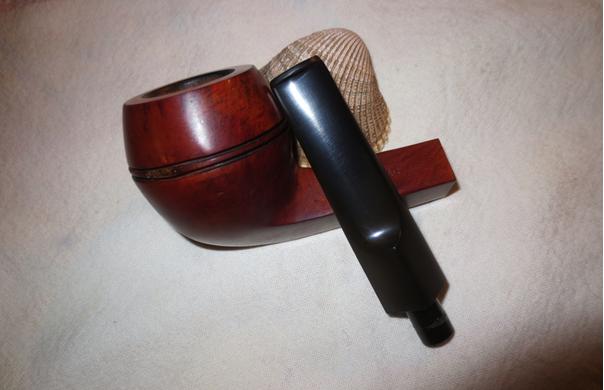
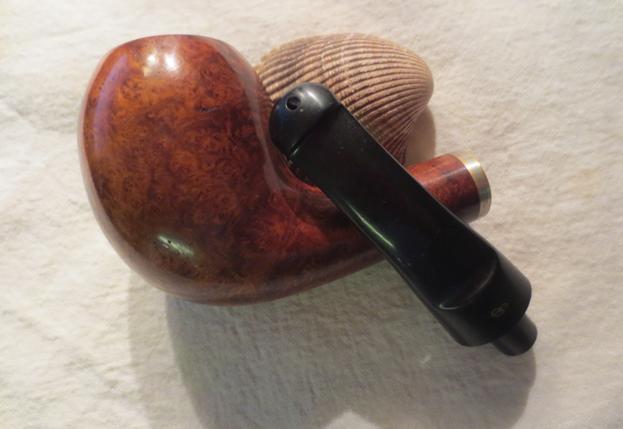
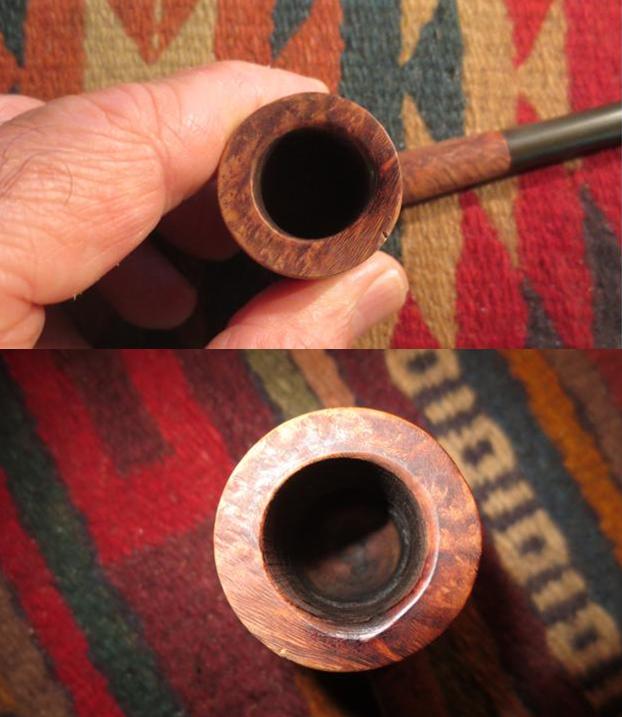
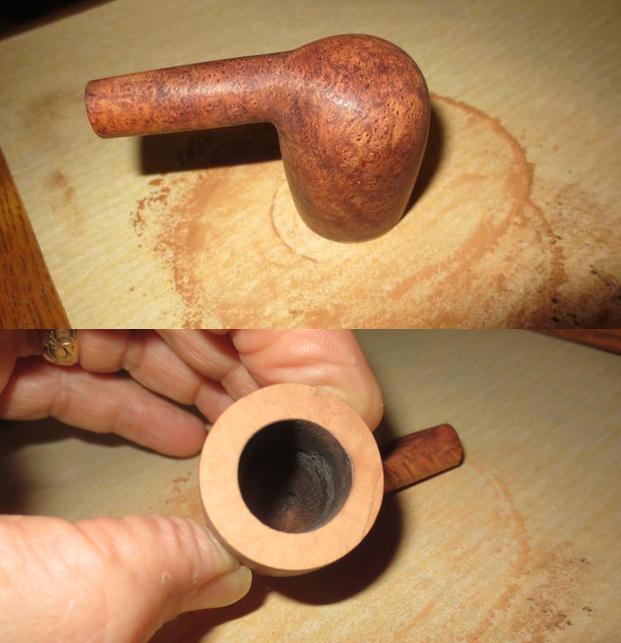
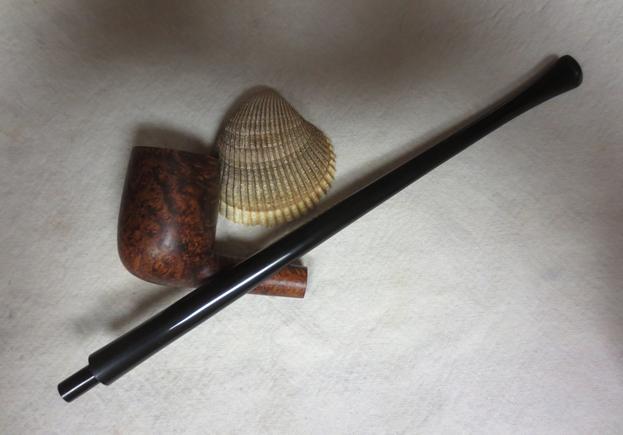
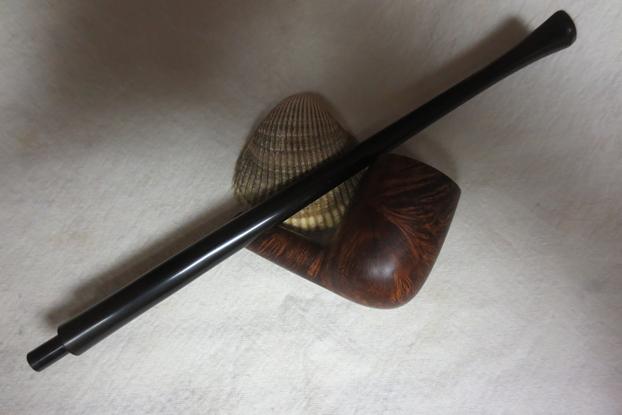
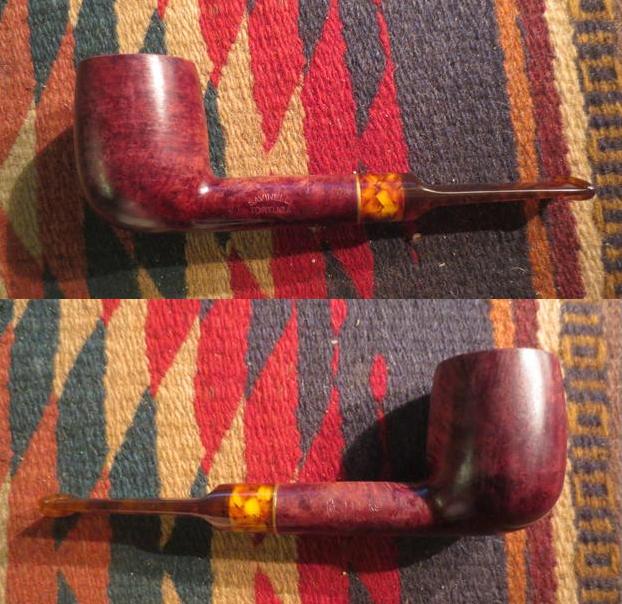
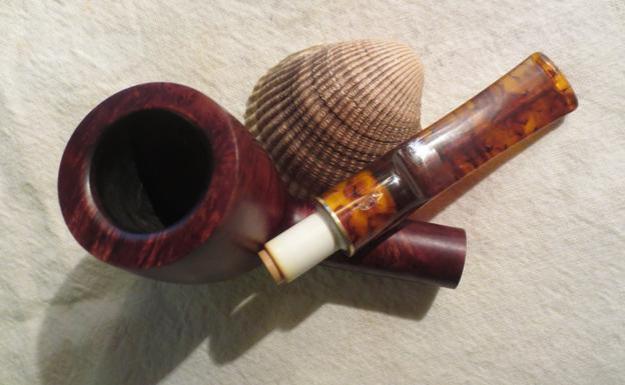
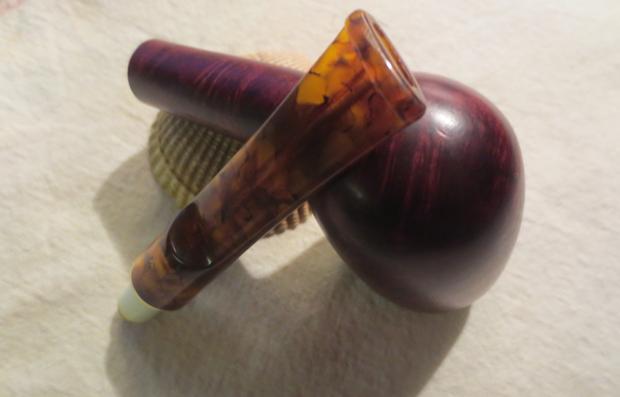
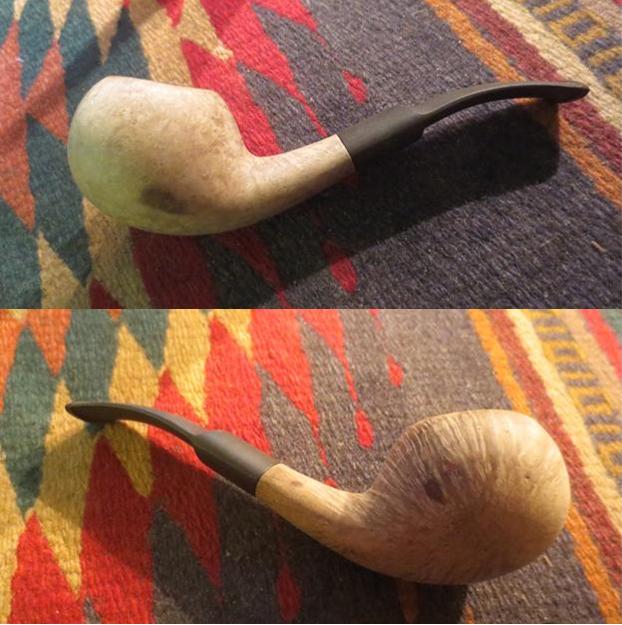
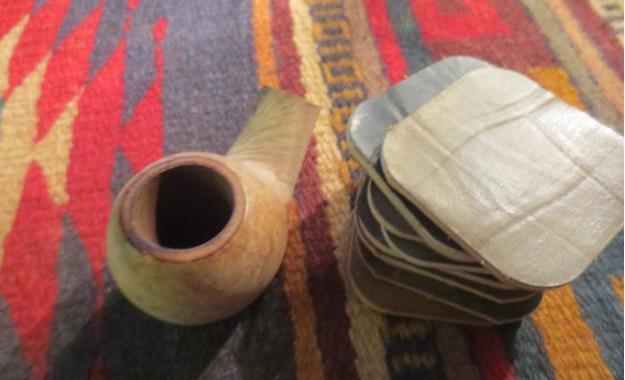
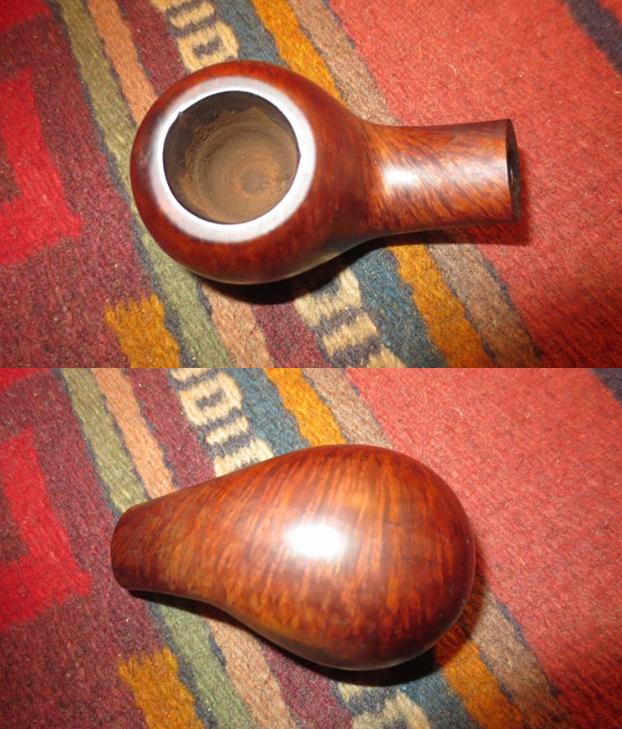
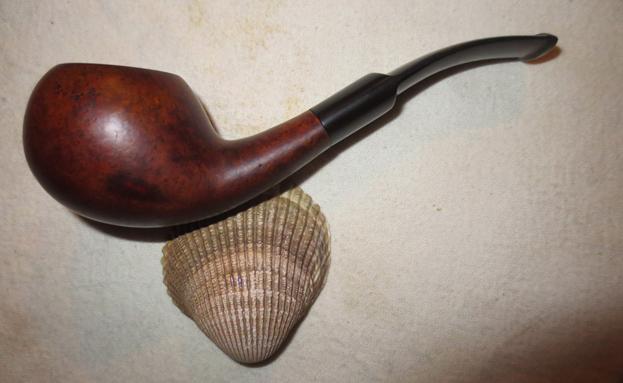
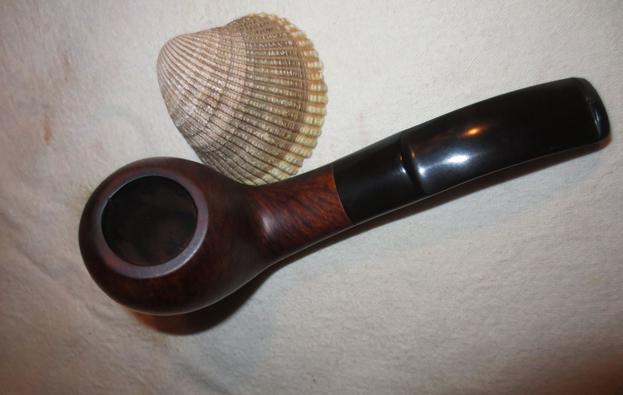
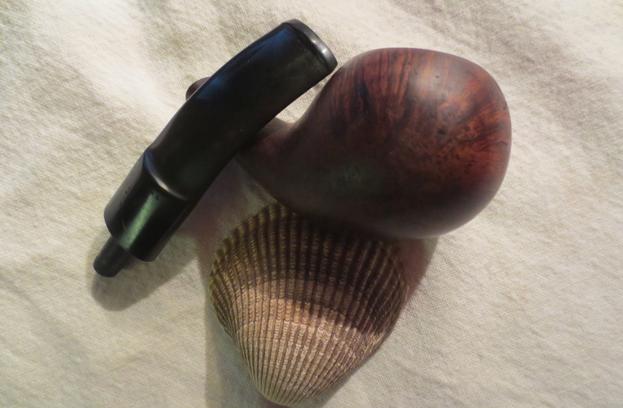
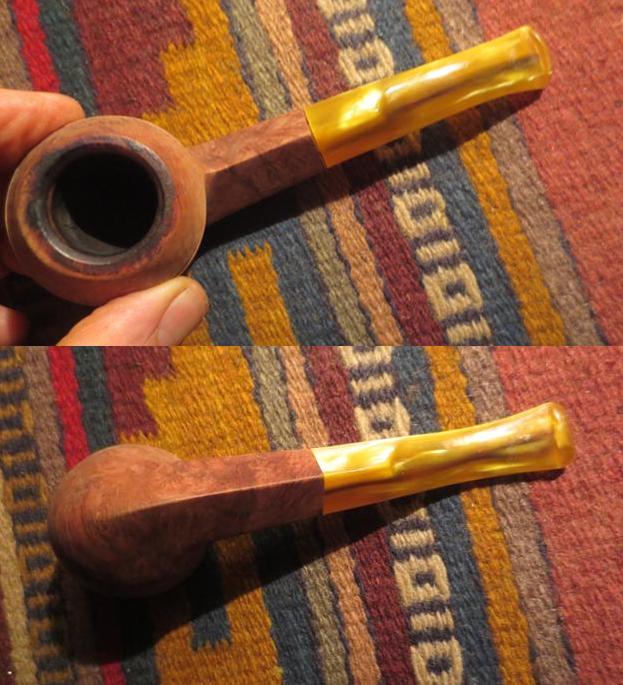
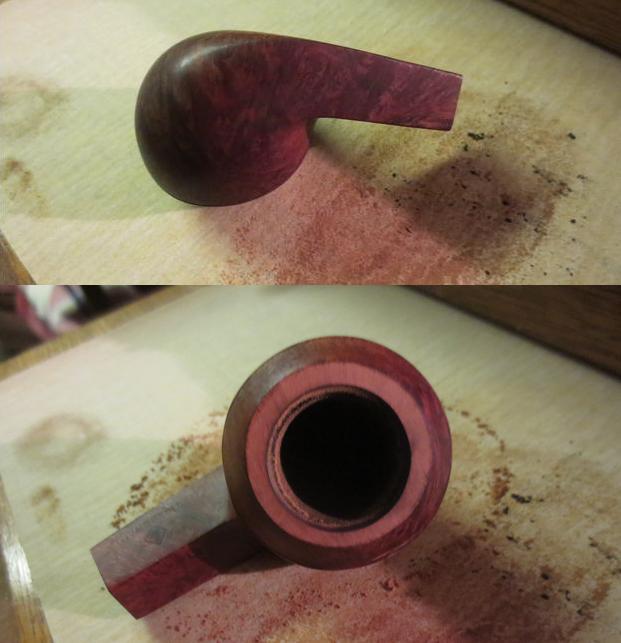
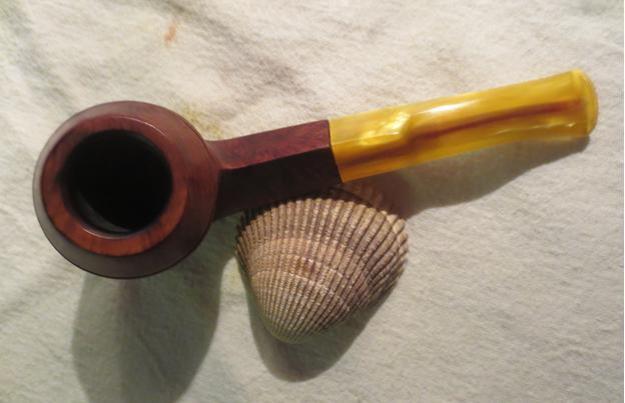
Here is the elegant meerschaum as I first saw it.


 RESTORATION
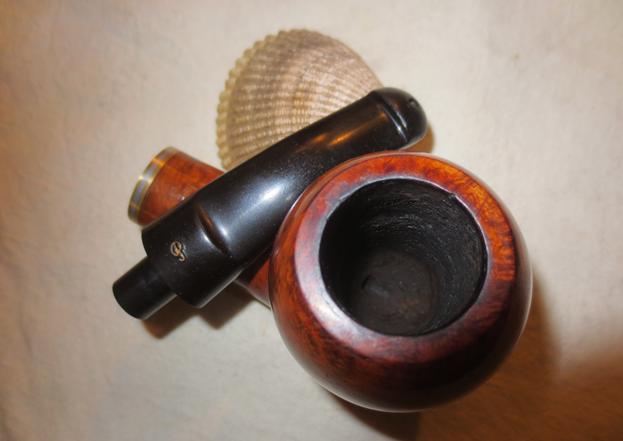
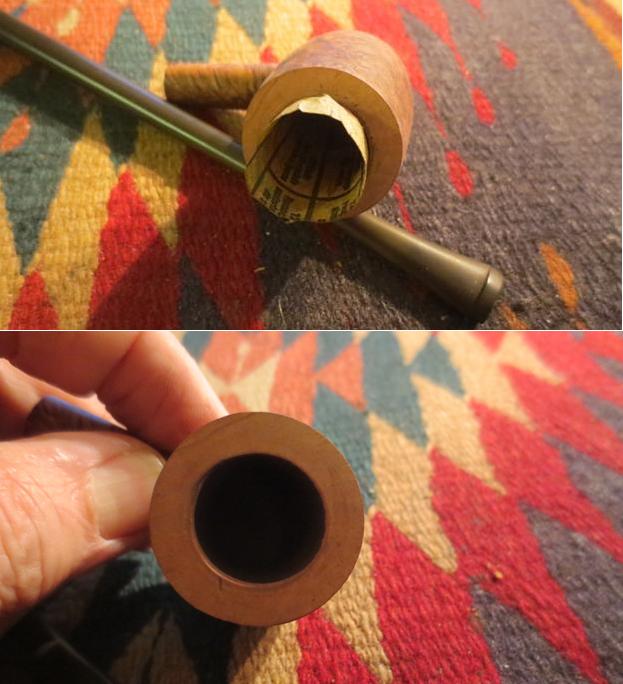
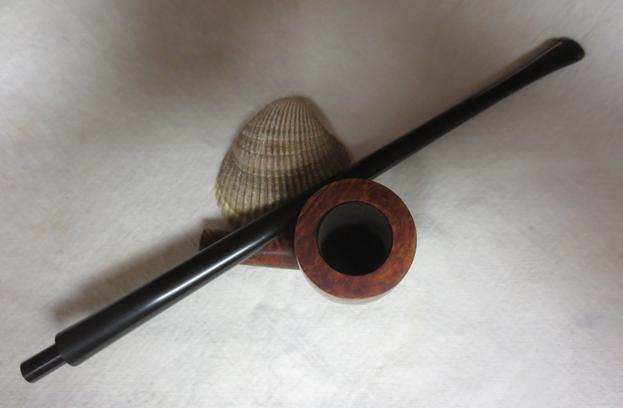
Note the grime, extensive scratches, rim burn, dirty chamber with tobacco of an unknown vintage still inside, and of course the bit that was in utter ruin. I even had an almost identical replacement that I could use for it, but not without refitting. And then there was the fresh coat of beeswax I would have liked to add for the perfect completion of the proper repair. But as Fred would have none of that, and time was of the essence as he had important business to conduct – watching TV back in his tiny studio apartment – before I might never see the pipe again, I was lucky to have a box with my primary implements of restoration with me in the trunk of my Ford SDX.
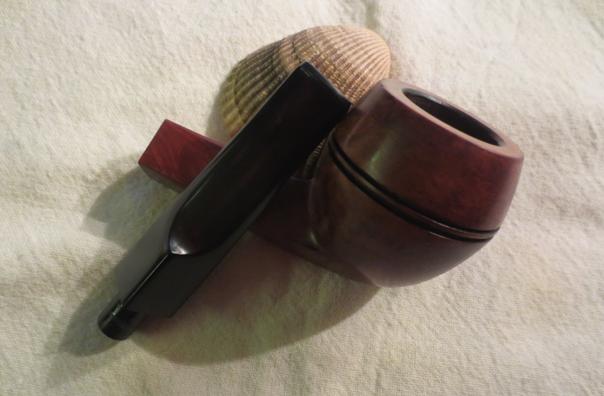
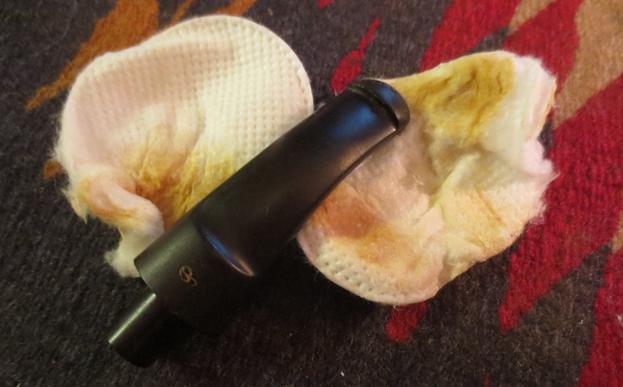
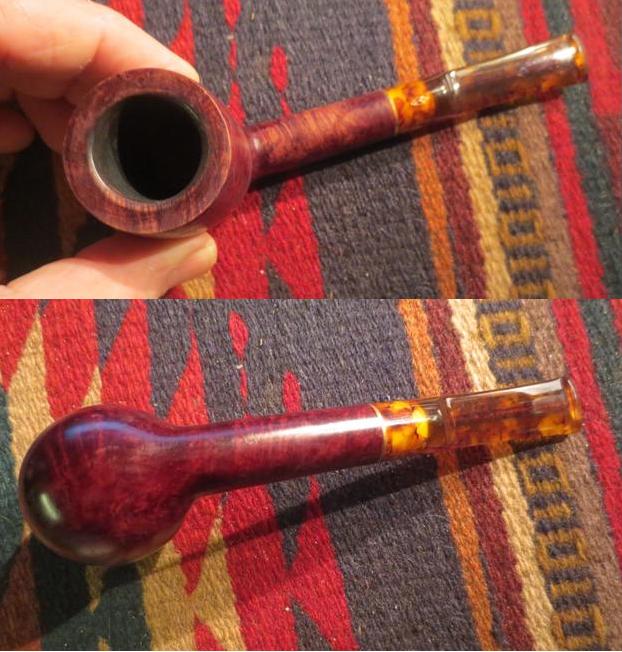
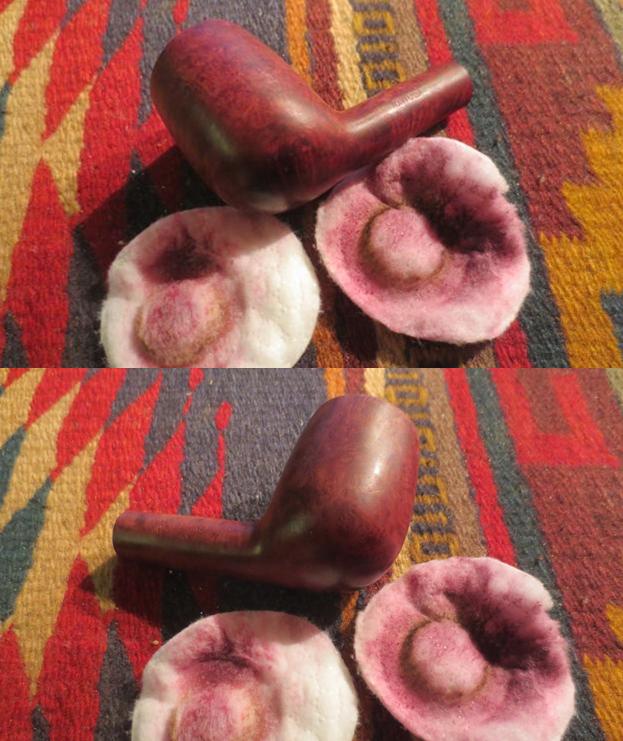
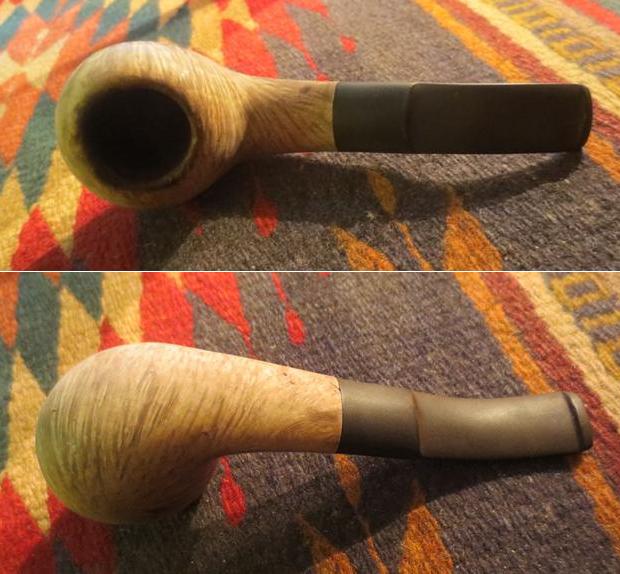
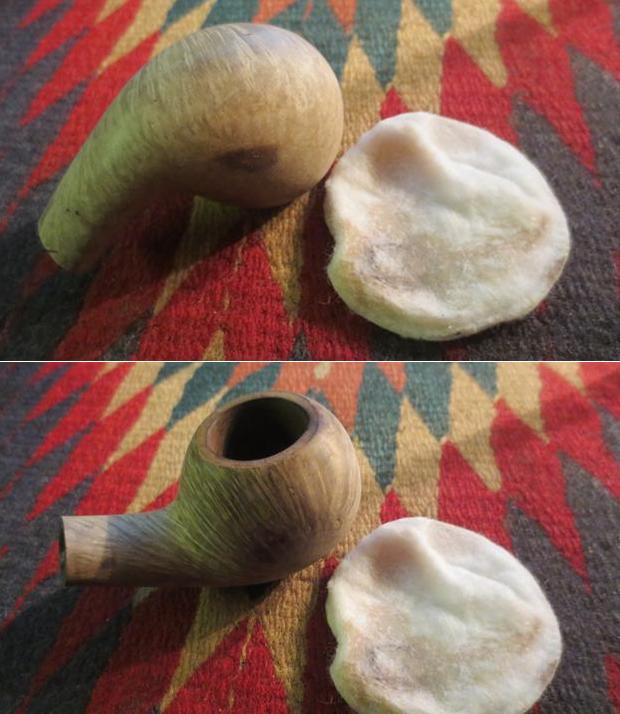
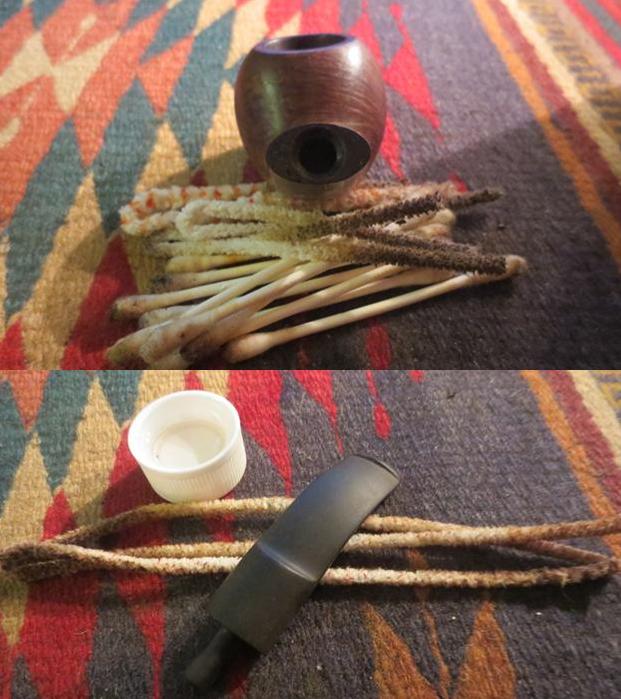
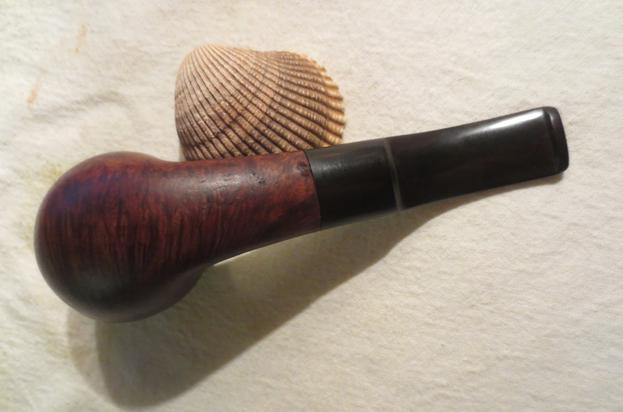
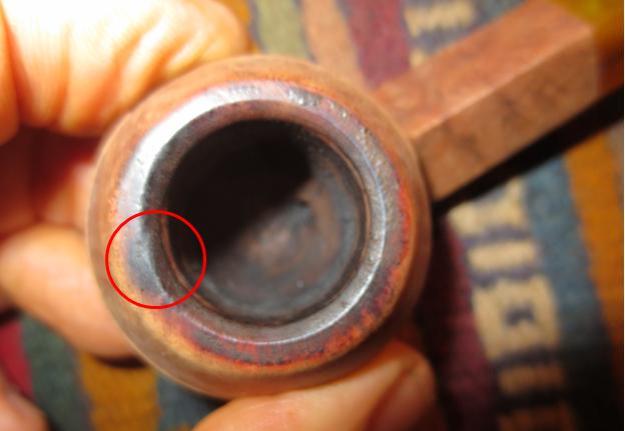
I began with the vigorous applications of purified water on the stummel, using small cotton gun cleaning squares to remove layers of ancient dirt, and then resorted to a very small amount of diluted Everclear. The second photo below shows the need for the alcohol.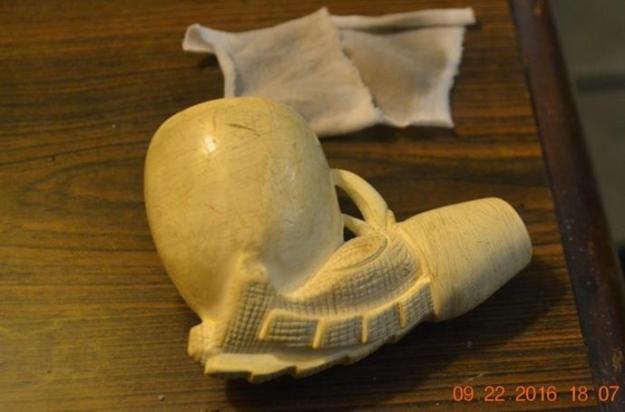
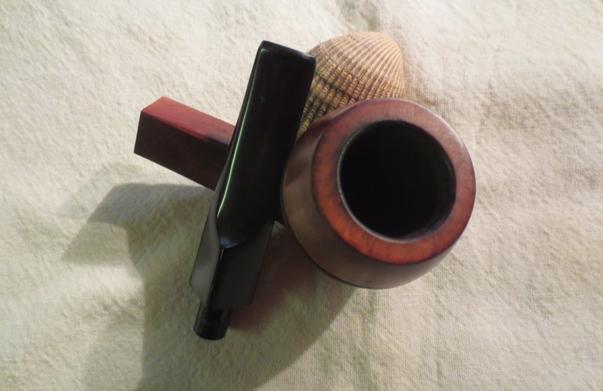
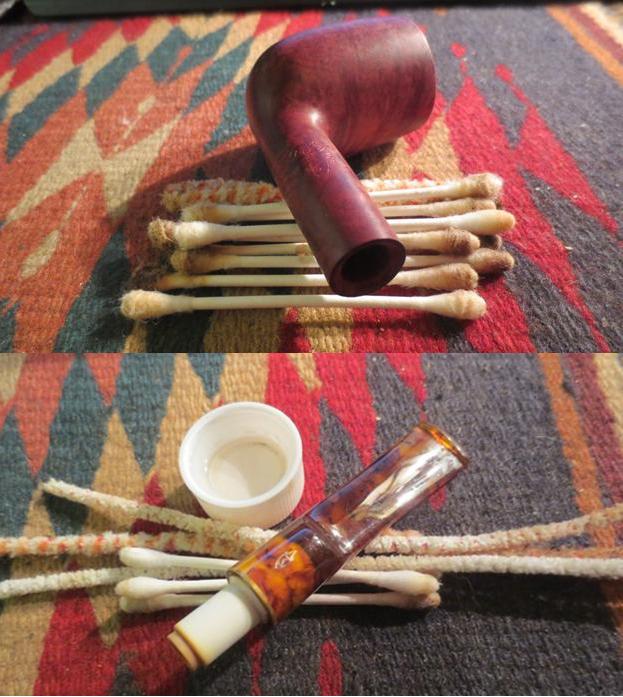
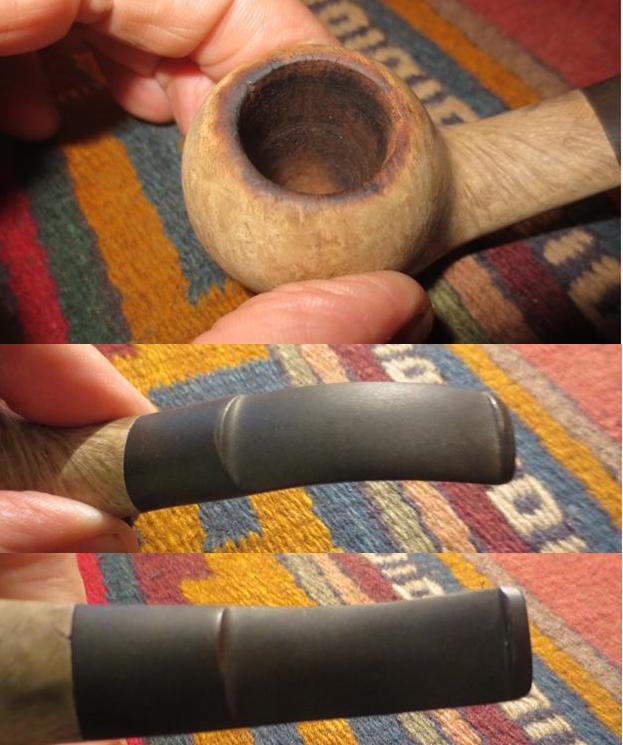
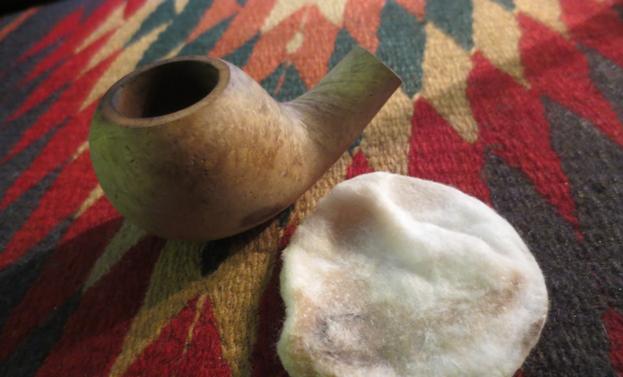
 Superfine “0000” steel wool on the rim did much but not enough there. A progression of 150-, 180- and 320-grit sandpaper cleared out the excess char in the chamber and made it smooth.
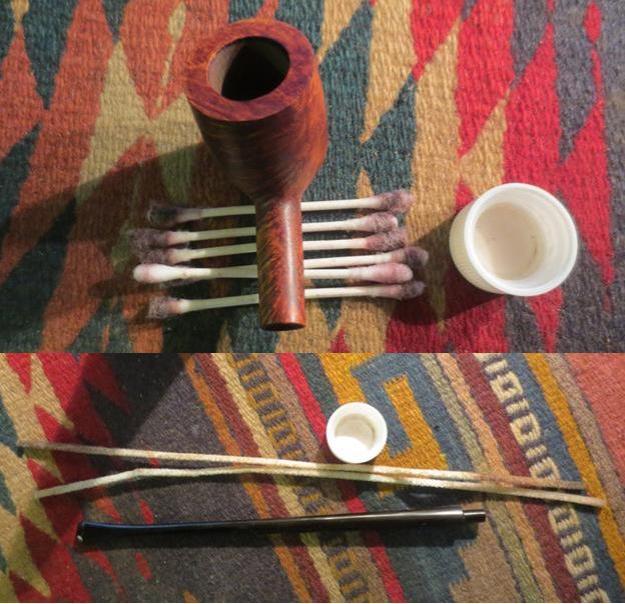
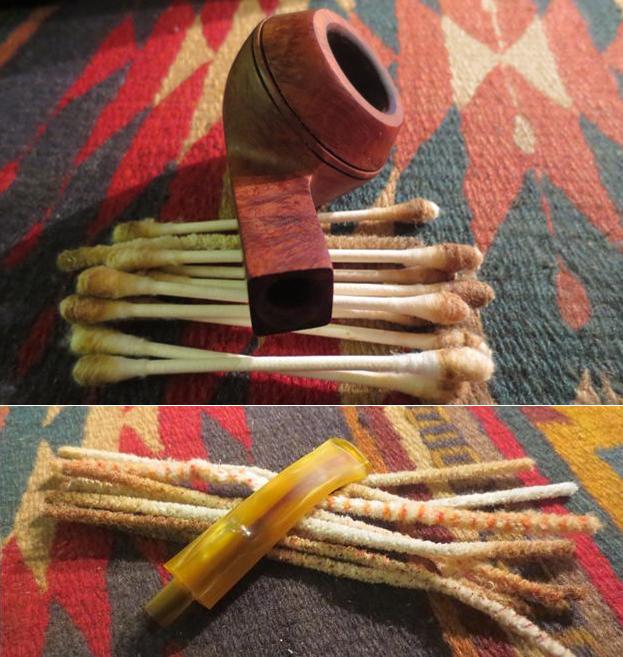
 Again, with cotton balls soaked in more purified water, I scoured the outer stummel, and used pipe cleaners and freshener to clear out as much of the crud and filth inside the shank.
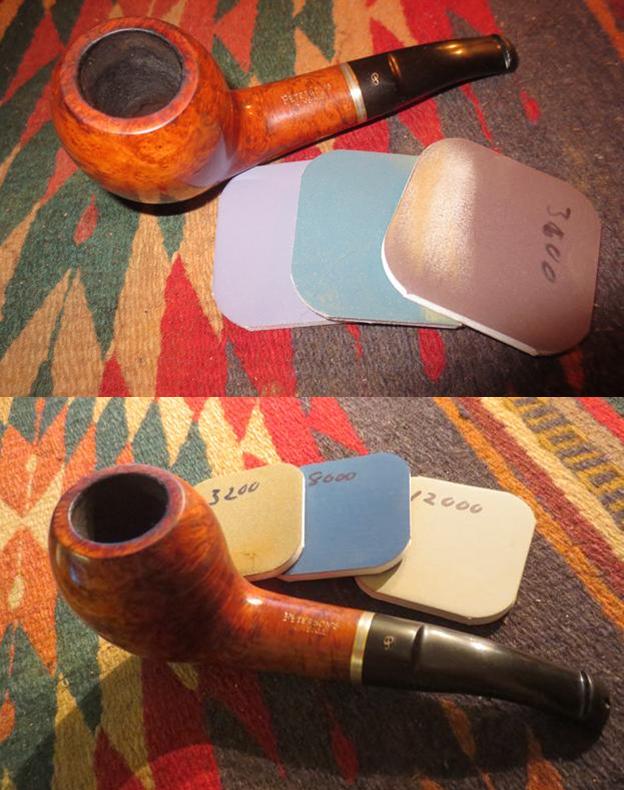
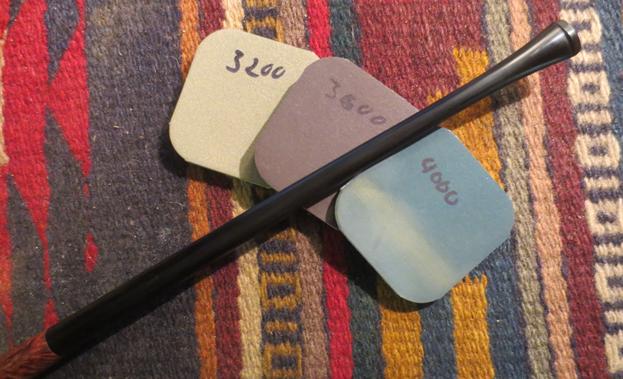
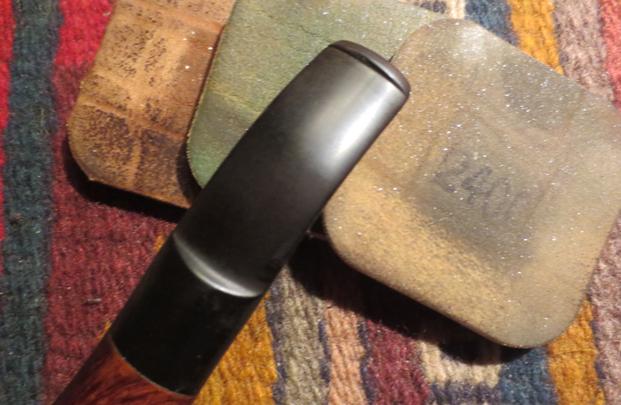
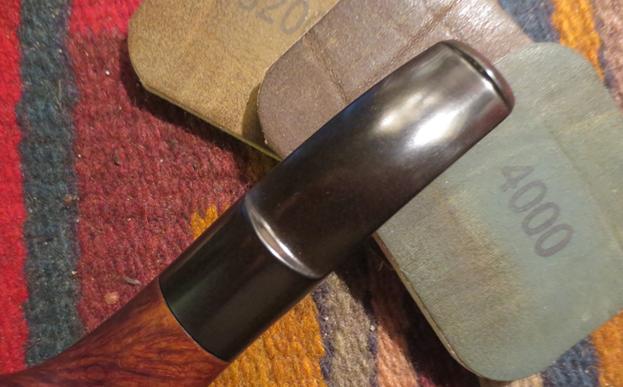
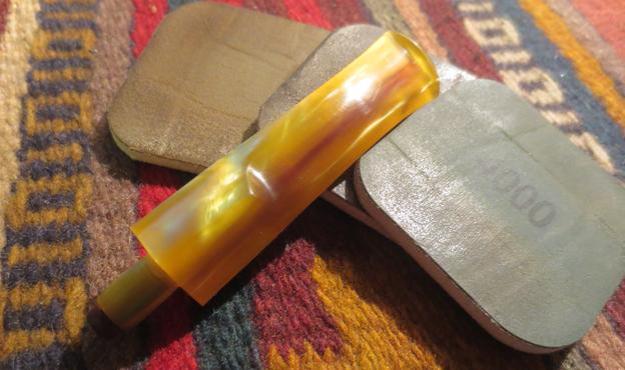
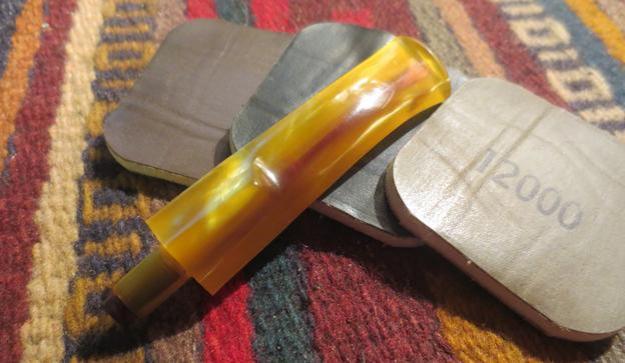
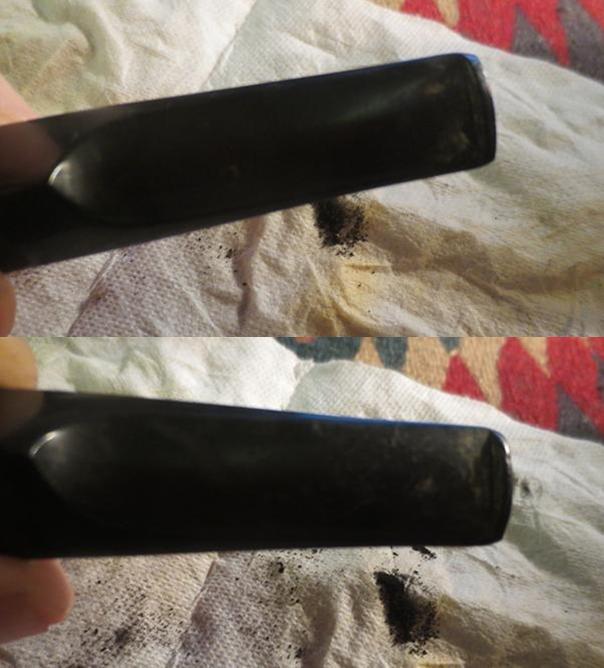
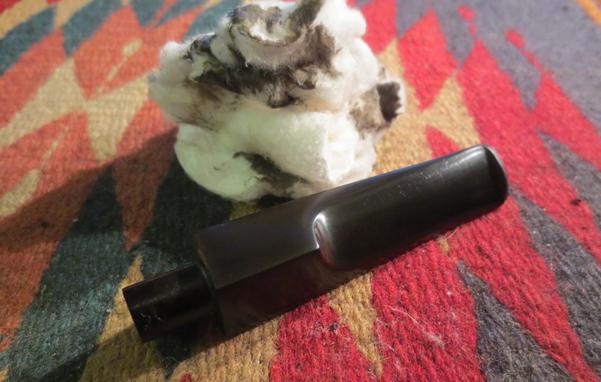
 Other than spot buffing with the “0000” again, that was all I could do for the meerschaum. I took the awful bit in hand and used the full wet micro mesh treatment on it from 1500-12000.
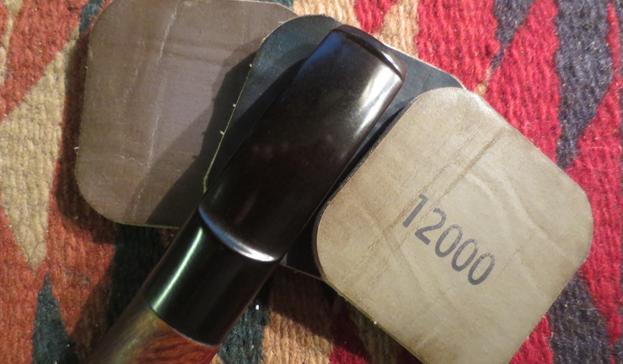
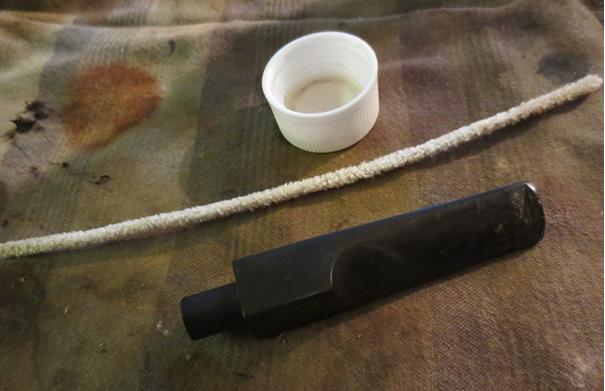

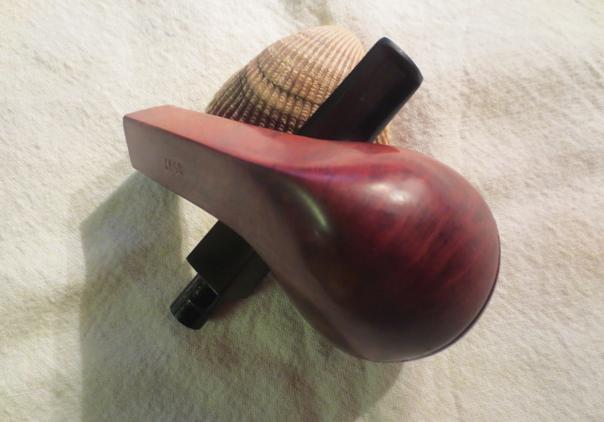
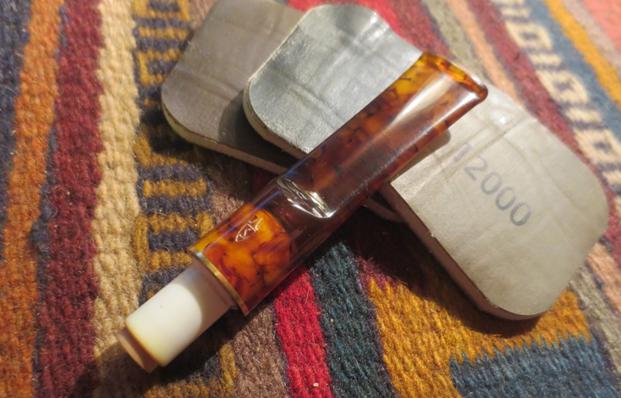
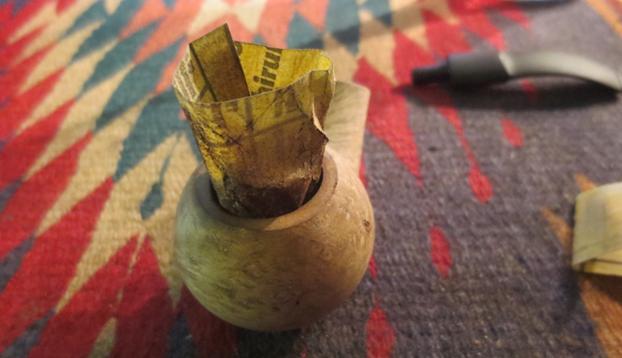
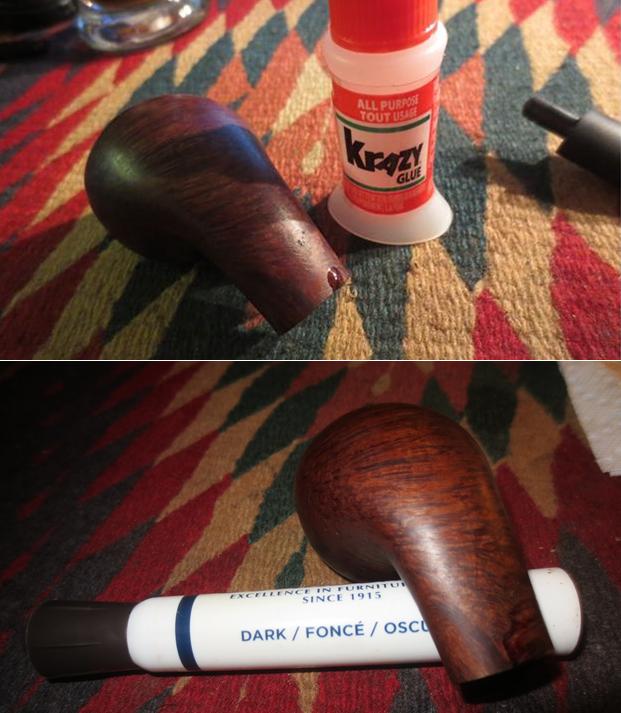
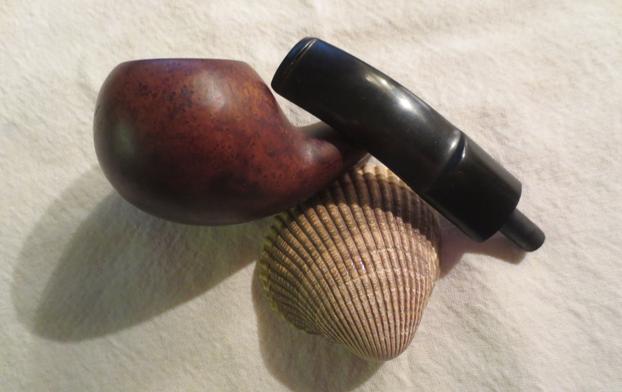
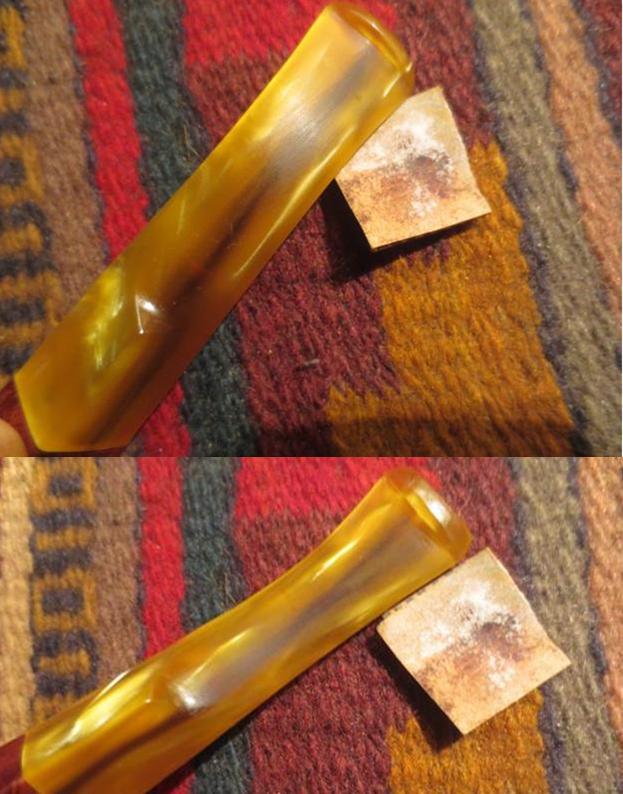
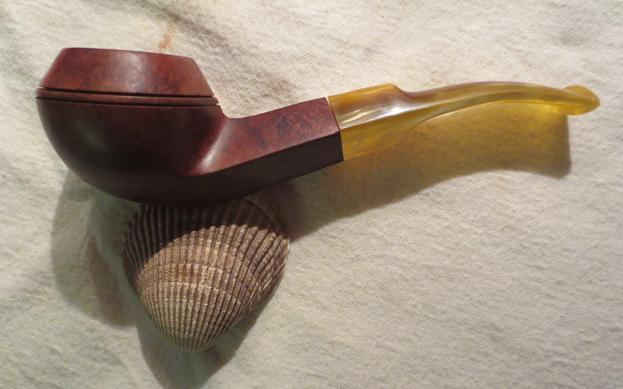
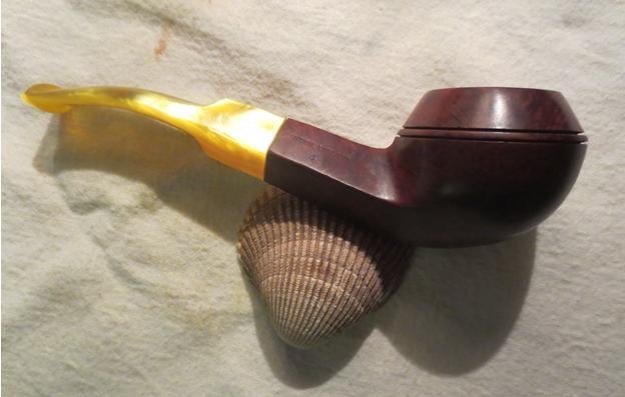
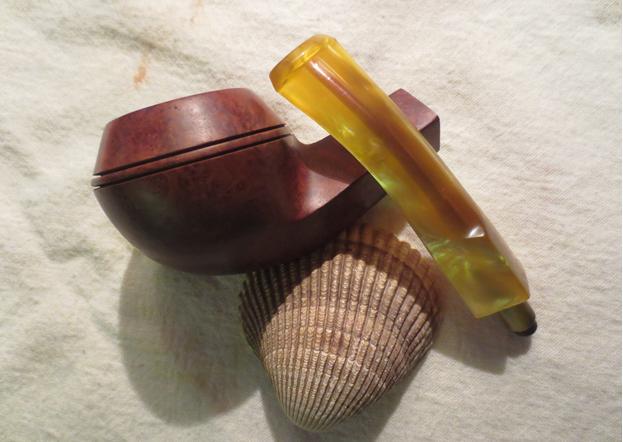
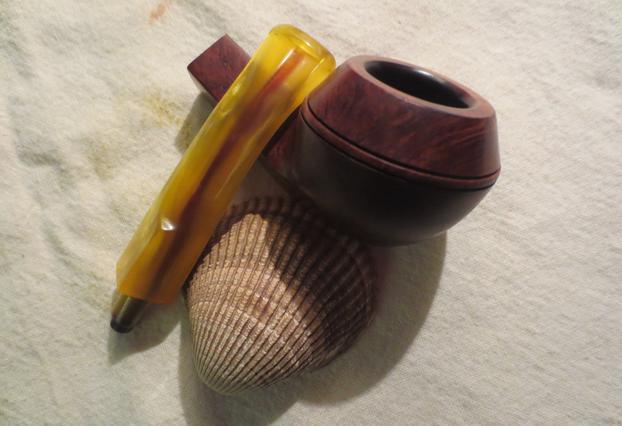
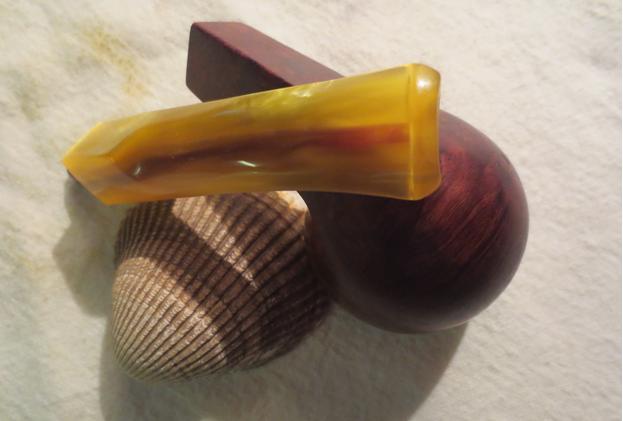
 I coated the bit with a dab of Halcyon II wax, let it sit, and worked it in with a thick cotton cloth. As for the weird obelisk-like piece of meerschaum marked Hirsch, I doubted at the time that it was part of the pipe but knew it could be a crazy lid of some sort. Steve supported my hunch of the likelihood that it was not part of the pipe. He surmised it might have been used with cork around it as a fancy wine bottle stopper or to plug something else. I buy that! But I took the last two shots before I received Steve’s sage input, and by then, the pipe was forever out of my control.
I found the actual Kirsch brand records online with last-minute research. The Trademark was first recorded on January 1, 1907 and is now owned by Newell Window Furnishings Inc., a subsidiary of Newell Rubbermaid Inc. The business suppliers fine home design goods using an assortment of exotic materials, including meerschaum.
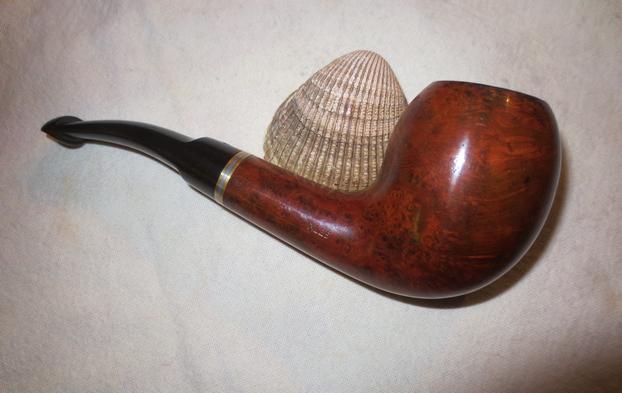
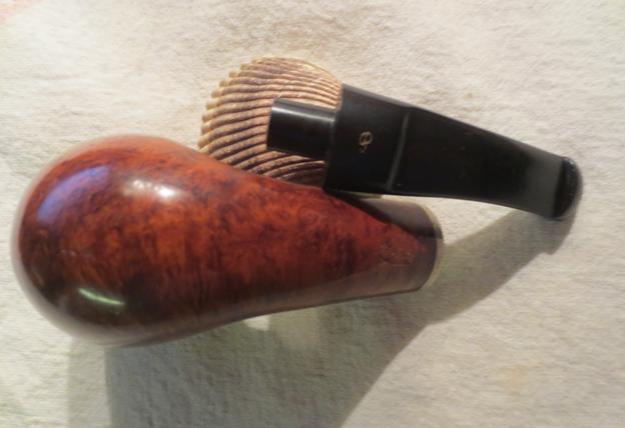
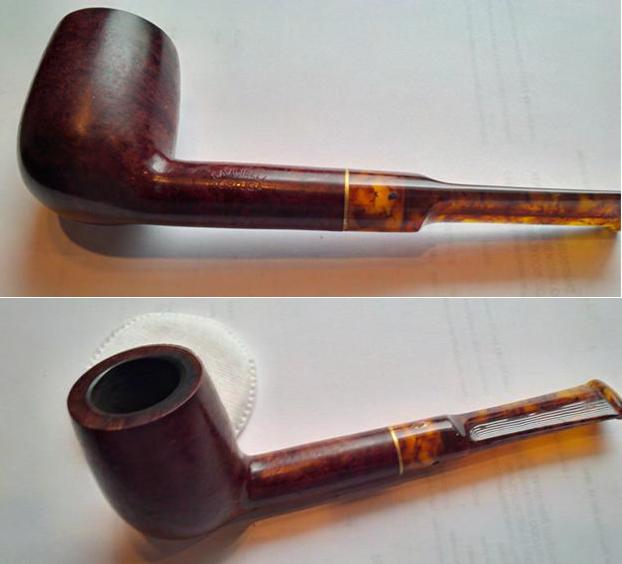
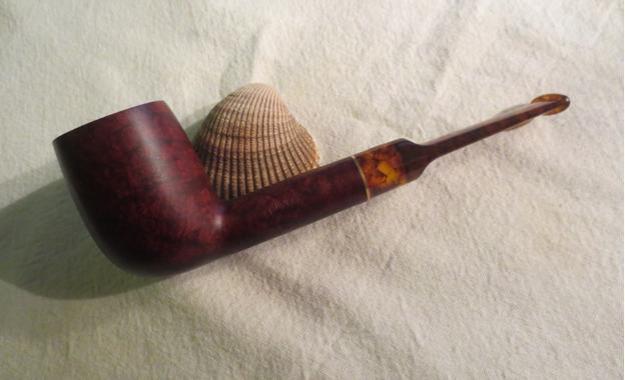
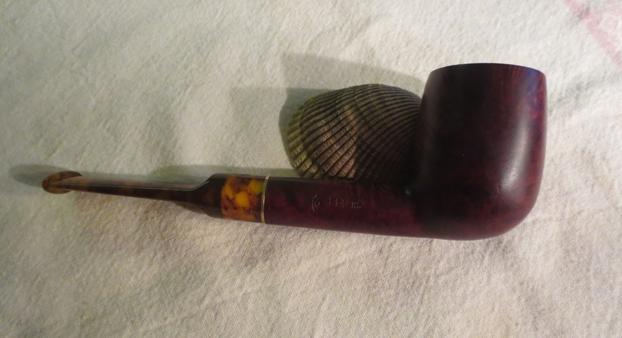
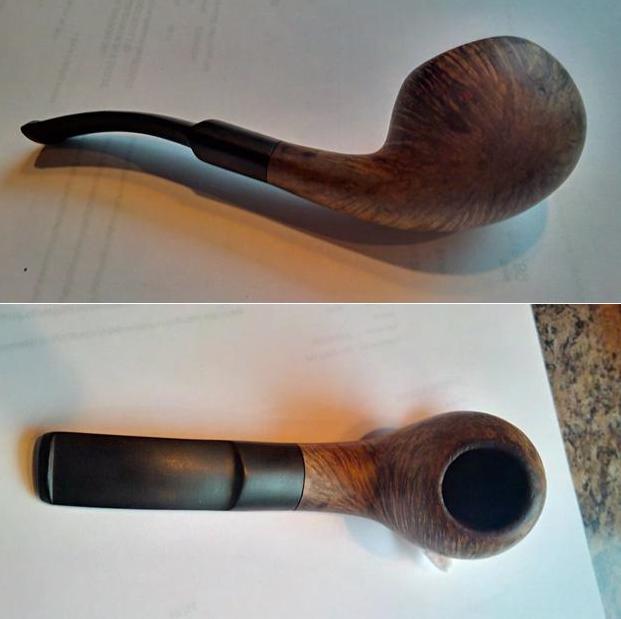
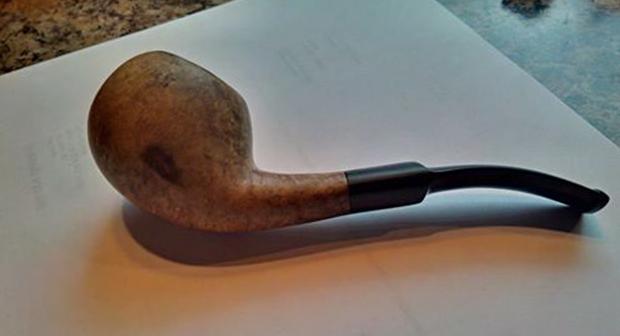
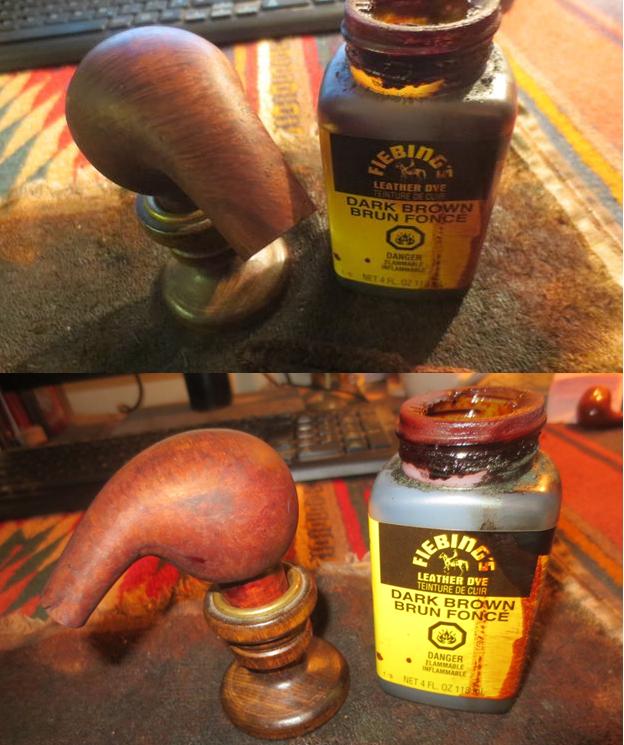
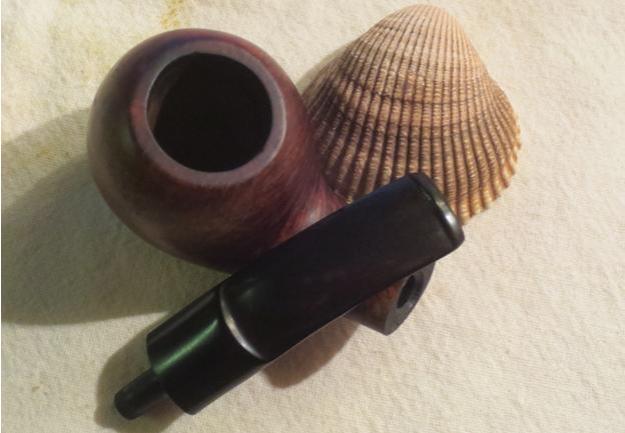
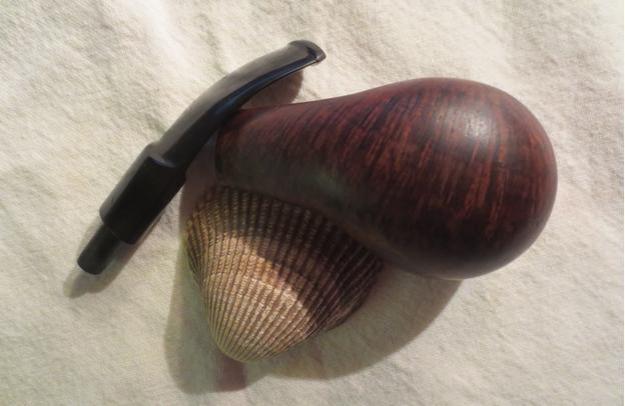
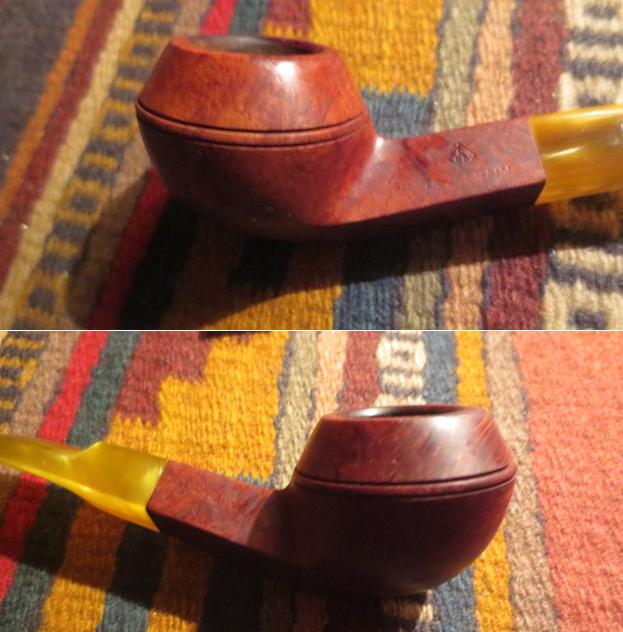
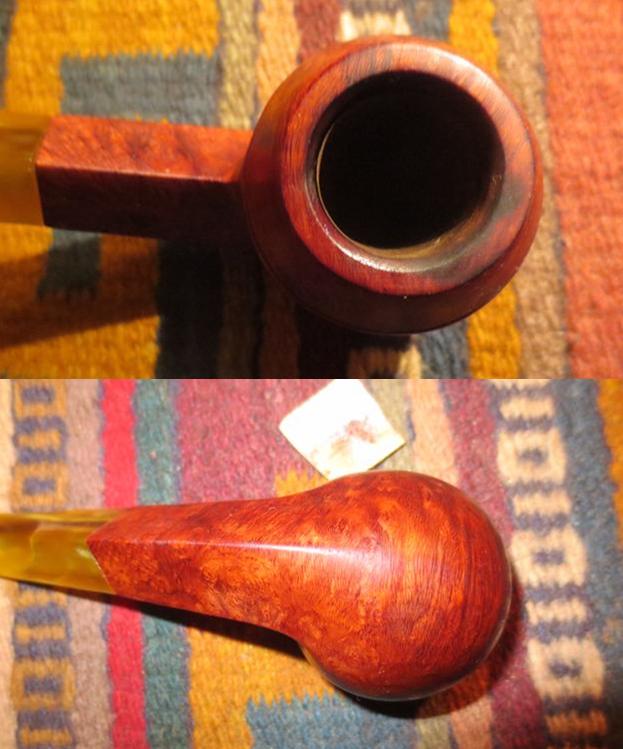
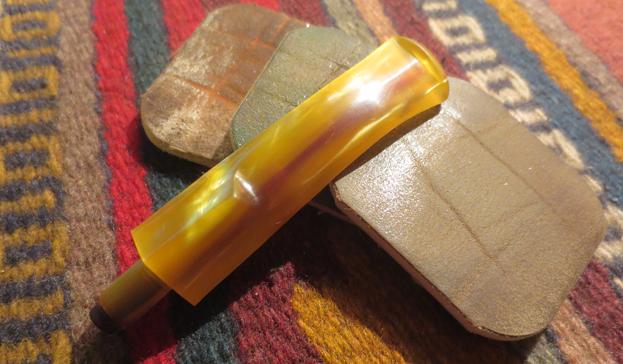
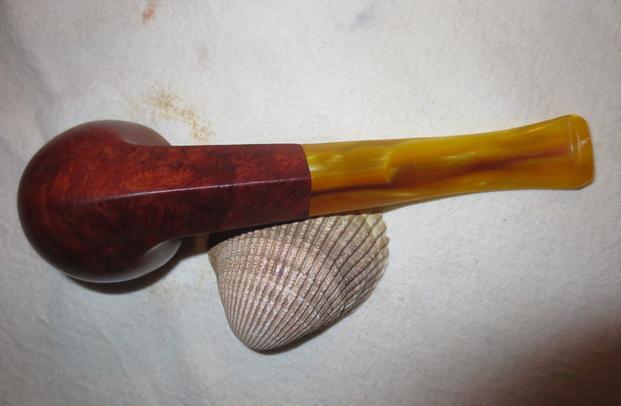
For better or worse, here is the result. I based the time spent on this rush-job at 42 minutes from the date and time stamps on photo number 8, showing the beginning of the cleaning with purified water at 18:07, to photo number 14, with the bit finished at 18:49.


 CONCLUSION
The last time I saw Fred was when I dropped him off at his apartment, the precious meerschaum wrapped in a piece of terry cloth and stowed in a box tucked with great protection in the crook of an arm. Earlier that night, he was rushing about the club, sweating, his blood pressure elevated even to the average observer, anxious and agitated, and seeming to have some trouble swallowing. All of these are signs of serious adverse effects to anti-psychotics. I have not seen him since then and am, for good reason, somewhat worried.
Every time Fred speaks of his father, it is with a sadness that is far greater than that which he feels for the man’s passing. As the former long-time caregiver to another friend, who was also my roommate for a month short of 15 years, I saw the tension that the mental illness of a family member causes. Families, in particular the parents, will alienate one of their own who is infirm in a physical or mental way. Like other, so-called lower forms of animals, they push from the nest those who are born with any weakness, for many reasons: fear, shame, powerlessness to correct the problem, to name a few, but more than anything else, an unbearable sense of guilt.
But the true bearer of these feelings is the blameless victim of whatever handicap befell him. The worst part of this age-old denial of the basic humanity of those who are sick, however their diseases may be manifested, is the belief that is instilled in them from birth that they are somehow bad for reasons they do not understand, guilty in ways they are unable to comprehend, and more or less worthless. As in Fred’s case, they try to hide the self-loathing that consumes them with “inappropriate” outbursts such as laughing or trying to joke in an attempt to alleviate the unhappiness they sense in those who are dearest to them.
All of this is the cause of the true sadness I sense in Fred. I’m sure he never had a chance to make peace with his father; to say goodbye, even to visit him in the hospital or the home in which he was raised.
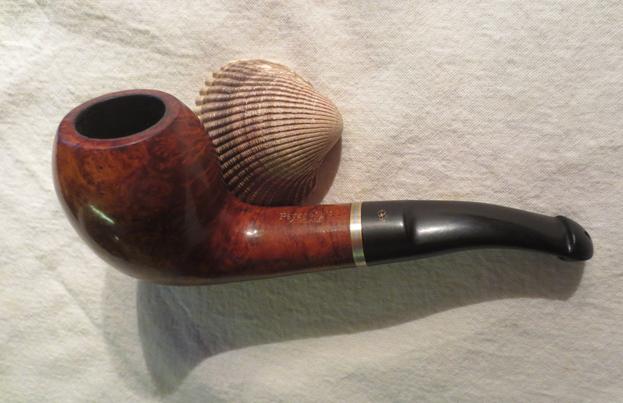
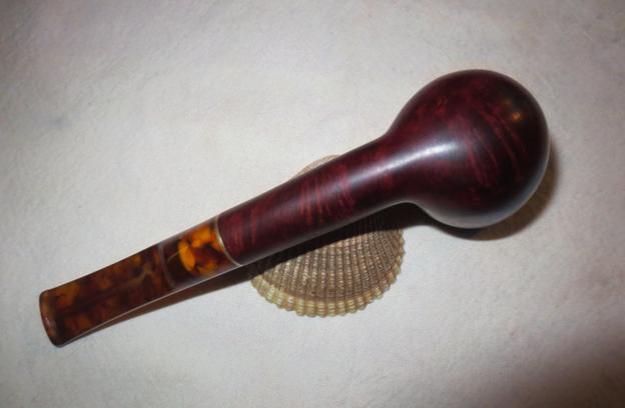
Instead of these memories, I try to recall the utter joy on Fred’s face when I had snapped the final shots of the improved meerschaum and handed it to him by the less-than-perfect bit. I told him he should try to avoid handling the porous meerschaum with his bare hands, grasping instead the bit where it pushed into the shank with a firm fit, or using a handkerchief maybe on the bottom of the bowl.
Fred nodded his head up and down in wondrous agreement, taking in little of what I said, I’m sure. His eyes were wide open with the appreciation all humans have for works of art.
SOURCES
https://rebornpipes.com/2014/10/09/the-guildhall-london-pipe-large-pot-an-account-of-extreme-abuse-robert-m-boughton/
https://trademarks.justia.com/715/83/kirsch-71583153.html
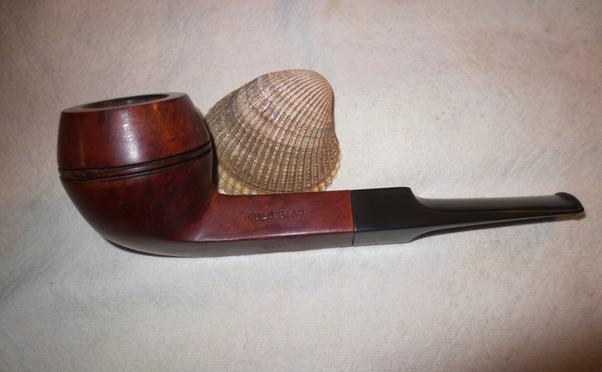
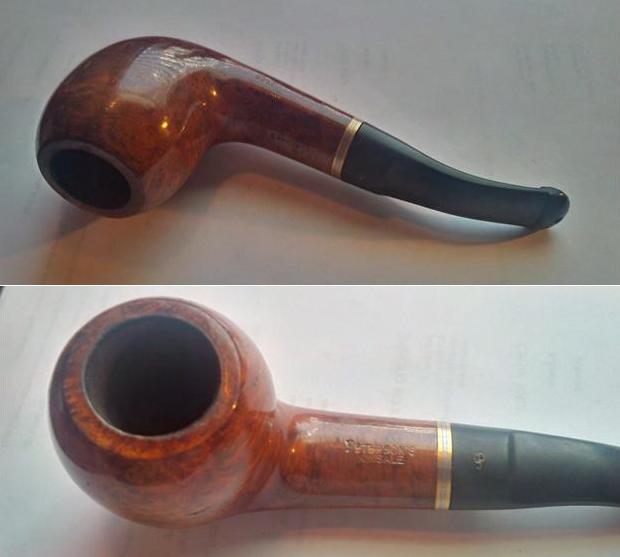
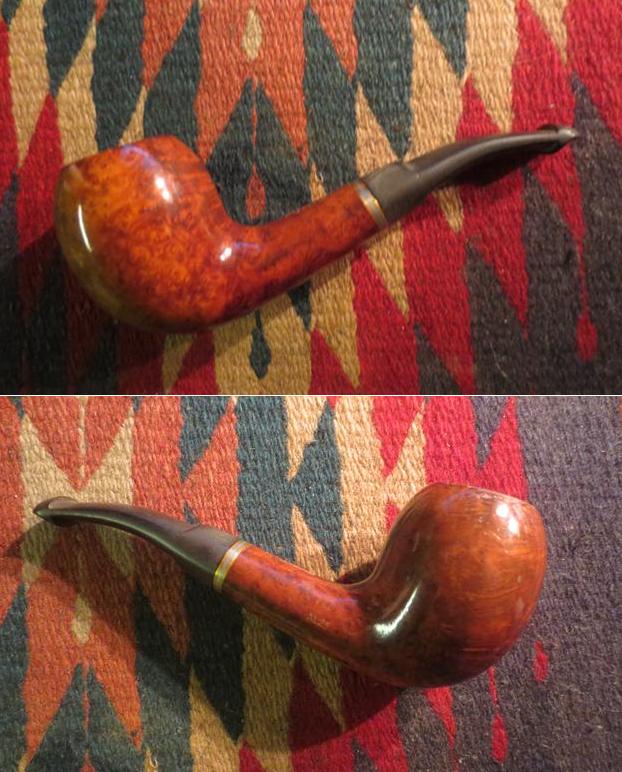
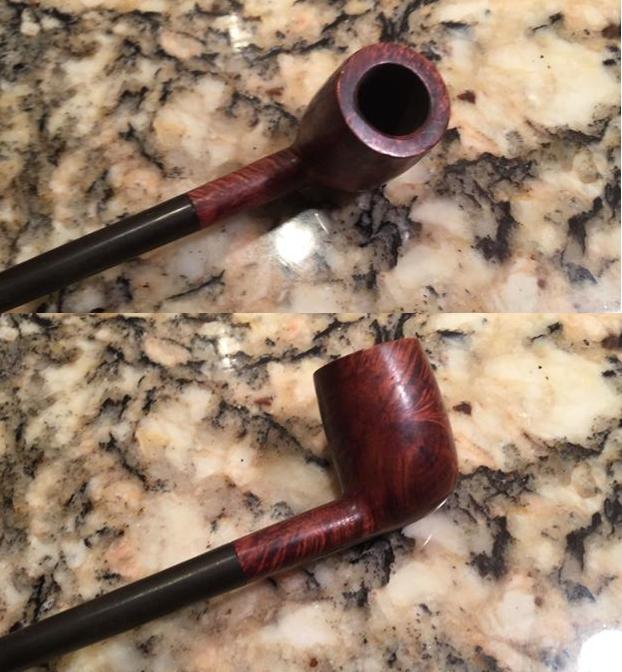
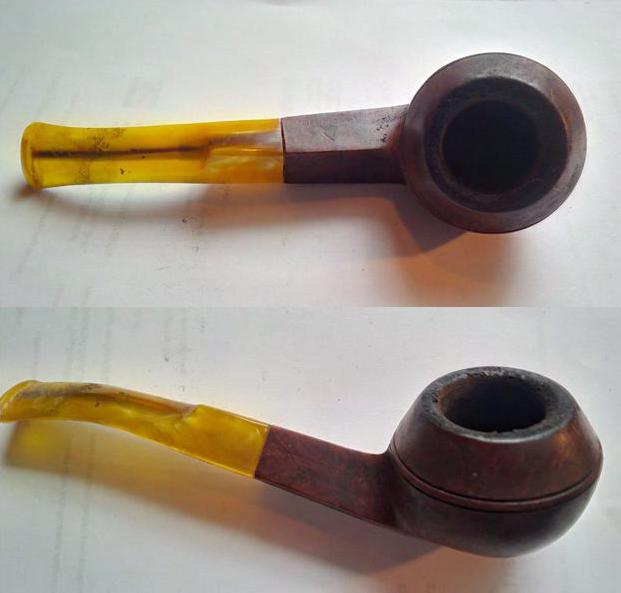
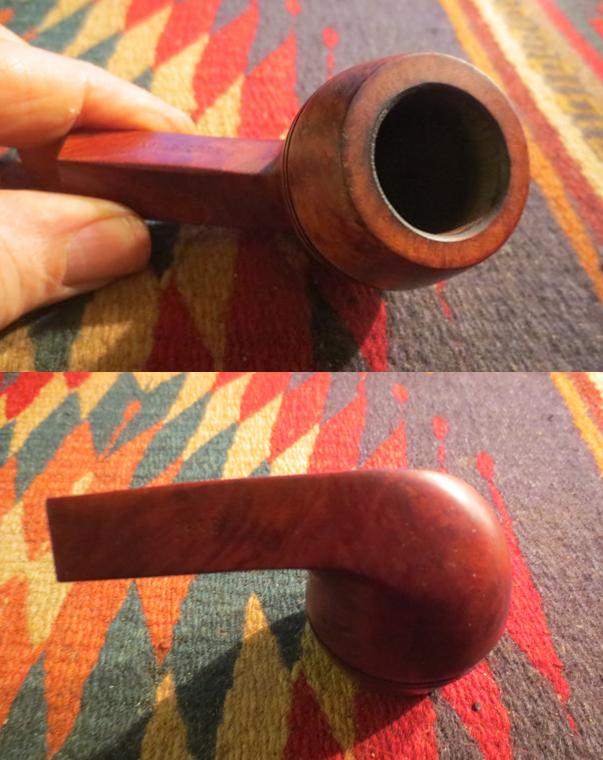
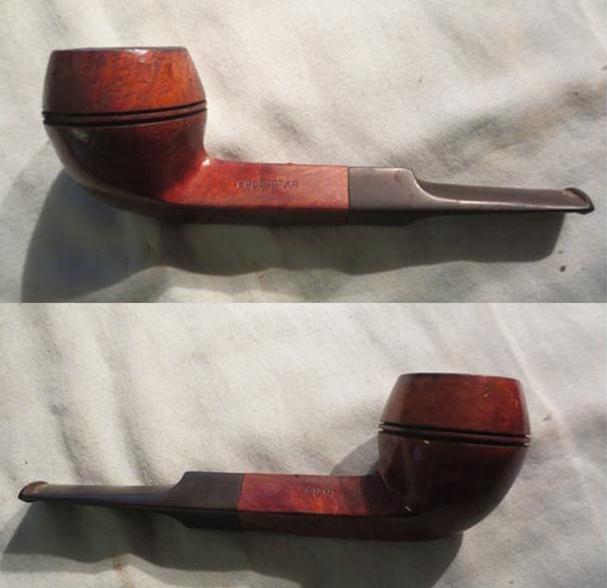 The pipe was dirty and the finish was very rough. The varnish coat was peeling away. There was a large chip out of the ring on the right side of the bowl. The rim was darkened and caked under tars. The cake was thick and overflowing the bowl. The stem was oxidized and there were tooth marks on the top and underside of the stem next to the button.
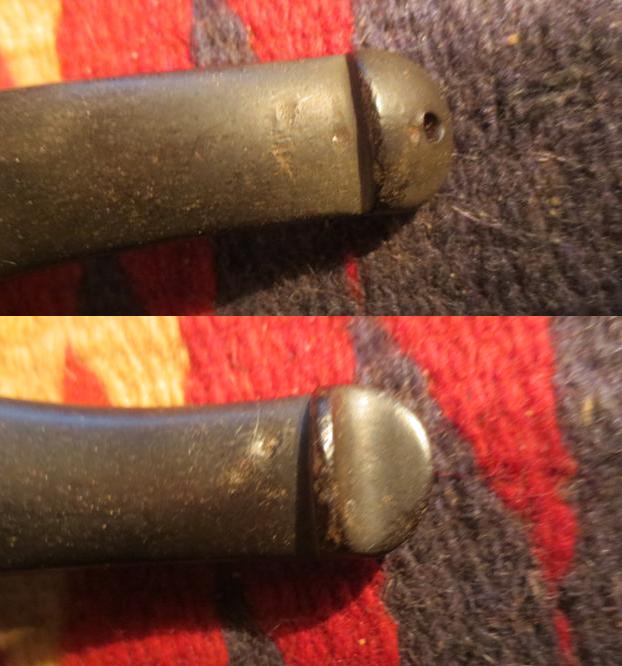
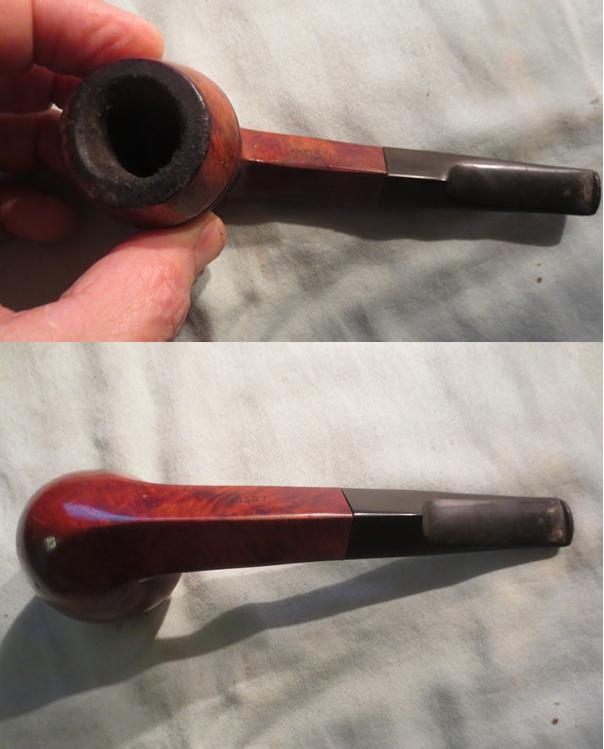 I took a close up photo of the rim and the bowl to show you what I was working on in dealing with this pipe. The bowl was a mess. I also took close up photos of the stem to show the bite marks on the top and underside of the stem.
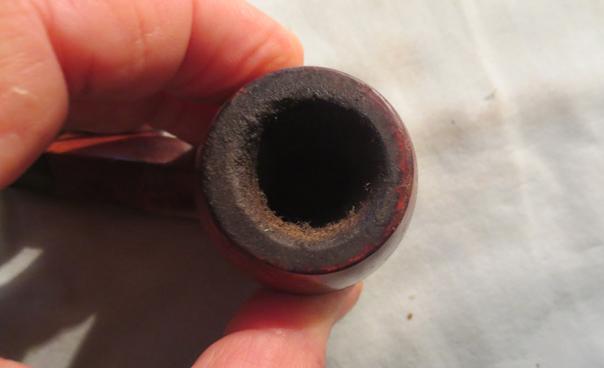
 I reamed the bowl with a PipNet reamer and a Savinelli Pipe Knife to take the cake back to bare briar on the bowl walls. There was a lot of cake so it took some time. I used the largest cutting head and the cutting head just below that one.
 I topped the bowl on a topping board with 220 grit sandpaper. I worked the rim against the sandpaper until the damaged bowl top was removed and the bowl was once again smooth and round.
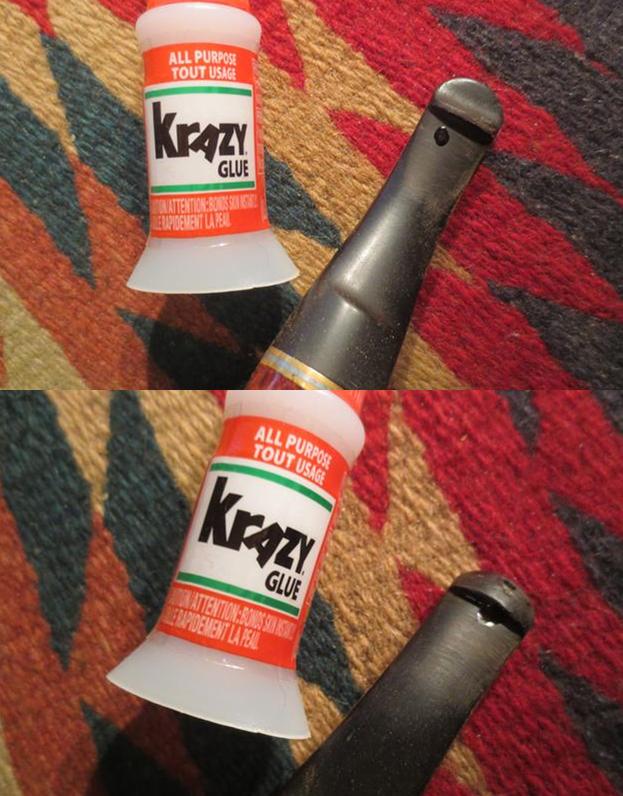
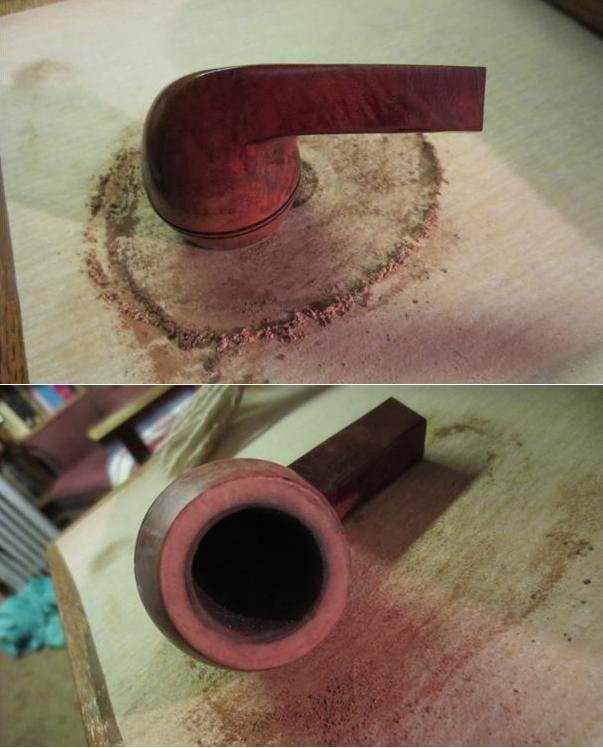 I repaired the damaged portion of the ring around the bowl with briar dust and super glue. I mixed the two together and made putty and pressed it into the damaged area of the ring. In the photo below you can see the repaired area on the ring.
 I used the Dremel and sanding drum to remove the excess patch and sanded it back until it was smooth against the rest of the bowl.
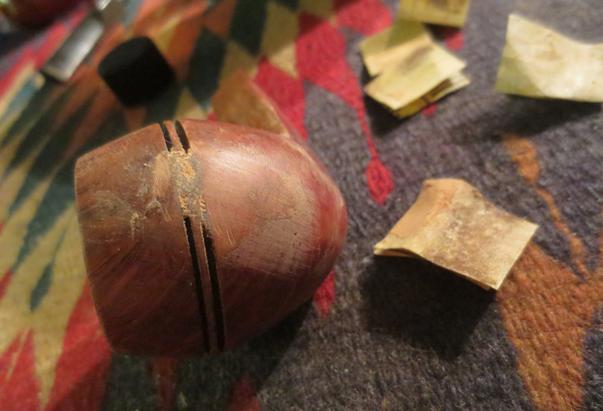 I sanded it with 220 grit sandpaper until the ring blended in with the rest of the pipe. I used a hack saw blade to recut the grooves on each side of the ring repair. The photo below shows the recut grooves and the repaired ring. It still needs to be cleaned up but it is looking better.
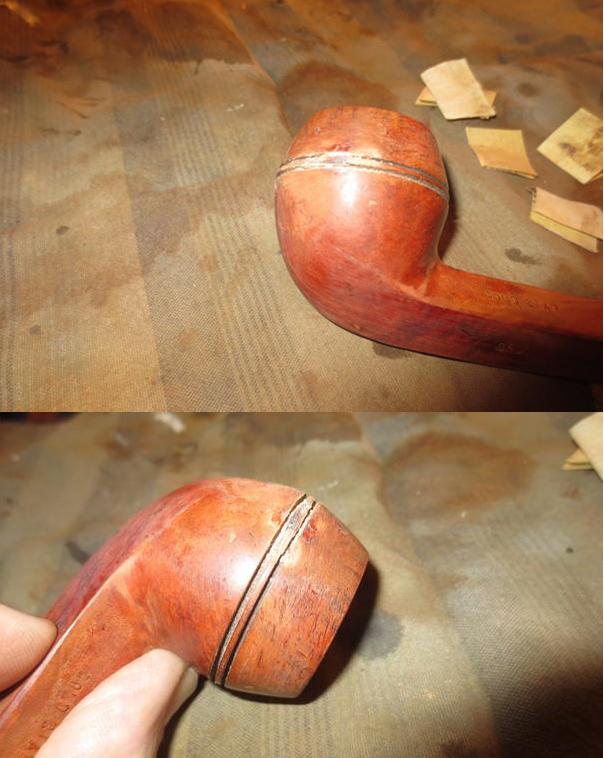 I used a knife blade needle file to clean up the grooves. I was able to match the grooves on the rest of the bowl. I sanded the ring with 220 grit sandpaper.
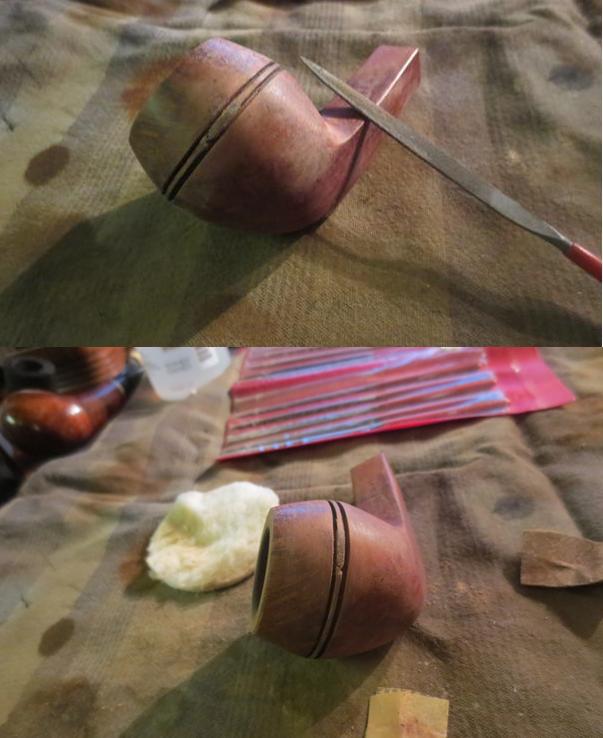 I wiped the bowl down with acetone (fingernail polish remover) on cotton pads. I broke up the peeling varnish with sandpaper and wiped it down again.
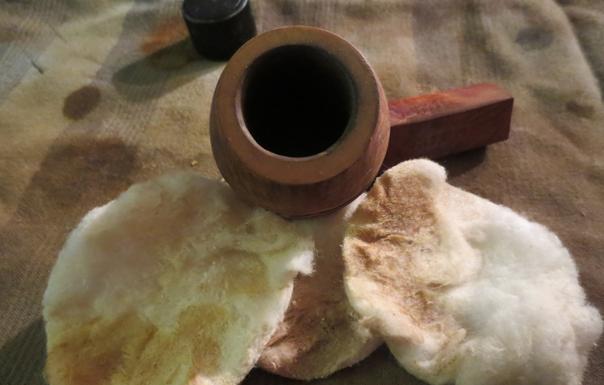 I scraped the inside of the mortise with a dental spatula to remove the hardened tars. It scraped away all of the buildup and then I scrubbed it down with pipe cleaners, cotton swabs and alcohol until it was clean. I cleaned the airway in the stem until it was clean.
 I sanded the tooth marks out the top and underside of the stem with 220 grit sandpaper until they were minimized.
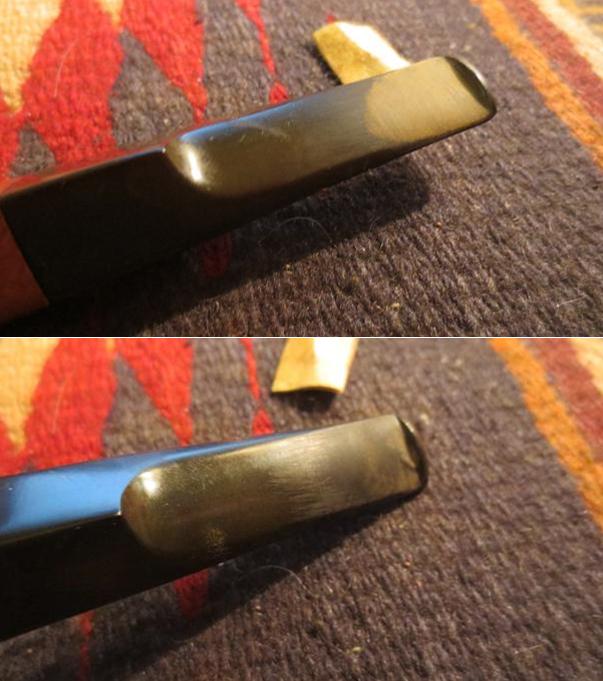 I wet sanded the stem with 1500-2400 grit micromesh sanding pads to smooth out the scratches in the vulcanite.
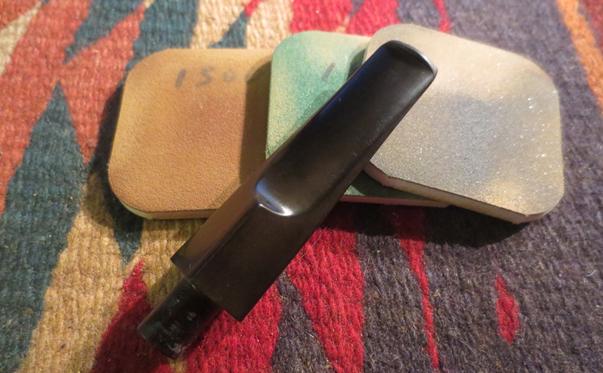 I scrubbed the stem with Before & After Pipe Stem Deoxidizer to remove the oxidation. It took some elbow grease but I was able to remove all of the oxidation with the new product. I am starting to really like this stuff.
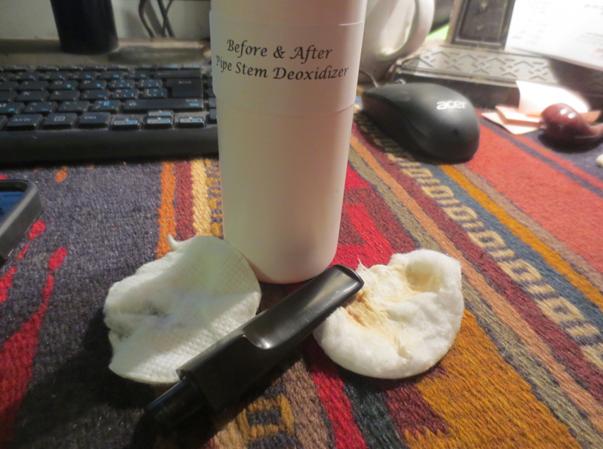 I polished the stem with the Before & After Pipe Polish using the fine and the extra fine polishing compound. I rubbed it on by hand using a finger and then scrubbed it off with a cotton pad until the polish was gone and the stem shone.
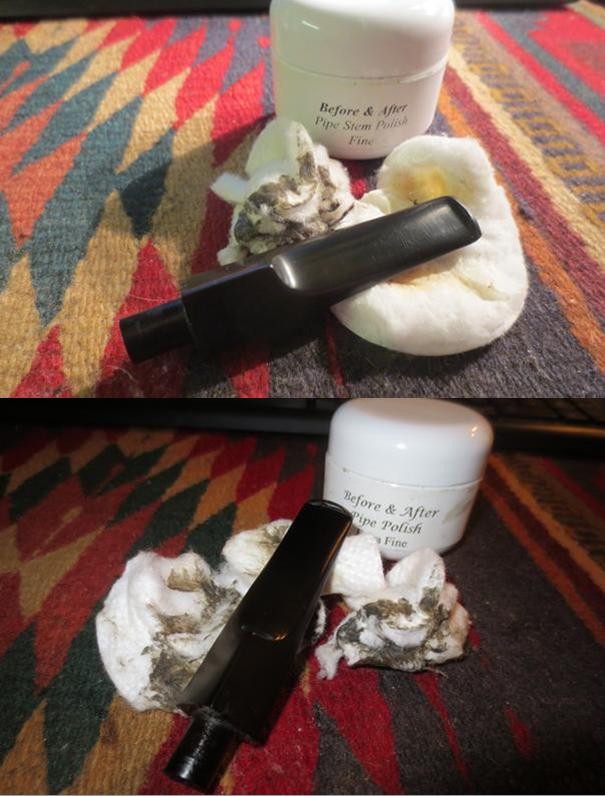
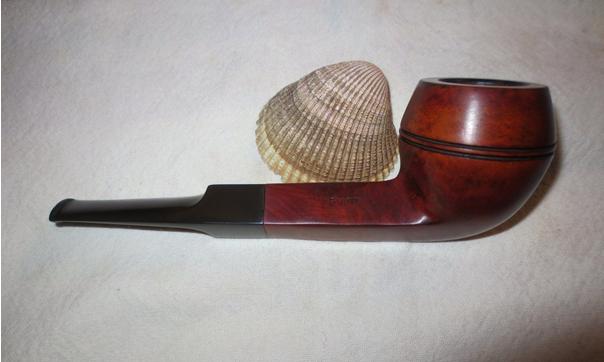
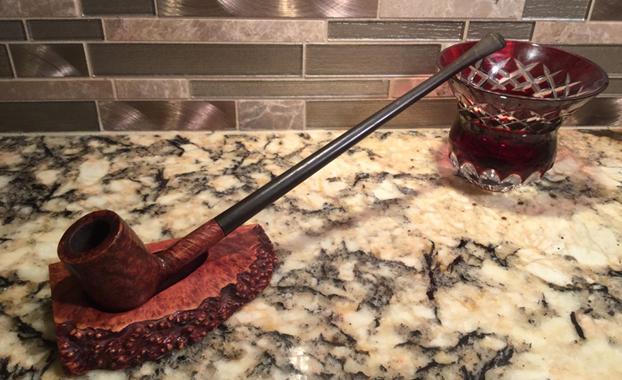
 I stained the bowl with a medium brown aniline stain and flamed it to set it in the grain. I repeated the process until the stain was evenly spread on the bowl.
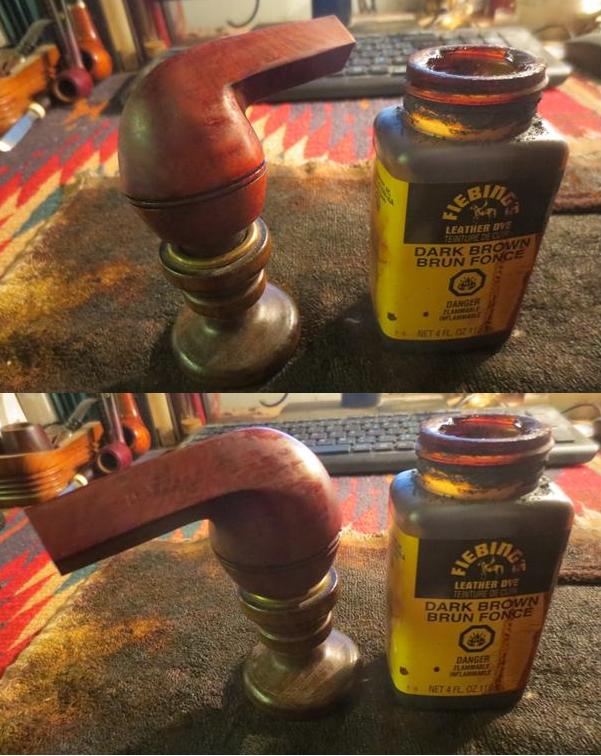 I buffed the bowl on the buffing wheel to see what the new stain coat looked like. I liked the new look of the old Gold Star Giant. What do you think?
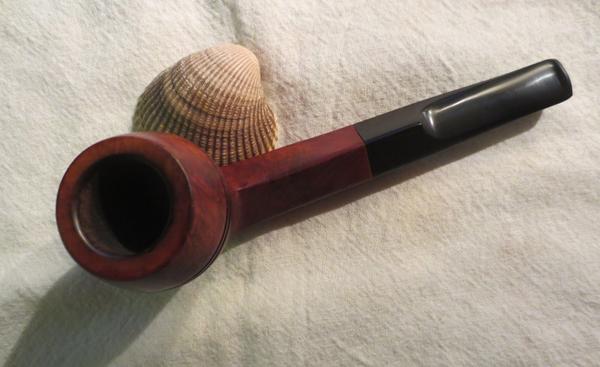
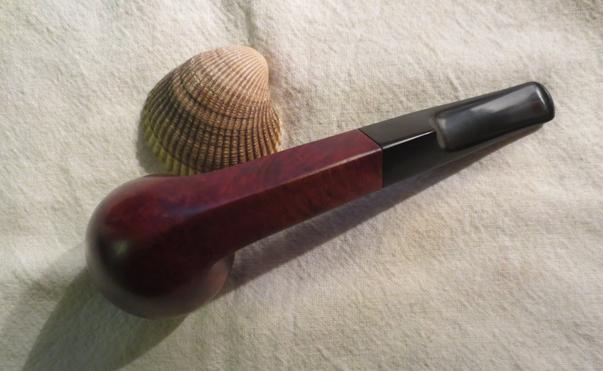
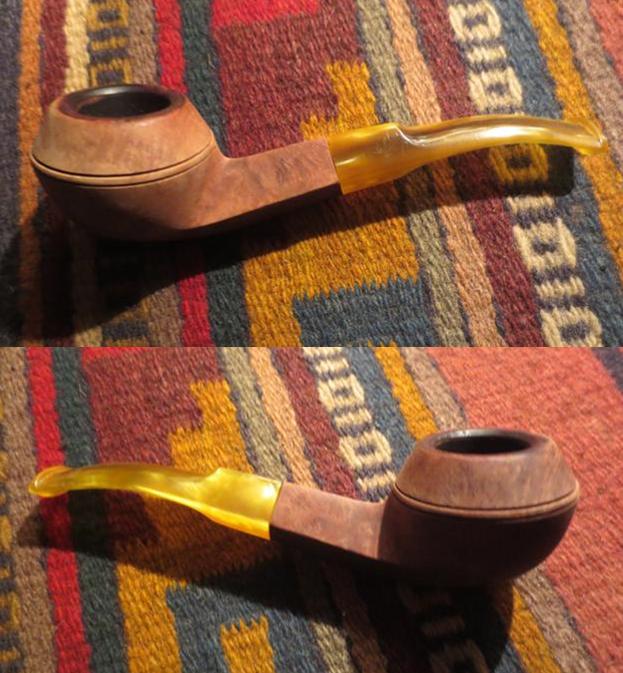
 I buffed the pipe and stem with Blue Diamond on the wheel to bring a shine to the bowl and gave it multiple coats of carnauba wax. I buffed it with a clean buffing pad and then with a microfibre cloth. The finished pipe is shown in the photos below. Steve, this one turned out to be another beauty. I am looking forward to hearing what you think about it once you get it back to Dawson Creek.