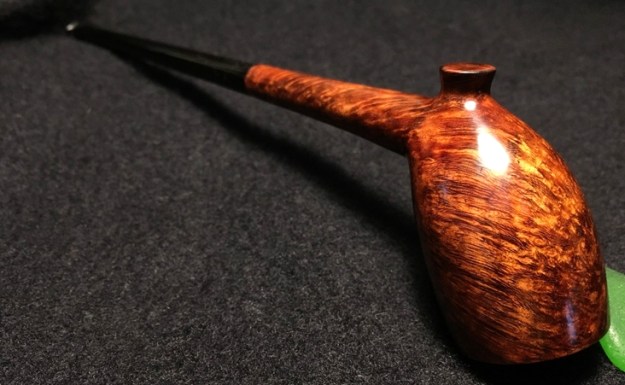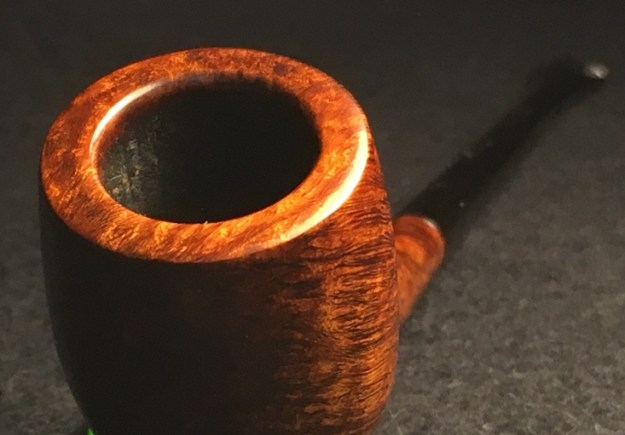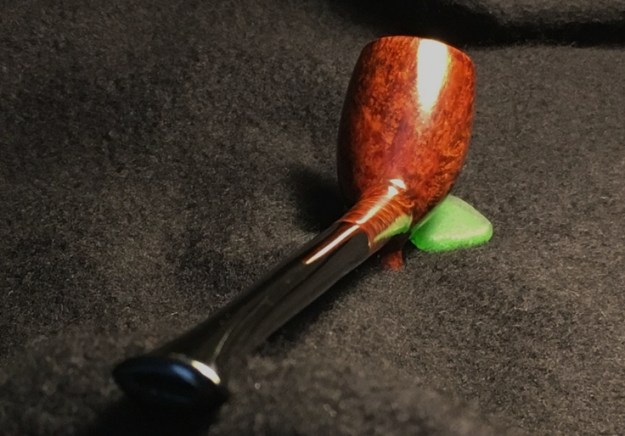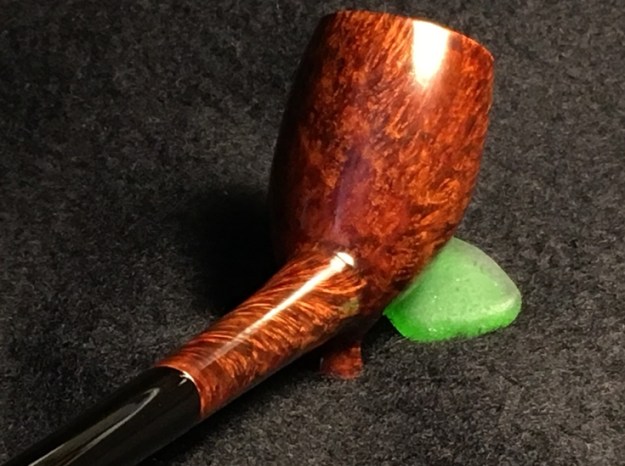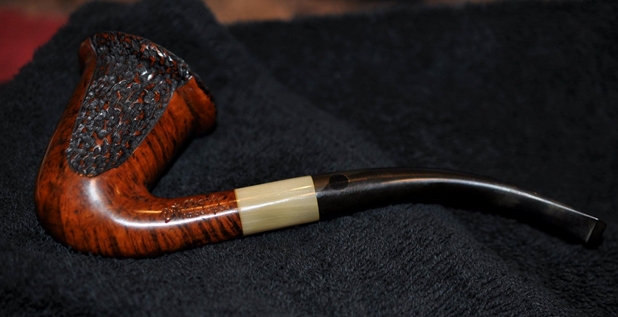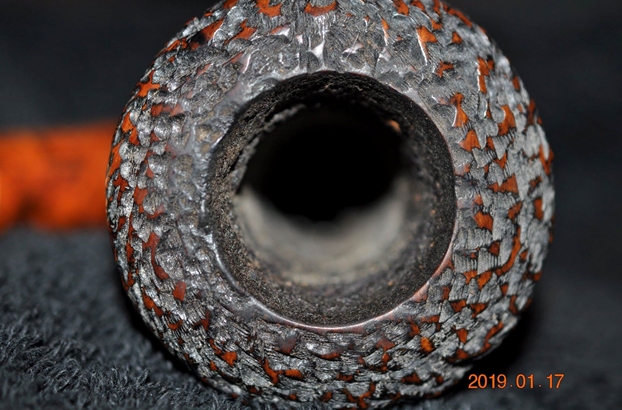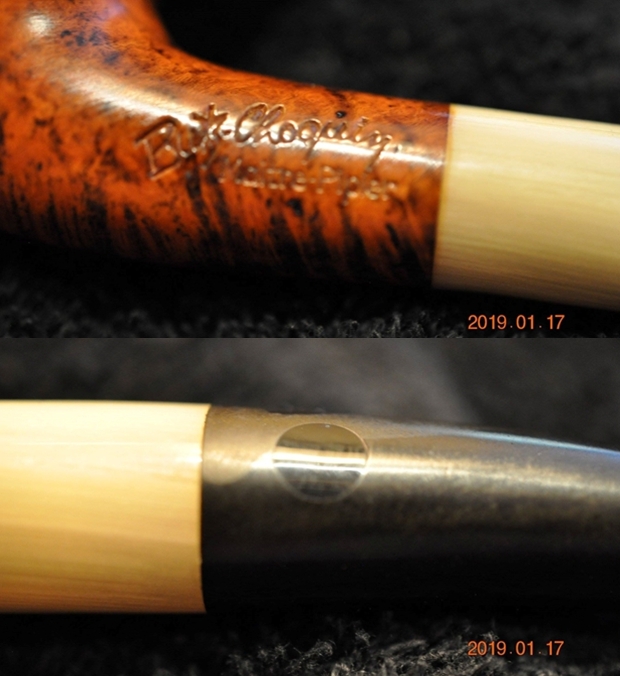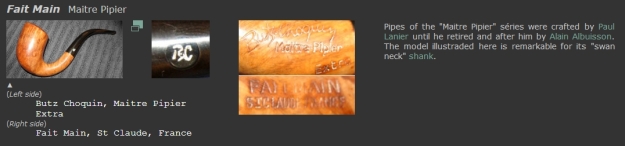
Tag Archives: refinishing

Rejuvenating a Ben Wade Hand Model London Made Billiard


Blog by Dal Stanton

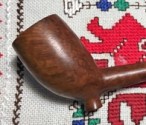
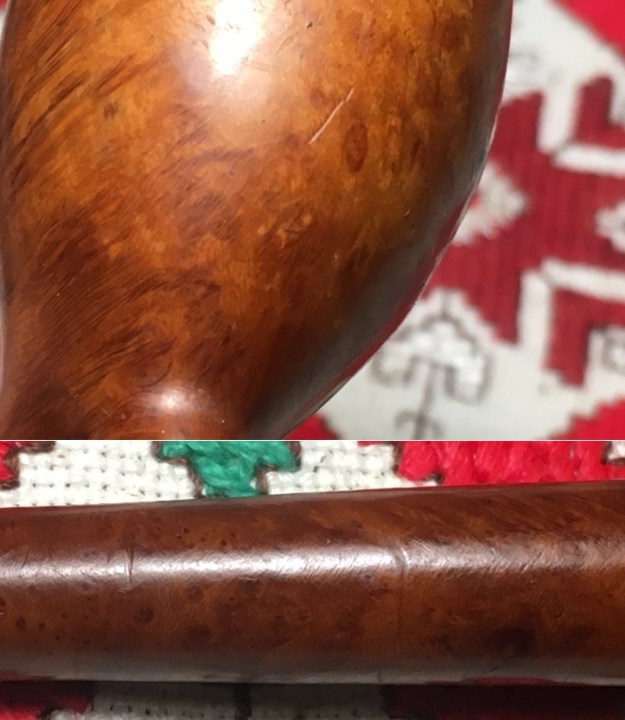
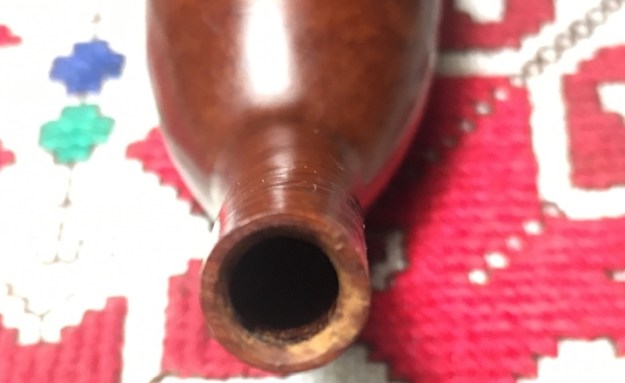
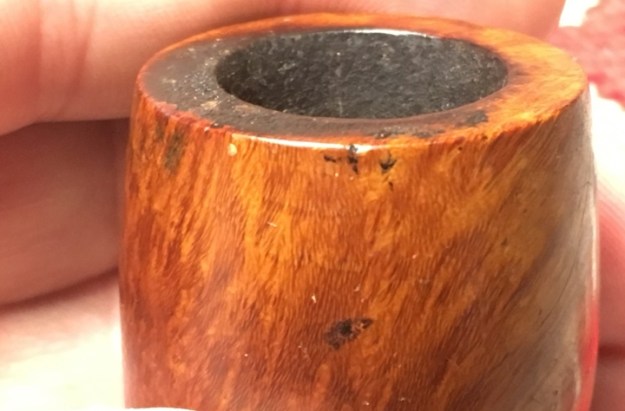
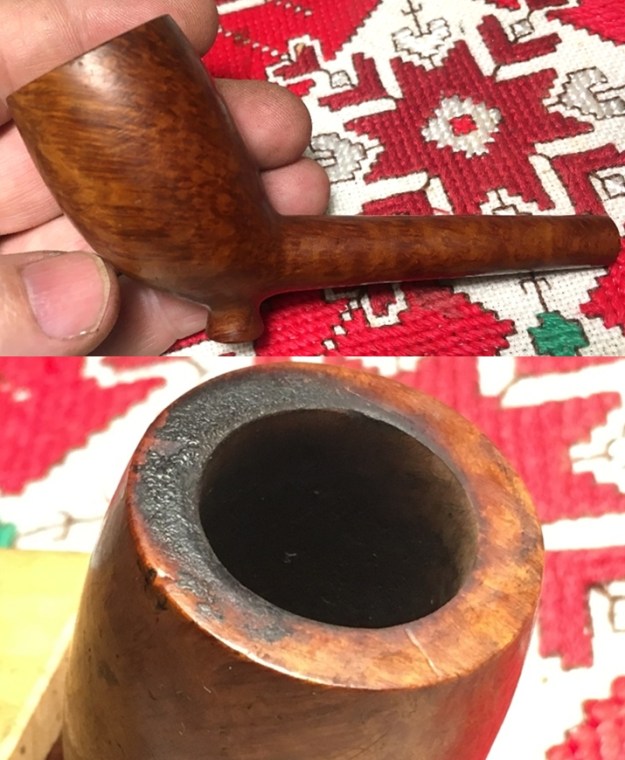
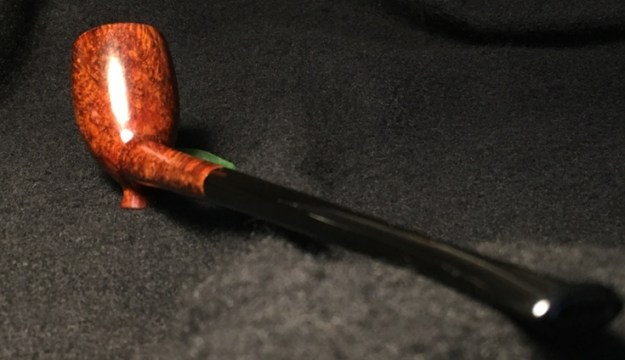
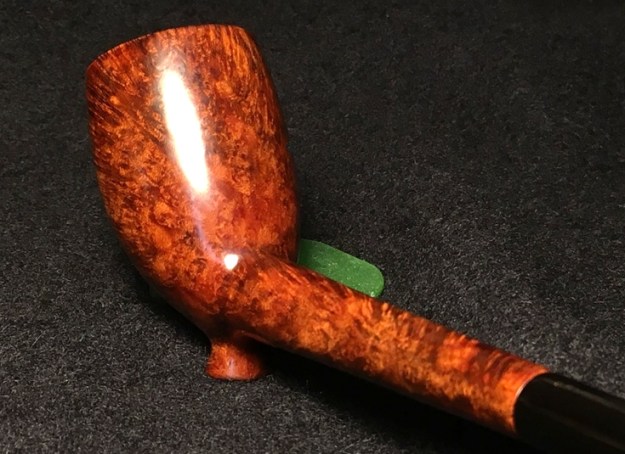
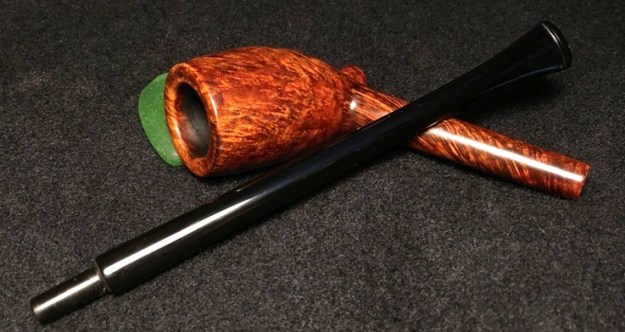
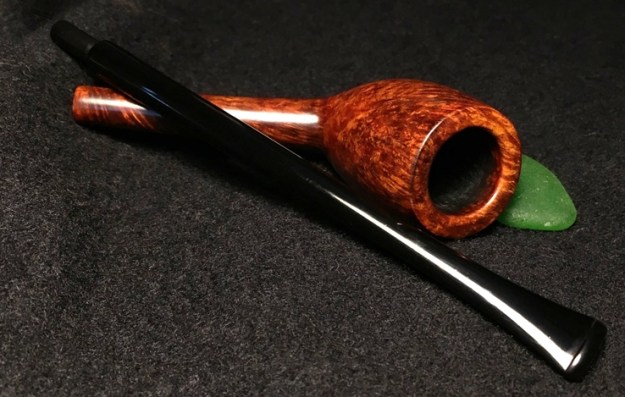
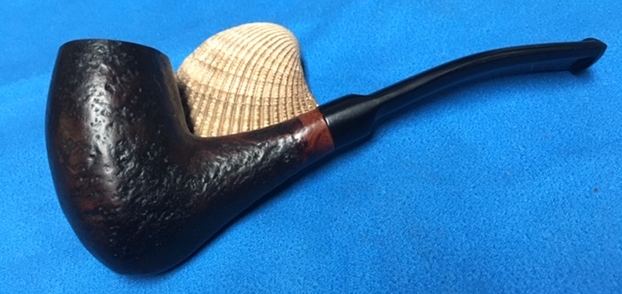
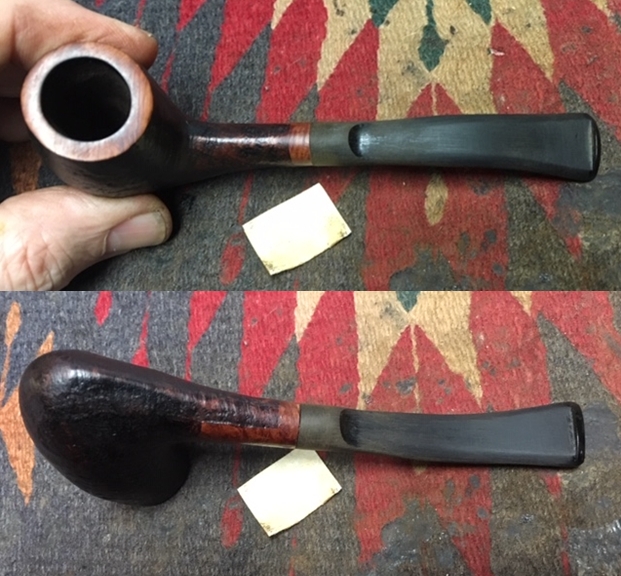
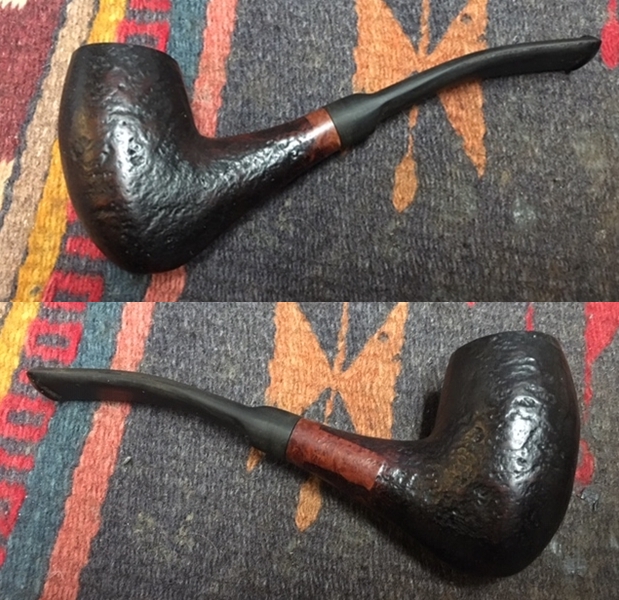
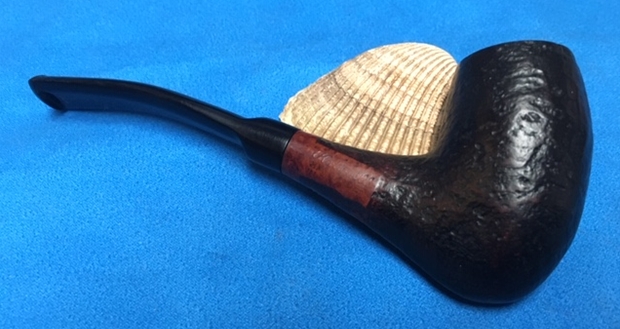
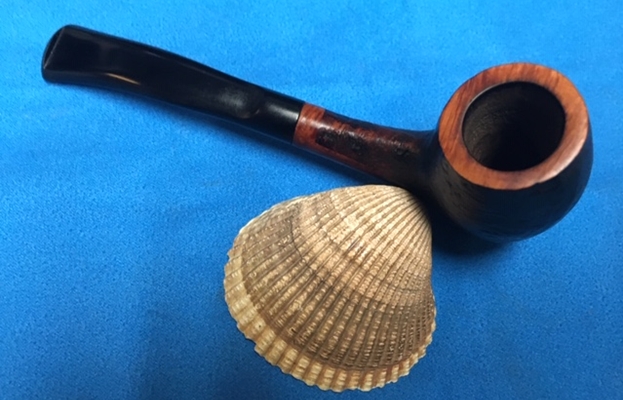
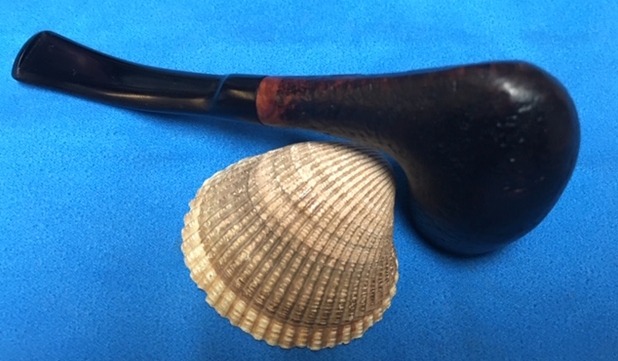
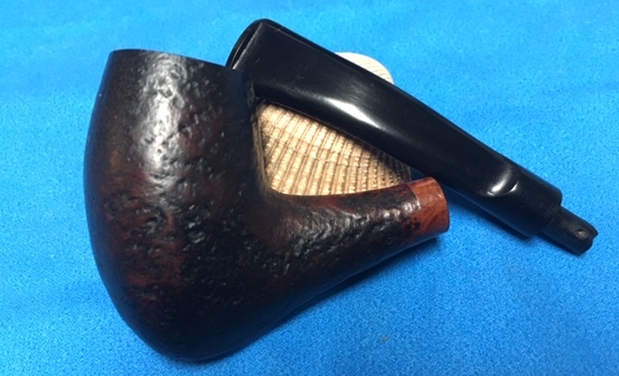
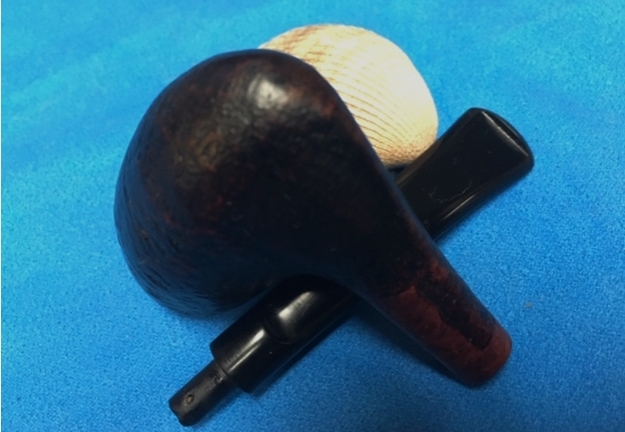
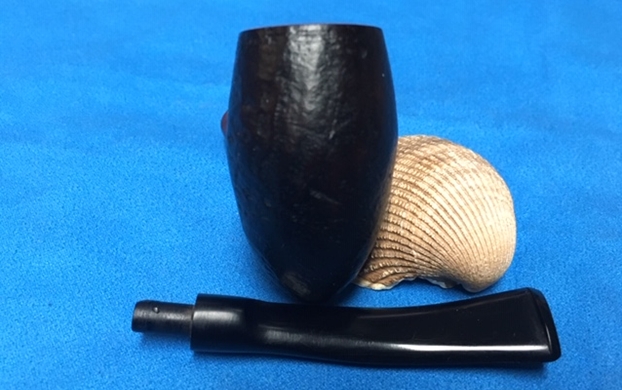
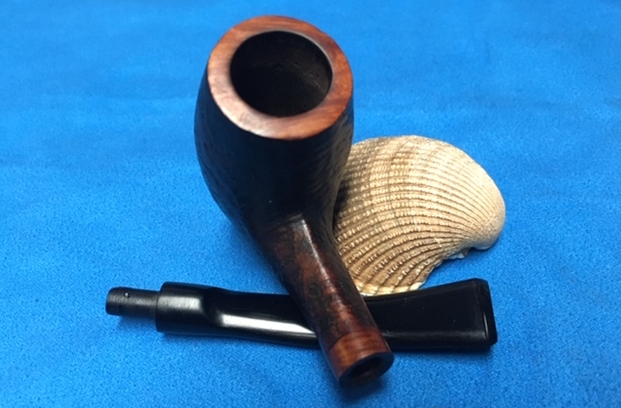
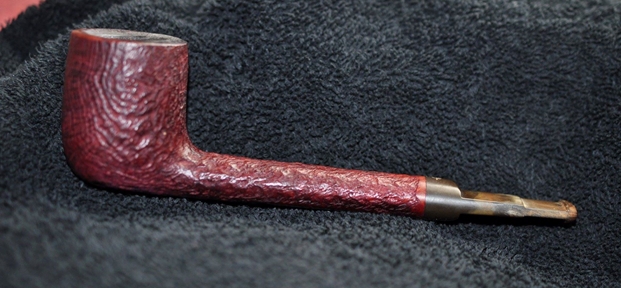
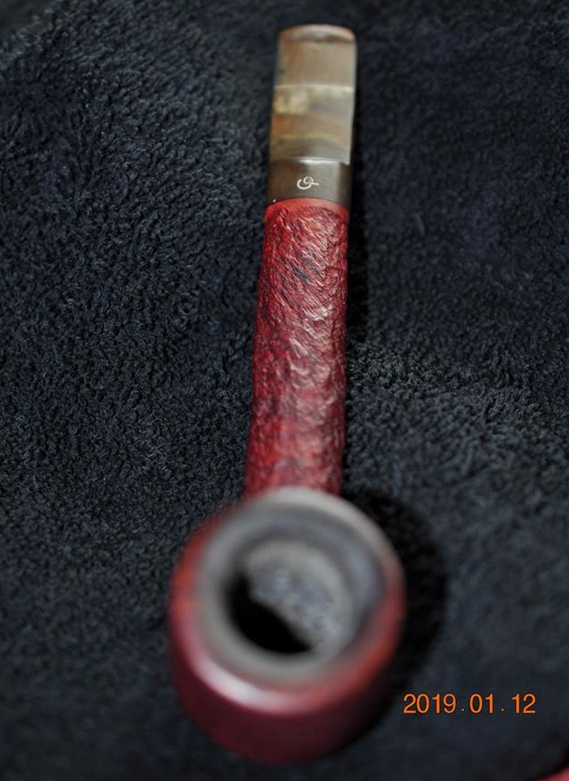
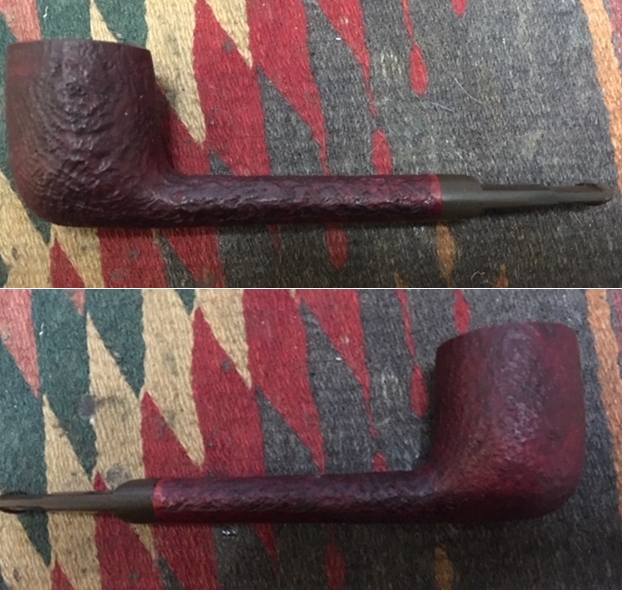
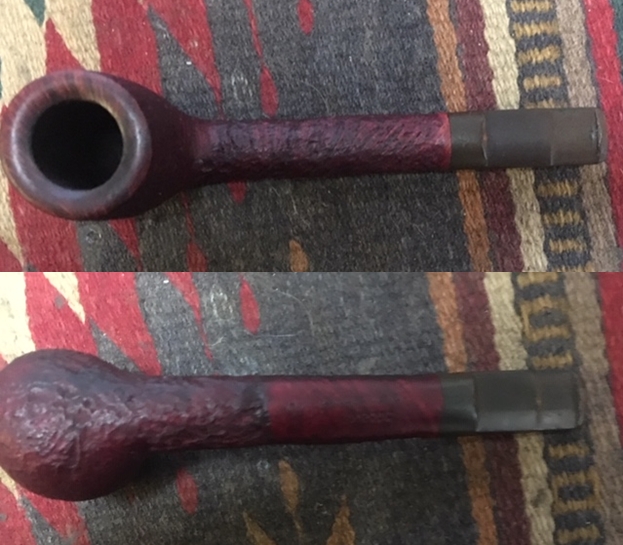
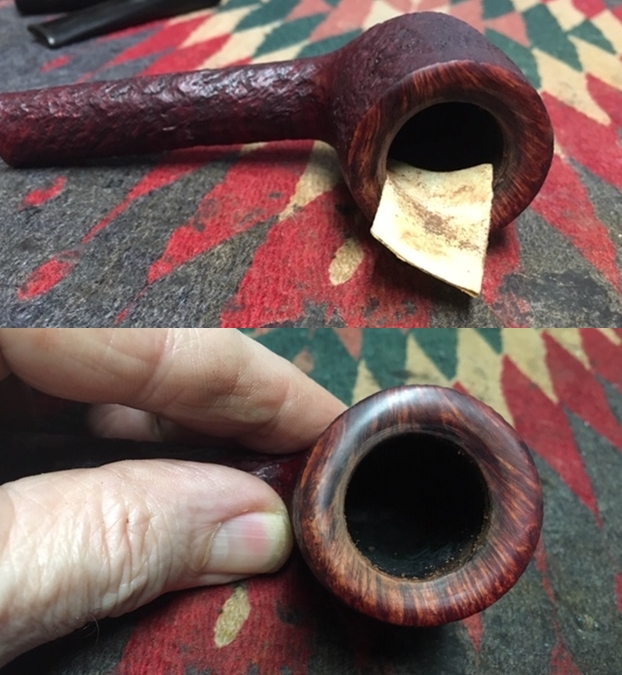
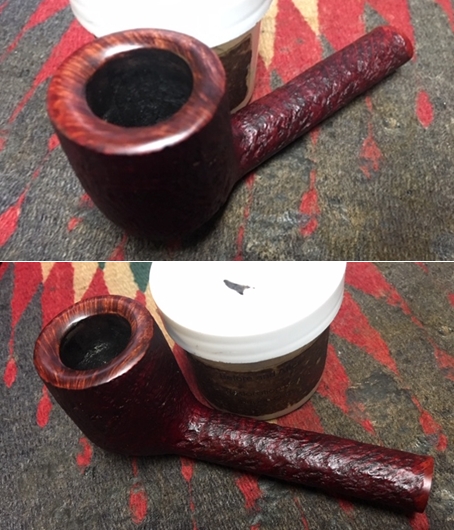
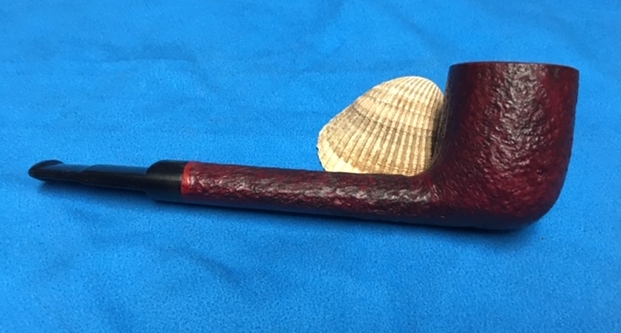
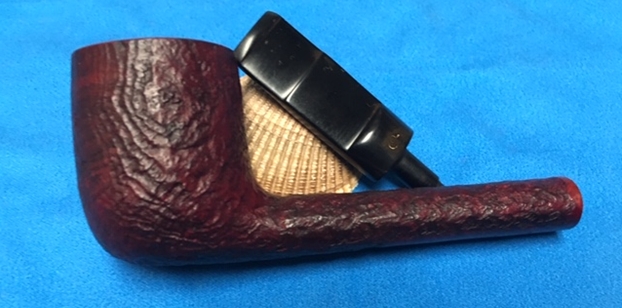
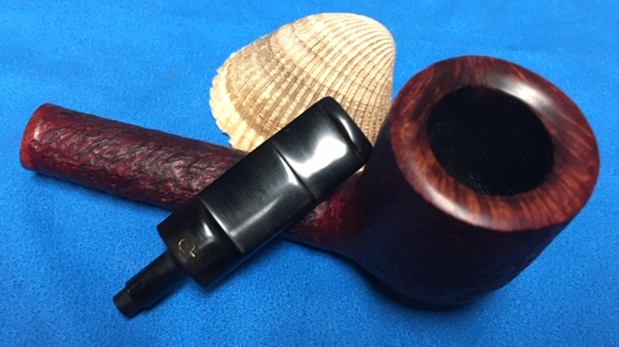
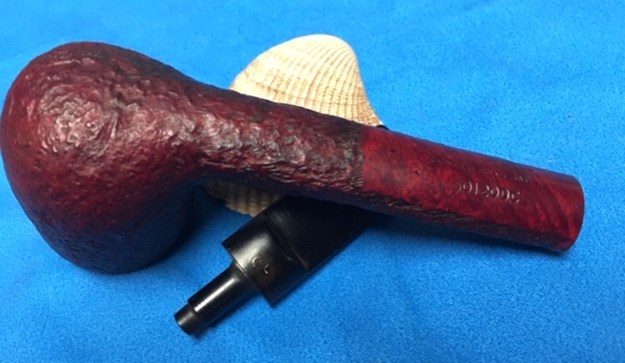
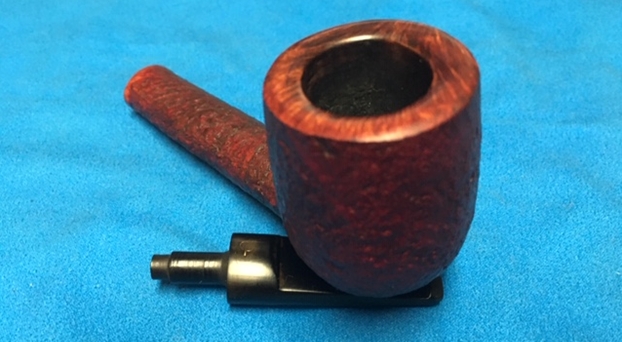
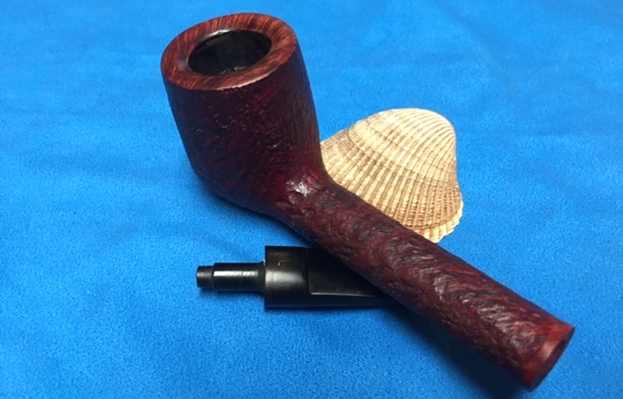
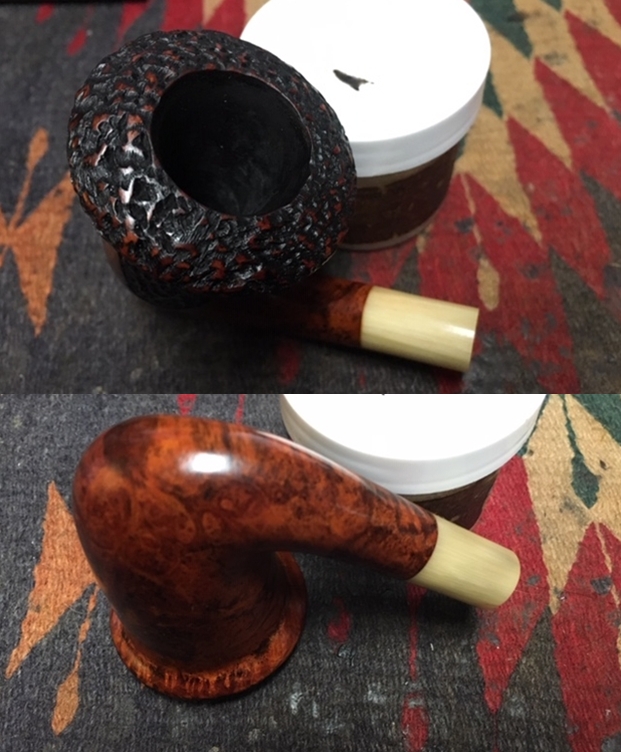
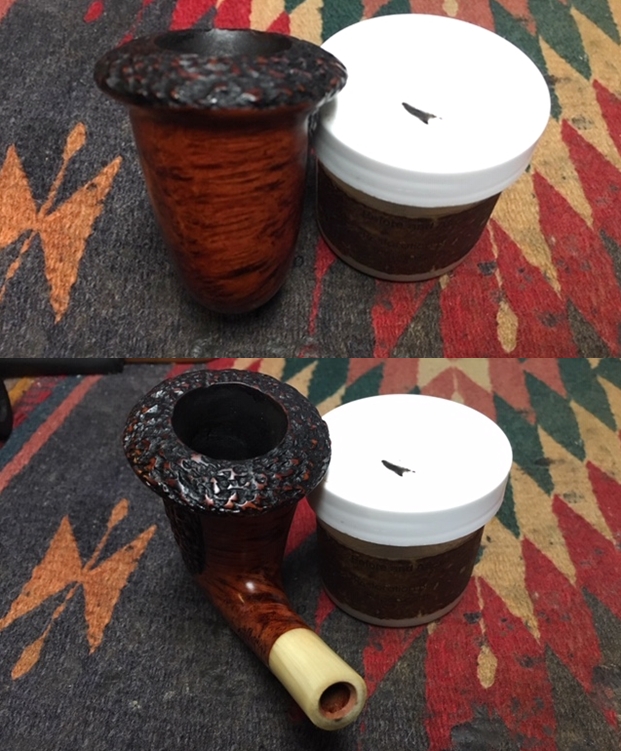
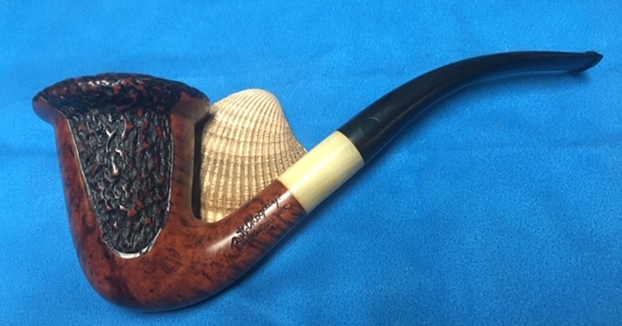
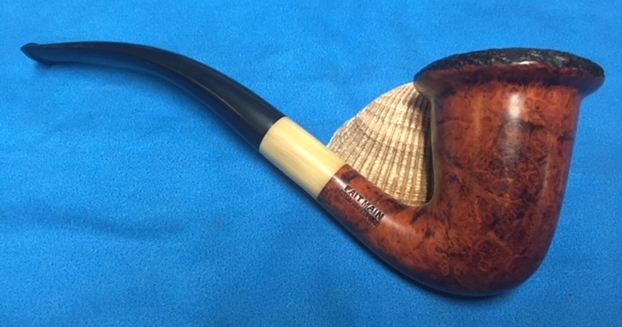
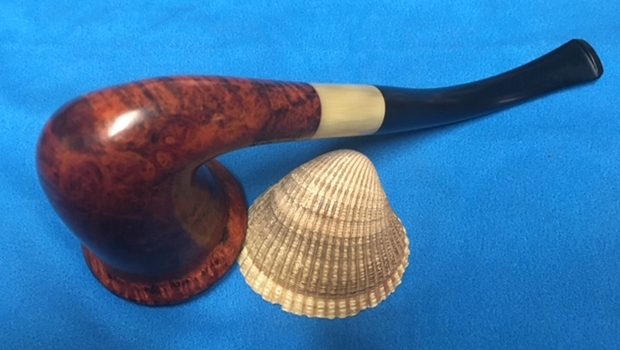
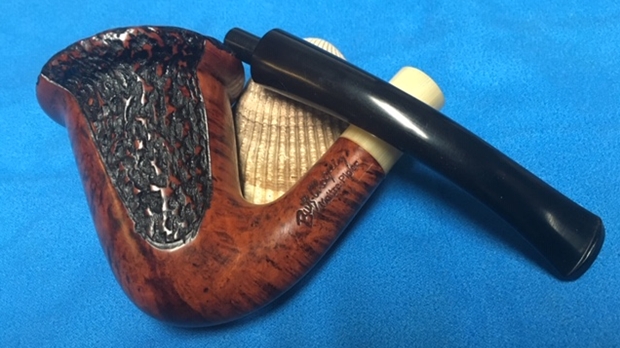
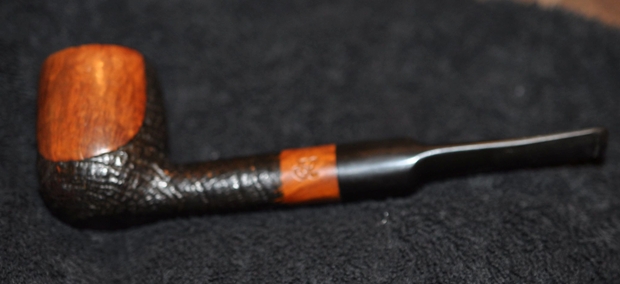
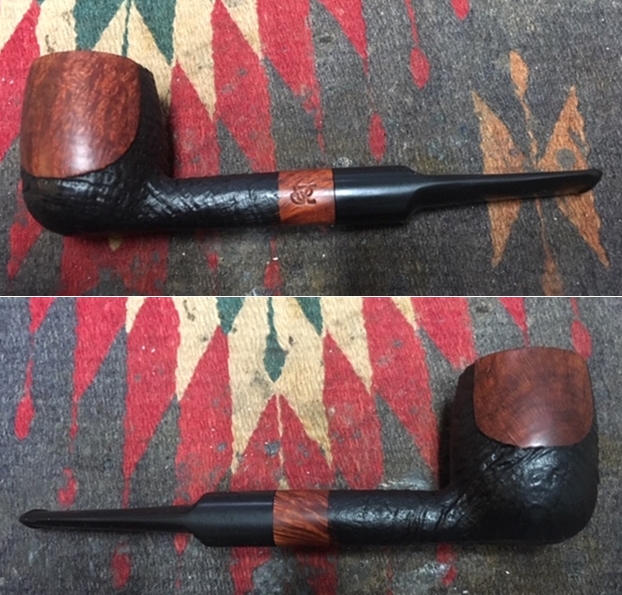
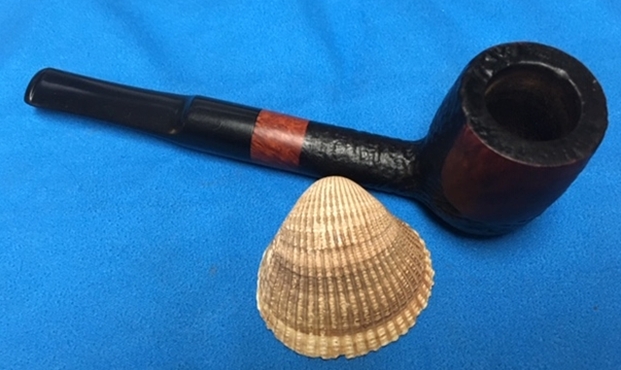
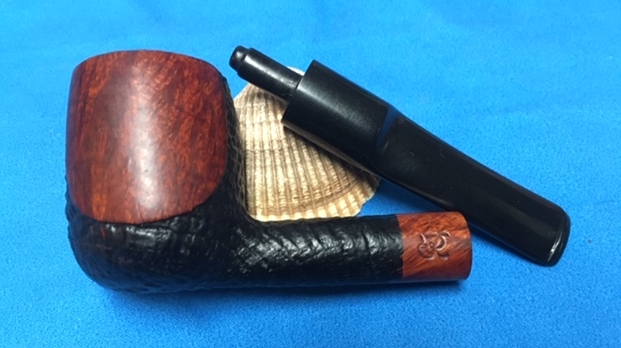
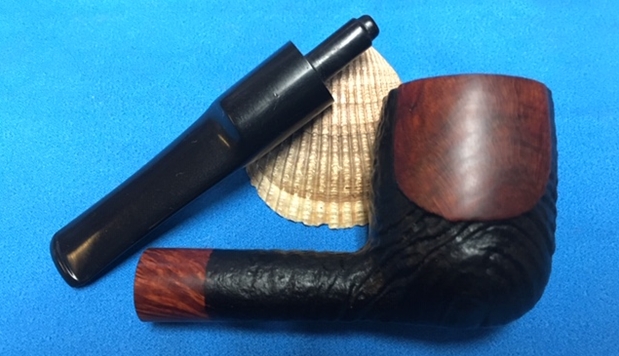
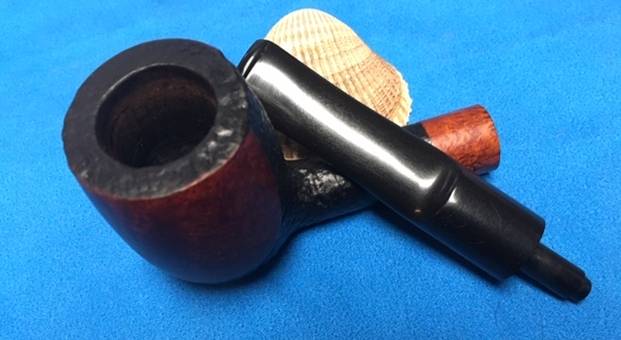
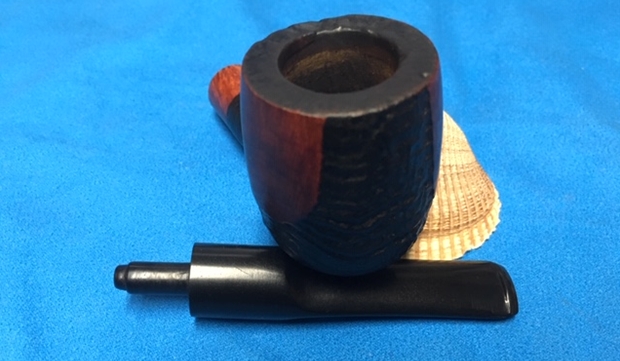
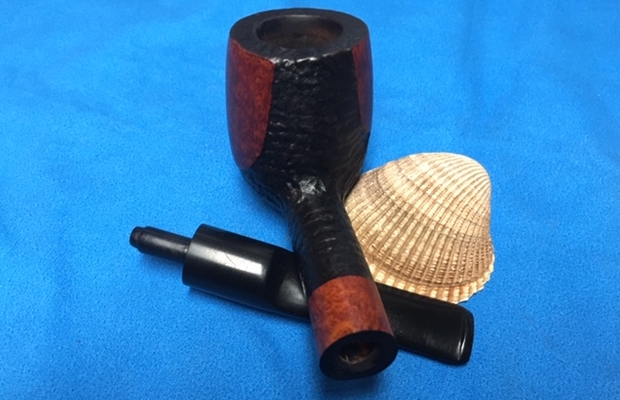
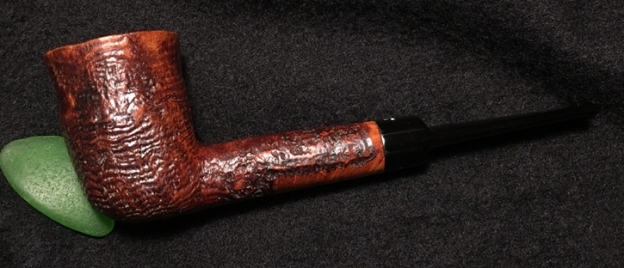
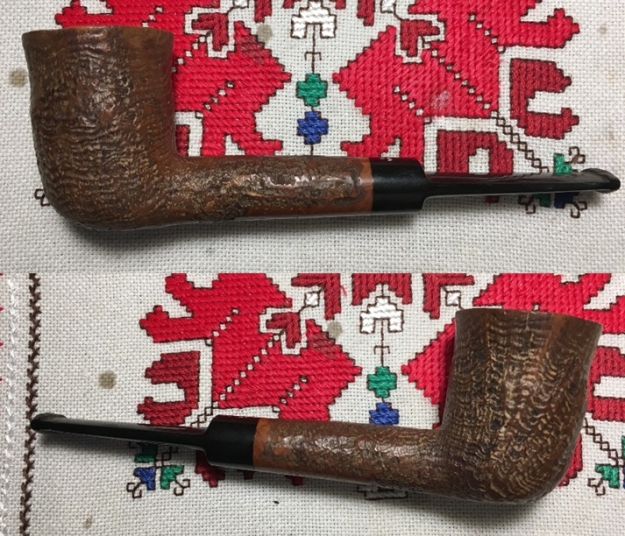
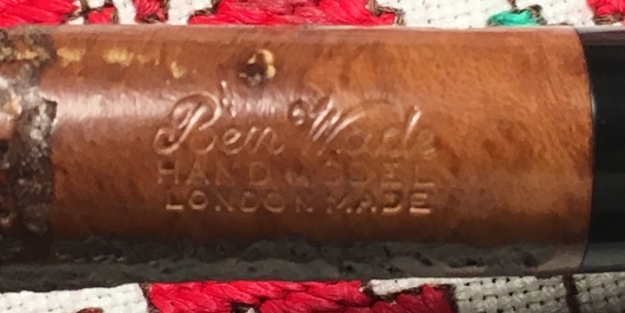
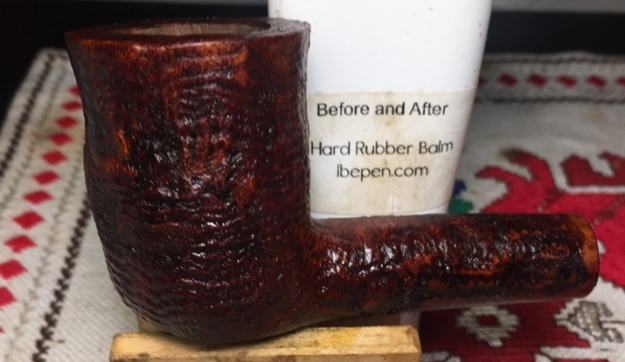
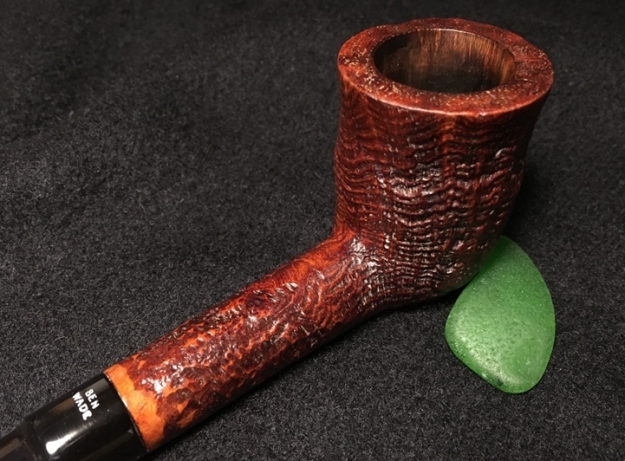
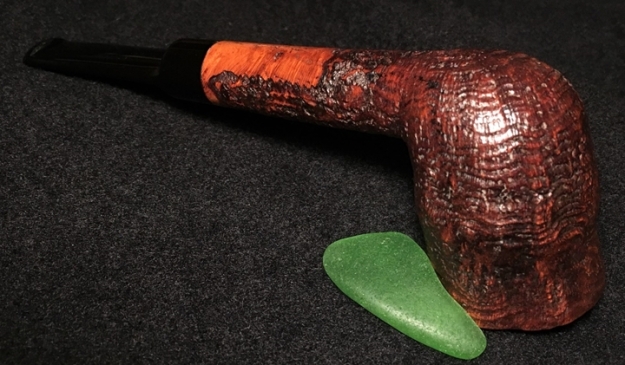
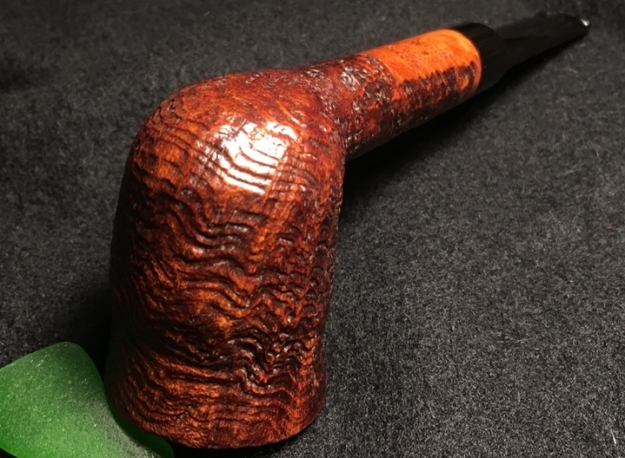
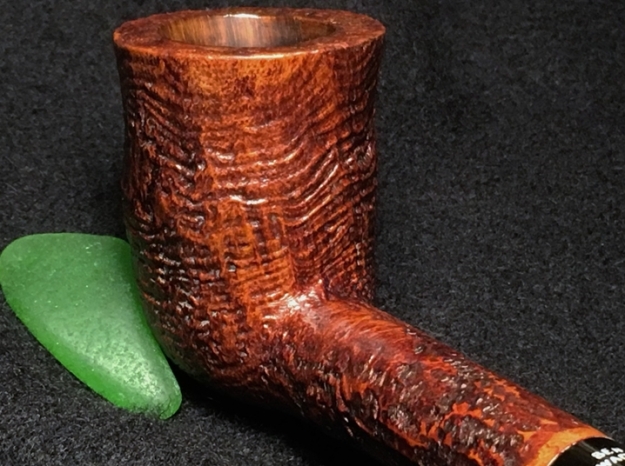
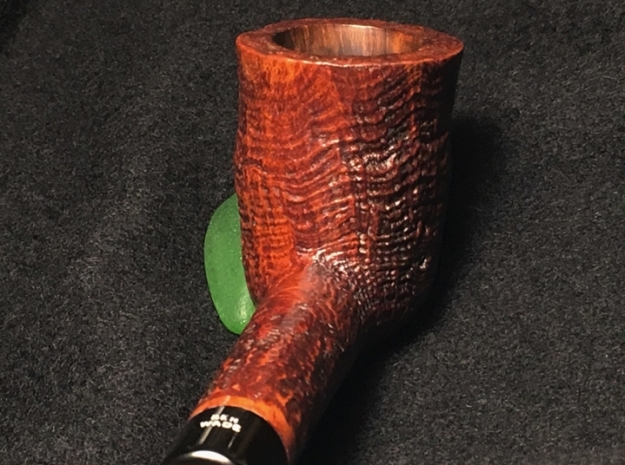
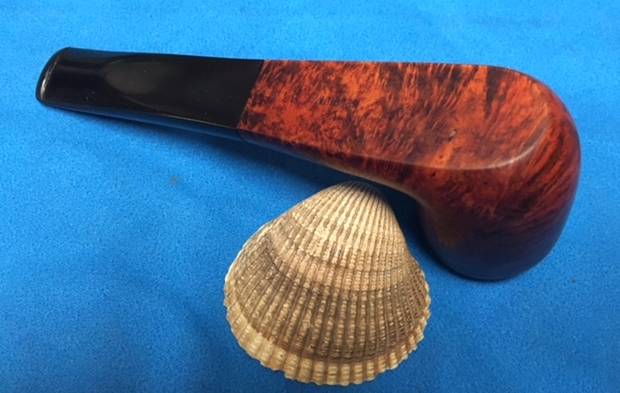
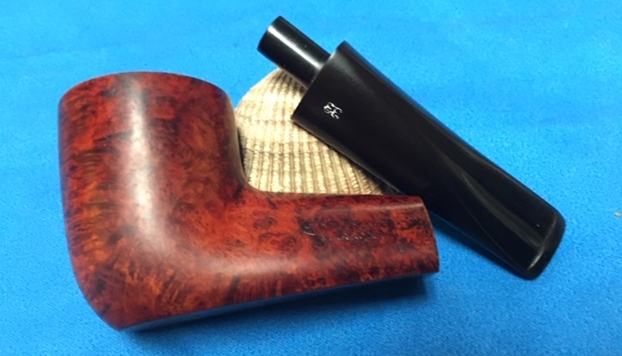
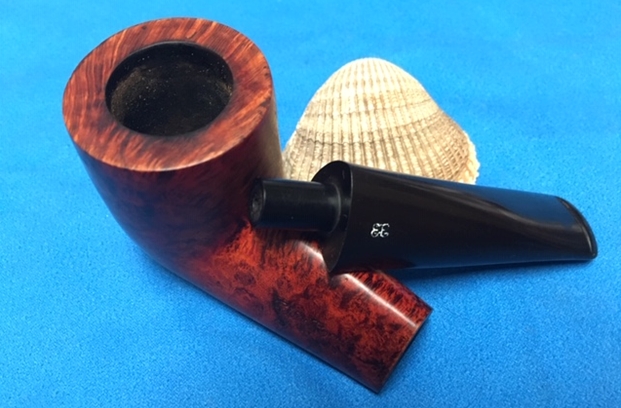
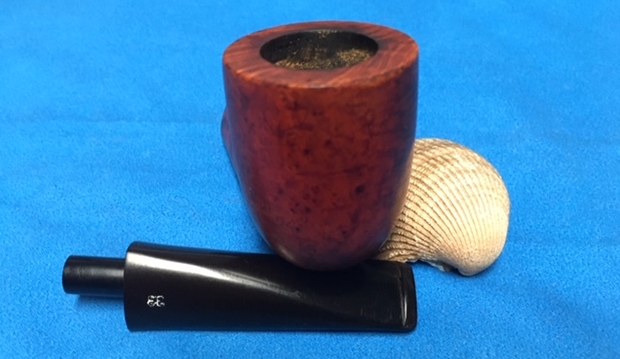
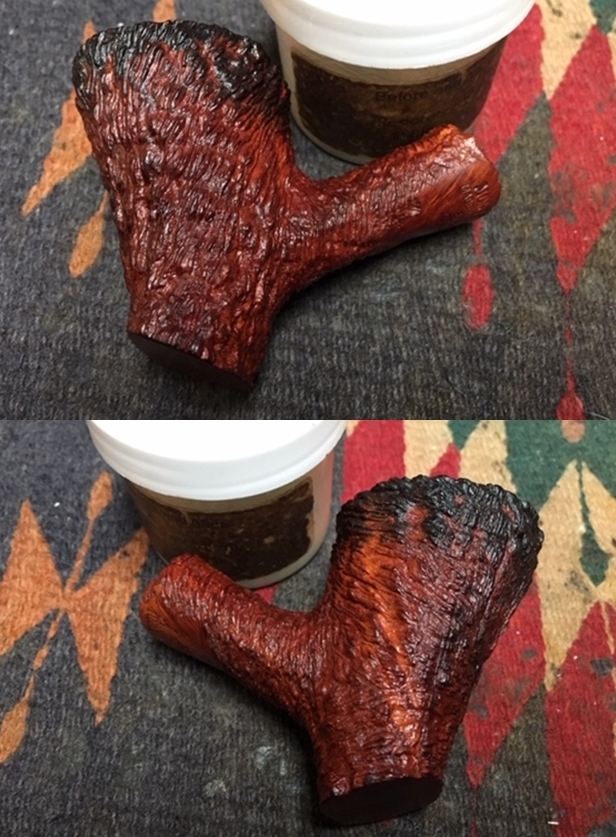
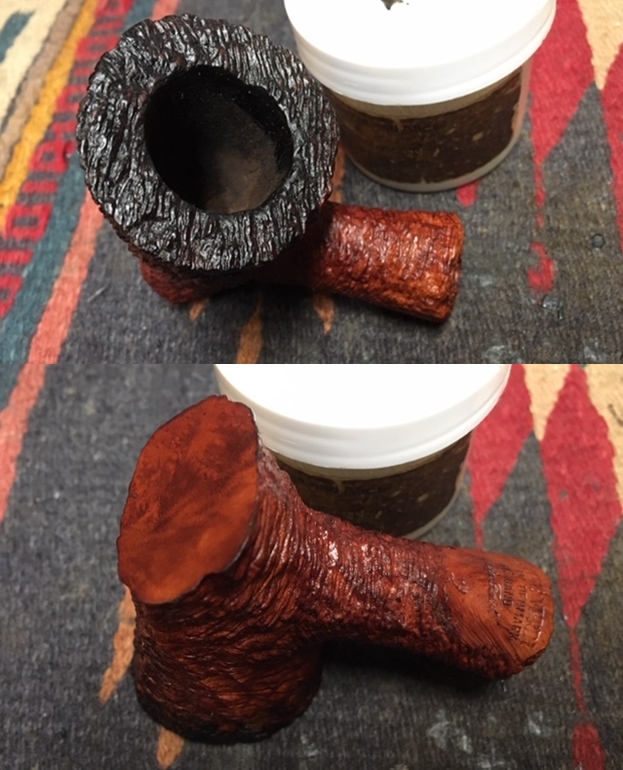
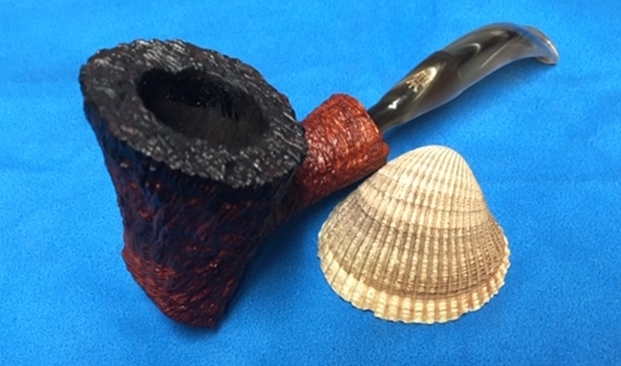
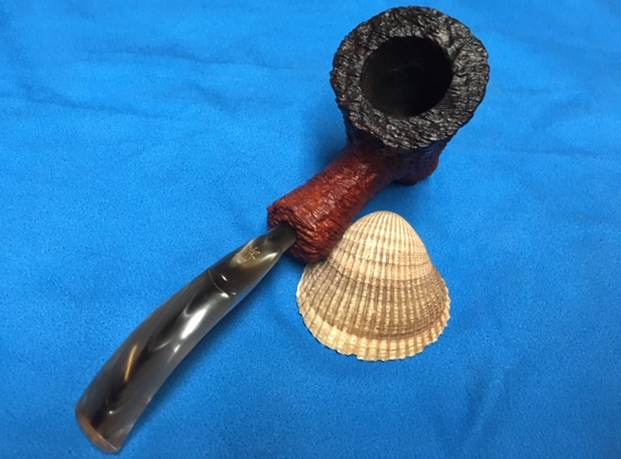
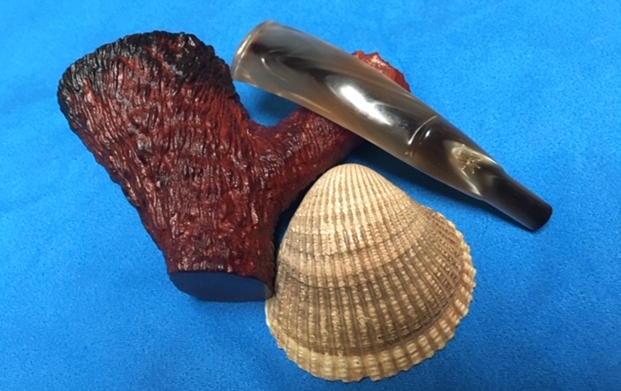
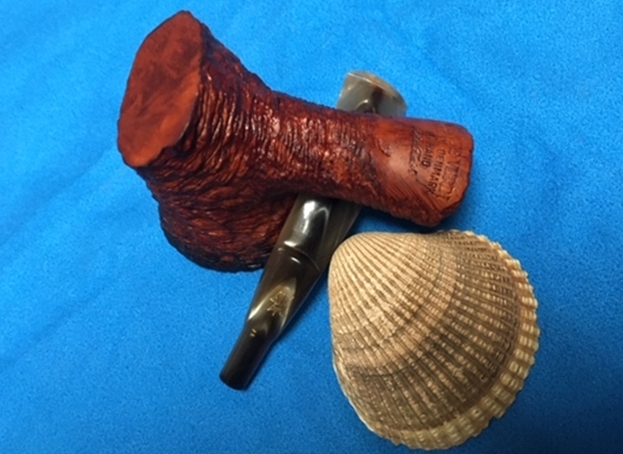
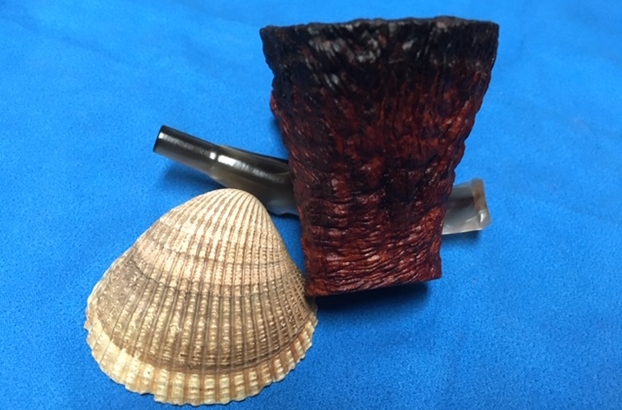
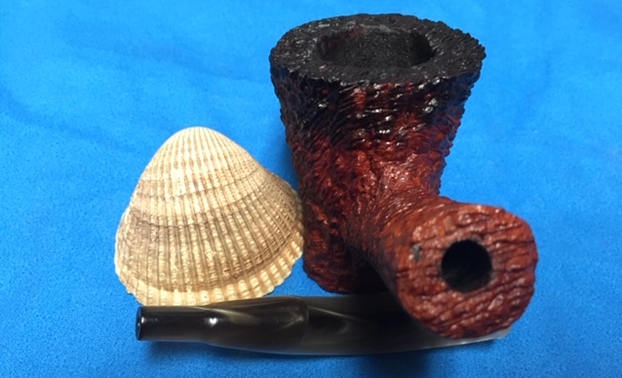
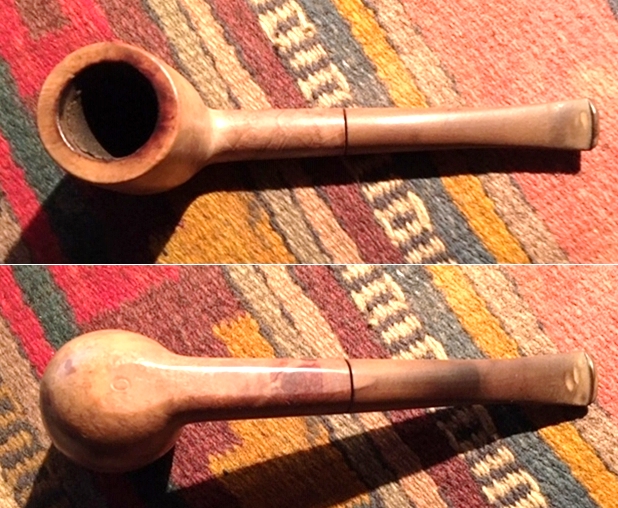
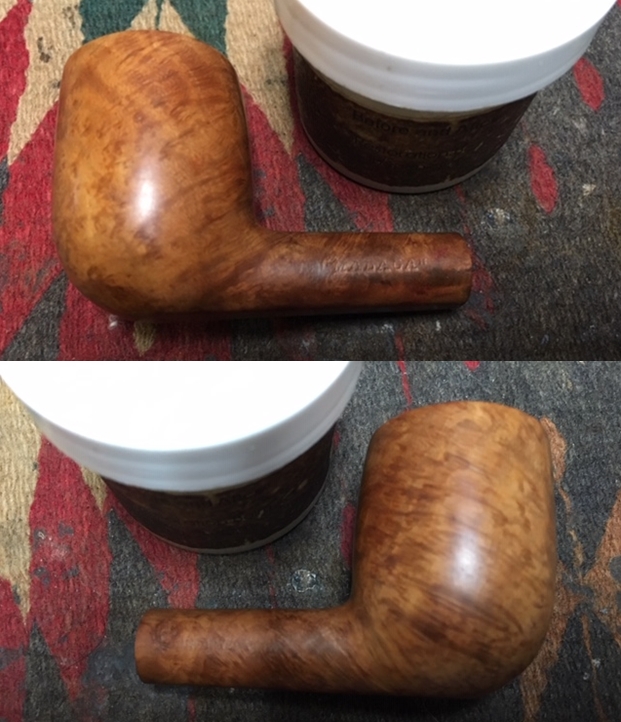
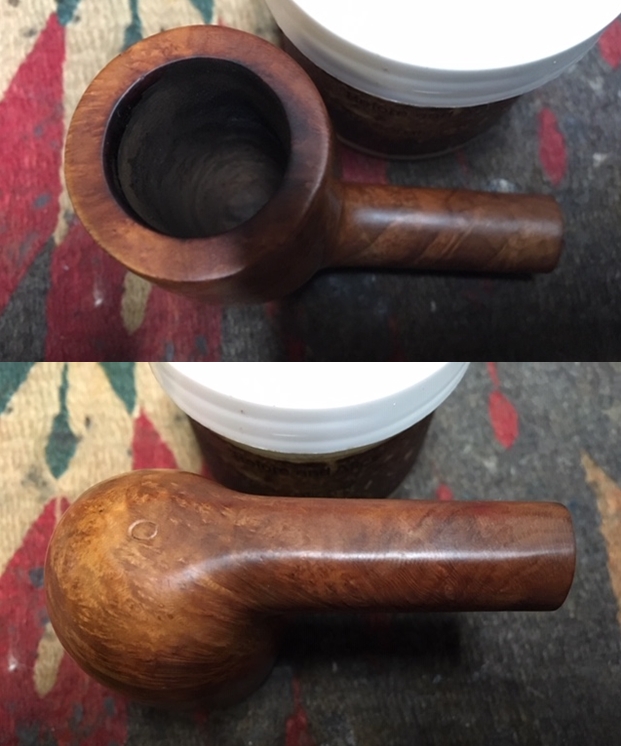
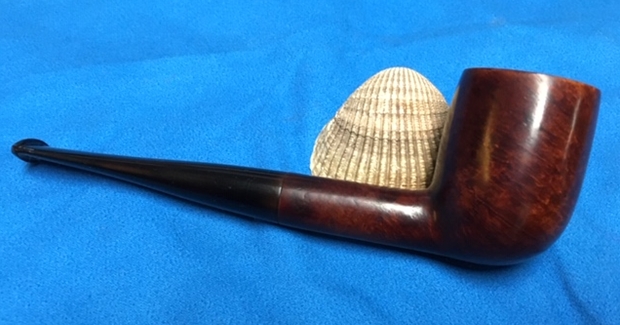
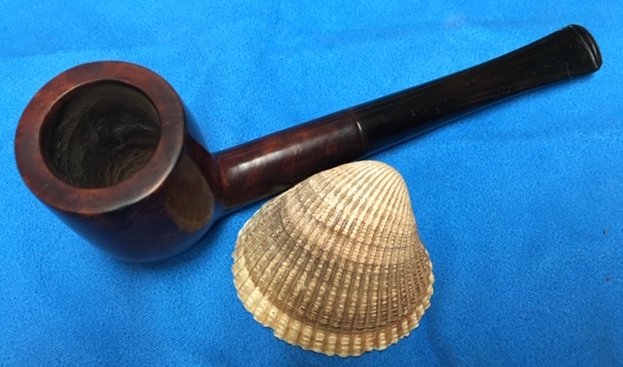
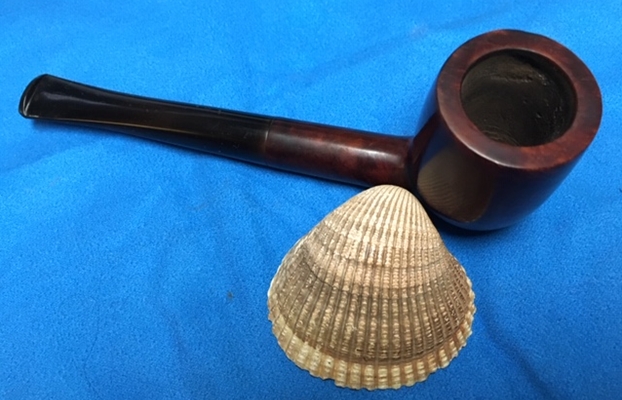
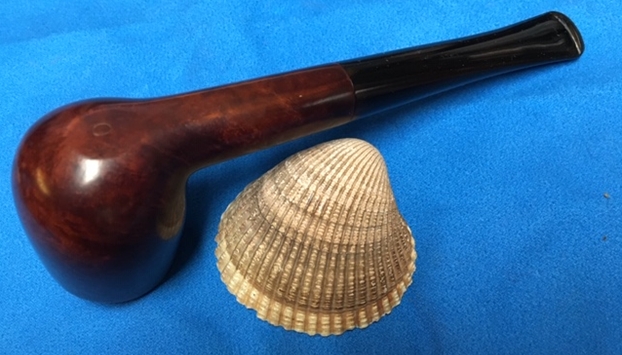
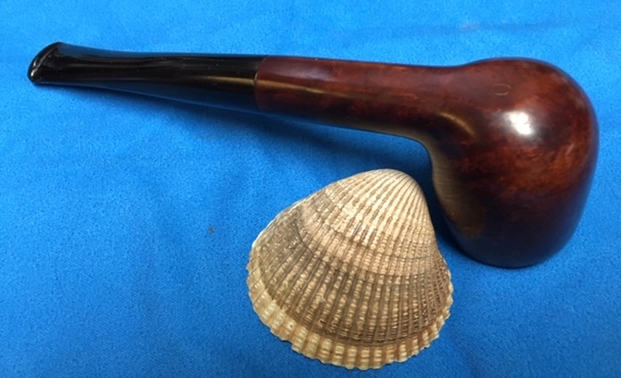
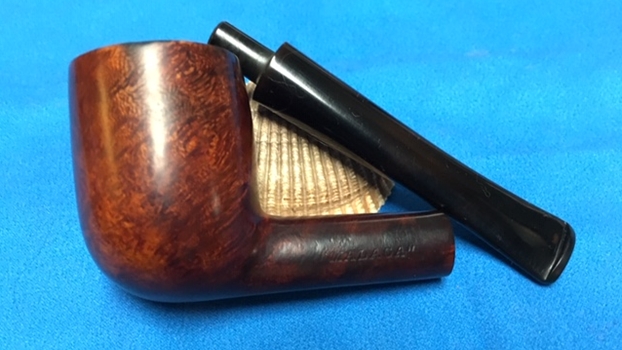
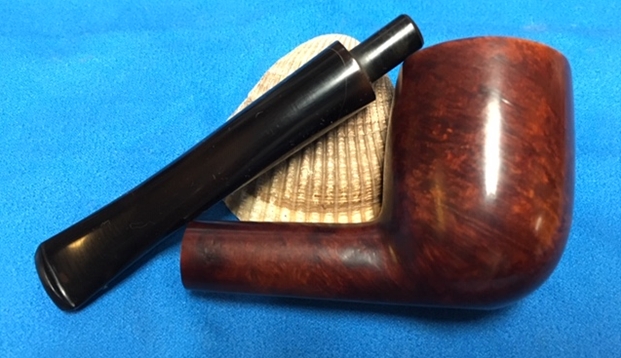
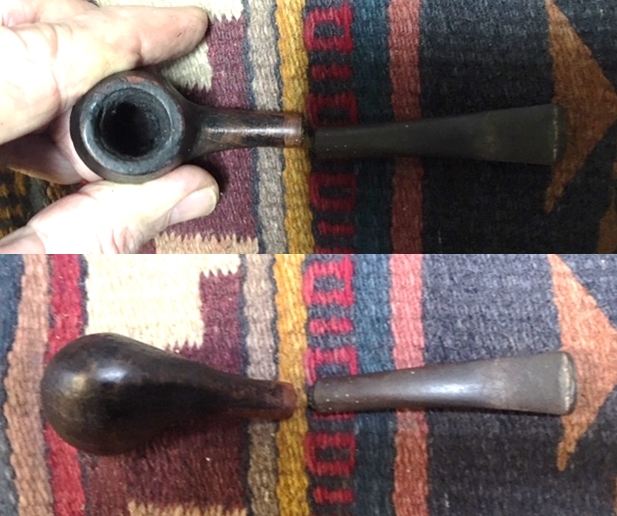
This Ben Wade came to me a couple of years back when I landed, from the eBay auction block, what I have called the Lot of 66. It continues to yield nice collectable pipes. The finish on this Ben Wade is a rustic looking blasted finish which is eye catching with the detail and bowl shaping. It caught Todd’s eye in the For “Pipe Dreamers” Only! collection and is the last of 3 that he has commissioned. Here are pictures of the Ben Wade Hand Model now on my worktable: I’ve discovered through the reading I’ve done about the name ‘Ben Wade’ that it has an up and down history. The Pipedia article is helpful in simplifying the history in four helpful ‘eras’ which I’ve summarized from the Pipedia:

The Family era (1860 to 1962) – the heydays of the English name when the pipes were stamped Made in Leeds, England.

Charatan / Lane second (1962 to 1988) – When Herman G. Lane purchased the name, the transition from a higher quality pipe during the long Family Era transitioned exclusively to the fabrication of machine-made pipes. Lane moved the production from the Leeds factory (closed in 1965) to Charatan’s Prescott Street factory. Ben Wade became essentially lower quality series pipes produced in standard shapes. The pipes during this period were stamped, “Made in London, England” or dropping the “London” and stamped with “England” alone. After Lane died, in 1978 his heirs sold the Charatan and Ben Wade names to Dunhill, which left the production of Charatan/Ben wade at the Prescott Street factor. In 1988 production came to an end for Ben Wade when the Charatan’s Prescott Street factory closed.

Ben Wade turns Danish (1971-1989) – During this era Preben Holm, from Denmark, was in financial difficulties and Herman Lane and he went into partnership producing the Handmade and fancy pipes. These pipes were marked “Ben Wade Made in Denmark”. These pipes gained great popularity, especially as the were marketed in the US. After Lane’s death, Preben Holm, not the businessman, was in financial difficulties and reduced his workforce and production, but at his death in 1989, production of the Danish Preben Holm pipes came to an end.

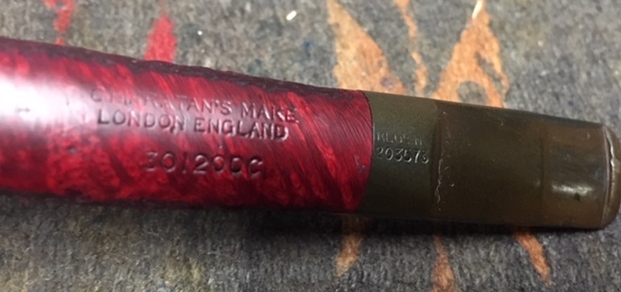
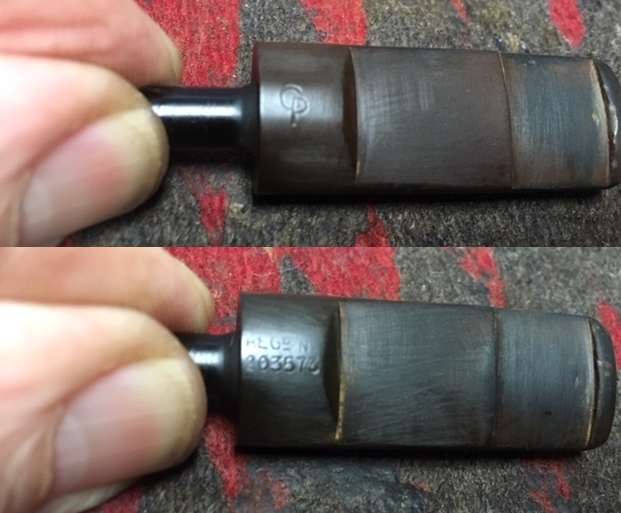
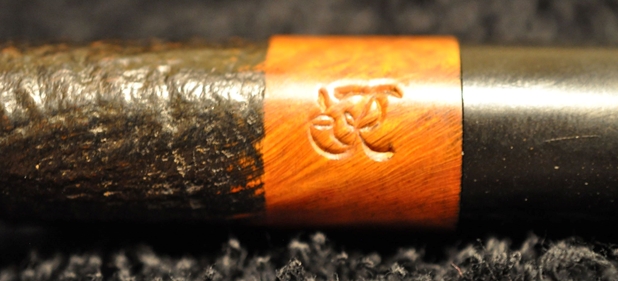
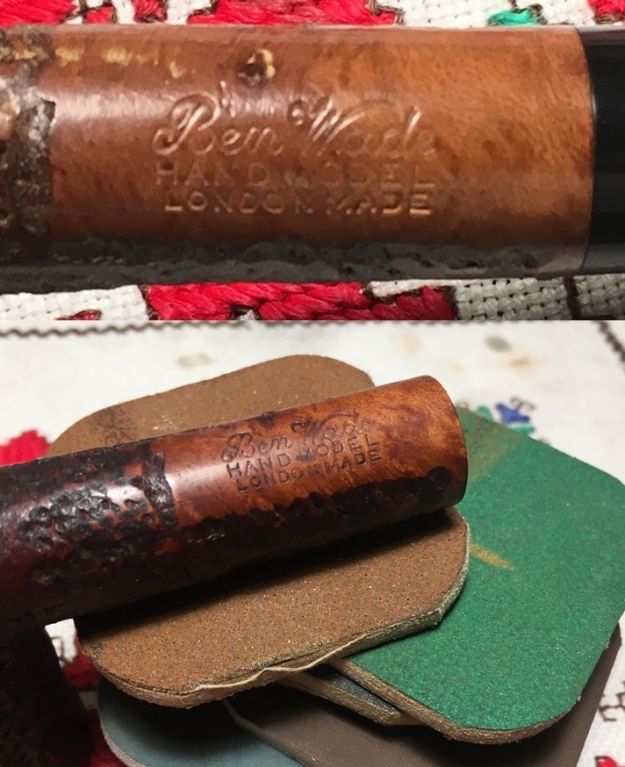
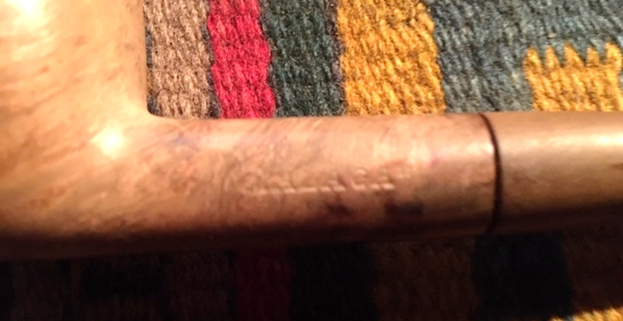
Resurrection – (1998 to present) – Duncan Briars bought the Ben Wade name from Dunhill in 1998 and production of Ben Wade pipes restarted at the Walthamstow plant, sharing the same space where Dunhill pipes are produced and reportedly benefiting from the same quality of production. During this present era, the stamping on the pipes is: “Ben Wade, Made in London, England”The reason I went through this summary of Ben Wade’s morphing history is because in nothing I’ve read about Ben Wade (and I’m sure there’s more out there), I found no reference to a Ben Wade Hand Model with the COM, London Made. The stamping on the pipe before me is ‘Ben Wade’ [over] HAND MODEL [over] LONDON MADE. The saddle stem has the Ben Wade stamped on the upper side of the stem saddle. My first glance at the blasted finish made me wonder whether this Ben Wade came out during the ‘mystery’ Resurrection period in the Pipedia article. Here is the full text that made me wonder:

As said before Preben Holm’s death marked the third end of Ben Wade and for long years there were no Ben Wade pipes in the shops anymore. But then, all of a sudden they were back in the USA some years ago! Who made these pipes? A concrete manufacturer was not known at first.

The rumors spreading were considerable. Especially because these Ben Wades – originally all blasted and in deep black color – featured so perfect straight and / or ring-grain that they were almost suspicious in view of the prices. The supposition that “Mother Nature” had been given a leg up by means of rustication combined with subsequent blasting was evident as different sources confirmed.

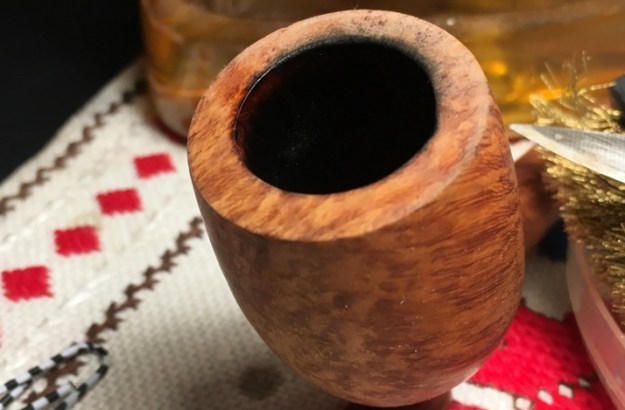
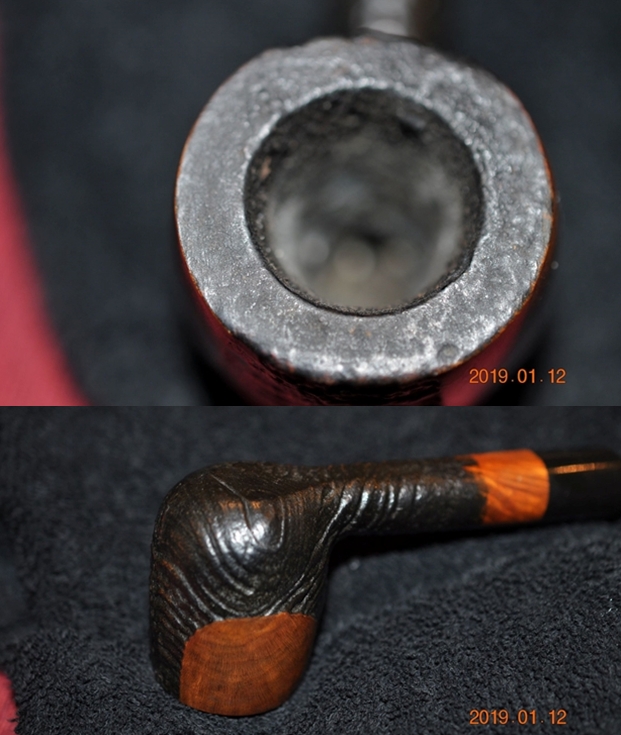
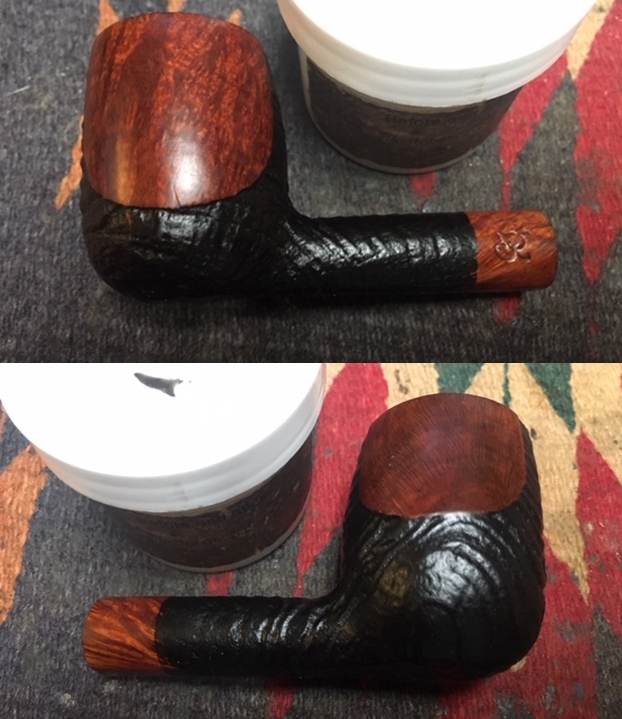
Steve on rebornpipes refers to pipes as having a ‘blasticated’ finish. The process is blasting a rusticated pipe making it appear naturally blasted but the more perfect lines make it seem better than ‘mother nature’ as the Pipedia described. As I look at this Ben Wade, I wonder if it’s from that time period and the grain looks so good, is it blastication? I sent Steve the picture below and his verdict was not blastication, but a really nice looking blasted finish. Yet, I’m stumped by the COM marking. Here’s a close-up of the stummel, very nice natural 3-D blasted grain and not blastication. I sent out pictures of some pictures and the nomenclature to various pipe Facebook groups and the responses I did get, though they were anecdotal, pointed to an earlier period. Paul, from Pipe Smoker of America FB Group, said that he believed it was a Pre-78 and made in Charatan factory. He also said that these were some of his best smokers are London BWs. It sounds good to me!

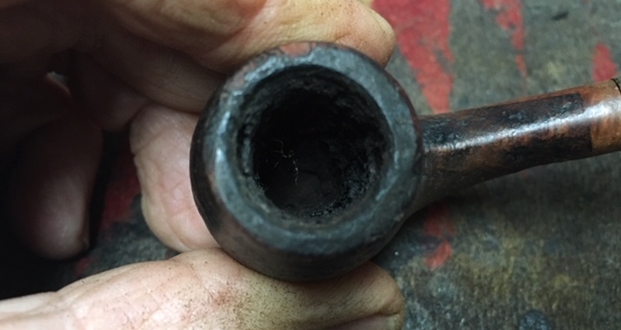
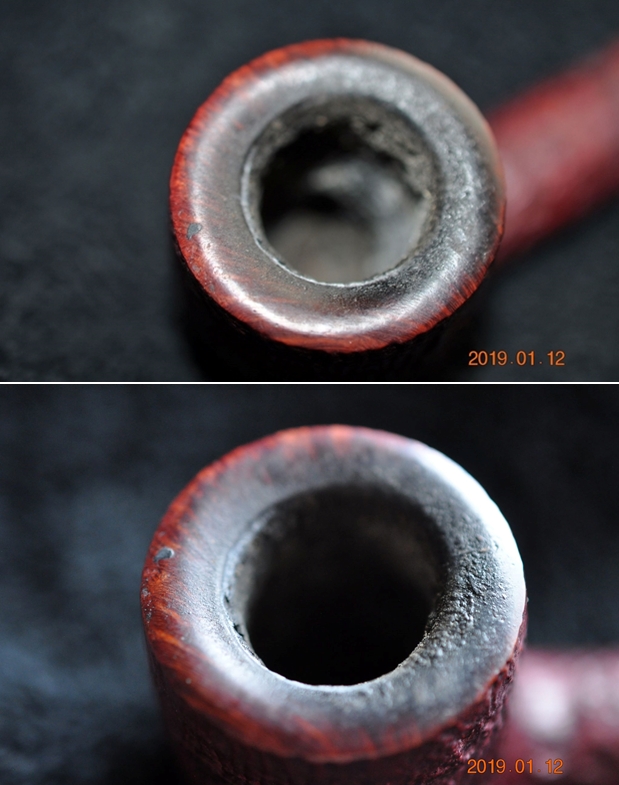
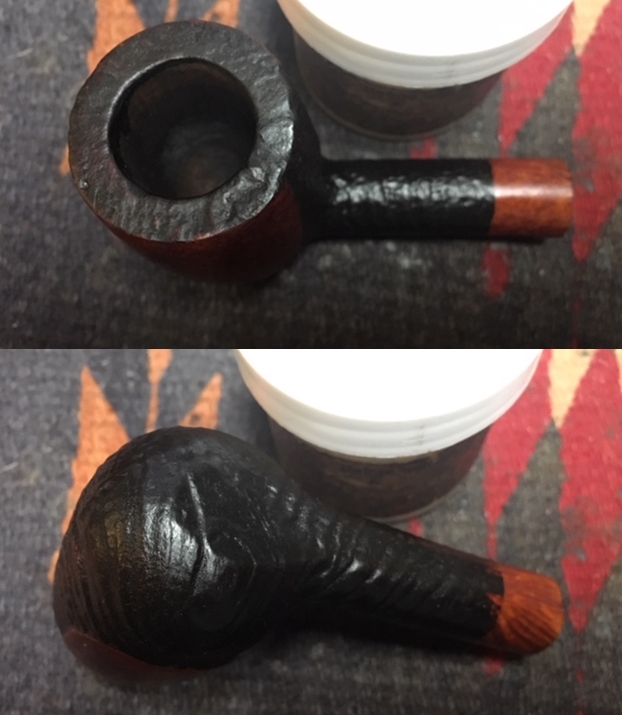
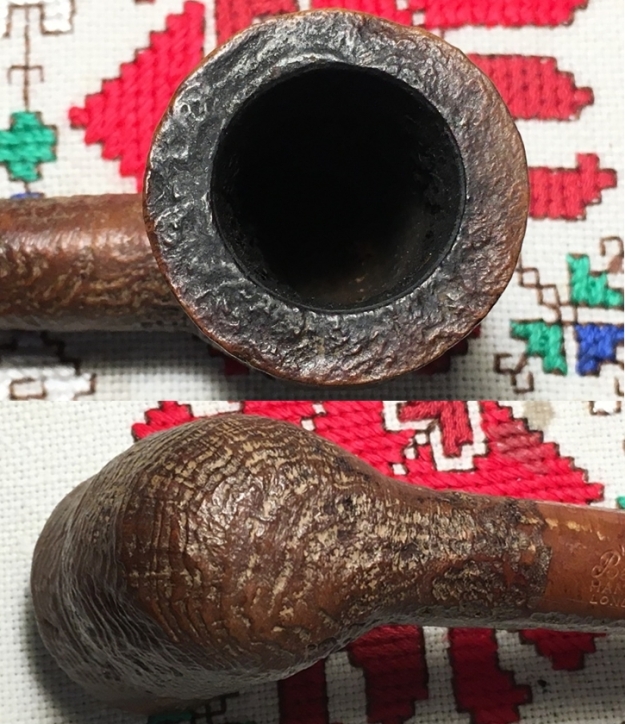
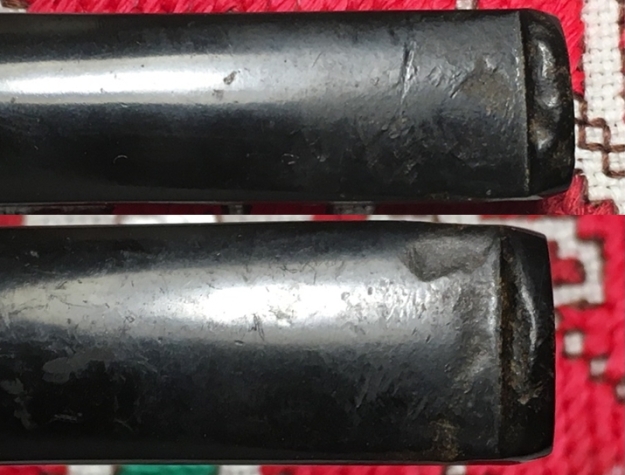
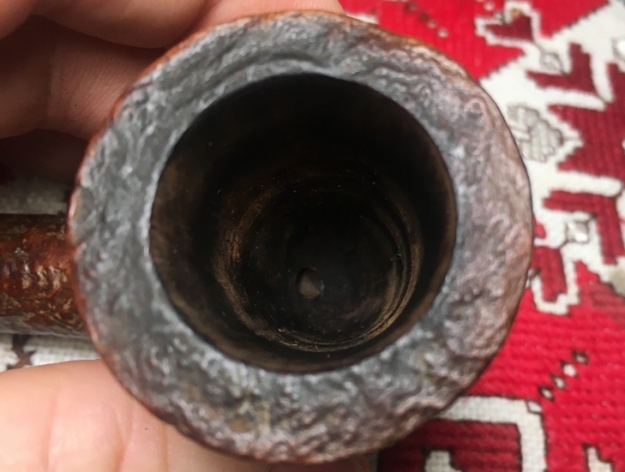
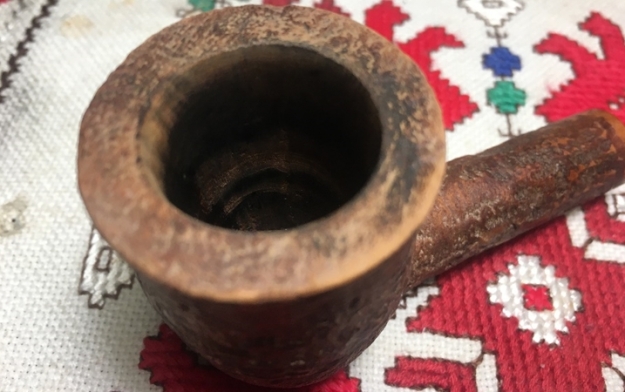
As I look at the condition of this Ben Wade, the surface needs cleaning to see what the finish will do. The finish is dark and tired as I look at it. The chamber shows light cake buildup and the rim is darkened with some lava flow. The stem will need to be cleaned of the oxidation and the button is chewed some with bite compressions on both the upper and lower bit.

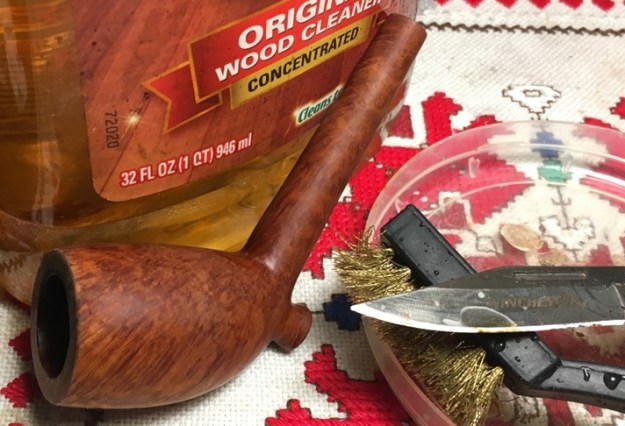
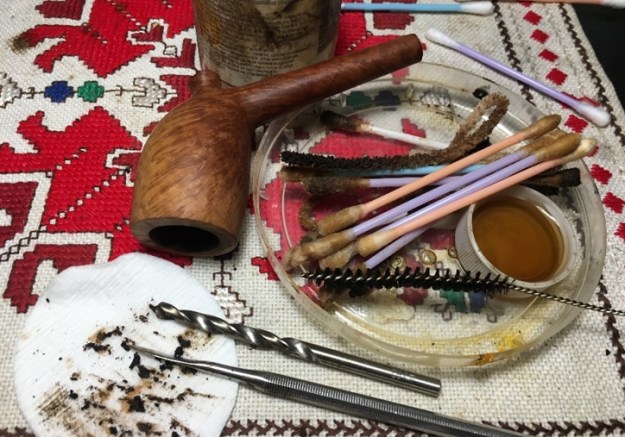
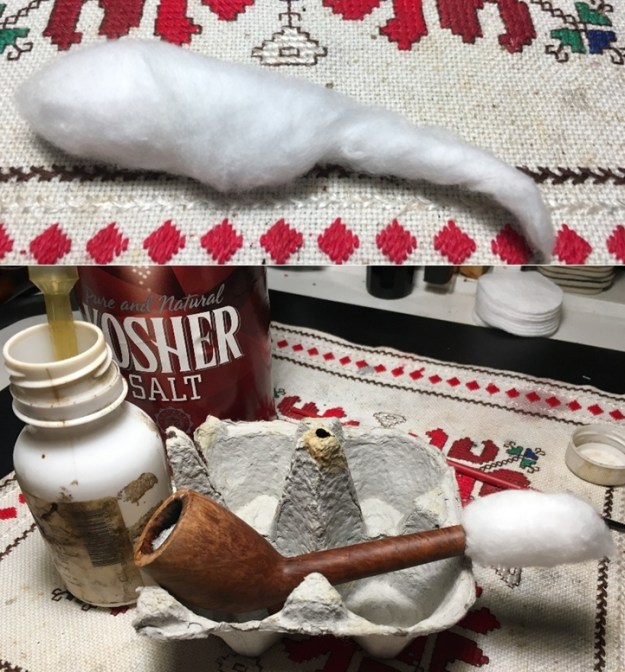
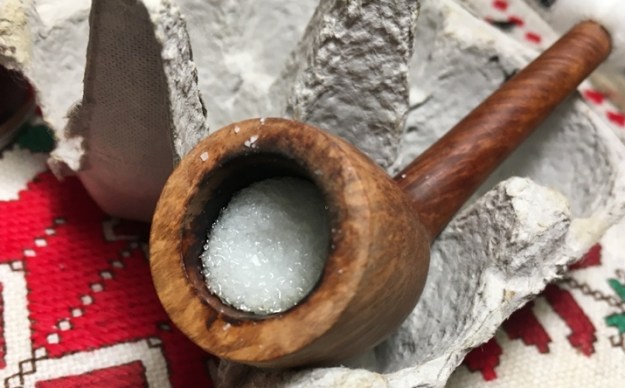
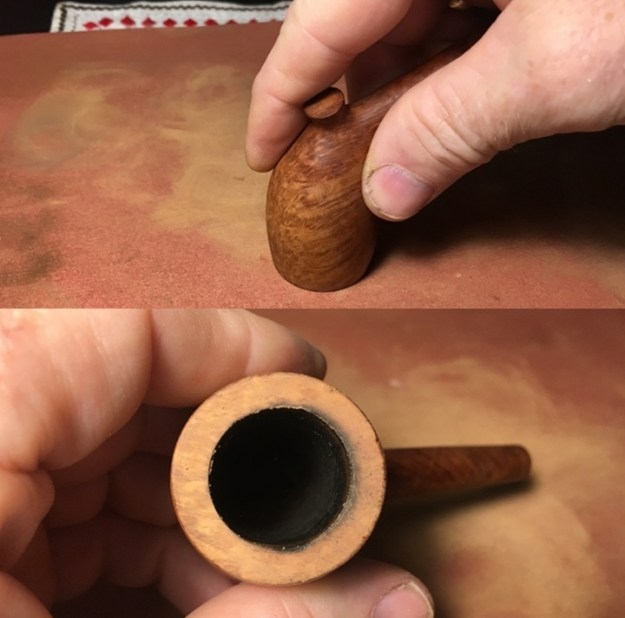
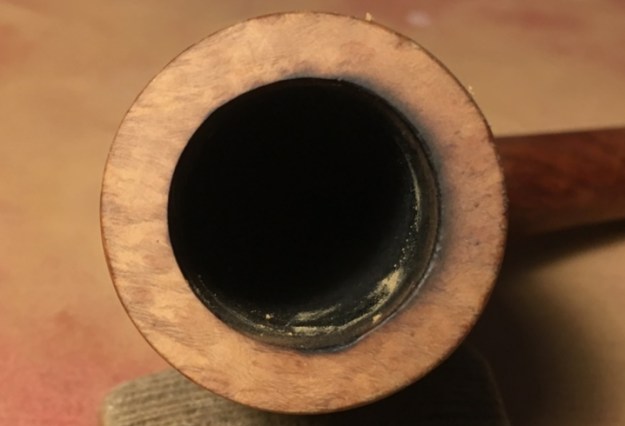
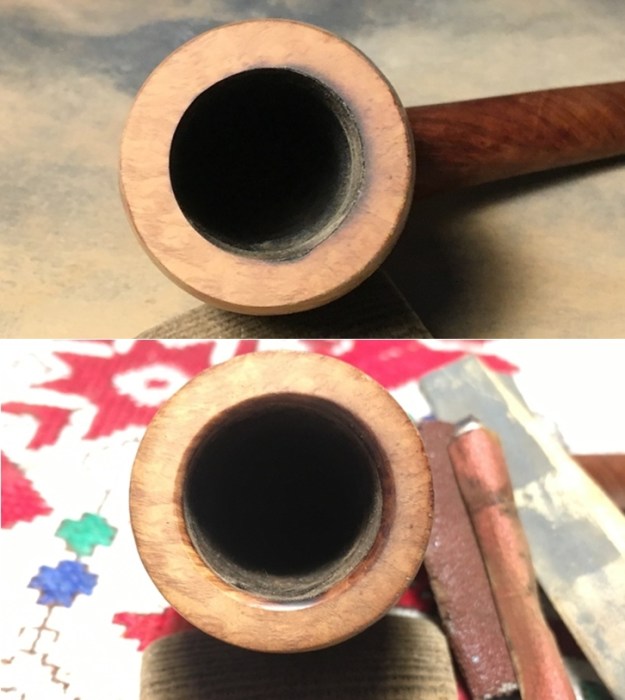
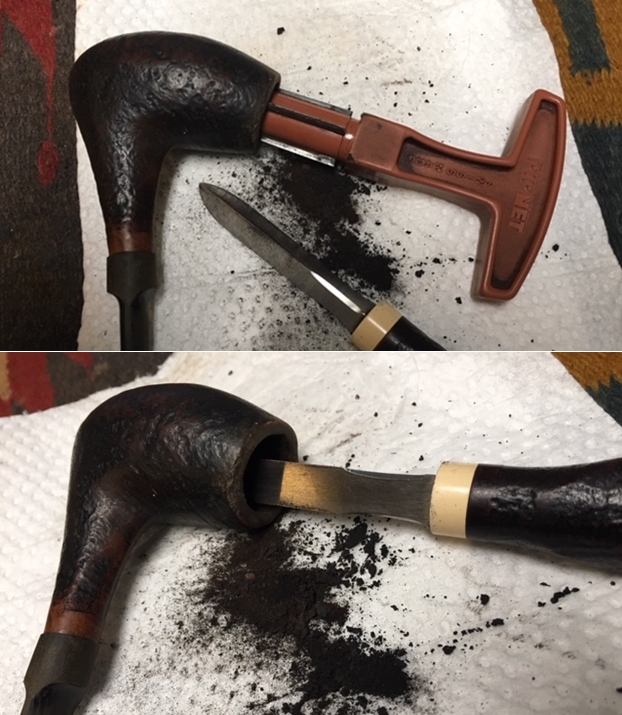
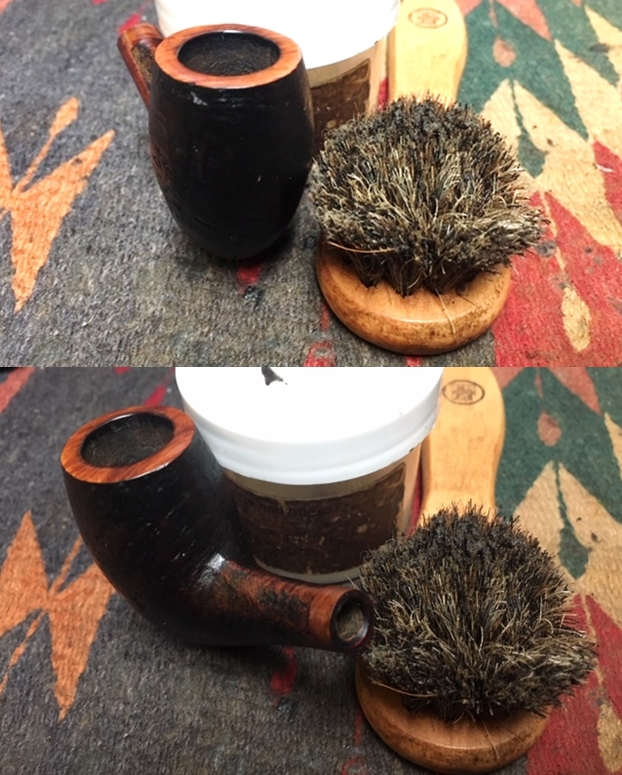
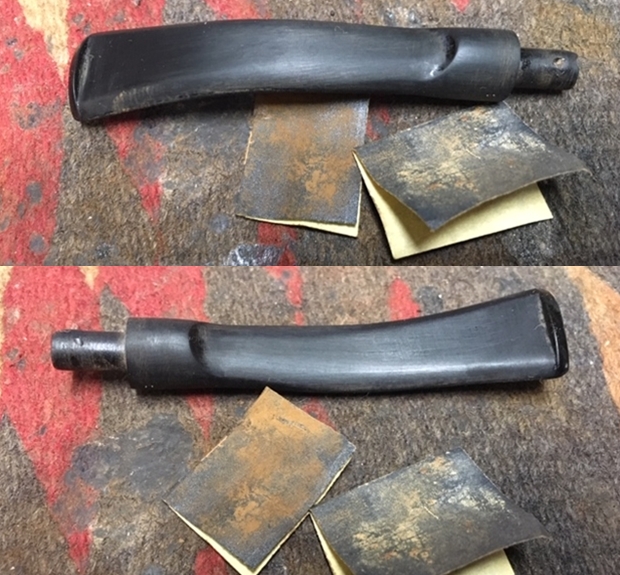
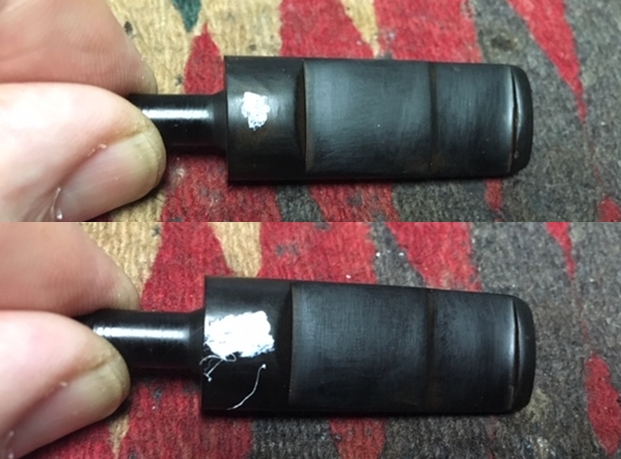
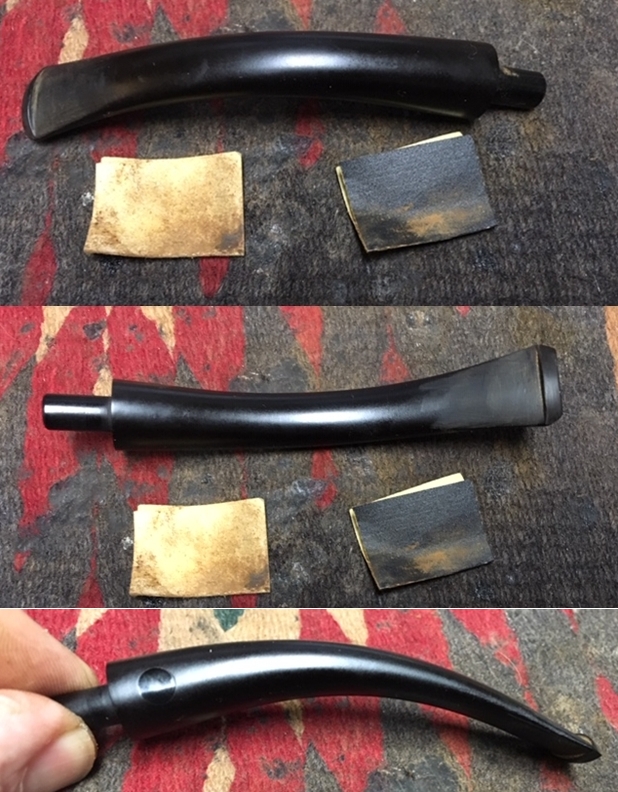
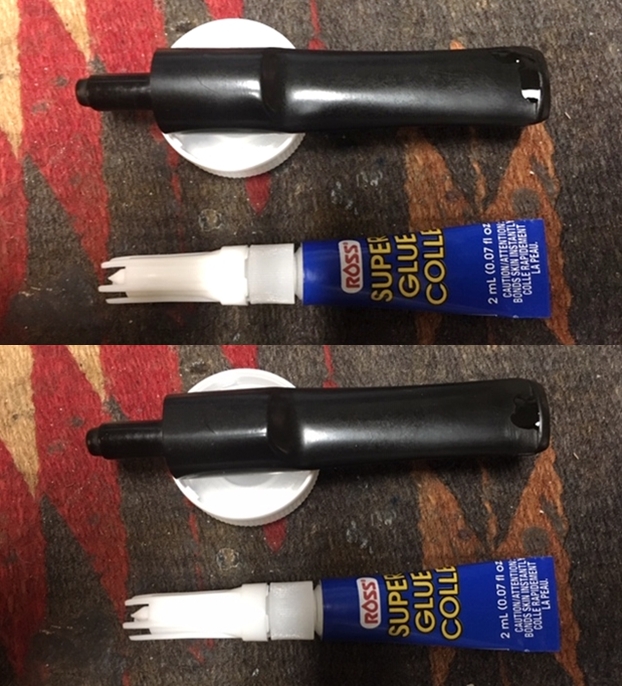
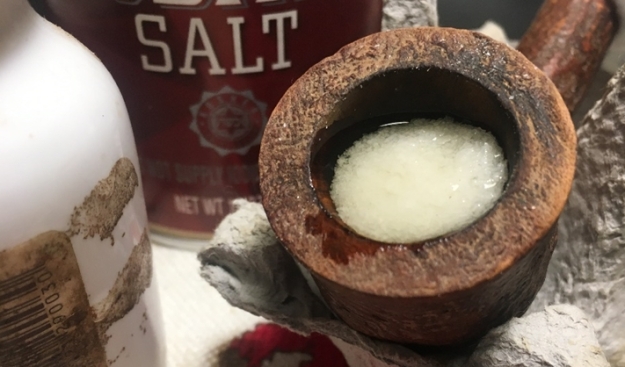
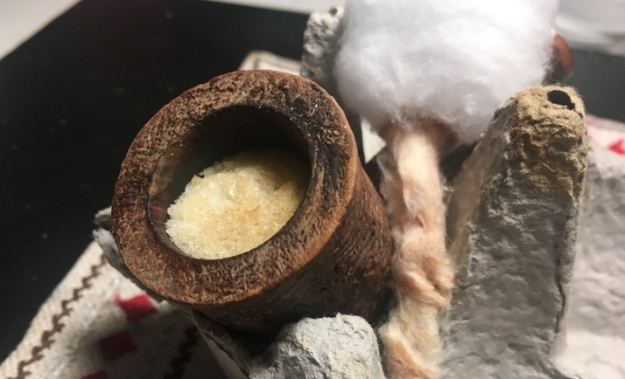
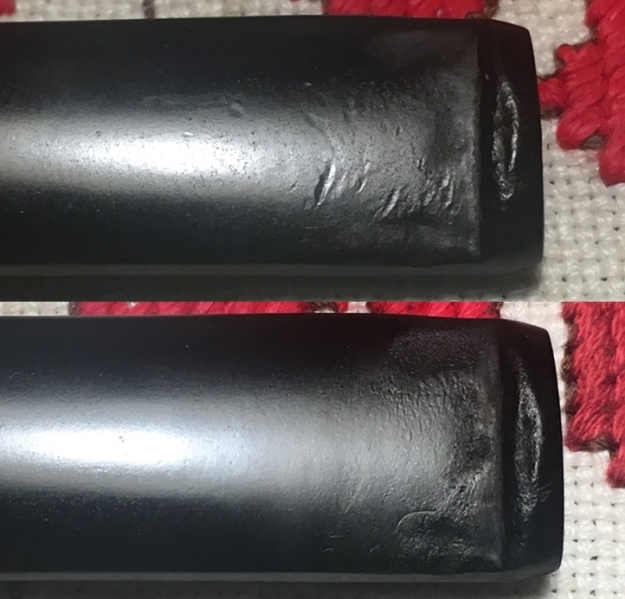
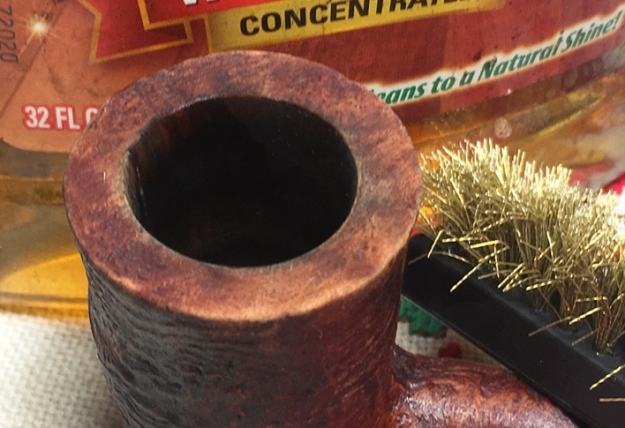
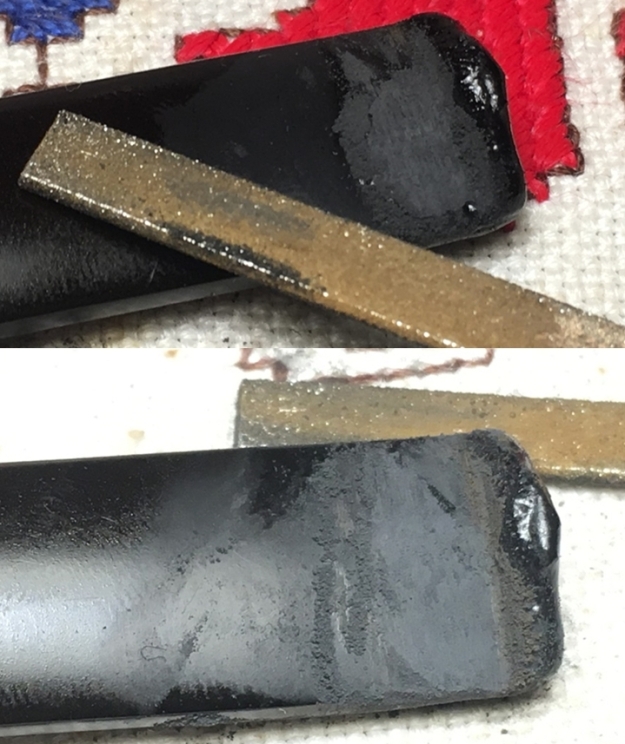
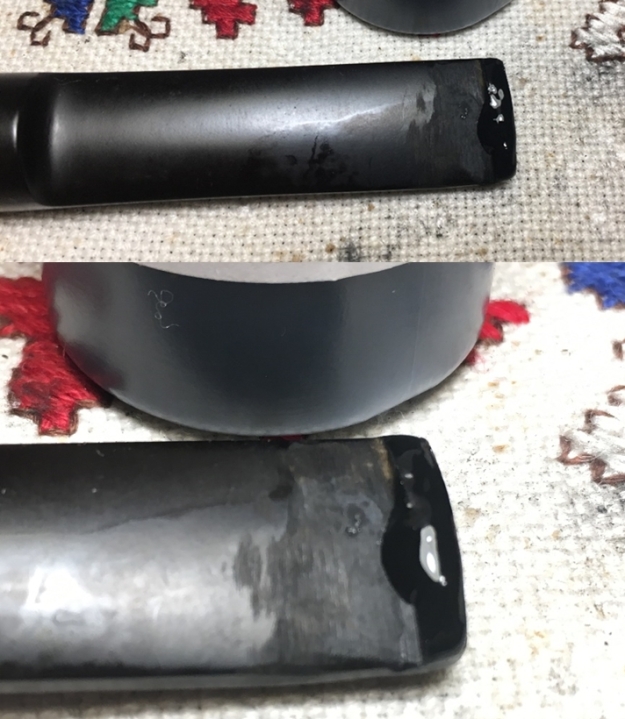
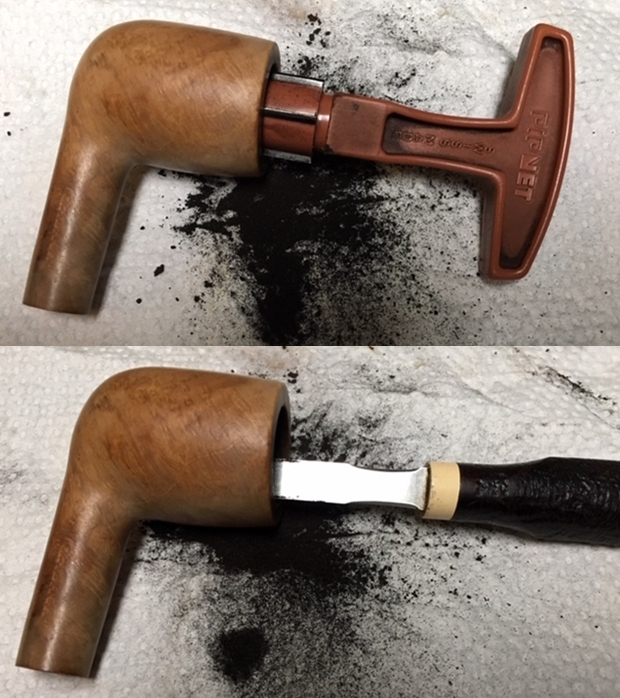
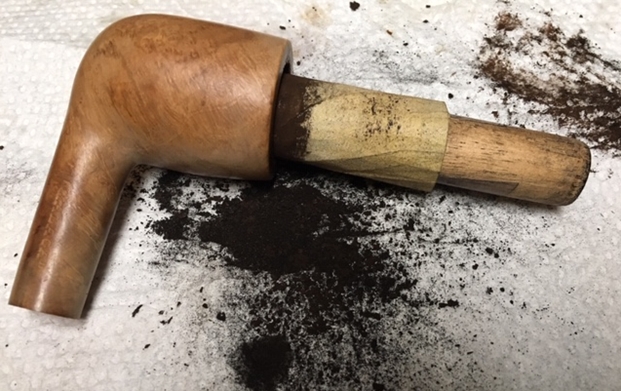
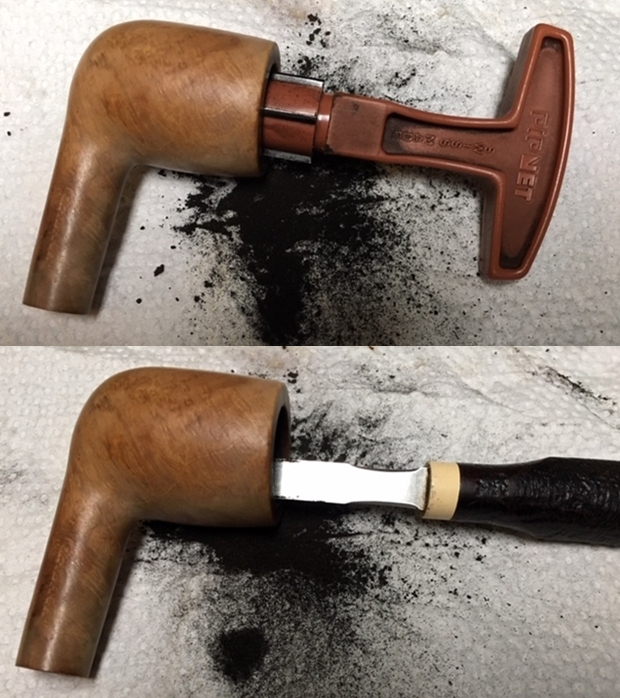
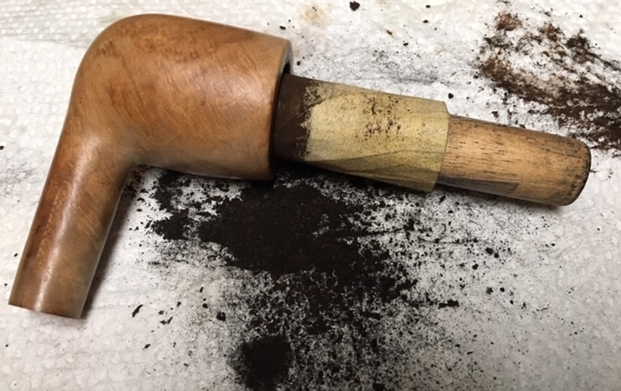
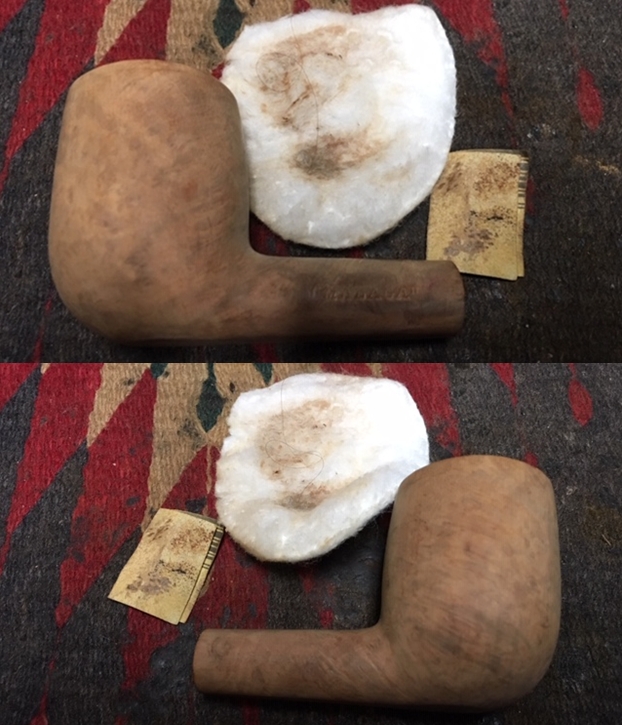
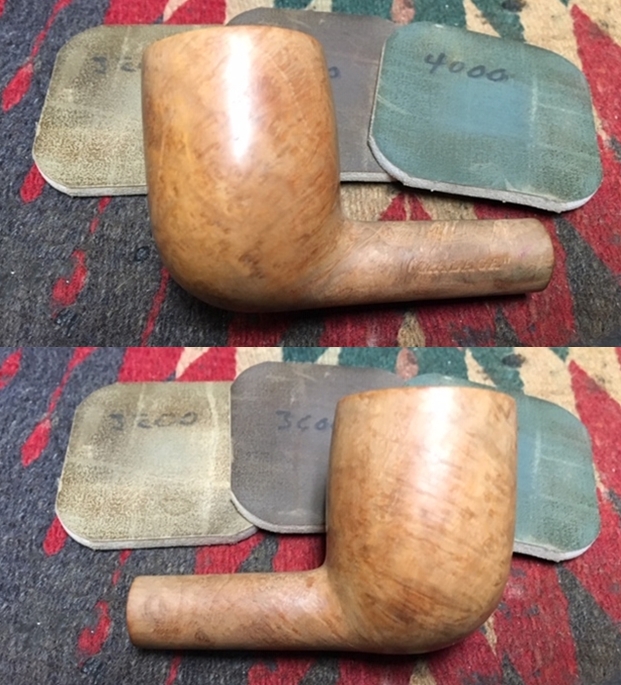
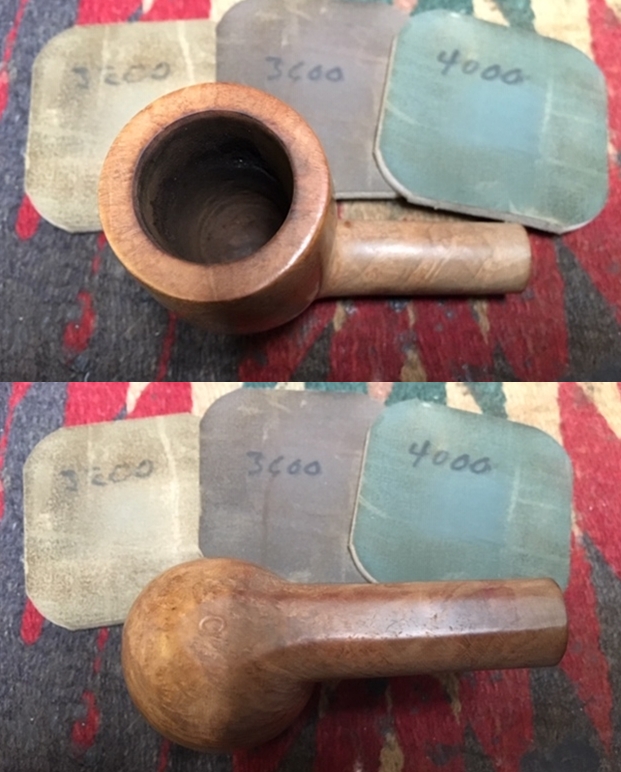
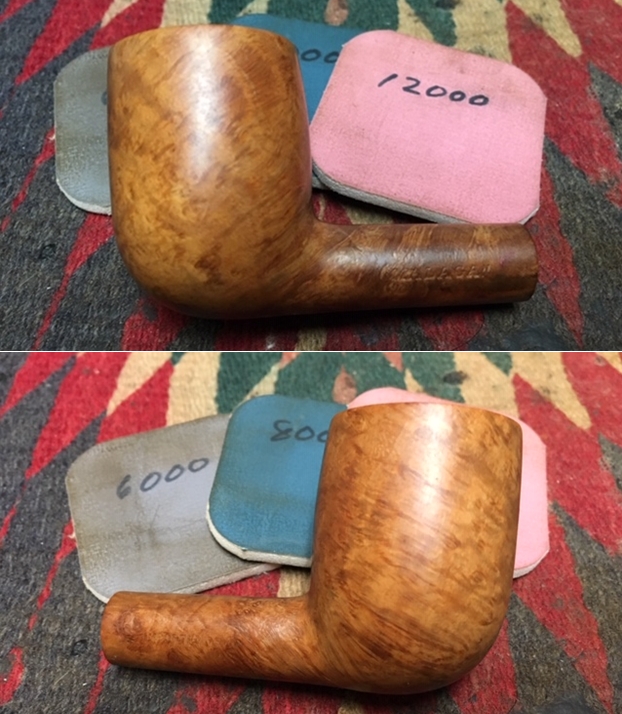
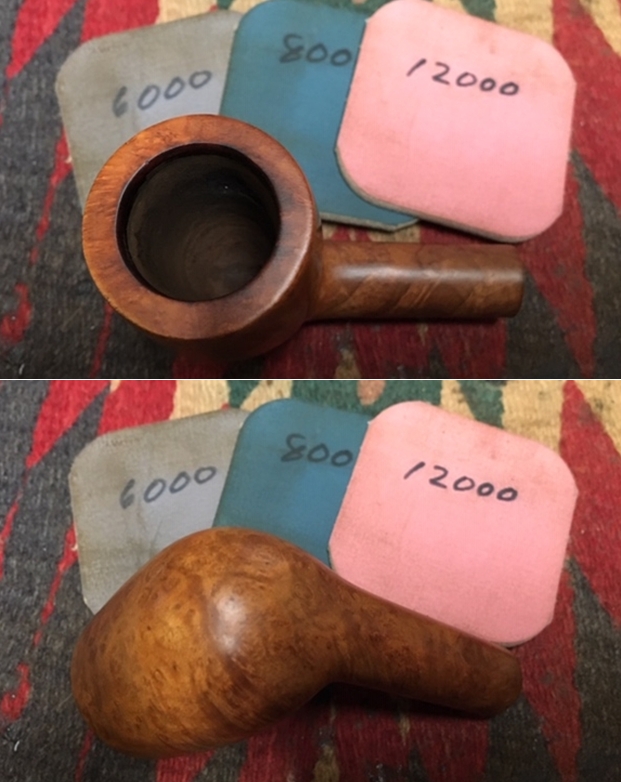
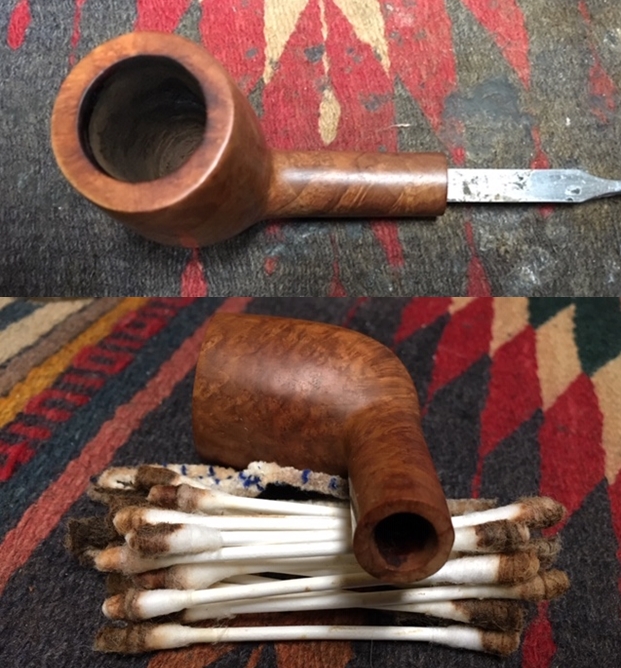
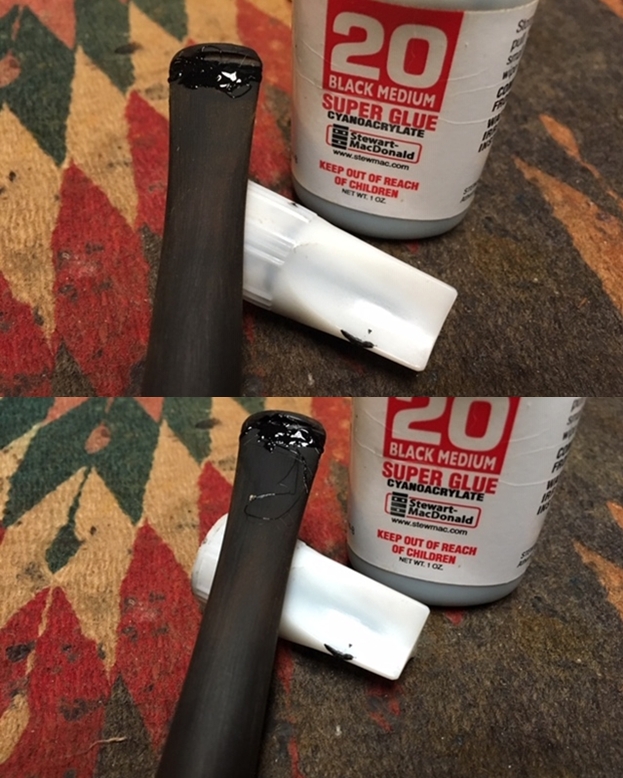
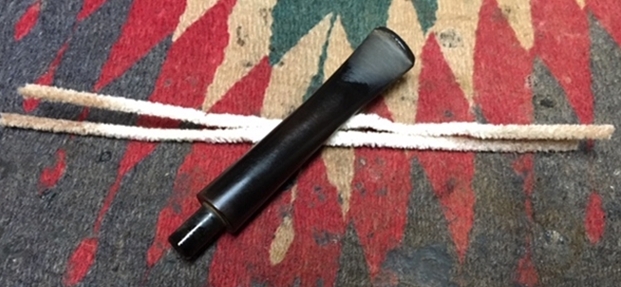
With a better knowledge of the Ben Wade Hand Model Billiard on my worktable, I begin by cleaning the stem airway with pipe cleaners wetted with alcohol and then add it to a bath of Before & After Deoxidizer along with other pipes and stems in the queue. After several hours, I fish out the Ben Wade’s stem and wipe it down with cotton pads wet with alcohol to remove the raised oxidation. The Deoxidizer did a great job.To begin to rejuvenate the stem, I apply a coat of paraffin oil (a mineral oil) to the vulcanite and then put it aside.Next, I go to work on the chamber using the Pipnet Reaming Kit. After putting paper towel down, I ream using 3 of the 4 blade heads available. I follow by fine-tuning with the Savinelli Fitsall tool and finish by sanding the chamber with 240 grit paper wrapped around a Sharpie Pen giving the briar a fresh start. I then wipe the chamber with a cotton pad and alcohol ridding it of leftover carbon dust. After inspecting the chamber, I see no heating or burning problems. I move on! The internals of the mortise and airway are next on the cleaning regimen. Using cotton buds and a few pipe cleaners, things clean up quickly. I also use a dental spatula and scrape the mortise wall and remove very little tars and oils. It’s nice when a stummel isn’t horrendously grungy! Moving on.Moving now to the external blasted finish, I use undiluted Murphy’s Oil Soap with a cotton pad to scrub. I’m wondering how strong the finish is – it appears a bit thin and the cleaning will reveal the answer. I also use a bristled tooth brush as well as a brass wire brush on the rim. After scrubbing, I take it to the sink and rinse the stummel with cool tap water without allowing water in the internals! The verdict is that the finish is worn and the scrubbing on the rim has left bare briar. With the day closing, I want to give the internals a further cleaning using kosher salt and alcohol as a soak. I create a wick from a cotton ball by pulling and twisting it. The wick serves to draw the tars and oils out. I then insert the wick down the mortise and airway with the help of a stiff wire. I then fill the bowl with kosher salt (which leaves no aftertaste) and after placing the stummel in an egg carton to keep it stable; I put isopropyl 95% into the chamber until it fills. I wait a few minutes and top off the alcohol once more. I turn out the light allowing the stummel to soak through the night. The next morning, I discover that the soak has not unearthed too much additional tars and oils from the internals of the pipe. This was confirmed after I followed with a few cotton buds and pipe cleaners dipped in alcohol. Cleaned!Turning my attention now to the Ben Wade stem, the Before & After Deoxidizer did a great job excising the oxidation from the vulcanite rubber compound. Now I focus on the bit and button repair which have some significant bite compressions. I take a closer look with a couple of pictures to mark the start of the repair. I start by painting the bit area with a Bic lighter to heat and expand the vulcanite. After doing this for some time I take comparison pictures to show the unsatisfactory progress. Comparing first:

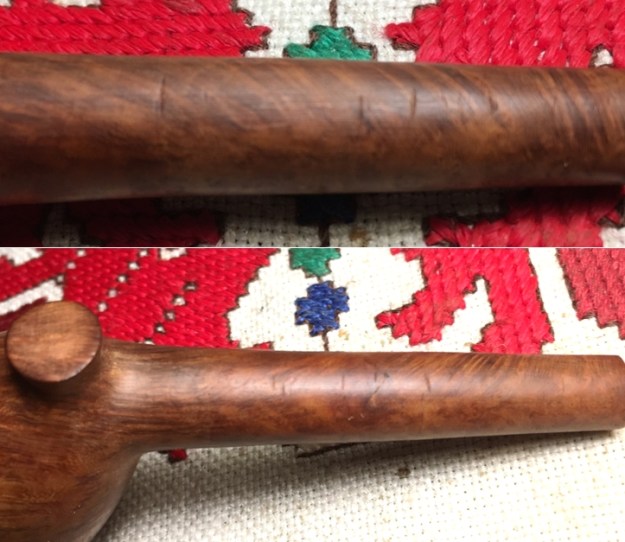
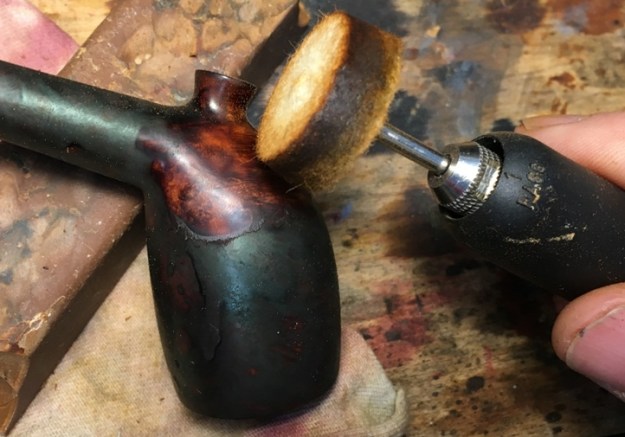
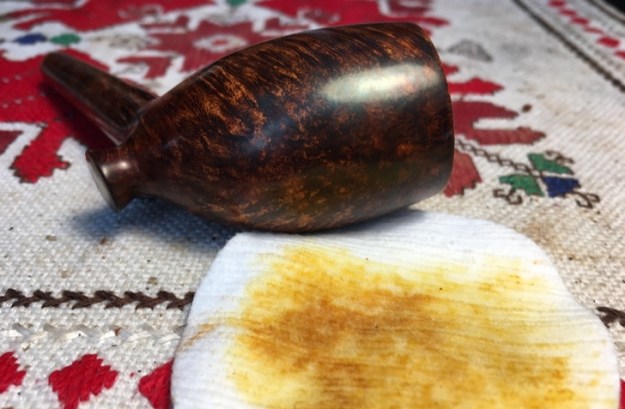
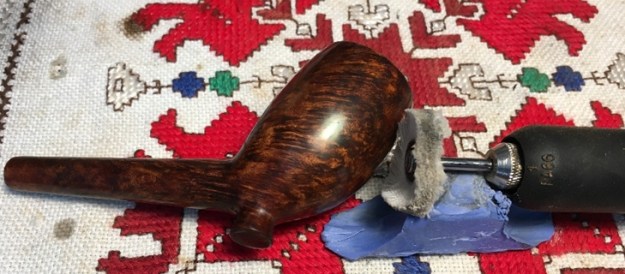
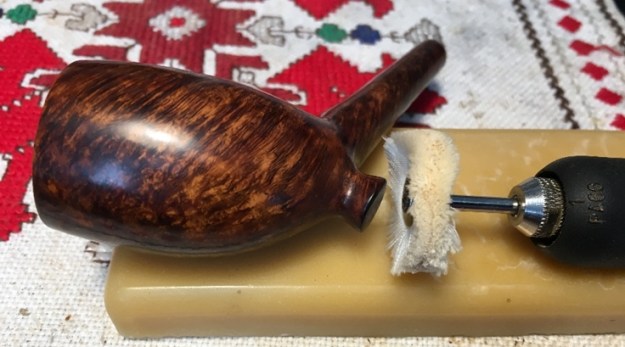
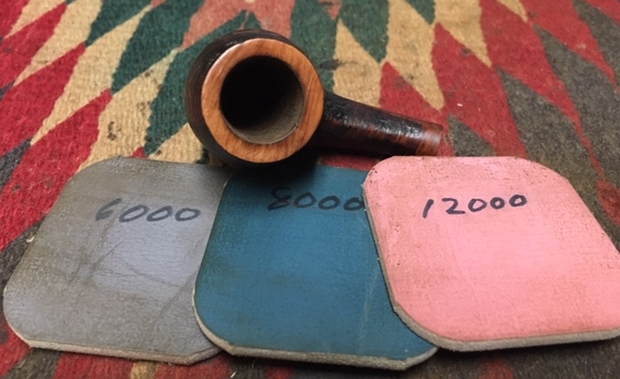
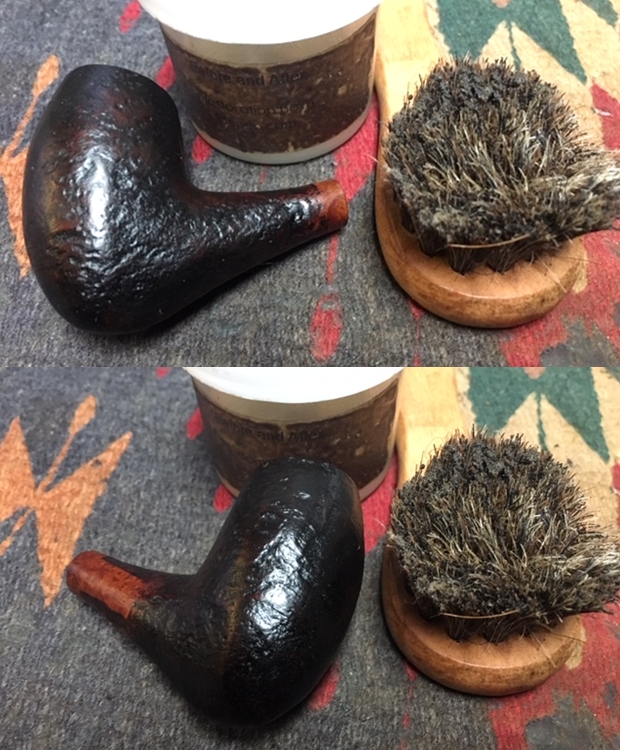
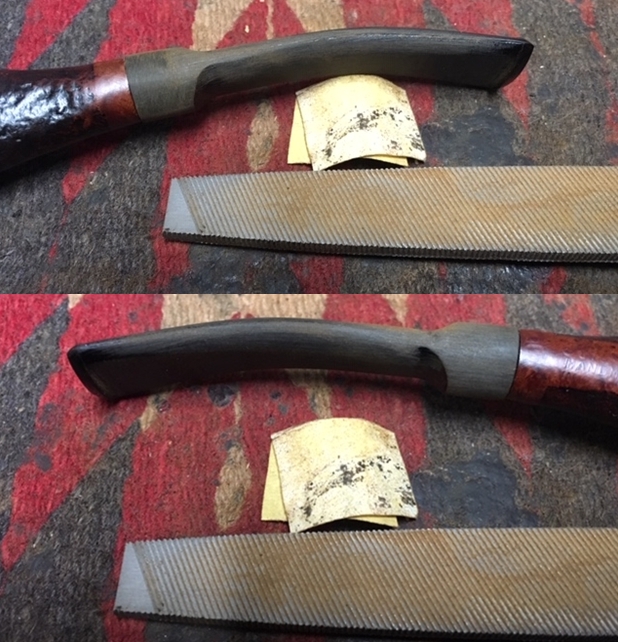
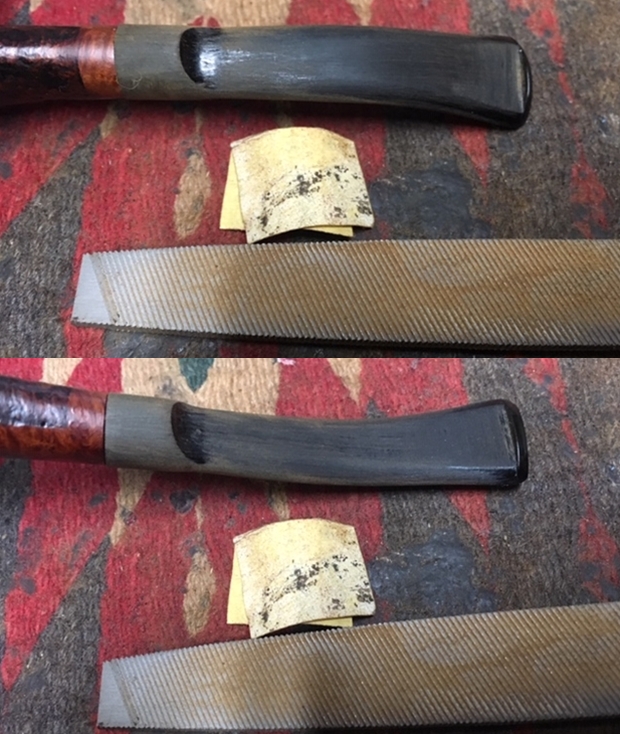
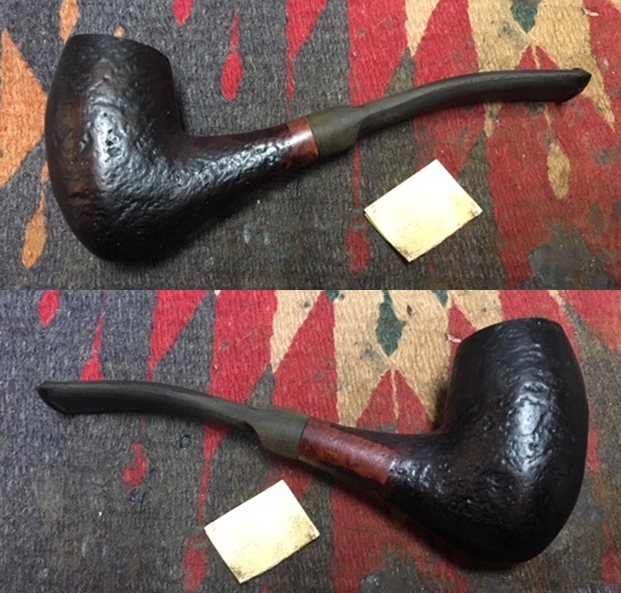
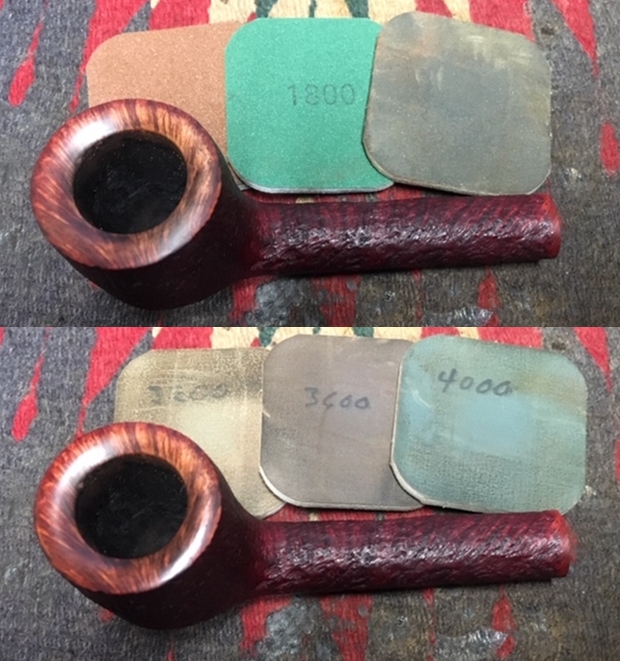
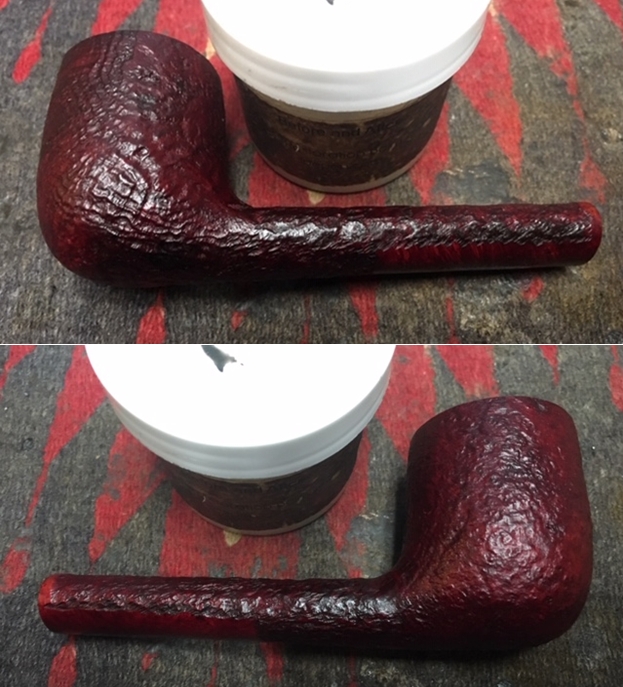
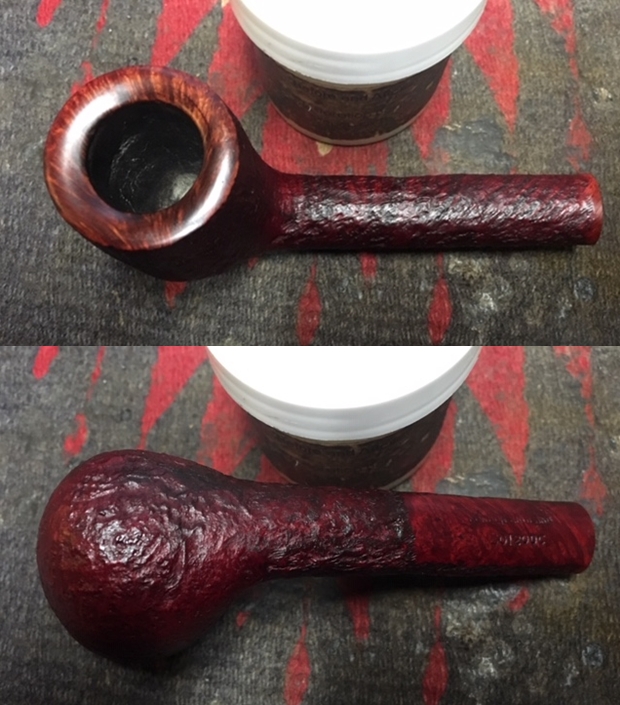
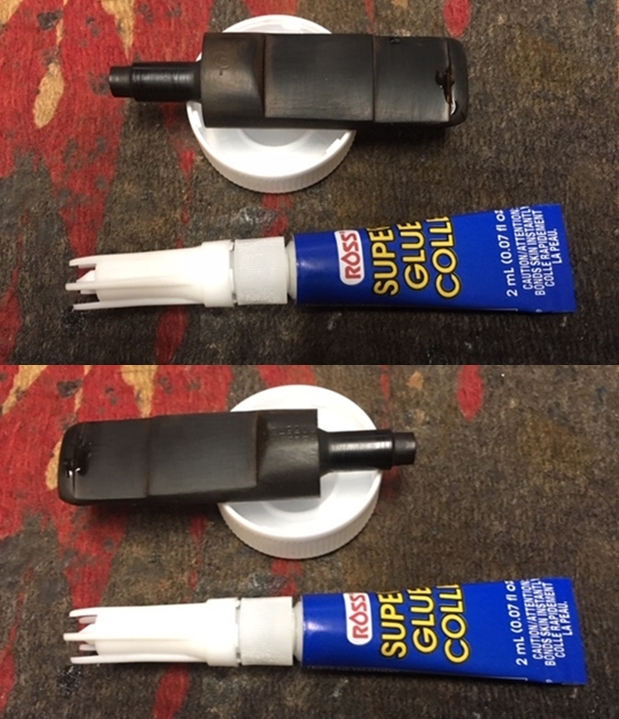
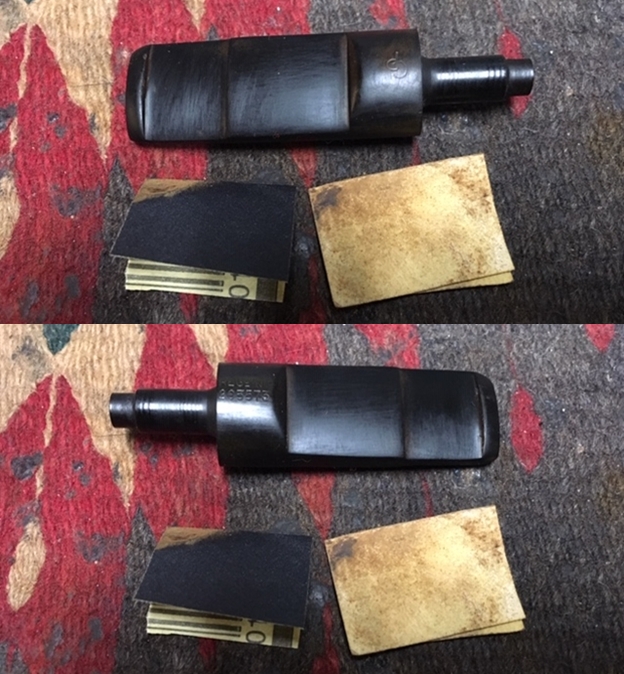
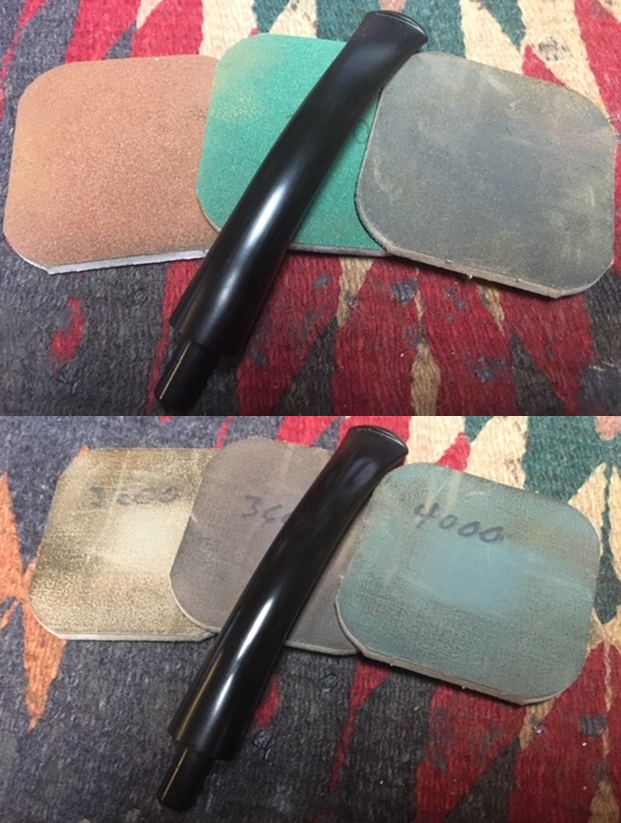
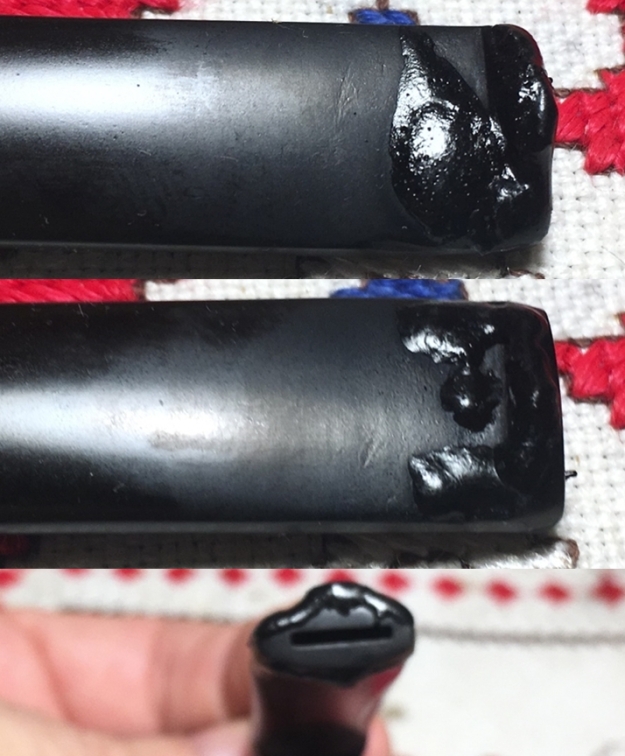
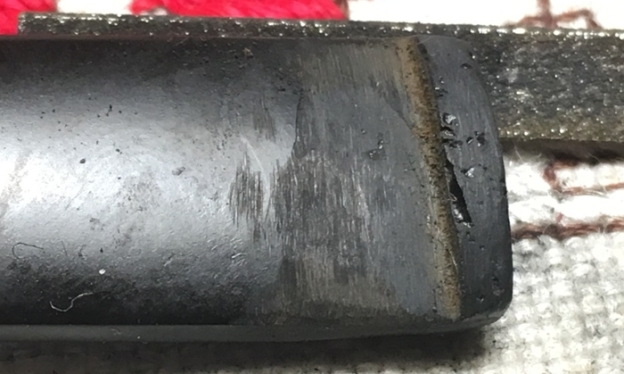
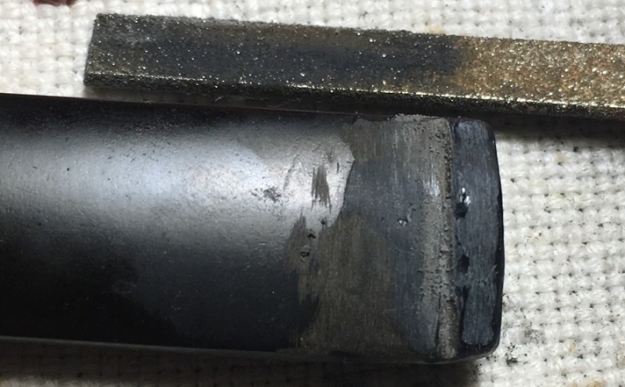
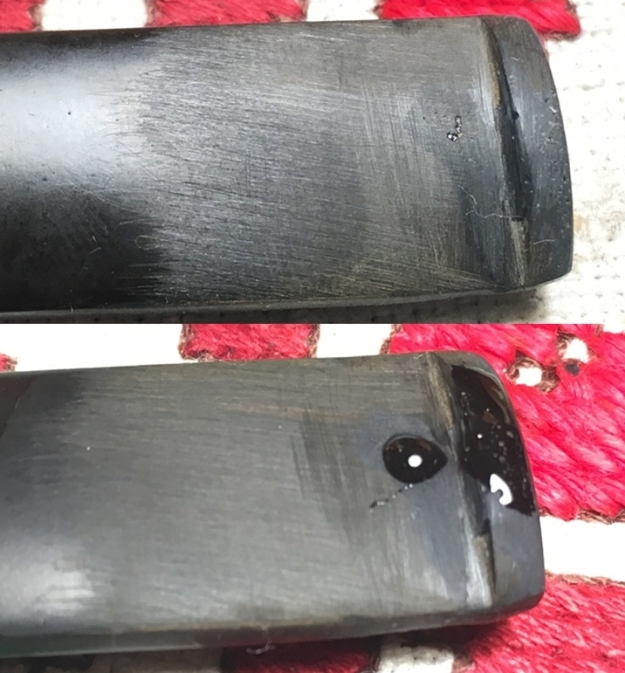
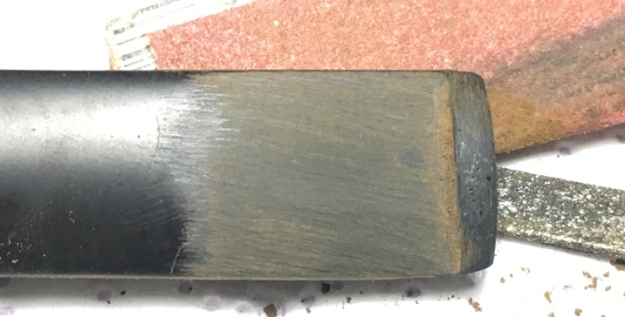
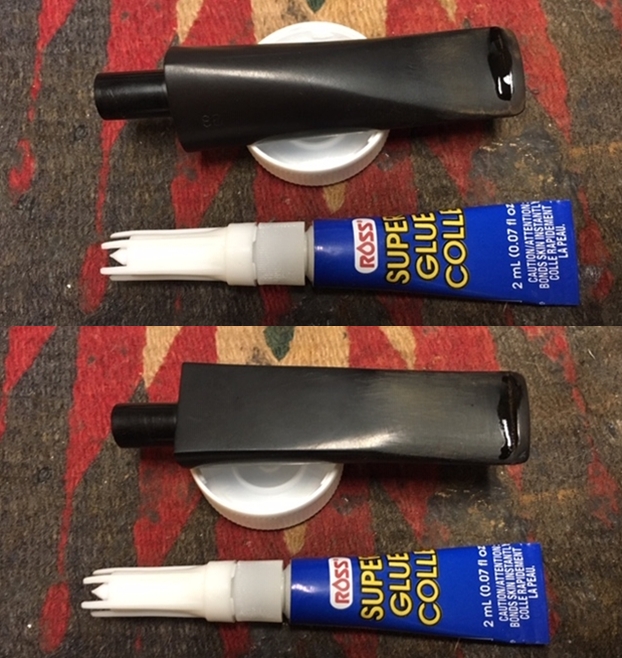
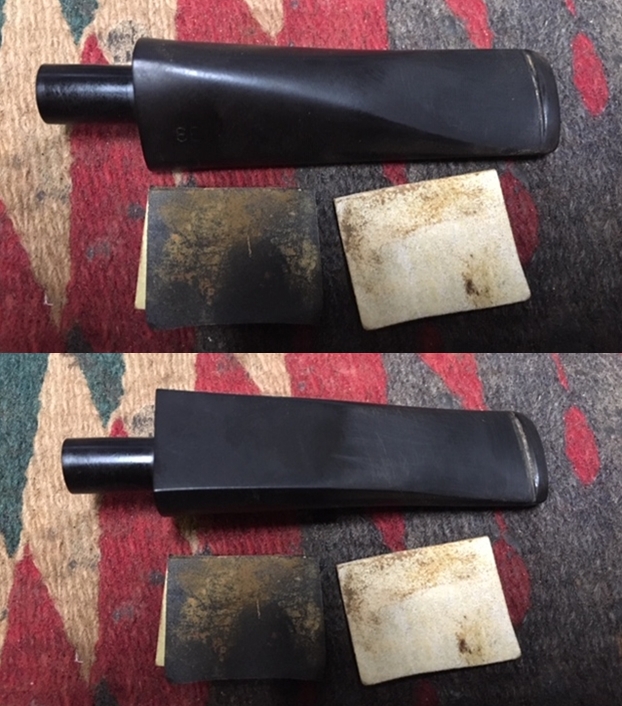
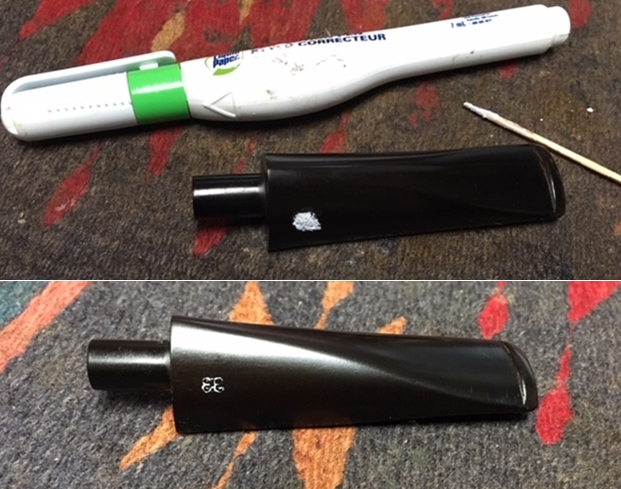
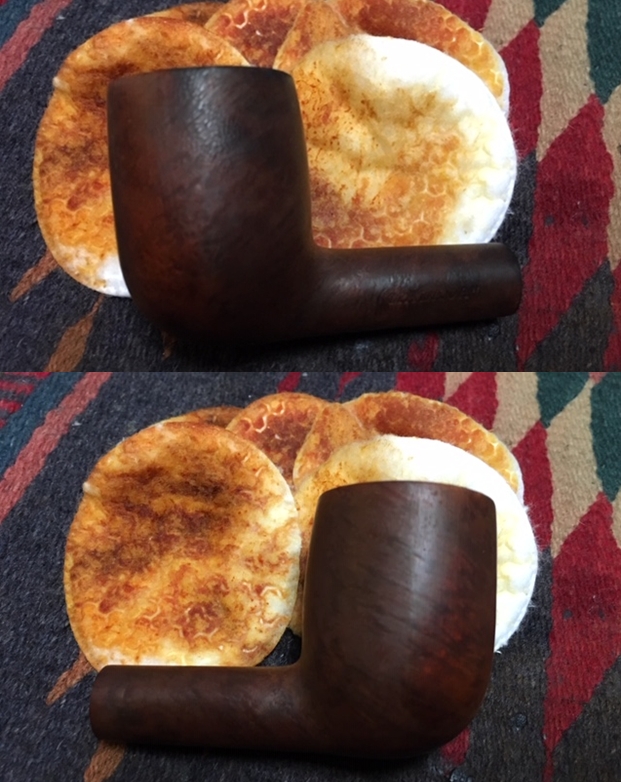
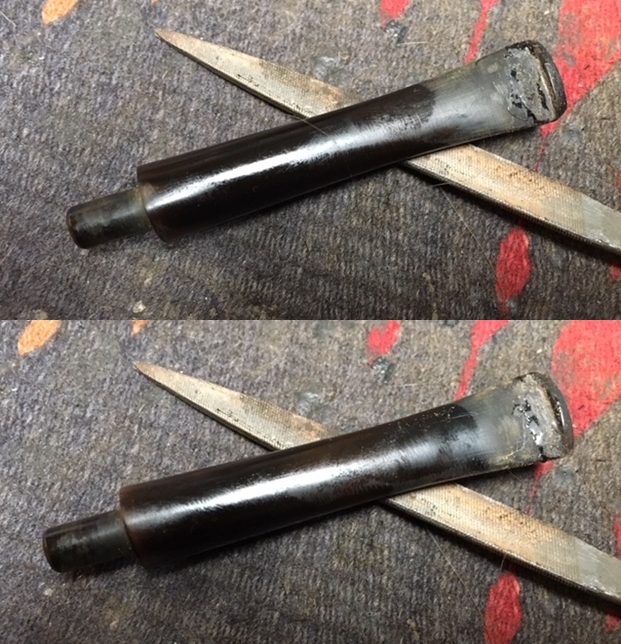
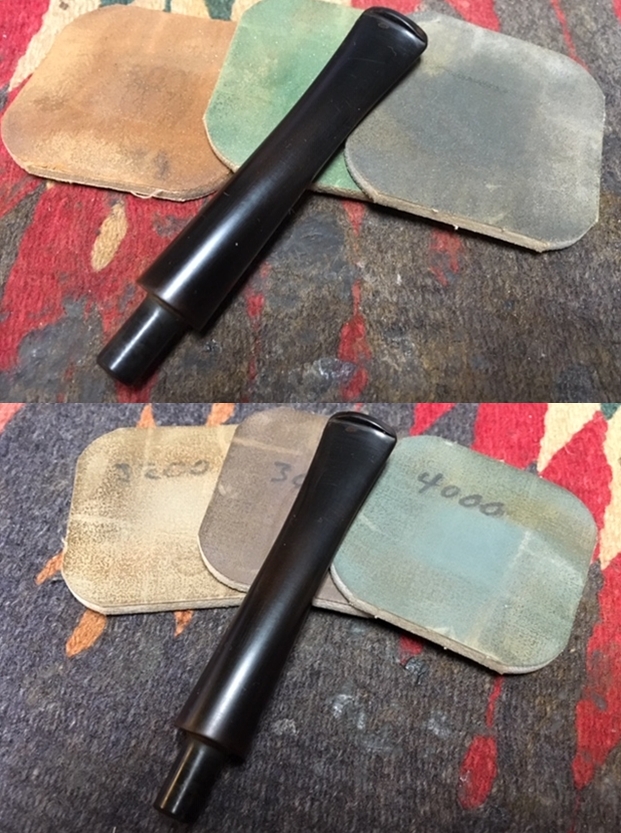
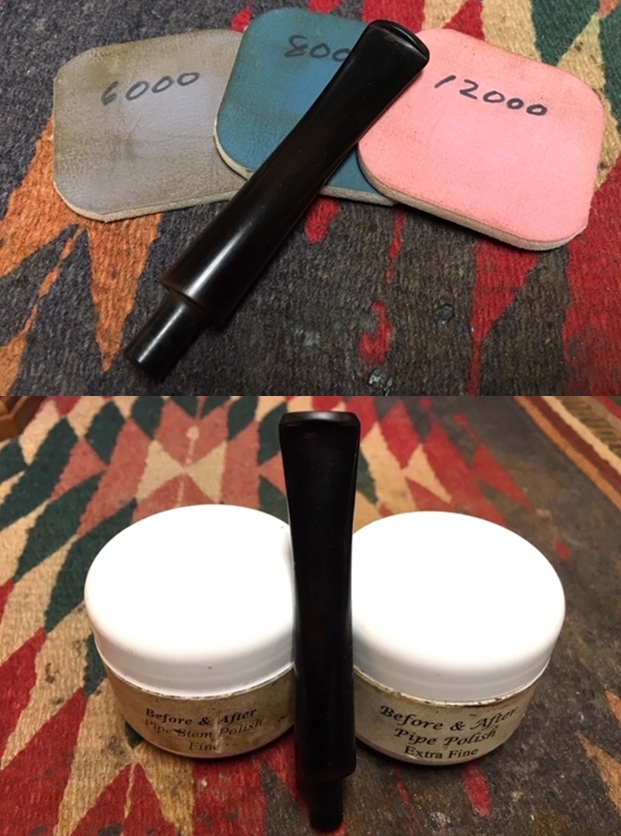
Upper bit, before and after:Lower bit, before and after:The heating process made little progress. I now mix activated charcoal with CA glue to form a patch material and apply it to the tooth compressions and to the button lips – I’ll need to reshape the button. I first clean the stem area with isopropyl 95%. I then gradually mix thick CA glue with activated charcoal on an index card. I aim for a thickness of molasses so it’s thick enough to stay in place not run but will allow some manipulation once applied. On the first mixing, I mixed too much activated charcoal with the CA glue and got one of the chemical reactions where the mixture hardens instantly giving off an acrid smoke!! This has happened before. I need to apply the mixture before it thickens too much. The next mixtures work well. After applying patch material to both upper and lower I set the stem aside to allow the patch to cure. I turn my attention now to the Ben Wade Hand Model stummel. I like the rustic look of this stummel. What I also like about it is that there is a curving or narrowing in the shaping of the bowl about 2/3s up as it moves toward the rim. With the rough finish, rough is good and the surface reminds me of tree bark! With the stummel being dry and with a light blotchy look in the valleys of the blasted areas, I decide to add some paraffin oil to the briar to hydrate it. Doing this also allows me to get a sneak preview of what the briar will look like somewhat finished, I apply paraffin oil to the surface with a cotton pad. This moisturizes the briar and I like what I’m seeing. The only thing I’m not liking is that the scorched place on the back side of the rim is still evident even with the help of a darkened blend. The pictures show what I’m seeing. I decide to go back to an elbow grease methodology and focus cleaning on the rim with a brass wire brush and Murphy’s Oil Soap. This time Murphy’s has its way. I did do a lot of scrubbing and the rim surface shows the skinned lighter area on the rim where the cleaning was, but the scorched area was removed.To darken the rim to blend with the rest of the bowl, I use a cherry dye stick which matches pretty well and I color the rim as well as the edge of the rim – external and internal. This looks good and will blend in more as I polish.Next, to clean up the lower shank panel, I very quickly and lightly, run the area through the full regimen of 9 micromesh pads from 1500 to 12000 – dry sanding with each. I wasn’t worried about the nomenclature because it is deep and solid, and I sanded very lightly with the pads. This gently cleaned the smooth briar of minor nicks and scratches.I like the look of the finish and decide that it looks good just as it is. In order to deepen and enrich the natural grain, I apply Before & After Restoration Balm. I like this product that can be found at http://www.lbepen.com. I apply some of the Balm to my fingers and thoroughly work it into the briar surface – into the nooks and crannies of the richly blasted briar. After applying, I let the stummel sit for a few minutes – 10 or so, and then I wipe the stummel with a microfiber cloth to remove the excess Balm and to buff it up a bit. I take a picture during the ‘absorbing’ period.The patches on bit and button of the stem are now cured after several hours. I begin to remove the excess patch material on the upper bit using a flat needle file. I’m careful to establish the new inner lip of the button. As I filed to shape the new button lip, I discover a crevasse hidden below which is too severe simply to remove. There are other pockets on the button that don’t look too promising. It is normal in my experience, that its necessary to apply additional patch material to fill pockets and gaps that appear during filing and sanding.To address patching the button problems, this time I use a black CA glue to fill the crevasse and pockets and I apply an accelerator to quicken the curing process. Again, filing and shaping the upper button lip and this time better results are realized.I follow filing by sanding with 240 grit paper (which I forgot to add as a prop to this picture!) to erase the marks left by filing. As with the filing of the button, the finer 240 paper reveal a cluster of pockets in the center bit area in the patch. Again, I spot drop black CA glue to fill the pockets, apply an accelerator and file the excess then sand the bit area with 240 grit paper. The upper bit and button area look good. The same process is repeated on the lower bit and button. It too, looks good. With the bit repairs completed and with the repaired button shaped, I continue by wet sanding the entire stem with 600 grade paper. I’m careful to work around the BEN WADE stem stamp on the saddle. After wet sanding with 600 grit, I apply 0000 steel wool to stem. Finally, I wet scrub the stem with Magic Eraser. I’m satisfied with the progress. I move forward with the micromesh pad regimen wet sanding using pads 1500 to 2400 followed by dry sanding with pads 3200 to 4000 and 6000 to 12000. I follow each set of 3 pads with an application of Obsidian Oil which further rejuvenates the vulcanite. I like that vulcanite pop! The stem looks great. I try to reunite the stem and the stummel and as is the case sometimes, after cleaning the mortise, the briar inside can expand causing the fit with the tenon to become too tight. I do not want to force the stem and risk a cracked shank, so I gently ream the mortise with a half-rounded needle file. Then I gently sand the tenon by wrapping 600 grit paper around the tenon.This works and I am able then to reunite the stem with the stummel and mount a cotton cloth buffing wheel to the Dremel and set the speed at about 40% full power.  I apply Blue Diamond compound to the entire pipe.  I run the wheel along the grain of the blasting to bring out the contrasts of rough briar as well as to buff it up into a shine.  After completing the Blue Diamond, before applying wax, I freshen the Ben Wade white stem stamp.  I clean the area with alcohol and then I dab a bit of white acrylic paint over the stamping.  I then use a cotton pad to tamp the wet paint which draws off the excess paint and helps the paint to dry sooner. Then using a toothpick, I gently scrape off the excess paint leaving a refreshed BEN WADE stamp.  It looks nice and crisp.I then mount another cotton cloth buffing wheel onto the Dremel and apply carnauba wax to the stummel.  I increase the speed of the Dremel from my usual 40% up to about 50 to 60% full power.  I do this to create more heat with the friction of the wheel to encourage the wax to dissolve in the craggy blasted briar surface.  Waxing a rough surface can cause the wax to collect and not to absorb into the surface.  The added heat encourages this and as I look at the waxing action, it looks like it’s having the desired effect.  Nice!  After finishing the waxing process, I then give the stem and stummel a rigorous and substantial hand buffing to remove any excess wax and to raise the shine.

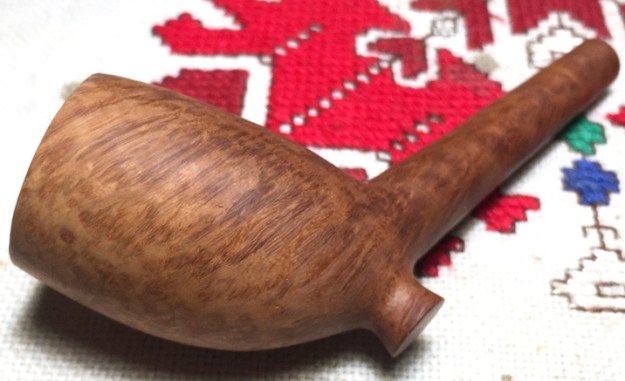
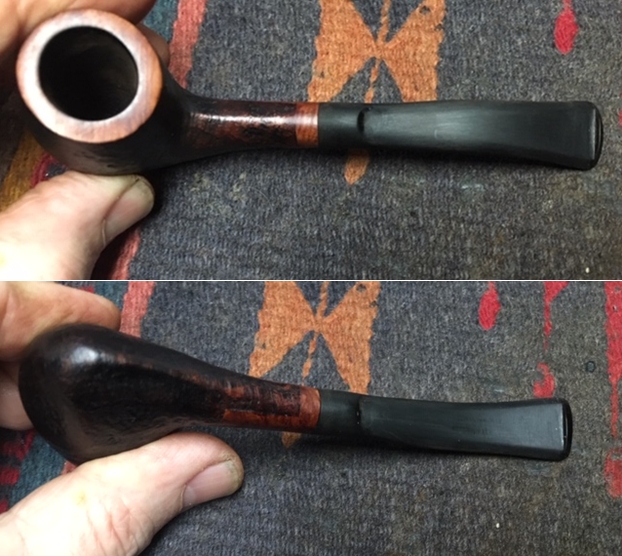
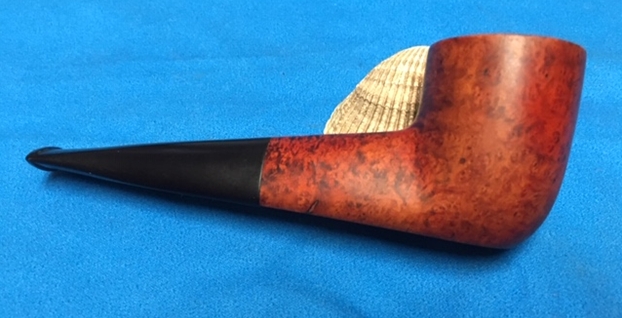
The blasted grain on this Ben Wade Hand Model is distinctive.  It looked so good I thought that it might be the blastification process, but it is the real deal.  The shaping of the bowl also adds to the rustic effect with it tightening near the top and then flaring out.  The blasted briar displays many hues of grain – very eye pleasing.  This is the third of three pipes that Todd commissioned, and he will have the first opportunity to acquire this Ben Wade Hand Model from The Pipe Steward Store.  These pipes benefit the work we do here in Bulgaria with the Daughters of Bulgaria working among women and girls who have been trafficked and sexually exploited.  Thank you for joining me!
Life for an interesting Triangle Shank Enrico Bocci Belgium 612


Blog by Steve Laug

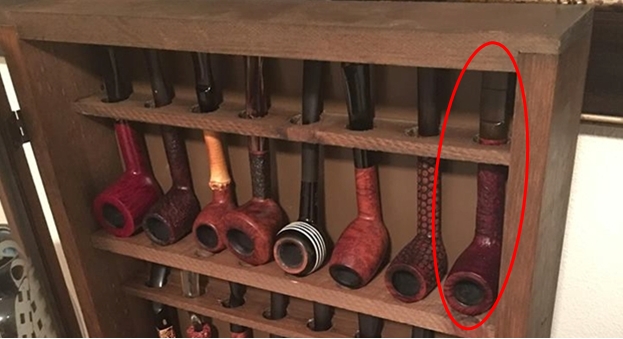
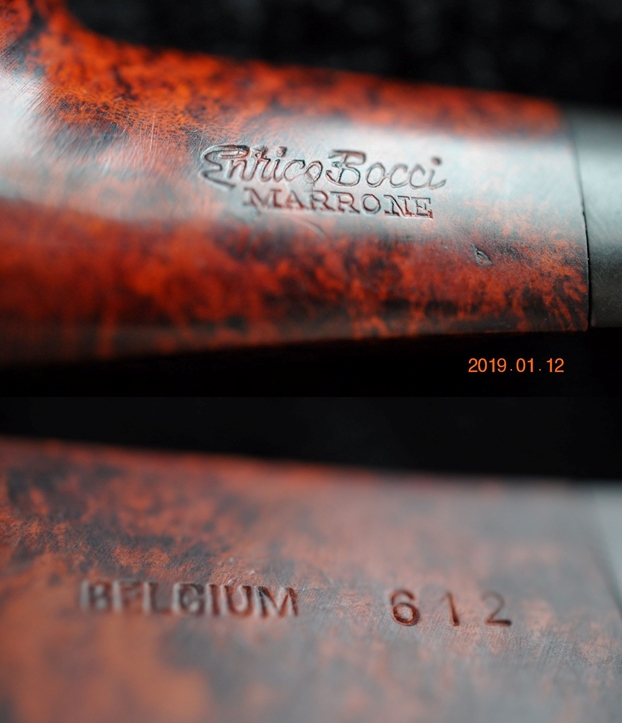
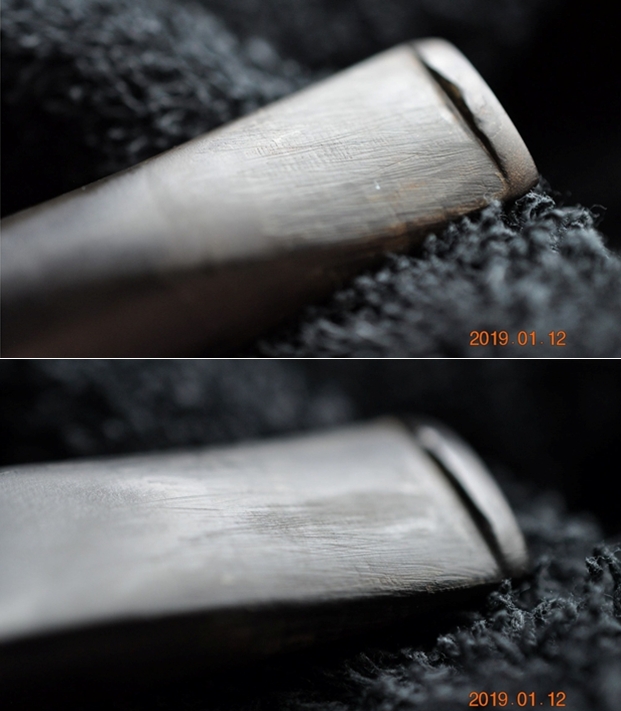
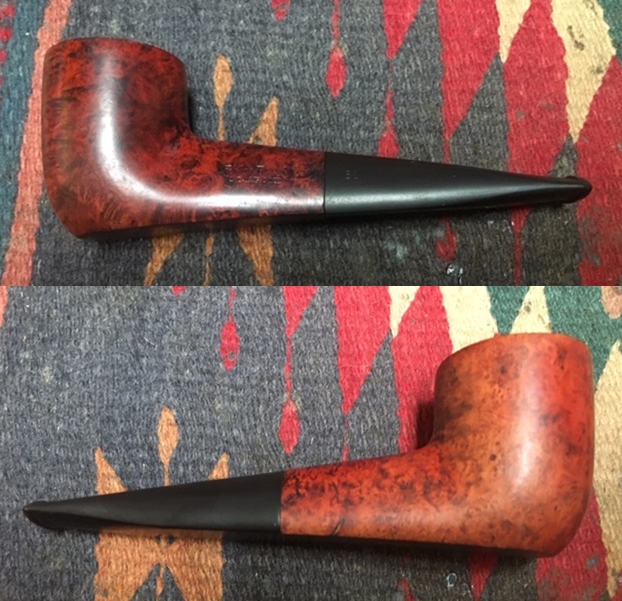
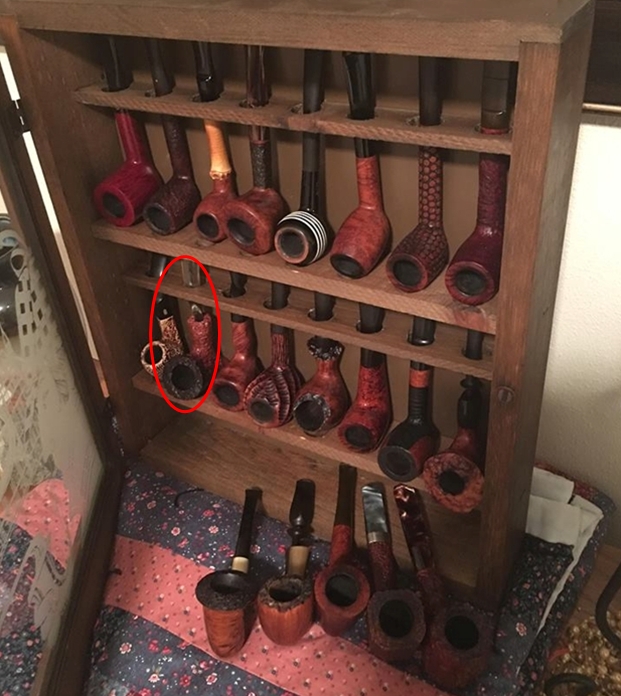
The next pipe in the queue is an interesting triangular shaped billiard – I think that is what I would call it. It came to us in the lot that included the pipe cabinet and 21 pipes. There is a decided slope from the button to the junction of the bowl and shank. The bottom of the bowl and shank is flattened and broad so that it is a very stable sitter. It is a unique piece and like many of those in this lot it is a brand that I have not seen before. It is on the second shelf, the third pipe from the right in the photo below. I have circled it in red to make it easier to identify.The finish on the pipe is very dirty with an interesting orange and black contrasting stain. I look forward to seeing it cleaned. There is a thick cake in the bowl and a lava overflow on the rim top. I can see some damage to the outer edge of the rim but because of the cake and tars it is hard to know what the inner edge looks like. Jeff took photos of the pipe before cleaning it. The photos give a pretty clear picture of the shape of the pipe and its general condition when we received it. Jeff took some photos of the bowl/rim top and the sides and bottom of the bowl to give and idea of the condition and the shape. You can see the nicks on the back and front side of the outer edge of the rim. He also took photos of the stamping on the left and underside of the shank. The left side was clear and readable. It read Enrico Bocci in script over Marrone. On the underside it said Belgium followed by the shape number 612. The left side of the stem also had a stamped EB logo. The stem had some deep scratching in the surface ahead of the button and some small tooth marks next to the button. There was also wear on the sharp edge of the button.Enrico Bocci was a brand that I was unfamiliar with so I did some research on the web to see what I could learn about the brand and the maker. I turned first to Pipephil and found the first lead. As usual the site gives a great summary. It identified the maker as Enrico Bocci and the brand as Italian (http://www.pipephil.eu/logos/en/logo-e3.html). This did not match the Belgium stamping on the underside of the shank so more searching would be necessary. I have included a screen capture from Pipephil that gave the initial information on the brand. It seems that Bocci retired from pipe making in the 1980s so that helped to date the pipe that I am working on.I turned then to Pipedia to see what I could find out there (https://pipedia.org/wiki/Bocci). The brand was listed under the country of Belgium. Sadly there was not a lot of information. I have copied the information and included it below.

Enrico Bocci, presumed to be of Italian origin, primarily turned out machine made pipes. The better ones were pre-turned and finally shaped and finished by hand.

From that at least I found that the maker was of Italian origin (not hard with a name like that). I knew that the pipe I had in hand was Belgian made and made prior to 1980. I also could deduce from the listing being in the Belgian list of pipemakers that Bocci lived there. Armed with that information I turned to deal with the pipe on the table.

As usual Jeff does a lot of the clean up on the pipes that we buy. He does a great job. When I pick them up here or do repairs here in Canada I am reminded just how much work he does to get the pipes to the point they are when I open his box to work on them.

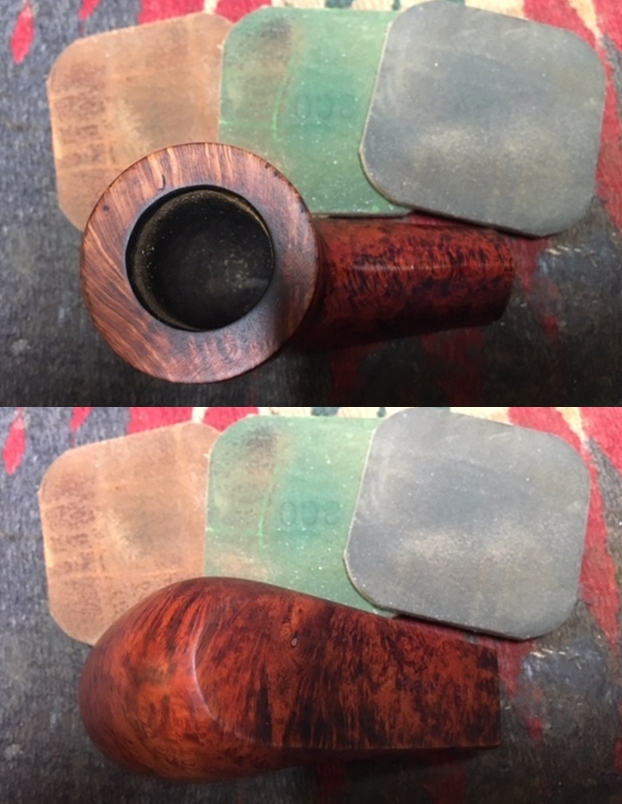
Jeff reamed the bowl with a PipNet pipe reamer and followed up with a Savinelli Fitsall pipe knife to remove the cake. He scrubbed out the mortise and the airway in the shank and the stem with alcohol, cotton swabs and pipe cleaners. He scrubbed the exterior of the bowl, rim, shank and stem with a tooth brush and Murphy’s Oil Soap to remove the oils and tars on the rim and the grime on the finish of the bowl of the pipe. He rinsed it off under running water. He dried it off with a soft cloth. He was able to remove most of the lava build up on the rim top of the pipe leaving behind some darkening and a clear view of the damage to the outer edge. I took photos of the pipe to show its condition before I started my work. I took a close up photo of the rim top to show the darkening on the top and the damage to the outer edge at both the back and the front. You can also see some nicks and marks on the surface of the rim top. The stem photos show the scratching I noted above that extends from the button forward about an inch. They also show the tooth marks and the wear on the button surface on both sides.I took photos of the stamping to document what it looked like at this point in our cleanup process. You can also see some of the fills in the bowl and shank.I decided to address the damage to the rim top and edges of the bowl first. I used a folded piece of 220 grit sandpaper to clean up the inner edge of the bowl first. Once that was complete, I topped the bowl on a topping board using 220 grit sandpaper to remove the damage along the top surface and minimize the damage to the outer edge of the bowl. It looks like I forgot to take a photo of the rim top at this point. I removed the damaged surface (a minimal topping). I worked over the outer edge with a 1500 grit micromesh sanding pad to smooth out the damage on the edges (the condition of the rim top can be seen in the third photo below). Once I finished that I polished the entire bowl and shank with micromesh sanding pads. I wet sanded it with 1500-2400 grit pads to clean up the rim and smooth out the bowl. There were shiny spots on the finish from what looked like a light varnish coat that needed to be removed as well. I decided to stain the rim top and touch up the spots on the bowl and shank that needed it with a Maple stain pen before proceeding with the rest of the polishing. This might seem odd but I have found that it can work to blend the colours better. I let the stain coat dry for about 30 minutes and worked on the stem. Once the stain had cured for that time I continued polishing the bowl.I continued to polish the bowl with 3200-12000 grit micromesh sanding pads. Each successive grit of micromesh made the grain stand out more and hid the fills better. The overall look of the bowl improved. With the rim top and bowl polished, I worked some Before & After Restoration Balm into the surface of the briar with my fingertips to clean, enliven and protect it. I let the balm sit for a little while and then buffed with a cotton cloth to raise the shine. The following photos show the bowl at this point in the restoration process. The bowl and the rim top look really good and the darkening and lava are gone. The finish looks good and though the fills are visible they are not as obnoxious looking as before. I am very happy with the results. With the bowl finished I set it aside and turned my attention to the stem. I sanded the scratches and the tooth marks on the stem and then filled it in with clear super glue. I set it aside to cure for about a half hour then smoothed out the fills with a needle file to dress up the sharp edge of the button. I sanded the repairs with 220 grit and 400 grit sandpaper to blend them into the surface. I polished the stem with micromesh sanding pads – wetsanding it with 1500-2400 grit pads and dry sanding it with 3200-12000 grit pads. I wiped the stem down with Obsidian Oil after each pad. I used some liquid paper or correction white out to touch up the stamping on the stem. I applied it with a tooth pick and when it had dried I buffed the excess off with a cotton pad.I further polished it with Before & After Pipe Polish – both Fine and Extra Fine. I gave it a final coat of Obsidian Oil and set it aside to dry.This interestingly shaped Enrico Bocci surprised me. When I first saw it I thought it was a Lorenzo pipe and expected a real mess under the stain and lacquer coat. It turned out I was wrong. I polished stem and the bowl with Blue Diamond polish on the buffing wheel. I gave the bowl and the stem multiple coats of carnauba wax. I buffed the pipe with a clean buffing pad to raise the shine. I hand buffed it with a microfiber cloth to deepen the shine. The pipe polished up pretty nicely. The contrasting grain came alive with the buffing. The rich contrasting orange/brown and black colour works well with the polished black vulcanite stem. The finished pipe is a beauty and feels great in the hand. Have a look at it with the photos below. The dimensions are Length: 5 ½ inches, Height: 1 ¾ inches, Outside diameter of the bowl: 1 1/2 inches, Chamber diameter: ¾ of an inch. I will be putting this triangular shanked billiard on the rebornpipes online store soon. It may well the kind of unique pipe you have been looking for so have a look. Thanks for walking through the restoration with me on this interestingly shaped Enrico Bocci.

New Life for a Pair of Kaywoodie Bamboo Shank Mandarins


Blog by Steve Laug

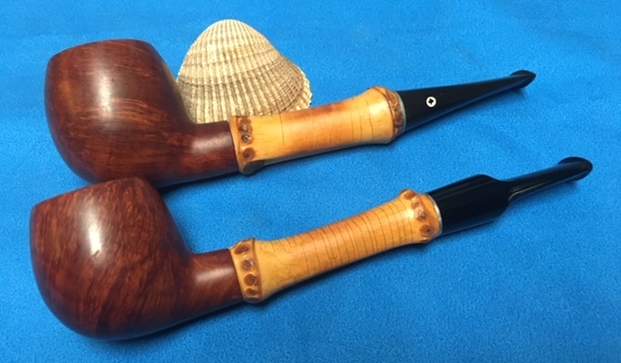
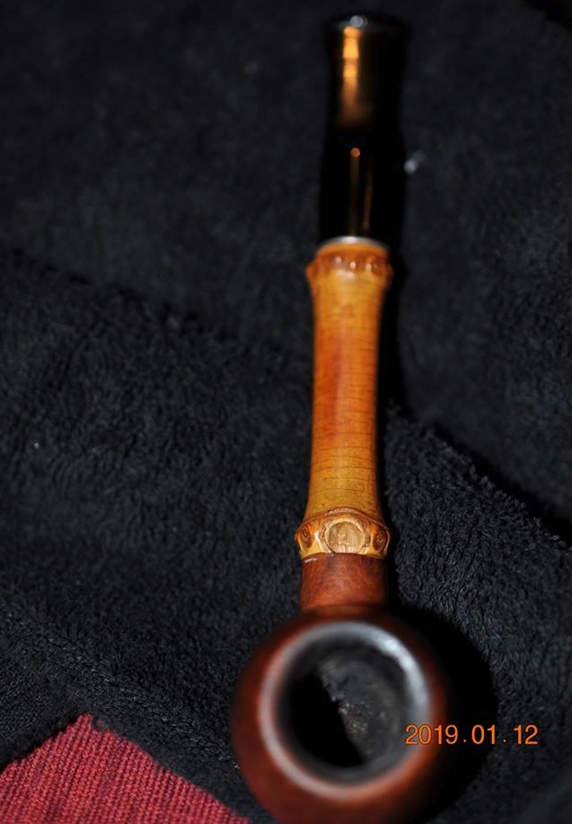
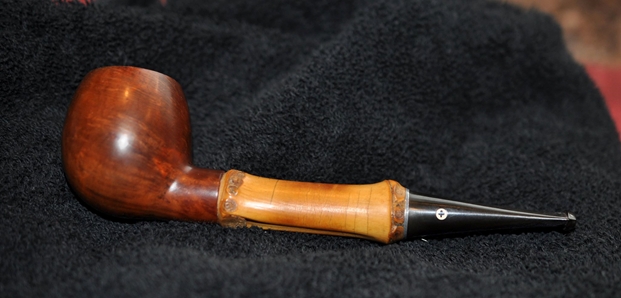
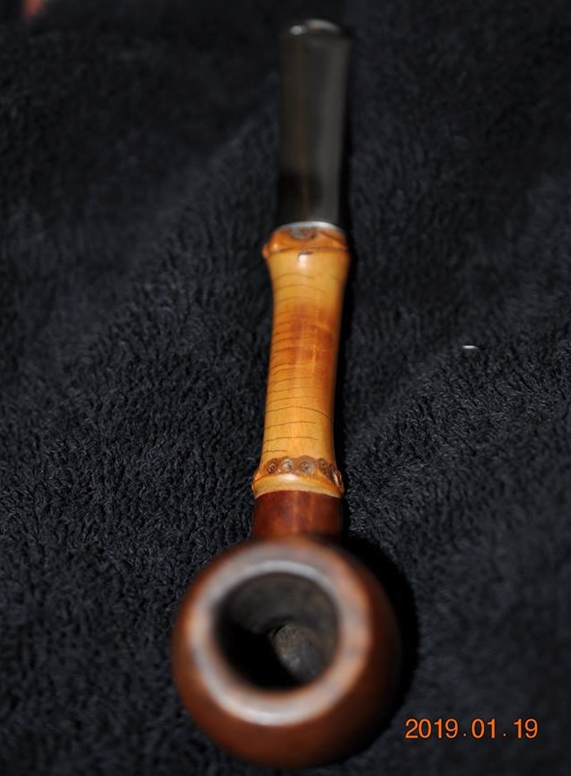
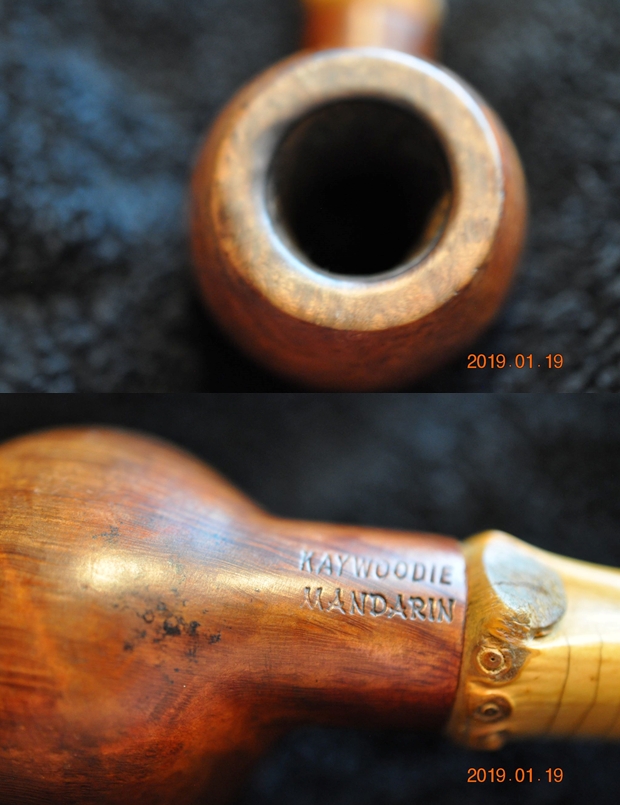
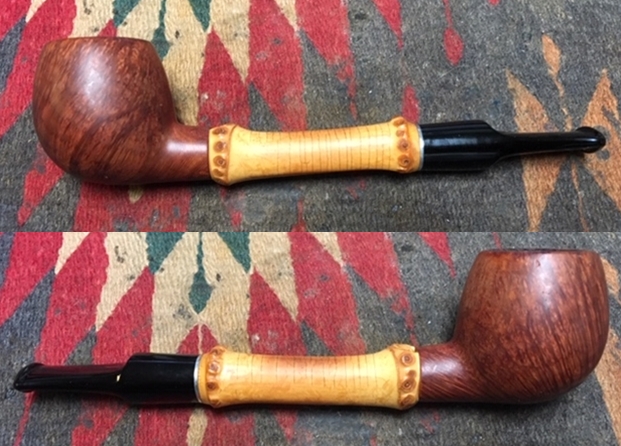
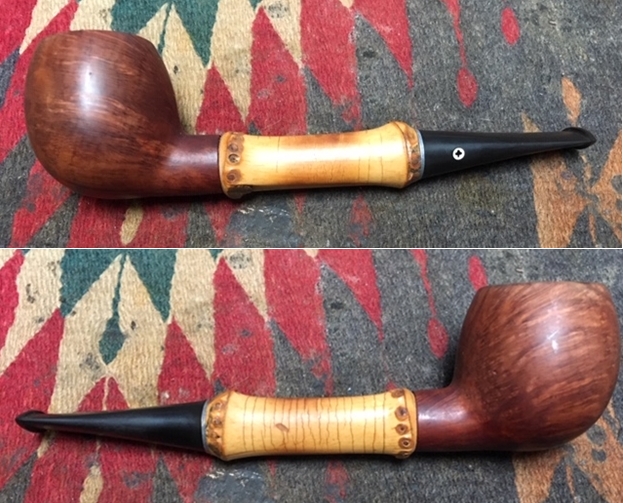
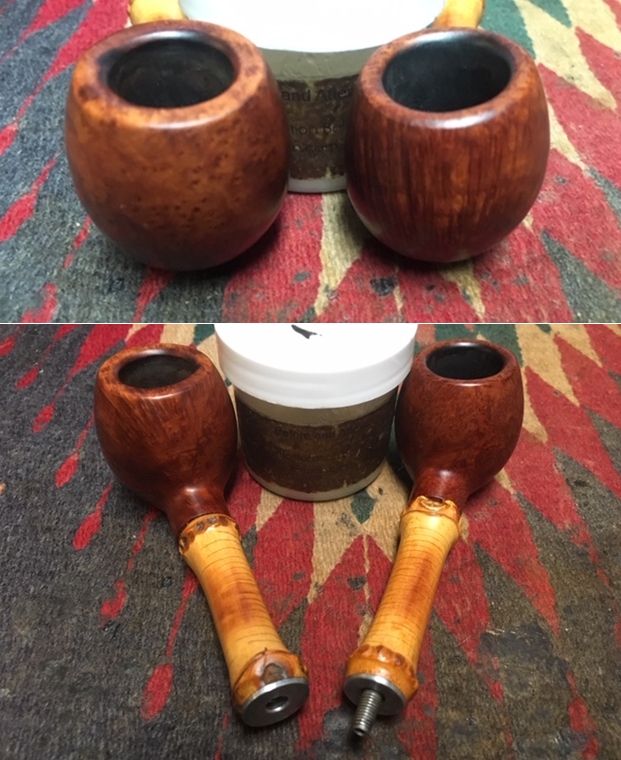
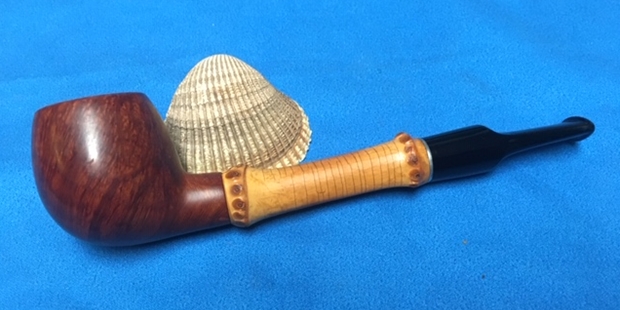
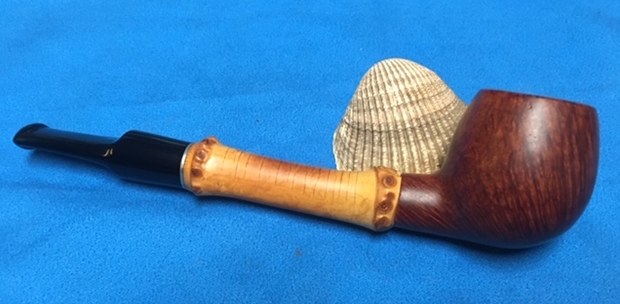
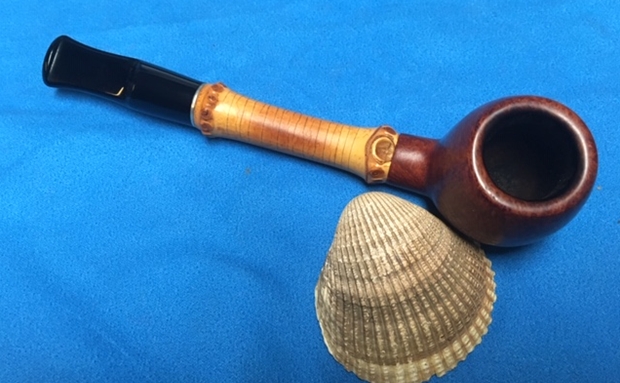
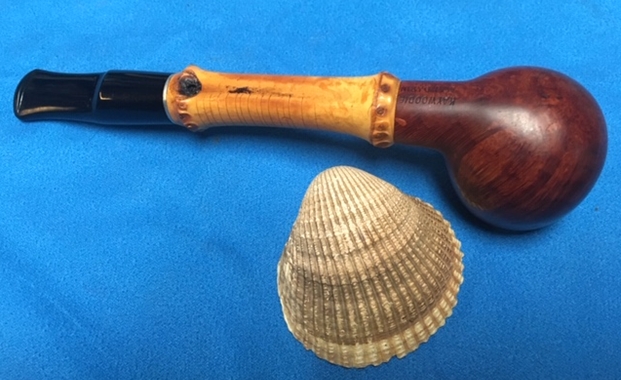
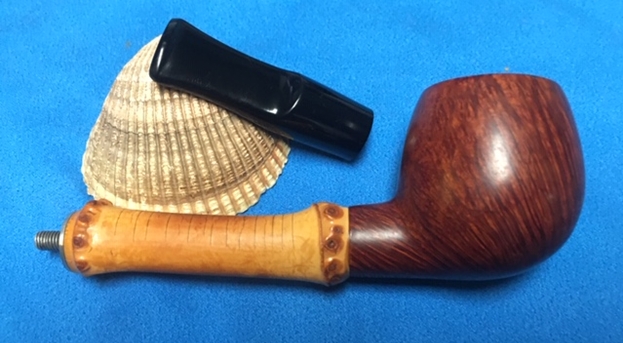
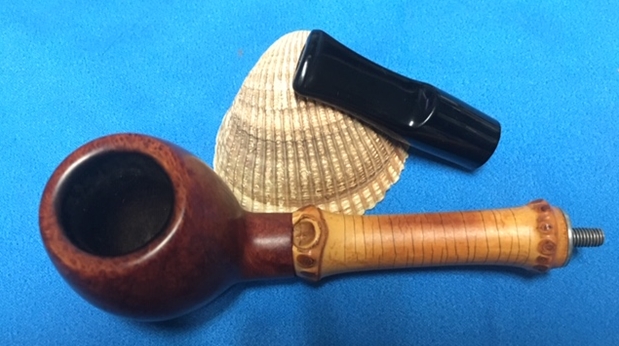
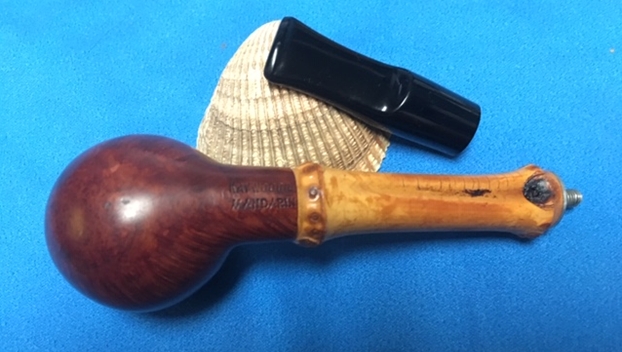
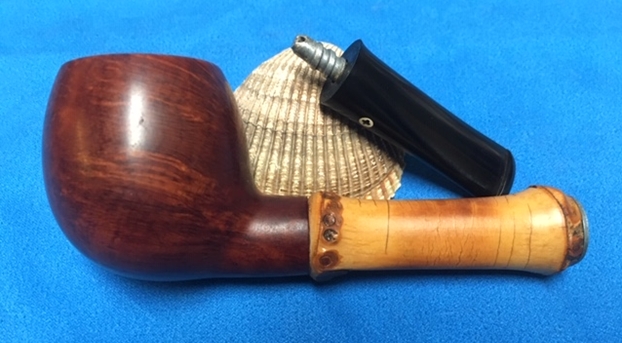
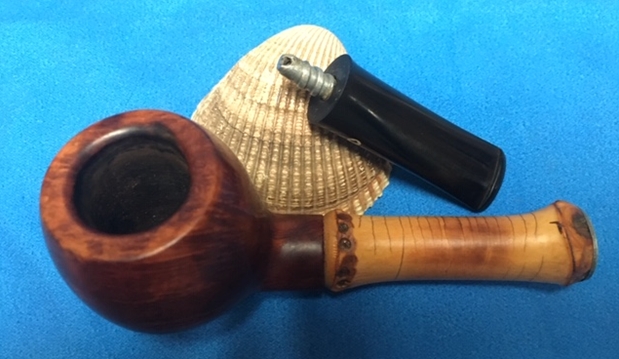
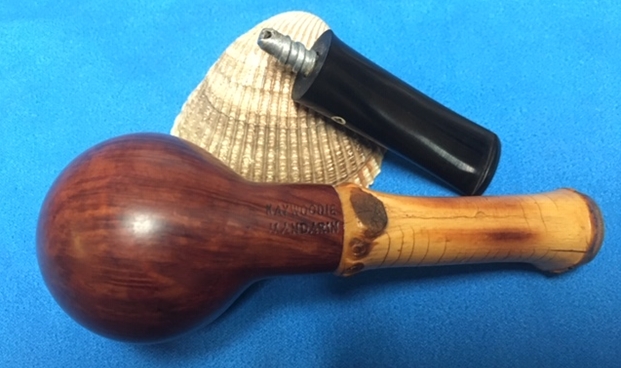
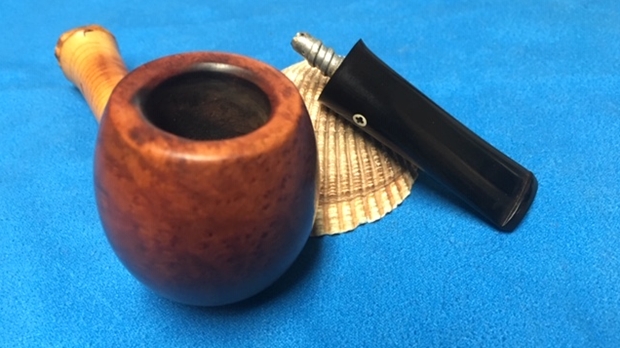
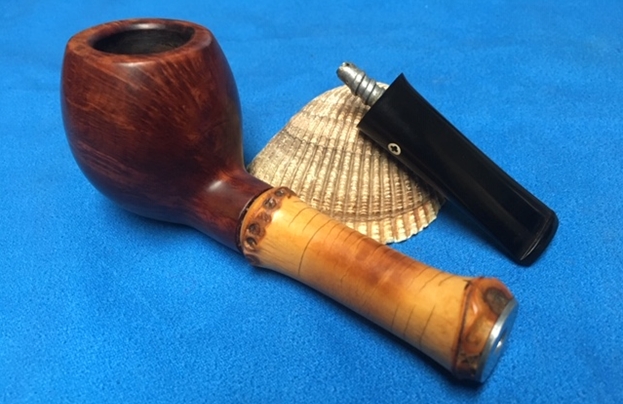
The next pair of pipes on the work table is another relatively new acquisition. The Mandarin with the acrylic stem comes from a collection Jeff and I purchased from Michigan. It included a pipe cabinet and 21 pipes that is pictured below. The second one came from a friend of Jeff’s who is always on the lookout for pipe he thinks we might be interested in the New York area. This one has the original stem. I have circled the first Mandarin in the photo below – third pipe from the left on the first shelf of the rack.In the last box Jeff sent me he included both of these pipes. Both have the bamboo shank, both have an apple shaped bowl. Both are stamped Kaywoodie Mandarin on the underside of the bowl. Both had threaded stems and a metal space at the end of the shank. The first pipe from the rack above had a thinner diameter bamboo shank while the second was thicker – both were two knuckle bamboo pieces. The first pipe had a black acrylic replacement stem with a saddle while the second one had the original tapered stem with the Kaywoodie Club in a white circle on the left side of the stem.

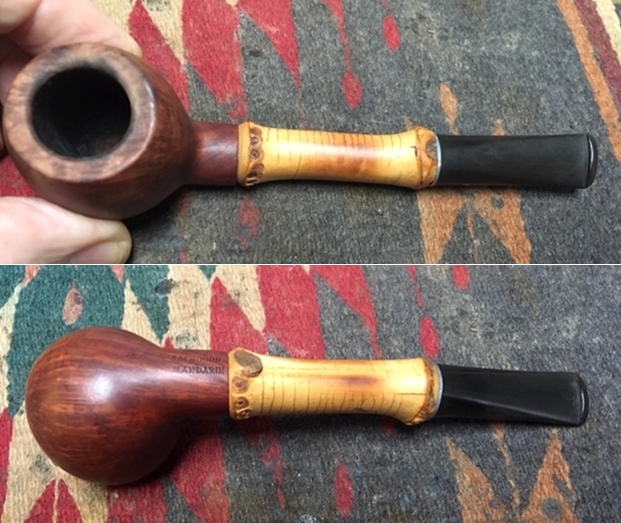
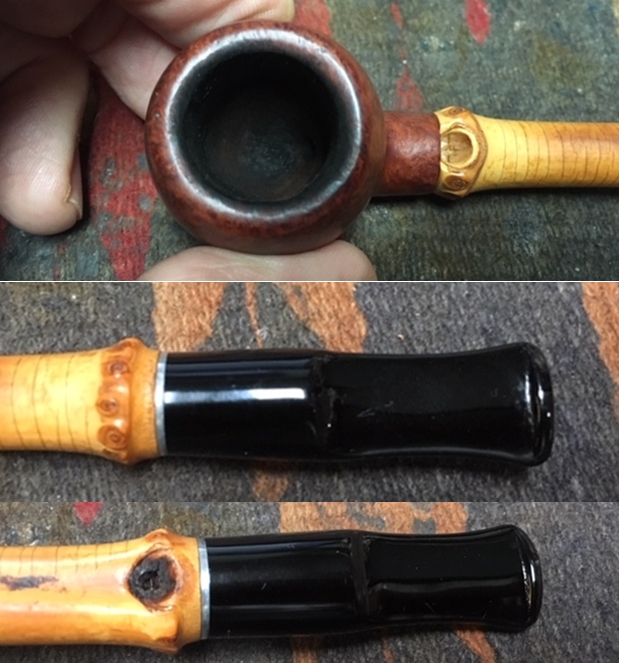
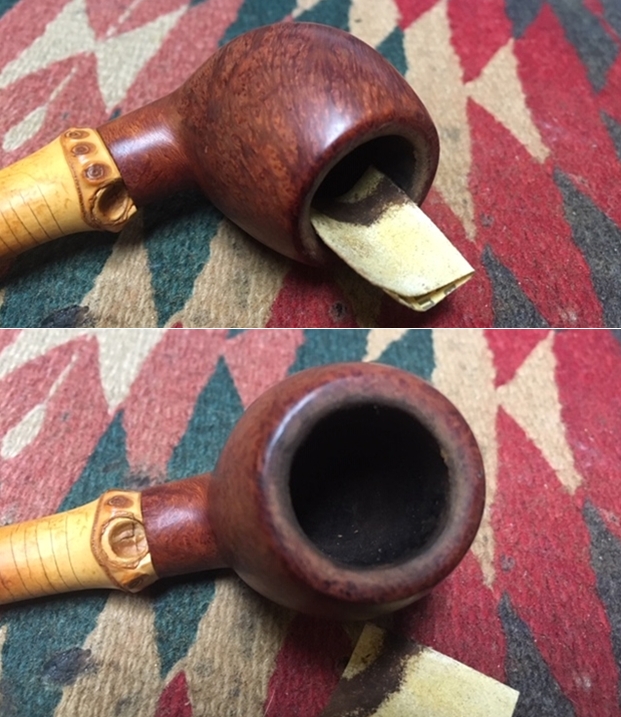
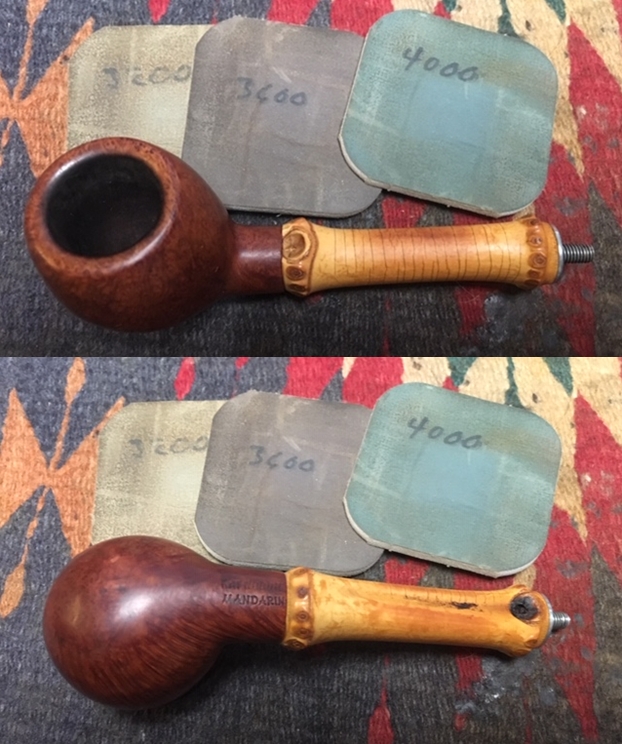
Both pipes were quite dirty which seems to be the case when working on pipes that were obviously someone’s favourite.  Jeff took photos of both pipes before his cleanup work. The first pipe from the Michigan collection is shown first. There was a thick cake in the bowl and lava overflowing onto the rim top. The inner and outer edges of the bowl looked very good. The stem had some tooth marks and chatter on both sides near the button and some tooth damage to the sharp edge and top of the button. The photos below show the first pipe. The next photo shows a close up of the bowl. You can see the thick cake in the bowl and the overflow of lava on the rim top. He also took photos of the bottom of the bowl to highlight the condition of the pipe. It had some great grain all around the bowl and some nicks. It was a dirty pipe and obviously well smoked. The bamboo shank extension had a nice patina and a crackle like look that had developed as the pipe was smoked.  The next photo shows the stamping on the underside of the shank. It is quite clear and legible.  Jeff also took a photo of the shank and the fit of the replacement stem to the shank end. It is well done and the alignment is very good.The close up photos of the stem show the tooth marks in the surface near the button and the damage to the button itself on both sides. The tooth marks and chatter were repairable and the button could be reshaped.The pipe from the New York purchase is shown second. There was a thin cake in the bowl and very little lava on the rim top. The inner and outer edges of the bowl looked very good. The original Kaywoodie vulcanite stem had some light tooth marks and chatter on both sides near the button and some light wear on the sharp edge of the top and the bottom of the button. The photos below show the second pipe. The next photo shows a close up of the bowl. You can see the cake in the bowl and the light burn marks on the right side of the inner edge of the rim top.  The second photo below shows the stamping on the underside of the bowl – clear and readable Kaywoodie Mandarin.The Kaywoodie Club logo looks great and the fit of the stem to the metal spacer on the shank end is very good.He took close up photos of the stem top and bottom at the button. You can see the tooth chatter on both sides and the slight wear to the sharp edge of the button. Generally the stem is in very good condition.Jeff reamed both bowls with a PipNet pipe reamer and followed up with a Savinelli Fitsall pipe knife to remove the cake. He scrubbed out each mortise and the airway in the shanks and the stems with alcohol, cotton swabs and pipe cleaners. He scrubbed the exteriors of the bowl, rim, shank and stem with a tooth brush and Murphy’s Oil Soap to remove the oils and tars on the rim and the grime on the finish of the bowl of each pipe and bamboo shank. He rinsed them under running water. He dried them off with a soft cloth. He was able to remove most of the lava build up on the rim top of the first pipe and the little bit oon the second one. I took photos of the pipes to show its condition before I started my work on them. The first one is the Mandarin with the acrylic stem. Here are the photos of the second pipe. I took close up photos of the bowl and rim top as well as the stem on each of the pipes. You can see the condition of the rim top and bowl in the first photo of each pipe. Jeff was able to remove almost all of the tar and oils but there was darkening and damage on the inner surface of the rim on the first pipe and the surface and inner edge of the second pipe. The acrylic stem on the first pipe had tooth chatter and some tooth marks on the top and underside of the stem near and on the button surface. The vulcanite stem on the second pipe had some chatter but otherwise was in very good condition. The first set of photos show the first acrylic stem Mandarin. The second set shows the original vulcanite stem Mandarin.

The first pipe.The second pipe.I wanted to confirm a possible date for both of these pipes. I turned to Pipephil to see what he had to say about the brand (http://www.pipephil.eu/logos/en/logo-kaywoodie-2.html). I have included a screen capture of the listing on the site. It appears to have been made between 1958-1967.I turned next to Pipedia to check out the Kaywoodie Collector’s Guide to see if I could get some more information on the Mandarin line. I found an interest monograph there called Notes on Kaywoodies Introduced between 1955 and 1968. It included reference to the Mandarin line. I include that in part below (https://pipedia.org/wiki/Collector%27s_Guide_to_Kaywoodie_Pipes). I have highlighted and underlined the Mandarin in the list below. Both of the pipes I am working on are the smooth versions.

NOTES ON KAYWOODIES INTRODUCED BETWEEN 1955 AND 1968

The material presented in this monograph is extracted from 1936, 1947, 1955, 1968-69, and four undated Kaywoodie catalogs. Based on a comparison of prices in the 1955 and 1968-69 catalogs, the four undated catalogs appear to span the period from the late 1950’s to the late 1960’s (i.e., after 1955 but before 1968). This section presents a brief summary of the Kaywoodie Pipes that appeared in these undated catalogs, but did not appear in either the 1955 or 1968-69 catalogs…

Here is a list of pipes from this time period.

…Hi-Bowl. Tall, tapered bowl in six shapes (see Table 5). Available in smooth or “rough” finish ($10).

Mandarin. Smooth or relief grain finish with burnished-bamboo shank ($10).

Setter. No shank, just a ridged hole for a slender, filter-free, push-bit. Available in “flat bottom” (hence, “Setter”) panel, billiard, and poker shapes. Smooth or textured finish ($10).

Tuckaway. The 1955 catalog shows a Drinkless Tuckaway that was simply a smaller version of other Kaywoodie styles. The Tuckaways of the 1955-1968 period had military mountings, filter-free see-thru bits, and were packaged in a leatherette case. Available in Standard, Relief Grain, and Super Grain grades ($6-$8, depending on grade). Miniatures. Two-inch miniature replicas of “their big brother”, complete with the Drinkless fitment and Synchro Stem. The catalogs show these as individually-cased pipes but multiple pipe sets were apparently available. Price: $5.

Miniatures. Two-inch miniature replicas of “their big brother”, complete with the Drinkless fitment and Synchro Stem. The catalogs show these as individually-cased pipes but multiple pipe sets were apparently available. Price: $5.

Colossal Super Grains. Available in three “oversize” shapes (see Section 3.2) in hand-carved or smooth finishes ($5).

Now I knew that both pipes came from this time period. They were made between 1955-1968. Somewhere along the way the first pipe had been repaired and given an acrylic stem (this was the Michigan pipe). The other pipe from the NY connection had the original stem and threaded tenon though the stinger apparatus had been clipped off.

I started by working on the rim top of both pipes. The first pipe had a more classic apple shaped rim that came to a rounded top curved into the bowl. The second one had a flat rim top that I suppose could have come from a restoration sometime in its life but I could not be sure of that.

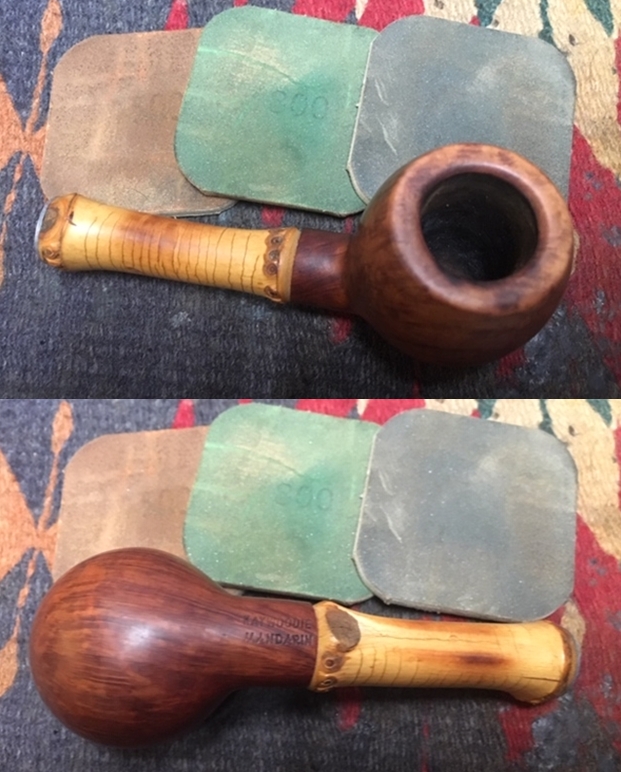
To smooth out the damage on the rim of the first pipe I sanded out the burn damage and the nicks with a folded piece of 220 grit sandpaper. I sanded the inner edge of the rim and the rounded top to remove the damage.On the second pipe I used a folded piece of 220 grit sandpaper to give the inner edge of the rim a slight bevel to remove the burn marks and smooth out the rim top and outer edge.I polished the bowls and the rim top on both pipes with micromesh sanding pads – wet sanding with 1500-2400 grit pads and dry sanding with 3200-12000 grit pads. I wiped the surface down after each sanding pad with a damp cotton cloth.

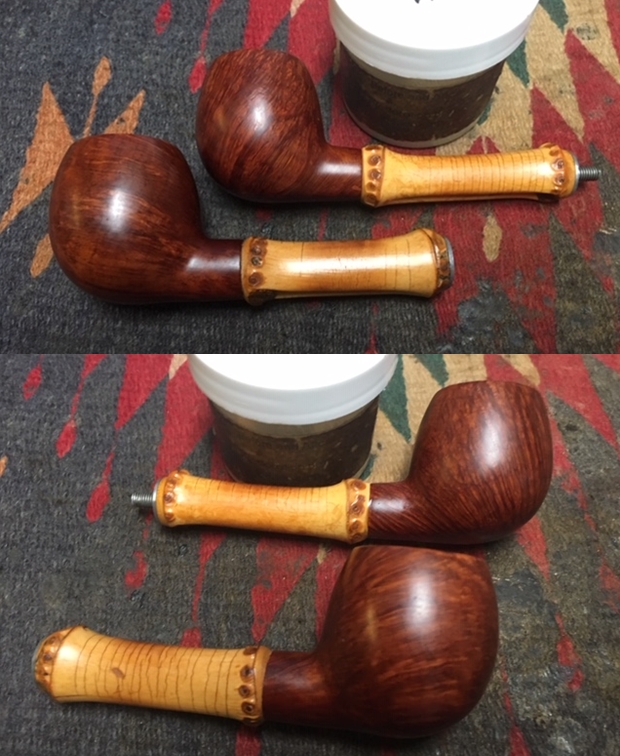
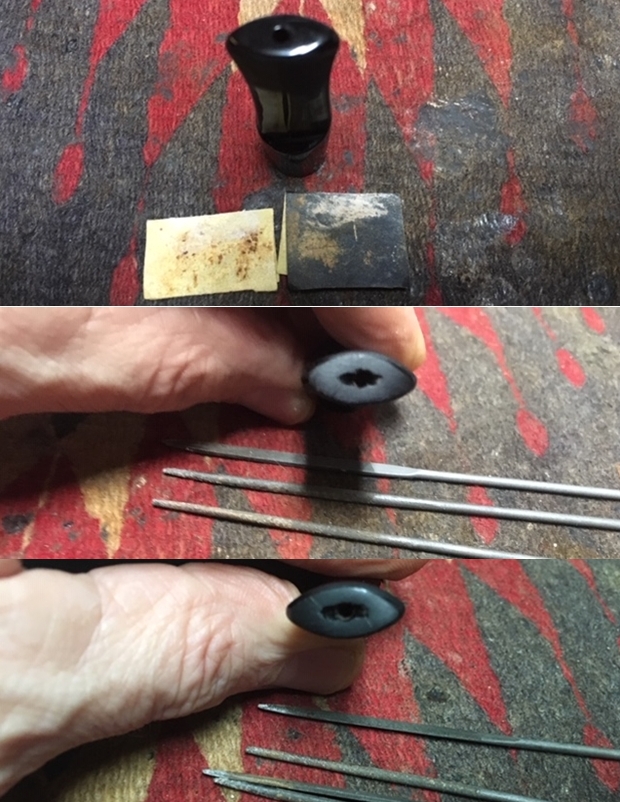
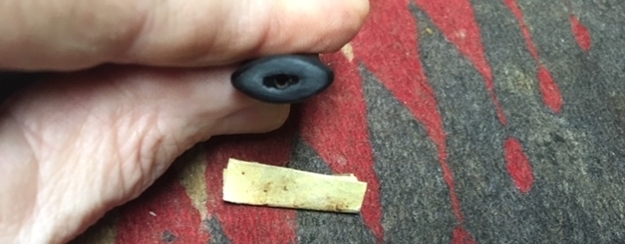
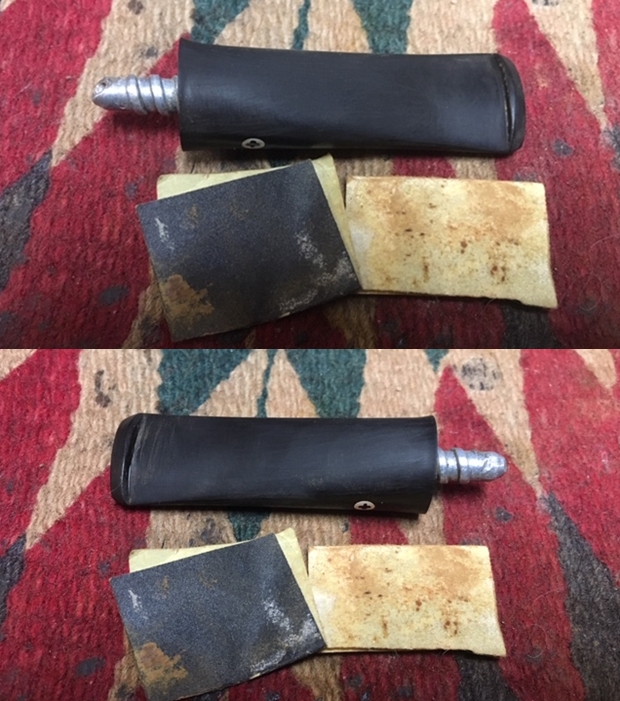
The first pipe. The second pipe. With the rim top cleaned, polished and restored on both of the pipes I worked some Before & After Restoration Balm into the surface of the briar with my fingertips to clean, enliven and protect it. I worked it into the bamboo on both pipes as well to enliven it as well. It took some time to really get it into the grooves and valleys of the bamboo but I was able to work it in. I used a shoe brush to make sure it was deep in the grooves. I let the balm sit for a little while and then buffed with a cotton cloth to raise the shine. The following photos show the bowls at this point in the restoration process. The bowl and the rim top on both pipes look really good and the darkening and lava are gone. The grooves and patina on the bamboo also look really nice with the new finish. I am very happy with the results. (Hopefully by now you can tell which is which. If not the pipe with the threaded metal tenon sticking out is the one with the acrylic stem from the Michigan collection.)I set aside the bowls at this point and turned my attention to the stems. I started with the acrylic replacement stem from the Michigan collection. I sanded out the tooth marks on the button surfaces on both sides with a folded piece of 220 grit sandpaper. I sanded it with a folded piece of 400 grit sandpaper to sand out the scratches. Once I was finished the tooth marks and chatter were gone.As I finished the stem I noticed that the end of the stem had an unfinished slot – merely a round hole that comes standard on replacement stems. It needed to be shaped and a slot cut in the end. I used a series of needle files to cut open the slot and shape it. I still needed to sand the slot but it was starting to look good. I folded a piece of 220 grit sandpaper and sanded the edges of the button to further shape it. The photos tell the story. I moved onto the original Kaywoodie vulcanite stem from the New York find. I sanded out the tooth marks on the button surfaces on both sides with a folded piece of 220 grit sandpaper. I sanded it with a folded piece of 400 grit sandpaper to remove the scratches. Once I was finished the tooth marks and chatter were gone.I polished both stems with micromesh sanding pads – wet sanding with 1500-2400 grit sanding pads and dry sanding with 3200-12000 grit sanding pads. I wiped them down after each sanding pad with a damp cloth. I polished them with Before & After Pipe Stem Polish and wiped them down a last time with the damp cloth and some Obsidian Oil and set them aside to dry. This beautiful pair of Kaywoodie Mandarin Smooth Apples really are unique and special pipes. The bamboo shank and the smooth well grained bowls make them quite stunning. I have a pair of these in my own collection and they are great smoking pipes. The patina on the old bamboo is very nice. You have to figure at the earliest these pipes come from the mid to late 50s and early 60s and at the latest they come from 1968. That means that they may be 64 years old at the earliest and then at the latest 51 years old. Either way they are old pipes. They have a lot of life left in them that is for sure and will definitely outlive most of us. I polished the bowls and stems with Blue Diamond polish on the buffing wheel. I gave the bowls and stems multiple coats of carnauba wax. I buffed both pipes with a clean buffing pad to raise the shine. I hand buffed them with a microfiber cloth to deepen the shine. The pipes polished up pretty nicely. The rich grain shining through the medium brown stain came alive with the buffing. The rich contrasting brown colour works well with the polished black vulcanite stem. The finished pipes are beautiful and feel great in the hand. Have a look at them in the photos below. The dimensions of the first pipe with the replacement Lucite stem are Length: 6 inches, Height: 1 1/2 inches, Outside diameter of the bowl: 1 1/4 inches, Chamber diameter: ¾ of an inch. The dimensions of the second pipe with the original Kaywoodie vulcanite stem are Length: 6 inches, Height: 1 1/2 inches, Outside diameter of the bowl: 1 3/8 inches, Chamber diameter: ¾ of an inch. I will be putting both Mandarin pipes on the rebornpipes online store individually and they can be purchased individually or as a pair. The patina on the bamboo of both pipes is a bonus on these beauties. Thanks for walking through the restoration with me on this pair of oldtimers.

New Life for a Preben Holm Monte Verde Twin Finish Freehand


Blog by Steve Laug

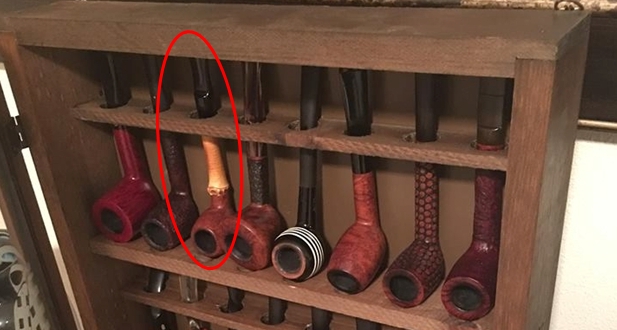
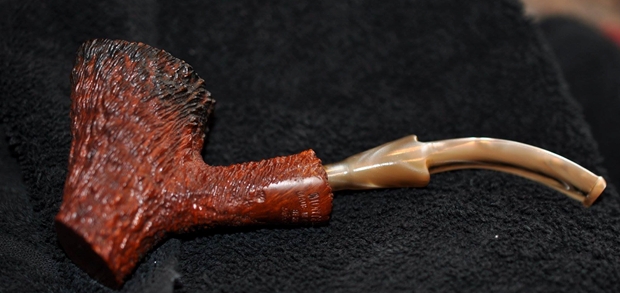
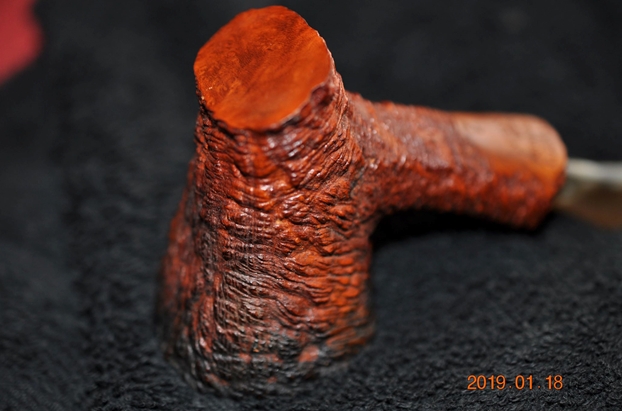
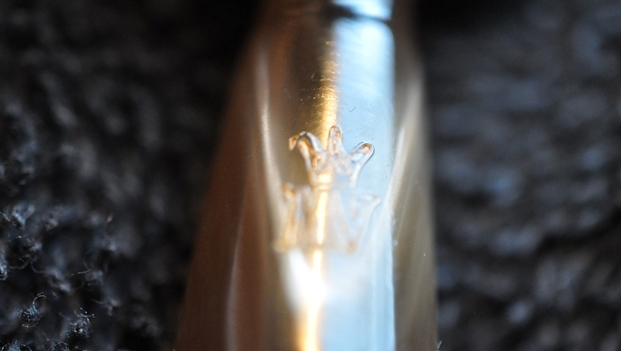
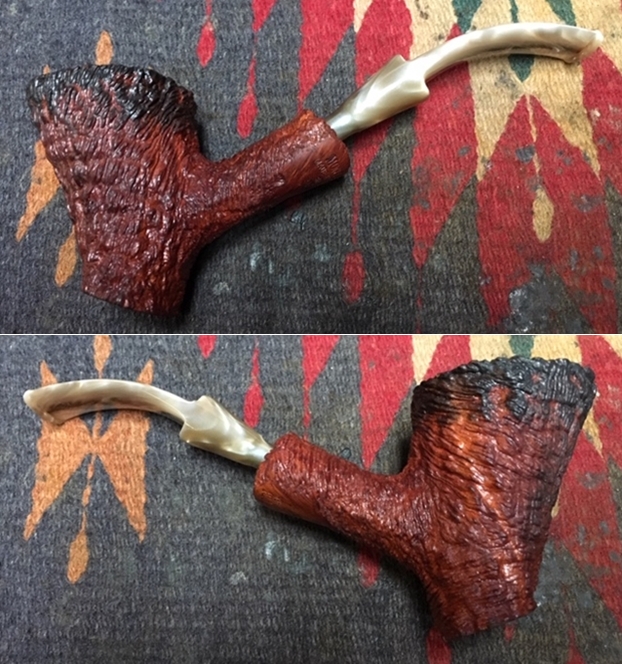
The next pipe on the work table is another relatively new acquisition from a collection Jeff and I purchased from Michigan. It included a pipe cabinet and 21 pipes that is pictured below. There were some nice pipes in that collection and some that I have never seen before.In looking over the pipes in the collection I pulled out several that intrigued me. The next pipe I chose to work on an interesting freehand pipe. It was a sitter with a scooped bowl leaning forward. The finish was two coloured – a dark flume around the rim top and about a ½ inch down the bowl sides and a medium brown the rest of the way around the bowl. The stem was a swirled Lucite in tans, browns and blacks that was cut for the freehand bowl. It had a crown on the top of the saddle with an MV below. The rustication on the bowl is very rough and then has what appears to be a wire rustication over the top of the original one. The grain shows through the rustication and it looks like the wire rustication follows the flow of the grain. It is shown in the photo of the rack above – it is identified at the left side of the second shelf of the rack by the red oval around it.

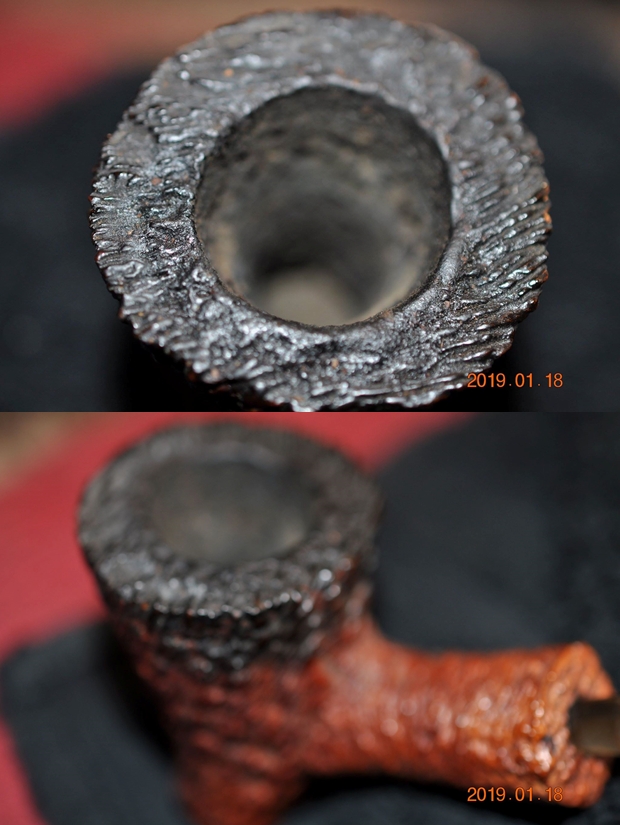
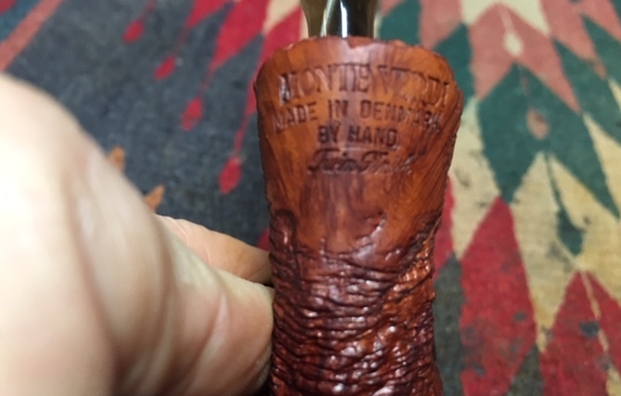
There was something about the pipe that made me think of Preben Holm carved freehands. The pipe is stamped on a smooth panel on the underside. It reads Monte Verde over Made in Denmark by Hand. Underneath that there is a script stamp that reads Twin Finish. It was quite dirty, like the rest of the pipes in this collection. There was a thick cake in the bowl and a heavy lava overflow on the rim top. The inner and outer edges of the bowl looked very good. The stem had some tooth marks and chatter on both sides near the button and some tooth damage to the sharp edge and top of the button. Jeff took photos of the pipe before he started his cleanup process. The next photo is a close up of the bowl. You can see the thick cake in the bowl and heavy overflow of lava on the rim top. He also took photos of the side and bottom of the bowl to highlight the condition of the pipe and the beauty of the rustication and finishing. It was a dirty pipe and obviously it was another favourite pipe because it is so dirty and caked.   The next photo shows the stamping on the underside of the shank. It is quite clear and legible.  The top of the stylized saddle stem has a Crown MV stamped into the surface. It appears to have originally been gold.The close up photos of the stem show the tooth marks in the surface near the button and the damage to the button itself on both sides. The tooth mark on the underside looked like a bite through but I was glad to see it was not.Jeff reamed the bowl with a PipNet pipe reamer and followed up with a Savinelli Fitsall pipe knife to remove the cake. He scrubbed out the mortise and the airway in the shank and the stem with alcohol, cotton swabs and pipe cleaners. He scrubbed the exterior of the bowl, rim, shank and stem with a tooth brush and Murphy’s Oil Soap to remove the oils and tars on the rim and the grime on the finish of the bowl. He rinsed it under running water. He dried it off with a soft cloth. He was able to remove most of the lava build up on the rim top and you could see a little remaining in the depths of the rustication. I took photos of the pipe to show its condition before I started my work on it. I took close up photos of the bowl and rim top as well as the stem. You can see the condition of the rim top and bowl in the first photo. Jeff was able to remove almost all of the tar and oils but there was some deep lava in the rustication at the back of the rim. The Lucite stem had tooth chatter and some tooth marks on the top and underside of the stem near and on the button surface. The tooth marks on the underside appeared to go through the stem but I was glad to see that it was just a deep mark. The swirled browns, tans, blacks and greys of the Lucite looked good with the variegated browns of the briar.I also took a photo of the stamping on the underside of the shank. The stamping is very clear and readable. You can also see the rustication style on the shank in the photo. It is an interesting looking piece of carving.Somewhere in the back of my mind rattled a memory that the brand was associated with Preben Holm of Ben Wade fame. It seemed like I had seen it listed on Pipephil’s site when I was working on Ben Wade and Preben Holm pipes. Now it was time to check that out.  I turned to Pipephil (http://www.pipephil.eu/logos/en/logo-m6.html) to check out my memory. Sure enough it was indeed a Preben Holm pipe. I have included a screen capture of the listing on the site.I also Googled the brand and found a thread on Pipes Magazine about the brand that gave me some more information (http://pipesmagazine.com/forums/topic/monte-verde-pipes). I include that below.

The Monte Verdi line was indeed a pipe style offered by Holm. It usually features heavily blasted and rusticated briar and smaller group sizes than some of his other lines. Some refer to this line as a “second”, but it provided an outlet for briar that had flaws and therefore unsuitable his other lines. Holm marketed many different lines featuring a variety of finishes in both stains and carvings and this is merely one of those. The ones I own are good pipes and smoke well. The blast finish is very interesting to look at and the tactile sensations make it fun to hold.

Now I knew the connection. I was working on a Preben Holm made pipe and it was an interesting one to work on. I started by working on the rim top. I used a brass bristle wire brush to clean off the remaining lava debris on the rim top. I was able to remove all of the remaining debris and the rim top looked really good. The deep rustication and the second wire rustication gave the pipe a very unique look.With the rim top cleaned I worked some Before & After Restoration Balm into the rusticated surface of the briar with my fingertips to clean, enliven and protect it. It took some time to really get it into the grooves and valleys of the rustication but I was able to work it in. I used a shoe brush to make sure it was deep in the grooves. I let the balm sit for a little while and then buffed with a cotton cloth to raise the shine. The following photos show the bowl at this point in the restoration process. The bowl and the rim top look really good and the darkening and lava are gone. The striations and rustication look really nice with the new finish. I am very happy with the results. I set aside the bowl at this point and turned my attention to the stem. I repaired the damaged areas on the edge of the button and filled in the tooth marks with clear super glue. Once the glue cured I sanded the repairs with 220 grit sandpaper to blend them into the rest of the stem surface. I polished the sanding marks with 400 grit wet dry sandpaper. The photos tell the story. I touched up the stamping on the saddle portion of the stem with some Rub’n Buff Antique Gold. I let it dry in the stamping for a bit then buffed it off with a cotton pad. It looked much better. The MV was legible and the crown looked good. The side of the M was a little faint as the stamping was worn.I polished the Lucite stem with micromesh sanding pads – wet sanding with 1500-2400 grit sanding pads and dry sanding it with 3200-12000 grit sanding pads. I wiped it down after each sanding pad with a damp cloth. I polished it with Before & After Pipe Stem Polish and wiped it down a last time with the damp cloth. This beautiful, double rusticated freehand is a special looking pipe and it feels amazing in the hand. I polished stem with Blue Diamond polish on the buffing wheel. I gave the bowl multiple coats of Conservator’s Wax and the stem multiple coats of carnauba wax. I buffed the pipe with a clean buffing pad to raise the shine. I hand buffed it with a microfiber cloth to deepen the shine. The pipe polished up pretty nicely. The multi-coloured grain shining through the rustication came alive with the buffing. The rich contrasting brown colour works well with the polished swirling brown, tan, black and white Lucite stem. The finished pipe is a beauty and feels great in the hand. Have a look at it with the photos below. The dimensions are Length: 6 inches, Height: 2 3/8 inches, Outside diameter of the bowl: 1 3/4 inches, Chamber diameter: 1 inch. I will be putting this Monte Verde by Preben Holm on the rebornpipes online store soon. It is such an interesting tactile pipe and if you have been looking for a freehand then this might be the one for you. Thanks for walking through the restoration with me on this interestingly shaped Preben Holm Hand made pipe.

A Hard Ridden “Malaga” Billiard Made New


Blog by Steve Laug

I have mentioned several times in the blogs I have done on the Malaga pipes that I have restored for Alex that he is now collecting them in a focused manner. He has found some beautiful pieces that come from the Malaga Pipe Shop in Royal Oak, Michigan in the USA. The more I work on the brand the more I am impressed by the quality of the craftsmanship and beauty of the pipes that came from the shop. I have written an earlier blog to give a little history of the Malaga Brand if you are interested: https://rebornpipes.com/tag/malaga-pipes/. That blog also includes links to a catalogue and the history of the pipemaker George Khoubesser). Follow the link to get a feel for the brand and the pipemaker. If the pipes Alex has found have been beautiful, this one was not! It was a bleached and varnished mess. The stem did not fit in the shank and the feel of the pipe when I ran my fingers over it was ridged and bubbled. It was a strange feeling pipe. It is stamped on the left side of the shank with “MALAGA” and on the heel of the bowl with a 0. I have not seen the 0 stamp before so I am unclear of the meaning. All I know is that this pipe was going to be a hard one to make beautiful again. Here are some photos of it before I started. The varnish coat had protected the bowl from scratches and dents but it was rough feeling with its ridges – almost like it had been painted on with a brush. The rim top was dirty with some darkening around the surface and the inner edges of the bowl. The outer edge was clean. The bowl had a thick cake. The finish had some dark stains along the left side of the shank around the Malaga stamping. There were also some stains on the underside of the shank. It really was an odd pipe in many ways. The stem was quite oxidized and there were deep tooth marks on both sides near the button. The button surface was also marked. The stem did not seat in the shank. That led me to believe that the shank was lined with tars and oils.The stamping was hard to capture because of the painted on varnish but is clear and readable. It is stamped “MALAGA” on the left side. The 0 on the heel of the bowl is very clear.The varnish coat was so hard and impervious I decided to throw the bowl into an alcohol bath to soak overnight. I did not think it would work but thought it was worth a try. I closed up the container and called it a night.In the morning I removed the bowl from the bath. It had not done any damage to the thick coat of varnish or whatever… it was a hopeless endeavour so I decided to wait and deal with it later. I reamed the bowl with a PipNet reamer using three of the four cutting heads. I took the cake back to bare briar. I followed up with a Savinelli Fitsall pipe knife to scrape away the remnants of cake and clean up the walls of the bowl. I finished the reaming with a piece of dowel wrapped in 220 grit sandpaper and sanded the walls of the bowl. To remove the damage to the rim and the varnish coat I used a topping board with 220 grit sandpaper and worked the rim against the surface of the board in a circular motion to remove the damage. I used a folded piece of 220 grit sandpaper to smooth out the inner edge of the rim and to remove the darkening present there. I decided to go back to stripping off the painted coat on the bowl. I sanded it with 220 grit sandpaper to break the shiny surface of the topping. I wiped it down with acetone on a cotton pad and sanded more and repeated the process until the finish was gone. With the varnish/plastic coat removed I polished the bowl with micromesh sanding pads.  Wet sanded with 1500-24000 grit pads and dry sanded with 3200-12000 grit pipes. I wiped the briar down after each pad with a damp cotton pad to remove the sanding dust. The colour of the briar was uneven and the area around the stamping had some dark streaks that I could not remove. I worked on them with a corner of micromesh but I was thinking I would need to stain the bowl to take care of the issues. Before I went that far I decided to rub the bowl down with some Before & After Restoration Balm. I rubbed it into the briar and buffed it to see what showed up. I like the grain but I wanted to go for a darker brown to cover the stains on the shank. I was not happy with the overall look yet but decided to clean out the shank and the mortise. I scraped the mortise walls with a dental spatula to loosen the build up in the shank. I used cotton swabs, pipe cleaners and alcohol to remove the tars and oils that had built up in the  shank and kept the stem from seating against the shank end.  With the inside and outside clean it was time to stain the bowl. I heated the briar and then applied some Fiebing’s Light Brown stain to the briar. I flamed it and repeated the process until I was happy with the coverage on the bowl.I let the stain cure for several hours and worked on another pipe. Once the stain had set I wiped it down with isopropyl alcohol on cotton pads to remove the excess and make the stain more transparent. I polished the briar with micromesh sanding pads – wet sanding with 1500-2400 grit pads and dry sanding with 3200-12000 grit pads. I wiped the bowl down with a damp cloth to remove the sanding dust. I worked some Restoration Balm into the newly stained surface of the briar and it came alive. The following photos show the new look of the pipe. I buffed the pipe on the buffing wheel using Blue Diamond polish. It removed a little more of the darker stain and the grain really began to shine through more clearly. I set the bowl aside and addressed the issues with the stem. I sanded the surface of the stem with 220 grit sandpaper to remove as much of the oxidation as I could. I wiped down the surface of the stem with a damp cloth and cleaned out the tooth marks with cotton swabs. I filled in the tooth marks with black super glue and laid the stem aside to let the repairs cure. I turned to work on another pipe while the repair cured.Once the repairs had hardened and cured I used a needle file to sharpen the edge of the button and smooth out the repair on the stem. I sanded the stem repairs with 220 and 400 grit sand paper to blend the repair into the surface of the stem. It took a lot of sanding to smooth it out but the finished product looked a lot better than when I started. I wiped the stem down with Obsidian Oil and then cleaned the airway in the airway with pipe cleaners and alcohol. I was quite surprised by the lack of debris and grime in the airway.I polished the stem with micromesh sanding pads – 1500-2400 grit pads and dry sanding 3200-12000 grit pads. I wiped the stem down after each pad with Obsidian Oil. I polished it with Before & After Pipe Polish – Fine and Extra Fine. When I had finished it I wiped it down a final time and set it aside to dry. This Malaga Billiard came alive with the buffing. I polished the bowl and the stem with Blue Diamond polish on the buffing wheel. I gave the bowl and the stem multiple coats of carnauba wax. I buffed the pipe with a clean buffing pad to raise the shine. I hand buffed it with a microfiber cloth to deepen the shine. The pipe polished up pretty nicely. The various styles of grain shining through the finish on the bowl. The rich contrasting brown colour works well with the polished black vulcanite stem. The finished pipe is a beauty and feels great in the hand. Have a look at it with the photos below. The dimensions are Length: 5 3/4 inches, Height: 2 inches, Outside diameter of the bowl: 1 1/4 inches, Chamber diameter: 3/4 inch. I will be putting this I have a few more of Alex’s pipes to finish then this one will be heading back to him. I look forward to hearing what he thinks of the new look Thanks for walking through the restoration with me on this Malaga.


Todd’s Second Commission: A GBD New Era London England 9493 Pot with Distinction


Blog by Dal Stanton

This is the second of 3 pipes that Todd commissioned.  I saw this GBD New Era long shank Pot or possibly a wide bowled Lovat, on the eBay block and liked it immediately.  It has seen some serious wear and tear, but he is obviously well loved, and the grain….  Oh my, the vertical grain on the bowl of the Pot shape it distinctive and when cleaned up….  Dream!  Well, my bid was enough when the bell rang, and it didn’t remain in my collection, and Todd saw the potential in the For “Pipe Dreamers” Only! collection and now this GBD New Era is on my worktable.  These pictures take a closer look at the GBD New Era: The nomenclature on both sides of the shank are thin but legible.  On the left flank of the shank is ‘GBD’ encircled in the oval [over] ‘NEW ERA’.  The right side of the shank is stamped ‘LONDON ENGLAND’ [over] 9493, the shape number.  The stem bears the classic brass GBD rondel.

I like this A Brief History of GBD from Pipedia to remind me of the origins.

The company was founded in Paris France in the 19th century by Ganeval, Boundier and Donninger who were no longer associated with the company by the turn of the century. By the time they left the GBD name was well established and thus retained. In 1903 an additional factory was built in England and ran by Oppenheimer. The Paris factory moved to Saint-Claude in 1952. Since 1981 the majority of GBD pipes come from the English factory. At about that same time GBD merged with Comoys, since then all production for both GBD and Comoy comes from a single factory.

The dating of this New Era can be determined with certainty to be before the 1980s. The brass rondel on the stem and straight line “LONDON, ENGLAND” stamping of the nomenclature identify it as being made prior to the merger with Comoy’s in 1982 (or 1981). 

The GBD line, New Era, can be found in catalogs going back to the 1950s.  The example I found on Pipedia’s article on GBD are pages from Circa 1950s Oppenheimer Pipes Catalog, courtesy Václav Blahovec, which I’ve included.

The add to the right is from Pipedia’s discussion on GBD Model Information is credited to the 1961 GBD Flyer, courtesy  Chris Keene’s Pipe Pages, unfortunately now a defunct website.  So, the spread of possible dating for the GBD New Era Pot on my table could span from the 50 through the 70s.

The quality of the New Era line is toward the upper third of GBD lines, from what I read in the Pipedia article.  This last quote from Pipedia’s reprint of Pieces From My GBD Collection, by G.L. Pease (re-published here by permission), sums up well GBD pipes and what I believe is true of the GBD New ERA before me:

Since then, many GBDs have come, many have gone. I’ve tried to select exquisite examples for my collection – pipes that are exemplary in every regard. Not all old GBDs smoke wonderfully, but when they do, they sing. The French made ones, for some reason, seem particularly suited to Virginias. GBDs are not exactly hip. They’re not trendy. They’re not the high-grade pipes du jour. But, they are solid, classic pipes with a long history, and they can be subtly and sublimely beautiful. They can also often be had without sacrificing too much coin.

As I look at the GBD New Era Pot on my worktable, what stands out immediately are the dark blotches on the briar surface, especially on the long shank.  If these were on the bowl or the heel, I would be concerned about heating damage.  But on the shank, the issue is on the briar surface and hopefully cleaning will address it. The chamber has moderate cake build up and the rim shows some lava flow and scorching on the forward part of the rim, yet there is darkening around the entire inner circumference.Oh my, the short saddle stem is oxidized and mauled!  Looking at the bit (upper and lower below) the forensics are not difficult to decipher. One can discern the eye or canine tooth imprinted followed by the first premolar – especially on the upper side.  The lower side is not as distinct, yet the practice is revealed.  The former steward’s ‘hands free’ approach was to insert the entire flat part of the stem on the right side in his (or her?) mouth and clamp down using the stem as a palate to hold the pipe in place.  Hmmmm, deep breath.  Moving on.With a good understanding of the pipe on my worktable, I begin the restoration by cleaning the internal airway of the stem with several pipe cleaners wetted with isopropyl 95% and then I add the GBD’s mangled short saddle stem to a bath of Before & After Deoxidizer along with other pipes in the queue. After the stem soaks for several hours, I fish the GBD stem out of the Deoxidizer and after draining the Deoxidizer, I wipe the stem with cotton pads wetted with alcohol.  A good amount of oxidation is removed, and the stem looks good after cleaning it.To begin the revitalization of the vulcanite, I then hydrate the stem by applying paraffin oil (a mineral oil) to the stem – it absorbs it well.  I put the stem aside for the time.To begin the cleaning regimen of the GBD Pot stummel, I ream the chamber using the Pipnet Reaming Kit. The dimensions of the chamber live up to a grand Pot image – the chamber is 1 inch wide and 1 3/8 inches deep, plenty of room for a bit of tobacco!  After putting down paper towel to minimize cleanup, the width of the chamber causes me to skip the smallest blade head and I use the remaining 3 larger blade heads.  I then transition to scraping the walls further with the Savinelli Fitsall tool and finish the reaming by sanding the chamber with 240 grit paper wrapped around a sharpie pen to give leverage.  After wiping the chamber with a cotton pad and alcohol, I inspect the chamber, and everything looks great – no signs of heat damage.  Now a fresh start for the chamber. Now, turning to cleaning the external briar, I hope that the cleaning will address the large dark blotches on the surface.  I use undiluted Murphy’s Oil Soap and a cotton pad to do the job – and what a job it does! As I scrub with the cotton pad the grunge starts breaking up and eventually the black spots on the shank are removed!  I love Murphy’s Soap!  I work further on the inwardly sloped rim also using a brass wire brush.  This helps, but the rim still has some scorching darkness left.  The pictures show the great progress. Remaining on the cleaning regimen, I now address the internals of the stummel using cotton buds, pipe cleaners wetted with isopropyl 95%.  I also use shank brushes which are perfect for the longer shank of this GBD.  To quicken the process, I also scrape the mortise with a dental spatula.  In time, cotton buds started emerging much cleaner.  Later, I plan to also clean the internal further with a kosher salt and alcohol soak.With some fear and trembling, I study again the mauled saddle stem.  The Before & After Deoxidizer did a good job removing the oxidation.  My first assault on the stem damage will be to expand the stem’s surface to regain the multitude of compressions on the upper and lower bit. I take pictures to mark the starting point for comparison.  Then, using a Bic lighter I paint the vulcanite surface.  As it heats, it expands and hopefully reducing the severity of the compressions.  After one round of heating upper and lower bit several times, I take a picture for comparison.

Upper, before and after:Lower, before and after:Next, using 240 grit sanding paper, I sand the upper and lower bit to get a better understanding of the contours of the remaining damage after using the heating method.  As you can see in the pictures I take after sanding some, the compression areas are revealed more clearly.  I have found from experience is that using charcoal/CA glue as a patch on the vulcanite stem, the patch material needs to have enough depth in the compression to get a good hold.  I have found that patching a compression that is too shallow will not hold, but sometimes these compressions are too deep to sand!  For instance, I debate whether it is better to sand the two lesser upper compressions on the lower bit (second picture) and risk sanding and taking too much of the stem?  And going partially and changing your mind with the view to applying patch material, and then it’s too shallow!  I decide to apply patch material at this point and then sand and see how it comes out.I first wipe the stem with alcohol to clean the area. To form the patch material, I mix CA glue with activated charcoal.  I start with the upper stem side.  I put a small pile of charcoal on an index card and put a blob of thick CA glue next to it.  Then, using a toothpick I pull charcoal into the CA glue mixing it as more is added.  When it thickens to that of molasses, I use the toothpick to trowel the mixture to the compressions needing filling.  I use an accelerator to speed the curing time.  I do the same for the lower bit compressions.  To now begin removing the excess patch material to the upper bit, I use a flat needle file.  The pictures show the progression.After bringing the patch mound down to the surface, I then switch to sanding with 240 grit paper to remove the excess patch material totally.  In the second picture you still see the patches, but the patch is now flush with the stem surface.Remaining on the upper bit, I refresh the button using the flat needle file and follow with 240 grit paper erasing the file marks and fine tuning the button restoration.  The upper bit repair looks great.Now, starting on the lower bit, I do the same using the flat needle file to bring the patch mounds down close to the briar surface.Then, taking over with the 240 paper I sand away the excess patch material totally bring the patch flush with the vulcanite surface.  The second picture looks closer showing pitting in the patch.  This happens when air bubbles are trapped in the patch material and when they are sanded, they are exposed as pits.  I’ll address this later.Moving again to freshen the button lip I use the flat needle file and transition to 240 grade paper to erase the filing scratches and to smooth the stem.  I like the progress!To address the air pockets in the lower patch I first wipe the areas with a cotton pad and alcohol to clean it.  I then paint a fine layer of thin CA glue over the patch area with the CA glue filling the pockets.  After the glue cures, I then sand it with 240 paper.  The patch is patched, and I move on! Now addressing the entire stem, I wet sand using 600 grade paper followed by applying 0000 steel wool.To complete this phase of the stem restoration, I use Magic Eraser on the stem to cleanse it further and then I apply paraffin oil (a mineral oil) with a cotton pad to rejuvenate the vulcanite.  From where we started with this stem, its been through a lot! I put the stem aside.  This work day is ending and the last thing I do is to continue the cleaning of the stummel giving it a kosher salt and alcohol soak through the night.  I first fashion a ‘mortise wick’ by pulling and twisting a cotton ball.  I then stuff it into the mortise and airway with the aid of a stiff straight wire.  I then fill the bowl with kosher salt.  I use kosher salt because it doesn’t leave an aftertaste and the whole process, with the salt and alcohol, freshens the briar and it is much more pleasant for the new steward!  After putting the stummel in an egg crate for stability, I then fill the bowl with isopropyl 95% until it surfaces over the salt.  After a few minutes the alcohol recedes, and I follow by topping off the alcohol once more.  I then turn out the lights. The next morning, the kosher/alcohol soak had done the job.  Both salt and wick were discolored from the process of drawing out the residual tars and oils from the mortise and airway.  After tossing the expended salt I wipe the chamber with a paper towel, push shank brushes through the mortise and blow through the mortise.  To make sure all was cleaned, I utilized a few more cotton buds and a pipe cleaner wetted with isopropyl 95% to finish the cleaning.  Moving on.With the cleaning completed, I study the bowl and the grade of this block of briar is pushing up the New Era reputation stamped on its shank.  Who ever the pipe crafter was in the GBD factory in London was, cut the block beautifully.  The main orientation of the distinct straight grain is astonishingly vertical around most of the bowl.  Predictably, the heel and the rim show the striking results of the horizontal cuts that formed them – bird’s eye grain, the end or cross-section views of the vertical straight grain.  This presentation of bird’s eye carries through the shank as well.   After the cleaning of the surface, the heel already displays beautifully its patch of bird’s eye grain.  The rim’s damaged state at this point, masks the bird’s eye that I see faintly.  The challenge of the rim, but what also makes it attractive, is the tapered cant toward the chamber, so topping is out of the question.  The taper is also gently rounded.  The other thing I see is the thin finish.  The cleaning around the rim created a discoloration so that the upper bowl is lighter – and there’s a water line circling.  The pictures show the things I’m describing. The first thing I do is to wipe the stummel with isopropyl 95% to clean the older finish off so that I’m starting with a clean slate – as much as possible!  The alcohol did a great job, just what I wanted.  Interestingly, what I thought were water lines running around the circumference of the bowl were not caused by cleaning.  I discover that it is also part of the grain structure – fascinating.  With curiosity, I looked back at pictures from the eBay seller and yes, the line pattern was there!  The pictures below look at it again after the cleaning with alcohol. Next, I start addressing the rim damage and sanding.  My goal overall, is to remove the damage and tease out the bird’s eye on the rim so that it is more distinct.  The picture below shows that the bird’s eye is hidden for the most part.  To start conservatively, I use a coarse sanding sponge that will hug the contours of the rim and gently sand.  Let’s see what this does.  The first picture below shows the cleaning of the rim in general and you can still see a scorch mark on the forward rim (at 9 o’clock in the pictures).  The second picture is focusing more into this area and you can better see that the lower area is still darkened from burning.  I’m not satisfied with the results.  Becoming less conservative out of need, I use 240 grit paper and sand the rim – approaching it more like a bevel with the paper rolled and I press the paper with my thumb, conforming to the contours of the rim.  I leverage the fact that the rim is already canted and I simply go with it.  I do the hard work with the 240 sanding the entire rim and focusing on the lower circumference more to remove the charged, discolored briar. I follow the 240 with the same approach but with 600 grit paper.  Now I’m seeing what I want to see!  The briar is cleaner and more responsive.  We’re on the right track.After examining the briar surface of the entire bowl again, I see no fills needing attention, but I detect very small scratches and pitting through normal wear and tear of the years on this GBD.  To address this, I use a medium grade sanding sponge and work on the small imperfections on the briar surface.  After this, I utilize a light grade sanding sponge on the entire surface.  I’m very careful to avoid the thin nomenclature stamping on the shank flanks. I like working with sanding sponges and the results look good.The micromesh regimen is next.  First, I wet sand with pads 1500 to 2400, then dry sand with pads 3200 to 4000 and 6000 to 12000.  Throughout, I’m uber cautious to avoid the thin nomenclature stampings on the shank flanks until the last couple of pads, which I run lightly over the stampings to clean it.  I love the pop of the grain after the micromesh regimen.  This GBD New Era is a very nice pipe. I put the stummel aside for the time and turn now to the waiting, short GBD saddle stem.  I run through the normal micromesh regiment wet sanding with pads 1500 to 2400 and dry sanding with pads 3200 to 4000 and 6000 to 12000, applying Obsidian Oil after each set of 3, when it strikes me that this stem had looked like it was mauled by a dog…and now.  If one works hard enough putting the glare at the right angle, like I did in the pictures below, you can see the residual scaring on the vulcanite stem where the patches were applied, yet these for restored pipes are marks revealing that they’ve had rough spots, but this one will wear his scars proudly. While working on the stem, my mind considers the next steps of the restoration process.  The question is which direction to go with the finishing of the GBD New Era Pot stummel – or bowl – it truly can pack a lot of one’s favorite blend!   Leave the natural briar as it is now or apply a dye.  The guiding principle when restoring vintage pipes with distinctive nomenclature and age is to try as much as one can match the original color motif.  So, I looked for examples of New Era pipes.

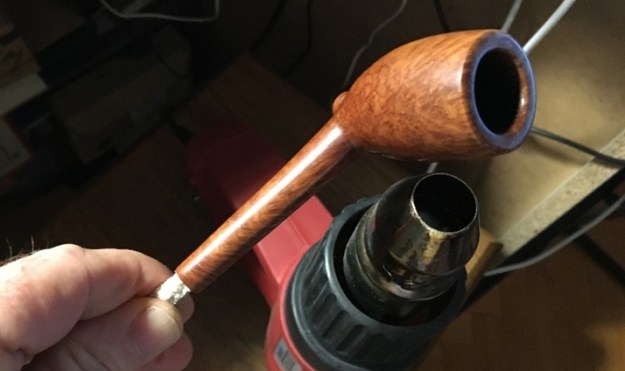
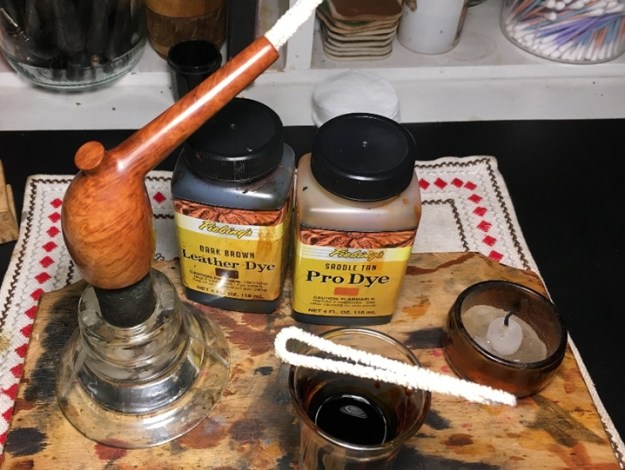
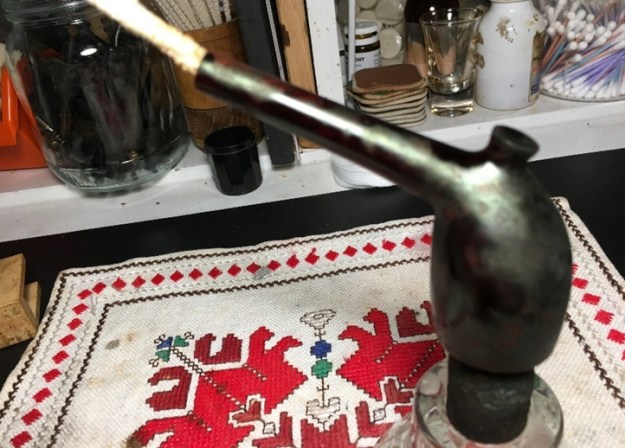
While doing research on GBD New Era, I read the very interesting and helpful article reposted in Pipedia: Pieces From My GBD Collection, by G.L. Pease (re-published here by permission).  It’s a good read, I enjoyed it.  What was most helpful was the listing by GBD groups or lines of pipes that were part of G.L. Pease’s collection.  I eagerly looked and found his offerings for New Era.  Not only did he have New Era, but 4 beautiful long, round shank Pot shapes, shape number 9493 like the GBD that Todd has commissioned.  I cropped the picture below to focus on the patina of the 4 Pots and on mainly the smooth briars.  To me, all the pipes leverage toward a reddish hue even though in different shades.  The lower smooth Pot is redder, leaning toward Oxblood or burgundy.  The Pot on the top, is reddish but leaning more toward the browns.  After studying these New Era pipes, I remembered reading about the red leanings of the New Era line from Pipedia’s GBD Model Information. I clipped this description about New Era:This confirmed what I had observed.  The question remains, how to mix dyes and hit the right hue, or as close as one can manage?  As I’ve done before many times with Steve Laug (Rebornpipes) and Charles Lemon (DadsPipes) I reached out to Charles because I recently read one of his blogs, Stem Repairs and a General Freshening for a “Made by Millville” Full Bent, where he discussed his approach to staining.  It was helpful information, well worth reading.  My question to Charles was how he might approach the reddish hues and mixing dyes.  His answer was straightforward and helpful – trial and error!  Yep, I know how to do the latter part of that well.  He did say that he had had success mixing Fiebing’s Saddle Tan and Browns to achieve that general direction, and to mix and test to see how it looks. So, armed with Charles’ input, I went to work mixing the dyes. I ended up with what Charles calls a ‘wash’ – being more diluted (with alcohol with aniline dyes and water with water-based) it can be applied more times as needed to acquire an increasingly darker result.  This approach would necessitate that I improvise my usual approach to staining.  After mixing Saddle Tan and Light Brown, I diluted it with alcohol to lighten the wash.  I assemble my desktop dying components, and I am ready.  I first wipe the bowl down with alcohol to clean the surface.  Following this, I heat the stummel with a hot air gun to expand the briar resulting in it more effectively absorbing the dyes.  After heated, I apply the dye mixture to a portion of the stummel surface with a pipe cleaner that I had folded in half.  After applying the dye to a portion, I fired that portion by placing it quickly over the lit candle.  The flame immediately combusts the alcohol in dye and sets the dye pigment.  I do this several times to cover thoroughly the stummel surface.  After repeating the washing and firing process many times, the bowl has the right look, sufficiently dark that I think will hopefully point in the right direction! It’s time to turn out the lights letting the newly dyed stummel to rest and to set the dye.The new dye set through the night and has settled in.  Allowing this ‘rest’ time helps guard against new dye coming off on the hands during the first uses of the pipe when the bowl heats.  To unwrap the fired dye shell around the stummel I mount a felt cloth buffing wheel in the Dremel, setting the speed to the slowest to avoid scorching the wood.  Felt cloth is more abrasive than cotton.  Added to this, I apply Tripoli compound to ‘plow through’ the thick dye residue.  While applying the more abrasive compound, I purge the wheel often on the edge of the chopping block which is my work station.  Not pictured is that I follow the application of Tripoli with the felt buffing wheel with a cotton cloth buffing wheel and go around the stummel one more time applying Tripoli compound at an increased Dremel speed of about 40%.  This is to fine tune and make sure no dye clumps are left behind. Next, after rejoining the stem and stummel, I apply Blue Diamond compound using a cotton cloth buffing wheel at a 40% speed.  I apply compound to the entire pipe.  When finished I buff the pipe with a felt cloth to remove the residue compound dust.The final step is applying carnauba wax by mounting another cotton cloth wheel onto the Dremel, maintaining the same 40% speed and I apply the wax.  Following this, I use a microfiber cloth and give the pipe a final hand buffing.

This GBD New Era Pot has come a long way.  The stem was mauled and now it looks great.  The patches can be seen in the glare but from where we started….  The grain on this New Era is striking.  I love studying the vertical grain that is distinct and certainly a feast for the eyes.  There is no disappointment with the bird’s eye grain that was teased out so well by the compounds on the rim.  The bird’s eye is small, tight and subtle.  The heel view is equally a cornucopia of bird’s eye.  I think what makes this GBD shape so classically appealing is the (‘Lovat’) long shank stretching the look of the large Pot bowl, which has plenty of space for a slow enjoyable time of fellowship with one’s favorite blend.  Todd resides in the Big Apple as he practices law and this second pipe in the list of three he commissioned will fit well.  He has the first opportunity to acquire this GBD New Era Pot from The Pipe Steward Store.  As with all my pipes, this pipe benefits the work we do here in Bulgaria with the Daughters of Bulgaria – women and girls who have been trafficked and sexually exploited.  Thanks for joining me!

Restoring a Rare, Limited Edition Brigham X-4


Blog by Steve Laug

The next pipe on the work table is a relatively new acquisition from a collection Jeff and I purchased from Michigan. It included a pipe cabinet and 21 pipes that is pictured below. There were some nice pipes in that collection and some that I have never seen before. This pipe was so unique that is I just had to tackle it next. It is shown in the photo of the rack above – the fourth pipe from the left side. Jeff showed me photos of the pipe on Messenger and I was intrigued. I had really no idea who had made it and I could not see the shank or stem markings to help with the identification. Jeff looked it over and could see no stamping on the shank that would help us out but it was undeniably unique. The carving reminded me of nautilus shell and Dal said it reminded him of a scorpion…nothing quite captured and accurate description of the shape and the carving on this pipe. Jeff took photos of the pipe before he started his cleanup process. I have included these below.  The next photo is a close up of the bowl. You can see the thick cake in the bowl and heavy overflow of lava on the rim top. You can also see the tars and grime in some of the carvings toward the top of the bowl. It was a dirty pipe and obviously it was someone’s favourite pipe because it is so dirty and caked.He also took photos of the side and bottom of the bowl to highlight the unique carving on the bowl sides. The shank itself had more a striped carving almost bark like that ran the length of the shank to the stem.The photos finally gave me my first clue about the pipe. The three vertical dots on the left side of the stem made me wonder if it was a Brigham. Usually Brigham will use those dots to signify particular lines of their pipes but I had never seen a bowl like this in all the years that I have been working on pipes so I had to wonder if it was on or if it had been a cannibalized stem that had been put into service on some other bowl. I would only know once I had it in hand and saw what it looked like off the pipe.The stem itself had a lot of deep scratches on the surface that looked like someone had scraped away the calcification that can build up under a rubber Softee bit. There were tooth marks on the stem surface on both sides near the button and some wear and tooth marks on the button itself. I have started to mention in the last few blogs that Jeff and I have established a habitual pattern that we both follow when we work on pipes. I include it here so you have a sense of that pattern. Jeff reamed the bowl with a PipNet pipe reamer and followed up with a Savinelli Fitsall pipe knife to remove the cake. He scrubbed out the mortise and the airway in the shank and the stem with alcohol, cotton swabs and pipe cleaners. He scrubbed the exterior of the bowl, rim, shank and stem with a tooth brush and Murphy’s Oil Soap to remove the oils and tars on the rim and the grime on the finish of the bowl. He rinsed it under running water. He dried it off with a soft cloth. He was able to remove the lava build up on the rim top and you could see the damage to the flat surface of the rim and the inner edge on the right side and toward the front of the bowl. I took photos of the pipe to show its condition before I started my work on it. I took close up photos of the bowl and rim top as well as the stem. You can see the condition of the rim top and bowl in the first photo. Jeff was able to remove all of the tar and oils and all that remained was some darkening toward back of the rim top. The inner edge of bowl was slightly damaged toward the front side. The vulcanite stem had tooth chatter and some tooth marks on the top and underside of the stem near and on the button surface. Jeff had soaked it in Before & After Deoxidizer and was able to get the stem really pretty clean. The tooth marks are quite prominent and will need to be addressed on both the stem surface and button. The three vertical brass dots on the side of the stem really stood out now that the stem was clean.At this point I took that pipe apart and I was pretty sure I was dealing with a very unusual Brigham pipe. I was not sure what it was or what era or even the stamping because even though I thought I saw some faint stamping Brigham over Made in Canada on the underside of the shank I was not sure because the rustication went right through the stamping. There was a number on the heel of the bowl in the cone bottom that was either 688 or 889 depending on the how the pipe was held. I really was mystified so I did what I usually do when I am dealing with a Brigham – I go to my resident expert in Eastern Canada. I wrote Charles Lemon of Dad’s Pipes a quick email to see what he could tell me. I am including his response and the copy of the Brigham pamphlet that he included with his email.

Hi Steve. I think you have a real find there!

I was out when your email came through but dug into my Brigham material when I got home. I think what you’ve got is a Brigham X4 – one of their “experimental” shapes from the 60s.

I’ve attached a close up pic from the Brigham brochure titled “Brigham Pipes – Makers of Fine Pipes Since 1906”, published circa 1960s. Same nautilus carving pattern, same stem. All the X shapes in the brochure are marked with the 3-dot vertical pattern.

These originally sold for the princely sum of $14.95 & Up! 😁

This is the first time I’ve seen an example of the X shapes outside of a brochure. They are very rare, limited edition pipes made in small numbers. Kind if Brigham’s way of testing new designs on the market…

Is it yours? If it’s for sale I’d love to add it to my collection.   — Charles

The brochure that Charles included is below. The blow up of the pipe he is referring to is in the first photo. The only difference with the one in my hands is a tapered rather than a saddle stem. So it appears I am dealing with a bit of a rare, limited edition Brigham X4 – one of their “experimental” shapes from the 60s. I wondered when I first took it apart if that was not the case but it is always good to be able to ask someone who knows more about a particular brand than I do. Thanks Charles. We will see if I let this one go.

I decided to address the damage to the rim top and the inner edge of the bowl first. I used a folded piece of 220 grit sandpaper give the inner edge a light bevel to minimize the damage to the inner edge of the rim. I also lightly sanded the darkened areas on the back side of the rim top.I polished the rim top and edge with micromesh sanding pads – wet sanding with 1500-2400 grit pads and dry sanding with 3200-12000 grit pads. I wiped the rim off after each sanding pad to remove the dust. The damage on the rim is pretty much invisible after polishing and the rim top really looked good. I worked some Before & After Restoration Balm into the rusticated and the smooth surface of the briar with my fingertips to clean, enliven and protect it. It took some time to really get it into the grooves and valleys of the rustication but I was able to work it in. I used a cotton swab to work it into the smaller divots in each ring around the bowl. I let the balm sit for a little while and then buffed with a cotton cloth to raise the shine. The following photos show the bowl at this point in the restoration process. The reworked rim top looks really good and matches the colour of the rest of the pipe. I am very happy with the results. Before calling it a night I cleaned out the tooth marks and reshaped the button on both sides of the stem. I wiped them down with alcohol on a cotton swab. I filled them in with Black Super Glue and set the stem aside to let the repairs cure overnight. There was morning and there was evening and it was good!The next morning after the repairs had cured I sanded the stem surface with 220 grit sandpaper to blend the surface of the repairs into the stem. I further reshaped the button with a needle file to sharpen the edges.I polished the stem with Denicare Mouthpiece Polish to remove some of the scratches. The gritty substance that makes up this polish makes it work really well as an intermediary step after sanding out the repairs and tooth chatter. (I used it because I have three small tins of it to go through before it dries out and is useless.)Some of you might have notice the Brigham Hard Maple Filter in the long aluminum tenon in all of the above photos and the ones that follow. I forgot to mention that I put one in the tenon when I worked on the stem to protect the aluminum from accidental damage. The Maple filter is a hollow tube made of hard maple that fits in the metal tenon. The metal tip is at the end of the tenon and actually extends all the way down the shank and sits against the opening of the airway into the bowl. It thus provides a distillator to pick up the moisture from a smoke while allowing uninhibited airflow through the pipe. One benefit of the design is that you can easily slide a pipe cleaner down the stem and into the bowl through the wooden filter/distillator tube. It is a pretty unique and effective design and one that is worth a try if you have never smoked one.

Back to the restoration… I polished the vulcanite stem with micromesh sanding pads – wet sanding with 1500-2400 grit sanding pads and dry sanding it with 3200-12000 grit sanding pads. I wiped it down after each sanding pad with a damp cloth. I polished it with Before & After Pipe Stem Polish and wiped it down with a last coat of Obsidian Oil. I set it aside to let the oil dry. This is one of the most uniquely carved Brigham pipes that I have ever worked on and I have worked on many of them. The unique spiral rustication with slots in the spiral bands and the smooth rim top is really nicely. The striated, barklike rustication on the shank works well with the rest of the shape. I polished stem with Blue Diamond polish on the buffing wheel. I gave the bowl multiple coats of Conservator’s Wax and the stem multiple coats of carnauba wax. I buffed the pipe with a clean buffing pad to raise the shine. I hand buffed it with a microfiber cloth to deepen the shine. The pipe polished up pretty nicely. The spiral rustication and the smooth edges and rim top began to almost take on life with the buffing. The rich contrasting brown colour works well with the polished black vulcanite stem. The finished pipe has a rich look that is quite catching. Have a look at it with the photos below. The shape, finish and flow of the pipe and stem are very well done. The dimensions are Length: 6 inches, Height: 2 inches, Outside diameter of the bowl: 1 5/8 inches, Chamber diameter: 7/8 of an inch. I will be hanging on to this pipe for the time being but may well one day pass it on to Charles. Time will tell. Thanks for walking through the restoration with me as I worked over this unique Brigham X-4.

The Decline of Restoring Old Pipes, Part 2/4: An Antique CPF Meerschaum Five Years Finishing


Blog by Robert M. Boughton
https://www.roadrunnerpipes2k.com/
https://www.facebook.com/roadrunnerpipes/

Copyright © Reborn Pipes and the author except as noted

Then I thought, boy, isn’t that just typical?  You wait and wait for something, and then when it happens, you feel sad.
— Sharon Creech, U.S. children’s writer, in Absolutely Normal Chaos (1990)

RECAP
In Part 1, I hypothesized that the discontinued manufacture or illegality of certain materials, as well as the dwindling availability and in some cases complete lack of pre-fashioned parts used in antique and other very old pipes, will lead to a serious crisis in restoring these great but often damaged old friends to their original conditions.  Without hashing over the details, which I already described in great although still incomplete specificity, I will add that I left out the obvious: none of the materials I discussed is irreplaceable in the sense that an old pipe with a broken amber stem or bone tenon can always be mended with Lucite or Delrin, for example.  To emphasize my way of thinking, which I know is shared by many other far more experienced and better practitioners of the art of pipe restoring than I, the thought of needing to resort to such practices except in the most severe cases is unthinkable, or to use a more descriptive word, an anathema to me.

At any rate, having no idea what I was getting into when I began writing the first installment, in the order in which various materials popped into my head, I soon reached a point where more and more endangered items presented.  For the sake of not breaking my train of thought any more than necessary on the one I happened to be trying to complete at the moment, I got into the habit of adding new section headings as I proceeded, as a sort of minimal outline.  The research alone led me in still newer directions, and so the sections grew in number – not to mention the research, which became so out of hand I almost lost control and never did get all of my sources in good order.  In the end, for those reading this who caught Part 1, believe it or not, I cut entire pages from the text and many of the sources that, due to the months spent composing my list of the most endangered materials either no longer applied or were redundant.  And still my sources alone took up at least two whole pages of the 24 I submitted to Steve.

Needless to say, as sad as I was to have to face the music, my little list had reached proportions prohibitive of an illustrative restoration to accompany it.  This installment will begin the phase describing the first of three projects that demonstrate the growing difficulty of restoring very old pipes to their natural beauty and even one relatively new but vintage example, despite my intentions, as if it were an antique.

INTRODUCTION
Five years ago, Chuck Richards presented the old and wounded but still spirited meerschaum to our Friday night pipe get-together.  The group of devoted Albuquerque area pipers being in its heyday at the time, the little tobacconist’s shop where we still meet in lesser numbers was filled beyond fire code capacity.  Folding chairs extended the normal smoker’s lounge all the way to the front glass counter, and still they were not enough.

I would regret to point out the business from cigar aficionados we pipe revelers cost the shop’s owner that memorable night, other than the few who were understanding or dogged enough to wend their ways through our standing-room-only mob.  But the sales in pipes and tobacco tins, and everything else that goes with them, more than made up for the loss on those evenings that are among my best memories.  Time has a way of changing all things, not just the antique meerschaum beauty Chuck passed around for all of us to ogle.

With the innate cunning and flair for dramatic understatement possessed by traveling carny operators of old, Chuck had the entire room enthralled – and yes, I was in the front row, center aisle, agog, right where he wanted me.  The panache of Chuck’s delivery was not in what he said of the pipe, however, but the way he appeared to satisfy the rest of the audience with an atypical dearth of anything better than teases, what Deep Throat called leads, at least as far as my hungry ears and eyes could discern.  Had I still been a news reporter with orders from my editor to get a good quote, I might have been out of a job.

That old reporter in me was accustomed to listening for diversions, avoidances and spins – every attempt “to deceive, inveigle and obfuscate,” as Special Agent Fox Mulder says in one of his most memorable lines from The X-Files (S4:E3).  That good habit must have kicked in to help me pick up on the mesmerizing but fugacious choreography of the show, designed only for the moment and then to be forgotten.     All I heard was “an old, now defunct pipe maker or distributor, probably in the U.S., called CPF,” “Best Make.” “still in its original case,” “with amber bit, gold band and broken bone tenon.”  But what did he omit and why?  During the intervening years, I’ve asked a few of those who were there that night about the occasion, and all of them indeed recollected some small part of the details, but little of substance, that are imprinted into my memory.

And then the act of mass hypnosis was over, the tiny space hot and stuffy, the crush of pipe enthusiasts swelling to the distant and narrow entrance somewhere in the background that was clogged with people coming and going beyond the usual capacity and hours of the shop’s operation, and which sole entry and exit, at any rate, lay beyond several treacherous eddies and straits still out of sight or reach.  I was not in my element and wanted to bail but needed to talk to Chuck.  With a distinct surreality, his bead bobbed nearby, like a life buoy in a foggy ocean.  We smiled at each other in what I felt was a meeting of the minds

I called out to him – shouted as loud as I could – as close to screaming as I ever have.  Imagine, not a vacuum such as space, but the opposite: chaotic babble and expansion.  Everything else drowned in the roiled sea foam of voices.

“Don’t you know anything more about CPF?”

We were face to face at last, but Chuck didn’t hear a word.  Neither did I, for that matter.  He even cupped a hand to an ear and gave up, communicating better with a single raised finger that he would come back.  When he did so, the crowd thinned out enough for us to hear each other.  He said, “I want you to take this home with you and do some research.  See what you can find out about CPF on your computer.”

Close your eyes if it helps and imagine the words above being cast upon you by Chuck in his always rich but then suddenly dulcet, soothing, fluid and entrancing tone

While Chuck projected these words to me, I tried my best to focus on his face, but my attention kept straying to the one-hundred-some-odd-year-old meerschaum pipe in its original tan case that looked so secure in his able custody but became more and more fragile and vulnerable as it was passed to mine. Much more was spoken between us that night before I began to understand that the dirty, damaged but reparable and, to me, priceless piece of art and history was not a loaner for research purposes as Chuck had suggested. Some blurry time later I realized he only said that so I would accept the gift from his hand. He knew I never would have touched it otherwise. About then the full truth struck me like a Mack truck with no brakes on a downslope of the Grapevine, a treacherous strip of I-5 in California with the Tejon Pass in its middle: Chuck expected me to restore it.

“But I’m not the right man for the job!” I went off like a maxed-out Jake break.

Chuck grinned at me a way only he can and then tried to calm the panic rising in me.

“When you’re ready,” I recall him saying. The rest is hazy.

As soon as I returned home that night, I began my computer research into “CPF tobacco pipes” as Chuck prescribed, and it became apparent that my friend indeed knew more than he let on. As Chuck suggested to the weekly pipe get-together almost six years ago in his circumspect description of the company, CPF was indeed a U.S. venture, in New York. I came across all sorts of conjecture as to the meaning of the three letters, with most agreeing the PF stood for Pipe Factory.

The C, on the other hand, was debated with unusual ferocity even for the very opinionated pipe world. The guesses included Consolidated, Chesterfield and Colossal, among others. There was even one complete rewrite of the truth suggested in a note at the bottom of the Pipedia link below, positing the amazing coincidence of a C.P. Fenner (one of two brothers who made cigarettes) as a viable candidate.

After hours of determined hunting, I was able to conclude with certainty that CPF stood for Colossus Pipe Factory, which enjoyed a relatively brief but glorious run from 1851-c. 1920. Steve later pinpointed the end of the road for CPF as 1915. In that short span of time, CPF, almost certainly employing the Old World skills of European immigrant crafters, made some of the most beautiful meerschaum and briar pipes available at the time. And it was a great time for pipes.

There were three absolute forms of proof that the Colossus Pipe Factory existed, and I later forwarded them to Steve: an antique bill of sale I no longer have, made out to a French company; a letter I found in a long scan of The Jeweler’s Circular issues (August 23, 1899) asking for the name of the pipe company doing business as CPF and receiving the above reply from the editors, confirming the Kaufman Brothers & Bondy connection, and an ad strengthening the tie between CPF and KB&B. Most sources agree KB&B assumed ownership of CPF in 1883. Here are the specific page from the jeweler’s magazine, another ad mentioning CPF, KB&B and Bakelite all in one, and an example of such a pipe.

For the most complete history of CPF, see Steve’s definitive piece in the link in my sources below. Steve’s hard work pulls together all of the available information on CPF along with very nice illustrations from his own vast portfolio of restorations.

1881: THE YEAR IN HISTORY
Until this very moment, as I edit my blog, I had put a conservative estimate of the Best Make’s date of manufacture as 1898. Now, revisiting the evidence, I notice that every ad or other official mention of CPF after KB&B took control mentions KB&B and its address at the time. Pinpoint dating being impossible, I now have good cause to revise the pipe’s manufacture to pre-1883, given the worn old case that makes no mention of KB&B despite the room to do so. Therefore, my new conservative estimate is 1881, making it 138 this year. As it turns out, 1881 was an interesting year, like every other year in my opinion, but I’ll just cite a few highlights.

January 1, 1881, Dr. John H. Watson was introduced to Mr. Sherlock Holmes.
February 24, work began on the Panama Canal.
March 4, James A. Garfield was inaugurated as the 20th U.S. president.
March 16, the Barnum & Bailey Circus debuted.
April 28, Henry McCarty, originally of New York City, escaped from the Lincoln County Jail in Mesilla, New Mexico. Best known as Billy the Kid and widely but erroneously believed to have been born William H. Bonney, McCarty had three other aliases. I had to mention this particular historical tidbit because I live in the natural born killer’s old stomping grounds.
May 21, Clara Barton founded the American Red Cross.
July 1, the first international telephone conversation occurred, Calais, Maine to St Stephen, New Brunswick
July 2, President Garfield was shot by a delusional speech writer who fancied himself responsible for Garfield’s victory. Being denied an ambassadorship was the last straw.
September 19, President Garfield died from an infection caused by the gunshot.
December 4, the first edition of the Los Angeles Times was published.

The Wright Brothers’ first flight at Kitty Hawk, NC was not for another 22 years. The 19th Amendment to the U.S. Constitution granting women the right to vote, ratified August 18, 1920, was still 39 years from reality. The 25th Amendment to the U.S. Constitution defining presidential disability and the line of succession was not ratified until February 10, 1967 – 85 years after Garfield’s vice president, Chester A. Arthur, was sworn in as the 21st U.S. president.

The year 1881 was also 19 years before the revolutionary scientific and technological century that forever and exponentially robbed people of the little daily pleasures that were perhaps our greatest inclinations, for taking time to read and write and contemplate life. And toward those goals, some Old World meerschaum carver had the idea to create a pipe with a bowl turned just enough to allow smokers to see the pages of the books, newspapers or literary magazines they enjoyed reading during moments of the day when they could escape the rat race. Few such clever pipes can be found today. The photo below shows another pipe with a design that nevertheless has an amazing similarity to my CPF Best Make and could very well be its brother.


RESTORATION
I should make one final point clear now: the reason this part of the blog is short on the actual restoration steps and includes relatively few photos is that most of the work involved – meaning everything other than reconnecting the stem – turned out not to be anywhere nearly as difficult as I had at first projected. That’s easy to say now, after having restored other meerschaums and removed an unknown number of broken tenons from shanks. Also, knowing the final key to this restore was finding a suitable bone tenon and getting it to fit snugly and securely in the shank afforded me time to, well, take my time.

All of that said, the most important factor in terms of my readiness to finish my part of this project is all of the experience I have had working out problems with other pipes during the five years this process wound up taking due to the one vital step. Most of those times, my impulse, and often my first step, were to seek the help of someone who had more experience than I. That left plenty of options. Although the friends I’ve pestered most for advice may not realize it, I began to research possible solutions steadily more often. Above all, I exercised the part of my brain that allows me, when I use it, to think my own way out of corners. That habit proved to be of particular benefit to this restoration, as I will soon explain. For the first year, I sat on the pipe, in the figurative sense, other than taking it out of the case now and then to admire its regal elegance. That time was in no way wasted or idle. I accomplished considerable online homework on various approaches to restorations of antique meerschaums. I had a fair number of successful meerschaum restorations under my belt, but I’d never even touched an antique pipe before, and they are a whole different ball of wax, so to speak. Here are the problems I anticipated:

1. The rim char was transformed by the power of time – which may heal all wounds but is more apt to cause them, and thus allow us to grow – from the more or less expected norm of bad to full crystallization around the top of the chamber.
2. The entire surface of the pipe was filthy, whether from improper handling or about a century in storage or both, but the deep, even gold of the patina indicated it had been well-loved and tended. Cleaning meerschaum should not be approached without caution as the first try can limit later options or, worse, show places where the pipe was handled with bare hands from the ghosts of ingrained skin oil and dirt, sometimes as permanent blotches..
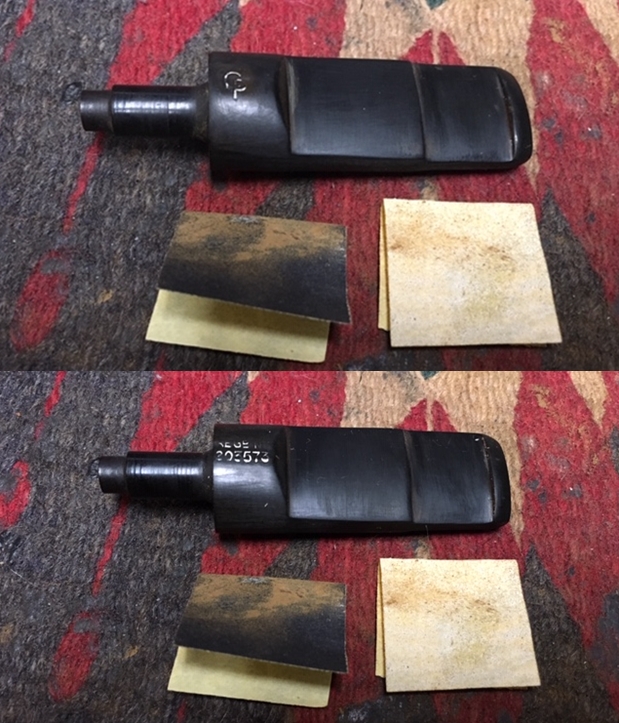
3. The original bone tenon was broken, half jammed deep inside the draught hole and the other half in the amber stem. Removing it from both narrow, fragile holes would be problematic, to use a gross euphemism. Replacing it would be a challenge – but a pleasant one, I imagined in my determination to honor my personal pledge to restore this great pipe to its original glory.
4. The shank looked as if it would need to be re-threaded. Wonderful.
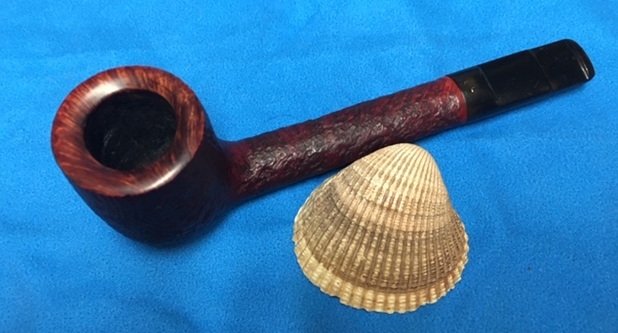
5. I have also never worked with amber but knew enough to realize it is brittle stuff, in particular the 133-year-old (at the time I took possession of the pipe) variety. There would be no thought of subjecting this precious bit to the perils of an electric buffer or even sandpaper.

That’s it. Nothing serious, just a mine field. But after long, intense consideration, I concluded the integrity of the wonderful patina must be preserved at all costs and opted for a traditional basic cleaning rather than one of the experimental processes of which I had read. That was in 2014.

Recalling the one dragon Harry Potter had to face in his quest to survive the Goblet of Fire competition, I decided to be done with one of several I saw swooping my way. I began the slow extraction of the original bone tenon broken off and entrenched by time in the stem and shank. .In this kinder, gentler age of Vulcanite/Ebonite/Lucite/ Delrin tenon removal, by and large, the material being non-organic makes it less vulnerable to easy damage. My situation presented a triad of evils with the bone tenon packed into meerschaum and amber.

In most cases, not to postpone a fight but to confront the problems in a more systematic order, I would have started elsewhere. This time I went straight for the mother dragon protecting its young. The bone tenon screw piece in the stem is difficult to see, but trust me, it’s there in the first pic. Against the odds, it was easier to extract, or I was just lucky, but it popped out in one piece. In contrast, the shank took a couple of hours of on-edge, sweaty browed finagling with alternating and bizarre tools such as a jeweler’s screwdriver, the extended end of a large paper clip and the shank reamer of a three-piece pipe tool, to name a few. Breaking away a layer at a time, eight pieces later I reached the end of the blockage. The photo of the pieces is worthless. Confronted with the need for careful removal of the char and crystallization spreading from the upper chamber onto the lion’s mane and left ear, I admit I’ve never read of super fine “0000” steel wool being appropriate for meerschaum or even wood pipes, but I’ve found that when milder approaches don’t remove all of the char (which they almost never do), in almost all cases the steel wool does the job without damage.  What’s more, it even leaves a nice polish on the regular meerschaum rims that have some real width to them, which the CPF’s does not.  Some readers have told me they like the steel wool approach also. For the chamber I started with 200-grit paper and finished with 320, which also is discouraged unless great care is taken as I did, and then gave the outside of the stummel a vigorous but only preliminary cleaning with small cotton pads soaked with purified water. For all of the dirt apparent on the cotton pads, note how much was still left.

I waited – another year and a half.  During that time I continued the grueling online search for bone tenons with the idea of finishing the work myself and asked friends at my local pipe club and internet sites for pipe enthusiasts for help, to no avail.  The intensified hunt was infused with a sense that the time was fast approaching the now or never point, and even found a site that seemed to have every size available.  However, after going back and forth with the owner several times and never hearing from him again, I began to despair.  That was in 2016.

Then, almost exactly one year ago, at the end of February last year, I thought, what the heck, why not try again?  So I posted an identical thread on Smokers Forums UK, but in a different category.  The first response included a link to Norwoods Pipe Repair in Clifton, Tennessee.  Not wanting to get my hopes up, I checked it out and found that the father and son team of Floyd and Kenneth Norwood seemed to have all the right stuff for my lion’s head pipe and a second, antique briar that needed a still rarer stem that had to be replaced with the bone tenon.  All about that in part 3.

I had to wait until early in April, after employing the skilled services of Kenneth Norwood in March to repair the briar pipe first because it belonged to a customer who wanted it back for good reason, to send the CPF via USPS Priority 2-Day delivery.  I can tell you, the Separation Anxiety I experienced was acute, not having been away from the pipe or failed to look in on it at least once a day for the previous five years and being fully aware of the ability of the Postal Service to lose packages or deliver them to the wrong person who then keeps them.  I paid to insure the package for $500, which could never replace the irrecoverable, and waited.
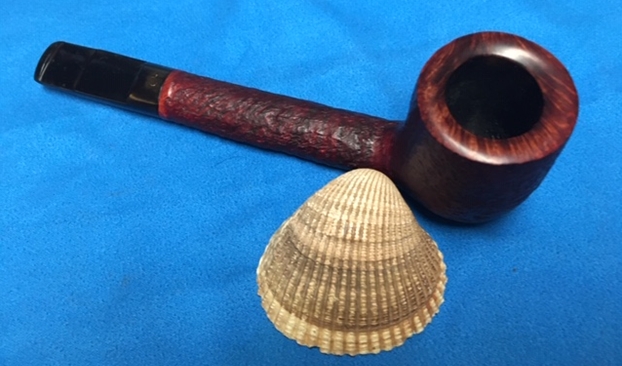
From the almost immediate turn-around time I had with the briar pipe, but fearing that may have been a fluke, I knew it would not be too long but was nevertheless surprised when it arrived again at my door less than a week after I mailed it.

I took a picture showing the masterful work completed by Kenneth, who had done better than re-thread the shank, but what with the wonders of the new and improved Windows 10 that have required so many full system restores of my computers that I’ve lost count, that photo and who knows how many others have gone missing.  I’m sure they’re floating around somewhere because we all know Microsoft never lets us really and truly delete anything, but heaven knows where it is.

By the way, Kenneth mentioned that he would need the stem to be straight for his work aligning it to the new tenon, and so I put the amber stem with a pipe cleaner through the air hole on a small sheet of aluminum foil in the over pre-heated to 150° F. About 15 minutes later, I removed the sheet and stem.  Amber is the easiest material to bend or straighten, I suppose because of its resinous nature that makes it heat quickly to the point where it is so malleable it will literally bend in half from its own weight if picked up by one end when removed from the oven.

Knowing this from an experiment I did almost a year and a half ago, I took hold of both ends of the cleaner and still saw the middle sag a little as I rushed the stem that straightened in the oven on its own to the tap to fix with cold water.  I can’t emphasize enough the importance of speed in this process.  If you’re bending the amber, it tends to straighten out again fast, and if you’re straightening the stem, it’s easy to bend it even by a tiny degree before fixing.

With that said, the next shots  start with the pipe as it was returned to me, with the stem still straight before re-bending, and after thinking to use a toothbrush and purified water to scrub every intricate detail of the amazingly realistic lion’s head.  This was quite a job, as the hand-carved details I noted are minute and almost as breathtaking as a real life, face-to-face encounter with the real thing: the ears alert and mane flowing backward, glaring eyes almost hidden beneath big brows, huge nose with fur and whiskers on either side, and that mouth with a hungry tongue and sharp teeth!  And that’s just the face.  The lion’s mouth is wide open, by the way, as if roaring or growling, and at times I had the idea it didn’t really care for my attentions – at least not until the task was done.  I have a bit of an imagination, you see, and another result was a flash to the story of Androcles pulling the thorn from the lion’s paw.Here are two shots of the work Kenneth did.And the rest.Now, the original real, cherry red amber stem was in remarkable condition for one that was used for a couple of years with loving attention, but the fact that it is well more than a century old makes its physical integrity achieve the level of astounding.  There were no dings or pits, and the scratches, if they could be called that, were so minor some people might have let them be.
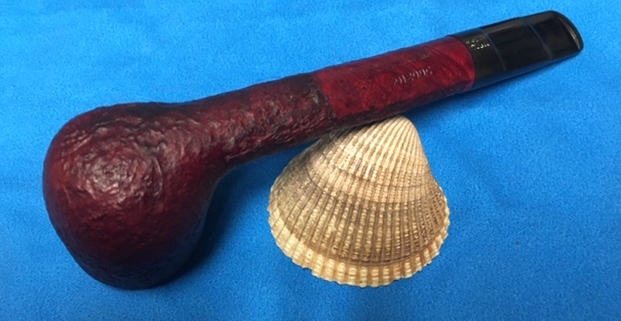
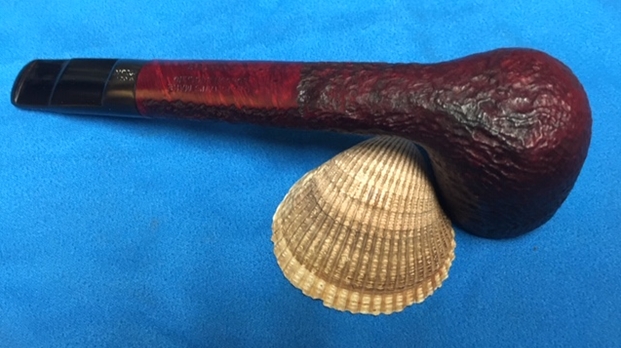
I’m a far cry from perfect and always will be, but I’m not some people.  Here it is from every angle before I did anything to freshen it up.

I gave it a wet micro mesh from 1500-12000.And I did a dry micro mesh the same way.Thinking a little more about it, I was still bent, as it were, on not putting the wonderful piece of expertly carved, polished, polymerized and  fossilized prehistoric pine tree resin – an organic material neither gem nor stone – anywhere near an electric buffer. After all, accidents can happen.  For such a catastrophe to occur to a piece of amber, even brand new, would be the end of it.  Amber’s biggest problems are its extreme softness, a 2 on the Moh’s Scale of 1-10, just a full step above talc, and its natural brittleness that begins to worsen the instant it is exposed to sunlight.  In other words, the exceptional suppleness of this antique stem makes it museum quality.  Whoever owned it kept it in a nice, safe place away from natural light, and when he died it must have stayed in its case in an attic or some other dark place.

At any rate, thinking on the idea of how to give it a little polish without the wheel, the obvious occurred to me.  I took out my little jar of Decatur’s Pipe Shield that I decided to give a try as opposed to the standard Halcyon II Wax, both of which are generally reserved for hand application to rusticated or sandblasted wooden stummels before rubbing into the wood with a soft rag.  As far as I know, it couldn’t hurt, and in fact gave the unique stem a higher sheen that at least I see in the final shots.

Finished with all of the visible cleaning, I remembered the pipe still needed sanitizing, meaning the shank, but a retort was impossible for reasons that should be obvious, yet every now and then we hear of some poor fellow – because any woman who might practice pipe cleaning or restoration would never make such a mistake – boiling alcohol through the insides of a meerschaum or even using the cold alcohol/kosher salt method and ending up heartbroken from the ruinous results.

On the other hand, a little alcohol mixed with water can go far to clean and sanitize a meerschaum shank.  Fred Bass, one of the leading meerschaum collectors and authorities, writes in an essay cited below that his traditional inside-out cleaning method for meerschaums includes careful application of straight alcohol to the dirty outer areas of the pipe  with a cotton pad or cloth  – and he suggests Everclear, which as most folks know is almost as strong as it gets at 95% grain alcohol, or 190-proof.  Residual alcohol should be tamped dry.   For the shank, he recommends a pipe cleaner or more if necessary dipped in Everclear followed by a dry cleaner.

Well, I’m sure that works since Fred (we don’t know each other, but I don’t think he’d mind the familiarity) has been restoring meerschaums for quite a while now.  But I just did not have the heart or nerve or courage or whatever you want to call it to make my first such try on my beloved CPF.  Also, I think Fred would agree that building up to the Everclear cleaning approach is always a good idea, and my initial cotton pads followed by a toothbrush, both with purified water, got all of the dirt off this beauty.  My compromise for the chamber sanitizing was to add a cap-full of Everclear to about a quarter-cup of water.

Here is the finished pipe, hand-buffed with a special heavy micro-fiber cloth. CONCLUSION
With the longest restoration job I’ve ever performed complete, I was almost said – with an emphasis on almost.  The relief and satisfaction with a job well done, if I say so myself and even though I did not do the shank work myself, were more than enough to compensate for any post-project blues.  That turns out to be the perfect word to segue to my final comments.

For anyone who noticed the damage to the CPF’s leather-covered wood case between the first and last picture in this blog, I can, with complete honesty and justification, blame it on the dog, Blu.  I kid you not.

She has admirable spirit, but a little too much of a good thing.  The problem with the pipe is that Blu will snatch, run outside and devour anything left out and unattended if it smells tasty or even different – cooked or raw food, ice cream, soda cans or bottles, coffee mugs, Vaseline, OTC meds in their bottles and, as I found out the hard way one morning, a mysterious little object that simply looked too good to pass up.

My heart stopped when I returned to the living from my bedroom and noticed the tan case that had been in the center of the coffee table missing.  I knew who stole it without a moment’s thought and almost saw red as vivid images and plans of canicide filled my mind.  You see, the CPF Best Make turned lion’s head meerschaum with a gold band and cherry red amber stem c. 1881 was in the box.

Had I not found the mauled case in the back yard dirt patch where Blu so loves to play and eat her ill-gotten food stuff, and the CPF miraculously safe and intact inside it, I can’t say what I would have done to the dog.  Sweetness only goes so far.  A man’s pipes are not to be messed with.

I’m sure everyone can appreciate my immediate overwhelming relief and forgiveness of Blu despite her terrible lapse in judgment.

PREVIEW
Part 3 of this series will describe the two years it took me to return an antique KB&B Blueline Bakelite billiard c. 1911 entrusted to me for a quick cleaning and restoration, and the unfortunate reasons for the…er, delay.

Part 4, taking a lesson from this restore, will go a touch further with my full restoration of an old First Quality meerschaum billiard with a wrecked inner shank, and the replacement of its tenon and stem.

 SOURCES

http://pipephil.eu/logos/en/logo-c1.html

https://pipedia.org/wiki/Colossus_Pipe_Factory

https://www.invaluable.com/auction-lot/colossus-pipe-factory-african-calabash-sterling-109-c-13648cbbb7

https://rebornpipes.com/2013/04/14/some-reflection-on-the-historical-background-on-cpf-pipes/

https://www.onthisday.com/events/date/1881

https://norwoodspiperepair.com/index.html

https://rebornpipes.com/2017/09/14/on-bending-and-straightening-amber-stone-stems/


A Special Gift for Her Grandfather in the People’s Republic of China – A Sculpted Rose Billiard of Italy


Blog by Dal Stanton

You need to first hear the story then the restoration of the pipe will come. Let me first tell you about the granddaughter.

Chrystal, age 30, came to Bulgaria for two weeks from the People’s Republic of China.  My wife and I hosted her in our home.  She has a master’s degree and teaches in an English language department in a university near Beijing.  Her keen interest in the well-being of people was the catalyst in becoming aware of the issues of human trafficking and the devaluation and exploitation of women.  Through foreign acquaintances she has in her role as a teacher, she heard about Daughters of Bulgaria – the work here in Bulgaria seeking to help trafficked and sexually exploited women.

Cross cultural adventure – our Bulgarian friend Ellie, translating Bulgarian menu using English for Chrystal, so that Chrystal can call ordering Chinese in Mandarin, with the hope of surprising the Chinese restaurant worker who speaks Bulgarian and Chinese! It worked!

Chrystal’s aspirations to know and understand more about this issue both intrigued her and struck a chord in her own core experience that prompted her to throw caution to the wind and reach out to the Daughters of Bulgaria staff via email about coming to Bulgaria and to learn about the issue and what tangible things are being done to help women coming off streets and out of brothels.   Her email was received with surprise and question – someone from China desires to come to Bulgaria to learn from us!  In the communications with Chrystal that followed, her deep and sincere concern for people in general and in her home, China, was very evident.  She came to Bulgaria during her annual January break from teaching at the university.  We were amazed at how quickly her visa to enter Bulgaria was approved!

During her visit, we had the privilege of learning about the path of her life in China.  As Westerners, we were anxious to learn about Chinese culture and customs and we were also interested in her personal story.

She, like most Chinese women while growing up, personally experienced the effects of the enduring custom of valuing sons over daughters.  With China’s strict one child per family law to control population which recently changed to allowing two children, Chinese families were faced with pressures to have a son – which is the greater honor for the family in a culture where honor is profoundly important.

During the one child per family period, Chrystal’s

Serenaded at a restaurant in Sophia, Bulgarian style!

parents had a baby and it was a girl – the opposite of honor became Chrystal’s experience as she grew up with this subtle sense of shame.  She recounted remembering the acute feeling of self-guilt that she wasn’t a boy and her presence brought dishonor to her family – she wasn’t what her parents wanted.  Growing up, she understood that her parents had to settle for a girl.

To counteract this sense of having lesser value, Chrystal’s smile was pained while looking down recounting how she sought to excel in everything she did as she emerged from childhood into womanhood – trying especially to earn her father’s love and acceptance.  Her passion to excel did have its benefits. It propelled her growing up, in her studies and eventual appointment as a teacher in the university, being observed and appreciated by her supervisor in the professional and academic university environment.  Yet, Chrystal has discovered that even this accomplishment was not enough to reverse the underlying, unspoken sense that she did not measure up – that she would always be the daughter for which her parents had reluctantly settled.  Chrystal confided that this perhaps, is why she was so drawn to learn more about the Daughters of Bulgaria and the profound effects of devaluing of women resulting in human trafficking – it so resonated in her heart and to some extent, in her experience of feeling the impact of not being valued by others – even by those closest to you.

Even though this part of her story is ongoing and unfolding, Chrystal’s concern for others and her simple joy in living (she always seemed to be laughing and smiling!) confirmed to me that she had found a good place in her life – at her core.  The serendipitous trip to Bulgaria, of all things, revealed to me that she’s taking life as it comes and living to the fullest as she is able – growing as a person and seeking to help others in need.  How will she use what she is learning in Bulgaria in China?  She confessed with a smile, she doesn’t know exactly but she believes it will be used in some way that will be evident in time – like a seed planted in soil.

Chrystal with her Grandfather and cousin. Can you guess?

When Chrystal started asking us questions about our life in Bulgaria, she found out that I do something she had never heard of before – restore pipes!  She was fascinated.  And when she heard that I sell restored pipes worldwide to benefit the Daughters, she decided to do her part in helping the Daughters as well.  The first thing she did was post some pictures and information about The Pipe Steward to her friends in China on social media available there.  For the next several days, the stats for www.ThePipeSteward.com launched because of ‘hits’ coming from China – yes, I can see the countries of those looking at the website!

Secondly, and most important in helping the Daughters, was to choose a pipe as a special gift for her grandfather.  I asked her why the gift for her grandfather?  I found out that February is Chinese New Year and it is customary to give gifts or money to family.  I asked her why a pipe?  She said that as a farmer – a common man, her grandfather is considered near the bottom of the social strata and her thoughts of him are of his life as a farmer and that he liked to smoke.  She described him smoking thick cigarettes with strong tobacco and said that he also had an old, long metal pipe that he liked, but she said there was nothing special about it.  (The answer posed in the picture to the right is on the ‘Left’ 😊)

After she methodically explored many ‘Help Me!’ baskets and scrutinizing MANY pipes, she found the special one (or, did it find her? 😊) she would give to her grandfather.  I asked her, out of all the pipes she had studied, why she had chosen the pipe she did?  She smiled as she looked down thoughtfully.  She described the ‘rose’ carving in the briar and said that it reminded her of the rose that forms the logo for the Daughters of Bulgaria – the rose is beautiful but also, fragile and strong.  The ‘rose’ sculpted in the pipe also formed a hope that revealed to me the depth of love that resides in Chrystal despite everything.  She said that when her grandfather smoked this pipe that she hoped that it would remind him fondly of her – that she would be carved in his heart like the rose on the pipe.

With Chrystal’s return to China coming soon, I quickly went to work on the chosen pipe she planned to give her grandfather after returning to China.  Just before her departure from Bulgaria, my wife loaded Chrystal with gifts from Bulgaria for her and her family (but a special jigsaw puzzle for Chrystal!).  I also presented her the restored ‘Rose Pipe’ ready for her grandfather. Her first reaction to seeing it and holding it in her hands was how it had changed!  The second was some concern that her grandfather may not appreciate its value.  She struggled a bit considering keeping it for herself because now it meant so much to her, not to smoke, but to cherish as a reminder of her time in Bulgaria.  It was gratifying to pass this pipe on which I had purchased from a seller in the US New England state of New Hampshire in 2016, brought to Bulgaria and was patiently waiting for Chrystal to come to Bulgaria so it could choose Chrystal and make its way to its new steward, a common man – a farmer in China, Chrystal’s grandfather.

When Crystal left Bulgaria on her trek back to China (on Aeroflot via Moscow and Peking!) she knew that I was writing her story in this write up of the restoration of her grandfather’s pipe.  I agreed to wait to publish this blog after Chrystal promised to send me pictures of her with her grandfather and after she presented the Rose Pipe to him.  True to her word, the pictures arrived less than a week after her departure with these words:

My grandpa really likes your pipe!!! My dad said it is so special and valuable. My mom said it is like an art. Yes, they are happy. My dad even didn’t know my grandpa likes pipe. But it turns out that my grandpa does like it!!  So, my dad is happy. I look forward to your writing [blog write up]. I feel so blessed and so loved to know you!!  By the way, what kind of wood is the pipe made of?With a deepened appreciation for the granddaughter and her love for her grandfather, and for the pipe man in China who has become the new steward of the Rose Pipe, I now tell the story of the restoration of the Sculpted Rose Billiard that was on my worktable but now in China.   First, to answer Chrystal’s question: Briar 😊. The only marking on the pipe is the COM, ITALY, on the underside of the shank.  The pipe has been well loved and used much by examining the chamber and rim.  The chamber shows very thick cake and the rim is gummed up with lava.  Both need to be addressed through reaming and cleaning.  The bowl itself is dark from oils and grime.  The reddish or Oxblood hue is dull and tired.  There are small dents on the surface from normal bumps and at least one small fill that I see that needs checking.  The vertical fire grain beneath the finish is very attractive – showing much, much potential, which I like.  The shank is slightly bent with a nice-looking saddle stem which shows some oxidation but hardly any tooth chatter.  I think this gift for Chrystal’s grandfather will turn out very nicely!  I take a few close-ups to show these issues. To begin the restoration of this special gift for Chrystal’s grandfather, I clean the stem’s airway with a pipe cleaner dipped in isopropyl 95% then I drop it in an OxiClean bath to soak to loosen and raise the oxidation.  After it soaks through the night, I take it out (and realize that I forget to take a picture of it!) and take the stem to the sink and wet sand using 600 grade paper.  This does very well in removing the oxidation.  To hydrate the vulcanite, I then apply paraffin oil (a mineral oil) to the stem and put the stem aside to absorb.  The pictures show these steps. Next, I tackle the thick cake in the chamber.  I take a starting point picture and then employ the Pipnet Reaming Kit blade heads to cut through the cake to give the chamber a fresh start.  I use 3 of the 4 blades available.  I then fine tune the reaming using the Savinelli Fitsall Tool. I follow this by sanding the chamber using 240 grit paper wrapped around a Sharpie Pen.  This gives me leverage to apply pressure and to reach down into the chamber.  I finish by wiping the chamber with a cotton pad wetted with isopropyl 95% to clean the carbon dust. After an inspection of the chamber showing no problems, I move on. I clean the externals of the stummel with undiluted Murphy’s Oil using a cotton pad.  I also use a bristled tooth brush on the sculpting.  I’m anxious to see how this Oxblood hue cleans up.  I also utilize a brass brush on the rim.  Brass brushes do not harm the surface.  The cleaning did a good job on the rounded rim as well as the stummel surface.  The old finish is thin and raw briar is left on the rim. I decide to check the condition of the two small fills on the left upper side of the stummel.  Using a sharp dental probe testing showed that the fills weren’t solid, so I dig out the old fill with the probe.  I see no other fills needing attention, so I decide to address these now. I wipe the area with alcohol to clean it and then I mix a small about of briar dust putty using thick CA glue.  Using an index card, I shovel some briar dust in a small mound.  I then drop some CA glue close to the mound.  Using a toothpick, I then pull briar dust into the CA glue mixing as I go.  As the two mix, it thickens.  When it reaches the thickness of molasses, I apply the mixture to the pits with a small mound of excess to be sanded after it the putty cures.After the briar dust patch sets up, I clean the internals of the mortise and airway using pipe cleaners and cotton buds. I also use a dental spatula to scrape the tars and oils from the mortise wall.  After some effort, the internals are cleaning up and the cotton buds are coming out clean.Turning back to the stummel, the patch has cured and using a flat needle file I file down the briar dust patch to almost flush with the briar surface.  I then use 240 and 600 grit paper to sand it down further to the briar surface and blending the patch.  Amazingly, a face appears for a while as captured in the second picture! I then wipe the entire stummel with alcohol to remove the thin finish and to clean the stummel.  Taking a very close look at the condition of the surface.  I see a lot of nicks, cuts and very small pitting.  The surface is in rough shape. I decide to employ sanding sponges to work on the rough briar surface as well as the rounded rim that has seen better days.  I start with the coarse sanding sponge sanding the smooth surface – I pass over the sculpted areas.  I then graduate from the coarse sponge to the medium grade sponge, then to the fine sanding sponge.  These pictures chronical the progression – starting with the coarsest sponge: Medium sponge: Fine sponge: Moving from sanding sponges, I fine tune further using the micromesh pads.  First, I wet sand using pads 1500 to 2400, then dry sand using pads 3200 to 4000 and 6000 to 12000.  The pictures show the progression. Well, it’s been a productive day!  To finish my ‘pipe work’ day, I’ll continue the internal cleaning of the stummel by allowing it to clean stealthily in a kosher salt and alcohol soak.  To do this I twist and pull a cotton ball to form a wick that I insert and push through the mortise and into the airway.  I then fill the bowl with kosher salt (you can use any kind of non-iodized salt – iodized salt leaves an aftertaste) and give the bowl a shake to settle the salt.  After I place it in an egg crate for stability, I use a large eyedropper and fill the bowl with isopropyl 95%.  After a few minutes, the alcohol is absorbed, and I top off the alcohol once more.  Putting it aside, I shut off the lights. The next morning, the salt and wick have both darkened from drawing out the oils and tars from the internal briar.  I toss the expended salt and wipe the chamber with paper towel making sure to remove left over salt crystals.  To make sure all is clean I run one pipe cleaner and cotton bud wetted with alcohol. Internals are clean!  Moving on. As I’ve reflected on the original reddish, Oxblood hue of the pipe, I think this was partly why Chrystal was drawn to the pipe – with its sculpted rose.  I will apply a dye to the stummel combining Fiebing’s Dark Leather Dye and Oxblood Leather Dye.  I’m envisioning a subtler Oxblood embedded in the darker brown, but leaning more toward the brown than red.  I will mix the two dyes in equal parts and see what happens!  I assemble all the desktop components of my staining process.  I first wipe the stummel with a cotton pad wetted with alcohol to clean it. I insert a shaped cork into the mortise to act as a handle.  After mixing the Dark Brown and Oxblood in a shot glass, I then warm the stummel using a hot air gun.  This expands the briar grain allowing it to absorb the dye more effectively.  After the stummel has been warmed, I apply the dye mixture to the briar surface with a folded over pipe cleaner.  After thoroughly covering the surface, I ‘fire’ the surface using a lit candle.  The alcohol in the aniline dyes immediately combusts when lit and sets the dye pigment in the briar grain.  I repeat this process a few minutes later and set the newly stained bowl aside to rest through the night. With the newly stained stummel resting, I return to the stem waiting in the wings. There are minor tooth chatter and bites on the button. I first freshen the button lips using a flat needle file.  Using 240 grit paper I quickly sand out file scratches and chatter. I then use 600 grit paper on the bit area, erasing the coarser paper scratches and follow by using 0000 steel wool on the entire stem.Moving next to the micromesh phase, I wet sand using micromesh pads 1500 to 2400, then dry sand using pads 3200 to 4000 and 6000 to 12000.  After each set of 3 pads I apply Obsidian Oil to the stem to revitalize the vulcanite.  The stem looks good. I love this part of the restoration process – unwrapping the fired stummel.  After making the decision to dye, often the grain makes its own decisions regarding how the dye is received – I’m never sure how dye mixtures will look in the end.  To unwrap the flamed stummel shell, I mount a felt cloth buffing wheel into the Dremel and set the speed at the slowest RPMs and apply Tripoli compound.  After completing the cycle with Tripoli, to further blend the dye I wipe the stummel lightly with a cotton pad wetted with alcohol.  Before moving to the application of Blue Diamond compound, I use a fine point Sharpie Pen and give a little highlighting to freshen the sculpting on the stummel.  Next, I rejoin stem and stummel and mount a cotton cloth wheel to the Dremel, increase the speed to about 40% full power and apply Blue Diamond compound to the stummel.  Blue Diamond is less abrasive and continues to tease out the natural sanded gloss of the briar.  The briar grain is responding with a smile on its face – oh my! After wiping the pipe down with a felt cloth to clean off the compound dust left by the Blue Diamond, I mount another cotton cloth buffing wheel onto the Dremel, maintain speed at 40% full power and apply a few coats of carnauba wax to stem and stummel.  When completed, I give the entire pipe a hand buffing using a microfiber cloth to raise the brilliant shine and finish up the restoration of Chrystal’s gift for her grandfather.

In Bulgaria, the rose is special.  Even though is a beautiful flower, here in Bulgaria it is not primarily known as a beautiful flower, but as a rugged producer of fine oils and perfumes known and exported world-wide.  This is one of the reasons why the rose became the logo of the Daughters of Bulgaria – but not only a logo, but a symbol of profound value, strength and beauty.  Women who have been trafficked and sexually exploited are treated as valueless property to be used and then discarded.  All people are endowed with intrinsic value – even those that are not treated as Daughters, but are daughters, with identities, stories and value.  When Chrystal chose this ‘Rose’ pipe, she wanted it to be a special gift to her grandfather for the Chinese New Year – a gift that would remind her grandfather of her – not a rose carved in wood, but that she would be carved in his heart.
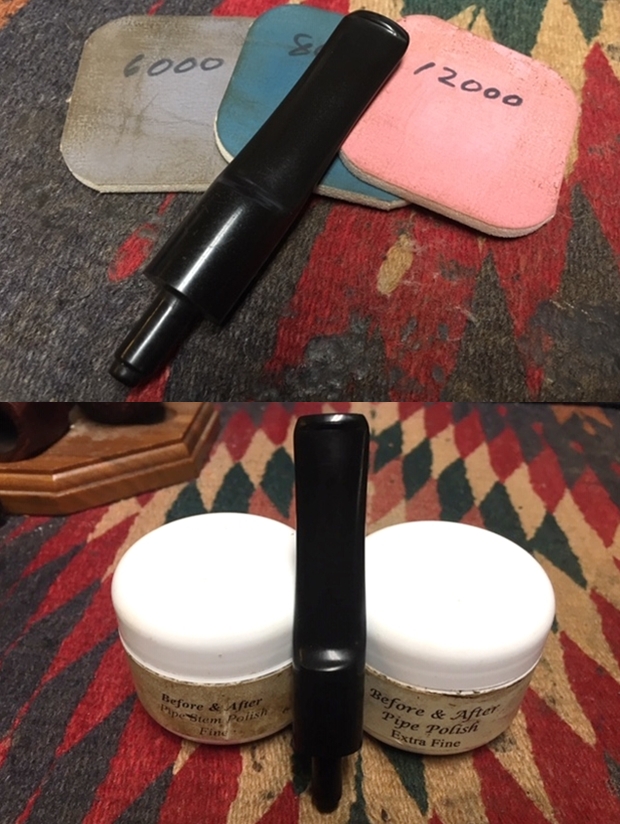
Chrystal could see the beautiful value and potential of this pipe when she chose it from among many to be her special gift.  She is truly a special young lady – truly a rose.  Thanks for joining me!    


The Final Pipe of the Foursome… a JR Hand Made Apple


Blog by Steve Laug

My brother Jeff picked up four pipes in classic shapes at an auction in Nampa, Idaho. All four pipes are stamped JR Handmade. Beside the Bulldog there were two Canadians and an Apple. All were stamped the same on the shank JR over Handmade and the opposite side Algerian Briar. I have been researching the brand on the web. I came across a potential pipemaker with the JR initials on Pipedia named J. Rinaldi but from what I can see he did not make classic shaped pipes. He pipes are very well made and have more of a freehand/freeform shape with shank adornments so it makes me wonder if these are his. I enlarged each photo on the Pipedia article but I was unable to see the stamping on his pipes for comparison sake. This leaves me with a lot of questions about the brand. The foursome came from the Boise, Idaho area like the House of Robertson pipes that I worked on last year. Those came from a pipe shop in Boise, Idaho and I wonder if it is not possible that the JR Handmade brand was also a pipe shop brand from a small shop in that area or even somehow connected with the House of Robertson brand. I heard back from a House of Robertson Collector in Boise about a possibility on the JR brand. Thayne Robertson, the carver of the House of Robertson brand and the shop owner had a son named John. He said John also carved pipes. Perhaps these are some of John’s pipes. But I will probably never know for certain… if any of you readers have any idea about the brand your help would be greatly appreciated.The above photo shows the foursome after Jeff had cleaned them. But before he cleaned each of them he took photos of the pipes as they came to him. I already wrote about the restoration of the Bulldog (https://rebornpipes.com/2019/01/28/the-first-of-a-foursome-a-jr-handmade-bulldog/) and the first Canadian (https://rebornpipes.com/2019/01/30/the-second-of-a-foursome-a-jr-handmade-canadian/) and the second Canadian (https://rebornpipes.com/2019/02/01/the-third-pipe-of-a-foursome-a-2nd-jr-handmade-canadian/). The next pipe is the second pipe down on the right side of the above photo – a classic Apple shaped with a saddle stem. I have included the photos of the Apple before cleanup. The pipe is very well made and follows the classic shape of an Apple perfectly. The bowl was stained with a medium brown top coat over a black undercoat. It is a well-shaped pipe that captures the mixture of flame and straight and birdseye grain around the bowl sides and shank. The top of the bowl had some damage and burn marks on the top and inner edge. The bowl had a very thick cake in the bowl. There was a light overflow of lava onto the rim top. The stamping on the top side of the oval shank read JR over HAND MADE. The black vulcanite stem had light tooth dents and chatter on the top and the underside of the stem. Otherwise it was in very good condition. It was lightly oxidized. He also took a photo of the bottom of the bowl and shank to show the various grains on the pipe. The photo shows the finish of the bowl and though it is very dirty but this is another beautiful pipe.Jeff took a photo to capture the stamping on the topside of the oval shank. The photo shows stamping JR over HAND MADE. The next two photos show the stem surface. There was tooth chatter on both sides near the button. There is also some wear on the sharp edge and top of the button. There is a thick oxidation and coat of calcification.As mentioned before, Jeff and I have developed a pattern of working on the pipes that has become habit to both Jeff and me. I include it here so you have a sense of that pattern. Jeff reamed the bowl with a PipNet pipe reamer and followed up with a Savinelli Fitsall pipe knife to remove the cake. He scrubbed out the mortise and the airway in the shank and the stem with alcohol, cotton swabs and pipe cleaners. He scrubbed the exterior of the bowl, rim, shank and stem with a tooth brush and Murphy’s Oil Soap to remove the oils and tars on the rim and the grime on the finish of the bowl. He rinsed it under running water. He dried it off with a soft cloth. He was able to remove the lava build up on the rim top and the rim top damage and the damage around the edges – both inner and outer is quite extensive. I took photos of the pipe to show its condition before I started my work on it. I took close up photos of the bowl and rim top as well as the stem. You can see the condition of the rim top and bowl in the first photo. Though the photo is a bit dark you can see that Jeff was able to remove all of the tar and oils. You can see the burn damage to the front inner edge of the bowl and some general darkening of the rim top. The vulcanite stem had light tooth chatter and some tooth marks on the top and underside of the stem near and on the button surface.I took a photo of the stamping on the left side of the shank. You can see that the stamping was clear and readable. I wiped down the bowl with a damp cotton pad to clean off the debris; then addressed the damage to the rim top and inner edge. I removed the damage to the top and the edges of the rim top. I was also able to reduce the burn damage to the front inner edge of the rim. I wiped down the rim after sanding with a dampened cloth and I am pleased with the results.I polished the rim top, the edge and exterior of the bowl and shank with micromesh sanding pads – wet sanding with 1500-2400 grit pads and dry sanding with 3200-12000 grit pads. I wiped the rim off after each sanding pad to remove the dust. The damage on the rim edges was virtually gone and the top looked really good after polishing. I worked some Before & After Restoration Balm into the smooth surface of the briar with my fingertips to clean, enliven and protect it. I let the balm sit for a little wall and then buffed with a cotton cloth to raise the shine. The following photos show the bowl at this point in the restoration process. The reworked rim top looks really good and matches the colour of the rest of the pipe. I set the bowl aside and worked on the stem. There were some tooth marks on the top and underside at the button that needed to be addressed. I also needed to do some work on the surface of the button on both sides. I also sanded away some of the surface oxidation.I polished the stem with Denicare Mouthpiece Polish to remove the hard to get spots on the saddle and the button edges. I scrubbed it into the surface with a soft cotton pad and then buffed it off with another pad. I polished the stem with micromesh sanding pads – wet sanding with 1500-2400 grit sanding pads and dry sanding it with 3200-12000 grit sanding pads. I wiped it down after each sanding pad with Obsidian Oil. I polished it with Before & After Pipe Stem Polish and wiped it down with a last coat of Obsidian Oil. With this fourth JR Hand Made pipes from the Nampa, Idaho auction I am even more certain that there is some connection to the House of Robertson Pipe Shop in Boise, Idaho. Since the completion of the third pipe I received an email from a House of Robertson (HOR) collector who lives in Boise, Idaho area. He used to frequent the House of Robertson Pipe Shop in Boise and knew the owner and carver of the HOR pipes, Thayne Robertson. He thought that there may well be a connection. He wondered if the JR Hand Made pipes could possibly been carved by the son of the House of Robertson pipe carver and shop owner. His name was John so it could well be John Robertson pipes. I may not be able to get definitive proof of this but even the hint of it is quite exciting.
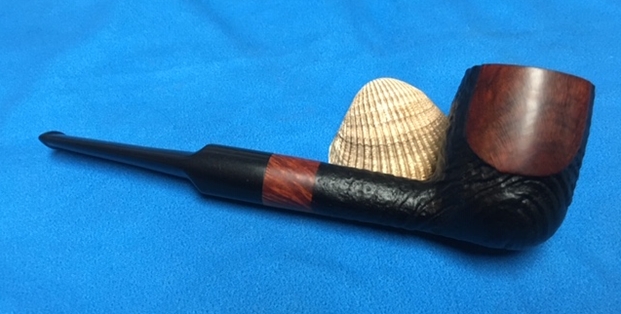
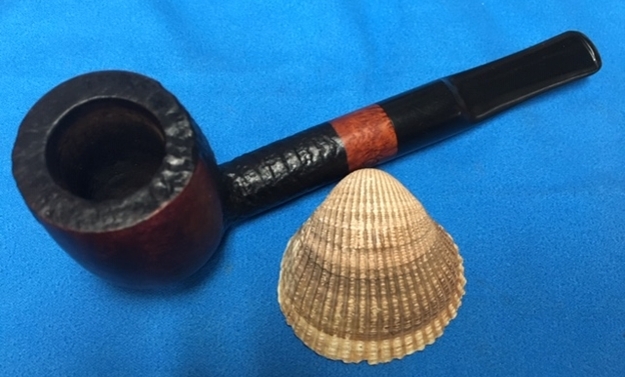
The four JR Hand Made pipes that I have restored are really well made and shaped. The stain job was done to highlight the mix of grain on the bowl. I polished stem and the bowl with Blue Diamond polish on the buffing wheel. I gave the bowl and the stem multiple coats of carnauba wax. I buffed the pipe with a clean buffing pad to raise the shine. I hand buffed it with a microfiber cloth to deepen the shine. The pipe polished up pretty nicely. The contrasting grain really began to stand out; it seemed to take on life with the buffing. The rich contrasting brown and black colour works well with the polished black vulcanite stem. This finished pipe has a rich look just like the Bulldog and the two Canadians and it is also quite catching. Have a look at it in the photos below. It is a well-shaped apple. The shape, finish and flow of the pipe and stem are very well done. The dimensions are Length: 5 3/4 inches, Height: 1 3/4 inches, Outside diameter of the bowl: 1 1/4 inches, Chamber diameter: 3/4 of an inch. I will be putting this newly finished JR Hand Made Canadian on the rebornpipes store shortly if you are interested in adding it to your collection. Thanks for walking through the restoration with me as I worked over the final pipe of the foursome from JR Hand Made pipes.