Tag Archives: pipe refurbishing

GBD 9438 Virgin Restoration


Blog by Al Jones

If you have followed my previous posts, you’ve noticed that I am a fan of the GBD 9438 shape. There is just something about the chubby Rhodesian shape that appeals to me. All of the 9438’s in my collection are excellent smokers and feel great in the hand. For the past two years, I’ve been on the lookout for one of the highest grades in that shape, the Virgin. I found this somewhat tattered 9438 Virgin with a Perspex stem on Ebay.

The pipe showed some bruising and nicks on the bowl, but the top looked in decent shape as did the Perspex stem. Photographing details of a Perspex stem is never easy, but this seller had plenty of good photographs.

Below are the pictures posted by the seller.  You can see the handling marks on the bowl in the first shot.

GBD_9438_Virgin-Before (10)

GBD_9438_Virgin-Before

GBD_9438_Virgin-Before (1)

GBD_9438_Virgin-Before (2)

GBD_9438_Virgin-Before (5)

GBD_9438_Virgin-Before (6)

The bowl had a light cake, which I reamed close to the briar with my Castleford reamer. I soaked the bowl overnight with Everclear and sea salt. I use a champagne cork to plug the shank end and try to work a little of the salt/Everclear slurry into the shank.

The stem was in pretty good shape, but had a tooth indention on the lower side and some scratches. I tried to lift the tooth mark with some heat, but the Perspex isn’t as resilient as Vucanite. I removed the scratches with some 1500 then 2000 grit wet 3M automotive grade wet sandpaper. Next I completed the stem work with 8,000 and then 12,000 grit micromesh sheets. I buffed it lightly with some automotive plastic polish. The draft hole isn’t heavily stained, which is a fortunate find on a Perspex stem. The tooth mark is on the bottom and the clear Perspex hides it nicely. (and makes it difficult to photograph)

My biggest concern about the briar was what appeared to be handling pinprick marks in several spots, probably from banging around in a drawer/box for a few decades. Using a torch, wet cloth and a pirated kitchen knife, I was able to lift a majority of the marks. The nomenclature was light, so I carefully buffed the bowl with first White Diamond then two coats of carnuba wax. That helped even out the color and hide some of the bruising. It’s not perfect, but has a nice level of patina.

GBD_9438_Virgin_Finished (6)

GBD_9438_Virgin_Finished (1)

GBD_9438_Virgin_Finished (2)

GBD_9438_Virgin_Finished (3)

GBD_9438_Virgin_Finished (4)

GBD_9438_Virgin_Finished (5)

GBD_9438_Virgin_Gallery

With this addition of this Virgin, I now have five different grades of the 9438 shape.

Fantasy

GBD_9438_Fantasy_Gallery 3

Tapestry

GBD_Tapestry_9438_2nd_Gallery

Prehistoric

GBD_9438_Prehistoric_Gallery

New Standard

GBD_9438_New_Standard_Gallery

I include this Seventy-Six Colossus as it is an oversized 9438 (stamped 9676) and clearly the 9438 chubby Rhodesian shape.

GBD_Colossus_76_Gallery

A Little Czech System Pipe Reborn


I had this little Czechoslovakian rusticated bowl in my box. I decided it was the day to work on it so I took it from the box and gave it the once over to see what needed to be done. The finish was a bit spotty, and the shiny varnish on it was peeling so I dropped it in an alcohol bath to try to break down the finish. The next three photos show the bowl after I had taken it out of the bath. While it was still wet I used a wire brush and some Everclear to scrub the surface of the bowl to remove the flaking finish and the varnish coat. I also topped the bowl to remove the damage that had been done to it from tapping it out. The fourth picture below shows the topped bowl

ImageImageImageImage

I went through my can of stems to find one that would fit. I had a nice p-lip style stem stamped WDC Wellington that came from a pipe of similar size and shape. I was able to sand it a little to make a good fit tight fit to the shank. I cleaned up the stem with micromesh sanding pads 1500-12,000 and then gave the stem a polish with Maguiar’s. I sanded it a final time with the 12,000 grit micromesh before wiping it down with Obsidian Oil. The two photos below show the finished stem.

ImageImage

I restained the bowl with dark brown aniline stain, flamed it, restained and flamed it a second time. The restained pipe is shown in the next two photos. Once it was dry I took it to the buffer and buffed the stem and the bowl with White Diamond.

ImageImage


I brought the pipe back to the work table and gave it multiple coats of the Halcyon II wax as I find it does a great job giving rusticated pipes a nice sheen. I also coated the stem with carnauba wax and hand buffed the entire pipe with a shoe shine brush. The hand buffing brought out a nice shine on the pipe.

ImageImageImageImage


GBD New Standard Reborn


Blog by Greg Wolford

I picked up the GBD New Standard recently because of its shape mostly: a thick-walled pot. It is stamped GBD in the oval over New Standard on the top of the shank. The bottom of the shank is stamped London England over 9682 with a “P” below and to the right of that.

When I got the pipe it was in pretty good shape: dirty, oxidized, the normal stuff. But it seemed lightly smoked with no cake and no real issues and only light chatter. IMG_5241IMG_5242IMG_5243Nomenclature

You can see in the top a pipe cleaner sticking through the drought hole, showing a well drilled pipe.

You can see in the top a pipe cleaner sticking through the drought hole, showing a well-drilled pipe.

The pipe has a few fills but the are mainly on the bottom – out of sight, out of mind – and I wanted to keep this pipe as original as I could so I didn’t bother with them.

I started with putting the stem into a OxiClean bath; I let it soak for about 45 minutes I believe. While the stems (I actually was doing two pipes at a time, as I often do) soak I did a cotton ball and alcohol treatment on the two bowls. Usually I use coarse salt, not cotton balls, for this but since this bowl appeared to be so lightly used and the second bowl was fairly gunky I thought this would be a good time to experiment with the new-to-me cotton ball treatment. I put one large cotton ball into each bowl, plugged the shanks with cotton swabs and set them up on a steel drainer I have in my kitchen. I then filled the bowls with 91% isopropyl alcohol, slowly, with an eye dropper.

The photos below show the progression of black “stuff” drawn out of the GBD bowl; you may also see some of the tars (brownish-yellow stuff) in the cotton ball from the other pipe. This process started within a minute, the first photo, and then each picture after is after about 15 minutes, with the final result at about one hour.

IMG_5246

I don’t know what the black “stuff” was but it sure removed a lot of it in the treatment! As a side note, I found the cotton balls easier to deal with than the salt and it seems to have done as good a job, too. I will probably continue to us this method in the future.

The stems had been soaking for about an hour, maybe 45 minutes, at this time and were ready to come out of their bath. As you can see, quite a lot of oxidation was raised and loosened by this soak.

IMG_5247

I then washed the stems in dish liquid and scrubbed them with Bar Keepers Friend and an old toothbrush; this took about an hour, making a paste of the powder and scrubbing, rinsing and wiping, then repeating. The results from that looked like this:

IMG_5248

Still a lot of oxidation and work left to go. Next came sanding and polishing with wet/dry paper and micro mesh. I used 320 & 400 wet/dry paper before moving on to the micro mesh. Before the mesh, though, I used the Novus 2 plastic polish on the stem to take off some of the scratches and a little more left over oxidation. I wet sanded with micro mesh 1500-4000 and then polished with the Novus 2 again. I now dry sanded/polished with the remaining grits of 6000-12000, then polished with Novus 1 plastic polish to get to this look

IMG_5249

Now I applied my “secret substance” before setting the stem aside to work on the bowl. This is how the stem looks at this point:

IMG_5250

What, you may ask, is my “secret substance”? Obsidian oil maybe? No. It is Mothers Back-to-Black automotive polish.

The bowl was really very easy since I didn’t plan on totally refinishing it. I wiped it down several times with acetone to take off the old finish and get the grime off of it. I then wiped it down a few times with cotton pads dampened with alcohol. I lifted a small amount of stain in the process but not enough to really change the color of the pipe, only enough to let the grain pop a bit more. The most time-consuming part here was rubbing, with alcohol then saliva on cotton swabs, to clean the rim. There were a couple of small dents I lifted with steam ( I heat an old “butter” knife with a heat gun and apply it to a dampened cotton towel that is laying over the dent) but can’t actually recall how many or where they were they were so incidental. The next photos show the stummel before taking it to the buffer:

IMG_5252IMG_5251

I then buffed the stummel with Tripoli before reassembling the pipe and buffing the whole thing with white diamond and then carnauba wax. Here is the finished pipe:

IMG_5253

This photo is slightly over exposed

IMG_5254IMG_5255

Wally Frank Shipmate


Blog by Greg Wolford

The same trip out that I picked up the Dr. Grabow Freehand I also picked up this Wally Frank. It was in pretty good condition, really just needing a good clean up. I’d never had a Wally Frank before, like the Freehand, so that was part of my interest. But the real interest laid in its shape: a Rhodesian.  The Bulldog and Rhodesian top my list of favorite shapes so this one had to come home with me.

The following photos show the Wally Frank and the aforementioned Dr. Grabow as they looked when I unwrapped them at home. You can see that the Frank was in much better condition than the Grabow, especially the stem!

IMG_4431 IMG_4432IMG_4433 IMG_4436 IMG_4436IMG_4434IMG_4435IMG_4436IMG_4438

There are some fills in the pipe but the only one that really bothered me was the one on the face of the bowl (last photo), though I’m not sure how well you can see it. That one irritation made me decide to refinish the pipe but to keep it as close to original as I could.

At the time I was working on this pipe I didn’t know I would be writing about the experience, so there are no in progress photos to share.

I started by dropping the stem into a OxiClean bath to loosen the gunk and oxidation. Since I didn’t want to remove all the stain I didn’t do an alcohol bath. I began by lightly reaming the bowl which was actually not bad at all; there was virgin briar still in there! After reaming, I began to clean the bowl with acetone on disposable cotton pads; I buy them in the make-up section of Wal-Mart. Once cleaned I then topped the bowl. For topping I used 320 wet/dry sandpaper laid out on my workbench which has a granite slab on it for my leather working. Once the bowl was sufficiently evened out to my satisfaction I began to work on the fill that annoyed me.

I used some 400 grit wet/dry sandpaper to touch up the area a but before I picked out the fill. I then cleaned the area with a isopropyl dampened cotton pad and then, using briar dust from the bowl topping, I packed the area with dust and dripped on some Super Glue. I let it penetrate for 30 seconds or so and then quickly wiped off the excess. The result looked nice, with little extra glue. I gave it another few minutes to set well and then moved on to sanding.

As I said, I wanted to preserve the original look as much as possible and the other smaller fills didn’t really bother me. I decided the best approach was to lightly sand the whole pipe with 400 grit wet/dry paper, avoiding the nomenclature completely. I would work over the entire bowl, wipe it with alcohol pads, evaluate, and repeat; I belive it took three passes to get it to where I liked it.

I then mixed up some Fiebing’s Medium Brown leather dye 50/50 with 91% isopropyl alcohol which I applied with a wool dauber and flamed in. I buffed it by hand to see what the color looked like, trying to blend the sanded briar with the mostly untouched stamped areas; it was a very close match but needed another application. The bowl rim needed more, too, due to the topping so I started by applying and flaming the dye to the rim only and then applying and flaming the entire bowl. Again I buffed it by hand and compared the two areas; I was happy with the results so it was time to move on to the stem.

After taking the stem out of the OxiClean bath I washed it well and scrubbed it with a Miracle Eraser, which removes a lot of the loosened oxidation. From there I began wet sanding with 320/400/800 grits; thankfully there were no holes, dents or even much chatter to work on with this stem. Next I applied the Novus 2 plastic polish. Sometimes I don’t use the plastic polish this soon but I wanted to get an idea of the shape of the stem at this point. The stem looked better than I expected so I then moved on to the micro mesh, wet sanding with 1500-4000 grits. I used another application of the Novus 2, which I work in with a cotton pad and then polish off with another clean one. I then polished with the micro mesh, dry, through 12000. At this point I switched to the Novus 1 plastic polish to bring up the shine.

I moved to the buffer and buffed the bowl with Tripoli. I then put the pipe and stem together and buffed the entire pipe with white diamond and a few coats of carnauba wax. I buffed the pipe out to the final shine with my “mushroom” on my cordless drill.Mushroom

The final result was one I am happy with. The pipe smokes much better than I’d anticipated; there is no more virgin briar in its bowl. The fit and feel of it are fantastic and now it looks more like it once did, when someone else loved it.

IMG_5186 IMG_5187 IMG_5188 IMG_5189 IMG_5190 IMG_5193

Dr Grabow Restoration and Stem Repair


Blog by Greg Wolford

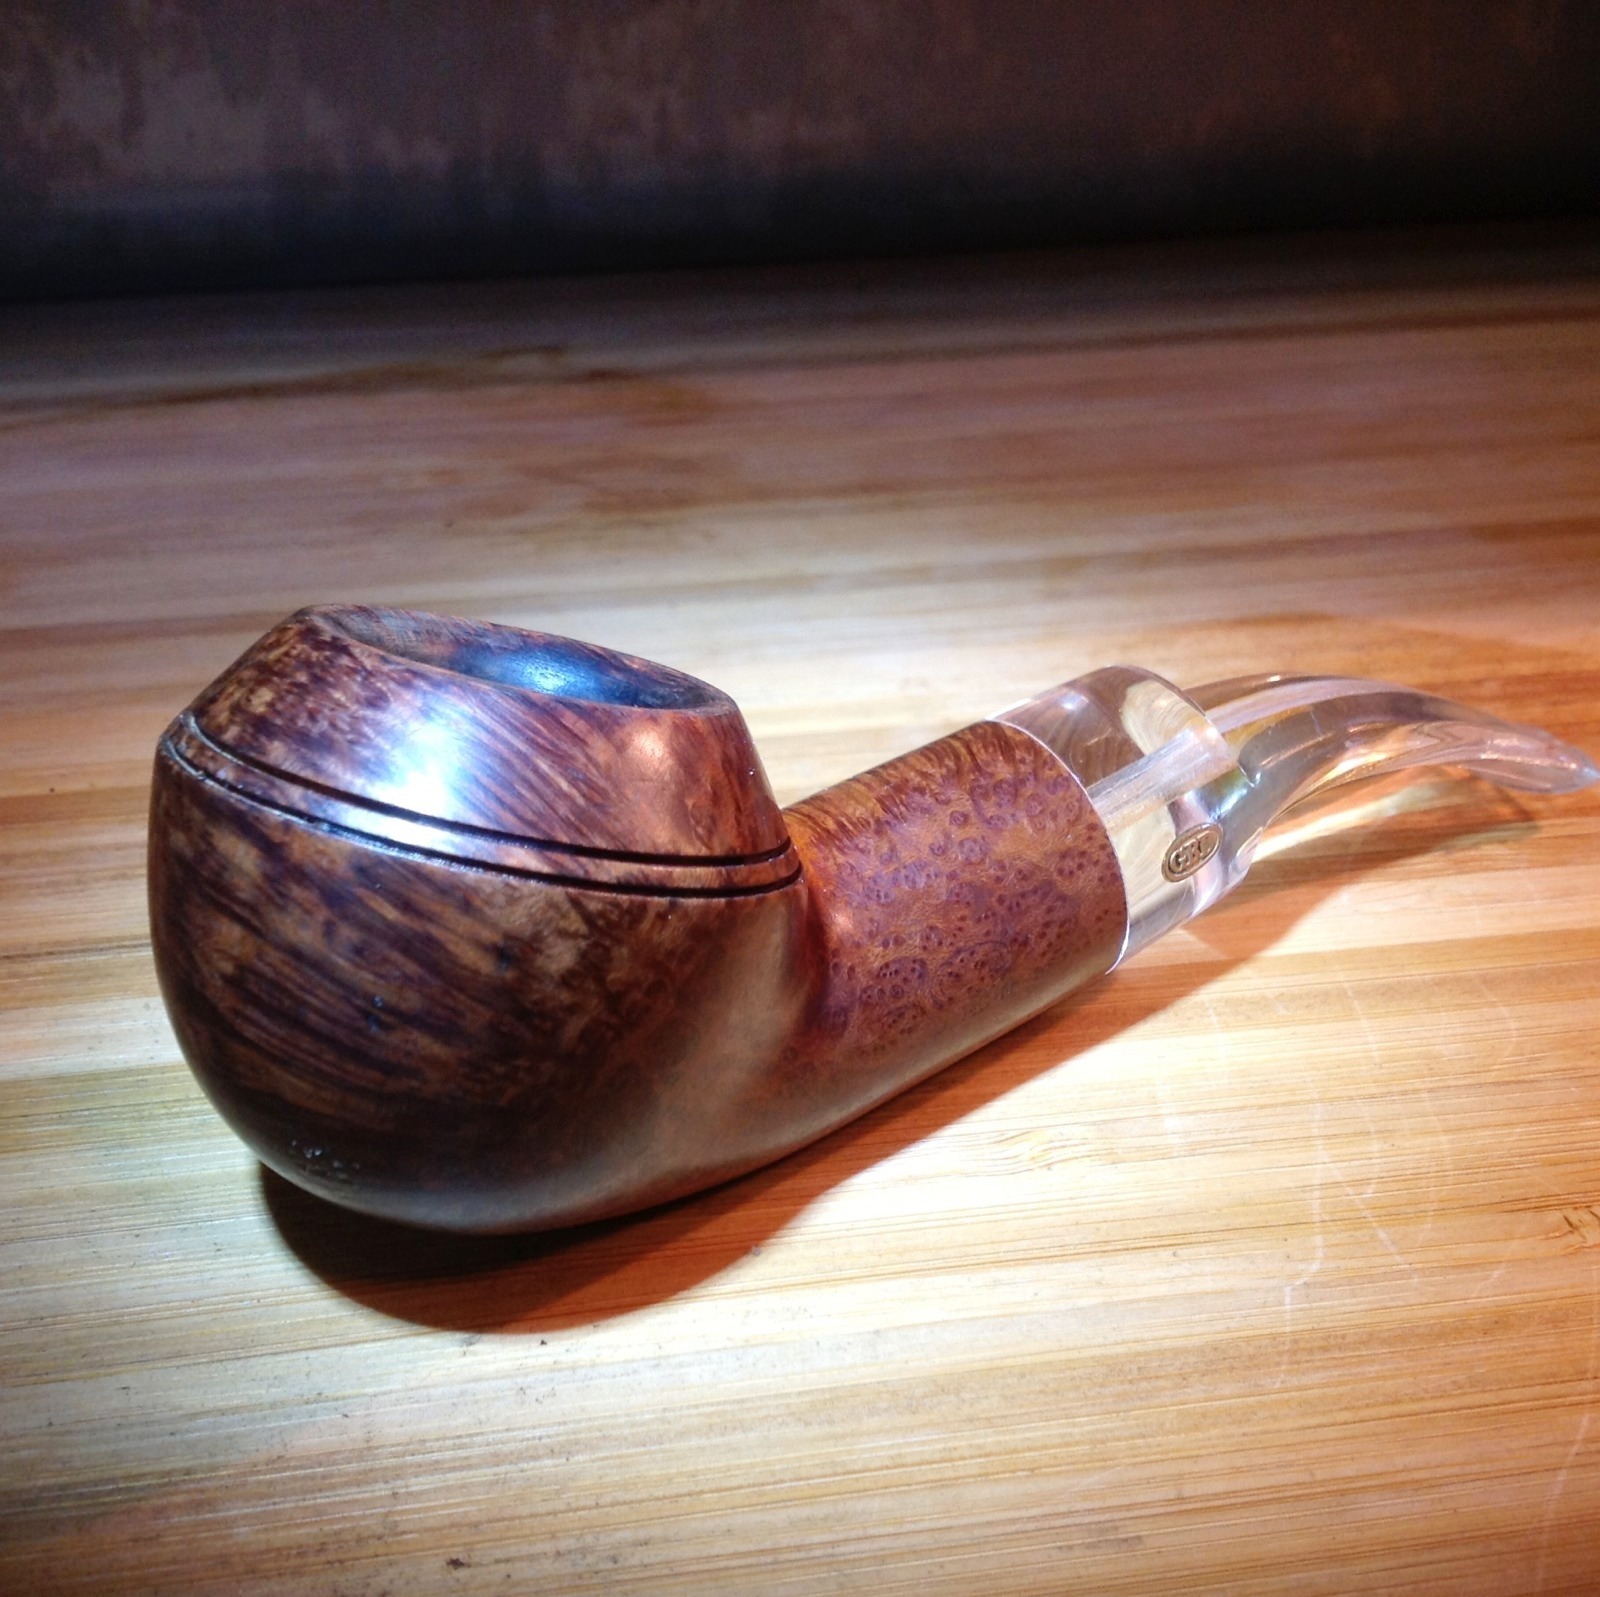
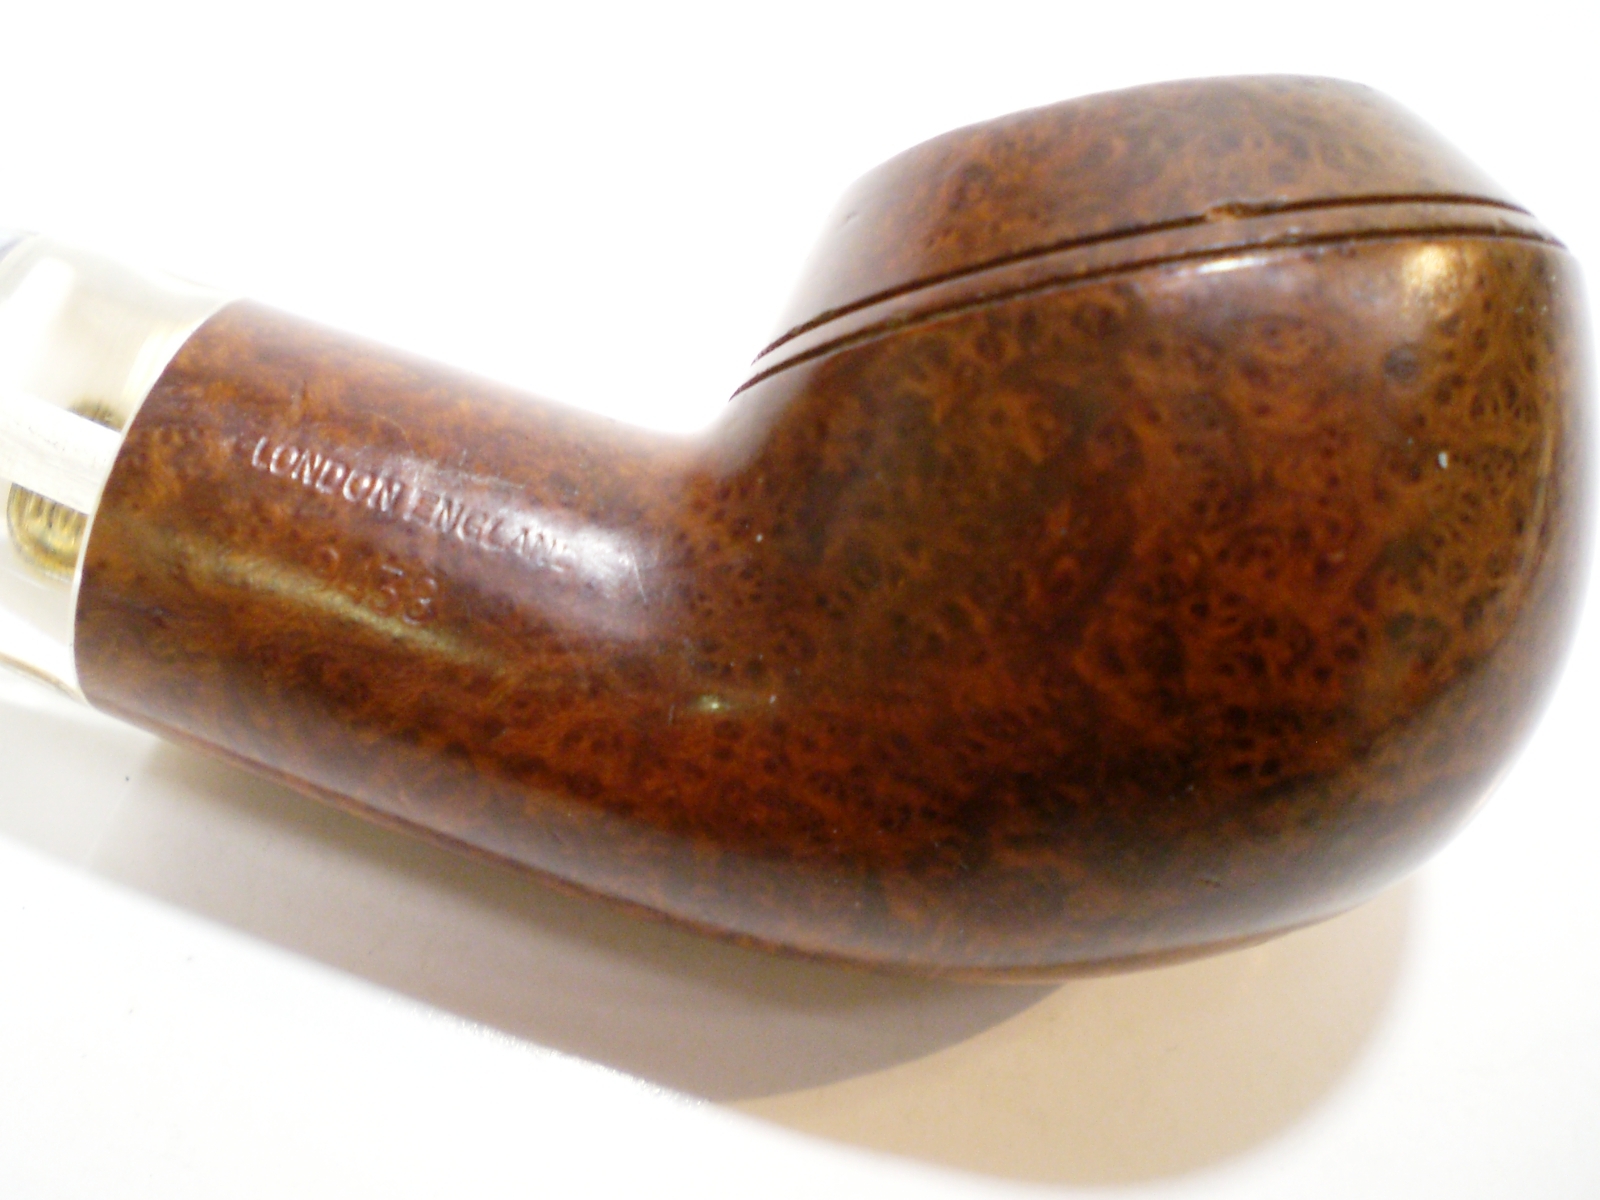
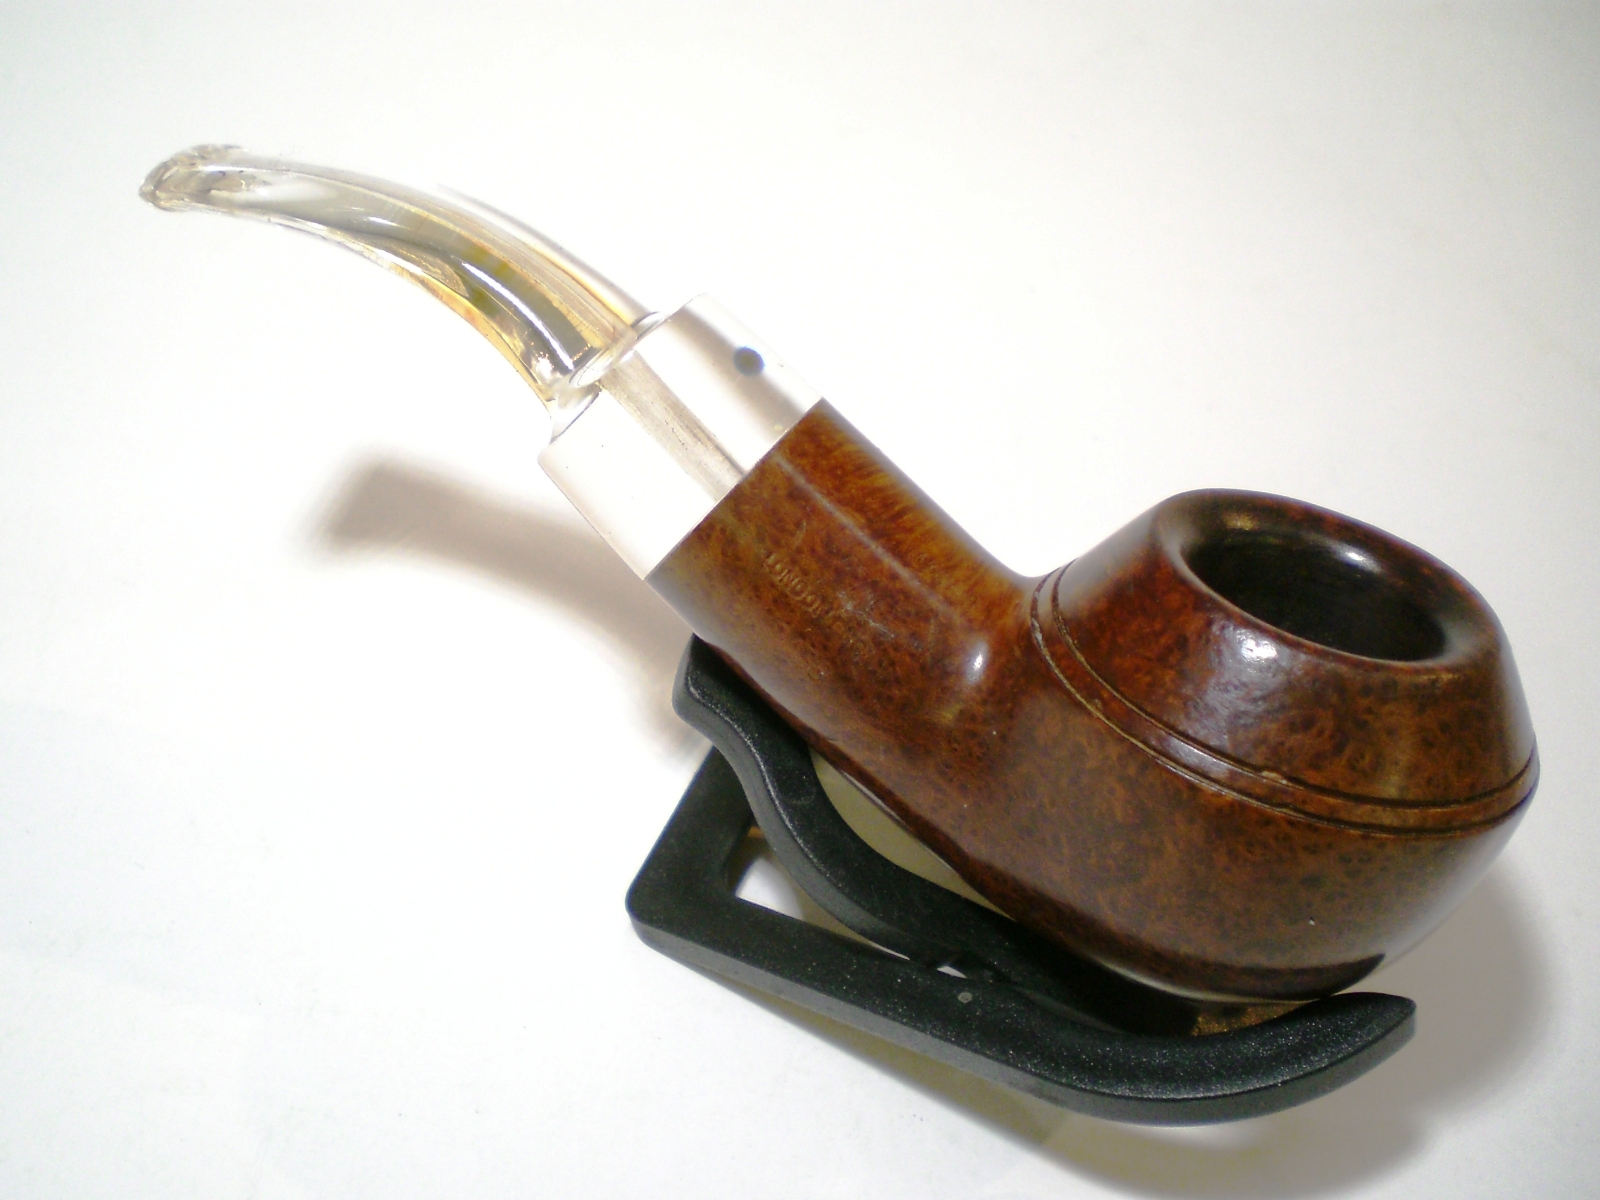
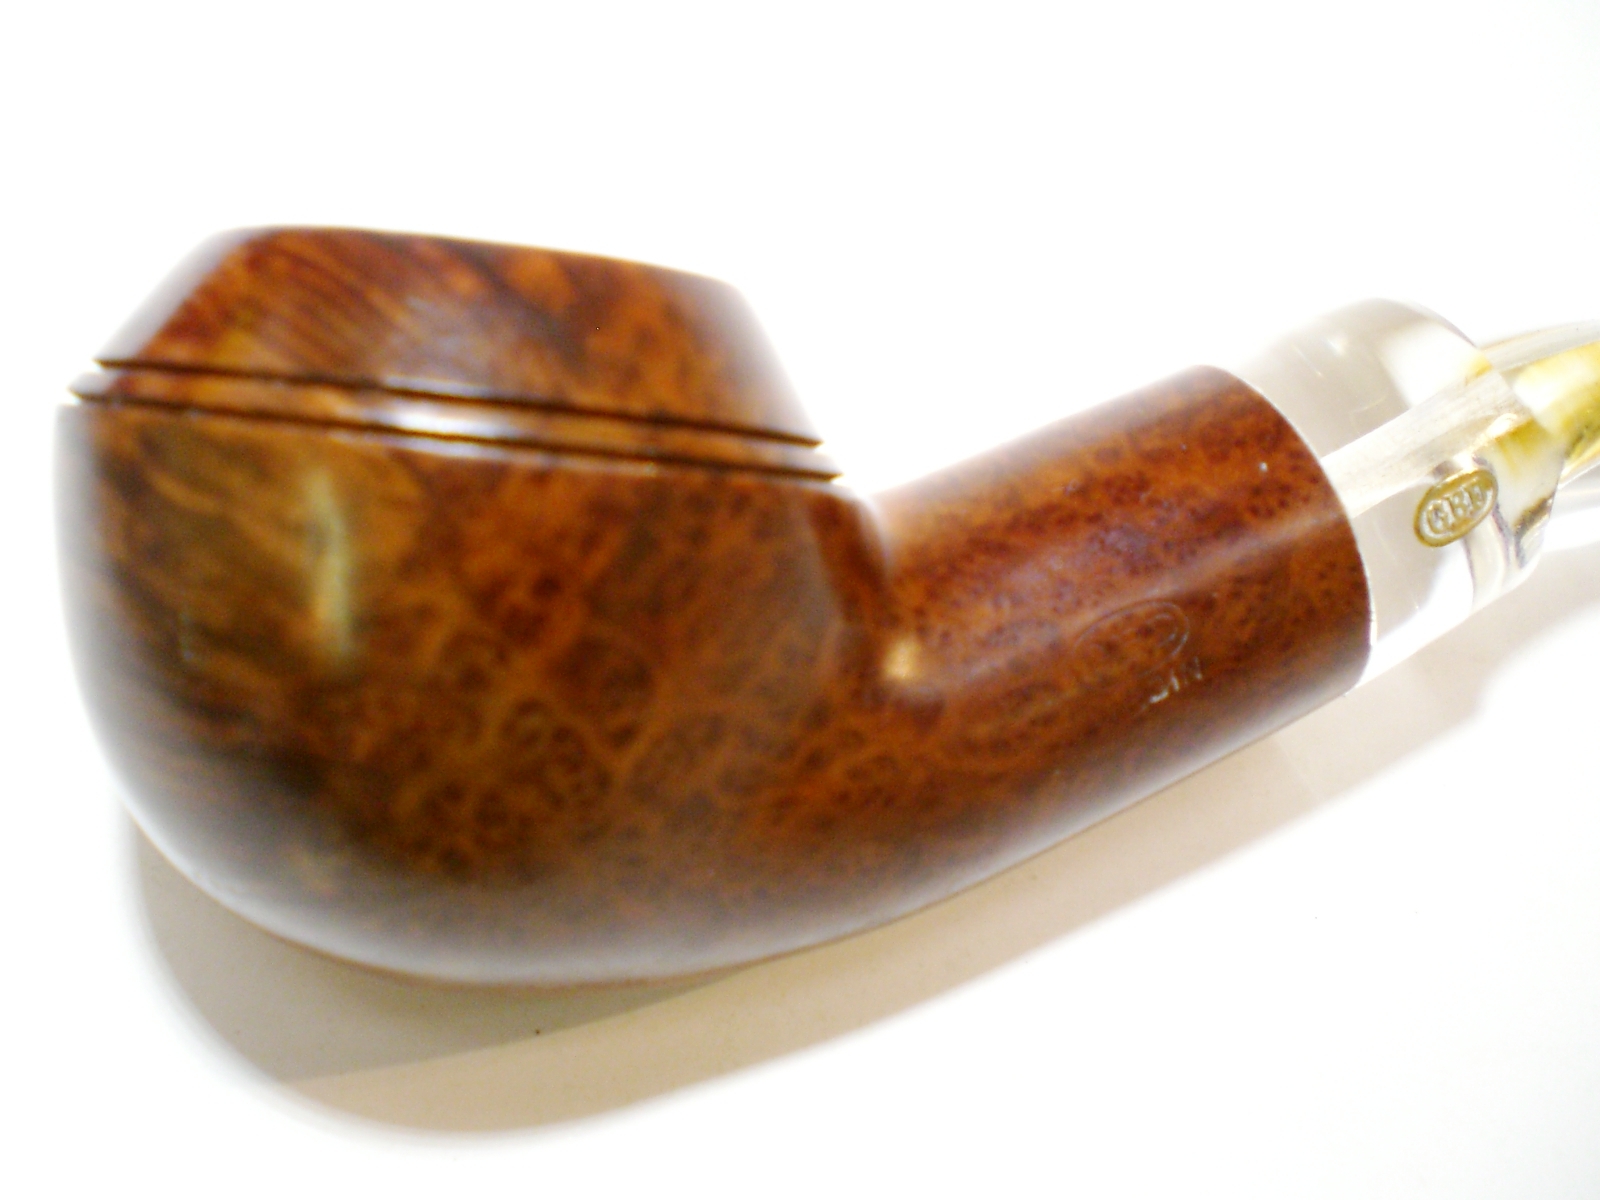
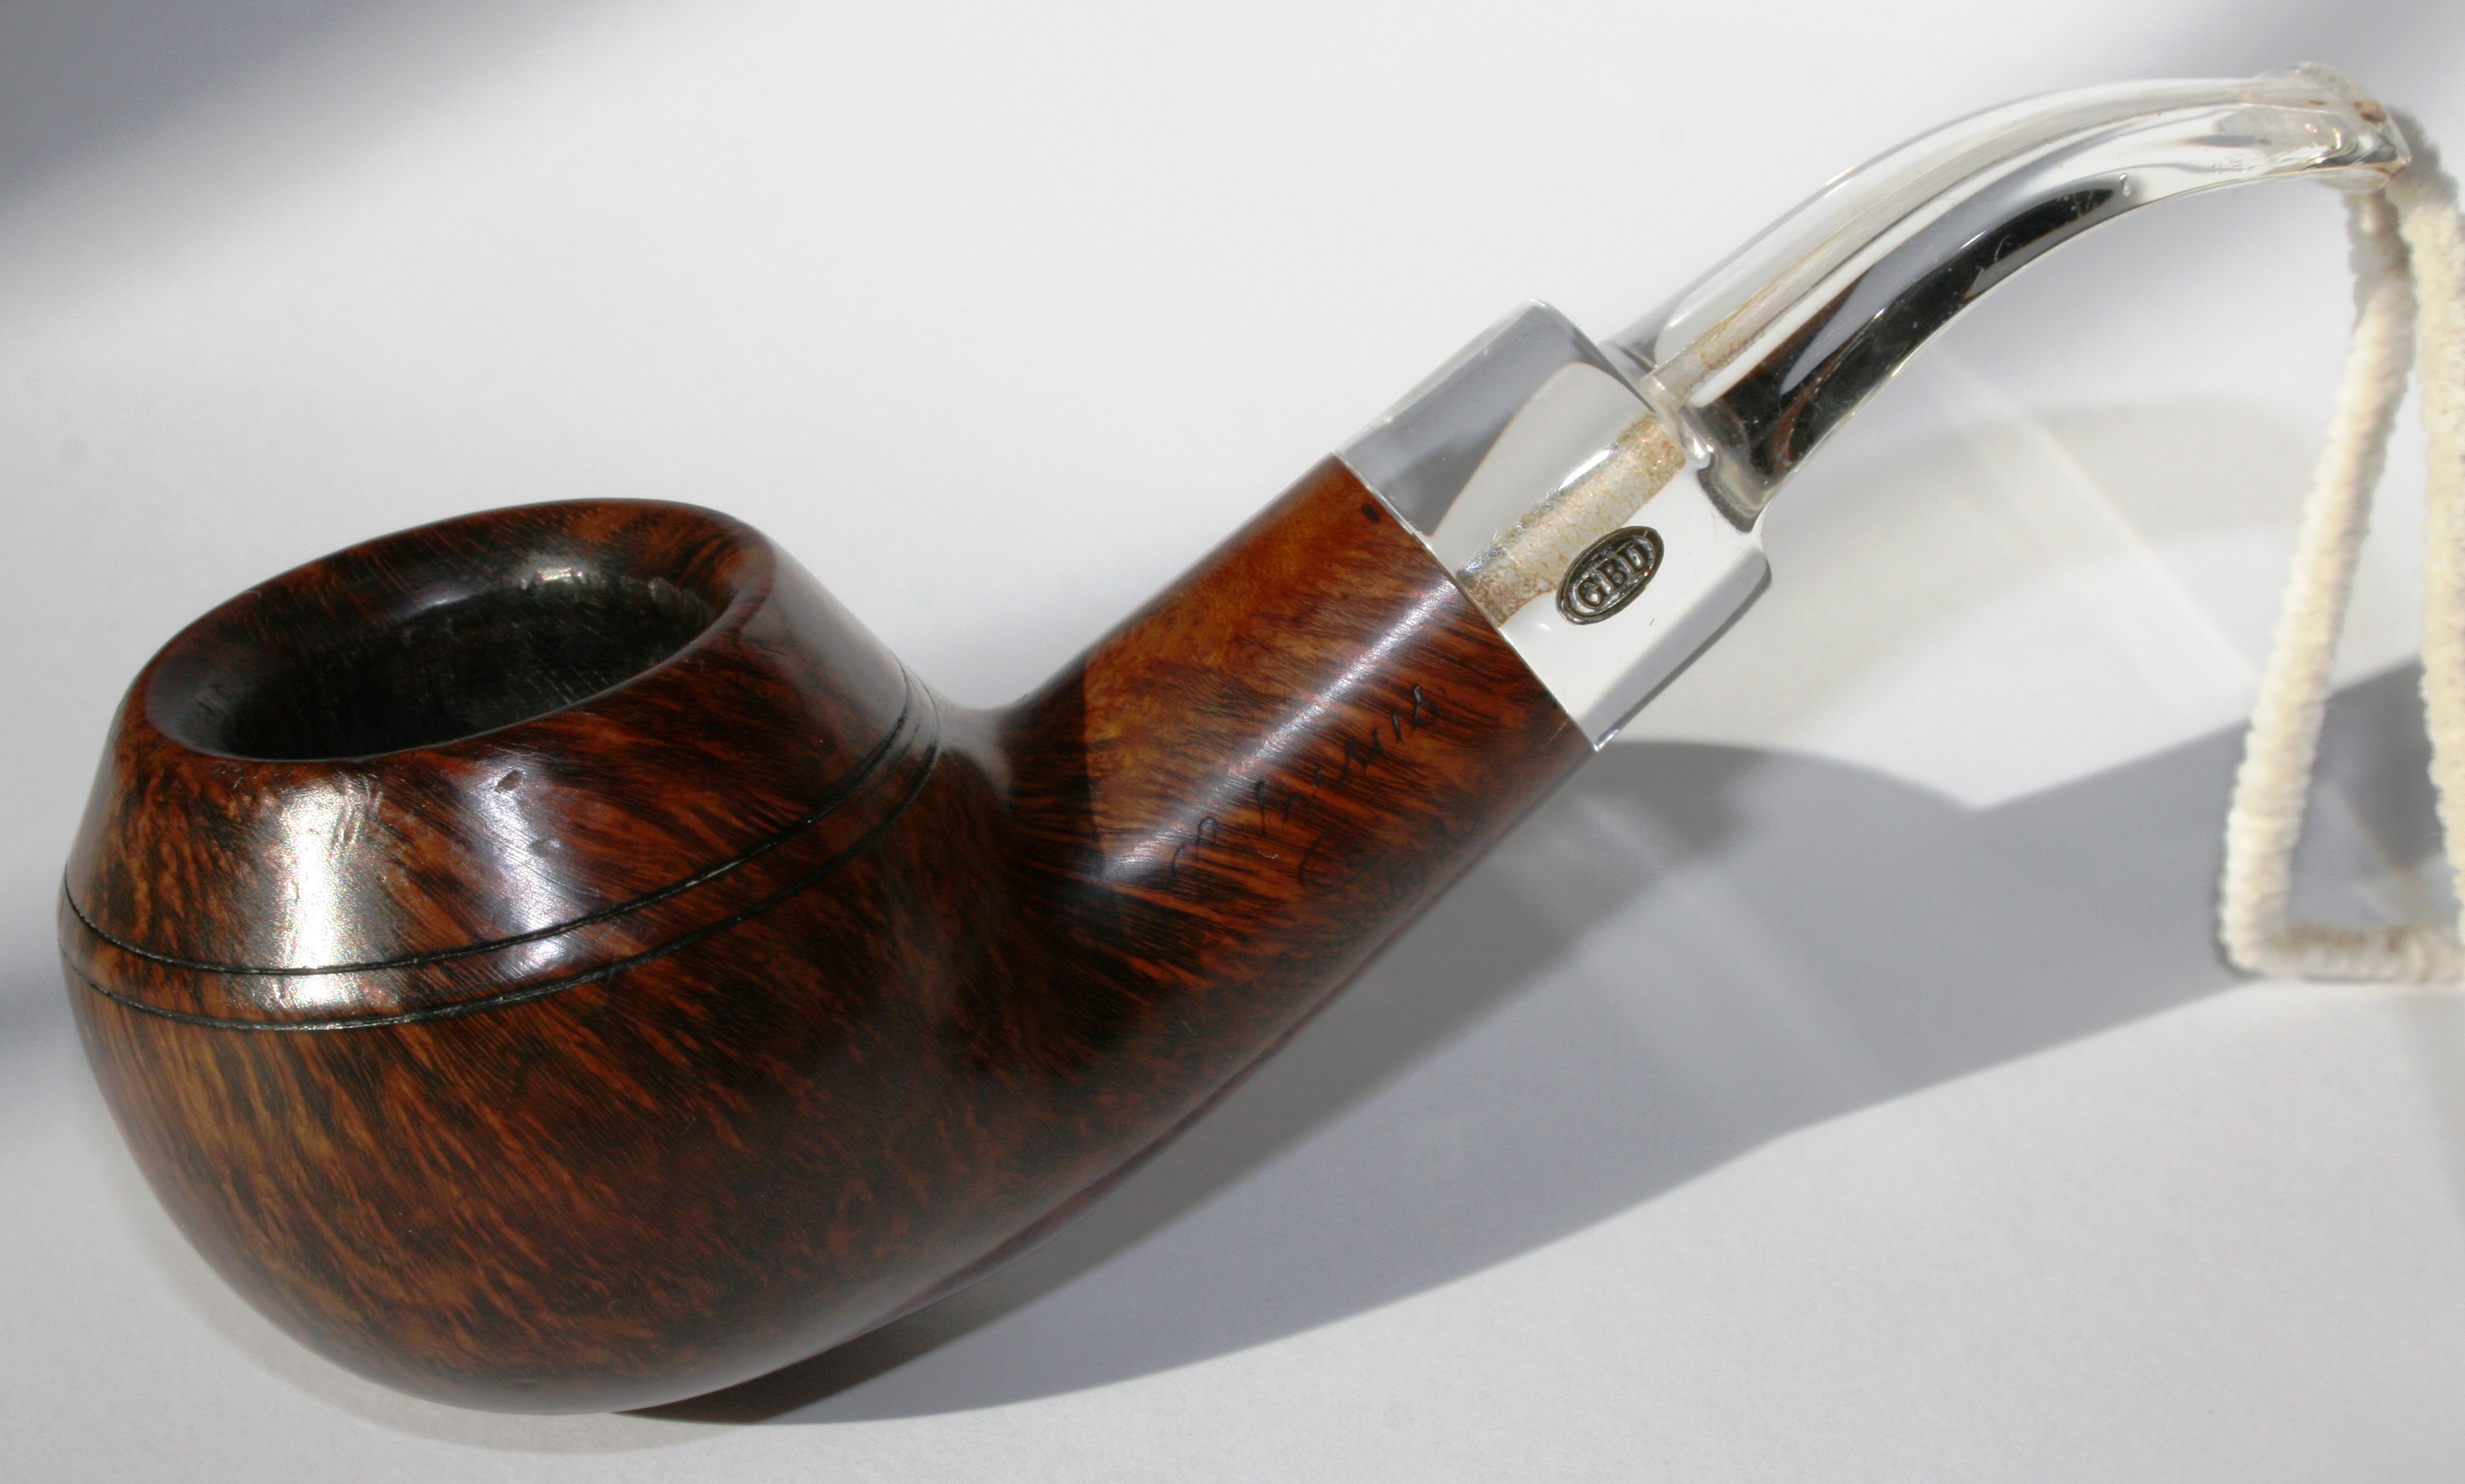
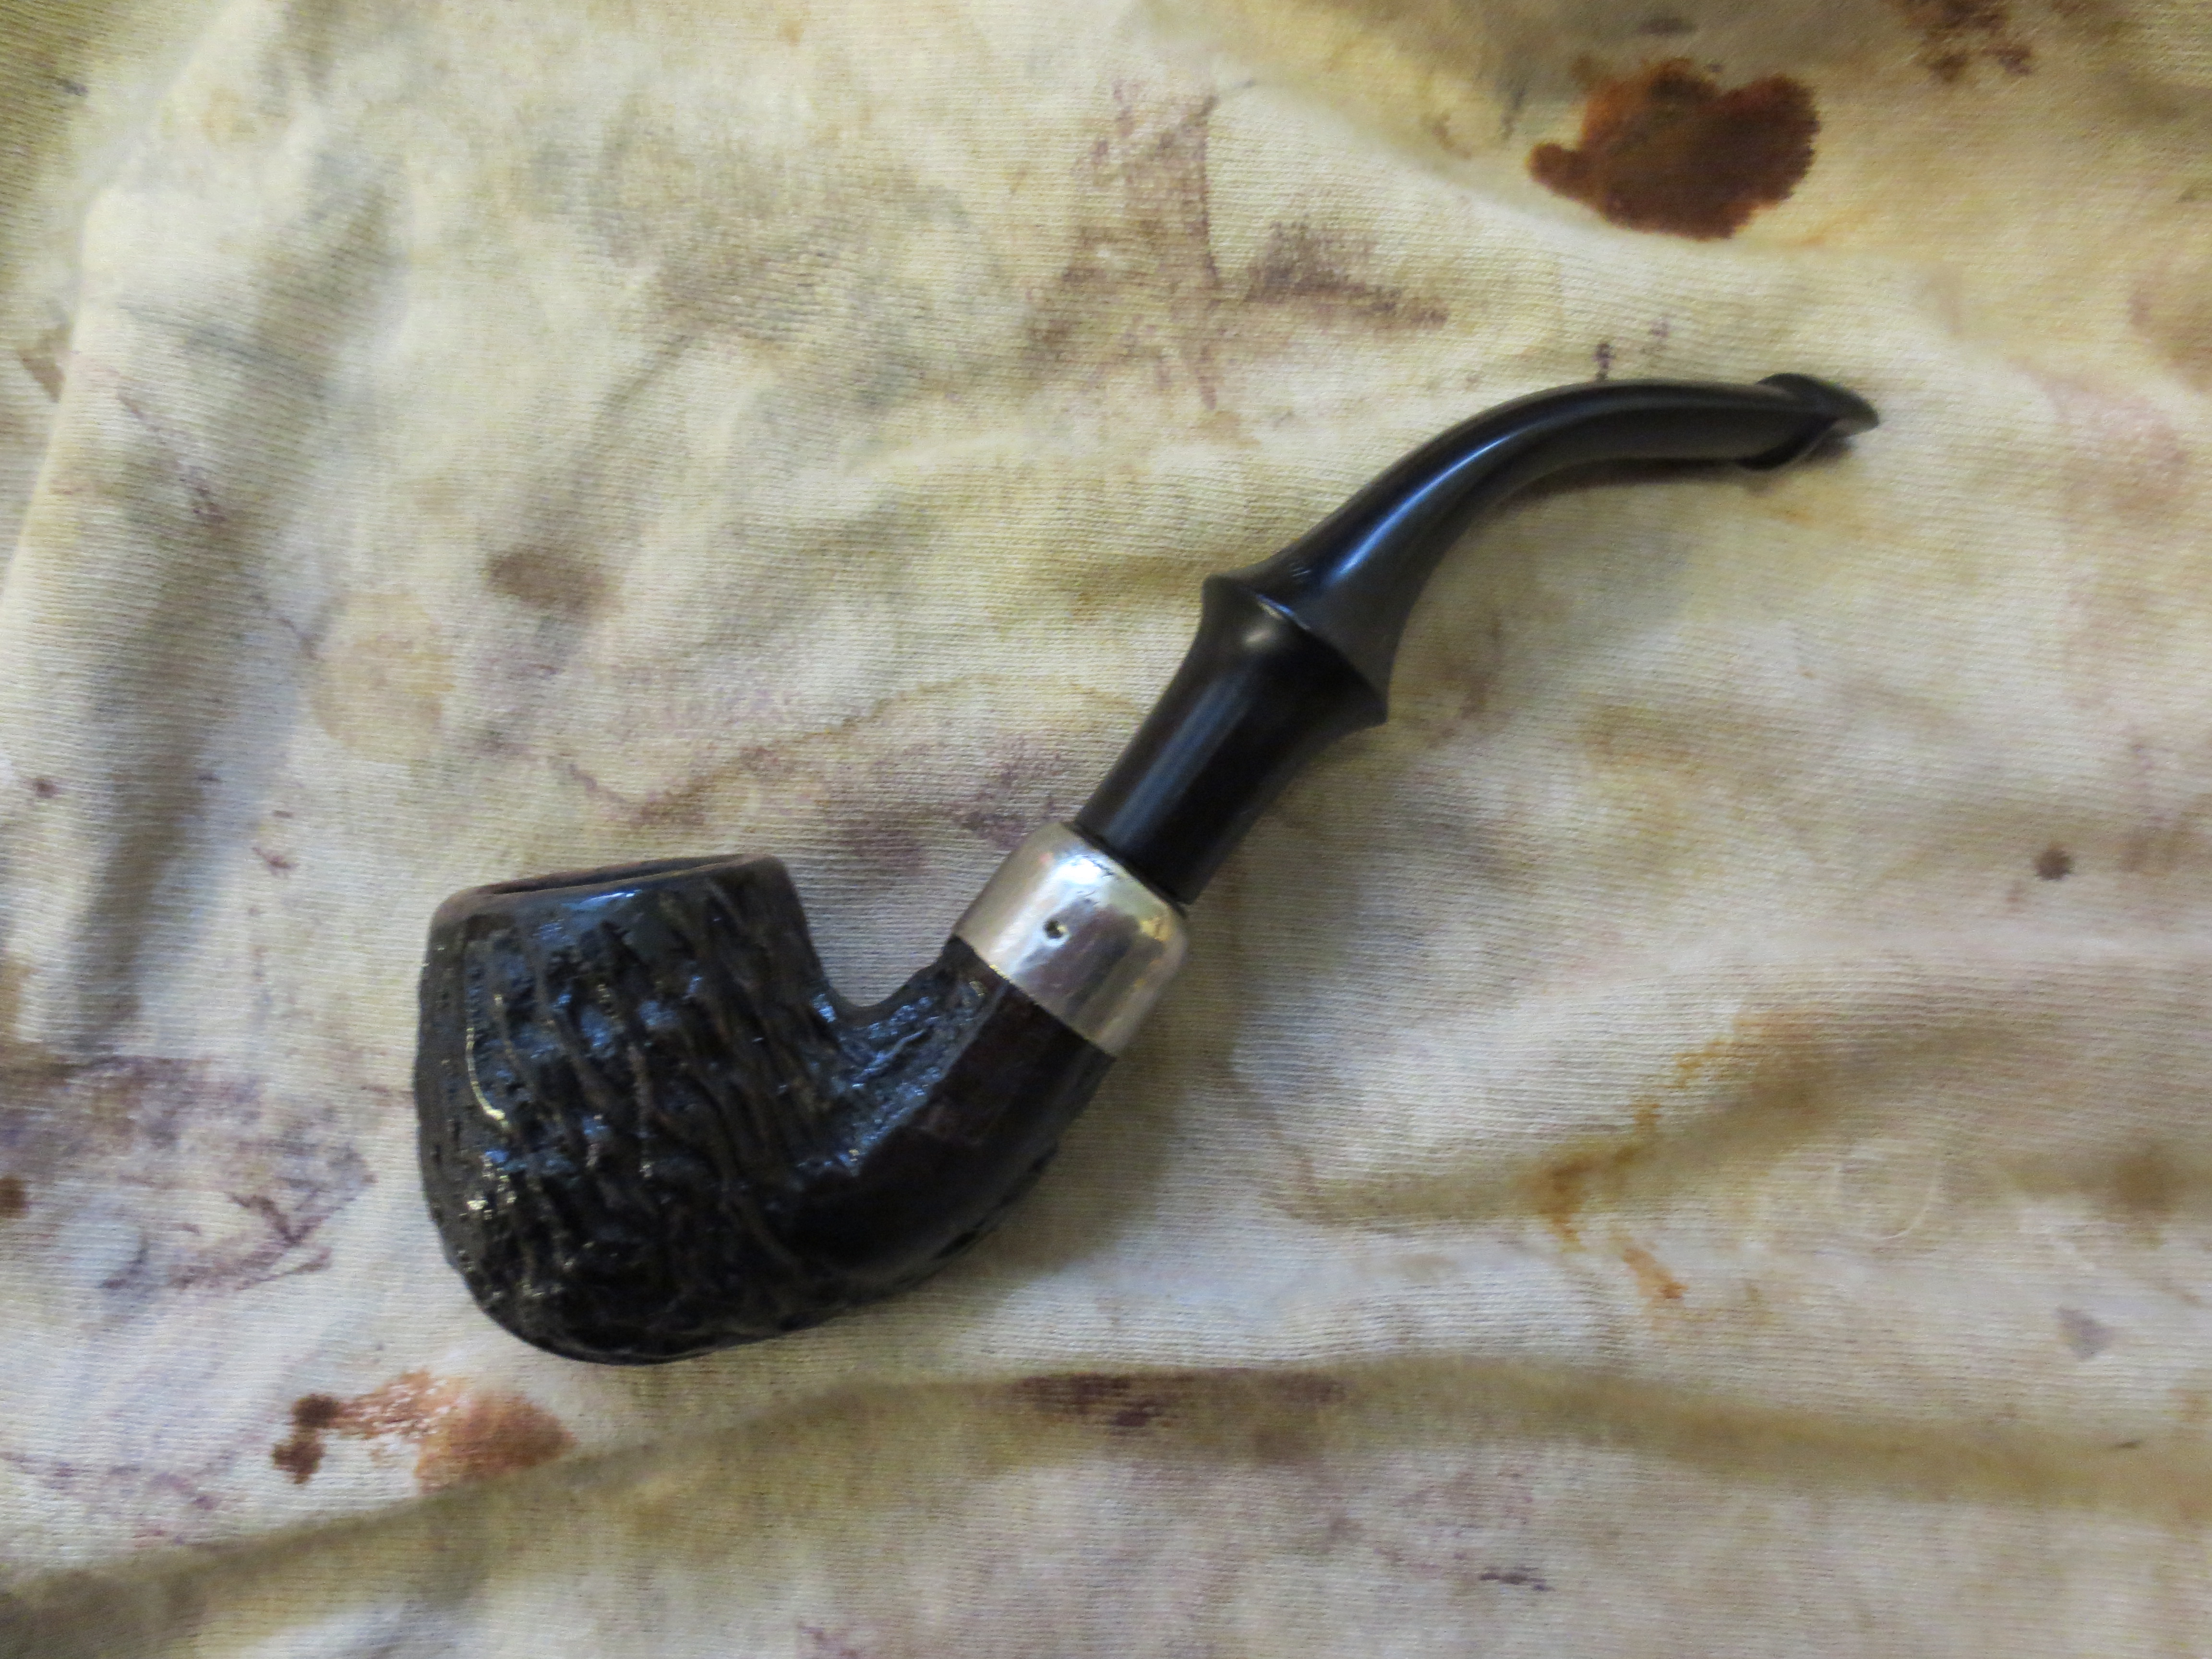
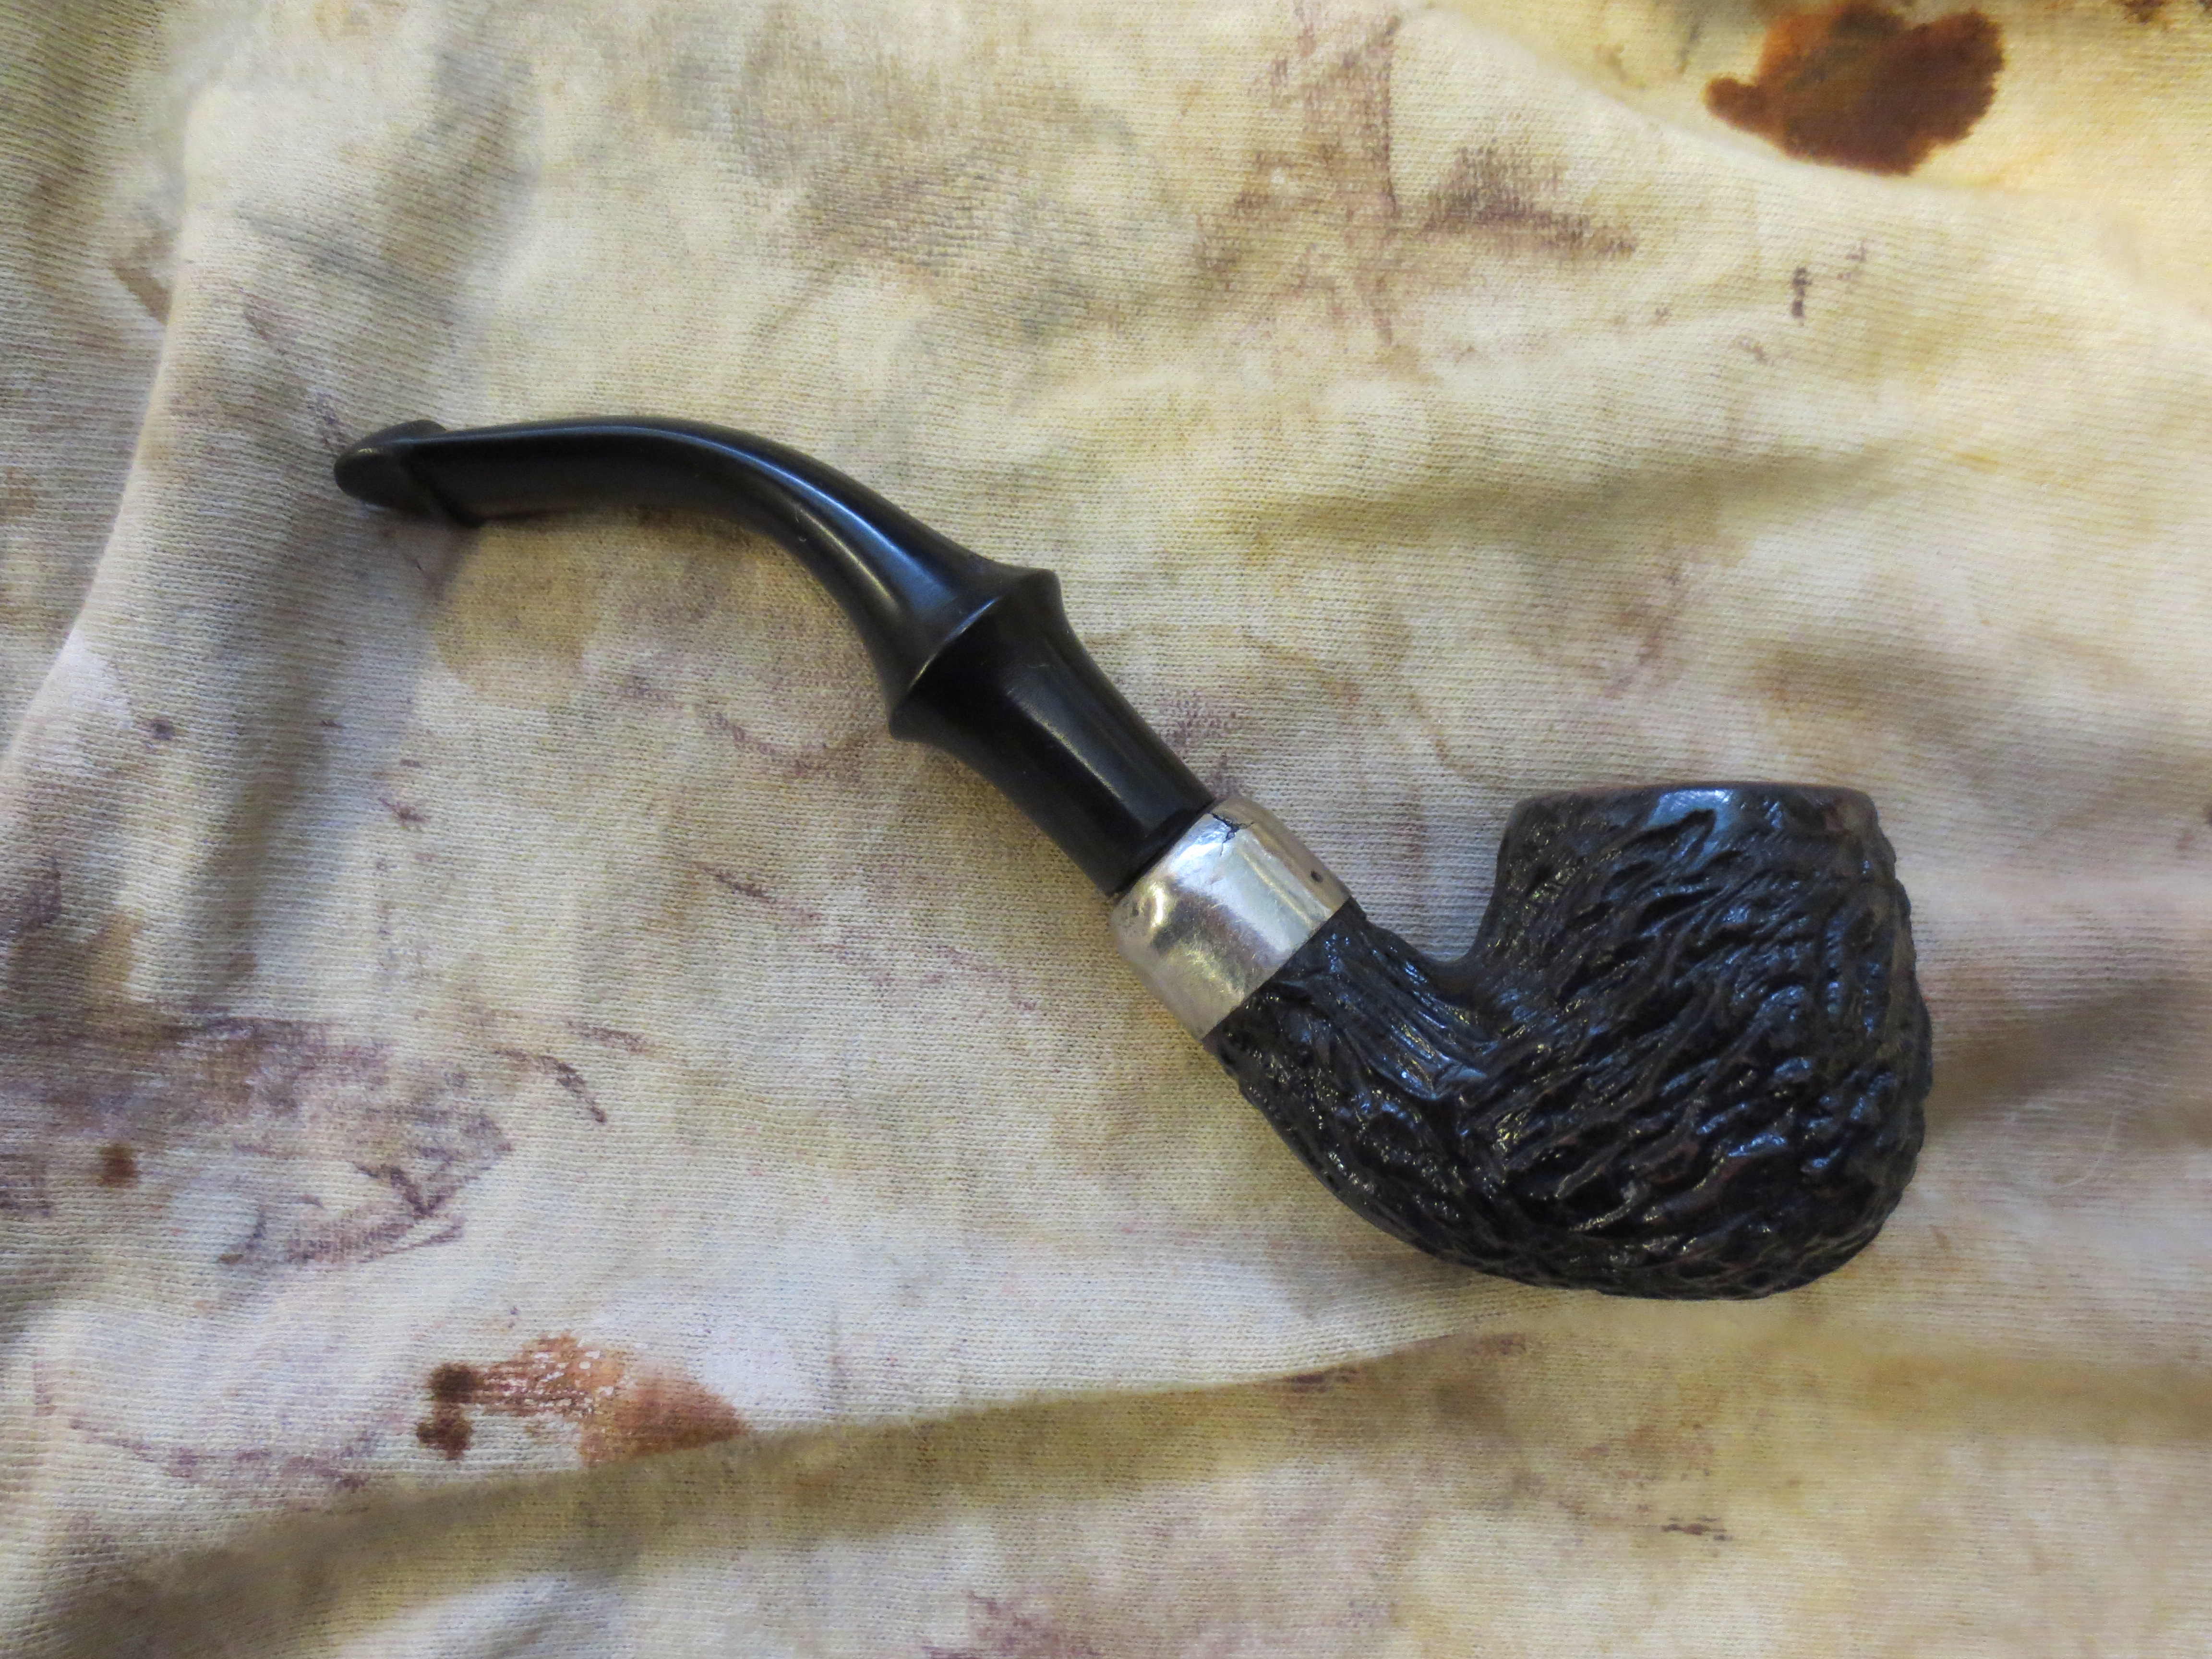
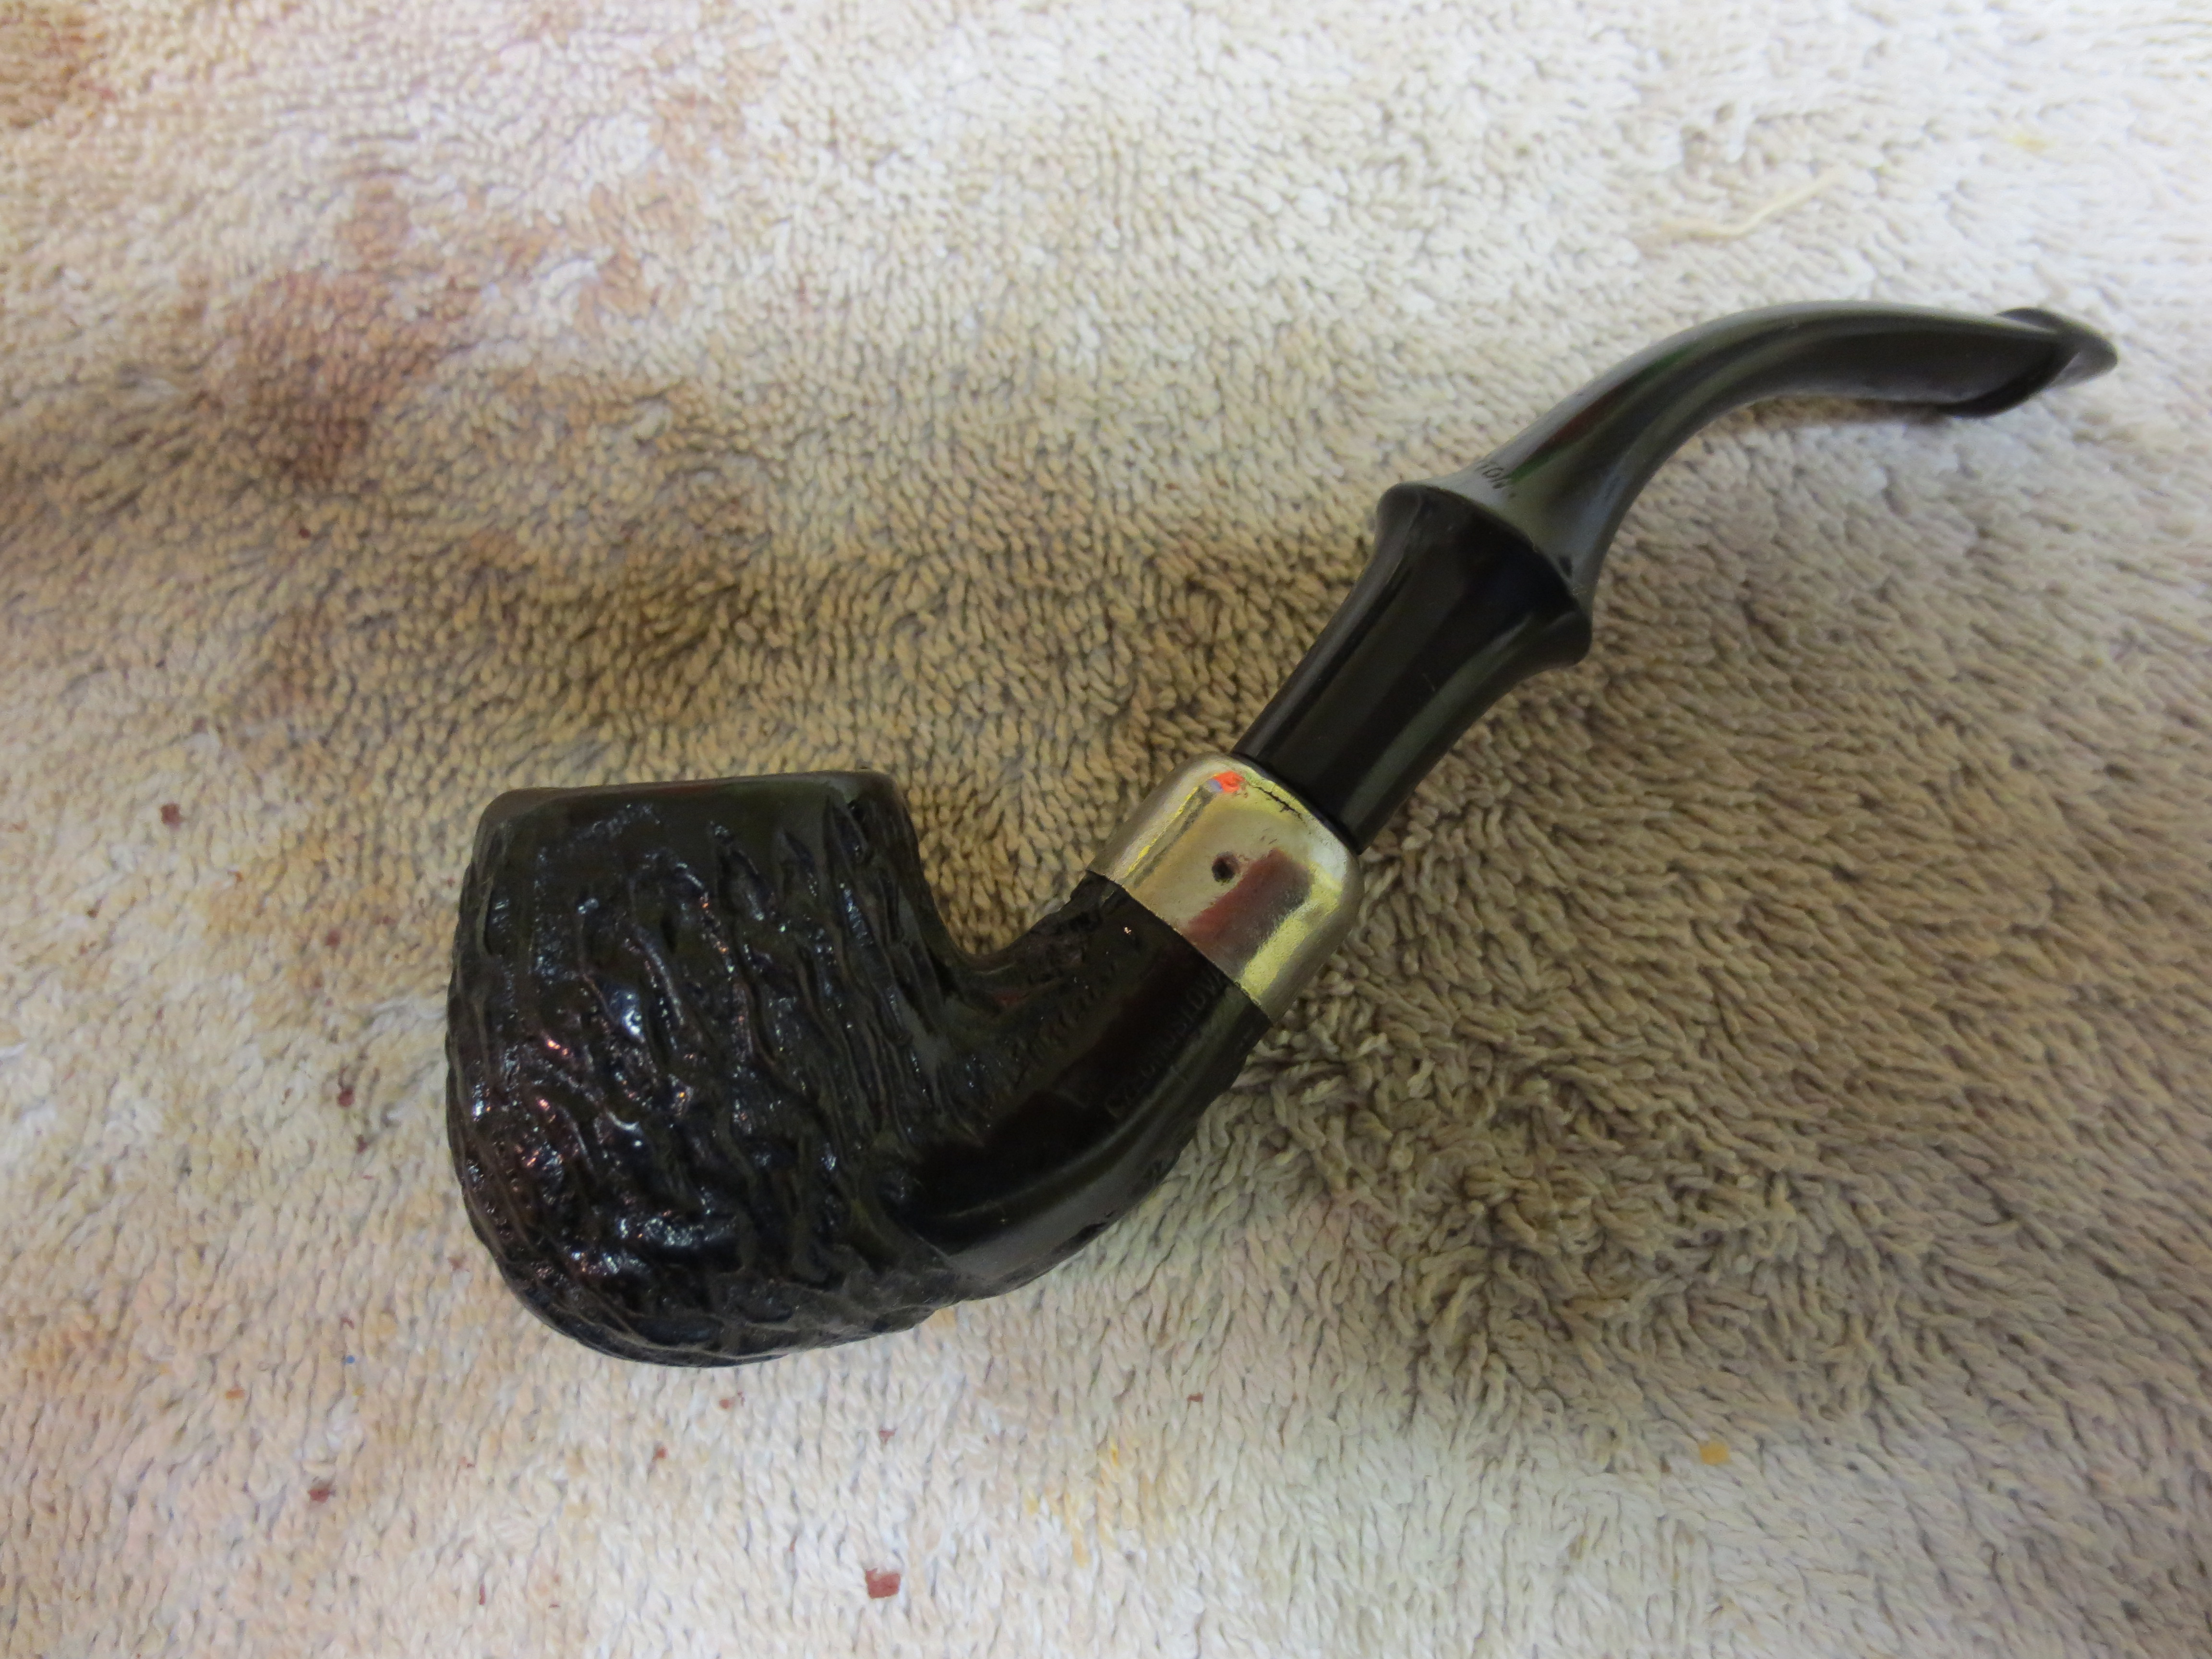
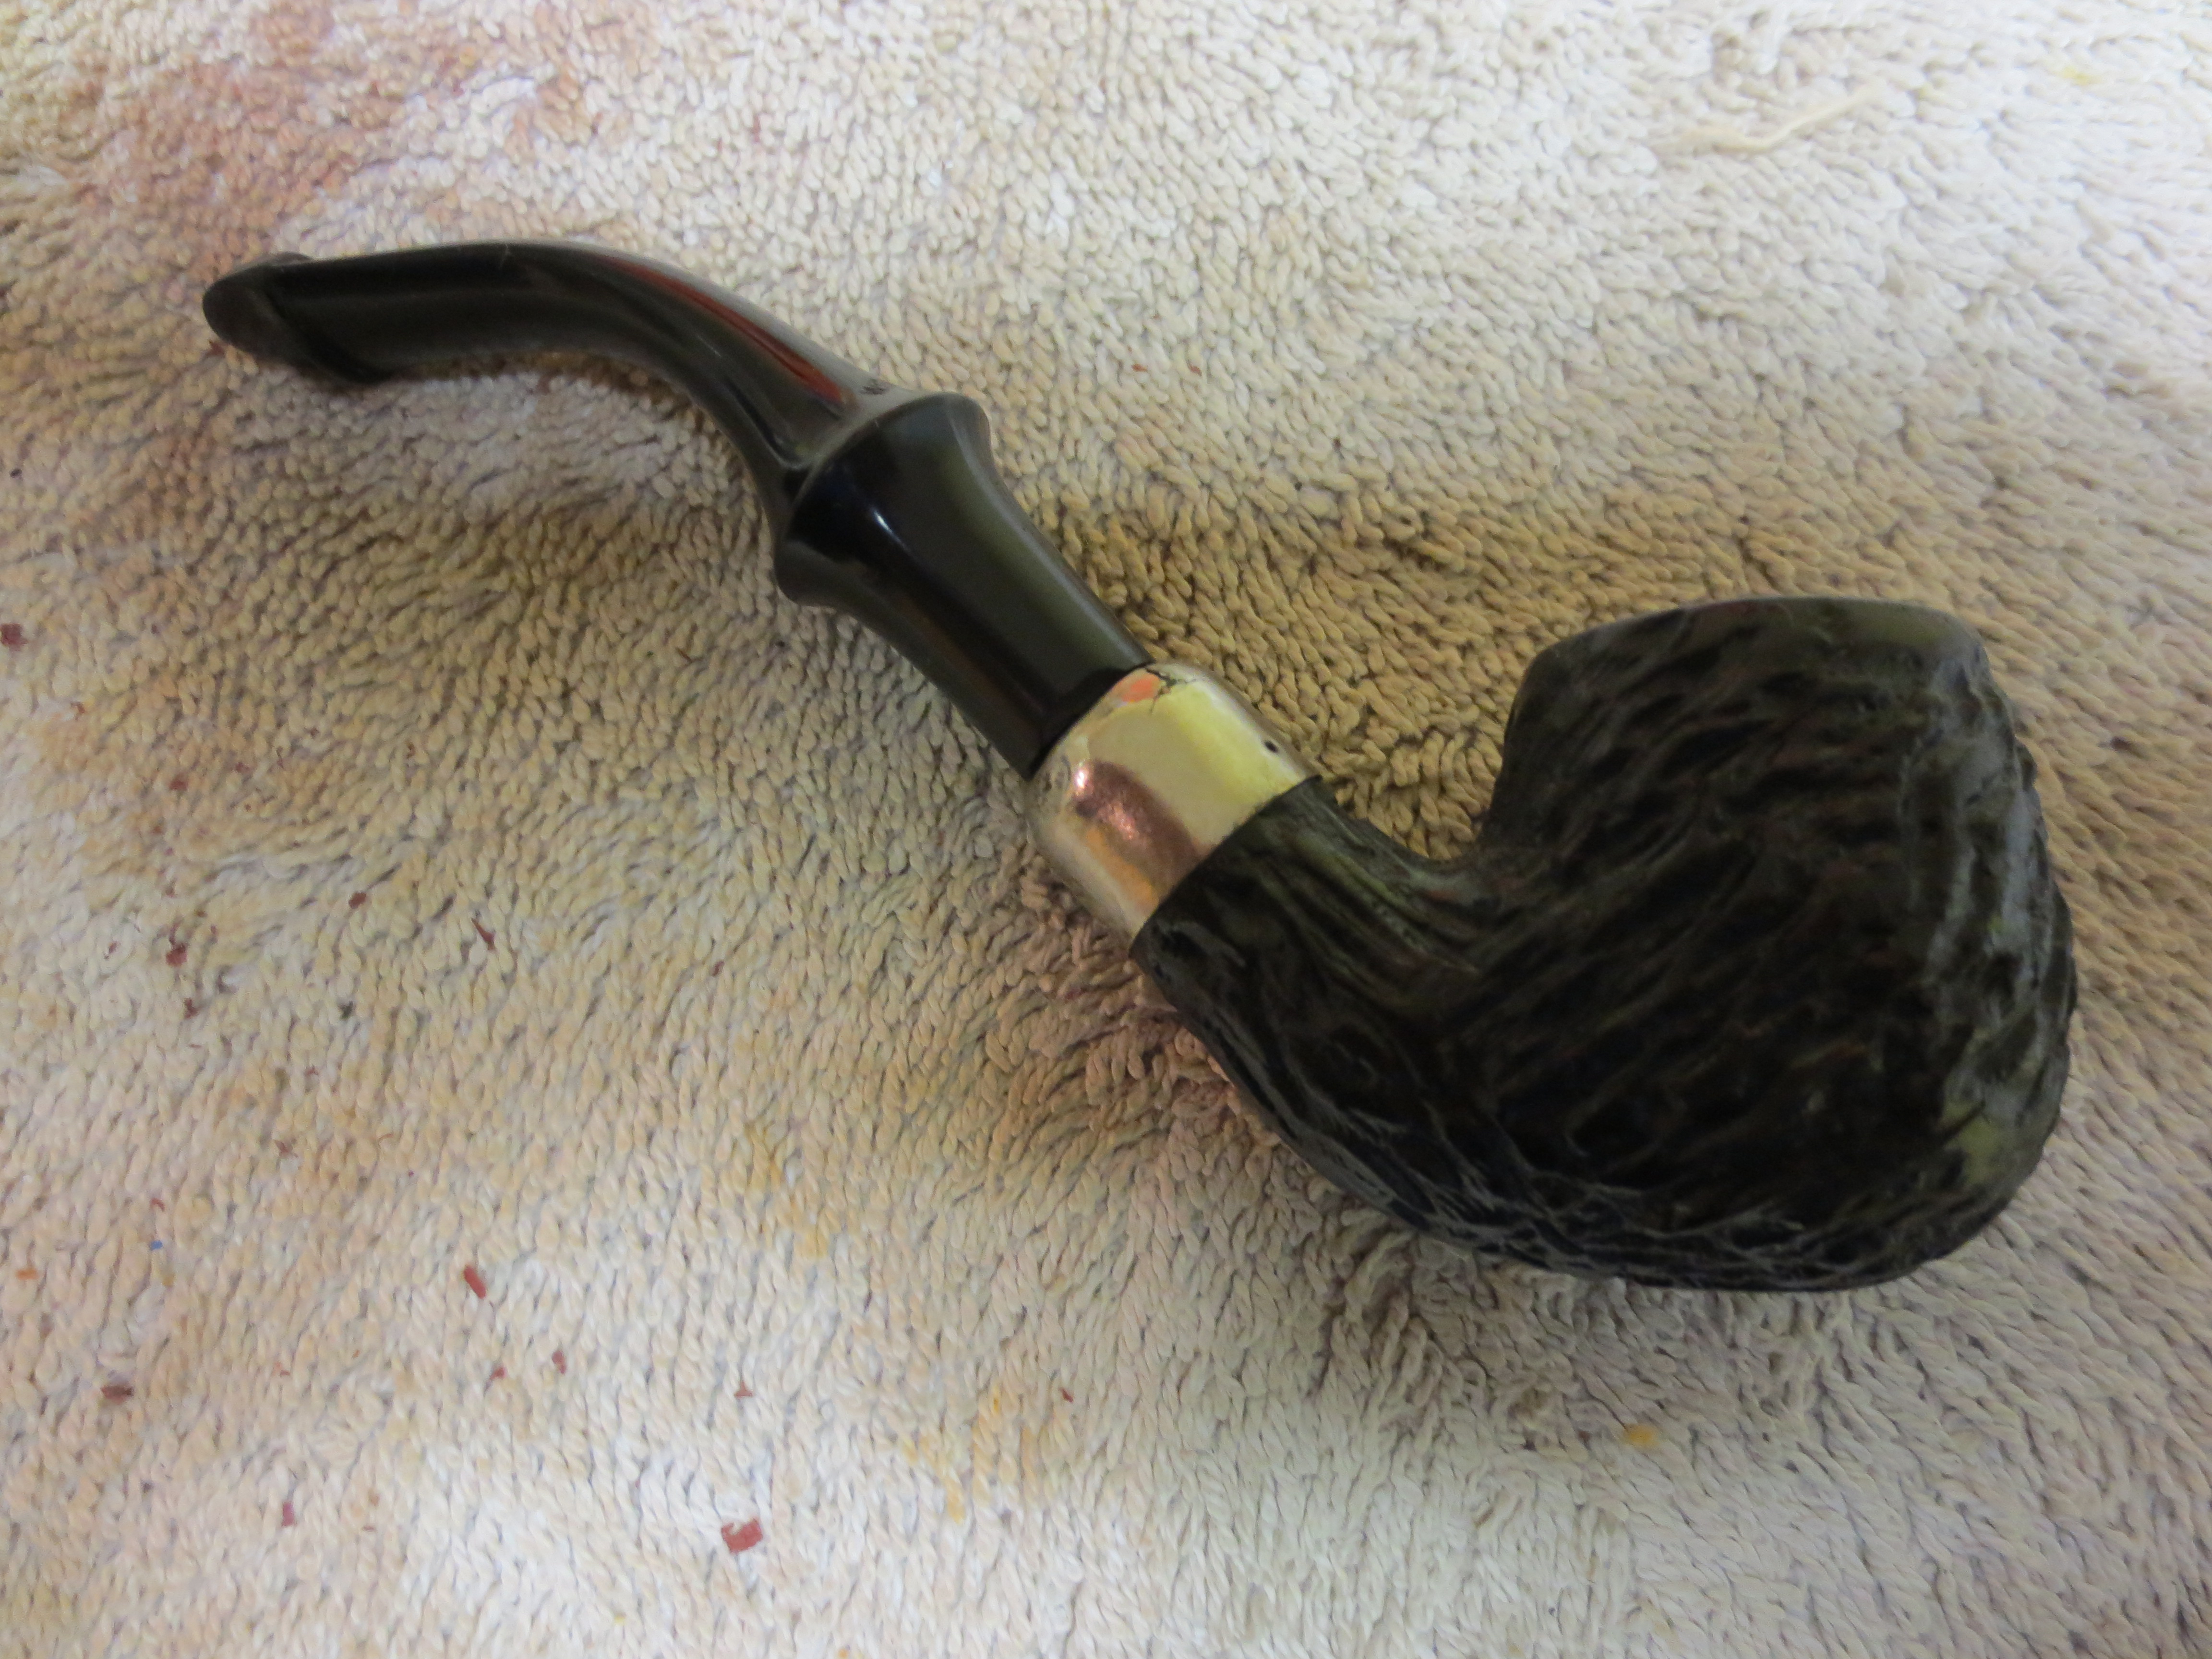
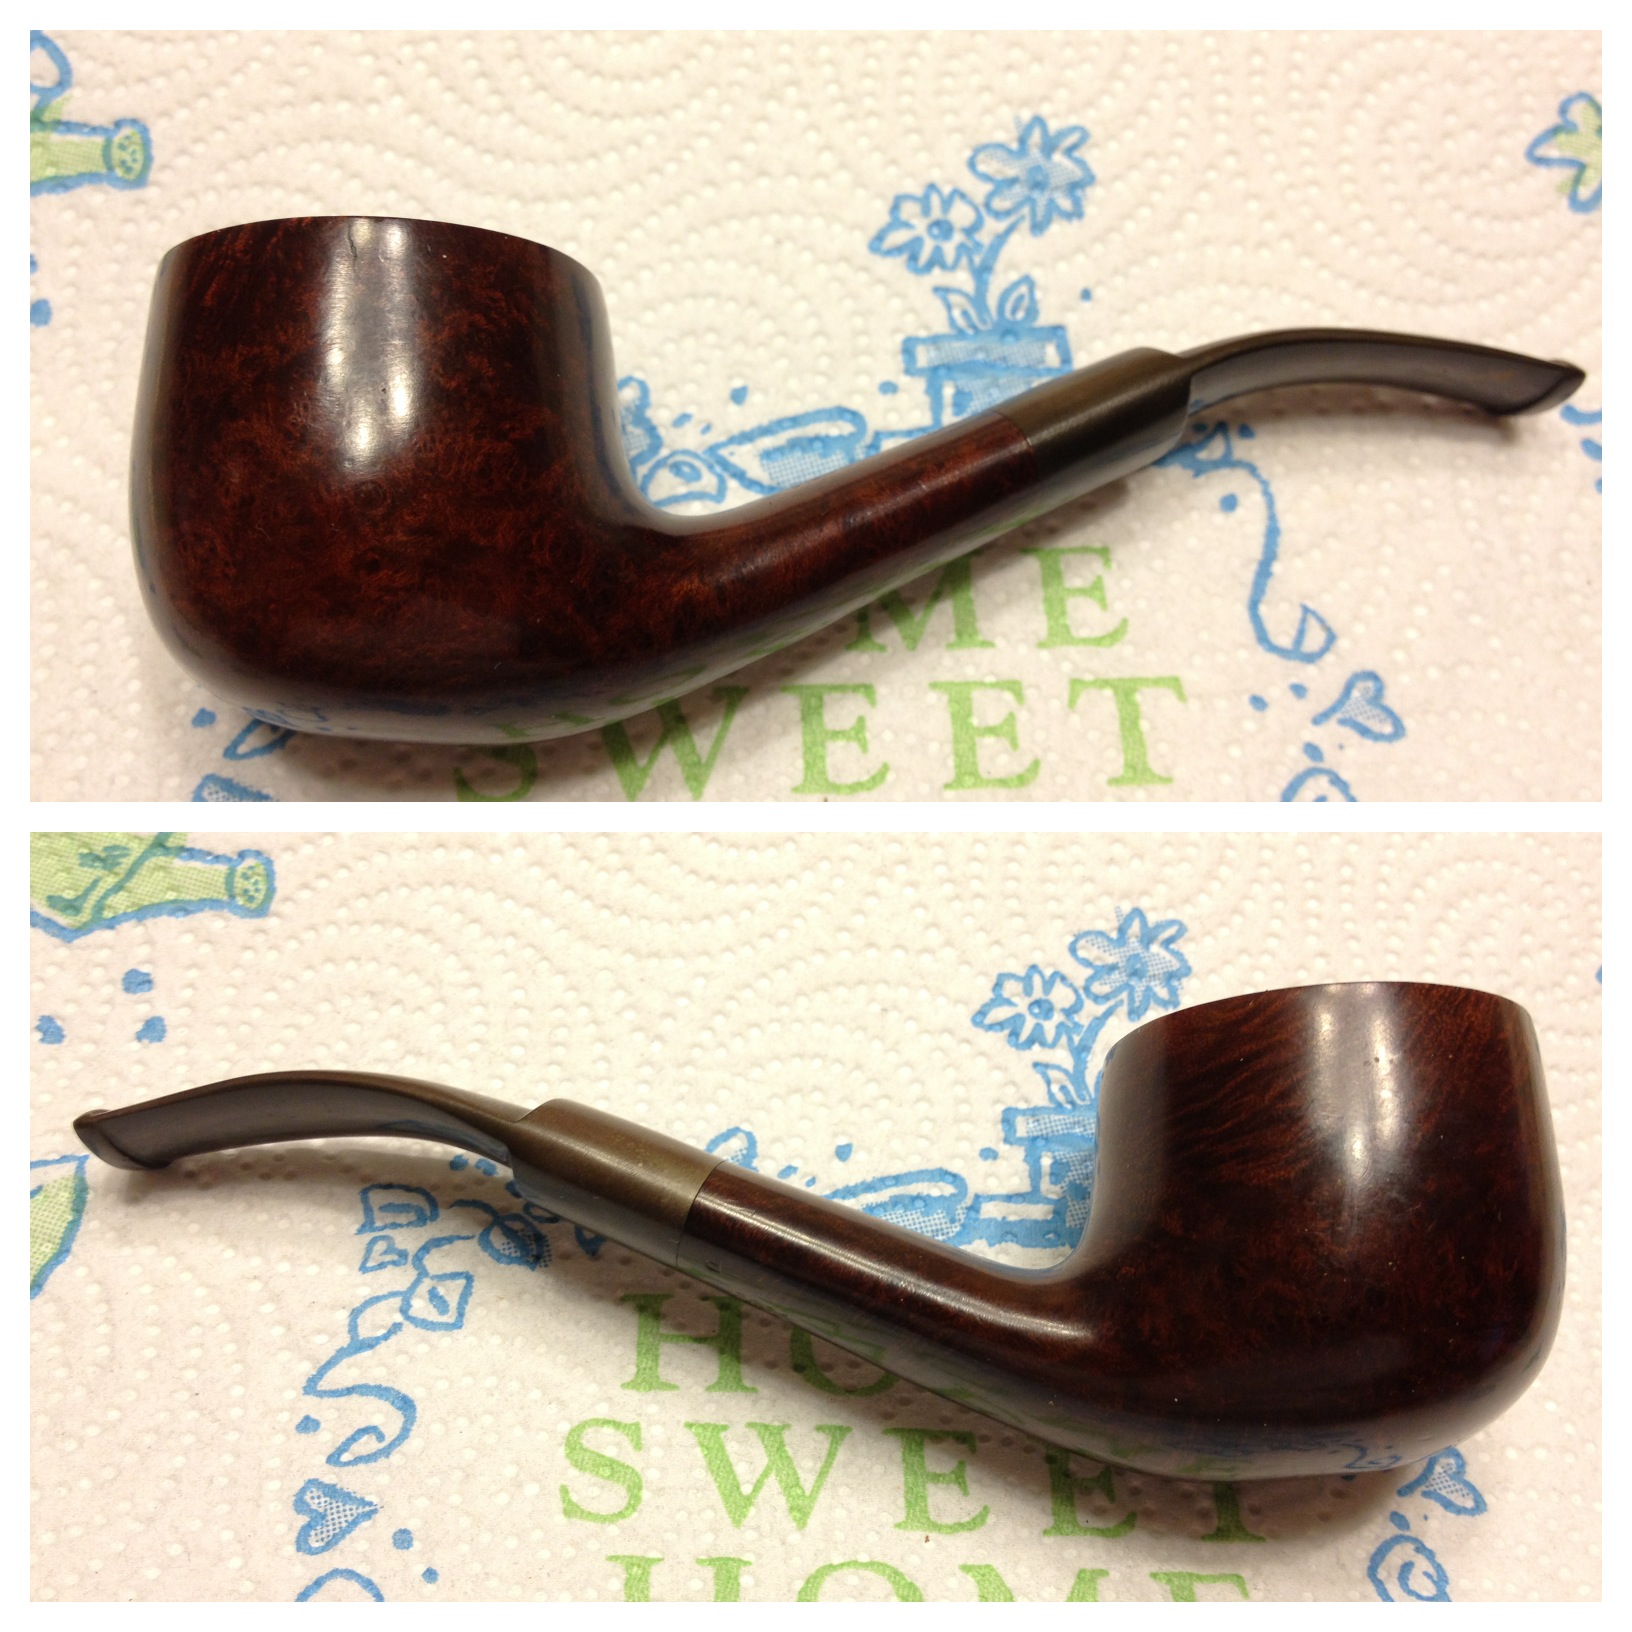
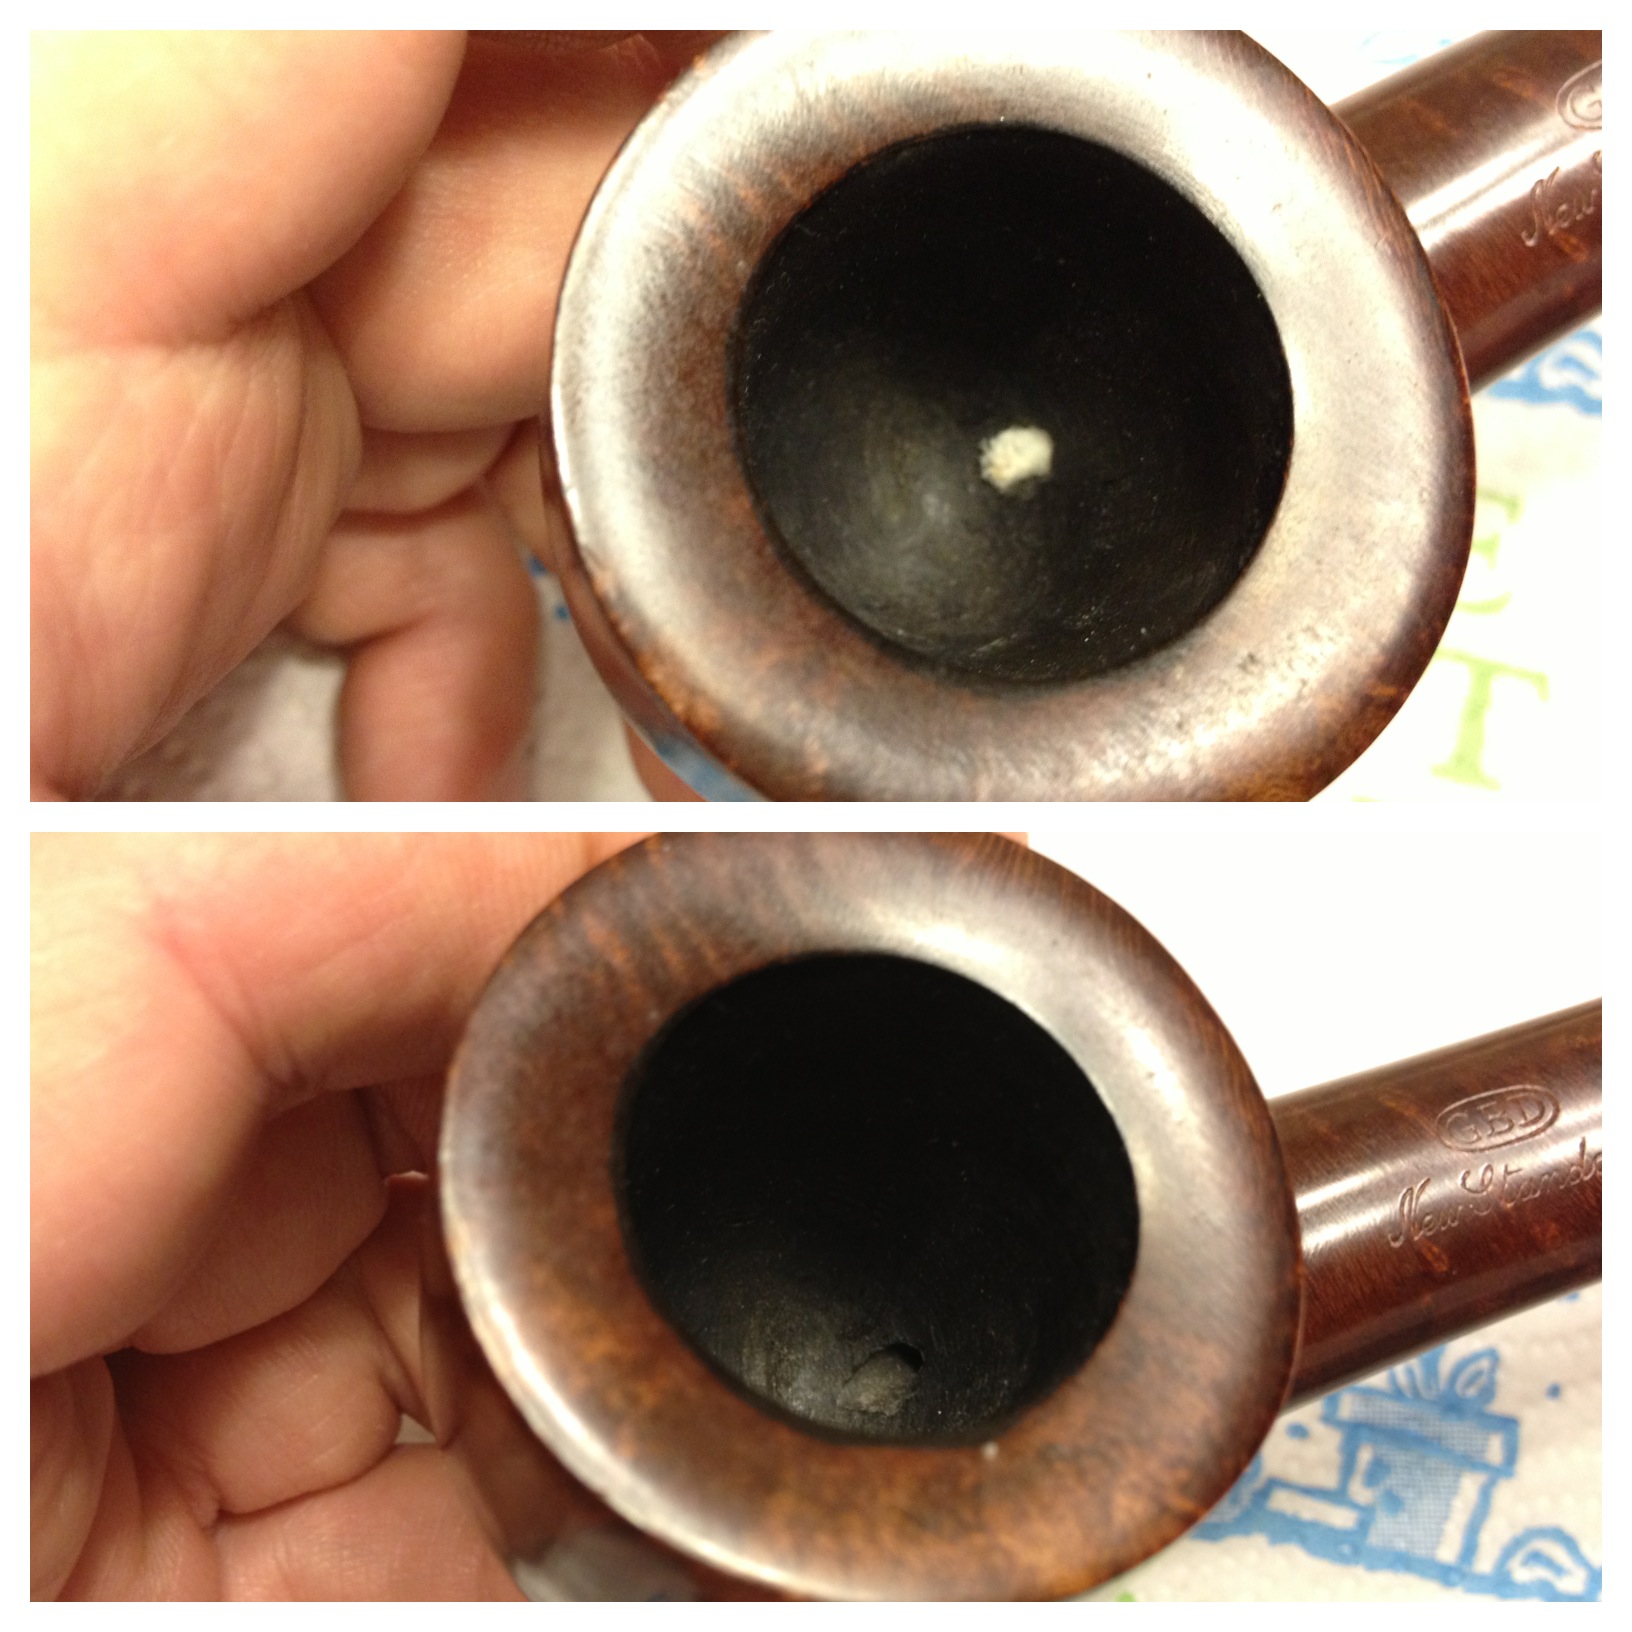
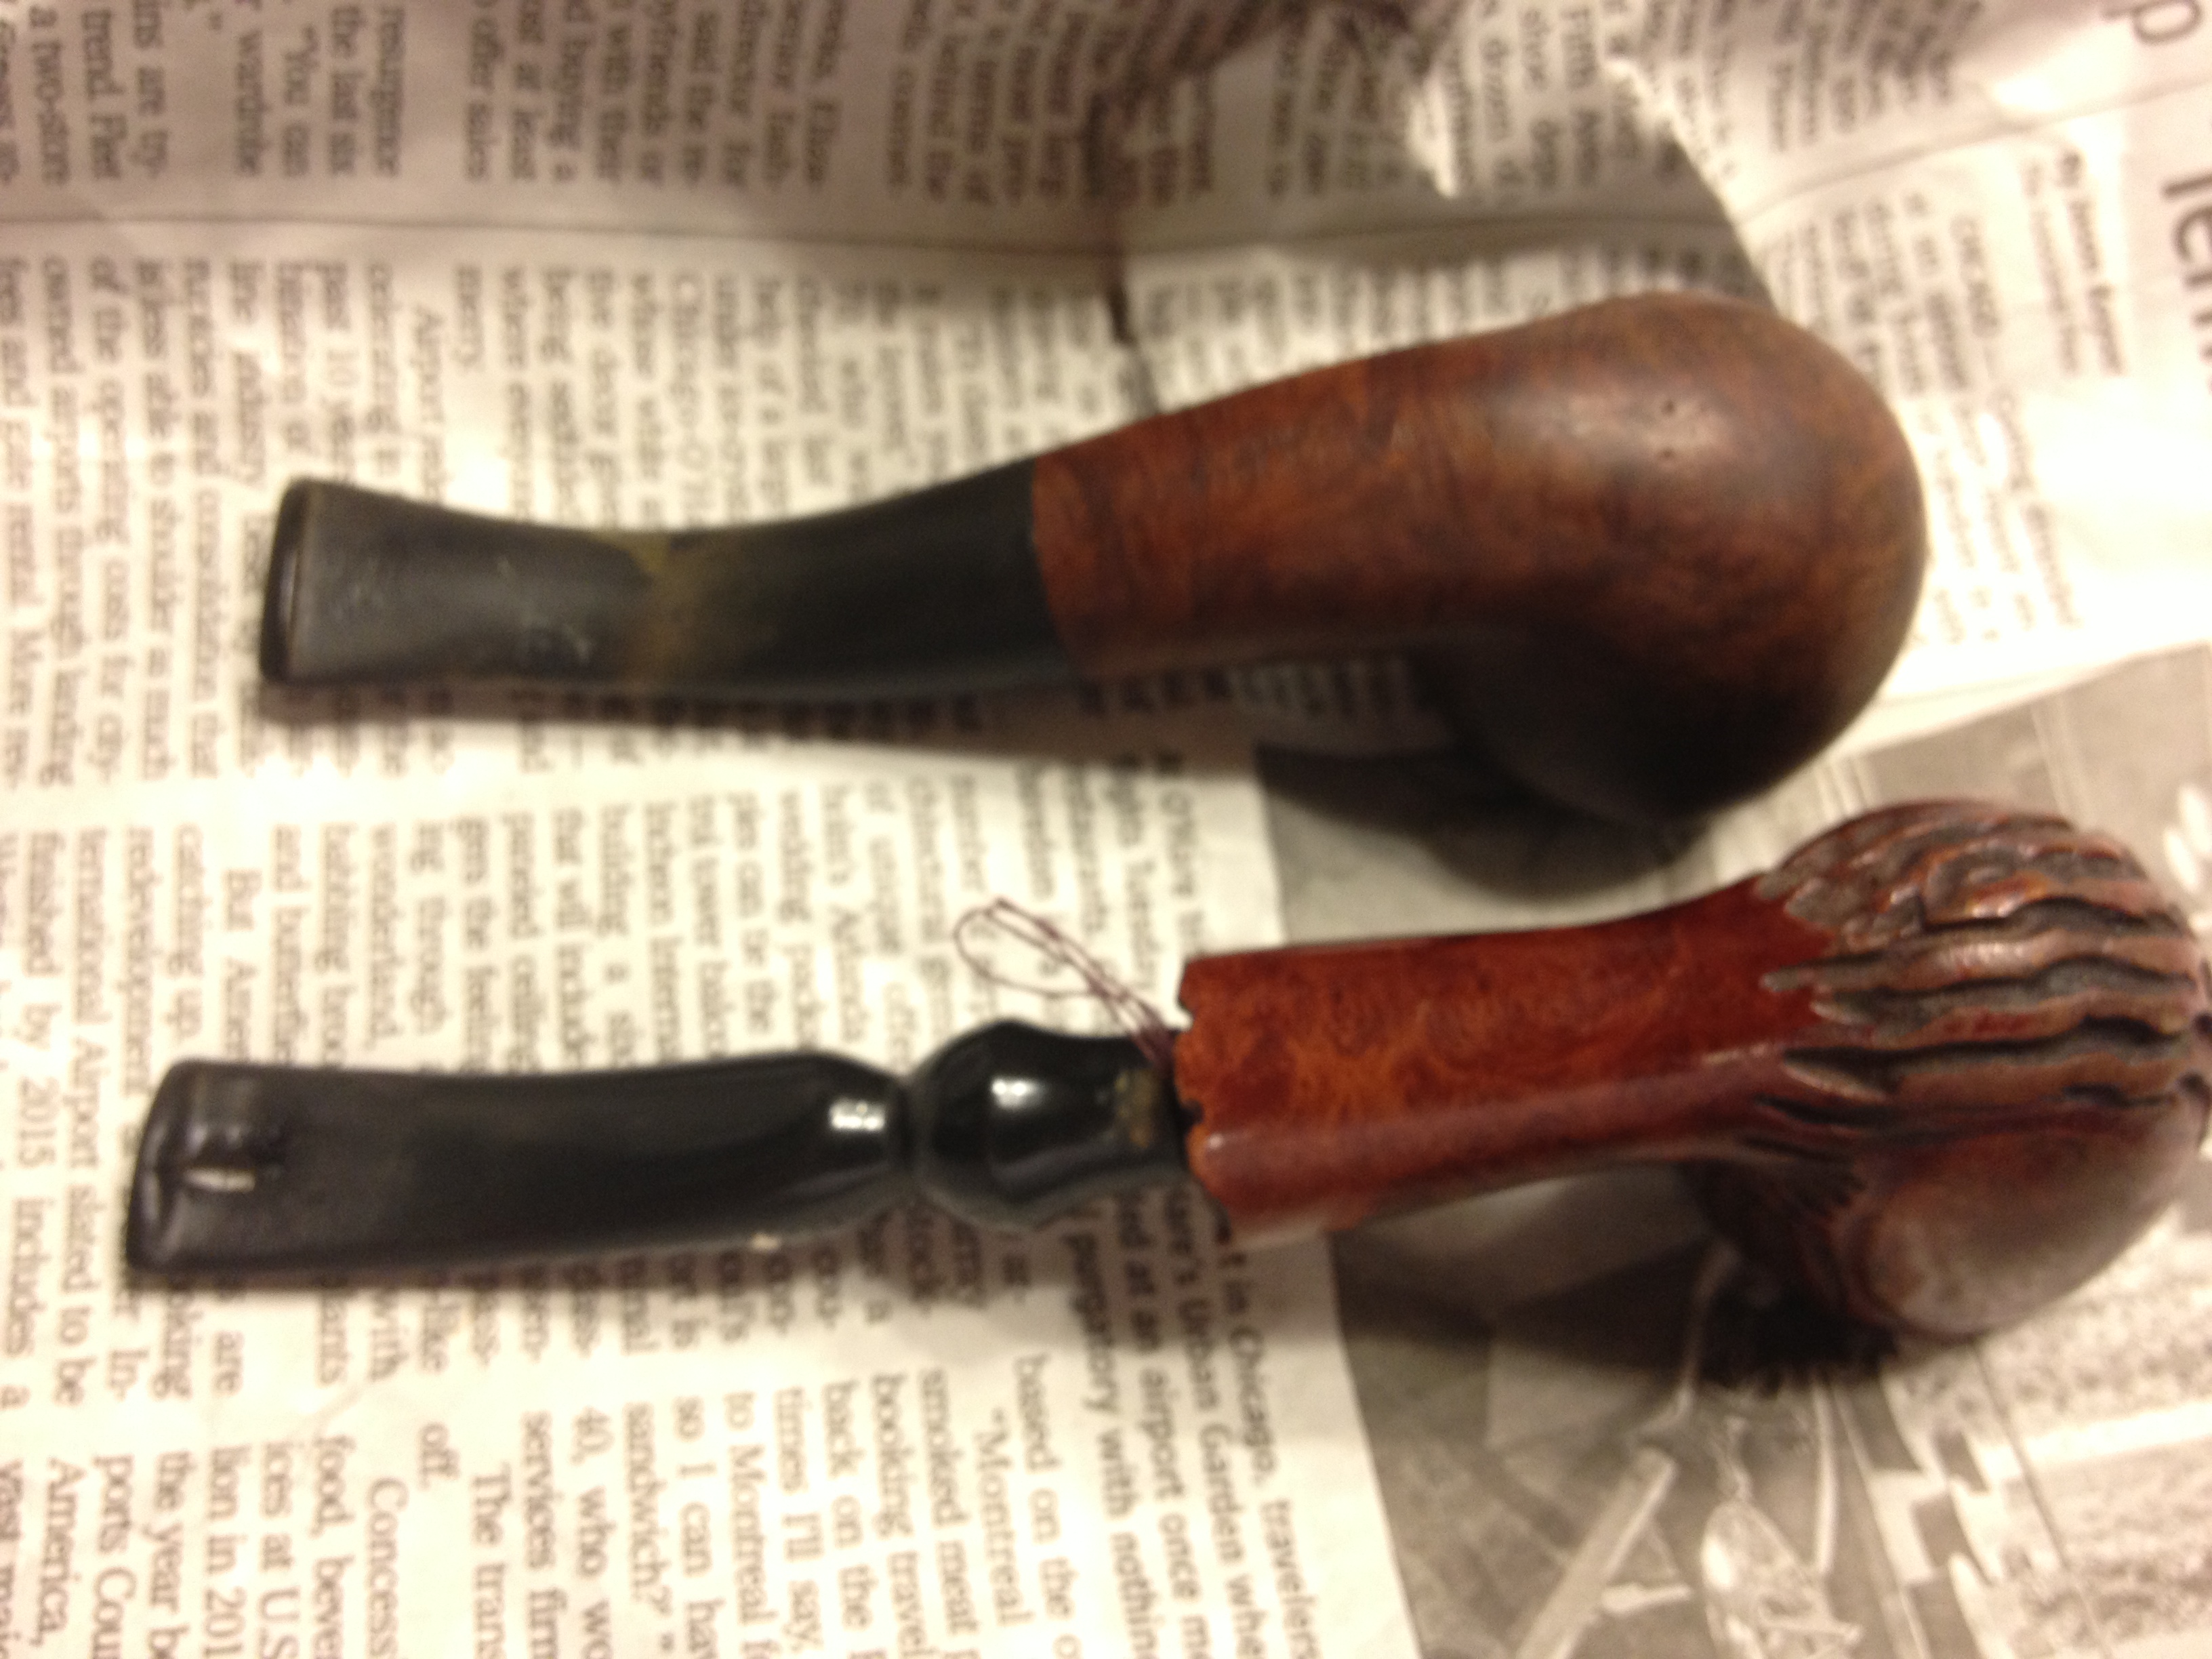
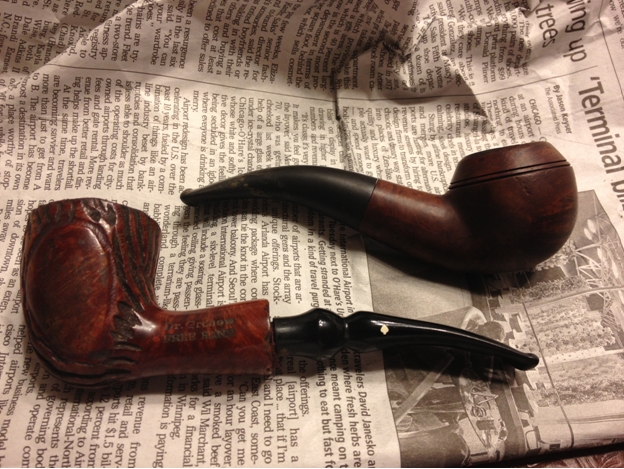
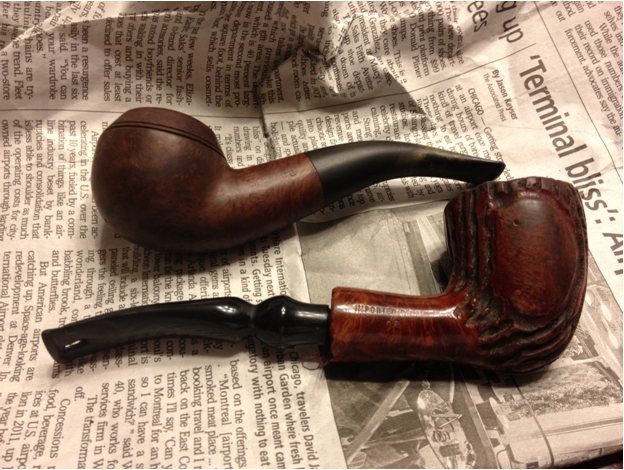
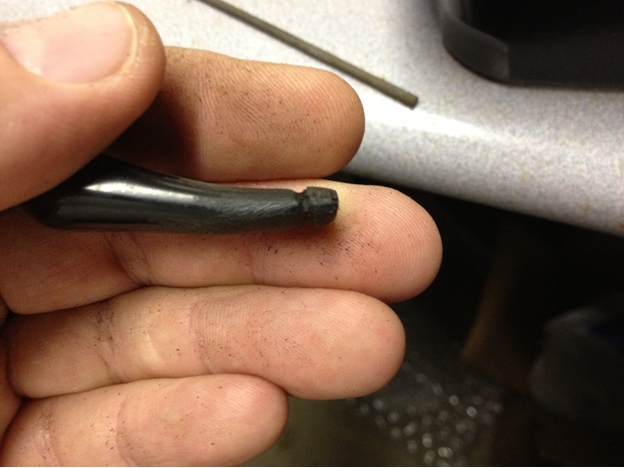
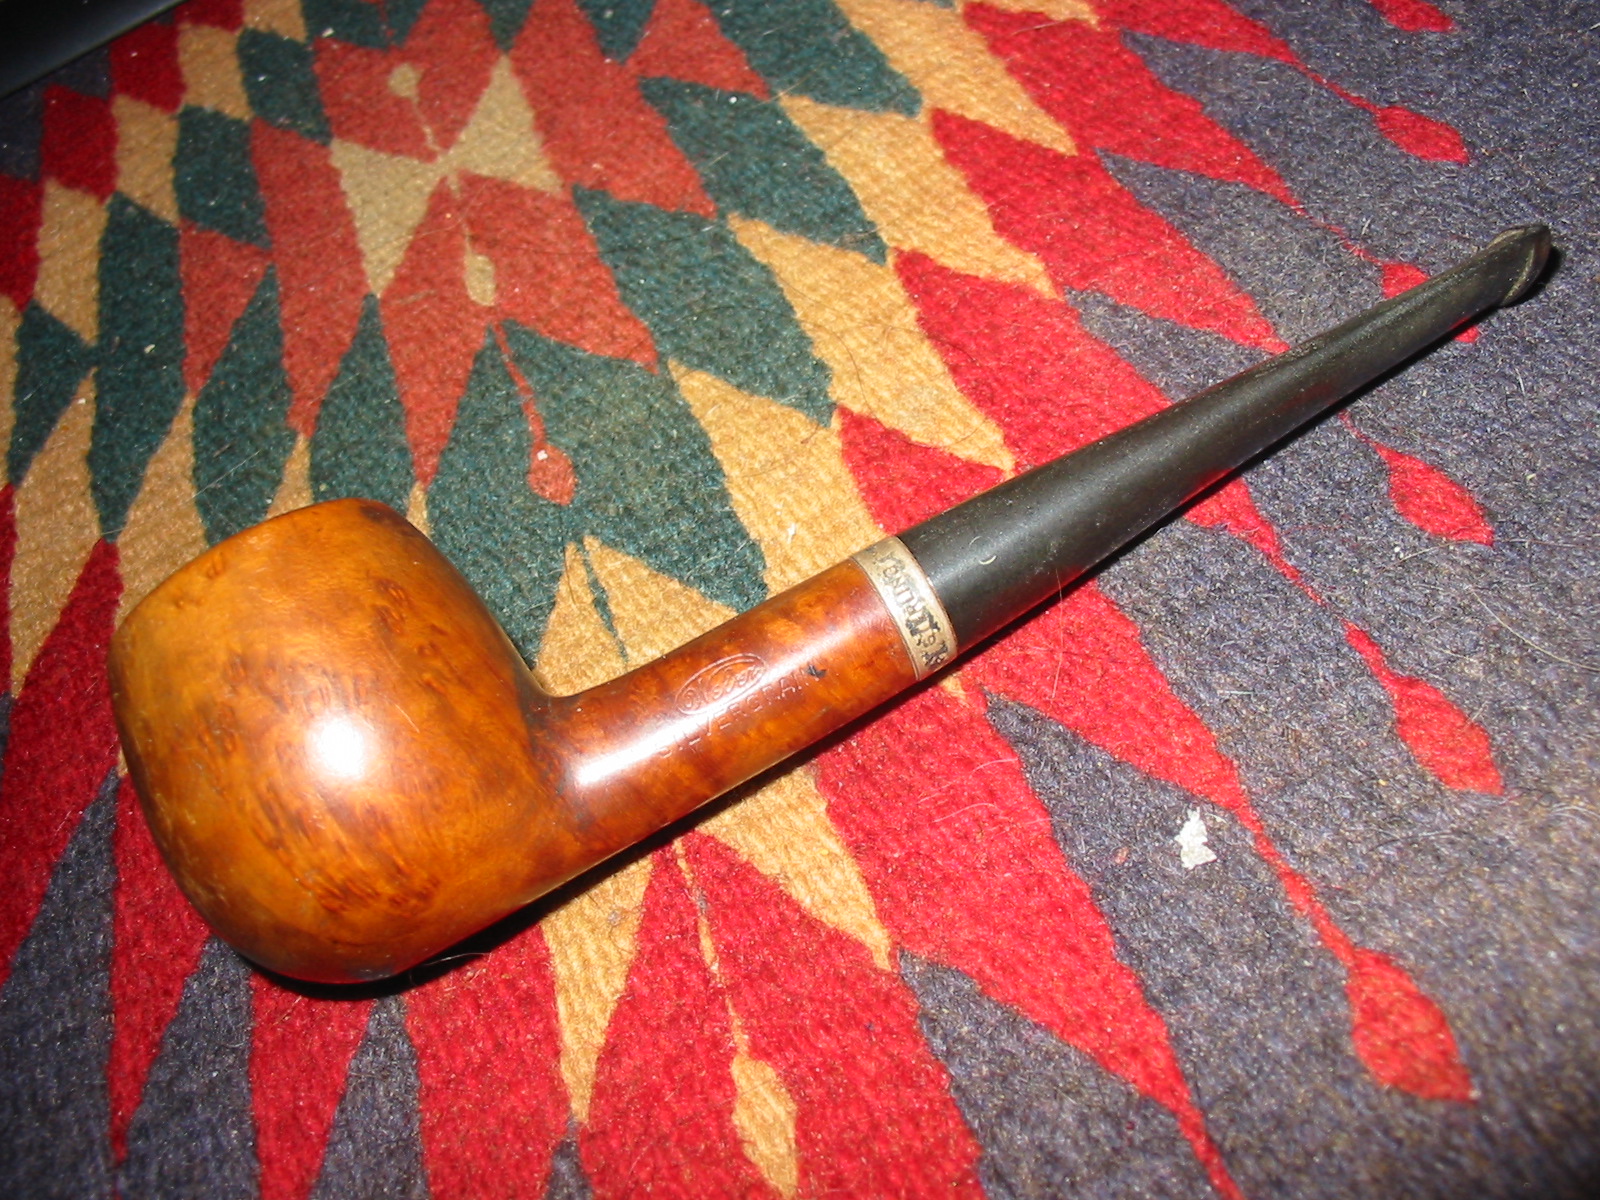
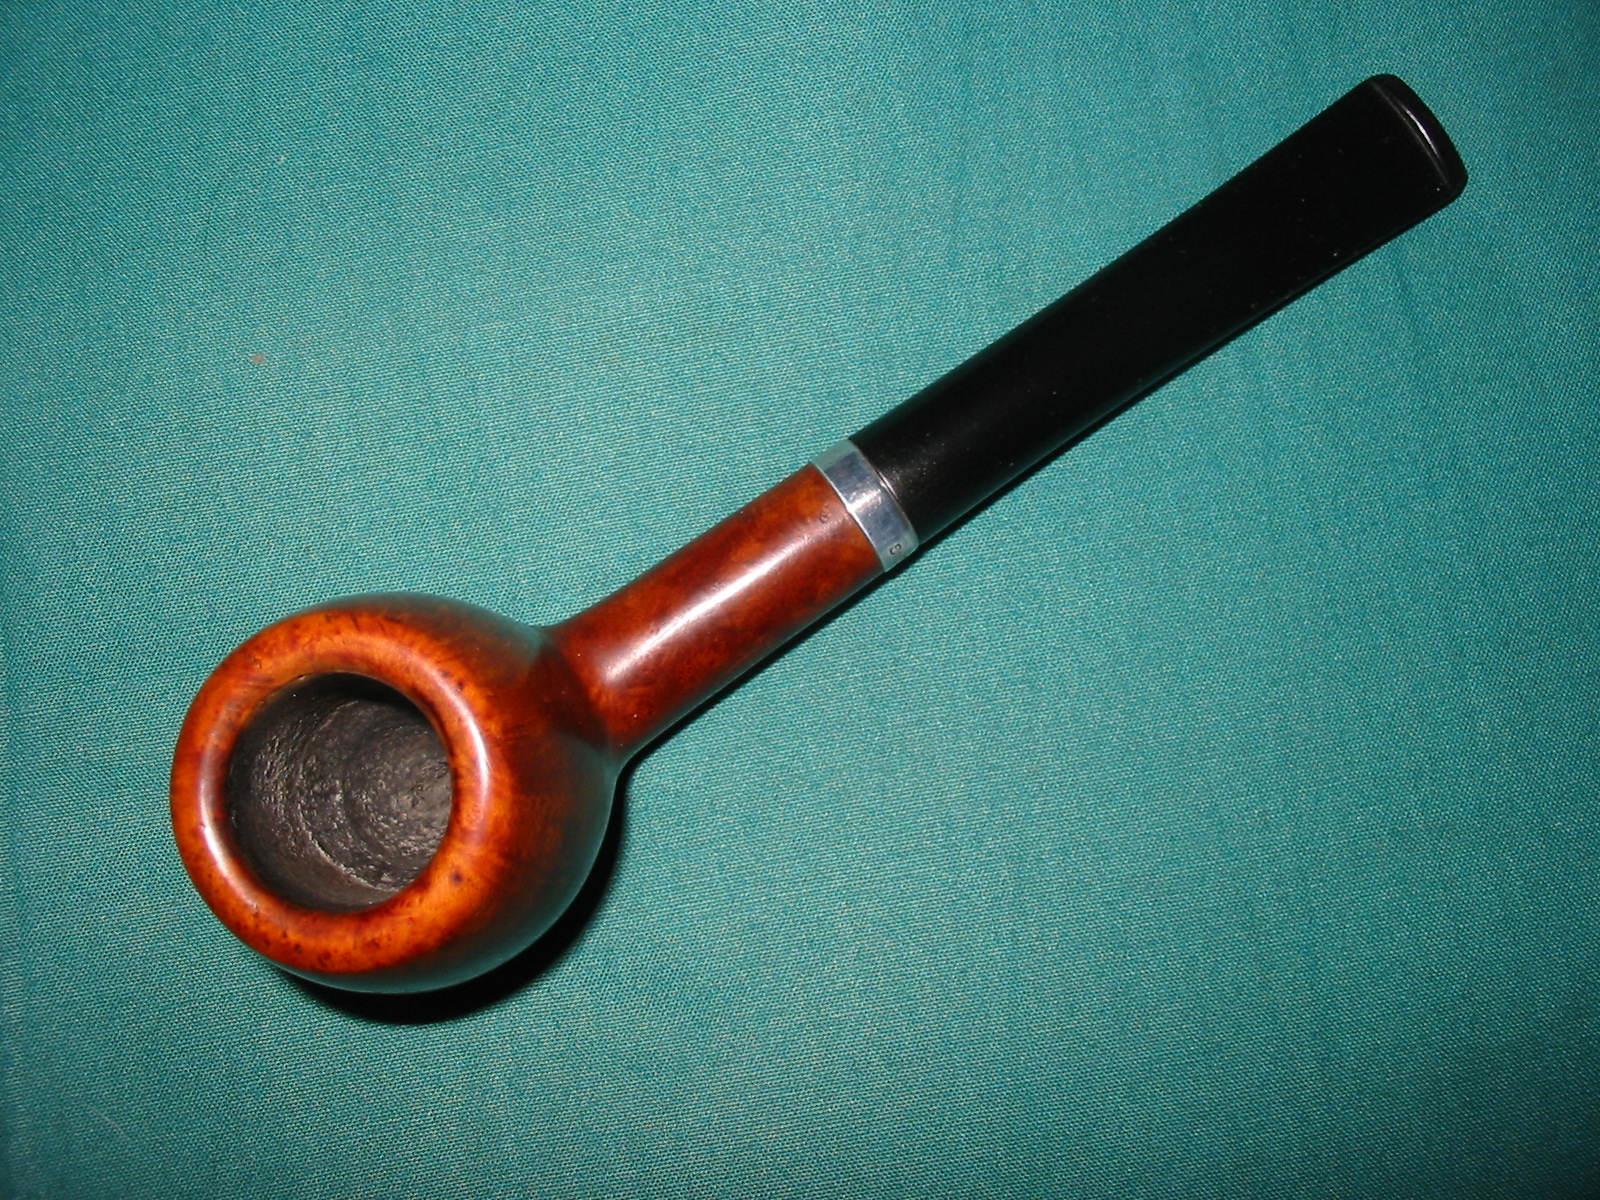
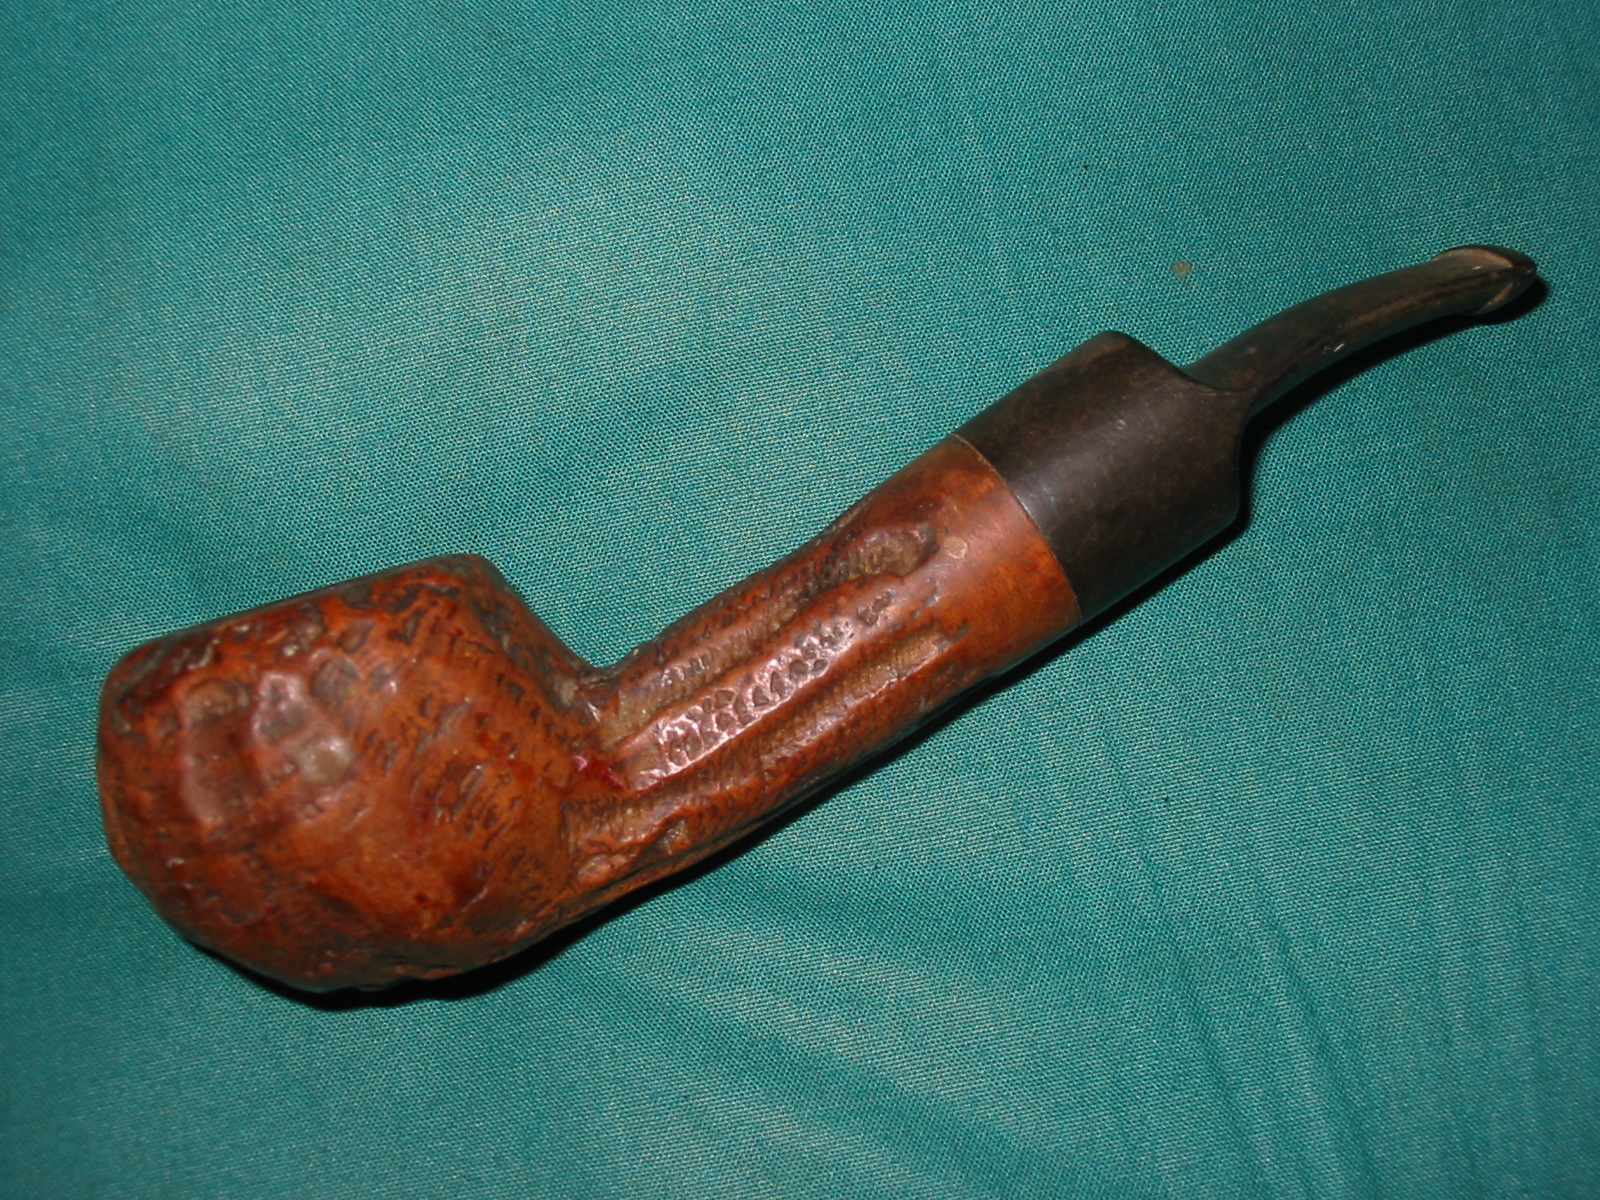
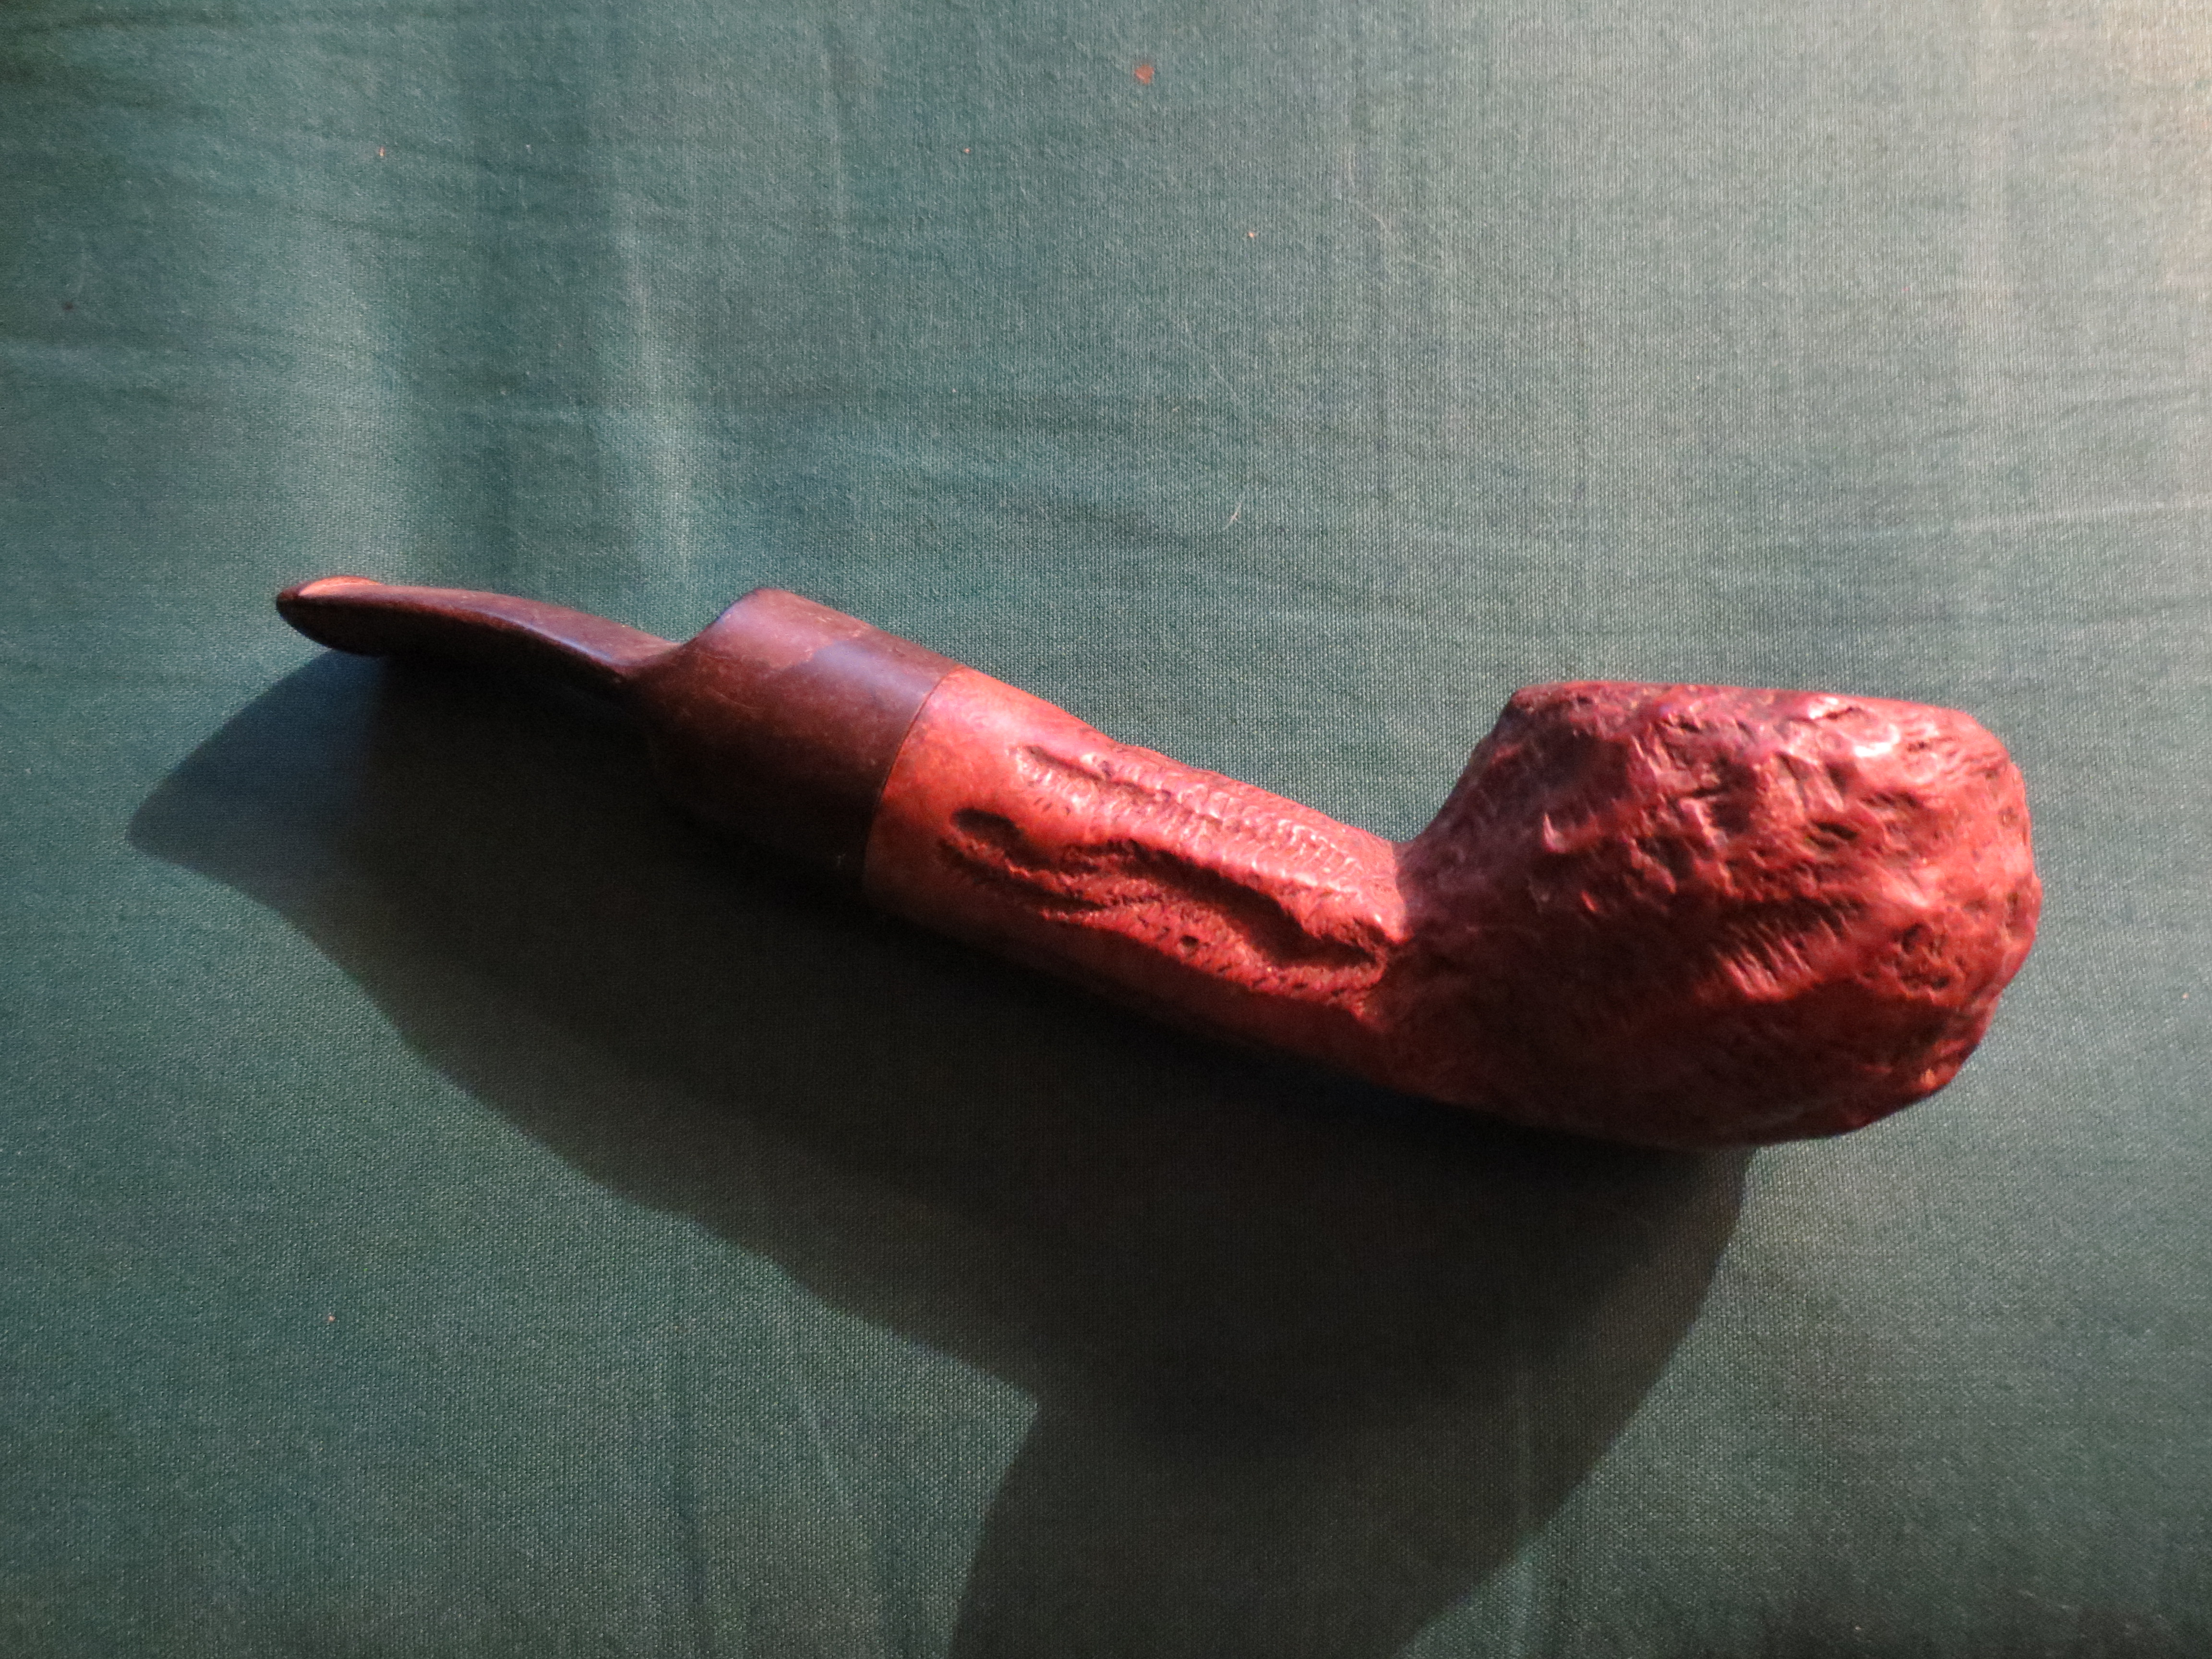
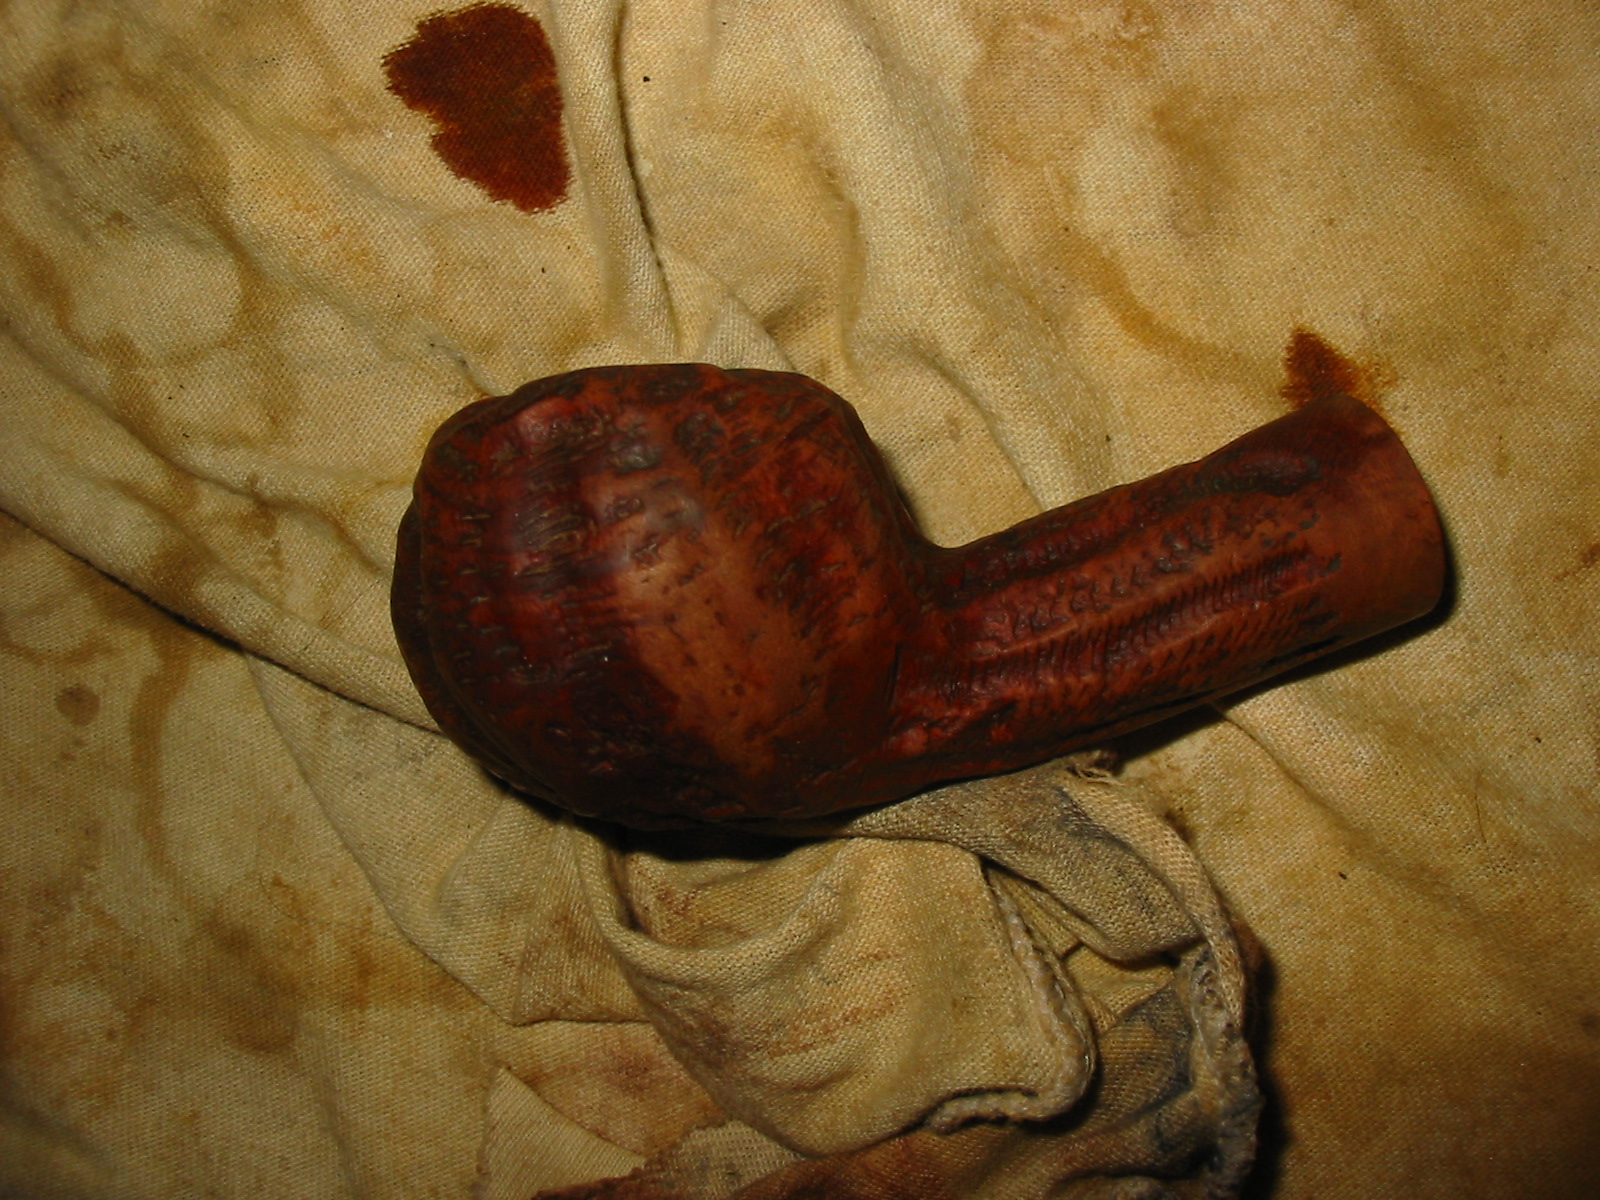
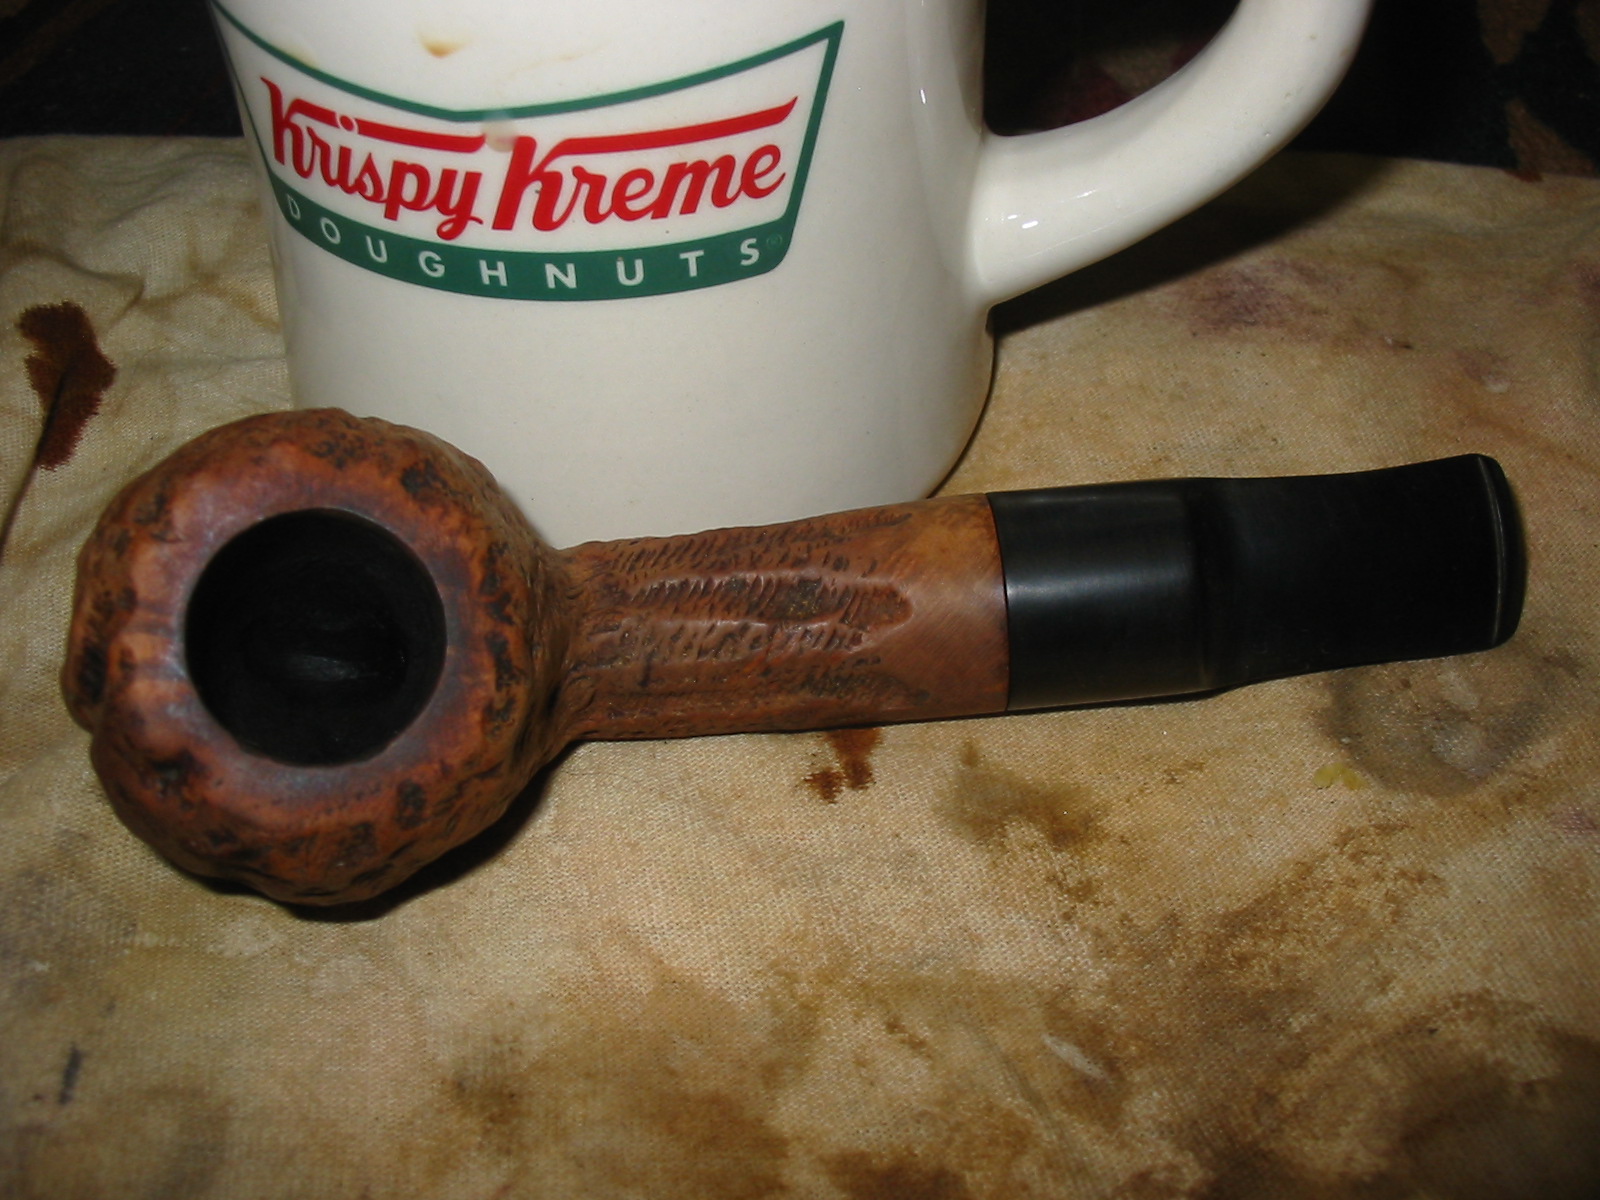
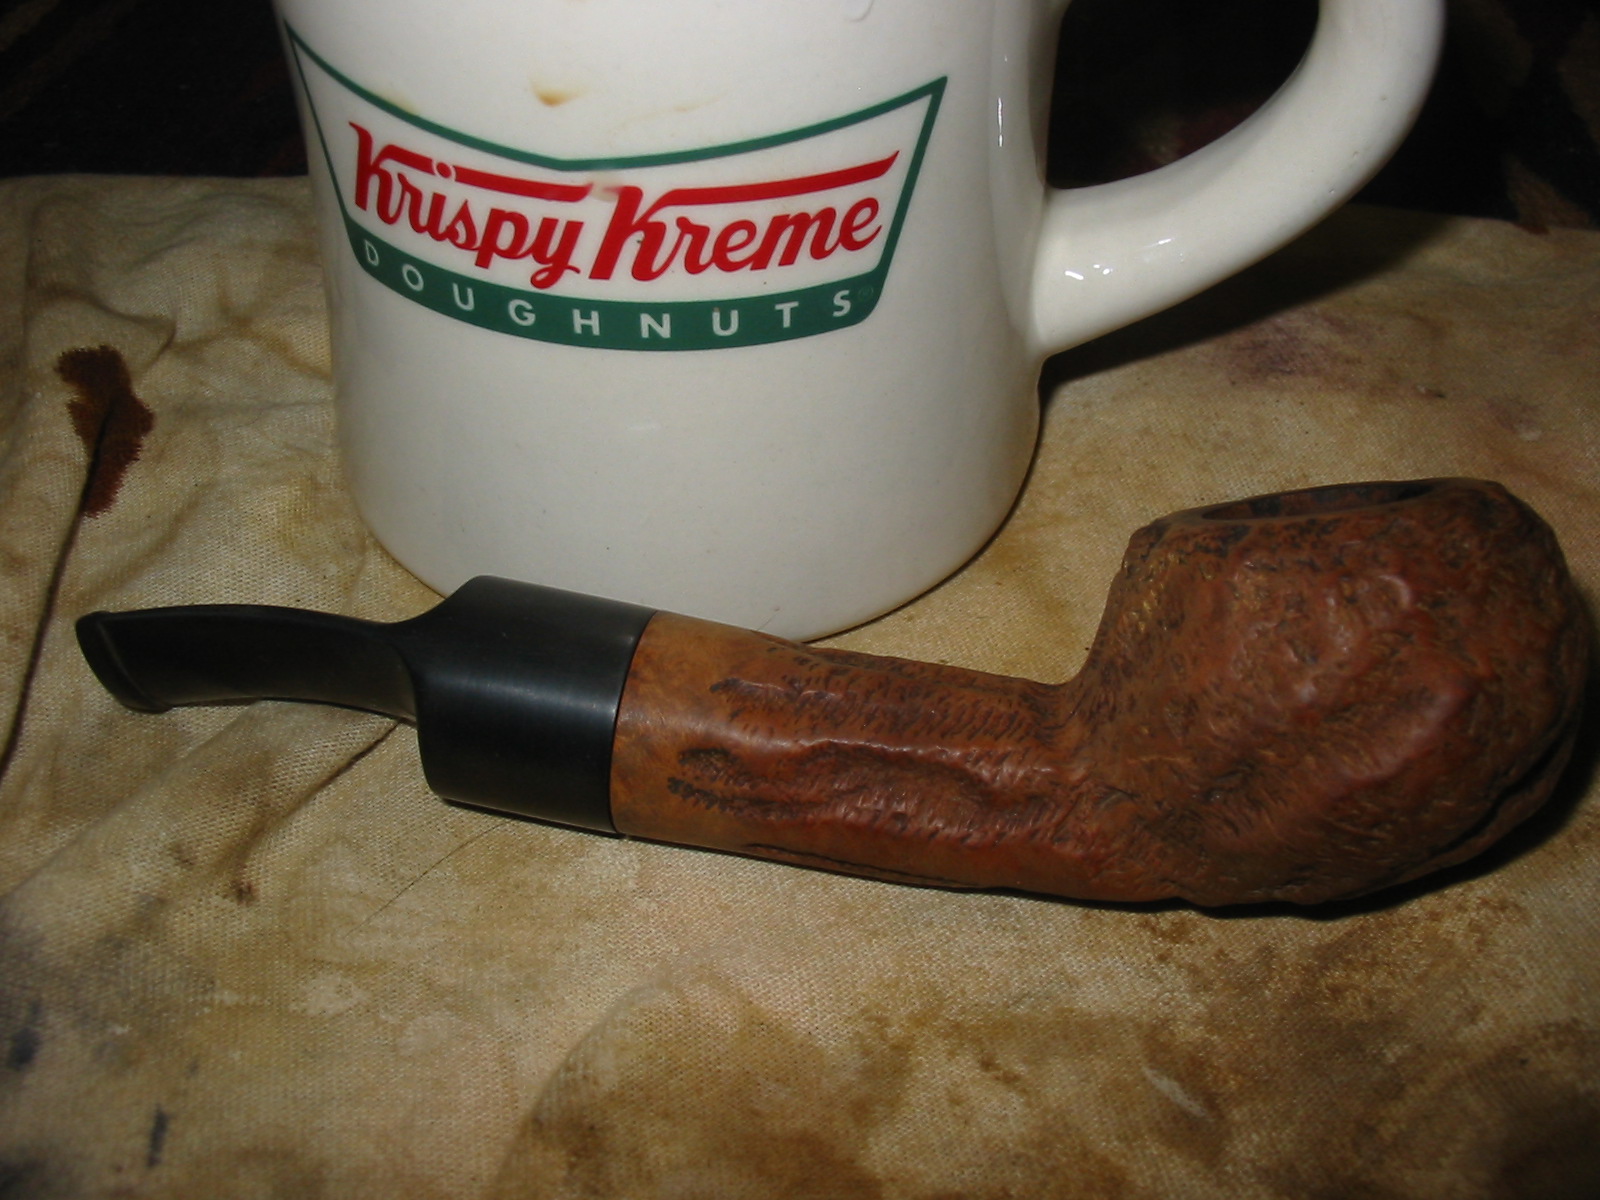
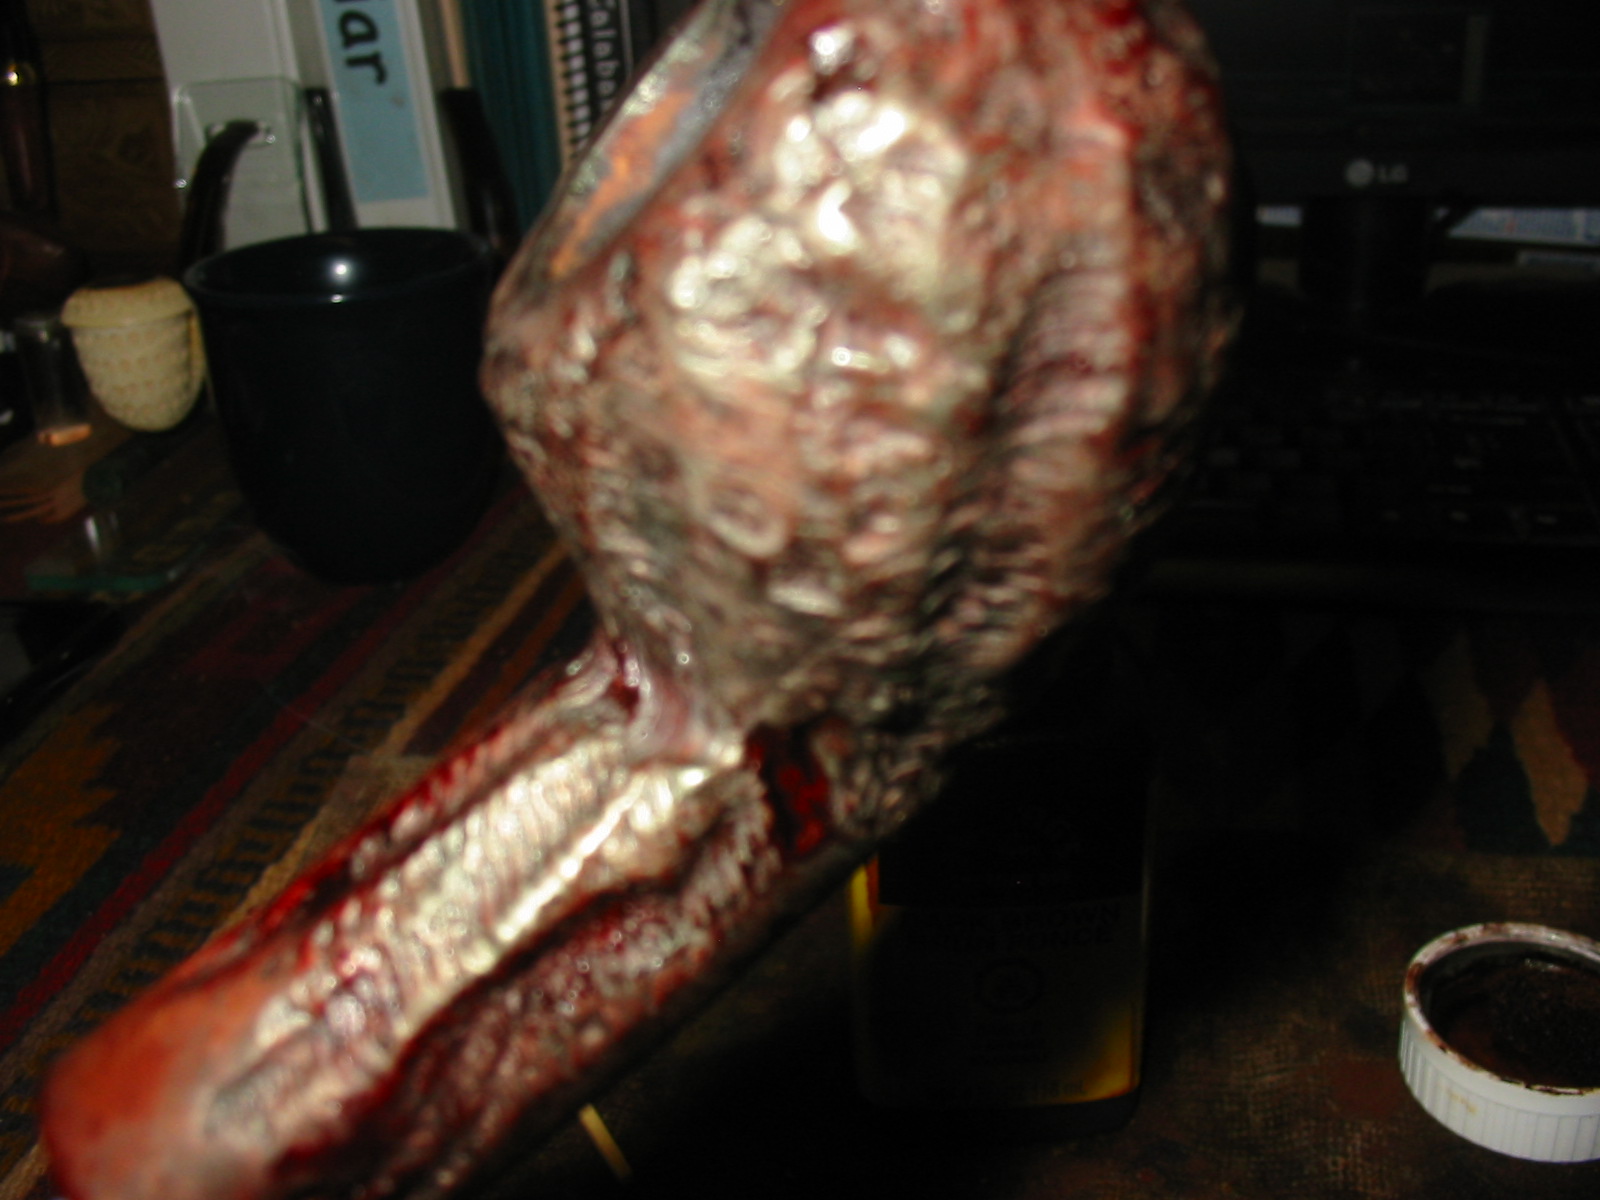
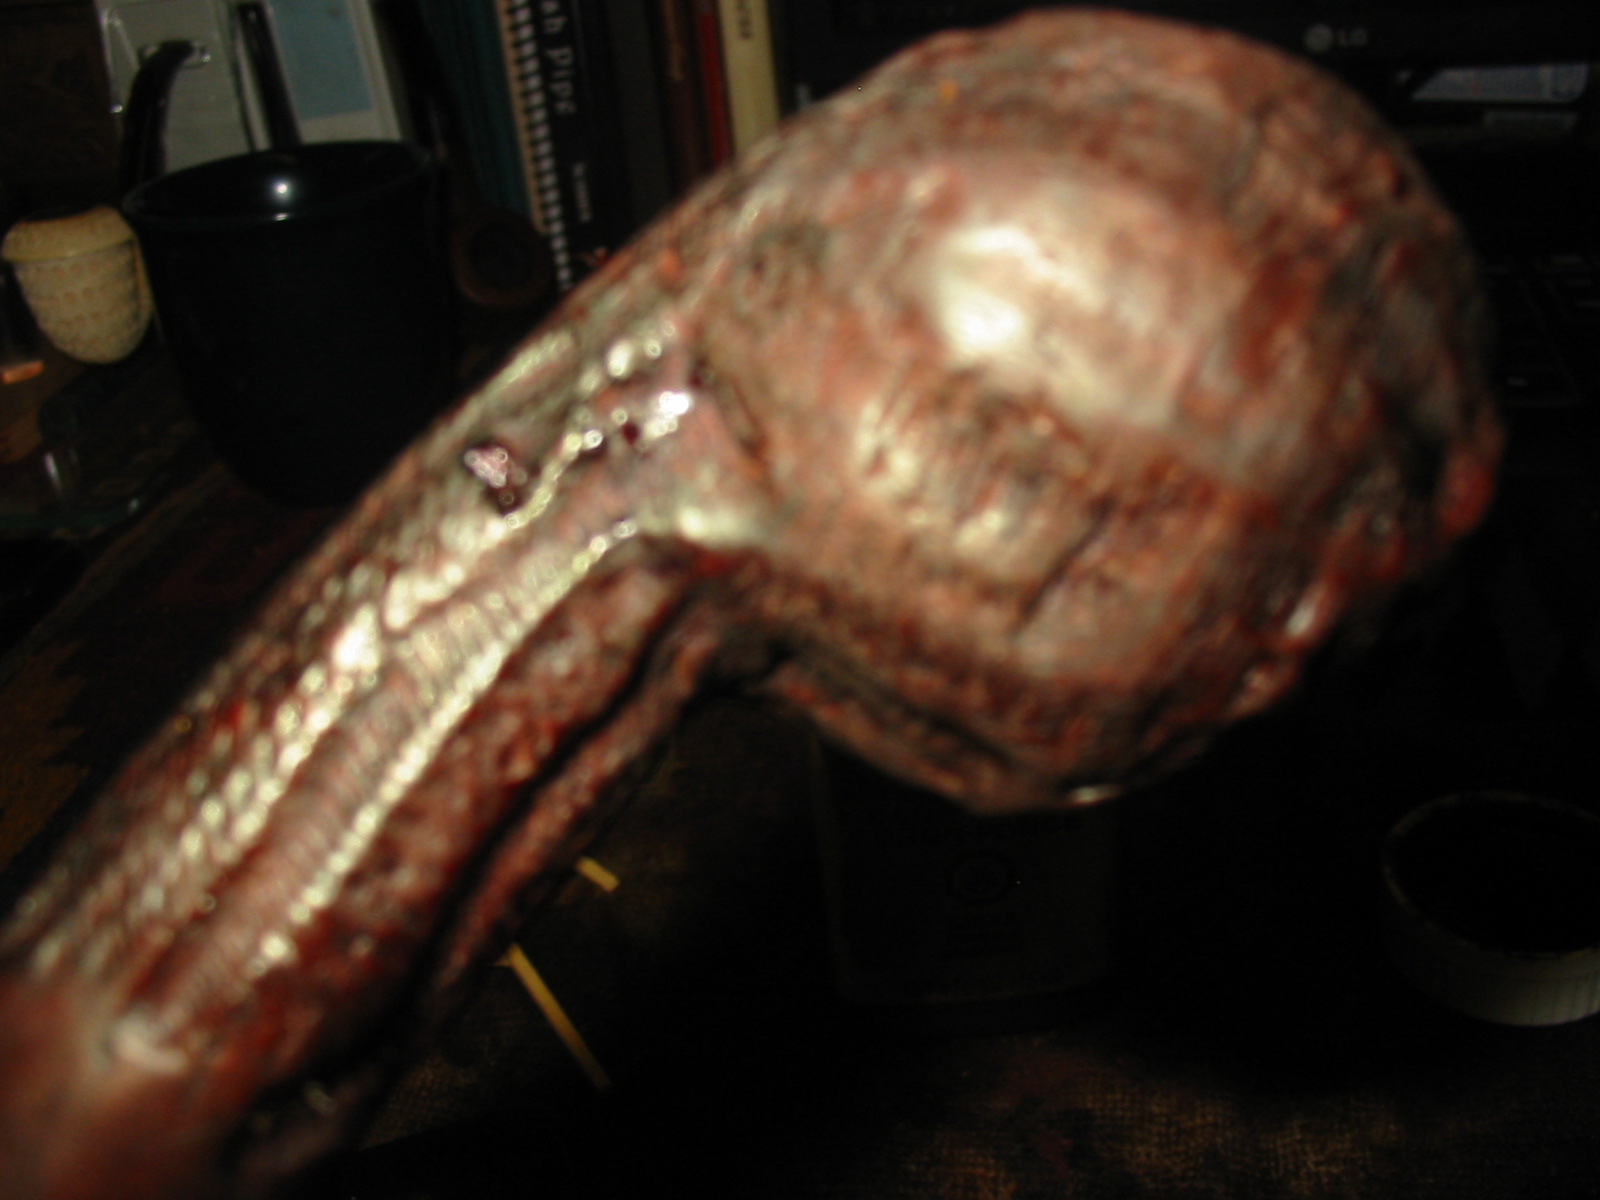
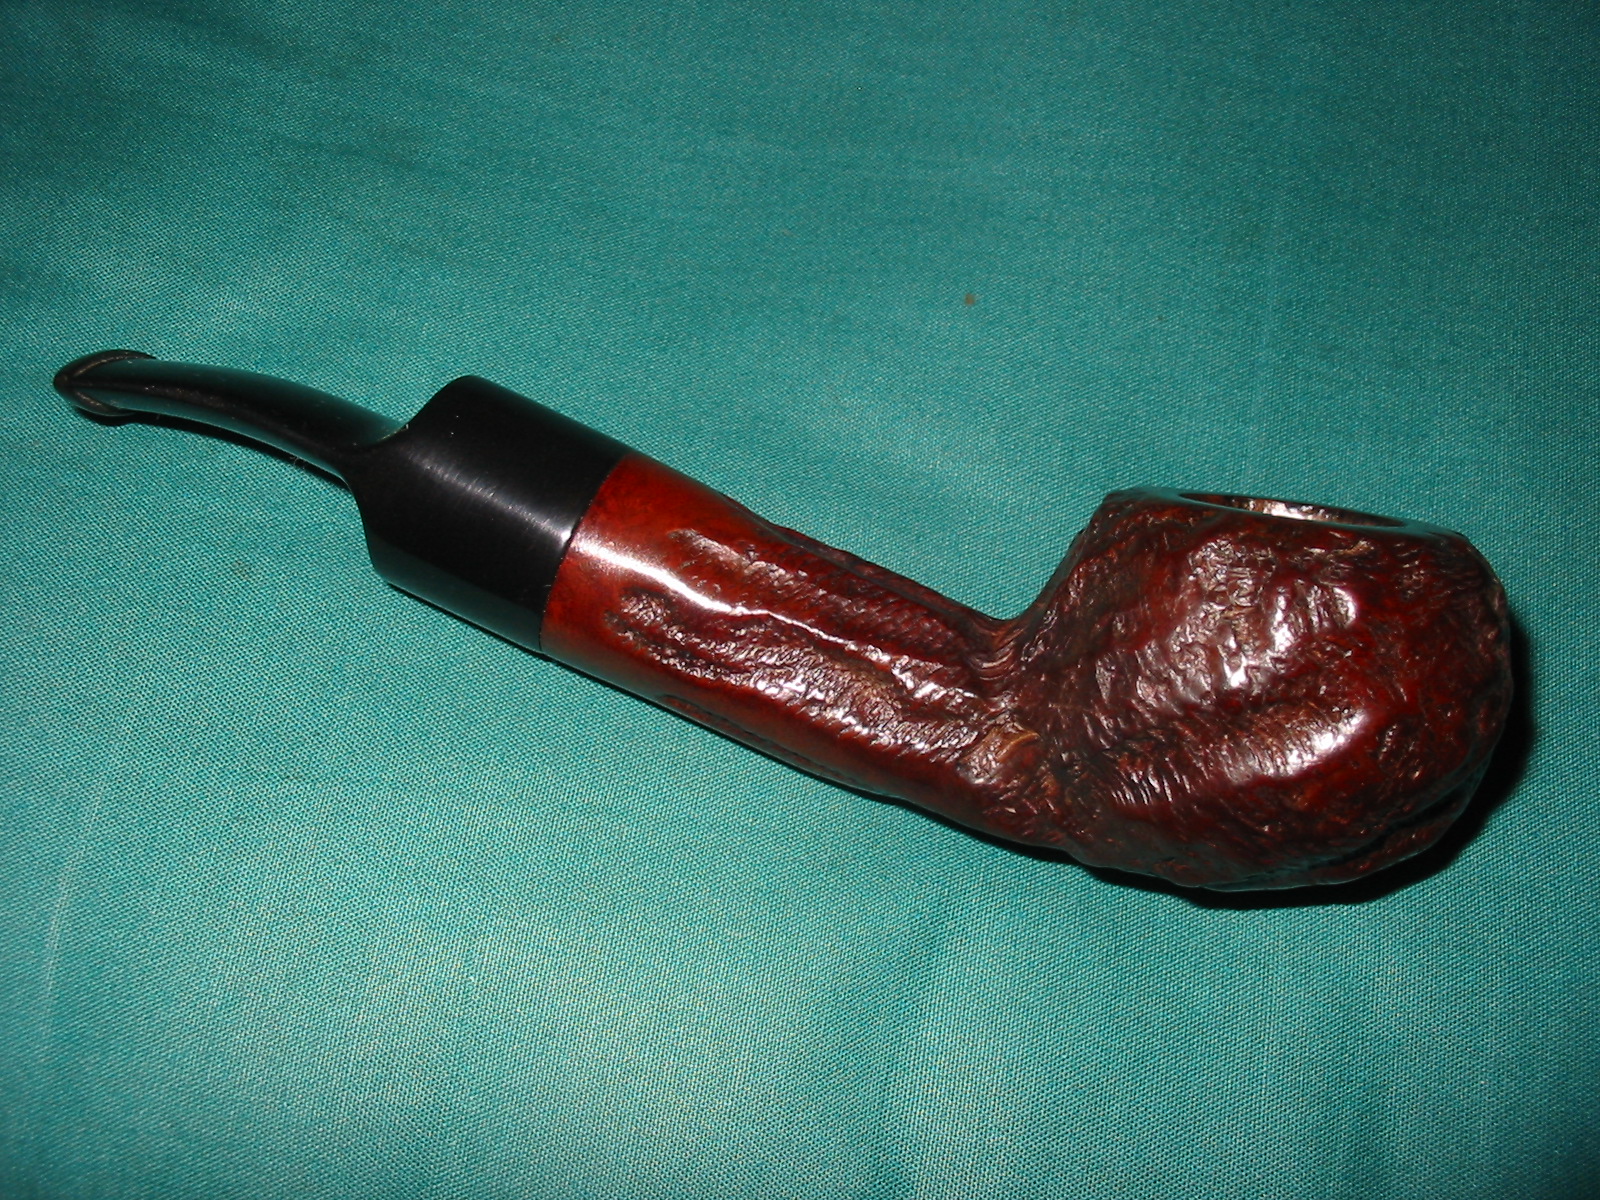
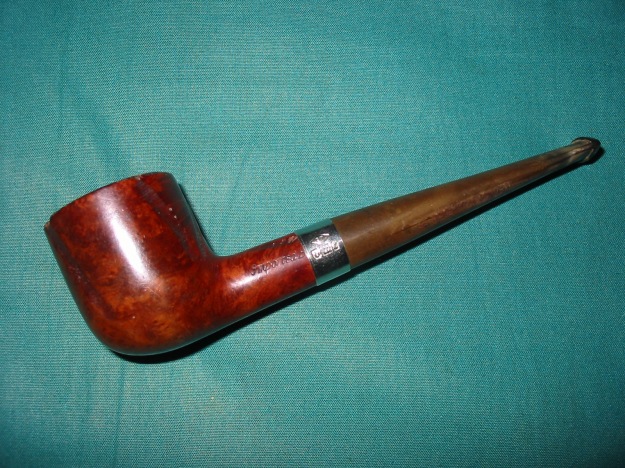
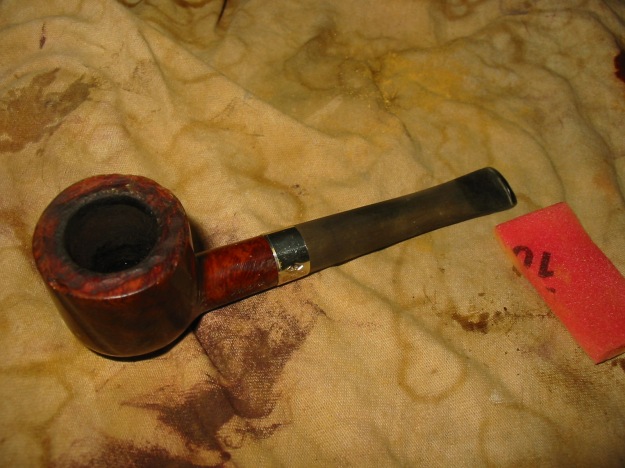
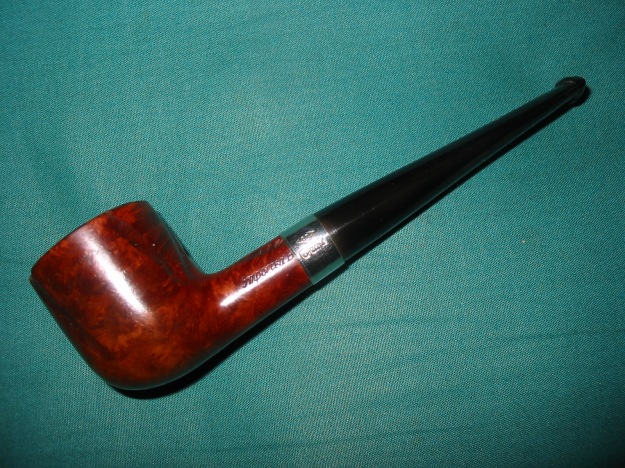
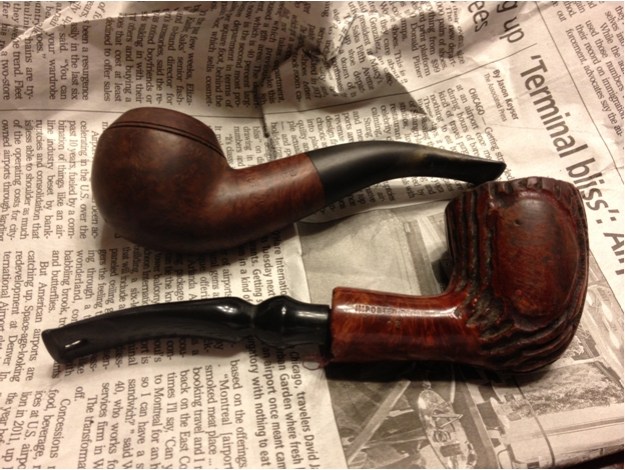
I picked up this Dr Grabow Freehand at an antique mall about a month ago when I got the Wally Frank that is visible in the photos, too. It was scratched to heck on all the smooth briar and the stem was chewed completely through. But I went ahead and bought it for three reasons:

– I’ve  never had a freehand
– I have been wanting to restore a stem with a hole or, in this case, a lot of damage
– I got a pretty decent price
So, I picked it up.Greg1

Greg2

Greg3

Greg4

Greg5 
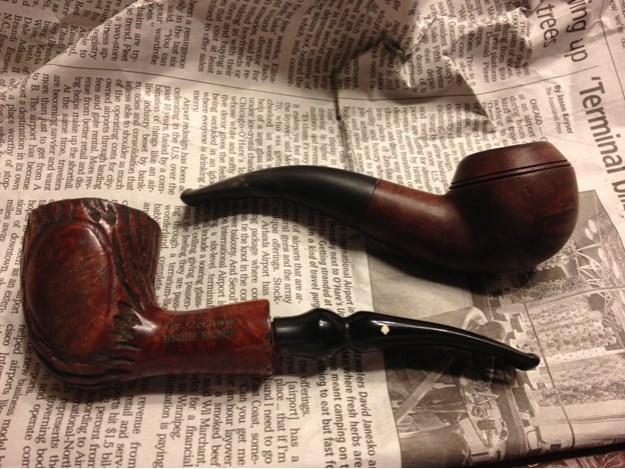
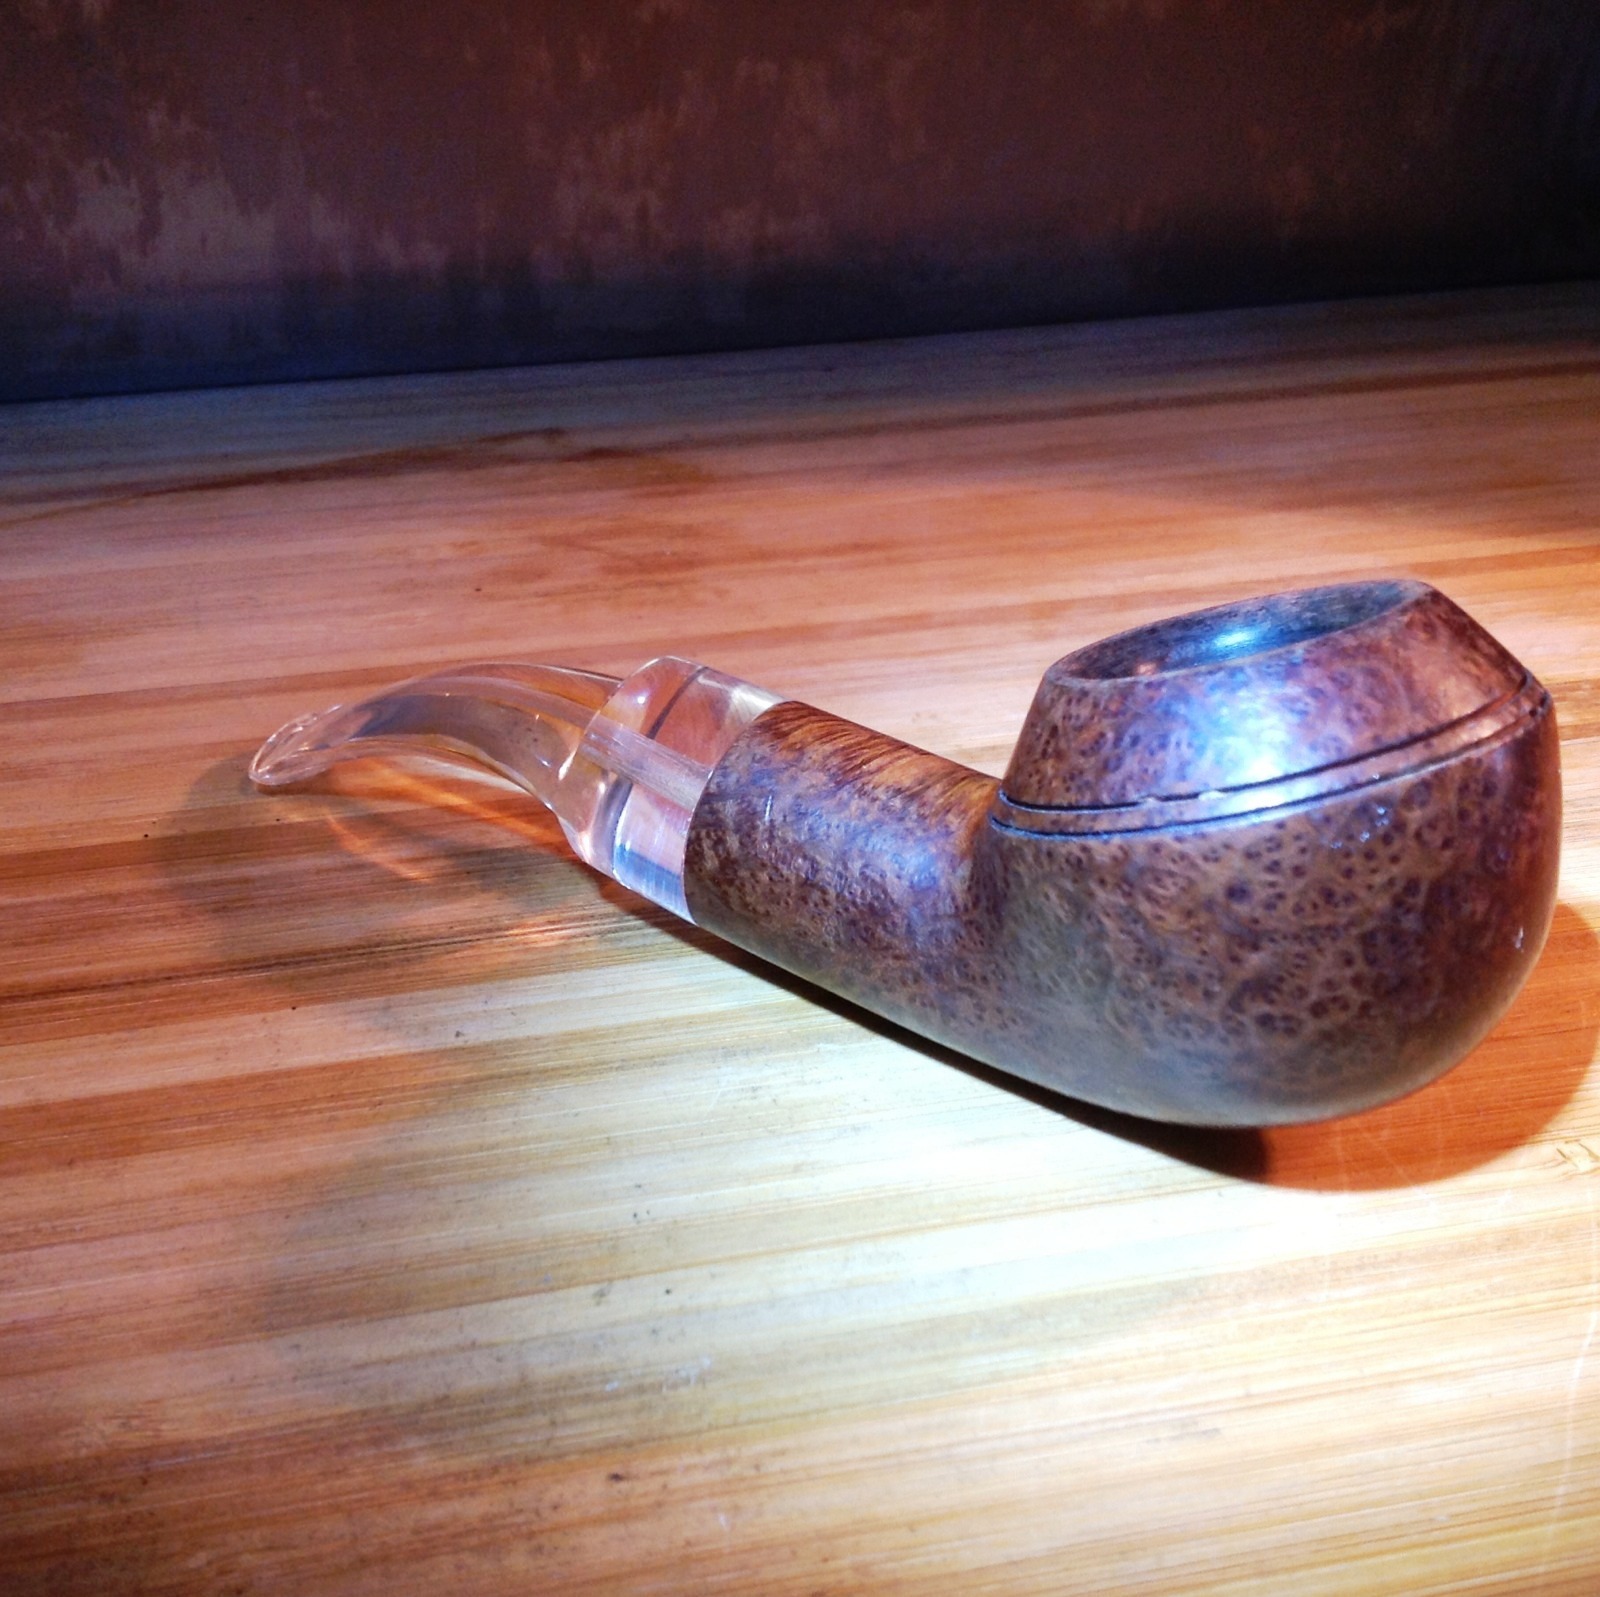
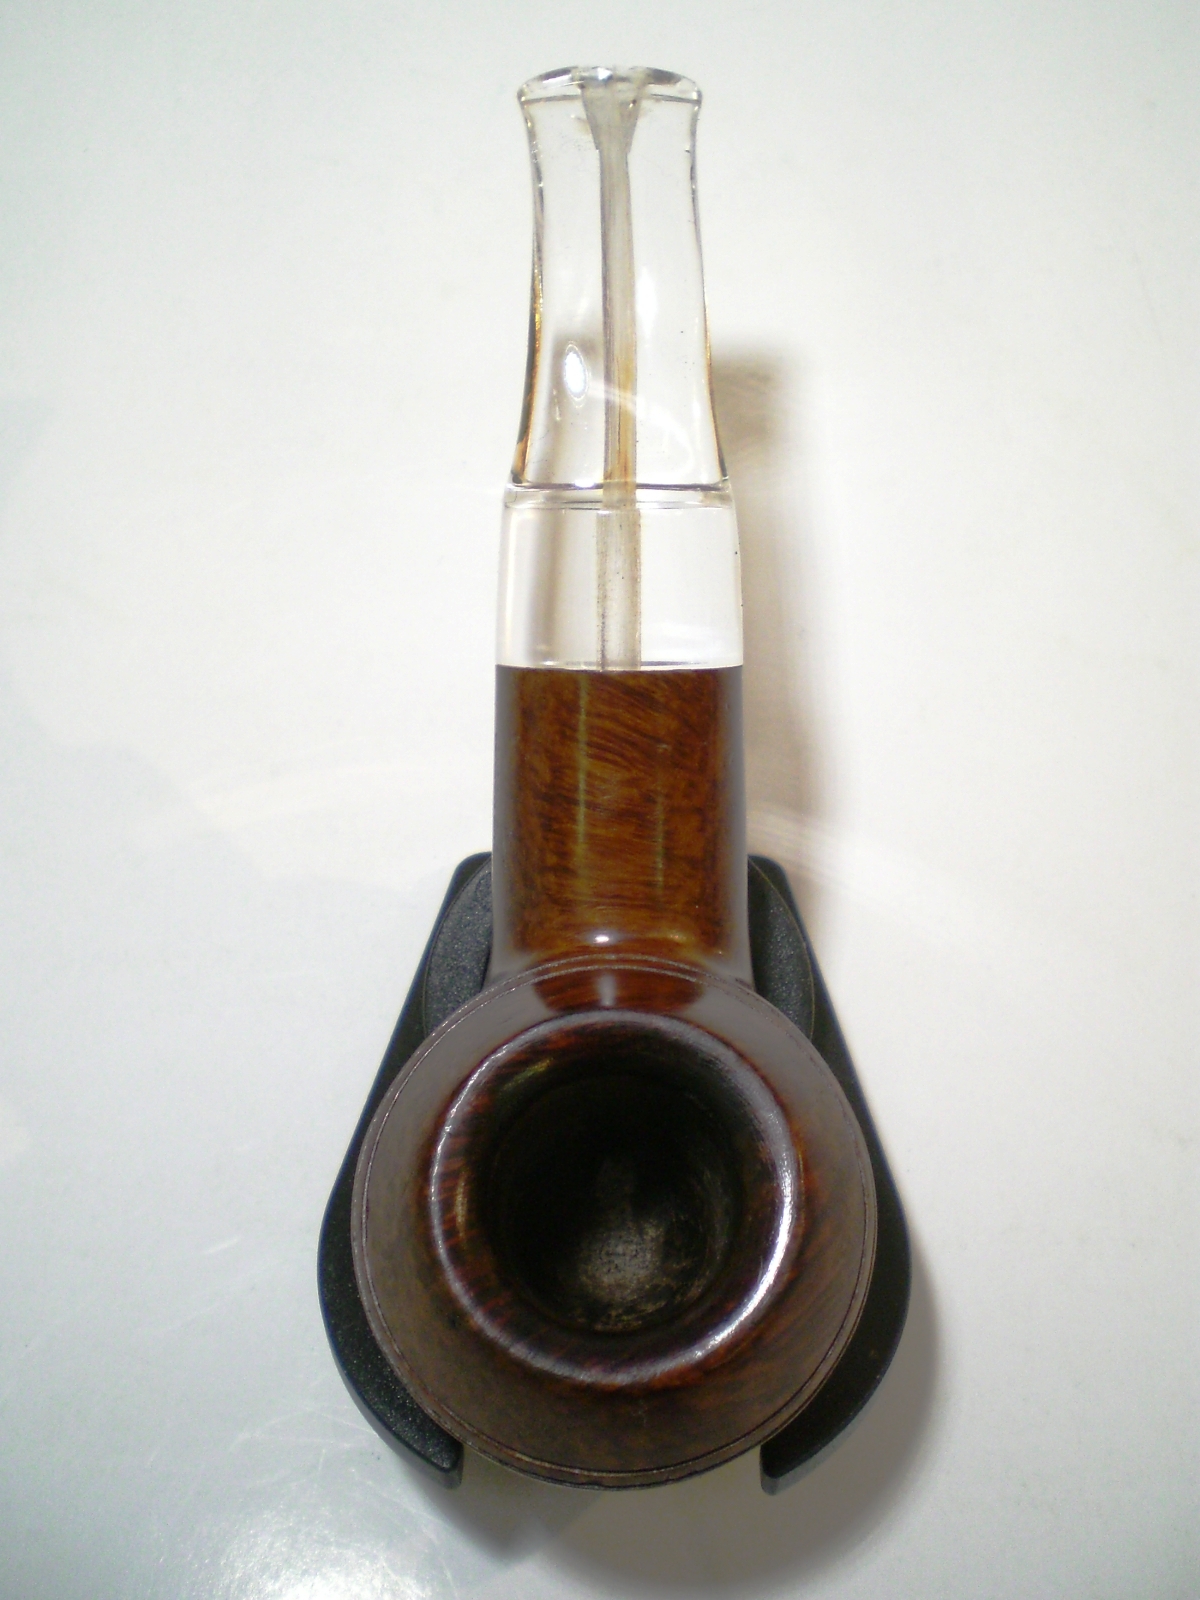
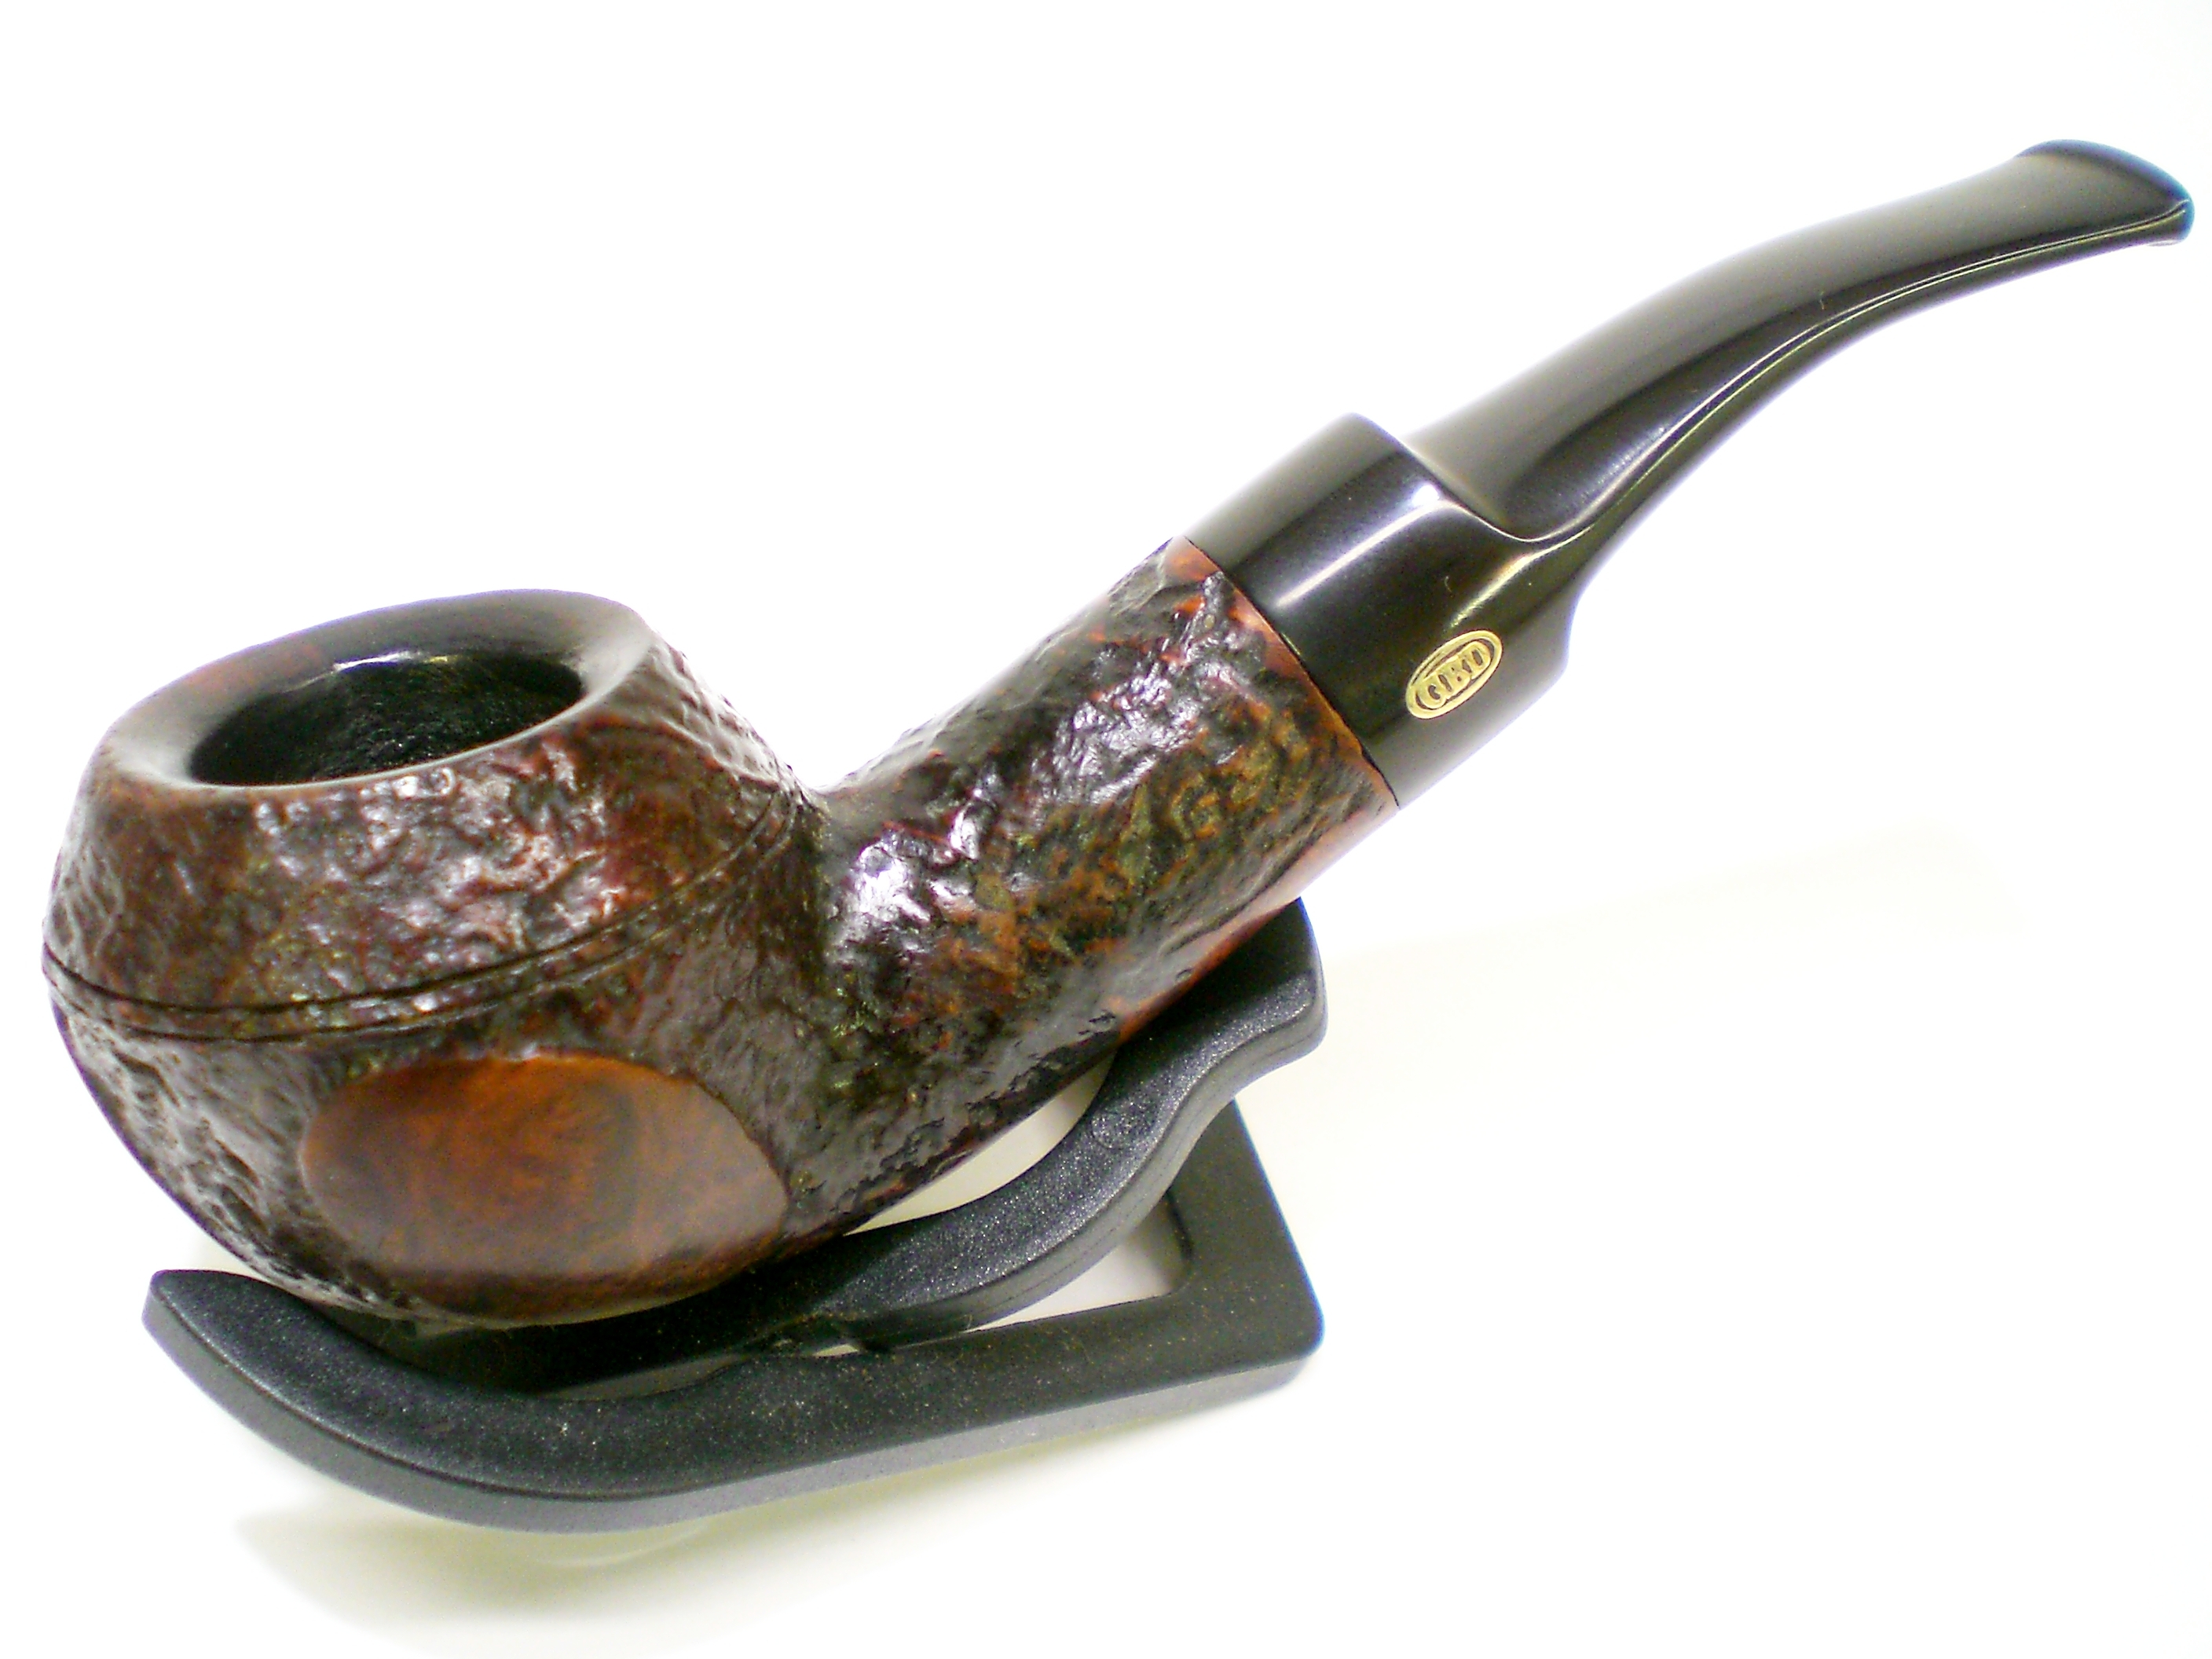
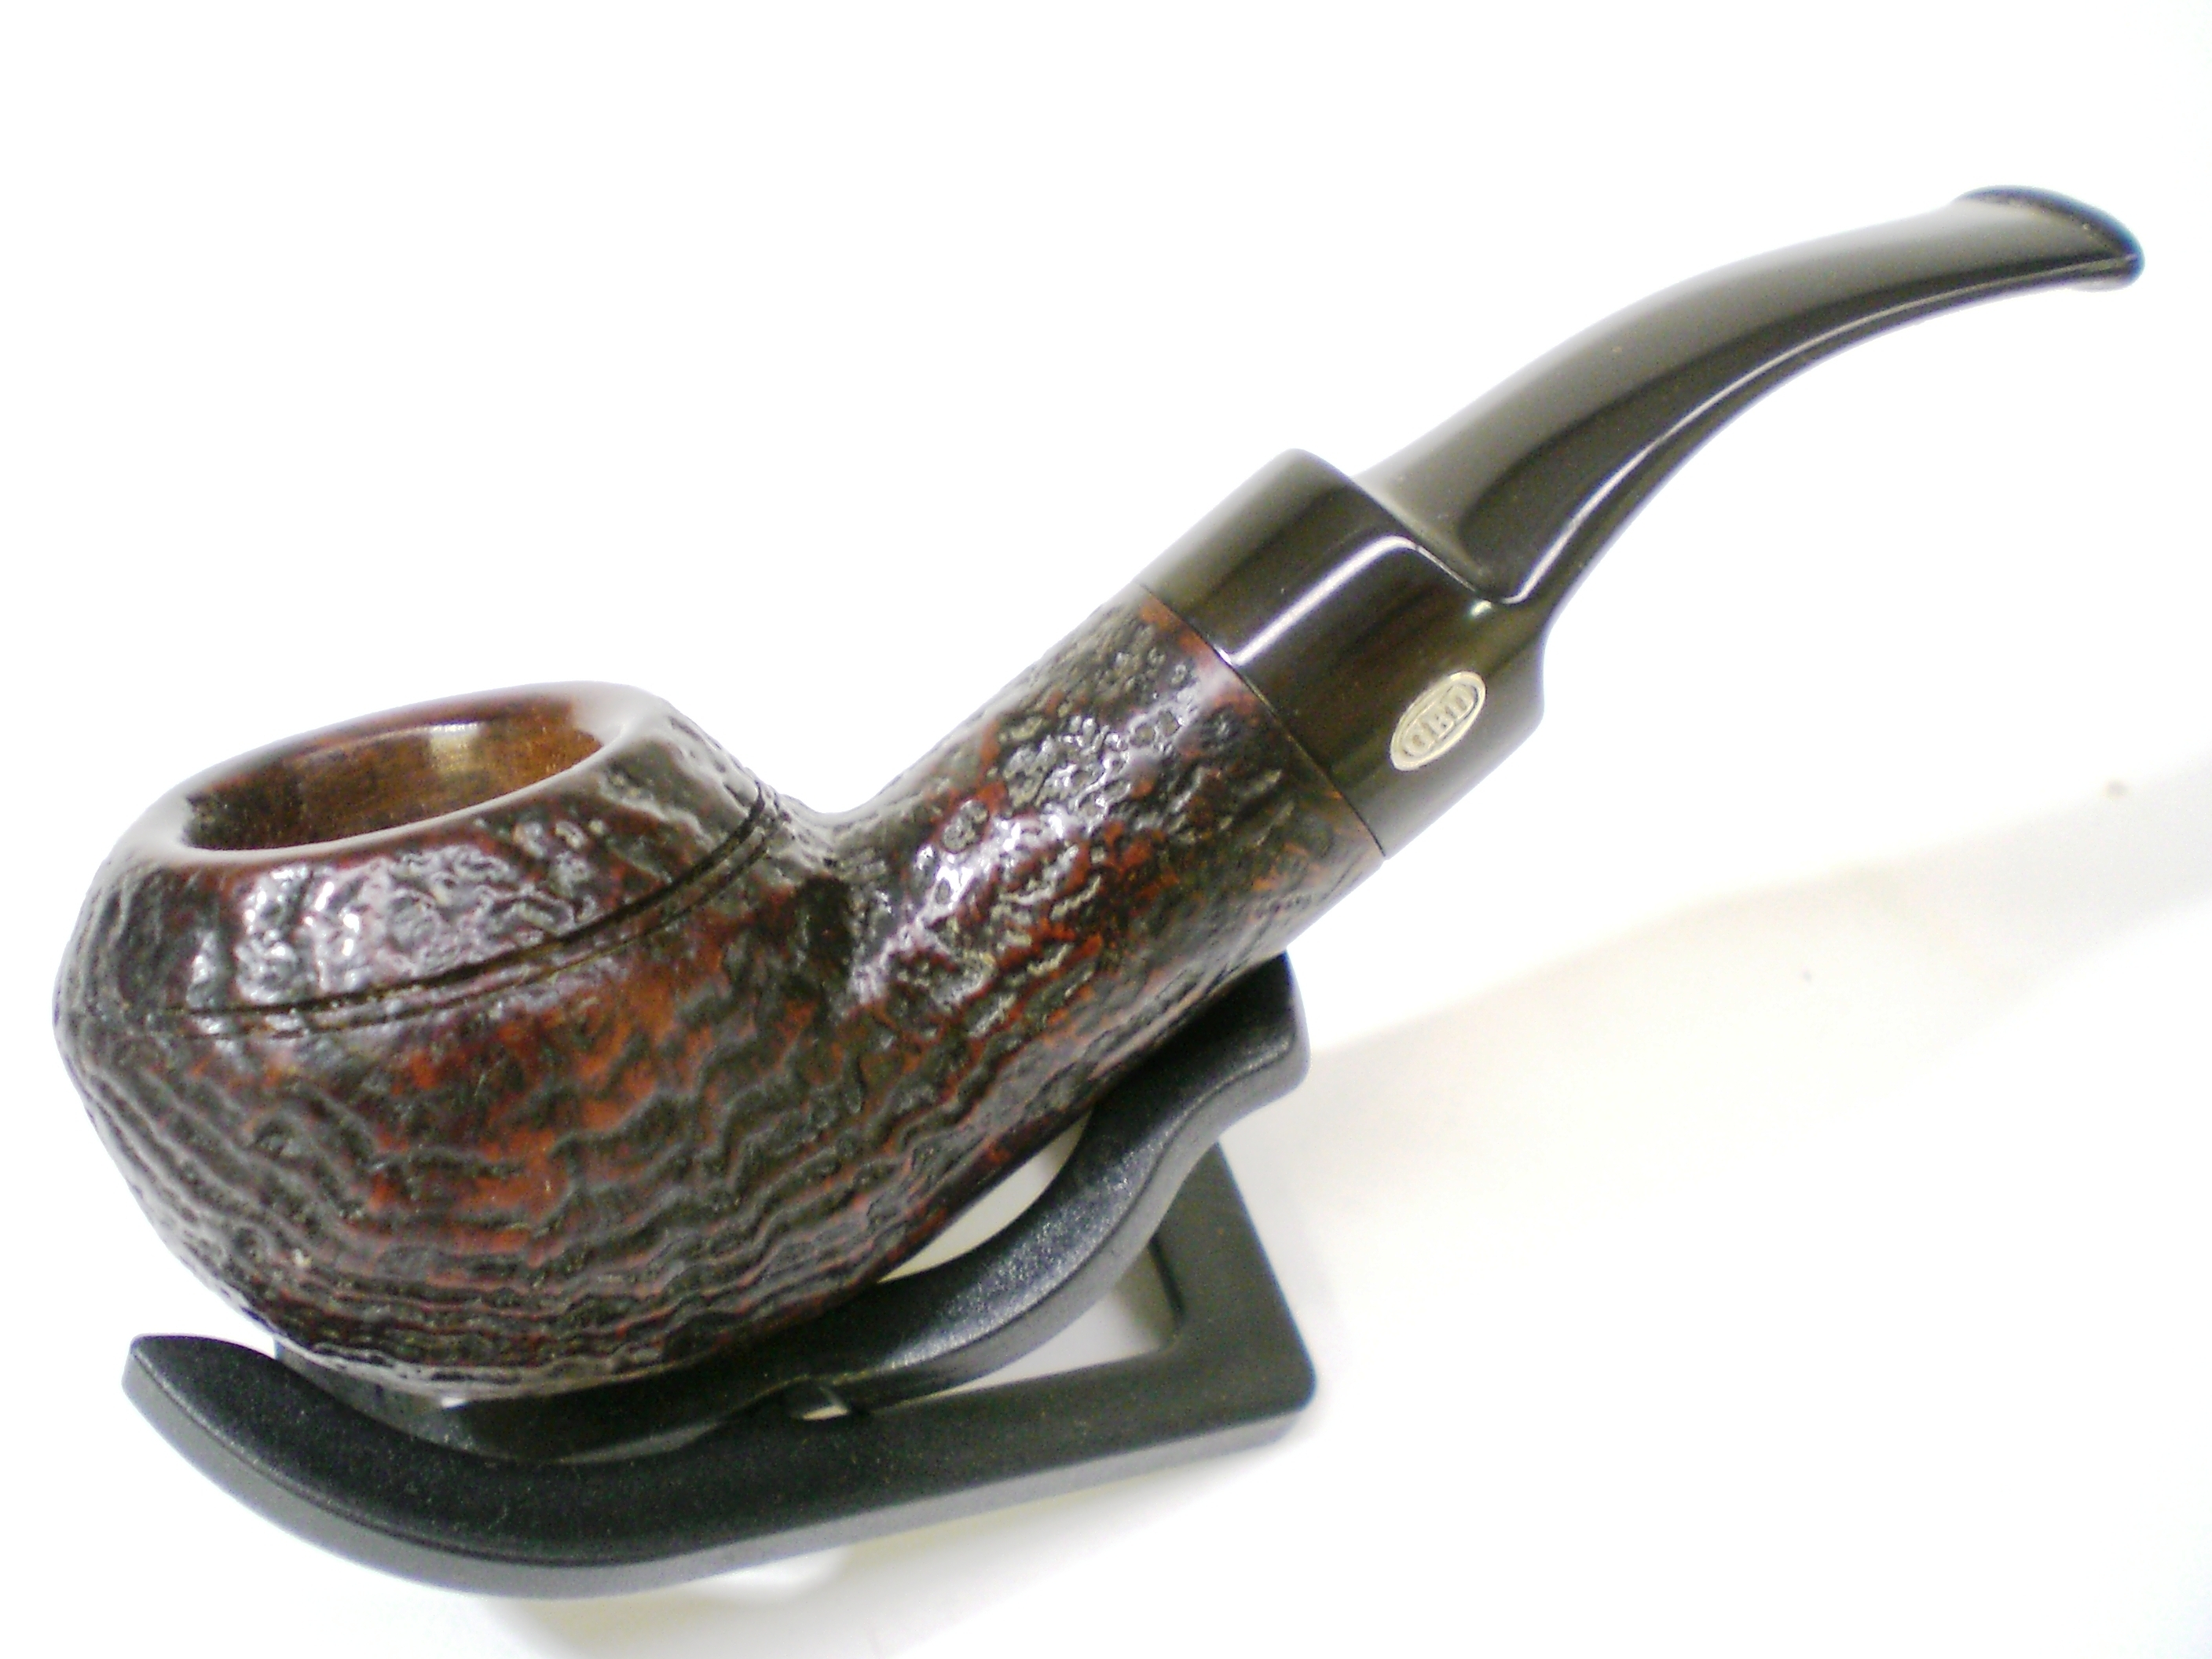
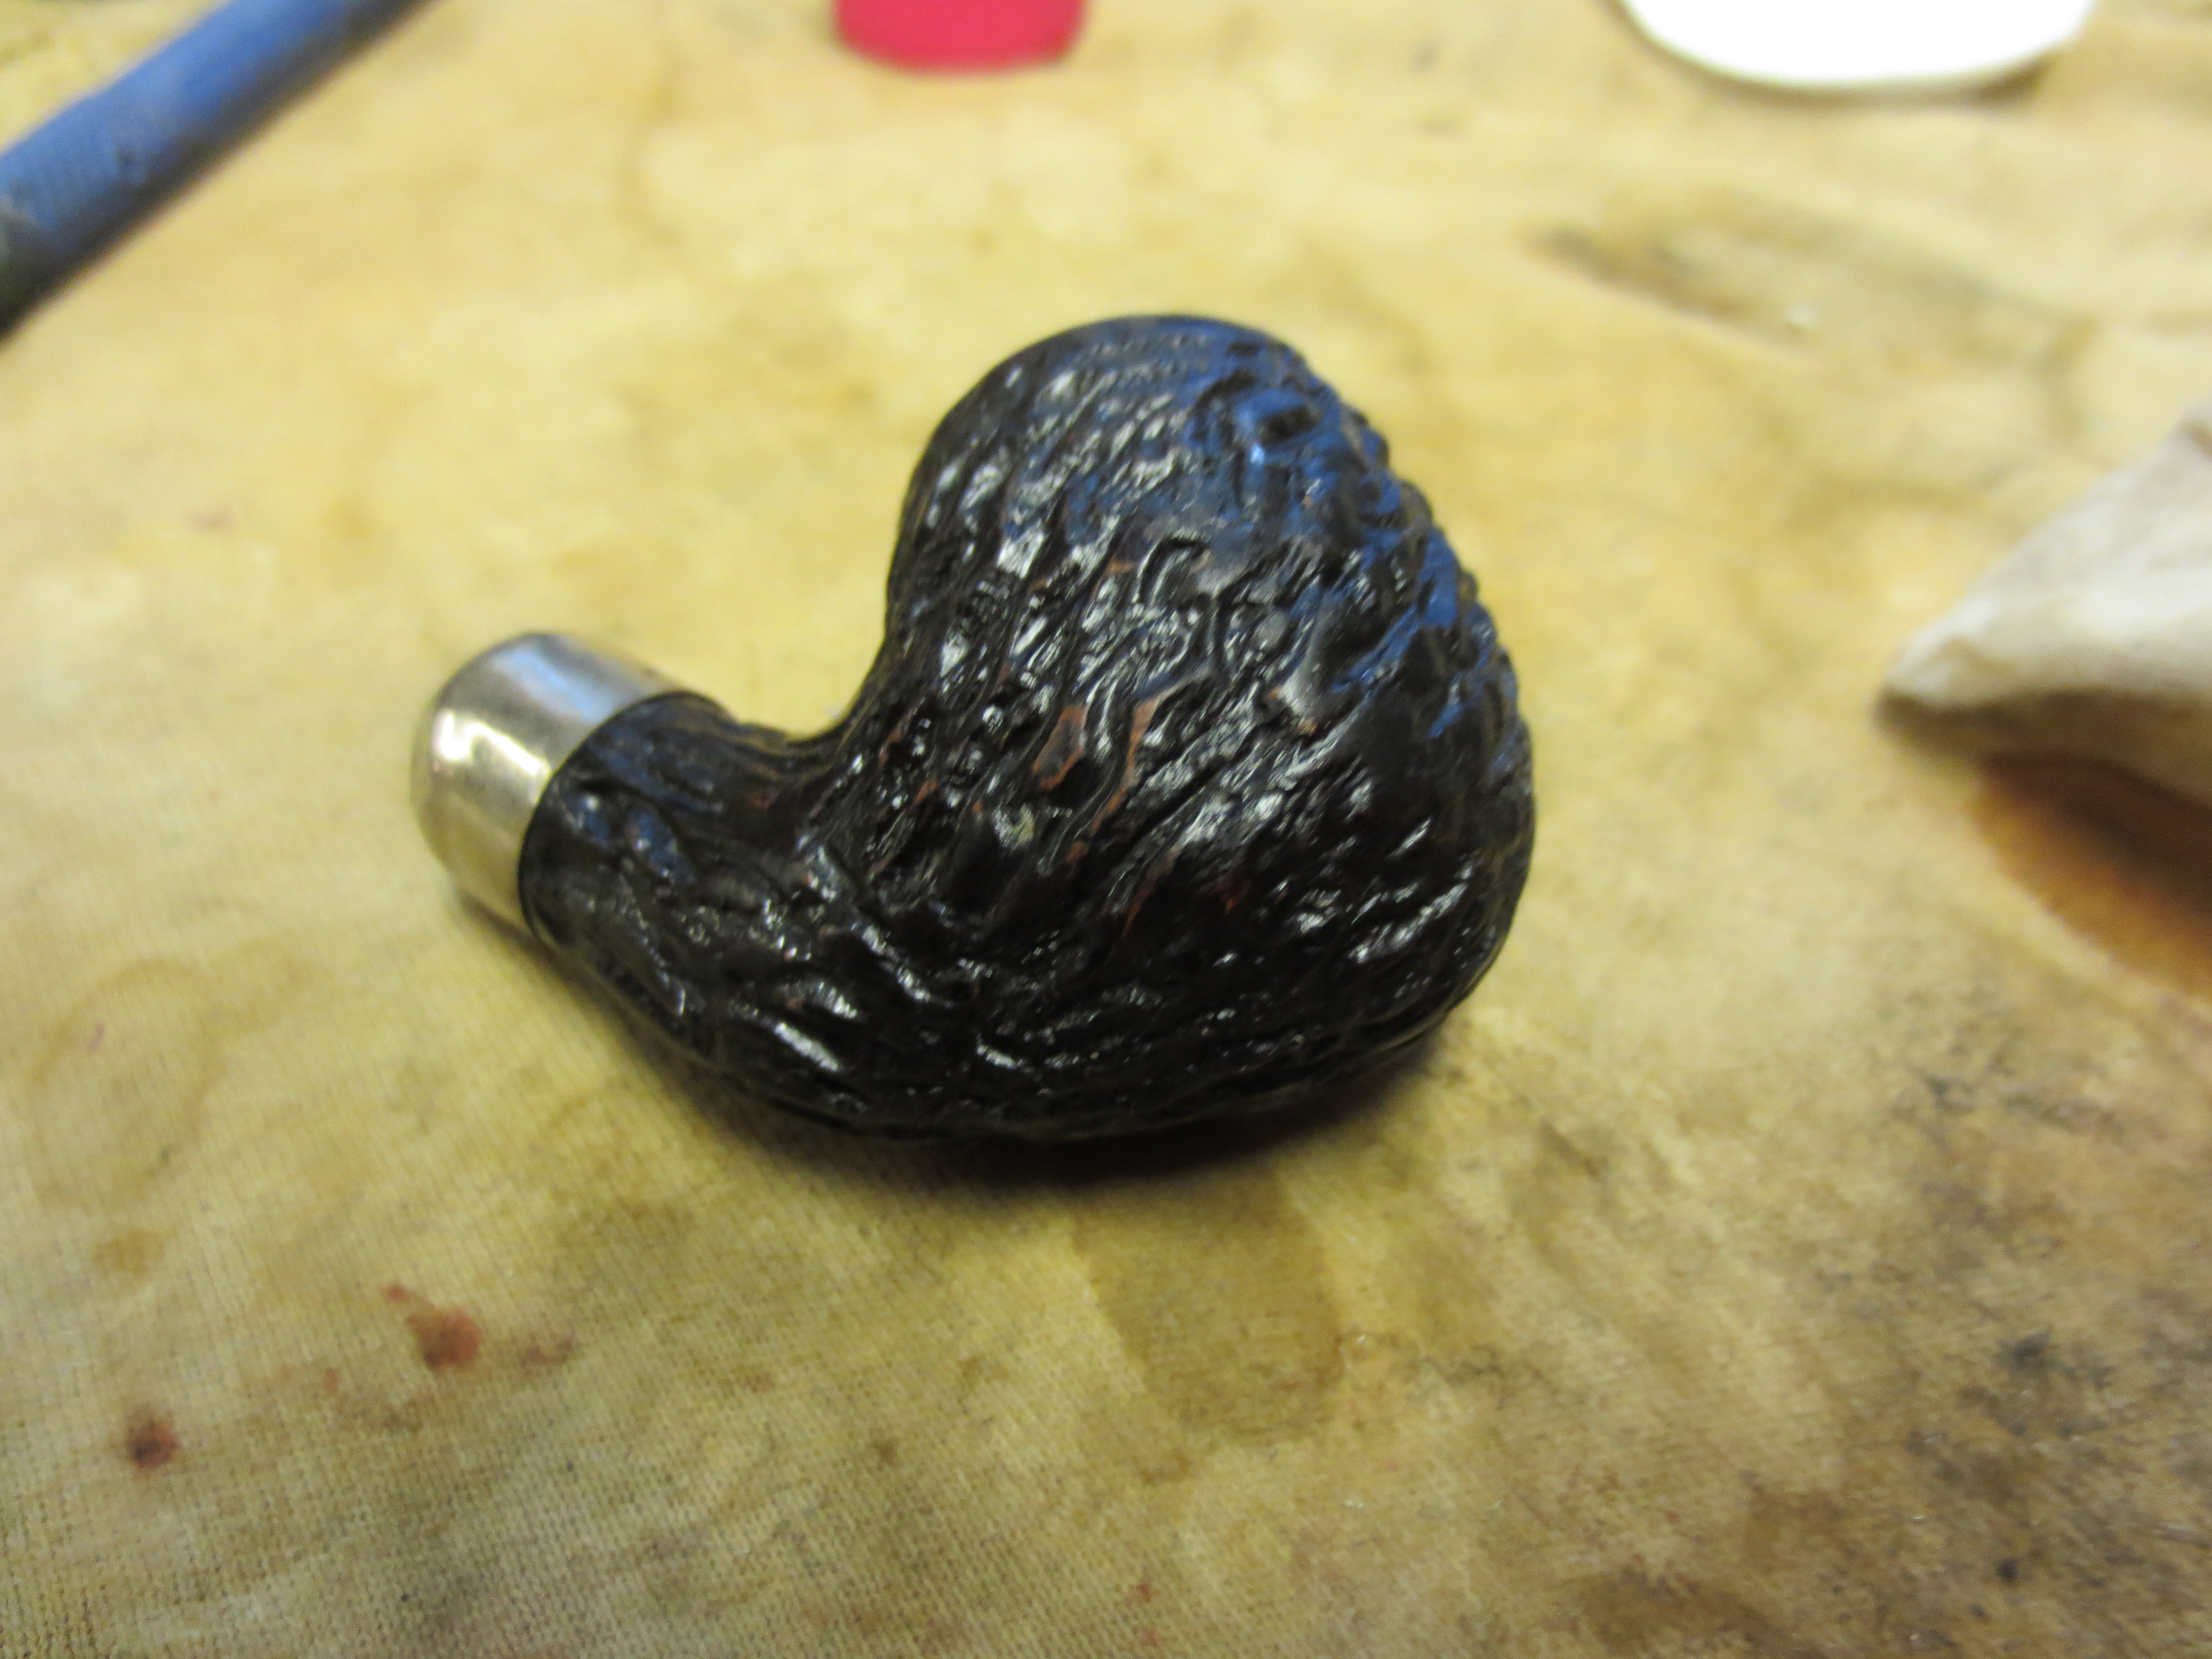
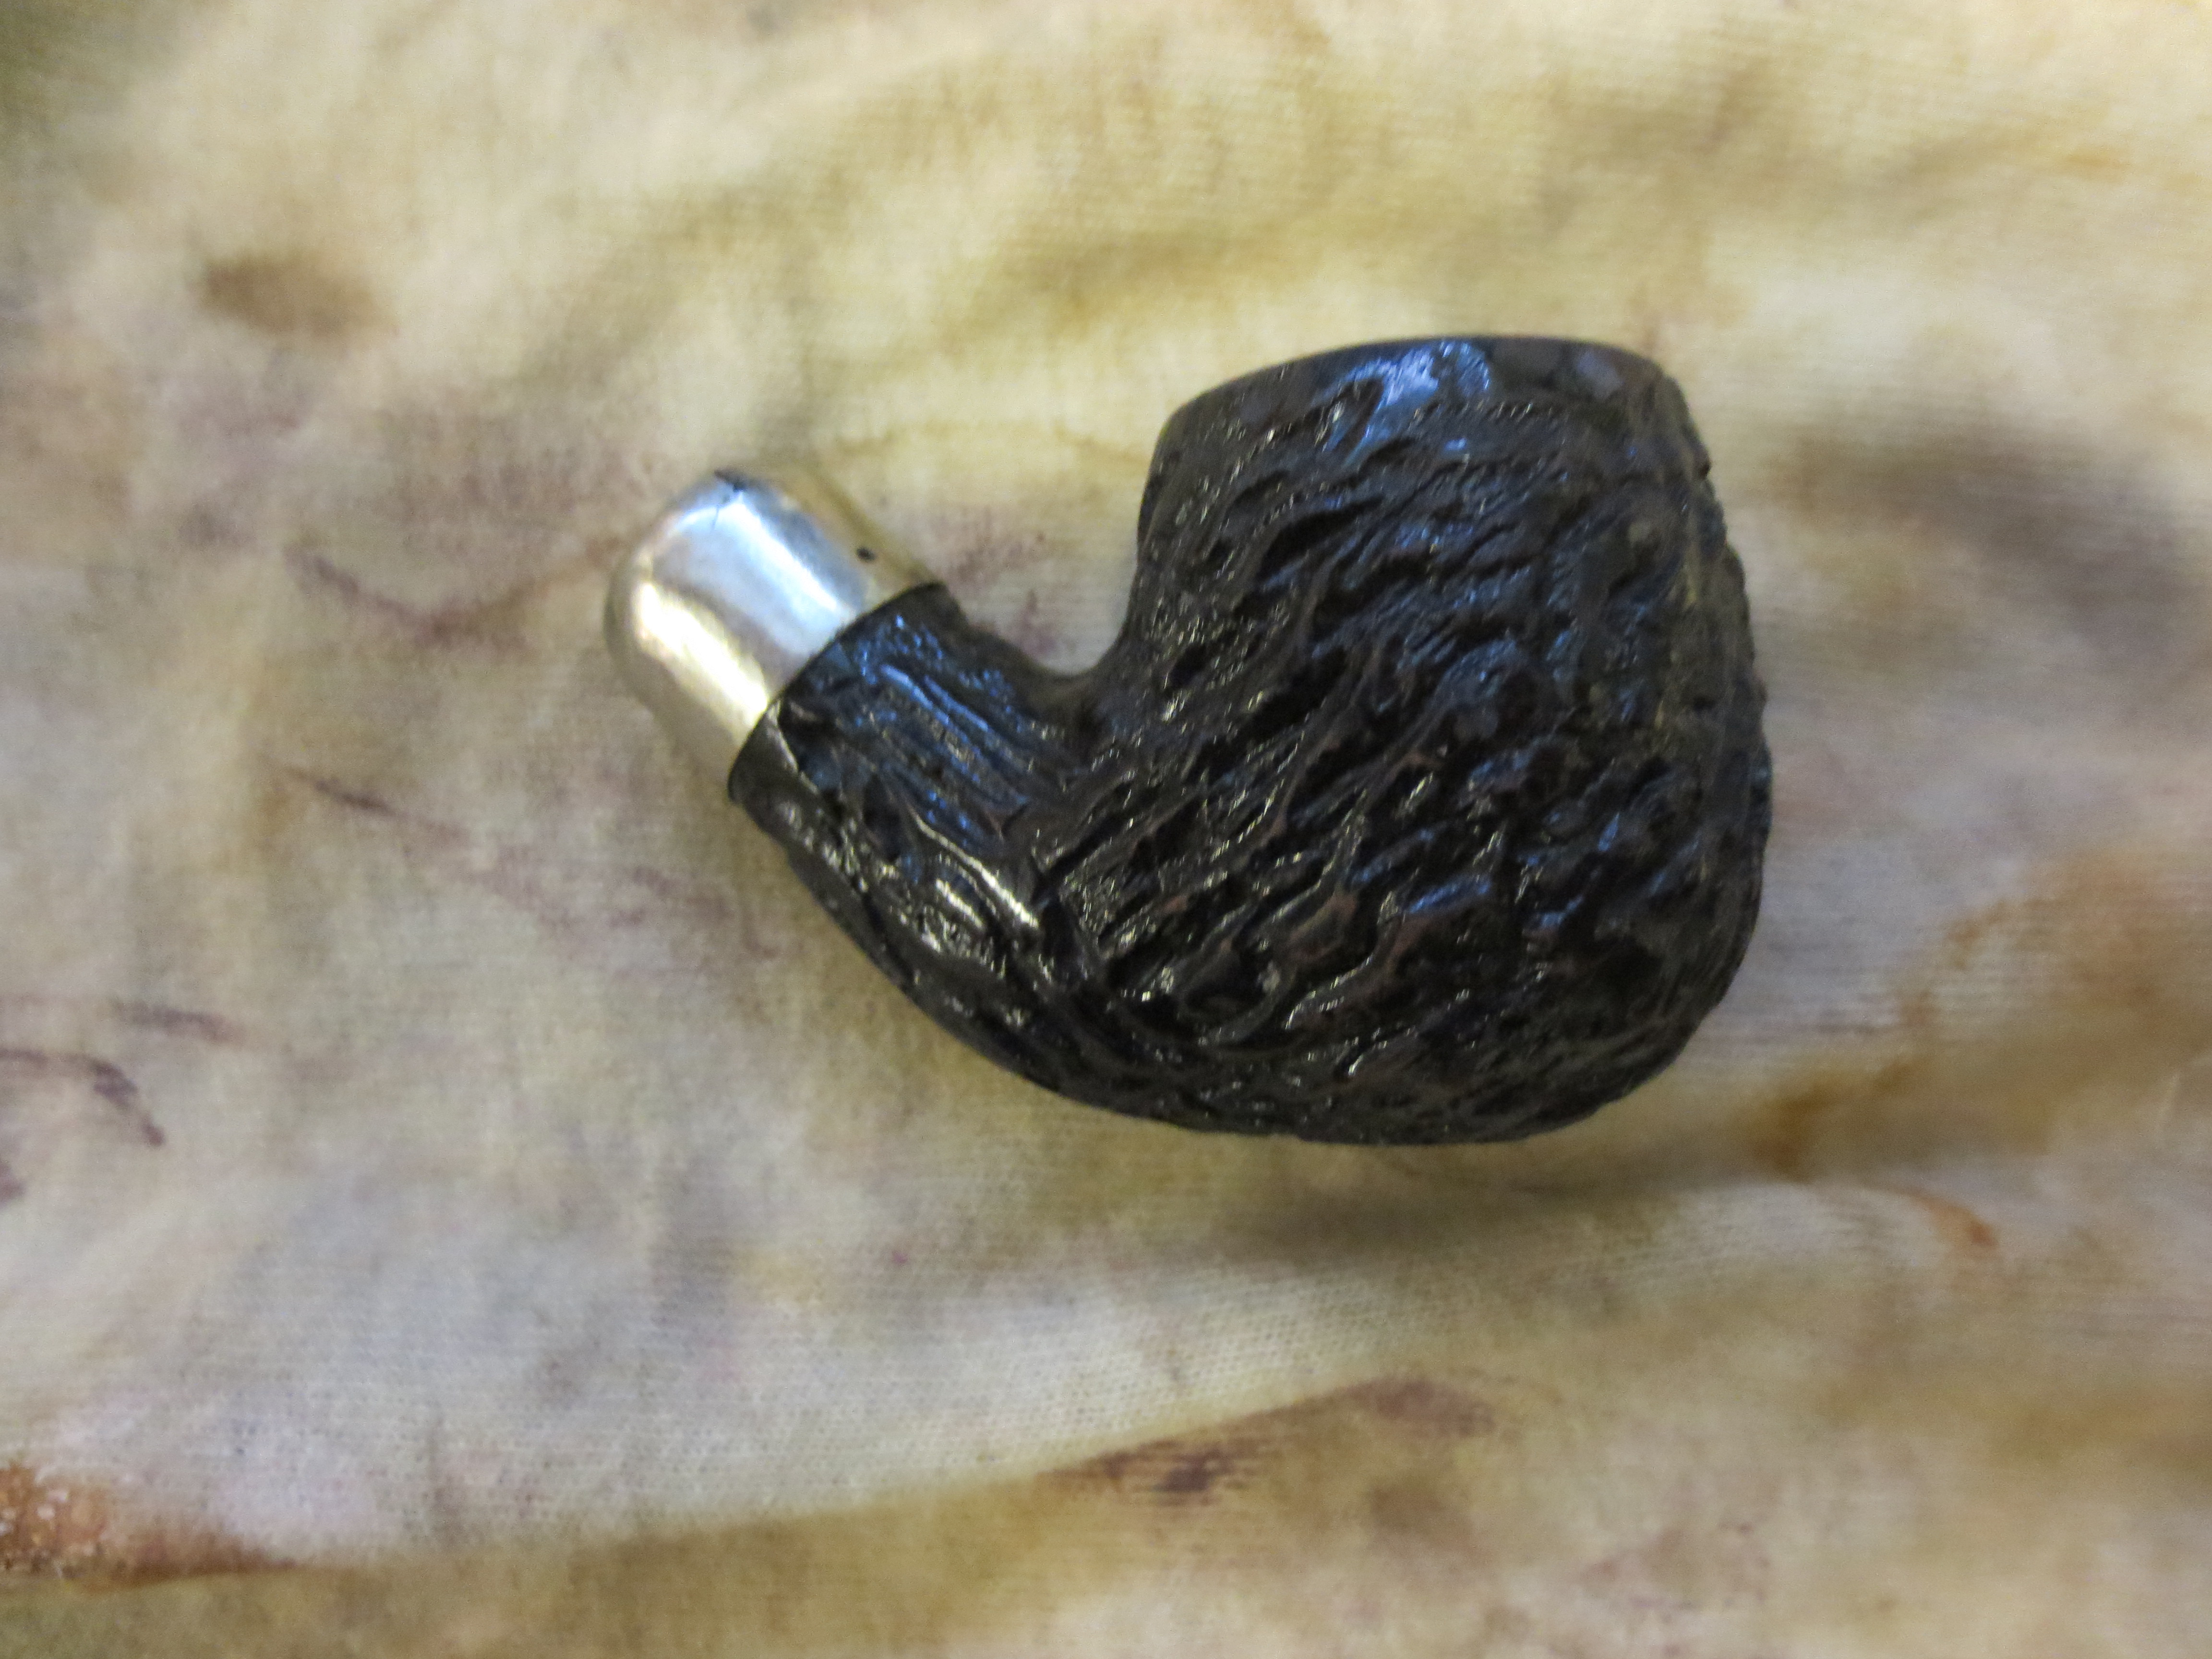
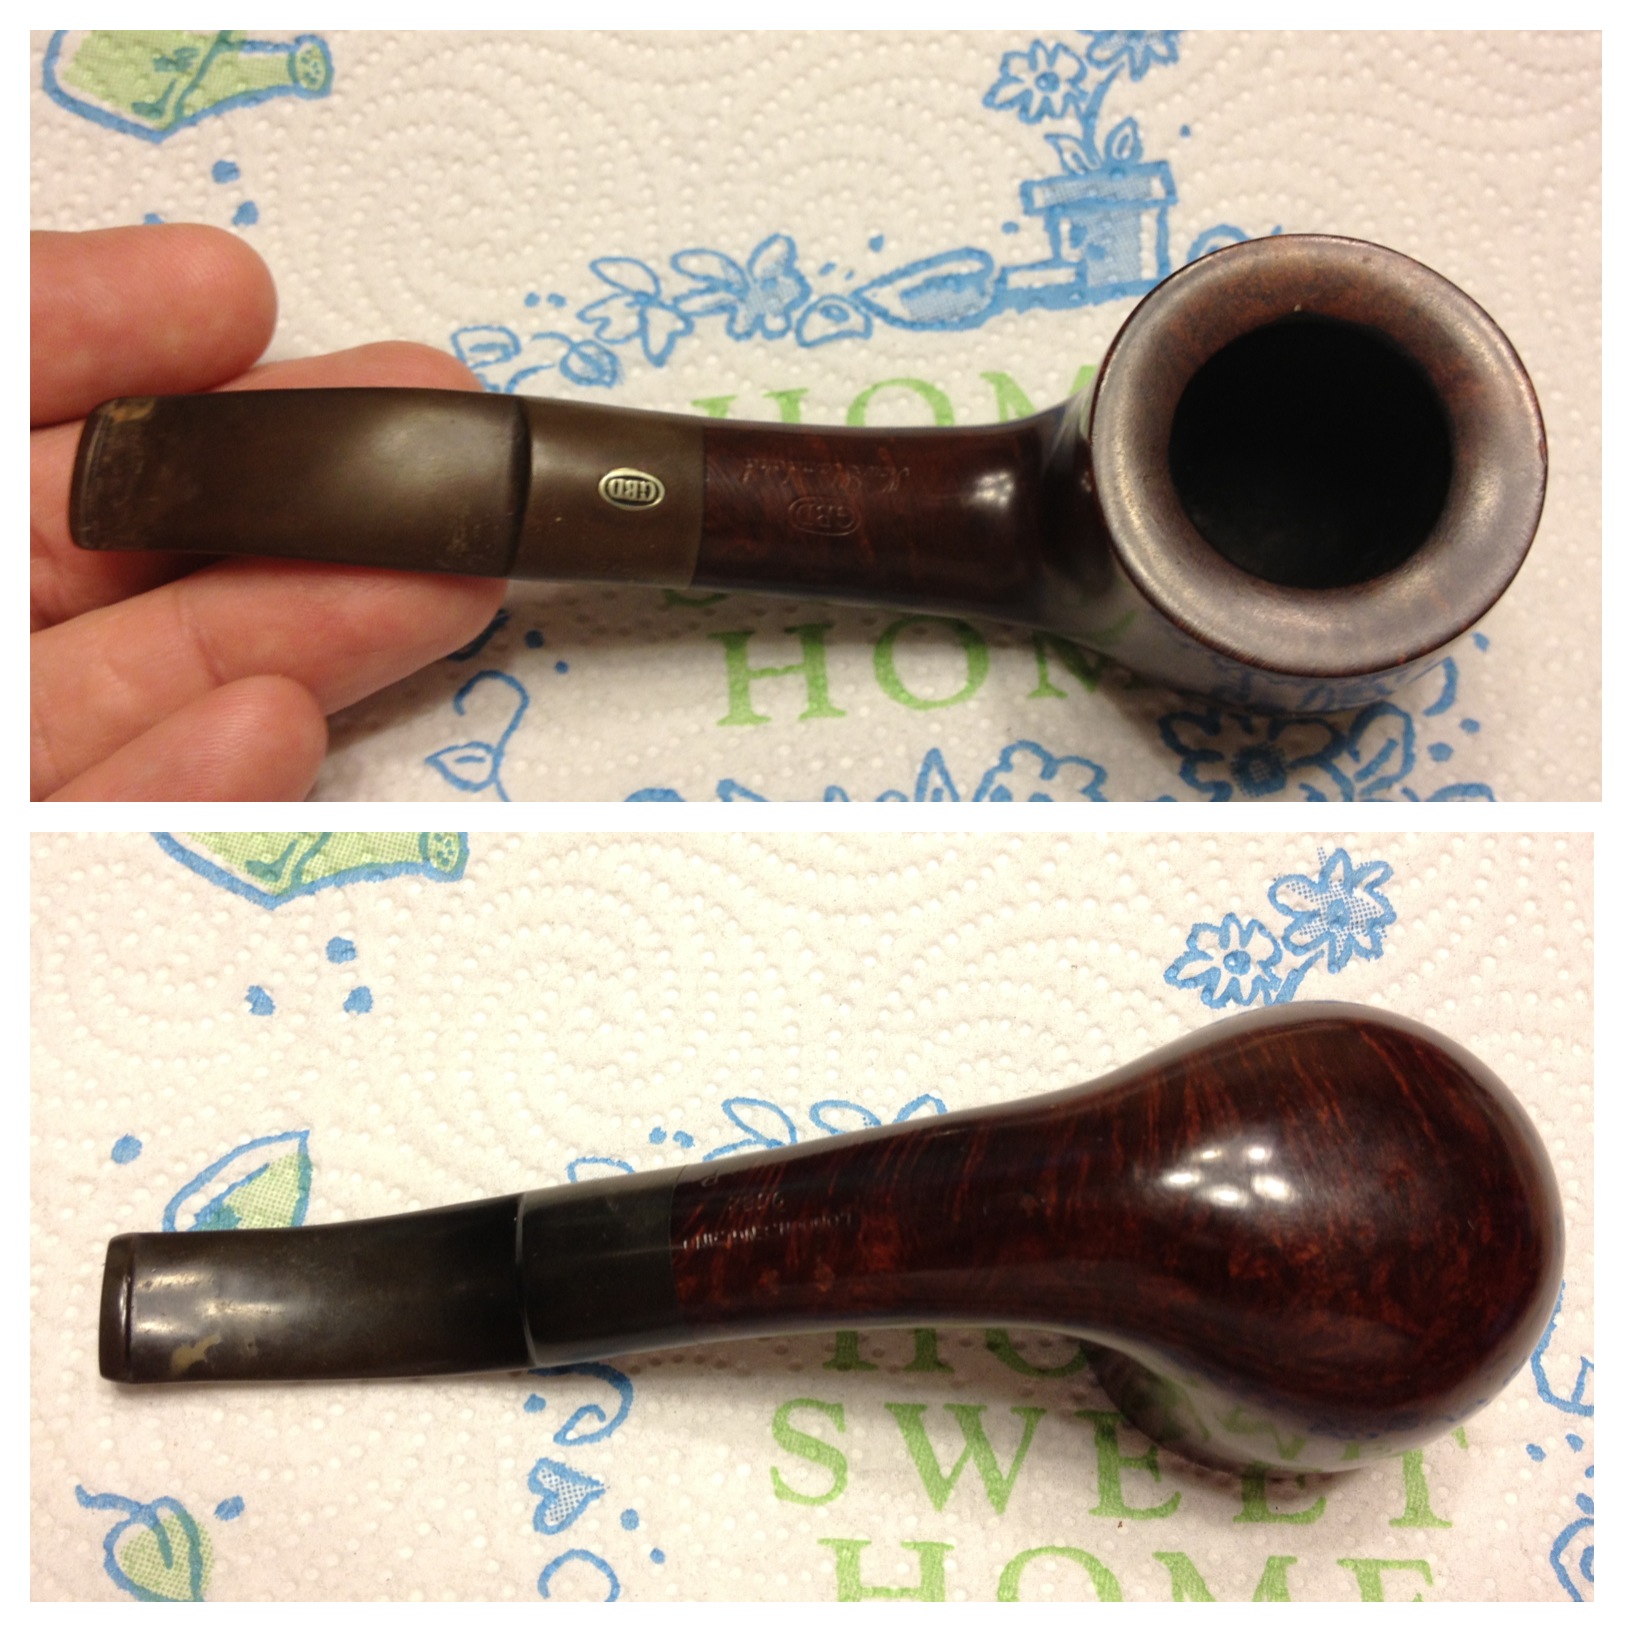
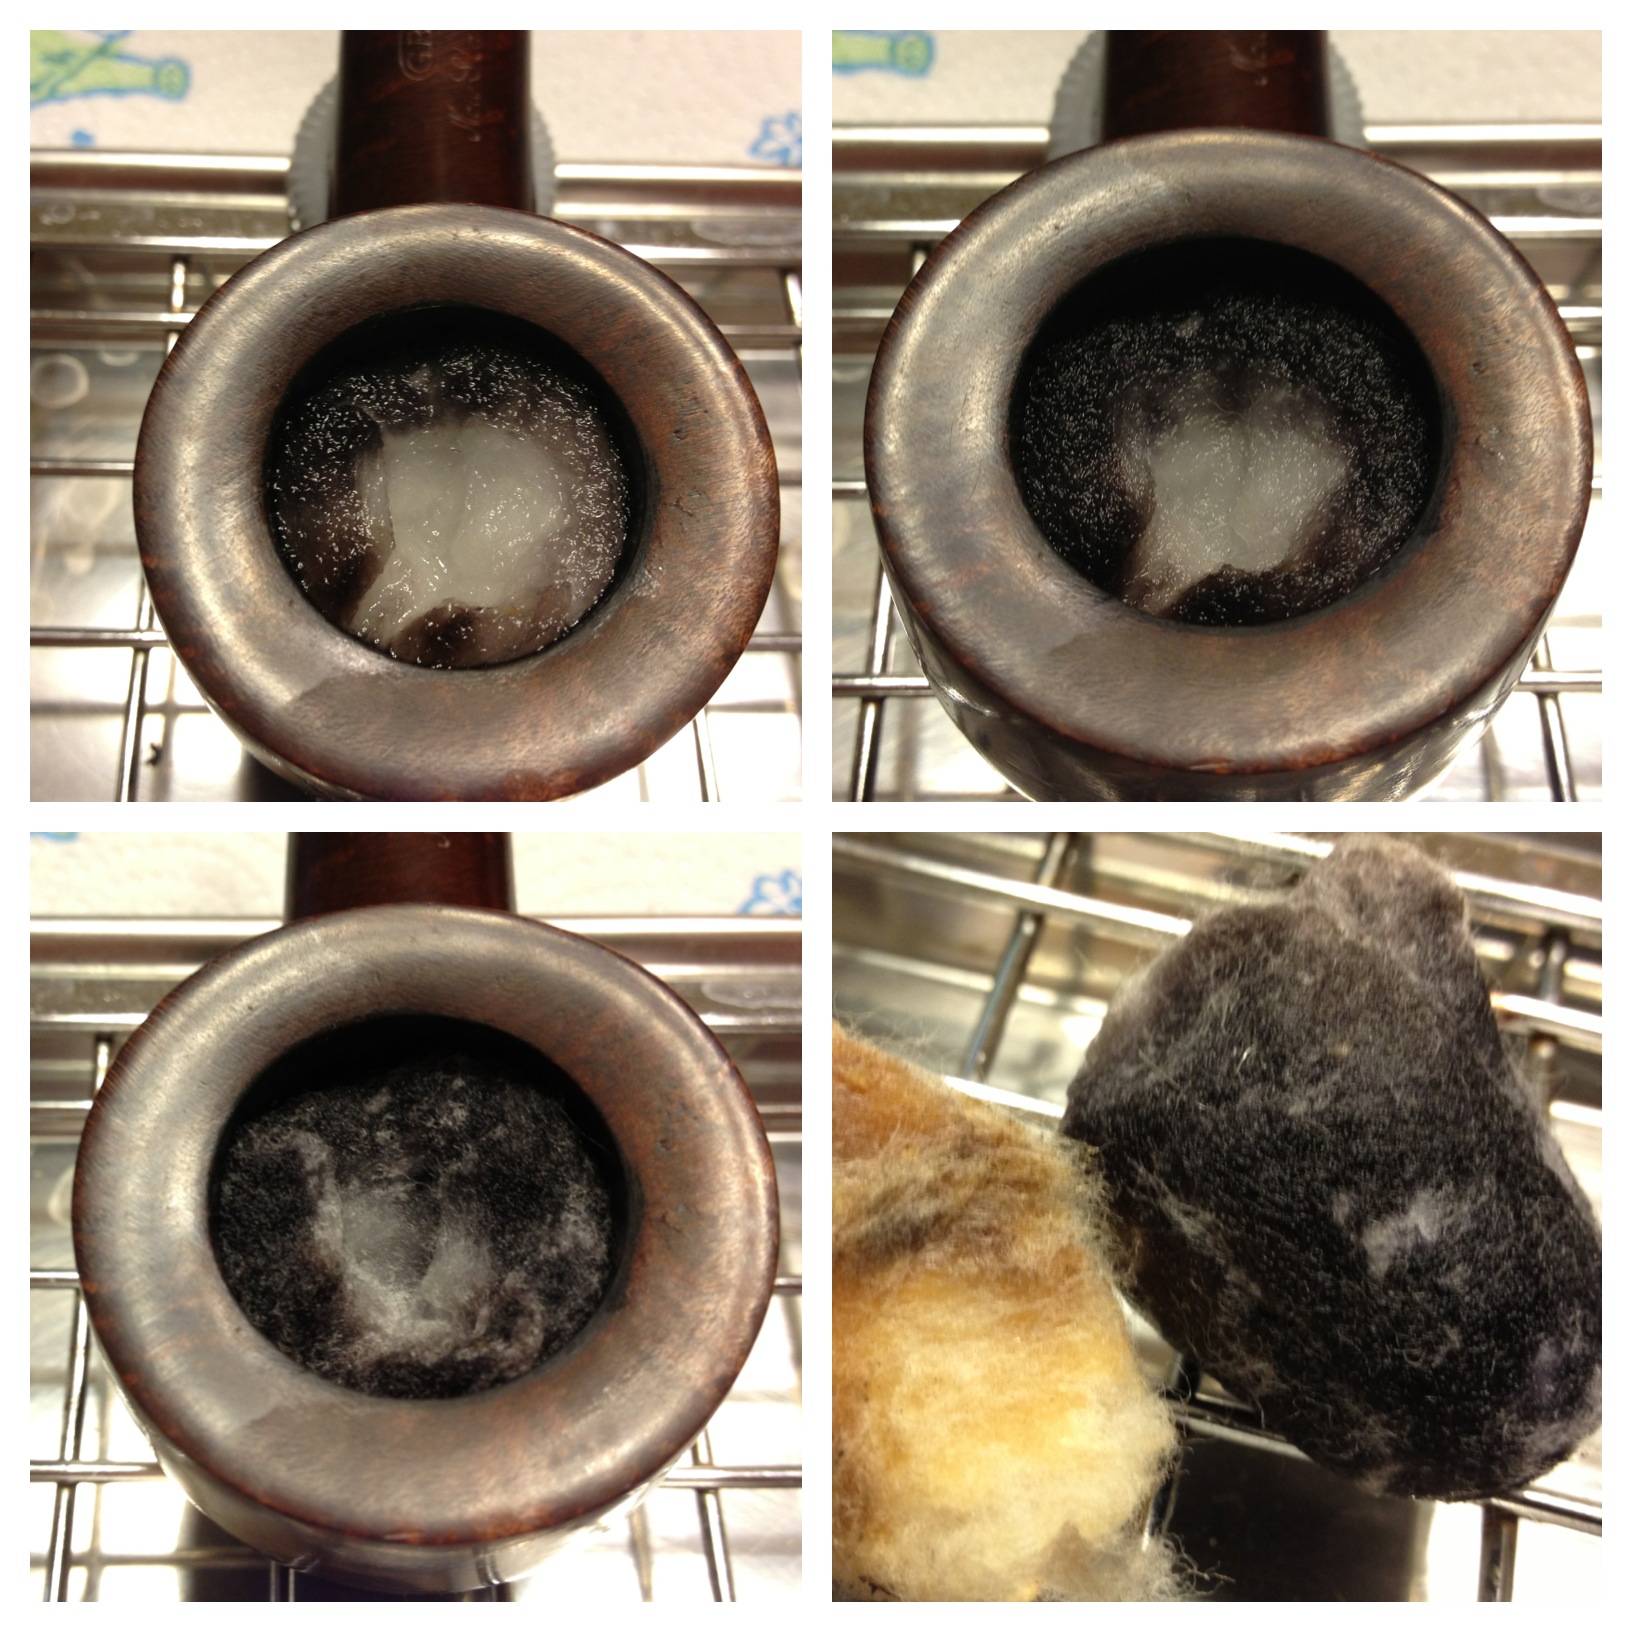
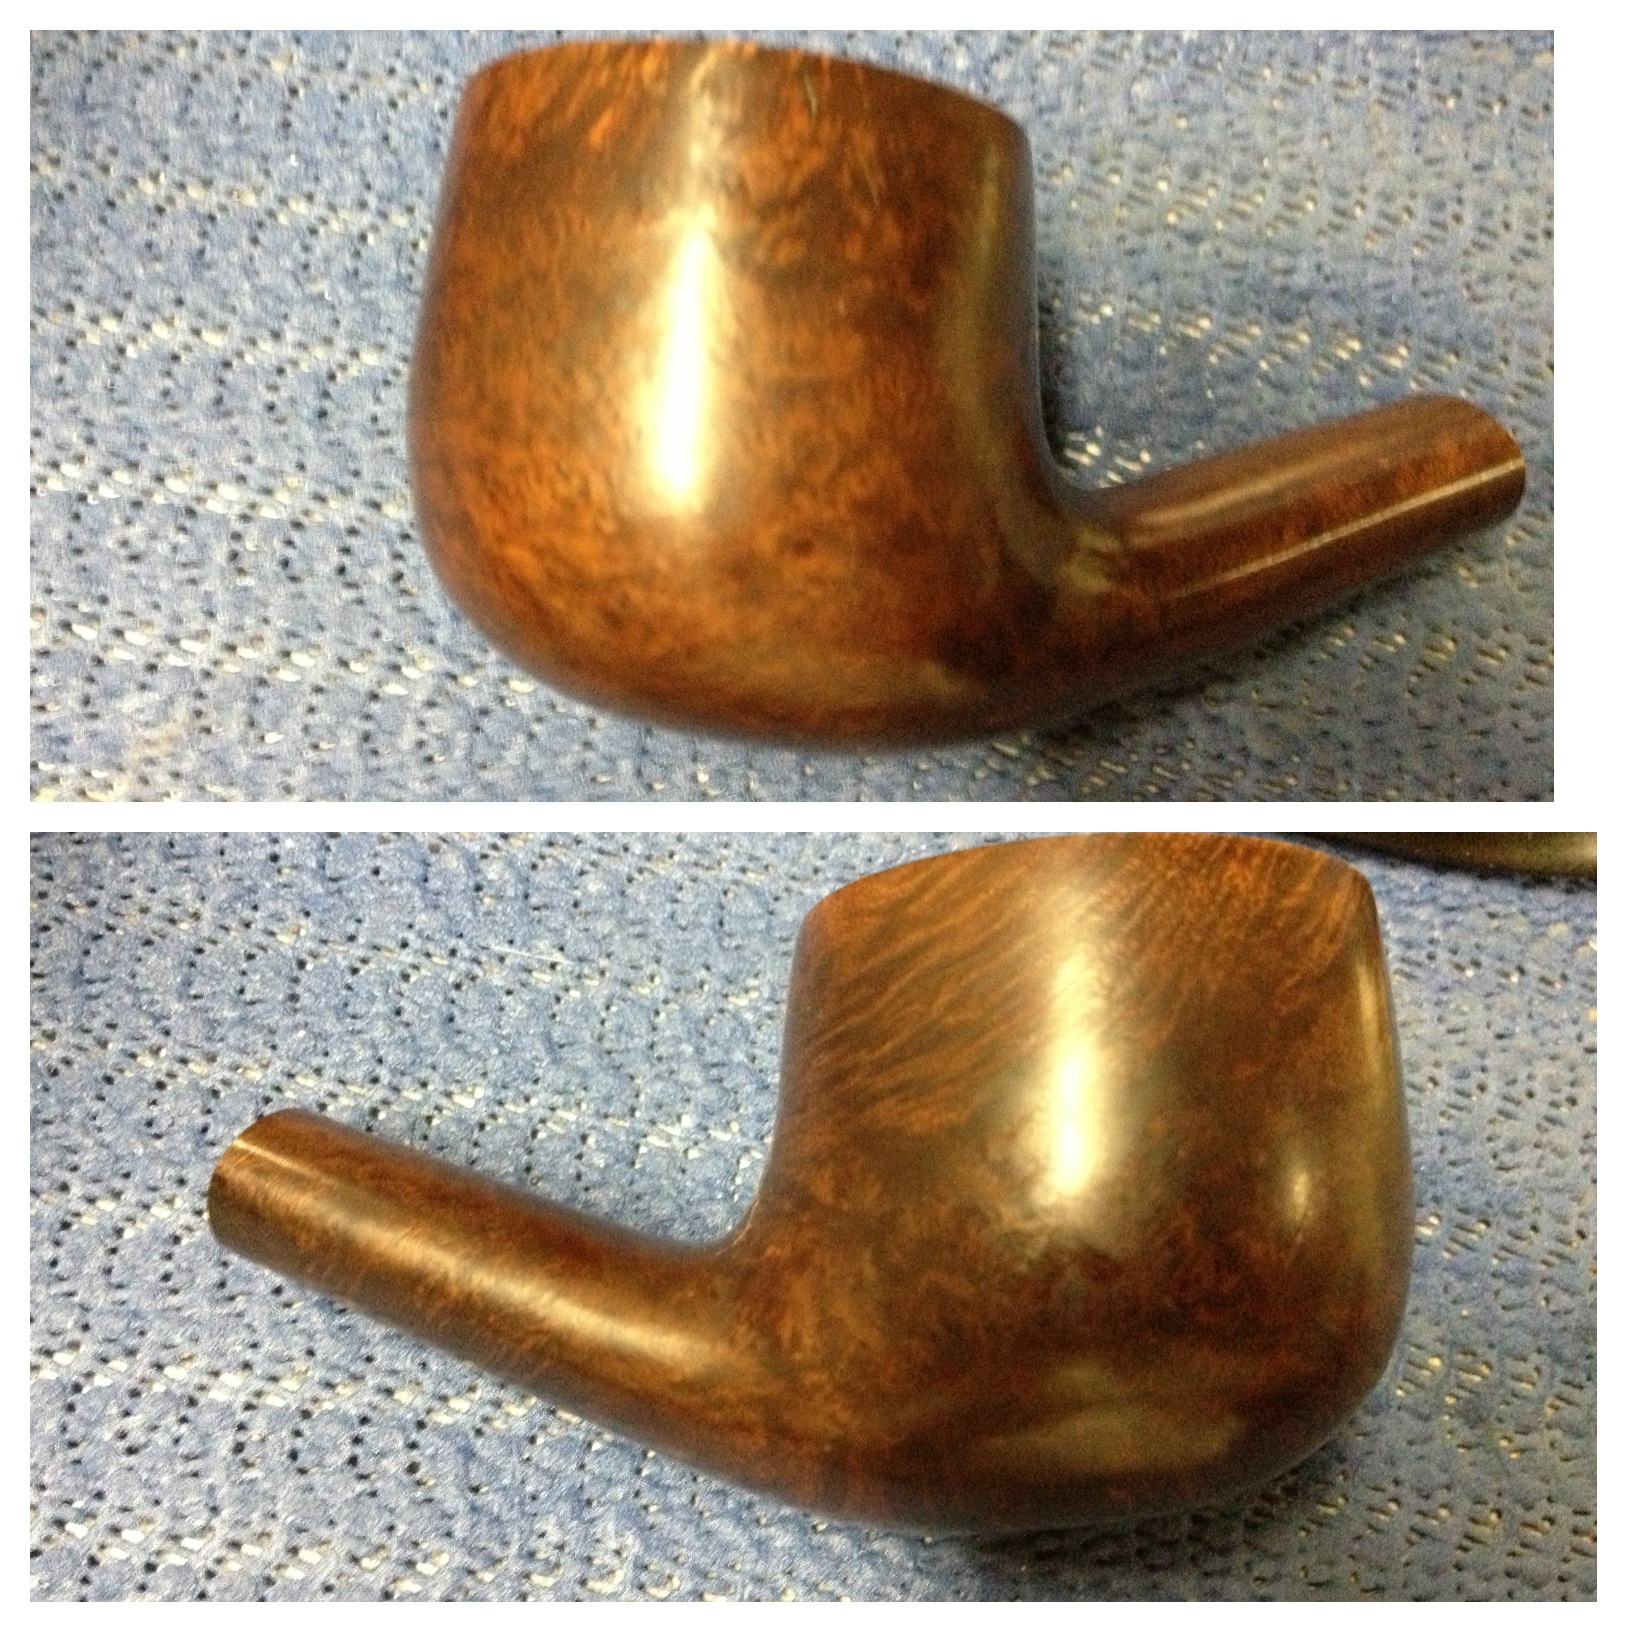
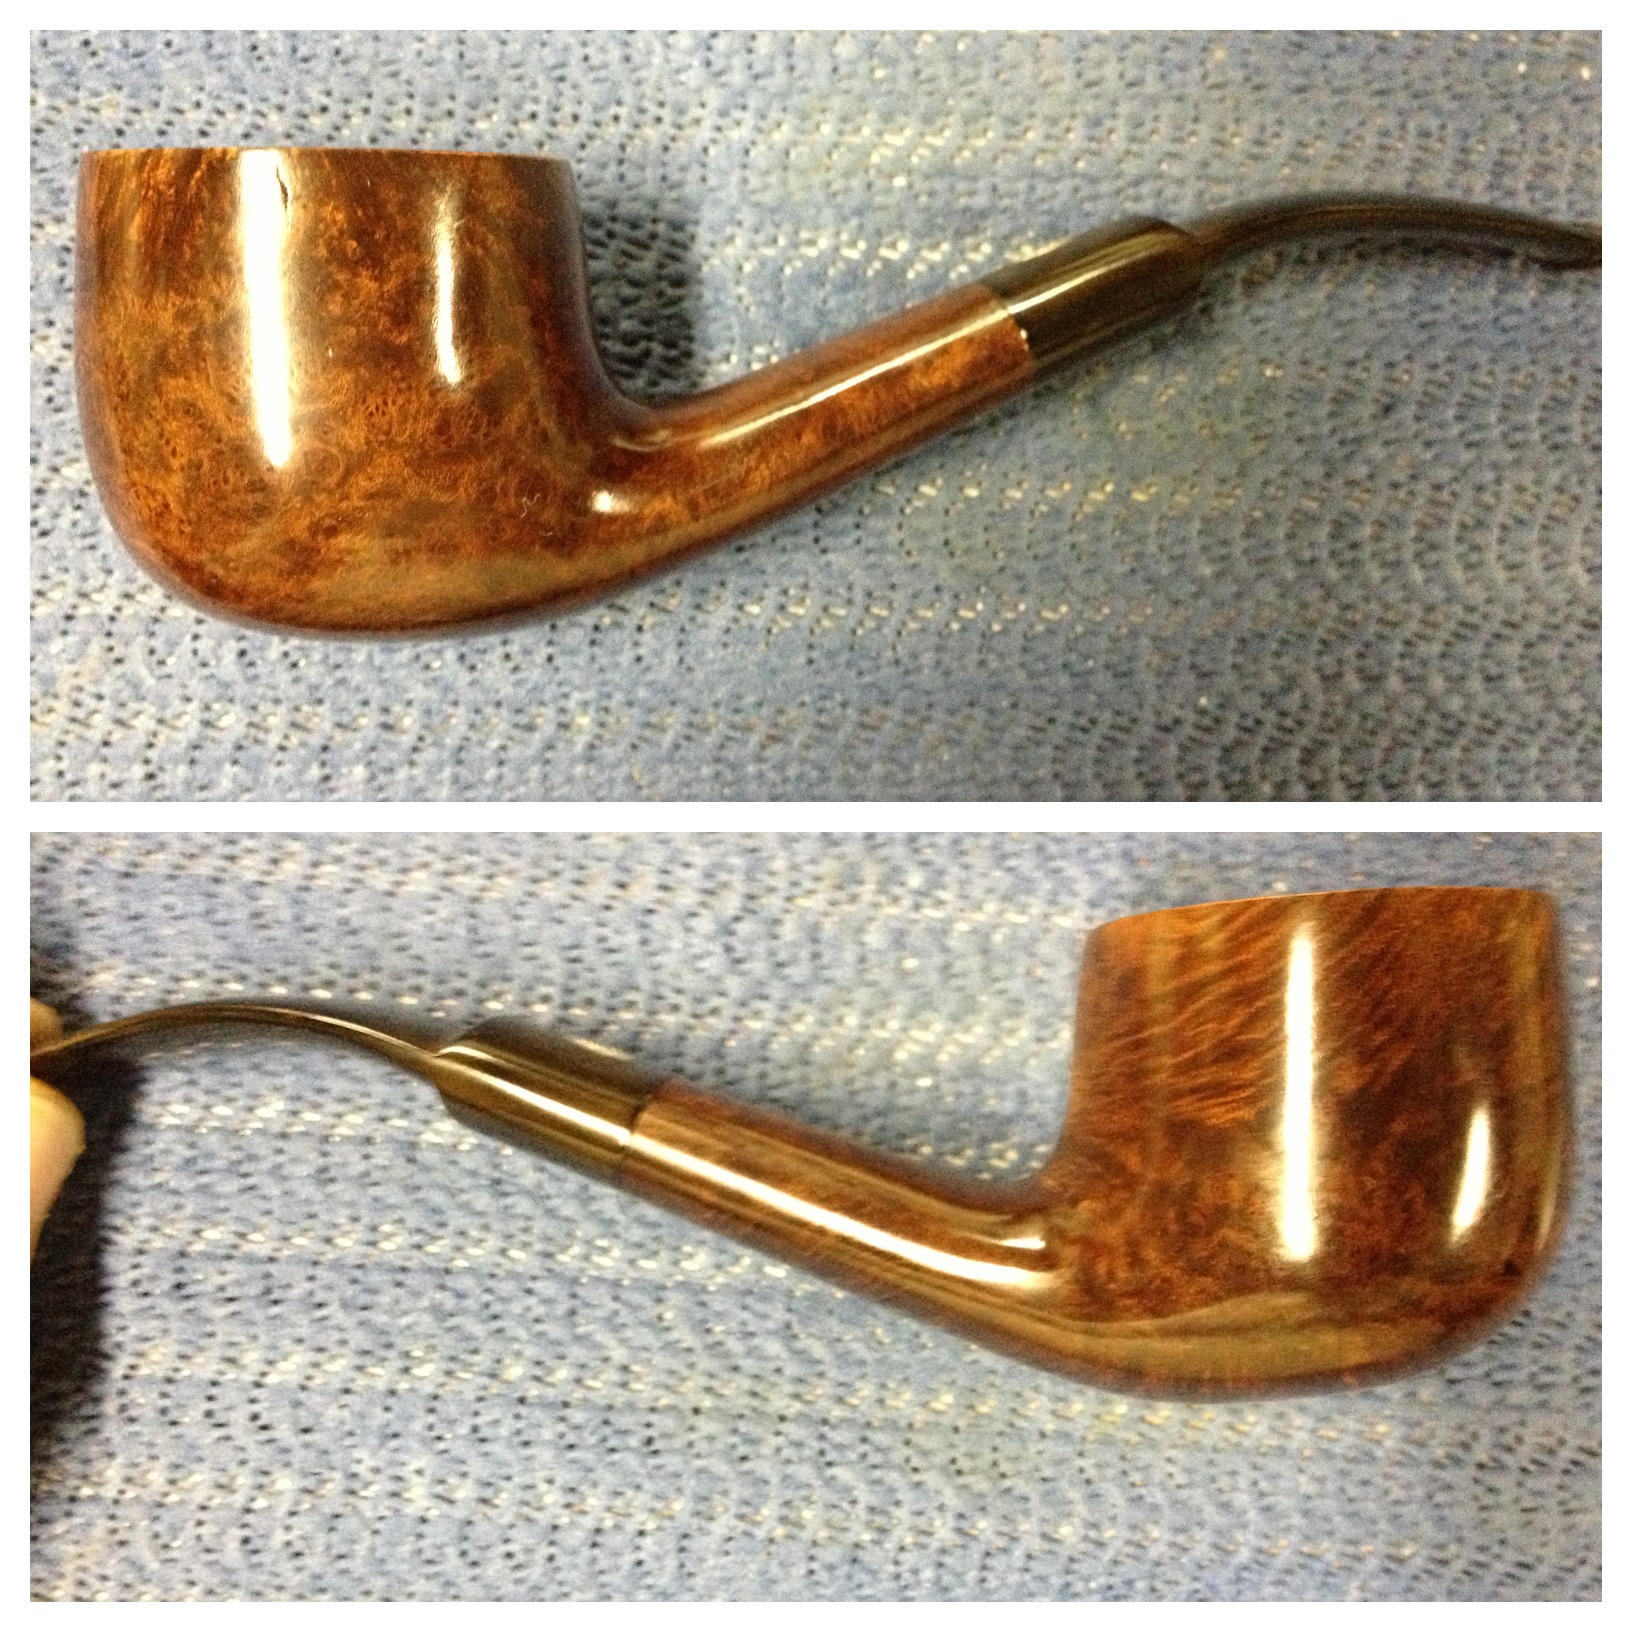
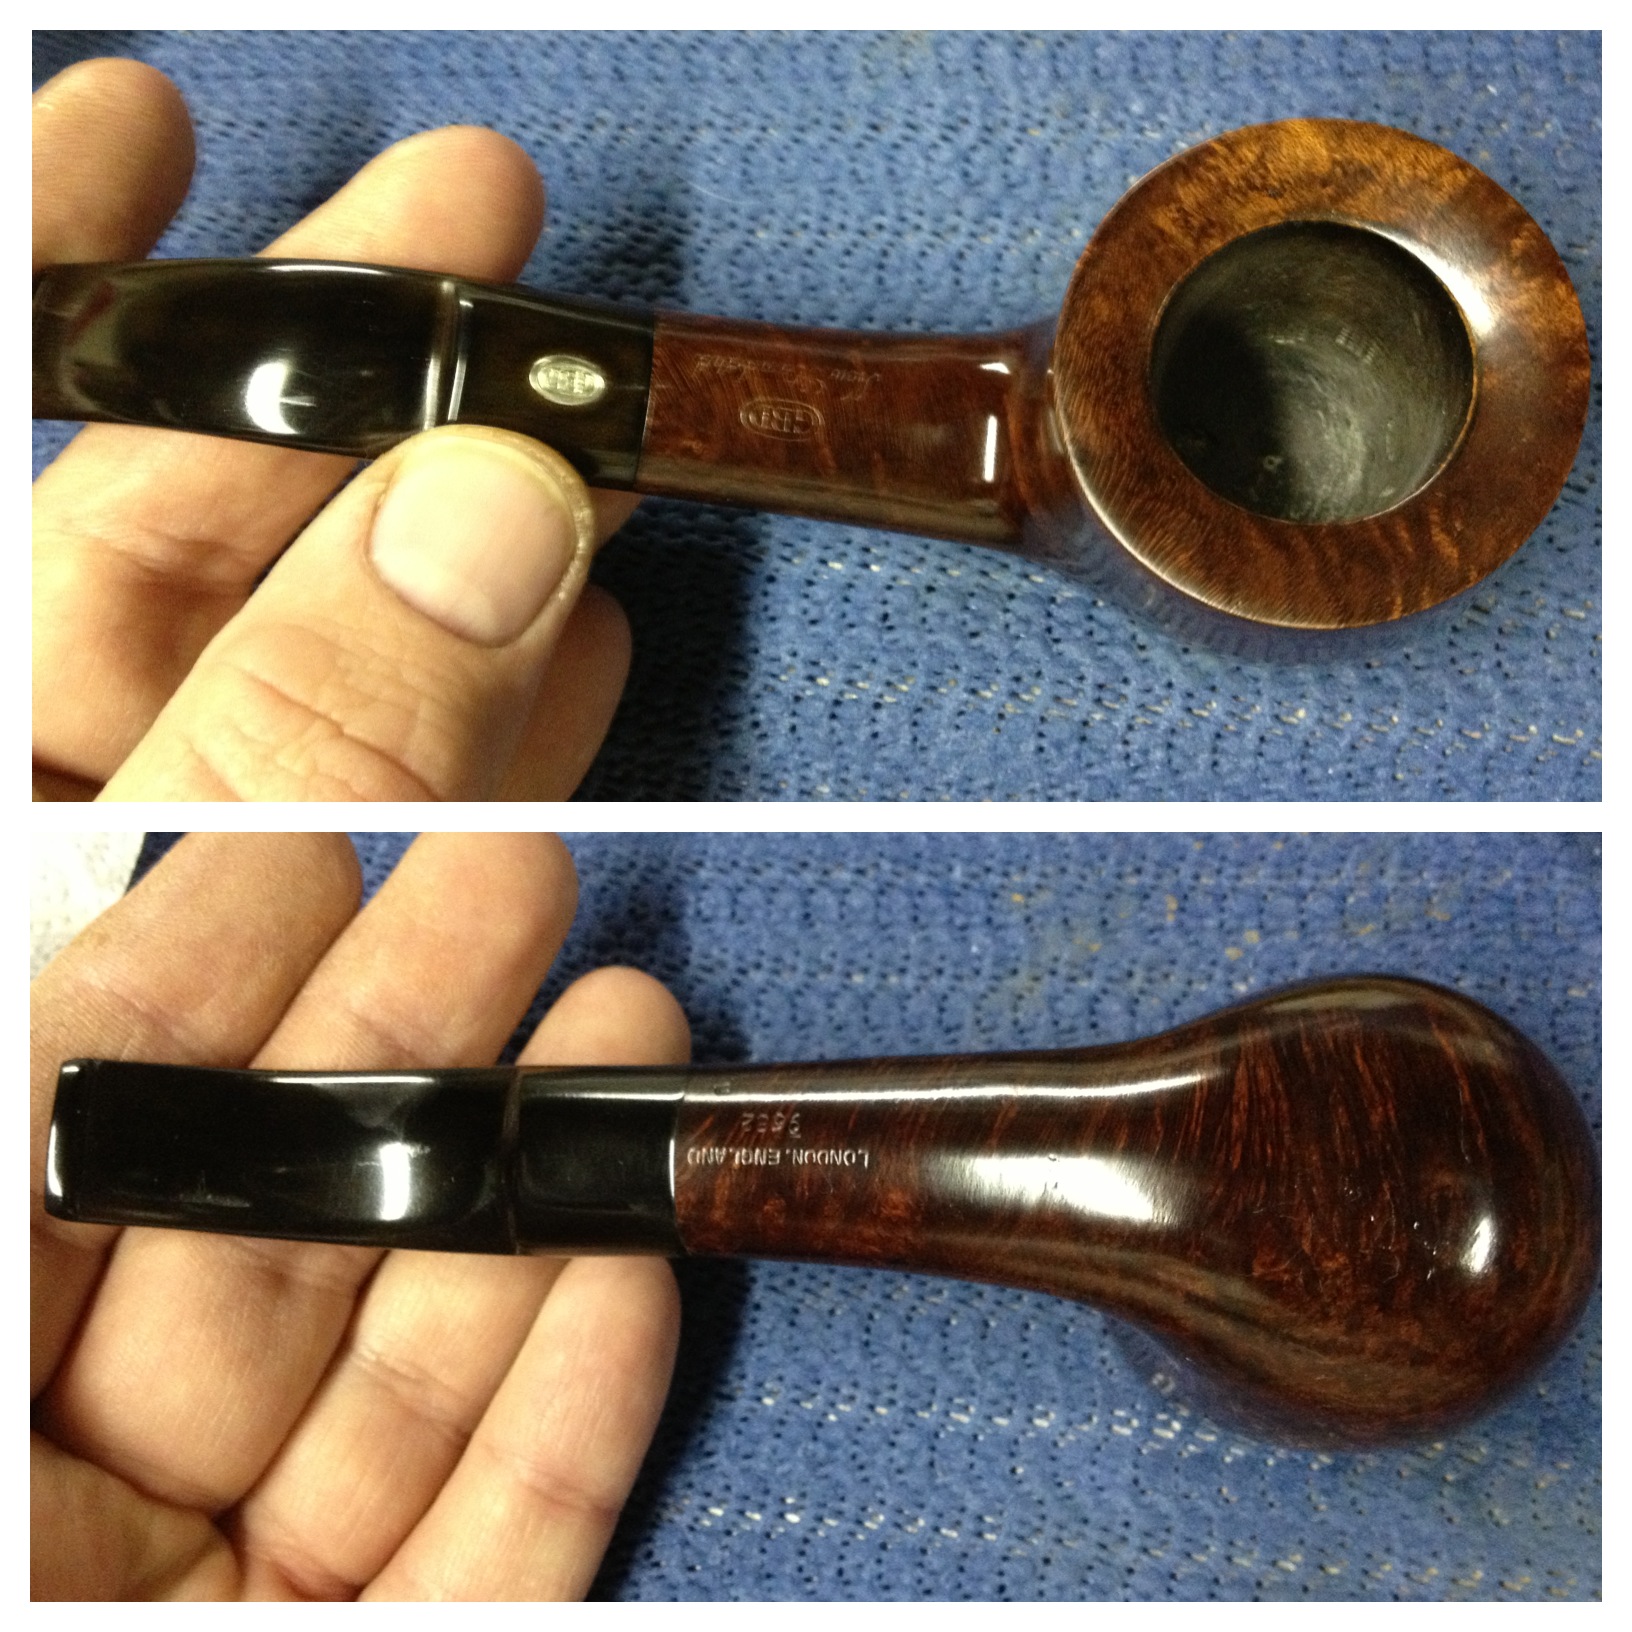
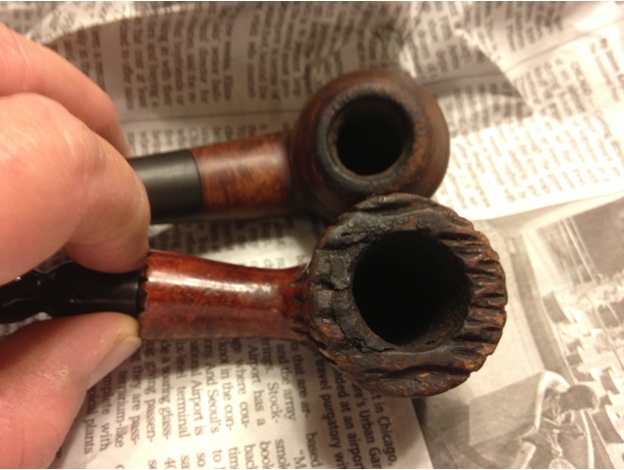
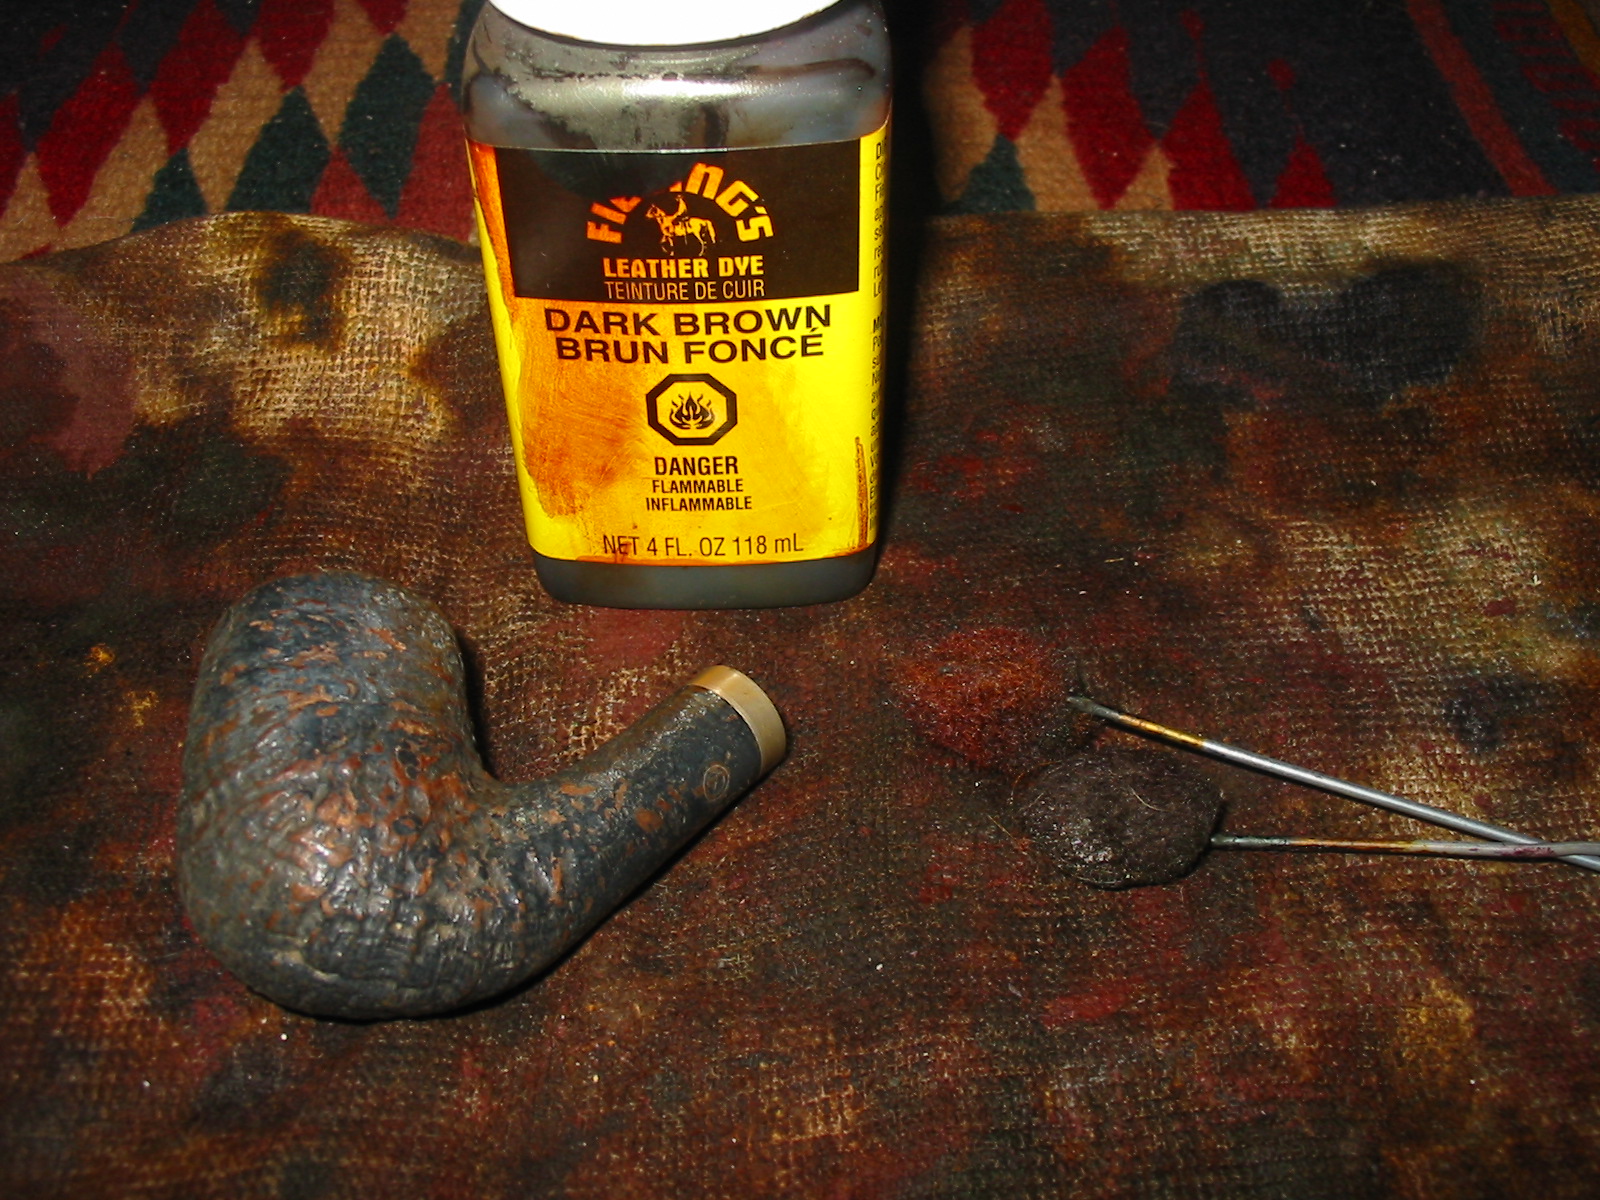
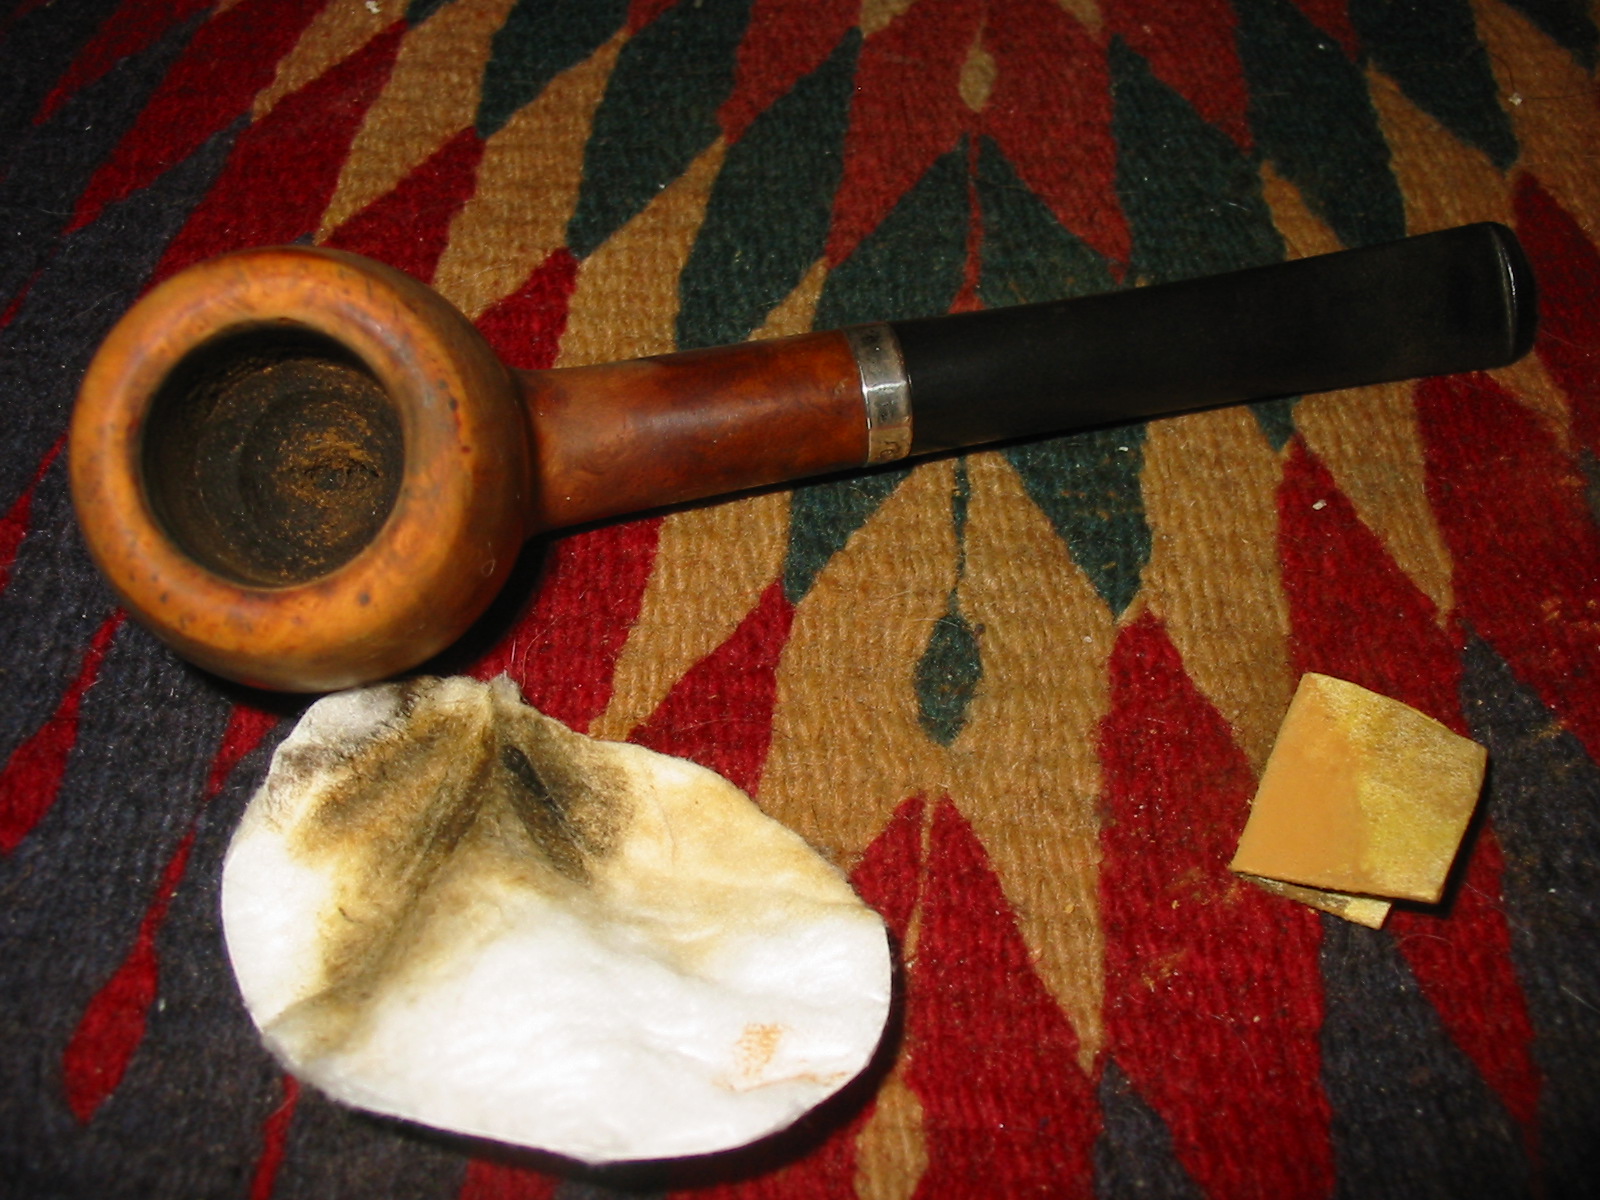
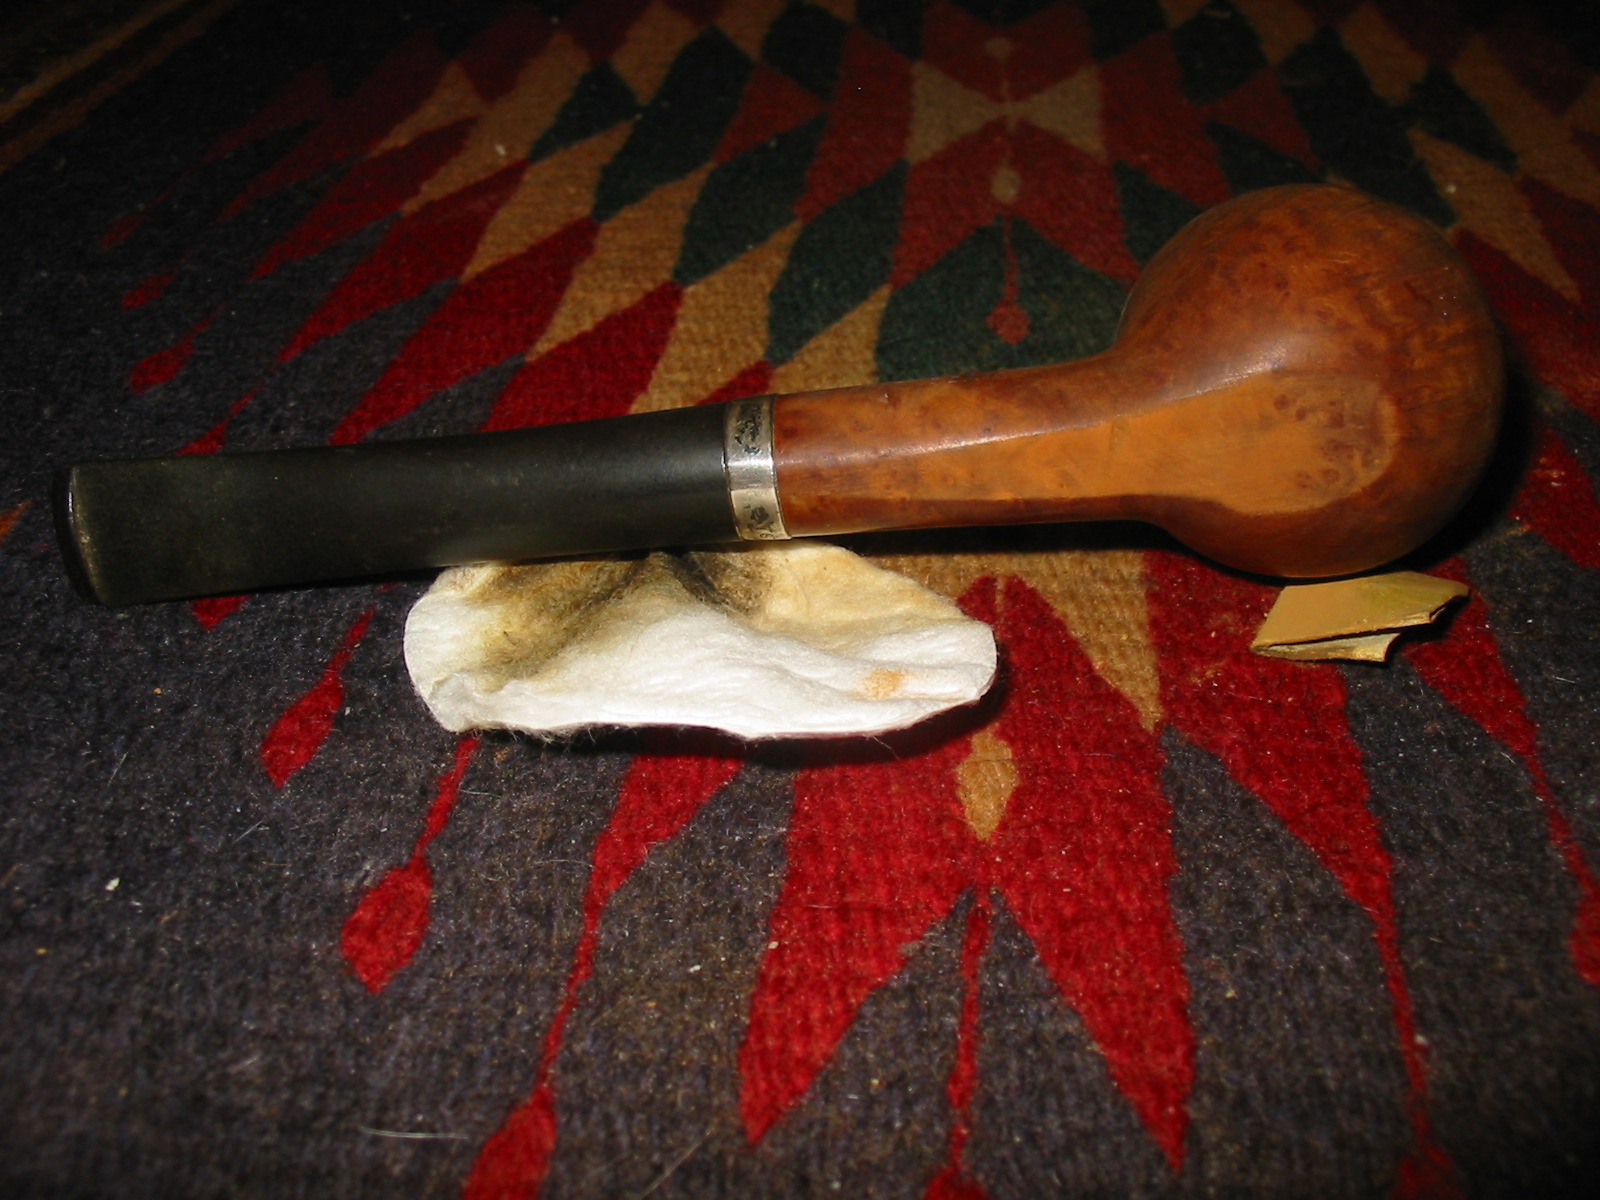
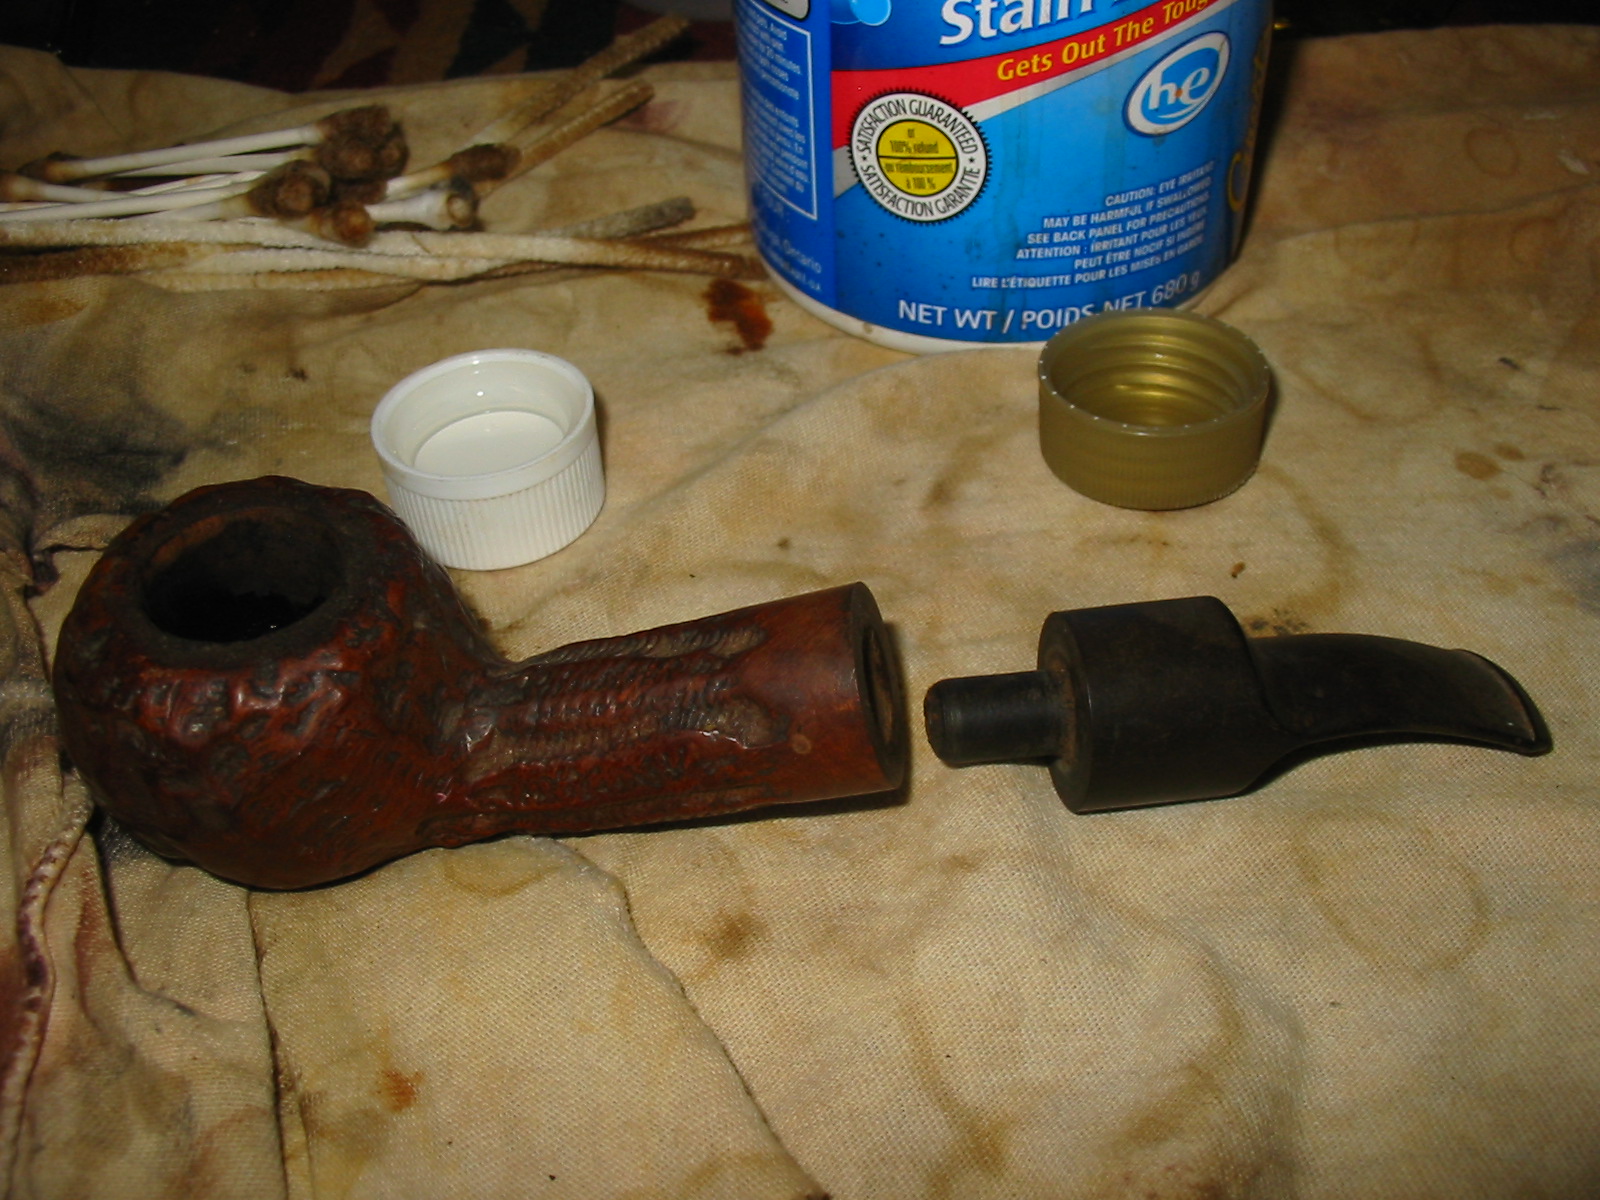
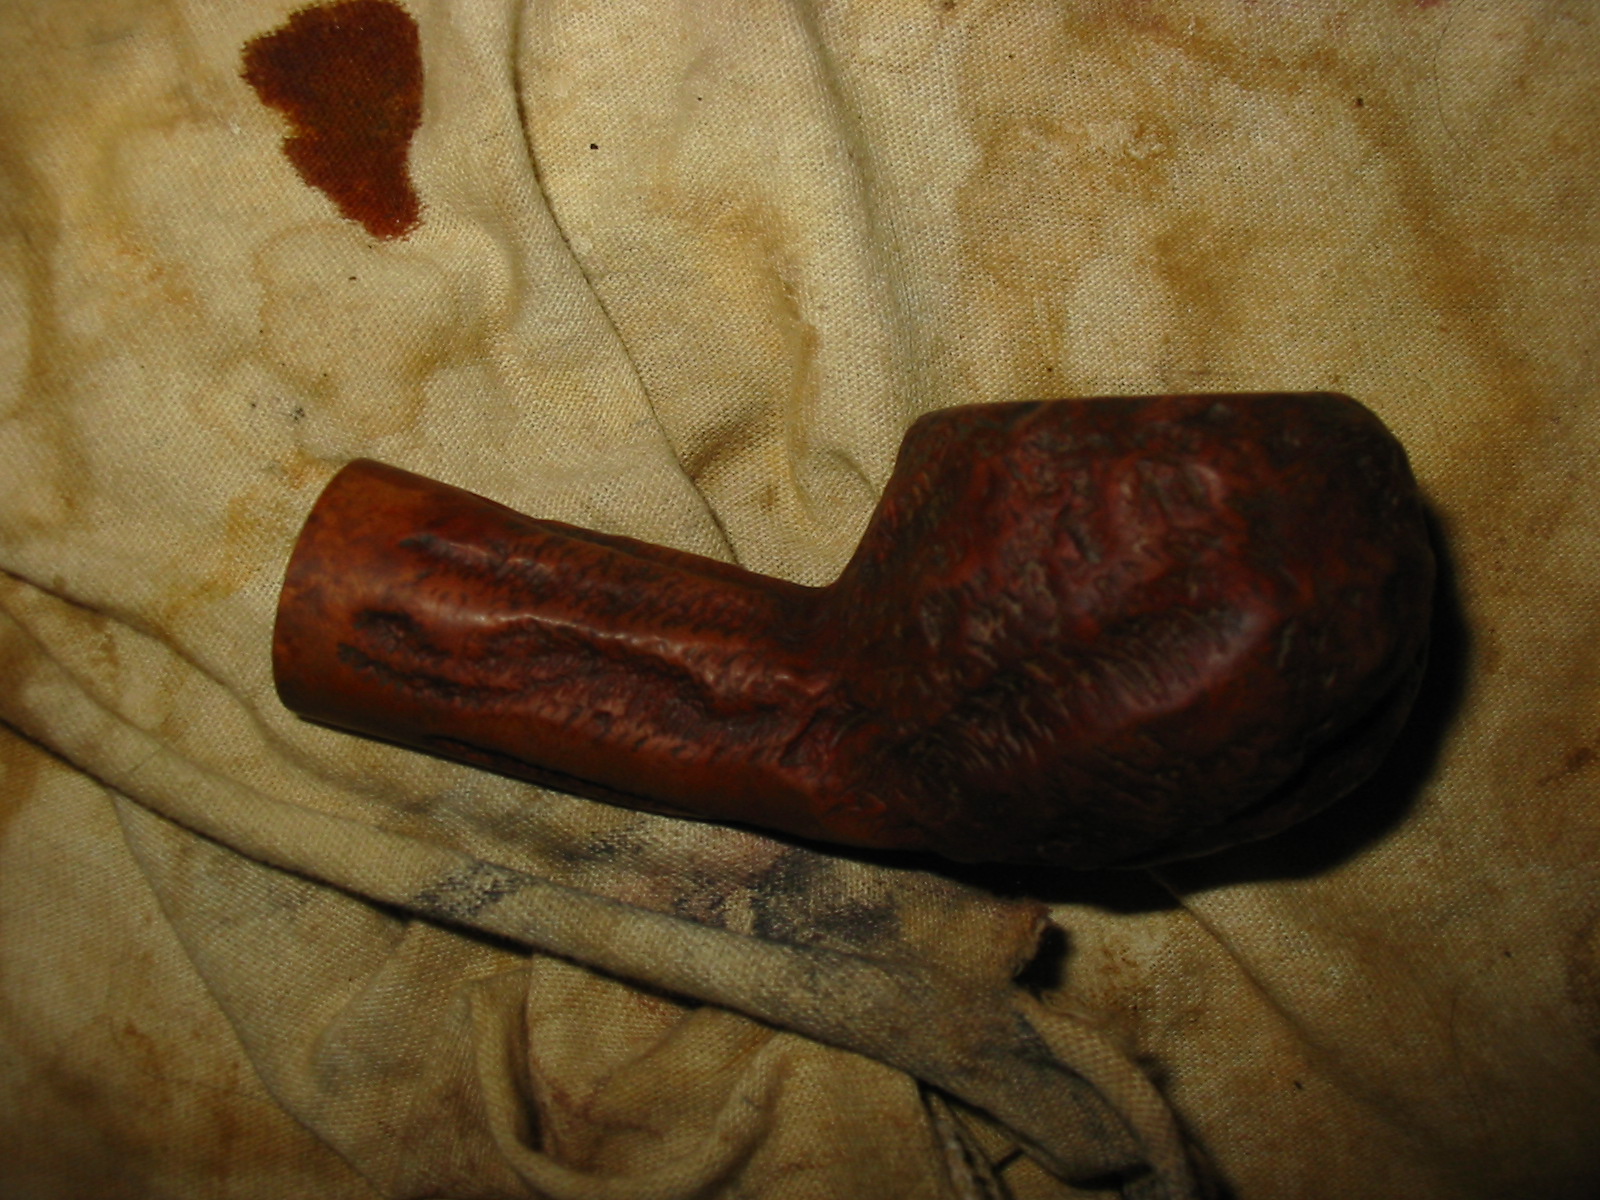
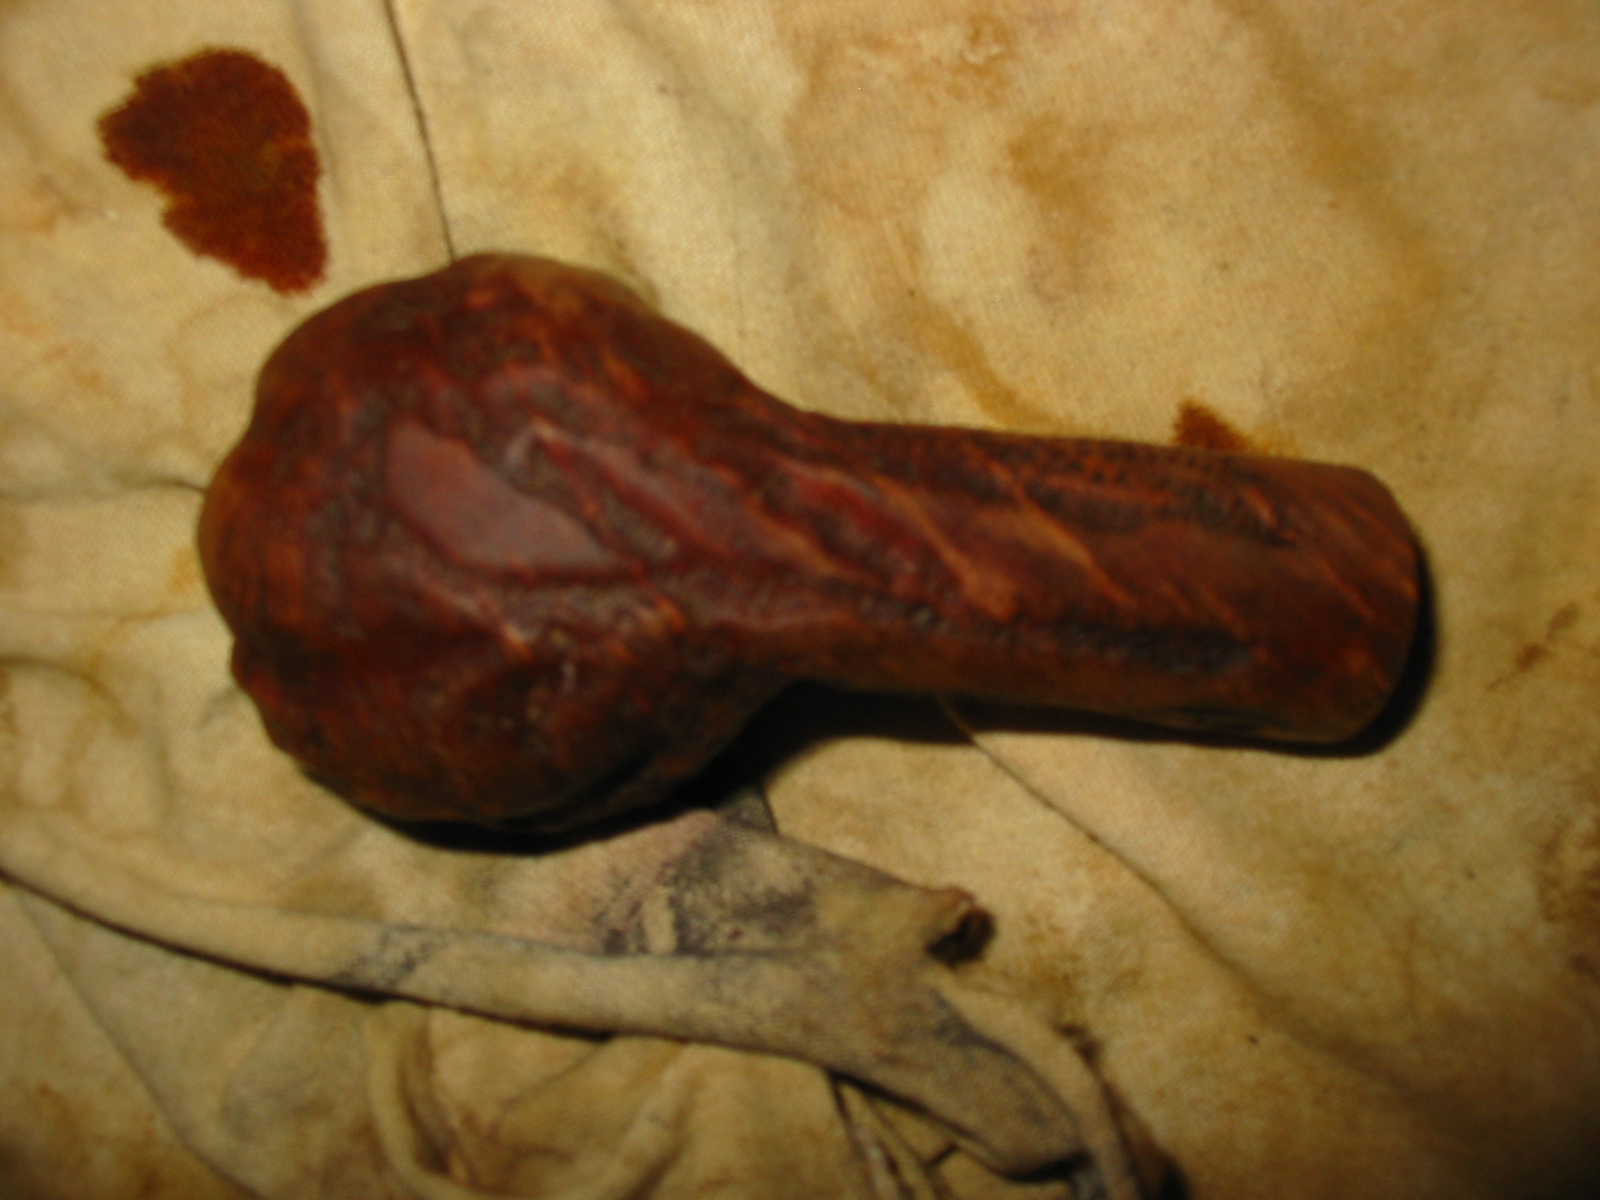
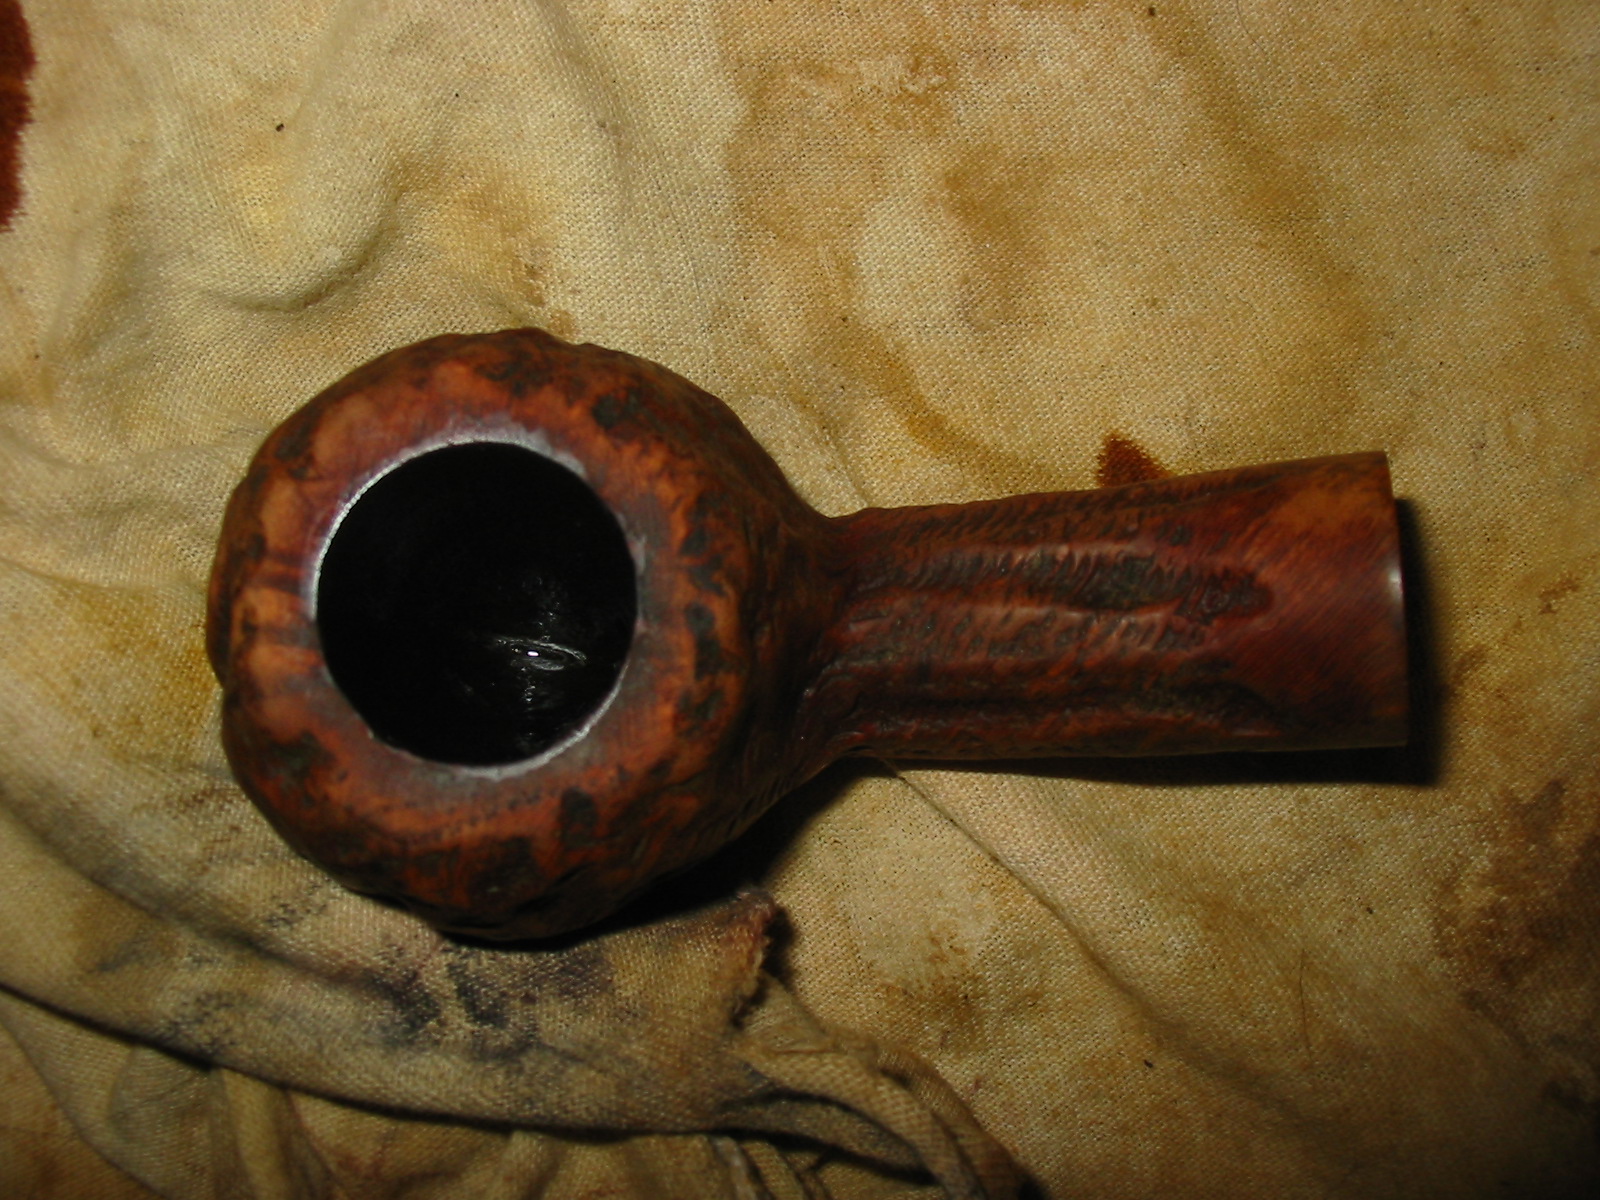
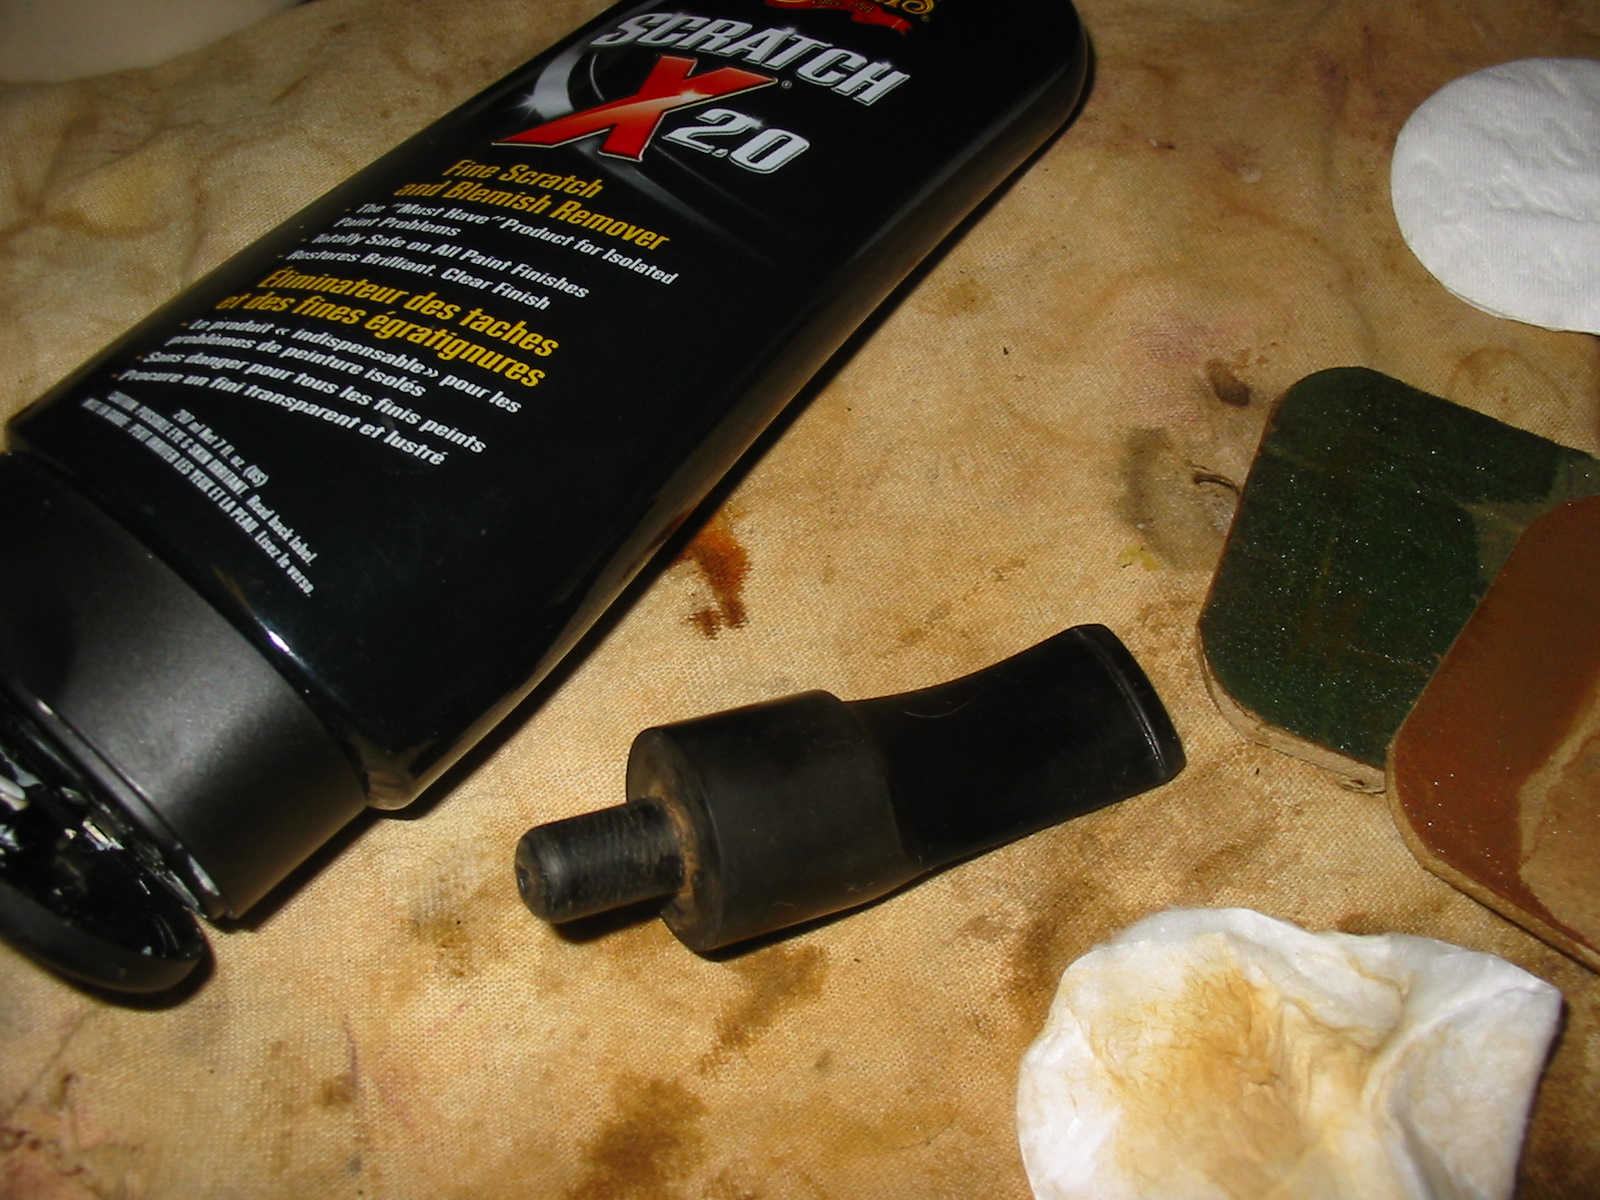
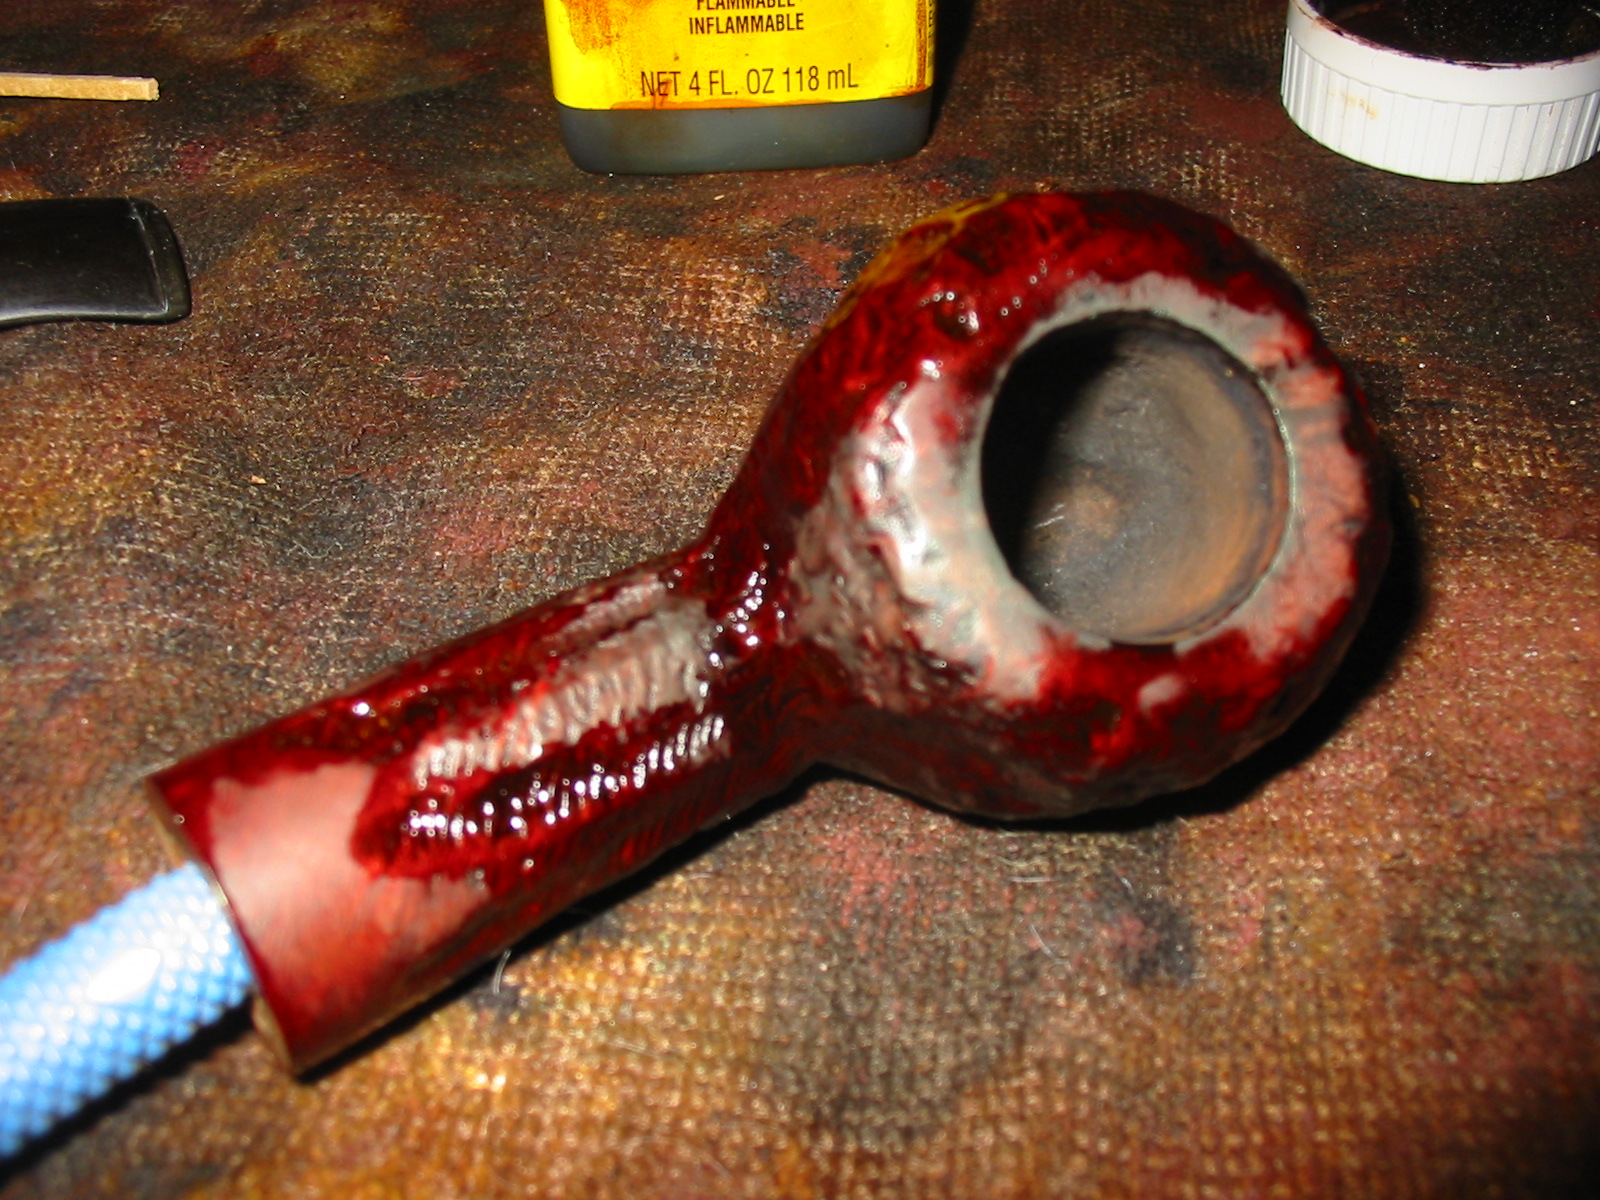
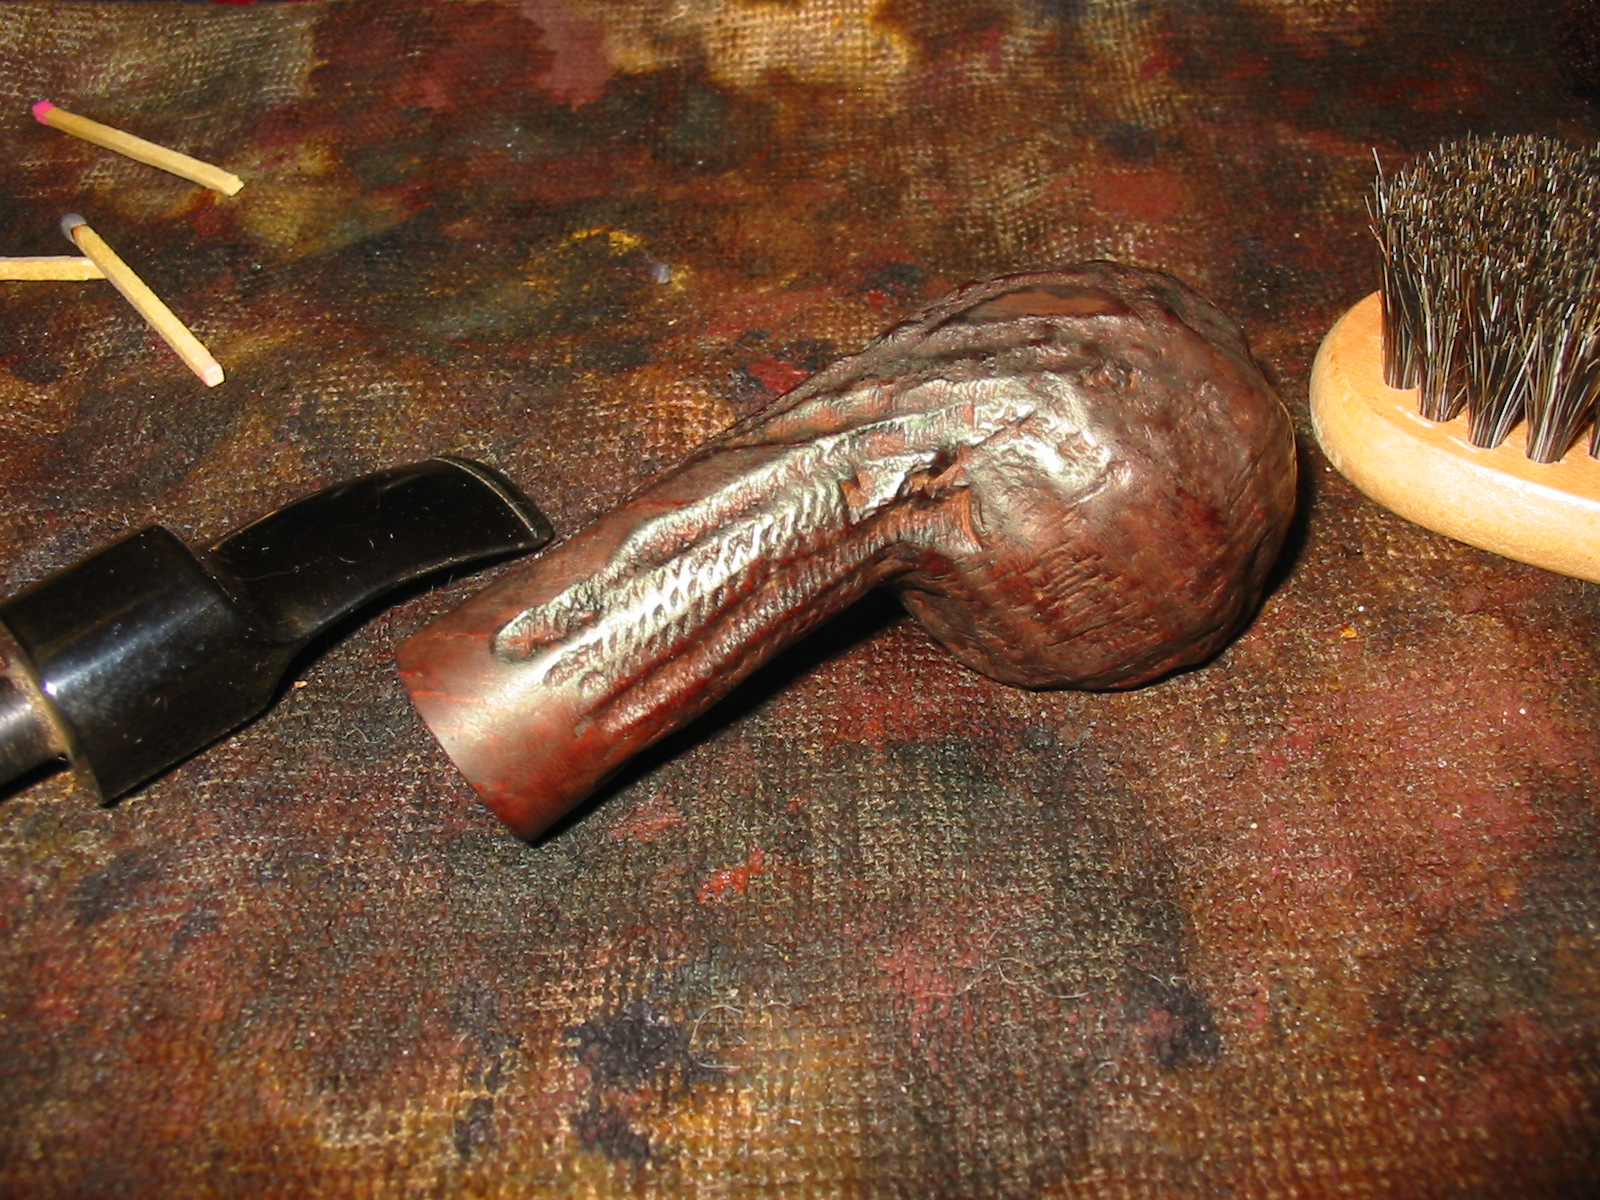
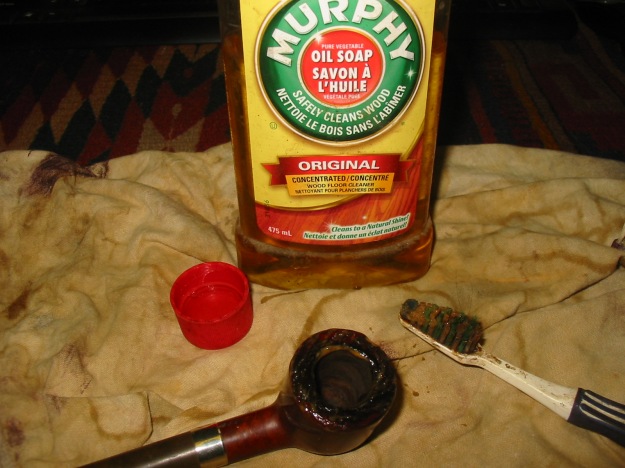
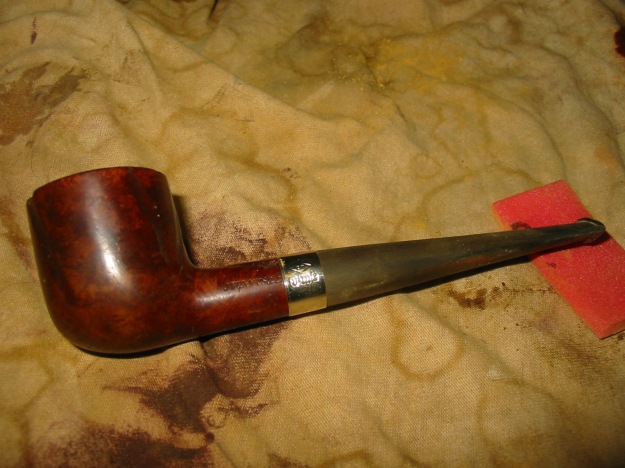
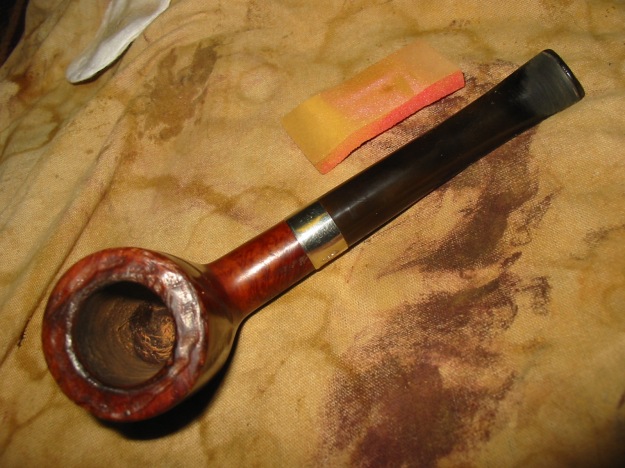
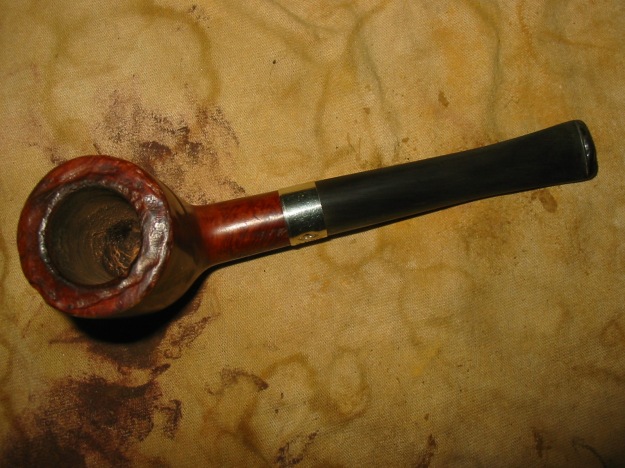
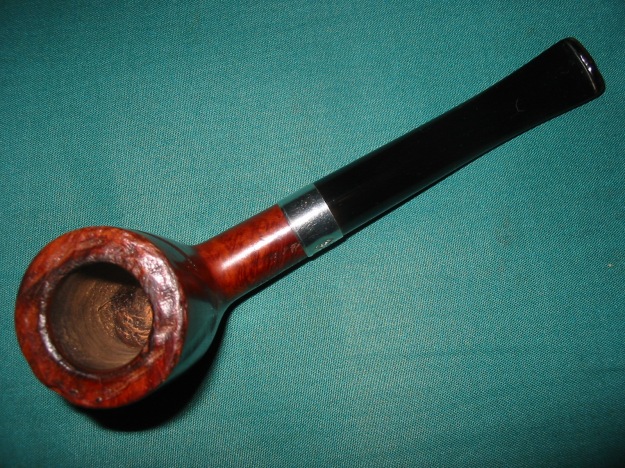
I decided to deal with the bowl first, by stripping it with acetone and soaking it overnight in an alcohol bath; I also put the stem in a OxiClean soak at this time.  After removing the bowl from the alcohol bath I then used a brass bristle brush to get all the tar and gunk out of the rusticated top grooves. Then I sanded it to remove all the scratches from the smooth briar and take the old stain off the high points using 400 grit wet/dry sandpaper.Then I used some water based black leather dye on it, getting into the recesses well and wiping of the smooth portions as I went; I wanted to keep that darker contrast in the grooves. After I had it covered to my liking I dried it with the heat gun. Next I went back to 400 grit to take down the high points and smooth areas to remove the small amount of black color from the water based dye. When that looked good to my eye I polished it with 600 grit, wiped it down with 91% isopropyl alcohol on a cotton pad to remove any left over dust and dirt.  I heated it with the heat gun again to make sure the briar was good and dry. When it was nice and warm I applied Fiebing’s dark brown spirit-based leather dye, diluted 2:1 with 91% alcohol and flamed it in; I did this twice. The color was a bit too dark now so I wiped the pipe down, taking care to not soak my cotton pad too heavily or get into the recesses too much, with alcohol until it looked right to me. I then set it aside.Greg6

Greg7 
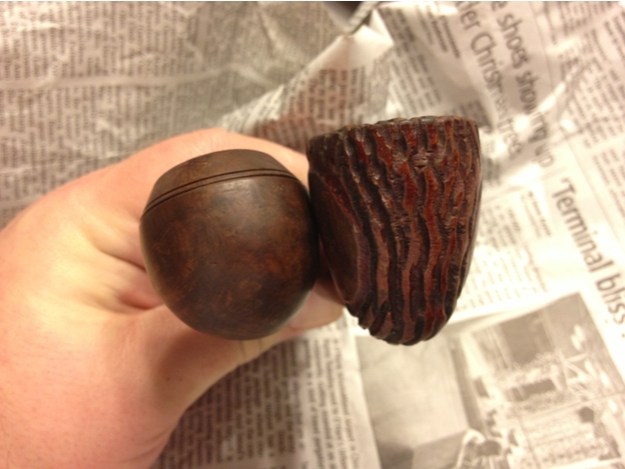
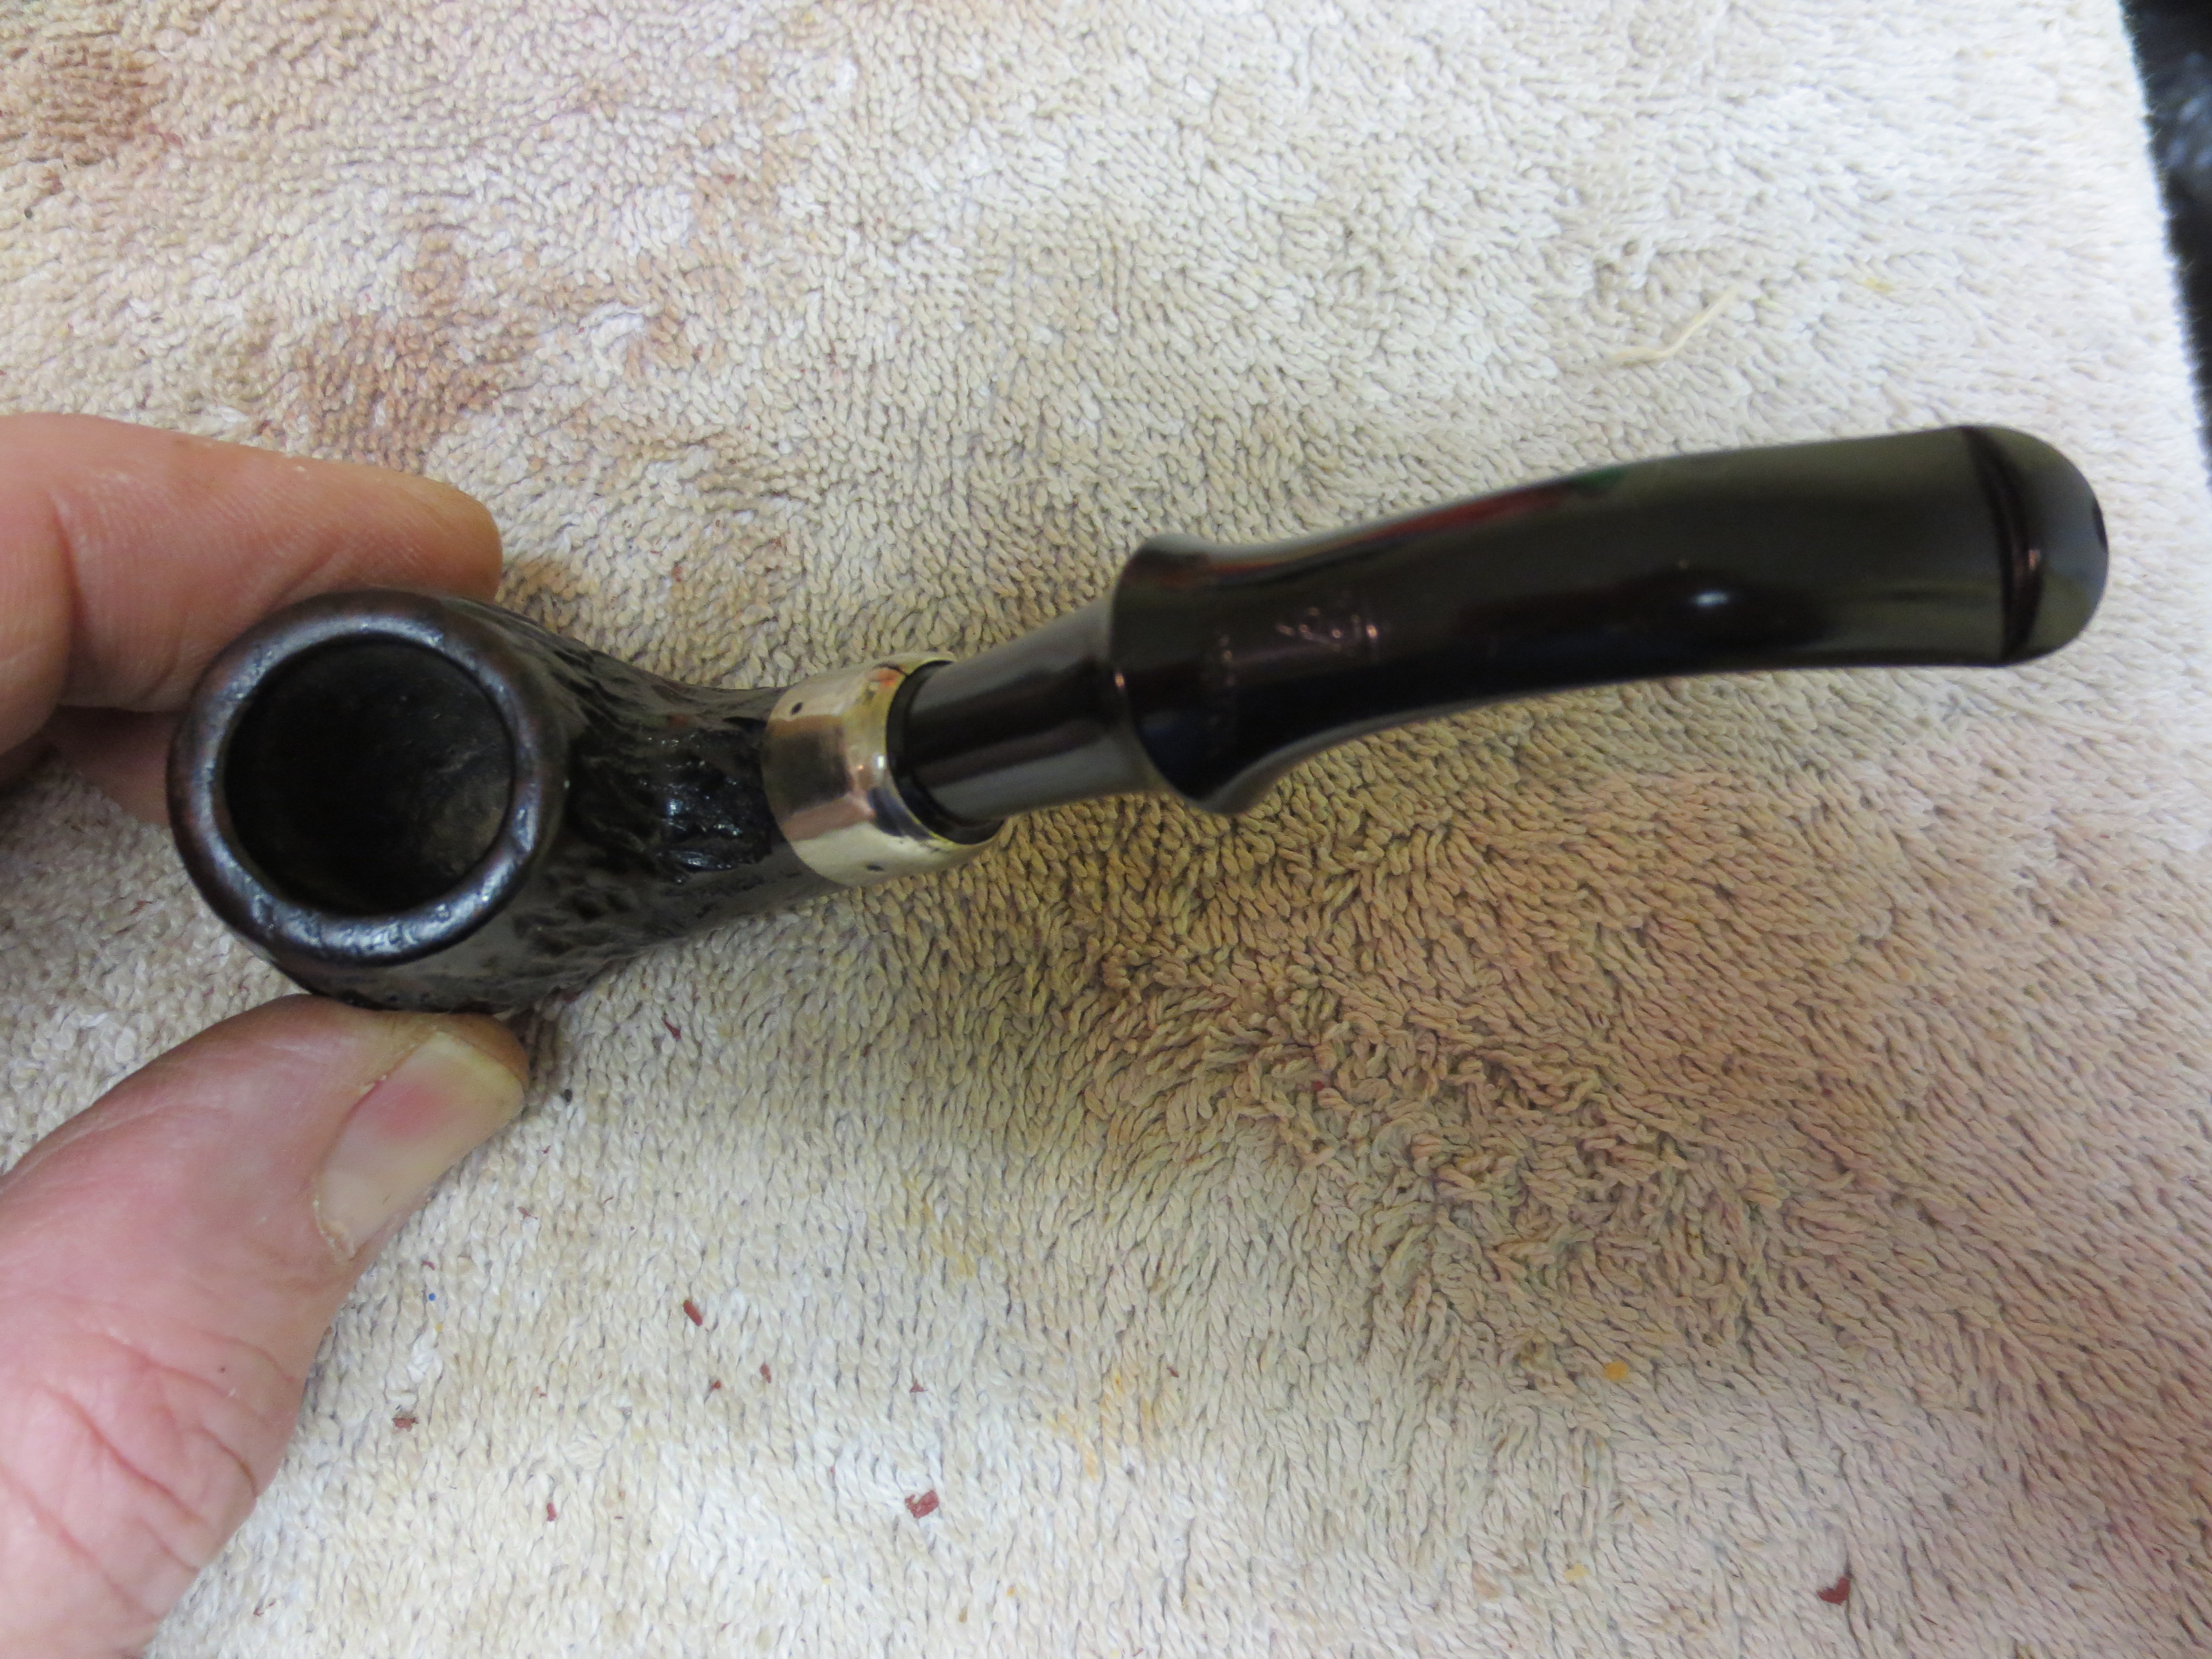
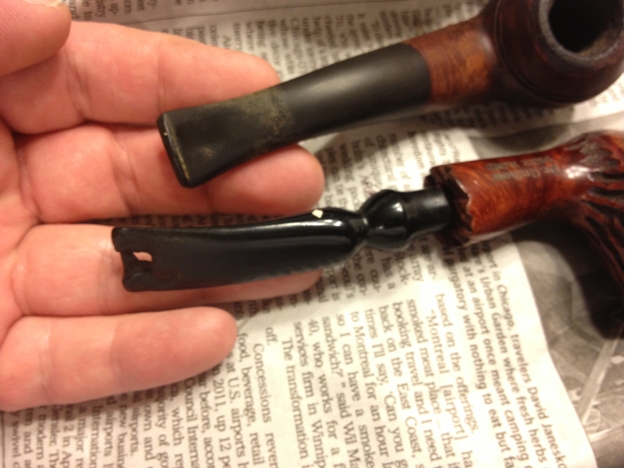
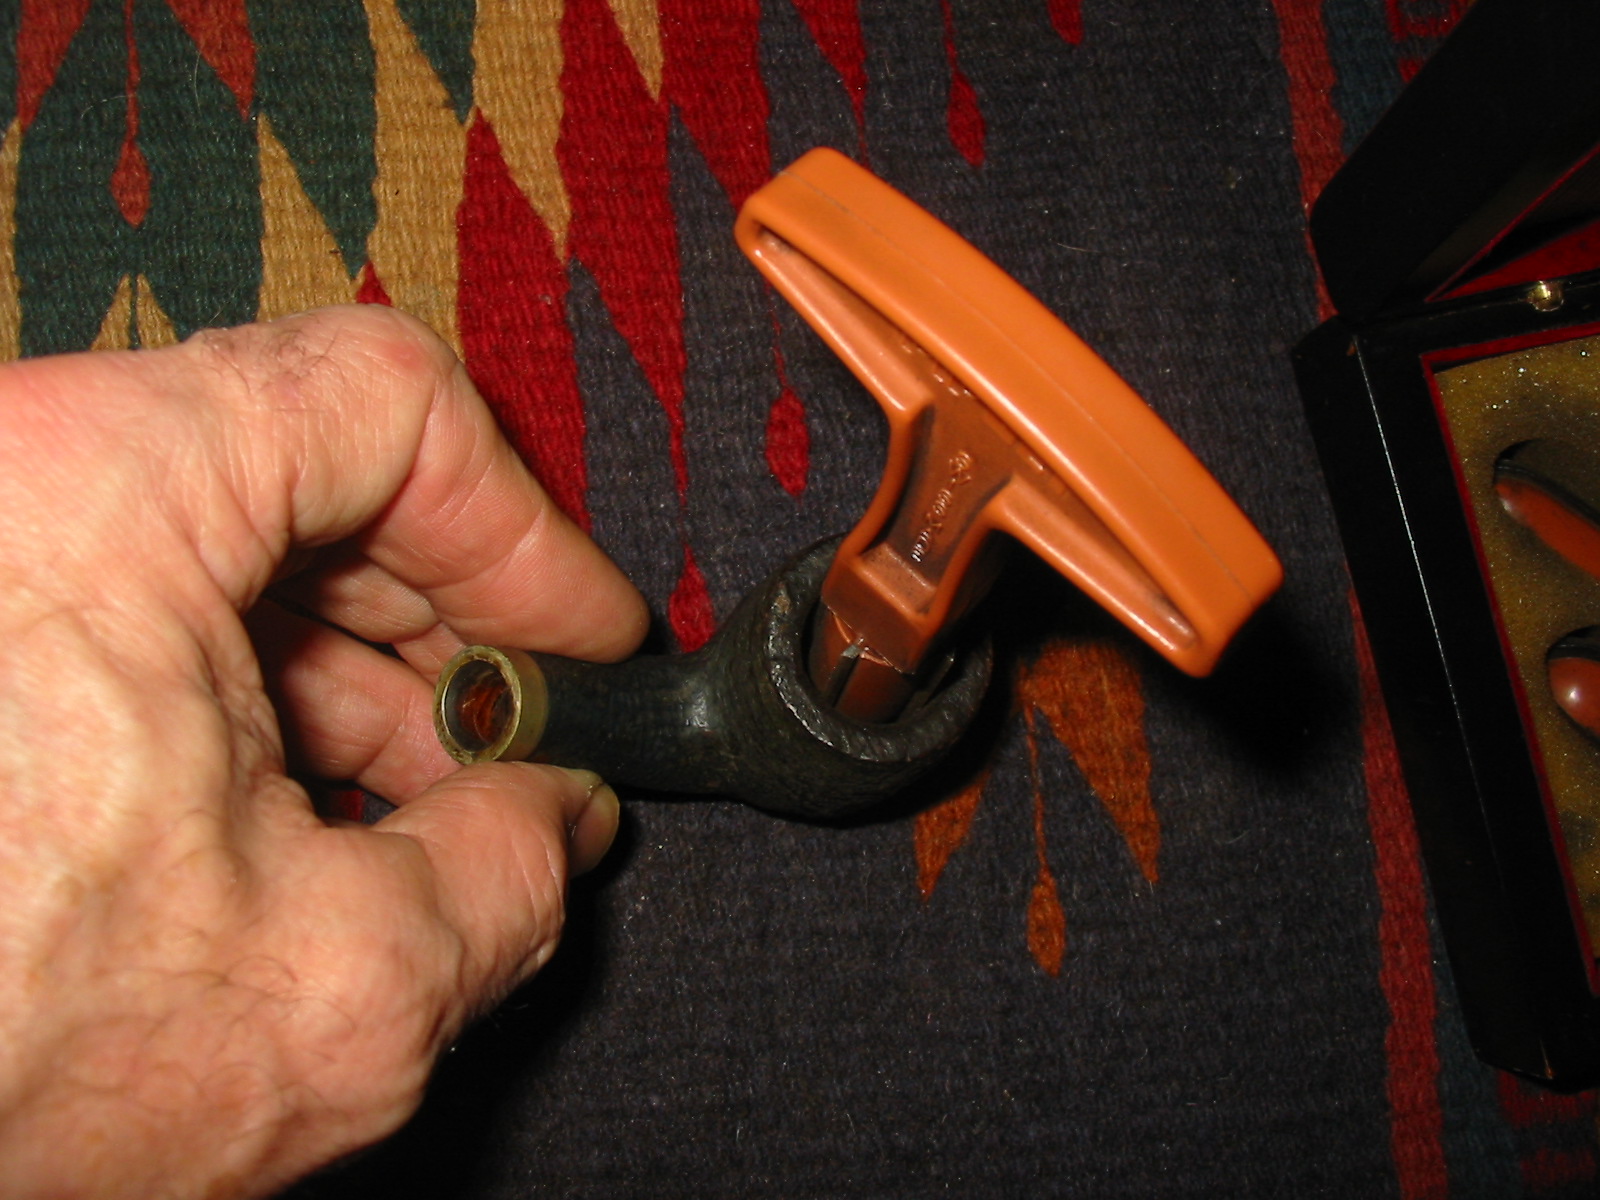
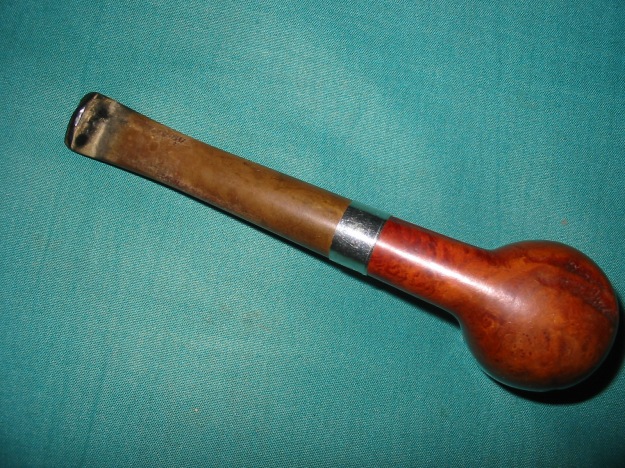
When I soaked the bowl in the alcohol bath I also left the stem in a OxiClean soak overnight. I had removed and washed it well before starting on the bowl so it was ready now to work on.Greg8 
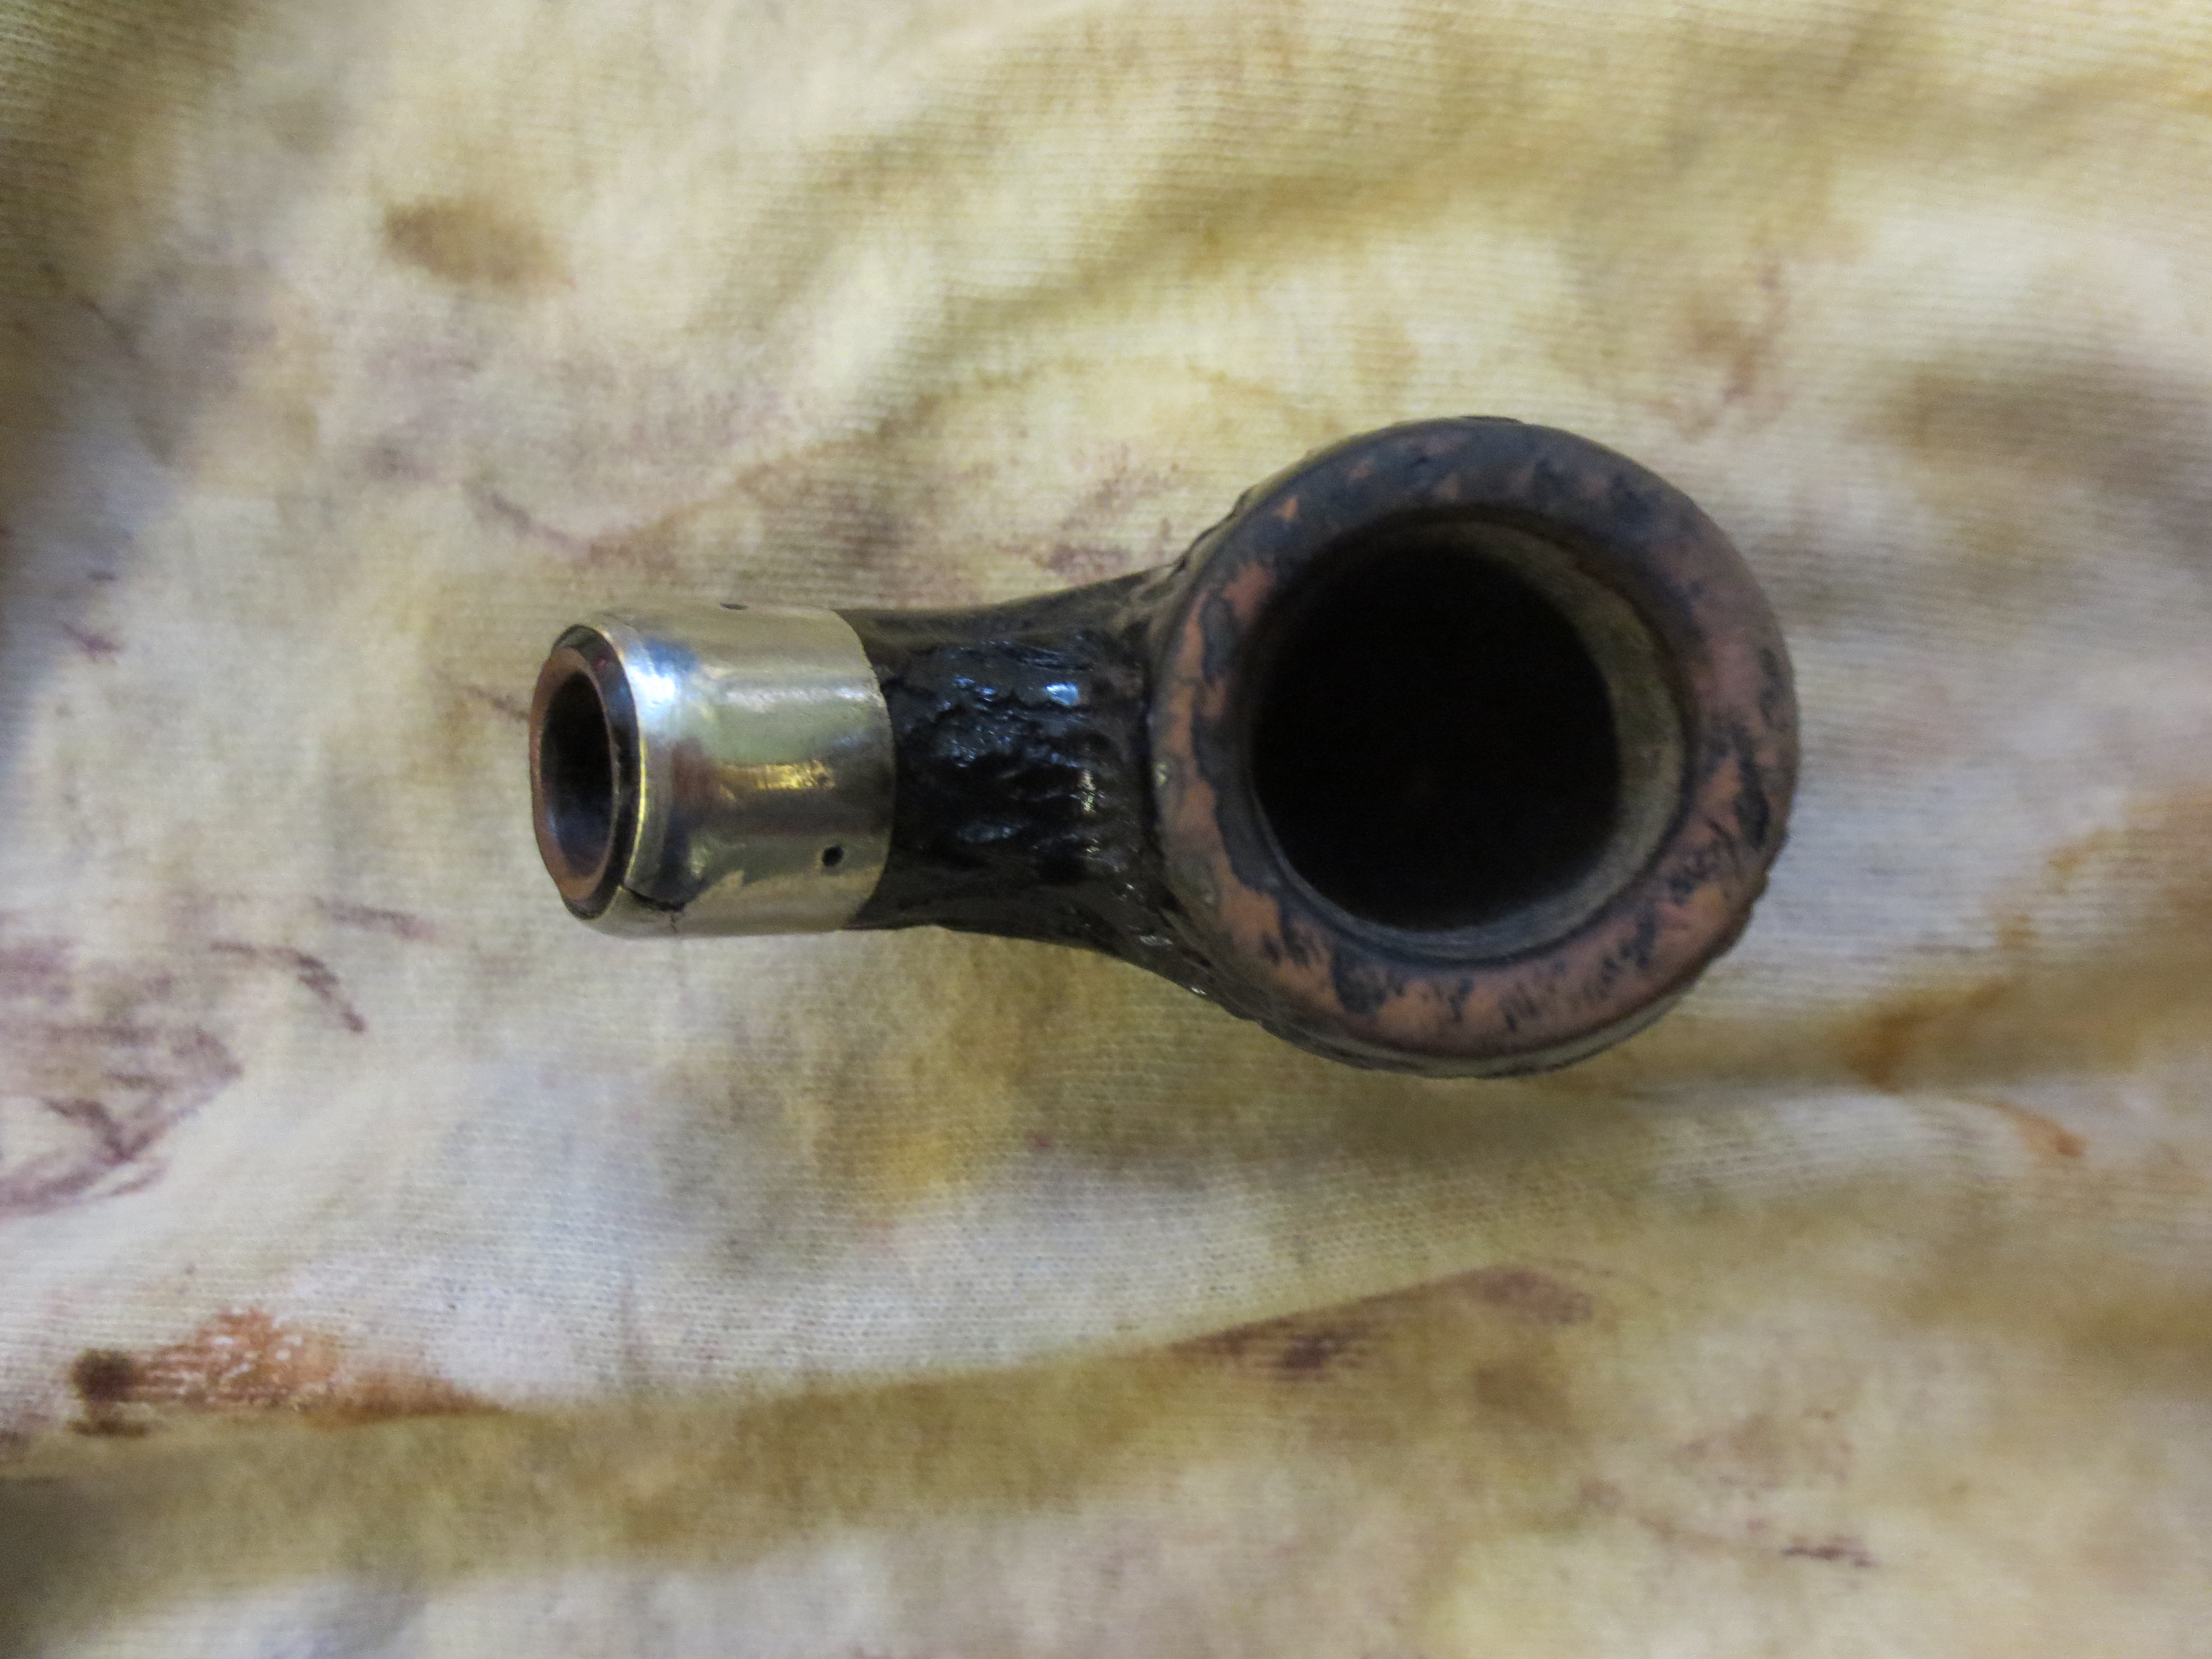
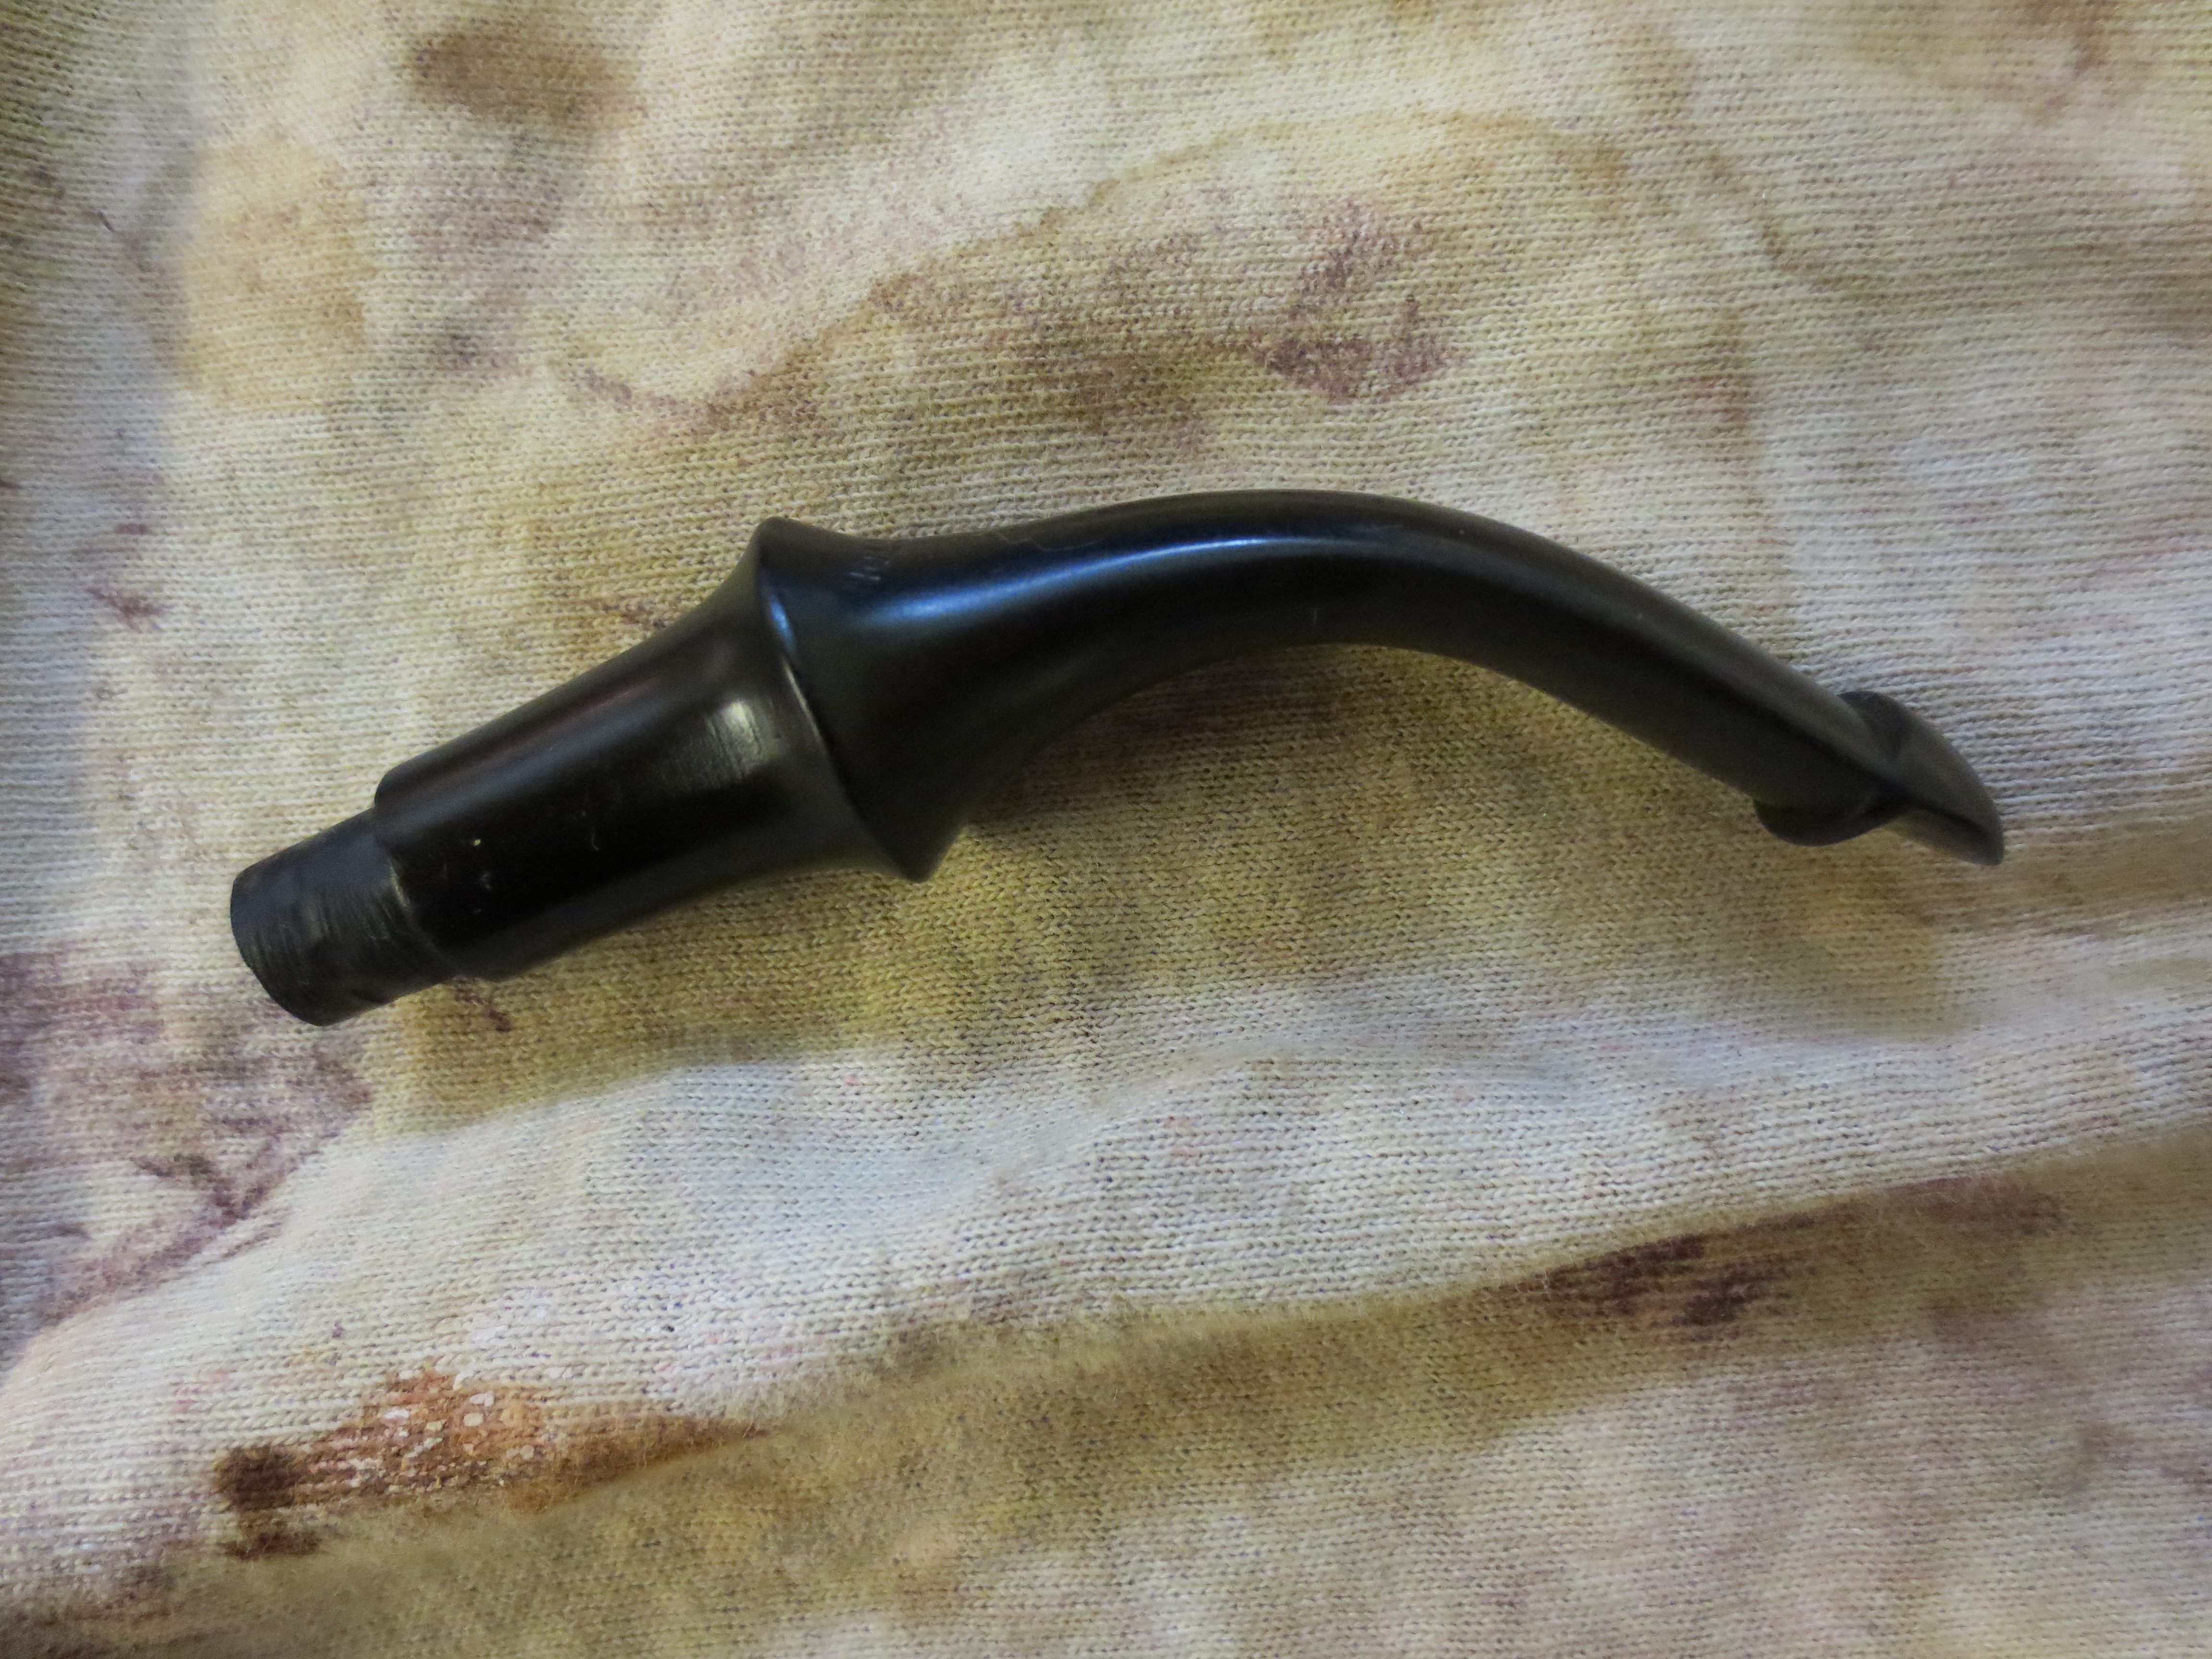
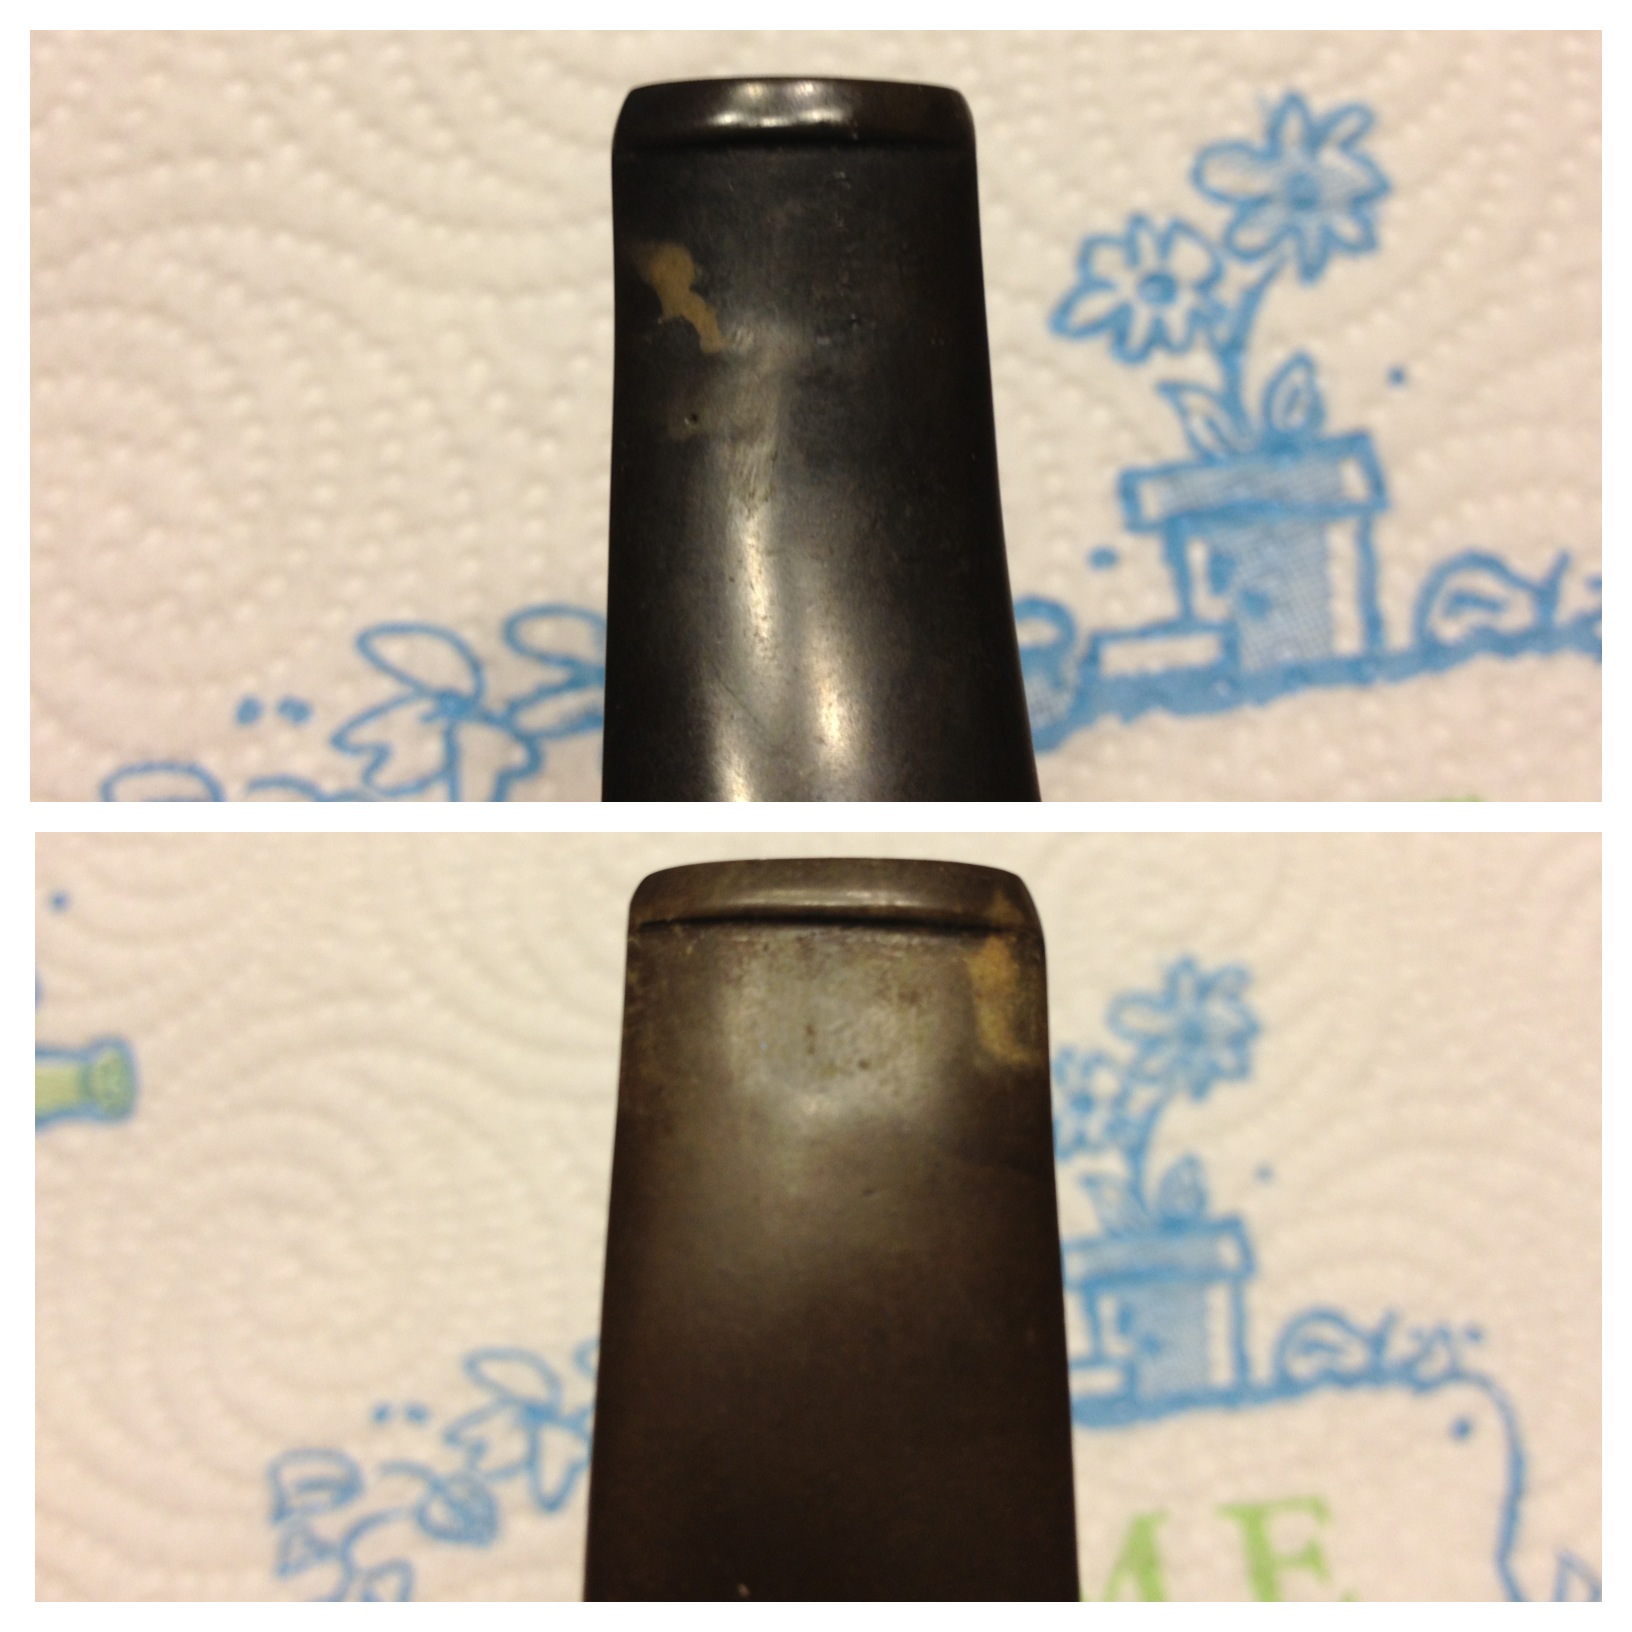
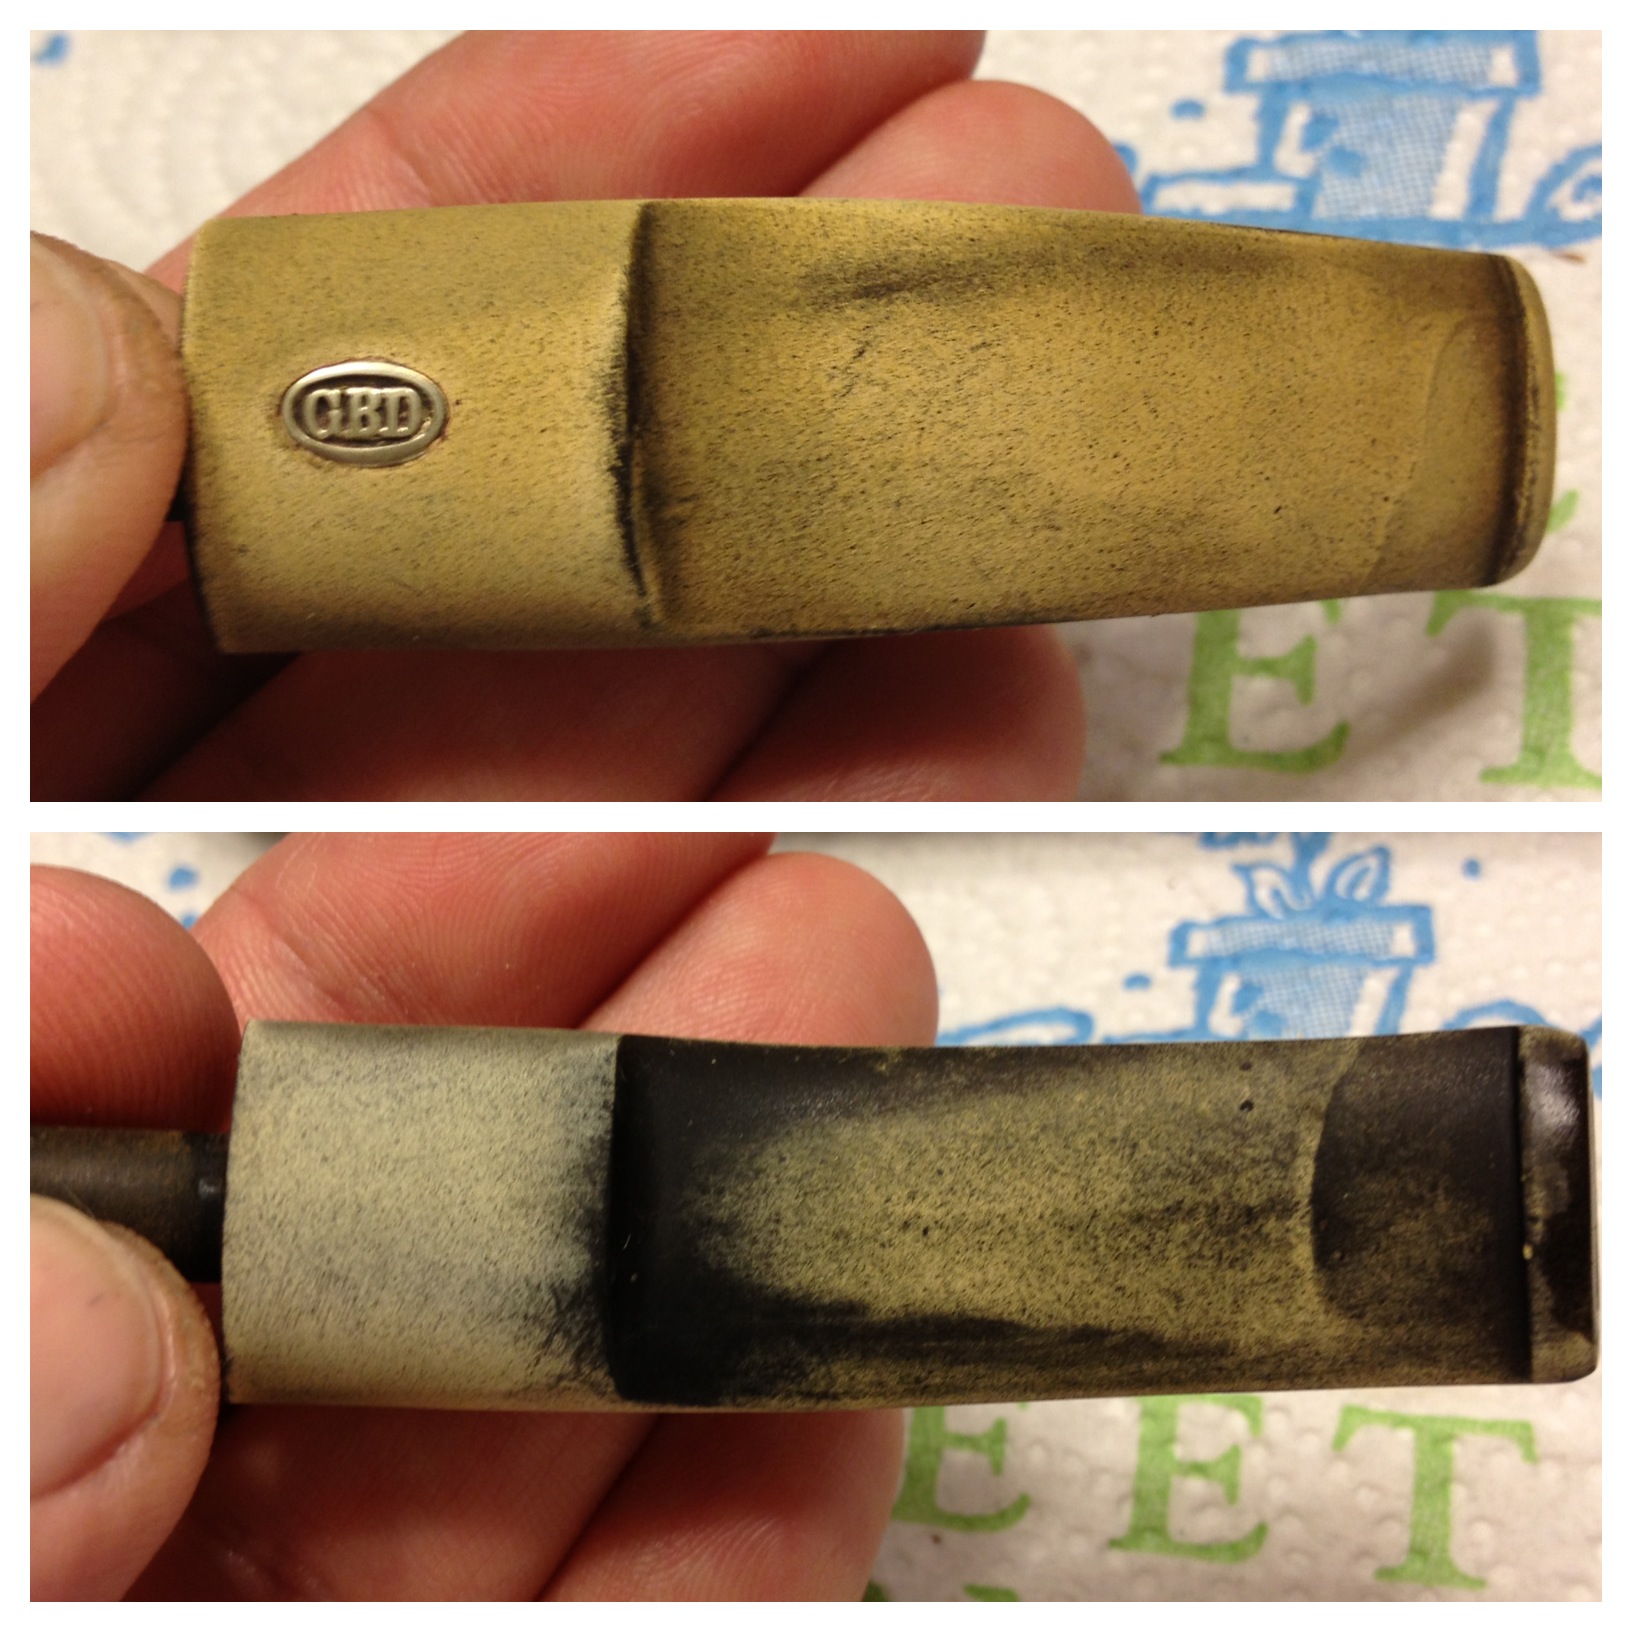
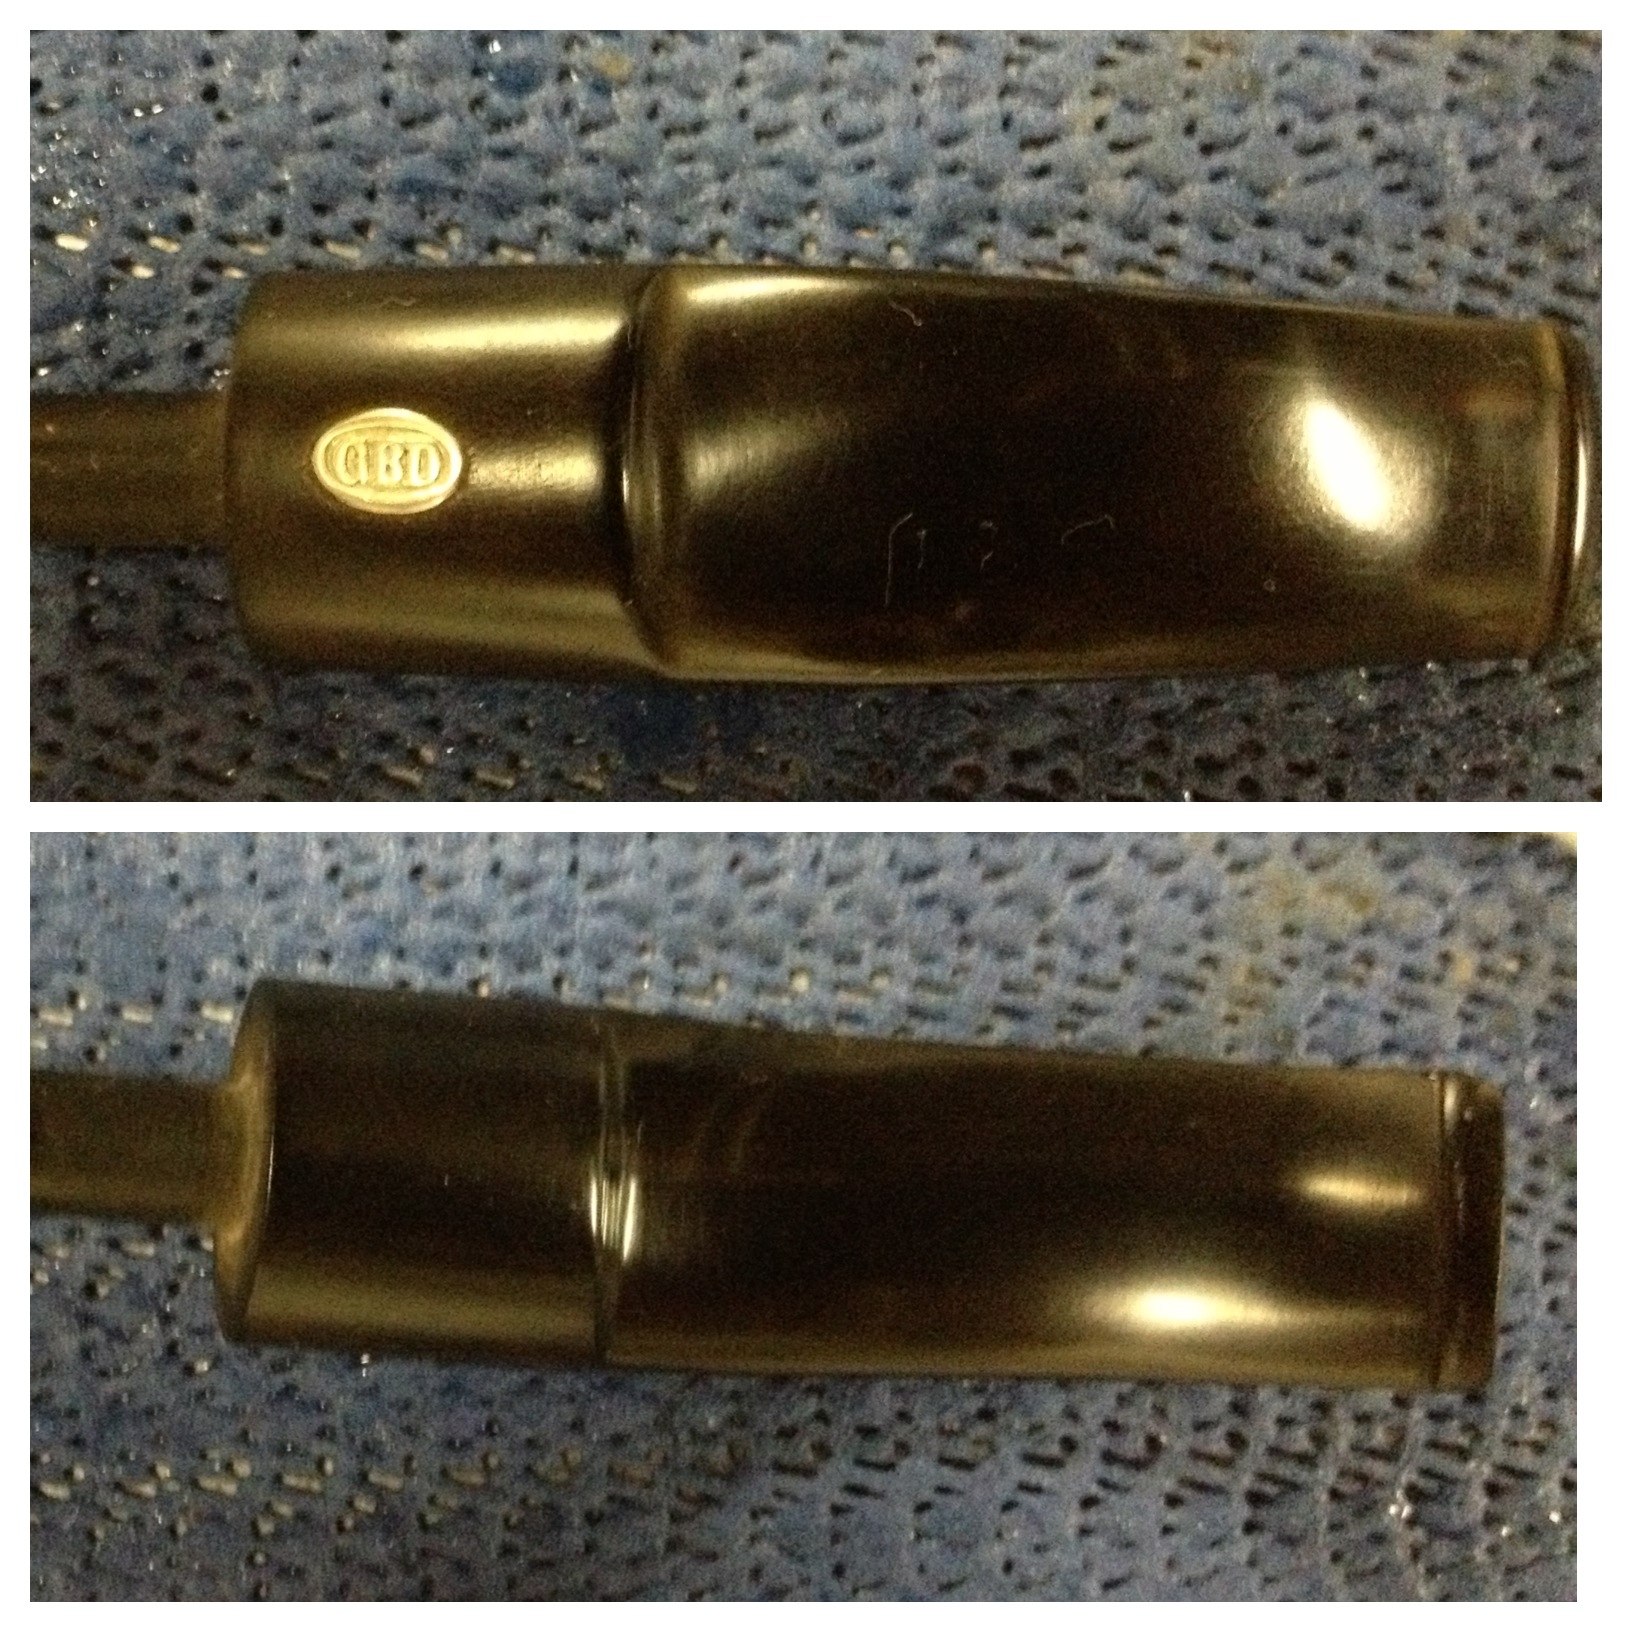
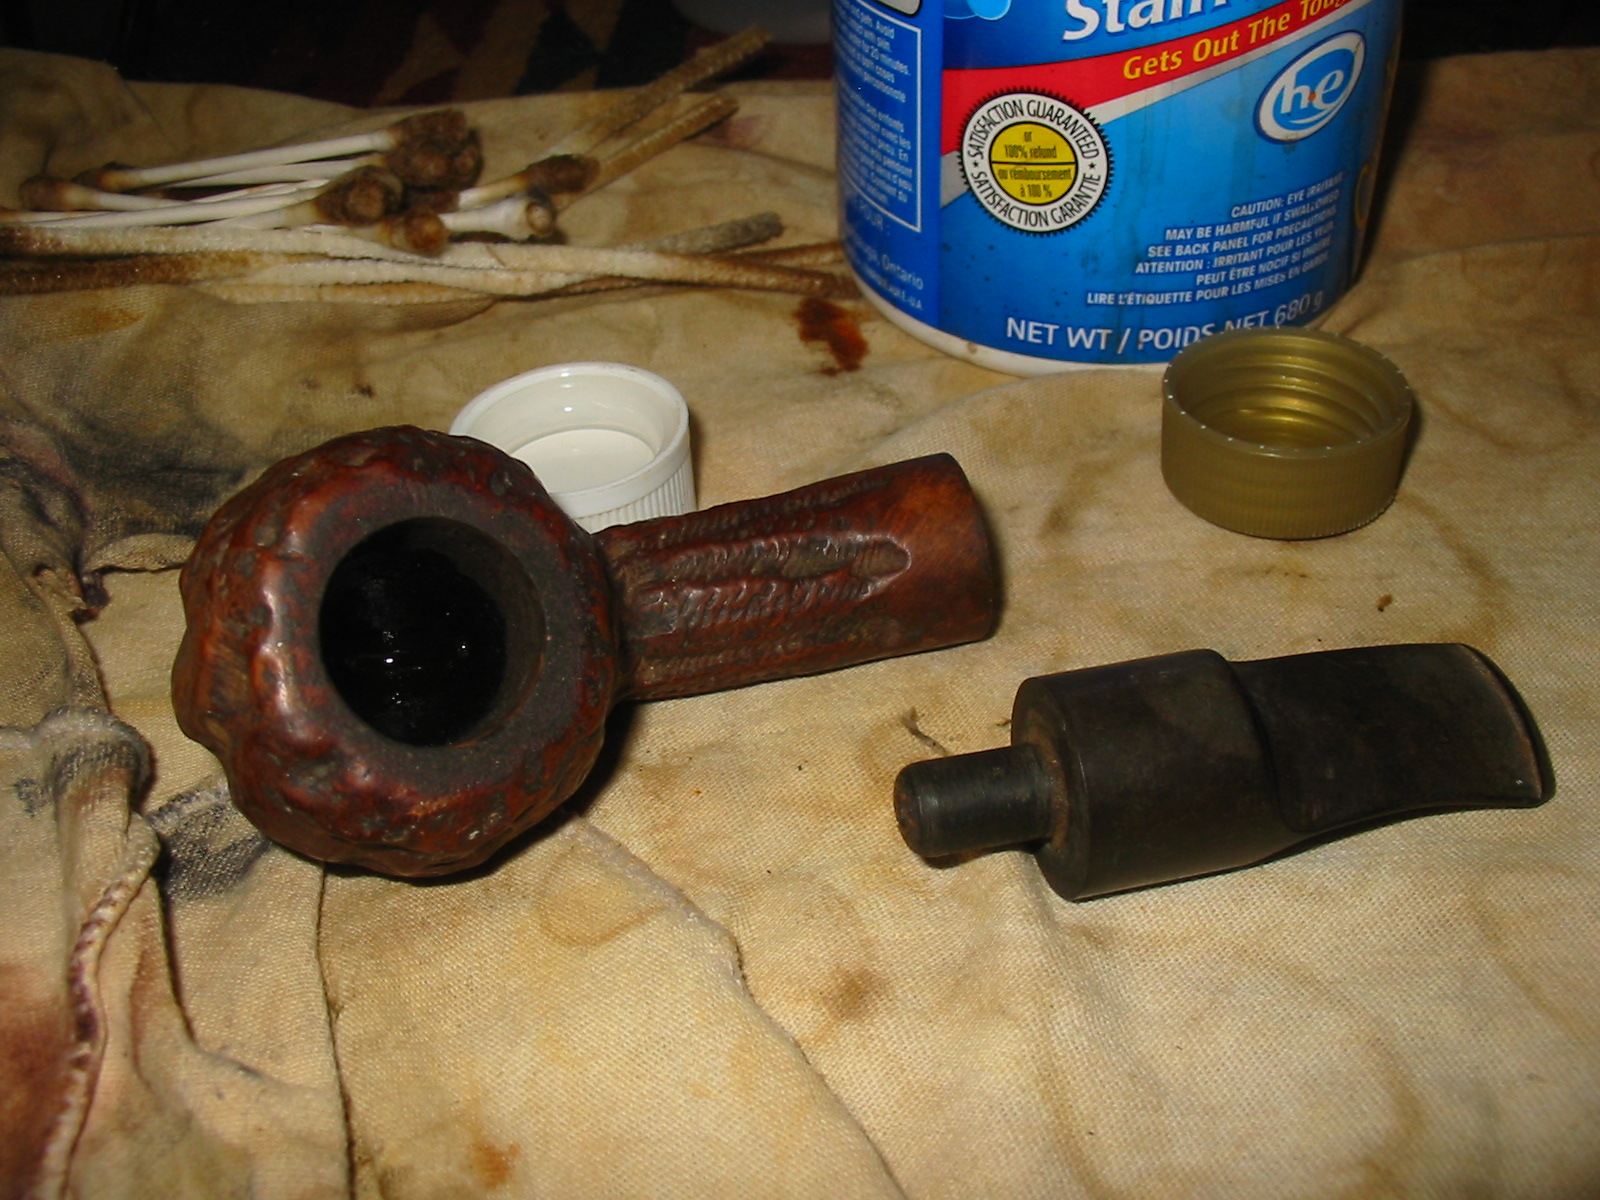
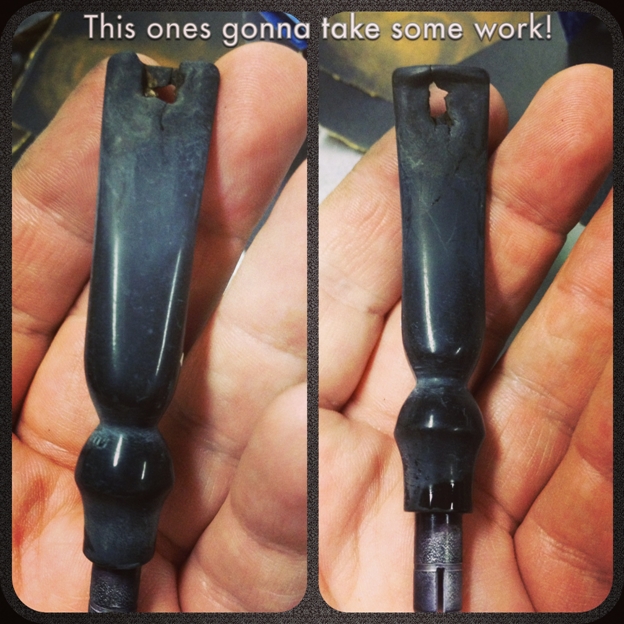
I decided to shorten and reshape the stem instead of replacing it or trying to fix the gaping holes. I used a coping saw to cut off the end, saving as much of the stem as I could. The bottom hole had also cracked so it required removing quite a lot of the stem to get most of the crack out. The next step was to grease a pipe cleaner with petroleum jelly and insert it into the stem. I then dripped some Super Glue into the crack and let it set up while I worked on something else.

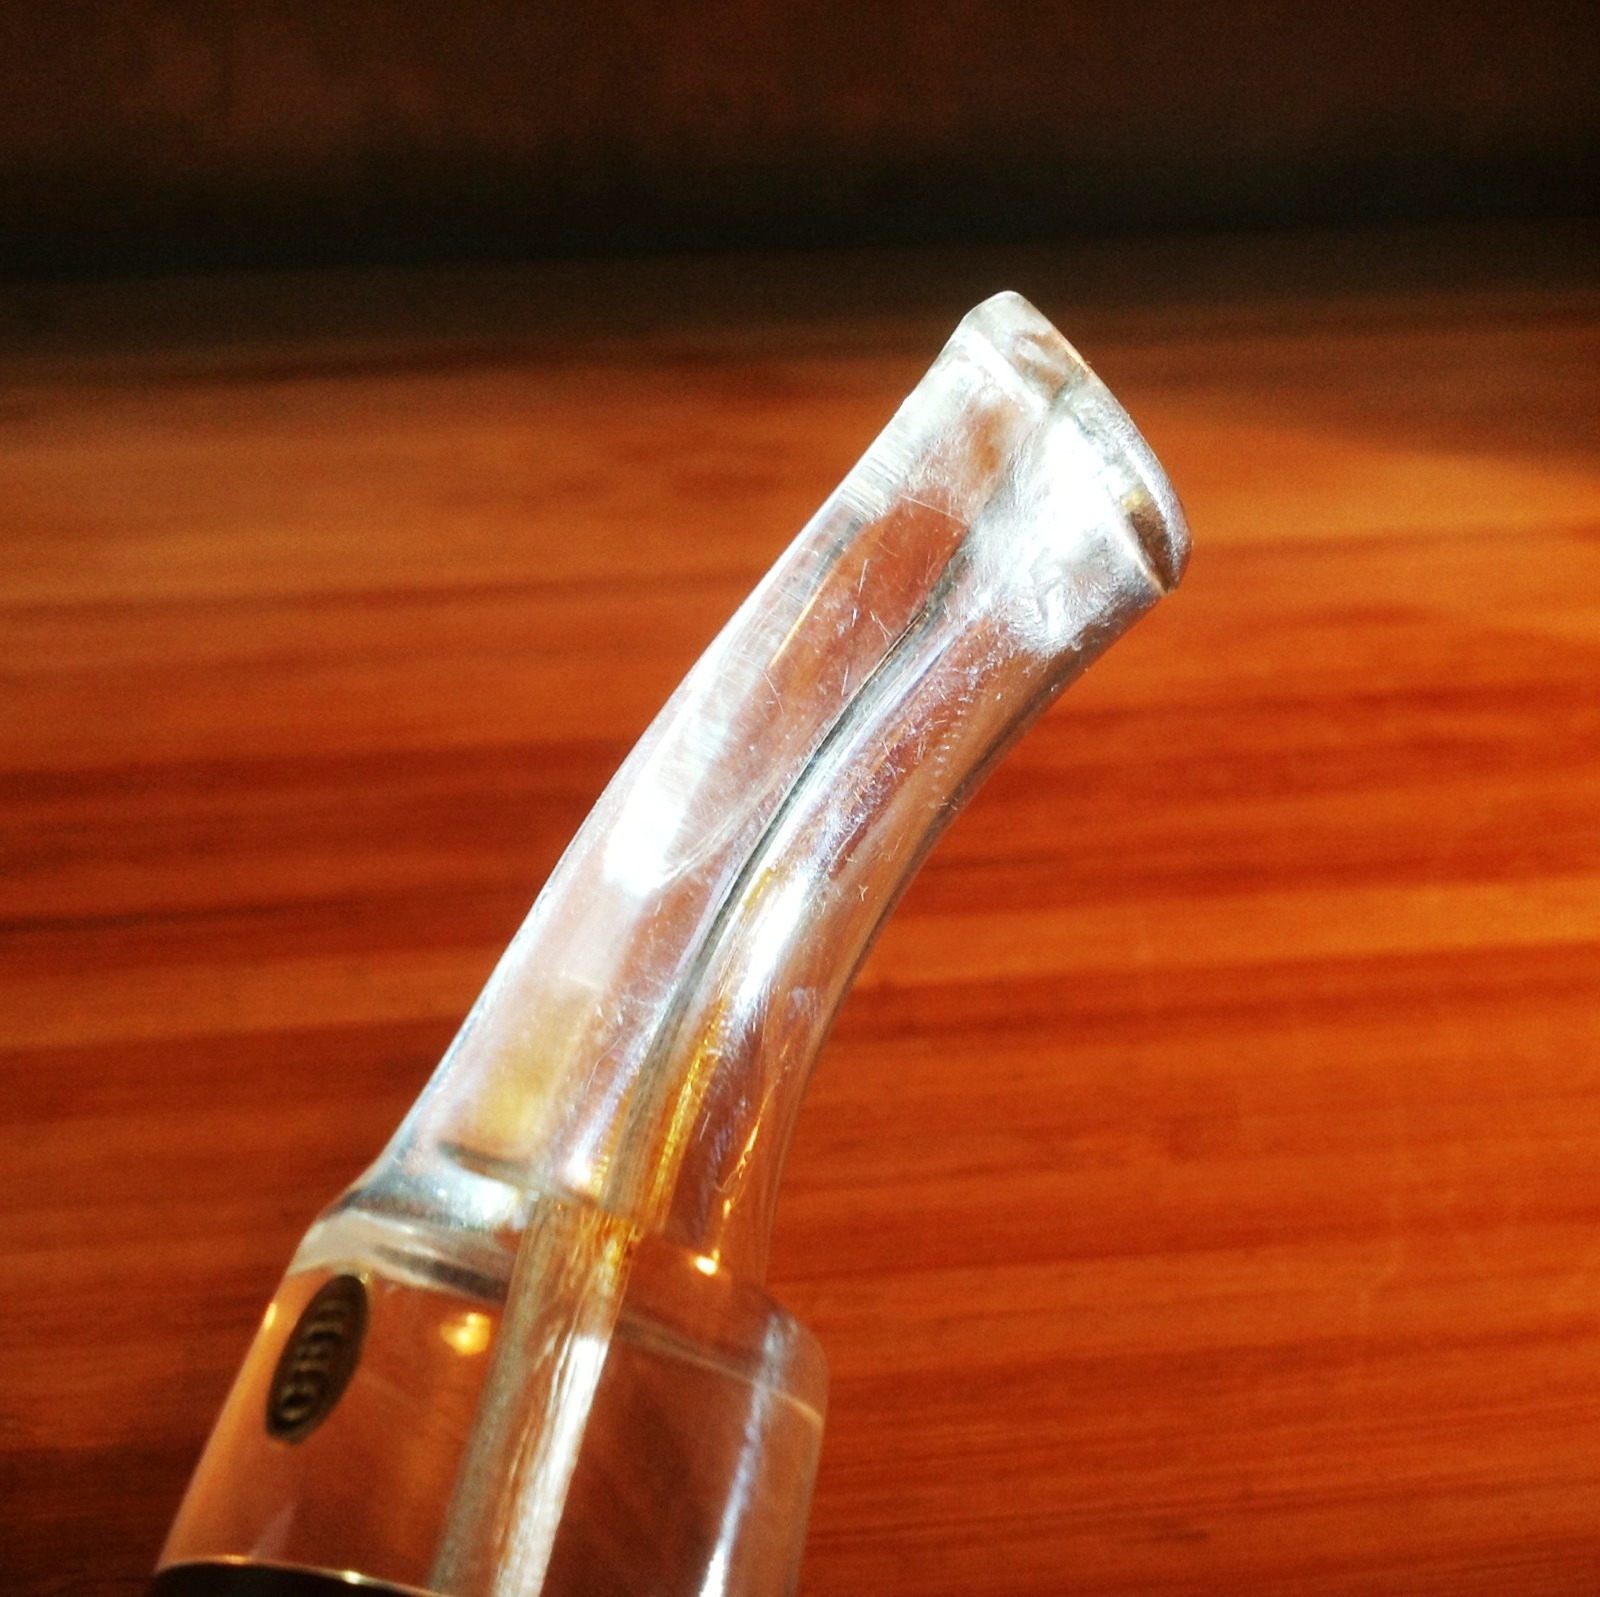
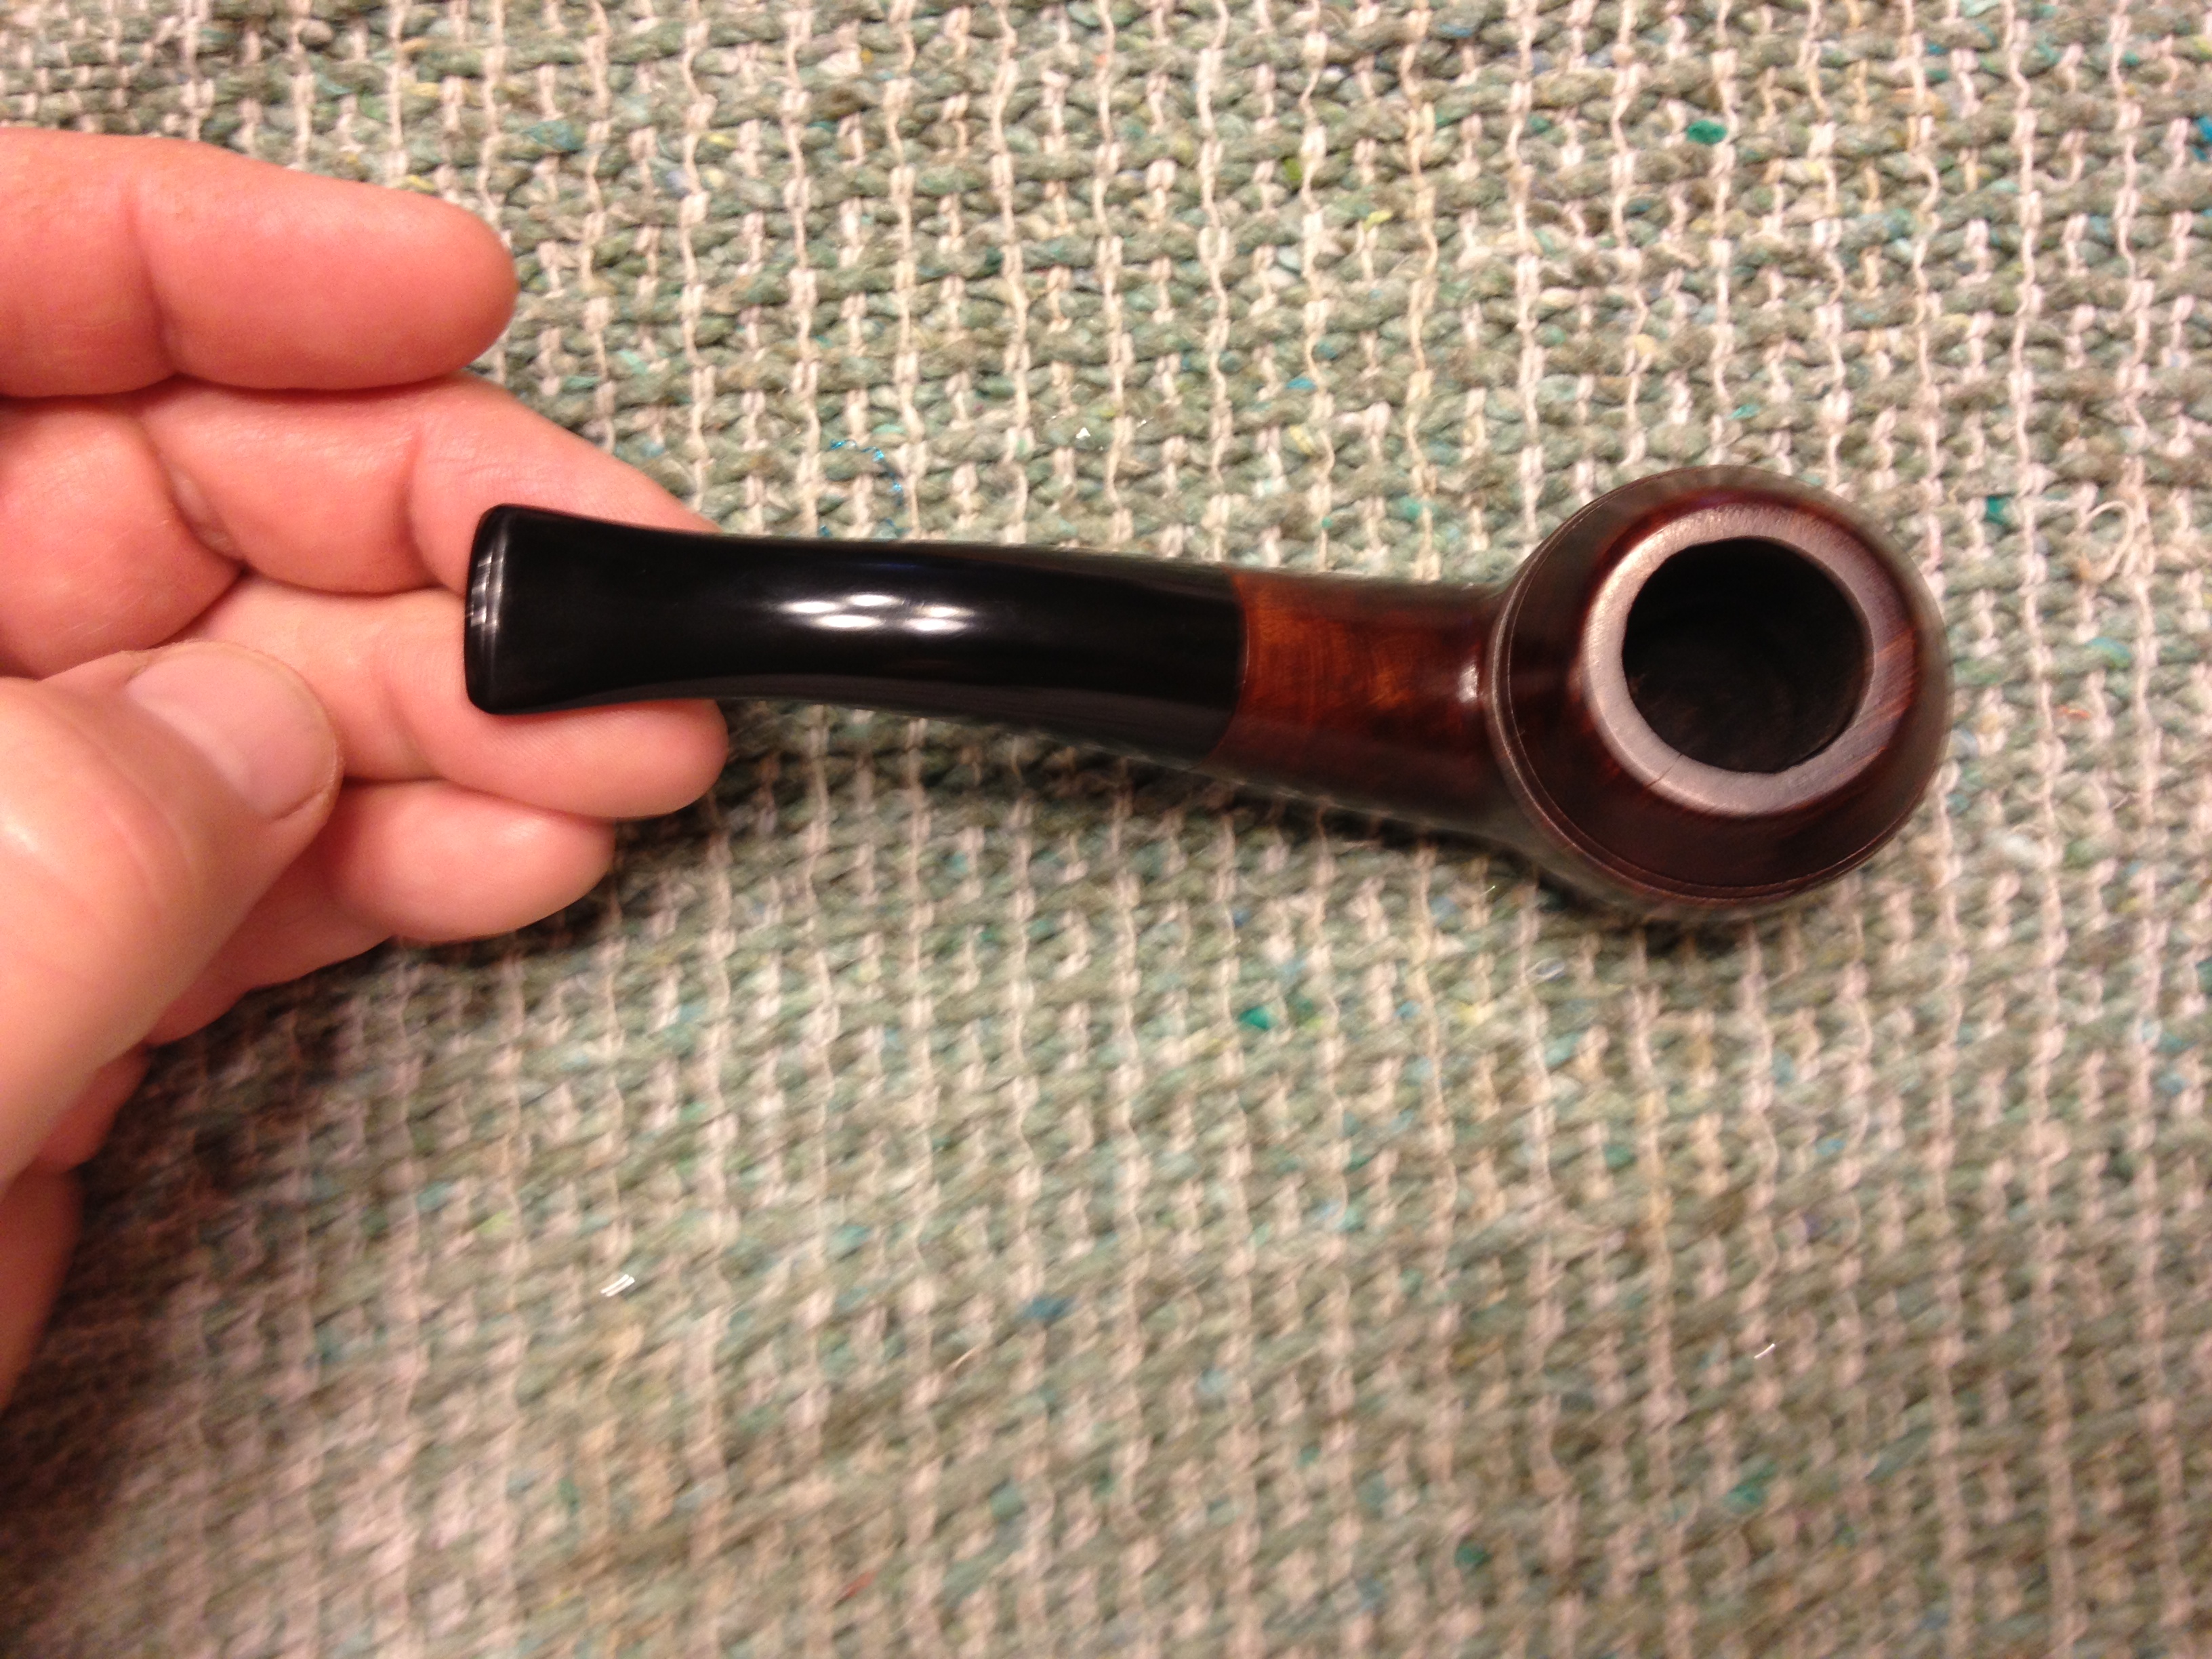
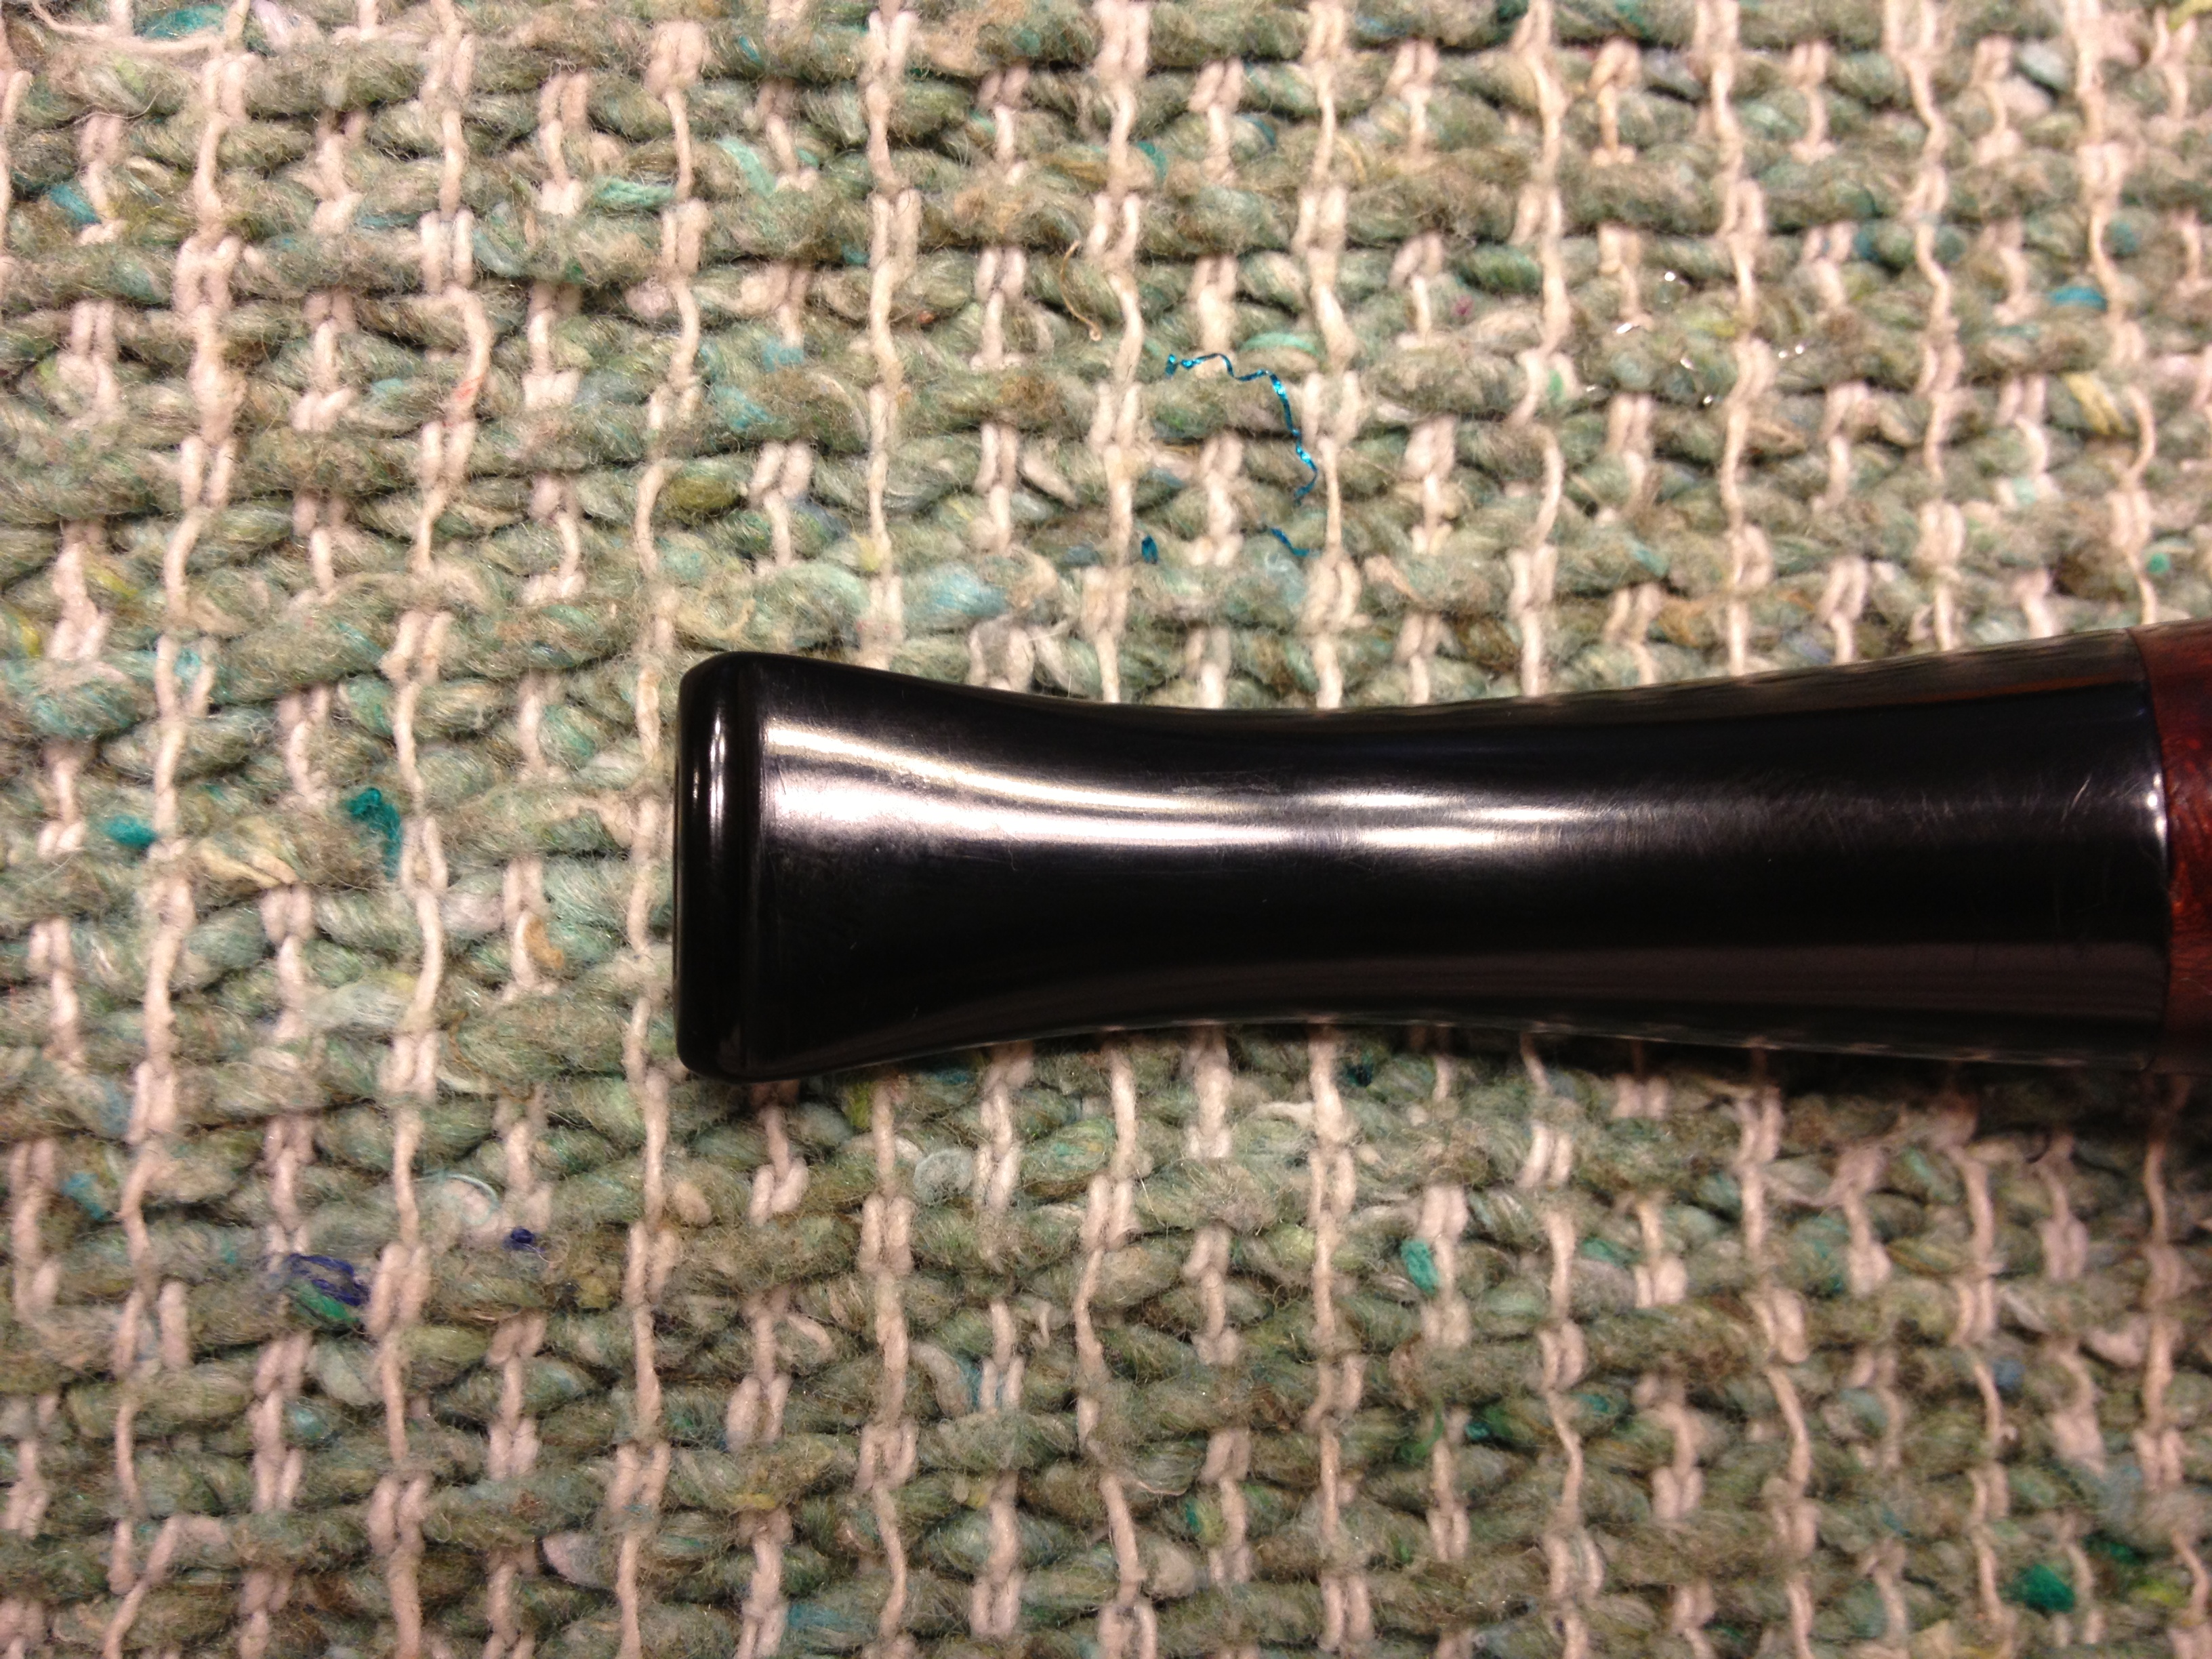
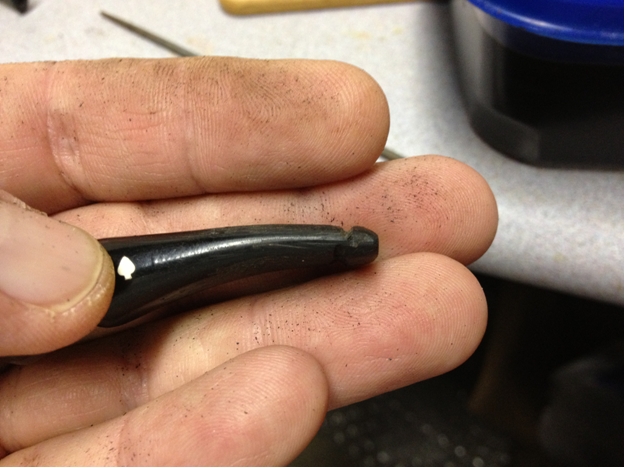
When I came back to it, the glue was hardened and I was ready to move on to the next step: making a new button. I began this process by scoring a line along the top and bottom of the stem where I wanted the button with a cutoff wheel on my Dremel. After I had the new button laid out, I then started to shape it with various needle files. I began shaping from the button back, forming it into shape with the rest of the stem. This took considerable time to get it even and “natural” looking. When I was satisfied I then began to shape the end of the button.Greg9

Greg10 
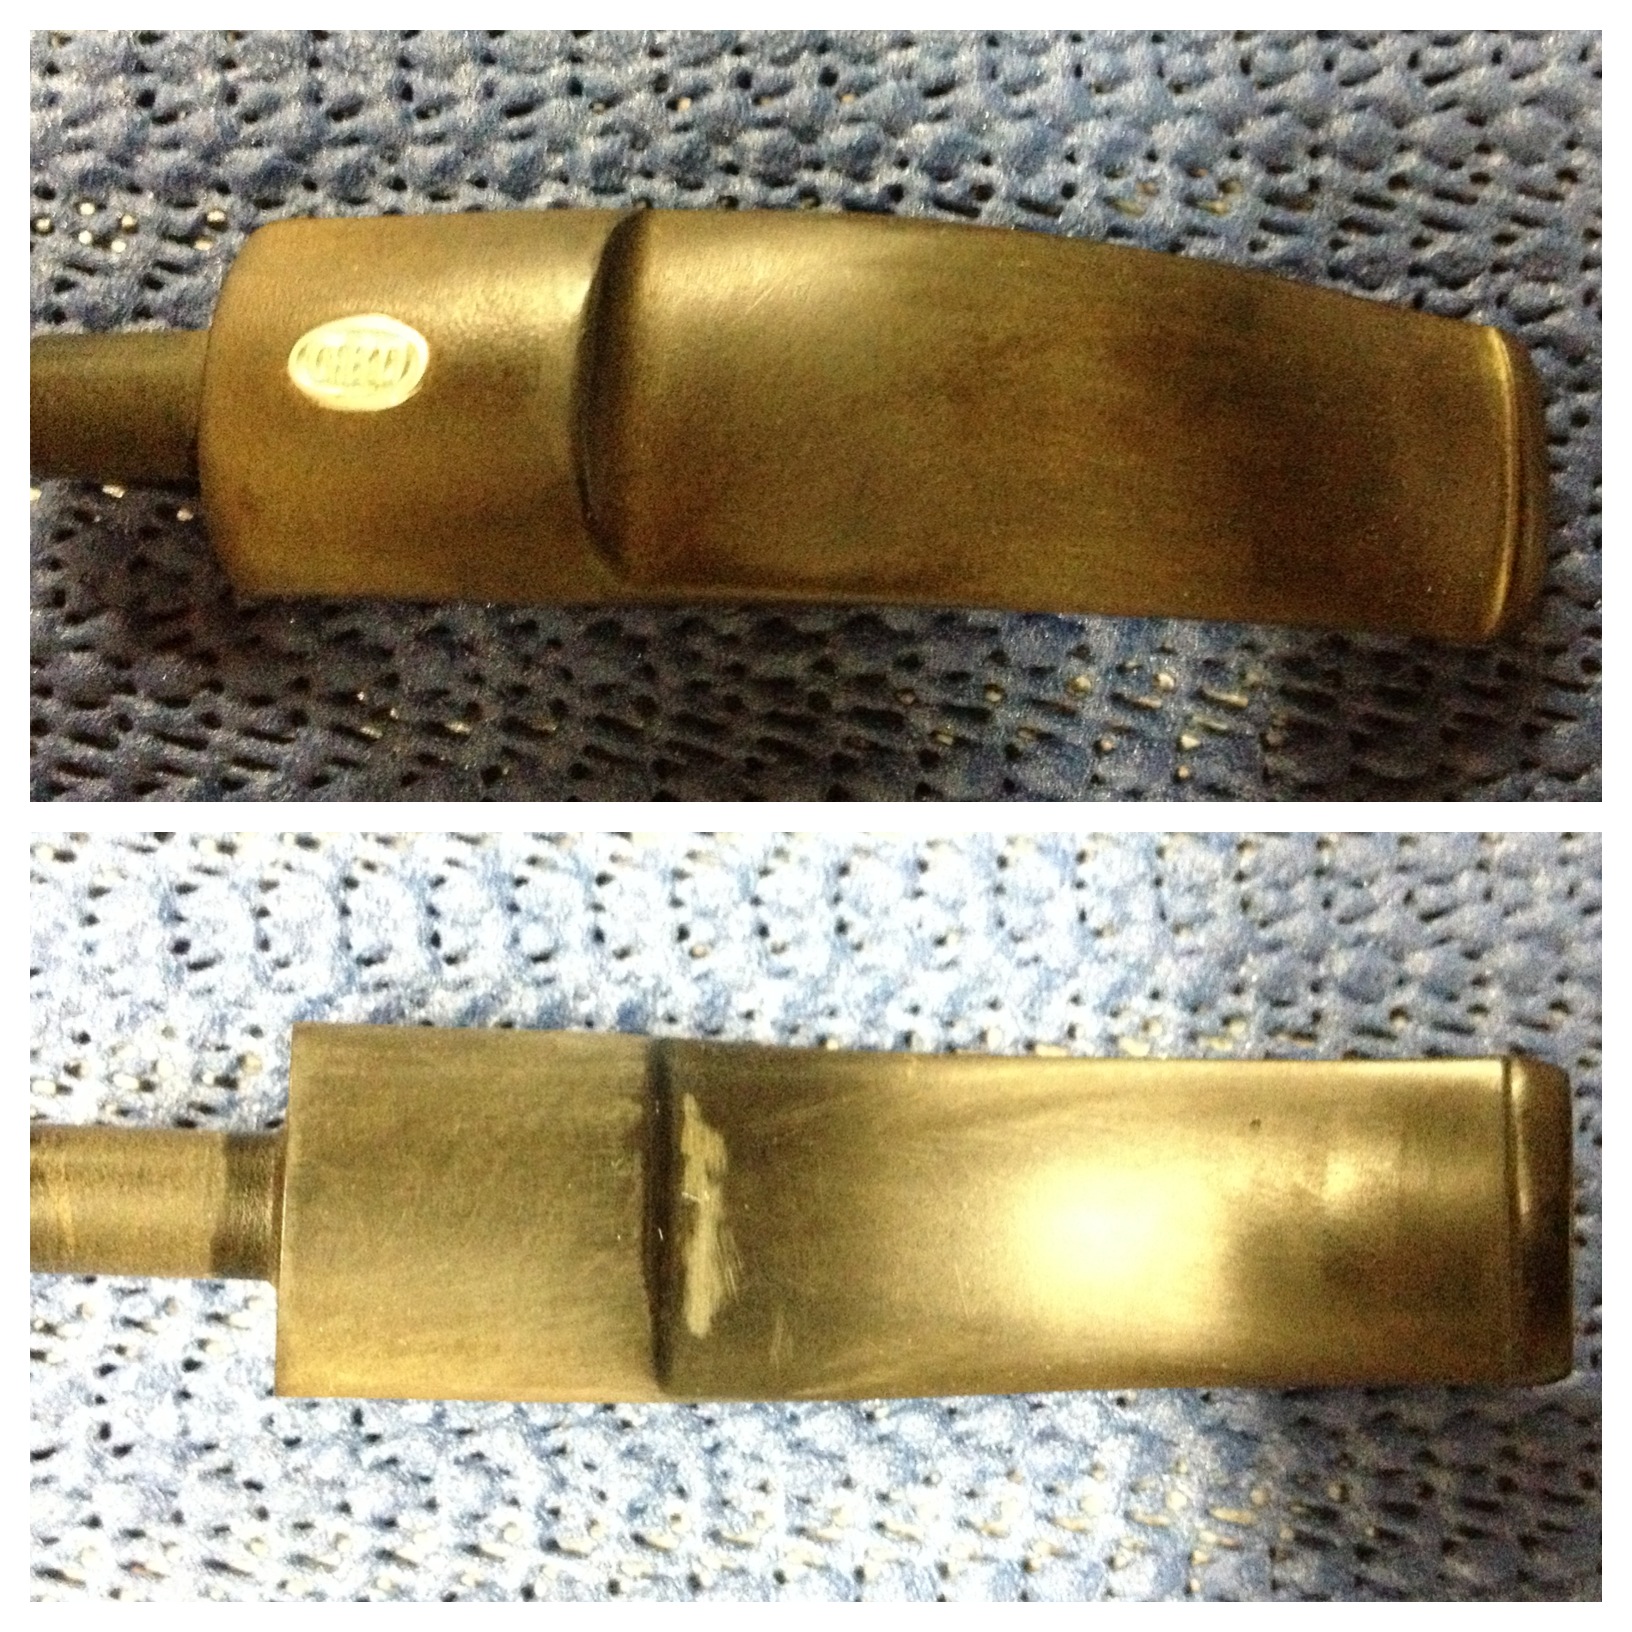
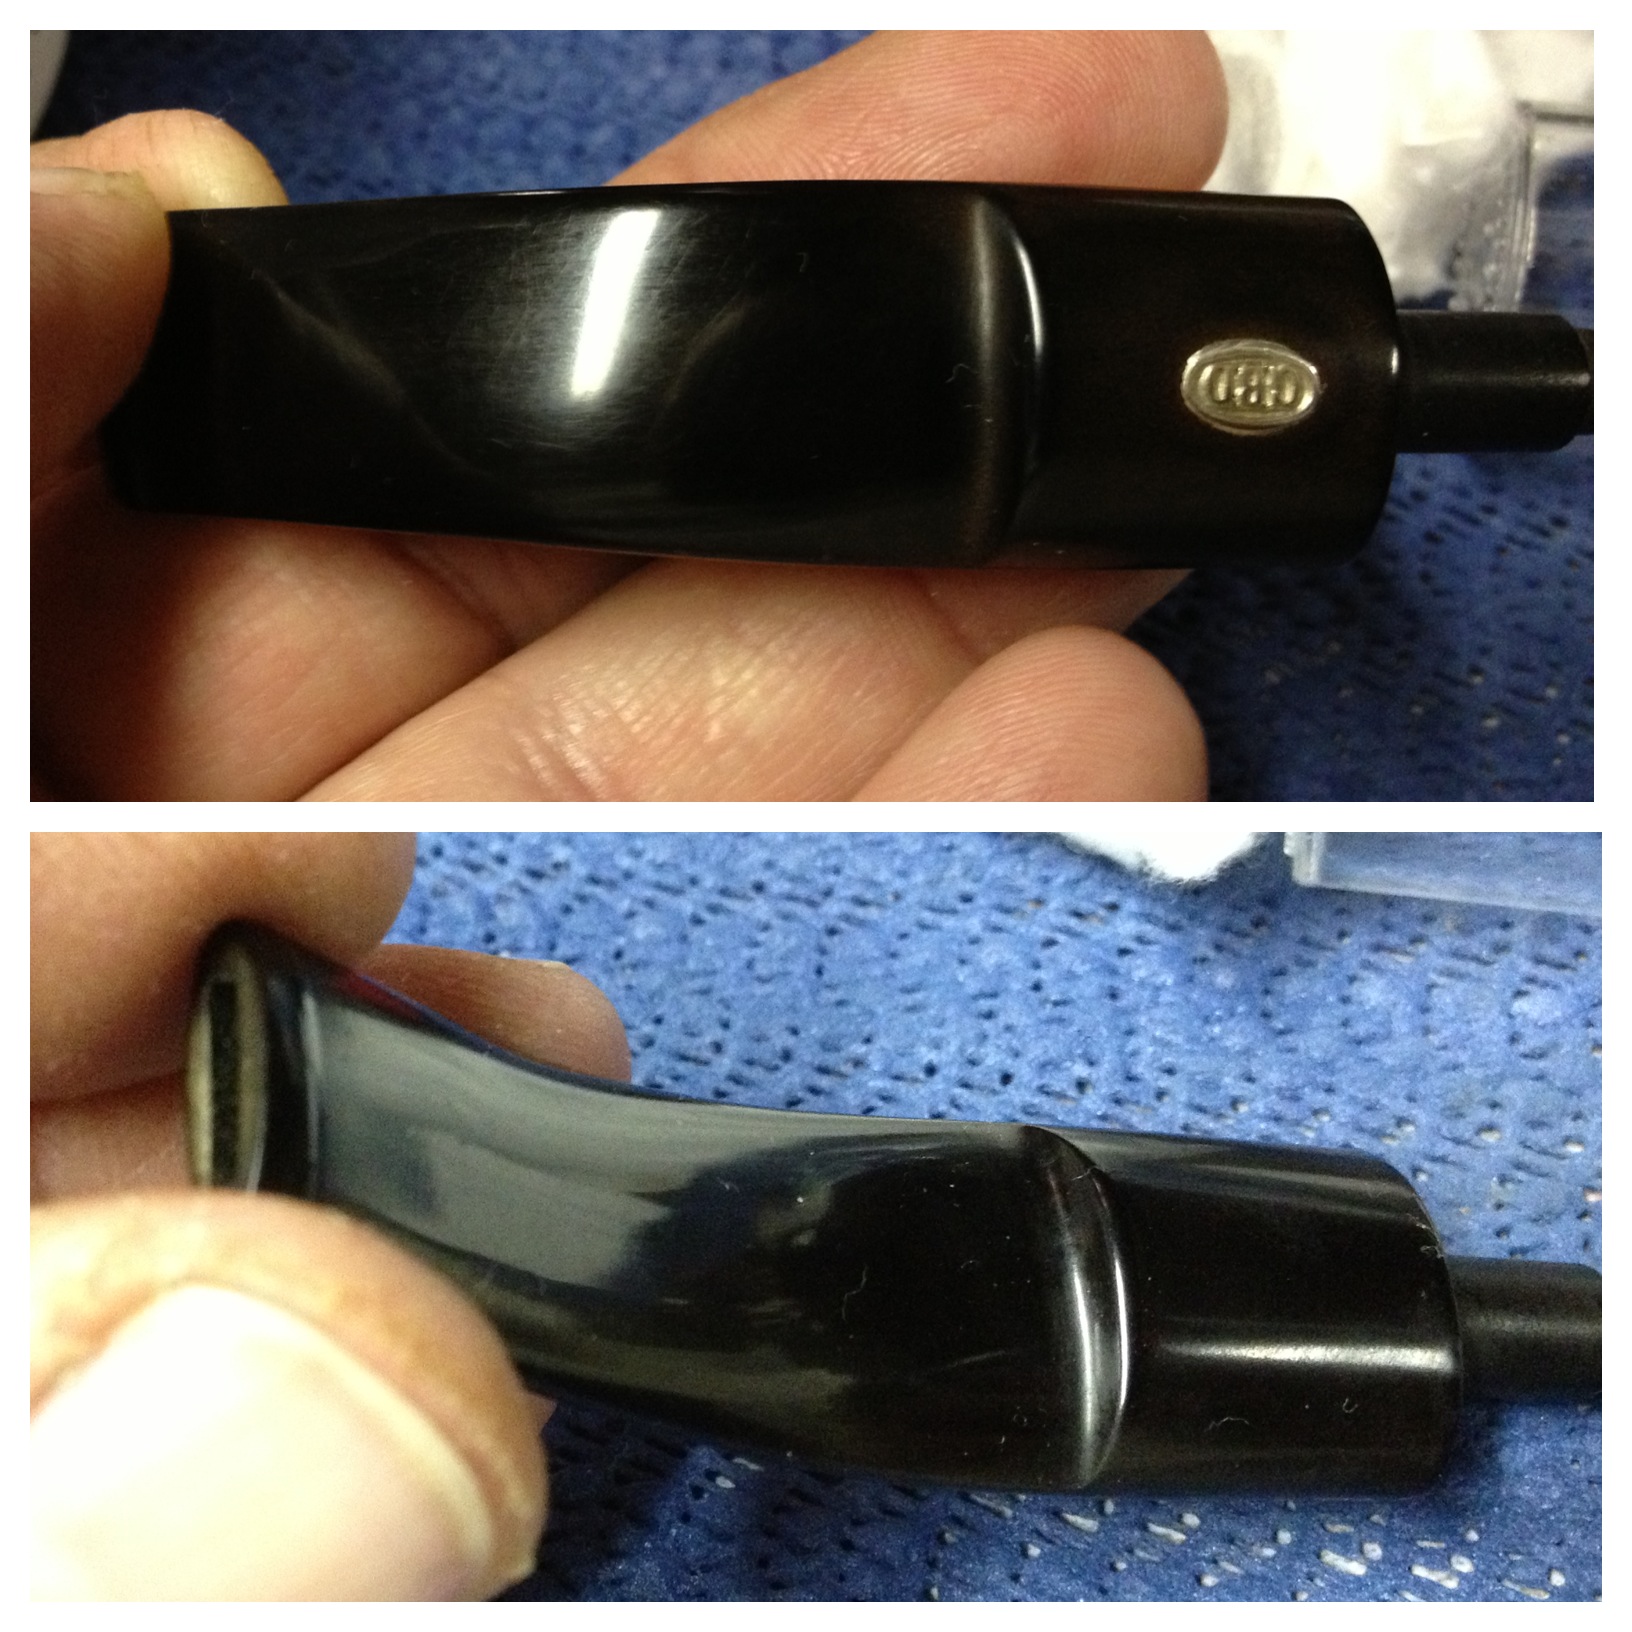
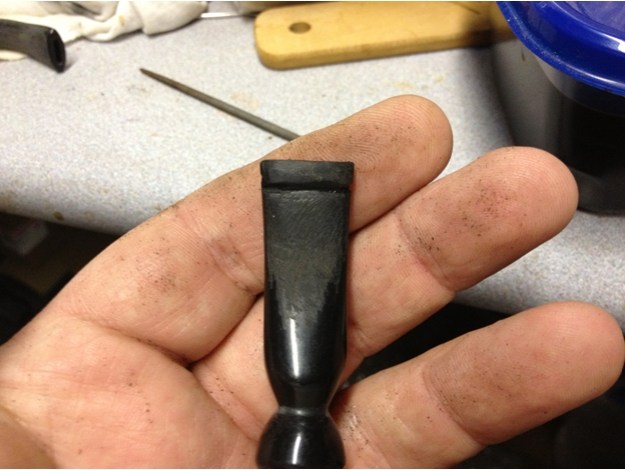
I shaped the bit with needle files, too, again using several to get the shape right. The first step for this was getting the angle to look right on the top; this didn’t take as long as I expected. I then began to form the bottom of the bit, trying to match the shape of the top as close as I could; this took more time and effort than I’d expected.

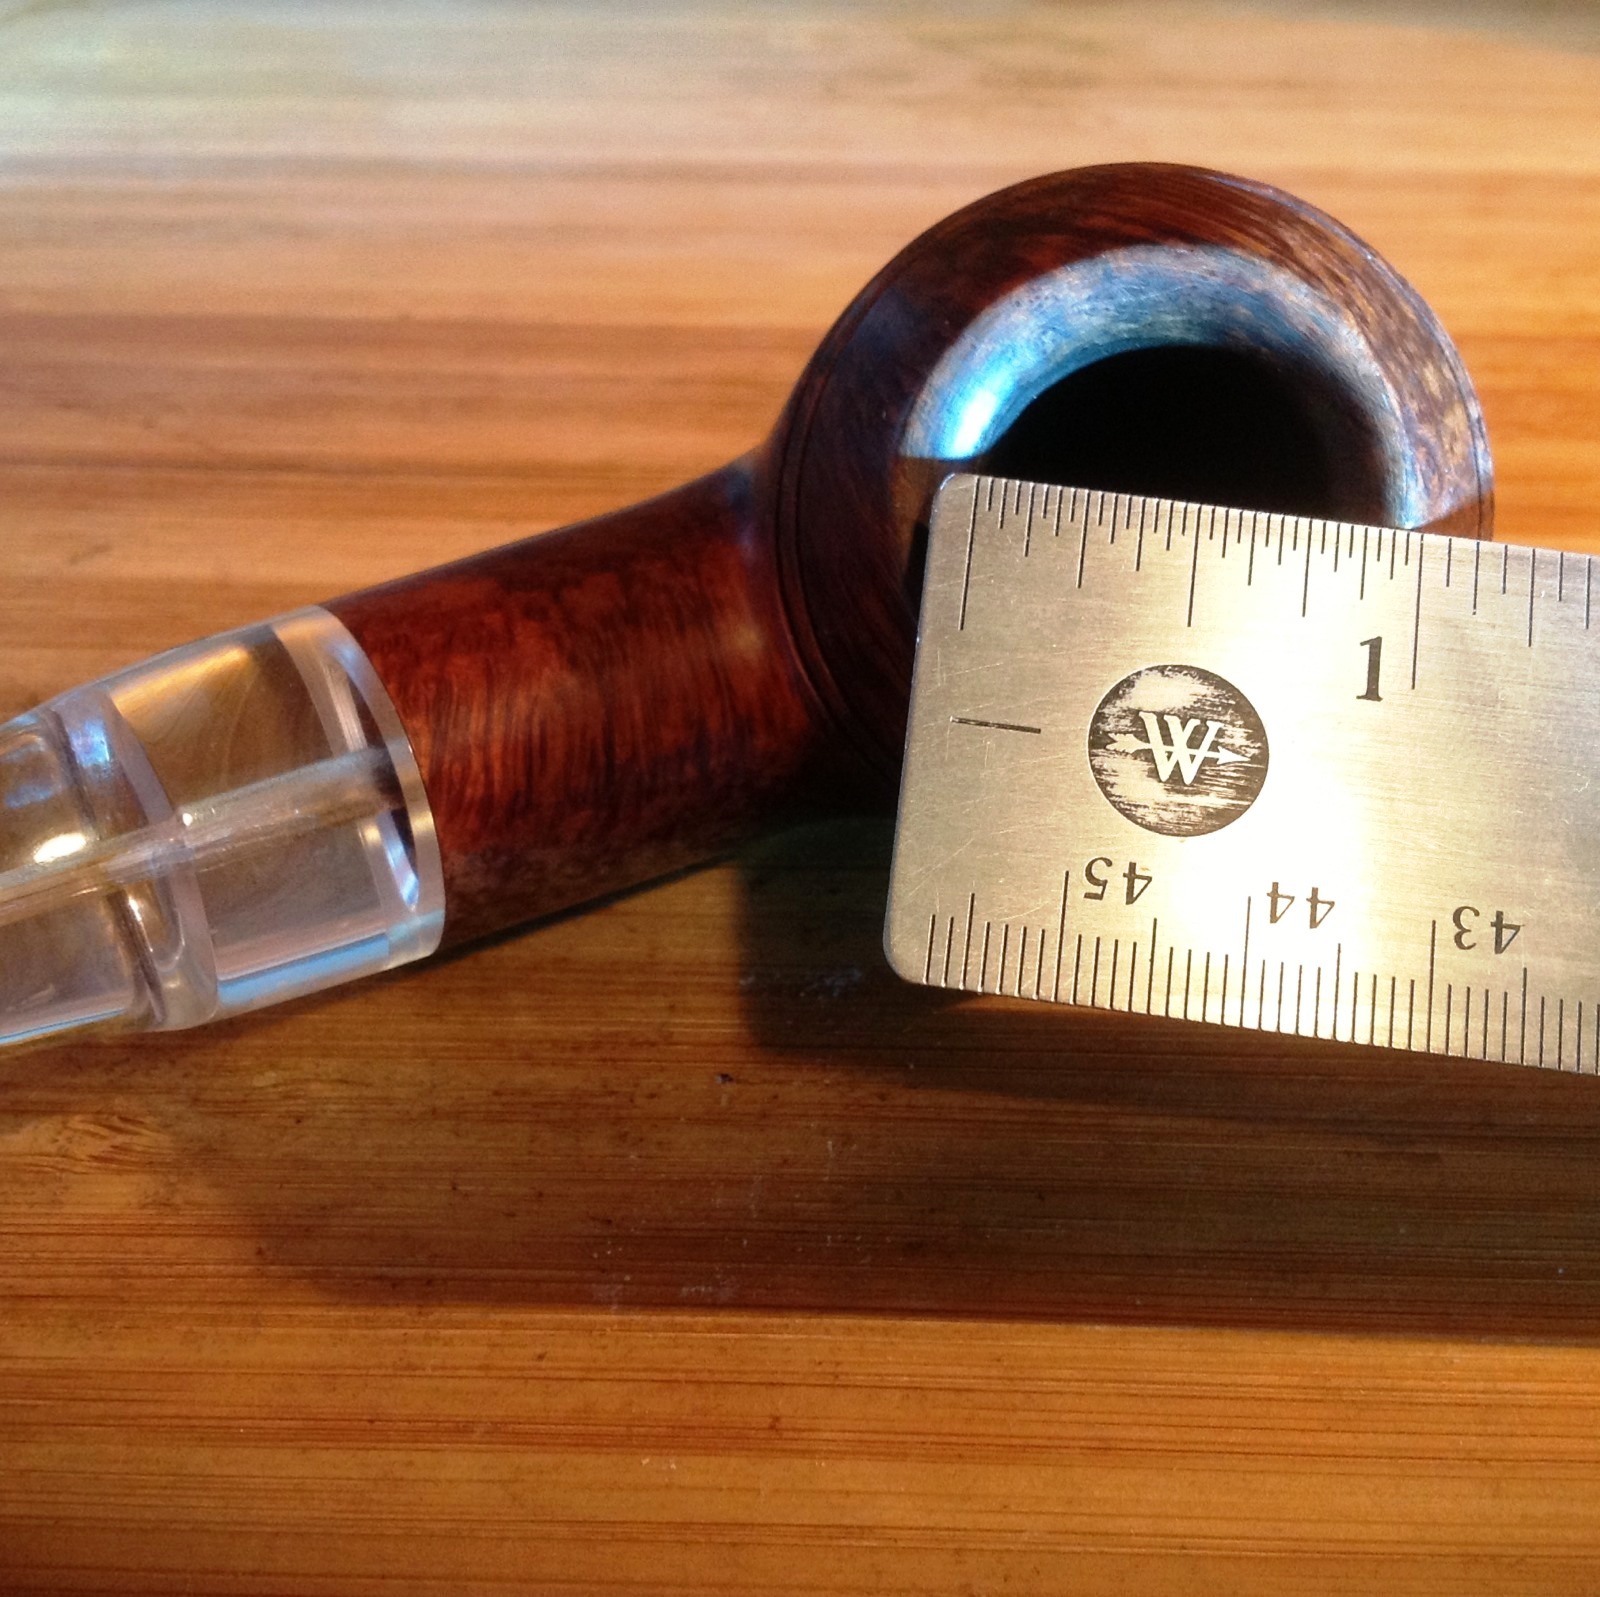
Making a new drought hole was something new to me. And was not without its challenges either. I used my needle files, again, to start shaping the new hole, making it a bit taller as well as wider than the hole that was left in the cut off stem. I took the extra time to fan the drought hole, too, partly because I wanted to and partly to see if I could do it. This ended up being some of the most time-consuming and tedious work of the entire project: I needed to make sure I didn’t go too thin in any direction but I wanted the hole to really funnel out well. I am pleased with the results and the way it smokes and would say it was worth the extra time and effort to accomplish it.Greg11

Greg12 
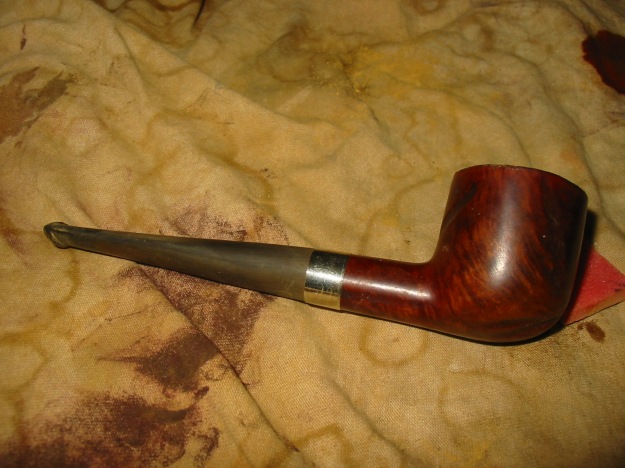
After all the shaping I wiped the stem well with alcohol to clean it off for a test fit – to my mouth. The test failed; the bit was too long and too steep. So back to the files I went. I filed, tested, filed, tested a few times until it felt comfortable in my mouth and looked good to me. Now time to get it shiny again.

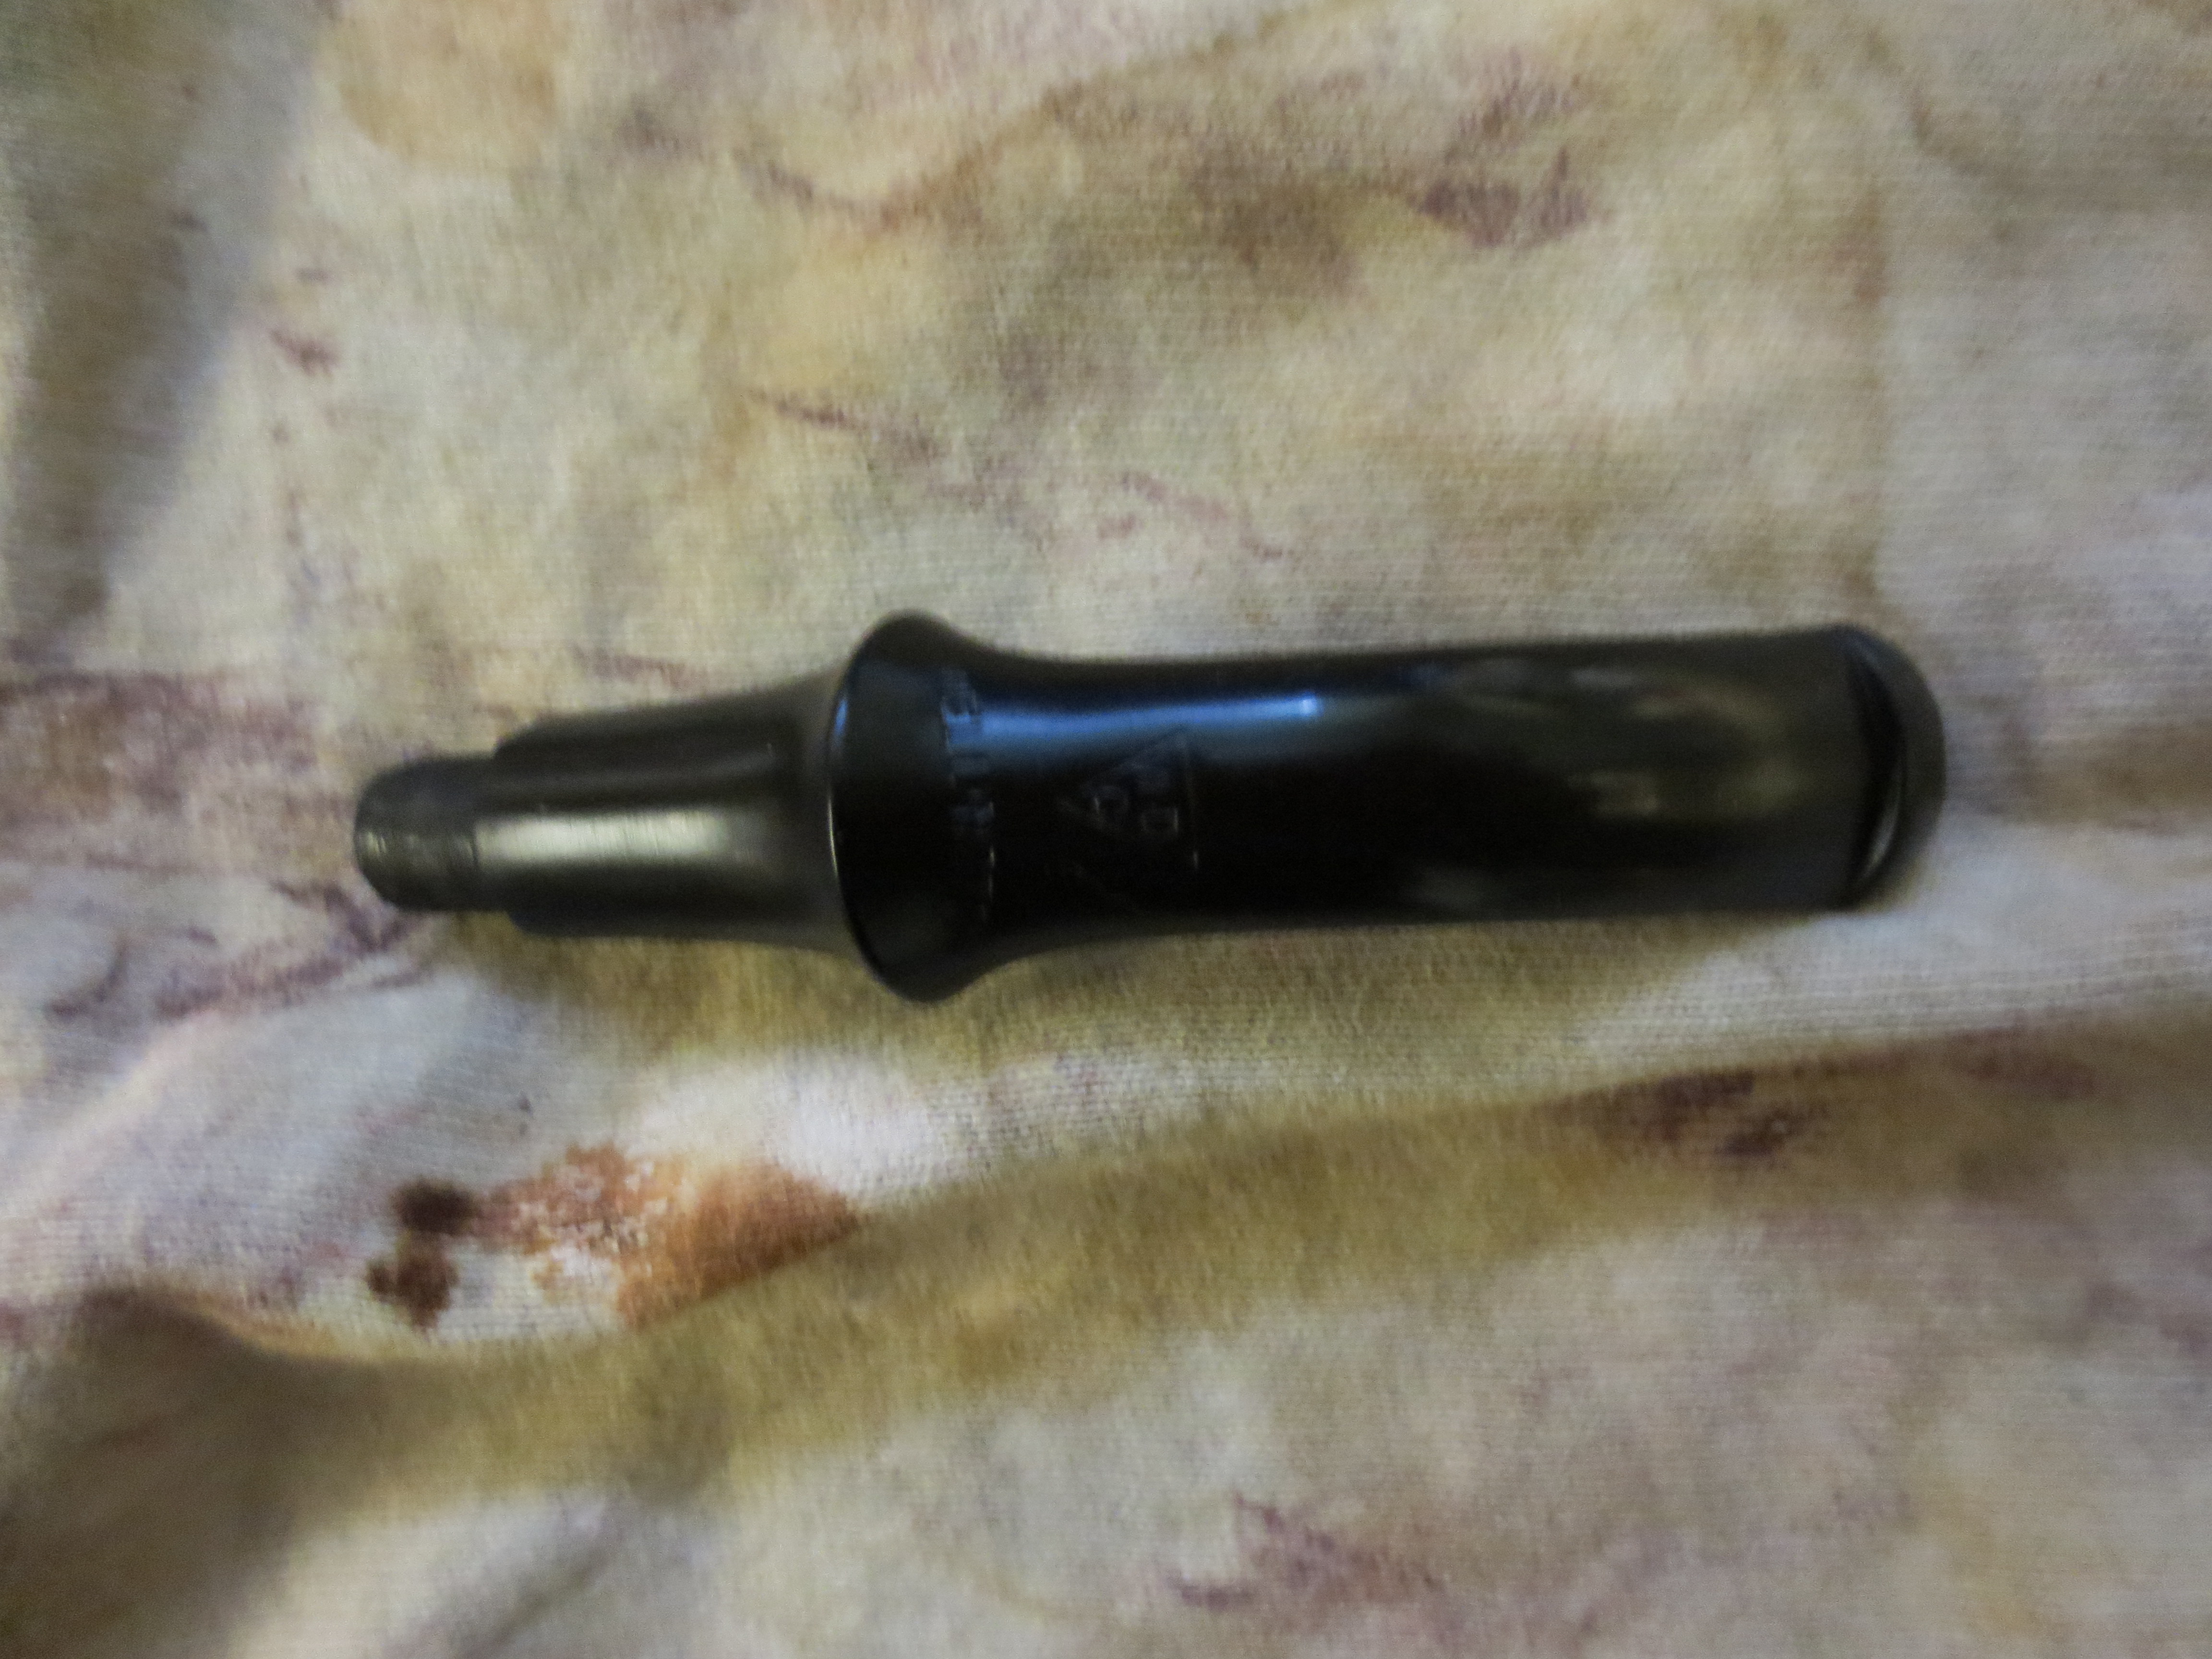
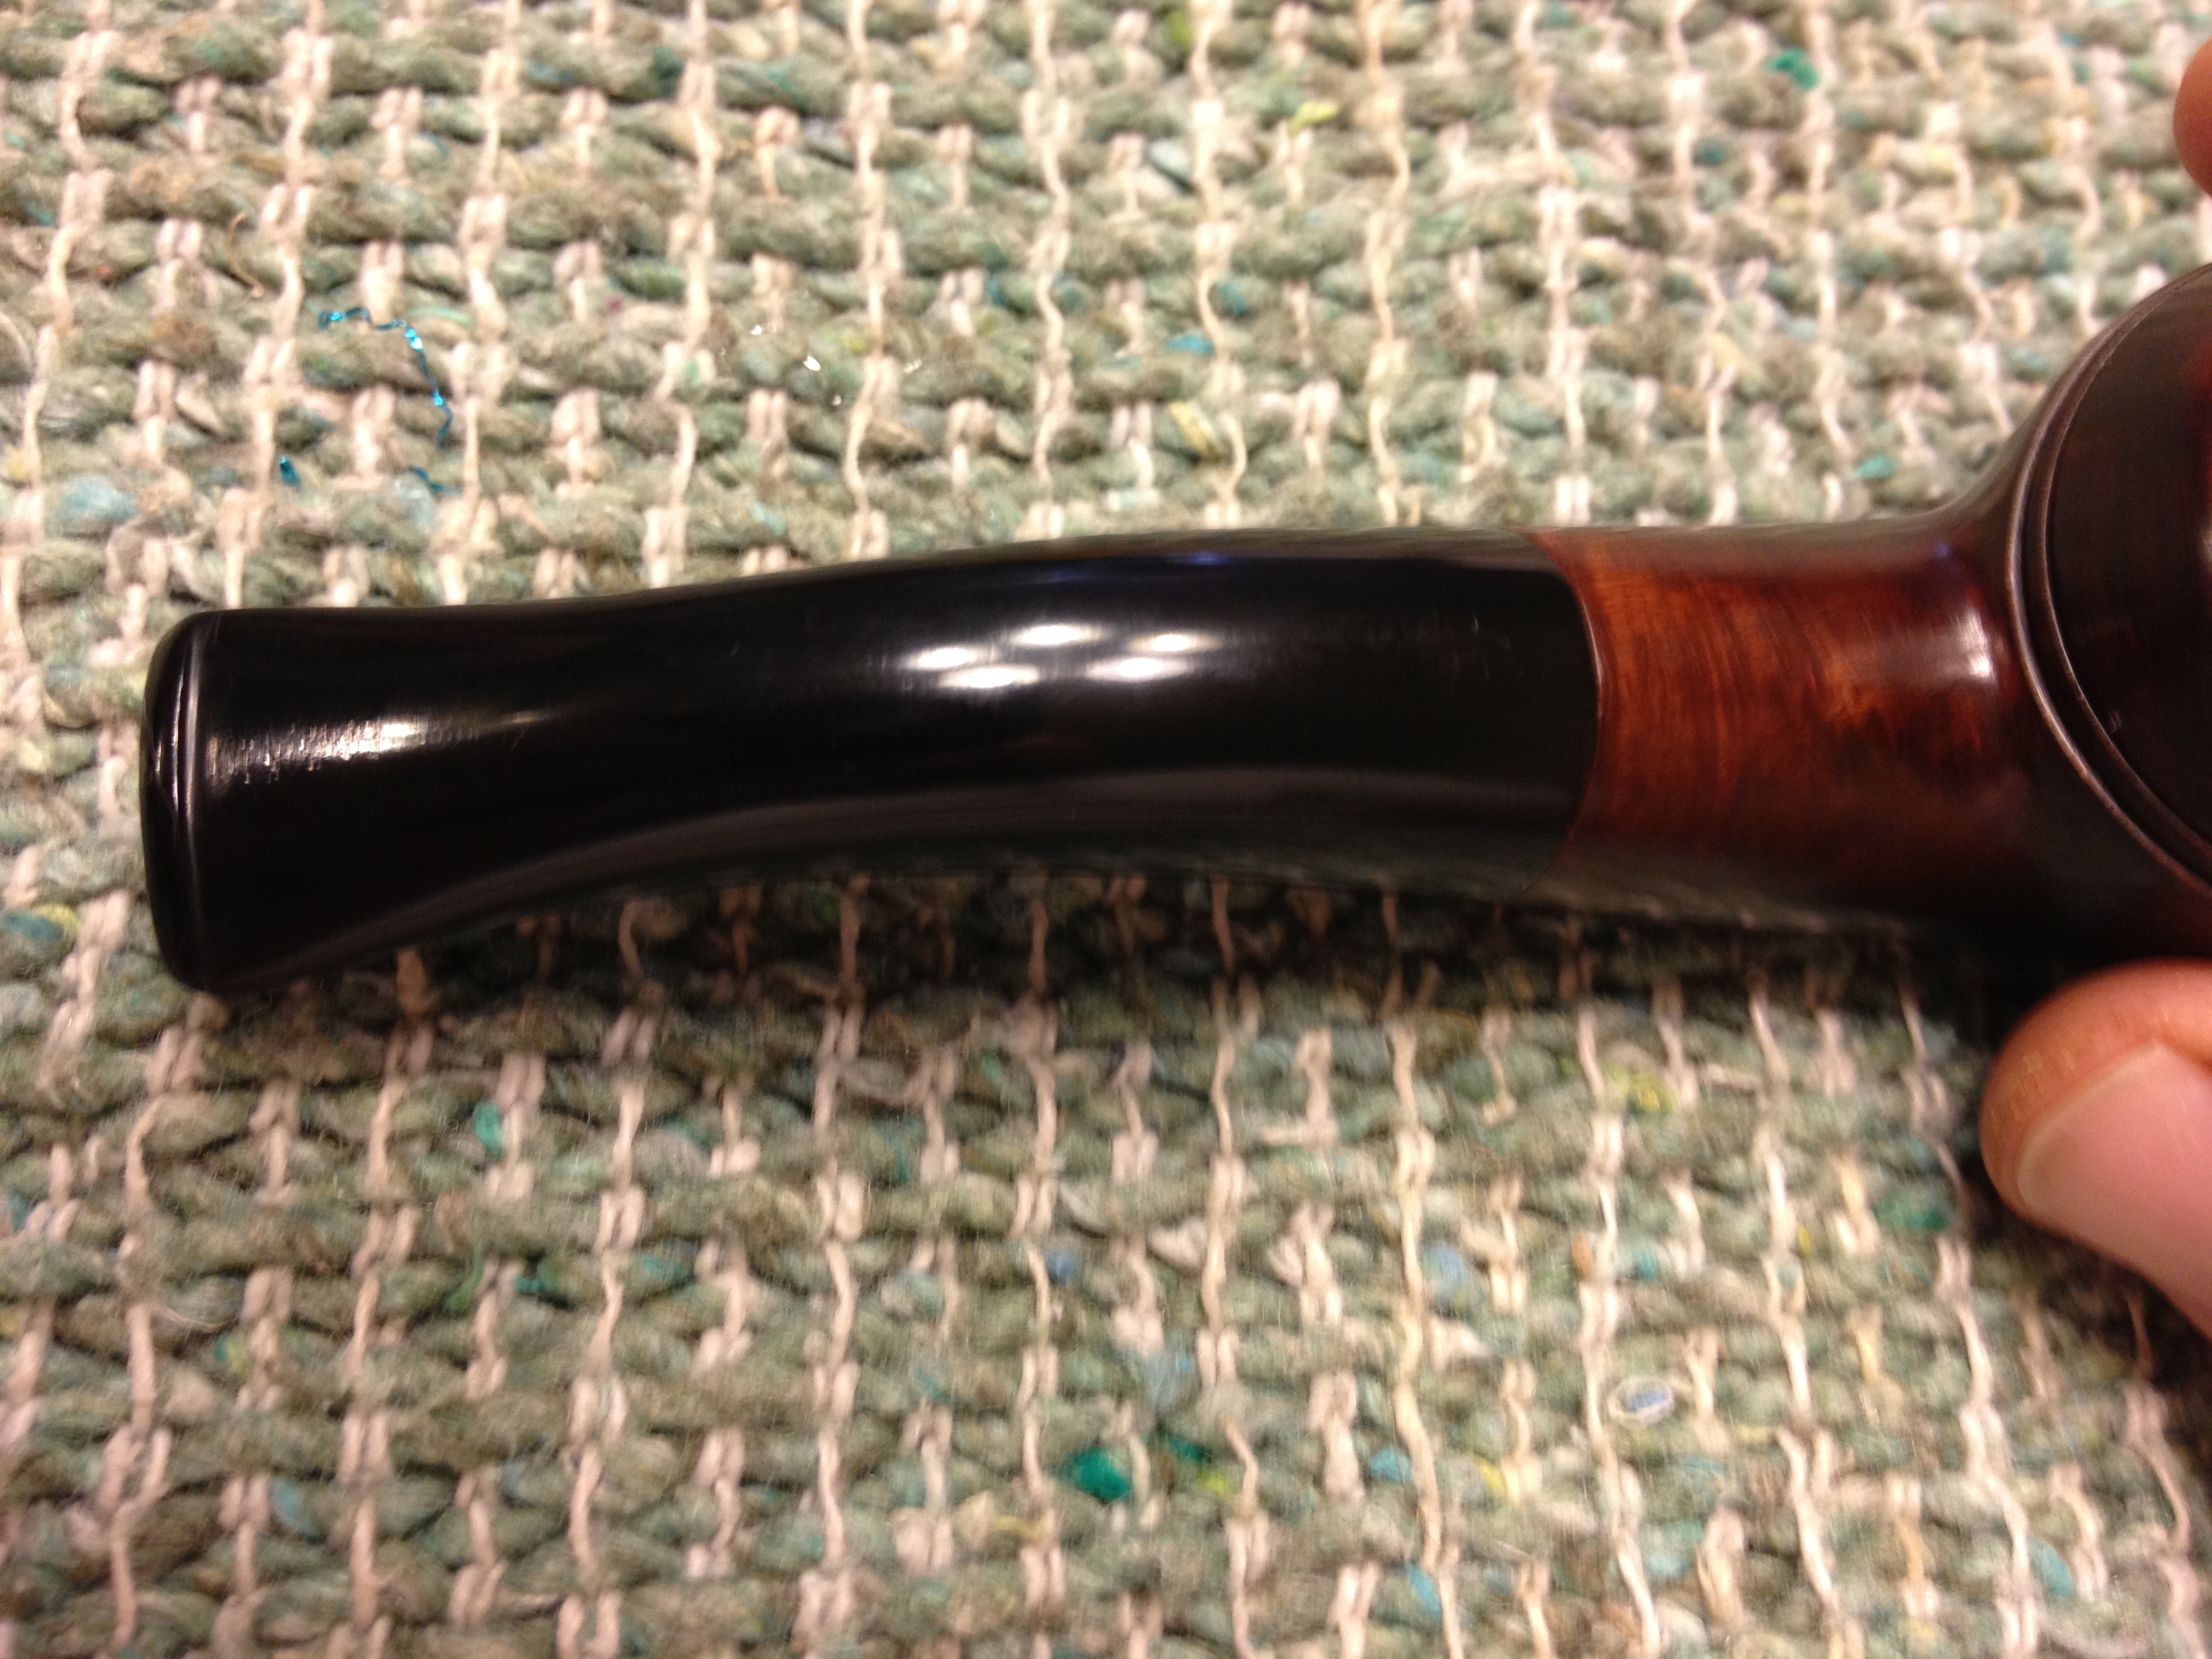
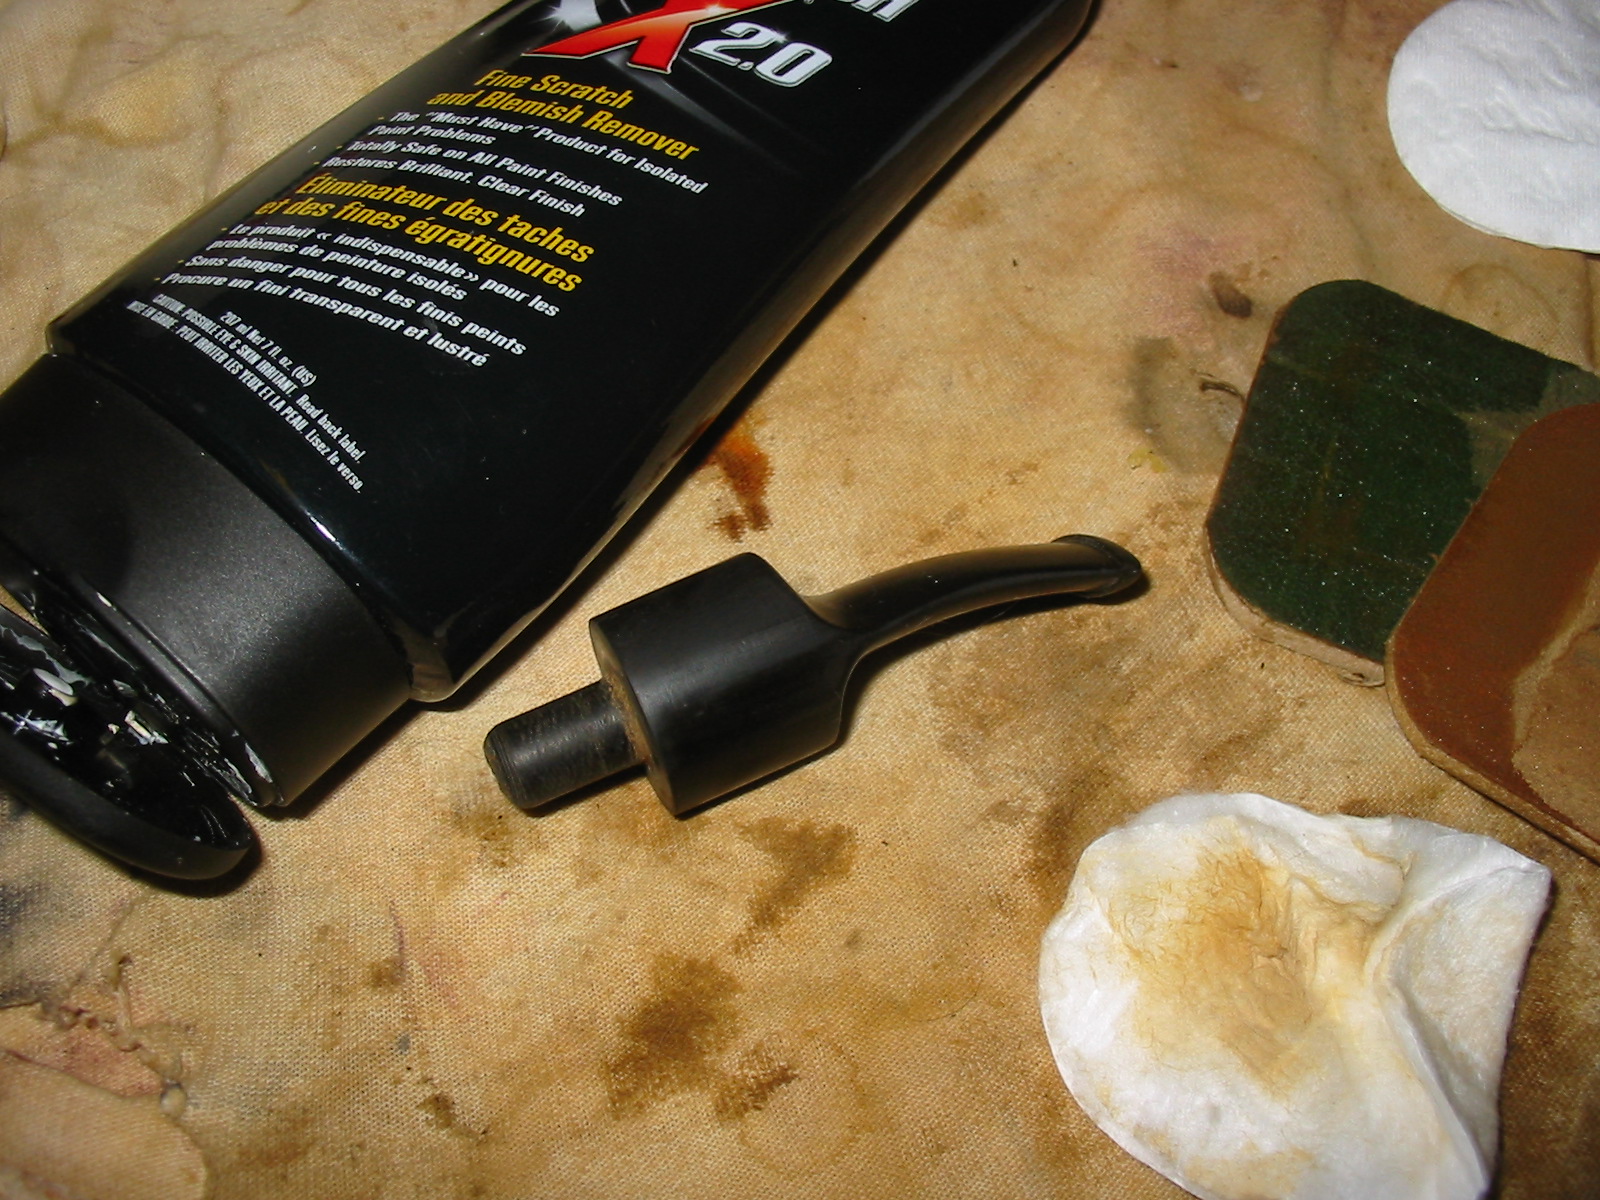
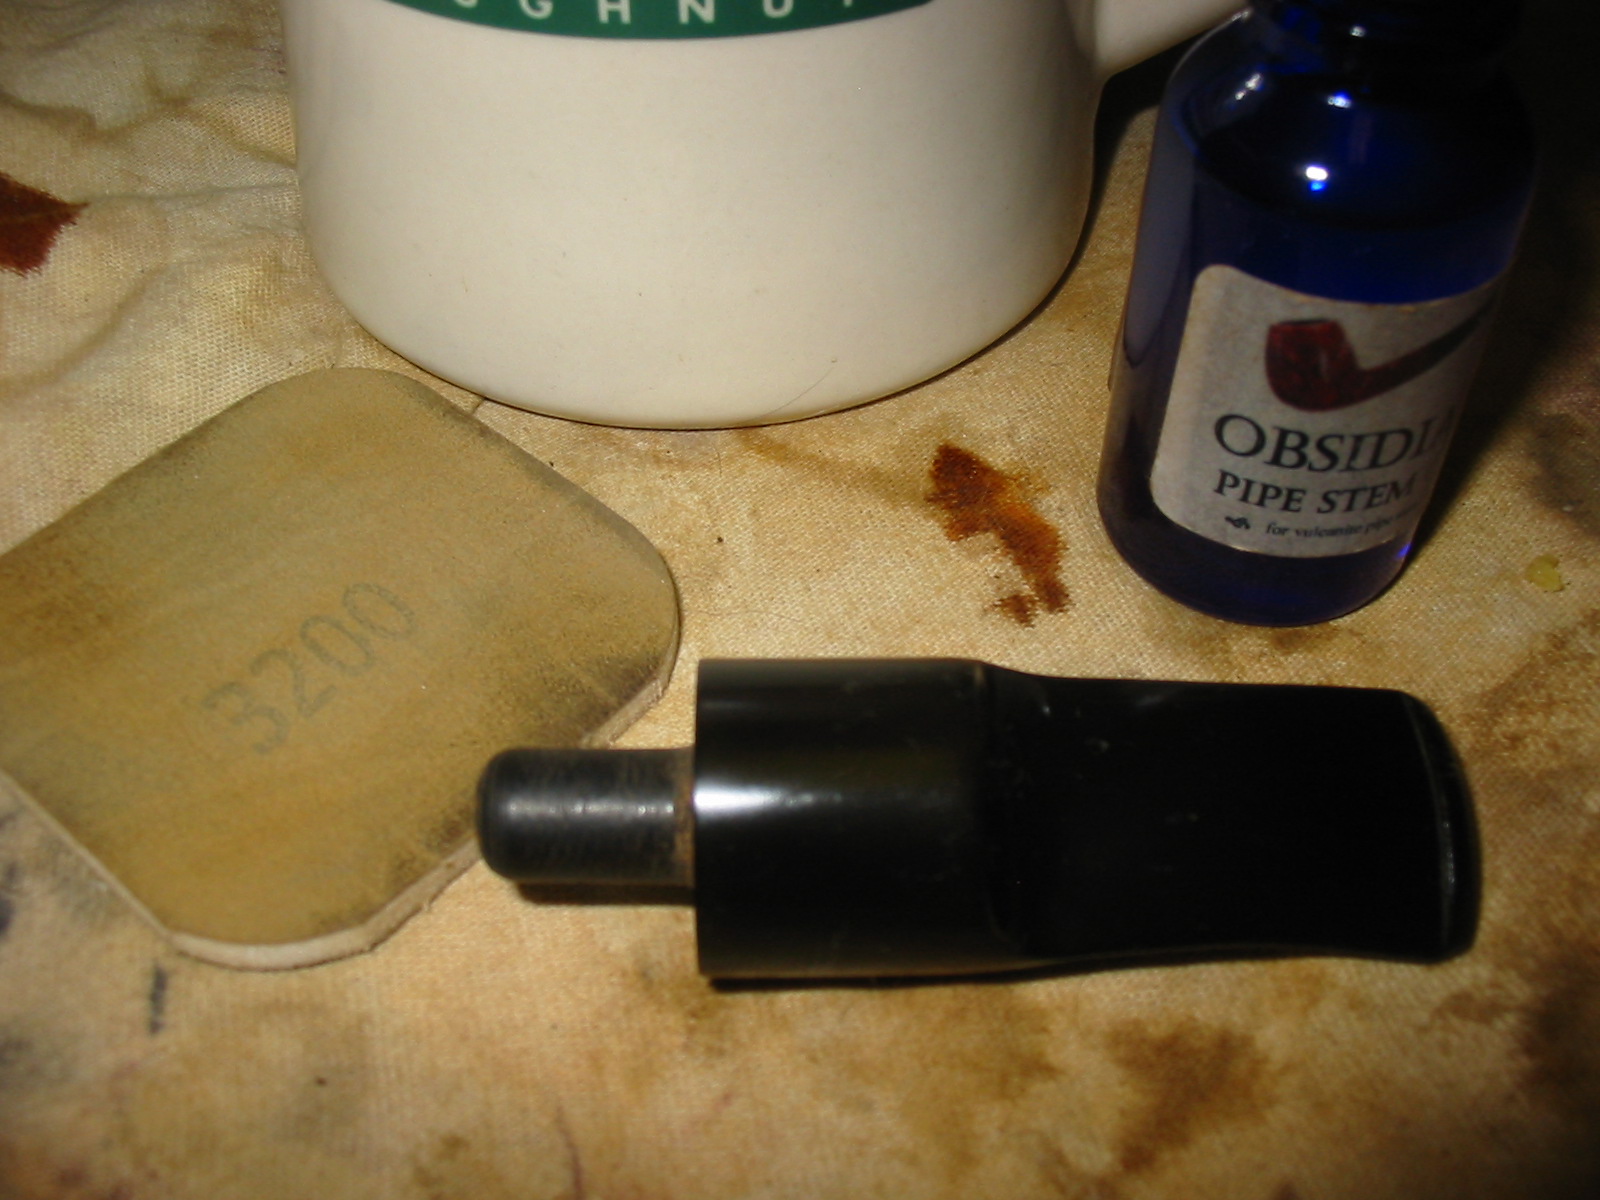
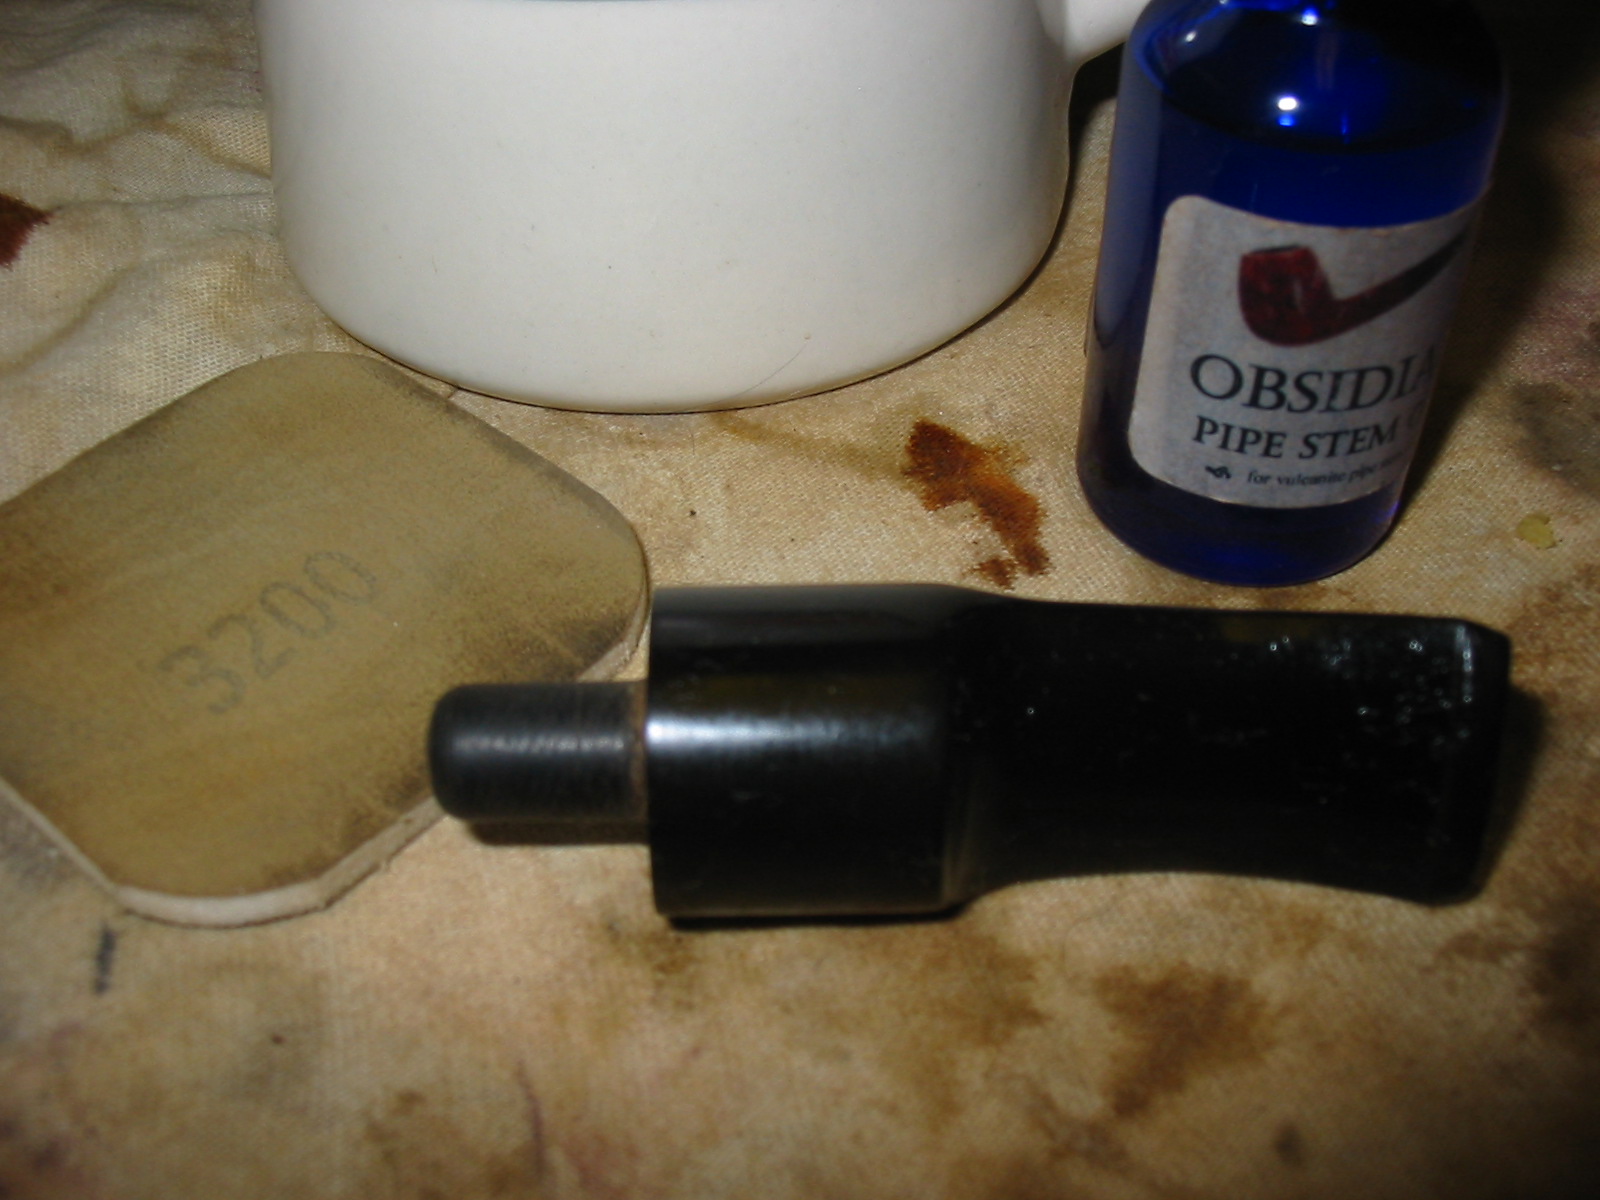
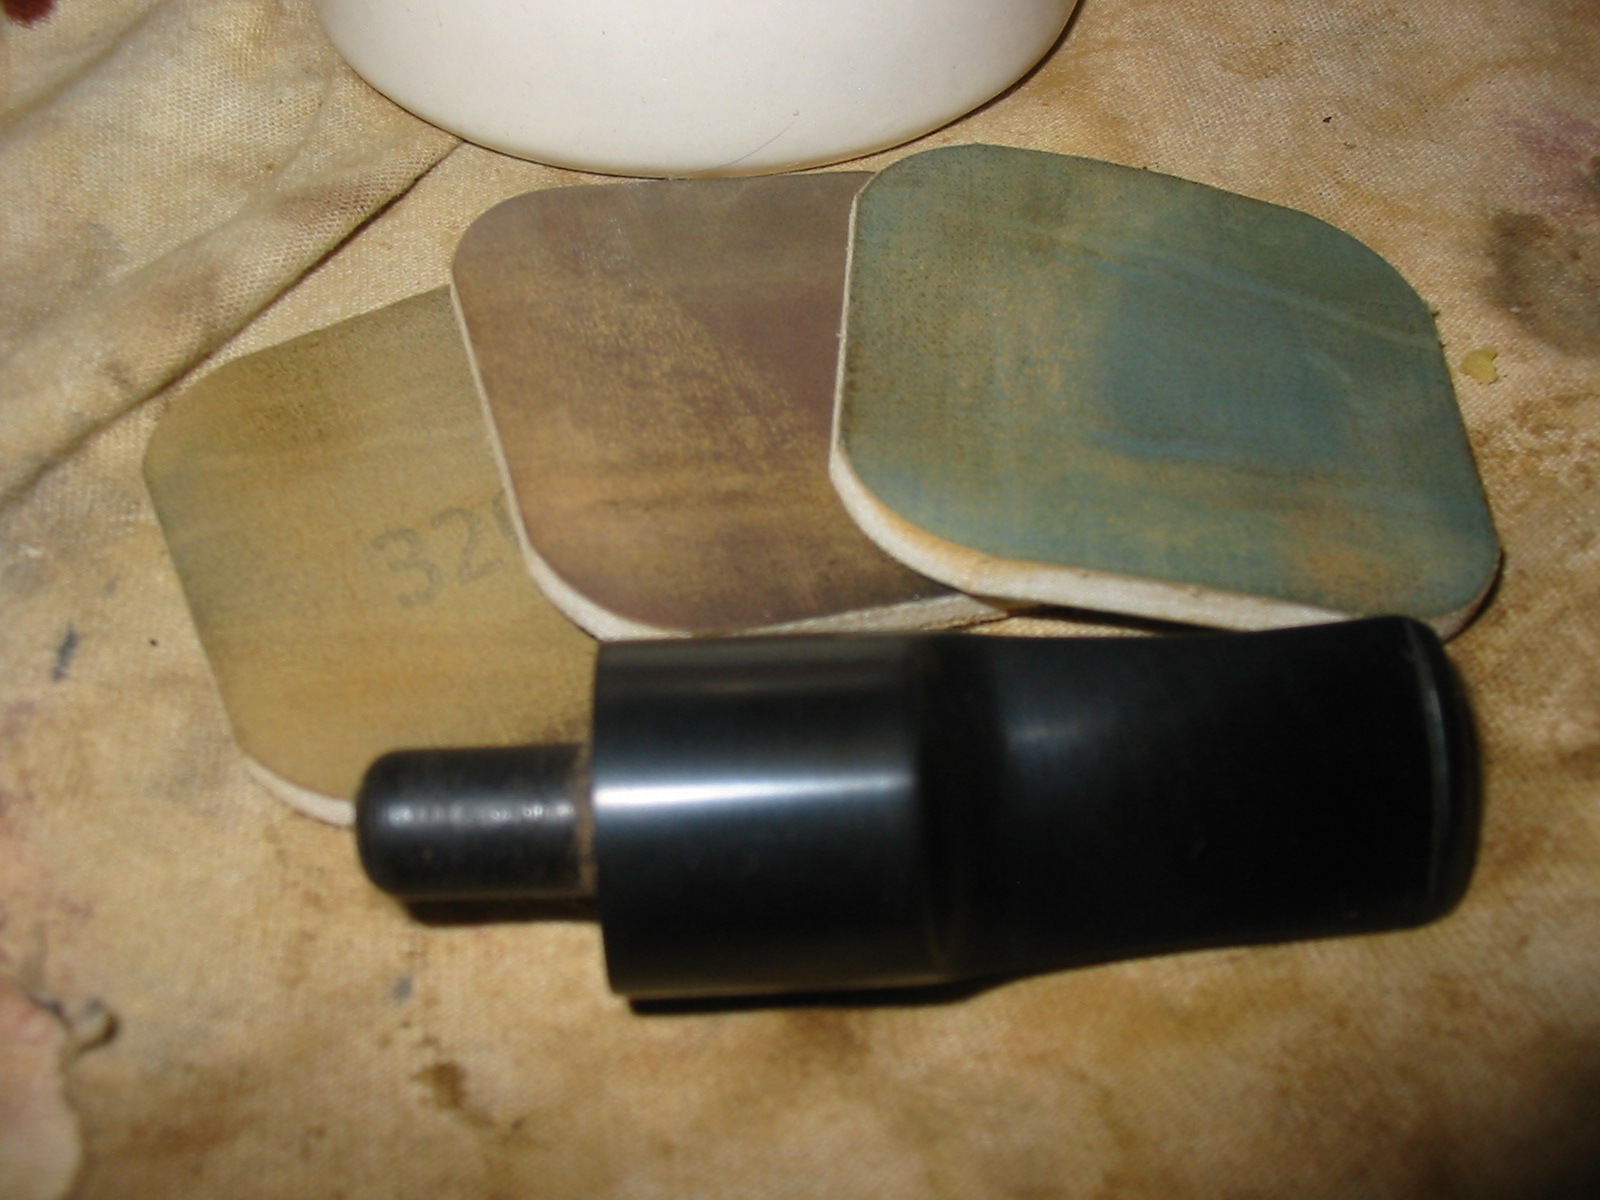
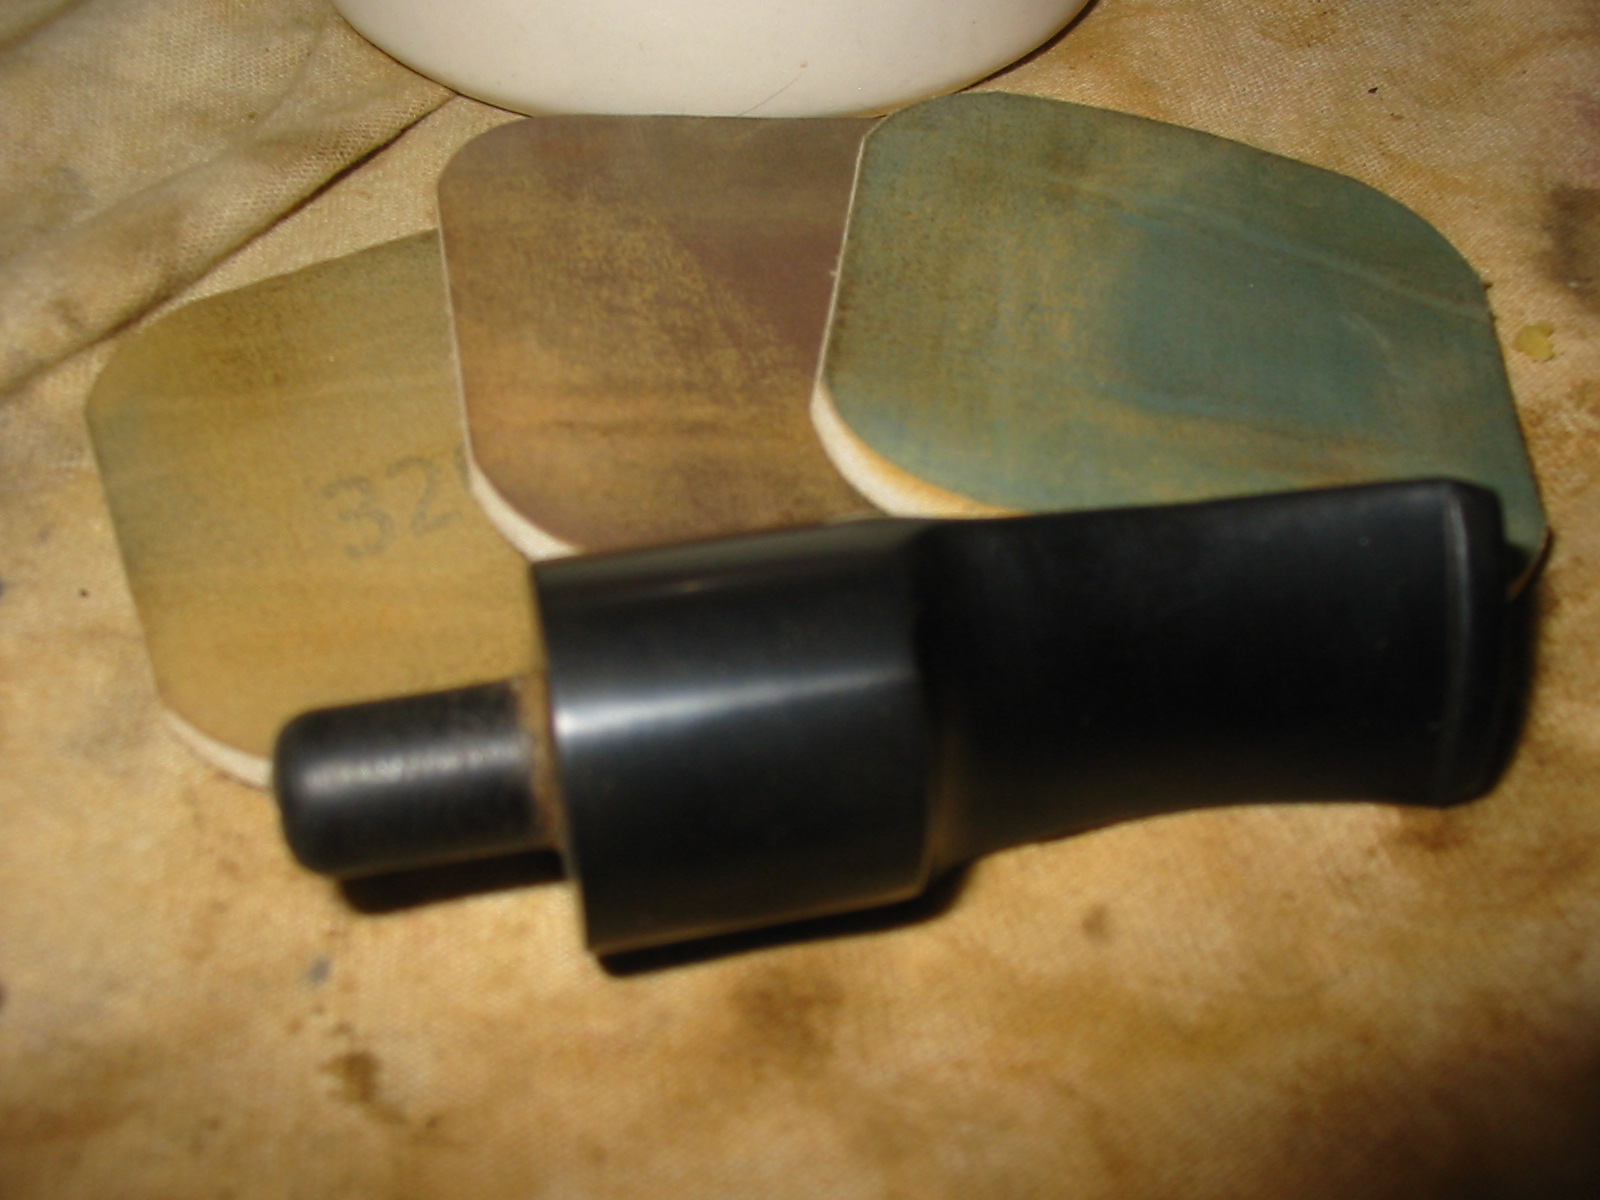
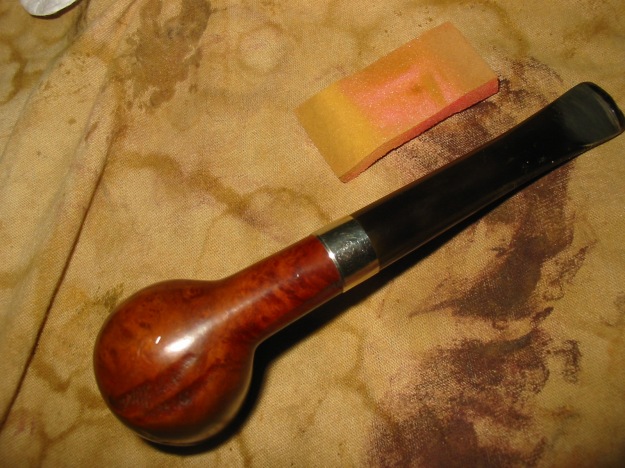
I began with a fine/medium grit sanding sponge. It worked very well to get in and around the bit to smooth it a bit more and to take out the file marks. I then began wet sanding with grits 220/320/400. At this point I applied some Novus 2 plastic polish. The Novus line come in three grades: 3 – the most course, 2 – the second, and 1 – the final polish. I began using this product on my motorcycle windshield a few years ago and loved it. I have numbers 1 & 2 but have yet to try 3.

After using the Novus, I began with the micro mesh, wet sanding with grits 1500/1800/2400/3200/4000 (I’m not looking at the numbers but I believe that was the correct grit numbers. I applied the Novus 2 again and then polished with micro mesh 6000/8000/12000. Now it was off to the buffer with pipe and stem.

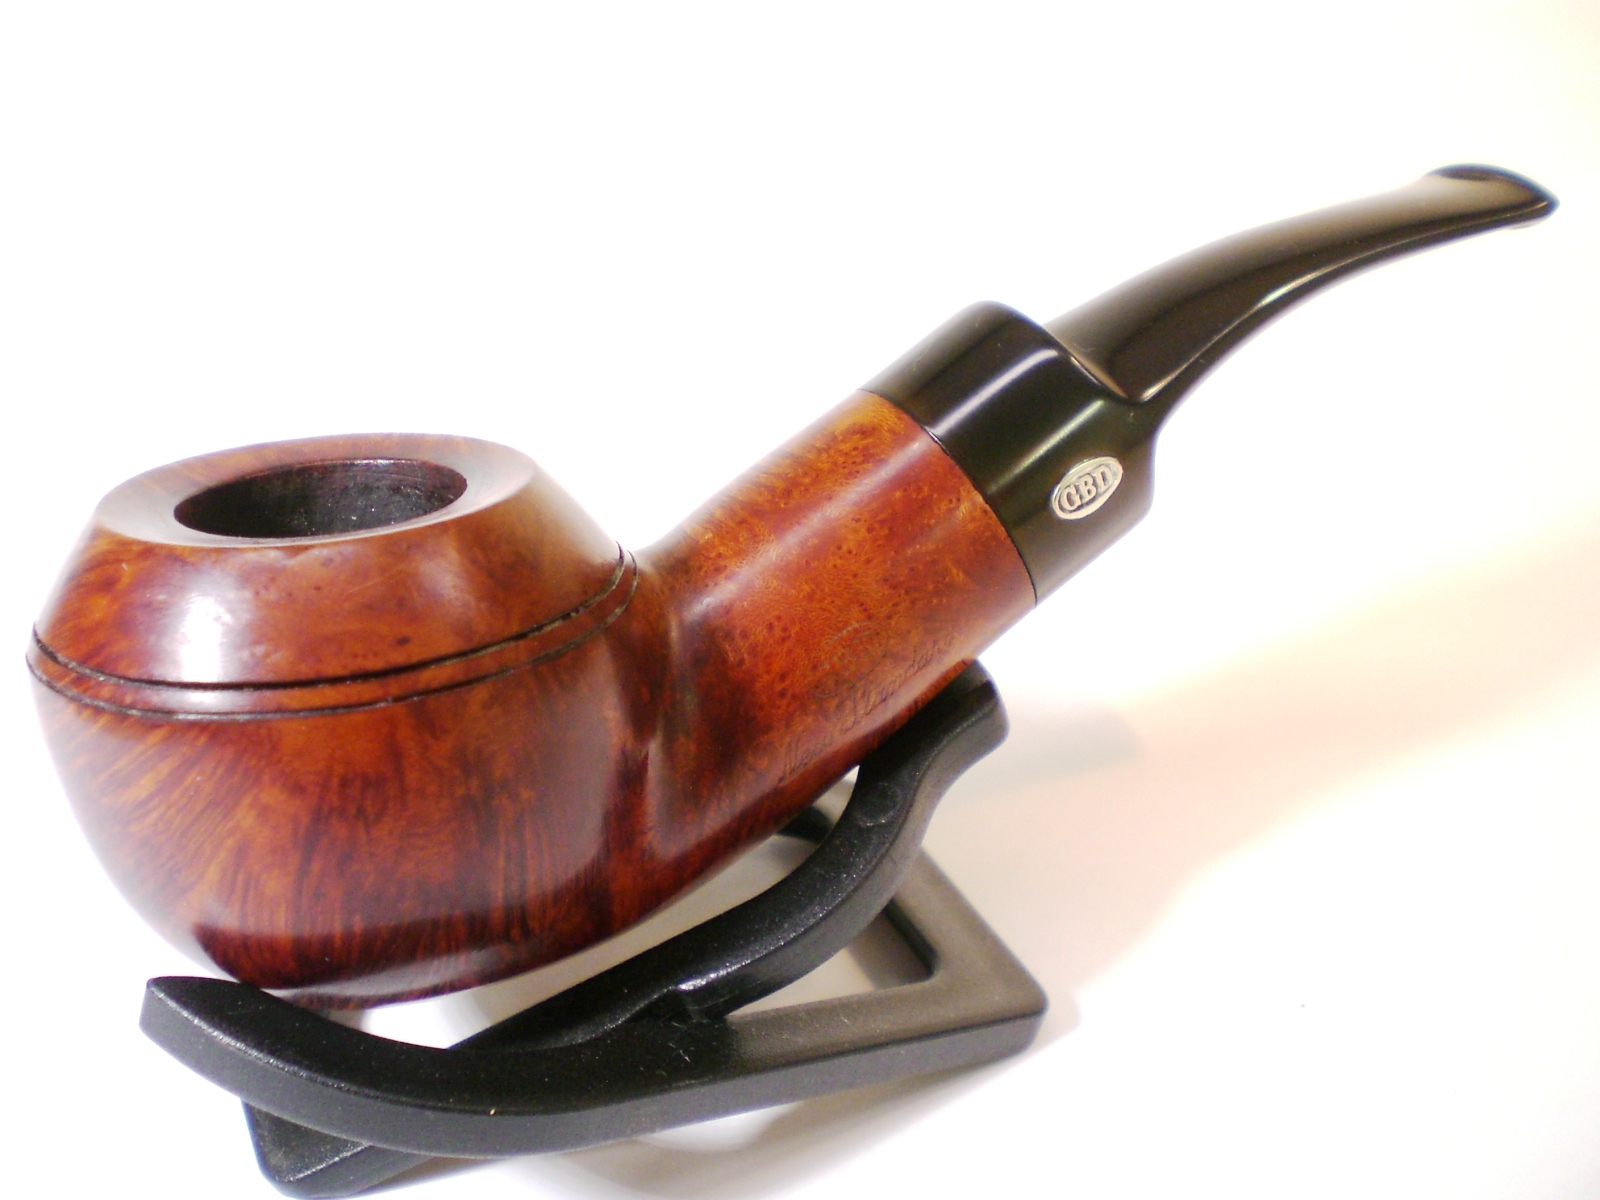
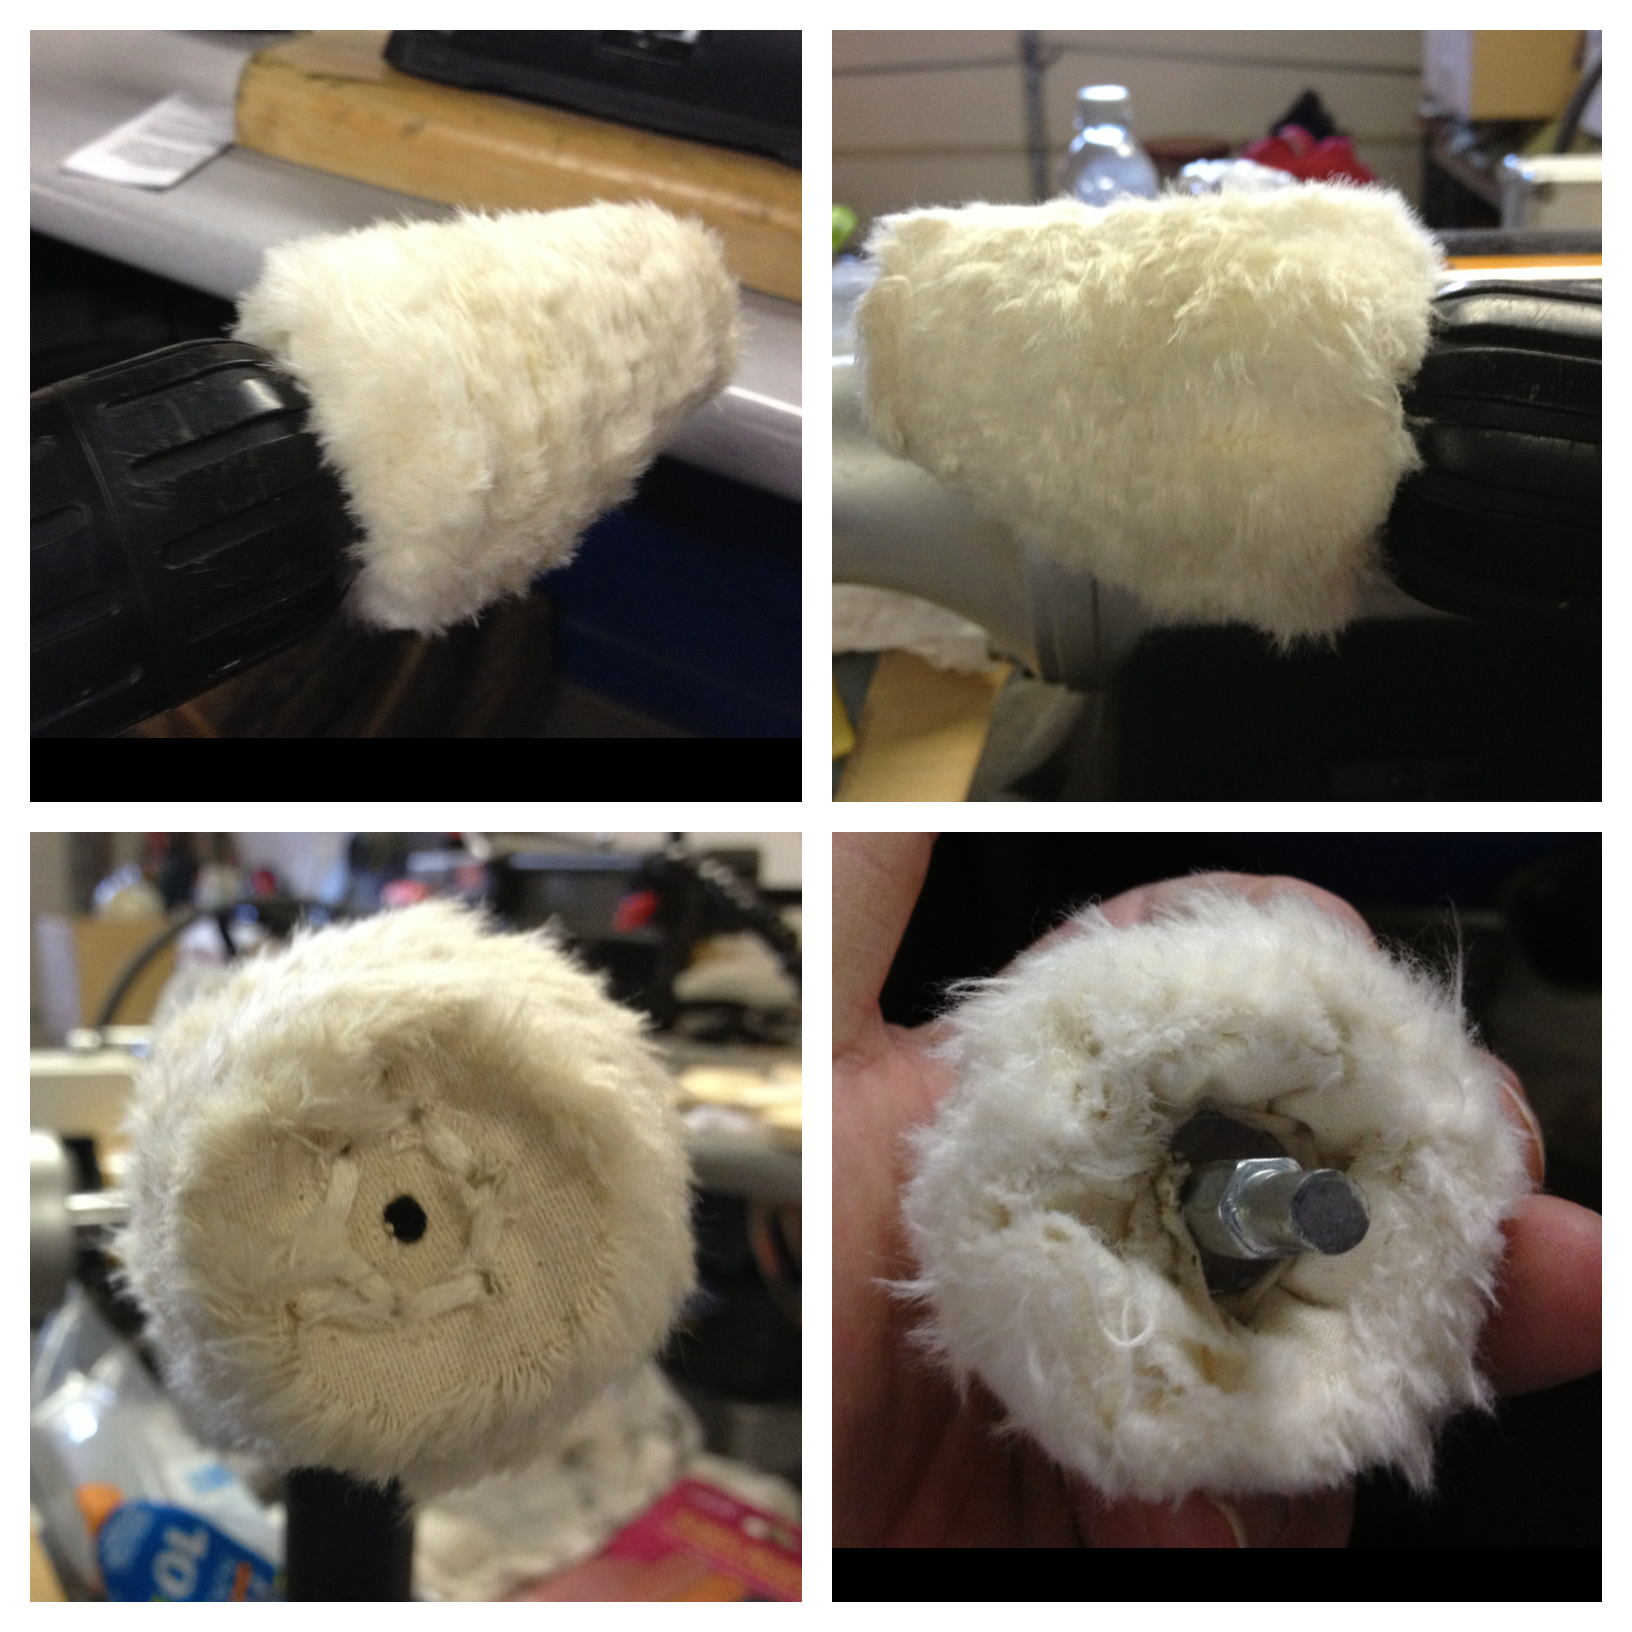
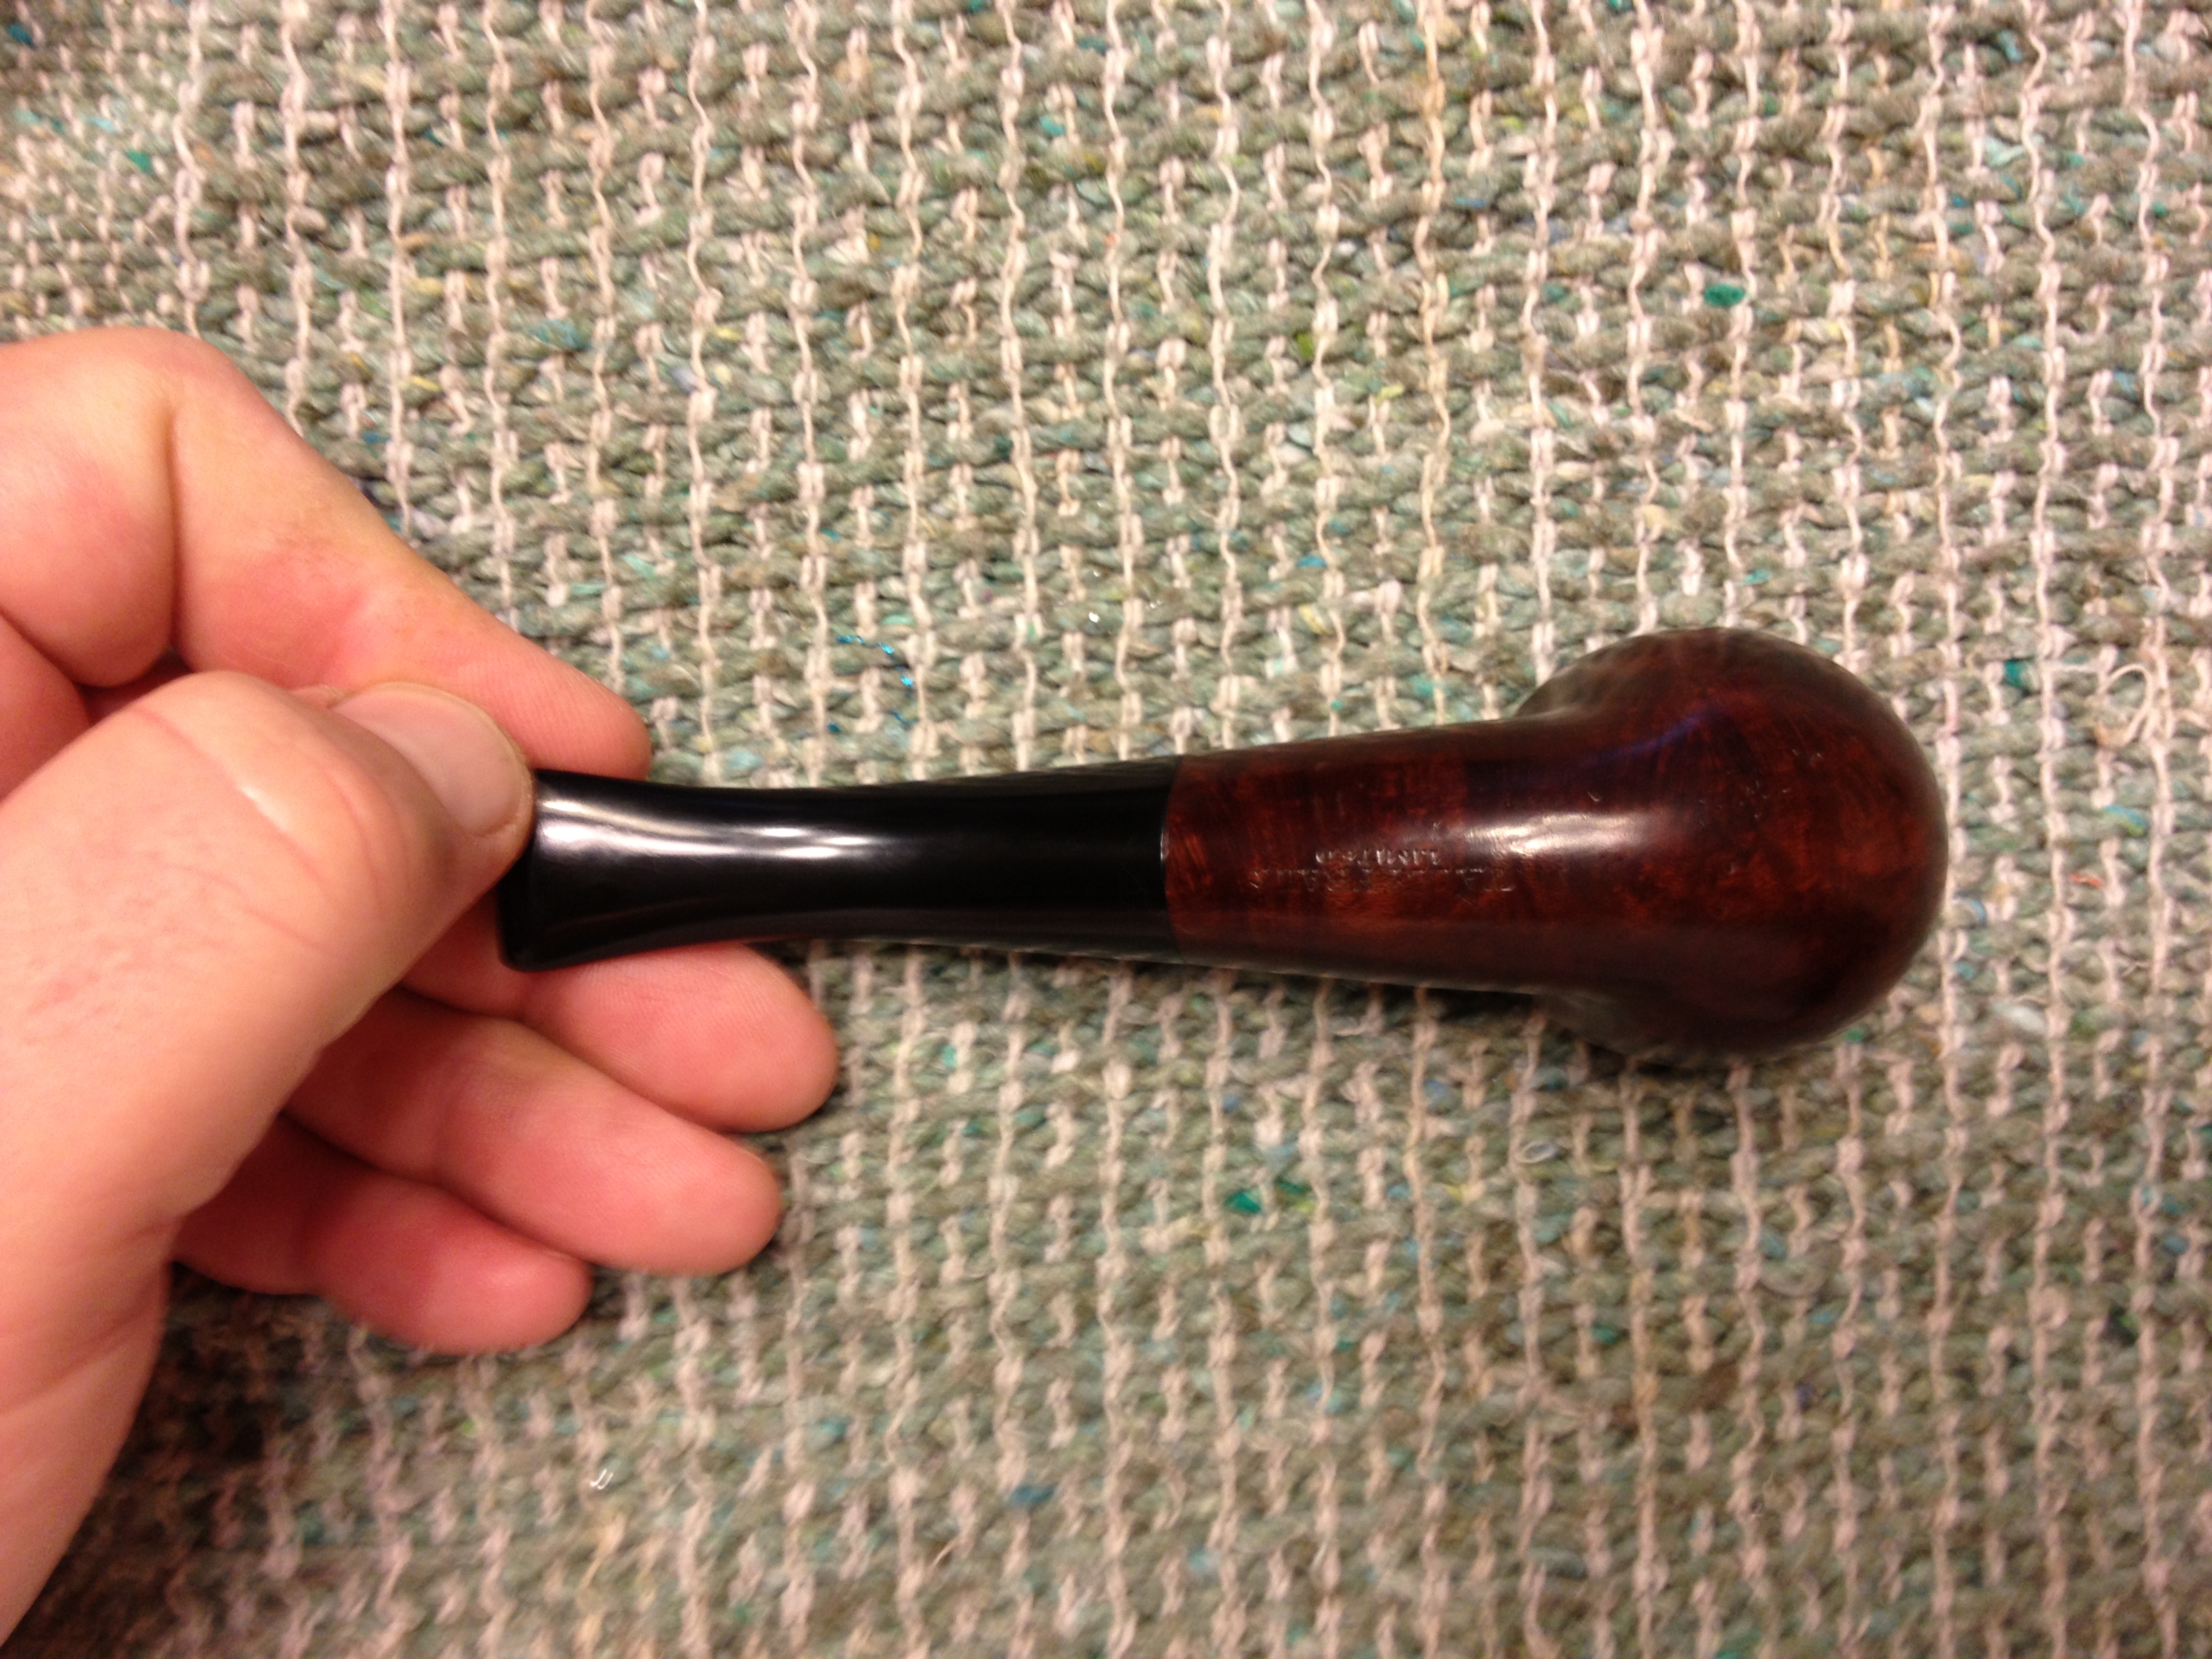
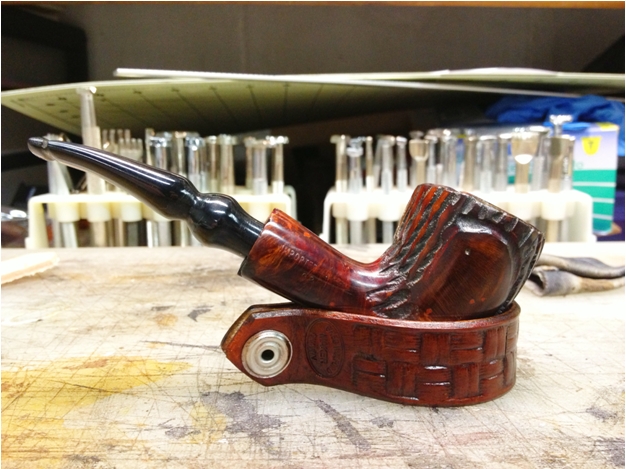
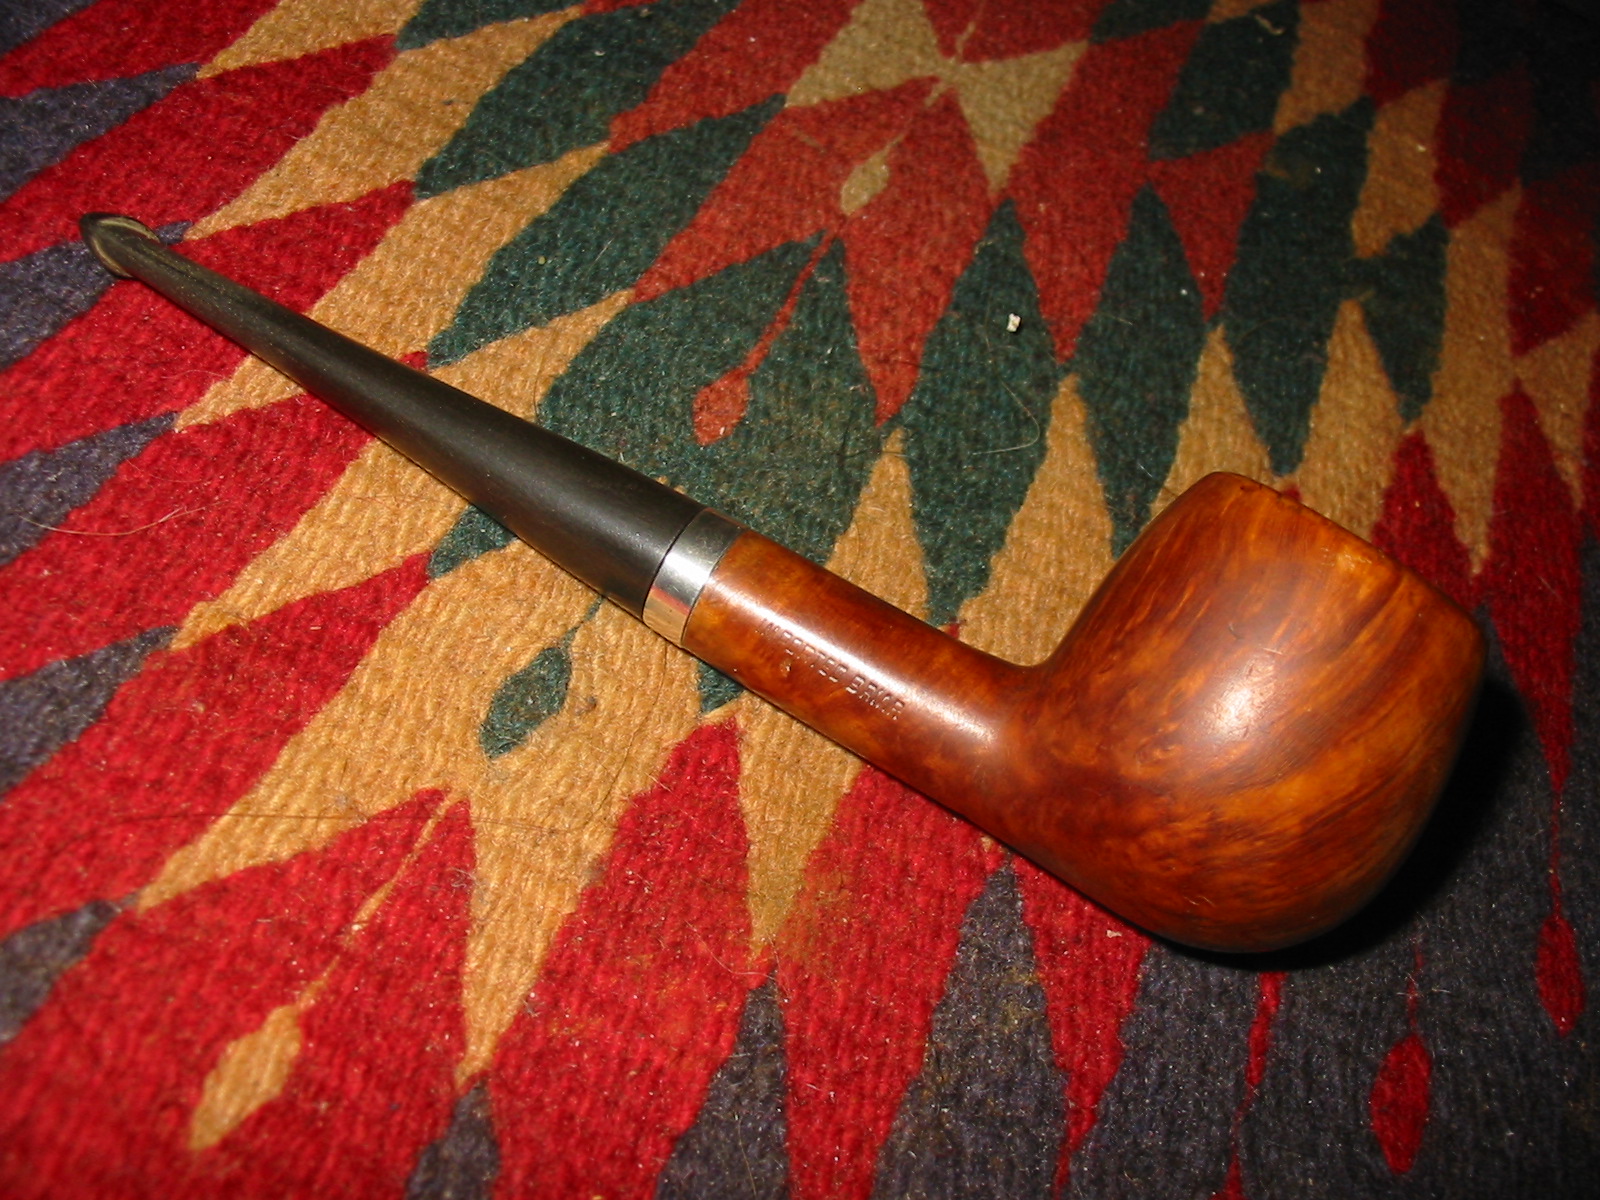
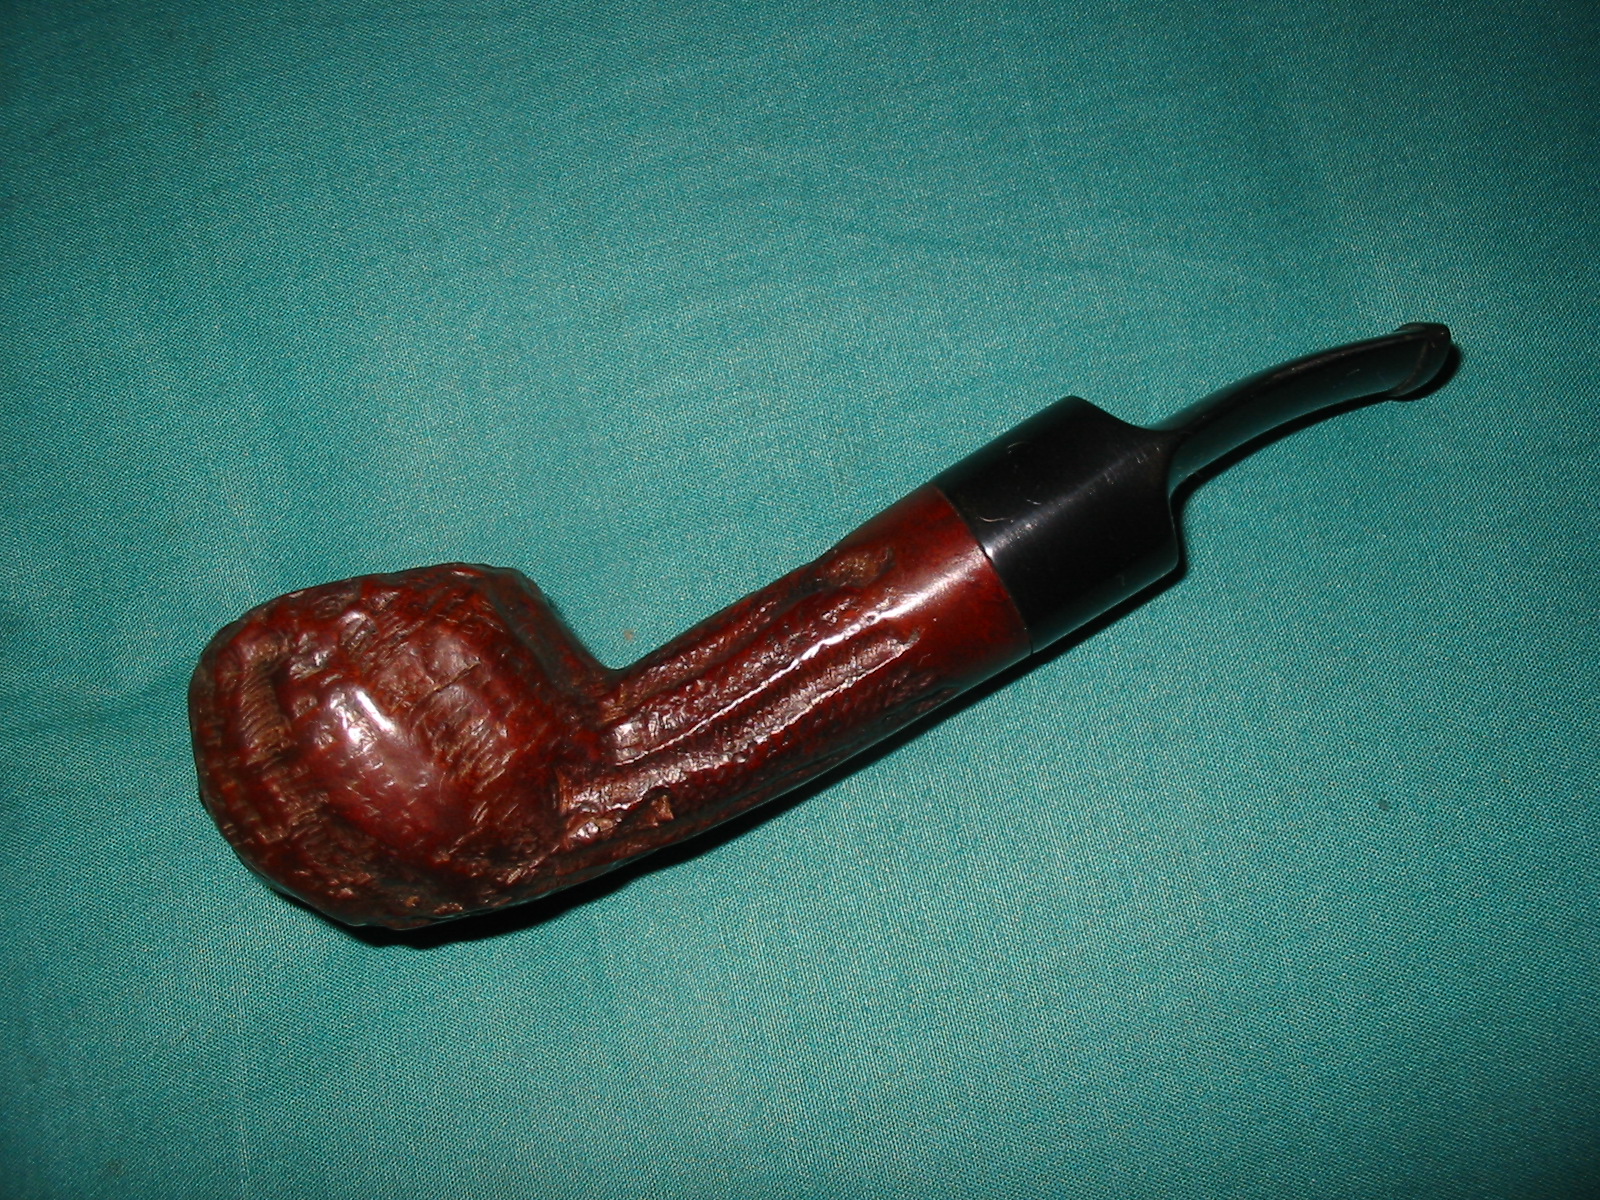
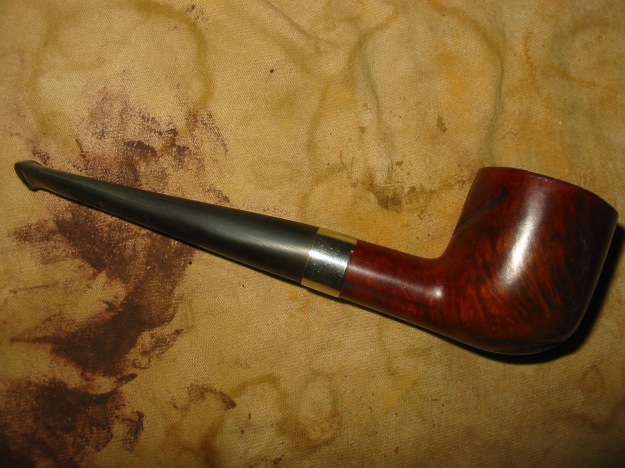
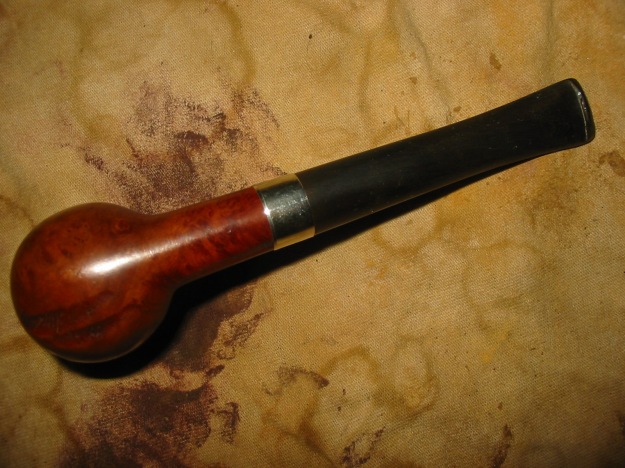
I buffed the pipe several times around with Tripoli to get the color just where I liked it. I then moved onto the white diamond for both the pipe and stem. I took a little extra time on the stem to make sure I fine tuned the button a little more, testing it every so often. After buffing the pipe and stem with white diamond I changed to a metal buffing wheel with blue rouge to polish the metal tenon on the stem; I hate a nicely polished stem that hasn’t has the metal (if there is any) not polished, too.Greg13

Greg14

Greg15 
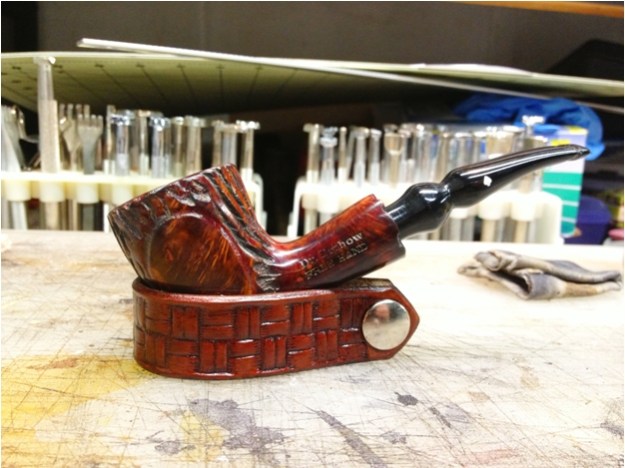
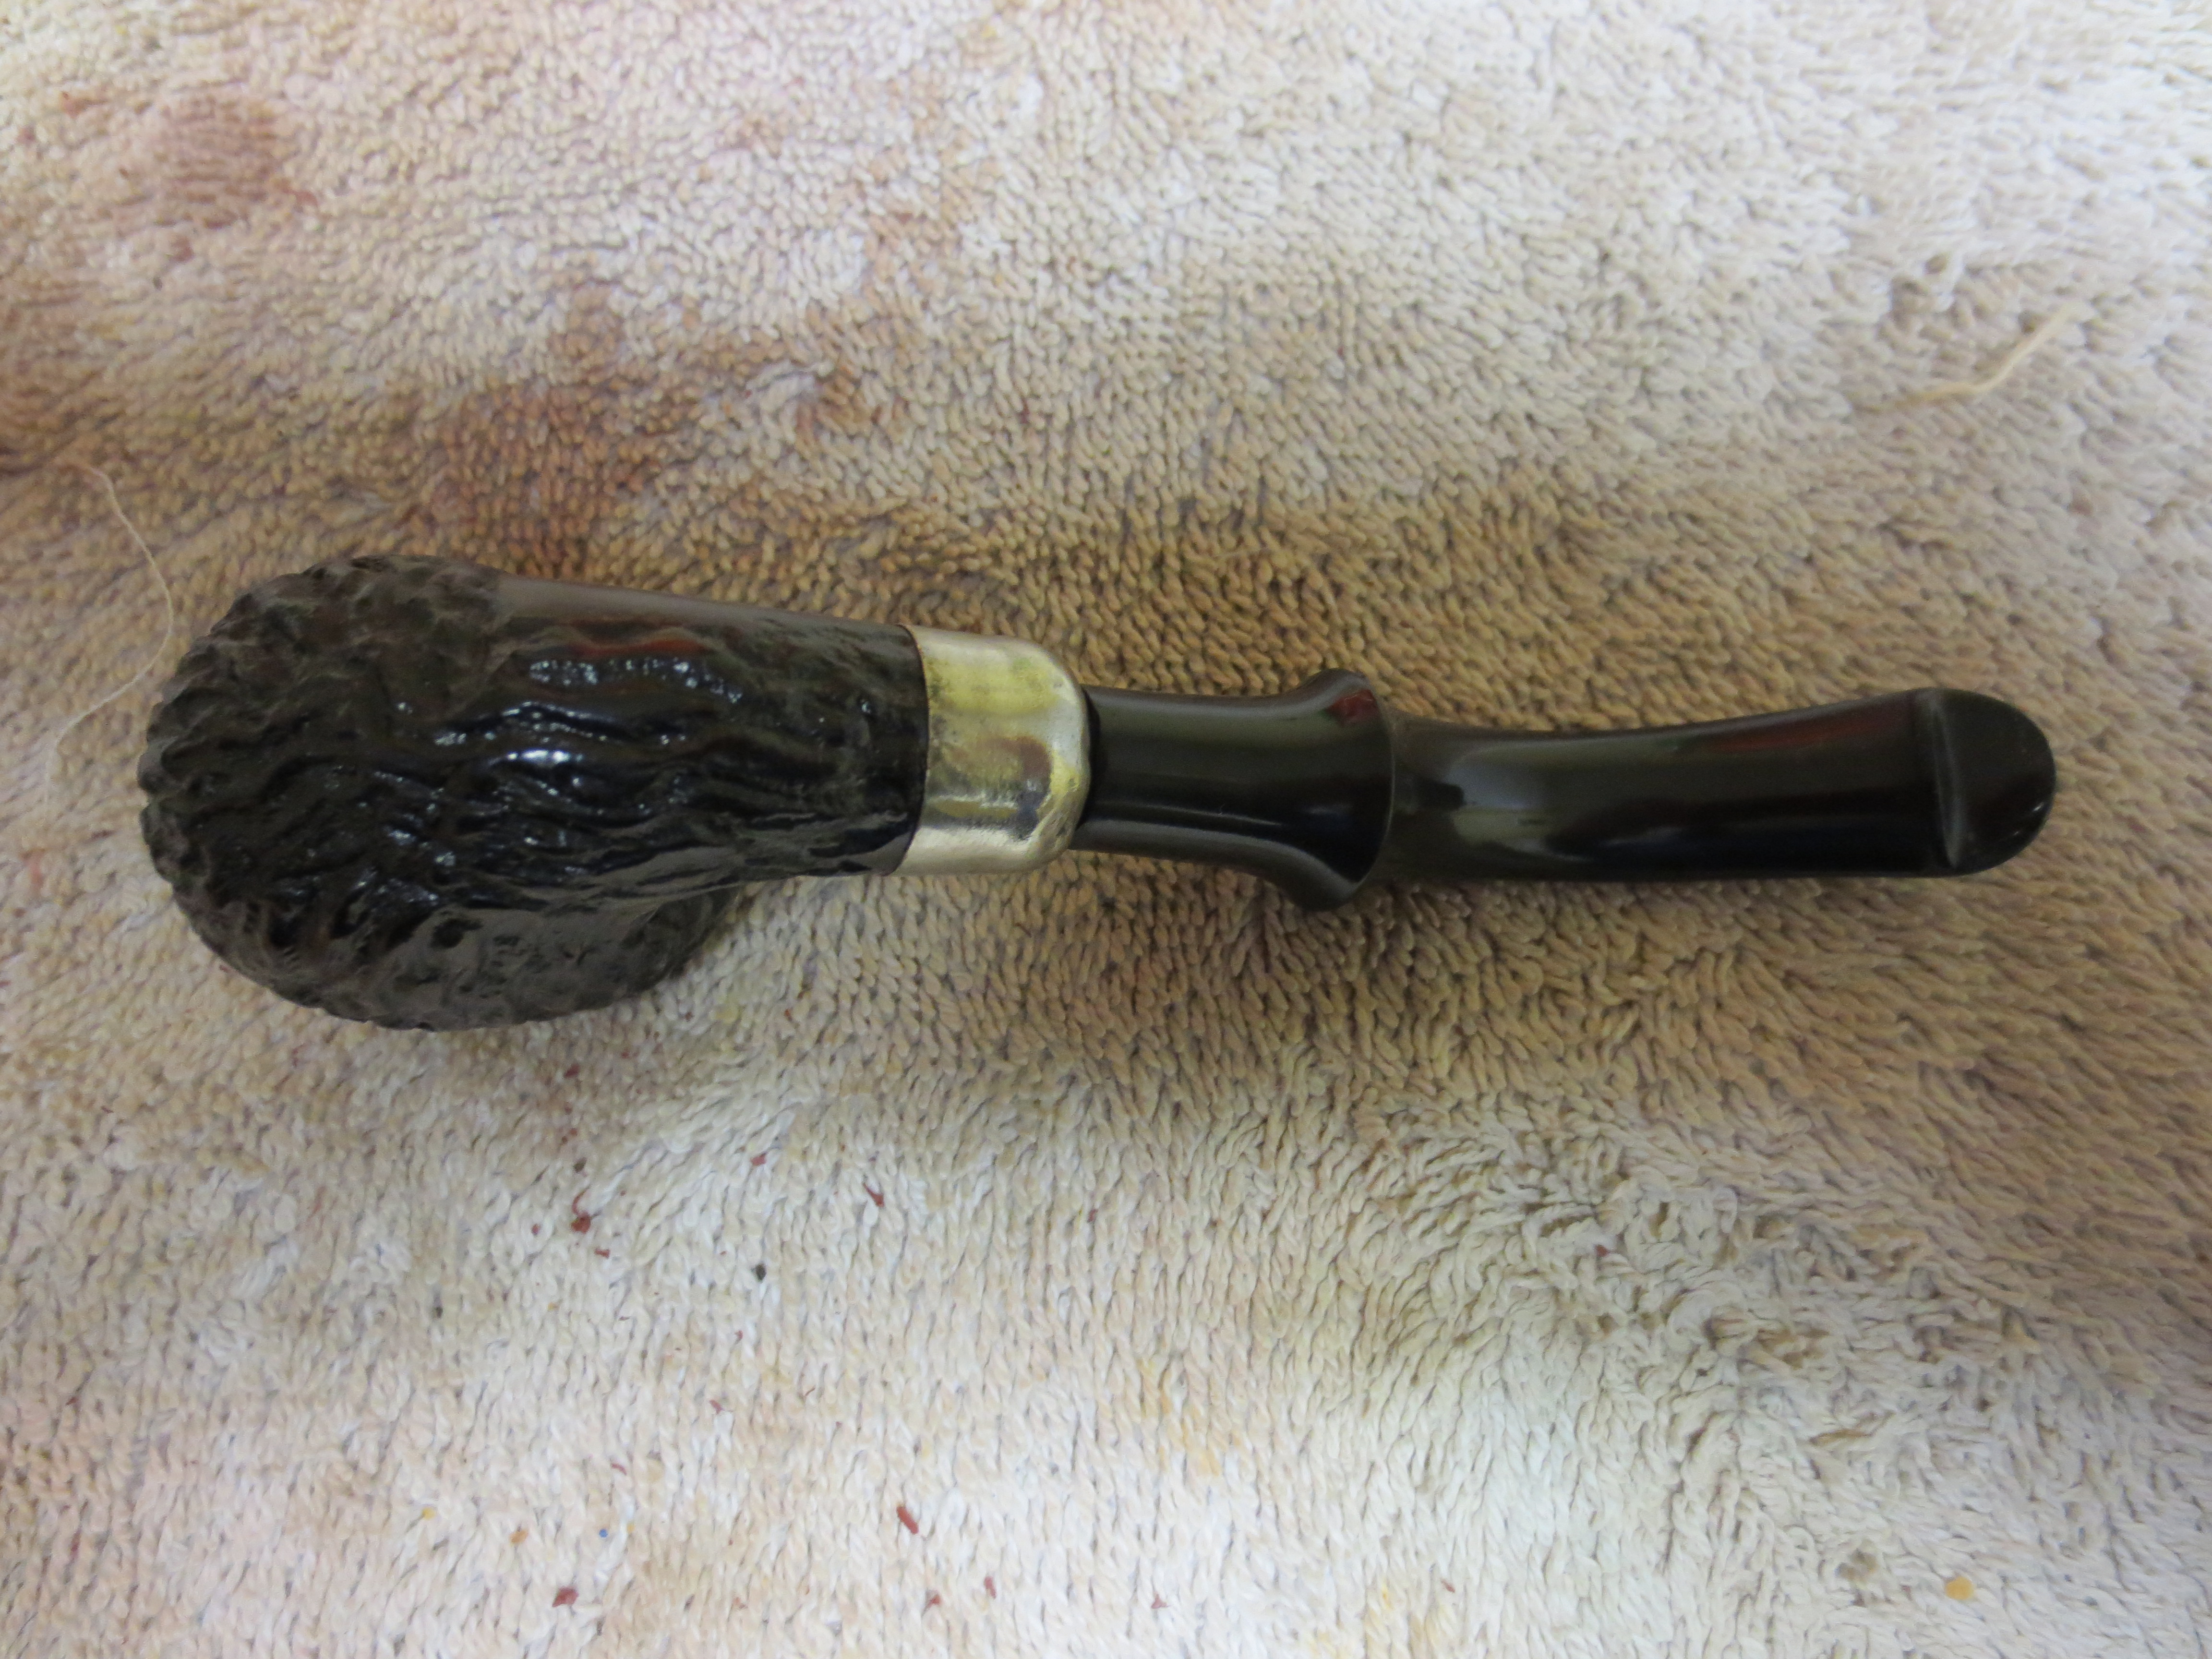
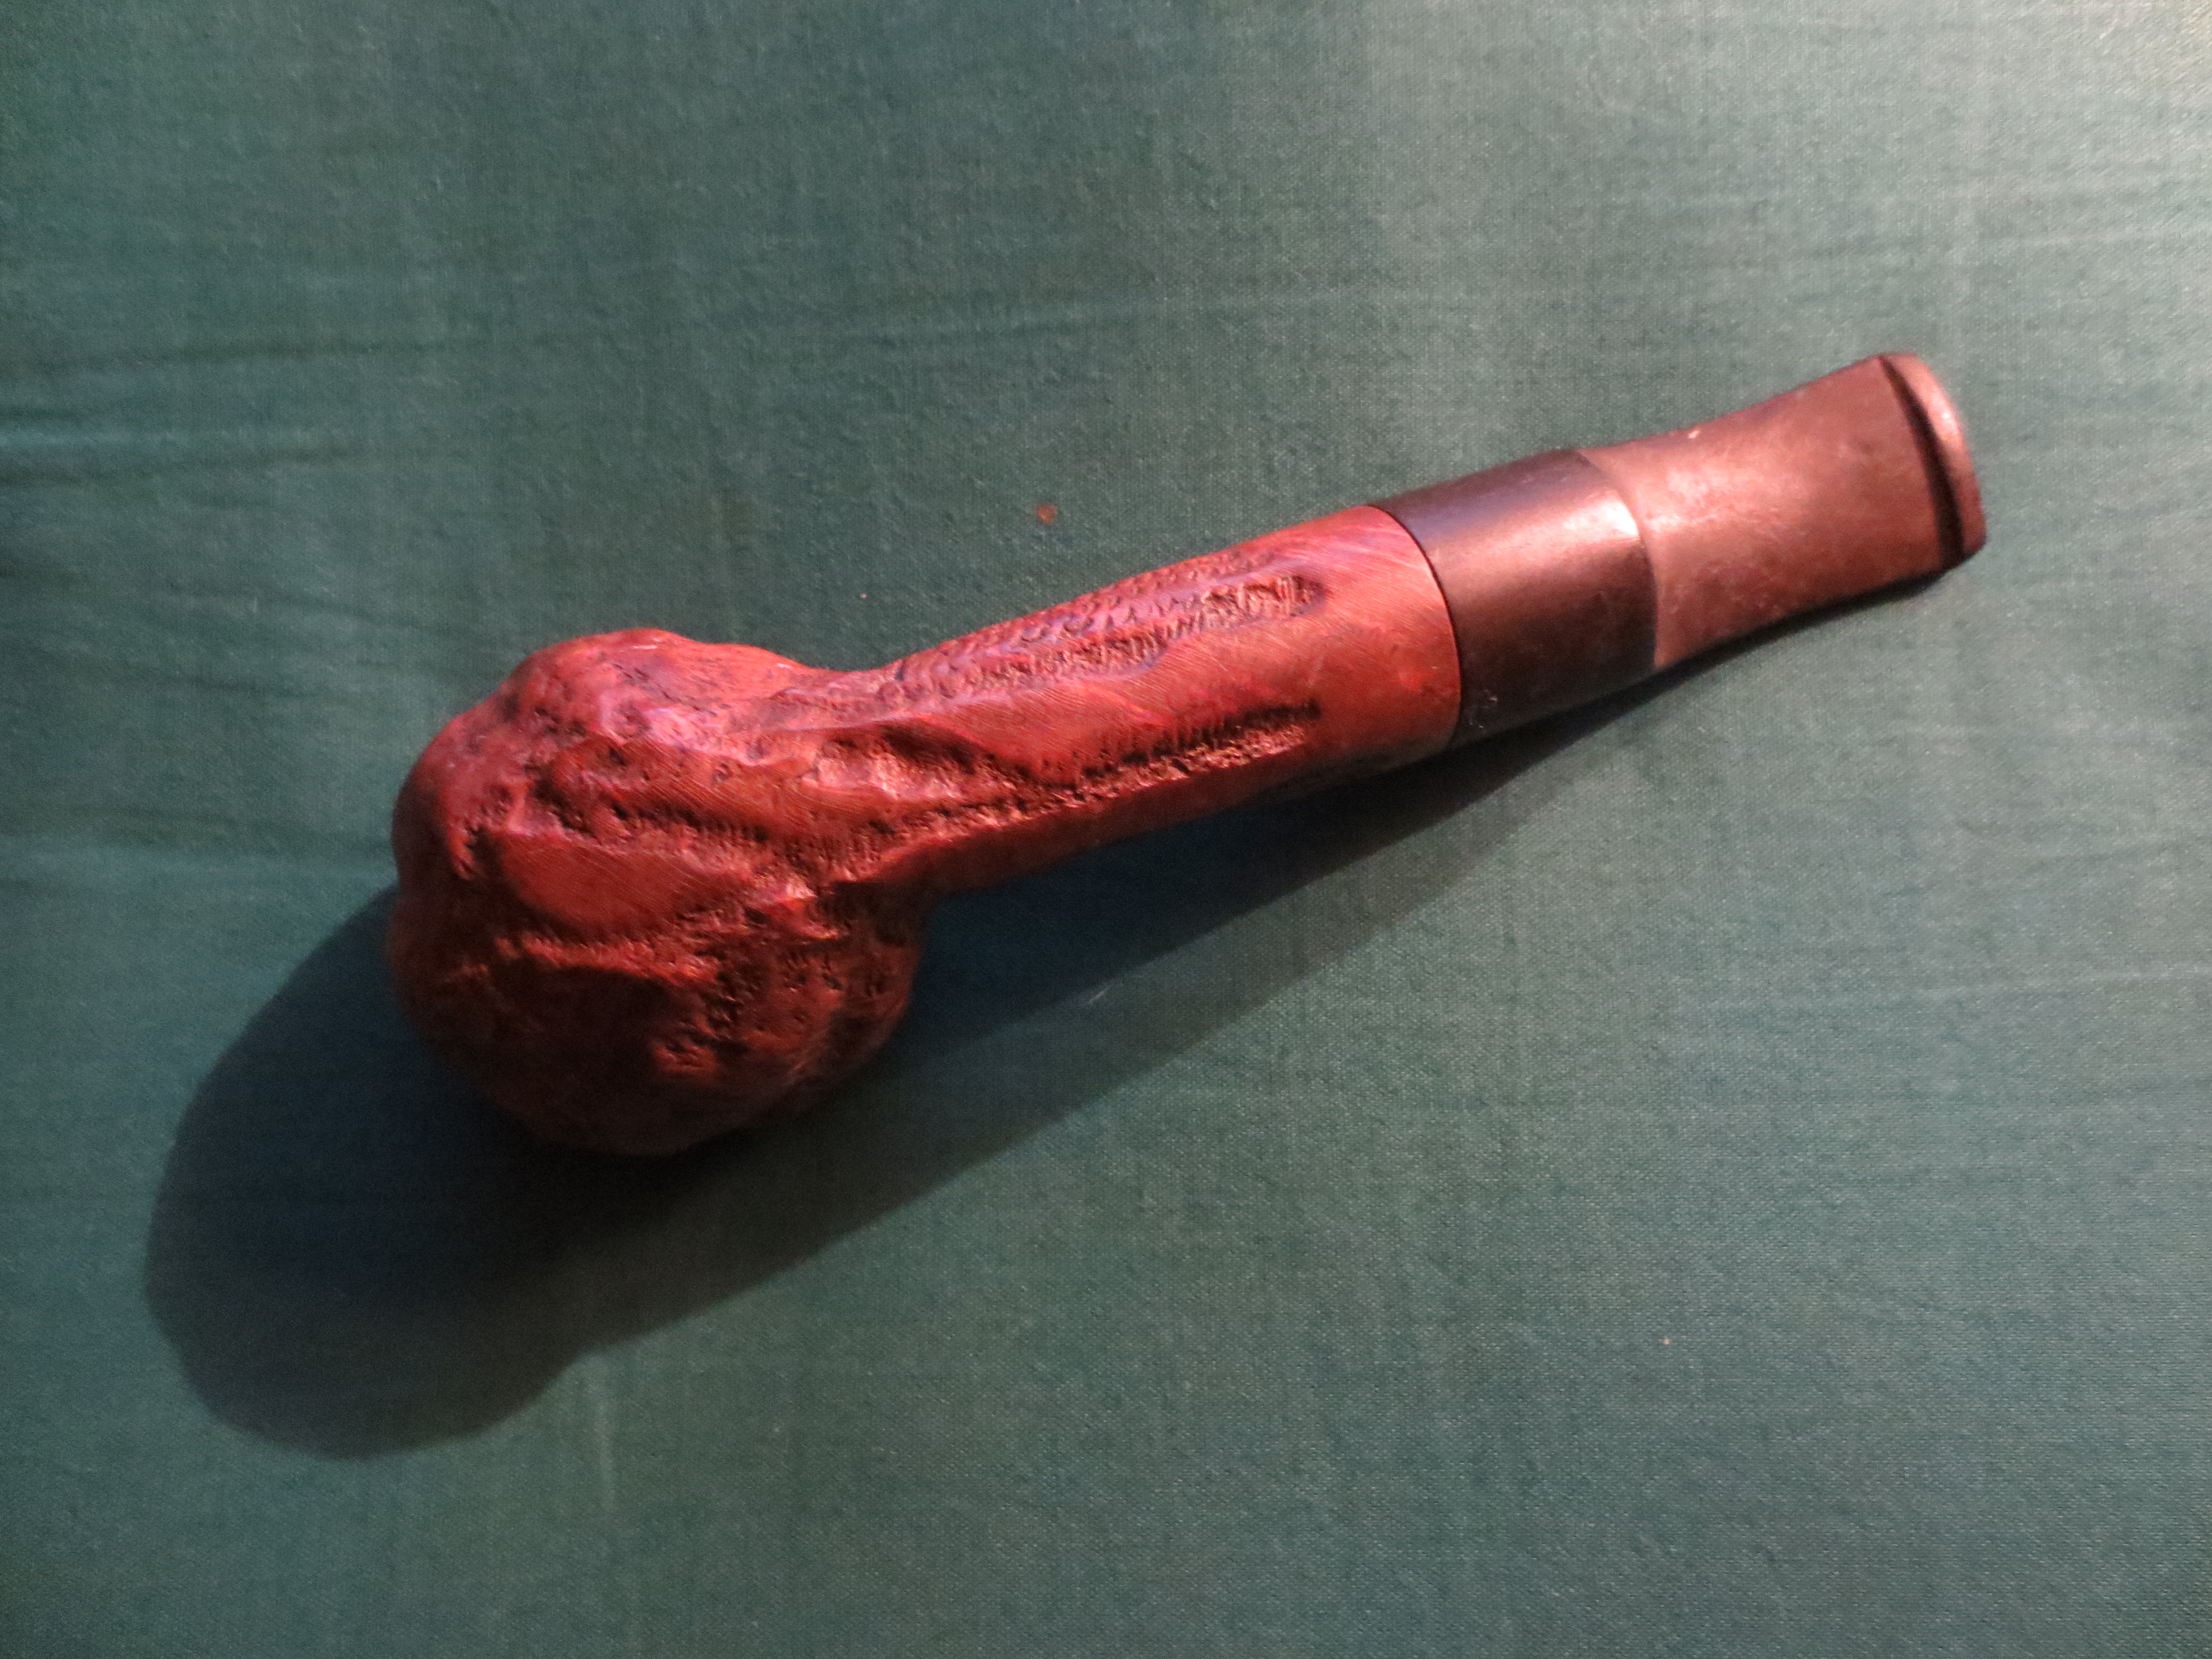
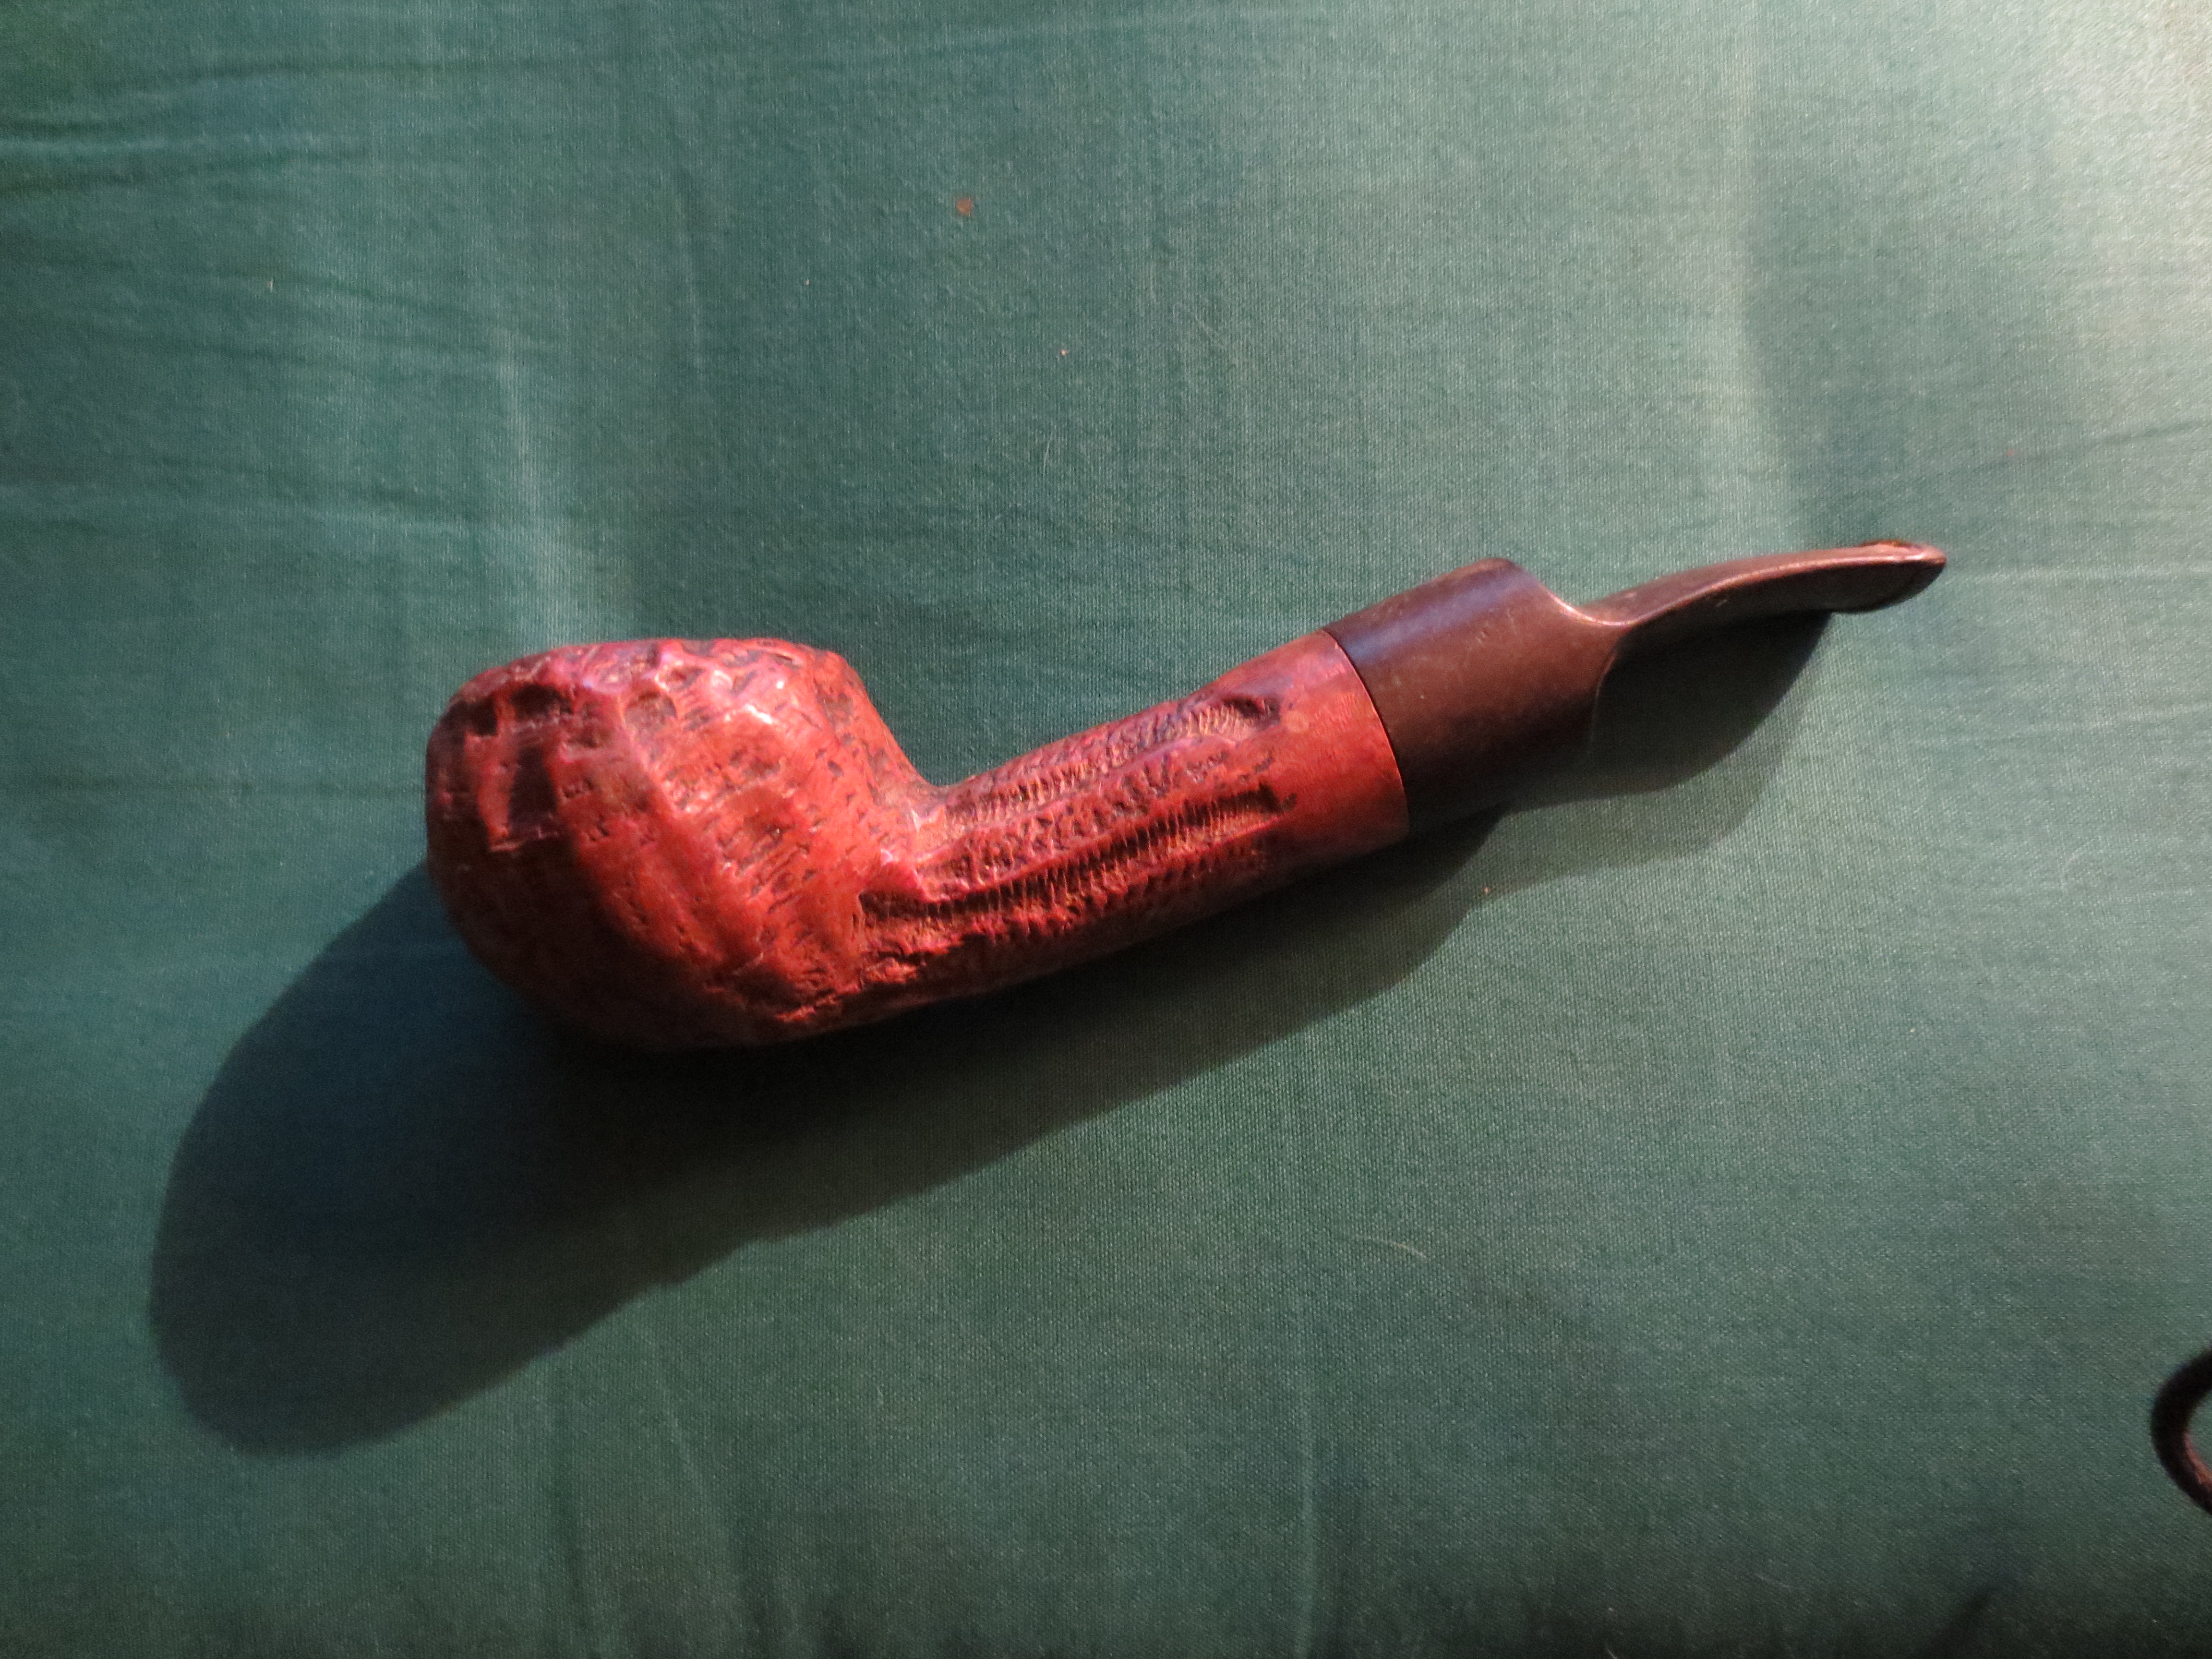
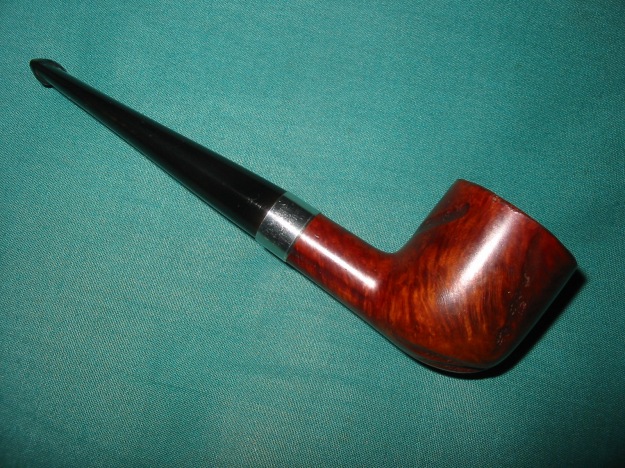
Several coats of carnauba wax was then applied to both pipe and stem. I did the final buffing with my “mushroom” on my cordless drill. I like the control I have with it and also the fact it’ll reach almost anyplace with little effort. The final touch was to polish the rustication with a soft toothbrush to make sure I didn’t have any wax residue left.Greg16 
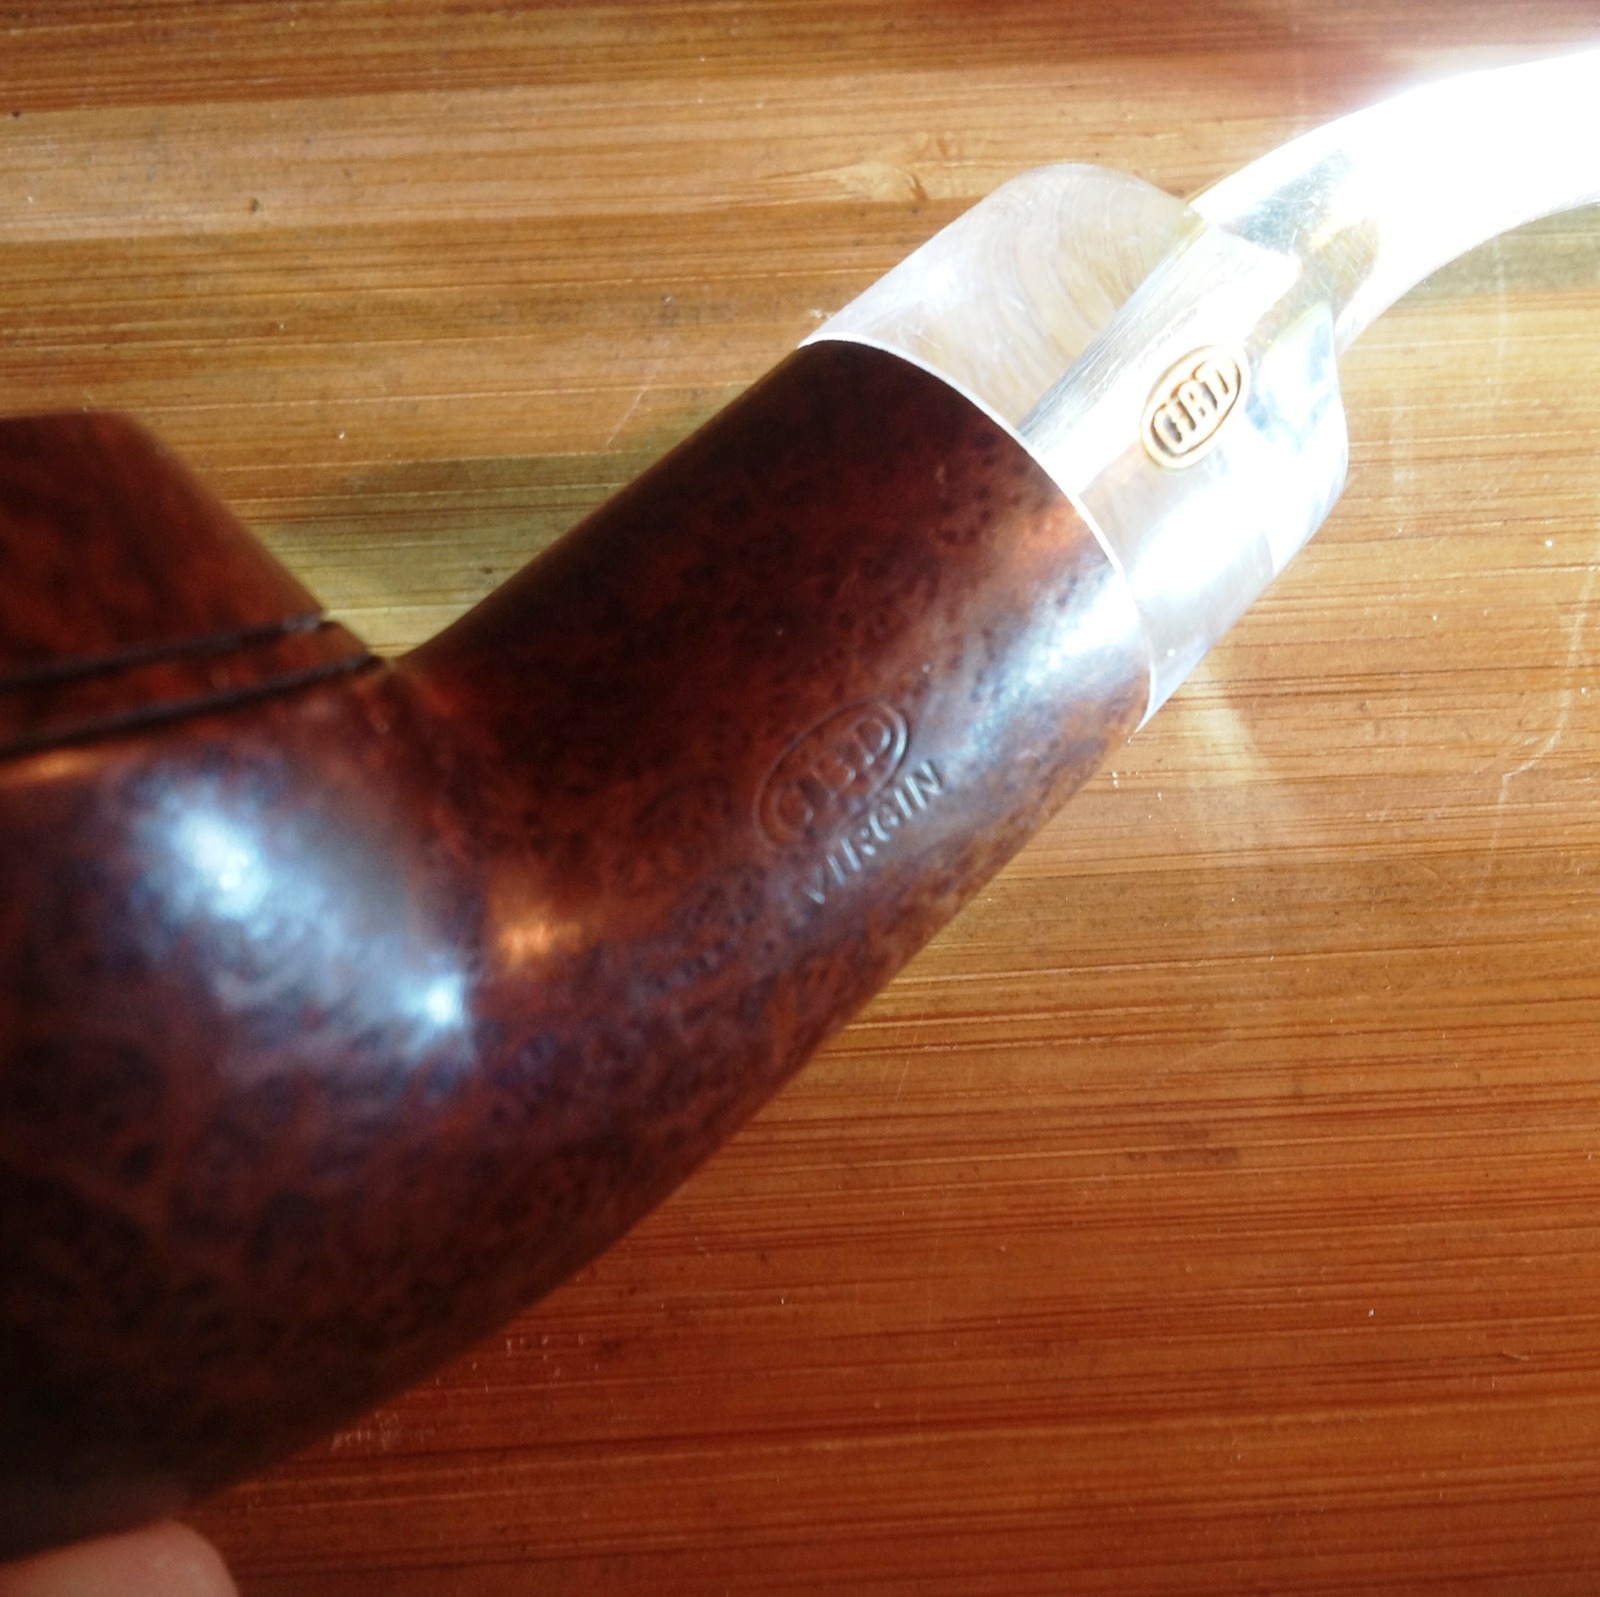
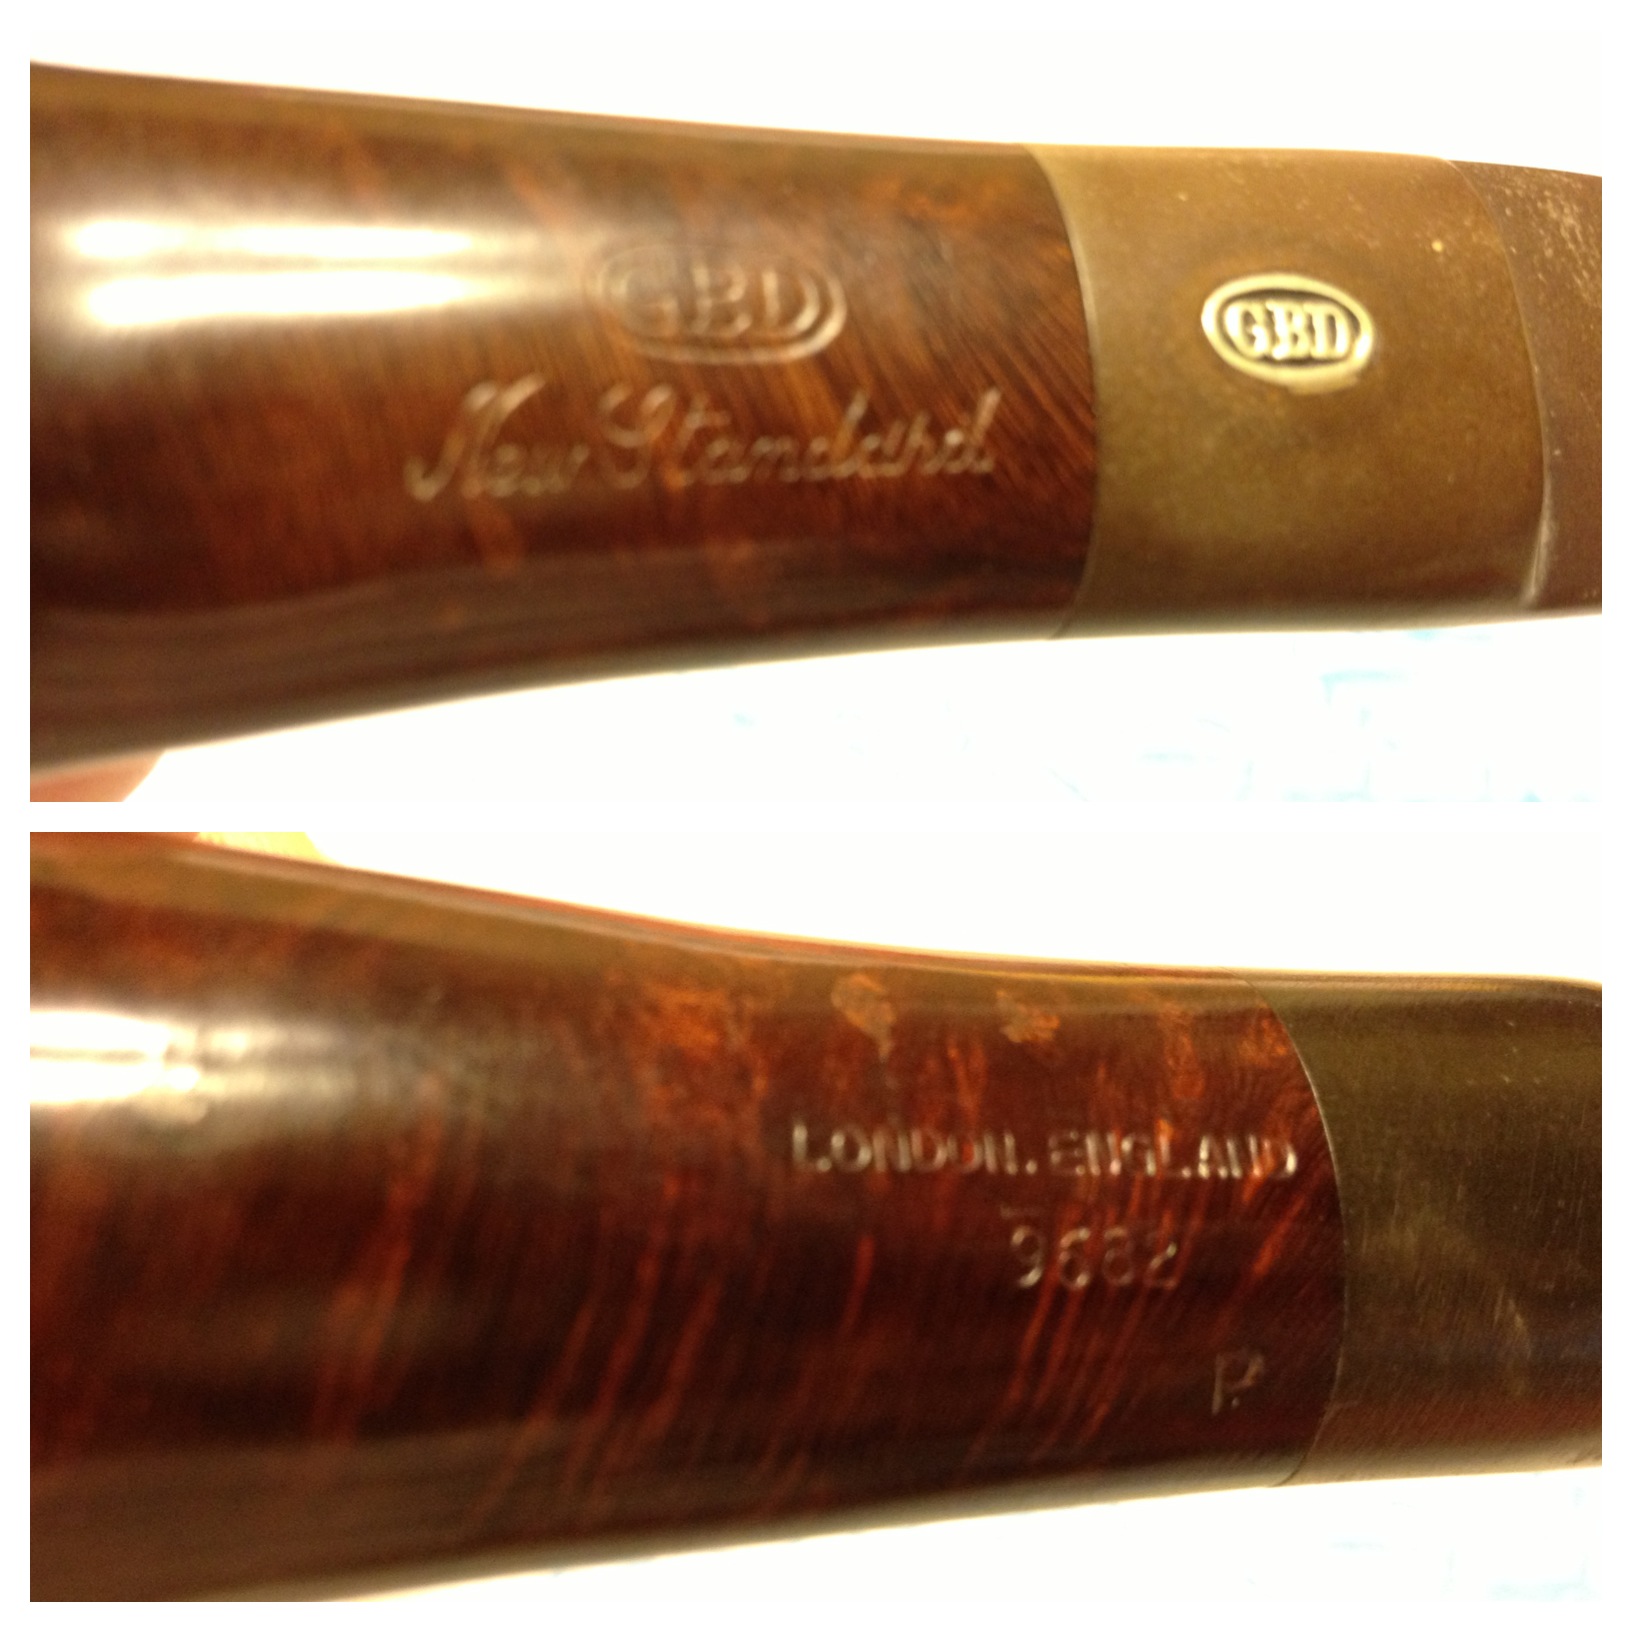
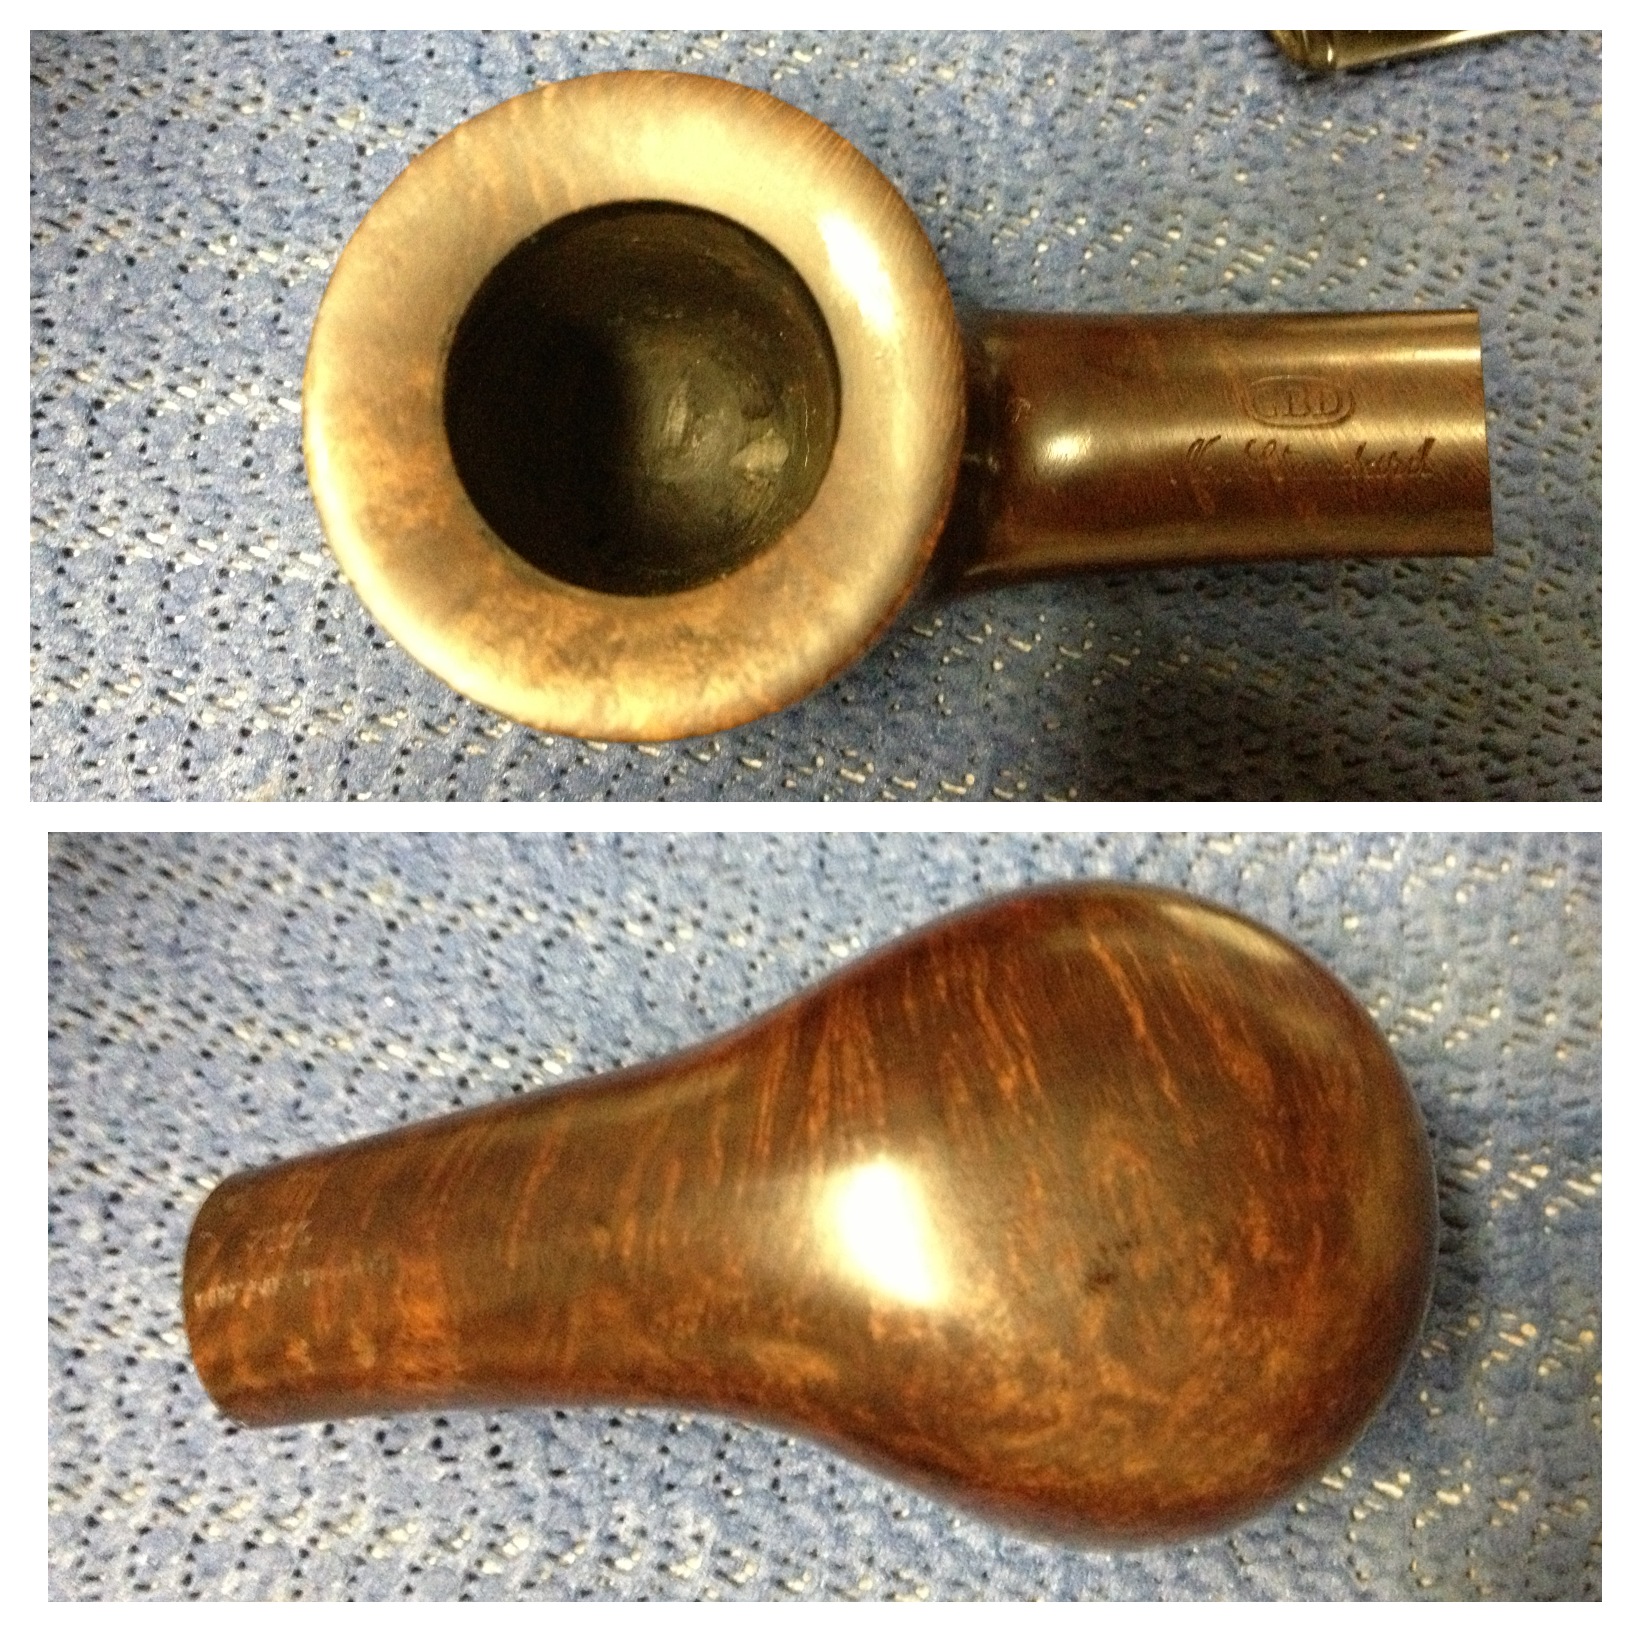
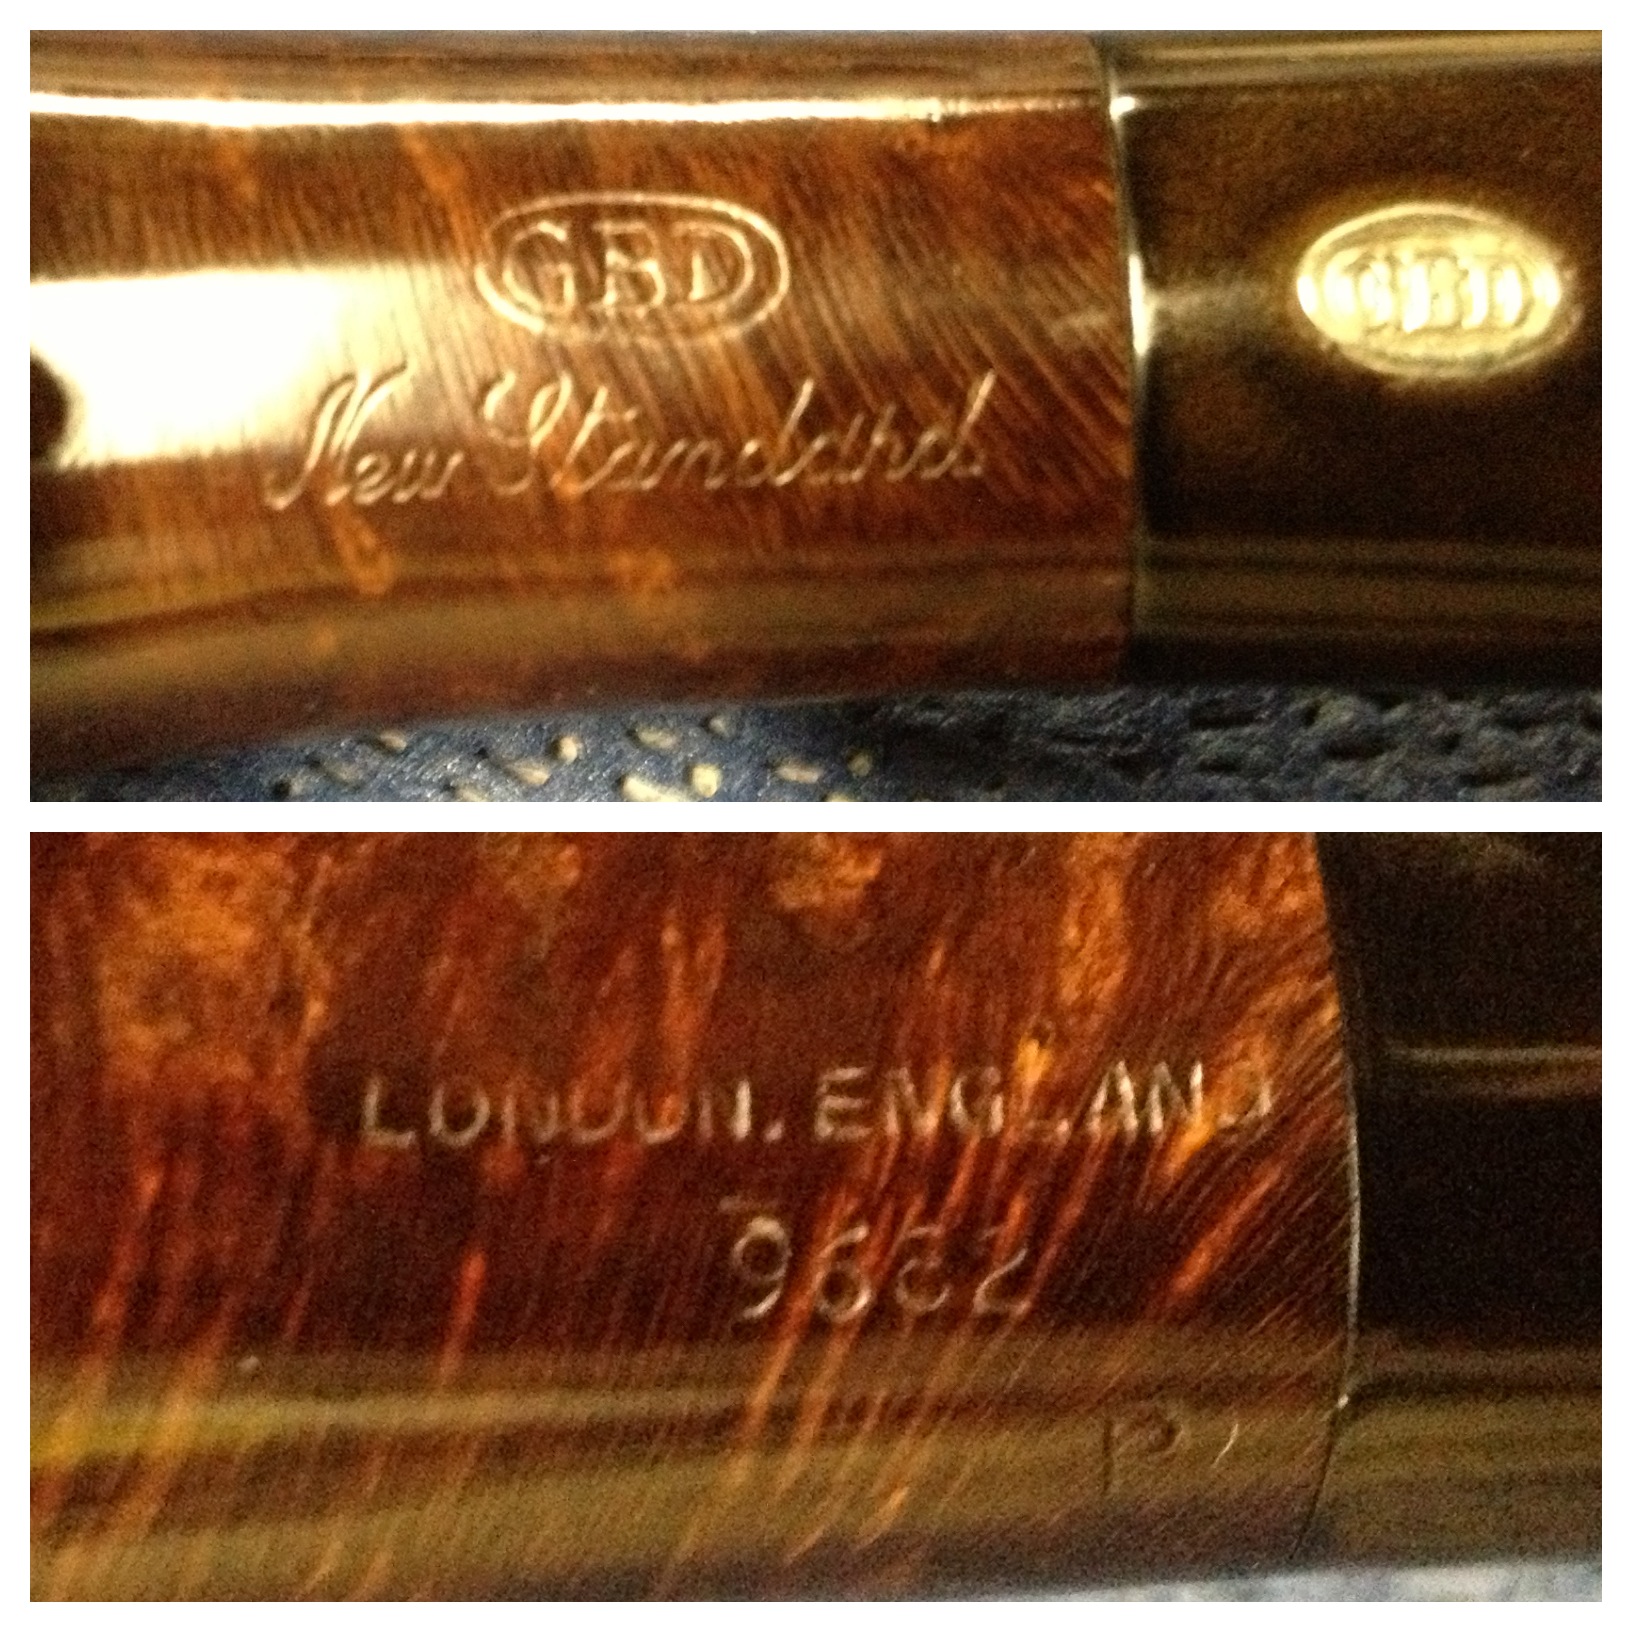
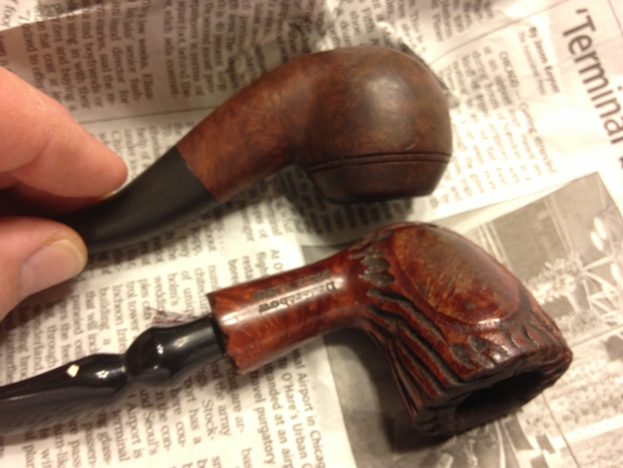
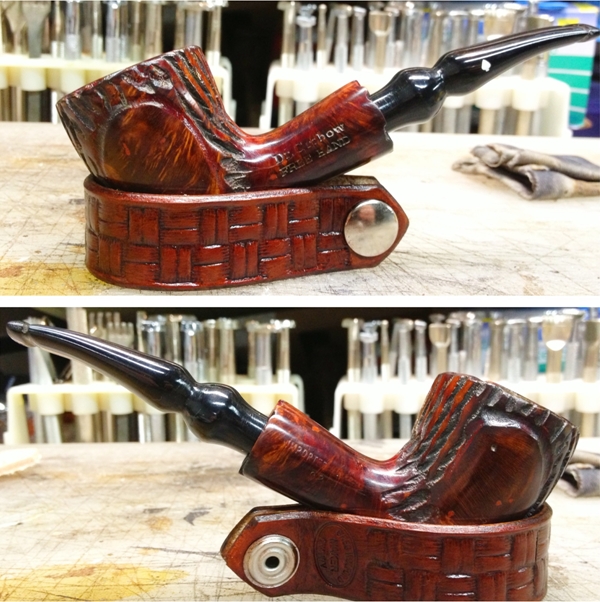
There were, and still are, some fills in the pipe but I wasn’t particularly concerned with them. Several are on the shank and it would have been “dicey” to try to fix them without ruining the nomenclature. There was one fill on the side that fell out, presumably from the softening of the putty in the alcohol bath. I missed that one until after I had already started smoking it.  If I’d seen it earlier in the process I would have fixed that one but now it’s there for the duration.Greg17 
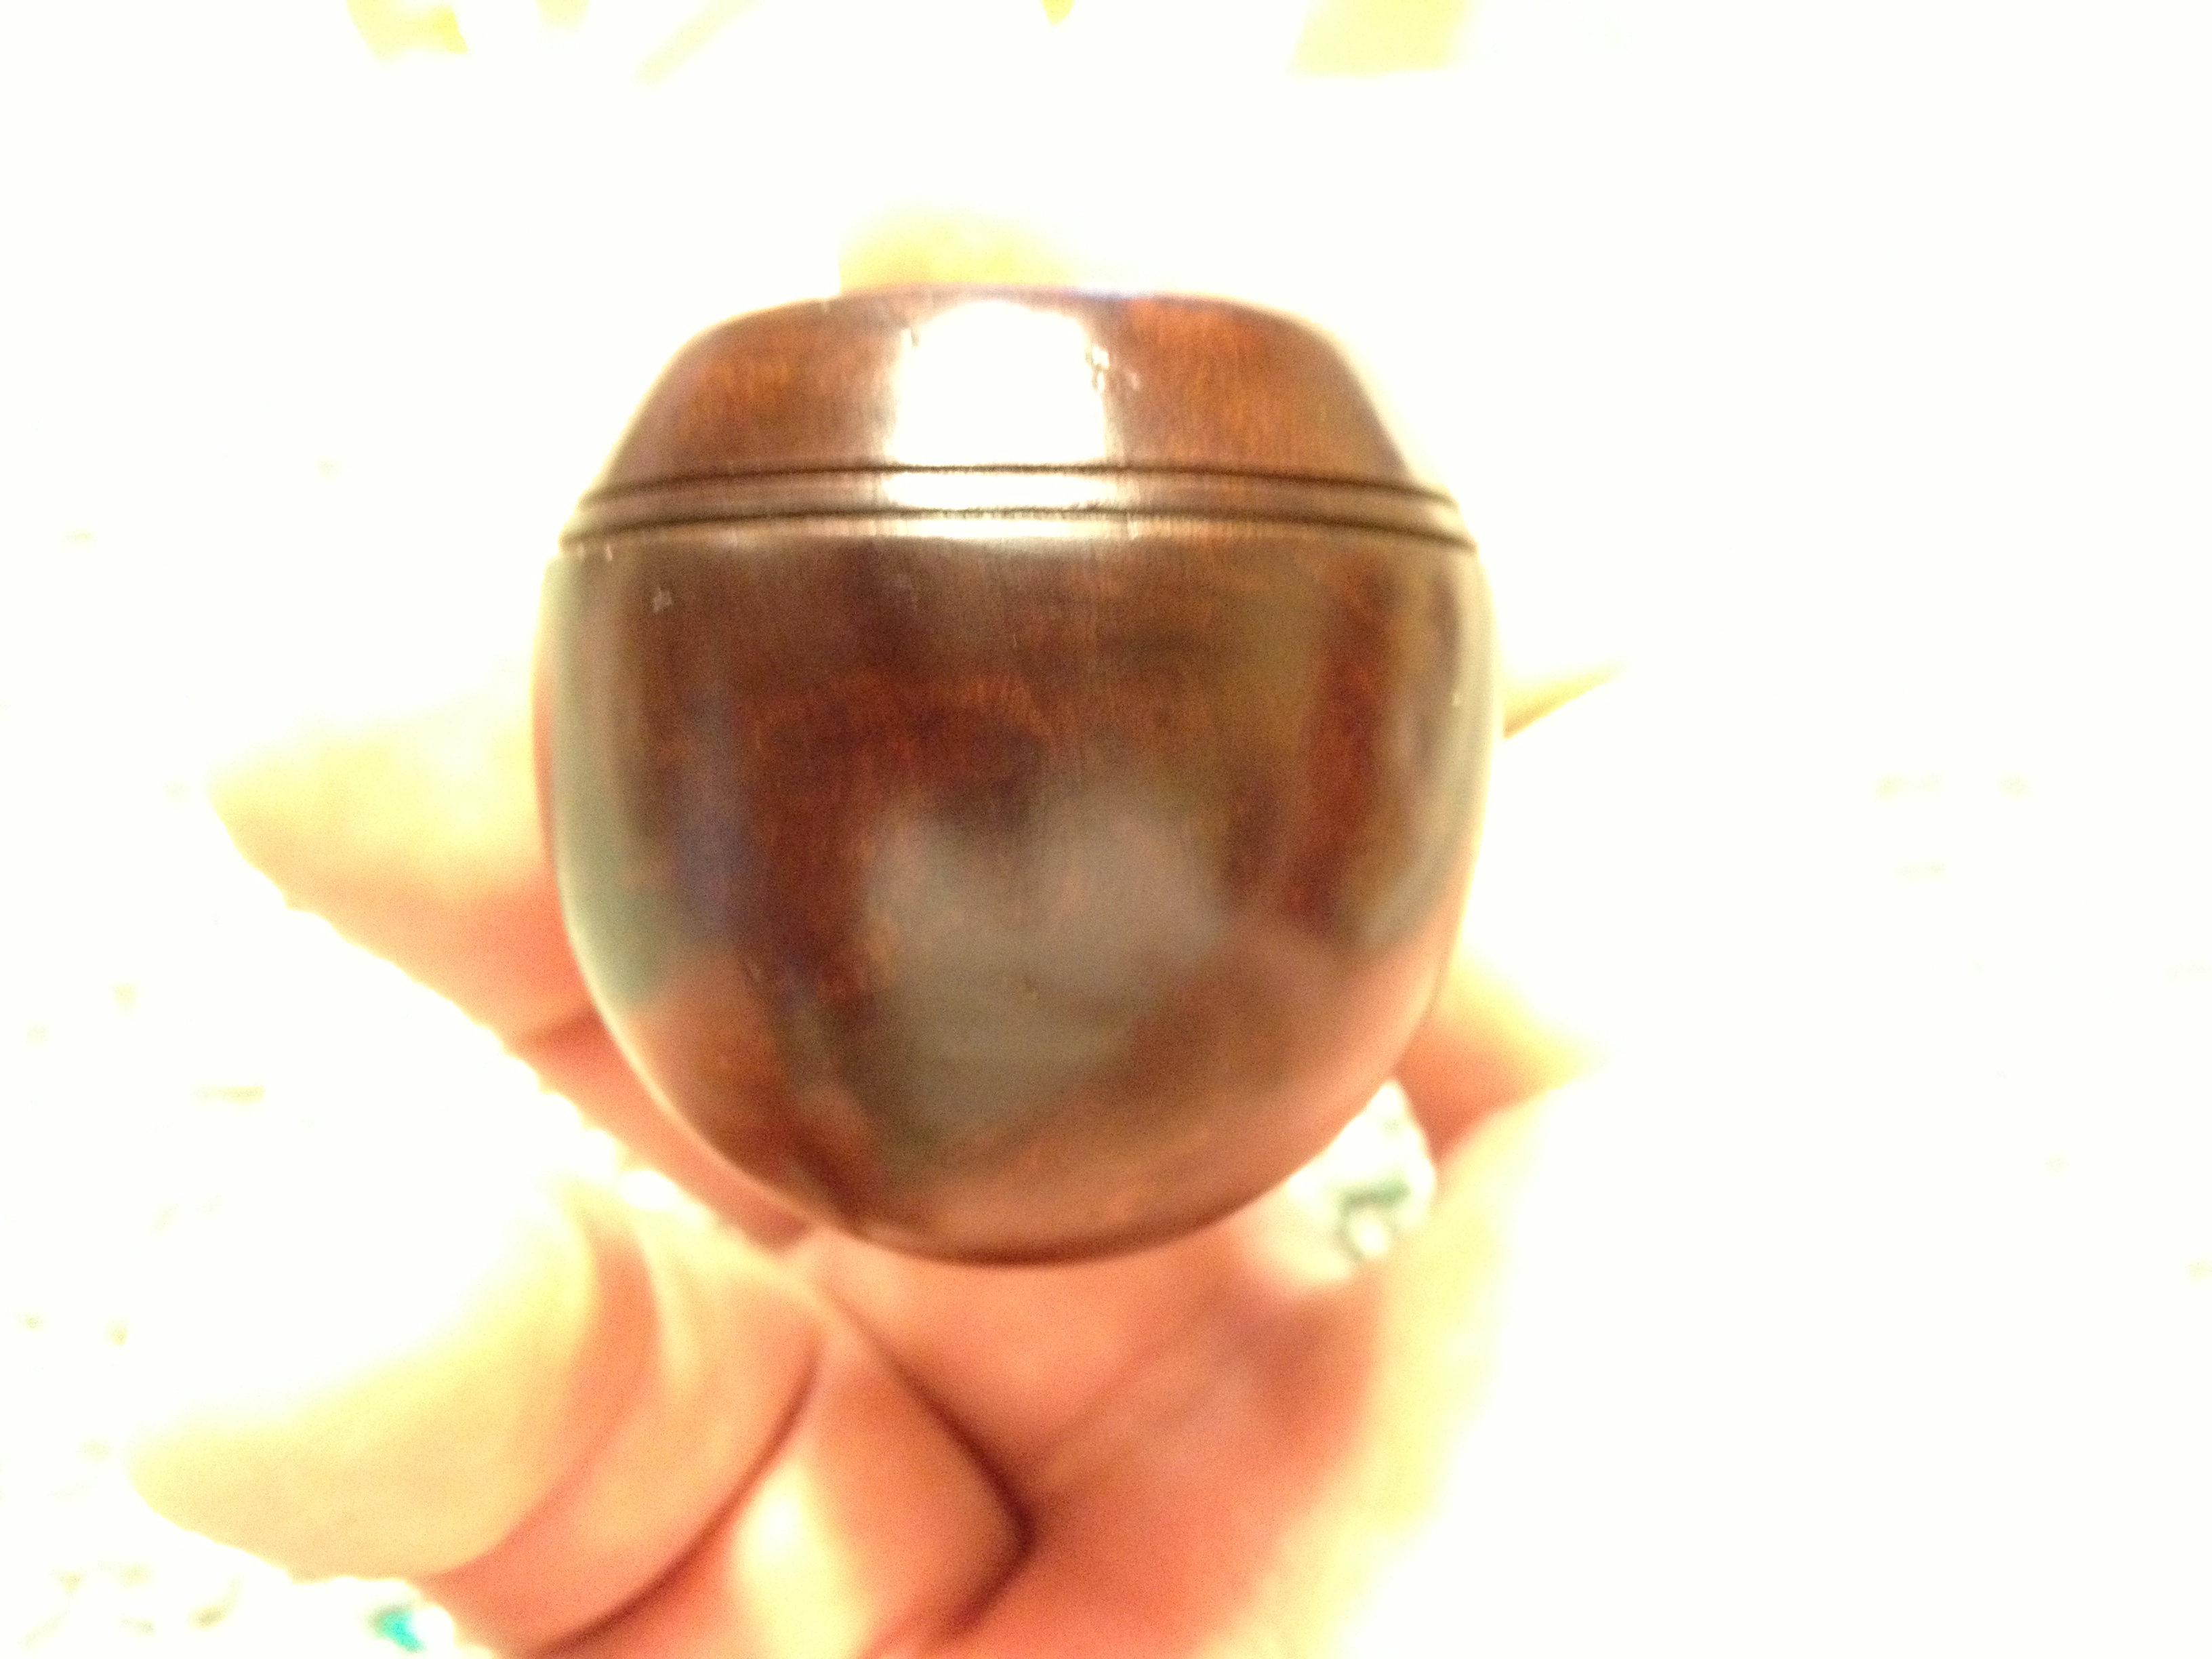
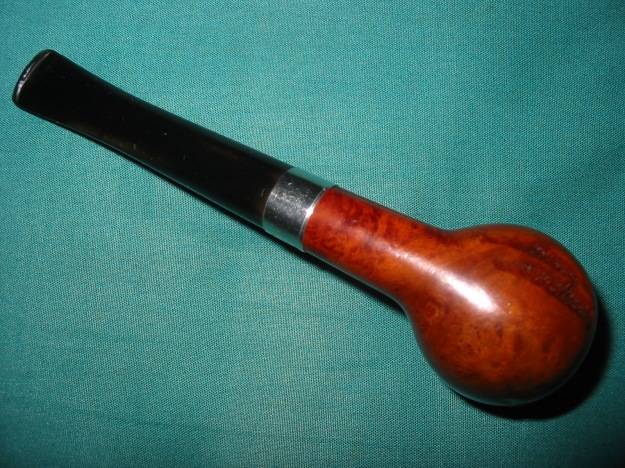
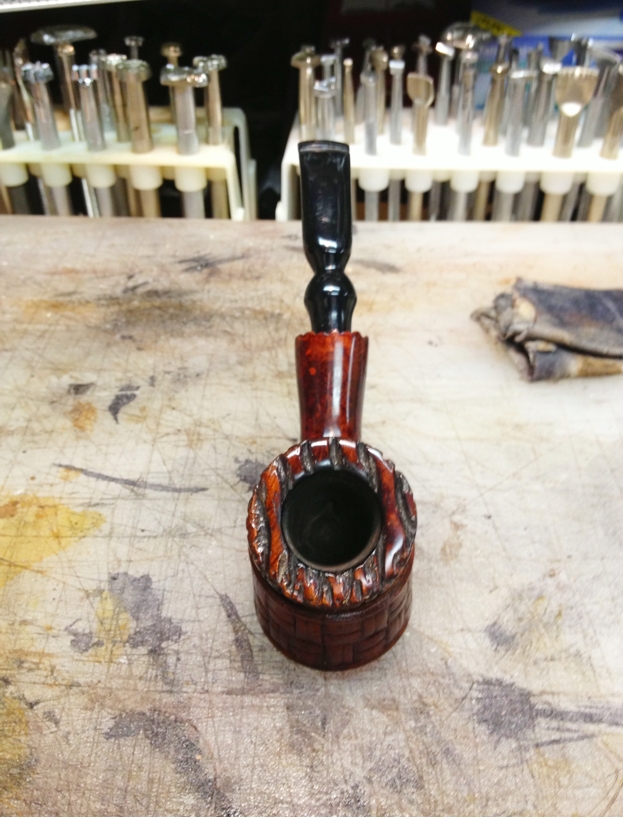
(I couldn’t get a good focused shot of the finished button.)

New Life for a Big Ben Select Bent Billiard


Blog by Steve Laug

I was gifted six pipes that were in need for refurbishment be a friend on Smokers Forums. The first one that caught my fancy was this nice sandblasted Big Ben Bent Billiard. It had a silver band and a nice looking blast. The finish was rough but shape is classic. The bowl was dirty and the shank and stem were filled with tars and grime. The bowl is stamped on the underside of the shank – Big Ben Select under a B in a circle. The outside of the stem was oxidized but the B logo was still deeply stamped. There was also a slight tooth mark on the underside of the stem near the button. The button was very tight and small – so much so that a thin pipe cleaner was work to get through the slot. The rim edges were worn and rough but as it was a blast this would not be a problem to clean up. Over the stain coat was also a shiny varnish or lacquer coat that I always find to be a pain to remove and deal with in a pipe that is worn like this one. It was just the challenge I wanted to have a go at this weekend. The next series of three photos show the pipe as it appeared when I opened the box and took it out for the first time.

ImageImageImage

I decided to begin by reaming the bowl so I removed the stem so that I could hold the bowl solidly and used my T handle Pipnet reamer. The next series of three photos show the reamer and the pipe bowl as I worked on it. Once I was finished I dropped it my alcohol bath to soak. The fourth photo below shows the bath after I had dropped the pipe bowl in the soak. The alcohol appears dirty but it is darkened from earlier stains that I have removed. I have filtered the alcohol several times over the past months to remove sediment and particulates that were in the mix. The alcohol works exceptionally well and I have found that the darkened stain in it adds a nice aged patina to the briar. The fifth photo shows the stem ready to go into the OxyClean bath. I dropped it in the bath and it immediately darkened the wash. I took it out and took a photo to show the before soaking look of the stem.

ImageImageImageImageImage

I left the bowl in the alcohol bath overnight and then this morning took it out and scrubbed it with a soft bristle tooth brush. I also picked out the paint that seemed to be in the grooves of the blast with my dental pick. I decided to also scrub the bowl with a brass bristle tire brush to get the paint flecks out of the briar. The next series of twelve photos shows the process I have described above. The first three photos show the bowl wet from the bath and the tooth brush off to the side that I use to scrub the sandblast. I rinsed the bowl off with alcohol from the bath and then dried it with a cotton cloth. The next two photos show the bowl with the brass tire brush. Once the surface had dried I scrubbed with the tire brush to remove the grime from the grooves in the briar. The final seven photos show the bowl as I wiped it down with acetone on a cotton pad to remove the remaining finish and top coat of varnish or lacquer. I wanted the briar very clean before I restained it.

ImageImageImageImageImageImageImageImageImageImageImageImage

After getting the outside of the bowl cleaned and ready to stain I worked on the inside of the bowl and the shank. The shank was interesting in that it had two stepped down portions. First there was the mortise area where the tenon rested. This was followed by an area that further stepped down to receive the inner tube style stinger in the end of the tenon. Finally there was the area of the airway into the bowl bottom. The step down drilling of the shank made this an interesting airway to clean out. I used isopropyl alcohol and some Everclear to scrub out each step down successively. I began with the mortise area that held the tenon. To clean this I used qtips or cotton swabs dipped in alcohol. I scrubbed that area until the swabs came out clean. I then proceeded to clean the next stepped down area where the inner tube sat. I used cotton swabs on this as well and pressed them against the opening and twisted them into that part of the airway. Again I used the alcohol and kept working on it until the swabs were clean. The final part of the airway I used a shank brush and alcohol followed by fluffy pipe cleaners until that area was also clean. The next series of three photos show the process and the dirty cotton swabs at the top of the photos.

ImageImage

After cleaning out the shank and wiping down the inside of the bowl I cleaned the stem. This was more of a pain than normal due to the constriction of the button and slot. A thin pipe cleaner would not fit into the stem from the button end. So I had to slowly move it into the stem from the inner tube end. I also was able to flatten the pipe clean and work it into the stem. It got most of the gunk out of the stem. The next two photos show the pipe after this cleaning. The stem button would need to be opened in order to give it a more thorough cleaning.

ImageImage

The next series of nine photos show the restaining of the pipe. I used a dark brown aniline stain that I have thinned down 2:1 with isopropyl alcohol. It does a good job of coverage on the briar but also allows some depth the staining. I like the look and effect of it on sandblasted briar. I applied the stain with a dauber and then flamed it with a lit match. I reapplied and reflamed the pipe several times to get a good solid coverage of stain.

ImageImageImageImageImageImageImageImageImage

Once the stain was flamed and dry I took it to my buffer and buffed it with Tripoli and White Diamond to remove some of the high spots and give it a shine. The first three photos below show the polished and buffed pipe. It was still a bit dark to my liking so I took it back to my work table and wiped it down with some isopropyl alcohol on a cotton pad to remove some of the top stain and give me a bit brighter and lighter finish. The next three photos show the bowl after it had been wiped down with the alcohol. It was exactly the colour I was aiming for so I set it aside to work on the stem.

ImageImageImageImageImageImage

I decided to open up the slot in the button to make it easier to clean the stem. The first photo below shows the slot before I started working on it. It was very tight and hard to get a pipe cleaner down the stem. I used several different needle files to open the slot. I took material off the top and bottom of the slot with the needle files and also cut the slot into more of a Y shape as I worked on it. The next four photos show the progress of the opening of the slot with the files. The final photo of the four shows the set of files that I use for the work. I took the photo with the stem on top of the package to give a bit of an idea of the size of the files. I finished the slot with a folded piece of sandpaper and worked it until it was smooth. I then recleaned the stem with pipe cleaners and alcohol until they came out clean.

ImageImageImageImageImage

After reworking the slot in the button I worked on removing the oxidation from the stem. I sanded the stem with 320 grit sandpaper to remove the tooth marks from the underside of the stem and also remove the softened oxidation. I also used a fine grit sanding sponge to remove scratches and marks to the stem. The two photos below show the stem after I had wet sanded the stem with 1500 and 1800 grit micromesh pads. I then used some Maguiar’s Scratch X2.0 polish and scrubbed the stem with a cotton pad. In the photos below the pad is in the lower part of the photos. I progressively sanded the stem with the remaining grits of micromesh – 2400-12,000 grit. I dry sanded with these until the stem shone. I wiped it down with Obsidian Oil and rubbed it in and then reworked the logo on the stem. I used some liquid paper in a correcting pen. I applied it heavily to the stamped area and then rubbed it off and sanded it with 4000 grit micromesh sanding pads to remove the excess. I repeated the process until I had good coverage on the stamping. The third and fourth pictures below show the refinished stamping on the stem. I finished working on the stem by giving it another coat of Obsidian Oil followed by multiple coats of carnauba wax.

ImageImageImageImage

I used a jeweler’s cloth to polish the silver band and then took the pipe to my buffer and gave the bowl a buff with White Diamond. I took it back to the work table and gave it a coat of Halcyon II wax and hand buffed it with a shoe brush. The final series of four photos show the finished pipe.

ImageImageImageImage


1918 J.K.L.K.Dublin Restemmed and Brought Back to Life


I saw this old stummel on EBay and was interested in giving it a refurbishment. It did not have a stem and when it arrived it was in worse shape than the seller had led me to believe. The bowl was filled with a hardened burned tobacco and also a half a bowl under that of unburned dried and hardened tobacco. The rim was very badly damaged and the cake was very thick. It was thicker about half way down the bowl and funneled down to the bottom of the bowl making the bowl appear to be conical. I knew from examining it that it was not a conical bowl so the cake would have to go. The silver band was twisted over to the right and was upside down. The stamping on the bowl was non-existent but the band was stamped J.K.L.K. and next to it were the hallmarks – a lion (signifying that the band was sterling silver), an anchor (signifying that it was made in Birmingham, England) and in the center of the threesome was the letter “t” in a boxlike shield with the corners trimmed (signifying the date of the pipe as 1918). I use a website that gives the information on hallmarks http://www.silvercollection.it/englishsilverhallmarks.html . The finish on the bowl was shot with darkening spots and worn spots. The grain underneath actually appeared to be quite nice. It looked like it would clean up very well to me. The first three pictures below show the state of the bowl when it arrived in the mail.

ImageImageImage

I took my dental pick and cleaned out the hardened tobacco, both burned and unburned. I collected it on a piece of paper to show the amount of material left in the bowl. It is always interesting to me to think about what had happened in the life of the original smoker to make him pause mid-bowl and stop smoking, set aside his pipe and not come back to it. I also wondered what happened to the stem on this pipe as it seemed that somehow it had been separated from the bowl and was nowhere to be found. I reamed the pipe with my PipNet reamer and dumped the carbon material on the paper as well. The next two pictures show the cleaning of the bowl and removal of the dottle and the cake.

ImageImage

I then set up my heat gun to heat and loosen the band in order to turn it to the correct position on the shank. I heated it using the lowest setting on the gun. I used a cotton cloth to try to turn the band several times before the heat loosened the glue and allowed me to turn it. Once it was loose I removed the band and cleaned off the old glue and the surface of the shank with an alcohol damp cloth. Once it was clean and dry I used some wood glue and spread it over the surface and then pressure fit the band in place and wiped off the excess glue. I used turned the band so that the letters and hallmarks were right side up and straight on the right side of the shank. The next three pictures show the heating and setting of the band as well as the finished set of the band.

ImageImageImage

I then looked through my can of used stems that I have scavenged and purchased until I found one that had the same diameter as the shank and band. I knew that I would have to work on the diameter of the tenon to make it fit the shank. I sanded the tenon until it fit well in the shank. I also needed to use a drill bit to smooth out the interior of the shank. I hand turned a drill bit into the shank until it was the same depth as the tenon and was smooth on the inside. I then used a slightly larger drill bit to set the countersink on the shank so that the stem would fit tightly against the shank. The next four photos show the process of fitting the stem to the shank.

ImageImageImageImage

At this point I topped the bowl rim to smooth out the surface and remove the chewed up surface and the dents and roughness. I used my board and a piece of emery cloth first. I turned the bowl top in a counter clockwise direction with the rim flat against the board and paper. I turned it on the emery cloth and repeatedly checked to see if I removed the damaged surface. I have found that regular checking keeps me from going too far with the topping process. The next four photos show the topping process. As I topped the bowl and cleaned the surface of the bowl exterior, a fairly large crack appeared in the side of the bowl and also on the top of the rim. It is visible in several of the photos at the 7 o’clock position on the bowl surface. It would need some work to repair it and a decision had to be made whether to do so.

ImageImageImageImage

Once it was sanded I wiped the bowl down with some more acetone on a cotton pad to remove the dust from the sanding. I decided to take the time to work on the crack and see if I could repair it with briar dust and superglue. I began by wiping down the bowl with a cotton pad and some acetone. Once the surface was clean I used my dental pick to clean out the crack. It did not seem to go all the way through to the inside of the bowl and as I cleaned it the depth of the crack became very evident. The first three photos below show the surface cleaned and ready to repair. The next two photos show the repairs that have been made with the briar dust and the superglue. I tapped briar dust into the crack first with my dental pick and then dripped the super glue on the rim and the bowl side. The glue on the rim ran and made a large spot of glue that would need to be sanded to clean up the spillage.

ImageImageImageImageImage

I sanded the rim by once again placing a piece of sandpaper on my flat board and sanded the bowl top like I did when I topped it. I used 320 grit sandpaper for the topping cleanup and also used the same grit sandpaper to sand the outside of the bowl. I sanded it again with 400 and 600 grit wet dry sandpaper and water to finish removing the excess glue and preparing the surface for a restaining. The next series of six photos show the repair after it has been sanded and wiped clean. The crack on the side of the bowl has all but disappeared with the briar dust/superglue repair. The one on the top of the rim also was smooth and once it was stained would also be virtually invisible.

ImageImageImageImageImageImage

I sanded the bowl with micromesh pads 1500-4000 grits and then wiped the bowl down a final time with some acetone on a soft cotton pad to prepare it for staining. I decided to use some dark brown aniline stain that I had thinned down 2:1 with isopropyl alcohol. I applied the stain with a wool dauber that came with the stain and then flamed it to set the stain. I reapplied the stain, flamed it a second time and then reapplied the stain a third time with several applications to the rim of the bowl. Each time I flamed it and set it. Once finished I took it to the buffer and buffed the bowl with red Tripoli and then White Diamond to polish it and see the finished look of the pipe to this point. The next three photos show the progress of the staining from first application to the resulting look after buffing with the White Diamond. After buffing the bowl I took it back to the work table and wiped the bowl down with some isopropyl alcohol on a cotton pad to lighten the stain some more as I wanted to make the grain more visible. I rebuffed the pipe with White Diamond and the last three photos below show the pipe after the final buffing.

ImageImageImageImageImage

Image

At that point in the process I went to work on the stem. I sanded the stem with medium grit foam back sanding pad to remove the oxidation. I used a Bic lighter and ran it over the surface of the stem to remove the oxidation on the surface. Once that was finished I sanded the stem with 320 grit sandpaper to remove the scratches and the marks in the stem. I also worked on the taper as there were some tooth dents in the surface of the stem that had changed the flow of the taper in front of the button. Once I had removed the scratches with the sandpaper I then used the micromesh sanding pads. I wet sanded with 1500, 1800 and 2400 grit micromesh and then scrubbed the surface with the Maguiar’s Scratch X2.0. I wiped it off with a cotton pad and then dry sanded the stem with 3200, 3600 and 4000 grit micromesh pads. I then scrubbed it a second time with the Maguiar’s and then gave the stem a coat of Obsidian Oil. Once it was dry I sanded it with 6000, 8000 and 12,000 grit micromesh pads.  I then coated the stem with another coat of Obsidian Oil and then several coats of carnauba wax.

ImageImageImage

I then took the pipe to the buffer and buffed it with White Diamond before coating the entire pipe with carnauba wax. I gave it multiple coats of wax and then buffed it with a clean soft flannel buffing pad. I also polished the silver band with a jeweler’s cloth to remove any remaining tarnish and polish the silver. The four photos below show the finished pipe. It is ready to smoke and enjoy in all of its renewed life.

ImageImageImageImage


Resurrecting an Old Weber Silver Grain Apple


Blog by Steve Laug

The fifth pipe of the six that I picked up in the antique malls in Washington State is a Weber Silver Grain Apple. It was probably the cleanest of the six in terms of work that would need to be done to bring it back to life and usefulness. The stem was oxidized and very pitted. The vulcanite was actually rough to touch. It was not the typical roughness I have come to expect in old vulcanite stems but more pitted with visible pits and ridges. There were two tooth marks – one on the top and one on the bottom of the stem about ½ inch above the edge of the button. The button itself was still very clean and the slot was the typical wide open oval that I have found on most of the older Weber pipes I have worked on. It was stamped Weber over SILVERGRAIN on the left side of the shank and IMPORTED BRIAR on the right side of the shank. On the underside of the shank there were some fairly deep gouges to the briar. The finish was not too bad just very dirty. The rim and inside lip of the bowl were very caked with tars and buildup and the bowl was caked with a light build up that was uneven around the sides of the bowl. There were also dings in the sides of the bowl that would need work. The W in a circle stamping on the stem was basically gone other than a small bottom edge of the circle. The silver band was dirty.

ImageImageImageImage

I decided to start work on this refurb by reaming the bowl and cleaning the bowl and shank. I used cotton swabs on the shank as it is a wide open drill from mortise to bowl. I believe this is because of the stinger apparatus that the Weber pipes used. It creates a chamber where the smoke swirls around the stinger and cools as it is then drawn to the stem and the mouth of the smoker. Once the bowl and shank were clean I worked on the outside of the bowl. I first lightly sanded the tars and buildup on the rim and the inner edge of the bowl to remove them. I used 320 grit sandpaper and lightly worked the area over to remove the buildup and to work on the inner edge. Once the rim was free of the tars and buildup I wiped the bowl and rim down with acetone on a cotton pad. The first wipe of that can be seen in the dark stains on the cotton pad in the pictures below. I also sanded the deep marks on the bottom of the shank. I steamed them a little to raise them and then sanded them to be as smooth as possible. I could not remove them entirely as the wood fibres were broken and would not rise totally. Sanding it to make it smooth would change the profile of the bottom of the shank so I brought is as far up as I could and smoothed out the roughness with the 320 grit sandpaper. I also cleaned the silver band with some tarnish remover and a jewelers polishing cloth. The band is stamped STERLING and came back to a clean shine.

ImageImageImageImage

Once I had removed the grime and tars from the bowl and shank I took it to the buffer and buffed the pipe with Tripoli and White Diamond. The resultant shine and colour was excellent so I decided not to restain the pipe at all but to leave it natural and give it some wax. The next series of photos show the bowl and shank when I had finished the buffing. The stamping is still crisp and sharp as I lightly buffed over those areas. I also buffed the stem to remove some of the roughness of the vulcanite and prepare it for sanding. I did a bit of sanding around the tooth marks and chatter in front of the button before buffing.

ImageImageImageImage

The stem was in need of quite a bit of work. I buffed it to begin with using Red Tripoli and then took it back to the work table to sand it with a medium grit sandpaper on a foam back to allow me to really work with the angles of the stem and button. I sanded with that sandpaper until the surface began to get smooth and I could feel the smoothness. I then progressed to the 320 grit sandpaper and worked on it longer. It took quite a bit of sanding to remove the ridges and pits. Once I had it to that point I decided to use the Maguiar’s Scratch X 2.0 and rubbed it on by hand and scrubbed the stem with a soft cotton pad to clean off the polish and the oxidation. I then worked with my micromesh sanding pads and wet sanded with the 1500-3200 grit pads. I then used another wipe down with Maguiar’s and then used the 3600-6000 grit pads on it. The next series of photos show the stem after all of the work described above and you can still see the roughness of the finish and the pitted oxidized state of the stem.ImageImageImage

At this point in the process I started over with my sanding of the stem. I again used the medium grit foam back sanding sponge and broke up the finish. I wanted to smooth out the pits in the vulcanite. I sanded and buffed with red Tripoli and then sanded it once again with the foam back sanding sponge. I wiped it down with a damp cloth and could see that I was finally gaining some ground on the roughness of the stem. I then sanded it with some 320 grit sandpaper and dampened the stem before sanding. I sanded it until the stem was smooth to my touch. I again wiped it down with a cotton pad and was ready to move on to the 400 and 600 grit wet dry sandpaper. I sanded the entire stem with these two grits and then buffed it with White Diamond and was pleased to see that I had the oxidation beat and the pitting was minimized. I then wet sanded with 1500, 1800 and 2400 grit micromesh sanding pads, polished the stem with Maguiar’s Scratch X2.0 and then moved on to 3200-4000 grit micromesh pads. I dry sanded with these pads and then took the stem and pipe to the buffer again and buffed it with White Diamond. I brought it back to the work table and wiped it down with some Obsidian Oil and let it dry while I did a few other things. Once it was dry I finished sanding with 6000, 8000 and 12,000 grit micromesh pads. I used these dry and once I was finished I gave the bowl another coating of wax and the stem a coating of Obsidian Oil and then several coats of carnauba wax. The finished pipe is pictured in the next series of photos.ImageImageImageImage

The bowl is only finished with multiple coats of carnauba wax and buffed and polished. I did not use any stain on the bowl. In the final photo above you can see the dent in the bottom of the shank that remains but the roughness of the edges has been minimized. The silver band was also coated with several coats of wax to slow down the tarnishing. I lightly buffed the whole pipe on my buffer with a soft flannel buffing pad.

Refinished a Custombilt Scoop in Memory of Bill Unger


Blog by Steve Laug

I just heard the sad news that Bill Unger died today. He suffered from leukemia and that war is over now. Bill touched many lives in inestimable ways and will be deeply missed by all who knew him. It was not long ago that all of us in the NASPC got news of Bill’s illness and his impending end. It was a shock for certain but none of us would have guessed it would end so soon. Bill is the one who got me started into hunting down old Custom-Bilt and Custombilt pipes. I read his book: As Individual as a Thumbprint: The Custom-Bilt Pipe Story and was sold on the uniqueness and smokability of these pipes. I don’t remember the date I read the book, but probably not long after it came out. I immediately went on the hunt. I have about a half dozen of the pipes and several of the Doodlers as well. With that background and Bill’s book I could not pass up this old pipe when I found it in the antique mall last weekend. It is fitting that the first refurb of this New Year happened on the same day as Bill’s death. So Bill I dedicate this refurbishment to you. I raise my pipe to you my friend and will smoke a bowl this afternoon in your honour. RIP Bill.

This old timer needed some tlc to make it a functional smoker again. The finish was shot and very dirty. The rim was caked and the cake was thick and heavy. The tars in the shank were so thick that the airway was virtually closed off. I am not sure how the previous owner could still smoke it. The stem was also clogged and dirty. The outside of the stem was oxidized. There were also some tooth marks and bite marks on the underside of the stem near the button. But something about the look and feel of this old timer in my hand drew me to it. I paid a princely sum of $11.99 to take this one home with me. The first set of photos show the state of pipe when I brought it home. The colour of the briar is correct in the first photo. The other ones are cast in an odd light that I cannot quite figure out but you can see what needed to be done to bring this pipe back to life and usefulness.

ImageImageImageImageImage

I took the pipe apart on my worktable and began the long process of cleaning out the tars and grime from the bowl and shank. I reamed the bowl with my Pipnet reaming set until it was down to the bare wood. I like bringing the bowl back to a new base to rebuild the cake as I like it. This one has an odd shaped bowl in that at the bottom of the bowl the airway enters quite high in the side of the bowl – about a 1/8 inch above the bottom of the bowl. Below the airway the bowl bottom is cut like a V – not sure if the previous owner cut the channel that way or it just happened for over working pipe cleaners in the bowl bottom. Whatever the cause, I will need to build up the bowl bottom with pipe mud. I cleaned out the grime from the bowl bottom with a dental pick and removed the dottle that had collected in the V. A good cigar will give me the ash I need to make pipe mud to do the repair. It should be as good as new when I have finished that. I used some isopropyl alcohol and then switched to Everclear to clean the inside of the shank. That took some work as the shank was very constricted from the end of the mortise to the bowl. I cleaned the airway with a bent paper clip and then bristle pipe cleaners to open it up. Because of the way the bottom of the bowl was I did not want to risk a drill bit to clean it at this point. Many pipe cleaners later the airway came out clean. I then scrubbed the mortise with cotton swabs and alcohol until it also was clean and spotless.

ImageImage

After I had finished cleaning the inside of the pipe I put it in an alcohol bath to remove the grime from the rim and the outside of the bowel. I let the bowl soak in the alcohol bath for about an hour. When the time was up I removed it from the bath and scrubbed it with the alcohol from the bath and a toothbrush. I scrubbed the rim and the exterior of the pipe to remove the softened grime. Once it was finished I dried it off and set it aside to dry. The next series of photos show the bowl after the cleaning in the alcohol bath and the scrubbing.

ImageImageImageImage

I went to work on the stem at that point and sanded it initially with fine grit sandpaper on foam backing. This gave me the ability to work the angles and curves of the saddle stem and the area around the button to remove the tooth marks and chatter. Once I had done that I used 320 grit sandpaper to sand out the scratches and remove the remaining oxidation. I then used Maguiar’s Scratch X2.0 to polish the stem. I coated the stem with the polish and then scrubbed it with a cotton pad and repeated the process two more times to give it an initial shine. The next two photos show the stem after the polishing with the Maguiar’s polish.

ImageImage

I put the cleaned stem back on the now dried pipe bowl to do some of the close sanding around the shank/stem union. I did not want to round the edges of the stem and ruin the smooth fit that the stem had originally. Using micromesh sanding pads 1500, 1800 and 2400 grit I wet sanded the stem. I then used Murphy’s Oil Soap and a tooth brush to scour the pipe bowl and shank exterior. I scrubbed it until the soap was brown and frothy. I then rinsed it in the sink under warm water and dried it off with a microfiber cloth. The next series of four photos show the finished bowl ready for a new coat of stain.

ImageImageImageImage

I then set the bowl aside and worked on the stem for the remainder of the micromesh sanding pads from 3200-12,000 grit. Before beginning with the 3200 grit I coated the stem with some Obsidian Oil and rubbed it into the stem. When it was dried I sanded the stem with 3200, 4000 and 6000 grit sanding pads. The next series of photos show the process of the sanding and the resultant look of the stem at this point.

ImageImageImageImage

I set up my staining area and took out the dark brown aniline stain. I thinned it with isopropyl alcohol 3 to 1 and then applied the stain with a dauber to get the stain into all the crevices. Once it was coated well I flamed the stain and let it set the stain. The flaming burns off the alcohol in the stain and works to set the stain in the briar. I reapplied the stain and reflamed it to set a second time.

ImageImageImage

After flaming the stain I let it sit for about 15 minutes to let the stain dry in the crevices of the rustication. The first photo below shows the bowl after the stain has dried to a nice matte finish. I then used a shoe buffing brush to buff the pipe. The second photo shows the bowl after that buffing. I then finished sanding the stem with 6000, 8000 and 12,000 girt micromesh sanding pads and then coated it a final time with Obsidian Oil.

ImageImage

The next series of four photos show the finished pipe. Once I was done with the stem I put it back on the pipe and took the pipe to the buffer and buffed the pipe with White Diamond and then coated the stem with carnauba wax and used Halcyon II wax on the rusticated surface of the bowl. The entirety of the pipe was then buffed with a soft flannel buffing pad to bring up the shine of the wax. Once I have smoked a bowl in Bill’s honour I will coat the bowl with pipe mud to raise the V shaped bottom of the bowl even with the entrance of the airway.

Now the pipe is ready to load with Virginia and smoke a bowl in memory and honour of Bill Unger. Here is to you Bill. May your bowls always be full as you enjoy the end of all your struggles. My prayers and condolences go out to your family and close friends.

ImageImageImageImage

Restemming a Custombilt Look Alike


This morning I decided to restem an old Custombilt look alike pot that I had in my box of pipes for repair. I am getting down to only twenty or so pipes left so it is the pipes I have left until the end. Some of these I left because they had no charm to me and others because I just was not ready to work on them. This old no name pot was one of the ones that held no charm for me. The rim was pretty covered with grit and grime. The finish was not in too bad a shape. There was a small crack in the shank which would need to be banded and then the matter of matching a stem to the pipe hung in the air. This morning I went through my can of pipe stems and found an old cast off taper stem that was the right diameter to match the shank. The tenon would need to be sanded to fit the mortise. I set it aside and reamed the pipe and cleaned the shank before fitting the stem. I opened the crack in the shank a bit with some pressure from a dental pick and dripped some super glue into the crack and held it tight until it set. I then heated a nickel band and pressure fit it to the shank. I sanded the tenon by hand with 240 grit sandpaper until the fit was snug.

IMG_9311 IMG_9312 IMG_9313IMG_9314

Once the stem was a good snug fit I went to work on the bowl. I cleaned the bowl with Murphy’s Oil Soap and a soft bristle tooth brush. I wanted to remove as much of the grim from the rim as possible and clean up the rustication on the rim surface without damaging the finish. I repeated the process by applying the soap, scrubbing and wiping it off with a cloth.

IMG_9315

When the rim was clean I wiped down the outside of the bowl with the Oil soap as well and removed the grime that remained on the surface. I then wiped the entire bowl down with some acetone on a cotton pad to even out the stain colouring. Once it was dry I took the pipe to the buffer and buffed the pipe and stem with Tripoli and White Diamond.

IMG_9316IMG_9317 IMG_9318

I sanded the stem with a sponge backed medium grit sandpaper. I find that this allows me to get into the crevices on the button and to follow the shape and taper of the stem well. At this point the two photos below show the stem after the buffing and sanding. I spent a bit of time working on some tooth marks along the edge of the button on both the top and the bottom of the stem. You can see the work that has been done near the button in the photos below.

IMG_9319 IMG_9320

I worked on the stem with the micromesh sanding pads using the 1500, 1800 and the 2400 grit with water to sand out the scratches and the remaining oxidation. At the conclusion of this process the stem was a nice matte black and the oxidation was basically history as can be seen in the photos below.

IMG_9321 IMG_9322 IMG_9323 IMG_9324

At this point in my stem rejuvenating process I rub the stem down with Maguiar’s Scratch X 2.0 a fine scratch and blemish remover intended for cleaning and polishing plastic headlight lenses. I rub it on by hand and then scrub it off with a cotton pad until the stem is clean. When I finish with the polish I move on to the next grits of micromesh 3200-12,000 grit and sand until the finish is a polished black with a depth to it. I dry sand with these grits of micromesh. Between the 4000 and 6000 grit pads I took it to the buffer and gave it a buff with White Diamond. I found that the oxidation at the shank end of the stem was still present after the buffing and would require some more work with the earlier grits of micromesh. I buffed that end with some Tripoli and then decided to try the Bic Lighter method to address the remaining oxidation. Once that was finished I sanded the stem with the higher grits of micromesh 4000-12,000 and then coated the stem with Obsidian Oil. I buffed the stem with White Diamond and then reinserted it in the pipe and gave the entire pipe a final buffing with multiple coats of carnauba wax. Here is the finished pipe.

IMG_9325 IMG_9326 IMG_9327 IMG_9328