Blog by Steve Laug
I was gifted six pipes that were in need for refurbishment be a friend on Smokers Forums. The first one that caught my fancy was this nice sandblasted Big Ben Bent Billiard. It had a silver band and a nice looking blast. The finish was rough but shape is classic. The bowl was dirty and the shank and stem were filled with tars and grime. The bowl is stamped on the underside of the shank – Big Ben Select under a B in a circle. The outside of the stem was oxidized but the B logo was still deeply stamped. There was also a slight tooth mark on the underside of the stem near the button. The button was very tight and small – so much so that a thin pipe cleaner was work to get through the slot. The rim edges were worn and rough but as it was a blast this would not be a problem to clean up. Over the stain coat was also a shiny varnish or lacquer coat that I always find to be a pain to remove and deal with in a pipe that is worn like this one. It was just the challenge I wanted to have a go at this weekend. The next series of three photos show the pipe as it appeared when I opened the box and took it out for the first time.


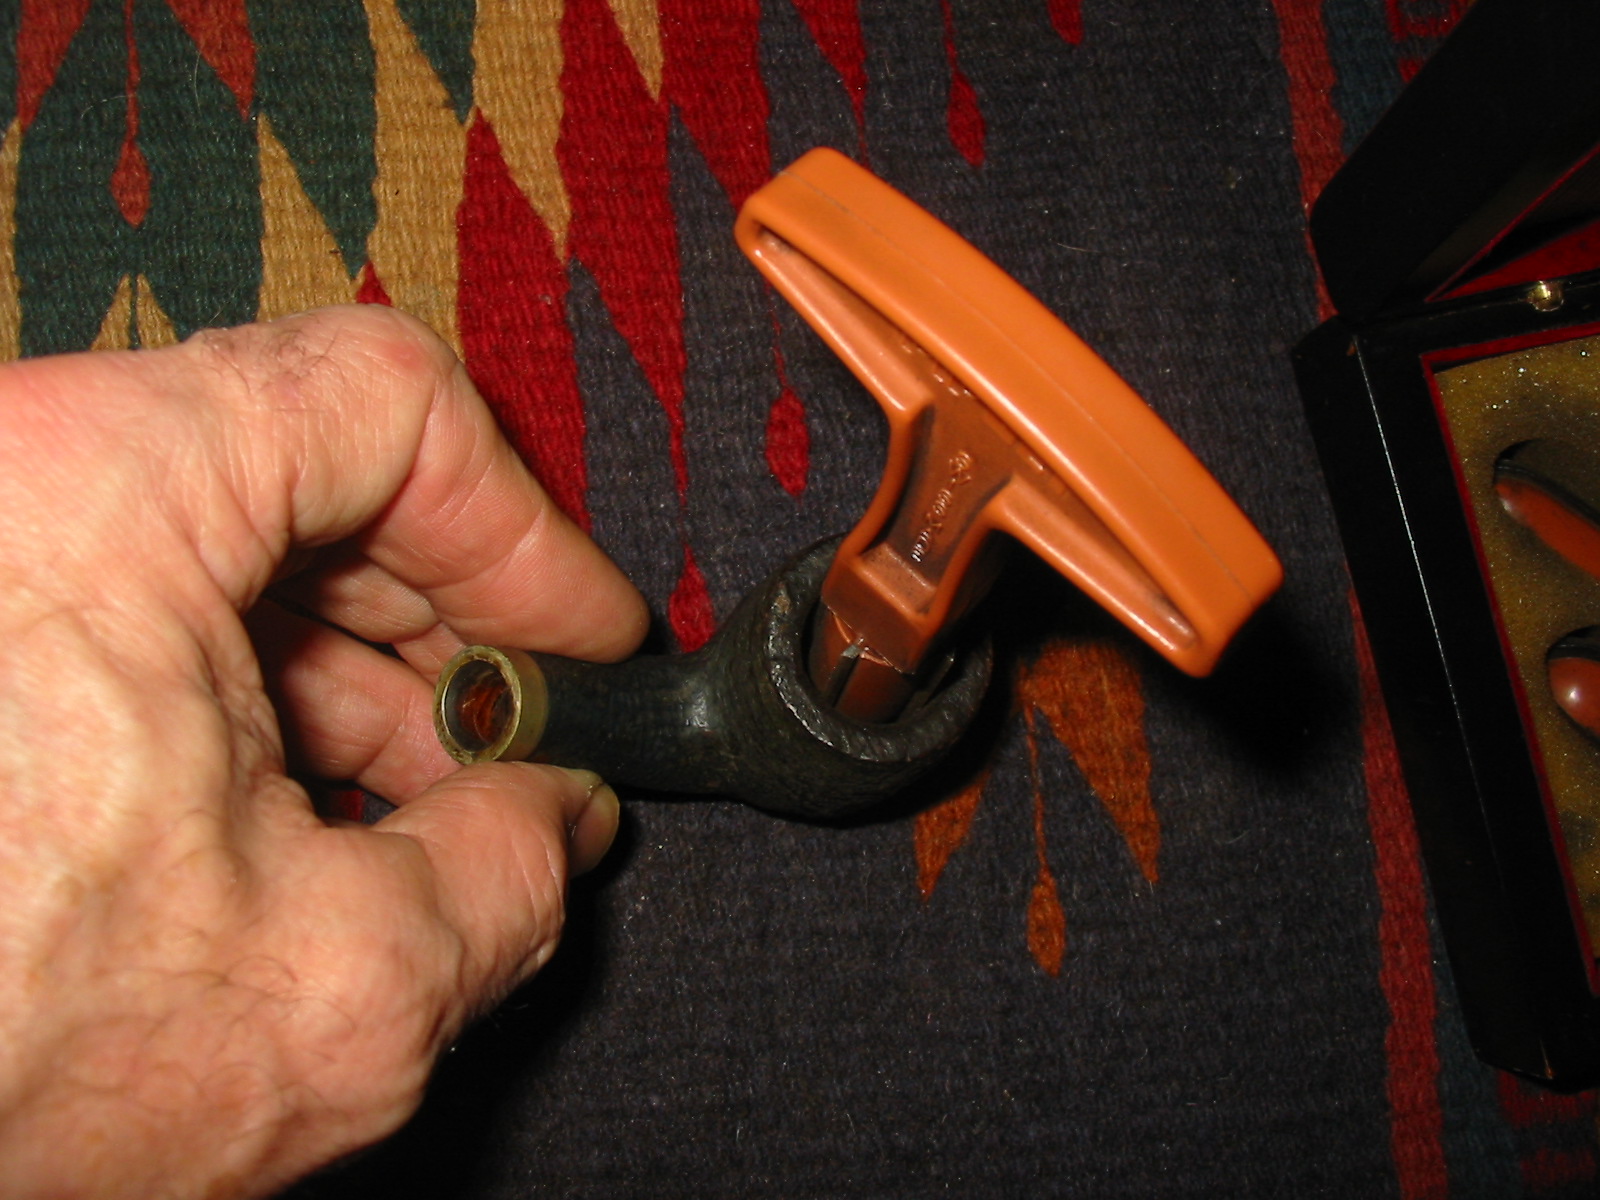
I decided to begin by reaming the bowl so I removed the stem so that I could hold the bowl solidly and used my T handle Pipnet reamer. The next series of three photos show the reamer and the pipe bowl as I worked on it. Once I was finished I dropped it my alcohol bath to soak. The fourth photo below shows the bath after I had dropped the pipe bowl in the soak. The alcohol appears dirty but it is darkened from earlier stains that I have removed. I have filtered the alcohol several times over the past months to remove sediment and particulates that were in the mix. The alcohol works exceptionally well and I have found that the darkened stain in it adds a nice aged patina to the briar. The fifth photo shows the stem ready to go into the OxyClean bath. I dropped it in the bath and it immediately darkened the wash. I took it out and took a photo to show the before soaking look of the stem.


I left the bowl in the alcohol bath overnight and then this morning took it out and scrubbed it with a soft bristle tooth brush. I also picked out the paint that seemed to be in the grooves of the blast with my dental pick. I decided to also scrub the bowl with a brass bristle tire brush to get the paint flecks out of the briar. The next series of twelve photos shows the process I have described above. The first three photos show the bowl wet from the bath and the tooth brush off to the side that I use to scrub the sandblast. I rinsed the bowl off with alcohol from the bath and then dried it with a cotton cloth. The next two photos show the bowl with the brass tire brush. Once the surface had dried I scrubbed with the tire brush to remove the grime from the grooves in the briar. The final seven photos show the bowl as I wiped it down with acetone on a cotton pad to remove the remaining finish and top coat of varnish or lacquer. I wanted the briar very clean before I restained it.


After getting the outside of the bowl cleaned and ready to stain I worked on the inside of the bowl and the shank. The shank was interesting in that it had two stepped down portions. First there was the mortise area where the tenon rested. This was followed by an area that further stepped down to receive the inner tube style stinger in the end of the tenon. Finally there was the area of the airway into the bowl bottom. The step down drilling of the shank made this an interesting airway to clean out. I used isopropyl alcohol and some Everclear to scrub out each step down successively. I began with the mortise area that held the tenon. To clean this I used qtips or cotton swabs dipped in alcohol. I scrubbed that area until the swabs came out clean. I then proceeded to clean the next stepped down area where the inner tube sat. I used cotton swabs on this as well and pressed them against the opening and twisted them into that part of the airway. Again I used the alcohol and kept working on it until the swabs were clean. The final part of the airway I used a shank brush and alcohol followed by fluffy pipe cleaners until that area was also clean. The next series of three photos show the process and the dirty cotton swabs at the top of the photos.


After cleaning out the shank and wiping down the inside of the bowl I cleaned the stem. This was more of a pain than normal due to the constriction of the button and slot. A thin pipe cleaner would not fit into the stem from the button end. So I had to slowly move it into the stem from the inner tube end. I also was able to flatten the pipe clean and work it into the stem. It got most of the gunk out of the stem. The next two photos show the pipe after this cleaning. The stem button would need to be opened in order to give it a more thorough cleaning.


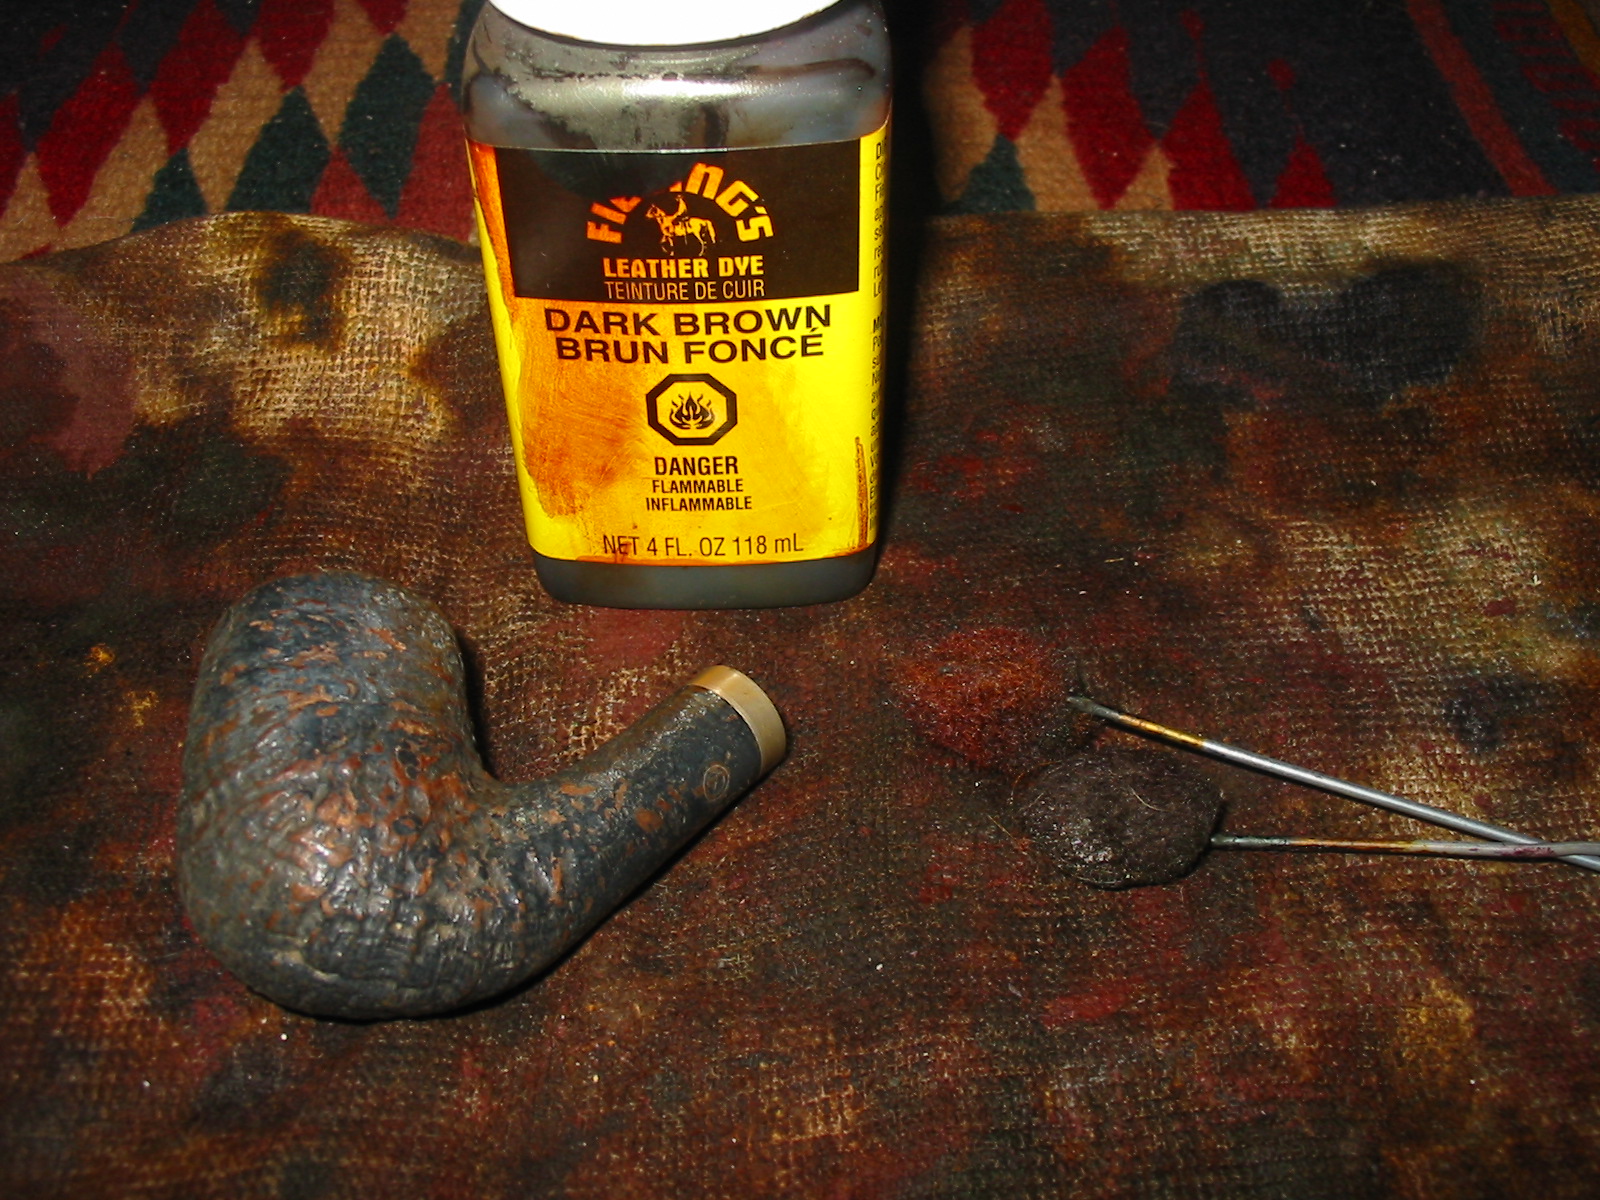
The next series of nine photos show the restaining of the pipe. I used a dark brown aniline stain that I have thinned down 2:1 with isopropyl alcohol. It does a good job of coverage on the briar but also allows some depth the staining. I like the look and effect of it on sandblasted briar. I applied the stain with a dauber and then flamed it with a lit match. I reapplied and reflamed the pipe several times to get a good solid coverage of stain.


Once the stain was flamed and dry I took it to my buffer and buffed it with Tripoli and White Diamond to remove some of the high spots and give it a shine. The first three photos below show the polished and buffed pipe. It was still a bit dark to my liking so I took it back to my work table and wiped it down with some isopropyl alcohol on a cotton pad to remove some of the top stain and give me a bit brighter and lighter finish. The next three photos show the bowl after it had been wiped down with the alcohol. It was exactly the colour I was aiming for so I set it aside to work on the stem.


I decided to open up the slot in the button to make it easier to clean the stem. The first photo below shows the slot before I started working on it. It was very tight and hard to get a pipe cleaner down the stem. I used several different needle files to open the slot. I took material off the top and bottom of the slot with the needle files and also cut the slot into more of a Y shape as I worked on it. The next four photos show the progress of the opening of the slot with the files. The final photo of the four shows the set of files that I use for the work. I took the photo with the stem on top of the package to give a bit of an idea of the size of the files. I finished the slot with a folded piece of sandpaper and worked it until it was smooth. I then recleaned the stem with pipe cleaners and alcohol until they came out clean.


After reworking the slot in the button I worked on removing the oxidation from the stem. I sanded the stem with 320 grit sandpaper to remove the tooth marks from the underside of the stem and also remove the softened oxidation. I also used a fine grit sanding sponge to remove scratches and marks to the stem. The two photos below show the stem after I had wet sanded the stem with 1500 and 1800 grit micromesh pads. I then used some Maguiar’s Scratch X2.0 polish and scrubbed the stem with a cotton pad. In the photos below the pad is in the lower part of the photos. I progressively sanded the stem with the remaining grits of micromesh – 2400-12,000 grit. I dry sanded with these until the stem shone. I wiped it down with Obsidian Oil and rubbed it in and then reworked the logo on the stem. I used some liquid paper in a correcting pen. I applied it heavily to the stamped area and then rubbed it off and sanded it with 4000 grit micromesh sanding pads to remove the excess. I repeated the process until I had good coverage on the stamping. The third and fourth pictures below show the refinished stamping on the stem. I finished working on the stem by giving it another coat of Obsidian Oil followed by multiple coats of carnauba wax.


I used a jeweler’s cloth to polish the silver band and then took the pipe to my buffer and gave the bowl a buff with White Diamond. I took it back to the work table and gave it a coat of Halcyon II wax and hand buffed it with a shoe brush. The final series of four photos show the finished pipe.


Pingback: A Pipe’s Journey – Big Ben Select Bent Billiard | rebornpipes
Very impressive! Thanks for detailing the process, Steve.
LikeLike
Holy mackerel, Steve! You have transformed that pipe. Well done! -bw
LikeLike
Thanks Bill, great to hear you say that as since it came from you, you know more than anyone else what it looked like. Thanks for the pipes my friend. I will post the others here as I finish them. Fun projects.
LikeLike
Very nice work, Steve – as always!
LikeLike