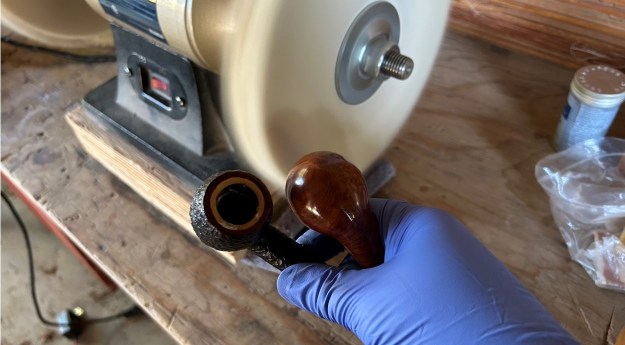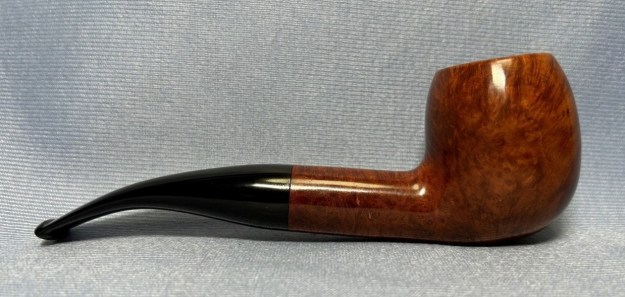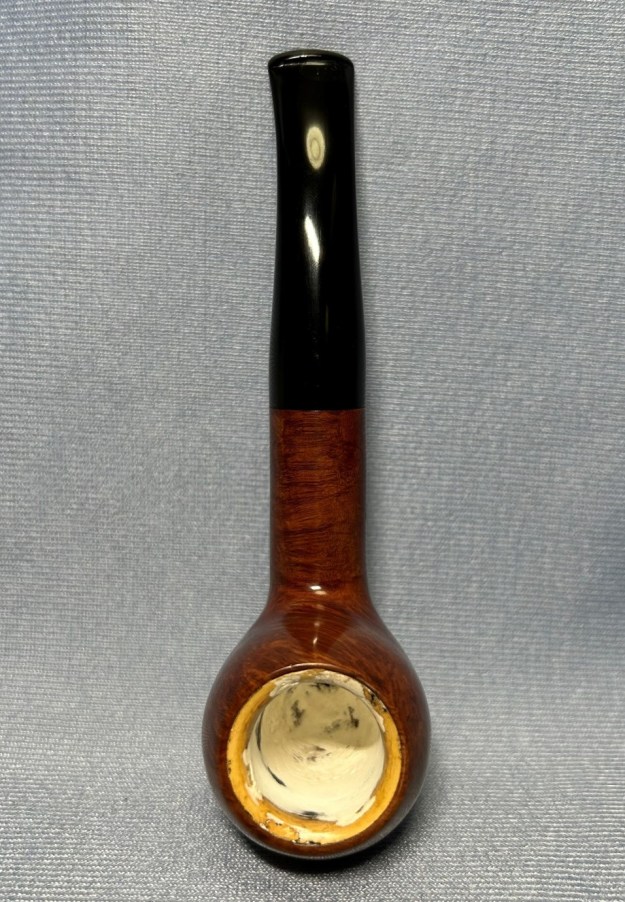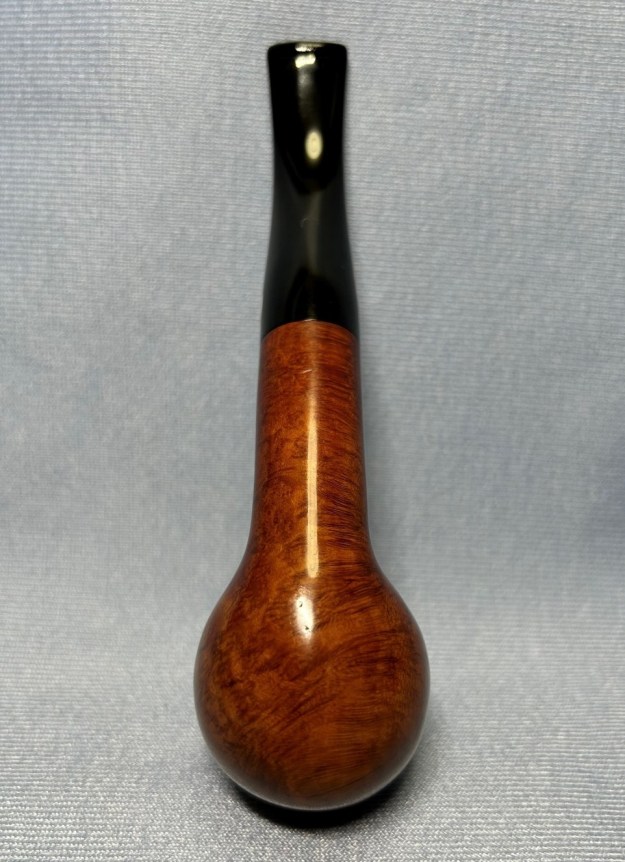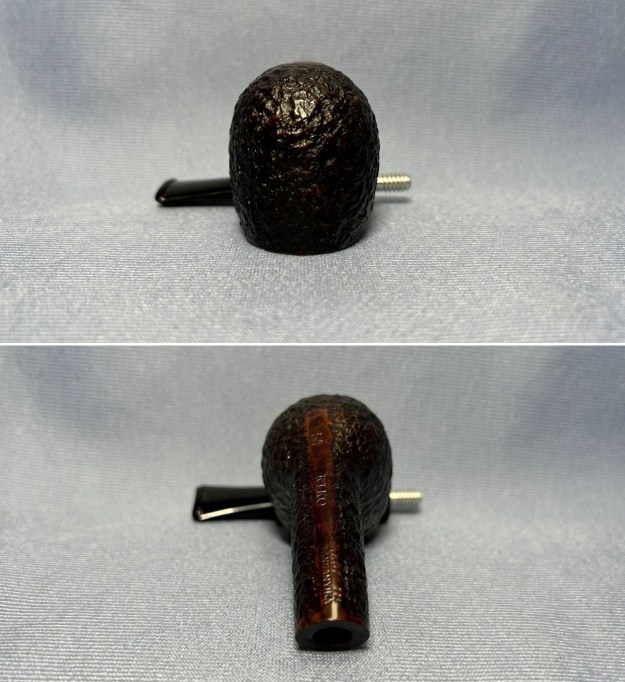
Tag Archives: KPIR

Major Repairs to a Broken Stem (KPIR #11)


by Kenneth Lieblich

Welcome to another instalment of my Pipe Incident Reports. The idea, in general, is to provide a brief write-up – focusing on a particular pipe-restoration-related issue – rather than an entire restoration story. Today’s story is on the resolution of a very specific pipe repair – a substantial radiating crack in an acrylic stem. I hope this blog post will be useful for those undertaking a similar repair.

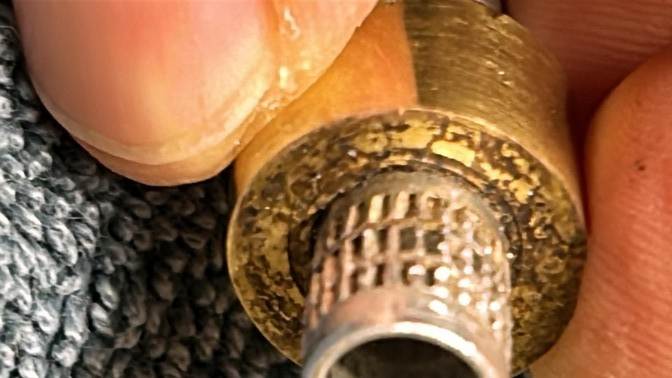
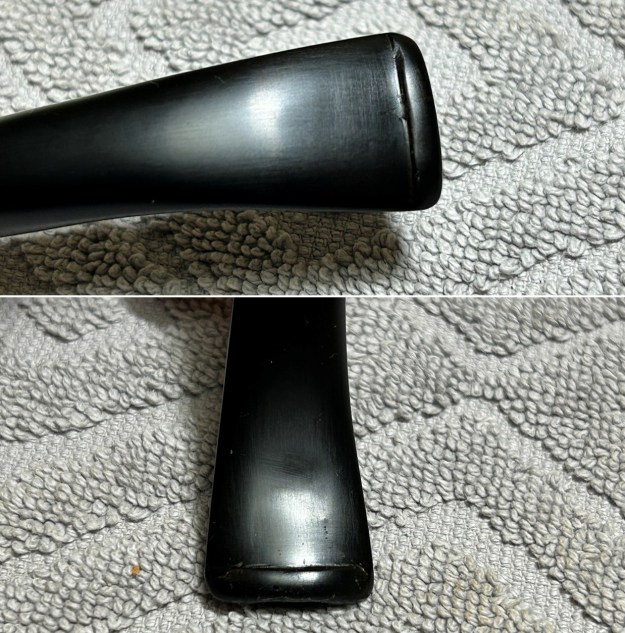
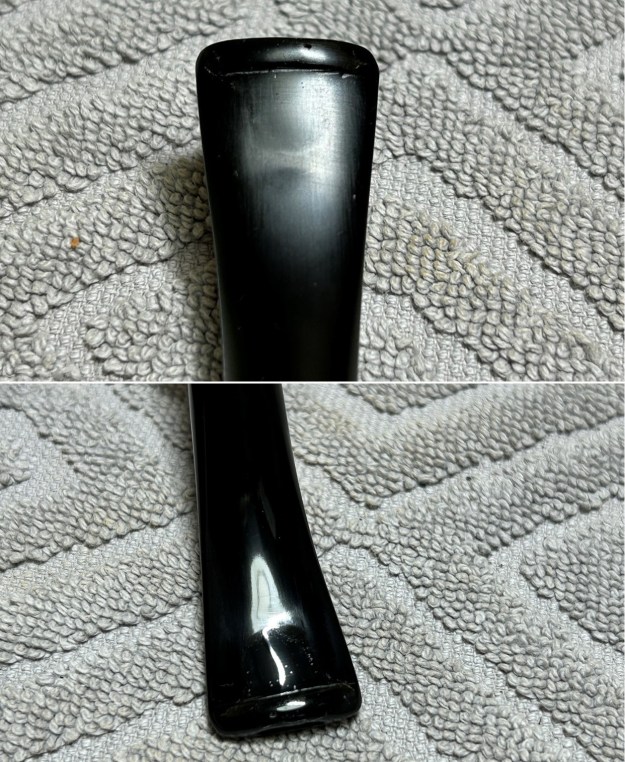
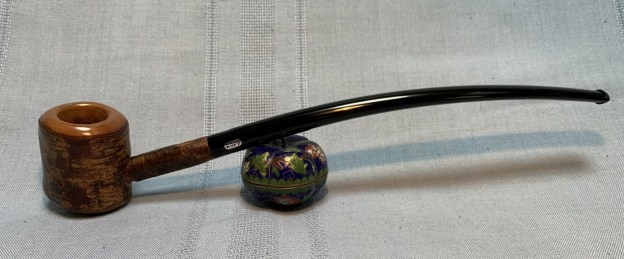
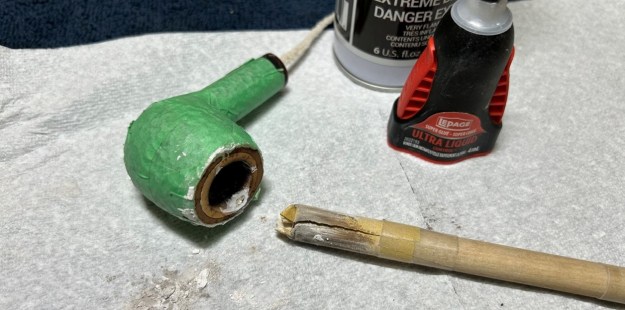
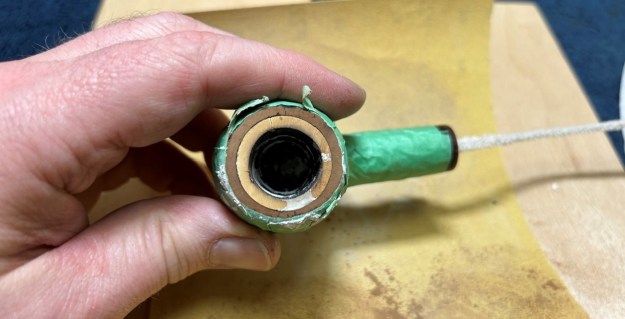
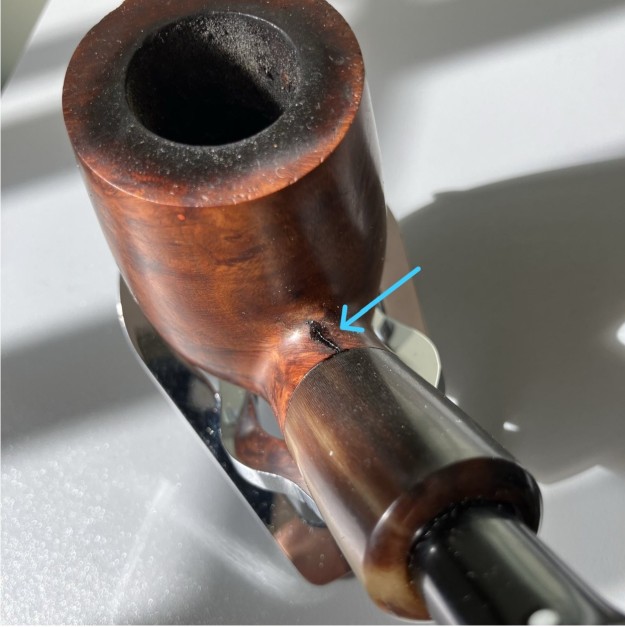
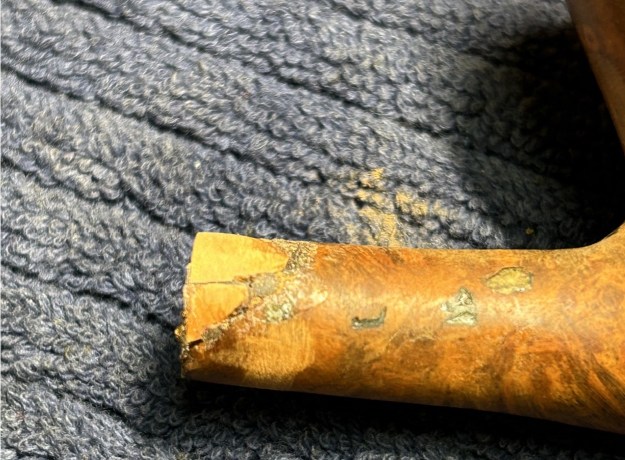
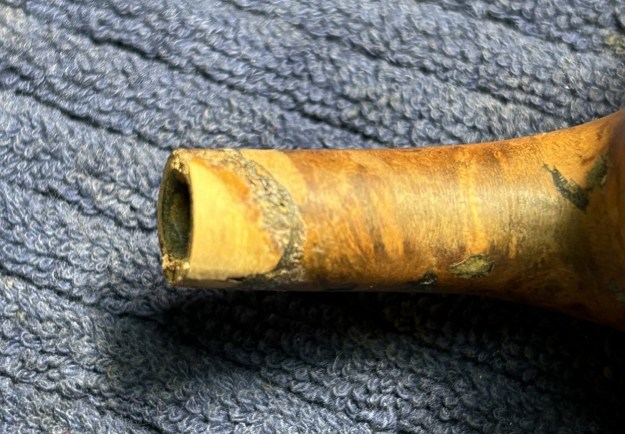
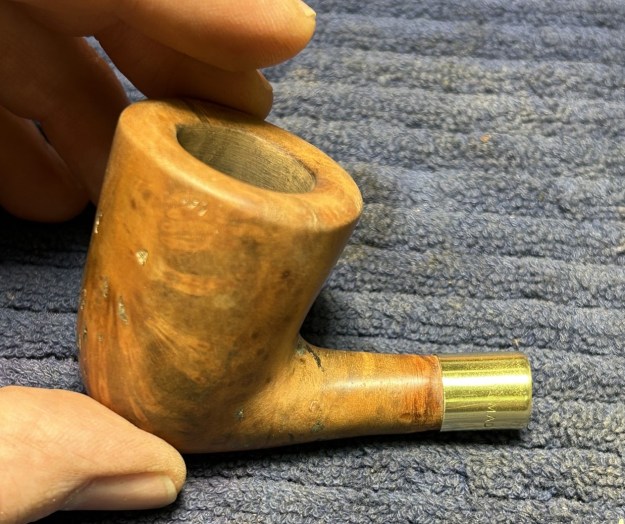
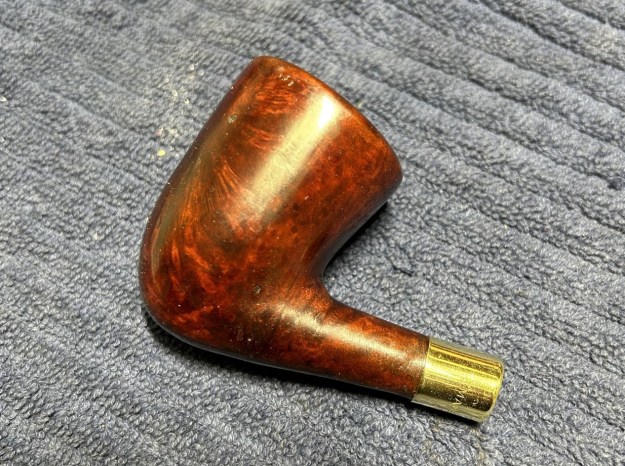
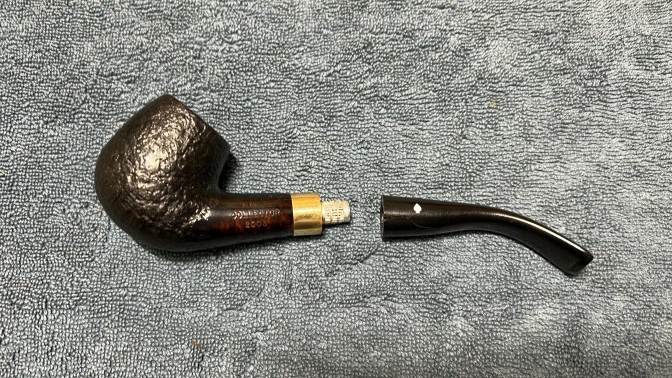
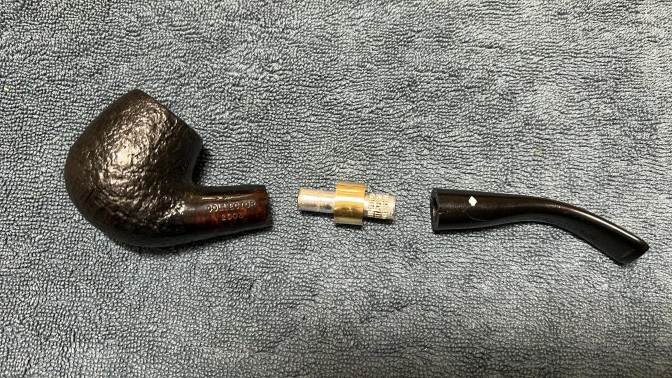
A gentleman contacted me about repairing the stem on a Dr Grabow Collector 2003 that he acquired. The damage was serious and required some significant work – but that’s what I’m here for! Let’s take a look. The photos below show how the pipe presented to me. The central component – connecting the stummel to the stem – was a brass band with an aluminum (or other metal) tube. The odd thing about the first photo is that that is not how the pipe should be. The metal section was stuck into the stummel and separated from the stem. That is the exact opposite of what should be. After some work, I managed to extricate the metal piece. The different metal components are affixed to each other permanently.
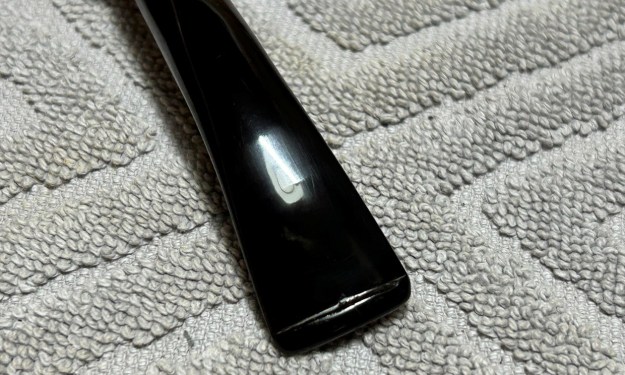
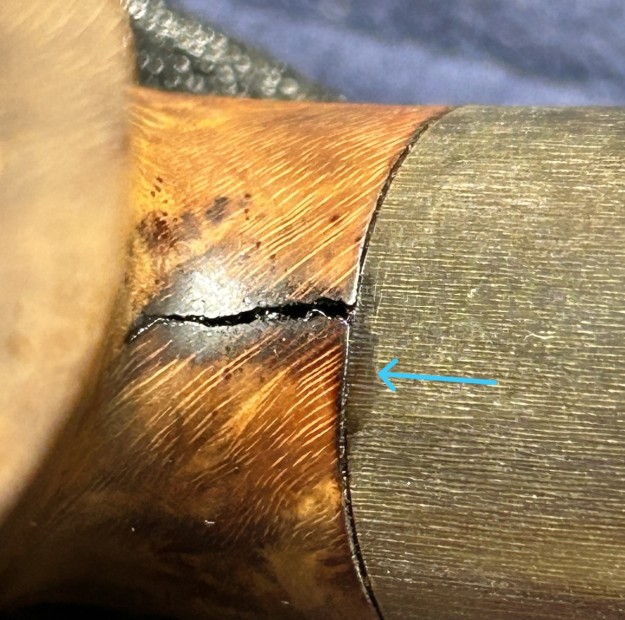
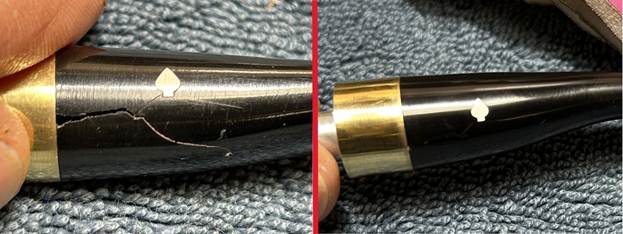
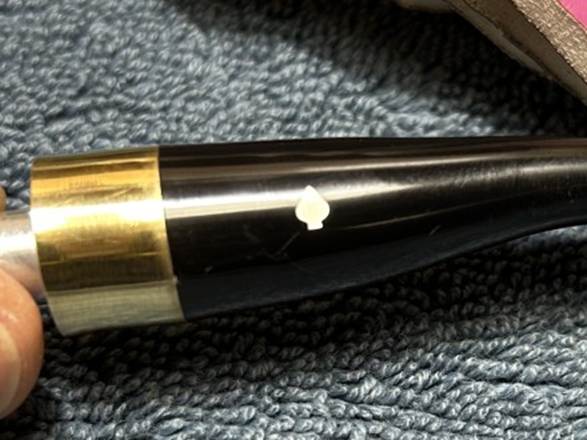
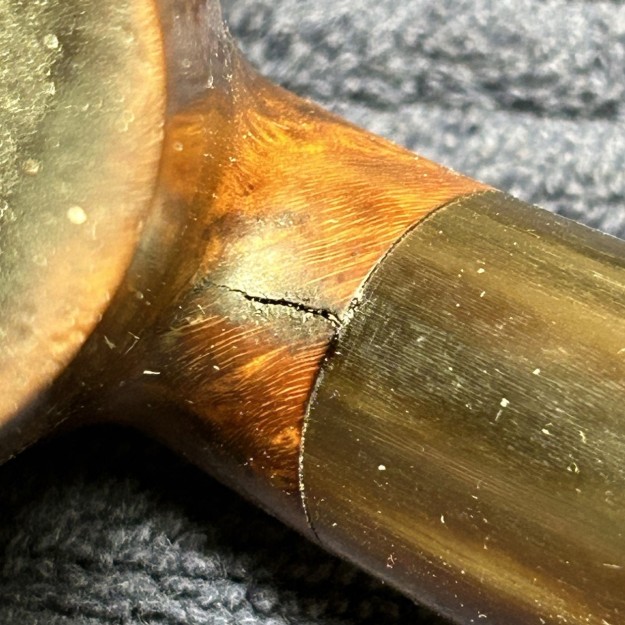
A quick look shows the problem: a radiating crack at the end of the stem. Wow – what a crack! Obviously, this needs to be repaired. We also need to reconnect the metal component to the stem. Finally, we need to ensure that the spade logo of Dr Grabow is not damaged or obscured by my repair.
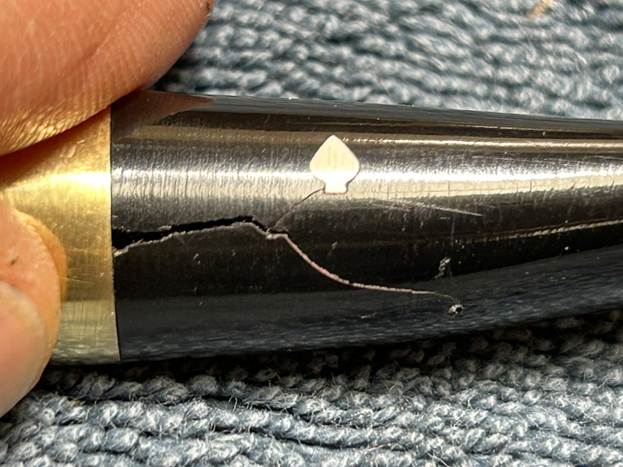
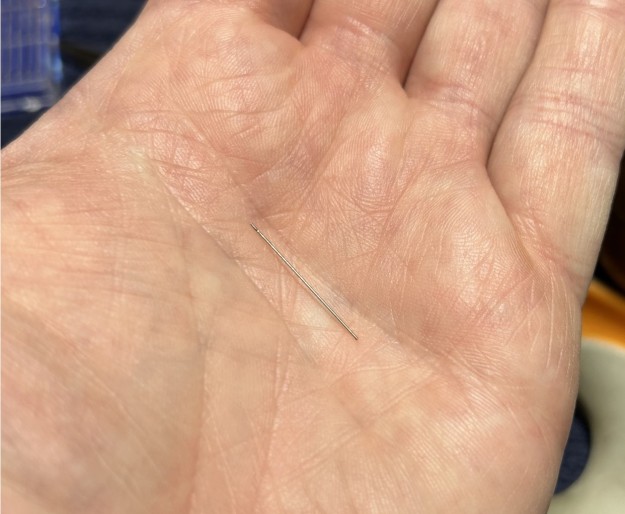
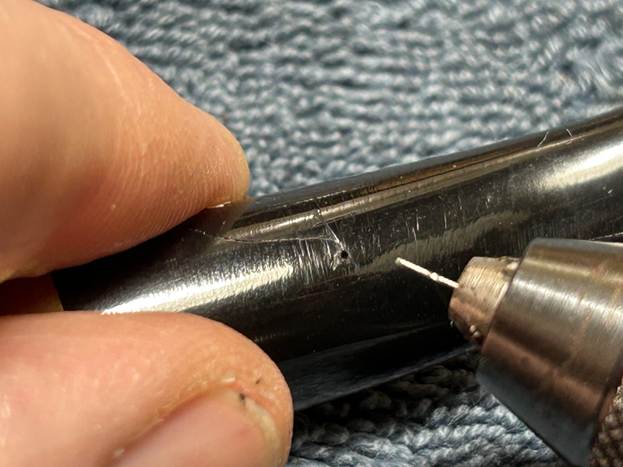
Before anything else, it is imperative that I ensure that the cracks do not continue to creep after I repair them. To that end, I took a micro-drill bit, inserted it in my rotary tool, and very carefully drilled a hole right through the wall of the stem. That hole will stop the crack from progressing. As you can see, the drill bit is incredibly thin and quite prone to snapping if great care is not taken. There is a crack that also radiated to the spade logo, but I did not drill there for fear of damaging that logo.
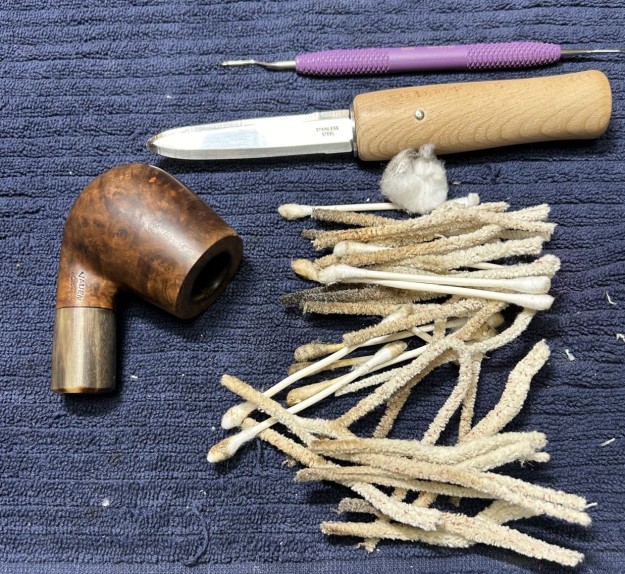
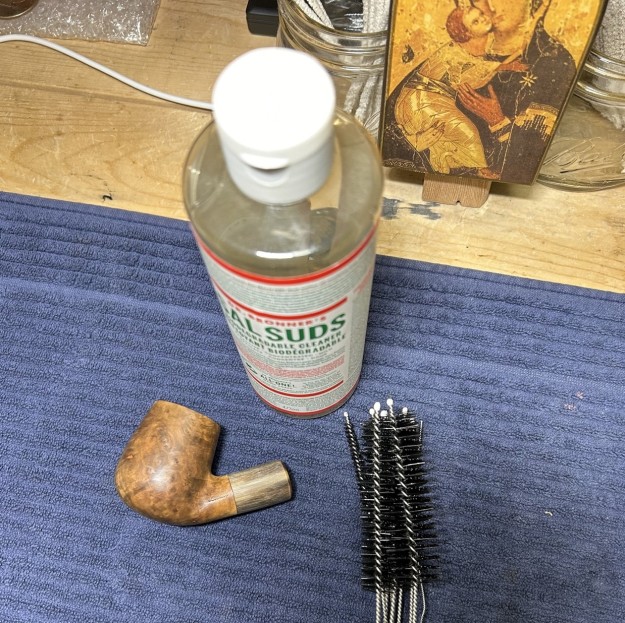
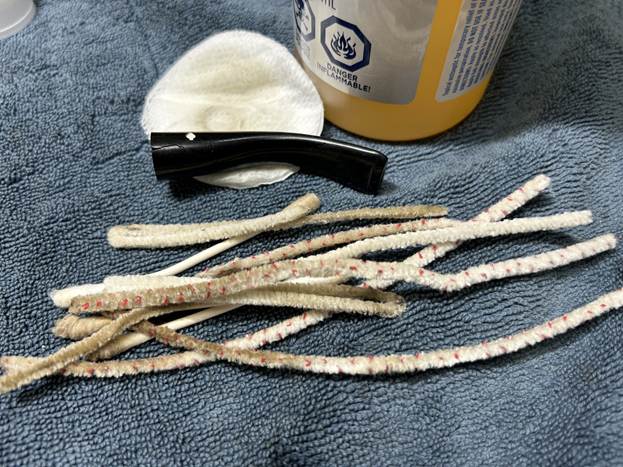
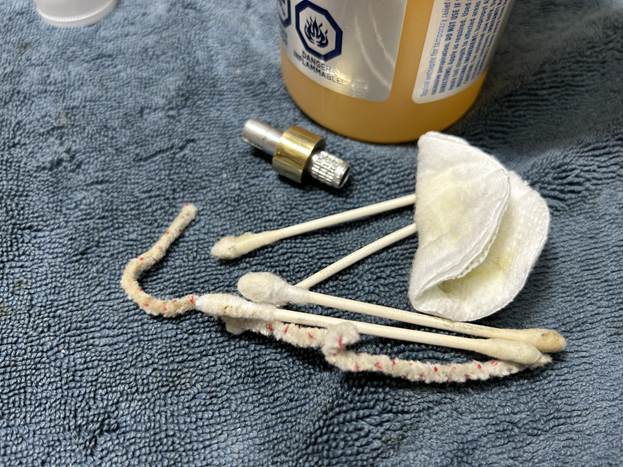
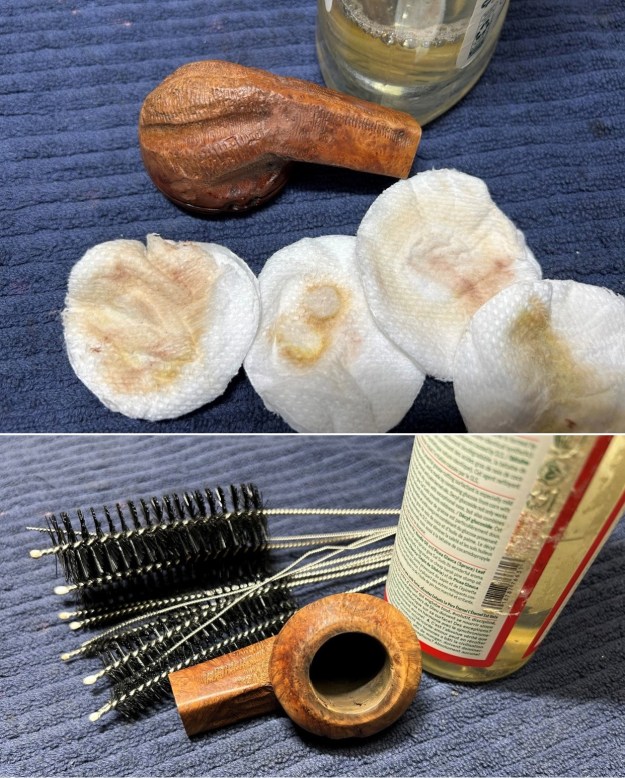
I used isopropyl alcohol on a few cotton rounds and wiped down the stem. I then disinfected the inside of the stem with both pipe cleaners and cotton swabs dipped in lemon-infused 99% isopropyl alcohol. I scrubbed thoroughly to make sure the interior was very clean – and I did the same to the metal components. Aside from cleanliness, this procedure also ensures a good bond between adhesive and components.
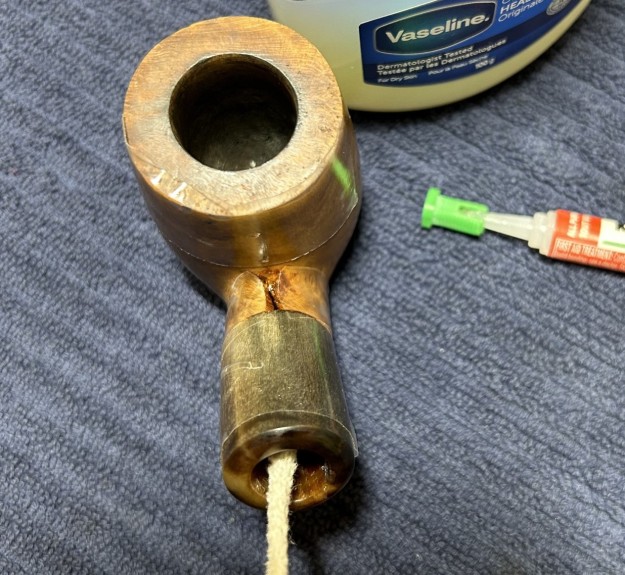
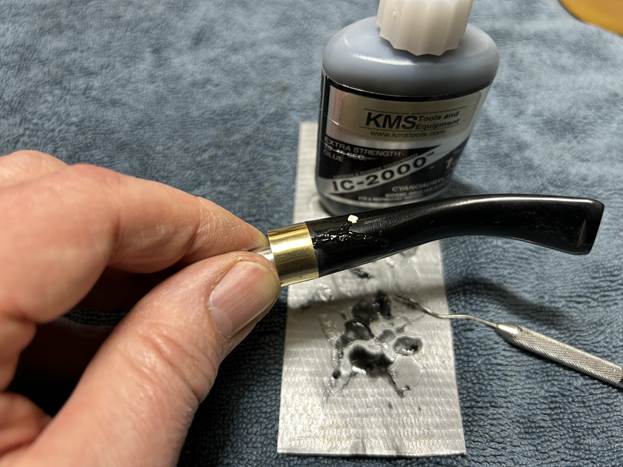
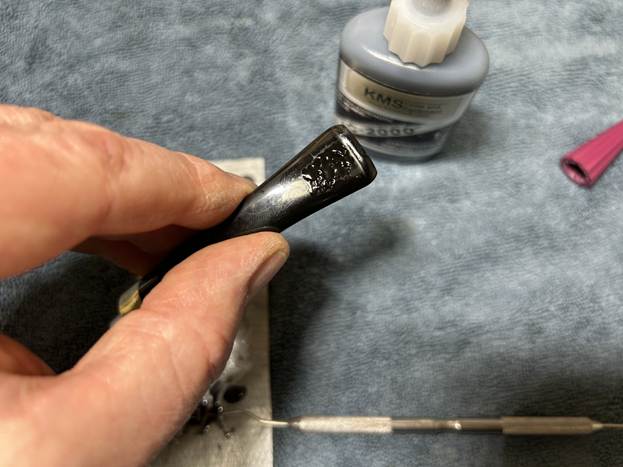
Repair time. I first used some black cyanoacrylate impregnated with carbon and rubber to reconnect the brass band etc. with the end of the acrylic stem. I also took care to ensure that the orientation of the band and stem were matching. Once that had cured, I applied the same adhesive to the crack itself. Using a very fine dental tool, I made sure that the cyanoacrylate penetrated the crack without dripping into the interior of the stem. While I was in the neighbourhood, I also set about fixing the tooth marks near the bit. This was done by similarly filling those divots with black cyanoacrylate adhesive and letting it cure.
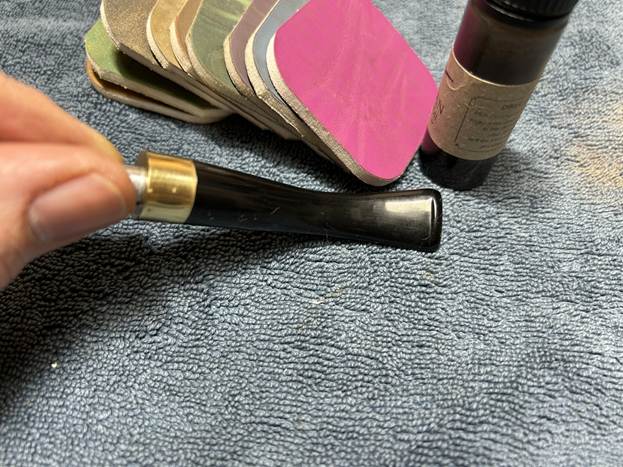
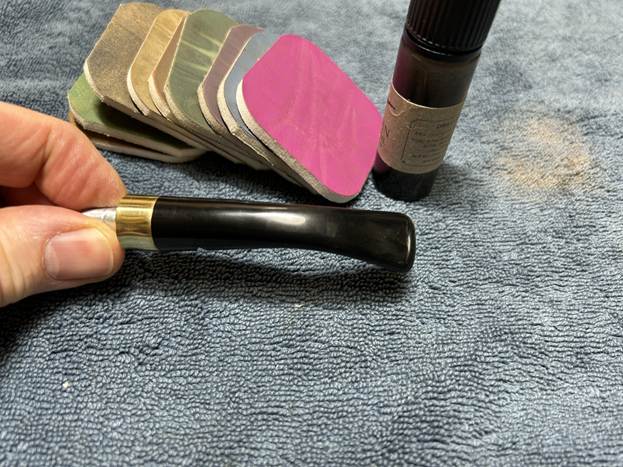
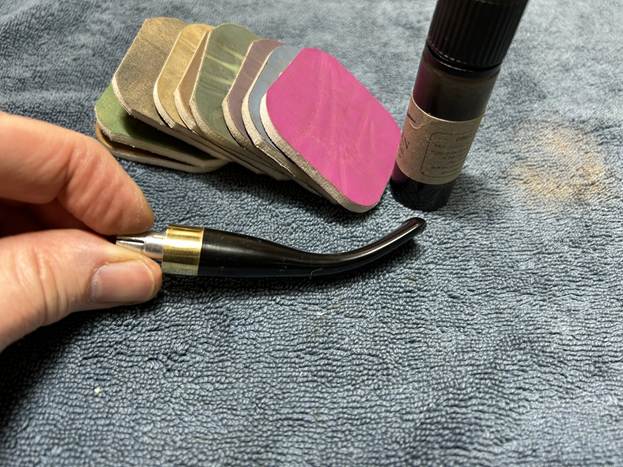
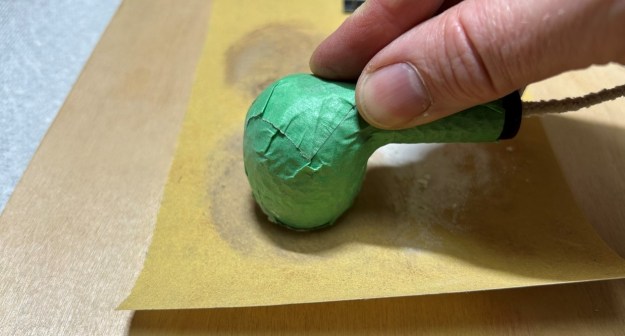
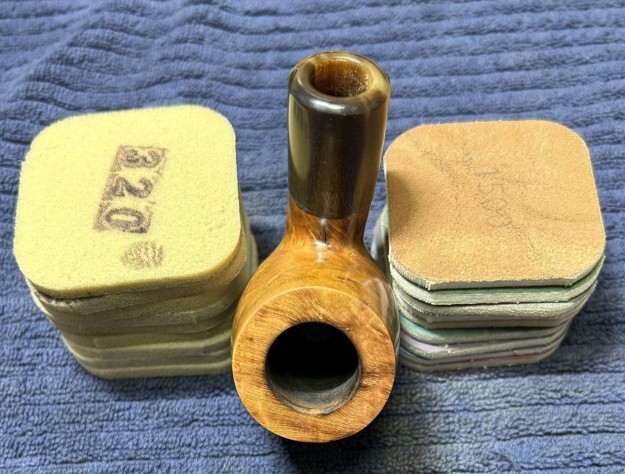
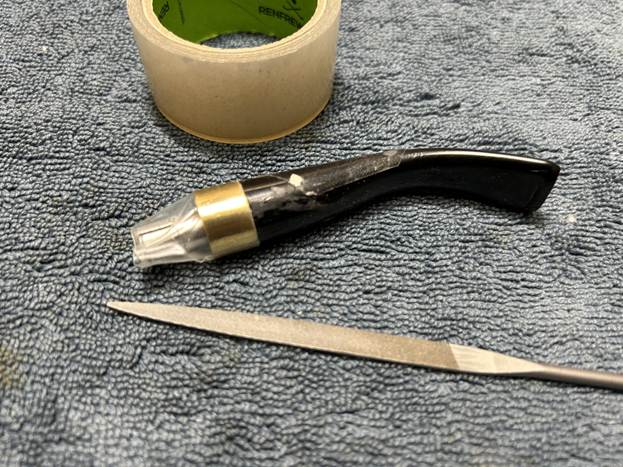
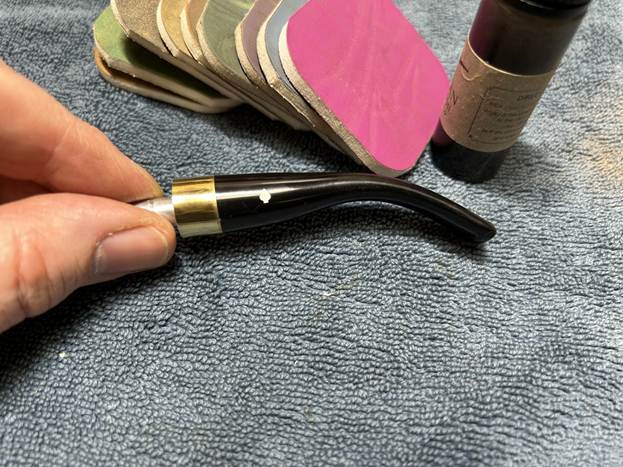
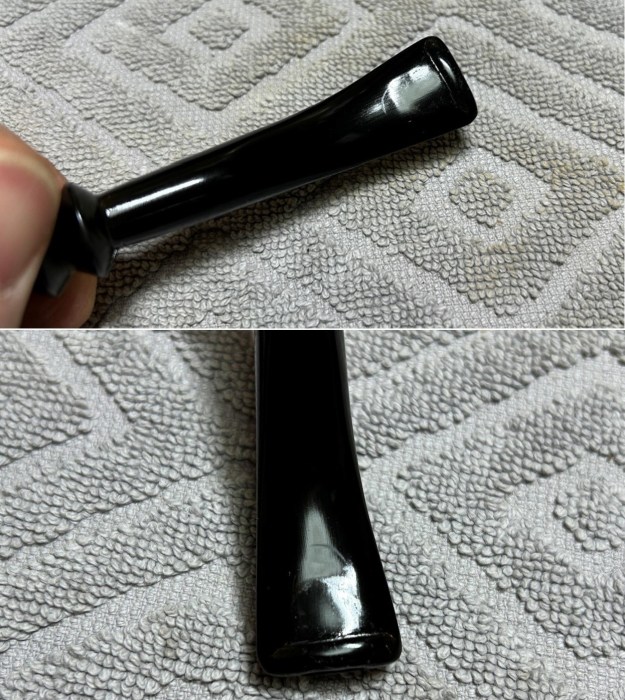
At this point, I took some clear hockey tape and carefully, precisely masked the brass band and spade logo with it, as protection. Then, with my set of needle files, I reduced the bulk of the cyanoacrylate repairs. I removed the excess adhesive as near to the surface as possible, without cutting into the acrylic. Following that, I used my micromesh sanding pads to sand out flaws, even out the acrylic, and provide gentle polishing of the finished surface. I also applied pipe-stem oil while using the last five micromesh pads. There was a wonderful, deep black shine to the stem when I was done.
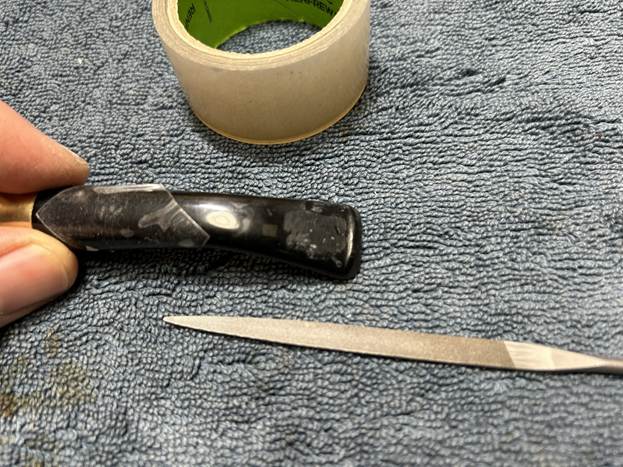
I am very pleased with how the repair turned out and I am sure that there are many years of smoking pleasure to be had from this pipe in the future. I should emphasize that the line you see to the right of the spade logo is not a scratch, but merely a reflection in the photo.
Thanks so much for joining me on this interesting repair. I hope you enjoyed reading this instalment of my Pipe Incident Reports – I look forward to writing more. If you are interested in my work, please follow me here on Steve’s website or email me directly at kenneth@knightsofthepipe.com. Thank you very much for reading and, as always, I welcome and encourage your comments.
Rethinking the Repair of Damaged Stems (KPIR #10)


by Kenneth Lieblich

Welcome to another installment of my Pipe Incident Reports. The idea, in general, is to provide a brief write-up – focusing on a particular pipe-restoration-related issue – rather than an entire restoration story. I’ve been blessed by a precious few God-given talents in my life, but innovation is not among them. I’m not usually able to come up with groundbreaking ideas to do things differently. Having said that, I do try and improve my repair/restoration skills, techniques, and procedures wherever I can. One can call it kaizen or whatever, but I try to find better ways of restoring pipes.Today, I am attempting to improve the process of repairing stem bite-throughs by incorporating steel mesh. Now, you might be thinking, ‘That’s not a sentence I ever expected to read’, and you are justified in that thought.

Many pipe repairmen have used various methods for repairing bite-throughs (holes) in vulcanite. Normally, this involves mixing cyanoacrylate adhesive with activated charcoal or powdered vulcanite. Some fellows have also tried some sort of epoxy to bring the stem back to life. In fact, when I started doing pipe repairs, I used that mixture of cyanoacrylate adhesive and activated charcoal. Then I discovered a black-tinted cyanoacrylate adhesive that came pre-mixed with rubber and charcoal. I introduced this product to Steve and it’s what he and I have been using ever since. However, I have always wondered about the durability of these repairs – especially against the bite of a man’s jaw. I wondered, could there be a better way?

Maybe. Read on, but please note: what I am proposing is NOT a complete solution. This is an idea that I hope someone will take and turn into a workable method.

I decided to test a pipe-stem repair with the aforementioned adhesive built around a stainless-steel wire-mesh structure. My thinking is that this would enhance the strength and durability of said repairs. For any engineers or scientists reading this article, please know that I have no scientific background and I am not equipped to conduct accurate tests of compressive or tensile strength. I am merely running an idea up the proverbial flagpole and seeing who salutes it. I hope that someone reading this will take the idea and, either, discredit it or expand upon it. The experiment I describe below is just that: an experiment. It is, possibly, a proof of concept – but certainly not the final step.

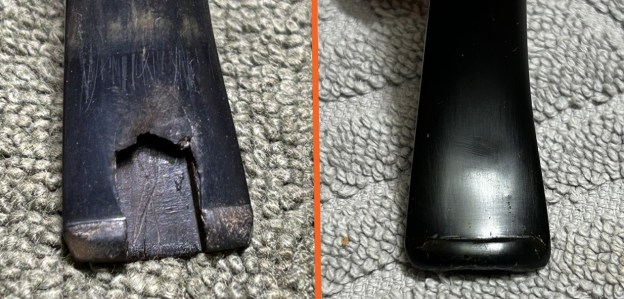
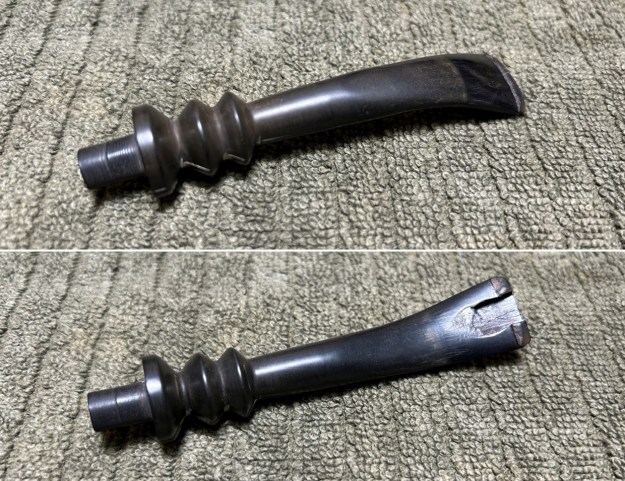
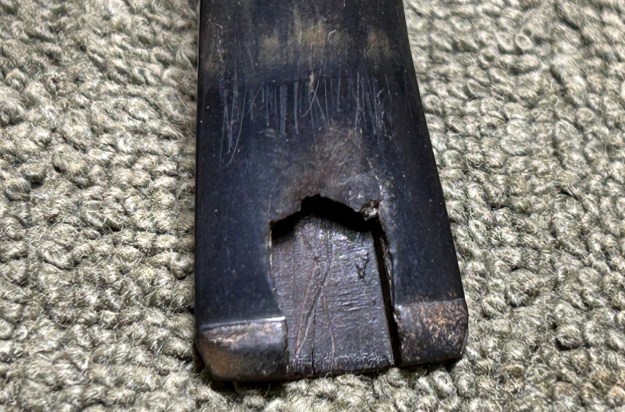
The idea came to me one day as I saw some sort of wire mesh being used in a concrete foundation. This mesh is used in construction to control cracking, to distribute stress, and add tensile strength. Perhaps it can be used, in like manner, where a large vulcanite repair is needed. My encounter with the concrete was providential because I had recently acquired a large lot of pipes, many of which had damaged stems. There was one stem in particular that stood out as a candidate for this experiment. Here it is: This is a stem that I would normally likely toss in the garbage, unless a customer specifically asked me to repair it. The damage is obviously serious. Ironically, this brutal damage actually makes this stem the perfect patient for this type of surgery.

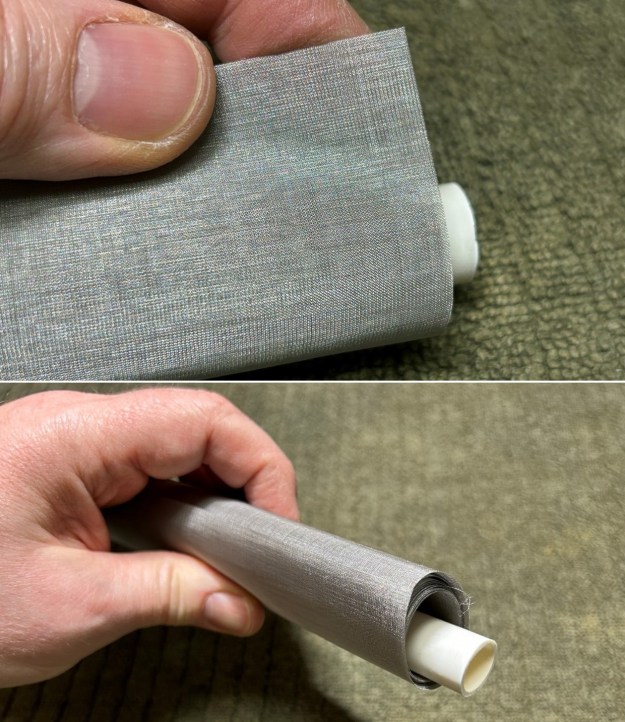
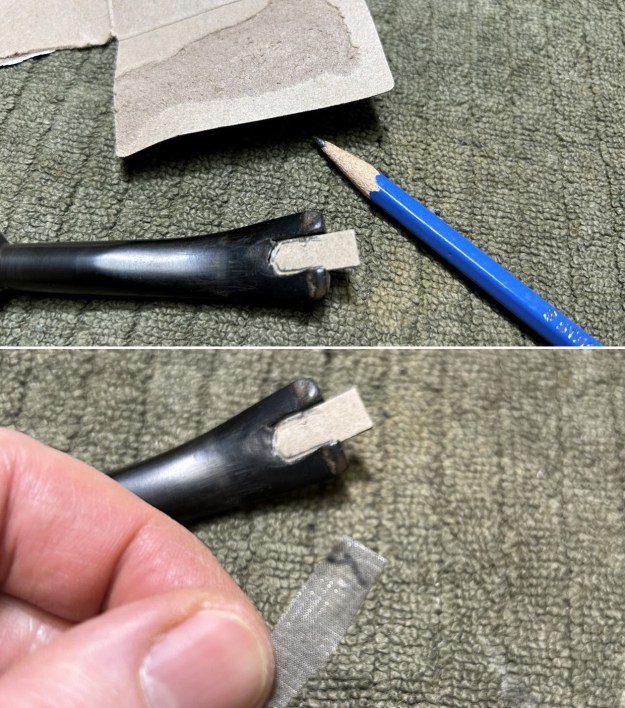
Here is the stainless-steel woven wire mesh. For those of you who know such things, this mesh has a mesh number of 200. It can be acquired inexpensively and comes in various mesh numbers. The larger the number, the finer the holes in the mesh. To be frank, my selection of 200 was pure guesswork. I didn’t really have a sense of what would be best – other than to say that it needed to be fine enough to prevent the adhesive from pouring straight through.On with the work! I first needed to create a platform upon which the adhesive and mesh could rest. This was obviously essential in order to maintain the draught hole in the bit. In the first photo below, you’ll see that I used cardboard, but I immediately abandoned that idea (I’ll explain why momentarily). I am displaying this photo in order to demonstrate my use of a pencil to scribe the precise shape of the missing section of vulcanite.I quickly eliminated the cardboard idea because it just isn’t as useful a material for this purpose. Instead, I used several layers of duct tape as my substrate. I can still scribe a line on the duct tape, but – more importantly – cyanoacrylate adhesive doesn’t stick to it. In other words, once the work had fully cured, I could readily remove the duct tape without affecting the repair.

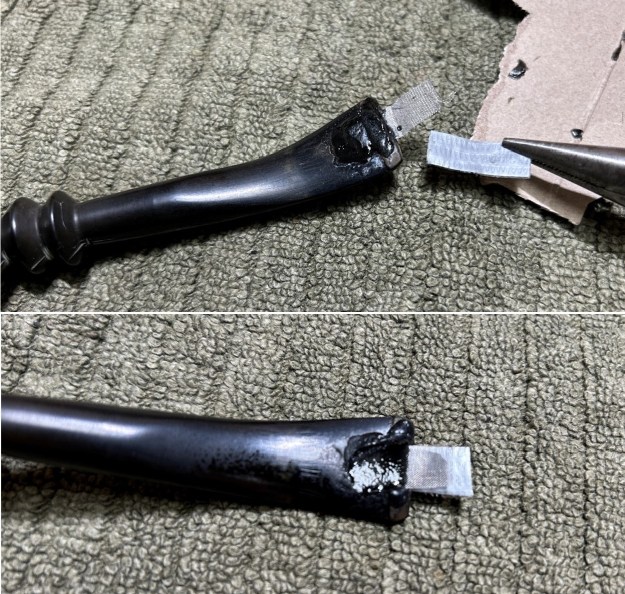
With my scribed line, I was able to transfer the pattern of the absent vulcanite on to the wire mesh and cut it to shape. Truth be told, it would probably be better to use welded wire mesh, but I have no idea where you acquire that in such a small mesh number. Anyway, before cutting the wire mesh, I took the critical steps of (1) gently sanding the mesh with sandpaper to provide a slightly rough surface to maximize the adhesive bond, and (2) cleaning the mesh thoroughly with acetone, to remove any sanding grit and any other substance that would inhibit a good adhesive bond.

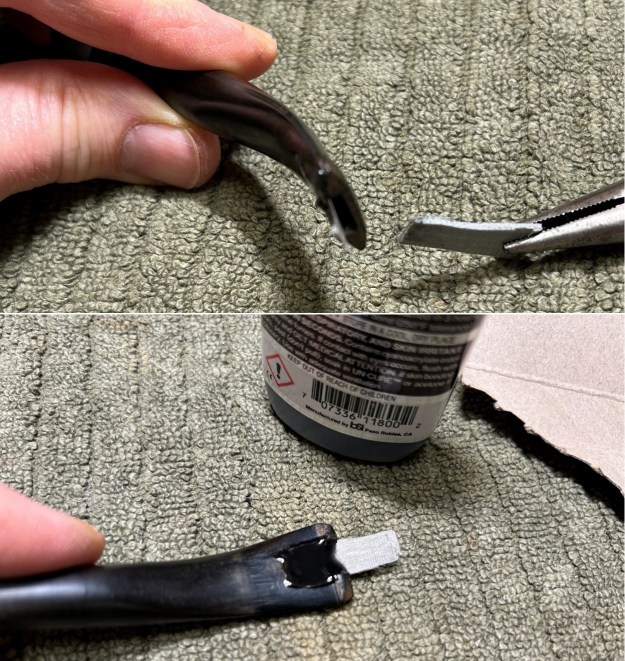
And away we go! It is important to apply the cyanoacrylate adhesive in thin layers, rather than one thick blob. I chose to apply a layer, spray it with an accelerator, apply another layer, etc. – until I was satisfied. Once complete, I left it to sit overnight and came back the next day. I freely admit that I am still concerned about the brittleness of this repair, but I think this is definitely a step in the right direction. Naturally, shaping and sanding was the next step – and this took a while. I should emphasise at this point that I didn’t employ the same attention to detail on this stem, as I would on a stem for a customer. I just wanted to get this done and see if it would work. As I sanded with needle files and sanding pads, I shaped the button and melded the repair into the surrounding vulcanite. You can see the results below. It’s pretty good and I’m sure it would look even better if I was doing it for sale or for a customer.

Some final thoughts: I think there is a rudimentary idea here. I feel confident in saying that the repair itself is likely stronger and more resilient with the mesh than without. However, I am apprehensive about whether the brittleness of the cyanoacrylate adhesive is improved or not – and I’m not sure how to reasonably overcome that issue (other than trying epoxy). Another problem that still exists is that there is no direct connection between the mesh and the pre-existing vulcanite. This surely isn’t helpful. It is at the edges – where the adhesive meets the vulcanite – that the bond must be weakest. Next steps might include (1) embedding the wire mesh in an epoxy – this might be the best way of addressing brittleness; (2) overlaying the wire mesh on the original vulcanite to create a bridge structure (although this creates its own big problems); (3) developing a way of affixing the mesh to the vulcanite.

Now, over to you! What do you think of this idea? How would you improve it? What are the next steps? What colossal errors have I made? Please let me know what you think in the comments below. If you make use of the ideas from this experiment in your pipe work, please let me know how it goes. I hope you enjoyed reading this installment of my Pipe Incident Reports – I look forward to writing more. If you are interested in my work, please follow me here on Steve’s website or email me directly at kenneth@knightsofthepipe.com. Thank you very much for reading and, as always, I welcome and encourage your comments.

Fixing the Cork Mortise on a Ropp Cherrywood (KPIR #9)


by Kenneth Lieblich

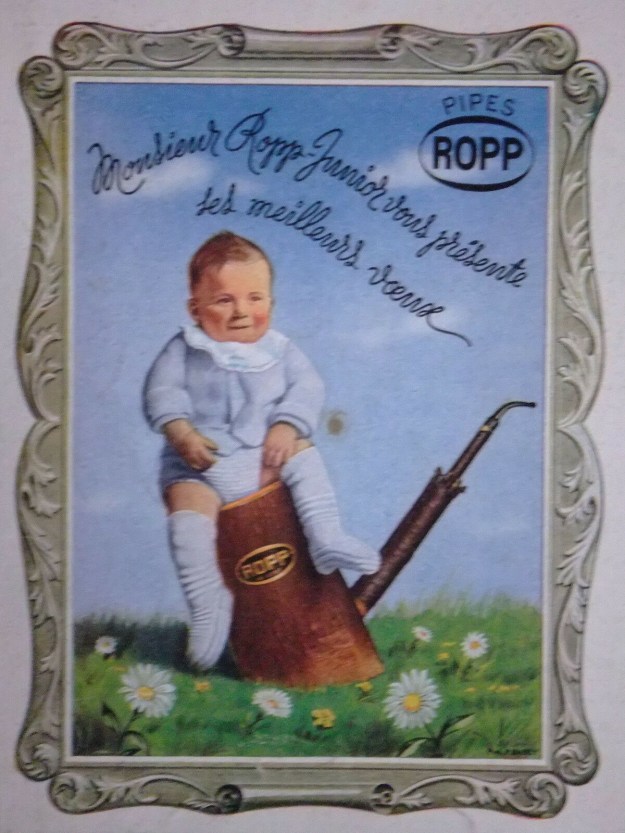
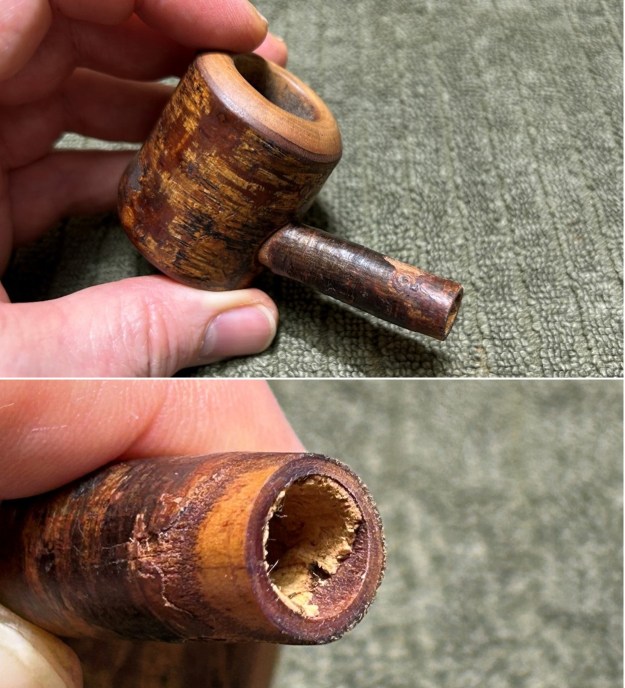
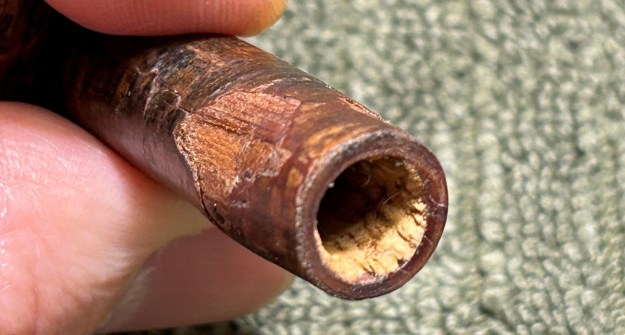
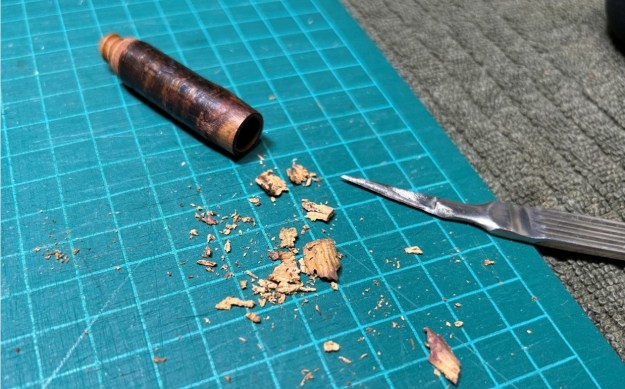
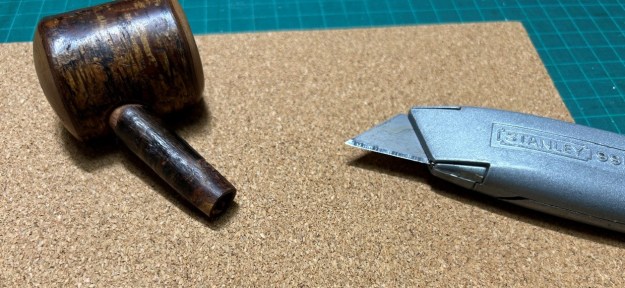
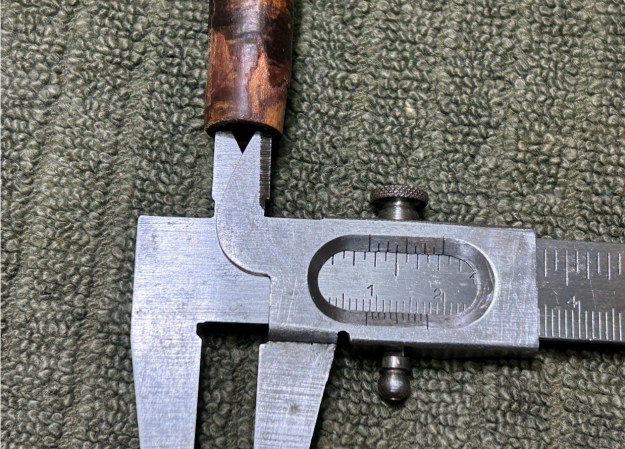
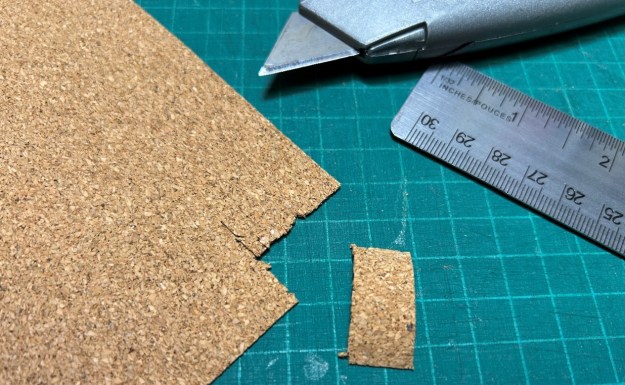
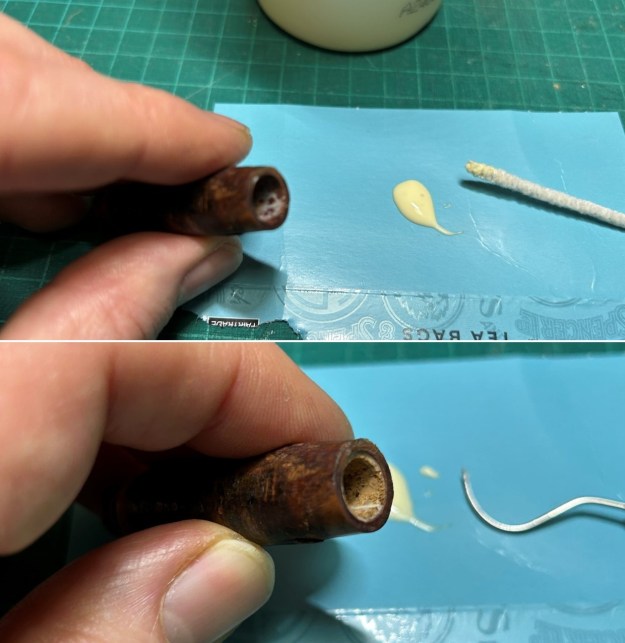
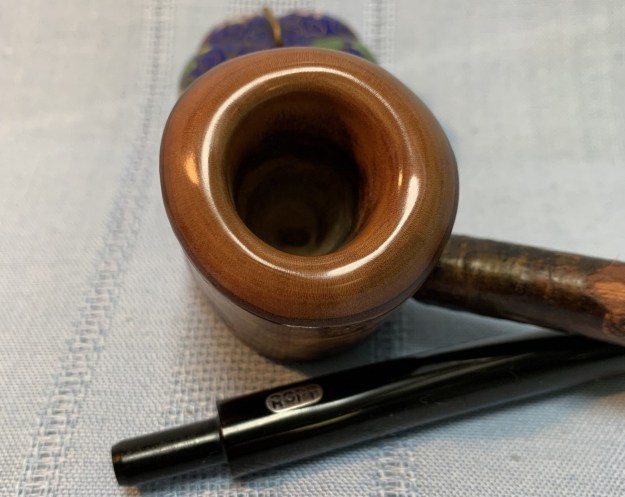
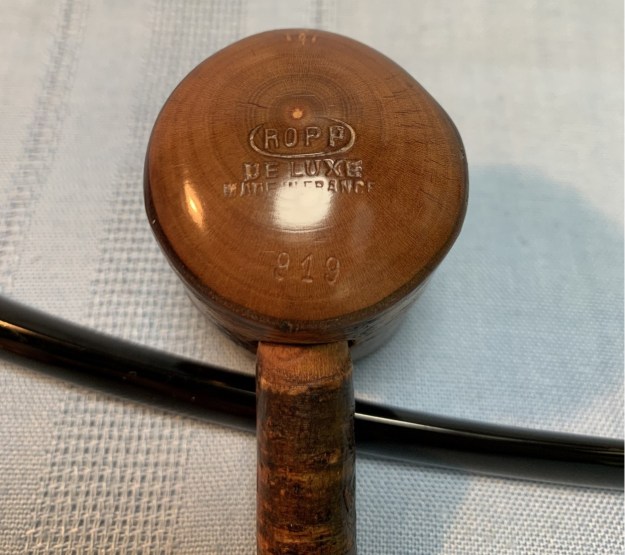
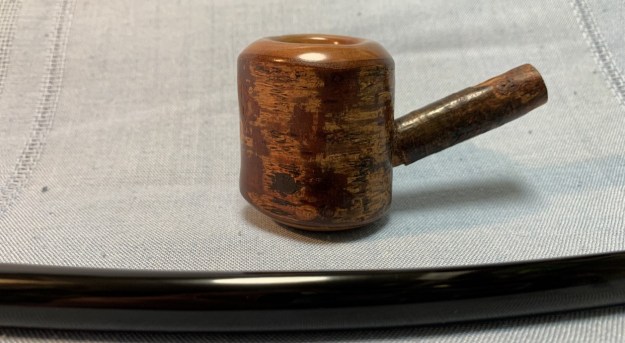
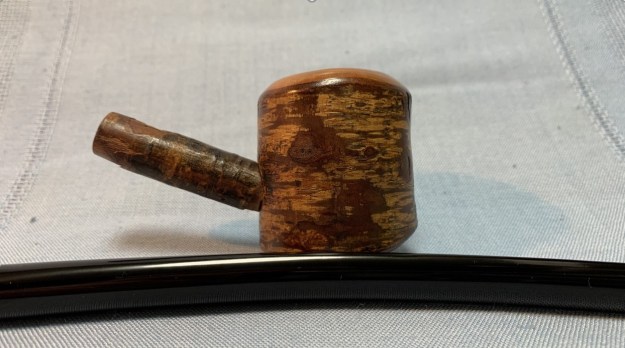
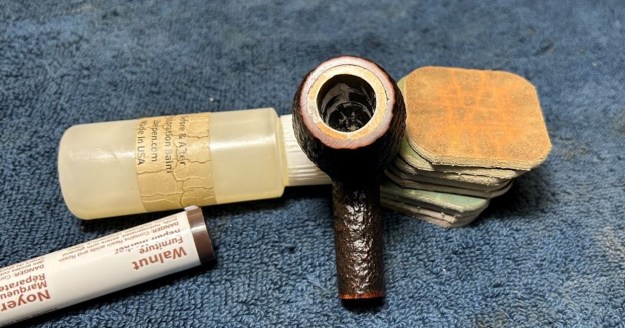
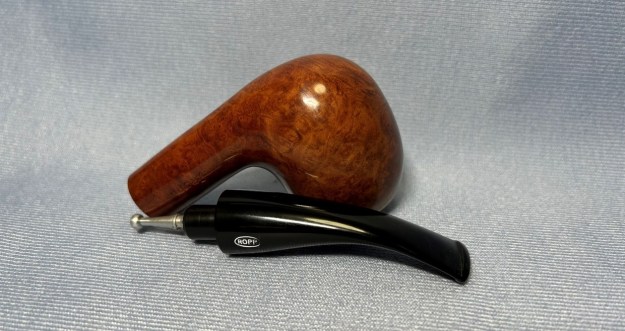
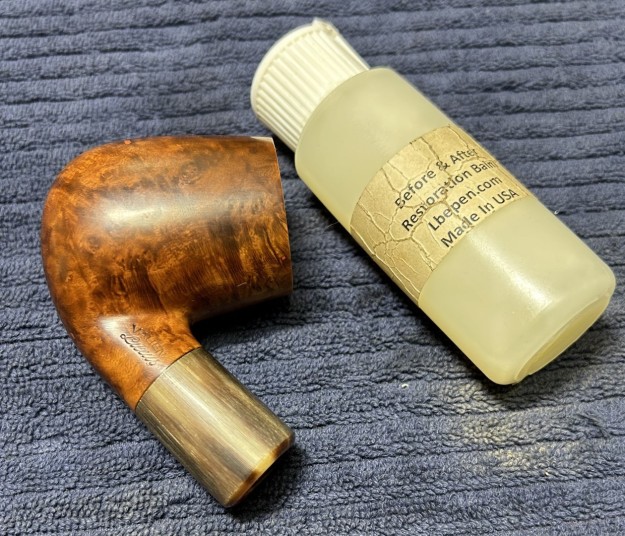
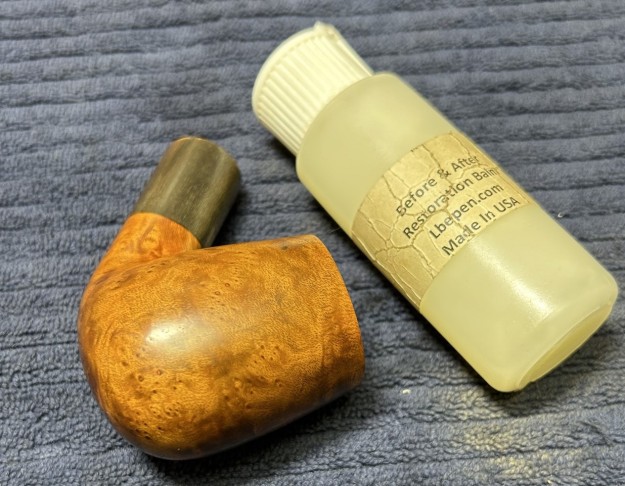
Welcome to another instalment of my Pipe Incident Reports. The idea, in general, is to provide a brief write-up – focusing on a particular pipe-restoration-related issue – rather than an entire restoration story. Today’s story is on the resolution of a very specific pipe repair – replacing a cork mortise – with some added challenges. I hope this blog post will be useful for those undertaking a similar repair.A couple of years ago, I restored this lovely Ropp De Luxe Cherrywood 919 for a friend and he’s smoked it with great gusto since then. In fact, you can see the story of its restoration here. By his own testimony, it’s a great pipe, smokes well, and feels good in the hand. However, over time, he noticed that the cork lining in the shank mortise had chipped and the stem was becoming loose – so he wondered what I thought about it. This news sounded concerning, so I asked him to bring me the pipe. I took it to my workbench and this is what I found: It’s an old pipe and I suppose that it’s no surprise that the cork would degrade over time. This must be repaired so that my friend can continue to enjoy his pipe. First, I took a fairly dull blade (deliberately) and cut out the remaining cork. Mercifully, this was easy and the debris came out quickly.I then gave some thought as to how this should be repaired. In the past, when I’ve repaired cork-lined mortises, I took the cork from a wine bottle and carved it to fit the mortise, then drilled out the cork to fit the tenon. This is fine, but not as precise and tidy as I would like. This time, however, I thought I would try something different. I bought some sheets of cork and decided that cutting an exact piece would be a better solution.How do I figure out what to cut for this pipe? Good question! I am no mathematician, but from somewhere in the recesses of my mind, I remembered how to calculate the circumference of a circle: C = 2πr (or, in this case, C = πd). I grabbed my Vernier caliper and measured the diameter of the mortise. This gave me the information I needed to cut the correct piece of cork. I test fit the tenon with the cork until it fit perfectly. Since cork is a type of wood, I lined the mortise with wood glue and delicately inserted the slice. I let it cure for a full 24 hours, then rubbed the whole stummel with some LBE Before & After Restoration Balm and worked that into the wood. The next day, I returned the pipe to my friend. Happy days.Thanks so much for joining me on this interesting repair. I hope you enjoyed reading this instalment of my Pipe Incident Reports – I look forward to writing more. Below are some photos taken from my original restoration. If you are interested in my work, please follow me here on Steve’s website or email me directly at kenneth@knightsofthepipe.com. Thank you very much for reading and, as always, I welcome and encourage your comments.
Repairing a Serious Injury to a Custombilt Bulldog (KPIR #8)


by Kenneth Lieblich

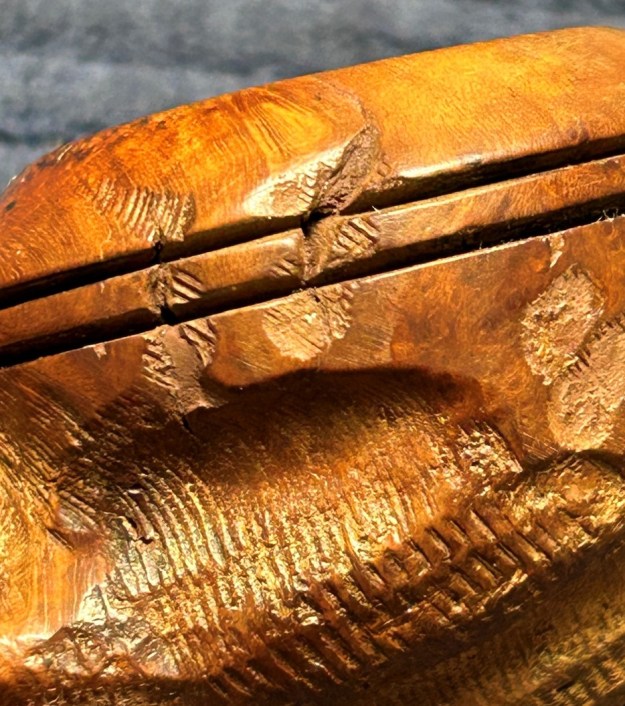
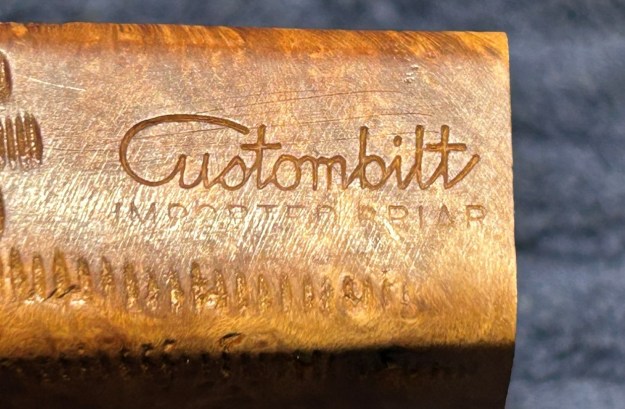
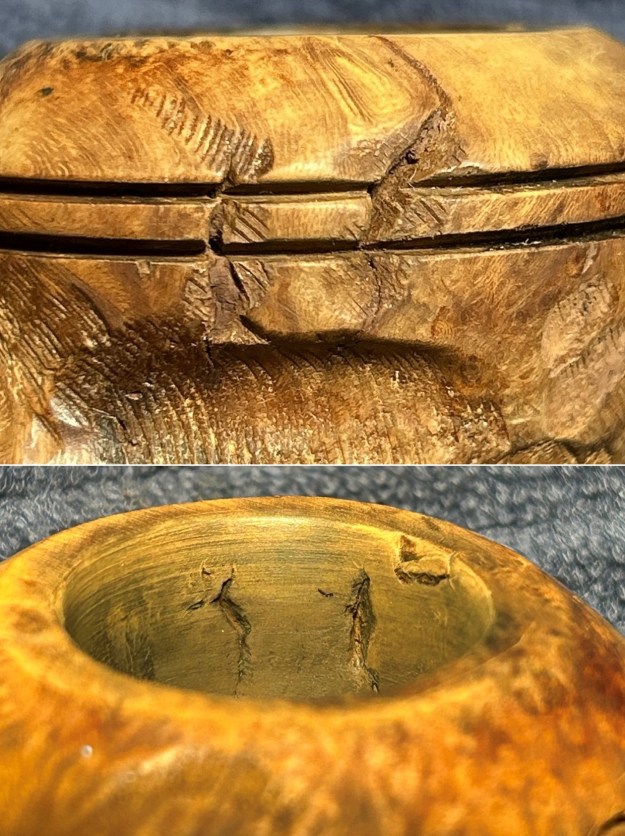
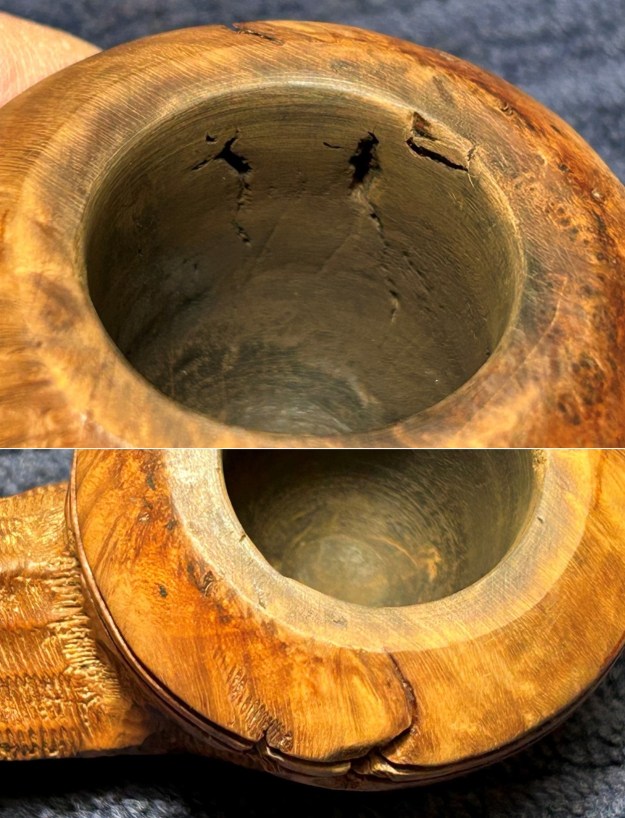
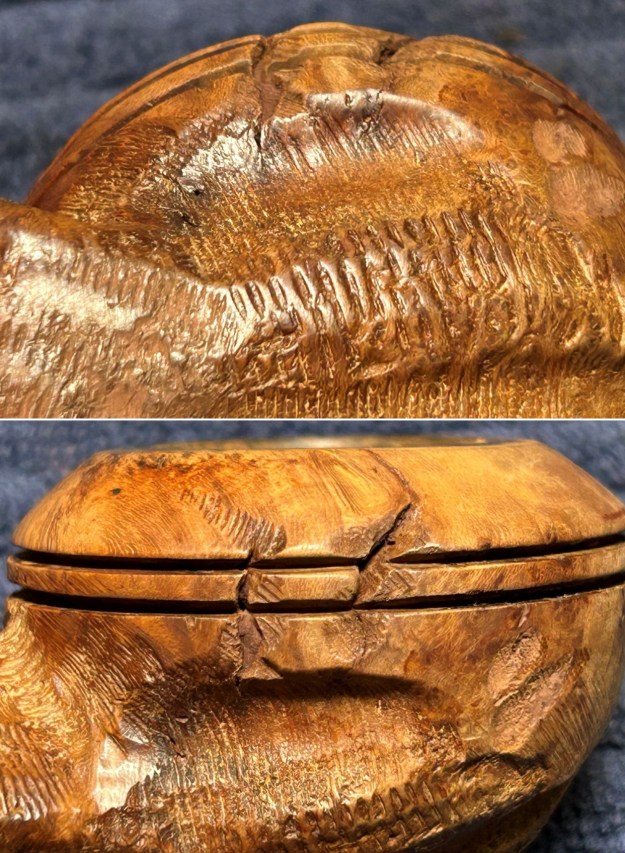
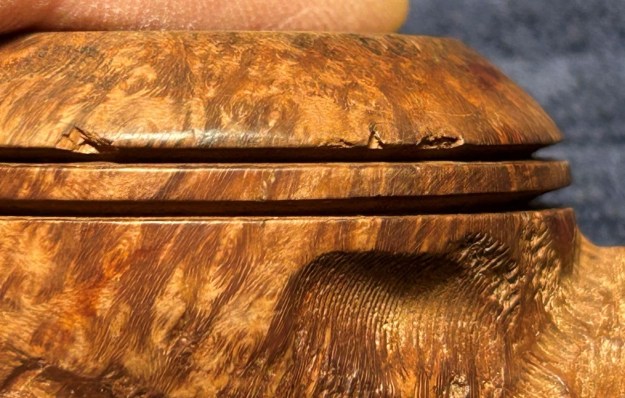
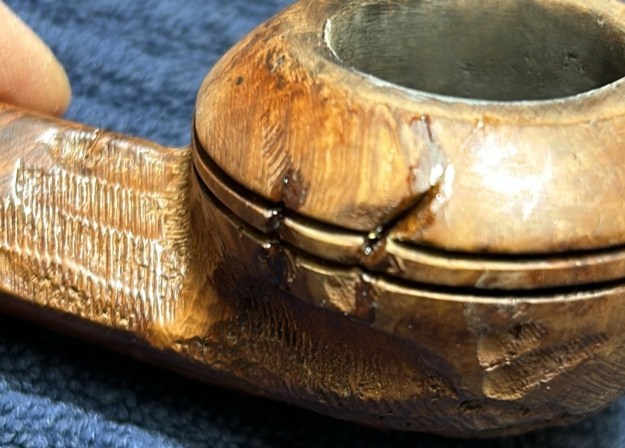
Welcome to another instalment of my Pipe Incident Reports. The idea, in general, is to provide a brief write-up – focusing on a particular pipe-restoration-related issue – rather than an entire restoration story. Today’s story is on the resolution of a very specific pipe repair, with some added challenges. I hope this blog post will be useful for those undertaking a similar repair. Every once in a while, my cousin-in-law sends me a pipe to repair. He hunts for pipes at antique shops and fairs, etc., and when he finds one that’s especially tricky to repair, he sends it my way! When he sent this particular pipe to me, he described it as a “crazy guy project”. Ahem. Well, crazy or not, I’m taking on the challenge. As you can see, it’s a handsome and rugged Custombilt bulldog, from the 1970s or ‘80s. My cousin-in-law did most of the cleaning already and did some restoration work on the stem, so I will be tackling the stummel only. For the most part, the pipe is in decent shape, but there are two major gouges on the side of the bowl. These gouges are going to be tricky to repair for four reasons:

    • the gouges occur in spots where there was already some of the signature Custombilt rustication. So I have to fill them and make them look good while maintaining the original rustication and not filling it in.
    • the gouges run transverse to the two pre-existing rings that run around the bowl. Again, I will have to repair these without negatively impacting those ring grooves.
    • the gouges actually penetrate all the way through the bowl to the inside. I will need to ensure that they are sound on the outside and on the inside.
    • the gouges also come with very fine cracks that extend in a ‘southerly’ direction, into some further rustication.

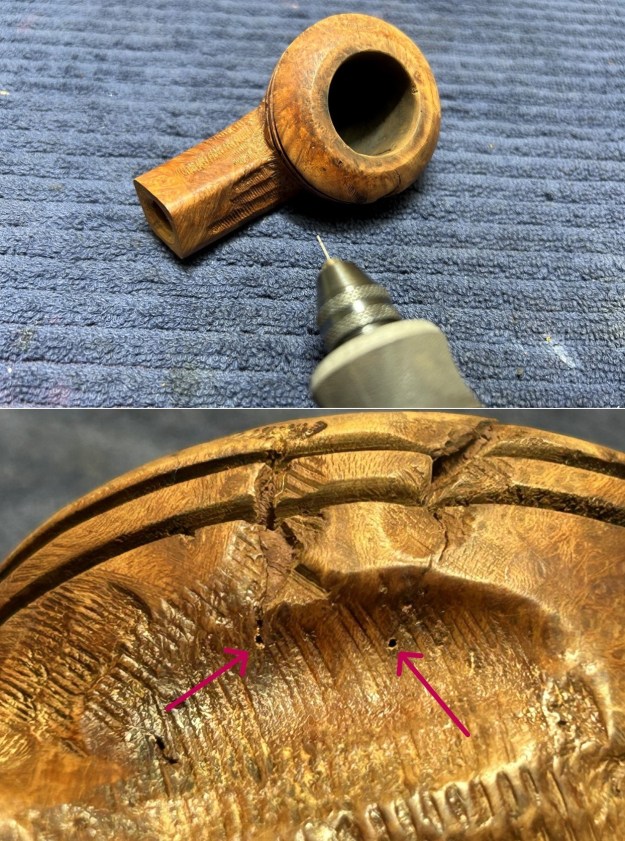
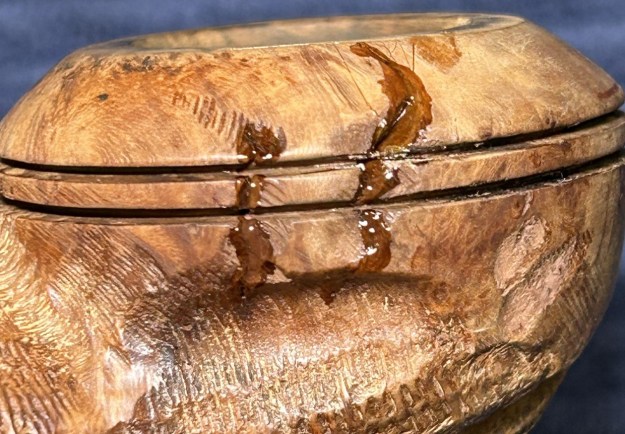
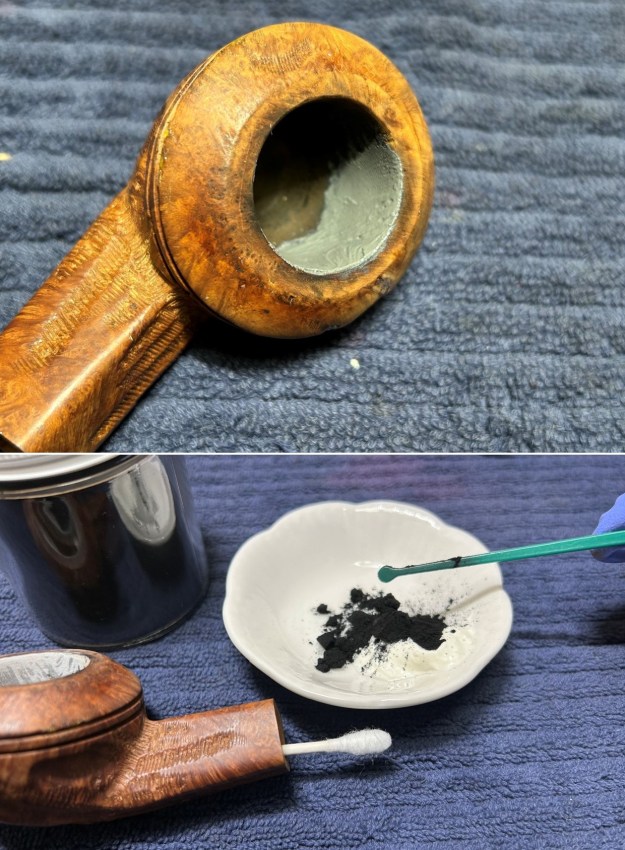
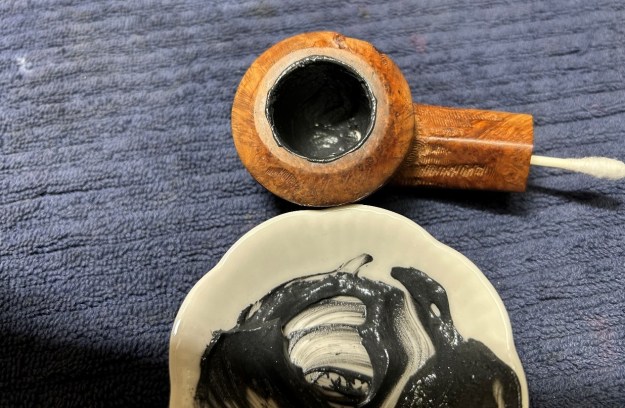
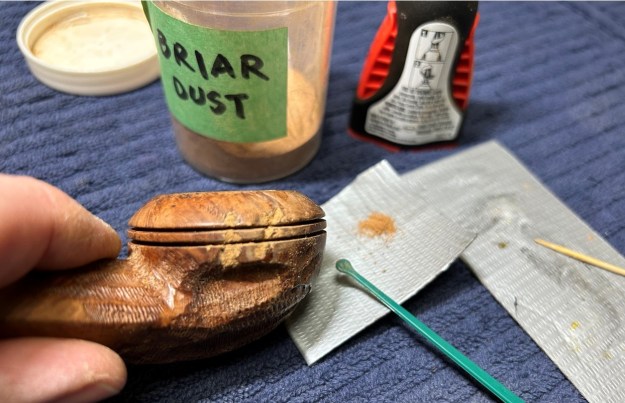
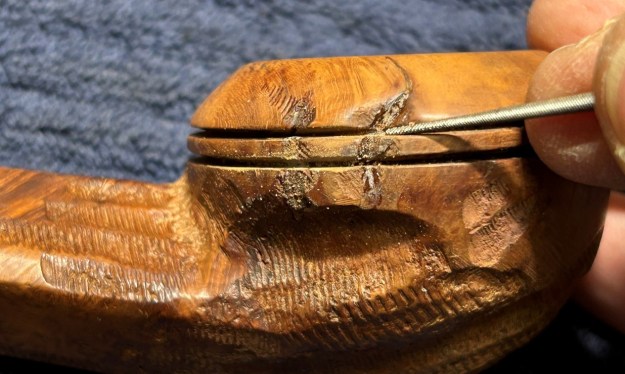
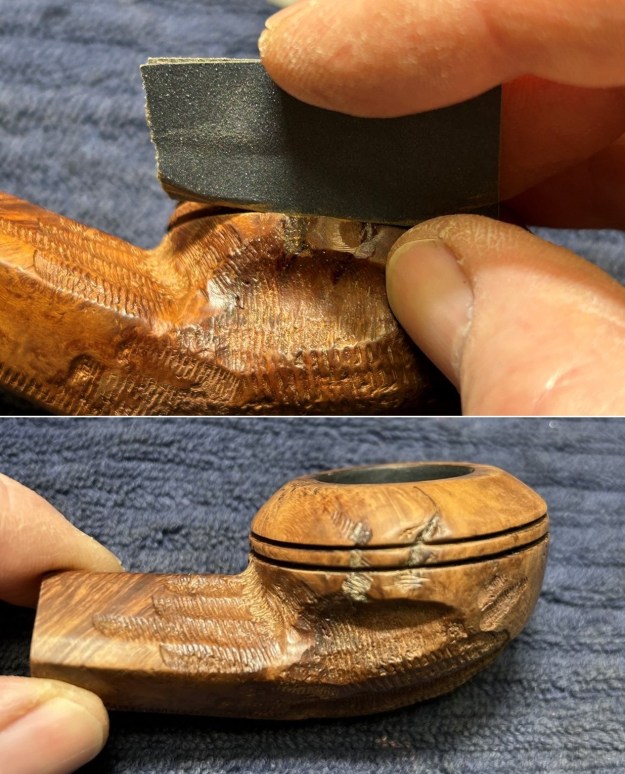
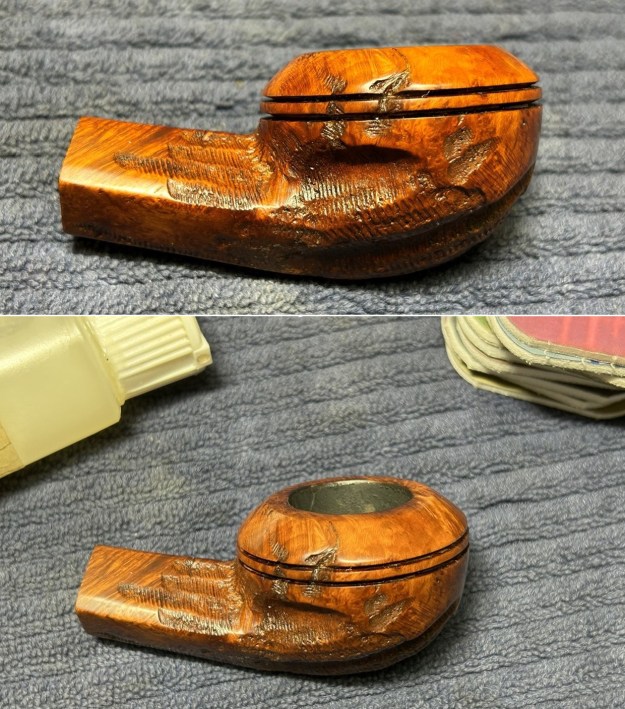
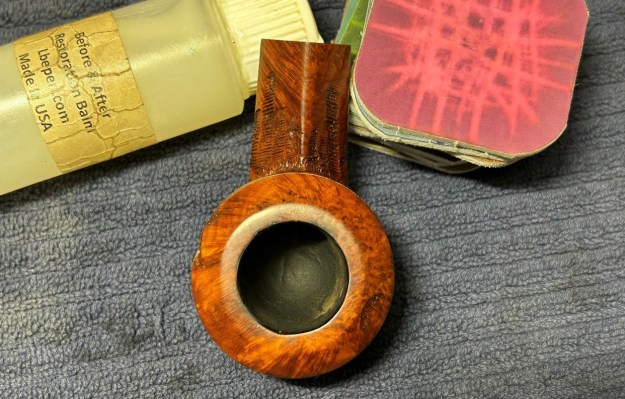
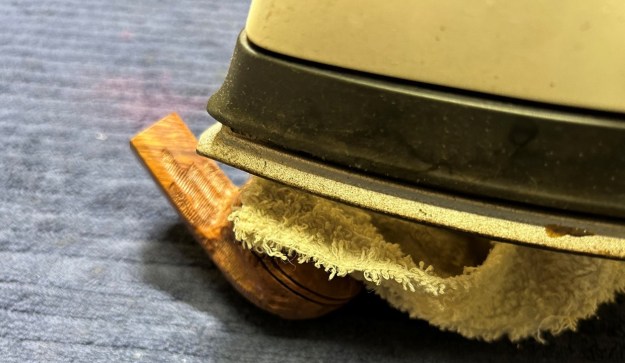
I haven’t even yet mentioned that there are a couple of chips missing from the bowl, on the opposite side of the gouges – and some dents on the rim. So, I’ve got my hands full – time to get started.As I mentioned, my cousin-in-law already did the vast majority of the cleaning – Deo gratias. To finish tiding up the briar, I wiped down the outside with some oil soap on cotton rounds (and a toothbrush). This does a good job of cleaning any latent dirt on the surface of the briar. I then scoured the inside of the stummel with some soap and tube brushes.Having completed that, I was able to address the dents on the rim. I dug out my iron and a damp cotton cloth. By laying the cloth over the affected areas and applying the iron to it, the hot and moist steam can often cause the wood to swell slightly and return to shape. There was some improvement – not a lot, but it was better than doing nothing.I decided to repair the tiny cracks in the briar next. Before anything else, it’s imperative that I ensure that the cracks do not continue to creep after I repair them. To that end, I took a micro-drill bit, inserted it in my rotary tool, and very carefully drilled a hole right through the wall of the bowl. That hole will stop the crack from progressing. As you can see, the drill bit is incredibly thin and quite prone to snapping if care isn’t taken.Now, I lined those cracks – and the gouges – with clear cyanoacrylate adhesive. Because of the intricacy of this work, I used a tiny awl to apply the adhesive. I needed to be precise and not smear it all over the place. I wish I had taken more photos of this procedure, but you’ll just have to take my word for it.Moving on to the matching holes on the inside of the bowl… I used an epoxy adhesive that is extremely hard, resistant to high temperatures, and completely inert when cured. It works superbly. I filled the affected area with the epoxy and let it cure for a full 24 hours. I took this step after applying the cyanoacrylate adhesive, so that the epoxy would not ooze out of the gouges. The next day, I roughened up the epoxy’s surface for the next step. I thinly coated the inside of the bowl with a mixture of my wife’s homemade yogurt and activated charcoal. Once hardened, this provided a good, faintly rough surface for a new cake to build. Now I needed to go back to the gouges and finish them off. I delicately and precisely added a mixture of clear cyanoacrylate adhesive and briar dust. This gives an incredibly hard and wood-like appearance to the repairs. I did the same to the chips I mentioned on the opposite side of the bowl. Most of the rest of the work was sanding. I used my dental tools, needle files and some fine sandpaper to sculpt the pipe back into shape. This was very tricky and took considerable patience – a virtue I have in short supply. Once done, I used all nine micromesh pads (1,500 through 12,000 grit) on the smooth parts of the stummel to finish it off. This sanding minimizes flaws in the briar and provides a beautiful smoothness to the wood. I rubbed some Before & After Restoration Balm into the briar and let it sit for 20 minutes or so. The balm moisturizes the wood and gives a beautiful depth to the briar. I then buffed it with a microfibre cloth. The Custombilt bulldog is much improved and I hope my cousin-in-law will like it. This was a complex repair – the results are not ideal, but they are as good as I can manage. I hope you enjoyed reading the story of this pipe’s restoration as much as I enjoyed restoring it. If you are interested in more of my work, please follow me here on Steve’s website or email me directly at kenneth@knightsofthepipe.com. Thank you very much for reading and, as always, I welcome and encourage your comments.
Fixing the Unfixable (KPIR #7)


by Kenneth Lieblich

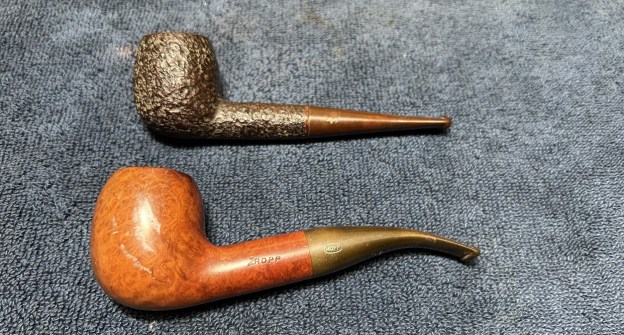
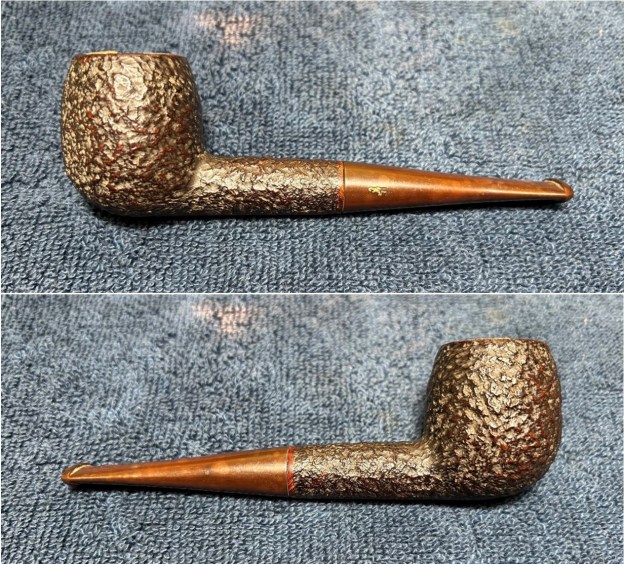
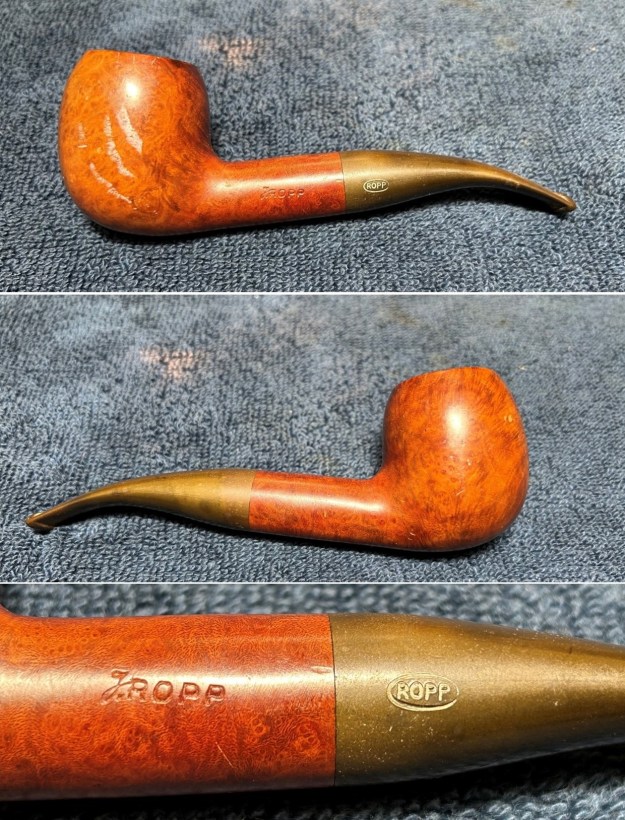
Strap yourself in – this is going to be a wild ride! My cousin-in-law likes to send me pipe projects that are a little off the beaten track. They also usually end up being quite tricky and this one is no exception. He sent me two meerschaum-lined pipes that have been badly damaged and require repair. One pipe is a Kiko, from Tanganyika in eastern Africa, and the other is from Ropp, the venerable pipe-maker of St Claude, France. Consider this to be the latest installment in Kenneth’s Pipe Incident Reports. This should be exciting.

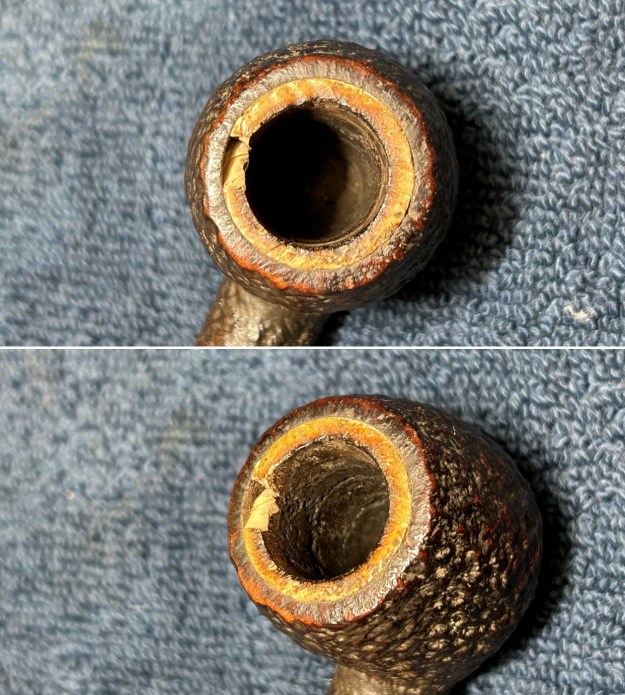
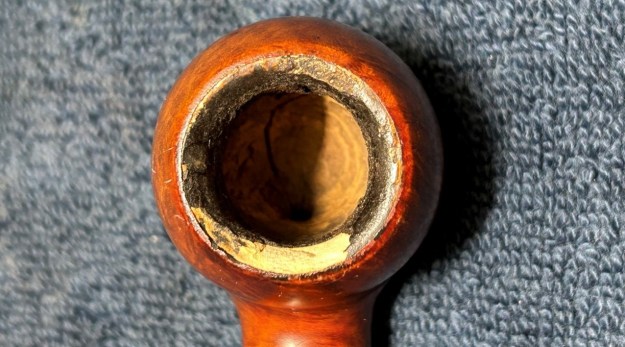
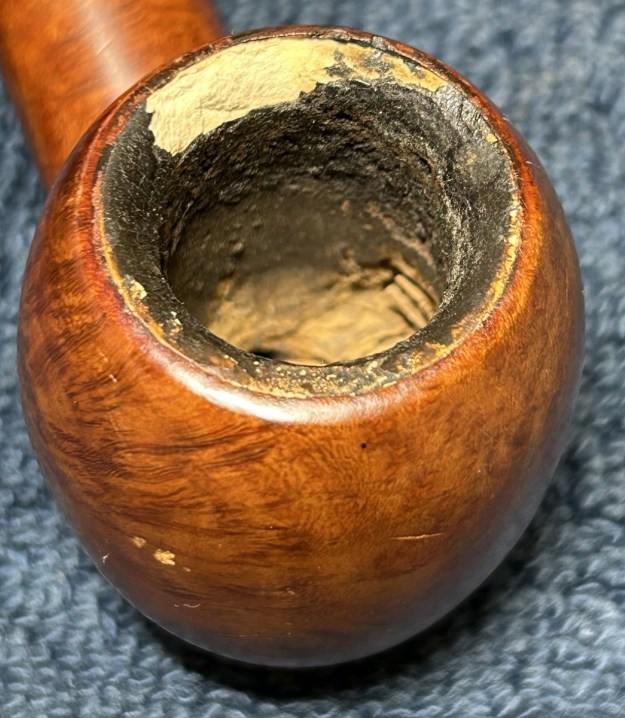
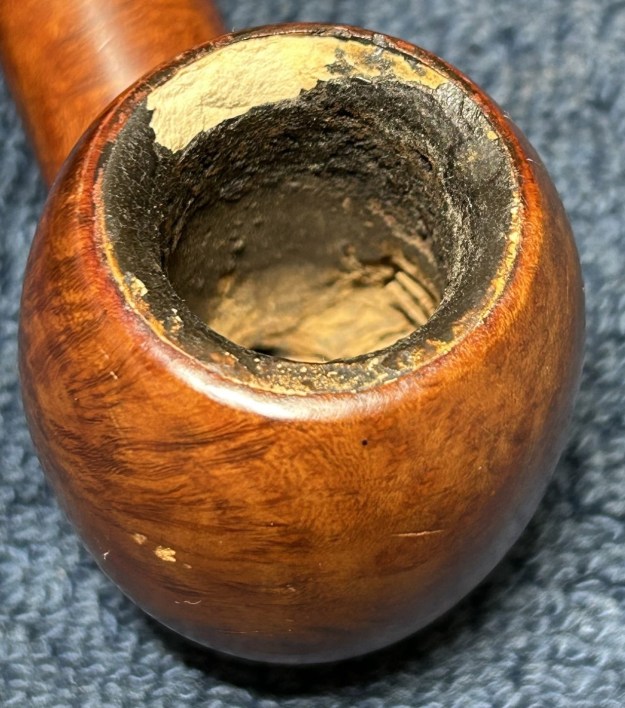
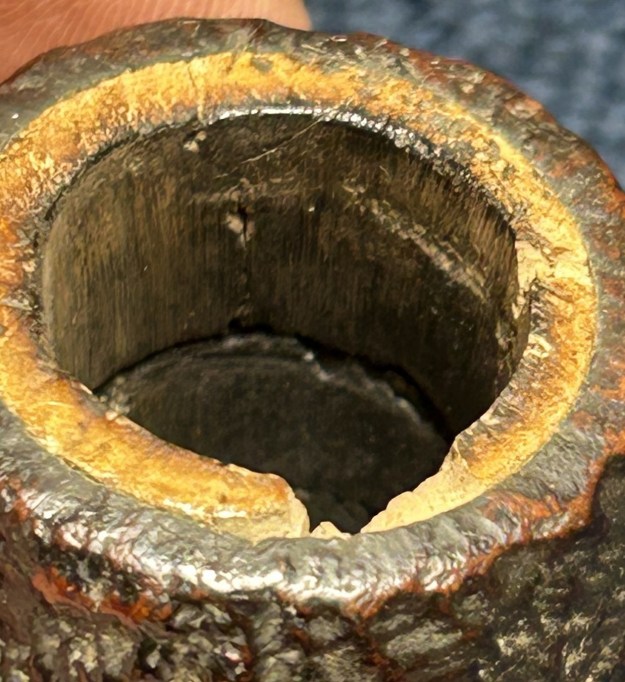
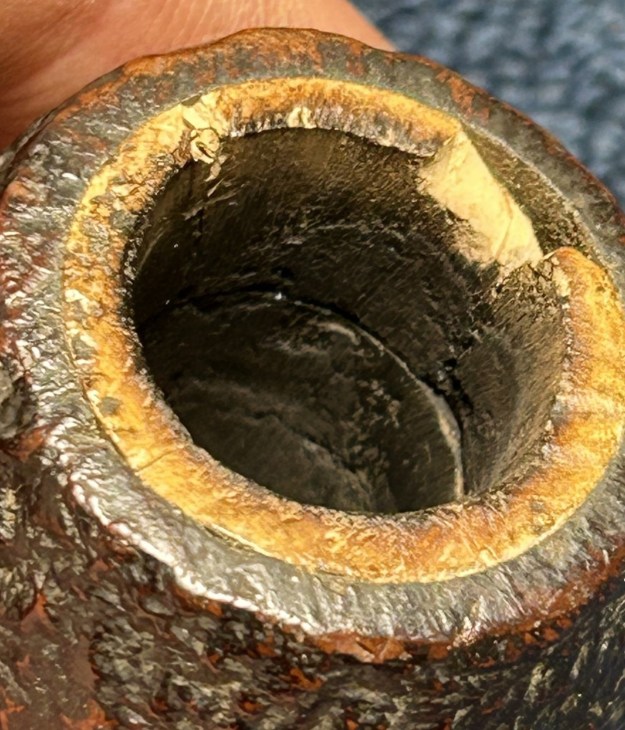
Although the briar exteriors are fine, the meerschaum interiors of the bowls are a complete disaster. The Kiko looks as though it’s probably been dropped at some point. Meerschaum is quite fragile, so no wonder it cracked so badly. The Ropp is equally bad, but I think that’s because it was badly reamed rather than dropped. Who knows and, quite frankly, the answer is of academic interest. They both suffered from having a cake which is not a good idea for meerschaum. I subjected these pipes to my usual cleaning procedures – for both stem and stummel – but I’m going to gloss over those details today. To be clear, both stems were deoxidized, repaired, sanded, and polished. In addition, the briar parts of the stummels were thoroughly cleaned, sanded, and polished too. I also did a thorough, but exceptionally careful, cleaning of the insides. I needed to remove as much filth as possible, but liquids like water, alcohol, etc., don’t do well with meer. As an aside, the Ropp had a substantial crack in the briar and this only added to the complexity of the repairs.In this blog post, I’m skipping writing about the usual stuff in order to focus on the major issue with these pipes – the busted meerschaum lining and how to fix it. In consulting with Steve, he mentioned a post on a blog from a few years ago that talked about repairing this very thing. The blog is called ‘Baccy Pipes’ and the fellow’s name is Troy W. I want to give him full credit for starting me on my research for this job. Here’s the link to his repair: https://baccypipes.wordpress.com/2017/06/10/old-time-meer-lining-repair-method-on-a-1930s-kaywoodie-shellcraft-5651/. The curious thing about this repair was that Troy used a mixture of egg white and chalk to mend the broken meerschaum. As he writes:

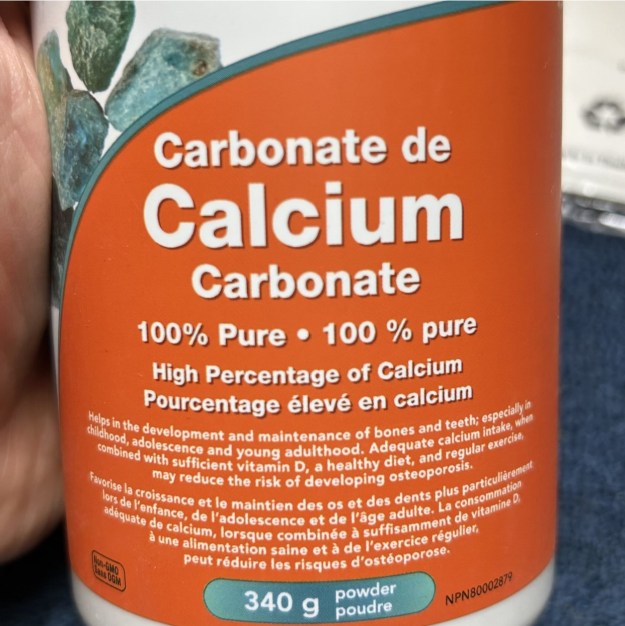
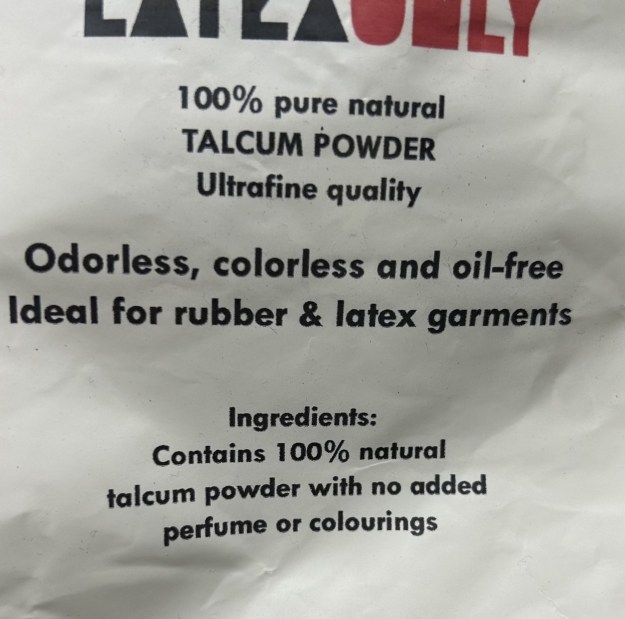
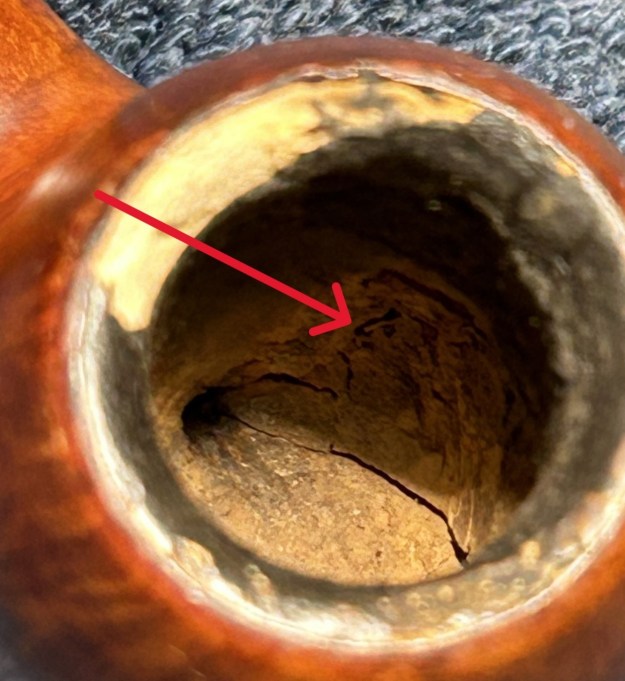
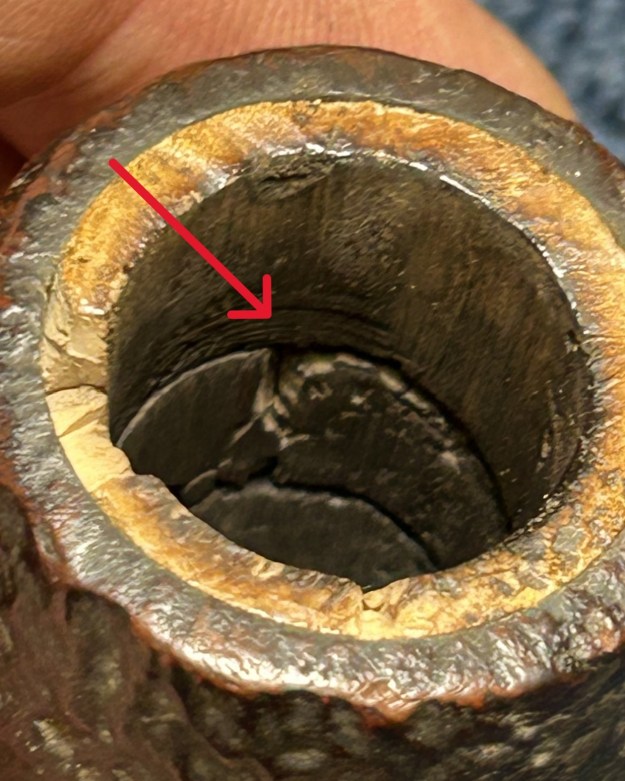
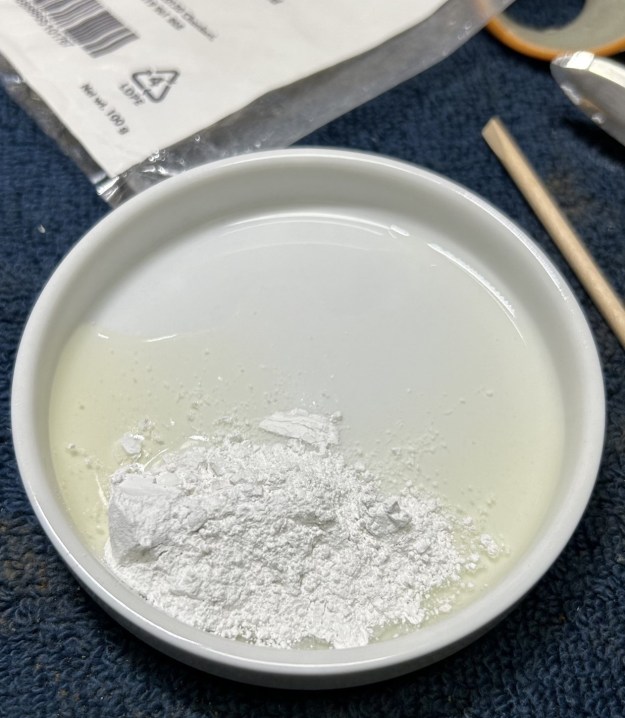
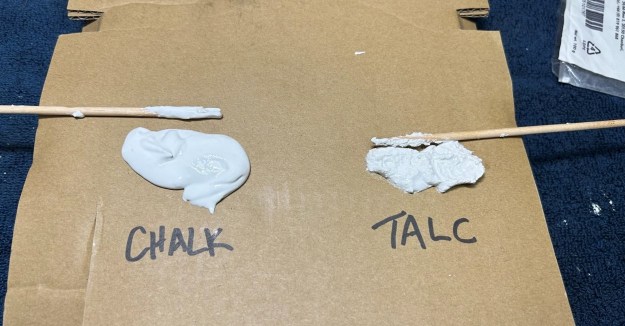
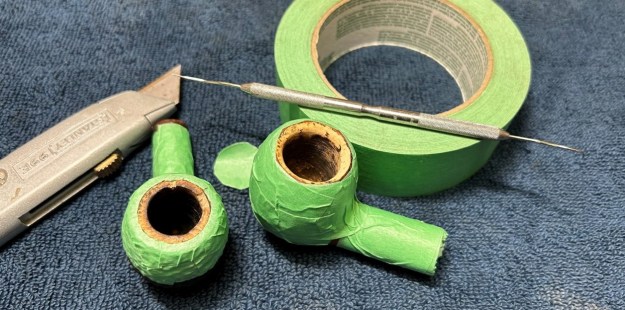
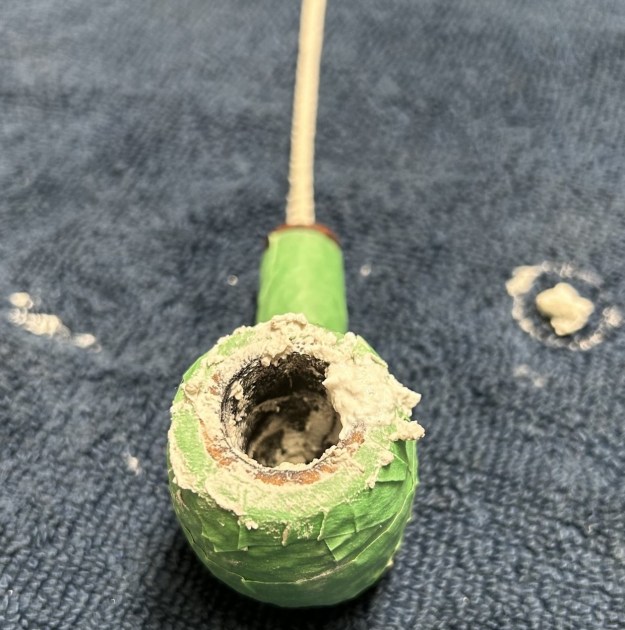
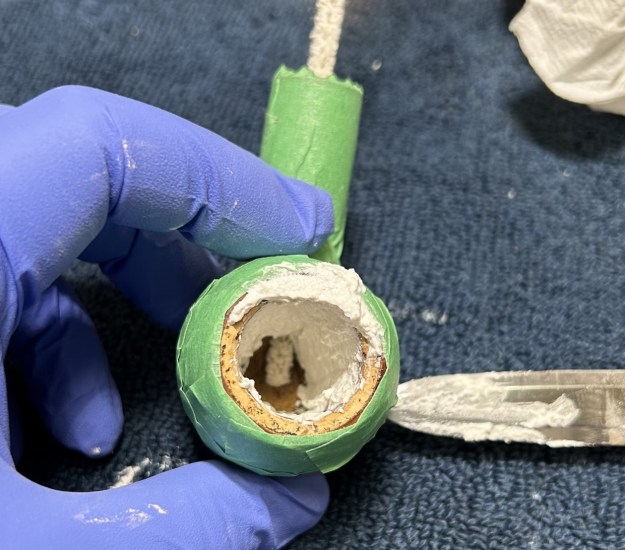
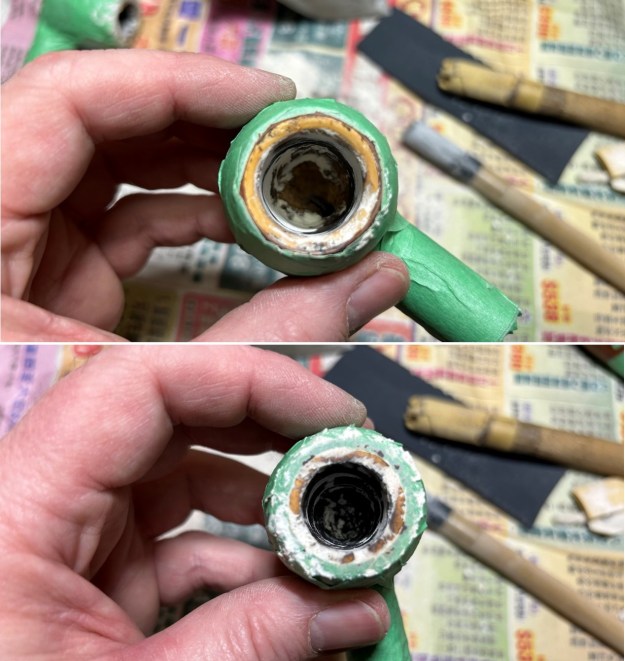
I had read and heard from other pipe restores that a old late 19th-early 20th century druggist recipe for fixing broken meerschaum was egg whites and finely ground chalk, so that was what I was going to try and fix the meer lined rim with. It is said to have about the same porous properties of meerschaum and imparts no taste to the tobacco.I was immediately intrigued and my brain began to ruminate on this. In the past, Steve and I have both used plaster of Paris when repairing meer-lined bowls. What about egg and chalk? Putting together the ingredients would be no problem: chalk, that is to say, calcium carbonate is easy to acquire. And then a thought struck me – I wonder if I could do an experiment on the properties of both calcium carbonate and a product that’s much closer to meerschaum in composition. Meerschaum is a type of magnesium silicate – and so is talc. They are not identical substances, but surely closer than chalk. If I could buy some pure, unadulterated talc, that might prove to be a good option. Well, it turns out that getting pure talc with absolutely nothing else in it was not as easy as I thought. I did eventually find a small package for sale on Amazon and it ended up being shipped from Germany (no idea why) to my home on the west coast of Canada. Let’s have a quick look at the insides of the two bowls, because they have different problems and very different sized apertures. The Ropp had the much larger bowl, and its insides were more damaged at the bottom. There was a surprising amount of meerschaum missing at the bottom and it is difficult to convey this in photos. However, the photos do clearly show the large chuck missing from the rim. I suspected that, although the width of the bowl meant it would be easier to access, it would require the most work and be the most difficult to repair satisfactorily. The Kiko had its own set of problems. There were also missing chunks on the rim, but the cracks inside were devastating. The width of the bowl meant that I could get nothing larger than my pinky finger inside. A small piece of broken meerschaum fell out from one of the cracks while I was inspecting it. That didn’t bode well. Now let’s start cracking some egg! Obviously, I took two dishes and mixed up a batch of chalk and egg white in one and talc and egg white in the other. Both materials were powdered, so I had no concerns about overly large particles in either mixture. During mixing, the talc seemed grittier than the chalk, but it was difficult to assess this properly and difficult to know how much to mix into the egg white. I put the two blobs on a piece of cardboard for a couple of days and let them set. Once dry, I conducted my own absurdly unscientific compressive strength test on both materials as a way of determining straight away if one material was clearly superior to the other. There wasn’t any obvious difference – and any differences I may have detected could easily have been a figment of my imagination. Both materials seemed about equal. I opted to try the talc first – for no other reason than it was chemically closer to meerschaum.I took both stummels and wrapped all of the wood in painter’s tape. I had nightmarish visions of what could happen to these pipes if I got the eggy goo on them. Better safe than sorry. I started applying the egg/talc mixture to the Kiko first. I wanted to make sure than the cavernous cracks were completely filled with the stuff. I needed a good bond and I added more than I needed – assuming there would be some shrinkage in the drying process. Similarly, I smooshed the mix on the Ropp too, hoping for the best. There’s no way to sugarcoat this: the whole process was a mess. Really a mess. Once the pipes had dried overnight, I took a look and I wasn’t particularly impressed with my work. But a more detailed examination was needed, so I put on a sanding mask and set about removing the excess material. I used sandpapers of various grits on dowels, sandpapers on my fingers, and sandpapers on my topping board. Hmm. The results were ok, but no better than that – and ‘ok’ just isn’t good enough for me.I hadn’t put enough material inside the Ropp – there were still areas that needed to be built up. I also felt that the material on the rims of both pipes was just too brittle – especially on the Kiko. Perhaps I was wrong to try talc.Round two. This time I repeated the entire process with egg white and chalk. Old boys in days of yore used it, so why not me? I won’t bore you by rewriting the same slathering and sanding process as above, but, the chalk mixture yielded no better results than the talc. The extra layer of goo was good insofar as it added more protection to the walls – but the results may have been the same if I’d added more talc. Sadly, the chalk did not seem to improve the frangibility of the rim.Round three. More slathering and sanding. I added a bit more egg/chalk mixture to bulk up areas that needed it and I hoped that perhaps the rim would somehow magically be improved.Round four – yes round four. This time – a slight change. I opted to return to the material that Steve and I have both used successfully in the past – plaster of Paris. This was not a complete redo, as before, but merely touch ups (in some cases aided by a drop of glue). At this point, I was placated by the plaster and felt that the results were acceptable – not perfect, but acceptable. Once the sanding was done, I could remove the painter’s tape and finish the pipes off. The Kiko needed some colour added to the rim after all the topping. I used my furniture pens to match the colour and it came out very well.Both pipes went on the buffing wheel and they look great. This was a very timing-consuming and enormously frustrating process. In the end, I learned quite a few things about the repair of meerschaum. Just like everything else, there isn’t a one-size-fits-all solution. I think egg/talc or egg/chalk is fine for small repairs, where the cracks are small and not structural. But larger repairs require something different: either grafting on a spare piece of meerschaum (which I have done successfully in the past) or using a more reliably solid goo like plaster of Paris.The Kiko and Ropp are much improved and I hope my cousin will like them. I hope you enjoyed reading the story of these pipes as much I as I did restoring them. If you are interested in more of my work, please follow me here on Steve’s website or email me directly at kenneth@knightsofthepipe.com. Thank you very much for reading and, as always, I welcome and encourage your comments.
Fixing an Unusually Tricky Crack (KPIR #6)


Blog by Kenneth Lieblich

Welcome to another instalment of my Pipe Incident Reports. The idea, in general, is to provide a brief write-up – focusing on a particular pipe-restoration-related issue – rather than an entire restoration story. Today’s story is on the resolution of a very specific pipe repair, with some added challenges. I hope this blog post will be useful for those undertaking a similar repair.

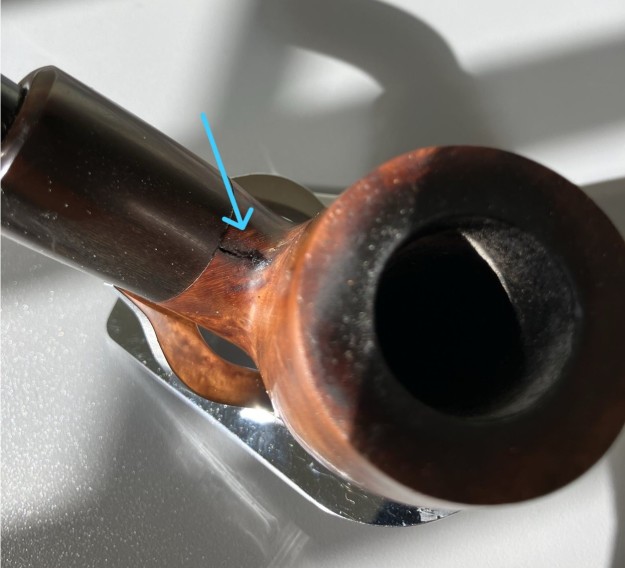
A couple of years ago, I restored a handsome Vauen Luxus 2013 for a friend and he’s smoked it with great gusto since then. In fact, you can see the story of its restoration here. By his own testimony, it’s a great pipe, smokes well, feels good in hand, etc. However, he noticed that a crack had appeared in the stummel and he wondered what I thought about it. This news sounded concerning, so I asked him to text me some photos and here is what he sent me: Yikes! Not good at all. Aside from the obvious damage, I wondered if I had missed something the first time around. I went back in my files and closely examined all the photographs of the pipe from two years ago. There was no hint of any damage or potential for damage. Naturally, I asked Steve about it, and he posited that there must have been a pre-existing flaw in the briar. As it was hidden in the shank, there’s no way we could have known about it in advance. Whatever the cause, it was up to me to fix it. The photos show that, as the pipe was smoked, tobacco oils leeched through the crack and stained the wood. Furthermore, the horn shank extension was also being stained. That isn’t a good sign, but – first things first – let’s get the pipe clean. I did my usual thing: reaming out the bowl, cleaning the tars and oils with isopropyl alcohol, etc., and scrubbing the insides with a cleaner and some tube brushes. I also used a dental pick to remove as much debris as possible from the crack. Here it is looking clean, albeit a bit the worse for wear:Fixing a crack like this isn’t the end of the world: it usually involves drilling micro-holes at both ends of the crack and then sealing it. In this case, its location added some considerable challenges. One end of the crack was adjacent to the horn shank extension and I didn’t want to risk drilling there and potentially damaging the horn. The other end of the crack was in the trickiest location to access – right in the lowest point of the bend in the stummel.

As usual, I used the smallest micro-drill bit I owned. This drilling is done to stop the crack from extending on its own. Before I stated drilling, however, I covered everything around the crack with some clear hockey tape. I wanted to prevent my drill from rubbing against the wood or horn, or potentially gouging anything during this rather precarious procedure. With great care, I managed to successfully drill the hole through the briar. I then plugged the shank with pipe cleaners coated in petroleum jelly, as it prevents the soon-to-be-applied cyanoacrylate adhesive from adhering to the insides (in case it drips inside). I created a thin bead of adhesive along the damaged area and ensured that it was well filled. I left the adhesive to cure and came back to inspect my work. It looks like it worked well. This sort of restoration will never be invisible, but will ensure a very strong repair for the future.Once again, the location of the repair proved challenging as I set about sanding down the excess adhesive with needle files and then using my Micromesh pads over the whole stummel. I added some Before & After Restoration Balm and worked that into the wood. I also took it to the buffer for some wax, but the photos below were taken before that. Thanks so much for joining me on this tricky repair. I hope you enjoyed reading this instalment of the Pipe Incident Report – I look forward to writing more. If you are interested in my work, please follow me here on Steve’s website or email me directly at kenneth@knightsofthepipe.com. Thank you very much for reading and, as always, I welcome and encourage your comments.
Experiments with Pipe Mud (KPIR #5)


Blog by Kenneth Lieblich

Welcome to another exciting episode of Kenneth Provides Solutions to Problems That Don’t Exist! In other words, it’s another installment of my Pipe Incident Reports. The idea, in general, is to provide a brief write-up – focusing on a particular pipe-restoration-related issue – rather than an entire restoration story. Today I’m conducting a detailed examination of the issue of pipe mud (aka pipe mortar, pipe plaster, pipe cement, etc.). Heretofore, the standard for pipe mud has simply been cigar ash mixed with a bit of water. This is what Steve uses and, undoubtedly, many, many other pipe men have used it over the years. Here is a link to an article Steve wrote about it and here is a link to an article Fred Hanna wrote about pipe mud, back when Adam was a boy.

The pipe ash mud is useful and simple, but could there be better mixtures? Maybe. The Pipes Magazine forums have a very interesting discussion on the use of ash in pipe mud and I recommend reading it here. What I have written below is absolutely not the first word on pipe mud (and it certainly won’t be the last). I am delving into only a small part of the world of mud.

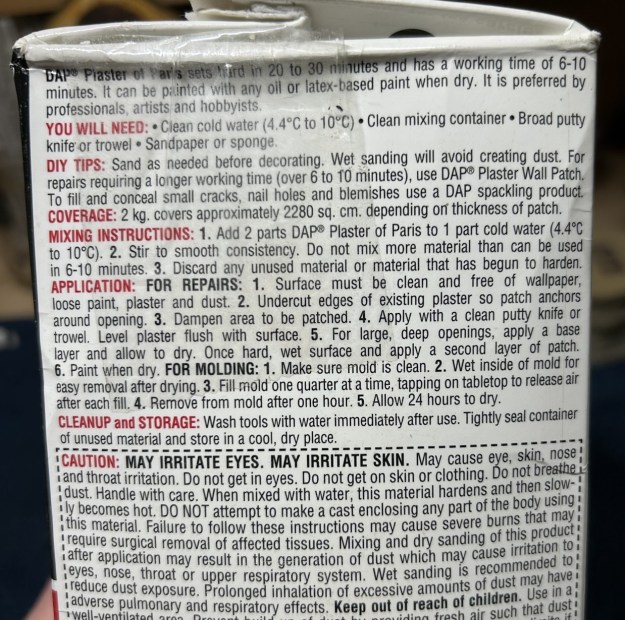
Before we go any further, let’s answer this question for the uninitiated: what is pipe mud used for? There are several uses, but the most common for me include (1) filling in micro-fissures from heat damage in the walls of a pipe bowl, and (2) lifting the heel of a bowl in order to ensure that it’s more closely in line with the draught hole. For these purposes, we need a material that is simple to make, easy to manipulate, and – once it has dried and set – inert, safe, and hard.

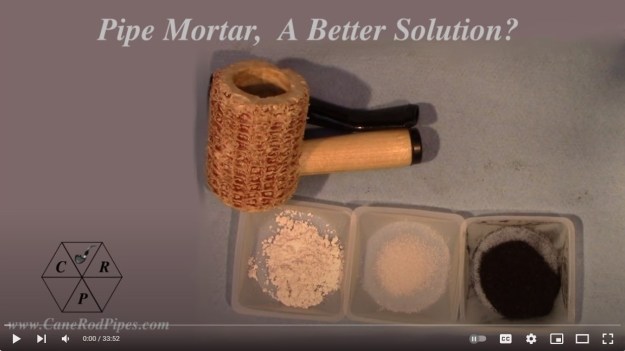
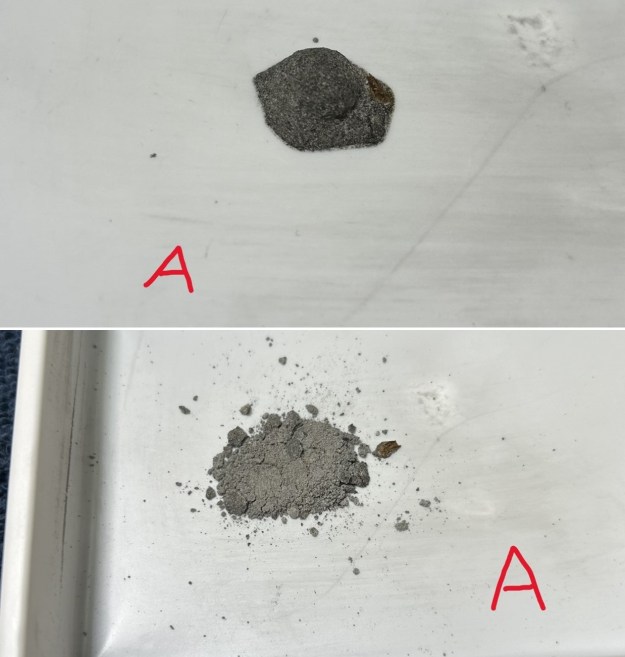
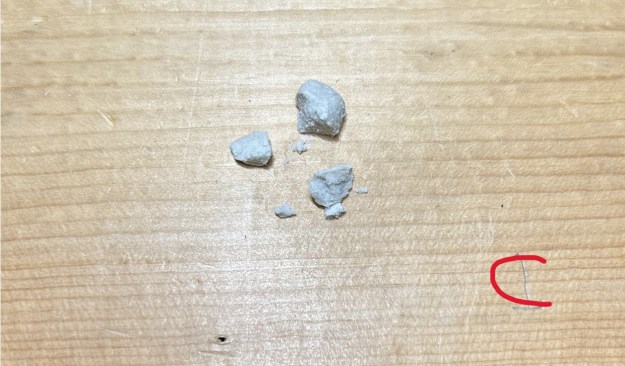
I’ve set myself the challenge of testing several different mixes of pipe mud – in this case, only based on plaster of Paris. I also made a batch with cigar ash, as a control. For the engineers and other scientists reading this article, please know that I have no scientific background and I am not equipped to conduct scientifically accurate tests of compressive (or tensile) strength at my home. However, I’ve done my best to eliminate as many variables in the tests as is reasonable, and I’ve attempted to test the compressive strength of the muds by comparison (and without having access to methods of testing through numbers). Given the disparity in results (and, quite frankly, the frivolity of the project), this proved to be quite sufficient for my needs. The idea for testing mud came to my mind after watching a YouTube video with a particular recipe for what the creator called ‘pipe mortar’. I’ve used it once or twice — it was fine, but nothing special. I’ll discuss its contents in a moment, but as soon as I mentioned it to Steve, he had some issues with it. I also chatted with John Young of NebraskaPeteGeek about it and he also had issues.I first set about making the control mud with cigar ash. I burned a small cigar by Schimmelpenninck until it was fully ashen. I then mixed it with a few drops of water to make a paste and let it set. For reference, I used distilled water in all of the muds – not because I think distilled water is required in any way to make this stuff, but just to eliminate a variable in my production. It’s important to know that ‘hardened’ pipe mud (made with cigar ash) is NOT very hard until the pipe has been smoked several times. It is the oils and tars from the tobacco that actually harden this type of mud.I’m not going to belabour my description of the recipes or the results. The first recipe below comes from the YouTube video I mentioned above. I’m giving all recipes a letter name for ease of reference.

A: cigar ash, drops of water (sorry I don’t have precise amounts for this one)
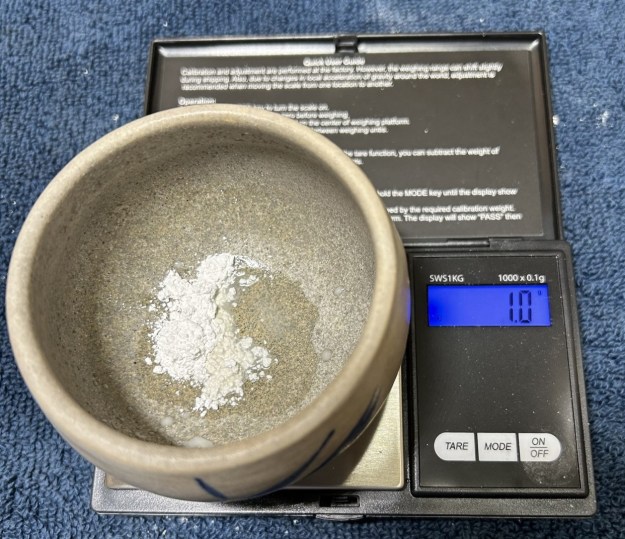
B: 1.0g of plaster of Paris, 0.5g of salt, 0.6g of activated charcoal, 12 drops of water.Recipe B is the one that Steve and John talked to me about. The creator says that the salt helps in strengthening his ‘mortar’. Steve’s concern is that salt isn’t great for the wood. It can cause tiny fissures, etc. to expand – this is also one of the reasons why Steve and I do not use salt in de-ghosting pipes. Anyway, the amount of salt involved is very small, so I don’t know if this has any effect or not. John, who has a background in chemistry, added that the salt wouldn’t be doing much in the hydrated calcium sulfate reaction. His view was that the salt is unnecessary.

Here are the other recipes:

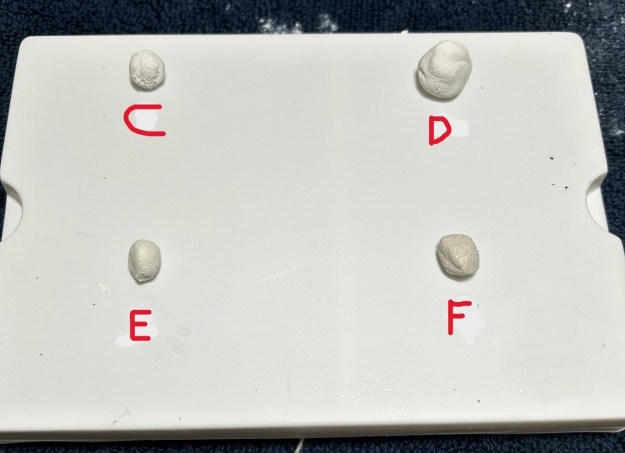
C: 1.0g of plaster of Paris, 8 drops of water.
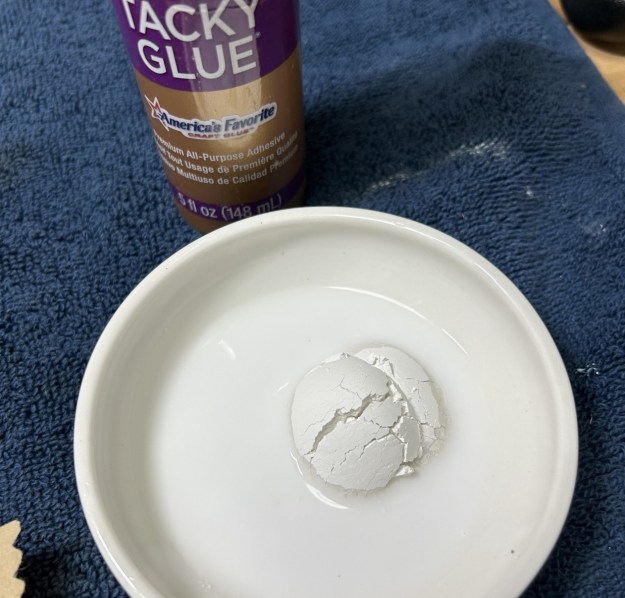
D: 1.0g of plaster of Paris, one drop of white glue, 8 drops of water.
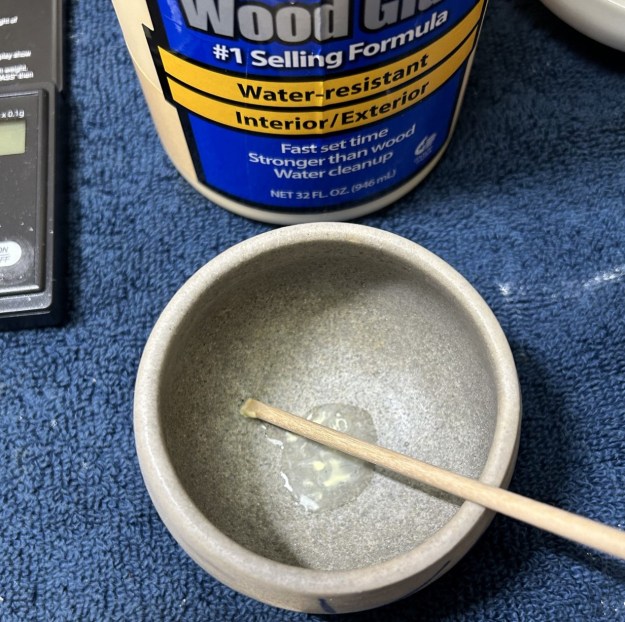
E: 1.0g of plaster of Paris, one drop of wood glue, 8 drops of water.
F: 1.0g of plaster of Paris, 0.5g of salt (pulverized), 9 drops of water. In case you’re wondering why I tested both white glue and wood glue, it is because I didn’t realize that they were both polyvinyl acetates. Anyway, in producing the four muds above, I didn’t do a great job of keeping the shape of the samples similar to each other. However, I don’t think this had an overly negative effect on the results at this stage. Definitely the worst of the four in compressive strength was F (similar to B). The middling mixture was C. The best were D and E. I’m giving the edge to E overall, but the difference between the two might just be in my head. They both had good hardness and compressive strength. I have some fine results, but there is an aesthetic problem: the best mud is white! It’s not the end of the world, but it doesn’t look great on the inside of a pipe one has just restored. A new test was in order. I made two new batches of E – but I added activated charcoal to one of them. These recipes look like this:

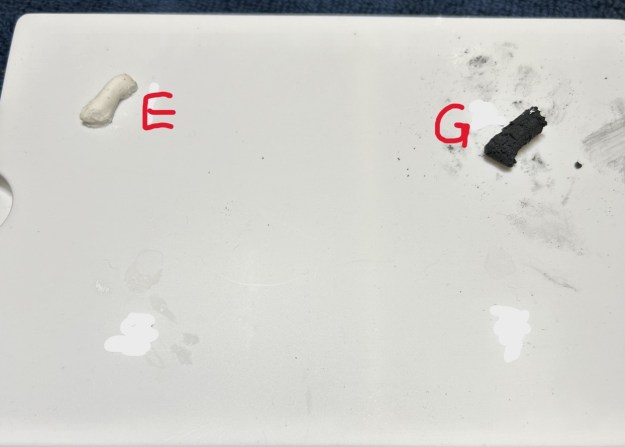
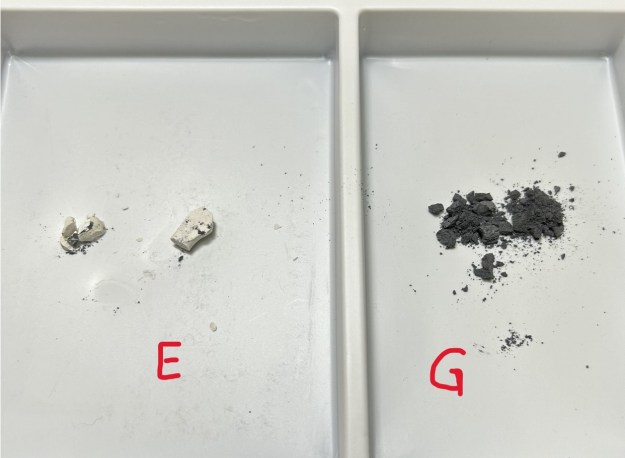
E: 1.0g of plaster of Paris, one drop of wood glue, 8 drops of water.
G: 1.0g of plaster of Paris, 0.6g of activated charcoal, one drop of wood glue, 9 drops of water.
For this test, I made a much better attempt to have the same shape of mud – a sort of cylinder. The result of the compressive strength test here was definitive: E was notably better. This was no surprise to John. He commented that the charcoal would weaken the structure of the plaster, as it would interfere with (rather than adhere to) the crystalline structure.One thing that I did not test – but probably should have – is mixing pipe ash with plaster of Paris and water. However, given the above results, I expect that it would also be inferior to E.

Here is my (slightly strange) conclusion: although E (perhaps along with D) was hardest and strongest, I am not advocating for YOU to use any particular pipe mud. I have my own thoughts on which mud is best for my work, but my opinion isn’t worth a hill of beans. My goal here is to present my amateurish results, hopefully for your benefit – and that’s it. It is your task now to take the results and do with them as you wish. Special thanks to Steve Laug and John Young for their words of wisdom.

If you make use of these results in your pipe work, please let me know how it goes. I would also be interested to know if you have a different pipe mud recipe you recommend. I hope you enjoyed reading this installment of the Pipe Incident Report – I look forward to writing more. If you are interested in my work, please follow me here on Steve’s website or email me directly at kenneth@knightsofthepipe.com. Thank you very much for reading and, as always, I welcome and encourage your comments.
Churchwarden Shank Transplant (KPIR #4)


Blog by Kenneth Lieblich

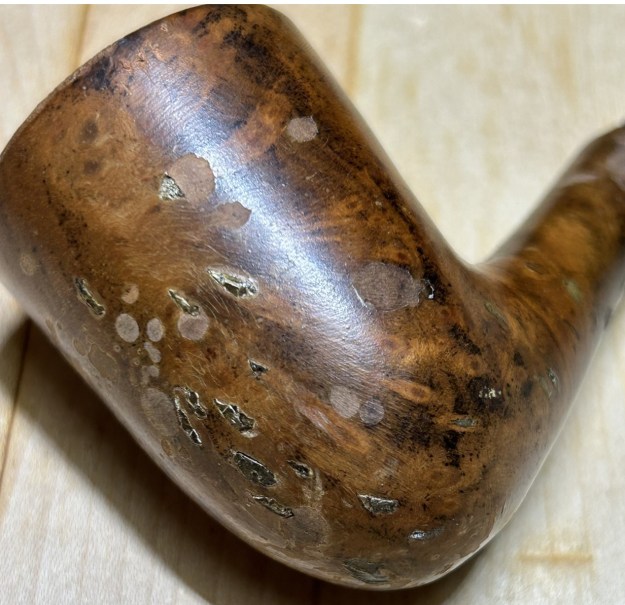
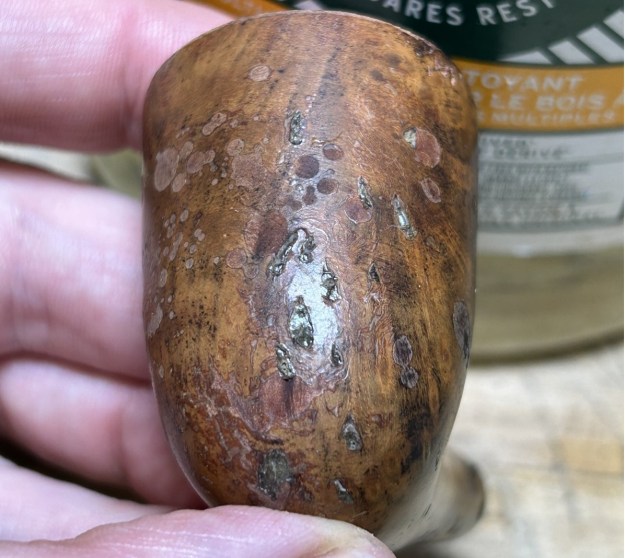
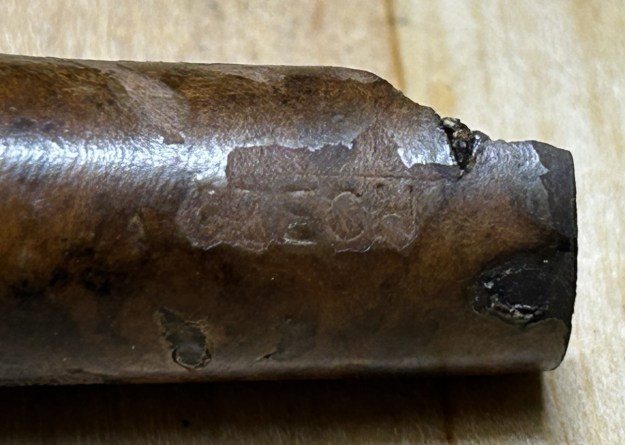
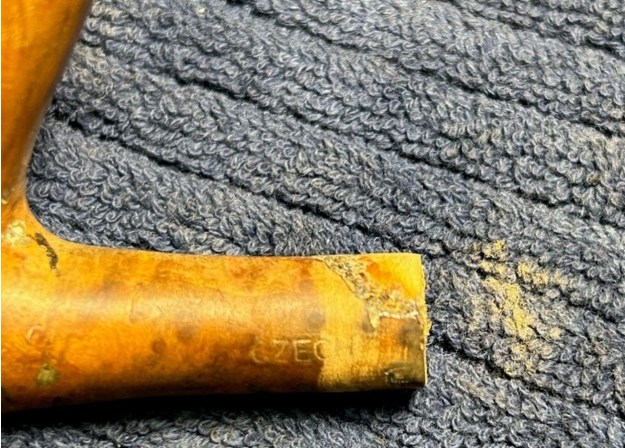
Here is another instalment of my Pipe Incident Report. The idea, in general, is to provide a brief write-up – focusing on a particular pipe-related problem and/or solution, rather than an entire restoration story. Previous articles in this series have discussed such things as plaster of Paris, lemon-infused isopropyl alcohol, Cordovan stain, et cetera. Today, I will talk you through my process of repairing a badly damaged shank. This shank was not simply cracked (as is often the case), but, as the photos show, was missing a large chunk of briar. One’s first question might be, “Why bother fixing this at all? Toss it in the fireplace!” That’s a fair point. In this case, however, the owner of the pipe wanted to keep it as a memento of her grandfather. Beauty is in the eye of the beholder and I was only too happy to help fulfill her wish.The pipe is a no-name churchwarden (with the word “Czech” along the shank) and it had clearly been through the wars. Not literally, of course, but this pipe was smoked hard! The old fellow must have loved this pipe and it must have smoked well. The stummel was full of cake, lava erupting on the rim, and fills everywhere – in fact, I counted no fewer than 39 fills. Anyway, let’s take a closer look at the shank. You can see what the problem is. My guess is that the shank was broken when the stem was removed from it at an inopportune moment. The tenon on the stem is an odd metal thing, which I suspect might be a replacement. The tenon and mortise certainly don’t fit together very well. Regardless, the tenon needs to be repaired in a manner that is both structurally sound and aesthetically pleasing.Furrowing my brow, I consulted with Steve about solutions he’s used in the past for this sort of problem. He initially proposed building up the shank with a mixture of briar dust and CA glue. This is what I had originally considered too, but I also toyed with the idea of actually using a chunk of briar in place of the missing wood. Steve said it might be fun to try, so that’s what I did. Regardless of which technique I used, the shank would have to be banded in order to provide structural integrity and (preferably) to hide some of the repair – which will be unsightly no matter what.

I have some wrecked stummels among my workbench items. I picked one, broke off a piece, and set about fitting it in place. It was immediately apparent that I needed a bit more wood, so I took another, smaller piece and fit that one too. I must admit, it took some trimming, filing, and general tinkering/fiddling to make it fit. Once I had a reasonable fit, I glued the pieces to the shank with CA glue. There were still gaps among the cracks and I dealt with that by adding a mixture of CA glue and briar dust.

Once the CA glue was cured, I set about filing, sanding, and shaping my repair. I obviously sanded the top of the shank to make it look normal, but I also sanded the end because the added bits extended beyond the main part of the shank. I also ensured that there was no roughness (or other problems) inside the mortise. To that end, I also gently filed the mortise. What an improvement! Fortunately, I found the perfect band to place on this stummel. It was made of brass, fit very snuggly, and – most importantly – it was quite long. The band covered all repairs beautifully.After prepping the stummel, I stained it so as to provide some camouflage for the aforementioned fills. I then added the band with some glue and polished it to a shine. The photo below is not quite the finished product but it is close enough to show what a difference this repair made.If you do try this type of shank repair, please let me know how it goes. I would be interested to know what your results are. I hope you enjoyed reading this instalment of the Pipe Incident Report – I look forward to writing more. If you are interested in my work, please follow me here on Steve’s website or email me directly at kenneth@knightsofthepipe.com. Thank you very much for reading and, as always, I welcome and encourage your comments.
 

Adventures in Cordovan (KPIR #3)


(Kenneth’s Pipe Incident Report #3)

Blog by Kenneth Lieblich

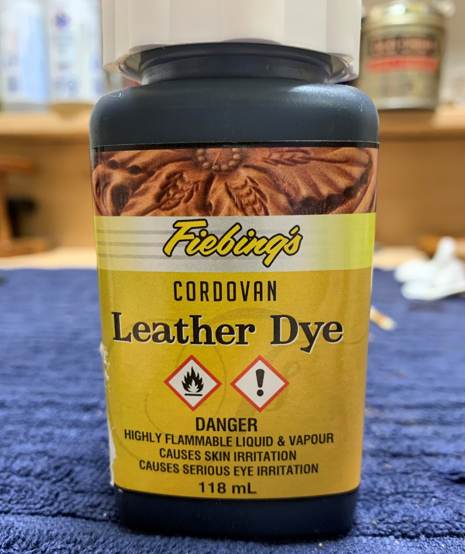
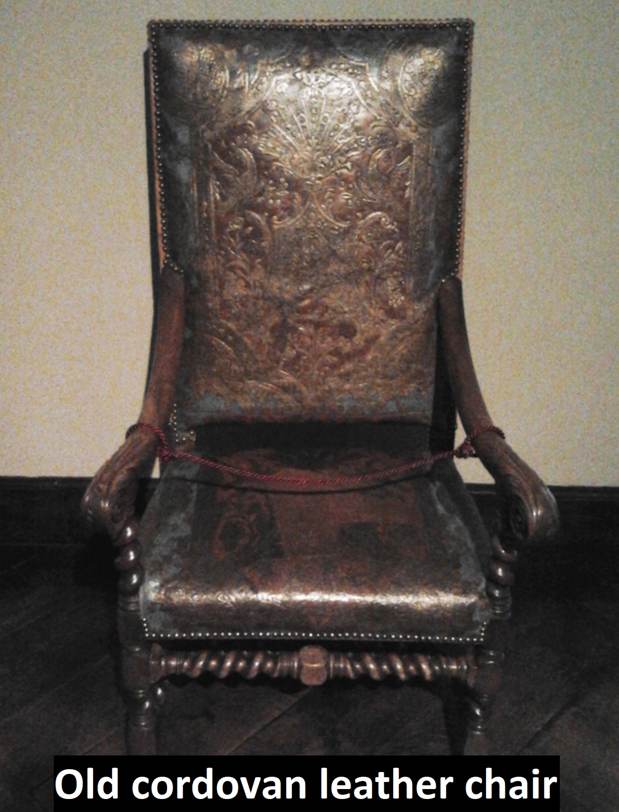
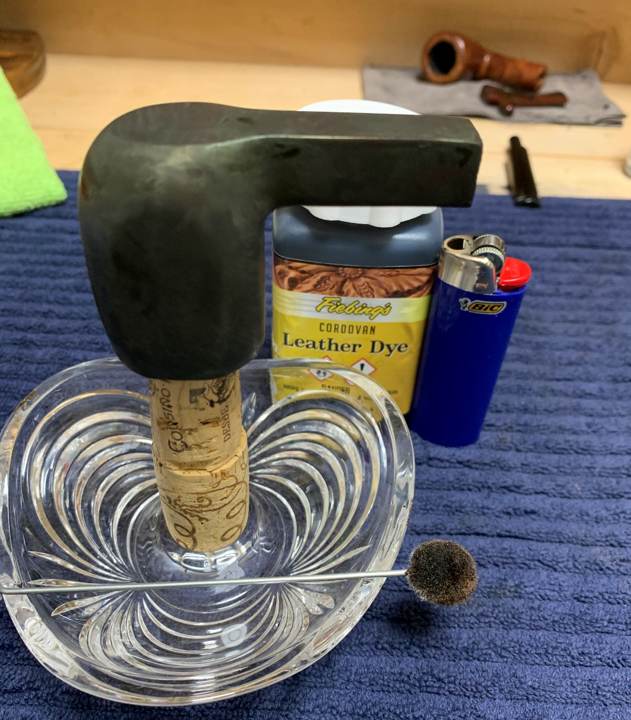
Here is another installment of my Pipe Incident Reports. The idea, in general, is to provide a brief write-up – focusing on a particular pipe-restoration-related issue, rather than an entire restoration story. Last time was all about lemon-infused isopropyl alcohol. Today’s report is about a colour of stain that I had not used before, but which always intrigued me: cordovan. If you’re not familiar with the term, it refers to a rich shade of burgundy (but with less purple) and is often compared and contrasted with oxblood.Of course, the name of the colour comes from the Spanish city of Córdoba. Córdoba (or Cordova) has had a thriving leather industry since the seventh century AD, and it is this that is most closely associated with the word, cordovan. I referred to my Oxford Dictionary of English Etymology. It confirmed this information and added that the first known use of the word in English was in 1591 – in this context, it was simply used as the adjectival form of the city name. According to the Dictionary of Color, the first recorded use of cordovan as a colour in English was in 1925.I expected this colour to be quite red and that accounted for my previous hesitation in using it. Certainly, the bottle of Fiebing’s Cordovan Leather Dye appeared a bit redder that I would have liked, but an opportunity presented itself to try it out on a pipe. I own Fiebing’s oxblood and I’ve used it before, but it was time to try something different…

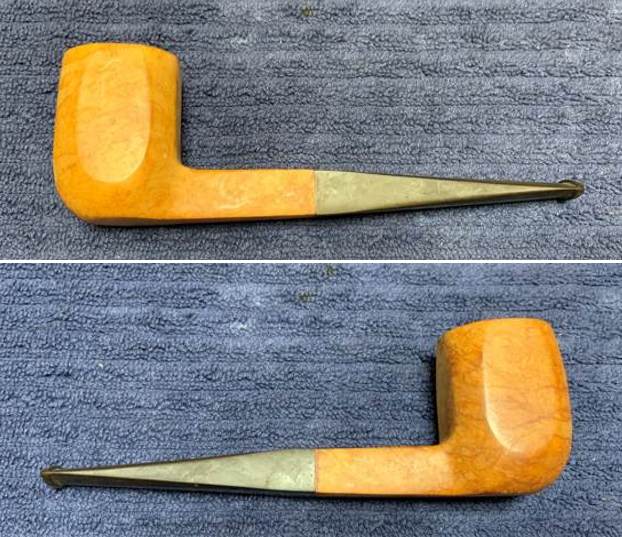
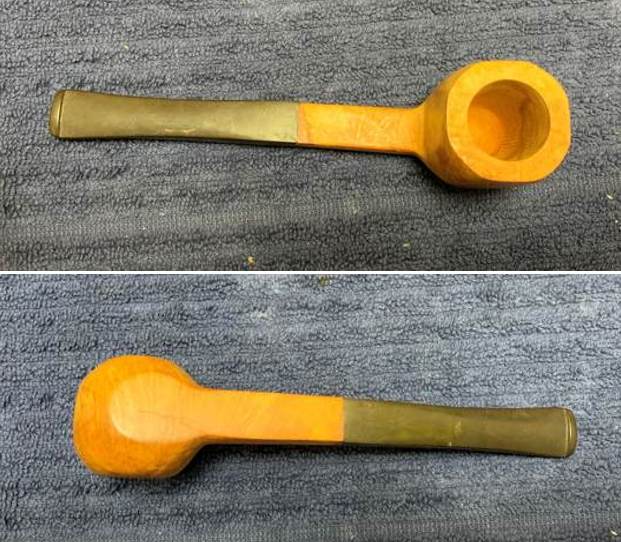
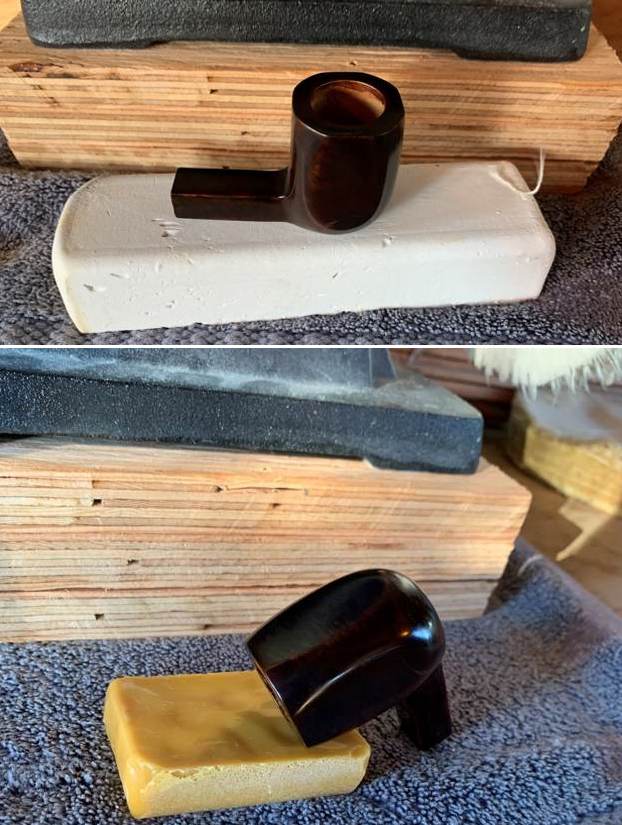
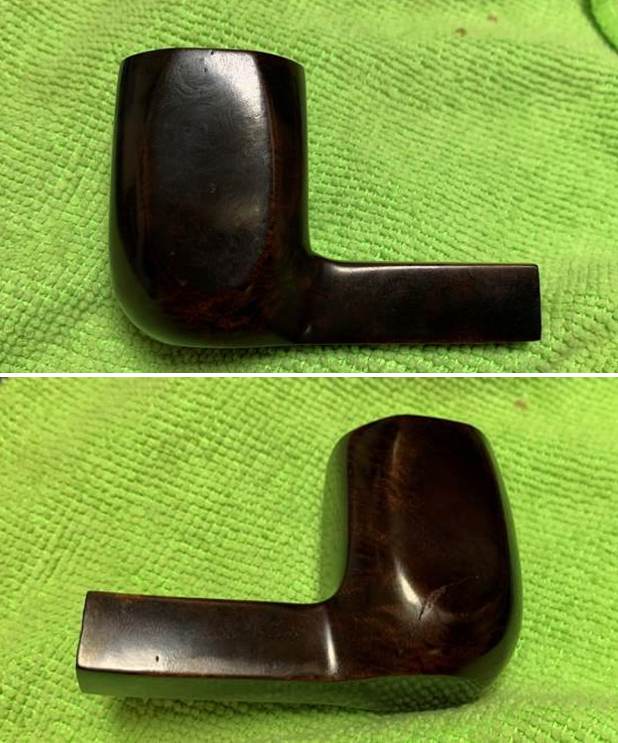
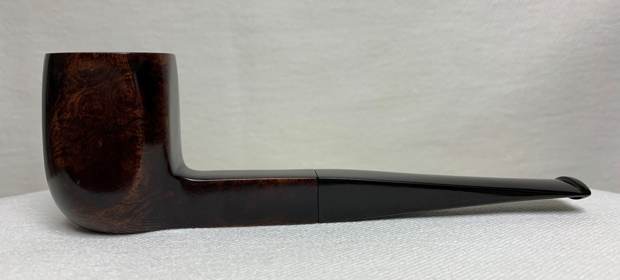
The pipe I’m using for this experiment is a handsome paneled billiard. It has no markings on it whatsoever, so I don’t know its origins. I acquired it in a lot of pipes that arrived from France, but there were some non-French pipes in that lot so I can’t be sure that it’s a French pipe. In any event, the pipe is unsmoked, never used. And so, I decided that this was the perfect candidate for me to try out my cordovan dye. The briar was raw and unfinished, so it would take the stain well. As you can see, the briar had some water stains on it and the pipe was generally dusty and dirty, despite never having been used.To give the dye the best chance of succeeding, I cleaned the stummel with Murphy’s Oil Soap. This removed all the stains and made the stummel nice and clean. I also used a can of compressed air to blow out any dust from the draught hole and chamber.The stem was also new but was clearly dirty from sitting around untouched for years. I cleaned it with a couple of pipe cleaners and then polished up the stem with all nine of my MicroMesh pads. Next, I had to address a couple of issues in the briar. As the photos show, there are some cracks in the wood that I need to tackle. Upon close inspection, fortunately, the cracks are quite shallow and do not meaningfully affect the integrity of the pipe.One of many techniques that I learned from Steve is to use a micro drill bit to stop any briar cracks from lengthening. So, I took one of my micro drill bits – and it is really tiny – put it in my Dremel, and drilled minuscule holes at the end of each crack. Of course, I followed this up by filling the drill holes and cracks with cyanoacrylate glue and let it fully cure. Once cured, I sanded it all down with my MicroMesh pads. Time to try the cordovan! As I mentioned, I expected cordovan to be quite red. In fact, it was a beautiful, rich, brown colour – I suppose at the brown end of burgundy. I flamed it and let it set and then coated it again with dye and flamed that too. I was pleasantly surprised at how attractive the colour was. However, I was equally concerned that I had made it too dark by staining it twice, so I decided to lighten it. Fortunately, this dye is alcohol-based, so I used isopropyl alcohol to wipe down the pipe and remove excess stain. I am very pleased with the results. I polished the pipe on my bench buffer with White Diamond and carnauba wax which made the pipe look all the more lovely.   Cordovan turned out to be an excellent addition to my palette of colours for pipe work. As I mentioned, I expected it to be much redder than it turned out to be, and that originally precipitated my hesitation in using it.   I am pleased to announce that this pipe is for sale! If you are interested in acquiring it for your collection, please have a look in the ‘Pipes from Various Countries’ section of the store here on Steve’s website. You can also email me directly at kenneth@knightsofthepipe.com. The approximate dimensions of the pipe are as follows: length 5⅝ in. (143 mm); height 1¾ in. (45 mm); bowl diameter 1⅛ in. (29 mm); chamber diameter ⅞ in. (22 mm). The weight of the pipe is 1⅛ oz. (34 g). I hope you enjoyed reading this installment of the Pipe Incident Report – I look forward to writing more. If you are interested in my work, please follow me here on Steve’s website or email me directly at kenneth@knightsofthepipe.com. Thank you very much for reading and, as always, I welcome and encourage your comments.
Kenneth’s Pipe Incident Report #2


Blog by Kenneth Lieblich

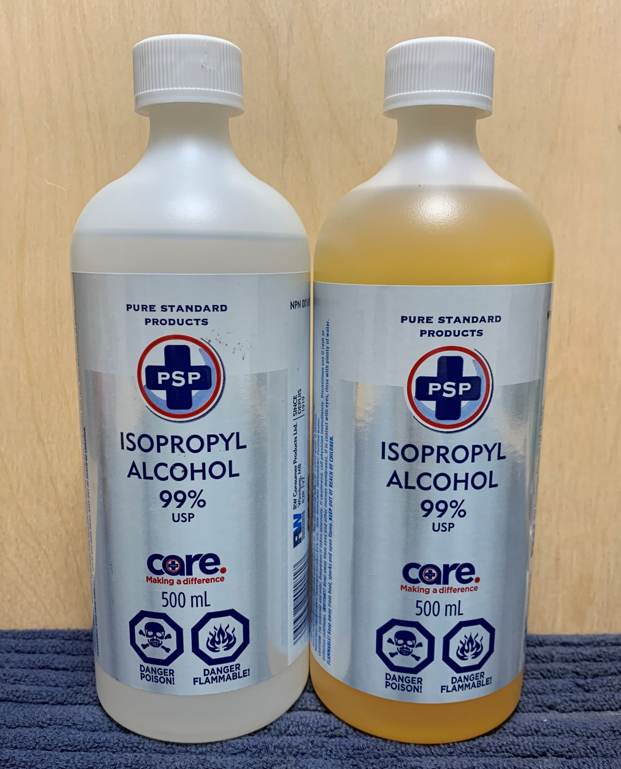
Here is another installment of my Pipe Incident Report. The idea, in general, is to provide a brief write-up – focusing on a particular pipe-related problem and/or solution, rather than an entire restoration story. Last time was all about plaster of Paris. Today’s report is about lemon-infused isopropyl alcohol. I have had questions, from time to time, asking me why I frequently use this lemon alcohol, rather than the usual, plain alcohol. In fact, I use both. If you do not know what this lemon alcohol is – no problem! That is what this report is intended to elucidate.
I learned about this lemon alcohol thanks to my wife. She stumbled upon a “mom” blog, written by Alexis Rochester, a mother who is also a professional chemist. One particular blog post extolled the virtues of lemon-infused alcohol as a household cleaner. My wife sent it to me, and I was intrigued at the possibility of this cleaner being used to attack the oils, tars, etc. on the inside of pipes. Obviously, the article was not considering the possibility of this being used on pipes, but I certainly was! If you are curious to read the original article, here is the link: https://chemistrycachet.com/lemon-infused-rubbing-alcohol/.
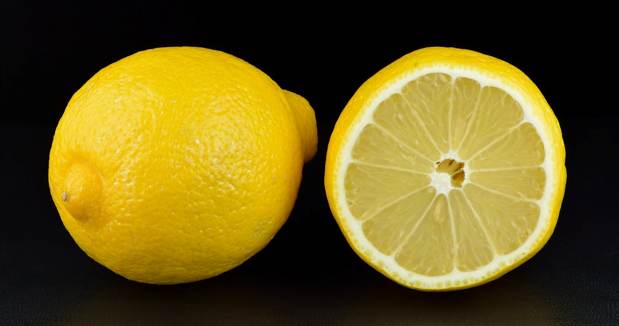
So, what is lemon-infused 99% isopropyl alcohol? In brief, it is the extracted chemicals from the zest of the lemon (Citrus limon), absorbed into 99% isopropyl alcohol. The addition of the lemon makes a more effective cleaner than alcohol alone.

I learned from the blog that isopropyl alcohol, on its own, is slightly acidic. This is important because some acidity is very effective for cleaning. Lemon zest is also slightly acidic. These low levels of acidity are NOT harmful to wood. It is also important to note that this lemon-alcohol extraction does NOT contain any lemon juice – that would be too acidic for our purposes. Essentially, we have a cleaner that is very mildly acidic and combines the best cleaning properties of isopropyl alcohol and lemon. Among other things, Alexis says the following in her post:

Rubbing alcohol is a great disinfectant on its own, but adding in lemon peels increases the disinfectant quality. Lemon peels contain ascorbic acid (vitamin C), malic acid, and citric acid all which make great cleaning options. But again, you are just getting the benefits of the peel without the acid of the lemon juice.

I went ahead and bought a bag of lemons and thought I would give it a try. Lemons are inexpensive and the method of manufacture couldn’t be easier. You simply peel a bunch of lemons, stick the zest in a container with isopropyl alcohol, seal the container, and let it sit for two or three weeks. You can read more details on how to make it from the link above.

Now that I have made this product and used it frequently, some important questions need to be answered: (1) is the lemon-infused isopropyl alcohol a better cleaner of pipes than alcohol alone;  (2) does this product leave a lemon “ghost” in the pipe; and (3) is it ultimately worthwhile making this stuff? I will address the questions in turn.

I am not a chemist and I have not personally executed the full, scientific method in answering the question of which is a better cleaner. However, anecdotally, I think that lemon-infused alcohol is a better cleaner of pipes than alcohol alone. I don’t really have the inclination to use full scientific rigour on this, but I have tried both and I think the lemon one is superior – perhaps not dramatically so, but superior nonetheless. Having said that, perhaps the most important statement in this report is this: I use both “plain” 99% isopropyl alcohol and the lemon-infused 99% isopropyl alcohol. It is not one or the other, but both.

In answer to the second question, there is no lemon ghost in the pipe after cleaning. Certainly, during the cleaning process (and for a few moments afterwards), there is a detectable scent of lemon in the pipe, but it dissipates very quickly. I have tested this several times. First, I have smoked pipes cleaned in this way and there was no hint of lemon at all. More emphatically, however, I had my son test this out – he was born blind. Naturally, he relies more heavily on his other senses in navigating the world. I told him to stick his nose inside pipes that I have cleaned with lemon alcohol and then asked him what he could discern. He was never able to smell any hint of lemon – even within a few minutes of the pipe being cleaned.

Third question: is it worthwhile for you to make this stuff? Yes it is, but I don’t think it is world-changing. As I’ve said, it is a superior cleaner (in my non-professional opinion) and I will continue to make and use it. However, it would be disingenuous for me to say that you MUST make this for yourself. For goodness’s sake, Steve and Jeff use plain alcohol and they are the gold standard of pipe cleaning and restoration!

If you do try this lemon alcohol, please let me know how it goes. I would be interested to know what your results are. I hope you enjoyed reading this installment of the Pipe Incident Report – I look forward to writing more. If you are interested in my work, please follow me here on Steve’s website or email me directly at kenneth@knightsofthepipe.com. Thank you very much for reading and, as always, I welcome and encourage your comments.