Blog by Robert M. Boughton
Copyright © Reborn Pipes and the Author except as cited
https://www.roadrunnerpipes2k.com/
https://www.facebook.com/roadrunnerpipes/
“I bet ya three-to-one I beat this.”
— John Joseph “The Teflon Don” Gotti, Jr. (1940-2002), Mafia boss, to law enforcement officers the night he was arrested for five murders, racketeering, loan sharking, tax evasion and related charges leading to his conviction
“The Teflon is gone. The don is covered with Velcro….”
— James Fox, FBI Assistant Director in Charge of the New York field office, upon Gotti’s conviction on all counts and sentence to life without parole
INTRODUCTION
While the denouement of the golden age of pipe restoration I anticipate here is only of importance to those who undertake the artful practice and the collectors they serve, and represents nothing as dramatic as the life of John Gotti or his vicious crimes from the age of 12 until he was convicted at 51, the problems I will describe are real and present The dangers relate to pipes made of wood, meerschaum, synthetic plastic and even metal, in particular antiques and many that are pushing the limits of vintage. The simple facts are that certain parts used in the construction of some old pipes are no longer manufactured nor can they be, and still more materials needed to restore them and others to original condition are not being pre-fashioned.
This dearth of components that once were ready-made or easier to come by restricts their availability to a rarefied number of true artists in the repair business possessing the essential skills to create vital pieces to the specifications of given projects. Such craftsmen, already very difficult to track down, are in fact dying out. The ability of most common and even some great restorers to complete their work as most would prefer – to the pipe’s authentic state – is therefore in grave peril. This is the sad reality
The supplies I have identified so far with careful thought, but by no means having reached a comprehensive list, are Bakelite, including Redmanol;:amber and amberoid; ivory, notwithstanding its illegality in the U.S. and most other countries, or in the alternative imitation ivory; bone and horn tenon screws; replacement bowls and other components of metal and other pipes; real corncob Aristocob inserts, made just for that infamous aluminum pipe, and the most surprising member on the endangered species list, the push-pull Teflon stem fittings used with most meerschaum pipes, especially newer ones.
AN ILLUMINATING CONVERSATION
I spoke on the telephone to Floyd Norwood, the patriarch of a two-generation family pipe repair business. He is retired but continues taking a hand in the operation as his son now runs the shop. Prepared for the immediate negative response, I wanted to know if I could buy an assortment of bone screw tenons from them, but his next words shook me and started the cogitation that led to this blog. I had left his name out of this because the conversation wasn’t a formal interview, but it will become obvious later in the series.
“Nobody makes these things anymore,” the old gentleman began. “These things” encompassed the various parts we had discussed, not only bone tenons but real amber and the Bakelite family of stem materials. Mr. Norwood’s voice was tired, sad and a bit disgusted.
“Tell me about it!” I replied in the heat of commiseration I immediately understood could not begin to match his own sorrow after a lifetime career seeing the dissipation of the tools he employed in his labor of love. “It took me two years to track you down, and then only in a recent, second, desperate plea for help did one friend on the Smokers Forums UK think to recommend you.” I dropped the name of the friend, who will remain anonymous.
A few others on SF responded with vague attempts to help that I appreciated, but none could recall the name of the person who did such specialty work for them in the distant past. Only when I posted in the thread that the problem was solved by the link provided in the first response did several other members chime in that they had also used Norwoods Pipe Repair at times and gave the man with whom I had the honor of chatting, or in more recent experiences his son, Kenneth, their highest recommendation for quality of service, speed and price. I amended my previous comment to include the total of four glowing referrals, but it did little to cheer up the aging expert whose specialized skills I have now enjoyed for three pipes.
“The kids these days doing the repairs, and even the older restorers, just aren’t interested or able to do the work involved,” the worn out and still somewhat irked master continued, “and I mean for a single job much less volume production for sale to people like you.”
I took no offense from the last phrase. He was correct, after all.
BAKELITE, REDMANOL AND CONDENSITE
Leo H. Baekeland (1863-1944), a Belgian-American chemist, invented Bakelite, the first synthetic plastic, in 1907. He named it after himself. I will save most of the ruthless and covetous tactics Baekeland undertook, in order to seize control of many much smaller companies that made similar but superior synthetic plastics, for another blog that is in the works. Here’s all you need to know for now.
Bakelite was patented for its revolutionary innovation that employed thermosetting, a process of controlling intense heating and pressure, of phenol and formaldehyde resins sometimes combined with lesser amounts of wood or asbestos fibers that resulted in soft or liquid material. In that form, Bakelite could be molded into any shape before final curing rendered it irreversible. Baekeland called his machine that performed the entire operation – what else? – the “Bakelizer.” Bakelite was particularly useful because of its electrical nonconductivity and heat resistant qualities that made it ideal for diverse products including electrical casings, firearms and tobacco pipes and stems, to name only a few.
The two particular small, independent chemical research and production laboratories to which I alluded a moment ago – the Redmanol Chemical Products Co. of America in Chicago formed in 1913 by Lawrence V. Redman, after whom his creation was self-styled; and the Condensite Co., started in 1910 and headed by A.J. Aylsworth, over which Redmanol had acquired a controlling interest – developed synthetic plastics that were stronger and capable of being colored in more varieties than Bakelite. Original Bakelite, whatever the color, still looked like plastic, while deep red, translucent Redmanol was so close to amber of the same color that it often requires an expert to differentiate the two.
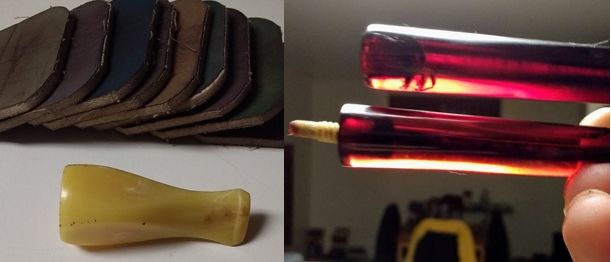
Bakelite cigar holder, left; real amber compared to Redmanol, right
The greater strength and coloring qualities of Redmanol and Condensite were the results of different chemical catalysts used employing the same basic heat and pressure process innovated by Baekeland. But Redmanol employed the action of formin on carbolic acid, while Condensite utilized the effect of chlorine on naphthalene. Furthermore, Baekeland’s machine, the Bakelizer, was only one means of achieving the intense heat and pressure necessary for the reactions of the two ingredients he chose. Aylsworth devised a means of heating the chlorine and naphthalene without pressure, a process Redman adopted. The three processes, therefore, rendered each substantially different. In 1922, however, a U.S. Federal Court judge in New York interpreted the tortuous patent laws in favor of Bakelite – which, by the way, not wanting to force its two greatest competitors to defend themselves sued not the manufacturers but their distributors – destroyed and merged the prized competitors into its growing family in the newly and litigiously formed Bakelite Corporation. Since then, Redmanol and Condensite products have been lumped together under the single name Bakelite.
The Bakelite patent can be read below. 


The Problems
The most obvious difficulty is that Bakelite, at least for tobacco pipe products, has not been manufactured since 1939, when Bakelite Corp. was acquired by Union Carbide and Carbon Corp. (Union Carbide Corp. since 1957). As was already noted, the curing process for Bakelite rendered it “irreversible.” Bakelite products were custom made for whatever use was needed. In other words, for purposes of restoring old stems made of Bakelite, which, again, includes Redmanol, any necessary replacement can be reworked in only one way: fitting an over-sized stem of an otherwise suitable candidate to a shank by serious sanding or other such methods. Any other alteration, such as bending or threading, is strictly impossible compared to Vulcanite, acrylic and even amber. By way of illustrations, imagine trying to find substitute parts for these beauties.
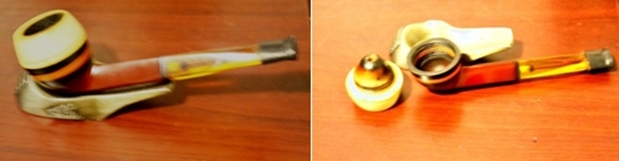
Socket pipe with meerschaum bowl, Redmanol shank and stem and bone tenon screw
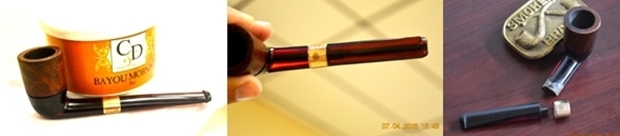
KB&B gold band socket pipe with irreplaceable threaded Redmanol stem and bottom and custom-made screw-in briar bowl
AMBER AND AMBEROID
Amber is an organic material (neither gem nor stone despite common descriptions) formed by the polymerization of prehistoric pine tree resin into hard, fossilized pieces that often have inclusions, meaning trapped insects or plants. More than half of the known inclusions found have been flies. Its colors include yellow and orange, the most common, as well as red, green, blue and brown, and these colors range in translucence to almost opaque. Found in the greatest quantities throughout Europe, amber is more common in the northern Baltic countries and Russia, but is also present in other places all over the planet. Amberoid refers to pieces of amber and sometimes other resins compressed by intense heat and pressure. Most of it is used for jewelry, primarily in small bits and pieces.
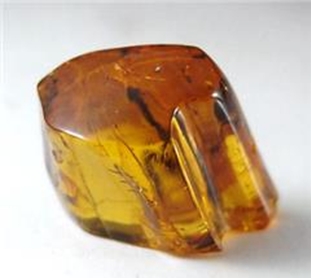
Polished Baltic amber courtesy Minerals.net
The Problems
Amber is on the soft and fragile side (2-3 on the Mohs scale of 1-10, with talc being 1 and diamond 10), and it begins to decay the instant it is exposed to sunlight. By human reckoning the process is very slow, but amber’s natural brittleness increases considerably within a human lifetime. That means that its use as a material for pipe stems in the late 19th and early 20th centuries leaves examples that are now more prone to chipping and breaking, neither of which damage can be repaired with a purist method if at all.
Also, even for anyone alive today who is capable of fashioning an amber stem, the cost is prohibitive, and the process very difficult Because amber does not actually melt, as in the sense of turning to liquid, but rather reaches the temperature where it would at about 570° F. and beyond that decomposes, there may be nobody around now inclined to try anyway, as Floyd Norwood suggested..
As a result, we are left with a more and more limited supply of random styles and lengths that can be found only at places such as eBay, where the sellers don’t know or care enough about pipe restoration to publish the measurements and, in my experience, are clueless when asked to provide such information. In other words, they can be found in random lots the measurements of which can only be guessed. The increasingly absurd prices of these lots make buying them a serious gamble with poor odds of winning.
Amberoid is a still bigger problem. For those willing to destroy various jewelry and other ornaments made of amberoid, the bits and pieces acquired would be useless. The only amberoid stems I can find available to buy are already on pipes, such as this Andreas Bauer meerschaum billiard courtesy of SmokingPipes.com. IVORY, REAL AND IMITATION
Ivory in its purest form is the dense material forming the teeth and tusks of large mammals including elephants that are still present in our world, their distant relatives mastodons that have been extinct since the end of the Pleistocene epoch 10,000-11,000 years ago and woolly mammoths (another ancestor of elephants that were alive during the earliest time of humans but died off completely 4,000 years ago).
Other, less valued forms of ivory are found in walruses, narwhals, hippopotami, rhinoceroses, warthogs and sperm whales, but also in a variety of smaller species such as elks. For most of human history, ivory has been prized for its artistic uses, from classical statues to piano keys. The fact that ivory, in particular its oldest and finest variety, can be carved into any form made it valuable for beautiful works of art, including ornate tobacco pipes.
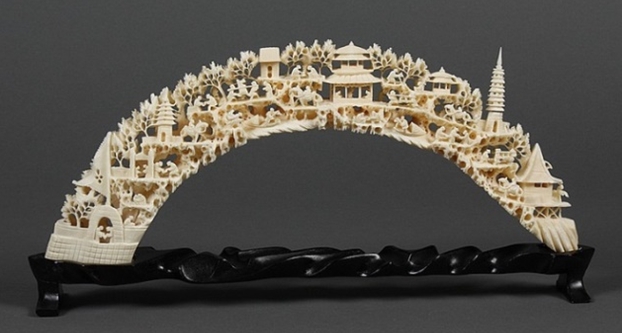
Japanese carved ivory tusk courtesy invaluable.com

1890 Tiffany ivory-silver pipe courtesy tobaccopipehistory.blogspot.com

Tsuge ivory billiard courtesy Brothers of Briar
There are several alternatives to ivory. Celluloid; believe it or not; invented in France in 1865, is the oldest. Best known for its later use as an early, highly flammable film for motion pictures; celluloid – not Bakelite – is touted on some sites as the first “successful” synthetic plastic and was used for products that were not limited to the following.

Celluloid chip and dice courtesy antiquegamblingchips.com

Billiard balls courtesy sciencehistory.org

Celluloid ivory sample sheets courtesy Rothko & Price
A second, more workable imitation ivory is vegetable ivory, found in the nuts of varieties of tropical South American palms. The white cores of these nuts are fashionable into all kinds of shapes that harden and can be polished like real ivory, and best of all, they can be drilled for stem making purposes. The nut below looks tiny but is in fact about the size of a large honeydew melon. It even has a fine grain pattern that can be differentiated from that of real ivory.

Vegetable ivory nut from Micronesia courtesy palomar.edu
There is a third, still better, resin-based variety of imitation ivory for pipe makers and restorers capable of tooling a stem from scratch. Although hesitant to promote a single business when there may be others using the same brand, I can’t find any, and the brand factor is vital because of the similarity of others that nevertheless possess serious basic differences. These characteristics include the use of polyester in those that are inferior for pipe use, leaving them weaker, less glossy when buffed and all-in-all not so close to the real thing that there might be a problem trying to transport an object made of this stuff through airport customs. To get around to the reluctant business plug, whatever the brand name is, it’s available at Vermont Freehand
The rods sold at that online business are offered in different diameters, the same as those used for traditional materials such as Ebonite. Vermont Freehand describes it as the finest available. It varies in price according to two grades, 1 and 2 where 1 is the better, and the diameter desired, from $3.60-$100. For example, the minimum 12mm diameter rod of Grade 2 is $3.60 compared to a 14mm rod of Grade 1, which is $7.20. The largest diameter of Grade 2 is 1.4” square at $28.80, and a 1.6” x 2.6” rectangle of Grade 1 is $100. Again, note the grains.
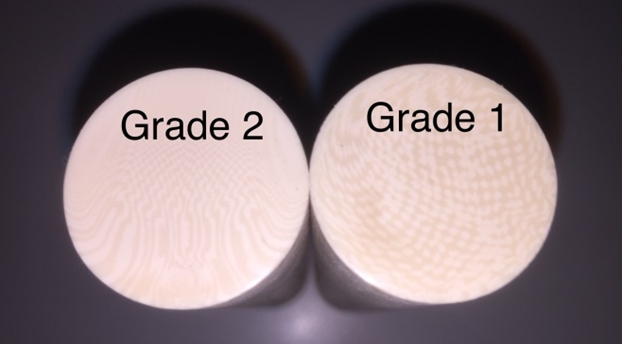
Imitation ivory stem rods courtesy Vermont Freehand
The Problems
In this case, the “problems” for the most part are really solutions to a greater crisis. Evolving international laws aimed at saving African and Asian elephant populations, devastated to the verge of extinction by poaching and unregulated exportation of tusks that are harvested for their great value, at the expense of elephant lives, have had unexpected and negative effects on the animals they are intended to protect. Uncooperative countries that I will not name here in the interest of avoiding geo-political argument and controversy have allowed poachers to capitalize on the increased value of ivory that resulted from the various embargo attempts.
Tougher and more restrictive bans are already being enforced to degrees that seem to have stabilized at least some elephant herds in Africa and Asia, and still more effective laws are being considered, notably in the United States and the European Union. The present laws, targeting buyers and sellers of ivory as well as art dealers and collectors, are expected to curb poaching still more.
Certain aspects of the laws have been met with resistance from art and personal rights advocates. The issues have to do with the age of the artworks, the years they were acquired and the sources, all of which create complexities for enforcement, to put it in the simplest terms that are anything but simple.
In 2016, the Obama Administration initiated a blanket ban on the importation of elephant ivory and almost all sales of ivory throughout the country. The very few exceptions include antiques that can be proven through a professional appraisal or a bill of sale to be at least 100 years old. Many ivory pipes fit that category. However, President Trump, undermining the Obama ban, directed the Fish and Wildlife Service to consider importation permits for sport-hunted elephant trophies from select African countries “on a case by case basis.” In other words, Trump has cleared the way for his rich cronies to bring elephant heads with their tusks intact home from safaris. This kind of favoritism, which was never announced publicly by the Trump Administration but rather via a Fish and Wildlife Service memo issued March 1, 2018, can’t possibly surprise anyone given Trump’s record since he assumed office.
Concerning imitation ivory of any kind, it is of more use to master artisans who can create a stem by hand or machine, again, rather than average or even skilled restorers. However, this resin-based imitation ivory sold by Vermont Freehand might be fashionable into small pieces suitable for filling chips and other damages to real ivory pipes – but only with serious practice based on what I’ve learned of its physical makeup.
BONE AND HORN SCREW TENONS
The good news is that bone and horn screw tenons, which can be made from the calcified skeletal remains of animals such as cows and deer, are not in short supply. To be sure, there are other sources, but J.H. Lowe, for example, offers “a multitude of styles and sizes” in assorted 12-packs for $28.90 – and you know what you’re getting compared to online auction sites that tend to be clueless as to the importance of the various elements of importance in measuring the correct size. Another plus when ordering screw tenons from an actual pipe supply store is that they are new. Here is a motley collection of bone screw tenons said to be antiques courtesy of Worthpoint.
 Without impugning the integrity of the seller of those screw tenons, if they are antiques, they represent a pristine collection of unused specimens. I’ll take this opportunity to emphasize that, although I am committed to using only the original materials for antique and extreme vintage pipe restorations, that devotion does not require any replacement parts to be as old as the pipe I’m refurbishing. A brand new screw tenon or anything else, so long as it’s the same substance as the one with which the pipe came, is fine with me, and I’m planning on stocking up on assorted sizes, styles and shapes of everything I can find in new condition. Still, I have a small collection of antique and vintage tenons, stems, bands, an endcap and one shank extension, upon which I look forward to expanding. No doubt the day will come for each to find its wizened old pipe mate, and I anticipate the matches, at the risk of sounding daft, with somewhat of a sense of excitement. Call me old-fashioned or sentimental or a codger or what you will, but there it is.

The two on the left are Redmanol.
 The Problems
I realize I’ve overstepped the subject of bone tenon screws a bit in this section, for reasons of expansion on the greater subject, but now to address the problems with those parts. Again, I stated that the bone tenons are in no immediate danger of extinction. I should have qualified that assertion by noting in most cases. Consider the photo of my antique bone screws above. I have no doubt that various suppliers of newly made old-style supplies such as these screws indeed have considerable varieties on hand, but the fact remains, many were custom made as long as a century or more in the past. As the venerable Mr. Norwood pointed out, nobody is stepping up to produce such oddities as bone screws to order. Of course, artisans able to do so can and will be found – but the task won’t be easy, as Part 2 of my series will show.
Then there are several other problems, I’ll call them: one, fitting a bone screw requires matching it to the stem and shank. In most cases, the measurements for each are different, not to mention the style of the tenon screw. Just whipping out the calipers and determining the approximate diameters of the two ends and the optimum length of the whole may not be enough. Two, bone is inherently soft and brittle, and therefore breaks with the least provocation. If you’re lucky, the original broken tenon will be available, but if so, it’s likely to be in bits and pieces, some powdered. It follows that matching can be problematic. Three – and this isn’t being persnickety – adding to all of the above obstacles is the likelihood, not possibility, that re-threading the stem and/or shank into which each end of the bone tenon screws will be necessary. To be blunt, not everyone is up to any or all of these tasks.
To sum up, the more than potential need for someone specializing in bone tenon repair will become mandatory.
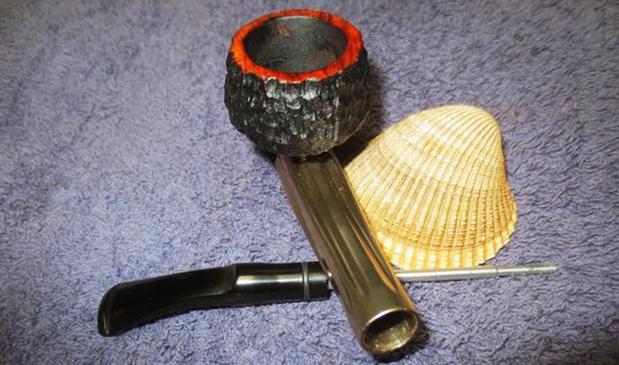
METAL SYSTEM PIPES
Arguably the most fascinating coincidence in the history of pipe making was the introduction in a single year of two brands of an altogether new kind of system pipe. The year was 1936, and the inventors were Frederick K. Kirsten, a German-born emigrant to the U.S., and Kenly C. Bugg, a native of Indiana. Both of them were engineers and prolific inventors with great numbers of diverse patents, and each chose aluminum for the frame, because of its light weight and rapid heat dispersion, as well as screw-on briar bowls. Otherwise, their designs were quite different Kirsten’s pipes are more box-like while Bugg’s are sleeker and more cylindrical.
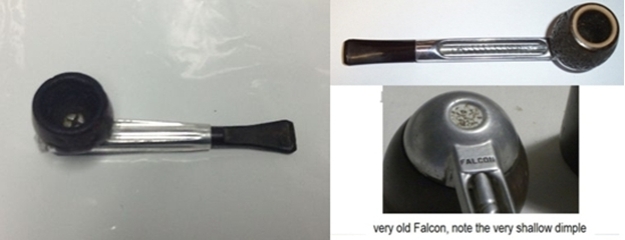
1930s Kirsten courtesy Pinterest and “very old” Falcon courtesy Smoking Metal
The basic systems – the details of which I will omit – differ, also, but suffice it to say, Kirsten’s was more complex while Bugg’s was simpler, using a moisture trap beneath the bowl.
Which man committed his plans to paper and created a prototype is moot. Kirsten had the presence of mind to begin manufacture and sale of his pipes the same year, applied for the patent in 1937 and received his grant with US Patent No. D112, 701 on December 27, 1938. Bugg, on the other hand, sat on his invention, not selling his first pipes until 1940 and receiving US Patent No. 142,280 on August 21, 1945. Kirsten, therefore, is generally credited with the invention of the metal system pipe despite the uncertainty of the exact date of the metal system pipe’s conception and in whose mind it occurred,
I have included the Patents for both for your enjoyment should you wish to read them (the Kirsten first followed by the Bugg).


The transition of production of the great American original Falcon pipes to Great Britain began in 1961, when production started there. In 1968, U.S. production of Falcon pipes was transferred altogether to Falcon Pipes Ltd. (also known as Falcon House Group) in Great Britain, which still later became the Merton and Falcon Co. The Falcon Pipe Group now runs the operation, as far as I can tell. Despite the convoluted name changes, Falcon pipes have maintained their quality since Kenly Bugg made the first one. By the way, to clarify a variation that began to annoy me, there is no second e in Kenly, despite frequent errors. See patent signature of inventor.
Everything so far in the category of metal pipes has been to explain the genesis of an explosion in brands and systems of metal pipes with bowls made of wood, meerschaum and the sundry Bakelite materials, to name some. The exact number of Falcon pipes sold worldwide to date is difficult to pin down, but two numbers stand out: by 1954, six million of them had been sold in the U.S. alone, and starting seven years later, from between 1961 and 1974, 16 million more were sold by the oft-switching producers in England to pipers around the world, excluding the U.S. This leads us on a nice, ordered path to…
The Problems
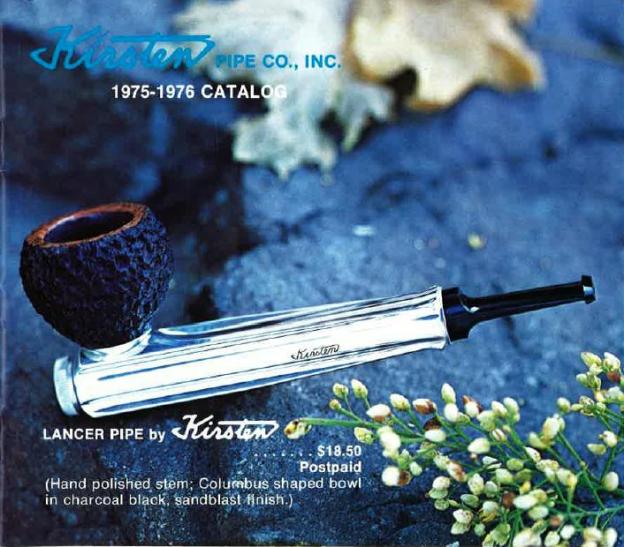
Rest easily, Kirstens and Falcons are in no danger of running out of replacement bowls and even other parts as both companies remain in business and don’t appear to have plans to stop. Replacements or new screw-in bowls are available directly from Kirsten Pipes or the Falcon Pipe Group’s distributors, such as the Arango Cigar Co. in the U.S. This is not to mention the numerous artisans who make bowls that fit either or both, including Don Warren Pipes for Kirsten bowls and DGE Handmade Pipes and Manly Things (I didn’t make up the name, so don’t shoot the messenger) for Falcon and/or Dr. Grabow Viking bowls, which are interchangeable.
That reassurance made, the rest will be brief and simple in its awfulness. I’m not about to go through the entire A-Z Index at Smoking Metal’s UK website to locate, count and determine all of the brands – known and unidentified – of metal system pipes identified and catalogued so far by Tony Pringle. Like a French gentleman whose first name is Richard but is known to countless pipe smokers as Pipephil (who retired a few years ago), Tony works alone and in his spare time, making his accomplishment a monumental feat even with the sparse contributions of readers.
All I need to point out is that many – no, more likely the vast majority – of the metal pipes listed and shown at Smoking Metal were manufactured without even a moment’s thought about compatibility with others of their kind. In blatant terms, this means they can’t be replaced without making one from scratch. And who is going to do that?
I’d say that works as the one and only necessary dilemma with this category of scarcity.
CORNCOB INSERTS FOR BELOVED OLD ARISTOCOBS
The Aristocob was invented by Joseph W. Zarikta and assigned to the Al-Cobb Corporation (later Aristocob, Inc.) of Grand Haven, Michigan with U.S. Patent No. 3,292,639, granted just in time for Christmas 1966.

 Here is what the new-in-plastic case product looked like, complete with the aluminum frame, plastic stem and two cob inserts, courtesy Smoking Metal. (Filter possibly not included.)
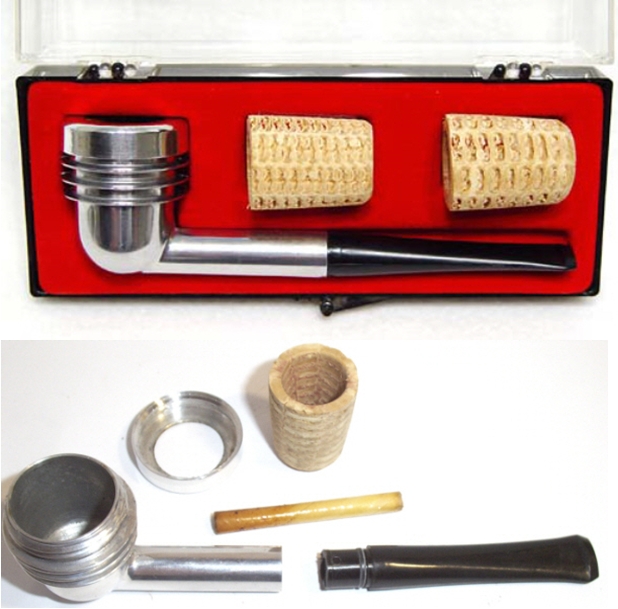
The Problems
Missouri Meerschaum took over manufacturing the Aristocob and its inserts in the mid-1970s. The best known maker of cob pipes discontinued the Aristocob at some point but continued manufacturing the inserts until 1983, when the endeavor became unprofitable.
While it is true that original Aristocob corncob inserts can still be found online, at one of the last sources in the astounding list at the end, for example, when they’re all gone, that will be the end of the real thing. The substitution of a custom-carved briar insert at the expense of the original cob is perhaps better for its durability in the lone case of the Aristocob. As far as I know, they are fashioned only by Steven LaVoice Jr. of Owl Pipes. I happen to know Steven’s work to be excellent after being compelled to use one of his traditional wood substitutes when I restored an Aristocob three years ago, about a year after Steven started business in Western Massachusetts.
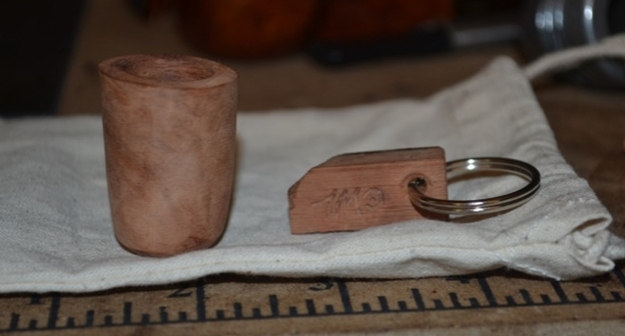
Briar insert from Owl Pipes, with a nice keychain included
Some cold-hearted pipers, hearing of the rising shortage of original corncob inserts for the Aristocob, may bid them good riddance or scoff, “So what!” I’ll answer that hypothetical question Those who continue to enjoy durable cob pipes know and appreciate the difference in taste afforded by the intended Aristocob insert. Any purists are left with one of these singular “art deco” smoking metal creations that’s rendered useless for them. Others can still buy a briar insert directly from Steven if the owner wishes to be rid of the short-lasting cob originals that I’m told become quite nasty the closer to their expiration they get, and thus avoid the intermediary restorer altogether. Steven makes different styles of inserts, one of which has the rough exterior reminiscent of real cob. (Being a bit obsessive-compulsive, I polished the one shown above, which sold to a happy old-timer.) And the cost of a briar insert, which is five times greater than the $5 I paid at a garage sale for the worn old Aristocob I restored, can be a one-time expense.
The critical fact remains, though, that nobody seems to be stepping up to make quality (non-flammable) cob inserts with a coating to harden them, and therefore, when Steven is no longer around “to do the work” with briar, remaining Aristocobs will be tossed in the trash or placed with nostalgia as heartless shells on shelves.
MEERSCHAUM PUSH-PULL FITTINGS
Now, here’s the most bizarre item on the list, and I hope it sparks English Parliamentary style chaos of furious, frenzied, fibrillating debate – but no fighting, please. I know that may be shameful of me, and I don’t care, because of the single and singular fact I will assert when I get to the proper Problems section. For now, a push-pull fitting is formed of two small pieces of polytetrafluoroethylene (Teflon) or a generic variation. Teflon is a polymer, or chemical compound of high molecular weight, discovered in 1938 by a new-hire at DuPont with a chemistry doctorate. Teflon, the specific combination of gases and other substances that formed by chance when the lucky chemist heated a canister a certain way by mishap, happens to be extremely resistant to solvents, acids, bases and heat, and hence corrosion and melting, and is therefore perfect for the most part to join a meerschaum pipe shank to its stem. Of course, it has other uses and fascinating properties anyone so inclined can read about near the end of my sources. At its simplest, Teflon is a very fancy synthetic plastic.
The two parts are paired with one piece that screws into the shank opening and another into the stem. A push-pull fitting, in other words, acts as a special tenon on one side that screws or pushes into the other. Most of the time by far, the tenon part is installed in the opening of the stem and fits the shank part, but I’ve seen the process done in reverse, probably because that’s the way some restorer could make the two match up without drilling either the stem or shank opening. The use of push-pull fittings was a great innovation to protect the fragile meerschaum and also do away with bone and horn tenons that are just as easy to break
Here are two shots, one of a trio of “standard” push-pull fittings of slight difference in size, courtesy Royal Meerschaum, that costs $3.99 for the three-pack. The other is a screw-in stem for one of my pipes. Standard just means they can be pushed or twisted together rather than screwed and are also the general sizes for newer meerschaum pipes.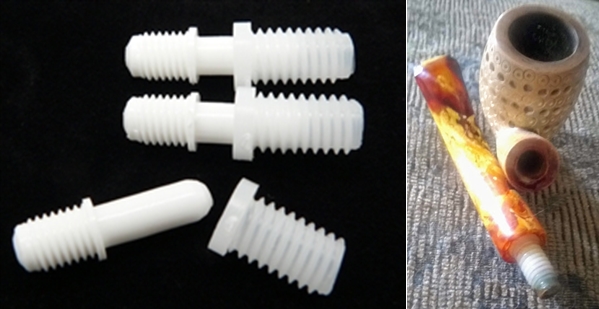 Note my Paktas billiard above with only the stem fitting that screws into the bare meerschaum shank. I’m always very careful unscrewing it!
The Problems
The single problem with these push-pull fittings is that they’re not hard to find in all of the typical sizes that are pretty much standardized today, but that means bupkis. The artisans who crafted meerschaum pipes in the old days – before push-pull fittings became popular in the 1970s – did everything themselves, including drilling the shank and stem however they pleased at the moment and depending on the size of the pipe. Ay, there’s the rub.
In this day and age where everything from furniture to motor vehicles is composed entirely or at the least more than half with cheap and readily available plastic, “real” or synthetic (think imitation Naugahyde), there’s no excuse for a lack of push-pull sets designed in enough sizes to accommodate older pipes. But there it is. Oh, they’re no doubt out there some place, but where? Norwoods Pipes and Walker Pipe Repair, again by way of examples, offer push-pull fittings, but (and no offense is intended to either of these fine pipe repair providers) if they have different sizes, they’re limited.
I sent the following very large lattice meerschaum stummel with no stem and a hole in the shank to Norwoods, which can provide almost any original replacement part, only to learn that the new Lucite stem was no problem, but a push-pull set that big was unavailable. A bone tenon screw was used instead for the same price, and that pipe with its new tenon and stem arrived in the mail soon after. In this case, I am quite pleased with the result, since I kept it for my own use and didn’t have to worry about any prospective buyer breaking the bone tenon and blaming me. That restoration will be the subject of the final part of this series.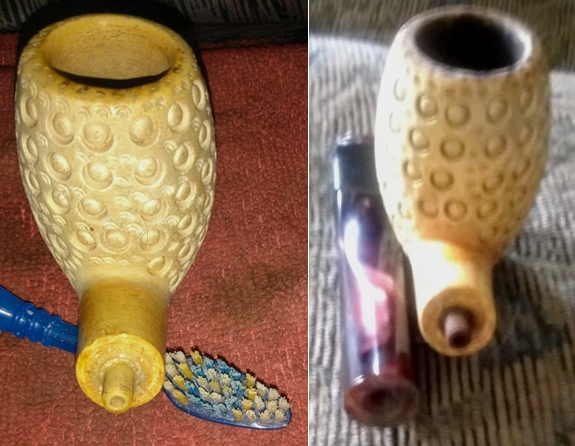
CONCLUSION
For now, I can continue to cobble together limited replacements of the various parts integral to the proper restoration of old pipes, and for those tasks requiring the dwindling repair services that exist, I can turn to them. I also know of a few artisans with the know-how to tool these small yet vital implements of restoration. Still, I have no doubt that within my lifetime the need “to do the work” myself will come. I can only hope practice will be enough…and I had better get to it.
SOURCES
http://norwoodspiperepair.com/index.html
https://patents.google.com/patent/US942699A/en?oq=942699
https://books.google.com/books?id=oYZGAQAAQBAJ&pg=PA6&lpg=PA6&dq=redmanol+chemical+products+founder&source=bl&ots=juthNFh-rW&sig=b9qO8plogjv6fj_u2TBjkdpIfCM&hl=en&sa=X&ved=0ahUKEwj-gNj4h9nNAhUM9YMKHXKjBwMQ6AEINDAE#v=onepage&q=redmanol%20chemical%20products%20founder&f=false, Phenolic Resins Technology Handbook, by NPCS Board of Consultants and Engineers, 2017, excerpted by permission
https://books.google.com/books?id=nTs8AQAAMAAJ&pg=PA144&lpg=PA144&dq=redmanol+bakelite+infringement+judgment&source=bl&ots=TCel6fmccJ&sig=ehZijKCRrQSs- RnL6xiDbVA5aKM&hl=en&sa=X&ved=0ahUKEwi39veundvNAhUT32MKHbeiCJwQ6AEIHDAA#v=onepage&q=redmanol%20bakelite%20infringement%20judgment&f=false Factory and Industrial Management, Vol. LXIV, No. 3, August 1922, excerpted by permission (p.144)
https://books.google.com/books?id=11FHAQAAMAAJ&pg=PA816&dq=in+search+of+the+man+made+amber+redmanol&hl=en&sa=X&ved=0ahUKEwis5OvgmNvNAhVk0oMKHYveA6sQ6AEIIzAB#v=onepage&q=in%20search%20of%20the%20man%20made%20amber%20redmanol&f=false Compton’s Pictured Encyclopedia, Vol. 2, excerpted by permission (p. 818)
https://en.wikipedia.org/wiki/Bakelite
https://rebornpipes.com/2016/07/05/the-scintillating-antique-kbb-redmanol-pipe/
http://www.jhlowe.com/bits-bakelite.htm
https://rebornpipes.com/2013/10/14/louis-blumfeld-1901-bbb-bent-billiard-by-james-gilliam-of-jsecpipes-com/comment-page-1/#comment-23486
https://www.minerals.net/gemstone/amber_gemstone.aspx
http://mentalfloss.com/article/73608/15-clear-facts-about-amber
https://www.amazon.com/REPLACEMENT-TOBACCO-STEMS-AMBER-STRAIGHT/dp/B01HZU8NBU
https://www.amazon.com/REPLACEMENT-TOBACCO-STEMS-STRAIGHT-AMBER/dp/B01HZU7M94
https://leta.st/blog/2016/07/history-of-russian-amber-1/
https://en.wikipedia.org/wiki/Baltic_amber
https://www.thefreedictionary.com/amberoid
https://www.shutterstock.com/search/amberoid
http://www.uniclectica.com/conserva/ivory1.html
https://www.washingtonpost.com/news/energy-environment/wp/2016/06/02/its-final-selling-just-about-any-item-containing-elephant-ivory-is-a-crime-in-the-u-s/?utm_term=.fe4c2ac312fb
https://www.npr.org/sections/thetwo-way/2018/03/06/591209422/trump-administration-quietly-decides-again-to-allow-elephant-trophy-imports
https://www.sciencehistory.org/distillations/magazine/celluloid-the-eternal-substitute
http://vermontfreehand.com/product/imitation-ivory/
https://www.amazon.com/ARVORIN-PLUS-Imitation-Substitute-Material/dp/B0755RG32T
https://www.chicagotribune.com/news/ct-xpm-2002-09-22-0209220243-story.html
https://www.dictionary.com/browse/casein
https://www2.palomar.edu/users/warmstrong/pljan99.htm https://www.ebay.com/itm/Antique-BONE-tenons-88-PIECES-Lot-of-Assorted-Sizes-Victorian-Vintage-pipe-/202297224337
http://www.jhlowe.com/misc-items.htm
http://www.smokingmetal.co.uk/pipe.php?page=56
http://www.kirstenpipe.com/pipes.html
https://www.etsy.com/shop/DonWarrenPipes?section_id=22062561
http://www.musiccitymarketing.com/cart_catalog_search.cfm
https://www.dgehandmadepipes.com/catalog/replacement-falconviking-bowls
https://www.ebay.com/itm/VINTAGE-NOS-ARISTOCOB-REFILL-COB-BOWLS-3-PER-BOX-ESTATE-PIPE-ALUMINUM-METAL-NOS/323553620046?hash=item4b554c704e:g:HGYAAOSwlHJbOmP0:rk:2:pf:0
https://www.owlpipes.com/product-page/briar-aristocob-inserts
http://www.jhlowe.com/misc-items.htm https://pipedia.org/wiki/Kirsten_Pipe_Company
https://pipedia.org/wiki/Falcon
http://www.smokingmetal.co.uk/pipe.php?page=366
https://www.markwaterpumps.limited/falcon-pipes-aluminium-die-casting-specialist-keeps-traditional-product-alive/
https://www.paykocimports.com/plastic-tenon-screw-set-3-pack/
https://en.wikipedia.org/wiki/Polymer
https://en.wikipedia.org/wiki/Fluoropolymer
http://www.royalmeerschaumpipes.com/Regular-Stem-Push-Pull-Fittings-p/sft-3.htm
http://www.walkerpiperepair.com/html/pipe_repairs.html
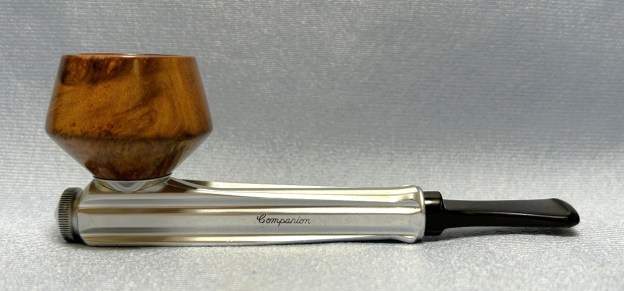
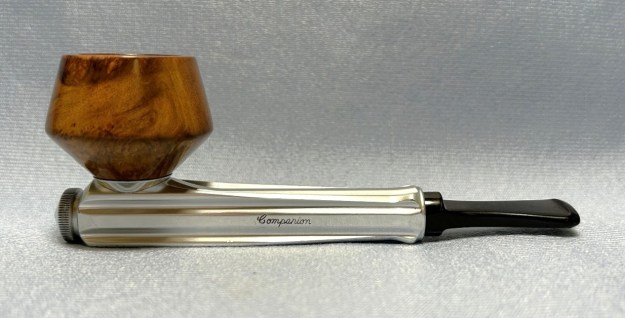
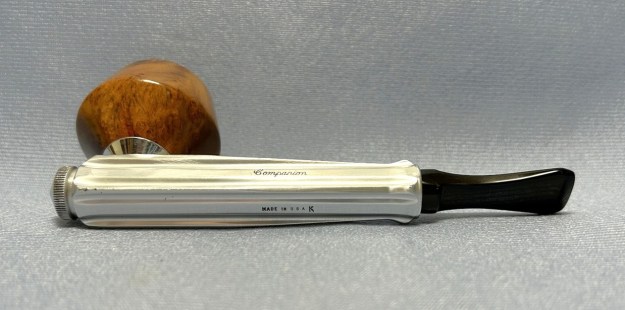
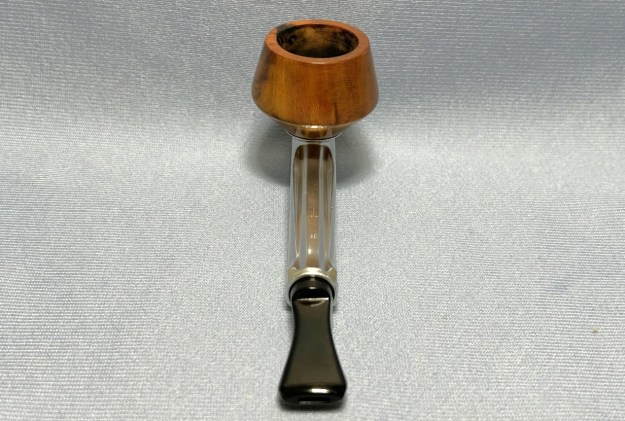
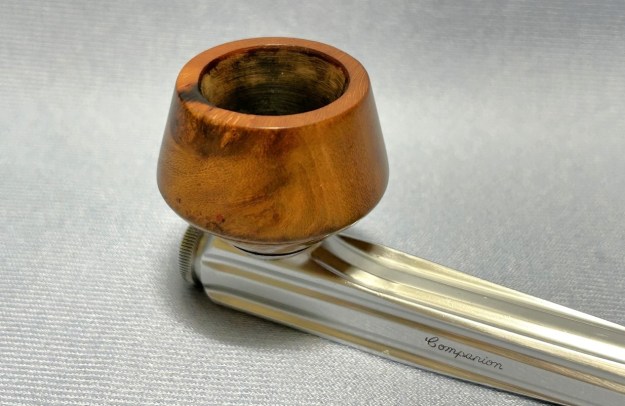
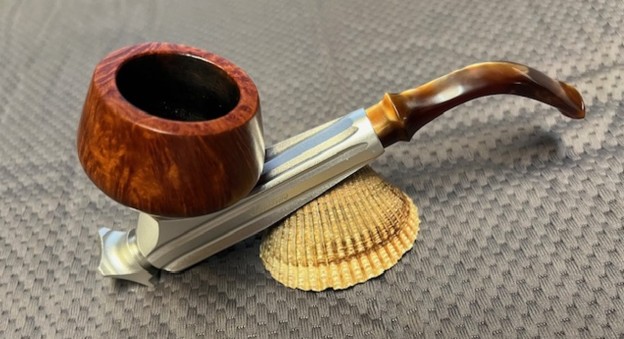
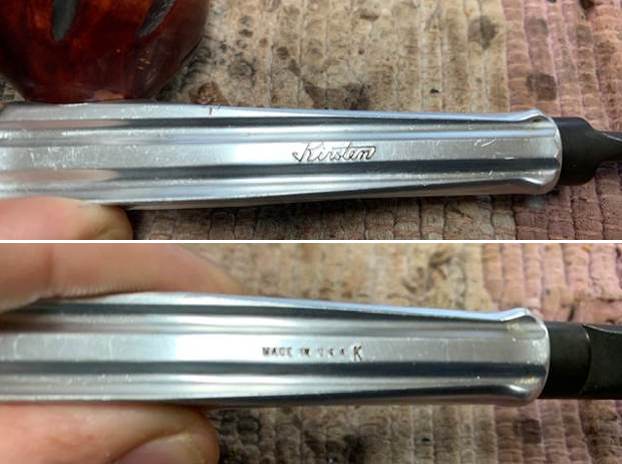
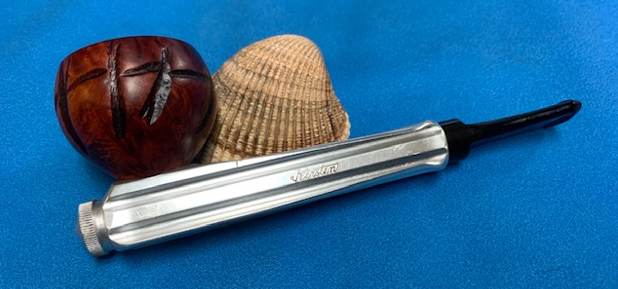
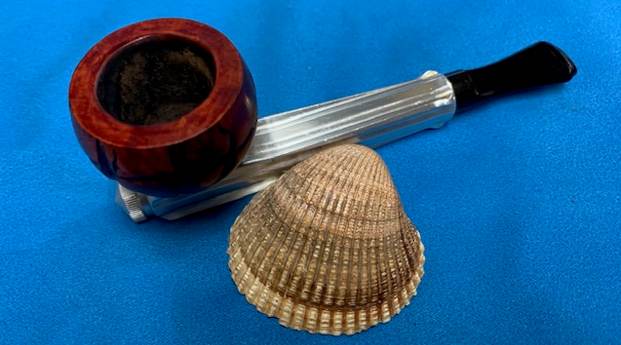
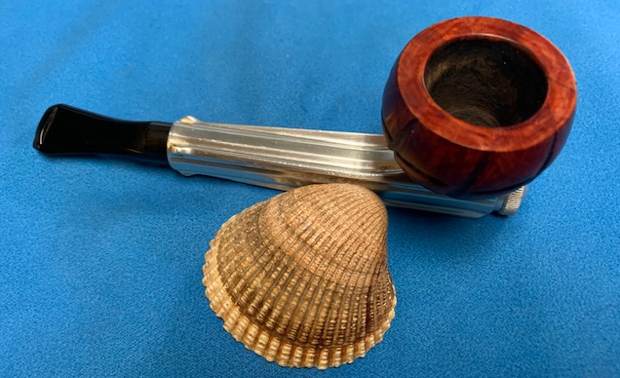
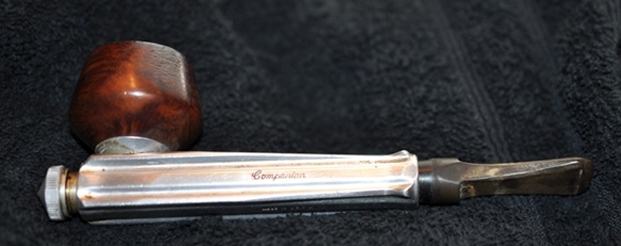
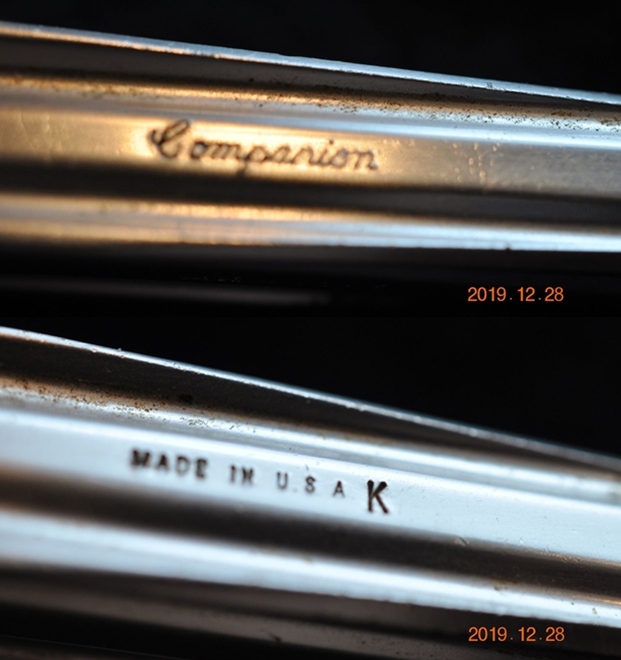
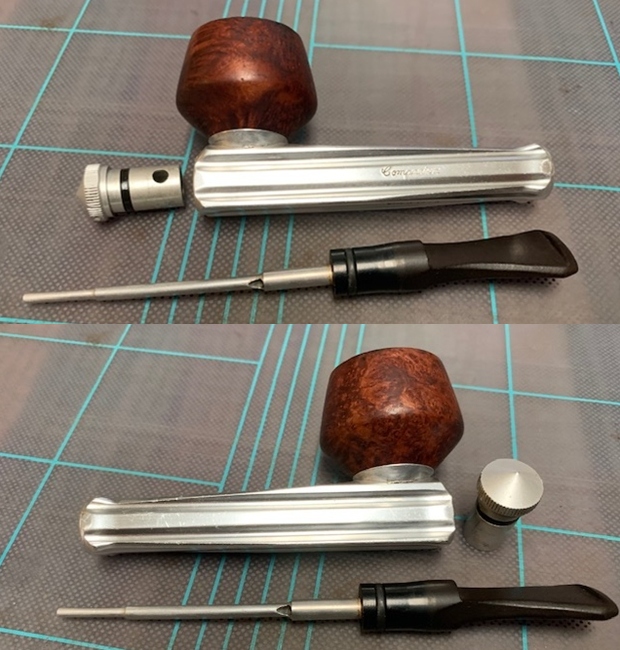
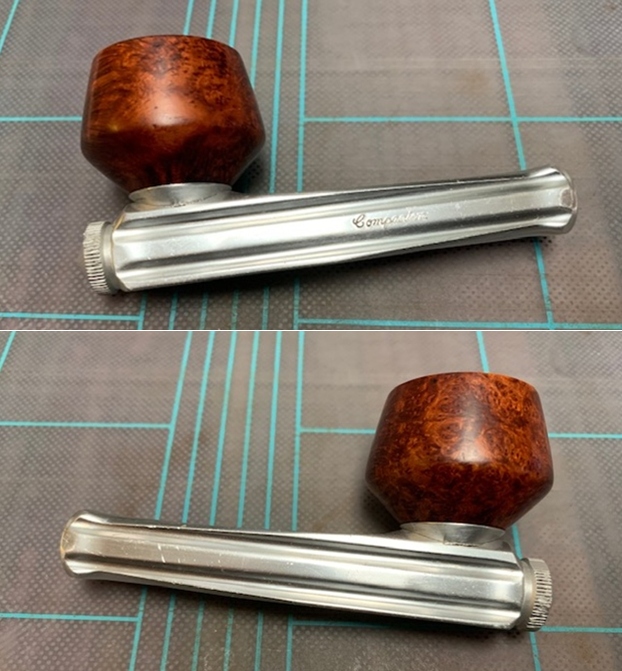
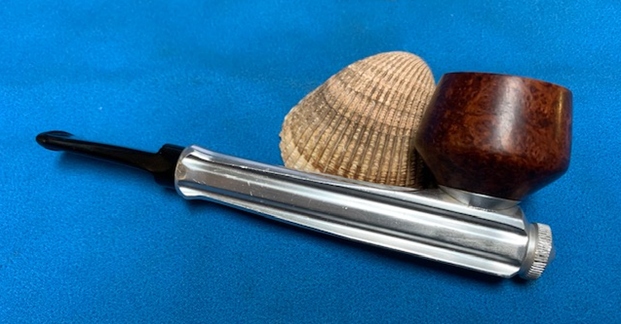
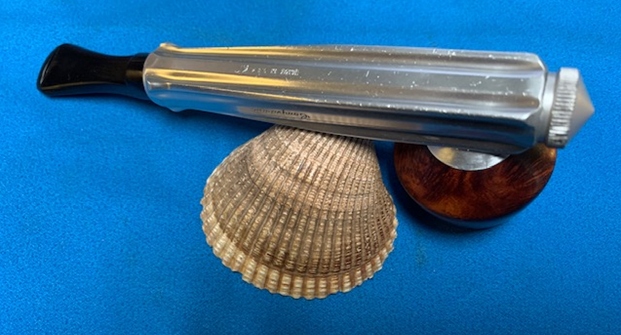
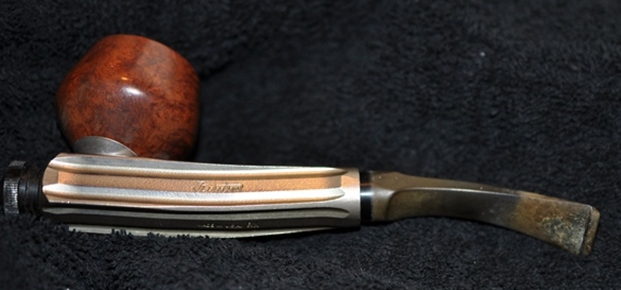
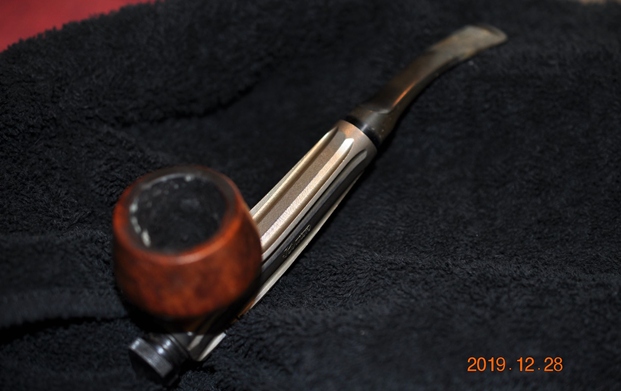
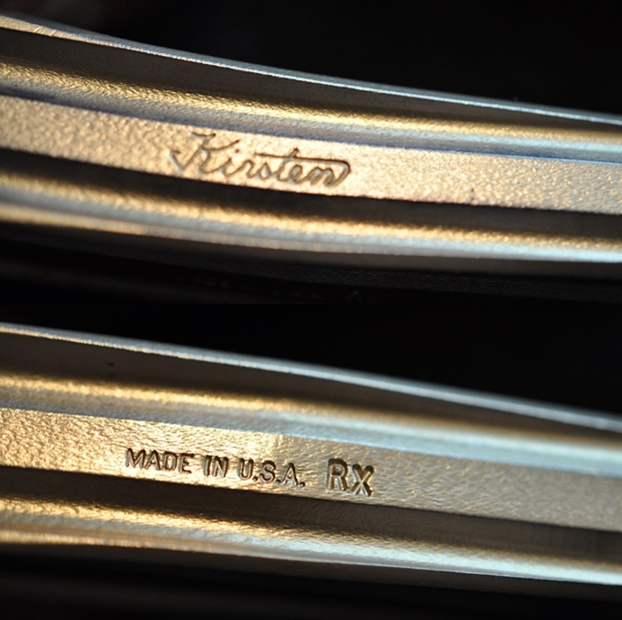
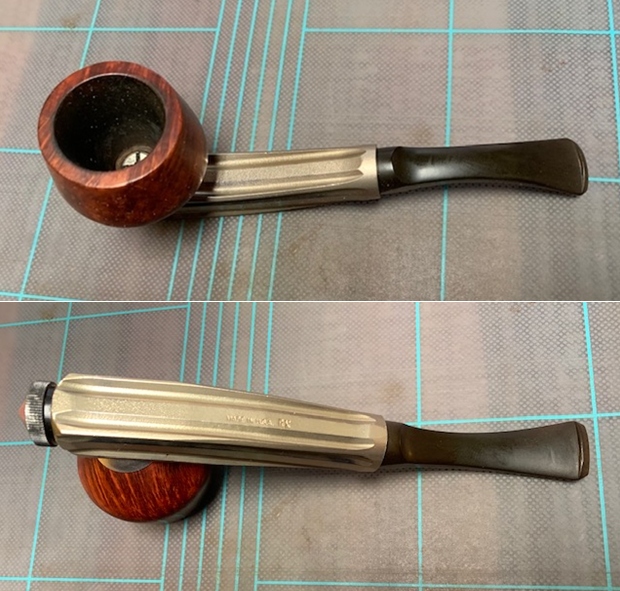
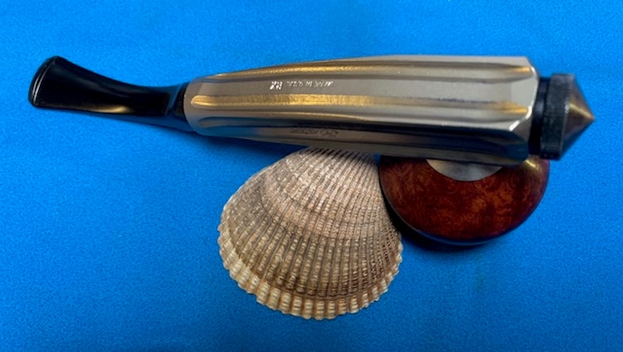
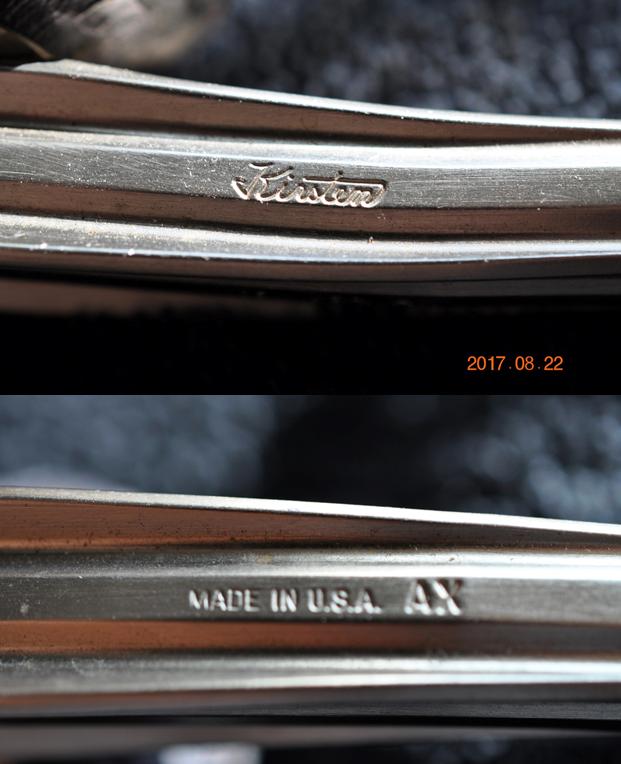
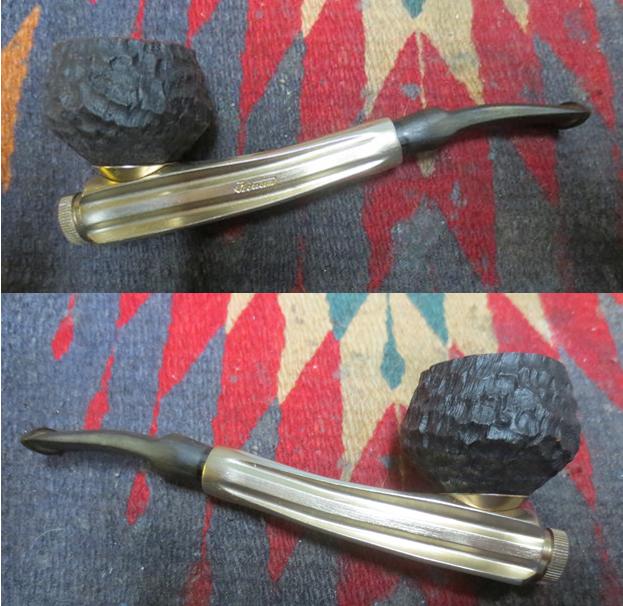
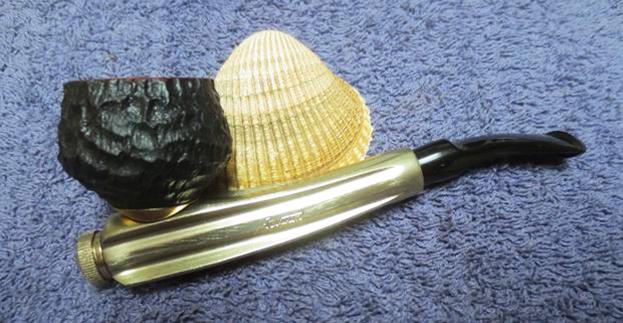
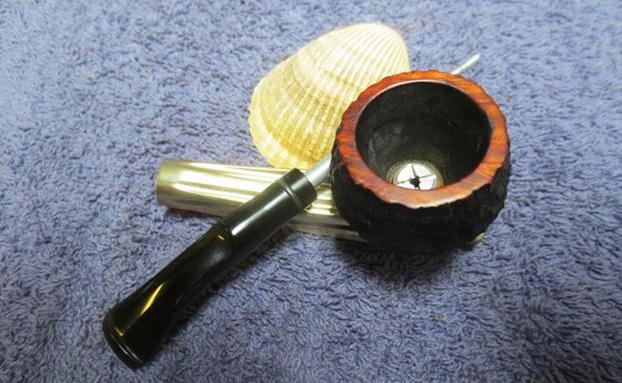
 This pipe has some markings. Interestingly, the name Kirsten is not one of them, but this is unquestionably a Kirsten pipe. On the left side of the aluminum body is the word, Companion. On the underside of the body are the words, Made in U.S.A. – next to that is the shape letter, K.
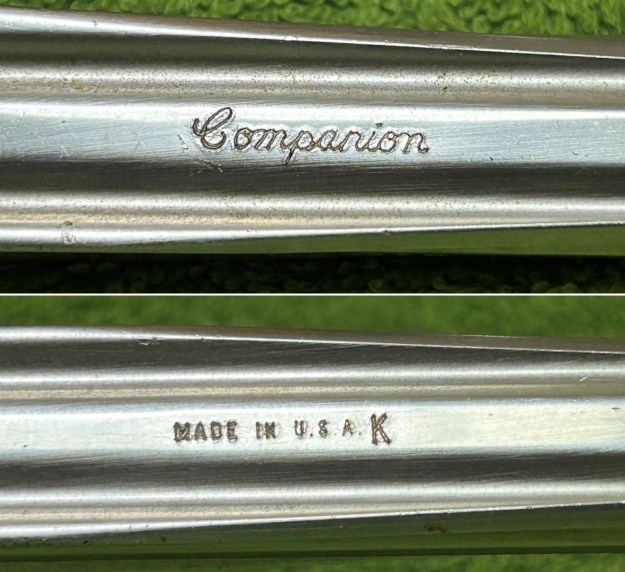 Kirsten pipes have a long and interesting history. Naturally, Pipedia has a long article on this, but, in fact, that information comes from the fascinating Smoking Metal website. I encourage you to read the various articles they have on Kirstens.
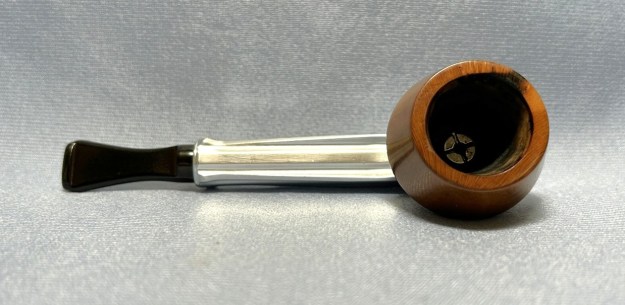
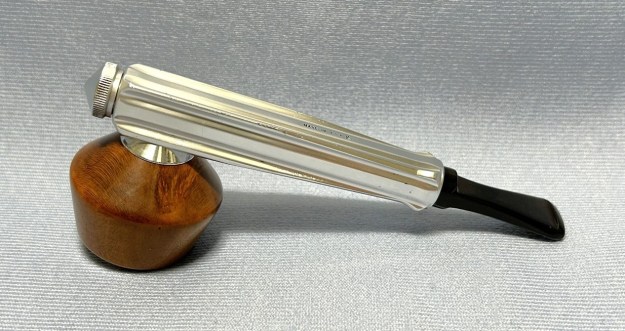
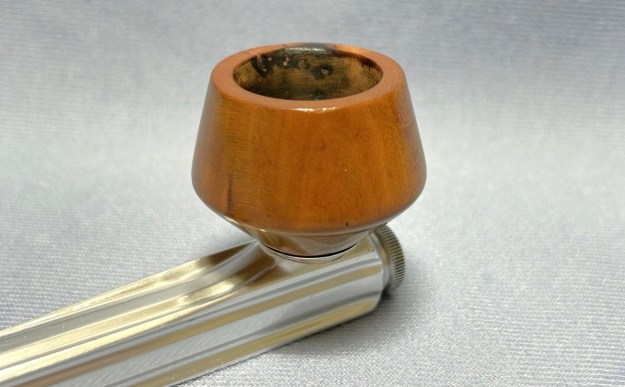
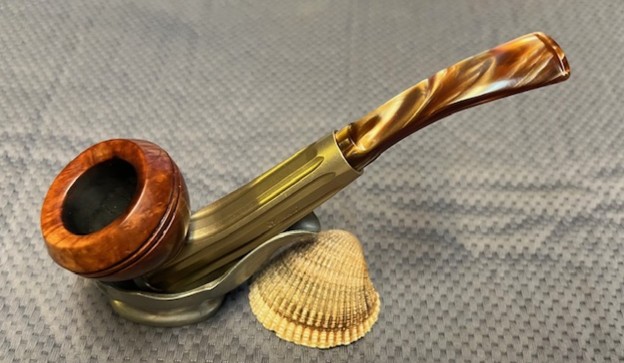
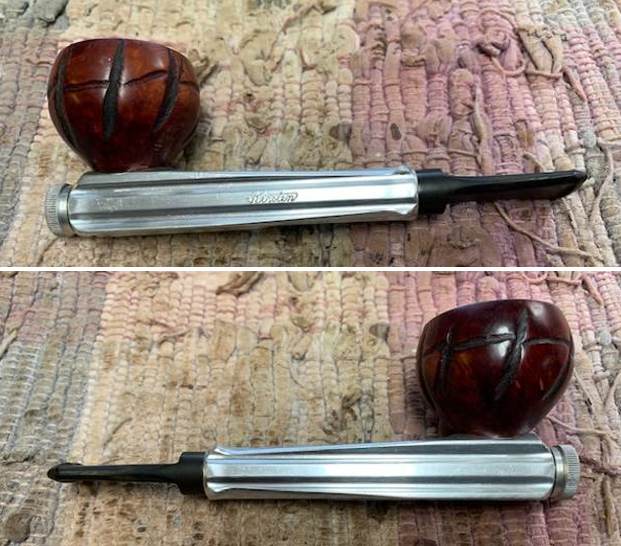
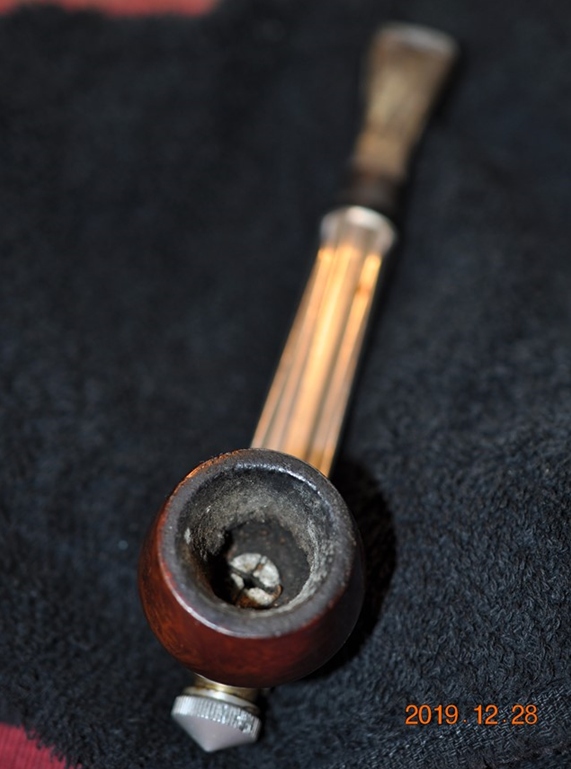
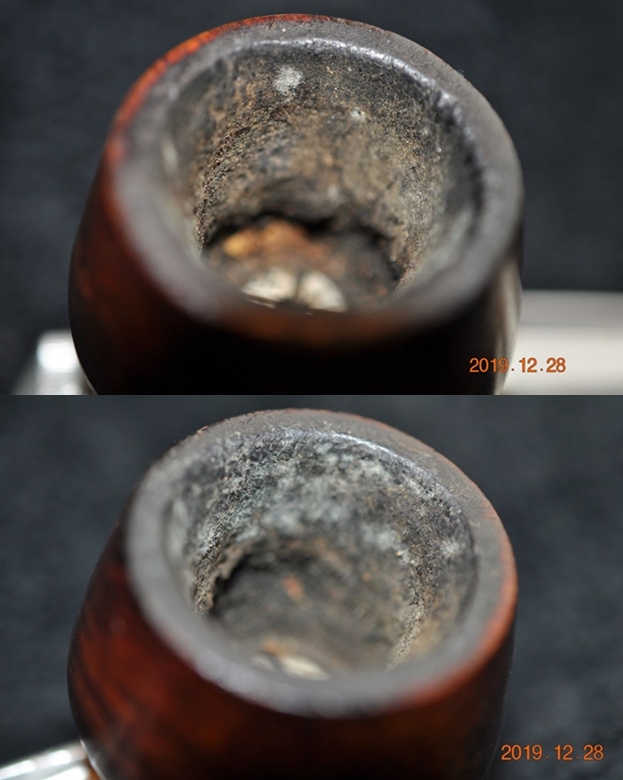
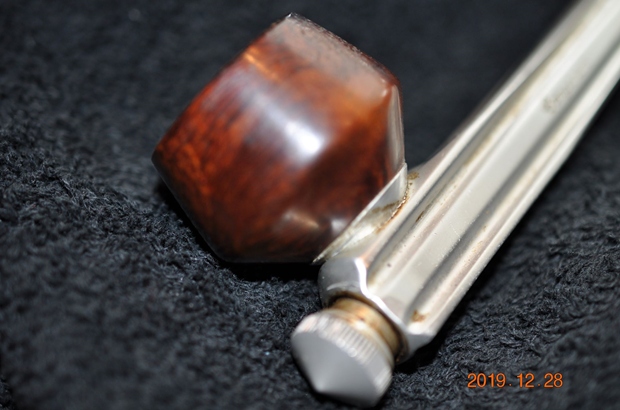
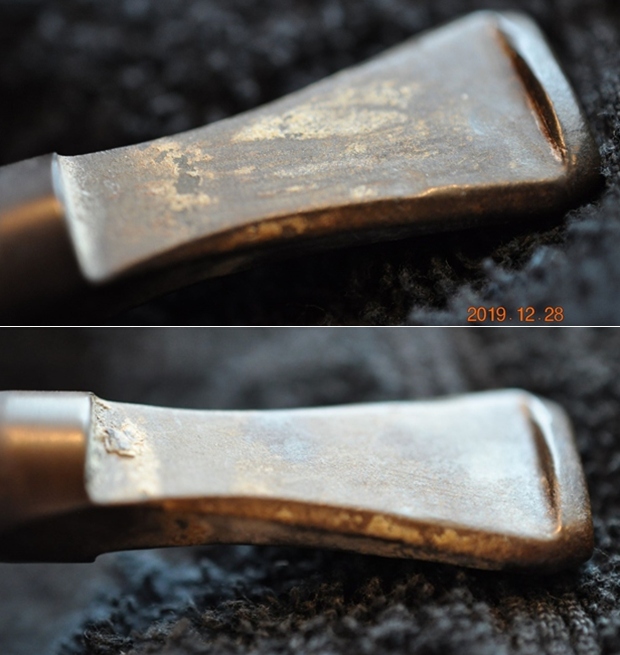
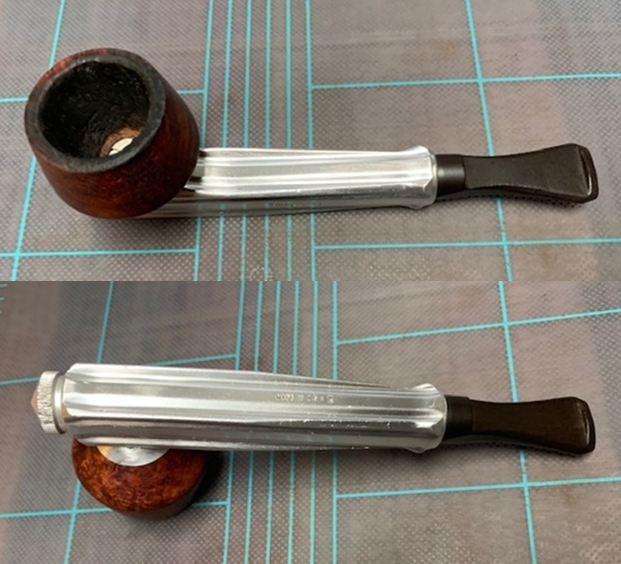
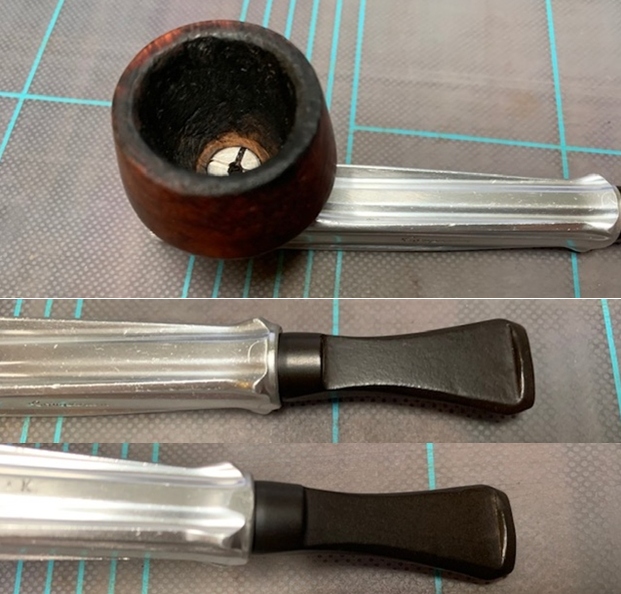
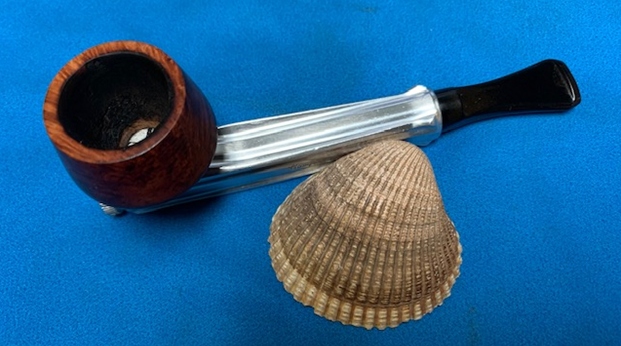
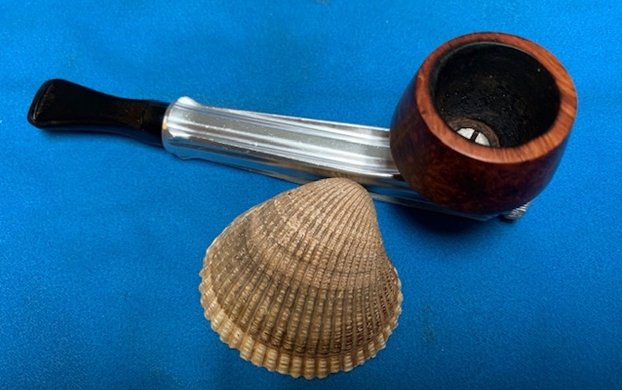
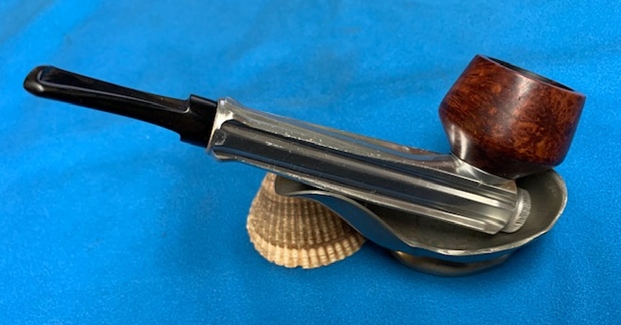
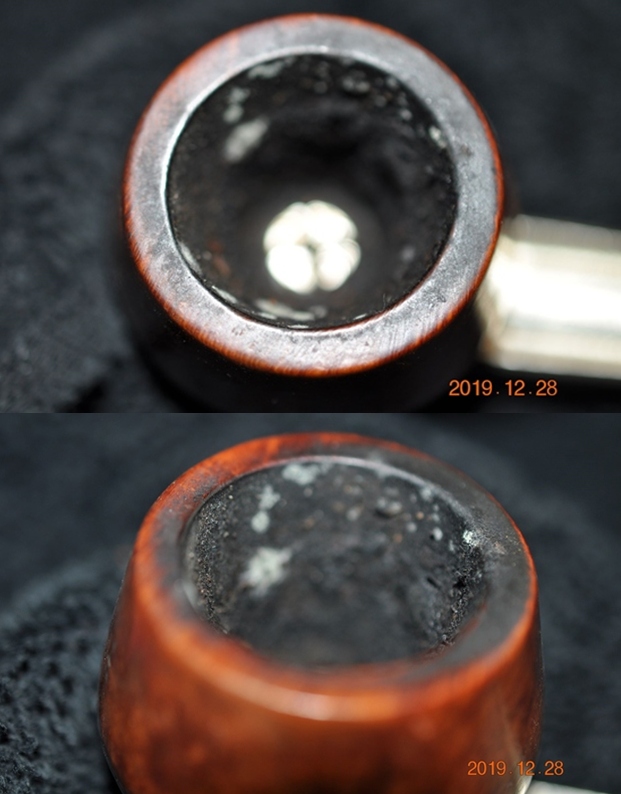
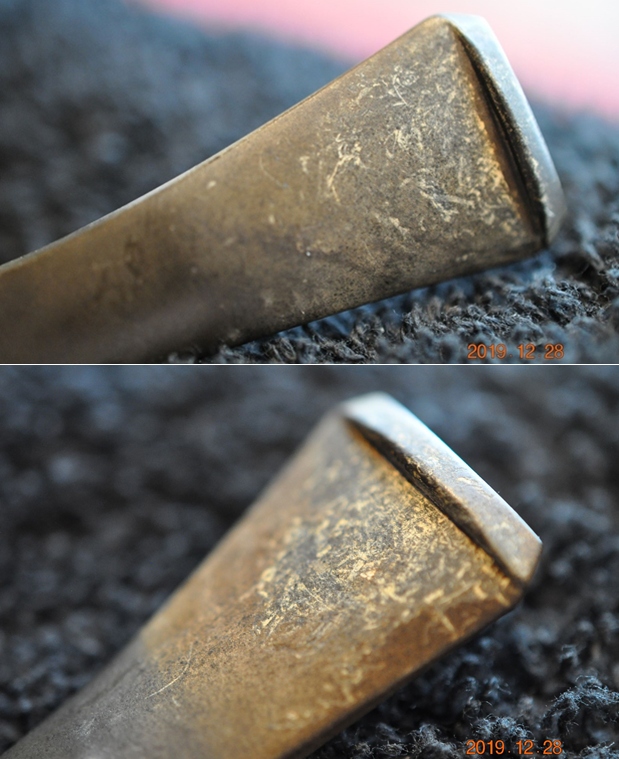
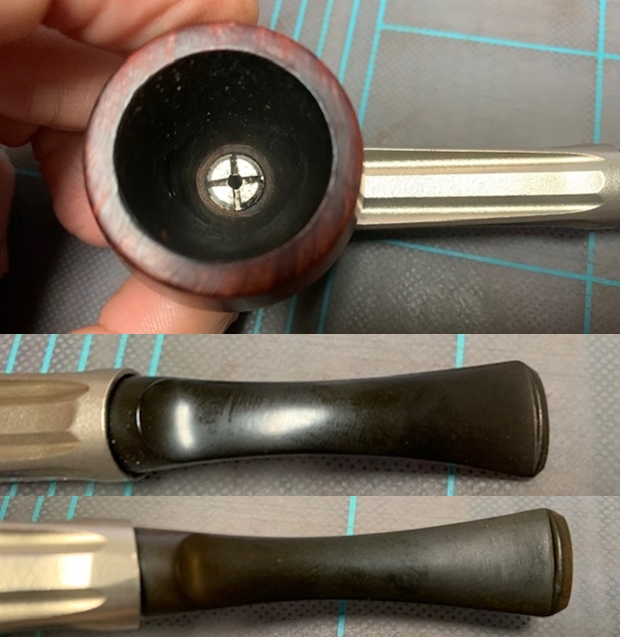
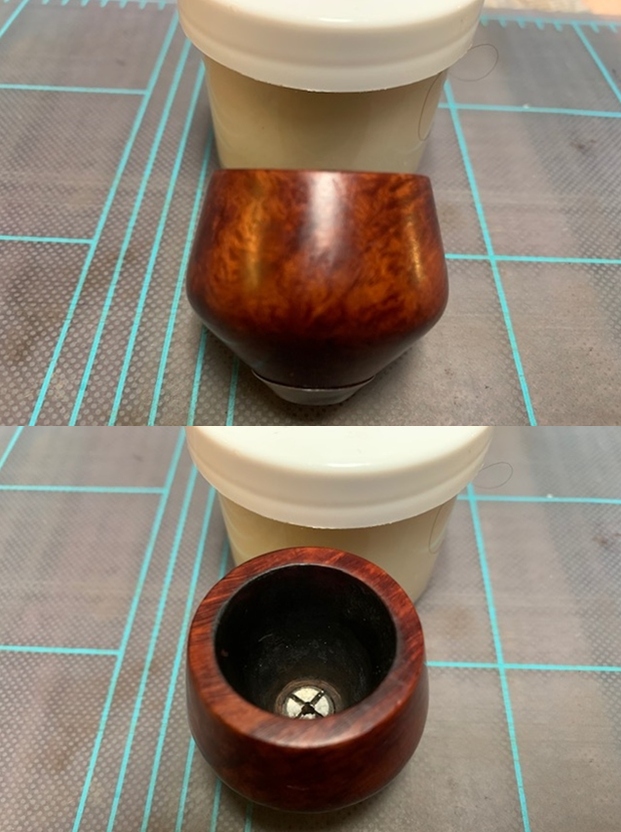
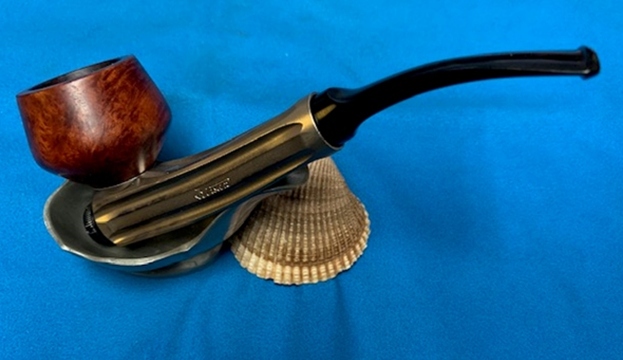
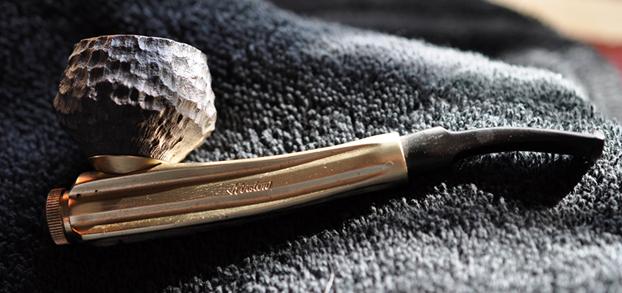
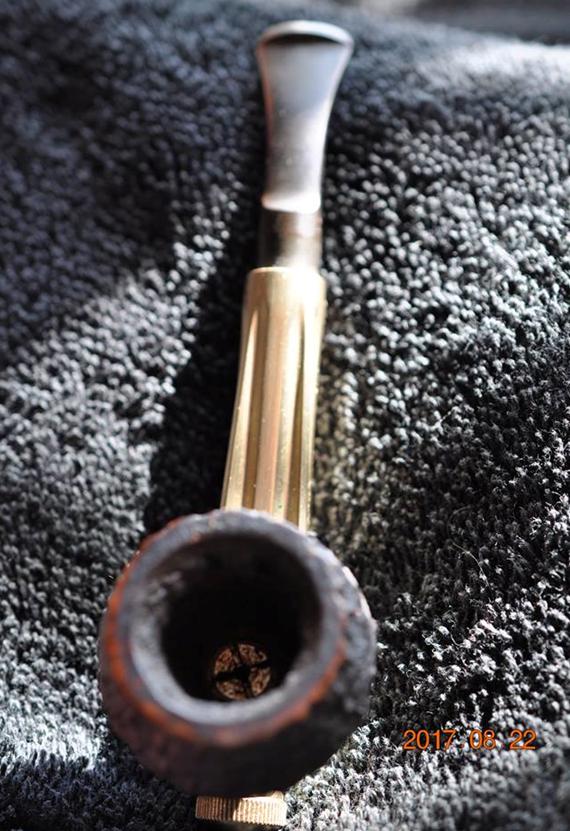
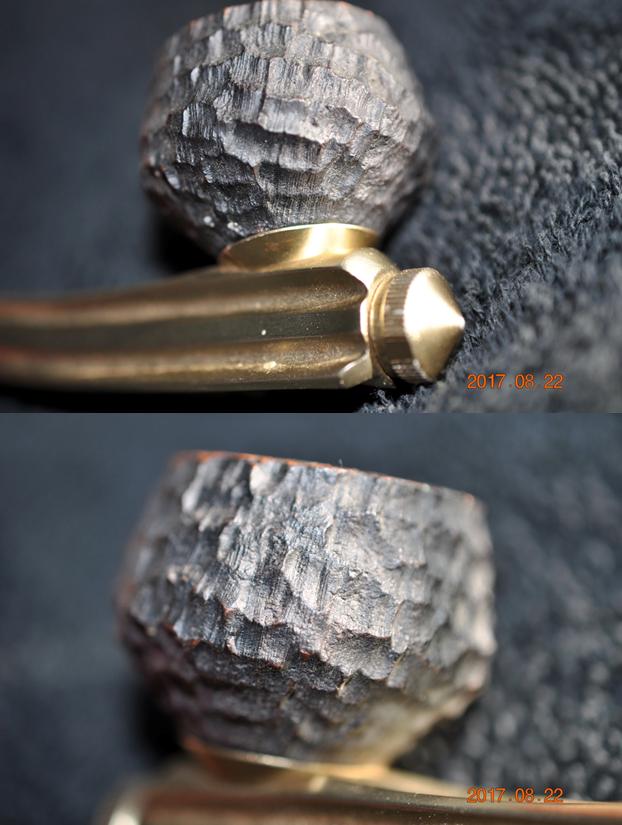
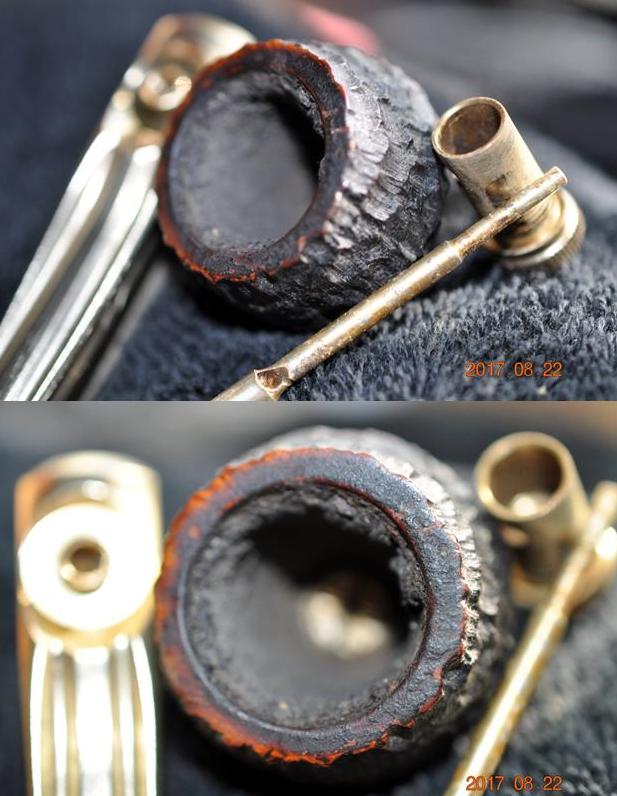
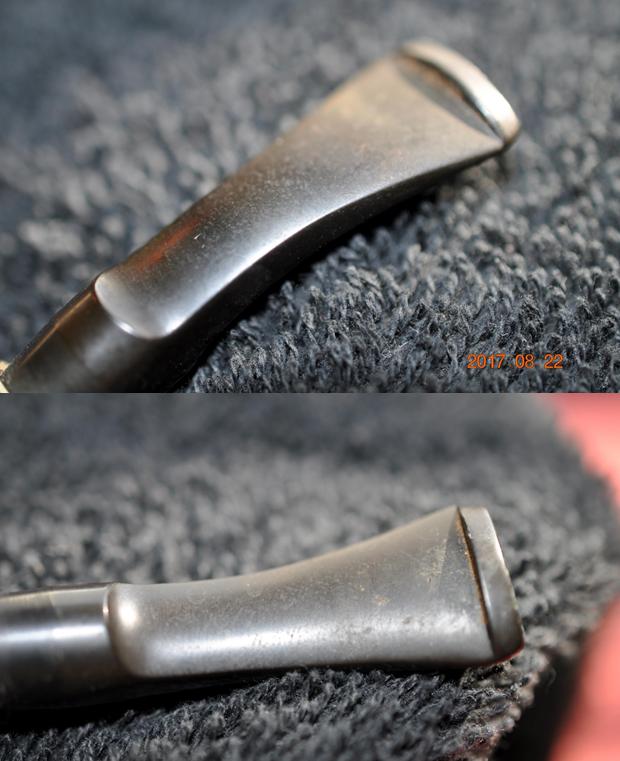
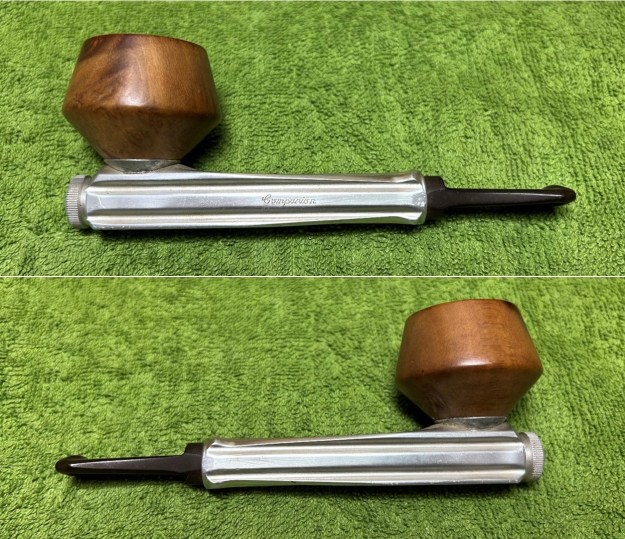
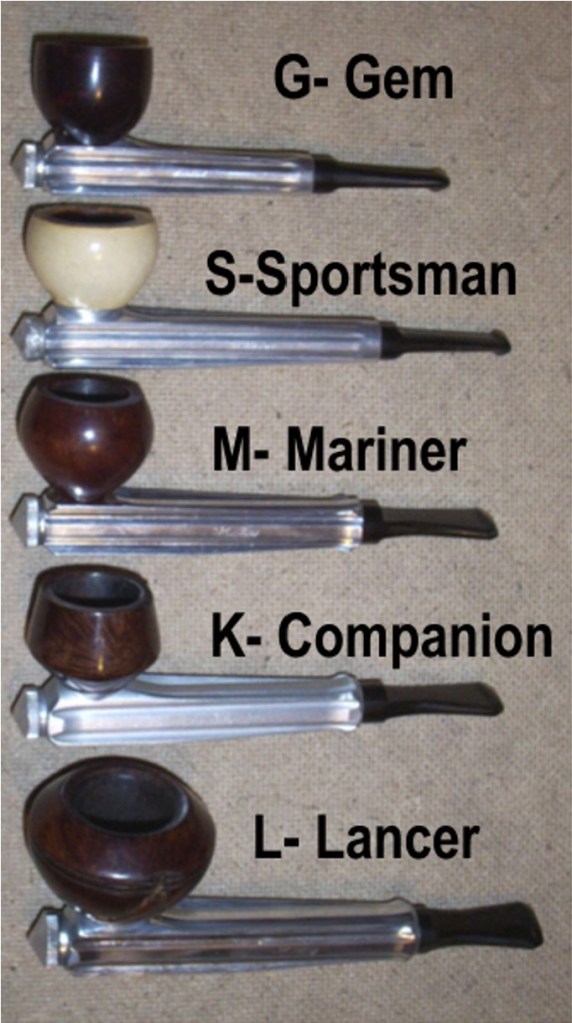 Let’s examine the pipe a bit. The aluminum is in decent shape – no major dents or scratches. There are merely micro-scratches, but no big deal. Similarly, the stem was in really nice shape. Only very minor tooth wear. Little oxidation and calcification. However, the briar bowl did have some issues. It had some cake in the bowl and was fairly dirty. The main problem was a significant burn on the rim. I’d have to take a closer look at that.
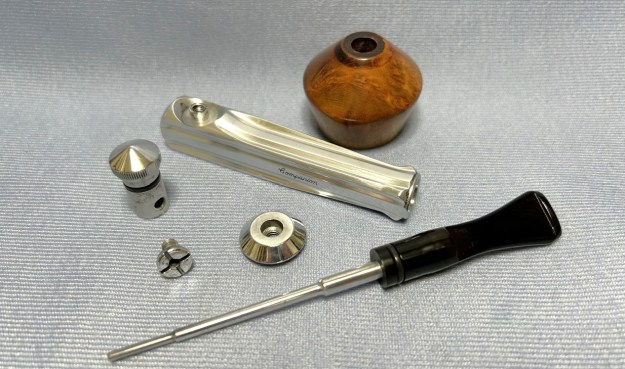
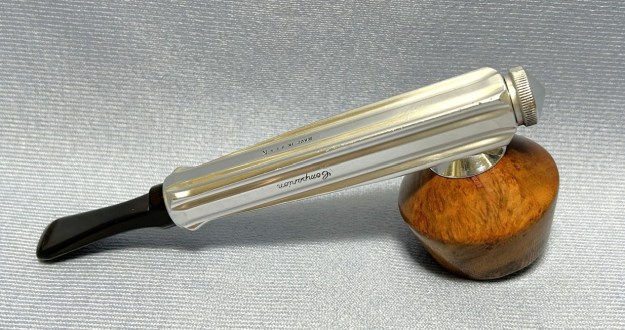
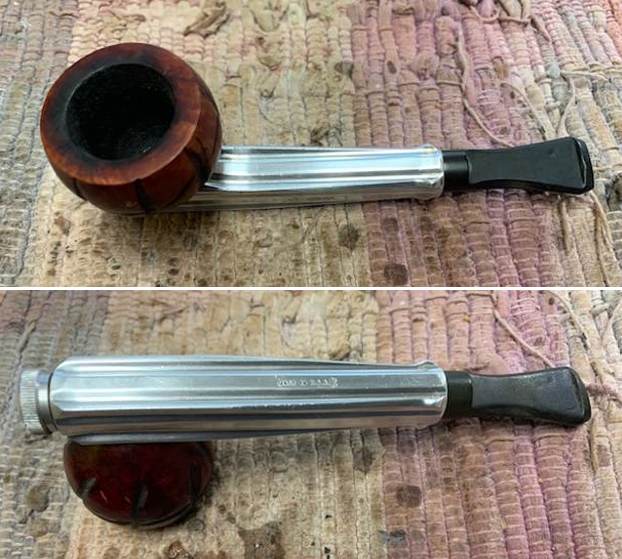
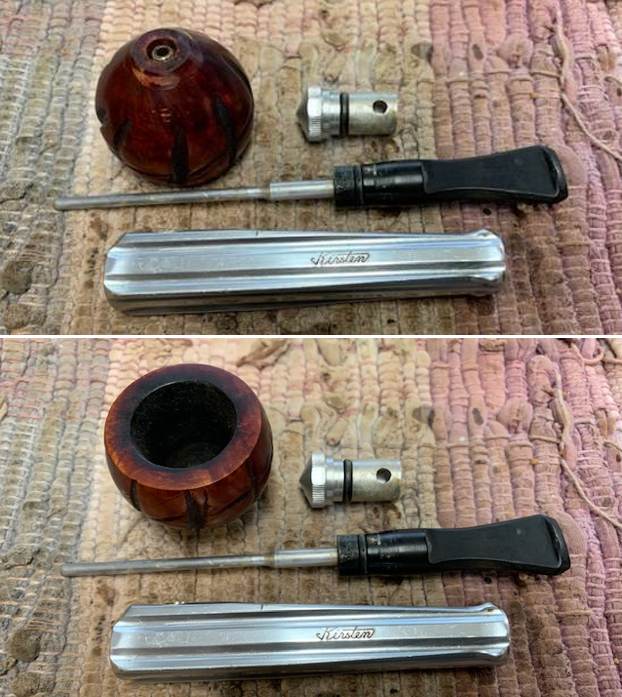
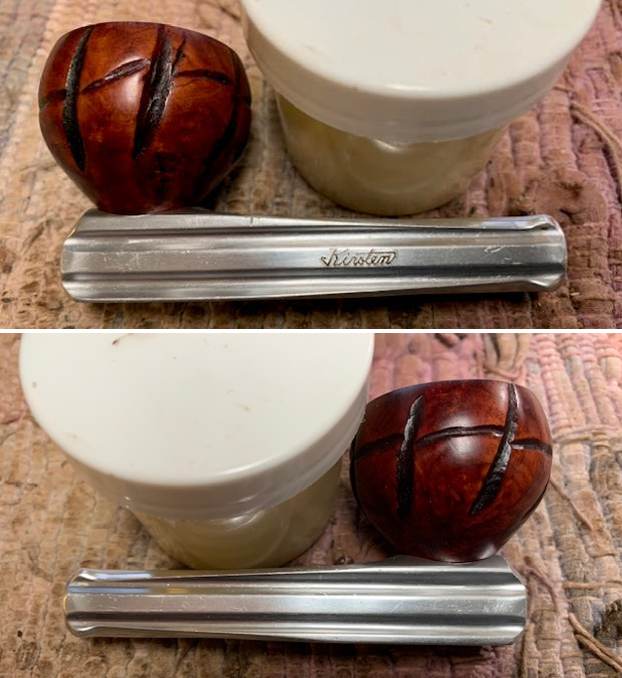
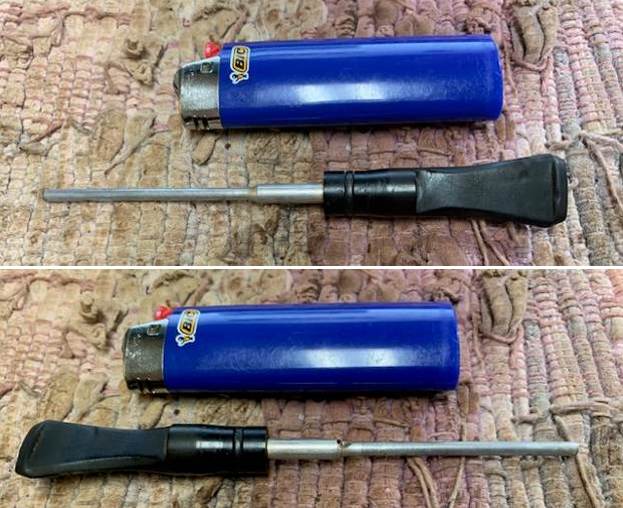
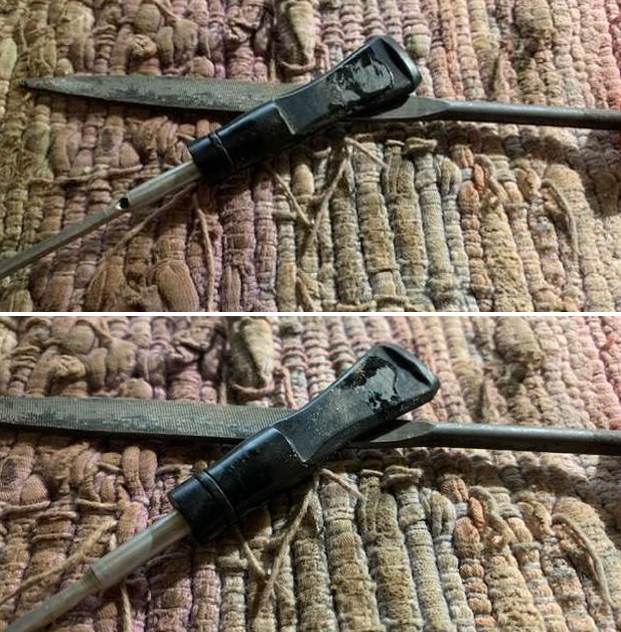
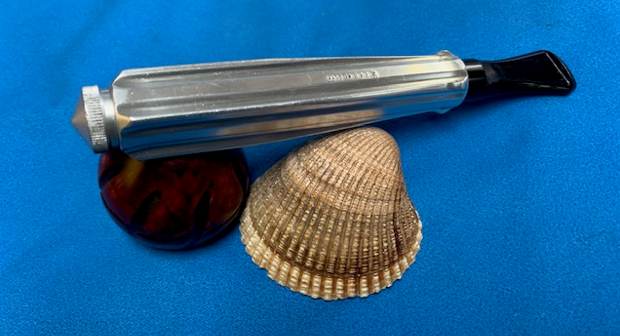
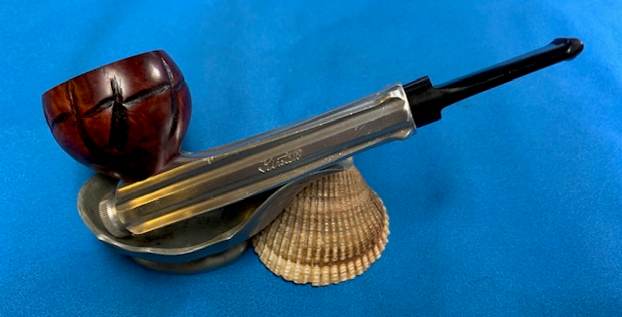
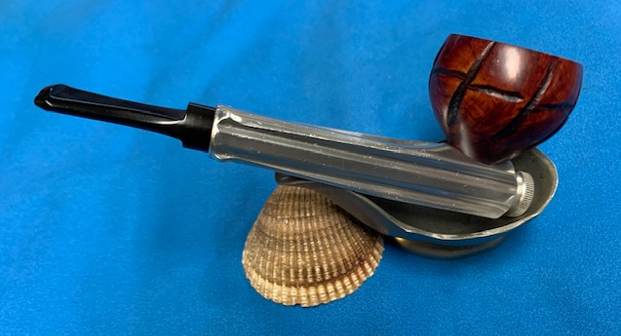
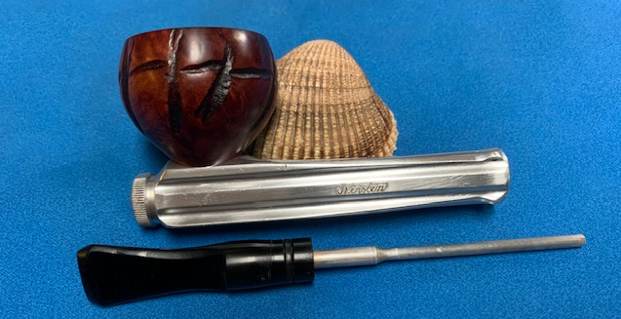
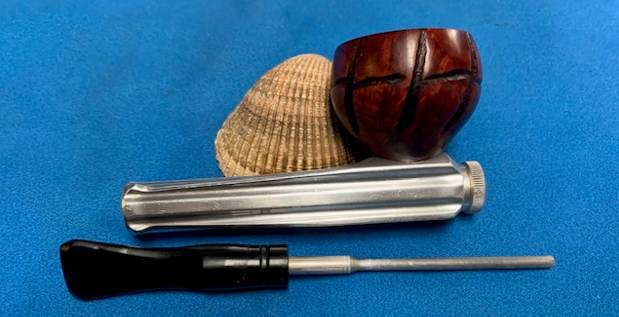
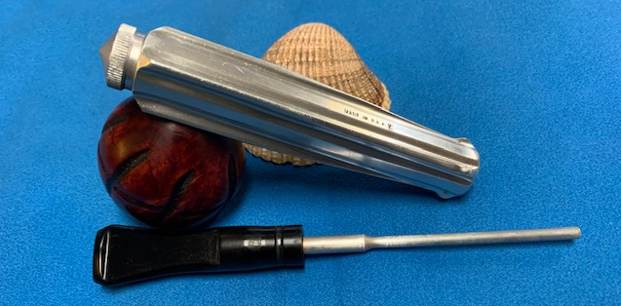
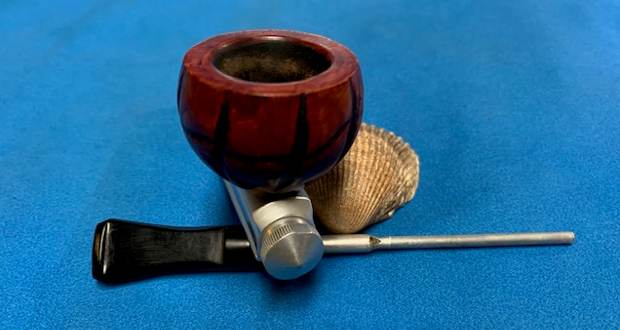
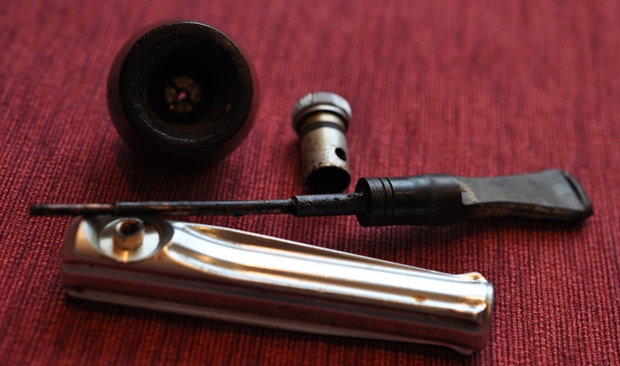
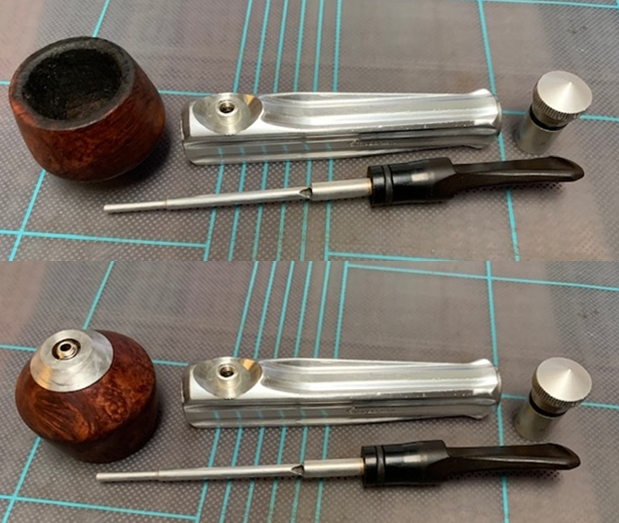
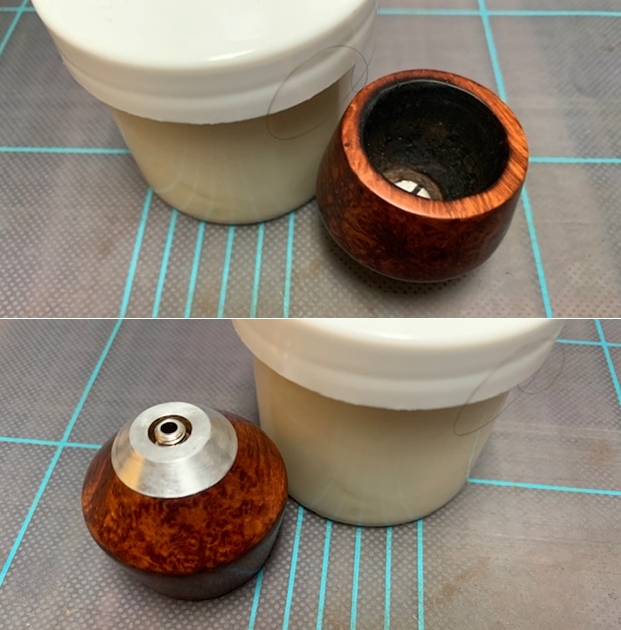
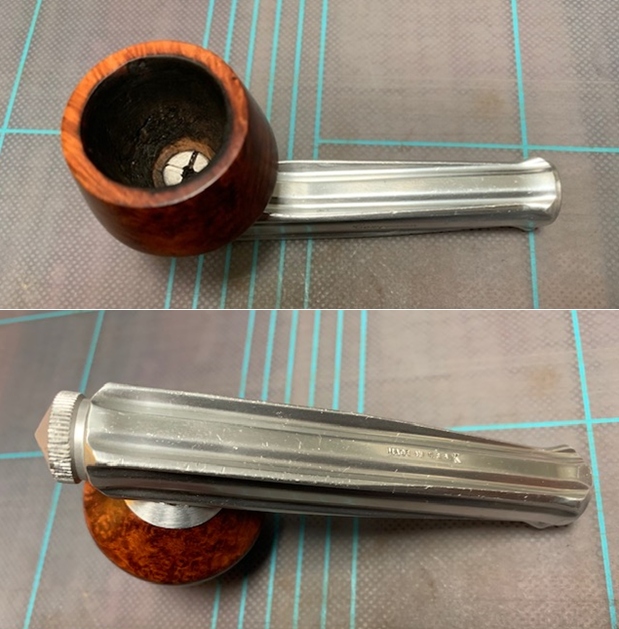
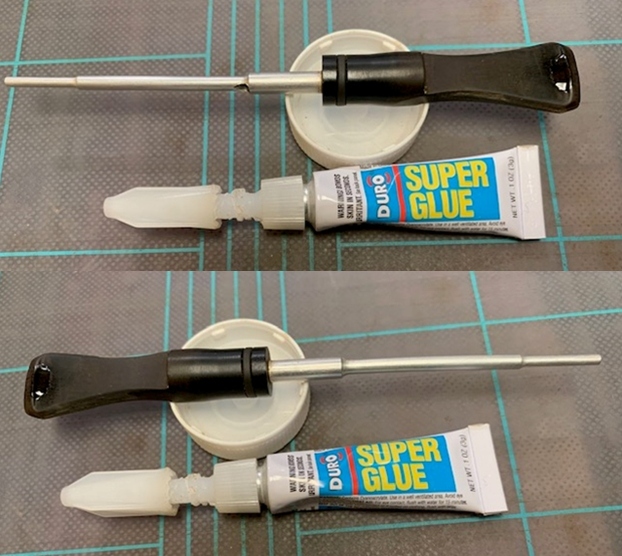
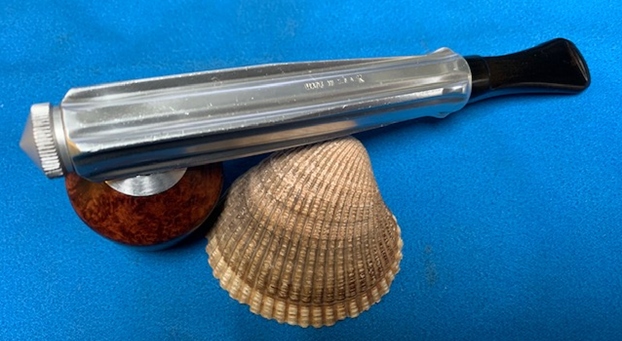
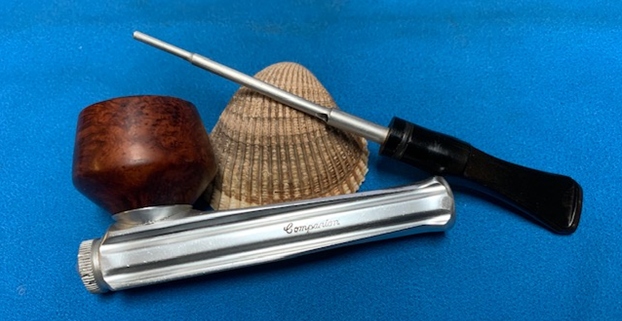
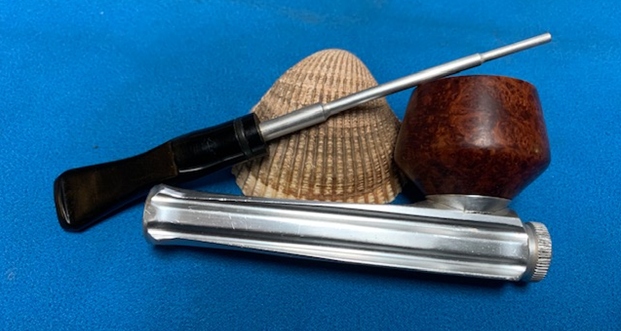
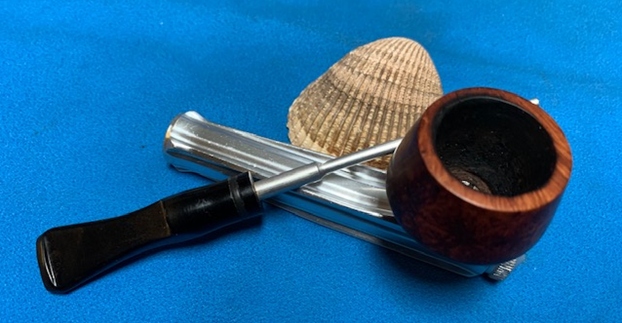
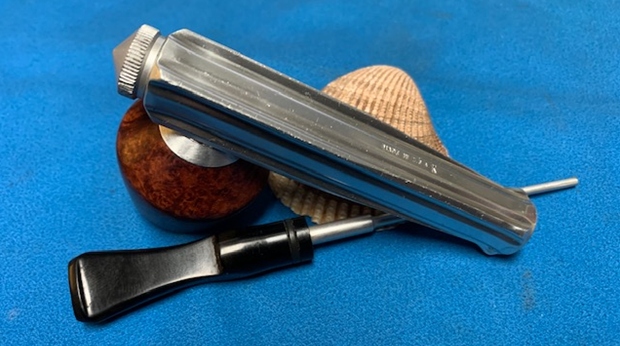
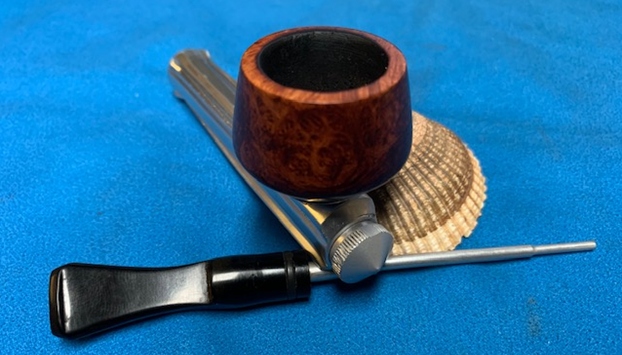
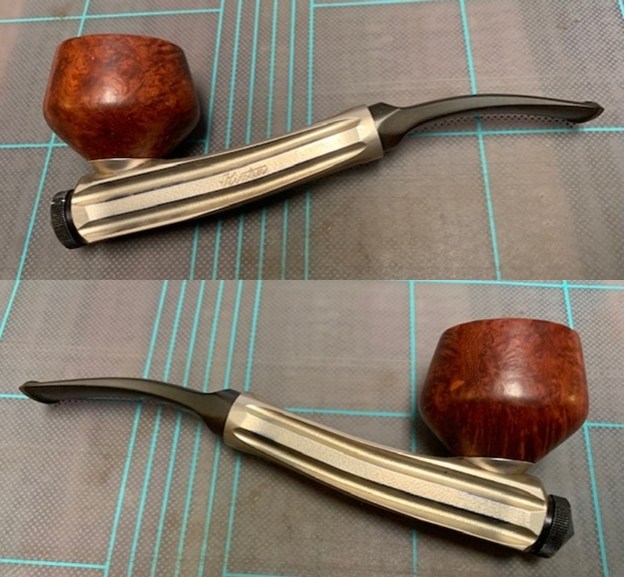
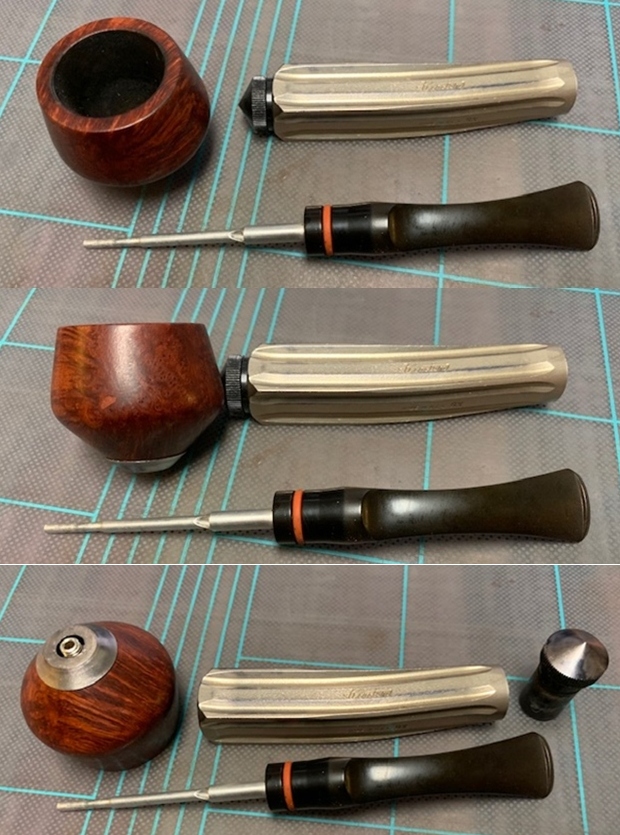
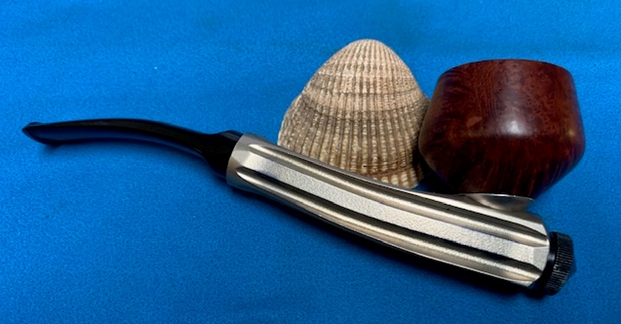
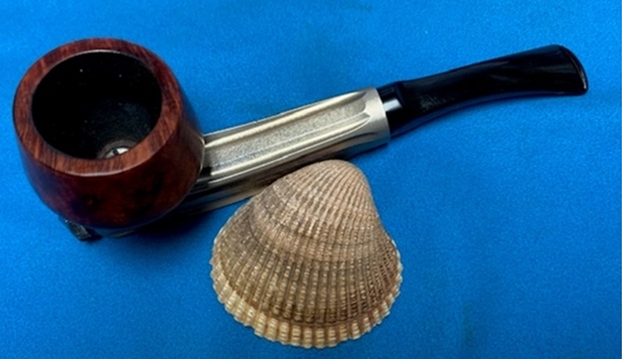
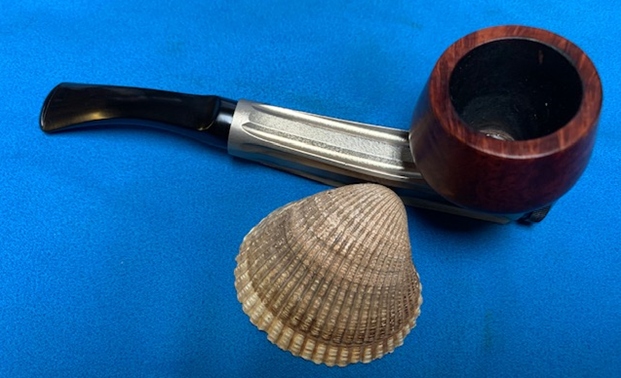
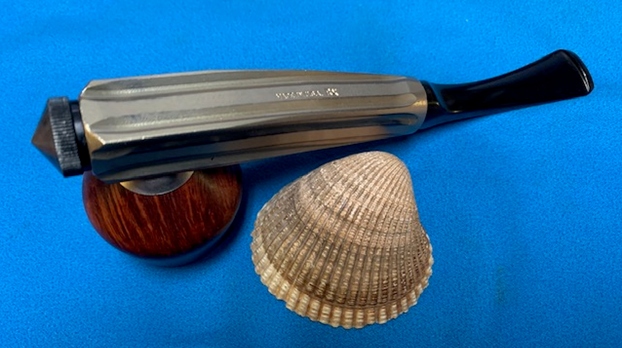
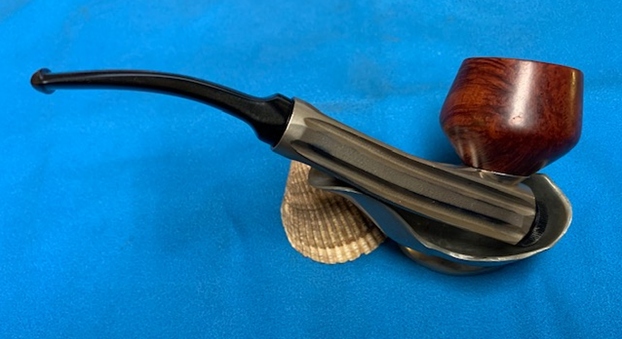
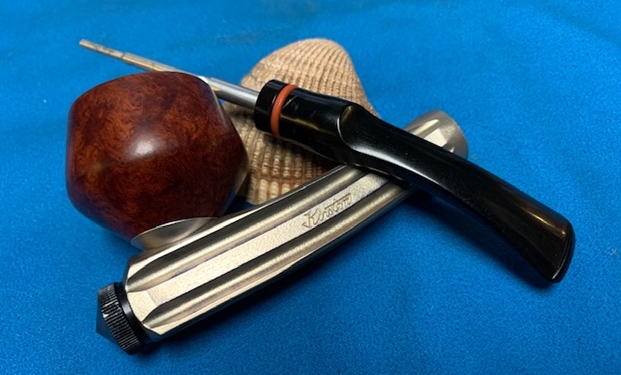
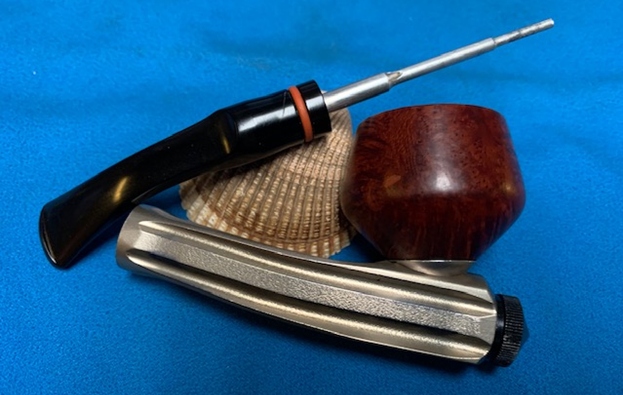
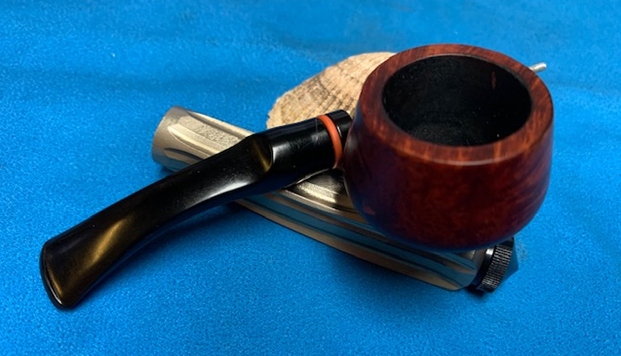
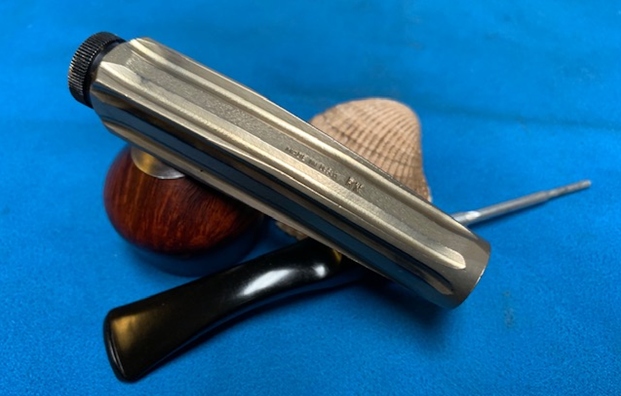
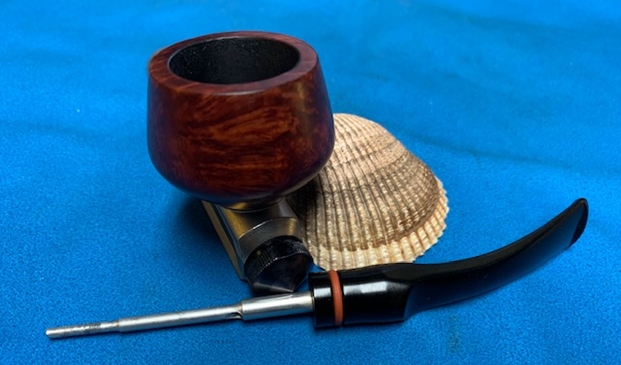
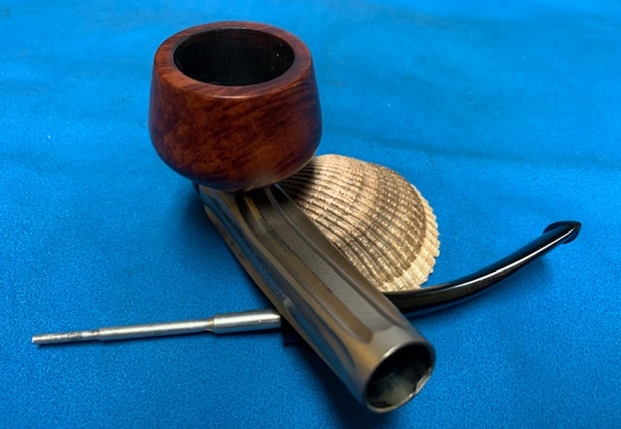
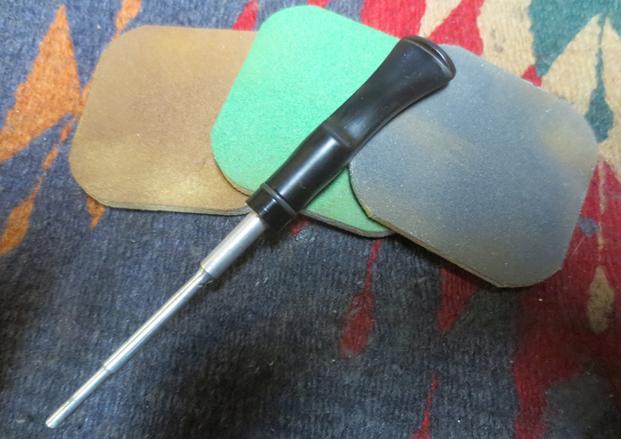
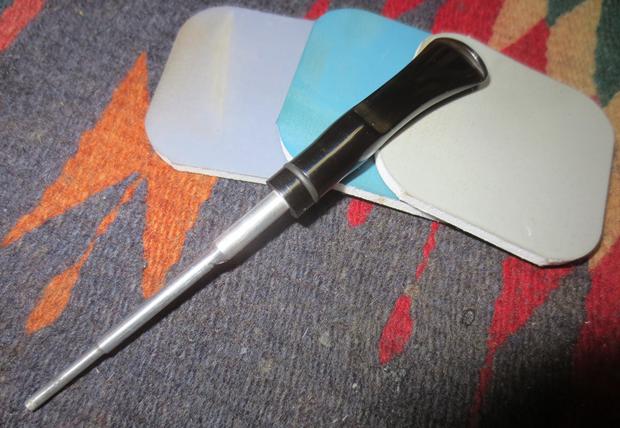
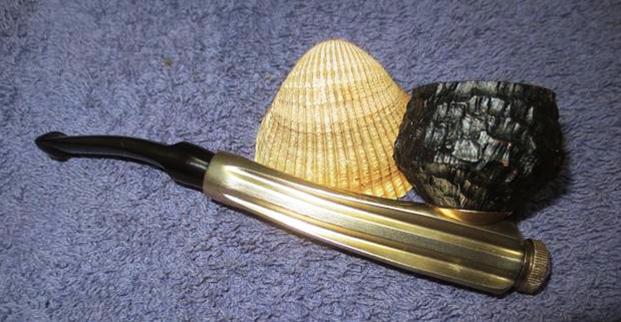
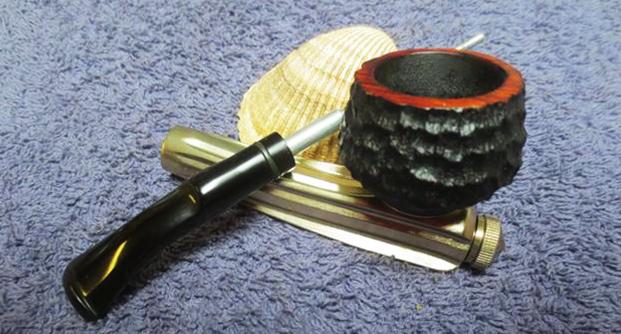
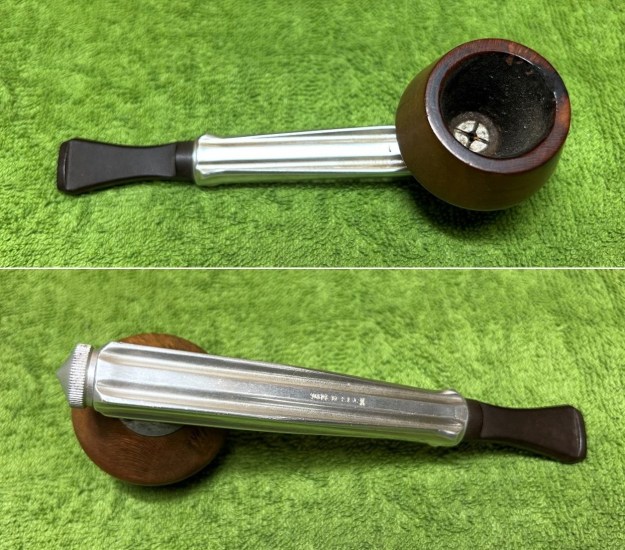
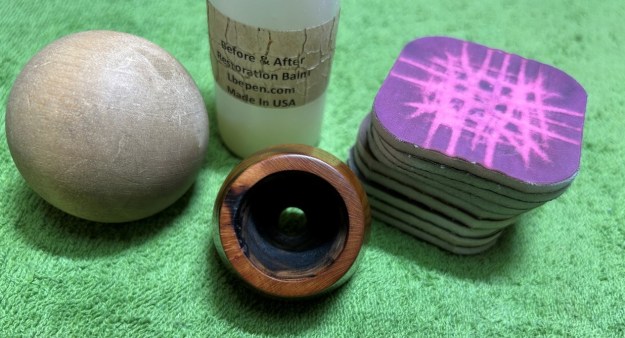
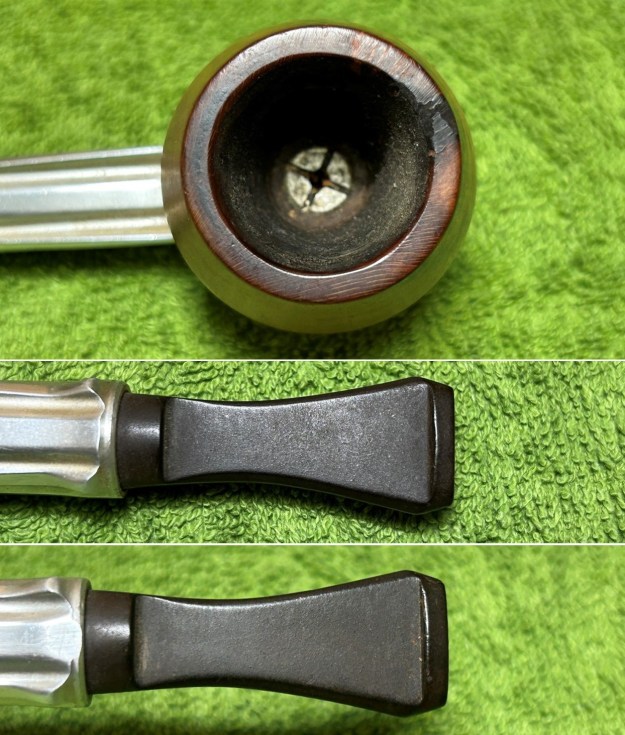 My first step was to take the entire pipe apart. Here is a good photo of the various components of this Kirsten – plus the screwdriver I used to take the pipe apart.
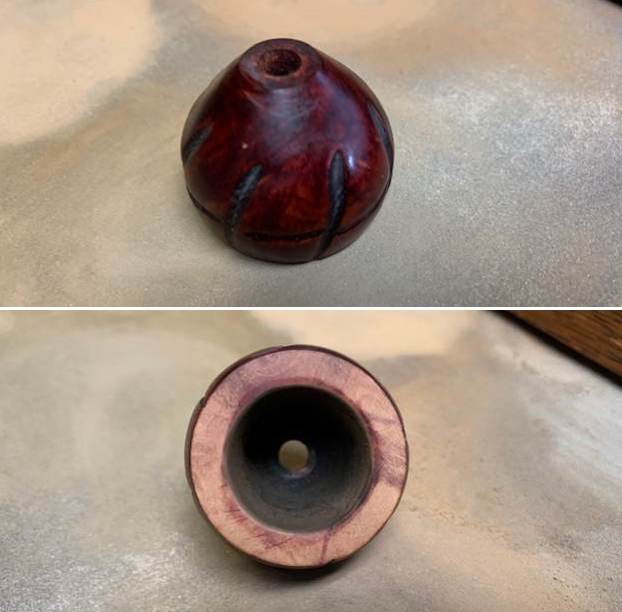
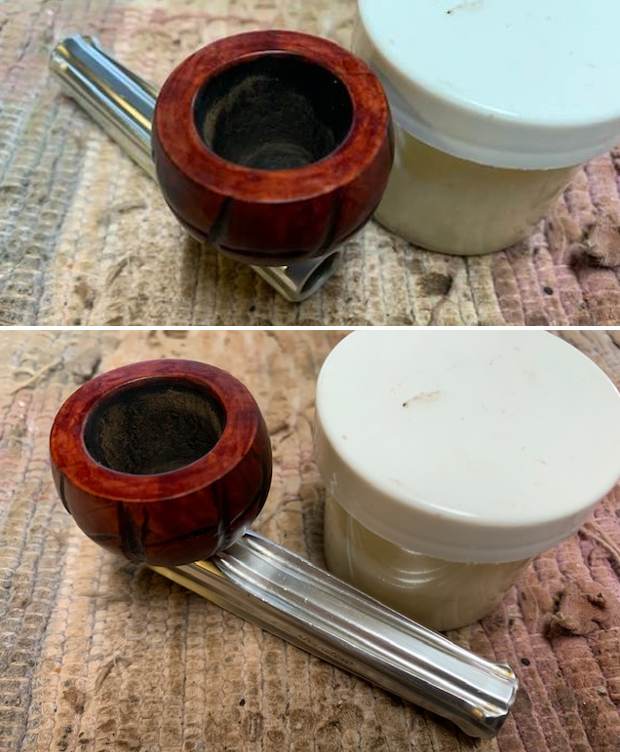
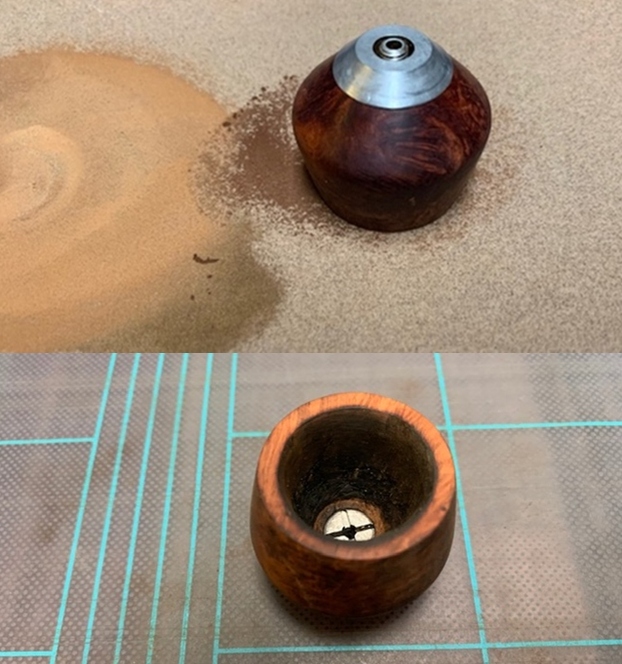
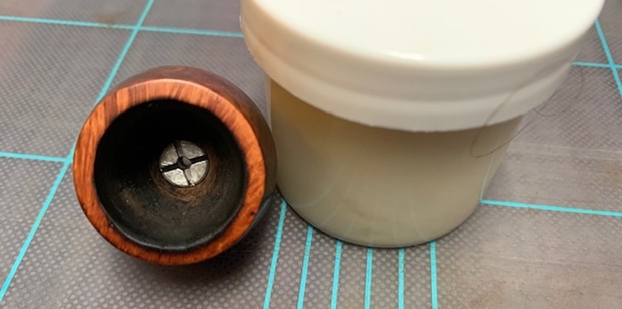
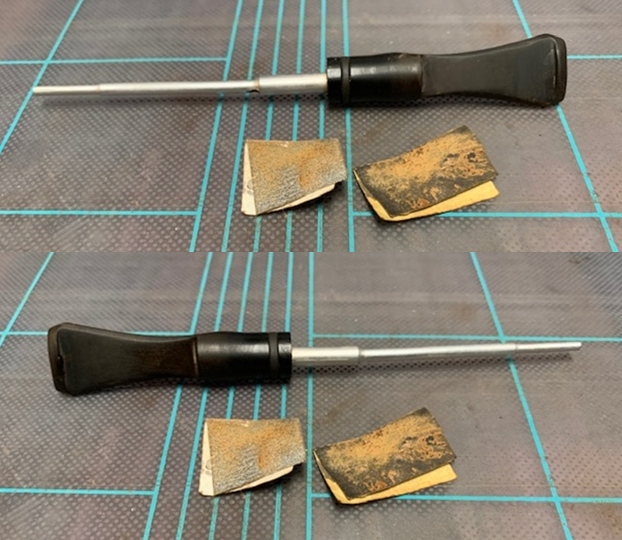
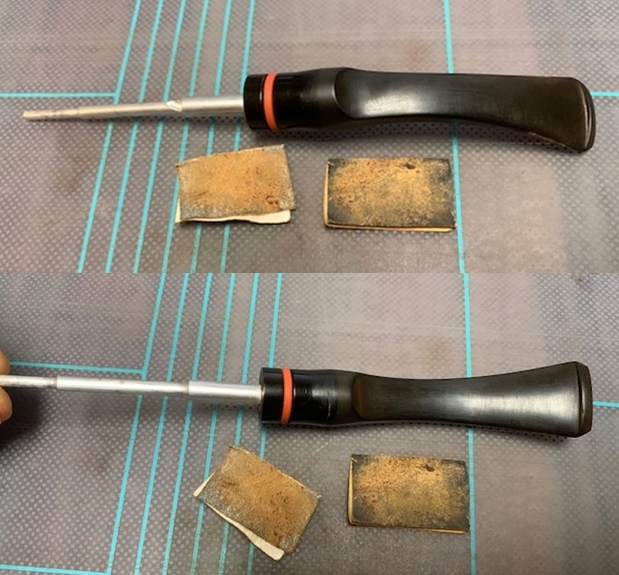
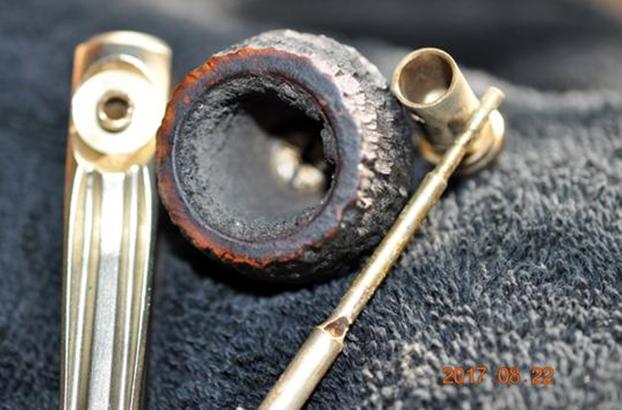
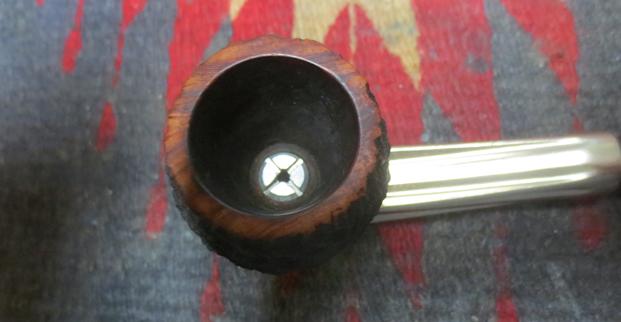
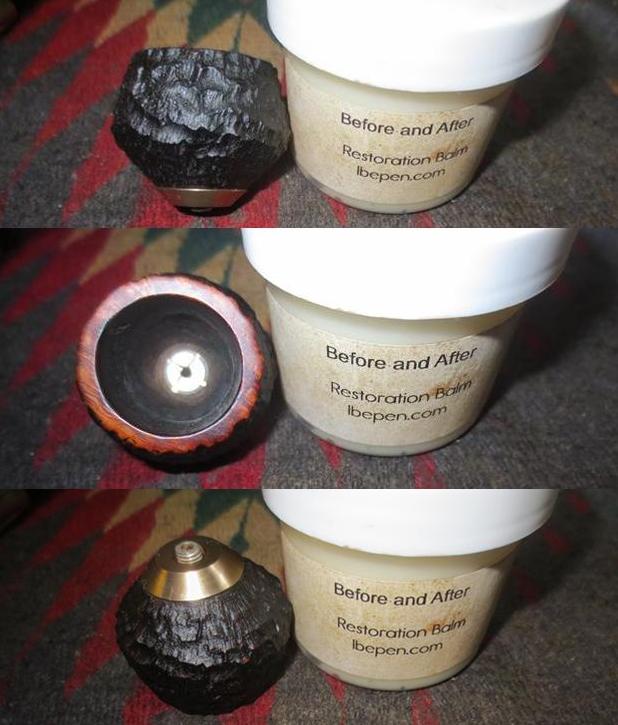
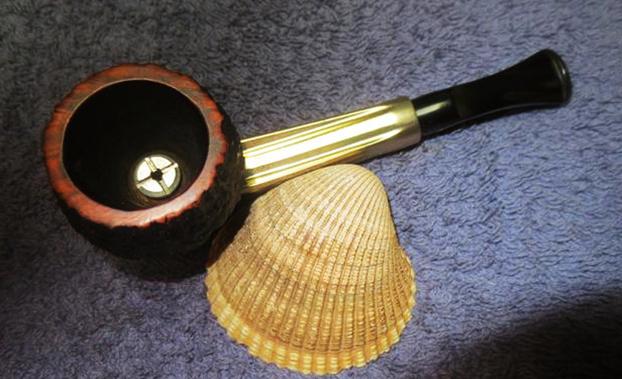
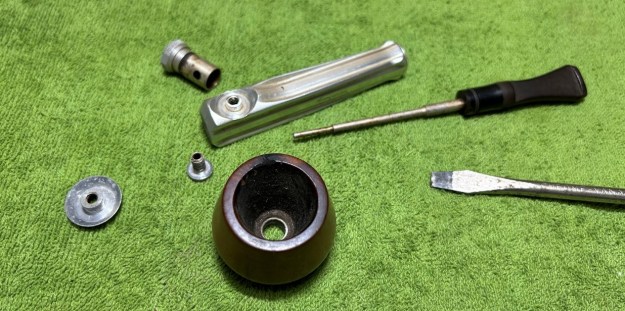 I decided to work on the briar bowl first on this occasion. The first step for the bowl is to ream it out – that is to say, remove all the cake inside. This accomplishes a couple of things. First (and most obviously), it cleans the bowl and provides a refurbished chamber for future smoking. Second, when the old cake is removed, I can inspect the interior walls of the bowl and determine if there is damage or not. I used a reamer, a pipe knife, and a piece of sandpaper taped to a wooden dowel. Collectively, these ensure that all the debris is removed.
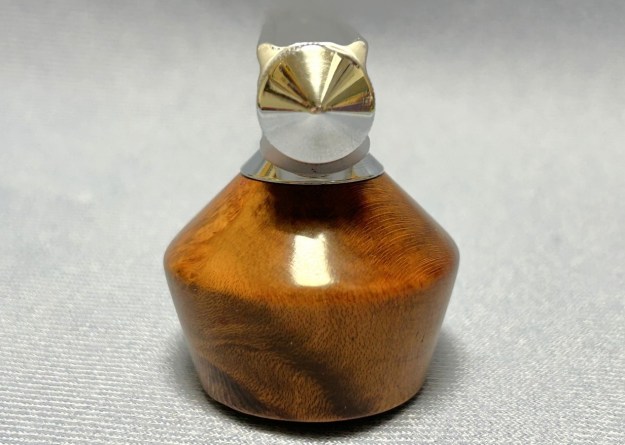
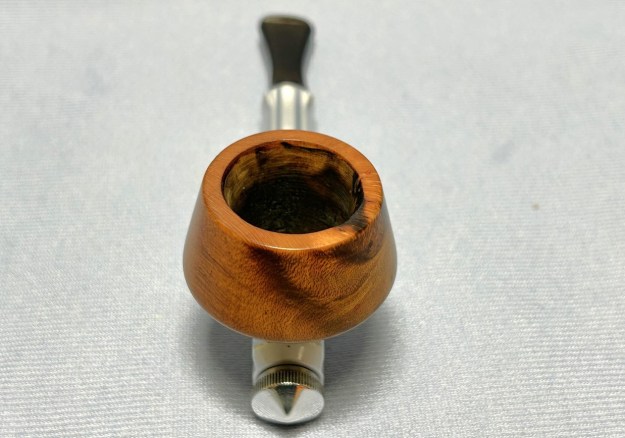
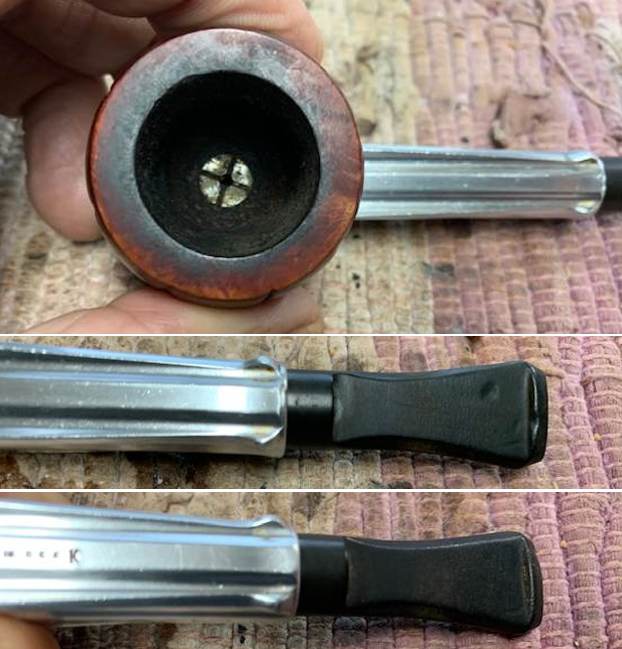
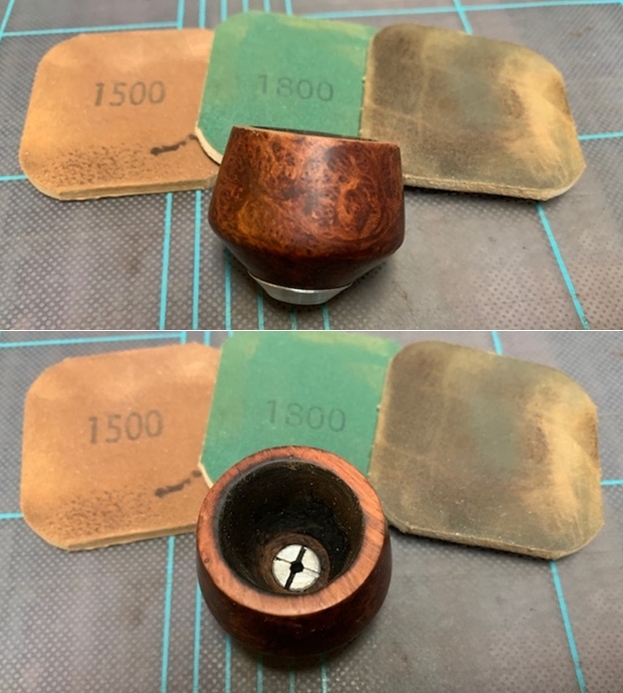
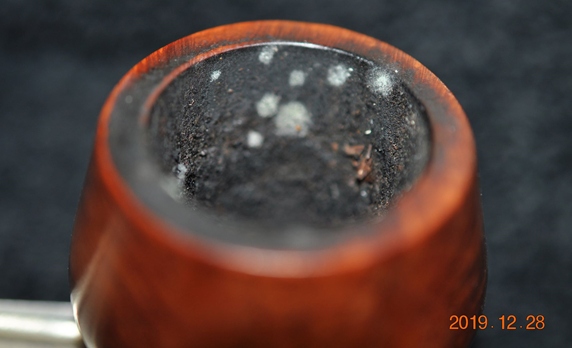
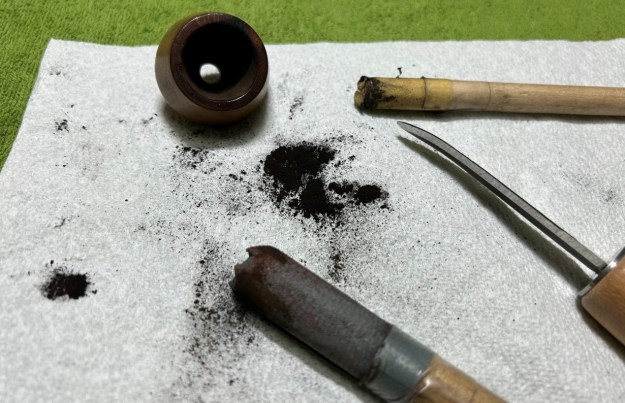 The damage to the rim is significant. In order to lessen the burns and nicks on the rim, I ‘topped’ the pipe – that is to say, I gently and evenly sanded the rim on a piece of 220-grit sandpaper. This effectively minimizes the damage, without altering the look of the pipe.
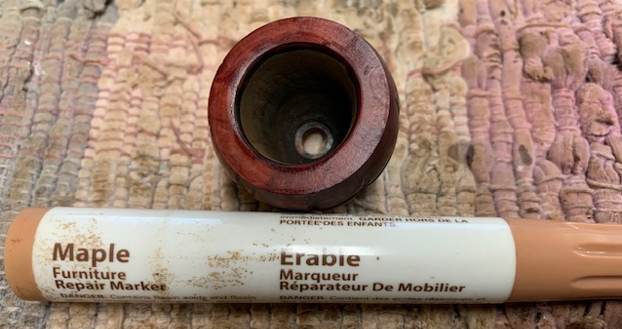
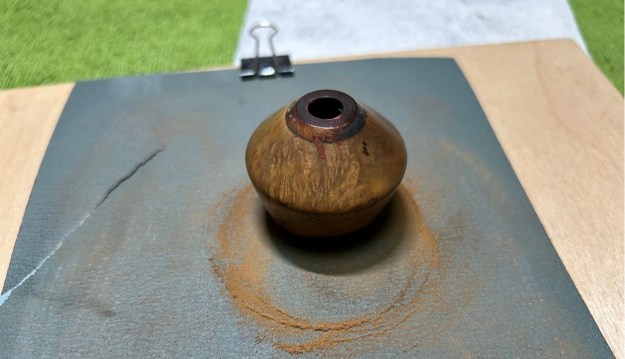 Some of the burn remained on the rim, so I took some crystalized oxalic acid and dissolved it in warm water. I took some cotton swaps, dipped in the solution, and rubbed the burned spot vigorously. Some of the burn was removed, but, unfortunately, some will always remain as part of this pipe’s history.
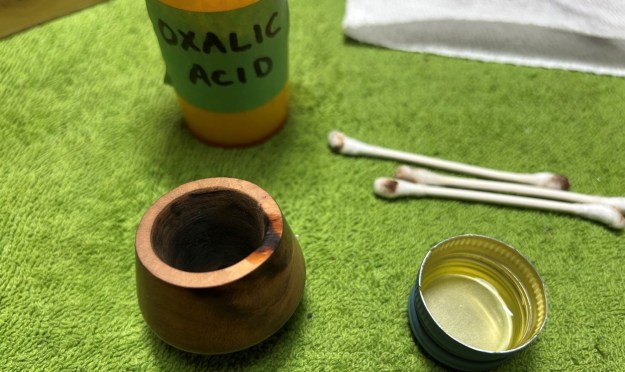 To tidy up the briar, I also wiped down the outside with some oil soap on cotton rounds (and a toothbrush). This does a good job of cleaning any latent dirt on the surface of the briar. The last step of the cleaning process is to scour the inside of the stummel with some soap and tube brushes. This is the culmination of a lot of hard work in getting the bowl clean.
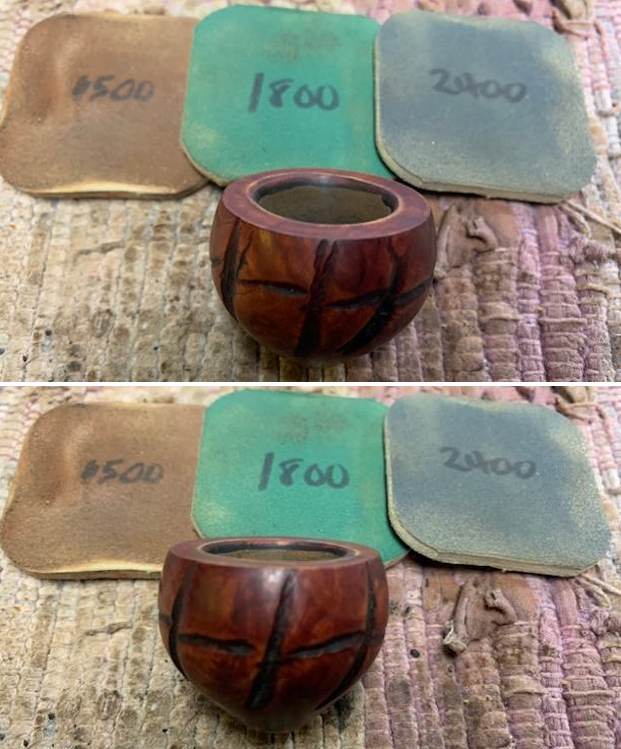
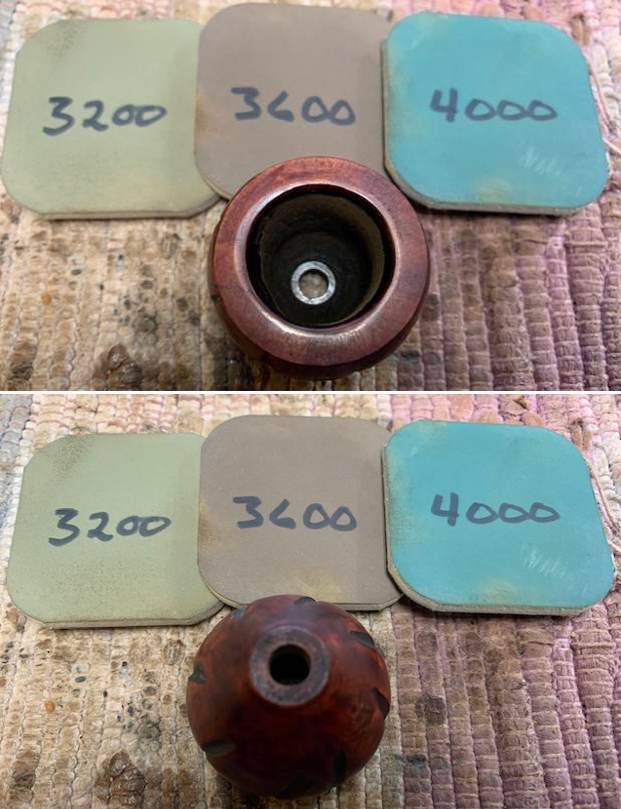
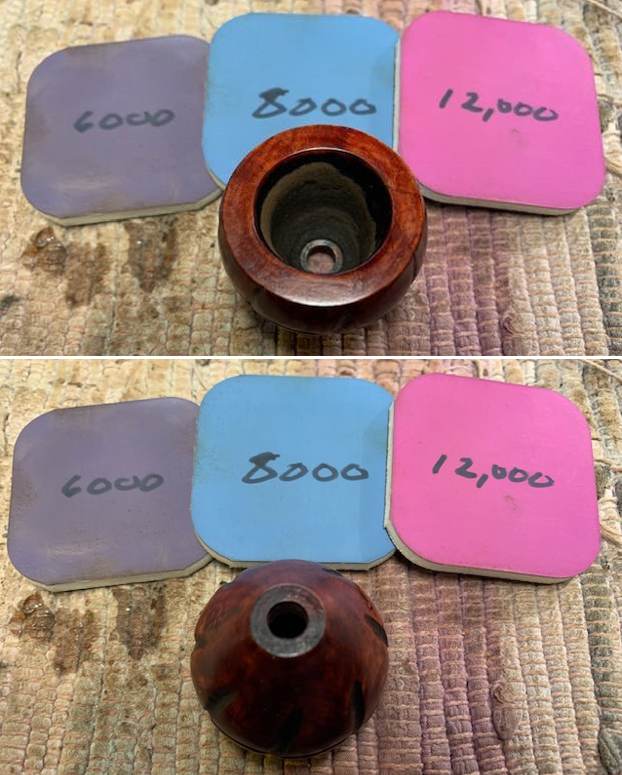
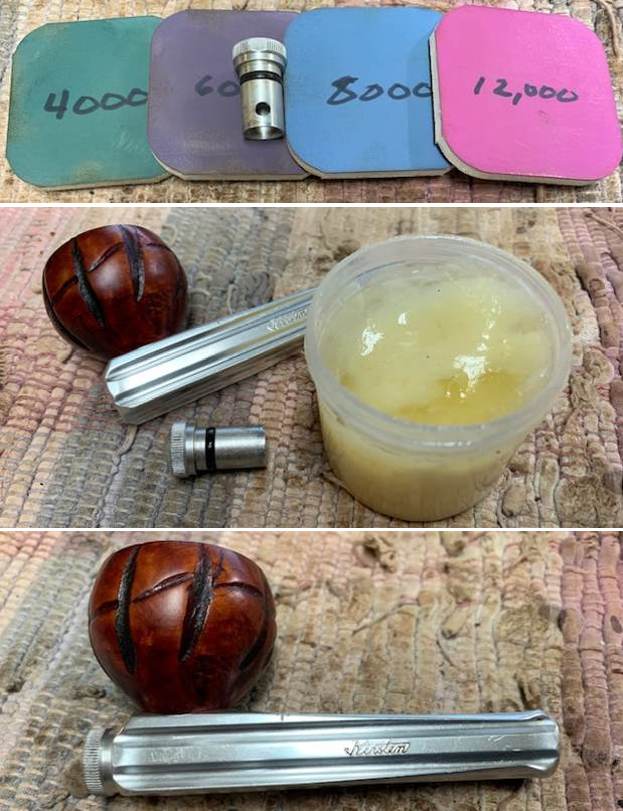
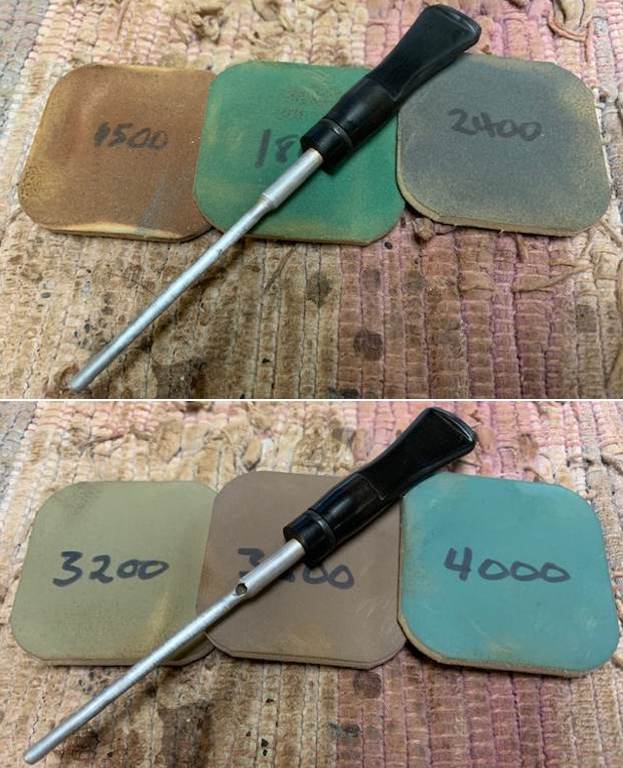
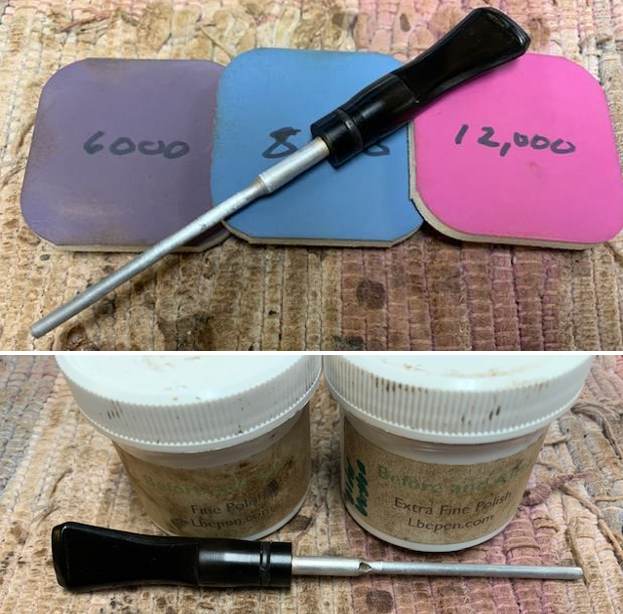
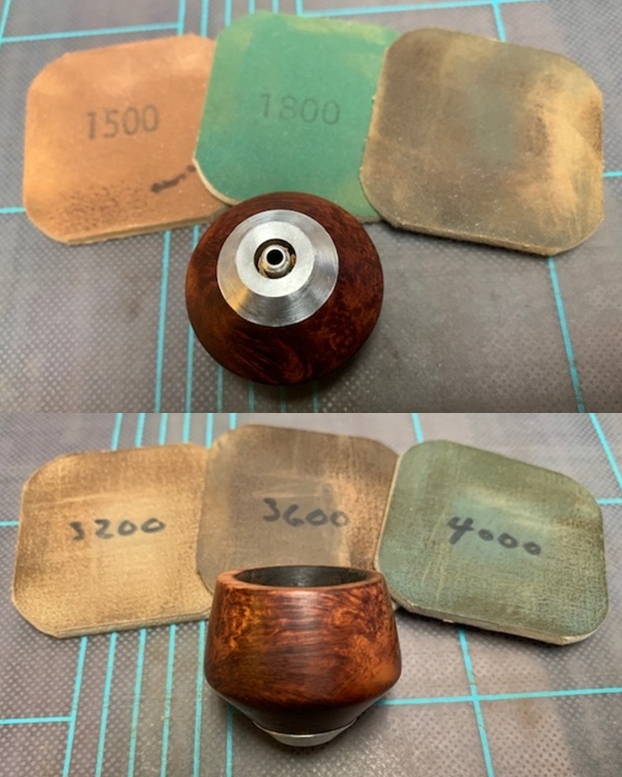
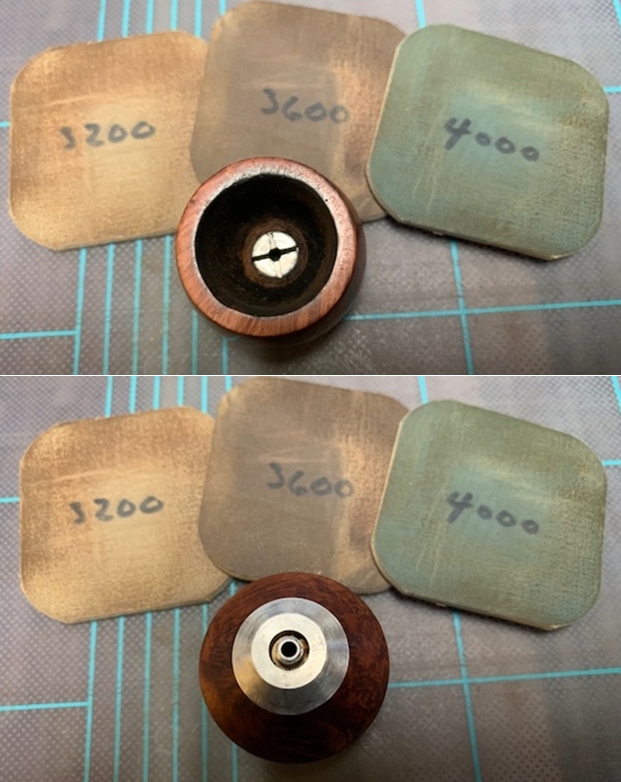
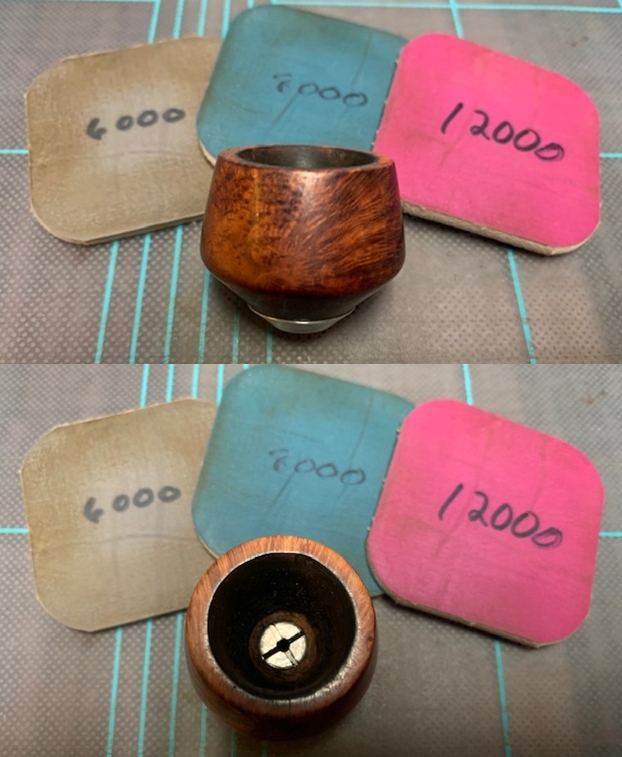
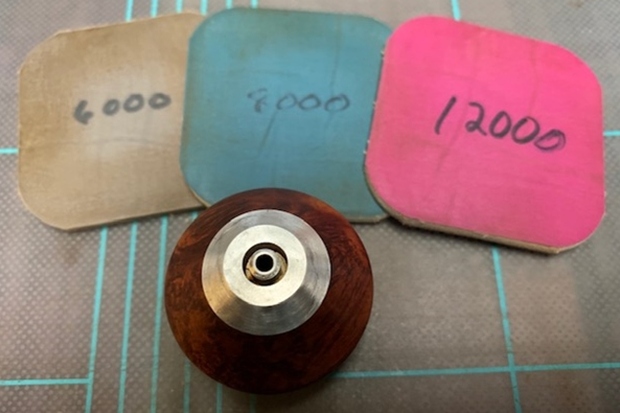
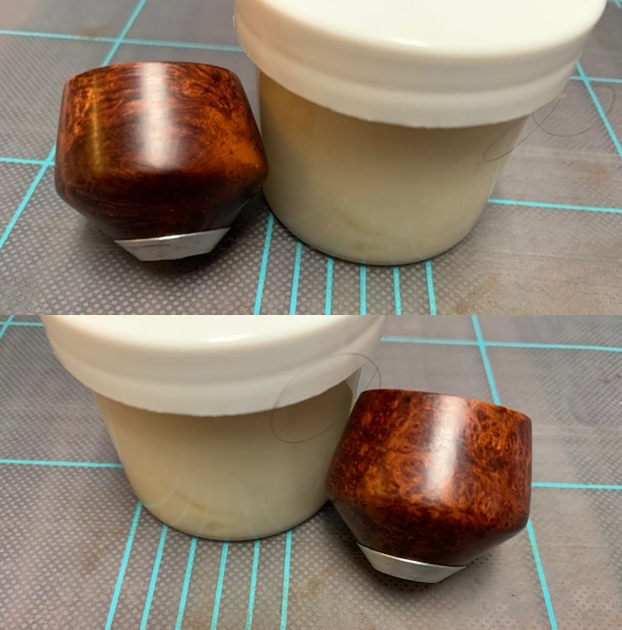
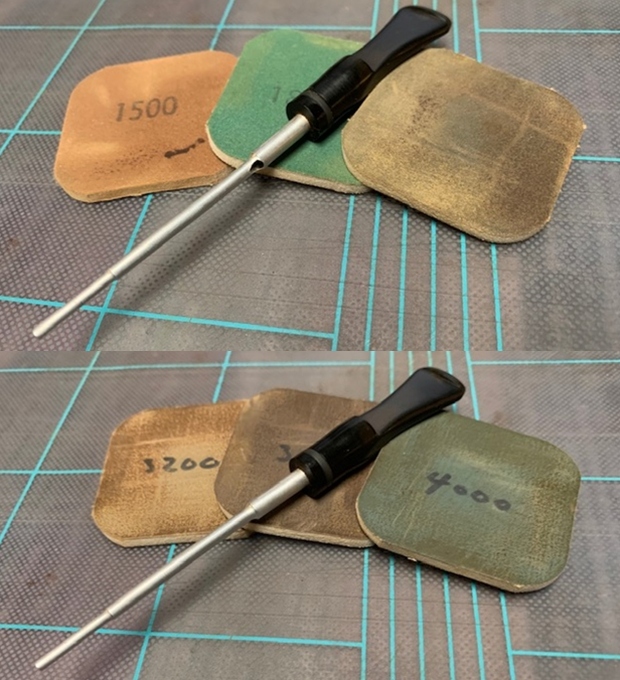
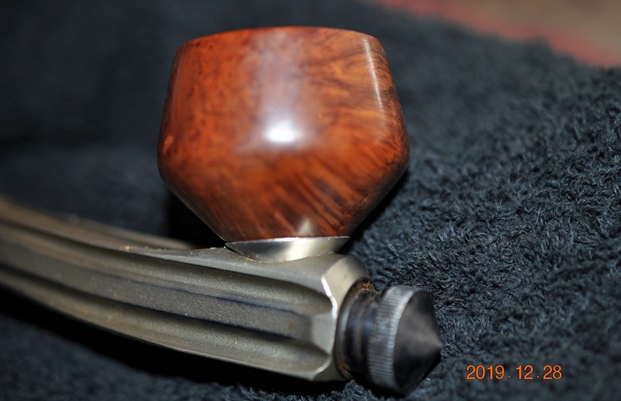
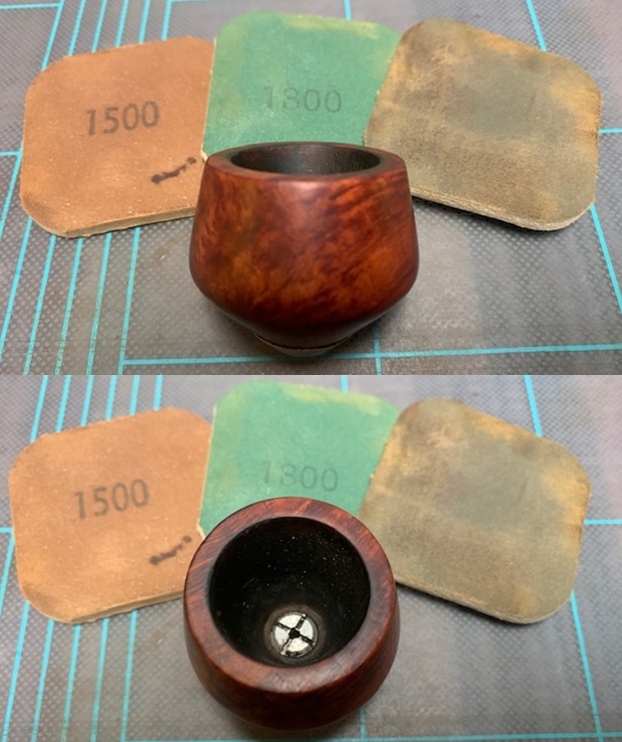
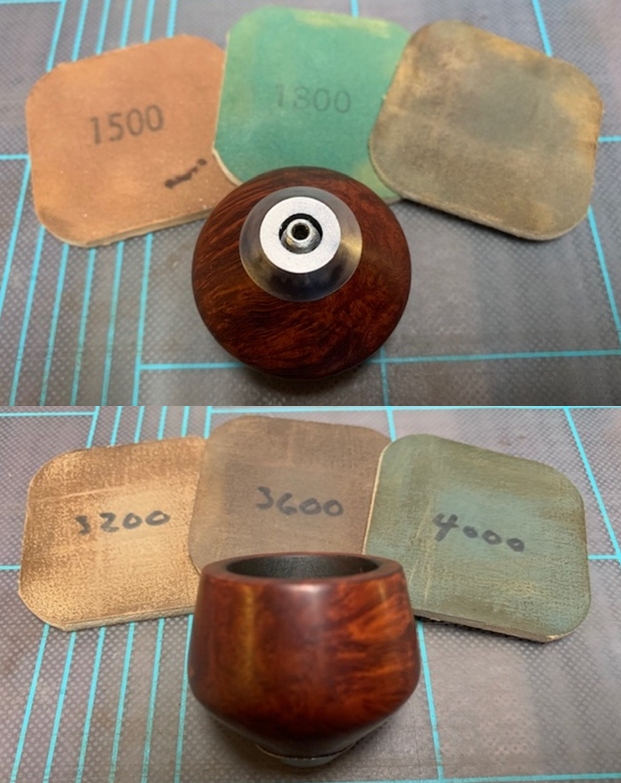
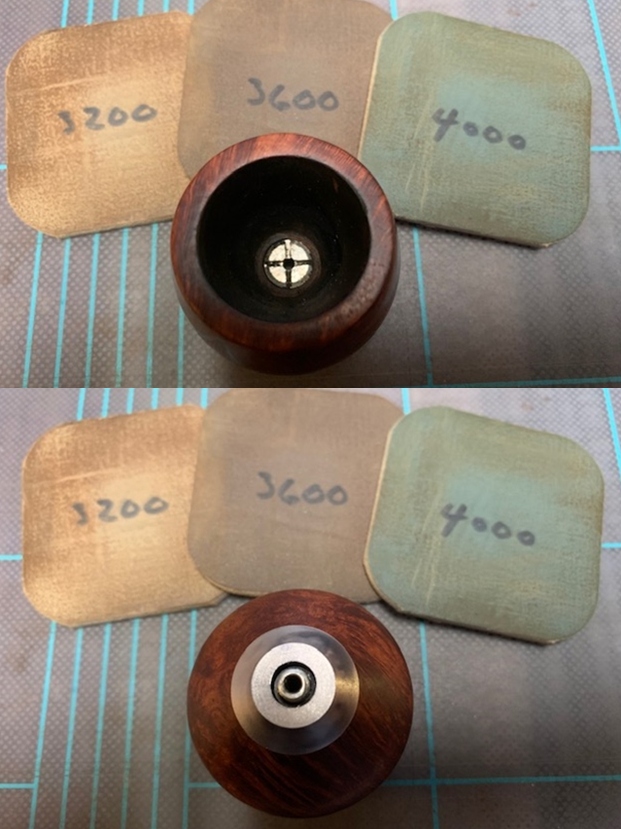
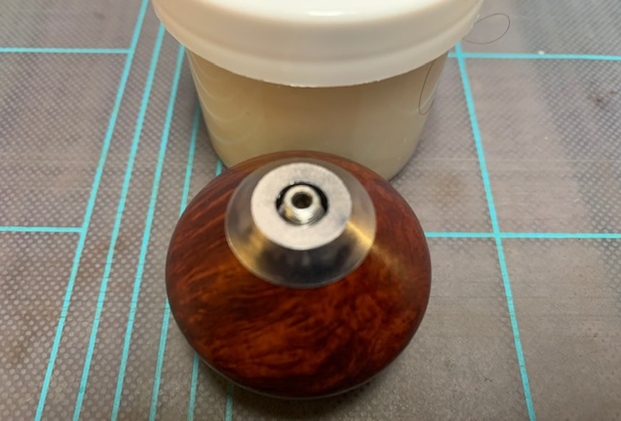
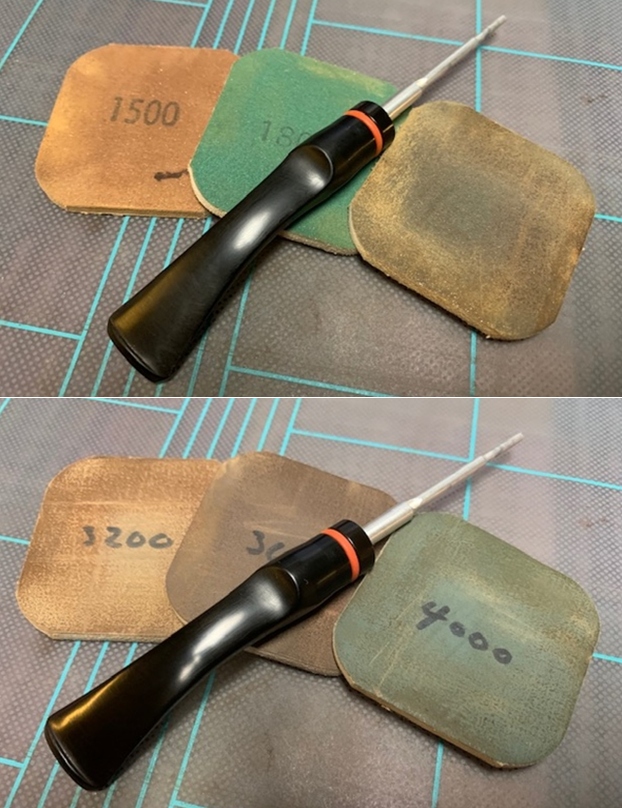
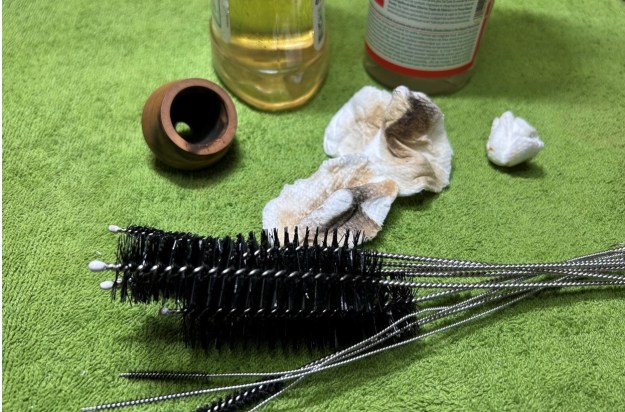 I took a solid wooden sphere, wrapped a piece of 220-grit sandpaper around it, and sanded the inner edge of the rim. This achieves two things: first, it removes some of the burn marks; and second (and more importantly), the circular shape and motion of the sphere gradually returns the edge to a perfect circle. I then used all nine micromesh pads (1,500 through 12,000 grit) on the outside of the stummel to finish it off. This sanding minimizes flaws in the briar and provides a beautiful smoothness to the wood. I rubbed some Before & After Restoration Balm into the briar and let it sit for 20 minutes or so. The balm moisturizes the wood and gives a beautiful depth to the briar. I then buffed it with a microfibre cloth.
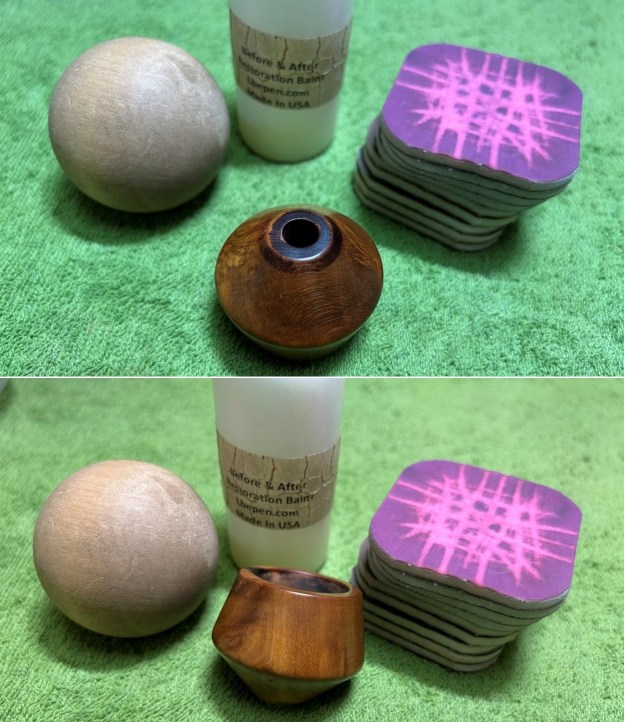
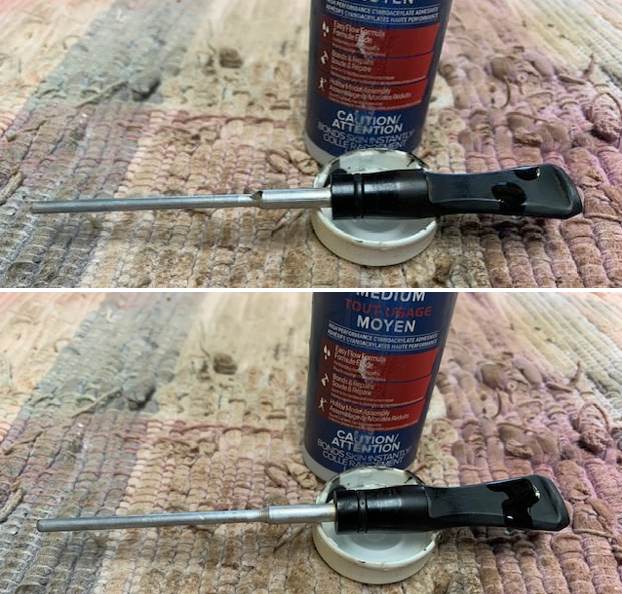
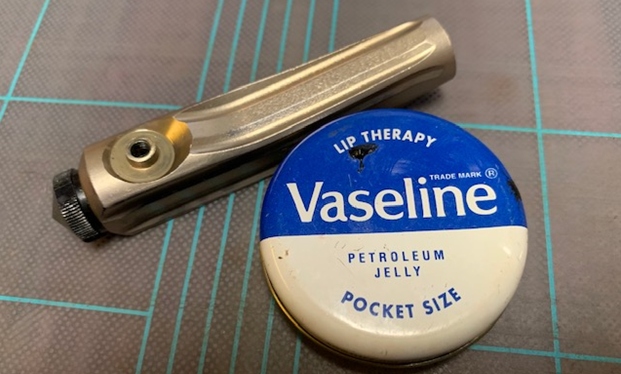
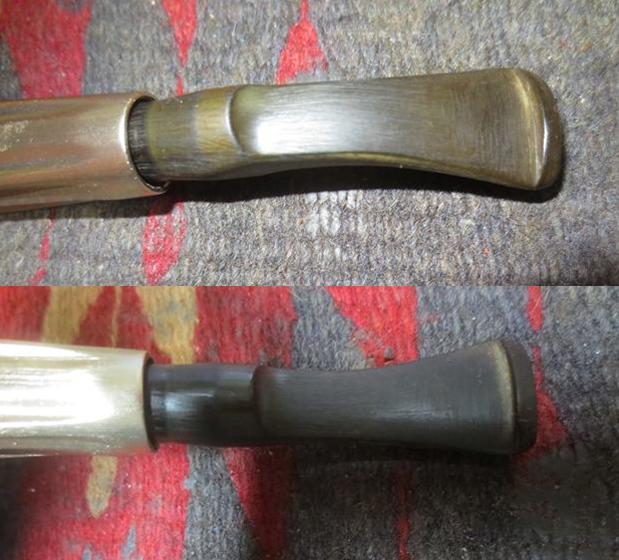
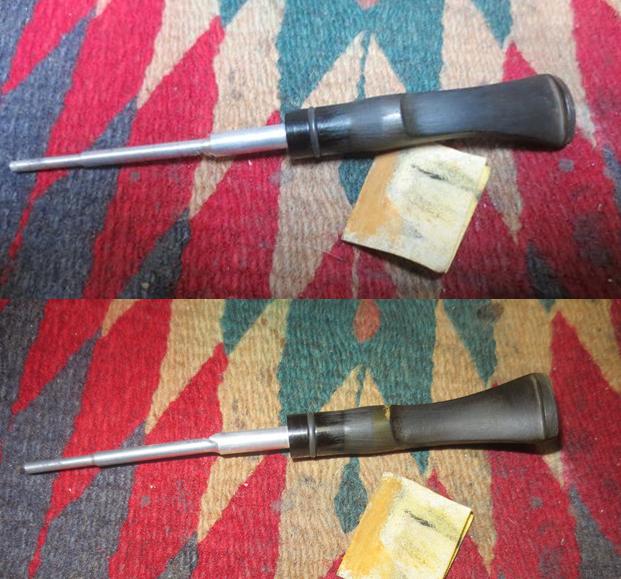
 On to the stem. I cleaned the inside with both pipe cleaners and cotton swabs dipped in 99% lemon-infused isopropyl alcohol. I scrubbed thoroughly to make sure the interior was clean.
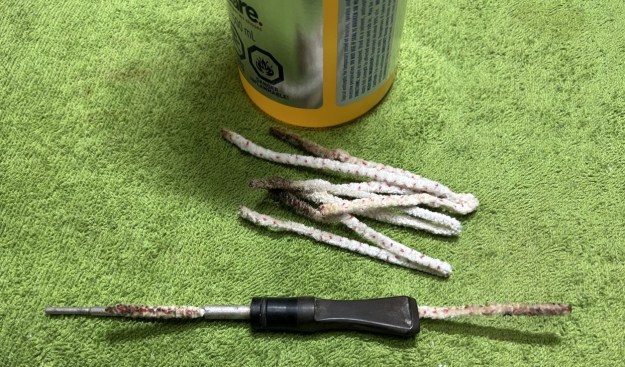 The goal of the next step is the removal (or minimization) of oxidation. Going to my sink, I used cream cleanser, cotton rounds, and a toothbrush, and scoured the stem to remove as much surface oxidation as possible. As the photos show, the result is a hideous brownish mess – but better off the stem than on it.
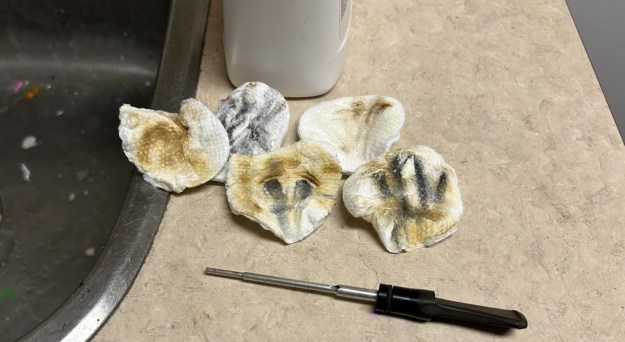 Once the stem was reasonably clean, I soaked it overnight in some de-oxidation fluid. This solution works to draw oxidation in the stem to the surface. This is a major aid and an important step in ensuring a clean stem. The following day, I drew the stem out from its bath and scrubbed the lingering fluid with a toothbrush.
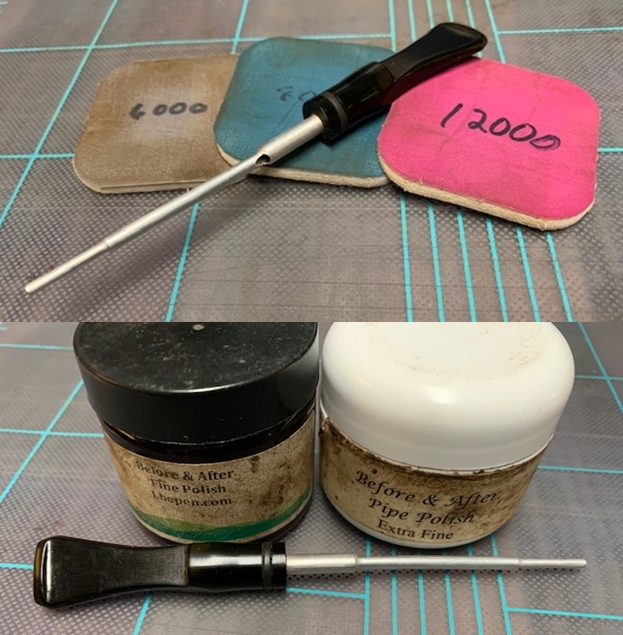
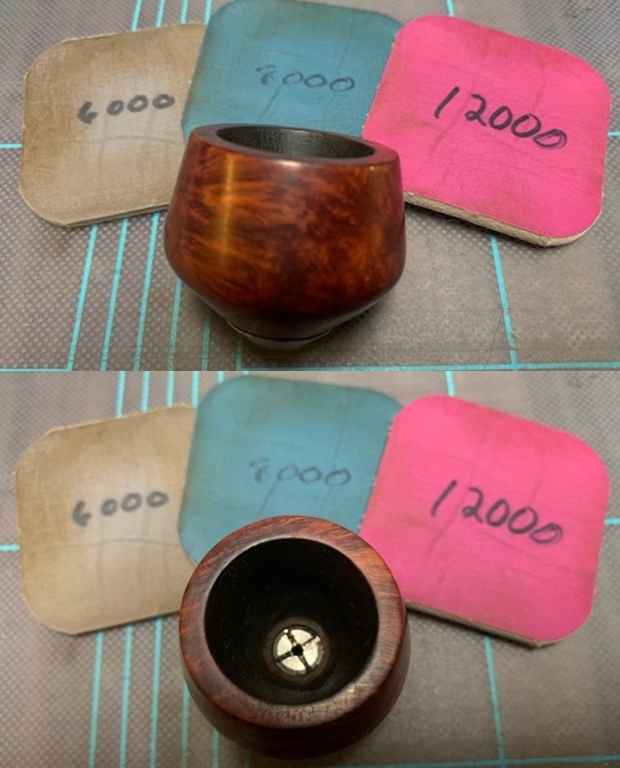
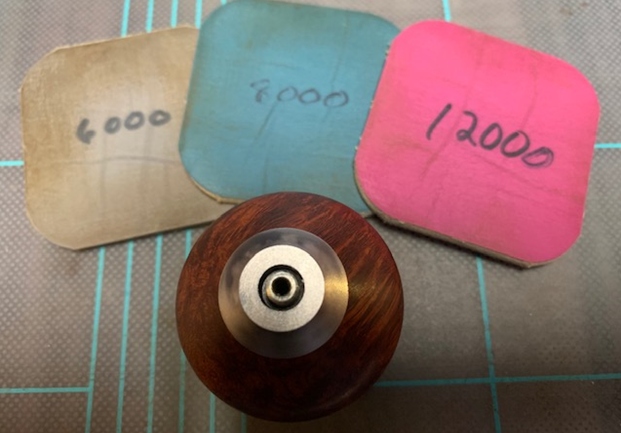
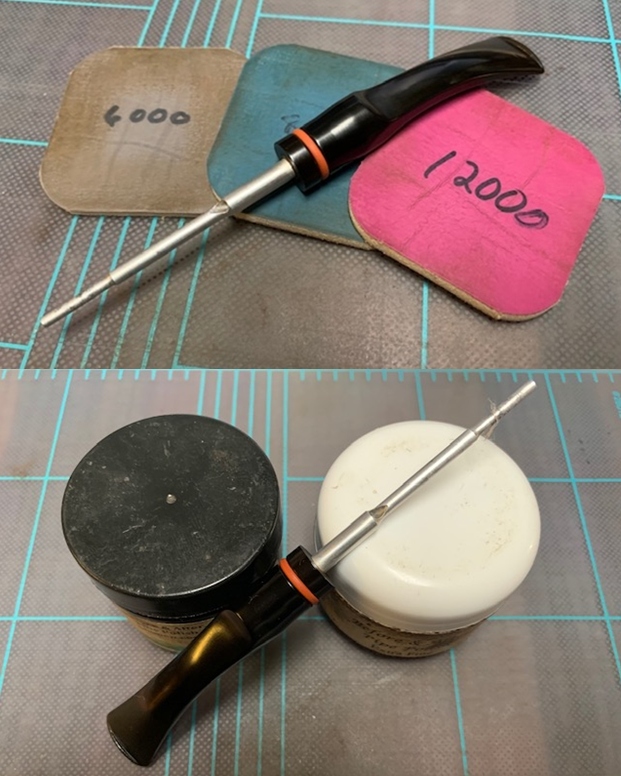
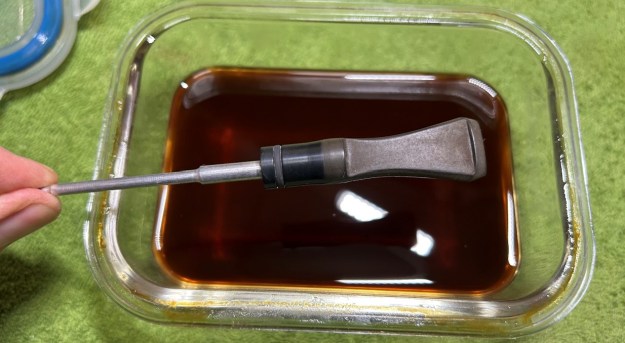 I used all nine of the micromesh sanding pads (1,500 through 12,000 grit) to sand out flaws, even out the vulcanite, and provide gentle polishing of the finished surface. I also applied pipe-stem oil while using the last five micromesh pads. There was a wonderful, deep black shine to the stem when I was done.
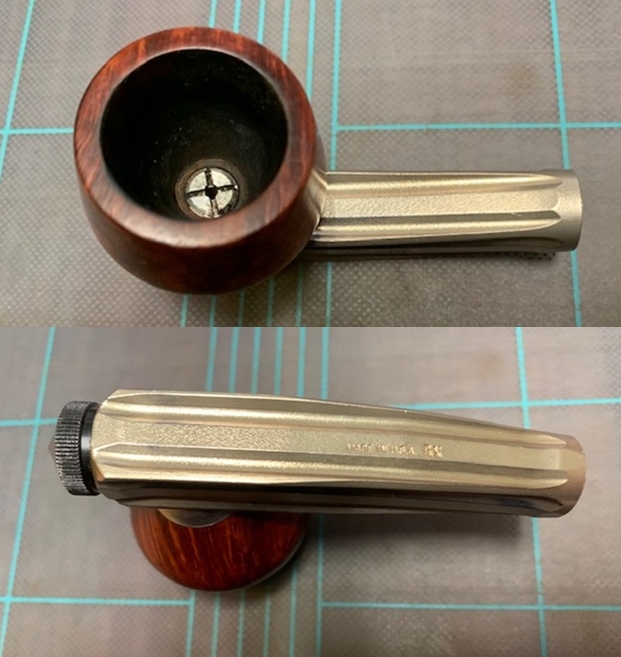
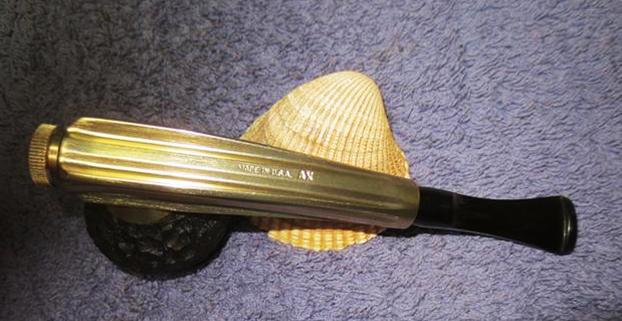
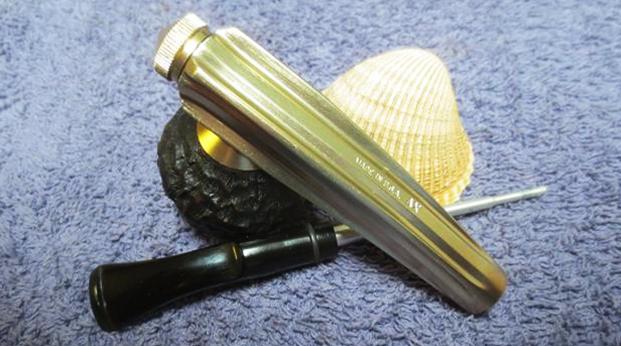
 Next was the aluminum body of this old Kirsten. In order to loosen up some of the old filth, I soaked all the metal pieces in a vinegar solution. This was only mildly successful and I would need to do more.
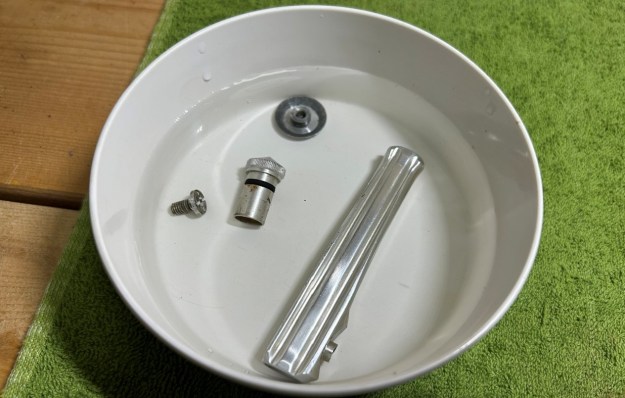 Just like other pipes, I cleaned the insides thoroughly with cotton swabs dipped in 99% lemon-infused isopropyl alcohol. This wasn’t enough – I also cleaned the inside of the aluminum with my cream cleanser and some tube brushes. That worked well! I then used my grey micromesh pads and polished the metal to a beautiful shine. Boy, it looked terrific after that.
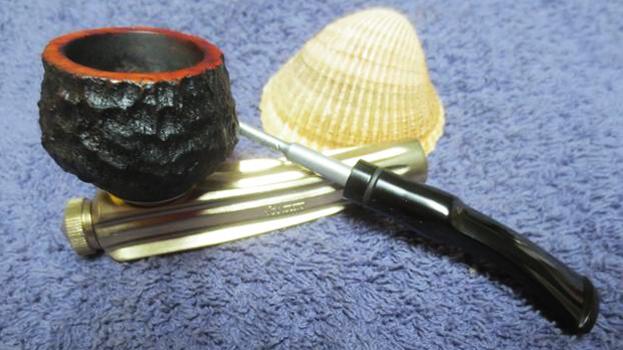
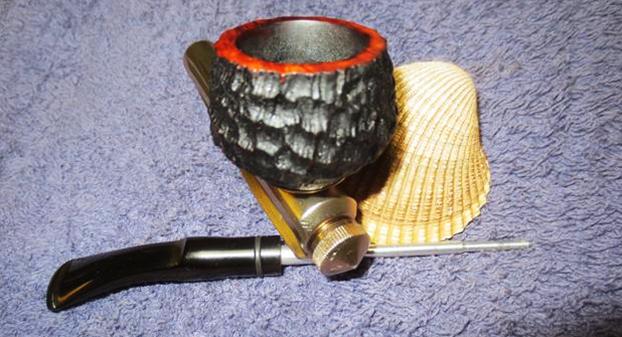
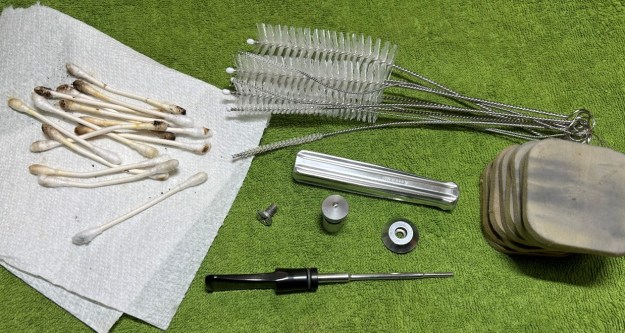 For the final step, I took the bowl to my bench buffer and carefully polished it – first with a white diamond compound, then with three coats of carnauba wax. This procedure makes the pipe look its best – the stummel sings and the stem glows.
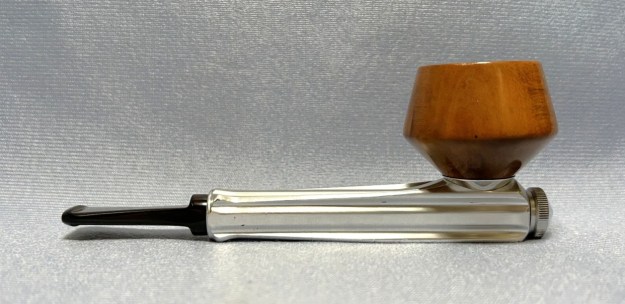
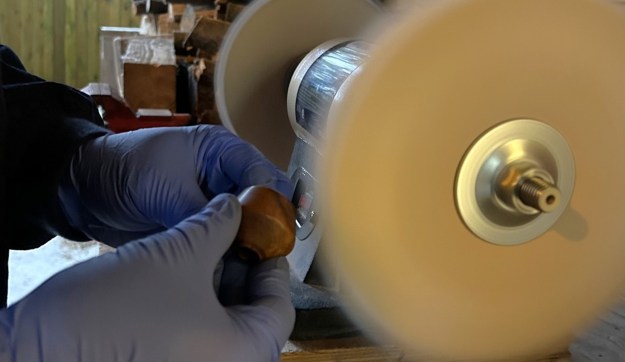 All done! This Kirsten Companion K looks fantastic again and is ready to be enjoyed by its new owner. It was great fun to work on. The approximate dimensions of the pipe are as follows: length 5⅓ in. (136 mm); height 1⅞ in. (48 mm); bowl diameter 1½ in. (39 mm); chamber diameter ⅞ in. (22 mm). The weight of the pipe is 1⅝ oz. (49 g). I hope you enjoyed reading the story of this pipe’s restoration as much as I enjoyed restoring it. If you are interested in more of my work, please follow me here on Steve’s website or send me an email at kenneth@knightsofthepipe.com. Thank you very much for reading and, as always, I welcome and encourage your comments.