Blog by Paresh Deshpande
To date, I have completed the restoration of nine pipes from my “Mumbai Bonanza” lot. In this lot, I found one pipe that was pretty battered up and in a very sorry state. It reminded me of an “Imperial Yello-Bole Carburetor” from my grandfather’s collection that I had restored some time back. Here is the link to the write up that was posted on rebornpipes.com; https://rebornpipes.com/2018/11/12/reclaiming-a-yello-bole-imperial-carburator-vest-pipe/
If at that point in time I felt that the Imperial was in a bad shape, holding and looking at this Mastercraft pipe in my hand was gut wrenching to say the least!!!! Believe you me readers, every time I selected a pipe from the Mumbai lot to work on, the first pipe that I would always pick was this pipe!!!!! I was in love with the shape of the pipe, the feel in my hand (which are quite large by Asian standards), the grains peeking out at me from under all that grime, the heft …I could go on singing praises about this pipe. But in spite of all these eulogizing, I always ended up returning it to the box as a future project. Why? Well, the answer lay in the condition of the pipe and the colossal investment of time required restoring it. I knew that this project would test all that I had learned till date and then some more, without the certainties of the end result!! But now I decided to complete this project, however long it may take and whatever the end results.
For those readers who have missed out on my previous work, I was fortunate enough to have heeded to the advice of my dear friend and mentor, Mr. Steve, and struck a deal with a junk collector from Mumbai. He did not know what he was selling and I did not know what I was buying as we reside in different cities!! The argument that Mr. Steve presented was that if not anything, I shall at least have some spares and this was logical. I struck a deal and here are pictures of the pipes that I received in this lot.

 This lot contains some very nice collectible pipes, a few well known brands and some mediocre brands. Overall, with seven Dunhill pipes, a Preben Holm #1 FH, a couple of “Made in England” Pete System pipes, a couple of Charatan’s Belvedere, Custom-Bilt, Stanwell and other assorted pipes, I would say that I had struck a decent haul! This is indeed my “Mumbai Bonanza”.
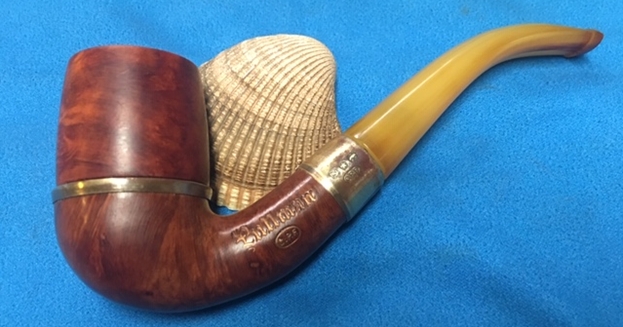
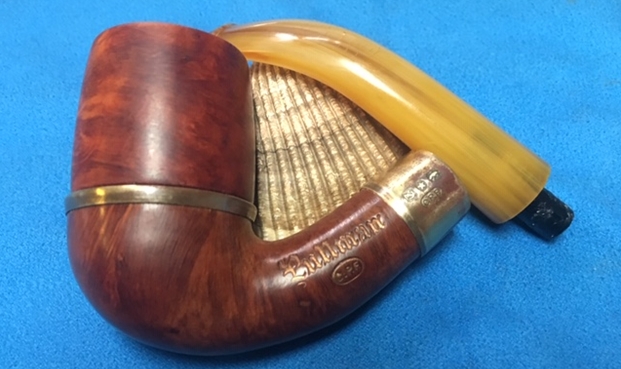
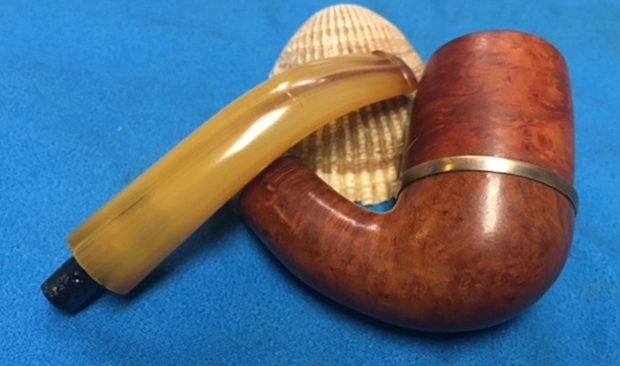
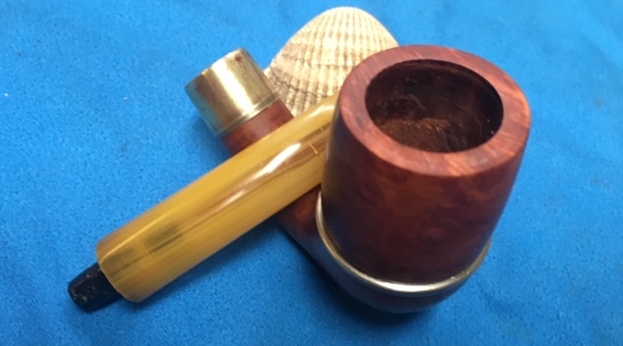
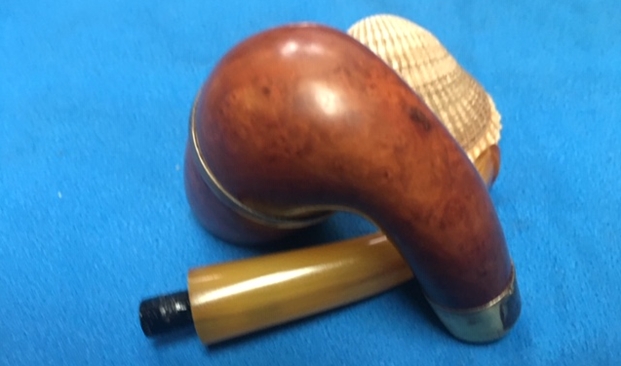
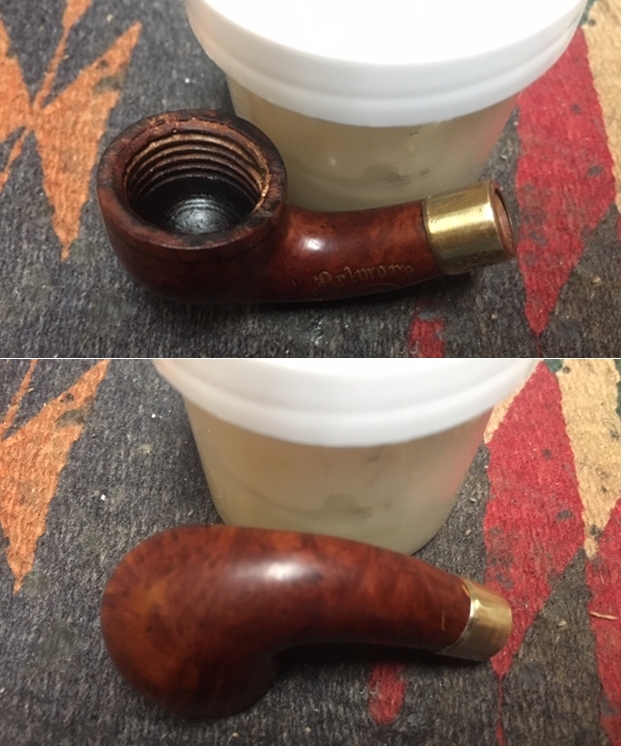
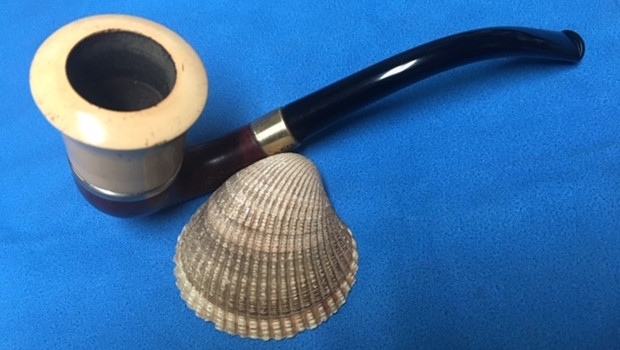
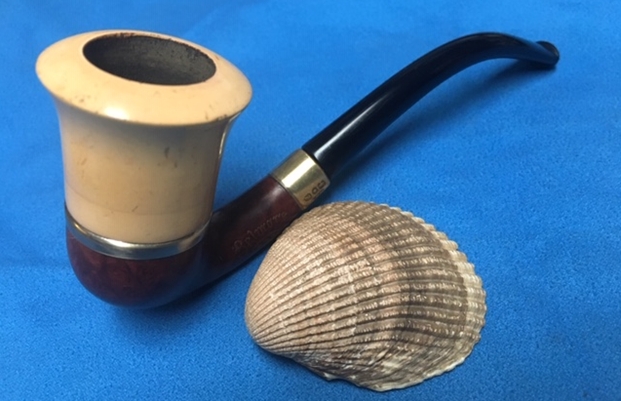
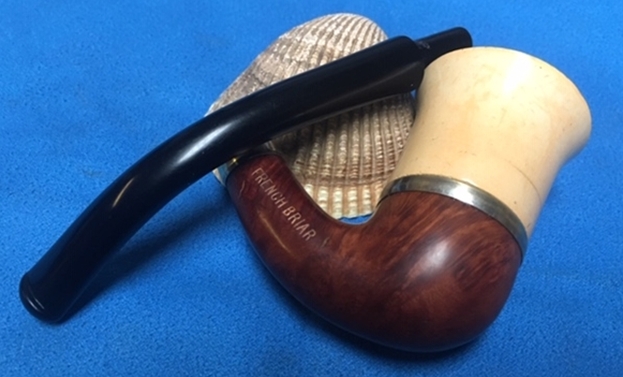
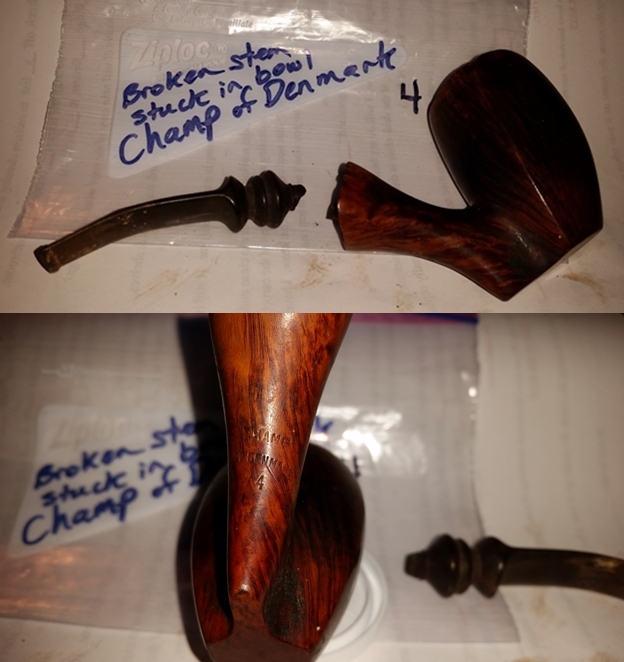
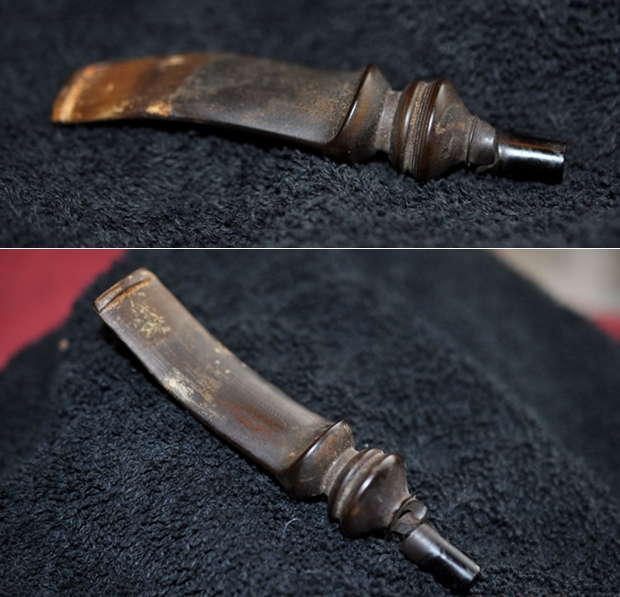
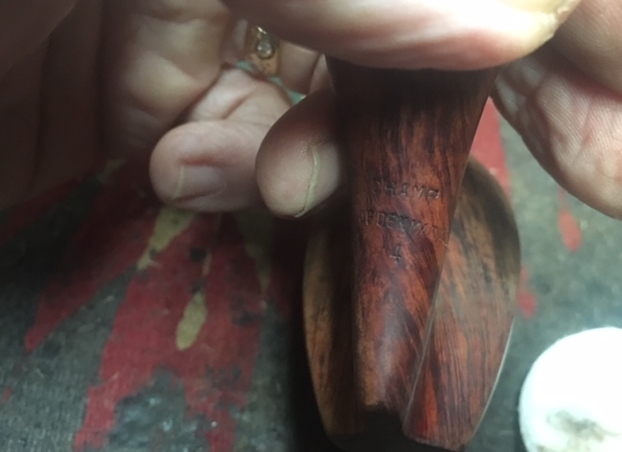
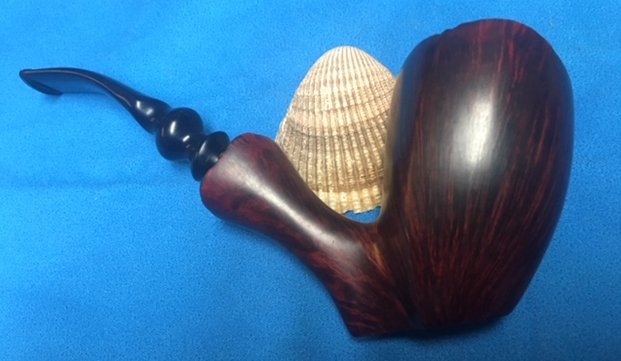
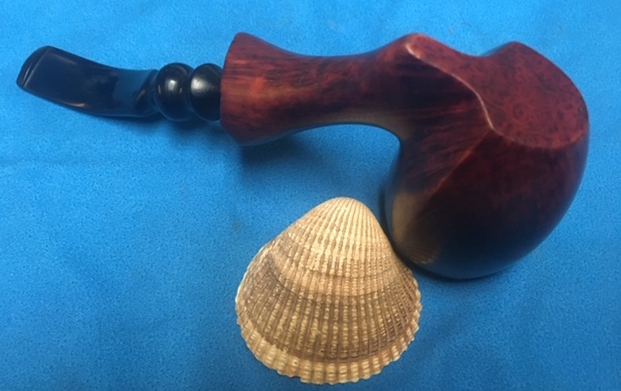
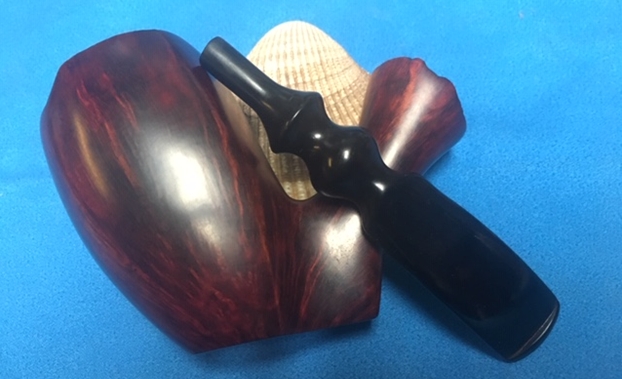
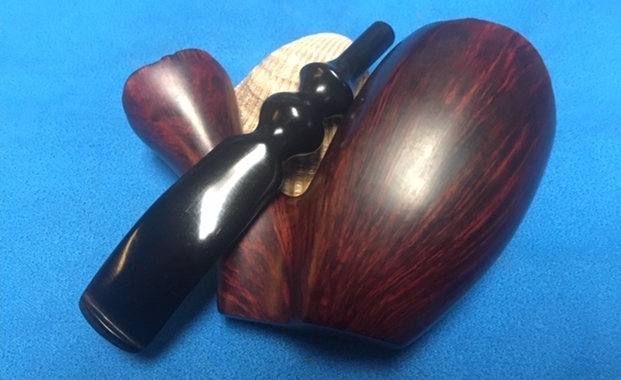
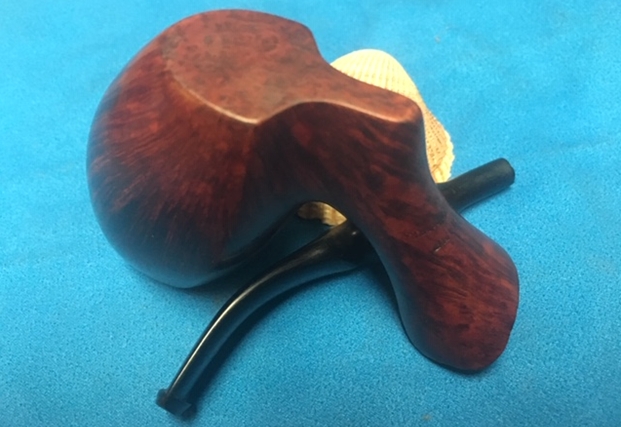
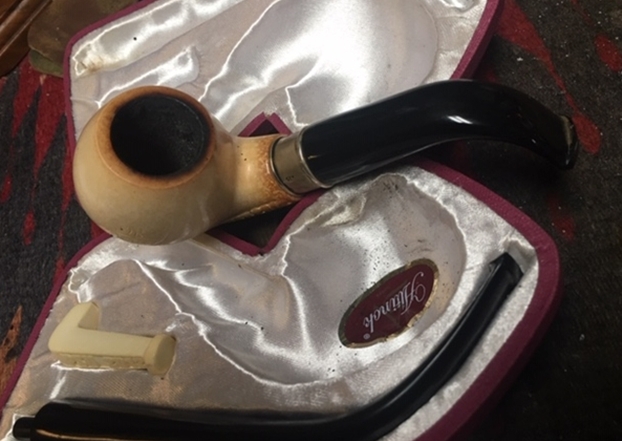
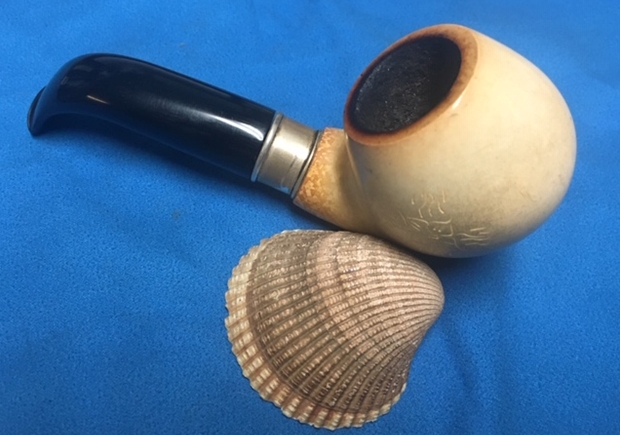
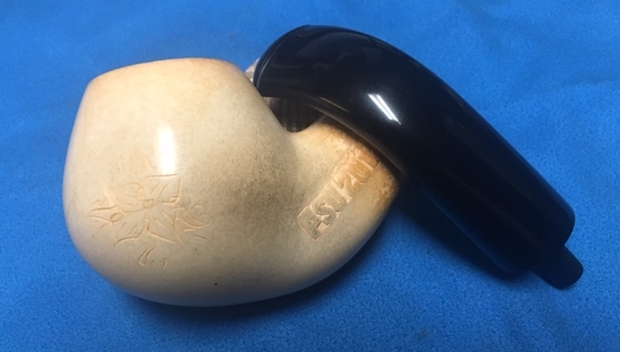
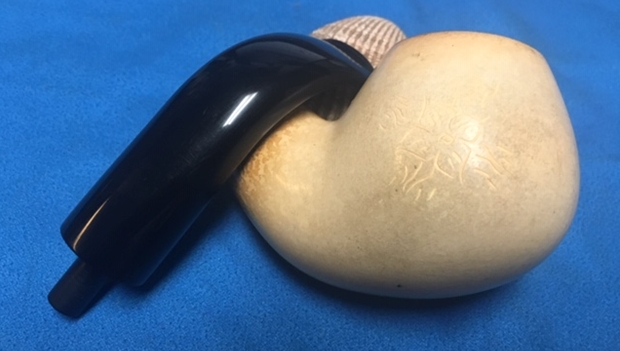
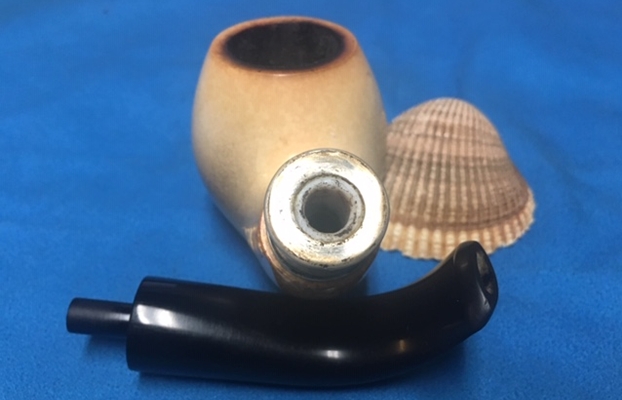
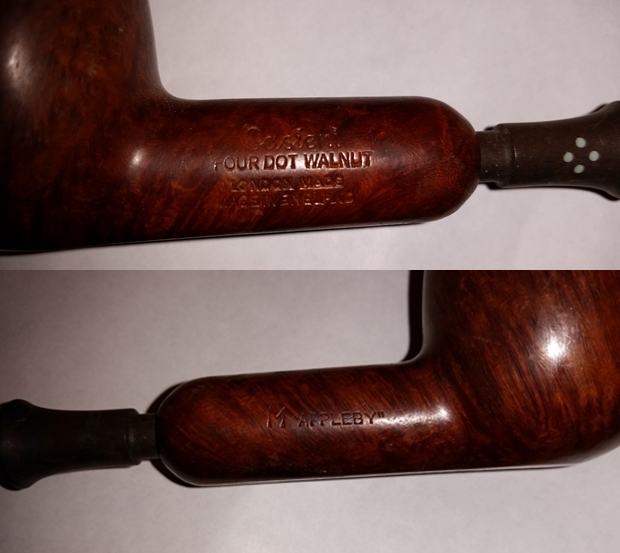
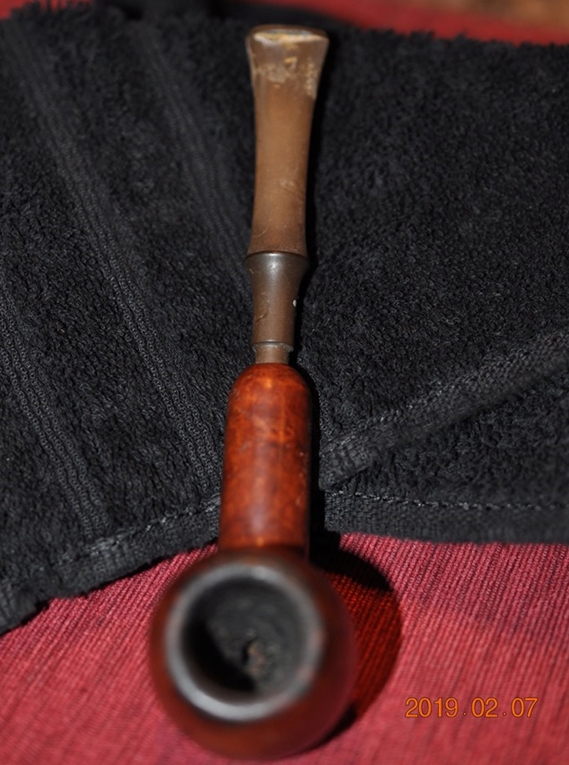
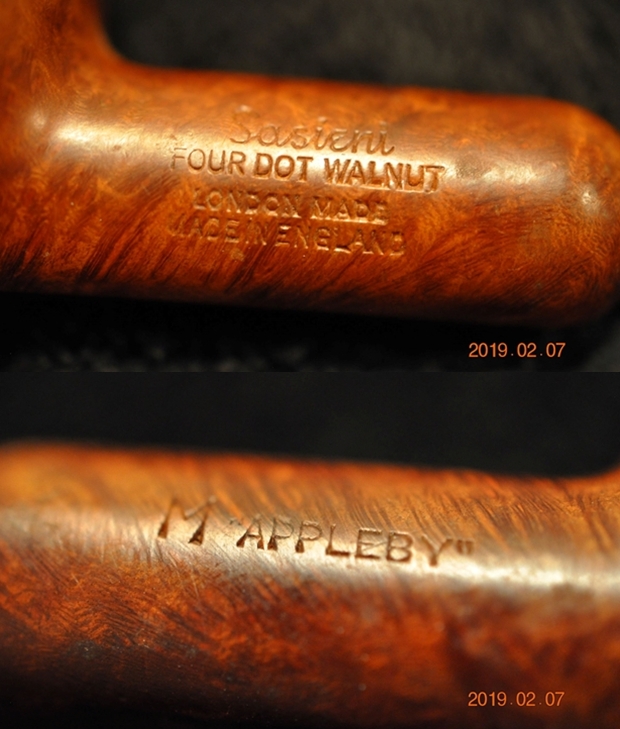
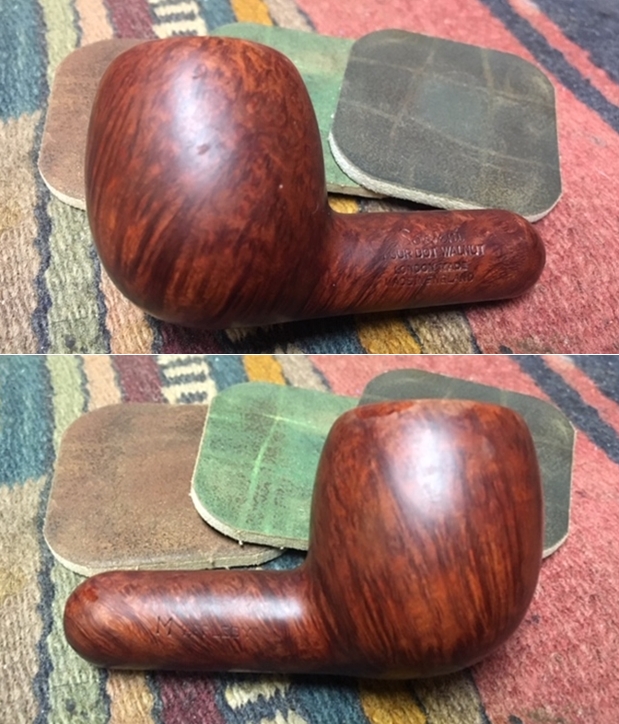
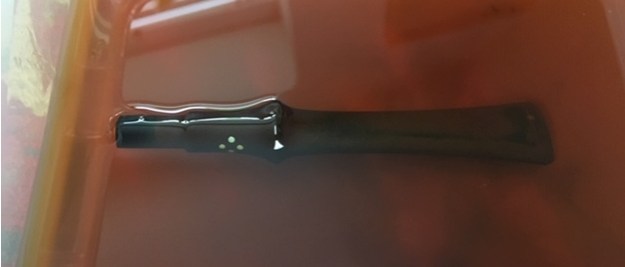
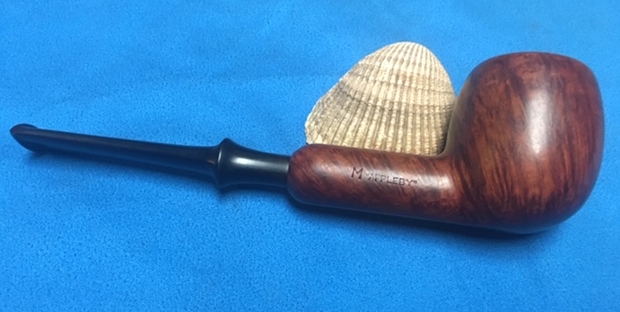
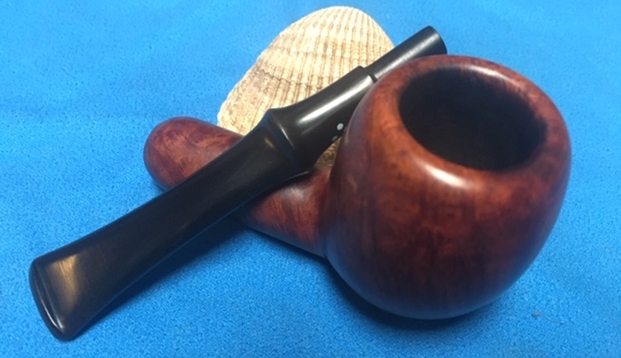
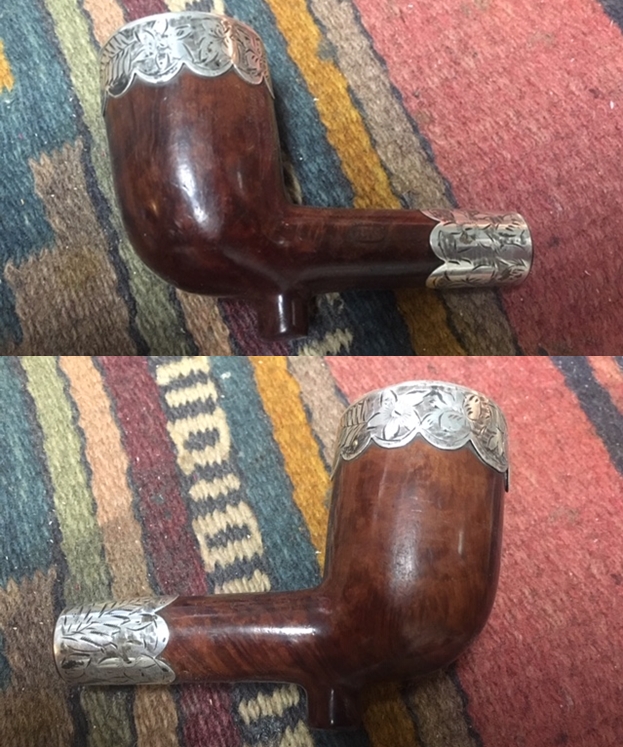
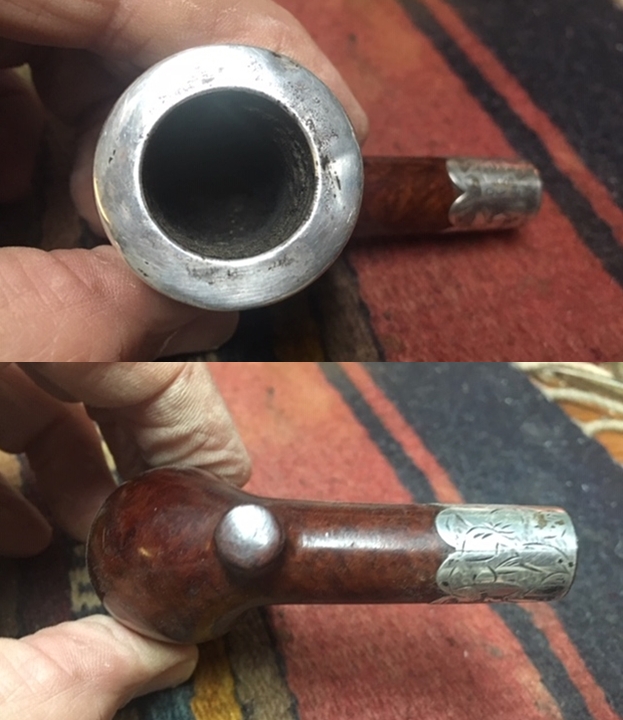
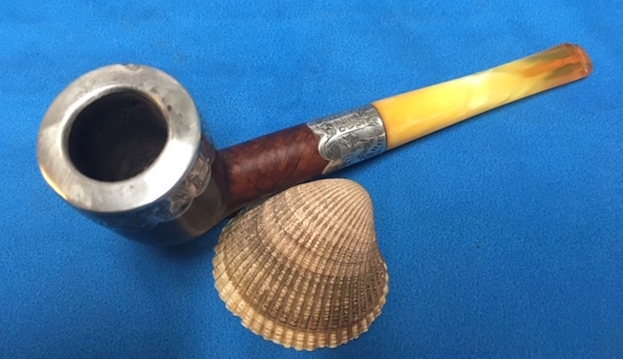
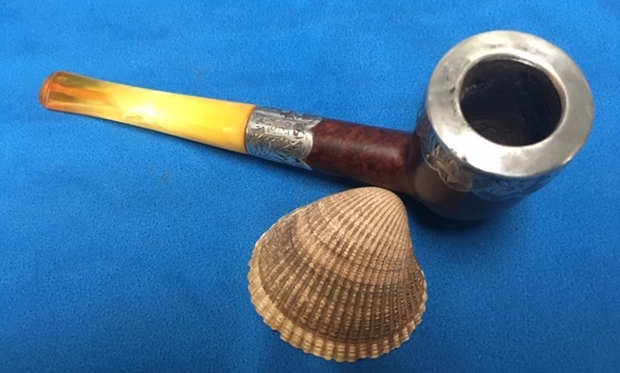
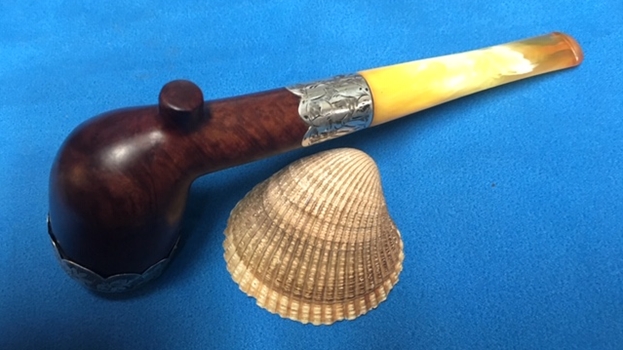
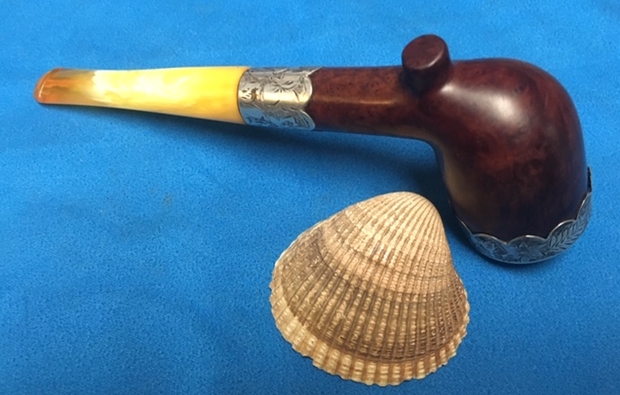
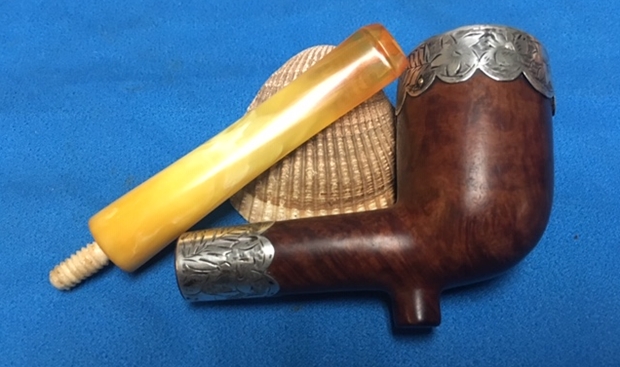
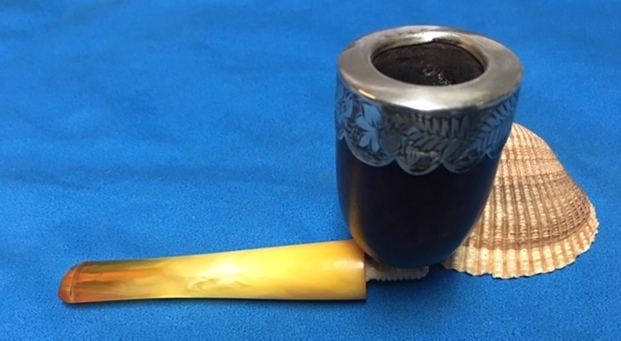
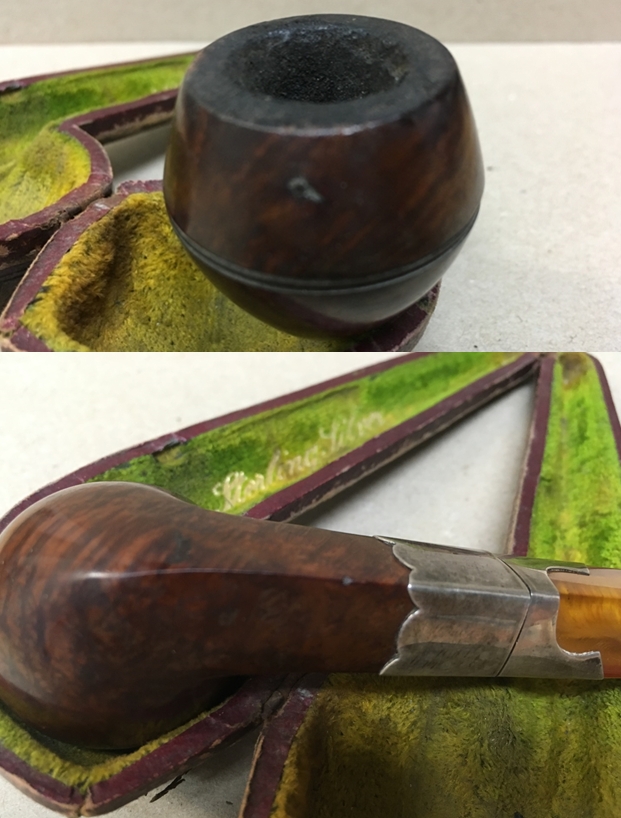
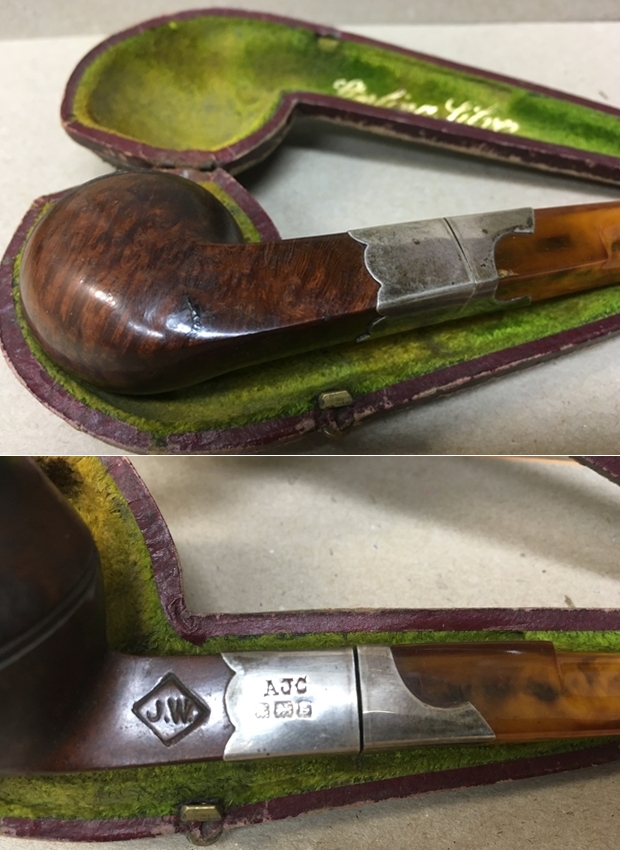
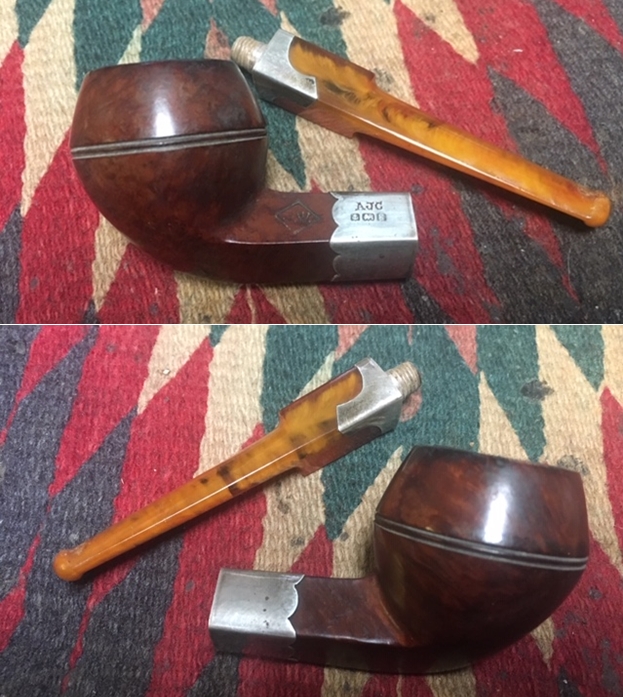
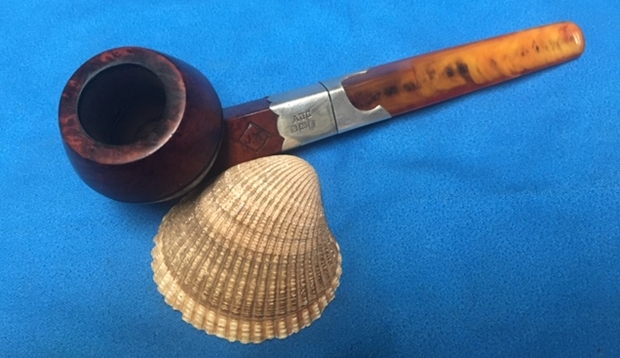
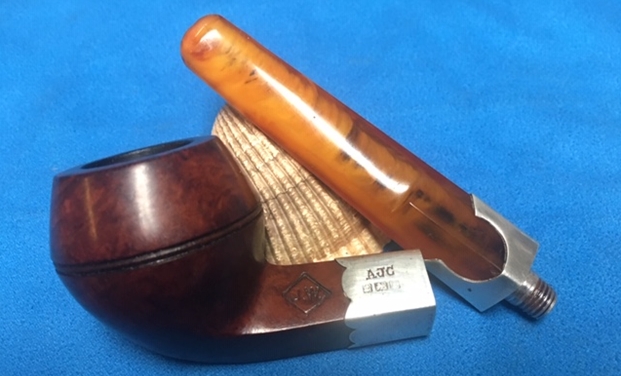
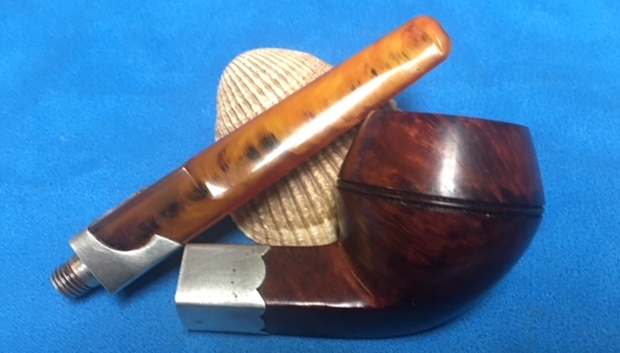
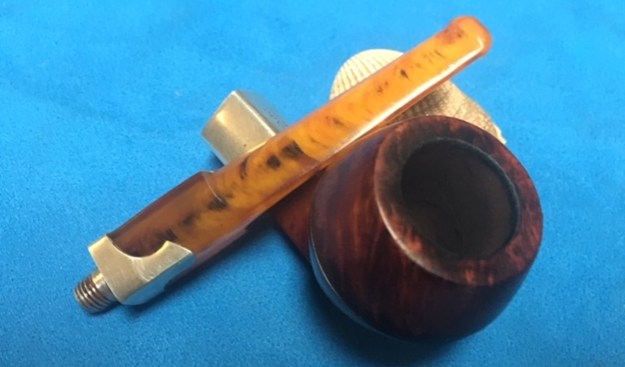
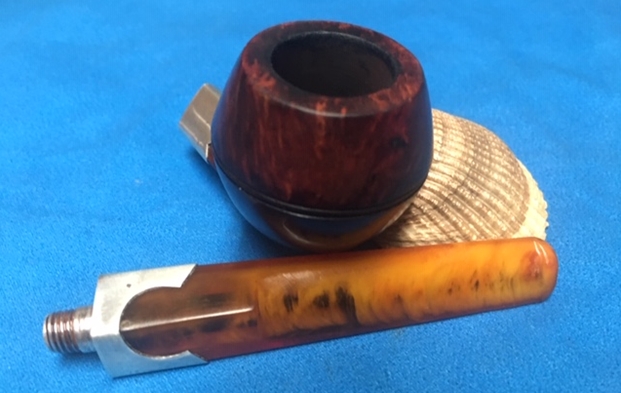
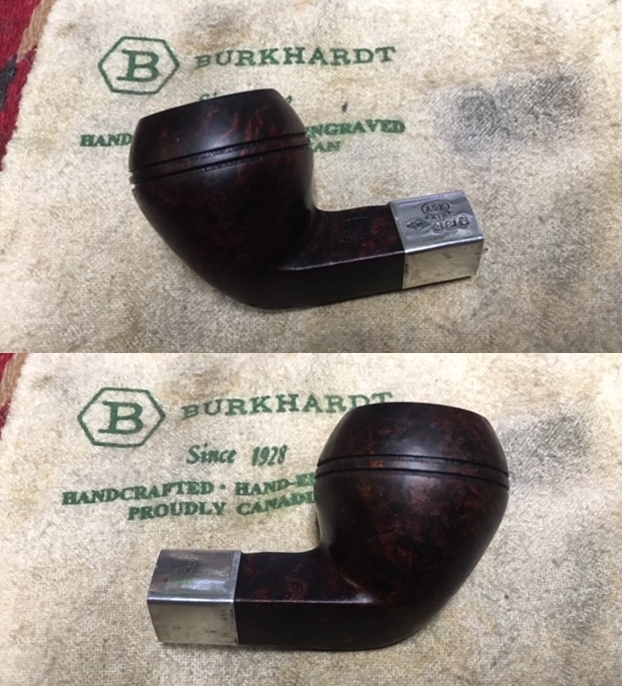
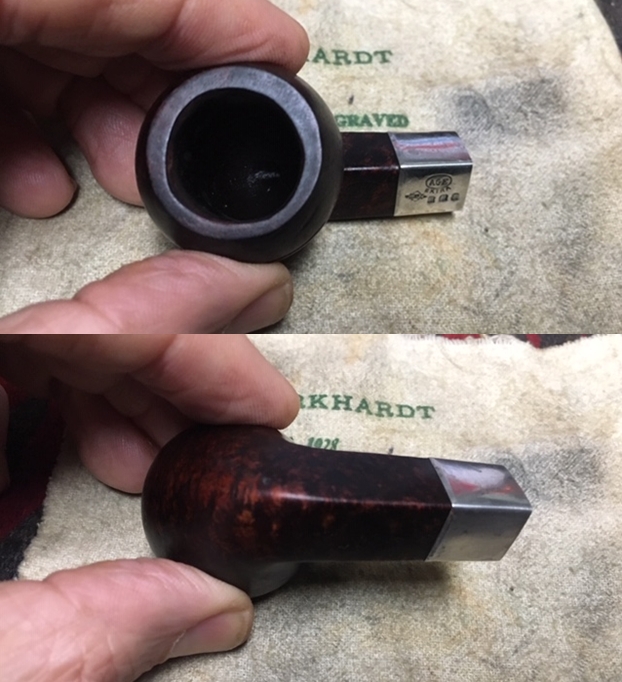
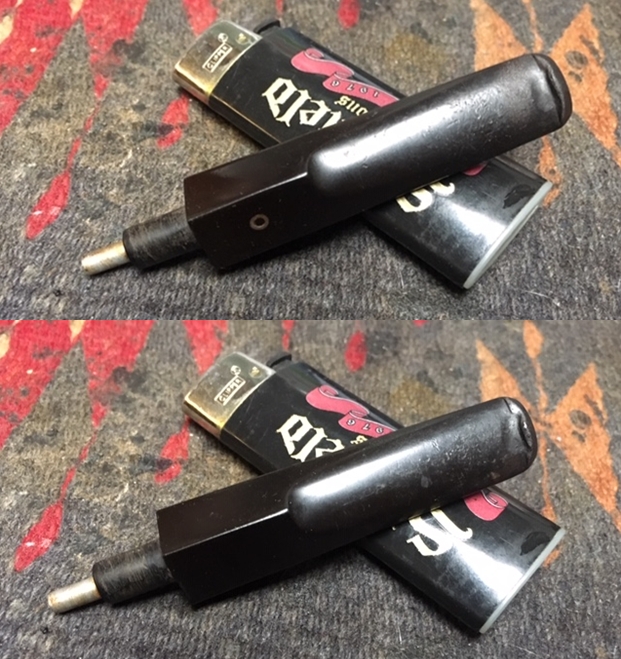
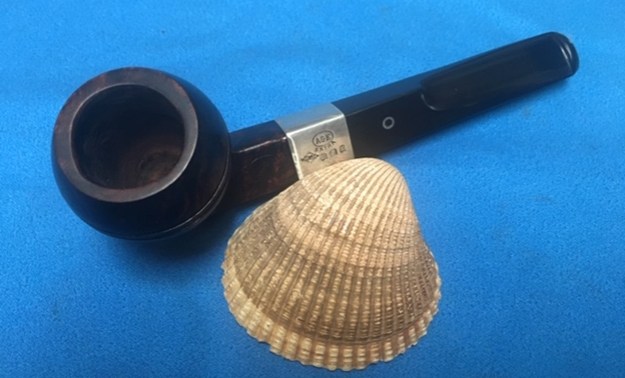
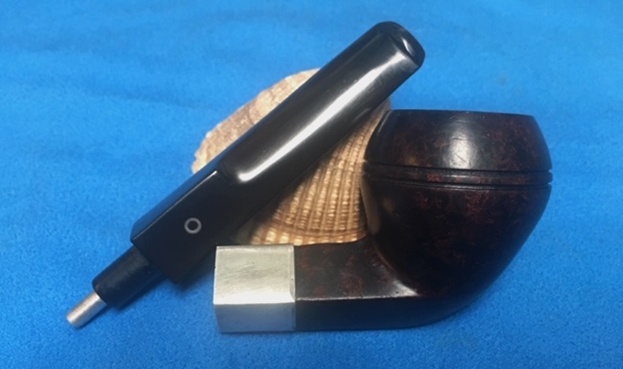
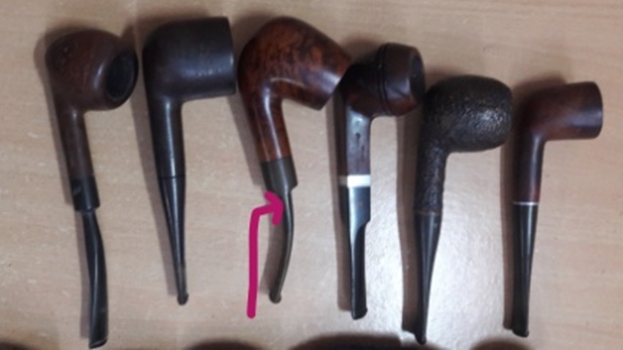
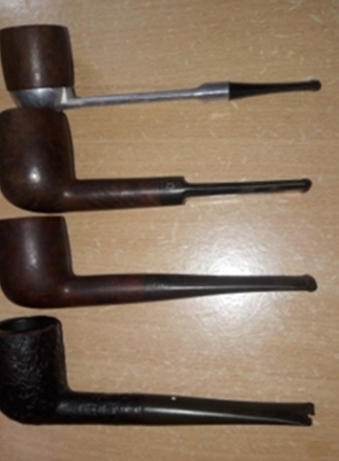
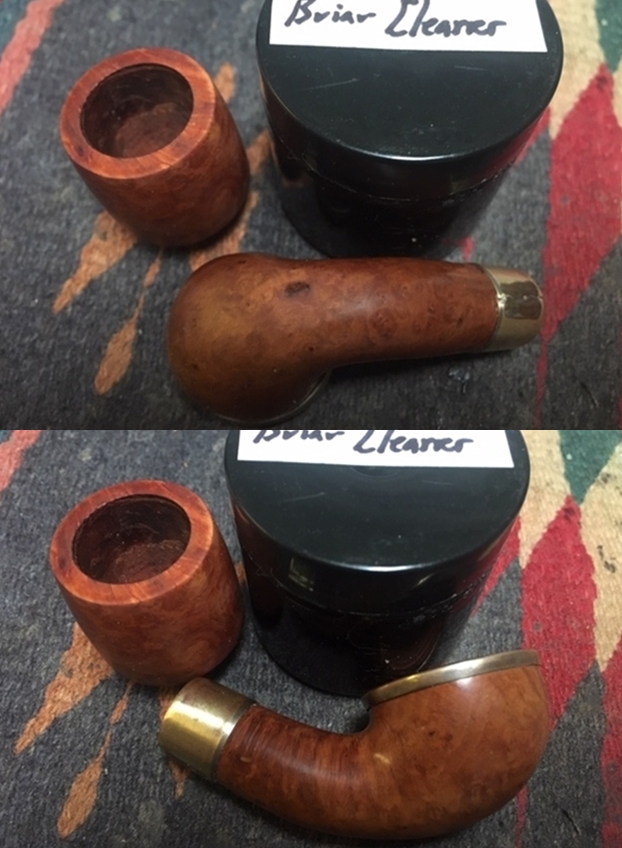
The tenth pipe that I decided to work on from this find is a straight pot and is indicated in yellow colored arrow in the picture below. It is stamped on the left side of the shank in a shield as Mastercraft in sentence form over HAND MADE in block capital letter. The right side of the shank is stamped in a straight line as AGED IMPORTED BRIAR in block capital letter. If at all there was any other stamping on the right side, it has been consigned to history due to severe damage further down the shank. The stem is apparently devoid of any logo stamp as I see it now. If at all there ever was a logo, it has completely worn out/ obliterated.
 Now coming to the research of this brand, which is my first, I referred to rebornpipes.com and as expected, Mr. Steve has extensively researched this pipe and has even posted some interesting old catalogs and hierarchy of the pipe lines from this brand. Here is the link;
https://rebornpipes.com/2014/06/23/a-mastercraft-pipe-lines-hierarchy/
I surfed further and found an interesting post on restoration of a Mastercraft Executive Choice by the master restorer himself, which amongst other details, included two photos from the 1969 RTDA Almanac which show a list of various MC pipe lines. The pipe currently on my work table is the very first one in the list and was the top most in MC hierarchy of pipe lines and also the most expensive of all MC pipes retailing for $ 10!!!!! Here is the link for the essay and I urge all readers to give it a read.
https://rebornpipes.com/2014/06/22/learned-a-bit-of-american-pipe-history-mastercraft-executive-choice-pot-restored/
Thus, I can now safely conclude that this pipe is from the late 1960s, had been a top-of-the-line product for MC and retailed as the most expensive pipe in its inventory!!!! Well, after this search, I feel the additional pressure in doing complete justice to this pipe to the best of my abilities and that I will have to up my game a notch higher.
INITIAL VISUAL INSPECTION
I really do not understand where I should start from, which damaged inch of the pipe I should describe first, let alone tackle and about which I am not even thinking at this point in time!!!!! But to finish, I have to make a beginning and let me just start with the chamber and the rim.
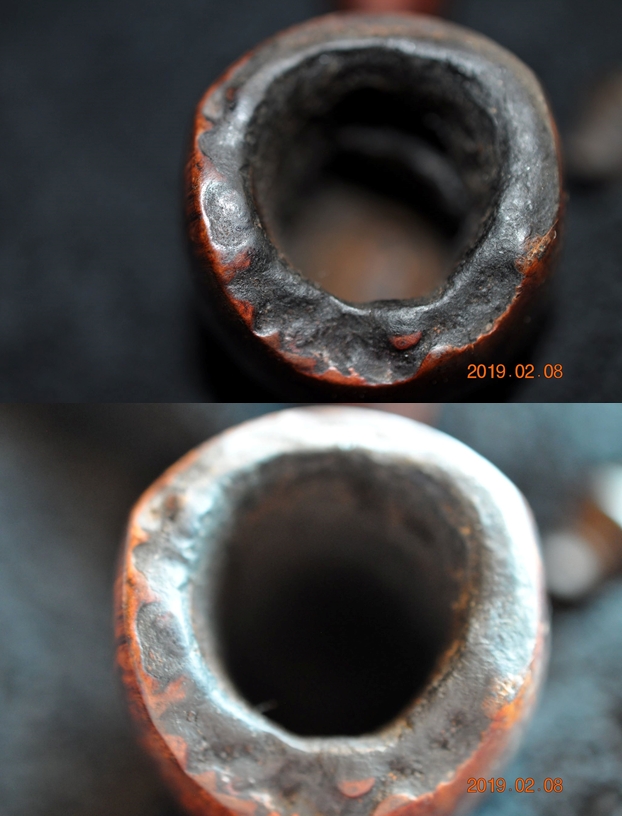
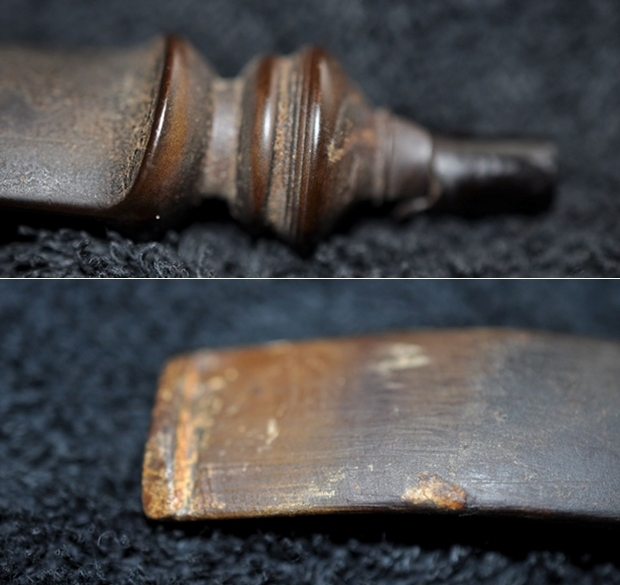
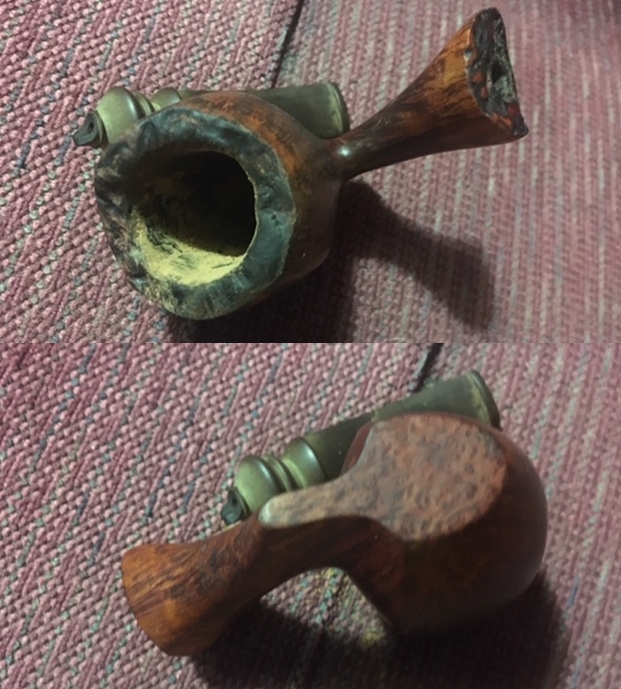
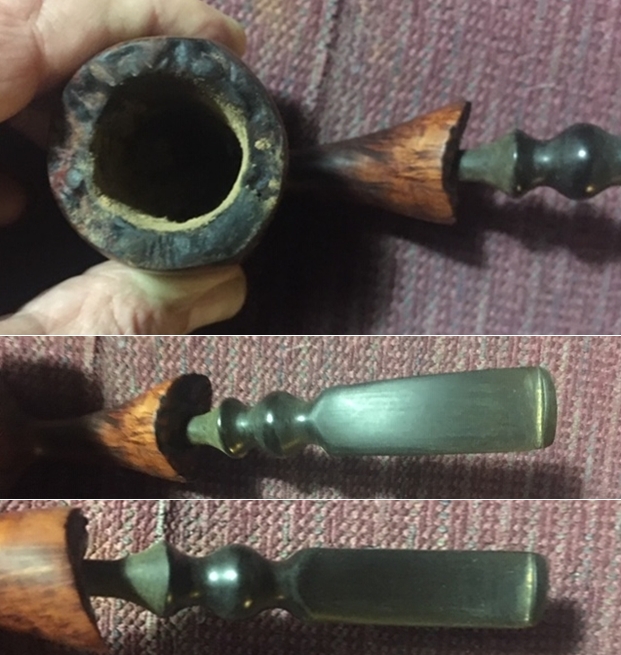
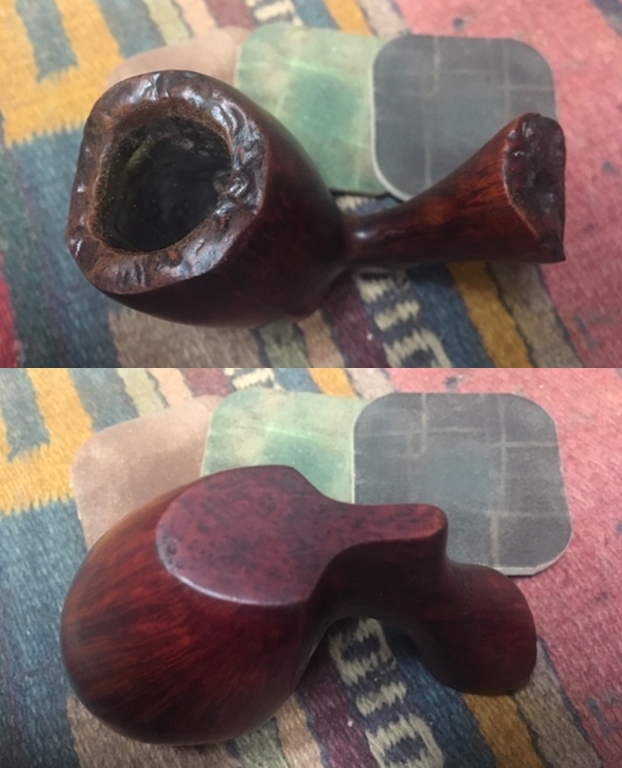
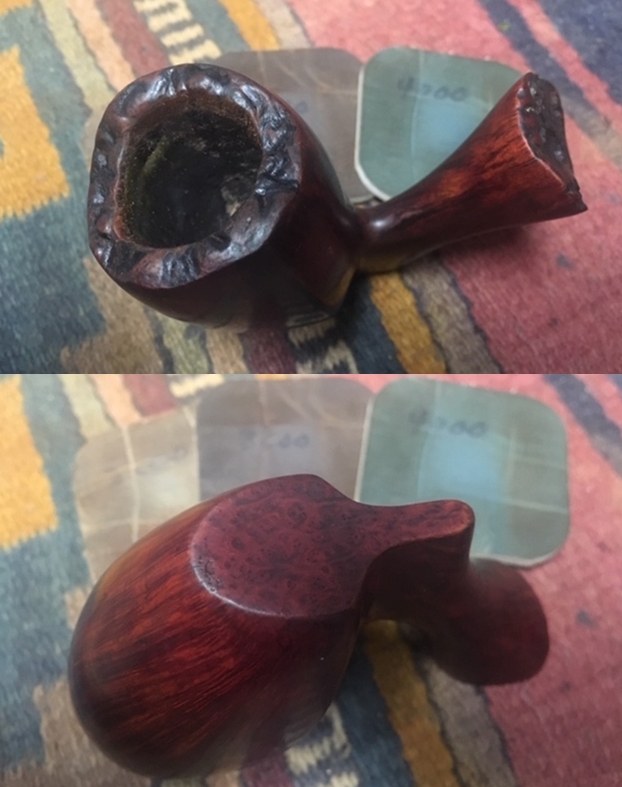
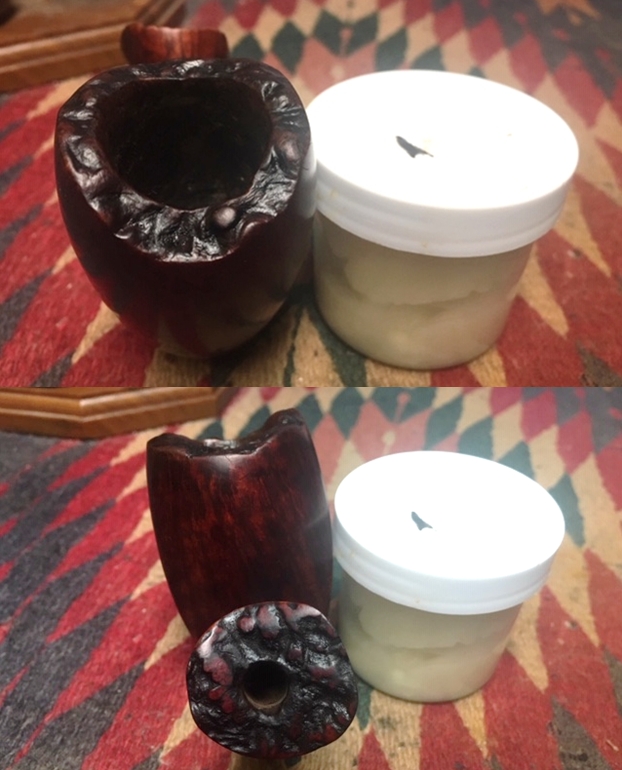
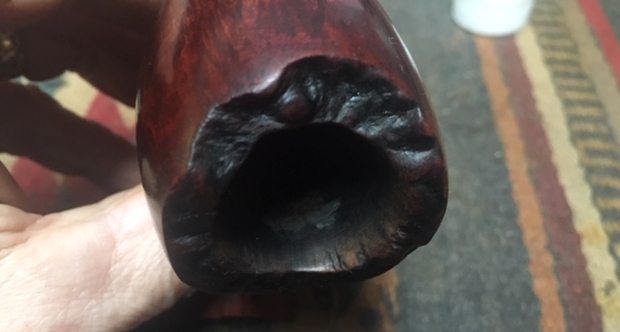
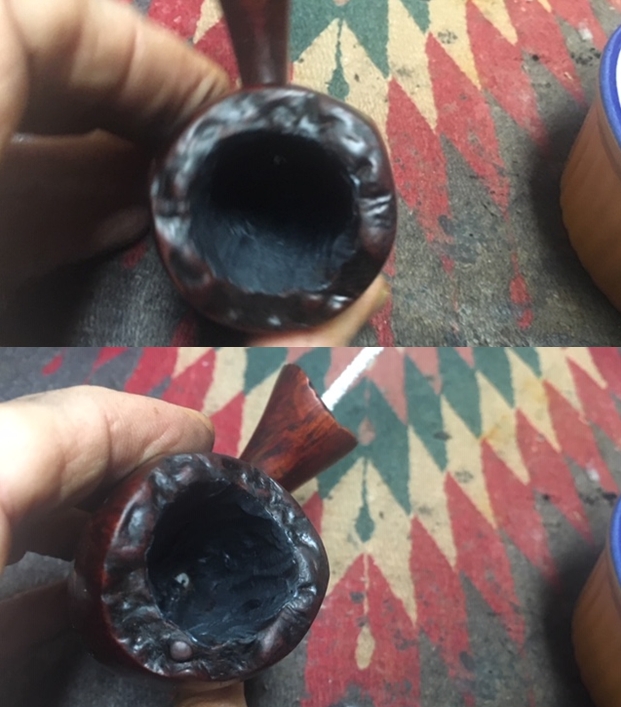
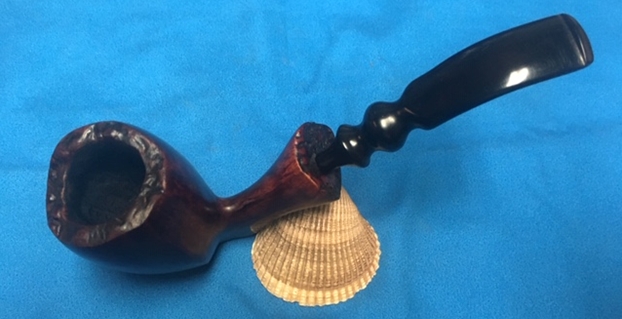
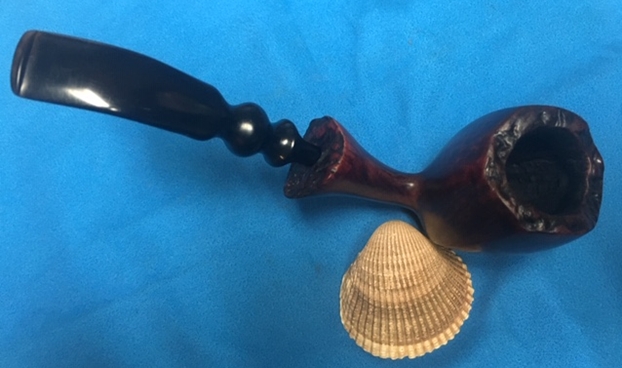
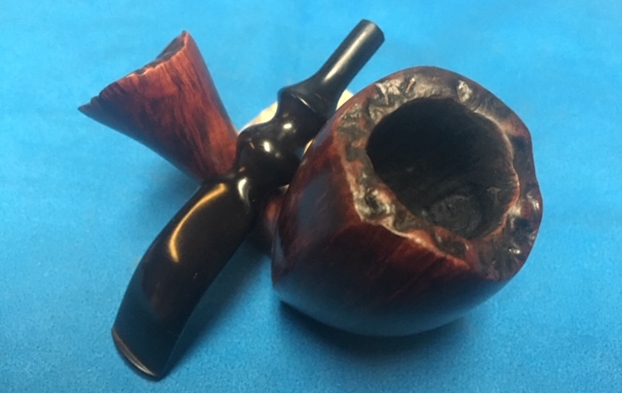
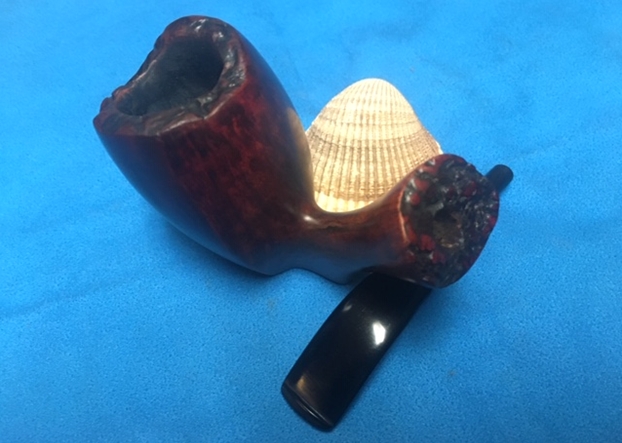
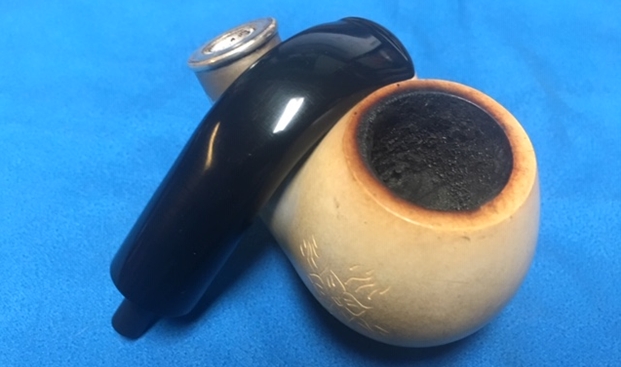
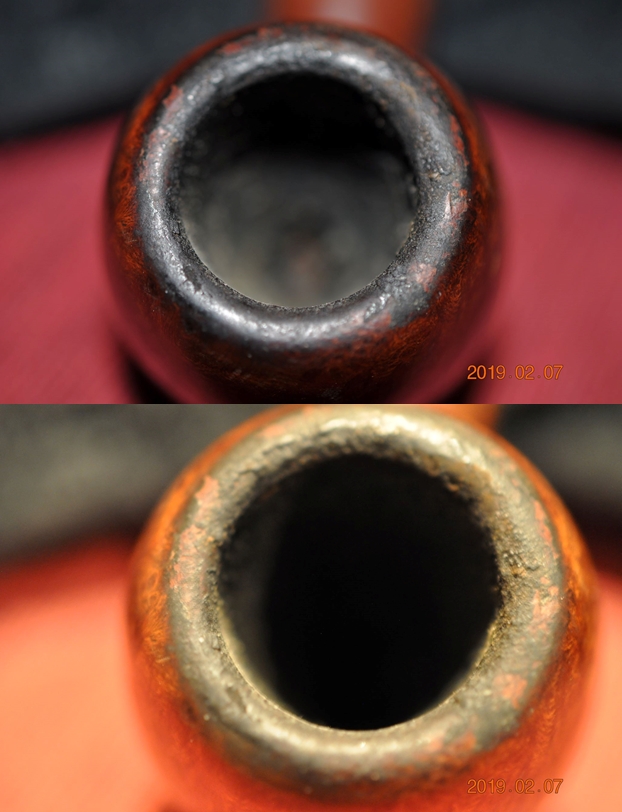
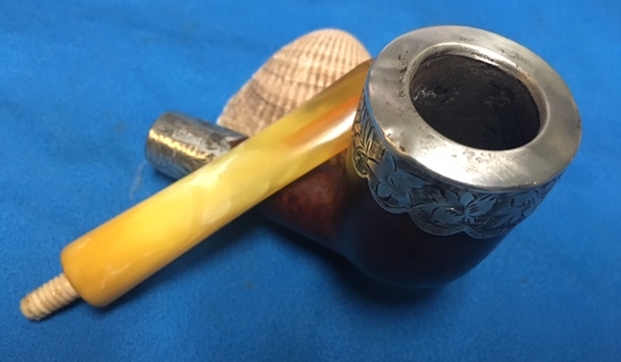
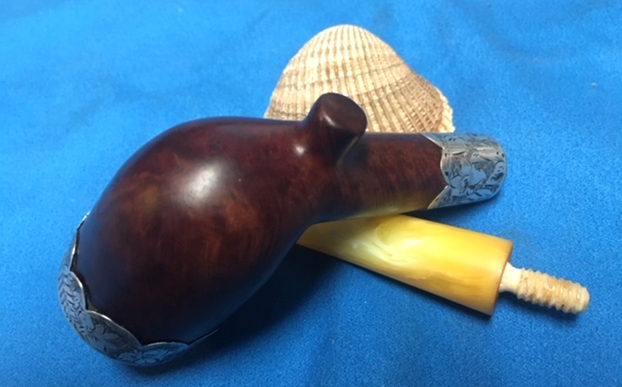
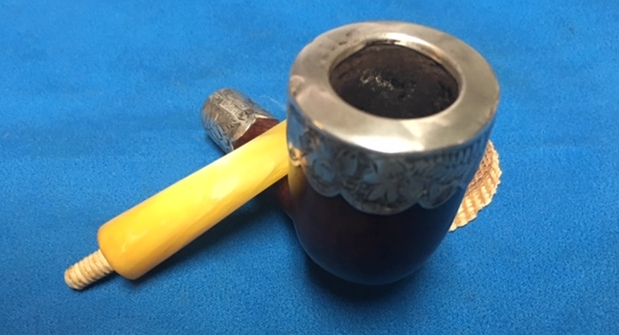
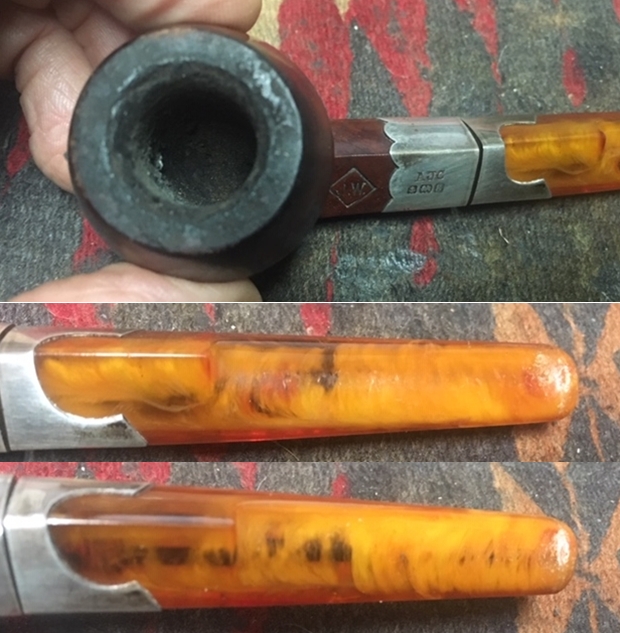
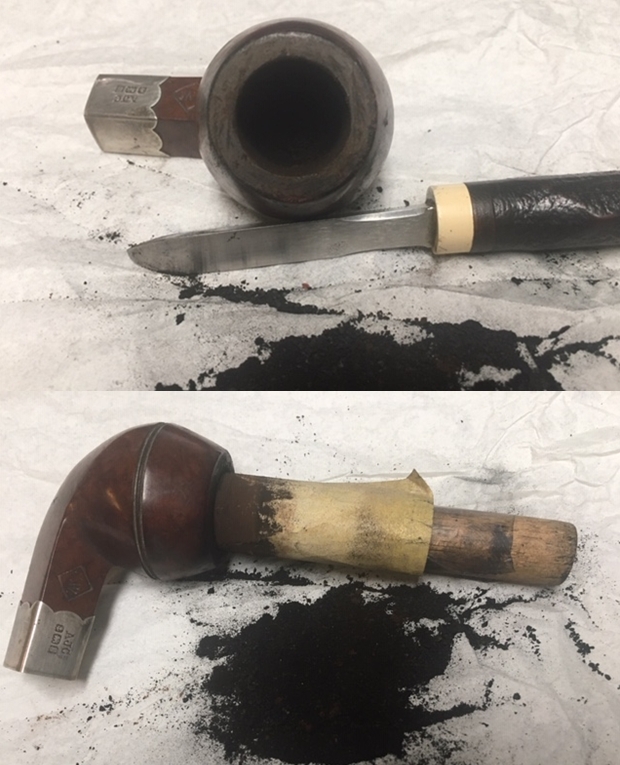
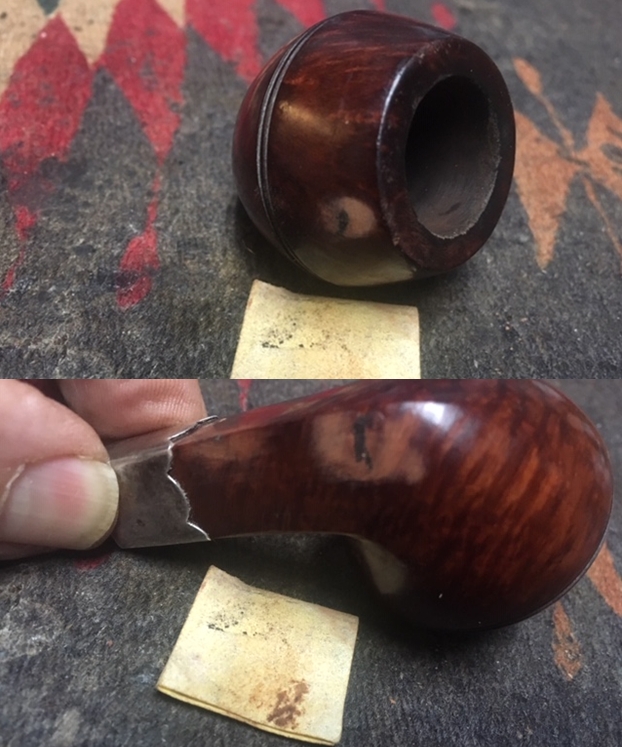
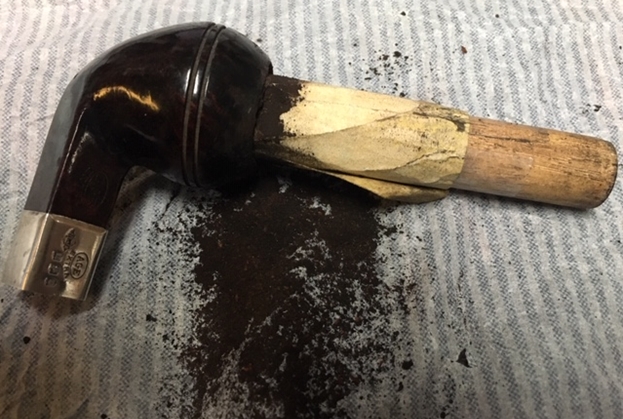
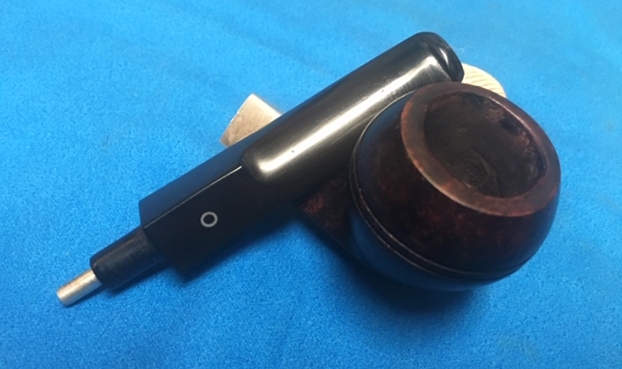
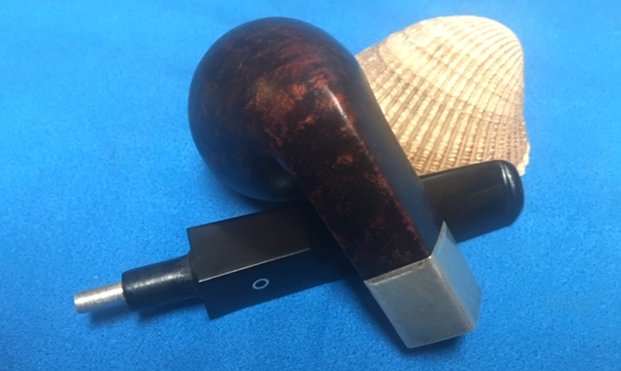
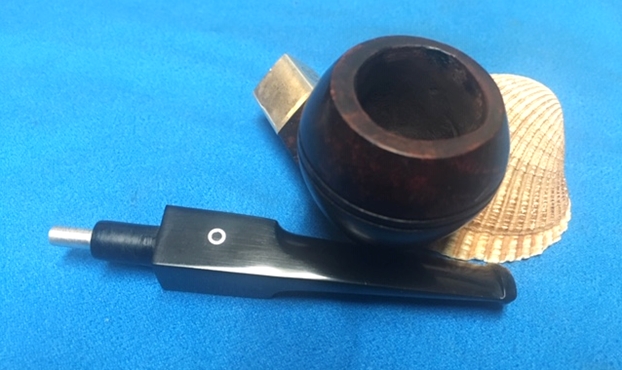
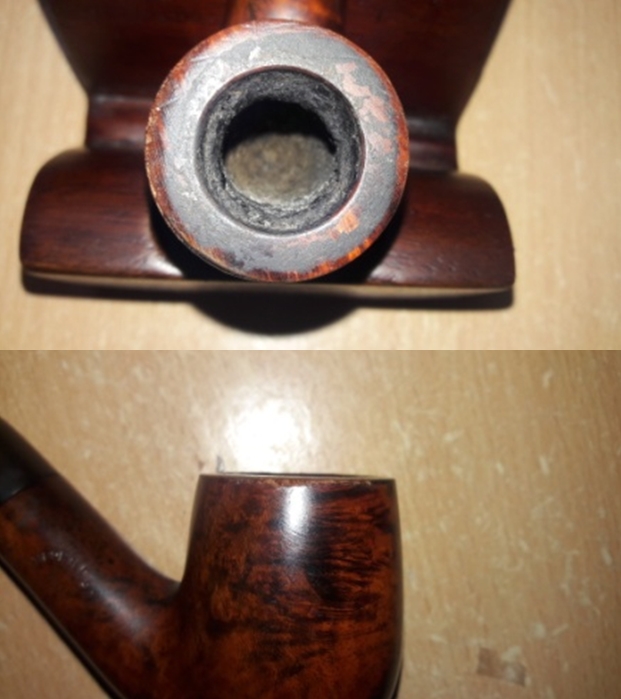
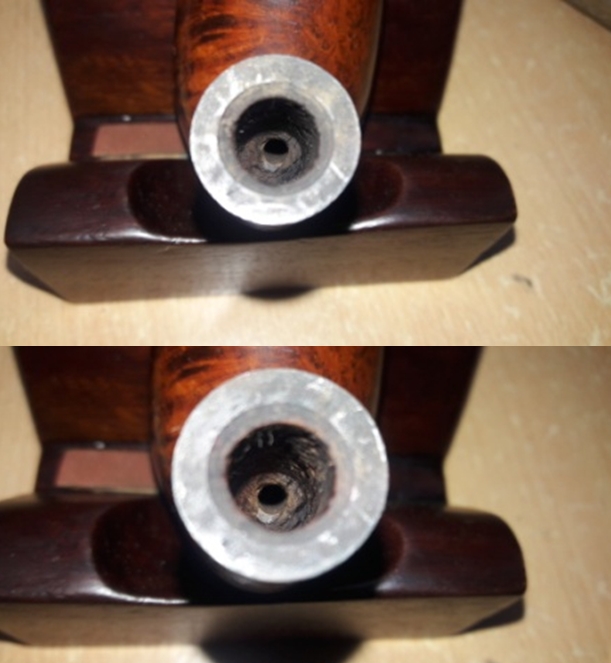
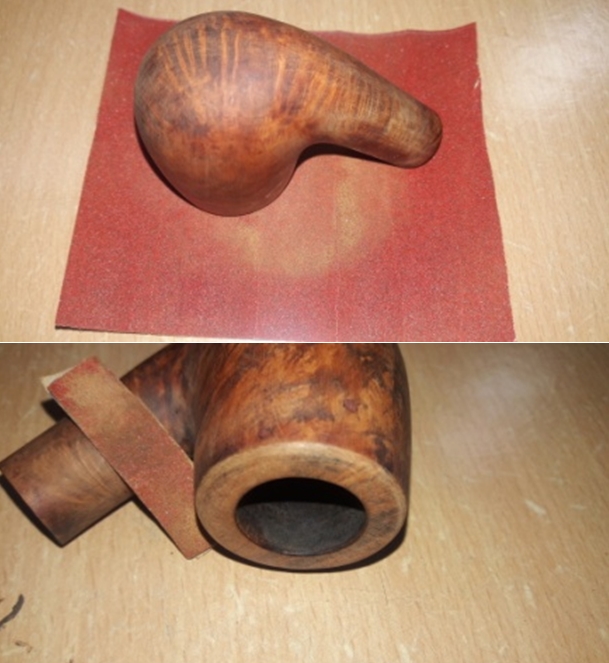
A thick layer of cake can be seen in the chamber. The rim top surface is covered in thick overflow of lava, okay; consider that as VERY thick, which has bubbled on to the rim top and further oozed over on to the stummel surface. The condition of the inner walls of the chamber and rim top surface will be known once the cake has been taken down to bare briar and the rim top crud has been scraped off completely (thankfully readers cannot see or hear me muttering silent prayers!). The less I speak about the edges of the rim, the better it will be for my morale. Every millimeter of the outer edge has been damaged by striking against table end by the previous steward, however I must thank the previous steward for ensuring an even all round damage…lol. The inner rim condition does not look too promising either! I suspect a charred rim in 7 o’clock direction (when held from the stem end) and is marked in red circle. However, once the cake has been removed, I shall be certain about the extent of this charring and any other damage (praying again, in fact I haven’t stopped praying since I began and unlikely to stop till I finish!).

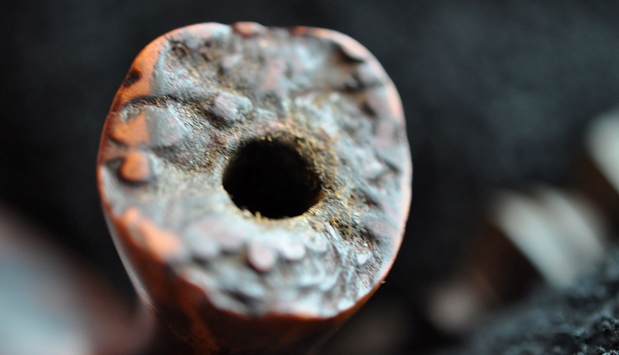
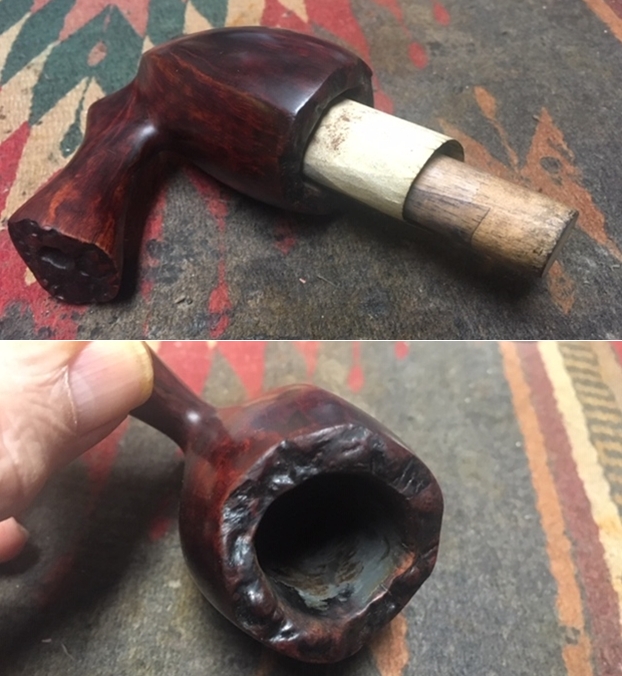
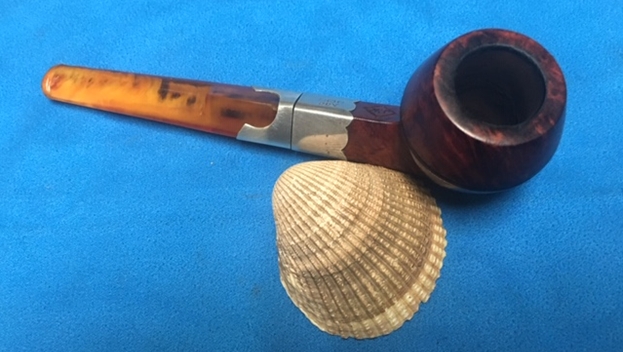
 Another issue which I have noticed is that the briar in the heel around the draught hole has formed a valley of sort (marked by yellow arrows), probably caused due to repeated and rigorous thrusting of a pipe cleaner through and beyond the draught hole over the years. Why would you clean the mortise and airway in this fashion??
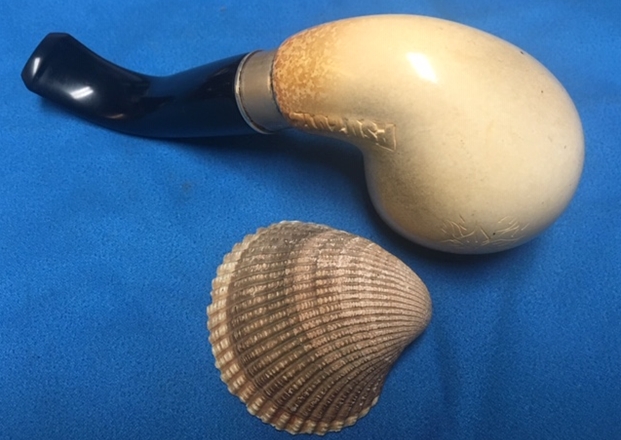
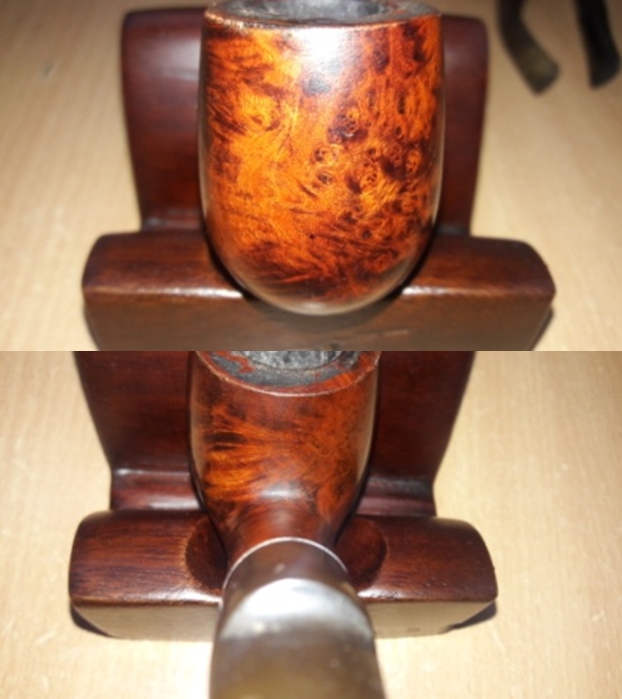
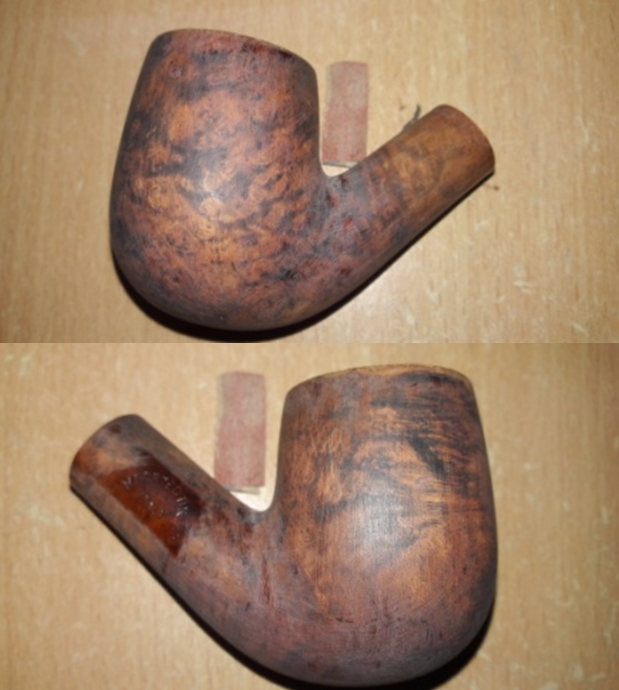
 The most significant damage is seen to the stummel. It appears that this pipe has seen active duty and has been extensively and actively used against Viet Cong by the previous steward with great success…..LOL!! Every inch of the stummel surface is peppered with a large number of deep scratches, dents and dings. The entire left side of the stummel has prominent nicks extending from the rim top right down to the foot of the bowl. There are deep road rash marks on the right side of the shank just below the stamping, extends over to the underside and towards the shank end and further extends over to the stem for about an inch from the tenon end towards the button end (marked in pastel blue circle). The damage to the shank end and stem is so perfectly aligned that it appears that the damage was sustained while the stem was attached to the shank. In short, the stummel has sustained massive damage over the years due to both, rough usage and subsequent careless storage. It is covered in oils, dirt and grime of all these years of smoking and subsequent uncared for storage. The stummel surface is sticky to the touch, giving the stummel a dull, lifeless and lackluster appearance. However through all this dirt, tar, oil, grime and damage, lovely densely packed straight grains can be seen on the sides and shank. It will be a challenge to address these issues and make the grains to reveal themselves in all glory. The mortise is blocked with dried gunk, adversely affecting both the airflow and the seating of the tenon in to the mortise.
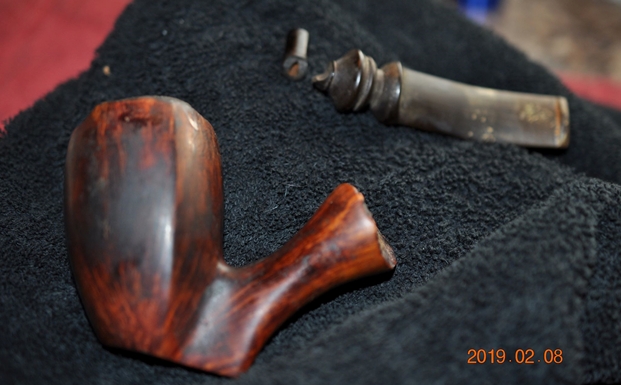
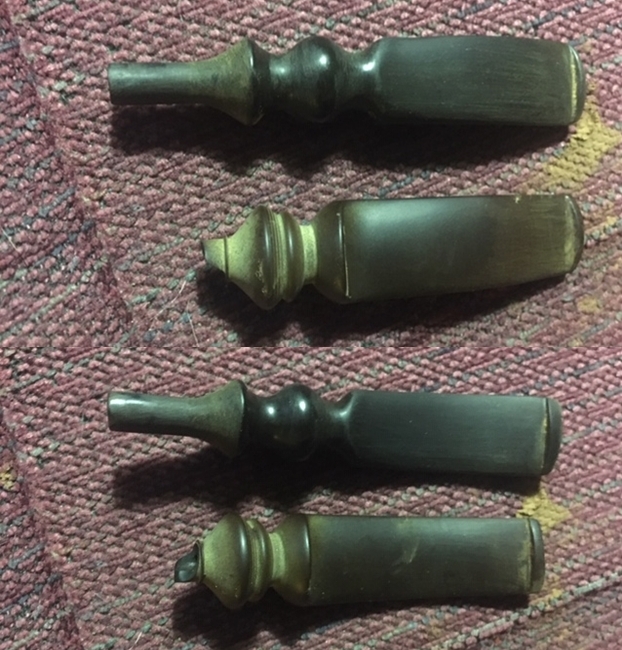
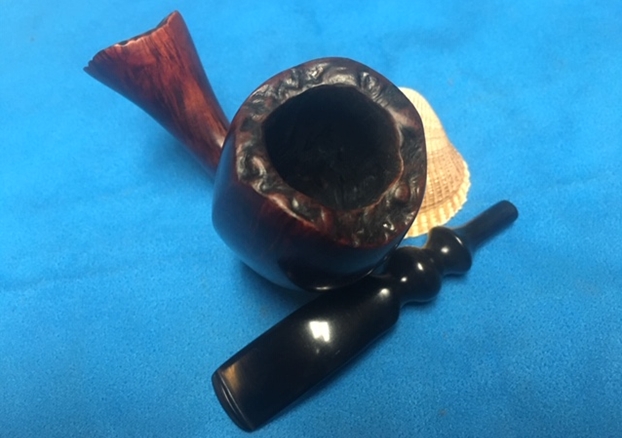
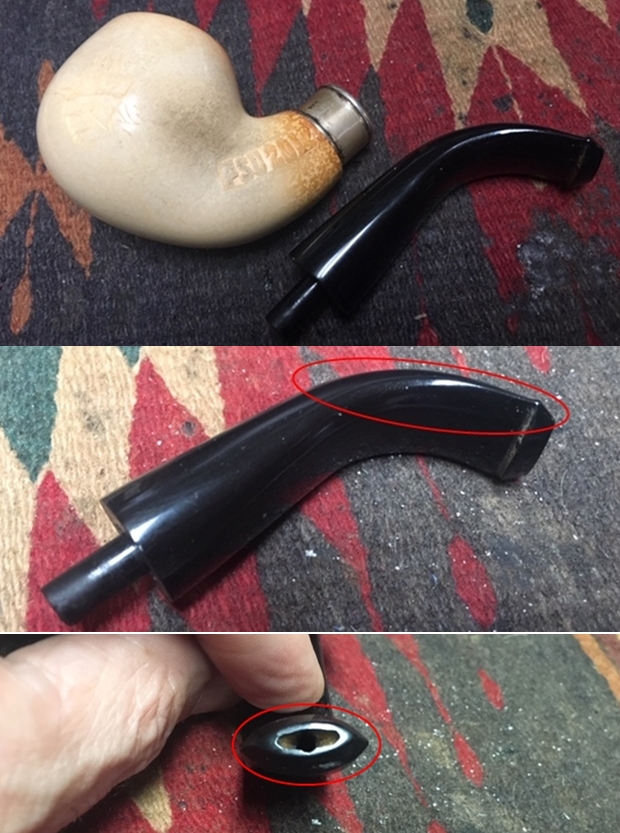
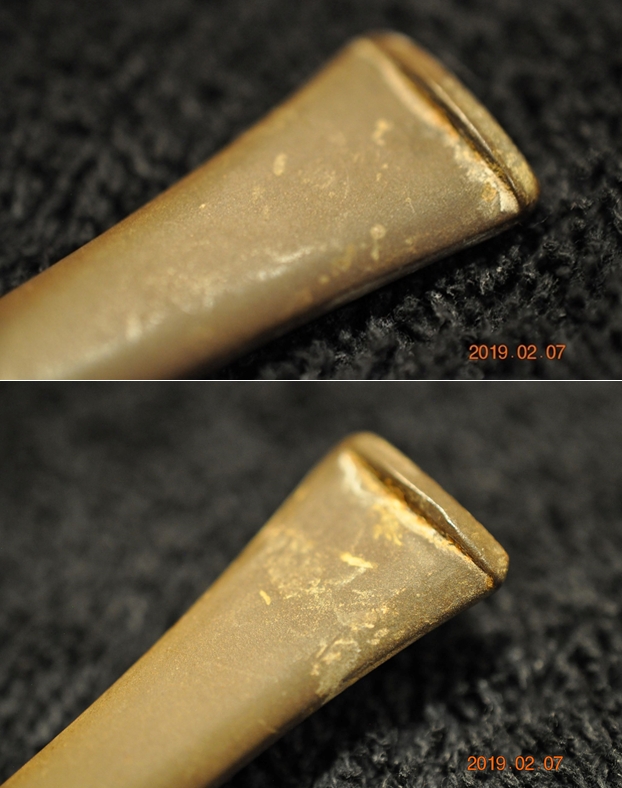
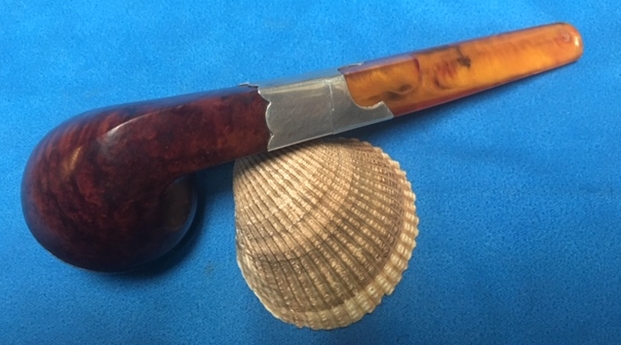
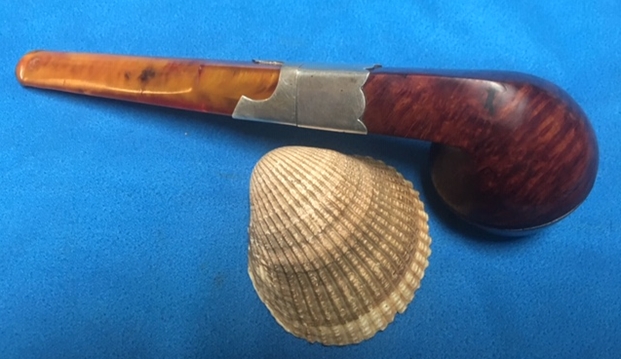
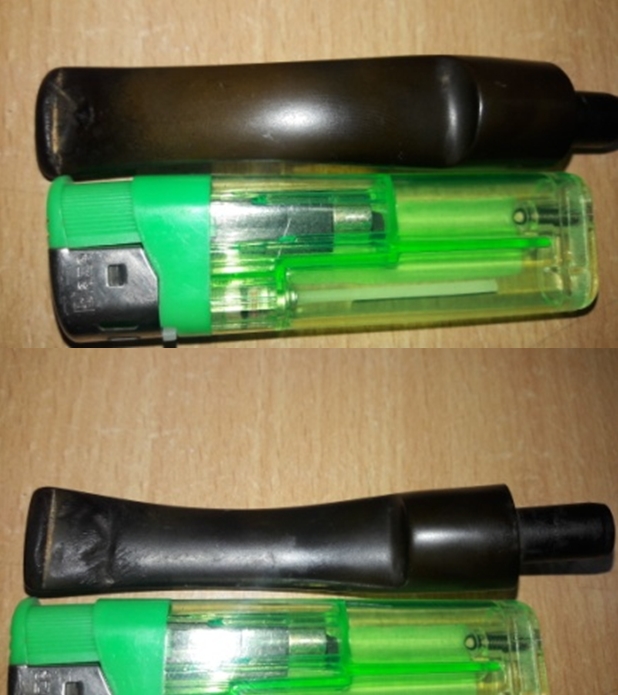
 The stem is also an equal disaster like the stummel with road rash marks on the right towards the tenon end. There is a round patch nearer to the button which appears to be a result of melting of the vulcanite. In all probability it had come in close contact with either a burning cigarette or some sort of a flame. It seems that the previous Steward used softie bit on his pipes as heavy oxidation can be seen where the bit was used. The bite zone, including the button edges shows dental compressions on both upper and lower surfaces. The button edges will have to be reconstructed and sharpened. The stem does not sit flush with the shank end and also the stem diameter around the road rash area has scrapped off resulting in a mismatch. This stem diameter will have to be rebuilt and I expect that once the mortise has been cleaned up, seating of the stem in the mortise would improve. The horizontal slot with a round center shows accumulated oils and tars. The stem surface shows signs of heavy oxidation.

 THE PROCESS
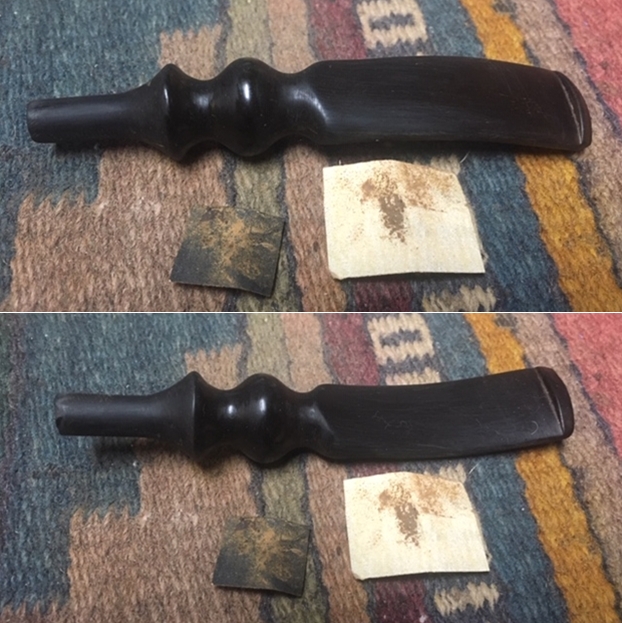
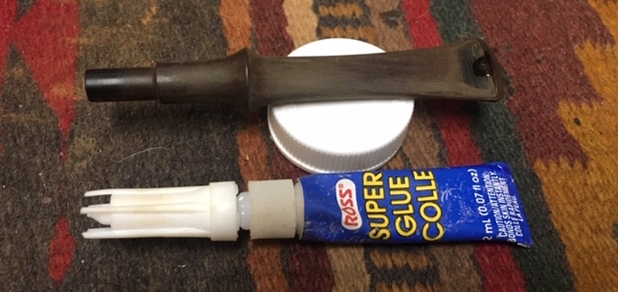
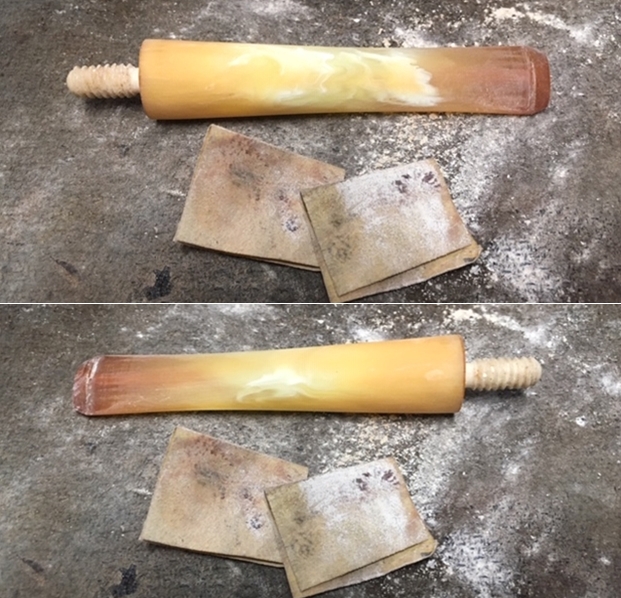
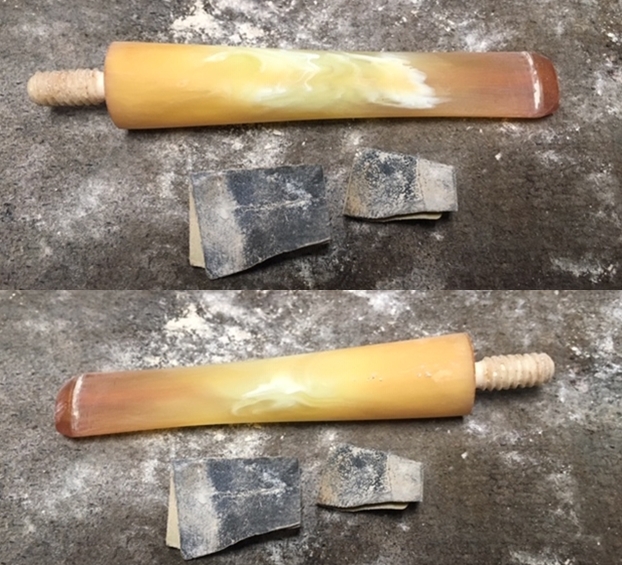
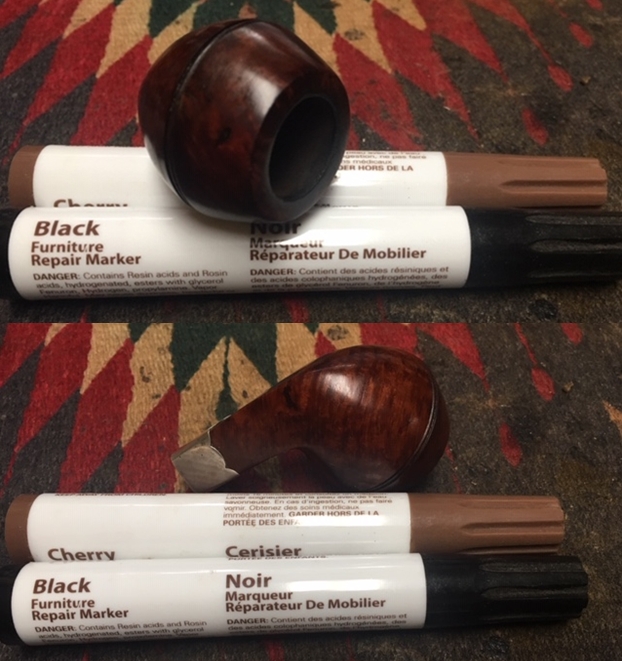
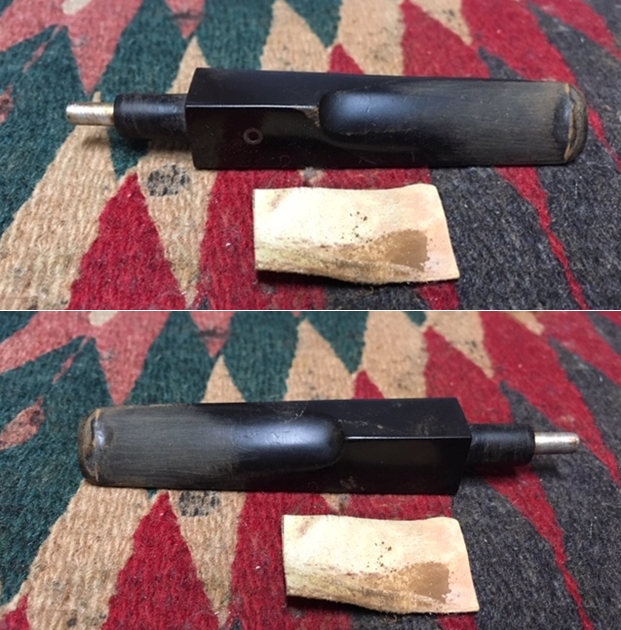
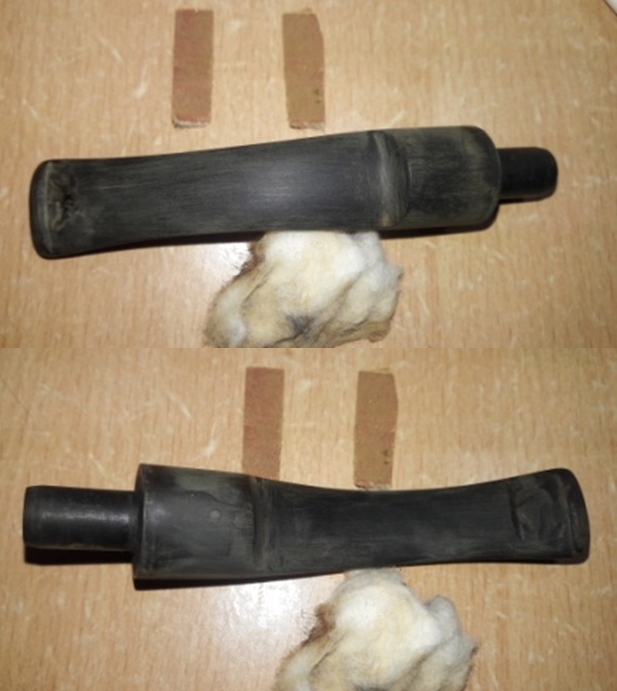
As decided during my initial appreciation of the condition of the pipe, I start this project by tackling the stem first. I flame the stem surface with the flame of a Bic lighter to raise the tooth indentation to the surface and follow it up with sanding the stem with a folded piece of 220 grit sand paper. This helps in getting rid of the oxidation while providing a smooth surface for the intended fills to reconstruct the damaged bite zone on both surfaces and also the button edges. I wiped the stem surface, particularly the damaged button end, with a cotton pad and alcohol to remove any traces of dirt and grime. I cleaned out the tenon and the internals of the stem with hard bristled and regular pipe cleaners dipped in isopropyl alcohol. Once I was satisfied with the internal cleaning, to revitalize the vulcanite and to have a fair idea of the progress made, I wiped the stem with a little Extra Virgin Olive oil.


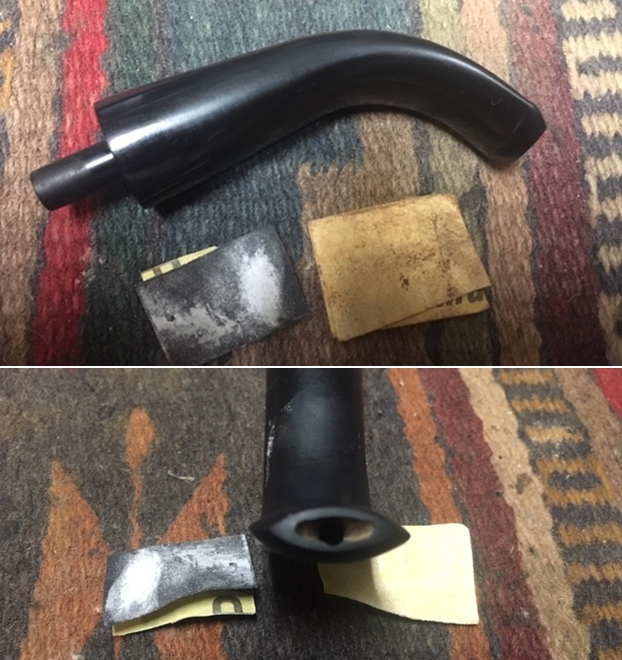
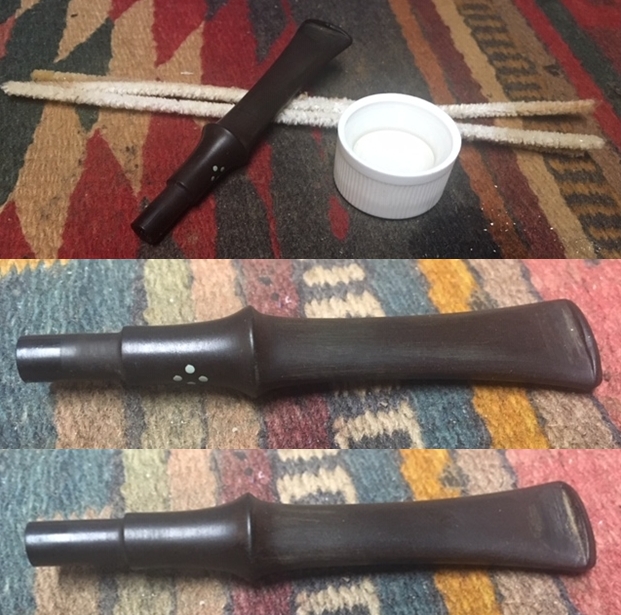
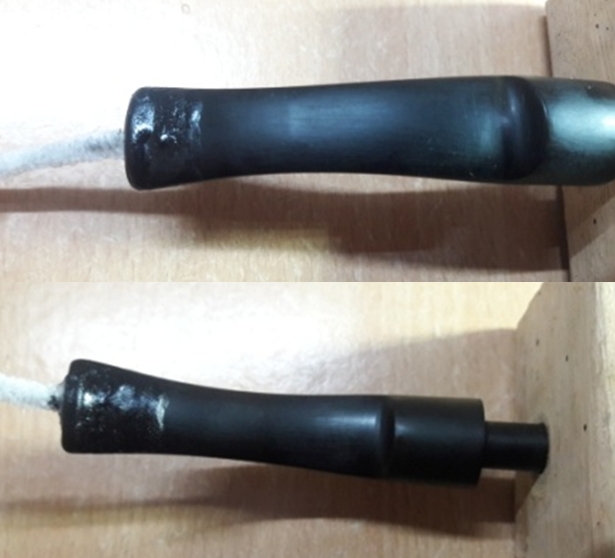
 When I looked at the tenon end of the stem, I realized the right portion of the stem, as seen from above, was not as round as the left and would need a fill so as to bring it flush with the shank end. However, I would have to fine tune the sanding of the fills on both shank end as well as the stem simultaneously in order to achieve a perfect flush fit. The portion that would require a fill is marked in yellow.
 I prepared a mix of CA superglue and activated charcoal and carefully applied it over the damaged bite zone on both surfaces, the side and lip and set it aside for curing over night. The mix was applied along the circumference of the tenon end stem which had been scrapped. I had applied this mix in sufficient thickness which would help during the filing and sanding to match the fills with the stem surface and shaping the button.
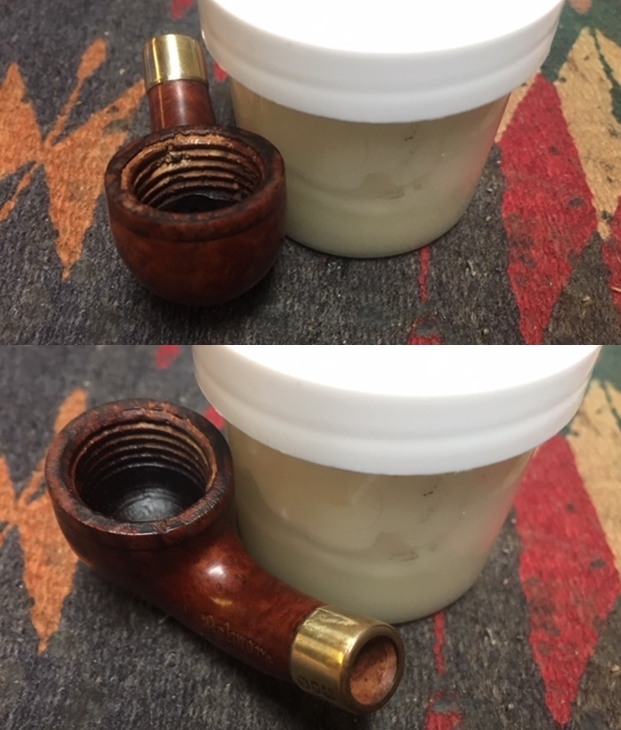
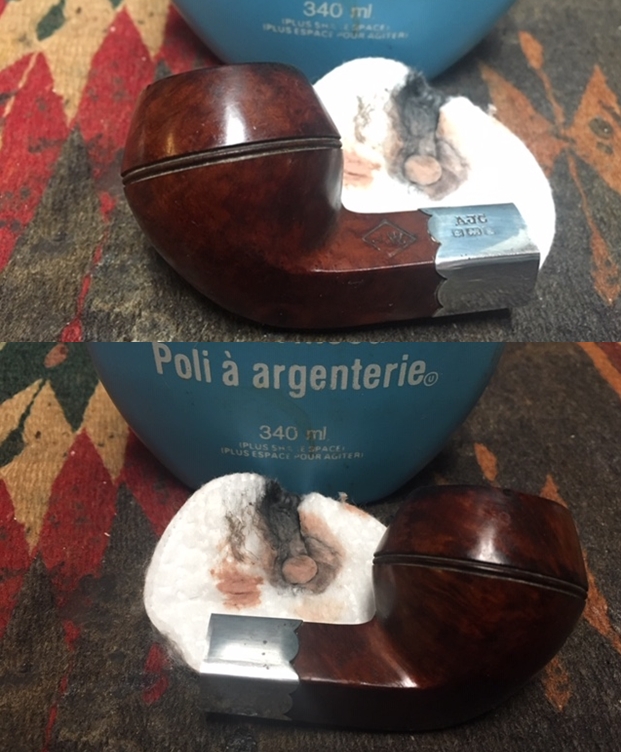
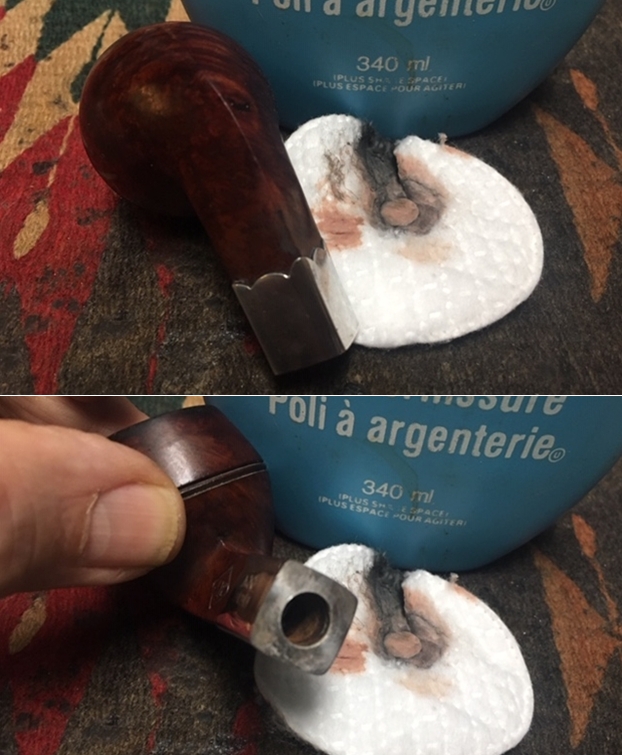
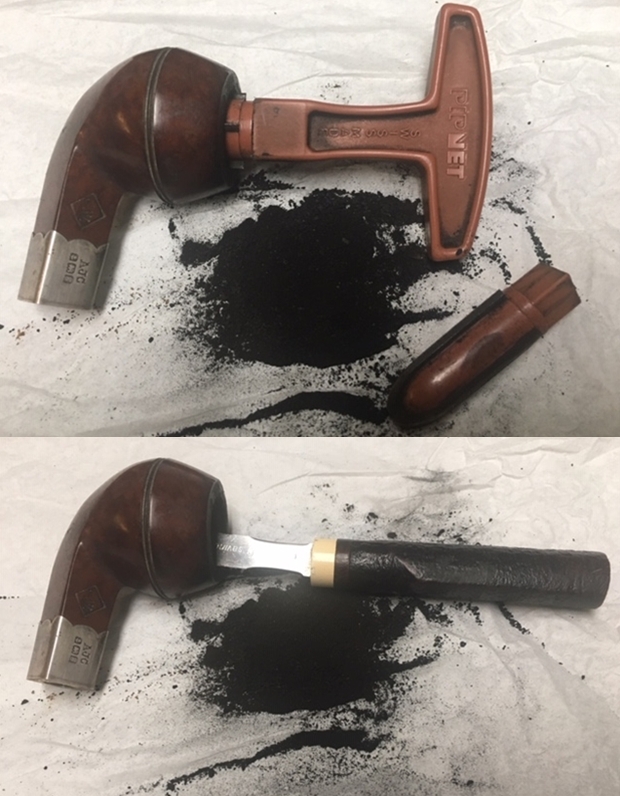
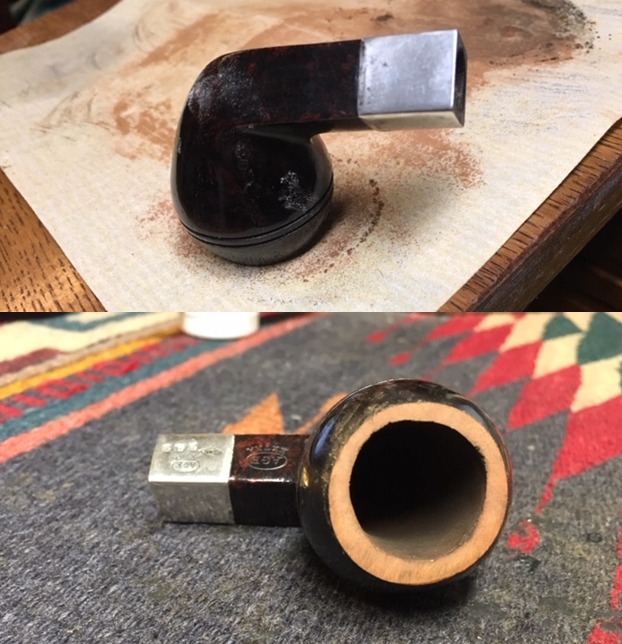
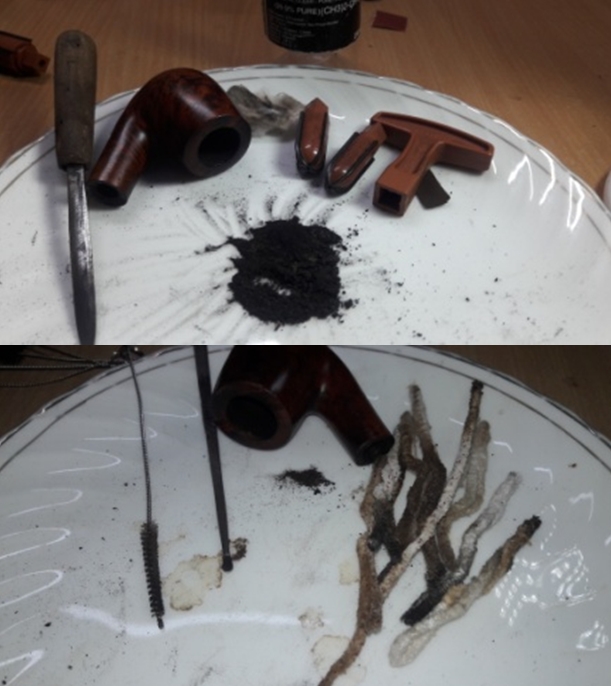
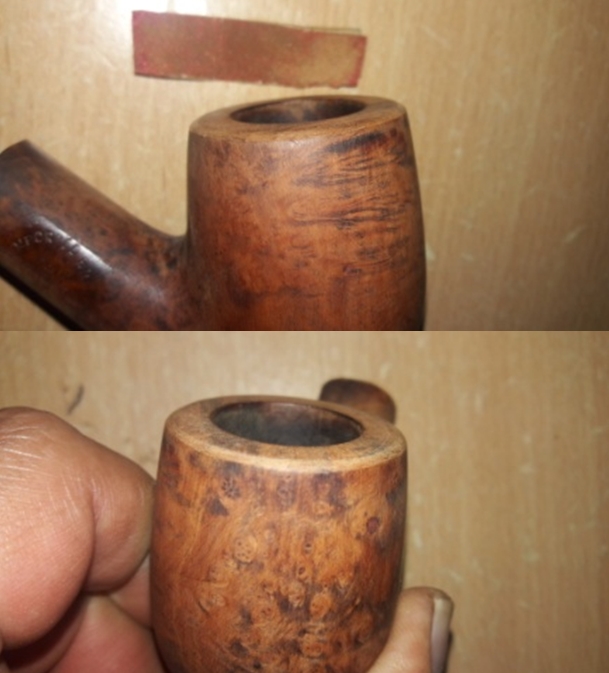
 While the stem repair was set aside to cure, I moved ahead to deal with the stummel cleaning. With size 3 and 4 head of a PipNet reamer, I took the cake down to bare briar. Using a folded piece of 180 grit sand paper, I sand out the last traces of cake and expose the walls of the chamber to ascertain that there are no cracks/ heat fissures. I wiped the chamber with a cotton pad dipped in isopropyl alcohol to remove the carbon dust left behind by all the reaming and sanding process. The walls of the chamber show a few heat lines, nothing serious, but they are present. These heat lines and the ridges on the bottom surface of the heel will be addressed later. This was followed by gently scraping away the lava overflow from the rim top surface with my fabricated knife. I cleaned the mortise by scraping away at the dried gunk with my fabricated spatula and followed it up with further cleaning using cue tips, pipe cleaners and shank brush dipped in isopropyl alcohol.
 The suspected charring that I had appreciated early on is now confirmed. The rim has thinned out considerably above the draught hole. The inner rim edge is also uneven. I shall be addressing these issues too subsequently.
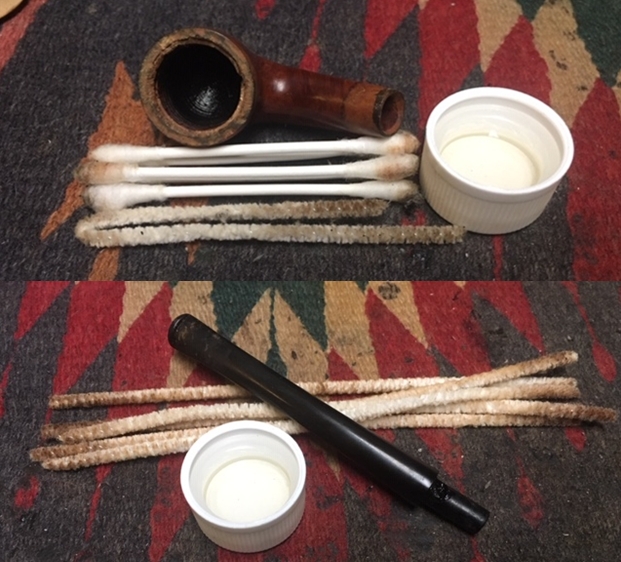
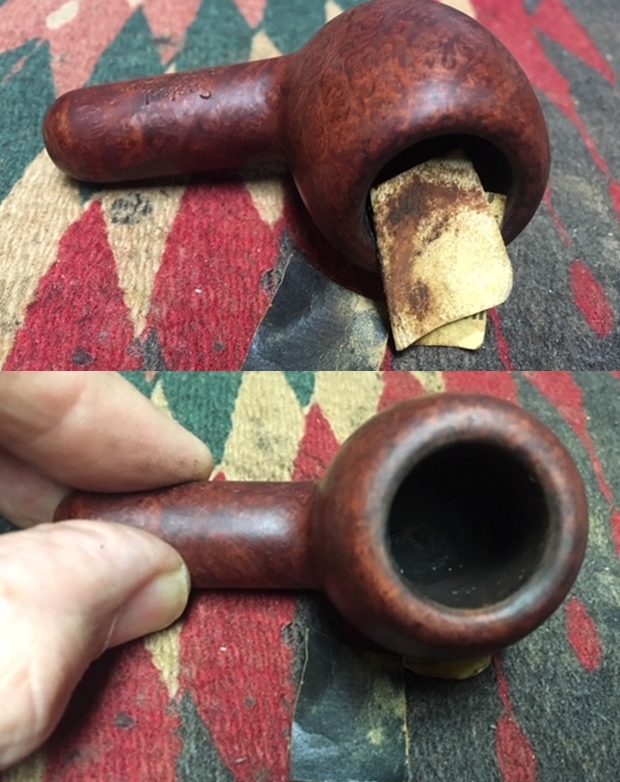
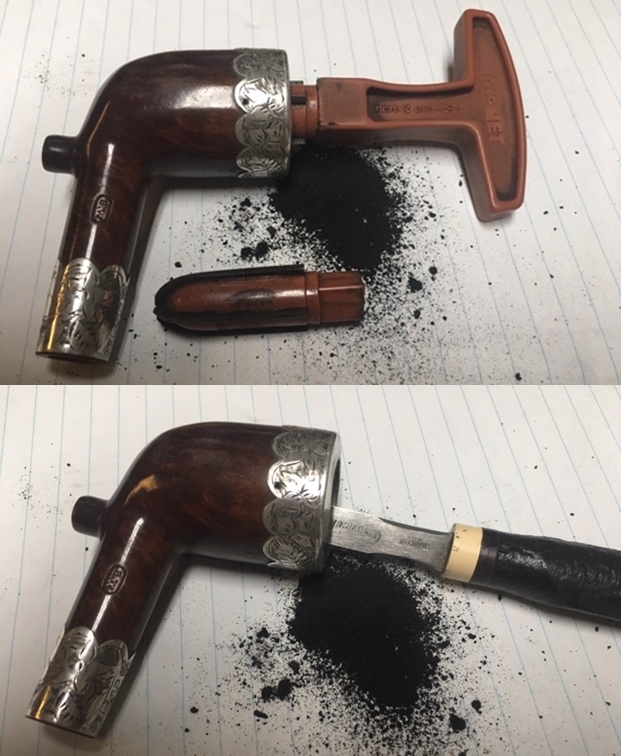
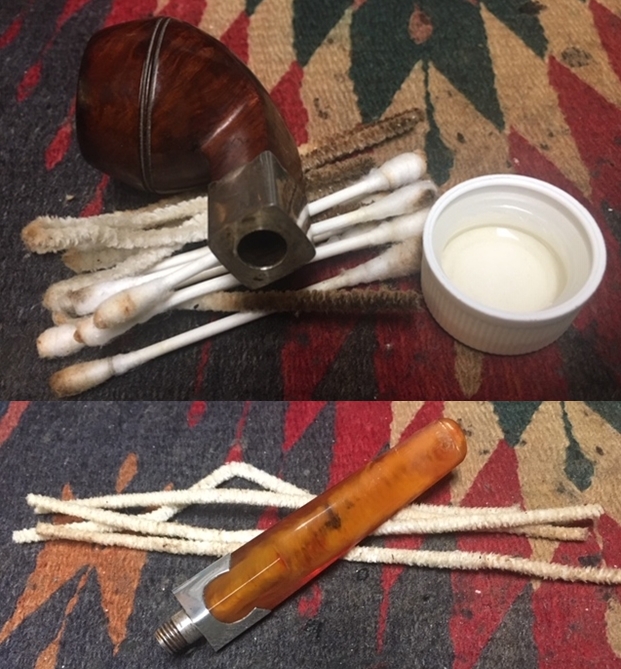
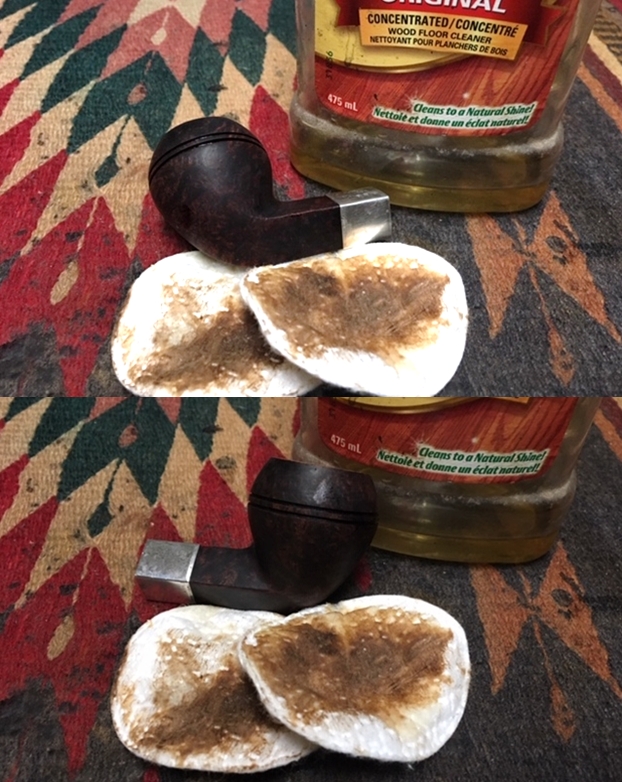
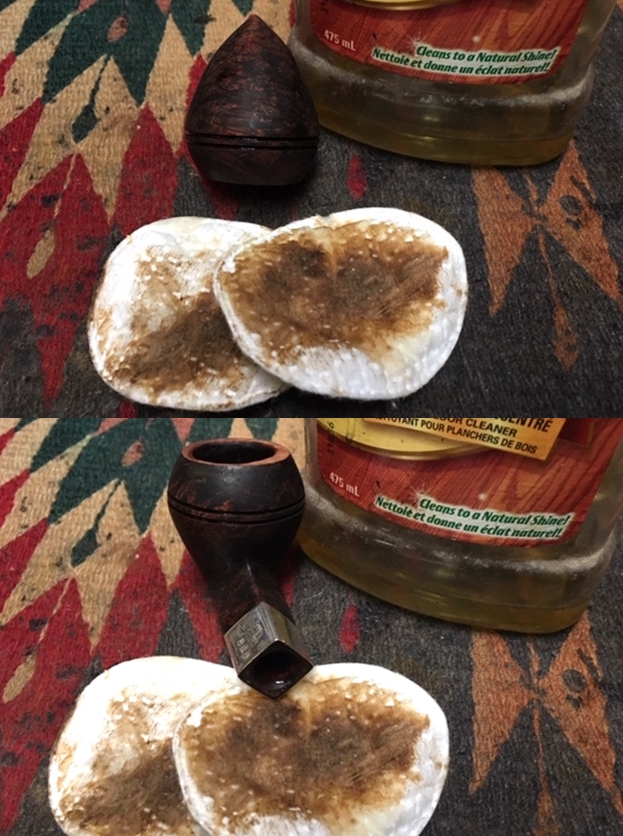
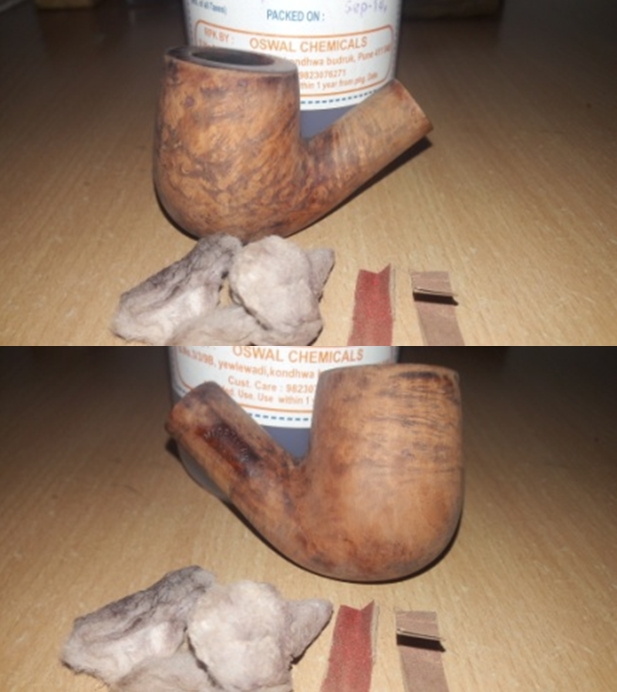
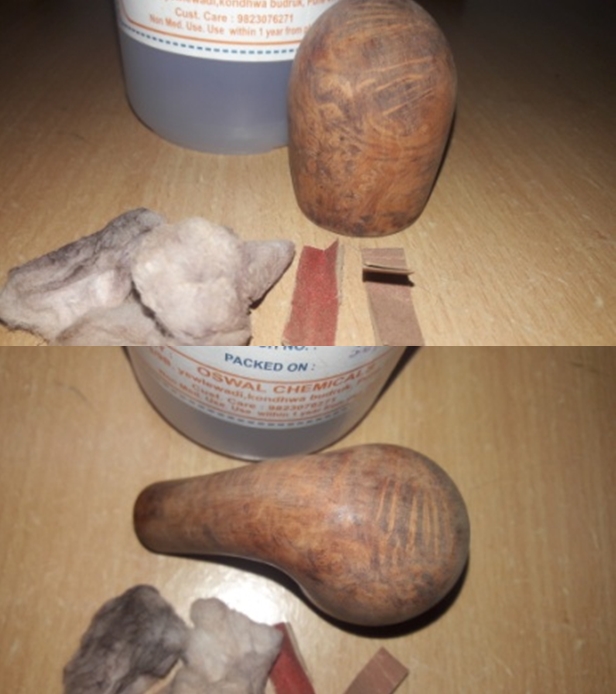
I followed the cleaning of the chamber with the cleaning up of the shank, mortise and the air way. Using hard bristled pipe cleaners dipped in isopropyl alcohol, I ran a few through the mortise. This moistened the hardened grungy depositions of all the oils and tars in the mortise. Thereafter, using my fabricated dental spatula, I scraped out all the accumulated oils and tars from the shank. The following picture hints at the degree of the grunge deposition that I was dealing with. I continued the mortise cleaning regime with shank brushes dipped in alcohol. However, the pipe cleaners continued to come out dirty and soiled unabated. This would need application of some serious cleaning process using salt and alcohol treatment. I rolled some cotton in to a wick and wound it around a pipe cleaner and inserted it inside the mortise up to and through the draught hole. Next, I packed some cotton in to the chamber and topped it with 99.9% pure isopropyl alcohol and set it aside for the time being. About twenty minutes later, I topped it again with alcohol and set it aside overnight for the alcohol to draw out all the tars and oils from the chamber walls and the cotton to trap the drawn out gunk. I must clarify here that even though it is recommended to use ‘Kosher Salt’, plain cotton and alcohol works with exactly the same effectiveness, but at nearly ¼ the cost of Kosher Salt!! So, in case someone else is paying, go ahead with using Kosher salt, otherwise cotton and alcohol works just fine! By next day evening, the alcohol and cotton had fulfilled its intended task. I ran a pipe cleaner through the mortise for a final clean and it came out……well, soiled black and dirty! The gunk and grime in this pipe was stubborn, indeed. I again went through the entire regime followed earlier to clean the mortise and was surprised to find the amount of grunge that was scraped out again. The crud that was extracted and the number of pipe cleaners used after the alcohol bath, as can be seen in the photographs, bears testimony to the extent of apathy the pipe was subjected to by the previous steward.
 I followed up the internal cleaning with external refreshing of the stummel surface. Using a hard bristled tooth brush dipped in undiluted Murphy’s oil soap, I very deliberately scrubbed the stummel and the rim top to remove the overflow of lava from these surfaces. The stummel and rim top was dried using paper napkins and soft cotton cloth and set it aside to dry out naturally. The stummel looks clean, but the road rash, dents and dings to the stummel and rim edges/ top now stands out prominently.

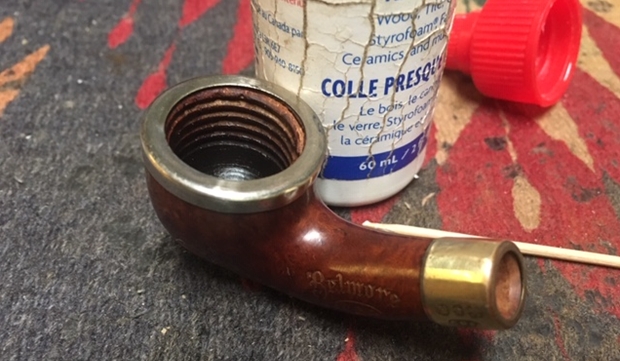
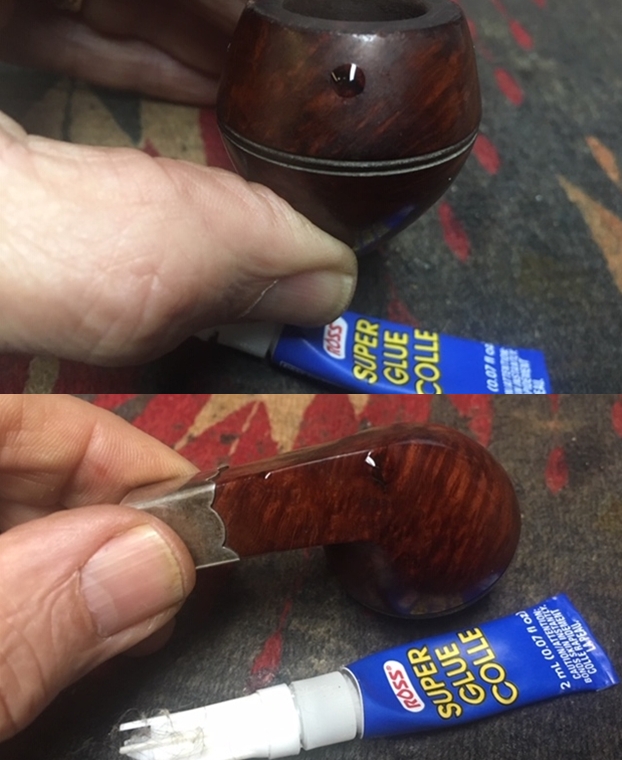
 I followed it up with sanding the entire stummel with a folded piece of 220 grit sand paper. This serves three purposes; firstly, it removes all the stubborn dust and grime from the surface, secondly, it evens out, to a great extent, any minor dents and dings from the surface and thirdly, it provides a smooth and clean surface for intended fills. With the road rash evened out to the extent possible, I repaired the road rash with a mix of briar dust and CA superglue. I always over fill the holes/ surfaces so that when I sand them down they are smooth and I can feather in the fills with the rest of the briar. I also build up the shank end, which was damaged due to the road rash, with this mix. I set the stummel aside to cure.
 Once the glue dried (very quickly by the way), I attached the stem to the shank end carefully aligning the stem fill with that of the shank end fill. I sand the entire stummel surface and the stem using a folded piece of 180 grit sand paper and matched the shank end with the stem fill. Once I had achieved a match, I detach the stem from the shank end. On close observation, I found that the shank end repairs had several tiny air pockets. I again filled up these air pockets with clear superglue and set it aside for curing, while I worked the stem.
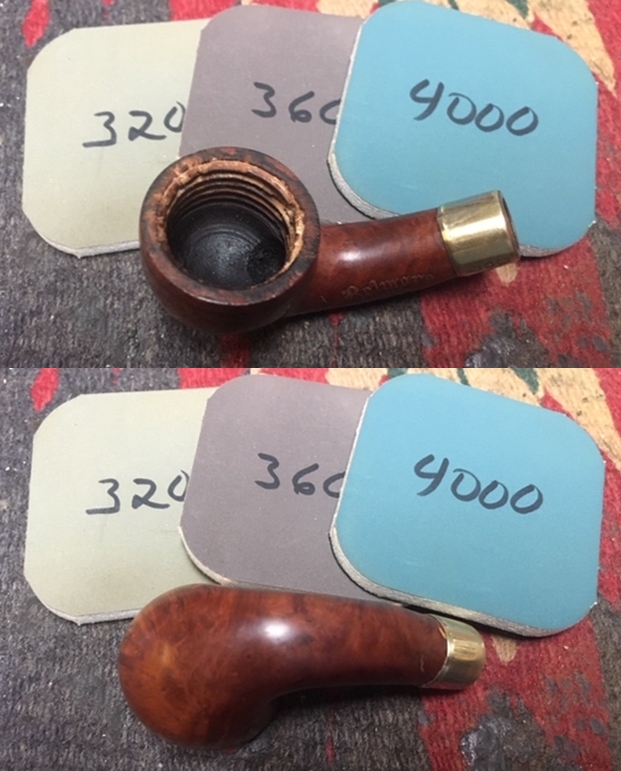
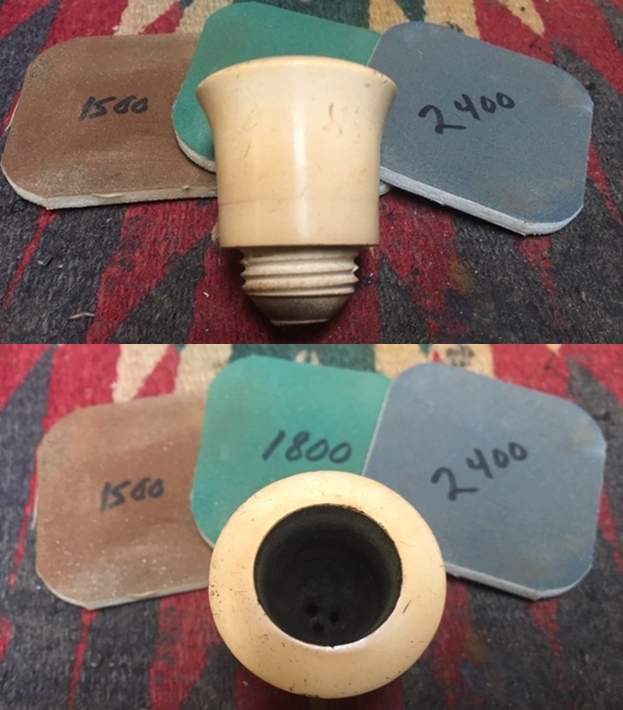
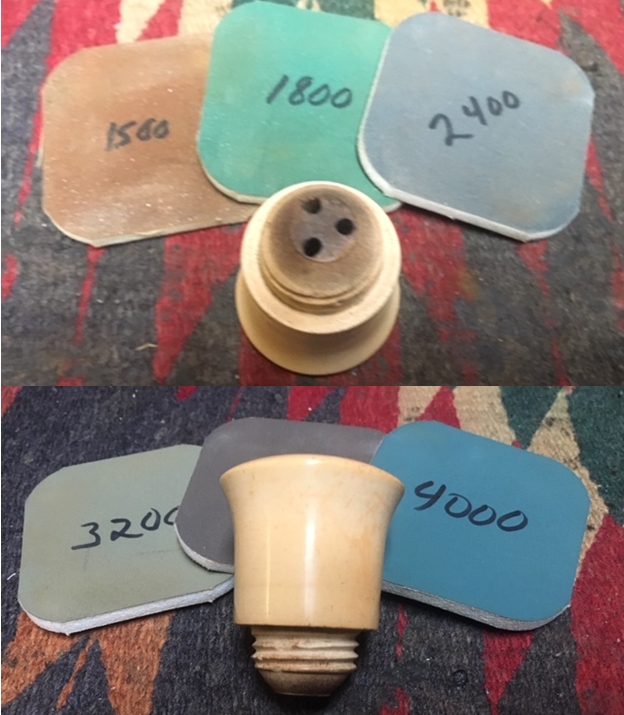
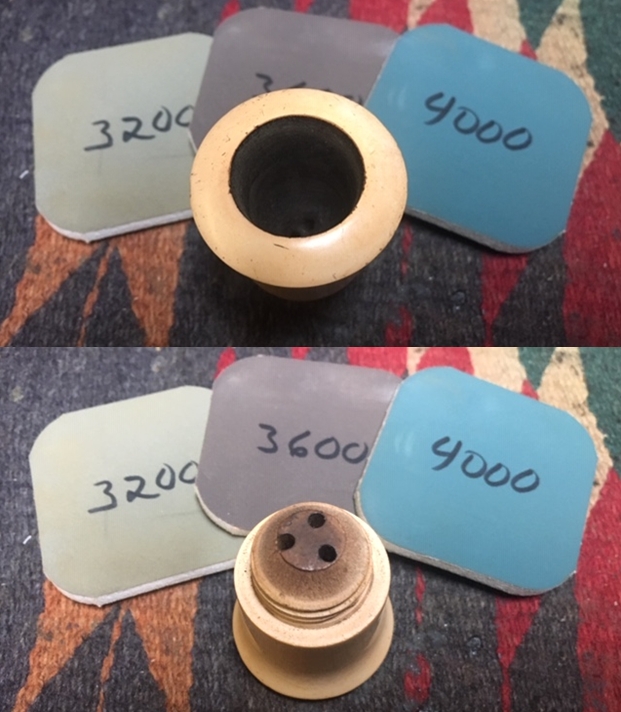
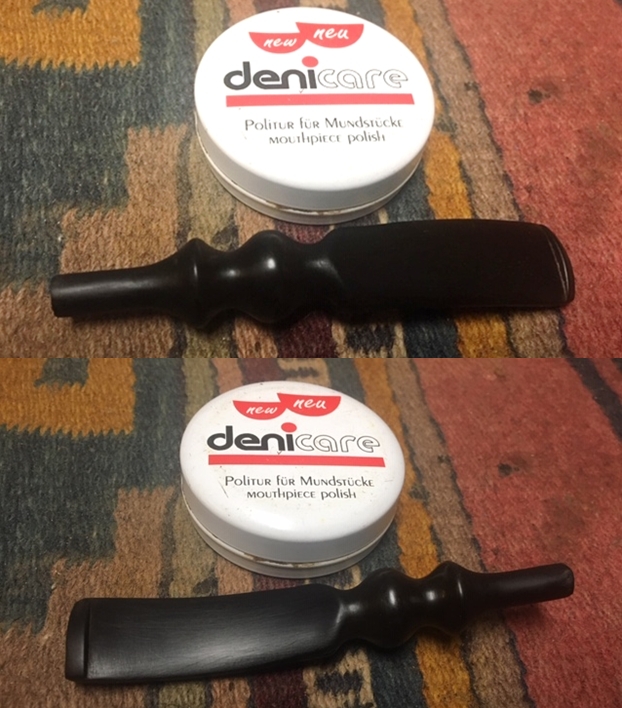
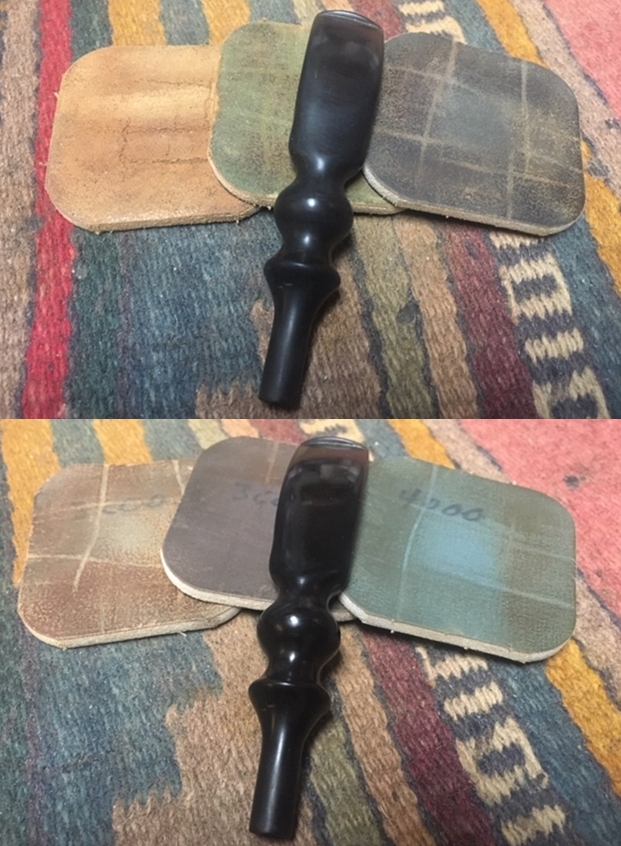
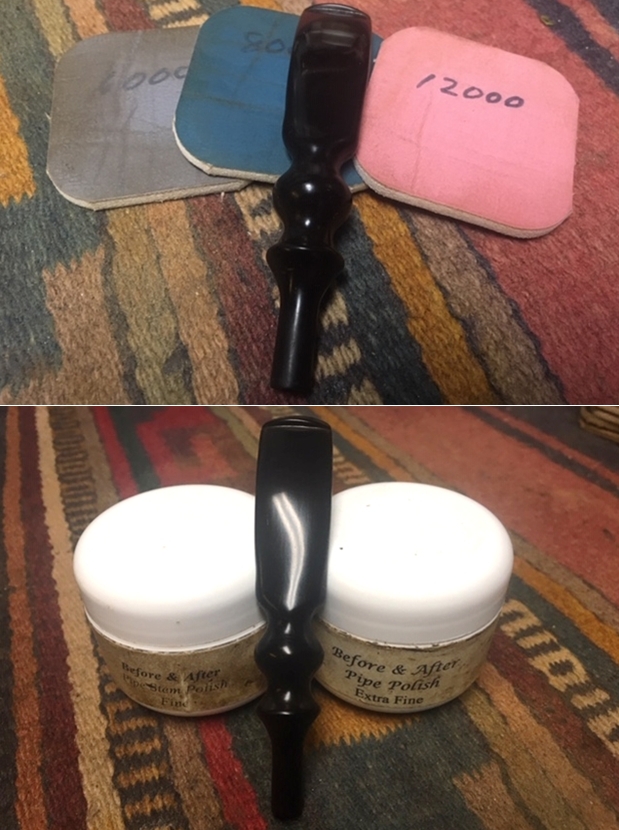
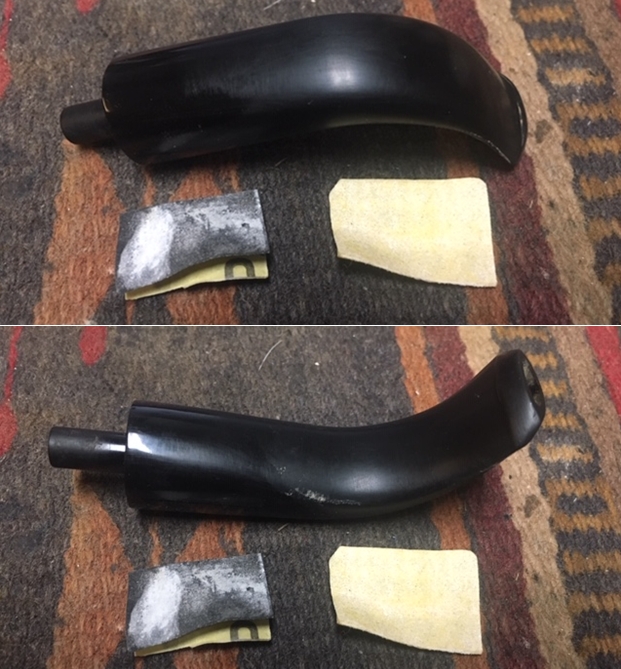
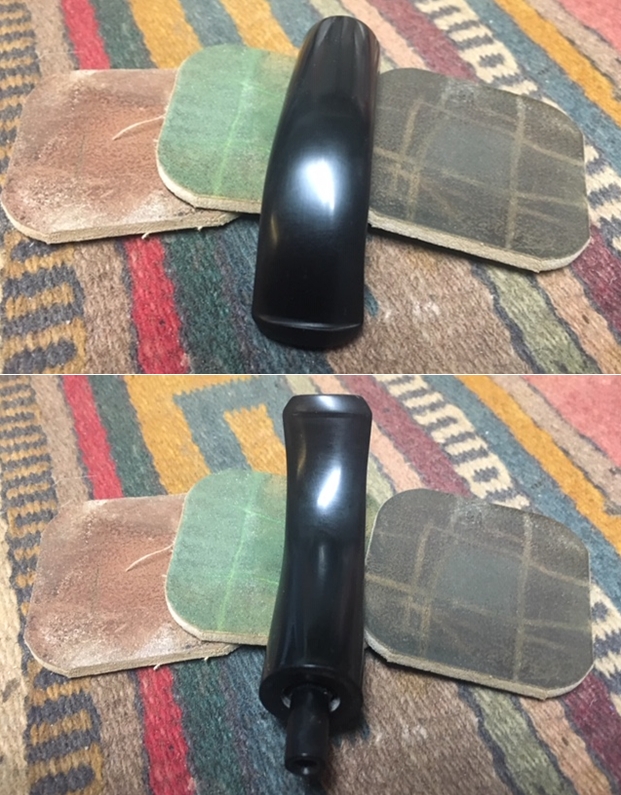
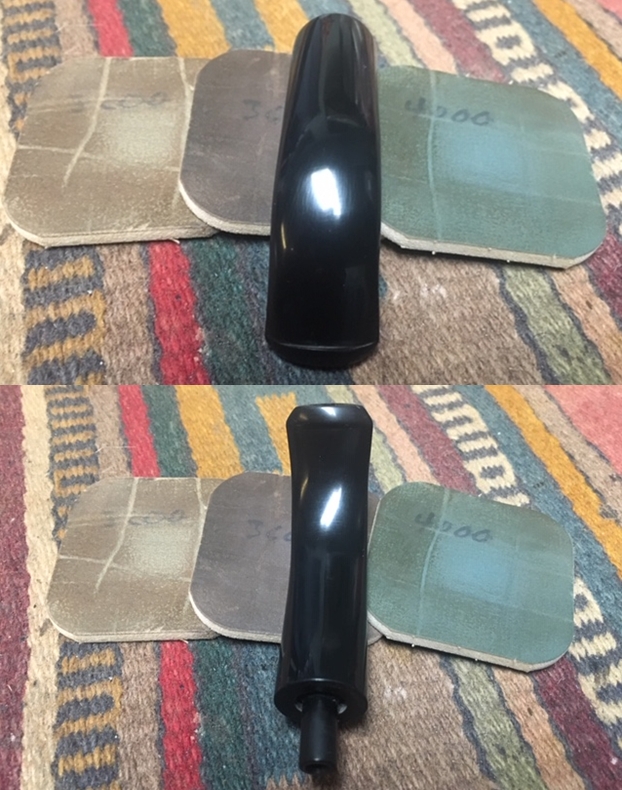
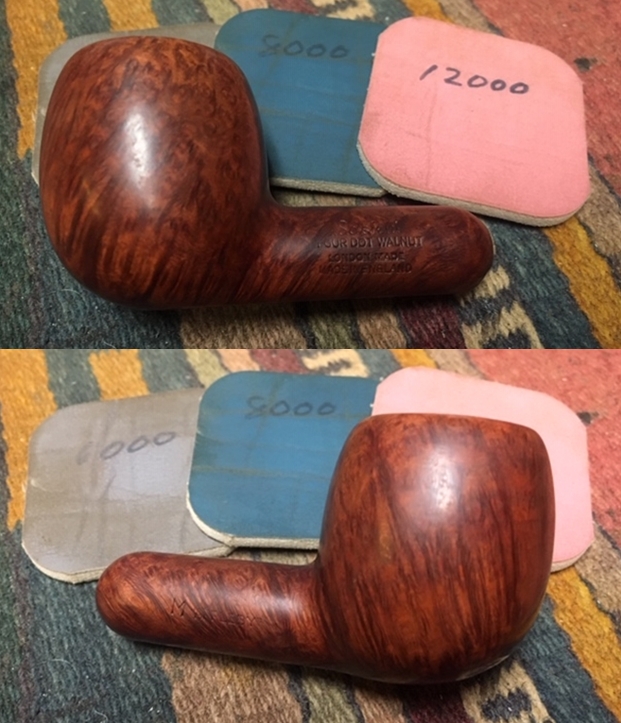
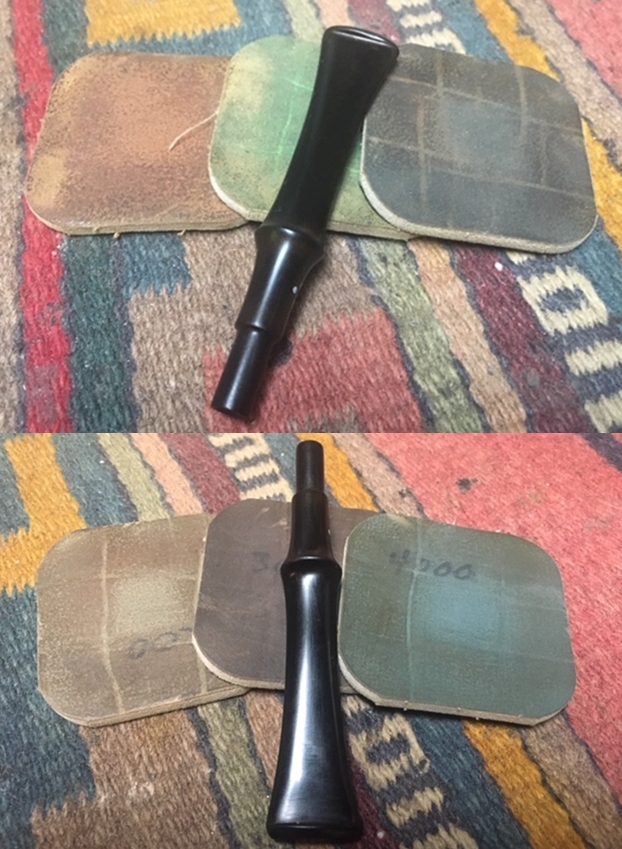
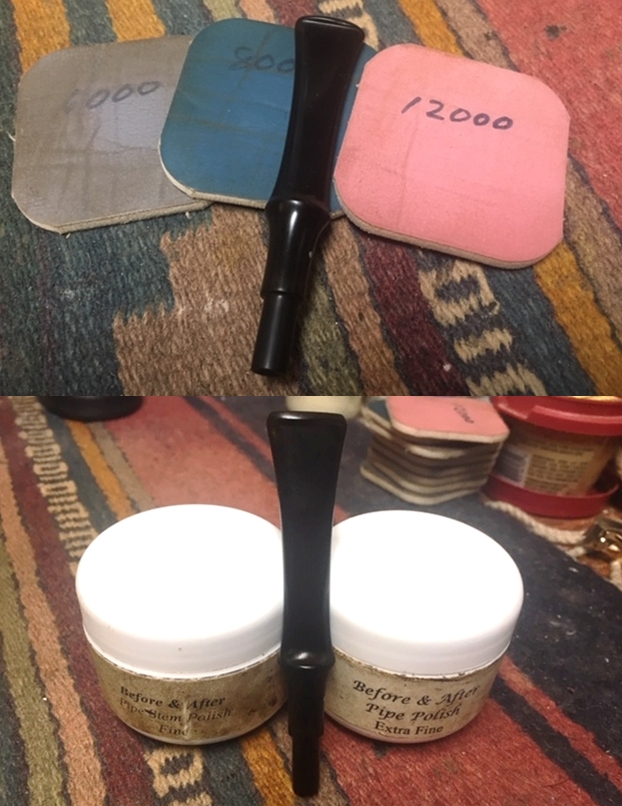
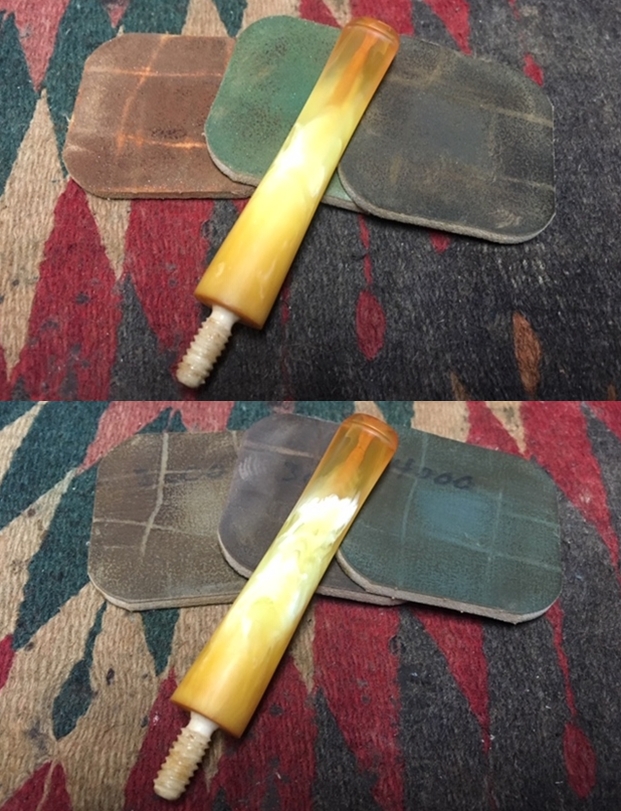
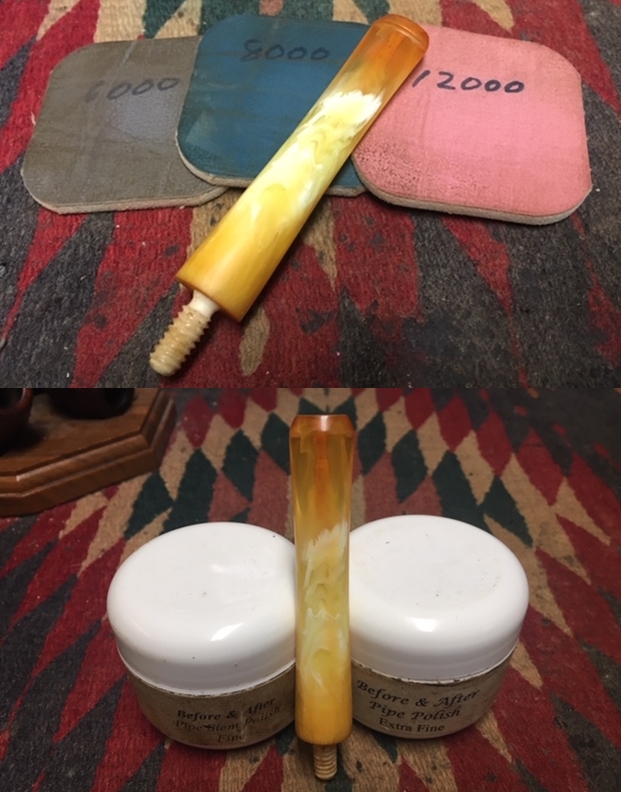
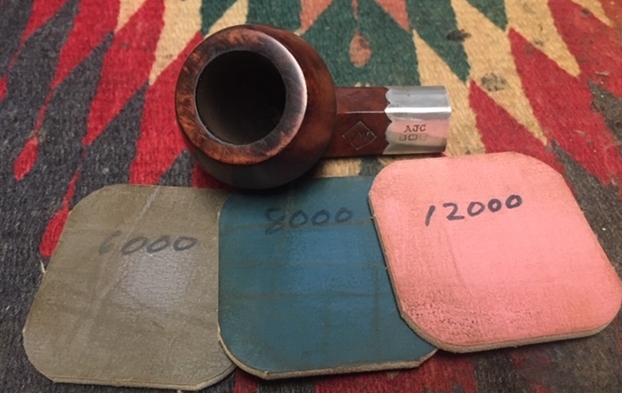
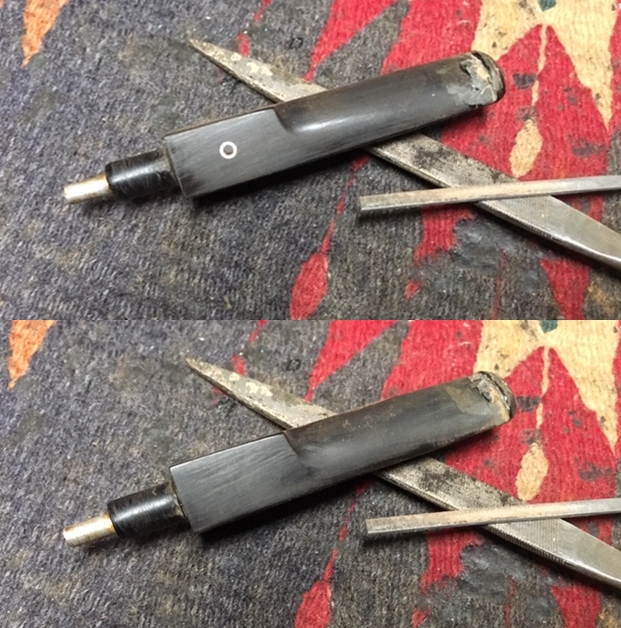
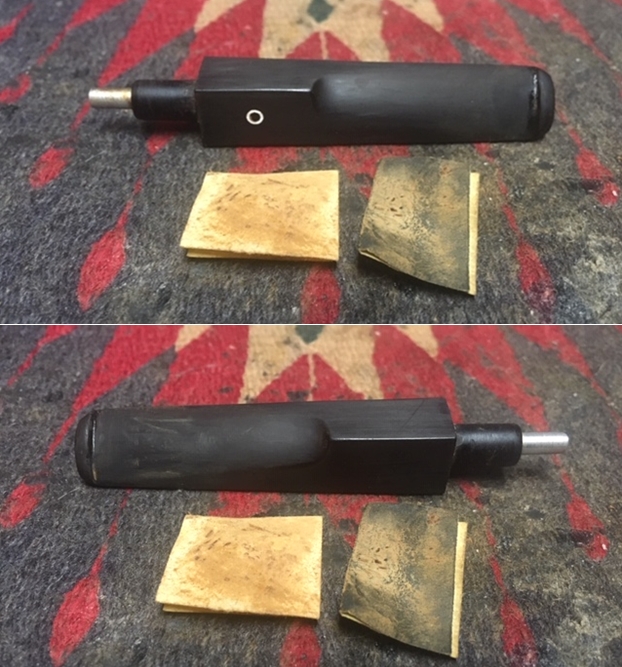
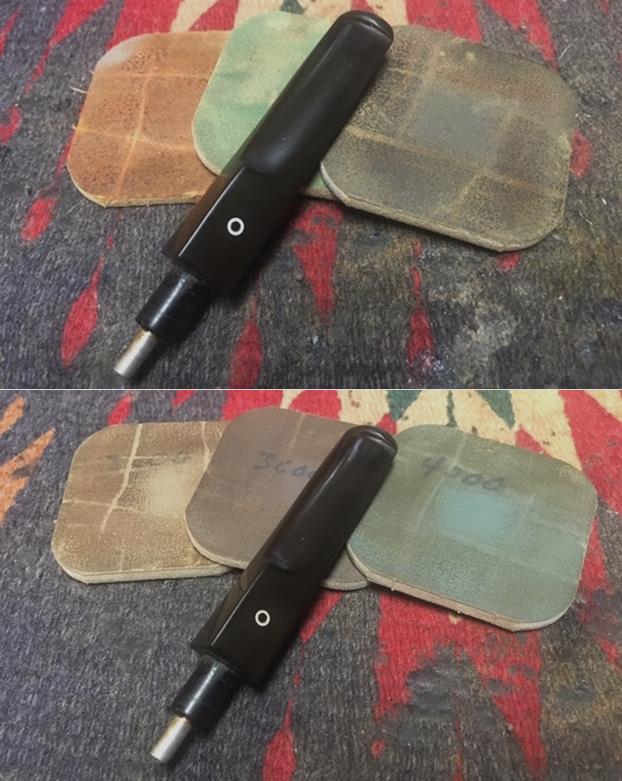
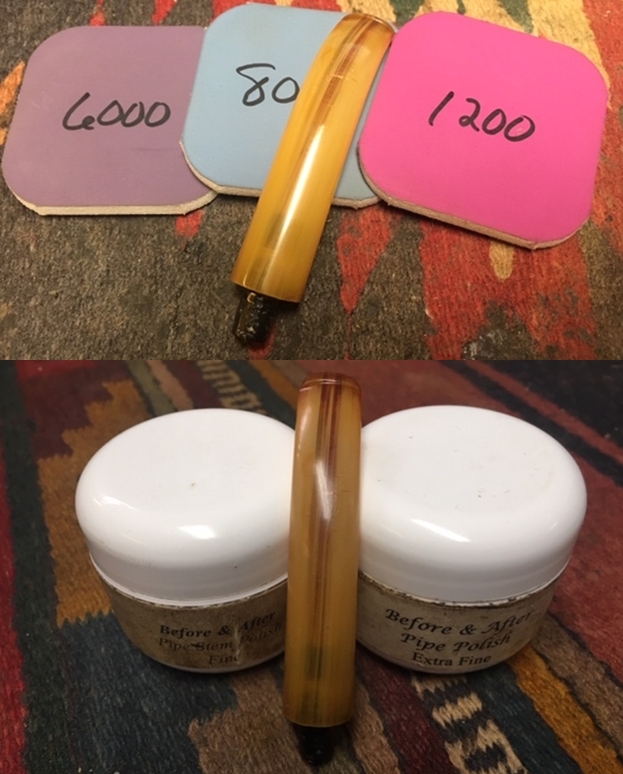
 Using a flat head needle file, I reshaped the button and follow it up by further sanding the stem with 320, 600 and 800 grit sand papers. Using the micromesh pads, I complete the polishing cycle by wet sanding the surface with 1500 to 2400 grit pads and dry sanding with 3200 to 12000 girt pads. The stem looks great with the fills nicely matched with the rest of the surface. I rub a little quantity of Extra Virgin Olive oil in to the stem surface.

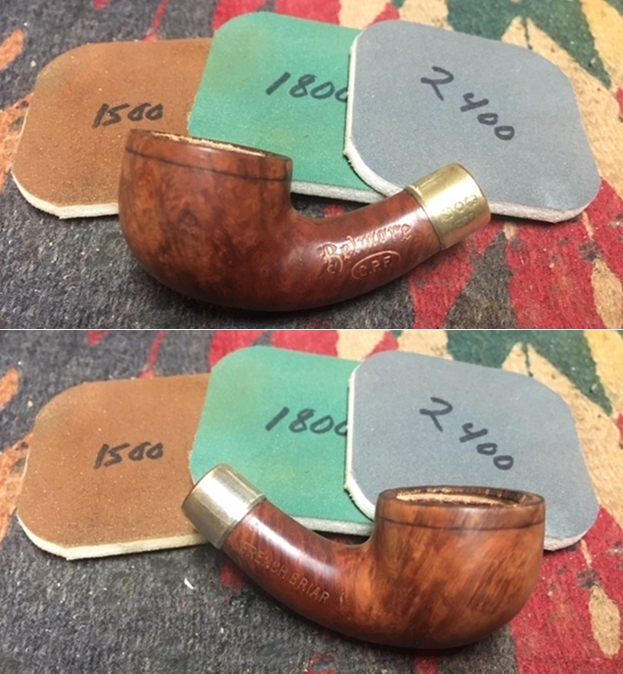
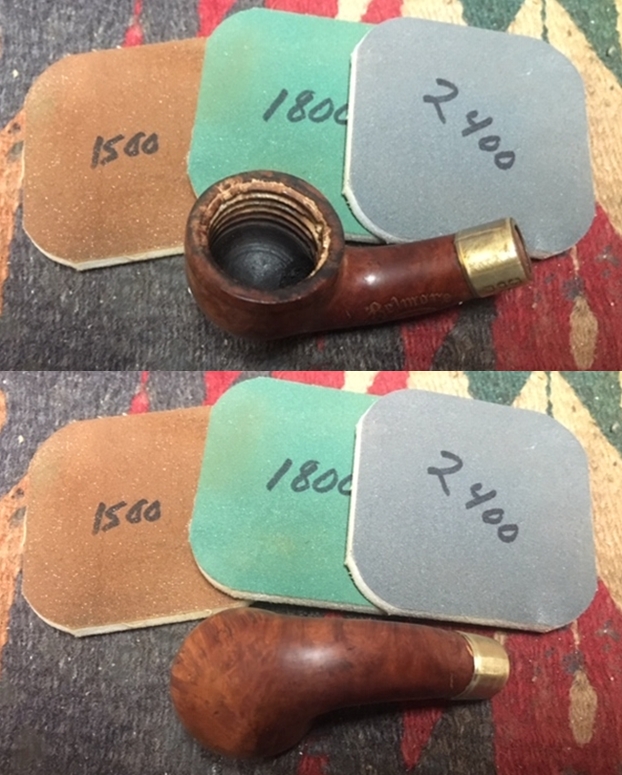
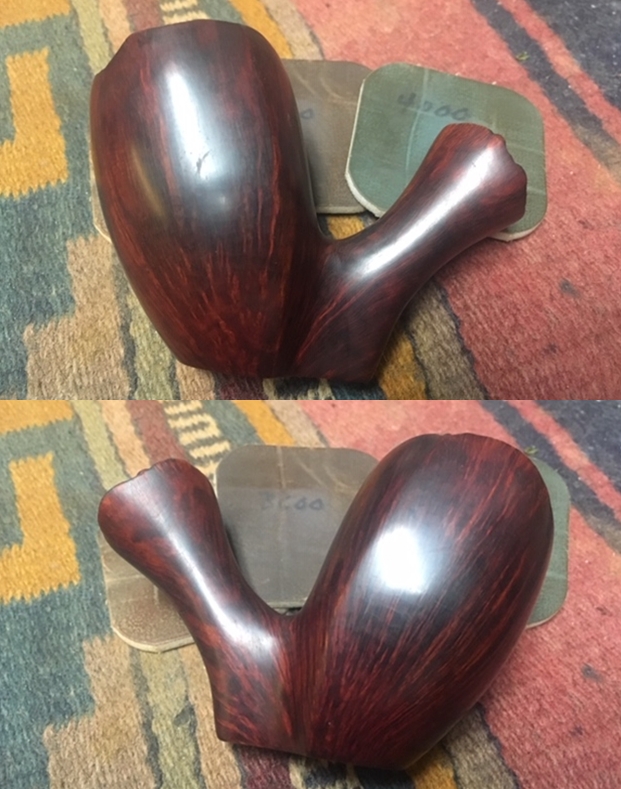
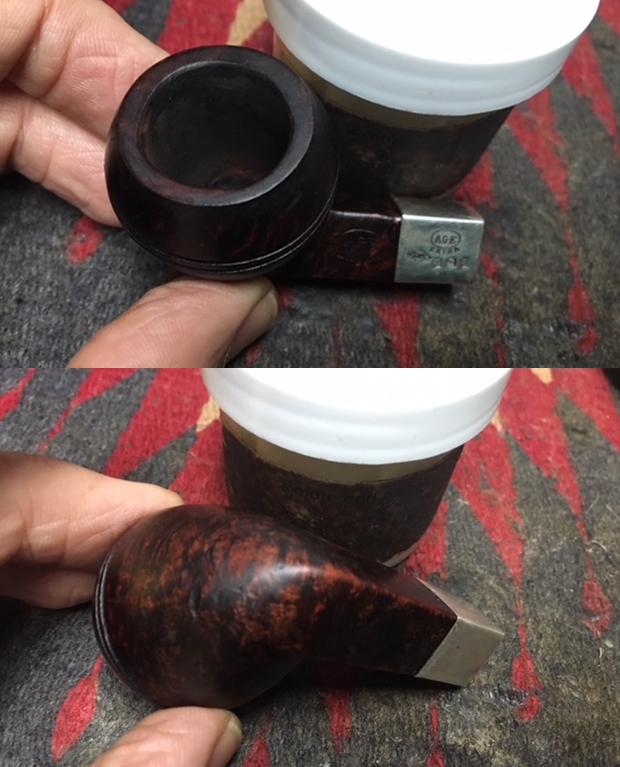
 With the stem repairs completed, I turn my attention back to the stummel repairs. The second fill to the road rash portion had cured and I sand it with a folded piece of 180 grit sand paper. However, I realized that the air pockets were still visible. I discussed this with my mentor, Mr. Steve, who suggested that I should first go through the micromesh polishing cycle and then decide if a refill is required or otherwise. With this advise, I move ahead to complete the stummel repairs. I top the rim on a piece of 220 grit sand paper to even out the rim surface dents and dings and also to reduce the charred rim surface. I addressed the out of round inner edge and the dents and dings to the outer rim edge by creating a bevel on both these edges with a folded piece of 220 grit sand paper pinched between my thumb and index finger.

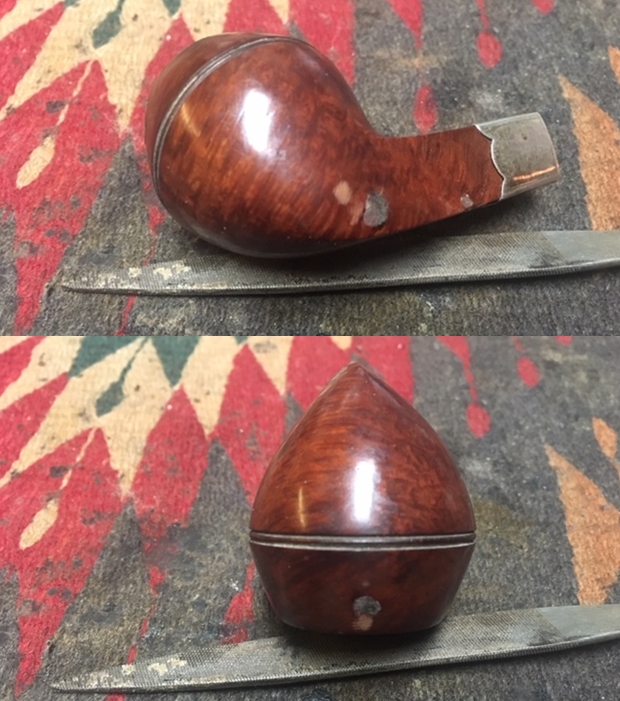
 The numerous scratches, dents and dings to the stummel surface was beginning to concern me as it was a conflict between my innate desire not to lose briar through sanding and the necessity to do just that if I desired to completely rid the stummel of all these evidences of its past and thin out the walls in the process. Readers, believe you me, these damages were deeper than you normally expect. I shall take a fresh call on this issue after I am through with the micromesh polish cycle.
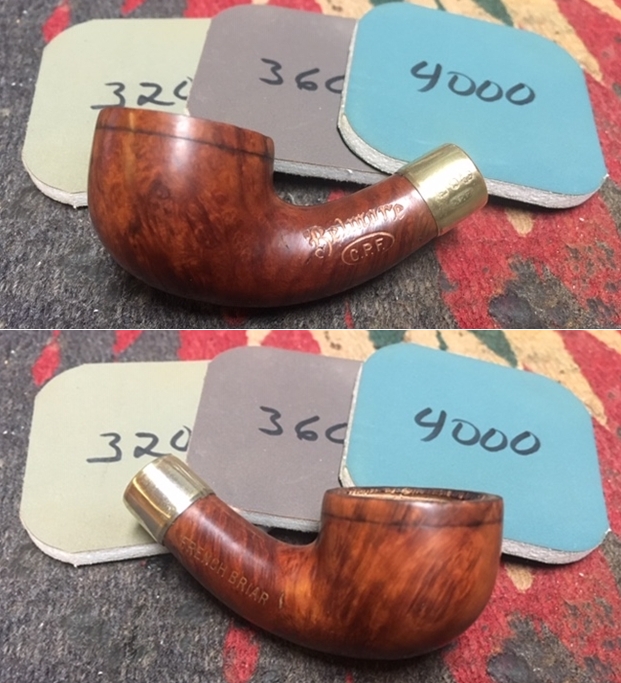
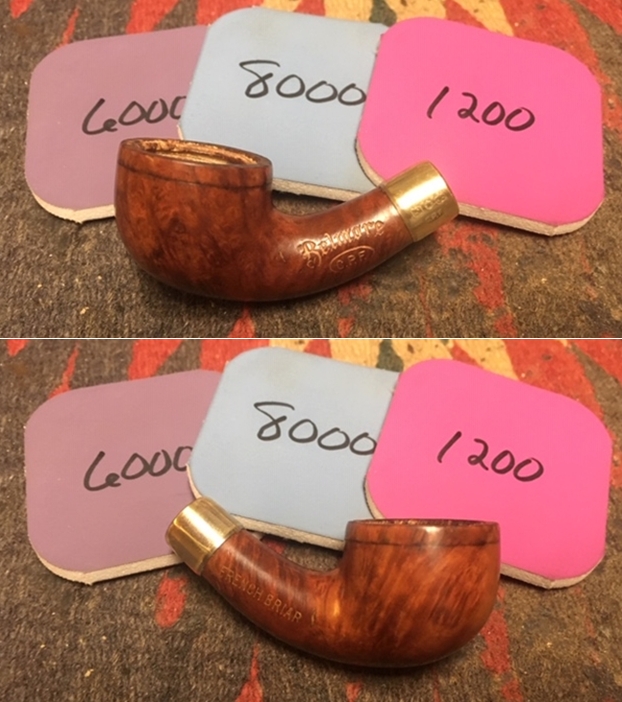
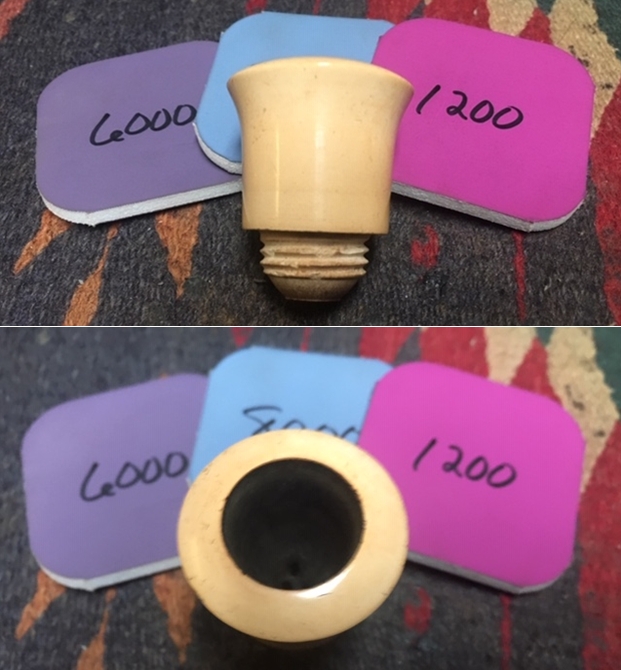
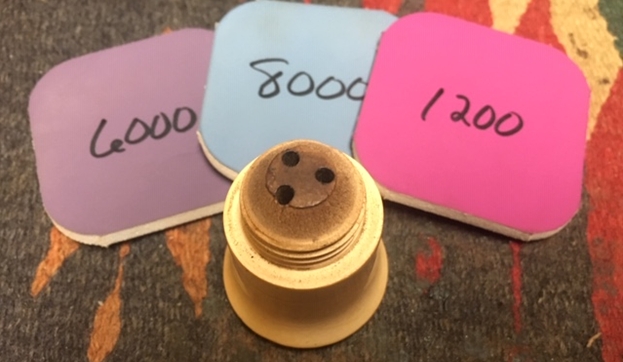
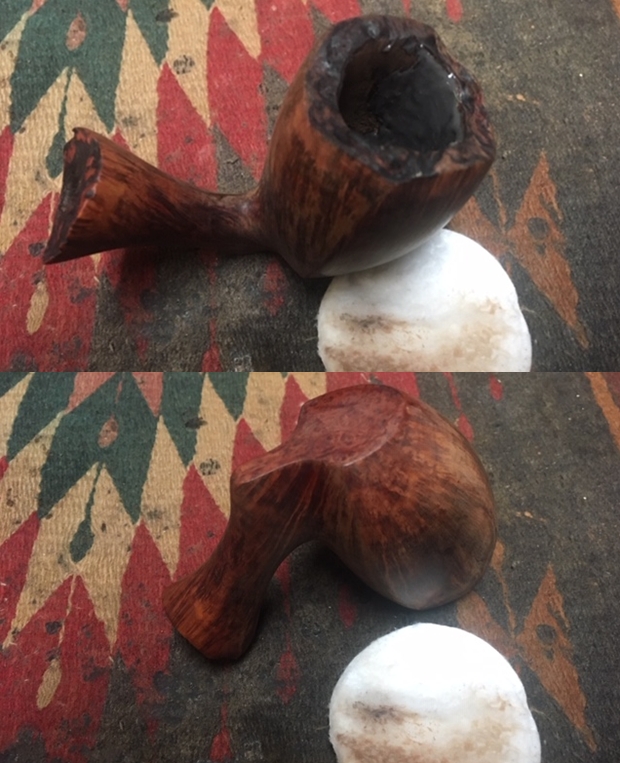
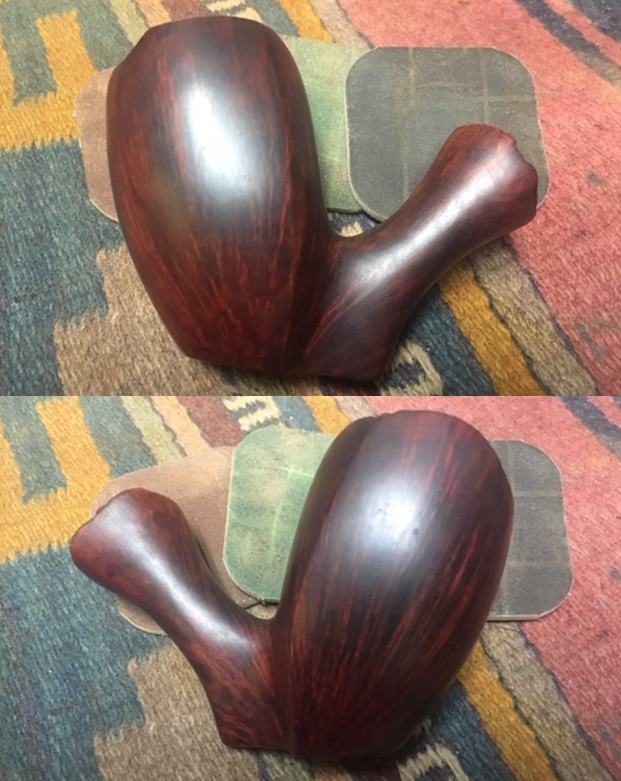
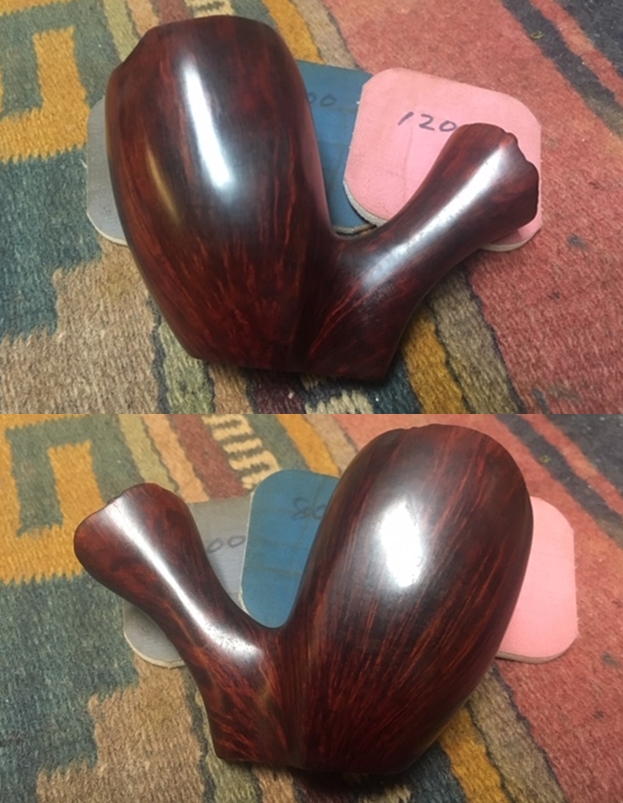
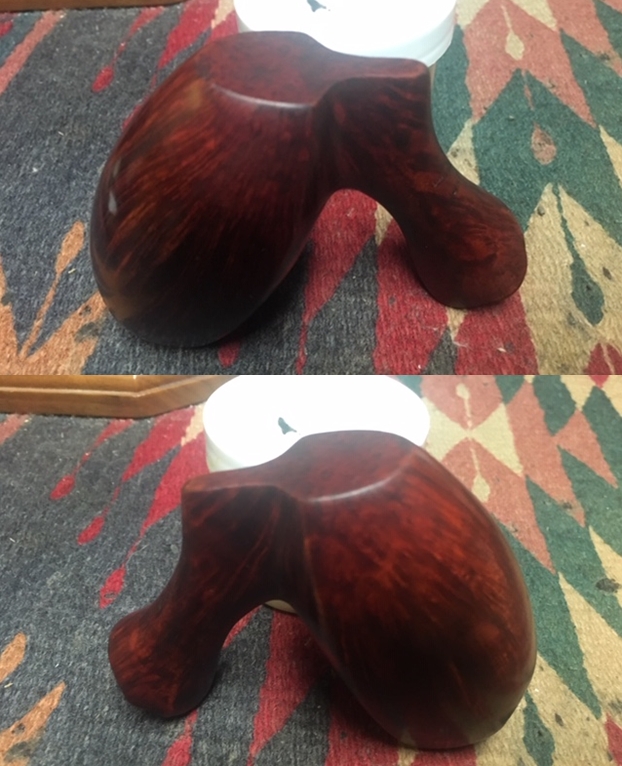
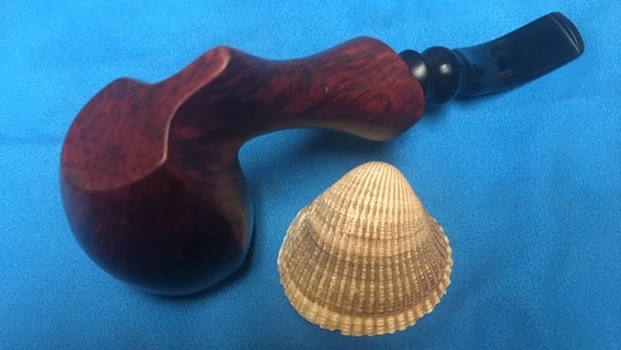
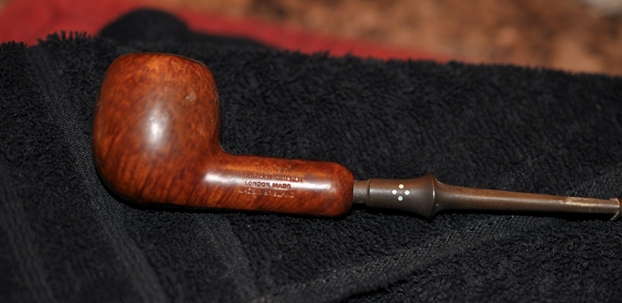
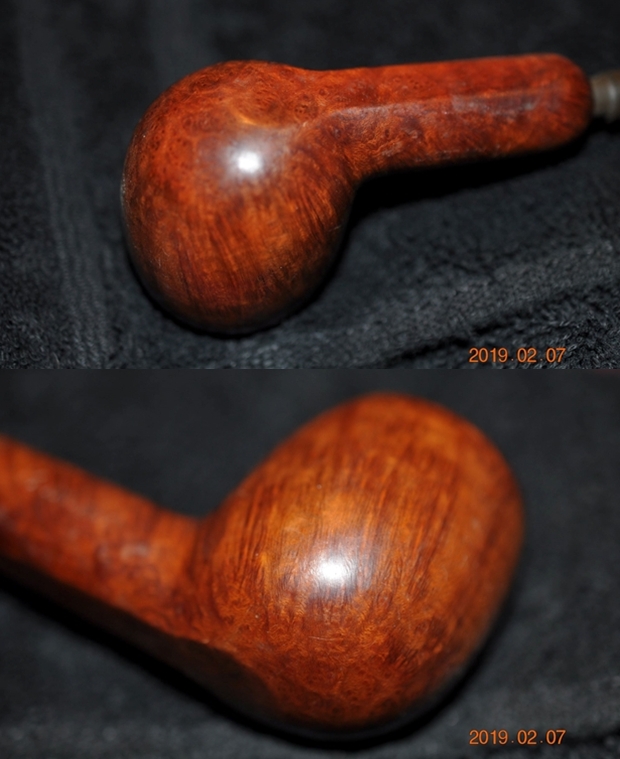
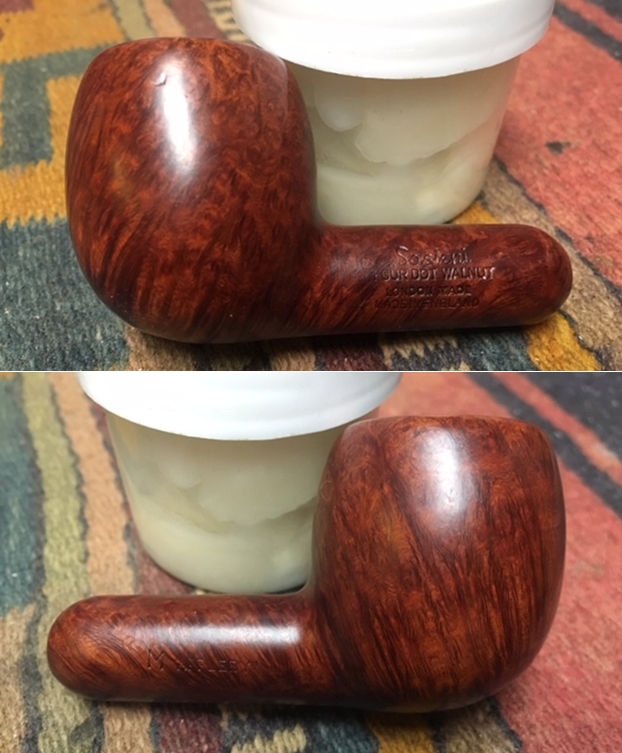
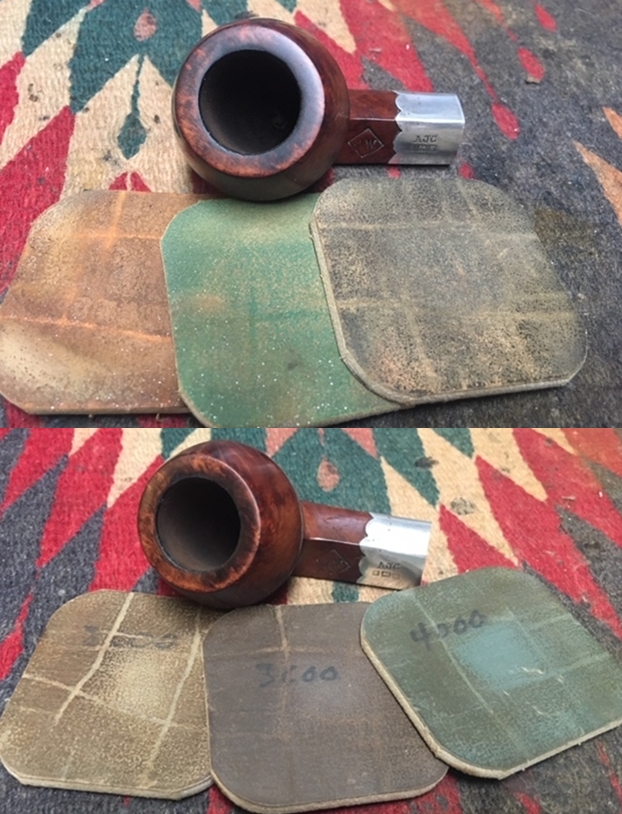
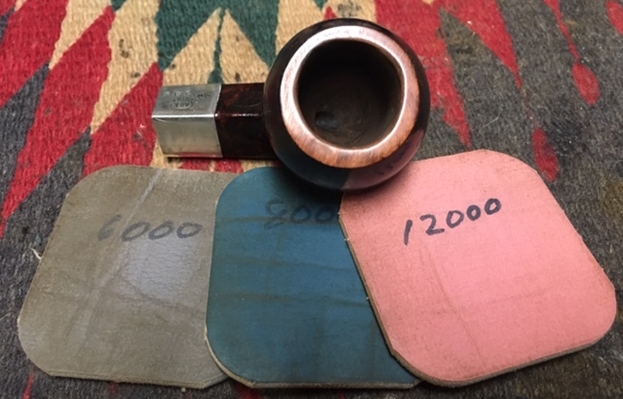
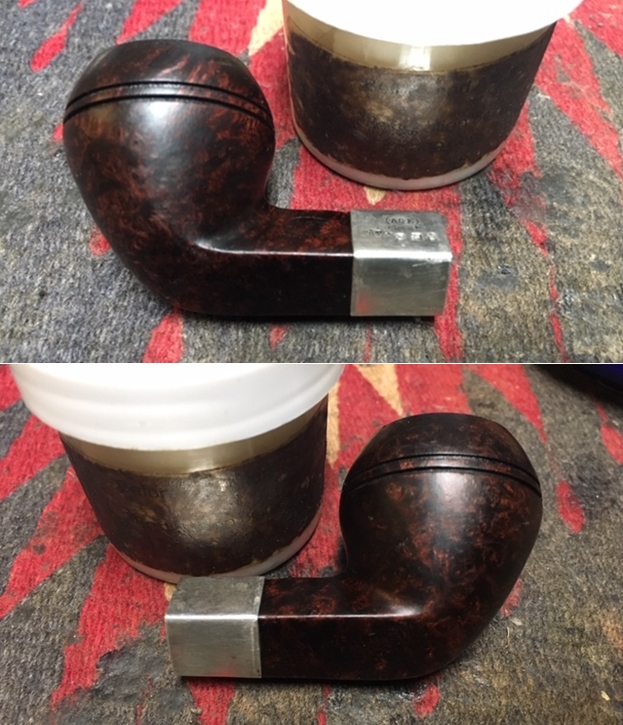
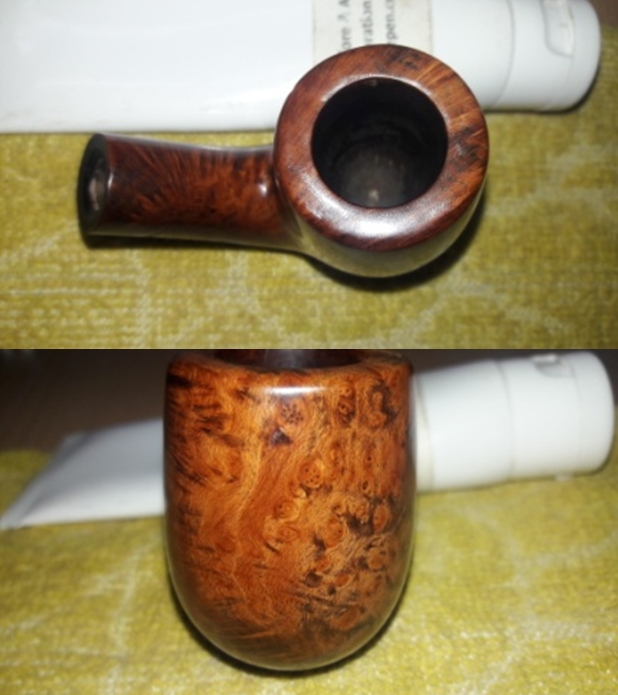
However, no sooner than I was through with wet sanding using 1500 to 2400 grit micromesh pads, the air pockets in the fill to the road rash stood out like sore thumb. I repeated the process of freshly filling it with a mix of CA superglue and briar dust. I set the stummel aside for the fill to cure. After the fill had cured sufficiently, I sand and match the fill with rest of the surface using a 220 grit sand paper. This was followed by polishing the stummel with micromesh pads, wet sanding with 1500 to 2400 pads and dry sanding with 3200 to 12000 grit micromesh pads. I wipe the surface with a moist cloth to remove the resulting dust. The stummel, at this stage, looks absolutely stunning with beautiful straight grain popping out from every inch. The dents, dings and scratches, though visible, are no longer an eye sore. In fact, it lends the pipe an aura of being a survivor and invincible. I decide to let the marks be!


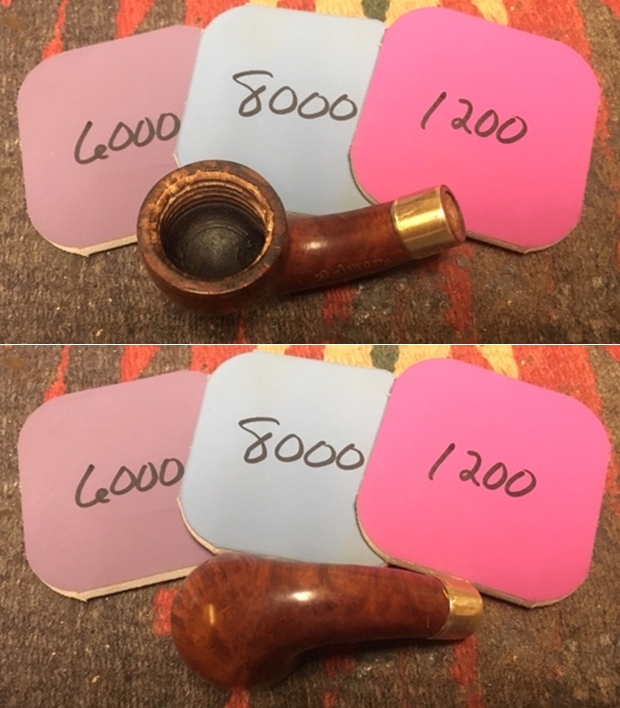
 Next, I rub a small quantity of “Before and After Restoration Balm” in to the briar with my finger tips and let it rest for a few minutes. The balm almost immediately works its magic and the briar now has a nice vibrant appearance with the beautiful straight grains on full display. I further buff it with a horse hair shoe brush.


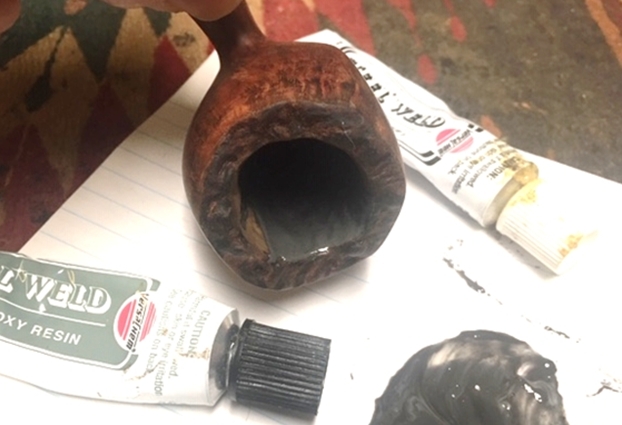
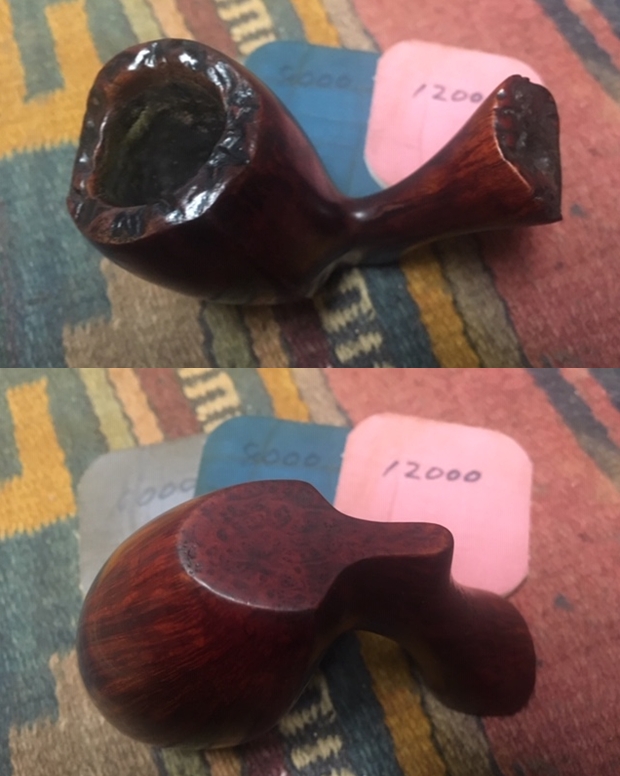
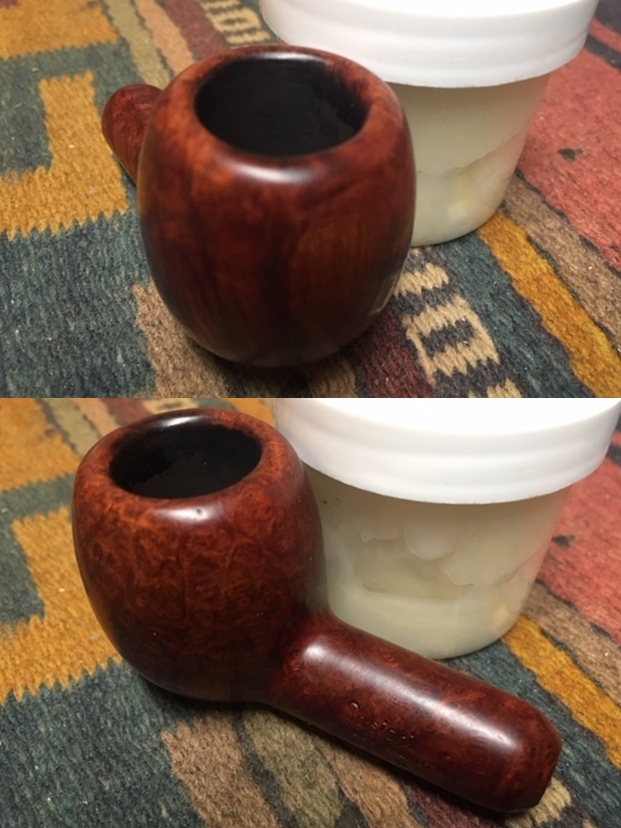
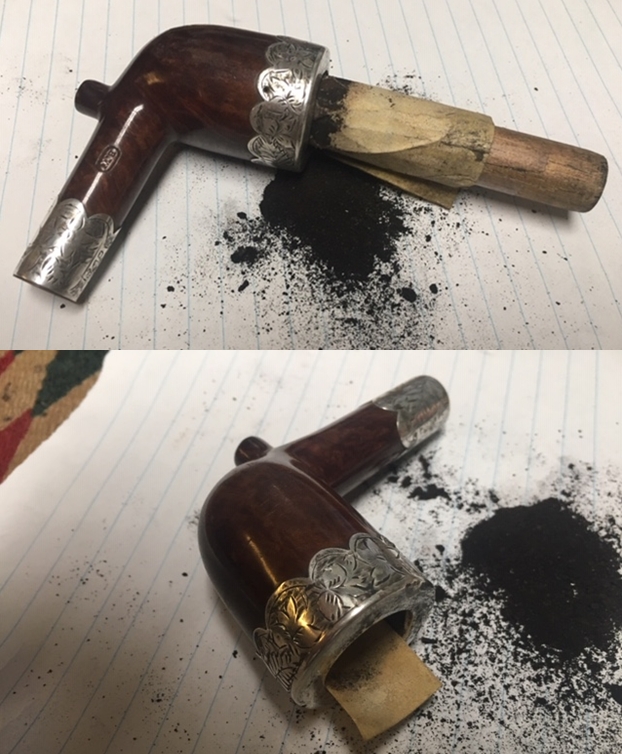
 The only stummel issue that needs to be addressed is that of the ridges at the heel near the draught hole. The first thing I do is insert Vaseline smeared folded pipe cleaner in to the mortise right up to the draught hole and slightly beyond. This prevents the draught hole from getting clogged. I begin by wiping the heel with a cotton pad wetted with alcohol to clean it. I make a mix of the two components of JB weld; hardener and steel in equal measures. The mix remains pliable for 6 minutes, which is adequate to spread it evenly and fill the worn out heel surface. I also covered the indentation formed on the front wall. Once I had achieved a satisfactory spread, I set the stummel aside for 4-6 hours for the weld to cure. The weld has hardened and I sand the fill to a nice smooth and even surface with a 180 grit sand paper. It was not an easy task as I had to do it manually with the sand paper pinched between my thumb and index finger. But I managed with satisfactory results. I shall be coating the inner walls of the chamber with a mix of activated charcoal and yogurt. This will not only help in faster build up of the cake but also isolates the weld from coming in to direct contact with the burning tobacco.
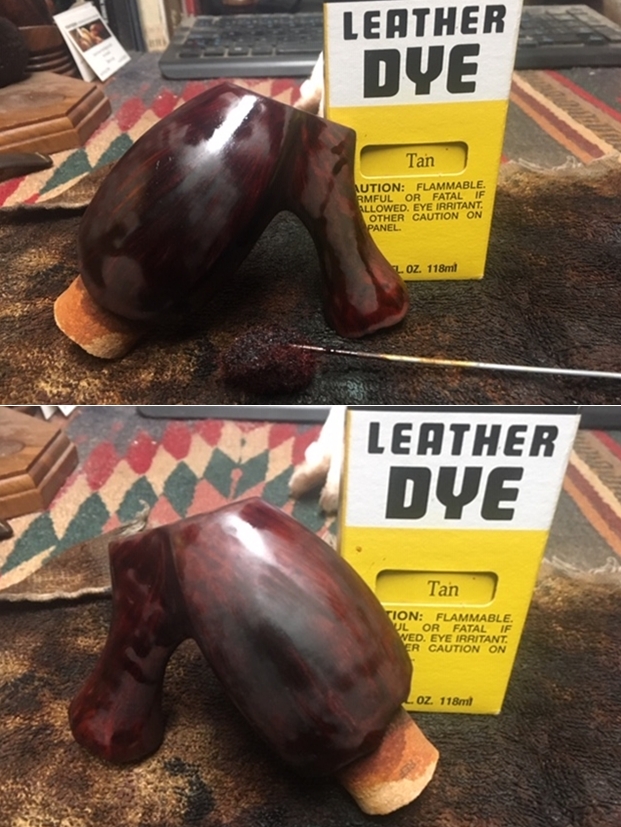
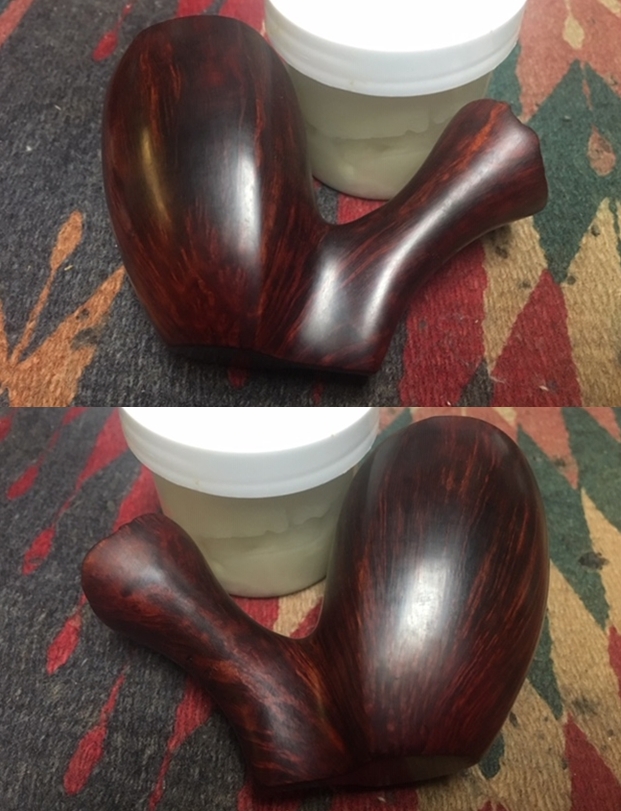
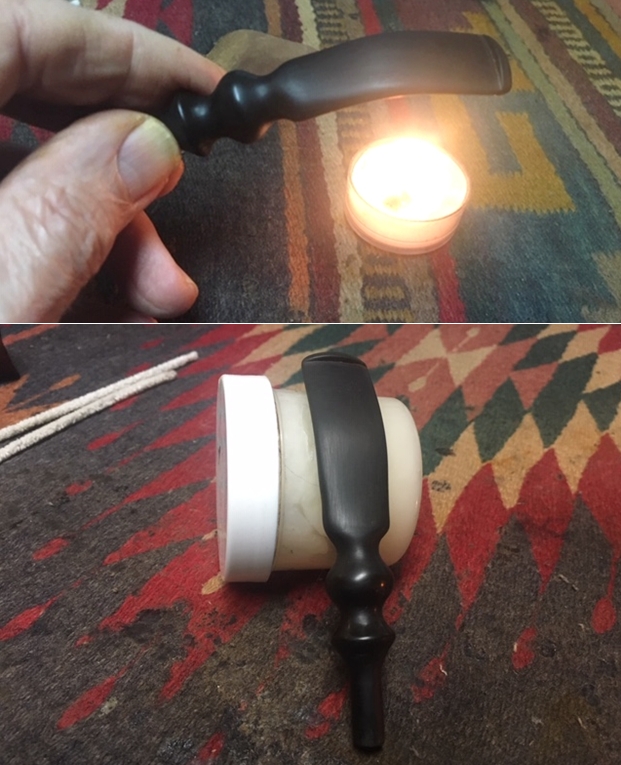
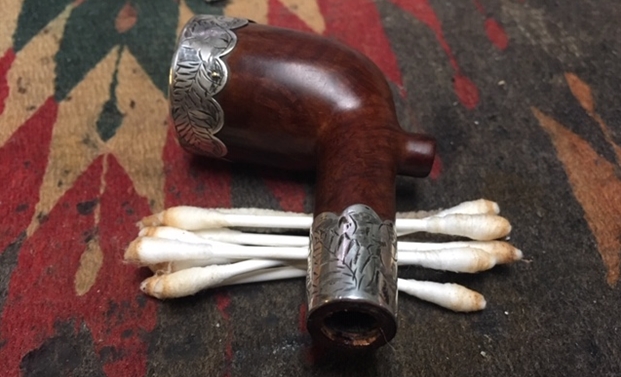
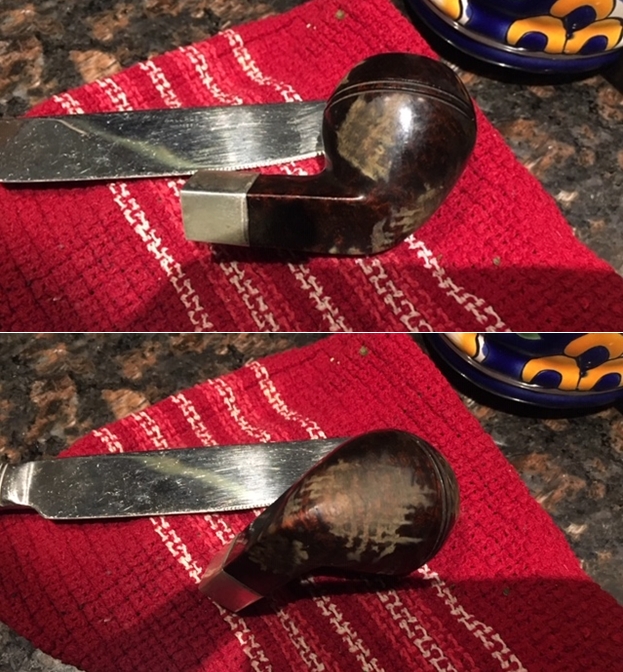
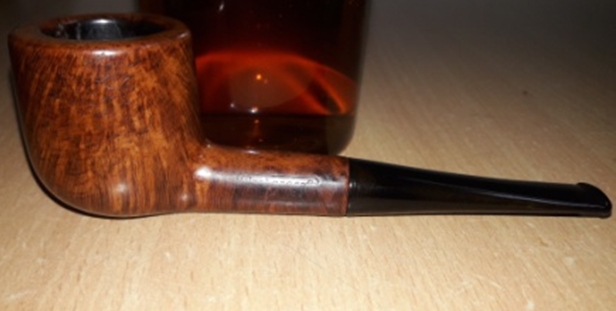
 To complete the restoration, I re-attach the stem with the stummel. I mounted a cotton cloth buffing wheel to my local machine which is similar to the Dremel. I set the speed at about half of the full power and applied White Diamond compound to the entire pipe. I wiped/ buffed the pipe with a soft cotton cloth to clear it of any leftover compound dust. With a cotton buffing wheel earmarked for Red Tripoli, which has a finer grit than White compound, I buffed the stem to a fine glossy finish. I then re-attach the stem to the stummel, mounted another cotton cloth wheel on to the polishing machine and applied several coats of carnauba wax. I finished the restoration by giving the entire pipe a rigorous hand buffing using a microfiber cloth to raise the shine further.


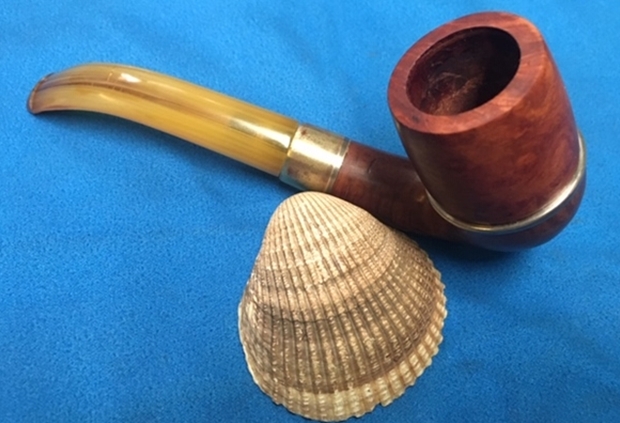
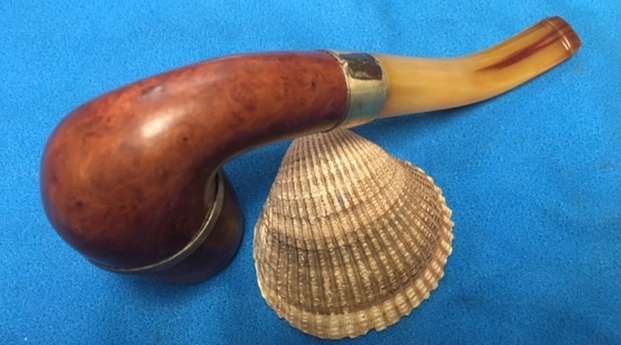
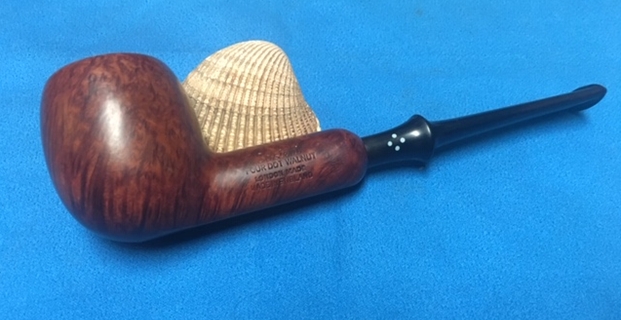
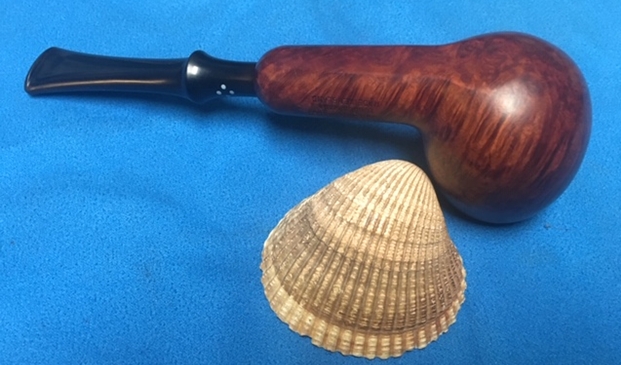
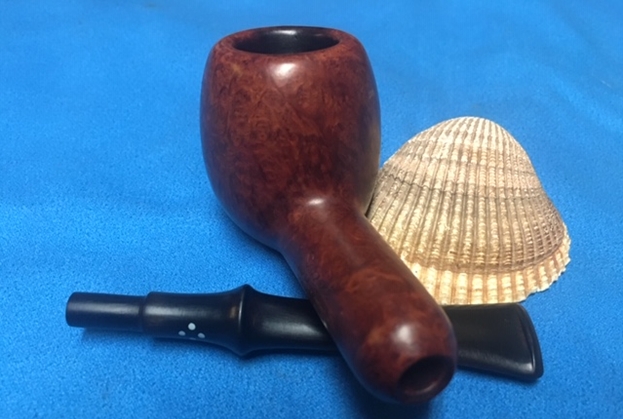
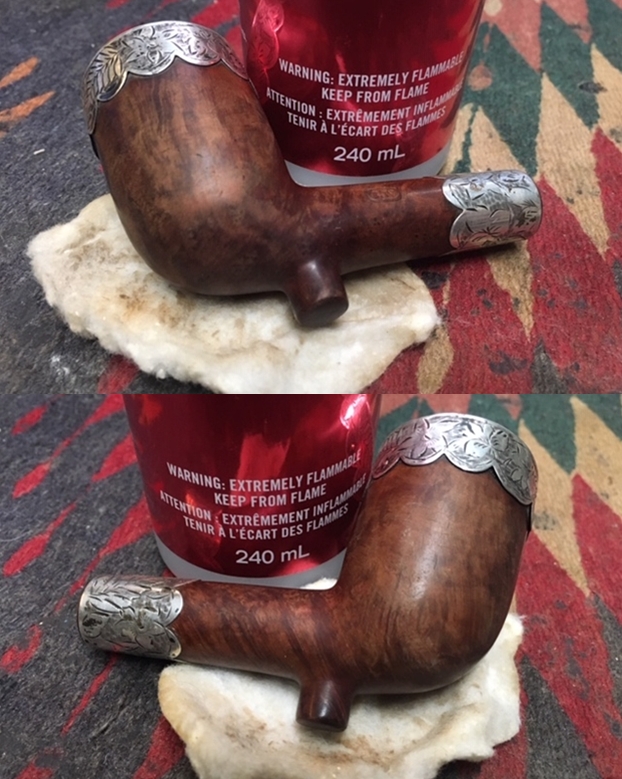
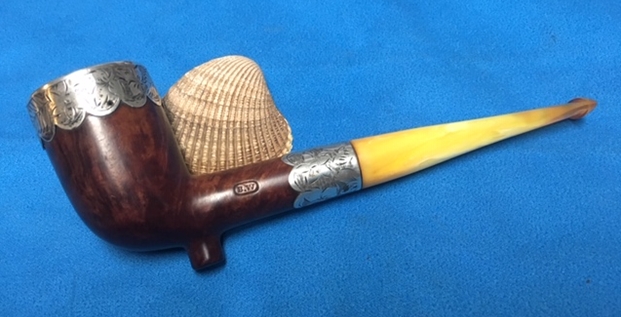
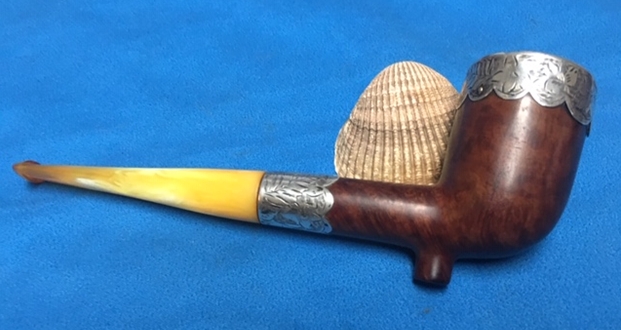
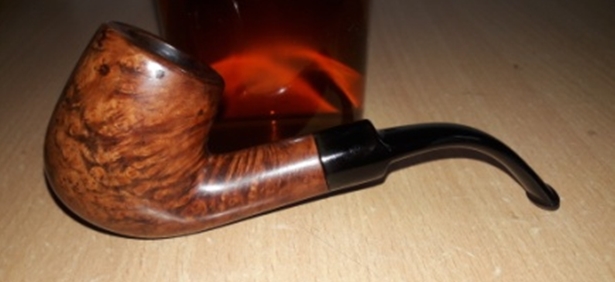
 The completed pipe looks lovely, fresh and vibrant; the pictures speak for themselves. I really enjoyed working on this pipe and hope that readers too enjoyed walking with me through this restoration. If only this handsome pipe could share the secret of its past life with all of us… if only!! Cheers.
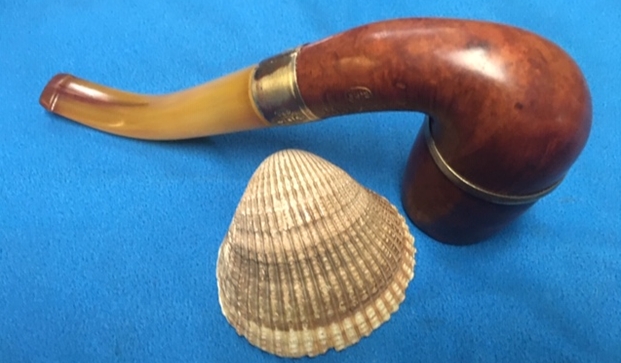
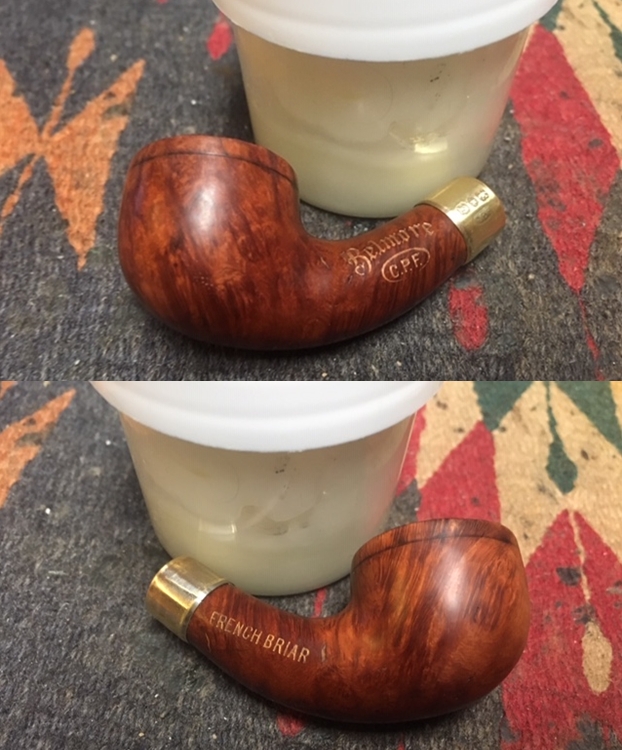
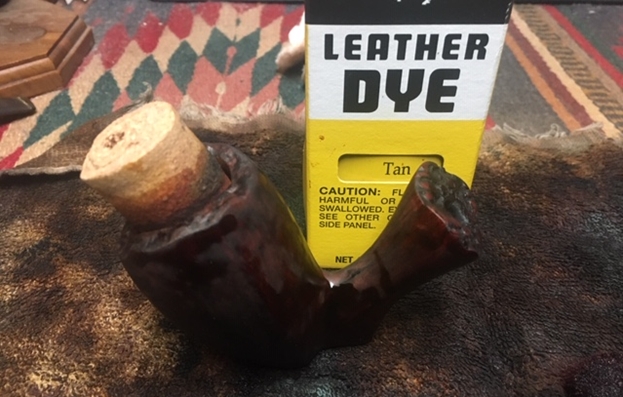
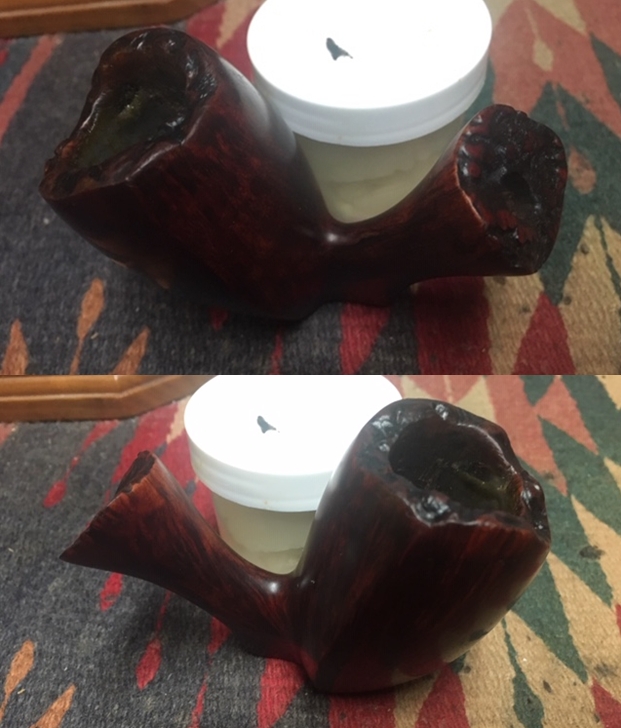
PS: After I was done with all the polishing and buffing, I gave the walls of the chamber, a nice and even coat of activated charcoal and yogurt. I am very happy that this pipe has gone to a war veteran Officer who loved the scars and the grains on this pipe, not to mention my figment of imagination that this pipe appears to have seen action against the Viet Cong and survived!! It was at his request that I did not stain this pipe to mask the fills. This fighter has indeed come a long way as can be seen from the pictures below.


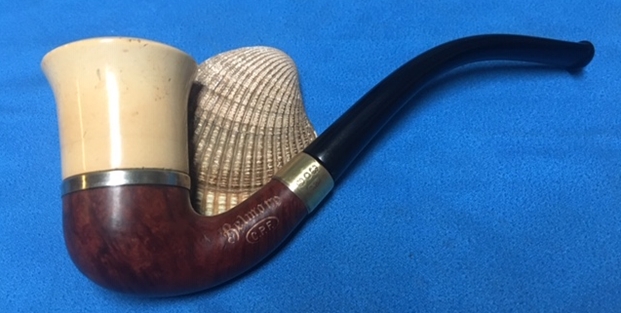
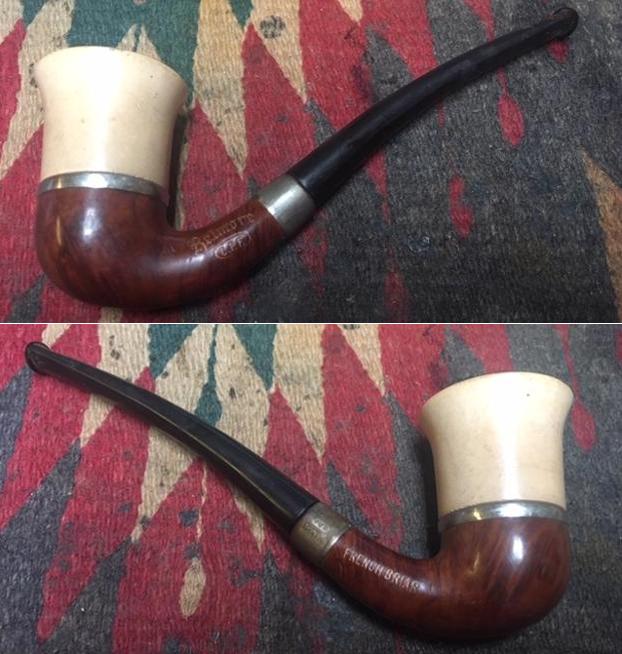
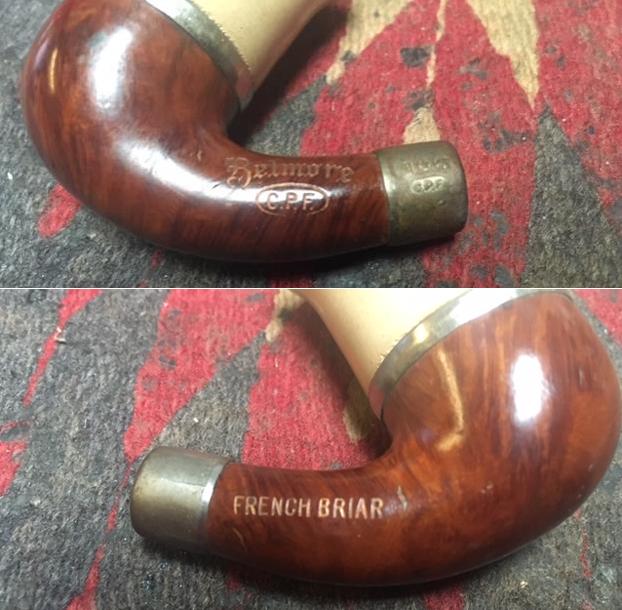
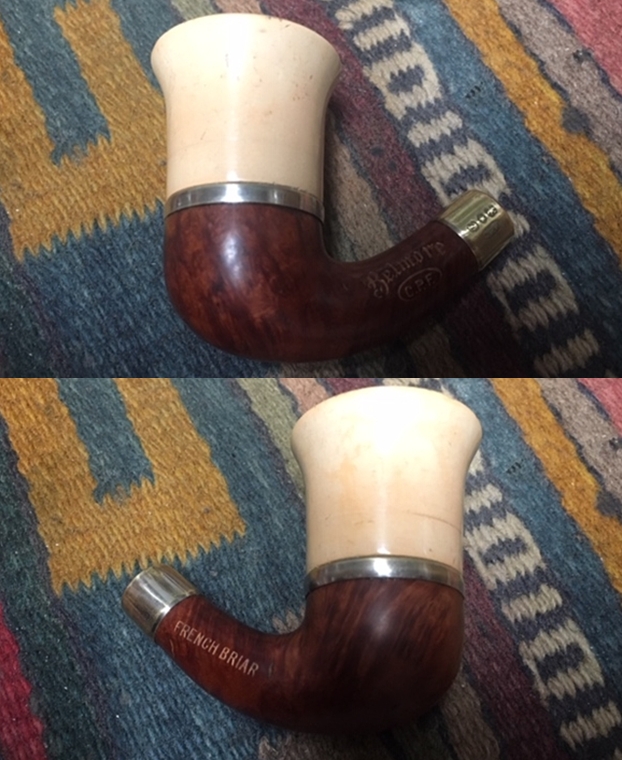
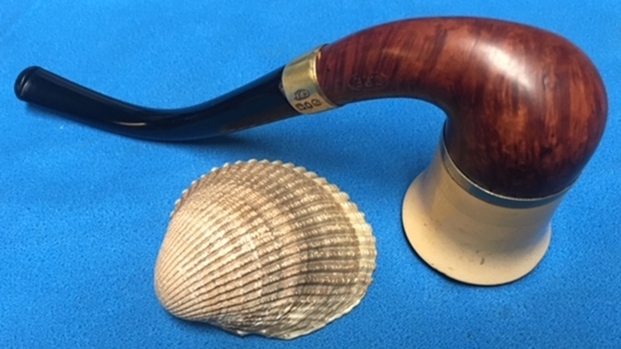
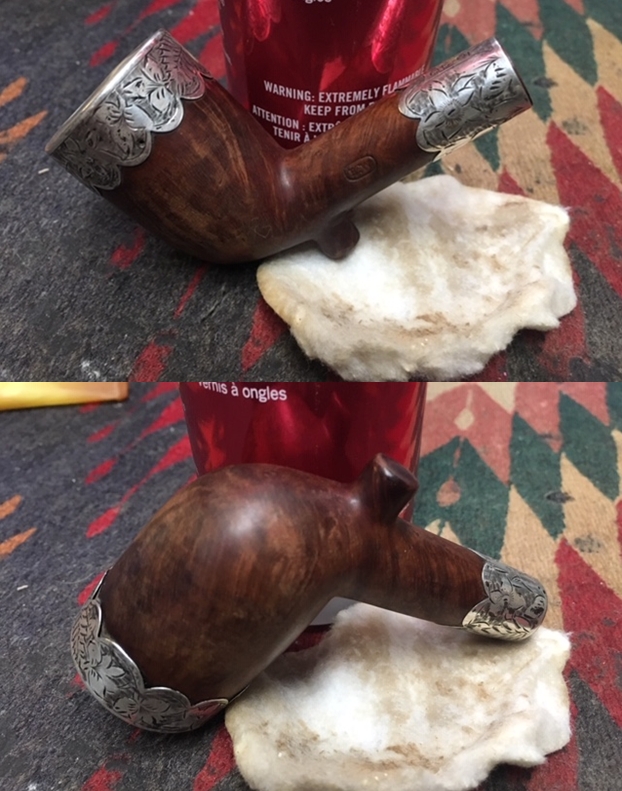
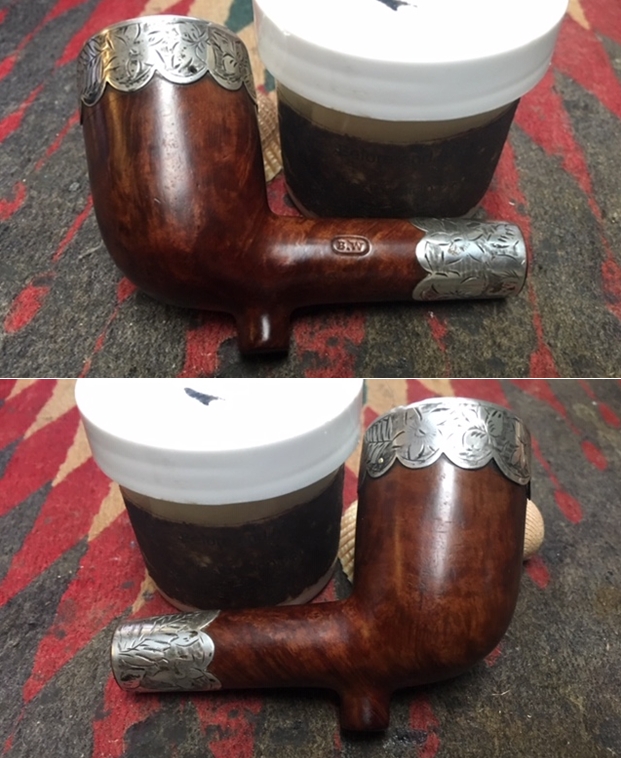
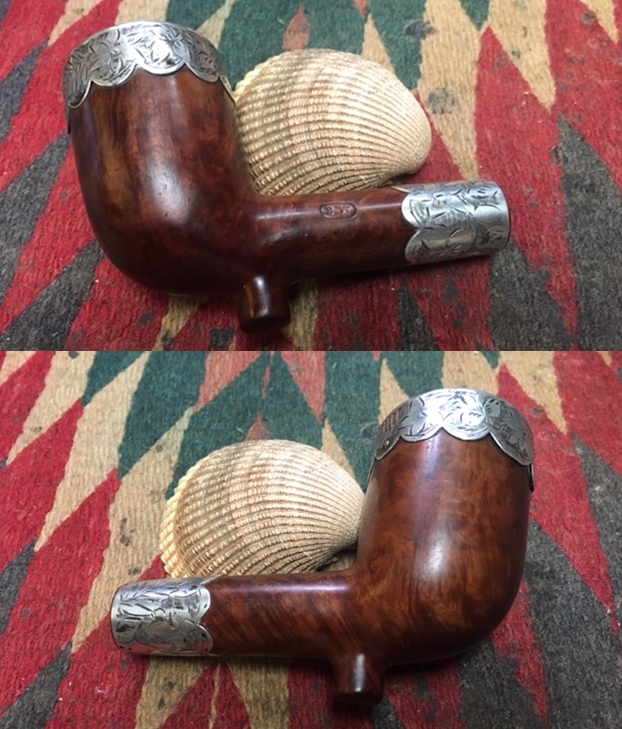
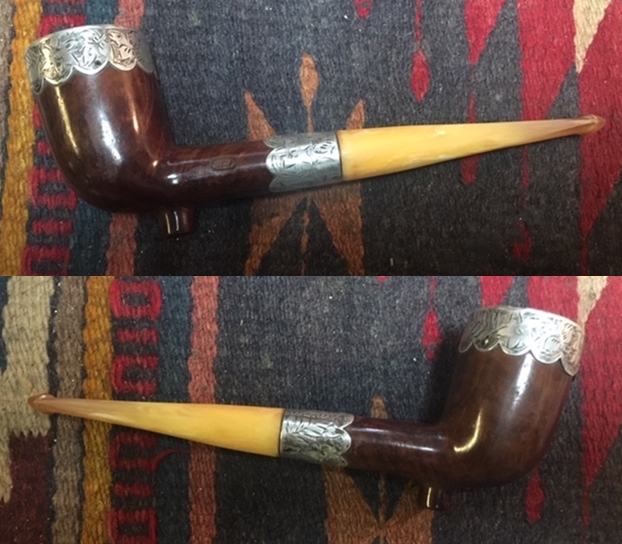
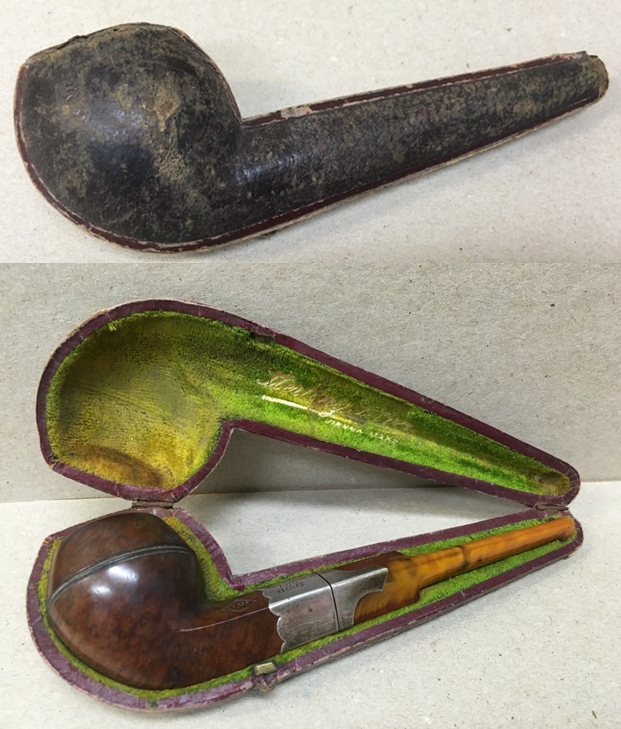
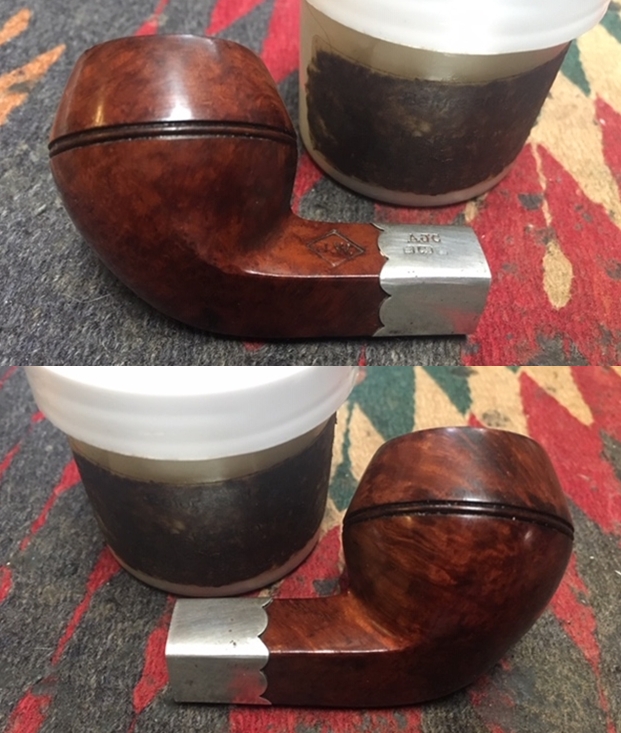
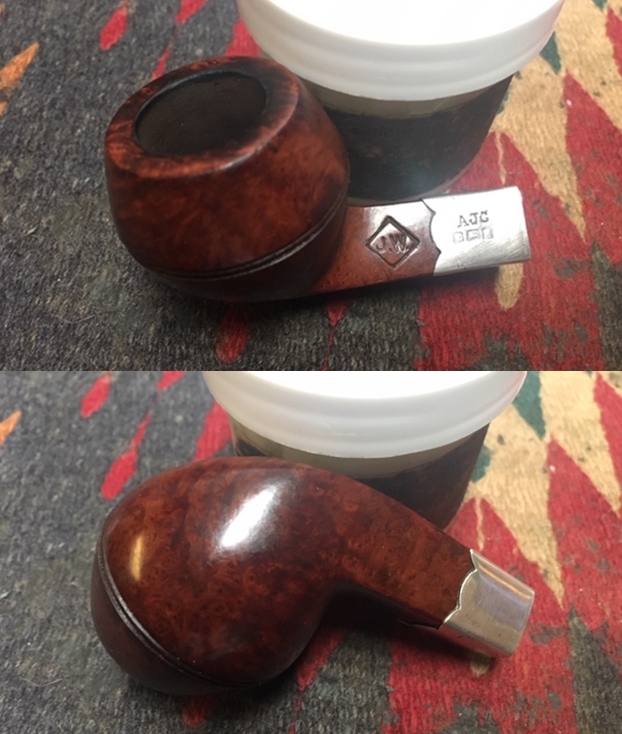
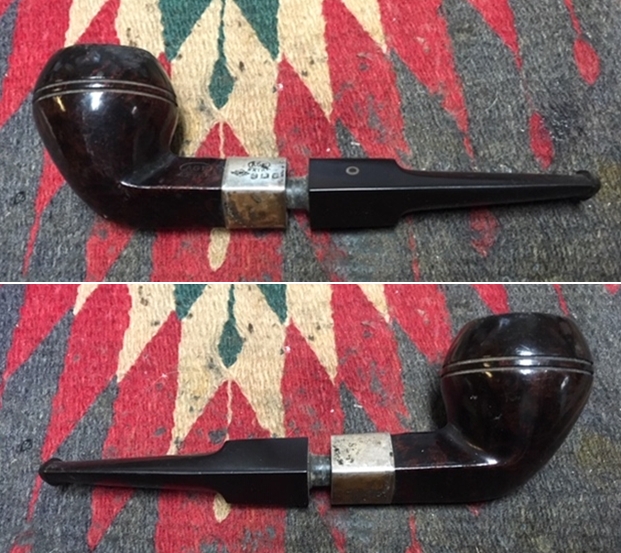
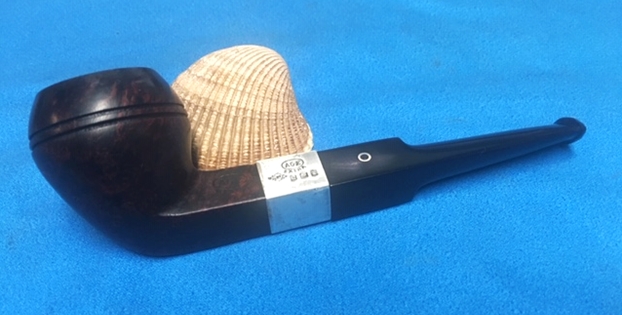
 The next photo shows the stamping on the left side of the shank. It is clear and readable. The stamping reads as noted above. The band is loose and is stamped with the C.P.F. in an oval logo with the faux hallmarks that are on all of the metal banded C.P.F. pipes.
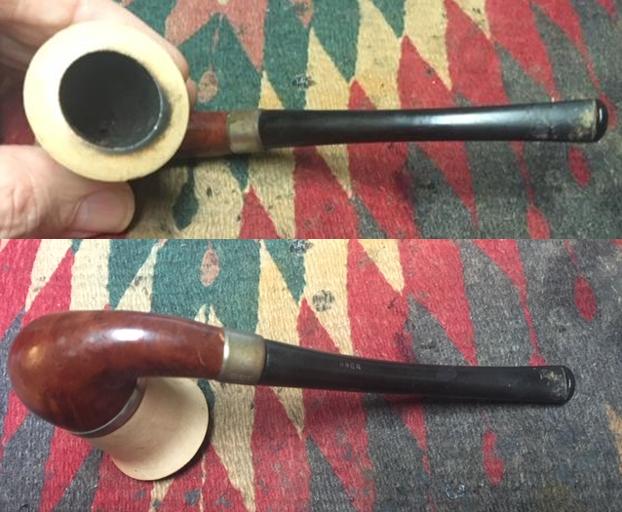
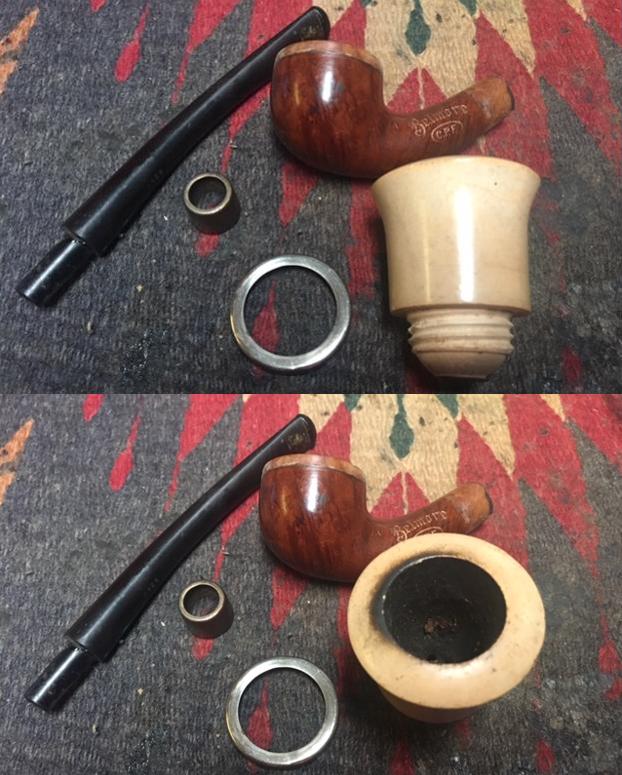
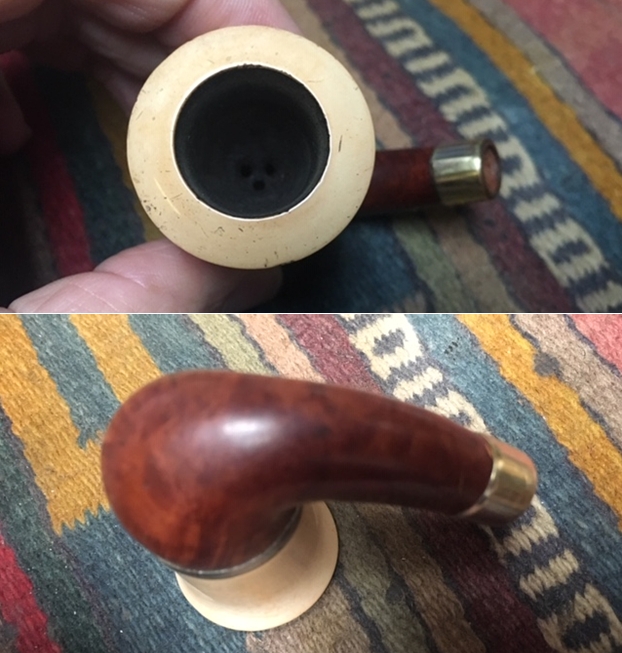
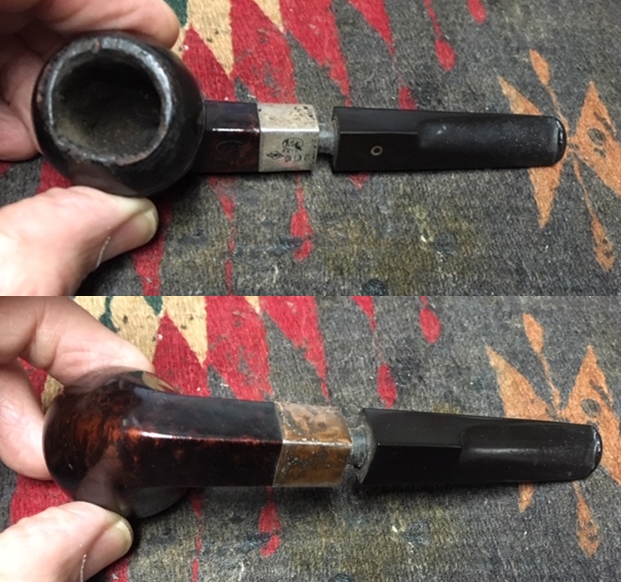
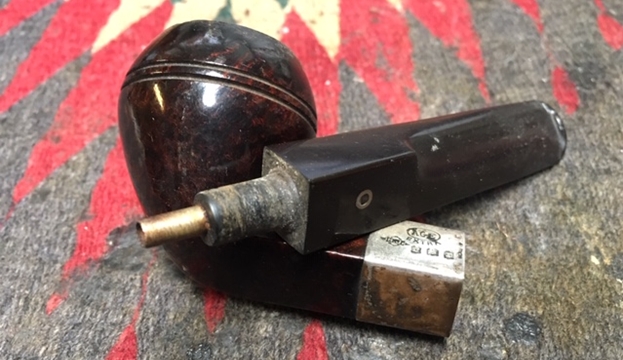
 I unscrewed the broken stem from the pipe and took photos of the parts – the briar base and bowl as well as all the adornments. The ferrule is split and will need work and the separator on the base is also oxidized and dirty.
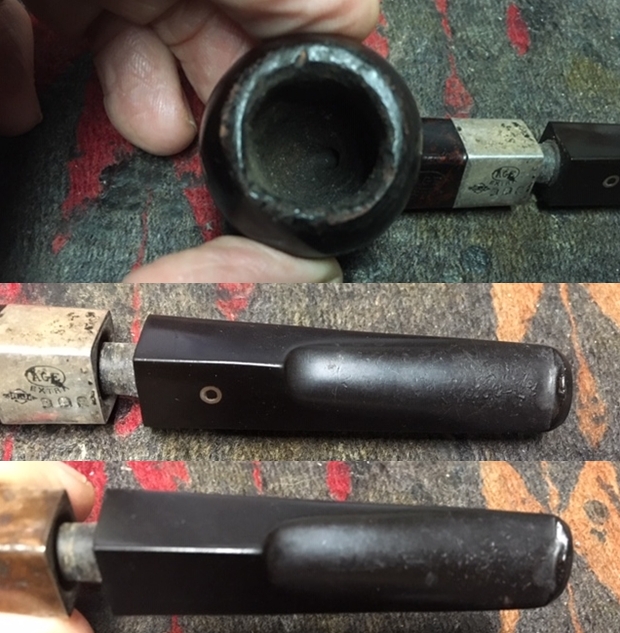
  I have included the following information with each of the blogs on C.P.F. pipes because I always want to keep the historical context in mind as I work on these. The link to the blog follows (https://rebornpipes.com/2013/04/14/some-reflection-on-the-historical-background-on-cpf-pipes/). I quote a pertinent part of the blog below:
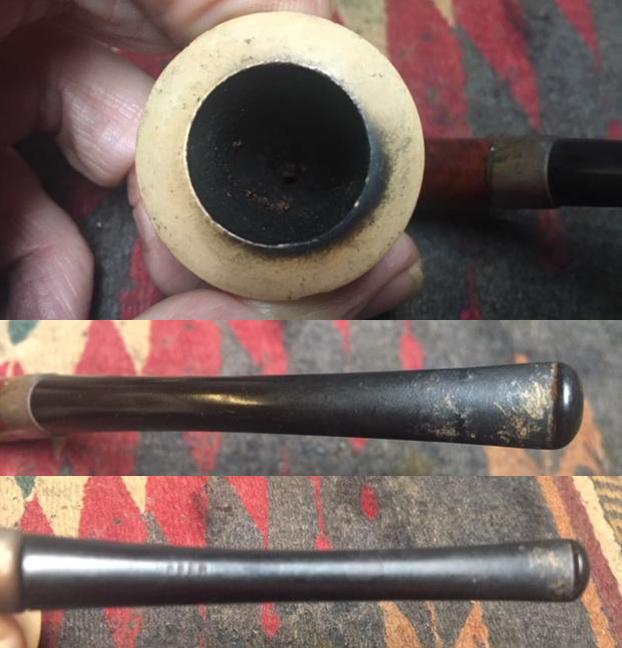
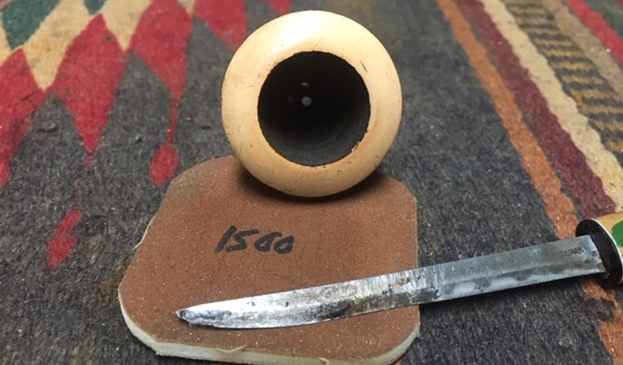
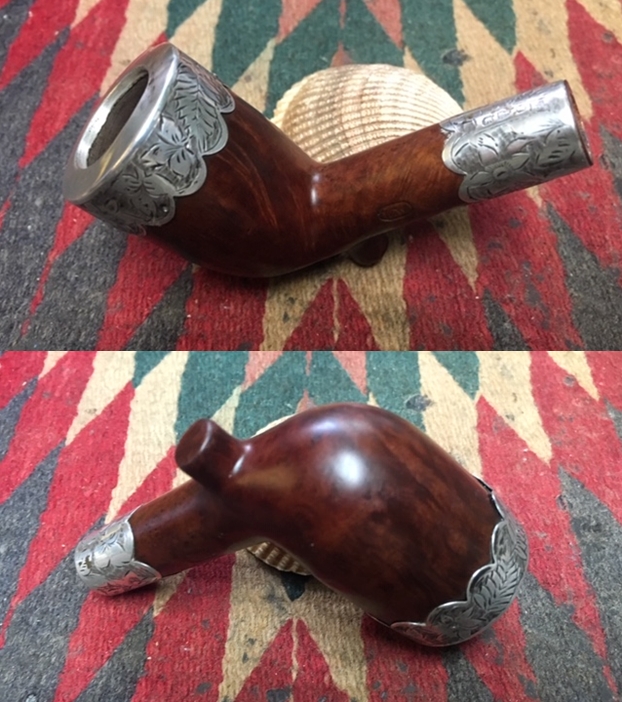
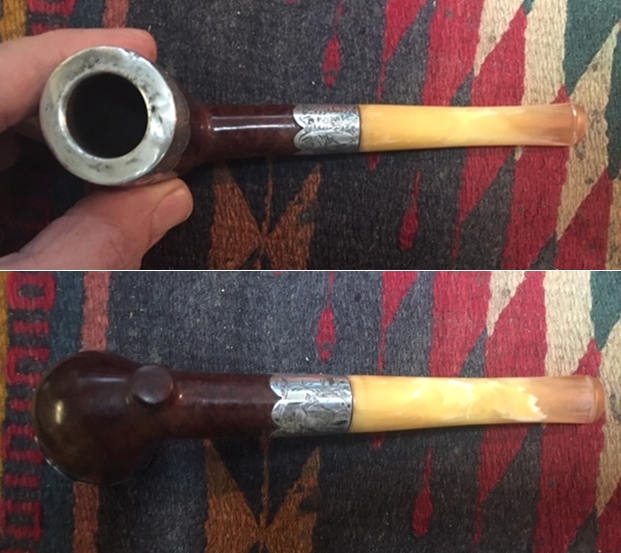
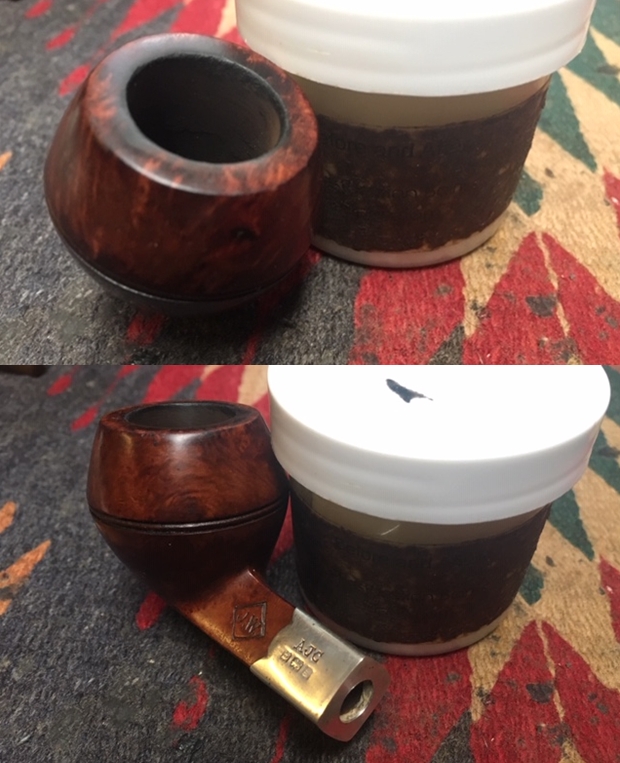
 I sanded the repaired spots on the top and underside of the base with 220 grit sandpaper to blend the repairs into the briar. I spread some white glue on the shank end and pressed the ferrule in place. I held the break in the ferrule together until the glue set. I filled in the crack with clear super glue until it was smooth and set it aside to cure.
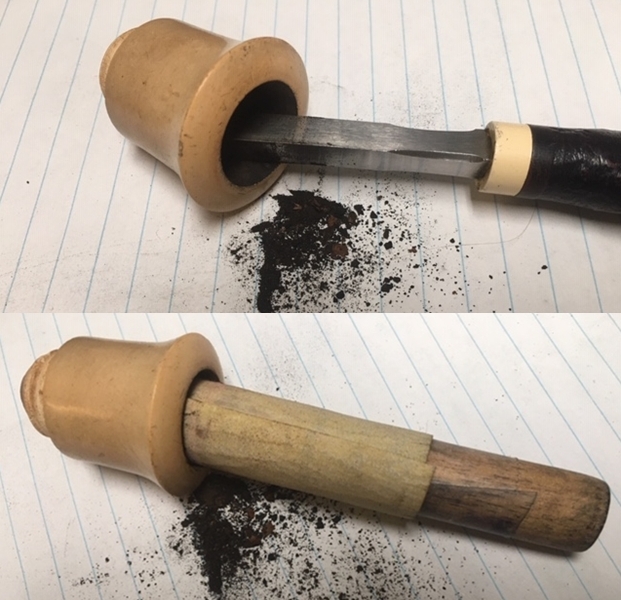
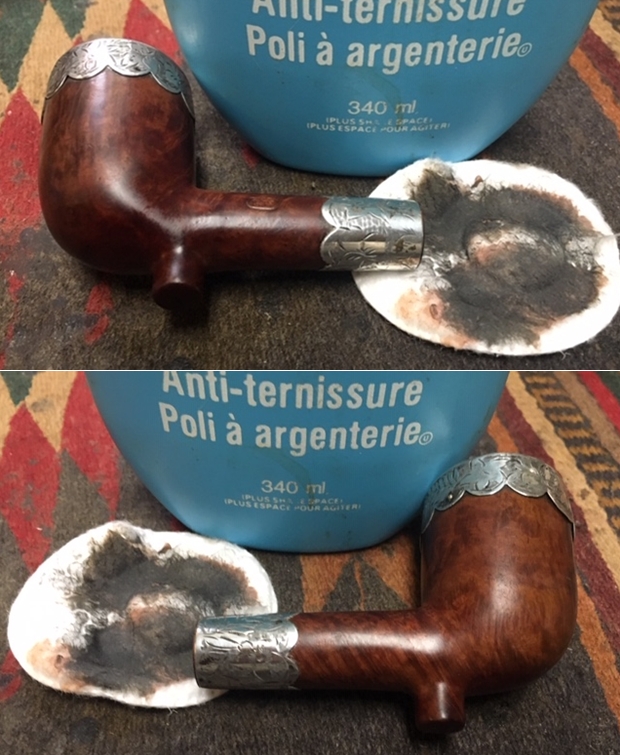
  The internals were clean and a quick pipe cleaner and alcohol run through the shank and bowl to clean out the dust. I polished the brass ferrule on the shank end with Hagerty Tarnish Preventative Silver Polish to remove the tarnish and wear. I used it on the space between the bowl and base as well. You can see the effect of the polishing – the metal shone.
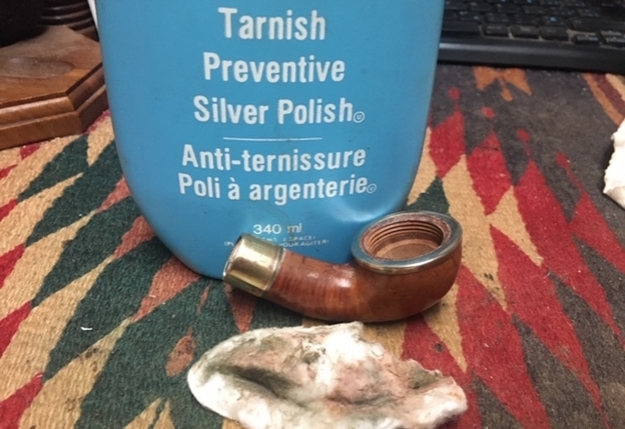 I wiped the bowl and base down with isopropyl alcohol on a cotton pad to remove the varnish coat on both the bowl and the base. The briar looked very good. There was a fill in the back side of the bowl and a little one on the underside of the shank.
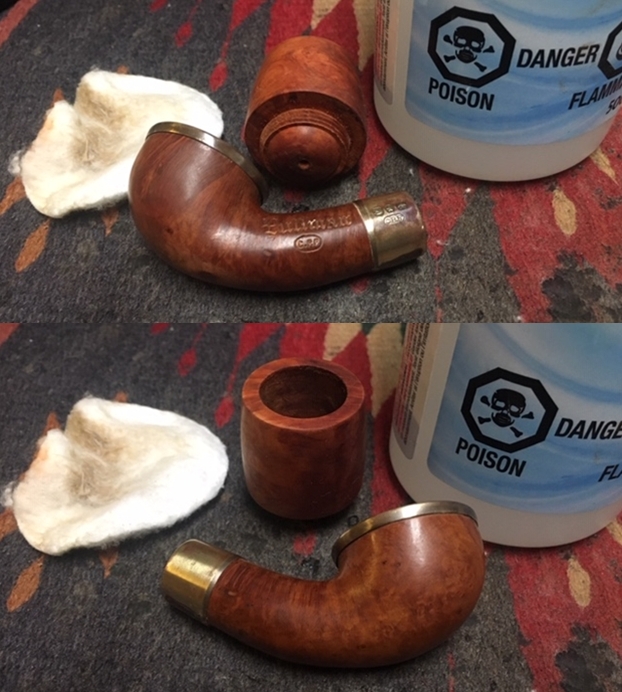
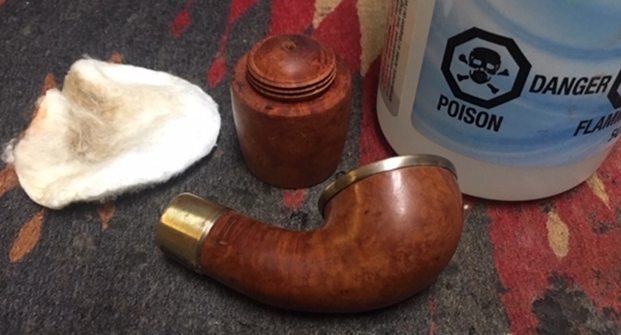 I am continuing to experiment with Mark Hoover’s Briar Cleaner to see what I think of it as a possible replacement for my usual Murphy’s Oil Soap scrub. I rubbed it onto the briar bowl and base and worked it into the grain of the briar. I wiped it off with a clean cloth. There was still a coat of grime and grit from the cleaner left behind so I rinsed it with warm water to remove that and dried it with a microfiber cloth. I am really not sure if this is any better than the Murphy’s but I am committed to working with it.
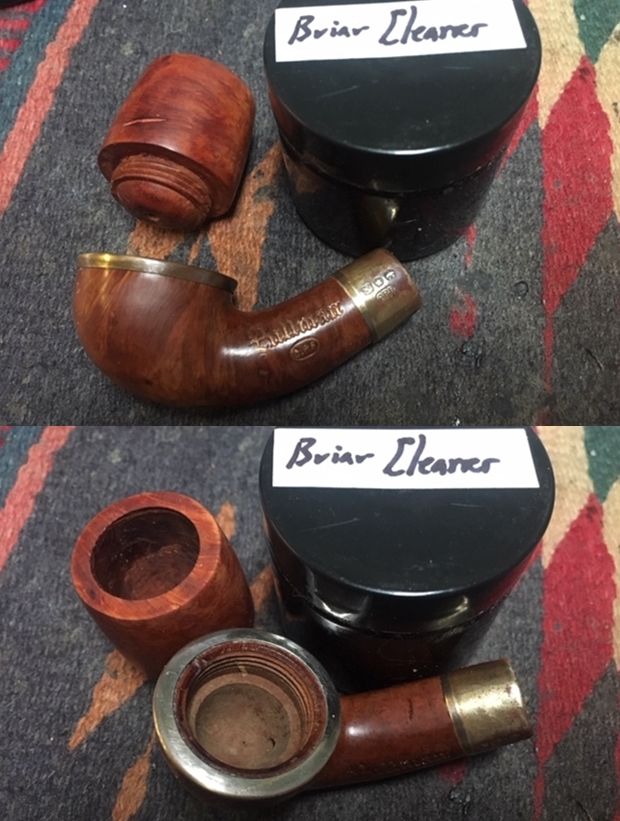
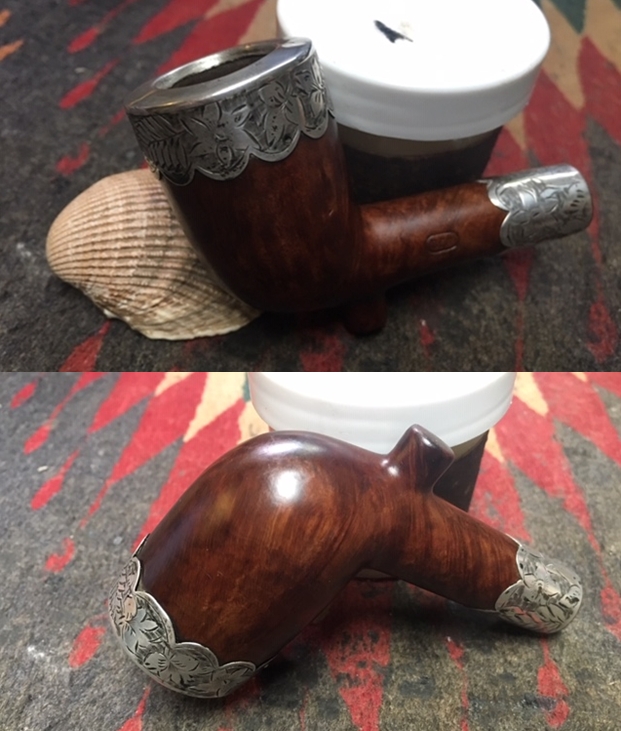
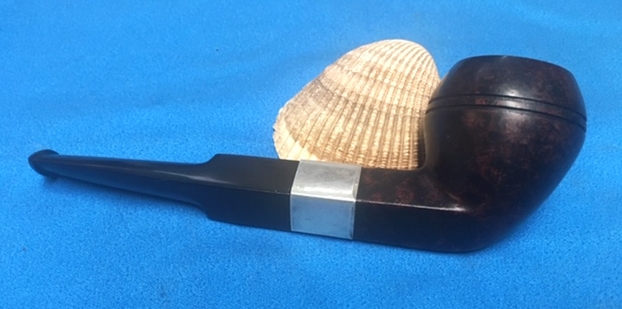
 I rubbed the briar bowl and shank down with a coat of Before & After Restoration Balm. I worked it into the surface of the briar. The product works to clean, enliven and protect the briar. The old briar was dry and it drank up the balm. I buffed the bowl with a soft cloth to raise a shine. I like how the pipe looks as this point in the process.
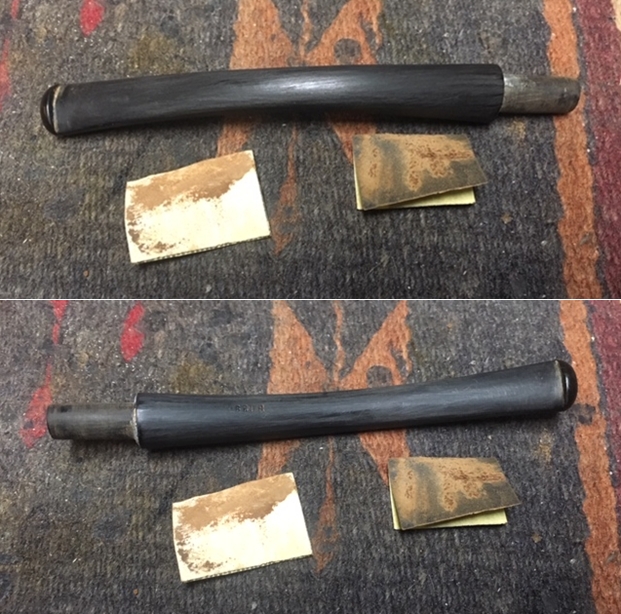
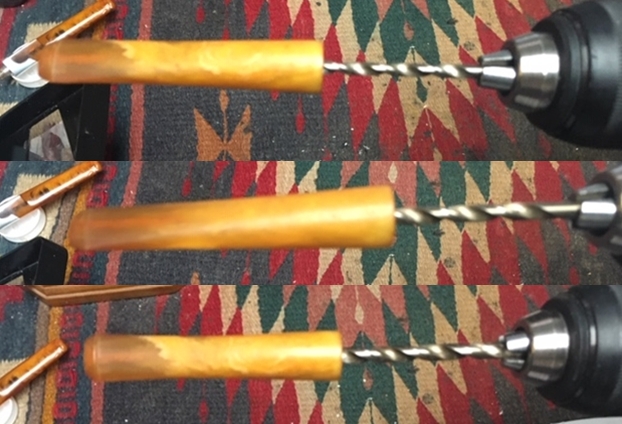
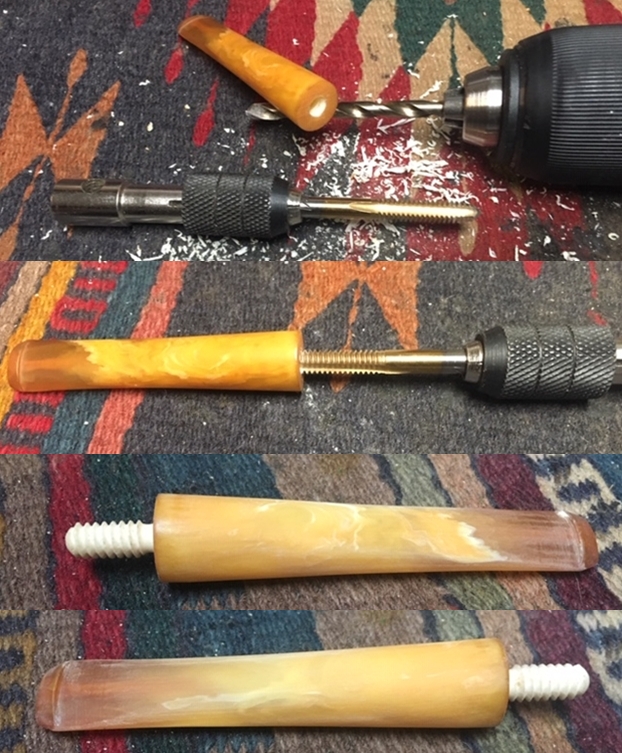
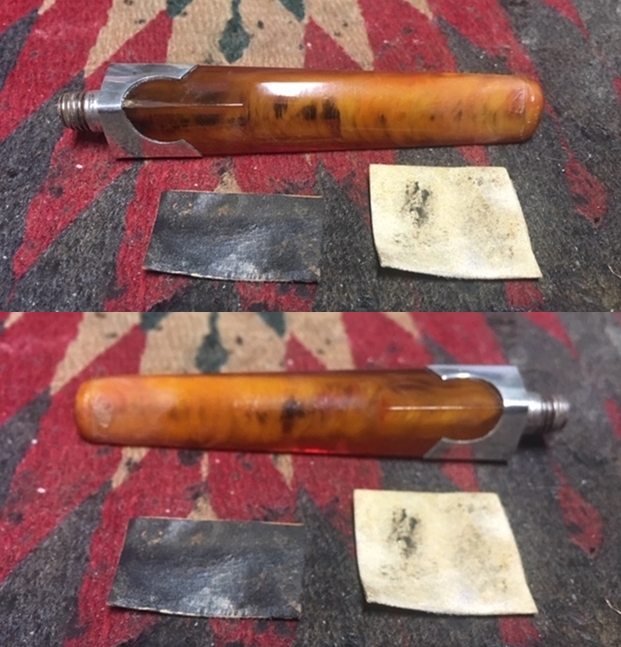
 I set the bowl aside and went through my can of stems and found a Bakelite stem with the same diameter and length as the original one. It had a push tenon that I would need to sand down a bit to get a good fit in the threaded shank. I tried to remove the bone tenon from the original stem but it was stuck and breaking the old stem would likely damage the tenon. I started working on the stem. I used a needle file to reduce the diameter of the tenon.
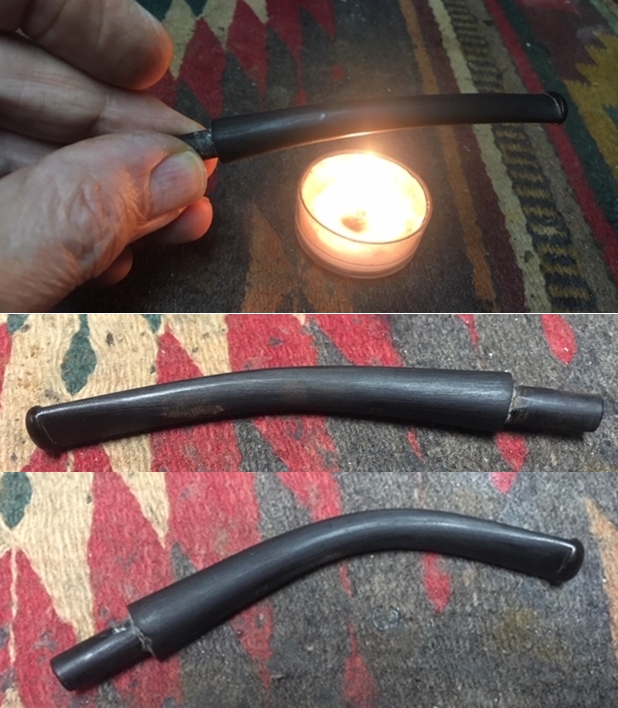
  I heated the stem with a heat gun until it was softened and then bent it to match the angle of the bowl and shank. I sanded out the small ripple marks from bending the stem using 220 grit sandpaper. I sanded out the scratches with 400 grit sandpaper. I wiped the stem down with Obsidian Oil.
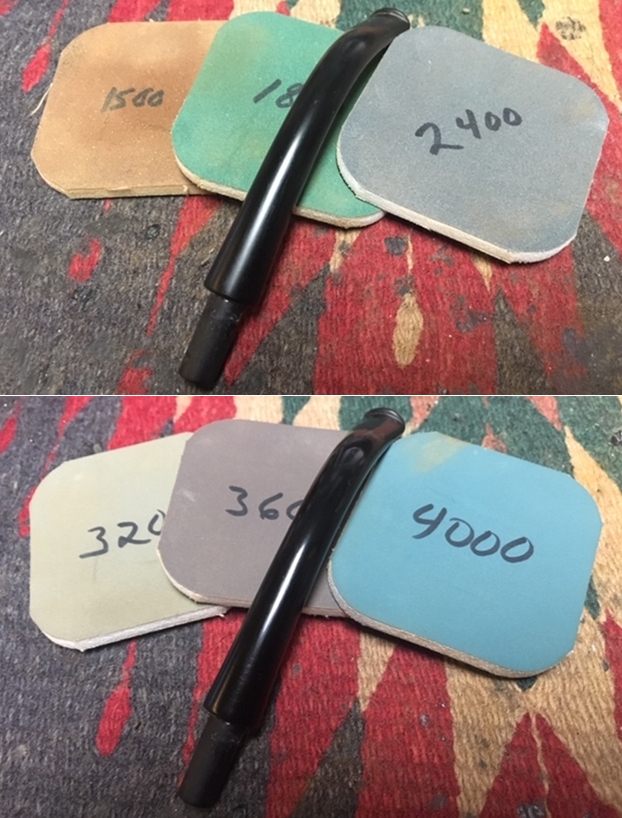
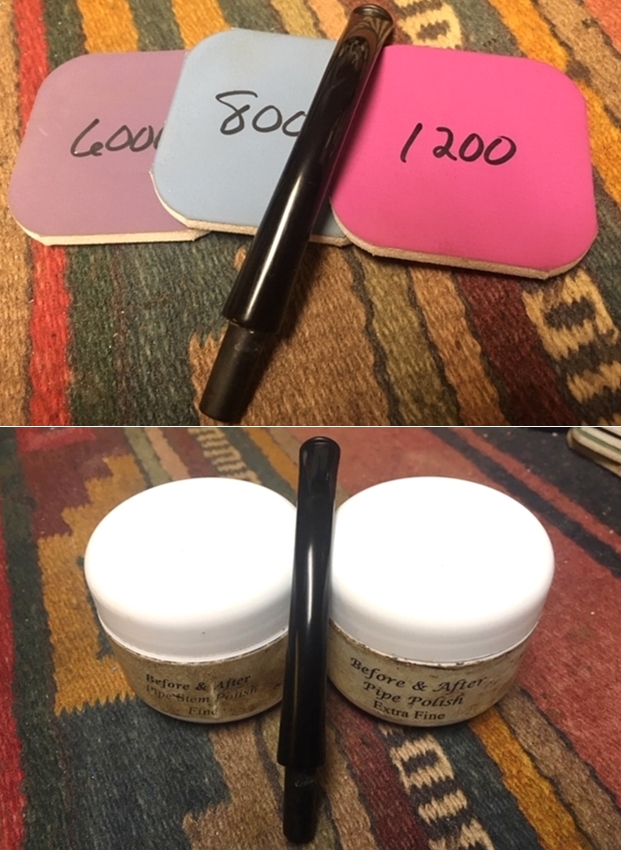
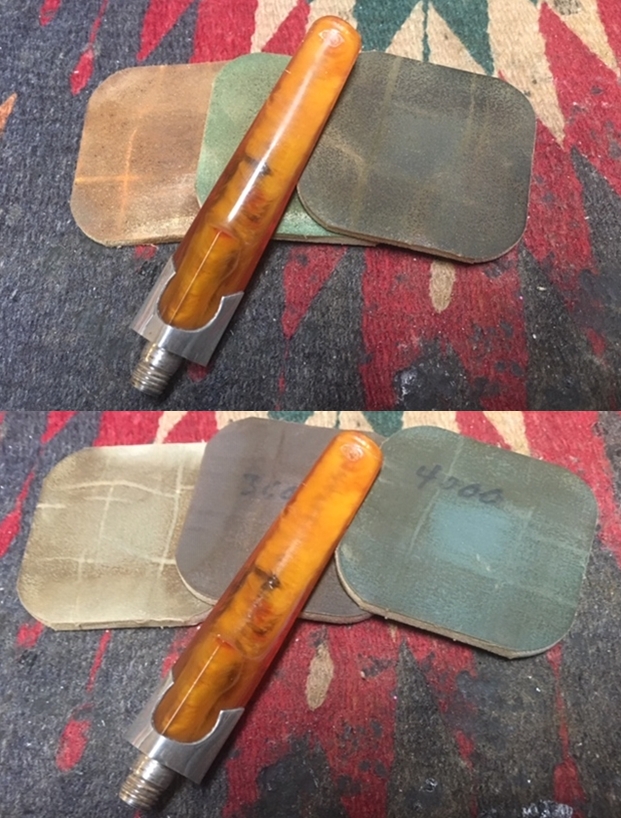
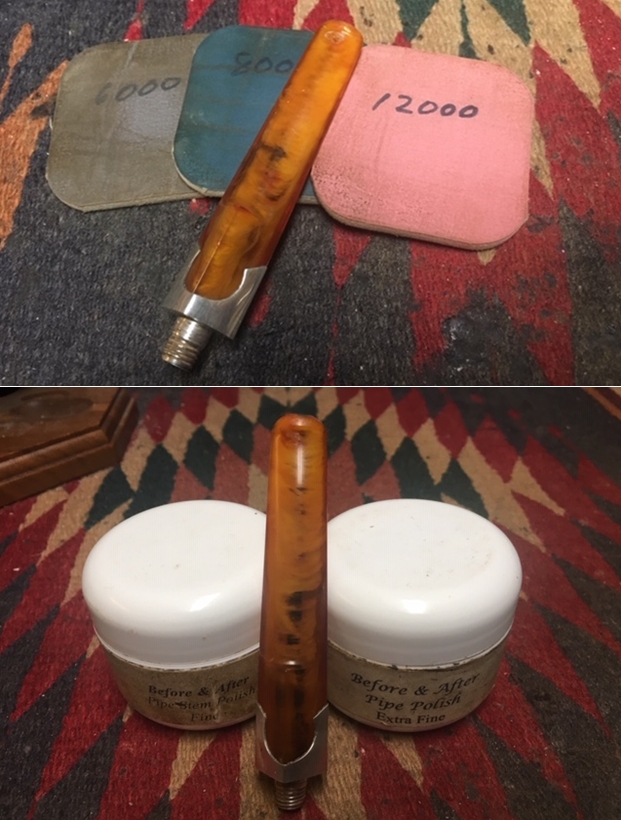
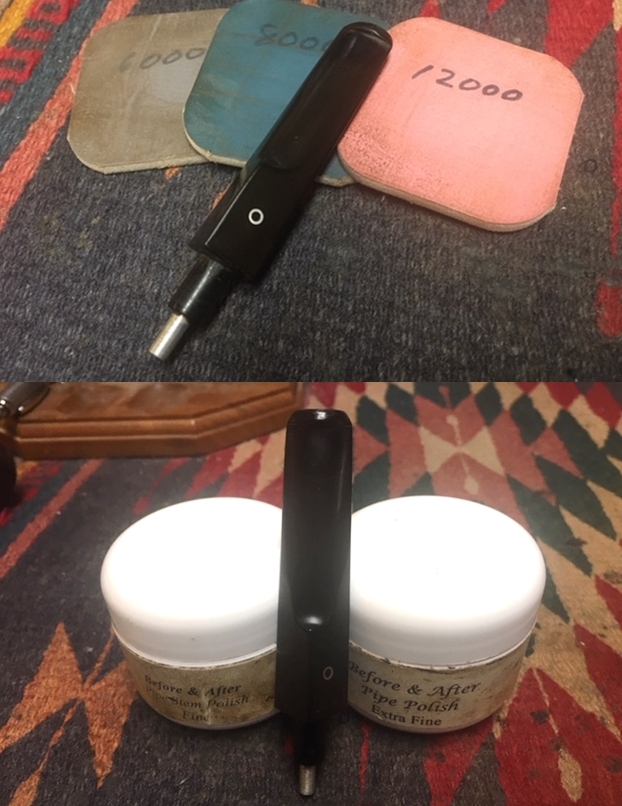
  I polished the stem with micromesh sanding pads – wet sanding it with 1500-2400 grit pads and dry sanding it with 3200-12000 grit pads. I wiped it down with Obsidian Oil after each sanding pad. I finished the polishing with Before & After Pipe Polish – both Fine and Extra Fine. I gave it a final coat of Obsidian Oil and set it aside to dry.
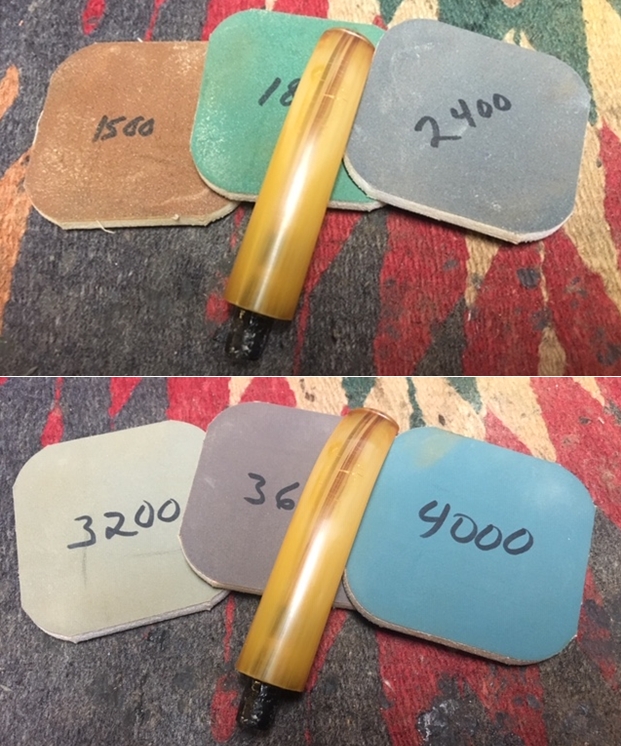
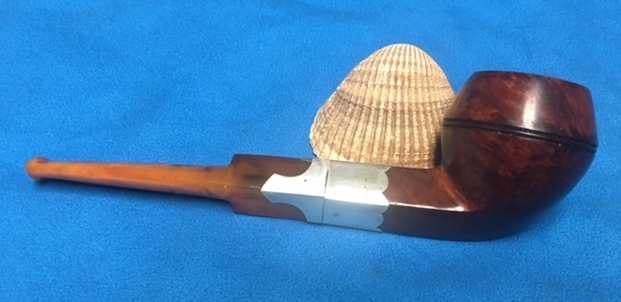
 By now if you have read rebornpipes for very long you know that I love these old C.P.F. pipes. There is some serious thought that they were carved by European trained craftsman who were skilled pipemakers. These pipemakers were brought to the US by the Colossal Pipe Factory to make pipes. Many of the shapes, bands and stems have such high quality workmanship involved that I really think there is truth to this story. This little bent Briar Stack is a real beauty.