Blog by Paresh Deshpande
The second pipe that was selected by Karthik was this Meerschaum pipe that came to me in a lot of 40 pipes that Abha and I had purchased on Etsy in October 2019. The pipes in this lot that came to us were in a very sorry state of condition. All or rather 90% of the pipes had seen very heavy use and almost negligible care. Barring a few, none of the pipes attracted any attention at first glance. However, beneath all the grime and sorry condition that the pipes were in, as my friend Dal Stanton aka The Pipe Steward always says, each had great potential. There was something about this meerschaum pipe that called out to Karthik and it is now on my work table.
In November of 2020, I had restored the third pipe from this lot, a Meerschaum lined Orlik pipe that posed intimidating challenges during the restoration process. However, Dal and Steve helped me save this beautiful pipe. Given below is the link to the write up for those desirous to know; A Second Inning For A Meerschaum Lined Orlik Bent Brandy | rebornpipes
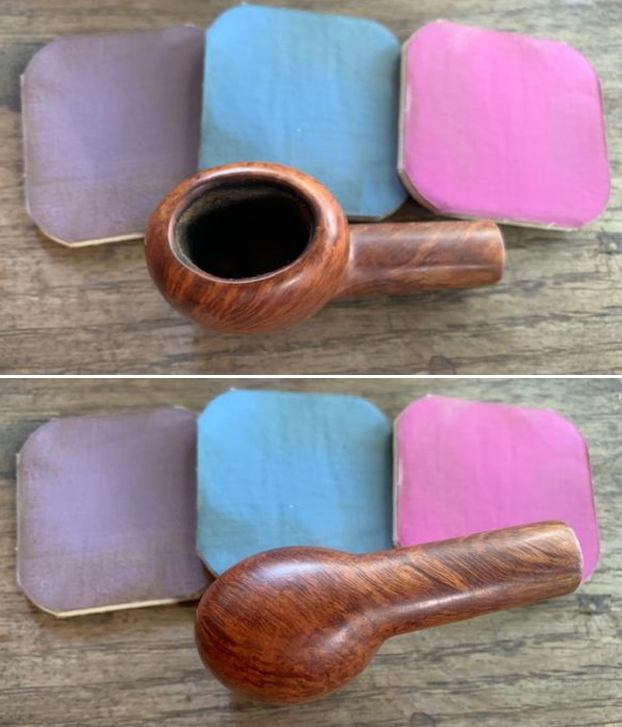
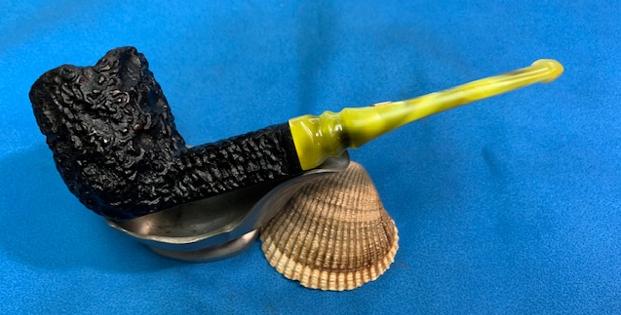
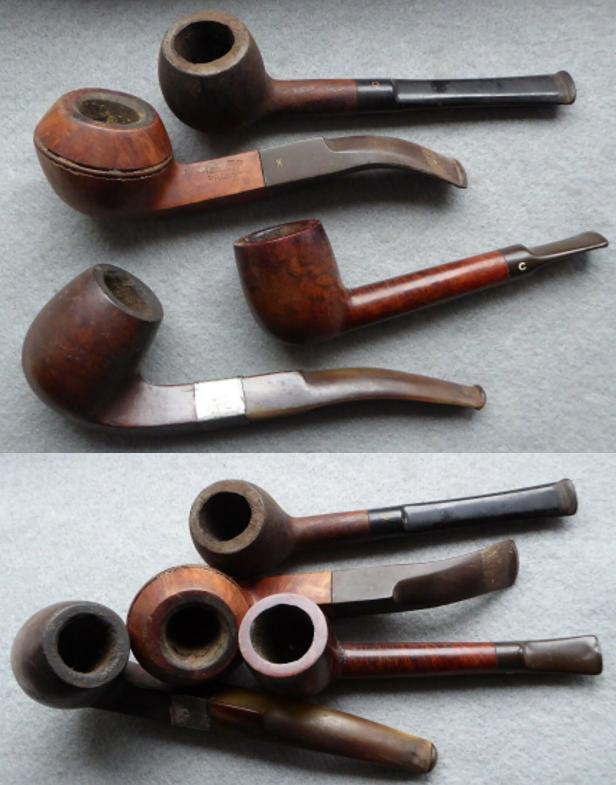
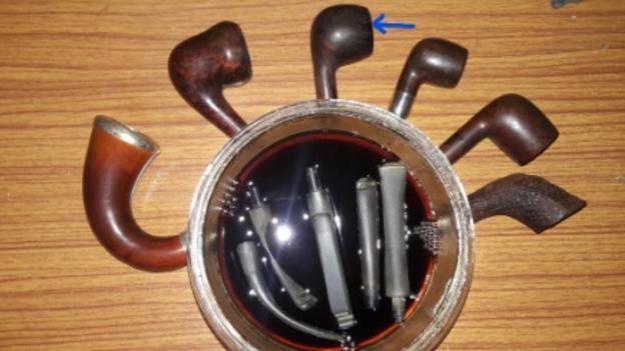
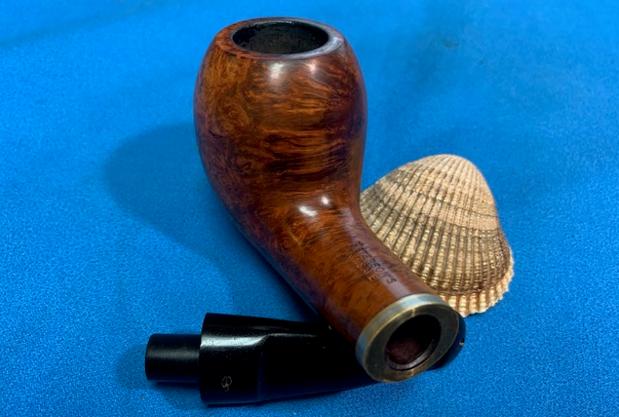
This then, is the fourth pipe from the lot of 40 and is indicated with a yellow arrow while the Meer lined Orlik is indicated in green. There is no stamping anywhere on either the shank or the stem to help with establishing the provenance of this pipe.
Before proceeding with the restoration of the pipes that were selected by Karthik, I had requested him to introduce himself to all the readers of Reborn pipes as a fellow piper and as one interested in pipe restoration. I am sanguine that we shall soon get to know and see his work. I have reproduced his mail here that I had received.
Hi Paresh sir,
Here’s my intro, hope it’s not too long:
Hello world! I’m Karthik, an engineer in India. I picked up pipe smoking last year as a way of staying off cigarettes, but have since fallen in love with the hobby itself. Living in India, I don’t have easy and immediate access to great pipes. So the idea of buying antiques and restoring them piqued my interest and I stumbled upon Reborn Pipes. As I read through post after post, I happened upon one of Paresh’s posts and both his name and his mention of Pune made me fall over myself in my rush to get in touch with him. I immediately emailed Steve, who graciously put me in touch with Paresh. Since then Paresh has been a great guide in my pipe smoking journey. Unfortunately I haven’t been able to start restoring any pipes myself, but I hope to get to that soon. In the meantime, Paresh generously showed me some of his collection and kept me in mind when he found something of interest. I hope to start down the path of restorations in the near future myself, with his guidance.
Regards,
Karthik
Definitely Karthik, together we shall learn and progress further.
With the introductions made, I move on to carry out initial inspection of the pipe.
Initial Visual Inspection
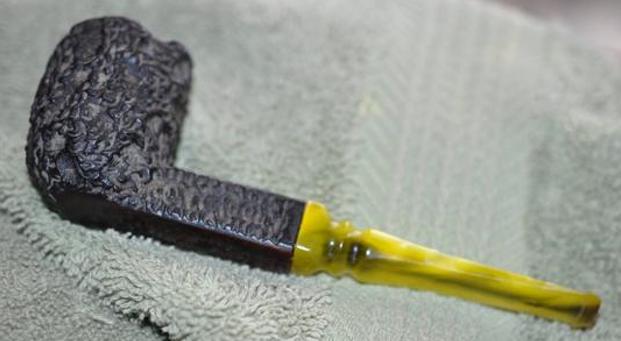
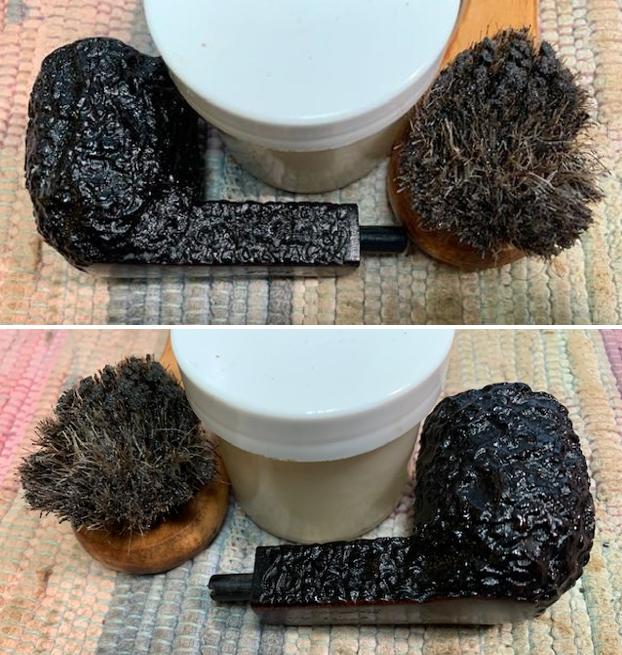
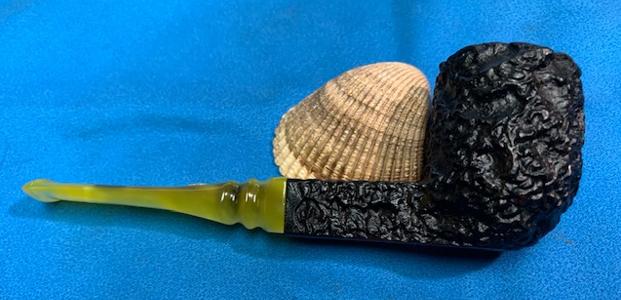
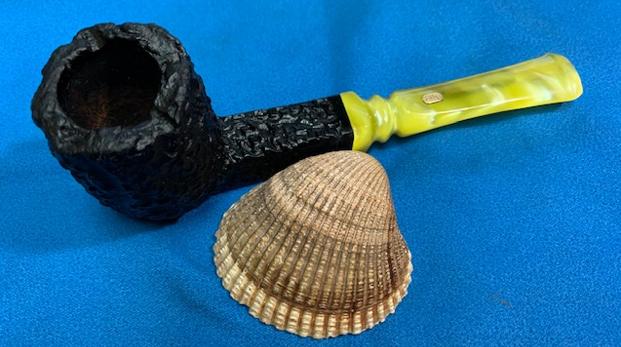
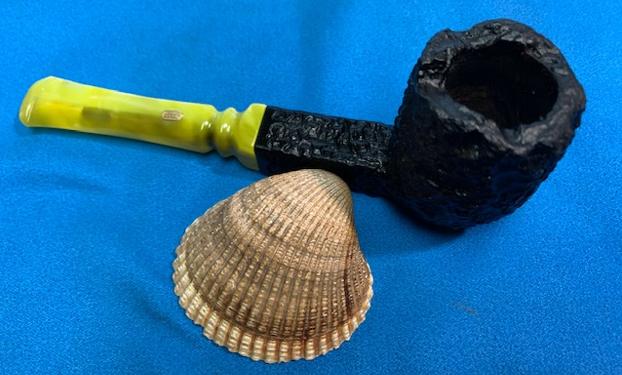
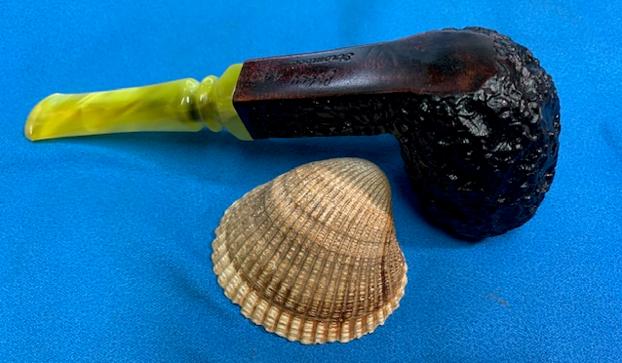
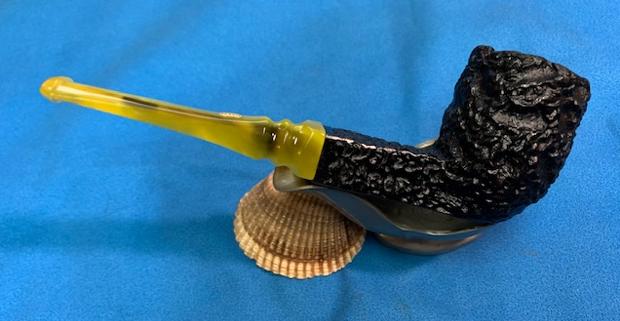
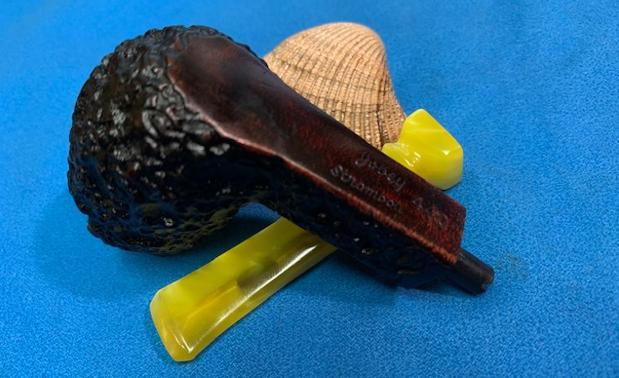
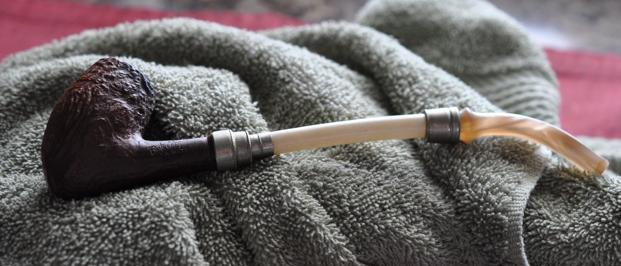
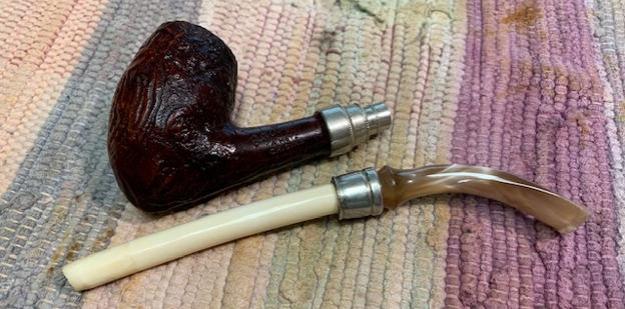
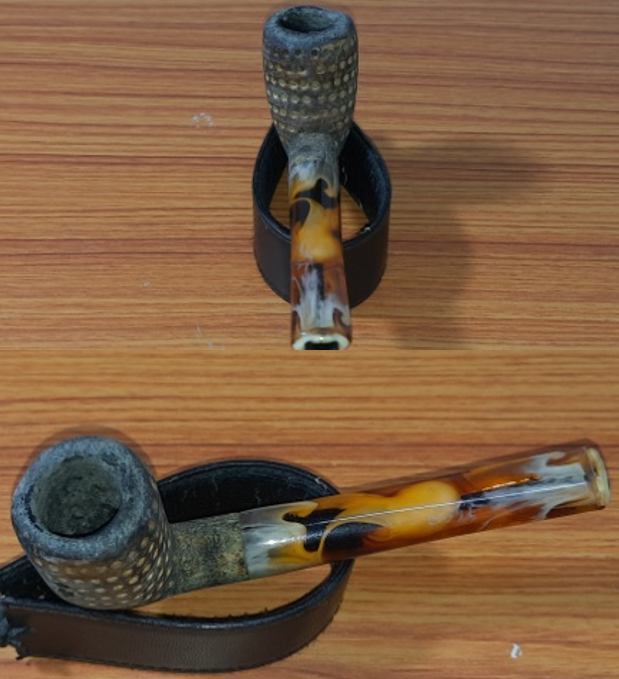
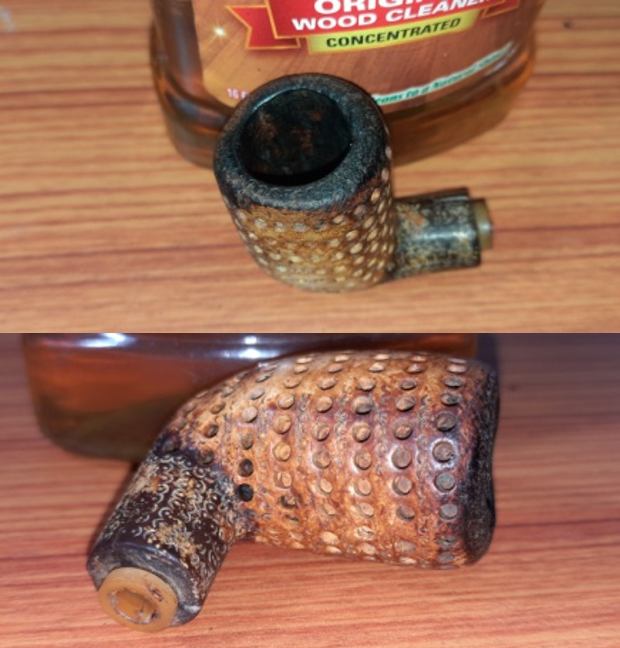
As with the other pipes from this lot, this one is also in a beat up condition. There is a thick layer of cake in the chamber with lava overflowing over the rim top surface. The rim top surface itself is badly damaged and is peppered with chips and dings/ dents. The stummel is covered in the grime of overflowing lava, dirt and dust. The perforations of the lattice design are filled with gunk from the lava overflow. A crack on the top surface at the shank end is easily discernible even to the naked eye. The stem airway appears black due to oils and tars but is devoid of any bite marks in the bite zone. Here are a few “Before” pictures of the pipe as it sits on the work table.
 Detailed Inspection
For me the detailed inspection is a deliberate act of great importance as it helps me understand the issues that needs to be addressed and formulate the sequence of steps in restoration.
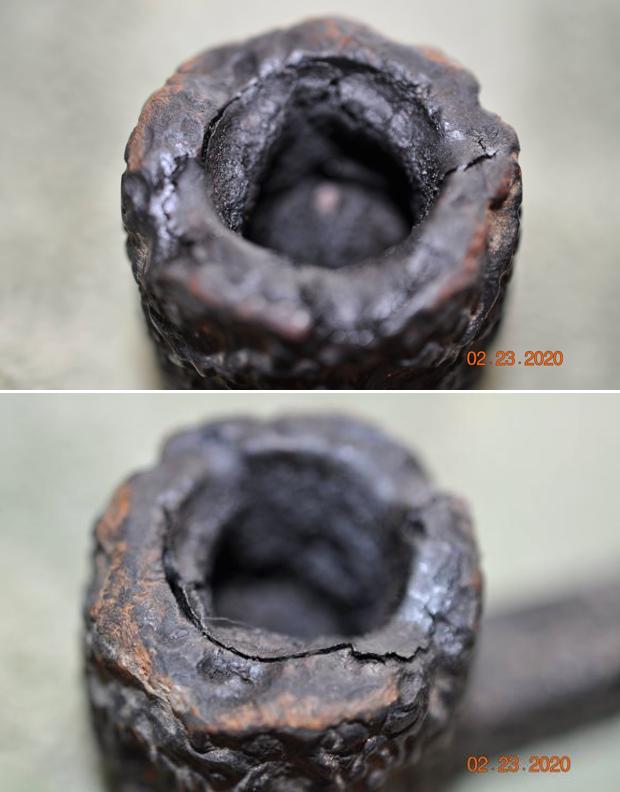
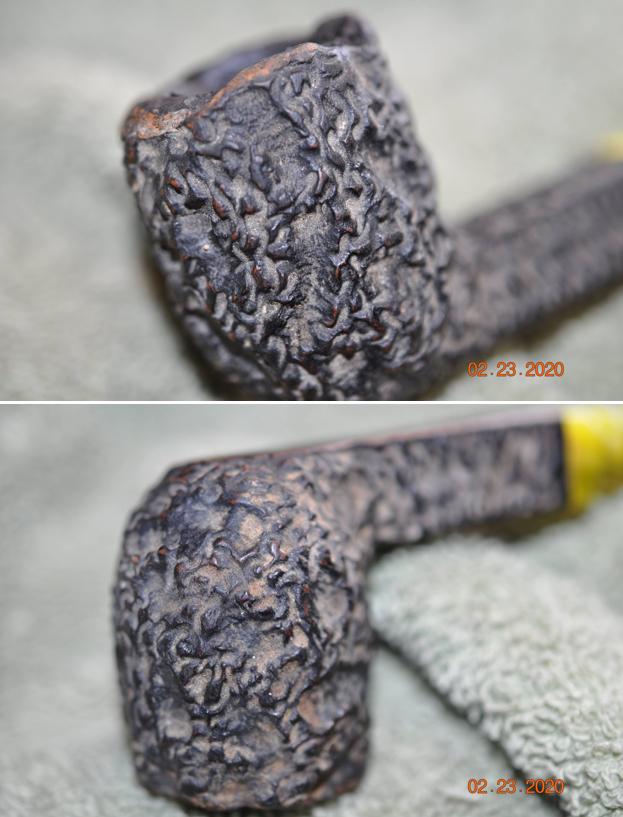
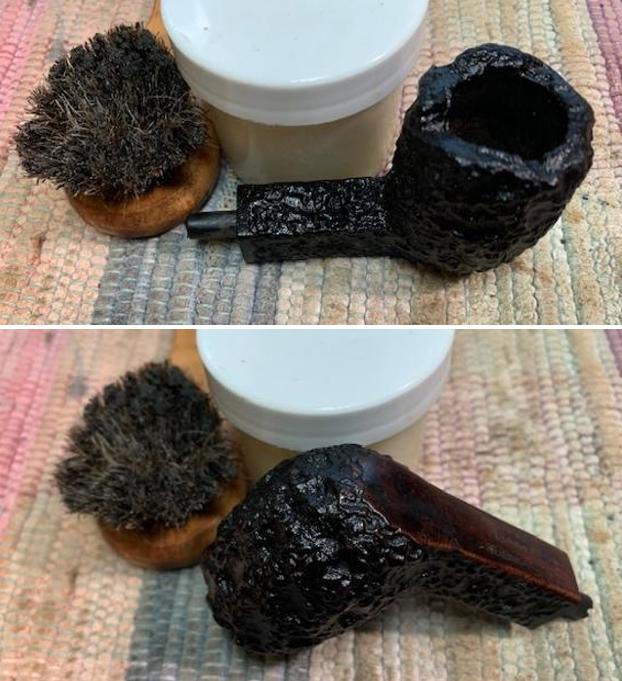
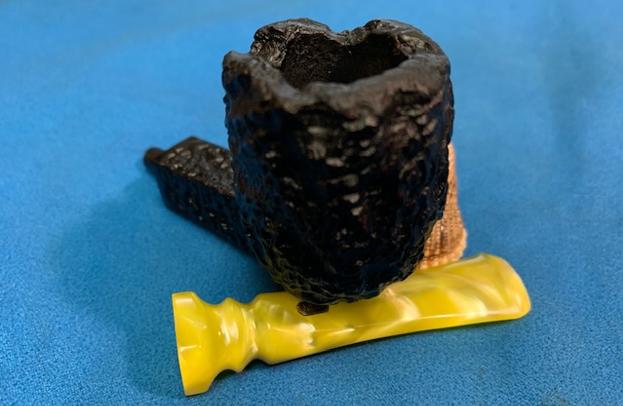
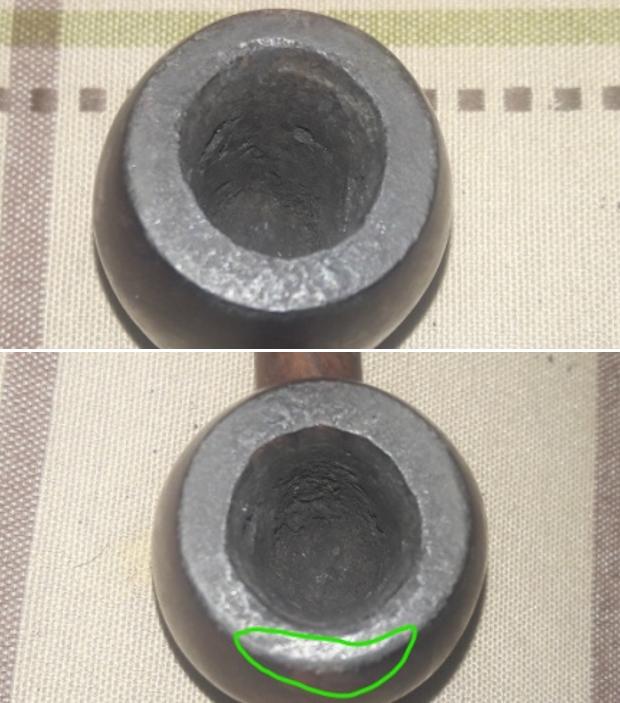
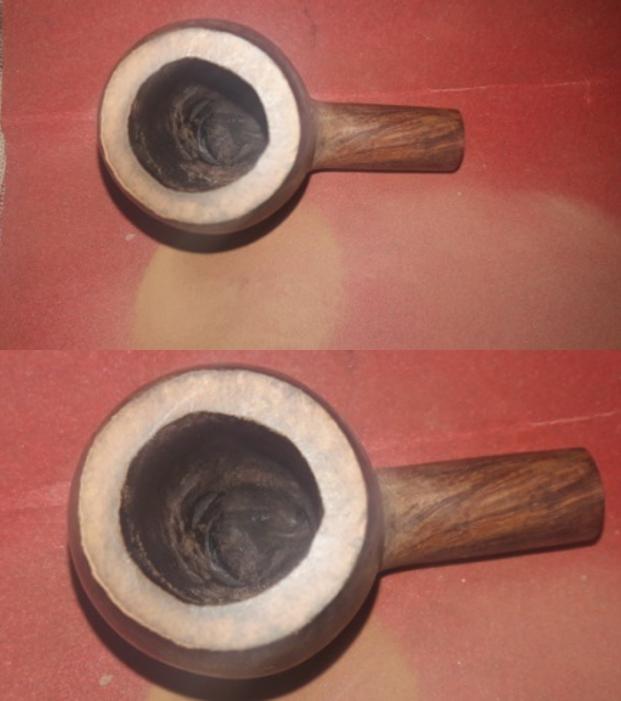
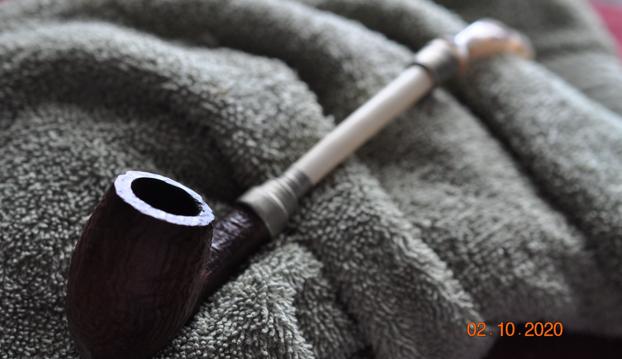
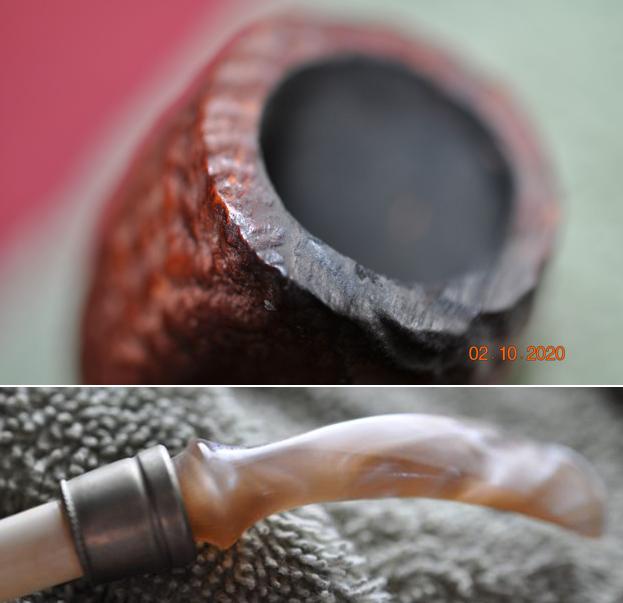
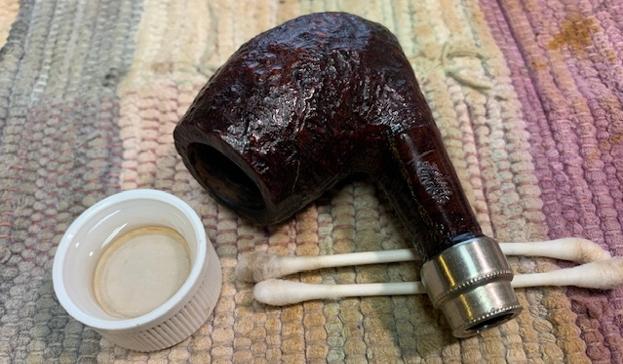
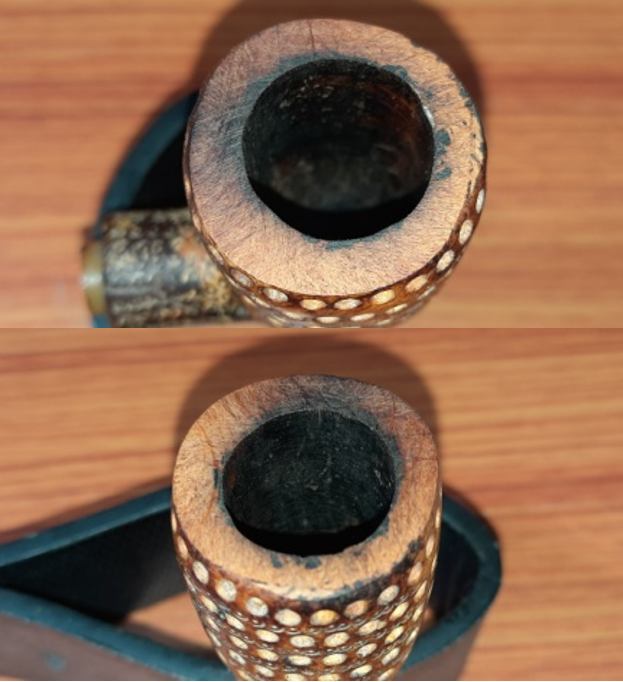
The chamber is heavily caked with copious amounts of lava overflowing the rim top and over the stummel surface. The chamber even has remnants of unburned tobacco. The rim top is of a convex shape and is heavily damaged with numerous dents and chips, probably caused due to knocking against a hard surface, the most severe being in the 12 o’clock direction (encircled in red). This damage has resulted in the chamber being out of round and the rim top, uneven. The condition of the inner walls of the chamber can be ascertained only after the cake has been removed completely; however, no apparent cracks or damage to the stummel surface is seen from the outside.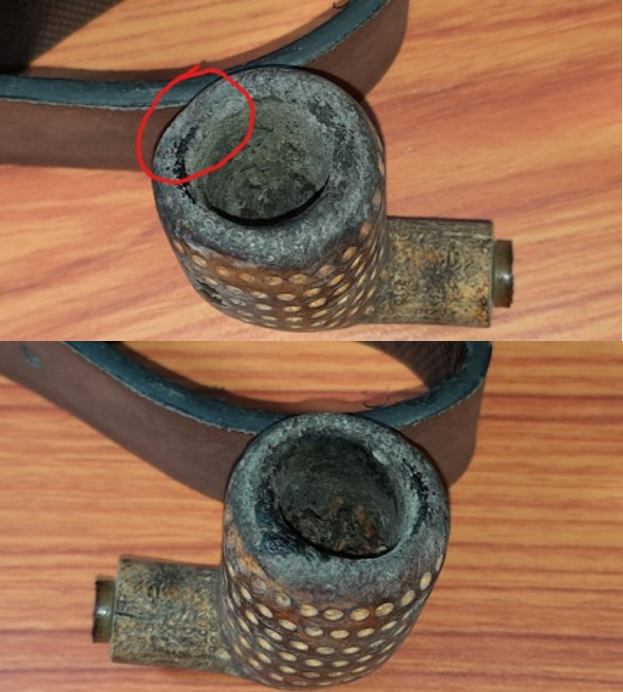
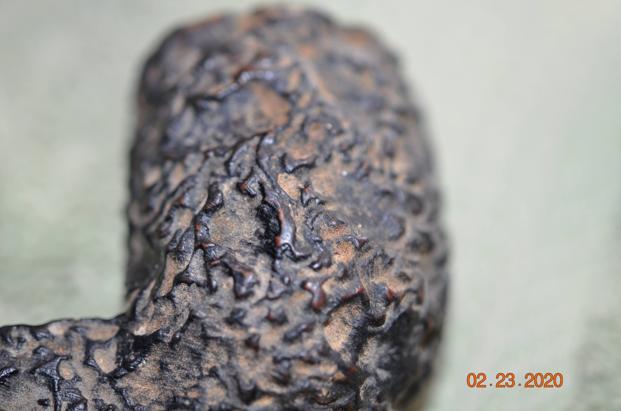
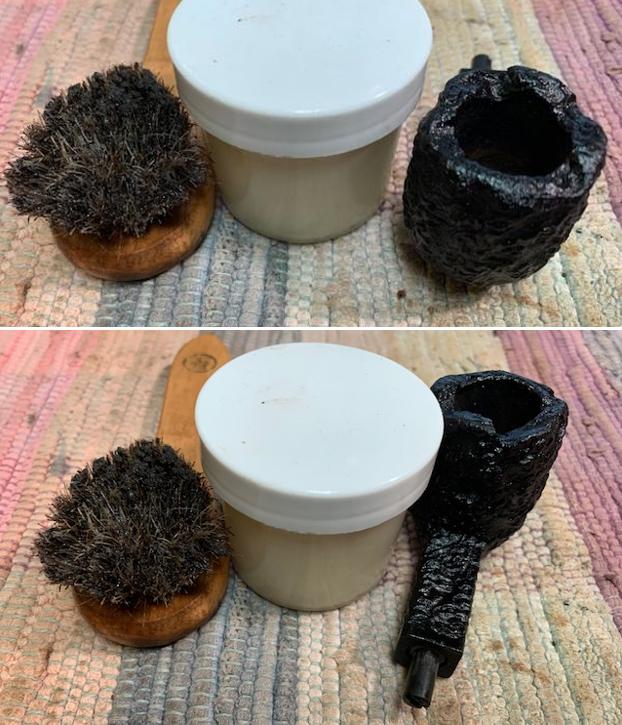
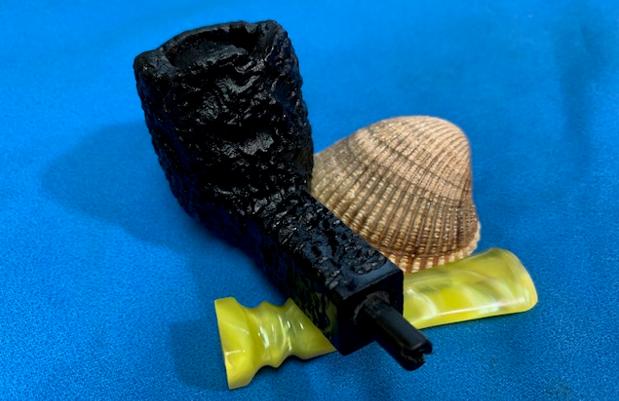
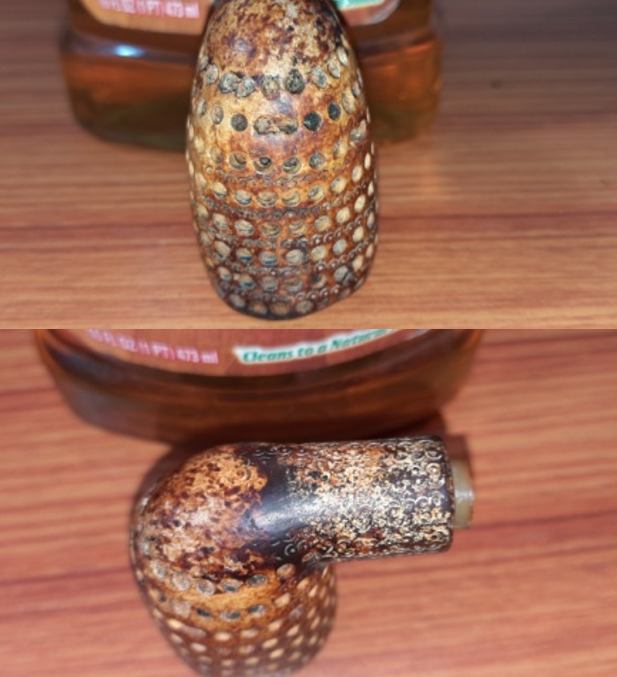
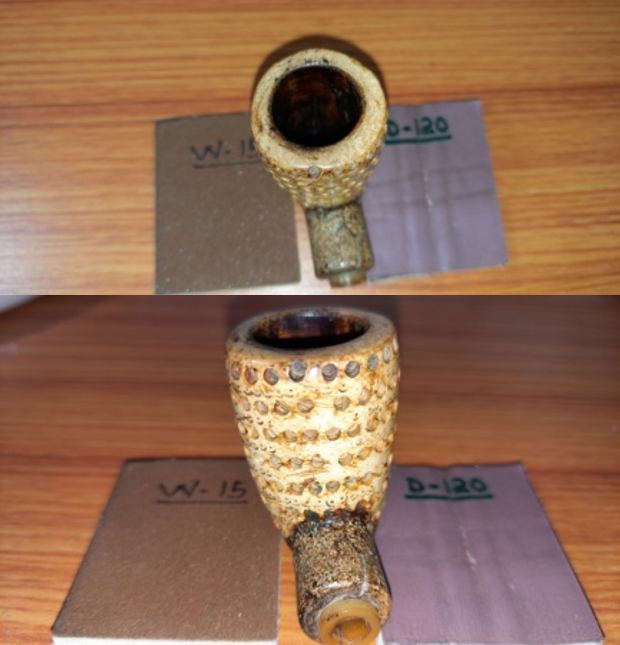
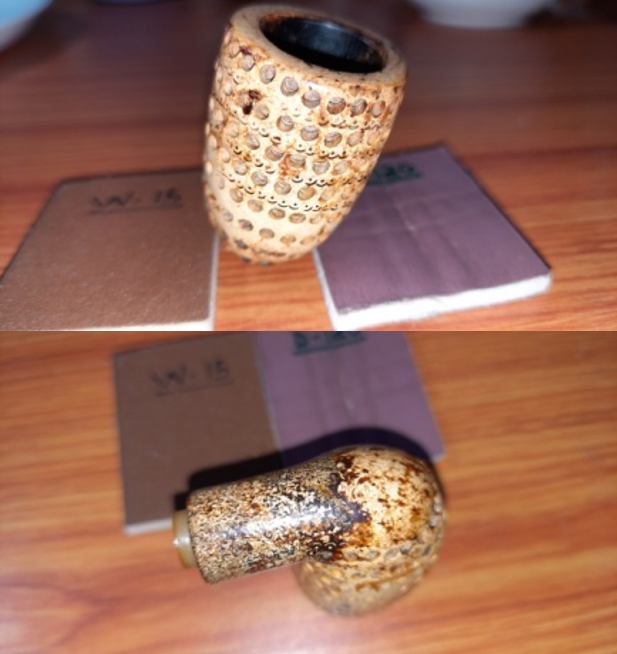
 The stummel surface is covered in lava overflow which in turn has attracted a ton of dirt, dust and grime. The stummel surface feels sticky to the touch and appears blotchy due to the patches of grime and dirt. The perforations of the lattice design are filled with gunk from the lava overflow and are damaged / broken in a couple of places (encircled in green). The shank surface too is covered in dirt and grime and is cracked (indicated with red arrows) over the upper surface to boot! Preliminary check with a pipe cleaner revealed that the mortise is ENTIRELY clogged with accumulated oils, tars and remnants of old tobacco. The only silver lining to this stummel is the gorgeous coloration that it has acquired over the years due to heavy smoking but well hidden beneath all the filth over the surface. The following pictures will provide a better visual perspective when compared to words, as to the condition of the stummel.


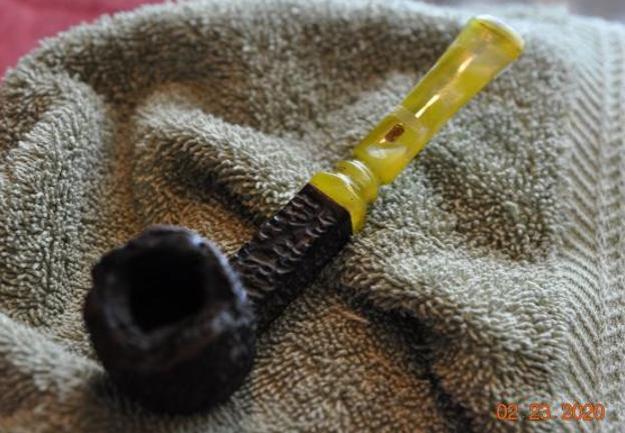
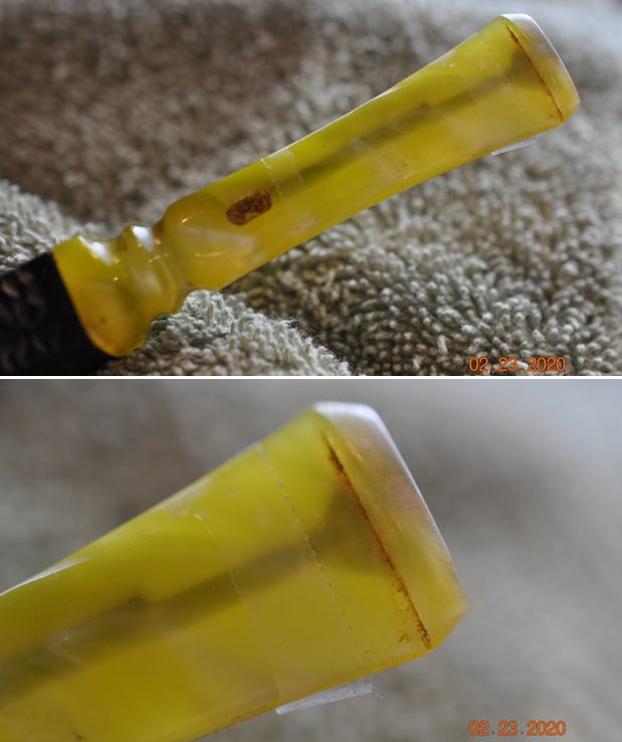
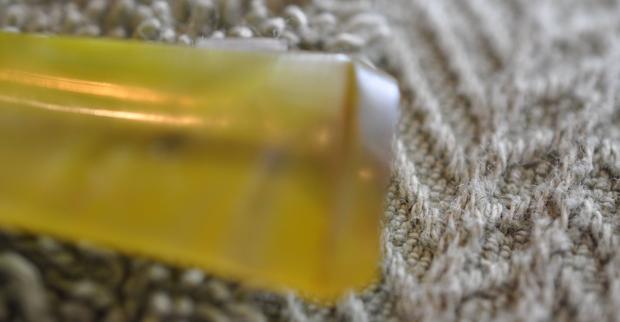
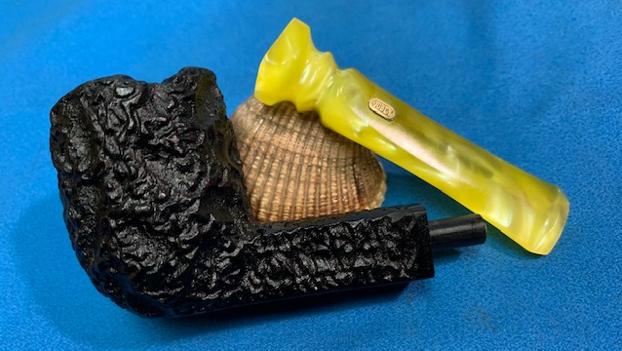
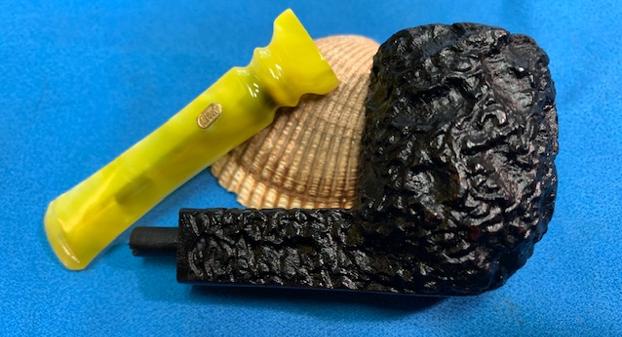
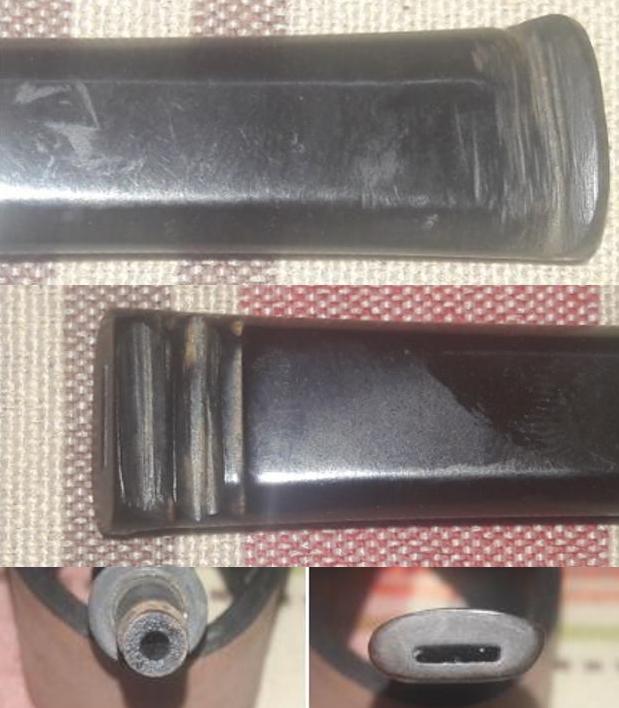
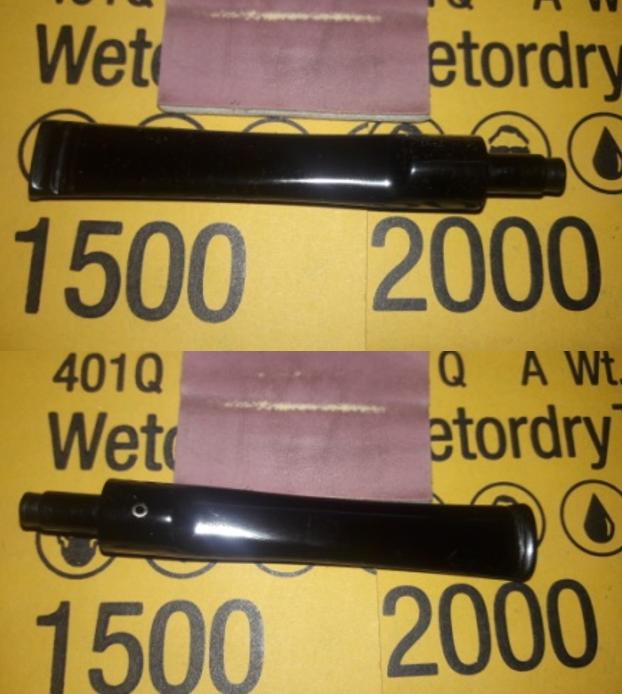
 The sordid tale of heavy use and uncared for condition of the stummel and mortise continues with the tapered acrylic variegated stem. The stem airway seems never to have experienced a pipe cleaner passing through it during its entire period of existence to date! It is blocked (can say that with certainty as a pipe cleaner did not pass through even ¼ of an inch from either stem openings) and appears black through the stem surface. The horizontal slot opening and the tenon opening shows heavy accumulation of old dried tars and gunk. The only saving grace is that the bite zone is devoid of any deep tooth indentations and bite marks over the button. Save for some minor superficial scratches, the bite zone is pristine.
 Overall, this is easily one of the filthiest pipes to be passing over my work table to date, but having said that, this pipe also has great pedigree and stummel coloration to die for, under all that filth.
The Process
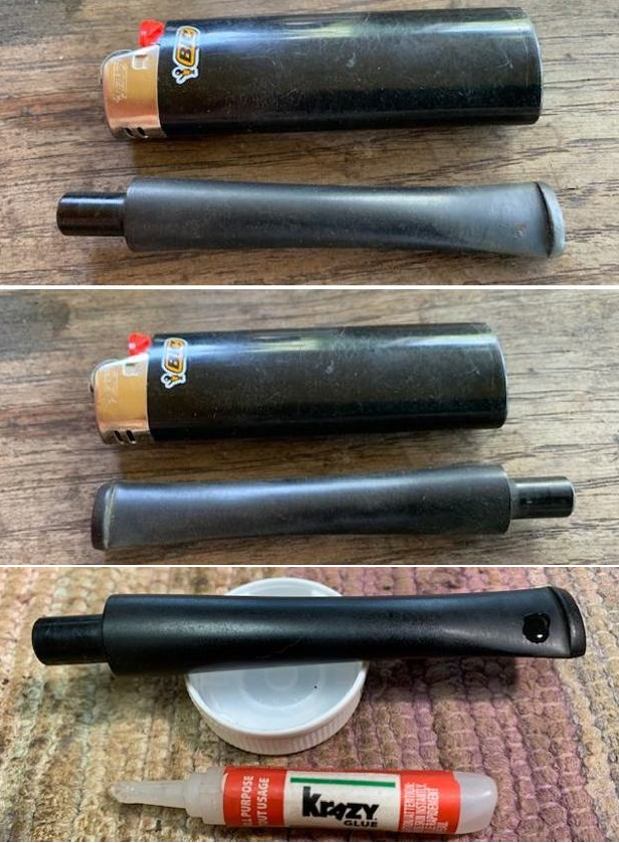
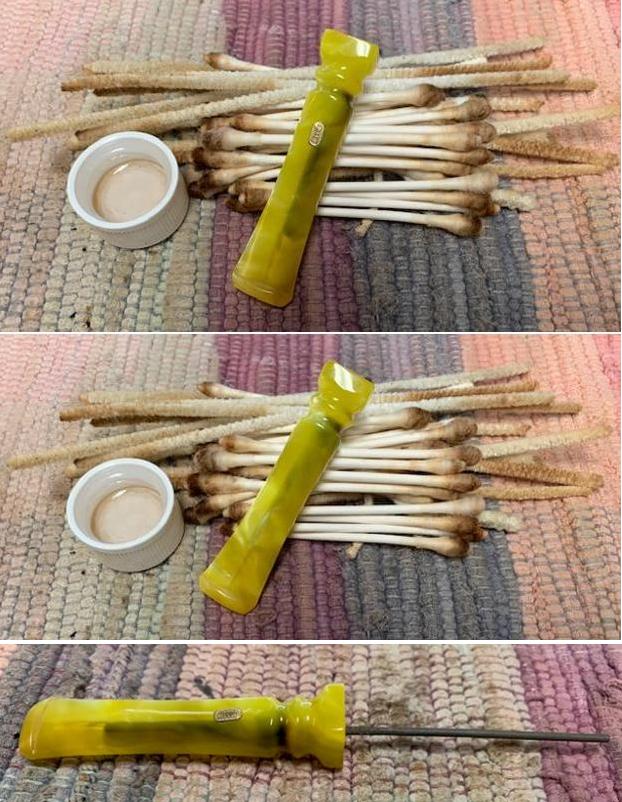
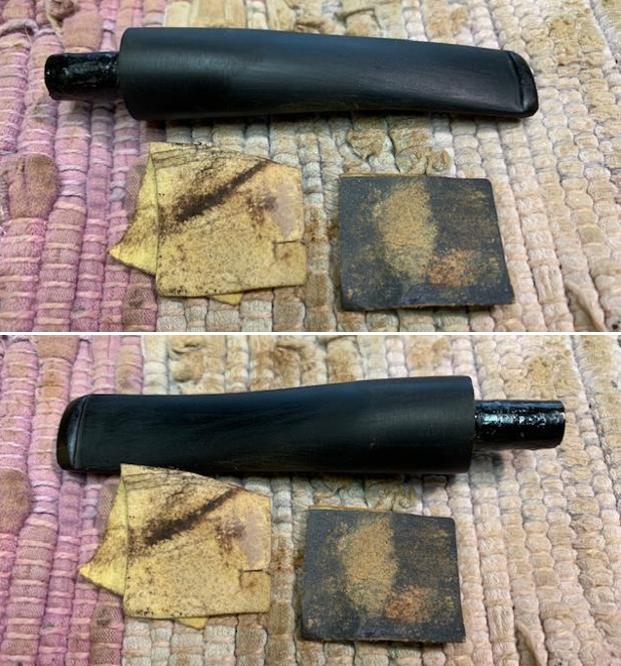
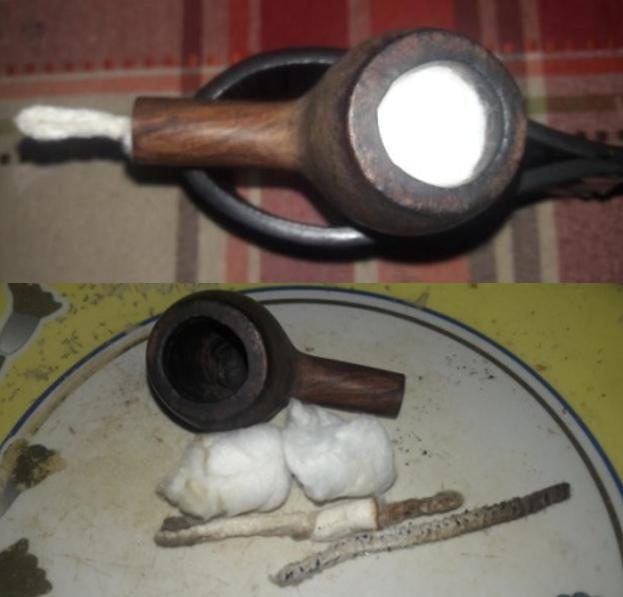
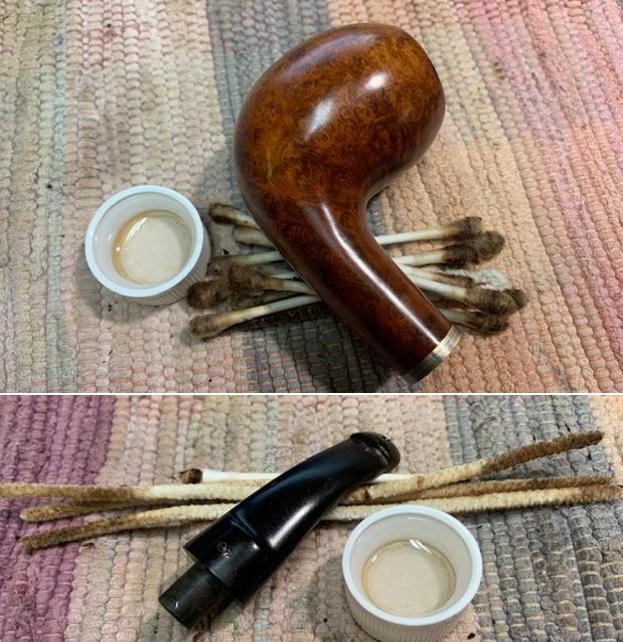
I decided to clean the stem first as I knew that it would take eons and tons of elbow grease to get the stem airway spotlessly clean. The first step towards achieving this goal was to get the screw- in tenon separated from the rest of the stem. I soaked the tenon end in isopropyl alcohol for a few minutes and once the dried oils and gunk had loosened, using nose pliers I unscrewed the threaded tenon from the stem. The now- gooey dirty, filthy mess that stared back from the tenon and stem made my stomach churn… I knew that we were in for some a haul on this stem. Here is what the stem and tenon looked like once they were separated. I launched a determined assault on the stem with a thin shank brush and anti-oil dish washing soap with the aim of cleaning the stem airway. Believe you me, the initial efforts in getting the shank brush out through the other end was beyond difficult. It took me the rest of the evening to get the shank brush moving through the airway with reduced resistance, a total of 6-7 hours. The next morning Abha, my wife, took over the cleaning of the stem from where I had left after she was done with her daily morning chores. Where, for a change, I had missed out on taking pictures for my last evening’s efforts, Abha did take a picture to show the gunk that was being cleaned from the stem airway. To further clean the threads at the tenon end of the stem, she placed a cotton ball soaked in lime juice for about 5 hours.
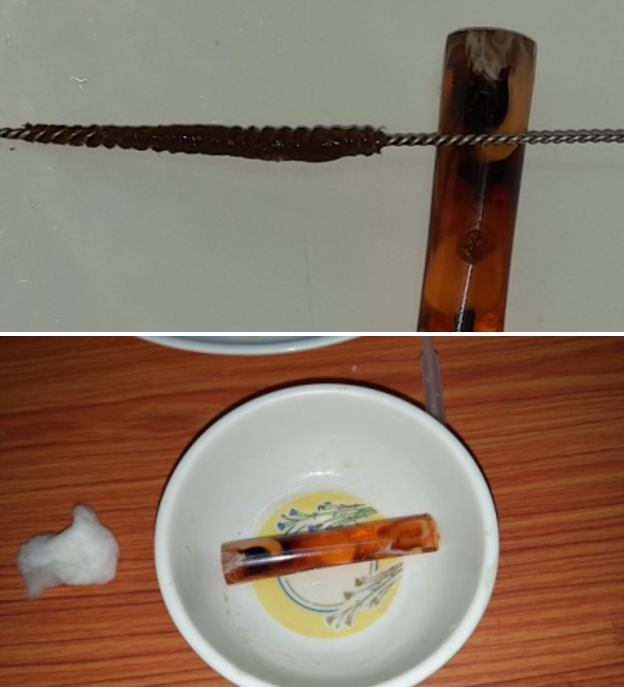 While the tenon end of the stem was soaking in lime juice, I decided to clean up the stummel. I first removed the unburned tobacco and followed it by reaming the chamber with smallest head of the PipNet pipe reamer. I was extremely gentle and careful while using the reamer head since the centrifugal force generated by the rotation of the head inside the chamber may break the meerschaum, if the pressure applied is in excess or uneven. I followed it by scraping the walls of the chamber and the heel with my sharp fabricated knife to remove the residual cake. To smooth out the walls and completely rid the chamber of old cake, I sanded the chamber walls with a folded piece of 220 grit sand paper. It was heartening to note that the chamber walls were in pristine condition. I ran a sharp knife over the rim top surface with just about enough force to remove the lava overflow. It seems that I would have to top the rim surface to make it smooth and even, sacrificing the stummel profile to an extent.
 By the time I was through with the cleaning of the chamber, the stem had been soaking in the lime juice for about 6 hours since early afternoon and it was my turn to work on cleaning the stem. So I was back at the sink with a shank brush and anti oil dish washing soap as weapons of choice against the stubborn adversary in the form of a filthy stem. A few hours later, as if by magic, the foam turned white and I declared myself a winner! I ran a few pipe cleaners, both hard bristled and regular, to further clean and dry the airway and also clean the threaded end of the stem.
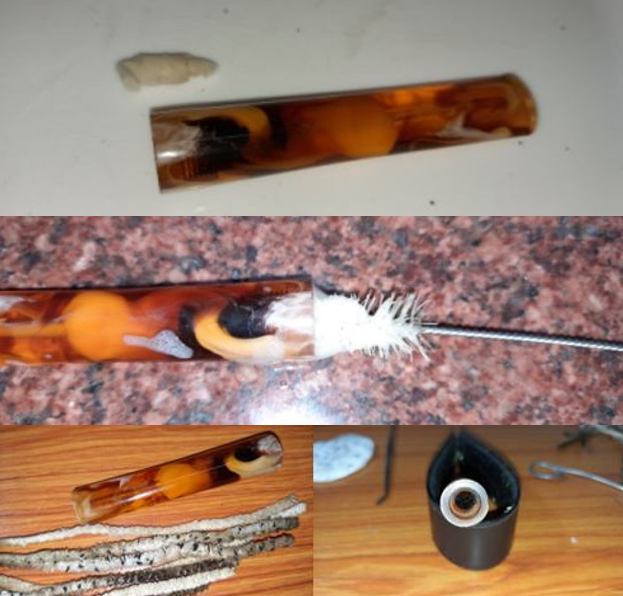 I handed over the stem to Abha to clean the horizontal slot and for further sanding and polishing of the stem. Very painstakingly, with a dental tool she cleaned out the entire gunk from the slot end of the stem. It’s been two days that we had been battling the filthy stem and still the minor scratches in the bite zone and sanding/ polishing remains to be addressed!! Not to mention the threaded tenon!
 While Abha was cleaning the slot end of the stem, I next cleaned the tenon that was equally clogged up. The application of shank brush, anti- oil dish soap and tons of elbow grease spread over three hours cleaned out the tenon airway.
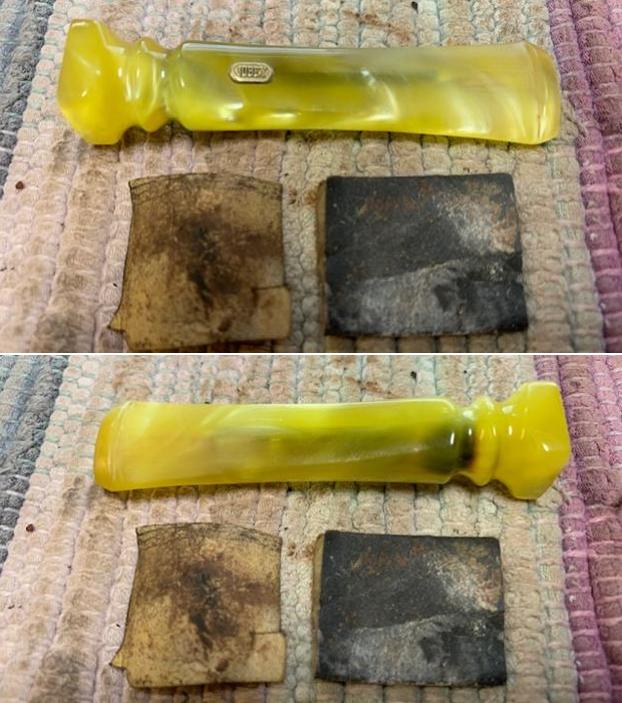
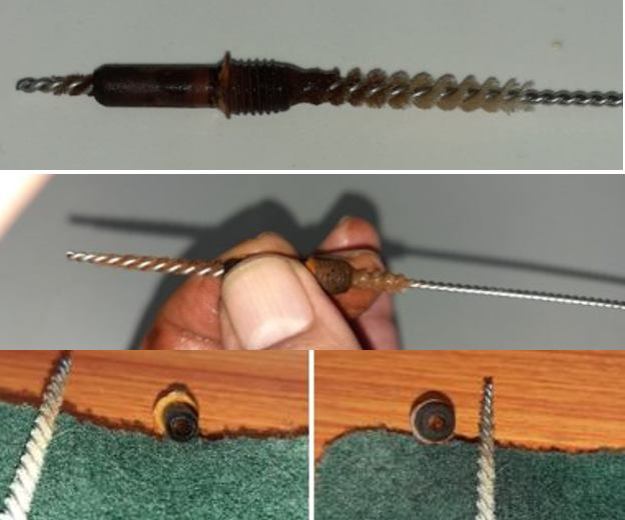 Once I was through with the internal cleaning of the tenon, I cleaned the dried oils and tars from the exterior surface of the tenon with a Scotch Brite pad and anti- oil dish washing soap. I was very diligent while cleaning the exterior of the tenon and made sure that all the oils and gunk from the threads of the tenon were thoroughly cleaned. This will ensure smooth seating of the tenon threads into the stem and make its removal and subsequent cleaning a breeze. This piece of information and hint on cleaning is for you Karthik!
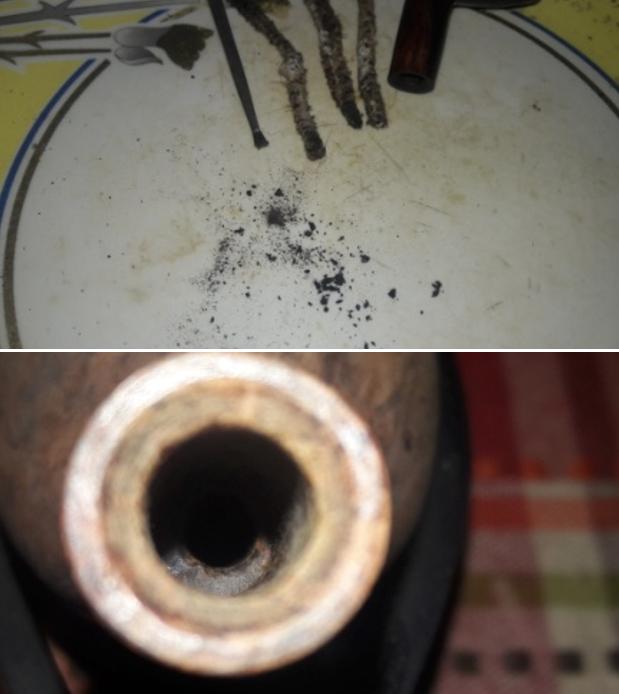
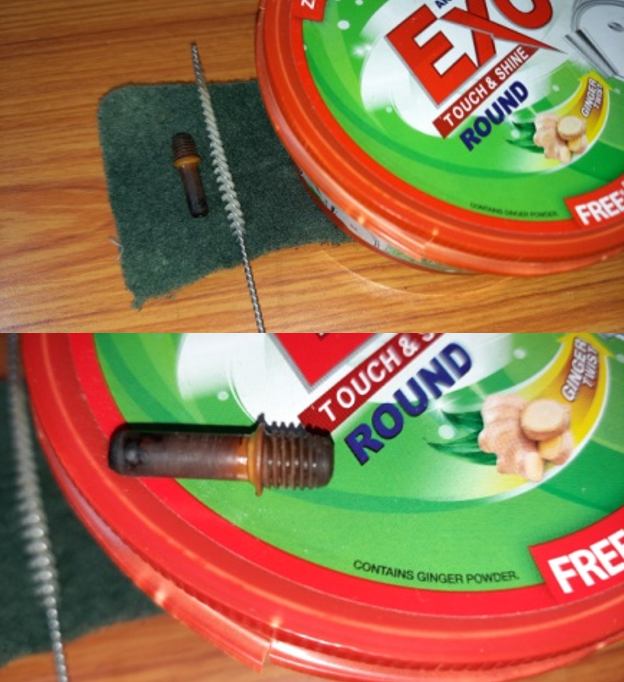 With the tenon all cleaned up, it was time to clean the mortise and shank internals. Given the state that the stem internals and tenon were in, I had no doubts in my mind as to the condition that the shank internals would be like. And I was not disappointed to say the least. Using hard bristled and regular cleaners dipped in alcohol, I opened up the shank airway. Once the gunk had loosened a bit due to the alcohol, I scraped out the entire gunk with my fabricated curved tool. A few pipe cleaners dipped in alcohol passed through the shank again and I was satisfied with the cleaning job. The colored heap of pipe cleaners and the mound of gunk scraped out from the walls of the shank are proof enough of the filth that was in the shank.
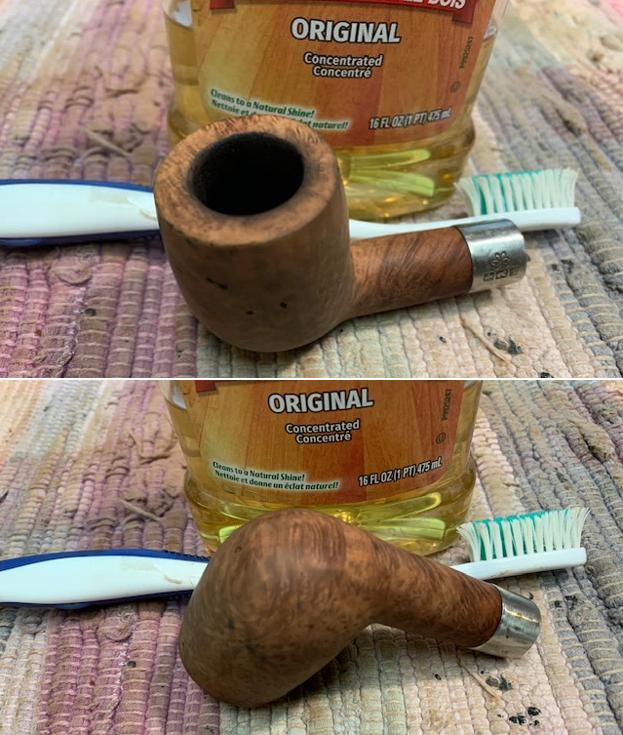
 Now on to cleaning the exterior of the stummel surface! I wiped the exterior of the stummel with Murphy’s Oil soap on a cotton pad. For the most stubborn and deep seated gunk, I used a tooth brush with a dab of the oil soap. I used a soft wired brass wired brush to clean the rim top surface. I wiped the stummel surface with a soft moist cotton cloth to rid the stummel of the residual soap and cleaned out each and every perforation of the lattice design on the surface with my sharp and pointed dental tools. It was time consuming and laborious, but an essential part of cleaning the stummel surface. I was tempted a number of times to take the stummel to the sink and give it a thorough rinse under running water, but the fear of the meerschaum (not sure if it was solid block meerschaum or pressed meer) disintegrating in my hands prevented me from doing so. The stummel color is now amply evident and shows huge promise and potential. Micromesh pad polishing cycle and a dab of beeswax will further enhance the appearance of the stummel.
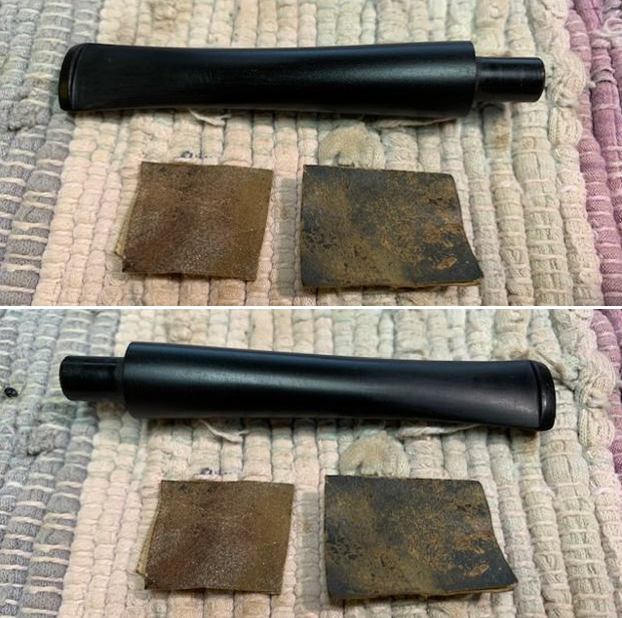
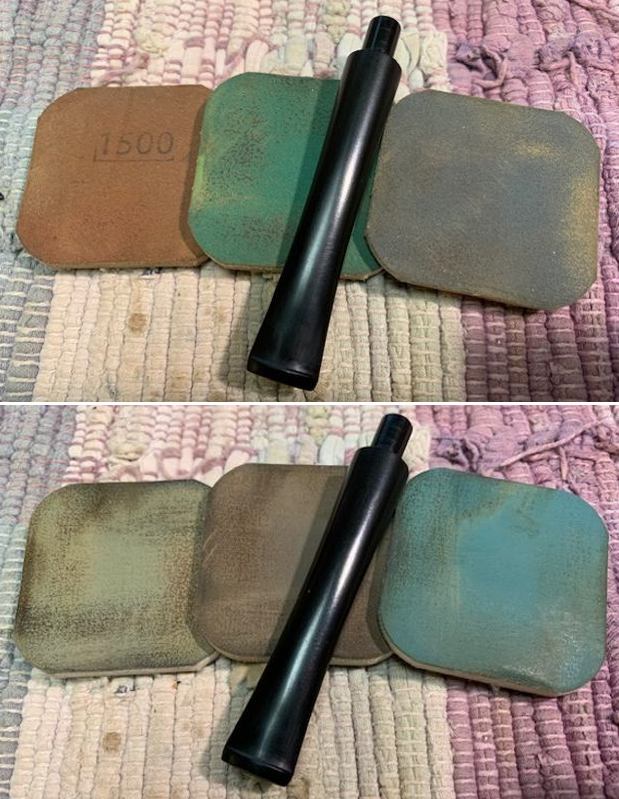
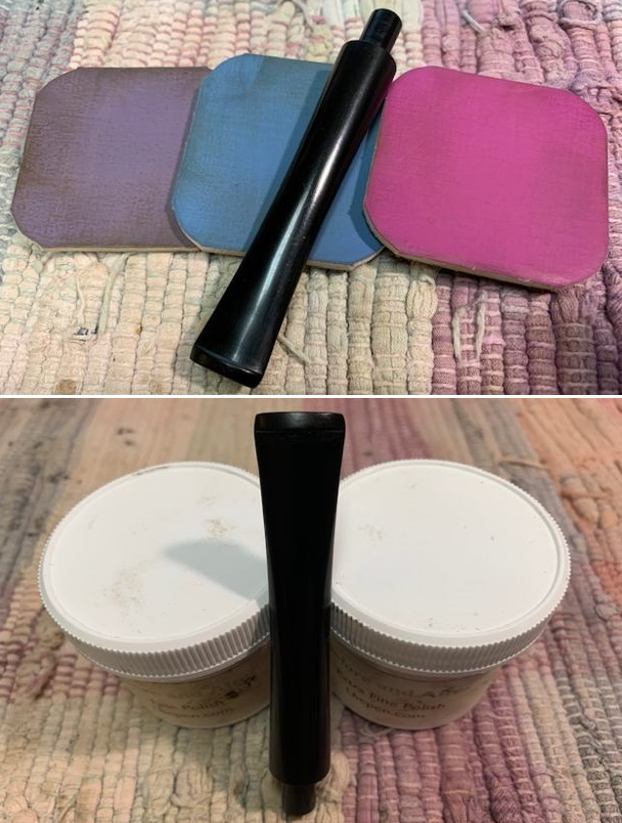
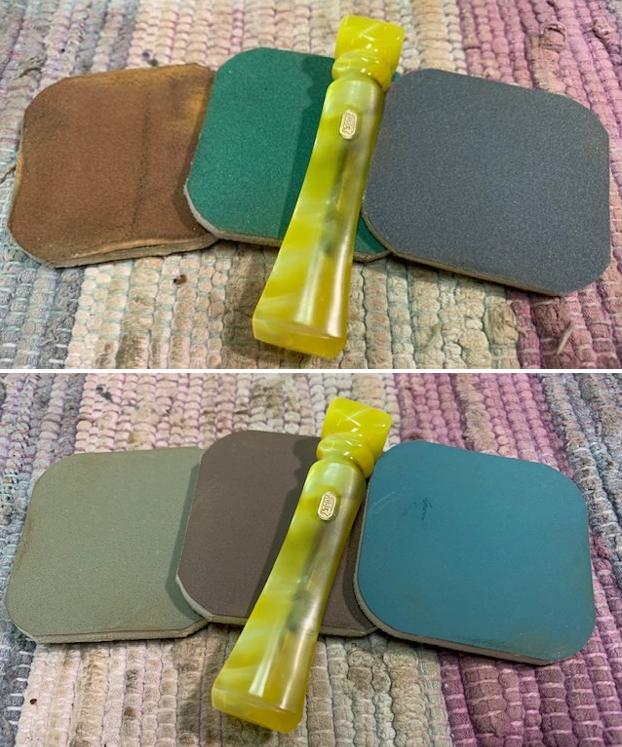
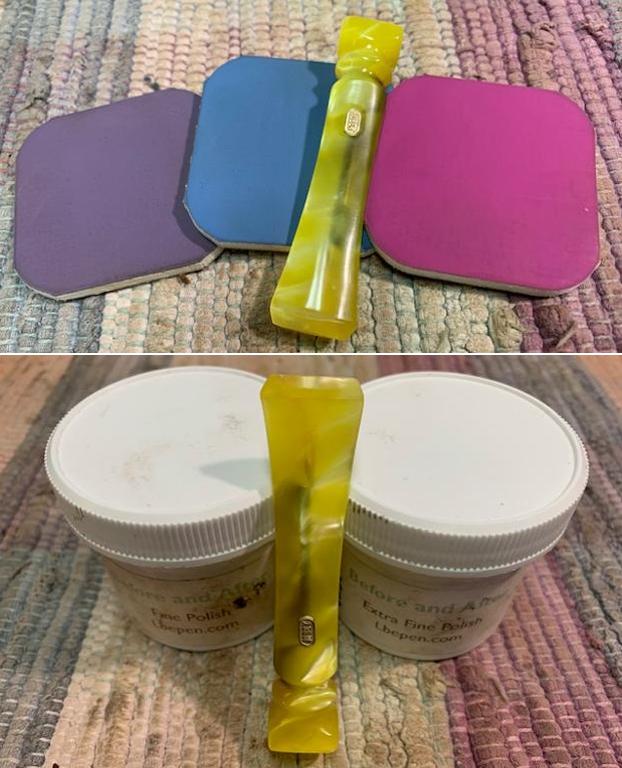
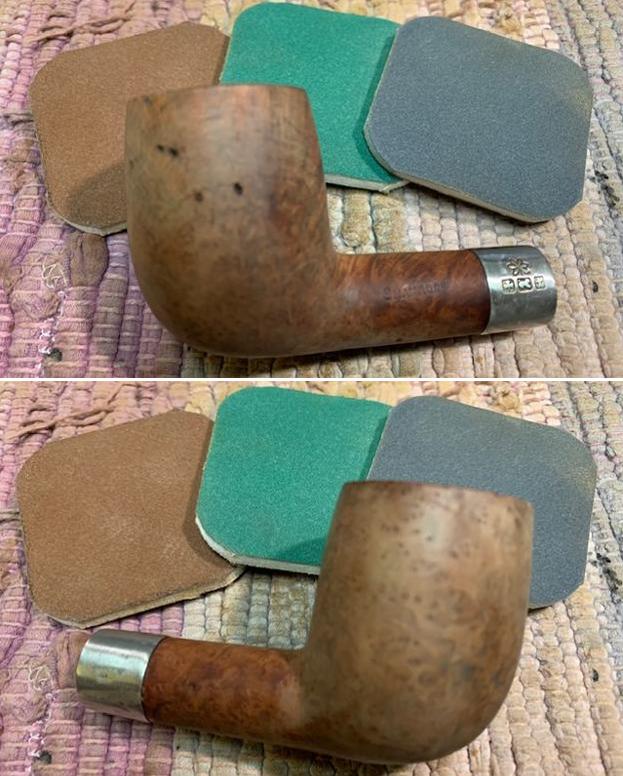
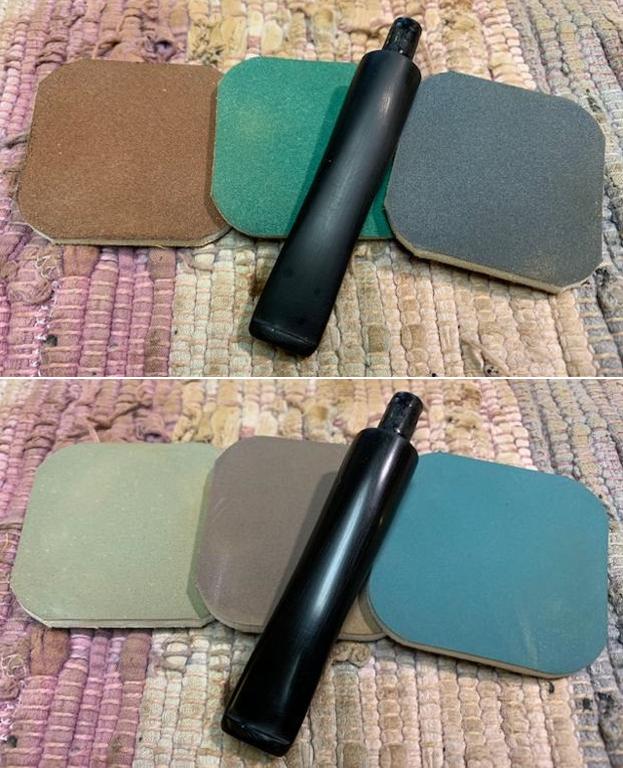
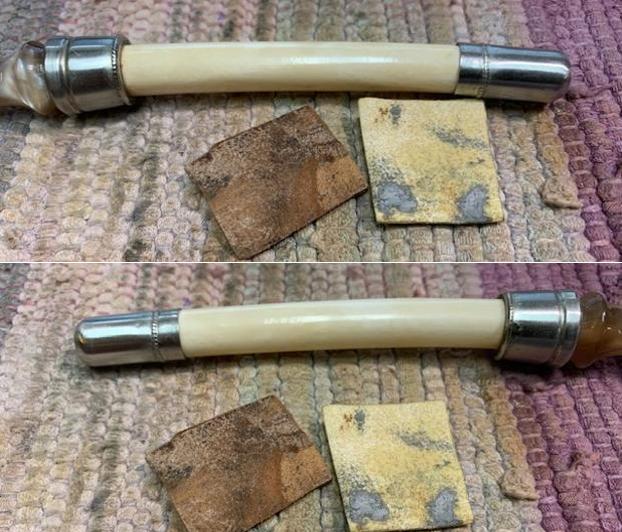
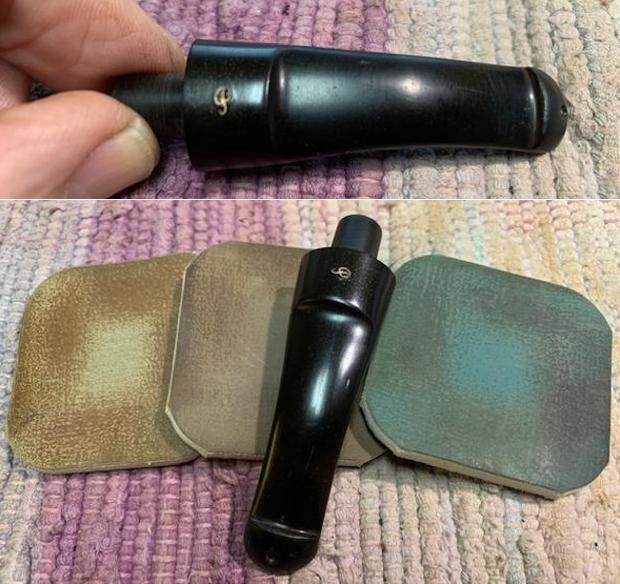
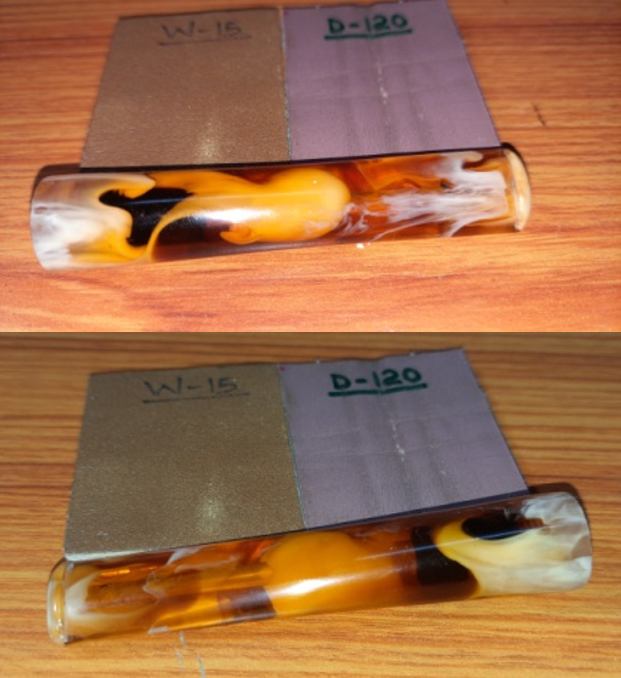
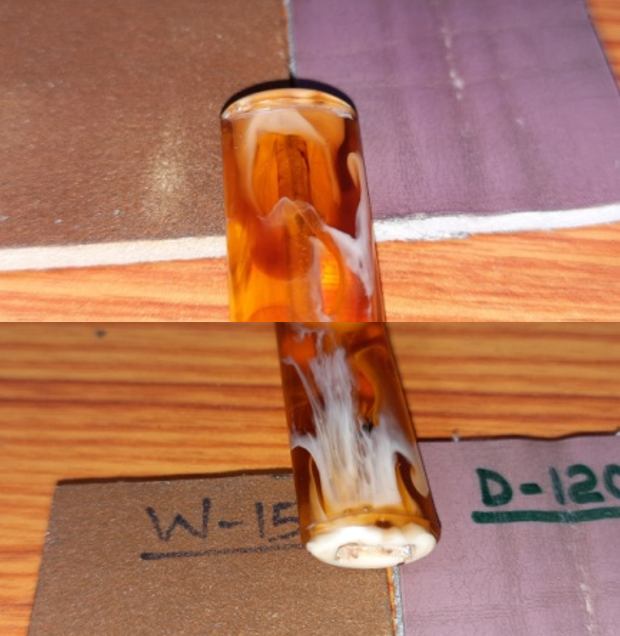
 While I was battling with cleaning the shank internals and exterior of the stummel, in her corner Abha was unobtrusively and quietly working on sanding and polishing the stem. She sanded the stem surface with 400, 600, 800 and 1000 grit sand papers to eliminate the scratches from the surface of the stem. Progressive use of finer grit sand papers helps in reducing the scratch marks left behind by the coarser grit sand papers. She finished the polishing cycle by going through the entire set of micromesh pads, wet sanding with 1500 through to 12000 grit pads. The polished stem looks amazing and should add a dash of sparkle to the entire pipe once the stummel is put through its paces of polishing and waxing.
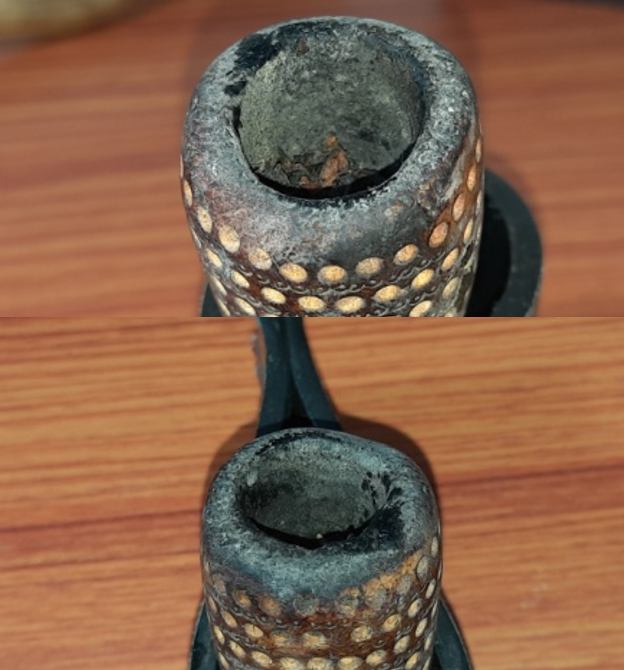
 Continuing my battle with the stummel, I topped the rim over a piece of 220 grit sand paper by slowly rotating the rim over the sand paper to address the badly damaged and deformed rim top surface. Though the profile of the stummel was altered to an extent, it was a necessary evil that was inescapable to get the chamber in round and even. Even though the rim top is now clean and even, considerable darkening of the inner rim edge in 6 o’clock direction and to the outer edge in 11 o’clock direction (enclosed in yellow) is prominently visible and would need to be addressed. Also the rim top is thick towards the shank end as compared to the thickness of the rim at the front.
 To address both the above mentioned issues with the rim top, I created a nice bevel over both the inner and outer rim edges with a piece of 220 grit sand paper pinched between my fingers. I am pretty happy with the appearance of the entire stummel and the rim top in particular at this point.
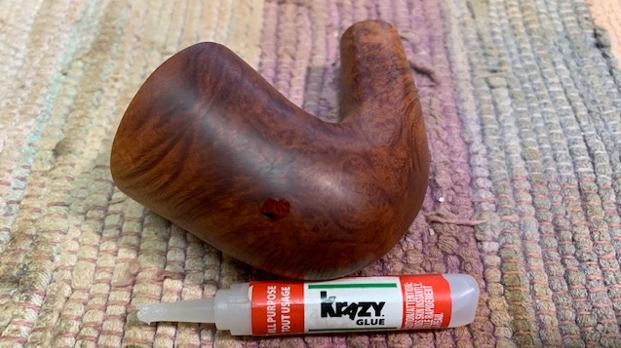
 The only other issue that remained to be addressed before progressing to the polishing of the stummel was that of the deep crack at the shank end. I filled the crack with thick CA superglue and pressed the shank ends closer for a tight and seamless fit with my rubberized pliers. I held the shank end together (for a good 30 minutes!!) till the glue had hardened sufficiently and set it aside to cure overnight. The next afternoon, using a folded piece of 220 grit sand paper, I sanded away the excess glue to match the shank surface. The repairs are now solid and will be further strengthened by adding a brass ring over the shank end to prevent it from expanding and cracking open again at a later date.
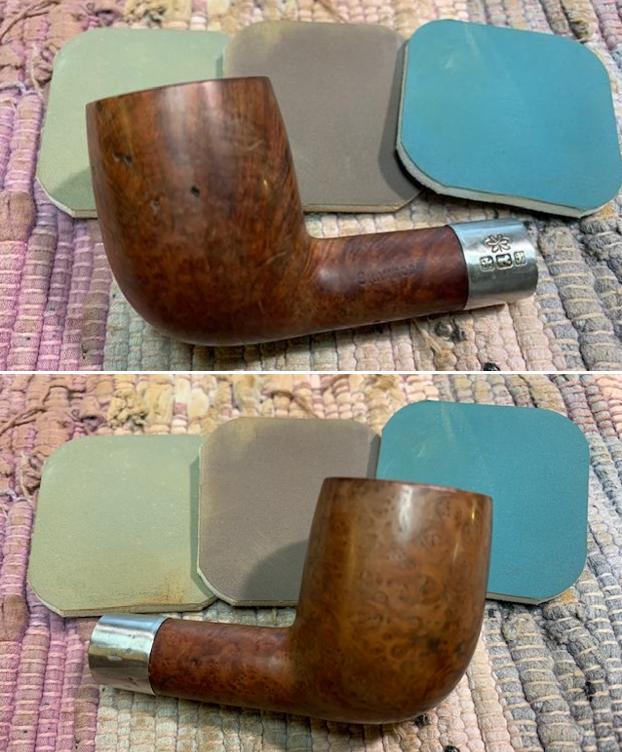
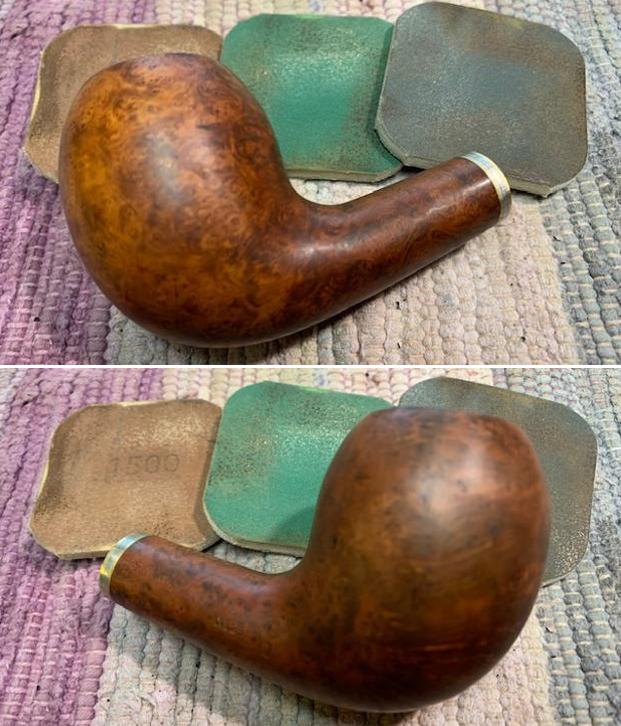
 With stummel repairs all completed, I handed over the stummel to Abha for her to work her magic in polishing the stummel. She dry sanded the entire stummel with 1500 to 12000 grit micromesh pads preparing it for the beeswax polish.
 Before I moved ahead with treating the stummel to a beeswax polish, I attached a tight fitting brass ring over the shank end. This brass ring would provide additional structural rigidity to the shank end and prevent the opening of the seams of the crack on the shank end during its subsequent use.
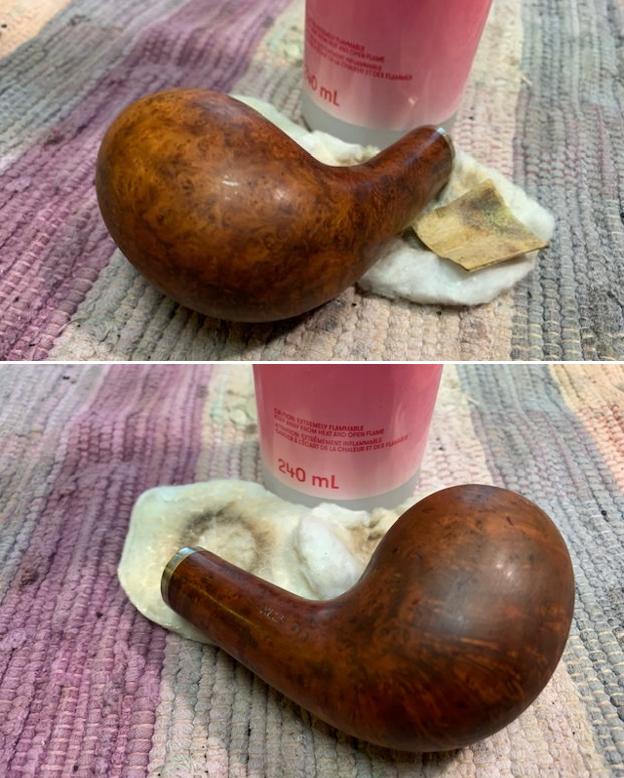
 During the course of my journey through the wonderful world of pipe restorations, I have restored a few Meerschaums and each had turned out to be a beautiful pipe. However, none was ever treated to a polish using beeswax, not for any other reason but only because I did not and could not get any beeswax here in India. Recently, while surfing Amazon India, I came across slab of pure organic beeswax and promptly purchased it in sufficient quantity to last me for a very long time. To cut the ramblings short, before proceeding with the polishing of the stummel, I read through a number of blogs on Reborn pipes, The Pipe Steward and also the write ups posted by Charles Lemon of Dads Pipes to understand the nuances of the process of applying beeswax over meerschaum pipes. Once I had chalked out the process I would be following within the constraints faced, I proceeded with applying wax over the stummel of one of my personal meer pipes as a test piece.
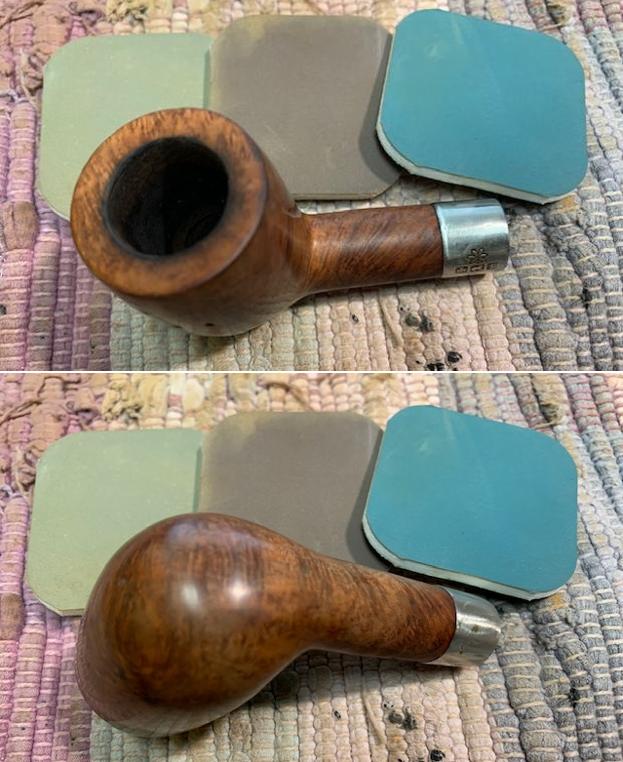
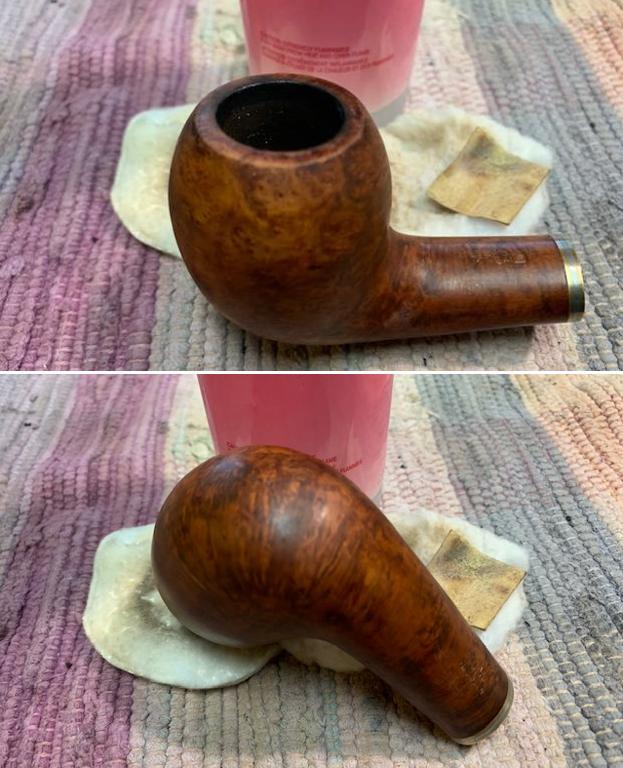
Firstly, I assembled the equipment and materials that would be needed during the process viz heat gun, paper towels, q-tips and a Katori, a steel container graciously lent by Abha from the kitchen and of course, beeswax. I stuffed the chamber with paper towels and the mortise with a folded pipe cleaner to prevent inadvertent seepage of the melted beeswax into either. Next, I melted a sufficient quantity of beeswax in the katori using my heat gun and thereafter heated the stummel. Using the q- tip, I completely coated the stummel with the wax and continued the application till the surface was saturated and set the stummel aside. Having gained sufficient confidence, I applied the wax to Karthik’s meerschaum pipe and another of my expensive meerschaum pipes setting the three pipes aside for the stummel to absorb the wax. 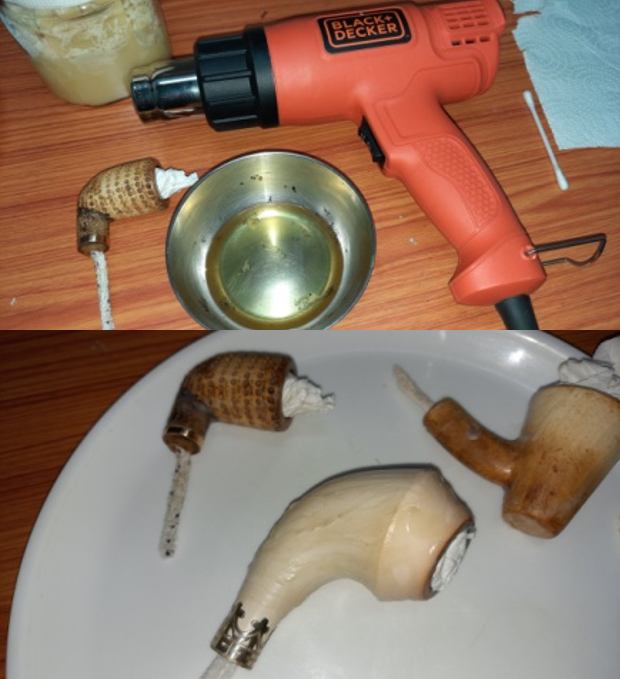 I reheated the stummel with the heat gun a few minutes later and let the excess wax either be absorbed or drip off from the stummel surface. The deep golden brown coloration that the meerschaum has taken is a visual treat, especially on the two older meerschaums. The lattice design pipe has taken on a beautiful color that is to die for, it’s really a beautiful pipe and Karthik has chosen well.
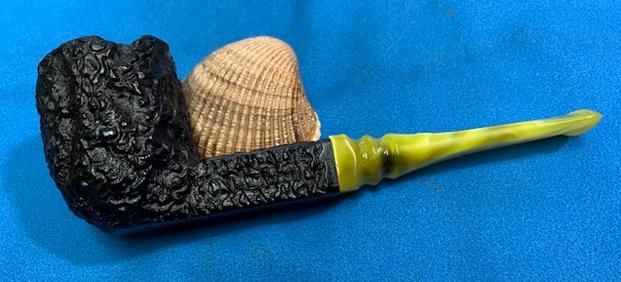
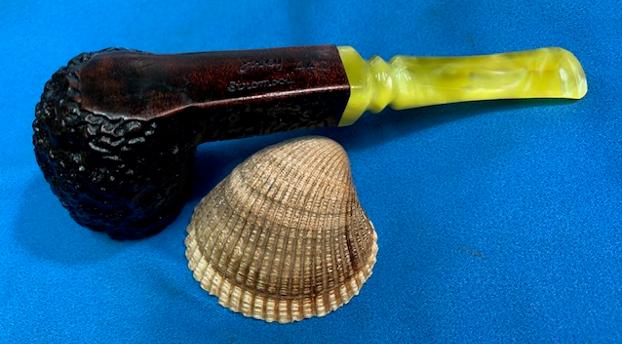
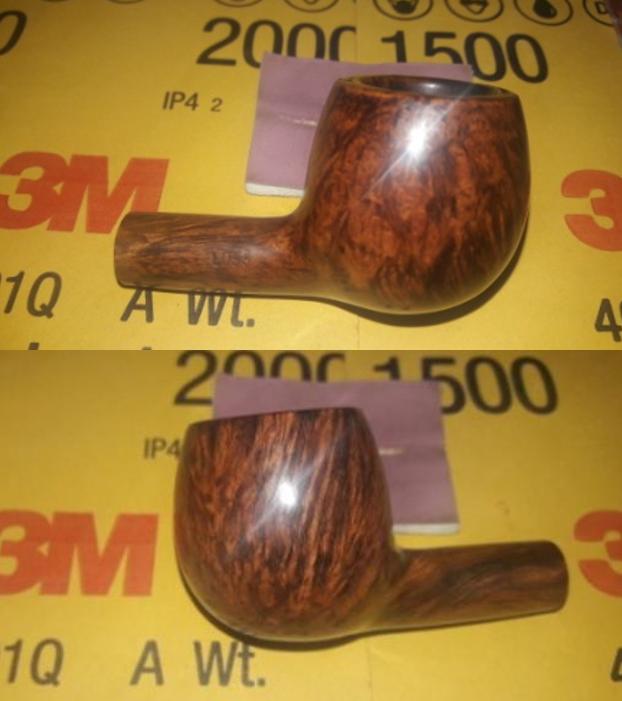
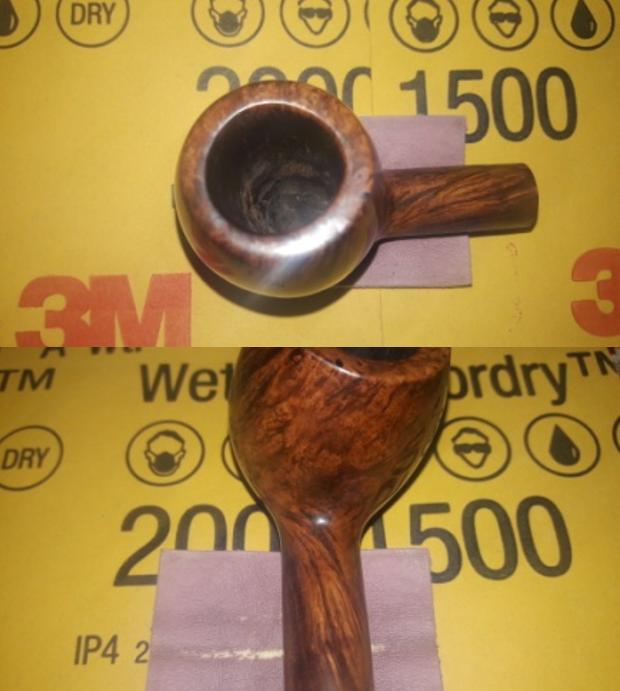
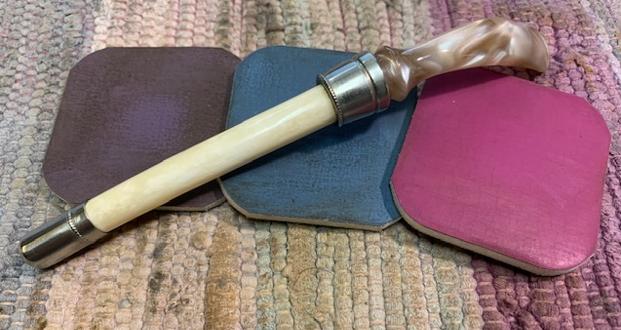
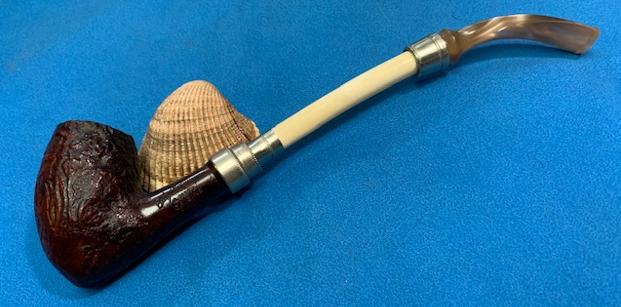
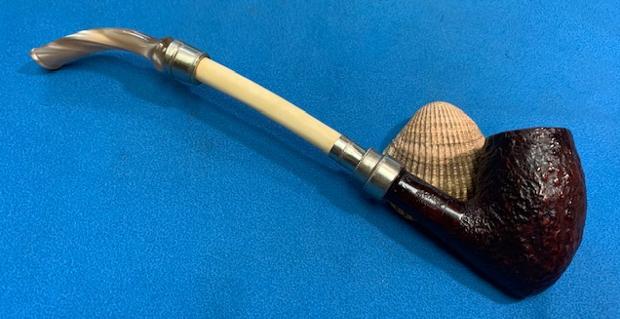
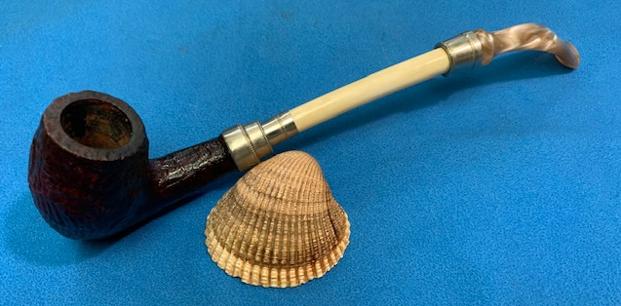
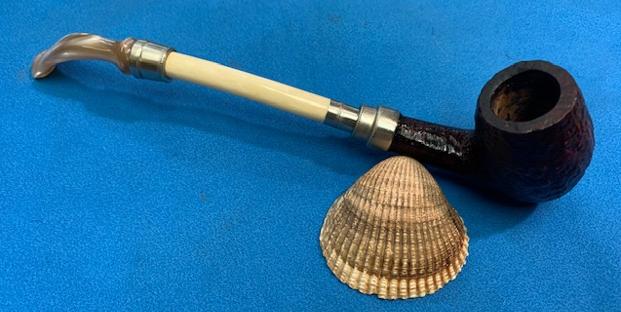
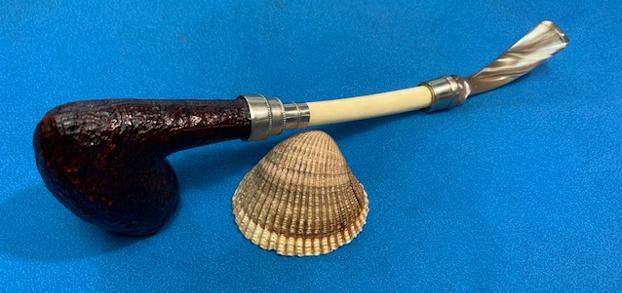
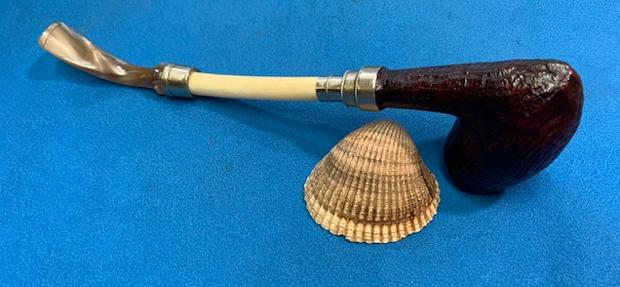
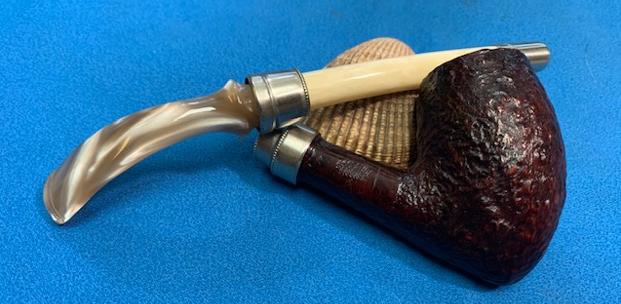
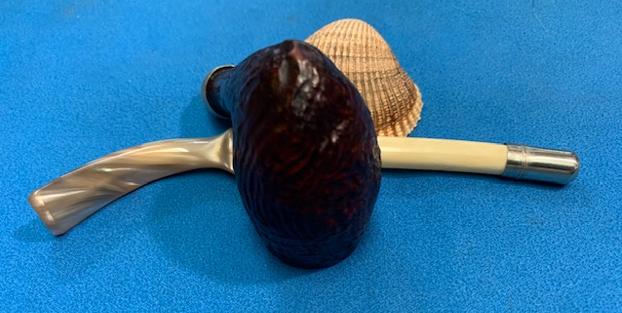
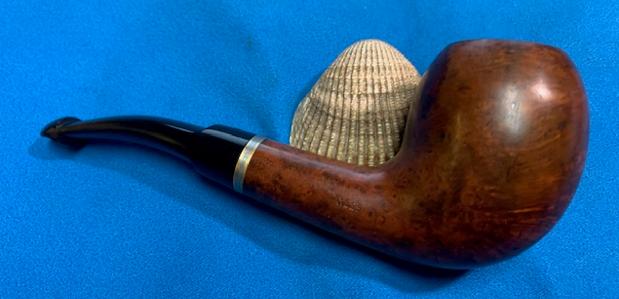
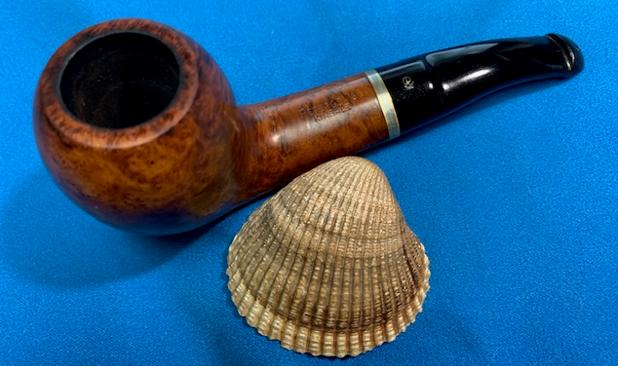
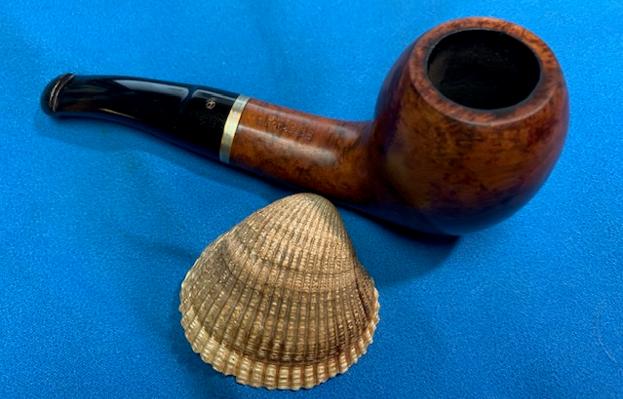
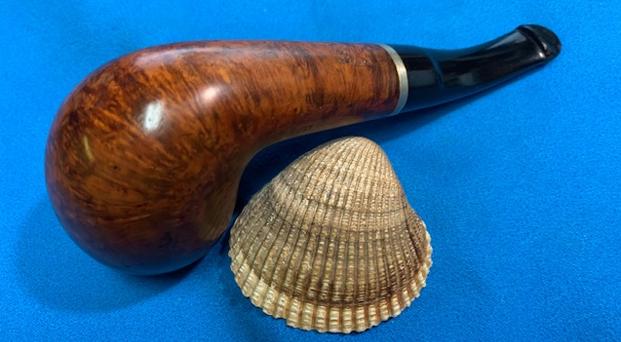
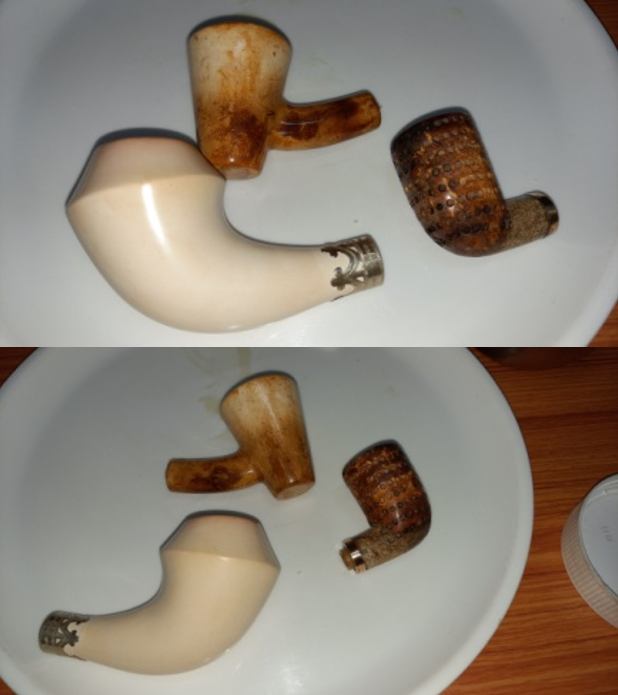 I rubbed of the excess wax with a soft cotton cloth and brought a deep shine to the surface with a microfiber cloth. The deep dark chocolaty golden brown coloration to the stummel contrasts splendidly with the shining variegated colorful stem and makes for a better visual treat in person than what is seen in the pictures below. I hope Karthik likes it as much as I did and that he enjoys this pipe for years to come.


 P.S. – This was the last of the three pipes that Karthik had selected; a Pete System pipe which I had posted earlier, this stack Meerschaum pipe and the third was a chubby Comoy’s Monaco Rhodesian pipe that I had restored a couple of years earlier. These will soon be in the hands of this connoisseur of beautiful pipes and would love to see him smoke them filled with his favorite tobacco.
And yes, I take this opportunity to thank Karthik for seeing the beauty that lay hidden beneath all the dirt and selecting this pipe which otherwise would have been lying around at the bottom of the pile of pipes for restoration. Here is a picture of the three pipes that are on their way to Bangalore… Sincere gratitude to all the readers who have shared this part of my journey in to the world of pipe restoration…Cheers!!

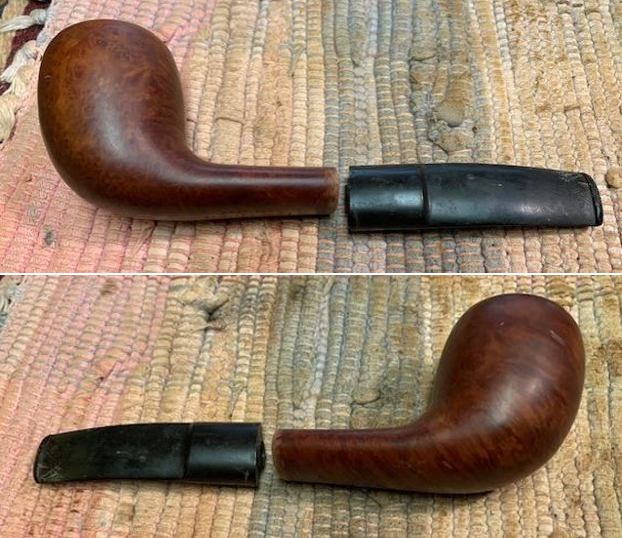
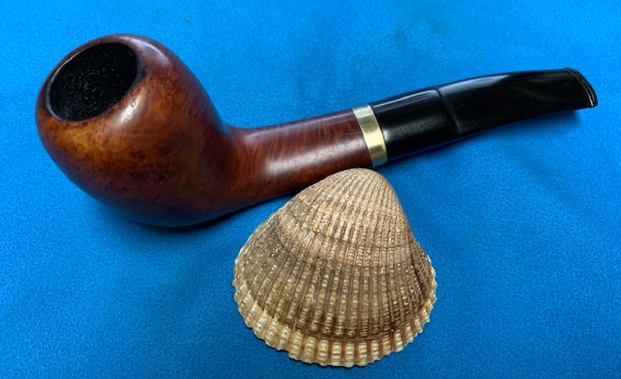
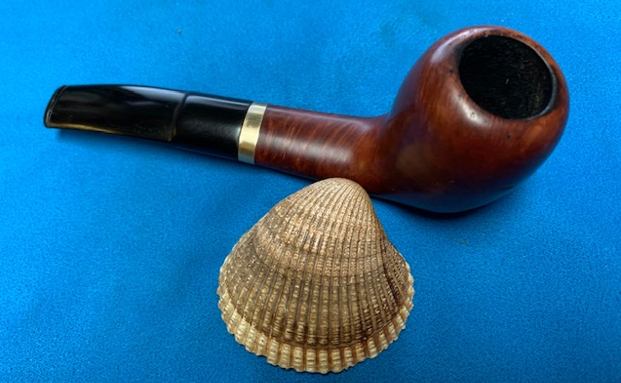
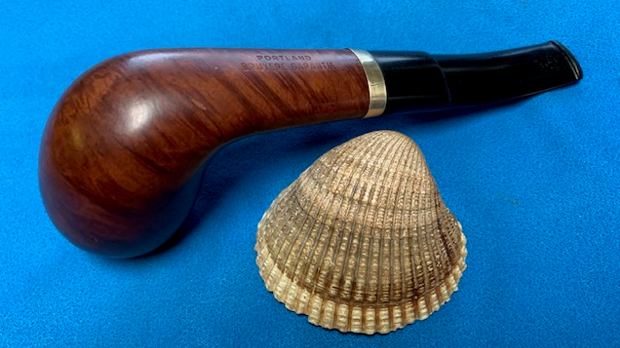
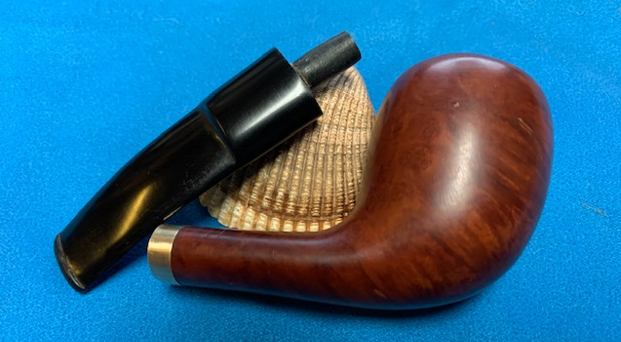
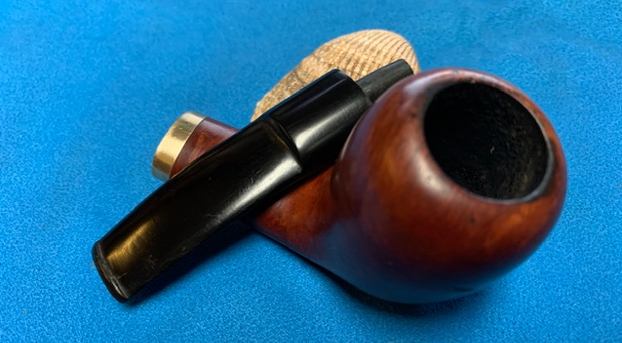
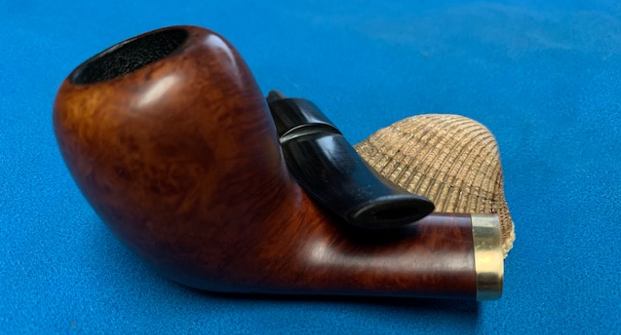
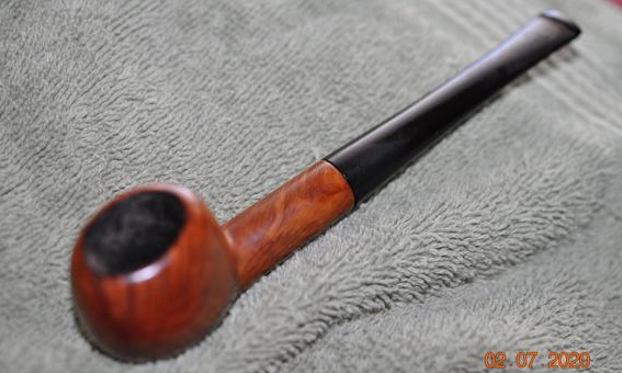
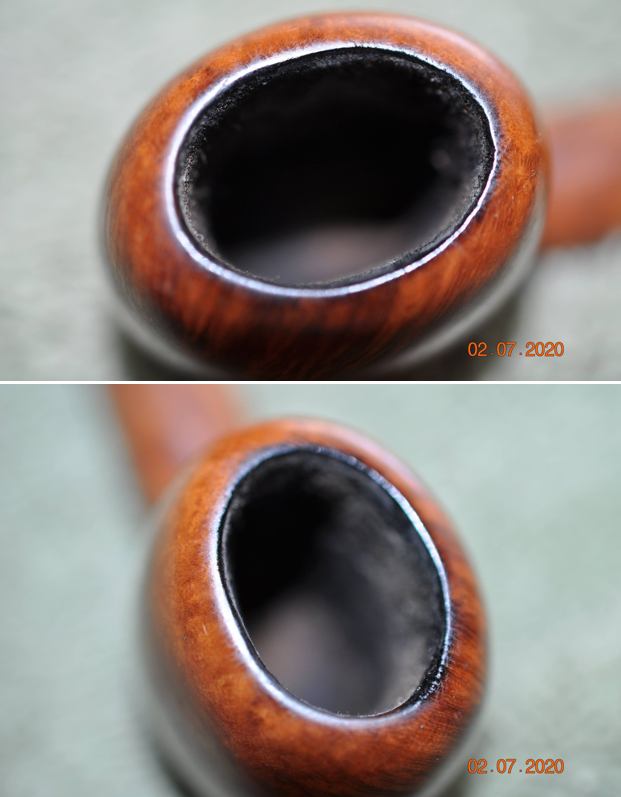
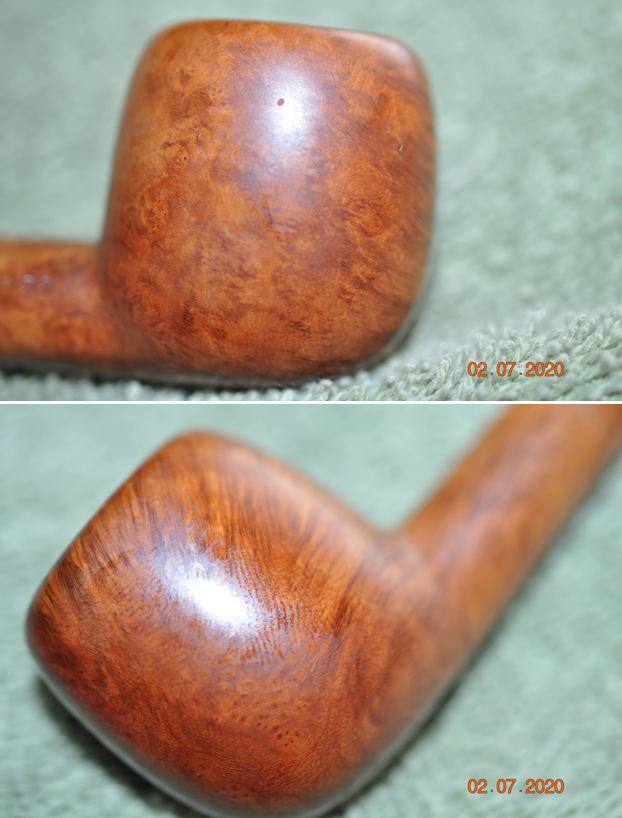
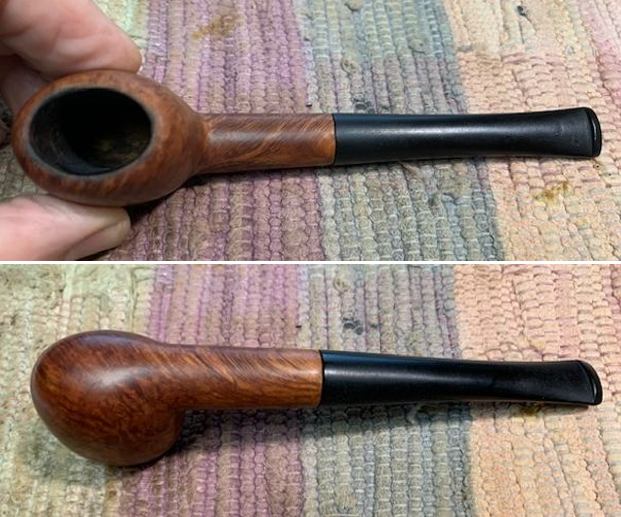
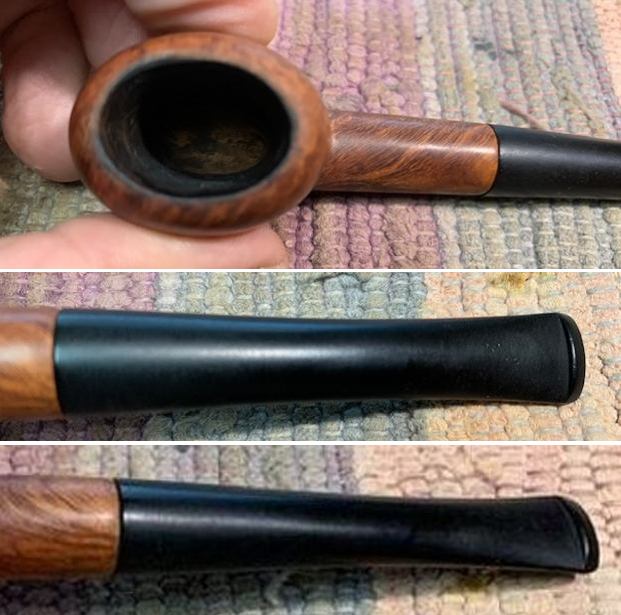
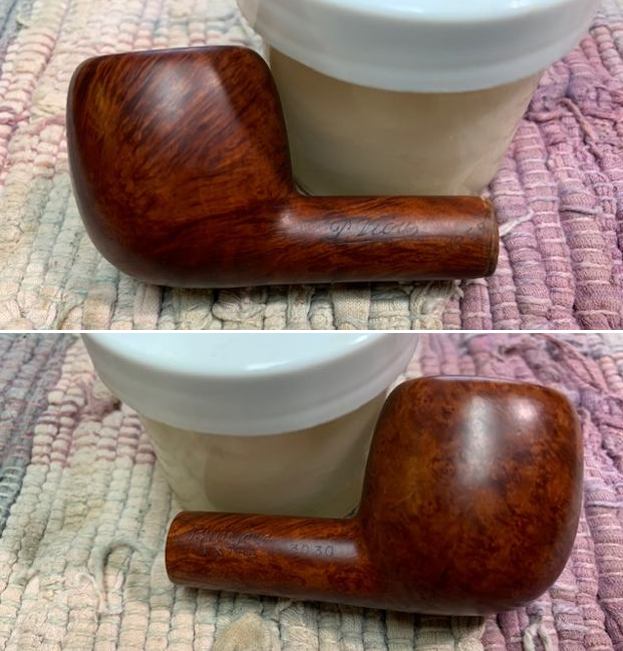
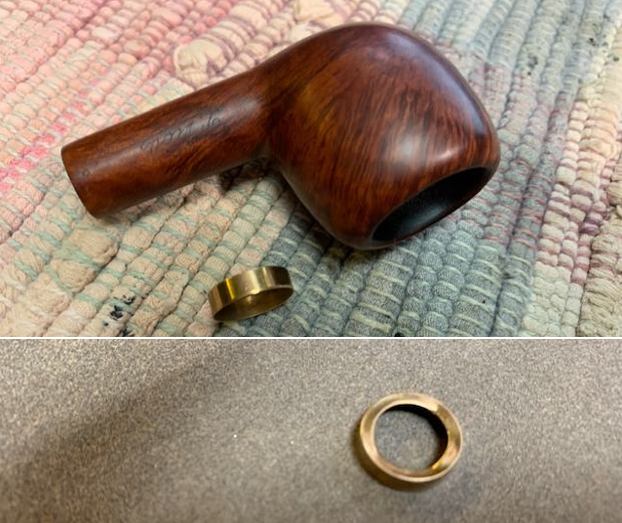
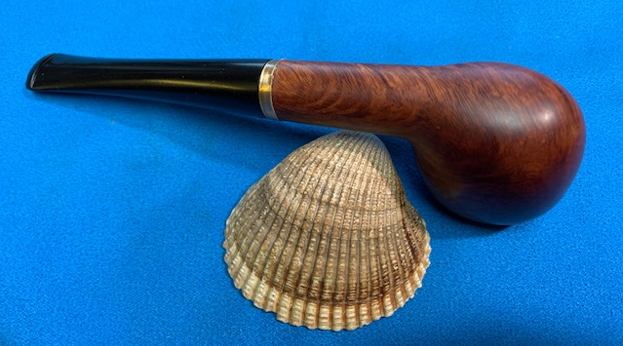
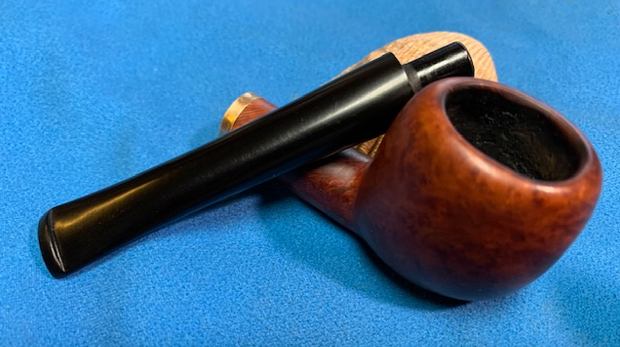
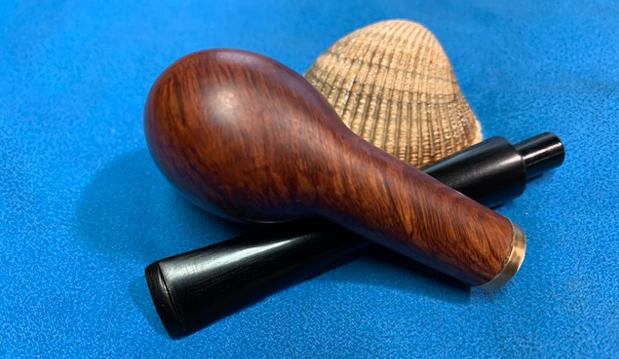
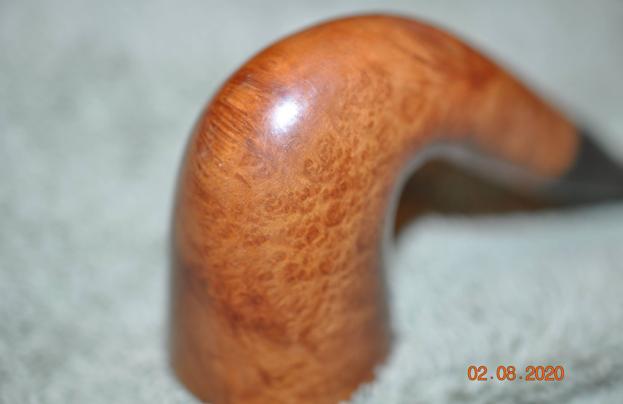
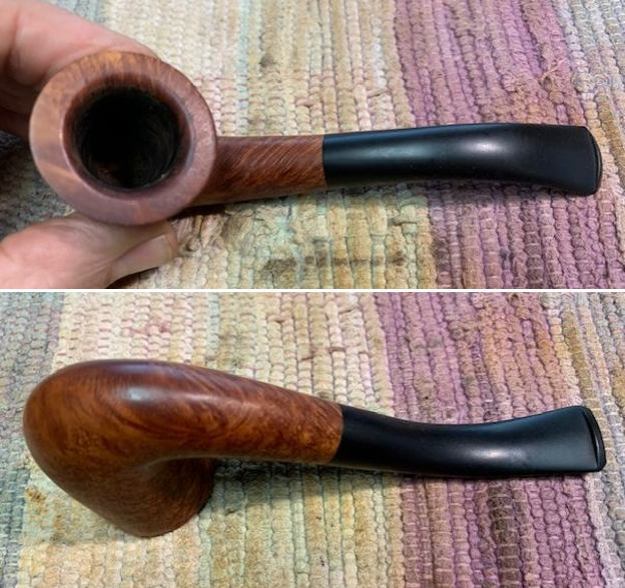
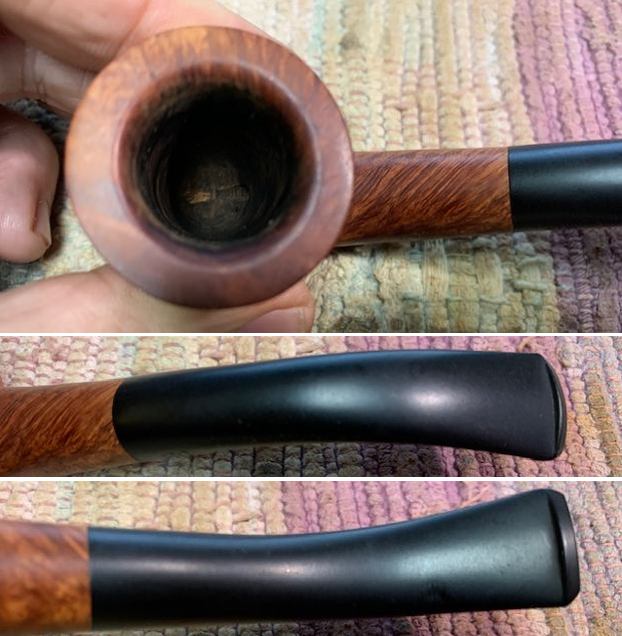
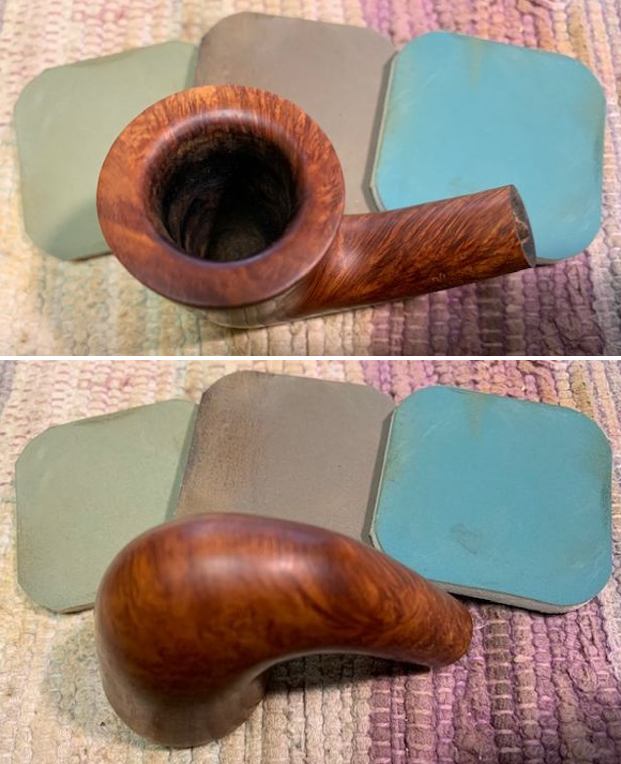
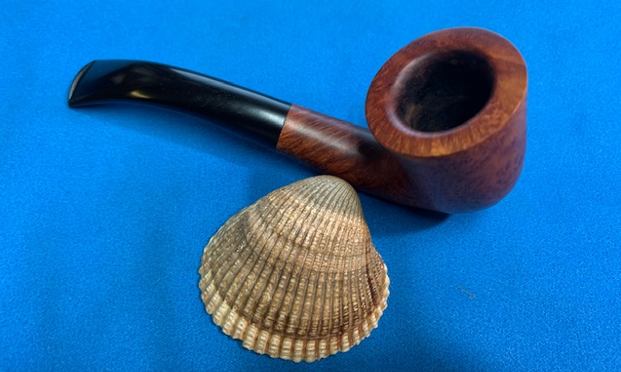
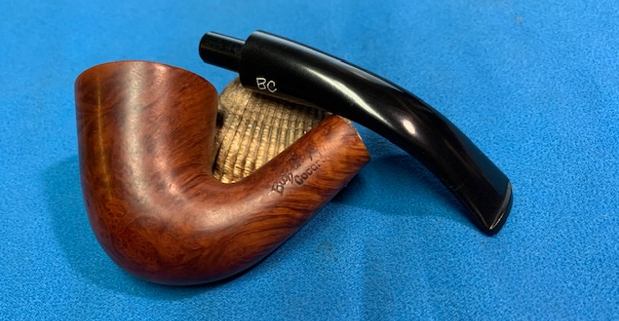
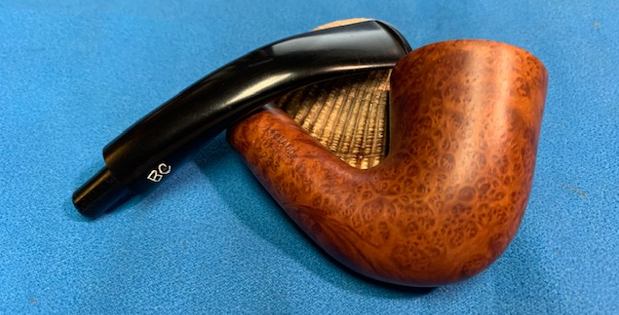
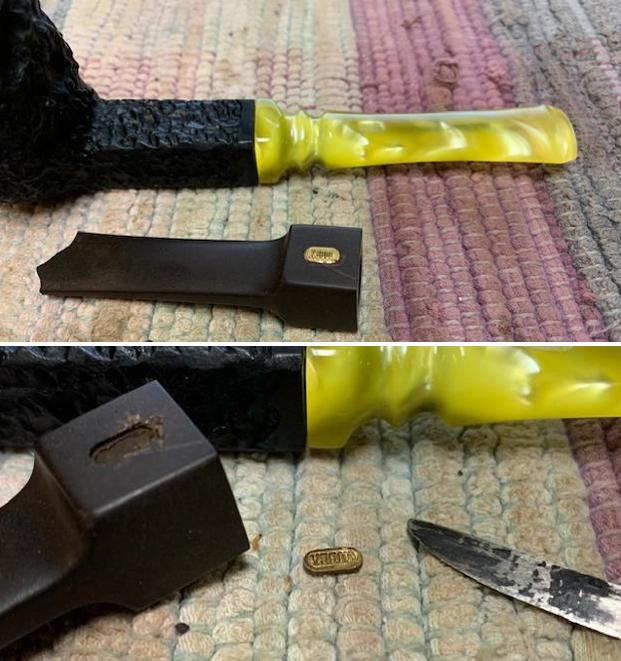
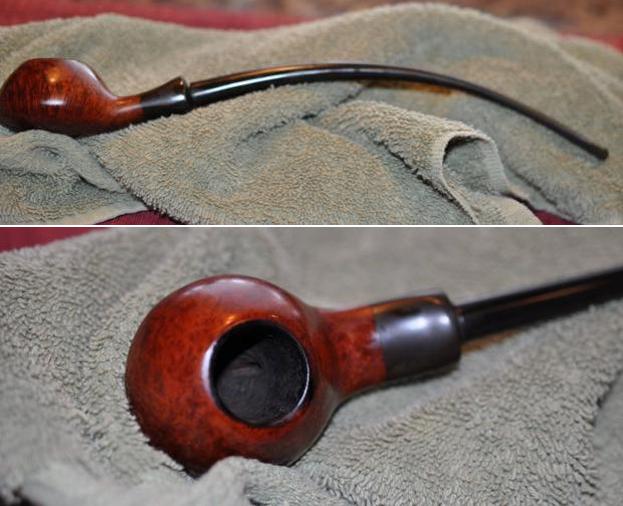
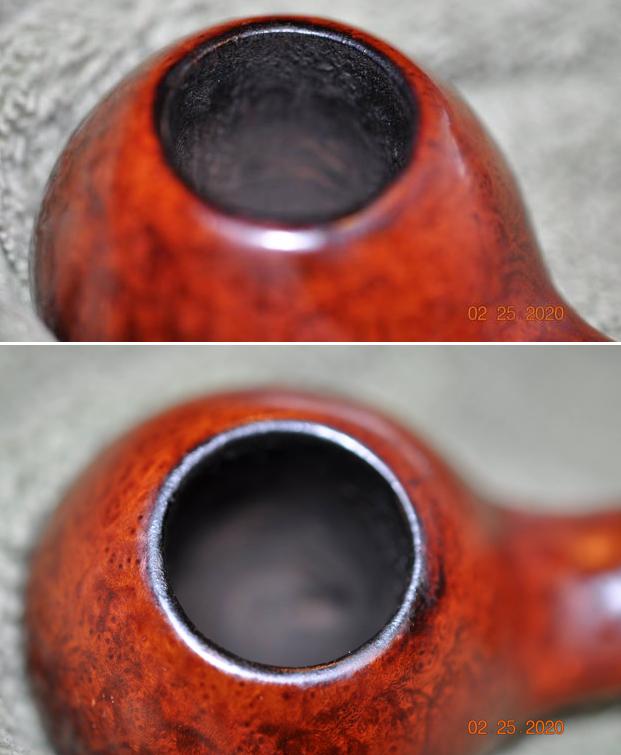
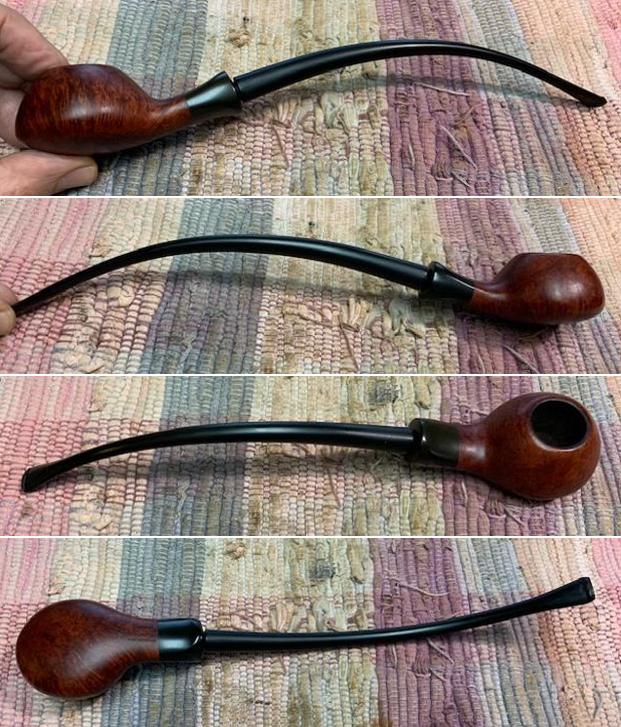
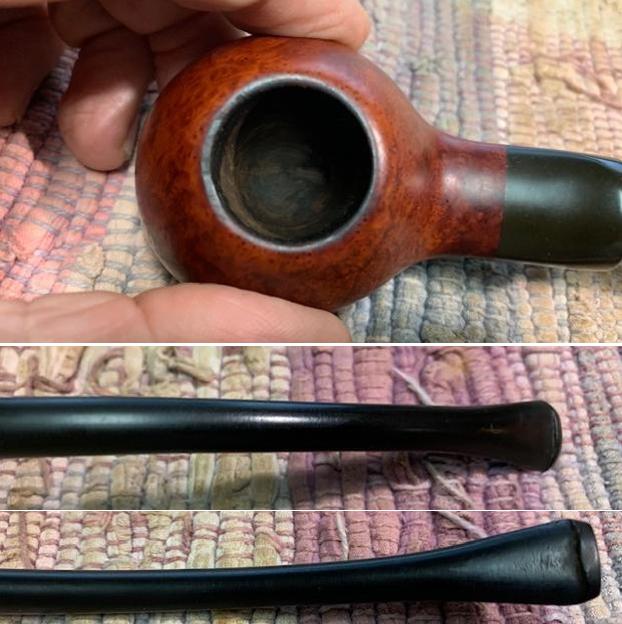
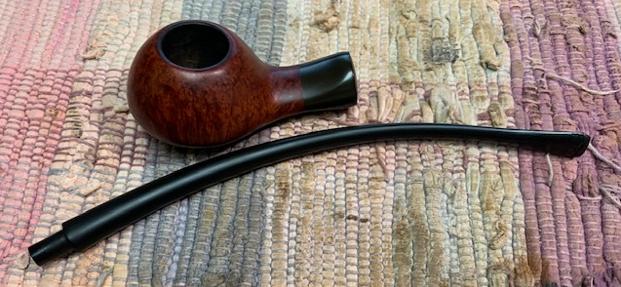
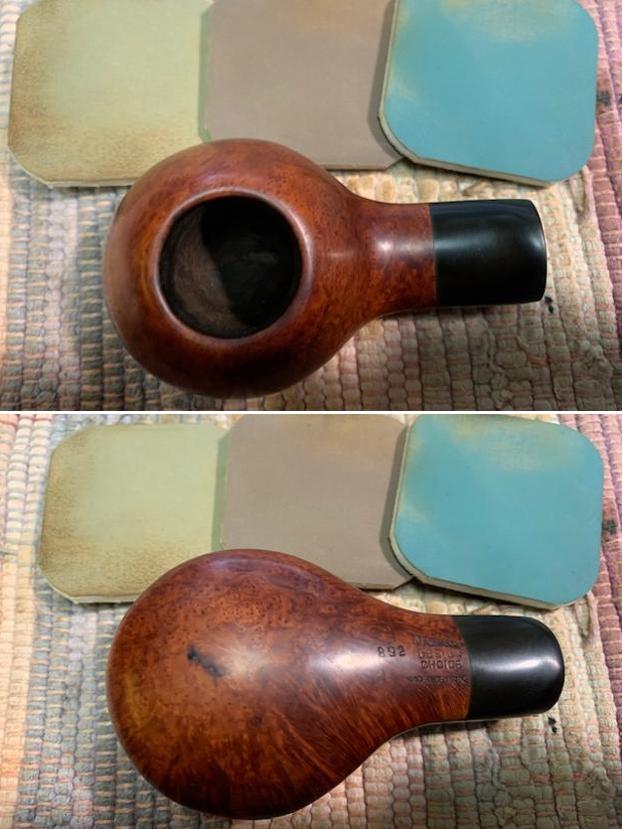
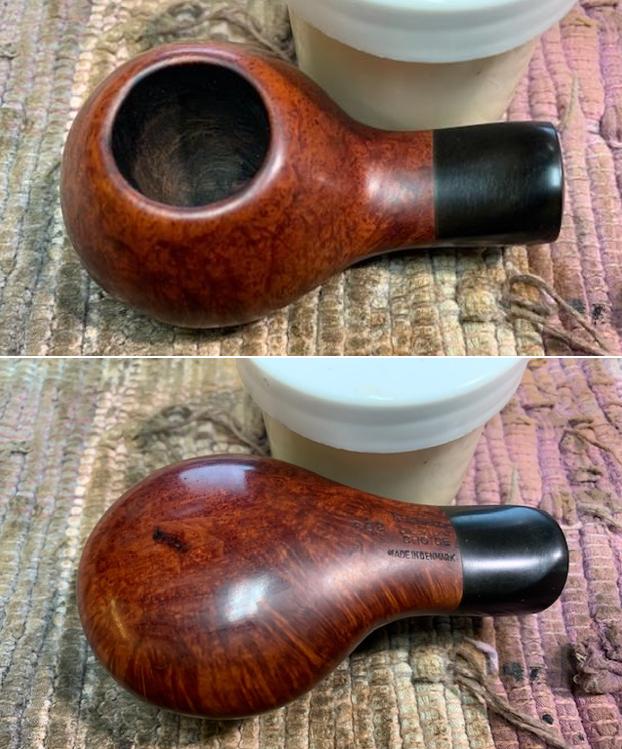
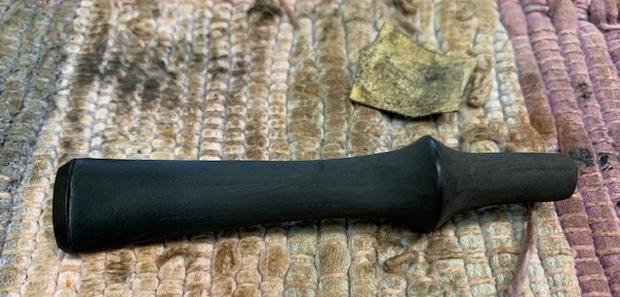
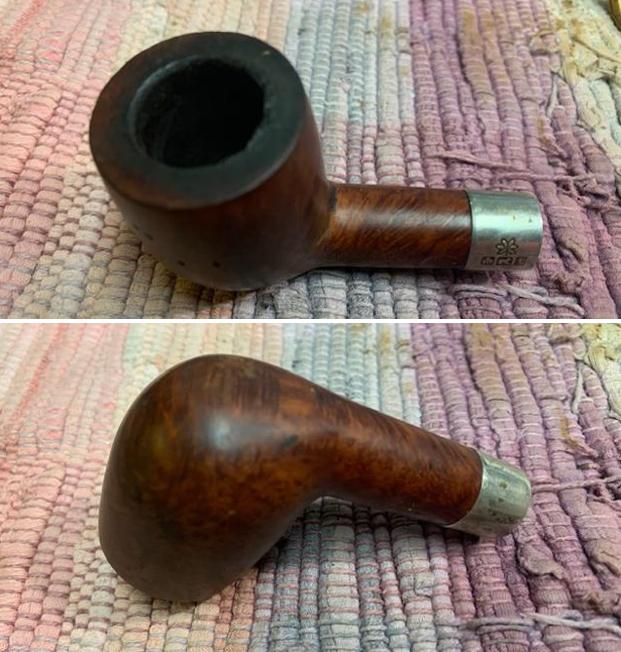
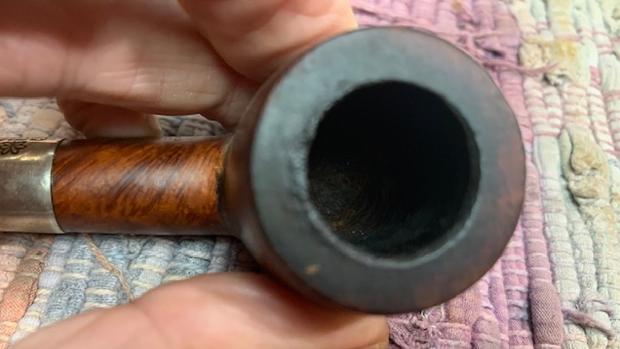
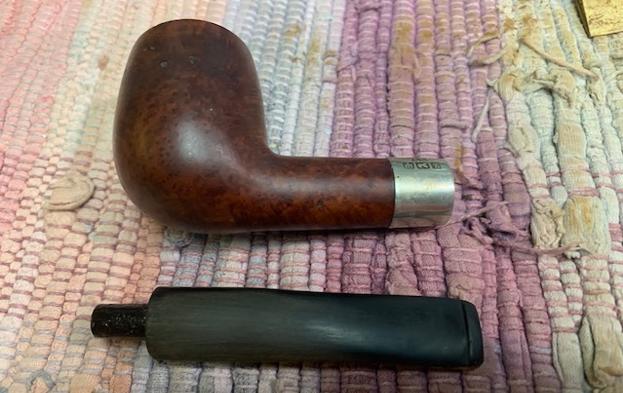
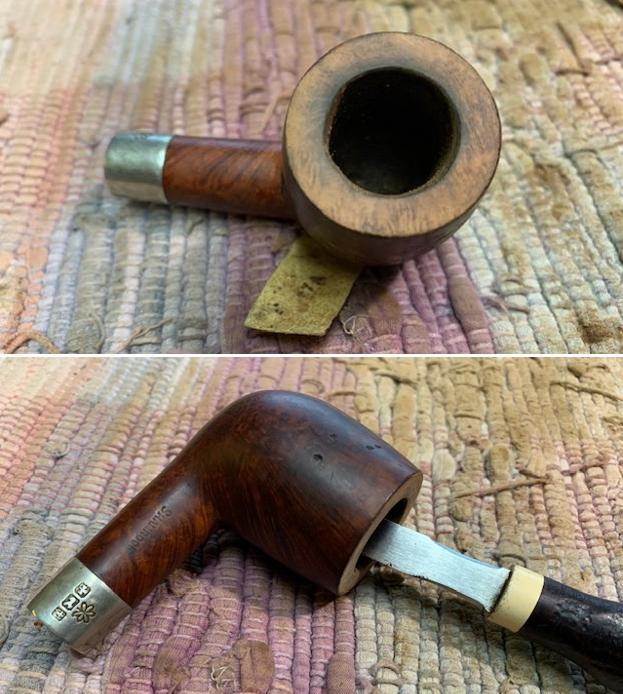
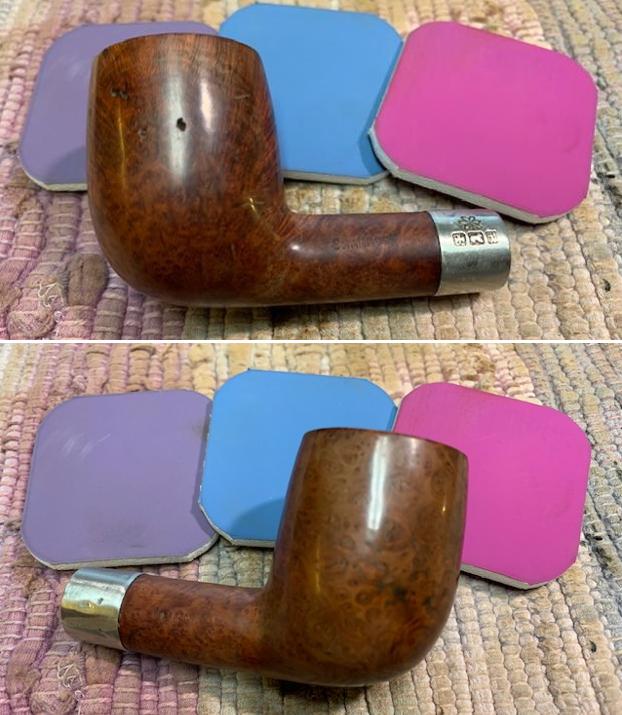
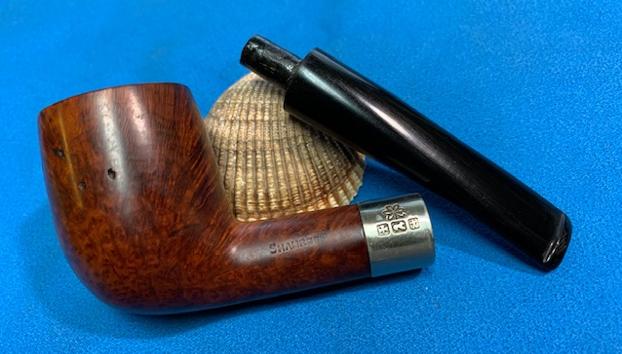
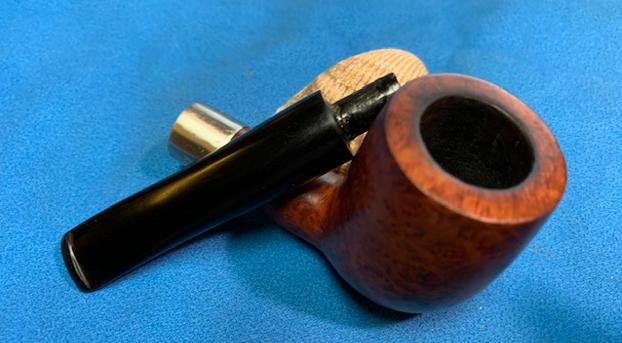
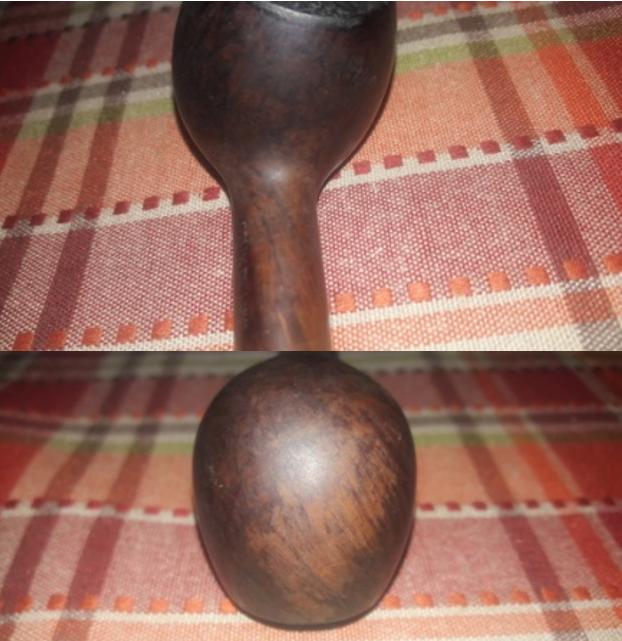
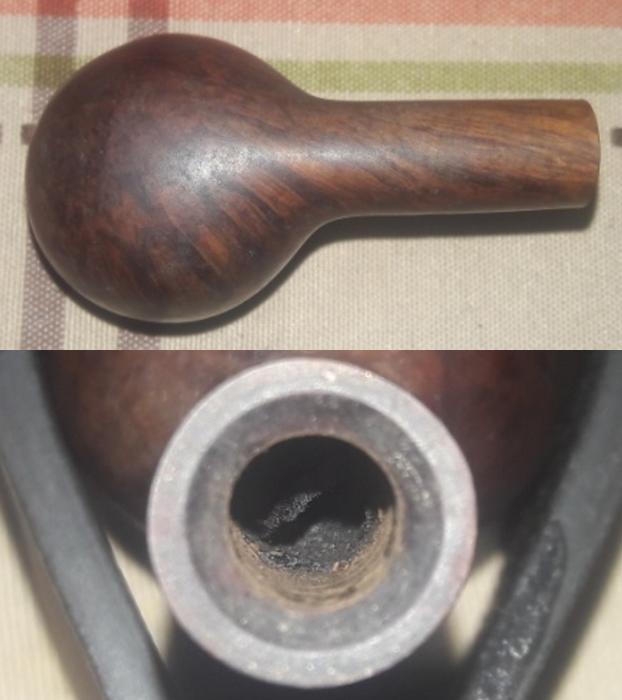
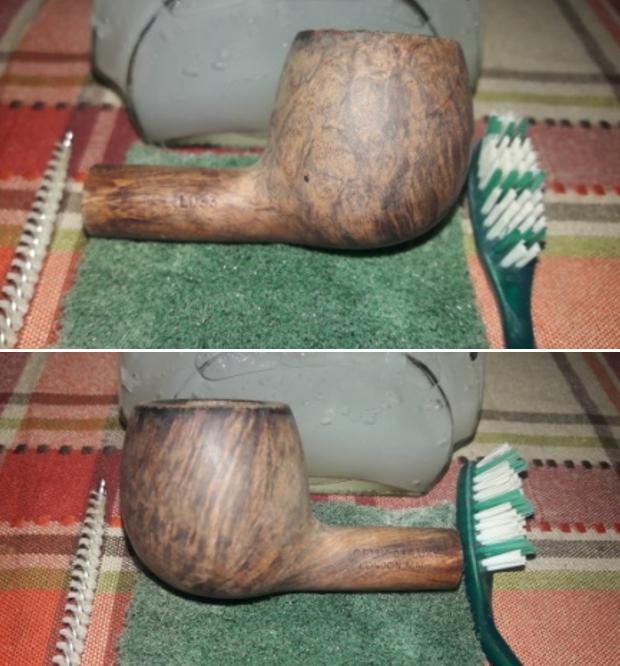
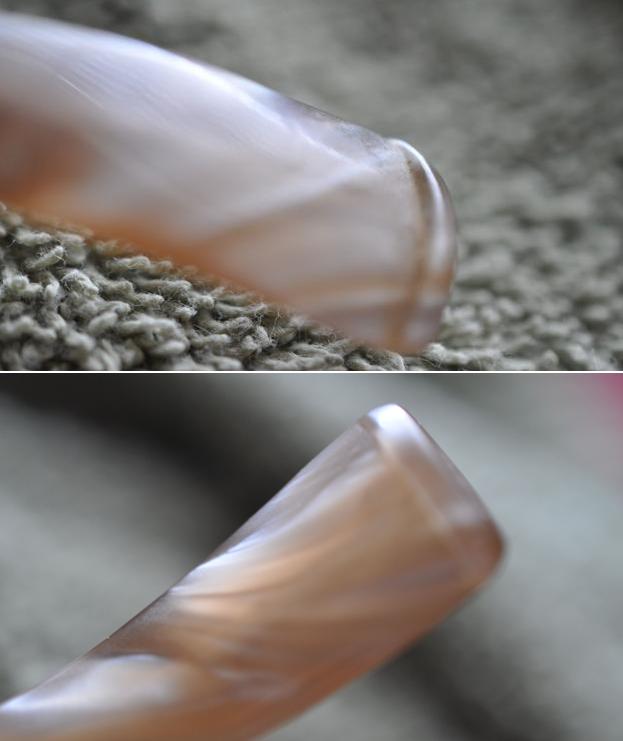
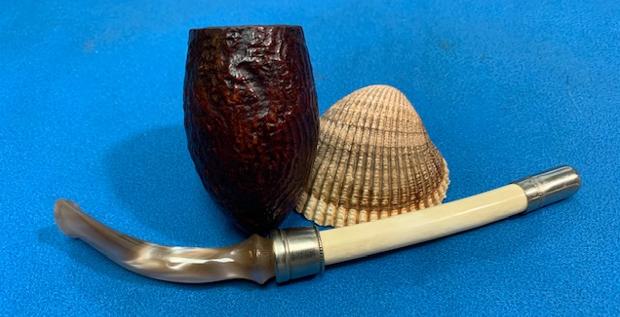
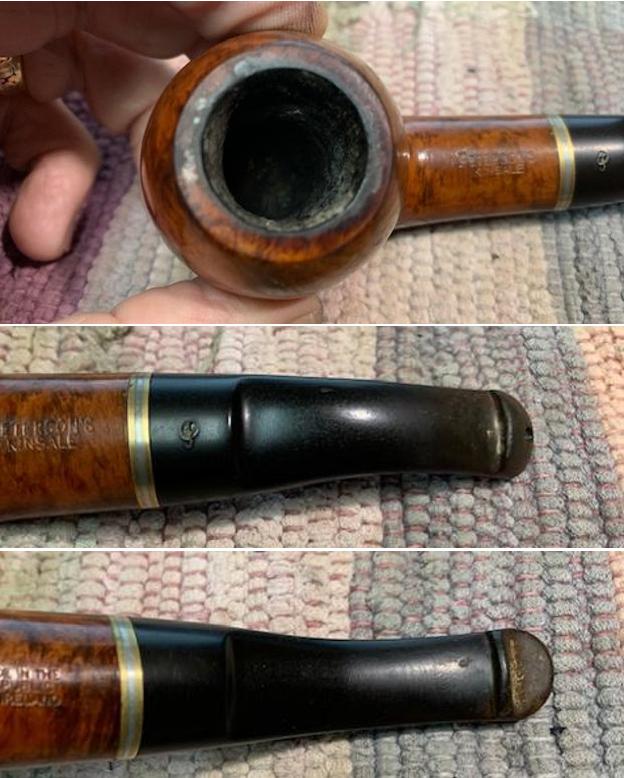
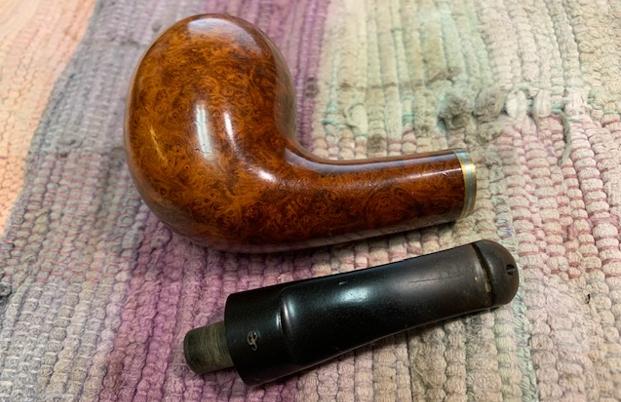
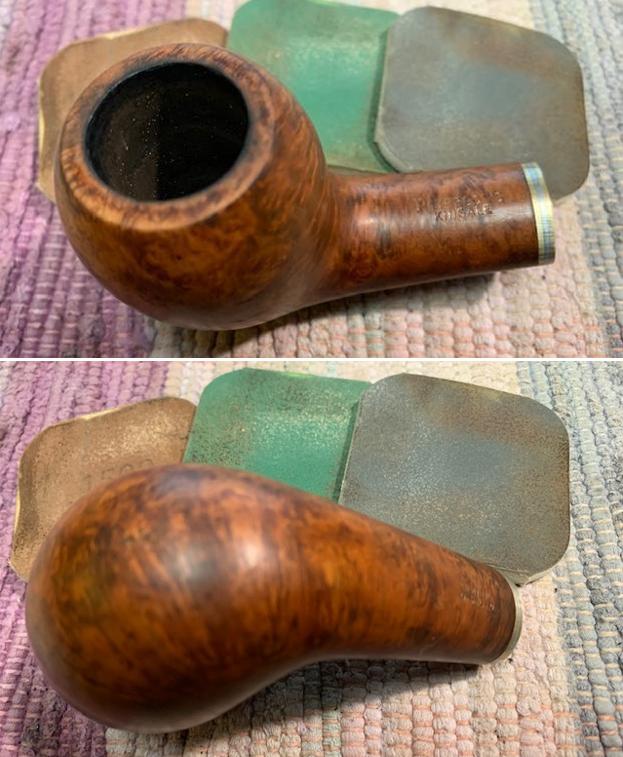
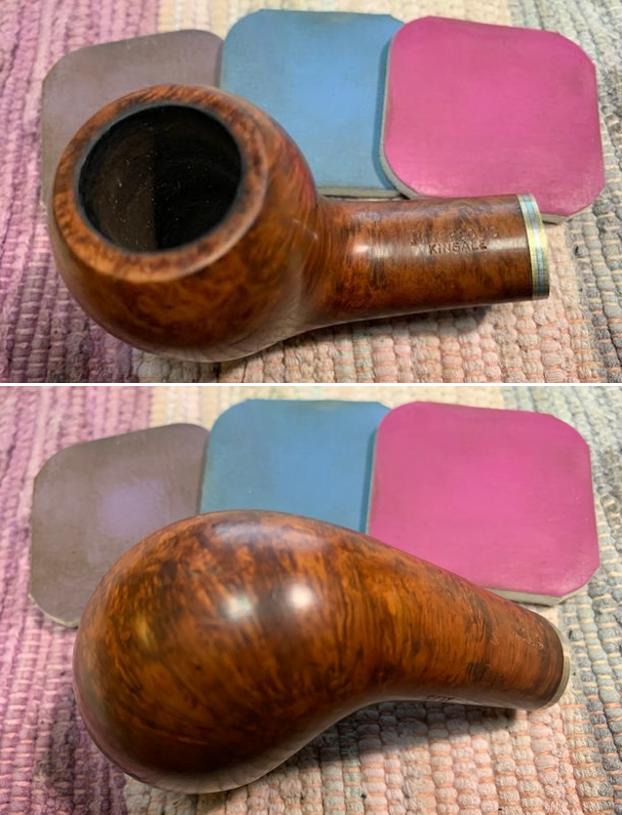
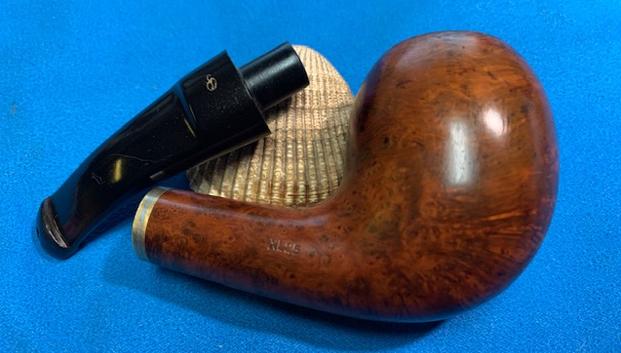
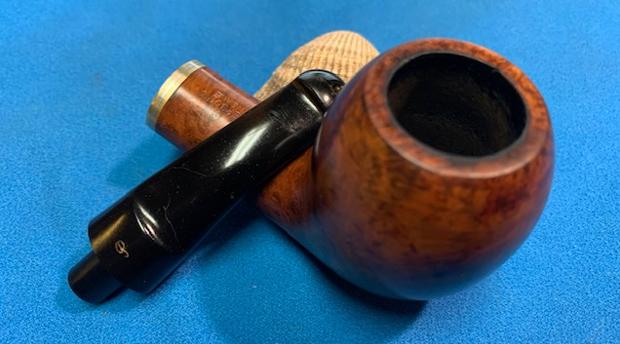
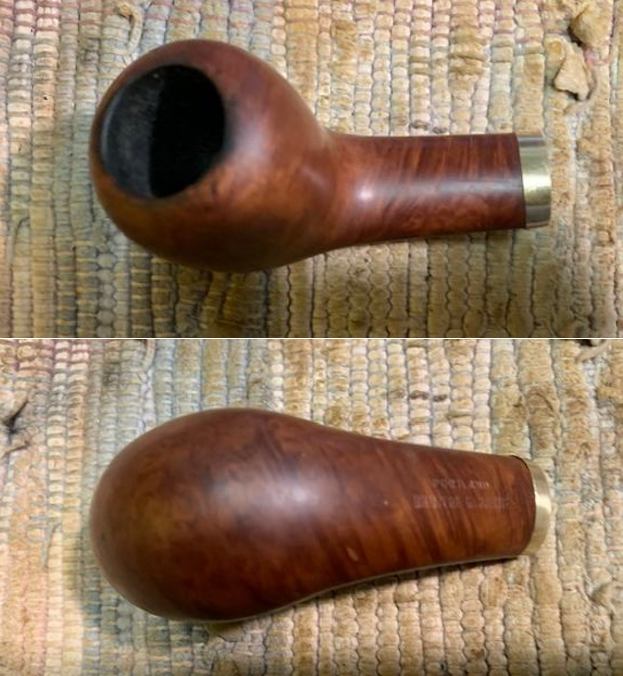
 I took photos of the rim top and the stem surfaces to chronicle the condition. The rim had some darkening from his lighter toward the right front of the bowl and on the back side. There was not any cake in the bowl as it was still quite new. The stem was just dirty with light tooth marks on both sides near the button. The tenon had snapped off very close to the stem so it would be a simple process to add a new tenon.
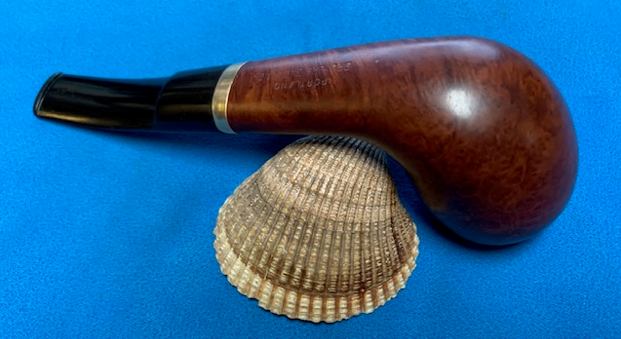
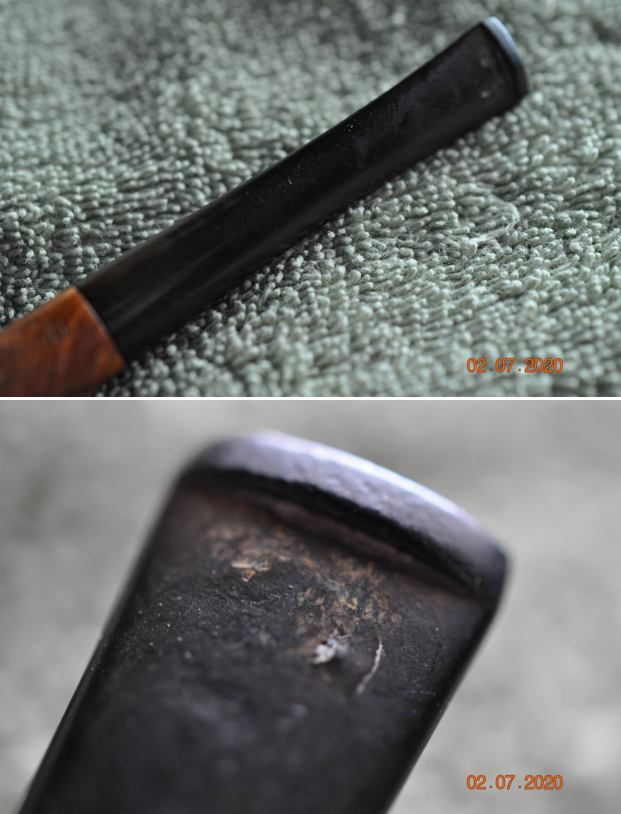
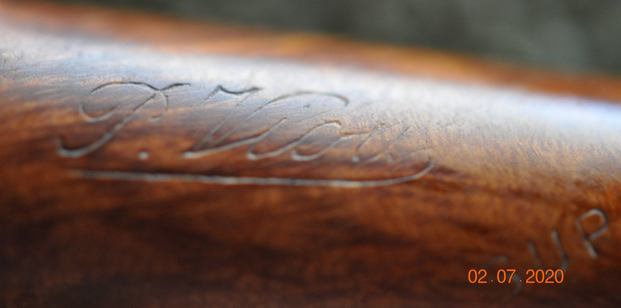
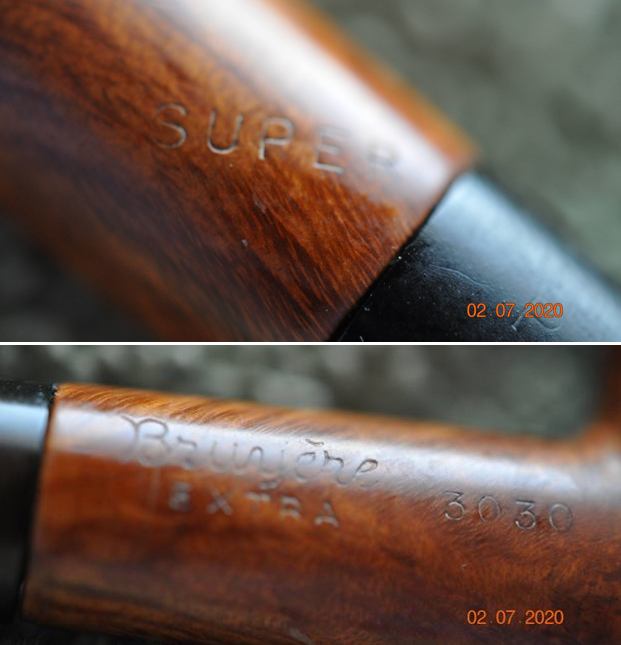
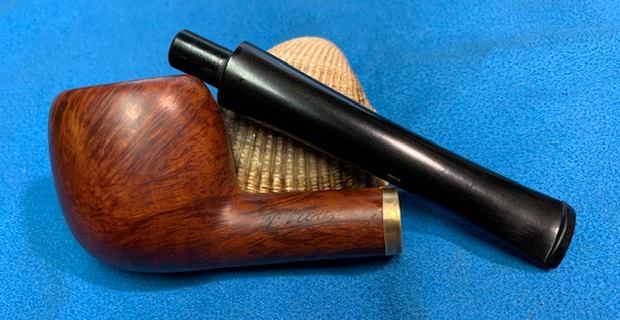
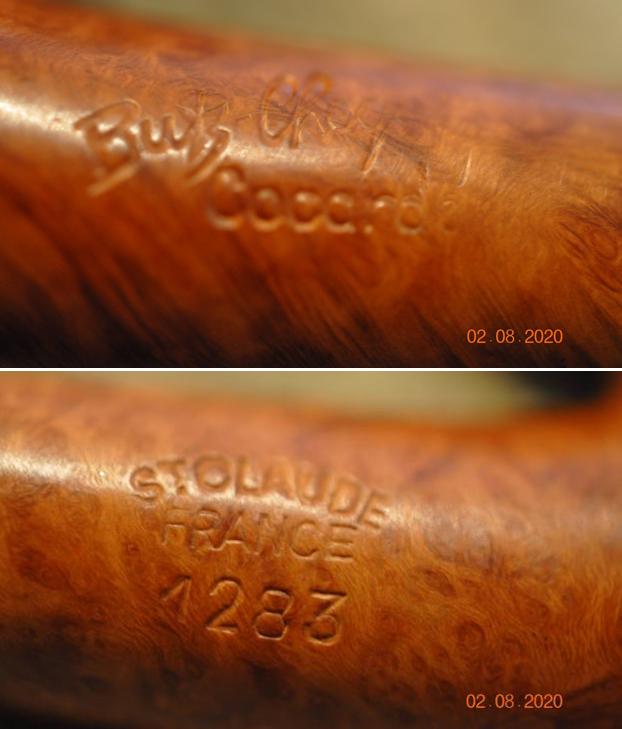
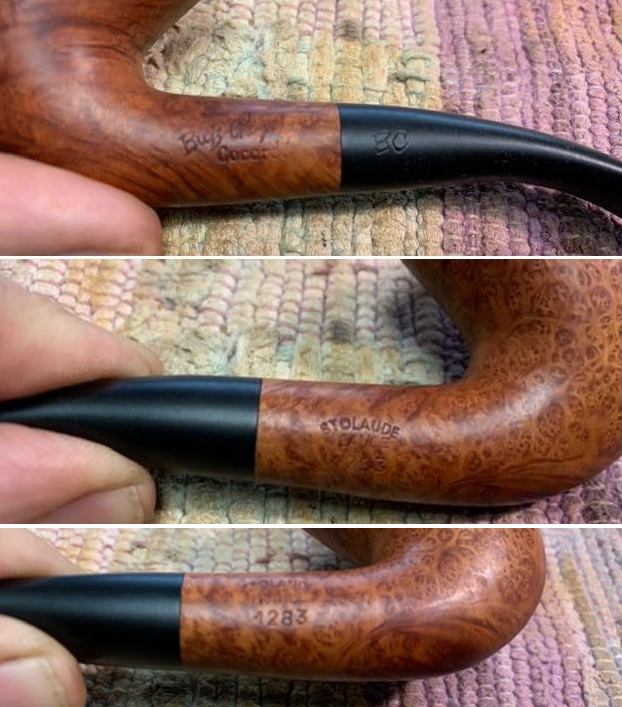
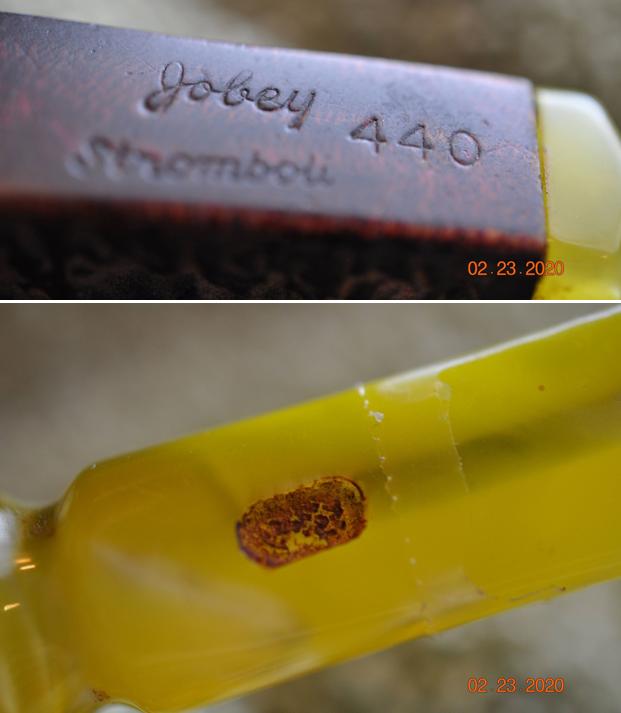
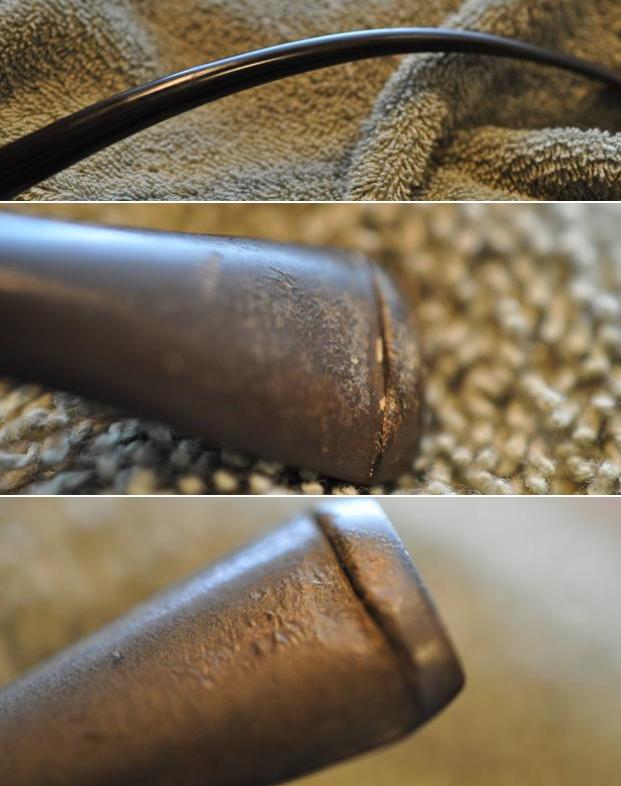
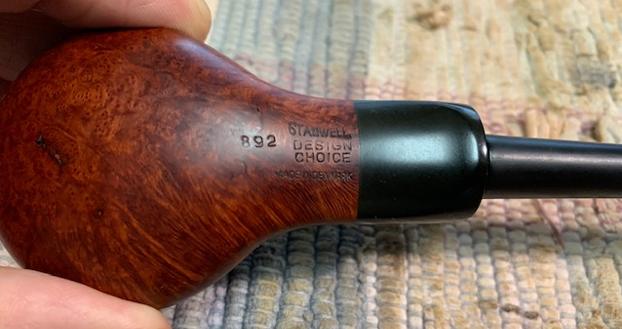
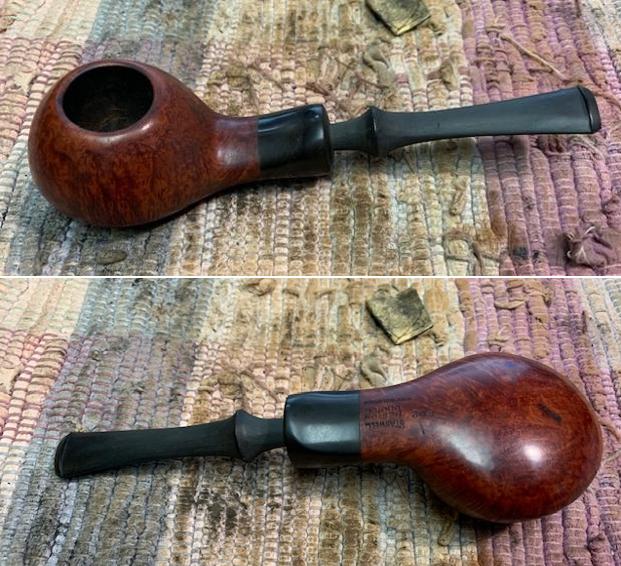
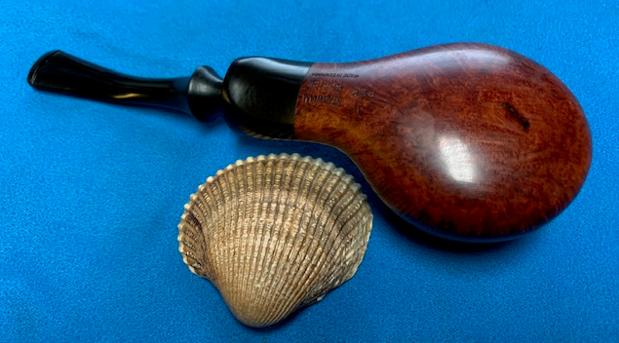
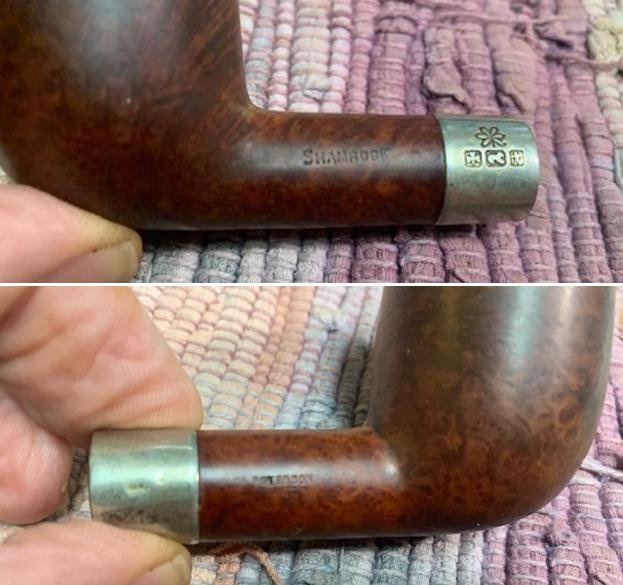
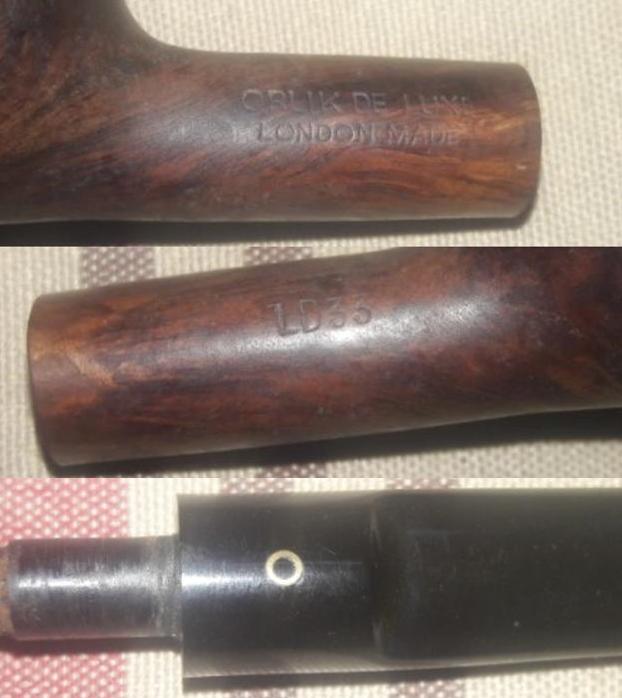
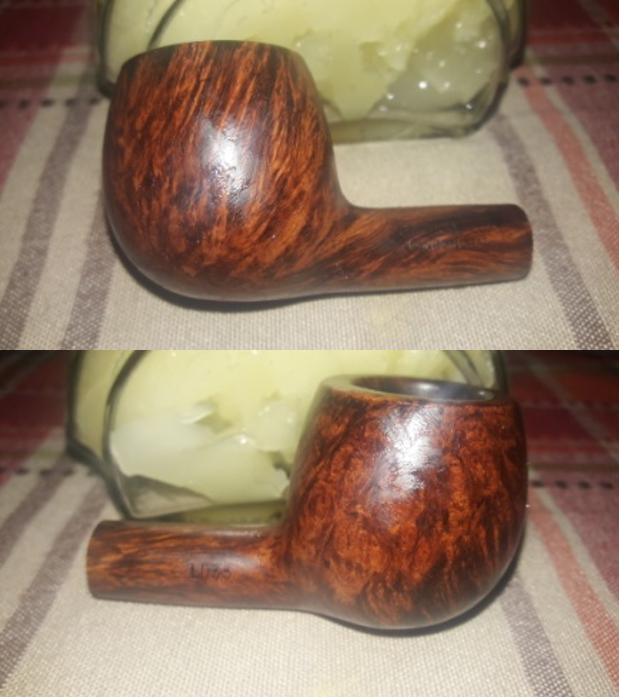
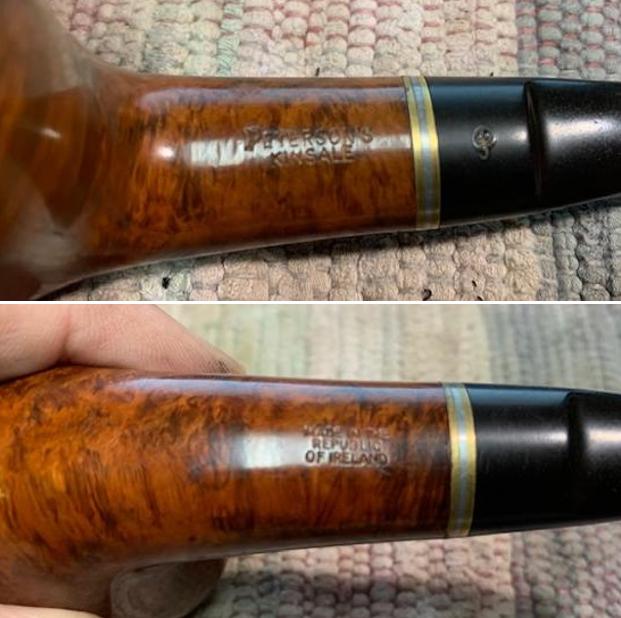
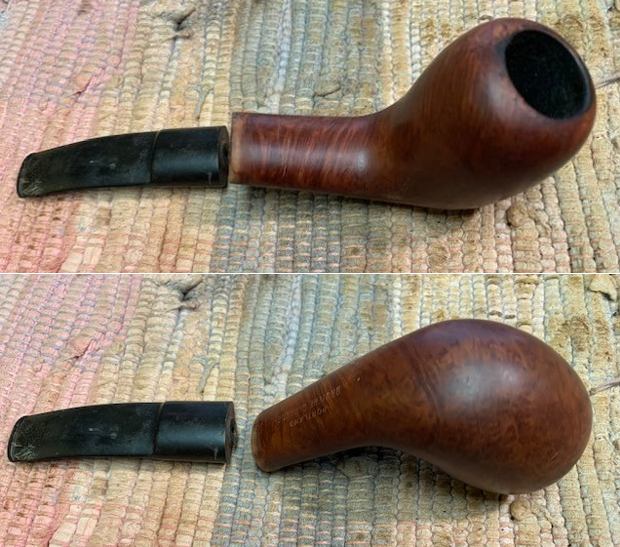
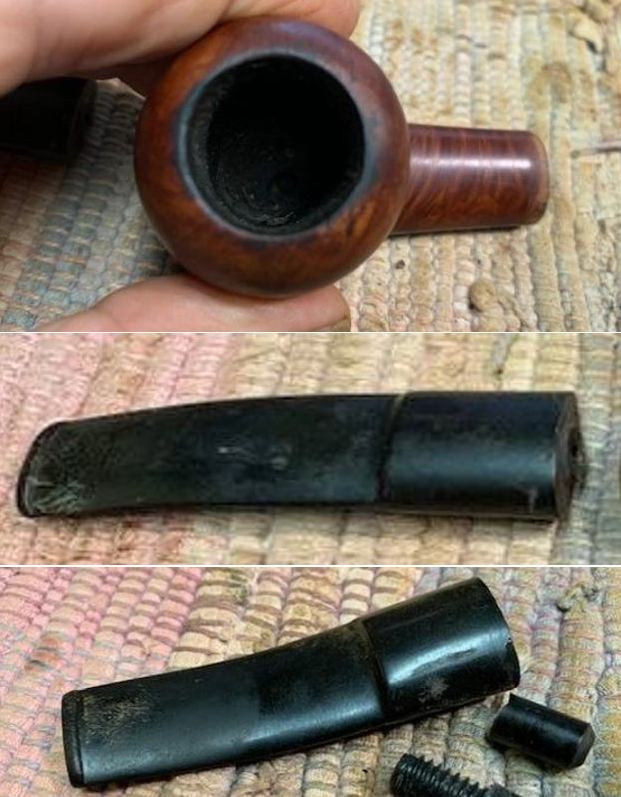 I took a photo of the stamping on the shank underside. It is clear and readable.
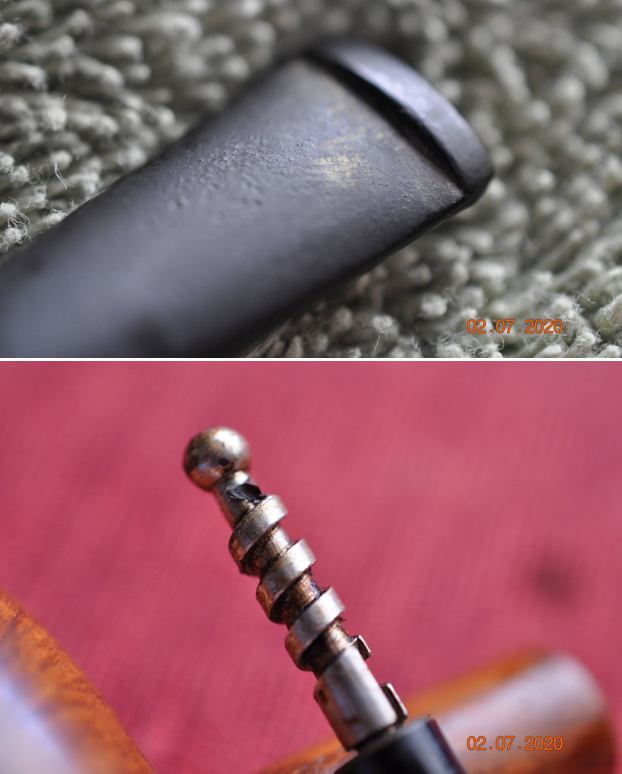
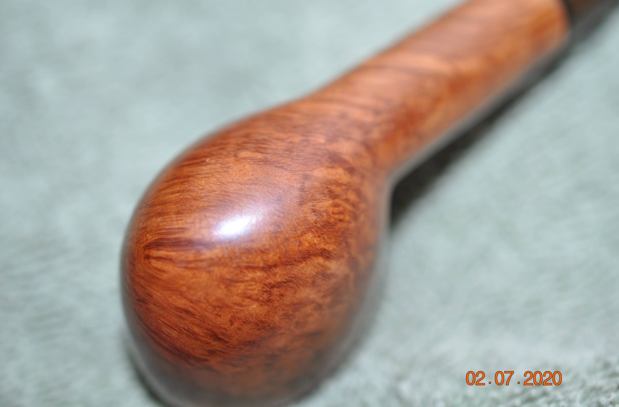
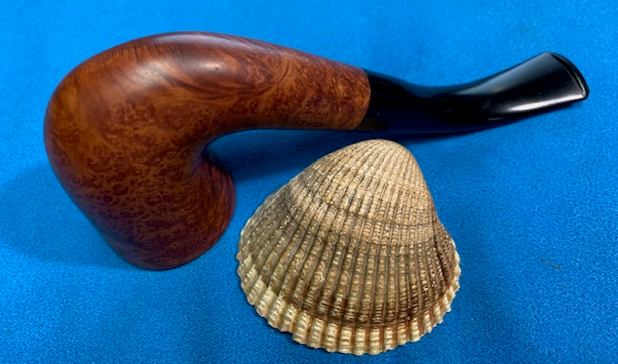
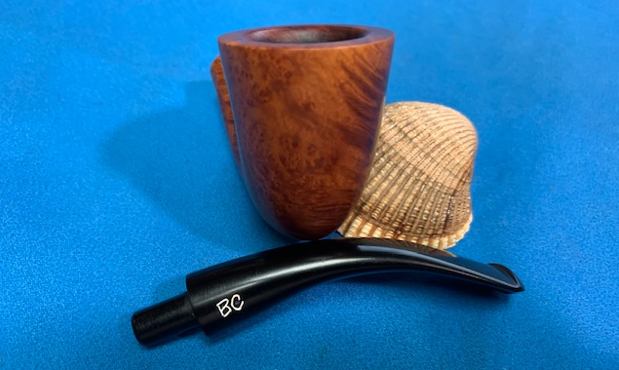
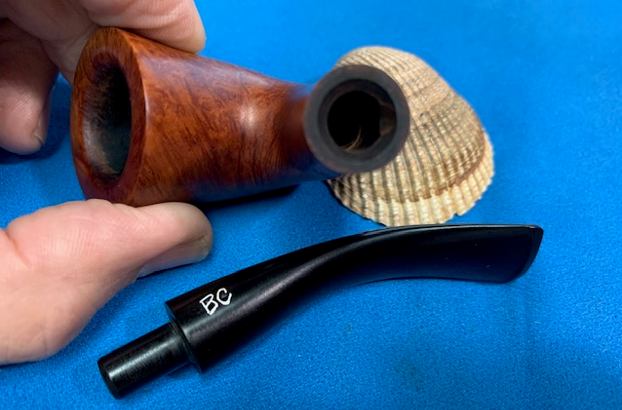
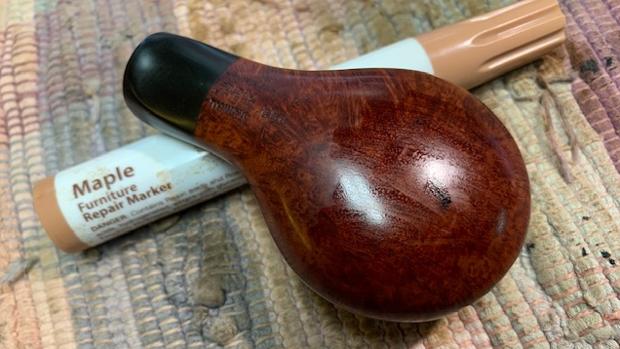
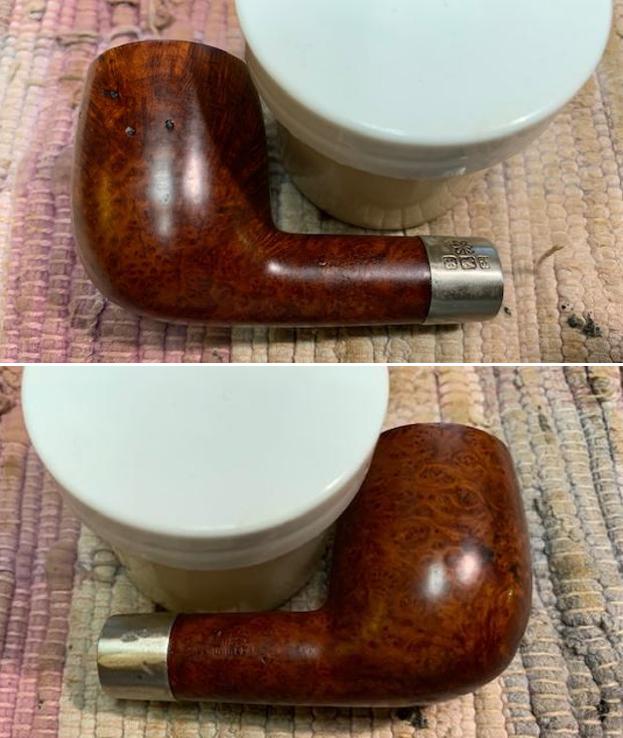
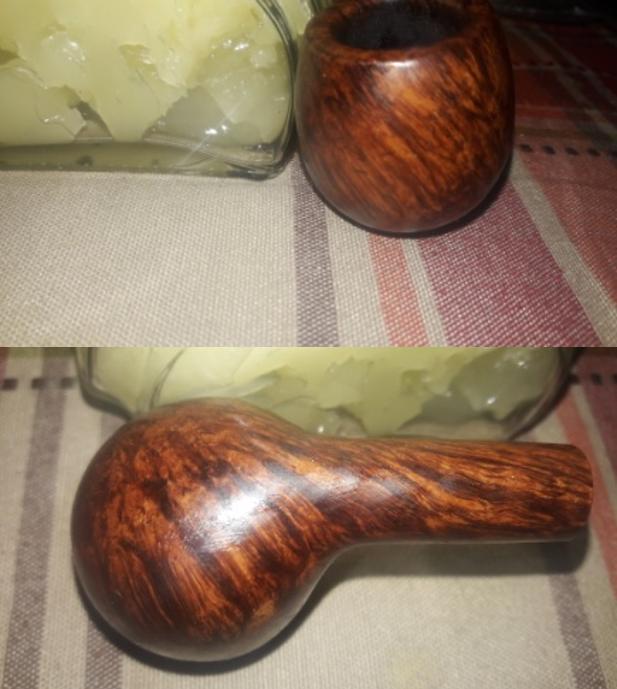
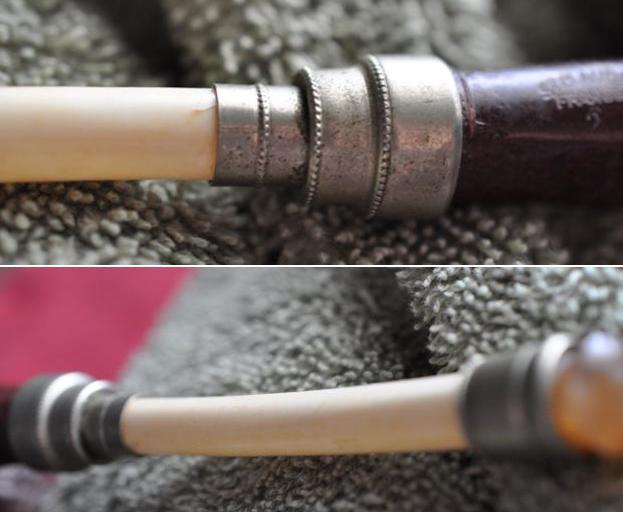
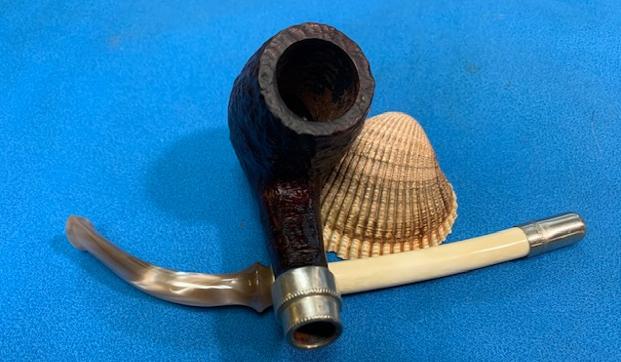
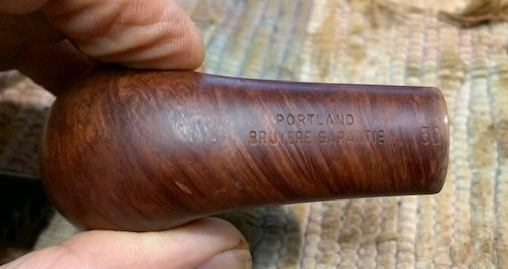 I took a photo of the parallel cracks on the top of the shank. These were hairline but they were present and though you cannot see it they go to the end of the shank.
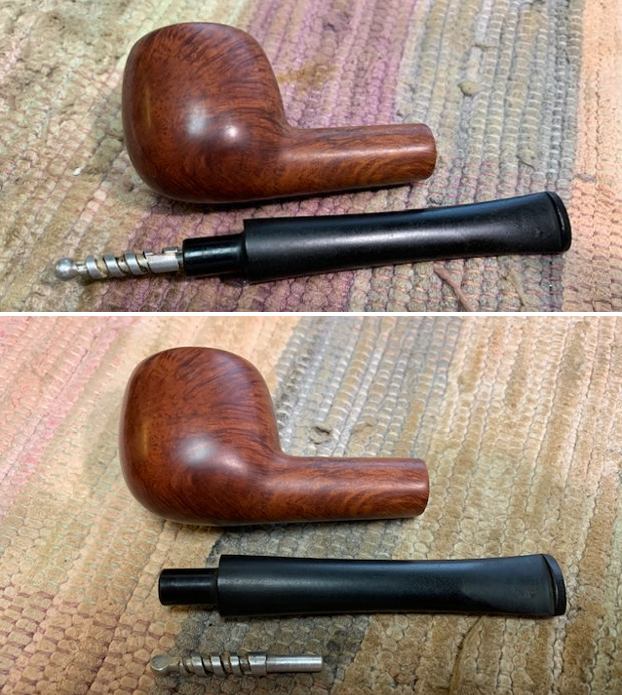
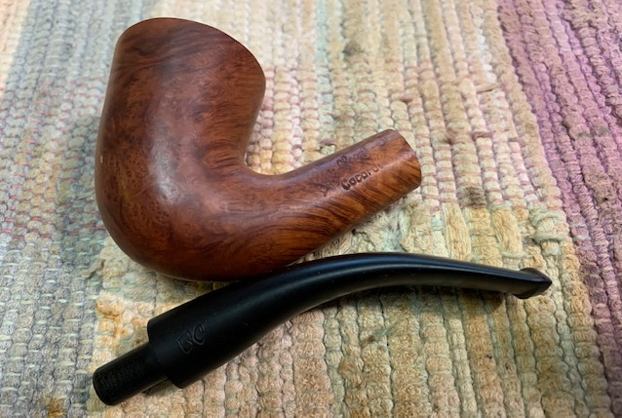
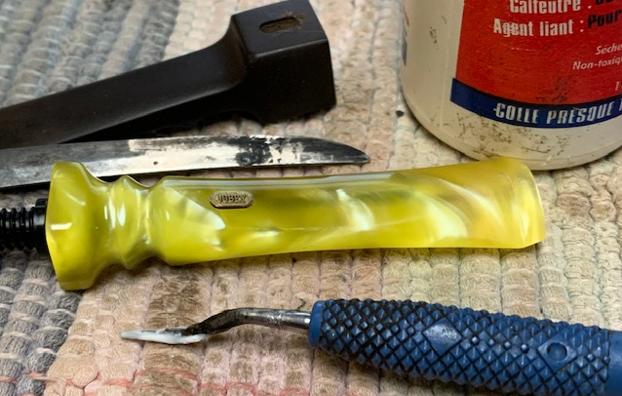
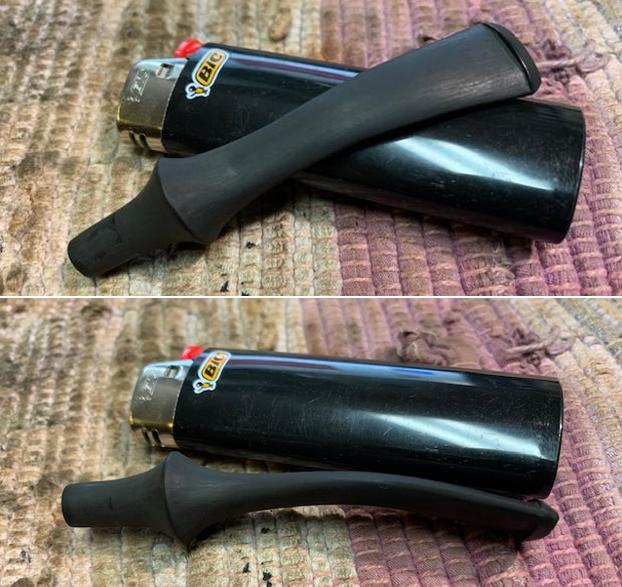
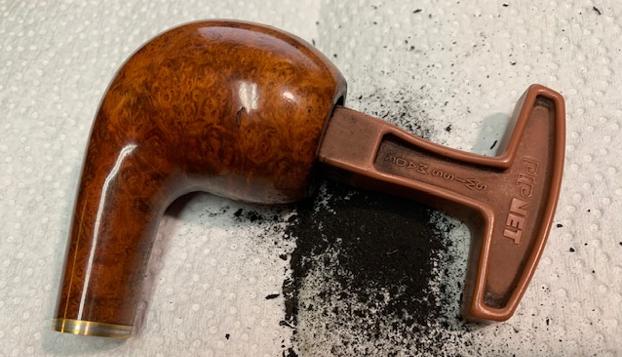
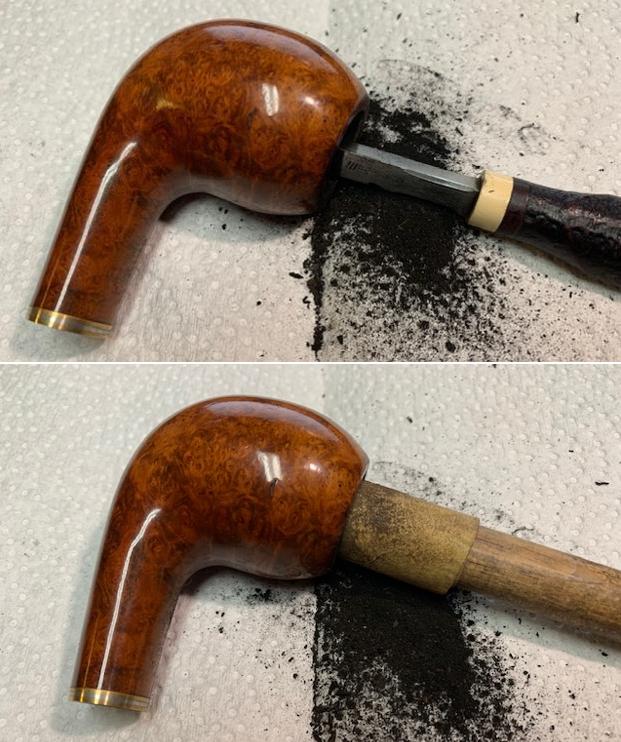
 I began my work on this pipe by pulling the broken tenon. I always use a coarse threaded screw and gently turn it into the airway in the broken tenon. I carefully wiggle it free. If it is tight a short 10 minutes in the freezer takes care of that.
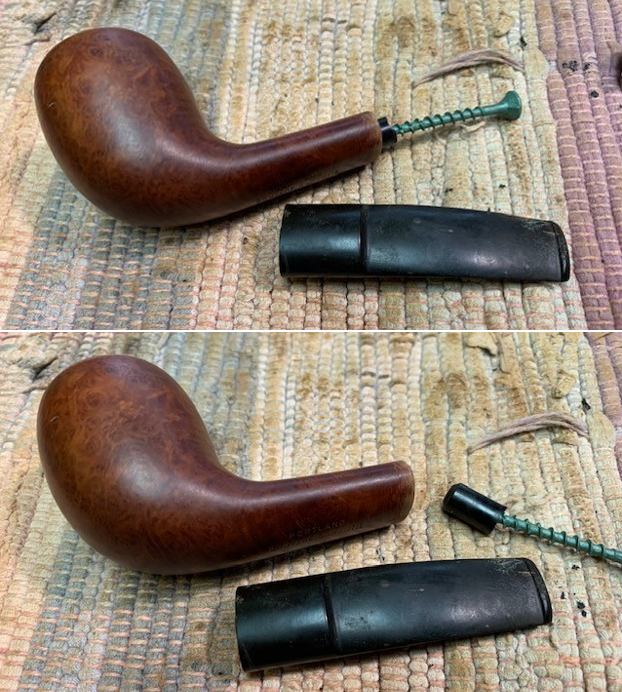
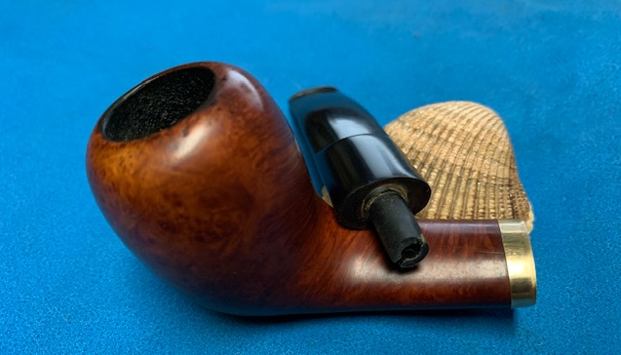
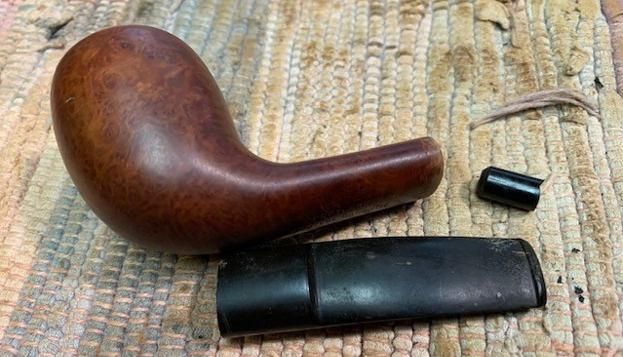 I went through my box of tenons and found a threaded one that was close to the diameter of the older broken tenon. It would need to be shaped but it would work.
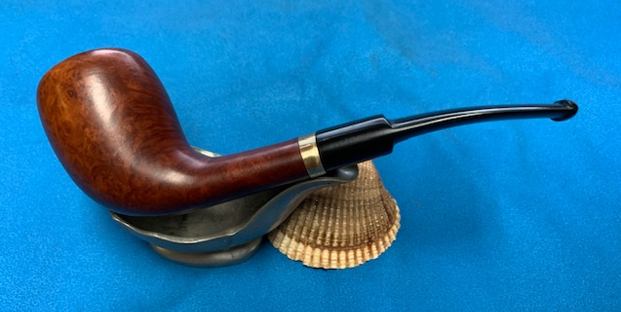
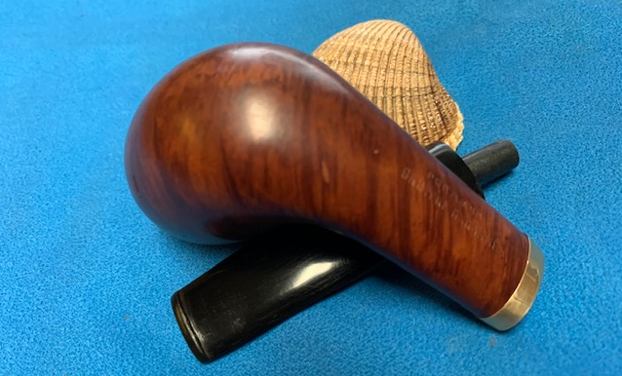
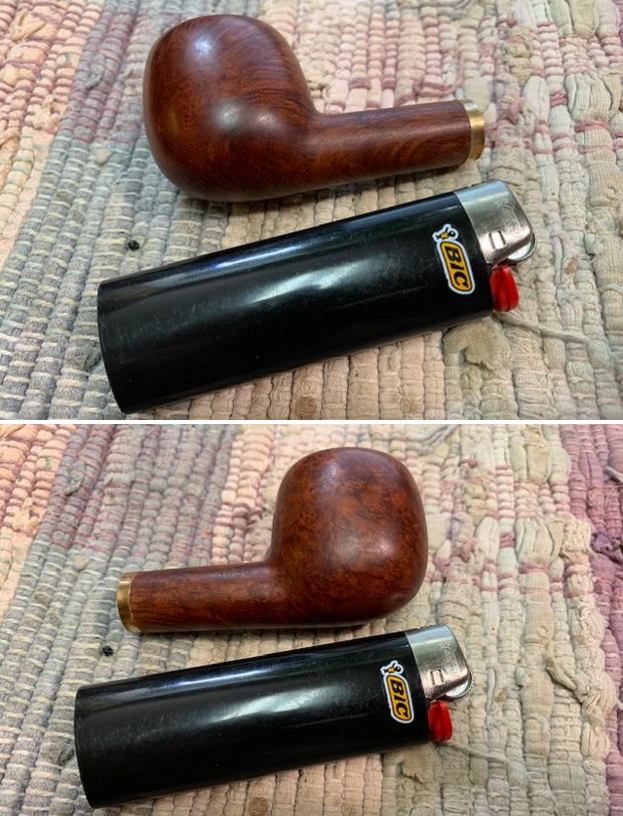
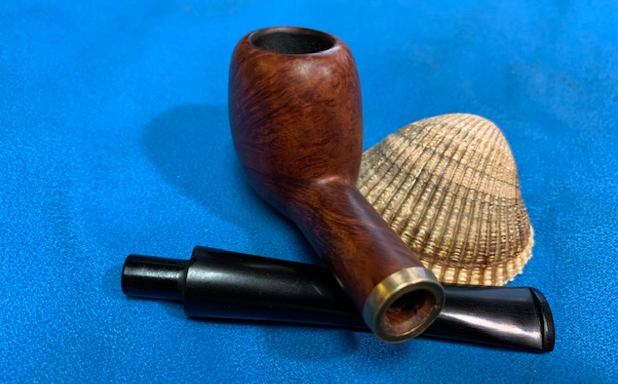
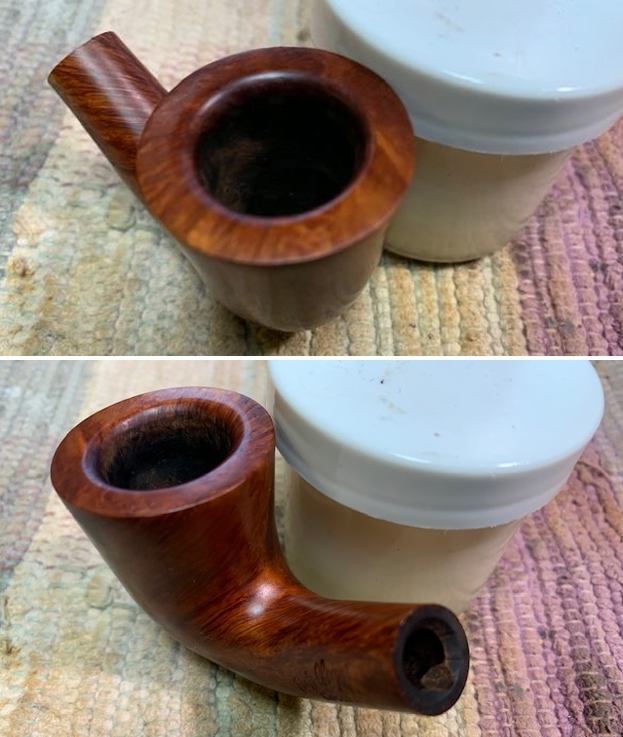
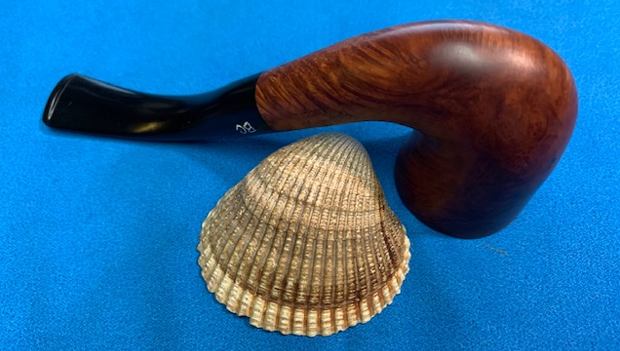
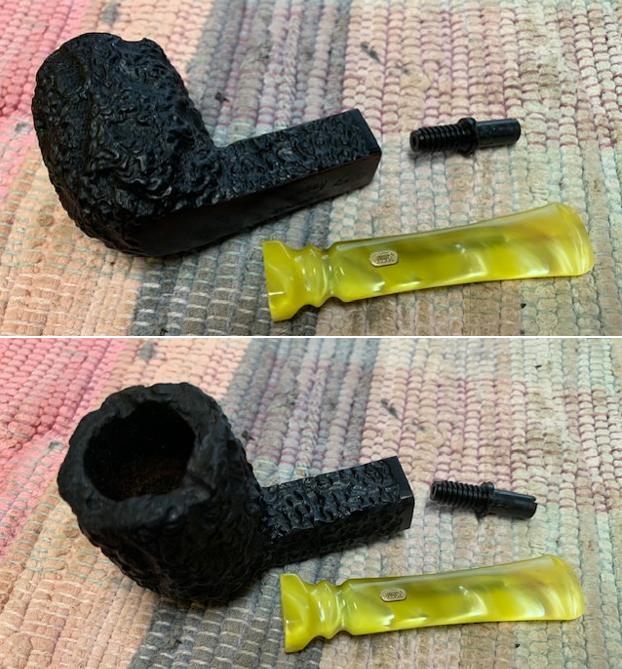
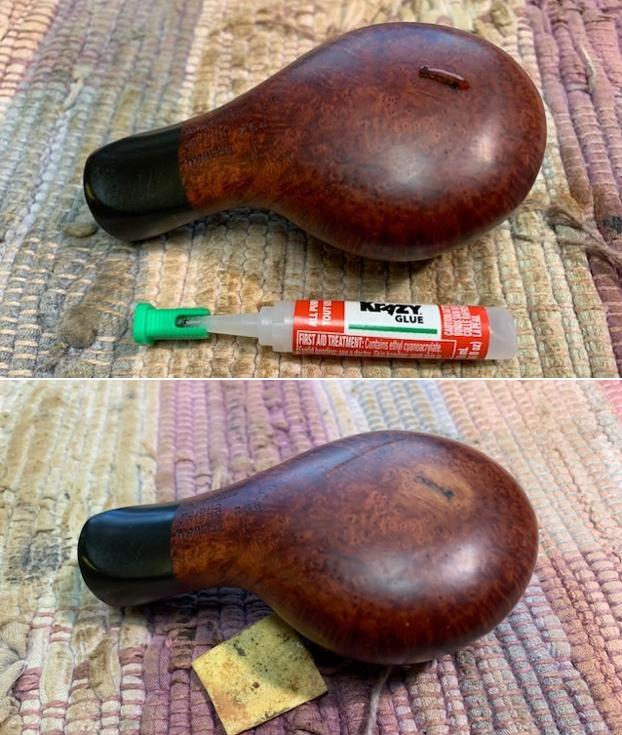
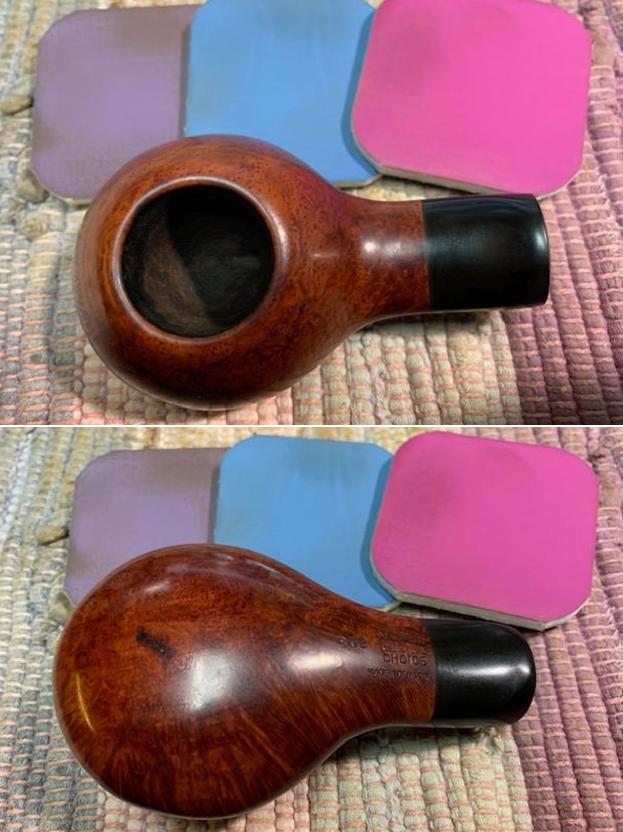
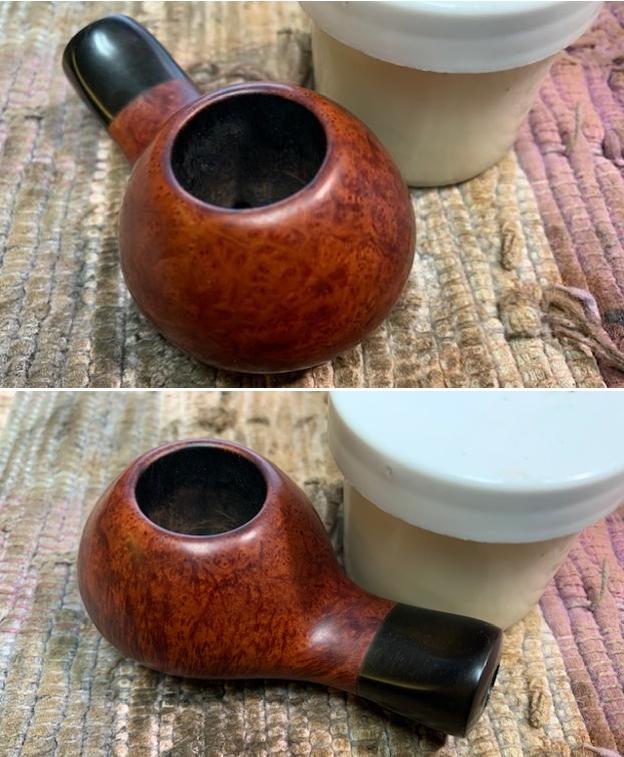
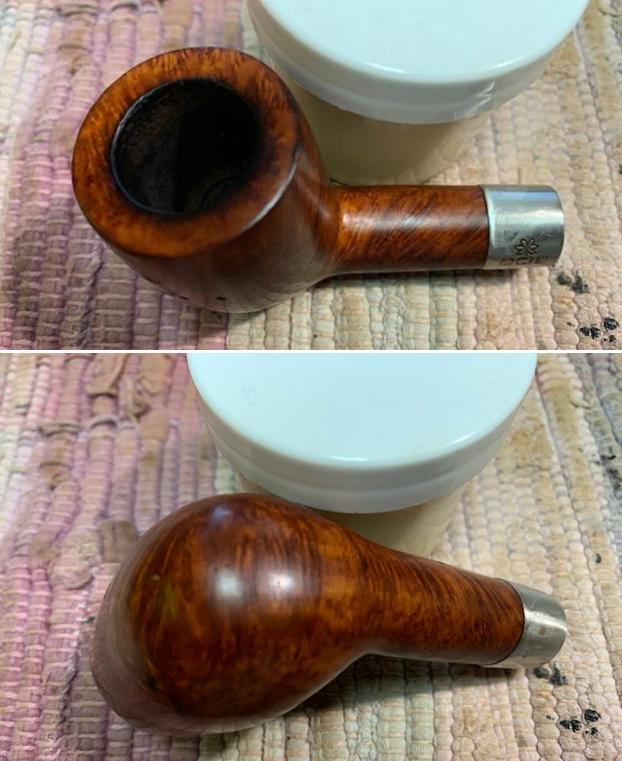
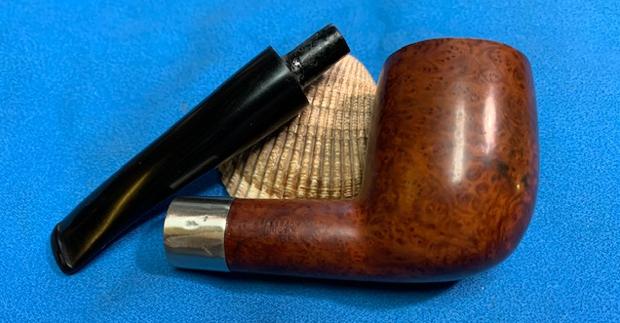
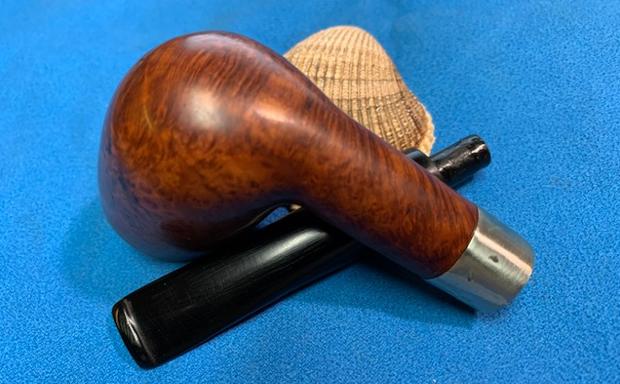
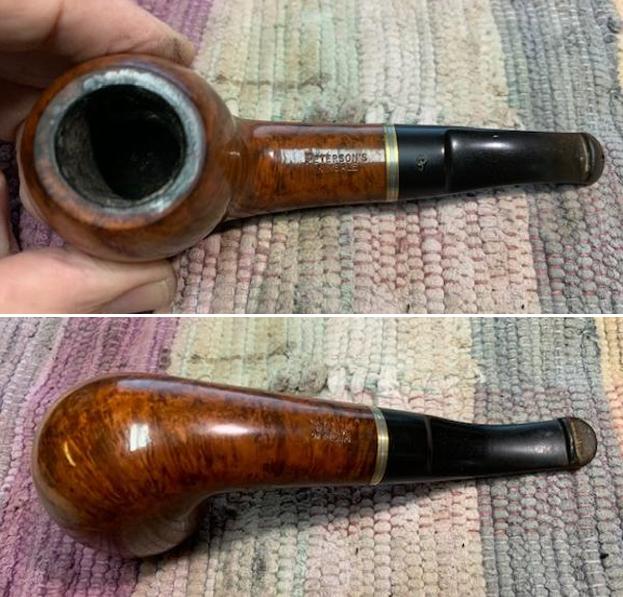
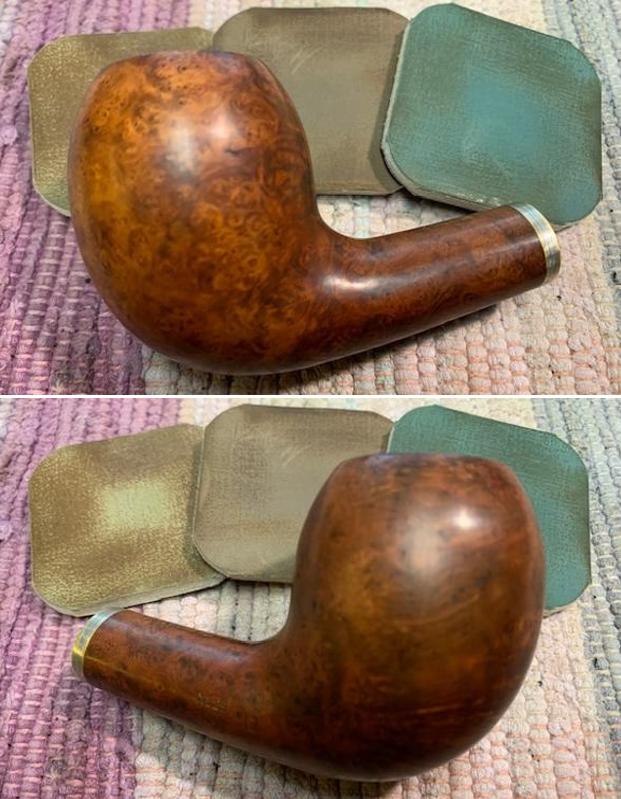
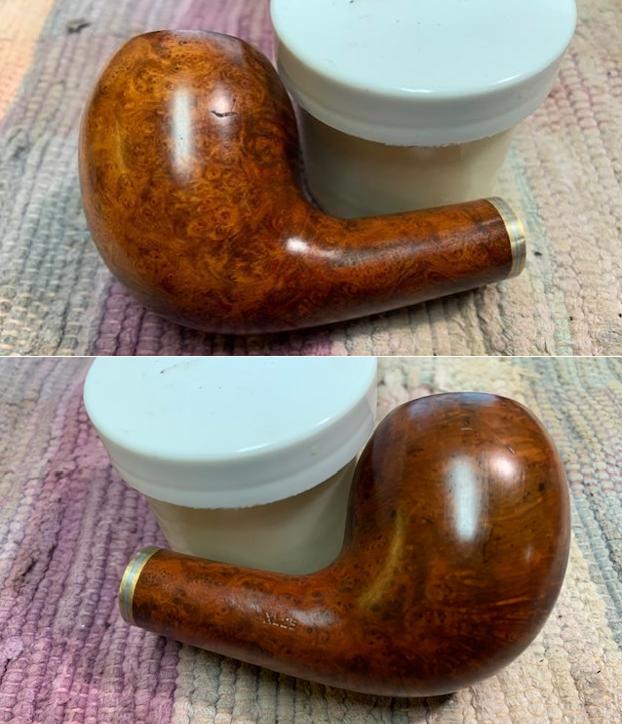
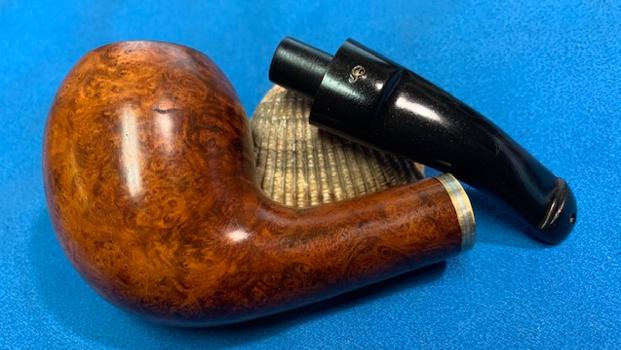
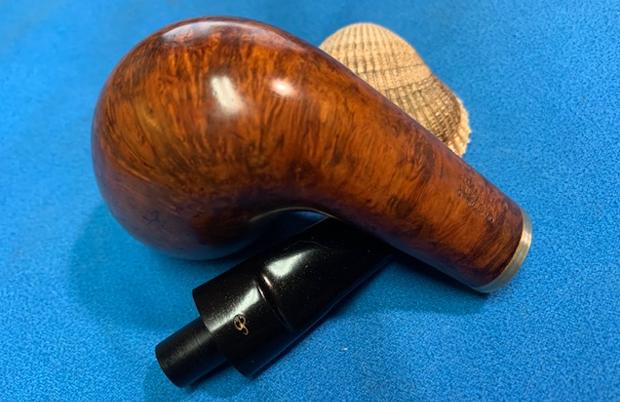
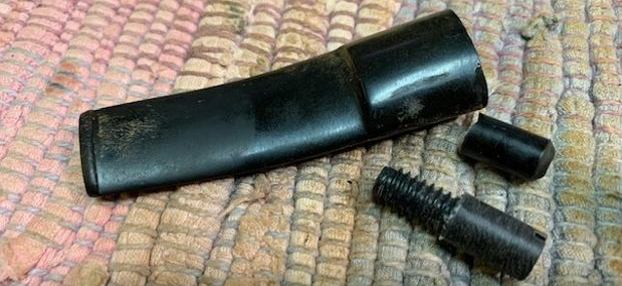 Before working on the stem I decided to put the band on the shank and repair the crack and protect it from going further. They are very fine cracks and I decided not to drill it as the hole would be bigger than the cracks. A tight fitting band would pull it together. I reduced the depth of the band with a topping board to make it thin and give a daintier look than the big clunky band. It is a thin brass band and it is pressure fit in place on the shank. I heated the band with a lighter and pressed it onto the shank. I like the look of the banded shank in the photos below.
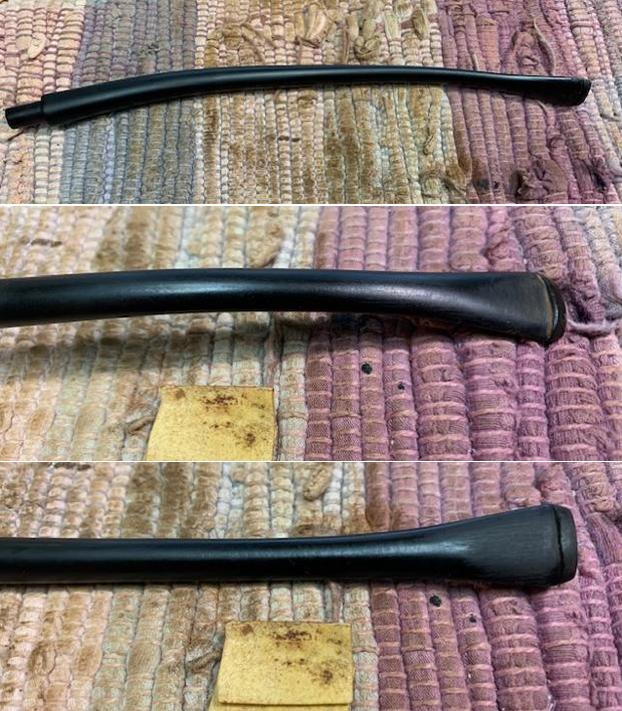
 With the band fitted it was time to work on the tenon and the stem. I used my Dremel and sanding drum to make the tenon smaller in diameter to match the shank. I worked on it until the fit in the shank was snug but not tight.
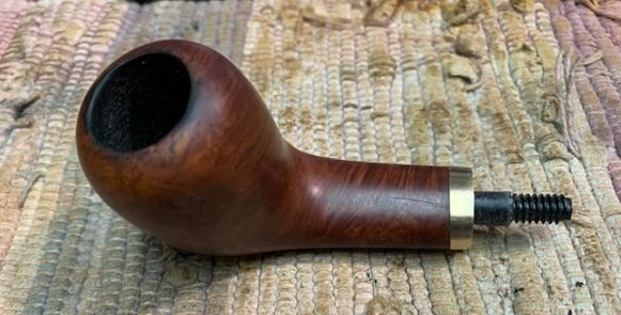 With that finished it was time to drill out the stem. I used the Dremel and sanding drum to flatten out the broken tenon end on the face of the stem. I started drilling with a bit slightly larger than the airway and finished with a bit that would allow the threaded tenon to fit the stem.
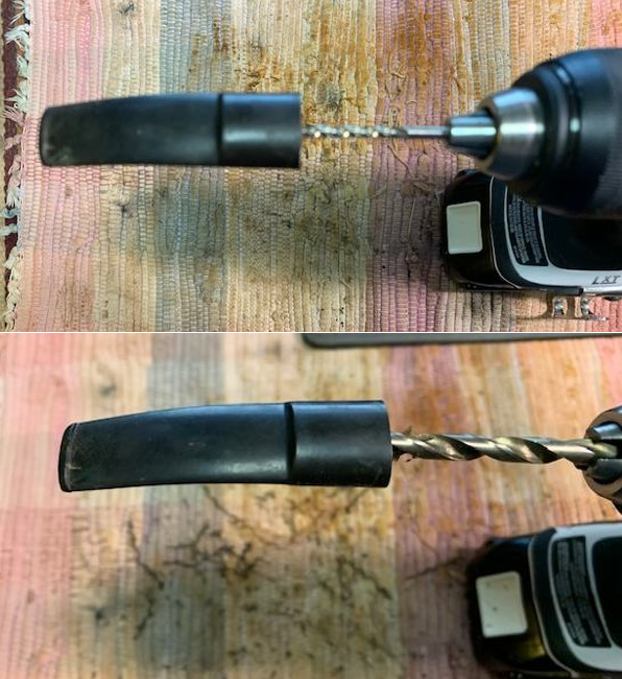 I do not tap the drilled hole in the stem. Rather I flatten out the threads slightly as they provided the grip for the glue when I insert the tenon in the stem. I coated the threaded tenon end with black superglue which dries more slowly than the regular glue and allows me to make adjustments in the fit. I checked the fit in the shank and was pleased with it. I set the stem aside so the glue could cure.
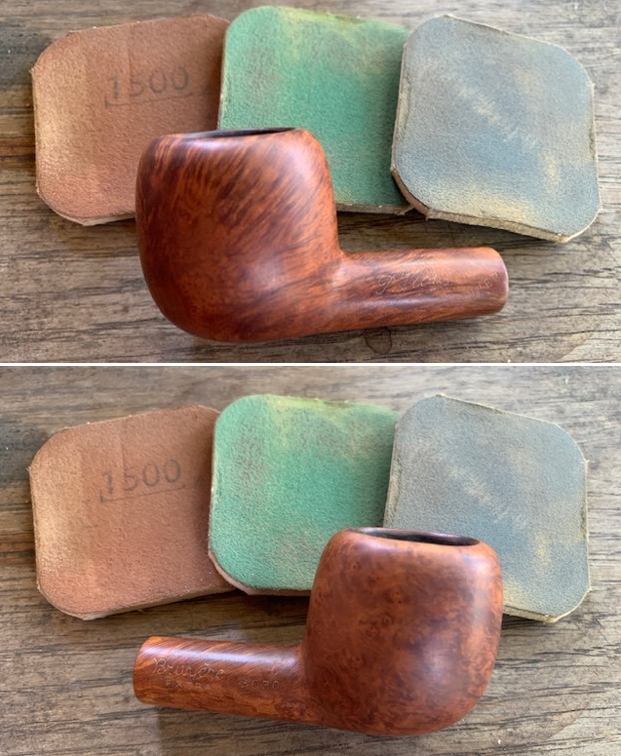
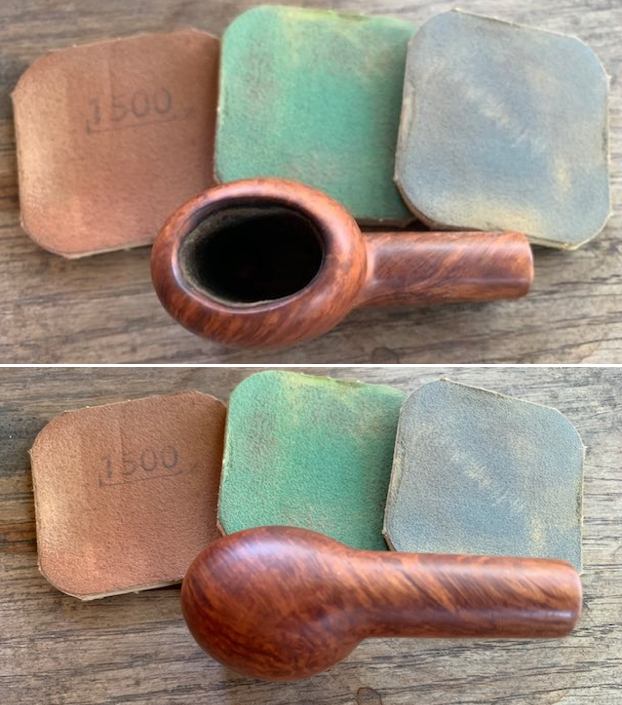
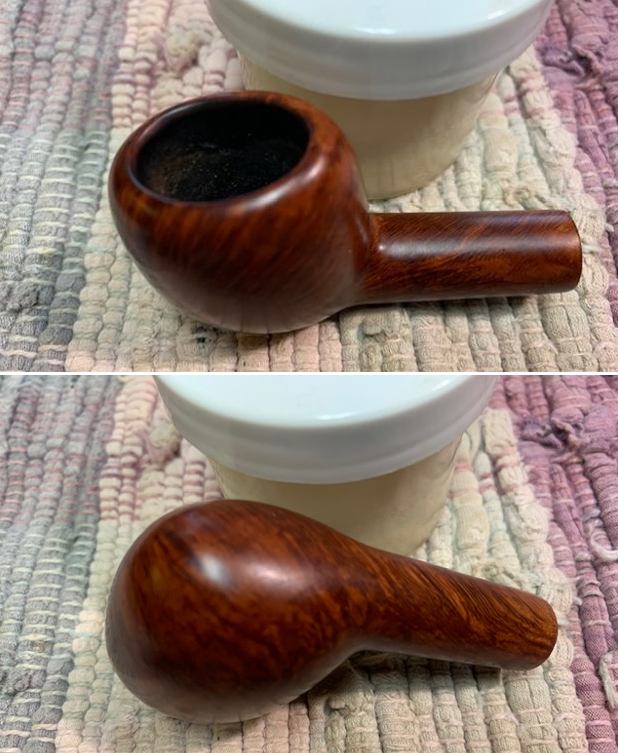
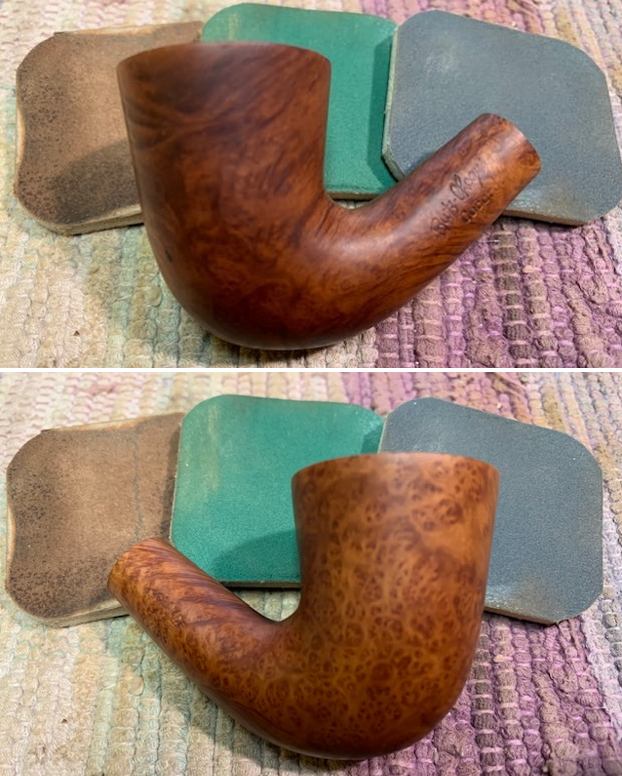
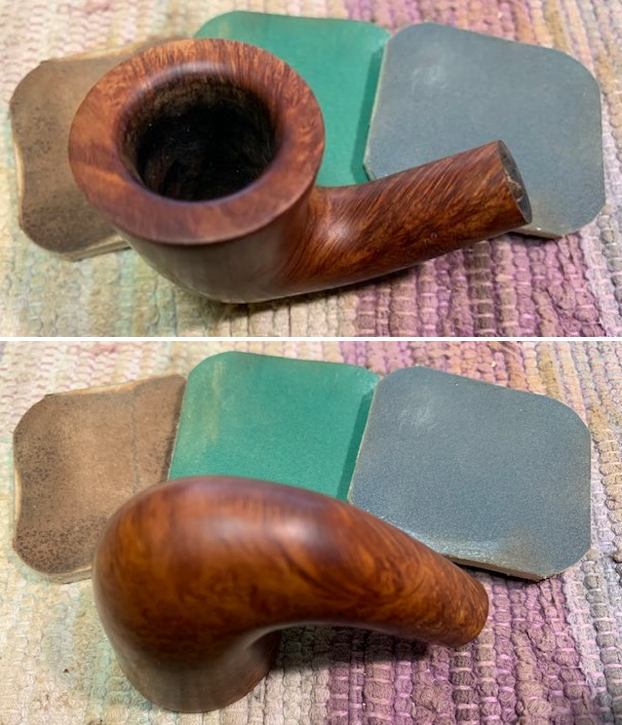
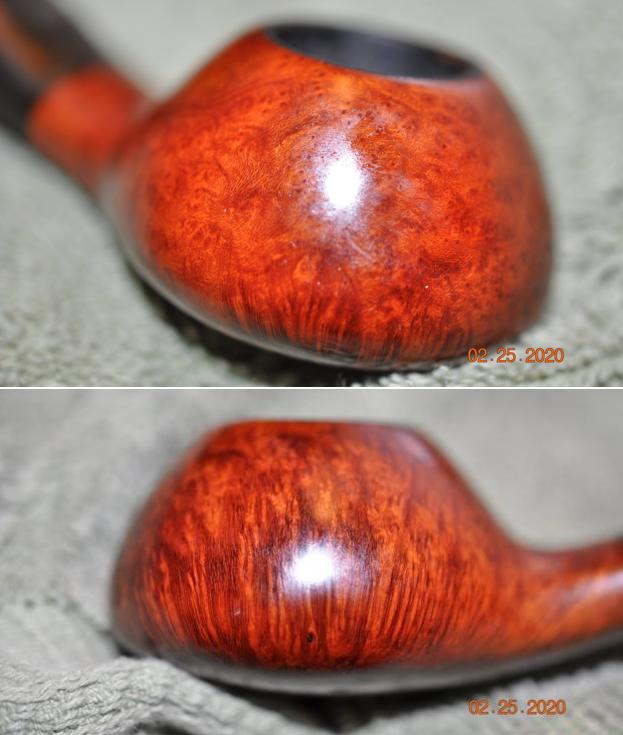
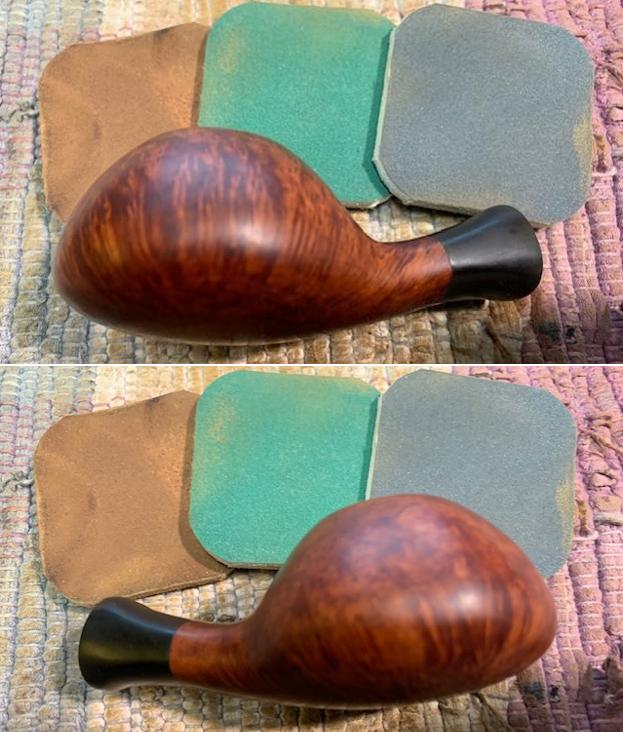
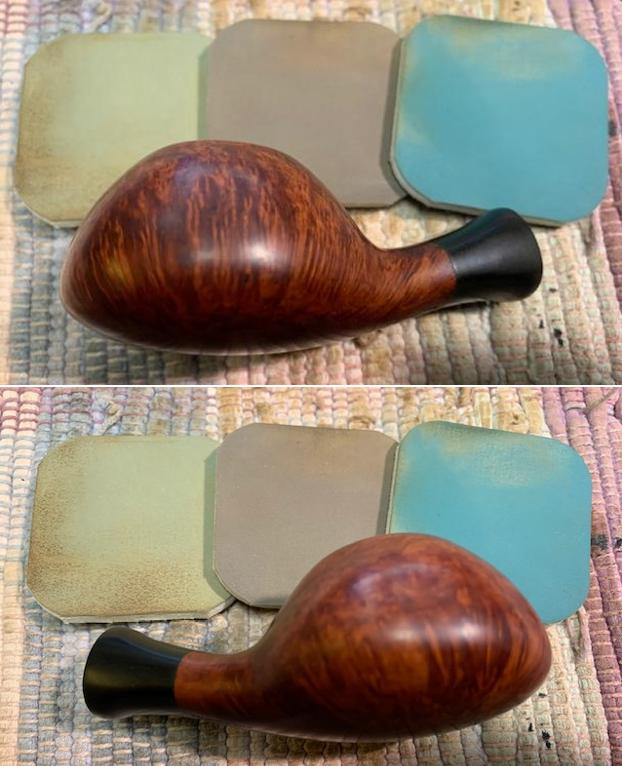
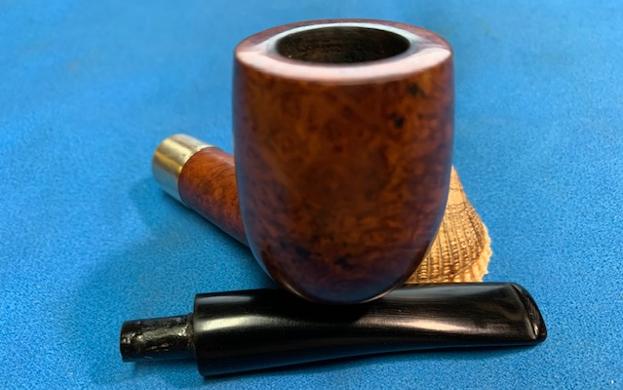
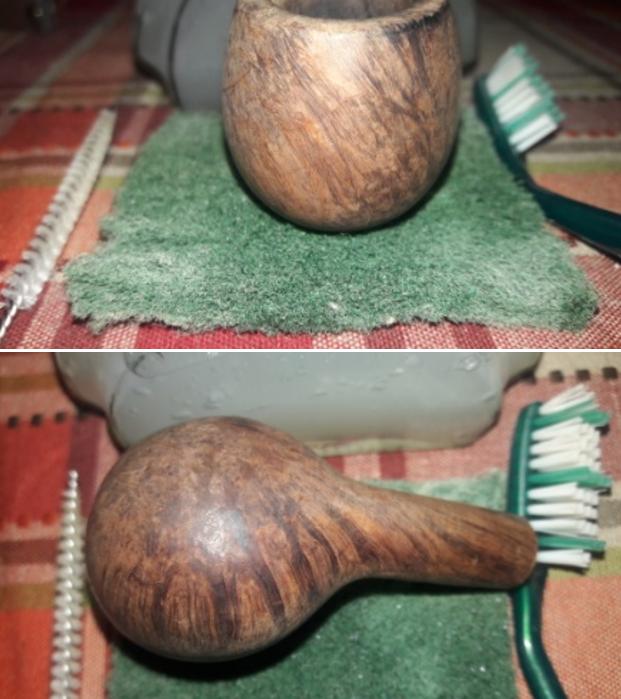
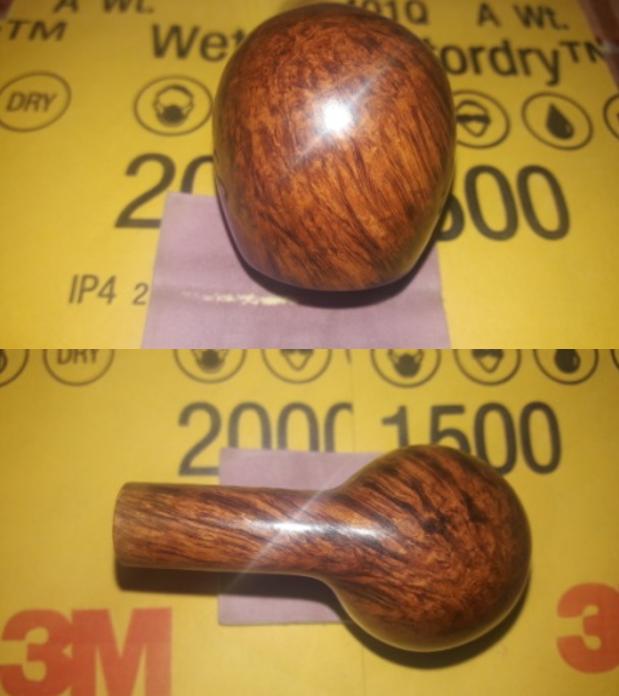
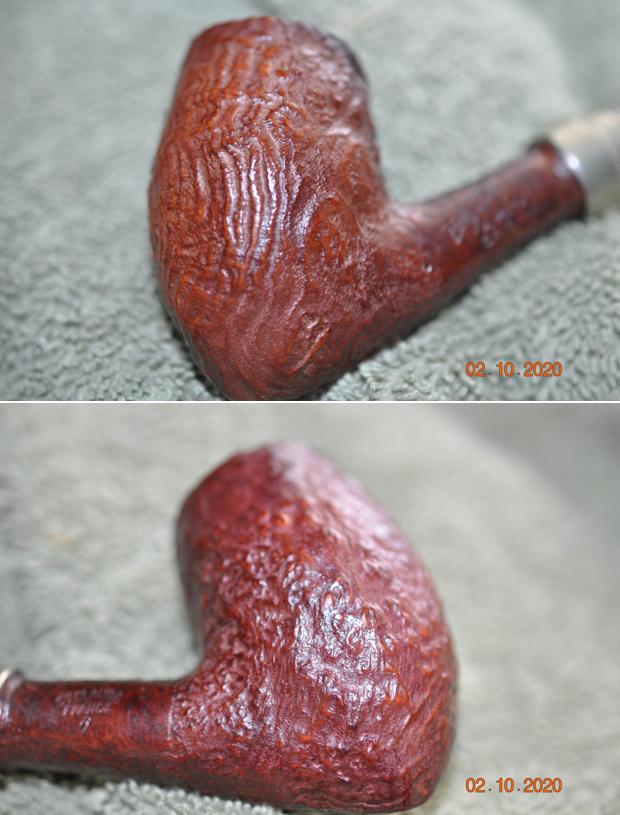
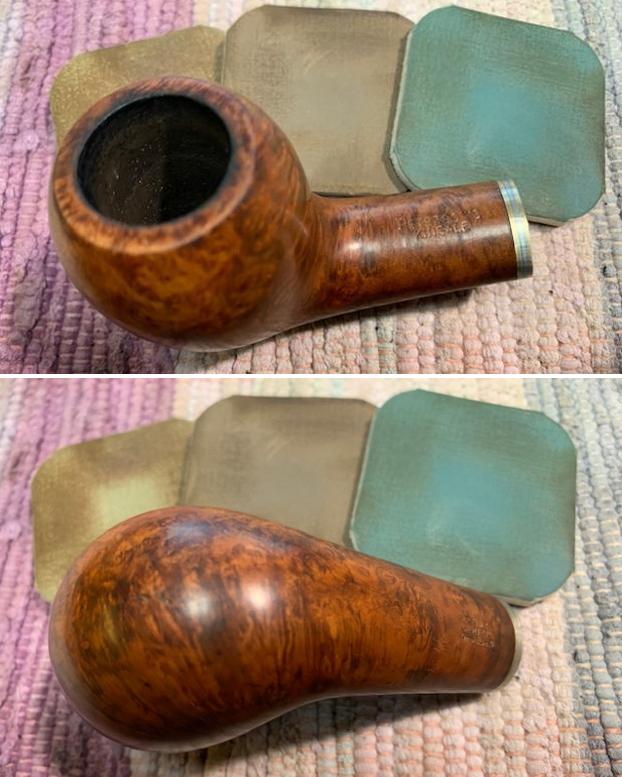
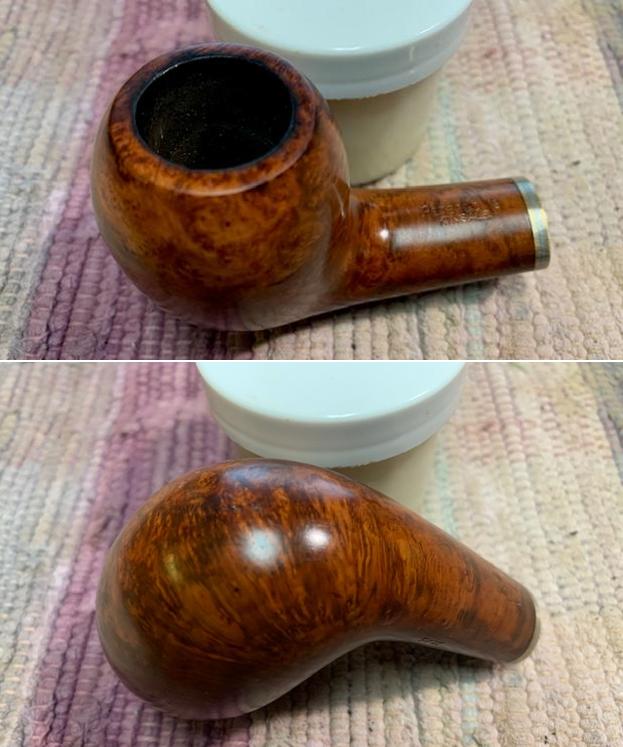
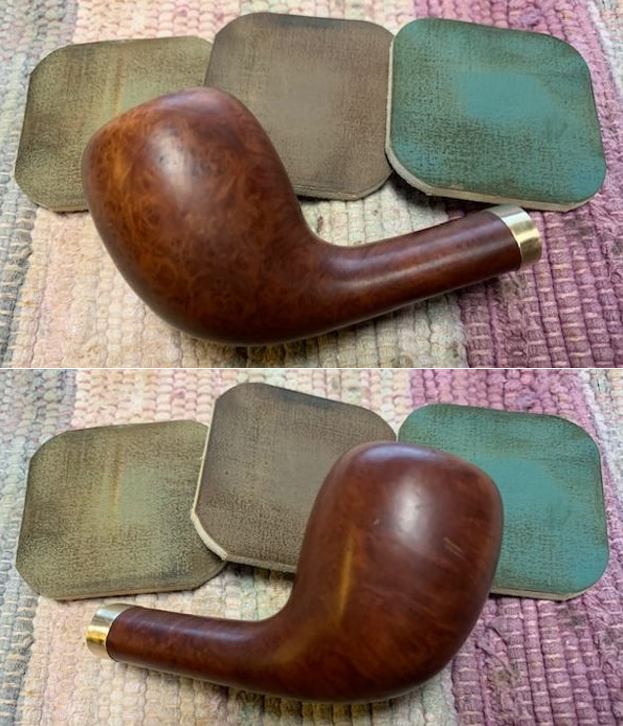
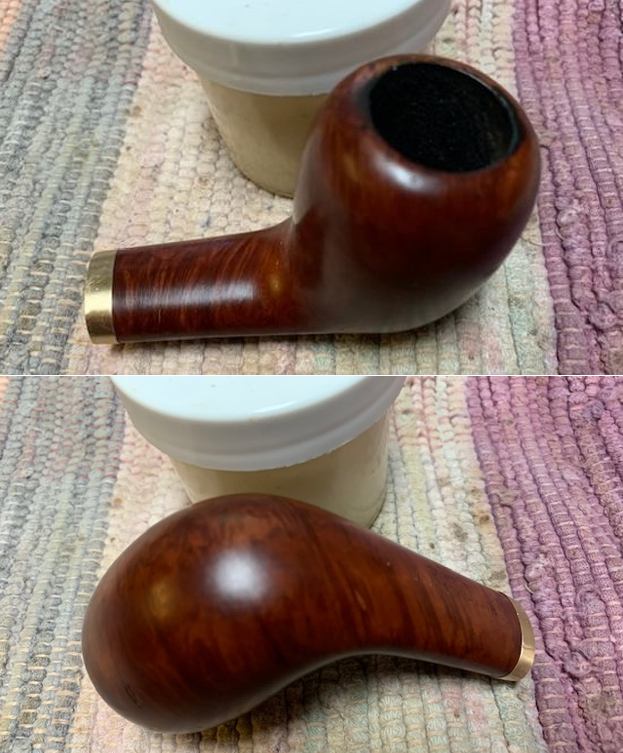
 I turned my attention to polishing the bowl. I polished it with micromesh sanding pads – dry sanding it with 1500-12000 grit pads. I wiped the briar down with a damp cloth after each sanding pad. The pipe really began to take on a shine as I worked through the pads.
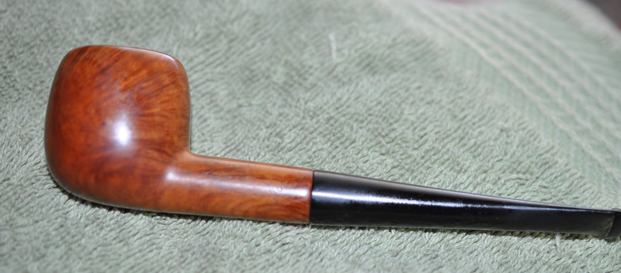
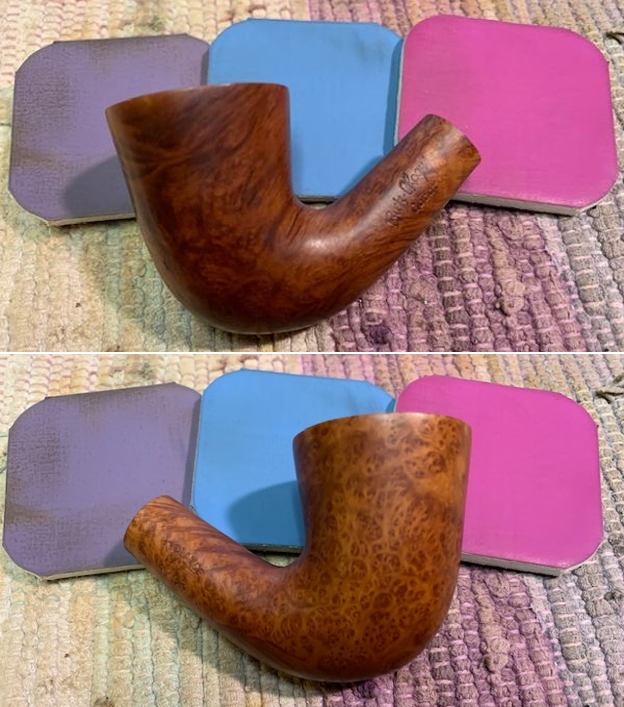
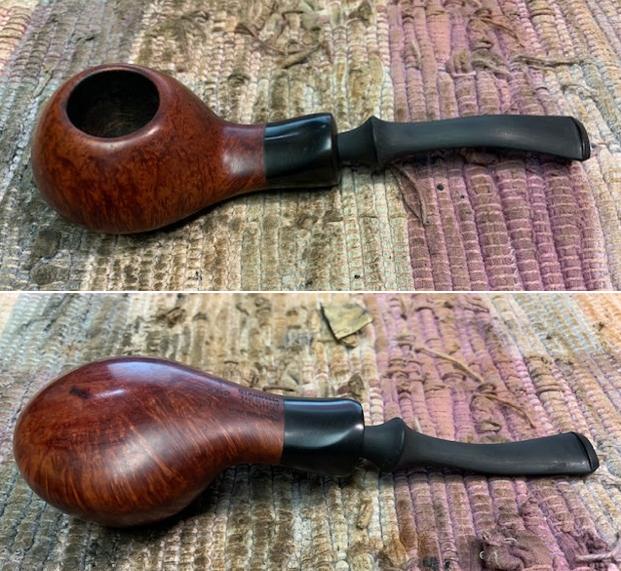
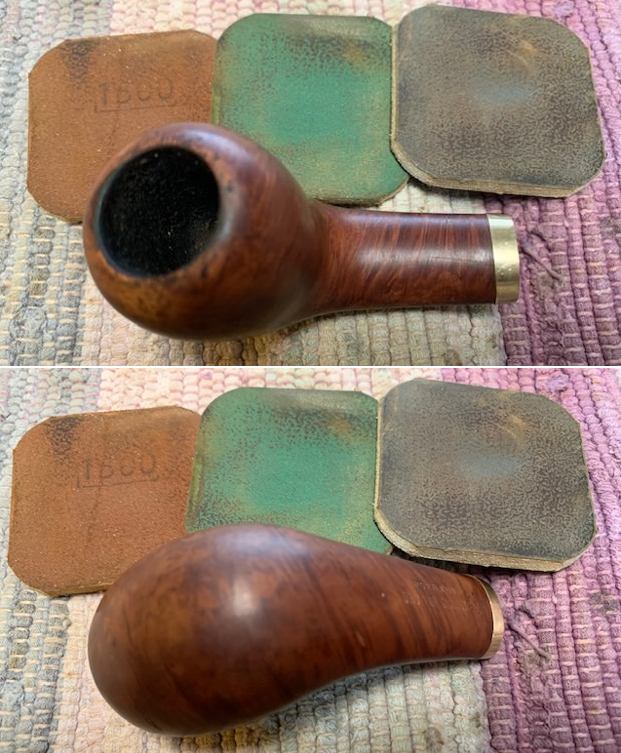
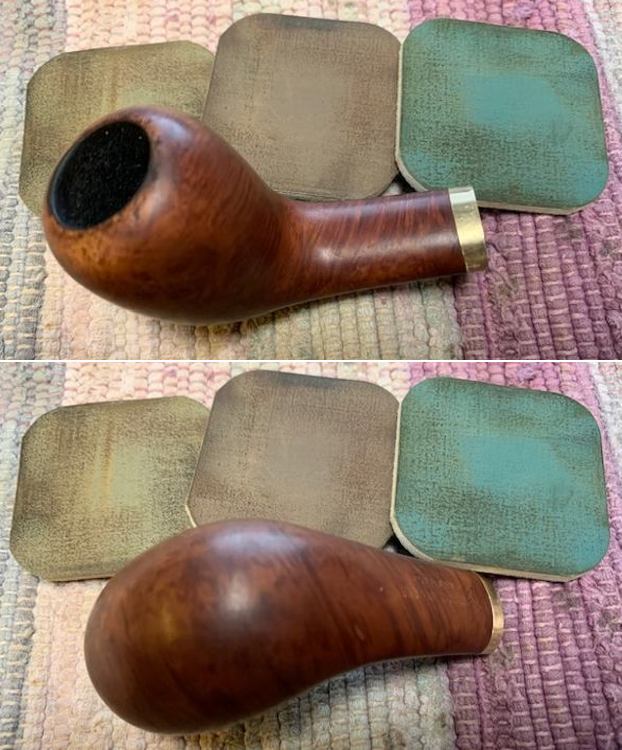
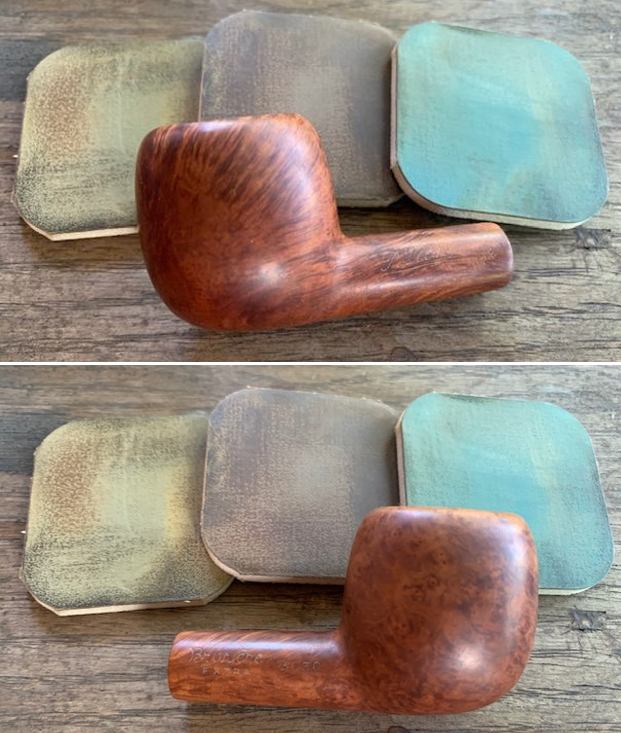
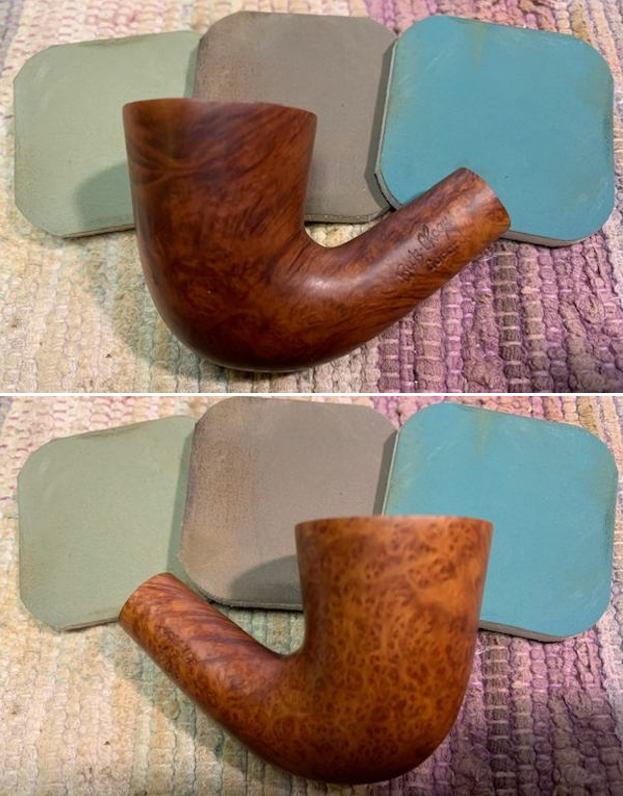
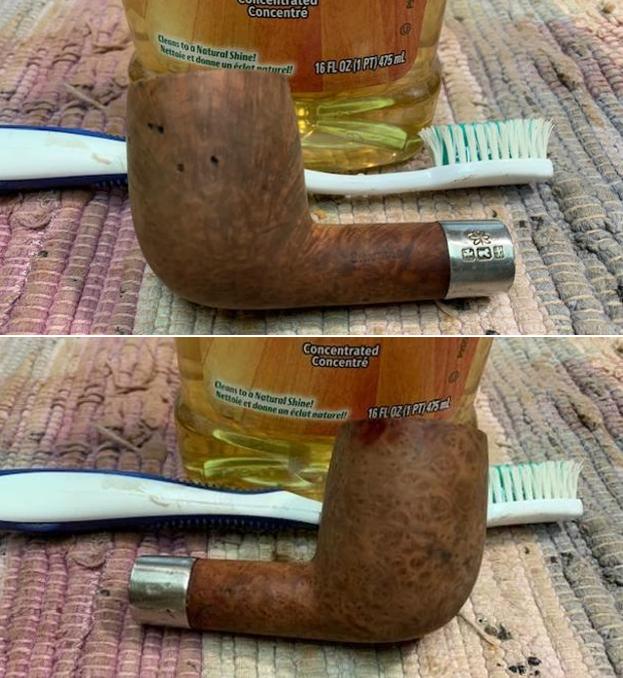
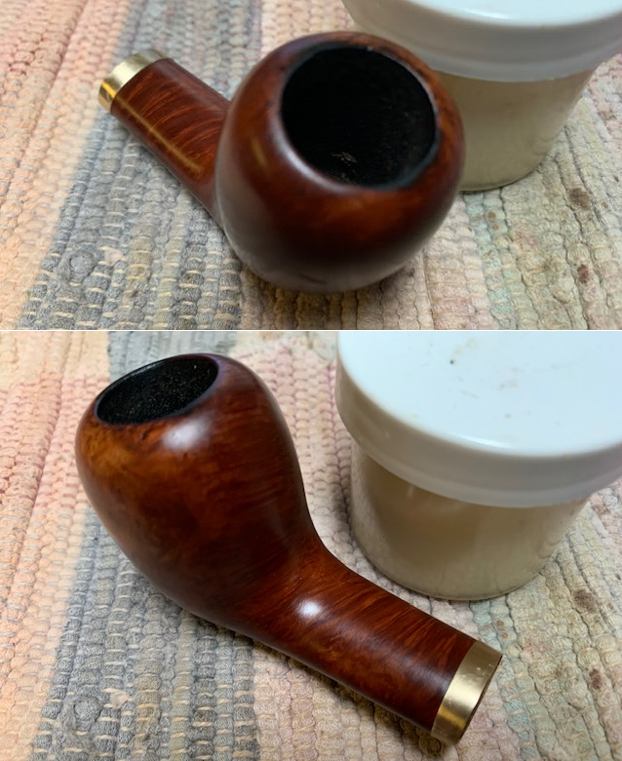
 I rubbed the briar down with some Before & After Restoration Balm. It works to protect, clean and enliven the briar. I rub it in with my finger tips and let it sit for 10 minutes. I buff it off with a cotton cloth to remove the excess and give the bowl a shine.
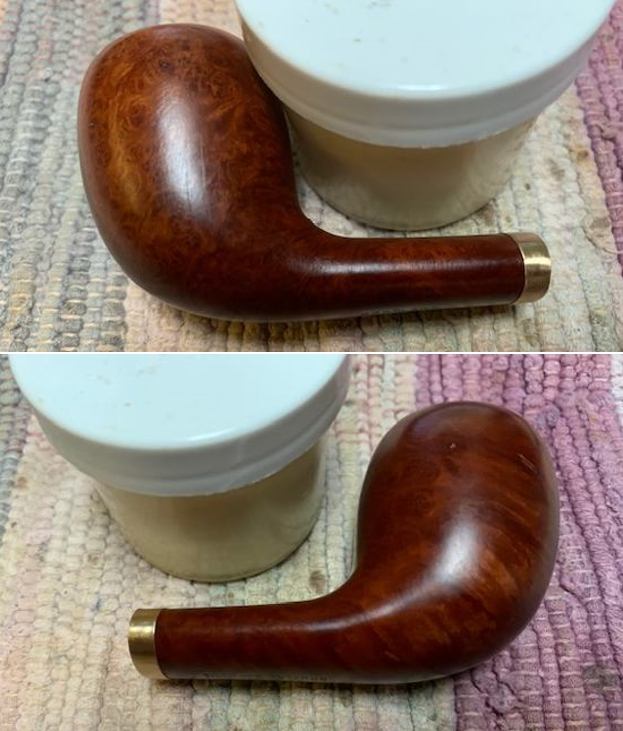
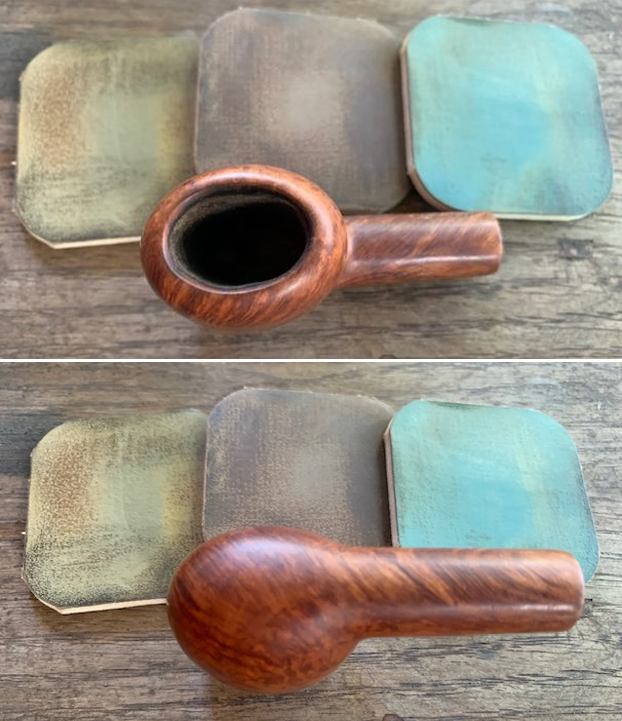
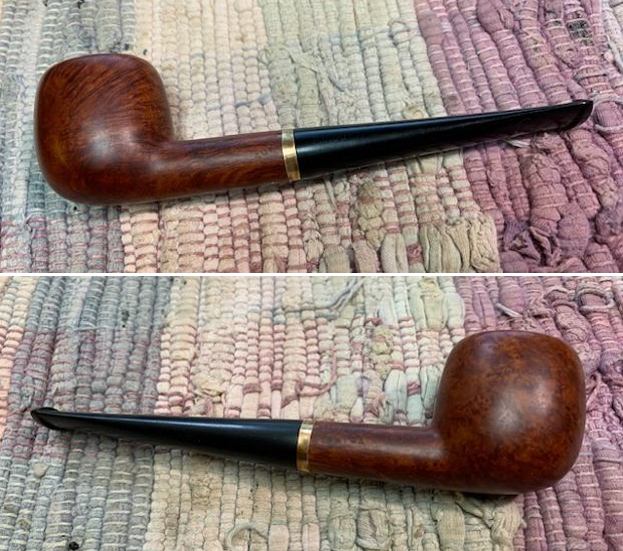
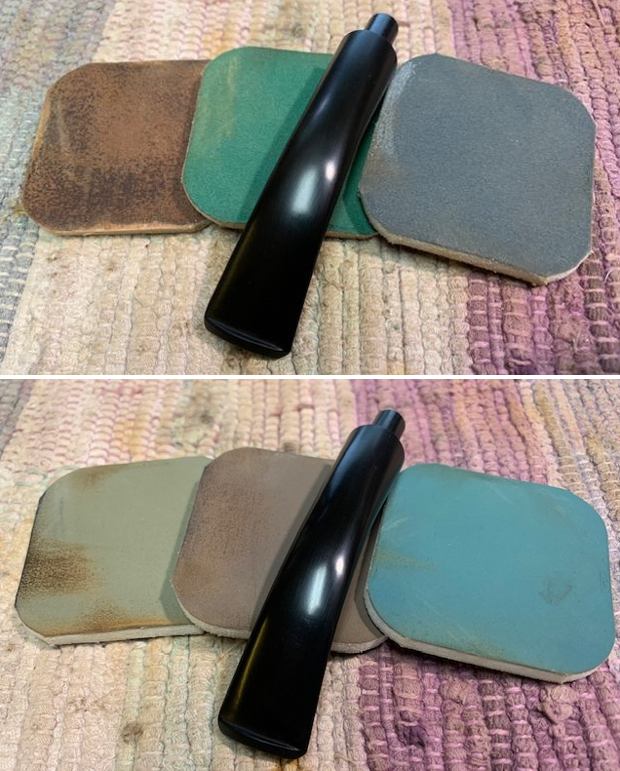
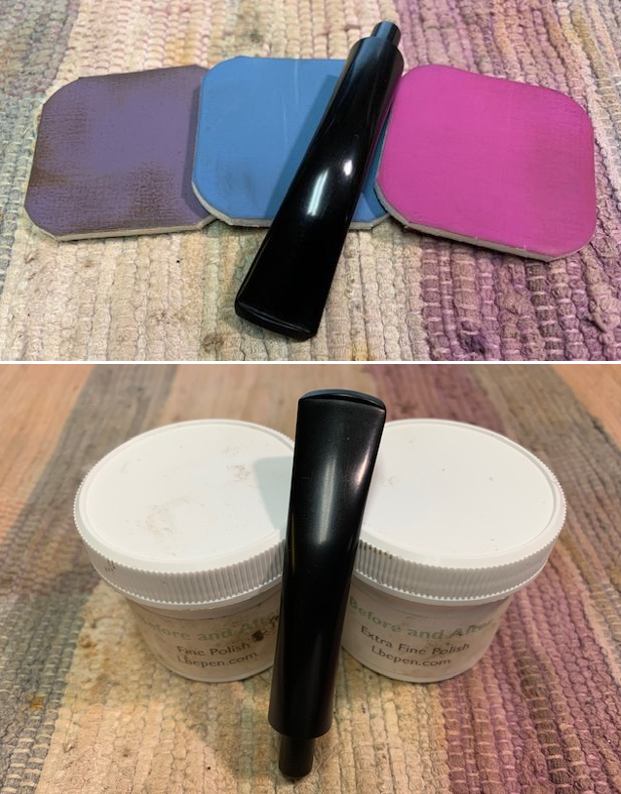
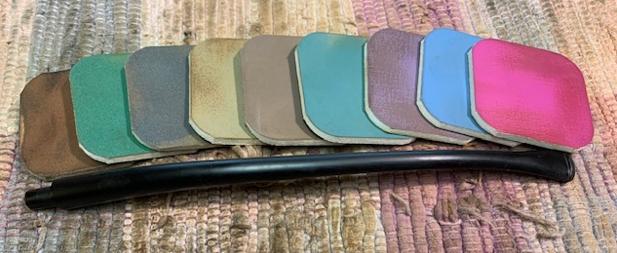
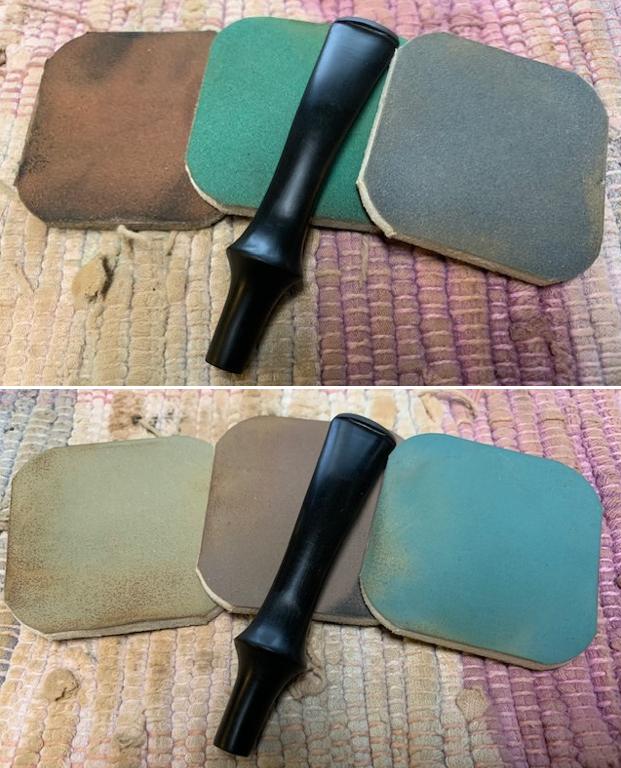
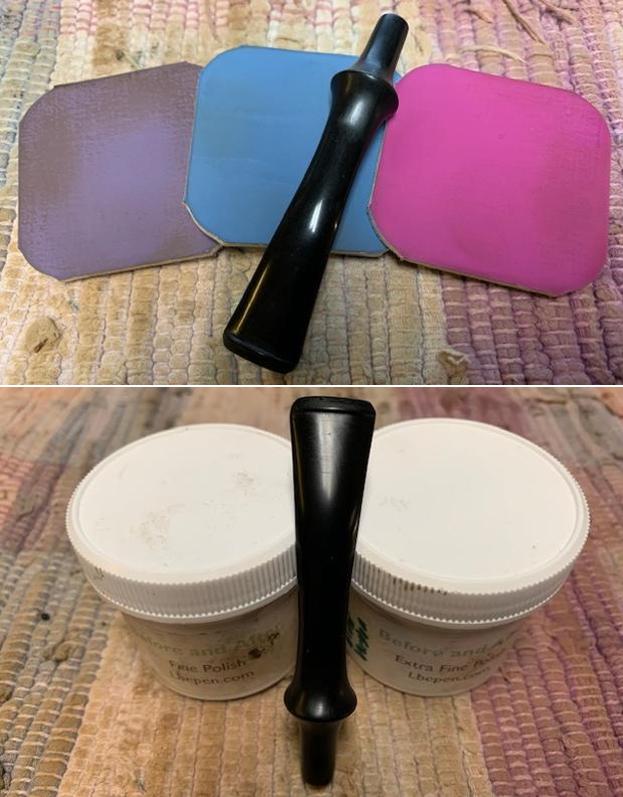
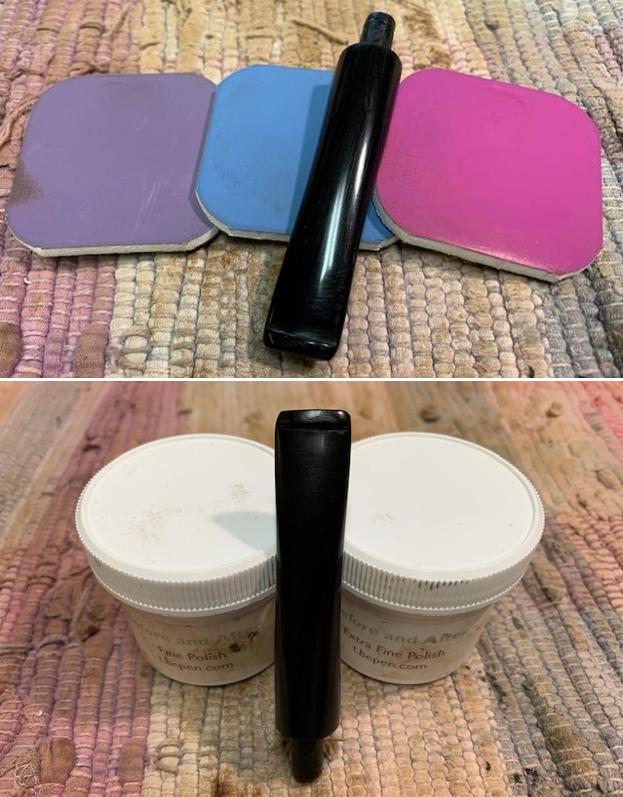
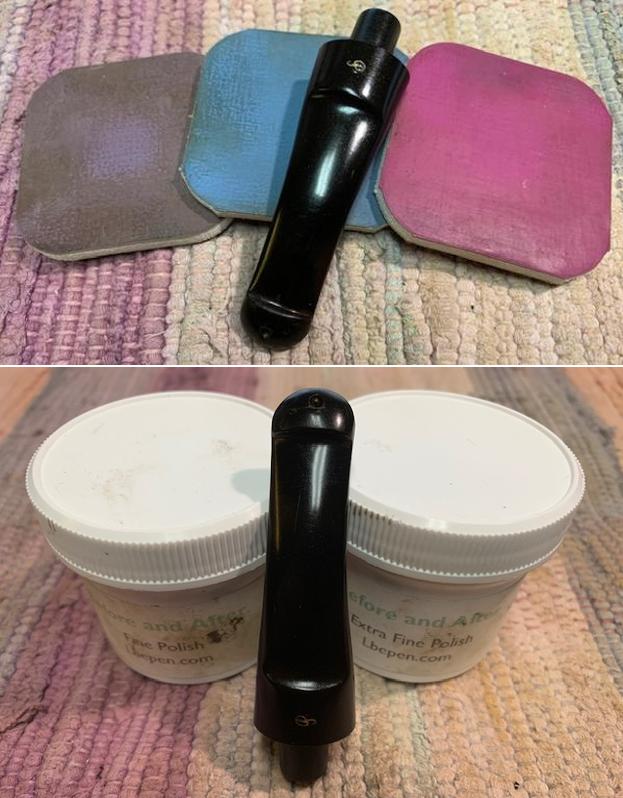
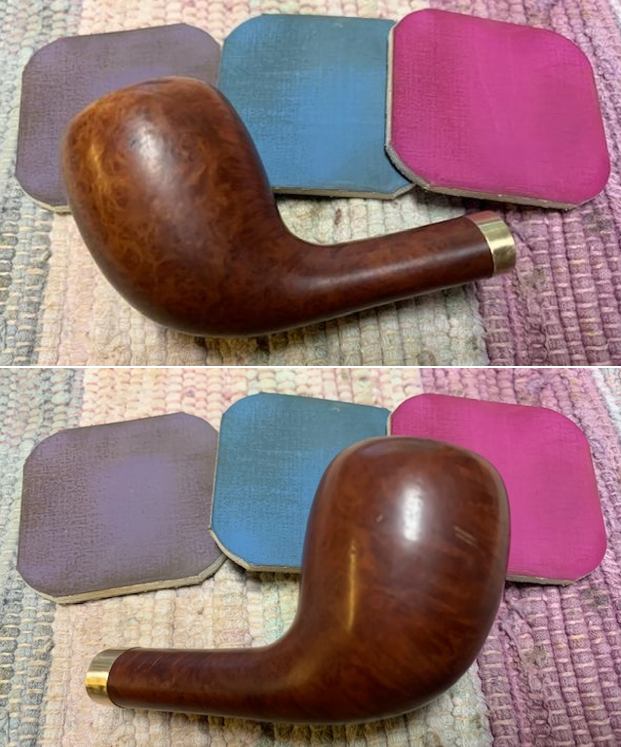
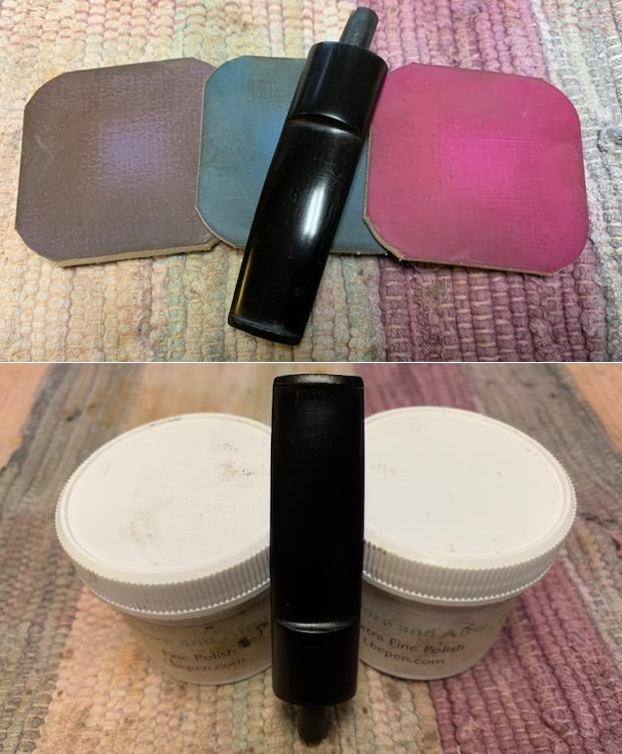
 I polished the stem and new tenon with micromesh sanding pads – 1500-12000 grit pads. I dry sanded with the pads and wiped the stem down with Obsidian Oil after each sanding pad. I finished the polishing with Before & After Pipe Stem Polish – both Fine and Extra Fine. I gave it a final rubdown with Obsidian Oil.
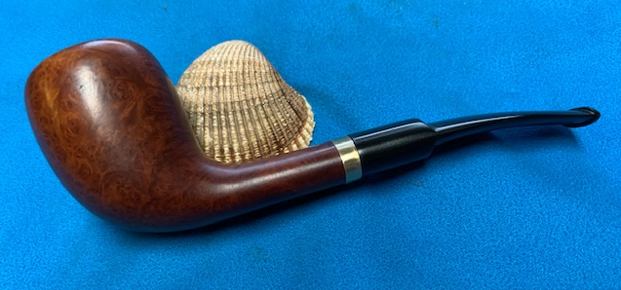
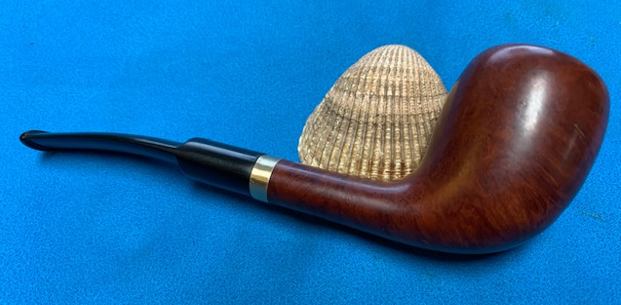
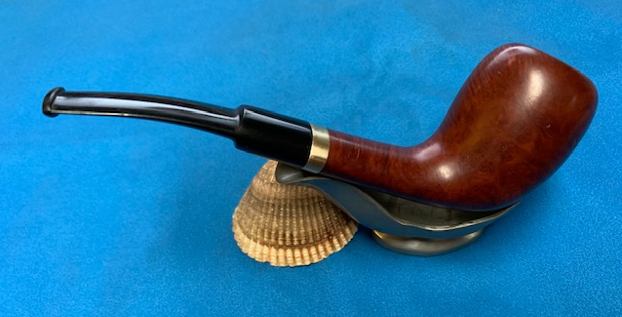
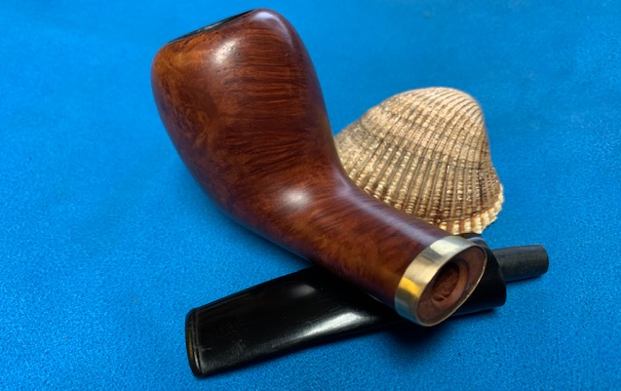
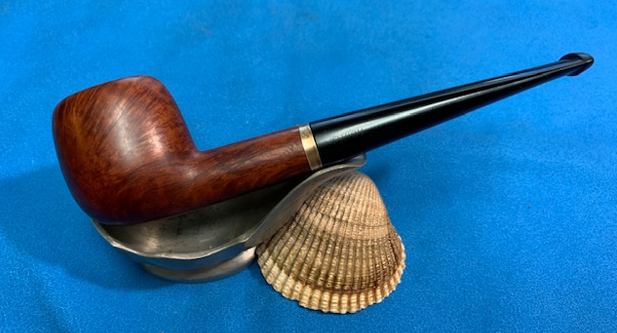
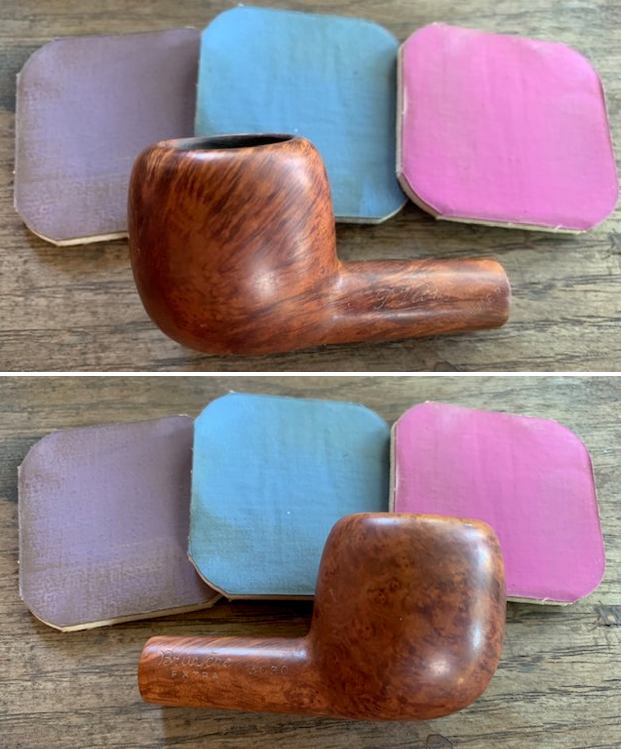
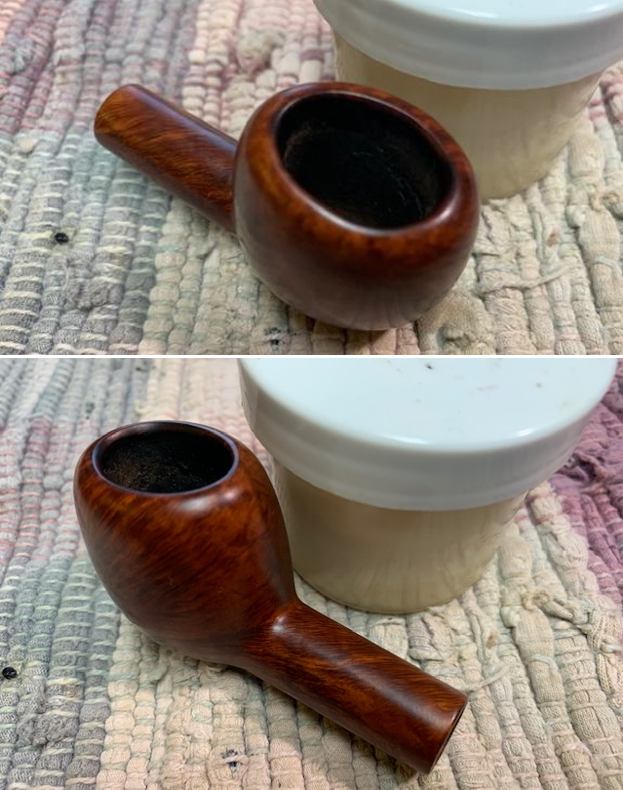
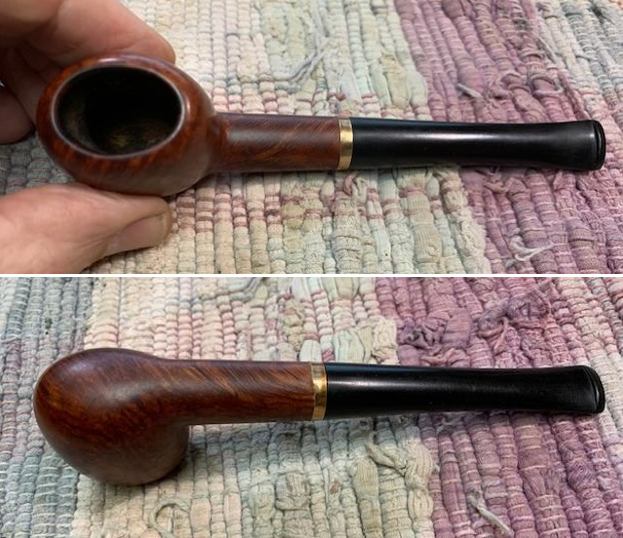
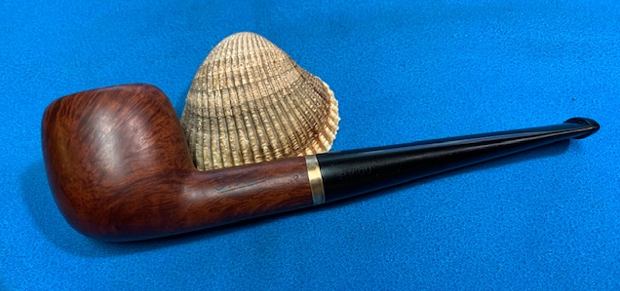
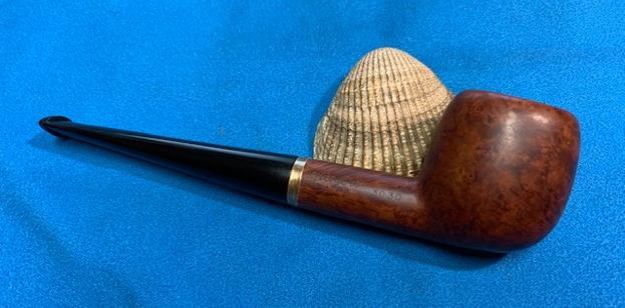
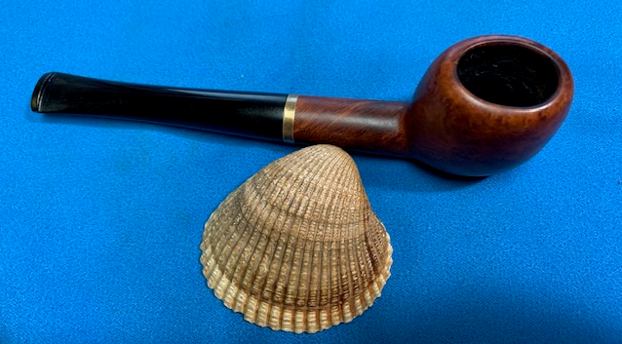
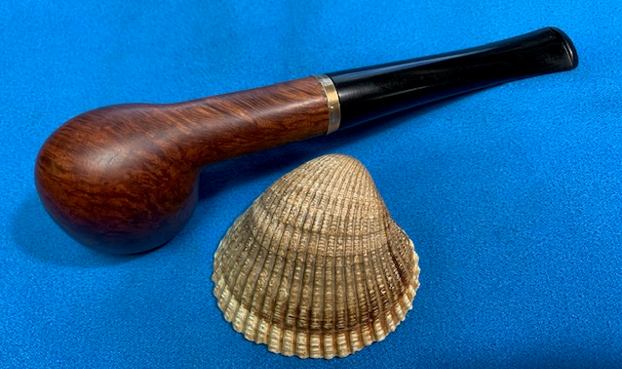
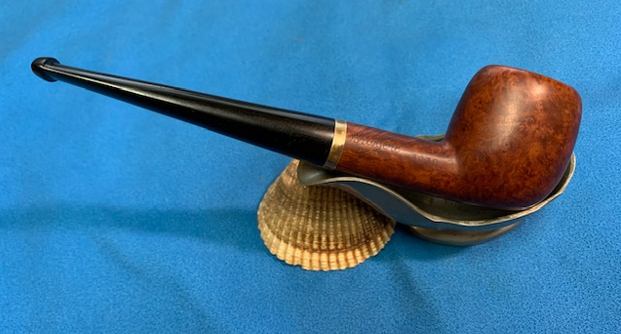
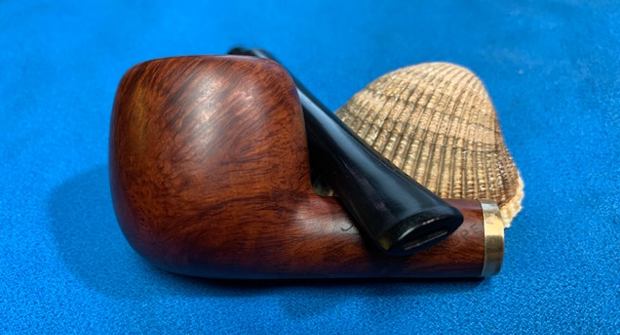
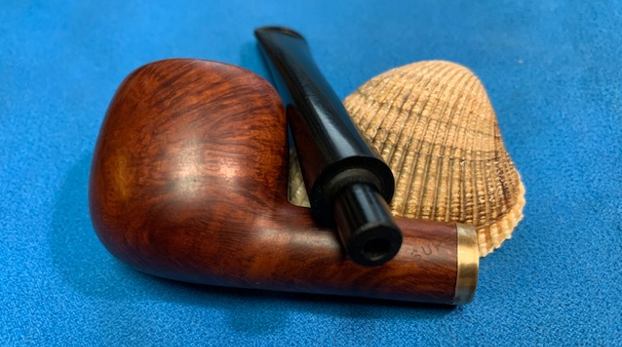
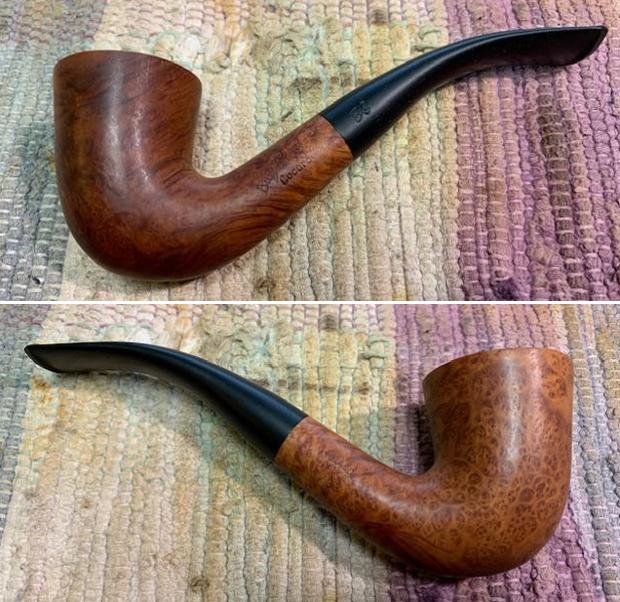
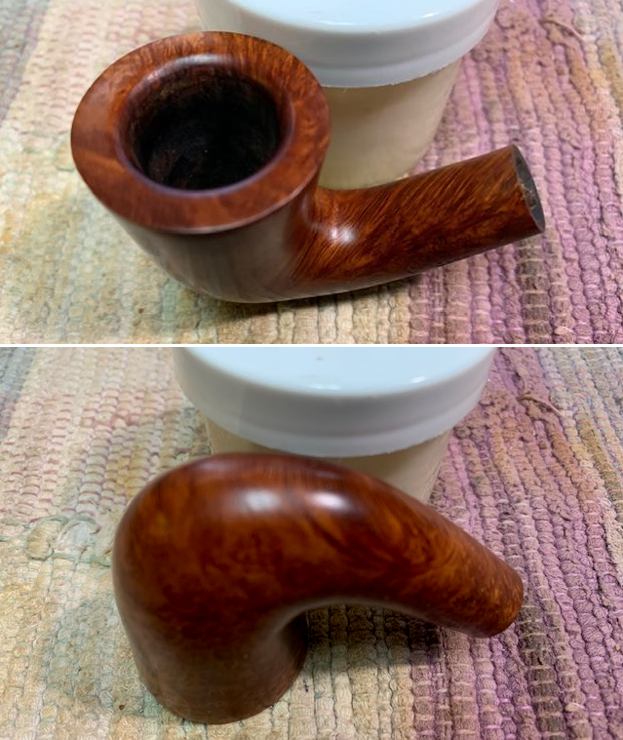
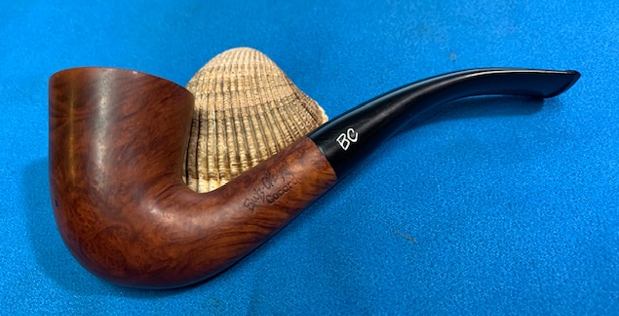
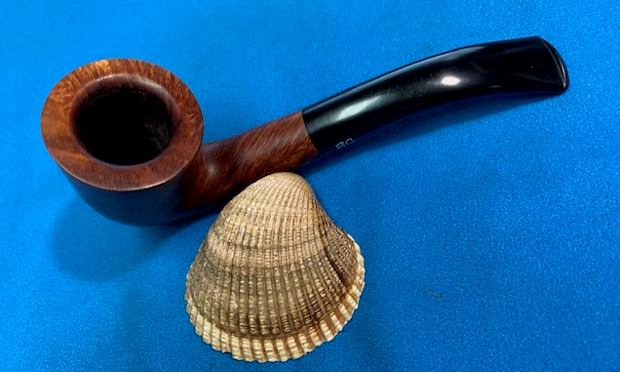
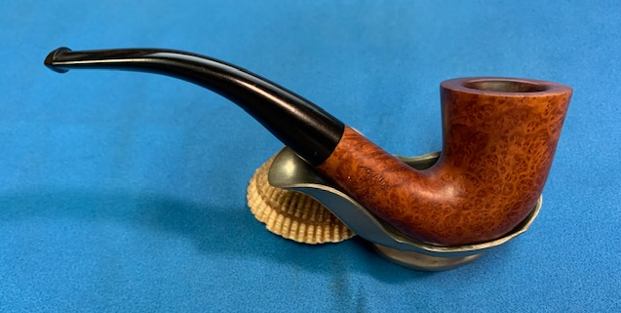
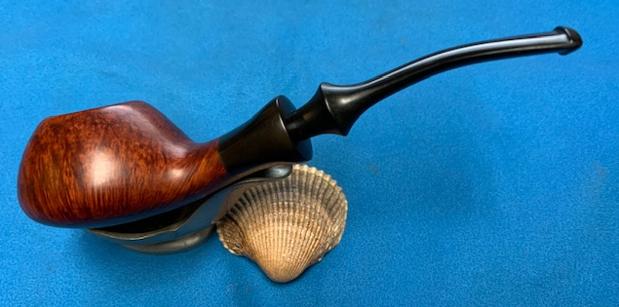
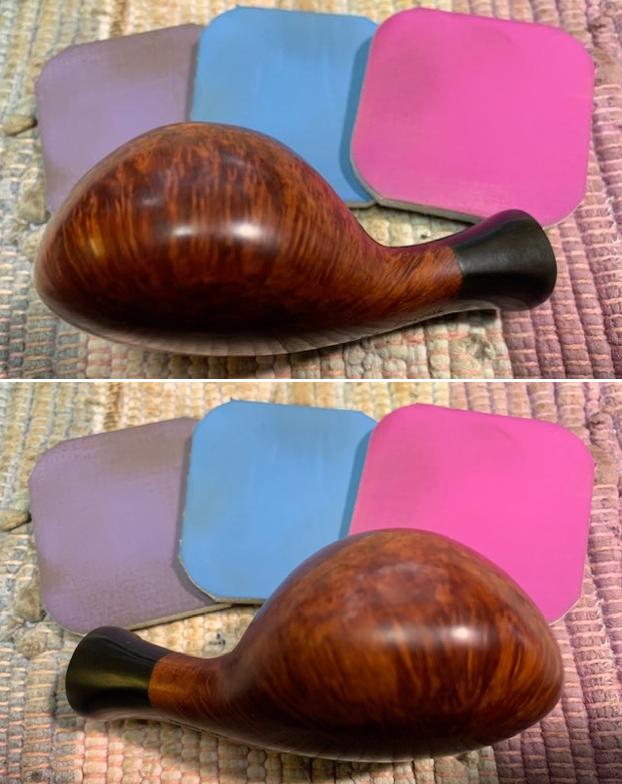
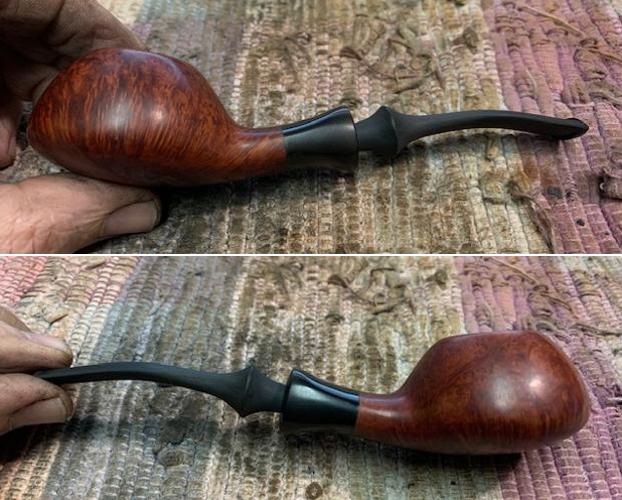
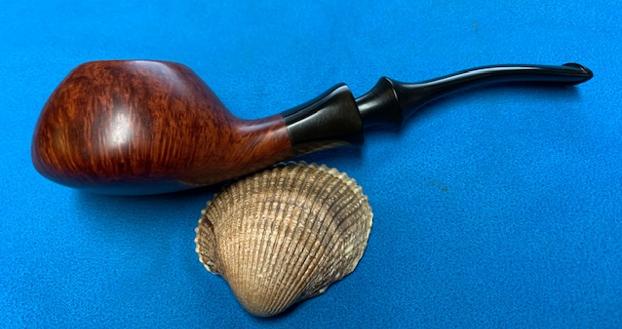
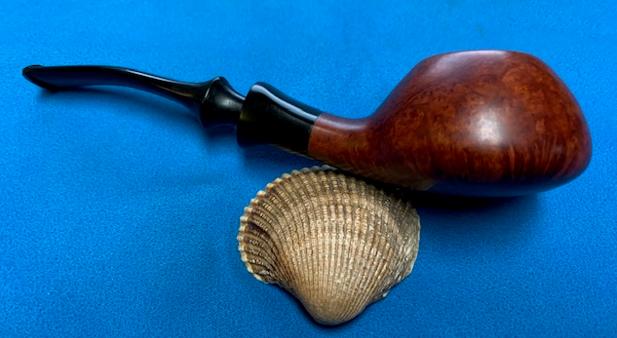
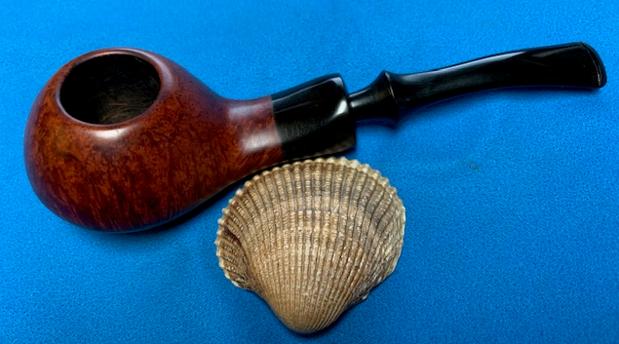
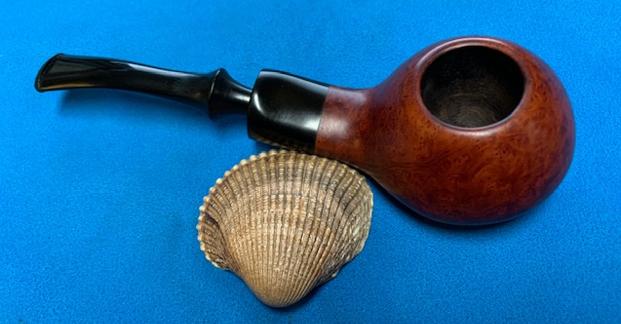
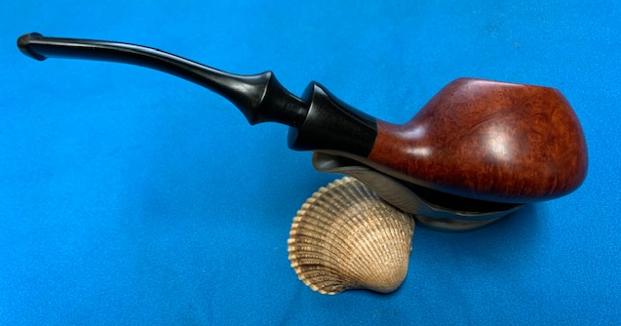
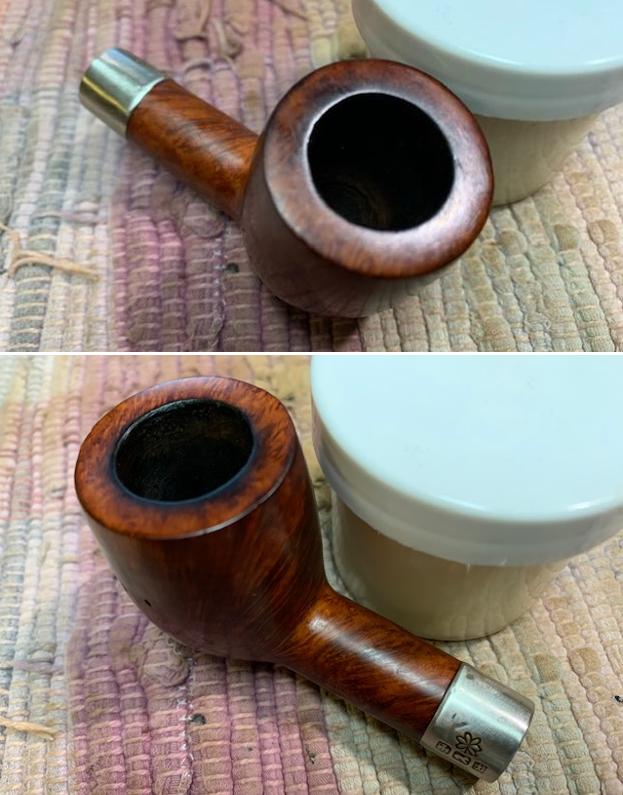
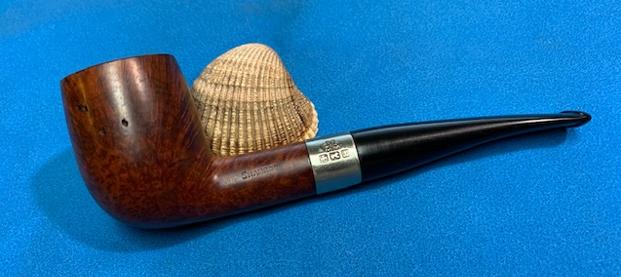
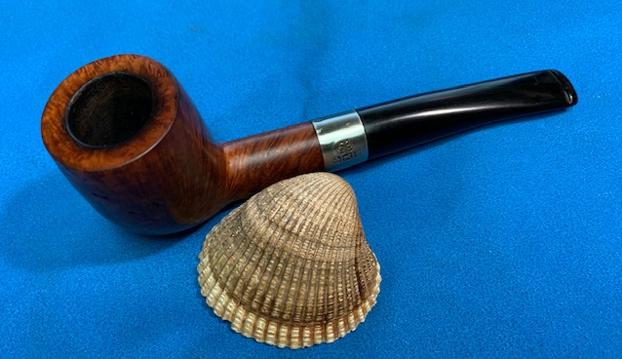
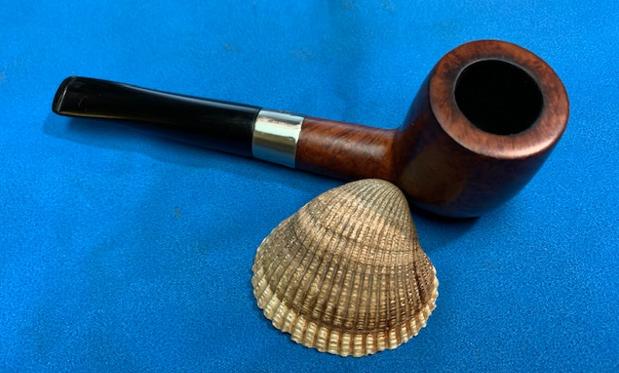
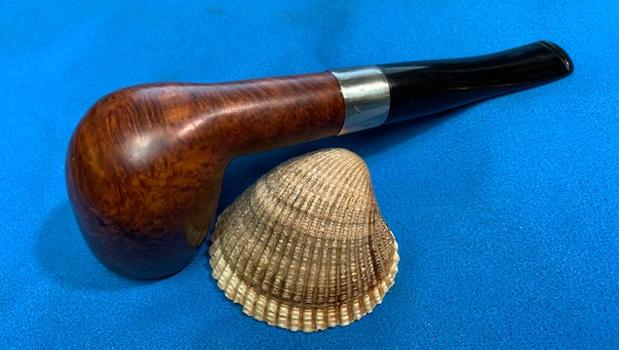
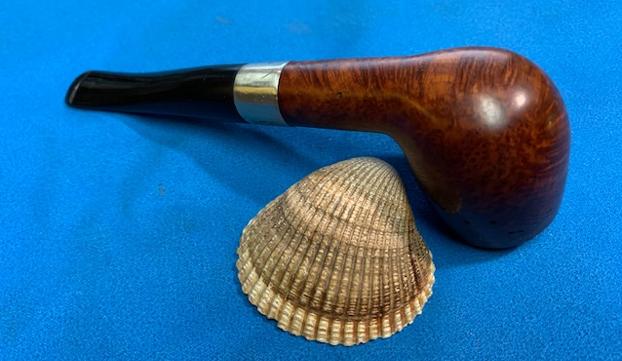
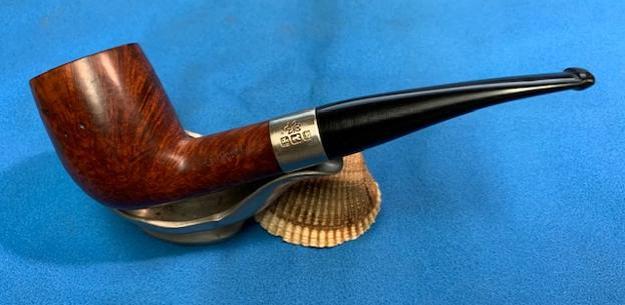
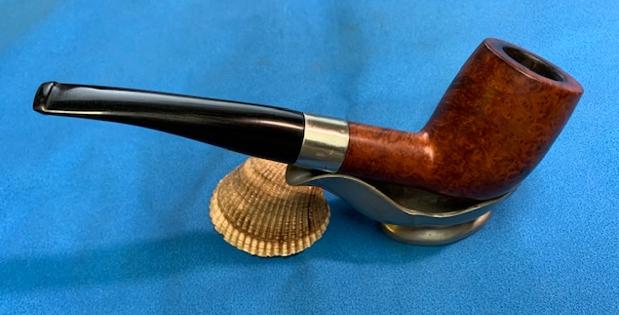
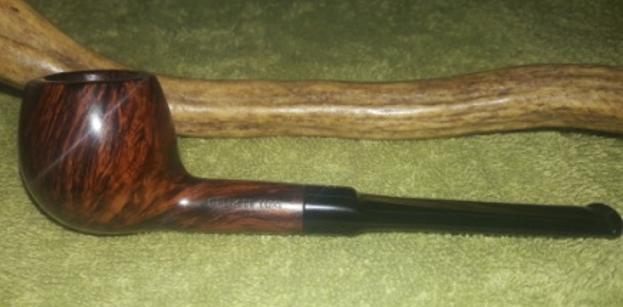
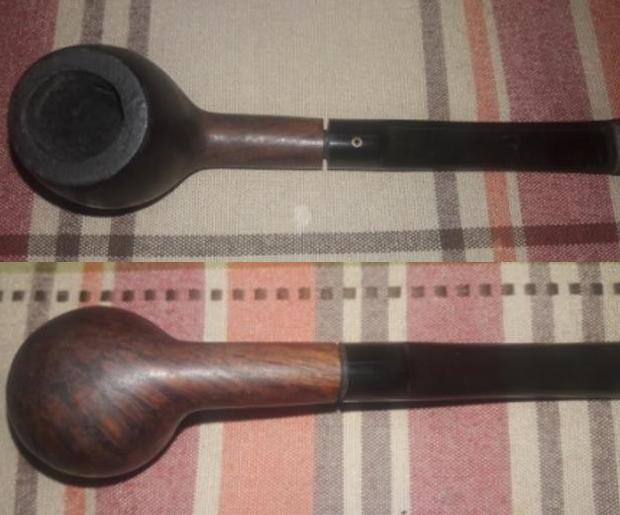
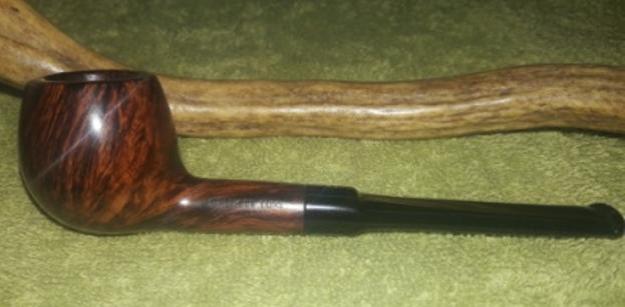
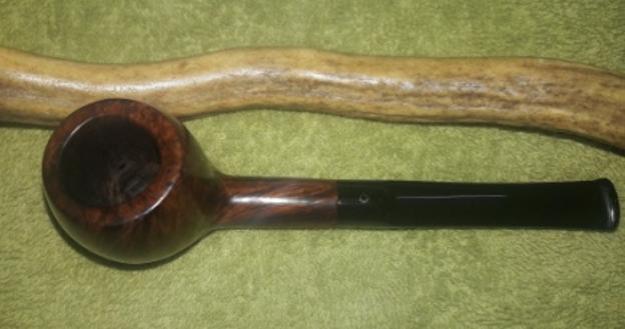
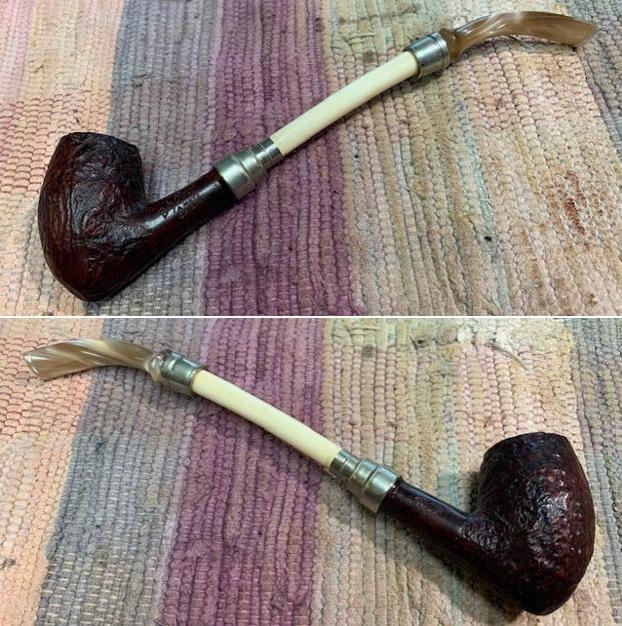
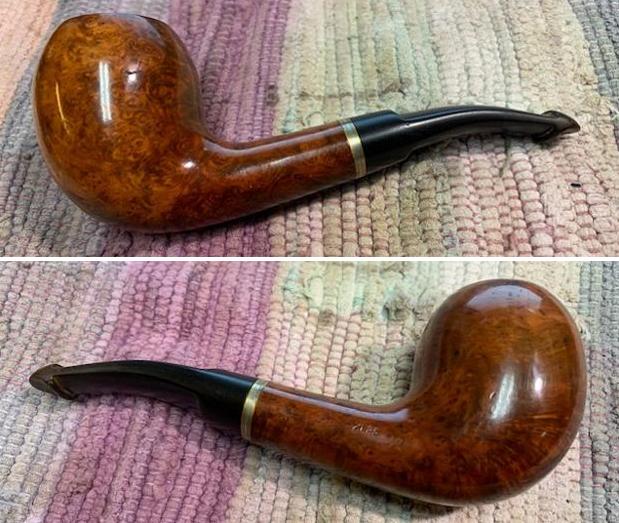
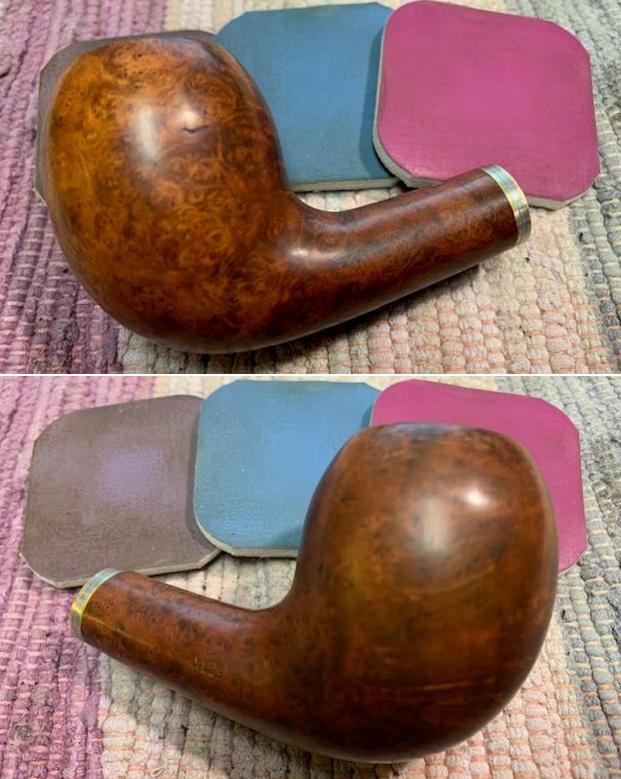
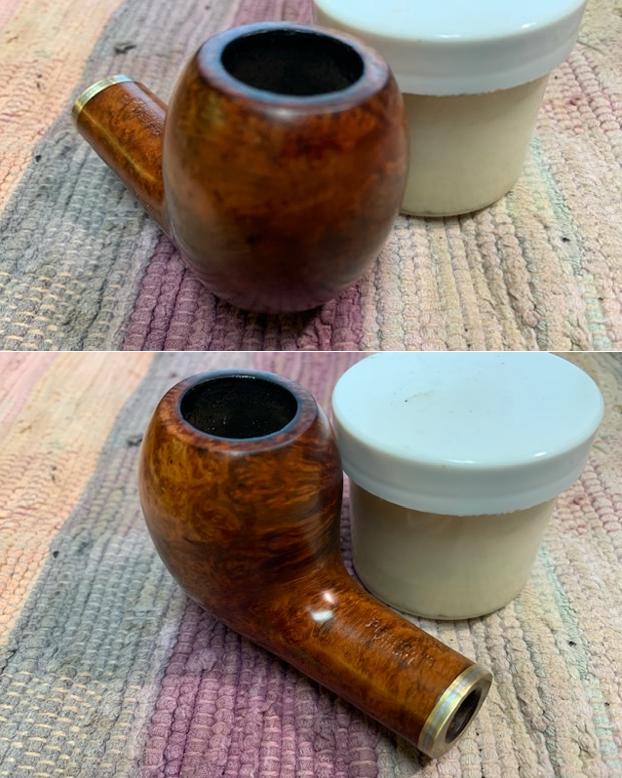
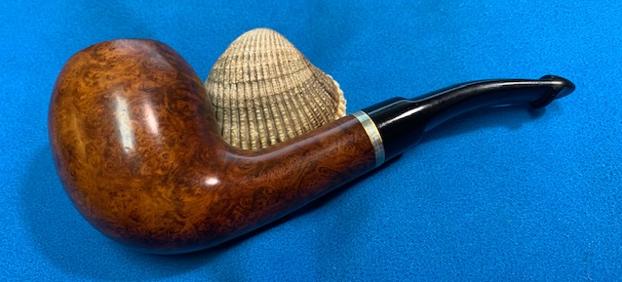
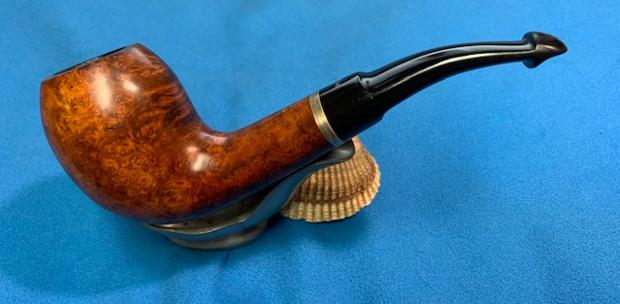
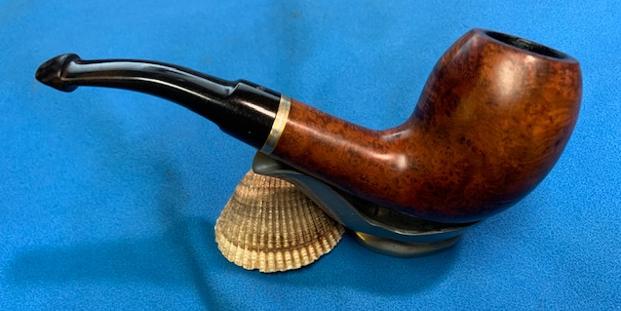
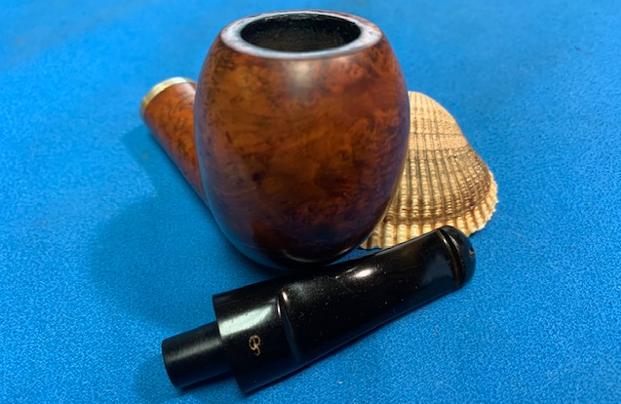
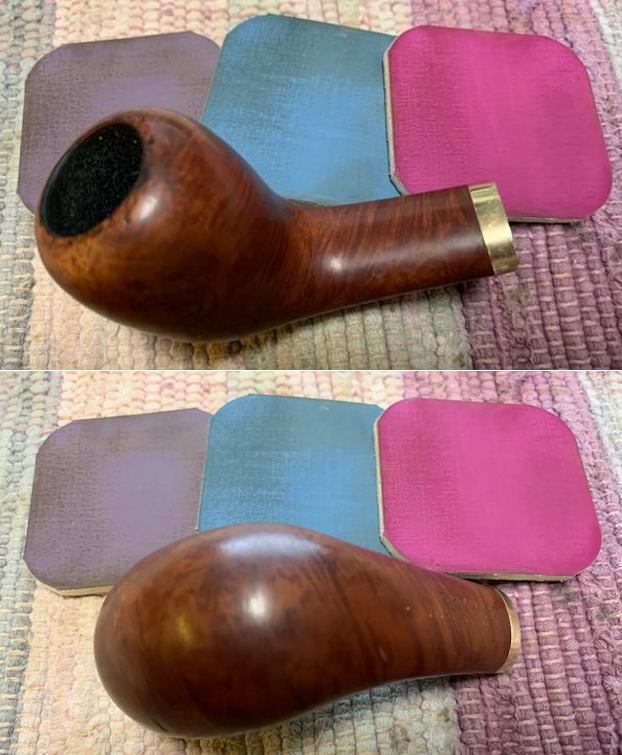
 I put the stem back on the bowl and polished the pipe with Blue Diamond on the buffing wheel to give it a shine. I gave it multiple coats of carnauba wax and buffed it with a clean buffing pad. I hand buffed it with a microfiber cloth to deepen the shine. I took some photos of the pipe before calling the pipeman to pick up his pipe. I am pleased with the look of the Portland Bruyere Garantie 60 Egg and the fit of the repair band and the stem to the shank. I think it will meet his expectations when he picks it up later today. Thanks for walking through the repair with me in this blog. Cheers.