Tag Archives: finishing

Another Unusual Estate Find – A Kaywoodie Metal Filter Pipe with Case


Blog by Steve Laug

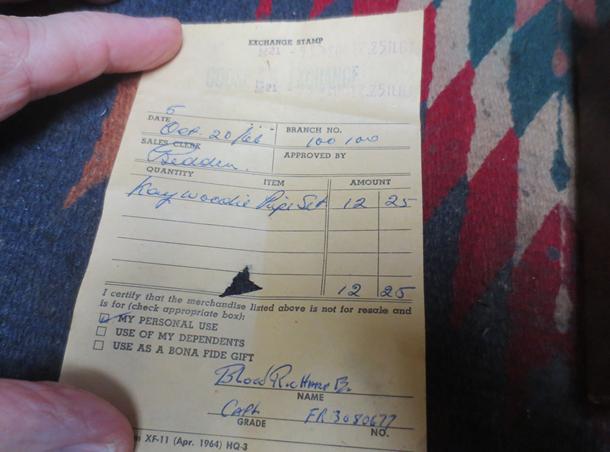
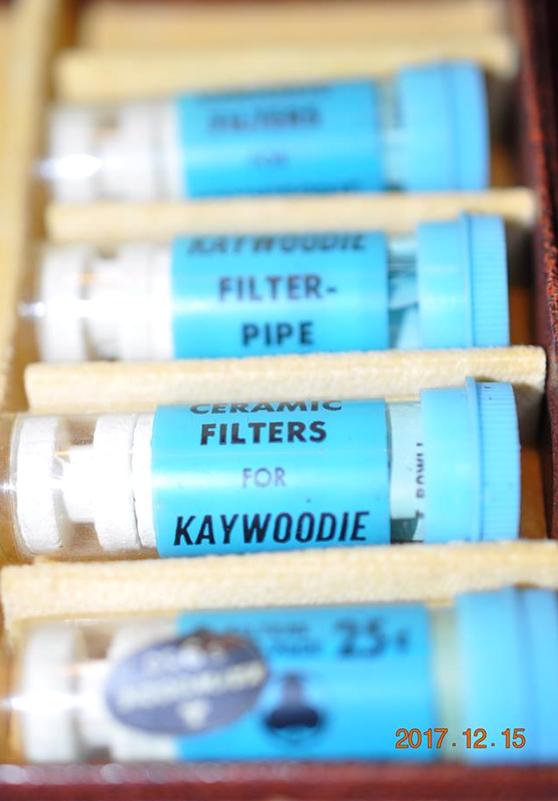
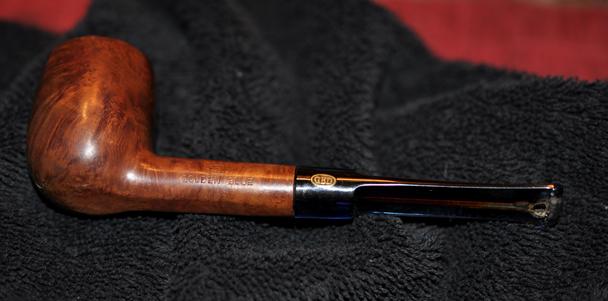
At a recent Estate sale Jeff picked up a boxed Kaywoodie Filter Pipe set. It was a brown leatherette covered hard case with a yellow satin lining in the lid that was printed in red ink with the Kaywoodie Club logo and read Kaywoodie over World’s Finest Since 1851. The cotton lining in the bottom compartmental part of the case was in good condition. It came with three bowls, the pipe and four unopened tubes of Kaywoodie Ceramic Filters. Each tube had an instructional brochure folded into the top. The box still had the labeling inside. There was the label that went with the original pipe with a $9.50 price tag. There was a label that was originally attached to the top of the stem that read “Spring Action Bit – Non-Detachable”. There was also the set label that read $20.50 over Kaywoodie, New York & London. This was a gold label that sat on the front edge of the box when the lid opened. Probably one of the most interesting pieces with box was the original sales receipt. The set was sold at Goose AR Exchange – a US Military Base Exchange. I found a Goose Creek, South Carolina Naval Base so I am thinking this may have been the location. The set was sold on October 21, 1955 to a Captain Richard B. Blood for the price of $12.25 well below the retail price of $20.50 on the case label. The outside of the box was in good condition. There was a damaged spot on the top right corner where a price tag must have been stuck and removed. The set was well cared for and smoked. Each bowl had been used but none of them were oversmoked or heavily caked. The metal base on each bowl was in decent condition. The coin slot for removing the base and changing the ceramic filter was still very useable. The filters in the tubes on the right side of the box were all unopened. The metal spring loaded Kaywoodie base was clean but the stem was lightly oxidized. 
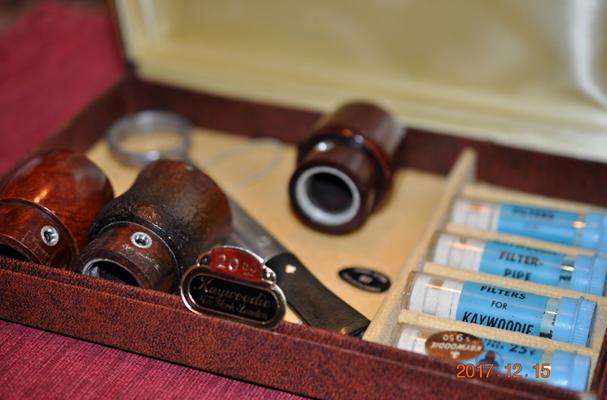
Jeff took quite a few photos of the content of the set. It really is an interesting piece with all of the parts intact in the box. 
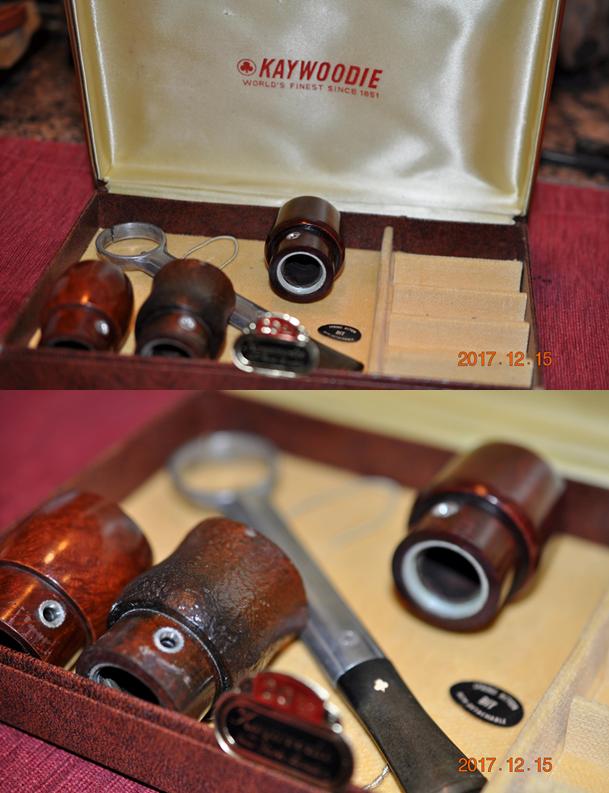
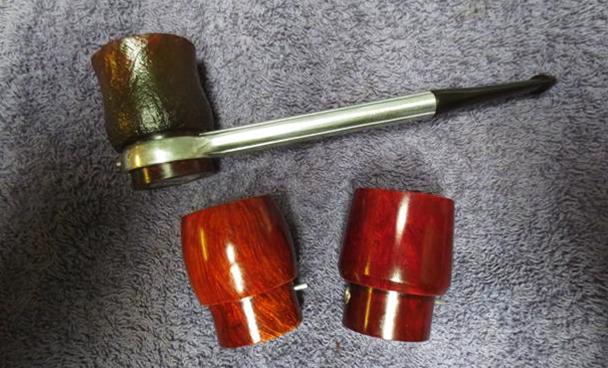
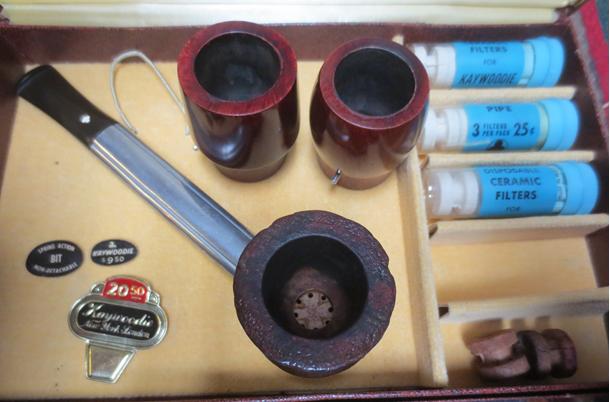
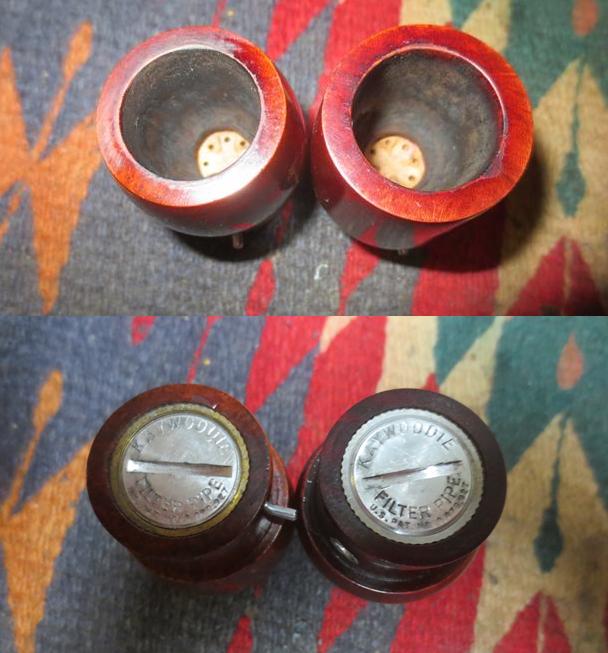
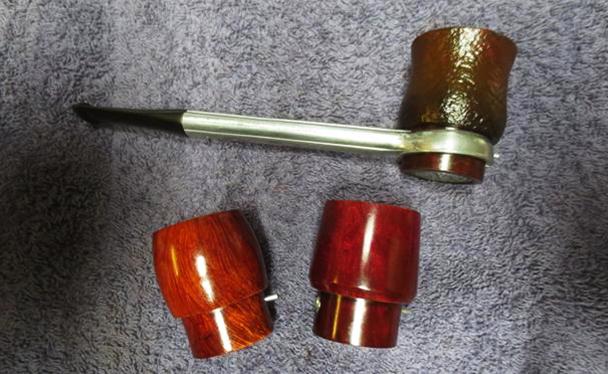
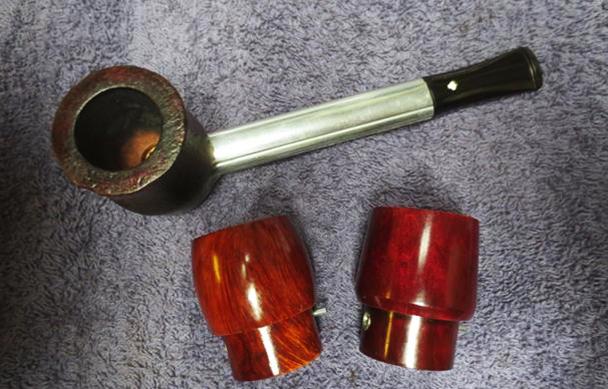
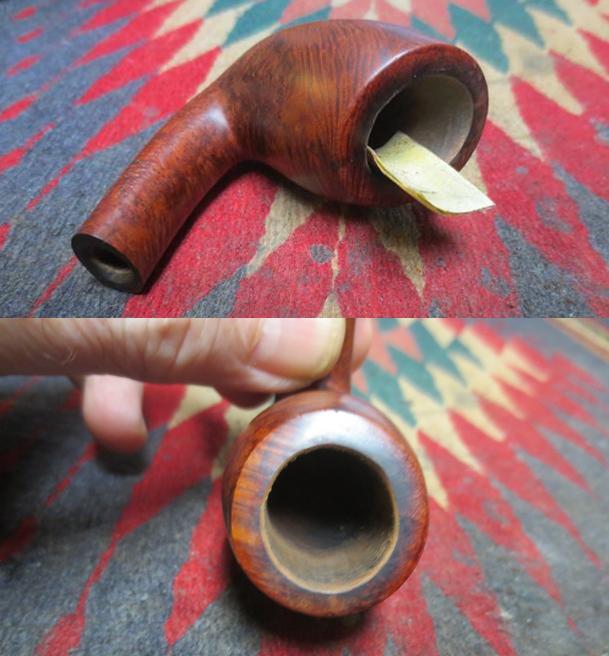
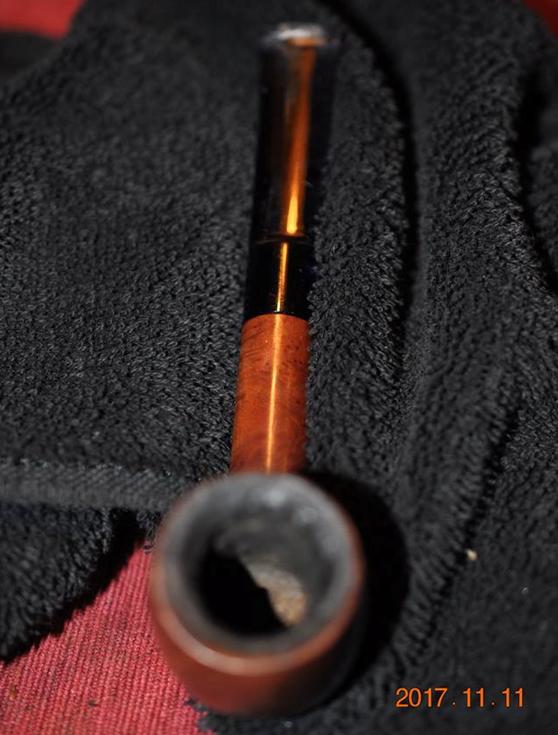
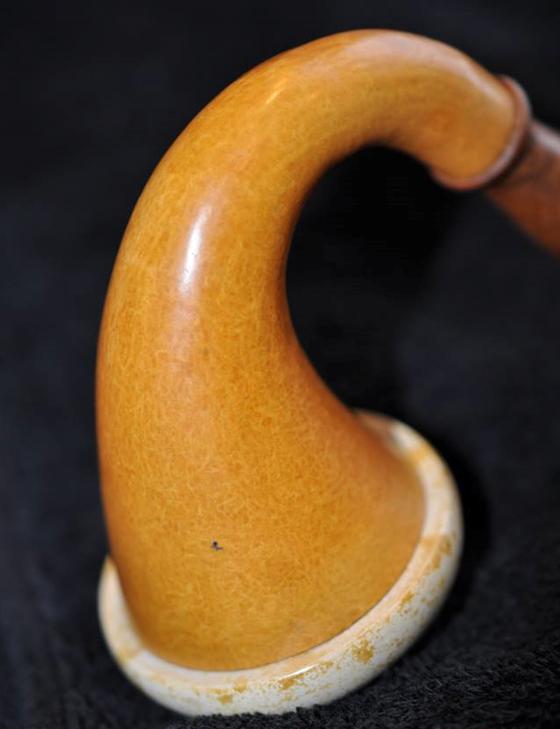
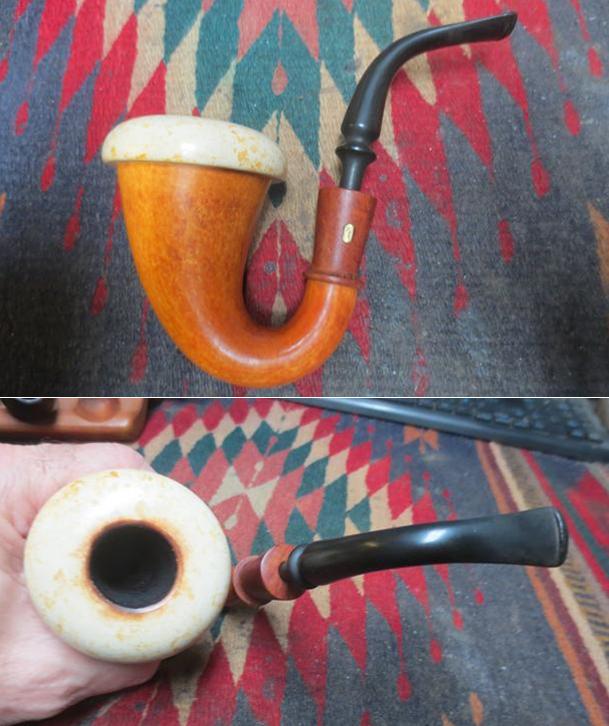
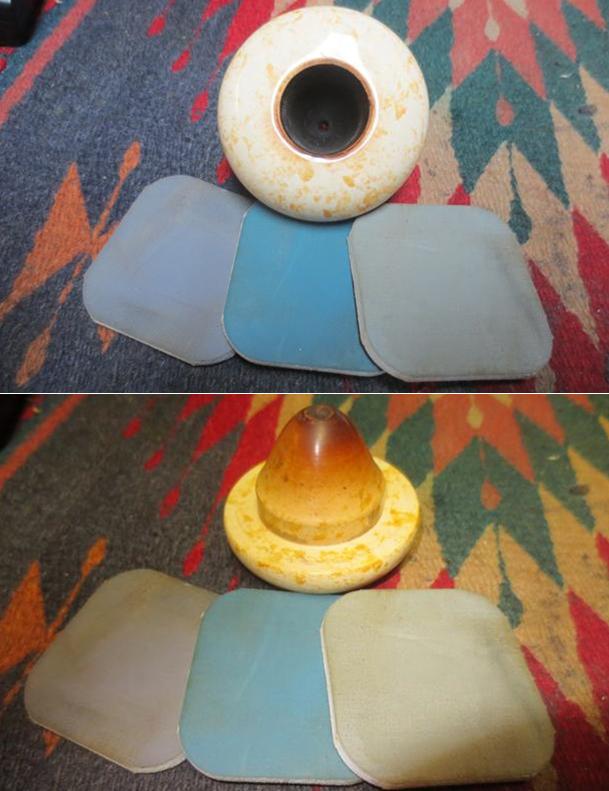
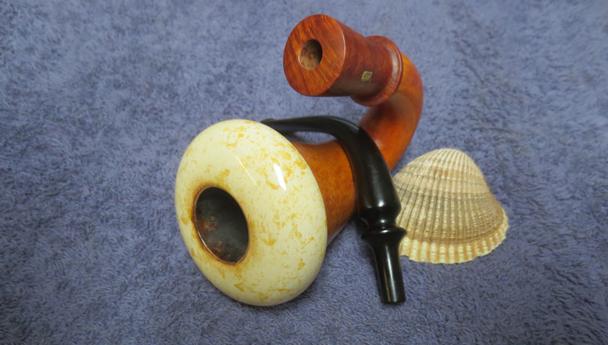
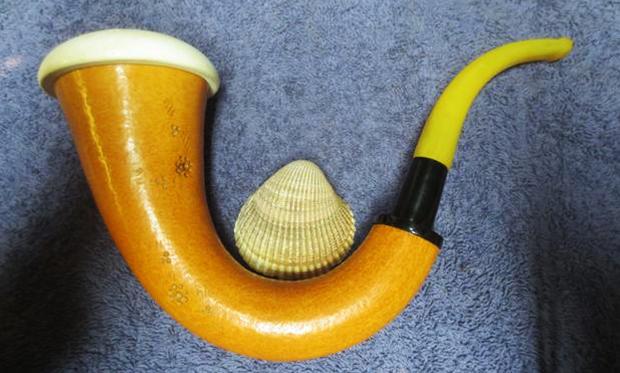
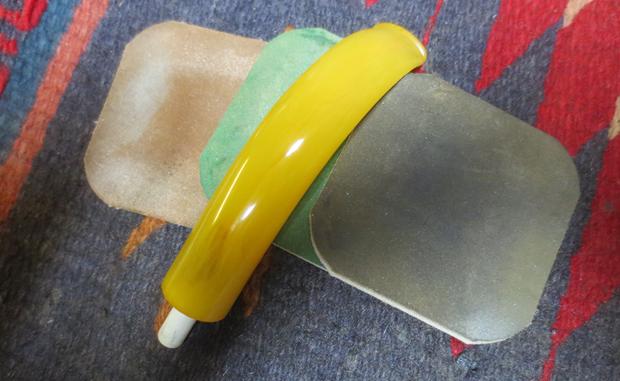
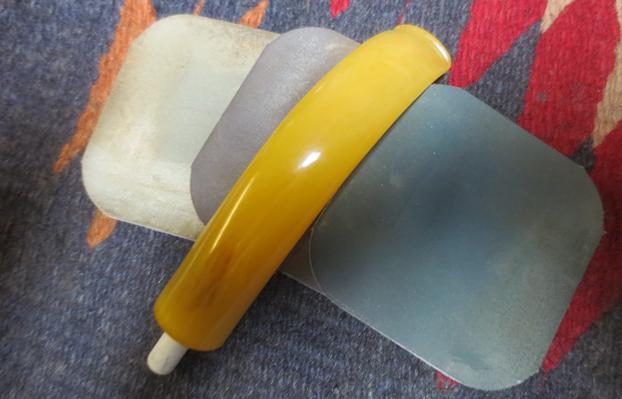
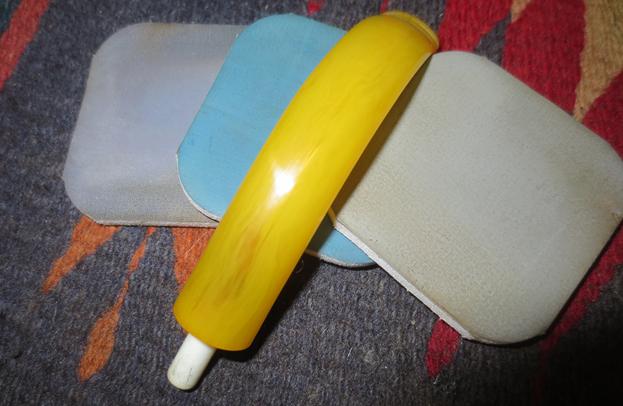
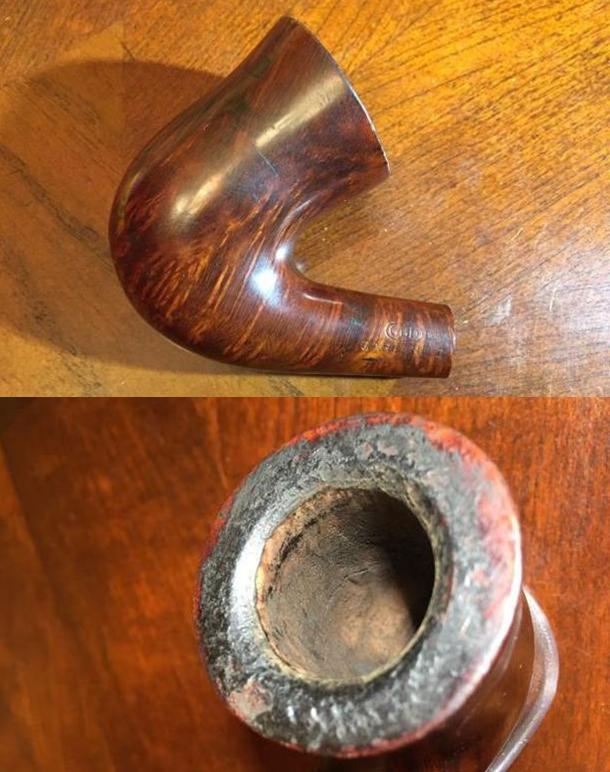
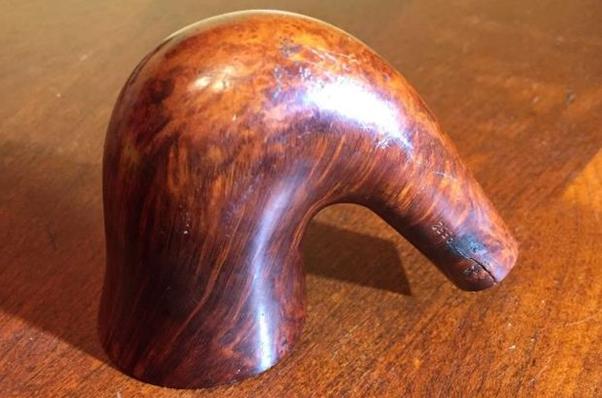
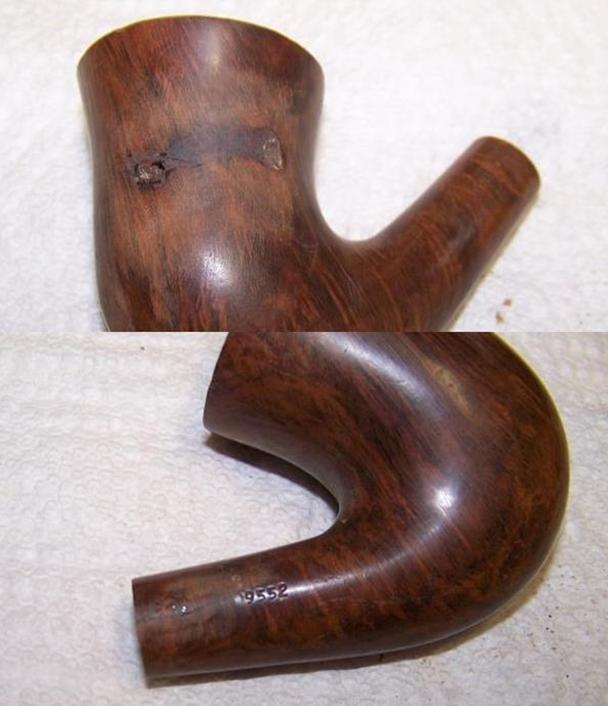
Jeff took the pipe base and bowls out of the box and took photos of them from different angles. The three bowls are different. I would tend to call the one on the left and apple, the middle an urn and the one on the right a billiard. 
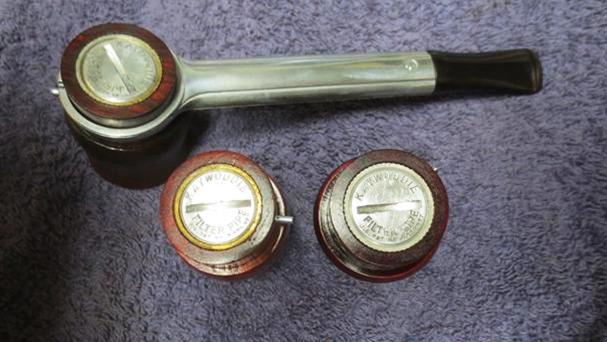
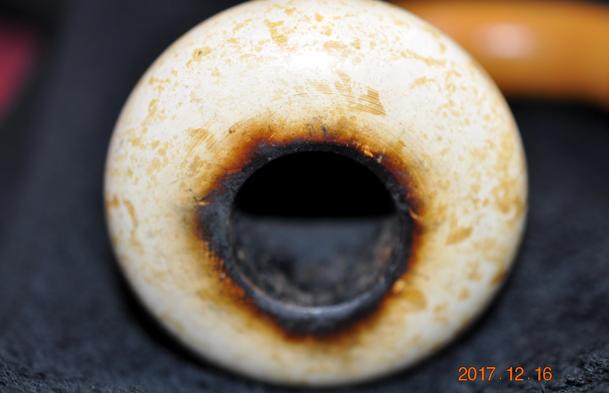
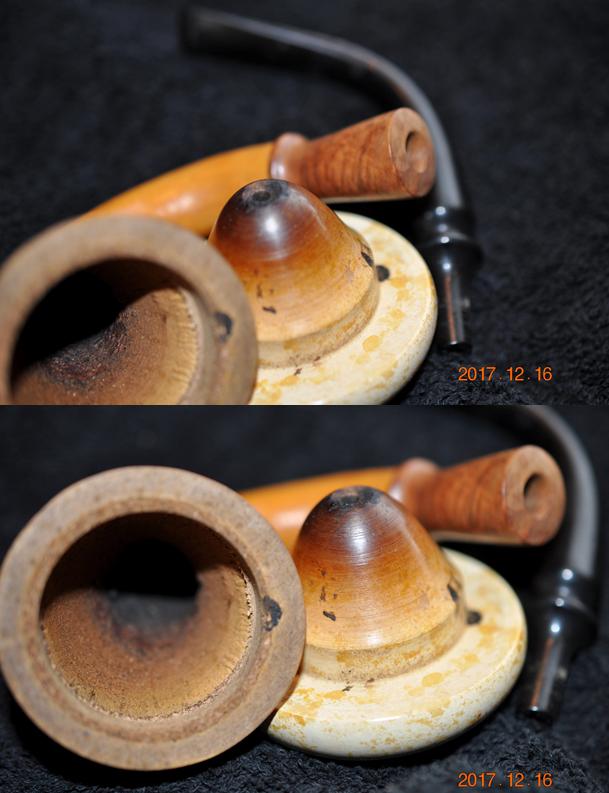
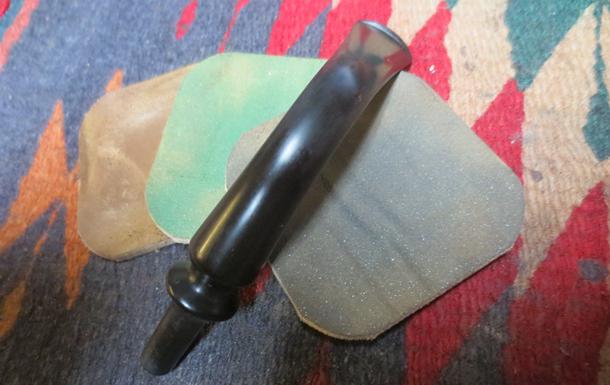
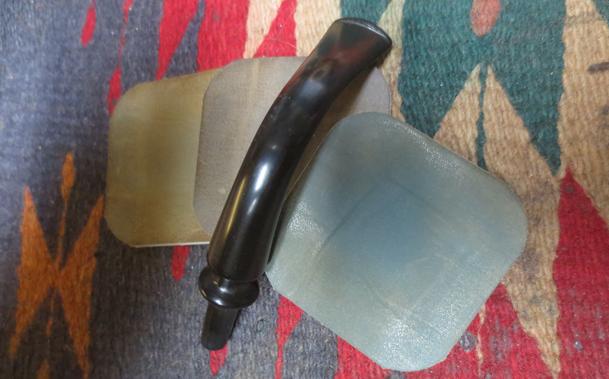
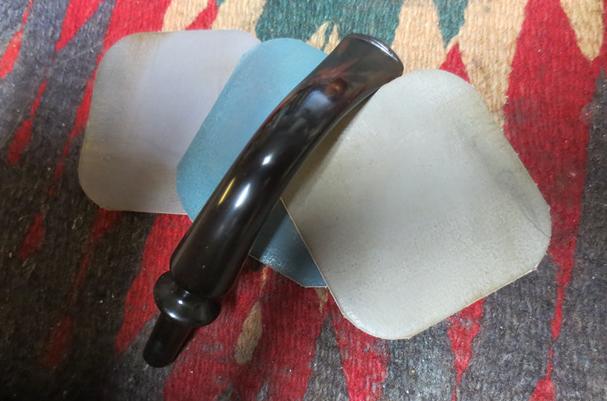
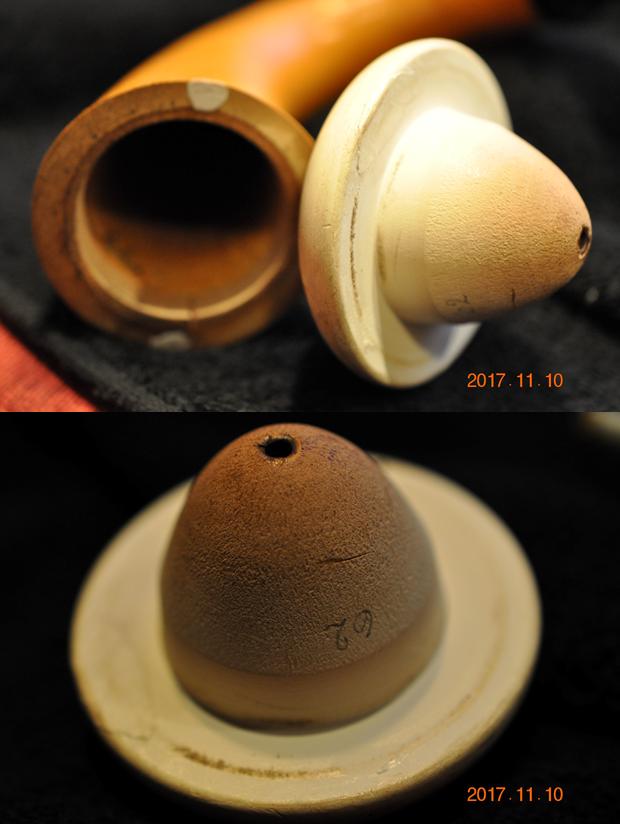
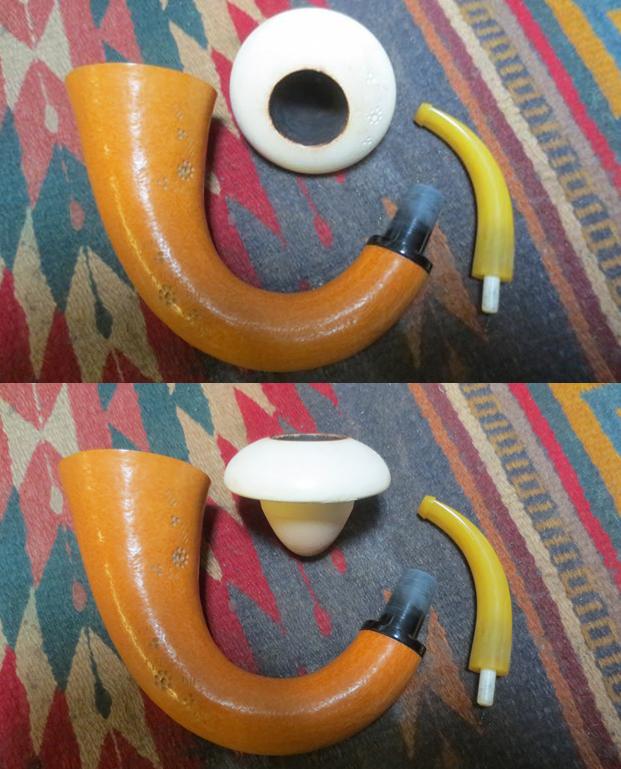
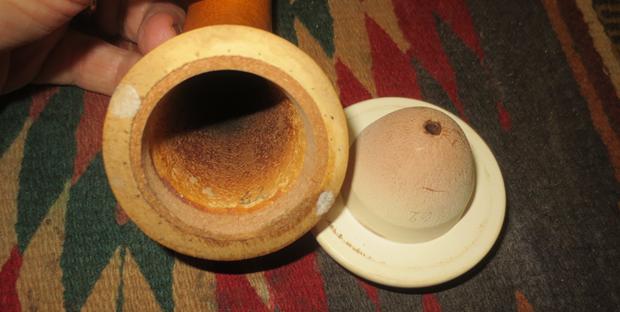
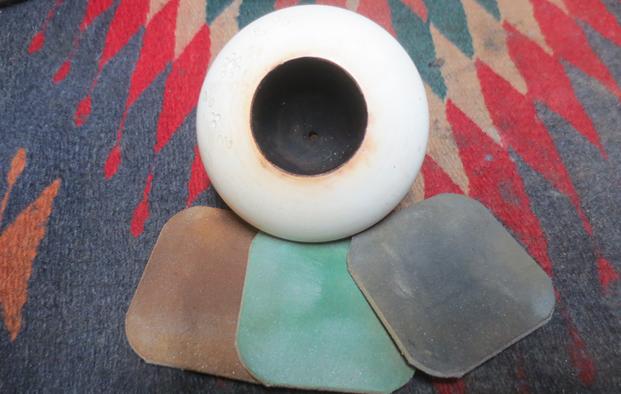
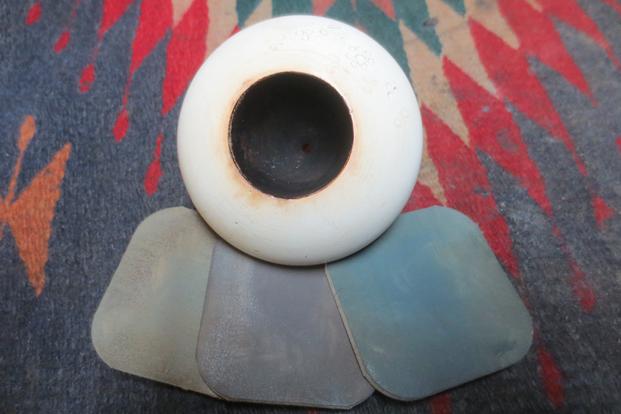
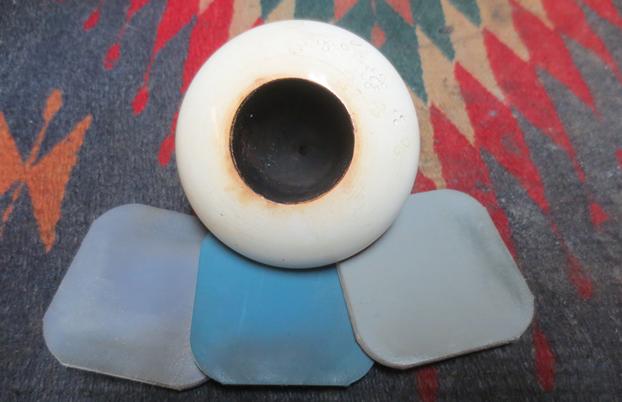
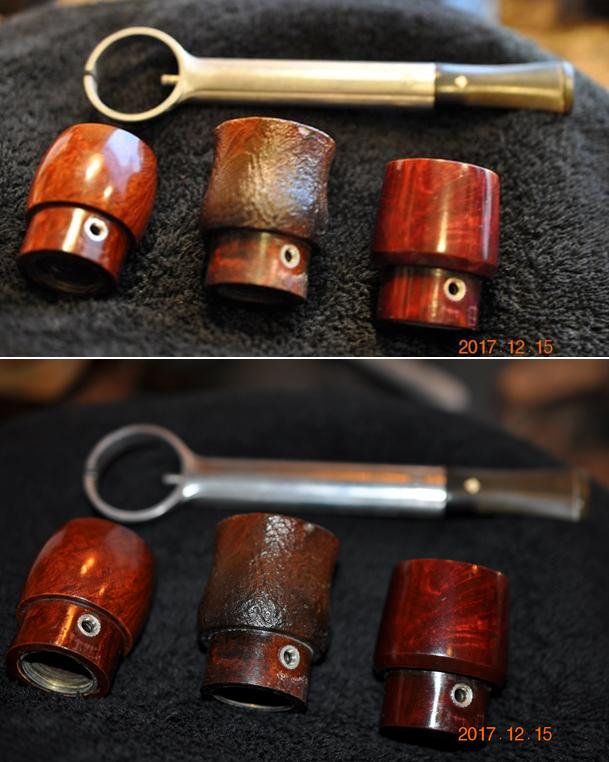
Jeff took all of the bowls apart. He removed the base from the bowl and took out the ceramic filter. The photos show all of the parts of the pipe.
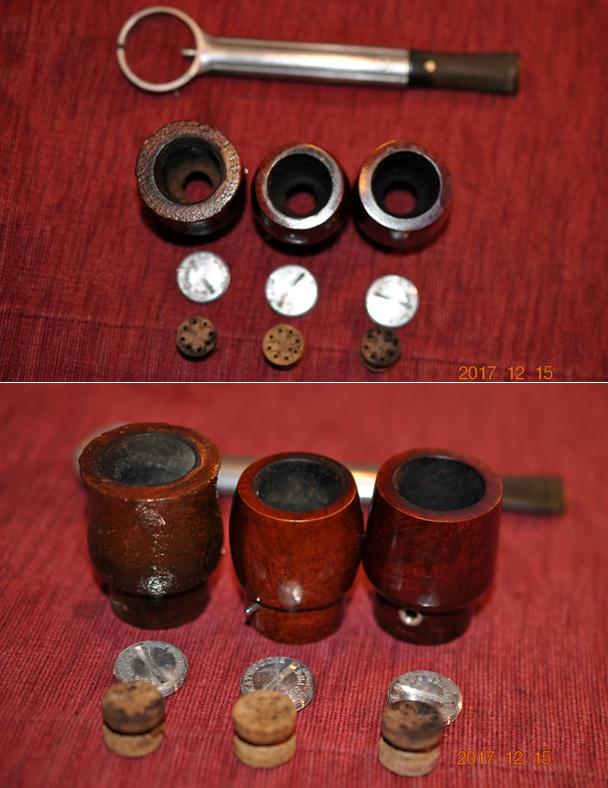
I have worked on one of these in the past but I have never seen a full set of the pipes in a case (https://rebornpipes.com/2016/01/30/it-was-a-kaywoodie-metal-pipe-that-i-had-never-seen-before/). In that blog I included the following advertisement and I thought it would be helpful here as well so I have included it again.

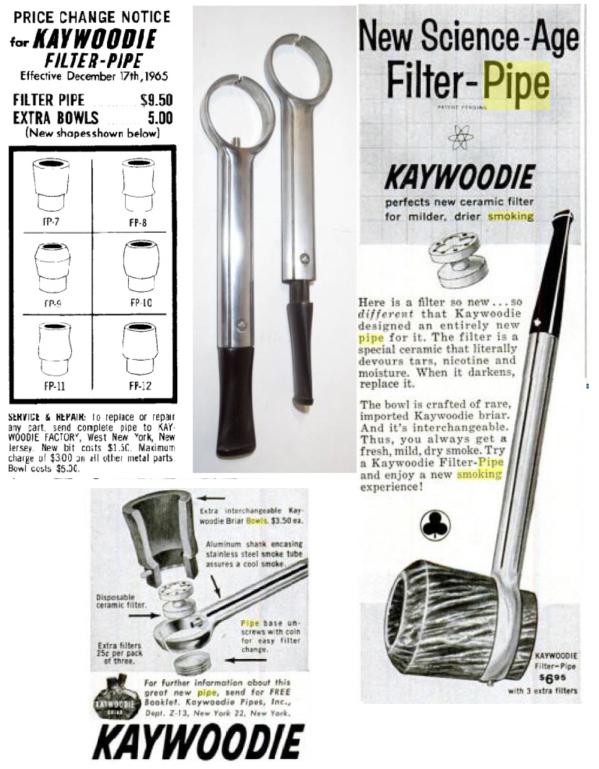
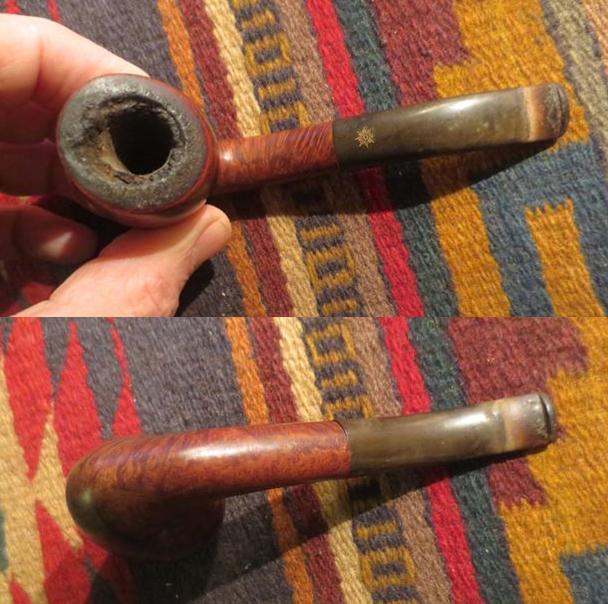
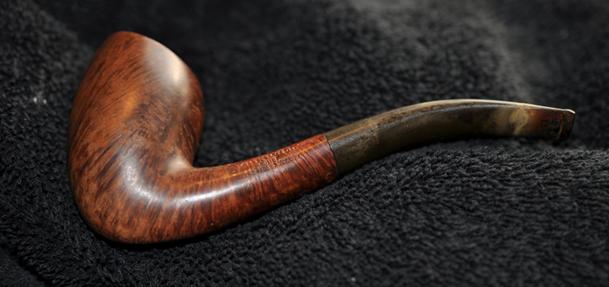
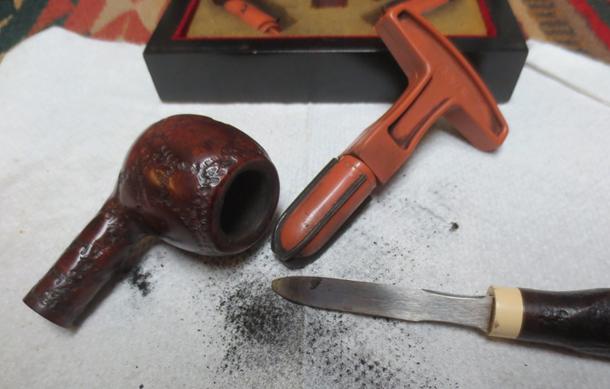
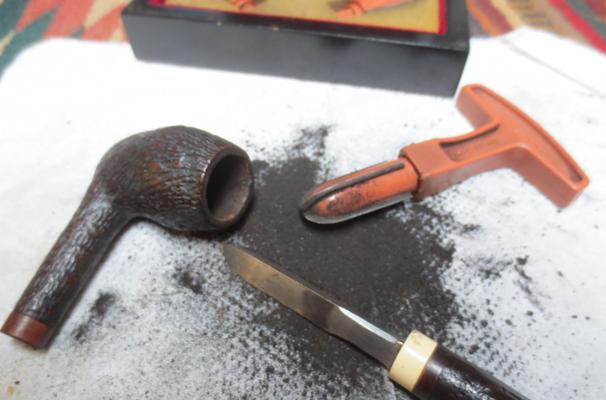
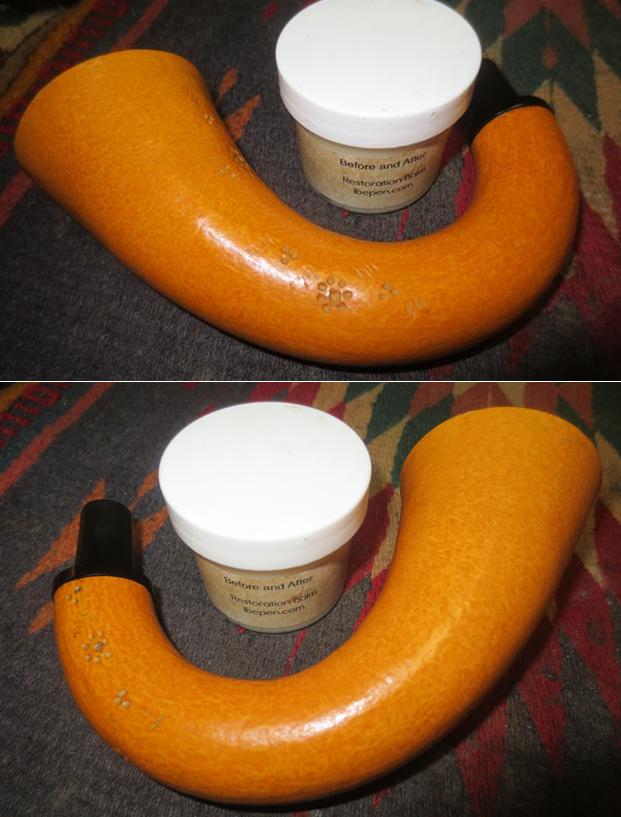
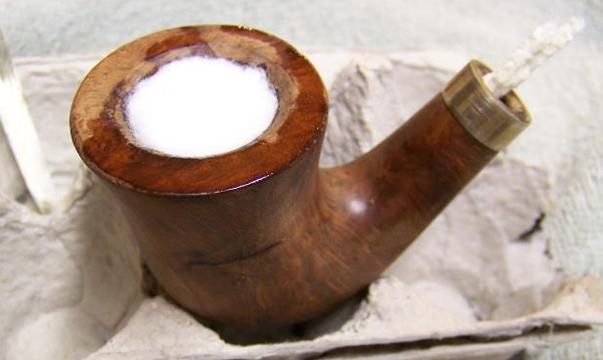
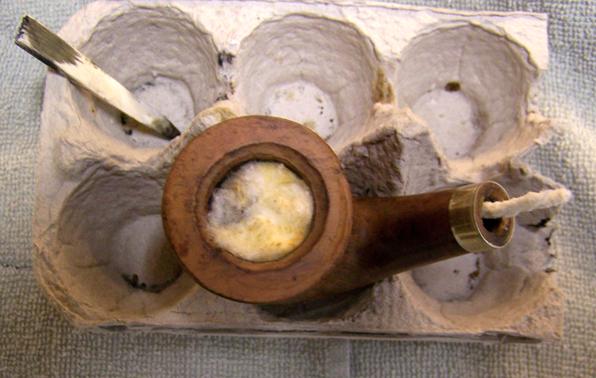
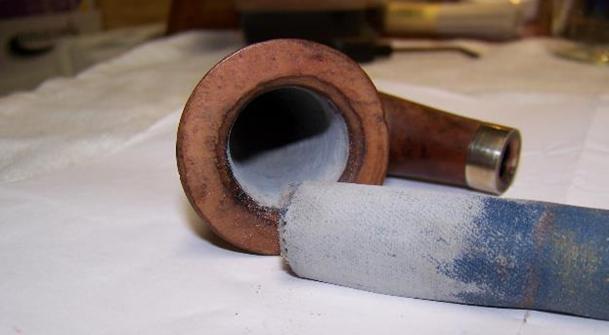
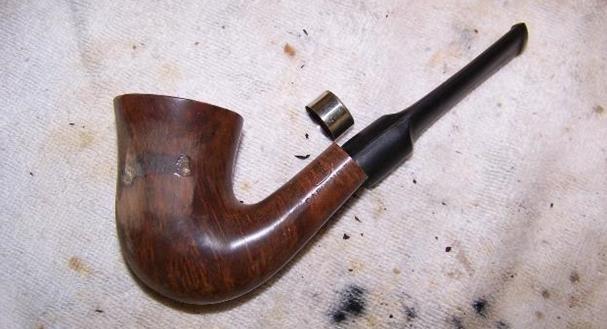
I think Jeff had a little more fun cleaning up this set. It came with some history and he always enjoys that part of the process. He did an amazing job on the cleanup on the bowl and stem. He worked on the dismantled bowls as this was the easiest way to clean this batch. He reamed each of the bowls back to bare briar. He started with a PipNet Pipe Reamer and followed up with a Savinelli Fitsall Pipe Knife. He cleaned the internals of the bowl and stem with alcohol, pipe cleaners and cotton swabs – scrubbing out the metal shank and the base plate to remove the light buildup in those areas. He scrubbed the exterior of the pipe with Murphy’s Oil soap and a tooth brush and was able to remove all of the varnish coat and grime from the smooth and sandblast finish on the briar. The inner and outer edges of each of the rim tops looked very good. He soaked the stem in an Oxyclean bath to remove the light oxidation. When the set arrived I took some photos to show how it looked before I did the restoration. This set has both a story and some age attached to it. It will look really good once it is polished. 
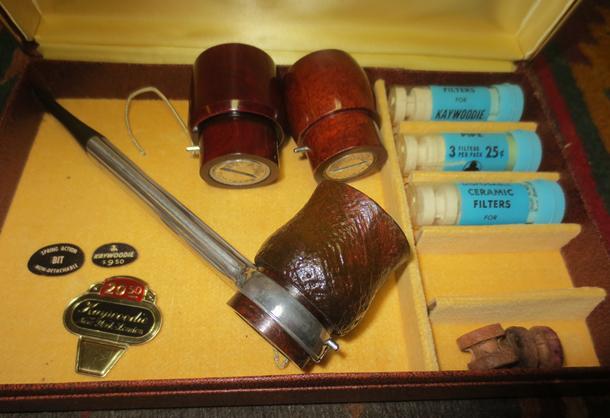
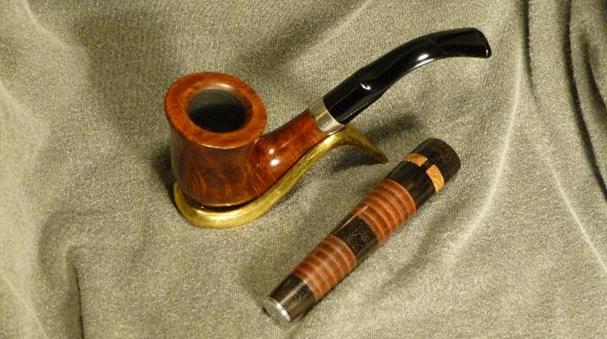
I took a photo of the pamphlet that had been folded into each of the ceramic filter tubes. It is a nice addition in that it explains how the filters work and how to change them.
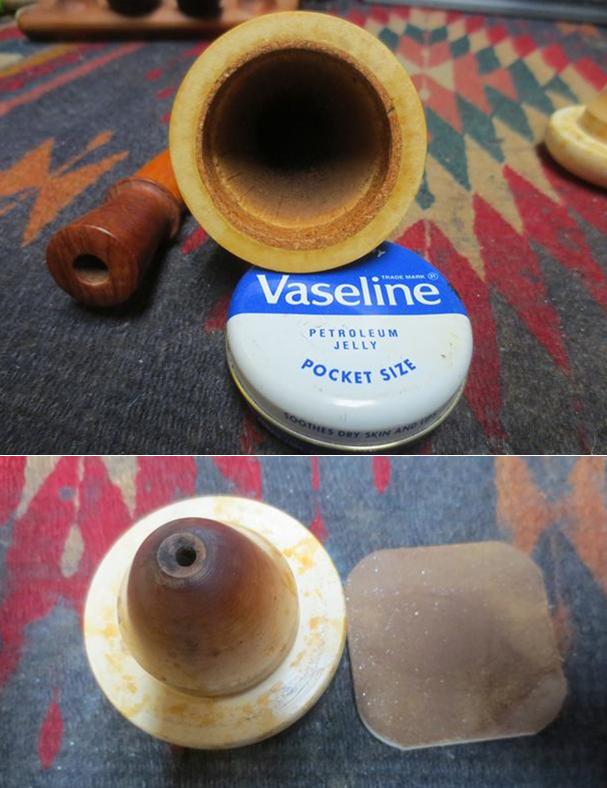
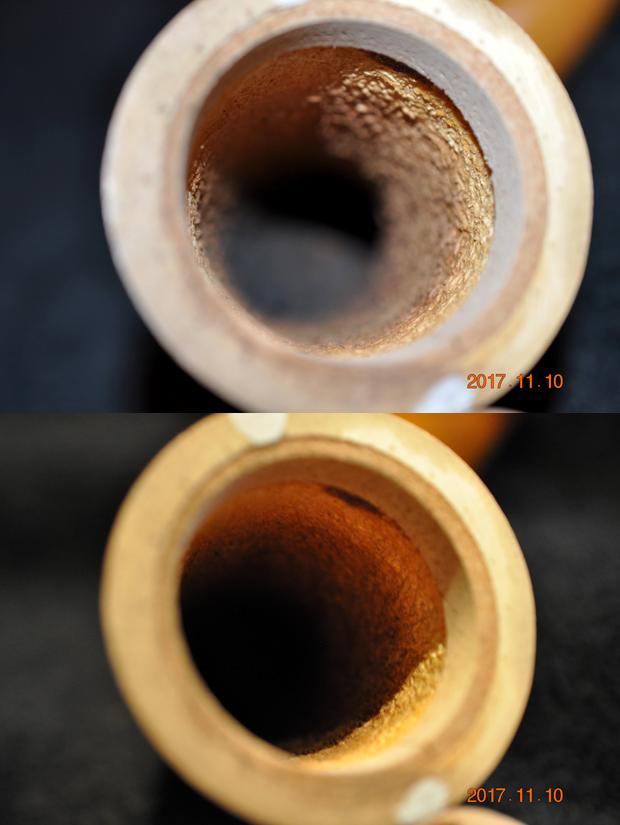
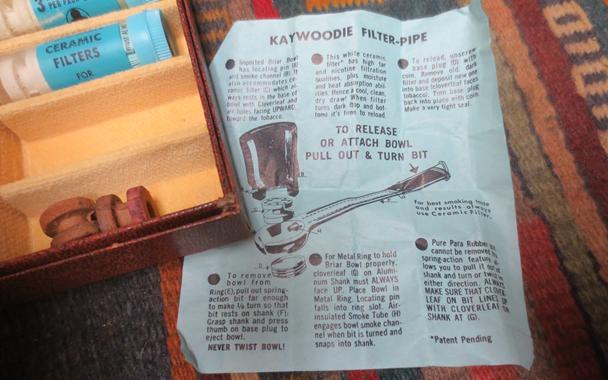
I took some photos of the bowls. He had done a great job cleaning them up. Each bowl had been taken apart and cleaned and a new ceramic filter installed in the base. They had been reamed, cleaned and polished. 
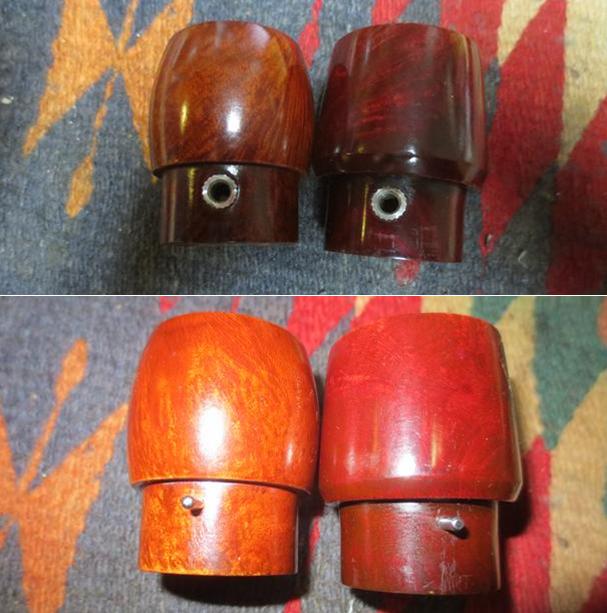
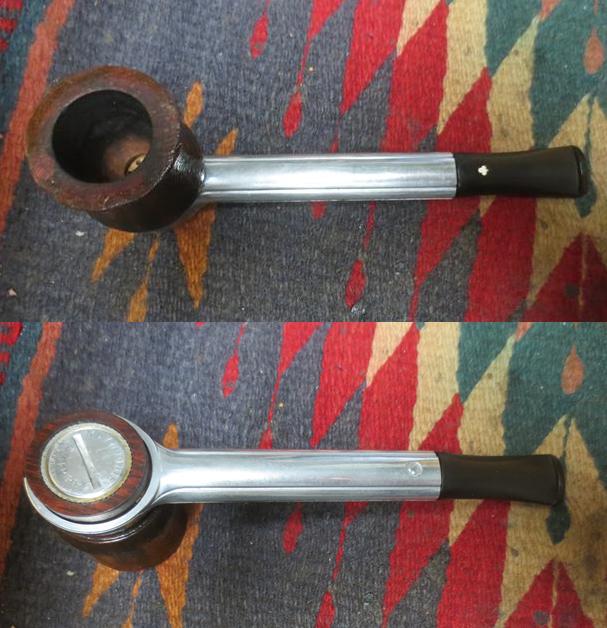
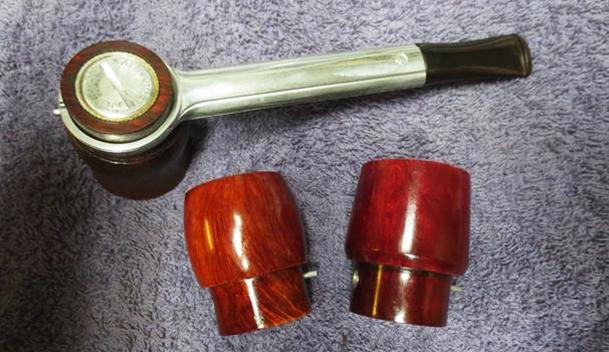
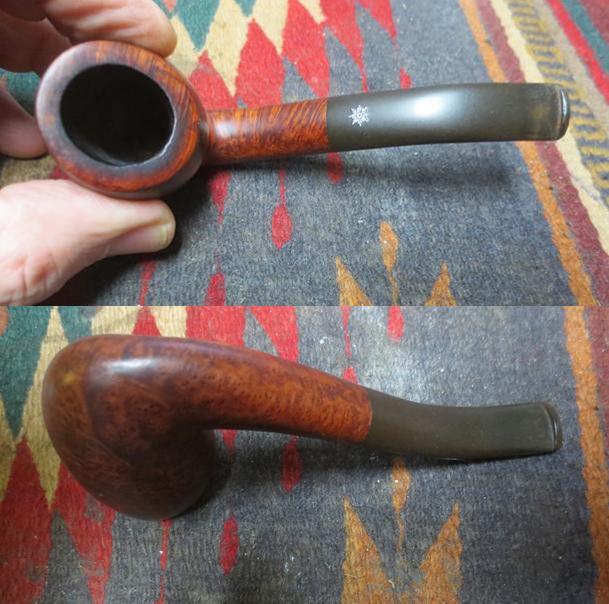
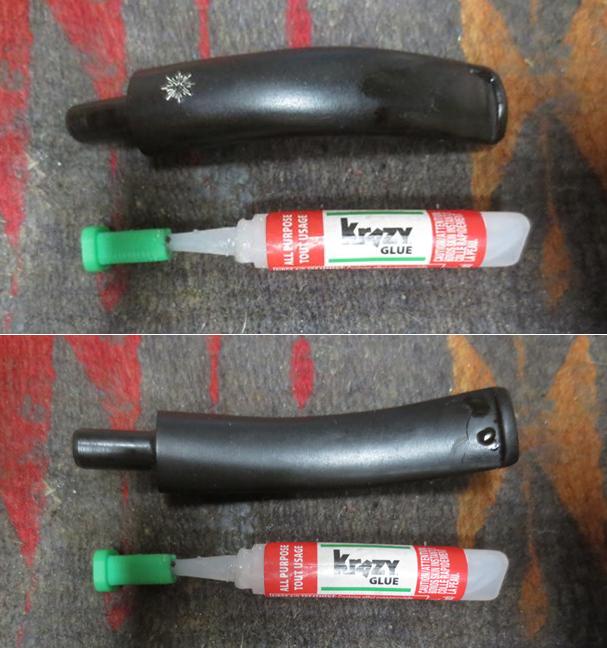
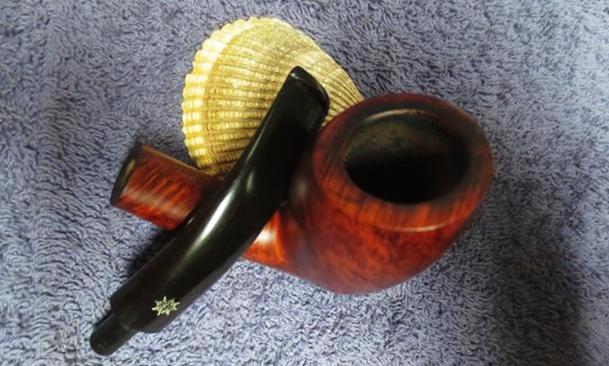
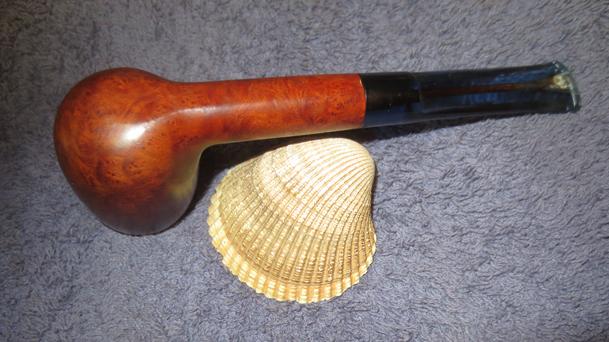
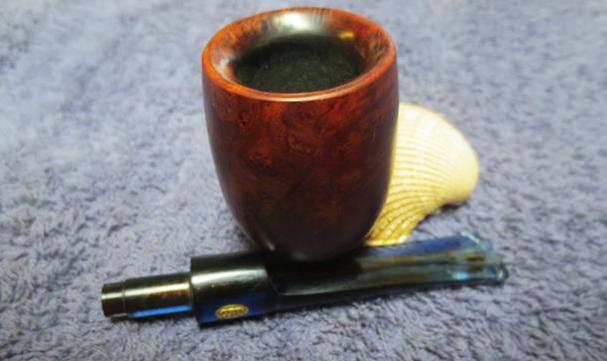
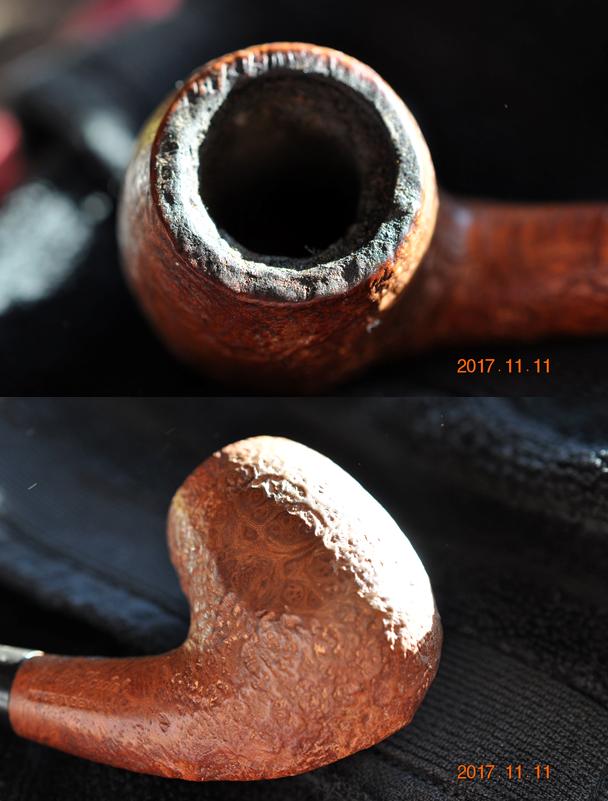
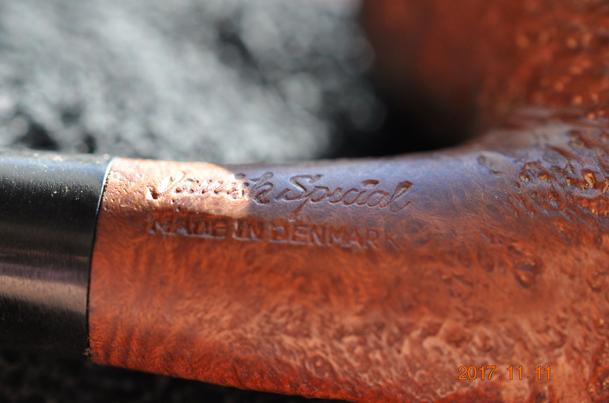
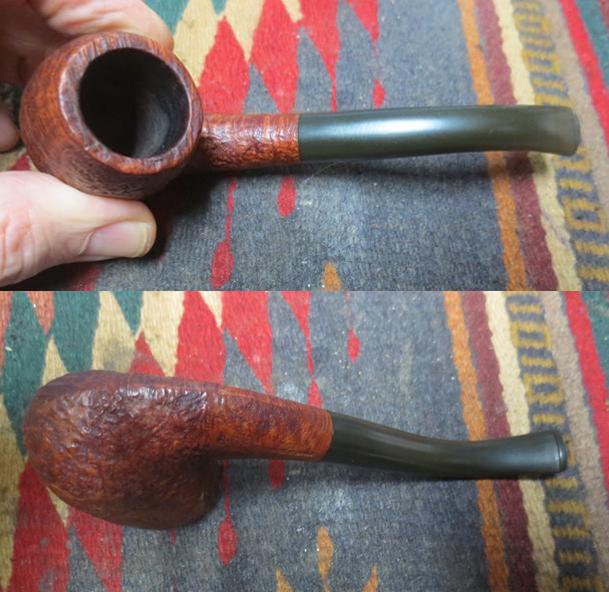
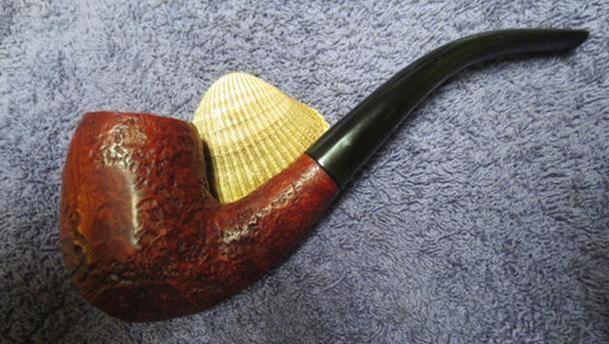
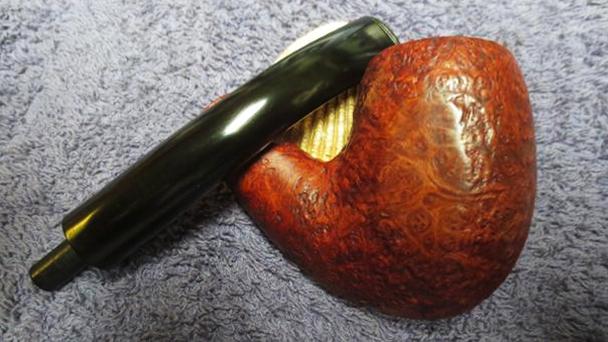
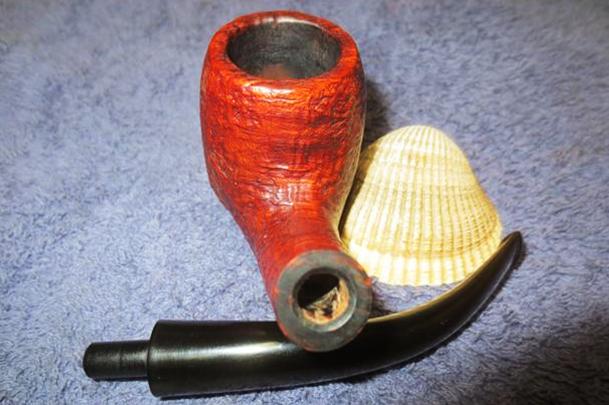
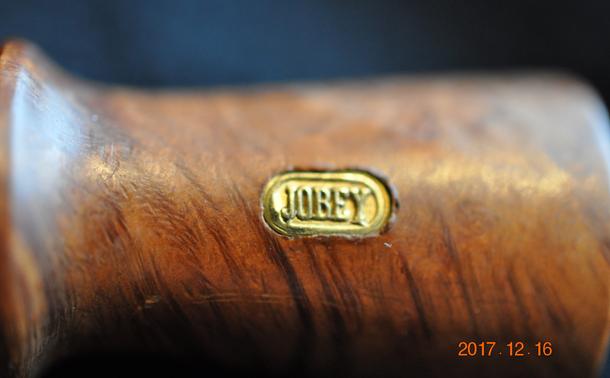
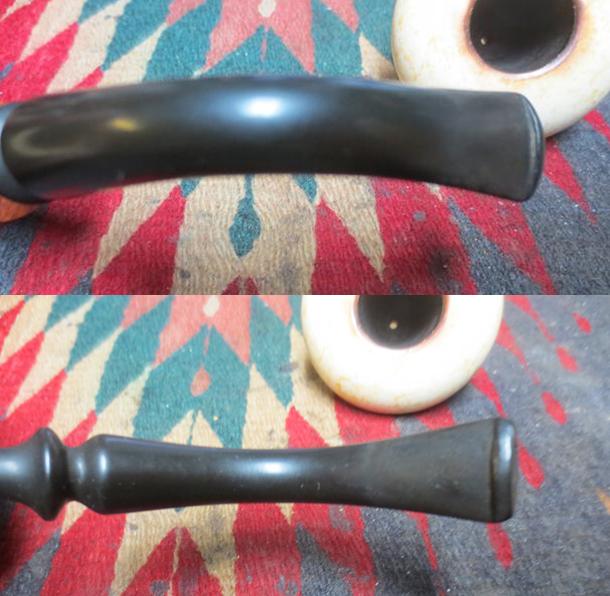
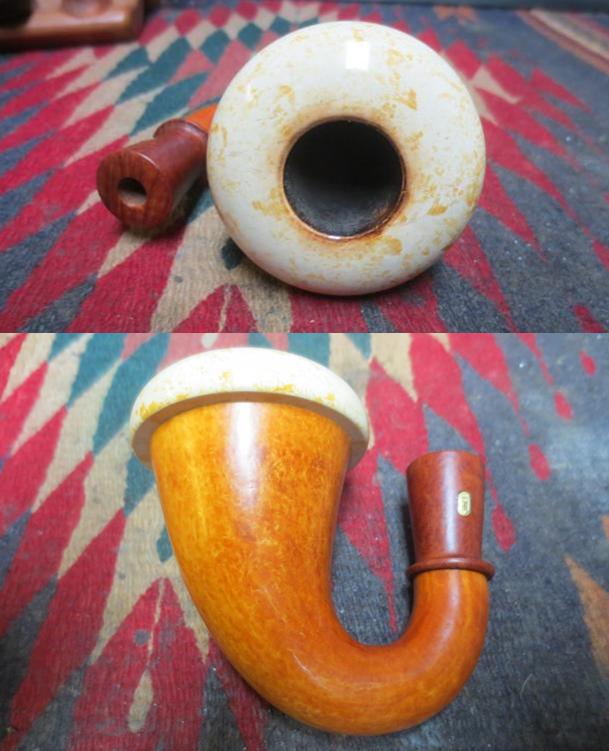
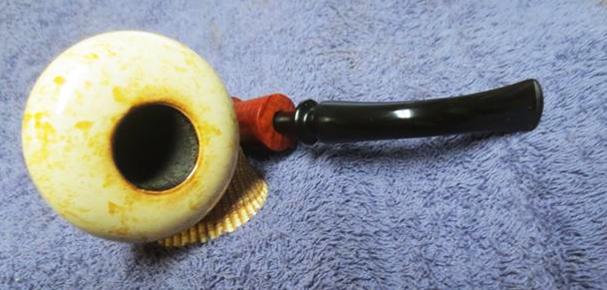
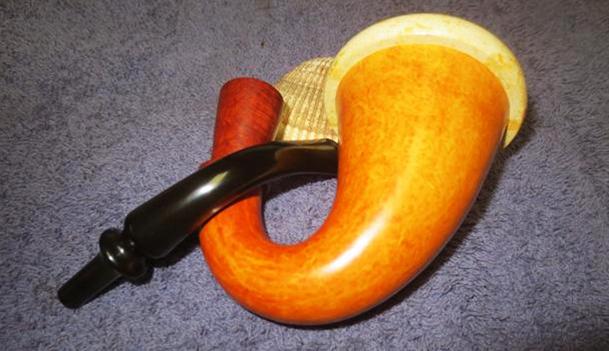
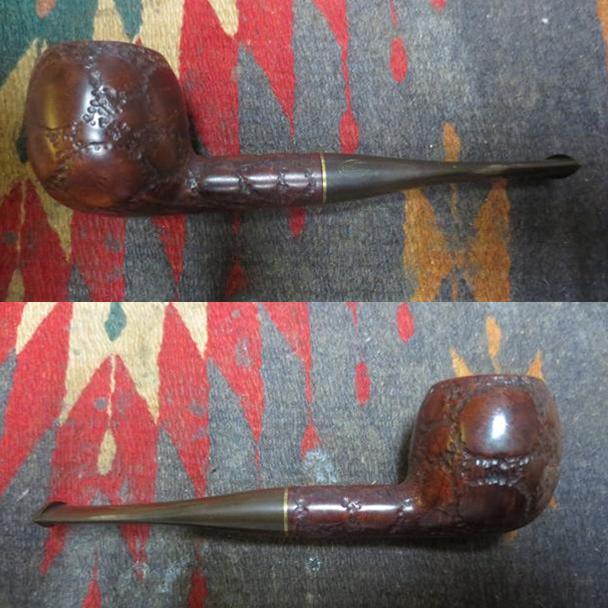
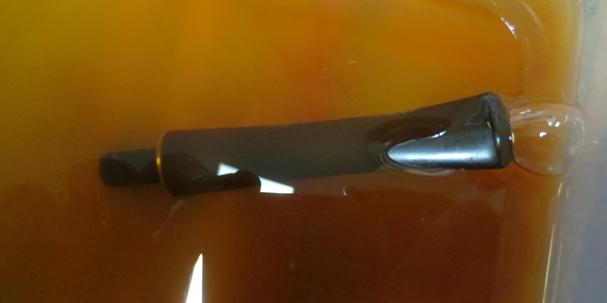
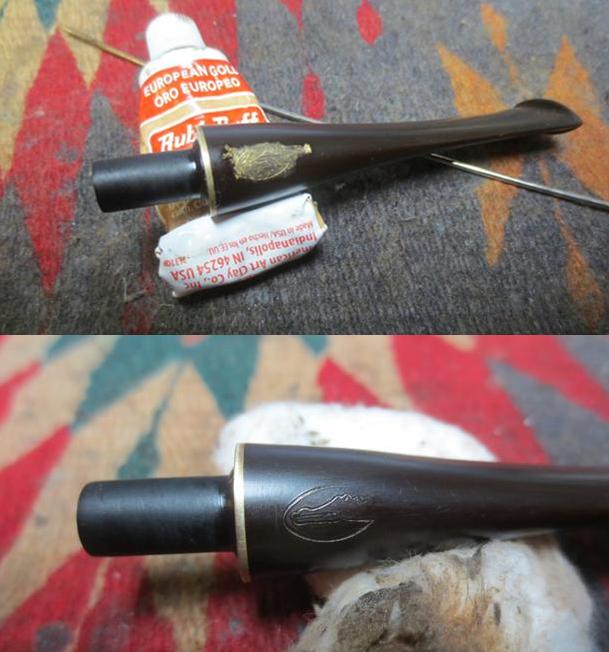
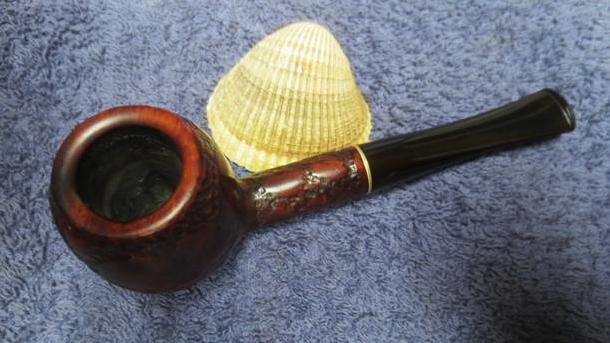
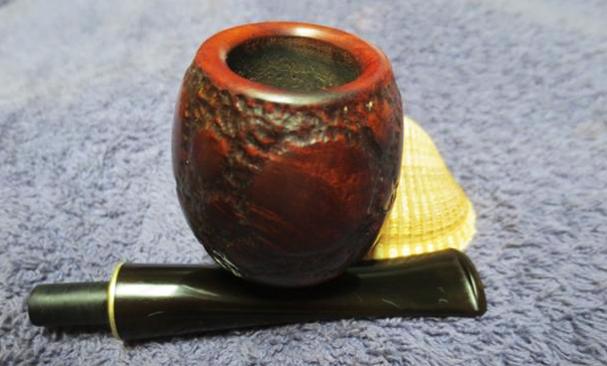
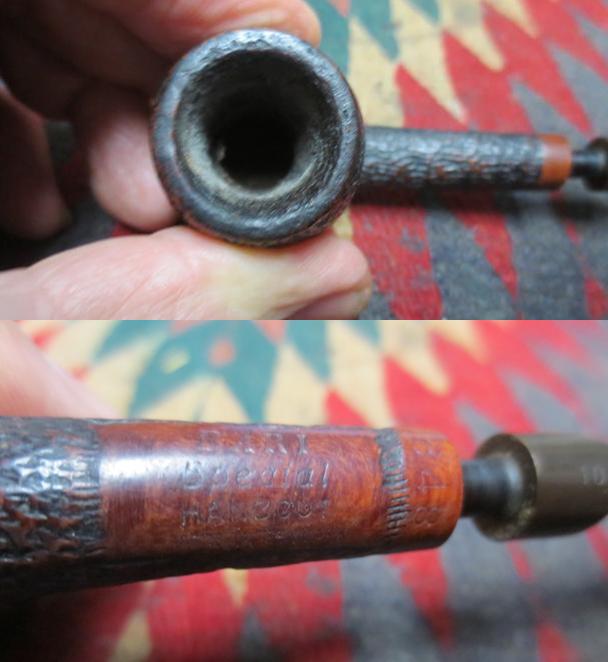
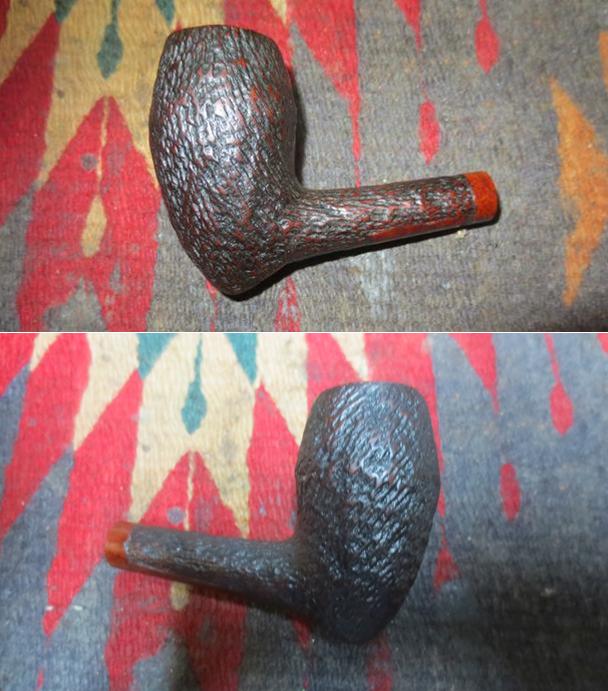
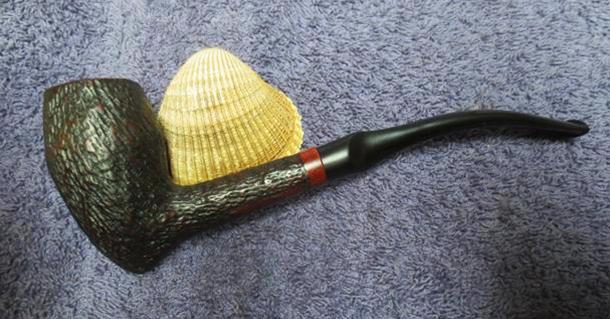
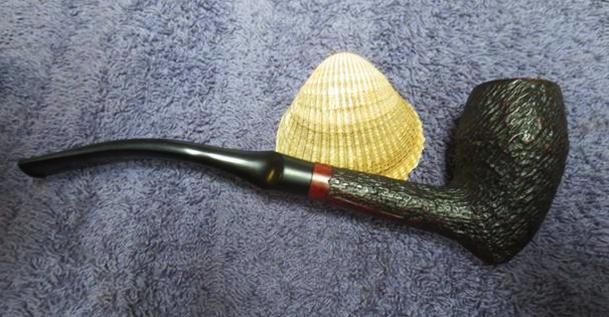
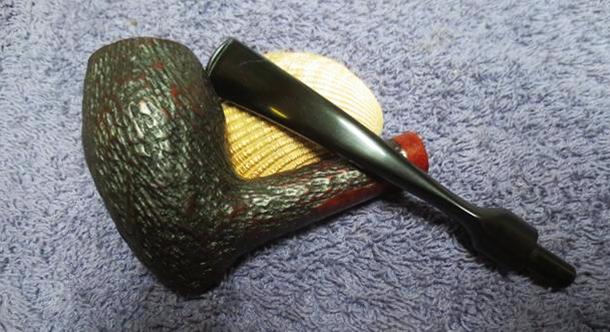
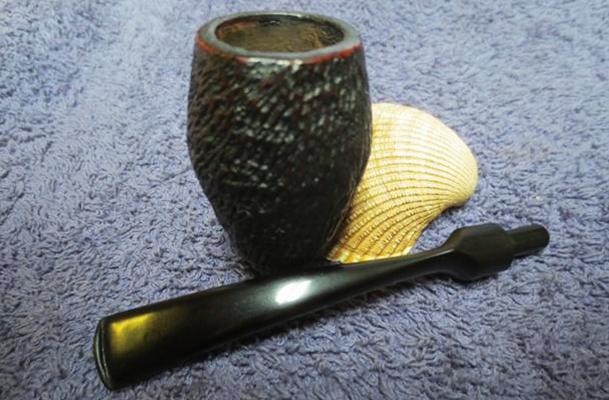
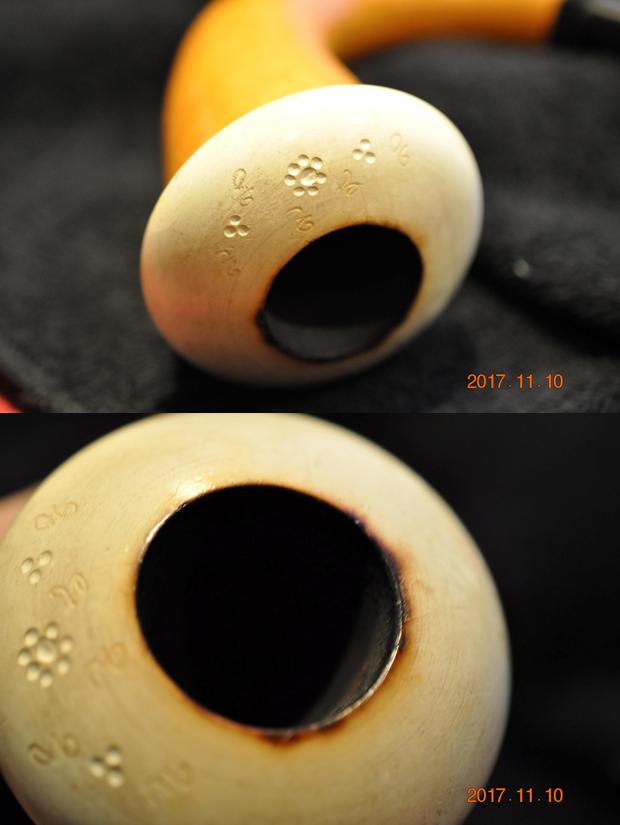
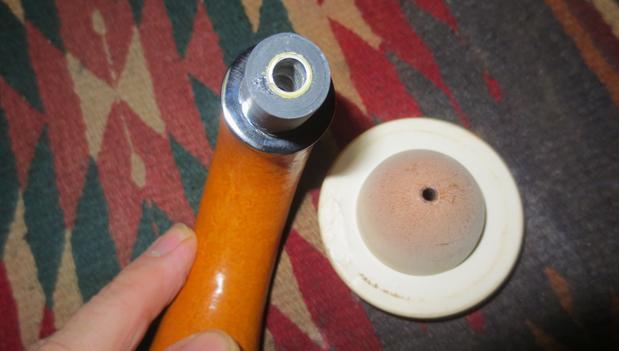
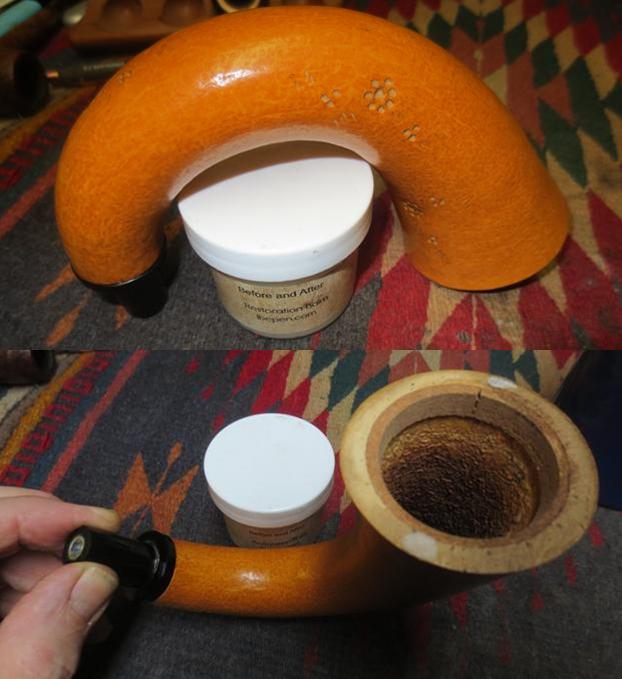
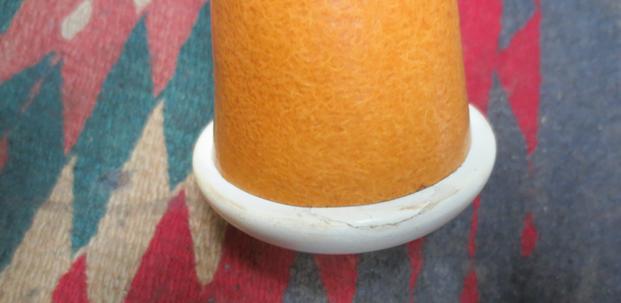
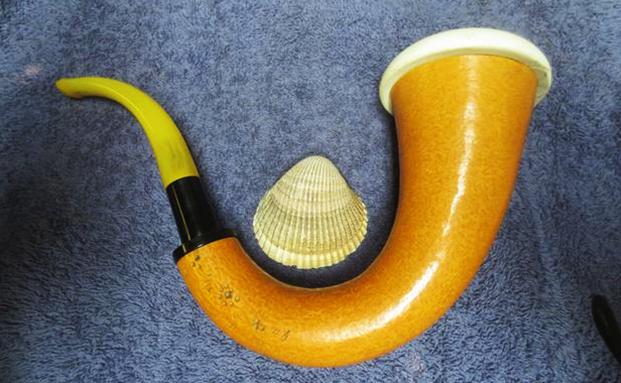
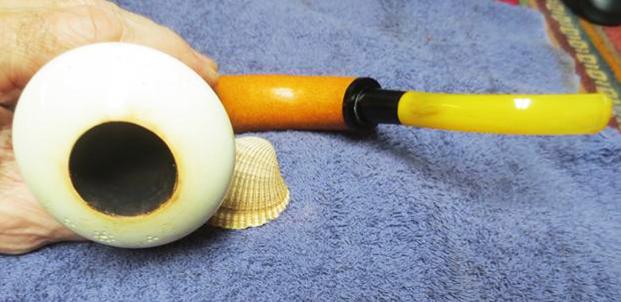
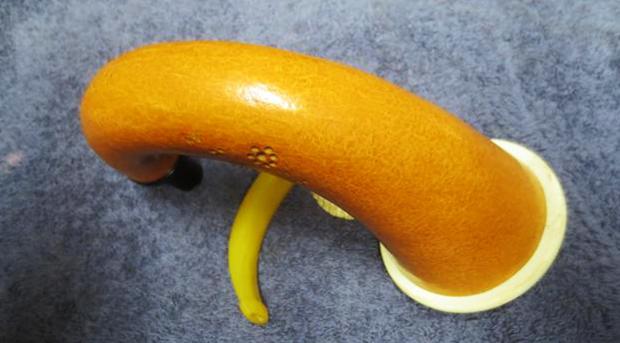
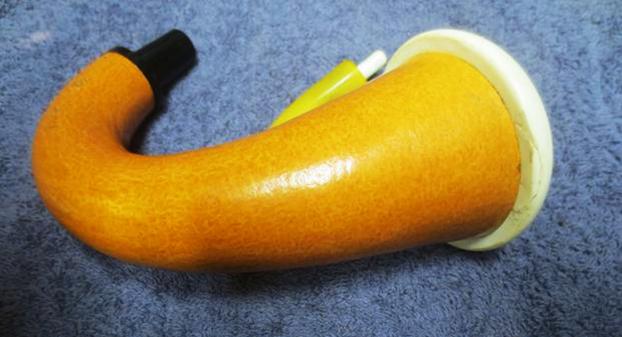
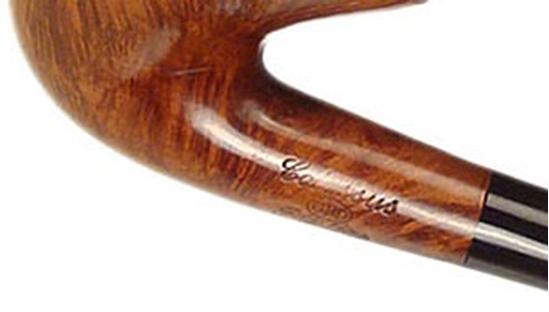
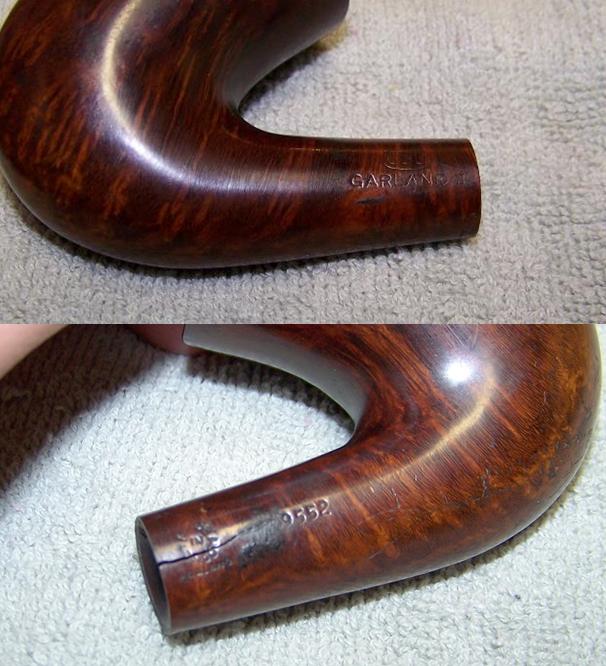
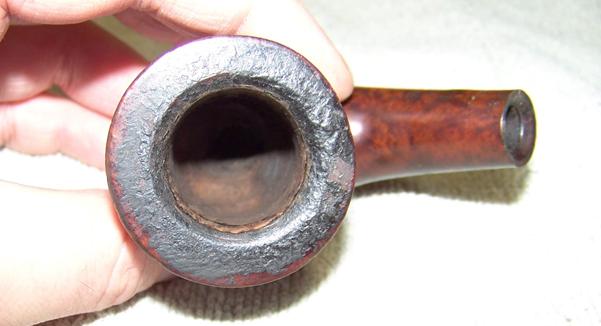
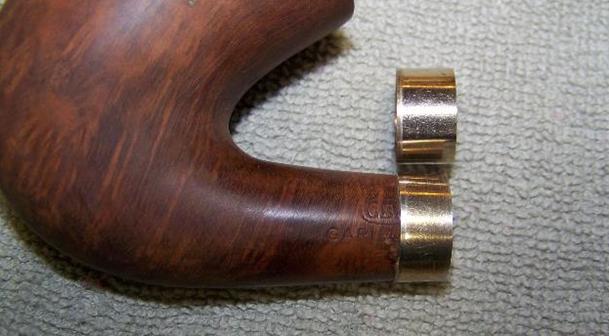
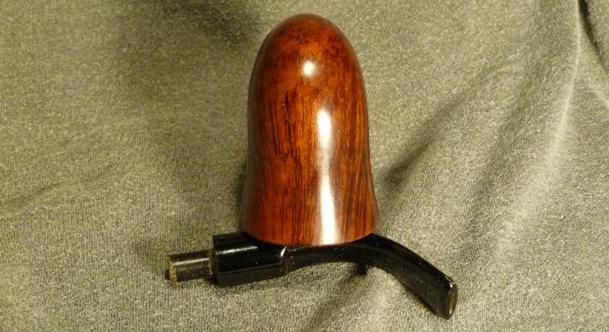
Jeff put the sandblast cauldron like bowl on the pipe base so I left it on for the photos. It was in good condition. The base has no marks on the top of the shank but on the underside is a cast Kaywoodie Club. The stem is not removable and is spring loaded and it has the Kaywoodie inset club on top. 
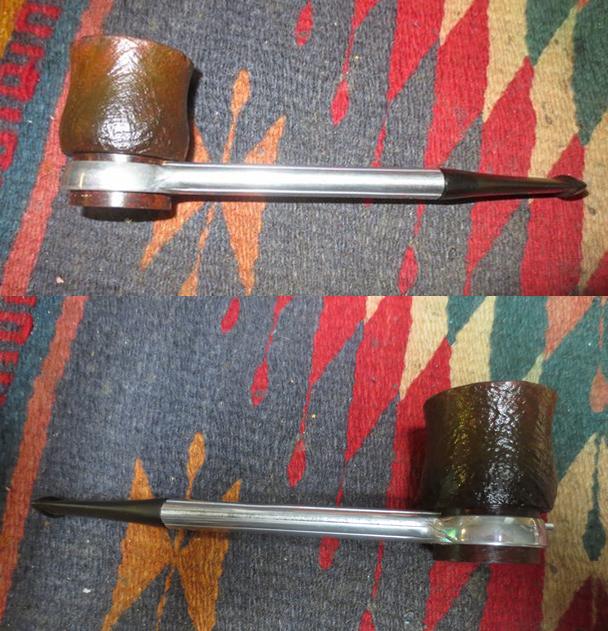
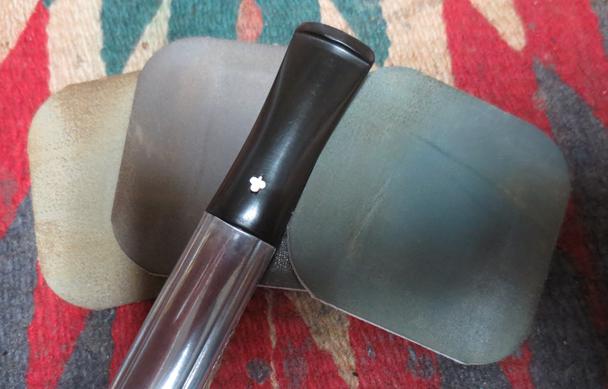
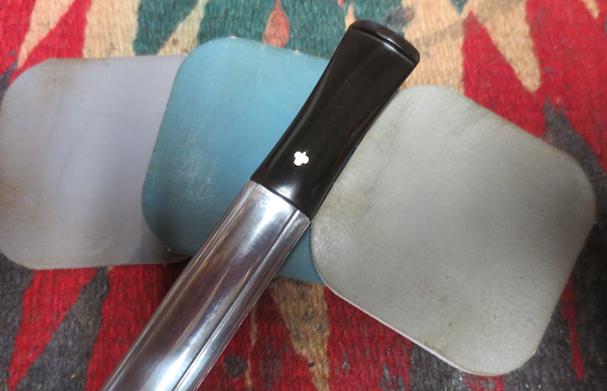
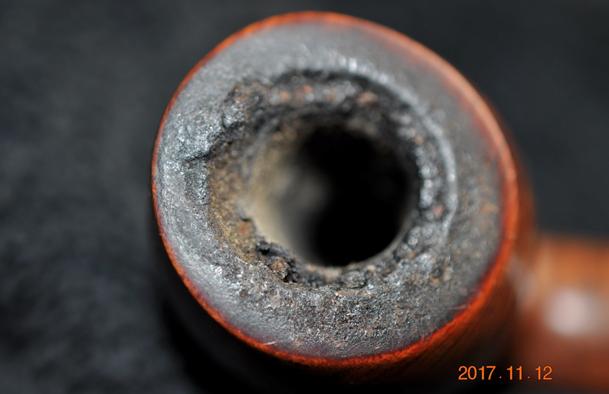
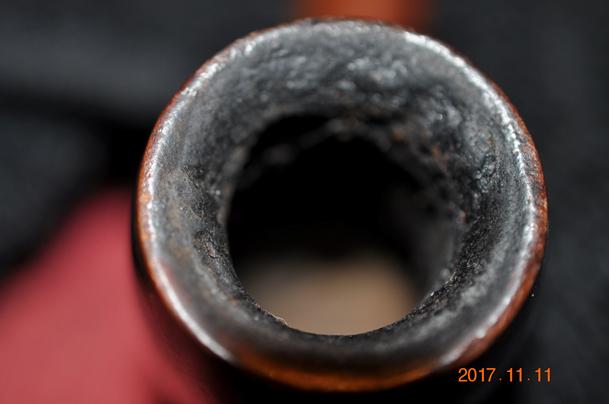
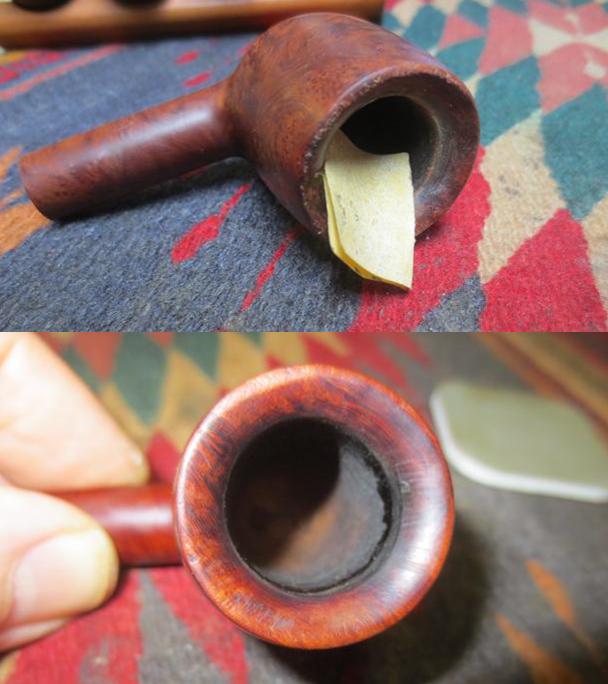
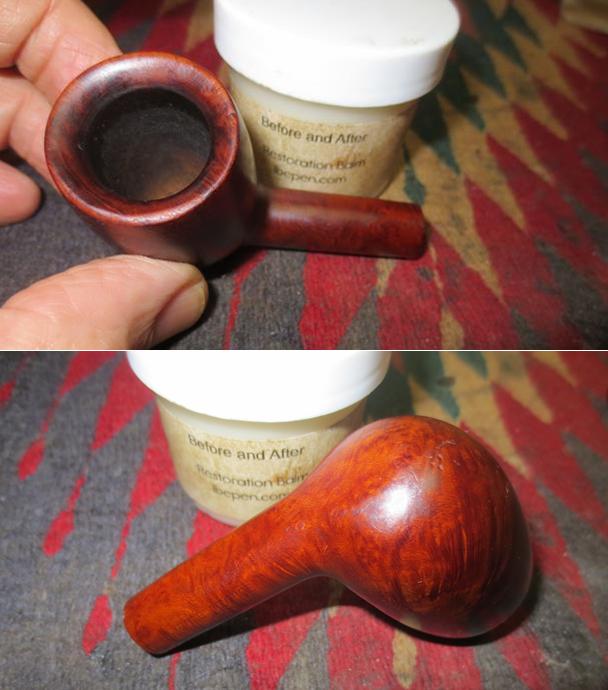
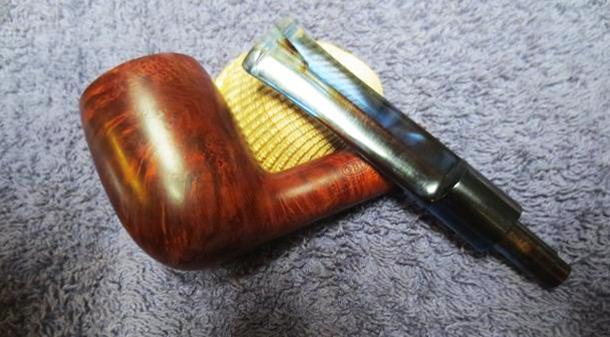
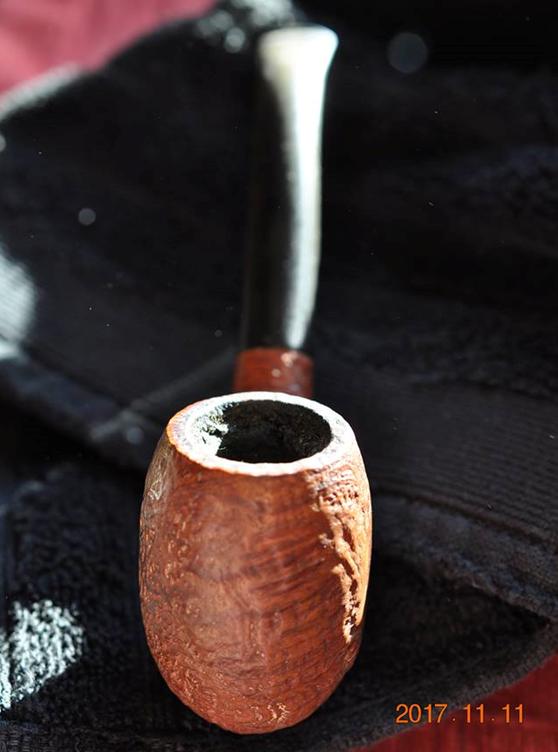
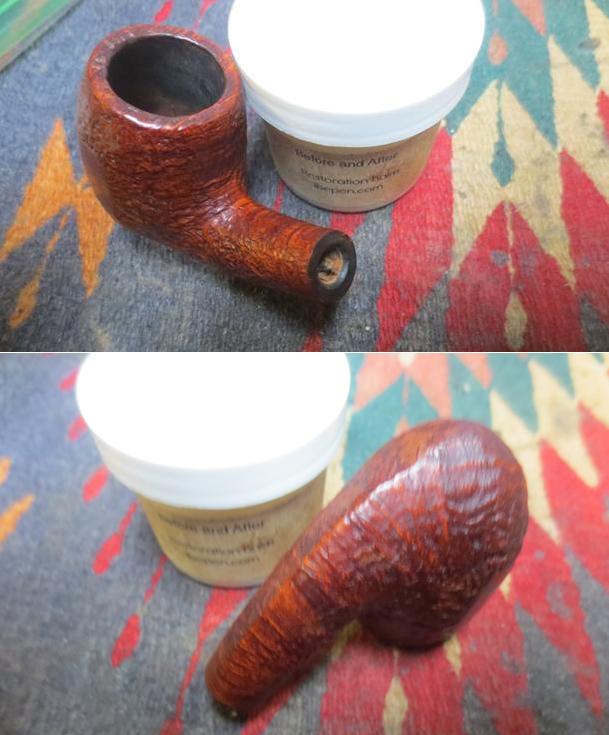
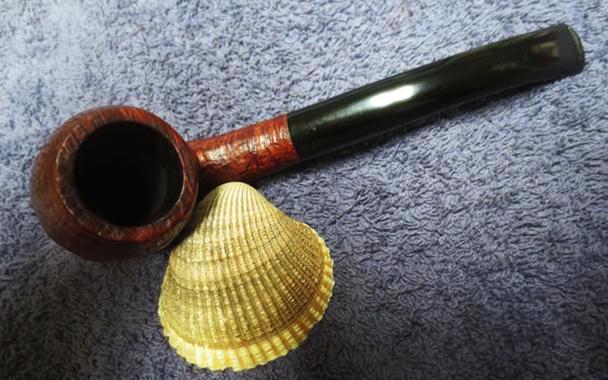
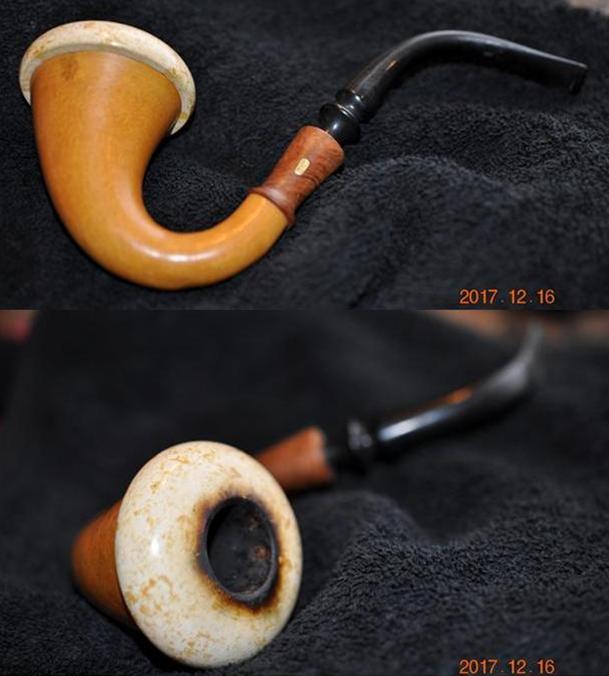
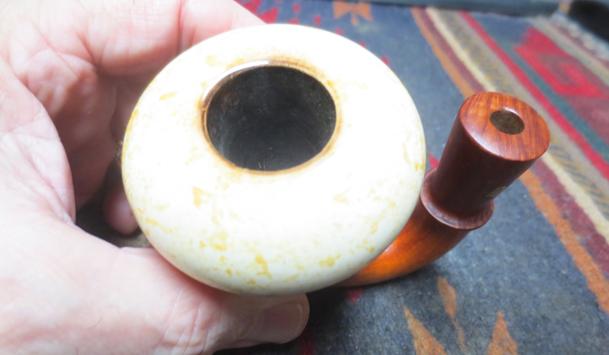
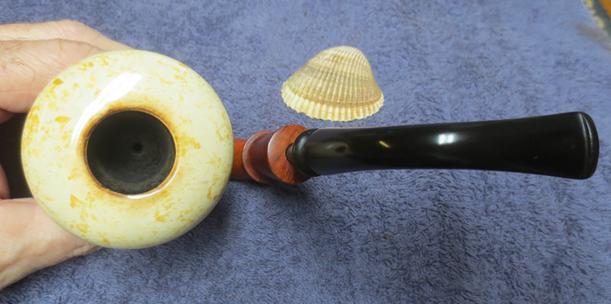
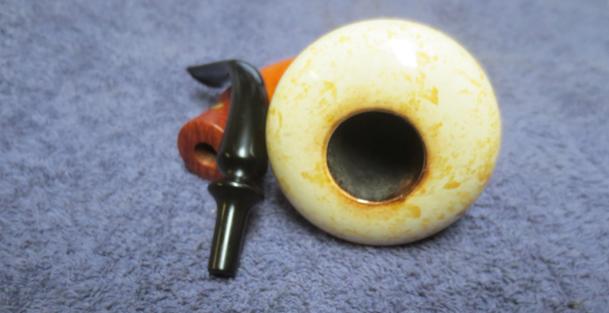
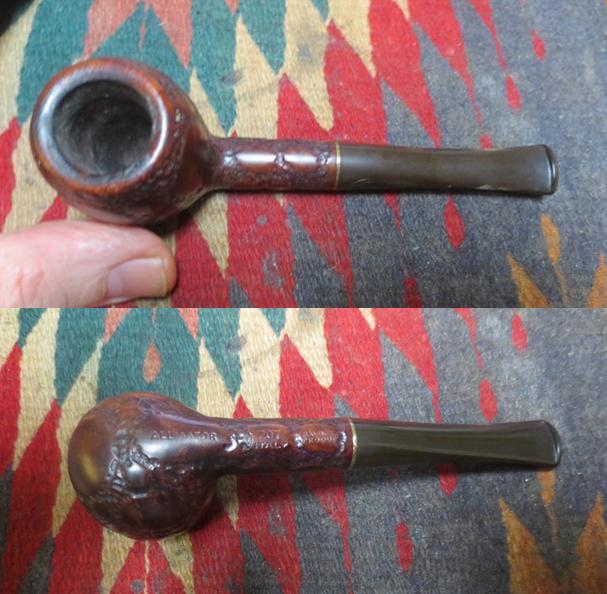
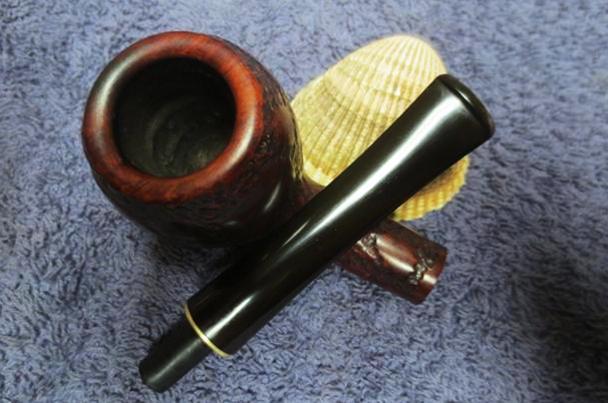
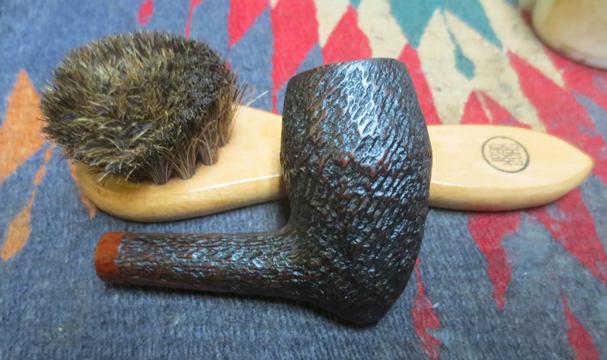
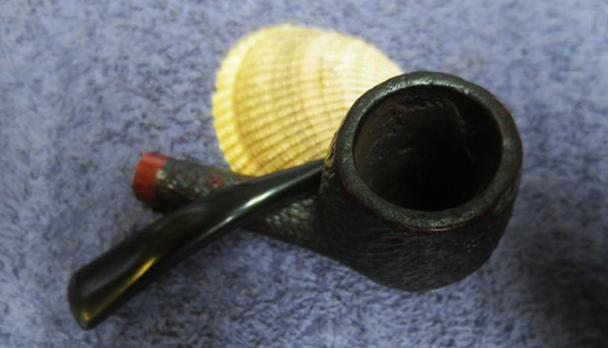
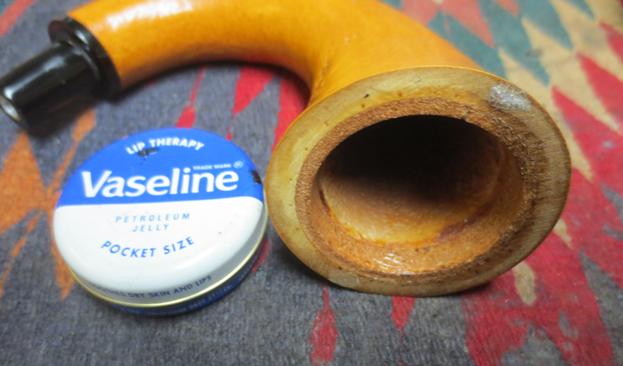
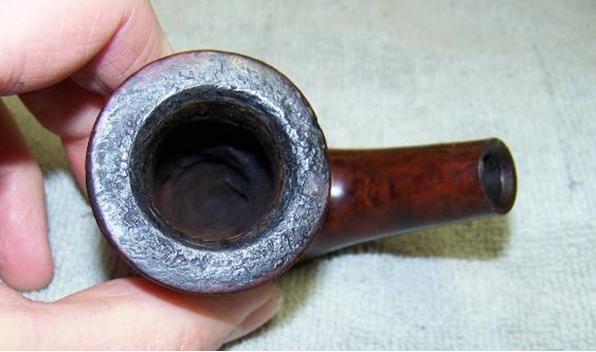
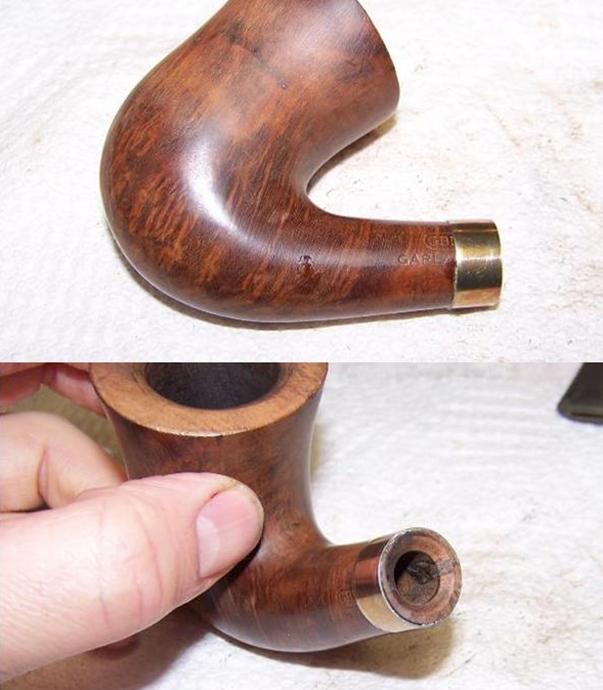
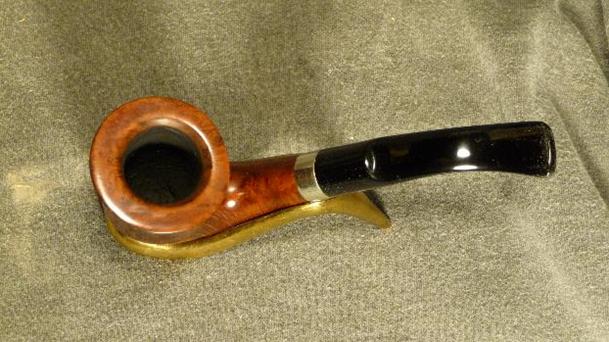
All of the bowls needed to be waxed and polished. This close up photo of the rim top and bowl show how clean he was able to get them. The base and stem also needed to be polished but they were also clean and free of tooth marks.
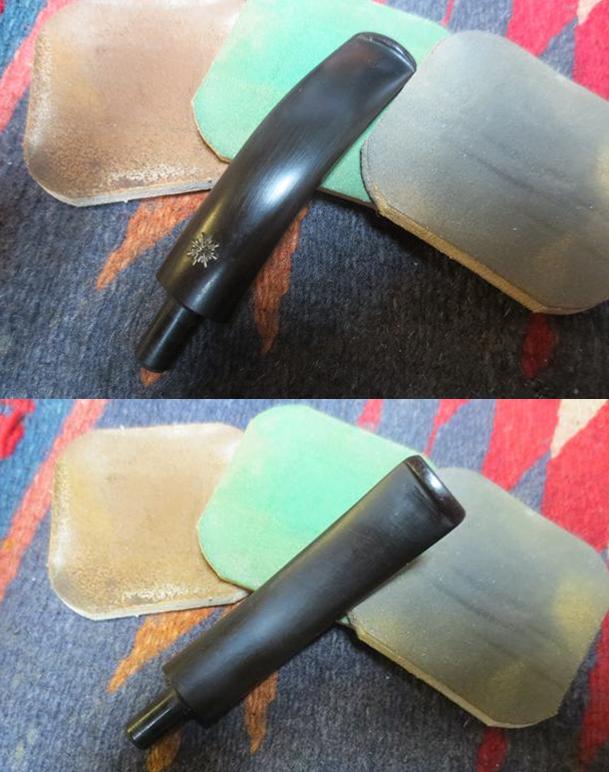
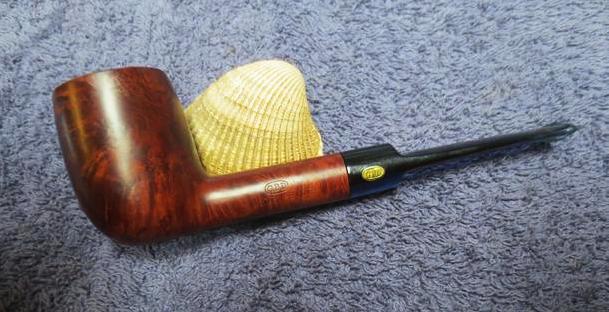
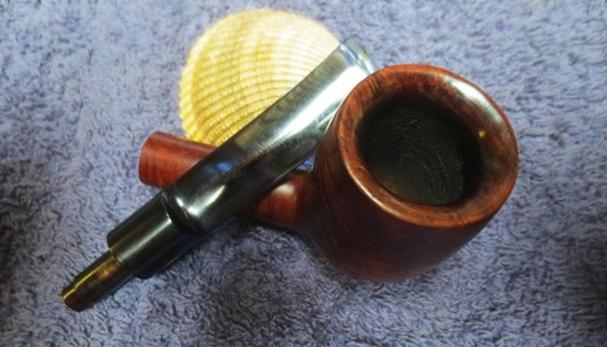
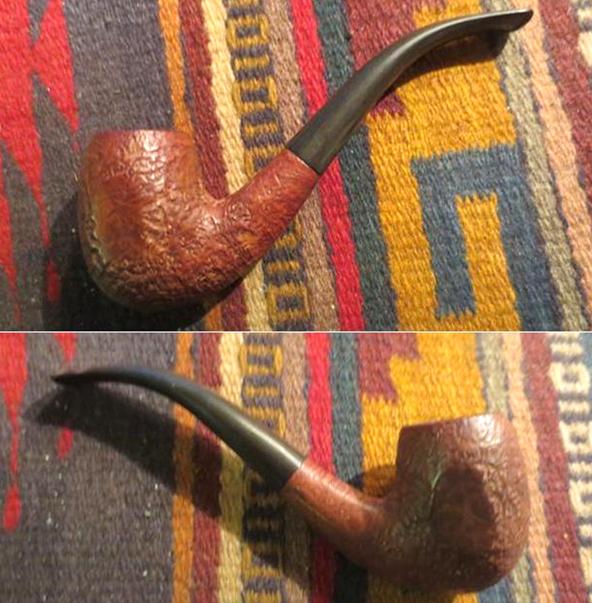
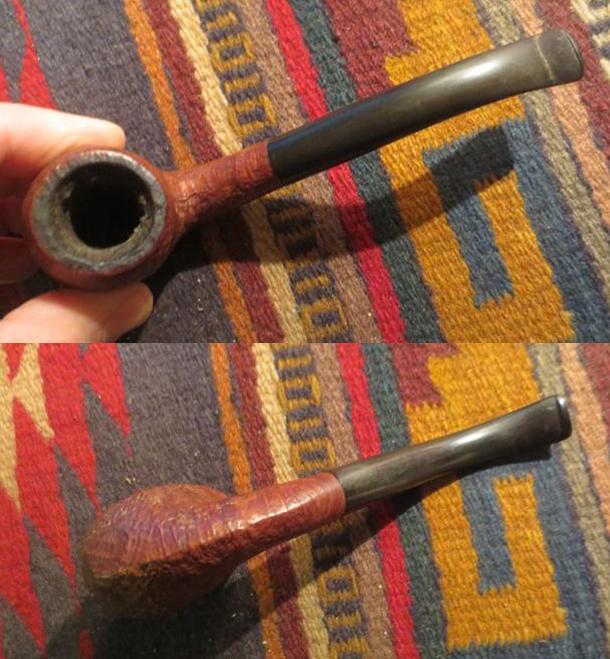
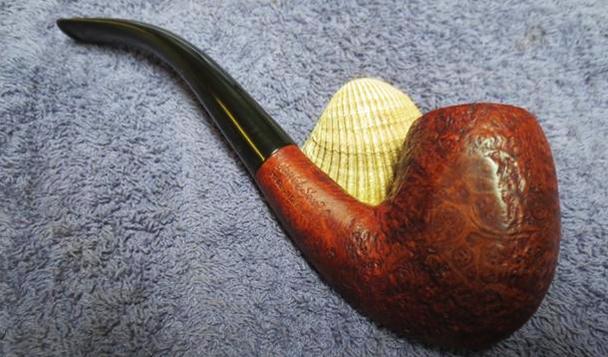
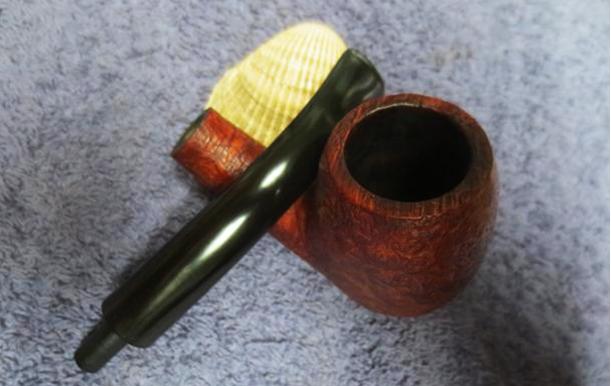
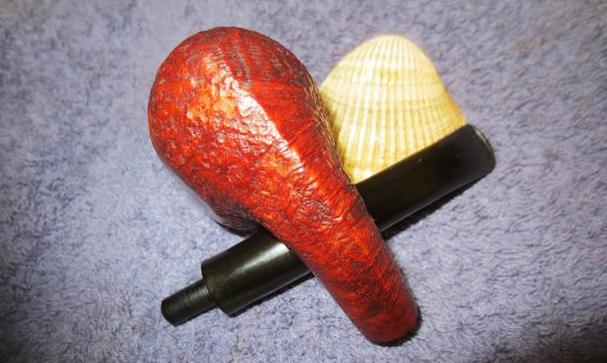
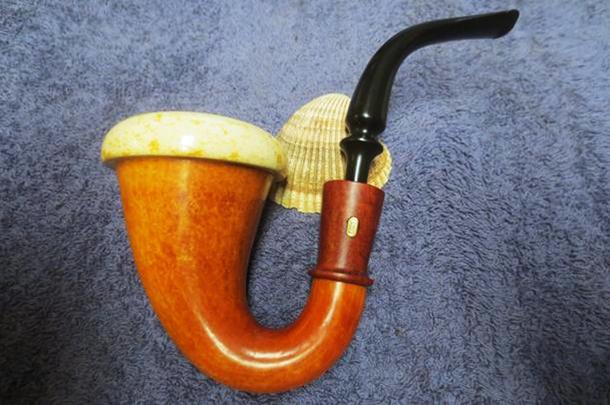
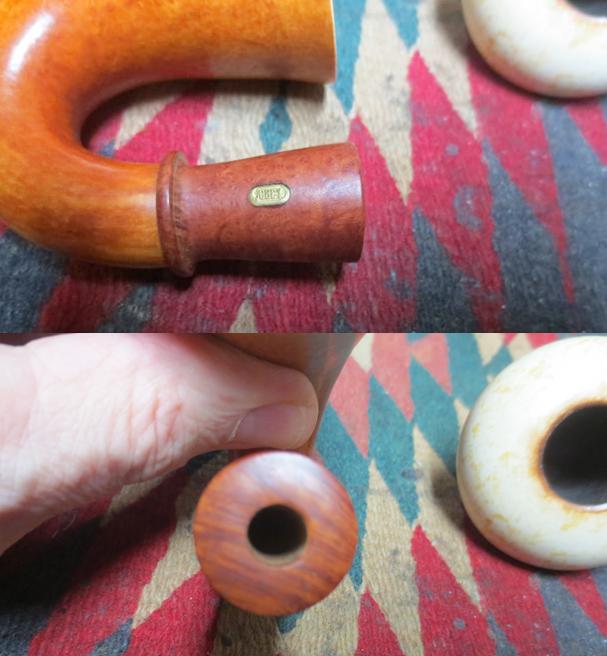
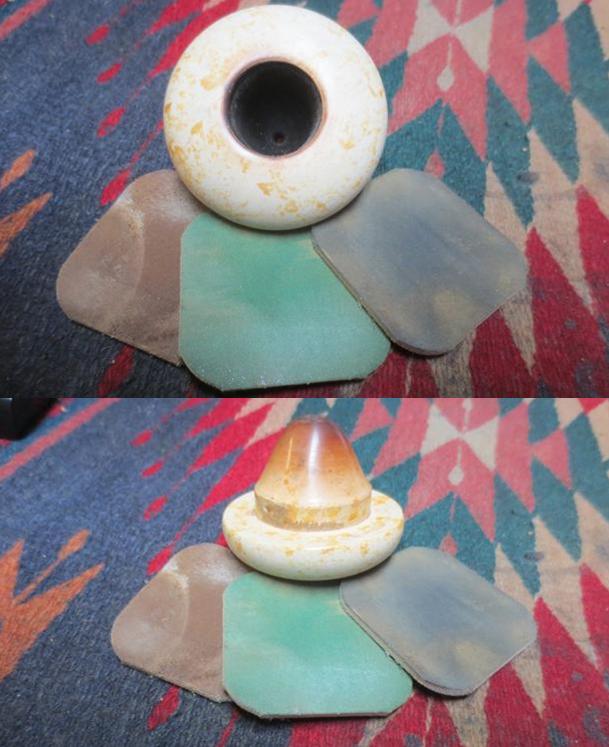
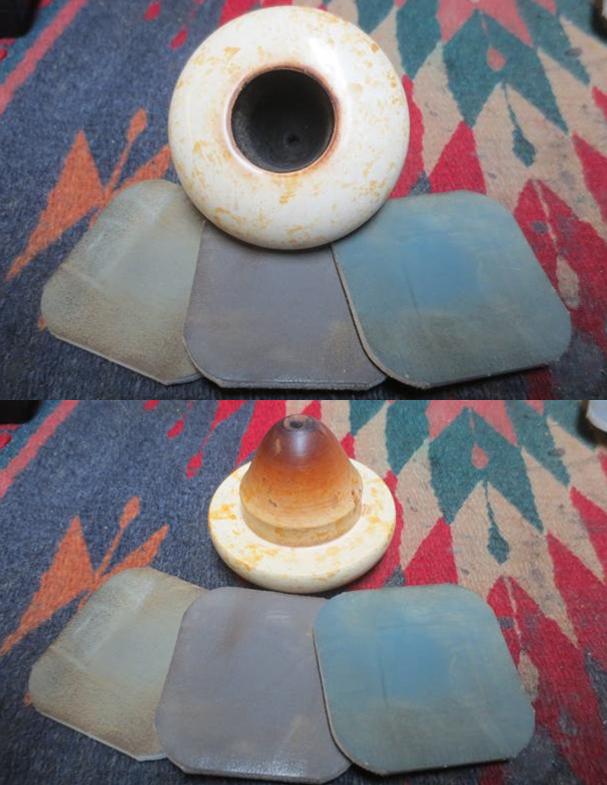
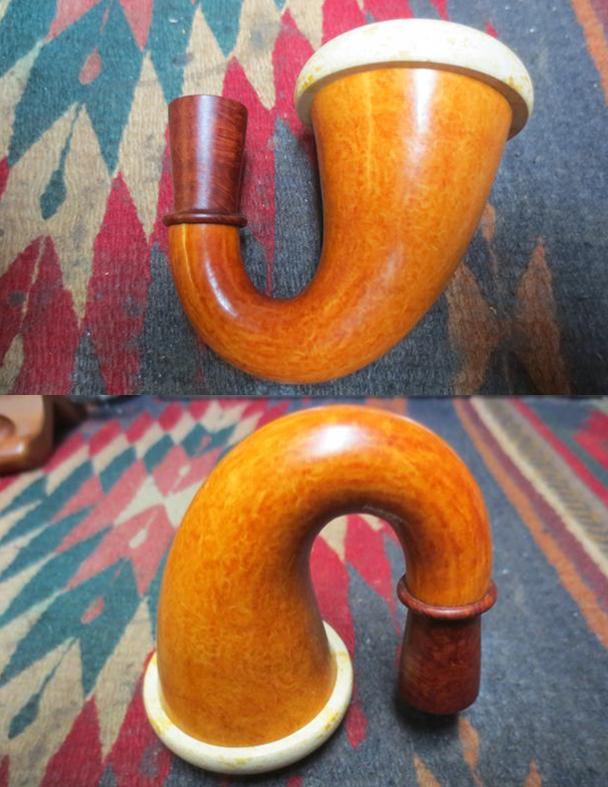
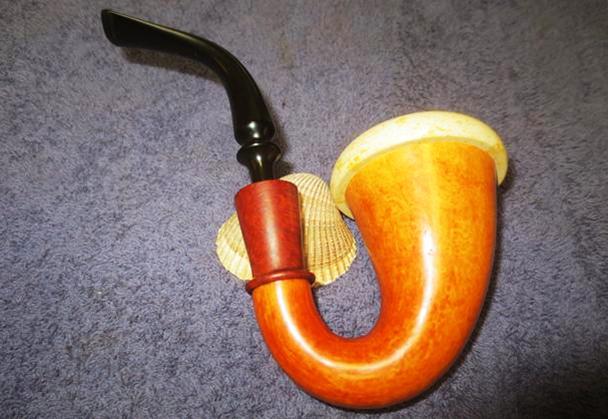
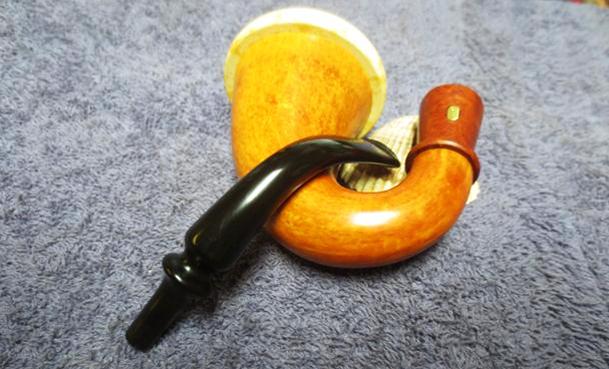
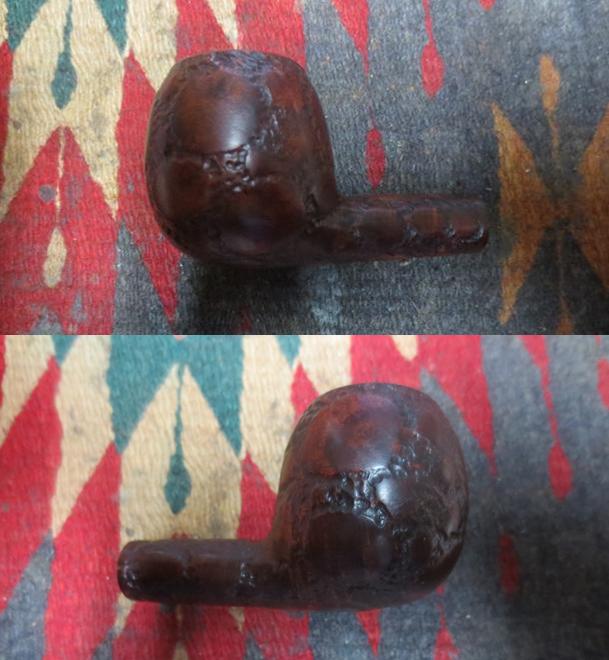
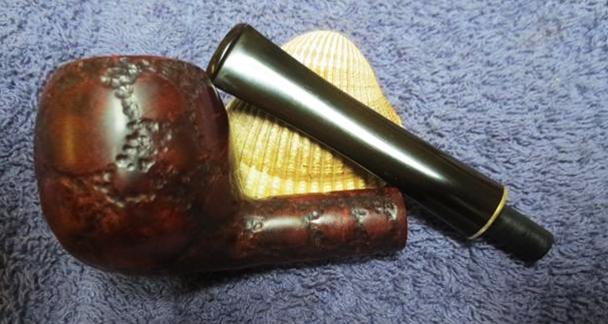
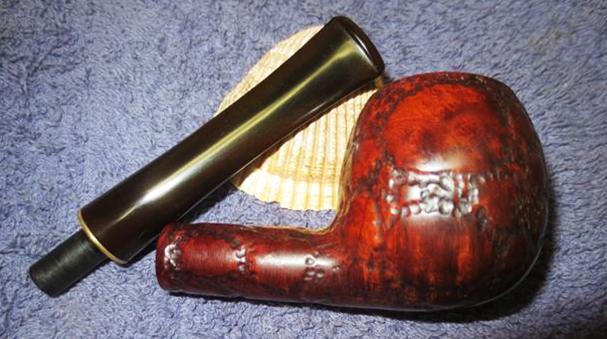
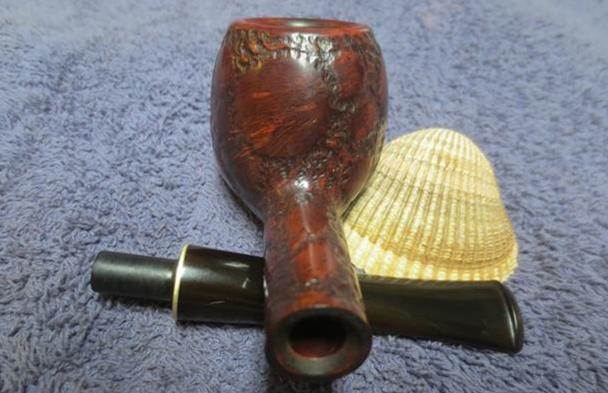
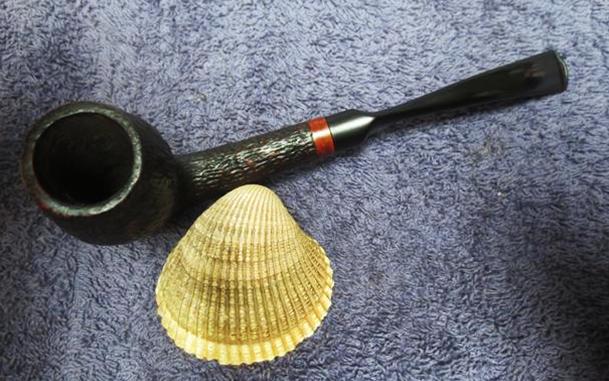
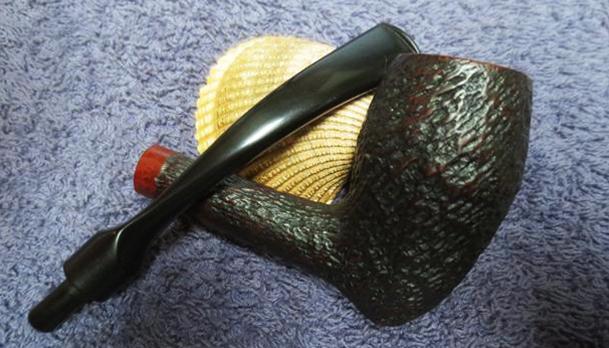
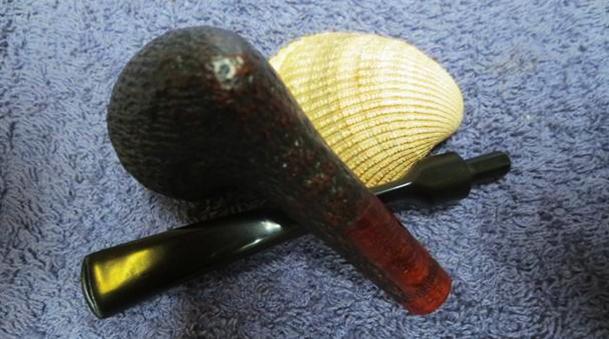
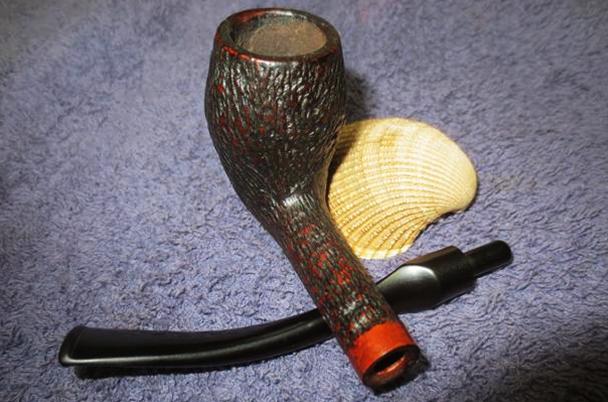
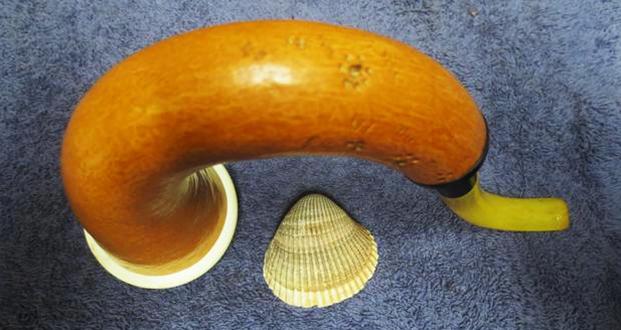
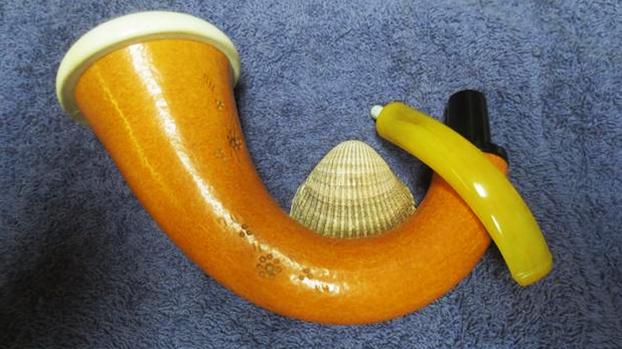
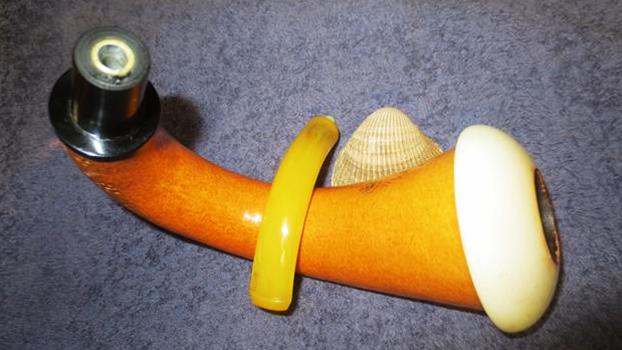
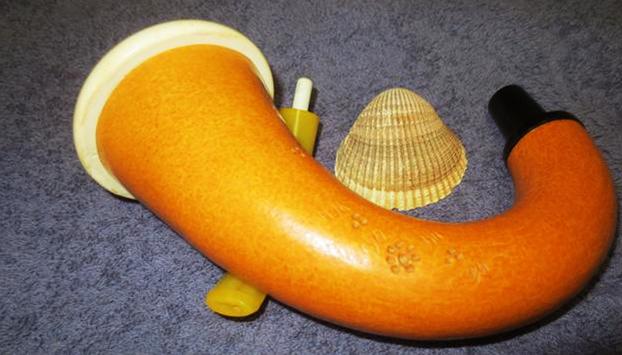
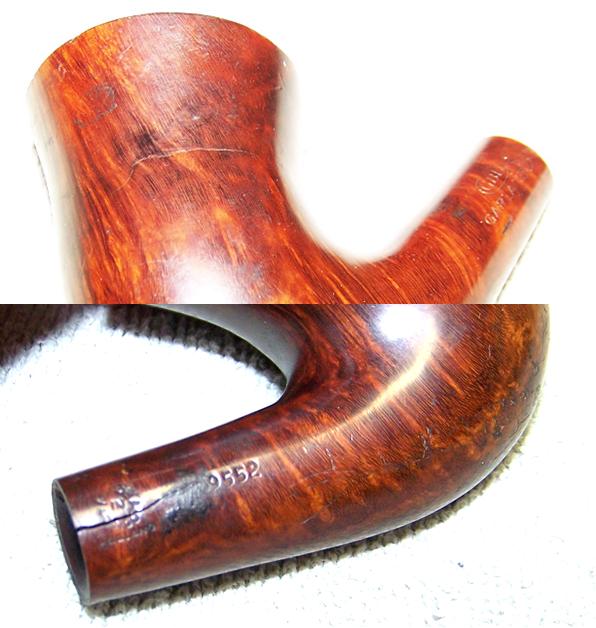
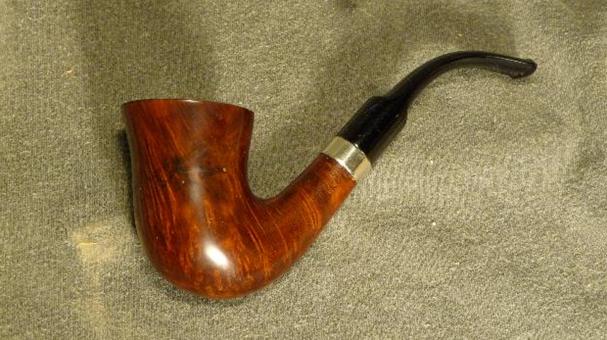
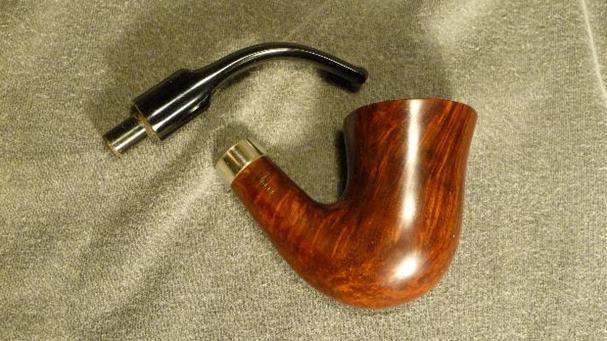
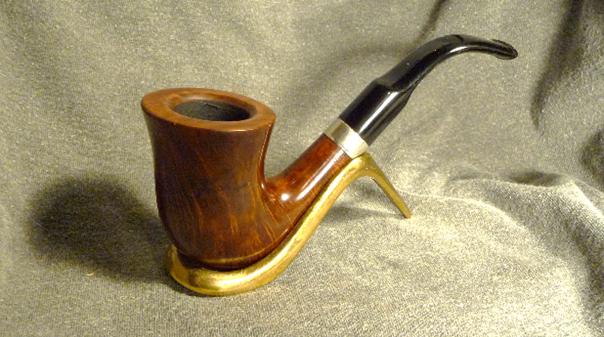
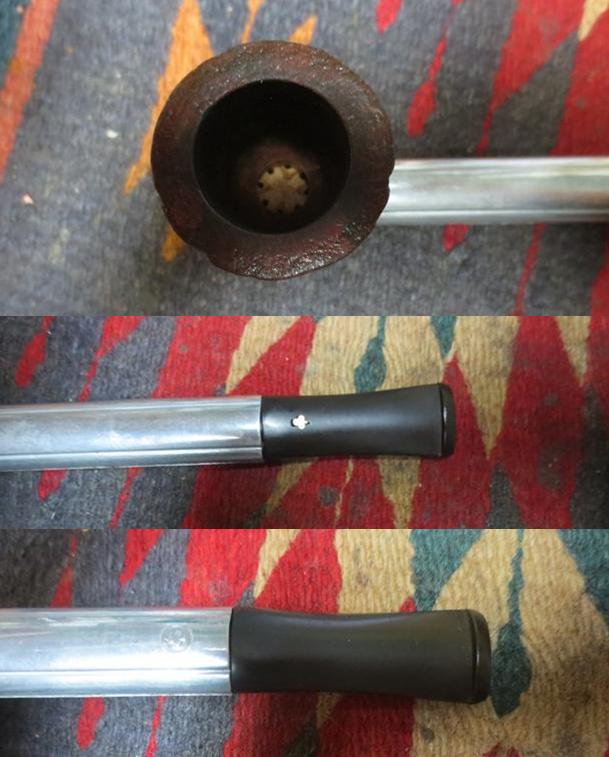
I took the bowl off the base and took a series of photos to show the pipe as a set. It is a unique and in its own way, beautiful set of bowls and base.
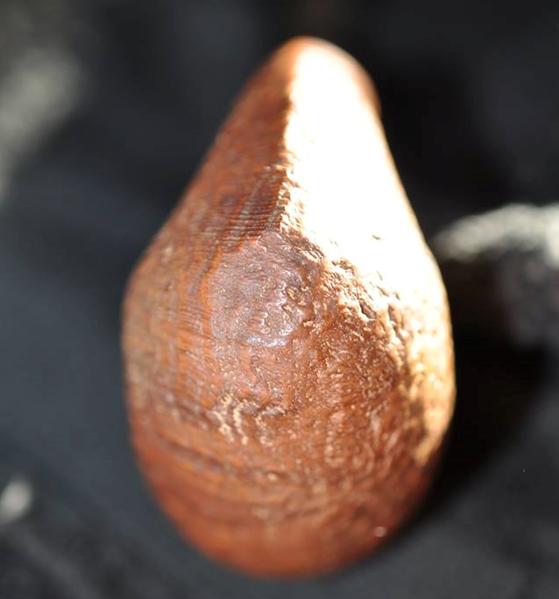
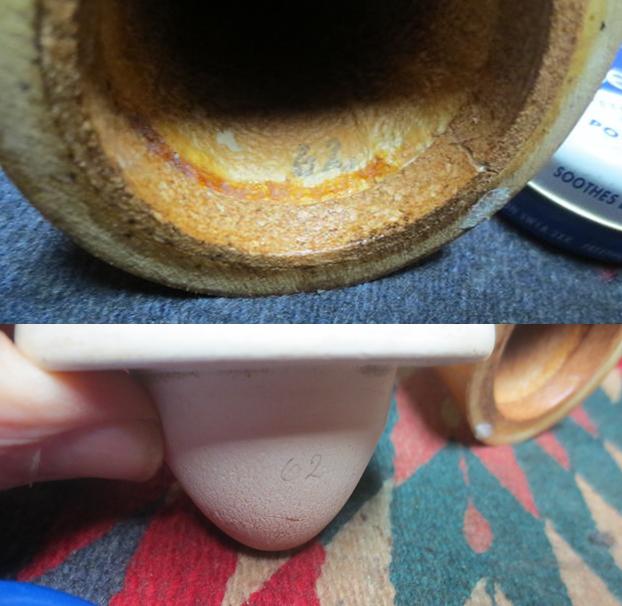
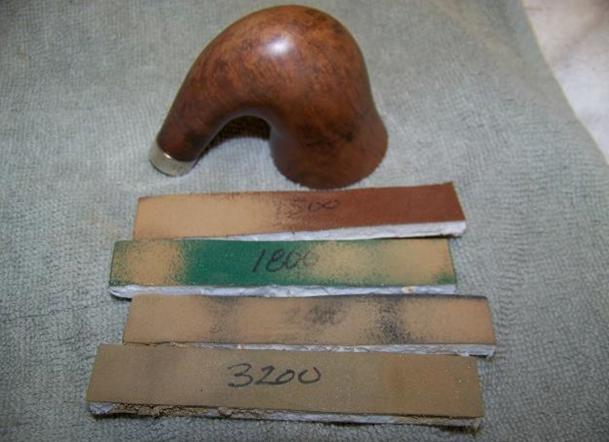
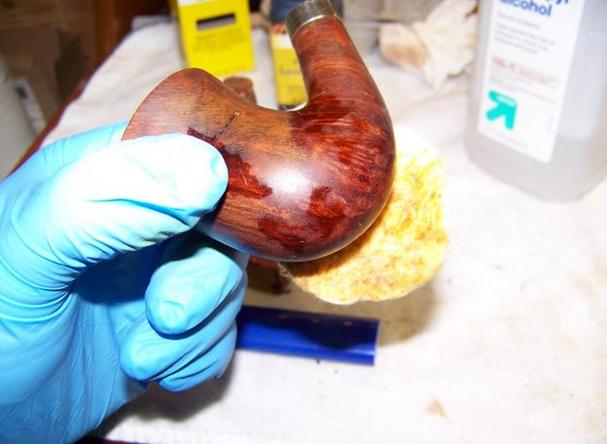
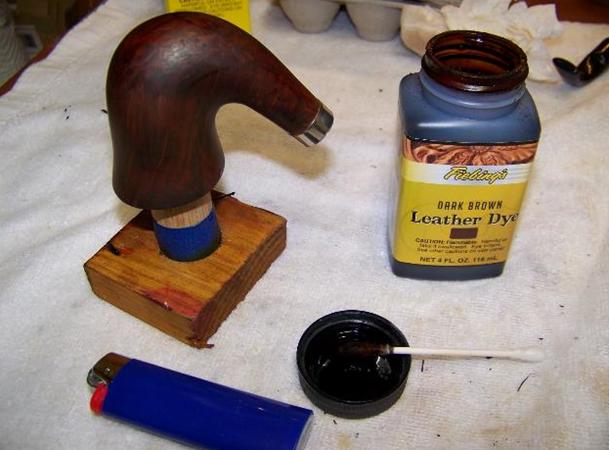
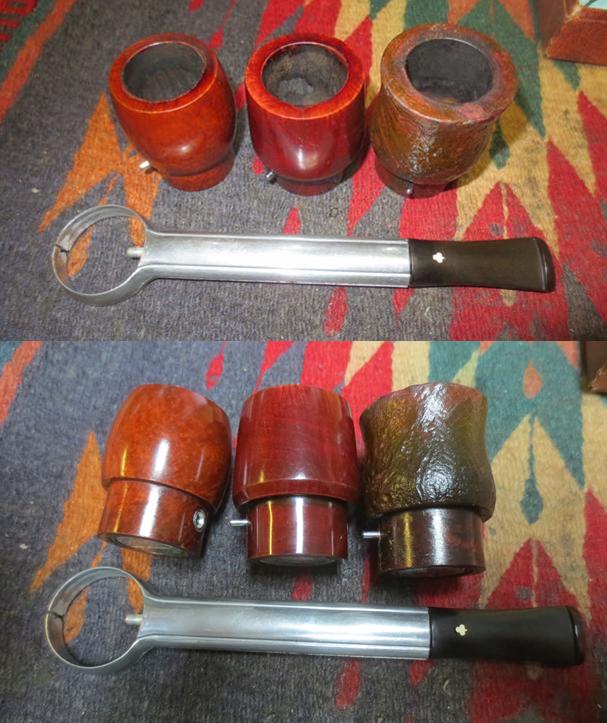
The rim top on the two smooth bowls was in good condition. I polished it with 1500-4000 grit micromesh sanding pads to polish them. The rim top on the sandblast bowl had some spots where the finish had been rubbed free and there were some nicks. I used a brass bristle wire brush to clean off the surface of the rim and then restained it with a dark brown stain pen. I set it aside and let the stain dry. Once it had dried I buffed it to polish the restained rim and the bowl.
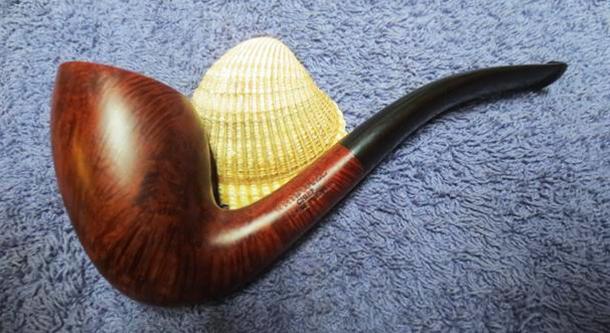
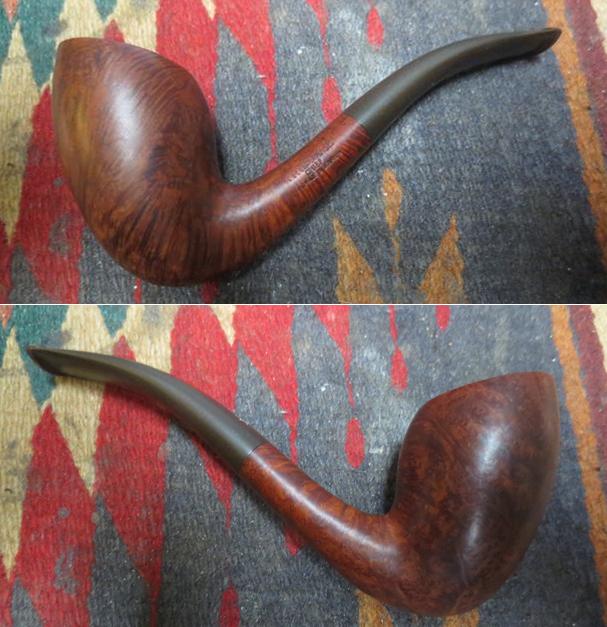
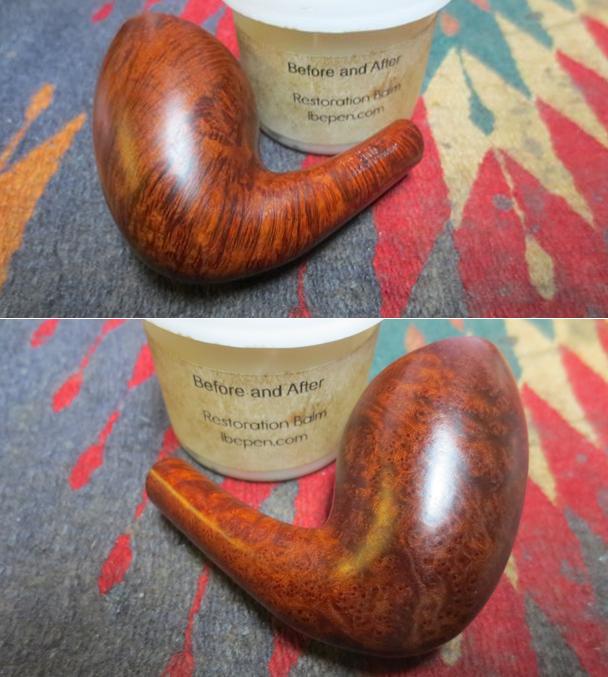
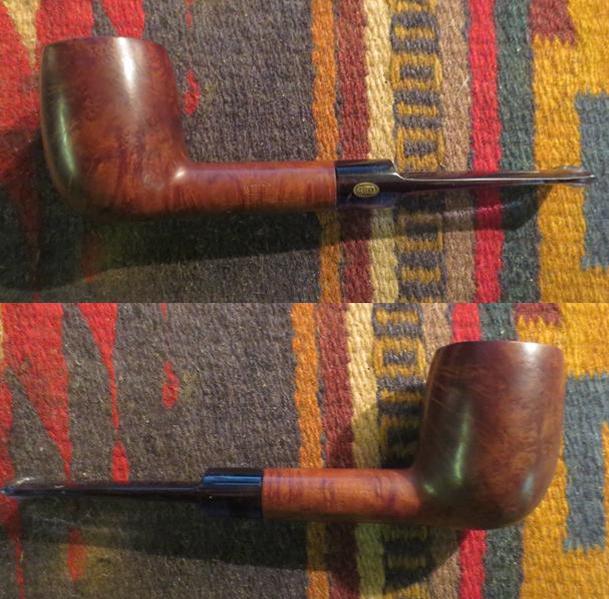
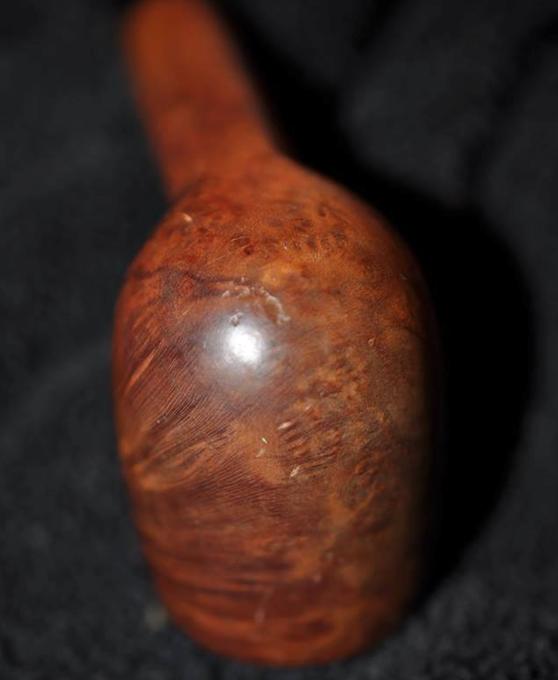
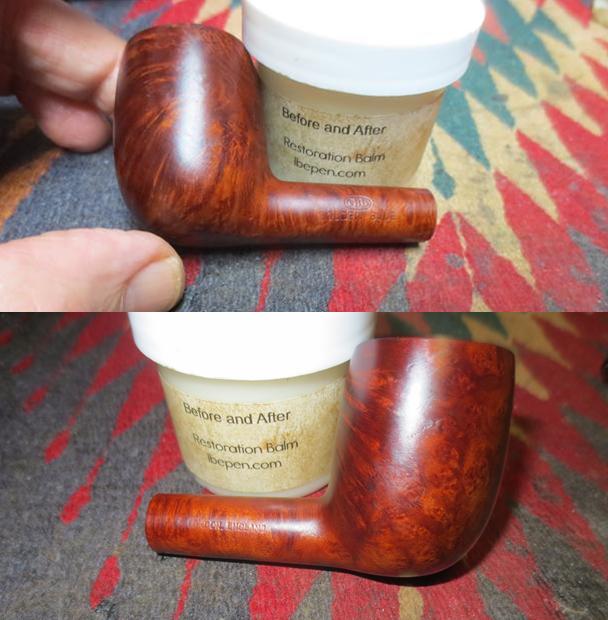
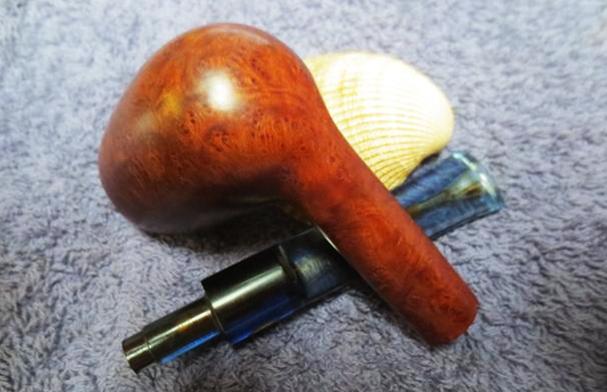
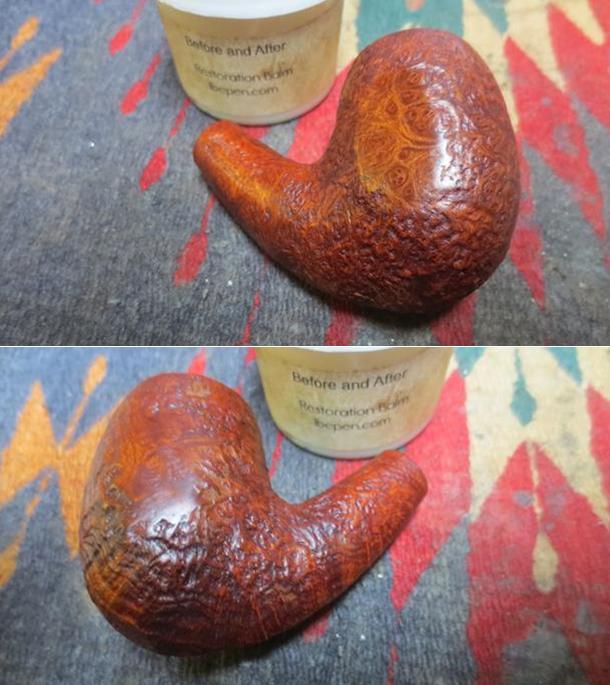
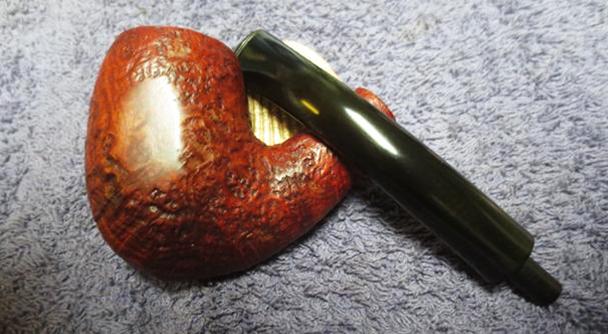
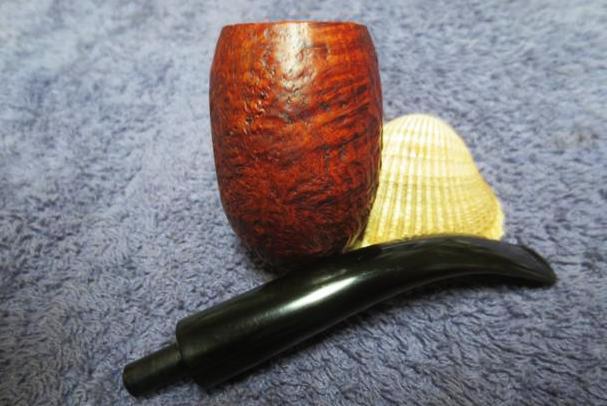
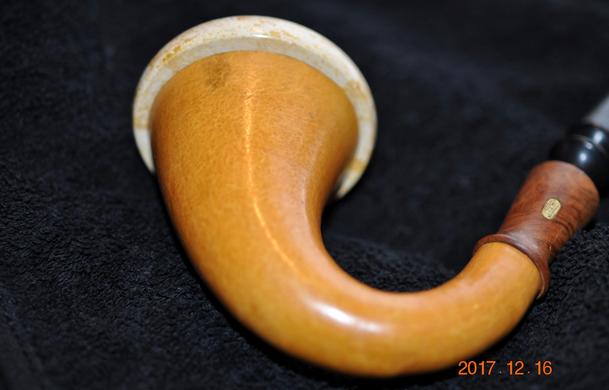
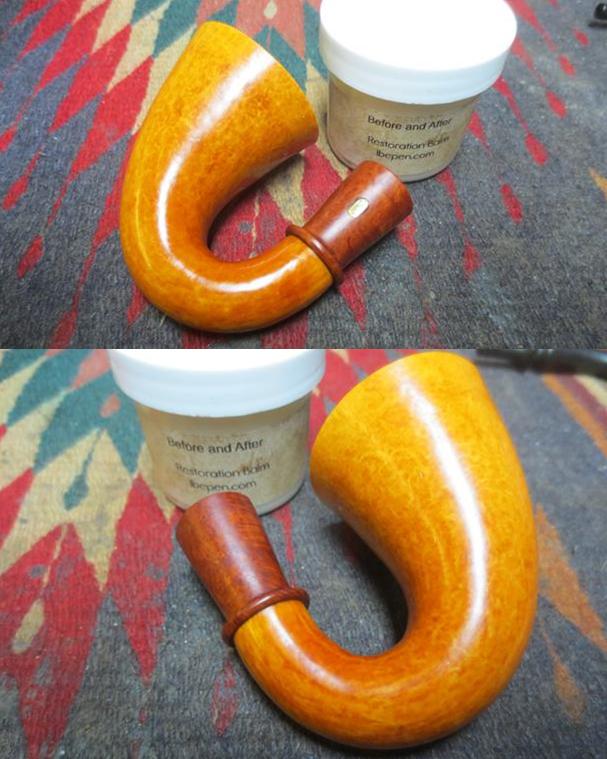
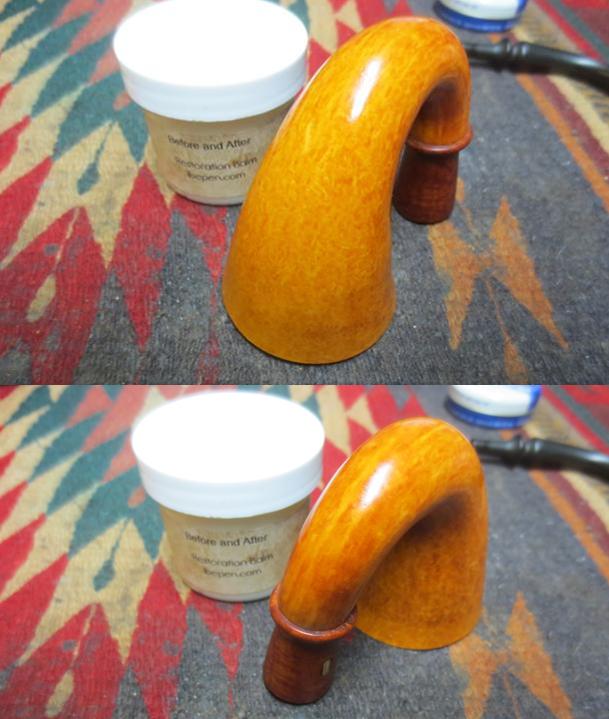
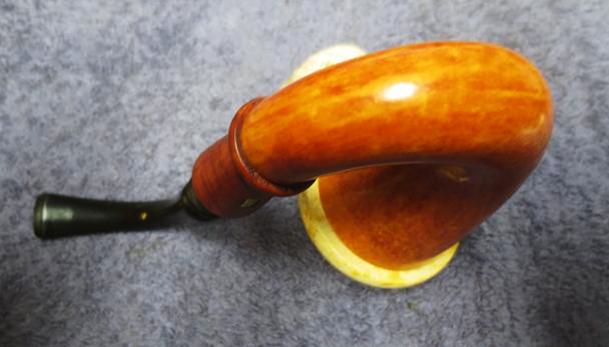
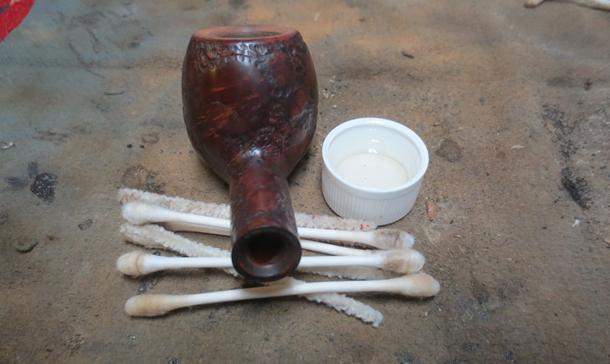
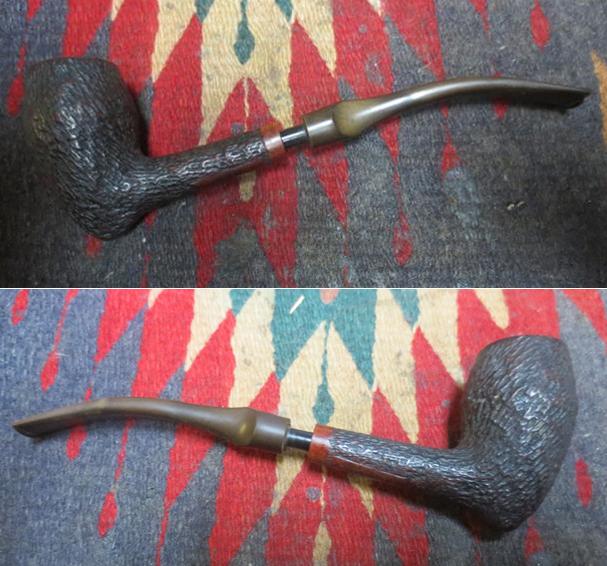
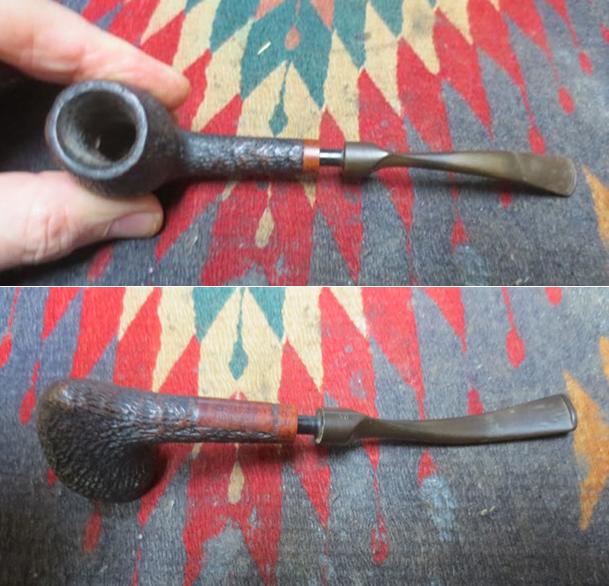
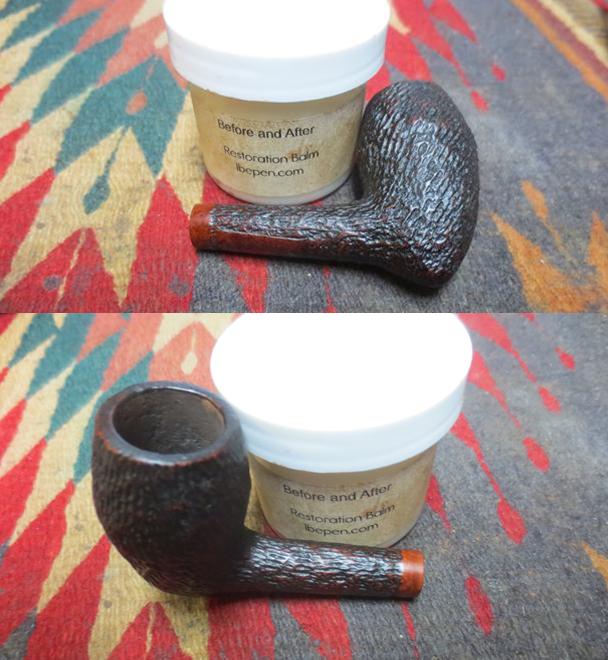
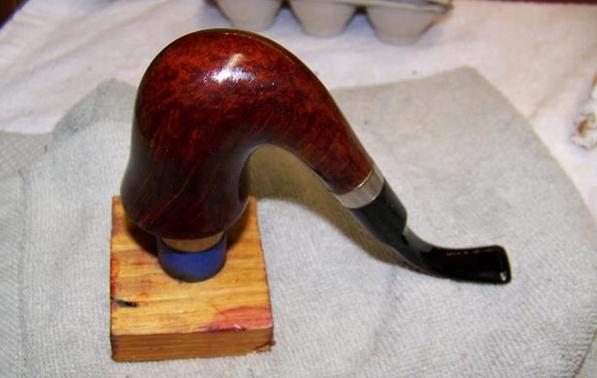
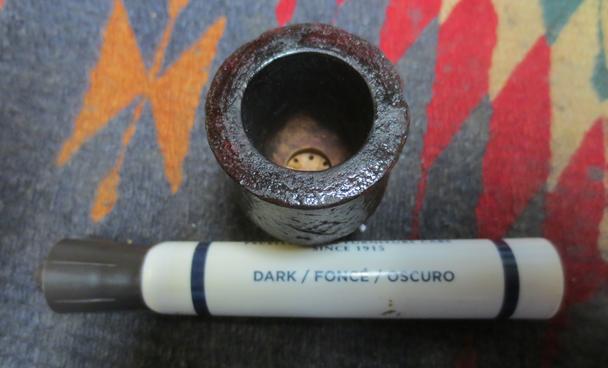
I worked some Before & After Restoration Balm into the surface of each of the briar bowls with my finger tips to deep clean, enliven and protect the briar of the smooth and the sandblast finishes. I let each bowl sit for a few minutes and then buffed them with a cotton cloth. The grain of the briar on each bowl really began to show through at this point and there was a rich shine to the briar. I took some photos of the bowl at this point to mark the progress in the restoration. 
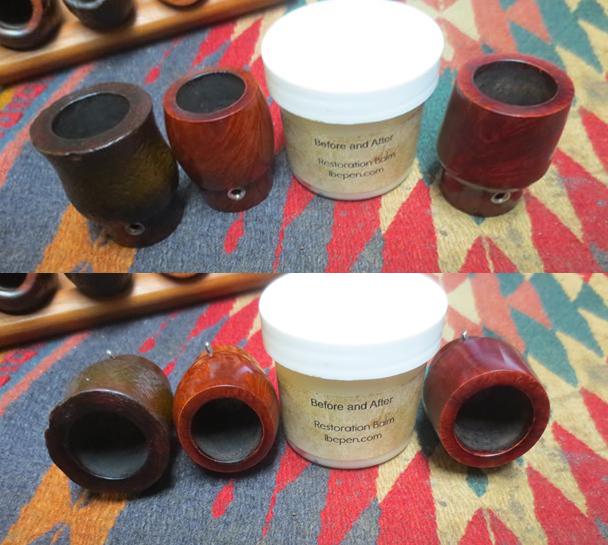
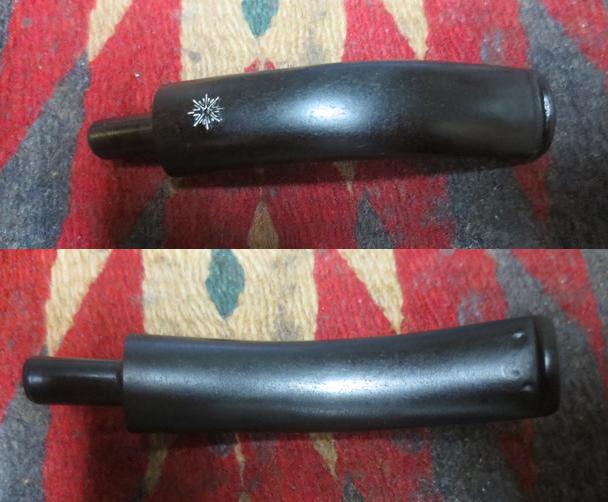
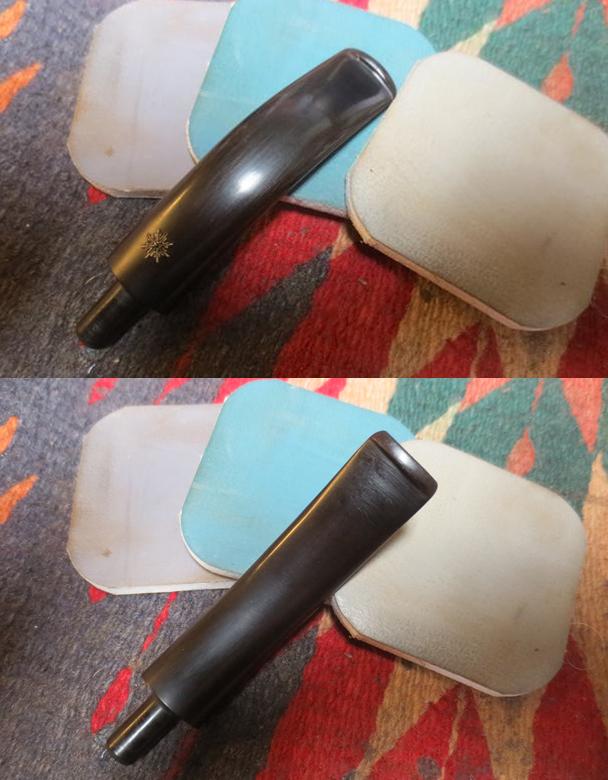
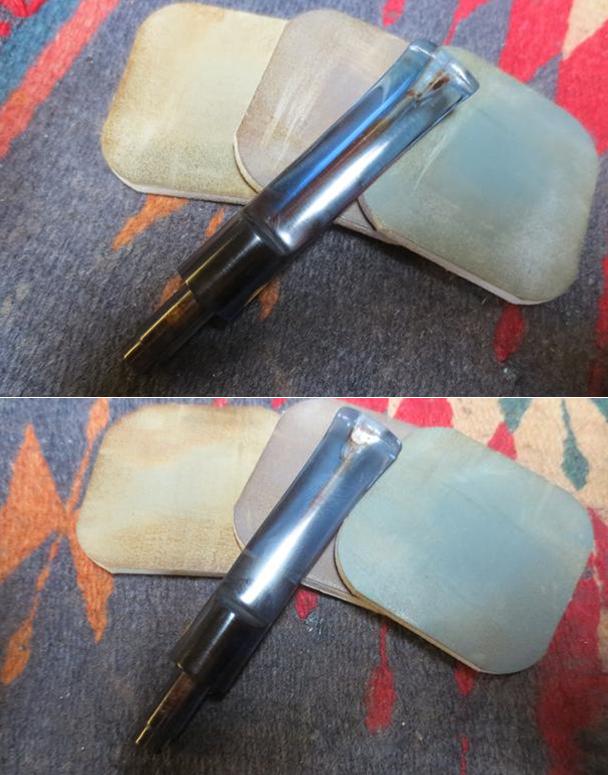
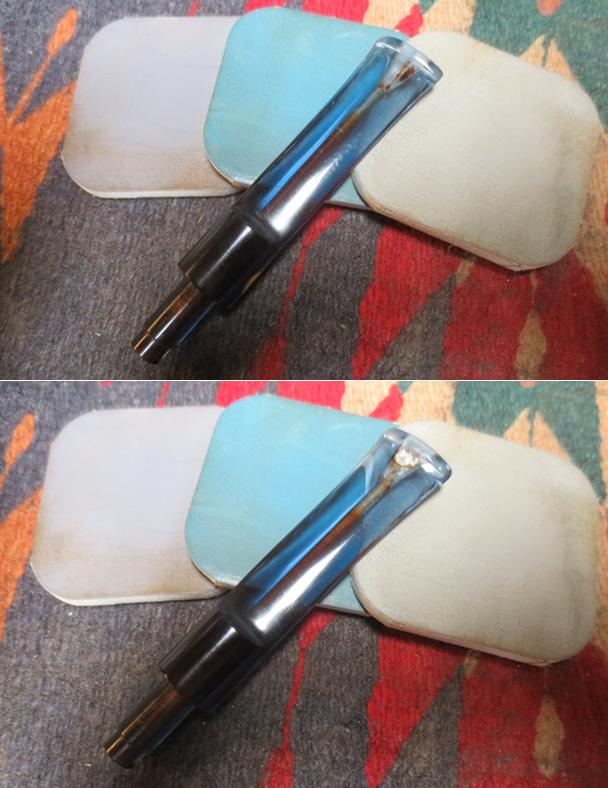
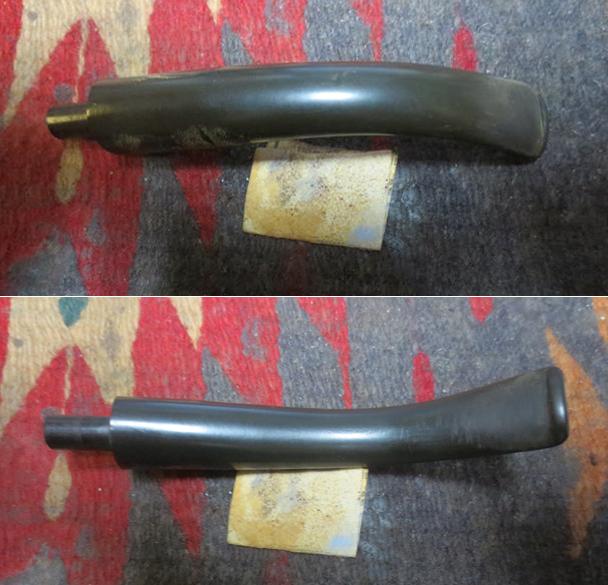
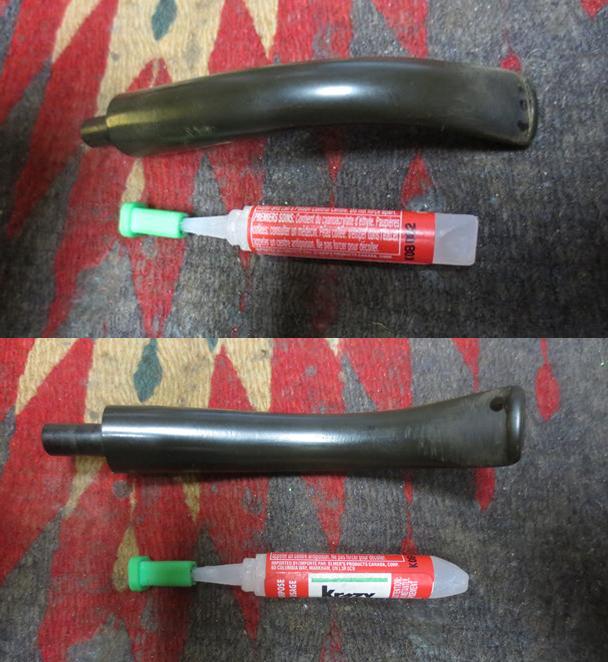
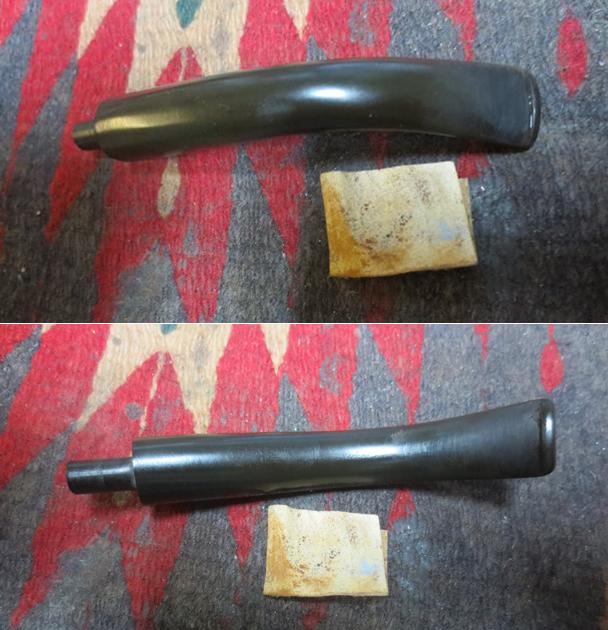
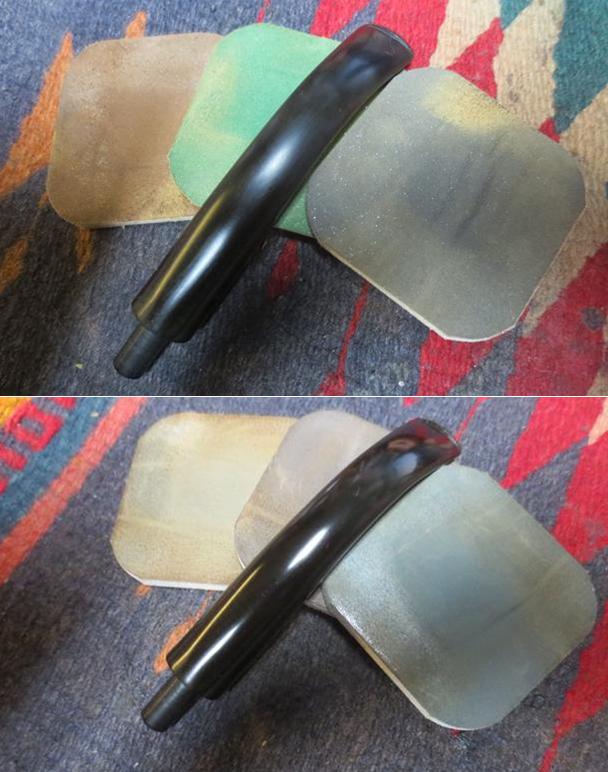
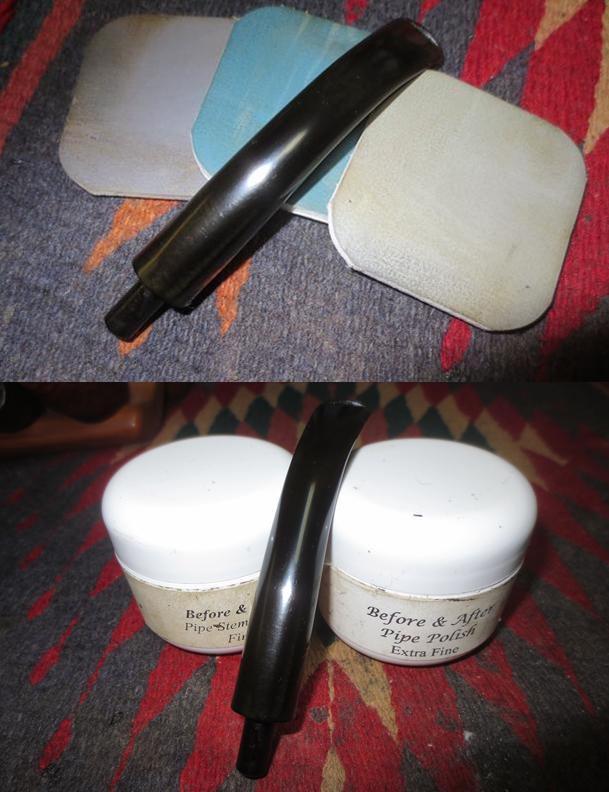
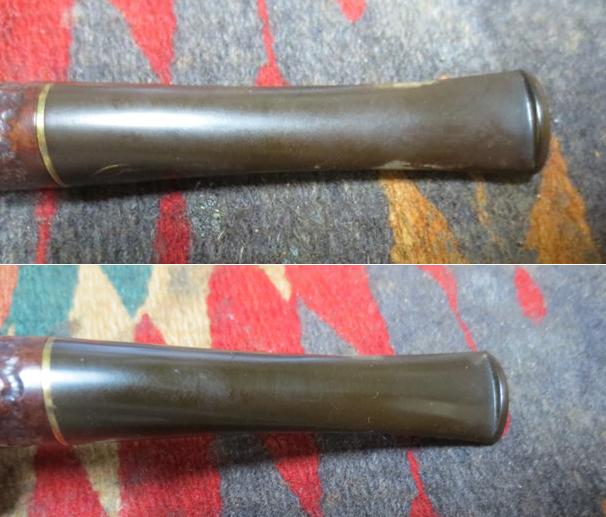
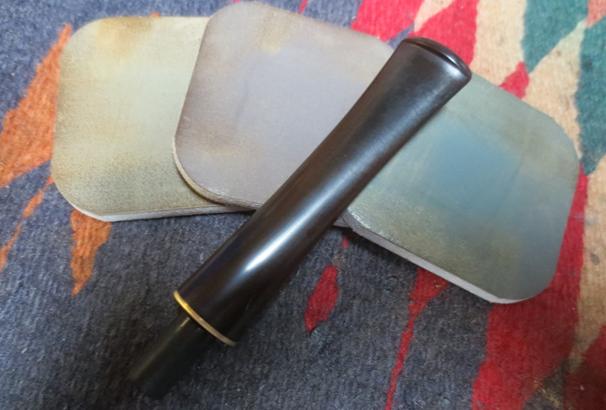
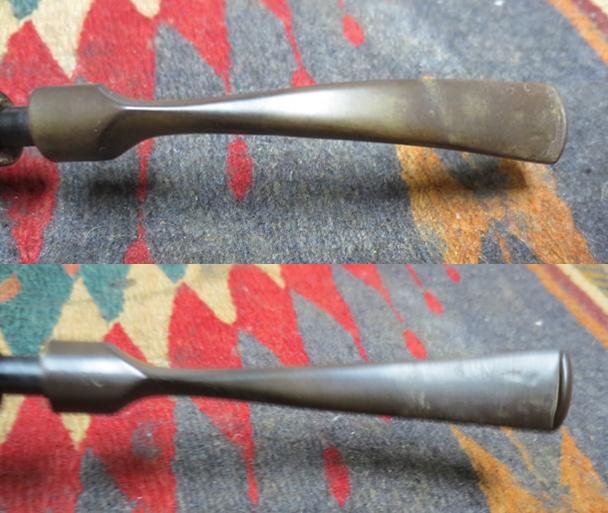
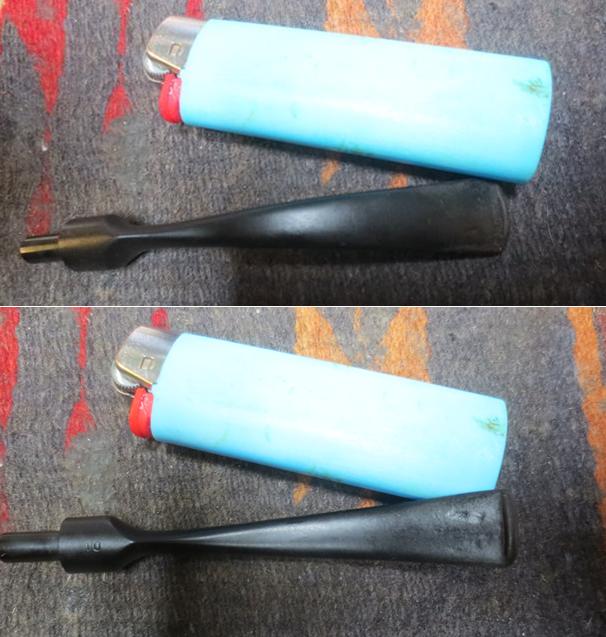
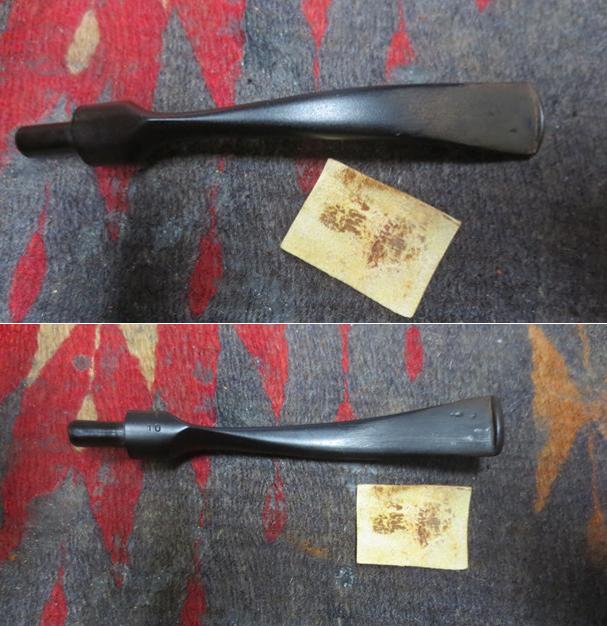
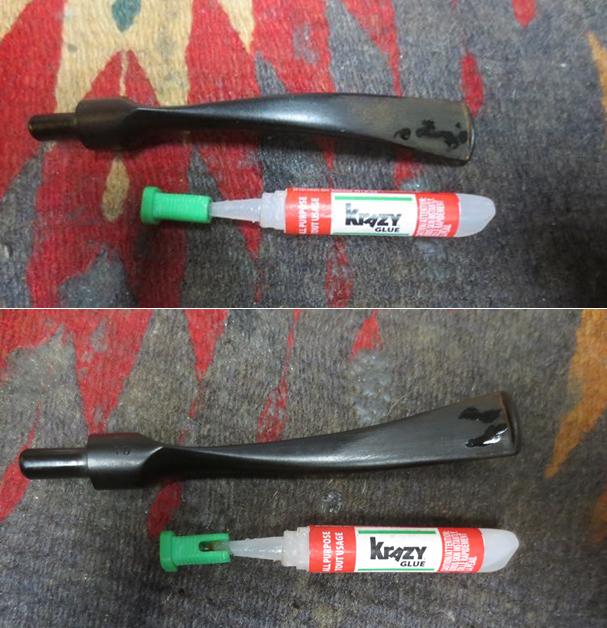
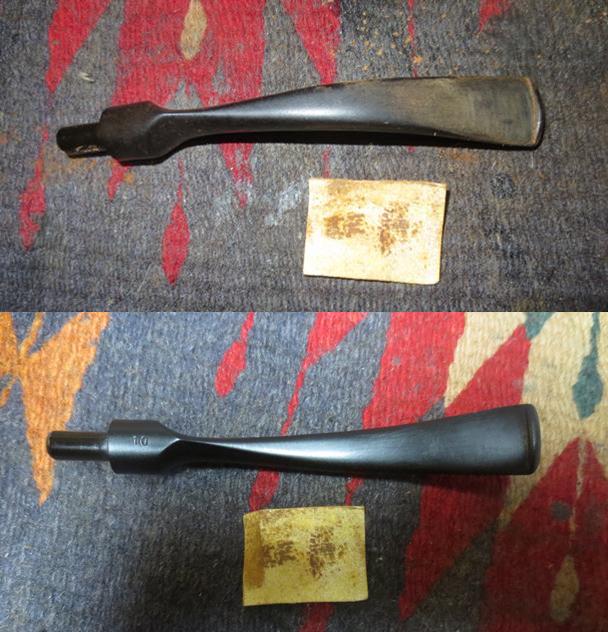
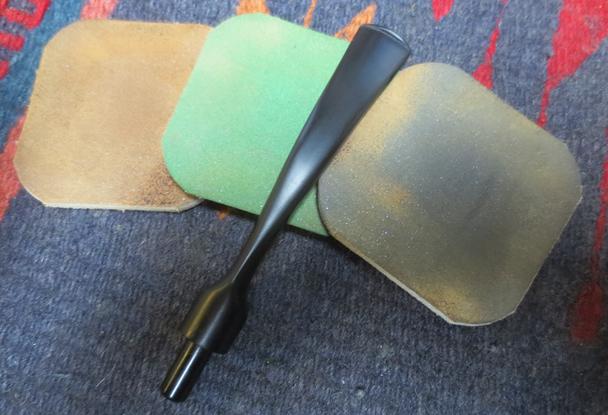
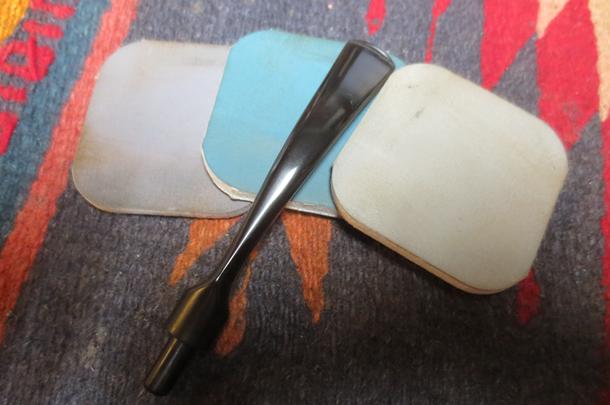
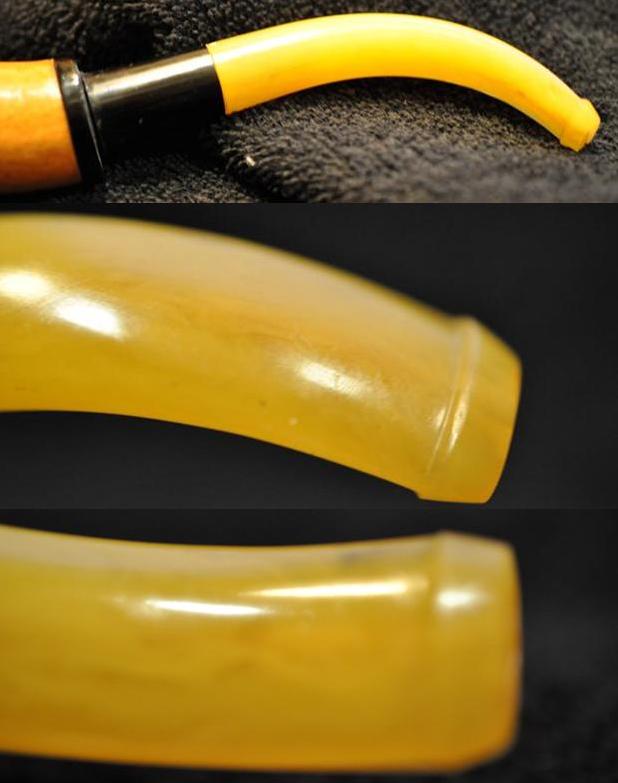
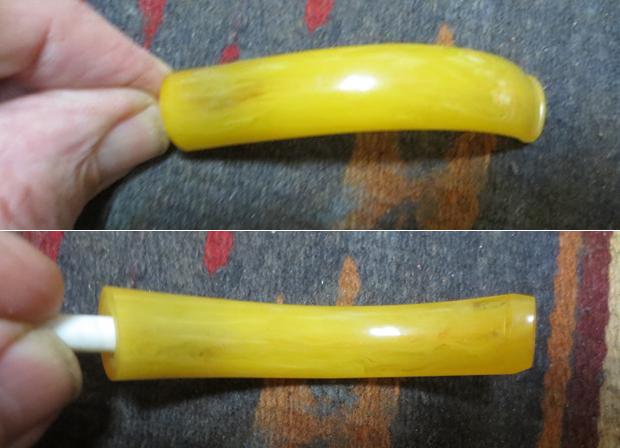
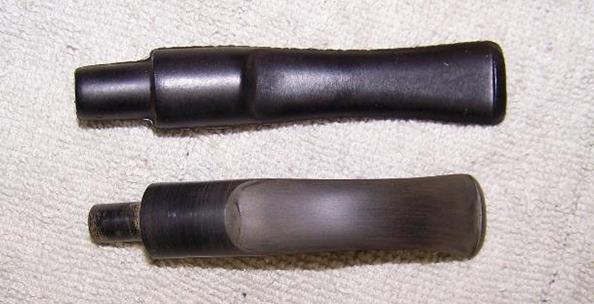
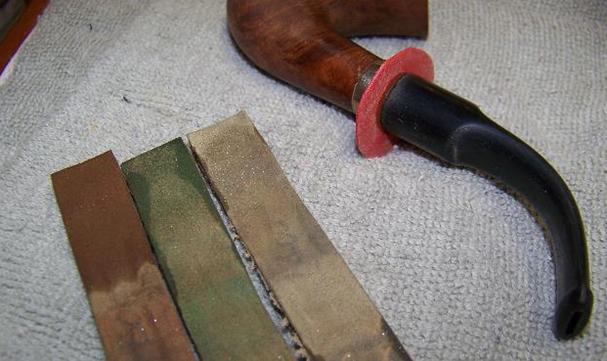
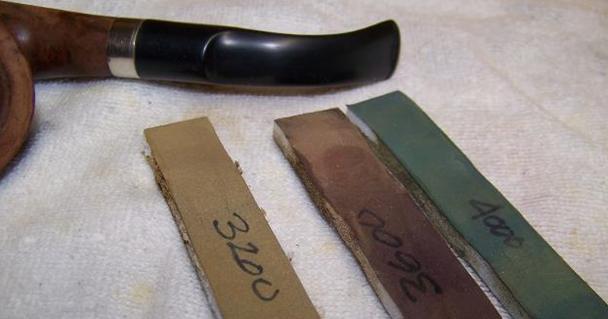
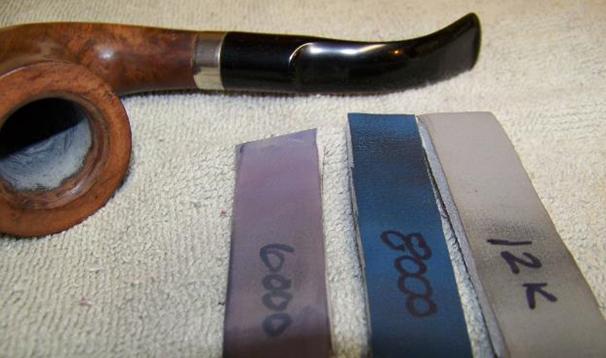
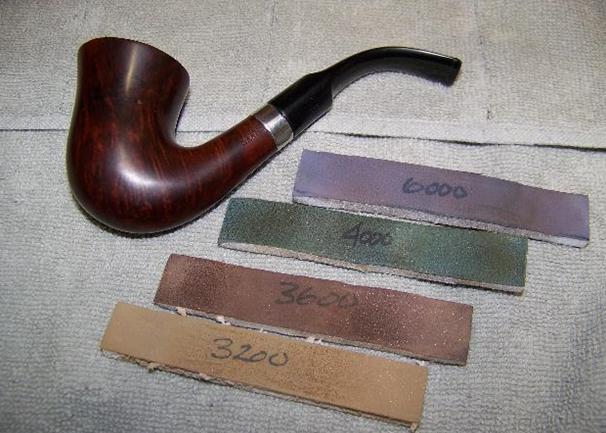
I worked over the stem with micromesh sanding pads. I polished out the scratches and marks in the vulcanite – wet sanding it with 1500-2400 grit pads and dry sanding it with 3200-12000 grit pads and wiped it down with Obsidian Oil after each one. When I finished with the 12000 grit pad I gave it a final coat of oil and set it aside to dry. 
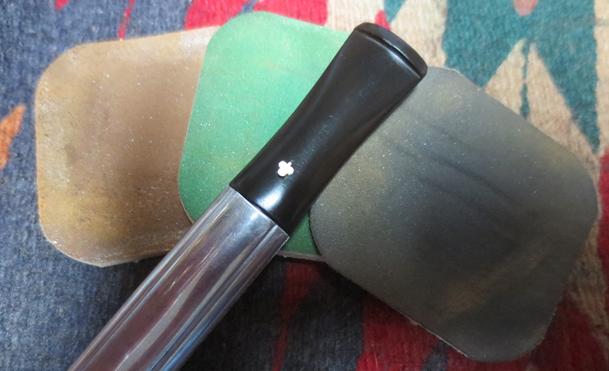
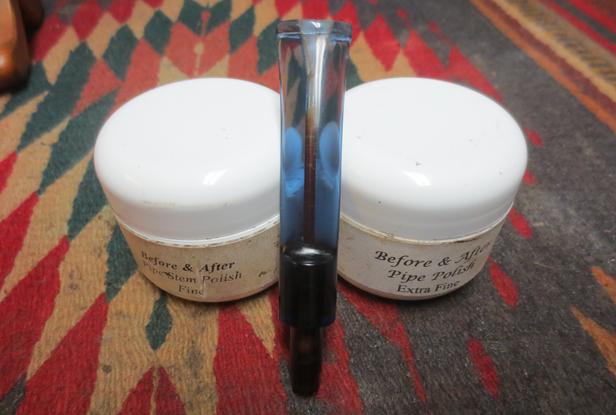
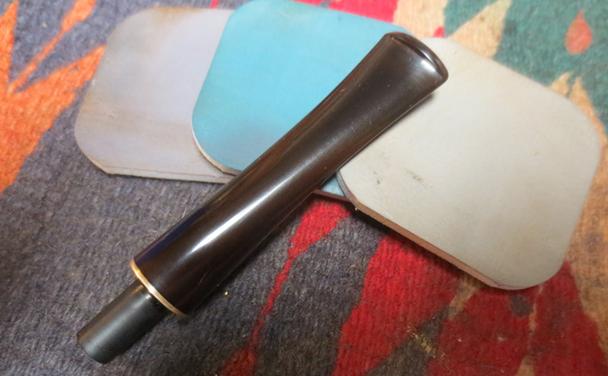
I polished the metal base and shank with a jeweler’s polishing cloth to bring some shine to the aluminum and to take away the tarnish. I find that a jeweler’s cloth impregnated with some anti tarnish compounds works really well on the metal used in aluminum pipes and also nickel, silver and gold bands used on shanks.
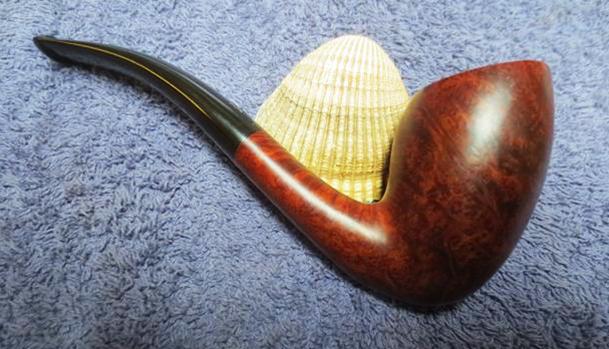
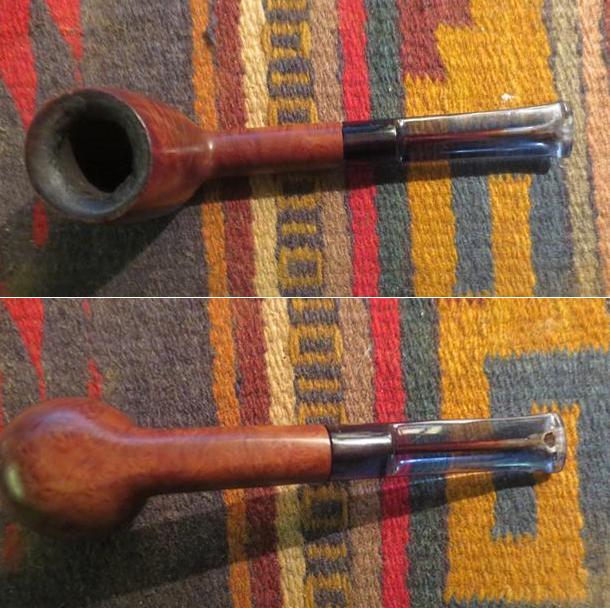
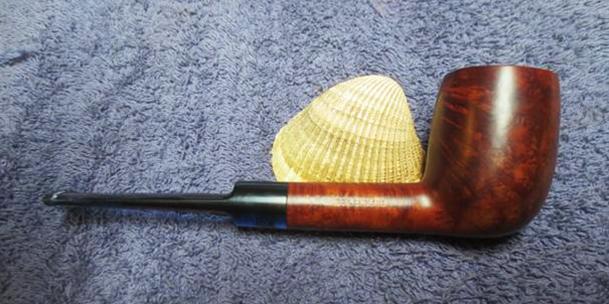
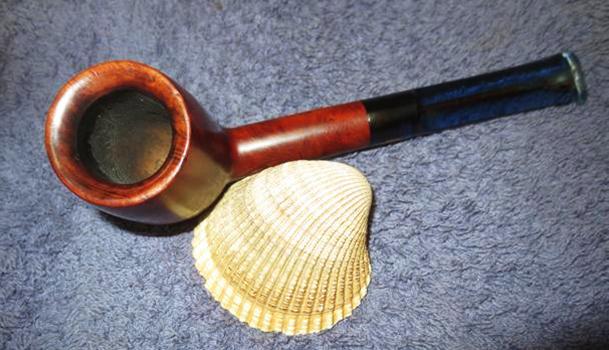
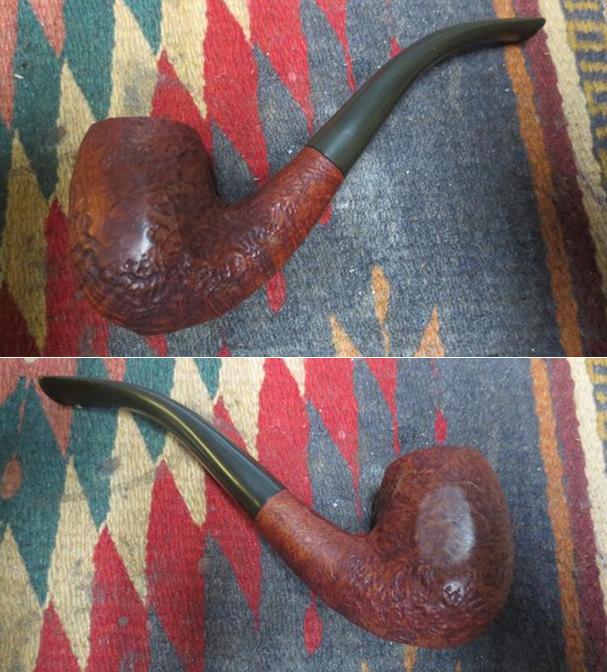
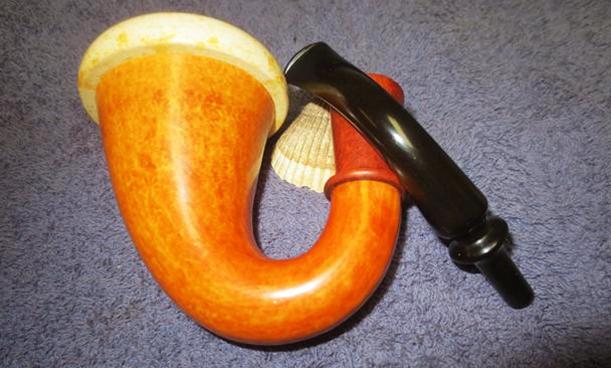
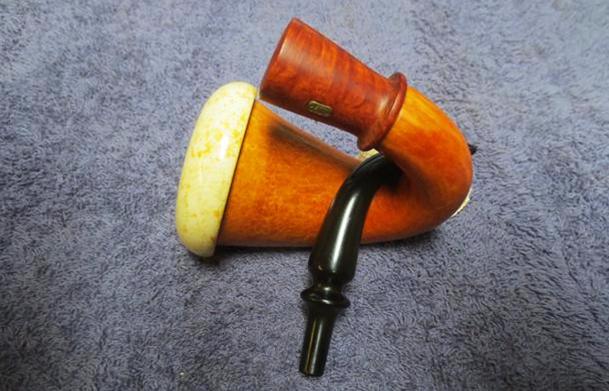
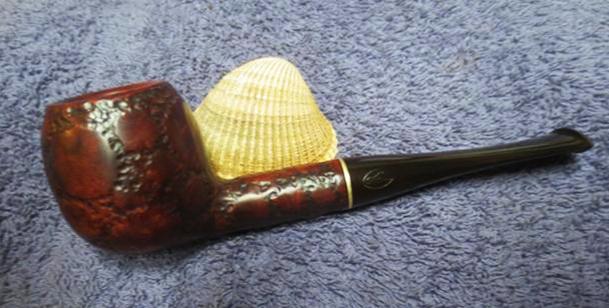
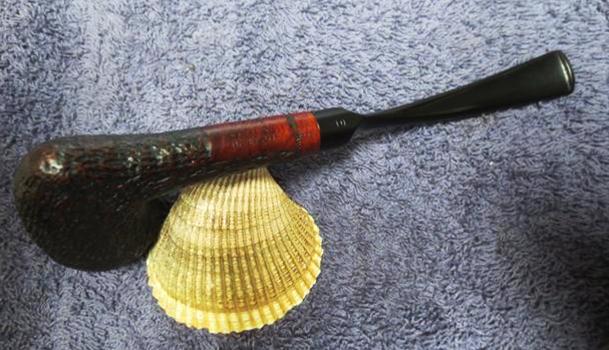
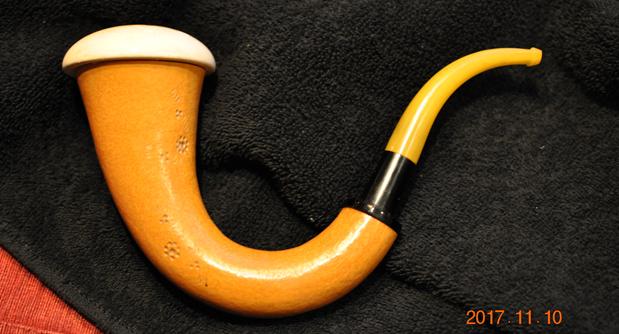
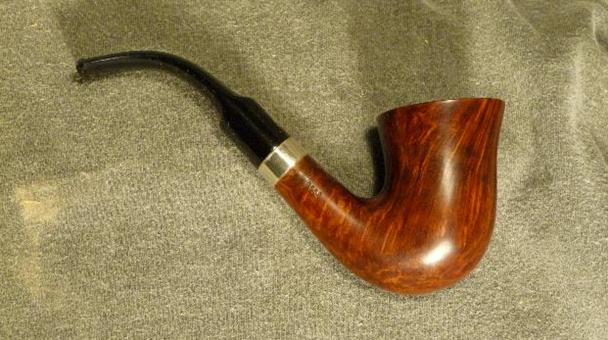
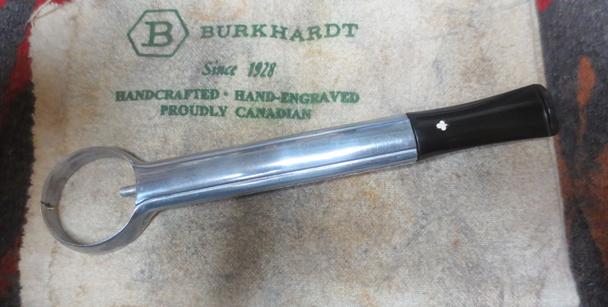
I put the bowl back on the metal base and took the pipe to the buffing wheel to work it over. I buffed the bowl and stem once again with Blue Diamond to polish it. I gave the bowl and the stem multiple coats carnauba wax. I buffed the entire pipe with a clean buffing pad to raise the shine. I hand buffed it with a microfiber cloth to deepen the shine. I also buffed the other two bowls with Blue Diamond and gave them each multiple coats of carnauba wax to polish and protect them. I buffed them each with a clean buffing pad as well to raise the shine and hand buffed them with the microfiber cloth. The finished set of bowls and base along with the case, the paper work and the extra tubes of filters are all included in this beautiful set. The finished pipe (without the case) is shown in the photos below. The bowls have some nice grain on each of them and each is not only a unique shape and finish but also in grain patterns. The pipe looks great like it must have when it came out of the factory. It is light weight and feels comfortable in the hand. The medium brown stain on the smooth bowls and the darker stain on the sandblast bowl works well with the polished metal base and the black vulcanite stem. It has a very elegant look to it and it is eye catching. This older Kaywoodie Filter Pipe Set will make a great addition to your collection. It looks good and if it like the one I have smokes very well.  The dimensions of the pipe are: Length: 6 inches, Height: varies from 1 ¾ inches with the sandblast bowl and 1 ¼ inches for the apple bowl, Outer Diameter of the Bowl: 1 3/8 inches, Diameter of the Chamber: 3/4 inches. I will be adding this set to the rebornpipes store shortly if you are interested in adding it to your collection. If you are interested email me at slaug@uniserve.com or send me a message on Facebook. Thanks for looking.

Restoring a Danish Handmade Kriswill Chief 40


Blog by Steve Laug

This Kriswill is yet another one from a local pipe shop. It came from the estate of the same older gentleman whose wife returned them to the shop for restoration and resale. This one is a smooth finished Kriswill. The briar is a combination of mixed grain around the bowl. It is stamped on the left side of the shank Kriswill over Chief over Handmade in Denmark. On the underside near the shank stem junction it has the shape number 40. I reviewed the information I had on Kriswill and have included some of that here.Kriswill was one of the large pipe manufacturers in Denmark during the 1960s and 1970s, and closed around 20 years ago. Their catalog cover read “By Appointment to the Royal Danish Court, KRISWILL, Kriswork Briar Trading, Briar Pipes Hand Made in Denmark.” After the Danish Kriswill enterprise ended, pipes were made in Norway and in France under the Kriswill label. In the 1970s Kriswill was bought by Lillehammer, and in the 1980s the pipes were made for a while at the Catalan factory, Iberica de Pipas. https://pipedia.org/wiki/File:Kriswill_Factory.jpg

The finish on the pipe was dirty and dull. The beveled rim top had lava built up that extended up and over the outer edge. It was hard to tell if there was damage to the inner edge of the rim. The bowl had a thick, hard cake filling the bowl. The stem was heavily oxidized and had some deep tooth marks on the top and underside at the button. It also appeared to have had a Softee bit at some point as the usual calcification was present on the stem from the button forward about an inch. This was included in the pipes that I sent off to my brother for cleaning. This is the third pipe that I have brought to the work table from the lot of about 50 to rework. I can’t say enough how much I appreciate his willingness to clean and ream the pipes for me. It allows me to move through the repairs much more quickly. When he received the pipe he took a series of photos of it to show its condition. He took a close up photo of the rim top showing the thick cake and the overflow of lava onto the top of the bowl. The cake is very thick and the lava hides the rim top. The bowl is quite small and in this condition would hold very little tobacco.The next photos show the stamping on the left and the underside of the shank. It is clear and readable. The Kriswill snowflake logo on the top of the stem is in very good condition and is undamaged.The vulcanite stem was heavily oxidized and had some deep tooth marks on both the top and underside near the button. They were deep but did not go all the way through the stem. There were scratches and nicks in the surface of the stem all the way around the stem. The button was worn down on both sides. There was some heavy calcification going on where there must have been a Softee bit covering the end of the stem. There were no surprises as this was true of most of the pipes in this estate.I am once again very grateful for the thorough cleanup that Jeff did on the bowl and stem. He carefully reamed the bowl back to bare briar with a PipNet Pipe Reamer and cleaned up the remnants with a Savinelli Fitsall Pipe Knife. He cleaned the internals of the bowl and stem with alcohol, pipe cleaners and cotton swabs – scrubbing out the mortise as it was dirty. He scrubbed the exterior of the pipe with Murphy’s Oil soap and a tooth brush and was able to remove all of the oils and dust in the smooth finish on the briar. He was able to remove all of the lava and grime from the beveled rim top and left it looking very clean. The inner edges of the bowl were slightly out of round and would need to be worked on. The outer edge of the rim top looked very good. He soaked the stem in an Oxyclean bath to remove the grime and calcification and to bring the oxidation to the surface. When the pipe arrived I took some photos to show how it looked before I did the restoration. It really is a beautifully grained piece of briar that should look amazing when it is polished. Jeff removed the thick, hard cake and the lava buildup on the rim top and clean off the inner and outer edges of the rim. The inner edge had some minor damage that made it slightly out of round. The outer edge looked really good. The top surface of the rim had some minor darkening but otherwise looked very good. The vulcnaite stem looked far better than when Jeff started the cleanup. There were a lot of scratches on the surface and a few tooth marks on both the top and underside if the stem. The snowflake logo was undamaged.The stem still had some deep oxidation in the vulcanite so I dropped it into the Before & Stem Deoxidizer bath and let it soak overnight. (The photo below shows the stem before I pushed it into the bath.)I used a folded piece of 220 grit sandpaper to reshape the inner edge of the bowl and to smooth out the surface and remove the darkening. I used 1500-4000 grit micromesh pads to polish the surface of the rim and the inner edge.I worked some Before & After Restoration Balm into the surface of the briar with my finger tips to deep clean the smooth finish, enliven and protect the briar. I let it sit for a few minutes and then buffed it with a cotton cloth. The grain of the briar really had begun to show through at this point and there was a rich shine to the briar. I took some photos of the bowl at this point to mark the progress in the restoration. I set the bowl aside and called it a night. In the morning I removed the stem from the Before & After Stem Deoxidizer and wiped it off with a paper towel to remove the remaining oxidation and bath. I cleaned out the airway with pipe cleaners and alcohol until it was clean. The stamping on the stem was untouched. The stem was pitted slightly and the tooth marks were very visible. It was ready for repairs to the tooth marks and polishing.I filled in the tooth marks with clear super glue on both sides of the stem and set it aside to allow the repairs to cure. When the repairs had dried I sanded them smooth and blended them into the surface of the stem. I reshaped the button on both sides of the stem with a needle file and sanded the stem down 220 grit sandpaper. The 3rd and 4th photos below show the stem at this point in the process. The surface of the stem on both sides looks good. The tooth marks are gone and the surface is smooth. I worked over the stem with micromesh sanding pads. I polished out the sanding scratches and marks in the vulcanite – wet sanding it with 1500-2400 grit pads and dry sanding it with 3200-12000 grit pads and wiped it down with Obsidian Oil after each one. When I finished with the 12000 grit pad I gave it a final coat of oil and let it dry. After the polishing I could still see light scratches in the vulcanite on the top at the curve and on the underside next to the stem. I buffed it on the buffing wheel with Red Tripoli and Blue Diamond and polished them out. I took it back to the work table and polished it with Before & After Pipe Stem Polish Fine and Extra Fine. I rubbed it down with some Obsidian Oil and took the following picture.I put the stem back on the bowl and took the pipe to the buffing wheel to work it over. I buffed the bowl and stem once again with Blue Diamond to polish it. I gave the bowl and the stem multiple coats carnauba wax. I buffed the entire pipe with a clean buffing pad to raise the shine. I hand buffed it with a microfiber cloth to deepen the shine. The finished pipe is shown in the photos below. It is a beautiful older Kriswill pipe in one of their classic shapes that looks great and feels comfortable in the hand. The reddish brown stain and the polished black vulcanite work together to give the pipe a rich look. If you are a fan of older Danish pipes this is one of the classic shapes from Kriswill. It will make a great pipe addition to the rack and should be a great smoker.  The dimensions of the pipe are: Length: 5 1/2 inches, Height: 2 1/4 inches, Outer Diameter of the Bowl: 1 1/4 inches, Diameter of the Chamber: 3/4 inches. I will be adding this one to the rebornpipes store shortly if you are interested in adding it to your collection. If you are interested email me at slaug@uniserve.com or send me a message on Facebook. Thanks for looking.


Restoring and repairing a stem on a GBD Golden Blue 119 Billiard


Blog by Steve Laug

The next pipe on the table is another one from a local pipe shop. It is a pipe from the estate of the same older gentleman whose wife returned them to the shop for restoration and resale. This one is a smooth finished GBD with a Blue Perspex stem. The smooth finish shows mixed grain around the bowl. It has a rim top that is beveled inward to the inner edge of the bowl. It is stamped on the left side of the shank GBD in the oval over Golden Blue. On the right side it reads London, England over the shape number 119. The finish on the pipe was dirty and dull. The beveled rim top had lava built up that extended up and over the outer edge. The bowl had a thick, hard cake filling the bowl. The stem had deep tooth marks on the top and a bite through on the underside at the button. The bite through was repairable but it would be visible. I sent the pipes off to my brother for cleaning. This is the second pipe that I have brought to the work table from the lot of about 50 to rework. I really appreciate his willingness to clean and ream the pipes for me. When he received the pipe he took a series of photos of it to show its condition. He took a close up photo of the rim top showing the cake and the overflow of lava on the beveled top of the bowl. The cake is quite thick and the lava has almost leveled the bevel in many spots around the bowl. He also took photos of the bowl sides and underside to show some of the nicks and dents in the finish. The next photos show the stamping on the left and the right side of the shank. It is clear and readable. The brass rondel on the left side of the saddle stem is in very good condition and is undamaged.The stem was Blue Perspex and had some deep tooth marks on the top side near the button. They were deep but did not go all the way through the stem. There were scratches and nicks in the surface of the stem all the way around the stem. The button was worn down on both sides. On the underside of the stem there was a large bite through. With the stem being blue it was going to be a challenge to repair. The repair on the bite through would be hard to blend in as there was not a blue super glue or epoxy that I could match.As I have come to expect, Jeff did his usual thorough cleanup on the bowl and stem. He carefully reamed the bowl back to bare briar with a PipNet Pipe Reamer and cleaned up the remnants with a Savinelli Fitsall Pipe Knife. He cleaned the internals of the bowl with alcohol, pipe cleaners and cotton swabs – scrubbing out the mortise as it was dirty. He scrubbed the exterior of the pipes with Murphy’s Oil soap and a tooth brush and was able to remove all of the oils and dust in the smooth finish on the briar. He was able to remove all of the lava and grime from the beveled rim top and left it looking very clean. The inner edges of the bowl were in excellent condition and outer edges have many small nicks. He soaked the stem in an Oxyclean bath remove the grime in the bite through and the edges of the stem. He cleaned out the blue Perspex with soapy water to remove the tarry oils and grime in the airway. He was able to remove much of the internal grime. When the pipe arrived I took some photos to show how it looked before I did the restoration. Jeff was able to remove the lava buildup on the beveled rim top and clean off the inner and outer edges of the rim. The inner edge looked very good but the outer edge had nicks and scratches. The top surface of the bevel had some minor darkening but otherwise looked very good. The Blue Perspex stem was in rough condition. There were a lot of scratches and nicks in the surface, tooth marks on the top side and a bite through on the underside. The airway still showed darkening from the tars and oils of the tobacco.I took a close up photo of the bite through to show the size and shape of the damaged area on the underside of the stem.I folded a pipe cleaner and flattened it to fit in the funnel of the airway. I greased it with Vaseline so that it would prevent the glue from sticking to the inside and anchoring the pipe cleaner in the airway. I worked my way inward building up the edges of the hole. I filled in the tooth marks on the top side of the stem and sprayed it with an accelerator. I filled in the remaining hole in the underside of the stem with clear super glue. Once it was filled in I sprayed it with accelerator and removed the pipe cleaner. Filling in the hole with the glue was a messy proposition as the glue was thin and ran up the stem surface.I used a needle file to remove all of the excess glue on the surface of the stem and blend the repairs into the surface. I also reshaped the button on both sides of the stem. I sanded the stem down with 180 grit and 220 grit sandpaper. The photos below show the stem at this point in the process. The top side is in excellent condition now. The tooth marks are gone and the surface is smooth. The underside where the bite through was filled in is solid but visible.I worked over the stem with micromesh sanding pads. I polished out the sanding scratches and marks in the Blue Perspex – wet sanding it with 1500-2400 grit pads and dry sanding it with 3200-12000 grit pads and wiped it down with Obsidian Oil after each one. When I finished with the 12000 grit pad I gave it a final coat of oil and set it aside to dry. I polished it with Before & After Stem Fine Polish and wiped it down. I followed that by polishing it with the Extra Fine Polish. I buffed it with a microfiber cloth to raise the shine. I sanded the inner edge of the bowl with 220 grit sandpaper to smooth out the surface and remove the darkening. I used a 1500 grit micromesh pad to smooth out the outer edge of the bowl. I rubbed the bowl down with Before & After Restoration Balm to deep clean the smooth finish, enliven and protect the briar. I hand rubbed it with my fingers to get it deep into the briar. I let it sit for a few minutes and then wiped it off with a soft cloth and buffed it with a cotton cloth. The briar really began to have a deep shine. The smooth surface showed some nice grain patterns and begun to look really good. I took some photos of the bowl at this point to mark the progress in the restoration. I put the stem back on the bowl and took the pipe to the buffing wheel to work it over. I buffed the bowl with Blue Diamond to polish the briar. I buffed the stem at the same time to raise the gloss on the Blue Perspex. I gave the bowl and the stem multiple coats carnauba wax. I buffed the entire pipe with a clean buffing pad to raise the shine. I hand buffed it with a microfiber cloth to deepen the shine. The finished pipe is shown in the photos below. It is a beautiful GBD pipe that looks great and feels comfortable in the hand. The reddish brown stain and the Blue Perspex work really well together. Though the repaired area on the bite through is visible it is solid. Thankfully it is on the underside of the stem. It will make a great pipe addition to the rack and should smoke dry and cool.  The dimensions of the pipe are: Length: 5 1/2 inches, Height: 1 3/4 inches, Outer Diameter of the Bowl: 1 1/4 inches, Diameter of the Chamber: 3/4 inches. I will be adding this one to the rebornpipes store shortly if you are interested in adding it to your collection. If you are interested email me at slaug@uniserve.com or send me a message on Facebook. Thanks for looking.

Restoring a Kriswill Made Danish Special Smooth Panel Bent Billiard


Blog by Steve Laug

The next pipe on the table is one from a local pipe shop. It came from the estate of an older gentleman whose wife returned them to the shop for restoration and resale. This one is an interesting sandblast finish bent billiard. The sandblast is interesting showing a variety of grain around the bowl. It has smooth panels on the right and left side of the bowl and the right side of the shank. It is stamped on the smooth right side of the shank Danish Special over Made in Denmark. The finish on the pipe was dusty and some of the grooves were almost filled in with grime and dust. The rim top had lava built up in the blast on the flat surface. The bowl had a thick, hard cake almost filling it in. The stem had several tooth marks and was lightly oxidized. I sent the pipes off to my brother for cleaning. I have about 50 of them to rework and a waiting queue of pipes to repair. I really appreciate his willingness to clean and ream the pipes for me. When he received the pipe he took a series of photos of it to show its condition. He took a close up photo of the rim top showing the cake and the lava on the flat top of the bowl. The cake is quite thick and the lava has filled in the sandblast on the surface of the rim. He also took photos of the sandblast around the sides and underside of the bowl. His final photo shows the stamping on the right side of the shank. It is clear and readable. The brand Danish Special was unfamiliar to me. I had heard of Danish Pride, Danish Star, Royal Danish and other Stanwell brands but this one was unfamiliar.I Googled the name and found that the brand was a sub-brand or second brand of Kriswill pipes. From there I did some reading on Pipedia on the Kriswill Brand and found the following:  Kriswill was one of the large pipe manufacturers in Denmark during the 1960s and 1970s, and I believe closed around 20 years ago. Their catalog cover read “By Appointment to the Royal Danish Court, KRISWILL, Kriswork Briar Trading, Briar Pipes Hand Made in Denmark.” https://pipedia.org/wiki/Kriswill

I also went to the PipePhil logos and stamping site and found more on the date of the brand. It had no explicit ties to the Danish Special that I had but it was interesting nonetheless.

Kriswill is a brand of Kriswork Briar Trading, in Kolding (Denmark) established about 1955. Some of Kriswill pipes were designed by Sigvard Bernadotte, Swedish prince and brother to the late Queen Ingrid of Denmark. He collaborated with his Danish partner Acton Bjørn. When the company went bankrupt in the late 1970s it was on a level with Stanwell. Dan Pipe Cigar & Company (Hafenstrasse 30 D-21481 Lauenburg/Elbe, Ge) bought the rights to use the name and it is Holmer Knudsen and/or Poul Winsløw who make the Kriswill line. Nørding, on its side, bought the plant and introduced a Kriswell line. http://www.pipephil.eu/logos/en/logo-k3.html

Jeff did his usual thorough cleanup on the bowl and stem. He carefully reamed the bowl back to bare briar with a PipNet Pipe Reamer and cleaned up the remnants with a Savinelli Fitsall Pipe Knife. He cleaned the internals with alcohol, pipe cleaners and cotton swabs – scrubbing out the mortise as it was dirty. He scrubbed the exterior of the pipes with Murphy’s Oil soap and a tooth brush and was able to remove all of the oils and dust in the smooth finish on the briar. He was able to remove all of the lava and grime from the rim top and left it looking very clean. The inner and outer edges of the rim top were in good shape. He soaked the stem in an Oxyclean bath to raise the oxidation to the surface of the vulcanite. It was clean and the remaining oxidation was very light. When the pipe arrived I took some photos to show how it looked before I did the restoration.  Jeff was able to remove the lava buildup on the rim top and clean grooves and crevices of the sandblast surface and edges of the rim. The inner and outer edges of the rim were in excellent condition and the rim top looked new. The stem was lightly oxidized and had tooth chatter and marks on both sides of the stem near the button.I rubbed the bowl down with Before & After Restoration Balm to deep clean the nooks and crannies of the finish, enliven and protect the briar. I hand rubbed it with my fingers to get it deep into the grooves. I let it sit for a few minutes and then wiped it off with a soft cloth and buffed it with a horsehair shoe brush. The briar really began to have a deep shine. The smooth panels showed some nice grain patterns and the sandblast looked really good. I took some photos of the bowl at this point to mark the progress in the restoration. I set the bowl aside and turned my attention to the stem. I sanded out the tooth chatter and many of the tooth marks with 220 grit sandpaper. There was a small tooth mark on the top and underside of the stem that I cleaned up and filled it in with a drop of clear super glue. When the glue cured, I sanded the repaired areas smooth to blend them into the surface of the stem. I worked over the stem with micromesh sanding pads. I polished out the sanding scratches and marks in the vulcanite – wet sanding it with 1500-2400 grit pads and dry sanding it with 3200-12000 grit pads and wiped it down with Obsidian Oil after each one. When I finished with the 12000 grit pad I gave it a final coat of oil and set it aside to dry. I polished it with Before & After Stem Fine Polish and wiped it down. I followed that by polishing it with the Extra Fine Polish. I buffed it with a microfiber cloth to raise the shine. I put the stem back on the bowl and took the pipe to the buffing wheel to work it over. I buffed the bowl with Blue Diamond to polish the briar. I buffed the stem at the same time to raise the gloss on the vulcanite. I gave the bowl and the stem multiple coats carnauba wax. I buffed the entire pipe with a clean buffing pad to raise the shine. I hand buffed it with a microfiber cloth to deepen the shine. The finished pipe is shown in the photos below. The dimensions of the pipe are: Length: 6 1/2 inches, Height: 2 1/4 inches, Outer Diameter of the Bowl: 1 1/8 inches, Diameter of the Chamber: 7/8 inches. I will be adding this one to the rebornpipes store shortly if you are interested in adding it to your collection. It is a beautiful Kriswill made pipe that feels comfortable in the hand. It will make a great pipe addition to the rack and should smoke dry and cool. If you are interested email me at slaug@uniserve.com or send me a message on Facebook. Thanks for looking.

A Refurb and a Replacement Stem for a Lorenzetti Galatea Apple


Blog by Steve Laug

Not long ago I received a phone call from an interesting woman who had been given my phone number by a local pipe and cigar shop. She had a couple of pipes that needed some stem repair. In our conversation it turned out that they belonged to her husband and he had a total of two pipes. Both of them needed work and she was determined to get them repaired for him. In our talking we spoke of the options – either repairing the stem or making a new stem. She spoke with him and they decided to repair them. A few days later her husband stopped by the house to show me the two pipes. We talked and he decided to work on one pipe at a time so that he would have one to smoke while I repaired the other one. I finished the repair on the stem of his Big Ben Nautic 252 bent apple kind of quasi brandy shaped pipe. Here is the link to the stem repair on that pipe. https://rebornpipes.com/2017/12/22/restoring-repairing-a-damaged-stem-on-a-big-ben-nautic-252/ I returned it to him and he dropped off his second pipe for a repair as well. Two days later he called and said he had already chomped through the repair on the one he took with him. Even with a rubber softee bit he had demolished the repair. So we decided on this one to replace the stem.

The second pipe is a Lorenzetti Galatea Bent apple shape. It is stamped on the left side of the shank Lorenzetti over Italy. On the right side it is stamped Galatea. There is no shape number on the bowl or shank. The end of the shank has a decorative ferrule that is silver with two silver rings and a Lucite ring. The original stem also had a silver band between the shank and the rest of the stem. Lots of bling on this Italian beauty. The stem was black acrylic. From the side view photos below the pipe looked pretty good. The finish was dirty but the pipe appeared to be in decent condition. The top view photos show what the bowl and stem looked like from the top and underside views. Like the other pipe the bowl on this one had never been reamed and there was a thick cake that was composed of aromatic tobacco. It was soft and sticky. The lava overflow on the rim top was also sticky to touch. The smell of the pipe was a sickly sweet and sour smell of a pipe that had never seen a pipe cleaner and never had been cleaned. Once again he had gnawed the stem and had broken the top edge and a bit of the stem in front of the button. It was a mess. The underside had deep tooth marks and was also damaged. The poor pipe was a mess but he obviously smoked it as much as he did the first one. Now I had a task – clean and replace the stem on this one so that I could put a new stem on the first one. I had a mission. I took photos of the pipe before I cleaned it up. I took a close up photo of the bowl and rim to show the thickness and composition of the cake and the thick overflow of lava on the rim top. It looked to me that there was some damage to the inner edge and bevel of the rim on the right side of the bowl toward the back. I would know more once I reamed the cake back and could see what was underneath. It was not in nearly the condition of the Big Ben that finished for him early. I also took some photos of the stem damage so that you could see what I was up against. The sad thing to me was that this second pipe had exactly the same damage to the stem and the bowl looked identical as well.I reamed the bowl back to bare briar with a PipNet pipe reamer. I started reaming it with the smallest cutting head and worked my way up to the second cutting head which matched the diameter of the bowl. I touched up the reaming with a Savinelli Fitsall Pipe knife.The rim was in rough condition. There was gouging around the inner edge of the bowl cause by a knife and there was some charring in that area as well. The rest of the rim was in rough condition and appeared to have been knocked about a bit. It would need to be topped and reworked.I topped the bowl on a hard board with a piece of 220 grit sandpaper. I was able to remove much of the surface damage to the rim top. The second photo below shows the top of the rim after the topping. You can see the charred area in that photo as well.I used a folded piece of 220 grit sandpaper to re-bevel the inner edge of the rim and smooth out the damaged areas on the right inner edge. I blended that area into the rest of the beveled rim. Once it was shaped correctly I wiped it down and polished the briar with micromesh sanding pads – wet sanding with 1500-2400 grit pads and dry sanding with 3200-6000 grit pads. I restained the top and inner edge of the rim with a dark brown stain pen. The colour blended well with the rest of the bowl.I had enough of the smell of the pipe permeating the workspace so I decided to rid it of the smell filled my work area. I used pipe cleaners, cotton swabs and alcohol to clean out the interior of mortise and the airway in the shank. I used a dental spatula to scrape the walls of the mortise area. It took a lot of pipe cleaners to remove all of the buildup but once it was clean the pipe smelled better and it would be more pleasant for me to work on.With internals clean I turned my attention to the outside of the briar. I rubbed the bowl and shank down with Before & After Restoration Balm to deep clean the smooth finish, enliven and protect the briar. I hand rubbed it with my fingers and wiped it off with a soft cloth. I buffed the bowl with a soft cotton cloth to polish it. It really began to have a rich shine in the briar. I took some photos of the bowl at this point to mark the progress in the restoration. With the bowl finished I set it aside and went through my can of stems to find one that would work well with the pipe. I had two that could work – one was a vulcanite stem that had promise and looked good on the shank. It was the same length but slightly smaller in diameter than the original stem. The other stem was Lucite/acrylic. It was the same diameter as the previous stem and about 1/8 inch shorter. It also looked good with the pipe. Neither stem had the metal adornment on the end. I had nothing like that in my available stems. I chose the acrylic stem as it as harder than the vulcanite and I believe it will outlast the vulcanite stem with this particular pipe man. The tenon was slightly shorter but the shank was wide open with a deep mortise that was designed for a filter. I figured the length of the tenon did not matter in this case. I bent the stem over a heat gun to match the original stem. I sanded out the nicks and marks on the stem surface. The second and third photos below show the stem after the bend. I continued to sand out the nicks and scratches with 220 grit sandpaper to smooth out the stem surface. There were a lot of rough places on the stem and the tenon that needed to be smoothed out and blended into the surface.I polished out the sanding scratches and marks in the acrylic on both sides of the stem and the button surface itself with micromesh sanding pads – wet sanding it with 1500-2400 grit pads and dry sanding it with 3200-12000 grit pads. I wiped down the stem after each pad with a damp cloth to remove the sanding dust. I used a series of needle files to open the stem and funnel the airflow. After that I buffed the stem on the buffing wheel with Blue Diamond to polish out the final scratches in the acrylic. I put the stem on the bowl and worked the pipe bowl over on the buffing wheel using Blue Diamond to polish the bowl and stem. I hand buffed the stem to raise the gloss on the stem and polished the metal stem adornment with a silver polishing cloth. I gave the bowl and stem multiple coats of carnauba wax and buffed it with a clean buffing pad to raise the shine. I buffed the entire pipe with a clean microfiber cloth to deepen the shine. The finished pipe is shown in the photos below. The medium brown stains on the smooth finish of the apple shaped bowl works well with the rich black of the Lucite stem. The new stem and the polishing revealed a beautiful piece of briar and a well-shaped pipe. Thanks for looking.

Restoring a Jobey Gourd Calabash with a Briar Shank Extension


Blog by Steve Laug

My brother Jeff has really gotten good at finding Gourd Calabash pipes on his recent “treasure” hunts. He picked up this batch recently. I posted about the large calabash in the middle of the right hand column recently and it is available on the rebornpipes store. It is by far the largest of the five calabash pipes that he found. The one I have chosen to work on it the one on the left side at the bottom circled in red. It is a unique looking Calabash to me in that it is a well bent and shaped gourd with a briar shank extension on the end of the gourd. It bears the Jobey brass oval logo on the side of the briar extension. When I first looked at it I wondered if it had the Jobey system tenon that I have come to expect on the Jobeys that I have in my own collection and the ones that I have worked on. However, this was not the case on this or the other two Jobey Gourd Calabashes in the bunch. All of them have the mortise drilled in the briar extension and is made for a push stem. I have never seen Jobey Gourd Calabashes before and frankly had no idea that the company even made them.Jeff took some photos of the pipe before he did his cleanup work on it. The photos below show it in the condition he found it in on one of his hunts. The gourd was dull looking and generally dirty. It had spots of sticky label material on the sides of the bowl. The briar shank extension was also dull and lifeless looking and there was a gummy substance in the brass logo on the shank extension. The meerschaum bowl was quite unique it is light weight and appeared to be block meerschaum but I am not certain as it had flecks of colour shot throughout the entirety of the bowl. There was a thick cake in the bowl and the rim had a coat of lava that went almost all the way around the inner edge of the chamber onto the rim top. The stem was oxidized and dirty. There were tooth marks and tooth chatter on both sides of the stem at the button.  The next two photos give a clear picture of the sticky label glue on the gourd and the dirty condition of the gourd. It also shows the flecks of colour throughout the meerschaum cup. The colour in the meerschaum matches the colour of the gourd. The next photo shows the condition of the meerschaum cup. The rim top of the meer had scratches in the surface and a heavy overflow of tars on the top of the rim. There is also darkening around the inner edge of the bowl and a thick cake in the bowl itself. It was hard to know if there was damage to the rim but once it was clean that would be clear. The two pictures following that show the condition of the inside of the bowl and the tars and oils on the walls of the gourd. The underside of the meerschaum cup is in good condition. There is some darkening on the underside of the bowl. There were some tars and oils spotted on the underside of the bowl. The cork gasket on the inside edges of the gourd was in good condition but dried out. It needed some grease to liven it up. The briar shank extension is dried out and has water spots. The next photo shows the brass Jobey oval insert inset in the left side of the briar shank extension. There is grime and a gummy substance in the lettering and around the edges of the insert. The briar was dirty and in need of a deep cleaning.The stem had light oxidation and tooth marks and chatter on both sides near the button. It also had the same price tag glue on the top and underside of the stem.I did some digging to see if I could find out about the connection between the calabash maker and Jobey. I found a bit of history of the brand on the Pipedia website at the following link. https://pipedia.org/wiki/Jobey . The section I am quoting is entitled Possible Jobey Origin. I quote it in its entirety.

Possible Jobey Origin

…the origins of this company seem to be shrouded in mystery, and most people claim that the origins were in England, followed by American production, and then a later move to St. Claude. There is another possible origin for the company, however, and it would suggest that Jobey was in Brooklyn, New York long before the 1969 patent of the Jobey “link”.

There’s not a lot of chatter about it, but if you can lay your hands on a copy of “The Tobacco World”, Volume 61, from 1941, there is a brief mention that reads “Norwalk Pipe Expands” and in the body states that Norwalk Pipe Corporation, “manufacturers of Jobey and Shellmoor pipes”, is moving to larger offices at 218 East Twenty-Sixth Street, NYC, as announced by Louis Jobey, president of that company. Norwalk is listed as one of the alternate distributors for Jobey on this page but apparently Louis Jobey was also actually working there at the time.

Before that, the first mention of Jobey seems to be back in 1915, when two brothers named Ulysses and Louis Jobey of Brooklyn, New York obtained a patent for an odd sort of cavalierish pipe in 1915, here’s the link: http://www.google.com/patents/USD46998

But less than four years later, in 1918, there’s a notice in the Brooklyn Daily Eagle on November 6th to the effect that Louis Jobey declared bankruptcy in the District Court, with final hearing scheduled for December 1918. And in an even sadder turn, that same month sees a funeral notice for Lorraine Jobey, the daughter of Mr. and Mrs. Louis Jobey, formerly of Brooklyn but now living in Moline Illinois at the home of Mr. and Mrs. George E. Hutchinson. The little girl evidently died in a fall.

There’s little else on Ulysses Jobey except that he evidently had a “junior” after his name or a son by the same name. Because Ulysses Jobey, Jr. was listed as the vice president in New Jersey of Lakewood Pipe Company Inc., a maker of smoker’s articles, in the 1922 New York Co-partnership and Corporation Directory for Brooklyn. Given the timing it’s likely this was the brother.

So while it is speculative, one possible origin story for Jobey is that the company was started by two brothers in Brooklyn in the teens with a new idea for a pipe, and failed amidst terrible tragedy. One brother went to one company and another to the other, but it was Louis who continued making Jobey pipes through the 40s under that name, despite evidently no longer owning the company. It would appear to be the Norwalk Company that was bought out by Wally Frank in the pre-link days. This would suggest that Jobey was always American.

From this I surmise that the Gourd calabash pipes were probably made by the Wally Frank Company or at least for them. I don’t know the dates of the manufacture of the pipes but my guess is that it is in the 60s.

Jeff did a thorough cleanup on the meerschaum bowl, the inside of the gourd and the stem. He carefully scraped the cake in the bowl with a Savinelli Fitsall Pipe Knife. He cleaned the internals with alcohol, pipe cleaners and cotton swabs – scrubbing out the mortise as it was dirty. He scrubbed the exterior of the meerschaum cup and the gourd with Murphy’s Oil soap and a tooth brush and was able to remove all of the oils and dust ground into the gourd. He was able to remove all of the lava and overflow from the top of the meerschaum bowl and left it looking very clean. Once he had removed the lava on the rim top and inner edge they were cleaner than I expected. The scratches in the meerschaum were quite shallow and would be easy to polish out. He cleaned internals of the stem with alcohol. When it arrived I took some photos of it to show how it looked before I did the restoration. I took the bowl off the gourd to have a look at the inside of the pipe. The gourd was very clean. The cork gasket was dry but that could be remedied easily enough. The mottle appearance of the meerschaum bowl can also be seen in the photos.The stem had cleaned up nicely with relatively little oxidation. The tooth marks on the top and underside along with the chatter were still present.The wooden shank extension (which looks like briar to me) is very clean and ready for polishing. I used some Vaseline petroleum jelly to lubricate the cork gasket and soften it. I have done this for years and I really like the effect of the jelly on the cork. I used 1500 grit micromesh sanded off the spots along the surface of the meerschaum cup where it sat against the cork and the top of the gourd to ensure a smooth fit.I used my fingers to rub the gourd and briar extension down with Before & After Restoration Balm to bring life to both and to remove any residual dust or dirt in the surface of the calabash. I wiped it off with a cotton cloth and buffed it with a shoe brush. The next few photos show the gourd at this point in the process. I polished the rim top, inner edge and underside of the meerschaum bowl with micromesh sanding pads – wet sanding with 1500-2400 grit pads and dry sanding with 3200-12000 grit pads. I wiped the surface of the cup down with a damp cloth after each sanding pad. When I finished sanding with the last pad I wiped it down again and set it aside. I checked the pliability of the cork gasket, rubbed a little more Vaseline into it and put the bowl back on the gourd. The fit of the cup against the gasket was snug but not hard to insert. It was perfect. The pipe was beginning to look finished. The shine on the gourd and the rim looked good. The briar extension had its own shine as well. I sanded the stem with 220 grit sandpaper to remove the tooth chatter on the top and underside near the button. I also found as I examined the underside that there was a strange rippling to the vulcanite almost like it had some heat damage. I sanded that area to clean up the ripples and smooth them out.I polished the vulcanite stem with micromesh sanding pads – wet sanding with 1500-2400 grit pads and dry sanding with 3200-12000 grit pads. I rubbed the stem down with Obsidian Oil between each sanding pad. After using the 12000 grit pad I buffed the stem with Blue Diamond to give a deep and rich shine. Normally at this point I put the stem back on the bowl and take the pipe to the buffing wheel to work it over. This time I took the parts to the buffing wheel. I gently buffed the meerschaum cup and rim with Blue Diamond to polish the meer. I carefully buffed the gourd base and briar shank extension with Blue Diamond being cautious about the pressure I put on the gourd. I buffed the stem with Blue Diamond to raise the gloss on the vulcanite. I took the pipe back to the work table and gave the gourd multiple coats of Conservator’s Wax. I gave the stem several coats carnauba wax. I buffed the parts of the pipe with a clean buffing pad to raise the shine. I hand buffed it with a microfiber cloth to deepen the shine. The finished pipe is shown in the photos below. This one is already spoken for and I think that the pipeman that it is going out to will really enjoy the unique look of his new pipe. Thanks for looking.


The Restoration of a Savinelli Alligator 207 Apple


Blog by Steve Laug

If you read the previous blog on the Bari Special Handcut pipe you have also read that for the past month or more I have been carrying on an online conversation with a Colonel in the Indian Military about his own pipe refurbishing and repair work. In the process of talking through a variety of the processes of pipe restoration he asked if I would be willing to work on a few of his pipes that had chipped or broken stems. We decided to look into what it would take to ship them to Canada from India. It seemed like a pretty daunting task but nonetheless he has some pipes in transit to me in Vancouver. In the meantime he wrote and said he had picked up a Bari and a Savinelli Alligator pipe and had the EBay seller send them directly to me in Canada so I could refurbish them for him and add them to the box of other pipes I would be sending back to him. I agreed and this week the pipes arrived.

Once I finished the Bari I worked the Savinelli Alligator apple shaped pipe. I have never been attracted to the alligator finish as it just did not work for me. This one however had some very nice looking grain underneath the rustication and in the smooth portions of the finish. The finish was dirty with dirt, grime and oils in the finish and rim edge. It looks good underneath that grime. The bowl has been reamed but a bit poorly. There is some scraping to the inner edge that has affected the roundness of the bowl on the left side and rear edges of the bowl. It is a filter pipe made for the Savinelli triangular Balsa filter that fits in the stem and extends partially into the shank. These are one of the better filters but should be either flushed out with alcohol or replaced often. The seller put a new filter in place in the stem. The stem fit well in the shank but looking down the shank it is dirty and covered with oils and tar. The stem is oxidized (though not as bad as the Bari was). It had some small tooth marks and chatter on the stem near the button. The stem logo is very faint and may not show up well once the stem is cleaned up. I took photos of the pipe to record the condition it was in when it arrived here in Vancouver. It gives me a benchmark to measure the finished pipe against as well. I took a close up photo of the rim top and bowl. The bowl had a thick cake in it all the way down to the heel. The rim top has some light lava overflow but it is not too bad. There is damage on the left side and back inner edge of the bowl that can be seen in the first photo below. The stamping on the underside of the pipe is quite readable through the grime. It reads Alligator and next to that is the Savinelli S Shield logo followed by the shape number 207 over Italy. Next to that it reads Savinelli Product. There is a brass separator on the stem that adds a touch of class to the shank/stem union.I took photos of the stem condition as well. You can see it is oxidized but not in bad condition. The light tooth marks on both sides are barely visible in the photos below. There is a very faint alligator stamp on the left side of the stem in an oval. It is faint enough that I am concerned that there is not enough depth to recolour it but time will tell.I dropped the badly oxidized stem in a bath of Before & After Pipe Stem Deoxidizer to soak away the oxidation. In this case the oxidation was quite thick and the stamping on the left side was so shallow that I did not want to do a lot of sanding. The deoxidizer could do its work. I put the lid on the airtight container and left the stem to soak overnight.I turned my attention to the bowl and the cleanup that was awaiting me there. I reamed the bowl with a PipNet pipe reamer using the second cutting head to work away the heavy cake. I worked at it very slowly so as to keep the blade from creating further damage to the roundness of the bowl. I cleaned up the remaining cake with a Savinelli Fitsall Pipe Knife taking it to almost bare briar and smoothing things out. I used a folded piece of 180 grit sandpaper to work on the inner edge and the damage to the top of the rim on the left and back edge of the bowl and down into the bowl about an inch. With the bowl reamed it was time to clean out the internals of the bowl and shank. I used 99% isopropyl alcohol, cotton swabs and pipe cleaners to remove the accumulated tars and grime in the shank and airway. I folded the used pipe cleaners and swabbed out the walls of the bowl with them. I scraped out the walls of the mortise using a small pen knife blade to remove the buildup on the walls and give the interior a clean smell and feel.I wiped the exterior of the bowl with a damp cloth and then scrubbed it with the Before & After Restoration Balm. I was sure that it would work well on the alligator pattern and the dirty condition of the finish on this pipe. I worked it into the grooves of the rustication with my fingers, rubbing it deep into the grooves. I used a shoe brush to further work it into the finish. I touched up the repaired rim top and edges with a dark brown stain pen and blended the colour into the rest of the stain on the bowl. I buffed the bowl with a shoe brush to further blend the stain on the rim. At this point the rim was looking far better. I buffed the bowl on the buffing wheel with Blue Diamond using a light touch. The photos below show the bowl after the buffing. It is really starting to look good at this point. Once the stem is done I will buff it a bit more and give it several coats of wax but for now it is finished and I am calling it a night. I took the stem out of the bath of Before & After Pipe Stem Deoxidizer and wiped it down with a paper towel to remove the excess deoxidizer. I ran pipe cleaners and alcohol through the airway to clean out the buildup inside. The stem was very clean and the oxidation was gone. The tooth marks in the surface of the stem on both sides near the button were even less visible.I used some European God Rub’n Buff to touch up the very faint logo on the left side of the stem. It helped a bit but it is pretty shallow so I am not sure it will last too long.I sanded the pipe lightly around the button to remove the tooth marks using 220 grit sandpaper. I polished out the sanding scratches and marks in the vulcanite – wet sanding it with 1500-2400 grit pads and dry sanding it with 3200-12000 grit pads and wiped it down with Obsidian Oil after each one. When I finished with the 12000 grit pad I gave it a final coat of oil and set it aside to dry. At this point I was not happy with the remaining oxidation that showed up under the flash of the camera so I went back to the drawing board and reworked it with the sanding pads. Once I finished reworking the oxidation, I put the stem back on the bowl and took the pipe to the buffing wheel to work it over. I gently buffed the rusticated bowl with Blue Diamond to polish the briar. I buffed the stem at the same time to raise the gloss on the vulcanite carefully working around the faint stamping on the stem. I gave the bowl multiple coats of Conservator’s Wax and the stem several coats carnauba wax. I buffed the entire pipe with a clean buffing pad to raise the shine. I hand buffed it with a microfiber cloth to deepen the shine. The finished pipe is shown in the photos below. I am hoping that the fellow I am restoring it for enjoys the second of his “new pipes”. For now he will have to enjoy it by looking at the photos but soon it will wing its way back to India. Thanks for looking.

The Resurrection of a Bari Special Handcut 848 Pinched Stem


Blog by Steve Laug

For the past month or more I have been carrying on an online conversation with a Colonel in the Indian Military about his own pipe refurbishing and repair work. In the process of talking through a variety of the processes of pipe restoration he asked if I would be willing to work on a few of his pipes that had chipped or broken stems. We decided to look into what it would take to ship them to Canada from India. It seemed like a pretty daunting task but nonetheless he has some pipes in transit to me in Vancouver. In the meantime he wrote and said he had picked up a Bari and a Savinelli Alligator pipe and had the Ebay seller send them directly to me in Canada so I could refurbish them for him and add them to the box of other pipes I would be sending back to him. I agreed and this week the pipes arrived.

The first one that I decided to work on was a Bari Special Handmade, a really delicate and interesting looking pipe. The bowl has a pretty thick cake but otherwise looks sound. The finish and the rim are very dirty with dust and grime from years of use and then sitting unused. The finish is an interesting wire rustication that follows the angles of the bowl and looks good under the grime. The interior of the mortise and shank are very dirty and the stem does not fit the shank well – very tight because of the tars. In fact it will not seat all the way in the mortise at this point. The style of the stem is one I have seen on Bari pipes before – a pinched stem is how it has been described. You can see why when looking at it from the top or bottom view. The stem is very oxidized and also has some deep tooth marks on both sides of the stem at the button. It is a very delicate stem. There is something about the pipe that assures me that it will look very good when it is finished. I took photos of the pipe to record the condition it was in when it arrived here in Vancouver. It gives me a benchmark to measure the finished pipe against as well. I took a close up photo of the rim top and bowl. The bowl had a thick cake in it all the way down to the heel. It was thick enough that I could not get my little finger into the bowl. It is a narrow conical bowl anyway but the cake is very thick and hard. The rim top has some lava overflow but it is not too bad. The stamping on the underside of the pipe is quite readable through the grime. It reads Bari over Special over Handcut. Next to the shank/stem junction the shape number 848 is also readable. Both are stamped in a smooth unrusticated band on the underside of the shank.I took photos of the stem condition as well. You can see why it is called a pinched stem from the photos. It is oxidized and very delicate. The tooth marks on both sides are visible in the photos below. You can see the ones on the underside as they are worse. There is a number 10 stamped on the underside of the saddle portion of the stem. My guess is that it is a replacement stem number should one be required by a repairman back when the pipe was made.I dropped the badly oxidized stem in a bath of Before & After Pipe Stem Deoxidizer to soak away the oxidation. In this case the oxidation was quite thick and the stem was delicate so I did not want to do a lot of sanding so the deoxidizer could do its work. I put the lid on the airtight container and left the stem to soak overnight.I turned my attention to the bowl and the cleanup that was awaiting me there. I reamed the bowl with a PipNet pipe reamer using the smallest cutting head to work away the heavy cake. I worked at it very slowly so as to keep the blade from ruining the roundness of the bowl and to keep from splitting or damaging the delicate bowl. I finished up the reaming with a Savinelli Fitsall Pipe Knife taking the cake back to bare briar and smoothing things out. I used a folded piece of 180 grit sandpaper to work on the inner edge of the rim and smooth out that edge of the bowl and down into the bowl about an inch. With the bowl reamed it was time to clean out the internals of the bowl and shank. I used 99% isopropyl alcohol, cotton swabs and pipe cleaners to remove the accumulated tars and grime in the shank and airway. I folded the used pipe cleaners and swabbed out the walls of the bowl with them. I scraped out the walls of the mortise using a small pen knife blade to remove the buildup on the walls that kept the stem from seating.I wiped the exterior of the bowl with a damp cloth and then scrubbed it with the Before & After Restoration Balm. I wanted to see how well it would work with the wire rustication pattern and the dirty condition of the finish on this pipe. I worked it into the grooves of the rustication with my fingers, rubbing it deep into the grooves. I used a shoe brush to further work it into the finish. I wiped it off with a clean cloth and buffed it on the buffing wheel with Blue Diamond using a light touch. The photos below show the bowl after the complete treatment I described. It is looking really good at this point. Once the stem is done I will buff it a bit more and give it several coats of wax but for now it is finished and I am calling it a night. I took the stem out of the bath of Before & After Pipe Stem Deoxidizer and wiped it down with a paper towel to remove the excess deoxidizer. I ran pipe cleaners and alcohol through the airway to clean out the buildup inside. The stem was very clean and the oxidation was gone. The tooth marks in the surface of the stem on both sides near the button were visible.I painted the tooth marks with a Bic Lighter flame to lift the vulcanite. One of the beauties of vulcanite is its “memory”. When heated the dents will come back to the surface. In this case the tooth dents on the top of the stem came up almost even. The ones on the underside were greatly reduced but still present (first two photos below). I sanded out the tooth marks and was able to blend the majority into the surface of the stem (third and fourth photo below). Those that remained I filled in with clear super glue (fifth and sixth photo) and after the repairs dried sanded them smooth to blend (seventh and eighth photo). The photos below tell the story. I worked over the stem with micromesh sanding pads. I polished out the sanding scratches and marks in the vulcanite – wet sanding it with 1500-2400 grit pads and dry sanding it with 3200-12000 grit pads and wiped it down with Obsidian Oil after each one. When I finished with the 12000 grit pad I gave it a final coat of oil and set it aside to dry. I put the stem back on the bowl and took the pipe to the buffing wheel to work it over. I gently buffed the rusticated bowl with Blue Diamond to polish the briar. I buffed the stem at the same time to raise the gloss on the vulcanite carefully working on the delicate stem. It would be very easy to break it at the pinched area. I gave the bowl multiple coats of Conservator’s Wax and the stem several coats carnauba wax. I buffed the entire pipe with a clean buffing pad to raise the shine. I hand buffed it with a microfiber cloth to deepen the shine. The finished pipe is shown in the photos below. I am hoping that the fellow I am restoring it for enjoys this beauty. For now he will have to enjoy it by looking at the photos but soon it will wing its way back to India. Thanks for looking.


Cleaning up a 1962 Gourd Calabash Pipe


Blog by Steve Laug

Jeff picked up this Calabash at a local estate sale in Idaho. It is a big pipe – large gourd, with the meerschaum insert and stem in place it is 8 ½ inches long and 5 inches tall. The diameter of the meerschaum cup is 2 ¾ inches and the chamber diameter is 1 1/8 inches. It is a bit different from other gourd Calabash pipes that I have worked on in that is has small flowers carved in the surface of the body of the gourd and in the meerschaum cup. The end of the gourd shank is capped with a plastic/hard rubber end cap and extension that are joined by a metal tube. The stem is acrylic and is a bright yellow colour. Jeff took some photos of the pipe before he started cleaning it. The gourd is in good condition and the overall appearance of the pipe is good. Jeff took some close up photos of the gourd to show its overall condition. You can see the carved flower patterns and small straight cuts around the flowers looking like blades of grass.The rim top had some scratching in the surface of the meerschaum as well as some more carved flower and leaf patterns. The bowl had some darkening around the inner edge of the bowl and there was a cake buildup in the bowl itself.Jeff removed the bowl to give a good look at the inside of the gourd. It was in good condition. Both the inside of the gourd and the underside of the meerschaum bowl had the number ’62 written on them in pencil. This makes me think that it is likely a date mark for the pipe – that is why I date it as a 1962 Calabash. The cork gasket around the inner edge of the gourd was in excellent condition. The cork was dry but otherwise undamaged. The black extension on the end of the shank was connected to the shank cap with a metal inner tube that lines the extension and provides a metal mortise for the stem. The stem was in excellent condition with light tooth chatter on the surface on both sides near the button with a little wear on the top and underside of the button itself.Jeff did a thorough cleanup on the meerschaum bowl, the inside of the gourd and the stem. He carefully scraped the cake in the bowl with a Savinelli Fitsall Pipe Knife. He cleaned the internals with alcohol, pipe cleaners and cotton swabs – scrubbing out the mortise as it was dirty. He scrubbed the exterior of the meerschaum cup and the gourd with Murphy’s Oil soap and a tooth brush and was able to remove all of the oils and dust in the carved flowers on the gourd and bowl. He was able to remove all of the grime from the top of the meerschaum bowl and left it looking very clean. Once he had removed the lava on the rim top and inner edge they were very clean appeared to be good shape. Some of the scratches in the meerschaum were deeper than others and would take some work to smooth them out. He cleaned internals of the stem with alcohol. When it arrived I took some photos of it to show how it looked before I did the restoration.  I took some close up photos of the bowl, rim and the stem to show how they looked after Jeff’s cleanup work. He was able to remove much of the grime and lave on the rim top. There was a little tar around the inner edge but the bowl itself was clean. The stem was in great condition. The Delrin push mortise was clean. It fit well in the metal tube in the mortise. I removed the meerschaum bowl and rubbed the gourd down with Before & After Restoration Balm to deep clean the smooth finish, enliven and protect the gourd. I hand rubbed it with my fingers and buffed it with a horse hair shoe brush to work it into the flower patterns on the gourd. I wiped it off with a soft cloth. The gourd really began to have a deep shine. I took some photos of the bowl at this point to mark the progress in the restoration. I rubbed Vaseline into the cork gasket to soften and enliven it. I rubbed it in, let it dry and repeated the process until the cork was softer.I took some photos of the pencil marks on the inside of the gourd and the underside of the meerschaum bowl. Both of the photos below show the marks and clearly reads 62.I polished out the sanding scratches and marks in the meerschaum with micromesh sanding pads – wet sanding it with 1500-2400 grit pads and dry sanding it with 3200-4000 grit pads. I wiped the bowl down with a damp cloth after each sanding pad. I dry sanded it with 3200-4000 grit pads and wiped it down with the damp cloth after each one. It looked better than before but I still was not satisfied so I buffed it again this time using Blue Diamond. I brought it back to the table and sanded it with the final three 6000-12000 grit pads. I wiped it down with the damp cloth after each pad. When I finished with the 12000 grit pad I gave it a final wipe down and set it aside. The final photo showing the underside of the meerschaum cup shows a previous repair that had been done before the pipe came to us. It was a good repair and the chip was smooth and there was no roughness to the outer edge of the cup. I polished out the tooth chatter in the acrylic stem with micromesh sanding pads – wet sanding it with 1500-2400 grit pads and dry sanding it with 3200-12000 grit pads. I wiped the stem down with a damp cloth after each sanding pad. I buffed the stem using a light touch with Blue Diamond on the buffing wheel. I brought it back to the table and did a final polish with the 12000 grit pad, gave it a final wipe down with a damp cloth and set it aside to dry. I worked over the black plastic end cap and extension with micromesh pads to polish them and remove all scratches in the surface. I gave the stem multiple coats of carnauba wax to protect and polish it. I gave the gourd bowl several coats of Conservator’s Wax and buffed it with a clean buffing pad to raise the shine. I hand buffed gourd and meerschaum cup with a microfiber cloth to deepen the shine. The finished pipe is shown in the photos below. The polished gourd, the rejuvenated meerschaum cup, black end cap and shank extension work very well with the bright yellow of the bent acrylic stem. The pipe is clean and ready to load and smoke with a favourite tobacco. It feels good in the hand and I would think it be cool, dry smoke. The dimensions of the pipe are: Length: 8 ½ inches, Height: 5 inches, Diameter of the meerschaum cup: 2 ¾ inches and Chamber diameter: 1 1/8 inches. I will be adding this one to the rebornpipes store shortly if you are interested in adding it to your collection. This is a larger pipe and it’s a nice addition to the rack. If you are interested email me at slaug@uniserve.com or send me a message on Facebook. Thanks for looking.

A Few Firsts on a GBD Garland II Calabash 9552


Blog by Aaron Henson

Before you get into this write up, I need to confess that despite my best efforts, I did a poor job of photo documenting this repair and restoration.  I had good intentions, but the project was spread out over two months, working on it as I had time. Because of this, some of the pictures were taken out of sequence and others were chosen that best show a repair but also show repairs that have not yet been covered in the write up.

I realized a while back, that I had not restored a pipe recently that I was really excited about.  There have been a number pipes that have crossed my work table and some have even posed some new challenges but the pipes themselves were hardly memorable. With the pickings at the second hand store in my area being slim – I turned to eBay to see if I could find a project pipe that would peak my interest.  After a few hours of browsing I, found just what I was after: a stemless, GBD Garland II stummel – shape 9552.  I submitted my bid and picked it up for a price that I thought was reasonable.

I don’t typically like to buy pipes on eBay.  I prefer to be able to see them first hand so I know what I am getting myself into.  But in this case the seller was forthcoming in the auction description, revealing that the pipe had a major crack in the bowl and another in the shank and of course, it lacked a stem.  But what really fascinated me was the shape of the stummel and what promised to be some beautiful grain patterns.

The following pictures were from the seller auction page: Wanting an idea of what kind of stem was originally on the pipe, I headed on-line to see what I could find.  My first stop was here at Reborn Pipes.  In a 2016 article, our host, Steve, restored a GBD Colossus Fantasy 9552.  I found additional examples of the 9552 shape in the GBD’s Prehistoric, Prestige and Virgin lines.  In all cases the 9552 originally came with a bent saddle bit – some fancier than others.

These next two pictures are of a Garland II I found online.  I was not going to try to duplicate the band in the stem, but knew I was going to need a band on the shank and that wouldn’t look too bad. Then I ended up at a Pipedia article for GBD Models where I learned that the Garland is a seconds line from GBD. I found this surprising because the Garland that I have and the ones I have seen online are excellent specimens of briar.  Admittedly, my eye is not that experienced, but just from the quality of the briar and the lack of fills and pitting I would guess that the Garland line is GBD’s higher end seconds consisting more of fabrication errors rather than materials flaws.  Can anyone confirm my guess?

Another interesting fact that I note is that the 9552 shape is often stamped with “Colossus”.  The term Colossus was used by GBD as plus sized pipe designation.  This size designation is used on all the GBD lines of pipes, but is lacking on this particular Garland II stummel. When the stummel arrived, I eagerly open the package and began to inspect the damage up close, fearing that some of the worst damage may not have been disclosed.  But the seller’s pictures and description were accurate and I didn’t find hidden issues.  The pipe was indeed big; the bowl height is 2.4 inches and the outside diameter is 1.75 inches. The chamber is 0.96 of an inch in diameter and 1.9 inches deep.

The left side of the shank is stamped GBD in an oval over Garland II.  The left side has the COM (Country of Manufacture) stamp: MADE IN LONDON in a circle over ENGLAND and the shape number to the right: 9552. There was a heavy amount of the lava on the rim and the bevel at the edge of the chamber was a little distorted.  The chamber too seemed to be drilled a little off center.  Perhaps this was the why it was a second?  The chamber had been reamed but not back to briar. The horizontal crack in the bowl was located on the left side and was a little over an inch long.  I suspected that it went all the way through bowl wall but I could not be certain until I finished reaming the chamber.  The crack in the stem was about half an inch long from the end of the shank right through the COM stamp but missing the shape number. Looking the pipe over closely, I noted quite a few dents in the heel of the stummel and handling scratches on the sides of bowl and the rim.  I guessed that this piece of briar had been rattling around in a drawer for some time.Now that I had the stummel in hand I could measure the shank diameter (.610” at the end) and estimate the length that I wanted the new stem to be; about 3-1/4 inches. I took these measurements to the Vermont Freehand website and selected a stem that best fit.  I chose the vulcanite stem blank number 722, a round saddle bit 21/32” diameter and 3-1/16” inches long.  I always order two in case I ruin the first one.  I also ordered four nickel plated shank rings, two 15.5 mm and two 16 mm not being sure which would be the better fit. With the parts on order, I started cleaning up the interior of the stummel.  I reamed the chamber back to bare wood with my Castleford reamer and Decatur pipe knife. I also cleaned the shank alternating with bristled and soft pipe cleaners dipped in 91% isopropyl alcohol.  The last person who tried reaming the chamber must have also ran a pipe cleaner or two through it because it only took five or six pipe cleaners before they started coming out as clean as they went in. The mortise I cleaned with cotton swabs. In all, the stummel was relatively clean. I wiped down the outside of the stummel with alcohol and acetone to remove the grime.  Underneath the dirt and oils was some beautiful straight grain with a birds-eye heel.  I looked closely and could not find any fills.  Next, I addressed the thin crust of dried tars on the rim.  I wetted down a green pad (mine was actually blue and did not work as well as the original green ones) with a mixture of tap water and granulated Oxy-clean.  Placing the pad in a shallow dish, I pressed the rim of the pipe down on the pad and scrubbed in a circular motion.  A little elbow grease and the moist Oxy-clean solution did its job. I dried the stummel with a paper towel and set it aside to dry for a bit.Next, I wanted to remove the ghosts of the previous tobacco that I could still smell in the chamber with an alcohol soak.  I use the cotton ball method because it seems to do the job and is easier to clean up than the salt method. This chamber needed three cotton balls and I used 98% grain alcohol for the soak. I placed a cap over the top of the bowl for the first couple of hours to keep the alcohol from evaporating too fast then I removed the cap so the evaporative action can draw out the tars from the briar.When I got back to it the next day I was disappointed (though not surprised) that the crack in the bowl was wet where alcohol had been seeping through.  At lease now I knew for sure that the crack went all the way through the bowl wall.  The good news was I could easily see the ends of the hairline crack.  I used a dental pick to mark the ends so I could find them later, then I removed the cotton balls and wiped out the chamber with a dry paper towel. I began the crack repair by using a small drill bit (0.5 mm) and hand drilled the stopper holes at the location I marked with the dental pick. Since the crack went completely trough the chamber wall I also drilled the hole all the way through the wall.  I have not dealt with a crack that was this deep before so I was on unfamiliar ground.  I packed the hole the half full with briar dust using a tooth pick then placed a drop of clear CA glue into the hole – coaxing it in with the tooth pick.  I filled the holes up the rest of the way and dripped more glue.  I used a magnifying glass to locate the end of the shank crack and gave it the same treatment.

I unsuccessfully tried working some CA glue into the bowl crack. The glue just seemed to set too fast and did not penetrate the crack.  The shank crack on the other hand I could work open and get the glue to flow into it.  I put a clamp on the shank while the glue set.  Then when dry, I sanded the glued repairs smooth with 220 grit paper, careful not to over sand and change the shape of the pipe or damage the stamping on the shank. I resolved to repair the bowl crack by applying coat of heat resistant epoxy to the inside of the chamber.  In this case I used the two part JB Weld – not the Quick Weld, which is useful for other pipe repairs.  For pipe chamber repairs, I like the original JB Weld epoxy, it is easy to use and when cured it has a 550 degree (F) heat resistance.  It is also easy to sand smooth.  I apply it with my finger because it is much easier to get an even coat.  I highly recommend wearing a pair of powder free Nitrile blue gloves for this operation! By this time the parts from Vermont Freehand arrived and wanted to band the shank. I have fixed a few banded pipes before but never put a band on an unbanded pipe. I tried dry fitting the two different sized bands I had bought.  The smaller band would only just slip on the first fraction of an inch so I was glad I had ordered the next size up. The bands were a bit wider than I wanted because I did not want it to cover up too much of the stamping.  Not sure what to do about the band width, I kept focusing on the seating of the band.  I used a heat gun to heat up the band and get it to expand.  Then with the band resting on a wood block, I pressed the shank down into the ring. The first attempt didn’t go well. The band was a bit cocked and only seated about a quarter of an inch.  I realized that the shank’s taper was going to prevent the band from going on much farther and that was going to resolve the width issue; I was going to have to trim the band.

I removed the band and heated it up again.  I smeared a little CA glue around the end of the shank and was able to seat the band squarely.  This time about 3/8” onto the shank.  Once cool, I used a skinny wheel on a rotary tool to trim of the excess band material and flush it up to the end of the shank.  Although the band covered up the COM stamp and ‘AND II’ of ‘GARLAND II’ it was necessary and it gives the stummel a touch of class. I was pleased that the replacement stem I had chosen seemed to be a good fit although it was going to need some work.  I started by using a fine tooth file to square up the face of the stem so it sits flush to the shank and removing the casting burrs.The tenon on the blank was way oversized as was the body of the stem.  I don’t have a tenon turning tool, so I use my drill press to turn the stem.  Wedging a bamboo skewer into the air hole at the tenon end, I leave about an inch of skewer exposed that I can secure into the chuck of the drill.  Setting the drill to about 1300 RPM I use small pieces of 60 grit sand paper to slowly reduce the diameter of the tenon and the stem until it the correct size. The drill press method works well in theory.  Once in a while the stem slips loose from its friction fit with the skewer and I have to reseat it.  I work the vulcanite with 60, 120 and 220 grit sand paper, leaving the polishing to be done by hand with micromesh pads.

I kept a caliper nearby set at the correct tenon diameter to check my progress.  As I got closer to the correct size, I switched to 120 and 220 grit paper.  But I didn’t switch soon enough!  By the time I got some of the deep scratches of the 60 grit out I had overturned the tenon and it was a hair too small.  I finished turning the body of the stem before addressing the tenon issue.I thought at first that a little bee’s wax on the tenon would be enough to tighten the fit but in the end I had enlarge the tenon.  To do this, I heated the tenon and inserted a drill bit into the air hole to enlarge the tenon.  Letting the tenon cool with the bit in it I checked the fit:  A little too big.  I didn’t want to take anymore material off the tenon because if the tenon gets hot during a smoke it will return to its original size, vulcanite has a memory.  I looked around my tool box and found a small punch that had a slightly smaller diameter than the drill bit and repeated the heating process.  This time the fit was much better.

With the stem fitted it was time to bend the stem.  I have jig for holding round stock and I used this to hold the assembled pipe steady with the bit resting on a 1-1/4” round dowel.  Using my heat gun, I heated the bit until it draped over the dowel.  I dipped the bent stem in water to cool the vulcanite and set the shape.  Then I checked the angle of the bend and had to repeat the process a couple of times until I had what I thought was the original stem shape just right.Stem polishing started with 220 grit to remove the remainder of the casting burrs.  Then I wet sand with micromesh pads 1500 – 4000.I removed the plastic guard after the 2400 pad.  I used the 3200 and higher micromesh pads to also polish the band.After the 4000 pad I coated the stem with mineral oil and let it sit for a few hours.  Then I finish polishing with pads 6000 to 12000. I started finishing the stummel by giving it a steam treatment to raise the dents and handling damage.  Holding a wet terry cloth rag on the briar I press a hot iron on to it.  This method works very well but I have two points of caution: 1) don’t burn your fingers in the steam; and 2) do not press the iron near the stamping, it will ruin stamping very quickly.  I only apply the iron around the bowl body and the heel where the dents are the worst anyway.

I sanded the stummel with micromesh pads 1500 through 3200, with special attention paid to the rim to make sure it was smooth.  I selected Fiebing’s dark brown aniline dye to better hide the repairs and applied the stain, without dilution, using a cotton swab straight from the bottle.  I used a flame to heat and set the stain.  I wiped down the stummel with isopropyl alcohol on a cotton pad to remove the excess stain.  I kept wiping it down until the level of color was what I thought it should be. After staining the stummel I like to refresh the briar with a light coat of mineral oil and let the oil soak in overnight.  All of the alcohol in the stain and the wiping down tends to dry out the stummel and I find the mineral oil helps to bring some of the life back to the briar.  It also seems to give the finished pipe a healthy look.After the oil soaked in, I polished the briar with the 3200 – 6000 micromesh pads.  Wiping it down with a clean cloth when finished.I took the assembled pipe back to my drill press/buffing station and ran over the entire pipe with red diamond polishing compound.  Two or three passes of the pipe seems to prepare the pipe well for the final finish.  I wiped the pipe down with a microfiber cloth to remove the buffing compound and then changed the buffing wheel for the waxing wheel.  Three coats of carnauba wax put a nice shine on the pipe.

The last step in this restoration was the bowl coat.  I had earlier sanded the epoxy chamber repair and wiped out the bowl with alcohol so the inside was relatively smooth.  I mixed up a small batch of bowl coat using 2 teaspoons of sour cream and about three activated charcoal capsules.  This made a thick, black, creamy paste that I spooned into the chamber with a wood spatula made from a popsicle stick. Donning the Nitrile gloves again, I used my finger to evenly spread the coating around the inside of the chamber. Wiping the excess coating off the rim with a cotton pad I set the pipe aside to dry for a few days.

Now am I looking forward to the weather warming up so I can break in this pipe.  I think it might become one in my regular rotation. Thank you for sharing in my adventure. If you like the tamper in the picture above, it is one that I made and is for sale.  Please see the Reborn Pipes Store page for it and other tampers.  All proceeds go to charity.