Tag Archives: Dal Stanton article

Refreshing a Savinelli Dry System 362


Blog by Dal Stanton

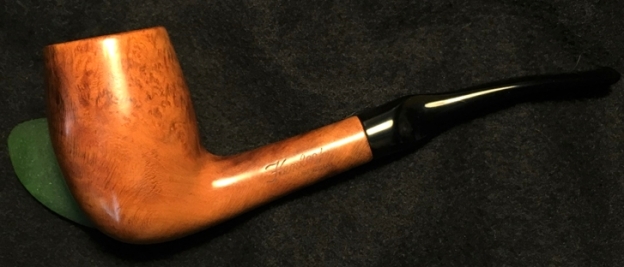
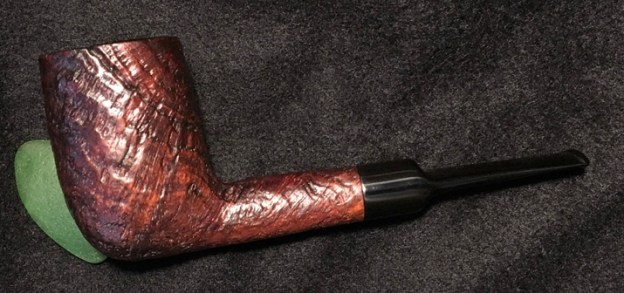
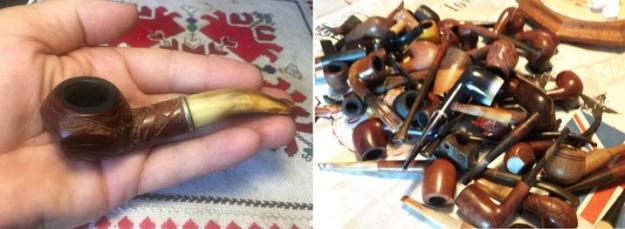
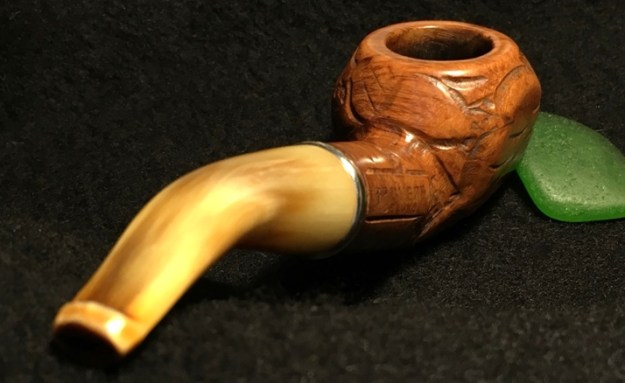
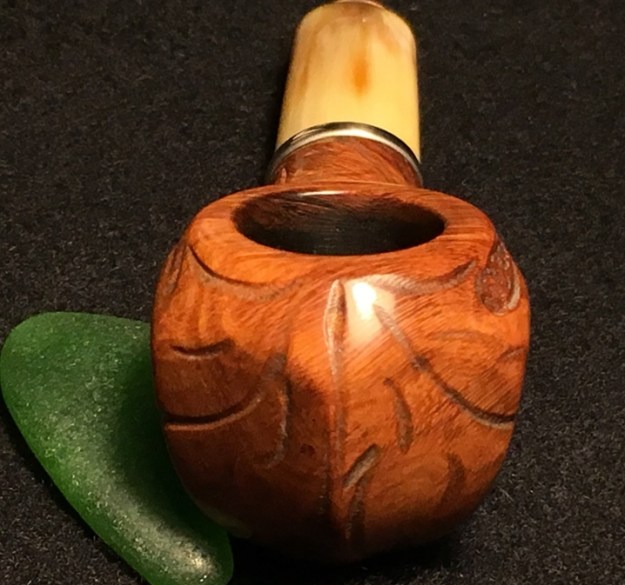
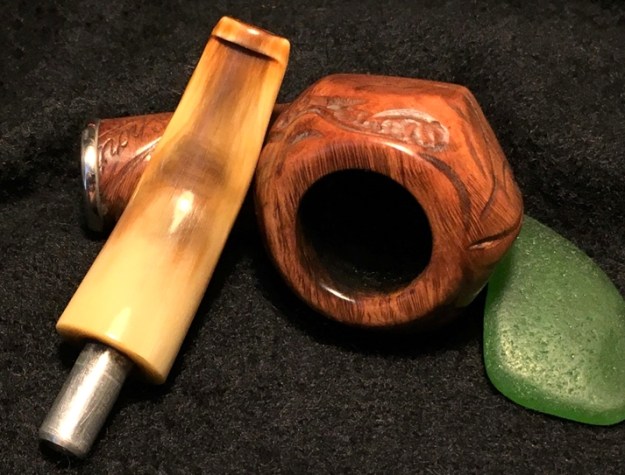
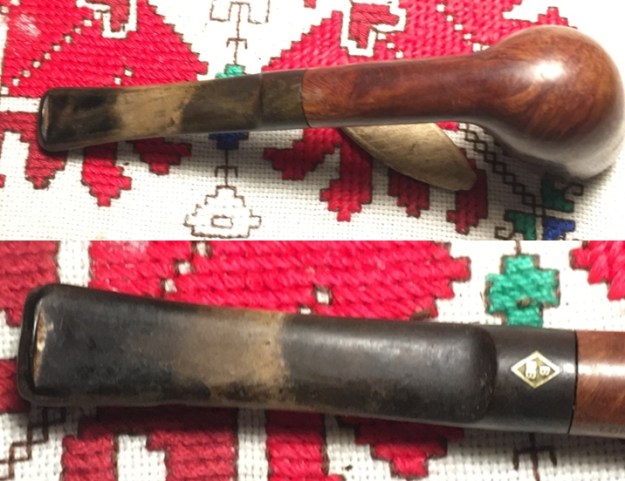
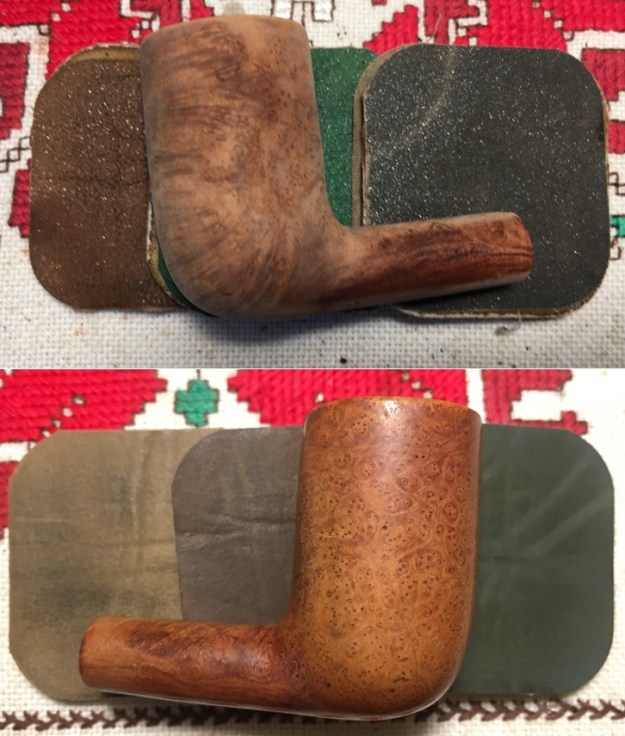
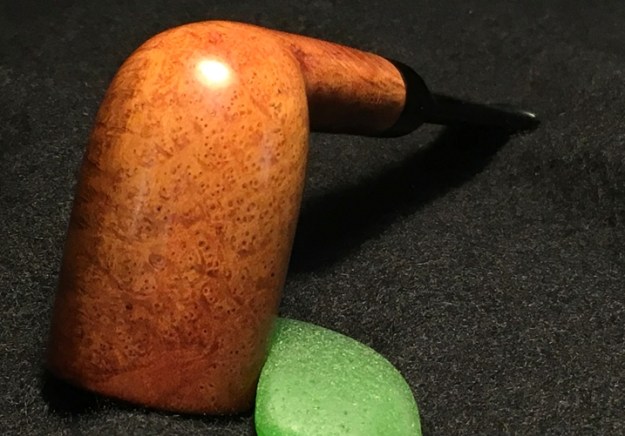
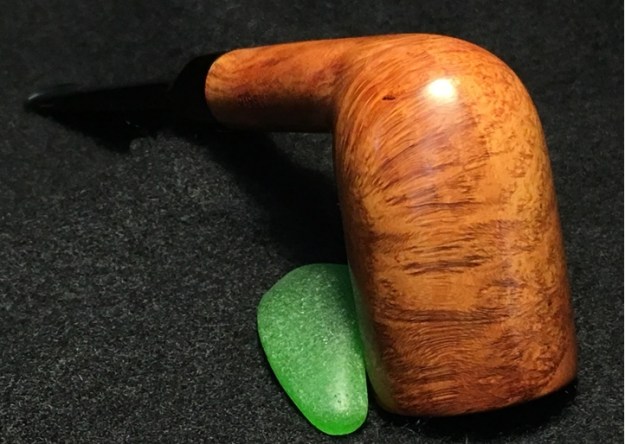
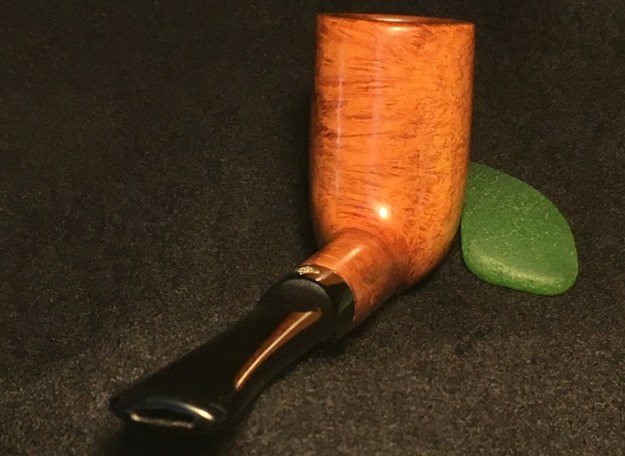
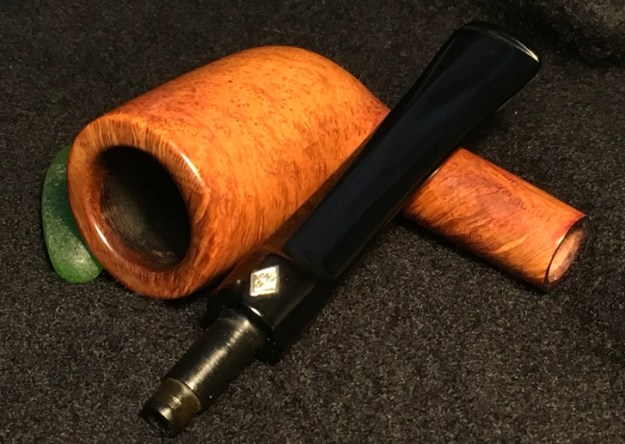
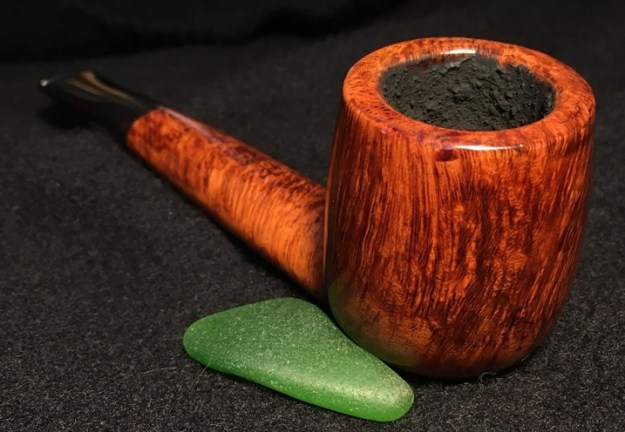
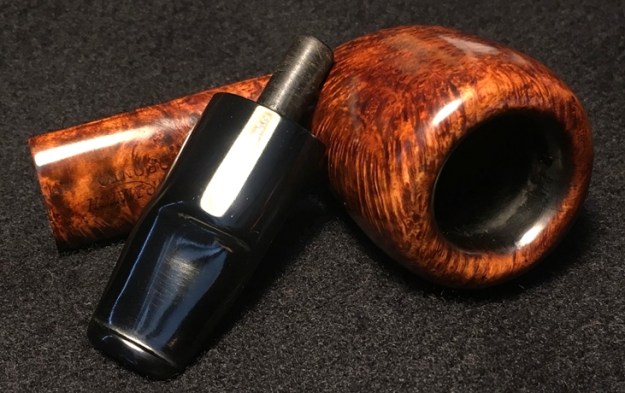
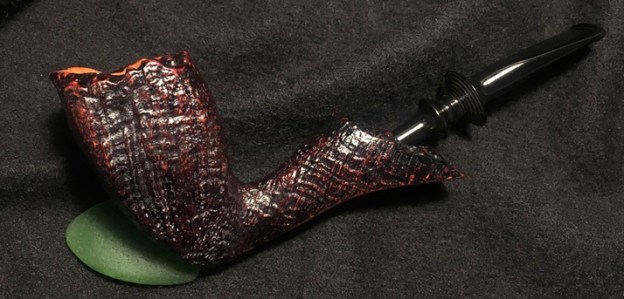
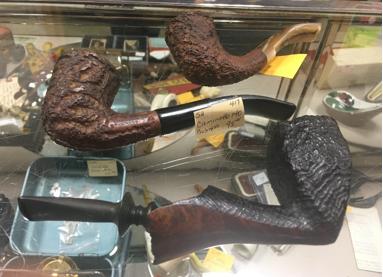
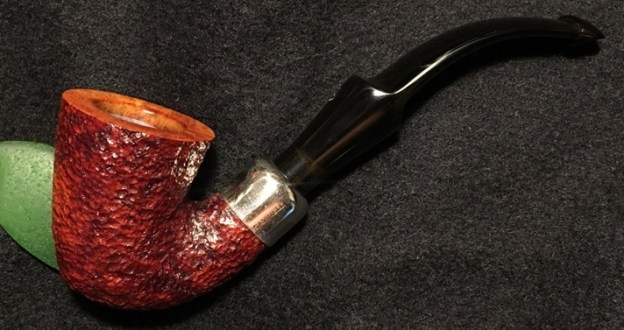
I acquired a pair of Savinelli Dry System pipes on the eBay auction block from a seller in Poughkeepsie, New York.  I initially was attracted by the ‘Peterson-like’ description of the pair – ‘Dry System’.  I also liked the tight bend and the ‘Dublin-esque’ bowls.  Both are ¾ bent with a conical bowl – a tight configuration that I liked immediately.  They almost seemed identical, but one had the shape number 362, the one on my worktable now, and the other had 3621.  When I unpacked them here in Bulgaria and took a closer look, I could see the differences.  Both have identical shapes but the 362 is a lighter rusticated finish with a smooth rim.  The 3621 is a darker blasted finish with a blasted rim.  These pictures show the differences.A friend of mine here in Bulgaria, Teo, saw the Savinelli pair on my website in the ‘For “Pipe Dreamers” Only!’ collection and inquired about them.  I was very happy that he commissioned the 362 to add to his collection which will benefit our work here in Bulgaria with the Daughters of Bulgaria – women and girls who have been trafficked and sexually exploited. Pipe smoking is very rare here in my adopted country of Bulgaria.  In the 13 years we have lived and worked in Bulgaria, I can count on one hand how many times I have seen a Bulgarian smoking a pipe!  After restoring the pipe, and if Teo decides to adopt it (it’s not obligatory for those who commission – they have the first opportunity to acquire it), I’ll look forward to sharing a bowl with him!  Here are more pictures of the Savinelli Dry System 362 on my worktable. 
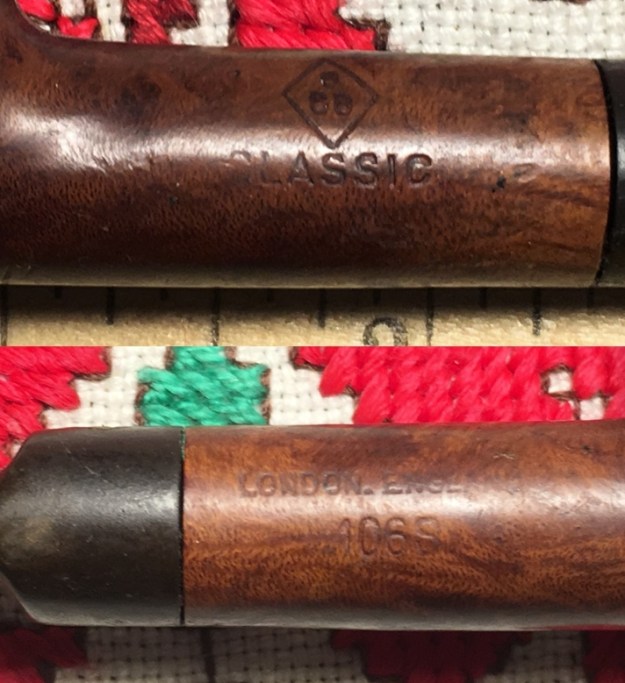
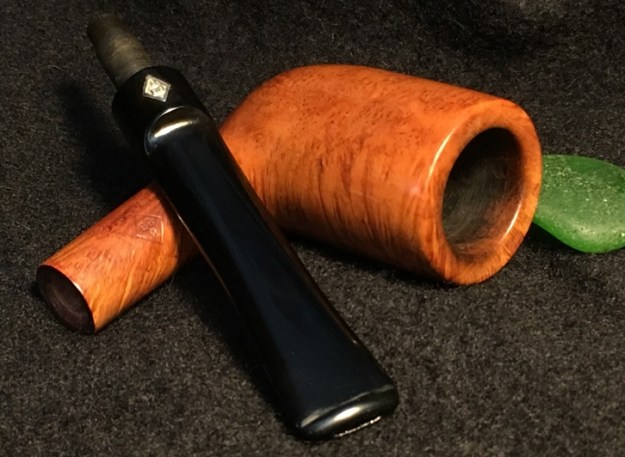
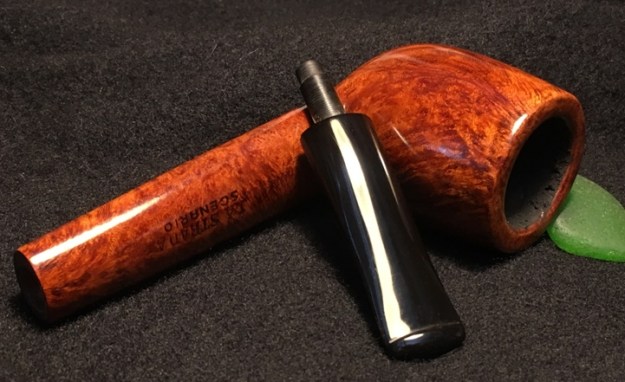
The smooth underside panel holds the nomenclature.  To the left is stamped ‘DRY SYSTEM’ then the Savinelli ‘S’ logo.  To the right of the logo is 362 [over] ITALY.  The nickel shank cap is stamped on the left side with ‘SAVINELLI’ along with ‘S’ on the topside of the military stem. I found nothing about the Dry System on Pipedia but Pipephil.eu came through with some very helpful information – especially about the shape number differences.  Looking at the Savinelli shapes chart on Pipedia’s Savinelli article, shapes 362 or 3621 were not among those listed.  Pipephil provided this on the Savinelli Dry System with the information that the Dry System could be stamped with either 3 or 4 digits for the shape number:The panel above also references a link comparing Savinelli’s Dry System P-Lip stem with the Peterson standard. I found the most information about the Savinelli Dry System on another site as I broadened my online search.  A South African based tobacconist, Wesley’s  (See LINK), provided a gold mine of information about the Savinelli Dry System:

Launched in 1981, it had taken several years of research into the negative points of existing system pipes, in order to improve on them. Perseverance paid off – by combining trap and filter, and enlarging the smoke hole, Savinelli achieved the “Dry System”, which in our opinion is the best answer to “Wet Smoking” so far developed.

Especially for new pipe smokers, the Savinelli Dry System pipe incorporates everything needed to provide a cool, dry smoke.

The name “Dry” comes from the introduction of the Balsa “filter” into the traditional system pipe – the “System” being the presence of the built-in moisture trap in the shank, linked with the “smokehole on the top” mouthpiece. The balsa mops up the moisture in the smoke hence the term “Dry” system, and if the pipe is smoked without the balsa all that will happen is that this moisture will condense and collect in the trap. It can then either be mopped up with a folded pipe cleaner or flicked out. Just be careful where you flick it!

Put this all together and you can see why we say these are technically our best designed pipes. But the technical qualities are not all these pipes have to offer. Extra bonuses are the feel, the finishes and the balance.

This information marks the genesis of the Savinelli Dry System line in 1981. Added to this information, Wesley’s included the following benefits of the Savinelli system with a helpful cut-away showing the internals:The description of the ‘smokehole’ of the mouthpiece, is interesting in the way it disperses the smoke so that it avoids tongue burn as well as keeping moisture entering the stem from the mouth. The trademark filtering system is also optional – use of the balsa insert which I use with great satisfaction with some of my own Savinellis.  Yet, even if you do not utilize the absorbing qualities of the balsa insert, the built-in moisture trap will hold the moisture for clean-up after smoking.  Sounds good!

Wesley’s Tobacconist also included this helpful Shapes Chart for the Savinelli Dry System pipes. The description for the 3621 suggests:

Regular shapes 3613 & 3621 are ideal for the new pipe smoker or for a short smoke for anybody.

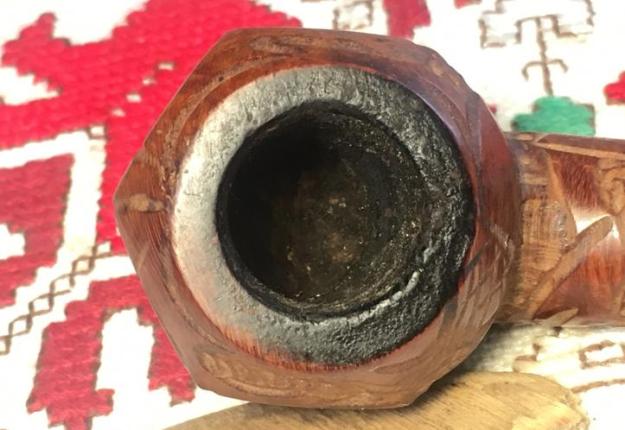
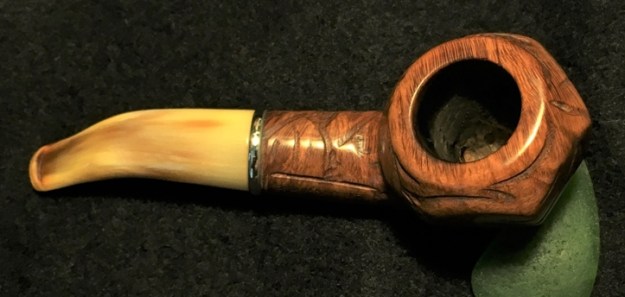
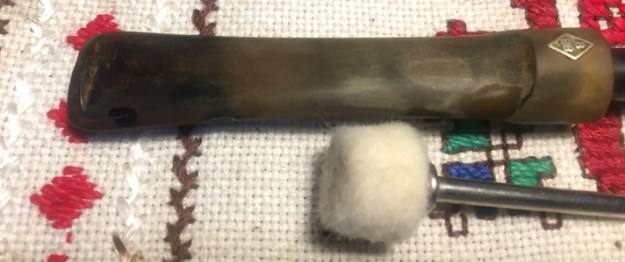
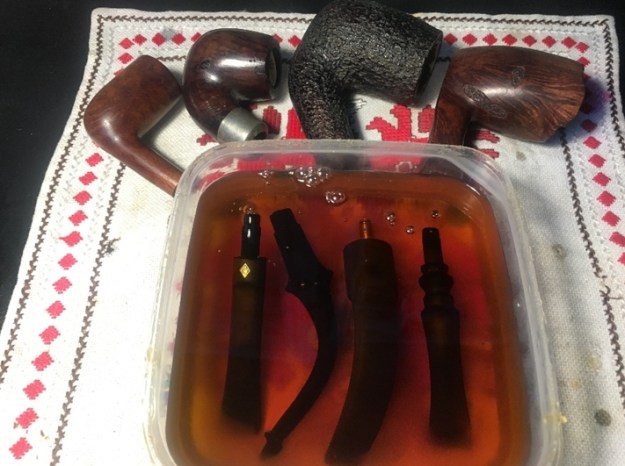
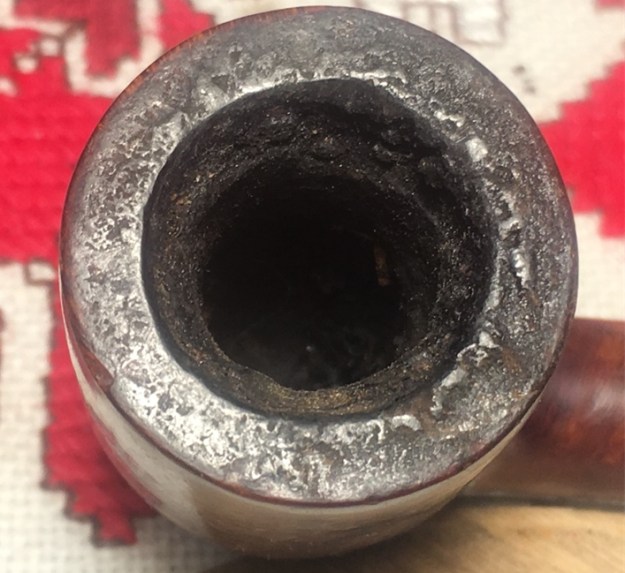
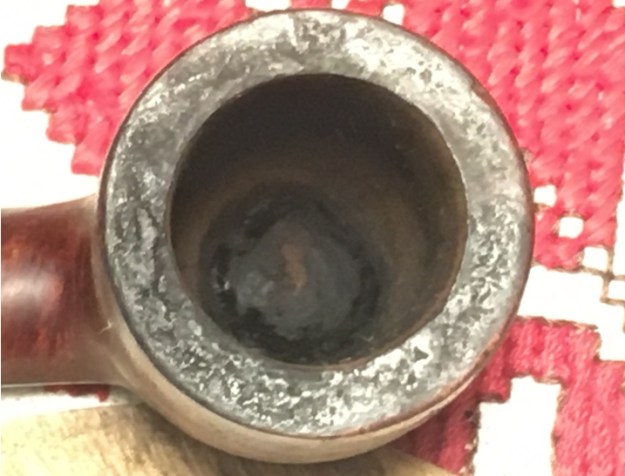
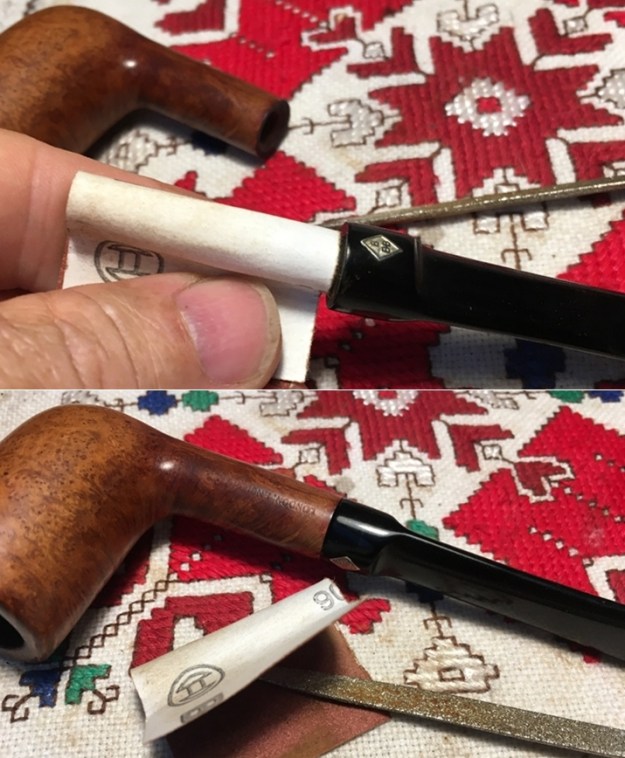
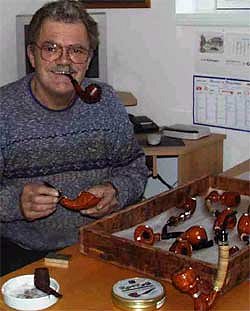
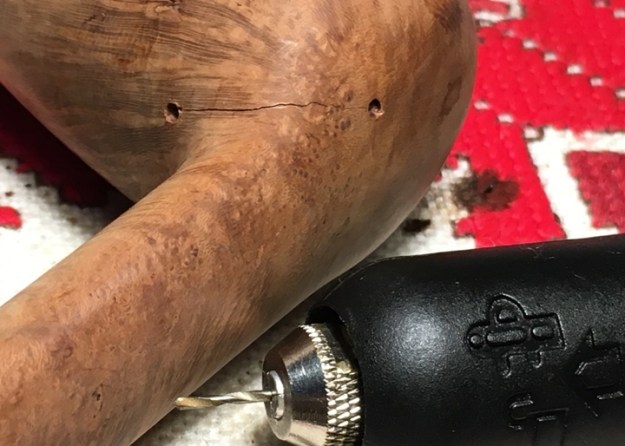
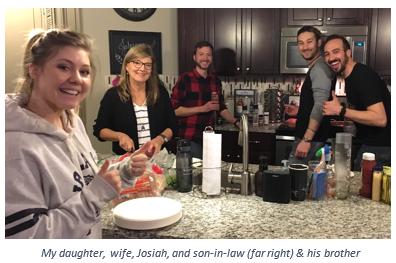
As I look at the Savinelli Dry System 362 now on my worktable, I’m wondering if it too is actually a 3621 and the craftsman applying the rustication was a bit overzealous.  I take a close-up to show that the latter half of ‘ITALY’ also succumbed to the rustication!Notwithstanding, this 362* is a sharp looking pipe in relatively good condition.  The chamber shows moderate cake build-up and the smooth, internally beveled rim is darkened with some lava buildup.  The rustication process is very tight and attractive and only needs some cleaning of the normal grime buildup.  The nickel shank cap will shine up nicely.  The Savinelli P-Lip stem has a good bit of oxidation and the P-Lip button shows almost no biting damage.  Overall, I’m hopeful of a smooth cleanup!  I begin the restoration by cleaning the airway of the stem with a pipe cleaner dipped in isopropyl 95% and then I place the stem in a soak of Before & After Deoxidizer along with other pipes in the queue.   My wife captured this Pipe Steward cameo appearance at the worktable! After several hours in the soak, I fish out the Savinelli stem and wipe it down with cotton pads wetted with alcohol to remove the raised oxidation.  I also run pipe cleaners through the airway to clear the excess Deoxidizer.  I can attest to the fact that this P-Lip stem is easier to clean than the Peterson version!To begin rejuvenating the vulcanite, a coat of paraffin oil on the stem does the job and I put the Savinelli P-Lip aside to absorb the oil.
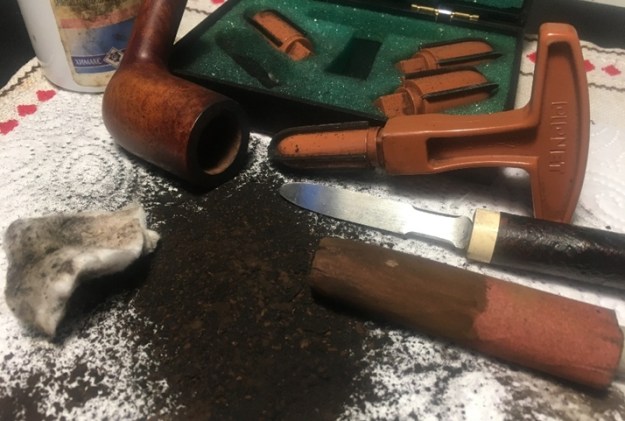
The chamber has a moderate cake build up and removing it to give the briar a fresh start and to inspect the chamber walls is the next step.
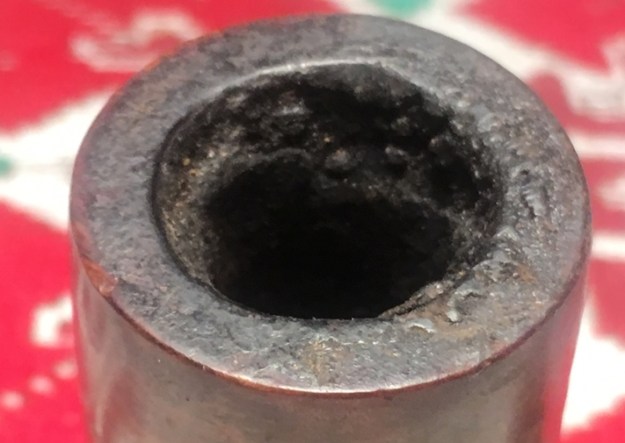
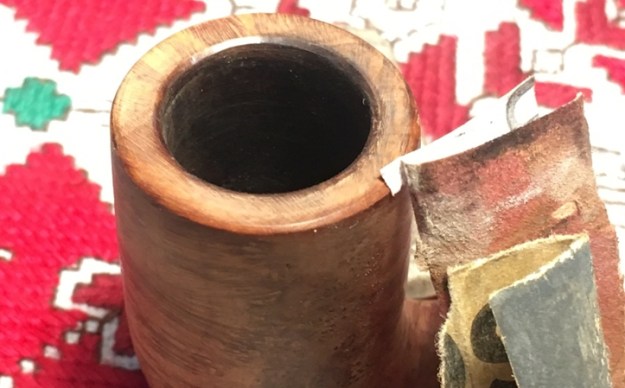
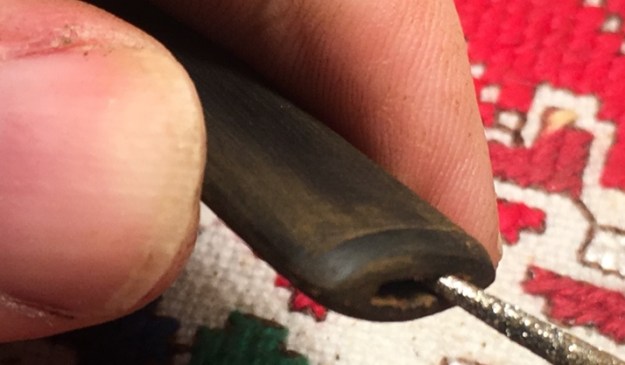
Using only the smallest blade head of the Pipnet Reaming Kit, it becomes clear very soon how quickly the canonical chamber narrows toward the floor.  I do not force the blade downward with much pressure to avoid digging into the lower chamber wall to form a reaming ledge. This has been evident on several pipes where I’ve seen the results of overzealous reaming.  Utilizing the Savinelli Fitsall tool next, the blade is better suited to the contours of the chamber wall.  To remove the final carbon residue from the chamber wall, sanding the walls with a Sharpie Pen wrapped with 240 grade paper does the job well.  Finally, the chamber is cleaned of carbon dust with a cotton pad wetted with isopropyl 95%. Inspection of the chamber walls reveals a very healthy block of briar.
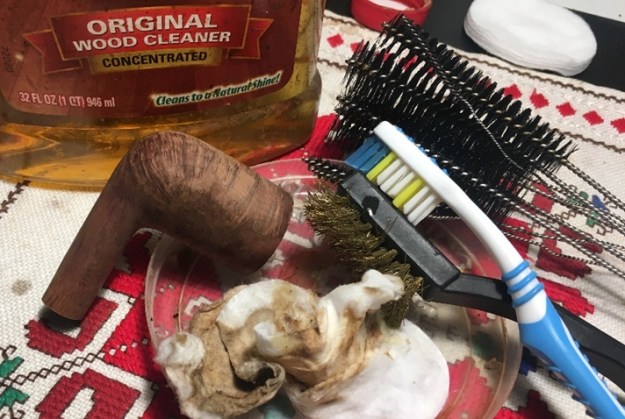
Moving now to cleaning the external briar surface, undiluted Murphy’s Oil soap is applied to a cotton pad to scrub the rim and rusticated surface.  A bristled toothbrush also works well on the rough surface freeing it of dirt and grime.  Utilizing both a brass bristled brush and the sharp edge of the Winchester pocketknife, the darkened areas on the rim give way.  With a very gentle touch with the blade, the excess carbon gives way on the rim and the sharp internal bevel.  Taking the stummel to the sink and using warm water the cleaning continues with anti-oil dish soap and shank brushes to clean the internals.  After thoroughly rinsing, the internal cleaning continues at the worktable with pipe cleaners and cotton buds wetted with isopropyl 95%. As cotton buds are dipped in and out of the mortise, the schematic of the internals included above comes to mind.  Without doubt, the trap system works!  What a muck of gunk is excavated from the trap as dental spatula and spoon are utilized to scrape the mortise walls and trap.  Finally, cotton buds and pipe cleaners start emerging lighter and I move on with clean internals left behind.Before moving on to the stem, I decide to apply the coup de grâce to the internal cleaning process first.  While working on the stem, a kosher salt and alcohol soak will continue the cleaning passively and freshen the bowl for the new steward.  I form a mortise ‘wick’ first by pulling and stretching a cotton ball.  I guide the end of the wick into the airway cut-away with the help of a stiff wire.  Following this, more of the cotton wick is stuffed down into the trap.  With the wick in place, after kosher salt is added almost filling the chamber, the stummel is placed in an egg crate providing stability to the operation.  Using a large eye dropper, isopropyl 95% is then added to the bowl until it surfaces over the salt.  After a few minutes the alcohol is absorbed, the bowl is topped off with alcohol once again and the bowl is set aside to allow the soak to do its thing. 
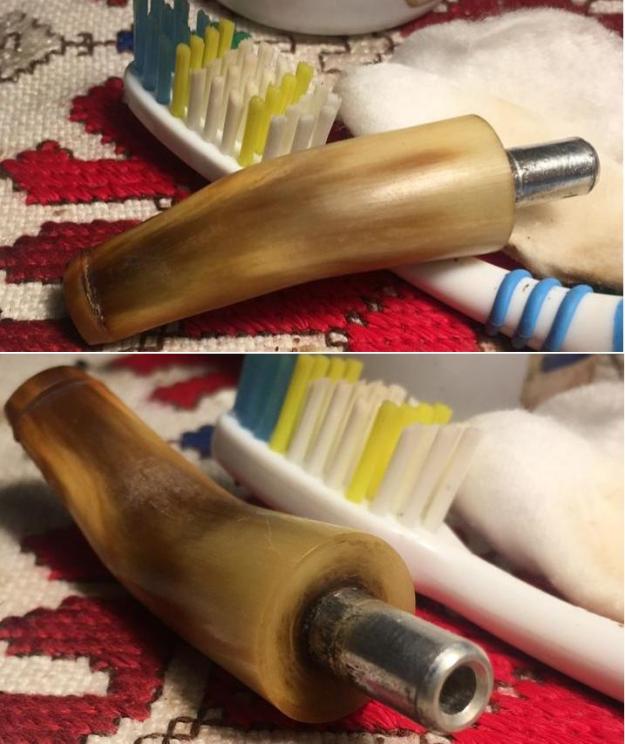
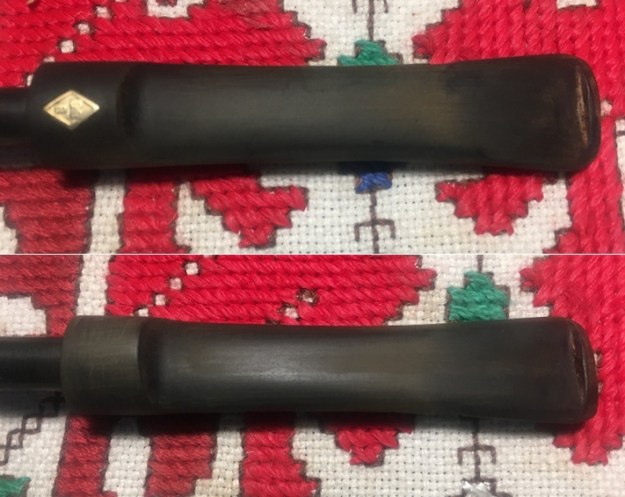
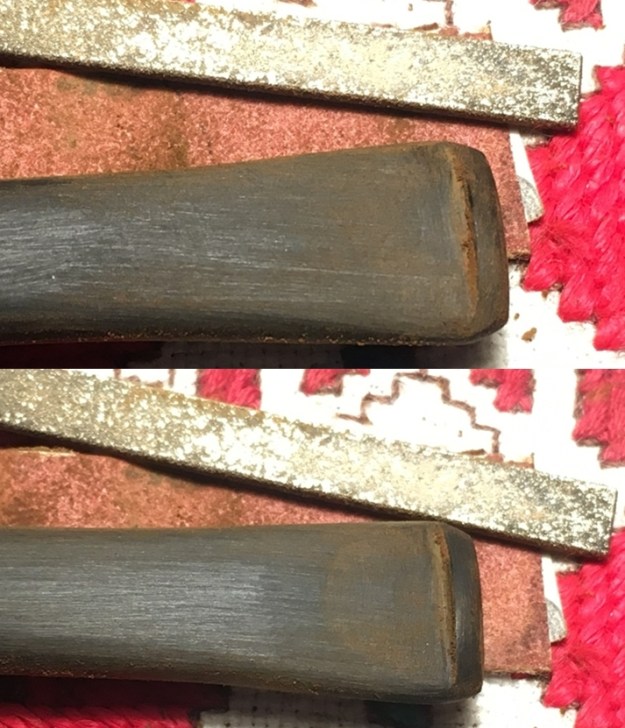
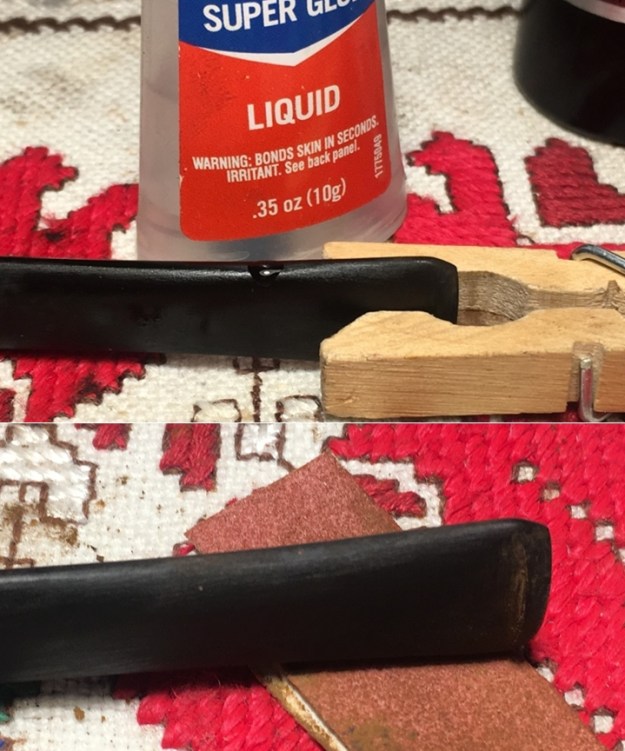
Moving now to the stem, closeups of the upper- and lower-bit area show little tooth compression damage but the condition of the vulcanite is very rough.
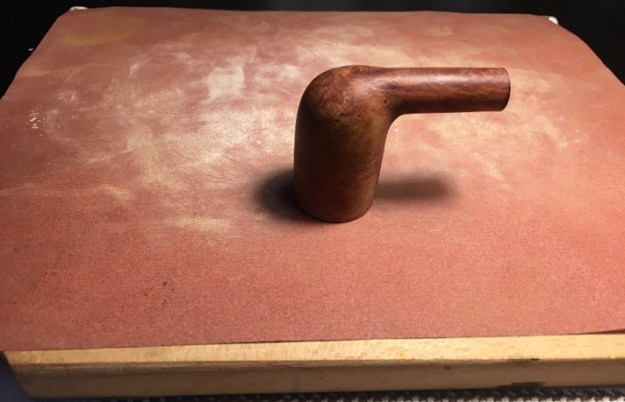
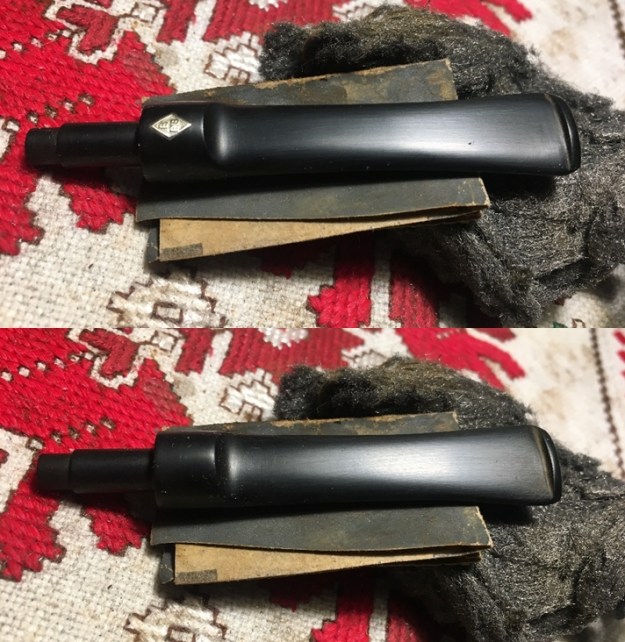
This is addressed by sanding the entire stem with 240 and 470 grade papers followed by wet sanding with 600 grade paper and finishing by applying 000 steel wool – throughout, care is given to sand around the Savinelli ‘S’ stamping on the upper side. 
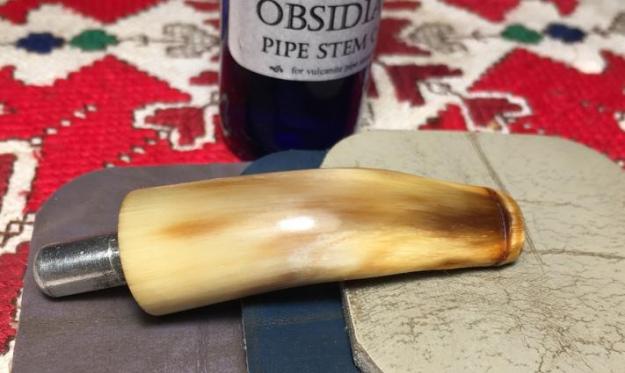
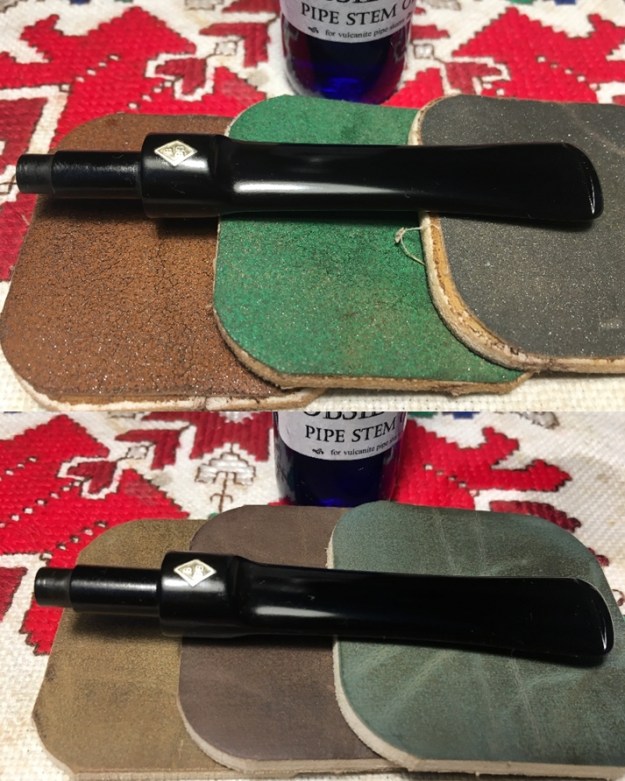
Straight away, using the full regimen of micromesh pads, with pads 1500 to 2400 I wet sand, followed by dry sanding with pads 3200 to 4000 and 6000 to 12000.  Between each set of 3 pads an application of Obsidian Oil further rejuvenates the vulcanite.  The stem looks great and I put it aside and turn to the bowl. The stummel has benefited from a kosher salt and alcohol soak through the night.  The soiled salt and wick reveal the extricating process of drawing the tars and oils out of the internal briar.  After clearing the used salt to the waste and blowing through the bowl and wiping it out with paper towel, to make sure all is cleaned and refreshed, another pipe cleaner and cotton bud are wetted with isopropyl 95% and inserted.  They reveal almost no soiling.  All is clean and I move on.
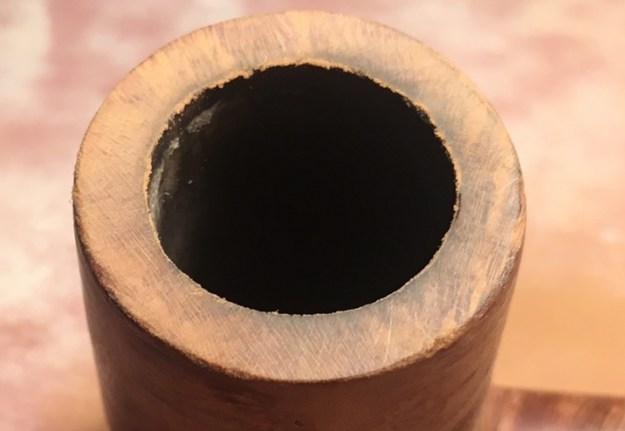
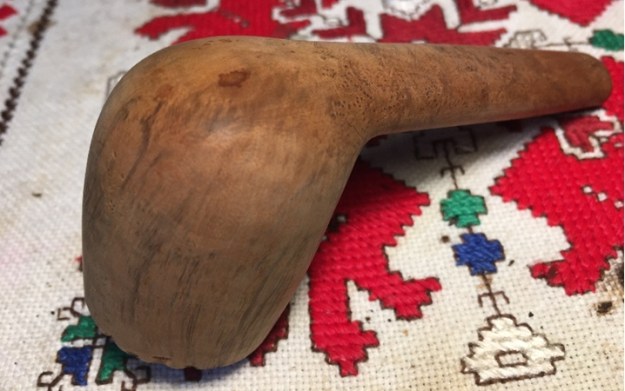
Looking at the smooth rim, it is attractive and shows very nice potential of contrasting rough briar and smooth briar grain.  I appreciate contrasting briar textures in a pipe’s presentation.
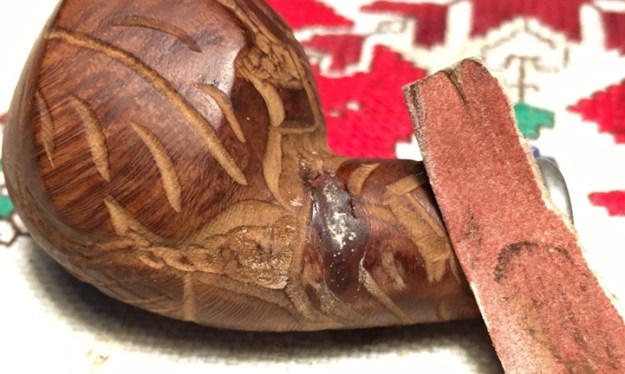
The rim has scratches and residual discoloration. To address this, both 240 and 600 grade papers are utilized to sand the rim and freshen the distinctive internal bevel.  Sanding very lightly, the patina is preserved while still cleaning the top surface.To now fully bring out the grain, I sand the rim with the full battery of micromesh pads – wet sanding with pads 1500 to 2400 and from 3200 to 12000 dry sanding does the job.  I’m really liking how this Savinelli Dry System is shaping up!
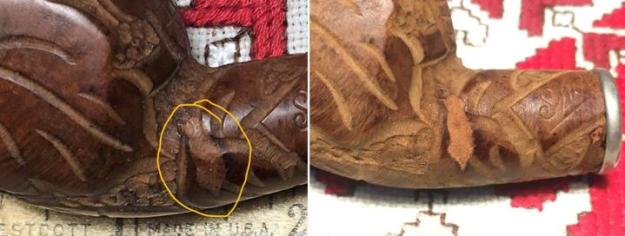
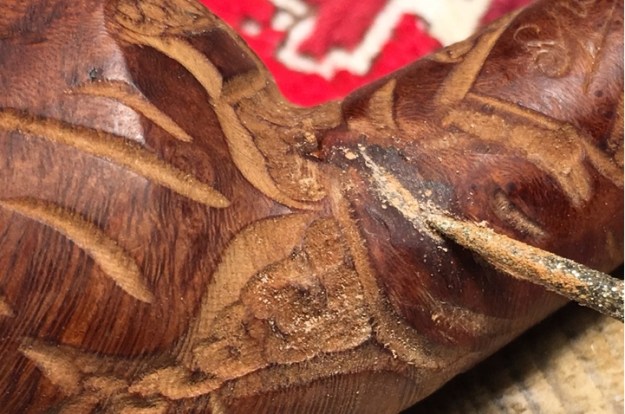
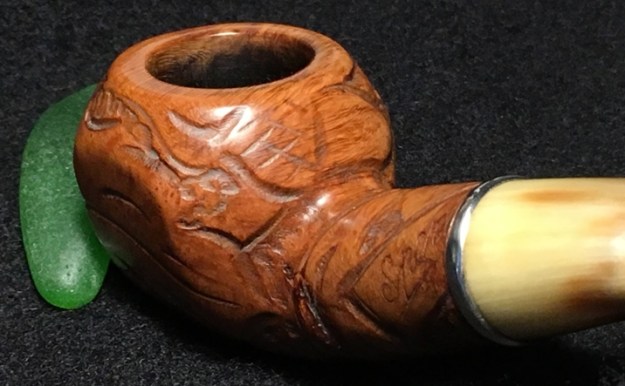
I take another close look at the Savinelli rusticated surface. I’m attracted to the tight, distinct pattern of the rustication.  The reddish hue stands out nicely. I always look forward to the application of Before & After Restoration Balm to briar surfaces – both smooth and rough.  The effect of deepening of the hues subtly is why I like this product.  I apply some of the Balm to my fingers and rub it in very thoroughly over the rustication and rim.  As I’ve described before, the Balm starts with a cream-like viscosity and gradually thickens into a wax-like consistency as it is worked into the briar surface.  After the application of Balm is completed, it stands for about 20 minutes ( the next two pictures below) and then using a cloth I wipe off the excess and buff up the surface with a microfiber cloth.  I love the results! 
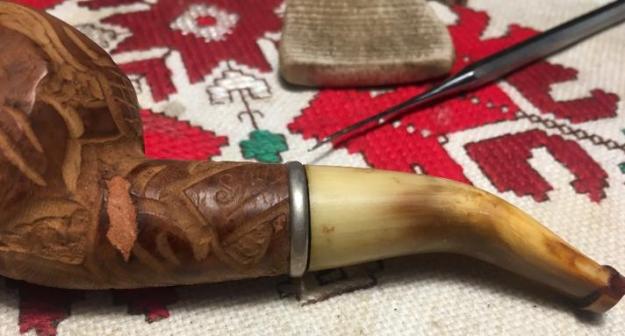
Before moving on with the next stage, the nickel shank cap needs addressing.  It is somewhat colored and dirty with fine scratches.  It will shine up nicely.To do the initial cleaning, Tarn-X is a product I acquired in the US and it works well.  After applying some of the solution with a cotton pad and scrubbing the nickel, I rinse it with tap water and dry. I’m careful to keep the solution off the briar.  It does a great job.After the cleaning with Tarn-X is complete, there remains the roughness of wear and tear shown in the picture below.
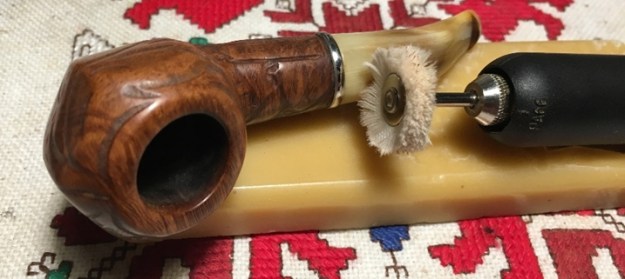
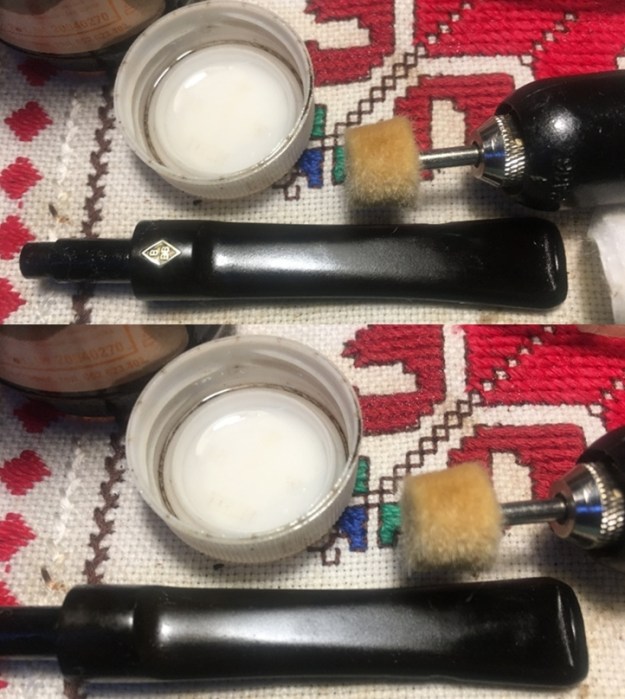
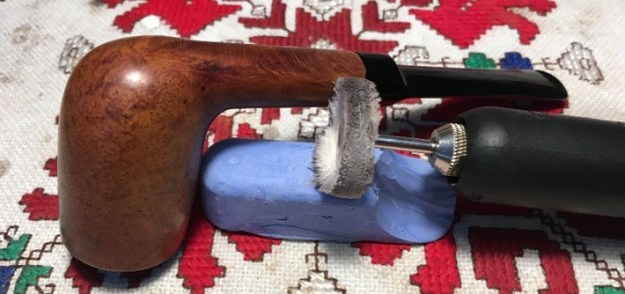
To address this, a dedicated cotton cloth buffing wheel is mounted onto the Dremel with a speed set at about 40% full power and I apply Blue Diamond compound to address the scratches and fine lines in the nickel.  I’m careful to keep the wheel over the nickel and not overrun on the briar.  This process can stain the briar very easily with a blackish hue.  Not good.The results are great providing Savinelli shank cap bling!Moving on with Blue Diamond compound, I mount another cotton cloth buffing wheel to the Dremel, maintain the same speed and apply the compound to the smooth briar rim and stem.  I do not apply the compound to the rusticated briar surface.  I’m afraid it will gum-up the surface and be a bear to clean.
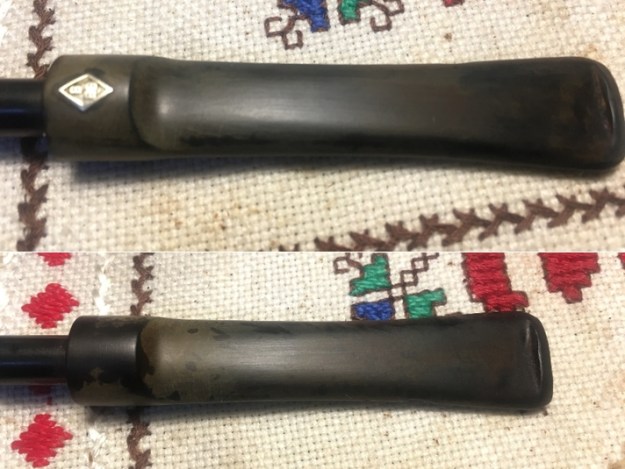
Looking more closely at the stem…, well, my OCD pipe restoration tendencies would not allow me to ignore some residual oxidation making an appearance as I fine tune the buffing with the compound.  The next picture, lightened to show what I’m seeing, reveals the oxidation around the ‘S’ stamping as well on the edges of the hump of the stem rise.   The stamping was intentionally protected from sanding to preserve the Savinelli ‘S’.  Yet, I’m not satisfied with the wide birth of oxidation that I’ve left!  And the residue on the sides – just will not do.I begin a more conservative approach to remove these vestiges of oxidation.  I start with Mr. Clean Magic Eraser with little success.Then I use Before & After Fine and Extra fine polishes which are supposed to continue the oxidation removal process.  I apply the polishes successively, rubbing in then wiping off.  The polishes may have helped marginally. 
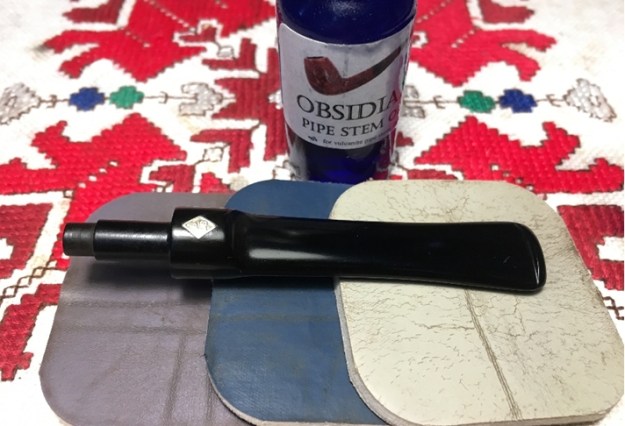
Not satisfied, sanding with 470, then 600 following again by applying 000 steel addresses the oxidation.As before, the full regimen of micromesh pads from 1500 to 12000 precedes applying Blue Diamond compound with the Dremel.  I’m satisfied with the results this time around! The oxidation encompassing the ‘S’ stamping is much tighter now and the oxidation spots that were on both sides of the hump have been eradicated. I move on.Before applying the final touch of polishing with carnauba wax, I freshen the Savinelli ‘S’ stem stamping using white acrylic paint. I spread some paint over the stamping and daub it with a cotton pad to remove the excess.  Using a toothpick, I very lightly scrape the paint removing the excess leaving the ‘S’ somewhat filled.  I repeated this process a few times to get it as right as possible.  The paint grips but not perfectly and the final ‘S’ isn’t as solid as I like, but it’s better than it was! 
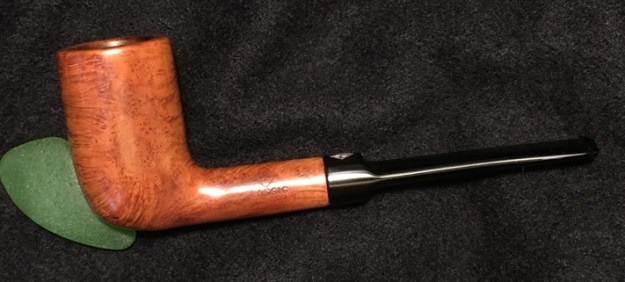
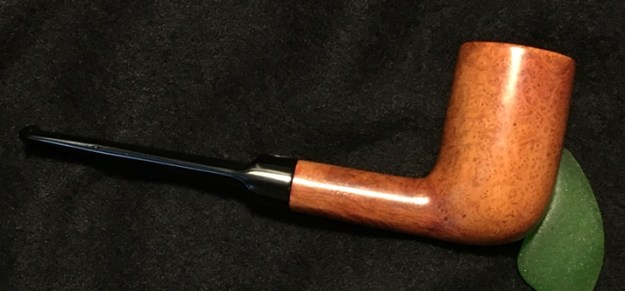
To complete the restoration of this nice looking Savinelli Dry Air System 362, after a cotton cloth buffing wheel is mounted onto the Dremel and speed set and 40 percent full power, I apply carnauba wax to the stem and rim.  In applying carnauba to the rusticated surface, I increase the speed to about 60% full power.  This aids the heating and assimilation of the wax into the rougher surface.  After applying a few coats, I give the pipe a rigorous hand buffing with a microfiber cloth to raise the shine.

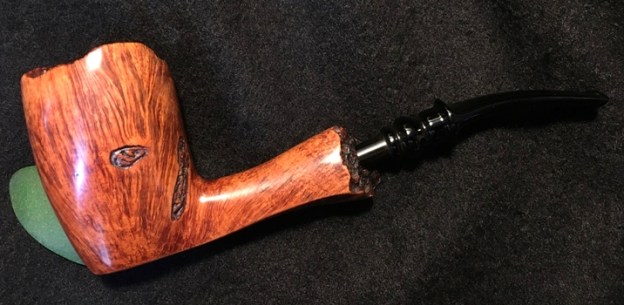
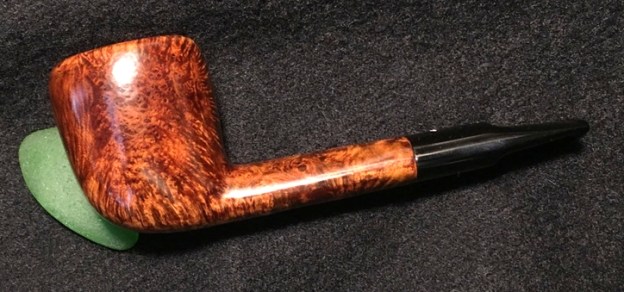
This Savinelli Dry System came out well.  The rustication is striking, and the deep reddish hues of the finish are a very nice contrast to the smooth briar rim.  The tight bent Dublin-esque fits well in the hand.  I appreciated learning more about the enhancements that Savinelli made to its Dry System and I look forward to hearing whether it truly does provide a step toward the pipe smokers holy grail – a dryer and cooler smoke! Teo commissioned this pipe which benefits the Daughters of Bulgaria – women and girls who have been trafficked and sexually exploited, and he will have the first opportunity to acquire it in The Pipe Steward Store.  Thanks for joining me!

A Black Sea Beach Pipe Project: The Third Stanwell Henley Special, Made in Denmark 57 Chimney


Blog by Dal Stanton

This Stanwell Henley Special Chimney is the last of the 3 Stanwell Henley Specials that I obtained off the eBay auction block.  Jim saw the Henley on the online ‘For “Pipe Dreamers” Only!’ and he commissioned the Oval Shank Billiard that I restored some time ago (see LINK) pictured in the middle below.  I had also taken notice of the solid craftsmanship of these 3 Danish made pipes, so I just restored the second, the Blasted Saddle Stem Billiard and put it in the Store to also benefit the Daughters of Bulgaria.   Then, I’ve claimed the third, a Chimney, to keep in my personal collection.  But I’ve thrown down the gauntlet on the Henley Chimney – I’ve developed a tradition of restoring a pipe in my personal ‘Help Me!’ basket collection to take with me to the beach on the Black Sea coast where my wife and I enjoy our summer holiday😊.

To review what I know about this Stanwell Henley line, I start with the seller’s information on eBay:

This auction is for three vintage Stanwell, Henley Line estate pipes from the 1950’s-60’s era. All are in good pre-owned condition. The stems are primarily free from teeth marks. The stems do have some fading. All of the stems fit snug and the wooden bowls are free from outstanding blemishes. As seen from top to bottom, the first pipe reads Henley Special #57, the second and third read Henley Special without any numbers seen. All of the pipes read Made in Denmark.

Here are the three Stanwell Henley Specials as I saw them on the eBay auction block.Pictured are the first and second Henley Specials after each was restored are pictured below. The transformation in these beautiful Danish pipes is unbelievable! As I expressed in the previous Stanwell Henley Special restorations, since I started collecting and restoring pipes, I’ve grown in my appreciation for Danish made pipes.  They tend to be stout, well-made pipes.  In my research on the Henley pipes, I have found no conclusive information dating them, but anecdotal information and a the feel of these pipes, I’m confident placing them in the 1950s and 60s. Pipedia’s article on Stanwell pipes simply places the Henley Special line in the list of Stanwell second brands.  The Chimney bound for my collection is identical with what Pipephil.eu provided.   It shows a Henley Chimney with the Fishtail stem slightly bent, along with the distinctive characteristic of a bulging midsection, which attracted me to this pipe!  The difference with the Pipephil listing is that it is blasted – nice.  It also shows an ‘H’ stem stamping.  The Chimney now on my worktable has no stamping on the stem – or it has worn off over time.The dating of the Henleys and this Chimney is elusive.  The only information I found in my initial research that gave any reference to dating isn’t conclusive. I found the following picture on Google images but the link to pipesmokersforum.com.  “Who made this pipe?”   I went to the pipesmokersforum site and searched ‘Henley’ and no reference or article emerged.  Having added this discussion to my research would have been helpful!  The picture I found puts a question mark in the late 50s.  Added to this the eBay seller’s description placing the pipes in the 50s or 60s and I do not know where this information originates.  Even though this information is anecdotal, the dating seems accurate to me based upon the appearance, craftmanship and feel of these pipes. I really like the Chimney stacked shape with a very nice feel in the hand.  I’m attracted to the tall Chimney and the interesting bulging of the bowl about midway.  The other thing that I like is the unique, pinched saddle fishtail stem.  Coupled with the tall bowl, the fishtail gives the pipe an overall sleekness – I like it a lot!

The dimensions of the Henley Chimney are: Length: 6 inches, Height: 2 3/16 inches, Rim width: 1 1/4 inches, Chamber width: 13/16 inches, Chamber depth: 2 inches. With the third Stanwell Henley Special Chimney on the worktable, I take some pictures to get a closer look. Of the 3 Stanwell Henleys I acquired, the nomenclature on this pipe is the clearest.  The left shank flank is stamped in cursive ‘Henley’ [over] SPECIAL.  The right shank side is stamped, MADE IN DENMARK [over] 57.  I assume this to be the shape number.The general condition of the Henley Chimney is good.  The chamber has thick cake buildup – but not has heavy as the other Henleys.  The rim has caked gunk and the smooth briar surface has grime and dirt and needs cleaning.  The one aspect of the stummel that is strange,  are the dark areas on the upper and lower shank.  These spots look like they’ve been scorched, but a shank usually isn’t the source of high temperatures.  I’ll have to wait to see what the cleaning does with these spots.  I take a few pictures to show what I see.The Pinched Saddle Fishtail stem has oxidation and some tooth compression – mainly on the lower bit.  To begin the restoration of the Stanwell Henley Special Chimney, I add it to a bath of Before & After Deoxidizer along with other pipes in the queue to deal with the oxidation in the vulcanite stem.  To keep the Deoxidizer as clean as possible, I first clean the airway using pipe cleaners dipped in isopropyl 95%.I then put the stem in the bath and allow it to soak for several hours.When I fish out the Pinched Fishtail stem, I run another pipe cleaner dipped in alcohol through the stem to clear away the excess Deoxidizer.  I then wipe down the stem with a cotton pad also wet with isopropyl 95% to remove the raised oxidation.  The B&A Deoxidizer does a good job.To begin the process of revitalizing the stem, I apply a coat of paraffin oil and rub it into the vulcanite.  I set the stem aside for the oil to absorb.Turning back to the stummel, I begin the cleaning process by reaming the chamber.  I take a starting picture and the last unsmoked baccy is seen on the floor of the chamber. Like the other Henleys, this one has thick cake.  I’m wondering if this Henley will have as much heating damage as the Blasted Saddle Stem Billiard I just restored.  I use the Pipnet Reaming Kit to ream starting with the smallest blade head.  The cake is hard, but the blade eventually works through.  I then use 2 more of the blade heads and then switch to the Savinelli Fitsall Tool to do the fine tuning by scraping the chamber walls.  Finally, after wrapping a piece of 240 grit paper around a Sharpie Pen, I sand the chamber walls.  Then, after wiping the chamber with a cotton pad wetted with isopropyl 95%, I inspect the chamber and I see some minor cracks in the chamber, but nothing requiring major attention. Transitioning now to the external surface, I take a few pictures to mark the start and then using undiluted Murphy’s Oil Soap, I begin scrubbing.  I’m anxious to see what the cleaning does! I use a cotton pad to scrub the stummel using Murphy’s.  I also use a pocketknife blade to scrape the rim and then I apply a brass wire brush to the rim.  I work on the dark spots on the shank and nothing subdues the discoloration.  I continue the cleaning by taking the stummel to the sink and rinsing it with warm water.  I continue to scrub the briar surface with a bristled toothbrush and using anti-oil liquid dish soap.  I transition to the internals using a shank brush with the liquid dish soap.  I look at the shank and the dark spots are holding on, but they have changed – the spot has roughened in texture.  This gave me the idea – I used the anti-oil dish soap and put a plastic dish scrubby and I apply it to the shank and voila!I’m not sure what the substance was, but it dissolved for which I’m thankful!  I finish by fully rinsing the stummel and bringing it back to the worktable.  I take some ‘after’ pictures showing the cleaned stummel and the areas of the shank.  There still appears to be a discoloration after the stummel dries, but this should dissipate through the further stages of the restoration. I continue the cleaning procedure using cotton buds and pipe cleaners wetted with isopropyl 95% to clean the internals of the Henley.  I also use a small dental spoon to scrape the mortise walls to remove old tars and oils.  Through the narrowing of the airway, I also hand turn a drill bit to aid in the excavation of gunk.  After some time, the buds and pipe cleaners are lightening, and I halt this phase of cleaning.To further clean the internals, I use a soak with kosher salt and isopropyl 95%.  I like utilizing this soak as it freshens the stummel and removes old odors.  I begin by pulling and twisting a cotton ball to serve as a ‘wick’ to draw out the old tars and oils that are further expunged from the internal briar.  I insert it into the mortise with a straight wire and then fill the bowl with kosher salt and place the stummel in an egg crate for stability.  I then fill the bowl with isopropyl 95% until it surfaces over the salt.  I wait several minutes and after the alcohol has receded, I then top off the alcohol.  Turning off the lights I let the soak work through the night. The next morning, I remove the wick and it has soiled through the night absorbing the tars and oils.  The salt is also discolored showing it has done the job.  I thump the expended salt into the waste basket and clean the salt out of the stummel by wiping with paper towel and blowing through the mortise.  To make sure the cleaning is thorough; I follow by using cotton buds and pipe cleaners again.  After two pipe cleaners and one bud, it is clear the soak did the job.  I move on.Looking now at the rim, there remains a darkened discoloration as a remnant of the lava.  I do not want to top the stummel in order to retain the original patina.  Using a piece of 240 grade I lightly sand the rim, more to clean than to remove briar.  I also lightly sand the inside rim edge to remove darkened briar on the edge. Looking at the stummel, there are very small scratches expected with normal wear. To address this, I use sanding sponges.  A start with a coarse grade sponge, follow with medium grade, and then with the light grade.  Sanding sponges are effective in cleaning the surface in a less invasive way.After the sanding sponges, I move straight away to the full regimen of micromesh pads.  I first wet sand with pads 1500 to 2400, then dry sand with pads 3200 to 4000 and 6000 to 12000.  The grain emerges very nicely through the process. Next, I apply Before & After Restoration Balm to the Henley Chimney stummel. I’ve been looking forward to this part of the process.  The Restoration Balm does a great job bringing out the subtle tones of the natural briar grain hues. I put some of the Balm on my finger and I rub it in to the briar surface.  It starts with a creamy consistency andthen thickens like a wax.  After applying it thoroughly, I put the stummel aside for about 20 minutes to allow the Balm to do what it does then I use a cloth to wipe the excess Balm and buff up the stummel with a microfiber cloth.The Pinched saddle fishtail stem is waiting to catch up with the stummel.  There are some tooth compressions on the bit, one on the upper and a few on the lower.  I take a fresh picture of these to mark the start.  I will first use the heating method to raise these compressions by painting them with the flame of a Bic lighter.  When heated, the vulcanite expands to reclaim its original shape or closer to it.  After applying the flame, there is a difference that I’ve pictured, before and after of the upper and lower bit. The heating minimized the compressions but did not fully erase them.  I dispatch what is left by sanding the bit with 240 grade paper and I use a needle file on the bit and button.  I refresh the button as well with the file.I wet sand the entire stem with 600 grade paper followed by applying 000 steel wool.Next, the micromesh process.  Using first pads 1500 to 2400, I wet sand followed by dry sanding with pads 3200 to 4000 and 6000 go 12000.  Between each set of 3 I apply Obsidian Oil to the pinched saddle fishtail stem.  The stem looks great! After reuniting stem and stummel, I mount a cotton cloth buffing wheel to the Dremel set at 40% of full power and apply Blue Diamond compound to the pipe.  When completed, using a felt cloth, I hand buff the pipe to remove the leftover compound dust in preparation for applying the wax.Again, after changing to another buffing wheel and maintaining the same speed, I apply a few coats of carnauba wax to the Henley.  I finish the restoration after applying the wax with a rigorous hand buffing with a microfiber cloth to raise the shine and to blend any excess wax into the surface.The butterscotch hue of this Chimney shaped stummel has a very warm draw to it.  I’m pleased with the plethora of grain movement that provides the kind of visual beauty that I appreciate in a pipe that I add to my collection.  I especially like the Chimney’s midriff bulge that is unique bringing attention to the shape.  The Pinched Saddle Fishtail stem also is a sleek and classy touch that completes the ensemble.  My goal was to finish this Stanwell Henley Special to take with me to the Black Sea Coast for our time of R&R enjoying the beach as well as the cuisine in the evenings. A little respite from our work with the Daughters of Bulgaria.  The Stanwell Henley Special performed well on the beach as well as in a classy, relaxed evening meal – the pictures tell the story.  I tell people that, I believe I’m living the dream – some would agree!  Thanks for joining me!  (www.ThePipeSteward.com)

Resurrecting a Second Stately Stanwell Henley Special, Made in Denmark, Blasted Saddle Stem Billiard


Blog by Dal Stanton

Jim was the recipient of the first Stanwell Henley Special, Oval Shank Billiard, that I restored some time ago (see LINK).  Jim saw it on the online ‘For “Pipe Dreamers” Only!’ collection benefiting the Daughters of Bulgaria – our work here in Bulgaria helping women and girls who have been trafficked and sexually exploited.  The second Stanwell Henley Special on the worktable is the Blasted Saddle Stem Billiard on the bottom in the picture below.  This pipe has not been commissioned and will be heading to The Pipe Steward Store and this beautiful stout Danish will also benefit the Daughters when a new steward brings it home.  I have also taken notice of the solid craftsmanship of these 3 Danish made pipes and decided that the third, a Stanwell Henley Special Chimney (on top in the picture below), would find a home in my personal collection.  The eBay seller gave this helpful information about this Lot of 3 Stanwell Henley Special pipes:

This auction is for three vintage Stanwell, Henley Line estate pipes from the 1950’s-60’s era. All are in good pre-owned condition. The stems are primarily free from teeth marks. The stems do have some fading. All of the stems fit snug and the wooden bowls are free from outstanding blemishes. As seen from top to bottom, the first pipe reads Henley Special #57, the second and third read Henley Special without any numbers seen. All of the pipes read Made in Denmark.

Here are the three Stanwell Henley Specials that I acquired on the eBay auction block from a seller in Maryland.  The Henley Jim commissioned is pictured in the center above and below is the restored pipe now in Jim’s collection – an unbelievable transformation!As I expressed before, since I started collecting and restoring pipes, I’ve grown in my appreciation for Danish made pipes.  They tend to be stout, well-made pipes and just fit the hand wonderfully.  Unfortunately, my original research did not uncover much online regarding the Henley line.  Pipedia’s article on Stanwell pipes simply places the Henley Special line in the list of Stanwell second brands.  Pipephil.eu provided more information with a Henley much like the slightly bent Chimney above which I’m claiming for my collection, with the interesting characteristic bulging midsection, but with a blasted finish.  It also shows an ‘H’ stem stamp.  None of the 3 Henleys of my acquisition have stem stampings – or they wore off long ago.The only information I found in my initial research that gave any reference to dating isn’t conclusive. I found the following picture on Google images with the link to pipesmokersforum.com, “Who made this pipe?”   I went to the pipesmokersforum site and searched ‘Henley’ and no reference or article emerged. I would have loved to read the thread that discussed the dating of the discontinued Stanwell second, Henley Special.  The picture puts a question mark in the late 50s and the eBay seller’s description placing the pipes in the 50s or 60s are anecdotal but seem to me to be accurate.  I will keep searching but based upon the look and feel of these Danish made pipes, I think the 50s/60s is on target.With the second Stanwell Henley Special on the worktable, I take some pictures to get a closer look. He’s a large bowled pipe with dimensions: Length: 5 1/2 inches, Height: 2 1/4 inches, Rim width: 1 7/16 inches, Chamber width: 7/8 inches, Chamber depth: 2 inches. The nomenclature on the blasted stummel is on the lower side of the pipe.  There is a flat panel running the length of the heel and shank allowing this Billiard to sit on the table – nice feature!  On the shank side of the panel in cursive is stamped a thin ‘Henley’ [over] SPECIAL.  To the right of this is stamped MADE IN [over] DENMARK.The condition of this Henley resembles the others in that they are very dark and dirty from grime over the stummel.  The blasted surface of this Henley will need much scrubbing with a brush.  One crevasse is so large/deep that when I first saw it, I thought that the bowl had cracked.  However, it is the result of the blasting process.  The blasted surface is amazing on this pipe. The chamber is choked with carbon cake buildup – this needs to be removed to give the briar a fresh start and to examine the chamber walls.  With the cake as thick as it is, there is concern for heating damage.  The rim is inundated with lava flow – it’s thick!  The saddle stem has also seen better days!  The oxidation is thick, and the bit has been chewed – or more accurate, clenched.  There are several compressions on both upper and lower bit – the former steward loved this pipe, but he was a hands-free clincher which would be no small feat for a pipe with a bowl this big!

This doesn’t happen often.  My wife got into The Pipe Steward activities to picture me cleaning stems of pipes in queue – two Henleys included – this second one and the third staying with me.  Yep, this is what my worktable looks like!  I clean each airway with pipe cleaners dipped in isopropyl 95% as well as employing shank brushes.  I clean the stems before placing them in the soak of Before & After Deoxidizer. The stems soak for several hours to work on removing the oxidation.  The oxidation on the Henley is pretty think.  We’ll see how the Deoxidizer works.When I fish out the Henley’s saddle stem, I rub/wipe the stem with cotton pads wetted with isopropyl 95% to remove the raised oxidation.  I also run a few pipe cleaners wetted with isopropyl 95% through the airway to clear the Deoxidizer.I also apply paraffin oil, a mineral oil, to the stem to begin the conditioning process.  The B&A Deoxidizer did a fair job on the stem.Turning now to the Henley stummel, I take a picture to show the condition of the chamber. The cake closes as it moves down the chamber.  I’m hopeful that the chamber walls are not suffering from heating damage.  To address the thick cake, I use the Pipnet Reaming Kit.  After putting down paper towel to save time on cleaning, I begin with the smallest of the 4 blade heads available.  With a chamber width of 7/8 inches and depth of 2 inches, he took all 4 blade heads that the Pipnet Reaming Kit had to offer.  The cake is hard and crusty, and it takes patience to work the blades and not overdo it.  I follow the reaming using the Savinelli Fitsall tool to continue to scrape the chamber walls clearing more carbon. Finally, I sand the chamber using 240 grade paper wrapped around a Sharpie Pen.  The sanding is very helpful in cleaning the walls to allow inspection.  After cleaning the chamber with a cotton pad wetted with isopropyl 95%, I’m able to get a good view of the chamber and the damage from heating is evident.I take pictures going around the chamber from different angles.  With the thickness of the cake that I removed, I’m not surprised to find heating damage.  I’m sure that the cracks and fissures that I’ve pictured are a result of the heat build-up caused by the thick cake and not allowing proper heating expansion and contraction.  This puts more stress on the briar and these results occur.  As I continue the cleaning, my mind will be processing the question of how to address this. Switching from the wall issues of the chamber, I move to cleaning the external surface.  Without a doubt, this stummel is the King of Cragginess.  I love the deeply hewn valleys and ridges of this large stummel created by a very thorough sandblasting process.  I take pictures to show the various angles.  The stummel is very dark and I’m anxious to see what cleaning does. I begin the cleaning by using undiluted Murphy’s Oil Soap and scrub with a cotton pad.  With the craggy landscape, the process graduates very quick to scrubbing with a bristled tooth brush as well as a brass wire brush on the rim.Taking the stummel to the sink, warm water continues the cleaning rinsing off the Murphy’s Soap and scrubbing the surface of the crags with the toothbrush.  I also attack the internals using shank brushes and anti-oil dish soap.  I scrub the internals well and rinse the stummel thoroughly.  The result of the cleaning is a considerably lightened stummel.  Another round of pictures show the cleaned briar landscape on the Henley stummel. The rim still appears to have some lava residue on it, and I continue to clean it using a dental probe to break up the carbon in the crags as well as apply the brass bristle brush to the rim. I like the results and I love how the crevassed valley rises and bisects the rim!  This blasted stummel has a lot of expression going on!I continue to clean the internals using cotton buds and pipe cleaners dipped in isopropyl 95%. Joining the cleaning process was a small dental spoon that allowed me to reach into the mortise and airway and scrape the wall, helping to clean the old tars and oils.  I also utilize drill bits to help excavate tars and oils deeper in the airway.  I insert the bit into the airway carefully and hand-rotate into the airway. The rotation helps to remove the gunk.  After a good bit of cleaning, the buds and pipe cleaners start coming out lighter.  I called a halt to the cleaning transitioning to a kosher salt and alcohol soak to continue the cleaning in stealth mode through the night.Before I set up the kosher salt and alcohol soak, I look at the stummel and it is a very dry piece of wood.  I decide to apply a coat of paraffin oil to the stummel allowing the oil to hydrate the briar while it’s sitting through the night with the soak.  Paraffin oil is a mineral oil available here in Bulgaria in the pharmacy.  I apply the oil over the surface with a cotton pad and take a few pictures.  Man, it looks good.  This gives me a sneak peek at what the finished pipe will look like left in its present state.  The rich dark burgundy tones are peeking out.Next, for the kosher salt and alcohol soak, I pull and twist a cotton ball to form a ‘wick’ that is inserted into the mortise with the help of a firm straight wire.  The wick serves to draw the tars and oils that are released further from the internal wood.  I then fill the bowl with kosher salt which will not leave an after taste as does an iodized salt. I then set the stummel in an egg crate for stability, tip the stummel so the salt surface is generally level with the end of the shank.  Then with the use of a large eyedropper, I fill the bowl with isopropyl 95% until it surfaces over the salt.  After a few minutes when the alcohol has been absorbed, I top off with more isopropyl 95%.  I then put the stummel aside for the night and turn off the lights! The next morning the soak had done the job evidenced by the soiled salt and cotton wick.  After tossing the expended salt in the waste, and wiping the chamber out with paper towel, and blowing through the mortise to dislodge salt crystals, I used a few more cotton buds and pipe cleaners wetted with isopropyl 95% to make sure all was clean.  The soak did the job and the stummel will be much fresher for the new steward of this Stanwell Henley Special.Before moving further, I need to address the heating issues in the chamber.  There are cracks and fissures which undoubtedly developed over time because the cake buildup became too much.  With the cake so thick, it hinders proper expansion and contraction when the pipe is used. The result is what we now see in this chamber.  To address this, I mix a batch of J-B KWIK Weld using the two components, Steel and Hardener.  I use a plastic disc as a mixing pallet with scotch tape over it to aid in clean up. After mixing the two components on the pallet, about 4 minutes is available to apply the Weld before it begins to harden. I mix the components thoroughly with a toothpick, then using my finger (with a surgical glove on!), I scoop a bit of Weld and apply it to the chamber wall.  I do this uniformly around the chamber and applying pressure to make sure the Weld is filling the cracks and fissures.  I’m VERY careful to avoid dripping Weld on the rim during the application.  Later, after the Weld thoroughly cures, I’ll sand the chamber removing all the excess Weld leaving behind only what filled the cracks and fissures – or that is the theory! I usually insert a pipe cleaner to guard the airway from the Weld, but this time I forgot and thankfully, no problems result.  After completing the application, I put the stummel aside for several hours allowing the Weld to cure.  Cleanup is quick – I simply peel the tape up and discard.Turning now to the saddle stem, the Before & After Deoxidizer did a good job, but I see residual oxidation yet remaining in the vulcanite.  I take a few pictures with an opened aperture to show what I can see with the naked eye.  The bit does not have tooth chatter as much as compressions – it appears the molars were engaged by the former steward to smoke the Henley hands-free.  To address the bit compressions, I first use the heating method.  Using a Bic lighter, I paint the compressions with flame and as the vulcanite heats, it expands to reclaim the original stem shape or at least the compressions are minimized.  After heating several times, the compressions have lessened but are still visible.   The before and after pictures tell the story – in fact, I had a hard time pairing the correct photos after the heating! I believe the compressions have been minimized enough that sanding will be all that is necessary to repair the bit.  Using 240 grade paper, I sand not only the bit and button, but I expand it to the entire stem to address residual oxidation as well.  I employ a flat needle file to freshen the button lips and to assist with the tooth compressions next to the lip.  In the sanding of the saddle, I use a plastic disc I fashioned and with the disc separating the stem and stummel, I reunite the two.  The disc acts as a shield to shouldering the stem shank facing.  The sanding removed all the compressions. The pictures show the progress. With the major sanding with 240 paper complete, I continue by wet sanding the entire stem using 600 grade paper.  I then follow the wet sanding by applying 000 grade steel wool to the stem.  I’ve lost track of which is the upper and lower stem.  The stem is looking great!I move directly to applying the full regimen of 9 micromesh pads starting by wet sanding with pads 1500 to 2400 then dry sanding with pads 3200 to 4000 and 6000 to 12000.  Between each set of three pads I apply a coat of Obsidian Oil to assist in rejuvenating the vulcanite.  The saddle stem has that glassy pop! I turn back to the stummel and the J-B Weld has had time to cure.  I begin to sand off the excess J-B Weld by using the Dremel with a sanding drum.  I set the Dremel to the slowest speed and gently, without much pressure, sand off the upper layer of the J-B Weld – the excess.  With the drum, as I’m working patiently around the entire chamber, I also sand out a reaming step that had developed near the floor of the chamber.  The Dremel shortens the work amazingly.  I then switch by wrapping 240 grade paper around a Sharpie Pen. I fine tune the sanding in the chamber so that eventually, the cracks and fissures are revealed now having been filled.  I love it when theory and practice come together!  I clean out the chamber of the dust and it looks and feels great! I run my finger over the formerly cavern-filled chamber and it is smooth.  I take finish pictures and move on. I’ve been looking forward to applying the Before & After Restoration Balm to this Stanwell Henley Special’s stummel to tease out the older patina of this vintage blasted briar surface.  I make sure the surface is clean from all the chamber sanding and I take a few pictures to mark the start.  I then apply the Balm to my fingers and rub it in to the surface.  The surface practically drinks the Balm as I work the Balm into the craggy landscape.  After it’s worked in well, I put the stummel aside for 20 minutes to allow the Balm to do what it does. I take a picture in this state. After about 20 minutes I wipe off the excess Balm and buff the blasted Henley Special stummel with a microfiber cloth.  The hues are deeper and richer.  I mount a cotton cloth buffing wheel onto the stummel and set the speed at 40% full power and after reuniting the stem and stummel, I apply Blue Diamond compound to the stem.  As I go along, I experiment with the Blue Diamond on the stummel.  I don’t want to gum up the craggy surface with Blue Diamond, but what I see, with a light application of the compound, is that the briar is sprucing up and I move the wheel along with the grain of the blasted briar.  I like the results.  When I complete the application of Blue Diamond, I give the pipe a good hand-wiping with a felt cloth to remove the carbon dust before application of the wax.  I like the results.Straightaway, I load another cotton cloth buffing wheel onto the Dremel, increasing the speed of the Dremel to about 60% full power – faster than normal on smooth briar, I first apply carnauba wax to the stummel.  I increase the speed for the blasted stummel to increase the heat of the application.  I’ve found that using the Dremel on the craggy surface allows me to get up and close with the application of wax on the rough surface.  Heating the wax more helps guard against it gunking up on the rough surface.  The added speed helps dissolve the wax over the rough surface.  I’m liking what I’m seeing!  When I apply carnauba to the stem, I slow the speed of the Dremel back down to the normal 40% full power.After applying the wax, I give the pipe a rigorous hand buffing with a microfiber cloth.  This not only raises the shine but also help disseminate any excess wax on the surface.  There is one last project left to do.  The chamber was riddled with heating cracks and fissures and I used heat resistant J-B Kwik Weld to fill in the cracks.  I coated the entire chamber with the Weld mixture then sanded it after the Weld cured.  After sanding, as the theory hoped, the results were, that the only Weld remaining was that which filled the cracks and the chamber wall is smooth and again usable to put this pipe back into service.  Beautiful!  I love it when theory and practice come together so well. To help provide a protective coat over the repairs and to encourage a new cake to develop, I apply to the chamber walls a coating mixture of natural yogurt (sour cream works, too) and activated charcoal.  I mix a small amount of yogurt and charcoal in a bowl and when the consistency of the mixure will not drip off the spoon its ready to go.  After putting a pipe cleaner through the draft hole, I use my index finger to reach into the chamber and apply the mixture.  I make sure that the chamber walls are thoroughly covered, and I put the stummel aside for a time to allow the coating to cure.  It dries into an amazingly hard surface.  It’s important for the new steward to use a folded pipe cleaner to clean the bowl initially after putting the Henley into service – not to scrape the bowl! I’m very pleased with the results of this second of the 3 1950/60s Stanwell Henley Specials I acquired.  I appreciate the Danish craftmanship that is evident in all three pipes and this Blasted Billiard is no exception.  The blasting amazes me with the craggy surface showing the 3-dimensional movement of the briar grain.  One ravine is cut so drastically, at first, I thought it was a cracked bowl when I first acquired the pipes, but it remains as part of a very expressive, deep hued blasted briar landscape.  With a chamber width of 7/8 inches and depth of 2 inches, the amount of blend one can pack into this bowl is pretty impressive and with the size of the stummel and the blasting – well, I’m tempted to keep it for myself, but the third Stanwell Henley Special next on the table will be staying with me.  This Henley is heading for ThePipeSteward Store benefitting the Daughters of Bulgaria – our work here in Bulgaria helping women and girls who have been trafficked and sexually exploited.  Thanks for joining me!

Cleaning up a Striking GBD Constitution Made in London England, 1978 Calabash


Blog by Dal Stanton

This beautiful GBD came into my collection from the eBay auction block from a seller located in Cocoa, Florida, USA.  When I saw it, I decided I wanted it, thinking I would add it to my own personal collection, but in the end I added it to the ‘For “Pipe Dreamers” Only!’ collection where Lowell saw it.  Lowell became the very happy steward of a striking Poker, what I called, Refreshing a ‘Faux’ Mastro de Paja Poker in the write-up.  It was not actually a Mastro de Paja, but the Poker was absolutely striking and Lowell has expressed his appreciation for this addition to his collection on several occasions.I’ve communicated with Lowell now and again on various FaceBook pipe man groups and when he messaged me about the GBD Constitution, it didn’t surprise me that it got his attention!  He commissioned it and I’m thankful for his patience as the GBD worked its way up the queue and now is on my worktable, and it benefits the Daughters of Bulgaria – our work here in Bulgaria helping women and girls who have been trafficked and sexually exploited.  Here are pictures of the GBD Constitution now on my worktable which I would call a briar Calabash shape. A very short history of GBD by Jerry Hannah is in a PDF file that Rebornpipes contributor, Al Jones, shared with me.  The PDF is entitled ‘GBD Pipe Shape & Model Listings’.

The company was founded in Paris France in the 19th century by Ganeval, Boundier and Donninger who were no longer associated with the company by the turn of the century. By the time they left the GBD name was well established and thus retained. In 1903 an additional factory was built in England and ran by Oppenheimer. The Paris factory moved to Saint-Claude in 1952. Since 1981 the majority of GBD pipes come from the English factory. At about that same time GBD merged with Comoys, since then all production for both GBD and Comoy comes from a single factory.

Based upon information I’ve gleaned from communications with Al, this GBD is like others that I’ve restored that straddle the transition when the Cadogan takeover happened.  From a previous communication I had with Al discussing the GBD Americana I previously restored (See LINK), he wrote:

Typically, the stamping used on pre-Cadogan pipes is the straight line COM, “London, England” stamp (see attached) combine with the brass rondell stem logo. Cadogan era pipes (made after 1981) have the round “Made in London” (with England under) COM, as shown on your pipe.  But, they typically have stamped stem logos. I see these pipes occasionally, and my assumption is they were made after the merger, until the brass rondell inventory was exhausted.  One common denominator on these pipes is a single letter.  I have no idea as to what it may mean, but M is frequently used.

These pipes also had many more finish names, like your Americana, that were not scene before. Comoy’s started doing the same thing, adding lines and letters just after the merger. I’ll look forward to seeing the restored pipe, it looks like a good candidate.

The GBD Constitution falls into the early 80s most likely since it still carries the brass rondel on the stem, which was used pre-Cadogan, but shows the post-Cadogan rounded MADE IN LONDON over ENGLAND.  Al’s guess is that they used the brass rondels until the inventory was eventually exhausted after 1981.  As Al said, GBD had many line names after 1981 and ‘Constitution’ is one of them.  The one on my worktable doesn’t have the rogue ‘M’ but a rogue ‘L’ – I’m not sure what it signifies either.  I’m open to input on this!  I could not find the shape number 1978 in any of the random lists of GBD shape charts that I have.  Even so, I’m calling this GBD a briar Calabash.

Looking at the pipe itself, the chamber has a light cake build-up with lava covering the rim.  The briar on this stummel is beautiful and needs cleaning from usual wear.  The acrylic stem is beautiful but has been scuffed up with some with minor tooth chatter.  It also shows interesting looking sub-surface imperfections just above the GBD brass rondell.  I call them imperfections – they look like cracks or bubbles.  Perhaps sanding will address these….

I begin the cleanup of the GBD by reaming the chamber using the Pipnet Reaming Kit.  I use 3 of the 4 blade heads available and then switch to using the Savinelli Fitsall Tool.  I scrape the chamber walls further and then finish the chamber cake removal by sanding using 240 grade paper wrapped around a Sharpie Pen.  Finally, I wipe the chamber with a cotton pad wetted with isopropyl 95% to remove the remaining carbon dust.  After inspection of the chamber, I see no heating problems.  I move on. Moving directly to cleaning the external surface, using undiluted Murphy’s Oil Soap with a cotton pad, I begin work on the stummel surface as well as the thick lava on the rim.  I also use a bristled toothbrush and a brass bristled brush on the rim.  I then take the stummel to the sink and continue to clean using anti-oil dish liquid soap with the bristled toothbrush to scrub the rim and shank brushes through the mortise and airway.  After rinsing I go back to the table and take some pictures.  The rim cleaned up beautifully. Next, to further clean the mortise, I use isopropyl 95% with cotton buds and pipe cleaners.  It doesn’t take much and the buds and pipe cleaners are coming out clean.Looking now at the rim, it has a tight, classy internal bevel that looks good.  I use both 470 and 600 grade papers to freshen it with crisper lines.  I also lightly sand the rim with both grades of paper to freshen it.  It’s in good shape and the grain will be looking good over the rim. The stummel is generally in good shape, but inspecting it closely, as expected with normal wear, there are fine scratches scattered over the surface.  I take a picture of one such scratch below to understand what I see.To address these light scratches and to clean up the surface, I like using sanding sponges which are great for cleaning the surface but not very invasive.  I use 3 sponges, from a coarser and medium grade to a light grade to sponge sand the surface.  The results are good.Working now on the acrylic stem, I had a question about the kind of acrylic this GBD stem was.  Being in the early 80s I didn’t think it was Perspex, the earlier clear acrylic that GBD utilized.  If this is the earlier Perspex, then I would not use alcohol or isopropyl 95% to clean the airway which can craze or shatter the acrylic.  After shooting a quick question to Steve, I was confirmed by him in my use of isopropyl 95% to work on this 80s vintage acrylic stem.  It didn’t take a lot of work and pipe cleaners emerged clean.The bit has very mild tooth chatter, mainly on the lower side.I use 240 grade sanding paper first to sand out the tooth chatter on the upper and lower bit.I then use 470 and 600 grade papers to smooth the acrylic bit further.  I expand the sanding by wet sanding the entire stem with 600 grade paper followed by applying 000 grade steel wool.I press forward using the full regimen of 9 micromesh pads on the acrylic stem.  First, I wet sand using pads 1500 to 2400 then follow by dry sanding with pads 3200 to 4000 and then with pads 6000 to 12000.  After each set of 3, as with vulcanite stems, I apply a coat of Obsidian Oil.  The rich, swirling honey colored acrylic looks great, but something is bothering me. I saw this acrylic imperfection around the brass rondel previously but decided to let it go because I thought the sanding I applied would work it out.  True, the coarser 240 grade sanding paper was only applied to the bit, not to this area.  The problem with these imperfections is that it’s not clear that they are on the surface of the acrylic.  I look at the area with a magnifying glass and probe lightly with a sharp dental probe to see if I can feel a surface disturbance and I don’t.  The reality is that I could detour here and sand and be left with the same problems because they are deeper in the acrylic.  How much sanding would it take and what is sacrificed in the rounding of the stem around the GBD roundel?  Sometimes being somewhat of a perfectionist is a problem – not being able to let go of an imperfection!  The following pictures shows the source of my consternation.I decide to do a compromise detour.  I suspect that the bubbling or cracking in the acrylic is deeper than sanding can address, but I will test the impact of sanding with a light strategic sanding of this area above the rondell using 240 grade paper.  I want to see if it makes a difference.  If not, I will move on.  The first picture shows some strategic sanding with 240 grade paper.Using the spittle approach to clean the area, I can see residual imperfections.  After sanding a little more, I come to the quick decision that sanding will not fully address these imperfections.  To remove them would require more sanding than this stem can muster.I’ll spare you the pictures,  that resulted in the final picture below after again applying 600 grade paper, 000 steel wool and 9 micromesh pads 1500 to 12000 and Obsidian Oil.  The result is that the detoured sanding may have reduced the presentation of the imperfections in the acrylic, but they are not fully removed.  As with life and our imperfections, they go with us!  I move on.The GBD Constitution stummel is waiting for attention.  To further clean the briar surface and coax out the beautiful vertical flame grain, I take the stummel through the full regimen of micromesh pads.  Sanding with pads 1500 to 2400 the process begins with wet sanding.  This is followed by dry sanding with pads 3200 to 4000 and then with pads 6000 to 12000.  The pictures show the progression – I like what I see!  There is no doubt in my mind that this GBD Constitution Calabash comes off an upper shelf.  The grain emerges through the micromesh process with no shyness! Next, to bring out the subtle natural briar hues in this already striking grain, I apply Before & After Restoration Balm to the stummel.  I apply it on my fingers and work the Balm into the briar grain.  It starts off having a thinner viscosity, like cream then gradually thickens into a waxier texture as it’s worked in.  After applying it thoroughly, I set it aside to allow the Balm to absorb and do its thing – the picture below captures this. I let it set for 20 minutes or so and then wipe the excess Balm off with a cloth and then buff up the stummel with a micromesh cloth.After reuniting the stem and stummel, I apply Blue Diamond to the pipe.  I mount a cotton cloth buffing wheel to the Dremel, set the speed to 40% full power and apply the compound.After finishing with the compound, I wipe the pipe with a felt cloth to remove the compound dust in preparation for applying the wax.  I change to another cotton cloth buffing wheel and keeping the speed the same, I apply Carnauba wax to the GBD Constitution Calabash.  After applying the wax, I hand buff the pipe with a microfiber cloth to raise the shine.My, oh my!  This GBD Constitution Made in London England was eye catching before I began the restoration, now its simply amazing.  I can’t get over the grain on this stummel.  The flame of the grain is beautiful as it rises vertically toward the rim.  The gentle sweep of the Calabash as it transitions from bowl, to shank, to stem, and to button, is very nice and cradles well in the hand.  The only imperfection in this pipe are the small specks in the acrylic stem next to the rondell.  Notwithstanding, a very nice pipe to add to the collection!  Lowell commissioned the GBD Constitution Calabash benefiting the Daughters of Bulgaria – women and girls who have been trafficked and sexually exploited.  As the ‘commissioner’, Lowell will have the first opportunity to acquire the pipe from ThePipeSteward Store.  Thanks for joining me!

Recommissioning a Classic Pocket Pipe:  A Fun Sport Horn Stem Sculpted Stubby Paneled Tomato


Blog by Dal Stanton

I’m calling this Sport Horn Stem “fun” because it’s a whimsical pipe.  As a ‘stubby’ he looks like he wanted to grow larger but didn’t.  He’s diminutive in stature and really qualifies as a ‘Pocket Pipe’ because he will be comfy in a pocket waiting for his steward to pack his bowl and spend some time together.  The dimensions are: Length: 4 1/4 inches, Height: 1 1/8 inches, Rim width: 1 inch, Chamber width: 11/16 inches, Chamber depth: 1 1/8 inches.  His paneled bowl has also been shaped with a sculpting that appears to be leaves, vines and a basket on his heel.  When you put this pipe’s characteristics together, whimsical comes to my mind.  He came to me as a part of the French Lot of 50 that I acquired from France’s eBay auction block.  This French Lot of 50 has been an amazing collection of pipes many of which are now with new stewards after they commissioned them from For “Pipe Dreamers” Only! online collection and many of which bearing names that are unknown to me.  This lot was also characterized by several pipes sporting horn stems – pointing in many cases to earlier French origins.  Here’s a picture of the Lot and the Sport is bowl down on the lower right.Peter was among those who trolled through the virtual ‘Help Me!’ baskets in Pipe Dreamers Only! and reached out to me about commissioning the Sport which benefits the Daughters of Bulgaria – our work here in Bulgaria helping women and girls who have been trafficked and sexually exploited.  Now on my worktable, here are more pictures of the Sport. The left side of the shank holds the slanted, cursive, ’Sport’ framed in a sculpted panel.  On the right side of the shank, is the French rendering of ‘BRUYERE’ [over] ‘DELUXE’.  As I’ve done several times before with this Lot, I’m assuming that the Sport is of French origin – the horn stem helps in this conviction as horn was a common stem material for pipe manufacturing in the earlier part of the 1900s. As I was half expecting, I found very little at my normal first stops at Pipedia and Pipephil.  ‘Sportsman’ is a popular name I saw in Pipephil but nothing with the simple, ‘Sport’.  Pipedia dangled some possibilities.

Pipedia listed in the Savinelli article (LINK) the Savinelli made sub-brands, seconds & order productions and had this listing: “Sport – About 1960’s – Chubby shape with very short stem or mouthpiece”.  Interesting, but the Sport just doesn’t have the Savinelli Italian feel with the horn stem and sculpting.  Pipedia provided two more leads – one of French origin and the other English.  Again, Pipedia only contributes in the English listing section and not with an article: “Sport: Brand of J. Cohen & Son. Also a Salvatella series, and a model by Chacom.”  I looked up the link given for Salvatella because I hadn’t heard of this name.  The short paragraph was interesting:

Salvatella was a pipe company founded in 1883 by Enric Moulines Giralt in Catalonia, Spain, long the center both of briar production and pipemaking in Spain. Giralt started the company after training with French pipemakers, and primarily dedicated himself to the development of briar. It was not until Giralt’s nephew, the third to take over the company, that Salvatella began producing pipes as well as briar. While at their height the company produced as many as 150,000 pipes per year and exported pipes worldwide, the factory closed in 2001.

Interesting, but nothing that helps me move forward.  The listing for ‘Sport’ in the Pipedia French manufacturers list was even less demonstrable: “Bristol Sport” followed by: “???”  Each piece of information is like a thread in the wind.  Nothing to get ahold of or to tie to!

In a last ditch effort to find something, I recalled the restoration of another petite French beauty that came from this French Lot of 50 that I had already researched and restored (See: Discovering the History with the Reclamation of this Petite EPC Majestic Bent Horn Stem Billiard).  The EPC Majestic I discovered dated in the 1920s and was produced by now defunct, A. Pandevant & Roy Co. near Paris.  The research of the EPC Majestic led me to old catalogs that helped me put the pieces of the mystery of its origins together.  The similarities between the Sport and the EPC Majestic gave me the idea that maybe the name ‘Sport’ might show up in the old catalog.  With a certain amount of hope I poured through the Catalogue only to find nothing.  One last thread in the wind of little use: Also, in the same French Lot of 50 was another pipe marked with “Sport” on its shank.  An attractive Bullmoose which is still in the For “Pipe Dreamers” Only! online collection waiting to be adopted!  A quick comparison of the markings leaves little hope that they are related….While I cannot corroborate this, I believe that the Sport before me is of French origin and that the horn stem gives it some vintage – how much, I cannot say.  Even so, it is an attractive and interesting pipe even though his origins will remain shrouded in mystery for now.

Looking at the pipe’s condition, it is in very good shape.  The chamber has a light cake build-up but the lava flow over the rim has some grit to it.  The sculpted surface needs cleaning and polishing.  The horn stem is beautiful and shows almost no bit wear.  It will shine up very nicely.  I start the recommissioning of this Sport Horn Stem Sculpted Paneled Tomato by starting with the stummel.  Using the Pipnet Reaming Kit I use only the first, smallest of the blade heads to ream the 11/16-inch-wide chamber.  I follow this by employing the Savinelli Fitsall Tool to scrape the chamber walls and clean out around the draft hole.  Finally, I sand the chamber using 240 grade paper wrapped around the Sharpie Pen and finish by wiping the chamber with a cotton pad wetted with alcohol to clean away the carbon dust.  With the chamber cleaned, I give it a quick inspection, and all looks good – no problems with overheating, cracks or fissures. Next, using undiluted Murphy’s Oil Soap with a cotton pad, I scrub the external sculpted briar surface.  I also use a bristled toothbrush to get into the crevasses of the sculpting as well as a brass wire brush to work on the rim.  After scrubbing the surface, I take the stummel to the sink and using warm water I clean the internals using shank brushes and anti-oil dish soap.  While I’m at it, I use the brass brush on the nickel shank facing.After rinsing, and inspecting the now clean stummel, I discover 2 things.  First, there is a huge fill on the left shank near the ‘Sport’ nomenclature.  I’m not sure how I missed it before, so I look at a ‘before’ picture and discover that the fill had been part of the sculpting in a very effective way.  The fill was almost fully masked because it was blended with the contours.  Now, I’ll have to work on doing the same!  The second thing I discovered is that the mortise has a cork layer which grips the metal tenon.  Thankfully, I discover this before digging in the mortise to clean it!  As I inspect the mortise, I also see what appears to be a metal tubing beyond the cork down to the draft hole.  I use a sharp dental probe to test it and it does feel like metal or a hard lining of some sort.  The presence of the cork could possibly add more weight to this Sport having some vintage to it.  Cork was often used on older pipes to grip the tenon – the EPC Majestic included. Just to make sure, I remount the horn stem to see if the grip was still good – it was.  I’ll treat the cork later with some petroleum jelly to hydrate it.  Wow – I can’t believe I missed that fill!!I continue cleaning the internals by using isopropyl 95% and cotton buds reaching over the cork as much as possible. I also scrape the sides of the mortise, beyond the cork to help excavate tars and oils.  After a lot of cotton buds and pipe cleaners, the buds begin to emerge lighter and cleaner and I’m able to move on!The huge fill on the left shank side needs to be addressed.  The fill is solid but eroded so that it falls beneath the surface level of the briar.  I first dig out the old fill material using a sharp dental probe. My, the hole is deep!  After removing the fill, I clean the area with a cotton pad and alcohol. I then mix thick CA glue with briar dust to form a putty to refill the hole. Before mixing the CA glue and briar dust, I put scotch tape down on a plastic disk that serves as a mixing pallet.  The tape helps to facilitate cleaning – I simply peel the tape up afterwards.  I place a small pile of briar dust on the disk and put some thick CA glue in a small puddle next to the dust.  Using a toothpick, I gradually pull some briar dust into the edge of the thick CA glue and mix it as I go.  When it gets to a thickness that it doesn’t run too much, I dollop some into the crevasse with the toothpick and knead the putty down into the recesses using the toothpick.  When the hole is filled and a bit higher than the surface, I put the stummel aside to cure.  Since the putty is so thick – the hole so large, I’ll let the curing go through the night.  I put the stummel aside and turn to the horn stem.I start by cleaning the airway with pipe cleaners dipped in isopropyl 95%.  After one attempt with the pipe cleaner I discover that the airway is closed.  Looking at the button, I can see that the slot is totally plugged with gunk.  I use a dental probe with a hook point to excavate the gunk out of the slot.  Eventually, I’m able to work a thin shank brush wetted with isopropyl 95% through the airway.  After several pipe cleaners and assistance from shank brushes, the airway started cleaning up and I move on.To clean the external surface of the horn stem I take it to the sink with a bristled toothbrush and scrub the stem with warm water and dish soap.  First, I take a pair of pictures to mark the start.After the scrubbing, the horn composition starts to show its subtle shadows.  Very nice.After cleaning the nickel tenon with soap and water and clearing the gunk buildup on the stem facing, I use 000 steel wool to clean the tenon further bringing out the shine.With the stem now clean, I study the horn stem.  It’s a beautiful piece of horn and the only thing I can do is simply spruce it up.  In the past, I benefited greatly by Steve’s essay on horn stem repair working on my first horn stem, A First Horn Stem on a Throw Away Pipe.  The key thing in repairing horn is to fill the gaps to keep the horn from drying and splintering as horn is very porous.  This stem needs no repairs, but looking closely, I do see normal minuscule porous texture.  The tighter or smoother the horn surface is, helps to guard against the decay of the horn.  I take a few closeups to show this.I treat the horn stem like a vulcanite stem but with greater gentleness.  I run the stem through the micromesh regimen, and I will apply compounds afterward.  I wet sand with micromesh pads 1500 to 2400 and follow by dry sanding with pads 3200 to 4000 and 6000 to 12000.  After each set of three pads, I apply Obsidian Oil to the horn and the horn drinks it up! I’m pleased with the results – even more gloss!  My day comes to an end. The next day, the briar dust putty fill has fully cured, and I go to work on it using a flat needle file to bring the fill mound down to briar level.I then use a piece of 240 grade sanding paper to smooth it further and to begin giving some shape to the patch to blend it.When the sandpaper did what it could do, I used a pointed needle file to sculpt through the patch to blend the patch with the surrounding area.  The good news is that the area is rough and busy which helps in blending the patch.With a combination of filing and sanding, I like the results.  The briar putty patch is darker than the surrounding area but I’m hopeful that the surrounding briar will also darken through the micromesh sanding/polishing process and with the application afterwards of Before & After Restoration Balm.After the external briar cleaning, the rim is looking good but still has some minor discoloration from charring on the internal rim edge and well as some roughness on the rim.  I gently sand the rim and the internal edge with a piece of 240 grade paper to dispatch the issues.  The rim looks good. Next, I apply the full regimen of nine micromesh pads starting with wet sanding using pads 1500 to 2400.  After this, wet sanding with pads 3200 to 4000 and 6000 to 12000 finishes the process.  Wow, it is amazing how this process brings out the grain! From the picture above, the sculpting lines are lighter, and the hue is uneven with the darkening hue of the surrounding smooth briar.  The micromesh has helped with the blending of the briar dust putty patch, but it’s still noticeable.  Applying Before & After Restoration Balm will address both these issues and I’m looking forward to seeing the results.  I put some Balm on my fingers and work the Balm well into the sculpting and briar.  It starts with a cream-like consistency and then thickens to feel more like wax.  I place the stummel aside for 30 minutes for the Balm to be absorbed (pictured) and then I wipe off the excess Balm with a clean cloth then I buff the stummel to bring out the grain.  The briar looks great!As I noted before, the presence of the cork in the shank to grip the tenon possibly helps place this pipe in an older vintage.  To treat the cork, I use petroleum jelly to condition the cork.  I apply a light coat with a cotton bud and work it in.  This will hydrate the cork and hopefully add much time to the cork’s continued life.With the horn stem and Sport sculpted stummel reunited, I apply Blue Diamond compound.  After mounting a cotton cloth buffing wheel to the Dremel, and setting the speed to 40% full power, the compound does the job of applying the fine abrasive to the briar surface removing fine imperfections and distinguishing further the sculpted crevasses.  After applying Blue Diamond to the stummel and stem, I change to another cotton cloth buffing wheel dedicated to applying Blue Diamond on nickel.  I give the nickel shank cap a quick buffing with the compound to raise the shine.  I use a different buffing wheel for each different kind of application. While polishing the cap, I’m careful not to run the wheel over the briar as the nickel will stain the wood with the black resulting from the polishing the nickel.Following the compound, I change cotton buffing wheels to a wheel dedicated to wax, maintain speed at 40% and apply carnauba wax to both horn stem and stummel.  Afterwards, the restoration is completed with a rigorous hand buffing to remove excess wax as well as to raise the shine.I cannot place with certainty the exact vintage of this Sport Bruyere Deluxe, but it has characteristics of an older pipe.  I believe it to have a French COM and the horn stem seated with cork, is a distinctive part of this ensemble.  The sculpted bowl is attractive, and the stubby, pocket-sized ease translates into a very fun pipe put back into service for a new steward.  Since Peter commissioned the Sport from the For “Pipe Dreamers” Only! online collection, he will have the first opportunity to acquire it from The Pipe Steward Store which benefits the Daughters of Bulgaria – our work here in Bulgaria helping women and girls who have been trafficked and sexually exploited.  Thanks for joining me!

Recommissioning a Sharp BBB Classic London England 106S Chimney


Blog by Dal Stanton

This very classy looking BBB I acquired with the French Lot of 50 that I won on the French eBay auction block along with several other treasures that I’ve enjoyed restoring for new stewards benefiting our work here in Bulgaria with the Daughters of Bulgaria.  Along with a few other pipes commissioned by my friend in India, Paresh saw this BBB in the For “Pipe Dreamers” Only! collection and was interested in adding it to his BBB collection.  I’ve marked the BBB in the pile of pipes that I acquired.  I love looking at ‘pipe piles’ 😊.With the pipe now on my worktable here in Sofia, Bulgaria, I take more pictures to show what got Paresh’s attention.  In prototypical English style, the pipe is on diminutive side measuring, Length: 5 3/8 inches, Height: 1 7/8 inches, Rim width: 1 1/8 inches, Chamber width: 3/4 inches, and Chamber depth: 1 3/4 inches. The left side of the shank is stamped with the classic ‘BBB’ ensconced in the rhombus [over] ‘CLASSIC’.  The right side of the shank is stamped, ‘LONDON, ENGLAND’ [over] 106S – what I’m assuming is the BBB shape number designation.  The shape of the stummel I would label as a Chimney sporting a saddle stem.  In my research I could unearth no BBB Shapes Chart that corroborates my designation matching the 106S.I love the look and feel of this pipe and its distinctive brass rondel embedded on the topside of the stem placing this ‘Best British Briar’ Classic in the 1950s and 1960s.  Below is pictured the evolution of the BBB stem markings which is included in an extensive article on the History of BBB Pipes by Fiona Adler that Steve reposted in rebornpipes after translating from the original French.Pipephil provides a very brief description of ‘BBB’:

BBB: ” Best British Briar” is now a brand of the Cadogan Company (Oppenheimer group). American rights to use the brand name were sold to Wally Frank in 1980.
Founder of the brand in 1847: Louis Blumfeld. The oldest pipe brand name in the UK has been registered in 1876 (Blumfeld Best Briar)
Grading (ascendant): Own Make, Bold Grain, Best Make, Rare Grain

With the dating of this pipe giving it a 50s/60s vintage, I was hopeful to find the ‘Classic’ line in some of the catalogs that Steve acquired from Victor C. Naddeo who is the administrator of the FB Group, Pipe Club of Brasil. I enjoy it when catalogs are posted but unfortunately, I found neither the ‘Classic’ line mentioned or the shape number 106S in the 60s catalog (See: Best British Briar Catalog to see the whole posting).The Chimney stummel is in very good condition – the grain pattern shows great promise after the stummel is cleaned of normal dirt and grime buildup.  The chamber has a thick cake and the lava overflow matches the fact that this pipe was well smoked and served his steward well.  I will remove the cake to give the briar a fresh start and to inspect the chamber walls for heating problems.  The saddle stem has heavy oxidation but very little tooth chatter on the bit.  I’m looking forward to seeing how the very nice-looking BBB Classic Chimney cleans up.

I start by trying something that I haven’t tried before.  The oxidation in the stem is a lot and very deep.  My experience with Before & After Deoxidizer is that it is not able to remove very strong oxidation fully.  It can address some of the issue, but not thoroughly – in my experience.  I try to break up the oxidation by using a small felt buffing wheel mounted on the Dremel set to the lowest speed.  I start first with simply the felt wheel, but I’m concerned that it is too hot on the vulcanite.  I add paraffin oil to the mix.  I wet the felt wheel with the mineral oil and buff the stem trying to break up the oxidation in anticipation of putting the stem in the B&A Deoxidizer soak.After buffing, I wipe the stem down with a cloth and put it aside and allow it to dry.  After drying, the next two pictures show that the buffing did help, but there is still oxidation.I continue by cleaning the airway of the stem with a pipe cleaner wetted with isopropyl 95%.  Once clean, I add it to a bath of Before & After Deoxidizer with other pipes in the queue.  I’m hopeful that the Deoxidizer will now be more efficient after the aggressive buffing I did. After some hours in the Deoxidizer soak, I fish out the BBB saddle stem and after draining off the excess Deoxidizer, I use cotton pads wetted with isopropyl to wipe off the raised oxidation.  I also run a pipe cleaner wetted with alcohol to clean the airway of the fluid.  The pictures show improvement, but I’m not satisfied.Next, I employ Mr. Clean Magic Eraser to address the oxidation further.  I’m satisfied with the results – the vulcanite appears to be free of the oxidation.To rejuvenate the stem, I apply paraffin oil to the vulcanite with a cotton pad and put the stem aside to absorb and dry.  I’m pleased with the results.Turning now to the BBB stummel, I take a few pictures to show the heavy build up both in the chamber and the rim.  I use only the smallest of the Pipnet Reaming Kit’s blade heads to ream the carbon cake out of the chamber. This will give the briar a fresh start.  I transition to the Savinelli Fitsall Tool to do the fine tuning by scraping the chamber walls more, and then wrap 240 grade paper around a Sharpie Pen and sand the chamber to clean it further of carbon cake residue.  Finally, I wipe the chamber with a cotton pad wetted with alcohol to rid the chamber of carbon dust.  I take a final picture of the cleaned chamber and after inspection, I see know problems in the chamber with heating cracks or fissures. Turning now to the external briar cleaning, I use undiluted Murphy’s Oil Soap with a cotton pad to scrub the surface.  I also work on the rim using my thumbnail to scrape the rim to remove the buildup and then with a brass wire brush.  I then take the stummel to the sink and using a bristled toothbrush I brush and further clean the surface under the warm water.  Using shank brushes and anti-oil dish liquid soap as well I clean the internals of the stummel rinsing with warm water.Next, using pipe cleaners and cotton buds wetted with isopropyl 95%, I continue the internal cleaning.  I also scrape the mortise walls with a small dental spoon.  This does a great job removing the thicker tars and oils that are hanging on.  After a time, the cotton buds begin to emerge cleaner.To continue the internal cleaning process, I use the kosher salt and alcohol soak.  To form a ‘wick’ to draw out the tars and oils, I twist and pull a cotton ball to form the wick.  A stiff wire helps to insert and push the wick into the mortise.  Then the bowl is filled with kosher salt, which leaves no aftertaste and freshens the bowl, and I set the stummel in an egg crate to keep it steady.  A large eyedropper is used to fill the chamber with isopropyl 95% until it surfaces over the salt.  After a few minutes, I top the alcohol off after it has absorbed into the internals. I set the stummel aside for it to soak through the night.  It’s late, I also turn out the lights! The next morning, the kosher salt and isopropyl 95% soak has done the job.  The wick and salt are soiled having drawn more tar and oils from the internal cavity.  I thump the expended salt into the waste and wipe the chamber with a paper towel as well as blow through the shank to remove expended salt crystals.  To make sure the internals are clean, I use a few more cotton buds dipped in isopropyl 95%.  As hoped and expected, they come out clean and I move on.With the cleaning complete, I turn my attention to the rim’s condition.  The cleaning did a great job removing the grime and lava over the rim, but the discoloration and skins and nicks on the edge of the rim remain.  I take a couple close-ups picturing both sides of the rim and nicking is evident.To address the rim condition, I bring out the chopping board and put 240 grade paper on it to serve as a topping board.  I top the stummel very lightly – just enough to clean the rim and allow me to erase the rim edge nicks with a simple, inconsequential beveling.After a few rotations on the board I take a picture.After a few more rotations, I’m satisfied with the 240 topping.  On the lower right of the rim you can see the remaining rim edge issues that I’ll rectify with a gentle beveling or sanding.To smooth the rim further, I exchange the 240 paper for 600 grade paper and go a few more rotations.Next, I introduce outer and inner edge bevels to erase the remaining damage and to give the Chimney’s top a smoother softer appearance.  I use 240 grade then 600 grade papers rolled to do the beveling.  I think it looks great.With the rim repair completed, I take the stummel through the full regimen of 9 micromesh pads.  First, I wet sand using pads 1500 to 2400 then dry sand using pads 3200 to 4000 and 6000 to 12000.  I take a picture between each set of 3 pads to mark the change in the briar.  It amazes me how the grain emerges.  This BBB Classic’s grain is striking.  As I track the grain around the bowls, the horizontal grain gradually transitions to bird’s eye grain as the stummel position pivots.  There are no fills in the stummel that I can see – a beautifully crafted block of briar! Before returning to the stem to catch it up with the stummel, I’m anxious to apply Before & After Restoration Balm to this BBB Classic Chimney stummel.  I place some Balm on my fingers, and I work it into the briar thoroughly.  The Balm starts with a cream-like consistency but then thickens into more of a wax-like consistency.  I like the Balm because it seems to draw out the deeper tones of the briar – nothing earth shattering, but the subtle enhancement of the natural briar grain is what I like most.  After applying the Balm, I put the stummel aside for about 20 minutes before wiping off the excess and then buffing it up with a micromesh cloth.  The picture shows the Balm at work.Next, I turn back to the BBB saddle stem.  The tooth chatter is minimal, but the button has some compressions.  The skin of the stem is rough as well.I begin by refreshing the button lips using a flat needle file.  I also work on the bit with 240 grade paper sanding out the imperfections. The slot is also a bit out of shape.  I use a sharp needle file to file the edges to balance the slot.While sanding, I see a pit on the edge of the stem that I didn’t see before.  I try sanding it out, but soon realize is too deep.  I remedy the situation quickly using a spot-drop of regular CA glue on the pit after cleaning it with a cotton pad and alcohol.  I use an accelerator to quicken the curing process and then sand it with 240 grade paper. I then wet sand the entire stem with 600 grade paper and follow by applying 000 steel wool to the whole stem.  The next step is applying the regimen of micromesh pads to the stem starting by wet sanding using pads 1500 to 2400.  This is followed by dry sanding with pads 3200 to 4000 and 6000 to 12000.  Between each set of 3 pads a coat of Obsidian Oil is applied to further enrich and condition the vulcanite.  The freshly sanded pop of the vulcanite contrasted with the embedded BBB Rondel is great!  While trying to reunite the stem and the stummel before applying Blue Diamond compound, it becomes evident that the cleaning of the stummel has expanded the briar making the fit of the tenon in the mortise a bit too tight and forcing the issue could easily result in a cracked shank!  Nothing desired at this point.  To remedy this, utilizing a combination of filing the mortise with a half-circle needle file and sanding the tenon down by wrapping a piece of 240 grade paper around the tenon and rotating the paper does the trick.  The combination approach now allows the tenon fit to be snug but not too tight.With the BBB Classic stem and stummel reunited, after mounting a cotton cloth buffing wheel onto the Dremel, and setting the speed at about 40% full power, Blue Diamond compound is applied to the stem and stummel.After the application of Blue Diamond compound, I wipe the pipe with a felt cloth to remove the compound dust in preparation of applying the wax.  Then, after mounting another cotton cloth buffing wheel on the Dremel, and maintaining the speed at 40%, carnauba wax is applied to the stem and stummel.  The restoration is finished with a hand buffing using a microfiber cloth to raise the shine.

I’m very pleased with results.  This BBB Classic London, England Chimney is a beautiful pipe.  The block of briar is exquisite, with no fills and a landscape of grain transformation as you track it around the bowl.  There is a striking tight patch of bird’s eye grain on the right flank of the bowl that holds the eyes.  As a 1950s/60s vintage BBB, even though the ‘Classic’ line could not be fully identified, there is little doubt as to the quality of this BBB Classic Chimney.  Paresh commissioned this pipe which benefits the Daughters of Bulgaria – women and girls who have been trafficked and sexually exploited and he will have the first opportunity to adopt this BBB from ThePipeSteward Store and bring it home.  Thanks for joining me!

A Denver Christmas Karl Erik Heading for the Black Sea Beach!


Blog by Dal Stanton

Last Christmas, my wife and I made the trek from Bulgaria to Denver to celebrate the holidays with our family – renewing relationships with our growing number of grandchildren in the US!  Living and serving in Bulgaria is a deeply fulfilling life, but we miss our family and this Christmas reunion was a wonderful close to the year.  One of the highlight activities with the ‘Ole Man’ (that would be me) is to go pipe picking at the various secondhand stores and antique shops in the Denver area.  My main aim during these picking expeditions is to add pipes to the ‘For “Pipe Dreamers” Only!’ collection to benefit our work with the Daughters of Bulgaria – women and girls who have been trafficked and sexually exploited.  One of the favorite spots I’ve picked before is the huge Brass Armadillo Antique Mall where you can spend hours and we did.  There were many pipes, but few were priced favorably enough for me to justify acquiring for the Daughters, but I did see one particular pipe that I ‘ooooo’d and ahhhh’d’ over and my Denver-based daughter, Jocelyn, and her husband, Jordan, were watching me closely 😊.  Yes, you guessed it, the Karl Erik Handmade in Denmark B Freehand that I was drooling over, but was stressing my pocketbook too much, had been secretly squirrelled away from the Brass Armadillo.  I discovered it a few days late under the tree on Christmas morning – woohoo!  When you have a dad who does what I do, gift giving is never a problem!  This Dad has made out quite well from Jocelyn and Jordan’s gift-giving.  Along with the Karl Erik Handmade, a few years ago they gifted me the pictured unbelievable 1907 McLardy Silver Ferruled Gourd Calabash which I restored (see LINK) and have enjoyed as a treasure in my collection.  The McLardy was enjoying their fire pit in Jocelyn and Jordan’s back yard while I enjoyed the very mellow McClelland Dark Star loaded in the McLardy.  Rebornpipes’, very own Steve Laug, suggested Dark Star as a good way to inaugurate the McLardy Gourd Calabash.  As usual, Steve was on the money! I love my family and I’m thankful to God for each one of our 5 children and the spouses they’ve found (one is still working on that!) and the now, 5 grandchildren they have brought into the world.  My younger daughter from Nashville, and her husband, Niko, joined me out by the firepit while we each enjoyed a Christmas bowl together at the foot of the Rocky Mountains – trying to stay warm!The Karl Erik is now on the worktable back in Bulgaria and was pulled out of my personal collection ‘Help Me!’ basket to restore.  Now Summer, mid-July, my wife and I will be heading to the Black Sea coast for a few days of R&R and I want to bring the Karl Erik with me!  He’s been waiting patiently for me in the basket and now on the worktable, I take some additional pictures to get a closer look at this striking Christmas gift. The nomenclature is located on the lower shank, just below the shank facing plateau.  Stamped there in cursive script is the name, ‘Karl Erik’ [over] HANDMADE IN DENMARK [over] B. Not long ago I worked on a Karl Erik, Knute of Denmark Freehand, that I gifted to my son, Josiah, upon his graduation with a Master’s Degree in counseling (see LINK).  The Freehand style was given to the pipe world by the Danish and Karl Erik was a major contributor.  Pipedia’s article gives the basic history which has been repeated many times – one more time for this Karl Erik on my worktable (https://pipedia.org/wiki/Karl_Erik):

Karl Erik Ottendahl (1942 – 2004) was born in Aalborg (Jutland), just a few miles from the very northernmost tip of Denmark. He began smoking a pipe when he was 14 and upon leaving school he started an apprenticeship in the craft as a lithographer at the age of 16. While working as an apprentice he began hand carving pipes as a hobby. Many were given as gifts to his more senior colleagues. Upon completion of his apprenticeship he moved to Nairobi, Kenya to work as a lithographer during the 1962 war. While in that war-torn country, he was unable to procure pipes for himself. In the face of such a predicament, he chose to continue to make pipes for his own use rather than go without.

Returning to Denmark after three years he couldn’t find a well paid occupation in his job, and so he began making a few pipes on the side to boost his income choosing his prenames “Karl Erik” – logo “KE” – for his label. When he managed to find some major Copenhagen pipe stores willing to sell his pieces his reputation grew little by little and he was finally able to purchase more and better machinery and began working full time as a pipe maker.

One other paragraph from the Karl Erik article in Pipedia referenced above is noteworthy in understanding this pipe man who died in 2004:

As one of the few notable Danes Karl Erik Ottendahl dedicated himself to the needs of the normal pipe smoker with a normal income. In the end he was one of the last of this tier. He never made any pretense of the fact that his “hand mades” were prefabricated to a large extent on automated machines and only the last steps of fine-shaping and finishing were carefully made by hand. But he never employed a copy milling, so many KE pipes may look very similar but not two are identical. As well the bulk of the stems was supplied by Stanwell in a close-to-finished state. Stanwell also did the sand blasting for KE to a large extent.

One more bit of information from Pipedia helped me understand the “B” in the nomenclature.  Regarding the grading system for Karl Erik pipes it said:

KE’s new grading used numbers ascending from D to A. The unique “Ekstravagant” pipes C, B, A, AA to AAA. These superb pieces of remarkable quality were, almost certainly, the least expensive high- quality handmade pipes coming from Denmark today!

What this tells me is that the ‘B’ rating is just under the best, ‘A’ rating regarding quality.  My Black Sea beach bound Karl Erik got my attention at the Brass Armadillo in Denver because of the sweeping vertical grain that defines and encircles the Freehand bowl – reaching upward to the expressive plateau.  I’m thankful that he doesn’t need too much attention to be recommissioned!  The chamber has light cake buildup and the plateau surfaces, bowl and shank facing, are dirty.  The smooth briar is in great shape and only needs cleaning.  The grain is pristine – I detect few very small scratches from normal wear and no fills, which one would expect with a Karl Erik higher grade I suppose!  The stem has very mild tooth chatter on the upper and lower bit and a small compression on the upper lip.  To begin, to address the very mild oxidation, I add the Karl Erik fancy stem to a soak of Before and After Deoxidizer with other pipes in the queue.  I first clean the airway with pipe cleaners wetted with isopropyl 95%. After a few hours soaking, I fish out the KE stem and after draining the Deoxidizer, I wipe the stem with a cotton pad wetted with alcohol to remove the raised oxidation.  I also run another pipe cleaner wetted with isopropyl 95% through the stem to clear the Deoxidizer liquid. To continue to rejuvenate the stem, I then add a coat of paraffin oil to the vulcanite and put it aside.Turning now to the Handmade’s stummel, I take a closeup showing the chamber and the mild carbon cake build up.  To remove the cake to give the briar a fresh start, I use the Pipnet Reaming Kit to start the job.  After putting paper towel down to help in clean up, I start by using the smallest blade head and then quickly graduate through two additional blade heads.  I then transition to using the Savinelli Fitsall tool and this does a great job getting down into the chamber’s hard-to-reach recesses.  Finally, I wrap a piece of 240 grade sanding paper around a Sharpie Pen and sand the chamber and follow by wiping it with a cotton pad wetted with alcohol to clean it.  After an inspection of the cleaned chamber, I see no problems with burning or heating. Moving on to the external briar surface, I use undiluted Murphy’s Oil Soap to scrub the briar with a cotton pad.  I also use a bristled toothbrush and a bit of a brass wire brush to clean the plateaus – bowl and shank facing.  After the scrubbing, I take the stummel to the sink and continue the cleaning by using a shank brush and kitchen dish soap to scrub the mortise using hot water.  After scrubbing, I rinse the stummel thoroughly. Now, moving to the internals I use cotton buds and pipe cleaners dipped in isopropyl 95% to start the cleaning. Happily, I find that the internals are clean after the previous scrubbing with dish soap and shank brushes – I move on!I move on to applying the full regimen of micromesh pads to the stummel.  I start by wet sanding with pads 1500 to 2400 and follow with dry sanding with pads 3200 to 4000 and 6000 to 12000.  I absolutely love the way the micromesh pads coax and tease out the grain.  Beautiful vertical grain – possibly called ‘fire grain’! Before turning again to the stem, I apply Before & After Restoration Balm to the stummel.  The B&A Balm does a great job pulling out the subtle hues of the grain.  I put some Balm on my fingers, and I work it into the briar surface.  For now, I do not apply it to the plateaus because I first need to do some further work.  I put the stummel aside for about 20 minutes to allow the Balm to do its thing.After about 20 minutes, I wipe off the excess Balm with a cotton cloth and then buff it with a microfiber cloth. Not bad!  I’m loving my Christmas gift!With the stummel on the sidelines for a time, I turn again to the Karl Erik fancy stem.  The light tooth chatter should be addressed easily.  I start using the heating method by painting the chatter with the flame of a Bic lighter.  The characteristics of the vulcanite expands as its heated to reclaim its original shape – or at least in part.  After painting with the Bic flame, I do a before and after picture for the upper and then lower.  There is a notable difference!

Upper before and after:Lower bit before and after:I continue using 240 grade sanding paper to dispatch the remaining chatter and compression on the upper button lip.  I also use the flat needle file to freshen the button.  I follow that with wet sanding the entire stem with 600 grade paper and finishing this phase of sanding with 000 steel wool – upper then lower: Next, in order to recondition the stem, I apply Before & After Fine and Extra Fine Polishes in succession.  For each, I apply using my fingers – rubbing the polish into the vulcanite and then putting aside for a few minutes to do its thing.  I then wipe the excess polish off with a paper towel and then buff the stem with a cloth.Turning again to the Karl Erik Handmade stummel, my next step is to freshen the plateau presentations.  Looking at examples of Karl Erik Freehand pipes, the treatment of the plateaus is even between leaving the plateaus the natural hue and darkening the plateau moonscape to provide a contrasting perspective.  With this Karl Erik, it appears that the plateau had color previously and so I decide to go in this direction.  The next two pictures mark the starting point for each plateau. The first step is to apply an Italian dye stick labeled Medio Noce, which is a very dark shade of brown that almost appears black.  I apply this in random ways along the ridges and valleys of both the rim and shank facing plateaus.  Then, more sparingly, I use a black Sharpie Pen to darken the more distinctive valleys.  I do this to give slight, subtle contrast in hues.  Forgetting to picture, I also use a fine point Sharpie to darken and accent to two small sculptings on the side of the stummel.Then to add more contrast, I use micromesh pads 1500 to 2400 to ‘feather’ sand off the peaks of the ridges.  I like this contrasting effect – providing a rustic look that is attractive.I then apply some Before & After Restoration Balm to the plateaus and put the stummel aside to absorb.Back to the stem with the full regimen of 9 micromesh pads.  I start by wet sanding with pads 1500 to 2400 and follow with pads 3200 to 4000 and 6000 to 12000.  Between each set of 3 pads I apply a coat of Obsidian Oil to further condition the vulcanite. The stem is looking great! With the stem ready to go, I mount a cotton cloth buffing wheel to the Dremel and set the speed at about 40% full power.  I then apply Blue Diamond compound to both the stem and the stummel of the Karl Erik Handmade. I keep the stem and stummel separated because it’s easier to rotate each piece individually.While applying the compound and working on the rim plateau, I realized that I was missing a great opportunity to release more grain to enjoy.  With a peaked Freehand style, I find that the inside wall of the plateau crest provides additional aesthetic enjoyment when it is sanded, and this allows a grain presentation on the chamber side.  I forgot to take a picture but borrow the previous picture during the B&A Balm to show the inside chamber wall – darkened and ignored.I decide to coax out this grain and use 240 and 320 grade papers in succession wrapped around the Sharpie Pen to sand this area.Following this, I use 600 grade paper wrapped around the Sharpie Pen.  I keep the sanding parallel to the chamber wall – I don’t want to bevel the internal lip eating into the plateau.  I follow the 600 grade paper by sanding the area through each of 9 micromesh pads – 1500 to 12000.The final step is to apply Blue Diamond compound to the chamber wall.  I like it.  It’s a small enhancement but I think it adds a classiness to an already very classy Karl Erik.With the application of the Blue Diamond compound completed, I wipe/buff the stem and stummel with a felt cloth to remove any residue compound dust in preparation of applying wax.  I mount another cotton cloth buffing wheel to the Dremel, maintain 40% power and apply a few coats of carnauba wax to stem and stummel.  After completing the application of the wax, I give stem and stummel (separately) a rigorous hand buffing with a microfiber cloth to make sure all the excess wax is removed and to raise the shine even more.

This Karl Erik Handmade in Denmark is stunning, and a wonderful gift: Thanks Jocelyn and Jordan!  I’m pleased to add it to my collection!  He came along to the Black Sea and here I’m inaugurating his recommissioning with a bowl of my favorite blend, Lane BCA.  Thanks for joining me!

Recommissioning an Italian La Strada Scenario Canadian 130


Blog by Dal Stanton

Pipes come to me in many ways – pipe picking in bazaars, second-hand shops and antique shops.  The eBay auction block is another way I procure pipes to restore to benefit the Daughters of Bulgaria, our work here in Bulgaria helping women and girls who have been trafficked and sexually exploited.  Another gratifying way pipes have come to me are from people who hear about the Daughters and want to help.  They donate pipes from their own collections or pipes that were passed on from loved ones.  In 2017, my wife and I were in Butler, PA, speaking at a church that has financially and prayerfully supported the work we do in Bulgaria for many years.  We were invited to visit the home of Dan and Jane Hartzler, who we’ve known for many years.  We had a great time visiting and Dan said he wanted to give me something.  He brought out 4 very well-used pipes in a rack and offered them to me to use to benefit our work with the Daughters.  The pipes came from his now deceased father, Rex, who was an Ohioan all his life from his birth in 1922 till his final day in July of 2011.  When I receive pipes in this way I always try to find out about their former steward – it adds depth of story and meaning when I restore pipes that are passed on.Dan shared with me about his father during that visit and in subsequent emails after we departed Butler. It’s not possible to capture an entire lifetime in the brevity of this write-up, but I found very interesting was that Rex had a yearning for adventure in his early years.  When he started college in 1940, he also took flying lessons and subsequently joined the Navy pilot program during WWII.  This choice in his life as a young man brought him into an interesting role during WWII.  He piloted blimps flying protective duty over the Panama Canal – a critical naval east/west artery to connect the Atlantic and Pacific naval operations.  This description from BlueJacket.com is interesting and adds insight to Rex’s duties as a ‘lighter than air’ pilot.  The primary role of the blimp was directed toward anti-submarine warfare.  The toll on merchant marine fleets were heavy during the beginning years of the Atlantic theater supporting the Allied war effort in Europe.  The ‘Lighter Than Air’ units played a key role in turning the tide of these major naval losses.  To guard shipping using the Panama Canal, blimps were stationed on both the Pacific and Atlantic sides to ward off submarine attacks on shipping.  Dan told me that is father never piloted again after the end of the war and settled into married life in 1946 and raised a family in Ohio.

Dan looked for a picture of his father smoking his pipe that I could add but couldn’t find one.  One reason for this was probably the fact that Dan’s mother didn’t like pipe smoke in the house, so Rex would normally load up the bowl with his favorite blend and go outside where he walked among the trees – and by looking at some of the pipes that Dan gave me, we concluded that he probably knocked on the trees or on other hard surfaces to clear the ashes!  I’m thankful for Dan’s contribution of his dad’s pipes to benefit the Daughters.  I brought them back to Bulgaria and placed them in the ‘For “Pipe Dreamers” Only!’ collection online and this is where Jim found the Canadian he wanted to commission.  Jim came to my Dreamers inventory with Canadians on his mind.  After looking at different offerings he came down to Rex’s La Strada, which I was very pleased to commission and now, begin restoring this well-used La Strada Scenario from Rex to a new steward.

Jim added one more request for the La Strada Canadian when I began work on it.  He sent this short note with a link:

dal,
noticed this as an improvement for many pipes. would it do well for the pipe you’re working on for me?  https://pipedia.org/wiki/Airflow:_The_Key_to_Smoking_Pleasure

 jim

The title of the Pipedia article piqued my interest and it introduced me to debate regarding “opening” the airway in a pipe to improve the physics of airflow.  The author of the article, Ken Campbell, originally posted it to The Pipe Collector, the official newsletter of The National Association of Pipe Collectors (NASPC), I believe in 2011 where he makes a compelling argument.  Ken Campbell sited those who did not agree with his assessments, but what I found interesting was the science behind the proposition that increasing the diameter of the airway, if done correctly, according to the author. can enhance the enjoyment, reduce gurgles, difficulties in keeping the bowl lit, etc.  A step closer to pipe smoker’s nirvana!  The science is interesting, and whether it’s correct or not, I’m not sure, but it’s compelling.  I’m repeating this paragraph from Campbell’s, ‘The Key to Smoking Pleasure’ in toto including the pipe artisans he sites to make his case:

My first clue came from an article I read in Pipes & Tobacco in the Winter/1996/97 edition, early in 1997. The article was entitled “Nature’s Designs” by Dayton H. Matlick and was about Lars Ivarsson, his pipe making and some of his philosophy and knowledge about smoking. I quote Messrs. Matlick and Ivarsson from this article: “Unrestricted airflow through the entire channel is essential for an easy-smoking pipe….’Once you pick the shape and size of pipe you like, test the airflow,’ says Lars Ivarsson. ‘Draw in through the empty pipe at normal smoking force. There should be no sound or, at most, a deep, hollow sound. This means the airflow is not restricted, an essential element of a good-smoking pipe. If you have any whistling sounds,… meaning restricted airflow, you will probably have trouble keeping it lit and it will probably smoke wet. According to Lars, ‘You’re getting turbulence in the airstream when you exceed a certain speed. The sound of that turbulence indicates that the smoke will get separated. Smoke is actually microdrops of moisture containing hot air and aroma. When air passes quickly through a restricted passageway, turbulence moves the heavy particles, including the moisture, to the perimeter, like separating cream from milk. This can be caused by too small a diameter or sharp corners in the smoke passage [which is] an extremely important issue….[T]he physics of the boring of your pipe will definitely have an impact on the taste of the pipe and your smoking pleasure. For all of his pipes, Lars uses a four millimeter [Ed. about 5/32nd of an inch] channel from one end of the pipe to the other. This may vary with the pipe maker, but the sound test will still hold true.”

The article is interesting, and I’m always interested in trying new things to expand my restoration repertoire, so I responded to Jim saying that I would give it a try, but because I had not done this before, I would need to research it more to make sure I get it right.  So, opening the airway of this La Strada Scenario Canadian is what I need to investigate and look for longer drill bits to add to my collection.

These were the pictures of Rex’s Canadian posted in ‘For “Pipe Dreamers” Only!’ that got Jim’s attention.

‘La Strada’ simply means, ‘The Street’ in Italian.  The information gleaned from Pipedia and Pipephil.eu (See LINK) point to the La Strada name being primarily an Italian pipe production made for export, especially to the US.  Pipedia also added this bit of information: La Strada was an Italian export brand. Its large formats had some success in the USA, and were included in the 1970 Tinder Box catalog.  Steve restored a very nice looking La Strada Staccato found on rebornpipes (See LINK) where he posted this page from Tinderbox showing La Strada Offerings.  The Scenario shown on this page is a Bent Stem Sitter.  Interestingly, the Staccato example is the Canadian shape that I have on the worktable. As I was looking at the Staccato line, I recalled that I have a nice quarter bent Billiard La Strada Staccato in the ‘For “Pipe Dreamers” Only!’ collection available for commissioning!  The ‘strapped’ sculpting and matte finish is the Staccato hallmark which I like.Looking at the La Strada Scenario Canadian now on the worktable, it is evident that it was put in service a good bit and the thick, uneven cake in the chamber shows this.  The lava over the rim is also thick revealing the signs of Rex’s stummel thumping practice as he would flip the Canadian over in his hand and thump it on a nearby tree to dislodge the ashes.  I take a few pictures below focusing in this area.  The rim’s fore section is nicked and chipped from this.  The second picture is looking at the back side of the bowl and the darkened area over the rim which was most likely how Rex lit his pipe.  Both pictures reveal the grime covering the stummel in need of cleaning.  The short stem of the Canadian reveals deep oxidation in the vulcanite and bite compressions on the upper- and lower-bit areas.With the initial assessment of the pipe’s condition completed, I begin the restoration by adding the stem to a soak of Before & After Deoxidizer to begin addressing the deep oxidation in the stem.  I don’t believe that the soak will fully remove the oxidation, but this is a start in the right direction.  The first picture below shows the La Strada on the far right after the communal activity of cleaning the airways before putting the stems into the soak.  Using pipe cleaners wetted with isopropyl 95%, I ream out the oils collected in the airways.  I not only am cleaning the airway but sparing the B & A Deoxidizer bath from undo contamination!  The stuff is expensive, and I want it to stretch as long as possible!  After cleaning the airway, I place the La Strada’s stem in the bath for several hours. After some hours, I fish the stem out of the bath and drain the excess Deoxidizer back into the bath.  I then use a cotton pad wetted with isopropyl 95% to wipe the stem down removing the raised oxidation resulting from the soak.  I also clear out the airway of fluid and clean it again with pipe cleaners wetted with isopropyl 95%.  As expected, my naked eye still detects the dark green evidence of residual oxidation in the stem – the pictures do not pick it up.  For now, to start the stem revitalization, I coat the surface with paraffin oil (a mineral oil) and put the stem aside to absorb the oil and dry. Now, looking to the Canadian stummel, I take a close-up of the chamber area showing the thick carbon cake. To address this, I start by reaming the chamber with the Pipnet Reaming Kit starting with the smallest of the 4 blade heads available.  After putting down paper towel to help in cleaning, I go to work.  Reaming the chamber not only cleans and gives the chamber a fresh start, but it allows me to see the briar underneath the cake to identify any potential burning issues with the chamber. I use 3 blade heads to ream the chamber then I shift to using the Savinelli Fitsall Tool to further scrape the chamber wall and to reach down to the floor of the chamber. After this, I sand the chamber using 240 grade paper wrapped around a Sharpie Pen to give me reach and leverage as I sand.  Sanding removes the final carbon cake hold outs and helps smooth the chamber surface.  The second picture shows the full arsenal of tools used to address the chamber reaming. After I wipe the carbon dust with a cotton pad wetted with isopropyl 95% to clean, I give the chamber an inspection.  About 2/3s down into the chamber there are evidences of some heat cracking which I don’t believe are serious enough to address with more than providing a new protective layer on the chamber wall.  I’ll do this later with a coating of either pipe mud or using a mixture made from activated charcoal and yogurt (or sour cream).  I take two pictures, the first with an open aperture to see more clearly the cracking.  Below the cracking, a small reaming ‘shelf’ has developed from too much forced pressure from the reaming tool.  I’ll work on smoothing that out with sanding aiming for a uniformed chamber contour. Next, to address the grime and oils on the Canadian bowl and long shank and to work on the lava flow on the rim, I first take a few pictures going ‘around the horn’ showing the starting condition. Next, I start by using undiluted Murphy’s Soap with a cotton pad and scrub the surface.  I also use a Winchester pocketknife to carefully scrape caking on the rim.  A brass wire brush also helps in this effort on the rim which helps clean but does not add to the rim erosion.  I start with the scrubbing using the Murphy’s Soap and work through scrubbing the smooth surface and scraping and brushing with the brass wire brush the rim area.I do an initial rinsing of the soap in the sink, and then immediately dive into cleaning the internals using pipe cleaners and cotton buds dipped in alcohol as well as the full range of long shank brushes reaching through the long Canadian airway.  I also excavate much oil grime and tars from the mortise and reaching into the airway using a dental spatula.  I then take the stummel to the sink, and using warm water, I rinse the stummel again and use dish soap and warm water with the shank brushes to continue cleaning the airway.  This picture shows the conclusion of the carnage!After completing the cleaning, I inspect the external surface and am glad to find no large fills or holes revealed after the cleaning.  I like the potential of this briar to come out well.  But I do detect one more problem to add to the list. Looking closely at the distinctive vertical grain pattern running upward from the heel just to the right of the shank, I detect a crack.  At first, I think that it may simply be a ‘gap’ between the grain lines, but the more I look at it, I believe it’s a crack that needs to be addressed or it will possibly grow along the grain line. I decide to address this problem straight away.  I first mark the terminus points on each side of the crack.  Using a sharp dental probe tool, I press an indentation at each of these points.  I need a magnifying glass to correctly identify the ends of the cracks.  I press these indentations at the end points for two reasons.  First, I can better see where I need to drill counter-creep holes with the Dremel, but also the probe holes create a guide hole or a starter to guide the Dremel’s drill bit which I’m applying freehand!  The first two pictures are of the lower guide hole and then the next two, the upper guide hole. Next, I mount a 1mm drill bit in the Dremel and with a steadier hand than usual, I drill both counter-creep holes freehand. The guide holes help a good bit.  The picture shows the holes drilled at each end.  Not bad!I use a thin CA glue to run along the crack to shore it up as well as in the counter-creep holes.  I use thin CA glue to encourage seepage into the crack to provide a better seizing of the crack.  I then sprinkle briar dust over the holes and the crack to encourage blending.Not long after, the crack patch has set up enough for me to continue my work on the stummel.  I turn my attention to the battered rim.  There is no question that it will be visiting the topping board.  I take another closeup of the fore section of the rim to show its raw, battered condition.  The second picture shows the deterioration of the front side progressed to the point it appears to be sloped forward.  The normal disposition of the plane of the rim on the Canadian will be close to parallel to the shank.  I’ll need to remove some of the rim to bring proper orientation back to the rim. I cover the chopping board with 240 grade paper, and I start rotating the inverted stummel over the paper.  I intentionally lean to the rear to help move the rim line toward level.  The next pictures show the progression of topping. At this point I’m satisfied with the progression.  The rim has evened out and even though there are residual chips on the front side of the rim, I believe the small ones can be dispatched with a slight beveling.  The larger ones remaining will need more attention.I switch to 600 grade paper on the chopping board and give the stummel a few more rotations to smooth the surface more.The smaller skinned-up area on the right should disappear with some gentle bevel sanding.  I’ll first apply some briar dust putty to the larger remaining chips on the left, and then sand these areas out.  One larger chip remains on the aft of the rim which will also receive a fill of briar dust putty.  It should work well.I use a plastic disc to serve as my mixing pallet and I also put down some strips of scotch tape to help with the cleanup.  I mix some briar dust with regular CA glue.  I first put a small mound of briar dust on the pallet and then add a small puddle of CA glue next to it.  I gradually draw the briar dust into the CA glue until it thickens enough to trowel to the chipped areas using a toothpick.  The pictures show the progress. With the patches on the rim curing, I turn to the La Strada Scenario’s short Canadian stem.  When the stem came out of the Before & After Deoxidizer soak, I noted that I could still detect deep oxidation.  I need to address this, but first I will work on the tooth compression on the bit.  They aren’t severe.  First, I use a Bic lighter and paint the bit with the flame to heat the vulcanite.  When heated, the physics of the rubber expands with the heating and hopefully will lessen the severity of the compressions.  This works well, but I still need to sand.  I sand using 240 grade paper to work on the remaining tooth compressions and the residual oxidation.  I use a plastic disk I fabricated to sand against to avoid shouldering the stem facing.  I also use a flat needle file to sharpen the button definition.I widen the aperture on this picture to show the continued residual oxidation near the disk – more sanding needed.After using the file and 240 grade paper, I wet sand the stem using 600 grade paper then follow using 0000 steel wool. I like the progress.I’m on a roll with the stem.  Next, I wet sand using micromesh pads 1500 to 2400.  I follow by dry sanding with pads 3200 to 4000 and 6000 to 12000.  After each set of 3 pads, I apply a coat of Obsidian Oil to further rejuvenate the vulcanite stem.  I love the newly polished vulcanite pop! The briar dust patches filling out the chips on the rim are fully cured.  Using a flat needle file, I first work to file the excess patch material on the topside of the rim.  I file the excess briar dust patch down until close to the rim surface. When each of the three main patches are filed down vertically, I switch to filing the sides of each patch down close to the briar surface. I then take the stummel back to the topping board and light turn a few revolutions on 240 grade paper and then 600 grade.  This brings the patches down flush with the rim.Using 240 grade paper again, I create a soft bevel on the external rim lip.  This both shapes the patches and cleans up the smaller nicks on the circumference of the rim’s edge. I also do the same on the internal edge of the rim.Finally, I go over both the external and internal bevels with 600 grade paper to smooth and blend.  I like what I see!  This phase of the rim repair is complete.Next, I address the crack repair patch.  Again, I use a flat needle file to file the excess material down to the briar surface then follow with 240 and 600 grade papers. While I have the sandpaper handy, the front of the bowl has some skins and pits.  I quickly dispatch these using 240 and 600 grade papers. I follow the rough sanding by utilizing sanding sponges before the micromesh regimen.  I use a coarse, medium, and then light grade sanding sponge and sand the entire surface.  I’m careful around the nomenclature on the shank.  I like using the sanding sponges to clean the surface of minor imperfections, but they are not invasive.Turning now to the micromesh pad regimen, I wet sand using pads 1500 to 2400.  I follow by dry sanding with pads 3200 to 4000 and 6000 to 12000. Wow!  I’m liking the way this grain is coming out. I’ve come to a juncture and decision point.  The grain has come out beautifully and I like the rich honey brown tone of the briar.  Yet, the patches on the rim and for the crack repair stand out and to me, distracting.  The pictures below show this and for this reason, I decide to apply a darker hue to mask the repair work. The patches will not disappear totally, but the contrast will be minimized.  I like using Fiebing’s Dark Brown for this purpose.  As an aniline – alcohol-based dye, I can lighten it by wiping the stained surface with a cotton pad wetted with alcohol. After I assemble all the components for staining on my worktable, I warm the stummel using a hot air gun to expand the briar which enhances the reception of the dye pigment.  After the stummel is warm, I use a folded over pipe cleaner to apply the dye.  I apply the dye in swatches and then flame the aniline dye with a lit candle.  The alcohol combusts and sets the pigment in the grain.  After I methodically apply dye and flame the entire stummel, I repeat the process again assuring thorough coverage.  I set the stummel aside to rest through the night to allow the new dye to settle in.  And for me, I turn out the lights and call it a day. The next morning, the flamed stummel has had enough time to rest the new dye.  To ‘unwrap’ the stummel removing the crust, I mount a felt buffing wheel on to the Dremel, set it at the slowest possible speed and begin the methodical process of both removing the crust as well as polishing the briar with Tripoli compound. I stop to take a picture during the process to show the emerging briar grain after the staining process.  It’s amazing as I uncover the briar.  I’m pleased with the hue that I’m seeing. Not pictured above is that I changed the felt wheel to a cotton cloth buffing wheel, increased the speed of the Dremel to about 40% full power and when over the entire surface again with Tripoli compound.  Unlike with the felt wheel, with the cotton wheel I can reach into the crook of the shank and bowl to apply compound removing the crust.  I also fine tune the polishing using the cloth wheel – it brings out and sharpens the grain a step more.

Below, after completing the use of Tripoli compound, I wet a cotton pad with alcohol and I very lightly wipe the stummel.  This helps to blend the newly applied stain as well as lighten the finish a bit.Next, I rejoin the stem and stummel (after I took this picture!) and mount another cotton cloth wheel to the Dremel, maintaining the same 40% power setting and I apply Blue Diamond compound to both stem and stummel.  After completing this, I wipe the pipe down with a felt cloth to remove the compound dust before applying wax.Before applying wax, to provide the chamber with a starter layer to encourage the develop of a protective cake, I mix Bulgarian natural yogurt and activated charcoal to form a mixture which I apply to the chamber walls.  After I stick a pipe cleaner through the stem and the draft hole, to guard the airway from being blocked, I mix the yogurt and charcoal dust to a point where the mixture does not drip off the pipe nail tool as I hold a dollop of the mixture in the air.  I then apply and spread the mixture over the chamber evenly and fully.  Satisfied with the progress, I then put the mixture aside for it to set-up after a few hours. I then mount another cotton cloth wheel to the Dremel and apply a few coats of carnauba wax to the Canadian.  To finish the restoration, after applying the wax I give the pipe a hearty hand buffing with a microfiber cloth to raise the shine even more.

Before completing the restoration, I received an email back from Jim regarding his request that I ‘open’ the airway from the factory drilling to a .4mm width.  I did some reading and found a long enough .4mm drill bit to do the job.  Yet, while it would not be a difficult thing to open the straight Canadian airway, my concern was that I really could not change the airway construction of the small, Canadian stem.  I didn’t know whether this continued compression point of the air passage would defeat the physics advantage of opening the airway.  I left it to Jim to decide and what he decided to do was to first test the airway’s factory diameter and then open the airway himself to compare smoking experiences.  This sounded good to me and I hope to hear from Jim the results of this comparison.

What can I say?  Rex’s La Strada Scenario Canadian has been reborn and ready to begin a new lifetime!  The pipe required some attention, but I’m pleased with the masking of the patches on the rim and for the crack repair.  The grain is exceptional on this Italian La Strada.  The bowl showcases both flame and vertical grains with some bird’s eye on the heel.  The longer Canadian shank is also a great plus – a cooler smoking experience.  Jim saw the potential of this Canadian in the For “Pipe Dreamers” Only! collection and since he commissioned it and waited patiently for me to restore it, he has the first opportunity to purchase the La Strada Canadian from The Pipe Steward Store which benefits the Daughters of Bulgaria – helping women and girls who have been trafficked and sexually exploited.  I thank Dan Hartzler for donating this pipe for this purpose, and I thank you for joining me!

Bringing a Silver Match Toronto 115 Squat Lumberman Back to Life


Blog by Dal Stanton

I acquired this Silver Match Toronto from what I have called, the ‘French Lot of 50’.  It was on the French eBay auction block and I was fortunate enough to have the winning bid.  When the Lot arrived here in Bulgaria from France, I unpacked it, took pictures of each pipe and posted them in the ‘For “Pipe Dreamers” Only!’ collection for potential new stewards to find and commission.  I have already restored many treasures in this French Lot of 50 for new stewards.  Robert saw the Silver Match Toronto 115 Squat Lumberman in the ‘Dreamers Only!’ collection and wrote me about commissioning it.  In my interchanges with Robert describing the pipe and what was involved in commissioning it, he wrote this in response:

Dal I’m still interested in commissioning the lumberman pipe and I’m in no rush. My wife and I just had a baby he just turned 1 week old! I found out about your restorations on Facebook on The Gentleman’s Pipe Smoking Society.  Thanks for returning my email and I can’t wait to see the outcome of this little pipe!

I also found out that he and his family reside in central Virginia and when we were writing, it was getting ready to snow where he lived!  Well, that was last November, and it has taken this long for Robert’s Lumberman to work its way up the queue and I’m thankful for Robert’s patience! – As well as all the stewards who commission pipes which benefit the Daughters of Bulgaria – women and girls who have been trafficked and sexually exploited.  Here’s a picture of the original Lot of 50 in the ‘wild’ that I saw on eBay – the Lumberman it identified with an arrow.Now with Robert’s commission on my worktable, I take more pictures to show this smart squat Lumberman – I call it ‘Squat’ but the bowl is large and will handle a nice packing of one’s favorite blend. The nomenclature is stamped on the upper and lower sides of the oval stem.  On the upper is stamped ‘SILVER MATCH’ [over] ‘TORONTO’.  The lower shank bears what I’m assuming to be a shape number: ‘115’.  The stem is also stamped with a design which I assume is the flame of a match being depicted – my best guess at this point, but I’m not sure! The information about the Silver Match name is thin.  A quick search on the internet shows that Silver Match has been the name of tobacco accessories manufacturer since the 1800s, but mainly of lighters.  Silver Match lighters seem to be highly collectable with vintage lighters dating back to the 1800s but most listed that I saw have a French origin.  The only information in Pipedia refers to Silver Match in the list of British pipe makers as an inexpensive brand sold by Roy Tallent Ltd., and marked with the stamping SM (LINK).  This is confirmed in my copy of Wilczak & Colwell’s, ‘Who Made That Pipe?’ that Silver Match has English origins and manufactured by Roy Tallent LTD/S’Elite LTD – both of which seem more to be in the accessories market than focusing on the manufacturing of pipes.  Pipephil.eu (LINK) brings these two together in the following panel.  It pictures pipes distributed by the famous lighter brand, Silver Match, but shows the two different stem stampings that may indicate either French or British manufacturing – the flame (French) and the SM (England).  If this is correct, the Silver Match Toronto 115 has a French origin, but I found no other information to corroborate this.  Arriving from France in my ‘French Lot of 50’ is anecdotal evidence perhaps supporting this.I’m calling this Silver Match a ‘Squat’ Lumberman because he meets all the qualifications of his place in the Canadian family with the oval shank, but he’s on the shorter side but I’m impressed with the nice ample bowl. I did look at both French and British made shape charts to see if I could discover a lead on who produced the Silver Match but found no matches with 115 that provided this information.

I can see some nice briar underneath the thick layer of grime over the briar surface, but I see one large fill that will need attention on the lower shank near the shape number.  The cake is thick in the chamber with corresponding lava covering the rim.  The stem has oxidation and the button is chipped and will need to be rebuilt.  With this inventory of the challenges this Silver Match Toronto Lumberman faces, I start the restoration by adding the oxidized stem to a soak of Before & After Deoxidizer along with other pipes in the queue.  I first clean the airway with a pipe cleaner wetted with isopropyl 95%. After several hours I fish the Silver Match stem out of the Deoxidizer and use a cotton pad wetted with alcohol to wipe off the raised oxidation. I also run another pipe cleaner wetted with isopropyl 95% through the stem to clean the Deoxidizer remaining in the airway.The Before & After Deoxidizer does a good job and it preserves the white in the Silver Match stem stamp logo – I still can’t figure out for sure what it’s depicting!  I follow by applying paraffin oil to the stem to begin the rejuvenation process.  I put the stem aside to dry and absorb the oil. Next, I address the very thick cake in the chamber.  The chamber is almost closed off as the cake angles down the chamber.  Using the Pipnet Reaming Kit, starting with the smallest blade head, I use 2 blades of the 4 available to me.  I follow the reaming by using the Savinelli Fitsall Tool to further scrape and clean out the carbon build-up.  Finally, I sand the chamber after wrapping a piece of 240 grade paper around a sharpie pen to give me reach and leverage.  To remove the carbon dust, I wipe the chamber with a cotton pad wetted with isopropyl 95%. After the cleaning, I inspect the chamber and it doesn’t have any cracks and fissures from heating damage.  It looks good!Next, I continue the cleaning by using undiluted Murphy’s Soap on the external surface using a cotton pad to scrub.  I also use a Winchester blade to scrape the rim addressing the thick lava you can see in the picture above. I also use a brass wire brush on the rim which doesn’t damage the briar.  After being in India, I learned about some of Jeff Laug’s (Steve’s brother) cleaning techniques and I decide to employ some of them.  After cleaning the stummel with Murphy’s, I take the stummel to the sink and clean the external surface with a bristled toothbrush with regular dish soap – the kind that is anti-oil.  I also use shank brushes to clean the mortise with the dish soap and warm water. After rinsing well, I dry the stummel with a cloth.  It came out well.As I observed earlier, there is a very large fill on the underside of the shank.  As expected, the cleaning of the stummel softens the old fill material and most of it fell out with the cleaning.  Using a sharp dental probe, I continued to excavate the material from the hole to clean it.Addressing the internals, I now use cotton buds, pipe cleaners, shank brushes and a dental spatula to scrape the mortise wall.  Using my tools to clean takes a bit of effort, but after some time, the buds started coming out lighter.  Later I will give the internals a further cleaning using a kosher salt and alcohol soak.Next, I patch the huge crater on the shank.  After I make sure all the old fill material has been removed, I clean the hole with alcohol. In the recent trip to India I discovered that there was some mild controversy around my method for filling holes using a putty created by mixing CA glue and briar dust.  Both Steve and Paresh said that they could not duplicate what I’ve been doing for some time – mixing the two components and creating a putty that remained supple.  What they experienced was the CA glue instantaneously solidifying when it touched the briar dust.  We discussed many different possible factors that would cause this difference in results – elevation, kind of glue, etc.  Another possible difference I suggested was that when I used an index card as a mixing platform, I would first cover the card with a strip of packing tape so that the glue would not be absorbed into the paper – which may, if it did absorb, cause the CA to solidify more rapidly.  Both Steve and Paresh were mixing on an index card surface without the tape.  I don’t know if they’ve had better results yet!  I decide to use a plastic lid as my new mixing platform.  You can see that I also put some scotch tape down so that I can clean easily.  I place briar dust on the tape and add BSI Extra Thick Max-Cure CA glue.I gradually pull briar dust into the puddle of CA glue and mix it with a toothpick.  I don’t overwhelm the glue with a lot of briar dust but gradually mix more in.As you can see, the CA is not solidifying as I add more.When the resulting mixture thickens to that of molasses, I use the toothpick and trowel the putty to the shank and fill the huge hole.  After filled, I put the stummel aside to allow the briar dust putty to cure.With the hour becoming late, I further advance the internal cleaning with a kosher salt and alcohol soak.  The patch on the shank has set up sufficiently.  I fashion a ‘mortise wick’ using a cotton ball. I stretch and twist the cotton until it creates a wick that will serve to draw out the tars and oils from the mortise.  I stuff the wick down the mortise with the help of a stiff wire.  After placing the stummel in a egg carton for stability, I fill the bowl with kosher salt which doesn’t leave an aftertaste as does iodized salt.  I then add isopropyl 95% to the bowl until it surfaces over the salt.  After a few minutes, the alcohol absorbs, and I top off with some additional alcohol and then put the stummel aside to soak through the night.   The next morning, I see what I was hoping to see.  The salt has soiled and after I draw out the wick it shows that it has continued the internal cleaning process of drawing out the tars and oils. After thumping and dumping the expended salt in the waste, I wipe the bowl with a paper towel and blow through the mortise to remove the salt crystals.I follow with a pipe cleaner and cotton bud wetted with isopropyl 95% to clean residue left behind after the soak.  I find that the internals are clean and refreshed for the new steward.  I move on!The crater fill on the lower side of the Lumberman shank has cured, and I begin the process of removing the excess briar putty using a flat needle file.  I file the mound down almost to the briar surface and then I switch to sanding with 240 grade paper to bring the patch flush with the briar surface. As is often the case, from the picture above, you can see the air pockets left in the sanded patch material.  To blend this, I touch up the patch with a dye stick after sanding the patch further using 600 grade paper.Turning now to the rim, the front and sides of the rounded rim have been skinned up a good bit which the following two pictures show. I use 240 grade paper on the rim and go with the rounded rim flow and sand out the roughened areas around the rim. I follow the rim sanding using sanding sponges over the entire stummel, including the rim.  I use a coarse sponge, followed by a medium sponge and finish with a fine sanding sponge.  The briar on this Silver Match Toronto is expressive and It’s coming out nicely with the sanding. After the sponge sanding, I identify a pit on the lower left side of the bowl. I decide to apply a clear CA glue patch to fill this pit.  After cleaning this area with alcohol, I blacken in the pit using a fine point Sharpie Pen then apply a drop of regular clear CA glue and set the stummel aside for the glue to cure. Not long after, the CA glue cures and I file the patch with a flat needle file followed by 240 and 600 grade papers. The result of this quick patch looks good.Waiting in the wings is the short stem of the Lumberman which sports a chipped button.  The button will need to be rebuilt using a mixture of activated charcoal powder and CA glue.I form an initial triangular insert from index card stock which fits into the slot of the button fully.  I had covered the inserted part with a layer of scotch tape to serve as a barrier to the patch material – to easily be able to remove the insert after the charcoal powder and CA mixture cures.  I then insert another triangular piece of card stock into the initial insert.  This serves to expand and tighten the insert.I open one capsule of activated charcoal dust on the plastic disc (also put a few strips of tape down for easier cleaning) and add BSI Maxi-Cure Extra Thick CA glue in a small puddle next to the charcoal powder and mix in gradually using the toothpick.  As with the briar dust putty, I draw charcoal powder into the CA glue until it reaches the viscosity of molasses and then trowel the putty to the stem to fill the missing button cavity. I trowel enough to fully over-coat the area.As hoped, after the charcoal patch sets up after a few minutes, with a bit of wiggling, the insert comes out leaving the slot and airway clear of the patch material.After several hours, the patch material has fully cured, and I go to work using a flat needle file.  I first work on clearing the excess patch material on the end of the stem.To more rapidly remove the mound of excess patch over the button I employ a small sanding drum mounted on the Dremel.  This removes the patch material very easily. I follow using the flat needle file to bring about the fine shaping of the button repair. I follow the filing and shaping of the button with 240 grade sanding paper to further smooth and shape.  I notice significant air bubbles being revealed by the sanding – ugh…Following the 240 paper, sanding with 600 grade paper and 0000 grade steel wool – upper and lower stem, brings out the air pockets even more distinctly. To address the significant presence of air pockets in this button repair, I first darken the pockets with a fine point Sharpie Pen then I paint thin CA glue over the button lip.  I put the stem aside for the CA to cure.Putting the stem aside for the time, I turn back to the stummel sanding it with the full regimen of micromesh pads.  Beginning with pads 1500 to 2400, I wet sand the stummel.  Following this, I dry sand using pads 3200 to 4000 and 6000 to 12000.  Wow!  The grain on this Silver Match Lumberman is nice.  You can tell that when the grain patterns in the briar are random, as in this stummel, it is usually a good indication that it was cut from the upper part of the burl which is called the ‘branch wood’ section where the branches of the briar shrub form.  This article I’ve found helpful in understanding better the nature of briar grain – Published in Pipes & Tobaccos, Fall 1999, GRAIN: The first of an infrequent series of articles concerning THE BRIAR PIPE By R. D. Field (See: LINK).  The grain that emerges through the micromesh process is very nice – the Silver Match Toronto is shaping up well. The thing that bothers me like a burr under a saddle is the huge crater fill on the underside of the shank. Even with a darkened stain to mask the fill, it will still be there.  Yet, the light briar surrounding it in the current state is too much contrast for me to swallow!  I come to a decision to stain the stummel a dark brown to provide as much blending as possible and to use the staining process to tease out in greater contrast of the grain. I assemble on the worktable all the needed components for applying stain to the stummel.  I will use Fiebing’s Dark Brown Leather Dye with the possibility of lightening the dye because it’s an aniline dye – alcohol based.  I can wipe it with a cotton pad wetted with alcohol to lighten the finish and blend it.  I first clean the surface using isopropyl 95% and a cotton pad and using a cork inserted into the shank as a handle, I heat the stummel with a hot air gun.  This expands the briar and helps the grain to be more receptive to the dye.  I then use a folded over pipe cleaner to apply dye in swatches and then I flame the wet dye using a lit candle.  This immediately combusts the alcohol in the dye and it sets the dye pigment into the surface.  I methodically apply dye to the surface and flame as I go.  I then set the newly dyed stummel aside to allow the dye to rest – I’ll let it sit through the night.  This helps setting the new stain so that it will not come off on the hands when the stummel is first fired up when it goes into service. With the stummel resting, I return to the patched button addressing the air pockets.  Unfortunately, I forgot to take pictures during this process, but the result is shown.  I use a flat file to remove the some of excess patch material and then gently sand with 240 grade paper and 600 paper.  I finish this phase using 0000 steel wool over the entire stem.  I’m not 100% satisfied with the button rebuild, but the stem is structurally ready to return to service.I move straightaway to using micromesh pads on the stem.  I begin wet sanding with pads 1500, 1800, and 2400 and follow with dry sanding with pads 3200, 3600, and 4000 and finish with pads 6000, 8000 and 12000.  Between each set of three I apply Obsidian Oil to the stem to help rejuvenate the vulcanite and the expected high-level gloss of the stem makes an appearance.  Nice.  I put the stem aside to dry and absorb the oil. The newly stained stummel rested through the night and it’s time to unwrap the stummel from the flamed crust residue revealing the grain below.  To do this I mount a new felt cloth buffing wheel to the Dremel and set the speed to the slowest possible to reduce the possibility of overheating with the friction.  I then apply Tripoli compound to the entire stummel.  I have been asked how long this process takes as I ‘plow off’ the crust and ‘clean’ the residue dye revealing the grain detail.  I timed it this time and the Tripoli compound application took me one hour and 10 minutes – yep, that long. When the help of my wife, she takes a picture of the process of removing the crust and revealing the hue of the newly stained briar underneath.  I’m pleased with the results.  The crater fill on the underside of the shank almost disappears as it blends with Fiebing’s Dark Brown Leather Dyed grain.  After I complete the application of Tripoli with the felt cloth wheel, I switch to a cotton cloth wheel, increase the speed to about 40% full power, and again apply Tripoli to the stummel.  I do this for two reasons.  First, with the cotton cloth wheel I’m able to reach into the crook of the bowl and shank which the felt cloth wheel cannot reach.  Secondly, I find that it sharpens the grain presentation as additional excess dye is taken away.  The result is almost like a luminescent effect. After applying the Tripoli, I give the stummel a gentle wipe with a cotton pad wetted with alcohol.  This lightens the hue a bit and helps blend the new dye.Next, I mount another cotton cloth buffing wheel and maintain speed at 40% and apply Blue Diamond compound, less coarse than Tripoli, to both stummel and stem.Next, I again detach the stem and I want to freshen the Silver Match ‘flame’ stamping.  It took me a while to figure out that was what it was – at least that’s what I think it is!  I apply white acrylic paint over the stamp and then gently wipe it off while still wet using the flat side of a toothpick. I use a cotton bud and the point of the toothpick to clean off the excess. The result is about 80% success.  The upper part of the flame wasn’t deep enough to catch the paint.  The result still looks good.After reuniting the stem and stummel, I mount another cotton cloth wheel to the Dremel, maintaining 40% full power, and apply carnauba wax to the entire pipe.  I give the pipe a few coats of wax then I give it a rigorous hand buffing with a microfiber cloth to raise the shine and complete the restoration of this nice looking pipe.

This Silver Match Toronto Squat Lumberman came out well.  The grain is striking with a smattering of swirls, waves, bird’s eye, and flame…, it’s an expressive piece of briar!  The darkened stain works great and masked the fill on the underside of the shank almost to perfection.  I’m pleased with the button rebuild, though I want to work more on reducing the air pockets in the process.  Overall, this stout Lumberman is ready for service.  Robert commissioned him and has the first opportunity to purchase this pipe from The Pipe Steward Store.  This pipe benefits the Daughters of Bulgaria – helping women and girls who have been trafficked and sexually exploited.  Thanks for joining me!

A Knute of Denmark Freehand – a Special Gift for My Son


Blog by Dal Stanton

This story begins in October of 2017 and concludes less than a week ago with the graduation of my son who received a master’s degree in counseling.  My wife and I have lived in Europe over 25 years and periodically we return to the US for several months from Bulgaria, to visit friends, family, and supporters of our work in Bulgaria.  It’s a great time renewing relationships and we travel a lot during these visits – often very tiring!  One of our favorite things to do as we travel (when we’re not flying over America from airport to airport) is to rent a car and drive off the interstates on the ‘Old Roads’ when we are visiting and speaking about Bulgaria.

On one such road trip, we were traveling from visiting our son (in St. Louis) and our daughter and her husband (in Nashville) and we were returning to home base near Atlanta, Georgia – to a little hamlet railroad stop called, Palmetto.  As often as possible when time allows, we break off from the interstates and cling to two lane highways that trace our path through small towns and villages.  Of course, I’m always looking for the antique and second-hand shops along the way to do pipe-picking!  We came across one such place in a small crossroads town of Alabama which was a great place to stop and rest and to search for pipe treasures!

I found 3 pipes that were candidates, but the one that received the lion’s share of my attention was the Knute of Denmark, a stout Freehand that had a beautiful balance of upper blasted briar and a large underside shank of smooth briar that encased the Danish nomenclature.   The bowl’s plateau was striking but the shank plateau facing sloping toward and tying in the fancy stem was frosting on an already nice-looking cake!  I was fully present in the moment of this exceptional find – a find that I would keep for myself and add the first freehand to my collection of vintage pipes.

I left the 3 at the front of the shop while I did a walk about through the shop.  While doing this, I was also researching the ‘Knute of Denmark’, the sole marks on the pipe.  I discovered that ‘Knute’ was a second of well-known Danish Freehand pipe maker and manufacturer, Karl Erik Ottendahl – this sweetened the pot considerably!

Dave’s Antiques was primarily a consignment shop and the desk person, perhaps it was Dave, had the number of the owner of the Knute and called him with my counter offer.  To my surprise and gratification, the owner accepted my offer.  The Knute Freehand joined me when my wife and I returned to Bulgaria and has waited patiently in my own personal “Help Me!” basket for his turn on the work table.  Here are some pictures of the Knute of Denmark I took while still in the US on that trip. Pipedia’s listing for Knute provided helpful information to appreciate more my newest acquisition and the Karl Erik name behind it:

Karl Erik Ottendahl

Knute of Denmark pipes are said to be made by Karl Erik, see his listing herein. Karl Erik Ottendahl was born in Aalborg in 1942, just a few miles from the very northernmost tip of Denmark. He began his career as a Lithographer as an apprentice in the craft at the age of 16. While working as an apprentice he began hand carving pipes as a hobby and to give as gifts to his more senior colleagues. He began his career making pipes for various labels in Denmark and the United States. Often, he would make the higher-grade pipes for a well-known brand that was known for their midrange or low-end pieces such as Wally Frank. While doing this he administered a factory of fifteen craftsmen. During this period, he did make some of his own handmade pipes, but he felt that the responsibility of managing the factory did not give him the freedom he wished he had.

Other brands confirmed to be from Karl Erik are: Champ of Denmark, HTL, Jobey Dansk, Knute, Golden Danish, Lars of Denmark, Larsen & Stigart (Copenhagen pipe shop), Shelburne, Sven Eghold and Wenhall (for Wenhall Pipes, New York), some Ben Wade and pipes marked IS and IIS.

One other paragraph from the Karl Erik article in Pipedia referenced above is noteworthy in understanding this pipe man who died in 2004:

As one of the few notable Danes Karl Erik Ottendahl dedicated himself to the needs of the normal pipe smoker with a normal income. In the end he was one of the last of this tier. He never made any pretense of the fact that his “hand mades” were prefabricated to a large extent on automated machines and only the last steps of fine-shaping and finishing were carefully made by hand. But he never employed a copy milling, so many KE pipes may look very similar but no two are identical. As well the bulk of the stems was supplied by Stanwell in a close-to-finished state. Stanwell also did the sand blasting for KE to a large extent.

I’m thankful for my family.  We’ve been spread out all over the world for many years, but we stay close.  My son, Josiah, is number 4 of our 5 children.  He’s pictured to the right of his baby sister and my wife, when we were in Nashville during our Christmas visit to the States last year.  Soon, we’ll be heading to the US again in May to join Josiah with other gathered family members as he graduates with a master’s degree in counseling from Covenant Seminary in St. Louis.  During his years in college and seminary, as a younger pipe man, he has enjoyed a bowl now and again.  He has gifted me with pipes that are special to me because they came from him AND they are very nice pipes as well after restoring them!  My first Peretti came from Josiah.  I have gifted all my kids, sons and daughters, with pipes that I’ve restored.  It gives me joy to pass pipes on which then become family heirlooms because ‘the ole man’ restored them.

I had been thinking for some time which pipe I could give to Josiah commemorating this great milestone accomplishment in his life.  The Knute of Denmark waiting for restoration came to mind.  Several weeks ago, when Josiah and I were Face Timing, he in St. Louis and I in Sofia, I asked him if he would like this Freehand as a graduation present?  His response did not take long!  I have viewed that Knute somewhat as a ‘Pearl of Great Price’ – looking forward to restoring it and recommissioning it into my collection and service.  Yet, for Josiah to have it to commemorate his graduation is something that will always be important.  When he goes through the ritual of taking the pipe from the rack, methodically packing the bowl with his favorite blend, lighting and reflecting upon life and faith – he will remember his accomplishment as well as how proud his family is of him.

With Josiah’s master’s graduation present now on my worktable, I look more closely at the pipe itself to assess its needs and issues.  The narrowing chamber has thick cake.  The attractive squared plateau is covered with lava flow and there is much dirt and grime lodged in the valleys between the ridges.  The sandblasted stummel is beautiful, but is also covered with grime, but I see no problems with the briar.  The same observation of much needed cleaning is also true for the shank facing plateau. The lower side with the smooth briar is blotched because the finish seems thin and uneven.  I also detect a few nicks where it looks like it was knocked on the edge of something – just to the lower right of the Knute of Denmark stamping.  The fancy stem has some oxidation and tooth chatter and compressions show on the stem bit.  I take a few fresh pictures to look more closely at the plateau and the smooth briar underside.  I begin the restoration of the Knute of Denmark by using a pipe cleaner wetted with isopropyl 95% and cleaning the fancy stem’s airway.  I then add the stem to a soak of Before & After Deoxidizer along with other pipes in the queue. After several hours soaking, I fish out the fancy stem and run another pipe cleaner wetted with isopropyl 95% and clear the airway of the Deoxidizer.  I also use cotton pads wetted with alcohol and wipe off the raised oxidation.  The Deoxidizer does a great job.  The fancy stem looks good.To start the process of rejuvenating the vulcanite stem, I wipe it down with paraffin oil, a mineral oil, and set is aside to absorb and dry.Looking now at the Freehand stummel, I use the Pipnet Reaming Kit and start removing the thick cake in the chamber.  I put down paper towel to catch the excavated carbon. Starting with the smallest blade head I begin reaming the chamber. Wow, the carbon cake is as hard as a brick!  I’m careful not to force the blade head too much but allow the metal blades to crush the carbon cake gradually as I rotate the handle.  I take a picture at the starting point and then about half way down the chamber that shows how the chamber has narrowed over time. I finally break through to the floor of the chamber and I’m careful not to over ream – to continue forcing the blade downwardly which would begin to damage the briar.  I continue with the next two blade heads, using 3 of the four available in the kit.I then switch to the Savinelli Fitsall Tool – the name of this tool is apropos, as it not only scrapes the chamber walls further but also reaches down and works around the draft hole – removing cake that is hard to reach.To clean further I also sand the chamber using 240 grade paper which I wrap around a Sharpie Pen using it as a dowel rod.  With this configuration I’m able to reach down into the huge chamber cavity and sand with some leverage.  This does a great job cleaning the chamber and removing the last vestiges of cake.Finally, I wipe the chamber with a cotton pad wetted with isopropyl 95% to remove the carbon dust left behind.  I take a picture of the pile of carbon cake removed from the chamber and the full arsenal used.After the reaming, I inspect the chamber and it shows no problems with heating cracks or fissures.  I move on!I’m anxious to see how the external blasted surface cleans up as well as the smooth briar – will the cleaning remove the thin finish?  The plateaus are full of grime as well.  I use undiluted Murphy’s Oil Soap on a cotton pad to begin the scrubbing.  I use a bristled tooth brush as well on the blasted surface and the plateaus.  To help clean the lava on the rim plateau I also employ a brass wire brush that will not damage the briar.  The cleaning did well. The rim plateau cleaned up but also lightened in the process – not unexpected.  The rest of the blasted stummel looks good. The picture below shows the blotch of old, thin finish.  The cleaning with Murphy’s did not remove it.  To clean it off and give the smooth briar under-panel a cleaned surface, I use a cotton pad wetted with alcohol to do the job.  I wipe it and it comes off.  The surface looks good now. With the external briar surface cleaned, I now start working on the internals.  Using pipe cleaners and cotton buds I go to work…, and I work!  The internals are very dirty and there seems to be no end to the cotton buds coming out looking like nothing was happening.  I also use a smaller, dental spoon to reach into the mortise to scrape the tars and oils which have accumulated on the internal briar surface.  I continue until the hour of the night is too late and I decide to change gears.Before going to bed I continue the cleaning effort on the internals by using a kosher salt and alcohol soak.  To do this I first create a cotton mortise wick by pulling and twisting a cotton ball and then stuffing it down the airway with the help of a stiff hanger wire.  I then fill the ample bowl with kosher salt and place it securely in an egg crate.  Then, using a large eye dropper, I fill the internal chamber with isopropyl 95% until it surfaces over the salt in the chamber.  After waiting a few more minutes, I top off the alcohol once more and turn out the lights!  Hopefully, through the night progress will be made as the cotton wick and salt draw the tars and oils from the internal briar. The next morning, the cotton wick was very soiled showing that progress was made through the night.  I remove the soiled and expended salt from the chamber to the waste and clean the remaining salt crystals using paper towels and blowing though the mortise. I follow with more pipe cleaners and cotton buds wetted with isopropyl 95% and at first, I was worried that I still had a ways to go!  But after a few times through, the cotton buds removed the remaining tars and oils drawn from the briar and started to emerge much lighter!  Success in hand, I move on.Looking at the external stummel, I have essentially 2 projects to consider, the sanding of smooth briar and color repair to both rim and shank plateaus.  After the cleaning process to the plateaus, the wood has lightened and there are bald spots that need to be colored to blend.  I decide to do this after sanding.  The large underside of the Freehand is beautiful and has a few very minor nicks. The other sanding needed is to clean up the internal chamber wall that rises to form the forward crest of the rim plateau.  This will clean up very nicely and should provide a striking contrast to the rough, rusticated plateau.  This ridge rise continues around the circumference of the upper chamber. I start by using a coarse 120 grade paper to work on mainly the gouges and scratches to the upper chamber wall where it appears that cleaning tools were a little too anxious!  This injury is primarily on the shorter rise on the back of the chamber (picture immediately above, to the left a bit).  After I work out these larger gouges, I switch to 240 grade paper and work it around the entire upper chamber area.  Then, I finalize the inner upper chamber with 470 then 600 grade papers.  I like it! Switching to the underside, but also including the upper chamber, I go directly to using micromesh pads by wet sanding with pads 1500 to 2400 followed by dry sanding with pads 3200 to 4000 then 6000 to 12000.  I’m careful to keep my thumb over the nomenclature stamping, Knute of Denmark on the underside.  Wow!  The smooth briar contrasts are taking shape and I like what I’m seeing. Now, the second project – repairing the briar coloration on the plateaus.  I take a few close ups of both the rim and shank facing plateaus.  I have been thinking a lot about my approach to this.  I’m satisfied with the condition of the color of the blasted surface – it has a classy looking weathered and rustic appearance with the dark stain that appears to have an oxblood or mahogany lean and is flecked with reds. I also take a closeup of the stummel surface to show what I’m seeing. I begin by cleaning each plateau with alcohol using a cotton bud – careful not to spread alcohol on the stummel surface.  Color matching is more of a dance or an artform rather than a science.  I use a cotton pad as a canvas and use different dye sticks to identify the best match for the darker overcoat color.  I have two brands of mahogany that are the two marks – the upper one is darker, and I like it better.  The cotton bud on the top is Fiebing’s Oxblood Leather Dye.  I like this for the undercoat.With a cotton bud I apply Fiebing’s Oxblood to both plateaus which serve as the undercoat. After waiting about 15 minutes to make sure that Oxblood was dry, I then use the Mahogany Dye Stick and go over the Oxblood application.  I do this for both plateaus. In the next picture it shows the Oxblood colored edge which is not the finished product!  I will address this.To help erase this edge line, as well as to lightly sand the plateaus to bring out the oxblood flecks, I use a 3200 grade micromesh pad and sand over the tops of the ridges of the rusticated plateaus.  This removes a bit of the darker overcoat and exposes the oxblood undercoat.  I also use the micromesh pad to reestablish the line of the smooth upper chamber briar helping to remove the line of oxblood.  I follow the 3200 grade pad and go through the remaining 5 pads to sand and polish the smooth upper chamber briar.  Lastly, I do a light wipe with a cotton pad wetted with alcohol to remove excess and blend the dyes on the plateaus.I like the results!  Both rim plateau and shank facing plateau look refreshed and emulate the flecking that is evident on the Knute stummel. With the plateaus completed, I condition the rest of the stummel using Before & After Restoration Balm aiming to bring the rest of the stummel into a harmonious alignment with the refreshed plateaus.  My hope and expectation are that it will deepen and darken the beautiful blasted surface.  It will be equally enriching to the smooth briar patches.  I take ‘before’ pictures to compare, but I doubt whether the pictures will detect the darkened tones.  We’ll see. I put a generous amount of the Balm on my fingers and work it into the blasted stummel surface, the rusticated plateaus and on the smooth briar patches.  I can immediately see the briar responding to the Balm.  Josiah is going to love this beautiful Karl Erik Knute Freehand!  After saturating the surface with the Balm, it gradually thickens to a wax-like viscosity as I work it in.  Finally, I place it on the pedestal to allow the Balm to do its thing as the briar absorbs it.  I take this picture during this period.  After about 15 or 20 minutes, I use a microfiber cloth to wipe off the excess Balm and buff the stummel rigorously making sure the excess balm has been removed from the nooks and crannies of the rustication and blasted surface.  I love it!  As hoped, the stummel’s enrichment with the Balm darkened it and both plateaus and stummel are closer in shade, but the plateaus, by design, just a wee bit darker.  Yes!The fancy stem is waiting in the wings.  The Before & After Deoxidizer did a great job removing the oxidation.  Now to address the tooth chatter and bites on the button.  The stem has a very slight bend to it to mark the orientation.  The upper bit has tooth chatter and a compression, but also long scratches along the length.  The Lower bit also has tooth chatter and compressions – the button is chewed as well.  When you freehand it with a Freehand you’re bound to see evidences of clamping. To begin to address these issues, I use the heating method to see if the compressions will lessen.  Using a Bic lighter, I paint the areas with the flame.  As the vulcanite heats, it expands, and the hope is that the compressions disappear or are much lessened.  I apply the flame on both sides, and it does make a difference in lessening the compressions.  I move on to using 240 grade paper to sand both the upper and lower sides.  I also use the flat needle file to freshen the button lips edges.  The compressions sand out nicely.  The pictures show the results with the upper and lower bit. Next, I wet sand the entire stem using 600 grade paper. I then buff the stem with 0000 steel wool.I see that the slot is not smooth, and I use rounded needle file to file the edges.Next, I apply the full regimen of micromesh pads to the stem.  I begin by wet sanding with pads 1500 to 2400 and then dry sanding with pads 3200 to 4000 and 6000 to 12000.  After each set of 3 pads, I apply a coat of Obsidian Oil to revitalize the vulcanite.  As expected, the Knute fancy stem now has that glossy shine – like new and better. I’m in the home stretch. I keep the stem and Freehand stummel separated for now as I apply Blue Diamond compound and wax.  It’s easier this way to manipulate the pieces.  I mount a cotton cloth buffing wheel on to the Dremel, set the speed at 40% of full power, and I apply Blue Diamond compound to both stummel and stem.  When finished, I buff both with a felt cloth to remove compound dust from the surfaces.  I use a bristled brush as well to make sure the rusticated and blasted areas are free of dust.  I use the felt cloth again.  I don’t usually have these action pictures, but with my wife’s help here are a few.Then I change buffing wheels on the Dremel, maintain the same speed, and apply a few coats of carnauba wax to the Knute stummel and stem.  I then hand buff the stummel and stem with a microfiber cloth to blend and collect any excess wax and raise the shine more.  Again my wife provides the picture and a good shot of The Pipe Steward workstation on the 10th floor of a formerly Communist apartment complex ‘block.’  All the tools of the trade!  I finish the restoration of the Karl Erik Knute, by rejoining the stem and stummel.After completing the Knute of Denmark, I slipped it into a black, pull string pipe sock and placed it in a Bulgarian ornate lidded wooden box to serve as the protector of the Knute of Denmark and the gift box for my son’s graduation gift.  When my wife and I flew to St. Louis from Bulgaria for the graduation ceremony, the pipe was safely stowed in my backpack.  Most of our family was able to gather from all over the United States to celebrate Josiah’s achievement.  Family is special – a gift from God to remind us of the way He created us – to be in loving and supportive relationships. Our family gathering around Josiah’s celebration was rich blessing for me and my wife since we live so far away.  Admittedly, often words fail to express the depths of a father’s pride for his son – for all his children and grandchildren.  They fail me now. During the ceremony we watched as Josiah was donned by his professors with his master’s degree hood.  Afterwards, we gathered together as a family in our hotel room where we enjoyed the precious moments and gifts were given.  Among them was the Knute of Denmark which met his new steward – a gift expressing the pride and love of a father for his son, and carrying a blessing of,  “Well done, son!”

Thanks for joining me!