Blog by Steve Laug
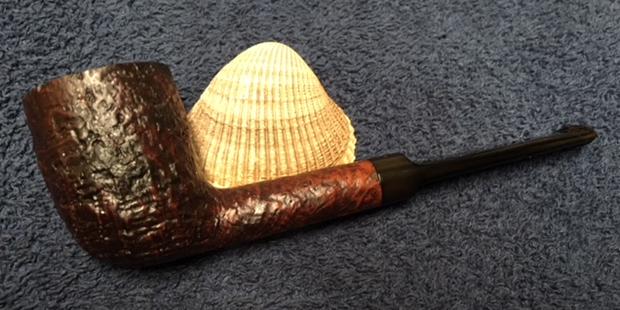
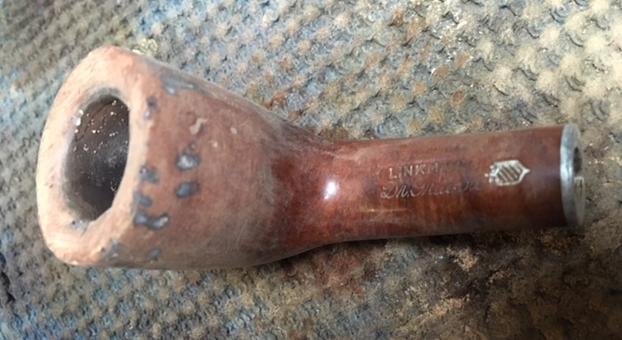
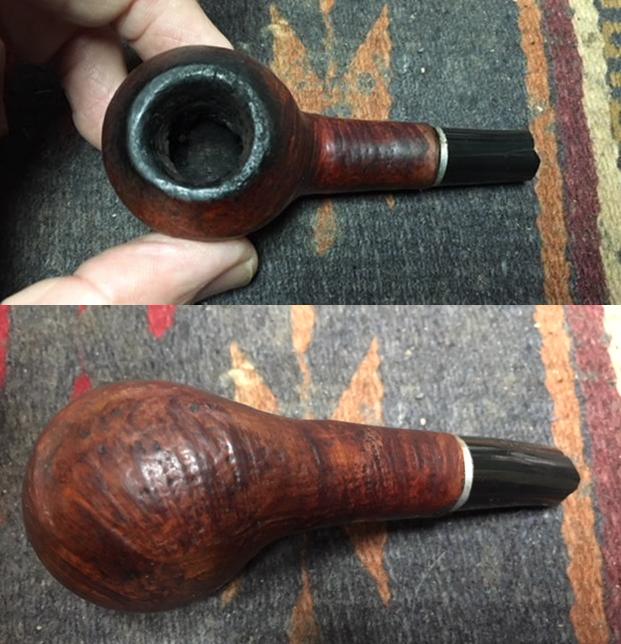
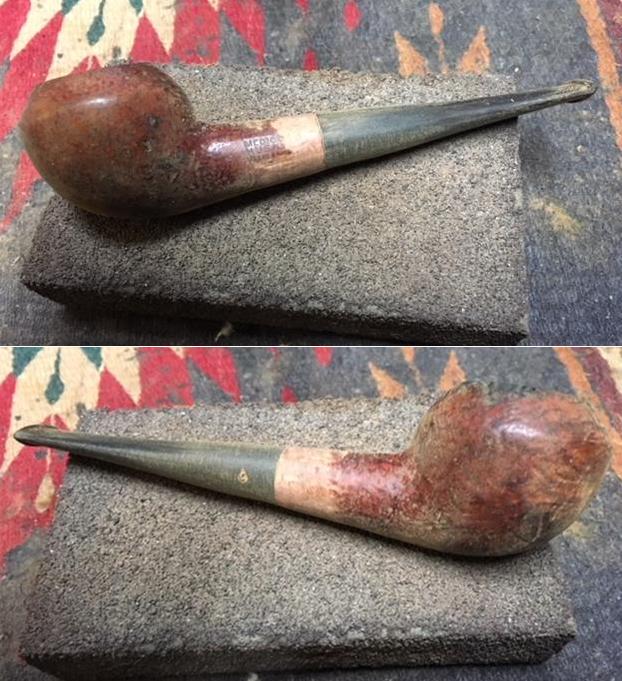
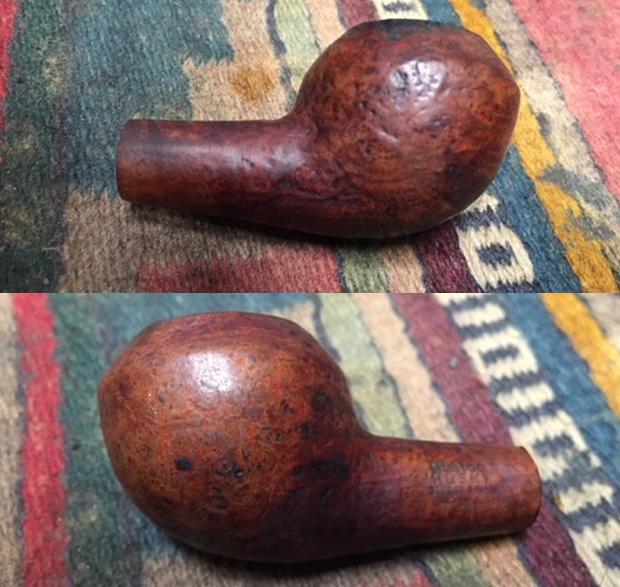
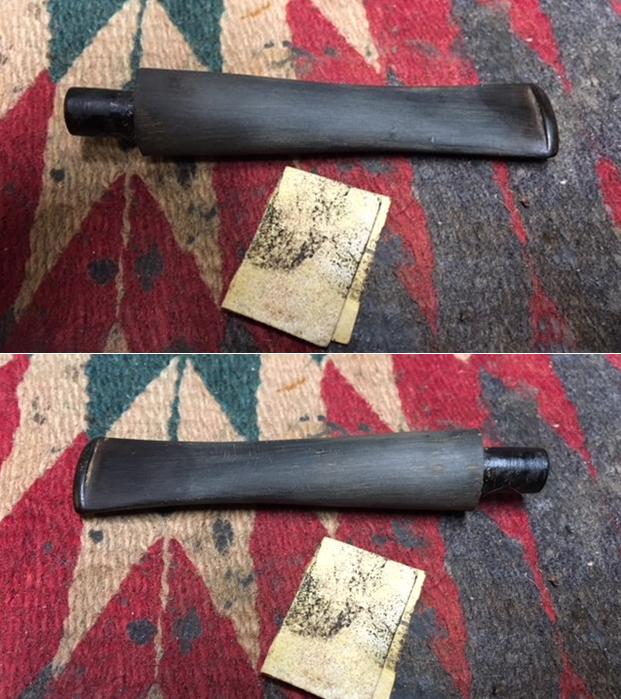
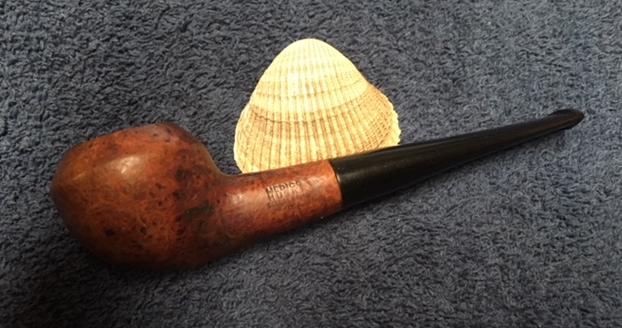
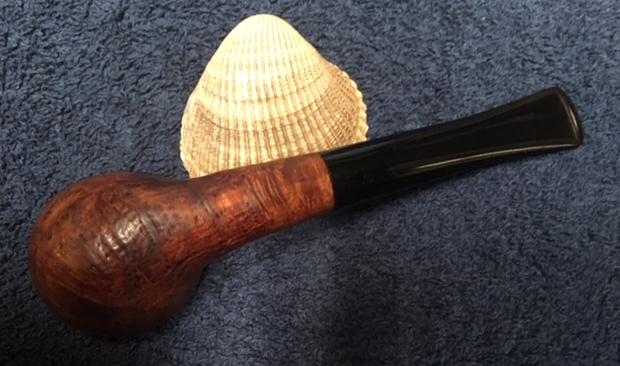
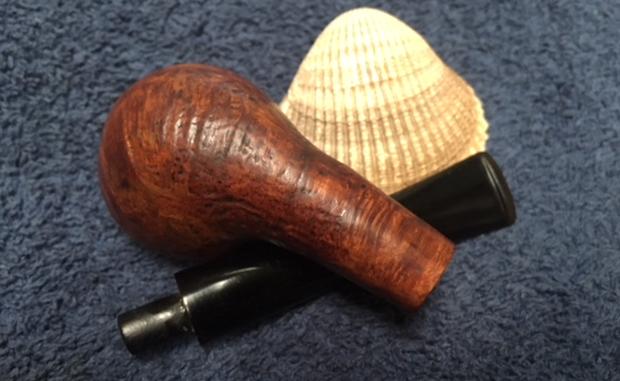
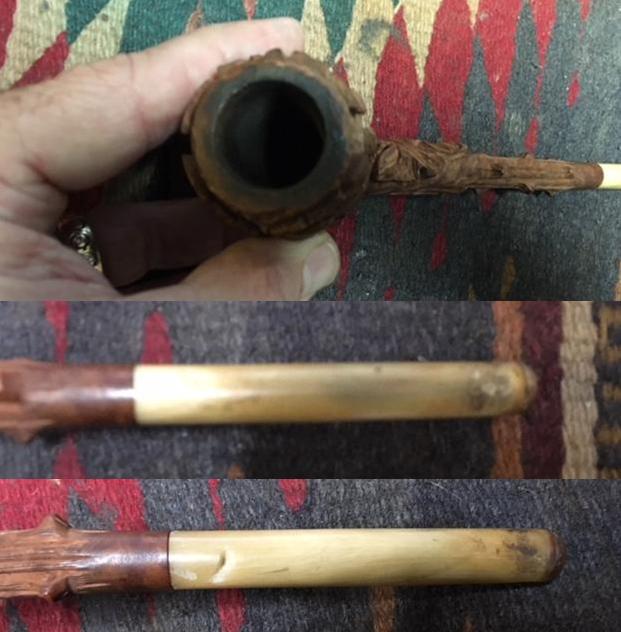
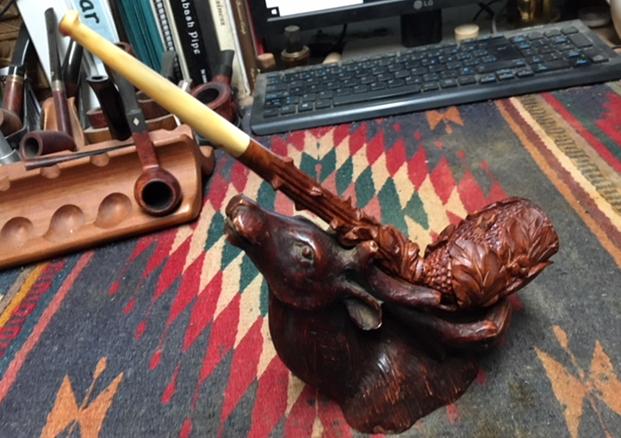
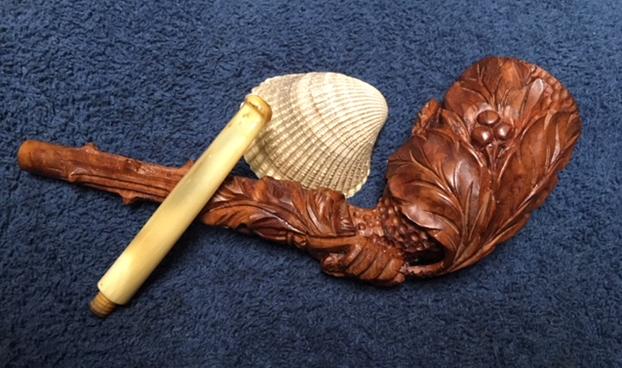
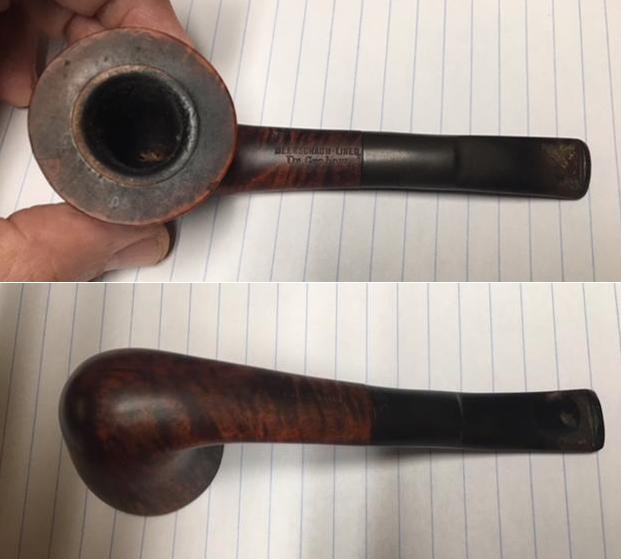
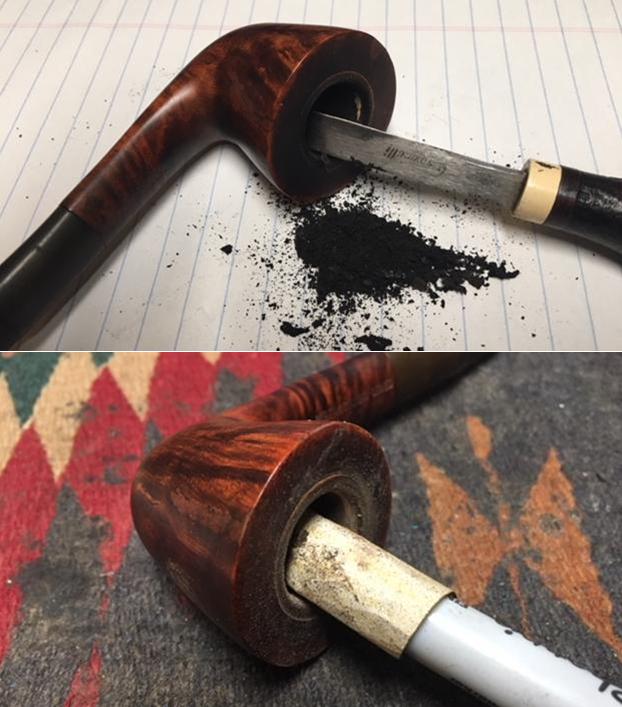
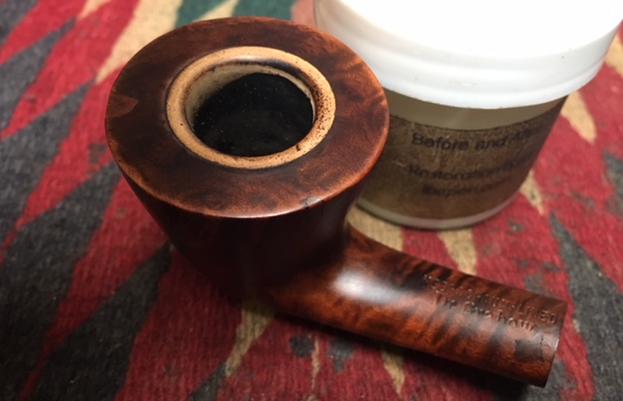
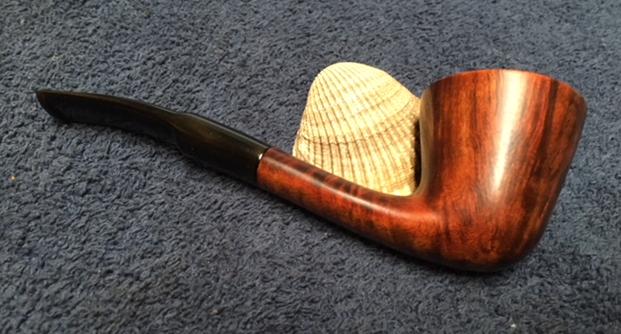
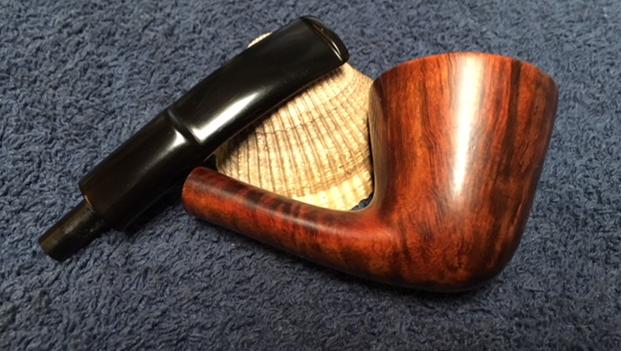
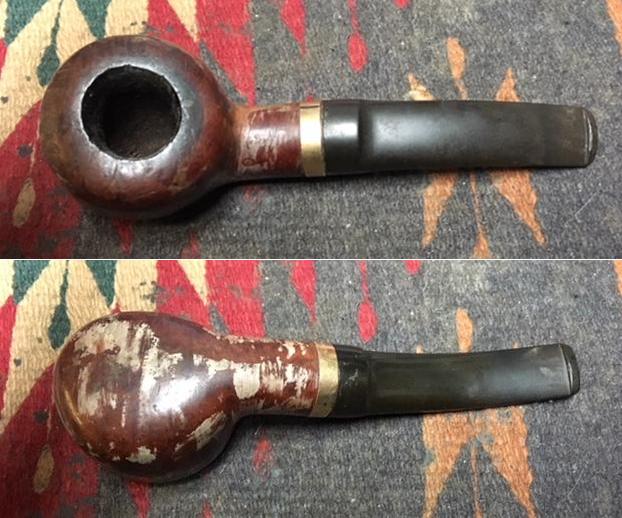
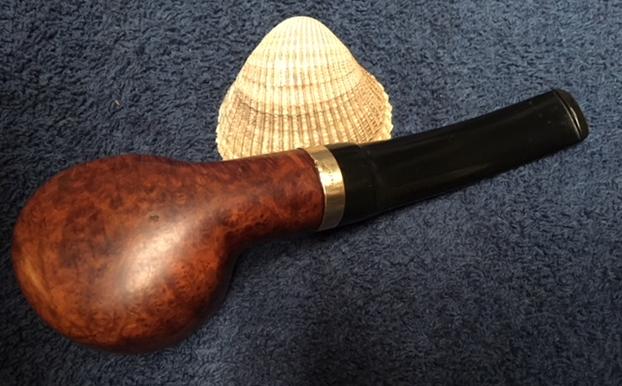
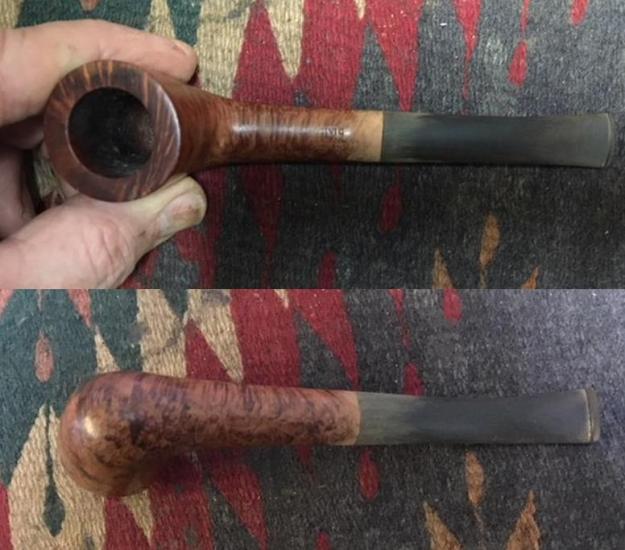
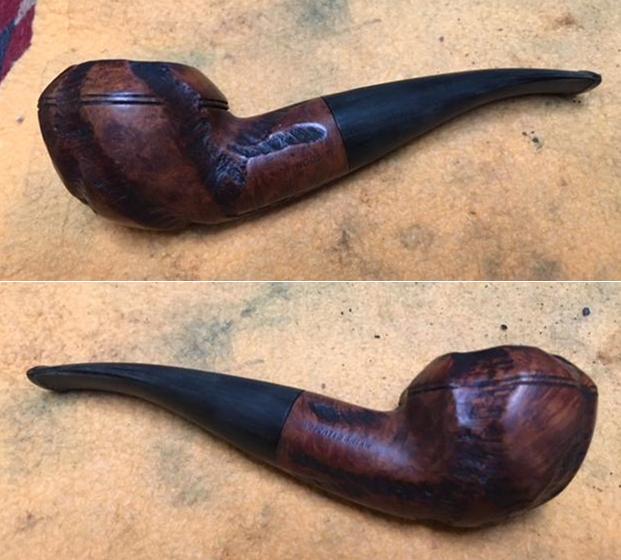
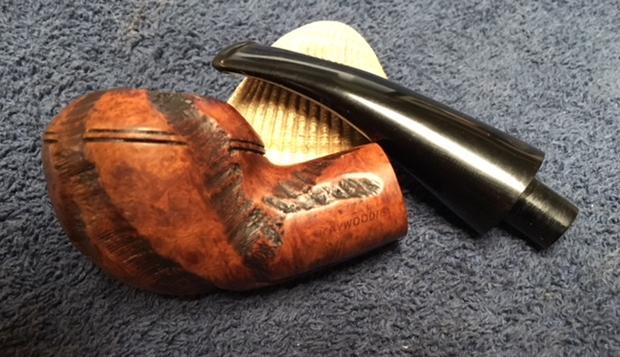
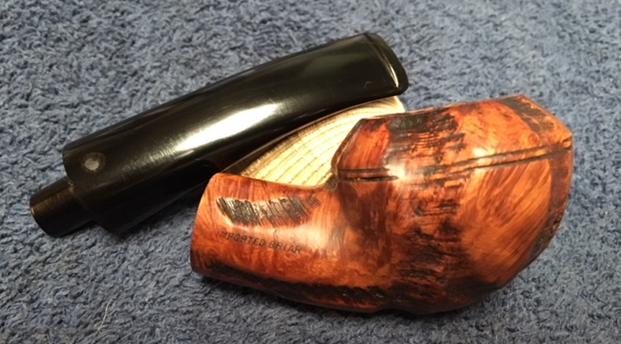
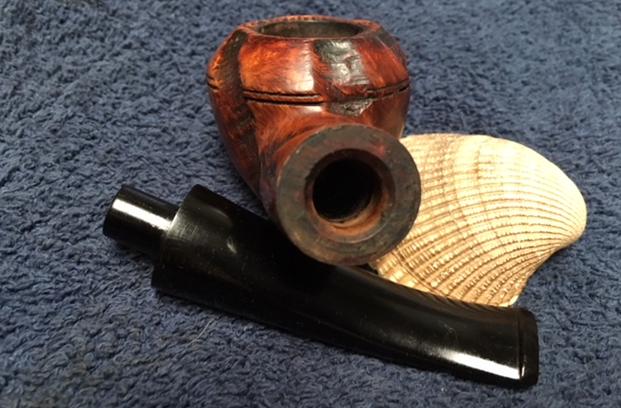
As I mentioned in my previous blog, Paresh, my friend in India reached out to me over Whatsapp to talk about a few more of his Grandfather’s pipes. He was confident in working on many of them but there were a few that he wanted me to try my hand on. His wife Abha would ream and clean them for me so I would be able to start with a relatively clean pipe. The third pipe was a sandblast Barling’s Make billiard with a vulcanite stem. It was another pipe that was in rough condition when Paresh and Abha started working on it. They reamed the thick hard cake with a KleenReem pipe reamer and clean up the exterior of the bowl with Murphy’s Oil Soap. They also cleaned the interior with alcohol, cotton swabs and pipe cleaners. The pipe was in very rough condition. There were cracks in the bowl on the front and the left side. The rim was beat up and out of round. It had been reamed with a knife sometime in its life. The stamping on the underside of the bowl and shank read Barling’s in an arch over Make over Ye Olde Wood. Next to that was the shape number 271. Further down the flattened shank it was stamped with an EL followed by Made In England, Fossil and T.V.F. The stem was lightly oxidized and had some tooth chatter and marks on both sides. It had a faint Barling’s cross logo on the top. I took photos of the pipe to show its condition when it arrived.
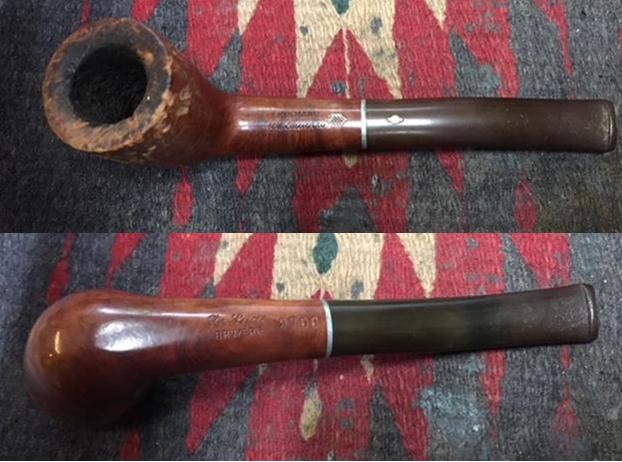
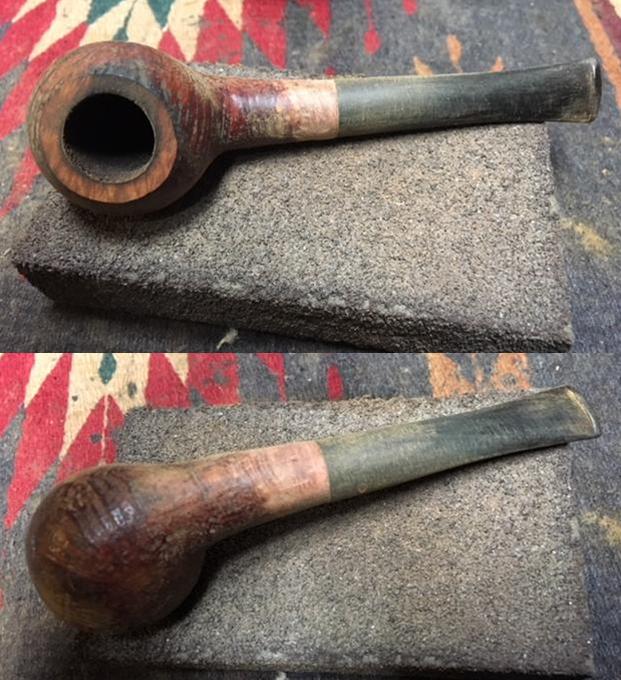
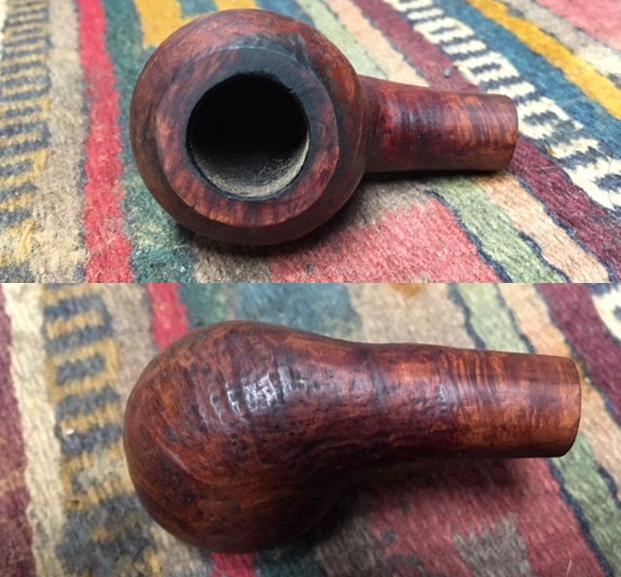
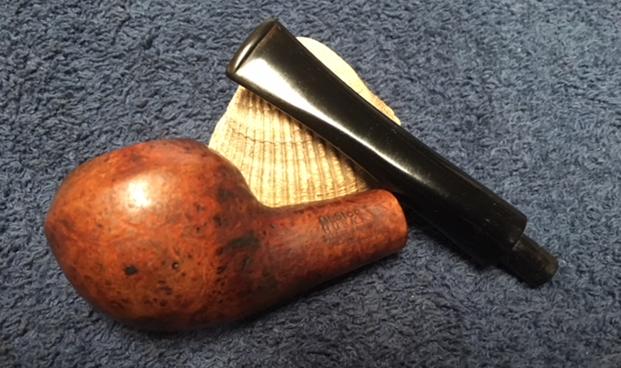
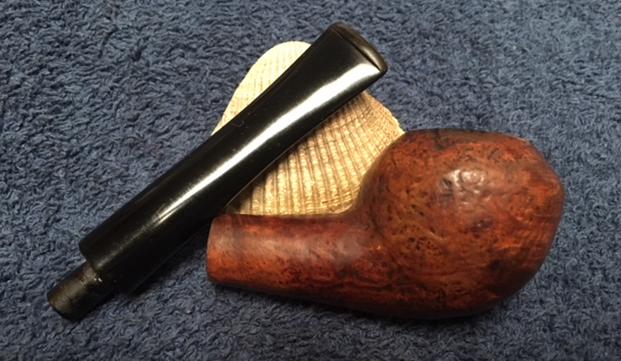
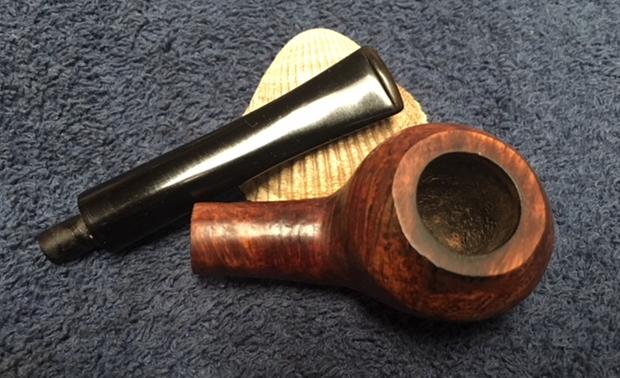
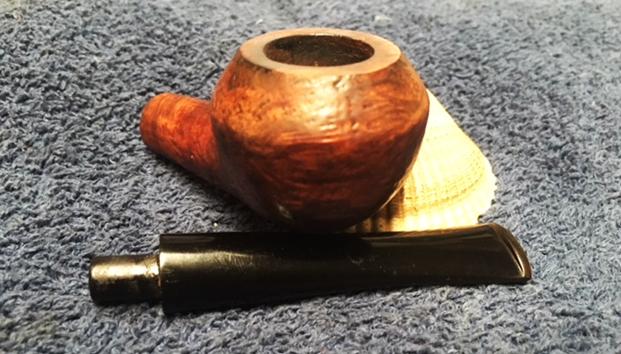
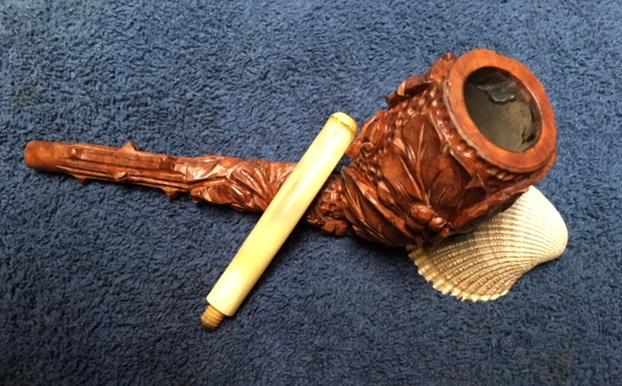
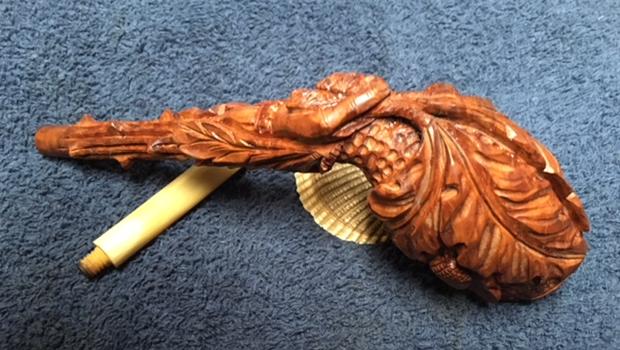
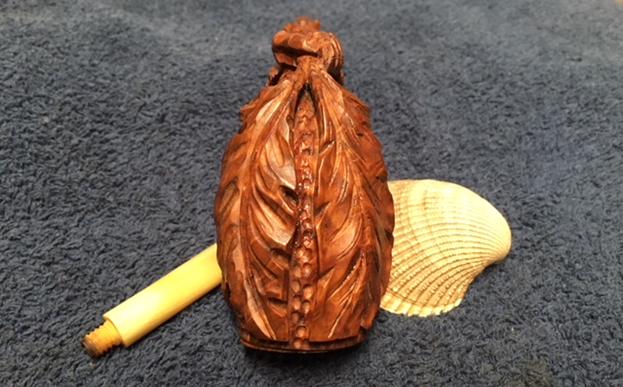
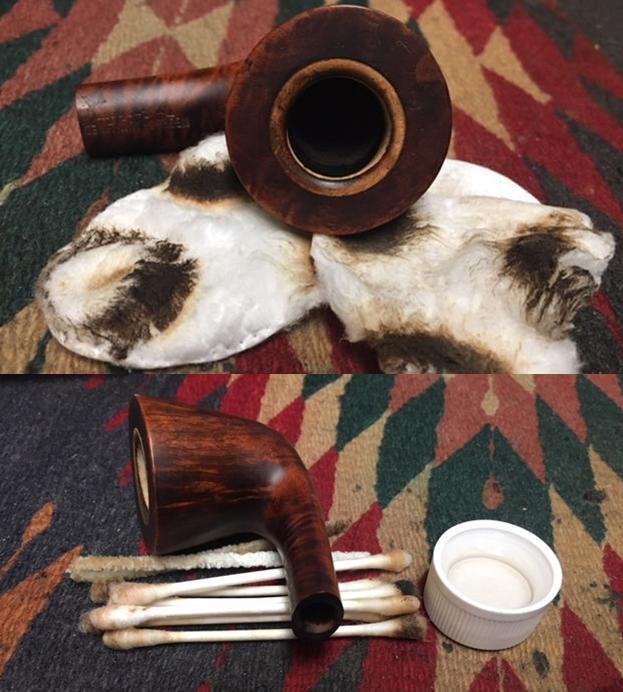
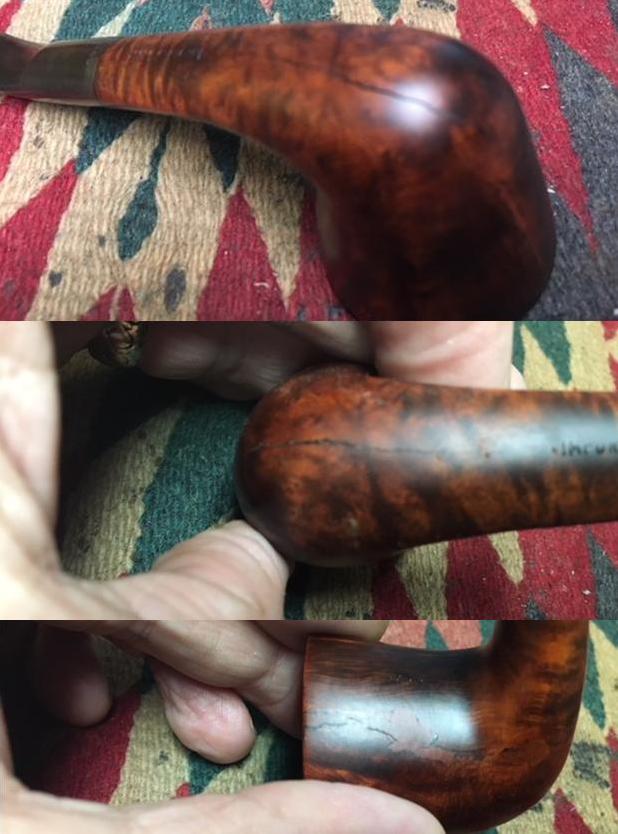
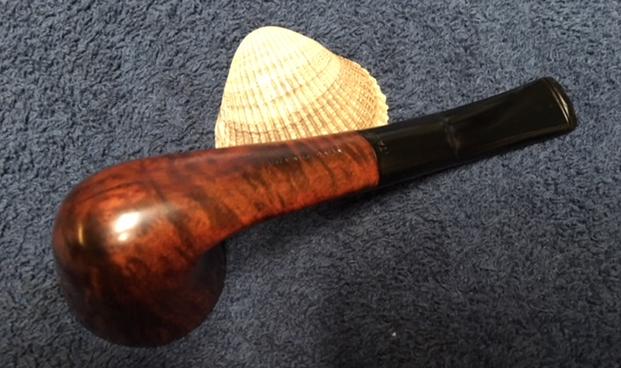
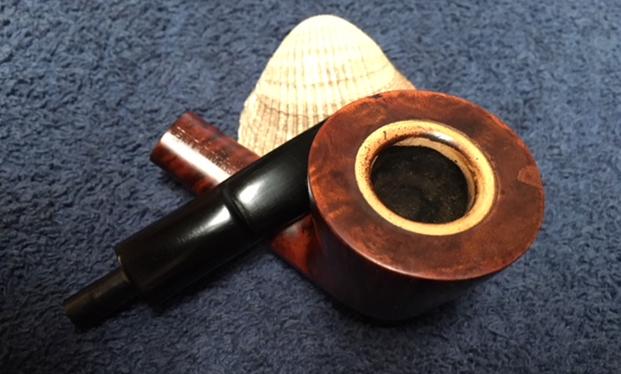
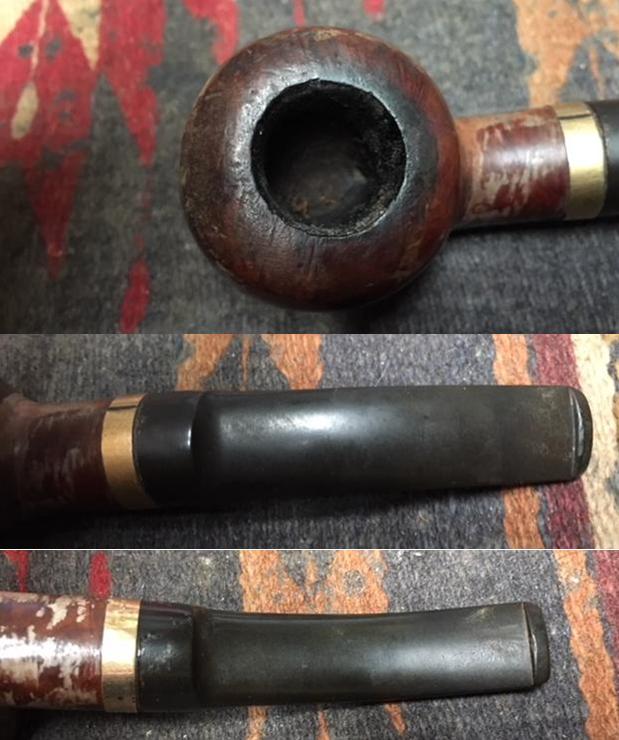
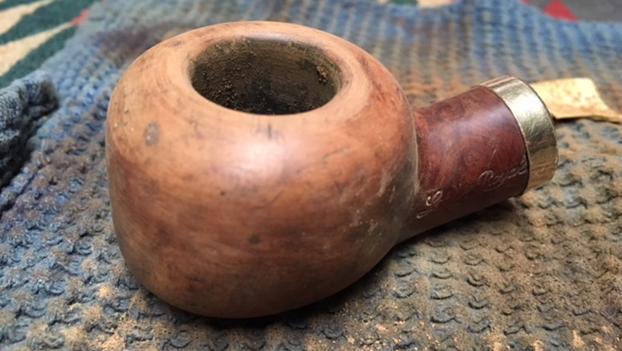
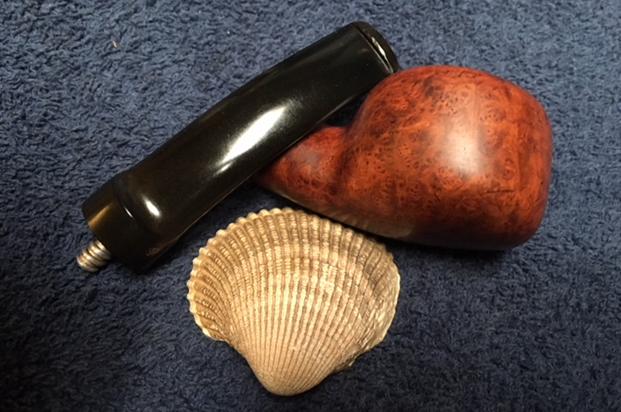
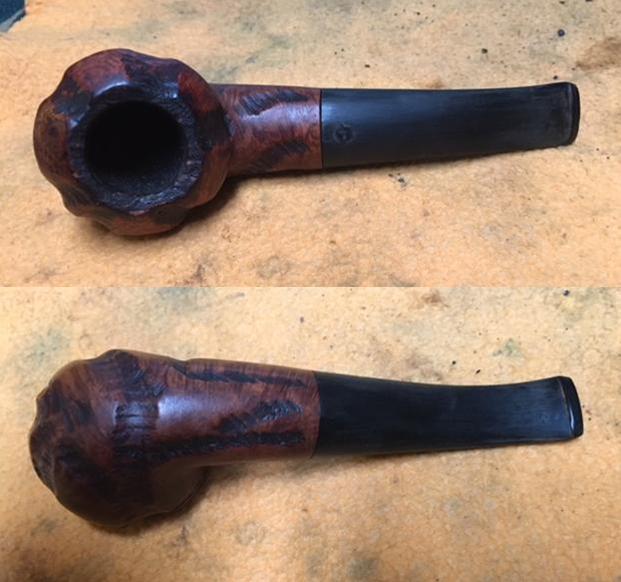
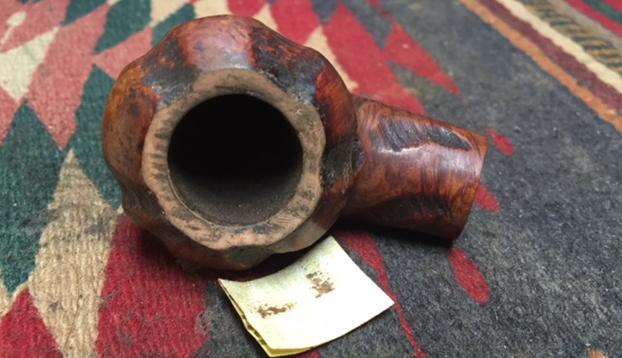
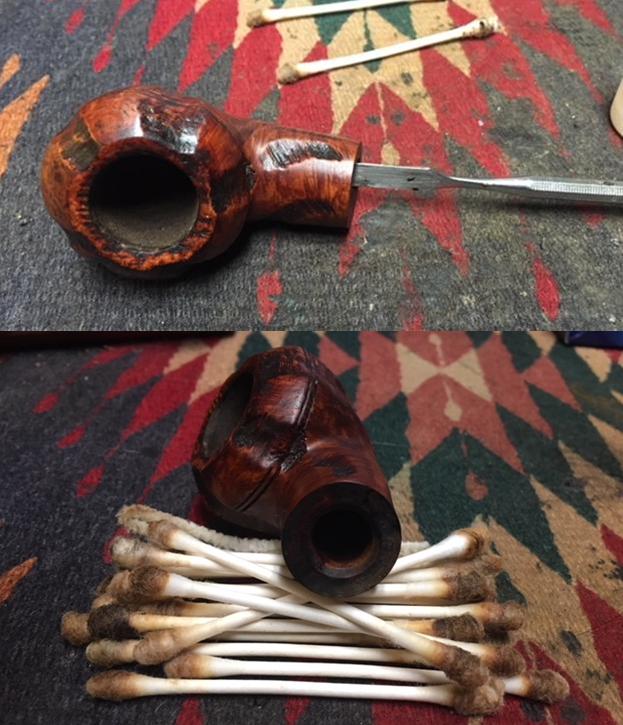
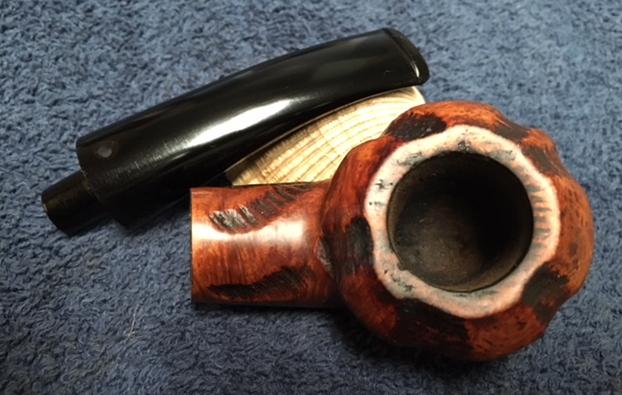
 I took some close up photos of the damage on the bowl to give a better idea of what I was working with on this pipe. The rim top was a real mess with nicks, chips and damage under a coat of tars. The bowl was out of round but workable. There were two cracked areas – one on the front of the bowl from the rim down and one on the left side from the rim down. Paresh and Abha had reamed the bowl for me so the inside was quite clean. The stem was in pretty decent shape with a few tooth marks and chatter on both sides of the stem near the button and some oxidation. The bowl was a real mess and it would be a challenge.
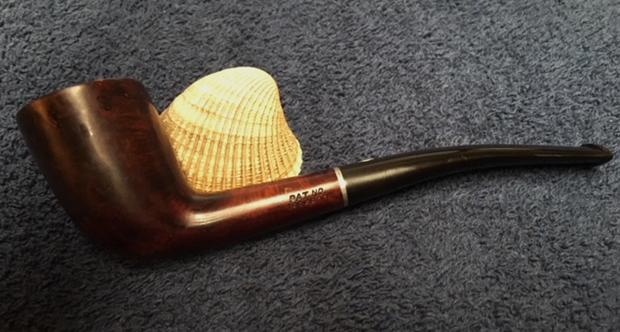
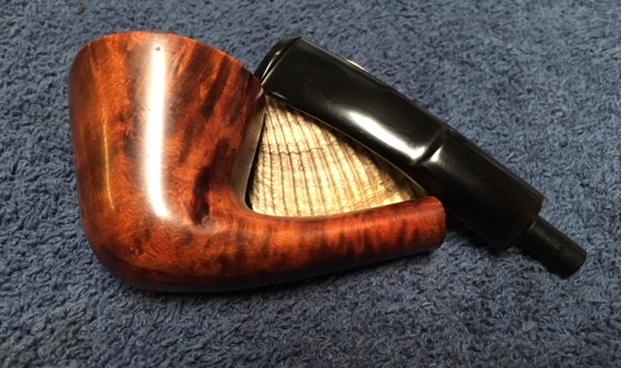
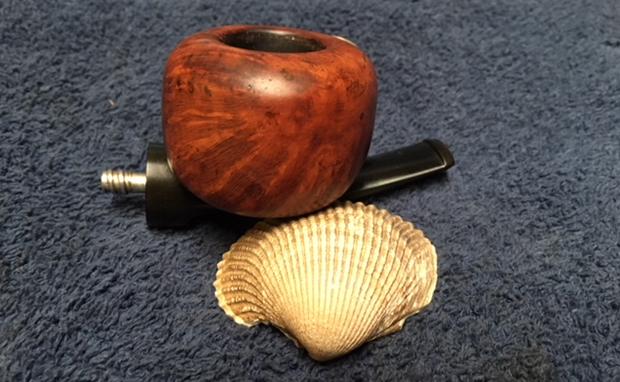
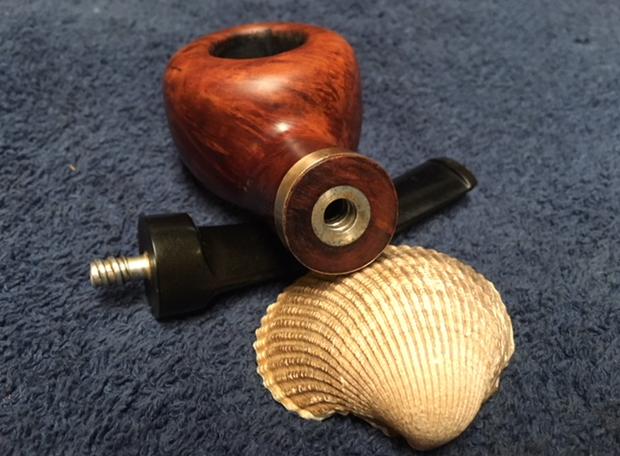
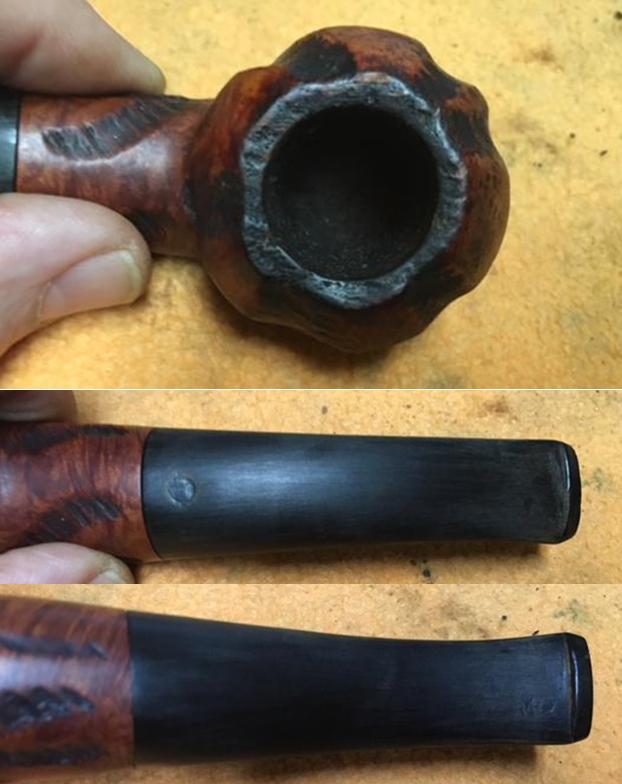
 I took photos of the stamping on the underside of the shank. As noted above it reads Barling’s in and arch over Make and the Ye Olde Wood over 271 on the bottom of the bowl. The shank is stamped EL followed by Made in England, Fossil and T.V.F.
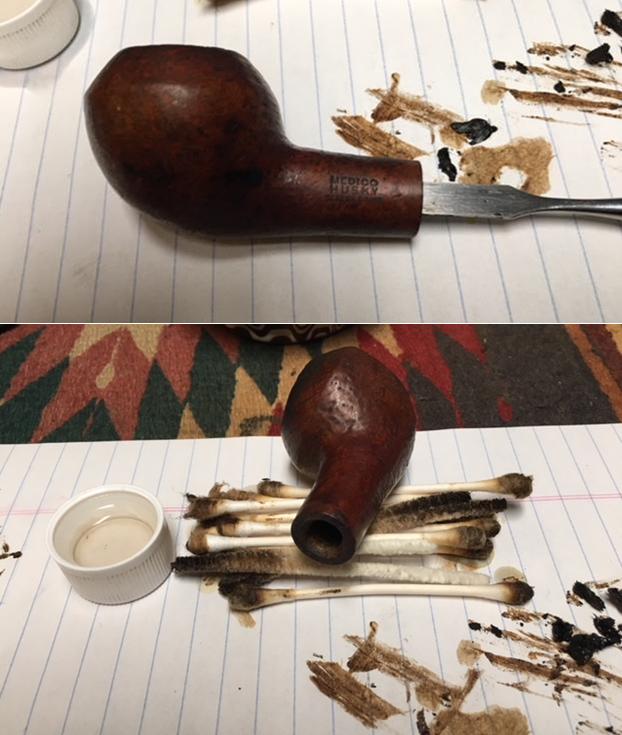
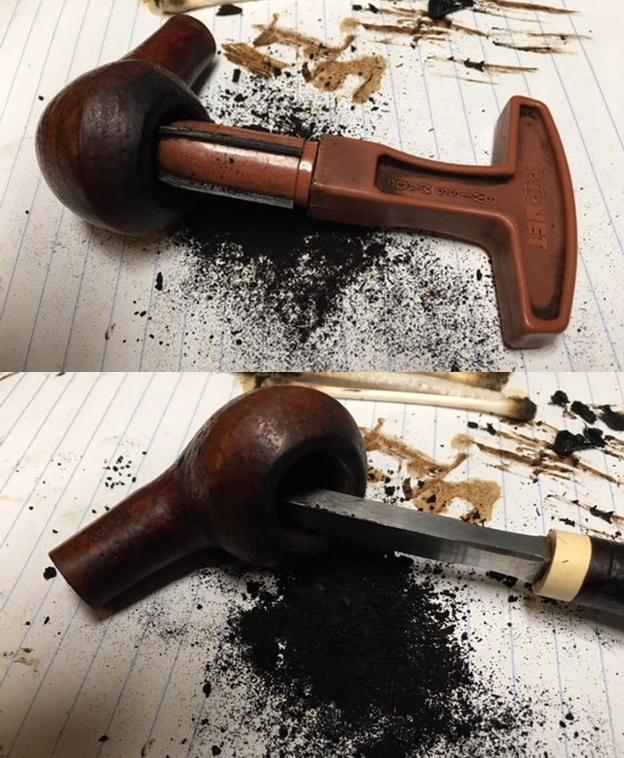
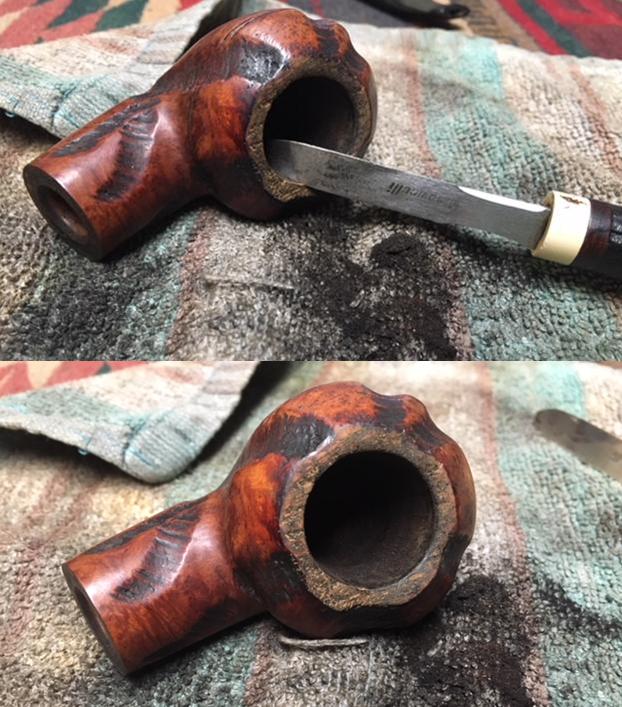
 I decided to clean up the remaining thin cake in the bowl to get back to bare briar. I wanted to see the extent of the damage on the walls of the bowl interior before I addressed the damage on the outside of the bowl. I used a Savinelli Fitsall pipe knife to scrape away the remaining cake. Once it was clean, I sanded the inside of the bowl with a piece of dowel wrapped with 220 grit sandpaper to smooth out the bowl walls and the inner edge of the rim.
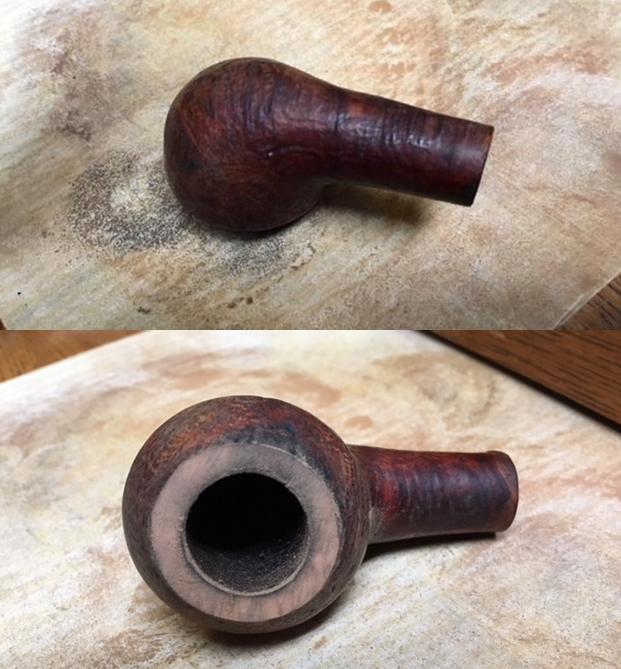
 To clean up the rim top and remove the serious damage on that portion of the pipe I topped it with 220 grit sandpaper on a topping board. I remove the damage portion and flattened the top of the rim. I would need to repair the cracks in the rim top and then rusticated it to match the finish on the bowl.
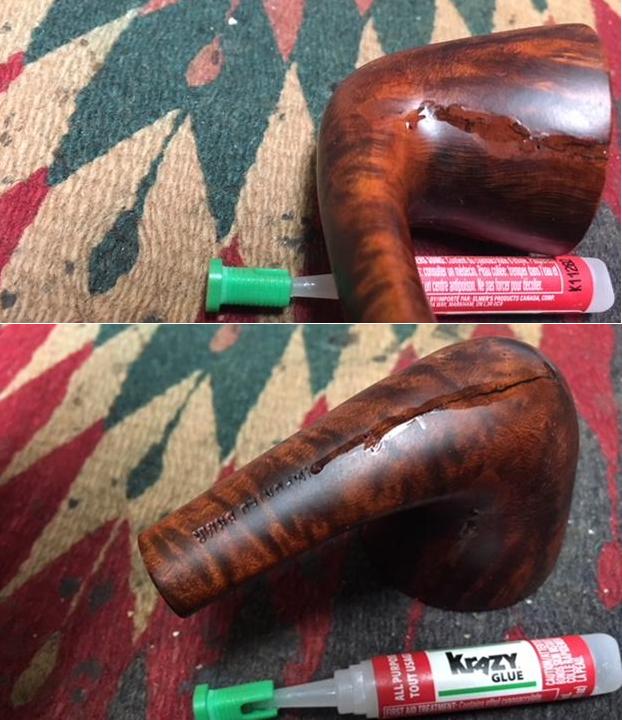
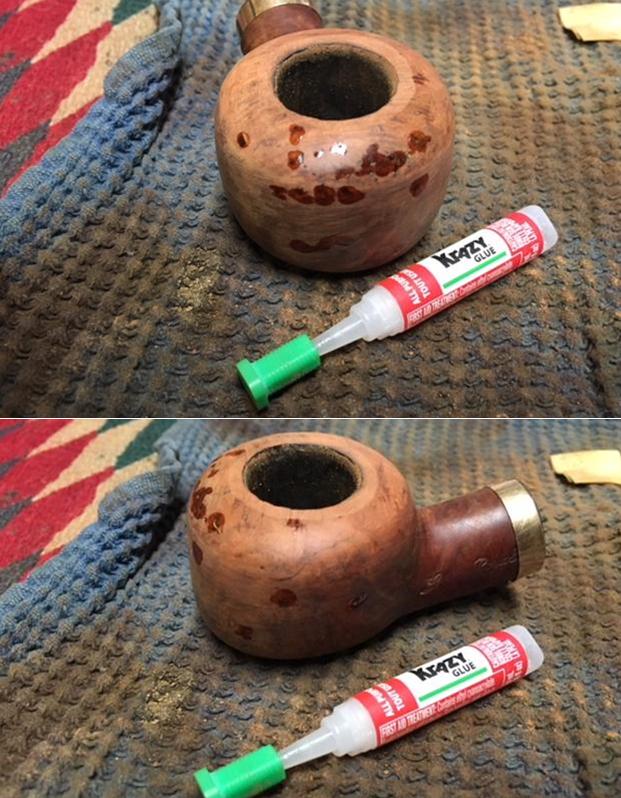
 I wiped down the surface of the briar with alcohol on a cotton pad to clean off the grime. I drilled tiny pin holes at the end of each crack on the exterior of the bowl in hopes of stopping the spread of the crack. I filled in the damaged areas around the bowl and on the rim with briar dust and clear super glue. At this point in the process the repairs appear quite crude. Lots of work still remains to blend them into the sandblast finish of the bowl.
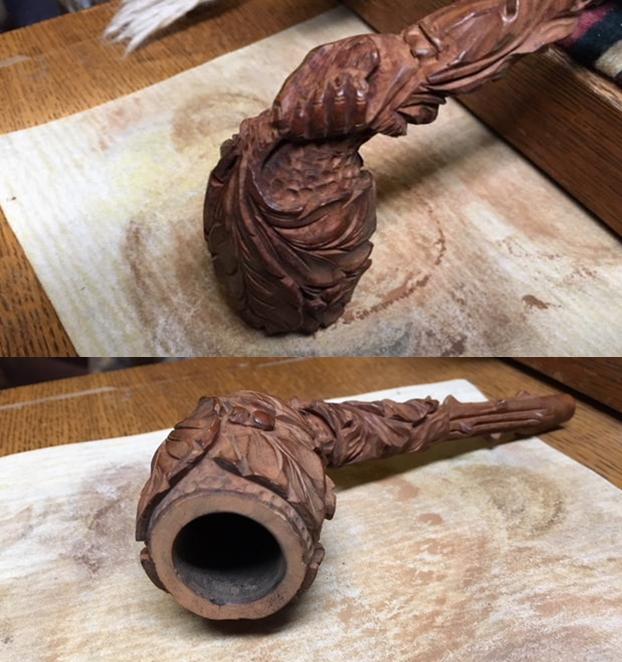
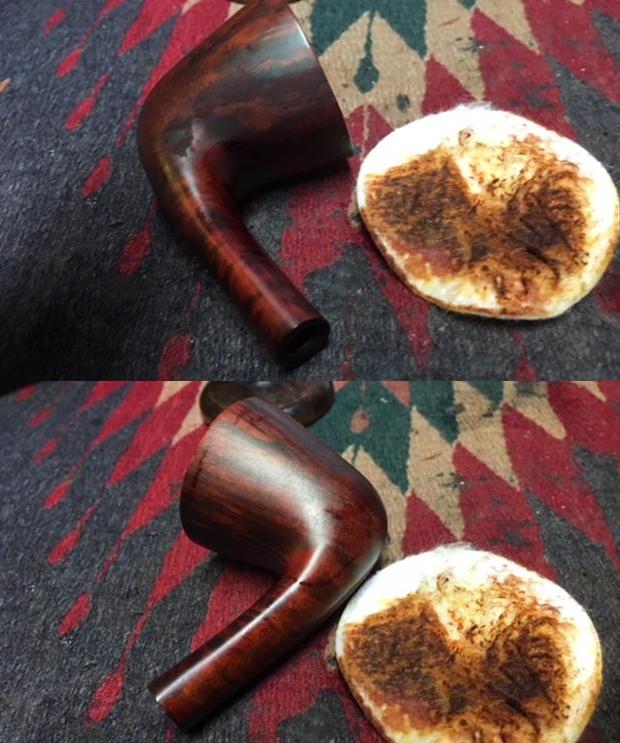
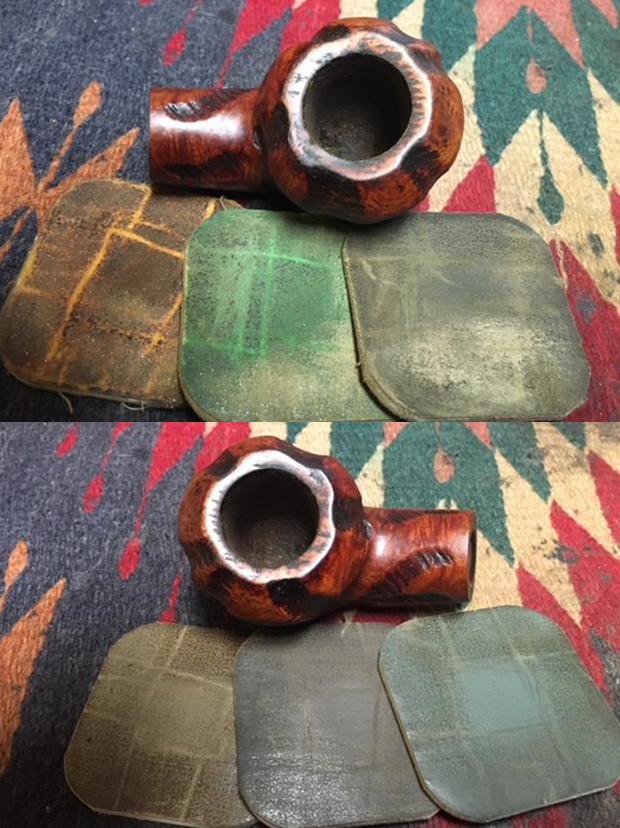
 I used a brass bristle tire brush to work over the repaired areas on the front and side of the bowl. I wanted to clean up the rough edges of the repair and try to blend it into the finish around it. The bristles are stiff enough to remove the edges and I think works well to blend it into the surface of the surrounding sandblast. I lightly topped the bowl again to smooth out the roughness of the repairs on the rim surface.
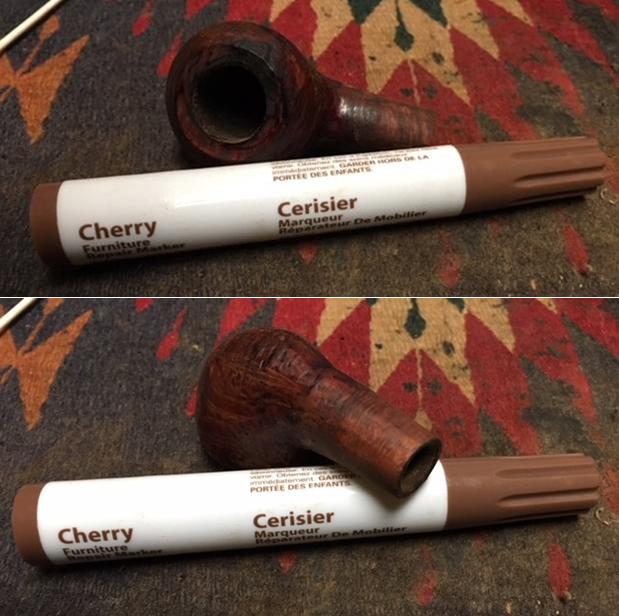
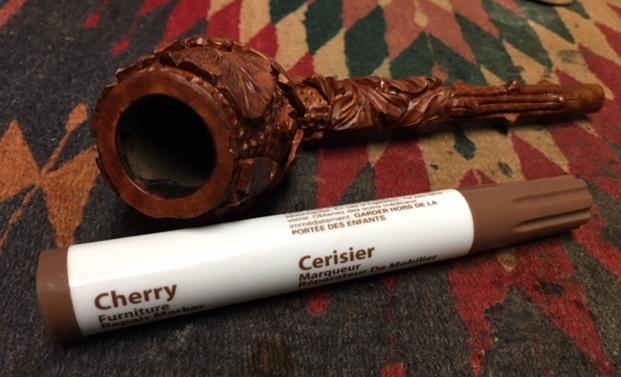
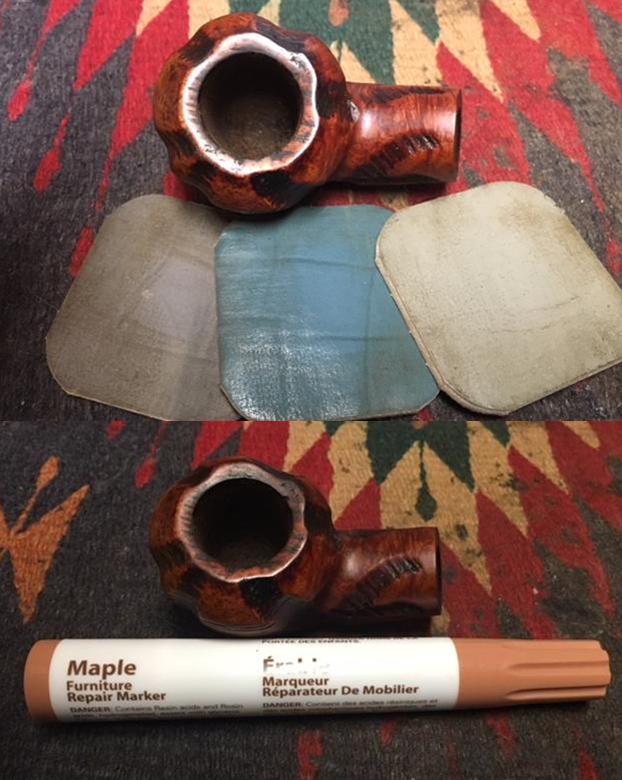
 I used some small burrs on my Dremel running at a slow speed of 5 to try to recreate the look of the sandblast on the rim top. It took a bit of doing but I think it gives the rim top a better look than the smooth finish. I blended a walnut and a Maple stain pen to approximate the mottled finish on the rest of the bowl. It worked pretty well I think. I will show full photos shortly.
  To fill in the cracks on the inside of the bowl and to protect it from burn out or further cracking I mixed up some JB Weld. It dries hard, is heat resistant and when dry is inert and does not gas off or breakdown (according to all I have been able to read). I used a dental spatula to apply it to the inside of the bowl. Once it cures for a day I will sand it out and remove the majority of it other than what will remain in the damaged areas.
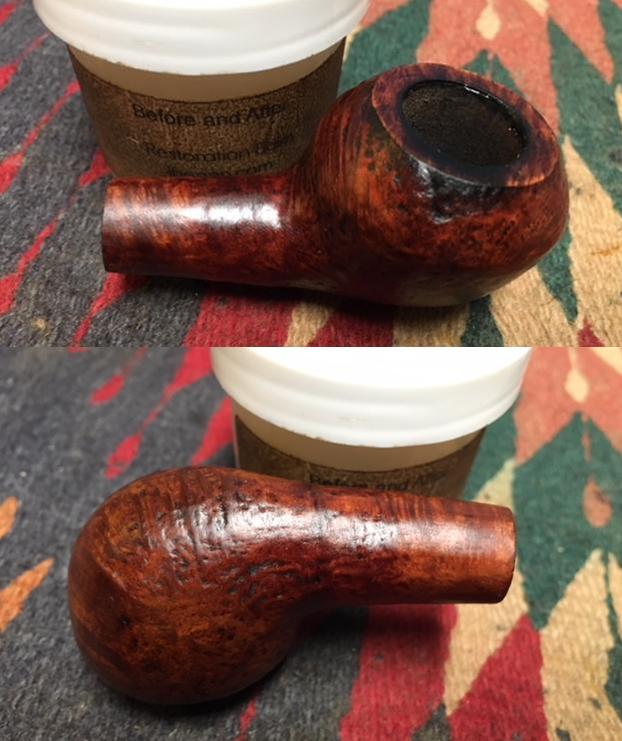
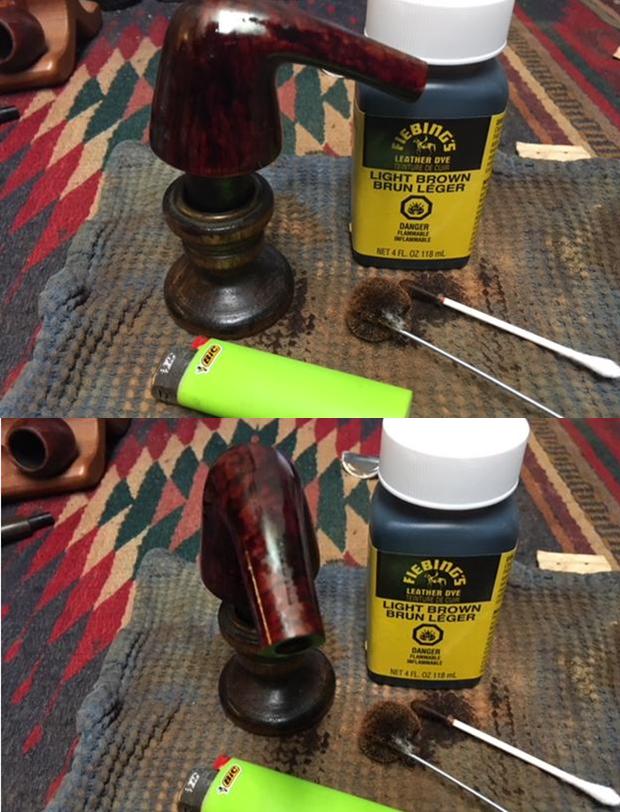
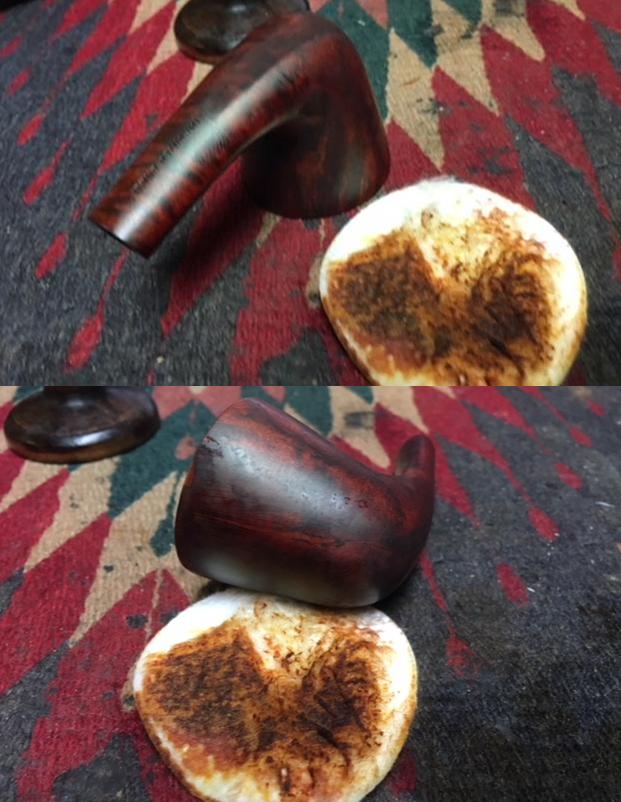
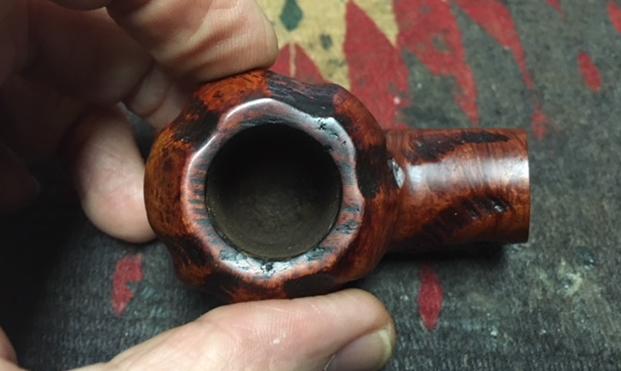
  I wiped off the rim top with a cotton pad and alcohol to remove the small drops of JB Weld that were on the surface and restained the rim top and the repaired areas on the side and front of the bowl. I will still need to buff the bowl and wax it but it is getting very close to the look I am aiming for with this repair.
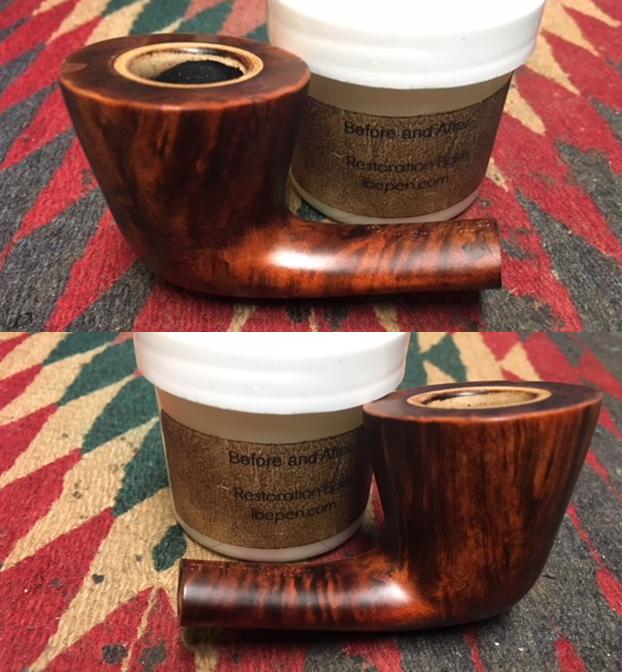
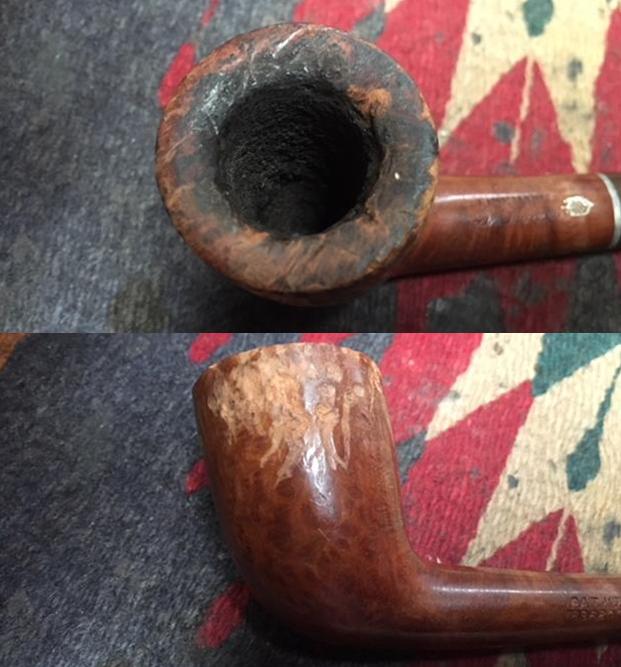
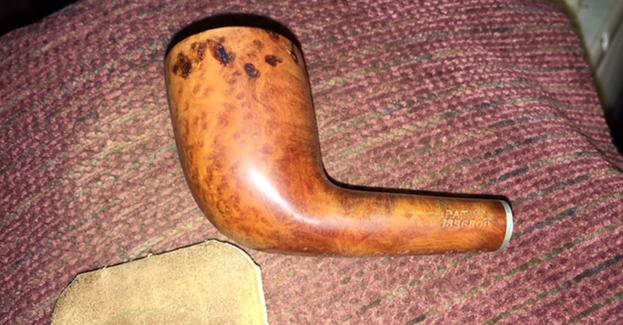
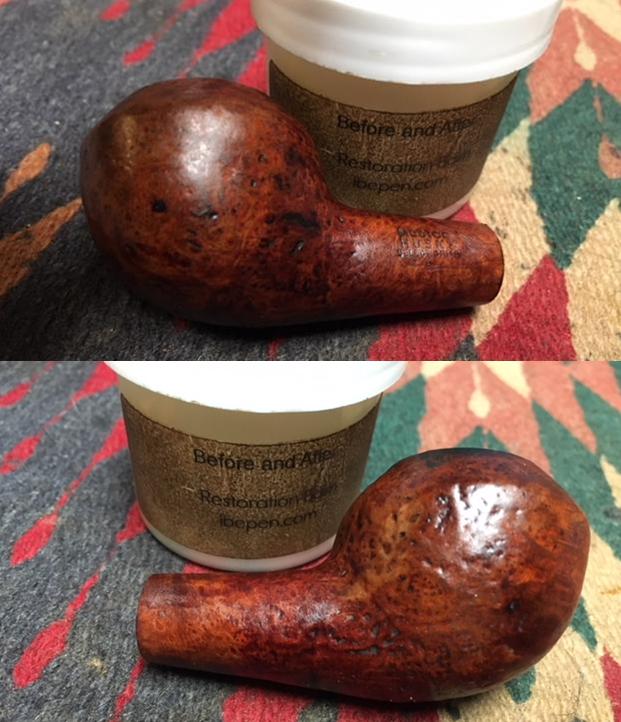
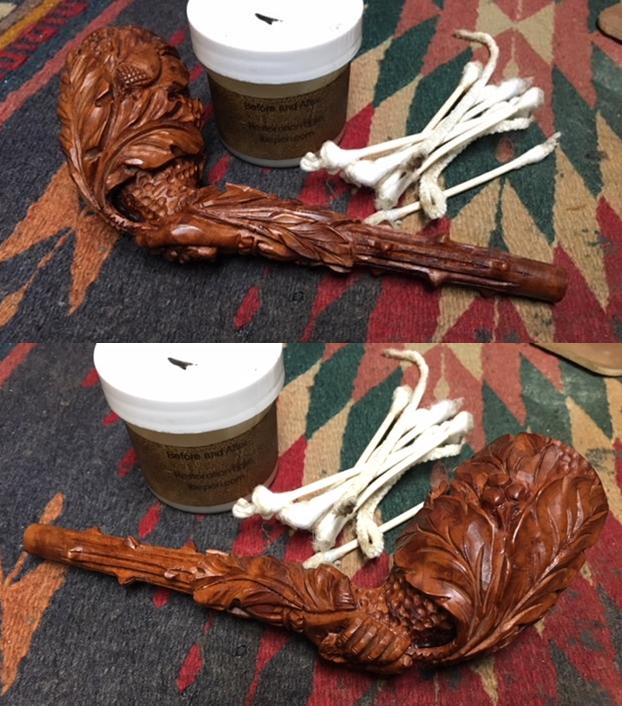
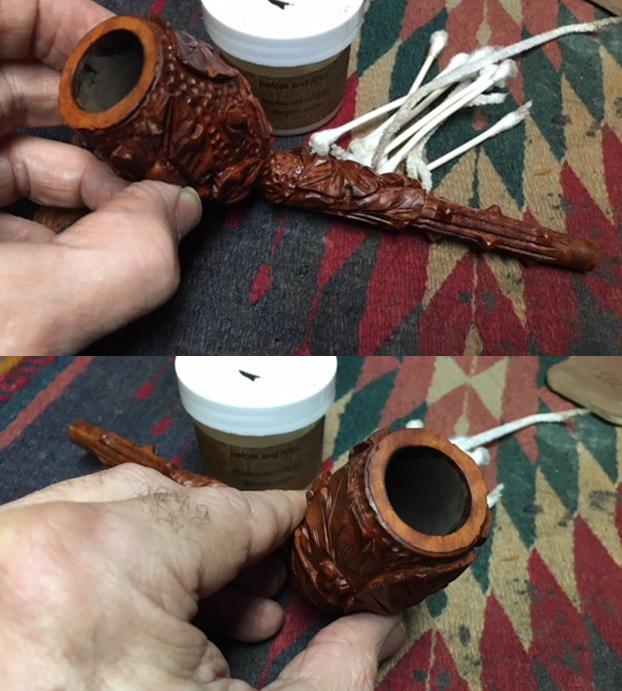
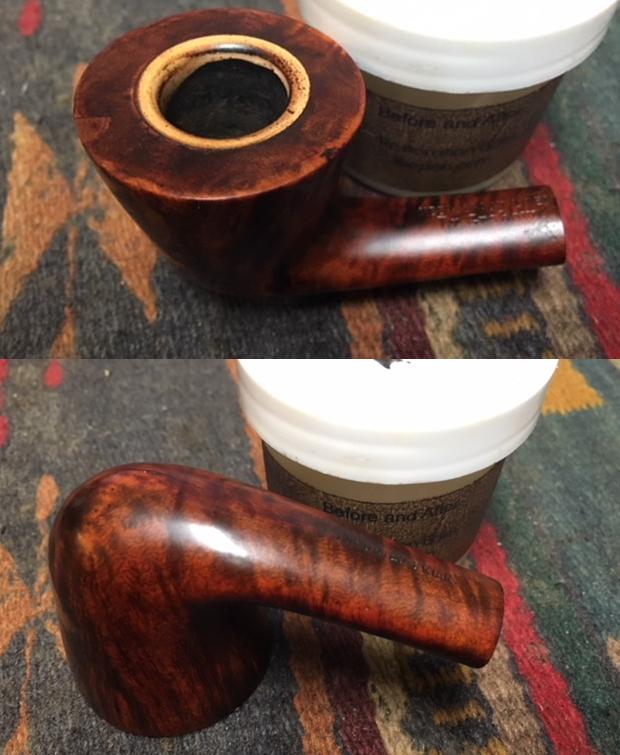
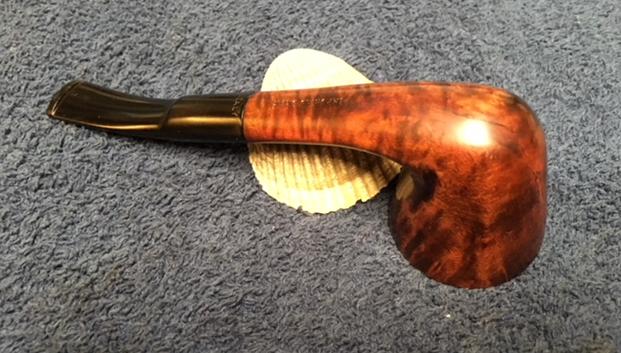
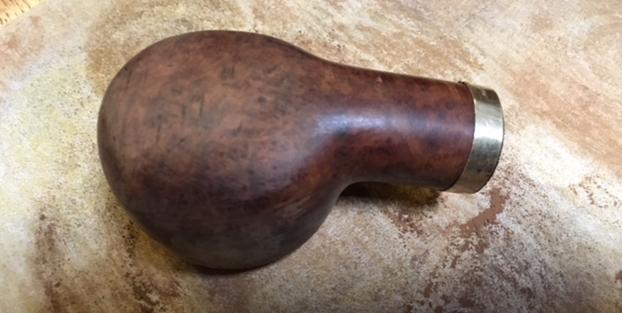
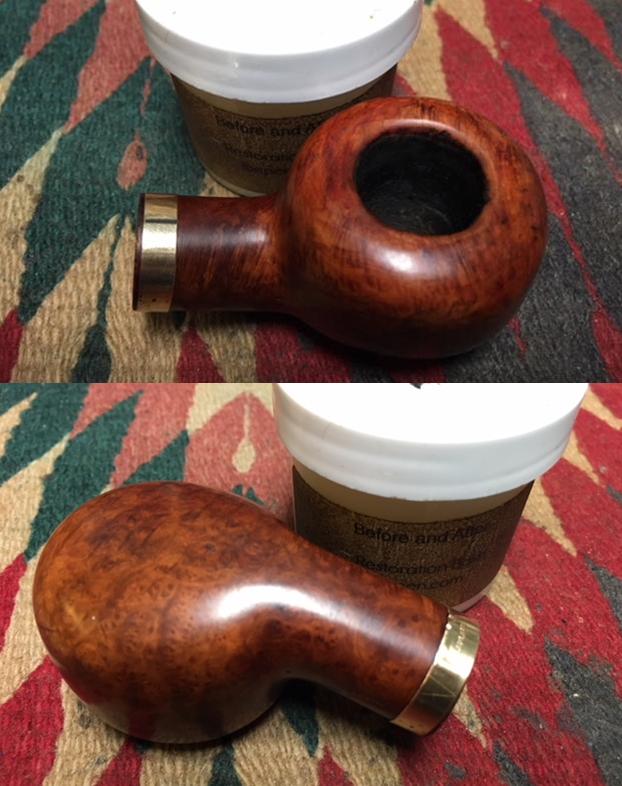
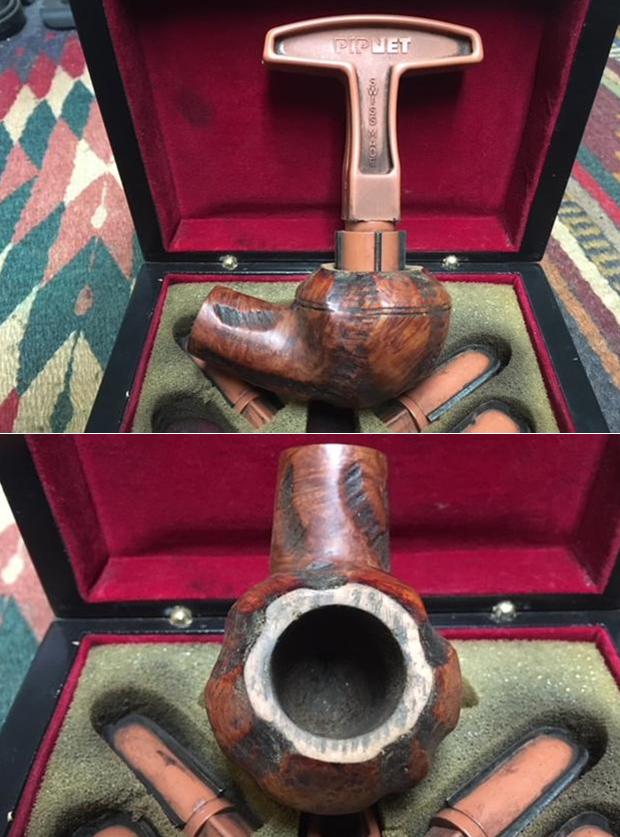
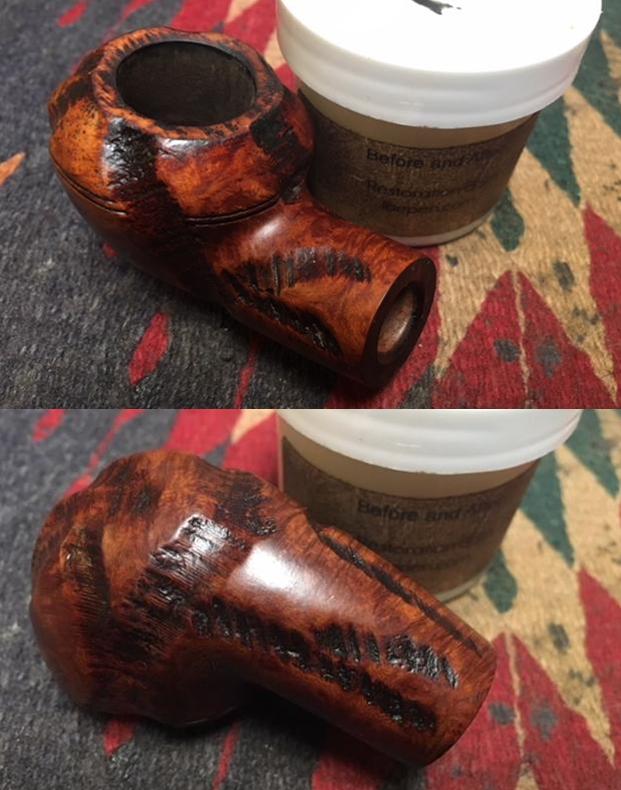
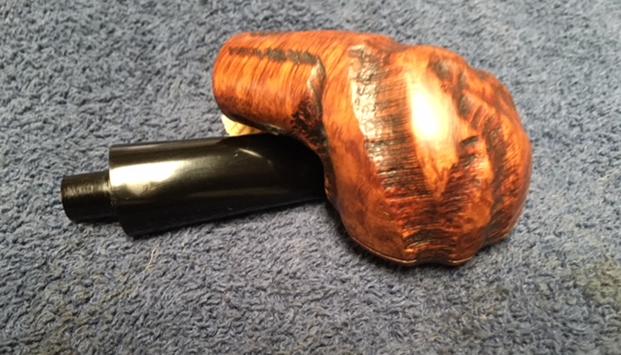
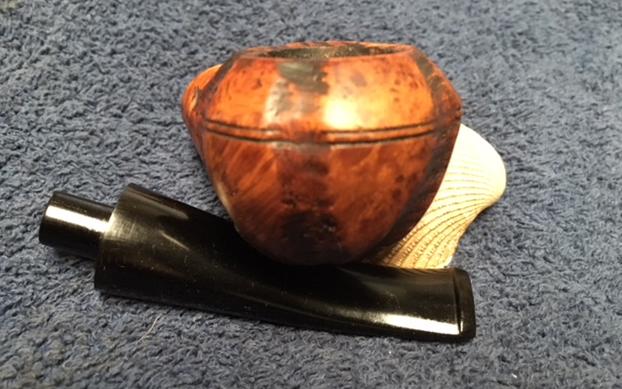
 I worked some Before & After Restoration Balm into the grooves and crevices of the sandblast finish with my fingers and a horsehair shoe brush. I want the product to go deep into the finish because it works to clean, enliven and protect the briar. Once I was confident that it was deeply worked into the blast I wiped it off and buffed it with a soft cloth to polish it. The pipe really began to have a rich shine. I took some photos of the bowl at this point to mark the progress in the restoration.
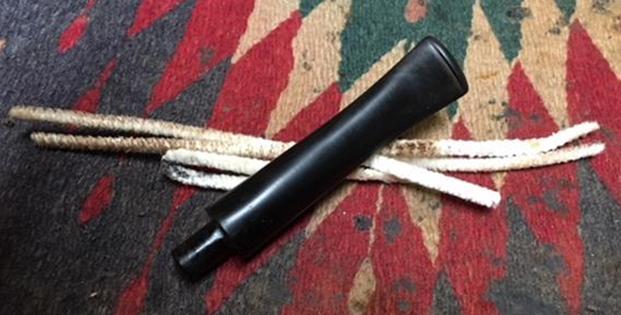
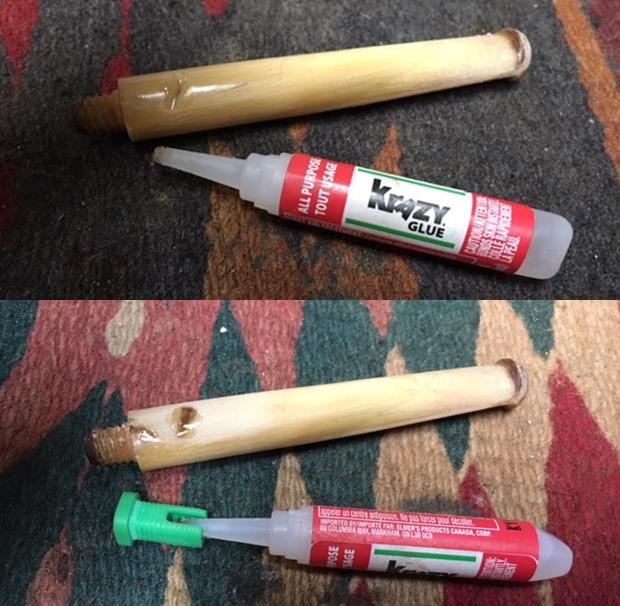
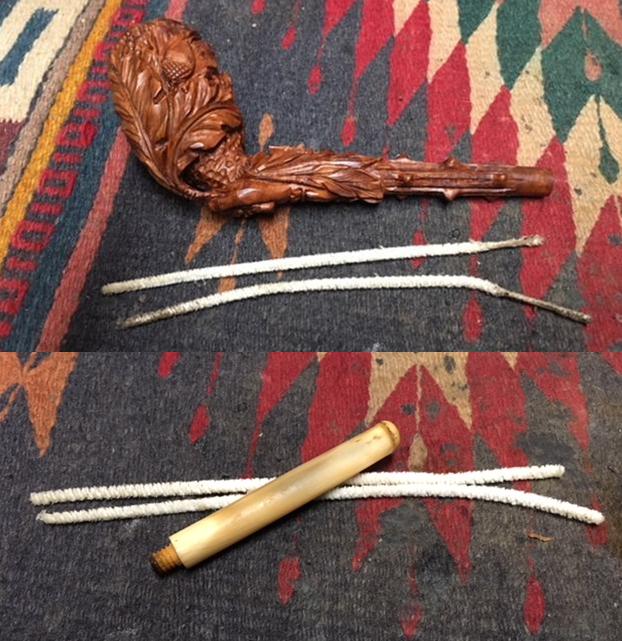
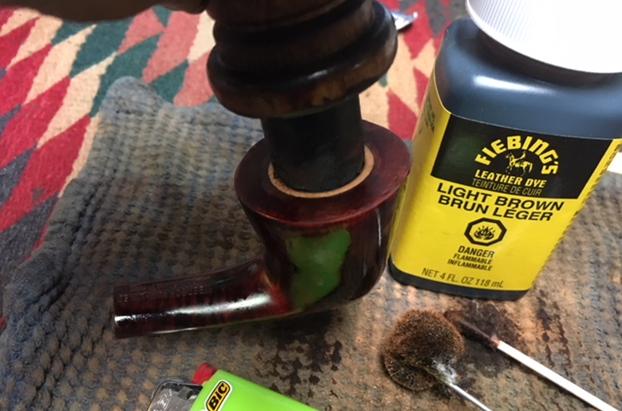
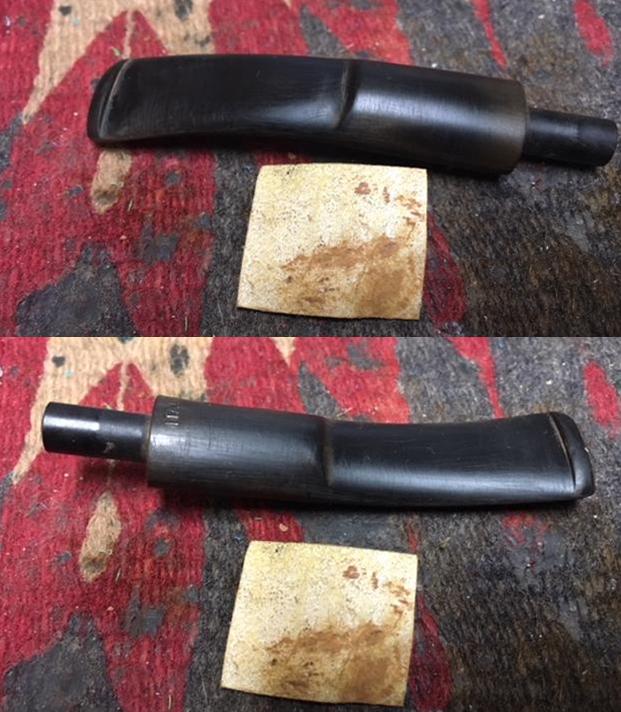
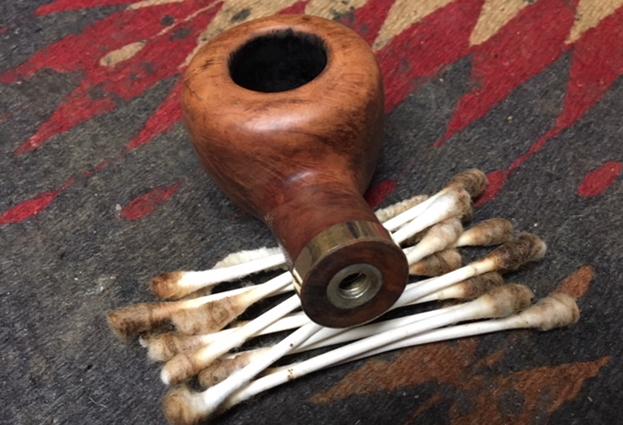
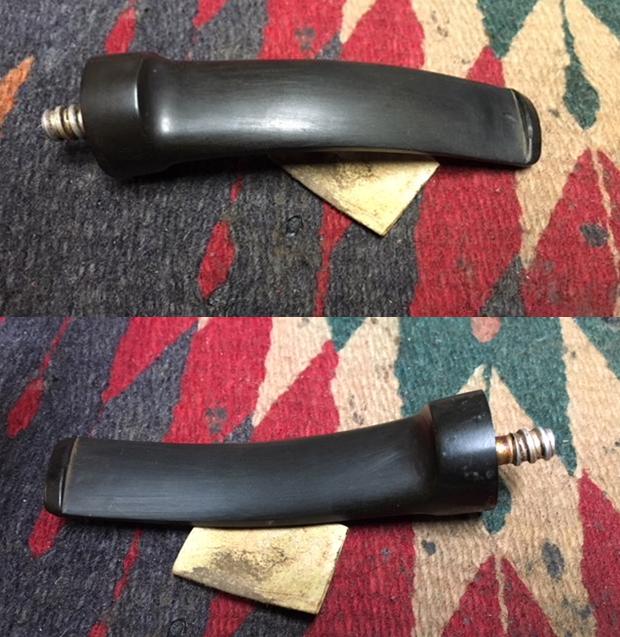
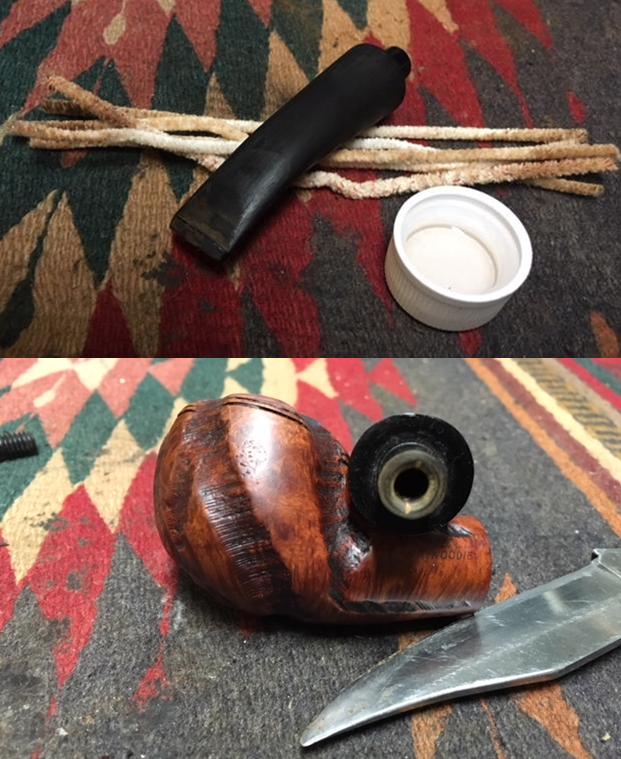
 I set the bowl aside and went to work on the stem. I cleaned the inside of the stem with pipe cleaners and alcohol. Once the stem was clean I checked it with a light for more potential problems inside. It was clear and spotless. I sanded the stem surface with worn 220 grit sandpaper to break up the oxidation (carefully avoiding the stamping on the top of the saddle).
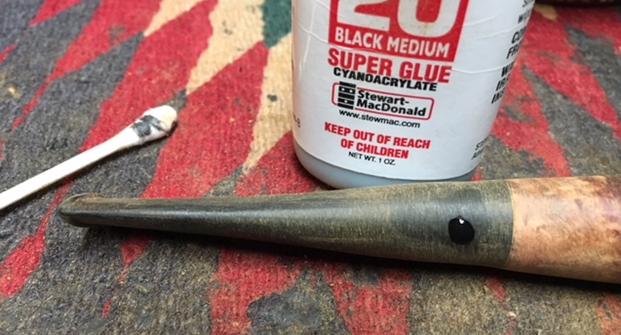
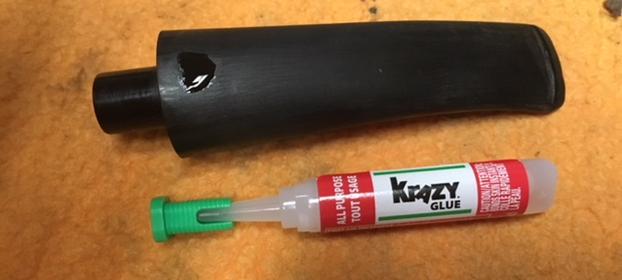
 I filled in the tooth dent on the top of the button on the top side of the stem and the two tooth dents on the underside with clear super glue.
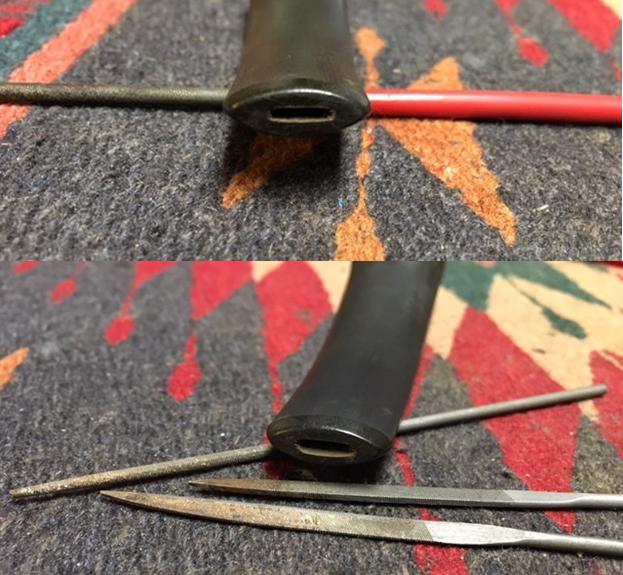
 Once the glue hardened and cured I filed the repairs flat and reshaped the button with 220 grit sandpaper. I worked over the surface of the stem again with the sandpaper to blend in the repairs.
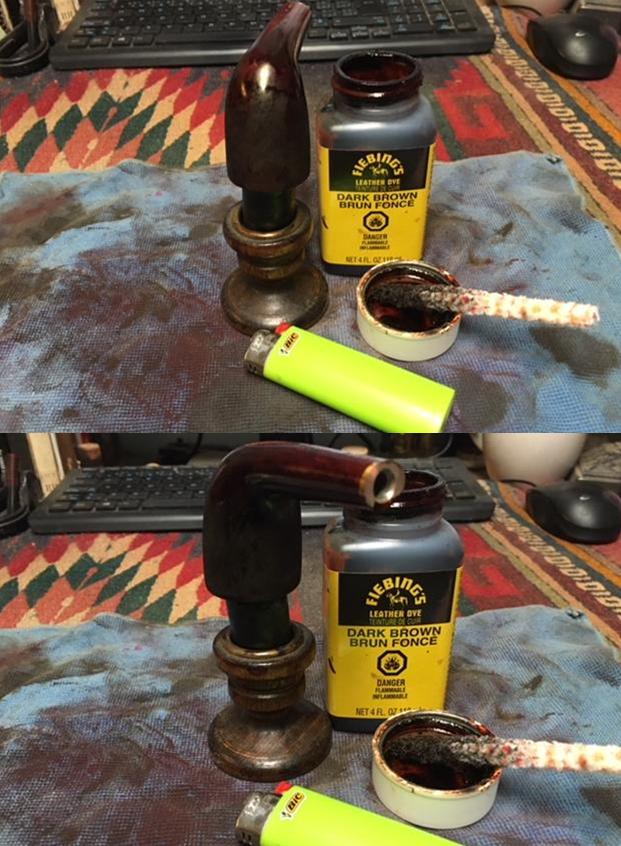
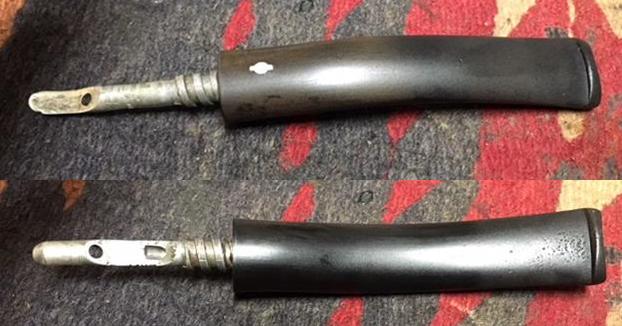
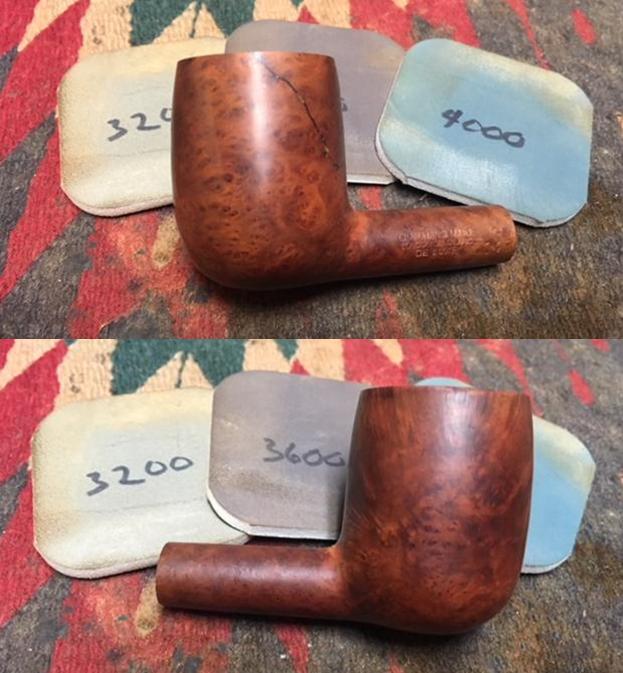
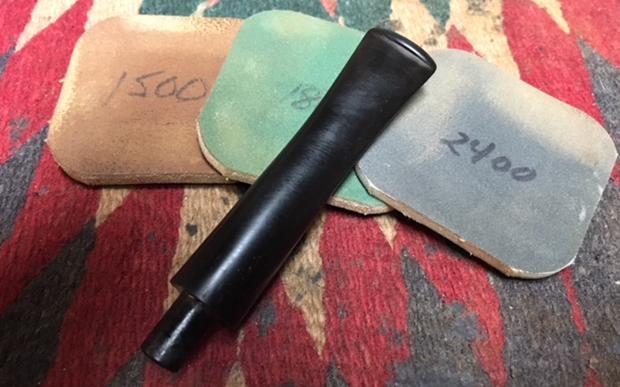
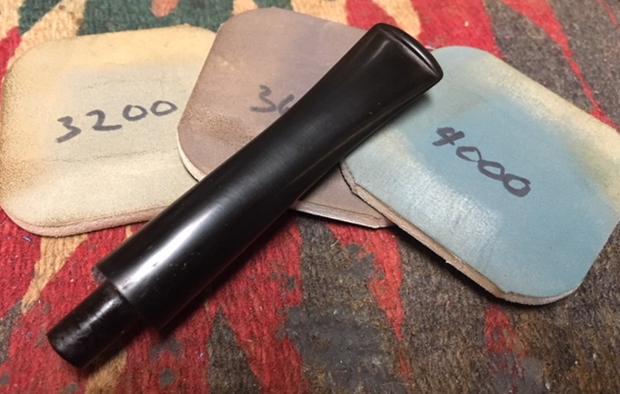
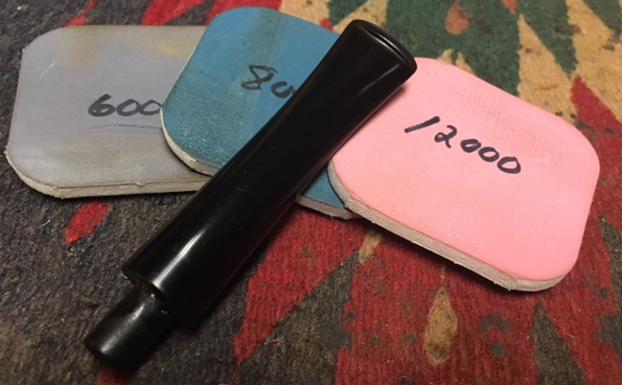
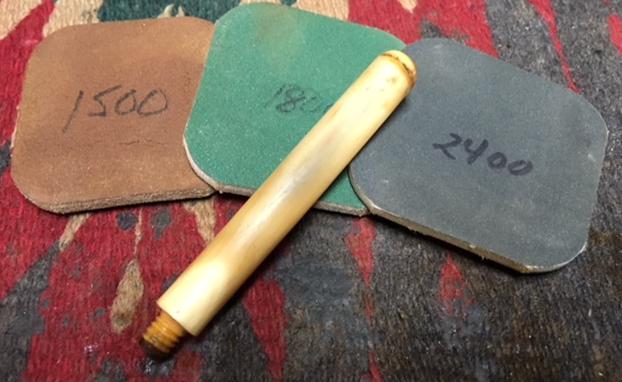
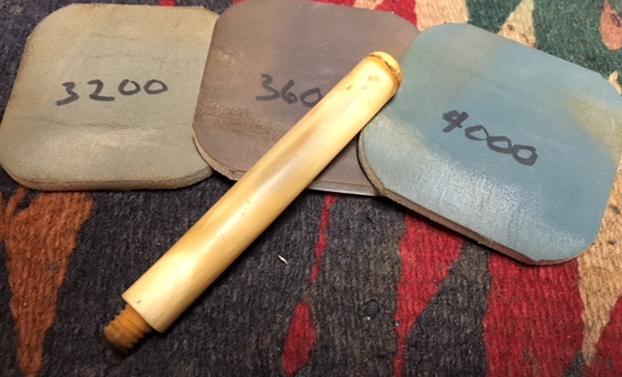
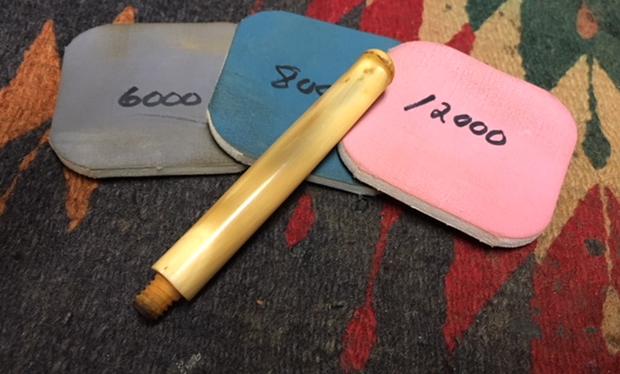
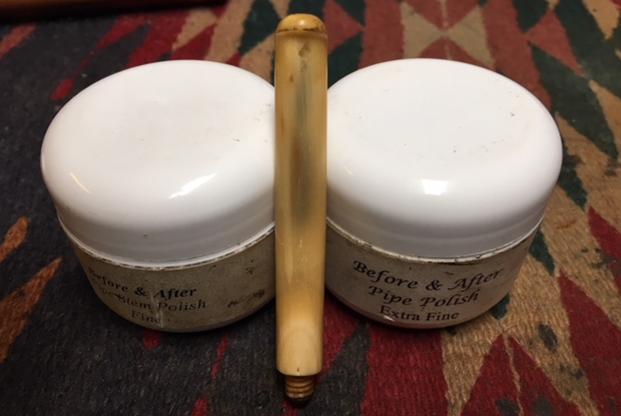
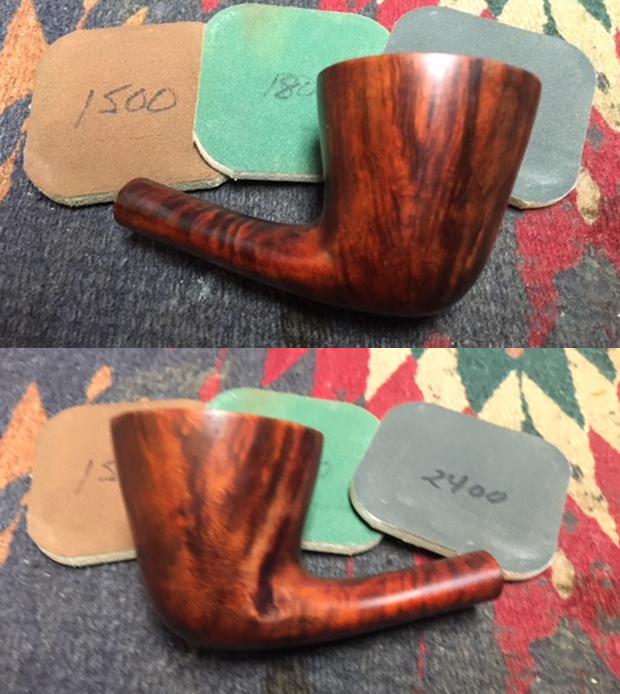
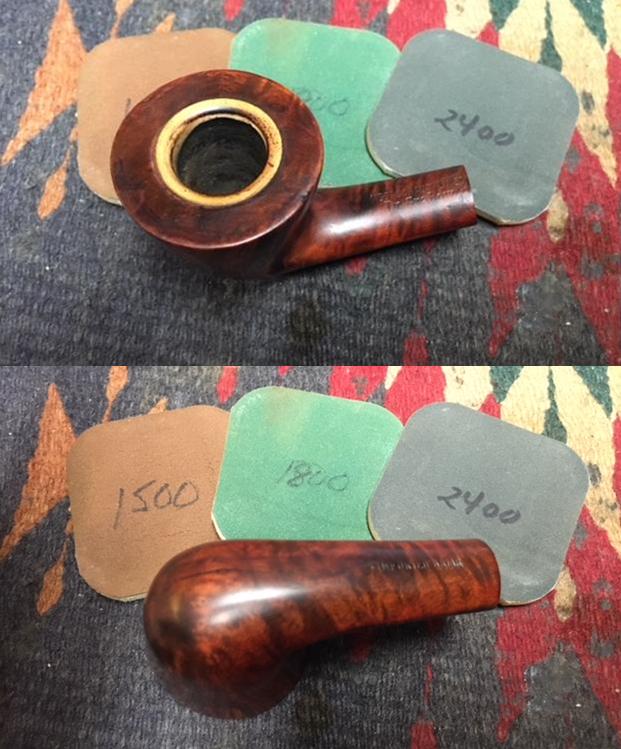
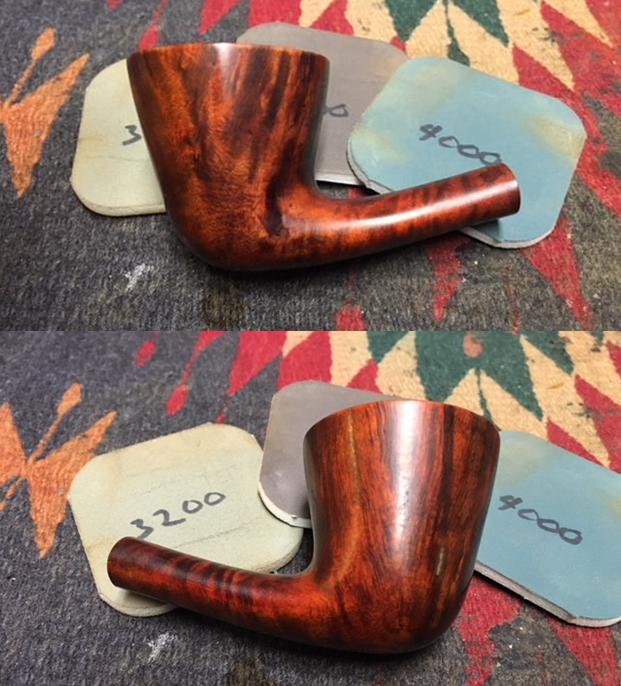
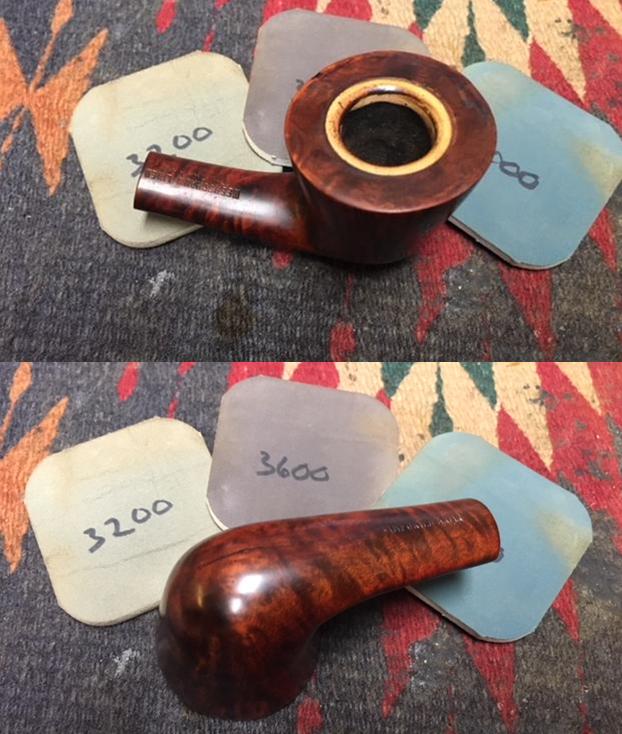
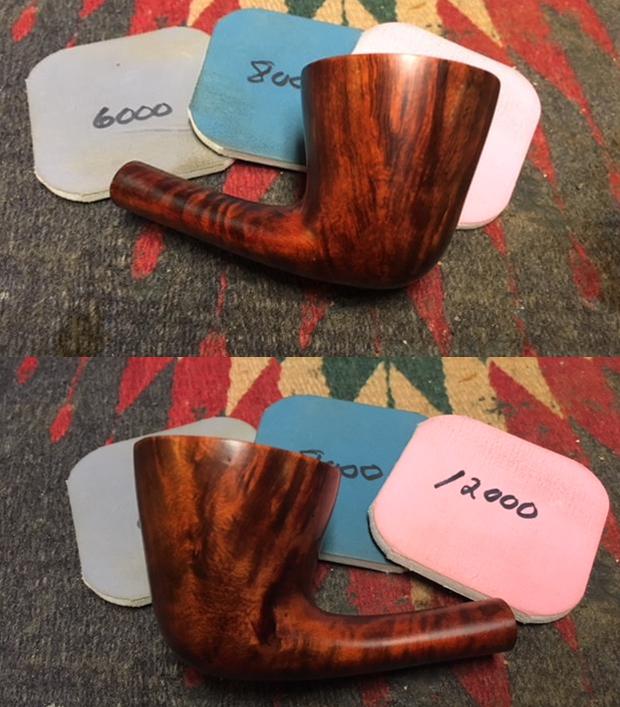
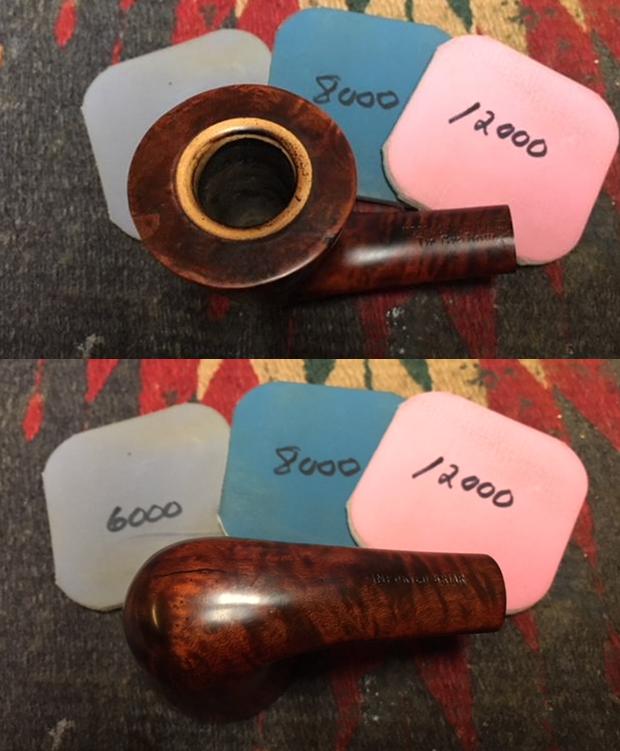
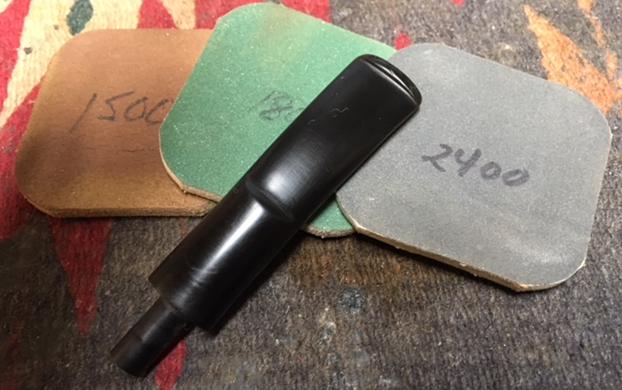
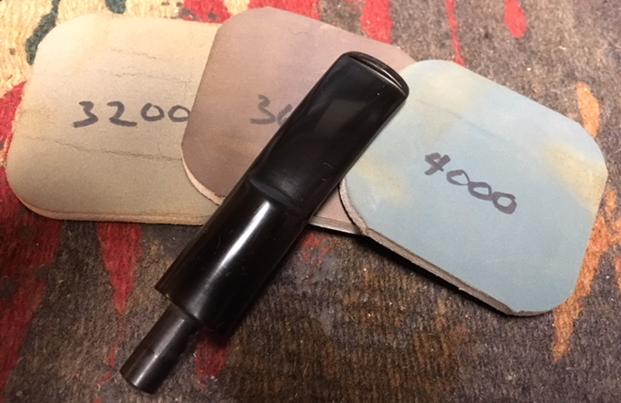
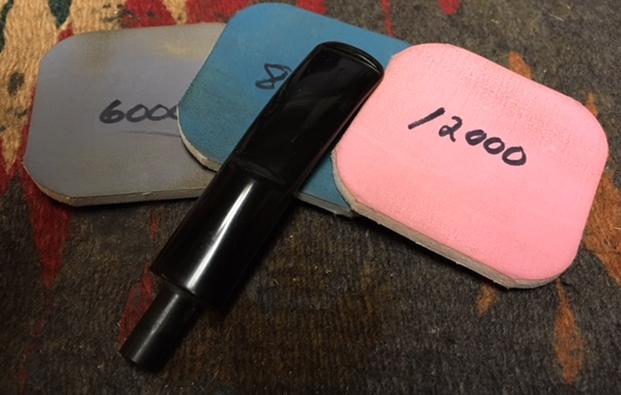
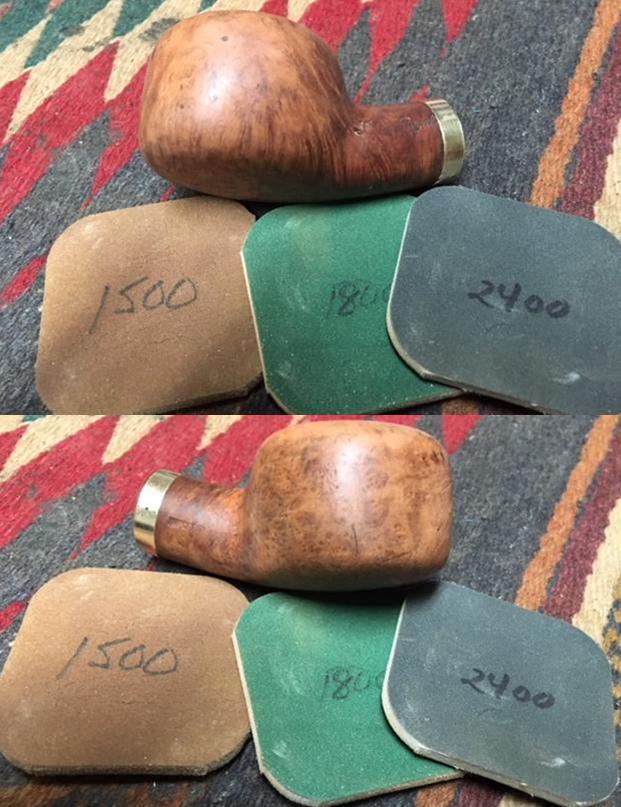
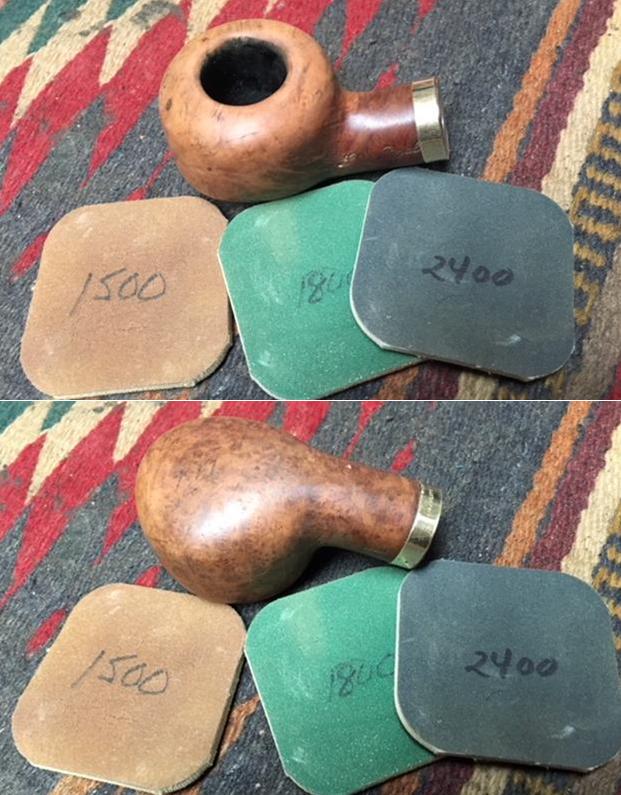
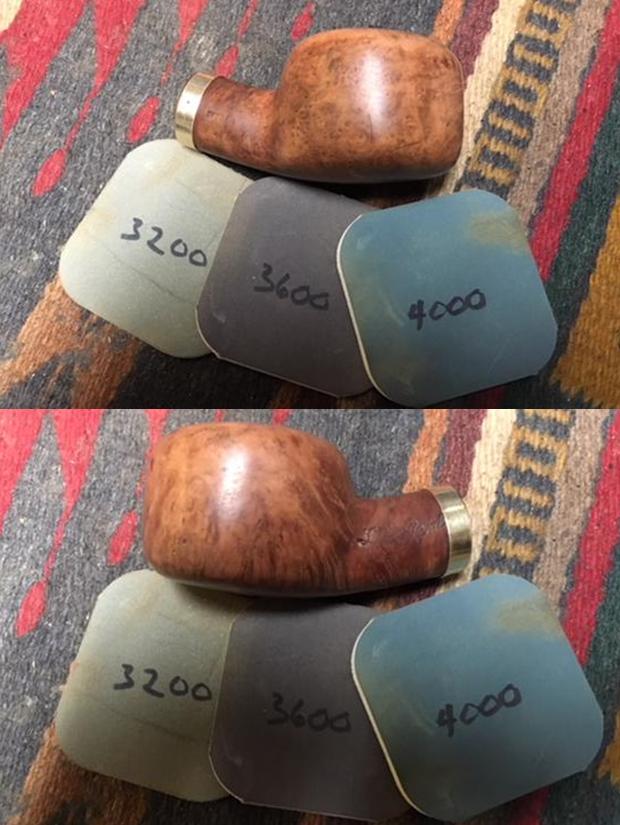
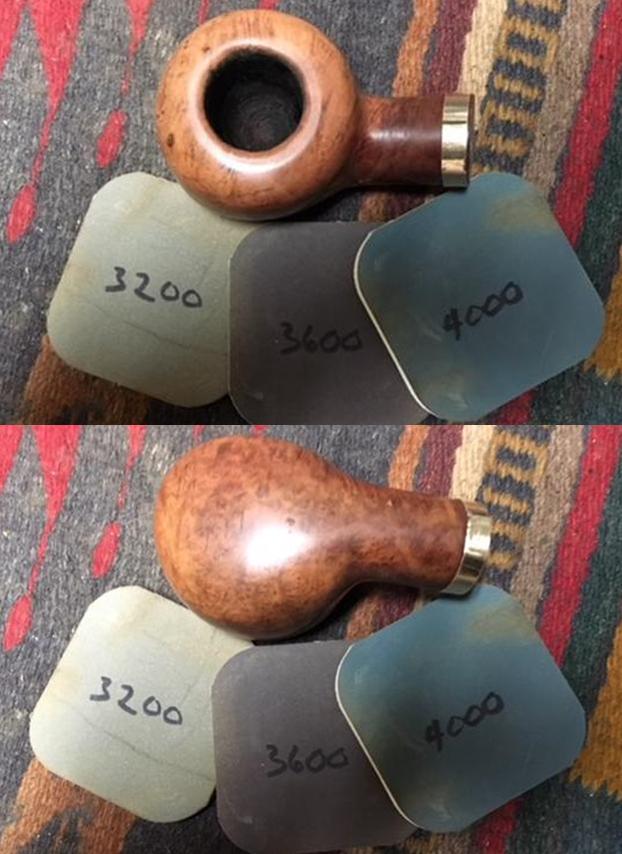
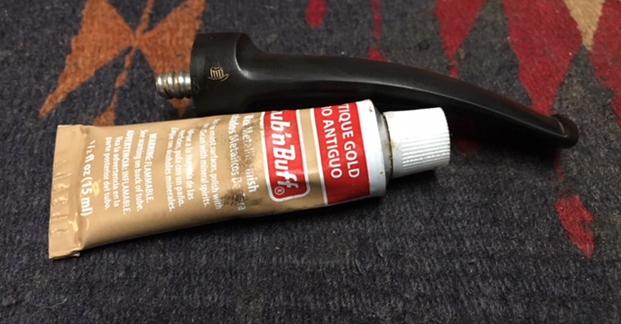
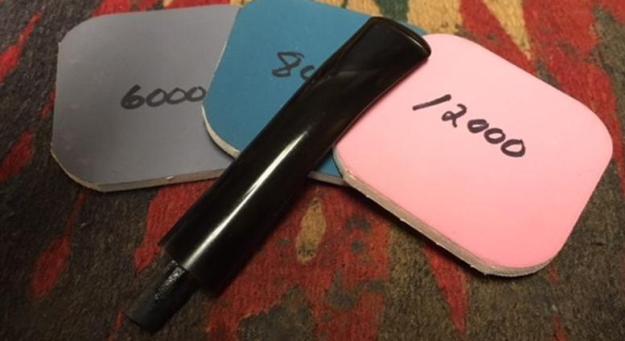
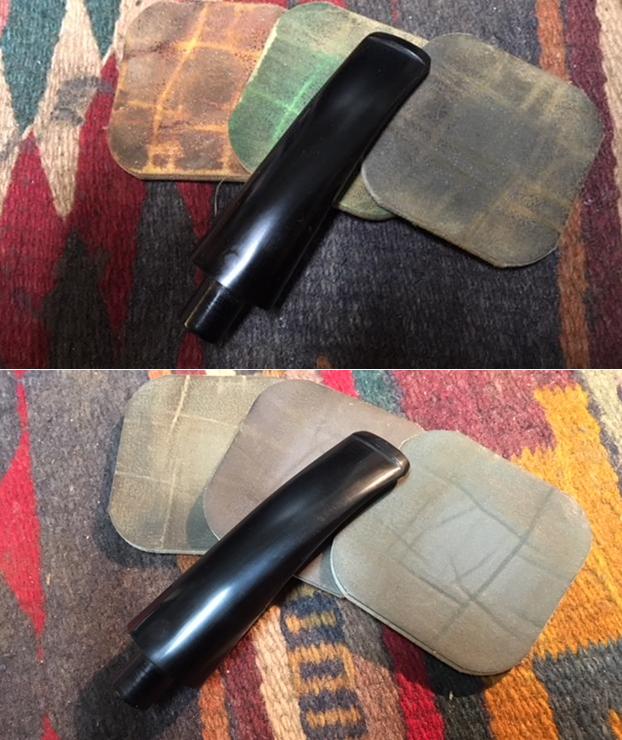
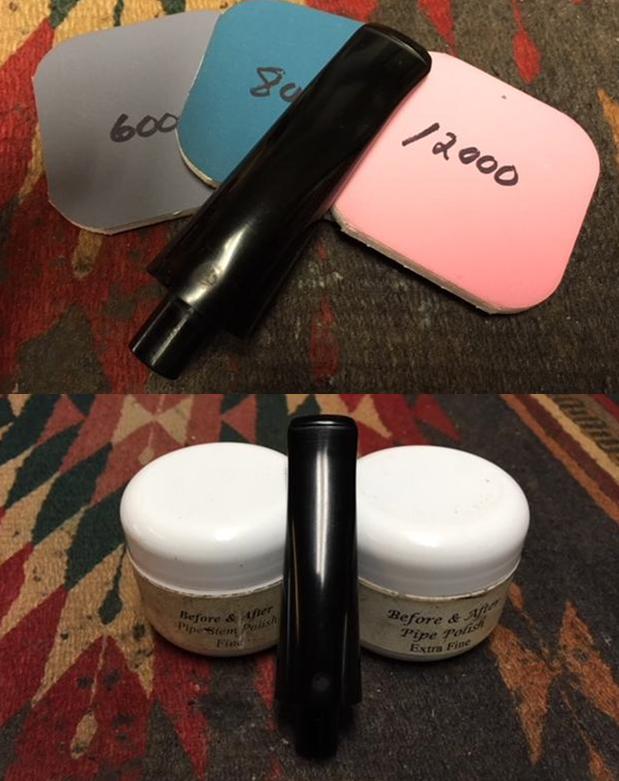
 I polished the vulcanite stem with micromesh sanding pads – wet sanding it with 1500-2400 grit pads and dry sanding with 3200-12000 grit pads. I wiped it down with Obsidian Oil after each sanding pad. I rubbed the stem down with Before & After Pipe Polish – both Fine and Extra Fine to polish out the scratches. I gave it a final coat of oil and set it aside to dry. I avoided the stamping on the top of the saddle. There is still some oxidation there that I left because I did not want to damage the stamp. It is a nice looking stem nonetheless.


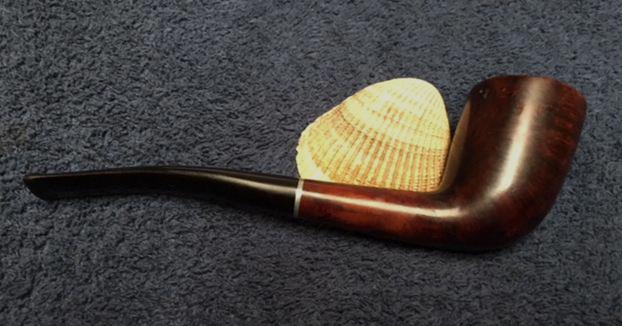
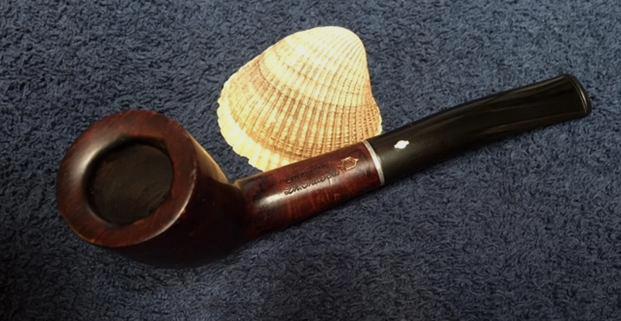
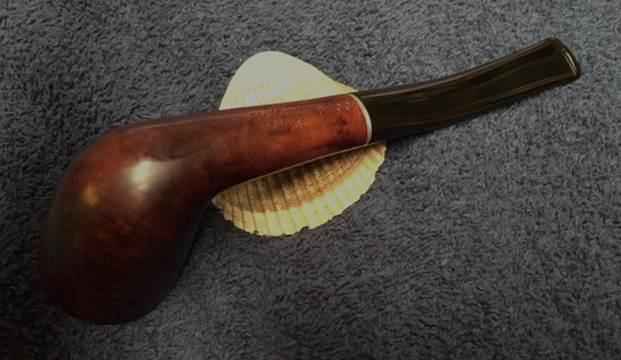
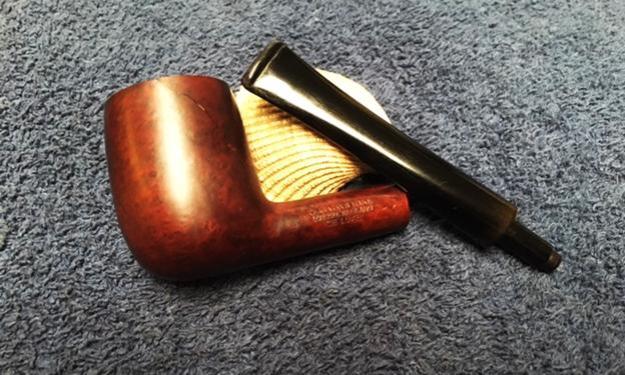
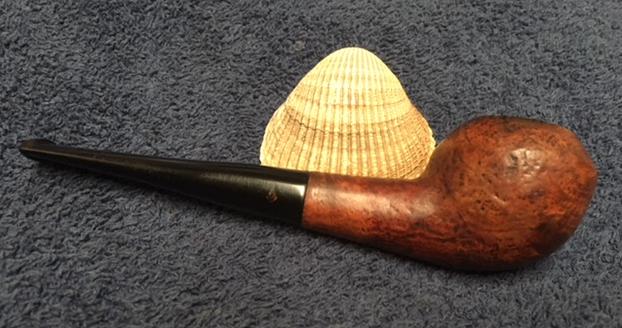
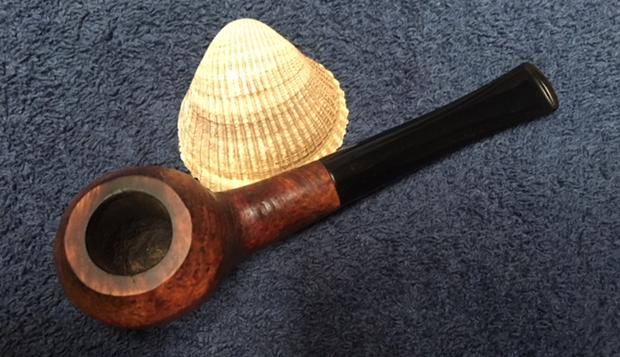
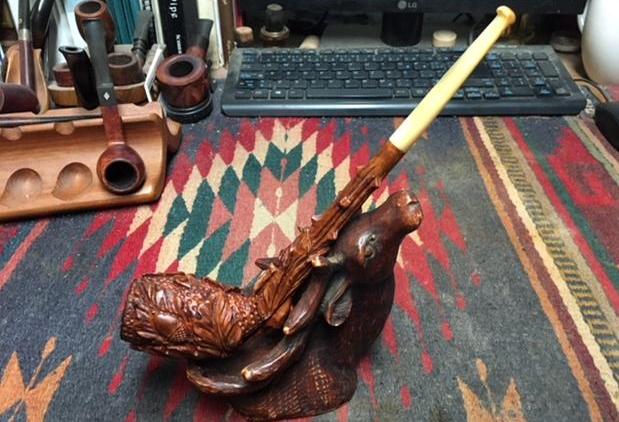
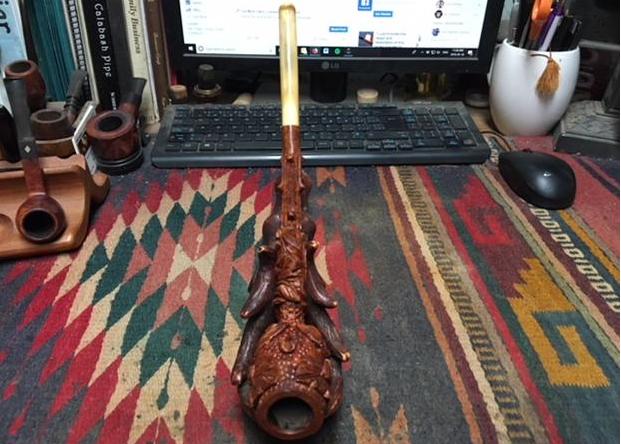
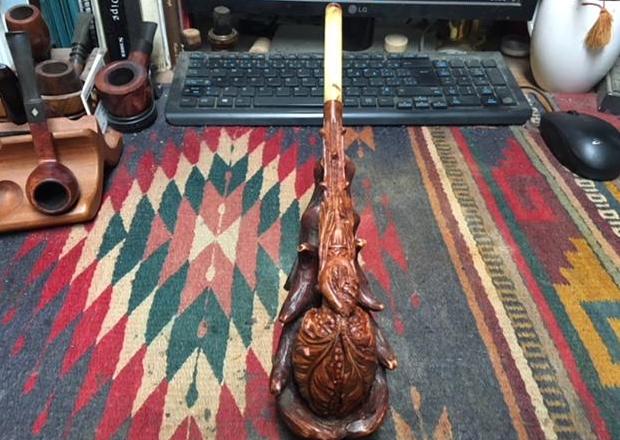
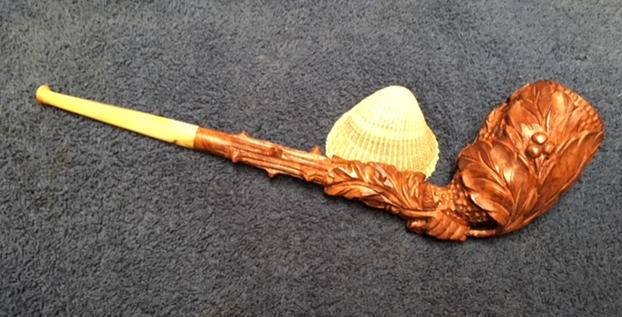
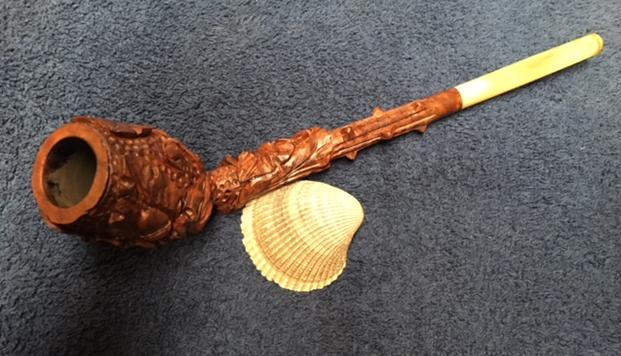
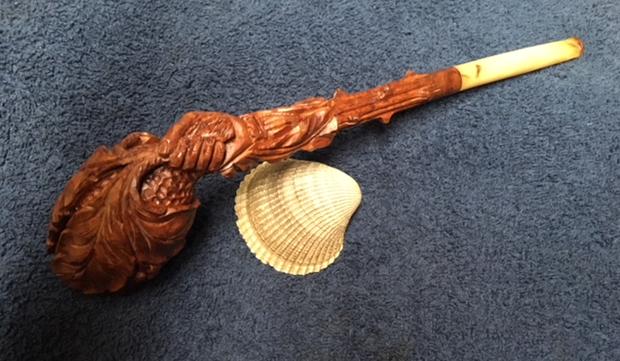
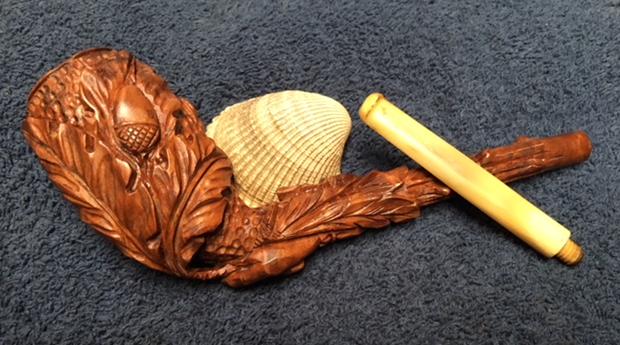
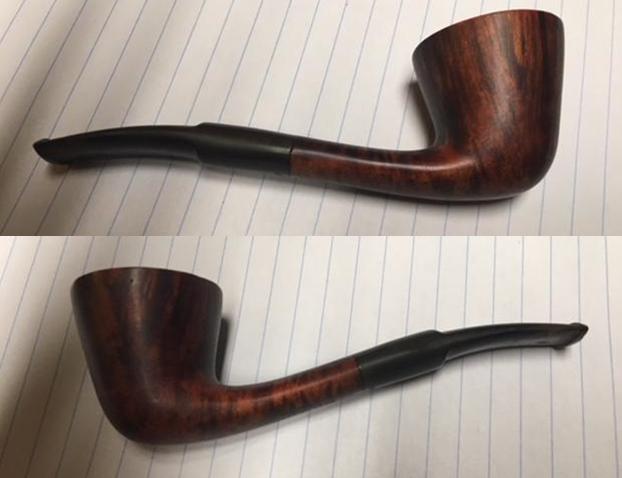
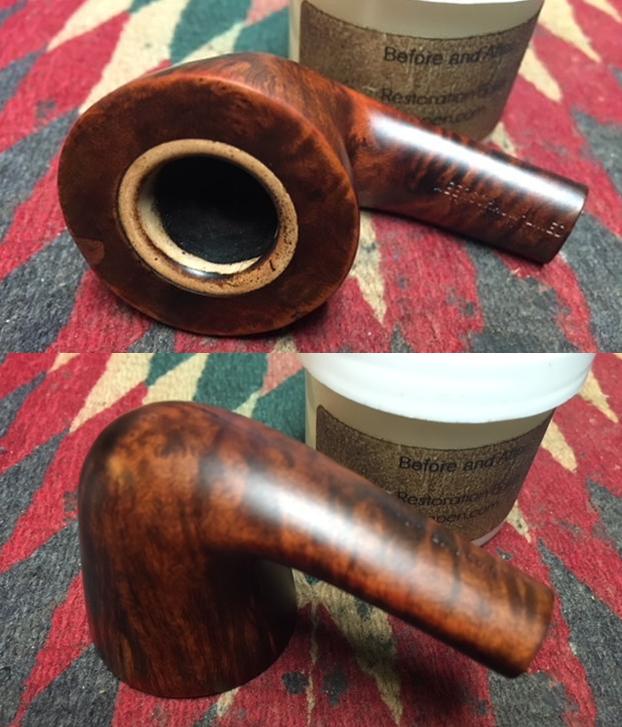
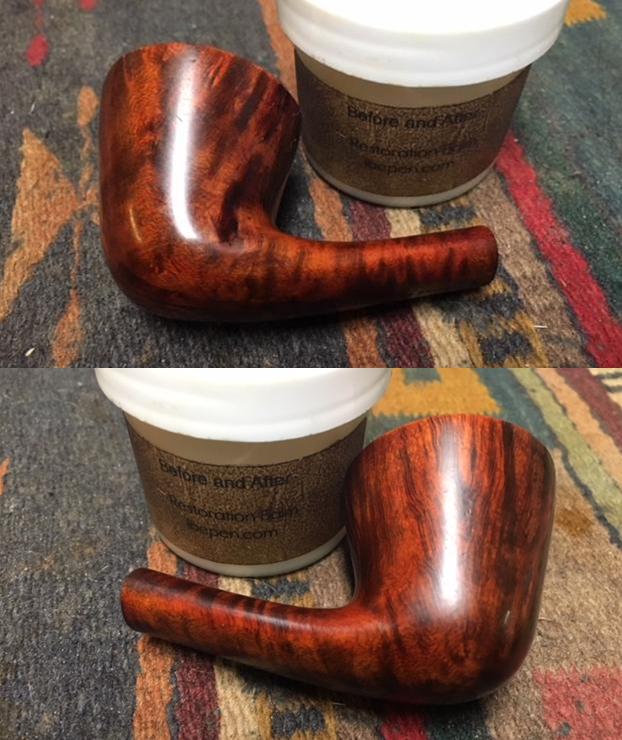
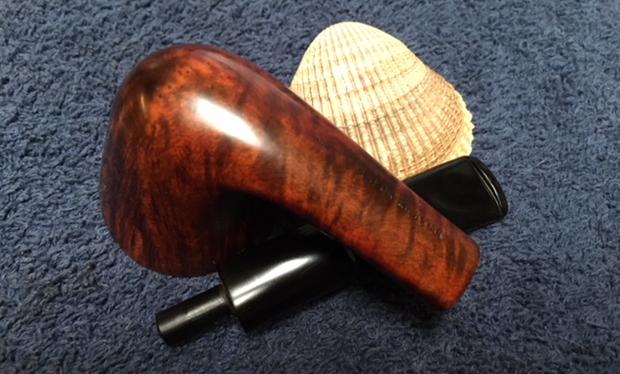
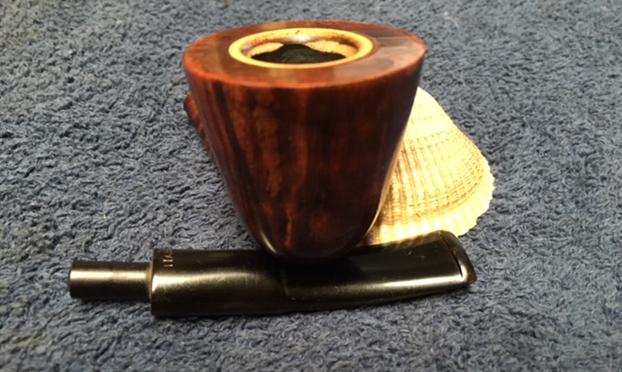
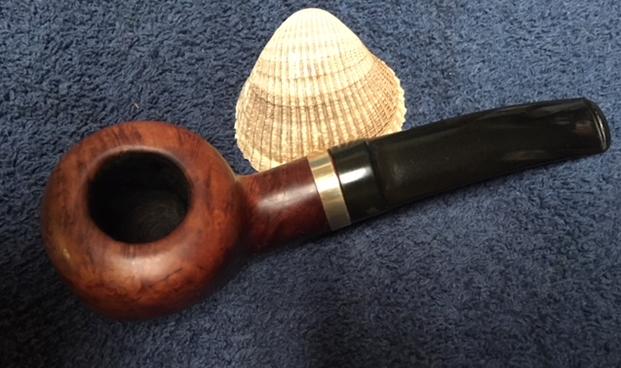
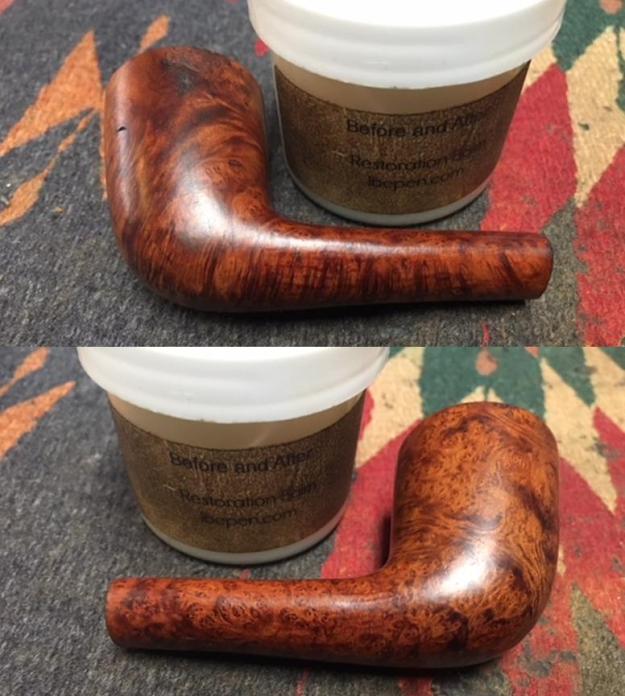
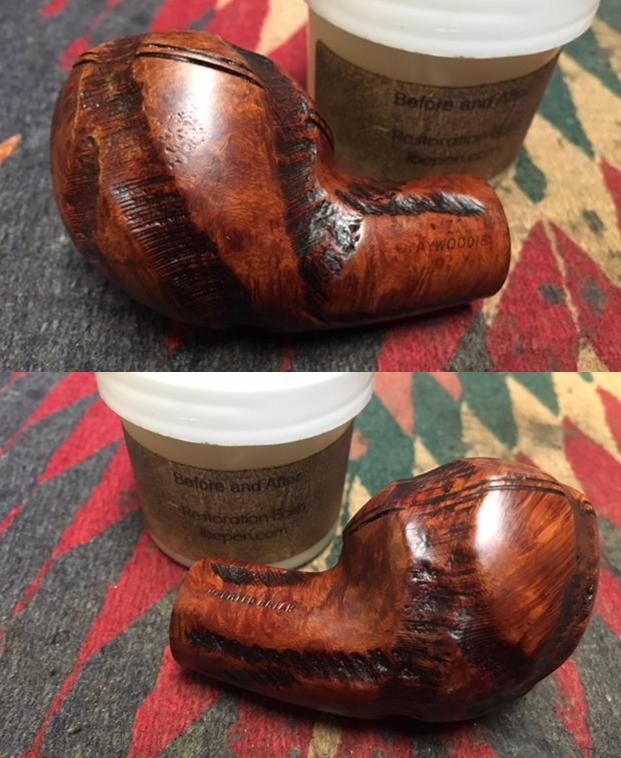
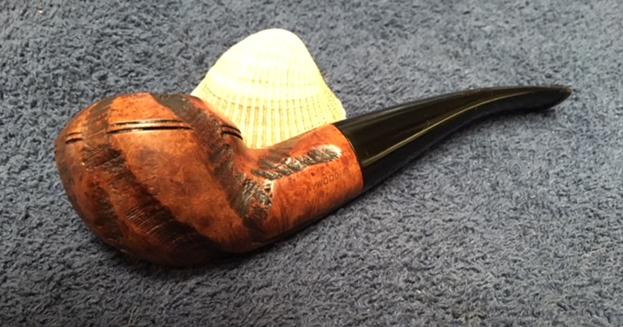
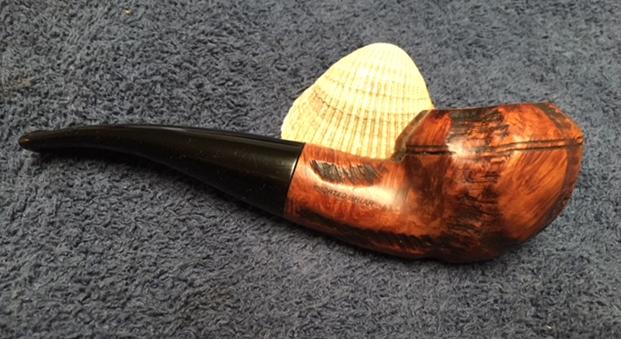
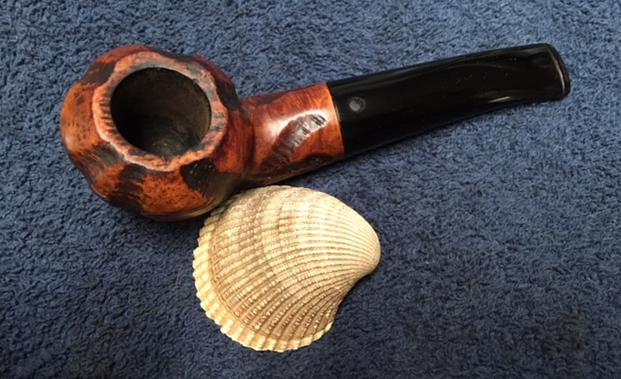
 I carefully polished bowl and the stem with Blue Diamond to polish out the remaining small scratches. I gave the bowl multiple coats of Conservator’s Wax and the stem multiple coats of carnauba wax and lightly buffed the pipe with a clean buffing pad to raise the shine. I hand buffed the pipe with a microfiber cloth to deepen the shine. The pipe polished up pretty nicely. The transparent mixed brown stain worked really well with the black vulcanite stem. The sandblast finish looked really good. The finished pipe is shown in the photos below. The dimensions of the pipe are Length: 5 1/2 inches, Height: 1 3/4 inches, Outer diameter of the bowl: 1 1/4 inches, Chamber diameter: ¾ inches. This is the third of the three of Paresh’s Grandfather’s pipes that he sent me to finish. I will pack the pipes up and send them back to India this week after I give the bowl a bowl coating. I look forward to hearing what he thinks of them once he gets to load them with his favourite tobacco and carry on the pipe man’s legacy of his Grandfather. Thanks for walking through this restoration with me as I worked over this beauty.


