Blog by Steve Laug
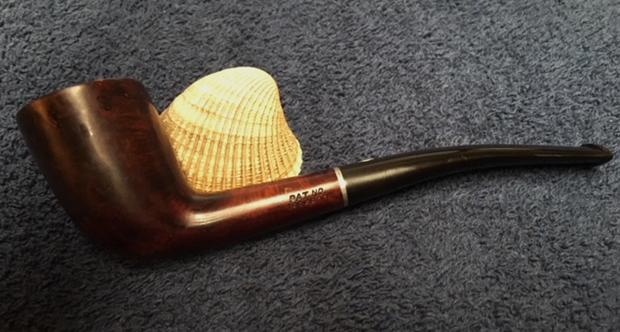
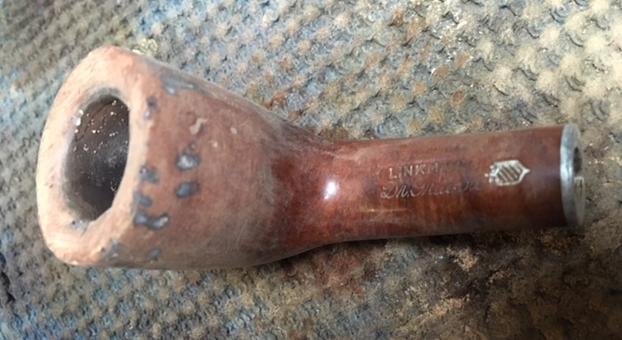
 As I mentioned in my previous blog, Paresh, my friend in India reached out to me over Whatsapp to talk about a few more of his Grandfather’s pipes. He was confident in working on many of them but there were a few that he wanted me to try my hand on. His wife Abha would ream and clean them for me so I would be able to start with a relatively clean pipe. The second pipe was a Linkman Zulu with a vulcanite stem. It was in rough condition when Paresh and Abha started working on it. They reamed the thick hard cake with a KleenReem pipe reamer and clean up the exterior of the bowl with Murphy’s Oil Soap. They also cleaned the interior with alcohol, cotton swabs and pipe cleaners. The pipe was in very rough condition. The sides of the bowl, the rim top had been beaten up heavily. There were gouges all over the sides and rim top of the bowl. It was a mess and it was very dirty. The stamping on the shank read Linkman’s over Dr Grabow with a silver shield next to the stem/shank junction. On the underside of the shank it was stamped De Luxe over Bruyere with a shape number 9700. On the left side of the shank it was stamped PAT. No. 1896800. The stem was oxidized but in decent condition. I took photos of the pipe to show its condition when it arrived.
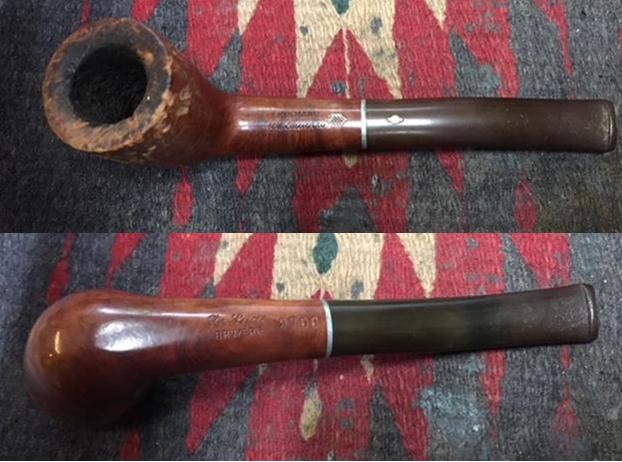 The tenon is the patented threaded Linkman shovel stinger apparatus. It is a single unit rather than an inserted stinger as in later models. The top of the stem has a Linkman propeller logo.
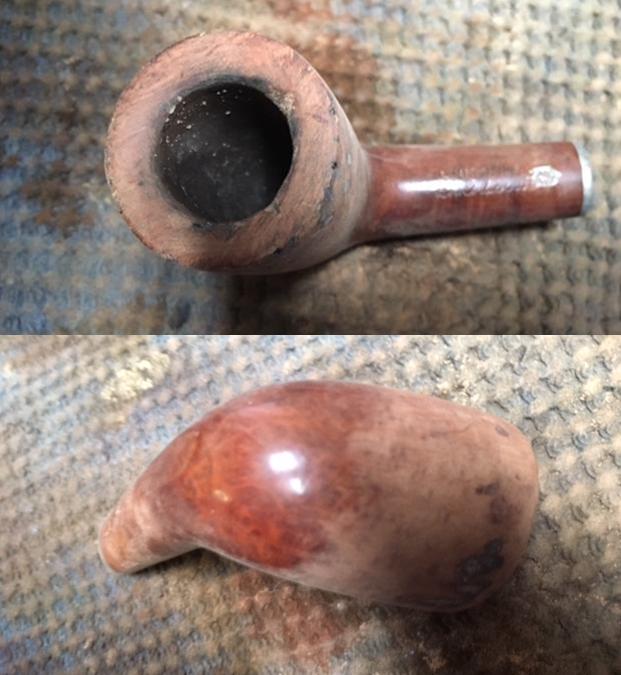
 I took some close up photos of the damage on the bowl to give a better idea of what I was working with on this pipe. The rim top was a real mess with nicks, chips and damage under a coat of tars. Paresh and Abha had left the cake in the bowl to me to work on because of the other damage to the pipe. The stem was in pretty decent shape with a few tooth marks and chatter on both sides of the stem near the button and some oxidation. The bowl was a real mess and it would be a challenge.
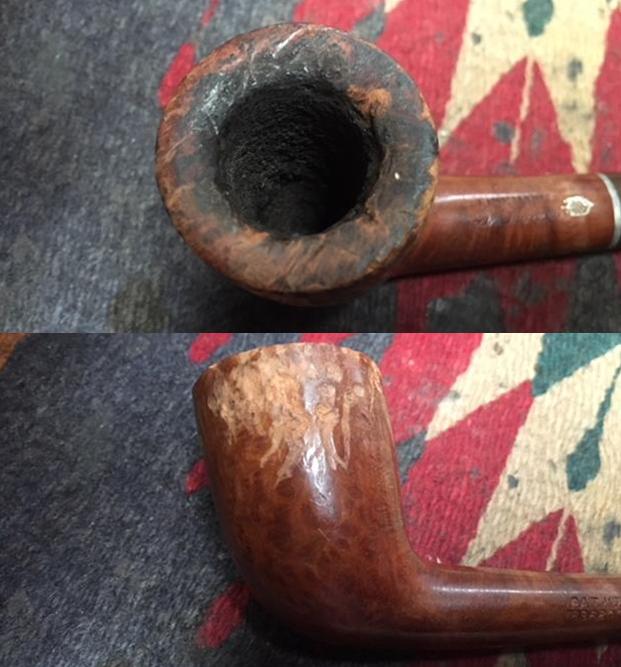
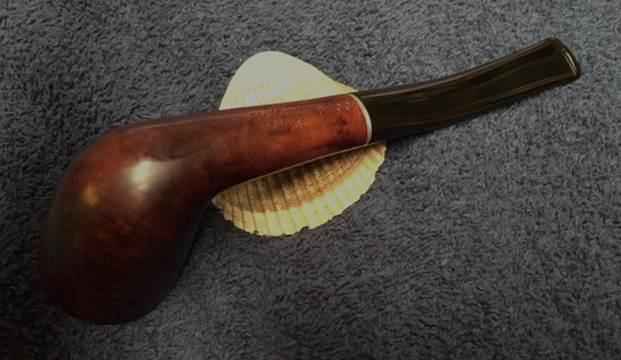
 I took photos of the stamping on the top, bottom and left side of the shank.
 I checked some of my usual sources to get some information on the brand and how it fit into the Linkman/Grabow hierarchy. The first link I checked was the Pipephil logos and stampings site. I include the link as follows http://www.pipephil.eu/logos/en/logo-l4.html. I quote as follows.
The M. Linkman and Co. was established by Louis B. Linkman and August Fisher in 1898. The company closed down in the 1950s and the Dr Grabow branch was sold to Henry Leonard and Thomas Inc.
I then went to the Pipedia website to get some more details and information. There was also a photo of Linkman that I thought added a nice touch to the work I was going to do on this pipe. Here is the link from the site if you want to check it out in full. https://pipedia.org/wiki/M._Linkman_%26_Co.
The na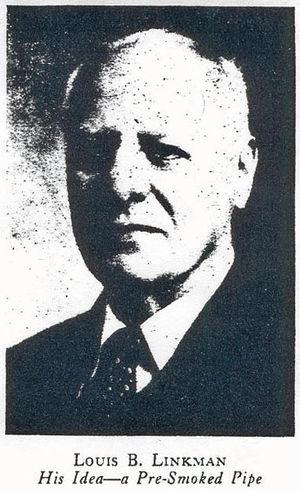 me is often said to stand for Mary Linkman & Company. Mary Linkman was the mother of Louis B. Linkman, originator of the Dr. Grabow pipe. This Chicago company produced meerschaums and briars both.
BACK IN 1898, two ambitious young men reached the momentous decision to go into business for themselves. They were Louis B. Linkman and August Fisher. From the time they were in knee pants they had worked for a pipe jobber in the mid-west.
Diligently saving a portion of their earnings, they accumulated a few hundred dollars, and in 1898 formed a partnership under the name of M. Linkman & Company. They opened a small shop on Lake Street, Chicago, employed two additional people, and started to manufacture pipes. {The article never mentions what the “M” stood for, or the reason for the name chosen.}
In 1890 {? — 1899, perhaps?} another young man, Anton Burger, who had also been employed by a pipe jobber in the mid-west, approached them and was taken in as a partner. M. Linkman & Company proceeded as a partnership; the business developed rapidly through the untiring efforts of these men in producing quality pipes and rendering good service to their customers.
The business continued to grow, and in 1907 M. Linkman & Company was incorporated with Louis B. Linkman as president, August Fisher, vice-president, and Anton Burger, secretary and treasurer. In 1914, Richard J. Dean, who had joined the firm in 1911 was appointed general sales manager.
The business was growing and expanding rapidly, and the executives soon realized the quarters in the Wells Street Bridge Building were inadequate, so in 1922 Linkman built a modern three-story reinforced concrete building at the corner of Fullerton Avenue and Racine, housing one of the most complete and modern pipe plants in America.
I finished by doing a Google search to find the US Patent Search site so that I could see if there was a patent document on file there for this patent number. http://patft.uspto.gov/netahtml/PTO/srchnum.htm. I entered the patent number and found a patent filed by L.B. Linkman for the pipe on April 11, 1932 and granted on February 7, 1933. I include that below.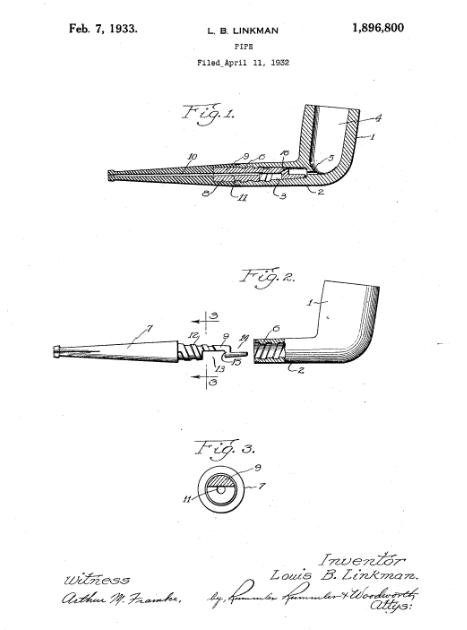

 I decided to clean up the bowl interior before I addressed the damage on the outside of the bowl. I reamed the bowl with a PipNet pipe reamer starting with the smallest cutting head and working up to the second head which was the same size as the bowl. I reamed the cake back to bare briar to see if there was any internal damage to the bowl. I sanded the inside of the bowl with a piece of dowel wrapped with 220 grit sandpaper to smooth out the bowl walls and the inner edge of the rim. I sanded the rim top with a folded piece of 220 grit sandpaper to smooth out the damage and reshape the inward bevel on the rim.
 I wiped down the surface of the briar with alcohol on a cotton pad to clean off the grime. I filled in the damaged areas around the bowl and on the rim with briar dust and clear super glue. I sprayed it with an accelerator (that is why it appears white in the following photos). The extent of the damage is very clear in the photos below.
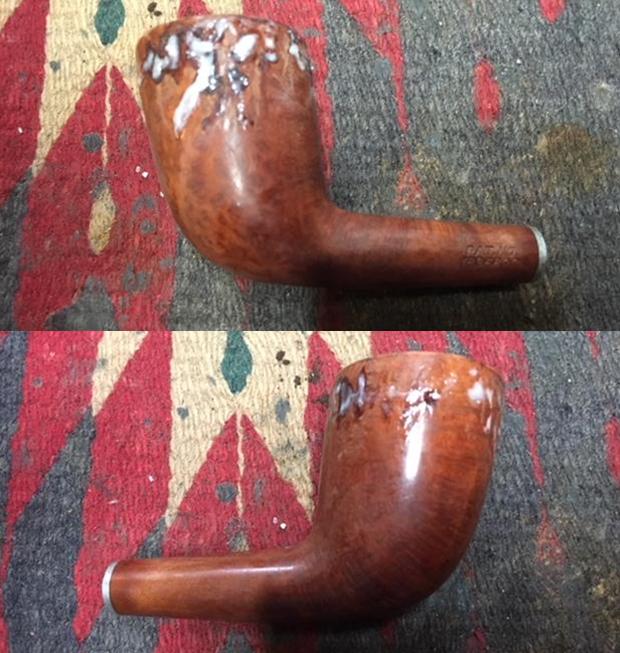
 I started to sand the bowl with 220 grit sandpaper to begin to smooth out the repairs. It would take a lot of sanding to smooth out the filled areas. The patches were rock hard. The photos that follow show the progress of the sanding.


 I polished the sanded briar with micromesh sanding pads – wet sanding with 1500-2400 grit pads and dry sanding with 3200-12000 grit pads. I wiped the bowl down with a damp cotton pad after each sanding pad. The briar took on a shine and the filled spots though dark were better than all of the damage present before.
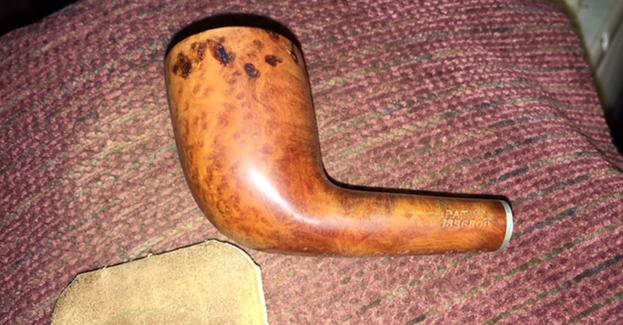
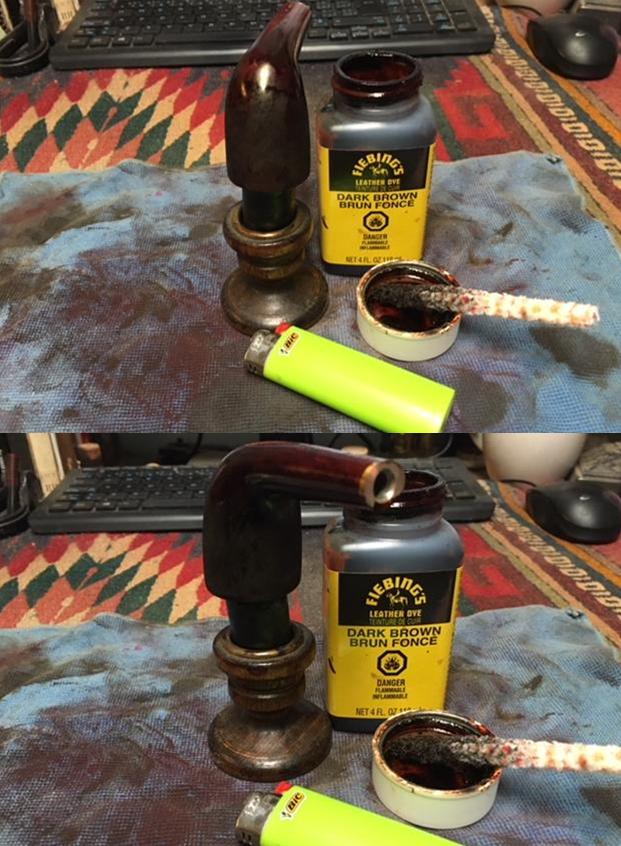
 To help hide the repairs on the bowl I decided to stain it with a dark brown aniline stain. I applied the stain with a folded thick pipe cleaner, flamed it and repeated the process until I was pleased with the coverage on the bowl. The photos below tell the story.
 Once the stain had dried, I wiped the bowl down with alcohol to make it a bit more transparent without making the repairs stand out. It is a tricky balance to work out as too much transparency reveals all of the blemishes while not enough makes it opaque and lacklustre. Once I polish the pipe I will know if I did enough or too much… time will tell.
 I forgot to take a photo of the stem before I put it in the Before & After Deoxidizer overnight and forgot about it. Today after lunch I remembered it and took it out of the mix. I wiped off the excess and ran it under warm water to rinse off the mixture. I was unable to run water through the stem so I dried it off to have a look. It looked better but it was absolutely plugged tight. That generally means there is something like a pipe cleaner broken in the stem but I would need to take it apart to tell for sure.
 I tried several different ways of opening the airway. I tried to push stiff pipe cleaners through the stem from the button. By measuring the length of the pipe cleaner with the stem I could see that the blockage was in the stinger itself. I tried pushing a straightened paper clip through the blockage from both ends – the button and the airway in the stinger. Nothing worked. I heated the stinger and tried again with the paper clip and again no luck. It was time to move forward. I heated the stinger with a lighter to loosen the tars holding it in place. Since it was a 1930 era pipe I figured it would be a threaded end the stem. Sure enough, once it was heated I unscrewed from the stem.
The photo below shows the culprit – a really stinky broken off pipe cleaner jammed in the stinger. The pipe cleaner was almost the length of the stem as well so it was clear that I was merely sliding by the jam with the stinger in place. With a pipe cleaner that old and worn I was worried I would just break off more in the stinger. I heated the stinger with the lighter and then carefully wiggled the pipe cleaner free of the stinger. The second photo shows the culprit freed from the stinger. You can also see that some of the fluff on the cleaner had come off inside the stinger and left it plugged. I could still not blow air through the stinger. (I have circled the ‘fluffless’ pipe cleaner end in the second photo below.) I tried to push through the clog with the paper clip pictured above, twisting it into the threaded end but was not able to break through. That left only one option for me. I chucked a 1/16 inch drill bit in my Dremel, set the speed to 5 and slowly worked my way through the rock hard plug. It took some doing to work it through the plug but I worked it back and forth until the airway was clean and I could blow air through it. I ran pipe cleaners soaked in alcohol back and forth through the stinger and removed all of the grit and tar that had built up around the plug. It was pretty nasty stuff. But after it was said and done I had a clear and clean stinger.
 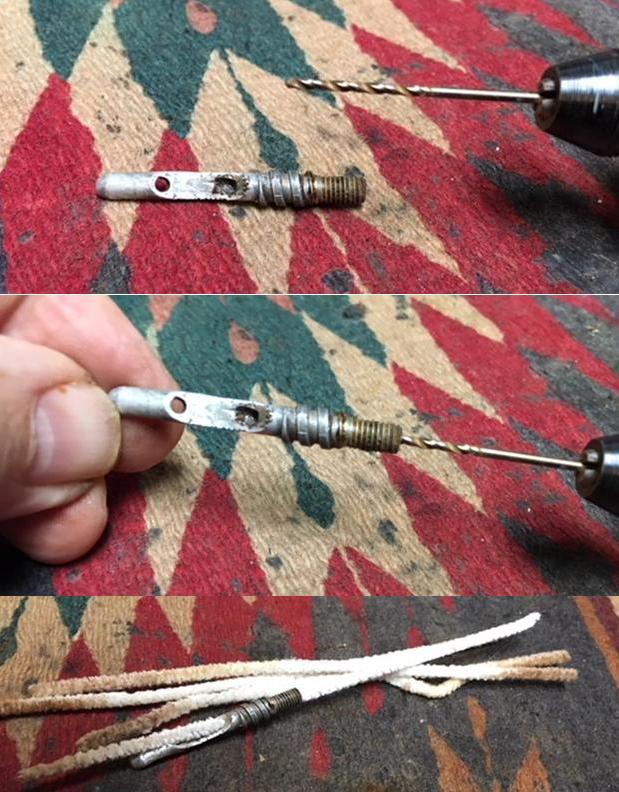 I cleaned out the inside of the stem with pipe cleaners, cotton swabs and alcohol. Once the stem was clean I checked it with a light for more potential problems inside. It was clear and spotless.
 I lightly greased the threads on the stinger and turned it back into the cleaned stem. I aligned it with the mortise in the shank. The stem was getting there. I still needed to work on some oxidation but it looked a lot better and I could blow through it easily.
 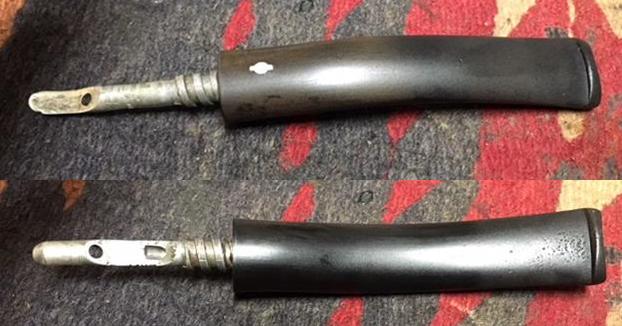 I polished the vulcanite stem with micromesh sanding pads – wet sanding it with 1500-2400 grit pads and dry sanding with 3200-12000 grit pads. I wiped it down with Obsidian Oil after each sanding pad. (I polished the metal stinger as well at the same time.) I gave it a final coat of oil and set it aside to dry.

 After staining the briar and wiping it down with alcohol, I touched up the repaired areas with a Black Sharpie Pen and blended in by rubbing it. I have been using Before & After Restoration Balm after staining to further blend and clean the briar. The product works to clean, enliven and protect the briar. I hand rubbed it with my fingers, working it into the exterior of the pipe. I wiped it off and buffed it with a soft cloth to polish it. The pipe really began to have a rich shine. I took some photos of the bowl at this point to mark the progress in the restoration.
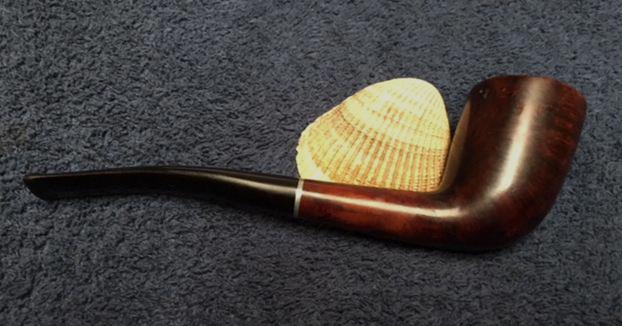
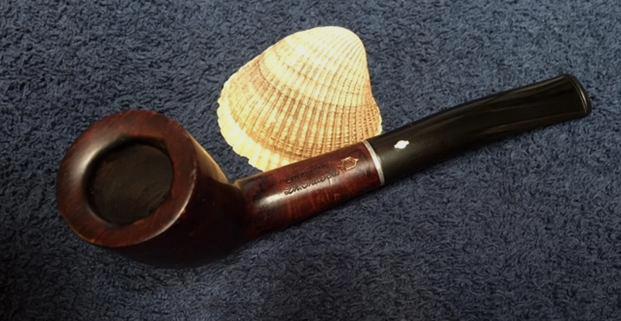
 I carefully polished bowl with 3200-12000 grit micromesh sanding pads. I polished the stem with Blue Diamond to polish out the remaining small scratches. I gave the bowl multiple coats of Conservator’s Wax and the stem multiple coats of carnauba wax and lightly buffed the pipe with a clean buffing pad to raise the shine. I hand buffed the pipe with a microfiber cloth to deepen the shine. The pipe polished up pretty nicely. The transparent dark brownish red stain worked really well with the black vulcanite stem. The finished pipe is shown in the photos below. The dimensions of the pipe are Length: 6 inches, Height: 1 3/4 inches, Outer diameter of the bowl: 1 1/4 inches, Chamber diameter: ¾ inches. This is the second of the three of Paresh’s Grandfather’s pipes that he sent me to finish. I will set it aside and when the others are finished I will pack them up and send them back to India. I look forward to hearing what he thinks of it once he gets to load it with his favourite tobacco and carry on the pipe man’s legacy of his Grandfather. Thanks for walking through this restoration with me as I worked over this beauty.


Steve, excellent, excellent save of Peresh’s grandfather’s pipe. The stummel repair is great and overcoming the stem blockage was textbook. I think Peresh will be pleased.
LikeLike
Thanks Dal. That one presented a lot of challenges.
LikeLiked by 1 person