Blog by Paresh Deshpande
I had purchased three Les Wood pipes from a gentleman and had restored the first of the three pipes and have added it to my personal collection. Given below is the link to the write up posted on rebornpipes and is a recommended read to know how I came to be in possession of this lot and brief research on husband wife duo of Leslie Wood and Dolly and the pipes they make.
https://rebornpipes.com/2022/08/05/pipe-gods-smiled-and-i-got-not-one-but-three-les-wood-pipes-restoring-a-les-wood-poker/
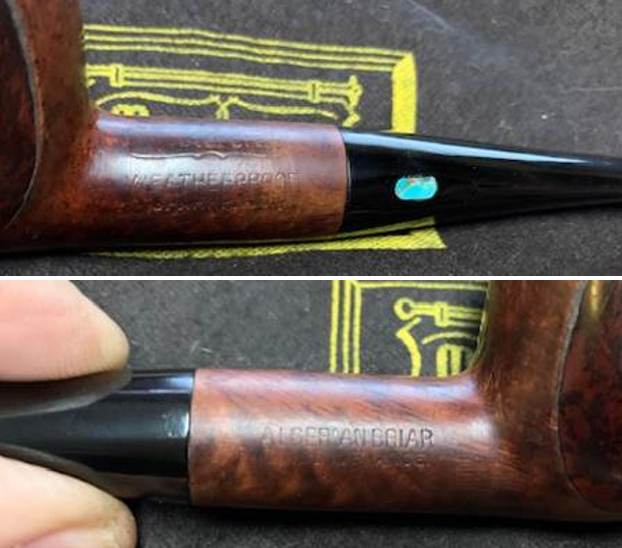
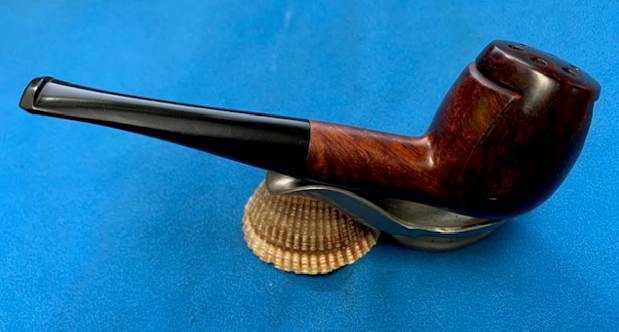
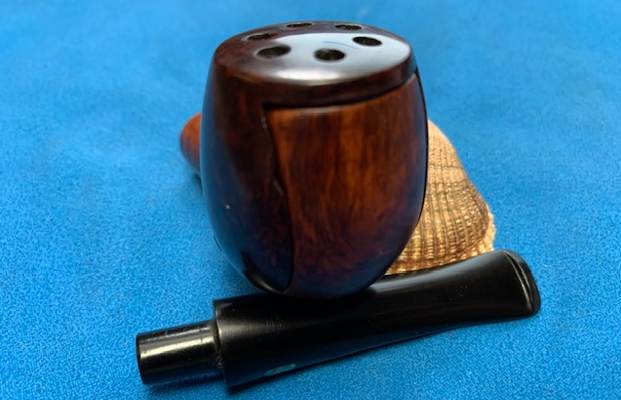
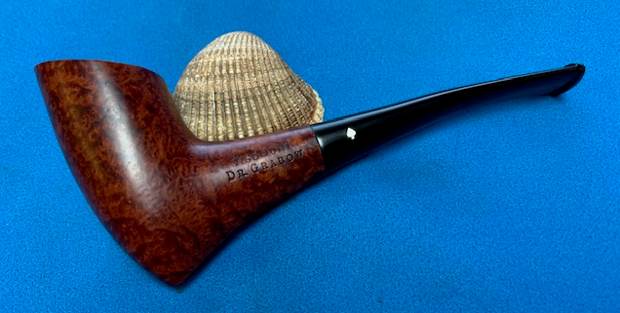
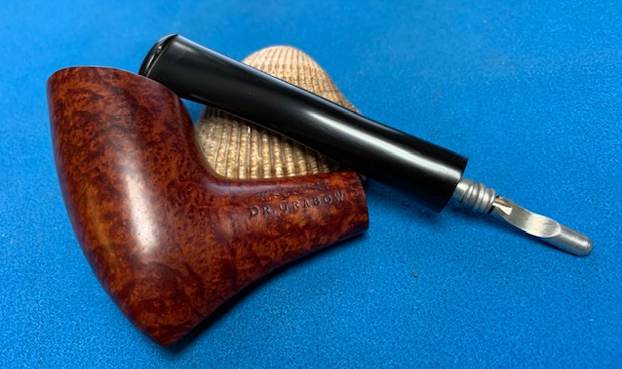
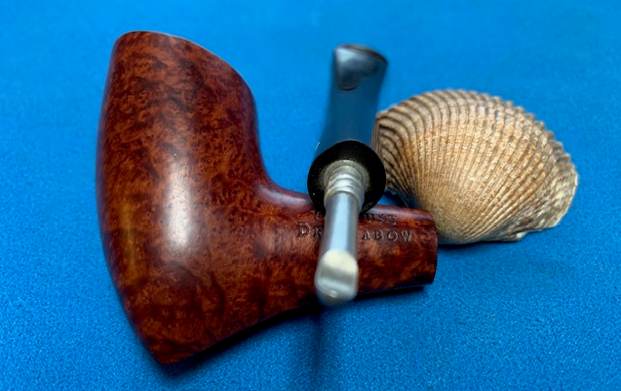
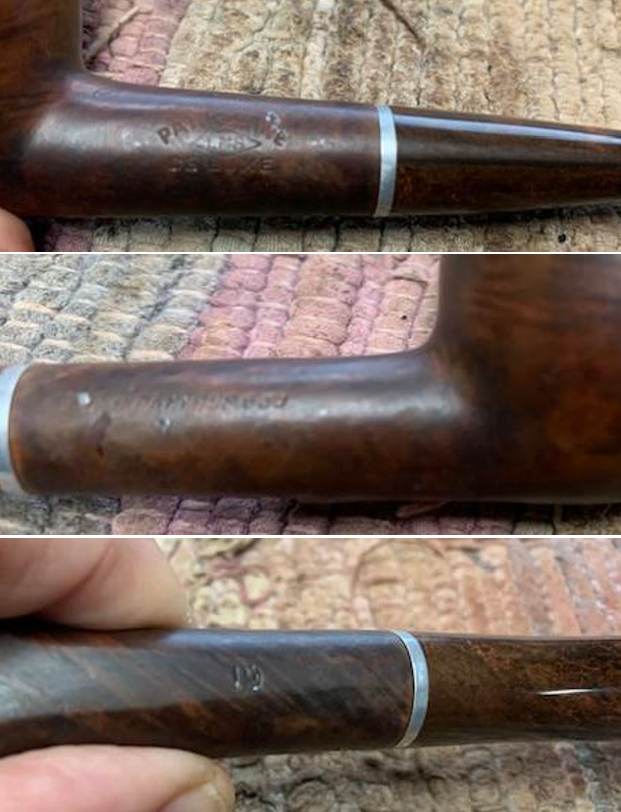
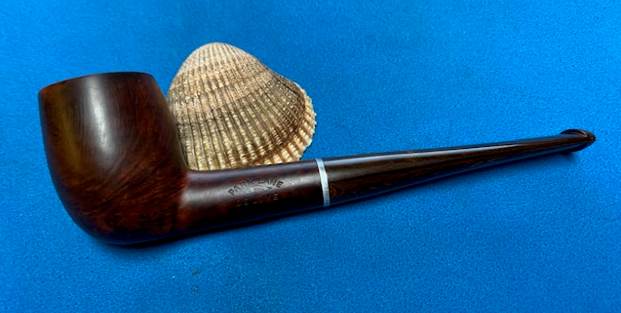
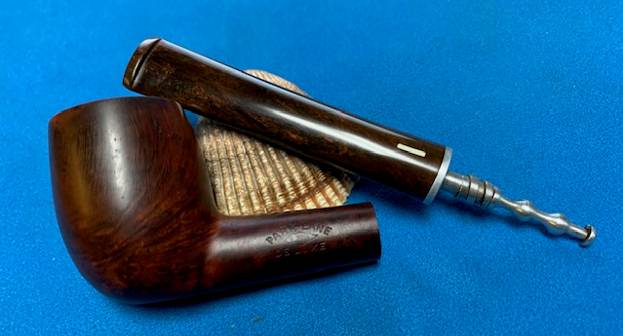
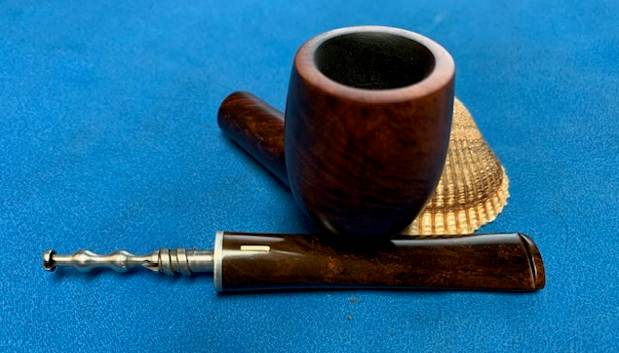
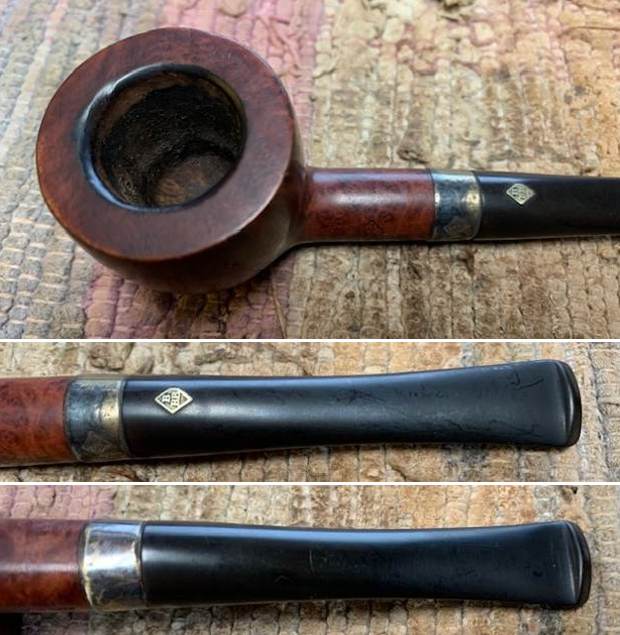
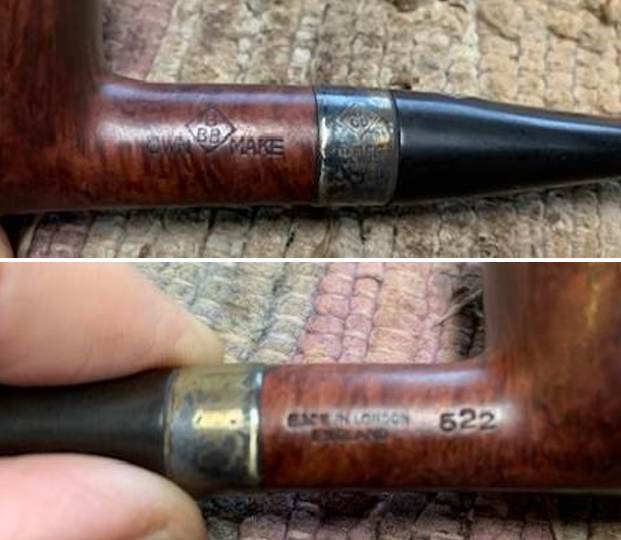
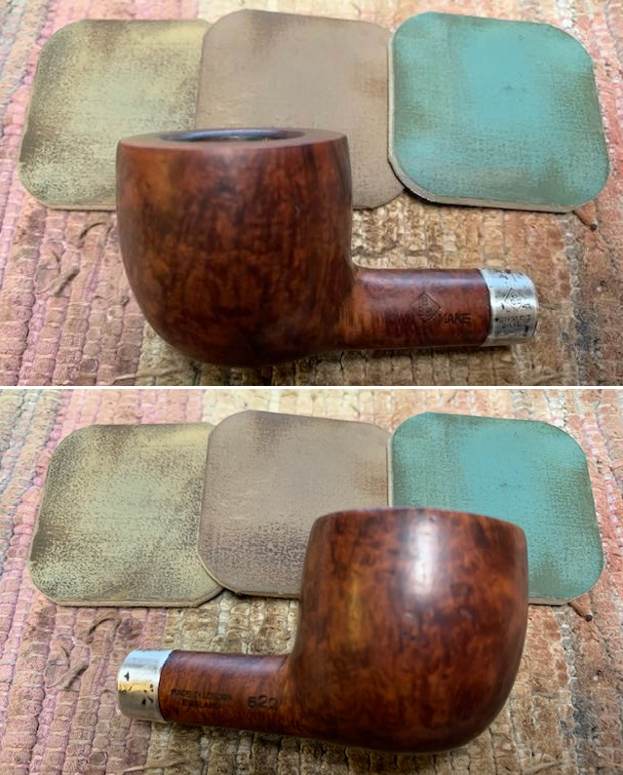
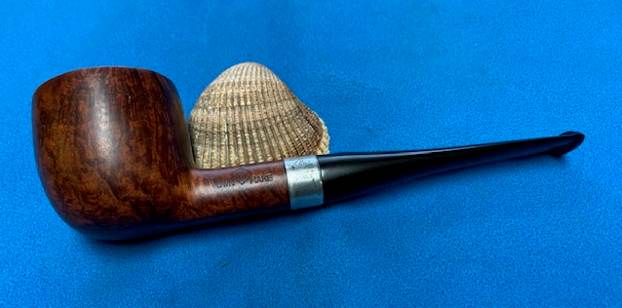
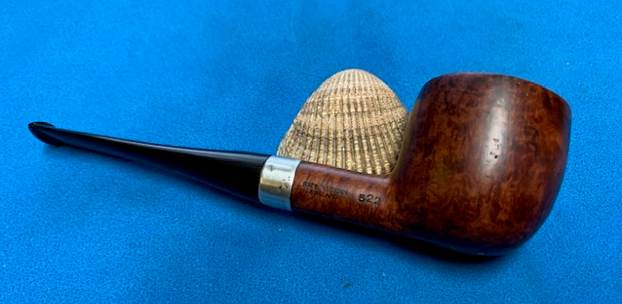
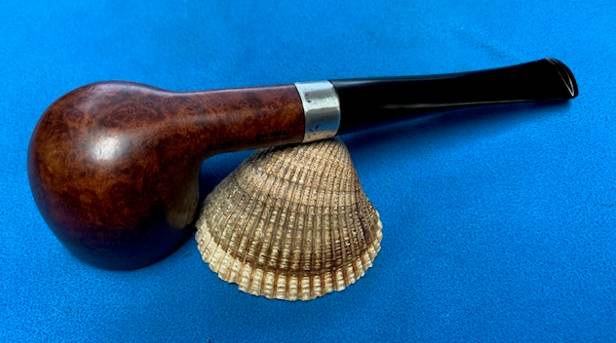
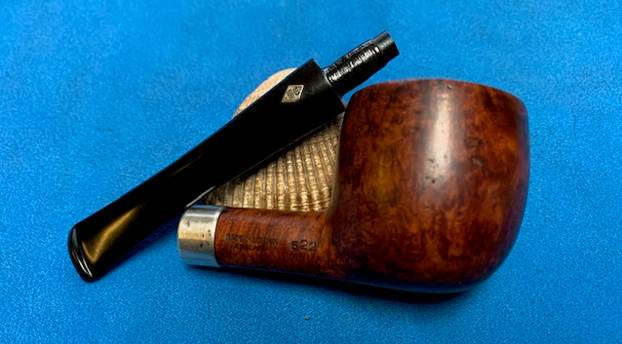
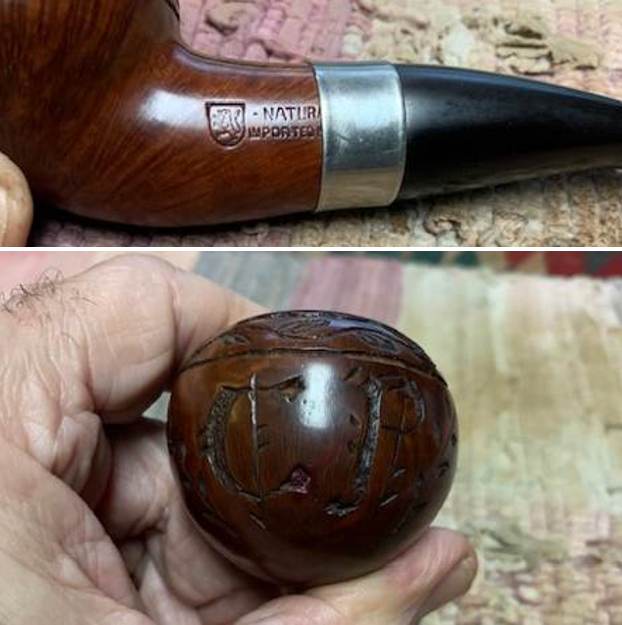
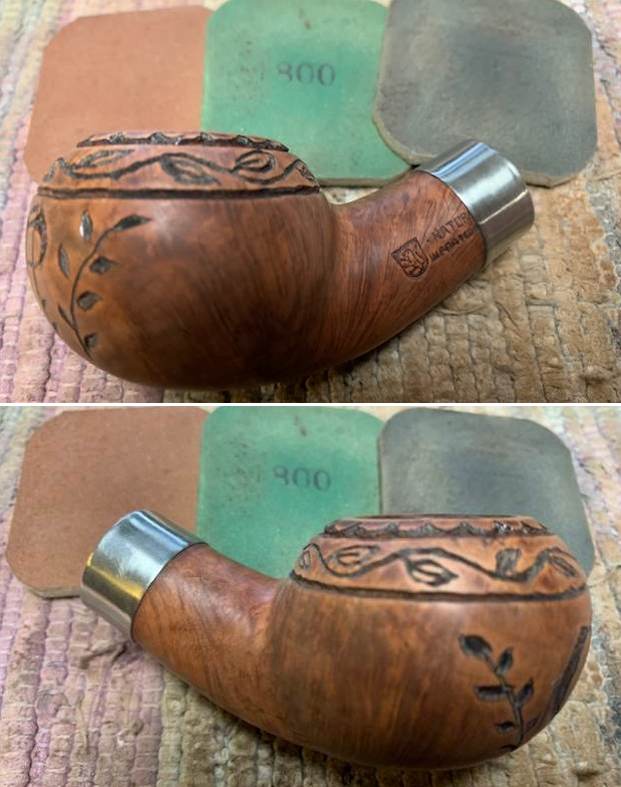
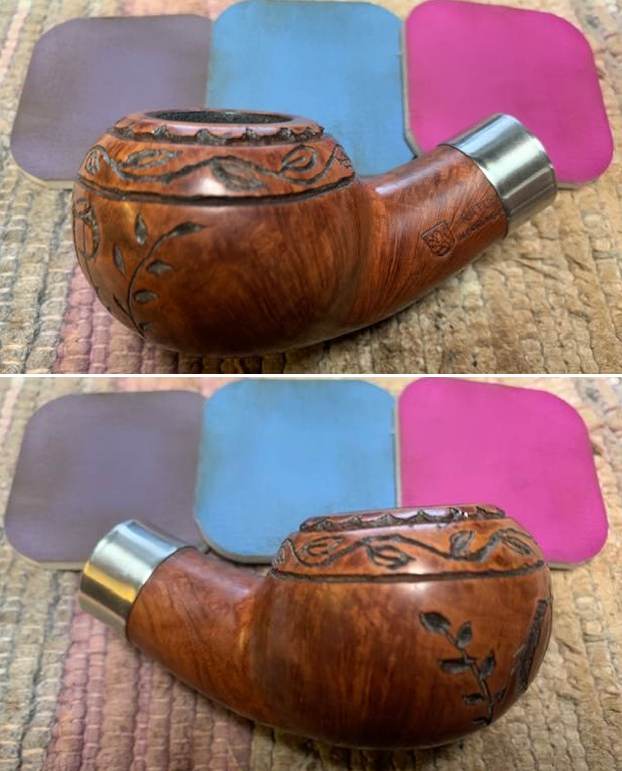
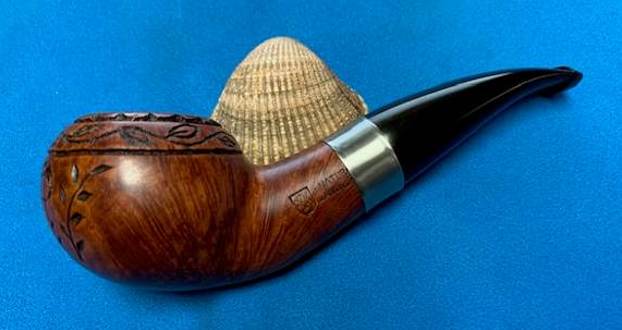
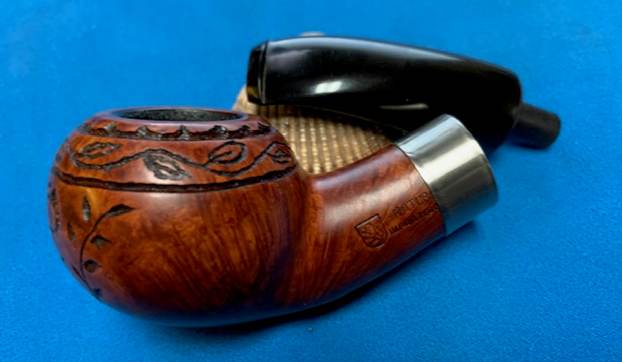
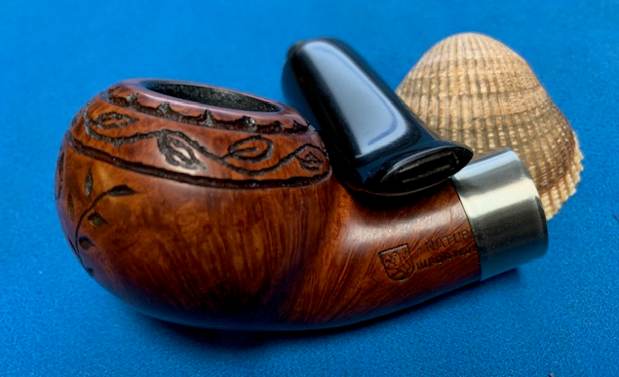
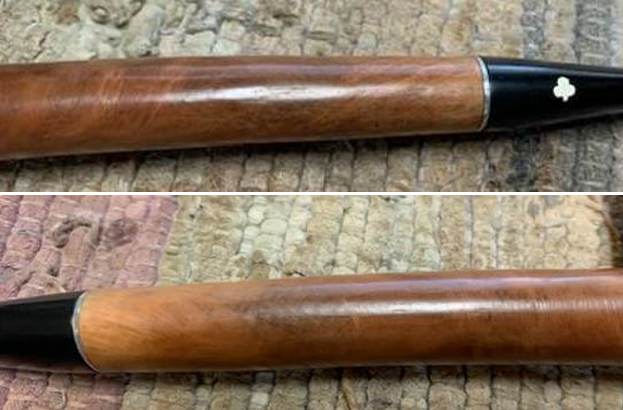
The second pipe that is now on my work table is a beautifully rusticated paneled Apple Half bent Silver Spigot. It is stamped on the bottom smooth surface of the shank as “FR LOUIS HESTON” over “FERNDOWN” in a slight arc over “BARK”. The sterling silver ferrule at the shank end bears the stamp “L & JS” in a rectangular cartouche over “.925”. The sterling silver mounting at the tenon end of the stem also bears similar stampings as seen on the ferrule. The vulcanite stem is stamped on the left side as “L J S”.
 Now this stamping varies significantly from the one that I had worked on earlier in that this pipe does not bear the stamping LES WOOD, HAND MADE IN ENGLAND and star (*) marking to denote the size. I referred back to pipedia.org to understand the variation in stamping. Here is what I found out and also the link to the write up is given below.
https://pipedia.org/wiki/Ferndown
Due to the vagaries of international trademark law, he sold his earlier pipes as ” L.&J.S Briars”, “Ellwood”, “Les Wood” or “L. Wood”. Until recently, an average of 1500 – 2000 pipes a year were sold as “Ferndown” — named for the mansion he lives in — in the UK and US, but as “L. Wood” pipes in Germany.
From the above, I assume that this pipe is from the recent past while the poker was from the earlier period. Truth be told, I am not 100% convinced on this and would really appreciate input, clarifications and detailed information on this variation in stampings observed from learned readers of rebornpipes.
There was not much that I could find about Fr. Louis Heston. An internet search of the name threw up data about Rev. Edward Louis Heston who left for heavenly abode in 1973. This period definitely does not coincide with the time period when Leslie Wood started making pipes under the FERNDOWN! Well, this too then is a grey area and would request readers to fill us all on this name and establish a relation between the name Fr. Louis Heston and this Les Wood pipe.
Initial Inspection
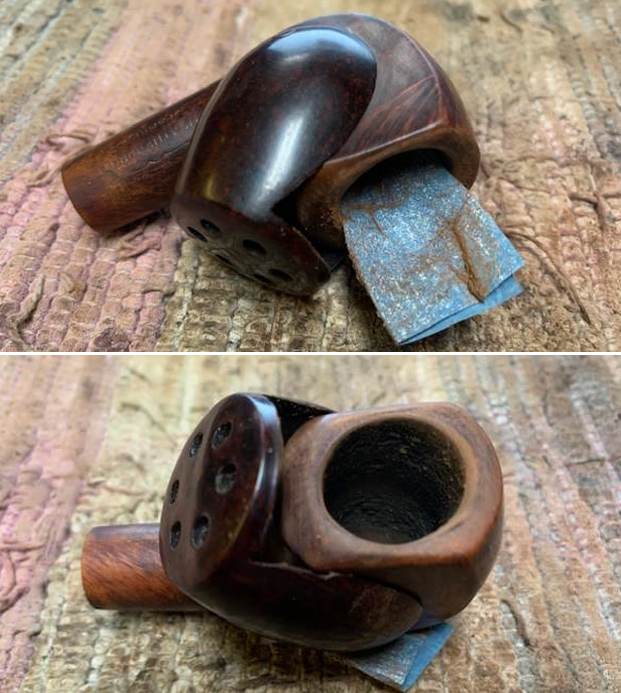
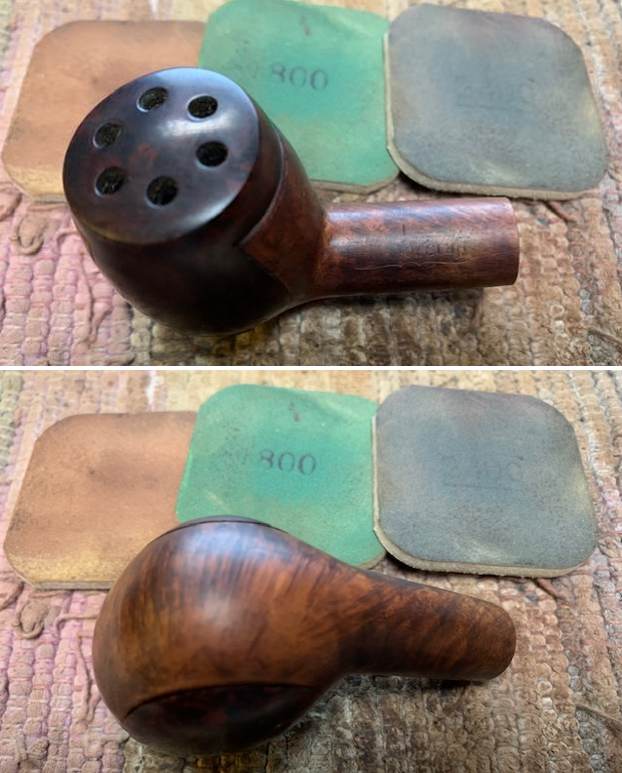
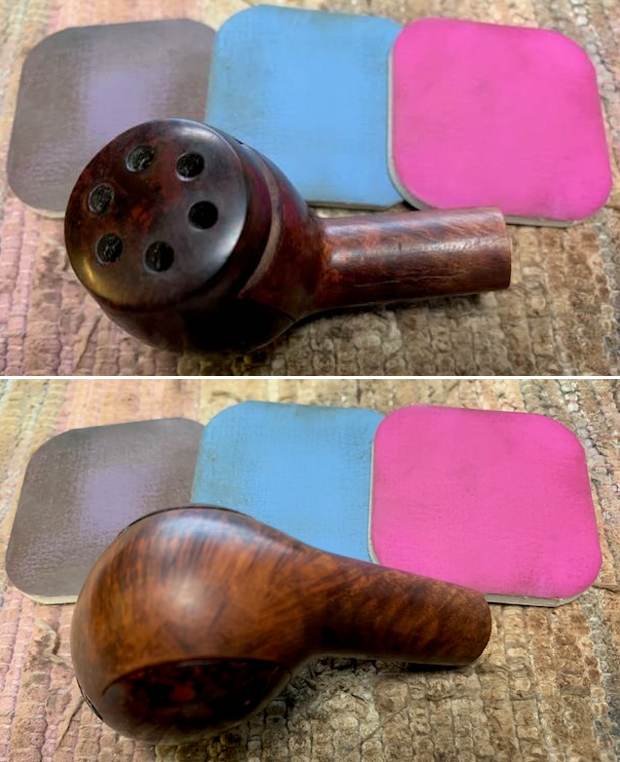
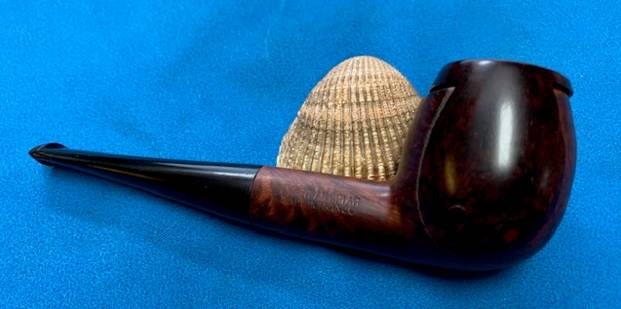
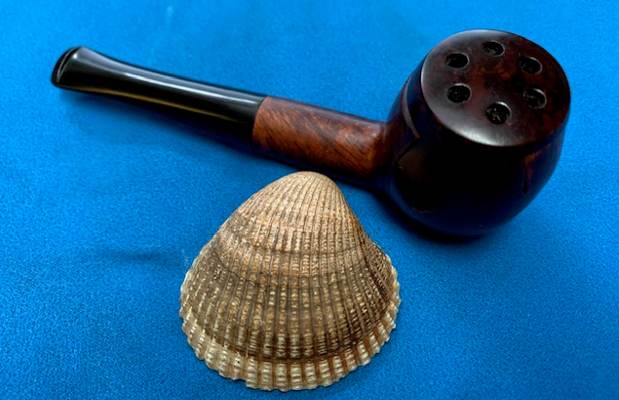
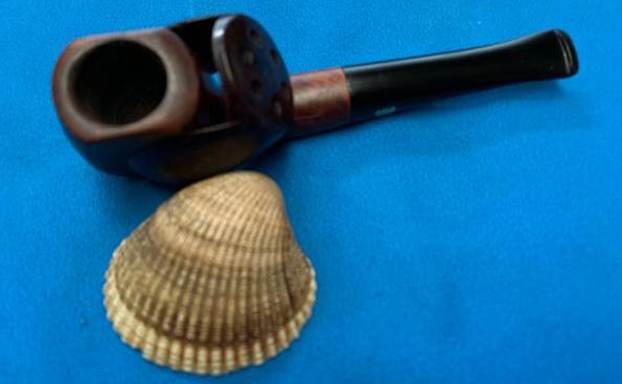
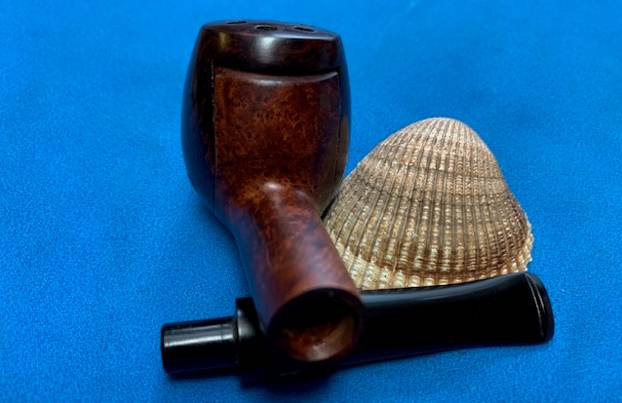
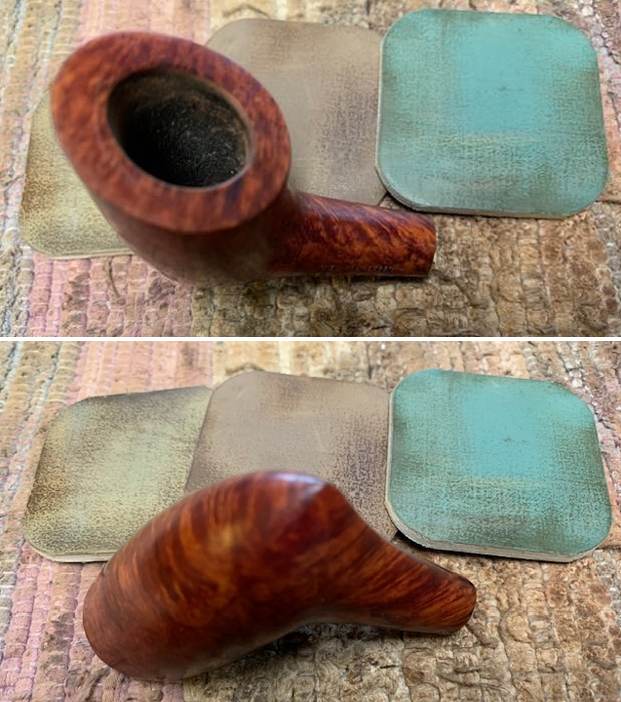
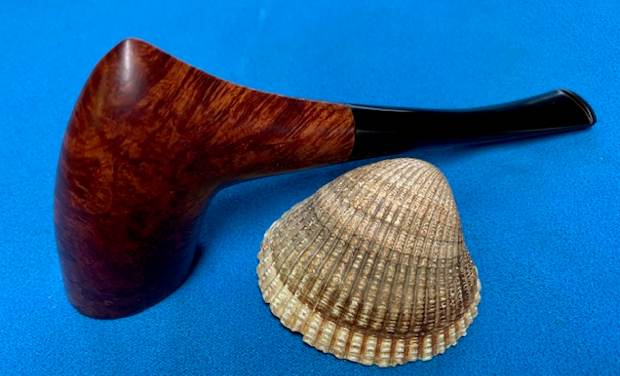
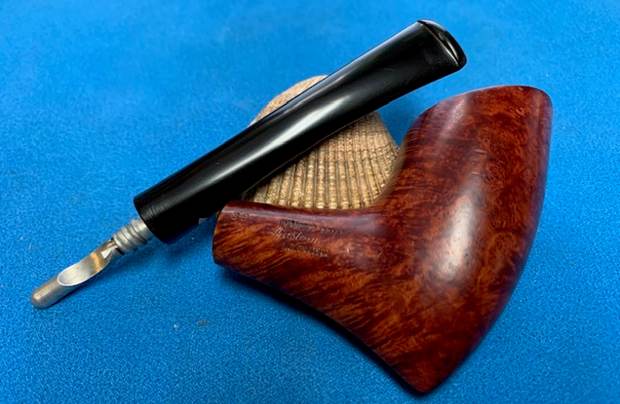
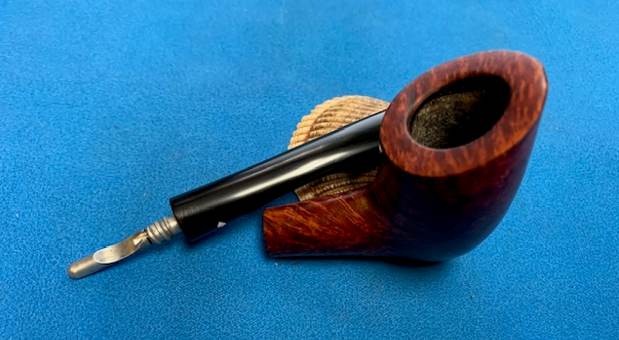
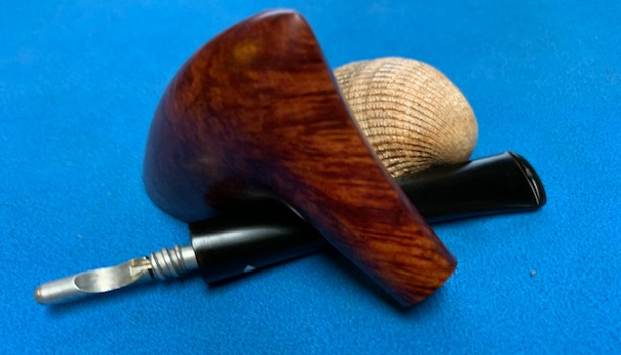
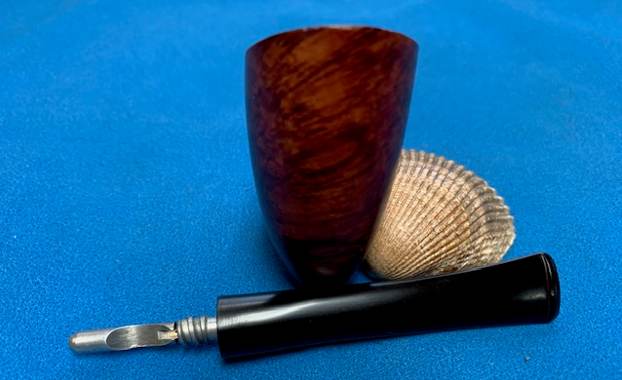
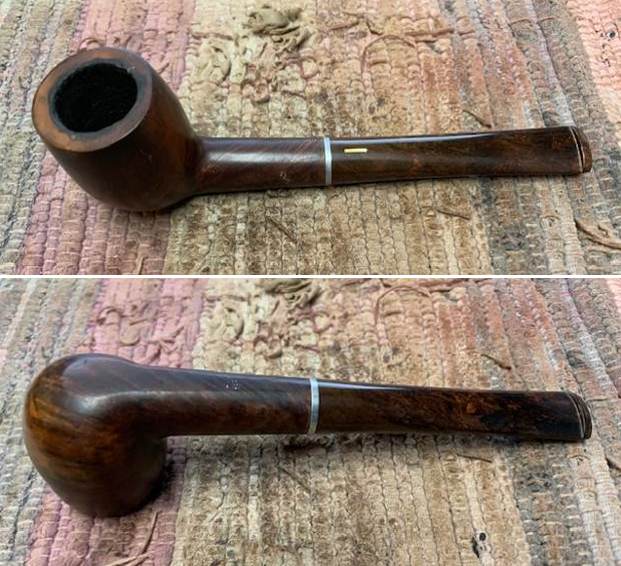
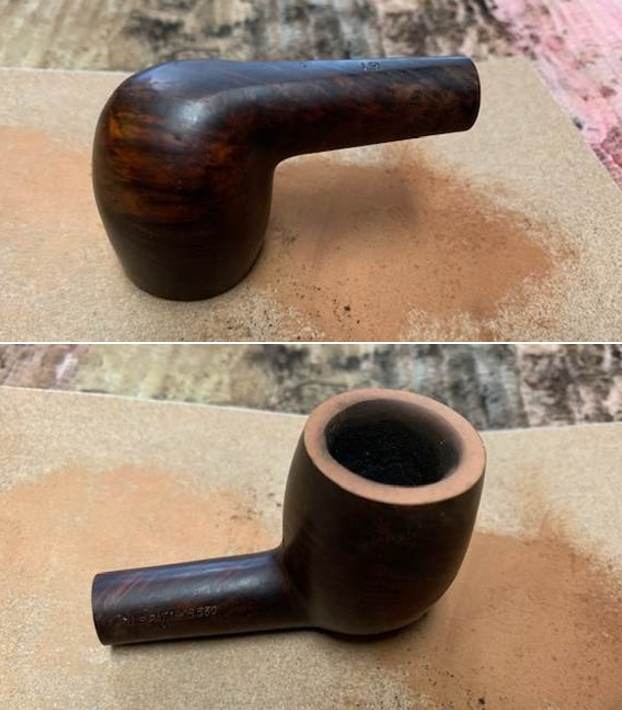
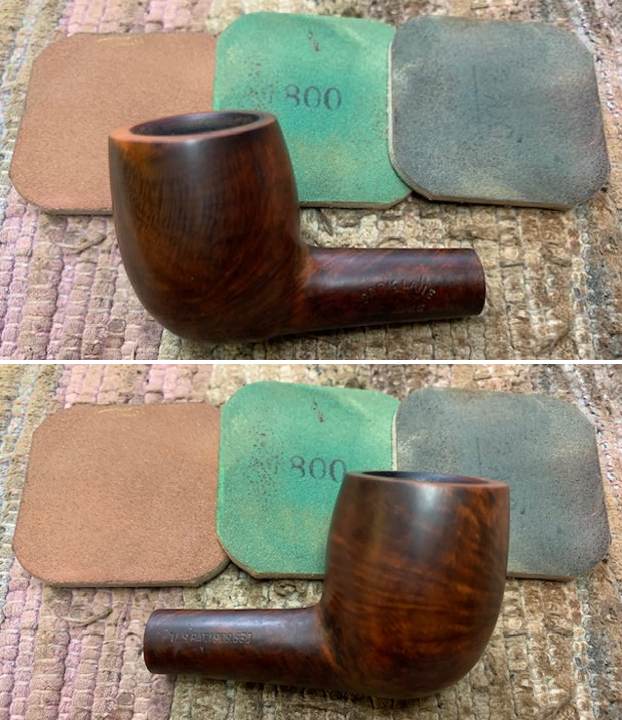
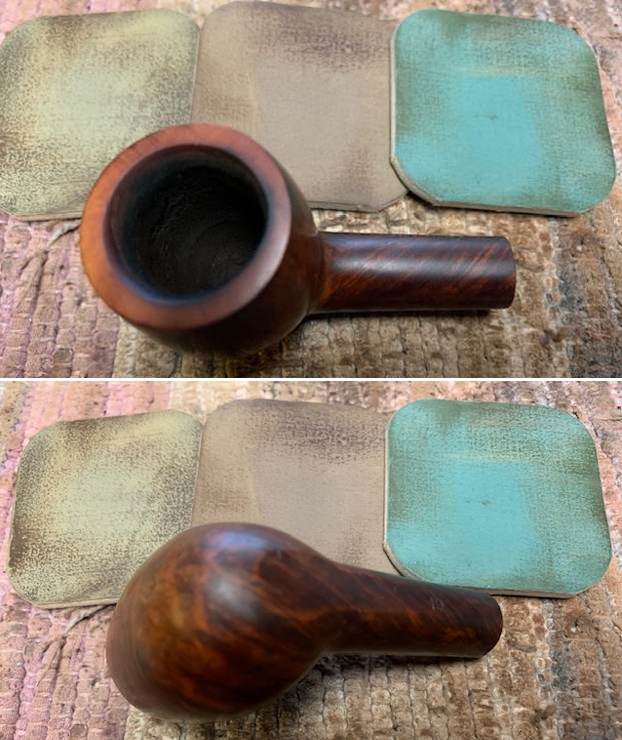
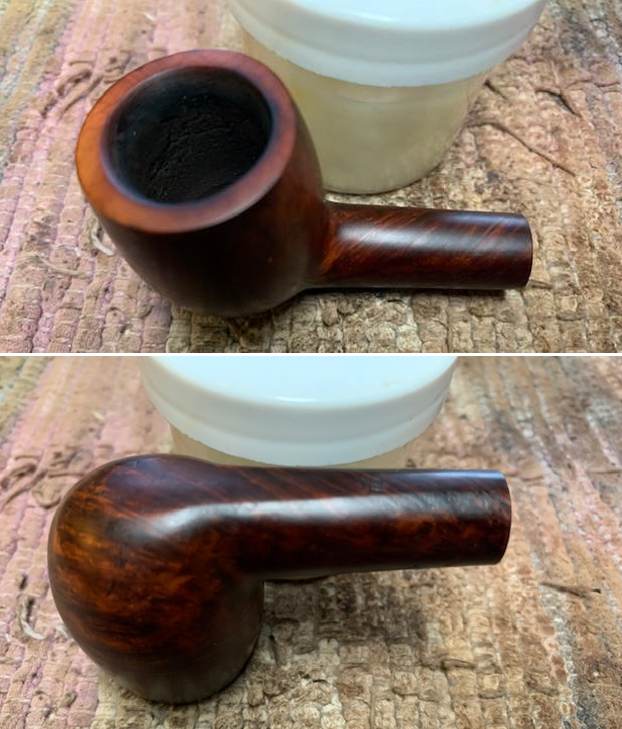
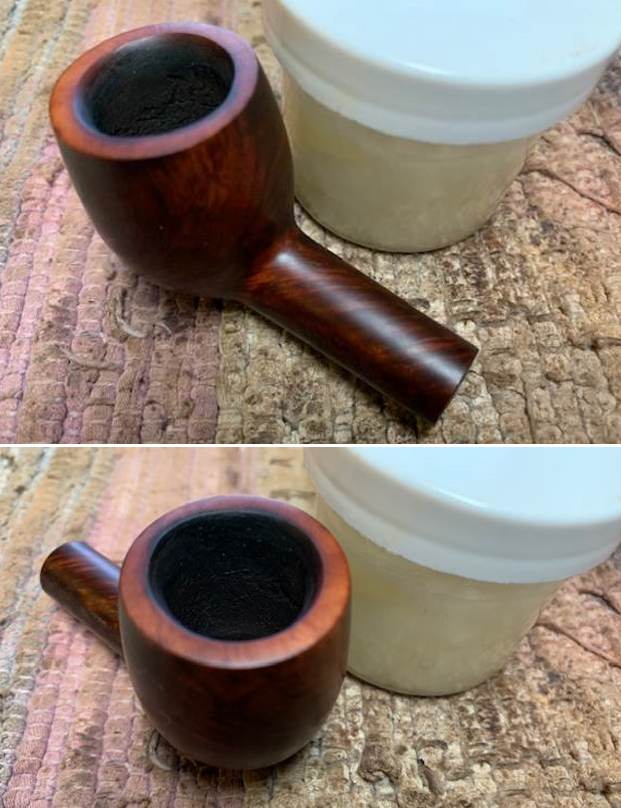
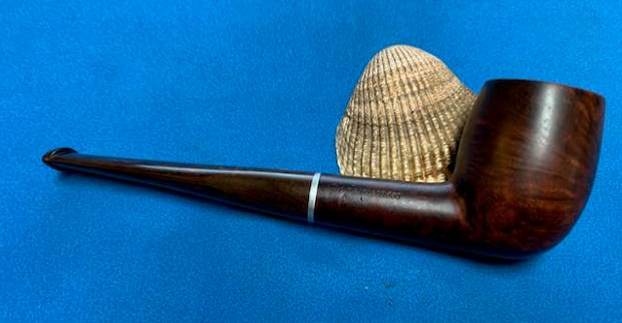
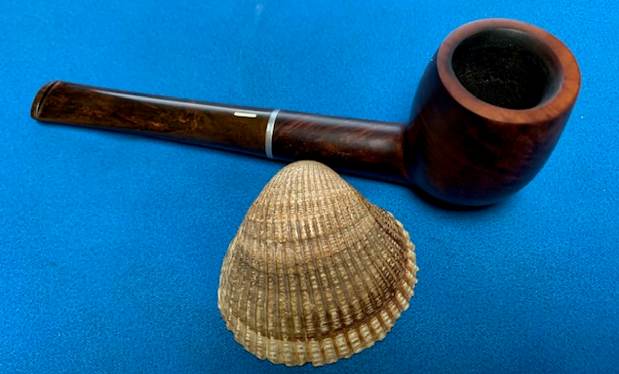
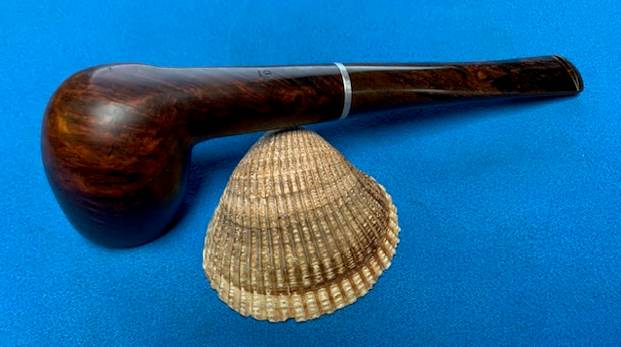
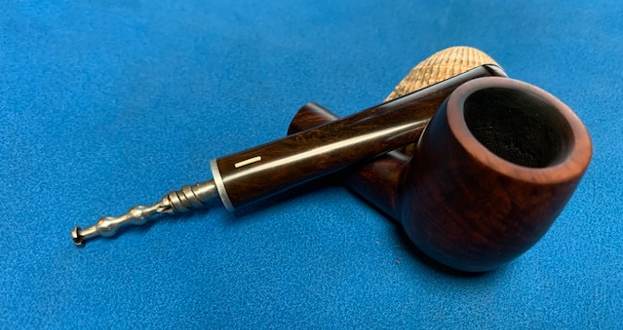
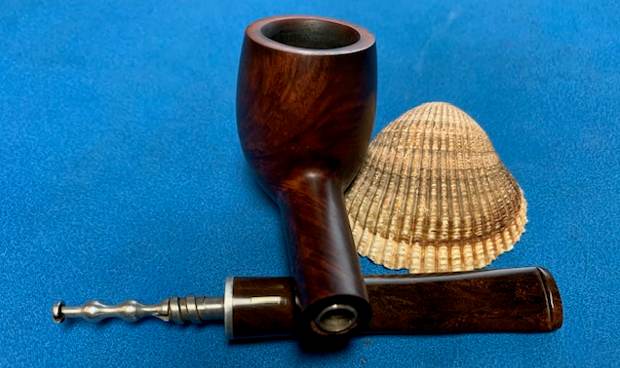
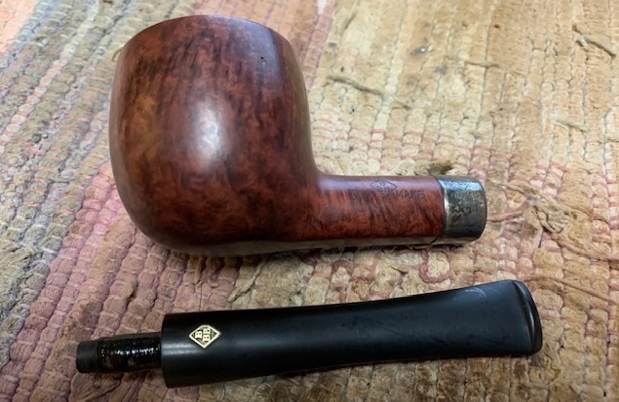
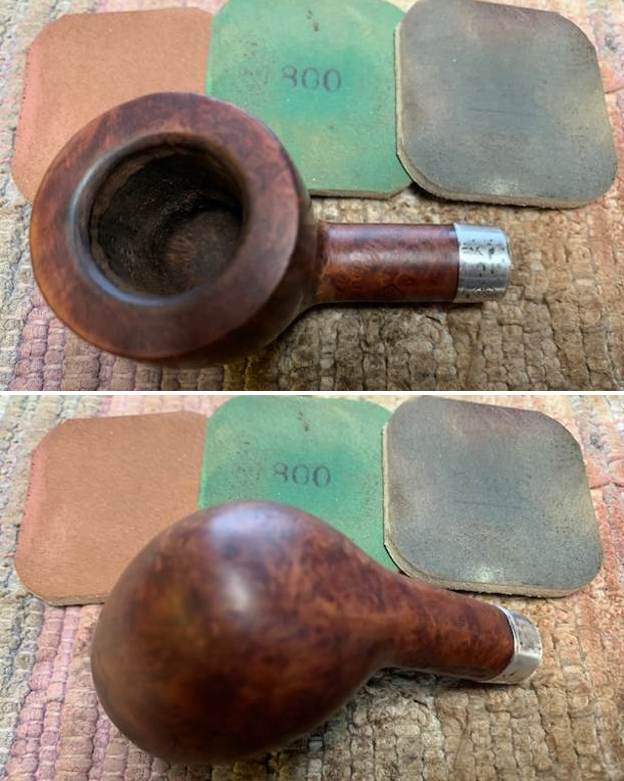
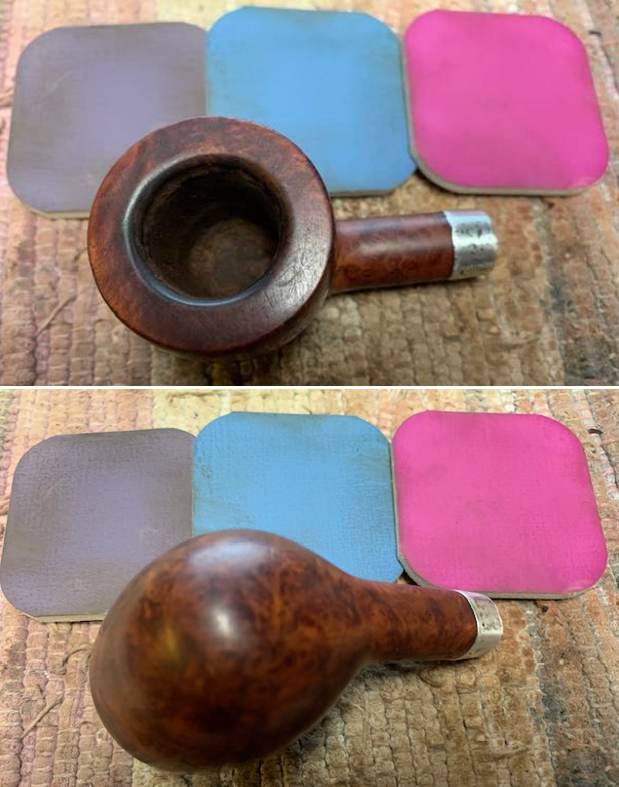
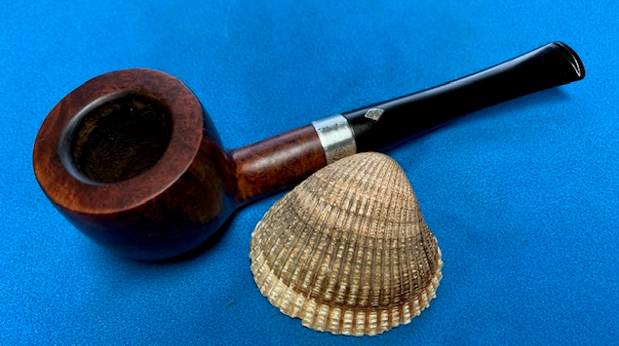
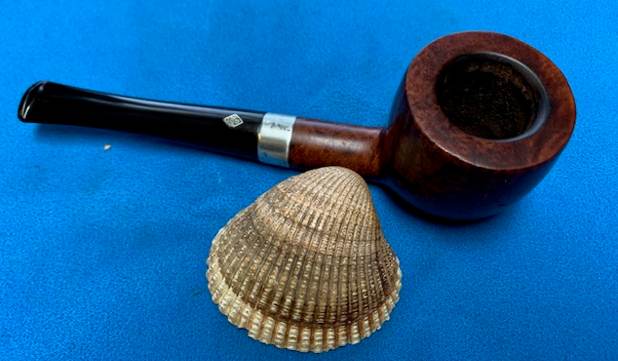
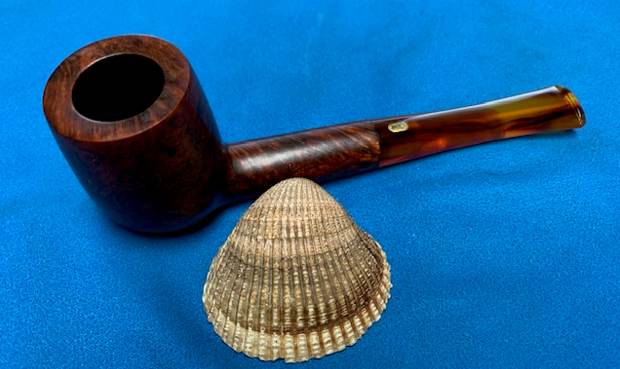
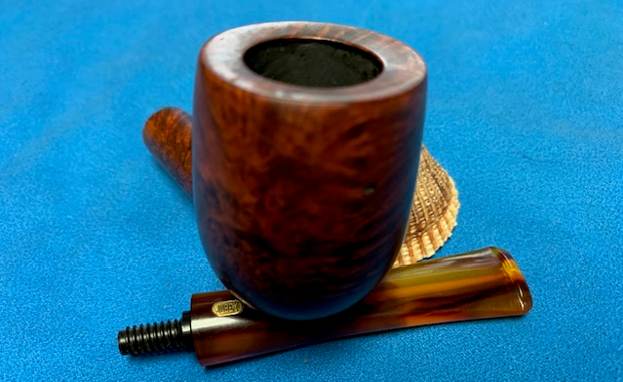
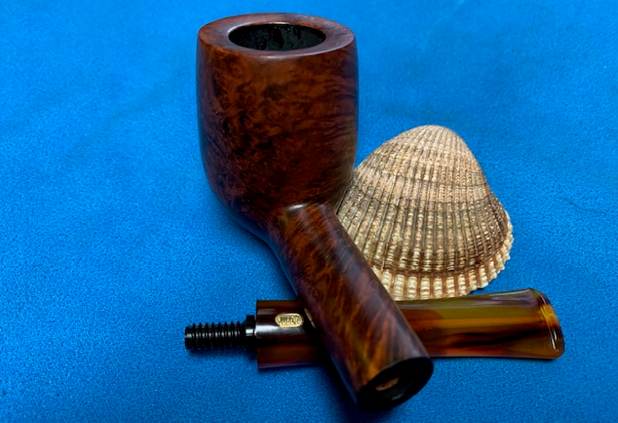
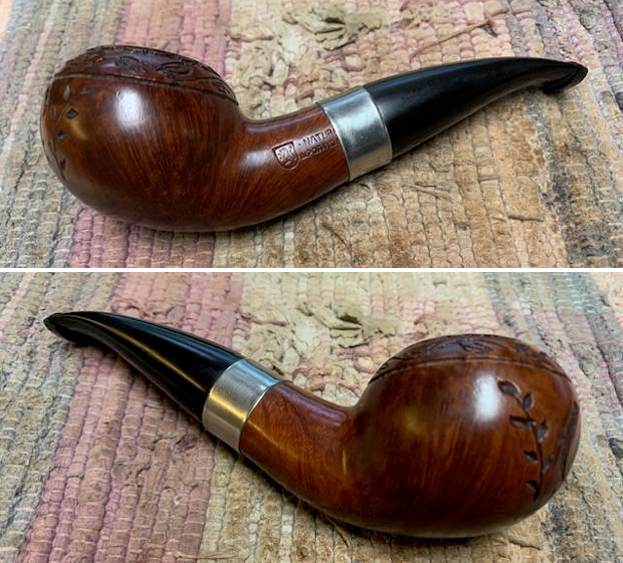
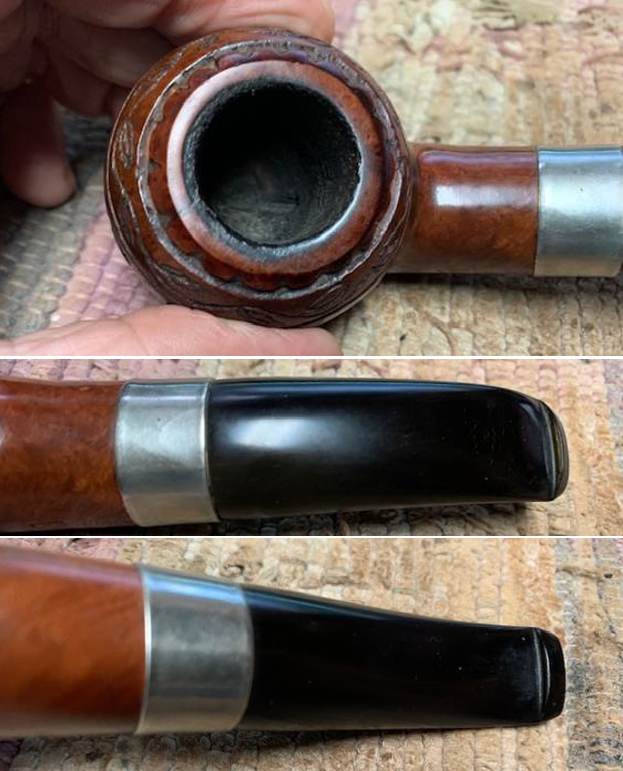
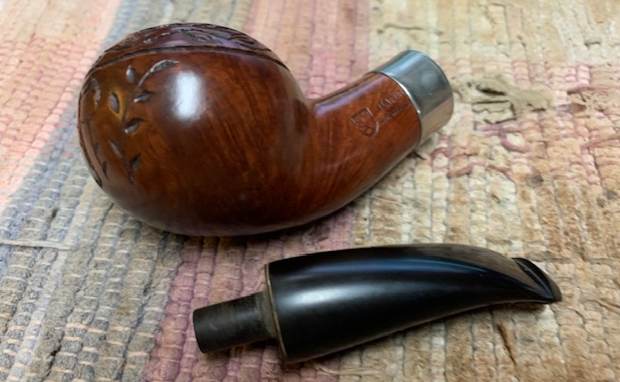
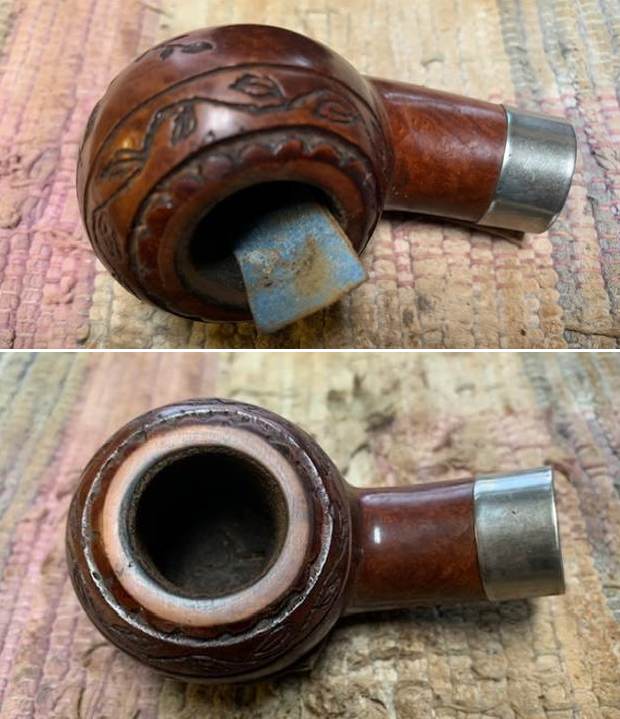
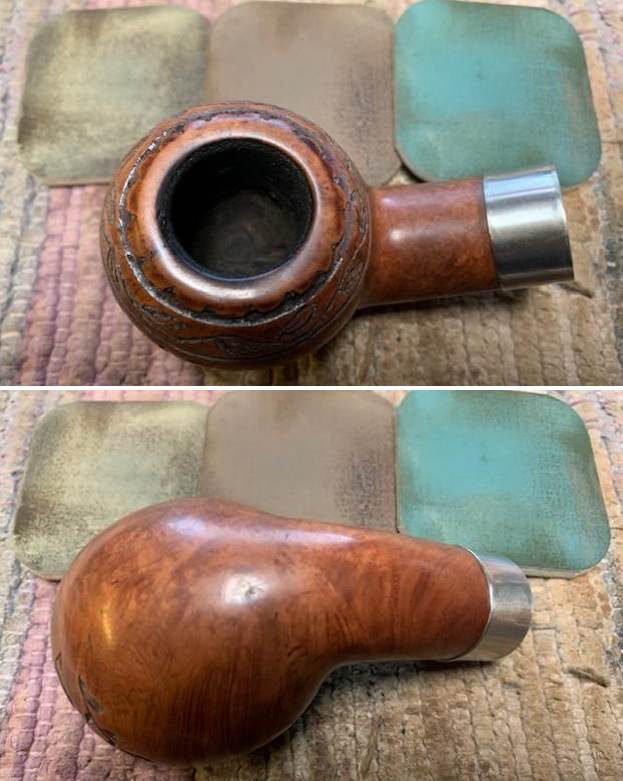
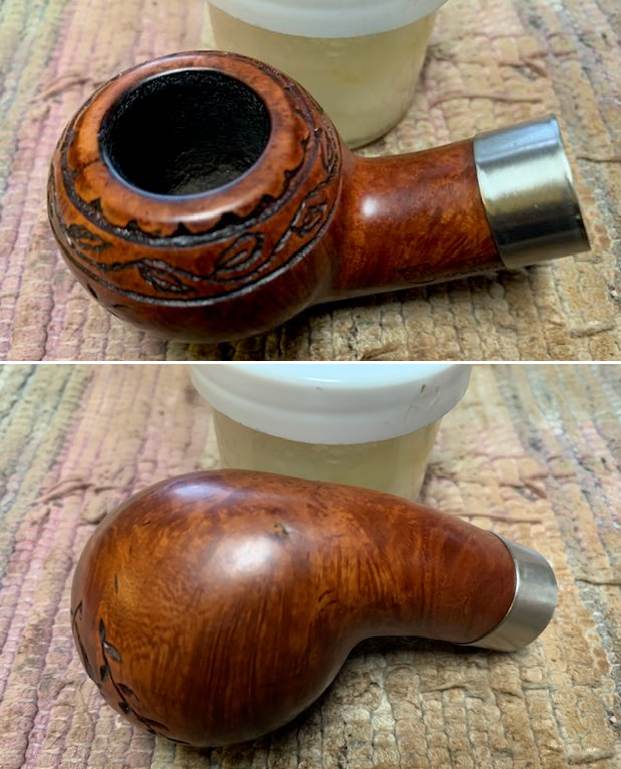
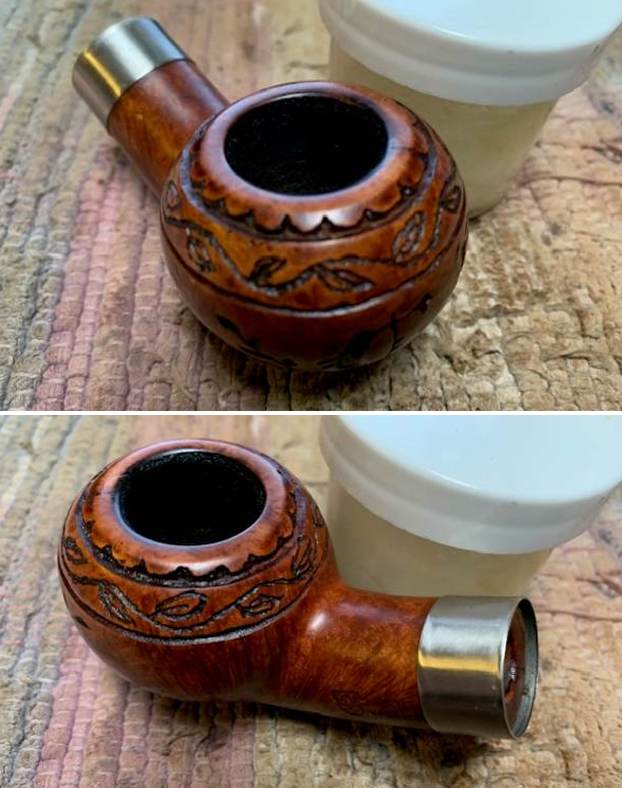
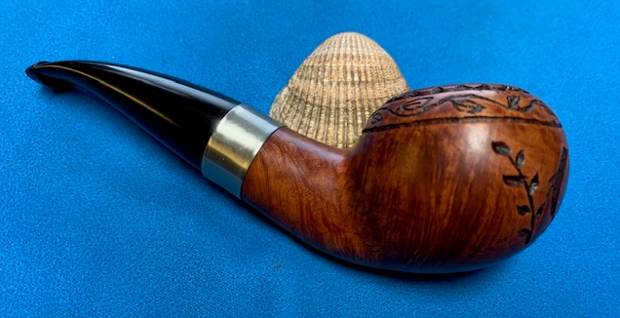
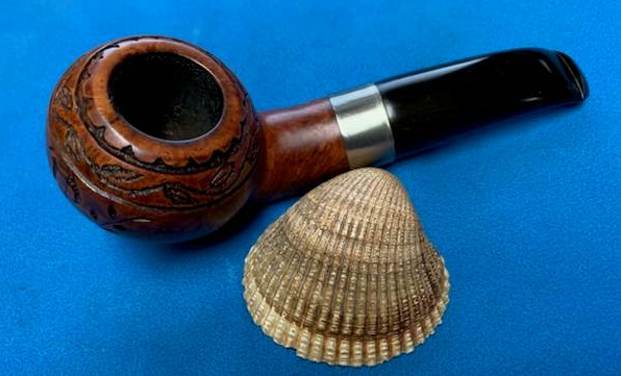
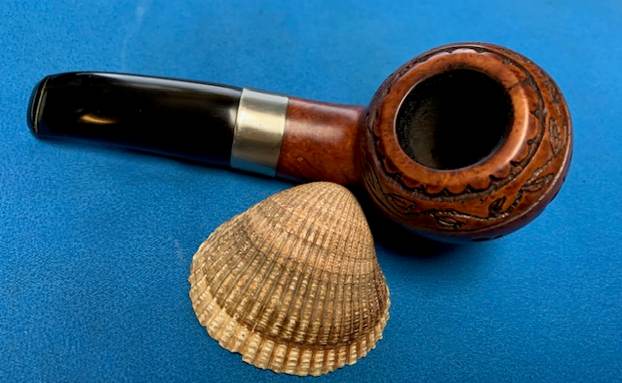
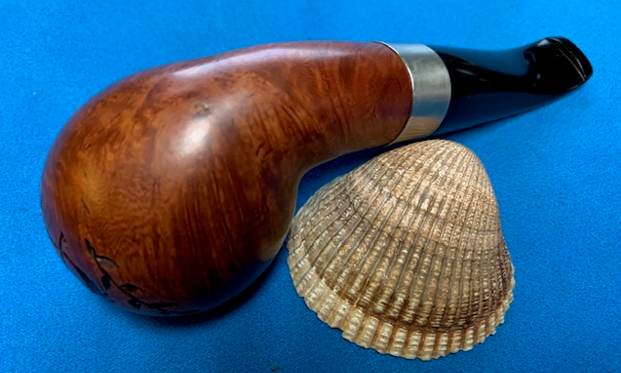
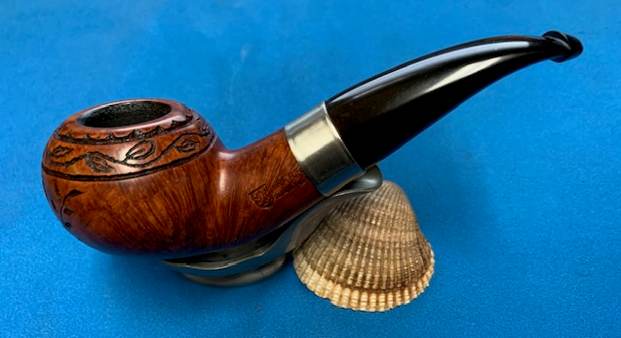
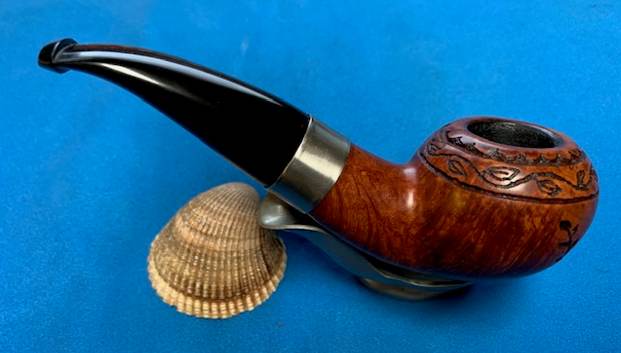
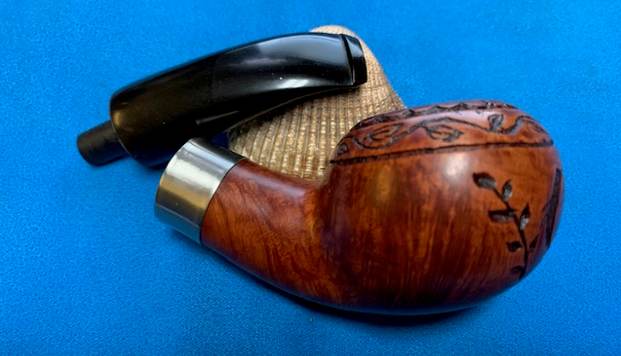
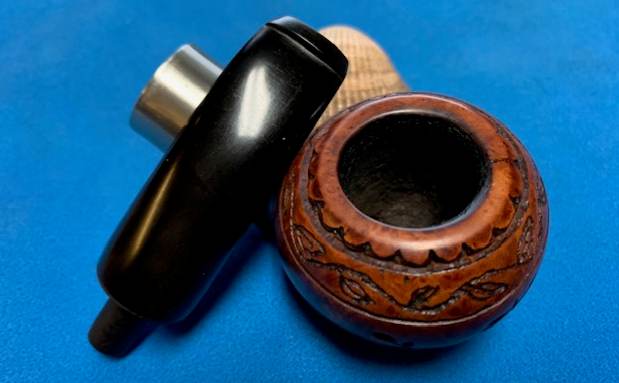
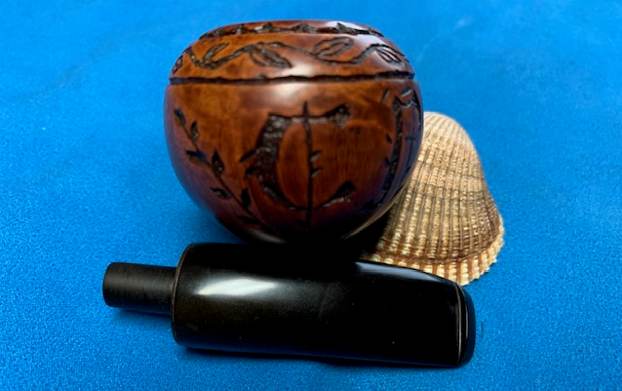
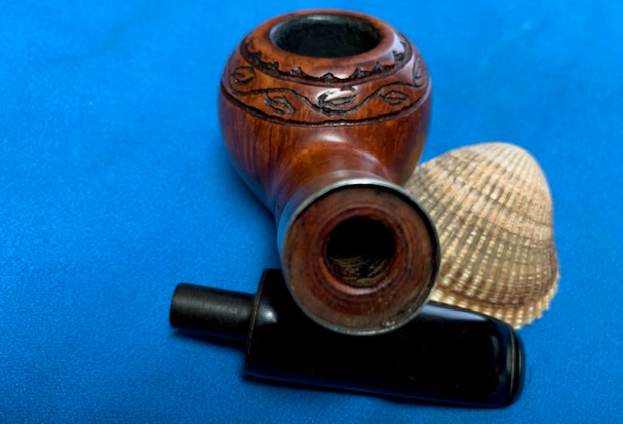
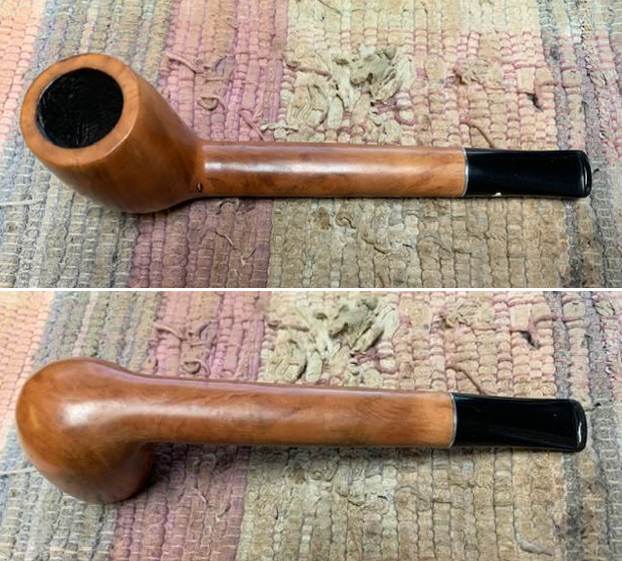
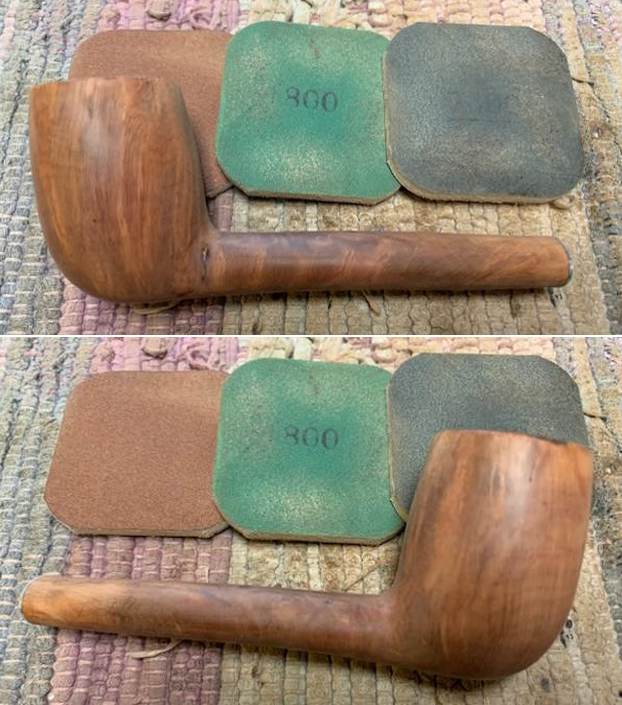
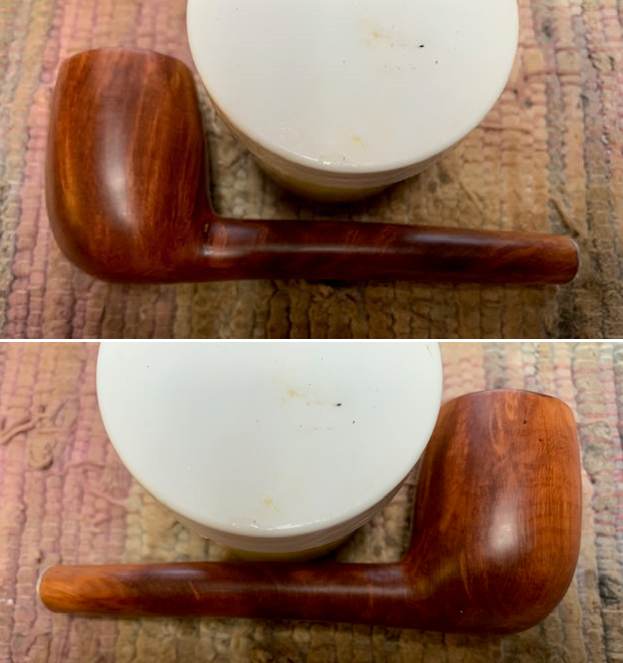
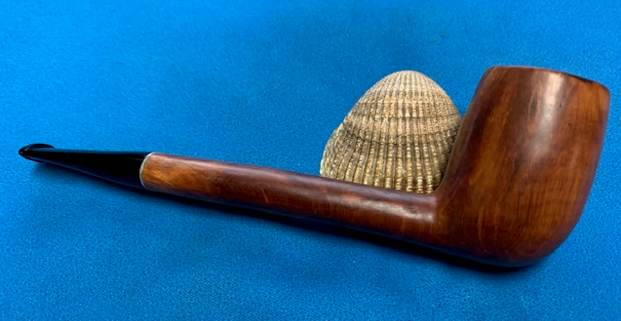
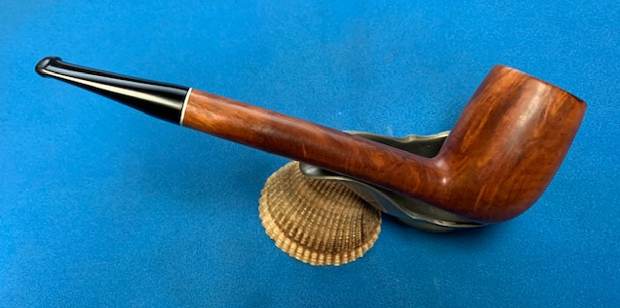
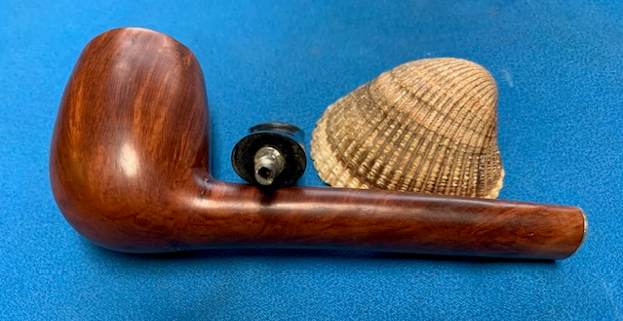
As observed with the Les Wood Poker that I last restored, this half bent Apple Silver Spigot too is in excellent condition. There is an even layer of cake of medium thickness in the chamber that is very hard and completely dry. The smooth rim top is sans any crusting of lava over flow but darkened towards the front. The eight panelled rusticated stummel appears in good condition with no signs of hot spots or cracked surfaces. The stummel has a lot of dirt, dust and grime grounded in to the crevices of the rusticated surface. The black and dark brown stain is faded at places giving the stummel is dull appearance. The fishtail vulcanite stem is deeply oxidized with some tooth chatter on either surface of the stem in the bite zone. The stampings on the shank, silver spigot and stem are all crisp and easily readable. The following pictures will provide a visual description to supplement the description given above. 

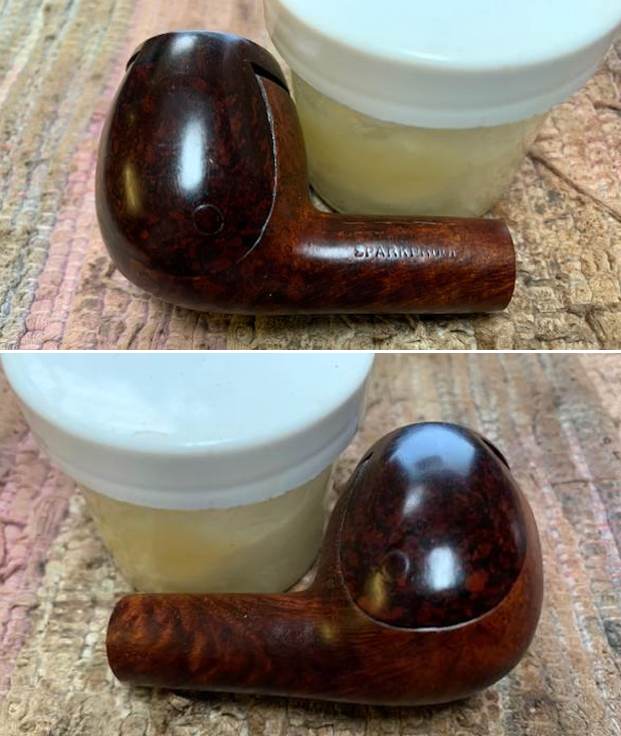
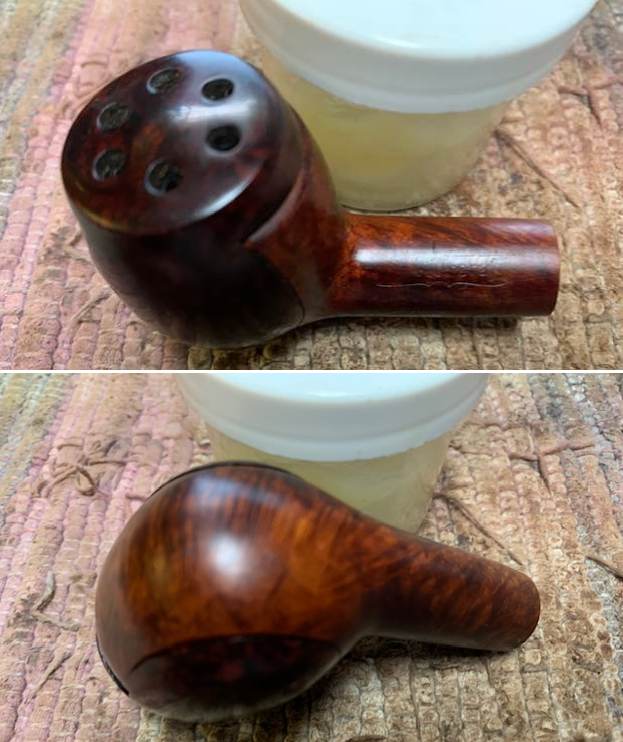
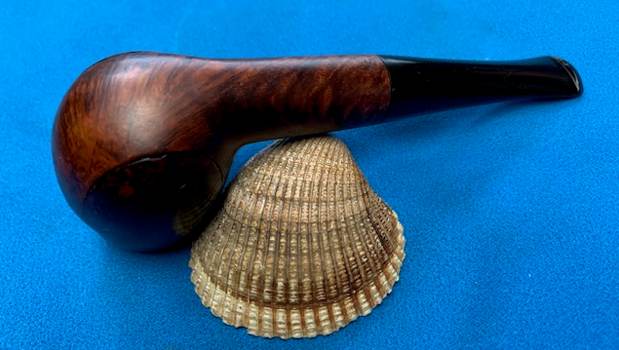
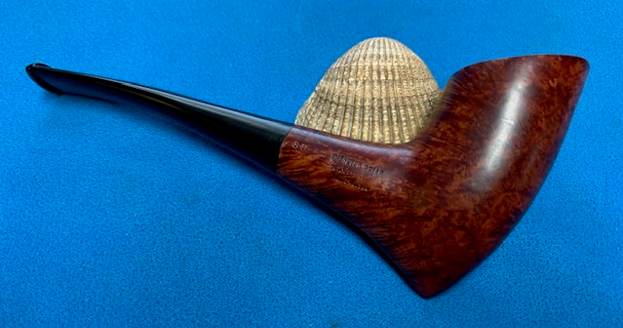
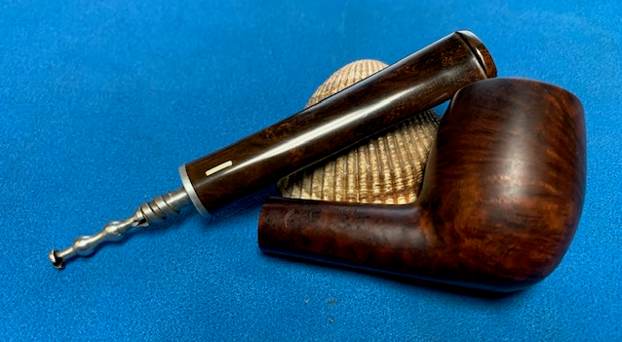
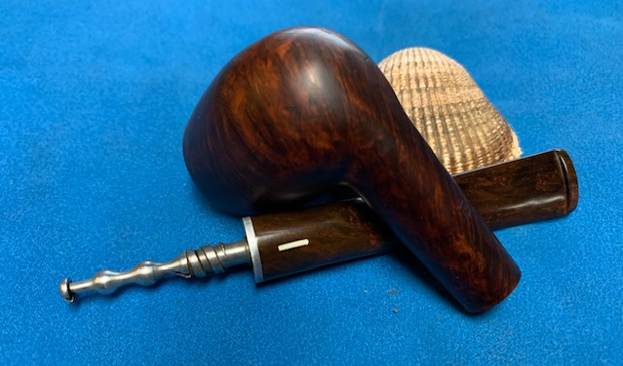
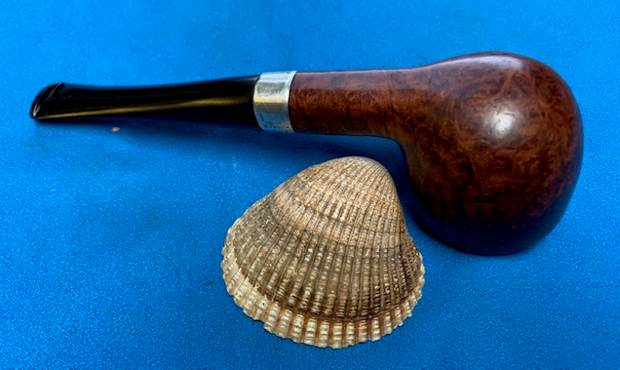
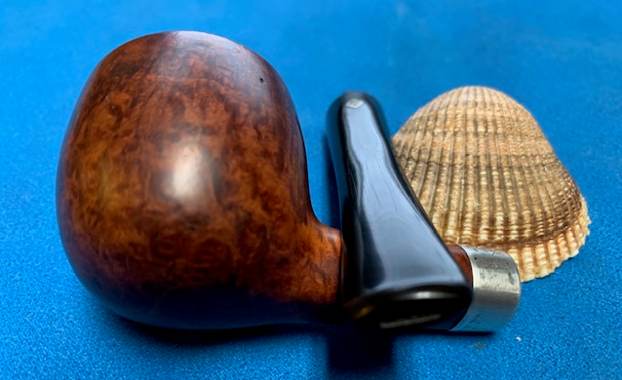
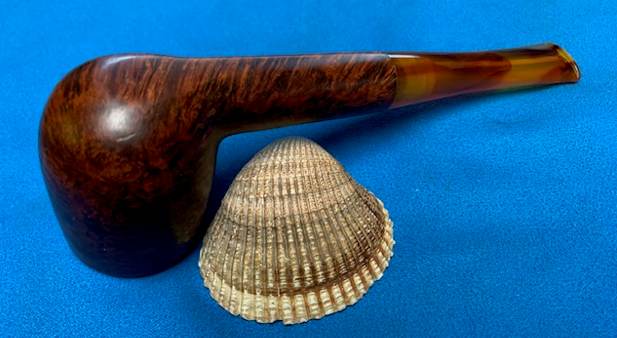
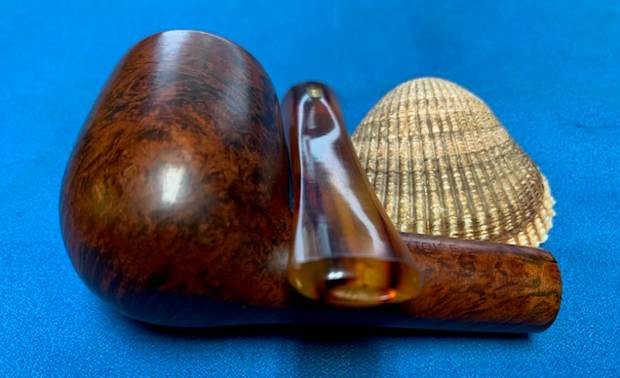
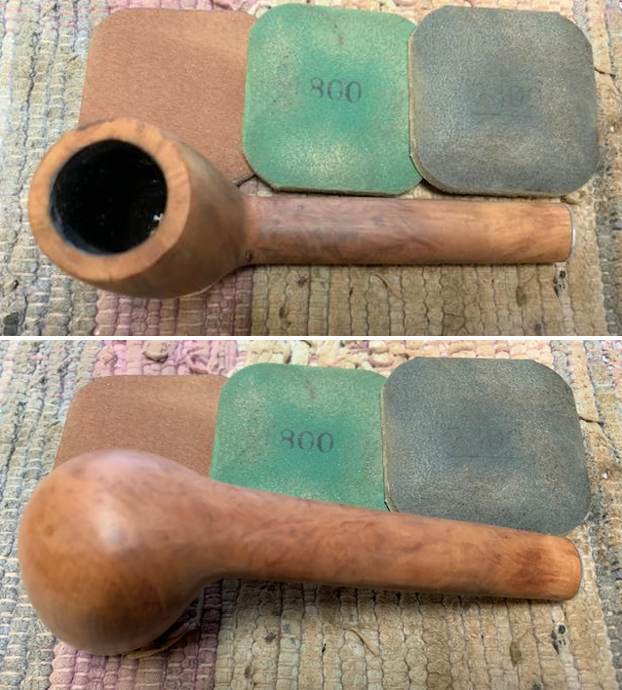
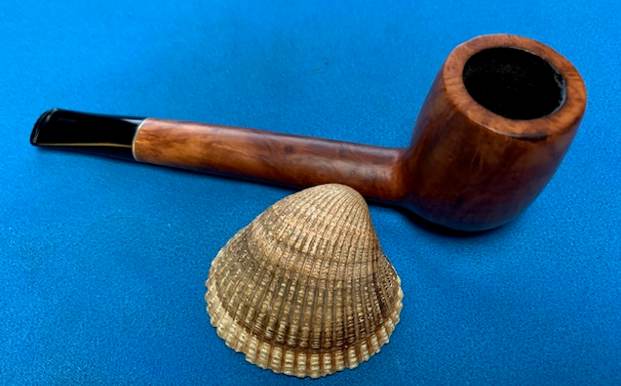
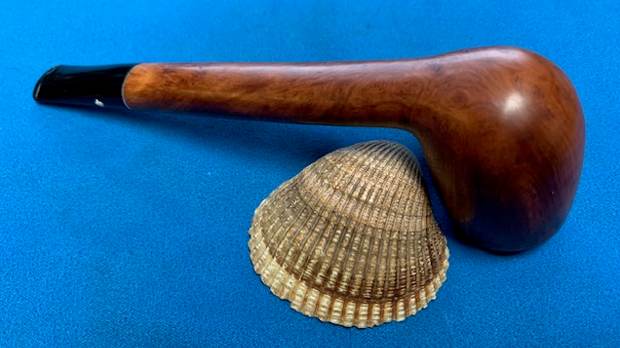
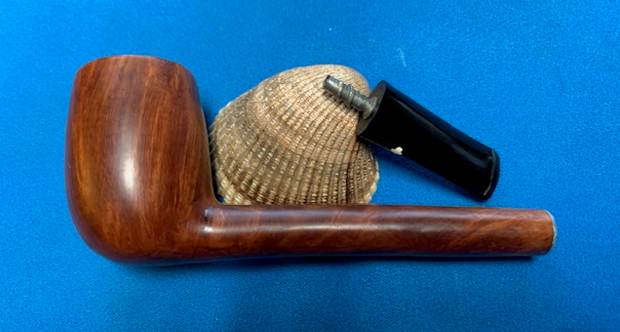
 I like the feel and heft of this large stummel in my hand. The rusticated panelled surface with it prominent ridges feels tactile in the hand and very comfortable to hold. There is a lot of dirt, dust and grime trapped in to the crevices of rusticated surface giving it a dirty grayish appearance. The entire stummel looks dull, dirty and lifeless. Heavy accumulation of dried oils, tars and gunk is seen clogging the mortise. The dark stain has faded in couple of spots further adding to the sorry appearance of the stummel. The sterling silver ferrule is oxidized and dull looking. However, once the stummel surface is cleaned up and rejuvenated, this will be one beautiful looking pipe.


 I like the feel and heft of this large stummel in my hand. The rusticated paneled surface with it prominent ridges feels tactile in the hand and very comfortable to hold. There is a lot of dirt, dust and grime trapped in to the crevices of rusticated surface giving it a dirty grayish appearance. The entire stummel looks dull, dirty and lifeless. Heavy accumulation of dried oils, tars and gunk is seen clogging the mortise. The dark stain has faded in couple of spots further adding to the sorry appearance of the stummel. The sterling silver ferrule is oxidized and dull looking. However, once the stummel surface is cleaned up and rejuvenated, this will be one beautiful looking pipe.

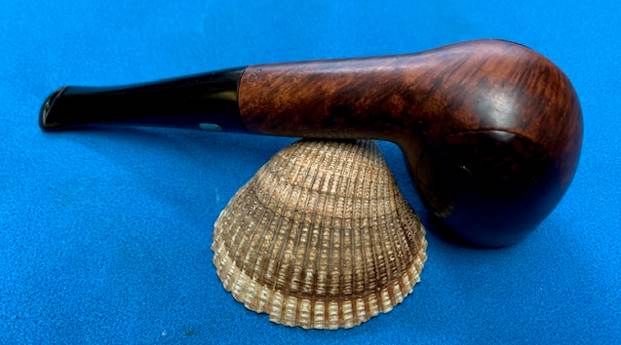
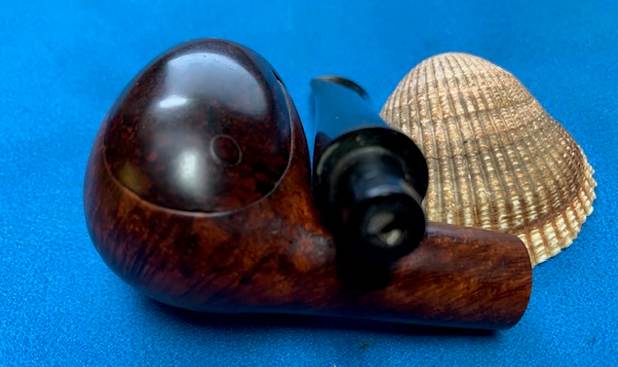
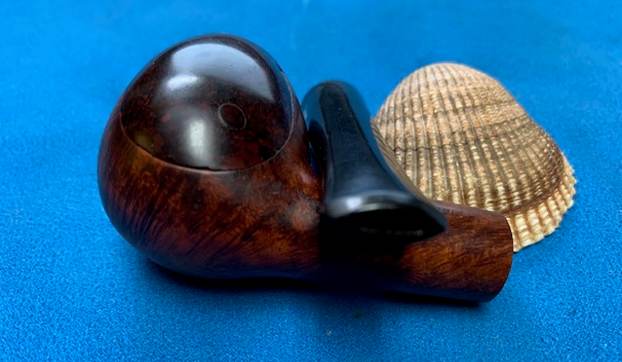
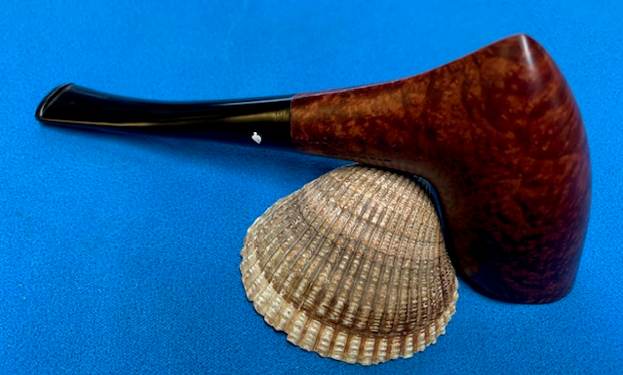
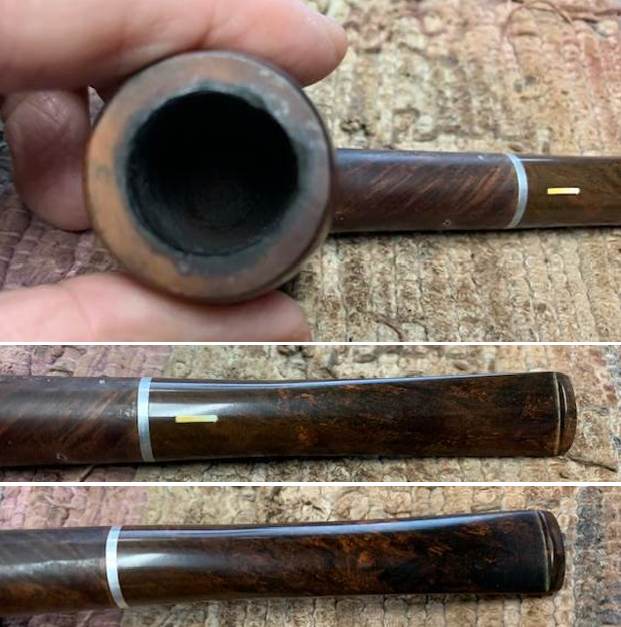
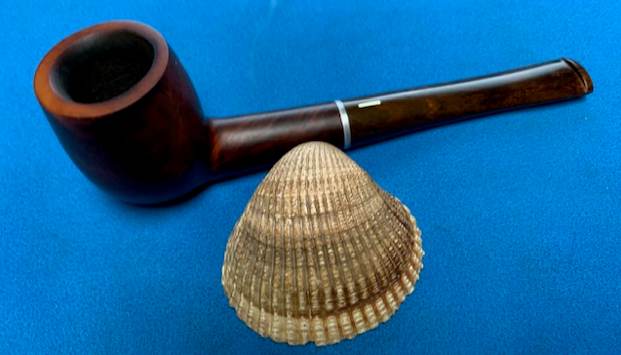
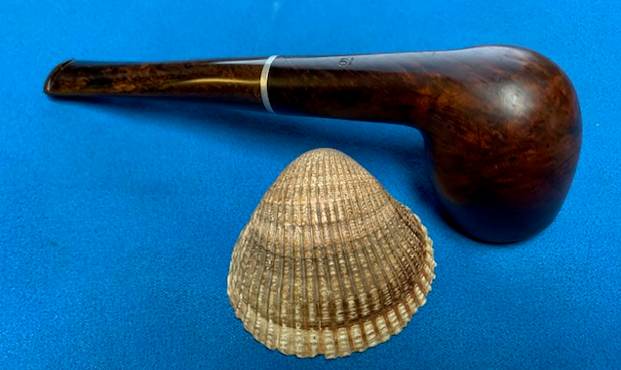
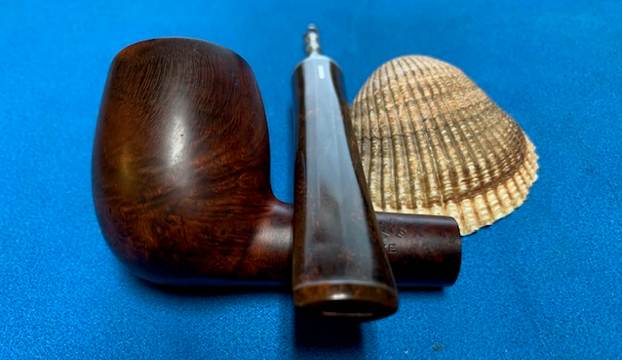
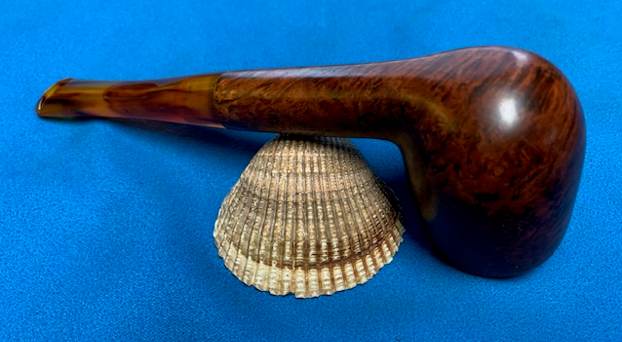
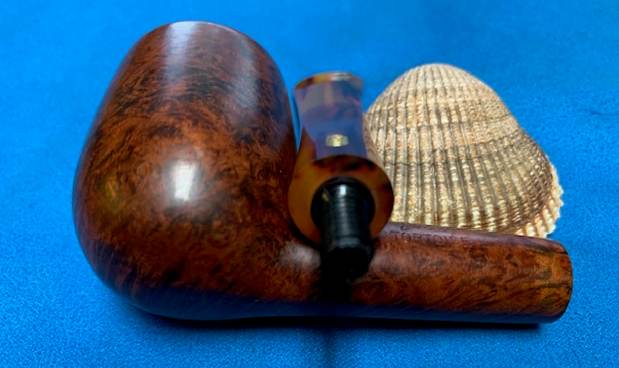
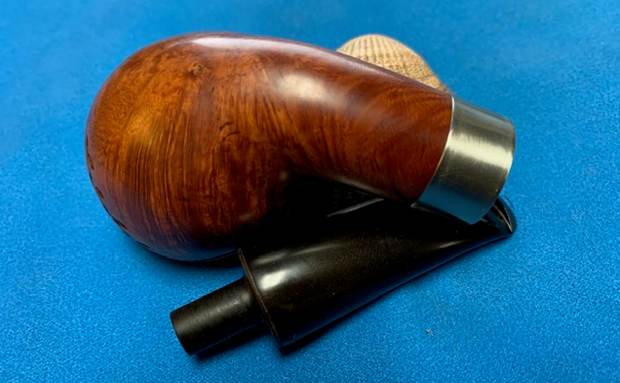
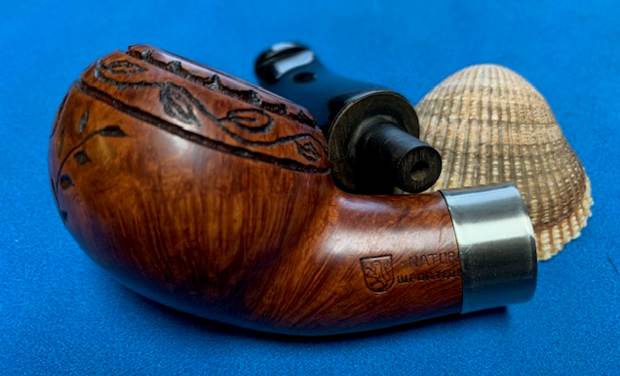
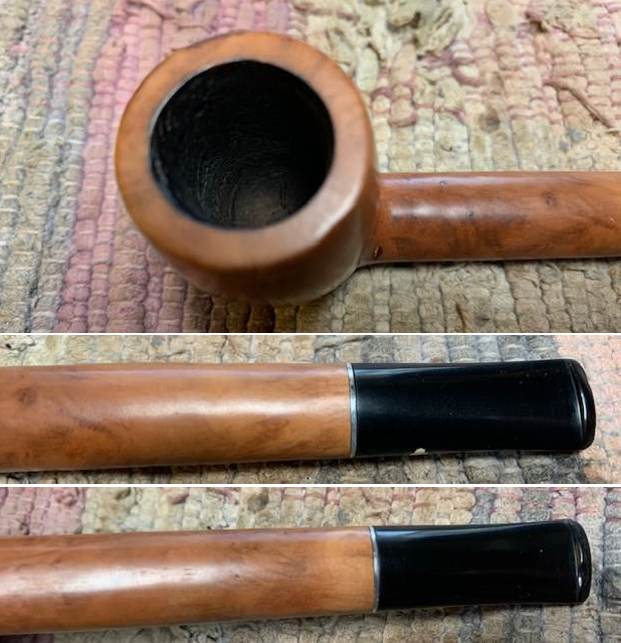
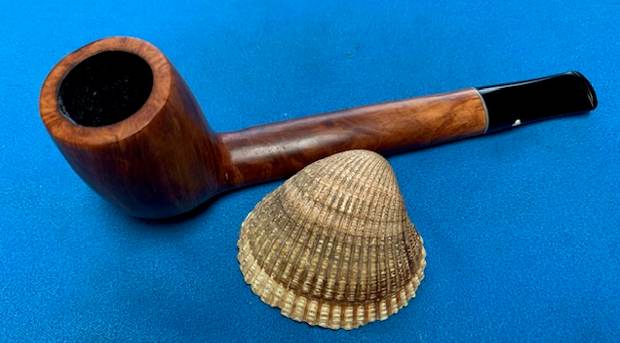
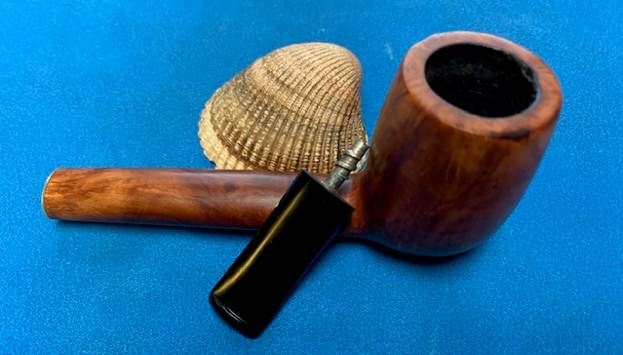
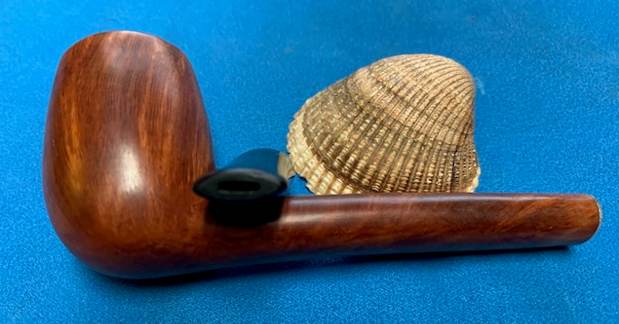
 The beautiful sterling silver mounted vulcanite stem is hand cut and oozes very high quality of material use and also craftsmanship of highest quality. The stem is heavily oxidized to an extent that it appears dirty green. Dark coloration and calcification is seen on either surfaces of the stem in the bite zone from prolonged use of rubber bit. Very minor tooth chatter and bite marks can be seen in the bite zone on both the upper and lower surfaces of the stem. These tooth chatter and tooth indentation should be easily addressed by heating the affected areas to raise the vulcanite and thereafter sanding it down to match the rest of the stem surface. The tenon end and the horizontal slot end shows accumulation of dried gunk and grime. The sterling silver mount is oxidized but shows no signs of any damage whatsoever.
 The Process
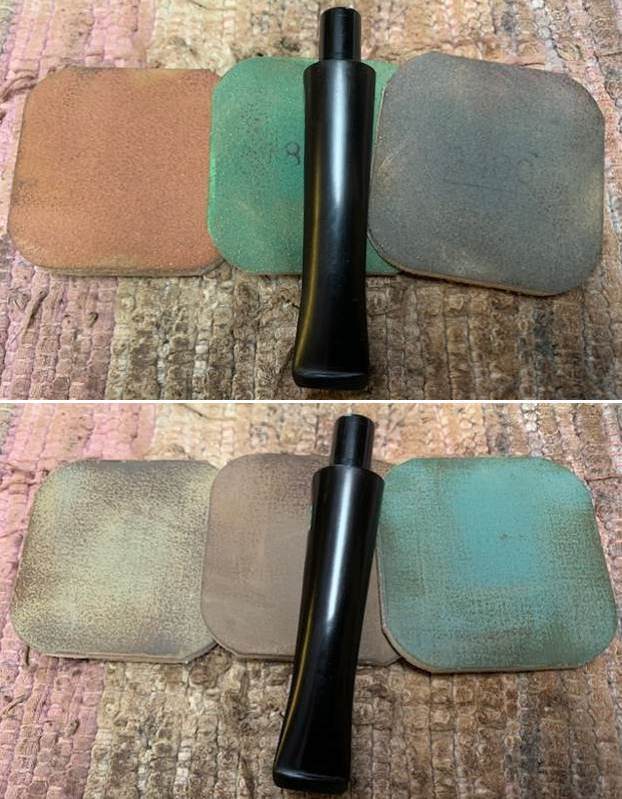
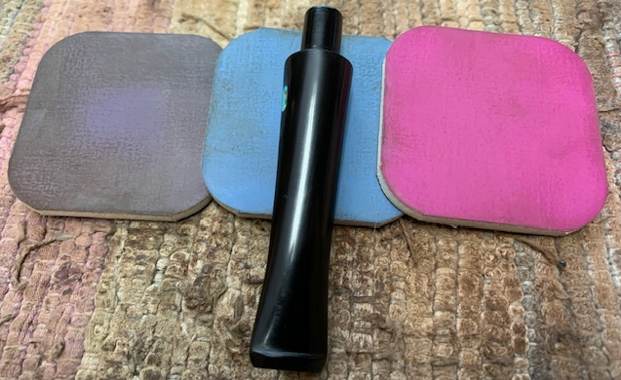
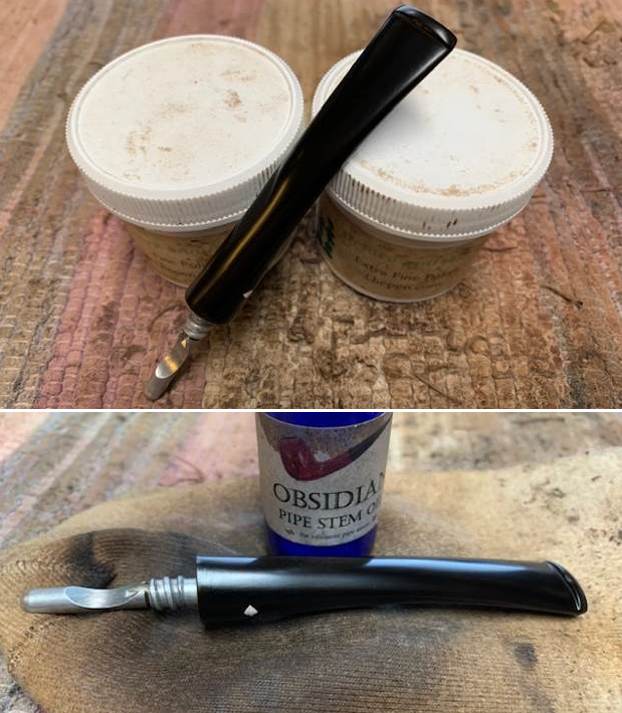
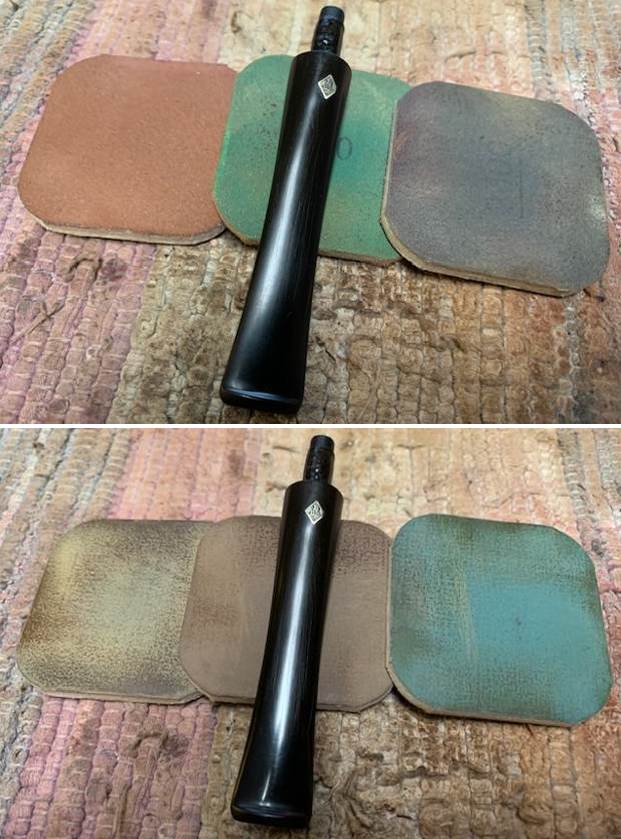
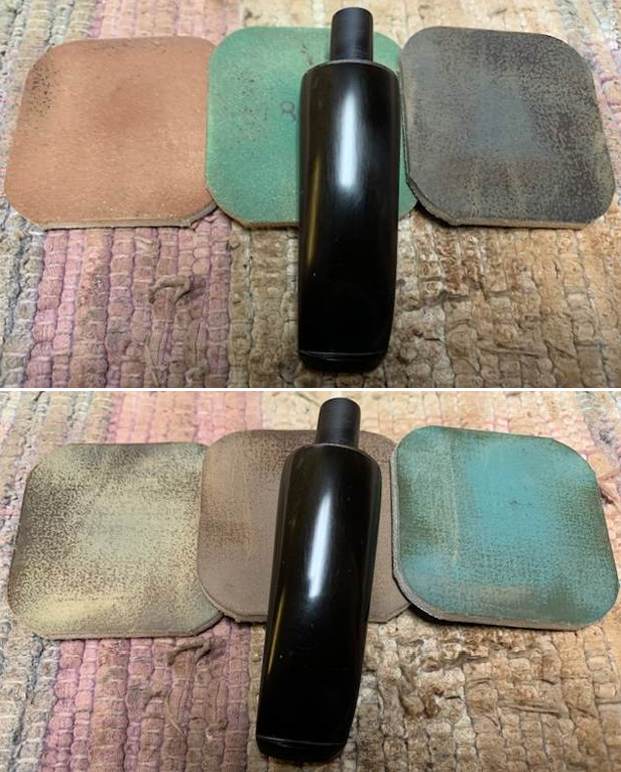
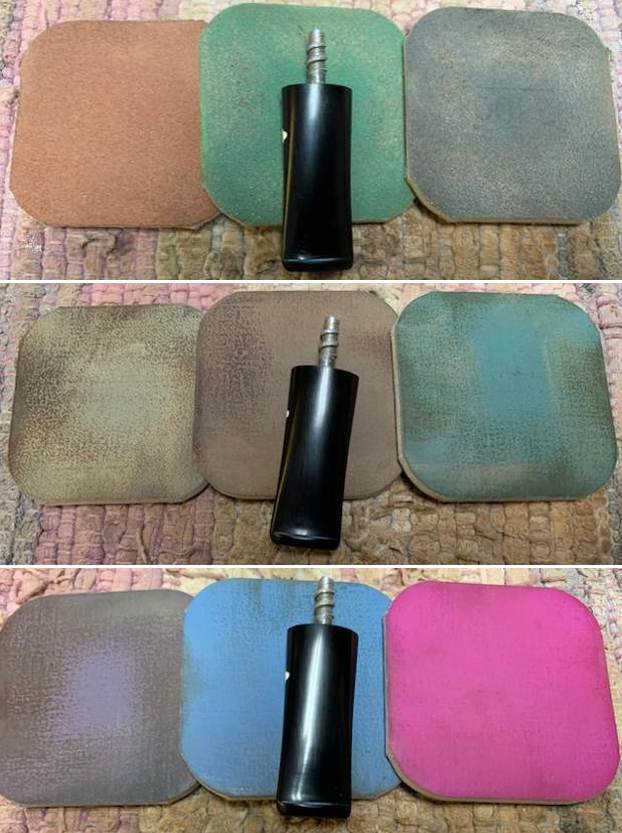
I started the refurbishing of this Les Wood by working the stem first. Since there were other stems that were ready to be put into the stem deoxidizer solution, I decided to clean the internals of this stem first so that it could be put in the solution with other stems. I cleaned the stem airway with a thin shank brush and anti oil soap. It took considerable time and elbow grease to get the stem airway clean. I used a sharp dental tool to clean the horizontal slot and further cleaned the internals with regular and bristled pipe cleaners dipped in alcohol. The stem was immersed in the Deoxidizer solution, a product that has been developed by Mark Hoover. This solution raises the oxidation to the stem surface and helps in easy removal and imparting a nice shine to the stem after polishing. The pipe is indicated with a red arrow. The stem is allowed to soak into this solution overnight.
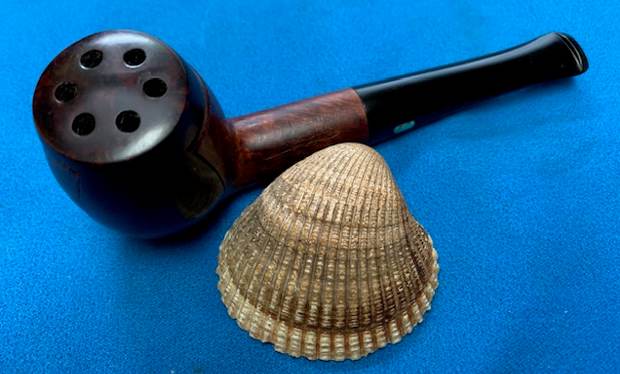
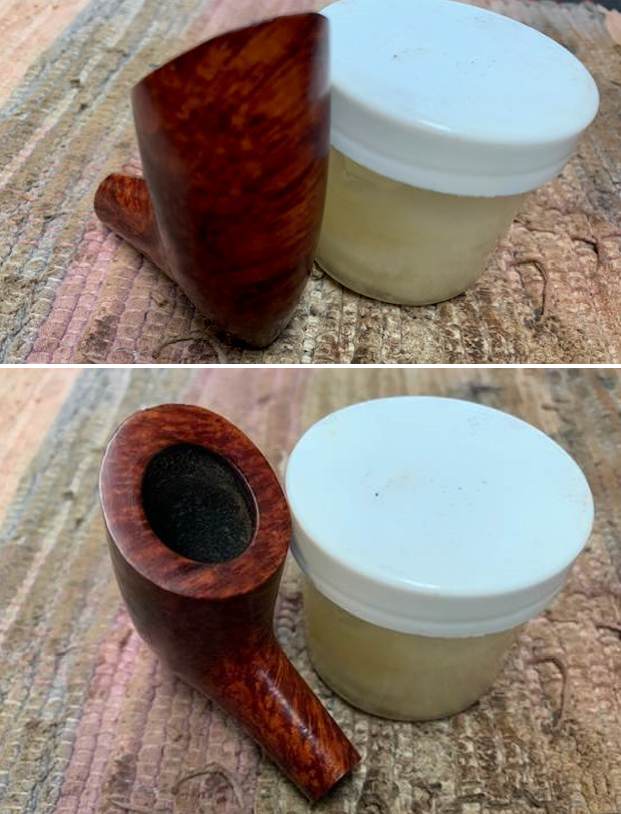
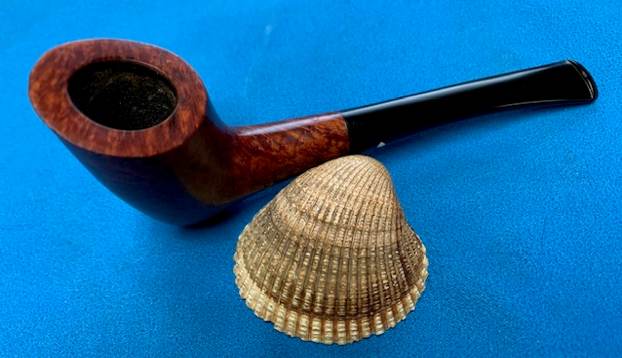
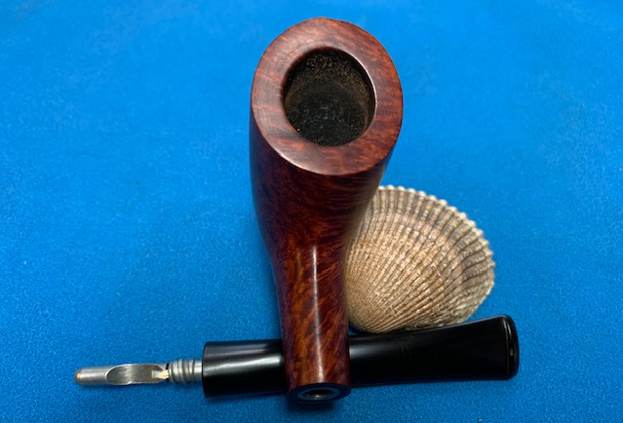
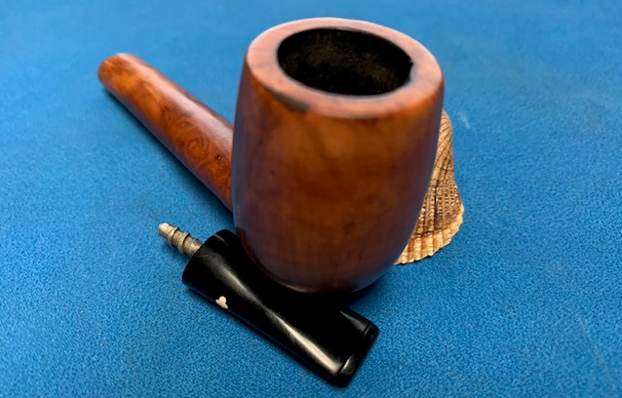
 Now it was time for me to work on the stummel. I did this by first reaming the chamber with size 2 followed by size 3 and 4 PipNet reamer heads. I further scraped the chamber walls with my fabricated knife to remove the remaining carbon deposits where the reamer head could not reach. Once the cake was reamed back to the bare briar, I used a 220 grit sand paper to remove all the traces of remaining cake and also to smooth out the inner walls of the chamber surface. Finally, to remove the residual carbon dust, I wiped the chamber with a cotton pad wetted with 99.9% pure isopropyl alcohol. The huge pile of carbon dust that was reamed out is an indication enough to the amount of carbon that had accumulated in the chamber. The chamber walls are solid without any heat lines or fissures. However, the hard cake was getting increasingly difficult to dislodge. I shall try and remove residual the hard cake after it has been moistened during the salt and alcohol soak.
 I further cleaned the mortise by scrapping out the dried gunk with a dental tool. I ran a few pipe cleaners dipped in alcohol to moisten the dried gunk and assist in its removal. I shall further continue the internal cleaning of the chamber and mortise with cotton and alcohol soak.
 I continued the cleaning of the chamber and shank internals with a salt and alcohol bath. I use cotton balls which is an at par substitute to Kosher salt as I have realized over the years. I draw out a wick from the cotton and along with a folded regular pipe cleaner; insert it in to the mortise and through the draught hole in to the chamber. Thereafter, I packed the chamber with cotton balls to about quarter of an inch below the inner rim edge and soaked the cotton balls with isopropyl alcohol up to the brim. About half an hour later, the level of alcohol had gone down, having being absorbed by the cotton. I topped it up once again and set it aside overnight. By next morning, the cotton and alcohol had drawn out all the remaining oils and tars from the chamber and mortise, fulfilling its intended task. I removed the cotton balls and ran pipe cleaners through the mortise to clean out all the loosened tars and gunk and further cleaned it with alcohol and q-tips.
 The cotton and alcohol soak had softened the hard and stubborn cake in the chamber and the mortise. Using my fabricated tool, I scrapped out all the hardened cake from the chamber and gunk from the mortise. The chamber now smells clean and fresh.
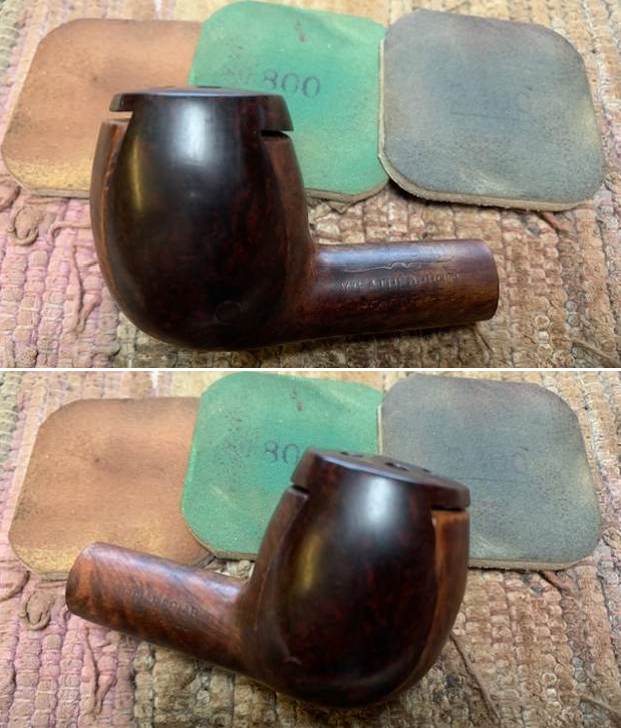
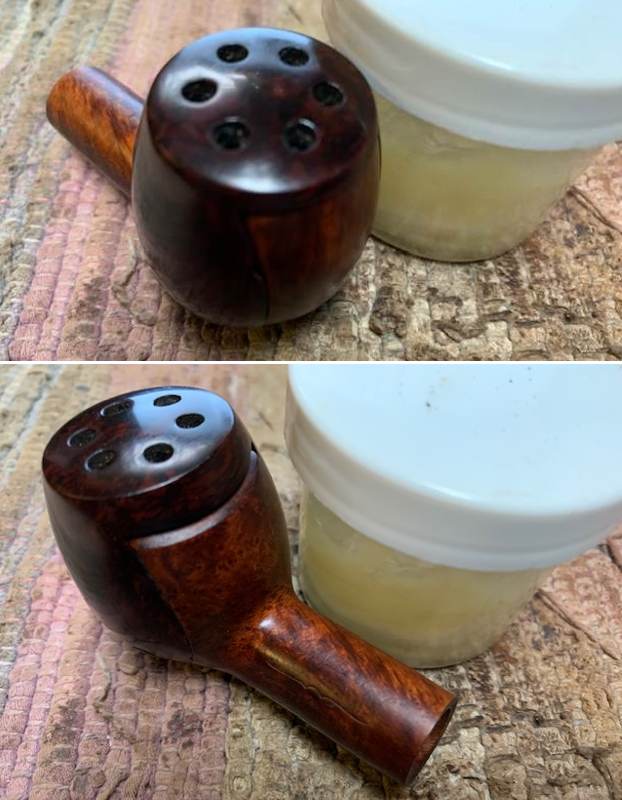
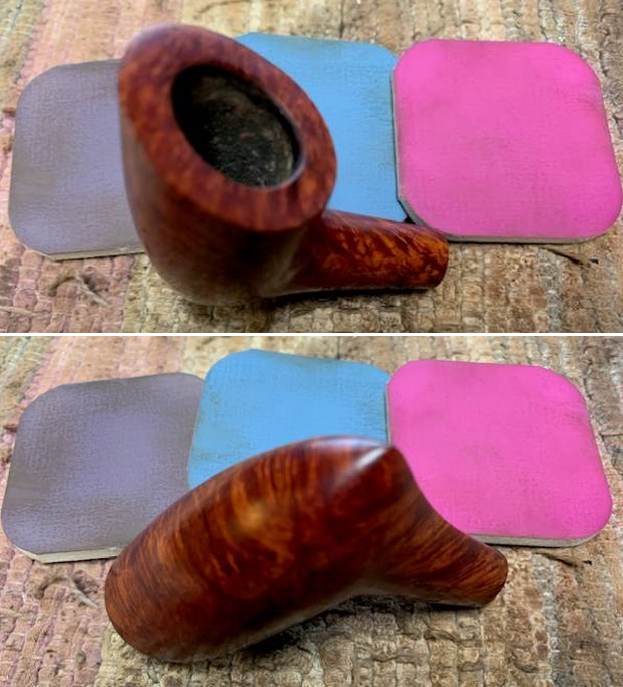
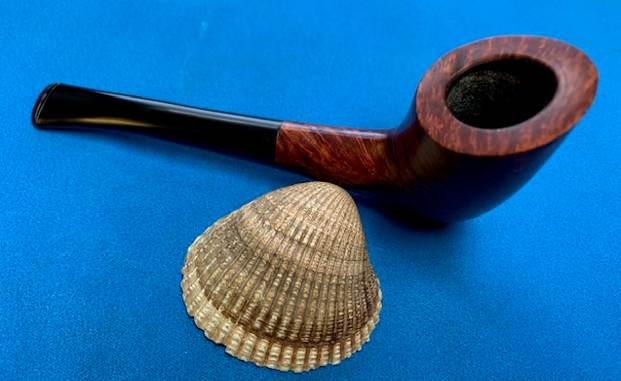
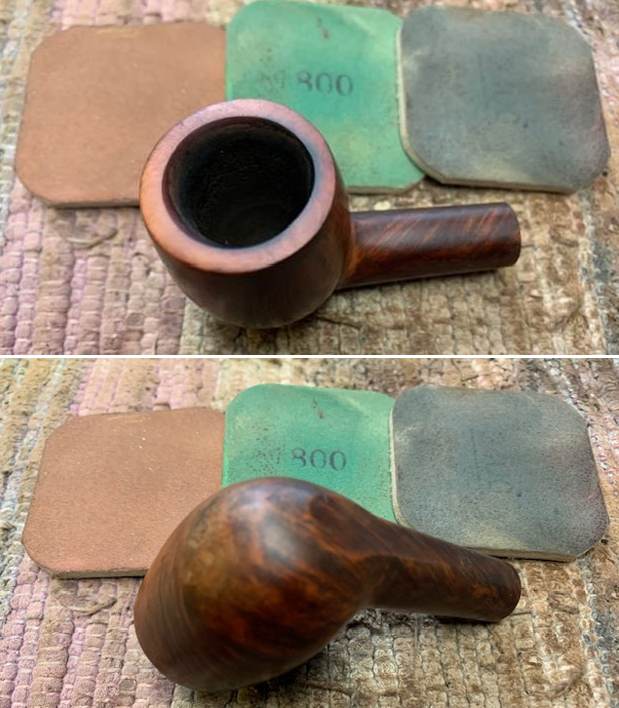
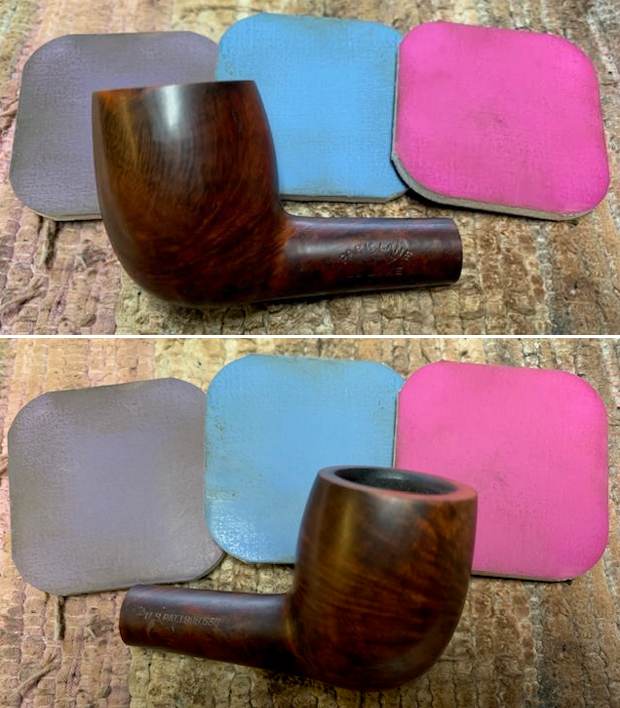
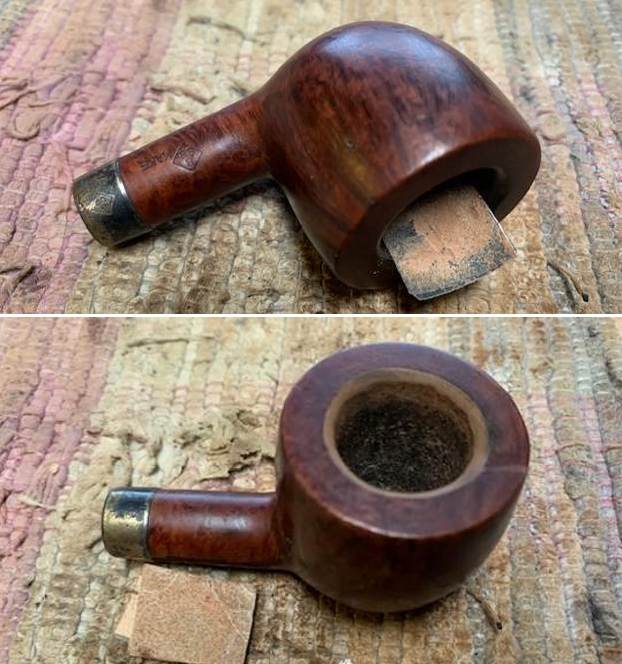
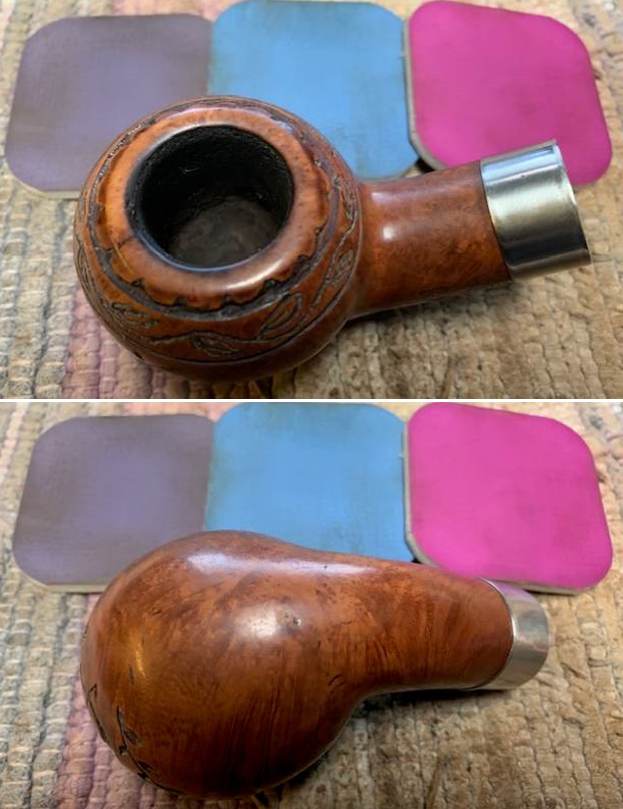
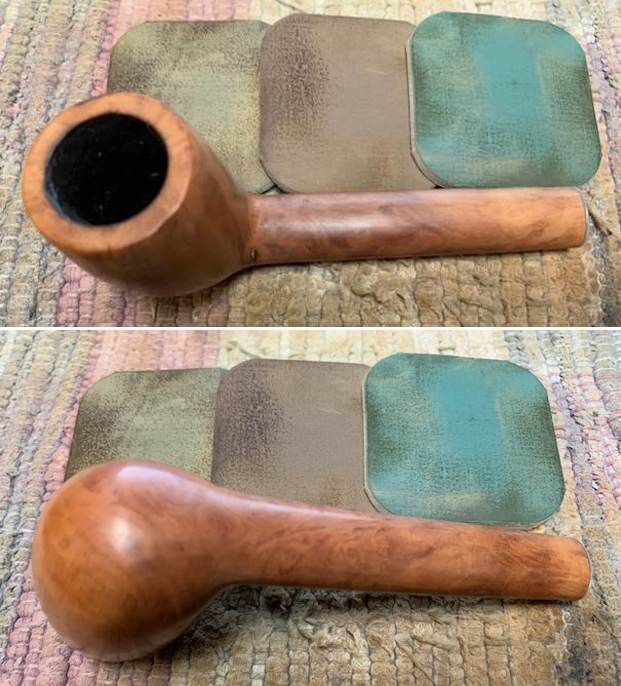
 Once the internals of the shank were cleaned, I cleaned the external surface of the stummel with Murphy’s Oil soap and cotton swabs followed by scrubbing the rusticated surface with a toothbrush and dish washing soap. This rid the nooks and crevices of all the accumulated dust, dirt and grime from the rusticated stummel. With a copper soft wired brush, I cleaned the rim top surface of all the crud that had accumulated over it. I wiped the stummel with a soft cotton cloth and set the stummel aside to dry out naturally. The charred inner rim edge (encircled in red) is now clearly visible and would need to be addressed.

 I simultaneously cleaned the shank internals with dish washing soap and shank brush.
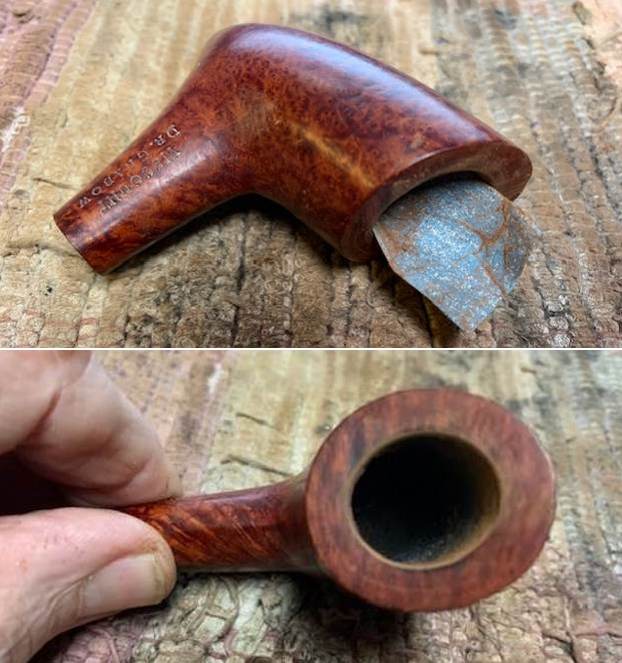
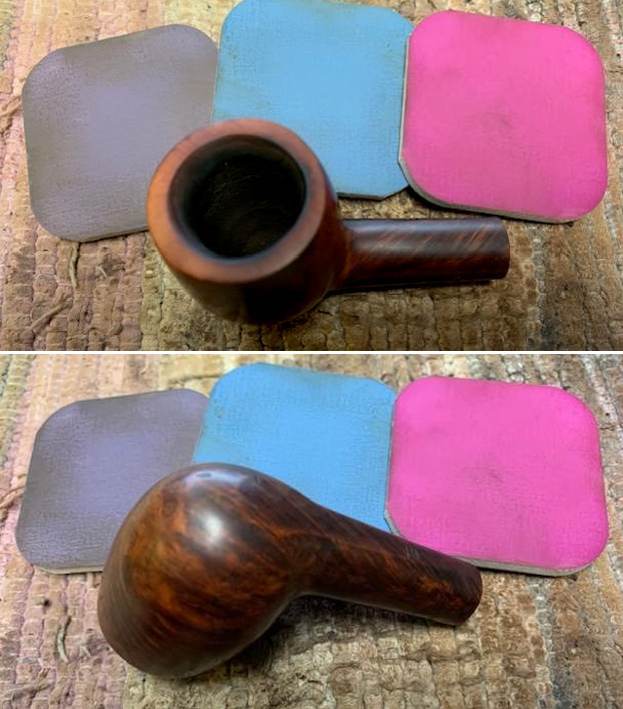
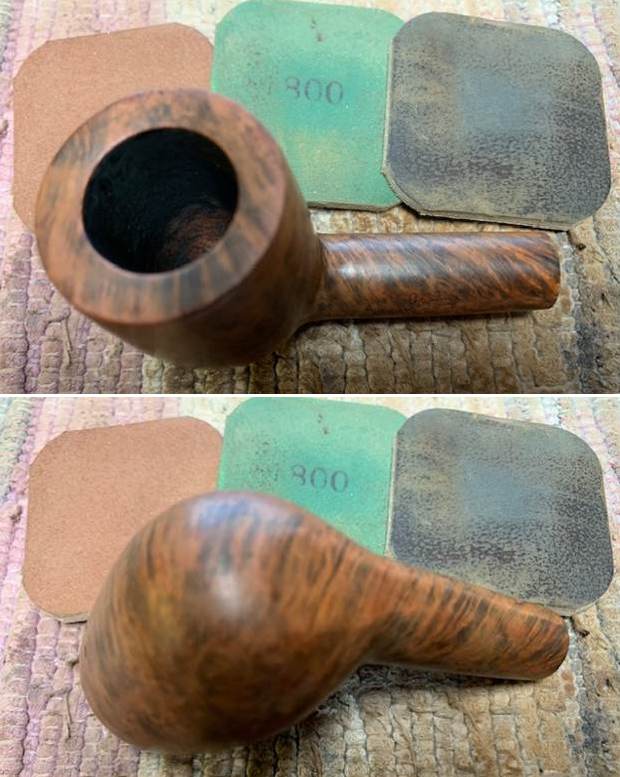
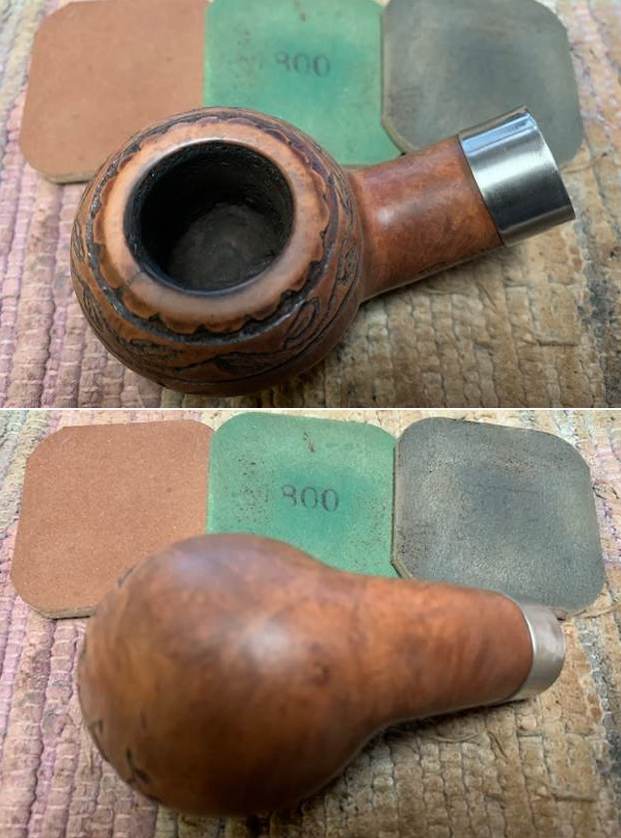
 Next, I decided to address the issue of charred inner rim edge and getting the chamber back to round. I topped the rim top over a 220 grit sandpaper to reduce the charred surface. I checked the progress frequently to ensure that the topping is just adequate. I addressed the darkened inner edge by running a folded piece of 220 grit sandpaper pinched between my thumb and index finger along the inner edge and crated a smart bevel. This bevel also helped to get the chamber back to round.
 I polished the smooth rim top surface by dry sanding with 1500 to 12000 grit micromesh pads.
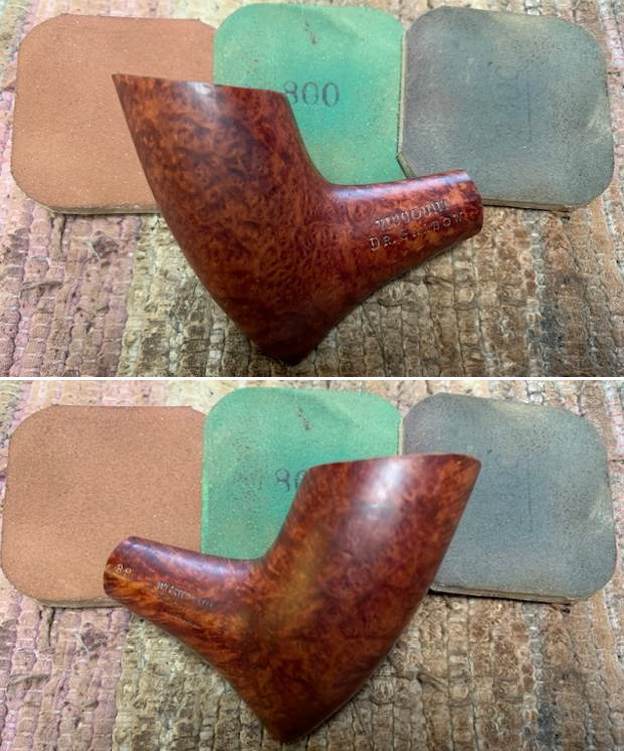
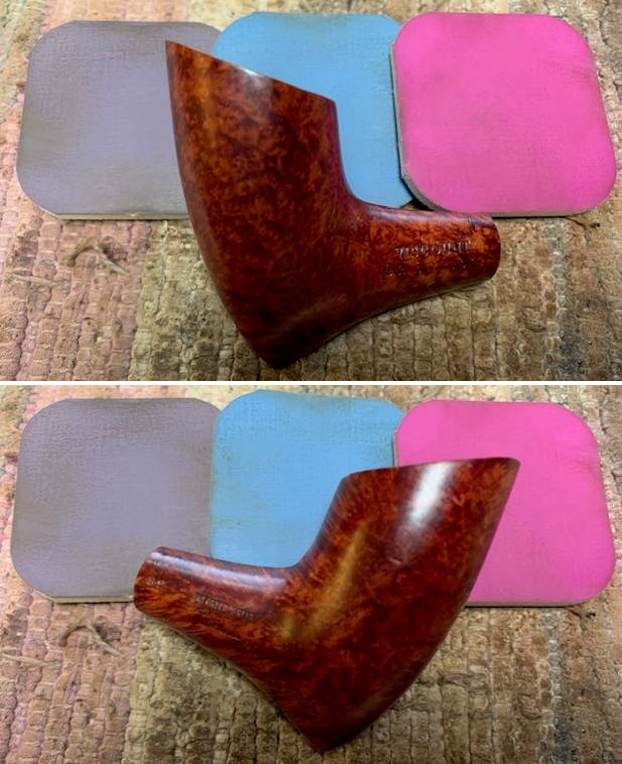
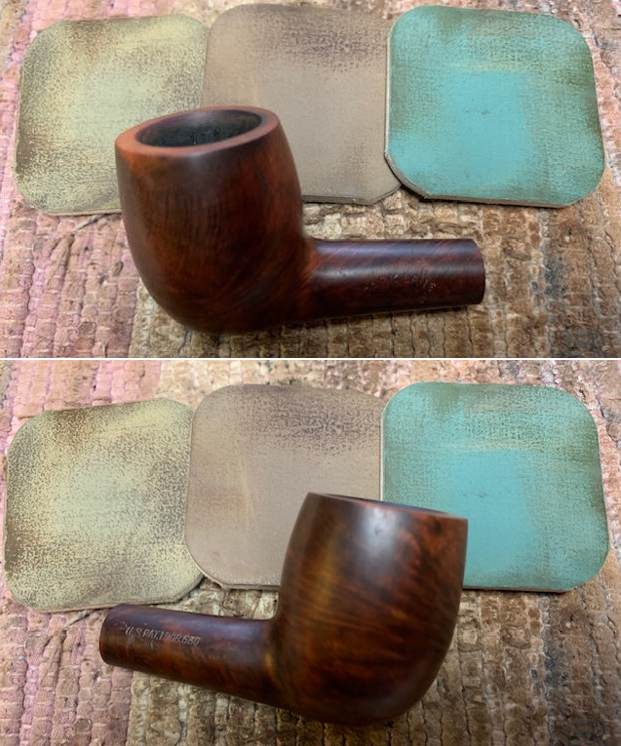
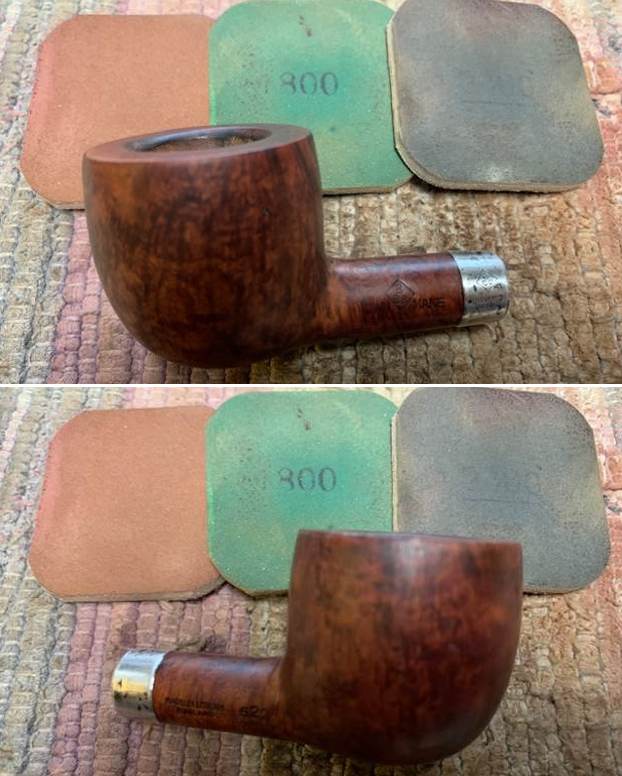
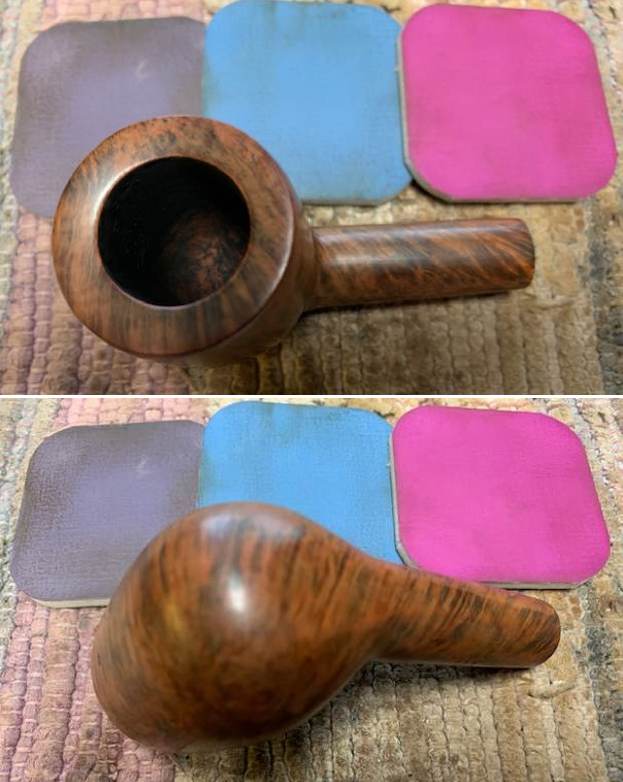
 The polished rim top looks much lighter than the rest of the stummel because of the topping process to remove the charred rim edge. To match the dark browns and black stains over rest of the stummel surface, I decided to re-stain the rim top surface using dark brown stain pen. I applied a coat of brown stain using a stain pen and set it aside for some time. I wiped the rim top using a soft cotton cloth to check the stain color and found it to be a bit lighter. I repeated the process till I had requisite color match and set it aside for the stain to set in.
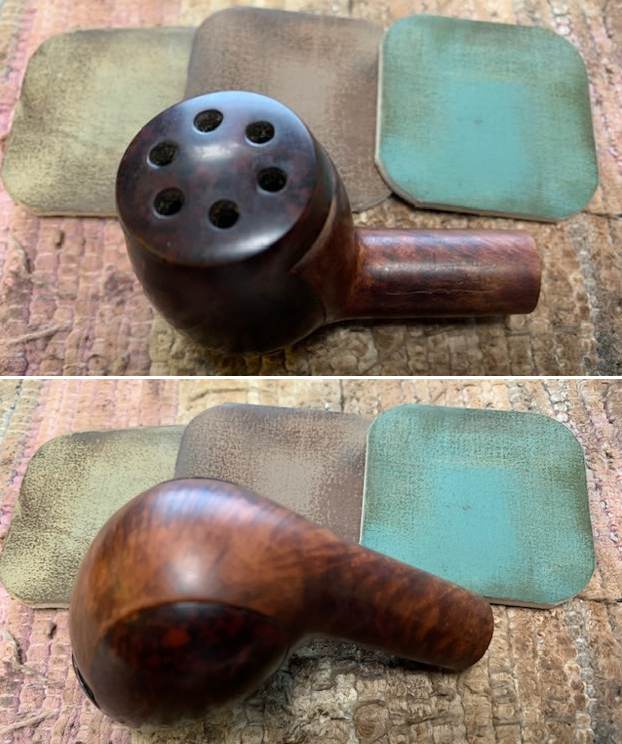
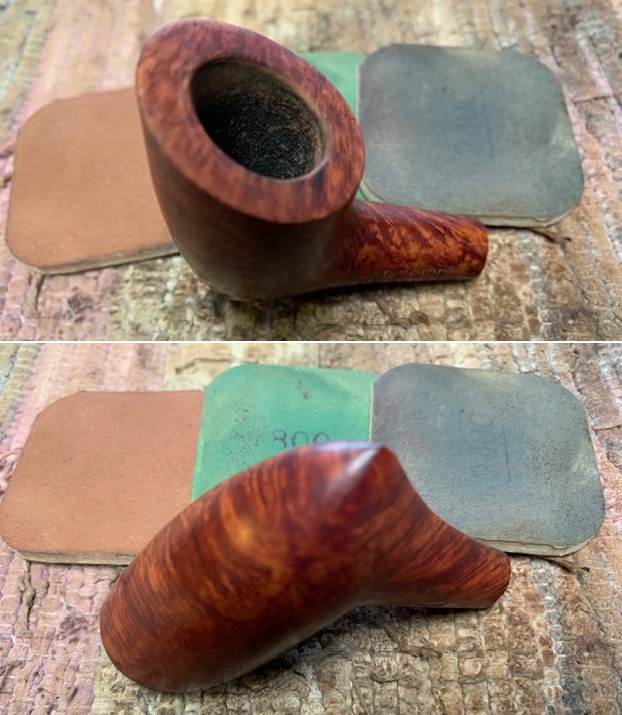
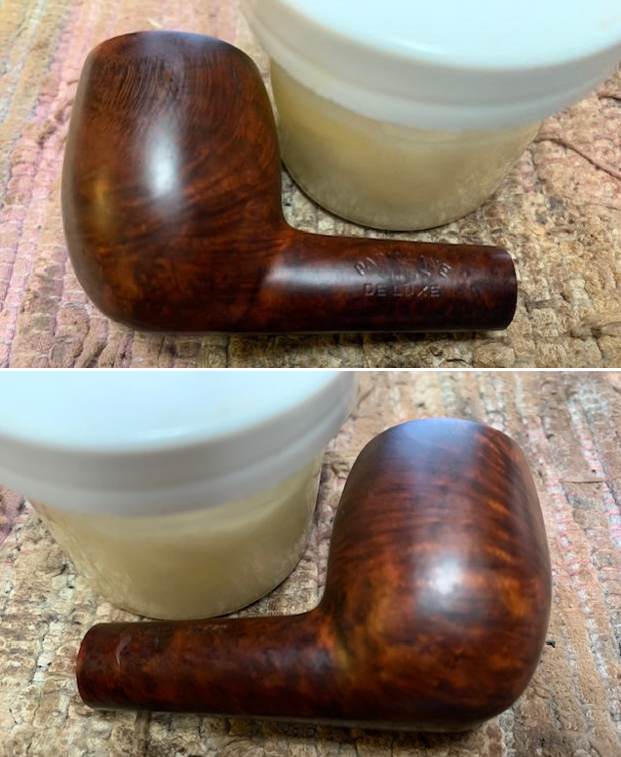
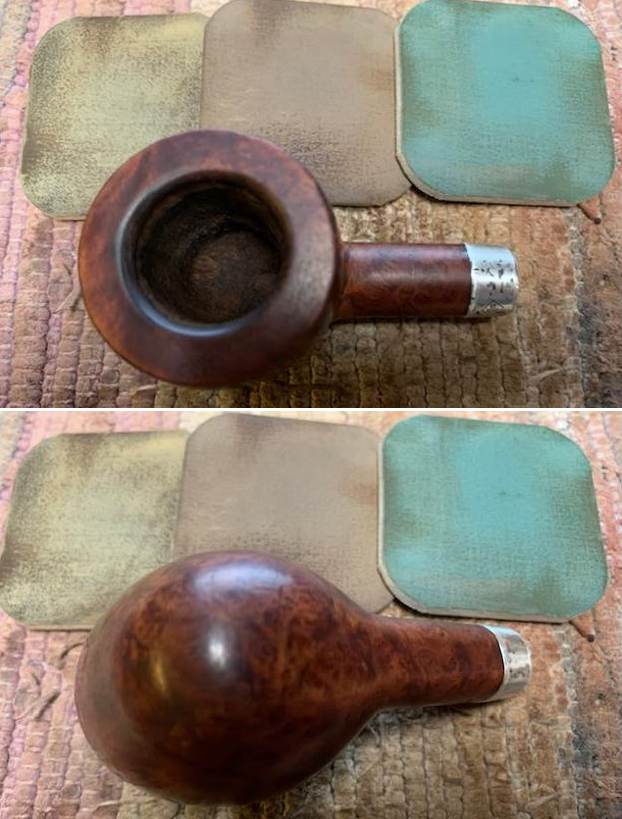
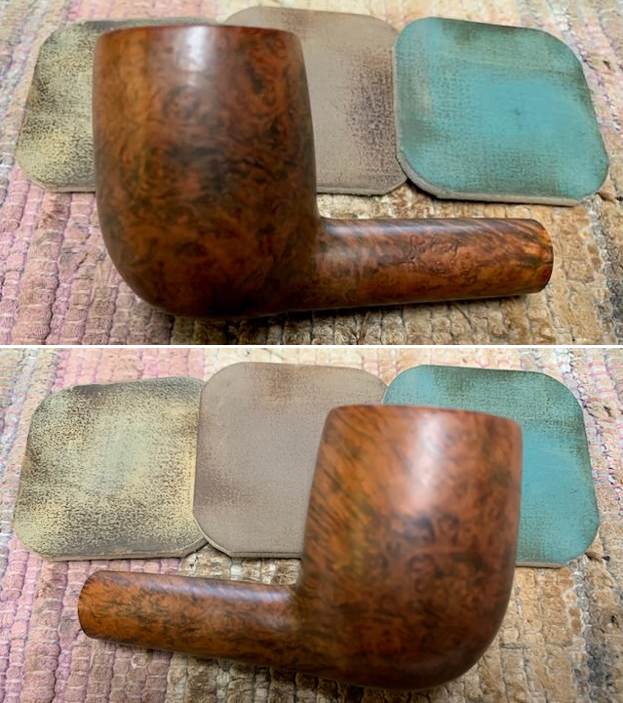
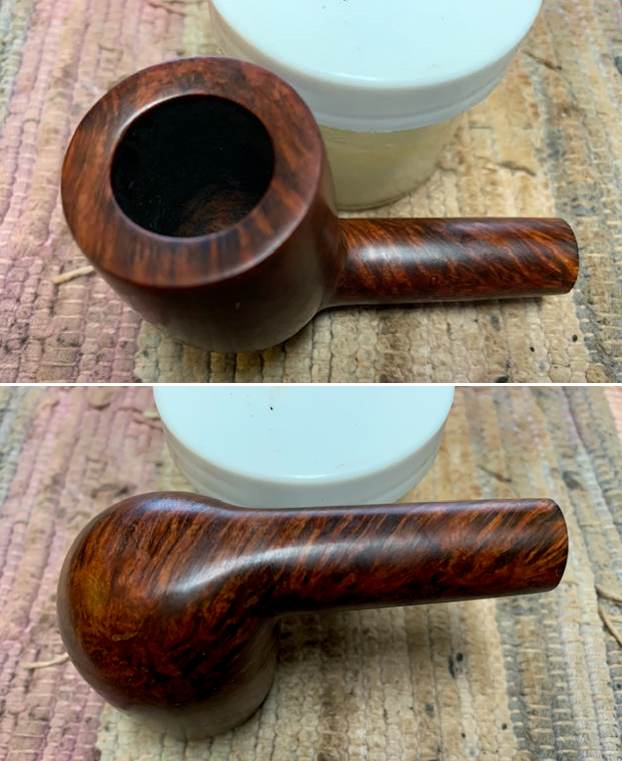
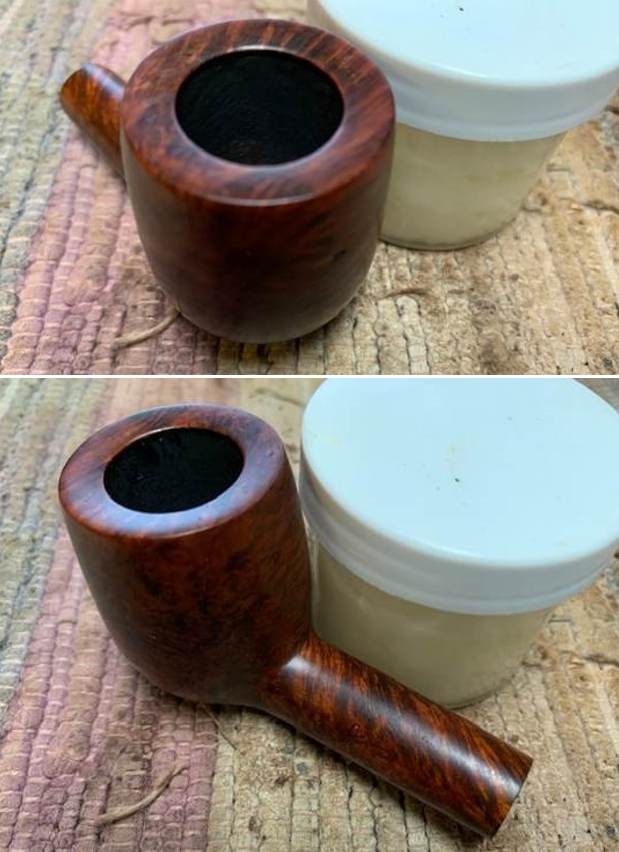
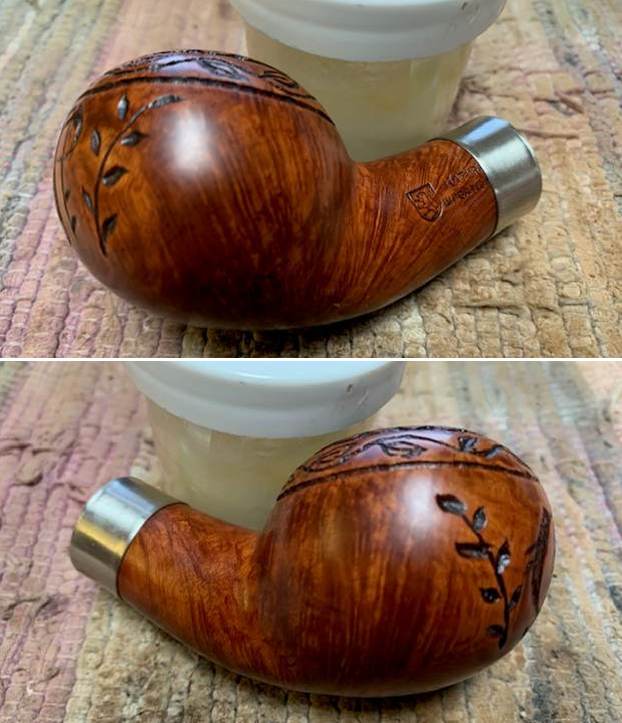
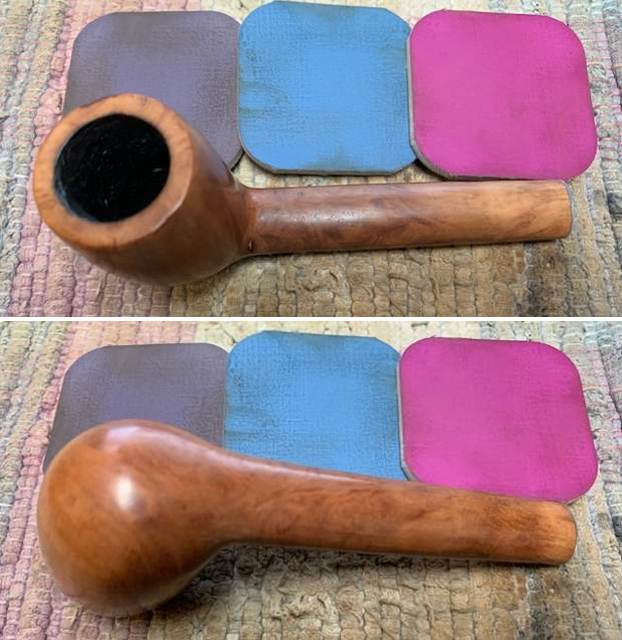
 I rubbed a small quantity of “Before and After Restoration Balm” into the briar with my finger tips and let it rest for a few minutes. The balm almost immediately works it’s magic and the briar now had a nice vibrant appearance with the beautiful rustication patterns on full display. I have been using this balm ever since I embarked on this journey and it is this part of restoration that I always look forward to. I further buffed it with a horse hair shoe brush. This pipe really oozes of a very high quality, in fact similar to the Les Wood Poker that I had worked on earlier. The consistent quality is awesome, to say the least. The rim top appears lighter hued, but that’s due to the lighting when I took pictures.

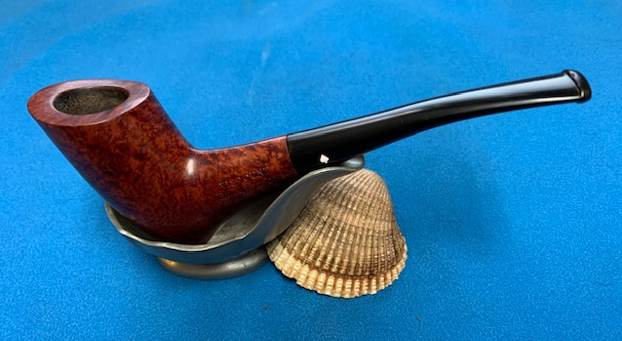
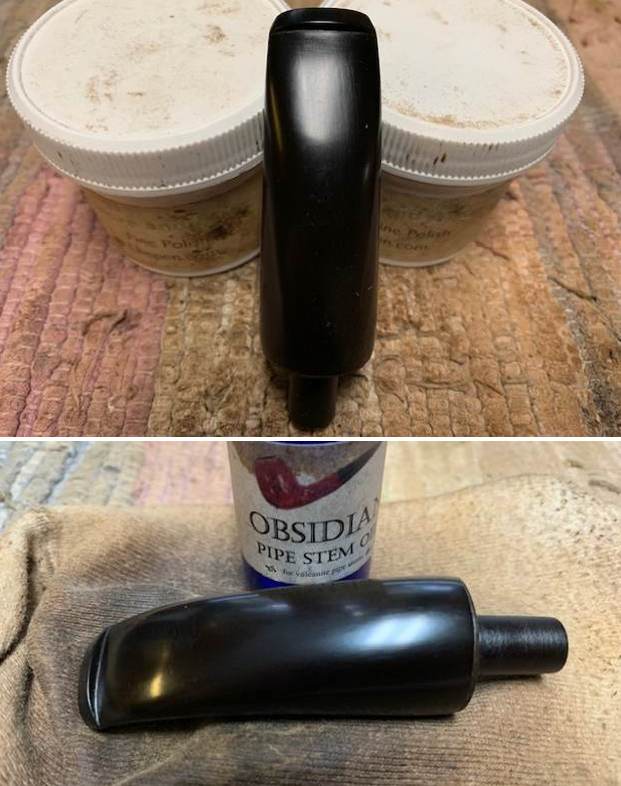
 Now that the stummel refurbishing was nearly done and also the stem had now been soaking for more than 24 hours, I removed the stem from the solution. I first scrubbed the stem surface with a Scotch Brite pad, always being mindful of the stem logo on the left side. I followed this scrubbing with a nice cleaning of the surface using a 0000 grade steel wool. I rinsed the stem under running water to rid the stem of the thick deoxidizer solution. I ran a couple of pipe cleaners to remove the deoxidizer solution from the airway. The beauty of a high quality vulcanite hand cut stem in shining black can now be appreciated once the heavy oxidation has been eliminated. There are spots/ areas where oxidation is still visible, but that will be eliminated once the stem is subjected to sanding and polishing using sand papers and micromesh pads. The beauty of this stem will be enhanced once it has been all polished and waxed.
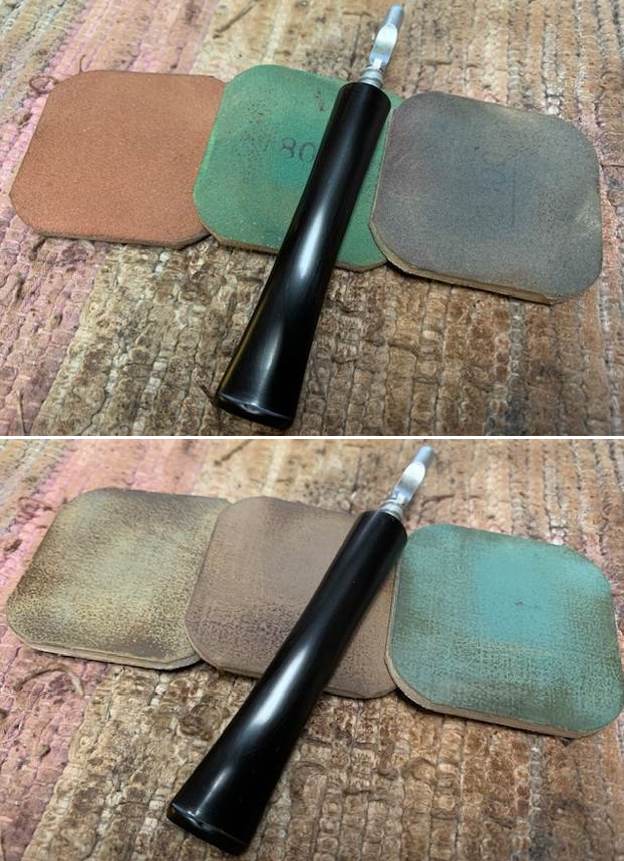
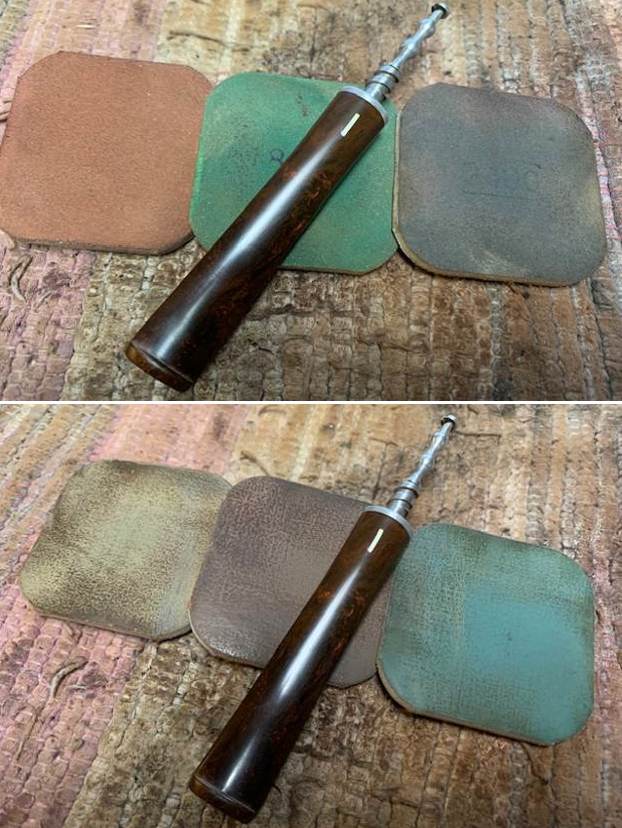
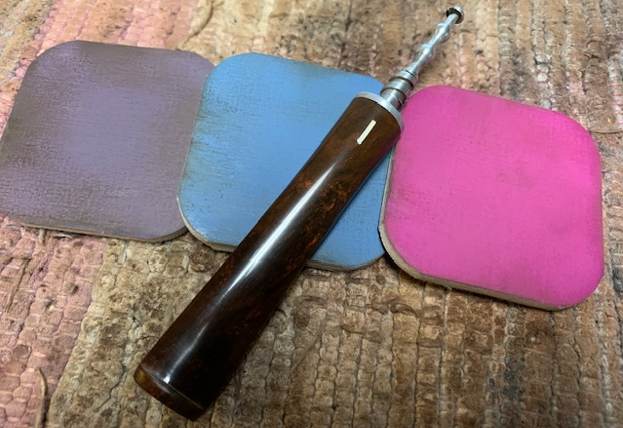
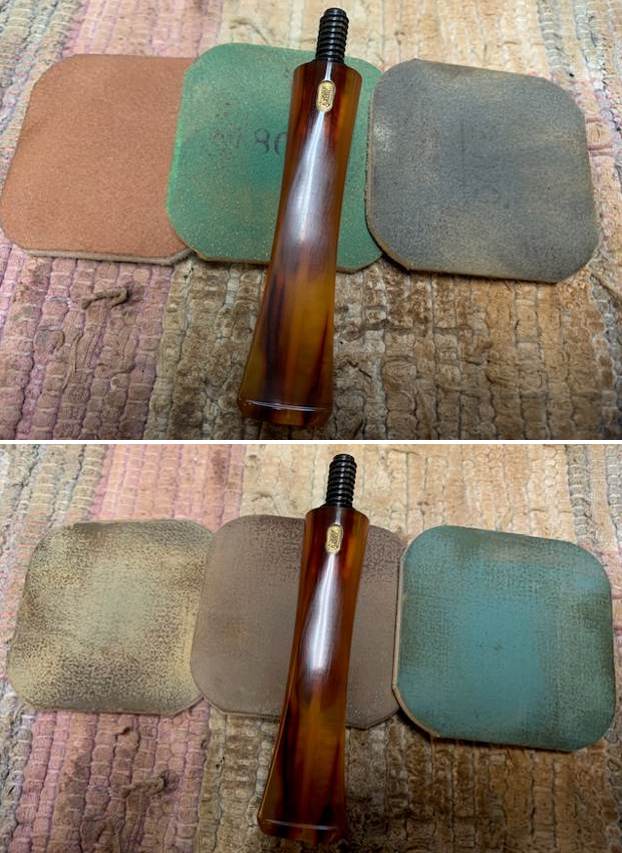
 A polish by wet sanding using all 9 micromesh pads (1500 to 12000 grit pads) brought out the deep black shine of the vulcanite. I rubbed a small quantity of EVO to hydrate the stem and deepen the shine.
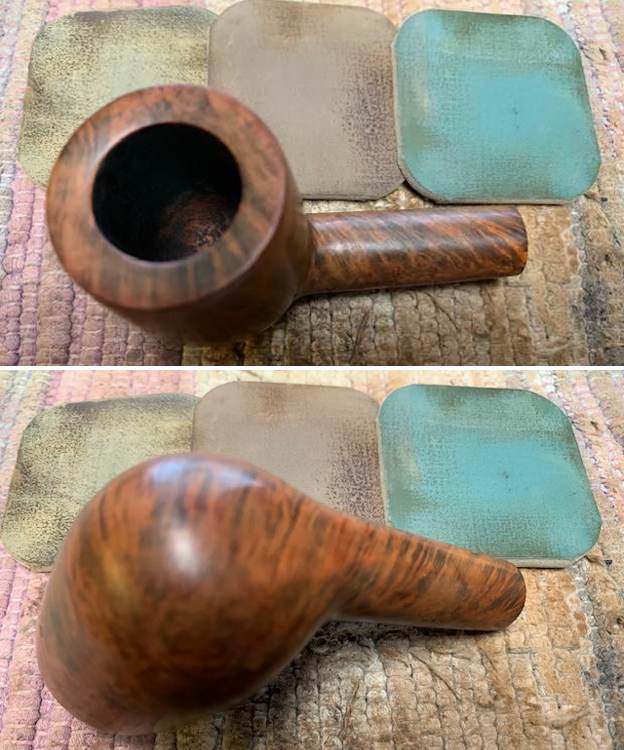
 This was followed by removing oxidation from over the sterling silverware seen on the pipe using a locally made compound that Abha, my wife, uses to polish her silver and gold jewellery and silver cutlery. This compound is a very fine powder and is least abrasive with fantastic results. The silver ferrule at the shank end and the silver spigot are now nice shining pieces of silver and provides a nice contrast to the shining black stem and the dark brown and black stummel. I painted the stem logo L J S using a Gold paint glitter pen and wiped off the excess paint. The stem logo is now nice and prominently visible.
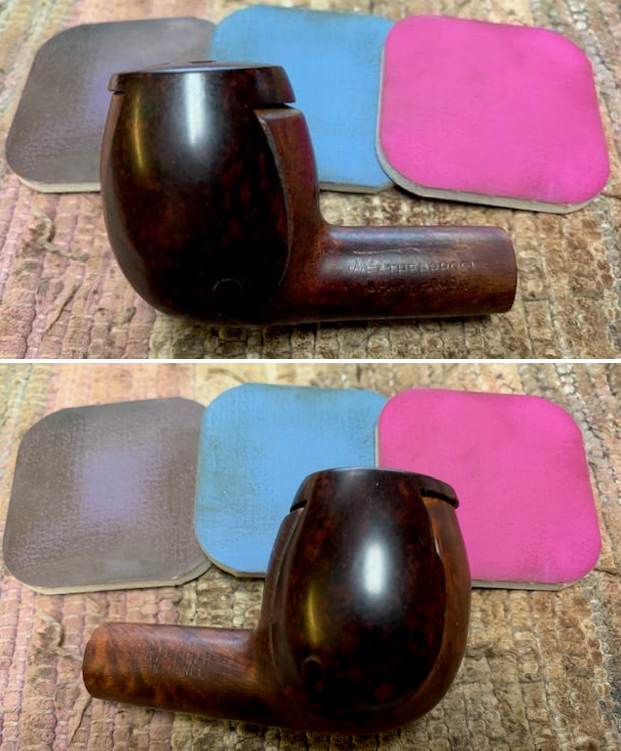
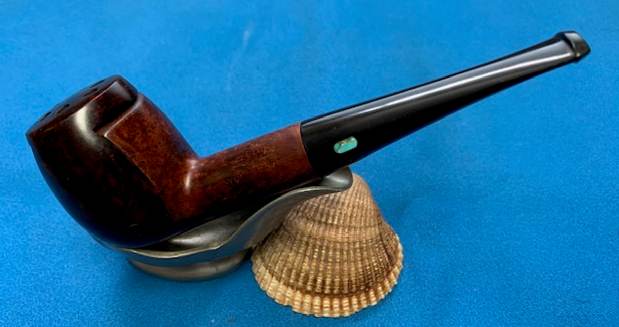
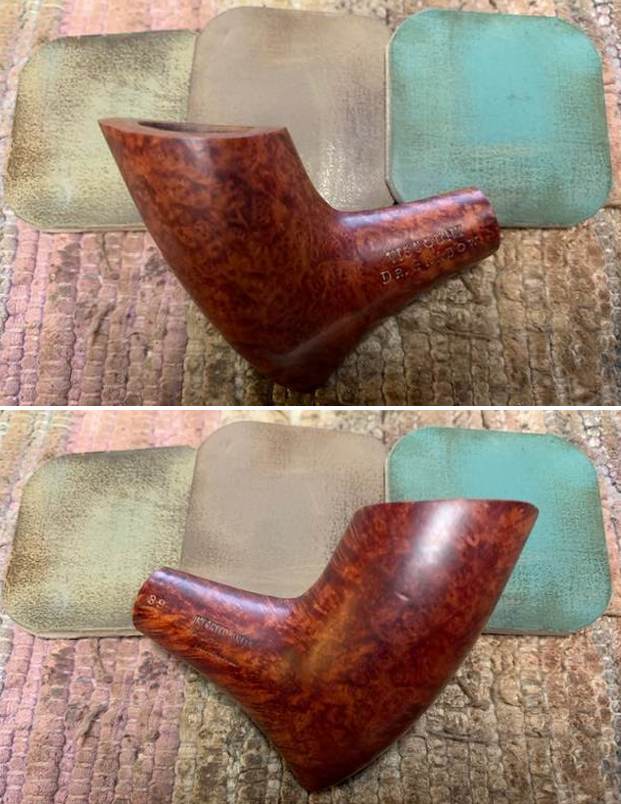
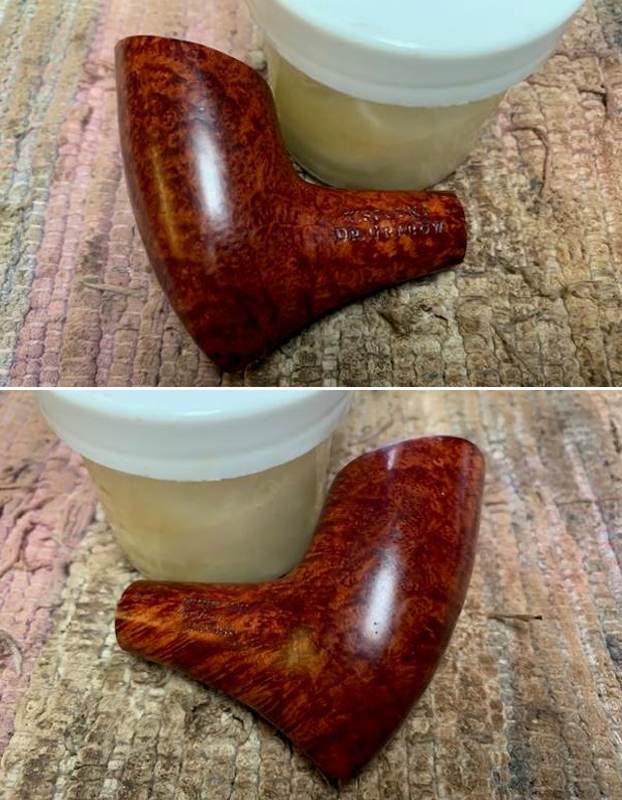
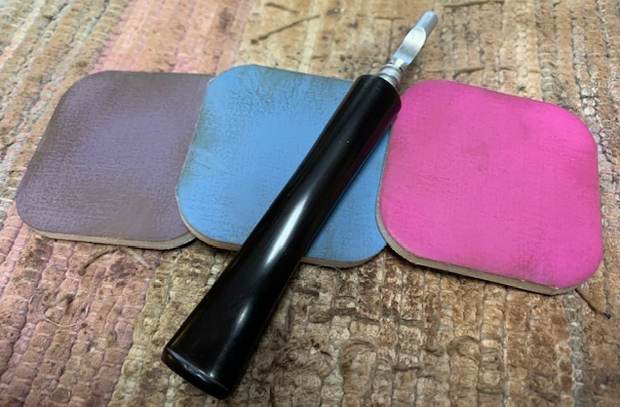
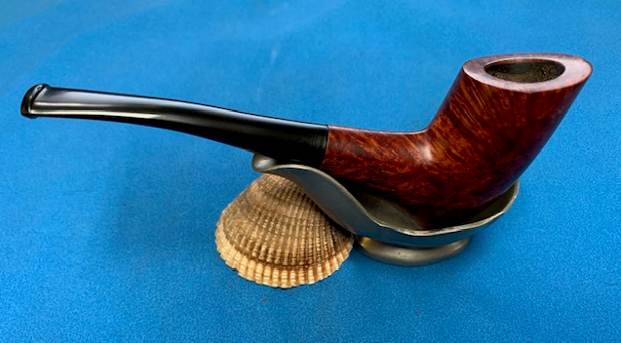
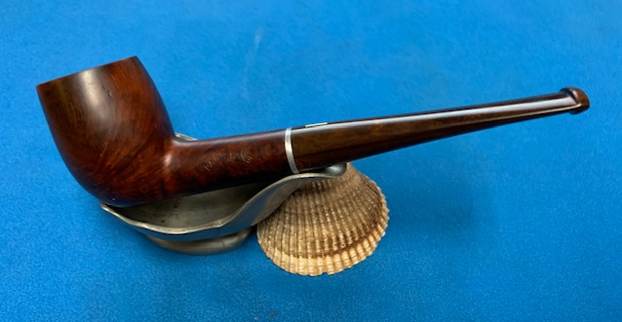
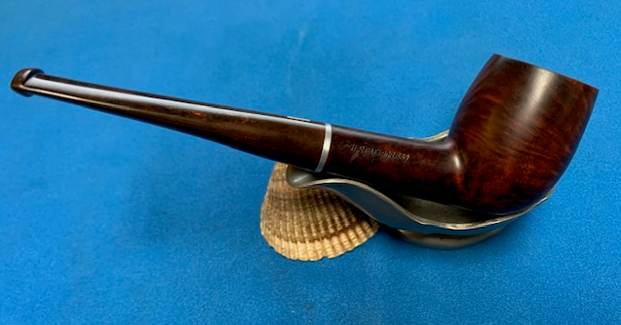
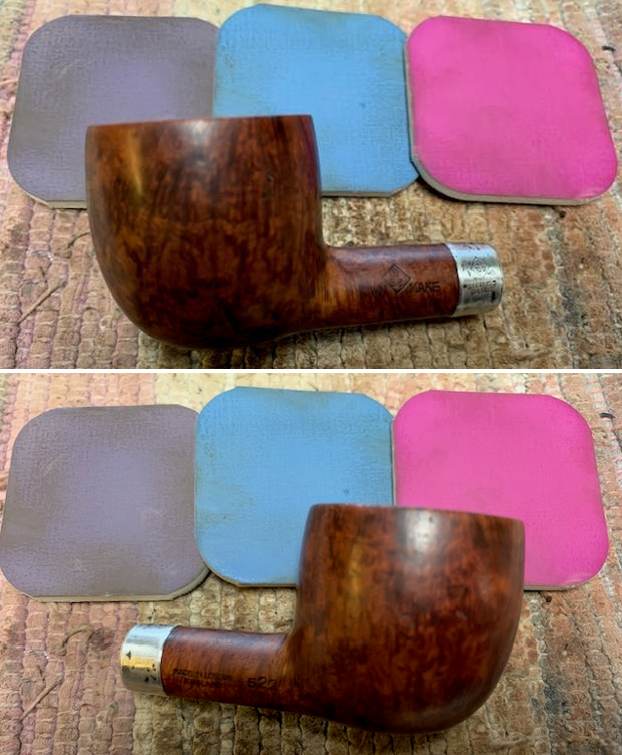
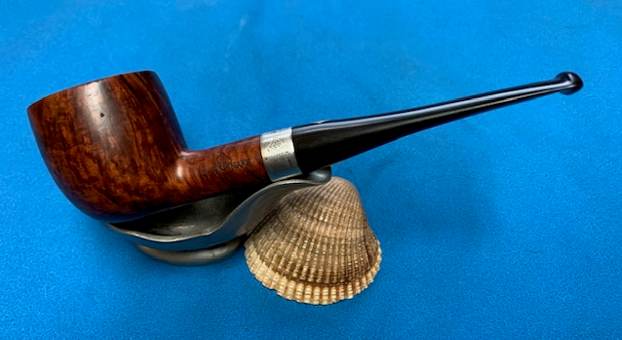
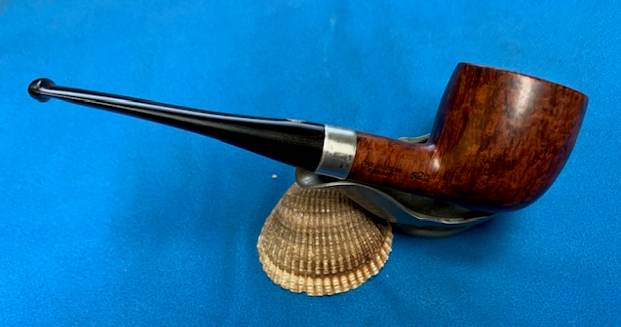
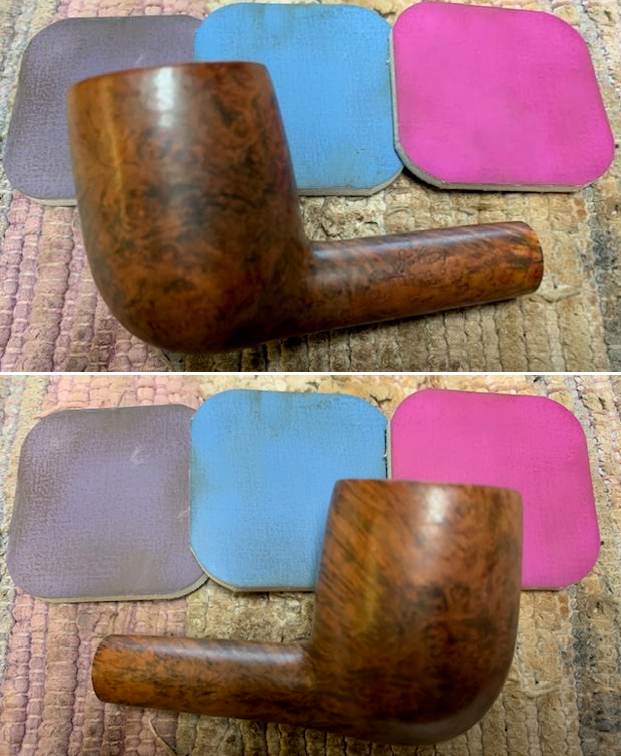
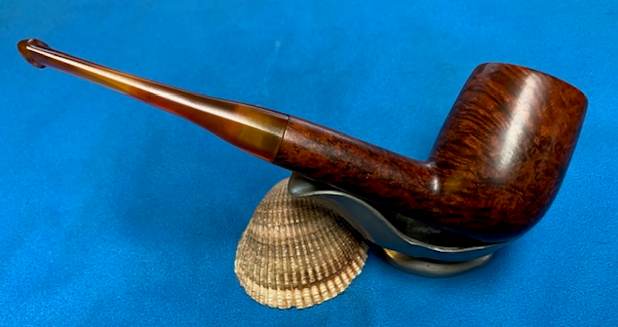
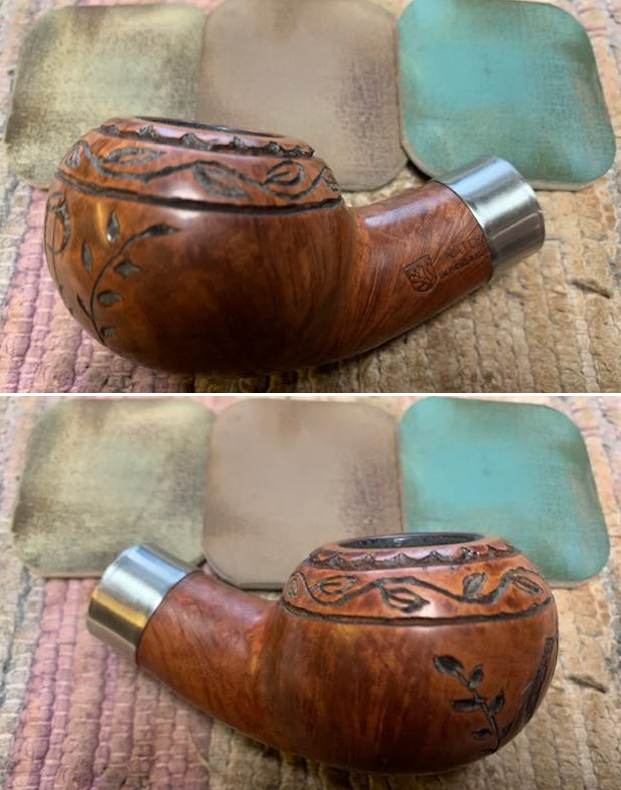
 I have reached that stage in this project which can be considered as the home run. I polished the rim top and the entire stem with blue diamond using a cotton wheel mounted on to my hand held rotary tool. The blue diamond compound helps to eliminate the minor scratches that remain after the use of micromesh pads. I completed this project by hand polishing the stummel with Halcyon II wax. I rubbed this polish deep into the rustications and after a couple of minutes, vigorously hand buffed the stummel with a microfiber cloth to a deep shine. I polished the stem with carnauba wax using my hand held rotary tool. This is a gorgeous looking spigot and I consider myself fortunate to have the opportunity to work on this beauty and, as my Guru Steve says, carry forward the trust in this pipe till it is time to pass it on to the next pipeman or pipewoman. Here are a few pictures of the completed pipe for you to appreciate while I take the opportunity to thank you each of you for sparing your valuable time in joining me on this journey.


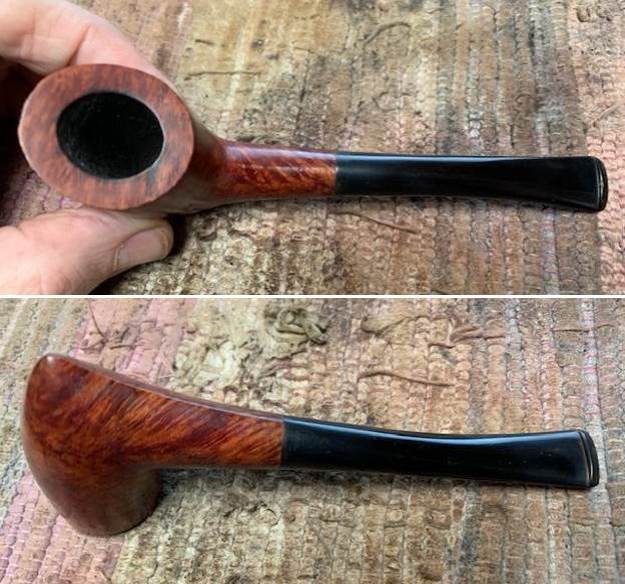
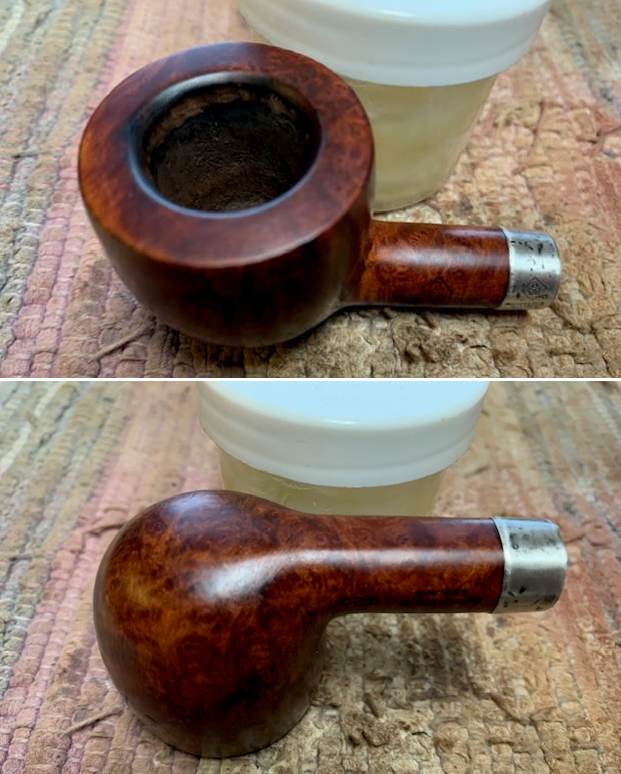
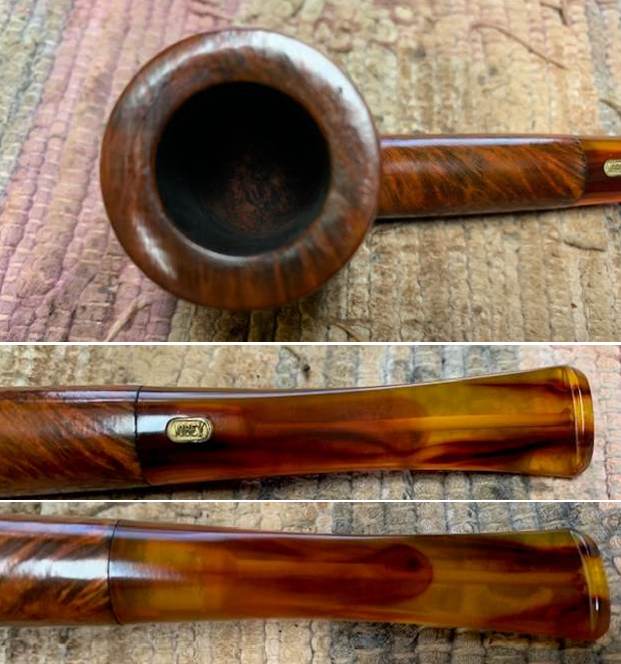
 Jeff took photos of the bowl and rim top to show what they looked like before the clean up. You can see the darkening and light lava on the inner edge and top of the rim. He also took some photos of the stem to show the condition of both sides. You can see the light marks on the top and underside next to the button.

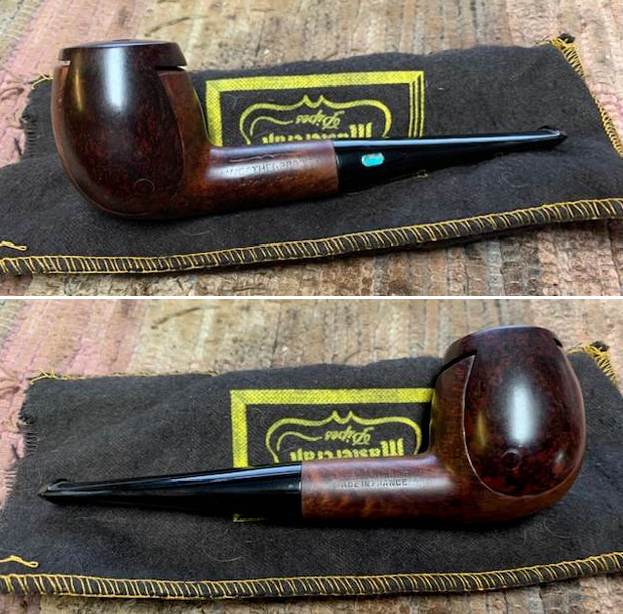
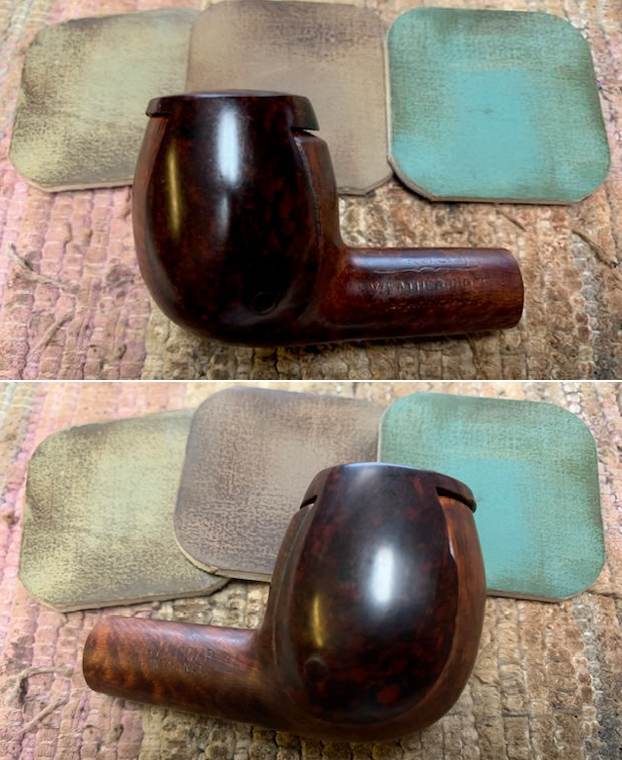
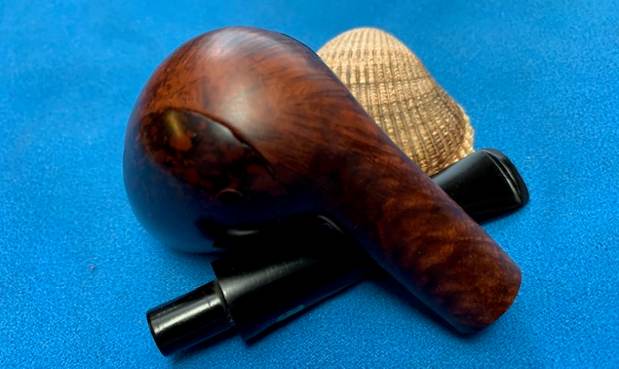
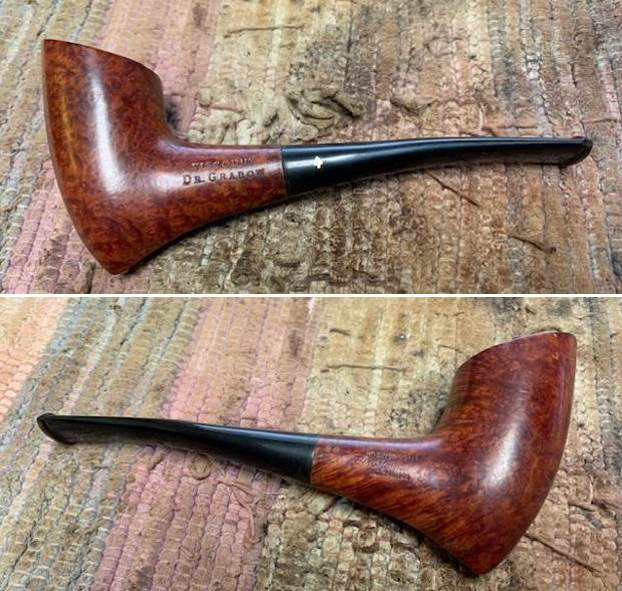
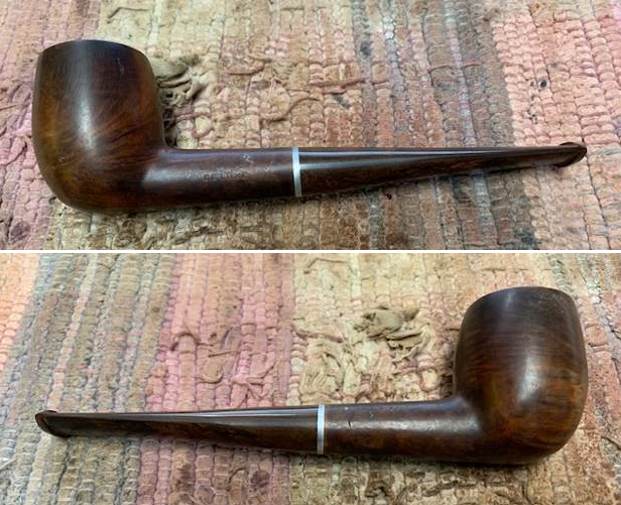
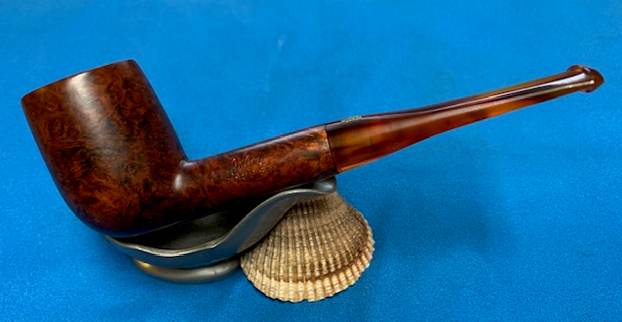
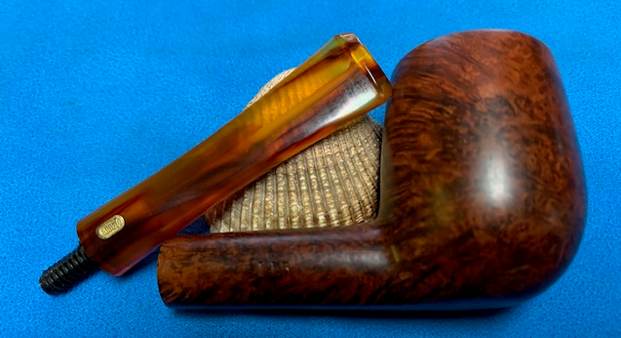
 The photos of the sides and heel of the bowl show the grain around the bowl and shank. The stain adds depth finish on the pipe. Even under the grime it is a real beauty.
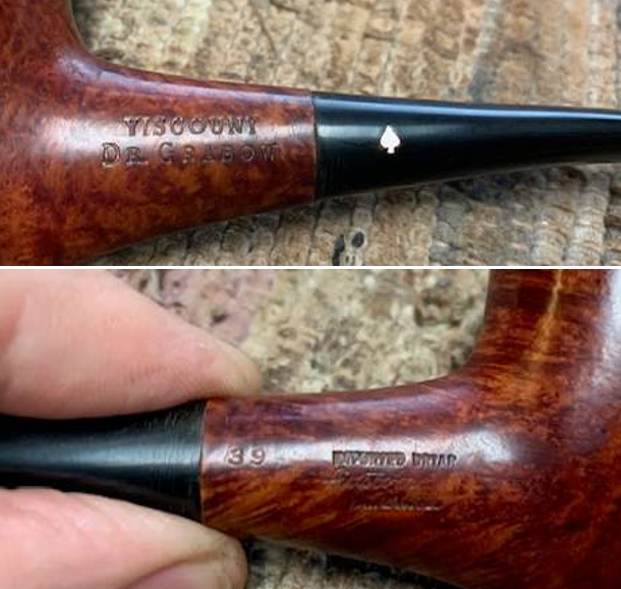
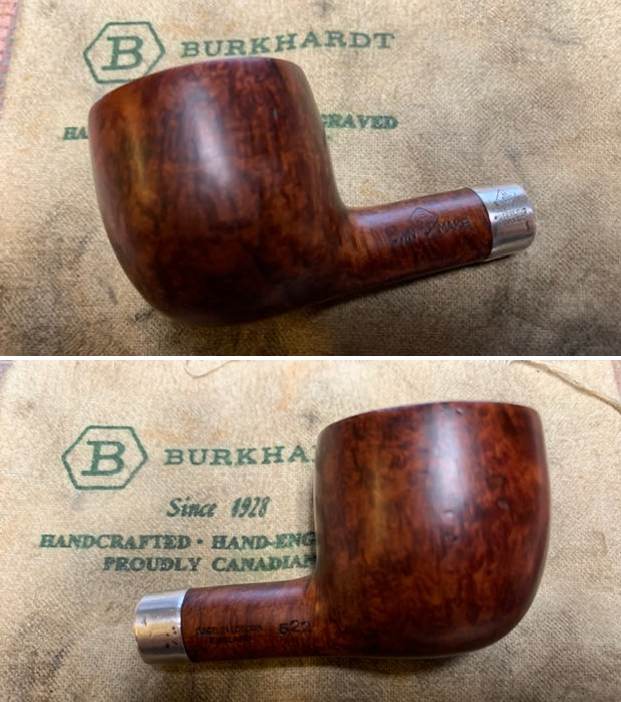
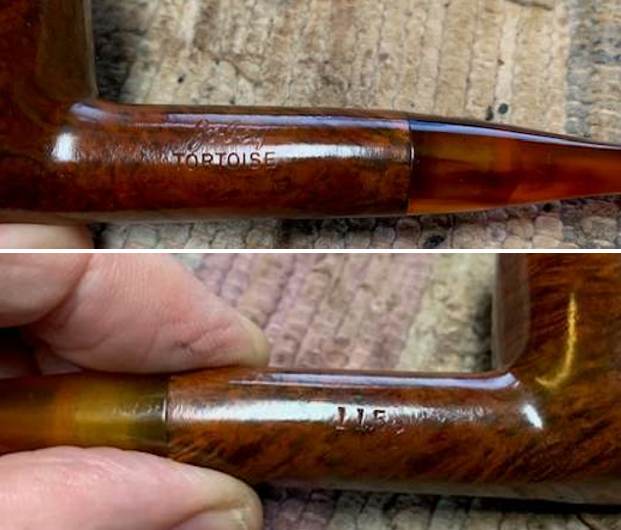
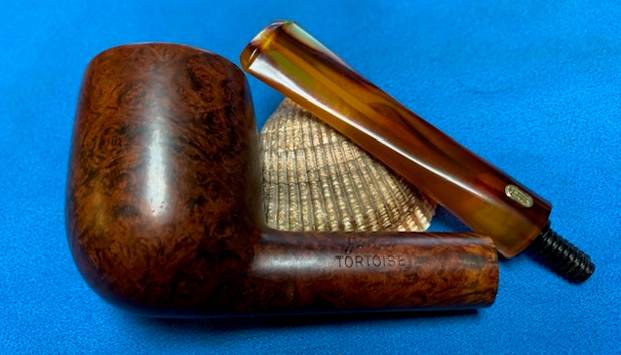
 The stamping on the lower left side the diamond shank is shown in the photo below. It is clear and readable as noted above.
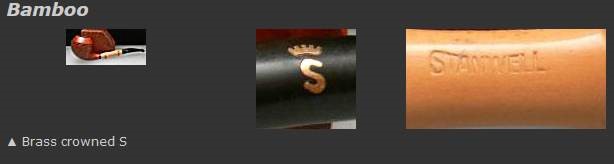
  Jeff had cleaned up the pipe with his usual penchant for thoroughness. He reamed the pipe with a PipNet Pipe Reamer and cleaned up the remnants with a Savinelli Fitsall Pipe Knife. He scrubbed the bowl with undiluted Murphy’s Oil Soap with a tooth brush. He rinsed it under running warm water to remove the soap and grime. He cleaned out the inside of the shank and the airway in the stem with alcohol, cotton swabs and pipe cleaners. He soaked the stem in Before & After Deoxidizer and rinsed it off with warm water. It came in Stanwell Pipe Sock. I removed it from the sock and took photos of the pipe once I received it.
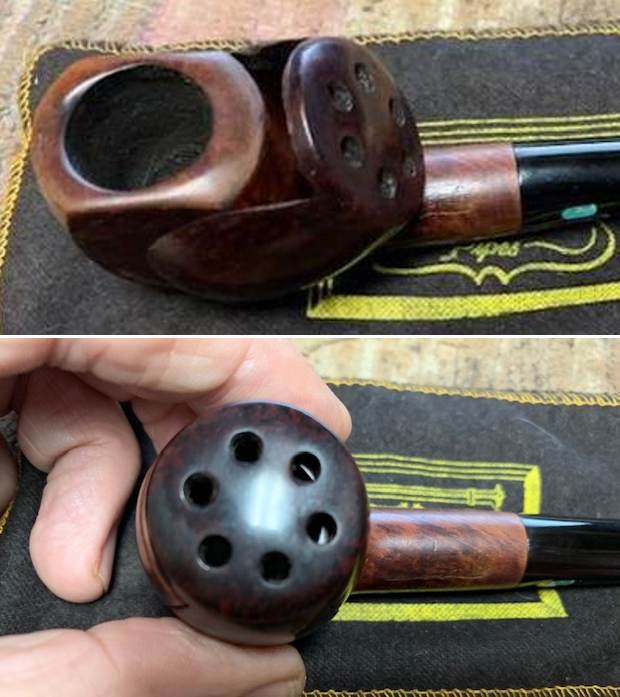
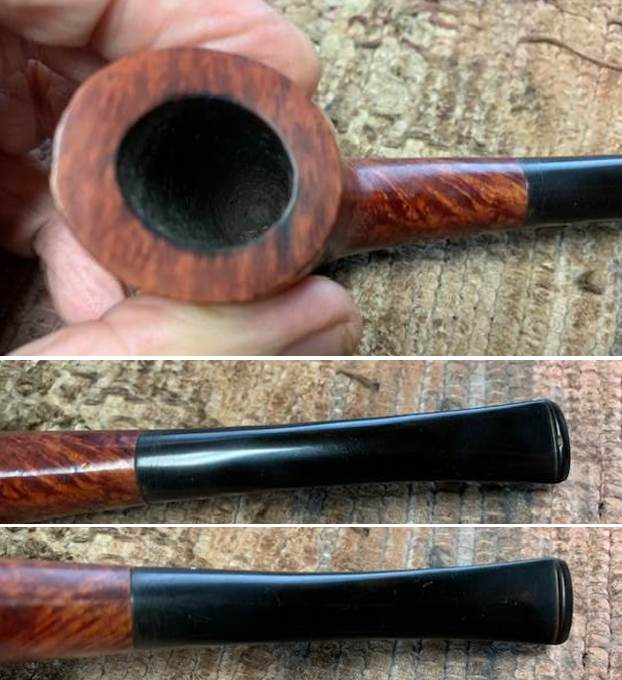
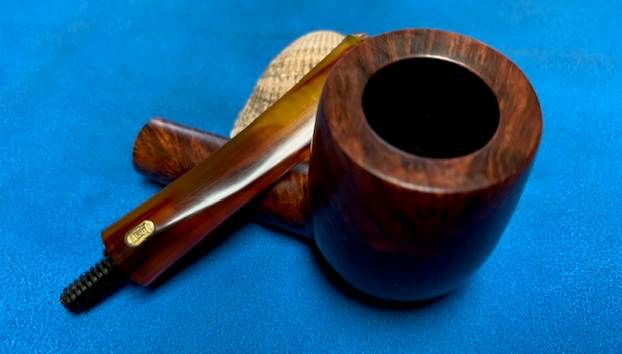
 I took close up photos of both the rim top and the stem. Jeff had been able to get the grime and lava off of the rim top and it looked pretty incredible. There was some darkening and marks on the rim top on the right side and the back of the bowl. The stem looked very clean. The tooth marks and chatter were minimal and should be easy to remove.
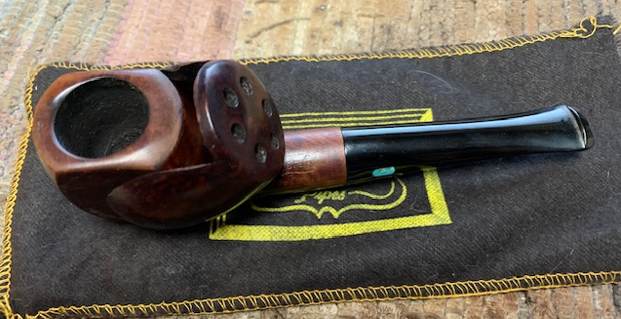
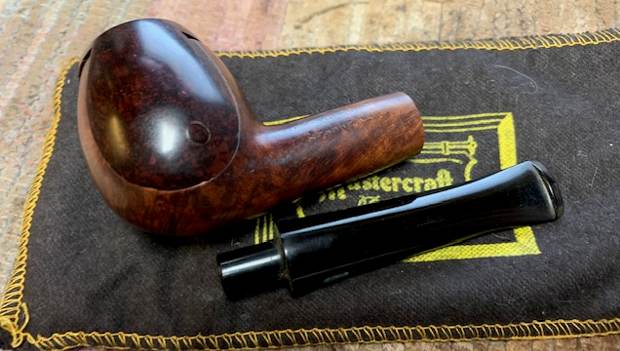
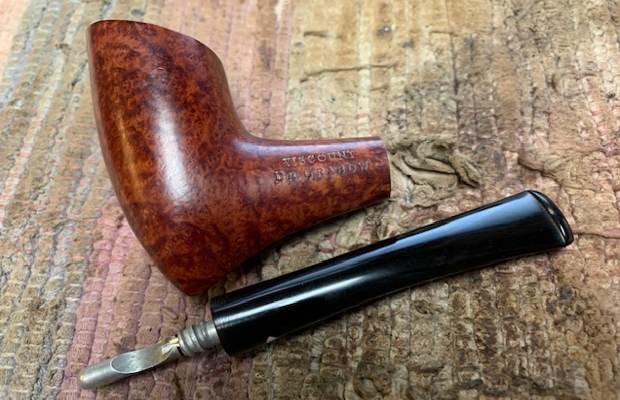
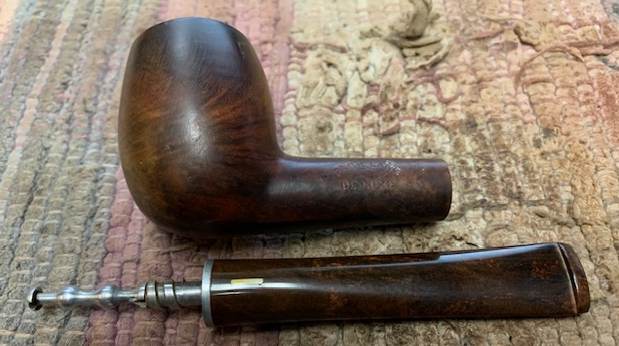
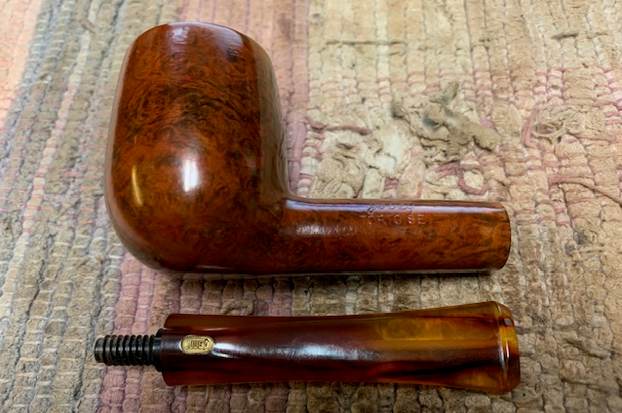
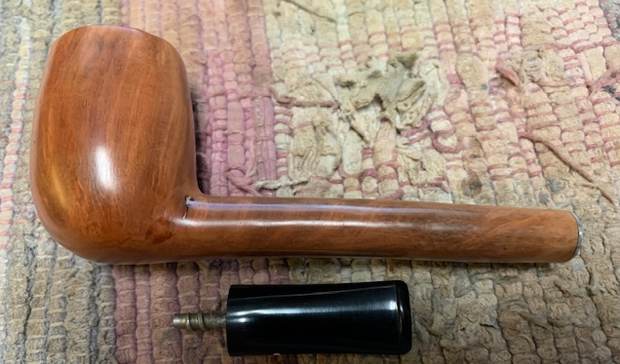
 The stamping on the shank side was readable as noted above. I also took a photo with the stem removed to give an idea of the perspective and design of the pipe.
 I started my work on the pipe by addressing the damage to the inner edge and the rim top with a folded piece of 220 grit sandpaper to bring the edge back into round and it looked much better. Over all the rim top and edges looked much better.
  Now it was time to do my work on the pipe. I polished the bowl and rim top with micromesh sanding pads using 1500-12000 grit sanding pads and wiping it down after each sanding pad with a damp cloth to remove the sanding dust and debris.


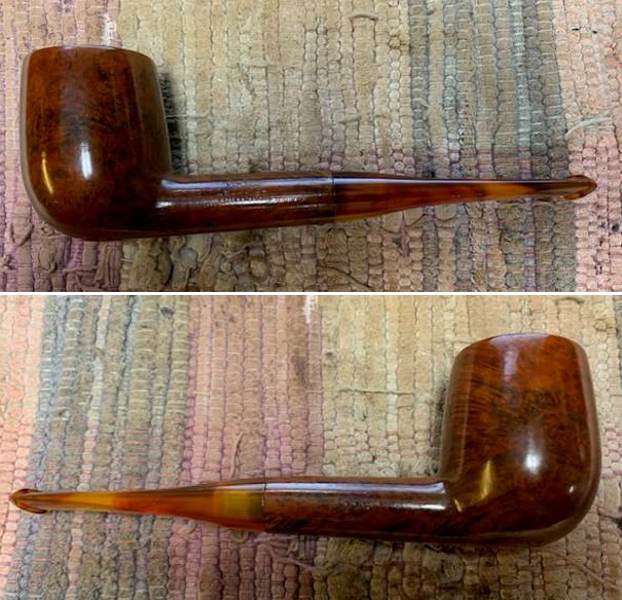
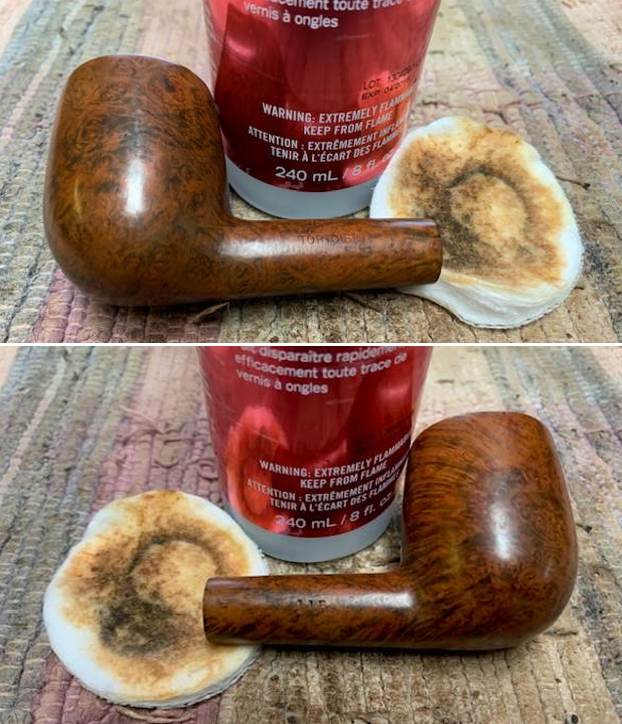
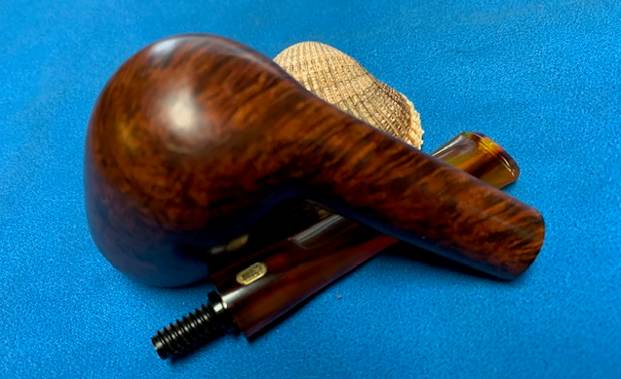
 I worked some Before & After Restoration Balm into the finish of the bowl and shank with my fingers. I want the product to go deep into the finish because it works to clean, enliven and protect the briar. Once I was confident that it was deeply worked into the finish I wiped it off and buffed it with a soft cloth to polish it. The pipe really began to have a rich shine. I took some photos of the bowl at this point to mark the progress in the restoration. The grain really stands out on the pipe in the photos below.

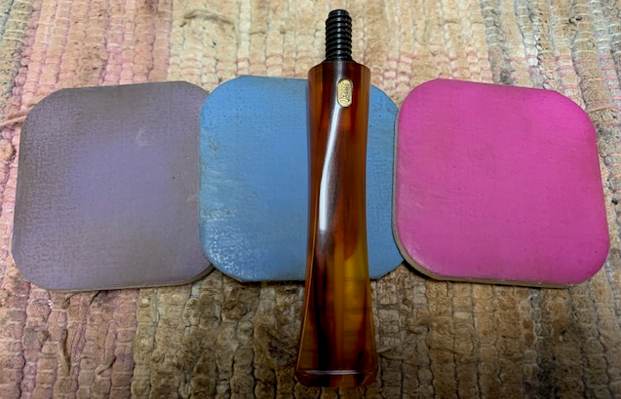
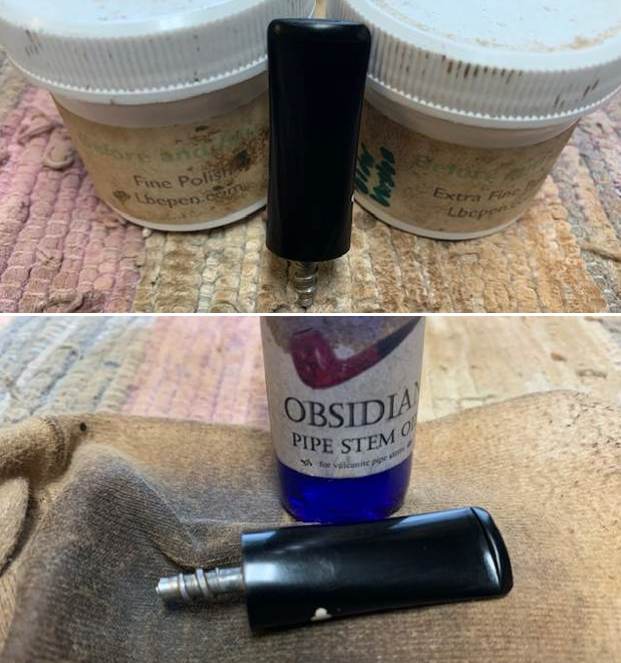
 I set the bowl aside and turned to work on the stem. I polished the acrylic stem with micromesh sanding pads – wet sanding it with 1500-12000 grit pads. I wiped it down with Obsidian Oil after each sanding pad.
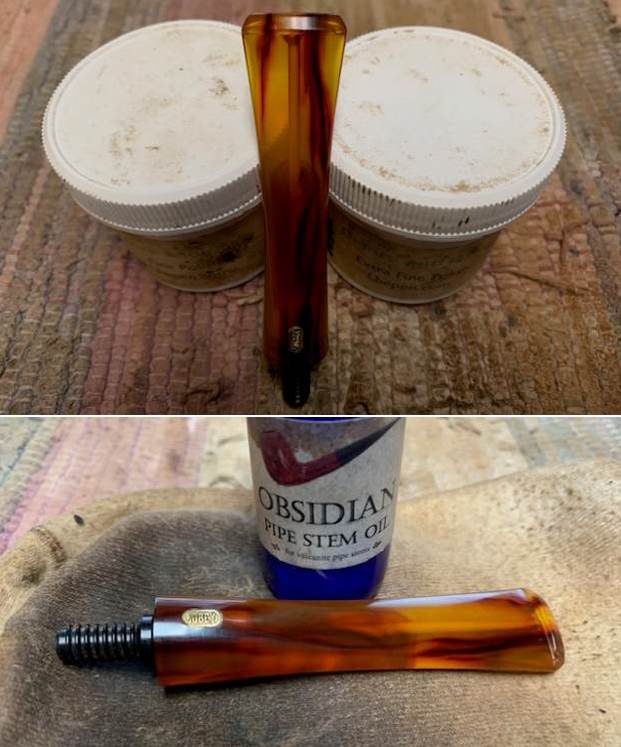
 I polished it with Before & After Pipe Polish – both the Fine and Extra Fine polishes. I gave it a final coat of oil and set it aside to dry.
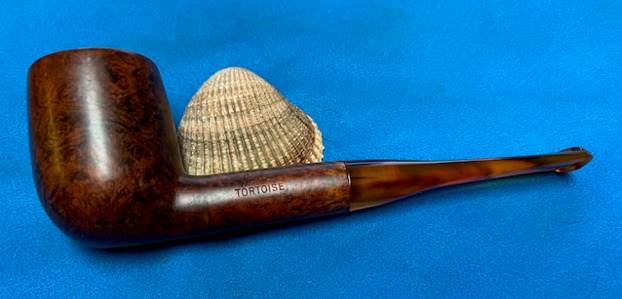
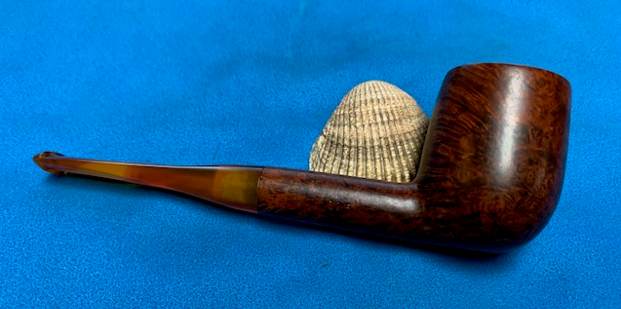
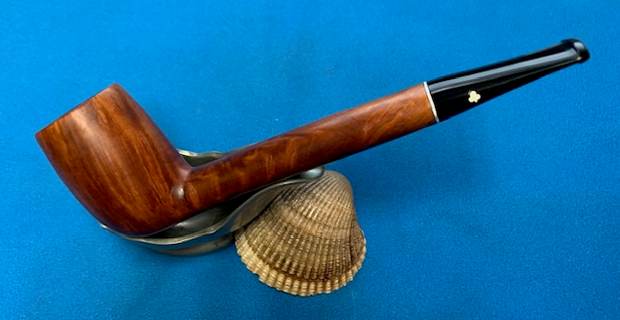
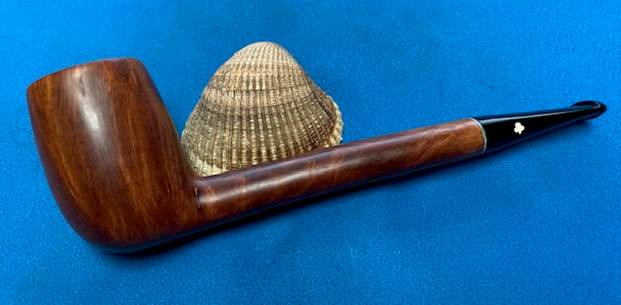
  This Stanwell Maron 32 Straight Bulldog with an acrylic taper stem is a great looking pipe now that it has been restored. The beautiful finish really highlights the grain and the polished finish is stunning. The triple layer brass and orange acrylic shank extension is also a great addition. I put the stem back on the bowl and carefully buffed the pipe with Blue Diamond on the buffing wheel. I gave the bowl and the stem multiple coats of carnauba wax on the buffing wheel and followed that by buffing the entire pipe with a clean buffing pad. I hand buffed the pipe with a microfiber cloth to deepen the shine. The finished Stanwell Maron Bulldog fits nicely in the hand and feels great. Give the finished pipe a look in the photos below. The dimensions of the pipe are Length: 5 inches, Height: 1 ¾ inches, Outside diameter of the bowl: 1 ¼ inches, Chamber diameter: ¾ of an inch. The weight of the pipe is 38 grams /1.34 ounces. I will be adding the pipe to the Danish Pipe Makers Section of the rebornpipes store. If you are interested in purchasing this pipe send me a message or an email. Thanks for reading this blog and my reflections on the pipe while I worked on it.