Tag Archives: Bowls – refinishing

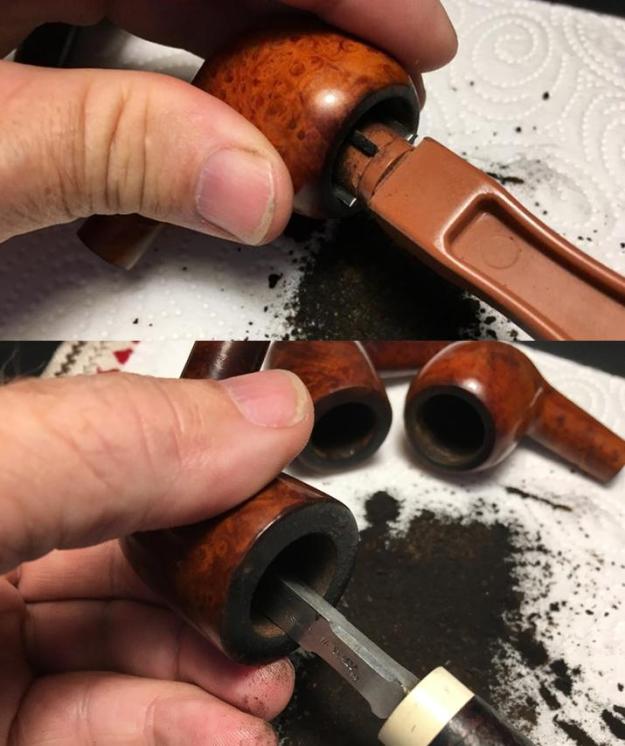
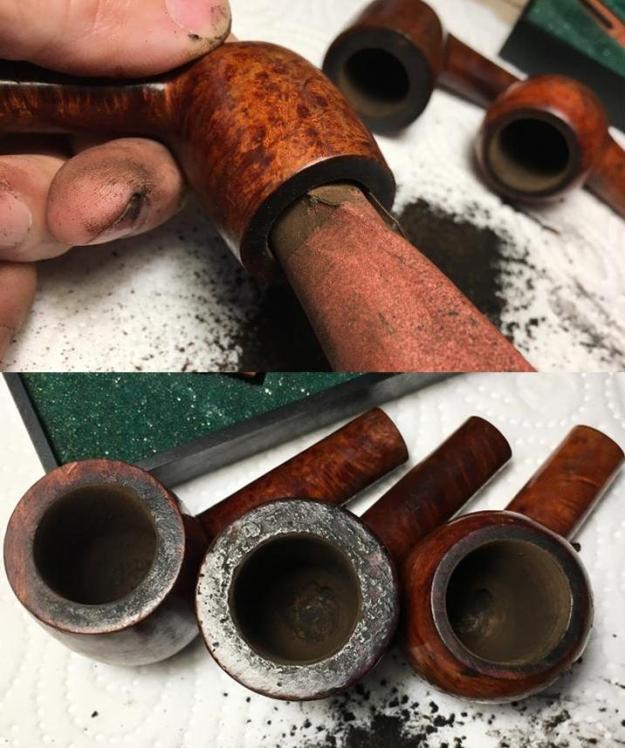
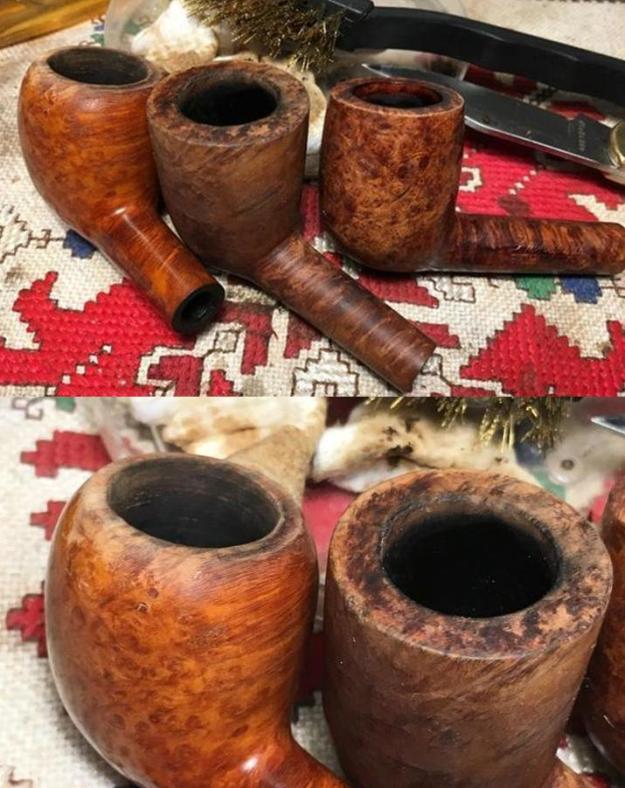
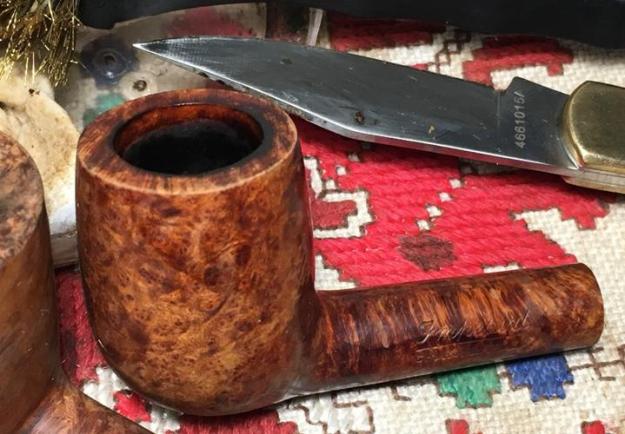
Restoring a Cased Set of Pipes – 2 JBV and 1 M&T Bent Military Mount Billiards – Part 3


Blog by Steve Laug

I have already introduced this set of pipes for you in Part 1 of this blog. It is an old cased set of three pipes. Two of them were stamped JBV in an oval and one was stamped M&T Best Briar & Bands. The set was missing the third JBV pipe which I would bet was a smooth meerschaum bent billiard bowl and a second stem. The second stem in the case was for the M&T pipe and was smaller in diameter than the stem for the JBV pipes. As I mentioned in Part 1 the silver was dirty and the bowls caked on all of the pipes but there was something about them that really attracted me. Here is the link to the first part of the blog – the restoration of the most damaged of the JBV pipes: https://rebornpipes.com/2018/07/22/restoring-a-cased-set-of-pipes-2-jbv-and-1-mt-bent-military-mount-billiards-part-1/.

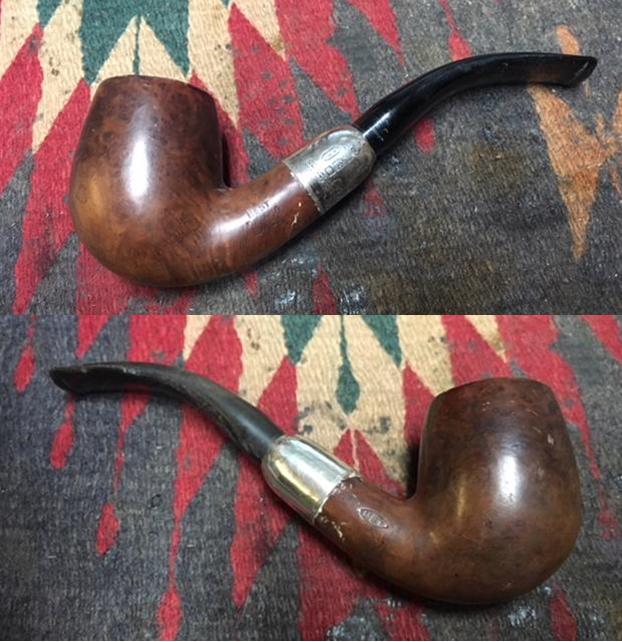
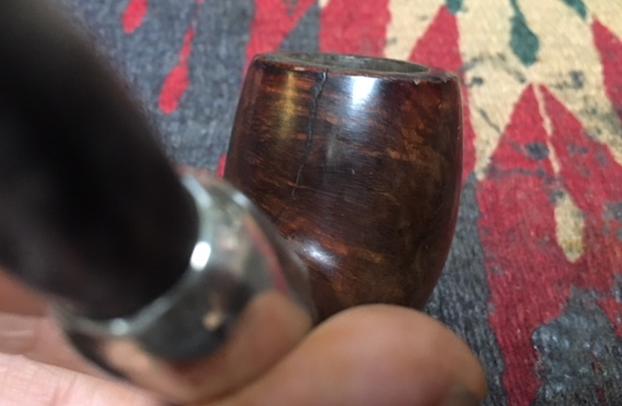
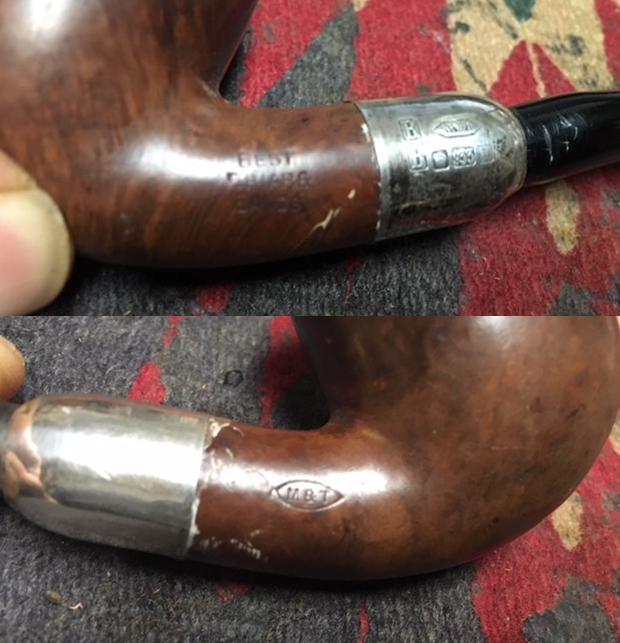
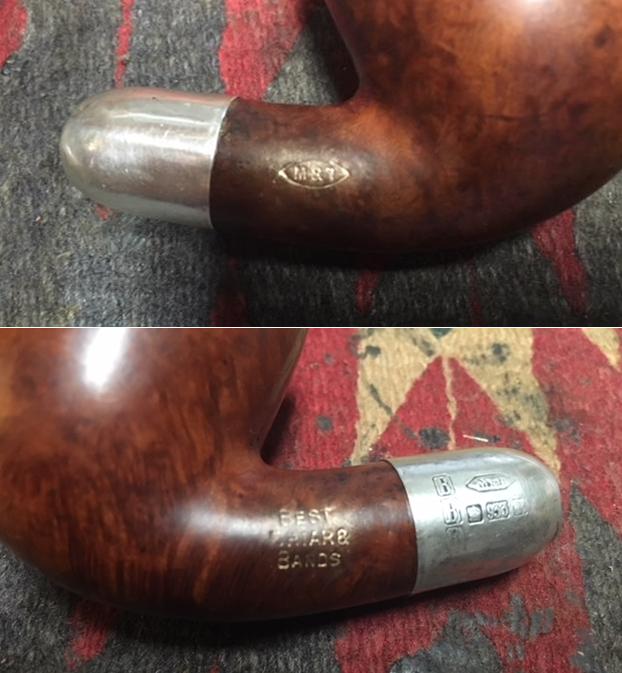
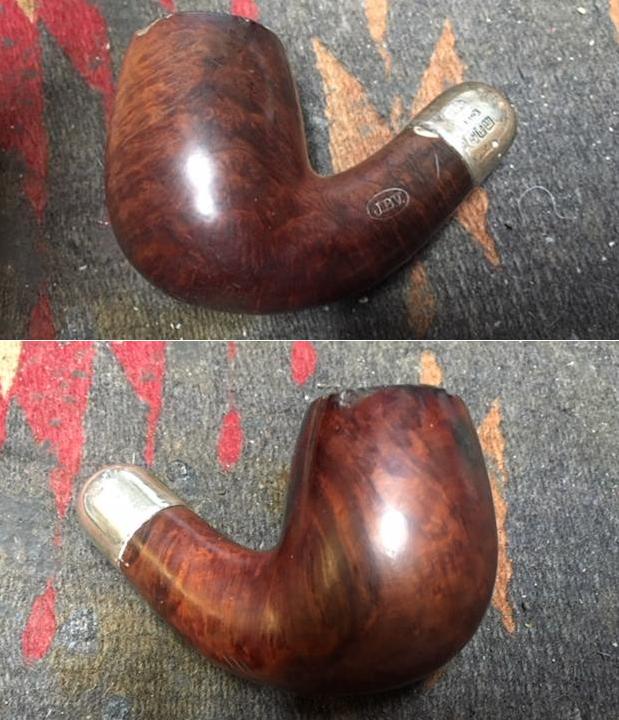
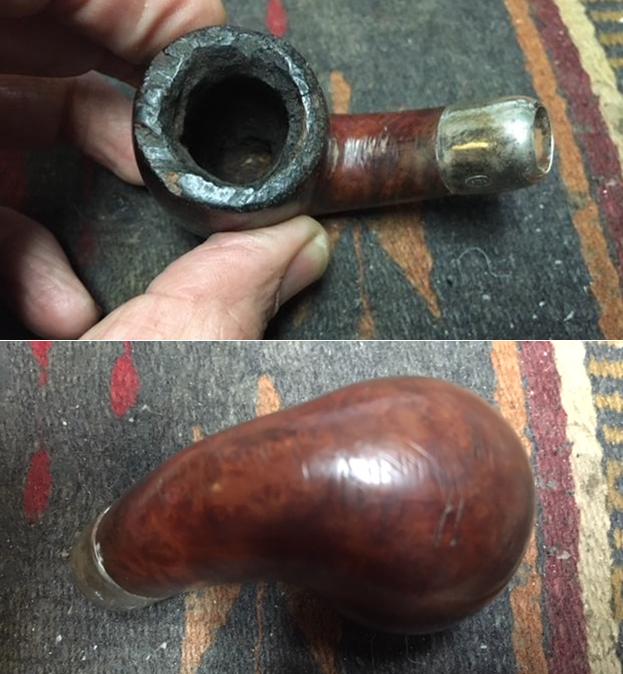
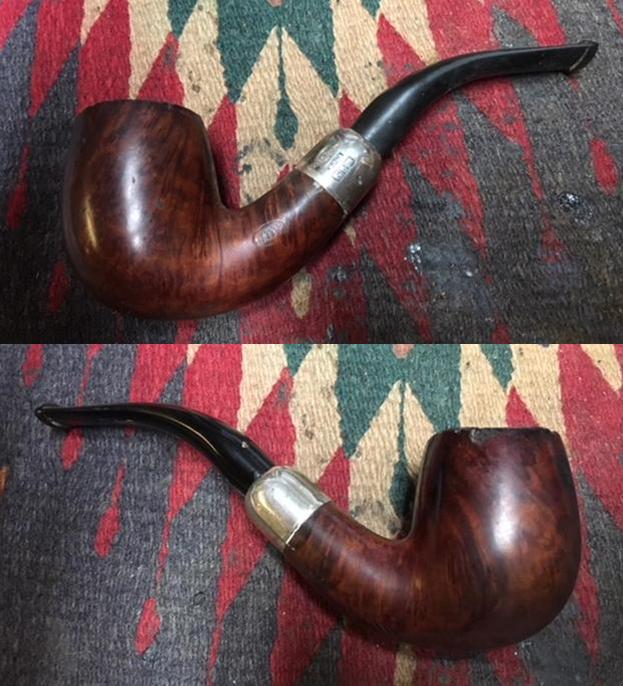
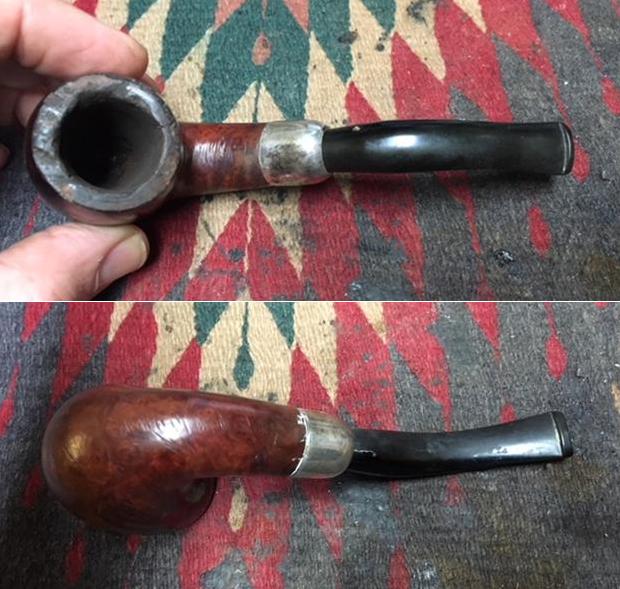
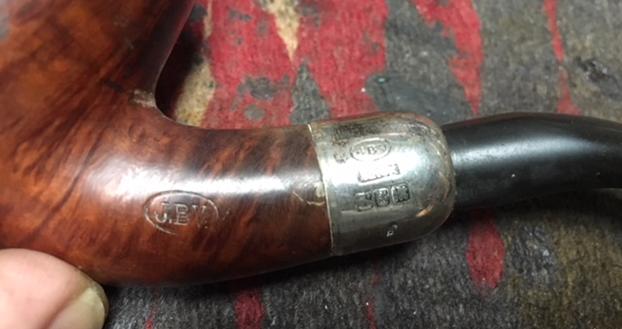
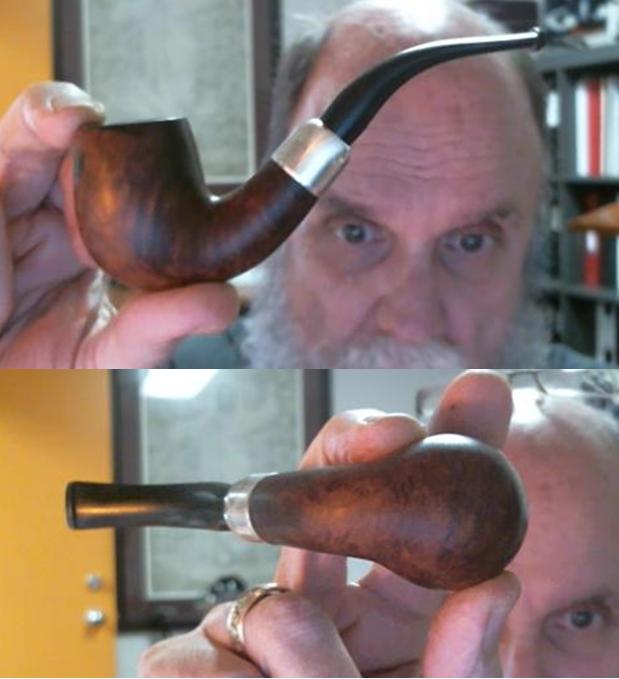
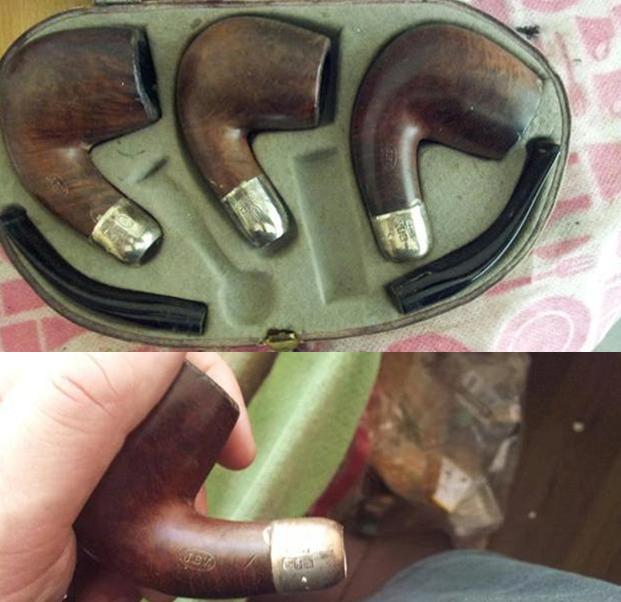
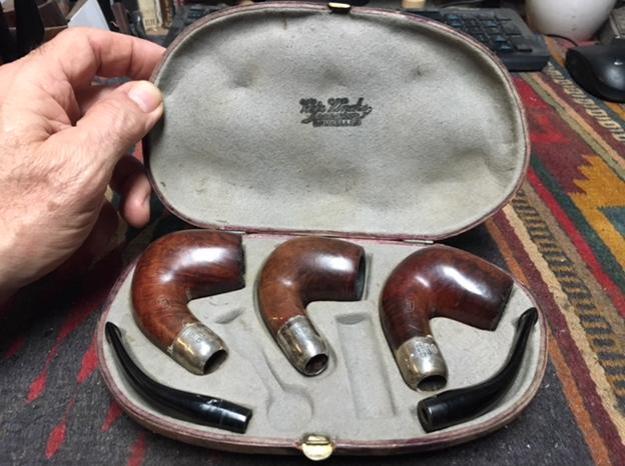
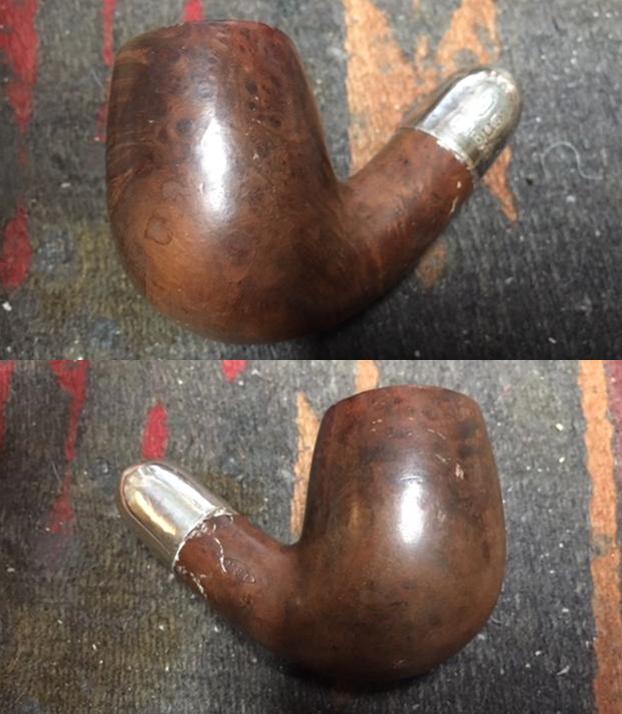
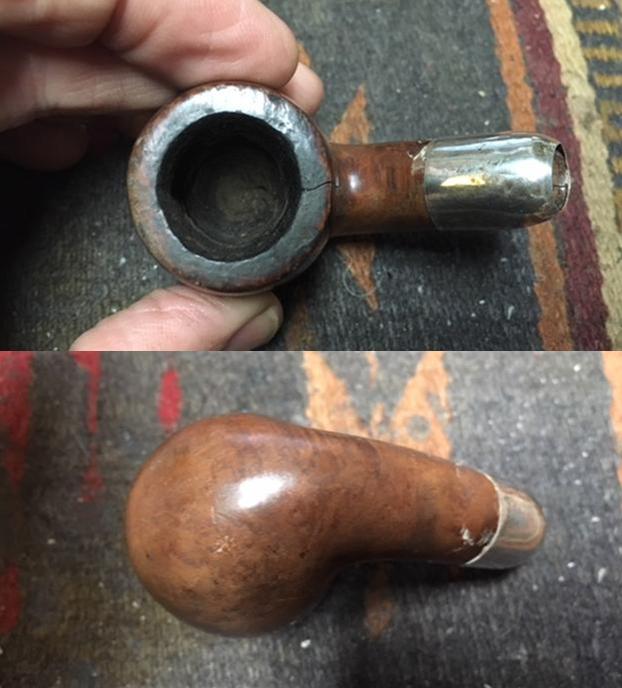
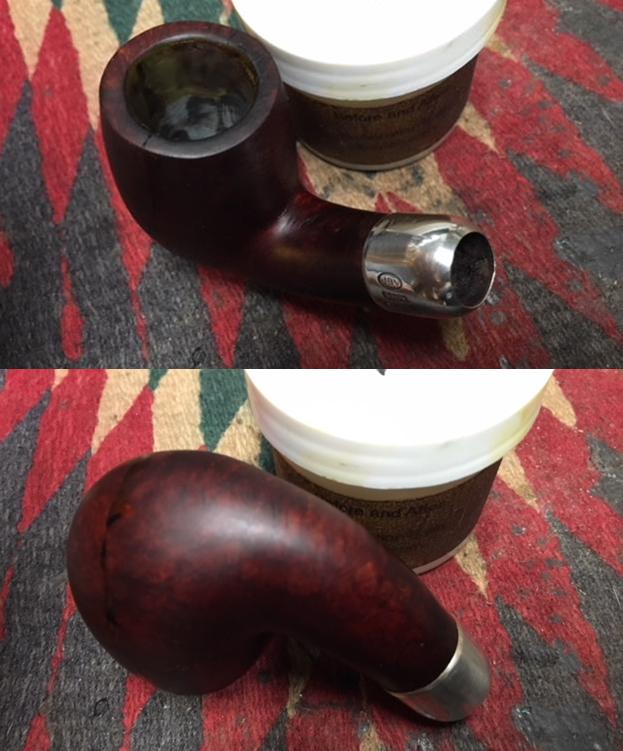
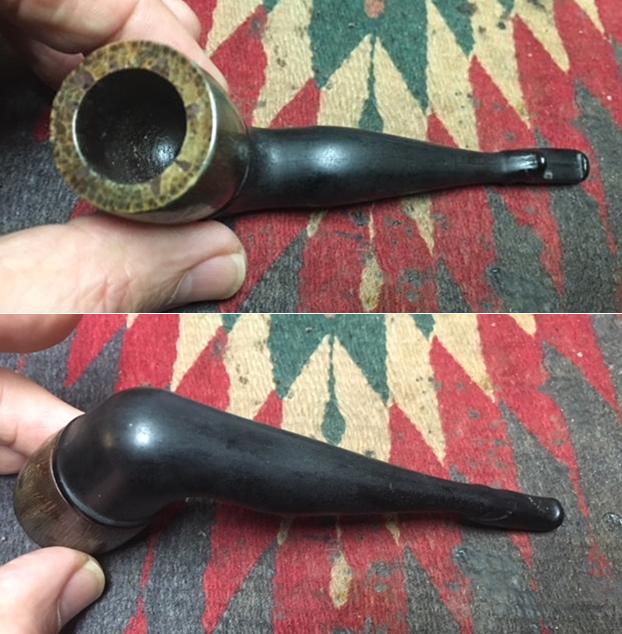
I am including a photo of the opened case showing the pipes and the stamping on the inside of the lid. It reads J.B. Vinche over “Au Nabab” over Bruxelles as far as I can interpret the blurred stamping on the felt lining. You can also see that the case has spots for what looks like a tamper tool and possibly a cigarette holder that are also missing.The next pipe that I chose to work on is the one on center of the case in the photo above. It is stamped M&T on the right side of the shank and Best Briar & Bands on the left side of the shank. The silver ferrule is also stamped BBB in three vertical boxes and the M&T is in an oval with pointed ends over three hallmarks that are hard to read. The pipe is in rough shape, but I am not sure I want to call it that after my experience with the first JBV splitting when I cleaned it. The finish on this one is also shot; there is silver polish on the shank ahead of the ferrule. The rim top is in the best condition of the three pipes and there are no deep nicks on the shank top or underside. There is a thick cake in the bowl and the rim top has some light dents. The inner edge is slightly out of round and there is a crack in the back of the bowl extending from the rim halfway down the bowl side. Like the rest of the pipes in this set the pipe is very dirty.   Throughout the process of  the restoration of the three pipes I have been hunting for information on the brand. I looked and found nothing searching for the M&T brand assuming that the pipe was also Belgian made. Today however I looked more broadly for M&T pipes and found one on Ebay that being sold. It tied the M&T stamping to a company called Müllenbach & Thewald.
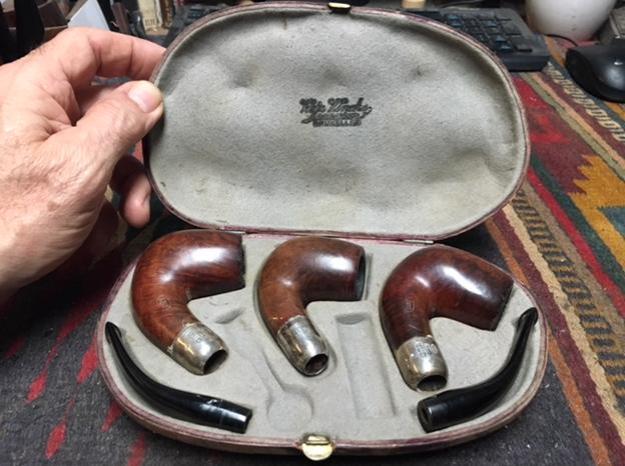
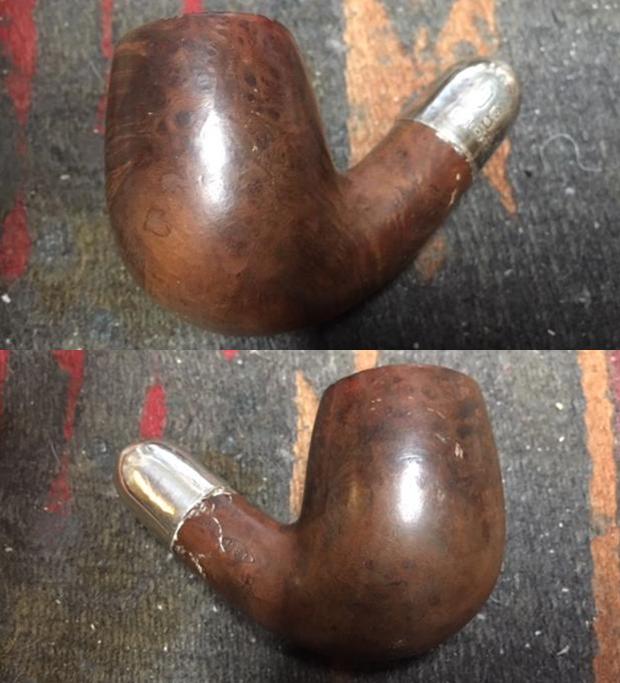
Armed with this new information I looked on Pipedia and found a writeup on Müllenbach & Thewald (M&T). Here is the link: https://pipedia.org/wiki/M%C3%BCllenbach_%26_Thewald

I quote from that article in full. The company Müllenbach & Thewald was established in 1830 by Jakob Müllenbach (* 19/10/1800, † 29/03/1876) and Wilhelm Thewald (* 31/05/1807, † 11/06/1888) in Höhr (later named Höhr-Grenzhausen) in the Westerwald area. Having married two sisters, Maria Magdalena and Catharina Friesehahn, the brothers in law joined forces to start a business dedicated to manufacture and trade clay pipes and other pottery goods the Westerwald has been famous for throughout centuries.

After 1848 M&T, as the pipes were stamped later, began manufacturing pipes from different Germany homed woods and as early as 1860 the fabrication of briar pipes started. Previously completely turned by hand, machine fabrication was taken up in 1864. Shortly after the turn of the century a workshop in nearby Vallendar specialising in briar pipes was opened. M&T didn’t make it to the top ranks in German pipe industry but was acknowledgded as a well reputated brand even though.

On 05/01/1945 Höhr was vastly destroyed by a bombing raid including the buildings of the company’s administration and the pipe workshop among other things. But as soon as 01/05/1945 the re-construction began and on 15/01/1947 the pipe factory re-started it’s production. The new and bigger facilities in Höhr-Grenzhausen led to the closure of the older briar workshop in Vallendar. At the end of 1949 47 persons were busy in Müller & Thewald’s pipe production department, where still pipes from other woods than briar were made. As old pictures from the middle of the 1950’s show the share of women workers amounted to more than 35%.

Around 1970 M&T got into serious trouble. Especially M&T’s mainstay, the budget pipe segment, was swamped with pipes from Italy and France, who could produce cheap pipes even cheaper than German brands for they possessed the desired raw material briar in their own countries and in addition wages were substantially lower there. As well the bulk of M&T’s models was fairly old-fashioned and therefore even the better lines of the fabrication couldn’t compete with those of Oldenkott and VAUEN anymore on the most important German market.

So Müllenbach & Thewald ceased pipe production after more than 140 years in 1972. Norbert Gerharz, the last foreman of the workshop, continued as a pipemaker on his own. Müllenbach & Thewald company today is one of Germany’s biggest firms in clay mining.

Given the new information on the brand I was able to decipher the hallmarks on the silver band. The first mark on the left appears to be a crown, the middle one is 933 and the one on the right has a year letter – perhaps a J. From what I can find online using a German Hallmarks Website to try to read the hallmarks (http://www.925-1000.com/Fgerman_marks_a1884_7.html) and a Dutch Museum Catalogue (http://pipemuseum.nl/index.php?hm=4&dbm=1&dc1=1&datering_start=1875&datering_eind=1925&q=1&wmod=lijst&sortby=datering_kruis&startnum=240&id=23843) it appears the pipe was made between 1900-1920.

Now I knew what I was working on. Quite a journey from thinking was a BBB originally to recognizing that was wrong and thinking it was Belgian Made like the JB Vinche brand to finally identifying it as a German made pipe. It also helped to potentially identify a time period for the JBV pipes in the case as well. The make, shape and case all fit the time period.

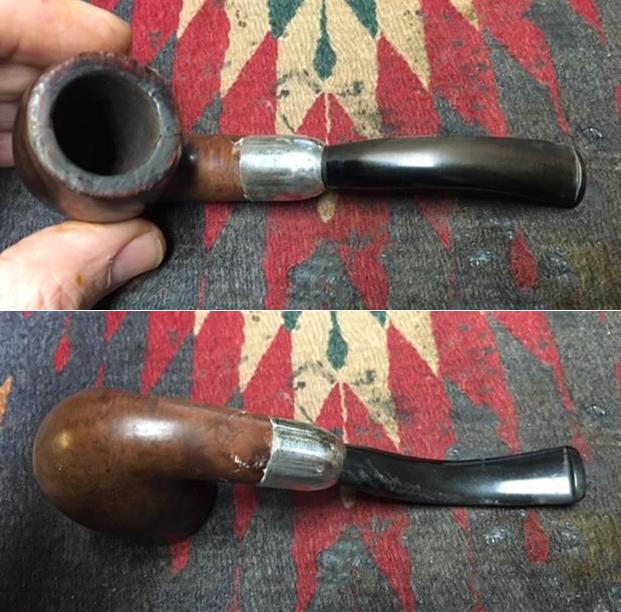
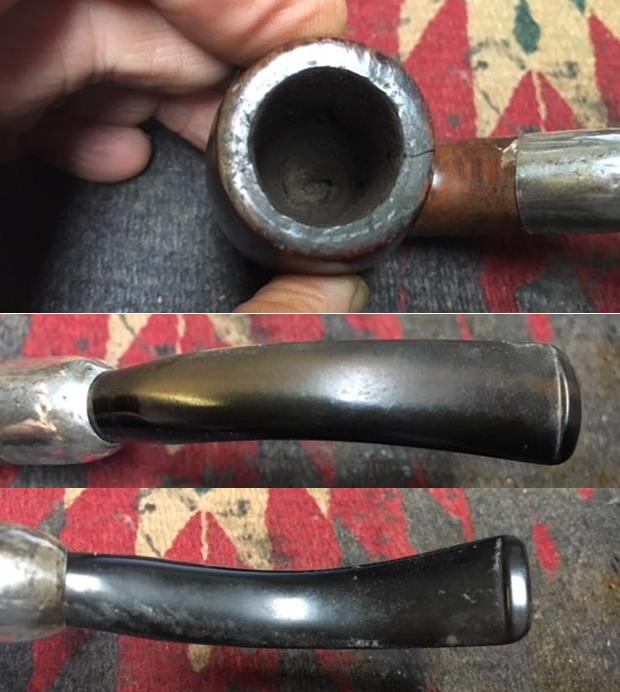
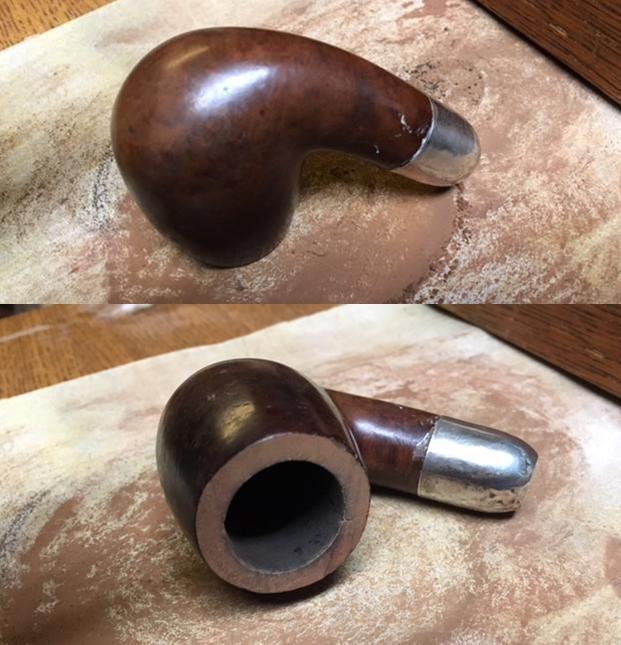
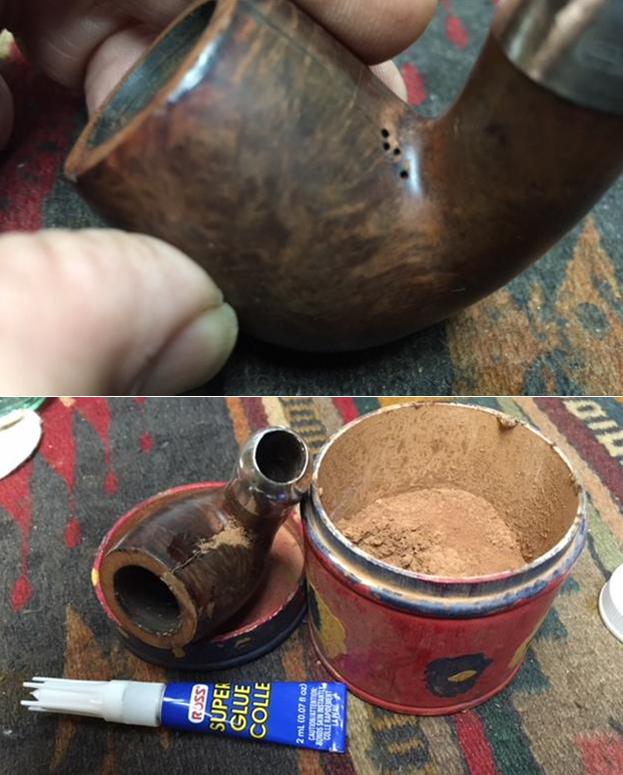
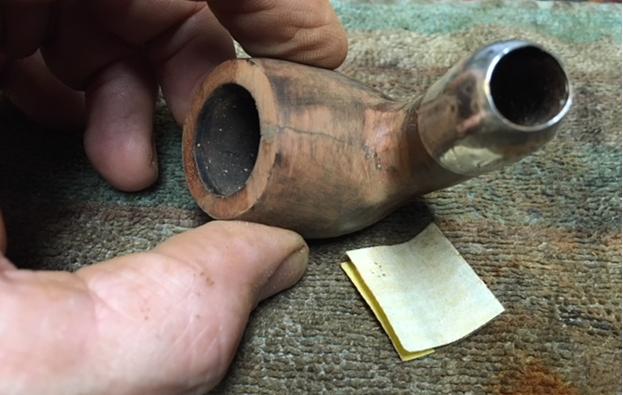
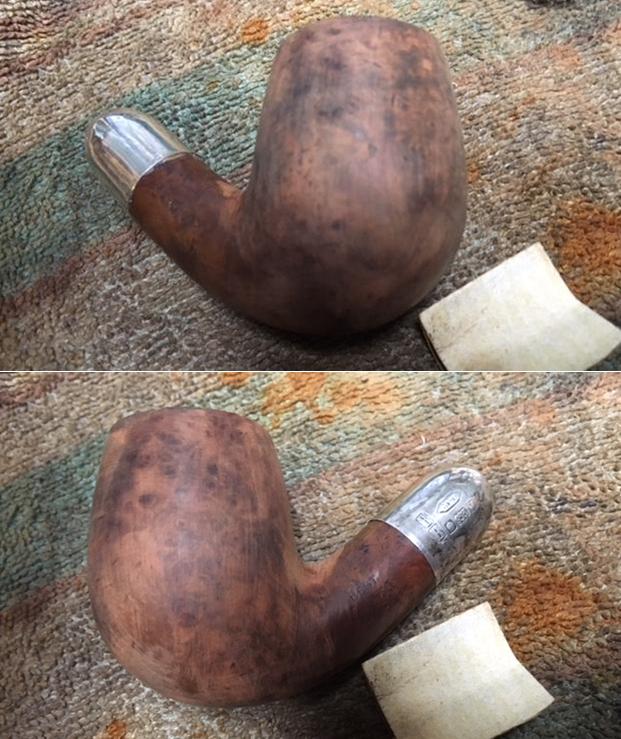
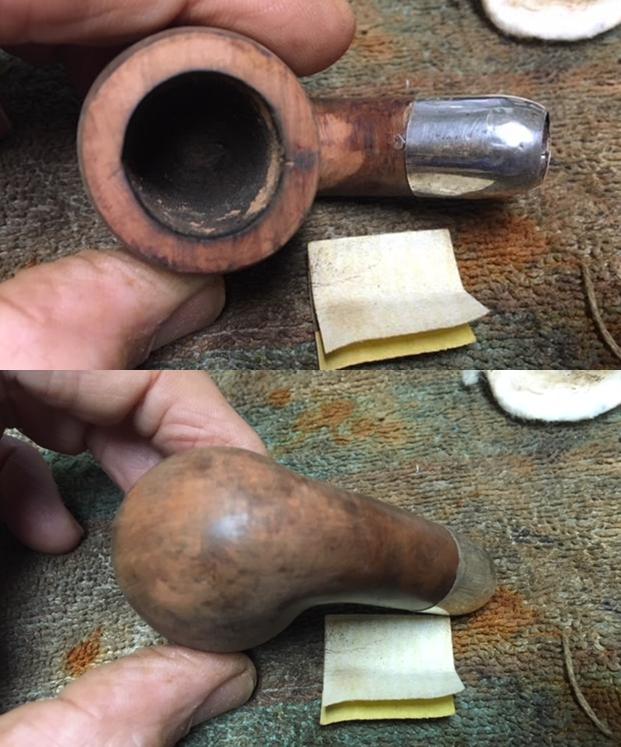
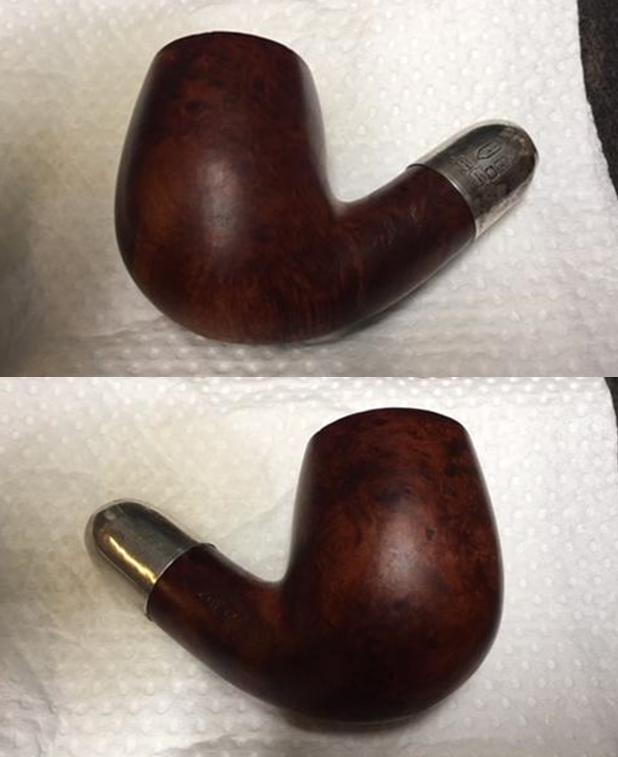
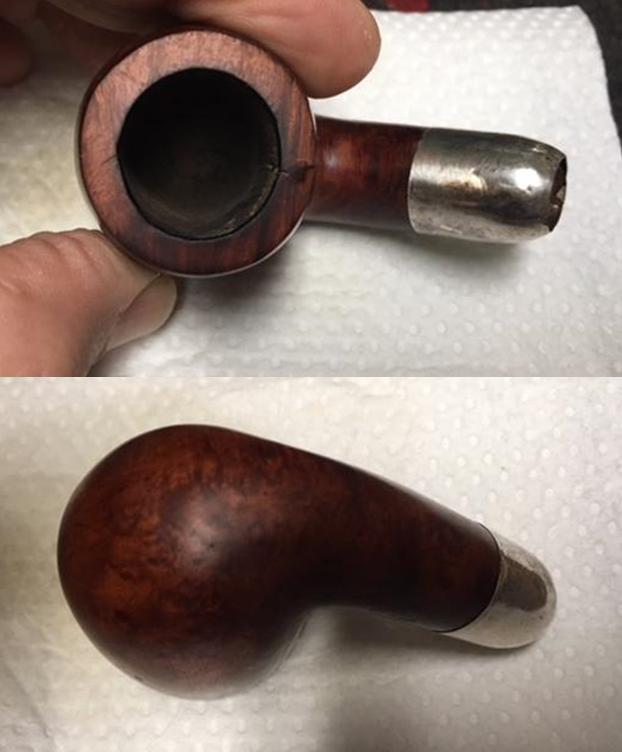
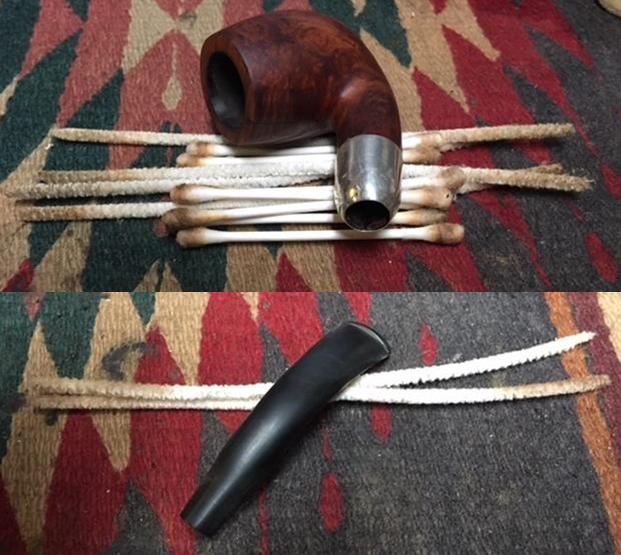
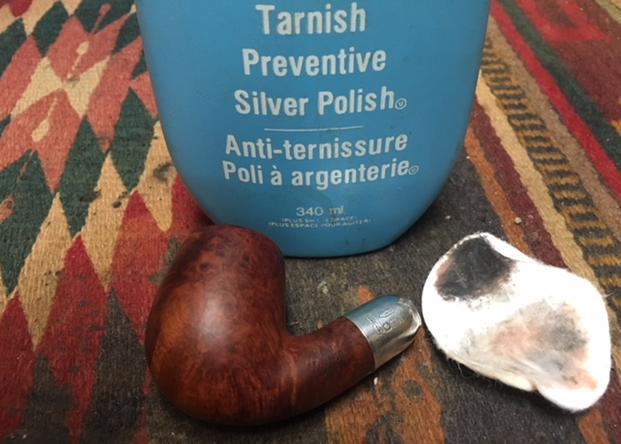
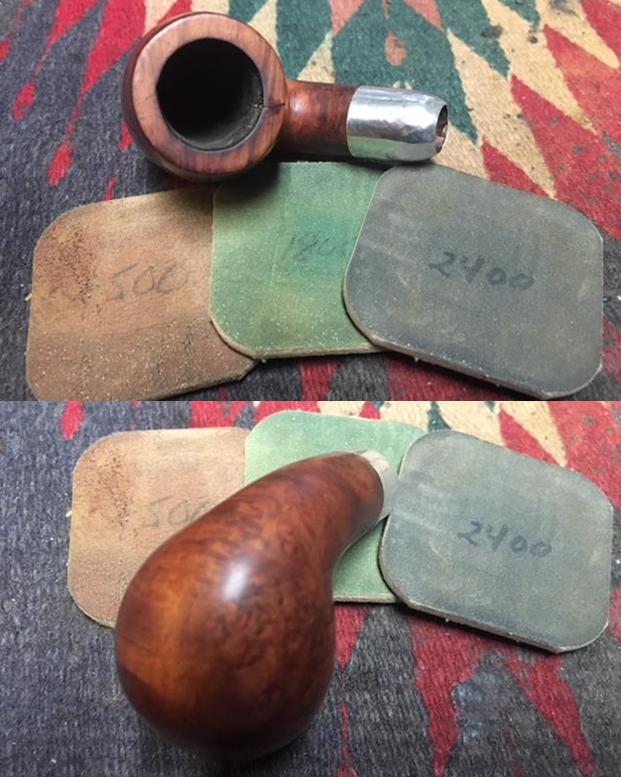
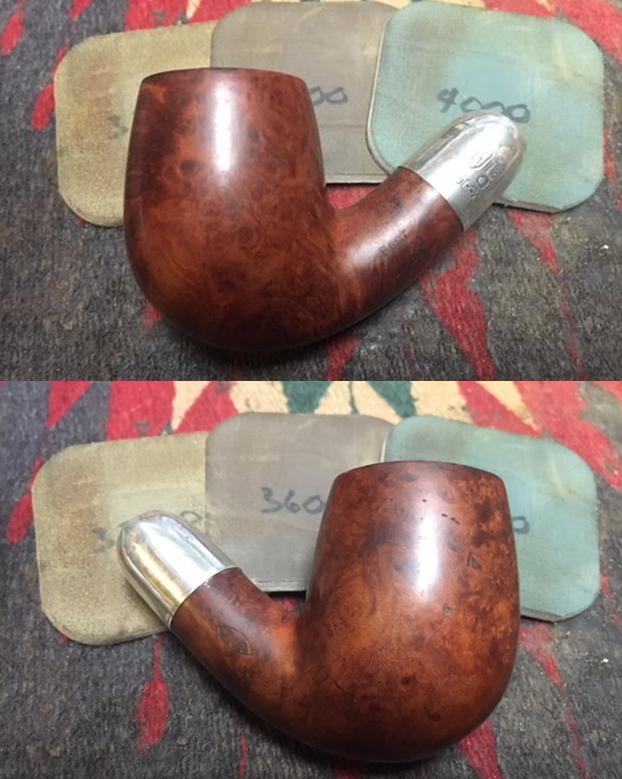
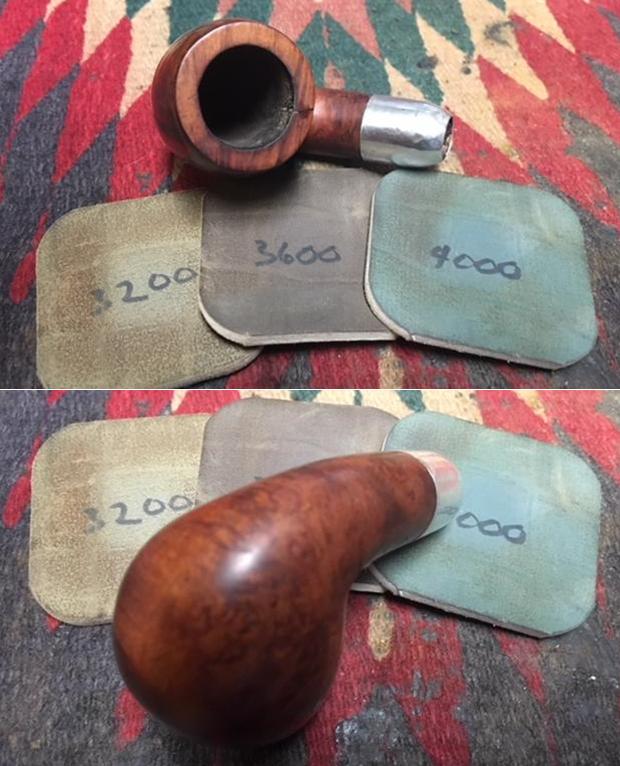
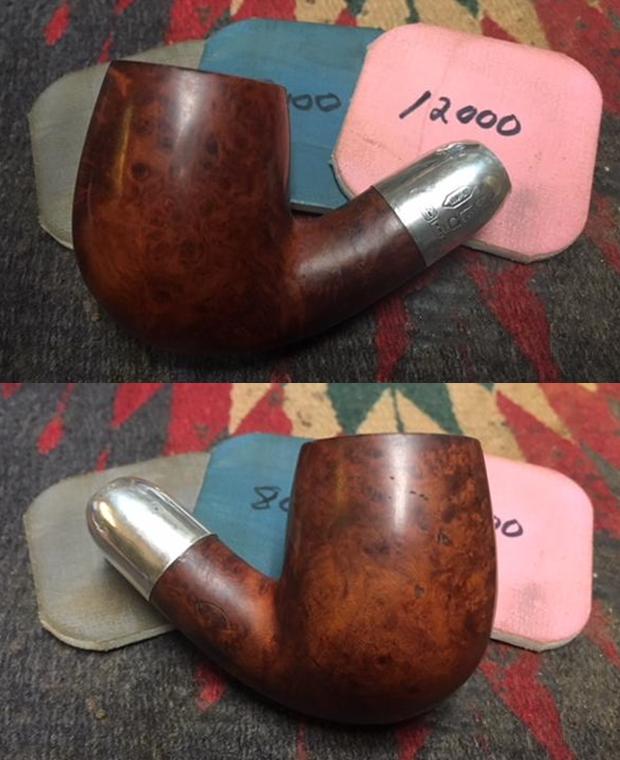
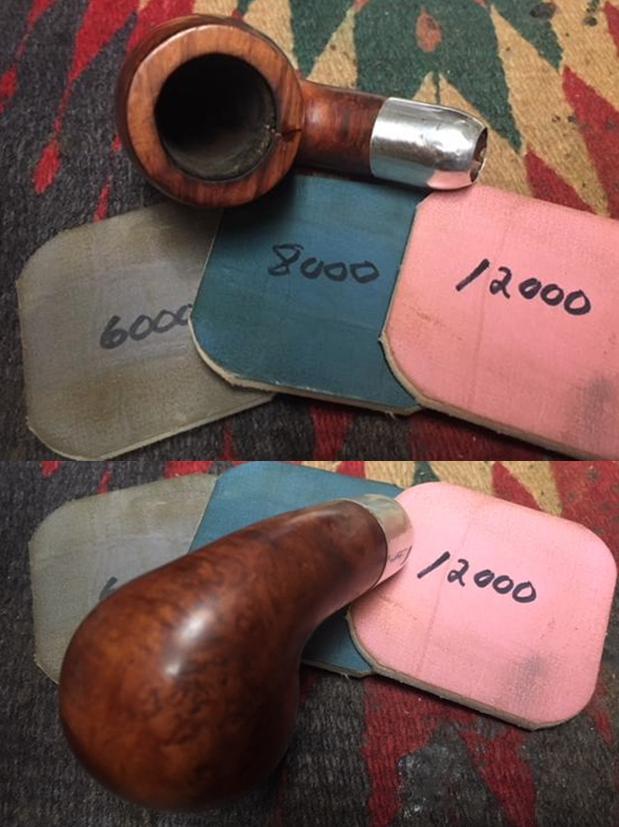
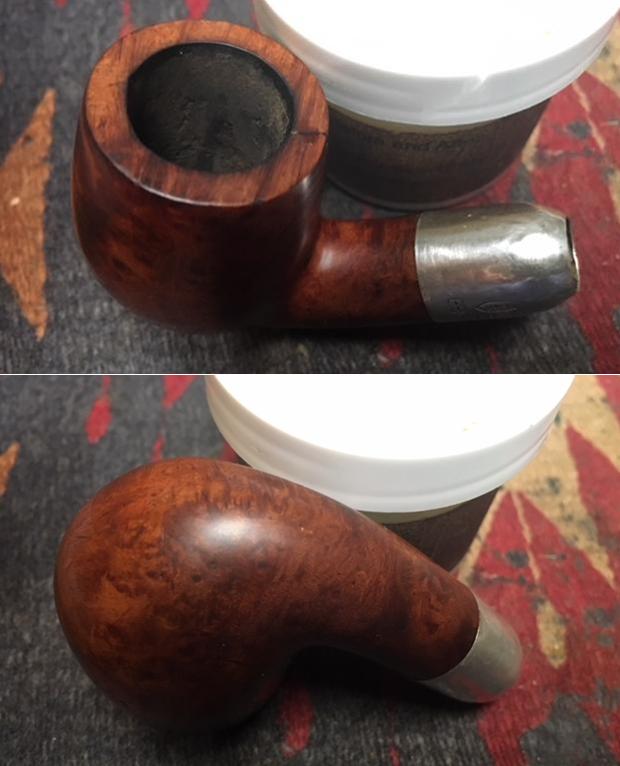
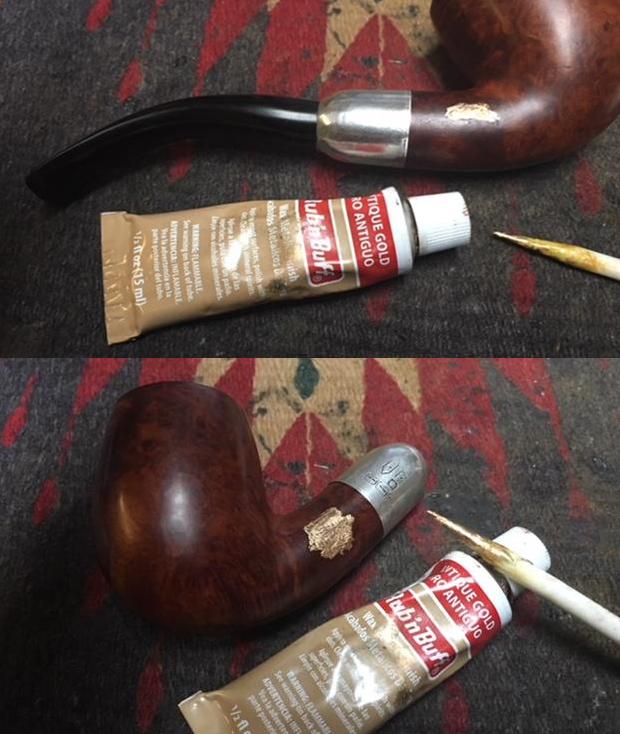
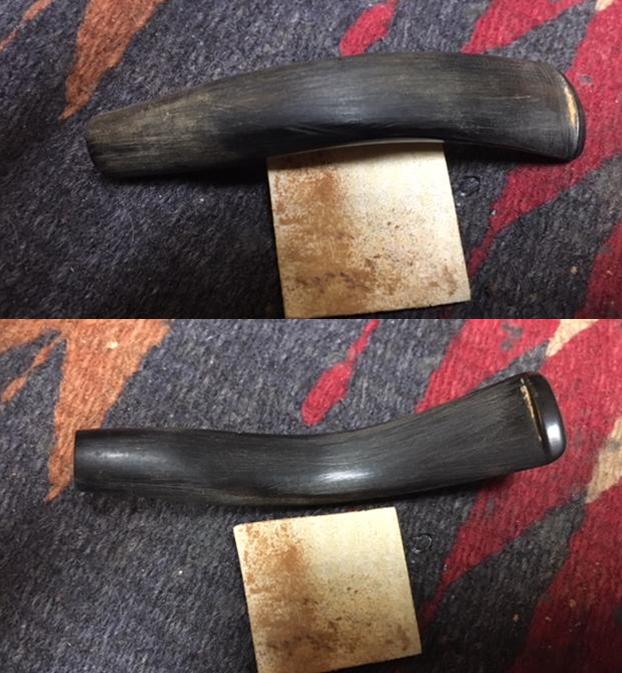
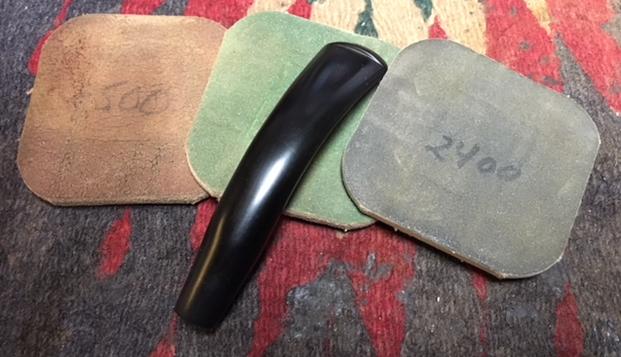
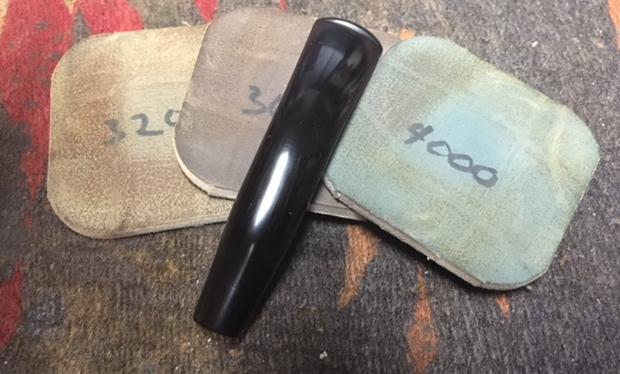
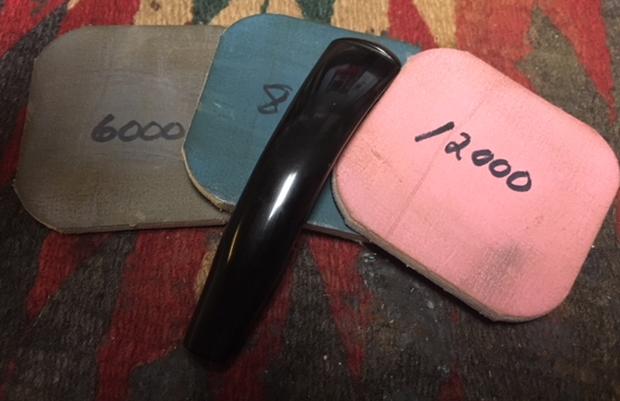
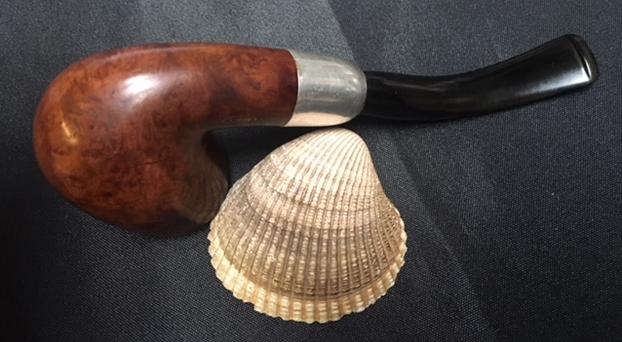
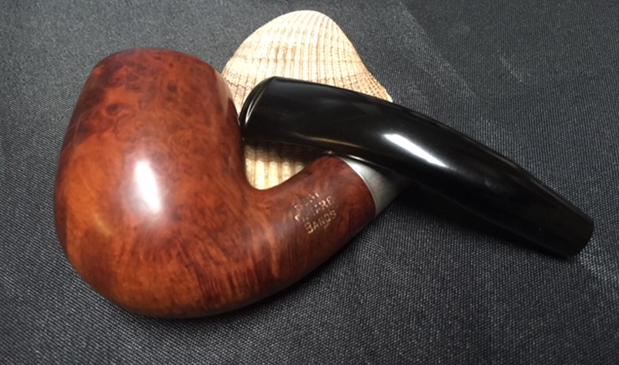
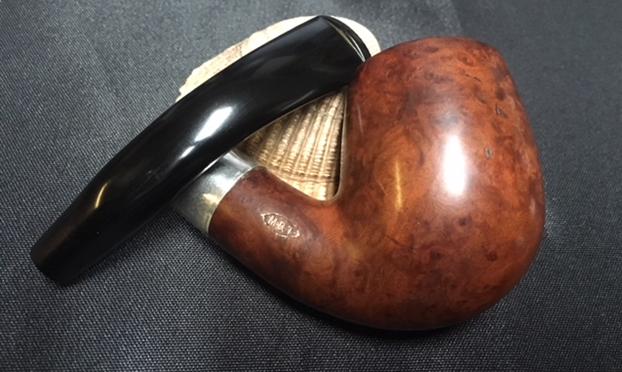
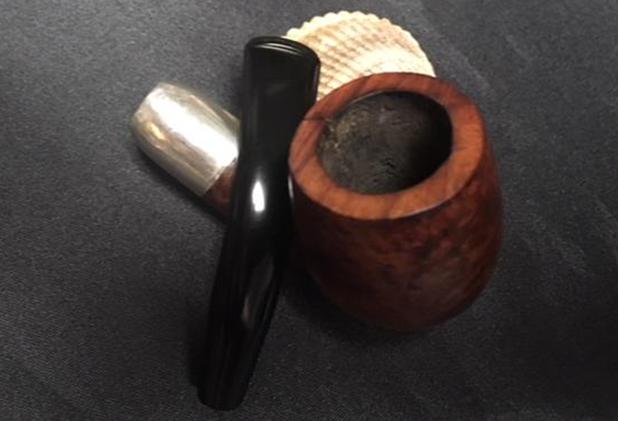
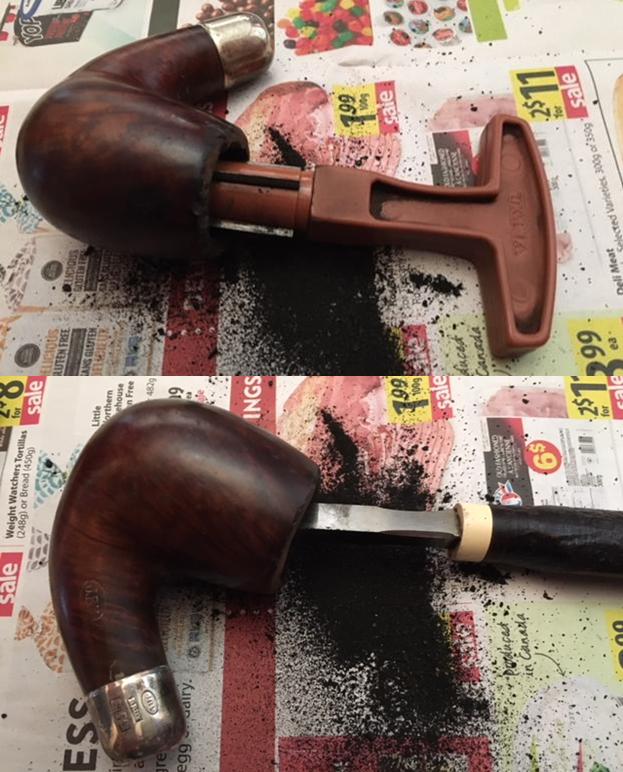
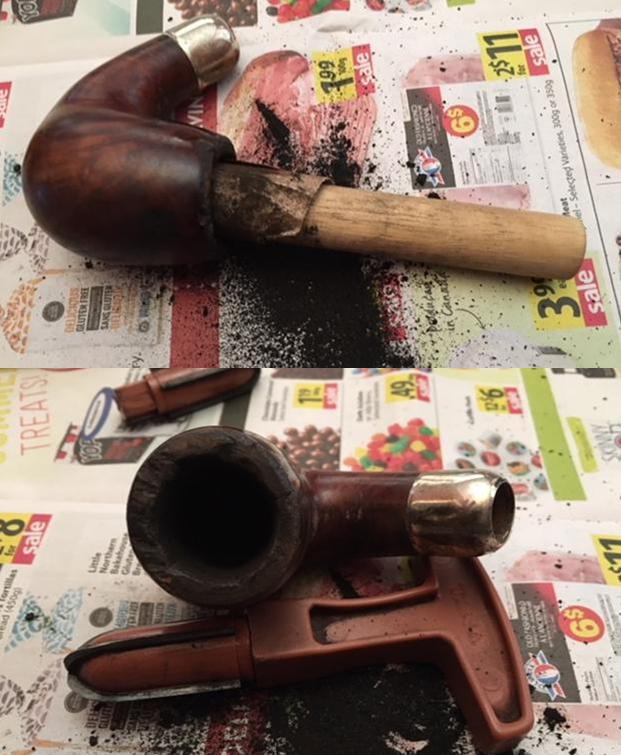
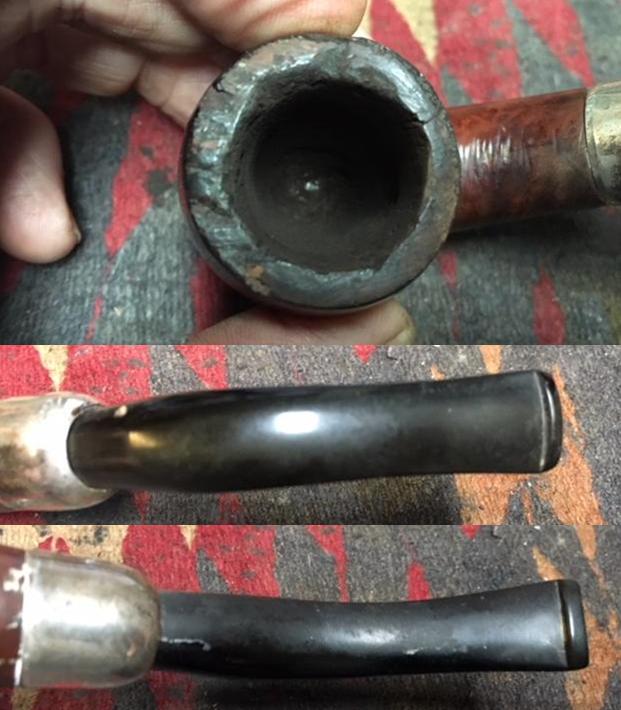
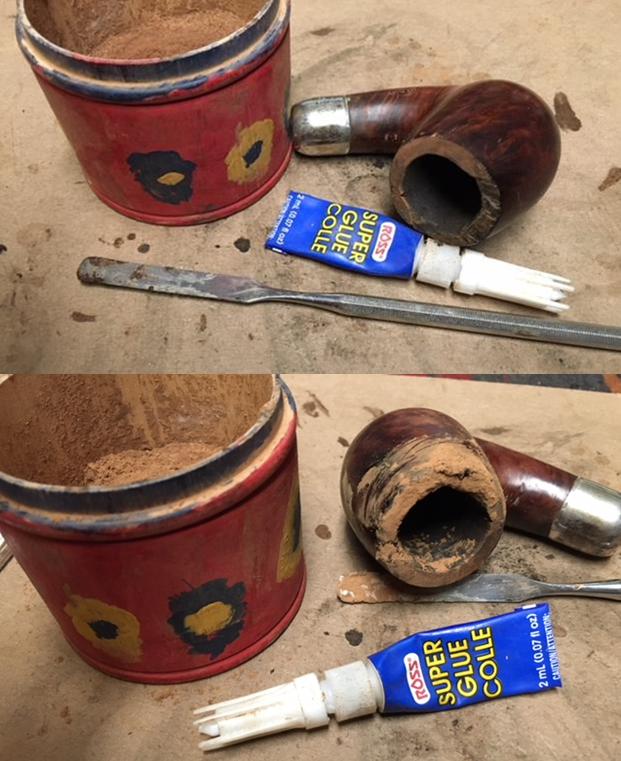
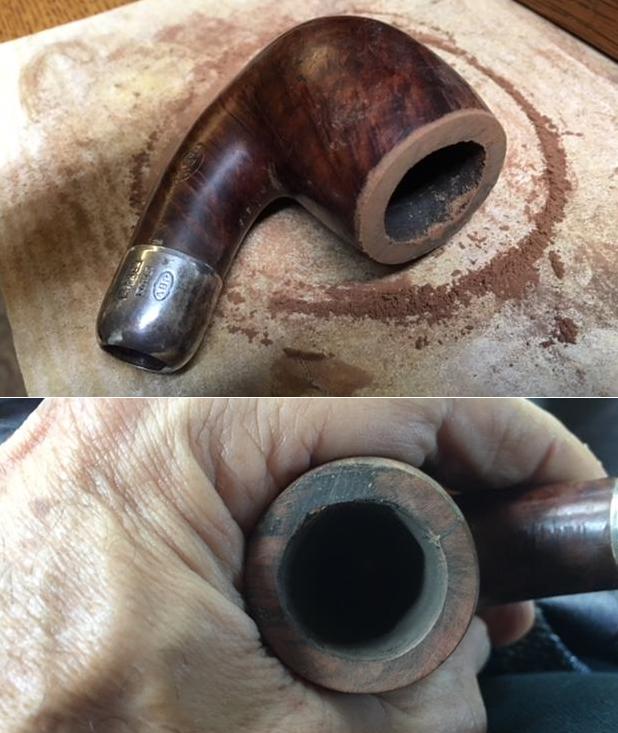
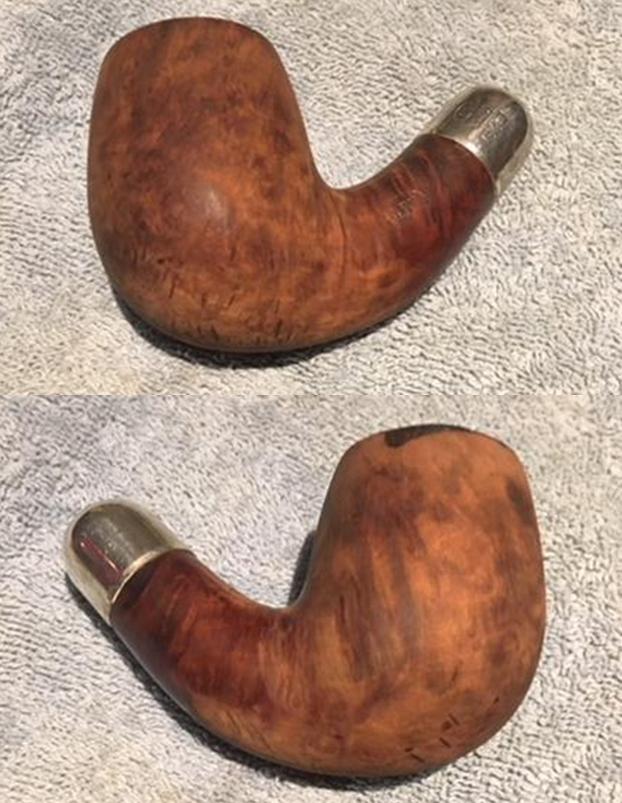
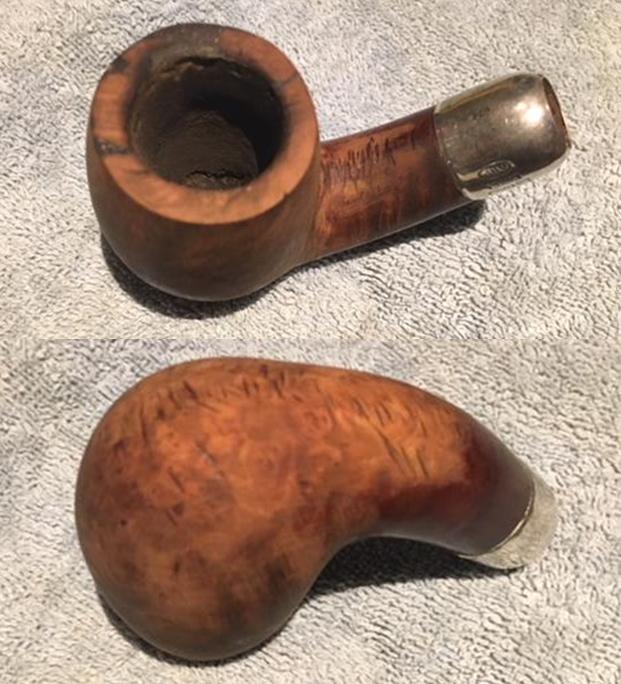
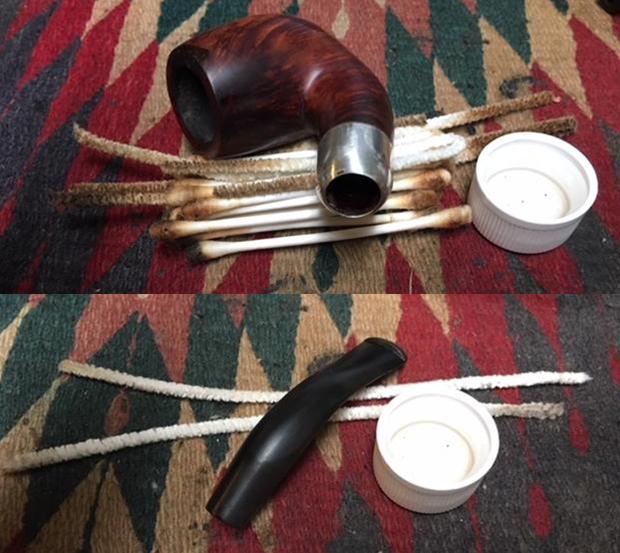
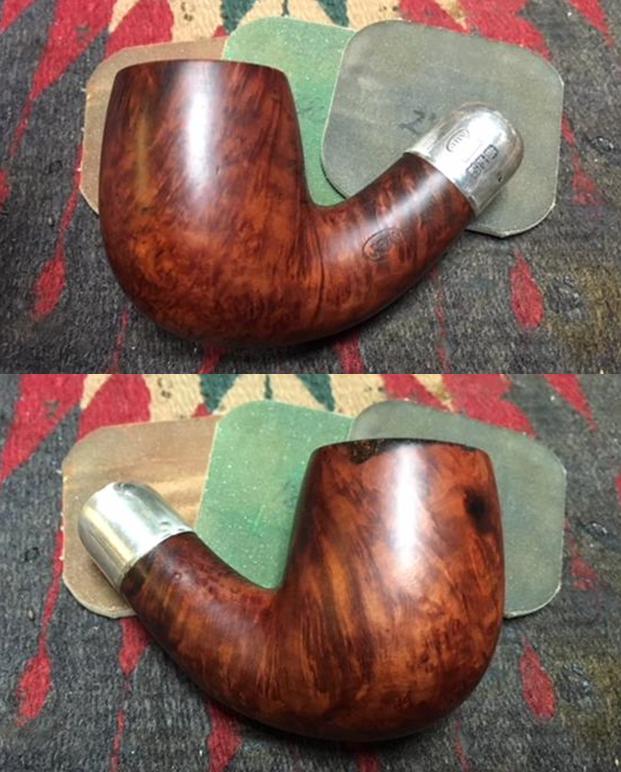
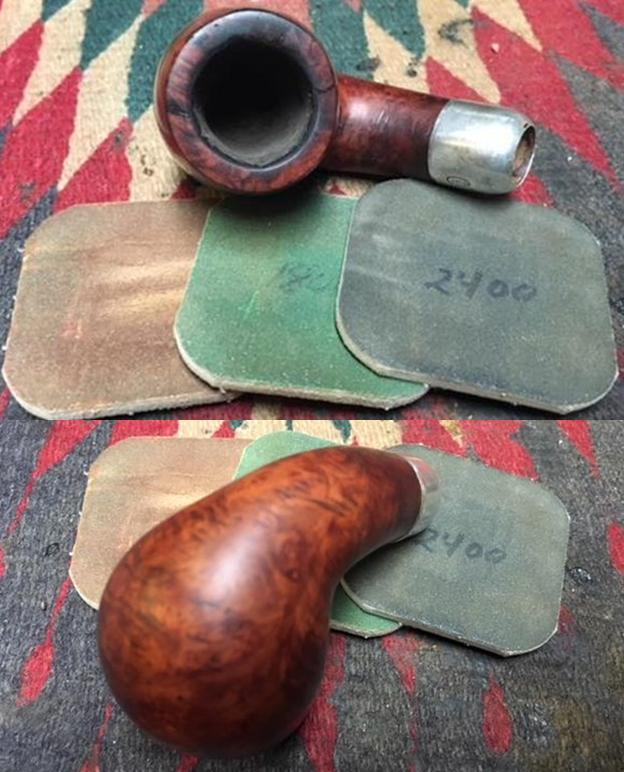
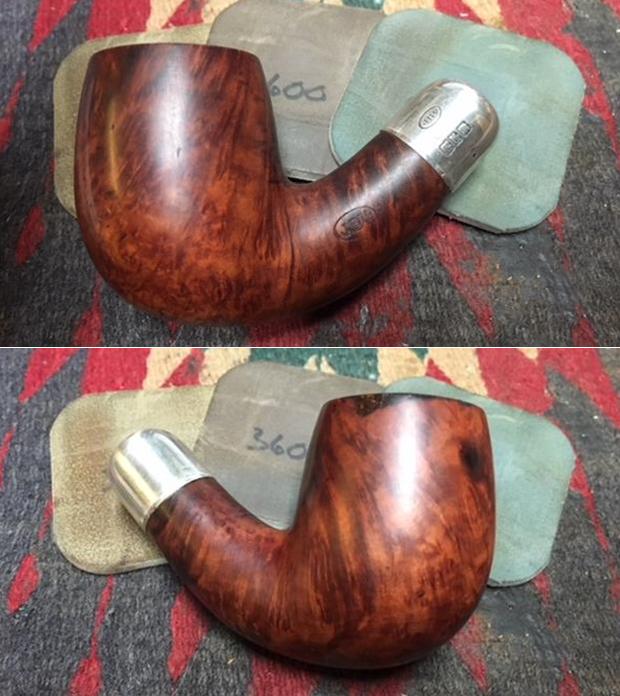
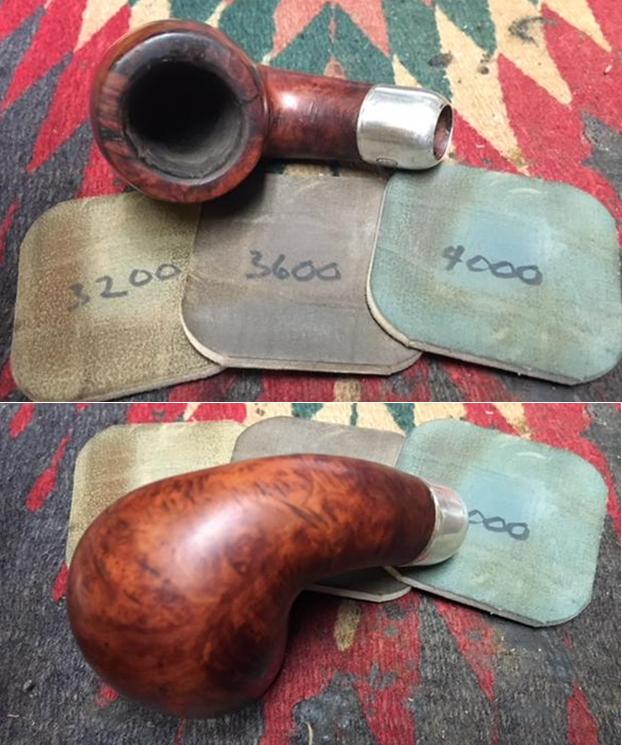
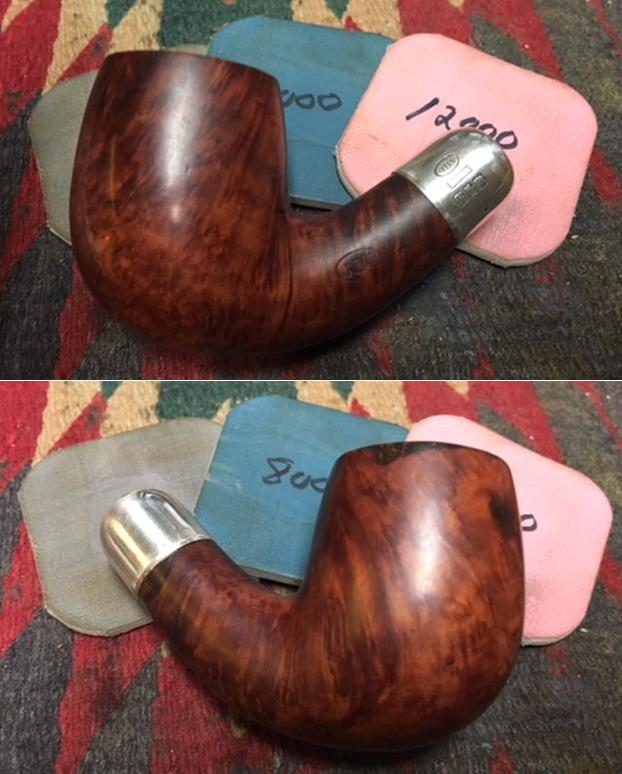
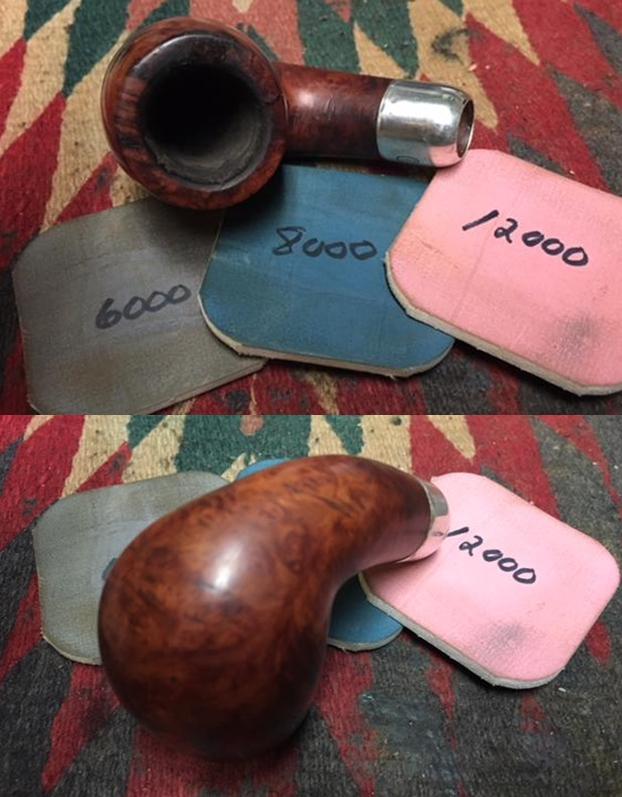
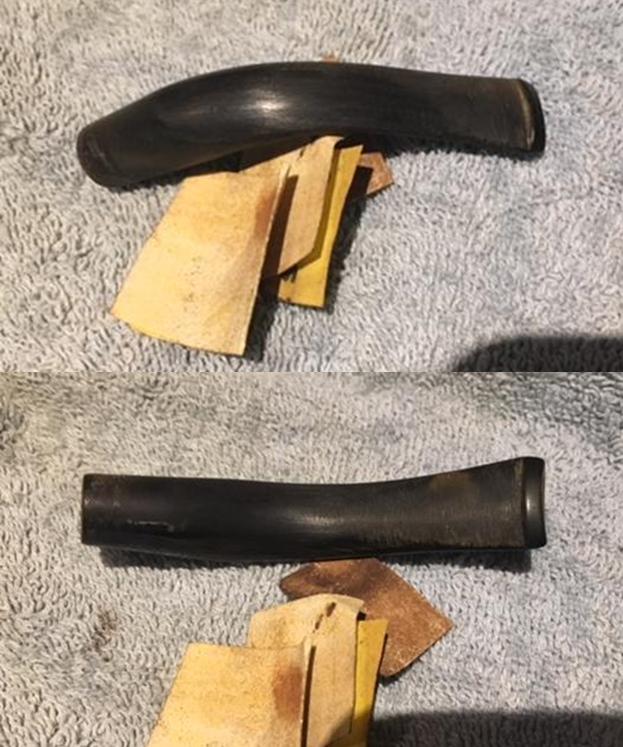
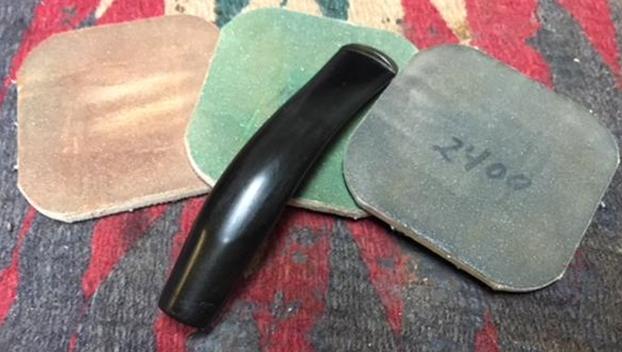
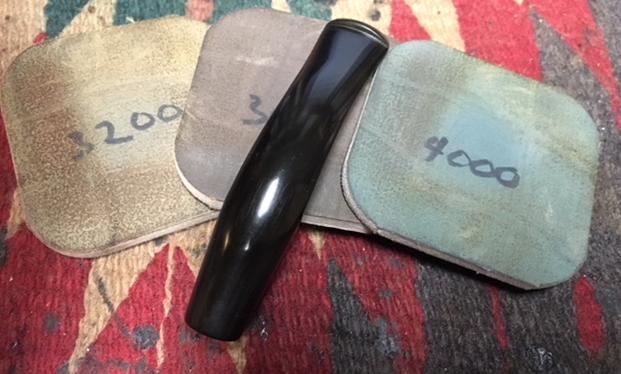
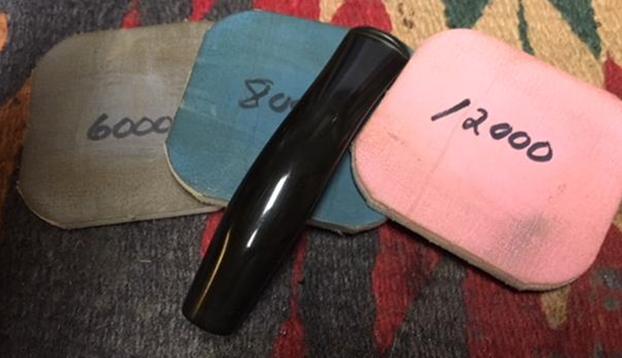
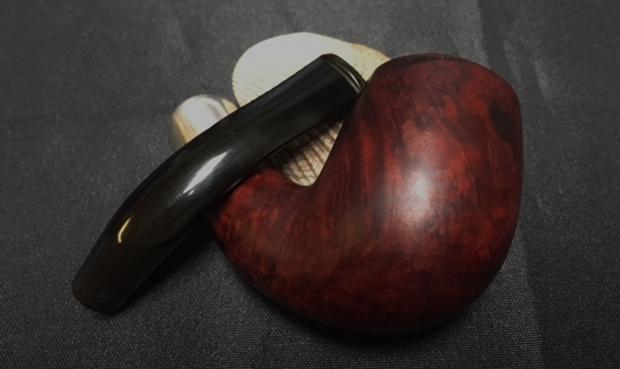
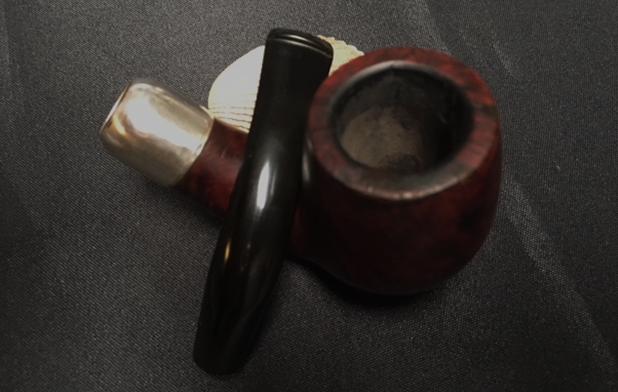
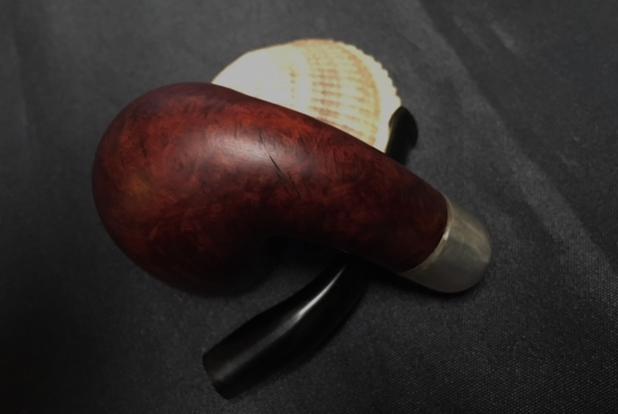
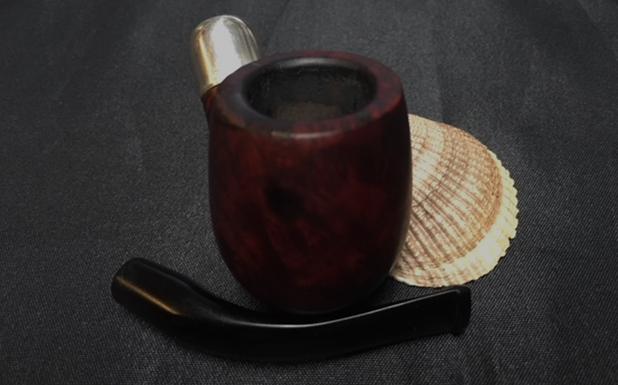
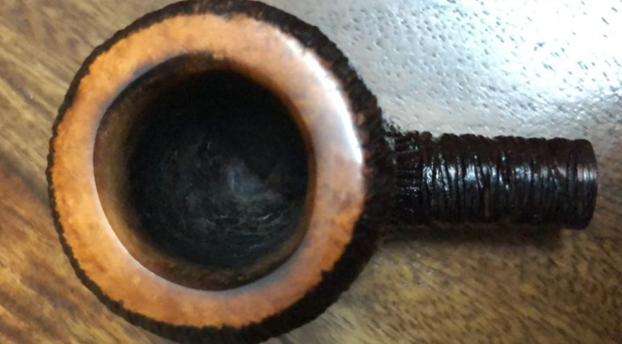
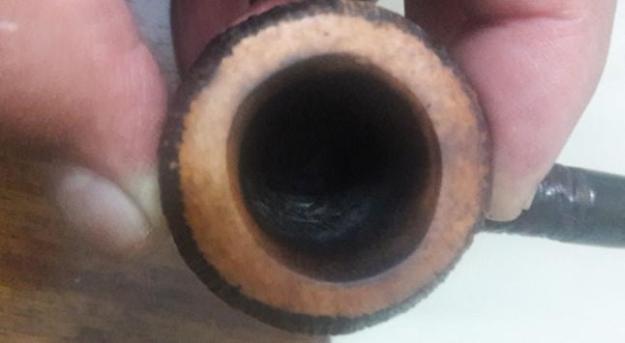
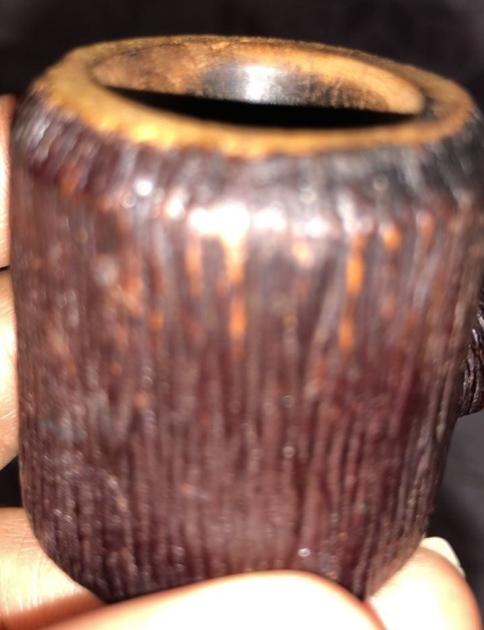
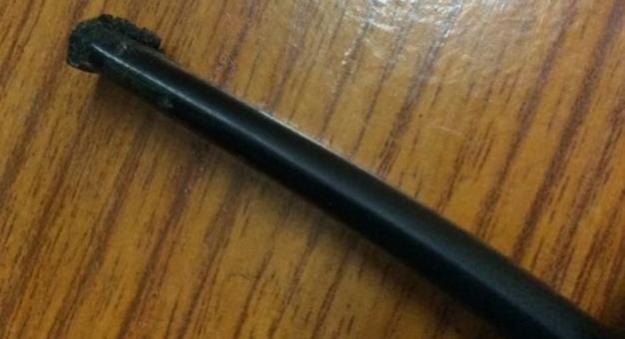
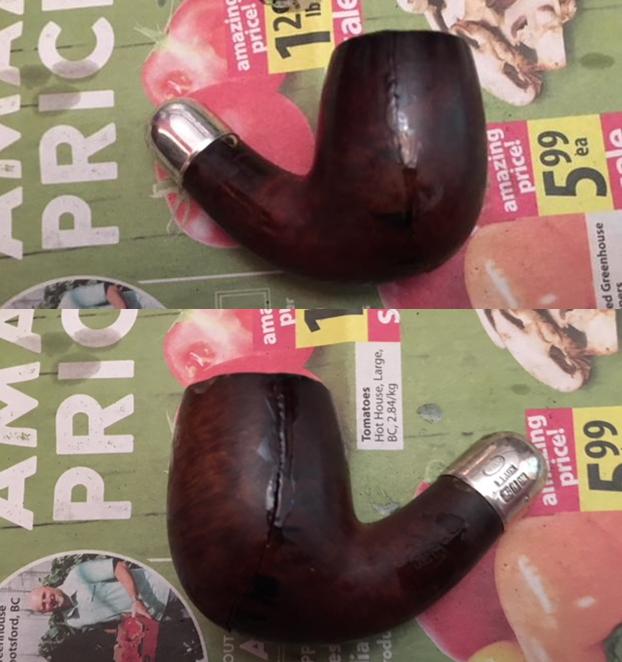
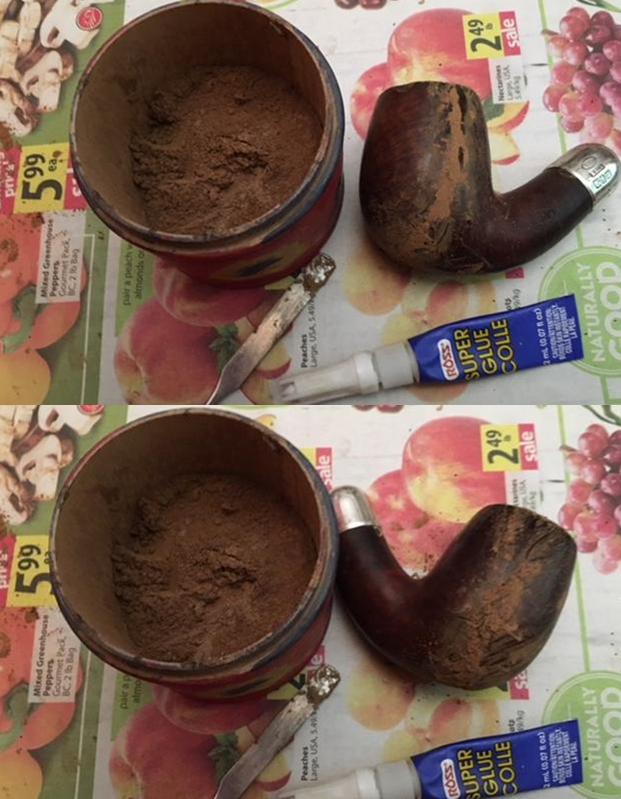
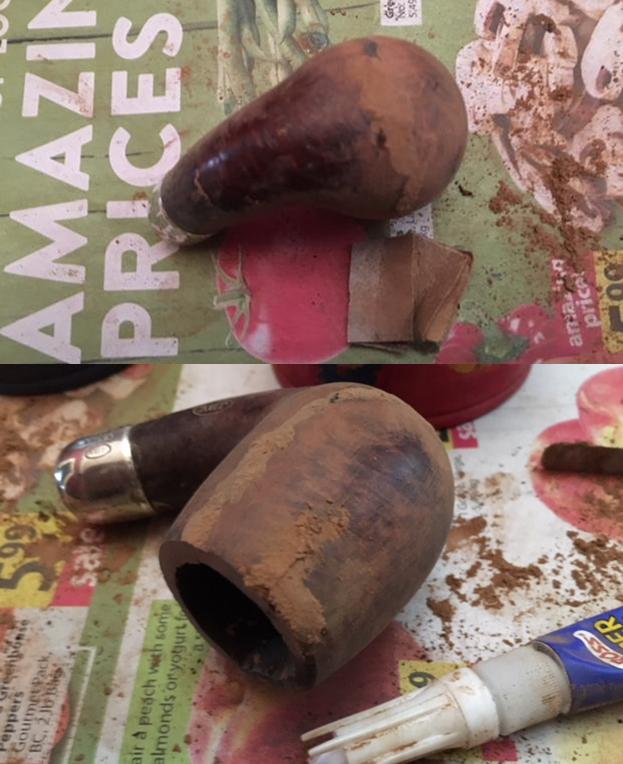
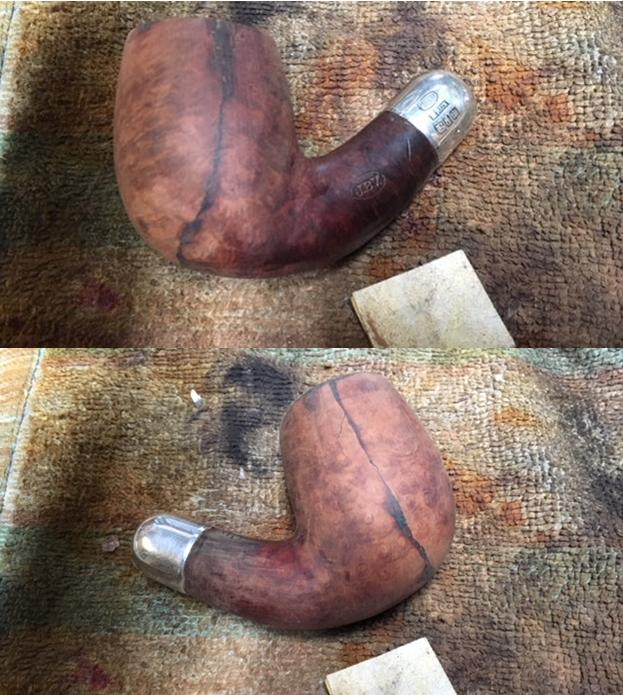
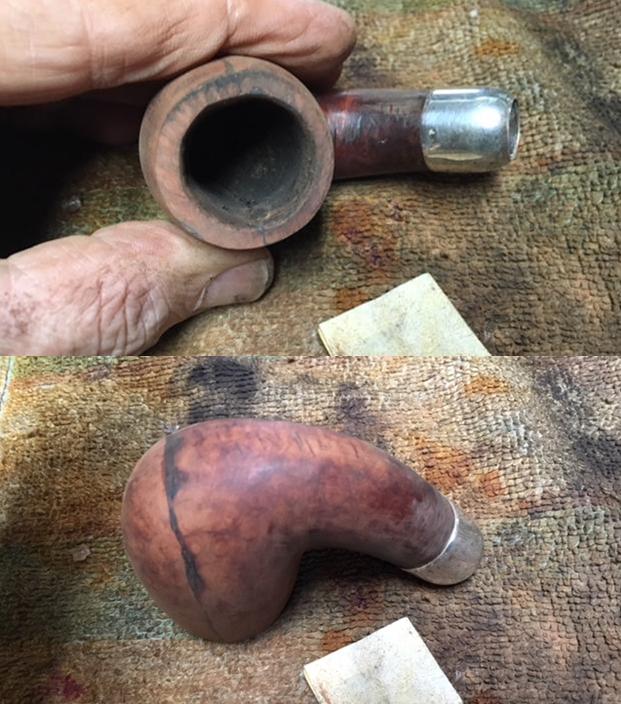
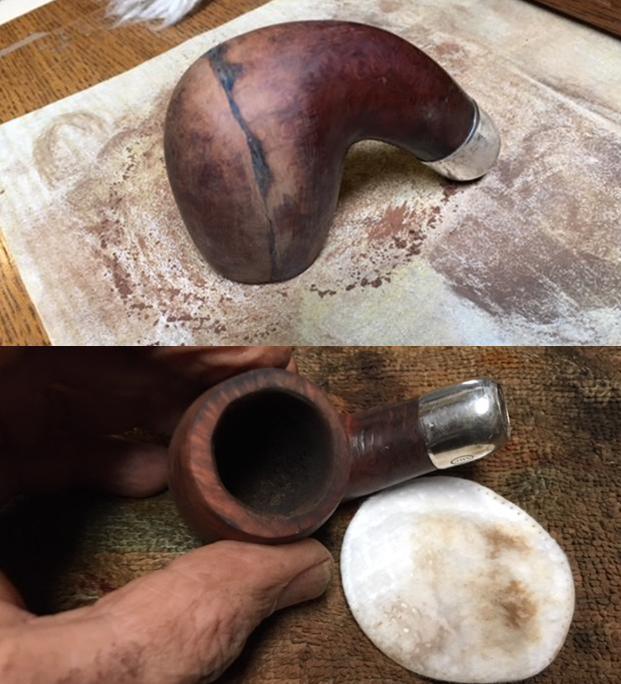
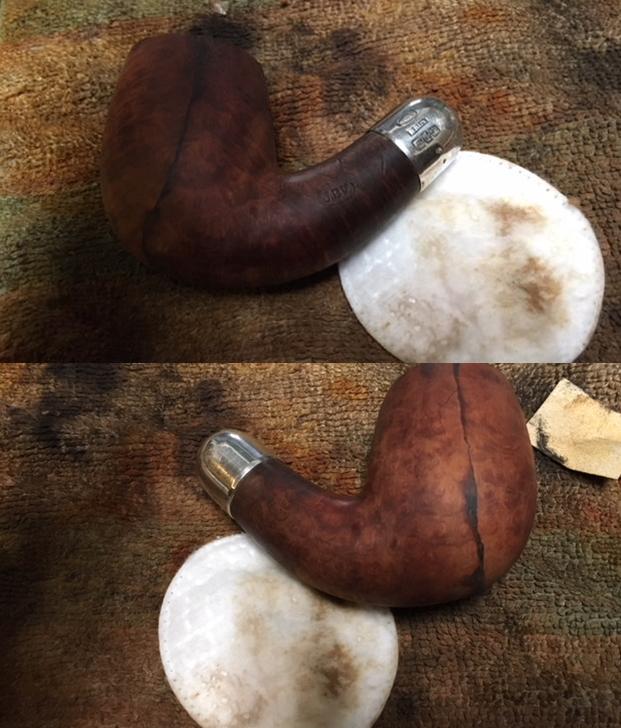
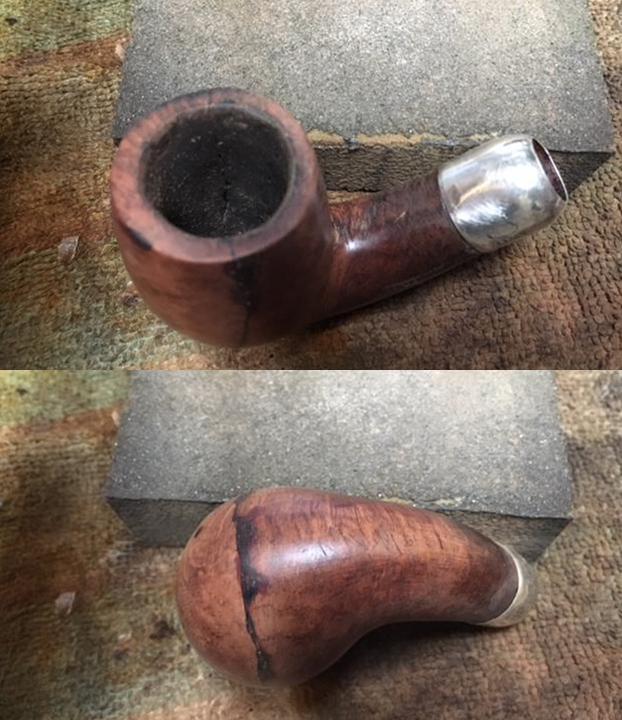
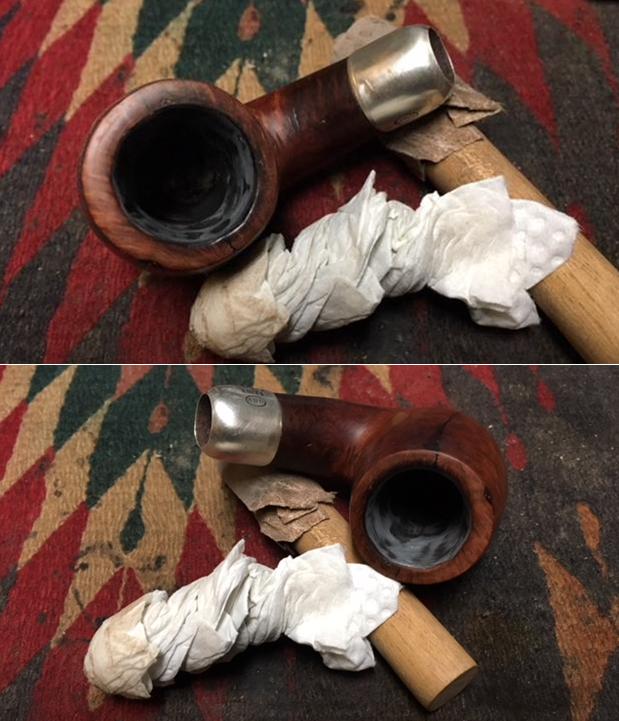
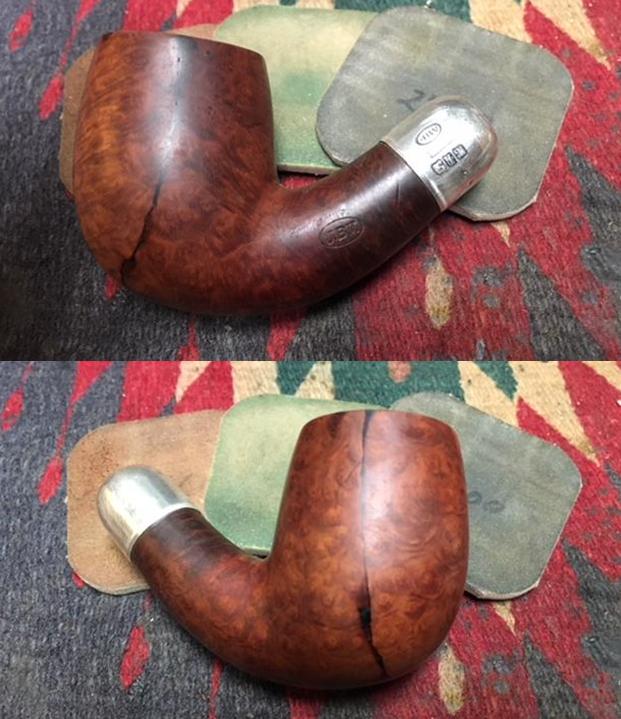
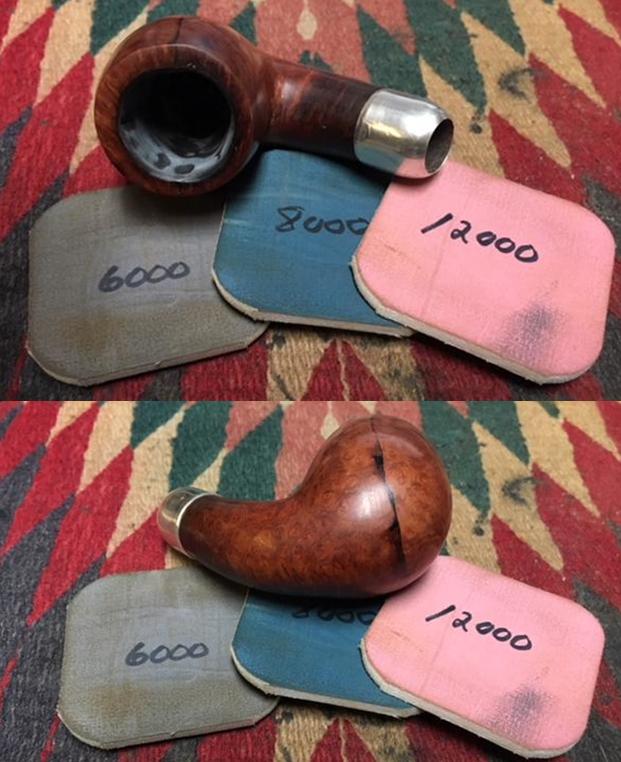
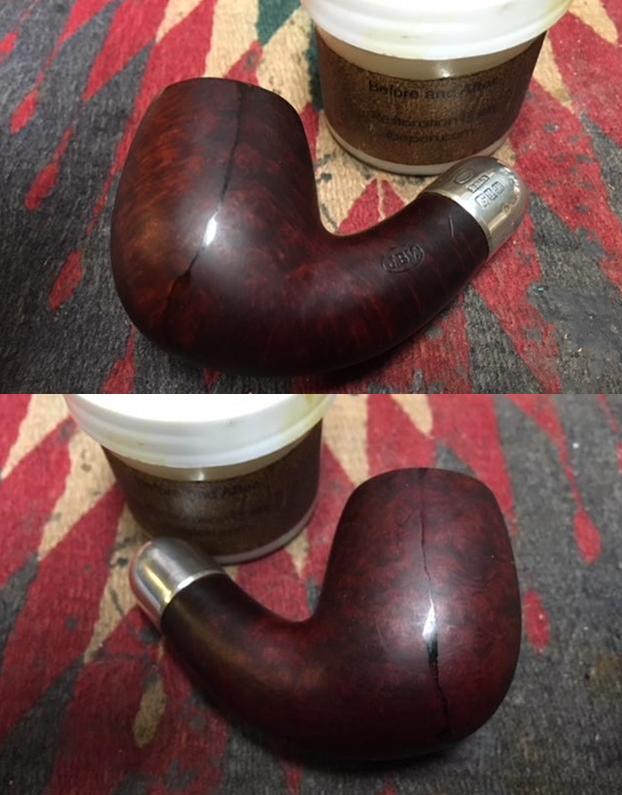
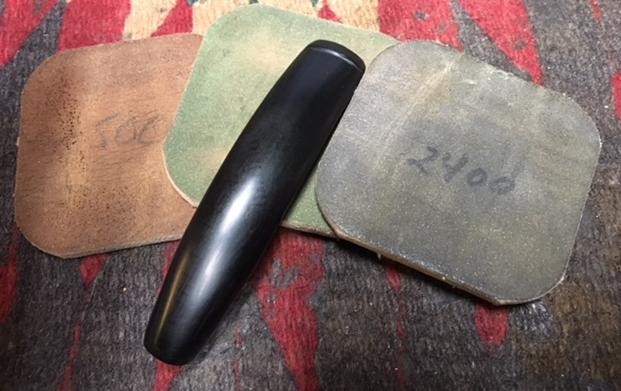
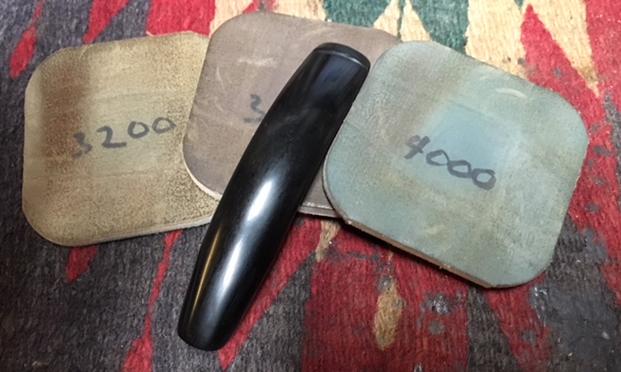
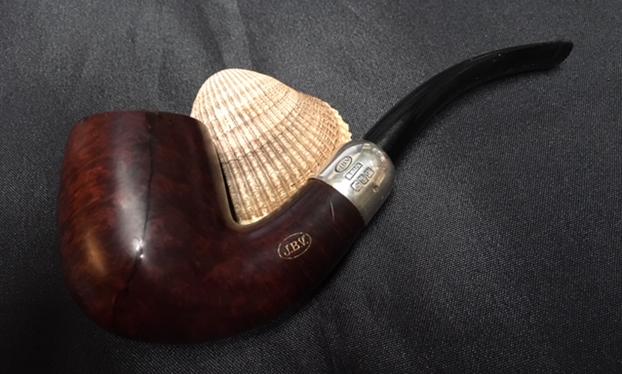
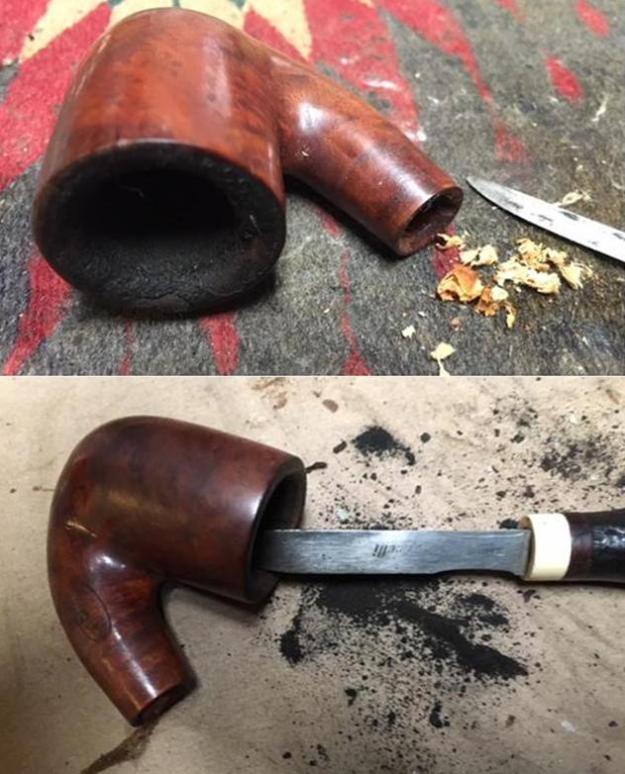
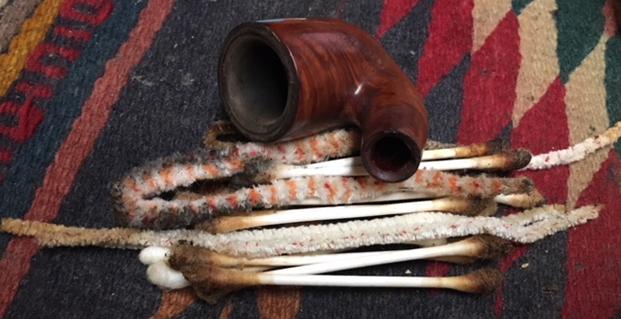
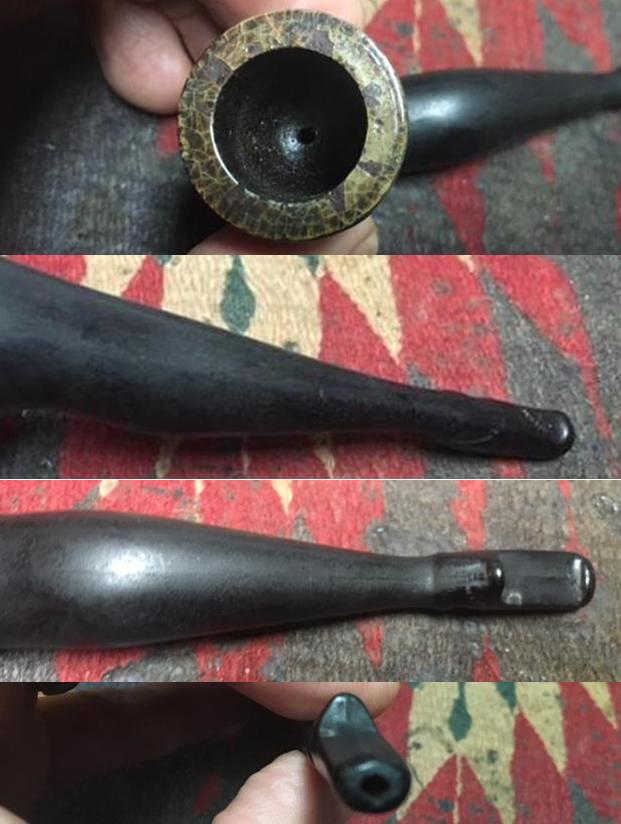
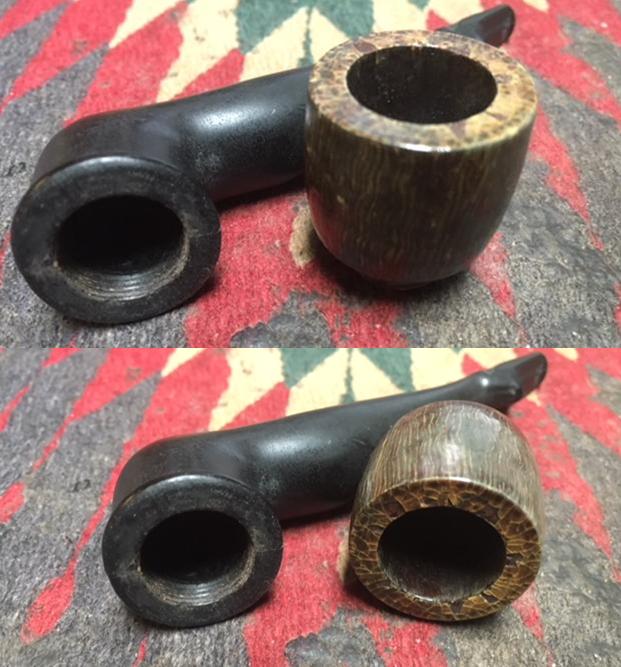
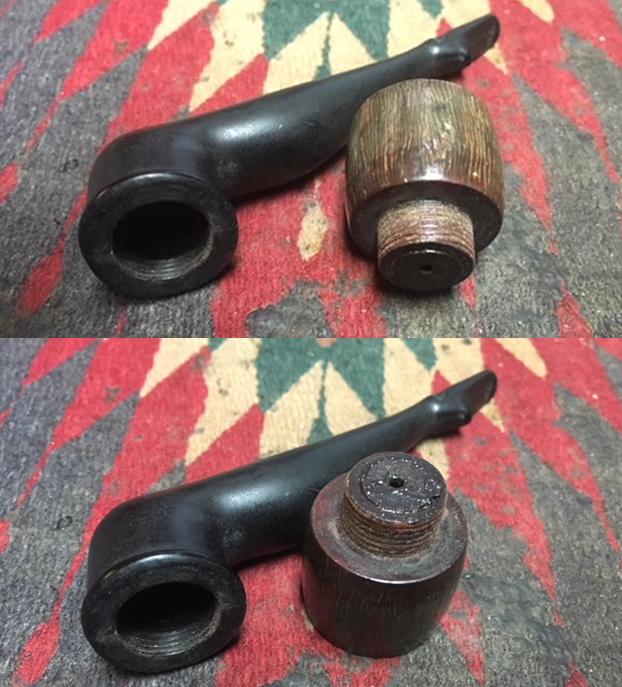
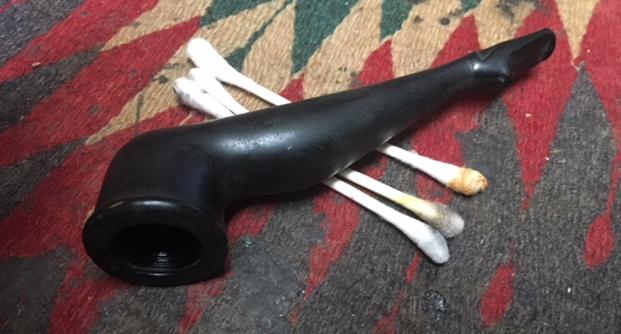
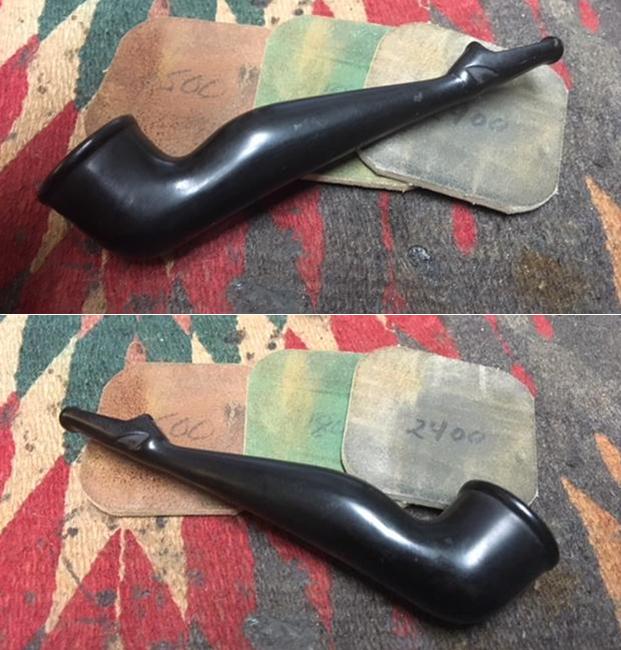
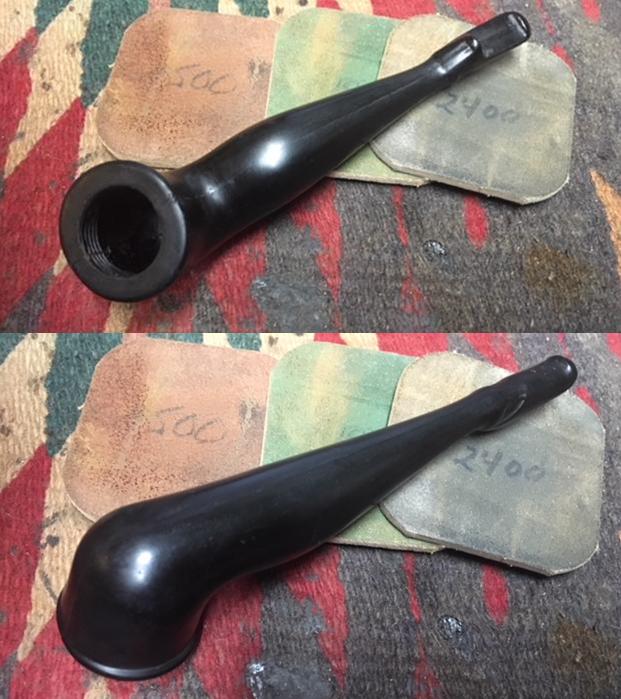
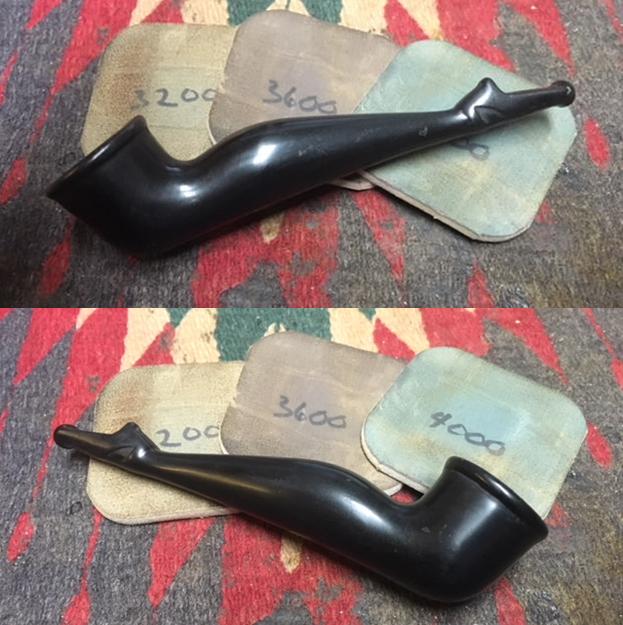
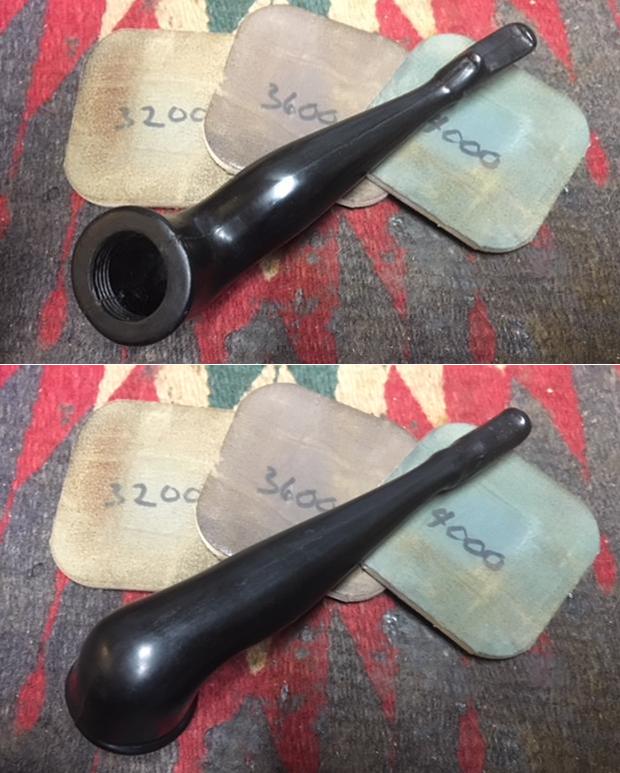
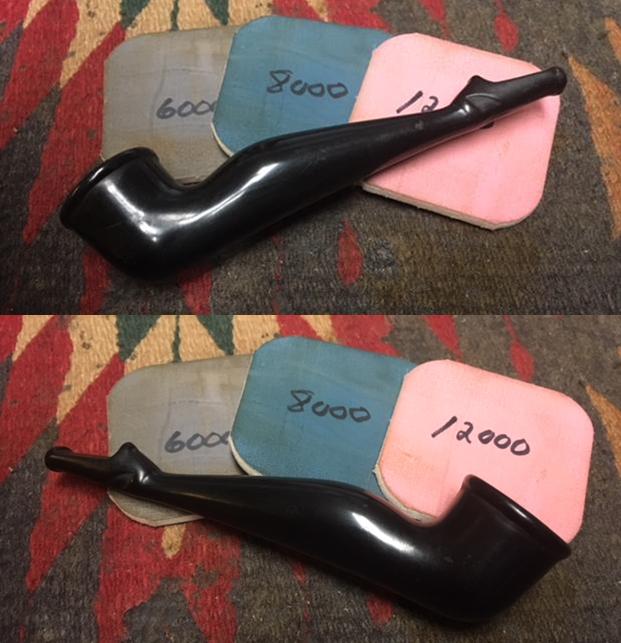
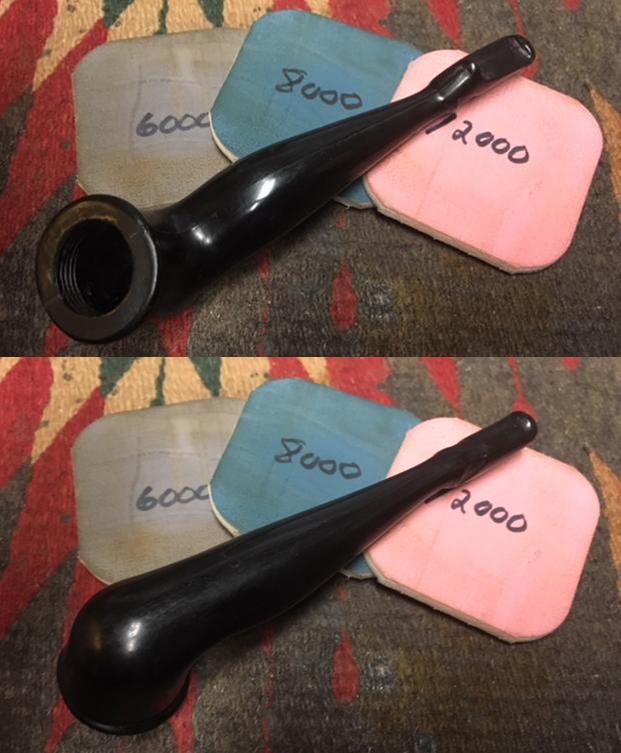
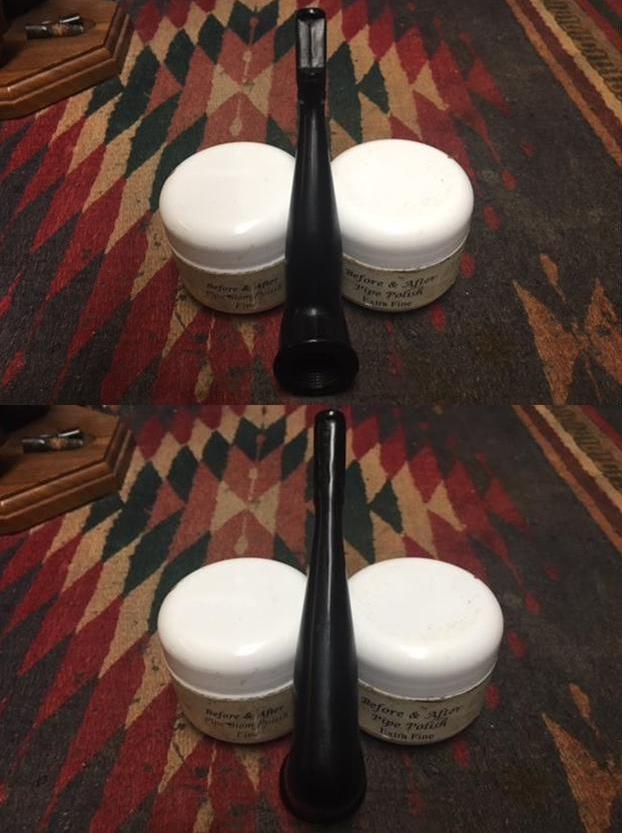
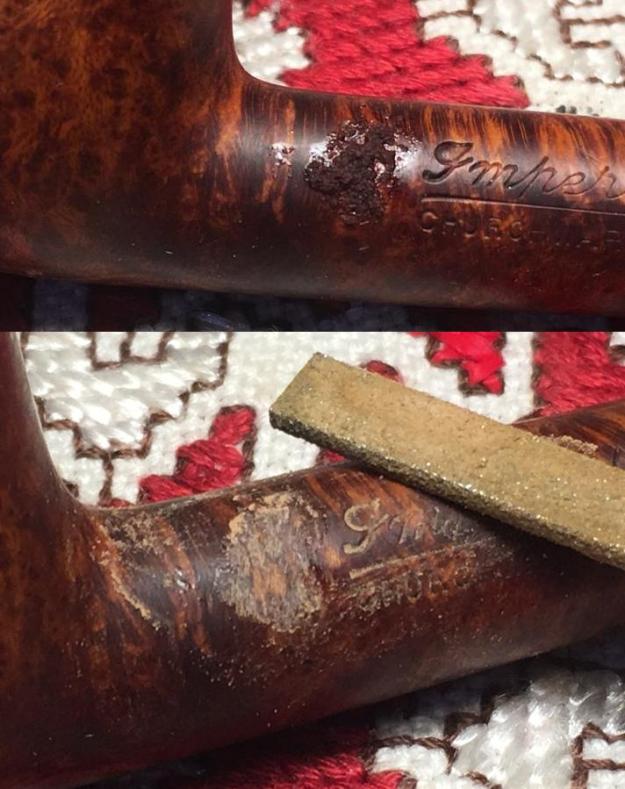
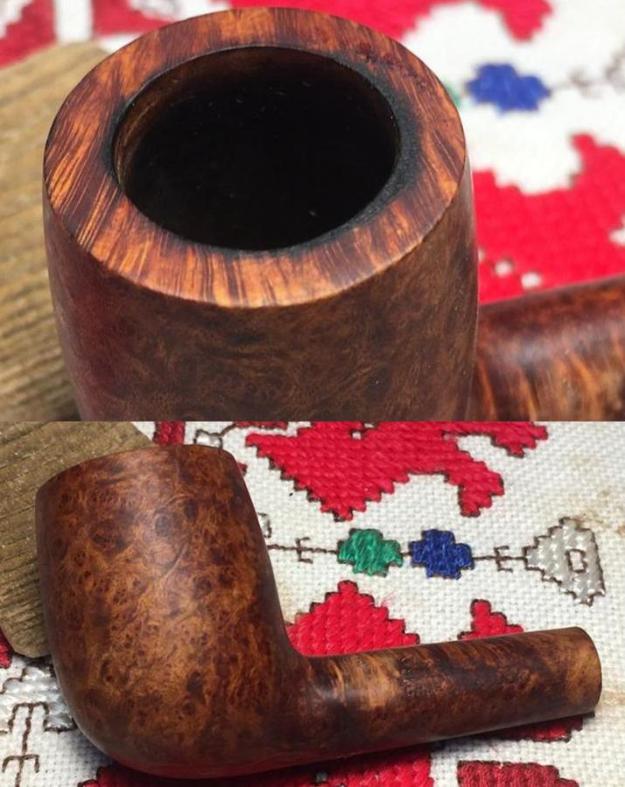
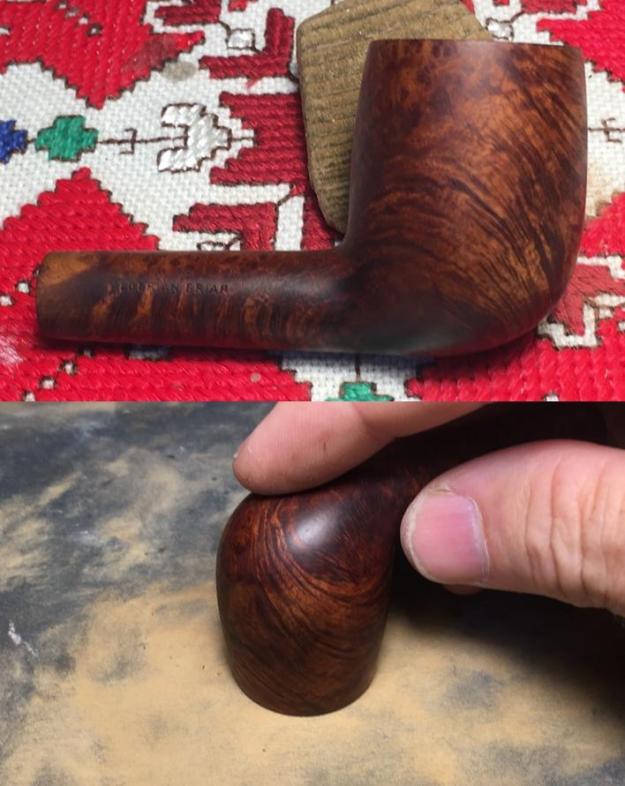
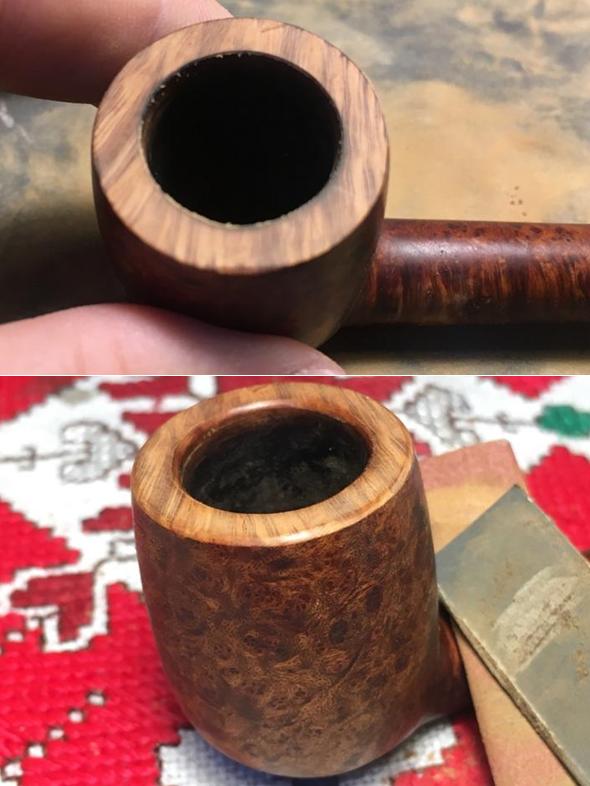
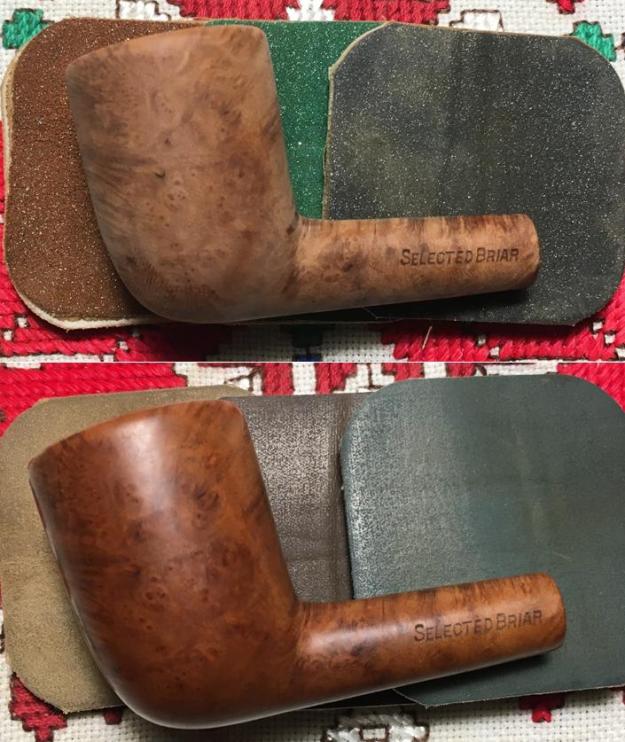
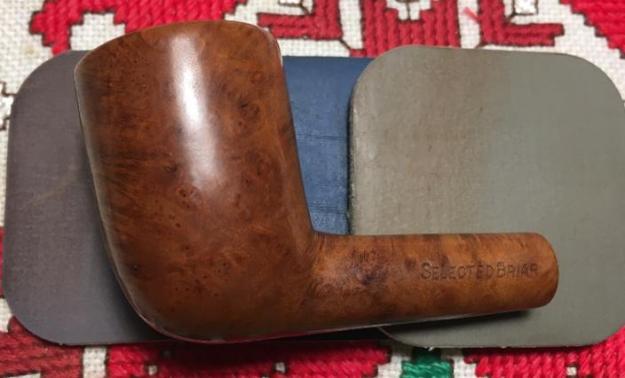
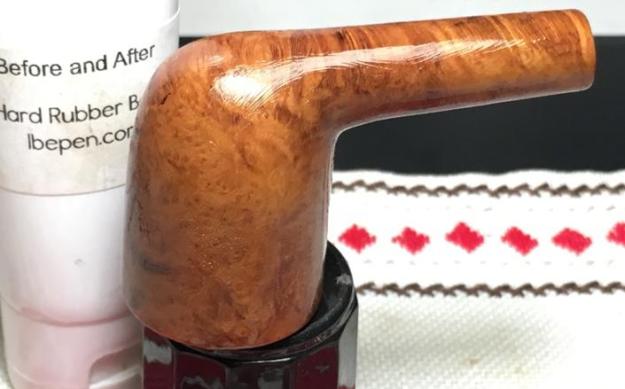
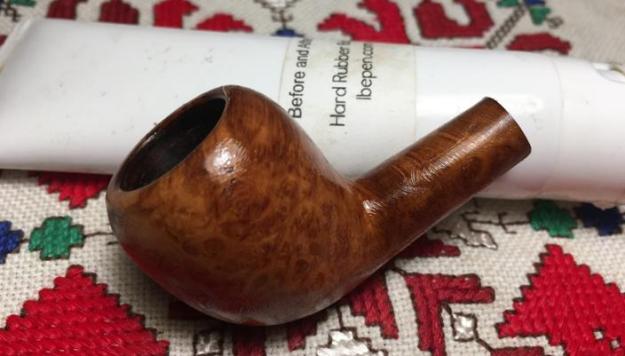
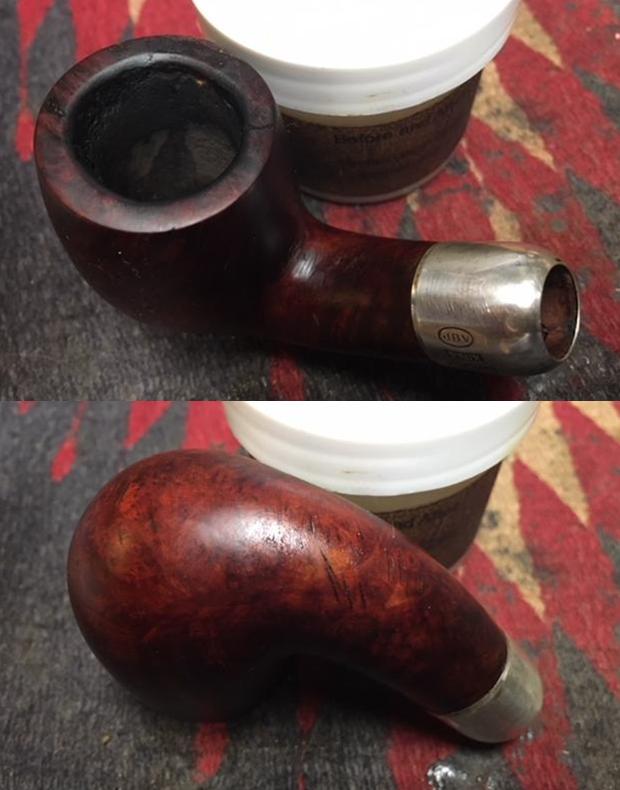
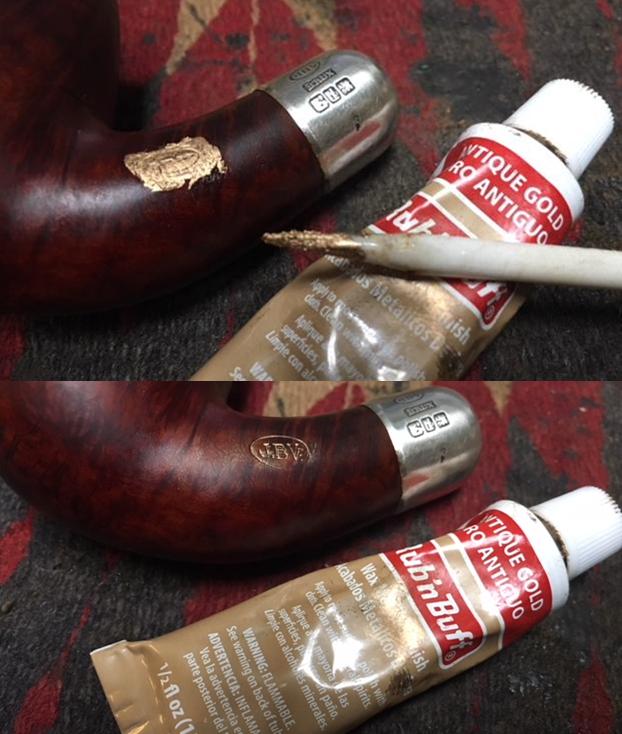
I had reamed the bowl on the M&T pipe when I did the other pipes in this case. I wrote about it in Part 1 of this blog. I used a PipNet pipe reamer, starting with the first cutting head and working my way up to the second. I took the cake back to bare briar to check out the interior of the bowl. I followed up by cleaning it up with a Savinelli Fitsall Pipe knife and finally sanding the bowl with 180 grit sandpaper wrapped around a piece of dowel. I took the pipe out of the case and took photos of its condition before I started working on it. I put the original stem in the shank to give an idea of the overall look of things. I really like the shape of all three of the pipes in this case. The M&T pipe was more delicate than the JBV pipe with a smaller diameter mortise and stem. It was a nice piece of briar other than the crack in the back side of the bowl. The flow and bend of the briar and the layout of the grain is nicely done. I took a close up photo of the rim top to show the extent of the damage. The rim top is dented and nicked and there is damage on the inner and outer edge of the rim. There is a small crack on the bowl rim on the back right side extending half way down the side of the bowl. I also took photos of the stem to show its condition. It was dirty and oxidized. There was some chatter on the top and underside near the button but there was no serious damage. I took a photo of the back of the bowl to show the crack that was there that would need to be addressed.I also took close up photos of the stamping on both sides of the shank and ferrule. It is clear but not clear enough to read the hallmarks on the silver.I started the process of refurbishing this old German made pipe by lightly topping the rim to remove the damage to the inner and outer edge.Once I had the bowl topped I drilled small microdrill holes along the ends of the crack as under light it went all the way down to the shank bowl junction. I wiped the bowl down with alcohol and filled in the crack and the pilot holes with super glue and briar dust. When the repair had cured I sanded the repair on the rim top, down inside the bowl for about a ¼ inch and down the back side of the bowl with a folded piece of 220 grit sandpaper. I blended the surface of the repair into the rest of the rim top and bowl. I sanded the outer edge of the bowl and the surface of the bowl itself with 220 grit sandpaper. There were many nicks and scratches in the finish as well as the areas that I had repaired. The bowl is beginning to look good at this point. I sanded the rest of the bowl with 220 grit sandpaper and wiped the bowl down with a damp cloth. When sanding, I carefully avoided the stamping on the shank so as not to damage that area. I took some photos of the bowl at this point in the process. Things were looking very good. I rubbed the bowl down with a light coat of olive oil and worked it into the briar. I find that a little oil at this point makes the nicks and scratches stand out clearly on the finish and show me what still needs to be sanded. I cleaned out the inside of the mortise and shank as well as the airway into the bowl and stem with alcohol, pipe cleaners and cotton swabs. The airway was open on this one so pipe cleaners worked to quickly clean it up. The mortise on this pipe did not have a Peterson’s style sump but was still quite dirty. It took a lot of work to clean it out. The stem on the other hand was quite clean on the inside.I polished the ferrule with Hagerty’s Silver Polish to remove the tarnish on the silver. I rubbed it on with a cotton pad and polished it with the same pad.I polished the briar with micromesh sanding pads – wet sanding with 1500-2400 grit pads and dry sanding with 3200-12000 grit pads. I wiped it down with a damp cloth after each sanding pad to remove the dust.  The grain was really beginning to stand out nicely. I decided to leave this one with the original stain and not darken or change it. I rubbed the bowl down with Before & After Restoration Balm. It cleans, enlivens and protects the briar. In this case I also found that it blended the stain well on the surface of the briar.   I reapplied the gold to the stamping on both sides of the shank using Rub’n Buff Antique Gold. I applied it in the stamping using the tip of a sanding stick. I let the stamping sit for a few minutes then buffed off the excess product with a cotton pad. When I buffed the bowl the excess gold would be removed around the stamping. Once it cured it would come off easily. I set the bowl aside and turned my attention to the stem. This was the original JBV stem and was made out vulcanite. I sanded out the tooth chatter on both sides of the stem near the button with 220 grit sandpaper. I polished the stem with micromesh sanding pads – wet sanding with 1500-2400 grit pads and dry sanding with 3200-12000 grit pads. I wiped the stem down after each pad with Obsidian Oil to wipe away the sanding dust and bring some life to the vulcanite. With the stem and bowl completed, the third and final installment of this blog – Part 3, is also complete. It is time to reconnect things and take some final photos. I buffed the bowl and stem with Blue Diamond on the buffing wheel. I gave the entire pipe multiple coats of carnauba wax to protect. I buffed it with a clean buffing pad to raise the shine. I hand buffed it with a microfibre cloth to deepen the shine. The repaired crack on the back side of the bowl and the rim top looked pretty good. The repairs blend in nicely with the original colour of the briar. The repairs are visible up close but they look natural. Thanks for walking with me as I continue on the threesome. With this one the three pipes that came in the case are finished. They presented some interesting challenges in terms of the repairs on each of them. They were interesting to work on and all are in smoking condition. Thanks for reading.

Restoring a Cased Set of Pipes – 2 JBV and 1 M&T Bent Military Mount Billiards – Part 2


Blog by Steve Laug

I have already introduced this set of pipes for you in Part 1 of this blog. It is an old cased set of three pipes. Two of them were stamped JBV in an oval and one was stamped M&T Best Briar & Bands. The set was missing the third JBV pipe which I would bet was a smooth meerschaum bent billiard bowl and a second stem. The second stem in the case was for the M&T pipe and was smaller in diameter than the shank of the JBV pipes. As I mentioned in Part 1 the silver was dirty and the bowls caked on all of the pipes but there was something about them that really attracted me. Here is the link to the first part of the blog – the restoration of the most damaged of the JBV pipes: https://rebornpipes.com/2018/07/22/restoring-a-cased-set-of-pipes-2-jbv-and-1-mt-bent-military-mount-billiards-part-1/.

I am including a photo of the opened case showing the pipes and the stamping on the inside of the lid. It reads J.B. Vinche over “Au Nabab” over Bruxelles as far as I can interpret the blurred stamping on the felt lining. You can also see that the case has spots for what looks like a tamper tool and possibly a cigarette holder that are also missing.The next pipe that I chose to work on is the one on the right side of the case in the photo above. It is stamped JBV in an oval on the left side of the shank. The silver ferrule is also stamped JBV in an oval over BRUX over three hallmarks that are hard to read. The first appears to be a flower, the second a person and the third is ARG over 900. The pipe is in rough shape, but I am not sure I want to call it that after my experience with the first JBV splitting when I cleaned it. The finish on this one is shot; there is silver polish on the shank ahead of the ferrule. There are some gouges in the top and underside of the shank. There is a thick cake in the bowl and the rim top is beat up. There are big chunks of briar missing around the outer edge of the rim. The rim top is chipped and damaged and the inner edge is in rough condition. The JBV Oval was originally gold leaf. There looked like there could be a crack in the bowl down the left side. Like the rest of the pipes in this set the pipe is very dirty. I have included that research in Part 1 of this blog. I also included an old catalogue and some information from Pipephil’s site and Pipedia (https://rebornpipes.com/2018/07/22/restoring-a-cased-set-of-pipes-2-jbv-and-1-mt-bent-military-mount-billiards-part-1/).
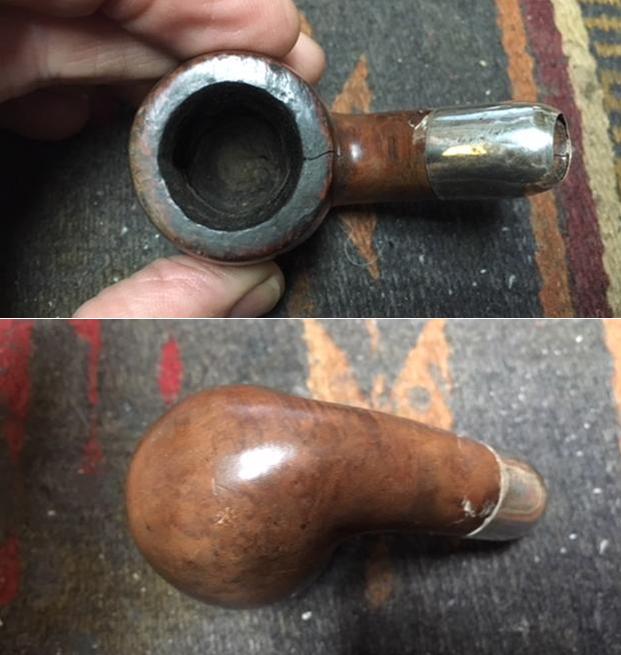
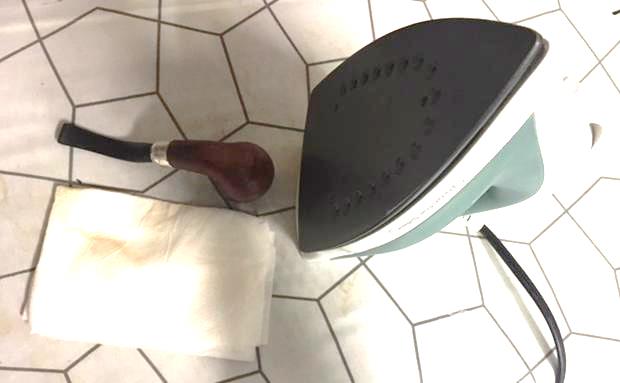
I had reamed the bowl on the second JBV pipe and wrote about it in Part 1. I used a PipNet pipe reamer starting with the first cutting head and working my way up to the second and lightly working on it with the third one. I took the cake back to bare briar to check out the interior of the bowl. I followed up by reaming it with a Savinelli Fitsall Pipe knife and finally sanding the bowl with 180 grit sandpaper wrapped around a piece of dowel. I took the pipe out of the case and took photos of its condition before I started working on it. I put the original stem in the shank to give an idea of the overall look of things. I really like the shape of the JBV pipes in this case. The flow and bend of the briar and the layout of the grain is nicely done. It is a shame that the previous owner beat them to death. But one thing I know for certain is that the pipes must be great smokers to have been smoked to the condition they are in when I received them here. I took a close up photo of the rim top to show the extent of the damage. It affects the top and the inner and outer edge of the rim. There are huge chunks of briar missing from the surface and the edges of the bowl. The damage to the outer edge extends down the sides of the bowl. There is also a small crack on the bowl rim on the back right side. I also took photos of the stem to show its condition. It was dirty and had some chatter on the top and underside near the button but there was no serious damage. It is interesting to work on pipes with bowls in this horrible condition and have stems that are not gnawed to the point of no return.I also took a close up photo of the stamping on the shank and ferrule. It is clear but the hallmarks are too worn to read.I started the process of repairing the rim by topping the bowl. I want to even out the high spots on the back and left side of the bowl. Topping part of the bowl is a precarious operation because if you are not careful you can give the bowl a slant. My idea was that those areas had less damage than the rest of the rim and could provide a stable base to work from to address the damage that was on the front and the right side.Once I had the bowl topped I was ready to begin the rebuilding process on the damaged areas on the front and right side. I built those areas up with briar dust and clear super glue. I filled in the large chipped areas on the side and front of the bowl. I repaired the small crack on the right back side of the bowl rim.When the repair had cured I sanded the top by hand with a folded piece of 180 grit sandpaper to flatten the high spots in the repairs. I check the bowl against a hard surface to make sure that it sat firmly in place and did not rock. Once it sat well I topped the entire bowl on the topping board with 220 grit sandpaper to smooth out the repairs and make the top of the bowl flat.I sanded the outer edge of the bowl and the surface of the bowl itself with 220 grit sandpaper. There were many nicks and scratches in the finish as well as the areas that I had repaired. The bowl is beginning to look good at this point. I sanded the rest of the bowl with 220 grit sandpaper and wiped the bowl down with a damp cloth. When sanding, I carefully avoided the stamping on the shank so as not to damage that area. I took some photos of the bowl at this point in the process. Things were looking very good. I steamed out the dents on the underside of the bowl with a hot iron and a wet towel. The heat from the iron created steam and the heat and moisture lifted the dents in the briar until they were smooth.I rubbed the bowl down with a light coat of olive oil and worked it into the briar. I find that a little oil at this point makes the nicks and scratches stand out clearly on the finish and show me what still needs to be sanded.I took a few photos with my computer at work while I was on my lunch hour. The pipe is beginning to look very good. The dents on the underside of the shank and bottom of the bowl are no longer visible. I cleaned out the inside of the mortise and shank as well as the airway into the bowl and stem with alcohol, pipe cleaners and cotton swabs. The airway was clogged so I pushed a pipe cleaner through into the bowl. The mortise was like a Peterson’s sump and it was filthy. It took a lot of work to clean it out. The stem was quite clean on the inside.I polished the briar with micromesh sanding pads – wet sanding with 1500-2400 grit pads and dry sanding with 3200-12000 grit pads. I wiped it down with a damp cloth after each sanding pad to remove the dust.  (You can see a small dark spot on the right side toward the front.) I stained the bowl with a Tan aniline stain. I had found that the stain was probably mislabeled as it had a definite red cast to it. I applied it with the dauber and flamed it with a lighter to set the stain in the finish.Once the stain cured I rubbed the bowl down with Before & After Restoration Balm. It cleans, enlivens and protects the briar. In this case I also found that it blended the stain well on the surface of the briar. I polished the silver with a jeweler’s cloth to polish and remove the tarnish. I reapplied the gold to the stamping on the shank using Rub’n Buff Antique Gold. I applied it in the stamping using the tip of a sanding stick. I let the stamping sit for a few minutes then buffed off the excess product with a cotton pad.I set the bowl aside and turned my attention to the stem. This was the original JBV stem and was made out vulcanite. I sanded out the tooth chatter on both sides of the stem near the button with 220 grit sandpaper.I polished the stem with micromesh sanding pads – wet sanding with 1500-2400 grit pads and dry sanding with 3200-12000 grit pads. I wiped the stem down after each pad with Obsidian Oil to wipe away the sanding dust and bring some life to the vulcanite. With the stem and bowl completed, the second installment of this blog – Part 2, is also complete. It is time to reconnect things and take some final photos. I buffed the bowl and stem with Blue Diamond on the buffing wheel. I gave the entire pipe multiple coats of carnauba wax to protect. I buffed it with a clean buffing pad to raise the shine. I hand buffed it with a microfibre cloth to deepen the shine. The badly damaged rim on the pipe came together really well. The repairs blend in nicely with the stain colour. The repairs are visible up close but they look natural. Thanks for walking with me as I continue on the threesome. Part 3 will address the third pipe in the cased set. With this one both of the original JBV pipes are finished. Thanks for reading.
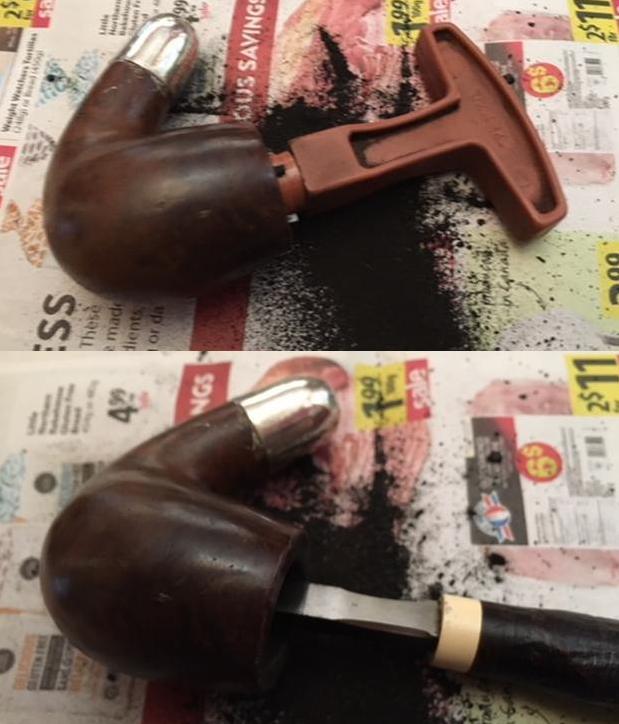
Restoration of a GBD Rockroot # 1345 Sitter


Blog by Paresh Deshpande

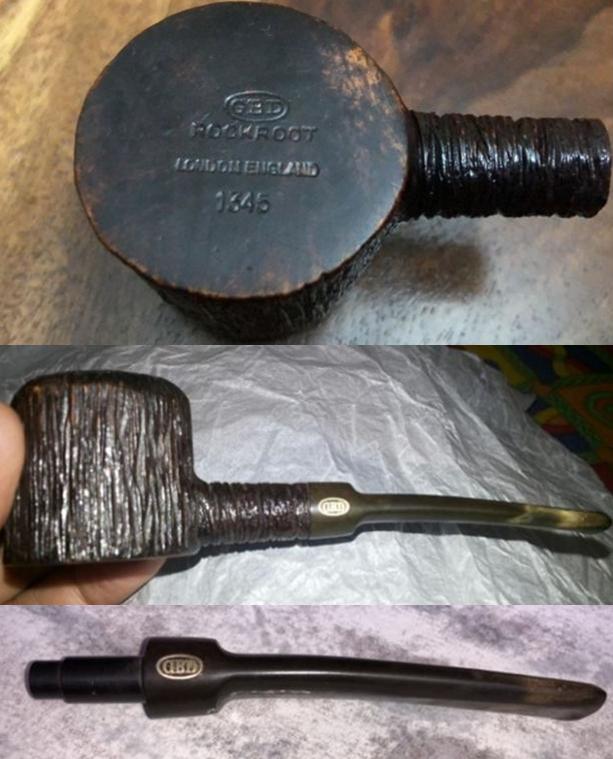
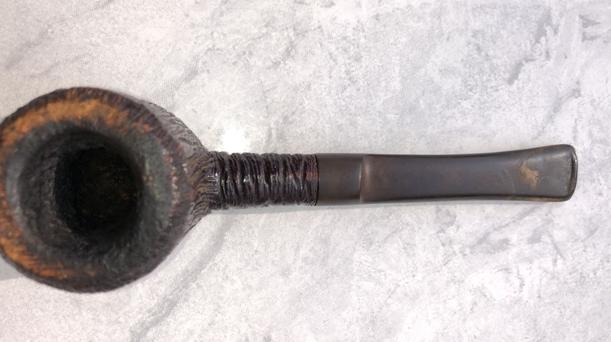
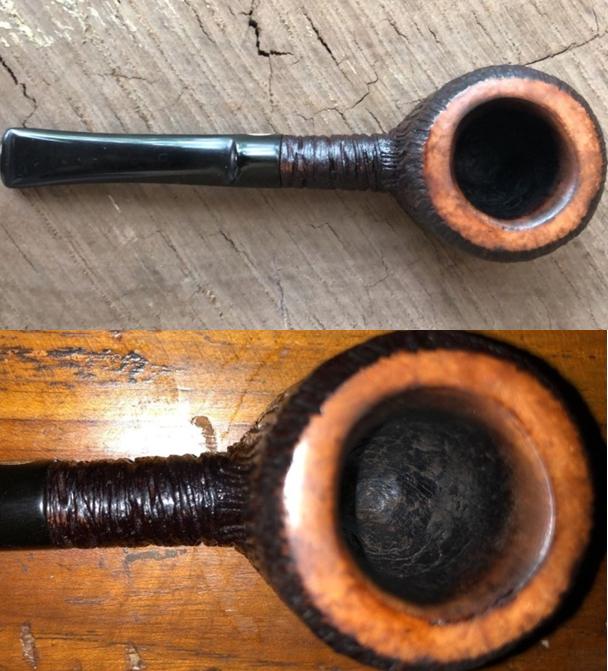
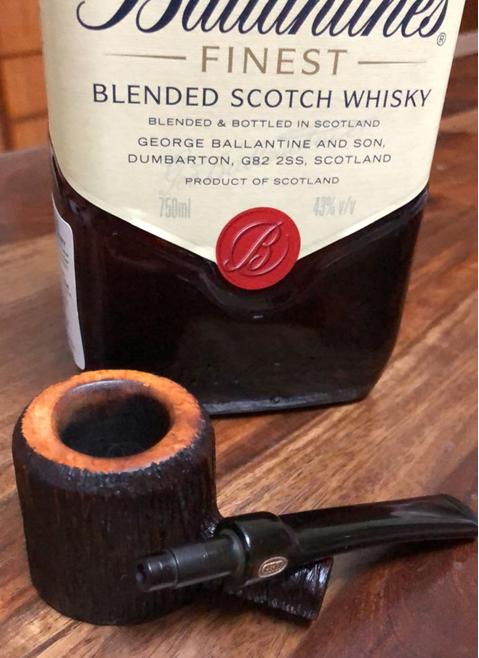
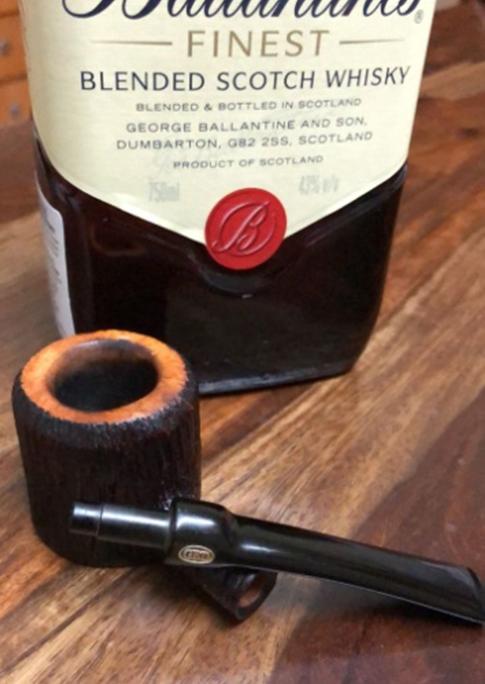
The next pipe that caught my fancy for restoration was a GBD ROCKROOT # 1345. This pipe has beaten Kriswill “Chief”  # 20 and Kriswill “ Golden Clipper” to the finish line, though not decisively since I do not have stain pens and I had to leave the rim top duly sanded to remove all the oils and tars and burn marks. Personally though, I rather liked the look of the contrast the rim provided to the dark coloured pipe bowl, shank and stem. But I have seen other similar GBDs and they all had the nice bowl coloured rim top which also looked beautiful!!!! Hence, my attempt at darkening the rim top. Without darkened rim top!! You decide and suggest please!!!

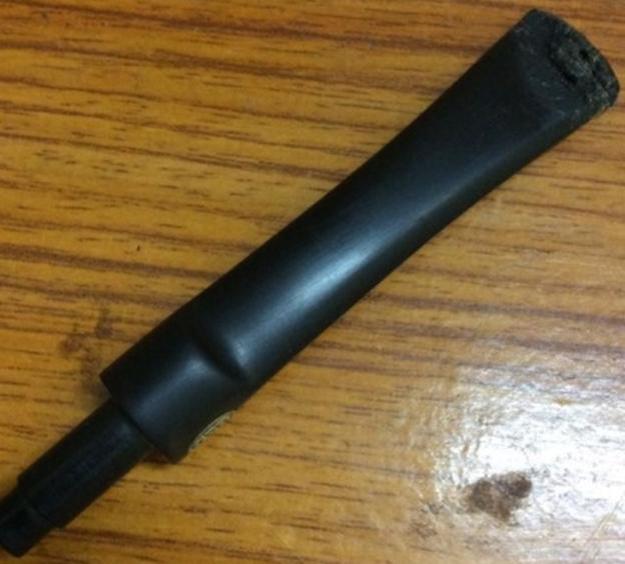
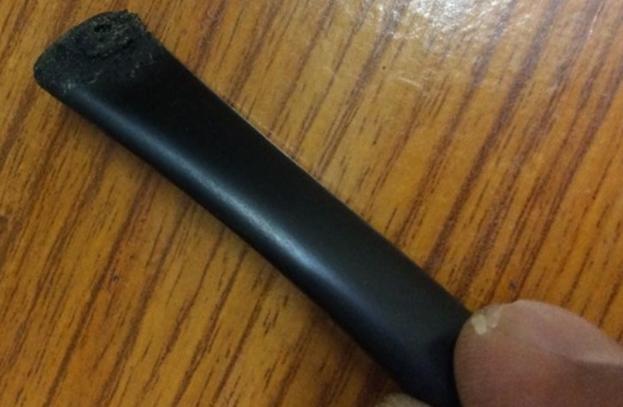
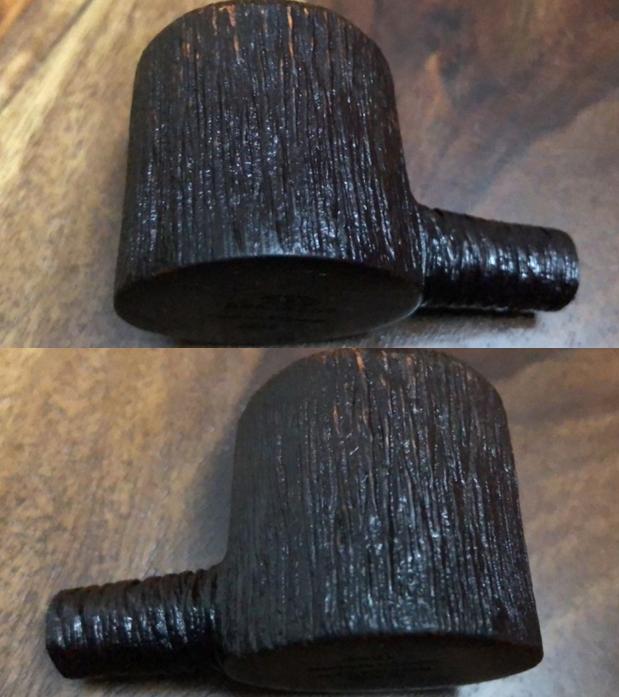
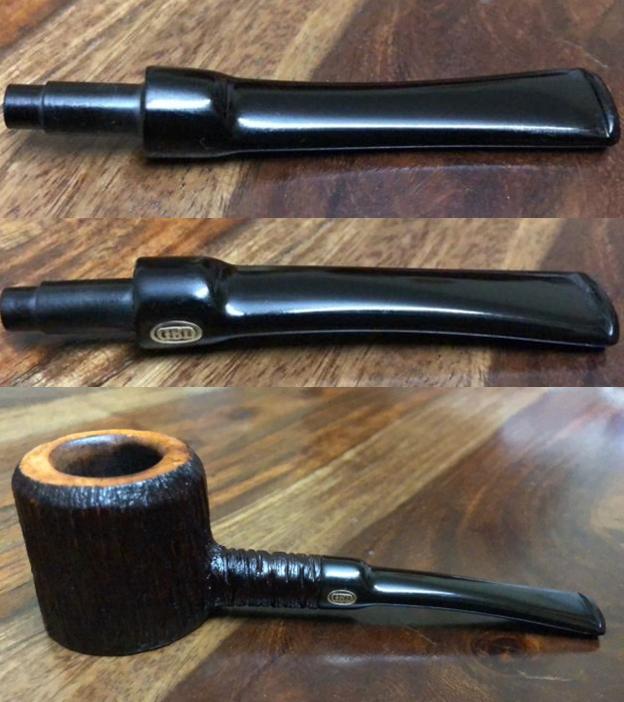
This pipe has a relatively smaller sized bowl with wire rustications running vertically along the bowl with circular wire rustications run around the shank. This wire rustication runs along the entire rim top. The bottom of the bowl is flat, smooth and bears crisp stampings with ‘GBD’ in oval over ‘ROCKROOT’ over ‘LONDON ENGLAND’ in a straight line over # ‘1345’. The saddle stem has a very subtle and delicate bend with just the lip touching the table top which coupled with the flat bottom of the bowl, makes it a perfectly balanced sitter. A brass oval roundel rim with embossed GBD is embedded in the saddle. This should polish up very nicely. INITIAL INSPECTION
The initial visual inspection of the pipe revealed the following:

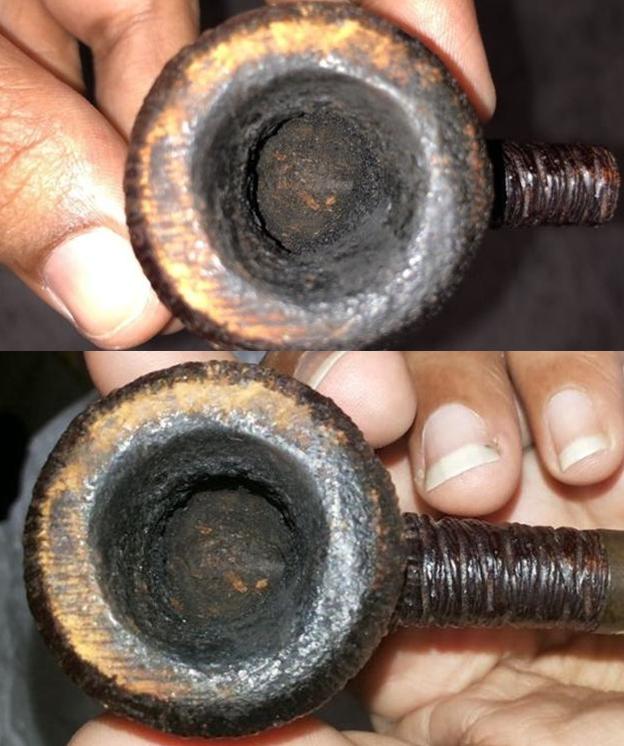
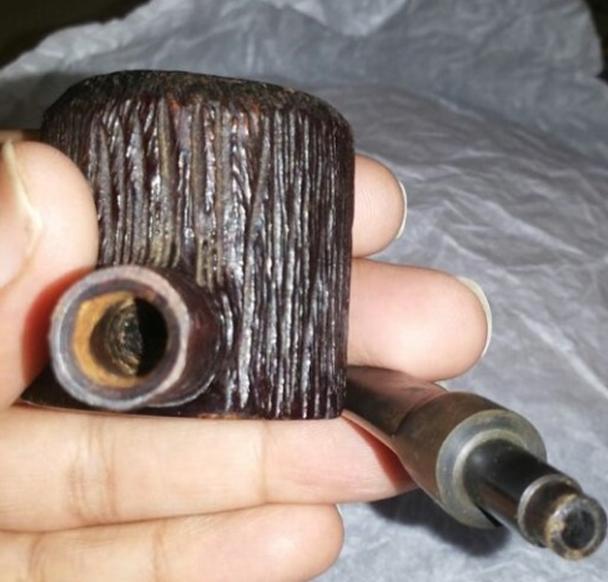
The bowl was heavily caked with oils, tars and grime overflowing onto the rim top and down the bowl along the vertical wire rustications. There appears to be some deep charring along the inner edge of the rim on the right hand side in 1’o’clock direction and on the left side in 7’o’clock direction. The extent of the damage to the rim can only be determined after reaming the bowl.The thin wire rustication on the rim top is worn out at certain places. The rest of the rustications along the bowl and shank is filled with dust, oils, gunk and dirt which has been accumulating over the years. Air did not pass through the stem. When the stem was removed from the shank, visual inspection revealed a completely blocked mortise and airway. The stem, too, was slightly blocked.The stem was heavily oxidized with heavy calcification near the lip. There was heavy tooth chatter extending up to an inch from the lip towards the saddle on both sides of the pipe. But thankfully there were no deep bite marks or holes. The lip on both sides has also been chewed out of shape.Dimensions:
Length – 5 inches
Bowl height – 1.5 inches
Bowl depth – 1 1/8th inches
Bowl inner diameter – 7/8  inch
Bowl outer diameter – 1.5 inches

THE PROCESS
As usual Abha, my wife, started work on the bowl while I addressed the stem. Using a Kleen Reem reamer and British Buttner pipe reaming tool, Abha removed most of the thick cake in no time. The reason being a 1 inch deep bowl!!! She had been very careful in avoiding the edges which had the charred marks. While Abha was working her magic on the bowl, I painted the stem with the flame of a Bic lighter to try to lift the light tooth chatter. The lightest of the tooth chatter evened out and the remaining ones were lifted to the surface. I had to sand out the stem to smooth out the tooth chatter. At this point, using a 220 grit paper, I sanded down the stem till the surface felt even and smooth to the touch. I tightly folded a piece of the grit paper and using its edge tried to shape the edges of the lip. Then I applied Extra virgin olive oil to the stem and kept it aside to be absorbed by the stem. And as usual, I just forgot to take pictures of the stem at this stage!!!

Thereafter, I turned my attention to the bowl with hesitation. This was so because the reaming had revealed that the issue of charring was something I had not handled before. I immediately Facetimed  Mr. Steve and sought his advice. It was decided that a smooth surfaced rim, akin to the smooth bottom of the bowl, will add an interesting character to the pipe and will also take care of the charred inner edge of the bowl.

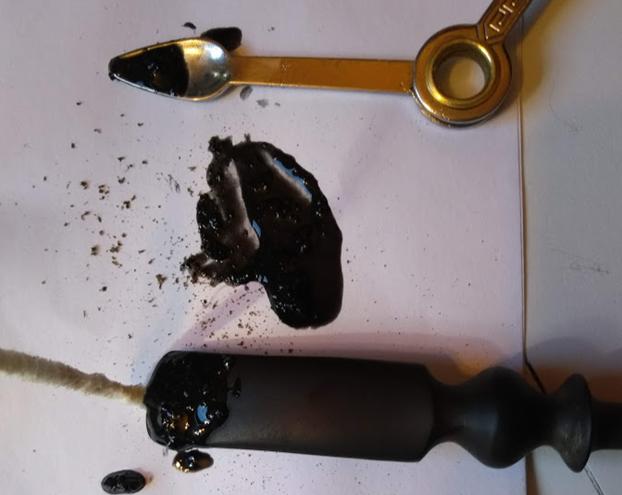
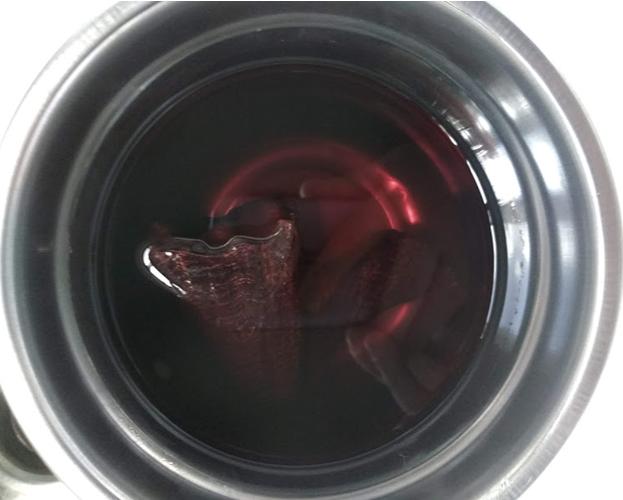
I began with cautiously sanding the inner edges of the bowl to remove as much of the charring as possible. Using Murphy’s oil soap and a hard bristled toothbrush I removed as much of the accumulated tars and lava from the rim top as I could. I lightly topped the bowl on a 220 grit sand paper. The charred portion of the briar came apart in chunks during the topping process. Thereafter, I tried to round off the inner edges of the bowl as much as I possibly could, by creating an inner bevel to cover up and address the charred portion. However, the bowl still remains out of shape.As can be seen, the bowl edge in the 1 o’clock (front right) and 7 o’clock (rear left) directions has moved out too far. I was not too inclined to sand down the other edges to merge with the moved out edges for fear of losing too much briar and further thinning the rim top. Any suggestions whether I should go all out with the inner edge to completely round it or leave it as is are welcome.  Once the bevel was made and I had sanded out as much of the charring as I was comfortable with, I sanded down the rim with micromesh pads, wet sanding with 1500 – 2400 grit and dry sanding with 3200 – 12000 grit. Using a brush and Murphy’s Oil soap, I cleaned the exteriors of the bowl, rim top and shank and rinsed it under running water. The bowl was wiped dry using a cotton cloth and left to dry out overnight. Turning my attention back to the stem, I wiped it down with a soft cotton cloth. On close inspection, I realized that there was one bite mark on both sides which was not raised and also that the lip edge was not defined/sharp. I mixed up activated charcoal powder with clear CA glue (the glue that was available to me here, has a tendency to come off in lumps. Hence I was skeptical about its function in this process) and applied it on both sides of the stem to fill in the bite mark as well as on the tip edge to define it further and set it aside to cure overnight. Next morning, I rubbed some “Before and After Restoration Balm” into the thin wire rustications of the dried out bowl. Every time I use this balm, I cannot help but appreciate how effectively it works to enliven and refresh an old briar bowl. I rubbed a small quantity of balm with my fingers into the thin wire rustications on the bowl and shank and kept it aside for a few seconds. Using a horse hair brush, I buffed the bowl and shank and worked the balm deeper into the closely packed rustication. I rubbed it down with a soft cloth to a bright shine. I had to use a lot of muscle power and time to get the desired shine since I do not have a wheel. I was satisfied with the way the bowl had turned out up to this point in the restoration.Thereafter I turned my attention to the stem. The fill of CA super glue and charcoal powder had cured sufficiently. Using needle files, I started filling away carefully and cautiously restricting the filing only to the filled areas. Using a flat head needle file, I filed away the excess filling and was satisfied with the end result. I used a 220 grit sand paper to further blend in the fill. I further polished the stem using micromesh sanding pads. Wet sanding with 1500 – 2400 grit pads helped reduce the sanding marks left behind by 220 grit papers to a great extent. I wiped it clean and coated the stem with extra virgin olive oil and let it rest for some time. This allows the vulcanite to absorb the oil. Thereafter I dry sanded the stem with 3200 – 12000 grit micromesh pads and applying olive oil after every third pad. The stem is now nice, smooth and shiny. I shared the pictures of the bowl and stem with Mr. Steve for his opinion and advice for further improvement. As is his style, Mr. Steve first appreciated the effort and suggested that a darker stain would look good. Since he was well aware that the stain pens I had ordered did not reach me, he suggested an ingenious and practical way of staining using local and readily available material. He suggested boiling black tea leaves in a little water and making a very strong and thick brew, letting it sit overnight. Using cotton swab/cue tip dipped in this brew, gently apply onto the area that is to be stained.

I followed his advice and applied it to the rim top of the Rockroot. After allowing it to rest for a few minutes, I gently wiped it off with a soft cotton cloth. The results are truly amazing. Mr. Steve further advised me to use regular black boot polish to further stain and bring back the shine to the rim top. The results of this can be seen in the following pictures of the finished pipe.This restoration has been a fantastic journey of learning, trials and frustrations which I enjoyed to the fullest. I cannot thank Mr. Steve enough for his wise, practical and timely advice and sharing his immense wealth of experience so readily with a novice like me. Thanks Steve!!!

Restoring a Cased Set – 2 JBV & 1 M&T Bent Billiards – Part 1


Blog by Steve Laug

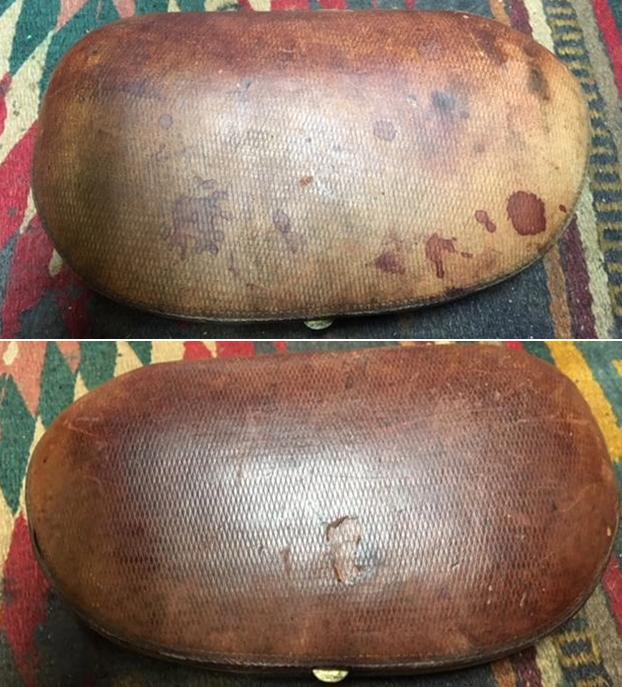
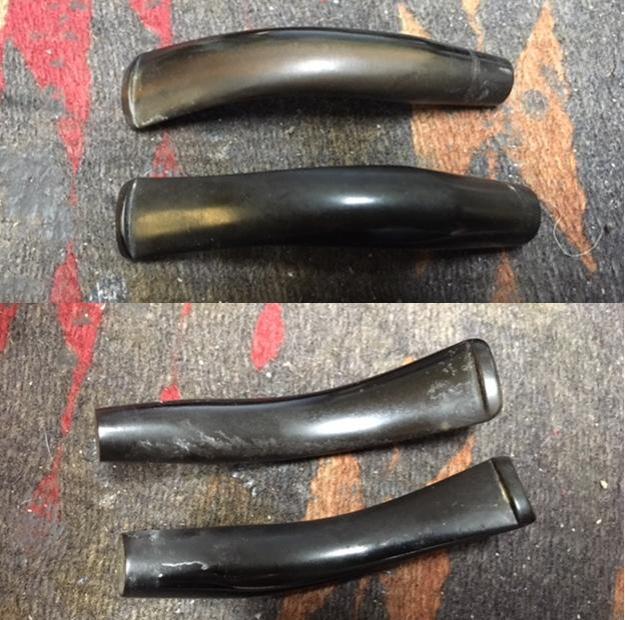
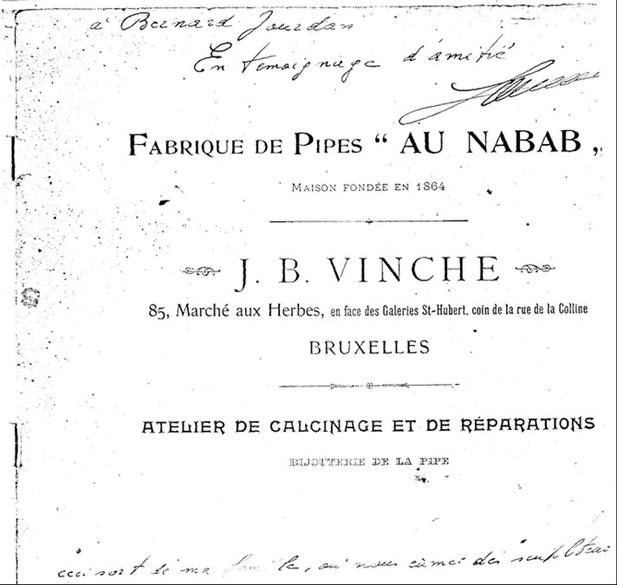
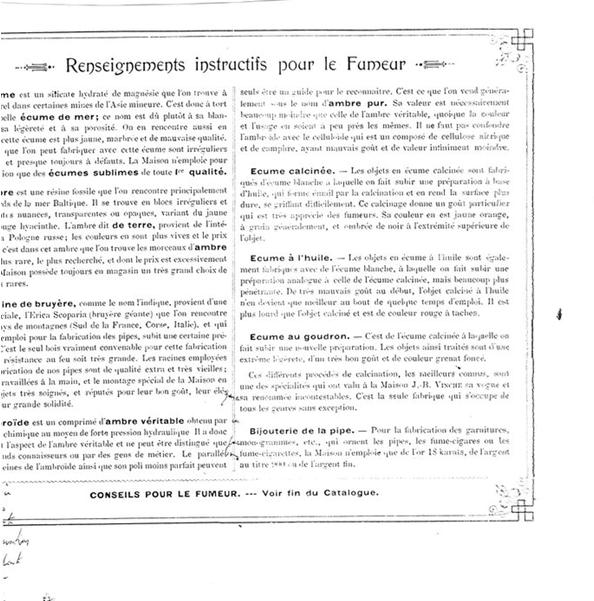
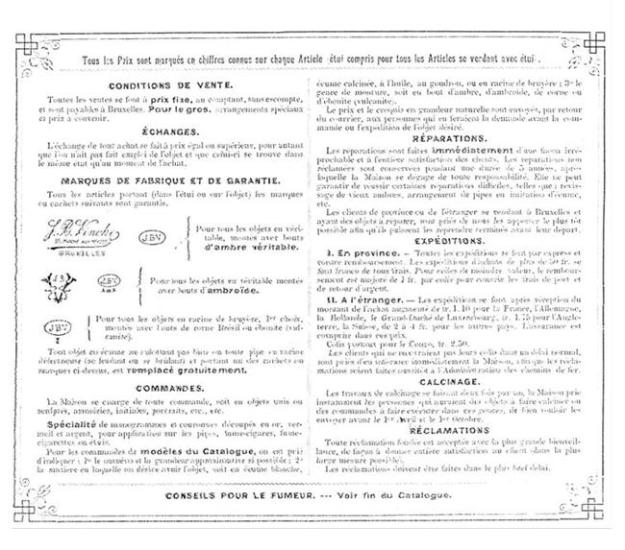
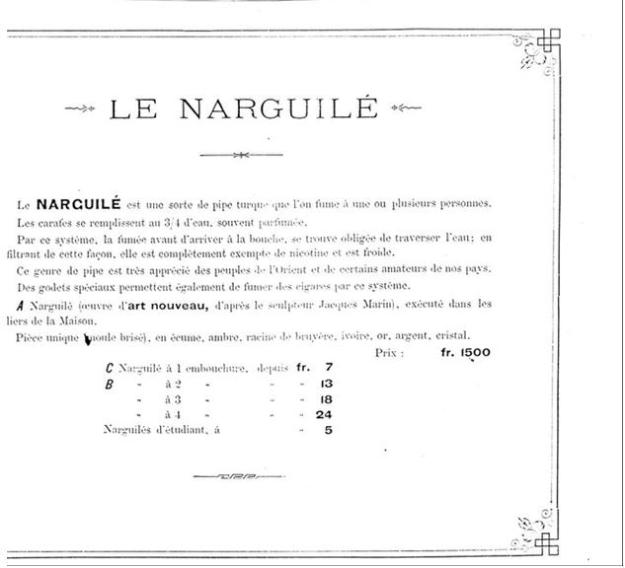
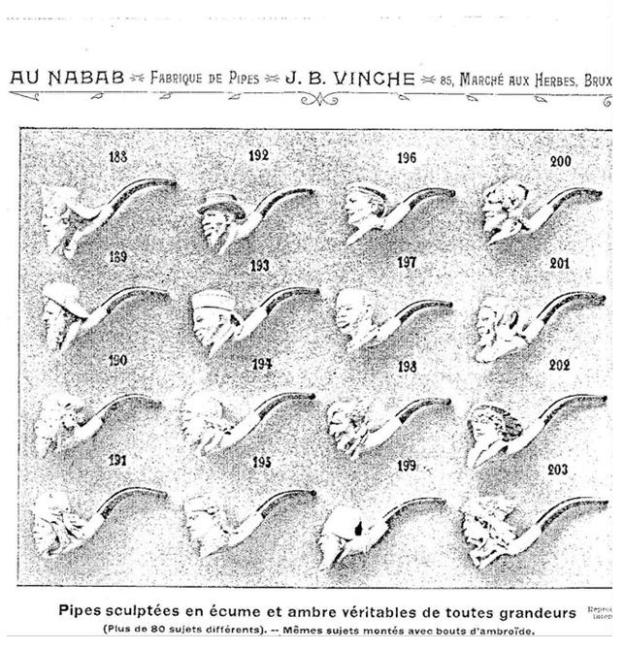
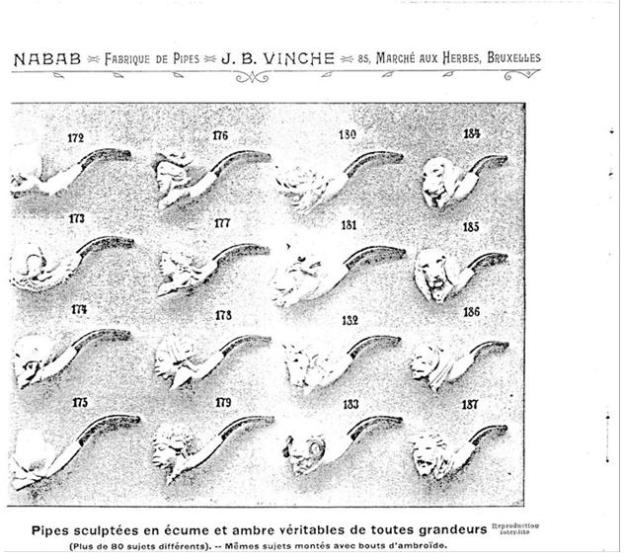
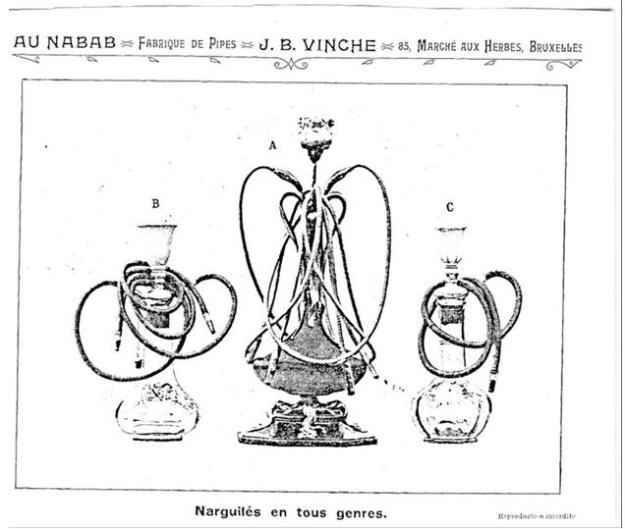
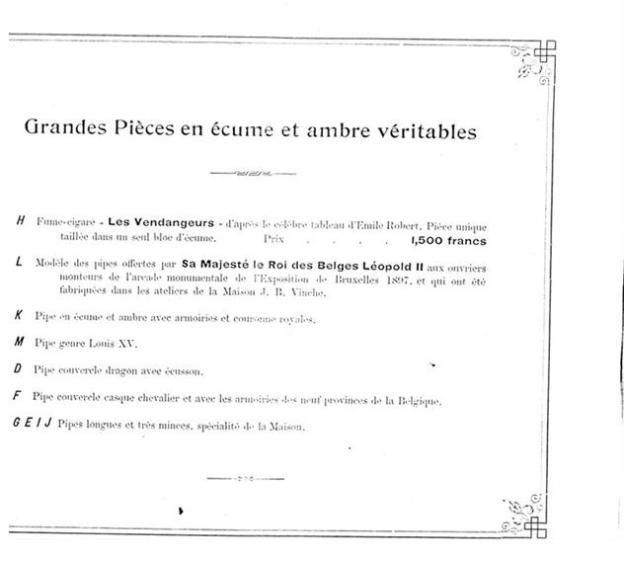
I was chatting with Chris van Hilst from Tobacco Pipe Restorers one day using Messenger and he was selling this old set of pipes. Two of them were stamped JBV in an oval and one was a M&T Best Briar & Bands. The set was missing the third JBV pipe and one of the stems was for the M&T. The silver was dirty and the bowls caked but there was something about the pipes that really attracted me. We talked prices and made a deal. I had him send the pipes to Jeff in Idaho as it was easier to deal with than sending them to Canada. I had him send me a couple of photos of the set that are shown below. The first is the pipes sitting in the case. It shows that there is some kind of cigarette holder and a tamper missing from the set. The second photo shows the JBV in an oval stamp on the left side of the shank of one of the pipes. I could also see hallmarks in the silver but was not able to clearly read them. Jeff received them pretty quickly and put them aside. My daughters went down for my Dad’s 90th birthday so he took the opportunity to send them north with them on their return trip. He had not had a chance to clean them so I was left to my own devices on this set of three. When they arrived, I took a photo of the case before I opened it and of the case open showing the pipes. It is covered in leather and is kidney shaped. It is lightly stained but other than a few nicks it is in great condition.There was some gold leters on the front edge of the case that reads FOURNISSEUR DE SM LEROI DES BELGES. It translates from Belgian French to read PROVIDER HM KING OF BELGIAN. Or the Provider for His Majesty King of Belgium.I opened the case and took a photo of the pipes on the inside and the stamping on the inside of the lid. It reads J.B. Vinche over “Au Nabab” over Bruxelles. That is what it reads as best as I can make out. It is pretty blurry.I took photos of each of the pipes before I started to work on them. I started with the pipe on the left side of the photo above and worked my way across for the photos. The first pipe below is the one on the left. It is stamped JBV in an oval on the left side of the shank. The silver ferrule is also stamped JBV in an oval over BRUX over three hallmarks that are hard to read. The first appears to be a flower, the second a person and the third is ARG over 900. The pipe is in rough shape. The finish is shot; there is silver polish on the shank ahead of the ferrule. There are some gouges in the top and underside of the shank. The JBV Oval was originally gold leaf. There is a thick cake in the bowl and the rim top is beat up. There are big chunks of briar missing around the outer edge of the rim. The rim top is chipped and damaged and the inner edge is in rough condition. The pipe is very dirty. The second pipe is shown below and is the one in the center position in the case. It is stamped BEST BRIAR & BANDS  with each word over the next on the left side of the shank. One the right side it is stamped M&T in a football shaped oval. The silver ferrule is also stamped with a BBB vertically on the side of the band next to the shank. Next to that is the same M&T stamp in an oval over three hallmarks that are hard to read. The first appears to be a flower, the second is 933 and the third is a crescent moon. The pipe is in rough shape. Once again the finish is shot; there is silver polish on the shank ahead of the ferrule. There are some gouges in the top and underside of the shank. There is a thick cake in the bowl and the rim top is beat up. There is a crack running down the back side from the rim halfway to the shank. The rim top is dented and damaged and the inner edge is in better condition than the first pipe. The pipe is very dirty. The third pipe is shown below and is the one on the right side of the case. It is stamped JBV in an oval on the left side of the shank. The silver ferrule is also stamped JBV in an oval over BRUX over three hallmarks that are hard to read. The first appears to be a flower, the second a person and the third is ARG over 900. The pipe is in rough shape. The finish is on this one is also shot; there is silver polish on the shank ahead of the ferrule. There are some gouges in the top and underside of the shank. The JBV Oval was originally gold leaf. There is a thick cake in the bowl and the rim top is beat up. There are big chunks of briar missing around the outer edge of the rim. The rim top is chipped and damaged and the inner edge is in rough condition. There looked like there could be a crack in the bowl down the left side. Like the rest of the pipes in this set the pipe is very dirty. There were two stems in the set. You can see from the photos below that they were different sizes. In the first photo the top stem is more delicate. It is narrower at the tenon end. It is for the M&T pipe while the bottom one is for the JBV pipes. The stems both are in decent condition with a little oxidation and minimal tooth chatter. There are no deep tooth marks so that is something to be thankful for. I knew that the set was older but I was unfamiliar with the brands. I had not heard of JBV so I did a bit of research on the brand and found an interesting link to an old catalogue. It turns out that the JBV is short for J.B. Vinche Company in Brussels. I have included the information on the brand that I found in the link as well as the link below.

This company maintained a factory in Brussels, Belgium, but records indicate that it also operated a retail establishment at 34, Rue Notre Dame des Victoires, in Paris under the name “Au Nabab” where, no doubt, it offered its product line for sale to the public.

https://www.facebook.com/tobaccopipeartistory/photos/a.111646685586370.24977.101191206631918/111646972253008/?type=3&theater

I also included some photos of a J.B. Vinche Catalogue from 1875. I checked on the Pipephil website to see what I could find there. Generally I find the site one of the most helpful in quickly confirming information on a brand. In this case it came through with a great bit of information. I did a screen capture of the pertinent section of the link. You can check it out further on the following link. http://www.pipephil.eu/logos/en/logo-v2.html.

The information included in the capture reads:

The brand has been created in Bruxelles in 1864 by Jean Baptiste Vinche and run after him by his son Victor. Marcel and Rene Vinche (3rd generation) managed the corporation from 1927 on. The brand is famous for its meerschaum pipes but briar pipes were also produced after 1938. In 1965 Jacques Vinche (4th generation) entered the family firm. Jeff and Mia Koopmans from Hilson Pipes joined in 1977. Today (2009) Ben and Wim Koopmans manage the business.Pipedia confirms this information at the following link: https://pipedia.org/wiki/Vinche.

I could not find out any information on the third pipe – the M&T Best Briar Band pipe. I checked in all of my usual sources and came up empty. Does anyone know anything about the brand? Let me know.

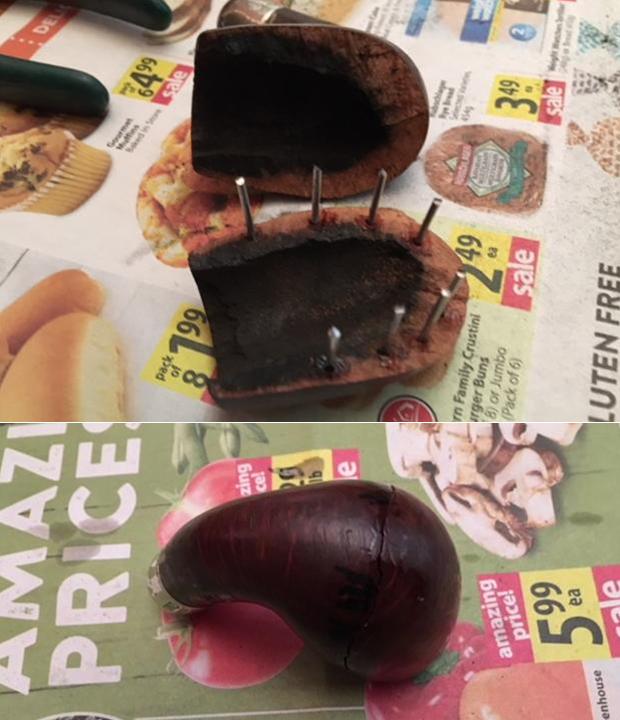
Armed with the background information, I decided to start on these pipes by reaming all three of them. The cake in each was quite thick and the damage to the rim and bowl made me proceed with caution. I was concerned about the cracked bowl in the M&T pipe as well as the potential crack in the second JBV pipe. I started with the first JBV pipe and reamed it with a PipNet pipe reamer starting with the first cutting head and working my way up to the second and lightly working on it with the third one. I took the cake back to bare briar to check out the interior of the bowl. I followed up by reaming it with a Savinelli Fitsall Pipe knife and finally sanding the bowl with 180 grit sandpaper wrapped around a piece of dowel. I moved on to the M&T Best Briar Band pipe and reamed it with a PipNet pipe reamer starting with the first cutting head and working my way up to the second and lightly working on it with the third one. I took the cake back to bare briar to check out the interior of the bowl. I followed up by reaming it with a Savinelli Fitsall Pipe knife and finally sanding the bowl with 180 grit sandpaper wrapped around a piece of dowel. I moved on to the second JBV pipe (the one that I thought had a possible crack). I started with the smallest cutting head on the PipNet pipe reamer and turned it gently in the bowl one twist and the bowl split in half in my hands. I was sick when I felt it break. I have never had that happen in all these years of working on pipes. It really was unbelievable. I held the pieces together and took the cake back to bare briar to check out the interior of the bowl. I used a Savinelli Fitsall Pipe knife to scrape away the remnants of cake. The photo below shows the bowl in half with the reamer next to it.This is not what I wanted to do next! I had planned to work through each of the pipes and have a nice set! Now I had to deal with this one and because it was part of an old set I felt obligated to try to put it back together. I was just sickening to have the second original bowl break in my hands. Why couldn’t it have been the cracked M&T bowl? But since it was the other JBV bowl I needed to repair it. At this point this blog also took a turn. I would do the rest of the first part of the blog on the bowl repair of this particular JBV pipe. I would have to follow up with at least one more part on the other two pipes in the set.
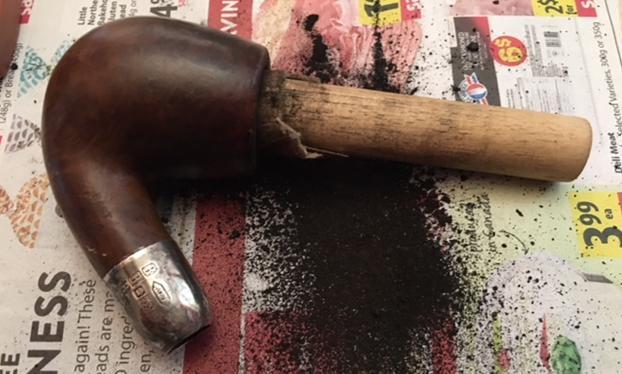
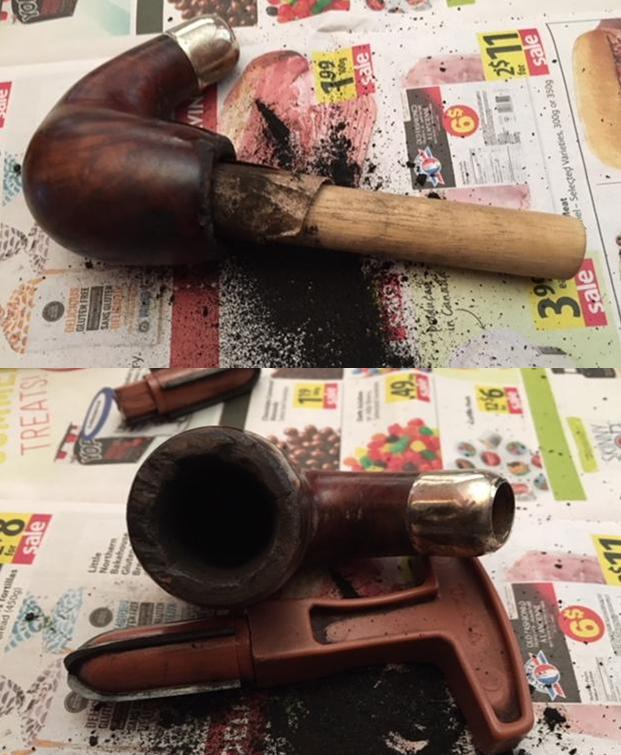
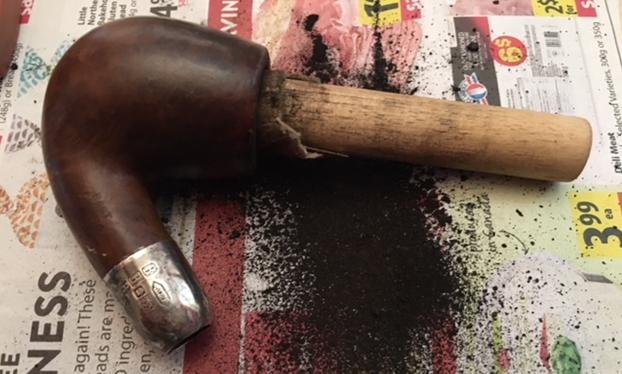
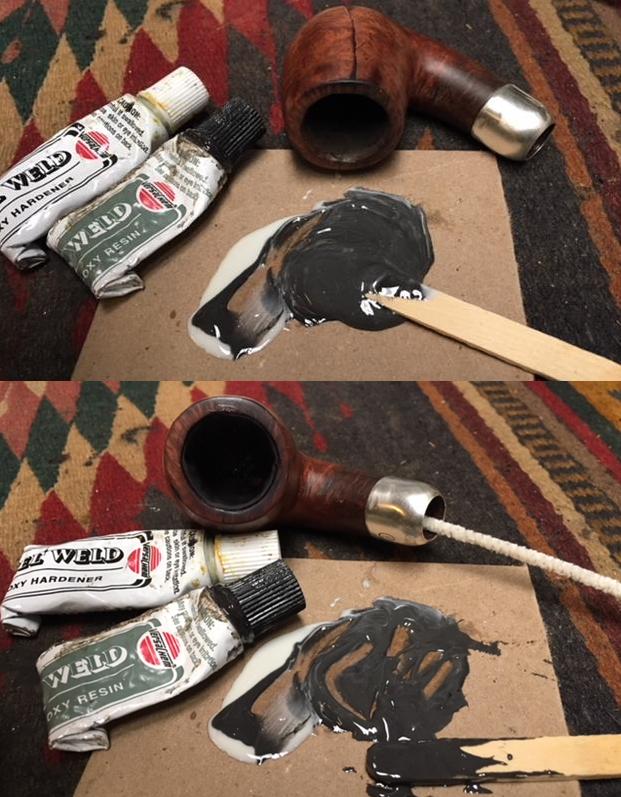
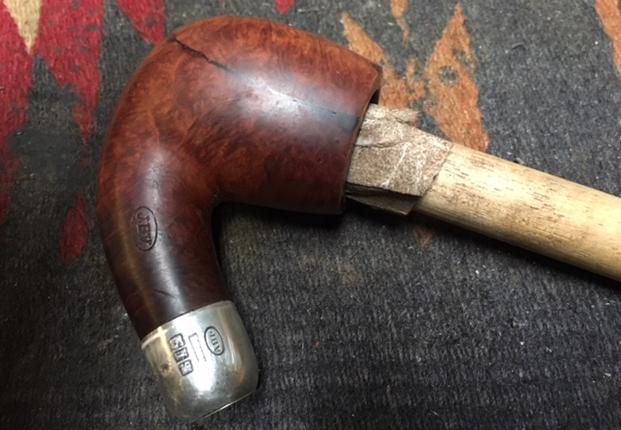
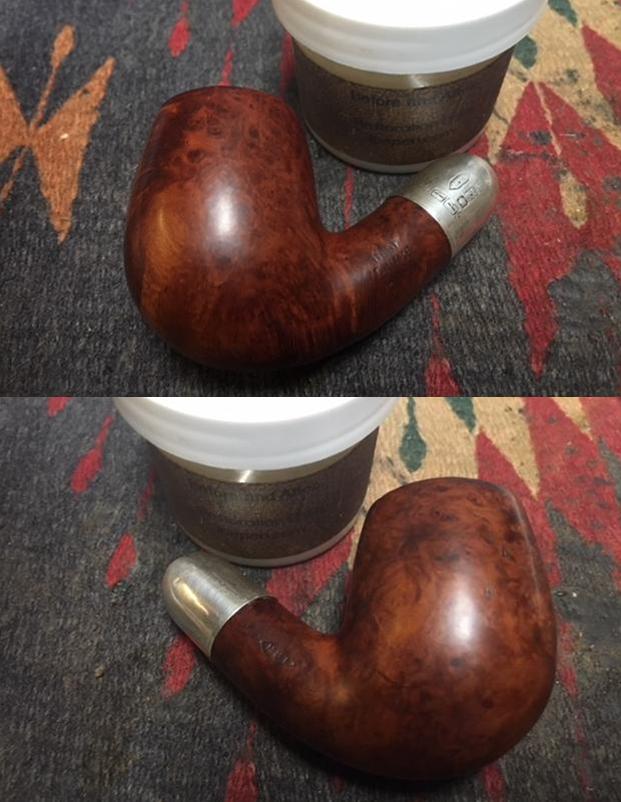
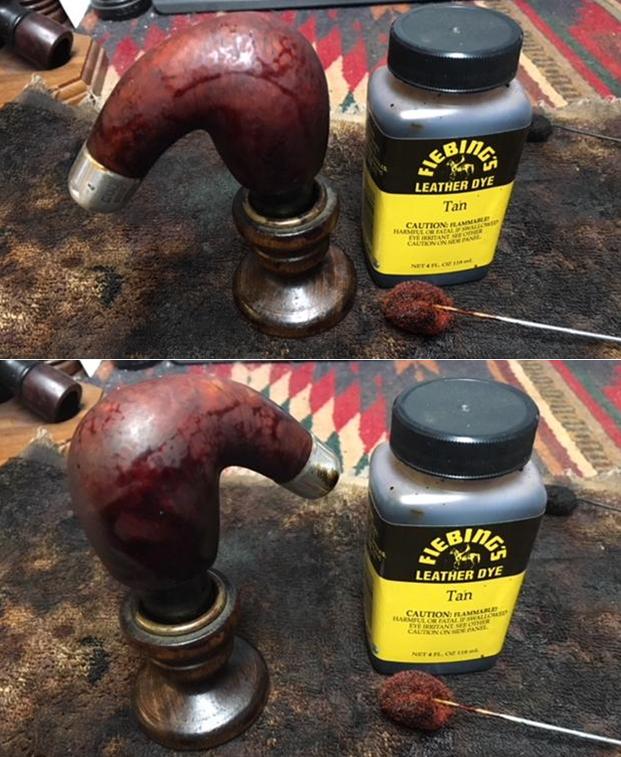
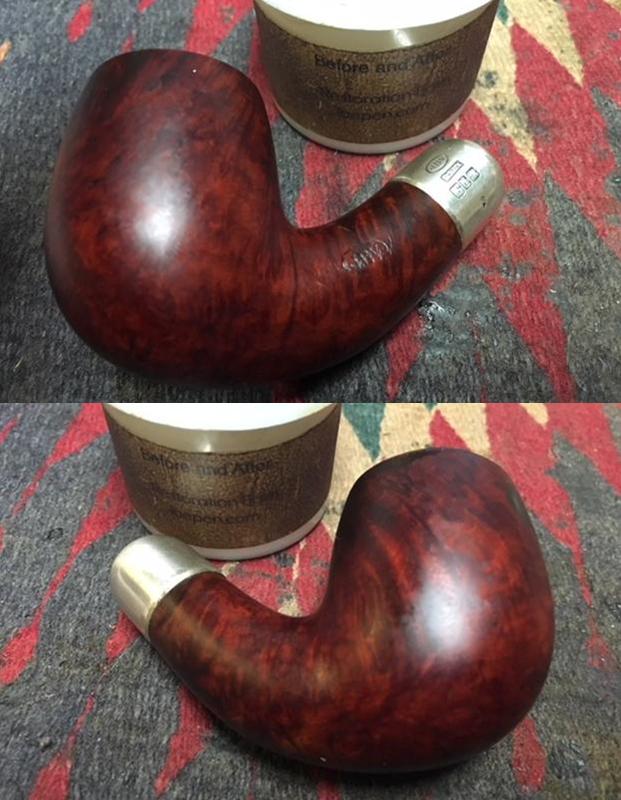
I turned to repair the bowl. I decided to pin the two halves together and then fill it and line the bowl with JB Weld. It would be a process. I drilled 8 small pin holes in the front half of the bowl and put stainless pins in the holes. I matched the two halves together and marked the holes on the other side of the bowl. I drilled matching holes. Once I had the holes aligned I painted each half with gel super glue and pressed the halves together and held them in place until the glue set. I filled in the cracks around the sides and bottom of the bowl with briar dust and super glue. I used a dental spatula to apply the patch all around the bowl. I pressed the mixture into the crevices that remained in the sides and bottom.When the repair hardened I sanded it with 180 grit sandpaper to blend it into the surface of the bowl. I also repaired the chips out of the edges of the bowl with super glue and briar dust. I sanded the bowl with 220 grit sandpaper and smoothed out the repaired areas and sanded the rest of the bowl at the same time. I carefully avoided the stamping on the shank so as not to damage that area. I topped the bowl to remove the damage to the rim top. I had hand sanded it with sandpaper to start the process and filled in the damaged areas with super glue and briar dust. Now it was time to top it. Once I had it topped I wiped the bowl down with alcohol to remove the dust and the remainder of the finish on the shank and bowl. I cleaned out the inside of the mortise and shank as well as the airway into the bowl with alcohol, pipe cleaners and cotton swabs. The airway was clogged so I pushed a pipe cleaner through into the bowl. The mortise was like a Peterson’s sump and it was filthy. It took a lot of work to clean it out.I sanded the exterior of the bowl with a medium and a fine grit sanding sponge. At this point I paused in sanding the exterior and turned my attention to repairing the inside of the bowl. I mixed a batch of JB Weld and put a pipe cleaner in the airway into the bowl to keep the airway from being covered with the mixture. I applied the mix to the inside of the bowl with a popsicle stick. I pressed it into the cracks and build up the damaged areas to protect it from further damage. With that I called it a night, set the bowl aside to dry and turned out the lights.  In the morning I sanded out the excess JB Weld with 180 grit sandpaper wrapped around a dowel. I wiped the bowl down with a damp paper towel to remove the dust. The photos below show the bowl at this point. I polished the briar with micromesh sanding pads – wet sanding with 1500-2400 grit pads and dry sanding with 3200-12000 grit pads. I wiped it down with a damp cloth after each sanding pad to remove the dust. I stained the bowl with a Tan aniline stain. I had found that the stain was probably mislabeled as it had a definite red cast to it. I applied it with the dauber and flamed it with a lighter to set the stain in the finish.Once the stain cured I rubbed the bowl down with Before & After Restoration Balm. It cleans, enlivens and protects the briar. In this case I also found that it blended the stain well on the surface of the briar. I polished the silver with a jeweler’s cloth to polish and remove the tarnish. I reapplied the gold to the stamping on the shank using Rub’n Buff Antique Gold. I applied it in the stamping using the tip of a sanding stick. I let the stamping sit for a few minutes then buffed off the excess product.I set the bowl aside and turned my attention to making a stem for this pipe. Remember I mentioned that the second stem in the case was for the M&T pipe and was too small in diameter for the shank of the second JBV pipe. I found a Bakelite stem in my box of stems that only needed to be shaped to fit the shank of the pipe. I tapered the end of the stem with a Dremel and sanding drum to match the taper of the other stem. I sanded it with 180 grit sandpaper to smooth out the Dremel marks and further taper it.I sanded out the tooth chatter and reshaped the edges of the button with 220 grit sandpaper. I also smoothed out the flow of the stem.I polished the stem with micromesh sanding pads – wet sanding with 1500-2400 grit pads and dry sanding with 3200-12000 grit pads. I wiped the stem down after each pad with Obsidian Oil to wipe away the sanding dust and bring some life to the Bakelite. With the stem and bowl done it the first installment of this blog is complete. It is time to reconnect things and take some final photos. I buffed the bowl and stem with Blue Diamond on the buffing wheel. I gave the entire pipe multiple coats of carnauba wax to protect. I buffed it with a clean buffing pad to raise the shine. I hand buffed it with a microfibre cloth to deepen the shine. This frustrating old pipe that split in half had been brought back to functional life and it does not look to bad to my eye. This is a long one. For some of you I am sure you are wondering what is wrong with me to take time to fix this one. To you I say it was worth the lessons that I learned and it is still a smokable pipe. Thanks for reading.
Restoring a Wally Frank Era Custombilt Sitter #633


Blog by Paresh Deshpande

After having worked on my grandfather’s old 1938-1946 era Custom-Bilt large billiard pipe (https://rebornpipes.com/2018/06/02/restoring-my-grandfathers-custom-bilt-pipe/), I was keen to work on a second Custombilt in the collection. This particular pipe was a sitter with ¾ bend to the stem. It has a very interesting shape. Being at the bottom of the learning curve on identification of pipe shapes and restoration, any help in accurate description of the shape of this pipe would be highly appreciated!!!!

The pipe has thin (as compared to the thick rustication on the 1938-46 Custom-Bilt that I had previously worked on) wavy and haphazard rustication starting from the bottom of the bowl and extending upwards to the rim. These wavy, haphazard upward sweeping rustications give the impressions of flickering flames of fire. These flaming rustications at the back of the bowl reach nearly the outer edge of the rim from either side of the bowl and progressively lower down towards the front of the bowl.  The shank has four prominent rustications extending from the bowl towards the end of the shank forming four distinct plain panels, one each on the top, bottom, left and right side of the shank. The left and right panels house the stampings on the pipe while the top and bottom panels are blank highlighting the beautiful cross grains.

Under all the dust, dirt, oils, tars and gunk of all the years, stamping on the pipe can be read as   “Custombilt” in cursive hand over “ORIGINAL” in block letters on the left side panel of the shank. The letter ‘C’ meets the ‘U’ nearly half way up from the bottom of the ‘U’. The right side panel of the shank bears the stamp # “633”. The stem is bereft of any stamping. While restoring the first Custom-Bilt from my grandfather’s collection, I had visited Pipedia for collecting information and dating of Custombilt pipes (https://pipedia.org/wiki/Custom-Bilt). There is an interesting review given by Richard Esserman  on a book written by   William E. Unger, Jr., PhD, which deals with the study of Custom-Bilt pipes. I have reproduced some interesting excerpts from the webpage:
“The book opens up with an intriguing statement that unfortunately is never fully followed up: Before beginning this history, I need to emphasize an important fact and to ask the reader to keep it firmly. Spelling-Custom-Bilt, Custombilt, and other variations-is extremely important to the various aspects of the following discussions. It was not, however, important to many people in the company’s early days.

Perhaps the reason for this is that briar pipes were simply viewed solely as smoking instruments-even as a “longer term” disposable item (perhaps like a good pair of shoes). I would suggest that Tracy Mincer would be shocked that these pipes are being collected today.

Tracy Mincer started the original Custom-Bilt pipes it appears in 1934. Bill meticulously details the start of the Company, how it was financed, the changes in the original ownership, how the company distributed its product, the manufacturing process, certain patented items, and other interesting stuff.

Mentioned briefly in this chapter was the fact that Custom-Bilt was producing big, carved pipes using Algerian briar for production up to WW II. One important employee, Hetzer Hartsock, stated:

I can tell you something about that rough texture that Custom-Bilt had. One reason rough textured was used was not only for looks but it could hide flaws in the briar. [The process gave] A very uncontrolled cut. Then he [Tracy] would buff it out. [page 25]

In 1946, the name was changed to Custombilt after Mincer began an association with Eugene J. Rich, Inc. There were some big changes in advertising and distribution. The slogan “AS INDIVIDUAL AS A THUMBPRINT” began at this time as well.

In the early 1950’s, Tracy Mincer developed severe financial problems that caused him to stop making the Custombilt, and he lost the name. In 1953, Leonard Rodgers bought the company and emphasized tobacco pouches and butane lighters. (However, it appears Mincer was working on his new pipe, the Doodler.) In 1968, Rodgers sold the Company to Consolidated Cigars.

In the early 1970s, Wally Frank Co. bought the Custombilt trademark and began to produce their version of the pipe in 1974 or 1975.

Hollco Rohr owned the Weber pipe factory, located in New Jersey, and produced the Custombilt pipes there. In 1987, the pipes were made out of the Butz-Choquin factory (France) and then Mexico until the late 1990s. Currently, the Custombilt name is owned by Tobacalera of Spain.

The Pipes

Most Custom-Bilt pipes that you see at a pipe show have somewhat big, chunky bowls with rough carving or gouges. It is very rare to see a completely smooth piece. In today’s market, the pipes are still considered to be on the large side but are not true giants. It should be noted that in the early days when the Custom-Bilt pipes were first being produced, these bowl sizes were considered very large and massive. The size of the average pipe was a group 3 or 4 sized Dunhill.

The first thing that Bill addresses in his chapter on pipes is the quality of the bowls in the early years. Rick Hacker, in his Rare Pipes book, suggests that Mincer bought blemished bowls from other companies and used the wood-working router to get rid of the blemishes. According to an important employee, Hetzer Hartsock, “Tracy used a very choice Algerian briar, and they were bigger blocks than what the other companies were using.”

William E. Unger, Jr., Ph.D. (“Bill”) has studied the stampings on a large number of Custombilt pipes and based on this extensive study conclusively dates Custombilt pipes. There is a picture of a stamp which resembles the stamping seen on my pipe, and is reproduced from Pipedia in the picture below.From the above details gleaned from Pipedia and the above stamp, it can be safely inferred that this pipe dates to the 1970s era. This also coincided roughly with the time when my grandfather quit smoking and I was waiting in the wings to make my debut into this wide and beautiful world in a few years time!!!!!! From the look on the pipe, it appears that my grandfather never believed in cleaning his pipes and believed in just keep using the pipe and once it fouled up, simply keep it aside and buy new one!! Thus, the reason for the large collection of pipes that I have inherited from him.

I had loved the first Custom-Bilt that I had worked on for its size, feel in the hand, its rustic looks and wide rustications and I love this Custombilt for its size, shape, the heft and the gorgeous beautiful flaming rustications!!! Well, have I fallen in love with Custombilts???? Maybe!!!!!!

INITIAL VISUAL INSPECTION:
Having admired the beautiful rustication, the shape/ size and safe in the knowledge that I will get to smoke it in the years to come; I proceeded to carry out a detailed examination of the condition of the pipe and the work that will be required during the process of restoration. Any follower of Mr. Steve’s blog will recollect the 10 steps elucidated by him for beginners in pipe restoration and I sincerely follow it. It helps a person to assess the condition of the pipe, what are the issues that needs to be addressed, what processes will be involved and while appreciating these facts, formulate a broad action plan for the entire restoration.

The bowl has a relatively thin layer of cake (…which subsequently proved incorrect!!!) which will have to be reamed out. The condition of the insides of the bowl needs to be appreciated thereafter. The pipe was used to smoke an aromatic tobacco since the smell was not offensive, but rather somewhat sweet. I believe that once the bowl is reamed to its bare briar, the smell will be taken care of!!As seen in the above picture, the outer edge of the rim is perfectly rounded with no damage whatsoever. However, there appears to be a small chip to the inner edge of the rim on the left side in the 9 ‘O’ clock direction. The exact extent of the damage or otherwise, can be appreciated only after the bowl has been reamed. It could be addressed/ minimized, if need be, by creating a slight bevel on the inner edge.

The airflow is restricted and required considerable effort to blow through the pipe. The airway in either the stem or shank could be blocked or the mortise could be clogged. Blowing separately through both, stem as well as the shank, I realized that both are blocked/ clogged.The draught hole is right at the bottom of the bowl and there is no reservoir/ sump as in the Pete system pipes. A pipe cleaner could not pass through the draught hole as expected. This needs to be addressed.

The bowl and shank are covered in dust, dirt, oils, tars and grime. The stamping, though readable, is covered in the tars, oils and grime.The rustications on the bowl and shank have turned black due to accumulation of dirt, oils and tars of more than 48 years of its existence. The rim, however, is clean and free of any overflowing lava.The stem is free of any serious damage, tooth chatter or bite marks. The oxidation was light and just a firm rub with a moist Mr. Magic clean sponge, removed a great deal of oxidation from the stem. Overall, this pipe and stem was not very heavily abused.THE PROCESS
This time around Abha, my wife, was not around to help me with the bowl and this, I definitely missed!!! Using a Kleen Reem pipe tool, I completely removed the cake from the bowl. The quantity of carbon cake that was removed from the bowl belied my initial appreciation about thin layer of cake. The bowl now looks huge!!!Another observation I had was that the cake was very dry and tightly packed. Using an improvised and fabricated knife, I scraped all the remains of the carbon from the stummel down to its briar and finished with sanding the interiors of the stummel using a 220 grit sand paper. I wiped the interiors of the stummel with cotton swabs dipped in Isopropyl alcohol (99.9%). The interiors are now looking clean, smooth, solid and fresh.Once the cake was completely removed, the small chip on the left of the inner edge of the rim in 9 ‘O’ clock direction, though visible, was not alarmingly large or prominent. The rim top slopes inwards and a bevel would not really look good. I was not sure how much sanding would be adequate and also since it does not look bad, I decided to lightly sand it using micromesh pads, wet sanding using 1500 to 3200 grit pads and dry sanding it with 3400-12000 pads. Any advice or suggestions pertaining to the issue of this chip is most welcome and will definitely teach me a thing or two.

The next issue that required to be addressed was that of the restricted airflow!!! I started with the cleaning of the interiors of the shank and what a mess it was! Using hard bristled pipe cleaners, shank brush and alcohol, I cleaned out the mortise. With a dental spatula, I scraped out most of the gunk and tars which had moistened due to alcohol. I used the drill tool in the Kleen Reem pipe tool with a pipe cleaner embedded in the slot in the head of the drill tool, dipped in alcohol to clean the airway in the shank and also the draught hole.With the help of q-tips and pipe cleaners dipped in Isopropyl alcohol, I cleaned the internals of the shank and scrubbed the inner walls of the mortise to remove the last remnants of the oils, tars and gunk. At this stage, the airway in the shank was clean, the draught hole was clean and opened out and the mortise was free of all the accumulated tars and oils and gunk of the past!!

With the internals of the stummel and shank cleaned and freshened up, I turned my attention to the exterior of the bowl. Using Murphy’s oil soap and a toothbrush, I cleaned the exterior of the bowl while paying more attention to the cleaning of the flaming rustications, which I had so come to love! I gave a very deliberate scrub to the bowl and into the rustications to remove all the dust, dirt and grime that accumulated over the years. I purposefully avoided brass brush/ steel wool while cleaning so as not to damage the thin horizontal rustications within the flaming vertical rustications. Once the cleaning with the oil soap was done, I rinsed it under running tap water and wiped it dry with a soft cotton cloth. I took care that the water does not enter into the chamber and the shank. The bowl now has a nice, beautiful, clean and robust look to it. I set the bowl aside to dry out and turned my attention to the stem.

Thankfully, this stem does not have any deep tooth/ bite marks or tooth chatter nor does it show any deep and stubborn oxidation. The wet Mr. Magic Cleaner had almost completely removed the oxidation. Using a 220 grit sand paper, I gently removed the minor tooth chatter that was visible. I folded a fresh piece of the grit paper into a sharp edge and sanded the button to give it shape. I wiped the stem down with a moist cloth to remove the sanding dust and applied a thin coat of Extra Virgin Olive oil and rubbed it into vulcanite with my fingers. I let it rest for a few minutes and wiped it off with a soft cloth.Once I was satisfied that the excess oil has been removed, I went through with the complete set of micromesh pads, wet sanding with 1500 to 3200 grit pads and dry sanding with 3400 through to 12000 grit pads. I rubbed extra virgin olive oil into the stem after sanding by each micromesh pad. In my exuberance to finish the pipe, I completely missed out on taking pictures at this stage. However, in the subsequent pictures of the completed pipe, you shall be able to appreciate the shining stem!!!!

I cleaned the internals of the stem using hard bristled pipe cleaners and alcohol. After considerable attempts at cleaning, the pipe cleaners finally came out of the other end. The air now passed through the stem freely. I further cleaned the internals of the stem till the pipe cleaners came out clean through the other end. Thereafter, I rubbed Extra Virgin Olive oil deeply into the stem and set it aside to be absorbed by the vulcanite.

Turning my attention the bowl the next morning, I liked the clean, fresh look of the bowl. Once again I gave it a good clean up with a dry soft cloth to remove any dust/dirt that might have settled on the bowl overnight. Thereafter, I rubbed a small quantity of “ Before and After Restoration Balm” into the bowl ensuring that it reaches the rustication also. I am truly amazed at the spread of this balm!  Just a small quantity quickly spreads and is sufficient to coat the entire bowl when rubbed with the fingers. The product was further rubbed into the rustication when buffed, using a horsehair shoe brush. I let it rest for a few minutes to let the balm work its magic on the briar. The transformation is amazing!! Once this was done, it was back to using muscle power to enhance the shine and beauty of the rustication by prolonged rubbing with a soft cloth followed by a microfiber cloth. These rustications give an impression of shimmering flames leaping upwards!!! I was very pleased with my efforts……I know it is akin to blowing my own trumpet, but I do believe that if the notes are correct and melodious, please blow it. The finished bowl is shown below. Finally when I fixed the stem into the shank, I realized with a cringe that due to the cleaning of the mortise, the fit was not snug, it was way too loose! I had read somewhere that holding the tenon to a Bic lighter flame, increases the girth of the tenon which in turn ensures a snug fit into the mortise. Sounds easy enough but doing it for the first time and that too with a pipe you have come to love and admire….. is not easy. However, I took the plunge knowing very well that even in the case I mess it up, Mr. Steve of rebornpipes would bail me out. I have realized that one needs to have that kind of back up so that the journey is smooth, insightful and free from fears of failure, and that in essence is what Mr. Steve is to me as my Guru. Thank you Sir once again!!

Well, to cut the long story short, I heated the tenon over the flame of a Bic lighter continuously turning it around. I stopped when the tenon felt slightly soft and pliable to the touch and set it aside to cool down with a pipe cleaner inside, praying for it to set perfectly into the mortise and not break/ crack. After the tenon had completely cooled down, I again attached the stem to the shank and, what a relief, the fit was nice and snug with just the right kind of noises!!! The finished pipe is shown below. This project was fun filled and a great learning experience. Thank you for sharing your valuable time with me while reading this post. And lest I forget, thank you Mr. Steve for providing me with invaluable guidance and a canvas for essaying my journeys.


A Humpty-Dumpty Restoration/Reclamation of a piece of Kay Family History


Blog by Steve Laug

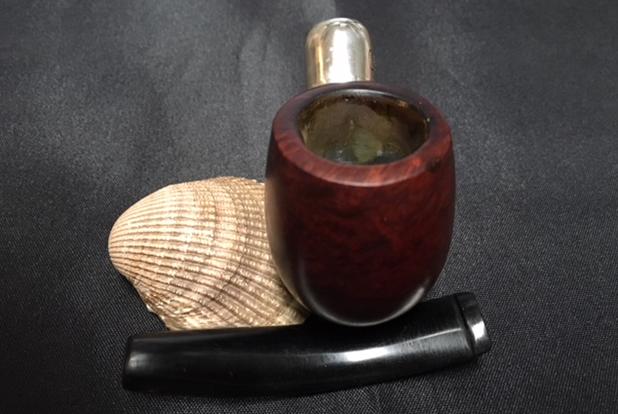
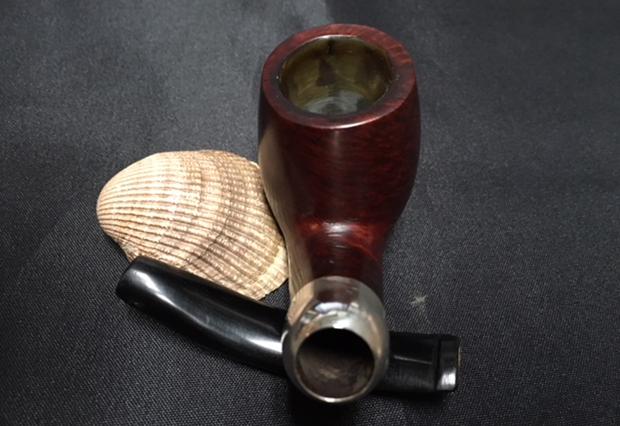
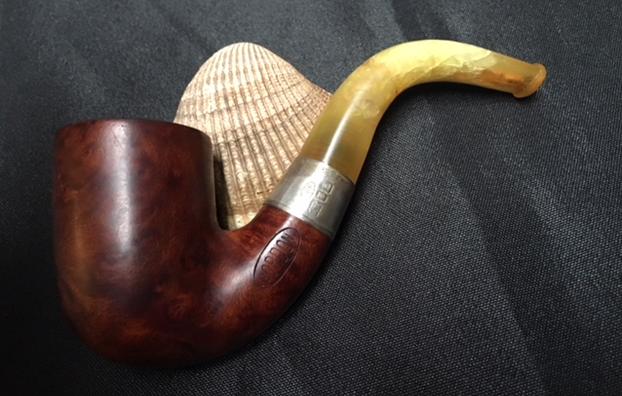
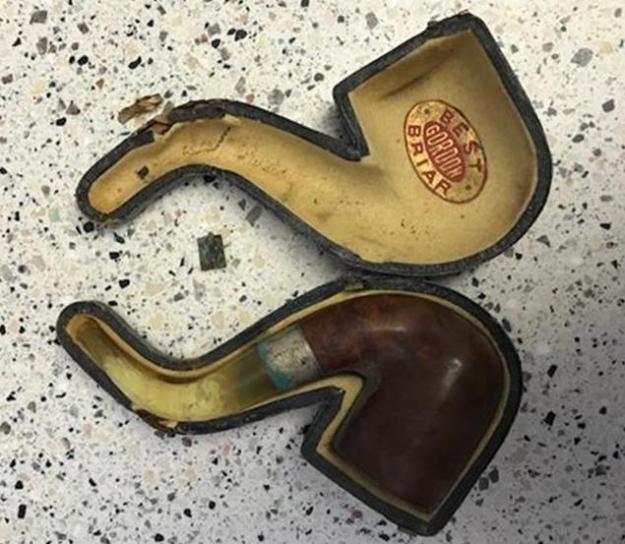
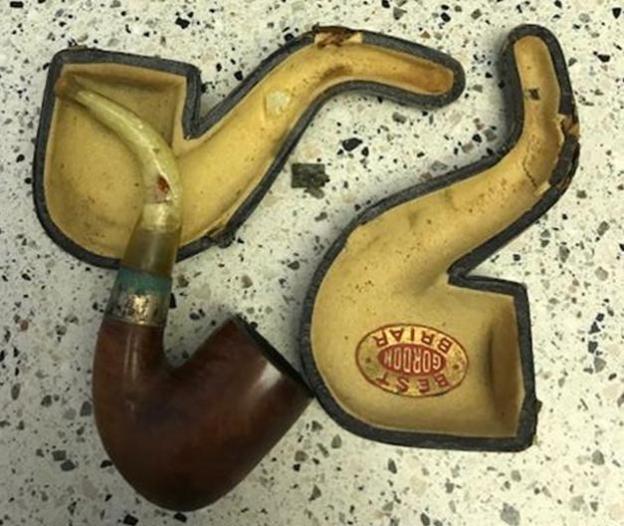
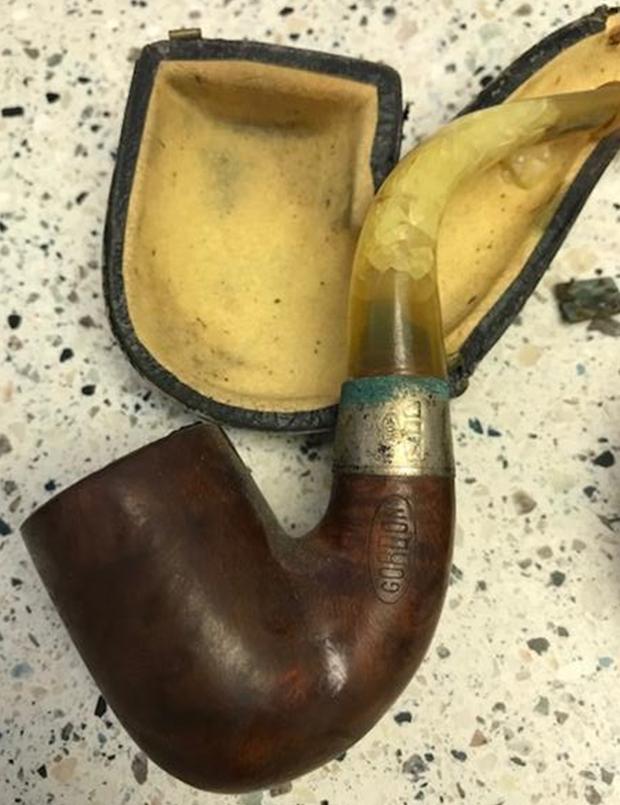
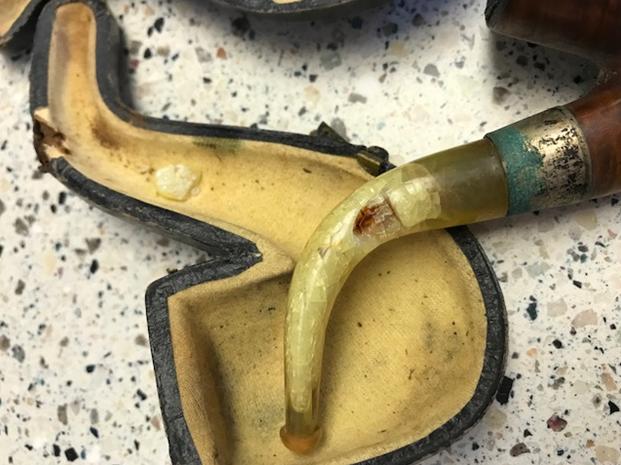
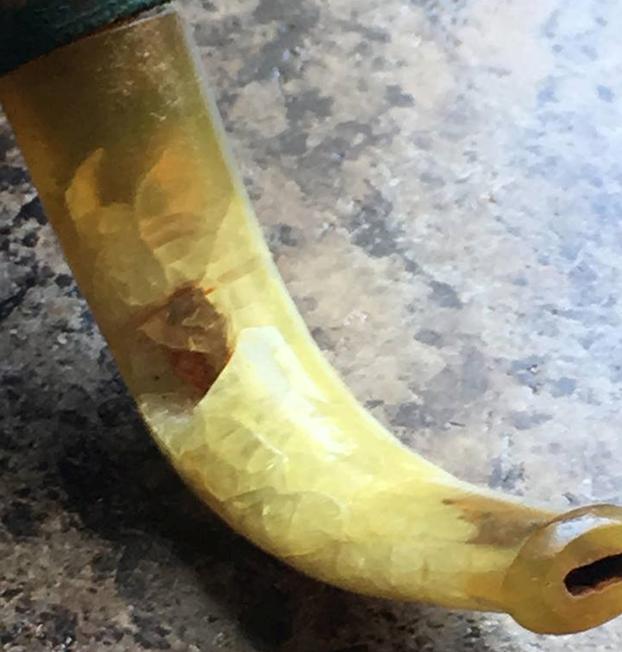
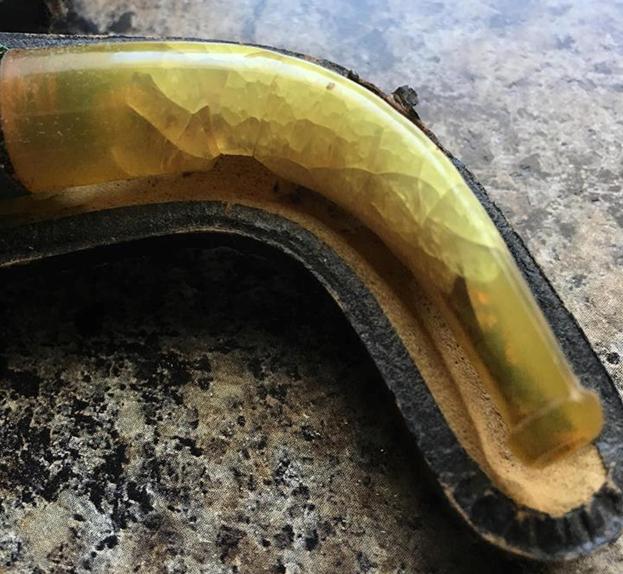
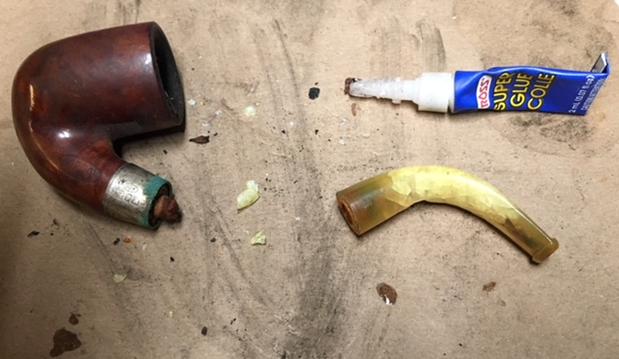
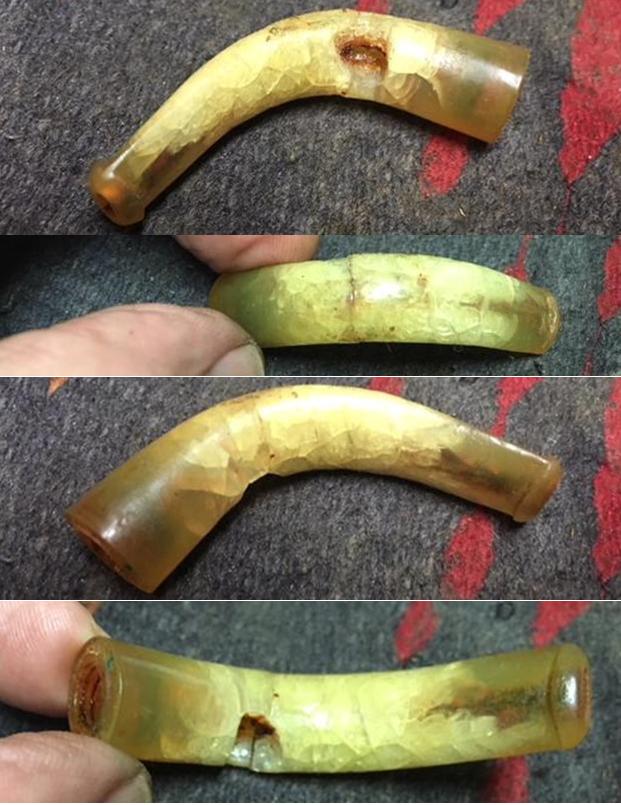
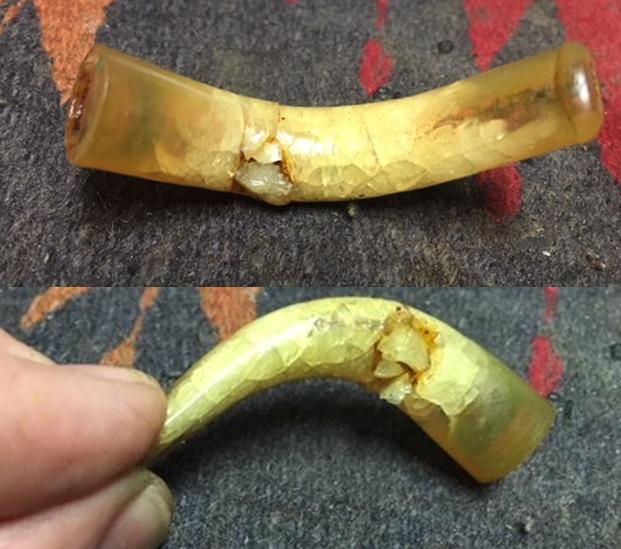
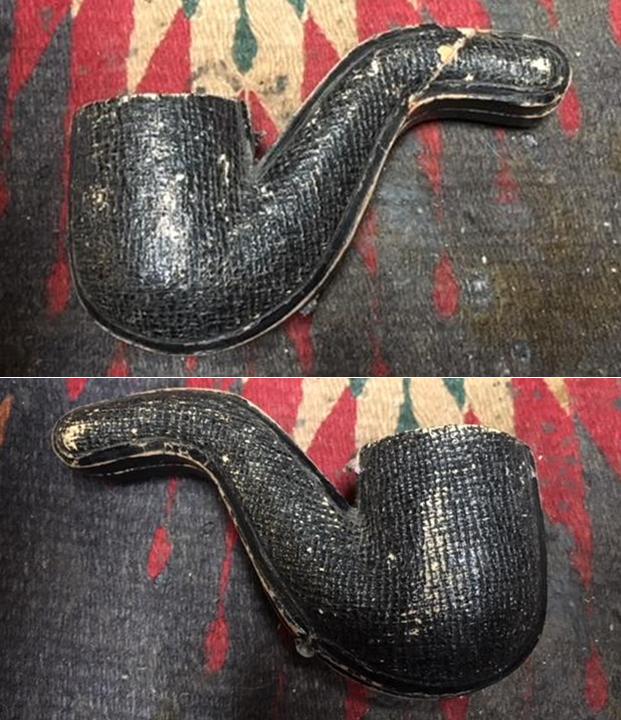
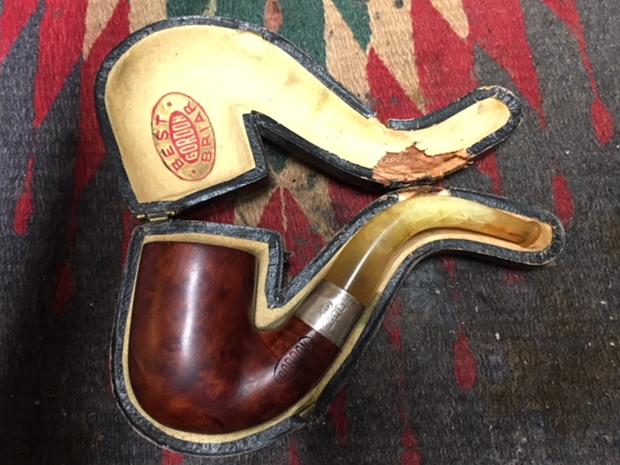
Not long ago I was in communication with Alice regarding a pipe that had belonged to her Grandfather, William Kay. She had been keeping it in a drawer for many years and she took it out to pass it on to her nephew. When she opened the case she said that the amber stem was crumbling to pieces and the case itself was also crumbling. She said that it had been kept dry and safe in a dresser drawer for years so she was sadly surprised by the condition of the pipe. It was a piece of her family’s history but it was in sad condition. She really did not know what to do with it. She wrote to see if I would even be interested in it. She wanted to pass it on and thought I might want it. When I heard about it I wanted to see it before I accepted the challenge to work on it and assess whether I could stabilize the amber and resurrect the old pipe. I was not sure but I wanted to see it. Alice graciously took some photos of the pipe and emailed them to so that I could have a look at what she saw as she looked at it. The photos below tell the story. From what I saw in her photos I was hooked. I could see the “crystallization” of the stem and the chunks of amber in the broken case. It looked salvageable from the photos. Besides that, I wanted to see what I could do with the pipe. I loved shape of the bowl and the curve of the stem. The band was green which made me wonder what was happening to make it that way. The pipe had definitely seen a lot moisture along the way. To me it was certainly worth a try to restore it and the history of the pipe alone made me want to work on it. I wrote Alice back and told her I was interested. After several emails went back and forth between, the pipe was on its way to my brother Jeff’s home in the US as it is definitely easier to ship things within the states that to ship them to Canada. I would have to wait for a bit until I would see it in person.
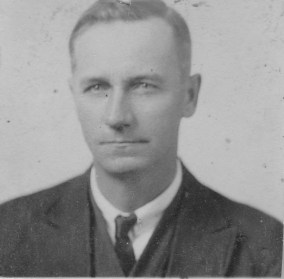
It did not take too long for the package to arrive at my brother’s house. When he opened the box it looked much the same as Alice had described it so nothing more happened in transit. My brother shook his head when he saw it and I think questioned my sanity yet again. LOL! We shall see if I have any semblance of sanity left once I have it in hand and see what I can do. I figure at worst I will need to craft a new stem for it and at best I may be able to make the amber one at least functional and stop the breakdown of the amber. I asked Jeff to take some photos of the pipe so I could see what he saw. He sent me the following photos and they pretty much tell the story of the pipe’s condition.Two of my daughters visited their Grandad in the States for his birthday at the end of June and brought the pipe in a baggie back to Canada with them on their return. I wrote and asked Alice to send me a photo of her grandfather and a couple of paragraphs about him to give me a sense of background on this pipe. She did a great job capturing his personality and a bit of the unique character that went with it. It helped me see a bit of the man behind this Gordon pipe and gave me even more reason to see it come back to life. Here is what she wrote about her Grandfather, William Kay.

William Ewart Kay August 21, 1880 – June 6, 1938.  His US Naturalization papers list his race as Scotch. (Not Scottish…Scotch) Born in Ontario, Canada, and ended up in Grassy Lake, Alberta somewhere around 1905.  He married Lucy Evaleen Phipps in 1909 and they had 4 children. He was a rather interesting man and not always a very nice one. About 1917 he relocated the family to Auburn, Washington and came as a railroad strike breaker. No one talked about those years but my father told me that he was known as Scabby Bill Kay until he died.  Railroad towns have no pity. The kids didn’t seem to suffer, at least. 

I have his pocket watch. It is not a very expensive piece.  According to whispered family stories, he often had a lady friend and this watch was a gift from one of them  When he came home sporting a shiny new watch he told my grandmother (not a stupid lady) that when he was walking home a crow flew over his head and dropped the watch right in front of him. Still shaking my head over that tale!  Grandmother outlived him by 26 years, happily. I think she loved every minute of not keeping his house. 

My Dad said he was an amusing man, a good carpenter and became a strike breaker because there was no work in Canada in those years. My dad met him when they were both working on a government fish hatchery project in Auburn. That’s about all I know about the man. He died 10 years before my birth and the family rarely spoke of him. Times have certainly changed. Nothing is a secret any longer. Sadly, being a family elder means I have no one to ask!

Thanks for all this. I hope it makes it in a reasonable number of pieces. I am still amazed that it disintegrated so fast and in so many strange ways. It has been in its case in a dry dresser drawer forever. — Alice

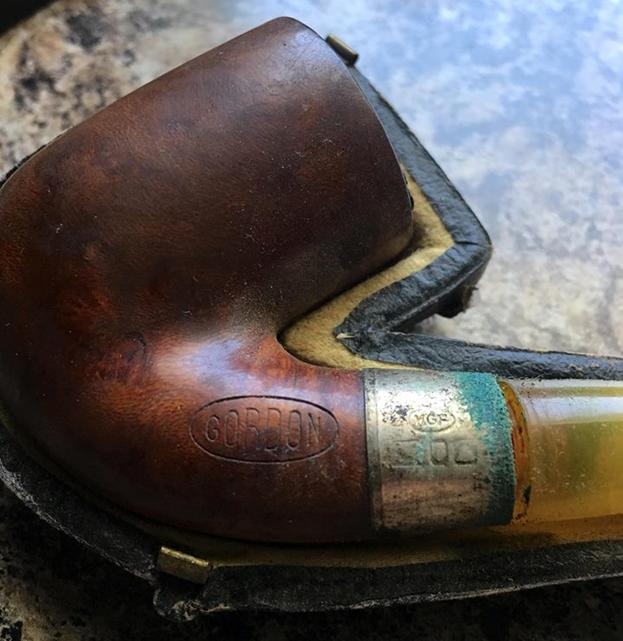
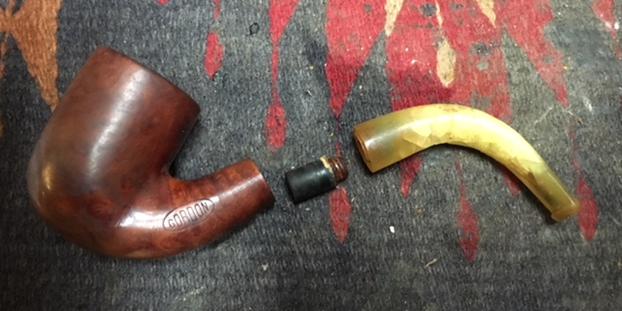
I was unfamiliar with the brand so I did a bit of hunting on the internet for information on the brand. The inside of the case Gordon Best Briar in an oval on the lid. Gordon was also stamped on the left side of the shank in an oval. I did find a Gordon pipe on Pipephil’s site but the stamping and logo were very different so I am not sure it was the same maker. I also looked on Pipedia and found a listing for Gorden Pipes – spelled differently but the information that followed the name stated that it was an early 20th century brand of Samuel Gordon and that the stamping was Gordon in a lozenge on the shank. Here is the link for that information as it does match this pipe (https://pipedia.org/wiki/British_Pipe_Brands_%26_Makers_E_-_H). There was no more information that I could find on the brand anywhere on the net. The time line fits pretty well with the look and make of the pipe I am working on.

Armed with that information and the backstory of William Kay I brought the pipe to my worktable started the rebuilding of the Humpty-Dumpty pipe. It was going to be a real challenge to put all the pieces together again. Rebuilding and stabilizing the stem was only part of the work. I was not sure that would even be possible because it really seemed to be disintegrating as I touched it. I am pretty certain that the stem is made of amber. I would know more once I tried to rebuild it and put the pieces back together. The tenon was loose in the stem and when I touched it I could see that it was not even connected.

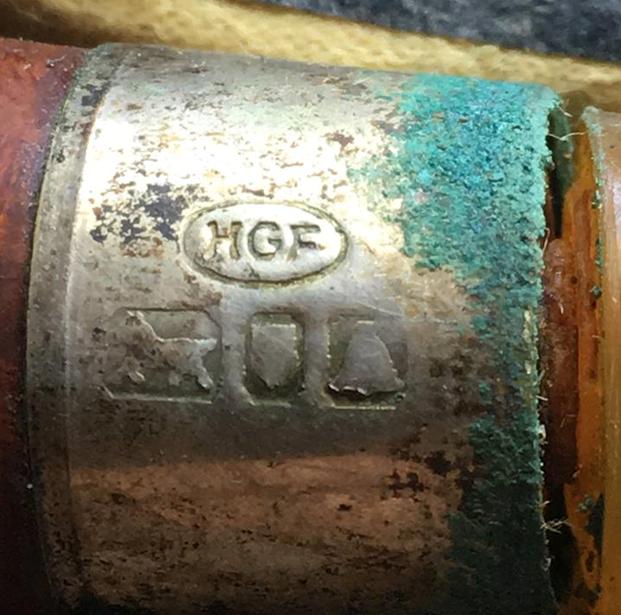
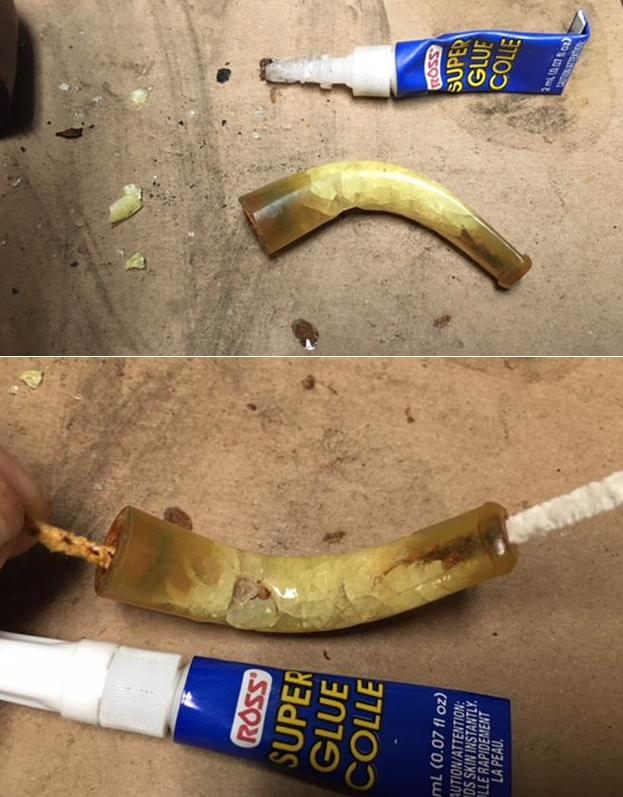
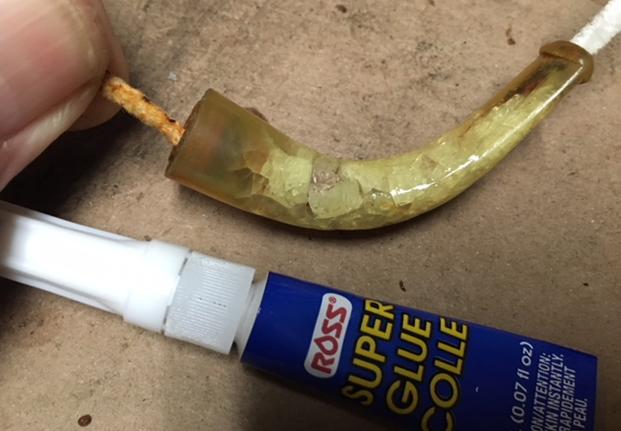
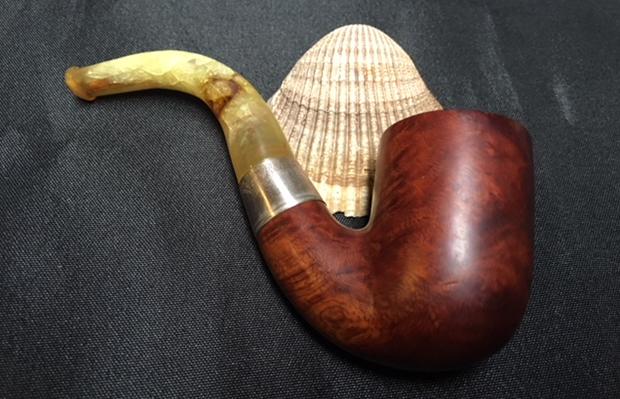
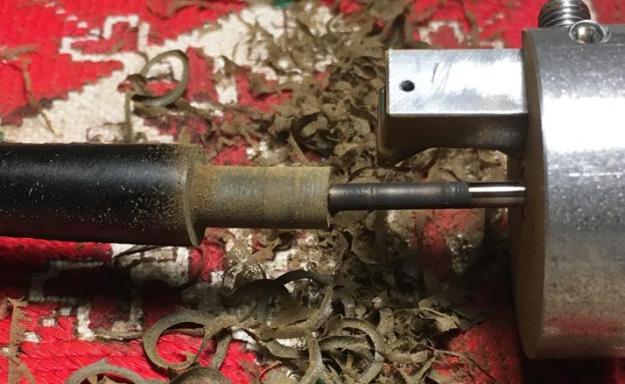
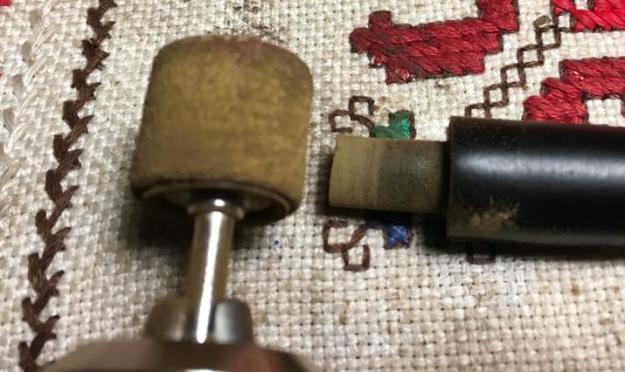
The tenon was metal and it was rusted and deteriorating. It was stuck in the shank of the pipe. I assumed that the end in the shank was also threaded because the stem end was. I thought that it was screwed into a threaded mortise in the shank. The band was silver and the normal black tarnish was present. There was a lot of pitting and a green oxidation that came from the metal tenon and inside the case. The finish on the bowl was ruined and worn out. There was a lot of buildup and grime on the outside of the bowl that would need to be dealt with. The rim top looked like it might be the least damaged part of this old pipe because of the thick lava coat overflowing from the cake in the bowl. The airway from the shank to the bowl was clogged. This was definitely going to be a challenge. I took a photo of the parts of the pipe when I removed the stem from the tenon.I tried to turn the tenon with a pair of pliers to see if I could unscrew it from the shank. It did not take long to realize that I was not dealing with a threaded tenon at all. The tenon turned out to be a push tenon. It looked like a repair person sometime in the life of the pipe had converted it from a threaded shank and tenon to a push tenon. Their methodology was interesting to say the least. They had slipped a hard rubber tube over the worn threads of the original tenon and drilled out the threaded mortise to receive the push tenon – creative but damaging. He had lined the mortise with a paper washer to hold the tenon tight in the shank. Over the years moisture had gotten into the mortise and the paper was disintegrated and stuck on the tenon and in the shank.  The threaded tenon conversion was full of rust as the original metal tenon had deteriorated with the moisture and wicked up the stem and around the band. It was a compound mess that would need creative solutions to be dealt with.The band was loose on the shank. The glue that had held it in place had long since deteriorated. I removed the green tarnished band from the shank and laid out the pieces of the pipe at this point in the process to show what I was dealing with.I decided to try to put all of the pieces of the amber stem together again. I greased a pipe cleaner and put it in the airway to keep the glue from filling in the airway. I glued it together with super glue gel and filled in the hole in the right side with the broken chunks of amber. I filled in the gaps around the chunks with clear super glue. I painted the surface of the rest of the stem with clear super glue to stabilize the stem material. Time would tell if it would hold together or not. I let the glue cure for over four hours and when I picked it up to look it over, it fell apart. The stem broke in half and there was a large hole in the right side of the stem. I had not fixed anything at this point but only made things significantly worse. I shrugged it off and glue the two parts back together again. I left the hole to deal with later. The photos below show the state of the stem after repairing the break. It was not looking very promising. I set the stem aside to cure for three full days – it was pretty depressing.I started to formulate a plan B – a new acrylic stem in case all the efforts on this older stem were for naught. I place an order for a stem with Tim West at J.H. Lowe and it is on its way here. I am hoping it will be a suitable replacement. In the meantime, I took all the pieces of the original stem that I had in the plastic bag that it came in and tried to put Humpty Dumpty back together again. I used an amber super glue gel to build up the edges of the broken part of the stem. I pressed the pieces in place in the hole to build it up and provide a base that I could fill in once the initial glue on the stem cured. I set the stem aside to cure for another couple of days. I did not want to take any chances with breaking it again.I kept looking over at it and wondering if my repairs would work in the long run. I could see that it was rough but I think it may form enough of a base for me to rebuild the stem with amber super glue once it cures. We shall see. I turned my attention to the filthy bowl. I had already removed the silver band from the shank as it was loose anyway. I used a sharp pen knife to scrape away the paper gasket that lined the walls of the shank. It fell apart as the knife cut it. I reamed the bowl with a Savinelli Fitsall Pipe Knife and scraped the rim top and inner bevel with the edge of the knife. I sanded the bowl with a piece of sandpaper wrapped around a dowel. I cleaned out the interior of the mortise, shank and airway to bowl. The airway was plugged and I could not blow any air through it from either the shank end or the bowl. I pushed a straightened paper clip through the airway to open it up again. I used alcohol, cotton swabs and pipe cleaners – smooth and bristle – to clean out the tars, oils and build up that had collected over the years. It was as much a mess on the inside as the outside.I wiped off the exterior of the bowl and shank with acetone on a cotton pad to remove the remnants of the old varnish finish and the grime that had been ground into the briar. At this point the pipe bowl was beginning to look pretty good. There was some nice grain on the bowl. Once I had the surface clean and free of the old finish and the debris of time it was ready for the next step in the process. I worked Before & After Restoration Balm deep into the briar on the smooth finish to clean, enliven and protect it. I wiped it off with a soft cloth. I buffed the bowl with a cotton cloth to polish it. It really began to have a deep shine in the briar. I took some photos of the bowl at this point to mark the progress in the restoration. The grain on the bowl is really beginning to stand out and will only do so more as the pipe is waxed. The stem was still quite a mess. Once the first coats of glue cured I used some thick amber super glue to fill in the larger holes in the right side of the stem and build up around the inserted pieces of the original stem. I needed to fill in some of the open space to stop the airflow through the repair. Once the amber glue had cured I filled in the small areas around the repairs with clear super glue. I set the stem aside and let the glue cure.The original tenon was a mess – it really was a hard rubber tube forced over a threaded metal tenon that was rusting and crumbling as well. The shank had been drilled out to remove the threads in the mortise so once again I am guessing that this was some repair person’s idea of creating a push stem. I had removed it earlier and put it aside. I created a new tenon for the stem. It was a threaded Delrin tenon – in this case the threaded portion on a Jobey system tenon was the perfect size for this stem. I would try fitting it once the glue had cured enough to not damage the stem further.  I reduced the side of the hip at the top of the tenon to match the diameter of the mortise using files and sand paper. I set the tenon aside and called it a night.
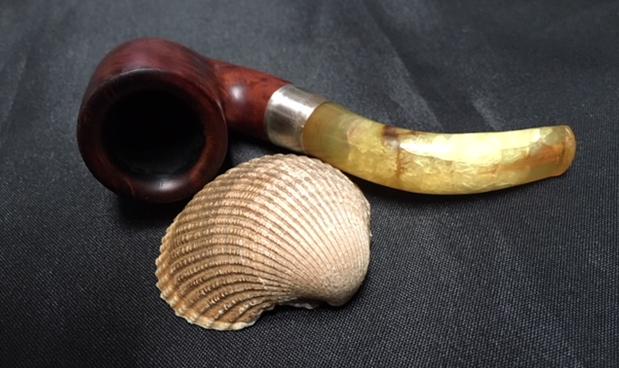
In the morning I checked the stem and found that the glue had hardened on the stem so I sanded the repaired areas with 180 grit sandpaper to smooth out the surface of the repairs and blend them into the rest of the stem. Then I tried to fit the mortise to the stem and found that my measurements were correct and it fit perfectly. I carefully turned it into the stem and took the following photos. The stem was looking pretty decent at this point and the patch seemed to be hard and stable.I decided to be daring at this point and pushed the stem into the mortise of the shank and took some photos of the pipe at this point. Even though there was still a lot of sanding to do on the stem to smooth and polish it, I was making progress and I was excited to see what it looked like. I wanted to send the two photos to Alice so she could see the salvage job on Humpty. At this point the stem material is stabilized and I could see that the stem would be usable. Now I needed to see if I could make it look even better.I smoothed out the final touches on the repair with 220 grit sandpaper to blend the repairs into the surface of the amber. I polished the stem with micromesh sanding pads – wet sanding with 1500-2400 grit pads and dry sanding with 3200-12000 grit pads. I wiped the stem down after each pad with Obsidian Oil to give life back to the amber. I put the stem on the shank and set the pipe aside to work on the broken and damaged case. I glued the parts together with all-purpose white glue. I pressed them together until the glue set enough to let the parts hold when I laid the case down. I polished the stem with a polishing cloth. I buffed the bowl with Blue Diamond on the buffing wheel. I carefully avoided the stamping on the left side of the shank so as not to damage it. I gave the bowl multiple coats of carnauba wax and buffed the pipe with a clean buffing pad to raise the shine. I hand buffed the bowl and stem individually it with a microfiber cloth to deepen the shine. The finished pipe is shown in the photos below. It is great to be able to hold William Kay’s pipe in my hand as a solid and smokeable whole. I can’t wait for Alice to read this blog and see the finished pipe. I look forward to hearing from her. This was a challenging and a fun project to work on. Thanks for taking time to give it a read.

FINDING THE NATURAL BEAUTY OF A KNUTE OF DENMARK FREEHAND


Blog by Robert M. Boughton
Copyright © Reborn Pipes and the Author except as cited
https://www.facebook.com/roadrunnerpipes/

For after all, the best thing one can do
When it is raining, is to let it rain.

— Henry Wadsworth Longfellow, in “The Poet’s Tale: The Birds of Killingworth,” in Tales of a Wayside Inn (1863)

INTRODUCTION
Longfellow’s powerful poem is about man’s intolerant bent for all things natural based on ignorance of the indispensability of even the smallest part in an ecosystem.  It speaks to acceptance and “gentleness, and mercy to the weak, and reverence for Life.”  The work is sad and satirical and, in the end, surprising in its song of survival, but, alas, will never be required reading in any public school.

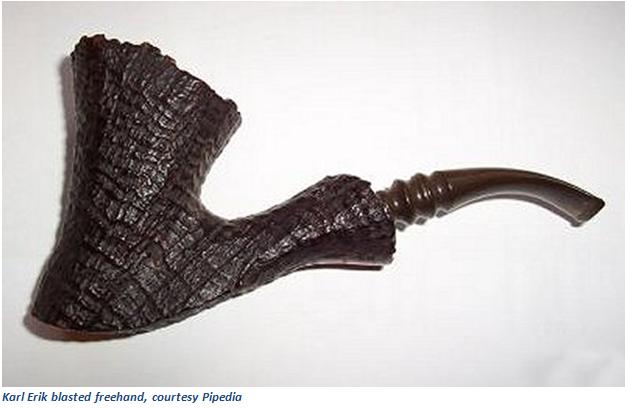
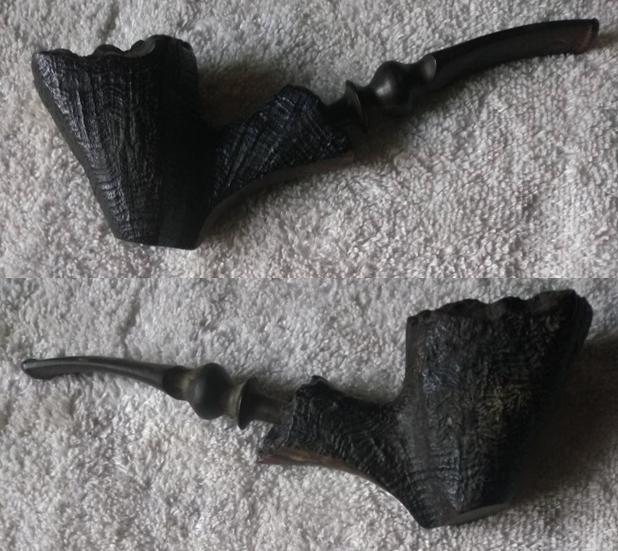
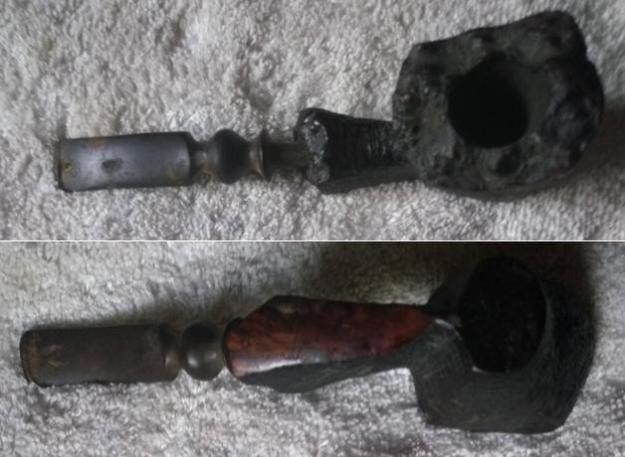
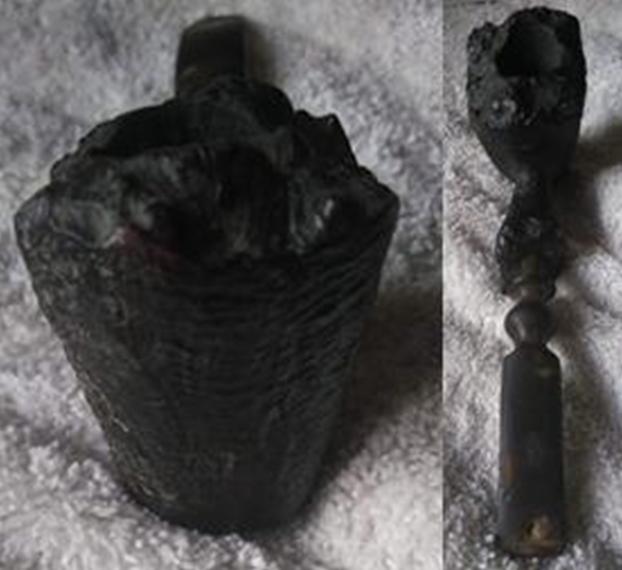
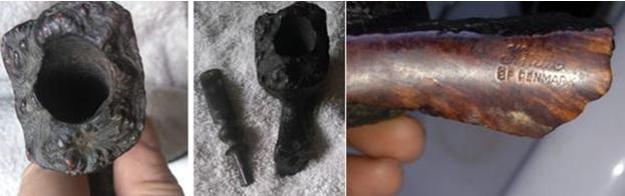
Knute of Denmark is a second of Karl Erik, which Karl Erik Ottendahl (1942-2004) made his main brand.  Ottendahl, an underrated and generous pipe maker who was a low-paid lithographer before he took up pipe carving as a hobby until it became his full-time vocation, understood the average smoker who made far less money than those fortunate enough to afford expensive varieties of the Danish freehand style of which he was an early crafter.  He therefore dedicated his life and work to pipes of great natural beauty at bargain prices.  Here is one that very much resembles the pipe in this blog, suggesting Ottendahl may have had a hand in making this Knute of Denmark.I suspect, or at least like to think, that Ottendahl read Longfellow’s magnificent poem, a couplet of which I quoted above, and if he didn’t, he would have enjoyed it.  And it was raining in the Isotopes City while I restored this pipe.

RESTORATION The stem was savagely damaged, with the top lip all but gone and a small hole below it and the bottom having two gouges.  Such long-term acts of mayhem must have been inflicted by someone with clear and severe anger issues who masticated the mouthpiece the way some people chomp on gum to stop smoking coffin nails.  I gave it an OxiClean bath to start.  At the same time, I stripped whatever dirt and stain (the latter of which I could see no signs) were present with an Everclear soak.  The immediate appearance of dark reddish swirls in the alcohol surprised me. The OxiClean soak, which was complete first, shows in the pic below how filthy the stem was.  Afterward, all I can say is it was clean. Figuring I had at least an hour before the stummel would be stripped, I filed off fine shavings from an old otherwise useless stem and made a nice little pile.  The ironic part of that task was that the stem was once a fancy type similar to the one I was fixing and would have been a perfect replacement had it not been toasted!  Then I added a few drops of black Super Glue, mixed it together with the shavings and quickly and liberally applied it to the stem after dipping a cleaner in petroleum jelly and inserting in the mouthpiece past the hole.  WARNING: I forgot my usual process of lubricating a small sliver of card stock paper also and inserting it inside the stem in front of the cleaner, but it all worked out later – with some extreme difficulty. That done, I had 12-24 hours before it would be dried, way more than enough time to finish the stummel that was ready to come out of the Everclear.  Checking out the progress of the alcohol soak, I was amazed by the almost blood red color of the 190-proof grain alcohol and guessed it was from residual maroon stain.For the first time after an Everclear soak, I wiped the still drying wood with a cotton rag saturated with purified water.  The water took longer to dry, but the result was stunning.  Despite the sandblasting, I believe what I beheld was the finest piece of briar I’ve ever seen.  Its natural beauty shone through the crisp dullness. I reamed the chamber, used a small sharp pocket knife to cut away some excess buildup and sanded with 150-, 220, 320- and 600-grit papers, then retorted the pipe. The following shots show the tremendous improvement of the wood’s potential color and glow.  I used the super fine “0000” steel wool in two of the photos only on the rim and shank opening.  But look at the difference. Late that night, with the stem patch dry, I took out one of my files, a narrow triangle with medium-grit flat sides to remove the thick, uneven mess on the top of the stem that is a necessary by-product of the black Super Glue method of hole-filling.  I was also able to remove most of the deep chasms on the bottom of the stem.  I began the smoothing process with a dual 150- and 160-grit sanding pad and regular, rougher 150-grit paper.The effort to salvage the ruined old stem was worthwhile and a good start on a plan of total rehabilitation for personal use, but this pipe is for sale, and I know the more difficult work of re-building the bottom lip will take longer and not, in the end, be suitable to pass off to a buyer.
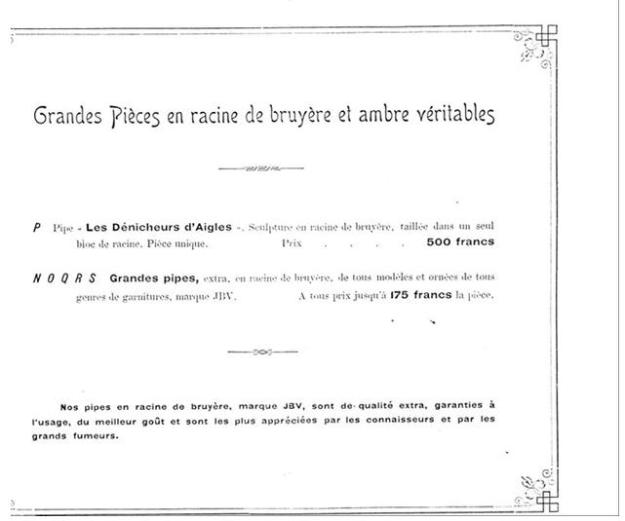
But as it happened, I had two other freehands with good fancy stems with which I could play musical chairs, a Ben Wade by Preben Holm I re-stemmed before and an estate Karl Erik I’m working on now that’s far too huge to support the smaller stem it came with.  For now, I’m enjoying the BW with the damaged Vulcanite stem as the yellow Lucite one fits the Karl Erik.  I liked the dark brown swirled Lucite stem that was on the Karl Erik better, and since the tenon of the BW by PH was too thin, the issue was settled.  I sanded down the elegant brown Lucite fancy stem’s tenon and smoothed it with steel wool before micro meshing it. A thorough buffing on the wheel with red and white rouge on the stem and stummel, and it was done. CONCLUSION
In the spirit of nature, I used no stain restoring this freehand that needed no artificial help to reveal its innate beauty.

SOURCES
http://www.pipephil.eu/logos/en/logo-k3.html
https://pipedia.org/wiki/Karl_Erik
http://www.hwlongfellow.org/poems_poem.php?pid=2047

Refurbishing a Bjarne Hand Made Nosewarmer


Blog by Steve Laug

In the past weeks I finished up some pipes for a guy here in Vancouver and when he came to pick them up he brought some more for me to work on for him. I finished up some of the ones on the worktable so I decided it was time to work on these. The third of them is a Bjarne bent apple nosewarmer with a short stem. It is another really beautiful pipe. The shape, the rich reddish brown finish along with the black acrylic stem with the bj logo all combine to make this a uniquely beautiful pipe.   The bowl had a thin and uneven cake. The upper half of the bowl was more thickly caked than the bottom half. I would need to ream it to even out the cake. There was some slight darkening on the rim top as well as dents and nicks in the top of the rim. The inside of the shank was dirty and needed to be cleaned. The black Lucite stem had tooth marks and chatter on the top and underside of the stem near the button. There was one deep tooth mark on the top edge of the button. The short saddle stem looked good otherwise. I took photos of the bowl and stem to give a clear picture of the condition of the pipe before I started to work on it.I did a quick review of the history of the brand by turning to Pipedia. Here is the link https://pipedia.org/wiki/Bjarne. I quote from part of that article to give a short synopsis of the history of the brand.

With a demanding job it was hard to find time to make pipes in that quantity, and Bjarne had to choose. His dream had always been to have a company of his own, and if he wanted fo fulfill that dream, now was the time to do it. But to leave a promising career, in which he probably would have become a Danish ambassador in some foreign country, was indeed a big step to take. “Many thought I was crazy”, Bjarne says, “and one of them was my wife. But she supported my decision anyway.”

He made that decision in 1973, and became a fulltime pipemaker. But he soon realized that it was impossible for one person to handle all of it–he could not make a lot of pipes, sell them and collect money for them all by himself. So he decided to find some pipemakers to help him. In those days Preben Holm was one of the biggest makers of fancy pipes, and he employed a great number of pipemakers. But not all of them were happy to work for Preben,m so Bjarne recruited a few of those.

During the first years all of Bjarne’s pipes were sold in the USA, but at the end of the 1970s he visited the pipe show in Frandfurt and found that there was a market for his there as well. However, he found that the Germans wanted a completely different style of pipes–pipes in traditional shapes. So if he wanted to be successful there, he had to add a completely new line to his production. “It was not easy, we learned it the hard way,” Bjarne says. But they certainly succeeded, and for a number of years Germany became the top-selling market for Bjarne’s pipes.

The photo below shows pictures of Bjarne Nielsen. The photo is from the Pipedia article and comes from Doug Valitchka as noted below the photo.I then turned to the Pipephil website – http://www.pipephil.eu/logos/en/logo-b5.html  and did a screen capture of the article there on Bjarne pipes. Bjarne Nielsen distributed his own brand of pipes carved by Danish Pipemakers. It is stamped on the underside of the shank with Bjarne over Hand Made in Denmark. There are no other stampings or numbers on the shank. The pipe was obviously made prior to 2008 when Nielsen died.I started my clean up on this pipe by reaming out the bowl and smoothing out the cake on the walls. I reamed it back with a Savinelli Fitsall Pipe Knife. I sanded it smooth and even with a dowel wrapped in 220 grit sandpaper. Once that was finished the walls were smooth and undamaged and the surface ready for a new cake.I worked over the rim top with micromesh sanding pads – wet sanding with 1500-2400 grit pads and dry sanding with 3200-12000 grit pads. I removed the most of the damage to the rim top with the micromesh sanding pads. I removed the area on the rear that had been darkened. I polished the exterior of the bowl with the pads at the same time. I wiped the bowl down after each pad with a damp cloth. I touched up the cleaned up rim top with a Maple stain pen to match the colour of the rest of the bowl. The match was perfect and once the bowl was waxed and polished would be indistinguishable from the rest.I rubbed down the briar with Before & After Restoration Balm. I worked it into the finish with my fingertips and finished working it in with a shoe brush. I worked over the rim top to blend it into the rest of the stain. The balm works to clean, preserve and enliven the briar. I really like the effect of the product on briar so I took some photos of the pipe at this point. I cleaned out the airway in the stem and shank, the mortise and shank interior with pipe cleaners, cotton swabs and alcohol. It did not take as much as I expected to remove all the tars and oils in the shank and mortise. The stem had some debris in the edges of the slot in the stem.I set the bowl aside and turned to address the stem. I sanded the tooth marks and chatter out of the stem surface with some folded 220 grit sandpaper. I polished the stem with micromesh sanding pads to remove the scratches in the acrylic. I wet sanded it with 1500-2400 grit pads and dry sanded it with 3200-12000 grit pads. I wiped the stem down with a damp cloth after each sanding pad. I polished the stem with Before & After Pipe Stem Polish – both Fine and Extra Fine polishes. I wiped it down with a cotton pad and gave it a final coat of Obsidian Oil. I set the stem aside to dry. I put the stem back on the bowl and buffed the pipe with Blue Diamond polish on the buffing wheel. I carefully avoided the stamping on the underside of the shank. I gave both the smooth bowl and the stem multiple coats of carnauba wax and buffed the pipe with a clean buffing pad to raise the shine. I hand buffed it with a microfiber cloth to deepen the shine. The finished pipe is shown in the photos below. I have five more pipes to finish for him – one move from his personal rotation and four of them that are some finds he made while pipe hunting. This is a fun bunch of pipes to work on. I look forward to moving through the rest of them. Thanks for looking.  

Restoring a Gutta-Percha Woman’s Leg Pipe with a Briar Bowl


Blog by Steve Laug

On Friday my wife and I took a drive out to one of our favourite spots near Vancouver to do a bit of walking and hunting. She likes looking for old cookbooks and I of course am always on the prowl for old pipes. We walked about for a while and enjoyed the beautiful day. We stopped by two antique malls and spent some time looking. She found nothing for her collection but I found three old pipes – A Parker Super Briar Bark 345 Bulldog in decent shape, a French Made Algerian Briar diamond shank Billiard and a Gutta-Percha Leg shaped pipe with a briar bowl. It was in the worst condition of the three pipes.The black cast/molded Gutta-Percha base was shaped like a female leg and even had a ballet slipper on the extended foot. The airway came out at the end of the toe. The base was nicked and dull looking with none of the rich glow that I know comes when the material is polished. But by far the worst part of the pipe was that some had dipped the briar bowl in a gold metallic paint rubbed it into the grain and then covered it with multiple layers of Varathane plastic coat. They had even dipped the threads on the nipple that screwed into the base in the plastic coat and painted the inside of the bowl as well. I say that was the worst part because otherwise the pipe was unsmoked. It would have been NOS (New Old Stock) before whoever did this abomination to the pipe. The bowl is normally a rich reddish brown colour in all the variations that I have seen on the internet so the gold and plastic finish would need to go. I took a close up photo of the rim top to show you the way it looked when I got it – I don’t know if some of you like the look – but I don’t. It is like painting an antique wooden piece with crackly gold paint to give it the look of hammered metal. It just does not work for me. I also took some photos of the base to show the condition of the mouthpiece end of the pipe. There were some nicks in the material but no tooth marks or chatter and the orific airway in the end of the toes was undamaged.I took photos of the bowl with it removed from the base to show how it had been painted with streaks to make it look like vertical grain – it was not as the wood was smooth and bits of it peaked through the gaudy gold finish. You can also see the thick plastic coat on the nipple that is threaded into the bowl almost filling in all of the threads. I topped the end of the nipple with 220 grit sandpaper on the topping board to remove the thick plastic coat that was not even smooth on that portion of the bowl. I did the same with the bowl to remove the plastic and metallic gold paint. Those areas definitely looked better to me but the bowl was a long way from looking normal.I tried wiping the bowl down with acetone to break through the plastic coat – no luck. The brown stains on the cotton pad come from the nipple end and the rim top where I had broken through the finish. There was only one way to remove this abominable coat of plastic and that was to sand it until it was gone… not my favourite thing. Think twice before any of you put that stuff on a pipe. It is truly awful and stops the wood from breathing.I sanded the bowl with 180 grit sandpaper and was able to break through the plastic coat and the gold coat. Underneath the bowl was nicked and damaged. The majority of the damaged spots were merely built up plastic coat and sanding them smoothed things out. But some of them were deep gouges in the wood. I sanded, cleaned with alcohol and filled those in with clear super glue and briar dust. When the repairs had cured I sanded them smooth with 180 and 220 grit sandpaper to blend them into the surface of the bowl. I sanded the bowl with a medium and a fine grit sanding sponge to remove the remnants of the repair and the plastic coat. It took a bit of sanding but the finish was finally smooth to touch. I sanded the bowl with micromesh sanding pads – wet sanding with 1500-2400 grit pads to smooth things out more.With the bowl smooth and clean I decided to stain it with the tan aniline stain I have. I am sure that it is mislabeled as it is far too red to be tan. I figured it would work well with this bowl.I wiped the bowl down with alcohol on cotton pads to even the stain coat and make it a bit more transparent. The trouble was that all of the flaws and nicks in the wood showed up then. I gave it a second coat of stain using a Mahogany stain pen to darken the overall surface of the bowl and still leave it transparent enough to see the grain in the wood. I rubbed some Before & After Restoration Balm into the surface of the bowl to enliven, clean and protect the newly stained bowl. I let it sit for a few moments then buffed it off with a cotton cloth. I took photos of the bowl at this point to show how things were developing. I set the bowl aside and worked on the base. I cleaned out the debris of time on the inside of the base with cotton swabs and alcohol. There were not a lot of tars as the pipe was unsmoked. But there was dust from sitting all these years since it was made.I polished the base with micromesh sanding pads – wet sanding with 1500-2400 grit pads and dry sanding with 3200-12000 grit pads. I wiped the base down after each pad with Obsidian Oil and rubbed it into the material. The pictures tell the story as the base begins to develop a shine. I further polished it with Before & After Pipe Polish – both Fine and Extra Fine to remove more of the scratches from the Gutta-Percha base. I rub the polish on with my fingertips and polish it with a cotton pad to raise the shine. I buffed the bowl and the base independently of each other with Blue Diamond on the buffing wheel to remove minute scratches and give the materials a shine. I gave both parts multiple coats of carnauba wax and buffed them with a clean buffing pad to raise the shine. I put the parts back together and hand buffed it with a microfiber cloth to deepen the shine. The photos below show the finished and restored pipe. I personally like the rich brown over the metallic gold on the bowl when I got the pipe. The dimensions of the pipe are petite – the length from thigh to tip of the toe is 5 ½ inches, the height from the knee to the thigh is 2 inches, the outer diameter of the thigh is 1 1/8 inches and the chamber diameter is 1 inch. It is a unique piece of pipe history and joins the rest of the Gutta-Percha pipes in my collection. Thanks for walking through the restoration of this leg pipe with me.

A Tale of Three Churchwardens


Blog by Dal Stanton

The first of the 3 was true born, but of hobbit stature.  He dreamed of walking in the world of men and of wizards – seeing eye to eye but anxious to serve.  The second was bound to the first but he held no claim to royal lineage. He stood proud in the best sense of the word and cherished his Green Land’s heritage and history.  The third of the 3, was free and bound to no man.  He was born into humbler circumstances but found favor in the Maker’s eye and the Maker dubbed him The Wise – a valuable gift to any man.  All 3 strong, bound together in one tale, bring hope to the Daughters of men. 

I am sure that if J.R.R. Tolkien were to write this blog about the restoration and creation of 3 Churchwardens, he might begin the tale something like this.  Every pipe man and pipe women, if they do not have a Churchwarden in their collections, are hoping one day to find one – each looking for that special bond.  Why?  Simply stated, Churchwardens are cool.  I have a Churchwarden that I’ve named, Gandalf – there are probably many Churchwardens out there bearing that name.  Why?  Simply stated, Gandalf the Wizard – first The Grey then The White – is cool.  He smoked a Churchwarden like no one else, packed with ‘Old Toby’ and who doesn’t want to be like Gandalf?

There’s A LOT of information on the internet easily obtained by a simple search of ‘Churchwarden’ and I don’t want to repeat what’s easily found.  The short of it is this – ‘Churchwarden’ is an old shape as far as pipes go.  Of course, they were prevalent throughout Middle Earth.  As the story goes, there were men back in the days when they didn’t lock churches at night, who were employed as ‘wardens’ of the church – whose responsibility was to guard the premises.  To be faithful to their charge, they were not allowed to leave the walls of the church.  That created an unusual dilemma between guarding the holy confines and the desire to enjoy one’s evening smoke.  The moral dilemma was creatively solved by a stem.  The length of the stem enabled the church wardens to tend to their evening bowls as they stood vigilantly inside the church walls while the stems extended through the windows…so the story goes (see Pipedia’s article).

Another very interesting factoid about Churchwardens comes from Bill Burney’s Pipedia description of the Churchwarden that it is unique among all pipes:

I want to include one other interesting link for those of you who are Middle Earth and Churchwarden enthusiast.  The question has always been asked by discerning folk, while Gandalf was smoking his Warden, or Bilbo, Merry and Pippen were puffing on theirs, what exactly was packed in their bowls??  Of course, we all know that the bowls had ‘Old Toby’ packed in them – or simply, ‘Pipeweed’.  This link goes to a fun site that explores the minutia of J.R.R. Tolkien’s Middle Earth including the story of pipe smoking and the mystery of what exactly inhabited the bowls of Middle Earth!  Enjoy!

The first of the 3 was true born, but of hobbit stature.  He dreamed of walking in the world of men and of wizards – seeing eye to eye but anxious to serve.

My ‘Tolkienesque’ opening, like Tolkien’s ‘Lord of the Rings’, holds some truth in the telling.  The ‘Tale of the Three Churchwardens’ started when I received an email from Toby – yes, I’m not making this up!  Gandalf smoked ‘Old Toby’ and a younger Toby from Germany wrote me about commissioning the “Imperial Churchwarden” (the ‘true born’ Churchwarden with royalty) as a birthday gift for a friend which he discovered in my website’s section, For ‘Pipe Dreamers’ Only.  We came to an accord and I put the Imperial Churchwarden from France in the queue to be restored in time for his friend’s birthday celebration. Later, when I found the Imperial in the “Help Me!” Basket, I was a little concerned.  The stem was shorter than I had originally thought – it was more of ‘Hobbit stature’ – a miniature Warden.  The stem was 5 ¾ inches beyond the shank or the total length of the pipe was about 8 ¾ inches or 22 cm – not really the coveted ‘Gandalf’ size.  I wrote to Toby with a proposal of adding some stature to the Imperial with a longer Churchwarden stem I had on hand – it would be more of a ‘Gandalf statured’ Churchwarden as a result.  I sent this picture with the proposed stem giving a total length of 11 inches or 28 ½ cm.  My Gandalf was on top for comparison.  Toby liked the idea and said that his friend was a huge ‘Lord of the Rings’ fan and that an extra 5 cms was a good investment for his friend to have a ‘Gandalf’ pipe.  

The second was bound to the first but he held no claim to royal lineage.  He stood proud in the best sense of the word and cherished his Green Land’s heritage and history.

Then Toby asked if I might have another long warden stem in my stores – he thought it might be good for him to add a Churchwarden to his collection – perhaps that both he and his friend could blow smoke rings into the air in proper wizard fashion on his friend’s day of celebration!  I ordered 3 more 8.5” Churchwarden stems from Tim West at http://www.jhlowe.com and they arrived in Bulgaria from the US with a returning colleague.  At this point I moved from restoring a Churchwarden (true born) to creating a Churchwarden with re-purposed bowls.  I went through my stores to find potential bowls to be wedded to a Warden stem and transformed to a Churchwarden (thank you Bill Burney!).  I sent two options next to the Imperial – a Dublin and a Rhodesian.  Toby chose the Dublin with the canted bowl which to him was more ‘Gandalf-like’.  And so, the Dublin will mast the Churchwarden stem – representing a strong and resilient people proud of their ‘Green’ heritage and history.

The third of the 3, was free and bound to no man.  He was born into humbler circumstances but found favor in the Maker’s eye and the Maker dubbed him ‘The Wise’ – a valuable gift to any man.                     

All 3 strong, bound together in one tale, bring hope to the Daughters of men.

With two Churchwardens bound to Toby – one for his friend and one for himself, I was thinking, while I’m working on restoring and creating these Churchwardens, why not fashion another to put in The Pipe Steward Store for another steward to add to their collection.  I found a small bowl that I really liked – a Yello Bole ‘Air-control’ Imported Briar.  I looked at the Air-Control stem mechanism and my thought was that no one will ever want this Yelo Bole as he is now attached to his ‘high-tech’ stem, but I really liked the Apple shaped bowl.  I think he’ll look great mounted on a long-bent stem – a third Churchwarden, a wise choice for anyone wanting to add a Churchwarden to his collection!  All three Churchwardens will benefit the Daughters of Bulgaria – women and girls, the ‘Daughters of men’ who have been trafficked and sexually exploited.I want to thank Charles Lemon of https://dadspipes.com  up front for his input that led me to add two new tools to my tool box and expanding my ‘restorative reach’ with pipes.  The first is a PIMO Tenon Turning Tool that I ordered at Vermont Freehand after seeing the tool on Charles’ Worktable and Man Cave blog.  Charles’ later restoration, Re-Stemming a Butz-Choquin Marigny Deluxe Hand-Made Calabash was very helpful providing a step by step description of its use in replacing a tenon and the use of the tool.  The other wonderful tool that I coveted reading the same ‘Re-Stemming’ blog was the electronic caliper which Charles uses hand in hand with his many stem repairs.  I hadn’t seen an electronic caliper in Bulgaria, but then, I had never looked for one either!  Joy of joys, I found a German made electronic caliper in the local ‘Bricolage’ – I was a happy camper!  My new toys – that is, tools 😊 pictured next. As I approach the restoration and creation of the 3 Churchwardens, I will try to work in the reverse – starting with the ‘Free Born’ Yello Bole, then the ‘Green Land’ Dublin and finally, the ‘True Born’ French made Imperial.  Why this order?  As I get used to my new tools, I would rather start with the ‘non-commissioned’ pipe first to hone in on the techniques, working toward the most important Churchwarden, the Imperial, destined to be a gift.  To experiment and practice, I have already turned one stem with the PIMO tenon turning tool – a French Jeantet Jumbo which came to me without a matching stem and has been waiting patiently.  Without description, this is what I did last night while watching the World Cup match between Sweden and Mexico (my wife rooted for Mexico where she grew up!).  Sweden prevailed.  The Jeantet Jumbo will be completed sometime in the future – he’s a ‘big boy’ pipe! Turning now to cleaning the stummels of the Churchwardens, I start first by reaming each with the Pipnet Reaming Kit.  Each stummel uses only the smallest of the 4 blade heads available.  I then fine tuning each with the Savinelli Fitsall tool, followed by sanding the chambers with 240 grade paper wrapped around a Sharpie Pen.  Finally, each is cleaned with a cotton pad wetted with isopropyl 95%.  After clearing the light to moderate cake in each bowl getting down to the briar for a fresh start, the chambers look good in each – no problems I can see. Turning now to the external surface I use undiluted Murphy’s Oil soap and cotton pads to scrub each.  The Dublin (center above) has the most lava over the rim, while the other two, not as much.  In addition to cotton pads, I utilize a brass wire brush for the rims and use a knife blade carefully to scrape the Dublin rim.  The Dublin and the Imperial will both need some sanding on the rim to clean them up.  All 3 stummels’ finishes reveal that they are thin and worn.  Murphy’s took much of the finish off but not all with the Yello Bole and Imperial bowls.  The Dublin’s finish is gone.  During the cleaning, I discover that I missed the remains of a broken off tenon in the mortise of the Dublin.  I keep screws of different sizes on hand for just these occasions.  Using a small diameter screw, I screw into the airway hole of the tenon just enough to grab some vulcanite and gently pull out.  I don’t want to insert it too far into the broken tenon to not expand it and crack the shank.  As hoped, a little pressure and thankfully, the tenon comes loose. With the mortise cleared in the Dublin, I proceed to clean the internals of all 3.  I use pipe cleaners and cotton buds dipped in isopropyl 95% to do the dirty work.  Here is a truism: Just because you’re cleaning a smaller stummel doesn’t mean it’s a smaller mess!  Each stummel required boocoos of cotton buds, pipe cleaners – I also scrape the sides with a sharp dental probe as well as hand-turning drill bits down the mortises to excavate the tars and oils.  The pictures show the finish line of sorts – later, before I turn out the lights, I’ll give each a kosher salt/alcohol soak through the night to provide more stealth cleaning.To remove the old finish from the stummels I wipe them down with isopropyl 95% and cotton pads.  The alcohol fully removes the old tired finish off the Imperial and the Dublin, but the Yello Bole’s old finish is persistent.  The first picture below reveals the sheen left on the Yello Bole but the others are dull.  To deal with the ‘Candie Apple’ finish that remains on the Yello Bole stummel I use acetone on a cotton pad.  This does the trick and now we’re down to the briar on all the stummels.With the stummels clean inside and out, the next step is fashioning the Churchwarden stems from the precast stems I acquired for the job.  I start with the Yello Bole by making an outside measurement of the original stem’s tenon which, of course, fits perfectly.  The measurement with the electronic caliper is 6.83mm.  From Charles Lemon’s blog that I noted above, Re-Stemming a Butz-Choquin Marigny Deluxe Hand-Made Calabash, Charles recommended a conservative approach to using the PIMO tenon turning tool which I employed on my first run with the Jeantet Jumbo, to first do a test cut of the tenon at approximately 40mm more than the target measurement.  This allows a more conservative sanding of the tenon to gradually bring it down to a good fit – not too snug and not too loose.  The Pimo tool comes with a drill bit to pre-drill the tenon airway on the precast stem to serve as a guide for the guide pin on the tool.  Adding my margin of error of 40mm to 6.83mm target size leaves me a practice cut of about 7.23mm to aim at for the conservative approach.  The pictures move through the steps. The tenon turning tool is in the drill shock and when powered rotates at high speed. With the cast stem’s airway guided by the guide pin, I push the stem steadily against the revolving blade of the tool and it peels away the vulcanite.  The blade peels the vulcanite in spaghetti-type curls.  My first practice cut is measured, and it is 8.45.  Another 1.20 mm can come off.  With the enclosed allen wrench, I adjust the Pimo tool to remove more vulcanite and the next measurement is 7.34mm.  That is a .51mm difference and places me in the conservative sanding zone.  Now, I complete the cut of the entire tenon – all the way to the face of the stem.  I haven’t figured out how to minimize the vulcanite shavings that spew out everywhere!  I note that the original stem’s tenon is shorter.  I use a sanding drum on the Dremel and take off the excess. The cut looks good and now it’s time to take file and sanding papers to gradually bring the tenon to size. Now, as I watch several episodes of Grimm which I discovered on Netflix here in Bulgaria, I gradually sand the tenon to a snug but not too tight fit.  I use coarse 120 grade paper to start – always sanding around the tenon to maintain proper round.  Then, using a flat needle file and 240 grit paper, I fine tune the tenon sanding – again, maintaining proper round by sanding around the tenon evenly.  I must admit, when the tenon gets down to the target size – when it starts to marginally slide into the mortise, my stress level increases!  I know how easily one can crack a shank by rushing the tenon’s entry into the mortise.  It takes ‘100s’ of sanding cycles followed by testing the fit (carefully!) before the tenon safely and fully engages and finds a new home!  Success!The tenon is snug and secure, and now I take some pictures to show the ridges that need to be removed and tapered through the shank and stem.  Also, the precast stem has casting ridges down the length on both sides and the button is in very rough form.  The entire Churchwarden stem needs to be sanded, smoothed and shaped along with the shank/stem transition.One picture to show the growth in stature this Yello Bole stummel now enjoys before retiring the old stem to the stem bucket.Several episodes of Grimm later, I’m satisfied with the rough sanding and shaping of the stem.  I show the full length and then some closeups of the shank/stem transition and the button shaping.  I like what I see. The next step is to introduce a gentle bend to the stem.  This will aid the future steward of this ‘Free Born’ to know which way the stem is properly positioned – there is an up and down after the custom sanding and fit – there is no standard stem fit – echoing the words of Charles Lemon’s blog!  To give me an idea of where and how much the bend should be, I used my Gandalf as a template on a piece of paper.  I also draw an outline of the original, smaller Imperial stem for comparison.  I mark the stem at the point that Gandalf’s stem’s bend began.  Bends are very subjective, but this gives me an idea what to shoot for.  After I insert pipe cleaners in both ends of the stem to guard the airway integrity during the bending, I heat the target area of the stem with a hot air gun and bend it when it becomes supple.  I take the bend to the faucet with cool tap water to set the curve.  At the start, I found that I was bending too much.  Thankfully, vulcanite is very forgiving – to correct the bend all I do is re-heat the stem and it straightens on its own.  After a few tries, I find a bend I’m happy with – a compromise between Gandalf’s slightly longer stem and the shorter, original Imperial. I put the Yello Bole ‘Free Born’ aside and now turn to the Dublin.   The following pictures are lacking my standard background working mat – it needed to be cleaned!  I start by doing an inside measurement of the mortise – 7.19mm.  That is the target width of the tenon that is shaped.  I use the drill bit provided and drill the airway to receive the PIMO guide pin.  I then bring the blade down to just touching the tenon and cut a test like before and measure – 8.15mm.  That leaves .96mm to the target size.  I make a quarter turn of the wrench, closing the blade that much and take another cut – 7.46.  The quarter turn took .69mm off the tenon.  I now have .27 mm of ‘fat’ left on the tenon.  Again, the pictures show the steps. Now, well within the conservative sanding zone, I use a flat needle file and 240 grit paper and sand the tenon down to fit with appropriate snugness.  I then sand down the stem and button as before with the Yello Bole.  I’m aiming for a fluid transition from shank to stem.  The Dublin shapes up nicely!I use the same template to give the Dublin’s new fitted stem a gentle bend over the hot air gun. Now to the Imperial.  The same methodology is employed as with the former 2.  I fast track describing the process with each picture.I drill the airway to guide the Pimo guide pin.The mortise is measured for the target tenon size – 7.56mm.With the PIMO tool I cut a ‘fat’ initial tenon that measures about 40mm larger than the target – conservative sanding zone. I measure the length of the original Imperial stem tenon and shorten the precast Churchwarden tenon to match using the flat needle file as a saw.After sanding the tenon down to a snug fit, I’m left with filing and sanding the ridge and tapering the warden stem.  I cover the Imperial’s nomenclature with masking tape to protect it from the shank sanding.After some filing with a flat needle file and sanding with 240 grit paper, the transition from the shank to the Warden stem is shaped and the button is shaped from the rough precast stem. As with the other two, I heated the Warden stem with a hot gun and when it became supple I give it a slight, gentle flowing bend and seal the bend under cool tap water.The 3 are looking good and the transformation is taking shape!I then take each of the Warden stems through a wet sanding with 600 grit paper and then used 0000 grade steel wool to continue the sanding but also buffing up the fresh vulcanite.  To hydrate each of the 3 Wardens I wipe the stems and stummels with light paraffin oil (mineral oil in Bulgaria), which serves to give me a sneak peak at the finished Churchwarden pipes.  I like what I see!With my day coming to a close, I utilize the night by allowing the stummels to clean further by using a kosher salt and alcohol soak.  I fashion cotton ‘wicks’ from cotton balls and insert them down the mortises into the airways.  They act to draw the additional tars and oils out of the briar.  I then fill each bowl with kosher salt which leaves no aftertaste as iodized salt does.  I then fill the bowls with isopropyl 95% until the alcohol surfaces over the salt.  I top each stummel off in a few minutes and I turn out the lights.The next morning, I wasn’t disappointed.  The salt in each bowl had darkened and each of the wicks had discolored indicating further extraction of the tars and oils.  The salt went into the waste basket and I cleared the excess salt by wiping the bowls with paper towel and blowing with some force through the mortises.  I also follow with pipe cleaners and cotton buds to make sure all was clean.  Only the Dublin resisted further but soon pipe cleaners and cotton buds were coming out clean.  Stummels are cleaned and ready for their future stewards!  The picture shows the final carnage.Now, turning from the labor-intensive stem work, I look at the stummels.  Starting with the ‘Free Born’ Yello Bole that drew my attention.  The small Apple shape fits well the classic Churchwarden motif.  The grain is active with lateral grain expressing in bird’s eye perspective on the sides.  There are some fills in the stummel – one larger one on the right side of the stummel then a few pocket fills.  The fills all seem solid, but I will keep my eye on them as I sand. The rim is darkened from tobacco lighting and the inner edge of the rim is scorched.  I decide to give the rim a very light topping using 600 grade paper – more of a clean up to reestablish crisp lines and to remove the charring.  I use a kitchen chopping board and put the 600 paper on it for the topping.  It doesn’t take much. To address the normal nicks and dents on the stummel I use micromesh pads 1500 to 2400 and wet sand the stummel.  After the wet sanding I again look at the old fills that caught my attention before to see if they softened.  They remain solid, but I can see very small pockets that might benefit from repair.  I do not dig out the fills but simply painted the fills with a very thin layer of thin CA glue with a tooth pick – like the repair to miniscule air pockets that emerge with a CA glue/charcoal patch on vulcanite stems.  The painting is thin, so it cures very quickly, and I focus sand the spots again starting with the 1500 micromesh pad to the present was sufficient.  There is no impact on the surrounding briar.  I complete the micromesh cycles by dry sanding with pads 3200 to 4000 and 6000 to 12000.  I keep the Warden stem mounted on the stummel to guard against shouldering the shank face – keeping a nice seamless transition from shank to Warden stem.Here I picture the right side of the stummel to show the results of the ‘paint patching’ the larger fill and a few on the shank.  It blended well. Now, the Dublin is next in line.  This Dublin has ‘Selected Briar’ stamped on the left side of the shank.  It has nice looking briar, but the finish has lost its luster – it’s dull, tired and bored.  The rim is dark and has several dings on the edge.  There is one noticeable fill on the right front of the Dublin stummel.  The canted bowl of a Dublin has always attracted me and when Toby chose the Dublin to mast the Warden stem, I agreed it was a good choice – it will be an impressive looking Churchwarden.  I take a few pictures to get a closer look. I start by taking the Dublin to the topping board using 240 grit paper.  Removing the tired finish and re-establishing the lines of the rim will go a long way in sharpening this stummel.  After turning the inverted stummel on the 240 paper a few revolutions, I switch too 600 grade paper and smooth out the scratches of the 240.  Then, using 120 grit paper I cut an internal bevel on the rim followed by 240 and 600 grade papers.  I also cut a very small bevel on the external edge of the rim with the 240 and 600 papers.  I create the bevels to soften the look of the stummel and to me, it’s a classy touch.Next, I take the stummel through the full micromesh pad cycle by wet sanding with 1500 to 2400, followed by dry sanding using pads 3200 to 4000 and then 6000 to 12000.  The Dublin’s attitude is shaping up nicely! Turning now to the ‘True Born’ Churchwarden, the nomenclature stamped on the left side of the shank is a cursive, ‘Imperial’ over ‘CHURCHWARDEN’ in full block letters.  ‘Algerian Briar’ is stamped on the right.  The COM is France, stamped in very small block letters on the lower shank along the shank face.  These pictures show what I see. It did not take long to match the unique ‘Imperial’ nomenclature found in Pipedia’s very short article about the Imperial Tobacco Co. referencing Lopes:

From Pipes, Artisans and Trademarks, by Jose Manuel Lopés’

The Imerial Tobacco Co. (Imperial Tobacco Ltd.) was founded in 1901 through the merger of several British tobacco companies. In 1902 it went into partnership with the American Tobacco Company to found the British American Tobacco Company.

Brands involved: Comoy’s, Bewlay, Nording, Ogden’s, Salmon & Gluckstein, and Steel’s

This example was provided by the courtesy Doug Valitchka to let me know that I had locked into the right company.Pipedia’s article on Imperial Brands goes into more of the history of the multitude of acquisitions that happened in the early 1900s to maintain competitive edge.  Today, Imperial Brands is an international consortium primarily involved in cigarette sales and is based in the UK.  I found only one reference in the article to a French-based connection referencing the closure of a factory in Nantes, France, in 2016.  The company website, http://www.imperialbrandsplc.com contains an extensive history of the company, but I found no references to pipe productions in France!  In Pipedia and in Pipephil – Imperial, references to Imperial, the country of manufacturing is consistently the UK and no mention of France.  So, the French connection to this True Born will remain shrouded in mystery!

The Imperial stummel has a dulled finish as the Dublin but promises a very nice briar grain beneath.  The bowl and rim have normal wear nicks and dents.  I also detect residue shininess of old finish that didn’t come off when I cleaned with Murphy’s Oil Soap. I quickly dispatch this using a cotton pad wetted with isopropyl 95%.Inspecting the surface I find on the left side of the shank, near the ‘Imperial’ stamping, a chip that needs patching. I mix a small batch of CA glue and briar dust to patch the chip – this will blend well after sanded down.  I put a small mound of briar dust on an index card and place next to it a drop of regular CA glue.  I mix a small bit of the briar dust into the glue and when I find the resulting putty about the consistency of molasses, I apply it to the chip and put the stummel aside to cure. While the patch is curing, the large job of continuing the sanding of the Churchwarden stems jumps to the fore.  I decide to do all 3 Wardens together by first wet sanding using micromesh pads 1500 to 2400.  I follow by dry sanding using pads 3200 to 4000 and then 6000 to 12000.  After each set of three pads, I apply Obsidian Oil to each stem to vitalize the vulcanite.  There’s a LOT of vulcanite real estate to sand with a Churchwarden stem!  It’s also not easy taking pictures of the long Warden stems. Turning again to the bowls, and the Imperial’s cured patch of CA glue and briar dust, I carefully file the mound/excess down toward the briar surface.  I’m careful to stay on the excess patch material so not to damage the nearby briar and nomenclature.  I then switch to 240 paper, rolled tightly and then 600.  The patch looks great. As I take a closer look at the Imperial stummel, the rim is blackened on the internal edge.  I start by giving the bowl a very light topping with 600 grade sanding paper to clean it and to reestablish lines.  I then bevel the internal rim edge enough to clean it up as well as giving the external rim edge a bevel to soften the rim and to ‘class it up’ a bit. I like how it’s shaping up. With the rim restoration complete at this level, I use micromesh pads 1500 to 2400 and wet sand the entire stummel.  I follow with dry sanding with pads 3200 to 4000 and finish with 6000 to 12000. I have noticed on the shank a lightened area that was a result of the stem/shank fitting process where more sanding was necessary.  To darken and blend this area, I use an oak Furniture stain stick to do the job and it looks good.  I take a picture.Now, to deepen and enrich the briar of the French made Imperial Churchwarden, I apply Before and After Restoration Balm to the briar surface.  I put some on my fingers and work it into the surface.  The Balm does an amazing job bringing out the richness and the luster of the briar grain that is already beautiful.  After about 20 minutes, I wipe the Balm off the stummel with a clean cotton cloth.  It buffs up nicely.  I take a picture of the stummel with the Balm on it.Next in line is the Dublin bowl.  As with the French Imperial, I take the Dublin through the full 9 micromesh pads, 1500 to 12000.  I show the progress after each set of three pads – the first three wet sanding, the last 6, dry. As with the Imperial, I apply Before and After Restoration Balm to the Dublin bowl.  I put some Balm on my fingers and work it into the briar.  The Balm starts with the texture of light oil then as I rub it into the briar, is thickens into the texture of a thicker wax.  After I work it in I set the stummel aside to absorb the Balm.  After a time, I wipe off the Balm using a cotton cloth – it buffs up as I wipe the stummel.The final stummel is the Free Born Yello Bole.  Since the stummel has already gone through the full micromesh pad sanding process, it is ready to receive the Before and After Restoration Balm to deepen and enrich the nicely emerging briar grain.  As with the others, I apply the Balm with my fingers and after setting is aside for about 20 minutes, I wipe/buff off the Balm.  I take a picture of the Balm on the stummel and afterwards. At this point, using the Dremel mounted with dedicated cotton cloth buffing wheels set at the slowest speed, each of the three bowls I apply Blue Diamond compound and White Diamond compound is applied to the stems.  After the application of the compounds, I buff each Churchwarden with a felt cloth to remove the compound dust before applying wax.  I then mount another cotton cloth wheel on to the Dremel, increase the speed to about 40% full power and apply carnauba wax to stems and stummels.  After applying a few coats of wax, I give each Churchwarden a rigorous hand buffing with a microfiber cloth to raise the shine.

The Tale of the Three Churchwardens is now beginning.  I am pleased with the results.  Each bowl responded well displaying a myriad of grains and patterns.  Each now displays that classic, long, graceful, wise aura of the Churchwarden genre.  It is true, only one of the Churchwardens started has a Churchwarden – the True Born.  He is now no longer of Hobbit stature and will walk with men and wizards.  The other two re-purposed bowls look great – I’m pleased.  Tobias of Germany commissioned the French made Imperial Churchwarden and the Dublin.  He will have the first opportunity to secure these Churchwardens for his friend’s birthday present and for his own collection in The Pipe Steward Store.  As ‘fate’ would have it, the third Churchwarden bound to no man, was claimed also by a person also living in Germany!  A colleague was visiting Bulgaria and saw the 3 Churchwardens on my worktable.  Thankfully, I was able to finish ‘The Wise’ to return with his new steward to Germany.  I declare that Germany receives the Middle Earth Award!  Each of these Churchwardens benefits the Daughters of Bulgaria – a noble cause of helping women and girls who have been trafficked and sexually exploited.  Thank you for joining me in the telling of the Tale of Three Churchwardens!

The first True Born Imperial Churchwarden of France The second was bound to the first, the proud Dublin Green Land Churchwarden The Third ‘Free Born’ Churchwarden