Blog by Dal Stanton
I’m almost finished working through the Peretti Lot of 10 I acquired off the eBay auction block. I’m amazed at the interest in these pipes since I posted a picture of the Peretti Lot on several of my favorite Facebook pipe groups. I also enjoy posting on Instagram and Facebook giving updates of the restorations on my worktable here in Sofia, Bulgaria. One of the best things I enjoy about ‘Pipedom’ and social media are the relationships developed around the world with pipe men and women whose love of pipes – their names and their histories, trust people like me who restore these friends enabling them to be passed on to the next generation of pipe men and women. That’s why I named my pipe space, The Pipe Steward. We are stewards when we understand that we don’t own, but we merely take care of something special for a time, add our histories then pass it on. I met Tim via social media when I posted the picture below. He was drawn to the Oom Pauls and commissioned one of the Sitters potentially to add to his already large collection – I see the plethora of posts and pipes he has on Instagram! So, adding this Peretti Oom Paul Sitter to his collection is special and appreciated. When one of my pipes is commissioned, the final decision to keep it is made after its restored and I publish the write up and a price is set. So, Tim has first dibs on this Oom Paul Sitter when it goes to The Pipe Steward Store. As with the other Perettis, this Sitter will benefit the Daughters of Bulgaria – our work here in Bulgaria helping women and girls who have been trafficked and sexually exploited.
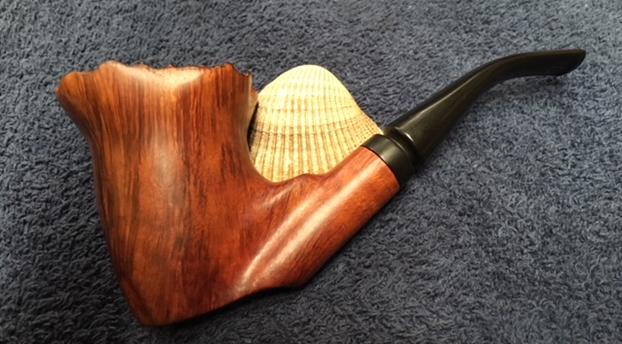
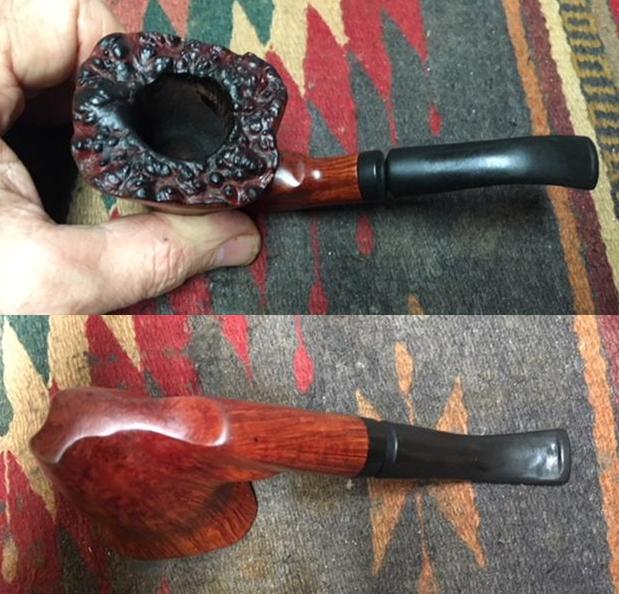
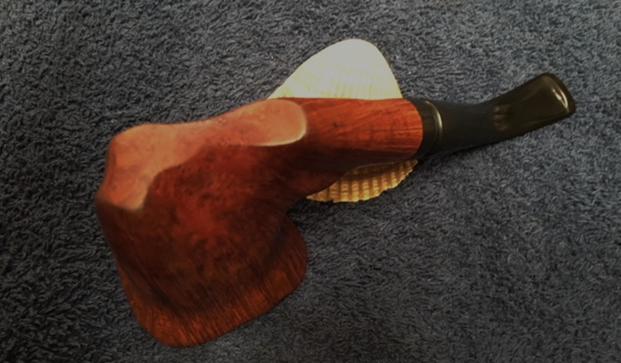
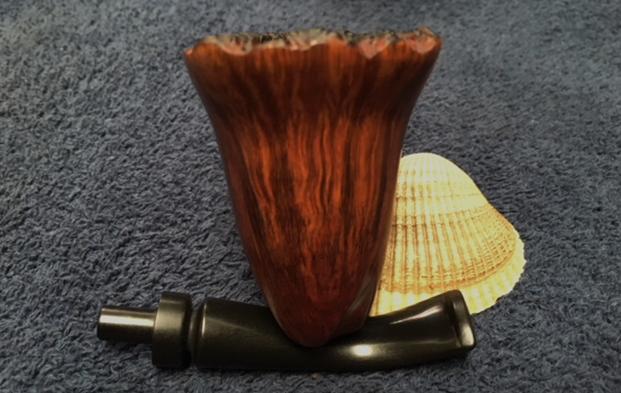
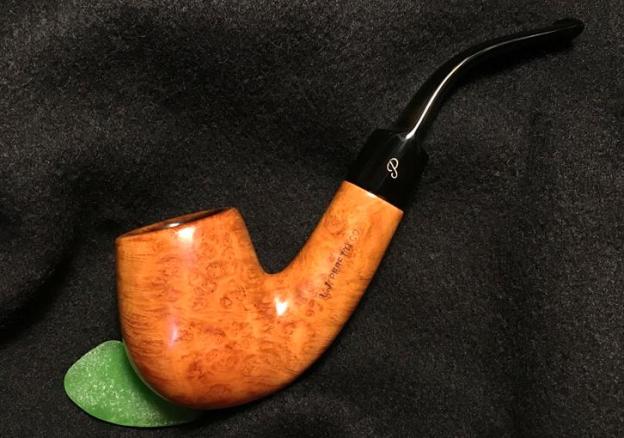
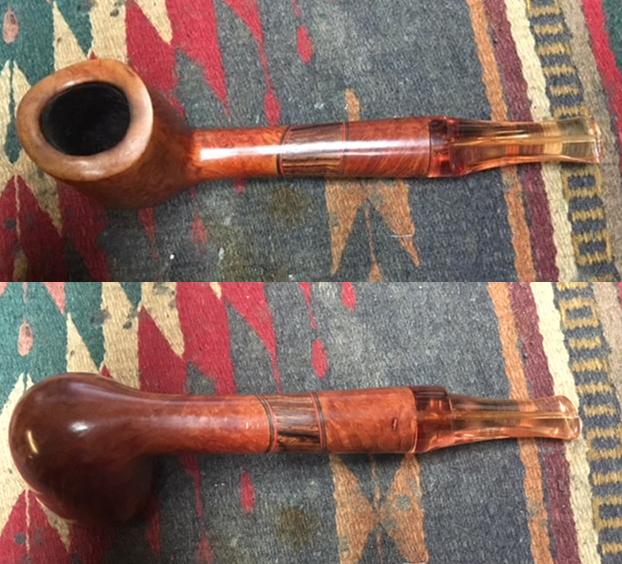
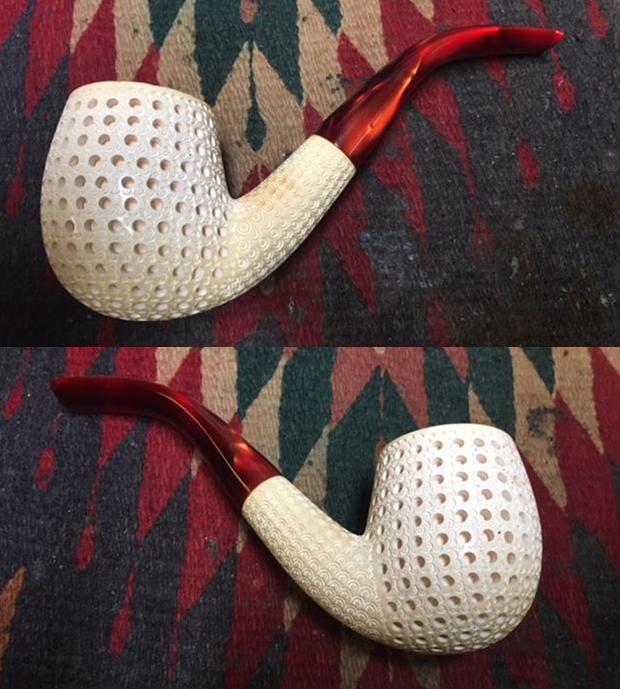
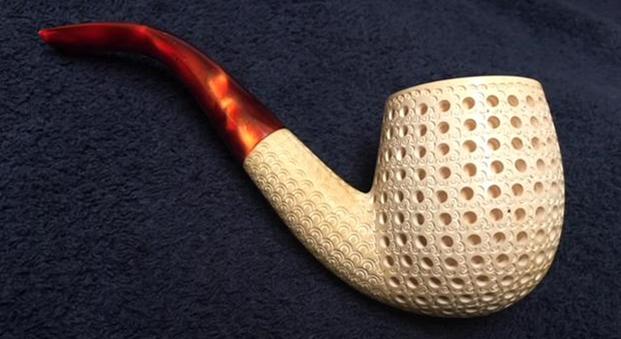
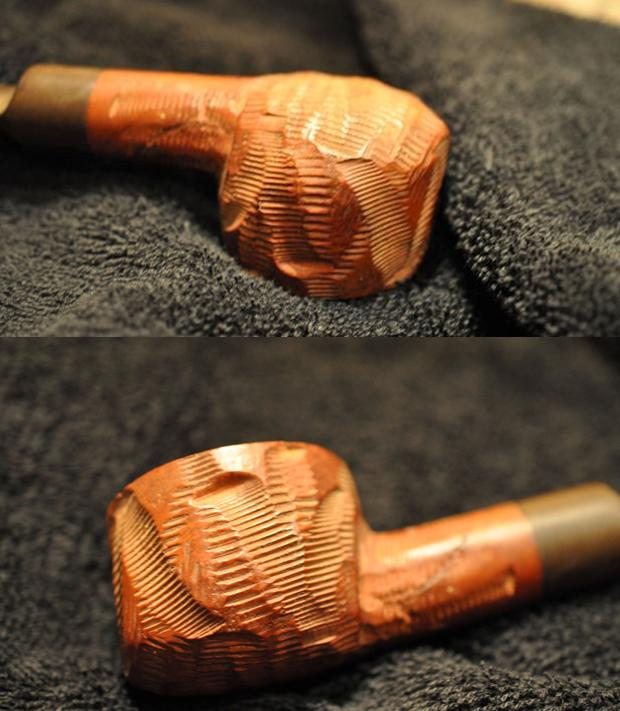
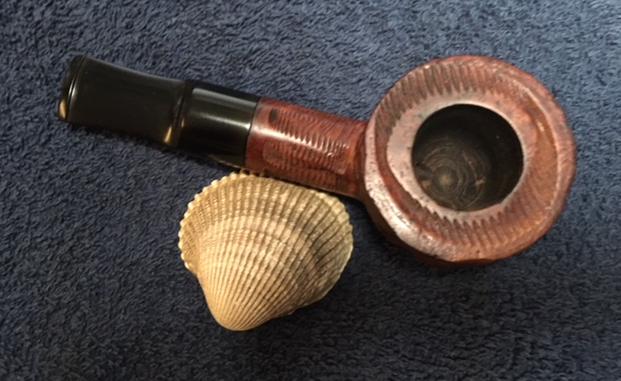
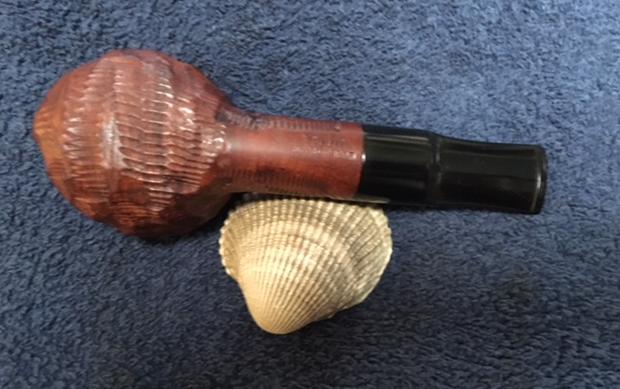
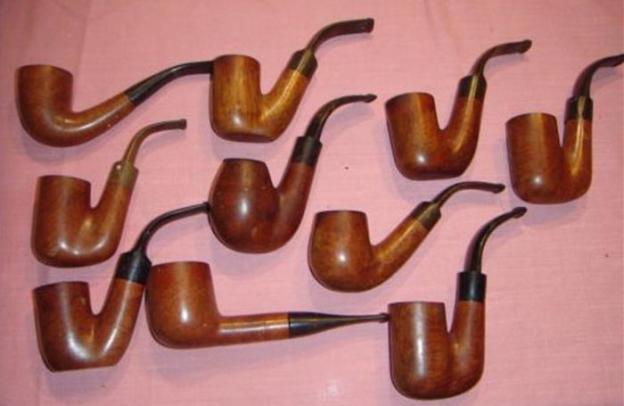 Of the Peretti Lot of 10, there are two Oom Pauls yet to be restored that have been commissioned. Two other pipes above are joining my collection of Perettis when I finally get to restoring them! The Calabash on the top, left, and the COLOSSUS Billiard on the bottom. The Oom Paul Sitter before me now is distinctive and stands out even in the picture above – bottom right. The vertical straight flame grain is distinctive even in its present state. Here are pictures chronicling the Oom Paul Sitter’s condition and challenges.

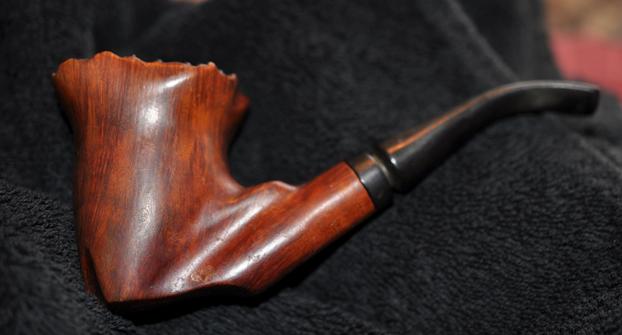
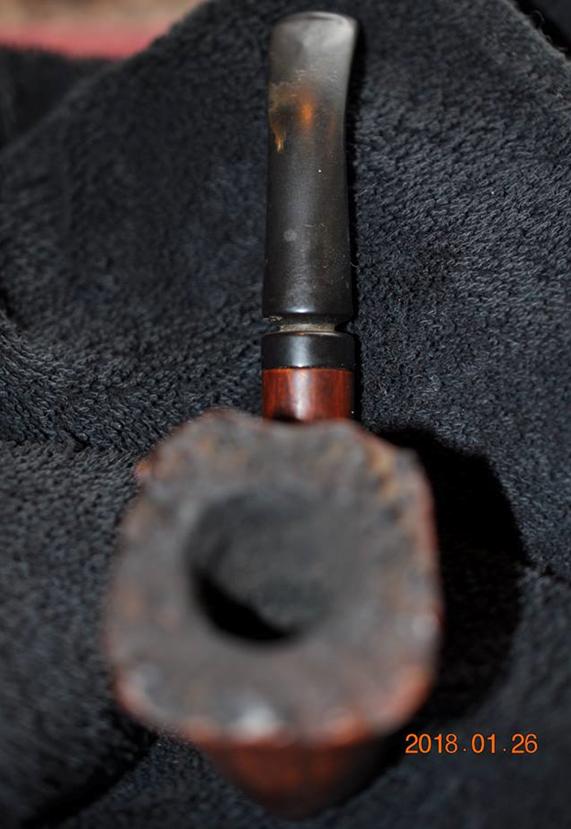
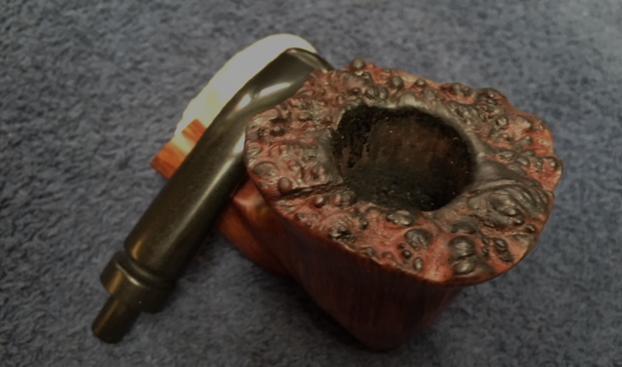
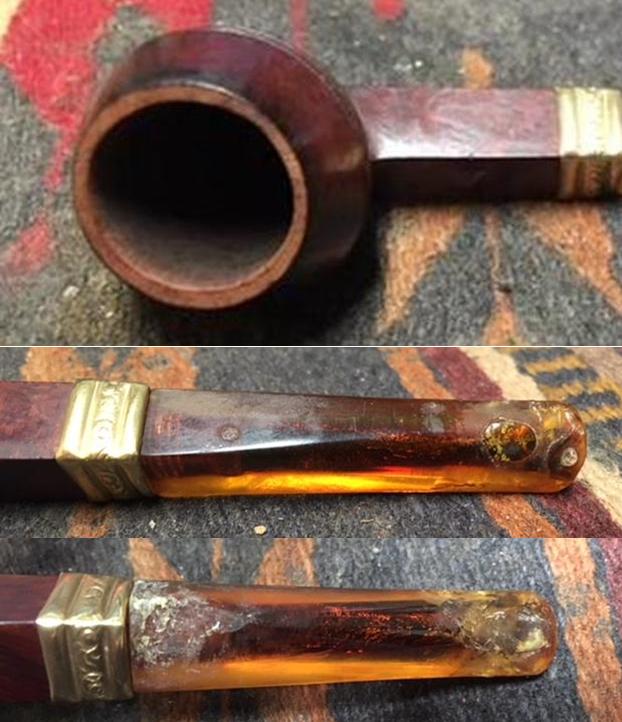
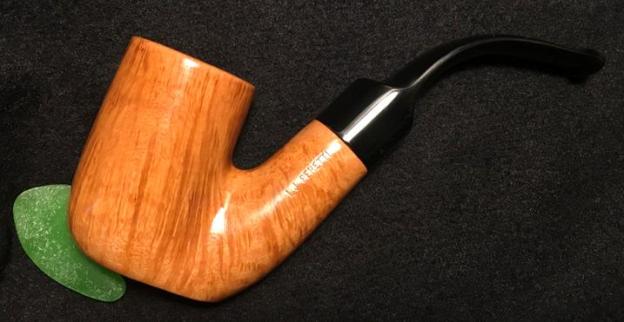
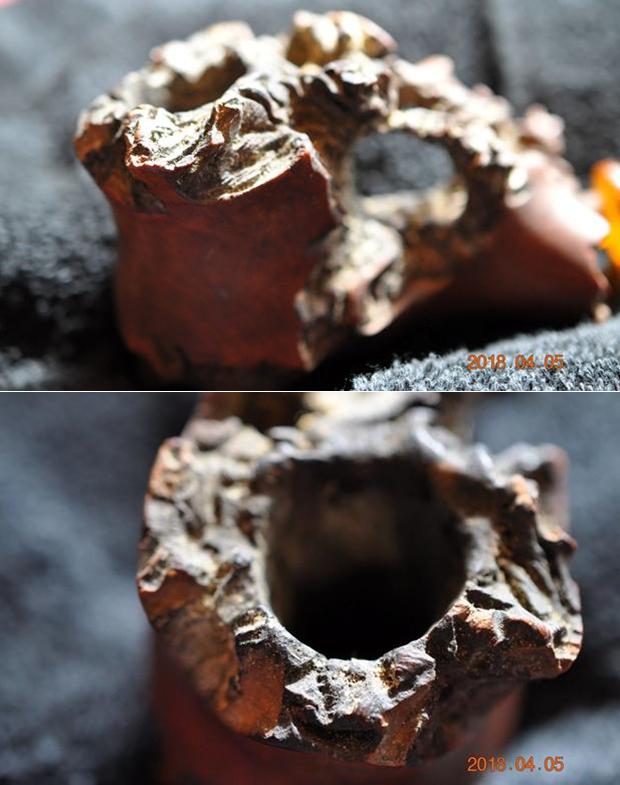
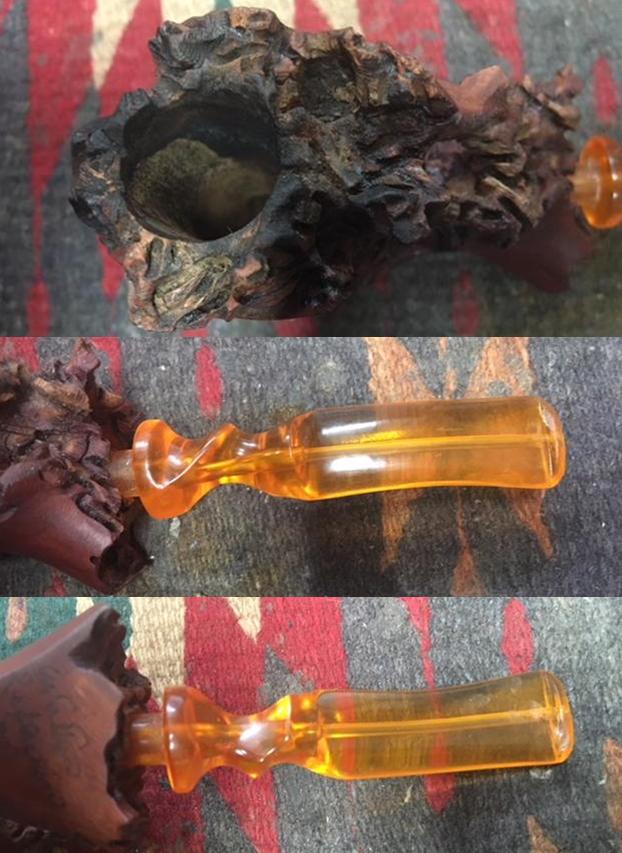
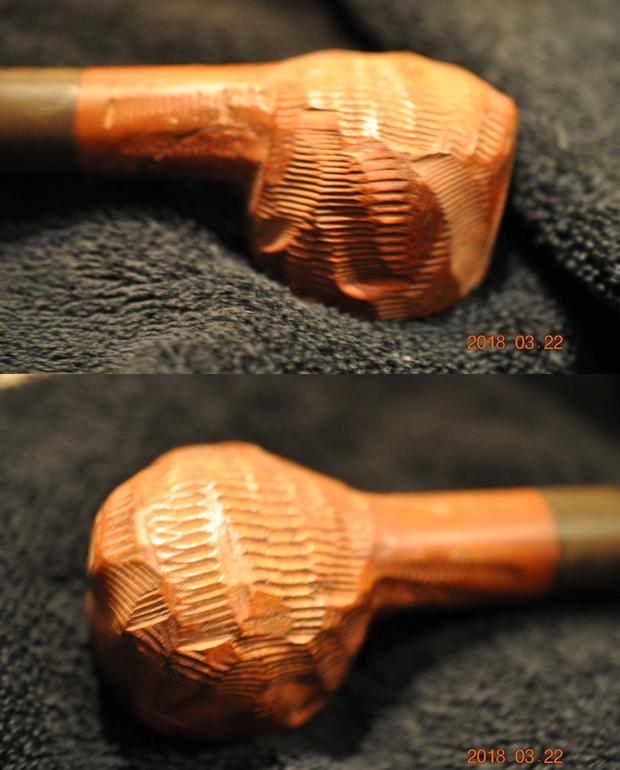
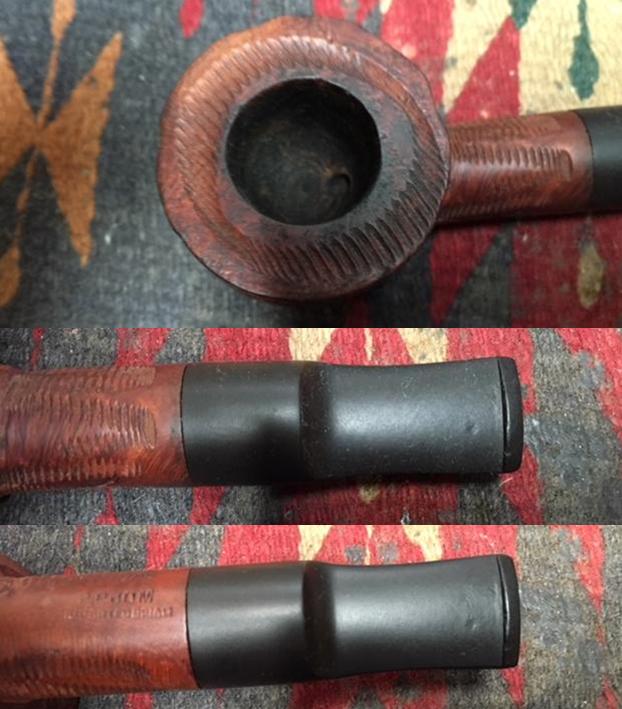
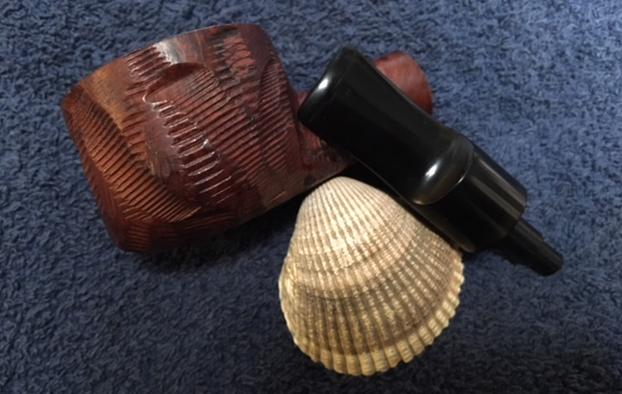
 The condition of this Sitter resembles all his brother Oom Pauls and the cousins. The former steward of these Perettis seemed to have a scorched earth policy. All of them, this one included, have thick cake in the chamber and thick, crusty lava flowing over the rim. As with the others, the left side of the rim has taken the brunt of the tobacco lighting and the briar is charcoal where the flame was pulled over the side, burning the rim. The unfortunate result of this is that when the charred wood is cleaned away, the rim/bowl is thinner on that edge and therefore out of round. The stummel surface is dirty but will clean up well showing the beautiful vertical grain. I see no fills in this briar. The stem carries with it the bites and dents that all the other Perettis received as well. The stem is moderately oxidized and has a little calcification on the bit. The one critical observation I have made about the Peretti Oom Pauls is that the drilling of the mortises for the tenon/stem fit hasn’t been the best. This Sitter’s stem does not sit evenly with the shank. The shank has a lip over the upper part of the saddle stem and the stem has a lip over the lower shank. The drilling has left something to be desired! The tenon fit is also loose. I have plenty of hurdles to address as this Oom Paul Sitter is recommissioned!
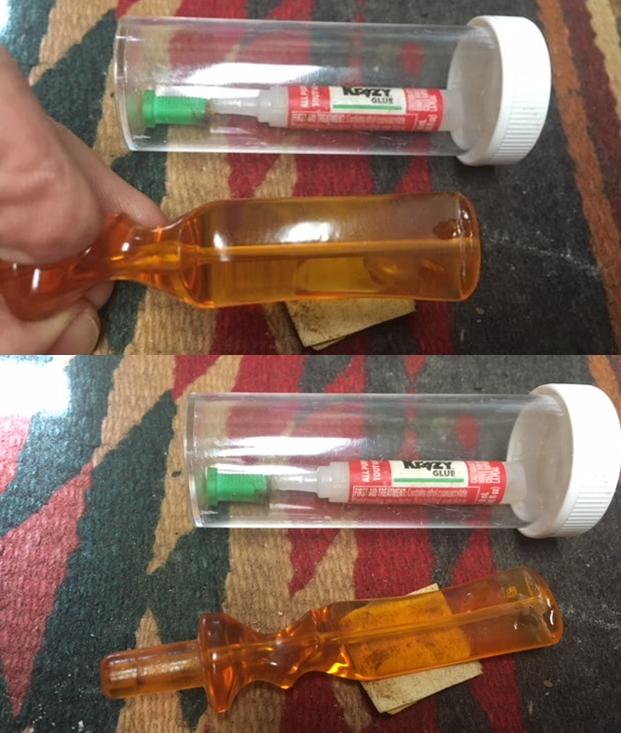
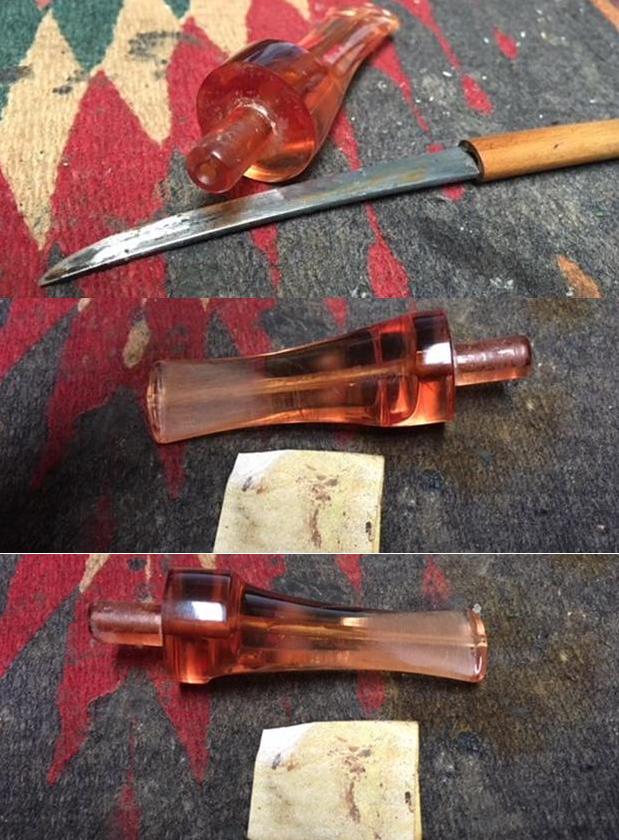
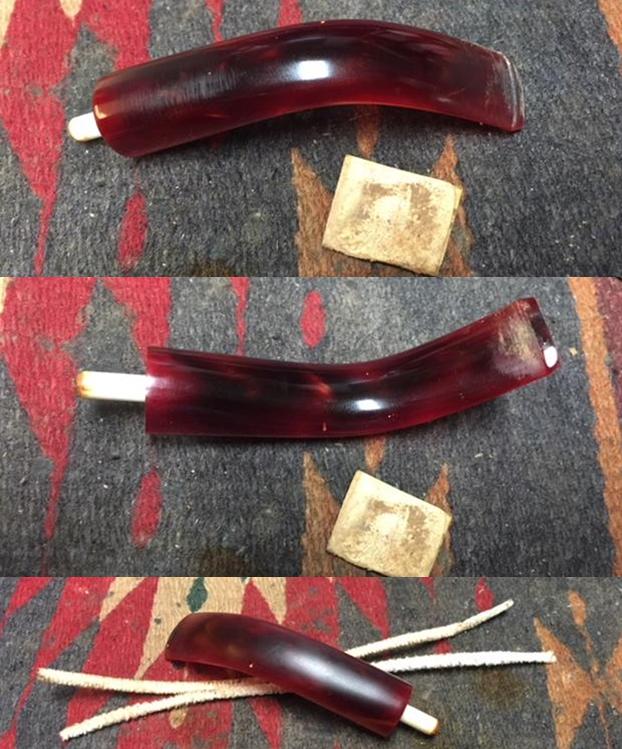
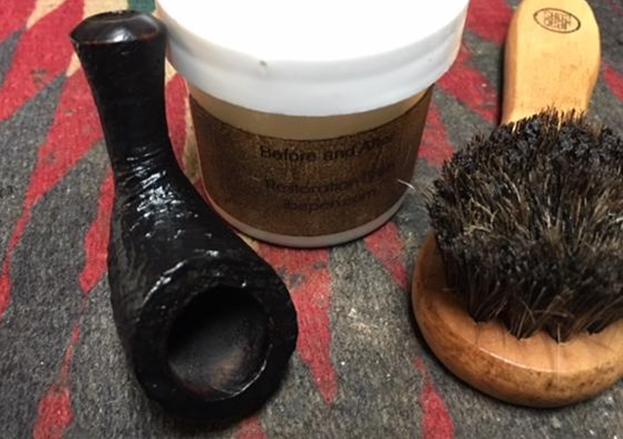
Beginning with the stem, it joins 4 other stems in a bath of Before and After Deoxidizer. The stem soaks for several hours and when I fish it out, I let it drain and then wipe it down with cotton pads and light paraffin oil – this removes the Deoxidizer and the raised oxidation which wipes off as a very nasty brown. The Deoxidizer has done a good job.
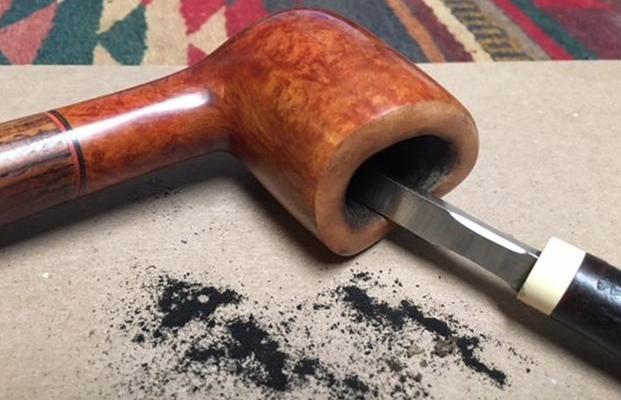
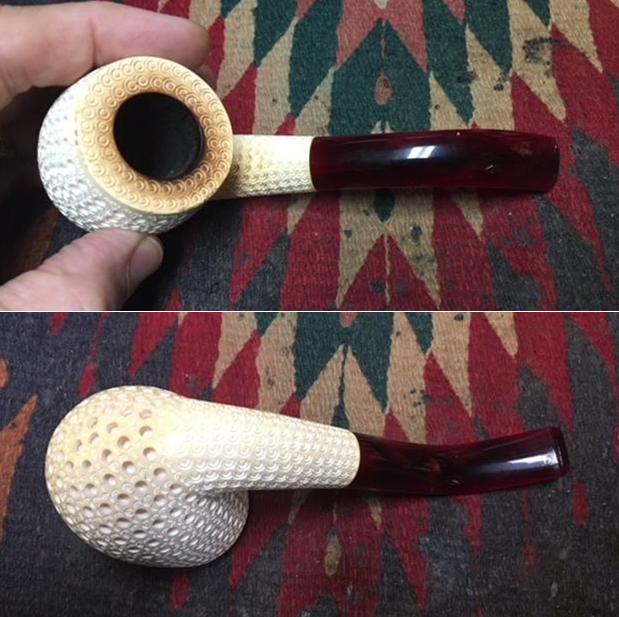
 Before proceeding further with the stem, I turn to the stummel cleanup. I start by reaming the thick, crusted cake in the chamber. Using my Pipnet Reaming Kit, I start with the smallest blade – first laying paper towel down to minimize cleanup! I use 3 of the 4 blades available in the Pipnet Kit. The cake is hard causing the reaming tool to seize at times and I’m careful not bear down through stops in the turning of the blades but draw out the blades and go at it again.
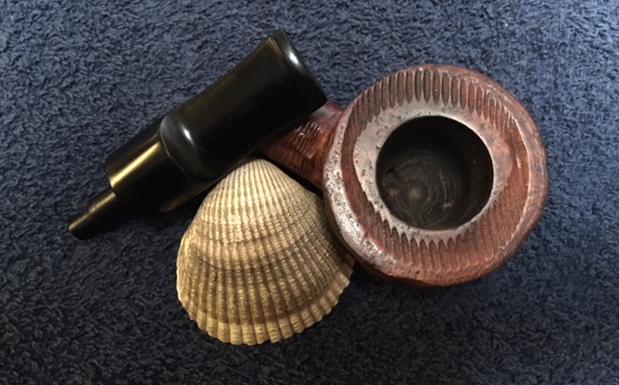
  I follow the Pipnet blades by employing the Savinelli Fitsall Tool which scrapes the walls more closely giving me more control. I remove more cake on the top rim charring. The goal is to find solid, healthy briar – which I do, but I can see the narrowing of the rim a bit due to the removal of the damaged wood.
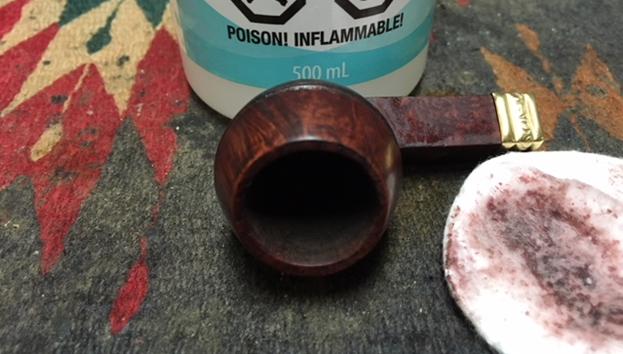
  I then sand the chamber with 240 paper wrapped around a Sharpie Pen to give leverage. This process clears the remnants of carbon cake and brings out a freshened briar to allow the new steward to restart a proper cake development – the thickness of an American dime is sufficient and helpful to protect the briar. Thicker than that and the carbon cake can damage the bowl as the cake heats and expands. Finally, I wipe the chamber with cotton pads wetted with isopropyl 95% – ridding the chamber of the carbon dust.
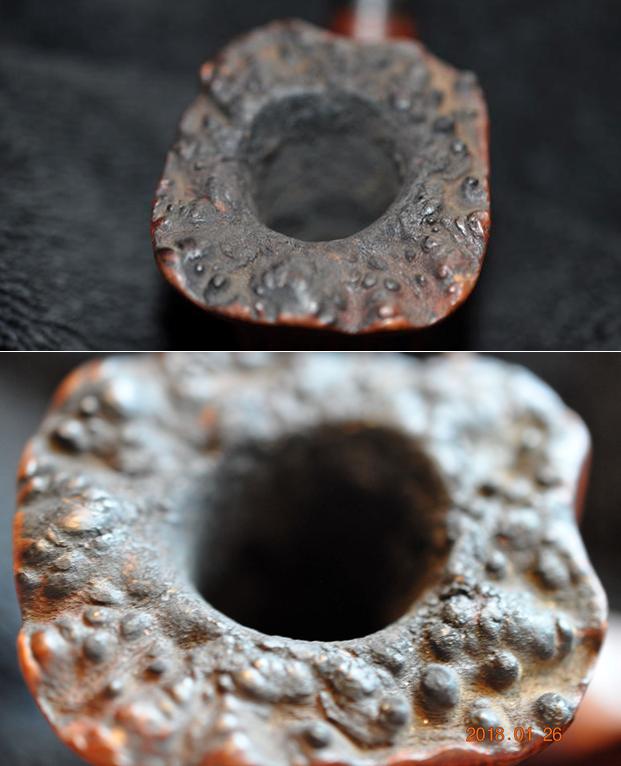
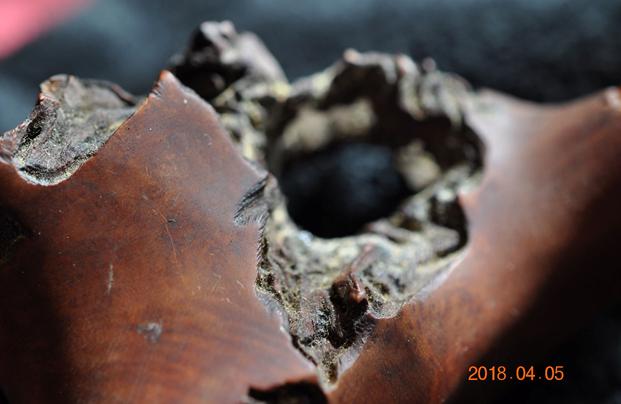
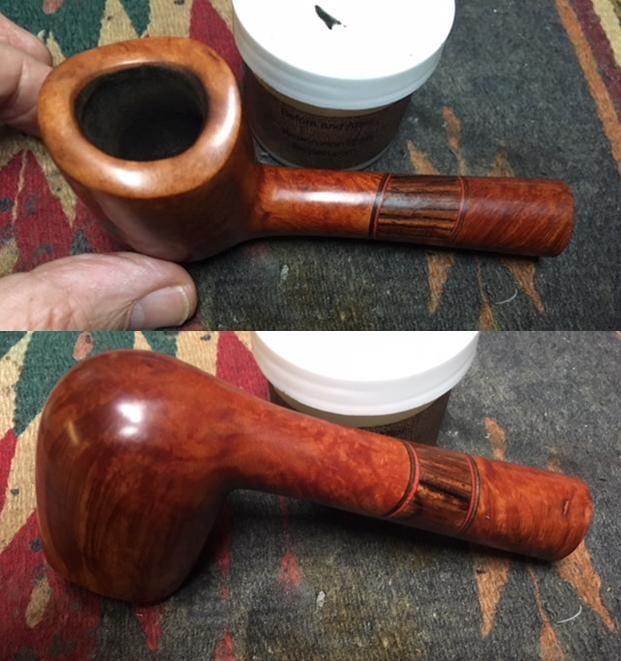
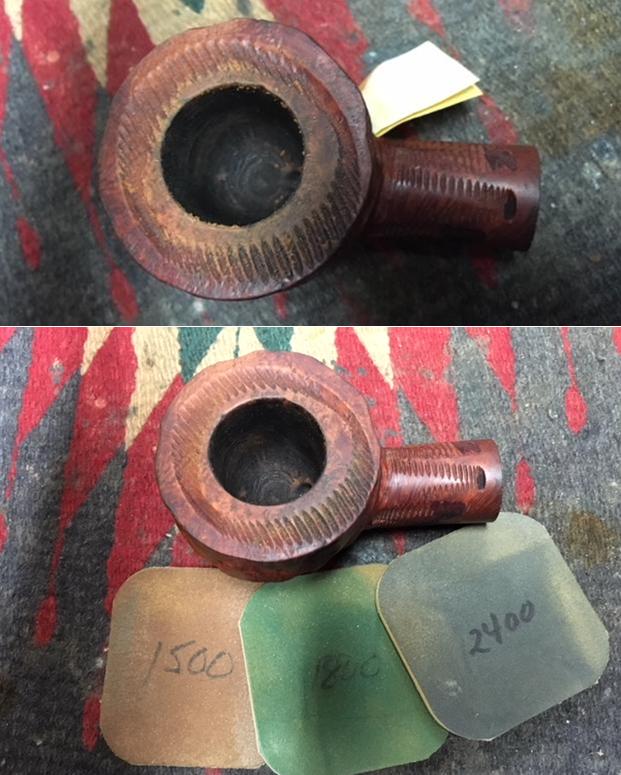
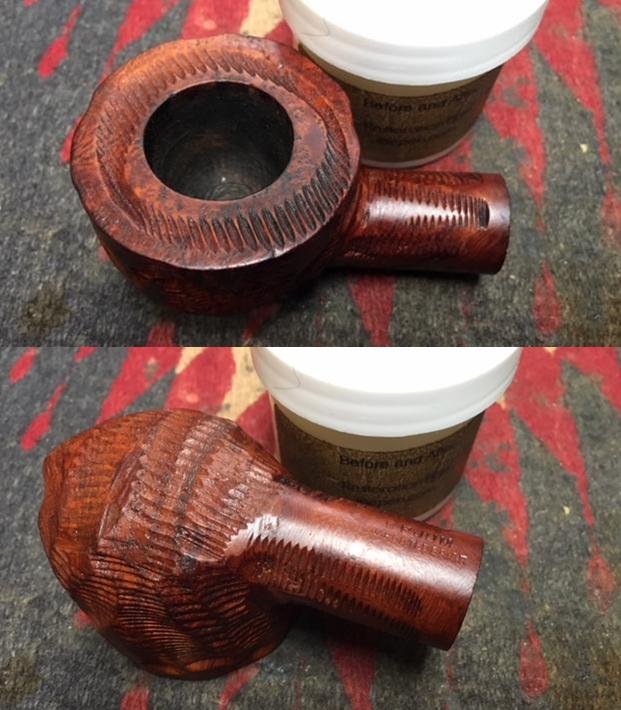
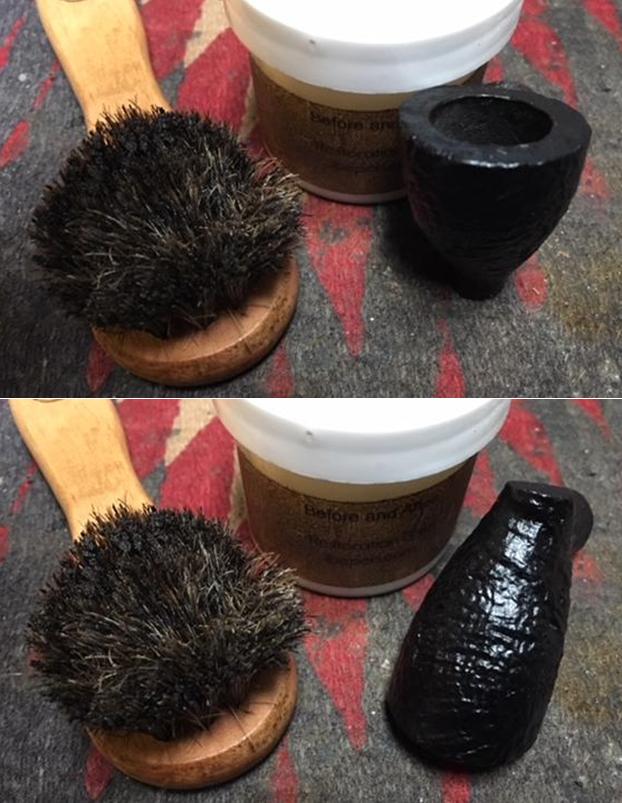
 The bottom of the picture below represents the left side of the stummel where the rim damage is greatest. You can see the narrowing of the rim on the bottom (left) compared to the opposite side.
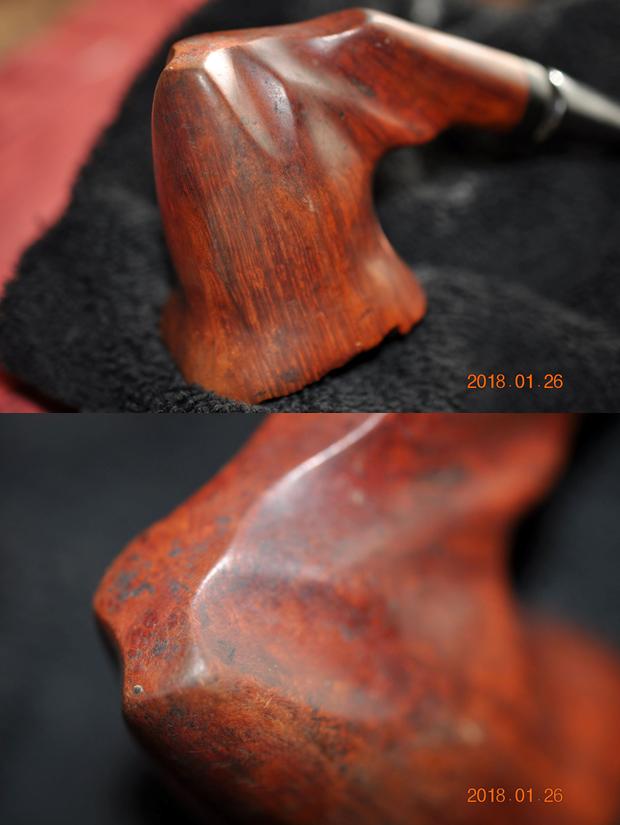
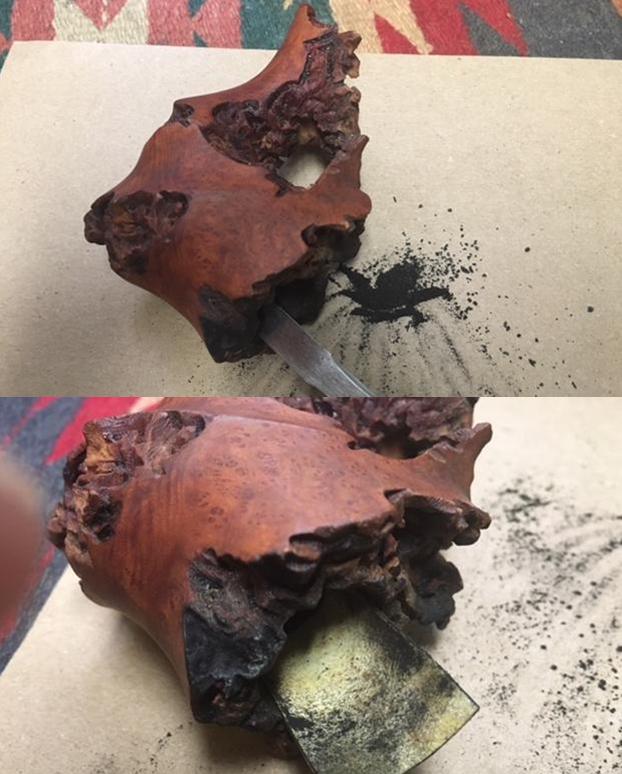
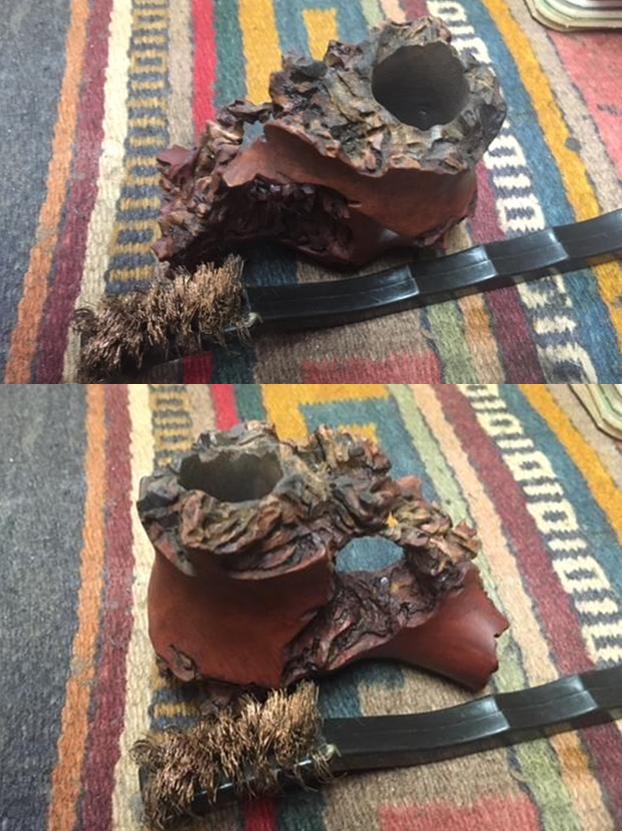
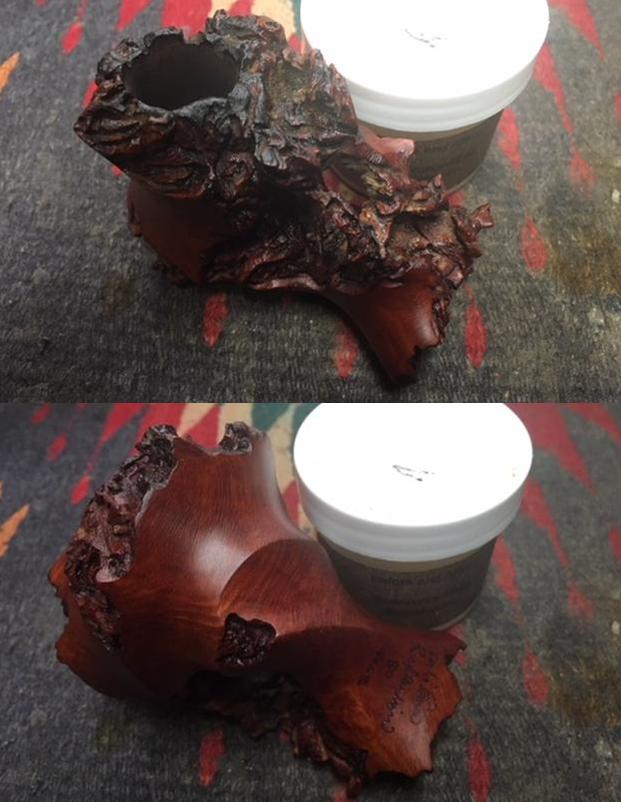
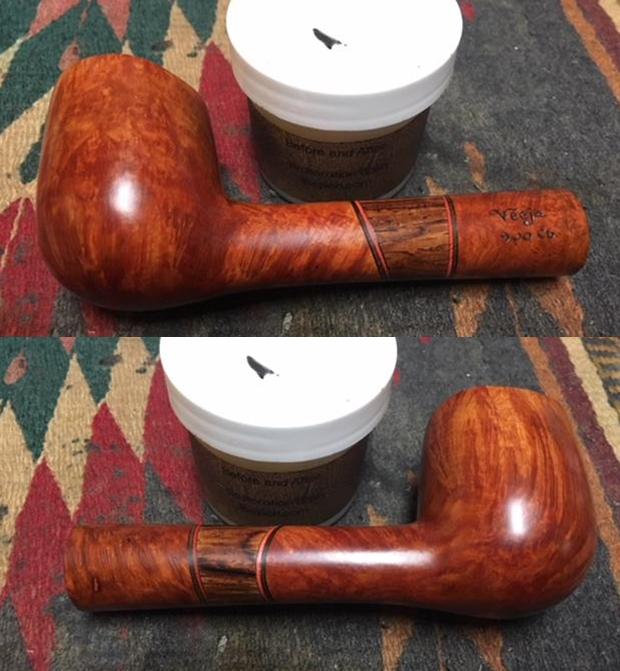
 Now to attack the lava flow on the rim and to clean the stummel surface. I take a few pictures of the stummel grime to show the progress. I’m looking forward to seeing what Murphy’s will do! Using undiluted Murphy’s Oil Soap, I go to work using cotton pads. I also use a brass brush on the rim – brass brushes do not scratch the wood. The hard crust is not easily moved. I use the Savinelli Fitsall tool’s flat straight edge and carefully scrape the crust off the rim. After getting the rim and stummel as clean as I can, I rinse the stummel with cool tap water and wow! I’m not disappointed. The beauty of this block of briar is shouting from the housetop! I’m liking this a lot. The downside is the rim. As with all the other brothers and cousins, this stummel will be topped to restore fresh briar to the rim. I love doing ‘before & after’ comparisons. Who says that a good cleaning doesn’t help!?


 Now, to clean the internals of the stummel I use pipe cleaners and cotton buds dipped in isopropyl 95%. I’m amazed that the internals, mortise and draft hole, are not terribly dirty. With only a few pipe cleaners and cotton buds expended, I turn to the stealth approach.
  To freshen the internals even more, I use the kosher salt and alcohol soak. I fashion a wick using a cotton ball by pulling and twisting it. I then push it down into the mortise into the draft hole using a straight hard wire. I fill the bowl with kosher salt which will not leave an aftertaste as iodized salt and I cover the bowl and give the stummel a shake to displace the salt. I then fill the bowl with isopropyl 95% until it surfaces over the salt. In a few minutes the alcohol has been absorbed so I top if off again. I put the stummel aside for the night, I turn out the light and my day is finished.
 The sun has risen on a new day in Bulgaria and the kosher salt and alcohol soak has done the job. The salt and wick are discolored showing that the oils and tars were absorbed through the night. I thump the stummel on my palm to dislodge the salt into the waste and I wipe the chamber out with paper towel as well as blowing through the mortise. I dislodge any leftover salt crystals. To make sure all is clean I run a pipe cleaner through the draft hole and a cotton bud in the mortise and all is clean and fresh. I wonderful thing to behold!
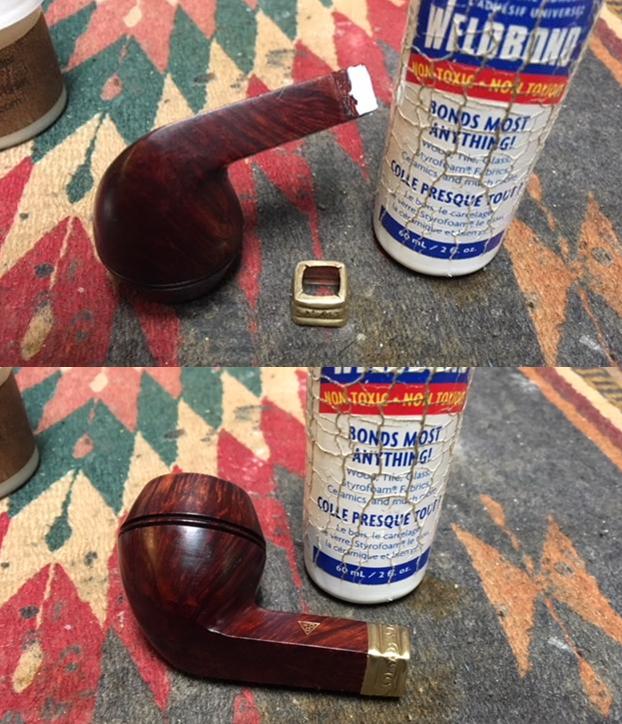
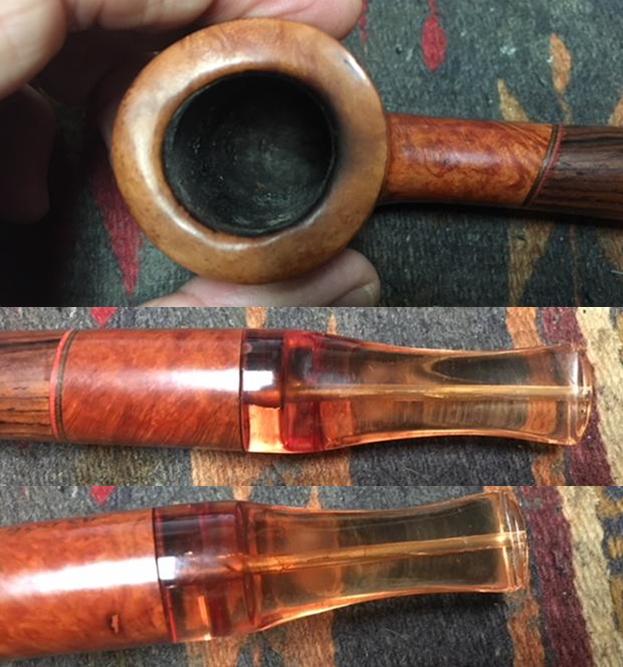
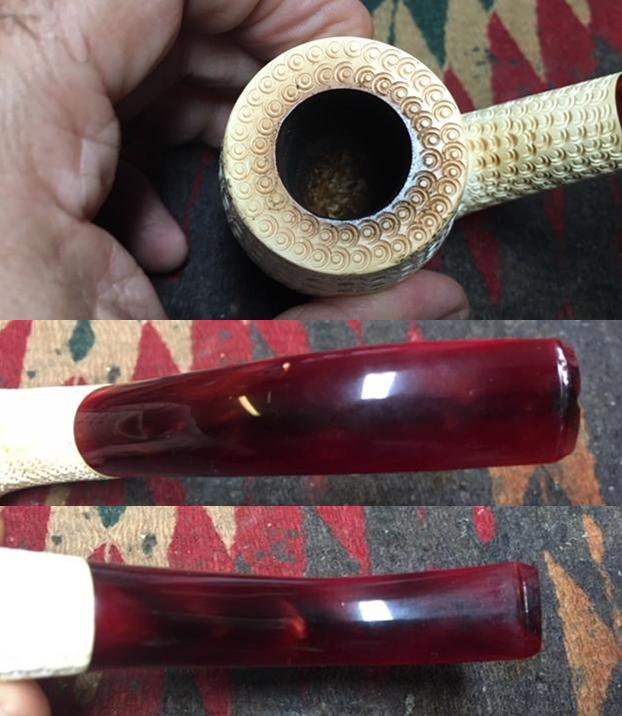
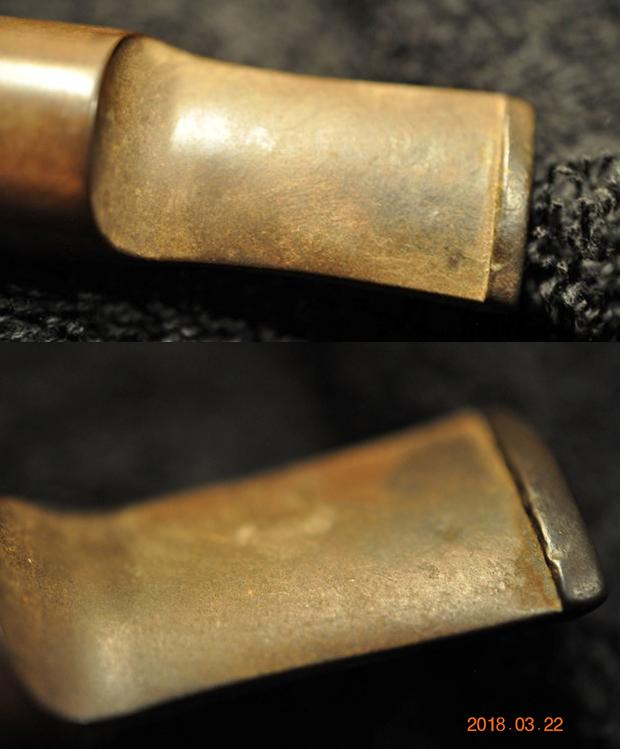
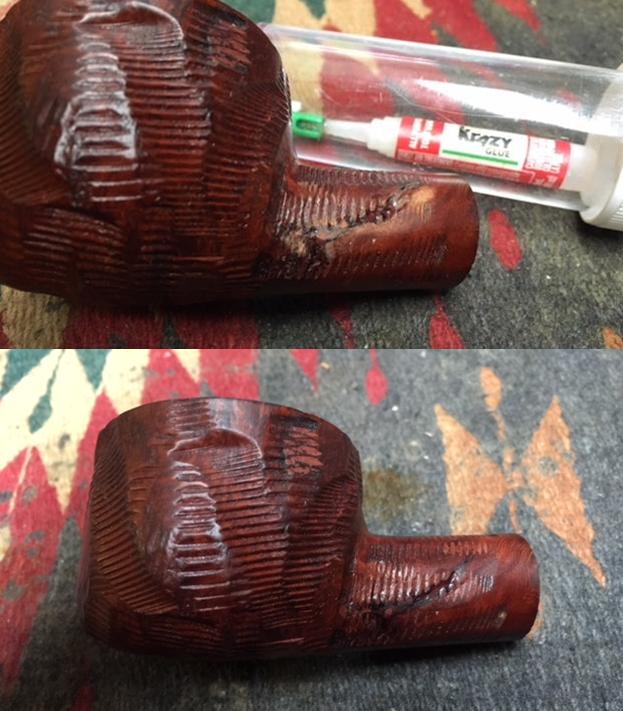
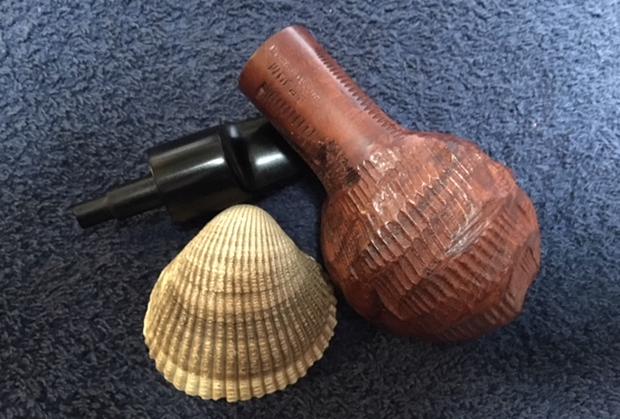
 Before proceeding any further with stummel or stem restoration, I work on the issue of the junction between the two. The upper half of the shank is extending over the stem so that when I run my fingers over the area there is an obvious ridge. I take a close-up to show this. Also, on the bottom of the shank, the stem extends over the shank – not as much, but I still detect a ridge in the opposite direction with the touch. The mortise drilling was too low creating the offset.
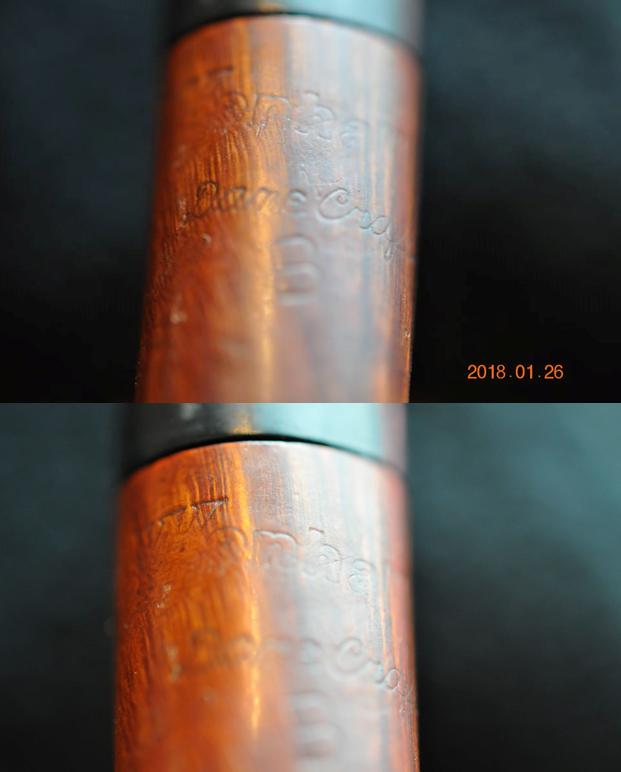
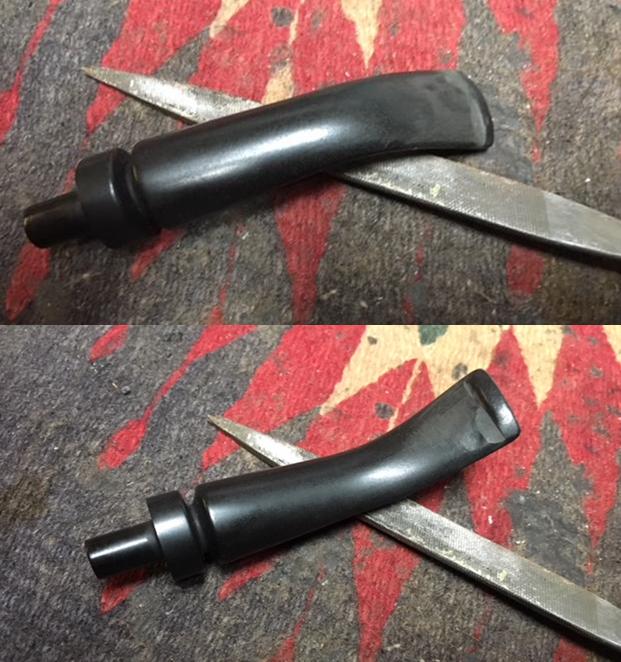
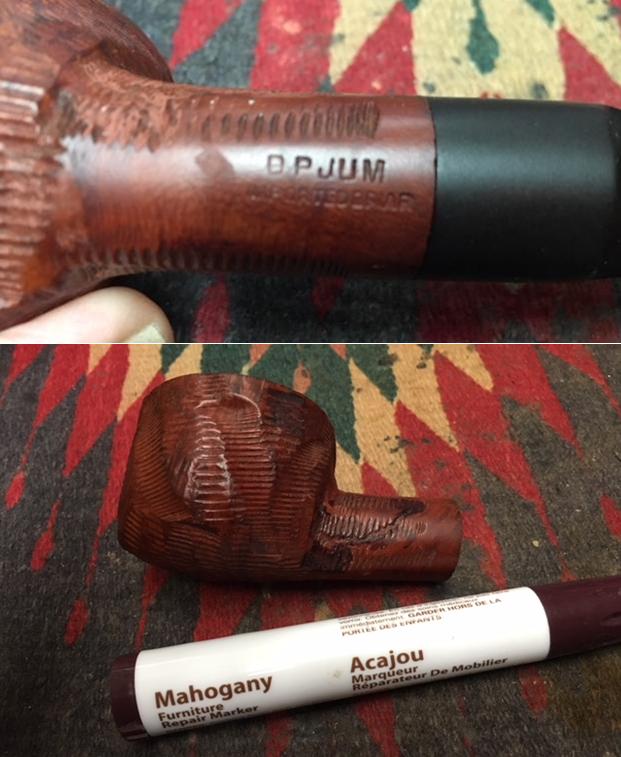
 Leaving stem and stummel joined, I carefully sand the higher areas on both shank and stem to form a smooth transition from shank to saddle stem. Of course, much care is given in the sanding so that I don’t inadvertently erase the ‘TI’ at the end of the L. J. Peretti nomenclature on the shank! In the immediate picture below, you can see the sanded alignment transitioning into what has yet to be sanded on the top of the shank.
 The hope is to remove the ridge, but also to taper the sanding down the shank a bit to avoid the ‘stuffed pants’ look – a bulge of briar paralleling the ridge sanding. The goal is a smooth, tapered transition.
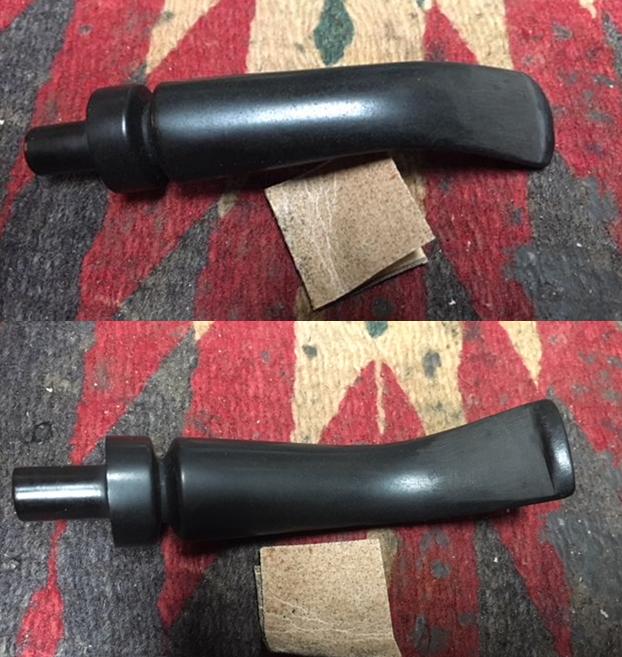
 I like the results. The ridges are removed and tapered. Now, switching to 600 grade paper I erase the scratches left by the 240 sanding. After the 600 grade sanding is completed, I take a look at the junction. Through the cleaning process, I have noticed that the stem has loosened in the mortise. I’ll need to address the tenon/mortise junction.
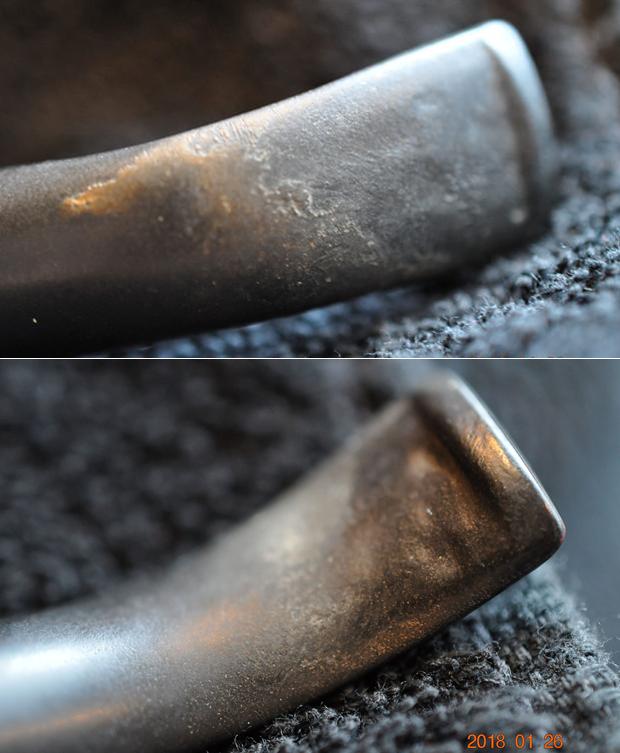
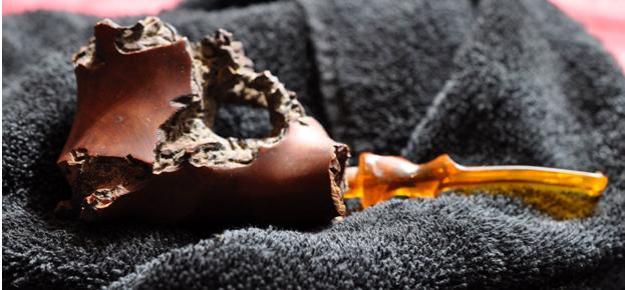
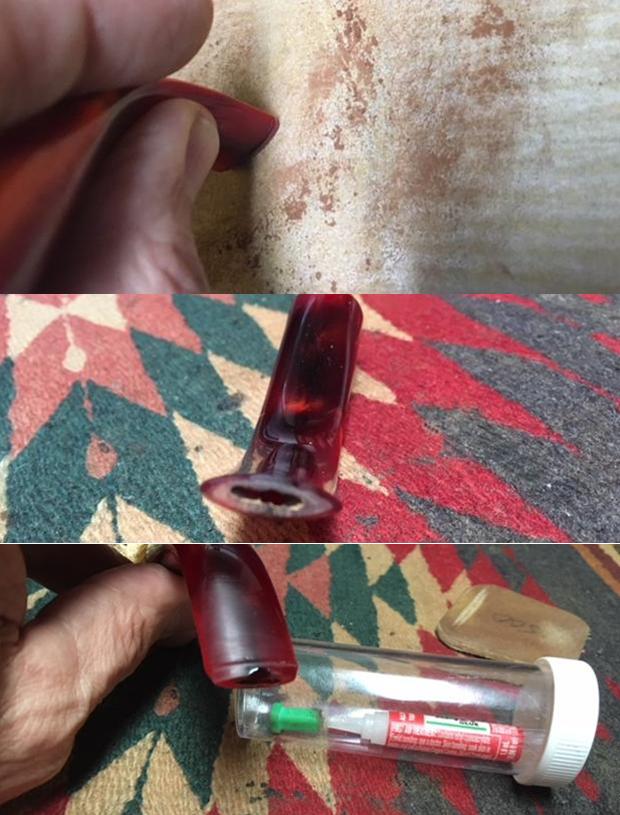
  …AND IT WAS GOING SO WELL, until it wasn’t. As I was surveying the stem, my eye caught sight of what looked like a hole on the upper side of the stem, mid-way through the bend. Oh my! Well, I first thought my eyes were not seeing what they were obviously seeing. My initial reaction was, “How did I do that?” Then, my next inclination was to look at earlier pictures of the stem to see if it was there and if so, how is it possible to have missed something so obvious?!?! I’m glad you couldn’t hear the conversation floating through my mind at that point! I found a picture before the restoration began, and yes, it was there. The pictures reveal the source my current frustrations which is part and parcel of pipe restorations – and life…. I put a dental probe in the hole, and yes, it did go through.
  I then ran a pipe cleaner through to see how thin the vulcanite was at the stem’s bend where the hole broke through. It appears thin, but salvageable. To test the integrity of the surrounding vulcanite I pinch it hard to see if it would break. It didn’t and that is good. I decide to patch it like a typical hole in a bit scenario but perhaps leave the patch a little ‘fat’ to add some reinforcement to the area.
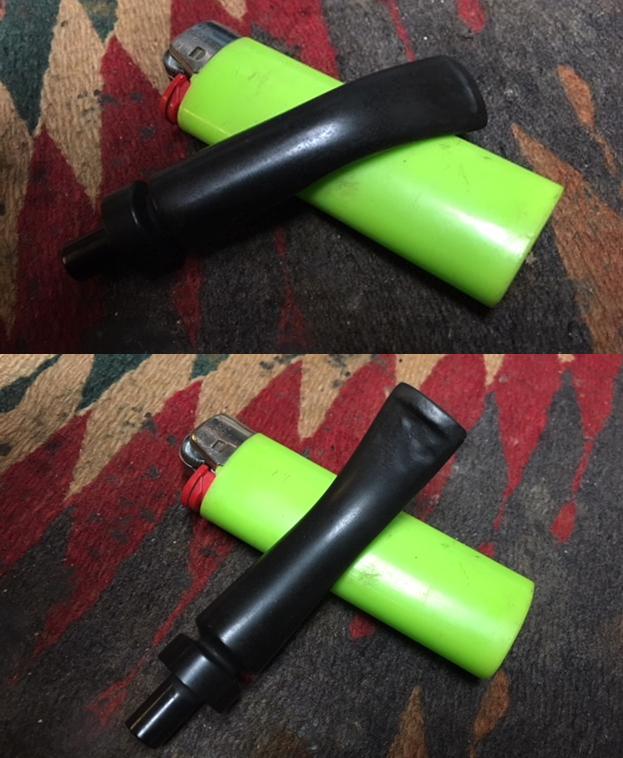
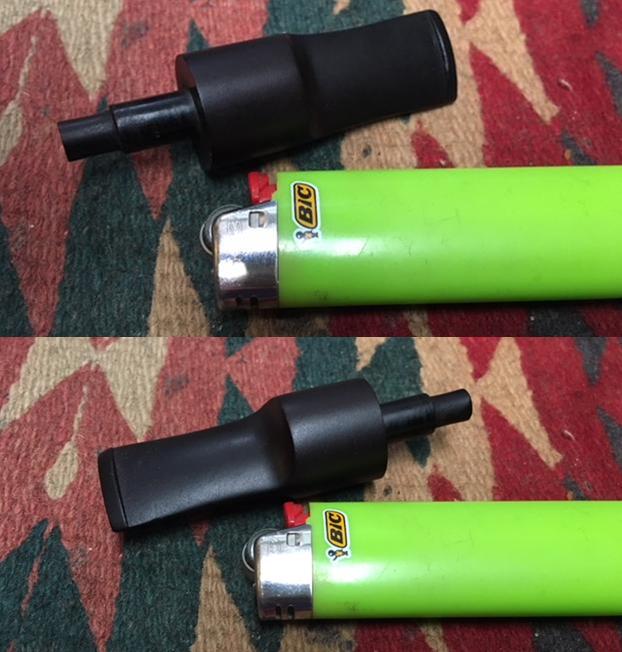
 So, the projects are mounting for this stem. First, to address the stem’s looseness – the tenon/mortise junction. Second, repair to the hole in the bend. Third, repair the chewed bit and button – upper and lower. Then, the sanding and preparations for the finishing phase. I begin with the tenon expansion to tighten the stem’s fit. I do this first because it’s the easiest and least time consuming. I find a drill bit just a little larger than the existing tenon draft hole to act as the ‘expander’. I use a Bic lighter and heat the vulcanite tenon by painting it with the lighter’s flame. As the vulcanite heats, as a rubber composite, it softens and becomes pliable. When heated sufficiently, gently I push the smooth end of the bit into the hole and the tenon expands as a result. It works like a charm. After heating the tenon, inserting the bit by twisting it, and retracting it, I test the fit. It is good and snug, but not too tight that one is afraid of cracking the shank – which I’ve had experience in!
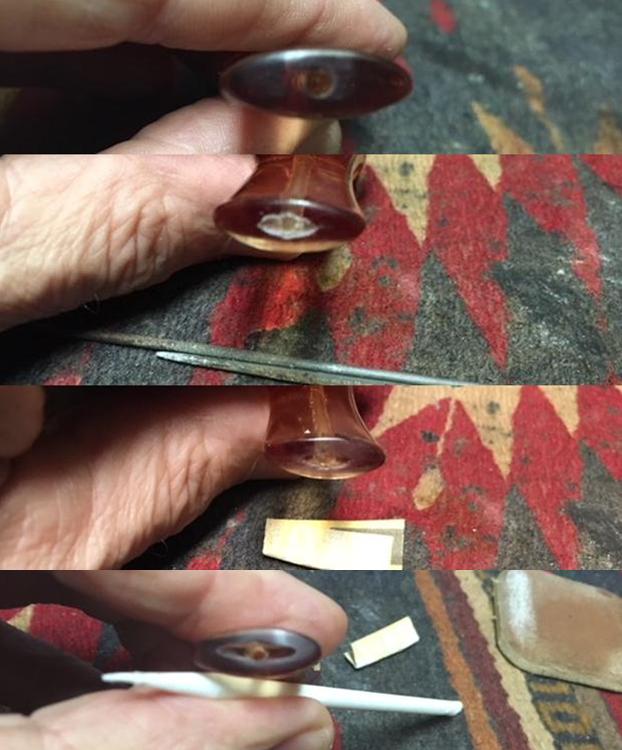
 I decide to do the prep work on the bit next so that at the conclusion, I can apply patch material to the bit area as needed as well as to the bend hole. Looking at the bit and button first, I take a few more pictures to get a closer look.
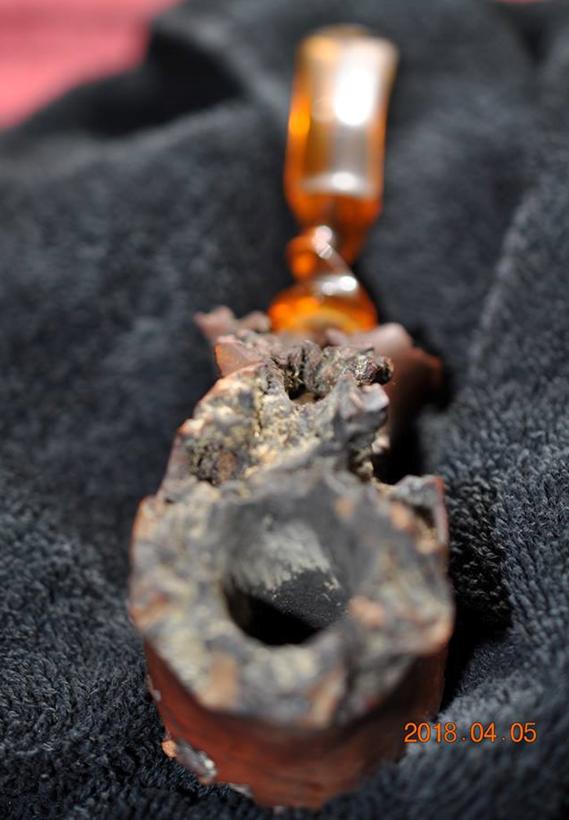
 I notice that there was something on the side of the draft hole and I began digging with a dental probe. One hunk of something dislodged like it was hanging on for dear life. I stuck the probe in deeper…there’s more…. I was incredulous! How could so much stuff hide in the button draft hole! I took pictures – it is an event!
 Addressing the dents first, I paint the dents with the flame of a Bic lighter to expand the vulcanite as it heats. As it expands, the dents tend to dissipate in their severity. Often, after flaming dents one is able simply to sand out the remaining damage – or much of it. I also flame the button hoping to minimize the dents on the lip. It did help, but sanding is still necessary.
 With a flat needle file and 240 grade sanding paper, I go to work on the upper and lower bit. I use the file to refine the button and remove the dents where possible. The sanding removes much except for one dimple on the top and one on the lower bit. The button sanded out nicely. I also employ a round sharp needle file to sharpen the edges of the draft hole.
 For the upper and lower dimples, I spot drop Special ‘T’ CA glue which is thicker. First, I clean off the areas with alcohol and cotton pads to clean it. I start with applying glue on the lower dimple and wait for an hour or so for the glue to set, and I flip the stem over and apply glue to the upper bit dimple.
  Now to the bend hole. I use 240 grit paper and lightly rough up the area around the hole. I then wipe it with isopropyl 95% to clean the area. Instead of applying CA glue, I’ll use a putty created out of mixing CA glue and activated charcoal dust. I believe this will give me more texture for blending if I leave a larger area of patch to reinforce the area. I don’t know if this will work in the end, but I can start with this intention and if it doesn’t work, I can always sand the excess. First, I put petroleum jelly on the end of a pipe cleaner and I insert it to where I see it has reached the hole. The pipe cleaner will hopefully keep the glue/charcoal in place and the petroleum jelly will keep the putty from sticking to the pipe cleaner, so I can pull it out! Next, I place some charcoal dust on an index card. I then place a bit of regular super glue next to the charcoal. I use a tooth pick to draw the charcoal into the glue so that it’s gradually added. In this way I can judge what the thickness should be – not too thin so it runs – not so thick that it doesn’t penetrate the hole. I mix the activated charcoal and superglue and when it seems to be the right consistency, I apply it to the hole using the toothpick as a trowel. I tamp the putty down so that it fills the hole and I spread the patch around the surface. I give a few movement tugs on the pipe cleaner and it is not stuck. I put the stem aside to allow all the patches to cure.
 Turning again to the stummel, I focus on the rim repair. I start by topping the Oom Paul Sitter. Using 240 grade paper on a chopping board I rotate the inverted stummel on the paper in a circular motion. I will remove enough on the rim trying to minimize the internal bevel which will remove the remainder of the charred wood. I’ll have to be careful. When placing the inverted stummel on the chopping block before putting the 240 paper down, I test how level the top is – the stummel rocks a bit. This tells me that the rim is not level and most likely the left side, where most of the damaged wood is, has deteriorated. Charred wood is softer and therefore probably dipped. I start topping and check often to see where things are going. I also use a sanding block to help direct the topping to areas to try to bring about an evenly rounded rim – a challenge with the charring damage on the left side of the stummel – depicted on the bottom in the pictures below. The pictures show the process.
 I’ve removed enough top briar real estate at this point and I will try to bring more balance to the rim as I remove the internal charring as I introduce a bevel. Using a coarser 120 grade paper, I cut the initial bevel removing the charring. I follow the 120 beveling using a rolled piece of 240 grade paper which smooths and continues to clean the char. I then take the stummel back to the topping board again to reestablish the lines of the rim. I do this a few more times, as I try to create a more balanced looking rim. I then top the stummel again with 600 grade paper and beveling as well. The pictures show the rim cleaning and balancing process.
 One last step. To soften the entire look of the rim, I introduce a gentle bevel on the external rim edge by cutting it with 120, following with 240 then 600 rolled pieces of sanding paper. Considering from where we’ve come, I’m satisfied with the appearance of the rim! It’s not perfect and this Peretti will carry the rim imbalance with it the ‘limp’ but he’s moving!
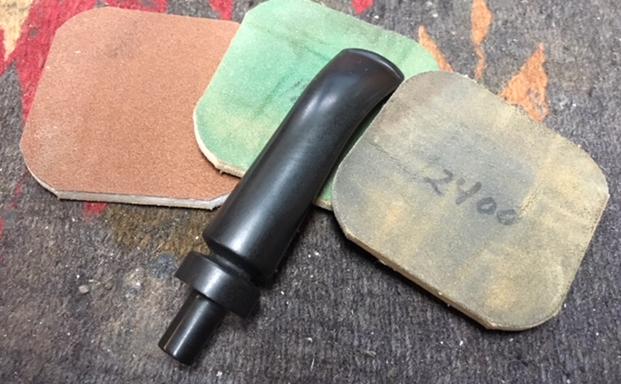
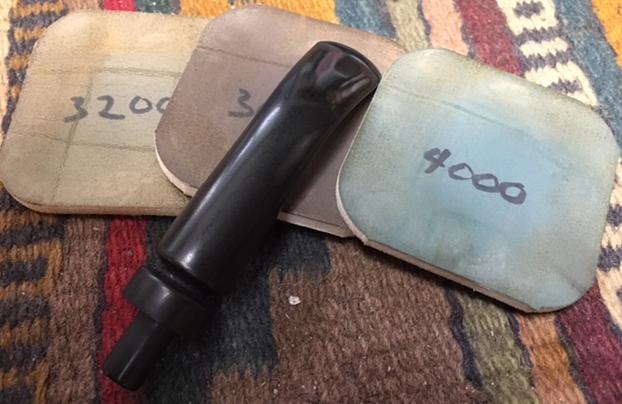
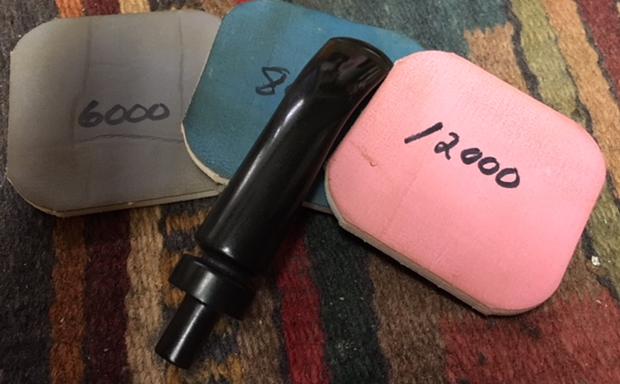
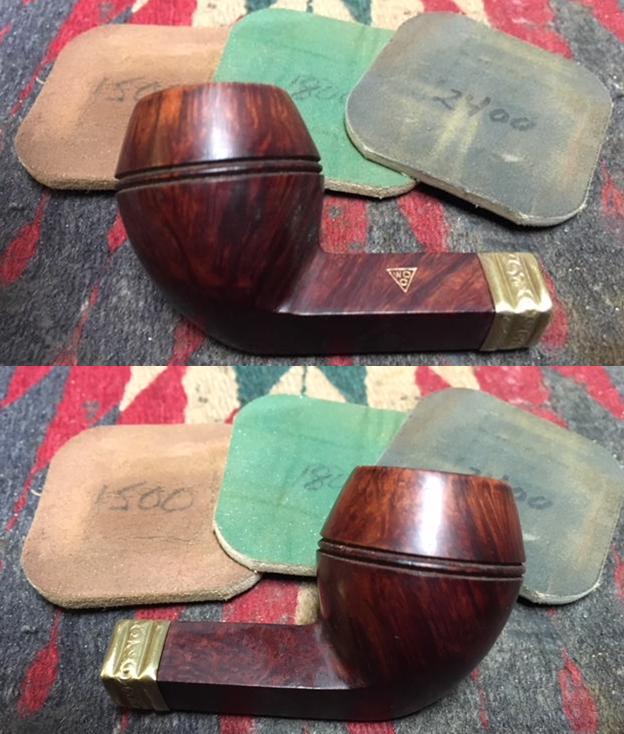
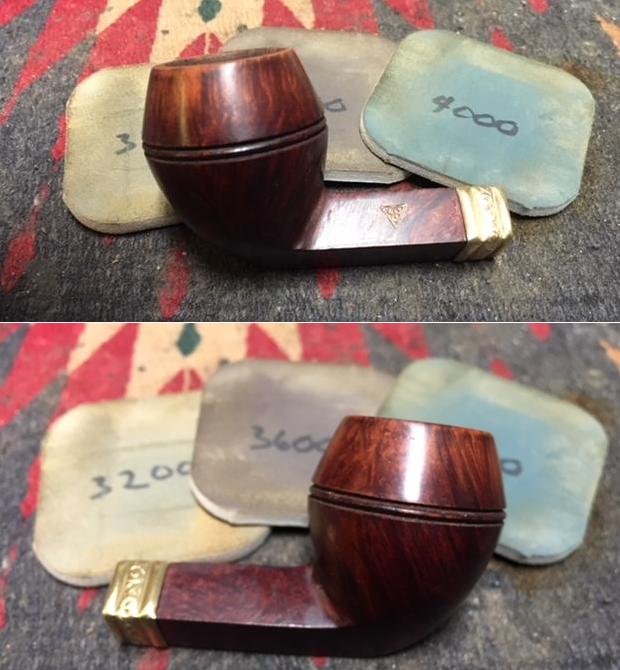
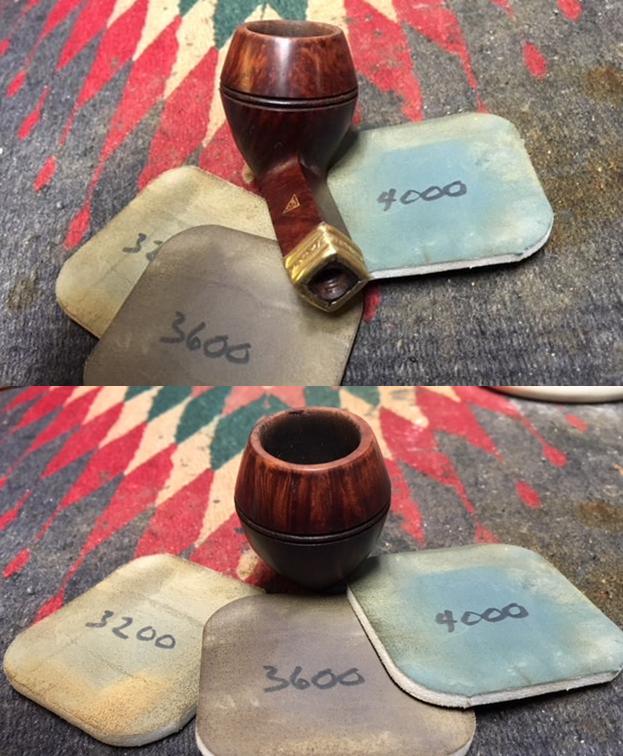
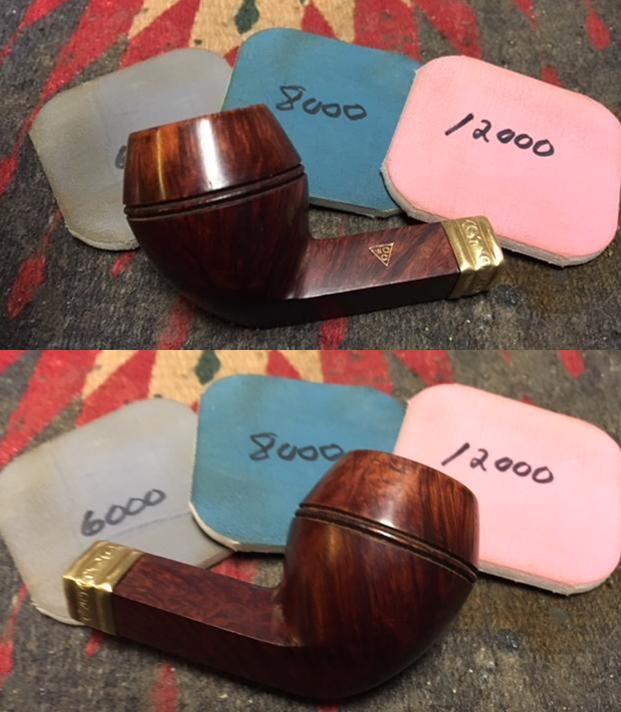
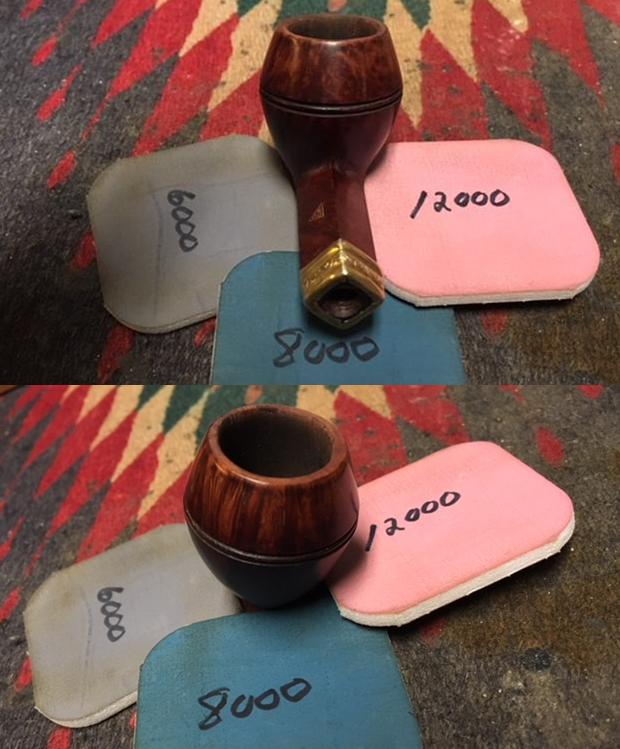
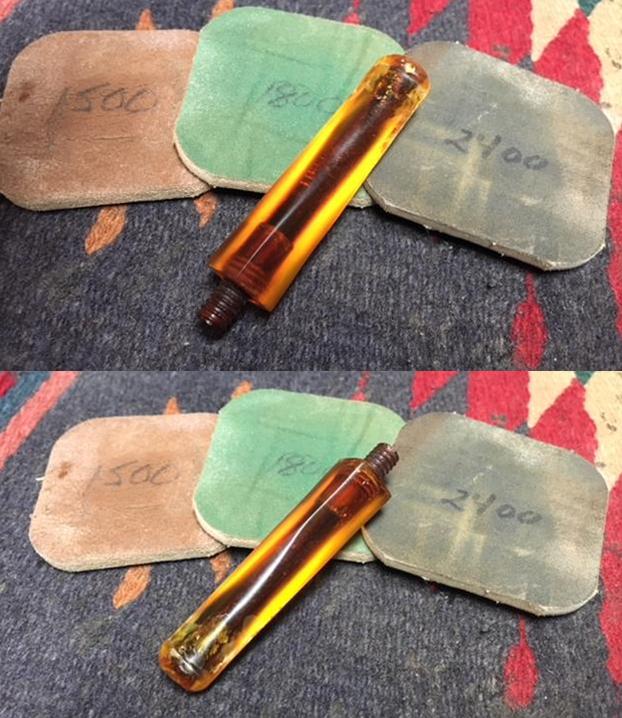
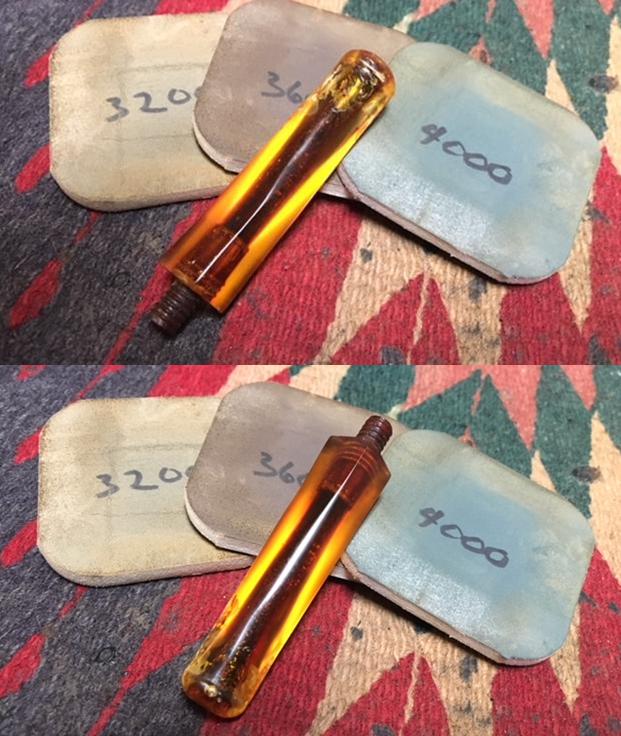
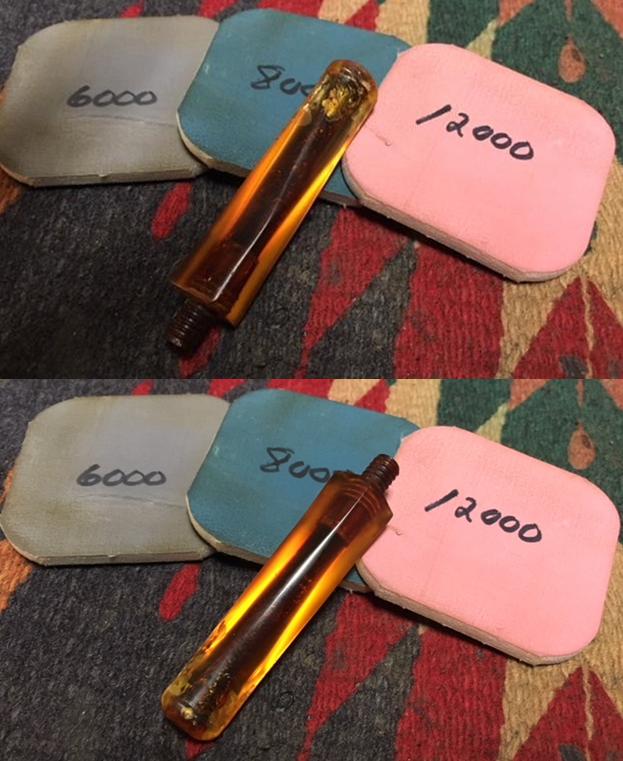
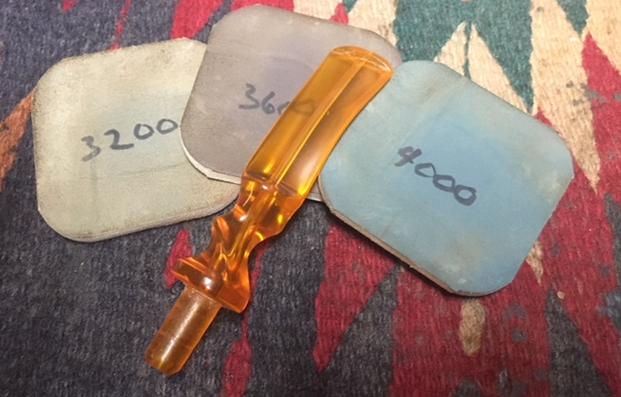
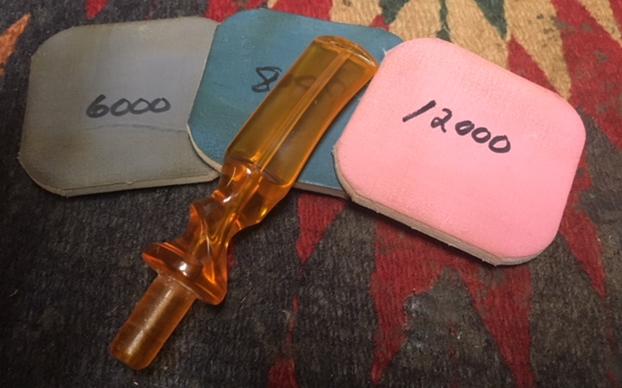
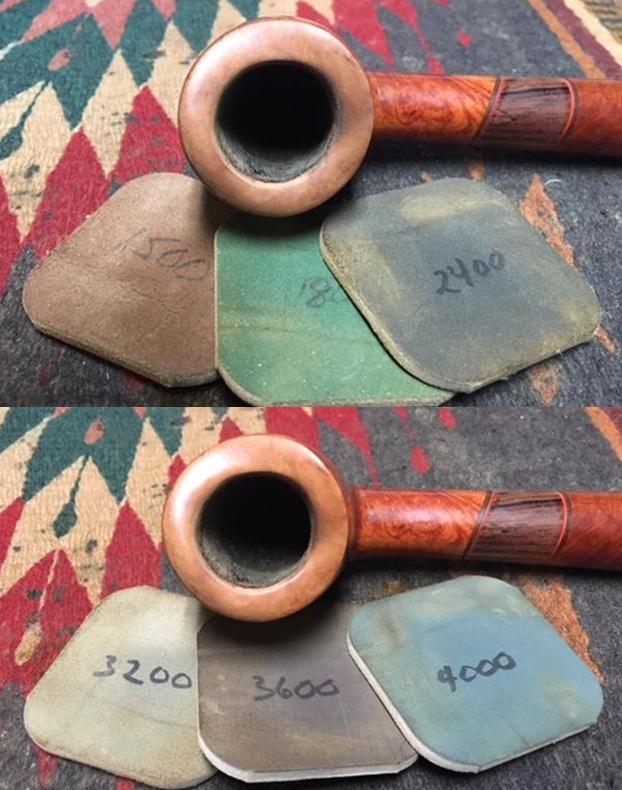
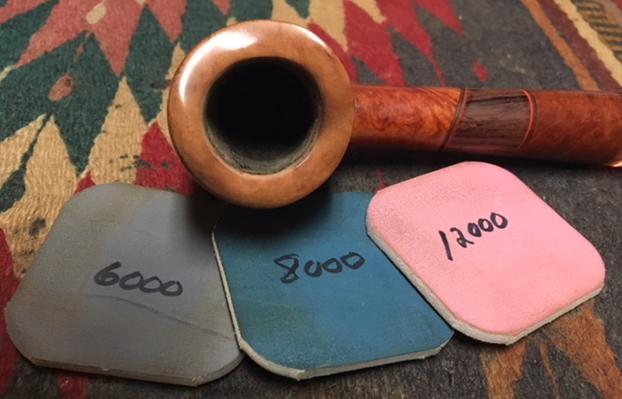
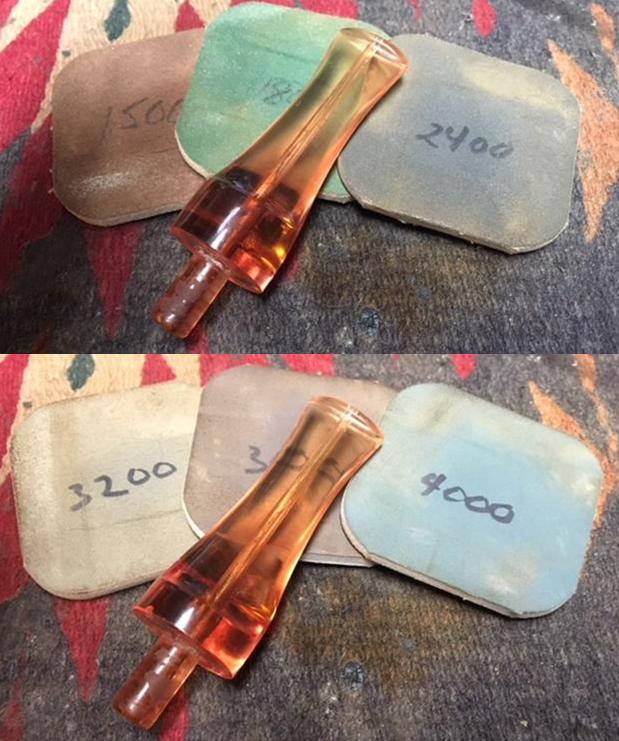
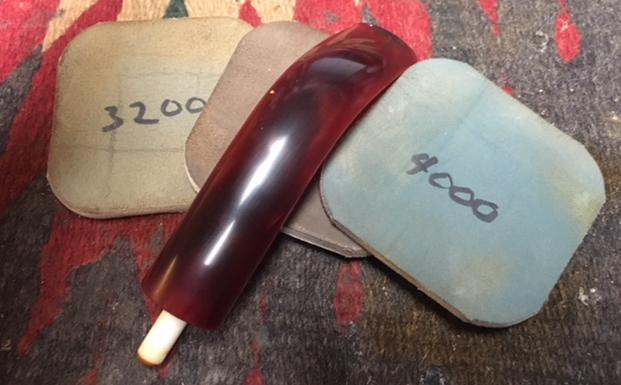
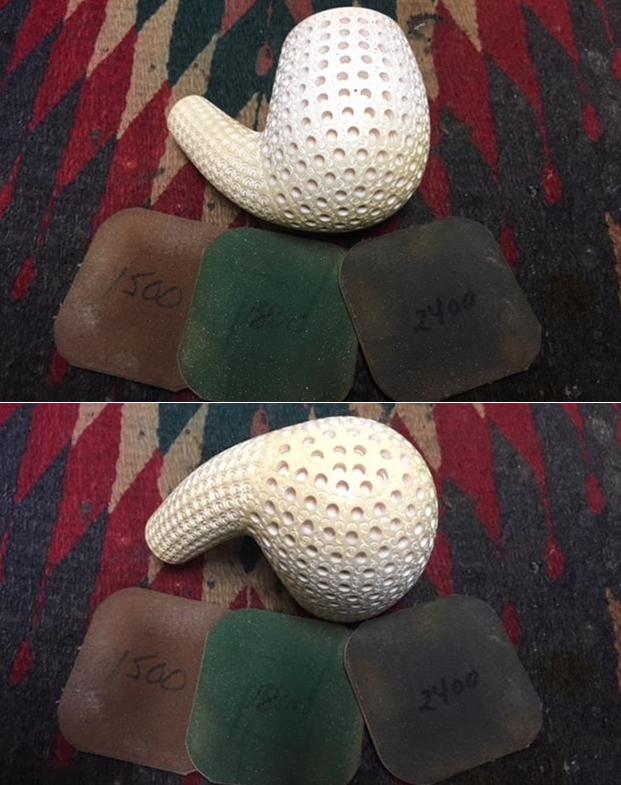
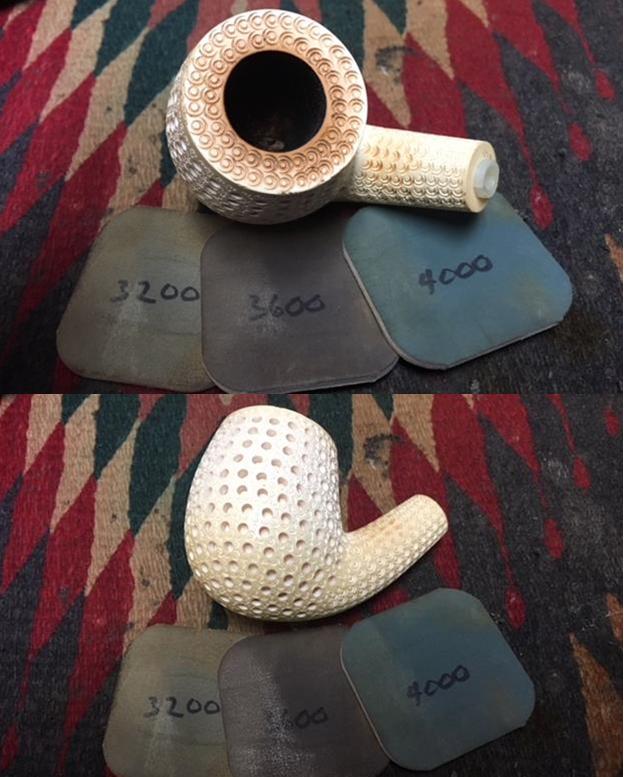
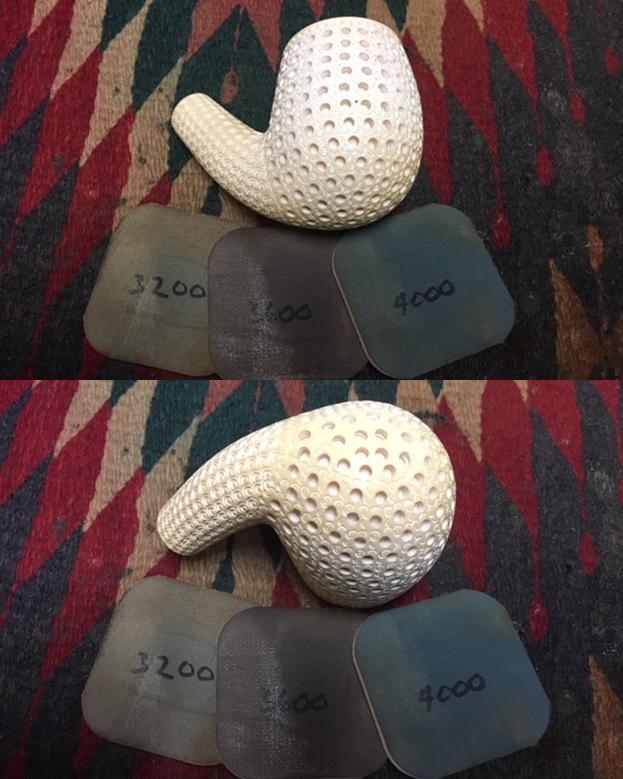
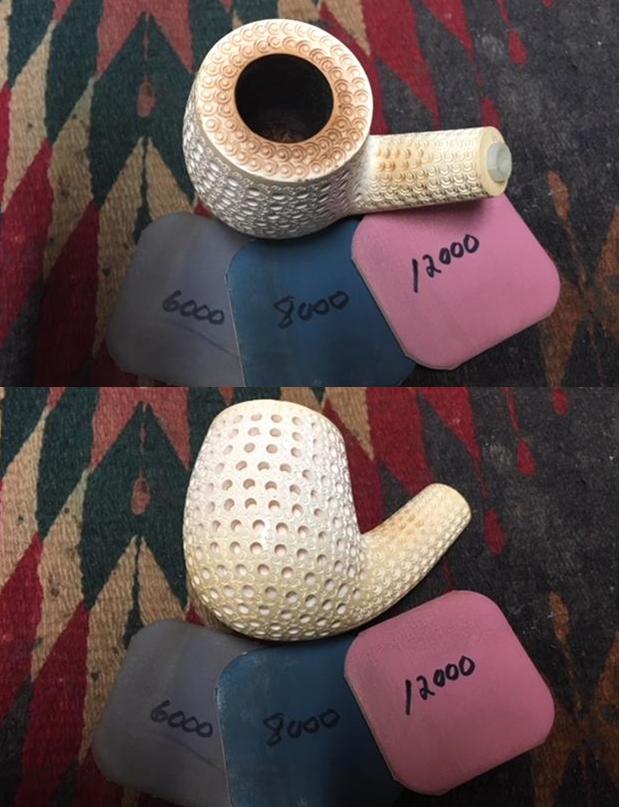
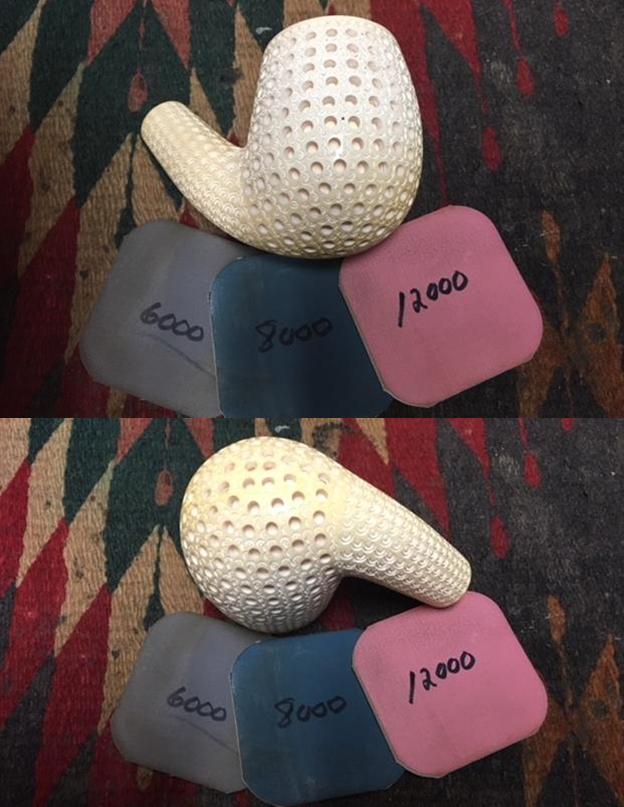
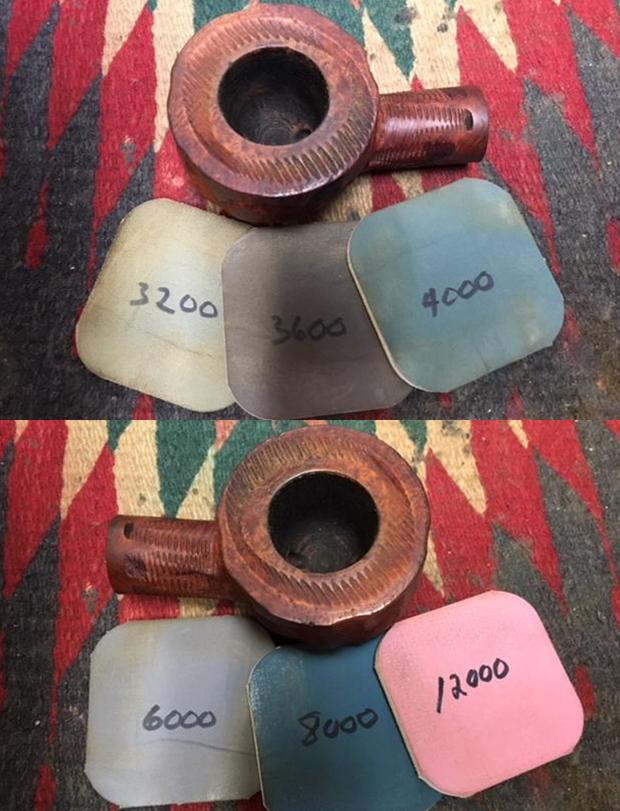
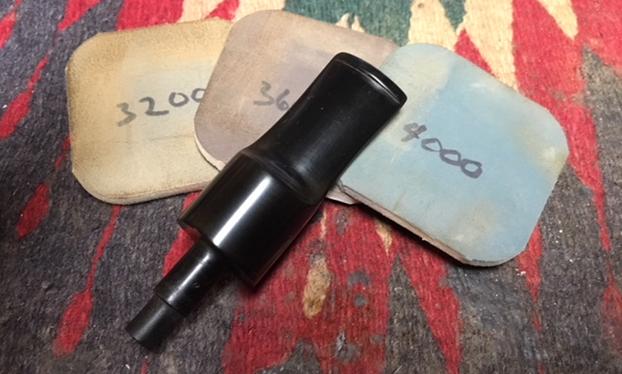
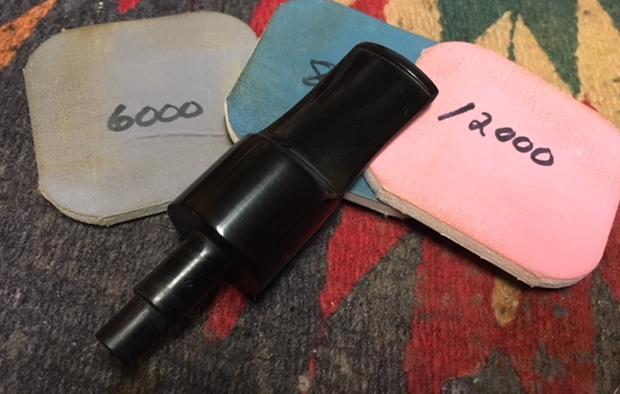
 Next, to prepare the stummel surface for the finishing phase, I use micromesh pads 1500 to 2400 to wet sand the stummel. Then I follow this by dry sanding with pads 3200 to 4000, then 6000 to 12000. The grain on this Peretti Oom Paul Sitter is exceptional. I watch it emerge through each micromesh cycle. This is going to be a beautiful pipe.

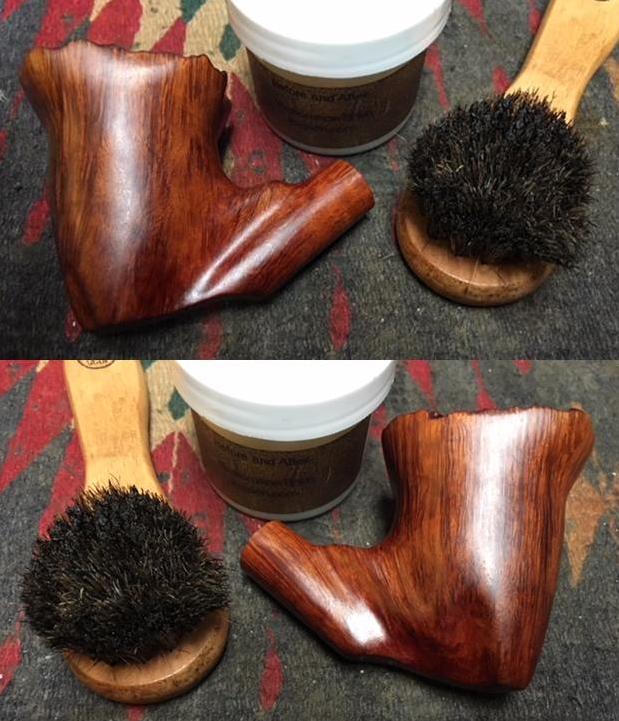
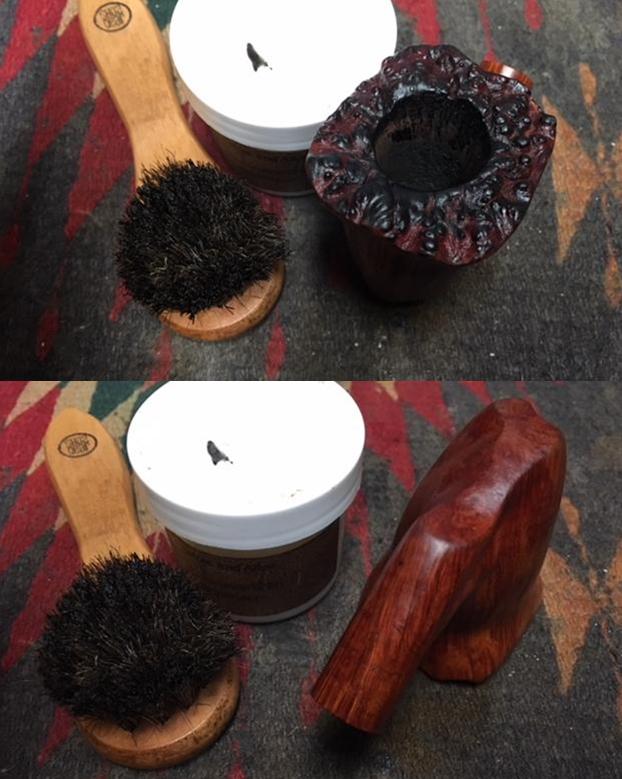
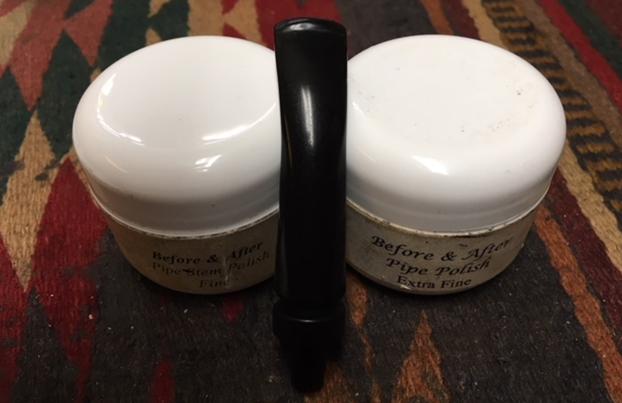
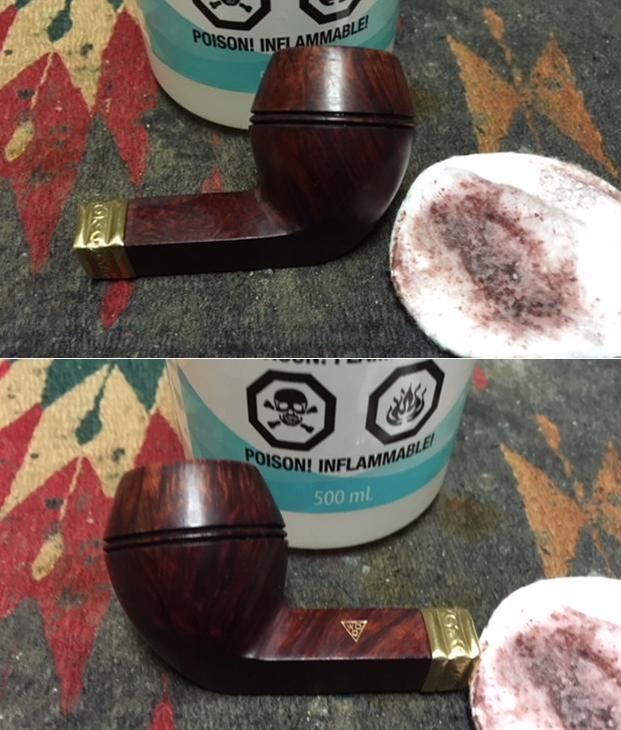
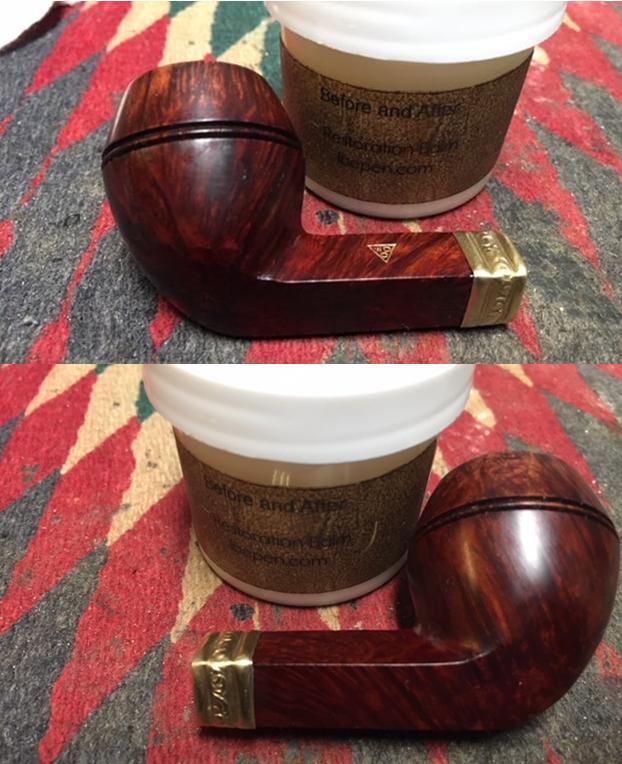
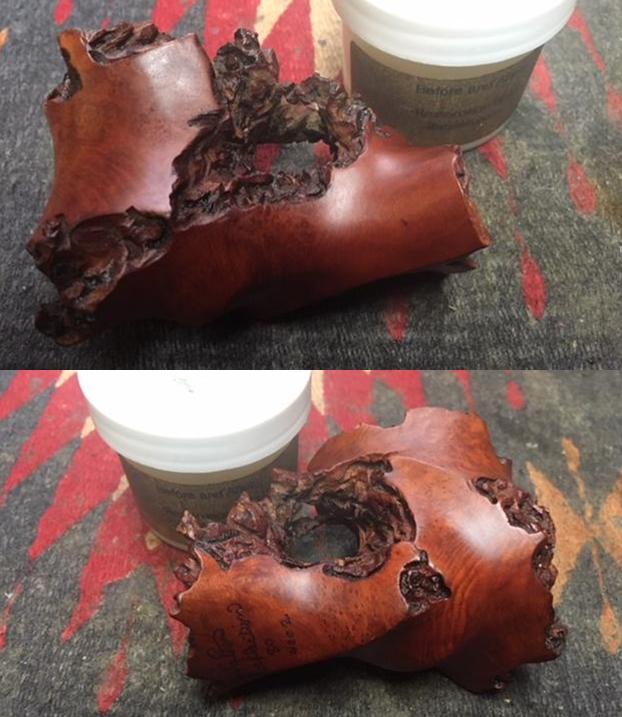
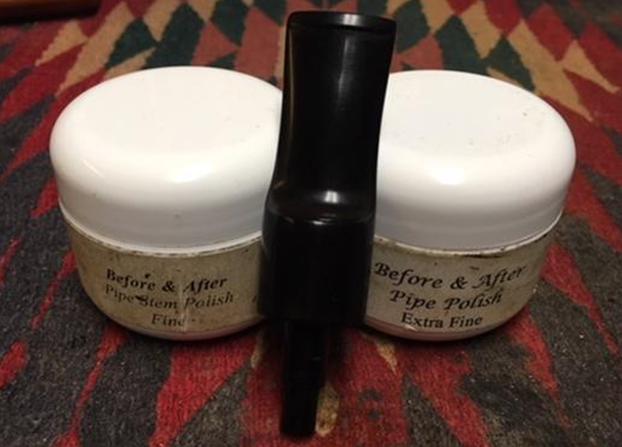
 With most of the Peretti Oom Paul restorations I have done (and the Peretti Half Bent Billiard) I was very pleased with the results of applying Before and After Restoration Balm on the stummels. Keeping the light, natural original motifs of these Perettis has been my goal and the use of the Balm has helped maintain this desire. I do the same with this Peretti. I put some Balm on my finger and I work the Balm into the briar surface. As I work it in, it starts as more liquid – with the consistency of light oil, but then gradually firms up until it is wax-like. After I work it in thoroughly with my fingers, I set the stummel on the clothespin stand to allow the Balm to do what it does for a while. I take a picture of the Balm on the stummel. After several minutes, I wipe the Balm off by buffing it out with a clean microfiber cloth. It looks great – as I was expecting.
 With the Sitter’s stummel waiting in the wings for the stem to catch up, I pick up the stem. Having had a night to thoroughly cure, the patches are ready to be filed and sanded down. Before I forget it, since I had a pipe cleaner with petroleum jelly on it in the stem’s airway, I want to clean the airway so I run a pipe cleaner through the stem dipped with isopropyl 95%. Also, the thought in the back of my mind is the putty in the hole patch, did it push through and harden in the airway and form an obstruction. Unfortunately, this was the case. With the pipe cleaner coming from the tenon side, there seems to be a ridge at the patch site just entering the bend. The pipe cleaner hung up there. Coming from the button end, there is no problem with an obstruction. As I test repeatedly, I discover that coming in from the tenon side, if I put a slight downward bend to the end of the pipe cleaner, the pipe cleaner would successfully navigate past the patch down to the button draft hole. This is not a perfect situation, but it could be much worse with no passage through the airway. Yet, the bright side of the scenario is that the patch is a bit stronger as a result, though the new steward will need to be aware of this bump in the road. So, we move on.
  I begin the filing on the bend hole patch using a flat needle file. I focus on keeping the file on the patch mound to not impact the vulcanite around the patch.
 To help me see what the patch would look like if I left it a bit ‘fat’ on the surface, I take a little detour. My thinking is that it might help strengthen the area to leave the patch fatter on the surface. To get a preview of the patch area, I ran the patch through the entire sanding process to get a better idea how visible it would be. It didn’t take long to go from the filing to 240, 600 then 0000 steel wool focusing only on the patch area.
  Then I ran the patch spot through all the micromesh pads 1500 to 12000, applied Obsidian Oil and I look at the patch area. I take two pictures to show the future. I decide I didn’t like the future! Actually, the patch isn’t that bad, but I know it’s there and it seems unfinished…. I decide to continue to blend the patch by sanding.
 This is the bend patch after continuing with 240 and 600 grade papers. That’s much better.
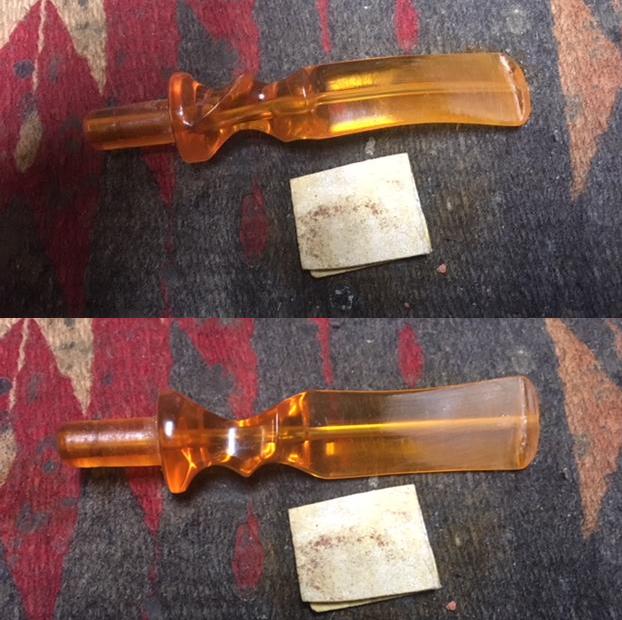
 I move on to the upper and then lower bit. I use the flat needle file, 240 then 600 on both upper and lower sanding the patches and blending them.
 I follow by sanding/buffing the entire stem with 0000 steel wool before starting the micromesh pad process.
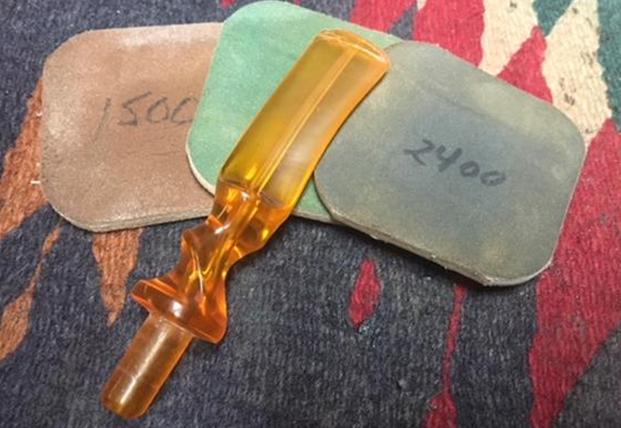
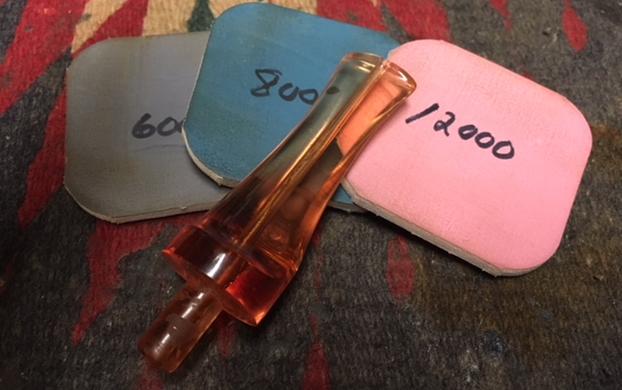
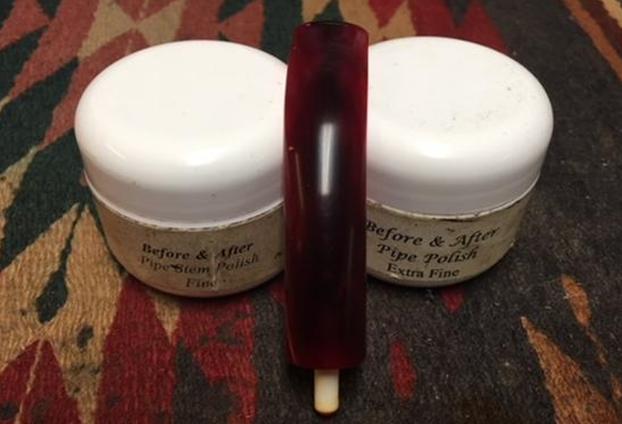
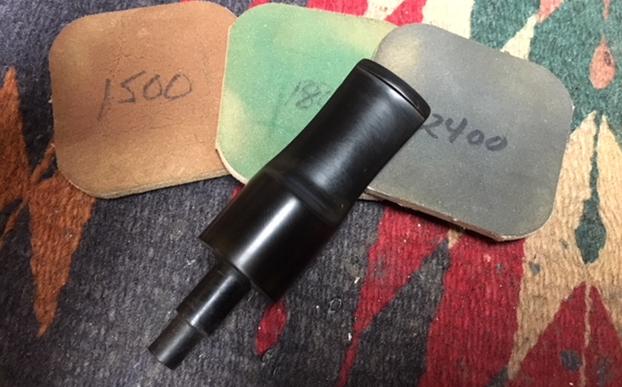
 Now to the fine-tuning sanding process. I wet sand the stem using micromesh pads 1500 to 2400. I then follow this by dry sanding with pads 3200 to 4000 then 6000 to 12000. After each set of three pads, I apply Obsidian Oil to revitalize the vulcanite. The Peretti’s stem is looking good even with all the repairs that were done. I love the glassy pop of the vulcanite! The patch work blended well.

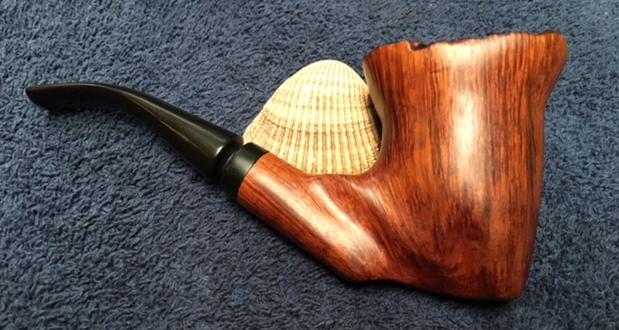
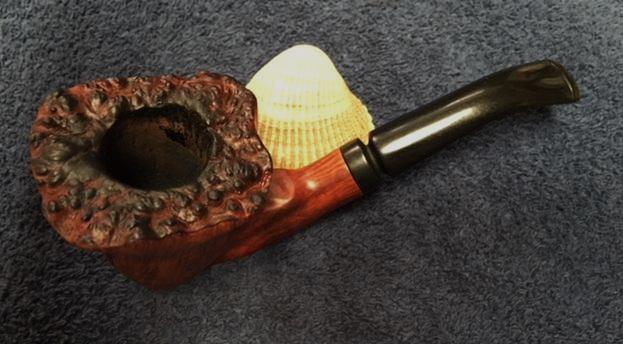
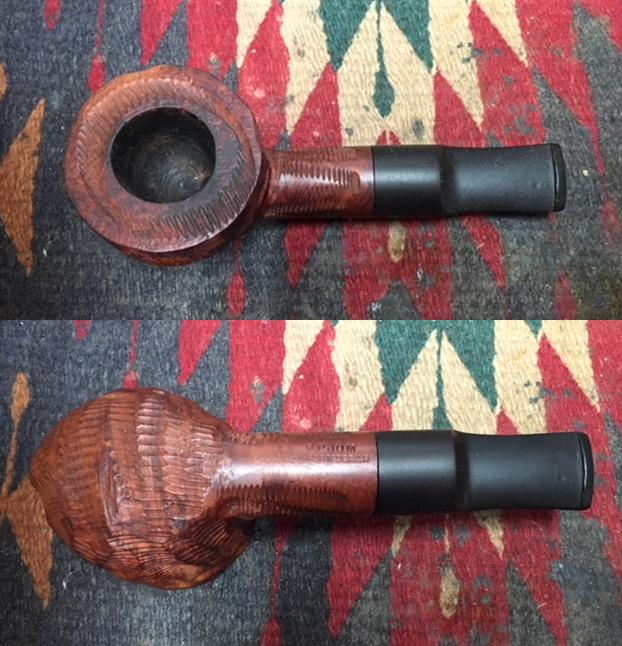
 Now the home stretch. I reunite the Peretti Oom Paul Sitters stem and stummel and mount the felt buffing wheel to the Dremel, set it at the slowest speed and apply Tripoli compound to the stummel. Tripoli is a coarser compound I apply using a circular pattern over the stummel in a methodical way to cover the entire stummel. I do not put too much pressure on the wheel, but allow the speed, compound and the felt to do the work. When the Tripoli is complete, I mount a cotton cloth wheel to the Dremel, remaining at the same speed and I apply Blue Diamond compound to both stummel and stem. I do it in the same way as the Tripoli. Finally, I change cotton cloth buffing wheels and apply White Diamond compound to the stem alone. When the compounds are completed, I buff the pipe with a felt cloth to remove the compound dust from the surface of the briar. I mount yet another cotton cloth buffing wheel to the Dremel, increase the speed to about 40% of full power and I apply a few coats of carnauba wax to stem and stummel. Finally, I complete the restoration of this Peretti Oom Paul Sitter by giving it a brisk hand buffing using a microfiber cloth.
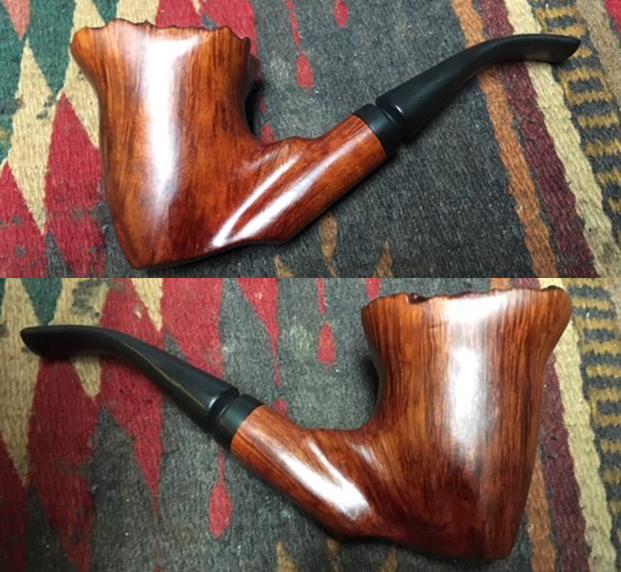
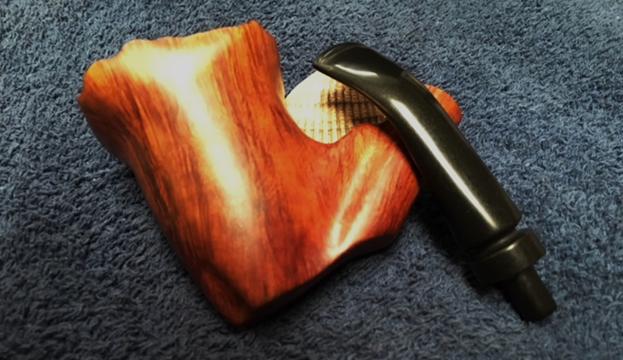
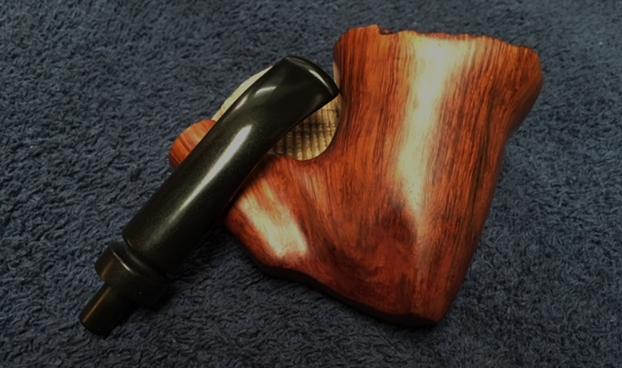
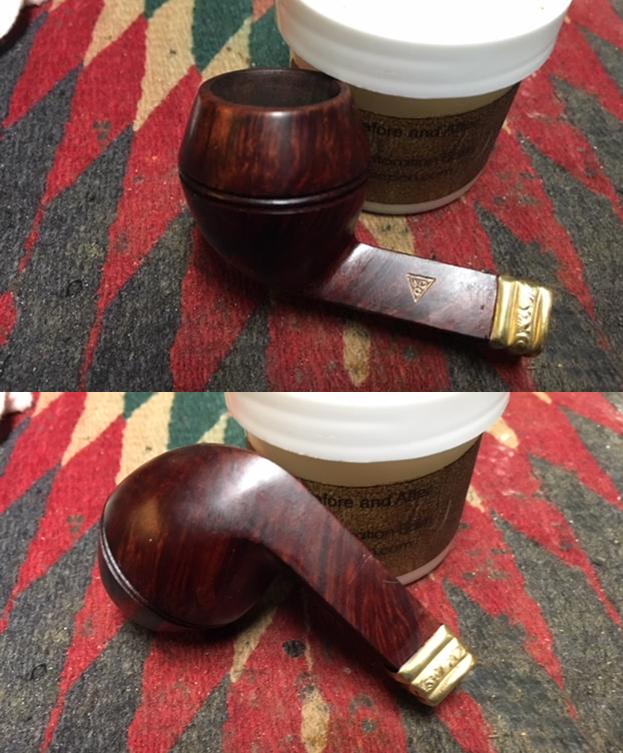
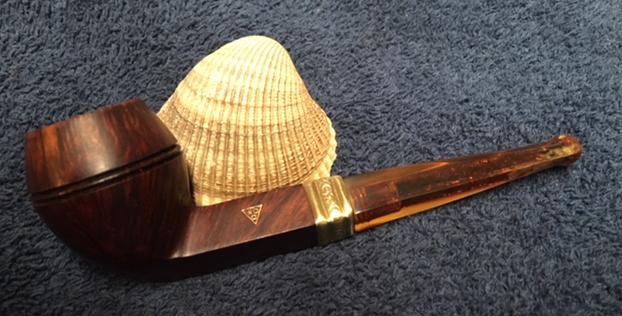
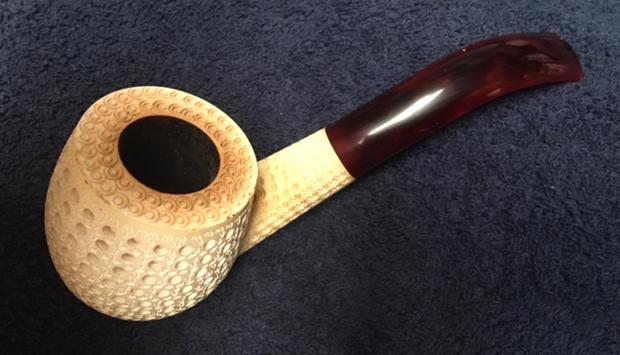
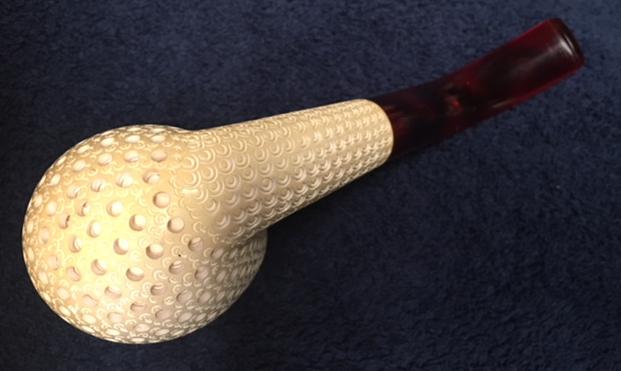
The vertical flame grain on this large Oom Paul Sitter stummel is striking and it is complemented by bird’s eye on the heel as well as the shank. It is unique in the Peretti Lot of 10 where the pipes showcased mainly horizontal and bird’s eye grain. This Peretti will provide much visual pleasure to his new steward and with the size of the bowl, he will pack enough favorite blend for a nice long reflective time. The stem and rim gave some challenges which I think have worked out well. He carries with him some marks from his former life – as we all do! Tim lives in Missouri and is the pipe man who commissioned this Oom Paul Sitter and has first dibs on the pipe when I put it in The Pipe Steward Store. This pipe will benefit the Daughters of Bulgaria – women and girls who have been trafficked and sexually exploited. Thanks for joining me!


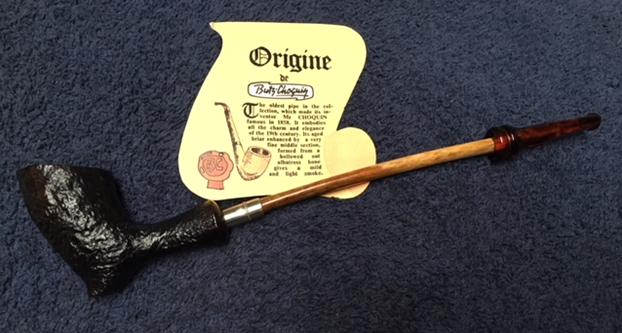
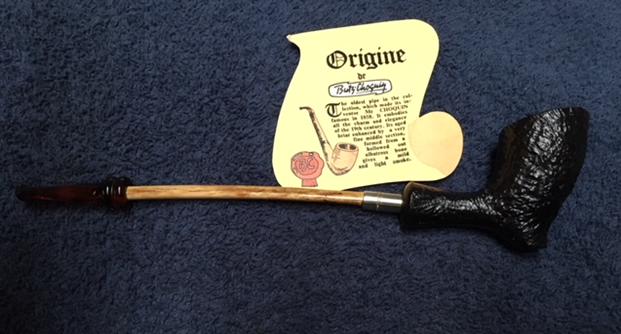
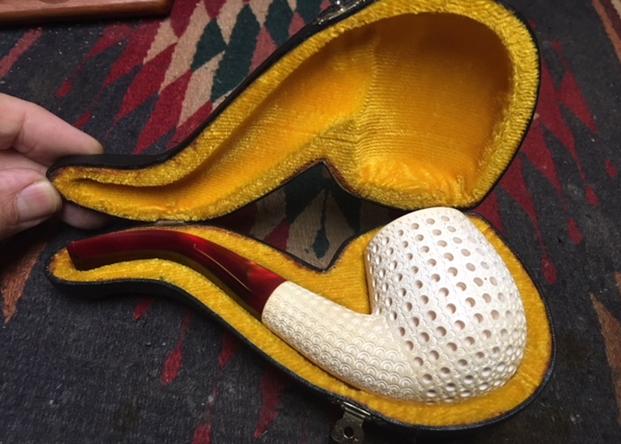
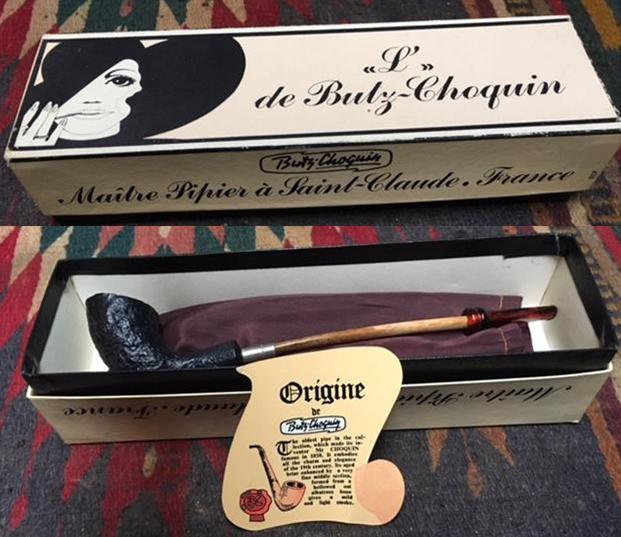 I took a photo of the card that was in the box with the pipe. It can be seen in the next two photos with English on the one side and the other side in French. It reads: Origine de Butz Choquin. The oldest pipe in the collection, which made its inventor, Mr. Choquin famous in 1858. It embodies all the charm and elegance of the 19th century. Its aged briar enhanced by a very fine middle section, formed from a hollowed out albatross bone gives a mild and light smoke.
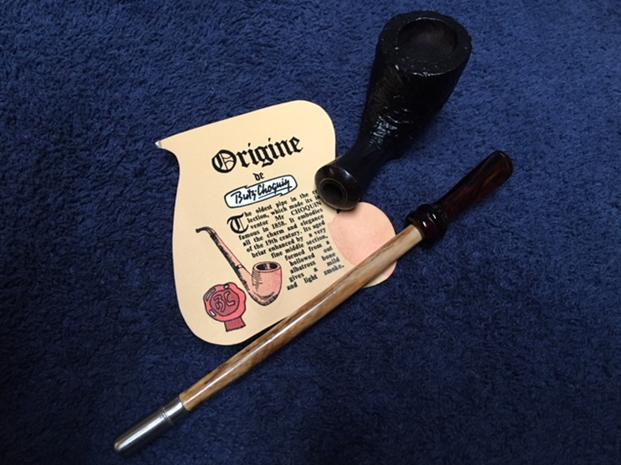
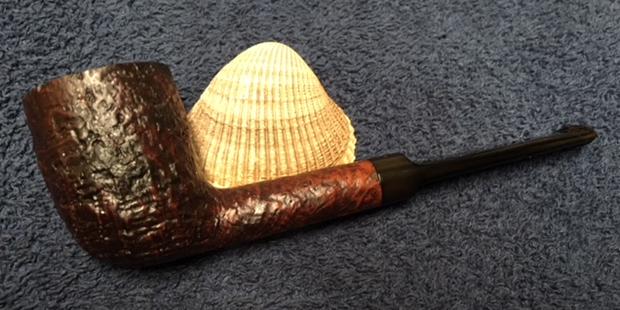
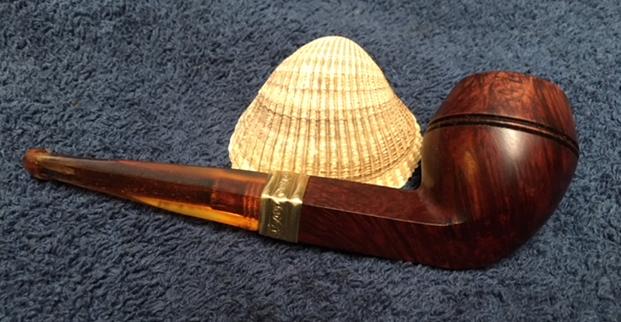
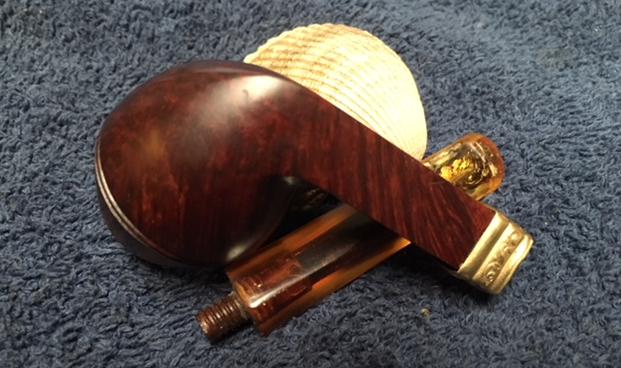
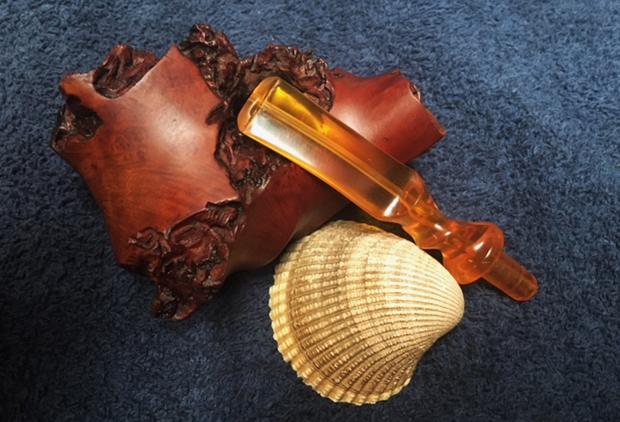
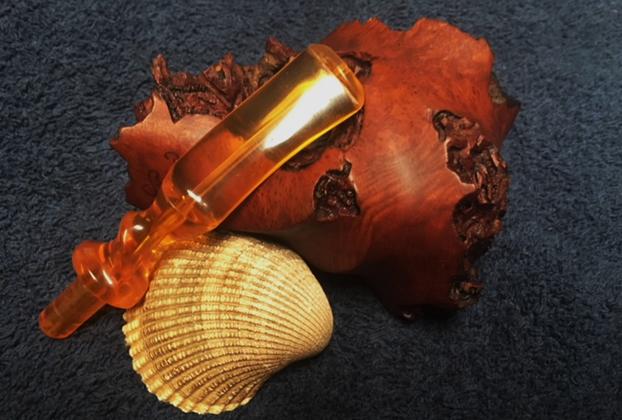
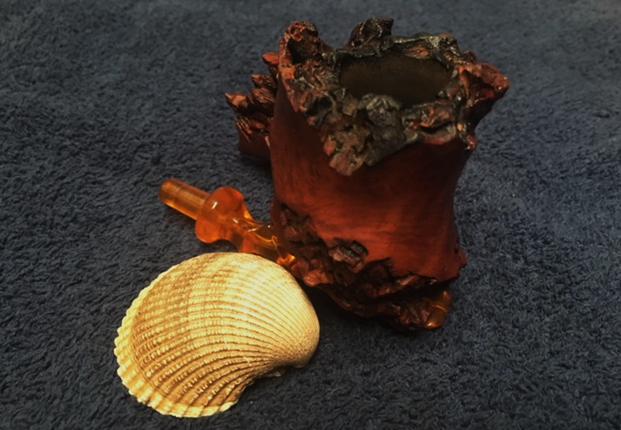
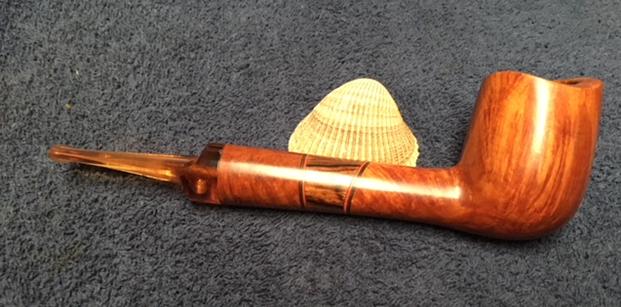
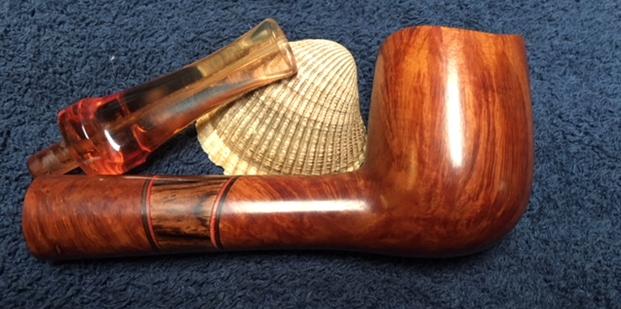
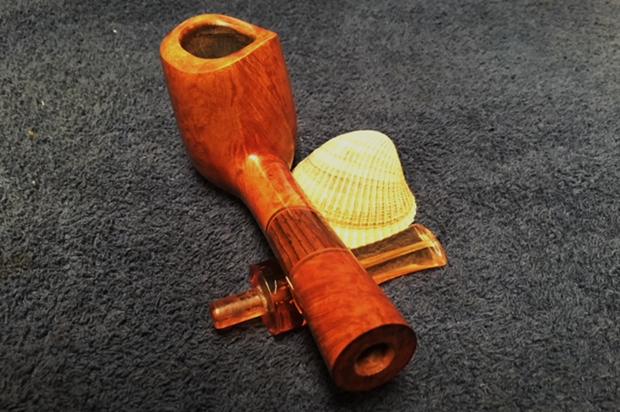
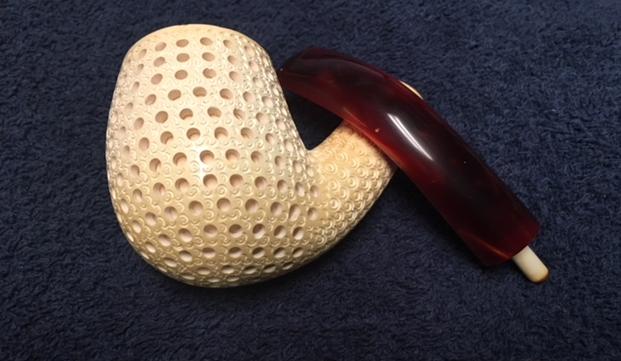
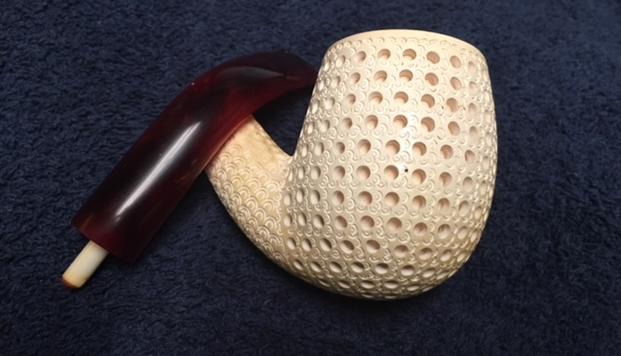
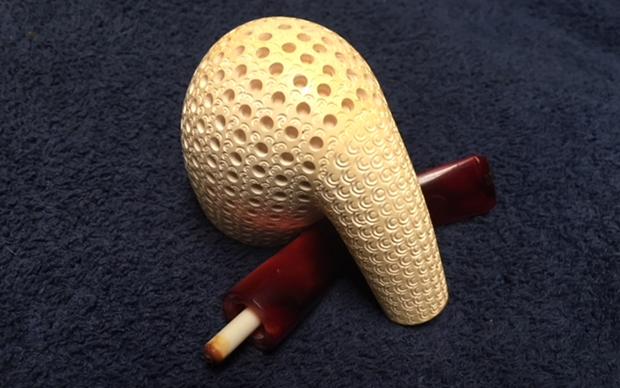
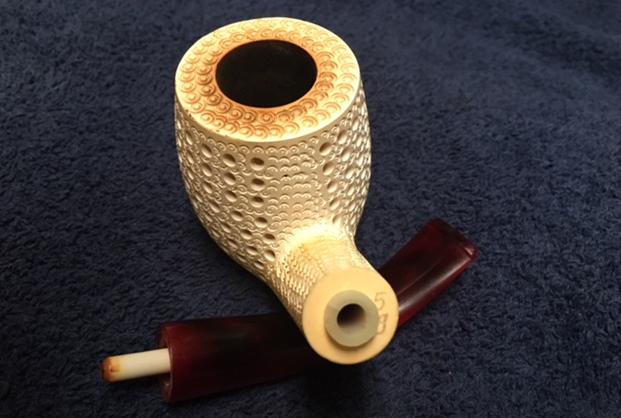
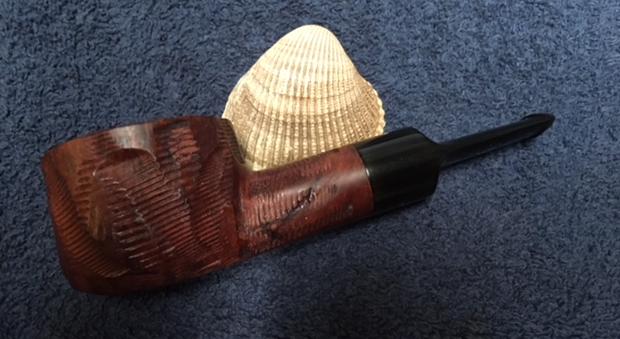
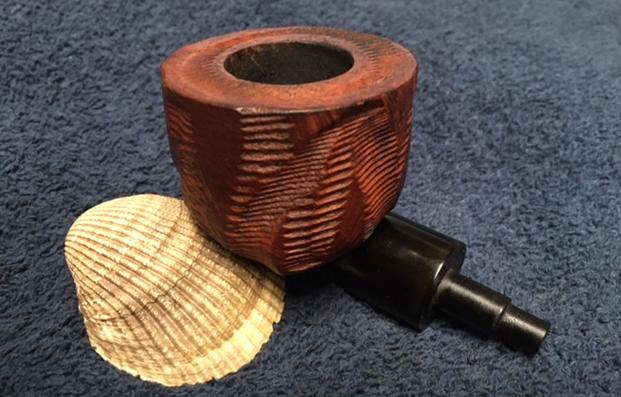
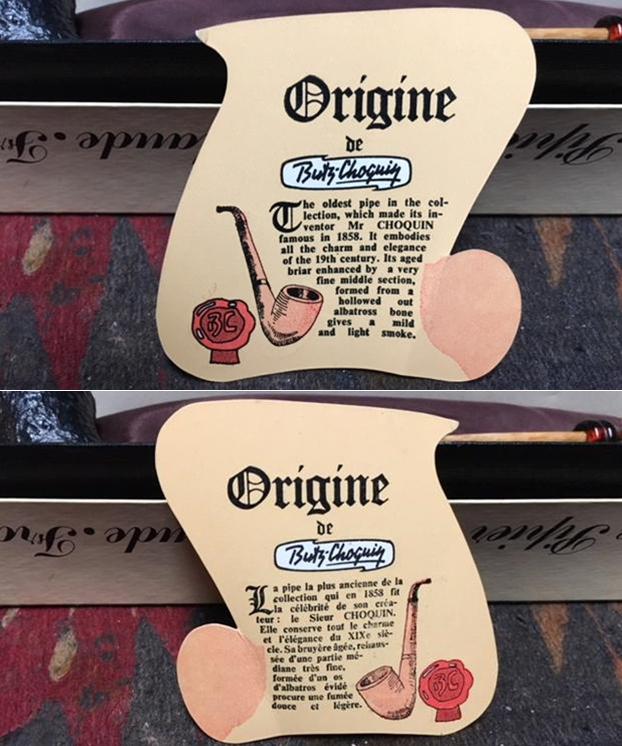 The fellow who sent it to me had packed it in a pipe bag. It was not original but it did the job. I took the pipe out of the bag and took photos of it from different angles to give an idea of the uniqueness and beauty of this pipe. The pipe is 7 ½ inches long, 1 ¾ inches tall, the diameter of the bowl is 1 1/8 inches and the chamber diameter is 5/8 inches. The sandblast finish is a little dusty but in very good condition and really quite attractive. The shape of the bowl has a foot on the bottom, almost like a clay tavern pipe and sits easily on the foot. The albatross bone is in great shape. It has a silver coloured end cap on it that is a bit tarnished. The stem is acrylic with Tortoiseshell amber or Bakelite look to it and it is in excellent condition. The bowl is lightly smoked and not even broken in; my guess is that maybe one of two bowls were smoked in it. There is still raw briar in the bottom third of the bowl.
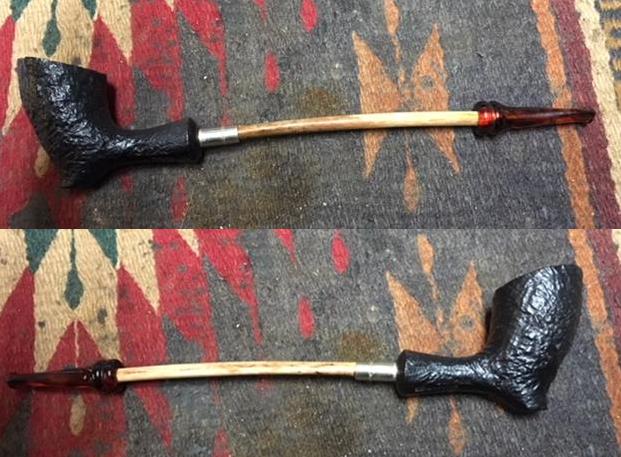
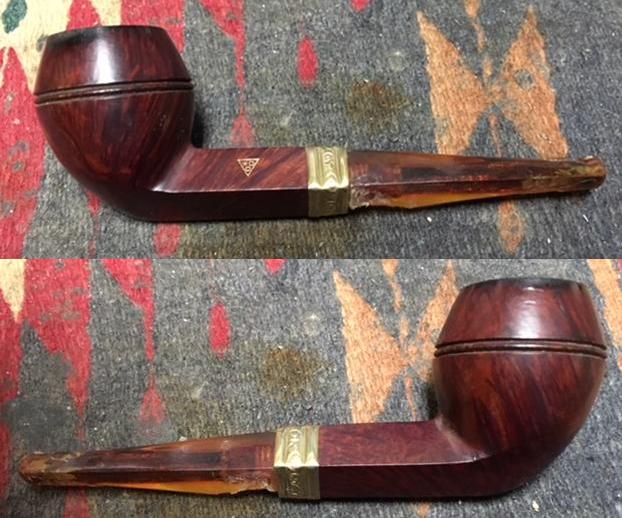
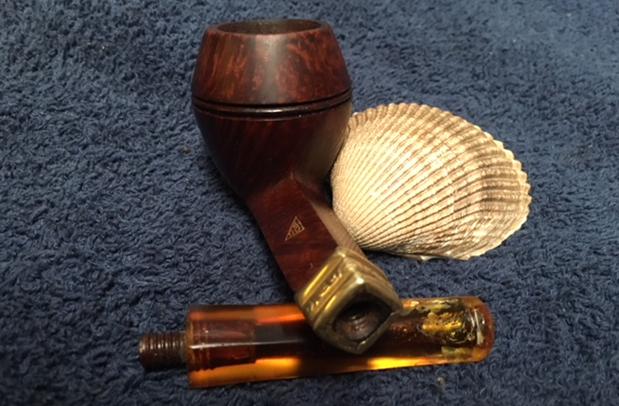
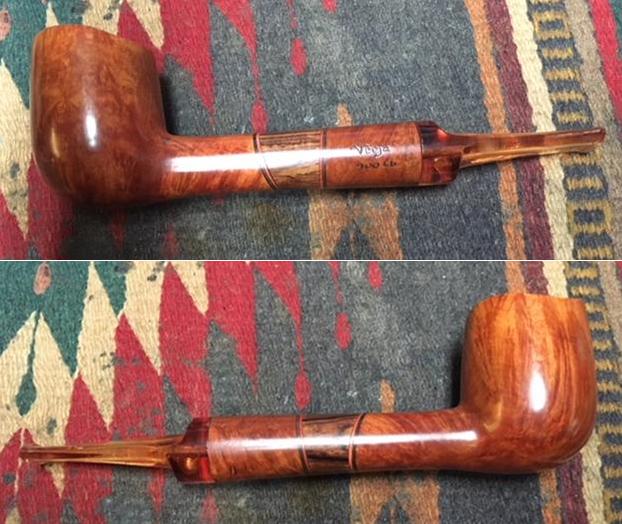
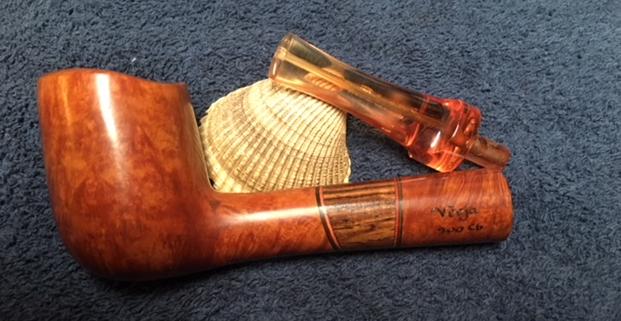
 I took some close up photos of the underside of the shank to capture the stamping there. It reads Butz-Choquin over MAVA with the number 025 on the shank end. As the pipe is turned it is also stamped on the underside St. Claude France.
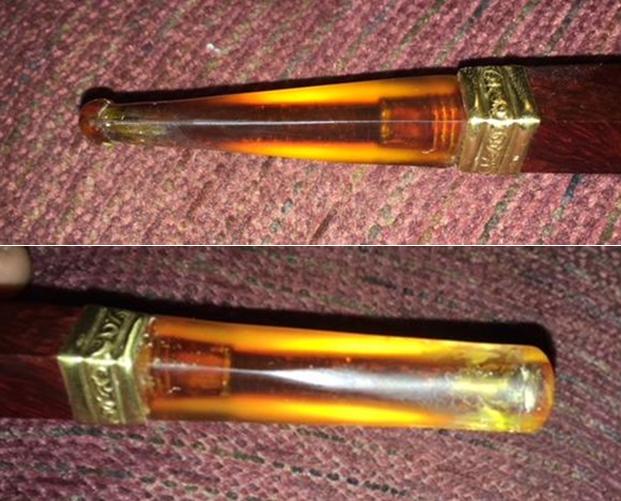
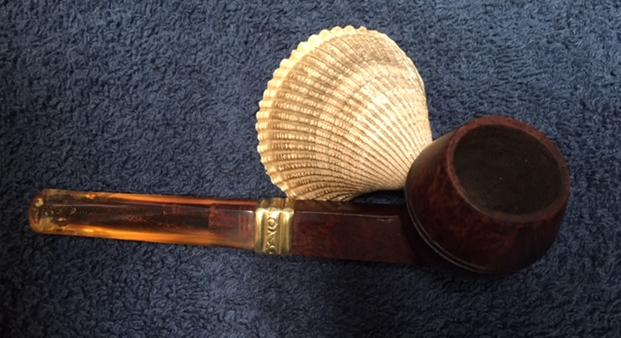
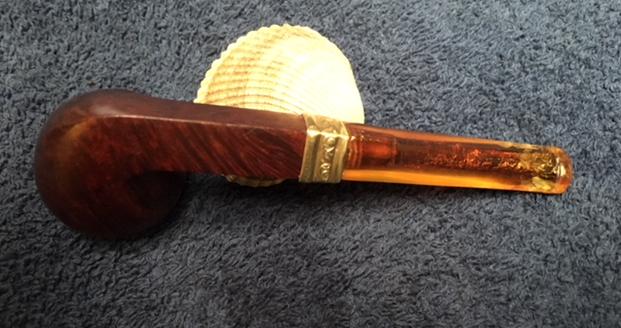
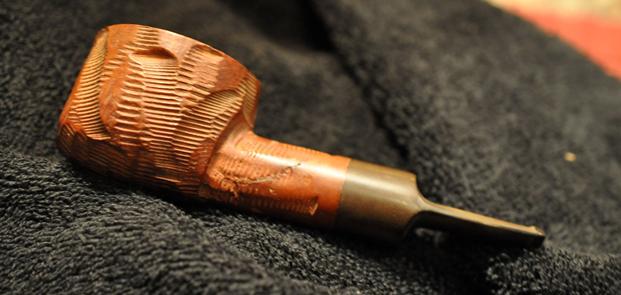
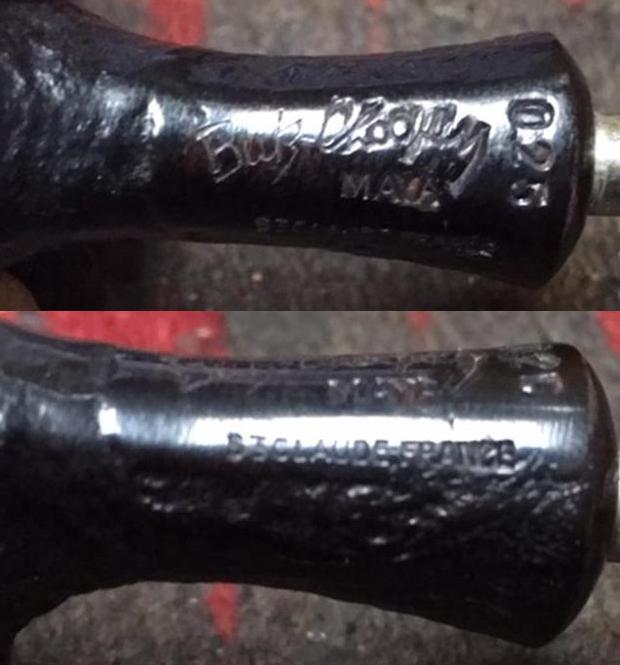 I took a photo of the end of the shank to show brass ring inset in the end to strengthen the briar with the long stem and the metal end cap on the stem.
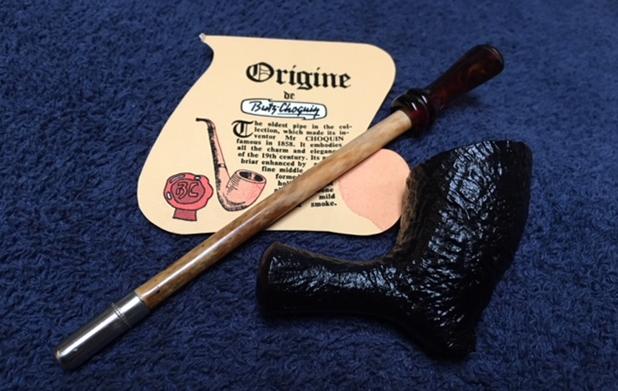
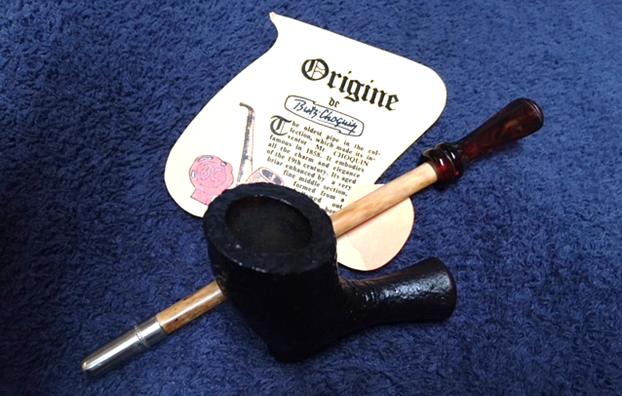
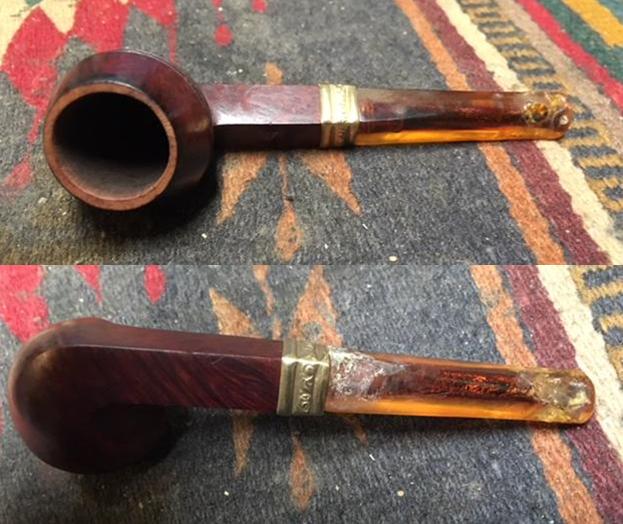
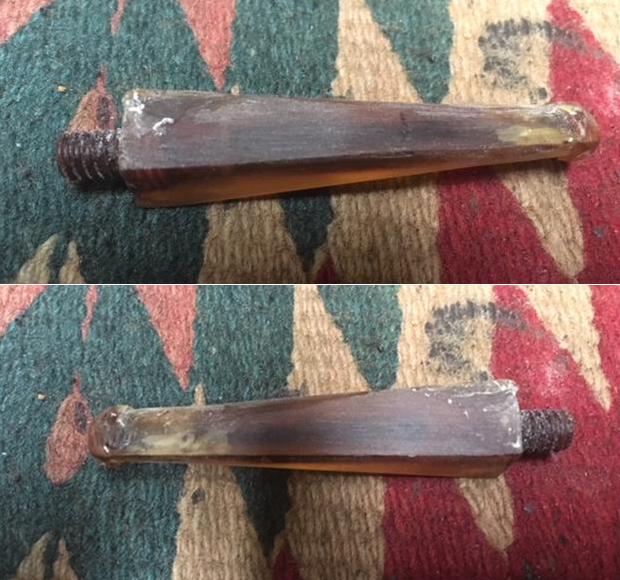
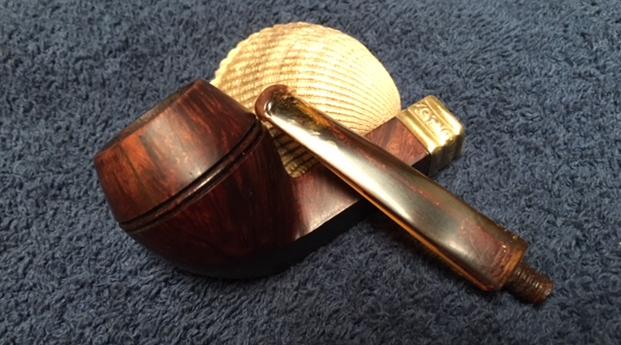
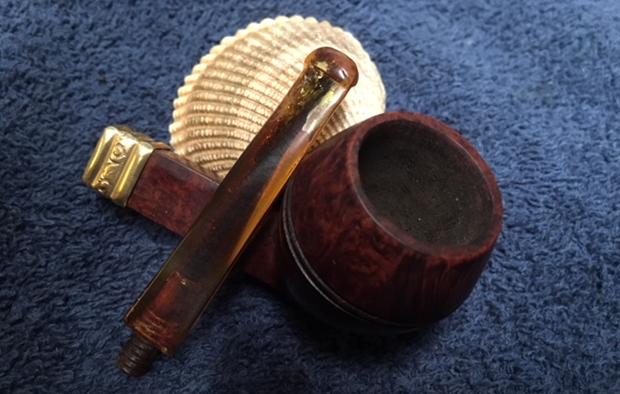
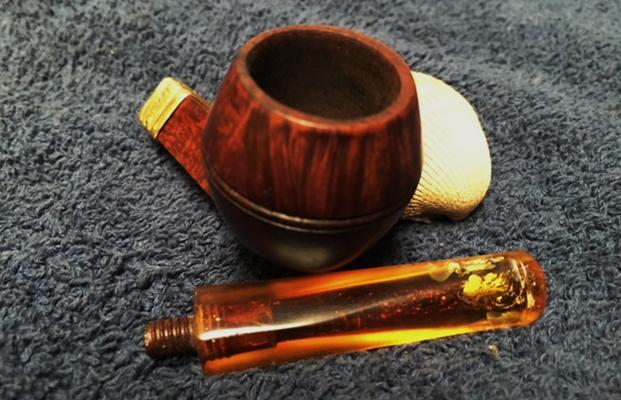
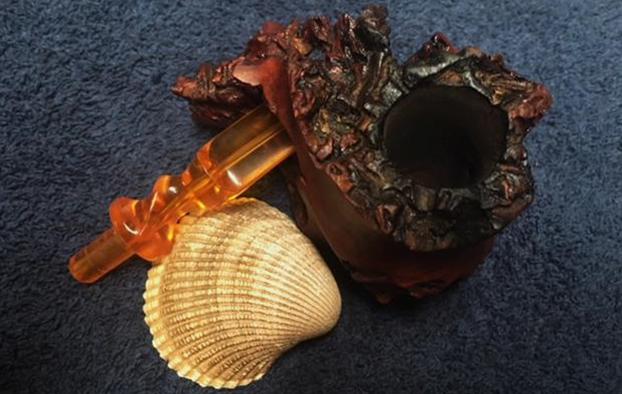
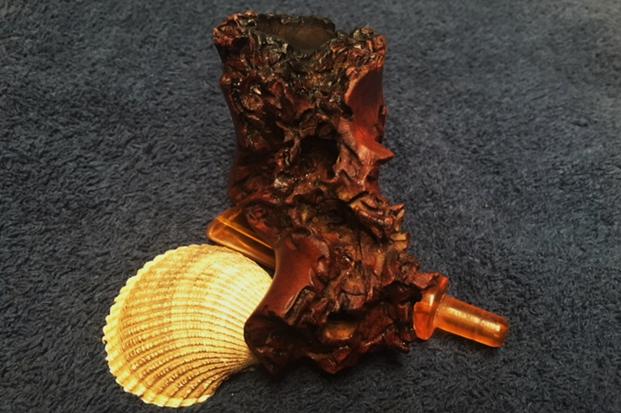
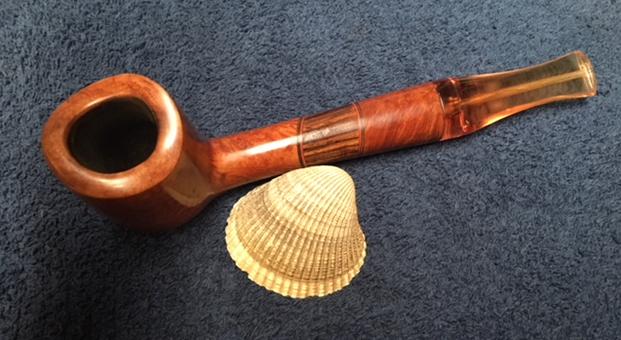
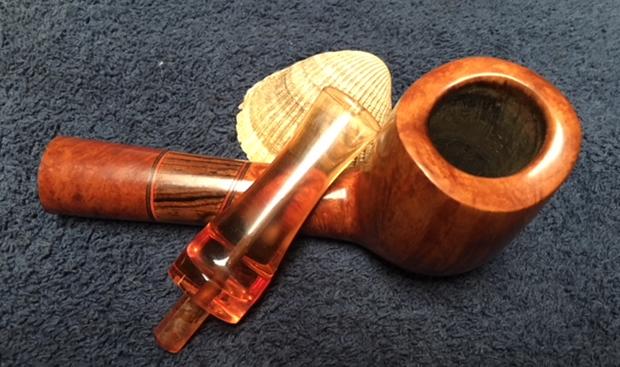
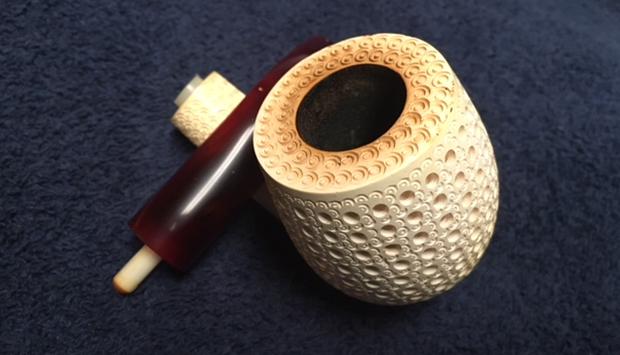
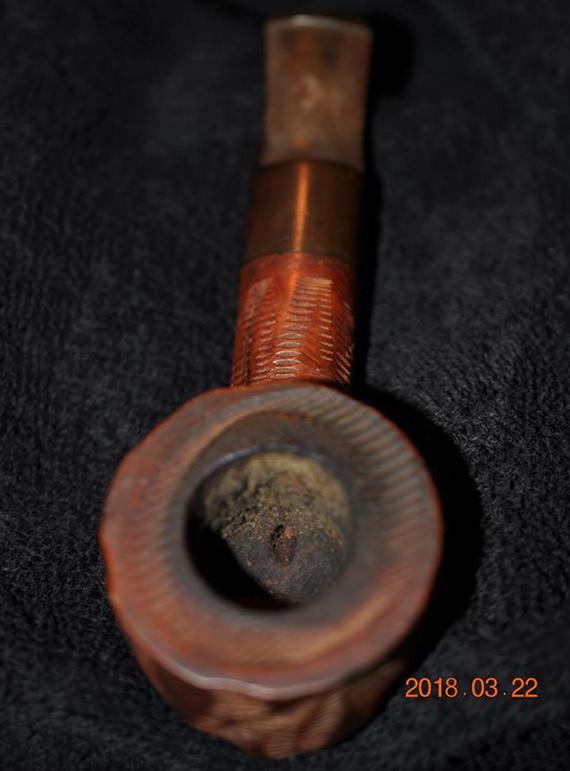
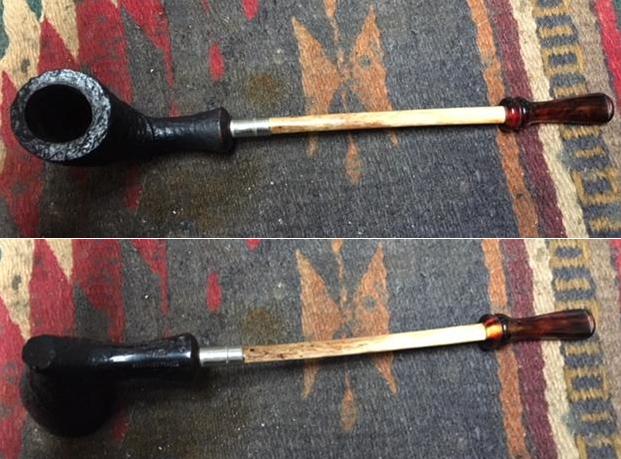
 I took the pipe apart and took pictures of the pieces. The first one below shows the bowl. You can see the raw briar in the bottom of the bowl and the slight darkening to the rest of the bowl. It is quite clean with a slight aromatic smell. I took photos of the albatross wing bone and the acrylic stem that was permanently attached to the bone.
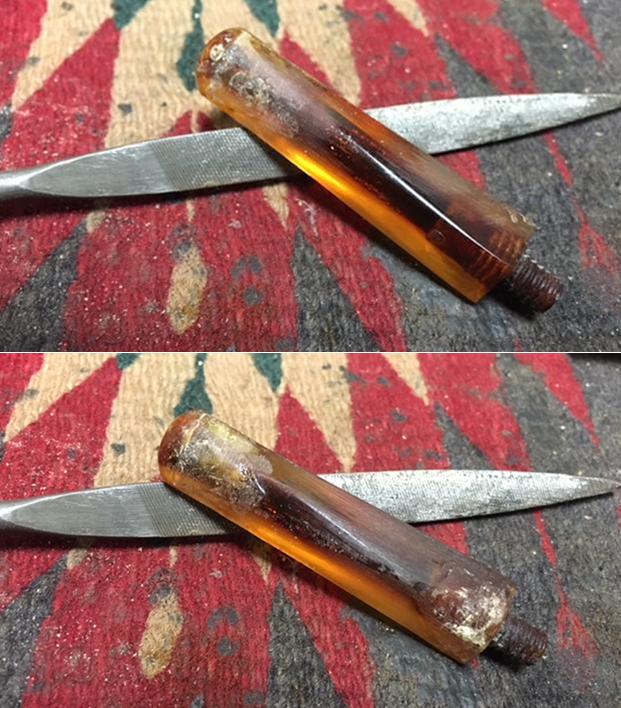
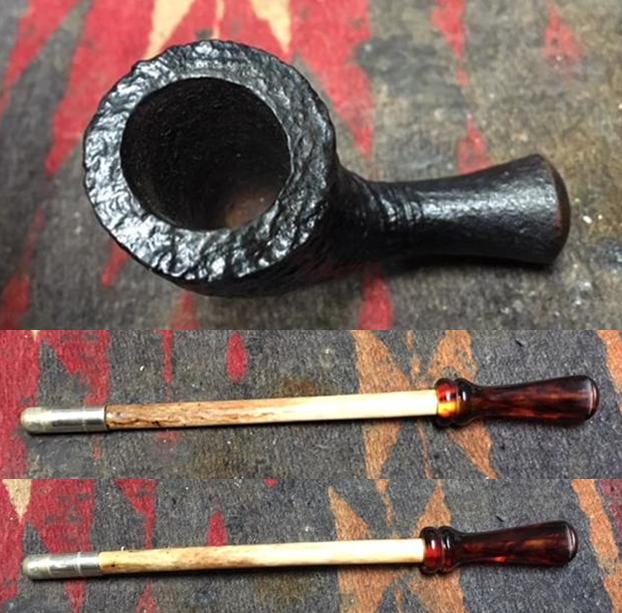 I took some close up photos of the stem to show its general condition. It is hard to tell from the photos but the stem has a Tortoiseshell pattern in the reds of the acrylic. There was some light tooth chatter on both sides of the stem at the button – nothing to deep or damaging. I also took a close up of the metal end cap on the shank end of the wing bone. It is tarnished where it is inserted in the shank but otherwise just dull.
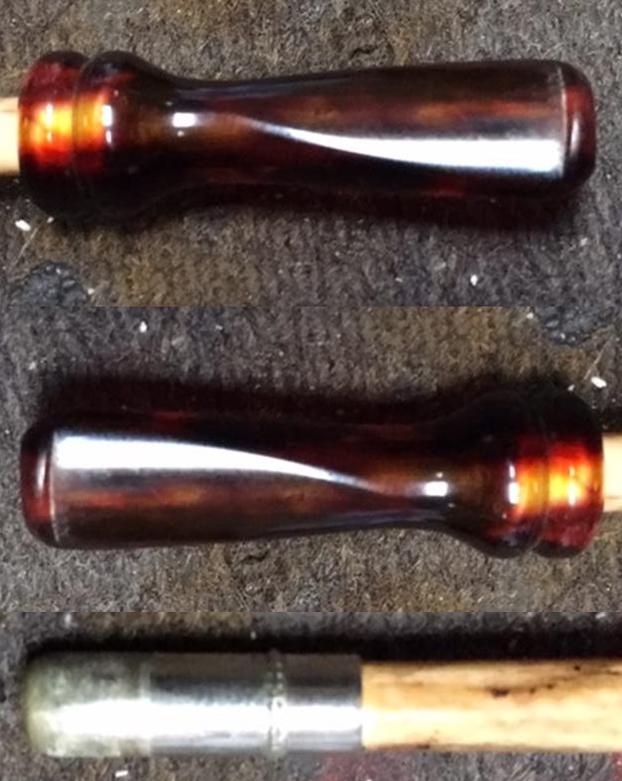 It was time to do a bit of reading about this pipe. The one I have is a little different from the one that is described in the quote below. It is not a billiard shape but rather a cutty shaped pipe. The extended stem on the one I have appears to be true bone rather than the white acrylic that is shown in the photos that accompany the article. The stem itself is reddish, amber or Bakelite colour rather than the black as noted. It is very light weight and actually quite delicate looking.
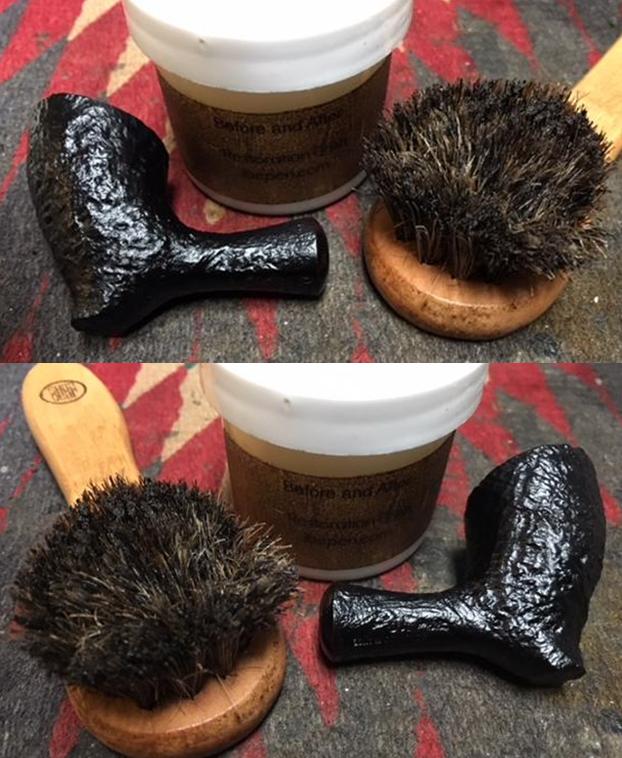
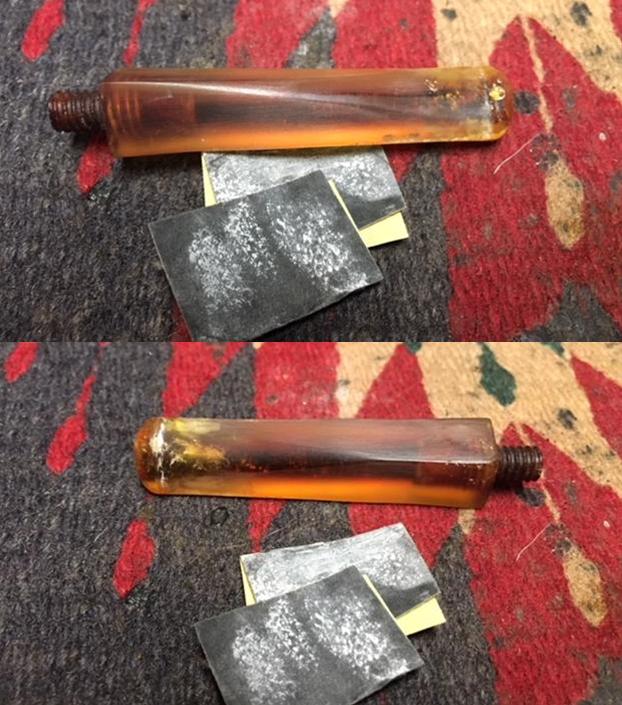
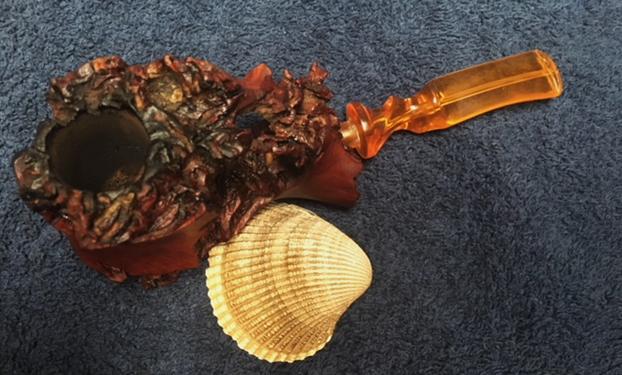
 I decided to use the Before & After Restoration Balm on the extended shank. If it was bone then it would enliven it and add protection to it. If it is acrylic the same would be true. Whatever the material is it is an oval piece with a slight bend in it. It is set in the stem and in the metal end cap. I rubbed it in by hand and buffed it off with a soft cloth.
 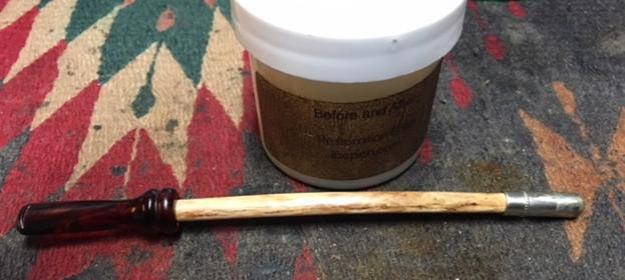 I polished the end cap with micromesh sanding pads – using 1500-12000 grit pads to bring a real sheen to the metal. It is probably nickel as it does not have any silver standard stamps on the cap. I polished it with a jeweler’s cloth as a finishing touch. It looks far better after cleaning.
 I cleaned out the mortise and airway in the shank and the stem with alcohol, cotton swabs and pipe cleaners to remove the lingering aromatic smell and any tars or oils that had collected in those spots. It was pretty clean so it did not take too much to clean those spots.
 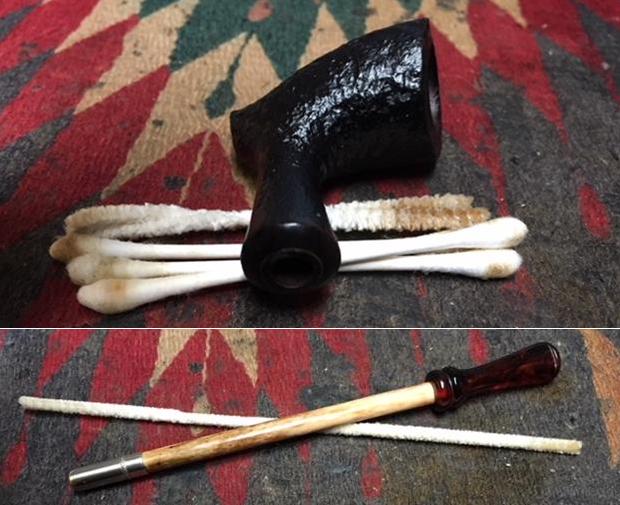 The bowl and shank extension were clean and polished. I set the bowl aside and worked on the stem. I sanded out the tooth chatter with micromesh sanding pads – wet sanding it with 1500-2400 grit pads and dry sanding with 3200-12000 grit pads. I gave it a final coat of oil and set it aside to dry.
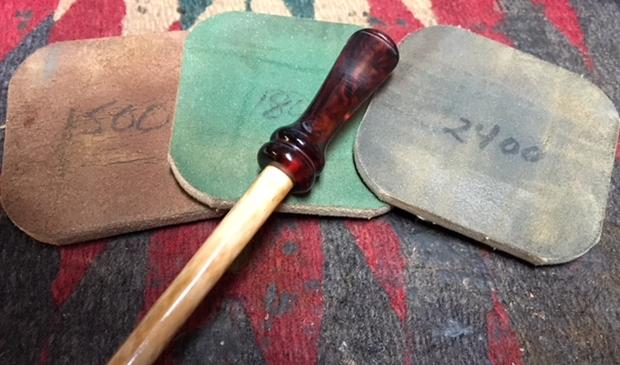

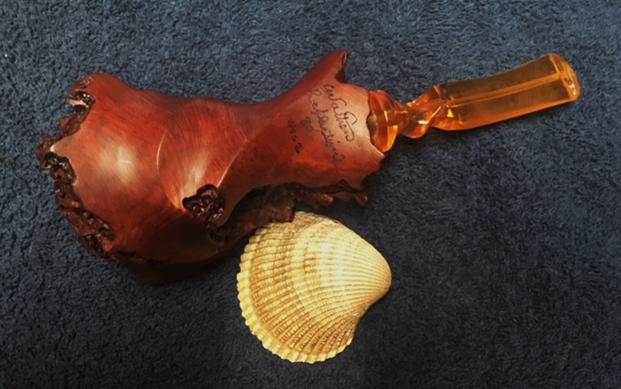
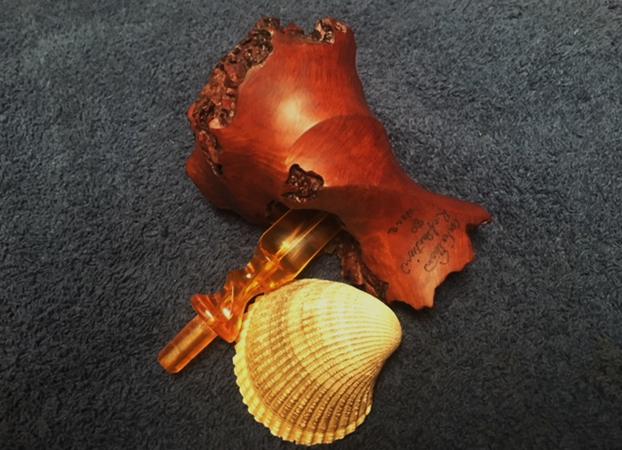
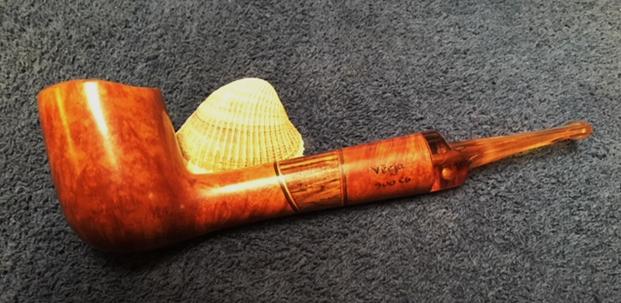
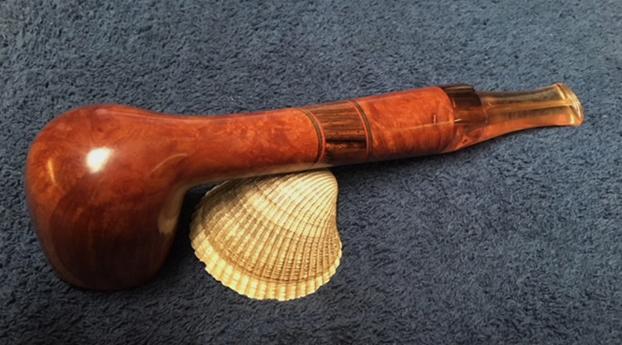
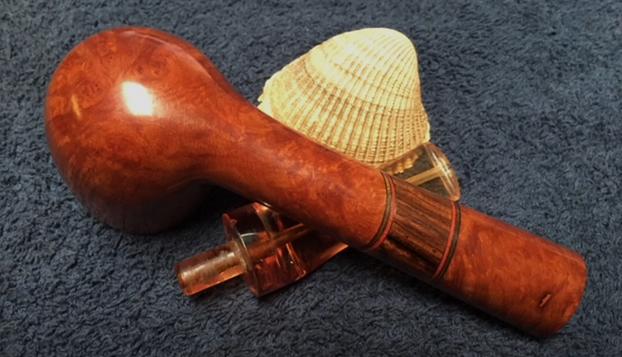
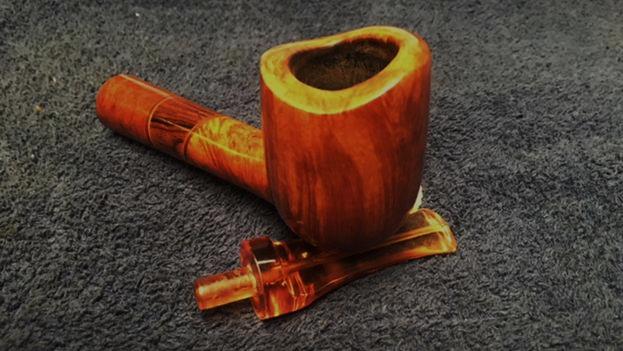
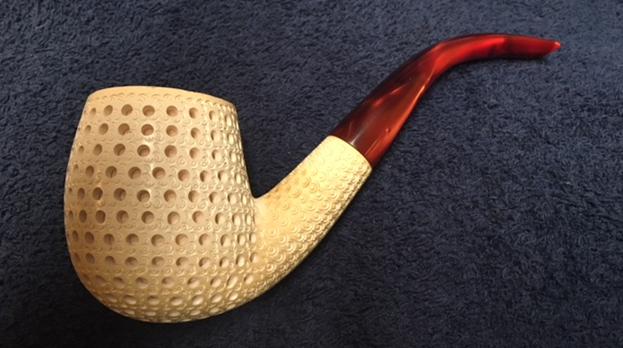
 I carefully polished bowl and the stem with Blue Diamond to polish out the remaining small scratches. I gave the bowl, shank extension and the stem multiple coats of Conservator’s Wax and buffed the bowl separately with a clean buffing pad to raise the shine. I hand buffed the extended shank and pipe with a microfiber cloth to deepen the shine. The pipe polished up pretty nicely. The dark brown stain worked really well with the mottled “wing bone” extension and the Tortoiseshell acrylic stem. The finished pipe has a truly unique look to it that I had not seen before. I really like the looks of it. The finished pipe is shown in the photos below. The dimensions of the pipe are Length: 7 1/2 inches, Height: 1 3/4 inches, Outer diameter of the bowl: 1 1/8 inches, Chamber diameter: 5/8 inches. This unique is staying with me as an addition to my collection. I look forward to loading it with some rich, aged McClellands 5100 and enjoying a quiet and reflective bowl. Hopefully this refurbishment was worth your time to read. Thank you for walking with me as I worked over this beauty.