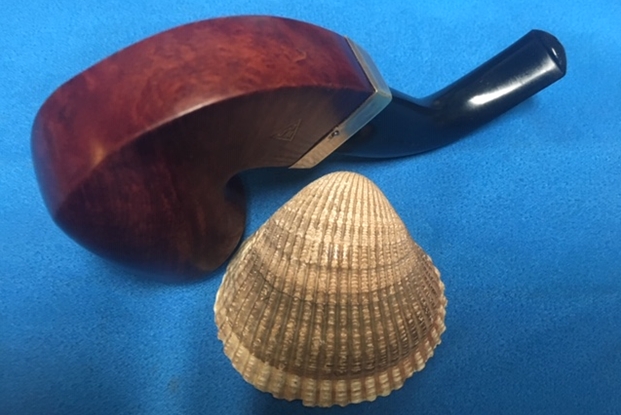
Tag Archives: bite marks

I Really Love the form and shape of Older C.P.F. Meerschaum Pipes


Blog by Steve Laug

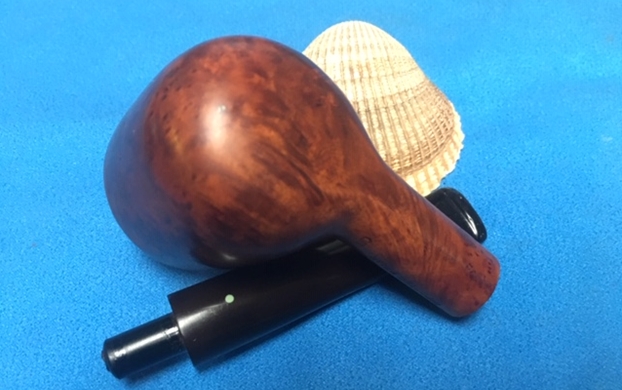
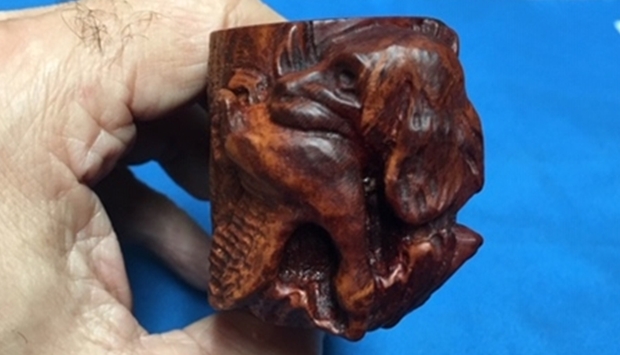
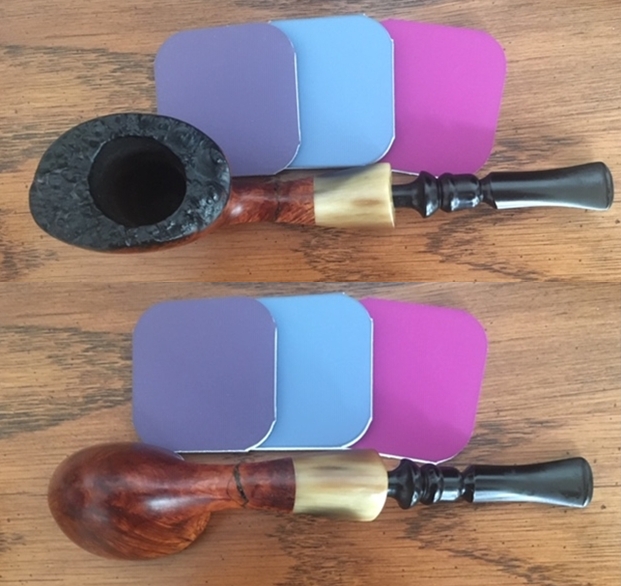
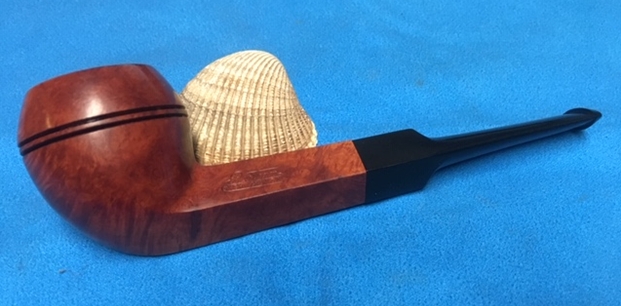
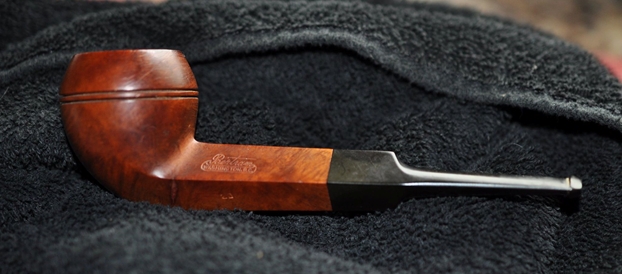
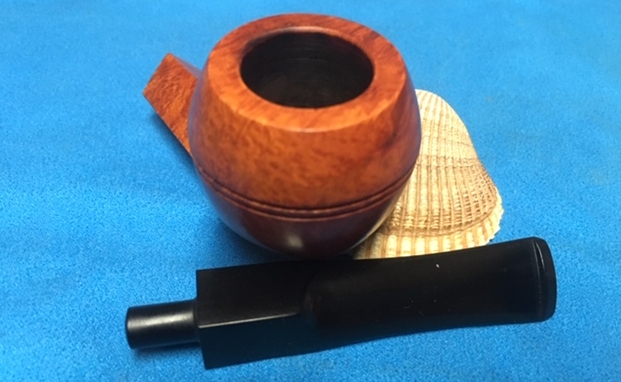
Not too long ago Jeff was contacted by a fellow who we have bought pipes from in the past. He has always been a good source of pipes for us and sold us some great pipes including a few C.P.F. pipes. He wrote to say that he had a few more pipes to sell and wondered if we were interested. He said that one of them was a small cased meerschaum pipe with a Redmanol stem. The pipe had been smoked and was worn but in otherwise good condition. The case had a stamp in the cover that read Warranted Genuine Meerschaum in and oval with a star. The shank had a silver band with the C.P.F. in an oval logo over Sterling. Jeff had him send us some photos of the pipe so we could have a look at it before making an offer. I have included a collage of those photos to give a general idea of what the pipe looked like and what attracted us to it. 
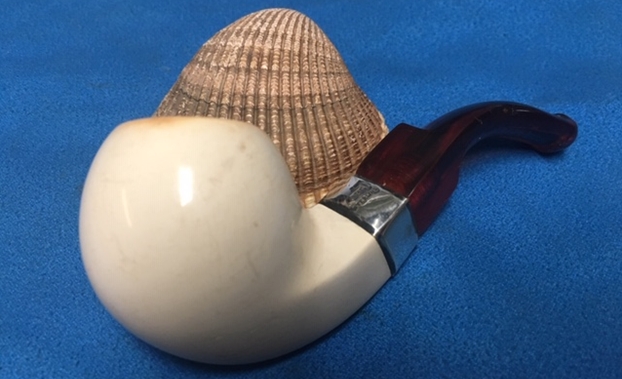
We made a deal – need you have doubted when you saw the C.P.F. oval logo on the Sterling shank band. We had the pipes shipped to Jeff in Idaho. When it arrived Jeff unpacked the pipe and did a quick examination of the pipe before he cleaned it up. He took photos of the case and the pipe. The logo on the inside of the case shows that it is a Meerschaum and warranted as such. The Star on the case is similar to others we have seen on C.P.F. pipes. The photos of the pipe in the case show the general external condition of the bowl. 
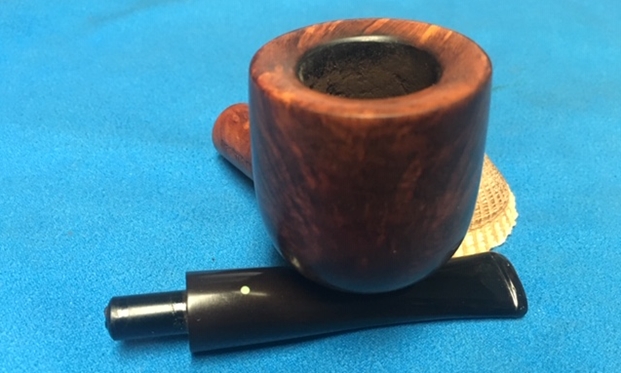
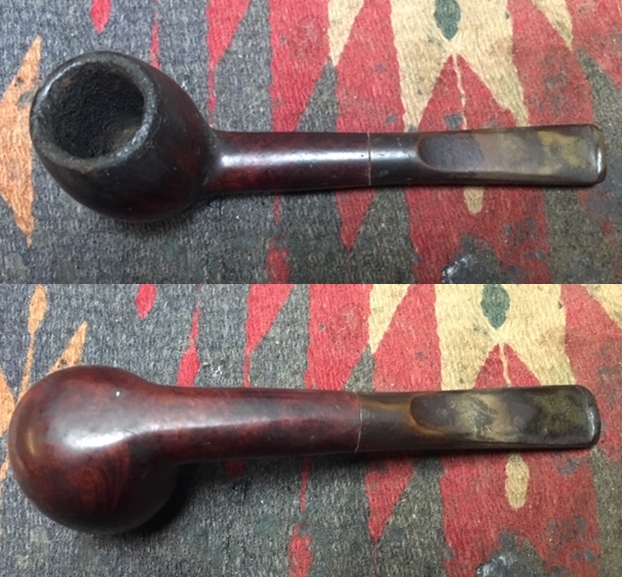
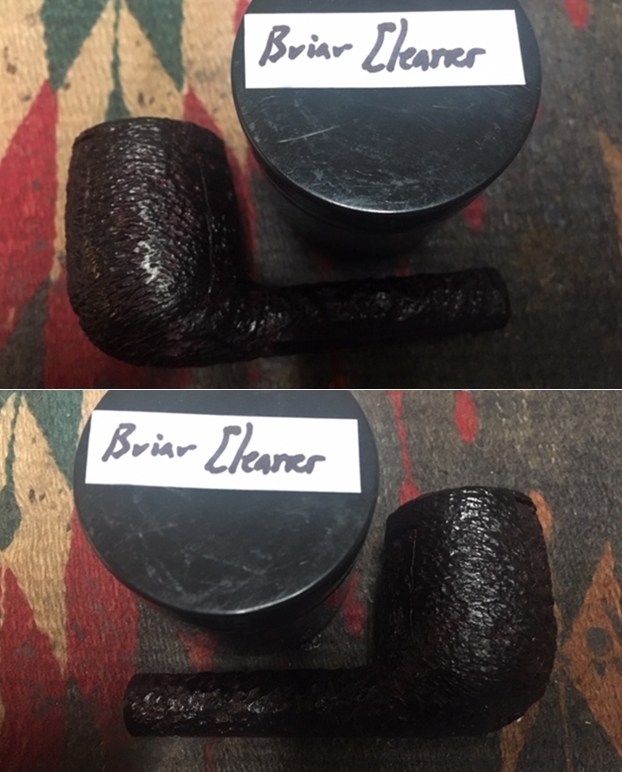
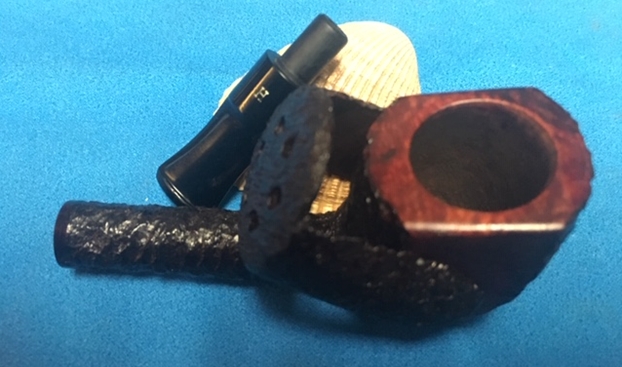
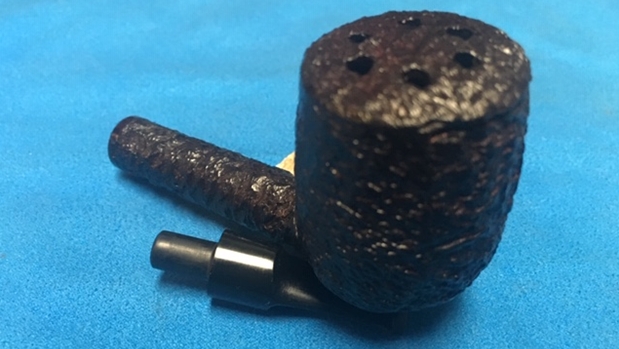
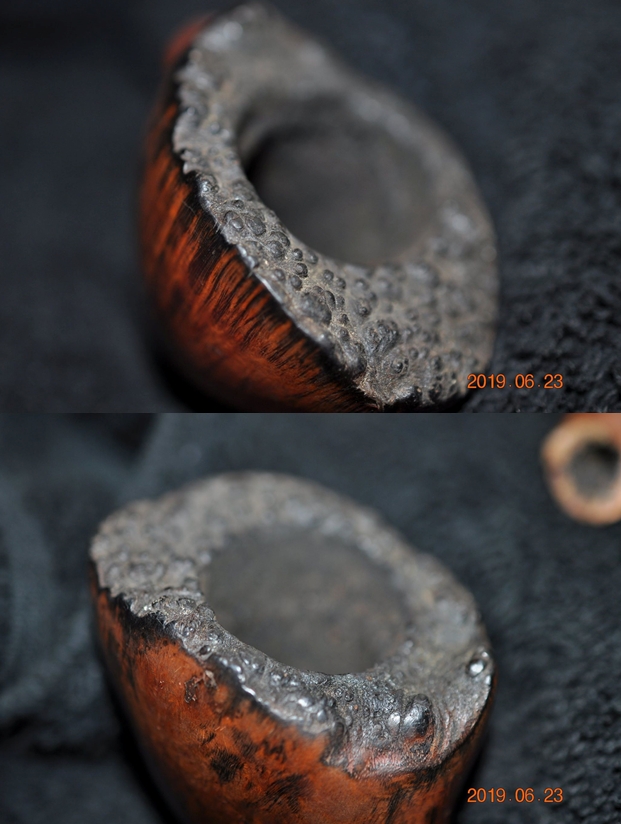
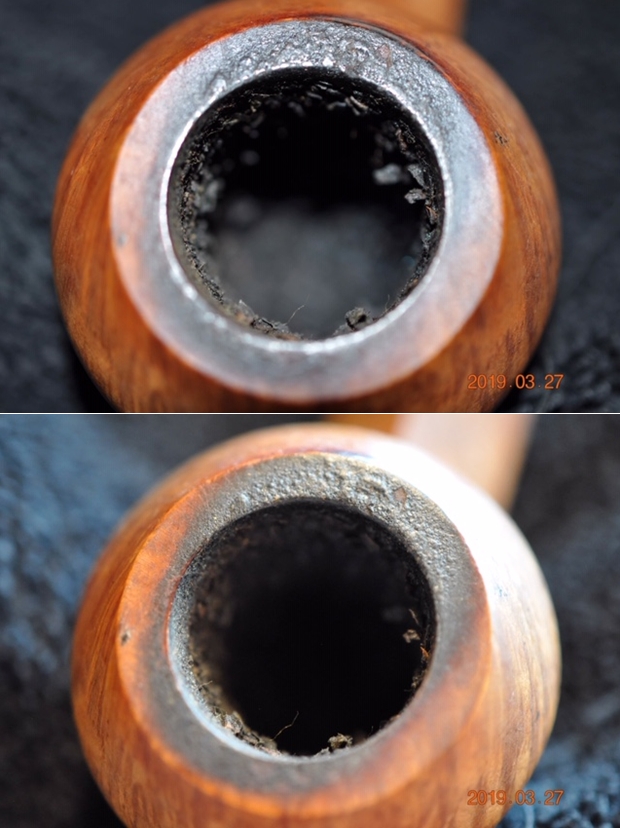
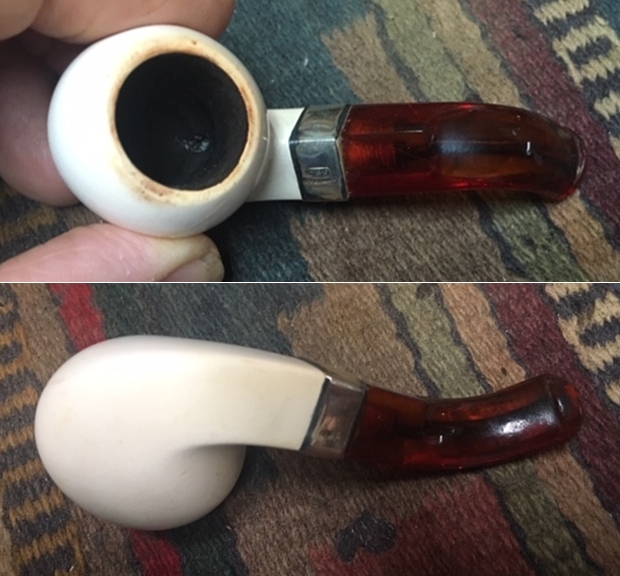
Jeff took the pipe out of the case and took a photo of the exterior of the pipe from above. It shows the cake in the bowl and the wear on the rim top as well as the slight darkening on the rim.
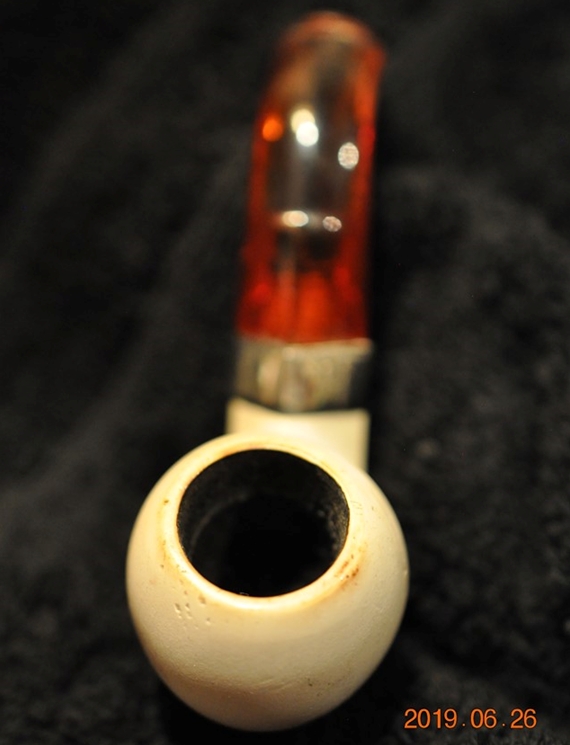
Jeff took a close up photo of the rim top and bowl to show the cake and the darkening in the meerschaum. He also took a photo of the underside of the bowl and though it is a bit out of focus it is nonetheless clear enough to show the general condition of the pipe. 
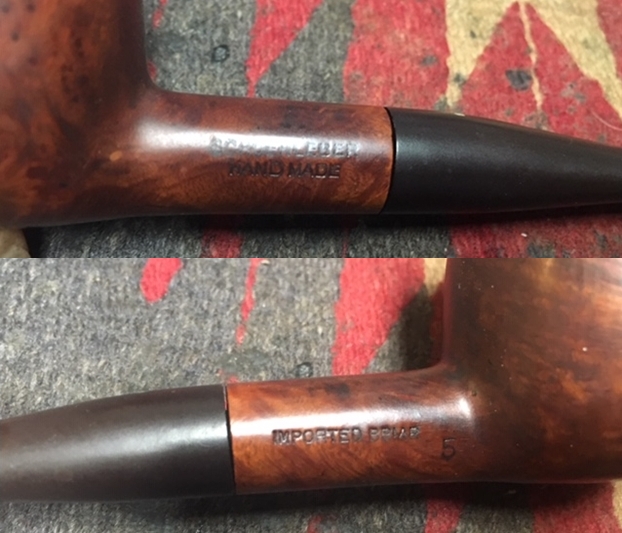
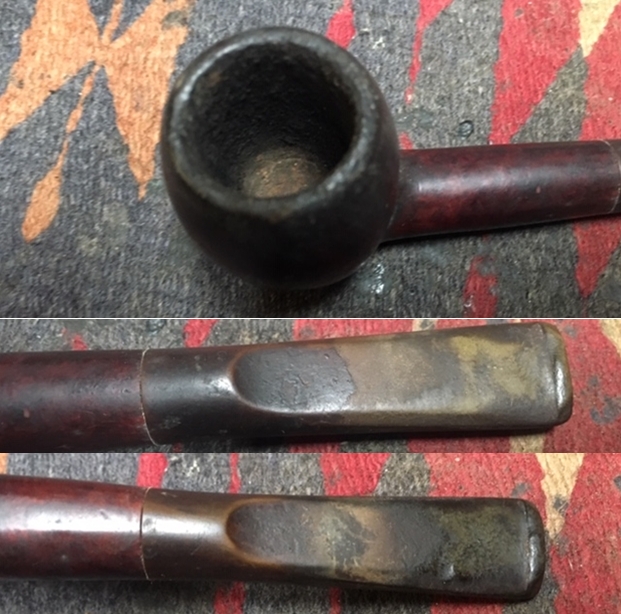
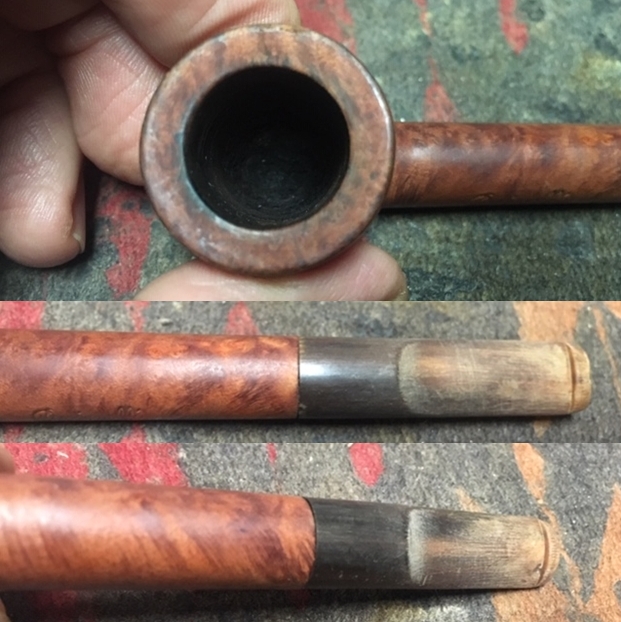
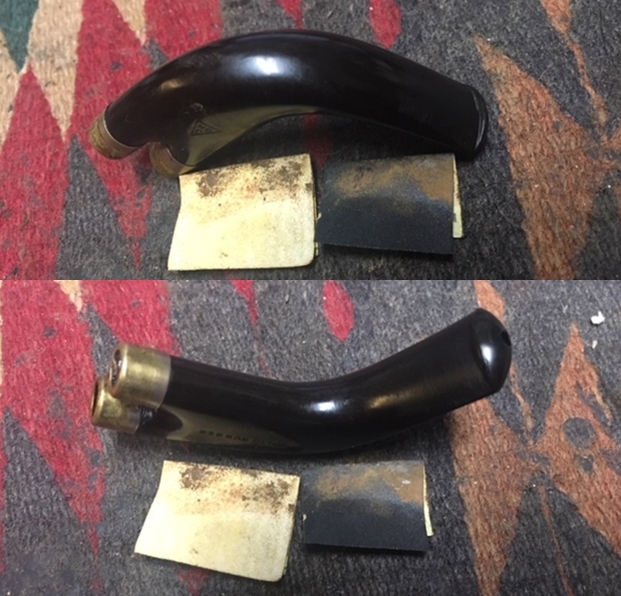
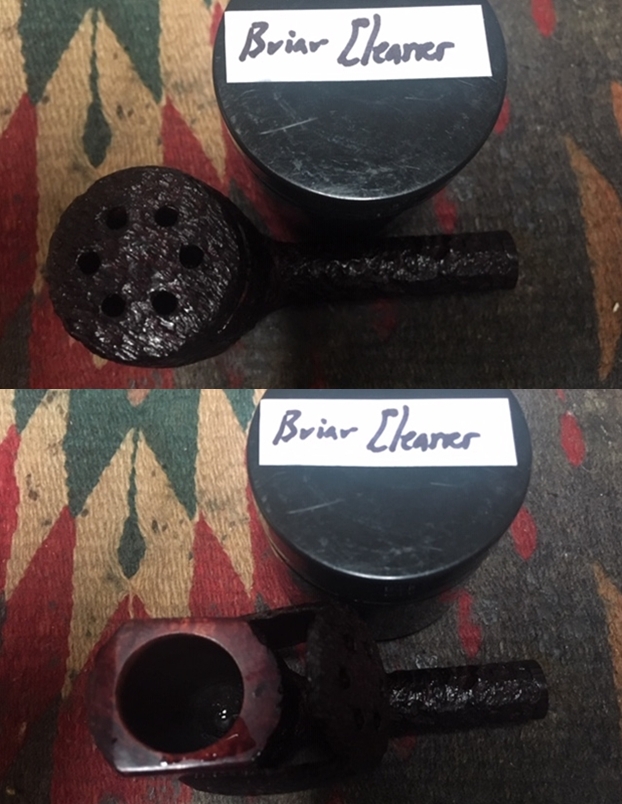
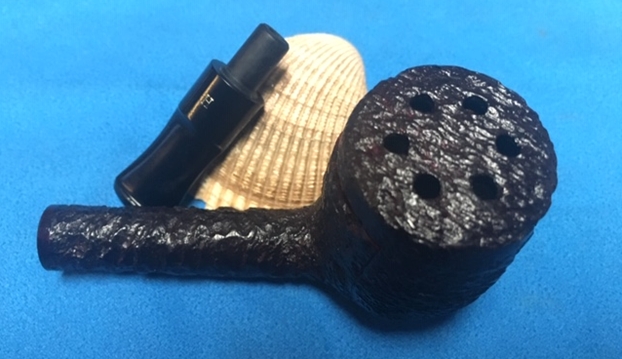
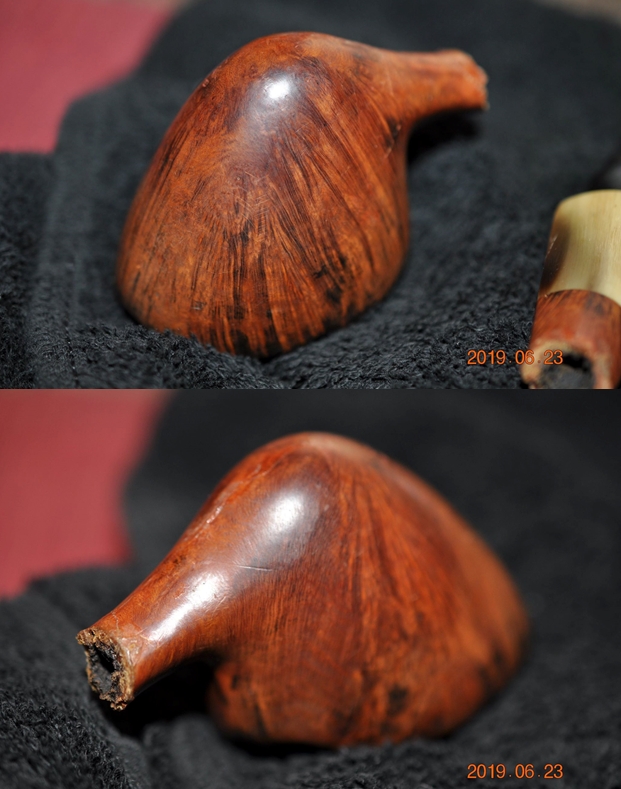
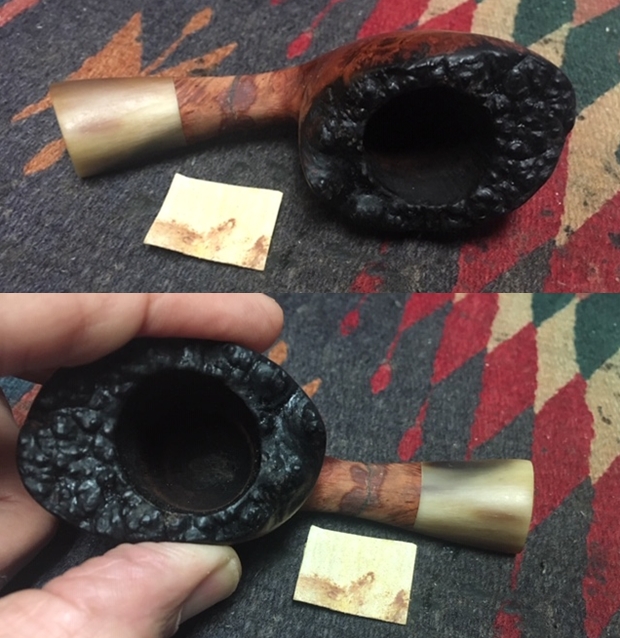
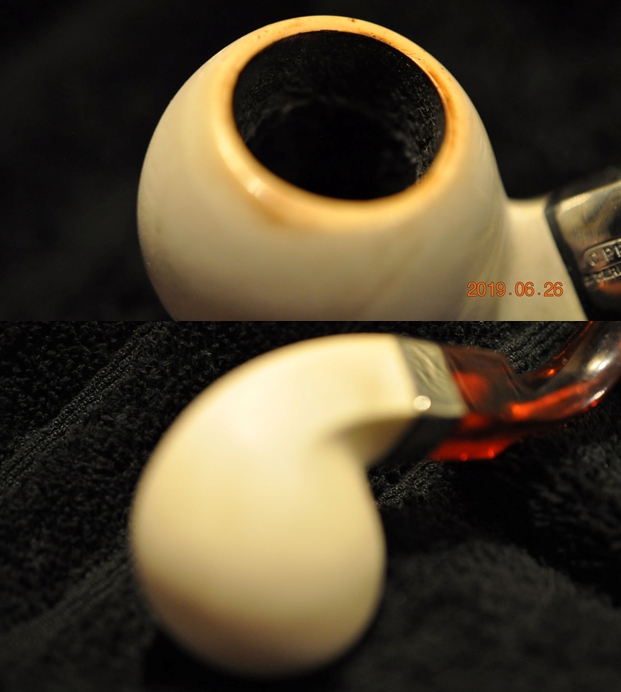
He took a photo of the stamping on the band showing the C.P.F. oval logo over the Sterling stamp. You can also see the chipping on the Redmanol stem next to the shank band. The alignment of the stem to the shank is perfect so that we can assume that the tenon is in very good condition.
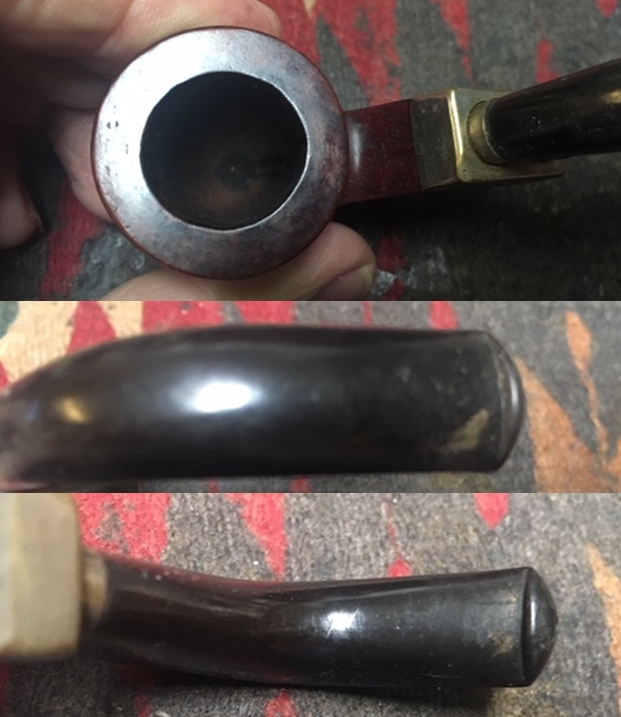
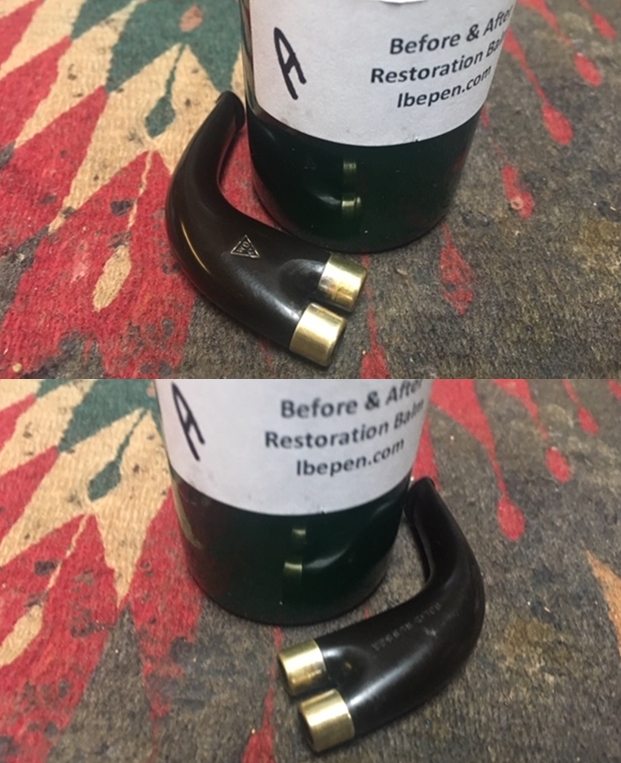
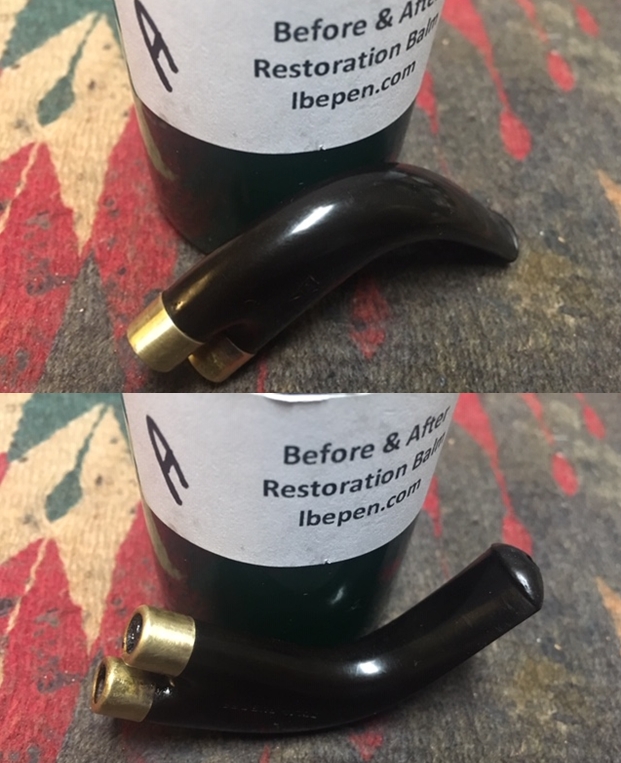
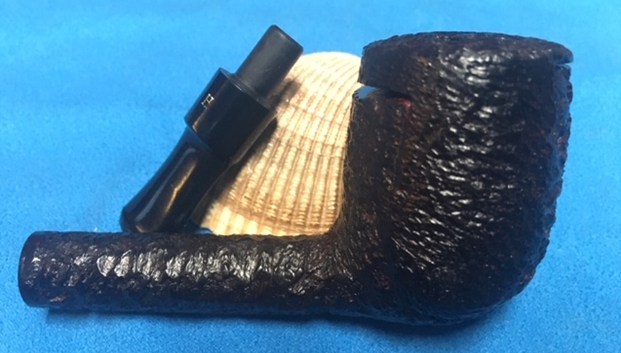
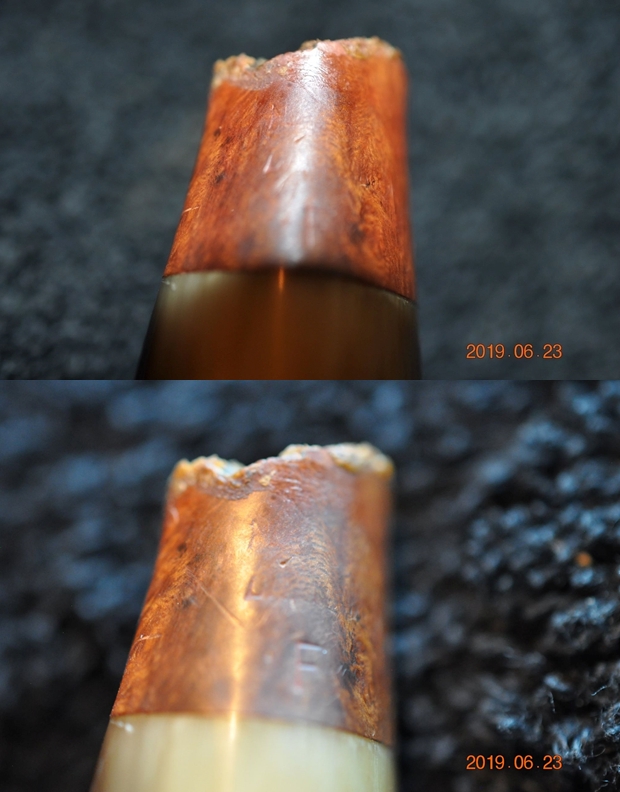
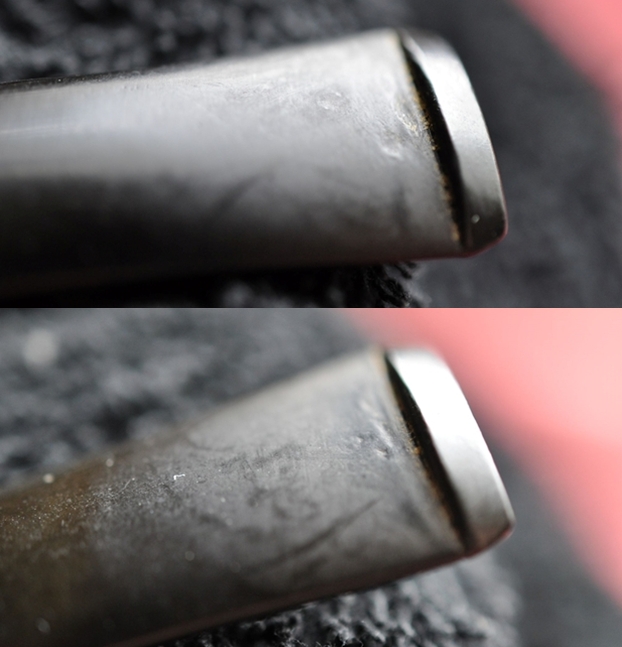
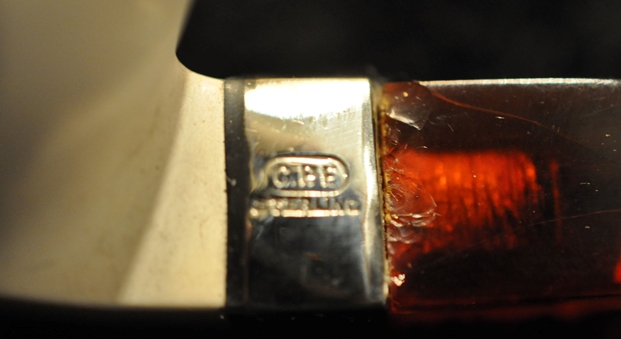
The next photos show the condition of the Redmanol stem. There is tooth chatter on both sides near the button and some chipping in the surface of the button.
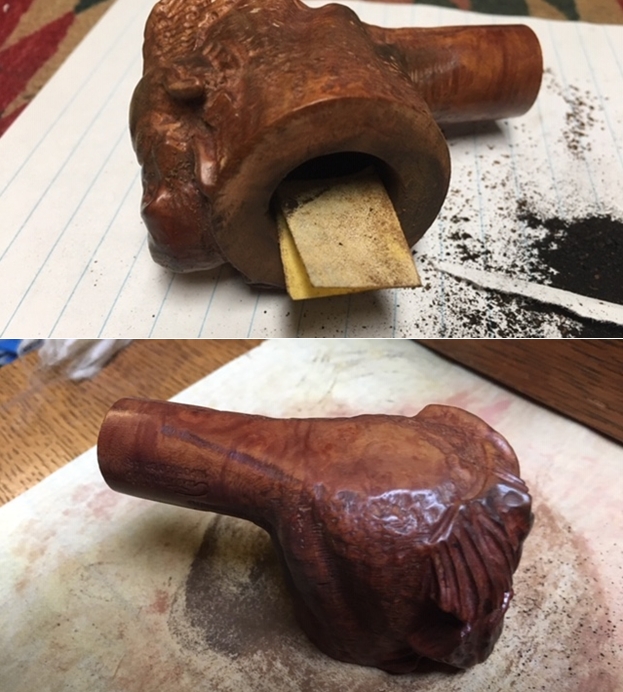
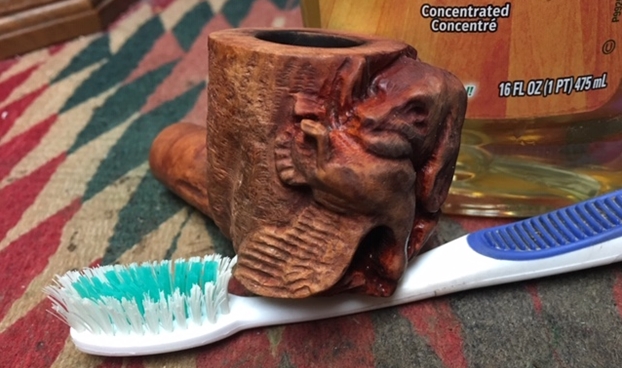
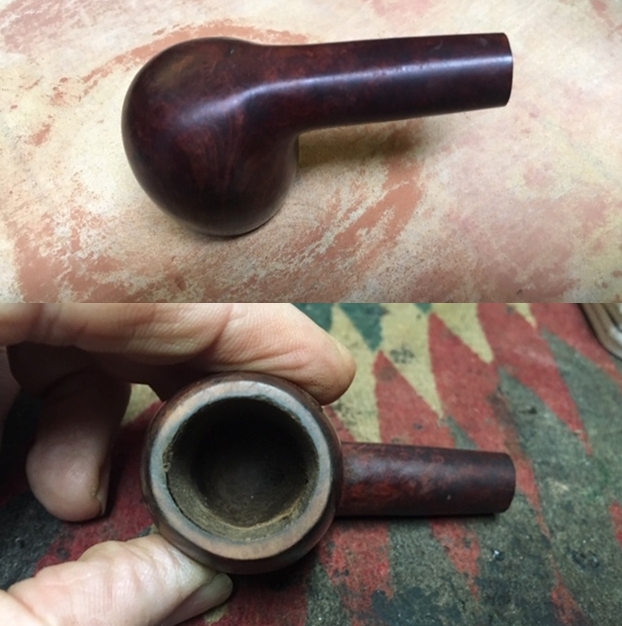
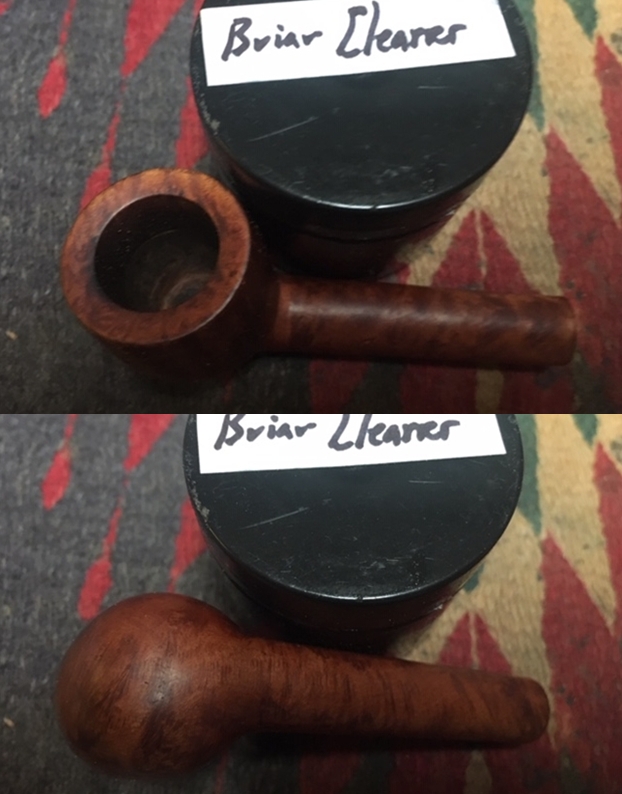
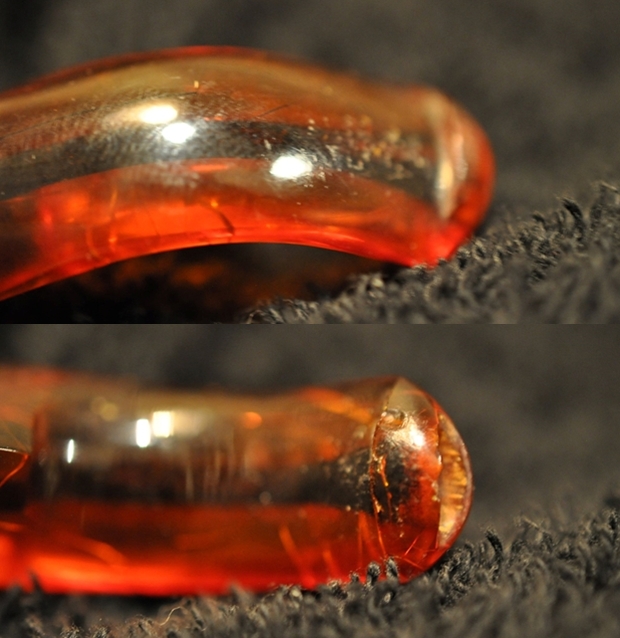
This afternoon I was going through one of the bags of pipes I brought back from Idaho with me on my last trip. It was the same group of pipes that had contained the unsmoked and smoked C.P.F. pipes. In the bag I found a small brown leather covered case. I had forgotten what was in it so I took it to my desk and opened it up. Inside the case was the small C.P.F. pipe that I had seen when I was visiting with Jeff. It was time for me to work on it.
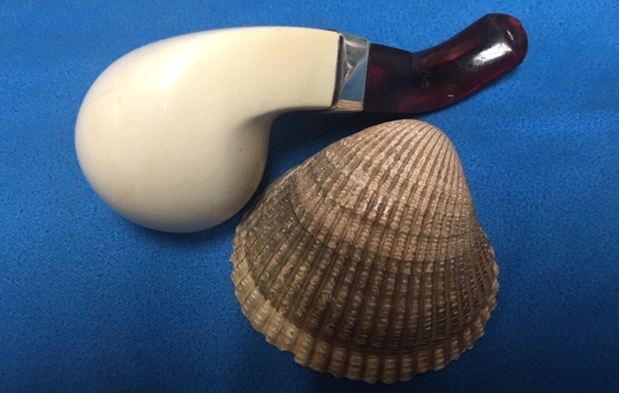
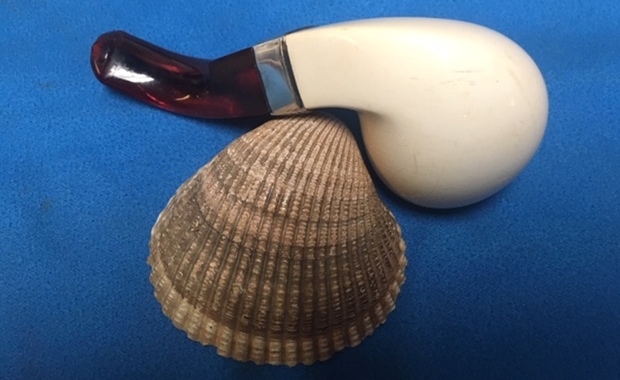
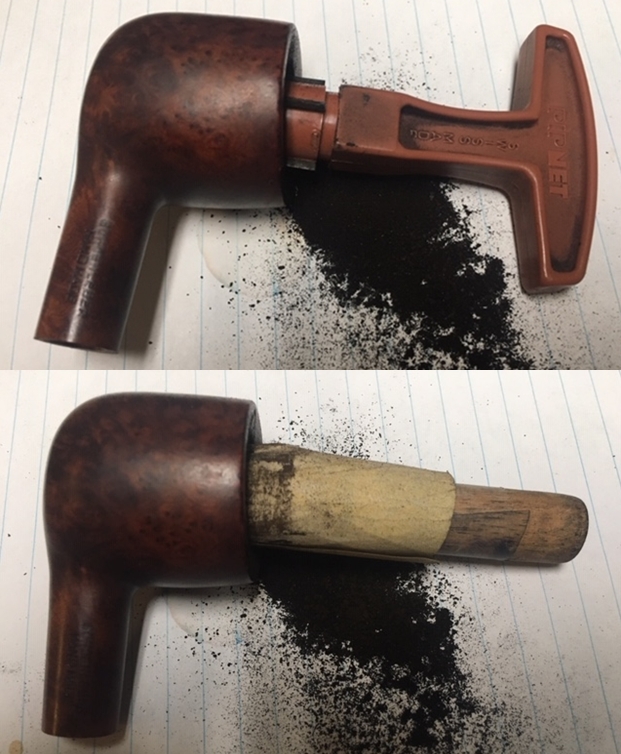
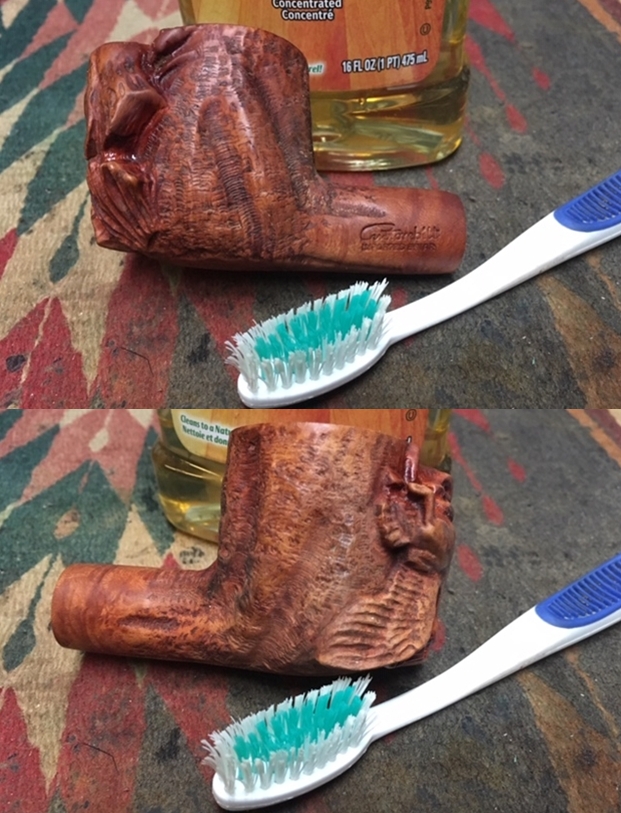
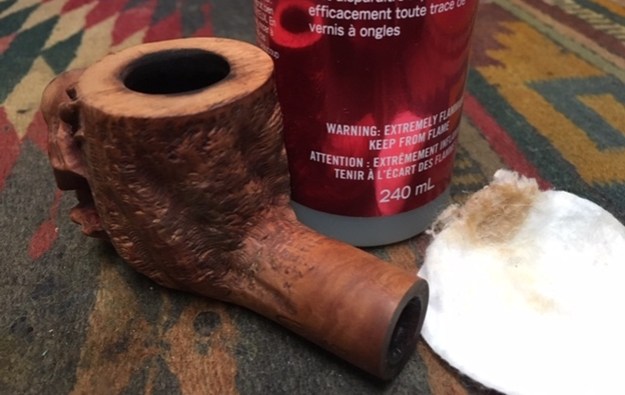
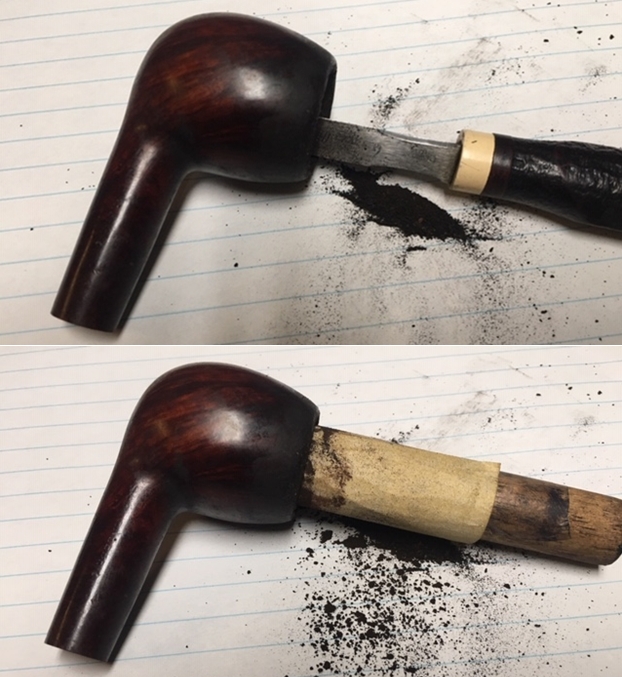
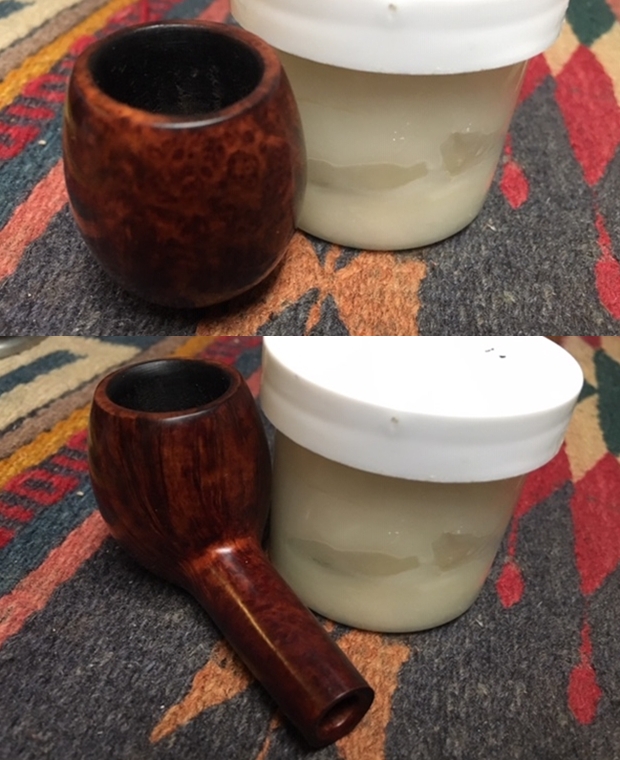
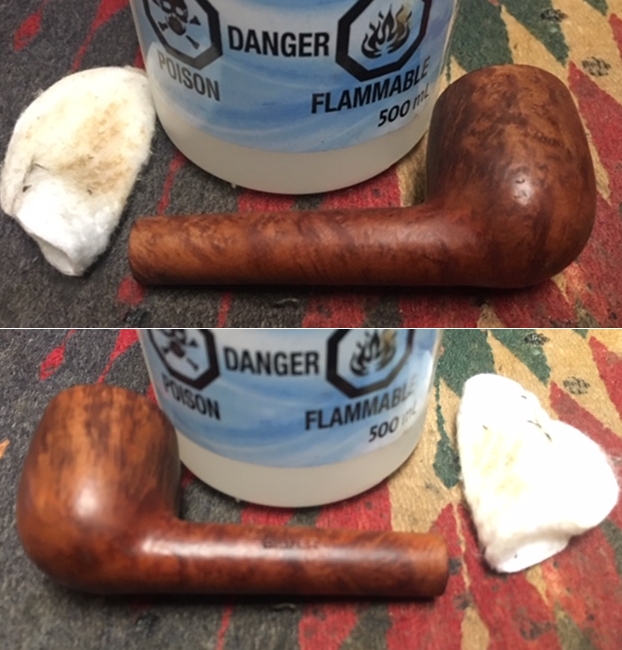
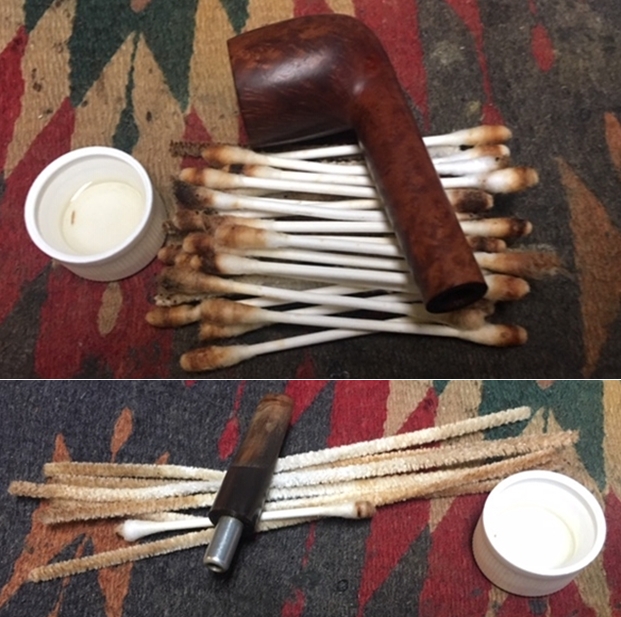
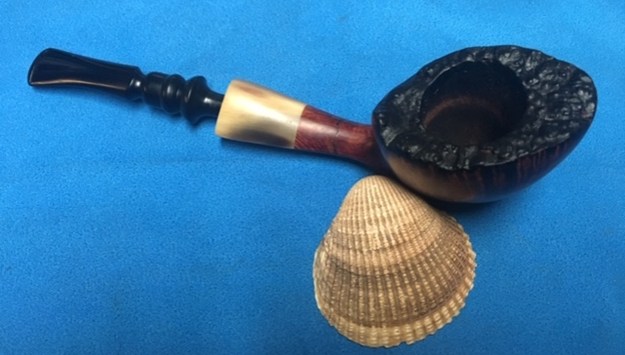
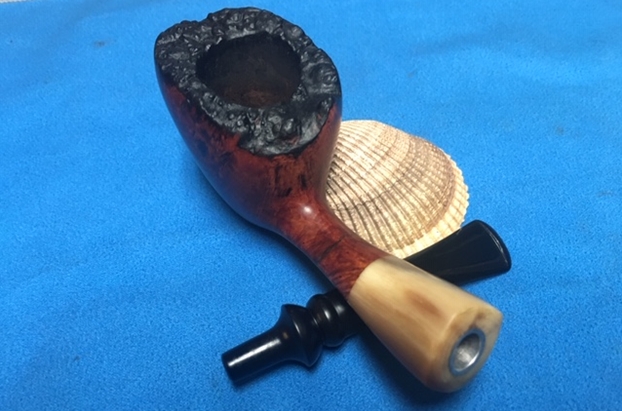
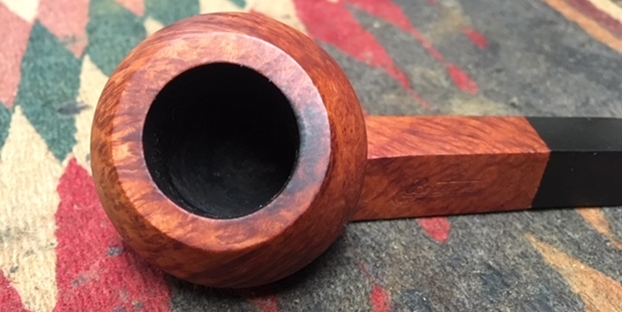
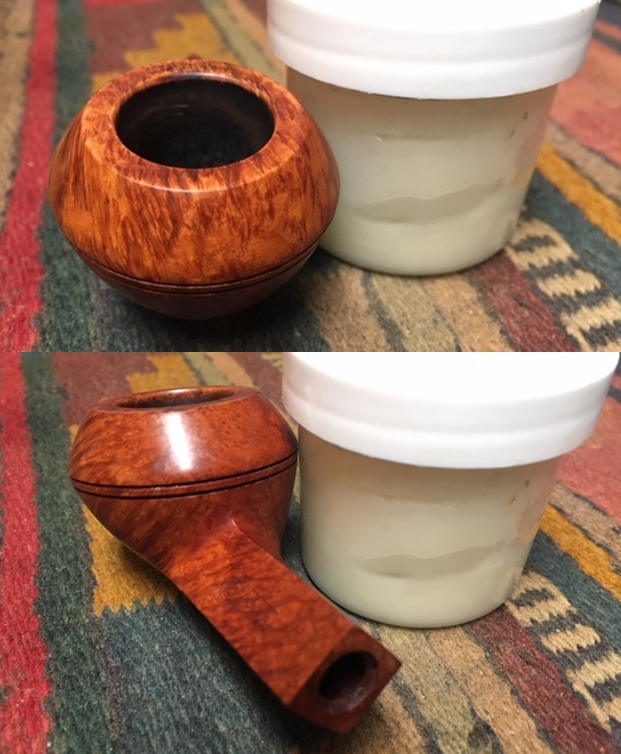
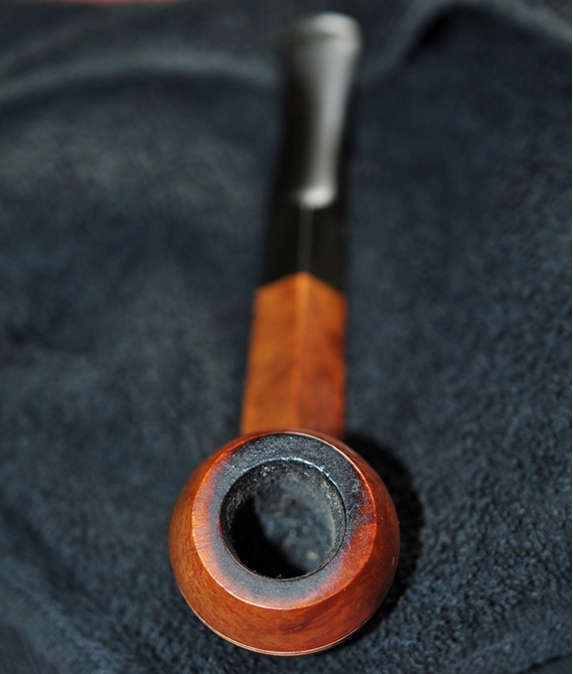
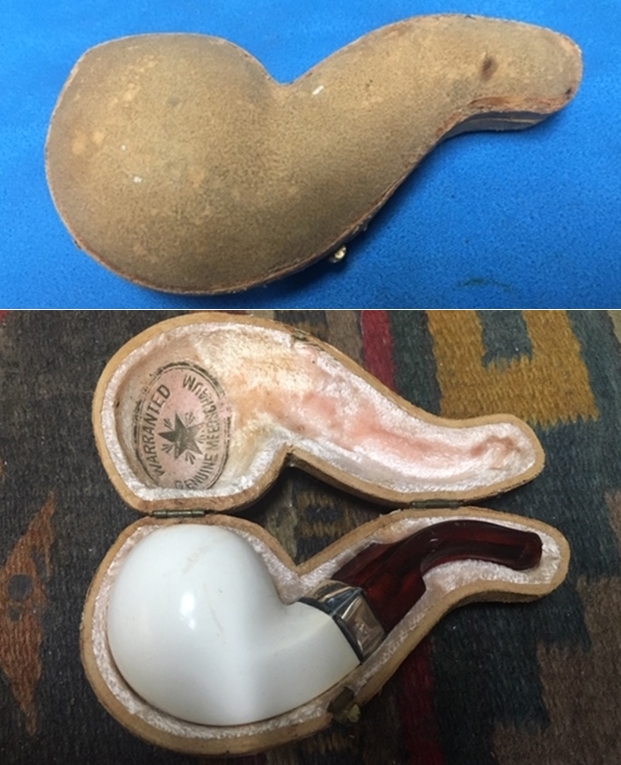
I took the pipe out of the case and examined it. Jeff had done his usual thorough work in cleaning up this pipe. He had reamed the bowl with a Savinelli Fitsall Pipe Knife to scrape out the cake. He scrubbed the exterior and interior with Murphy’s Oil Soap and a tooth brush to remove the grime filth on the meerschaum. He cleaned the internals with alcohol, cotton swabs and pipe cleaners until the inside was clean. The pipe looked very good and other than a little rim colouring was in excellent condition. The stem was in good shape other than the chips along the shank band and the tooth marks on the top and underside of the stem that would need to be dealt with in the restoration. I took photos of the pipe before I started my part of the restoration work. 
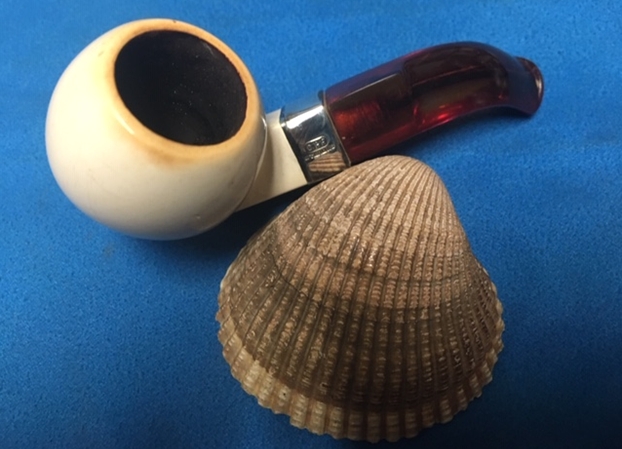
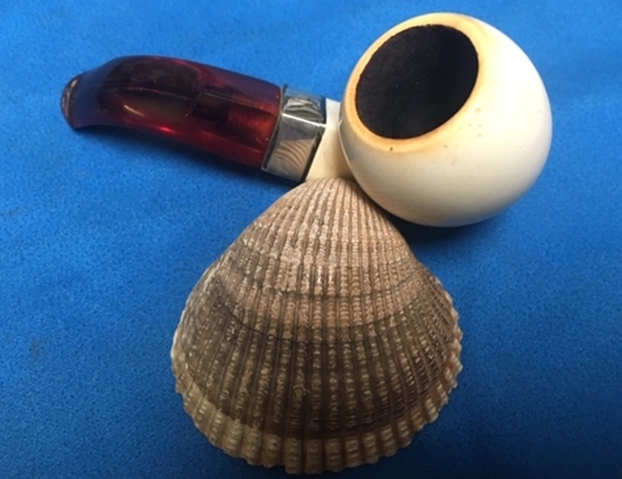
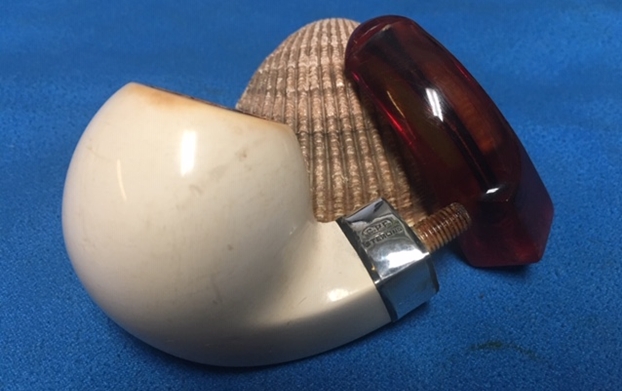
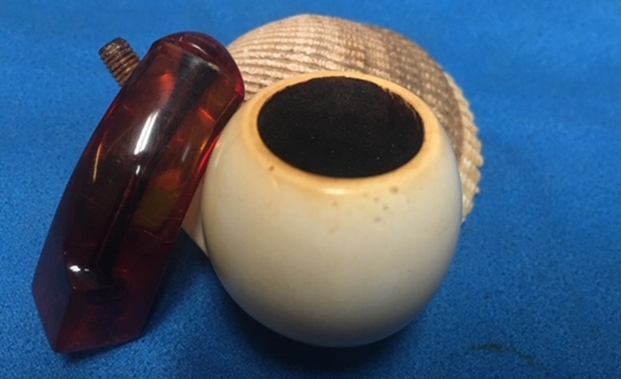
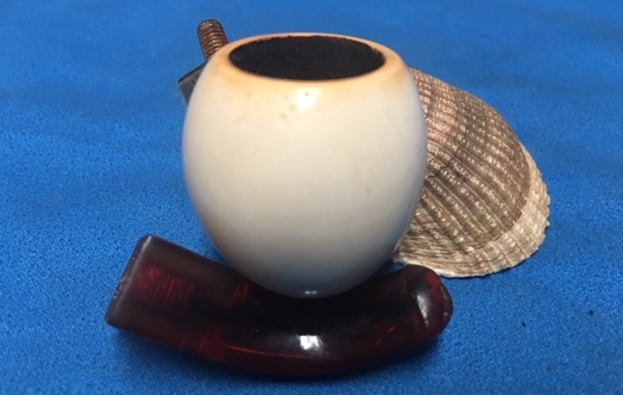
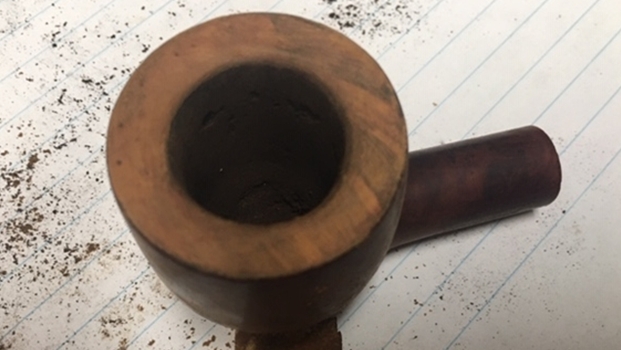
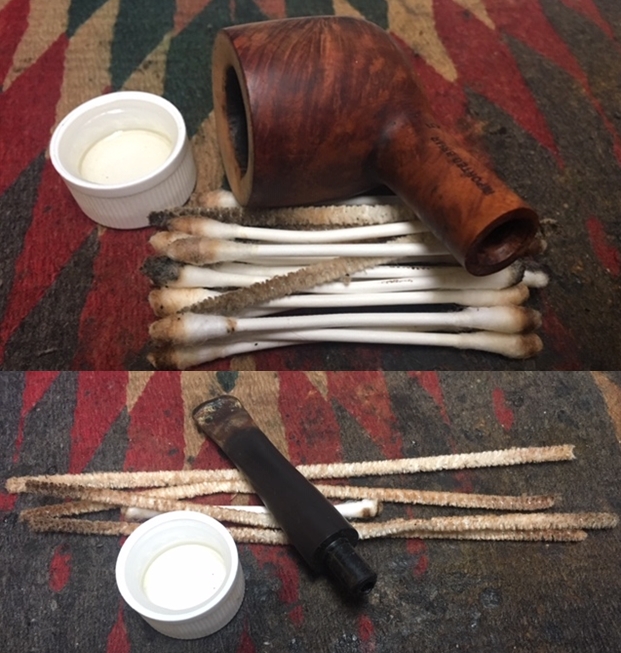
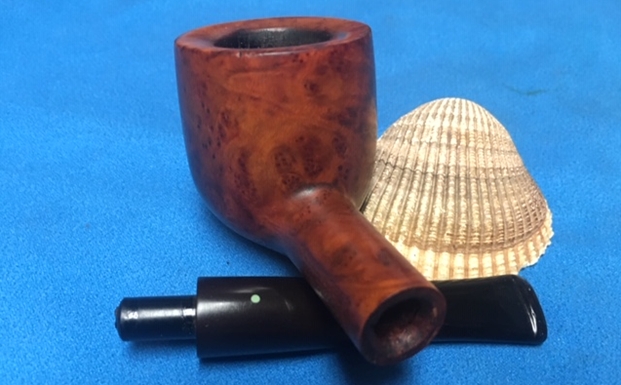
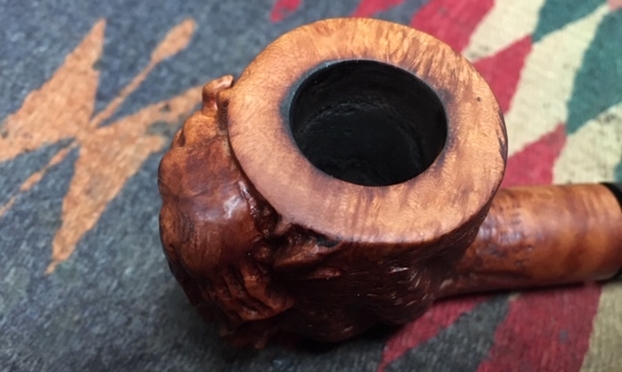
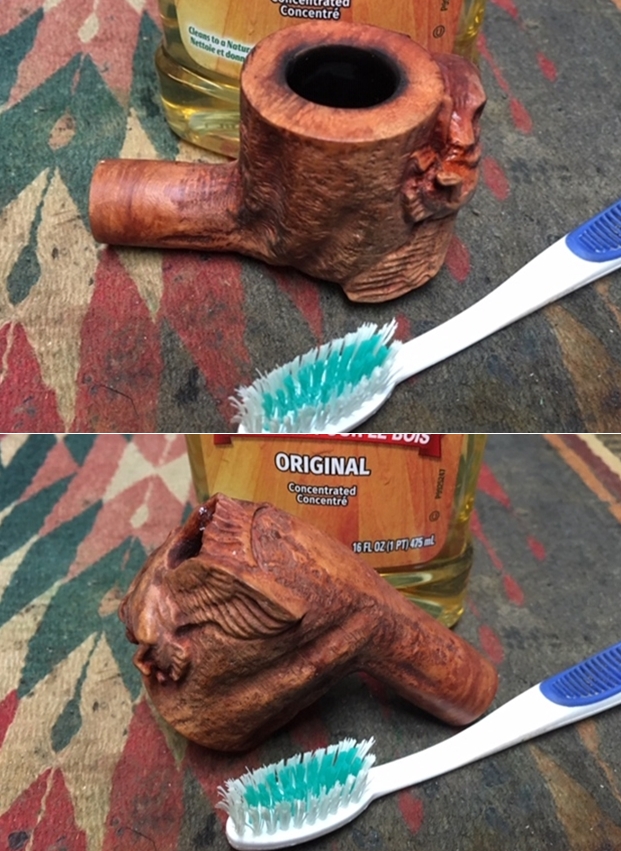
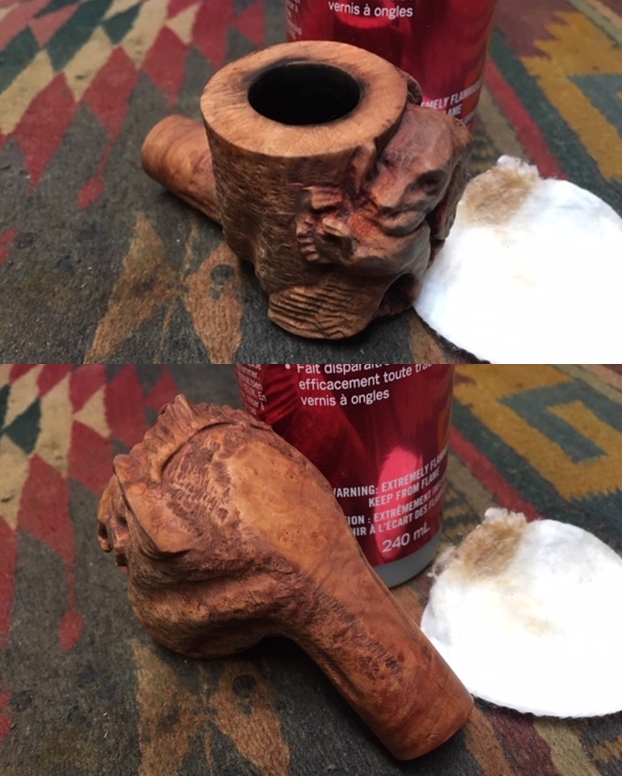
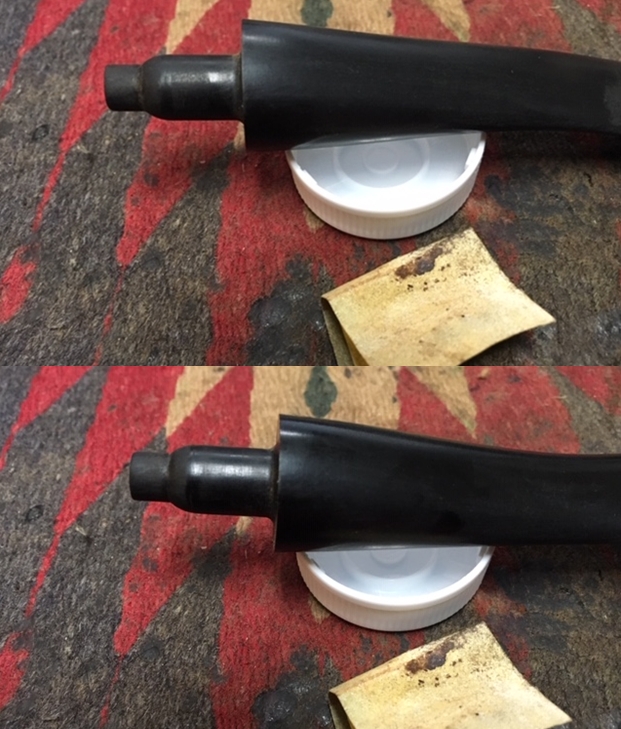
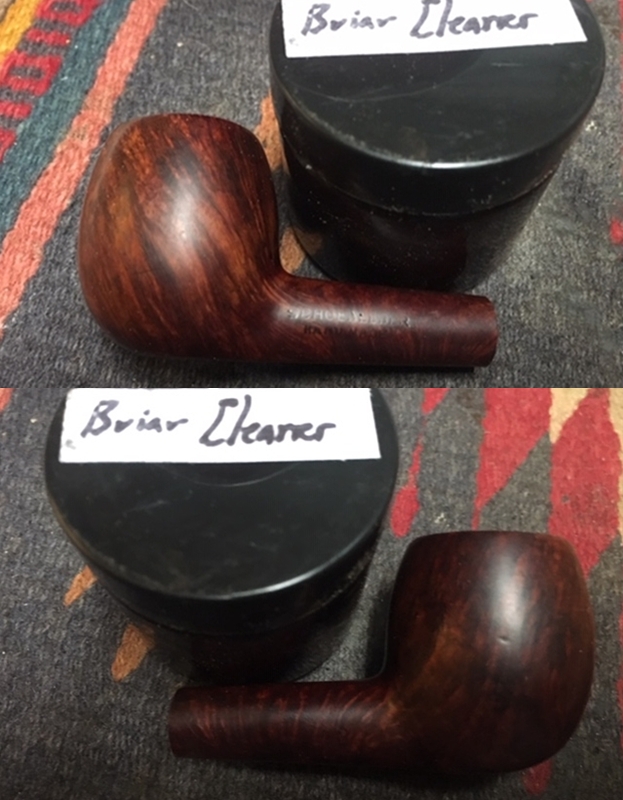
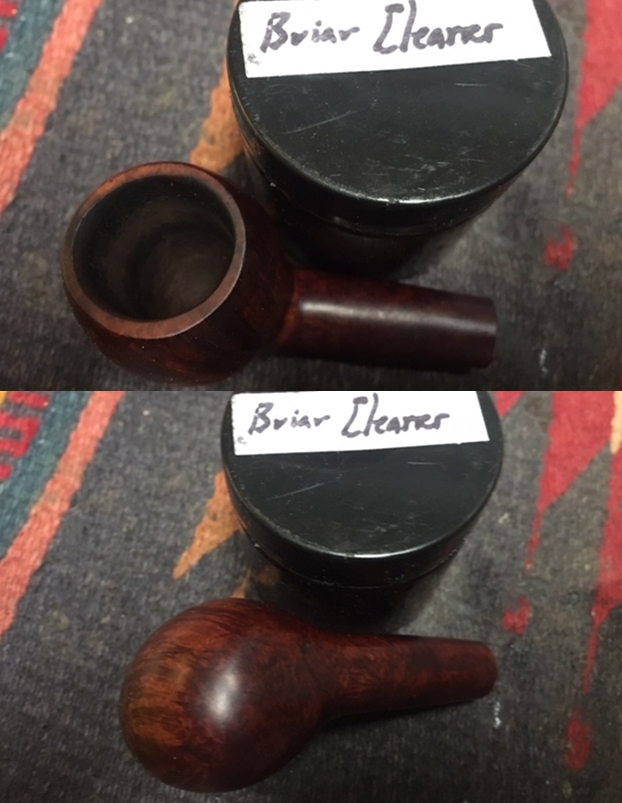
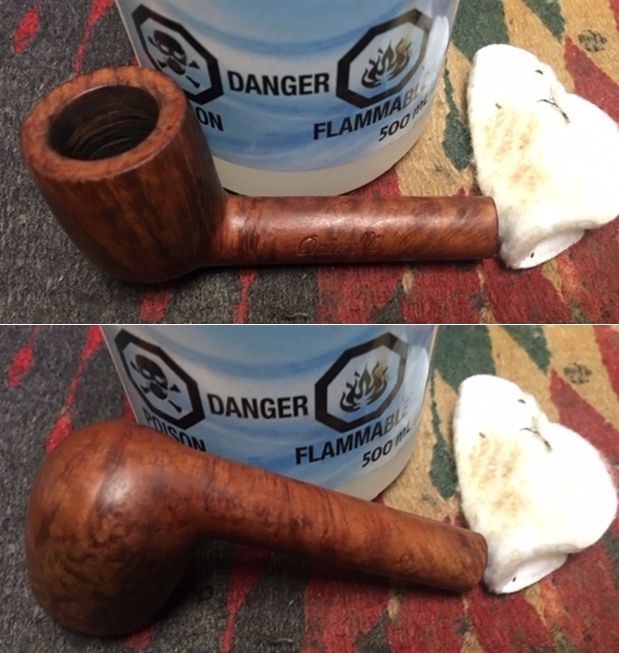
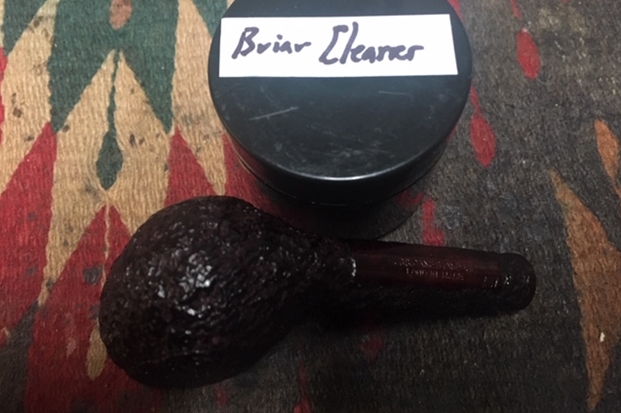
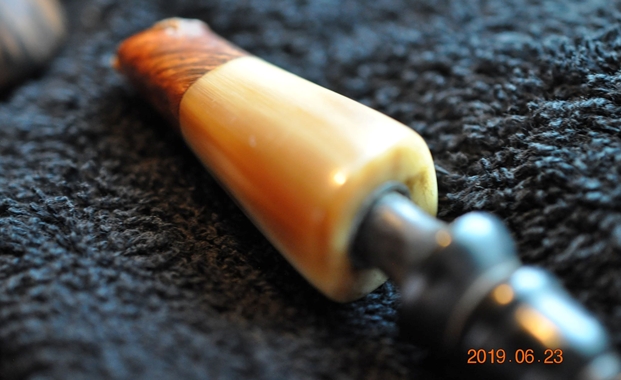
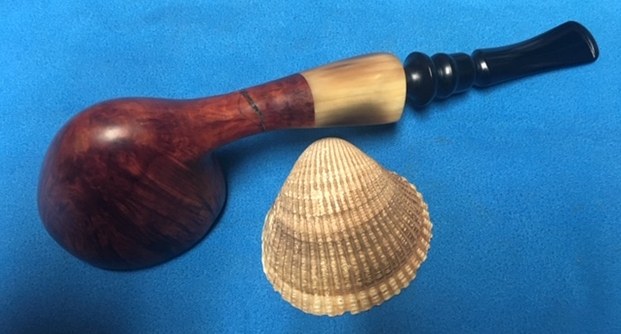
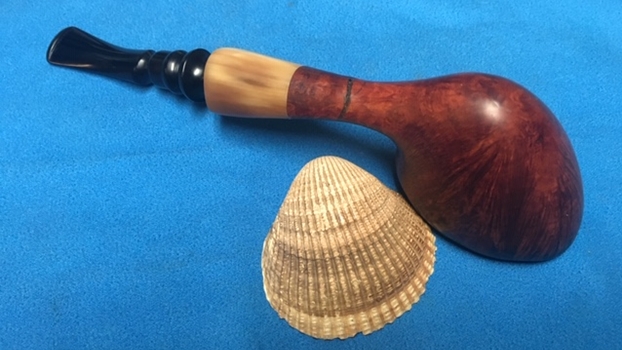
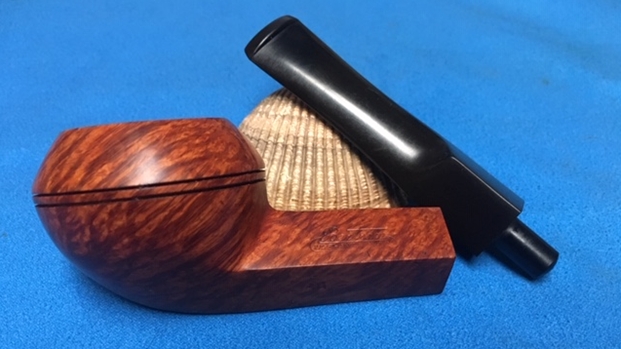
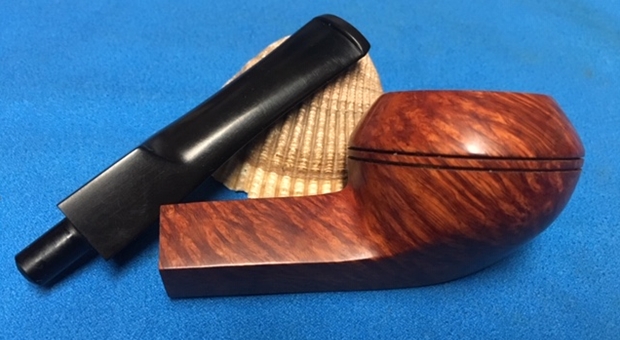
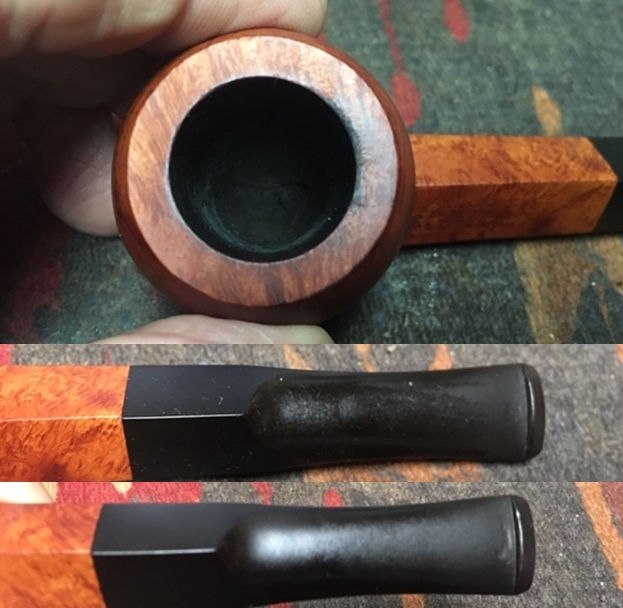
I took a close up photo of the meerschaum rim top and bowl to show the condition of the meer bowl after Jeff had cleaned it. The finish looked really good and there was only a very little colouration on the rim top. The silver band looked really good and the C.P.F. Logo and the Sterling stamp were very readable. The photos of the Redmanol/Bakelite stem show its general condition. It was very clean but had some chipping on stem at the junction of the band and the stem. There were tooth marks on both sides on button edges. The bone tenon was in very good condition and just a little darkening.
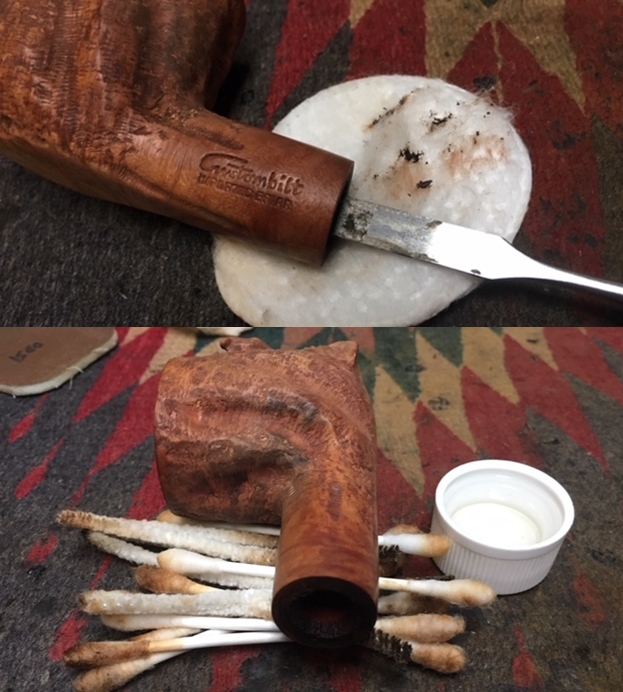
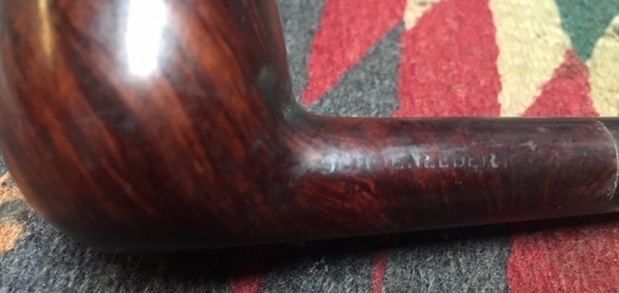
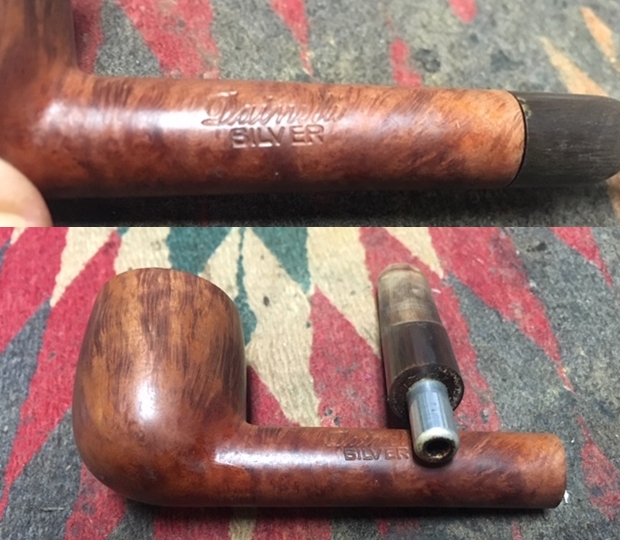
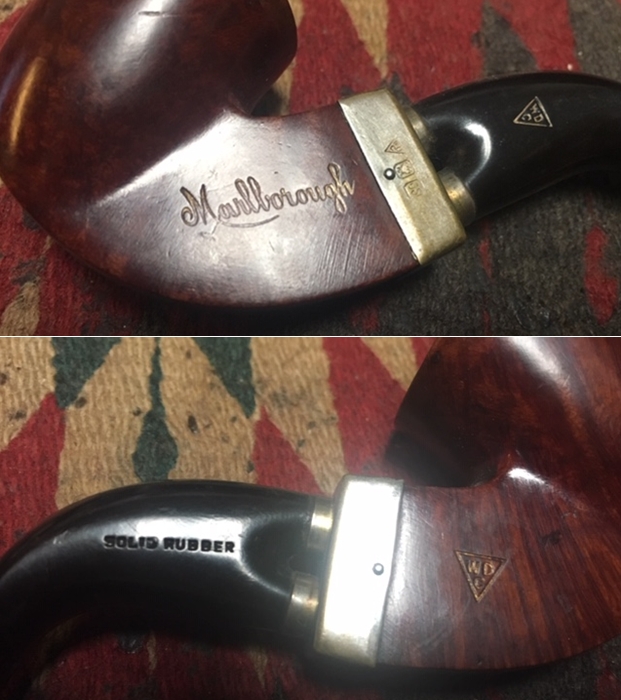
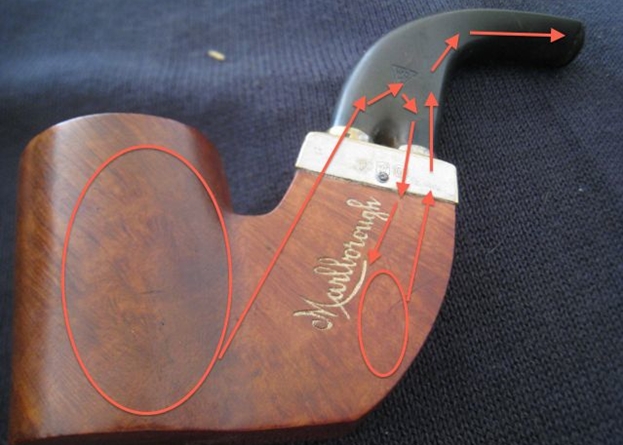
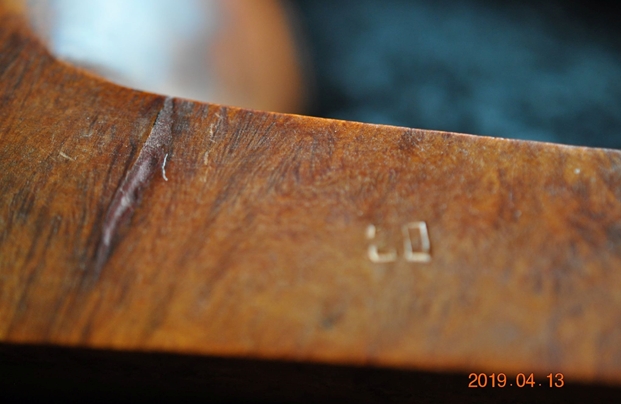
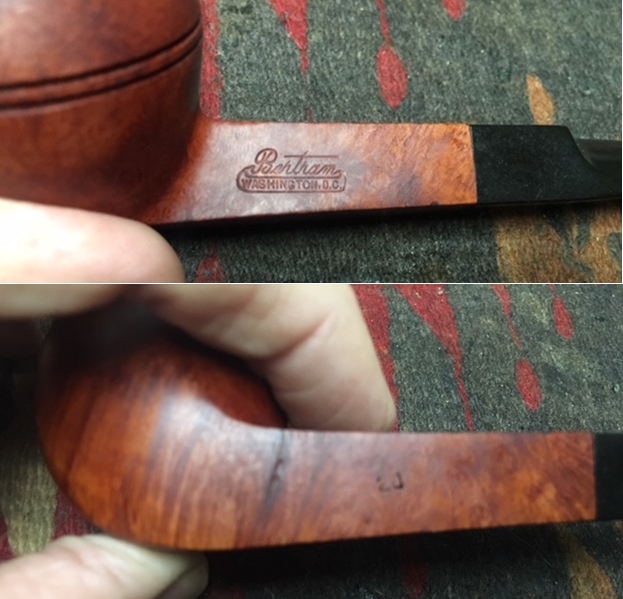
The next photo shows the stamping on the left side of the band. It is clear and readable. The stamping reads as noted above. The band is stamped with the C.P.F. in an oval logo over STERLING.I have included the following information with each of the blogs on C.P.F. pipes because I always want to keep the historical context in mind as I work on these. The link to the blog follows (https://rebornpipes.com/2013/04/14/some-reflection-on-the-historical-background-on-cpf-pipes/). I quote a pertinent part of the blog below:

From my reading and research it seems to me that C.P.F. brand was discontinued sometime in the 1910-1920 range. Again, turning to Bill Feuerbach I found that he notes the following, which pins down the time frame of the discontinuation of the brand more specifically, “I have a C.P.F. Chesterfield in our office display that has a nametag from way before my time that says 1900 C.P.F. Chesterfield. It looks like most other Chesterfields you’ve seen, including the military type push stem, except this stem is horn and not vulcanite. As far as I have gathered the C.P.F. brand was phased out sometime around 1915.” Interestingly, he noted that the Chesterfield name and style was later introduced in the KB&B, Kaywoodie and Yello-Bole lines. He says that the 1924 KB&B catalog shows KB&B Chesterfields…

… From my research I believe that we can definitively assert that the C.P.F. logo stands for Colossus Pipe Factory. The brand was purchased by KB&B sometime between 1884 and 1898 and that it continued until 1915. That time frame gives help in dating some of the older C.P.F. pipes you or I might find. It can be said that prior to the dual stamping it is fairly certain that the pipe is pre-1884 to 1898. After the dual stamping it can be placed post 1898 until the closure of the brand line in 1915. C.P.F. made beautiful pipes.

From that information I can tentatively date the pipe to the period prior to 1884-1898 when KB&B bought the brand because of the single C.P.F. stamp on the band. At any rate it is another old meerschaum pipe that is lightly smoked. The story of its journey to Jeff and me this long after the date it was made is another mystery. This is another of those pipes that makes me wish that it could share its story with us. I can only imagine the journey it has had even minimally from the bits that I do know. It traveled from the Colossal Pipe Factory in New York City to Florida and then on to Idaho Falls in journey that began in the 1880s and ended in 2019. Now it is has further traveled by air to Vancouver, Canada, as far west as it can go and remain on the same continent… what a well-traveled pipe. Armed with that information it was not time to work on the pipe.

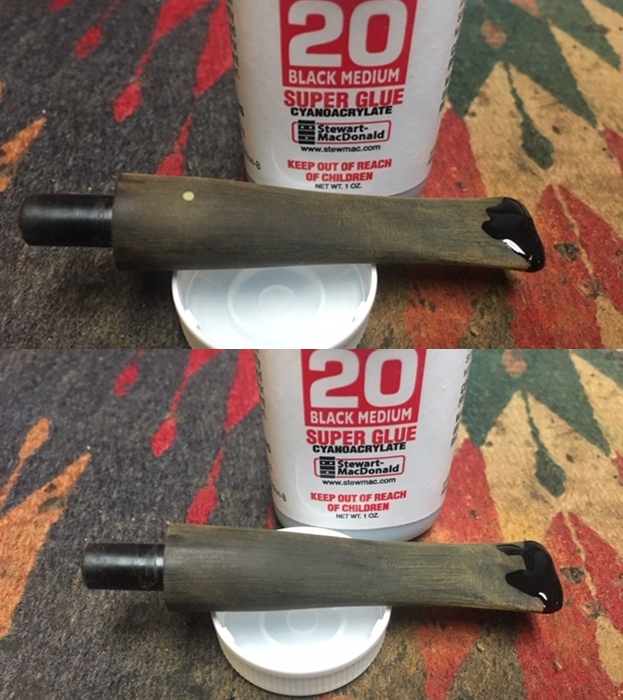
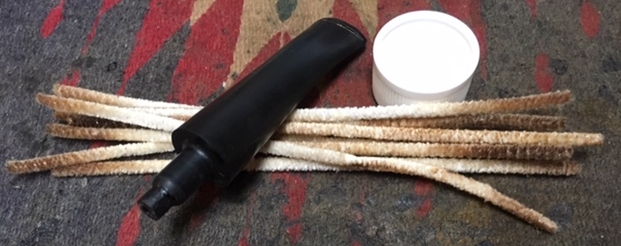
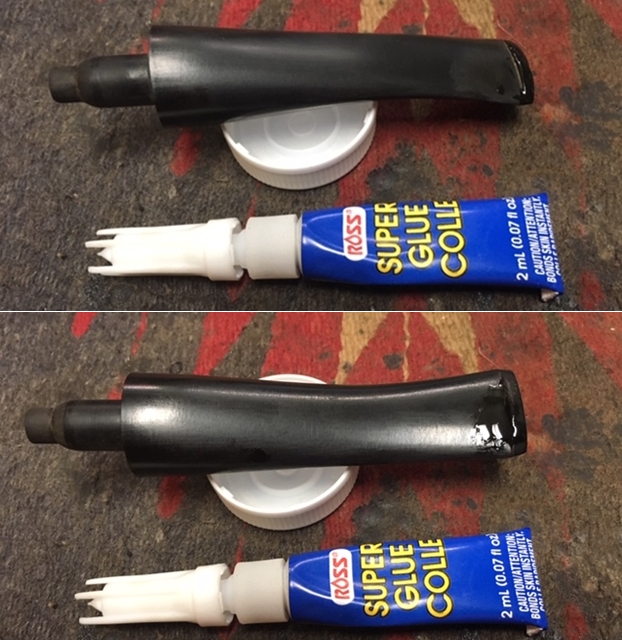
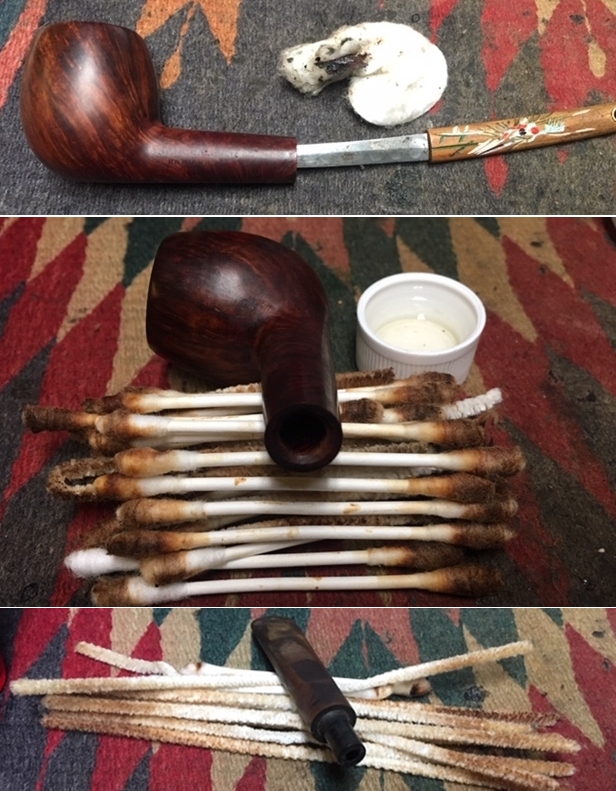
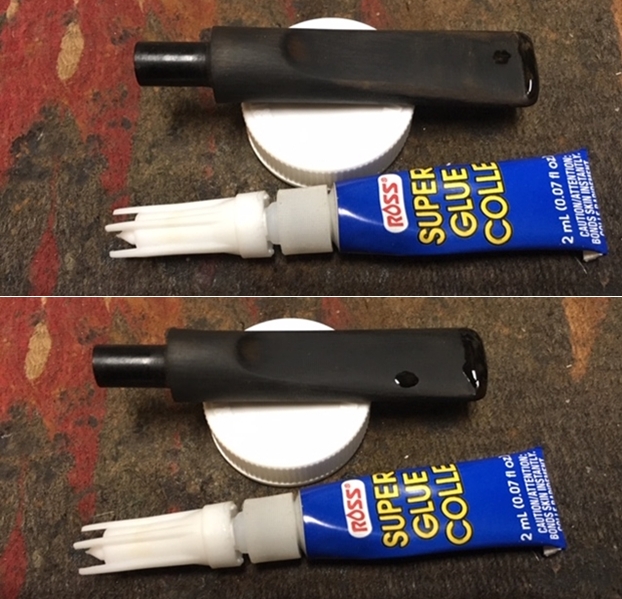
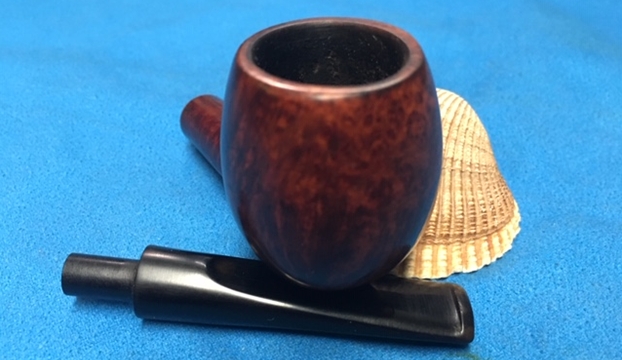
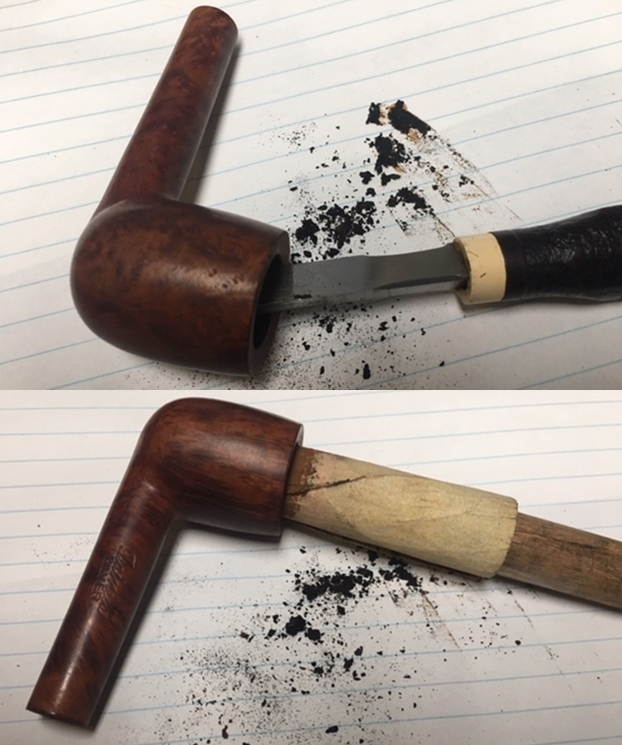
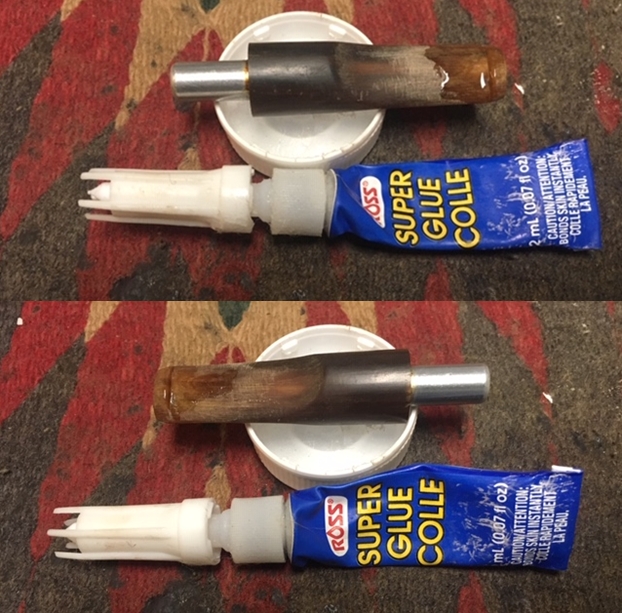
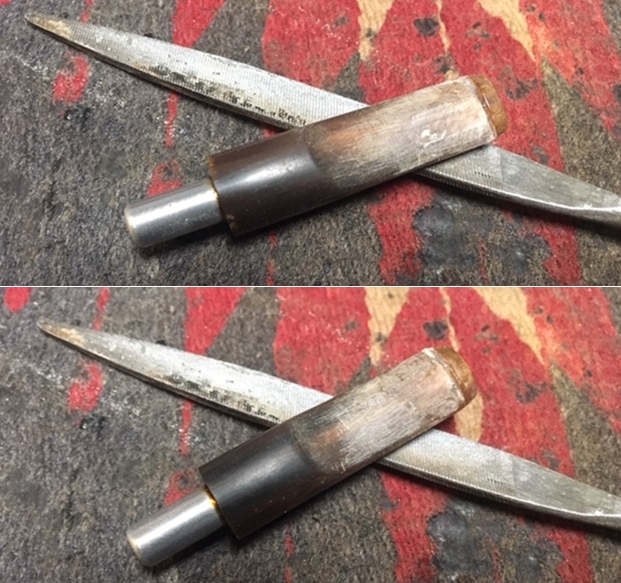
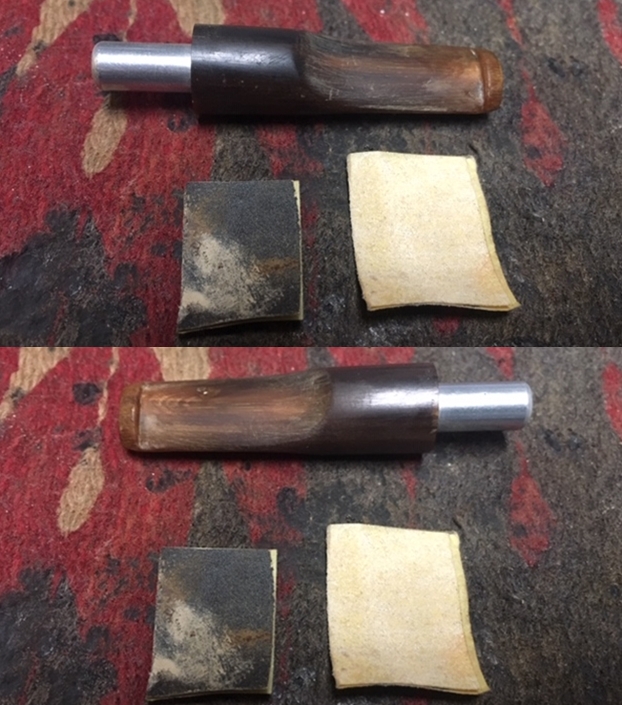
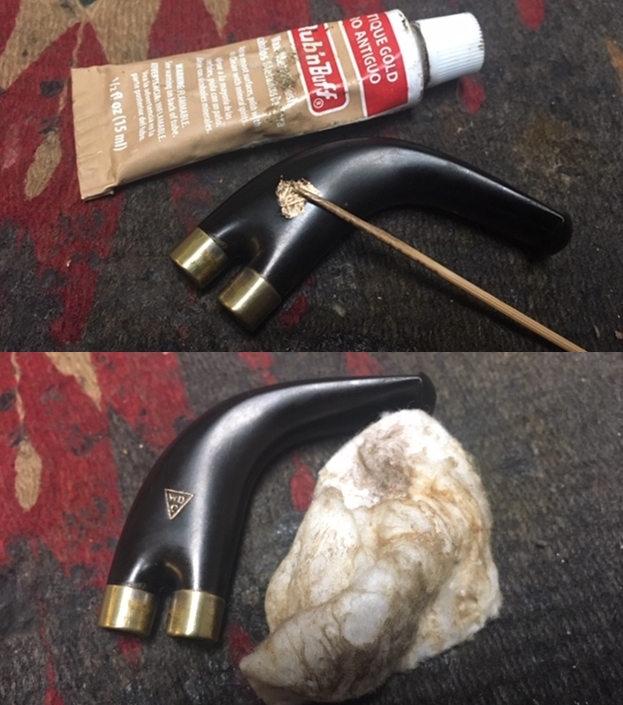
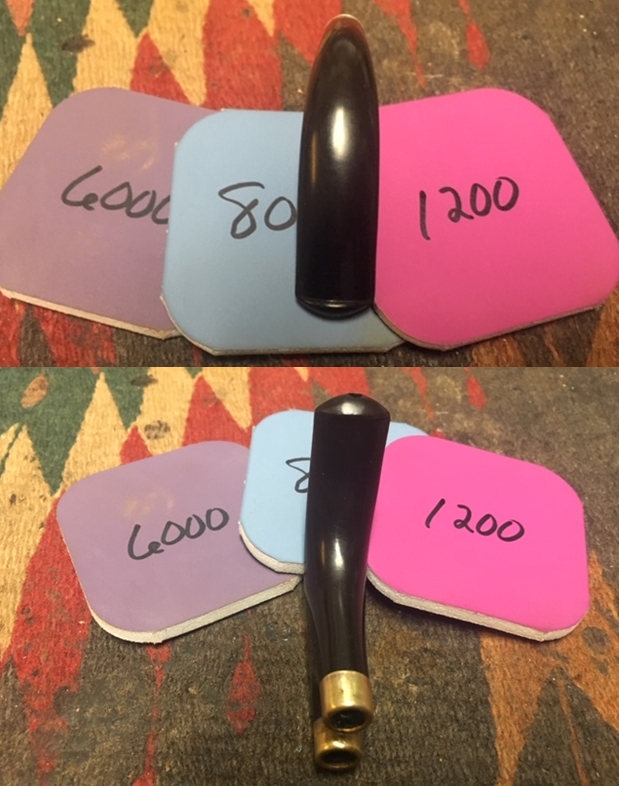
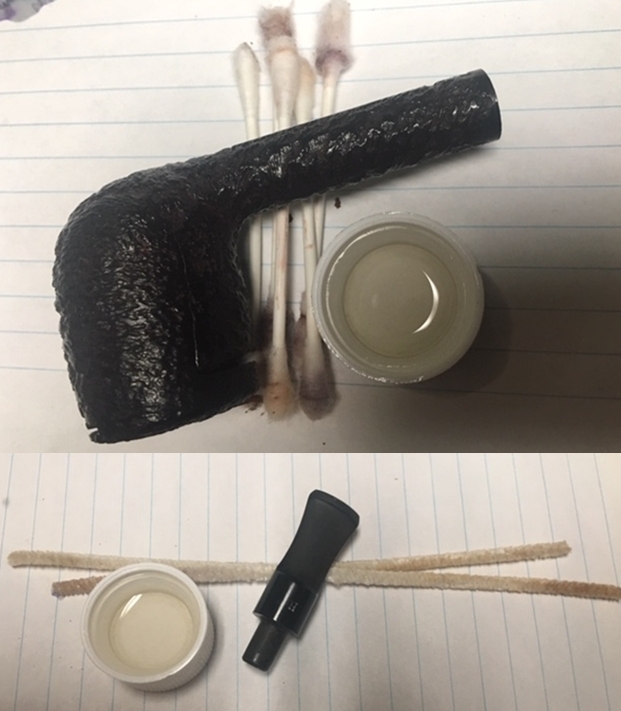
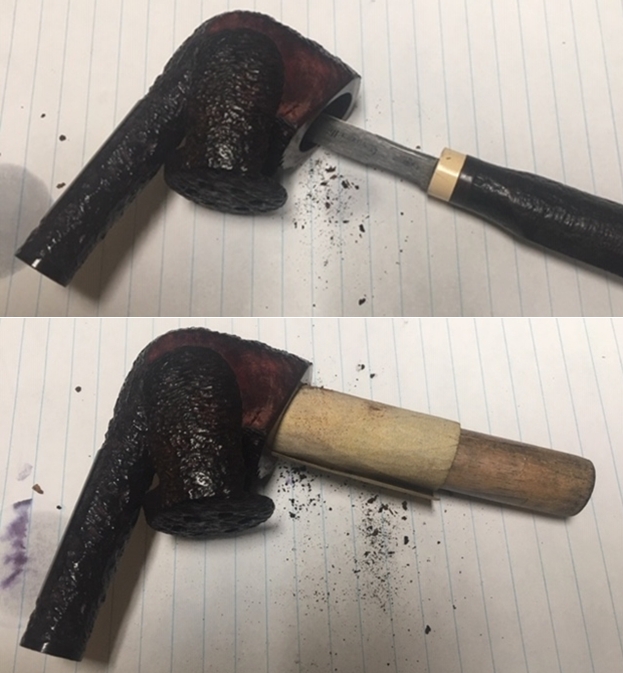
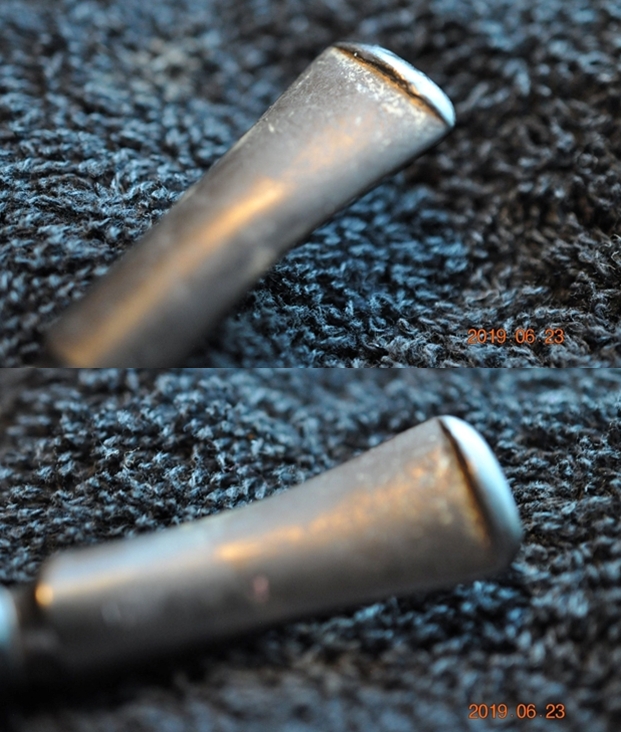
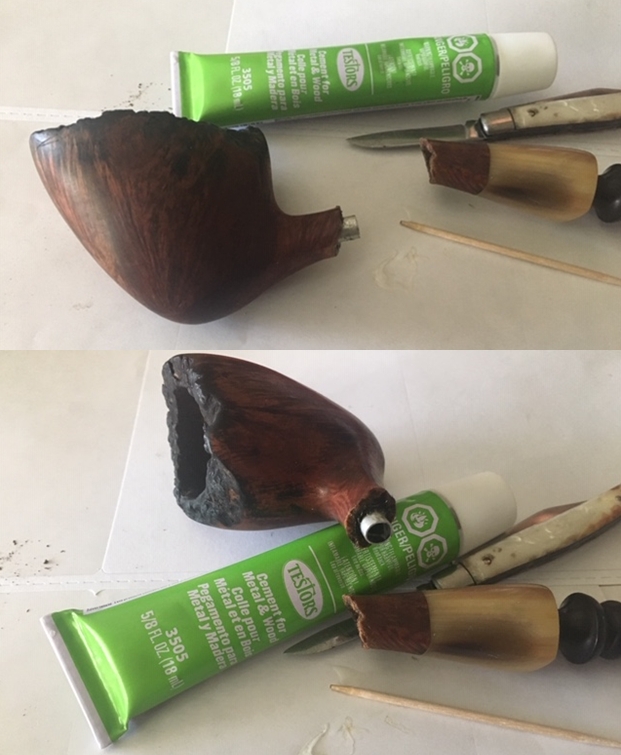
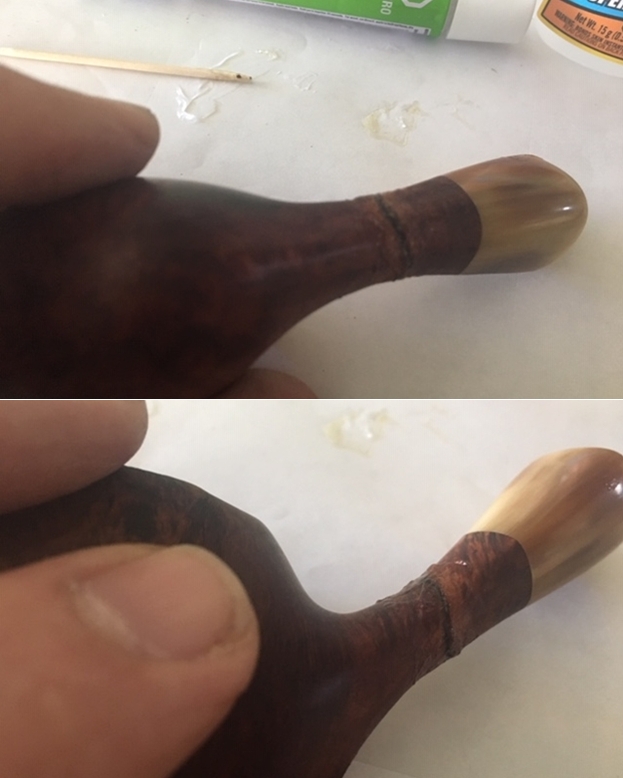
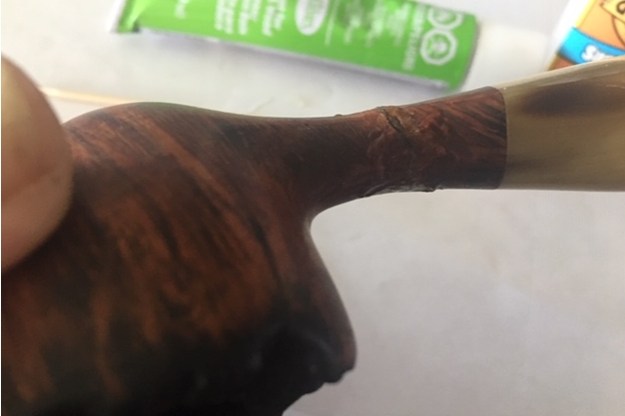
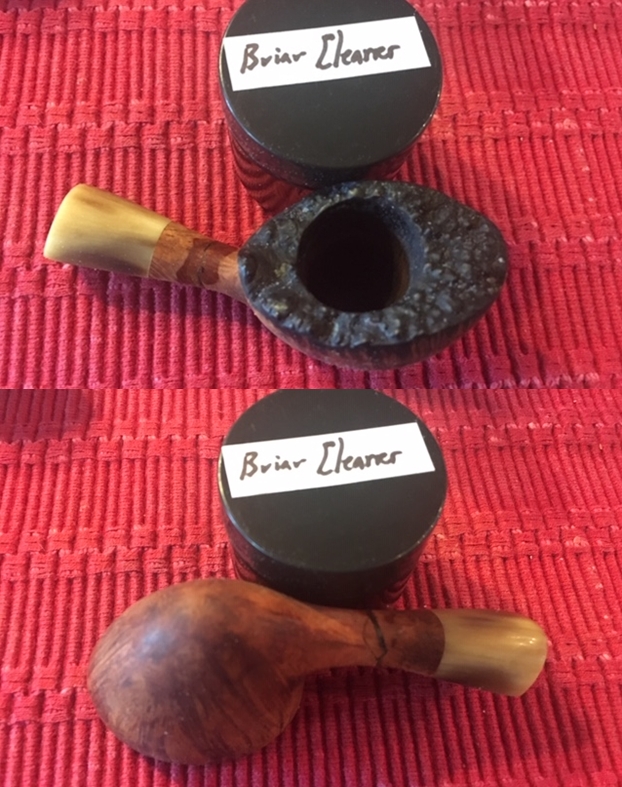
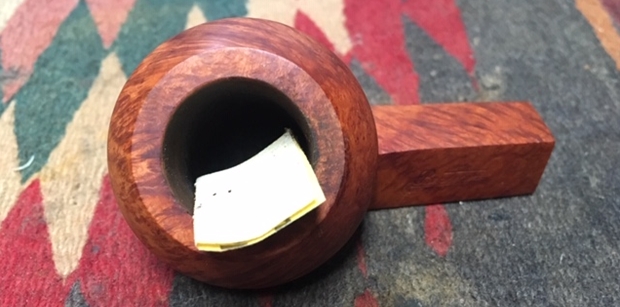
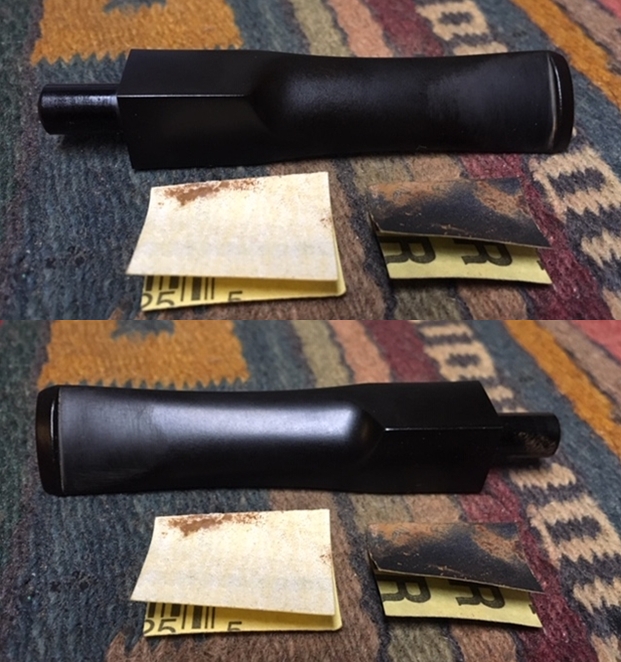
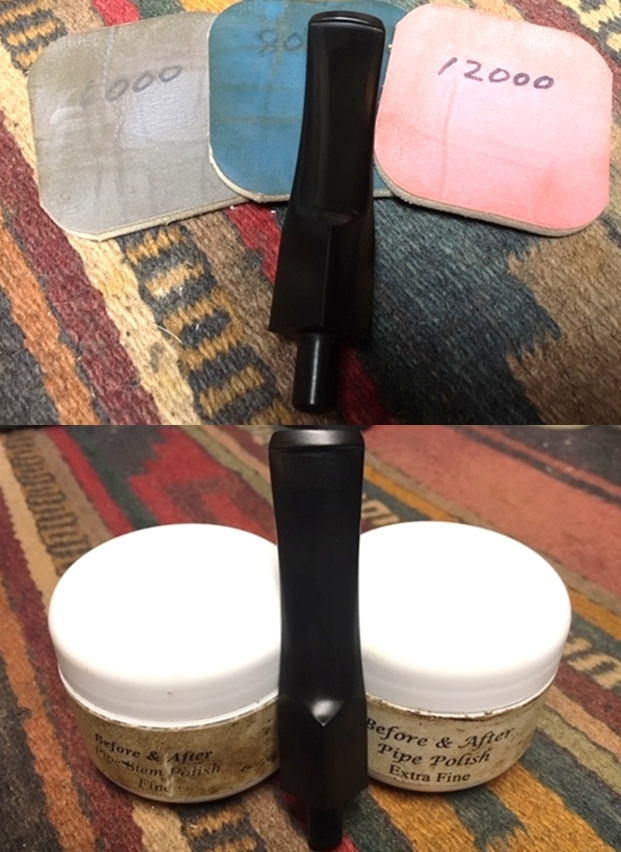
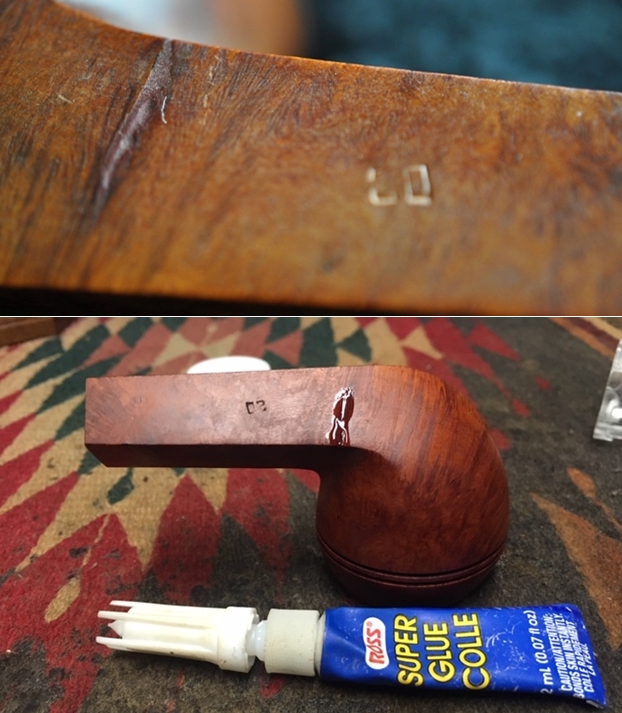
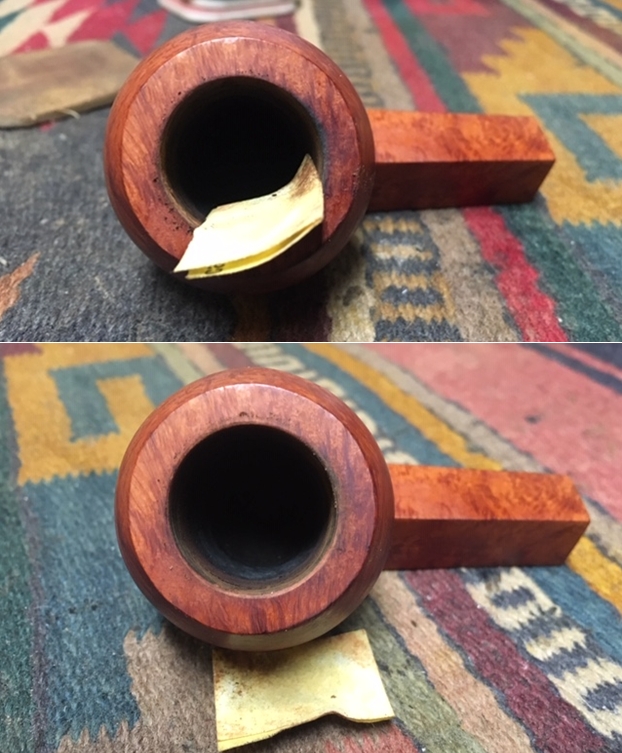
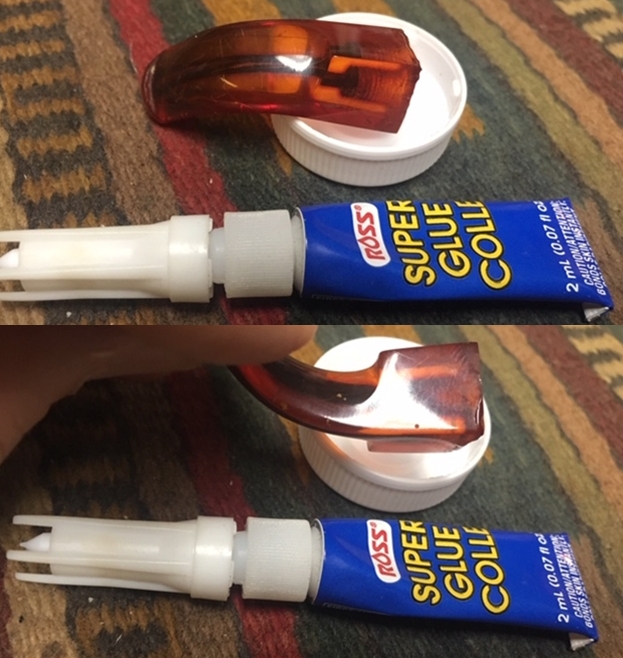
I decided to begin with the stem damage at the junction of the band and stem. There was chipping in the Redmanol/Bakelite at that point that needed attention. The first photo below shows the chipping. I built up the edge with clear super glue. At the same time I filled in the tooth marks on the button with super glue. I set the stem aside to let the glue cure. 
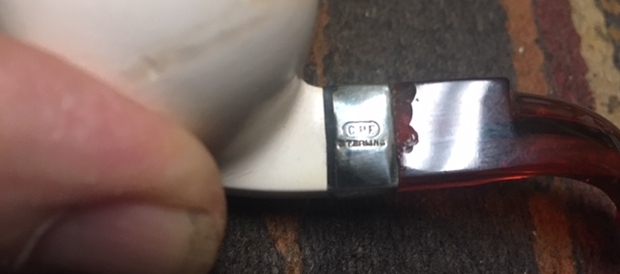
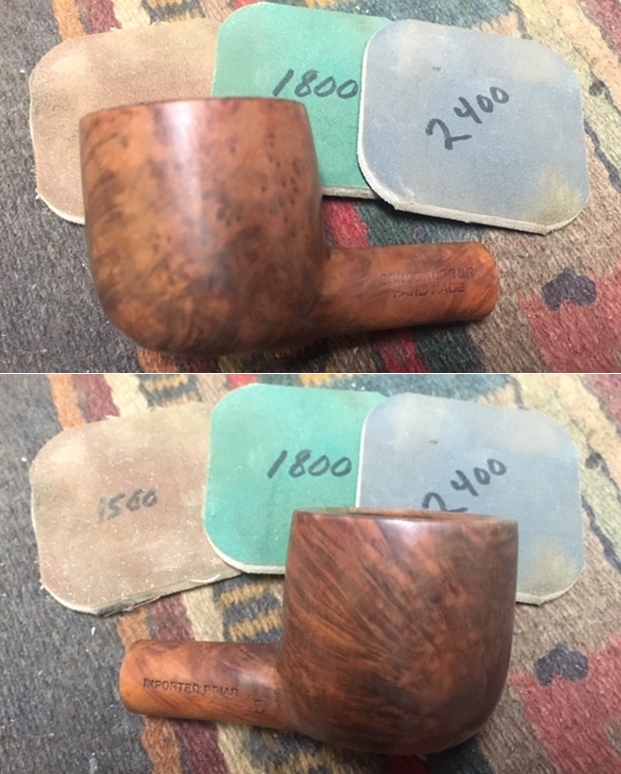
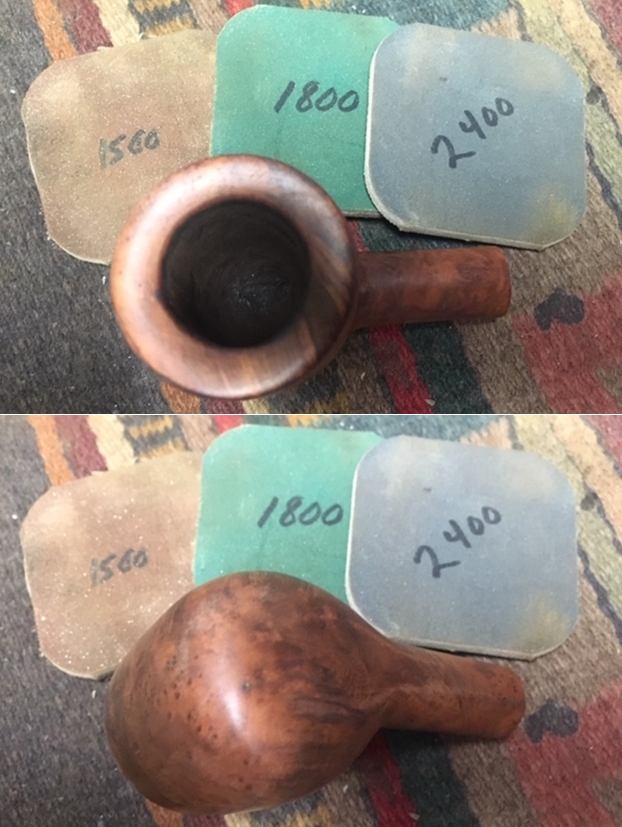
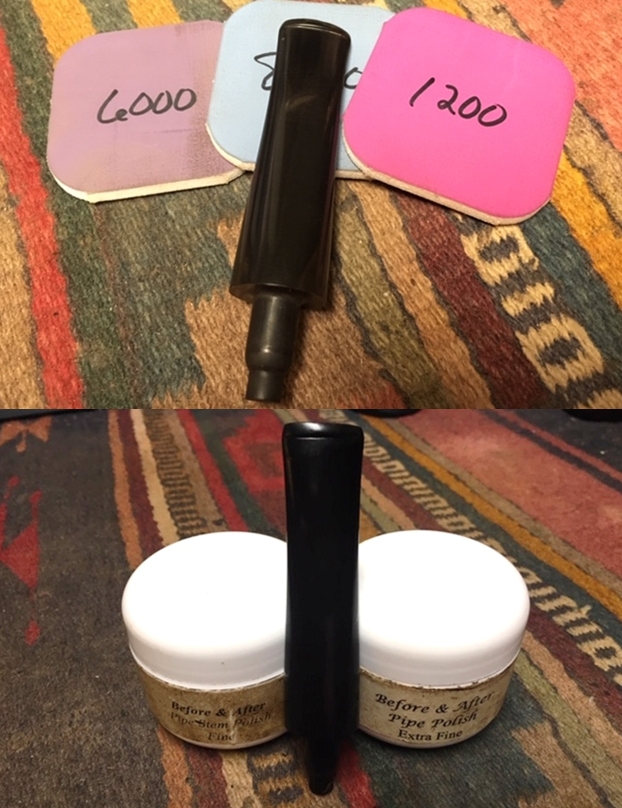
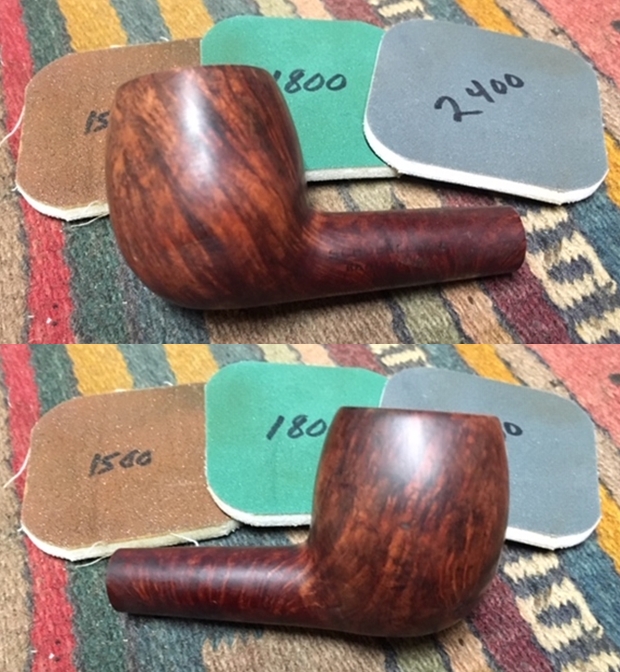
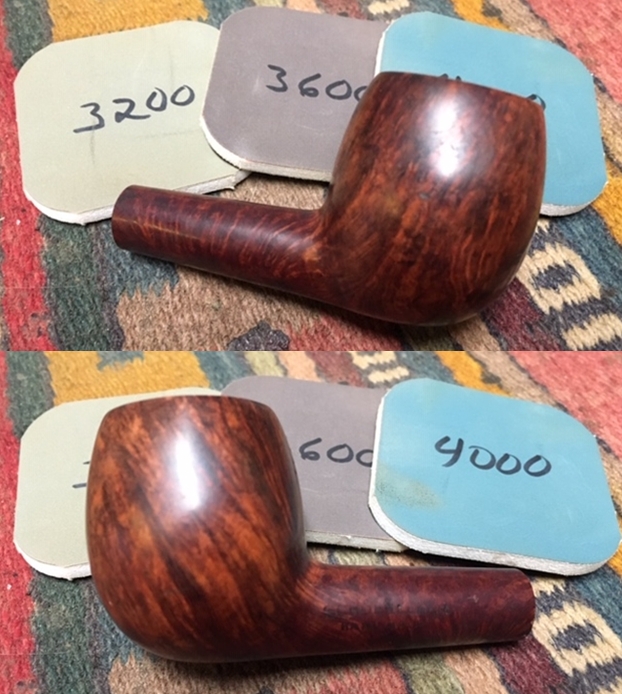
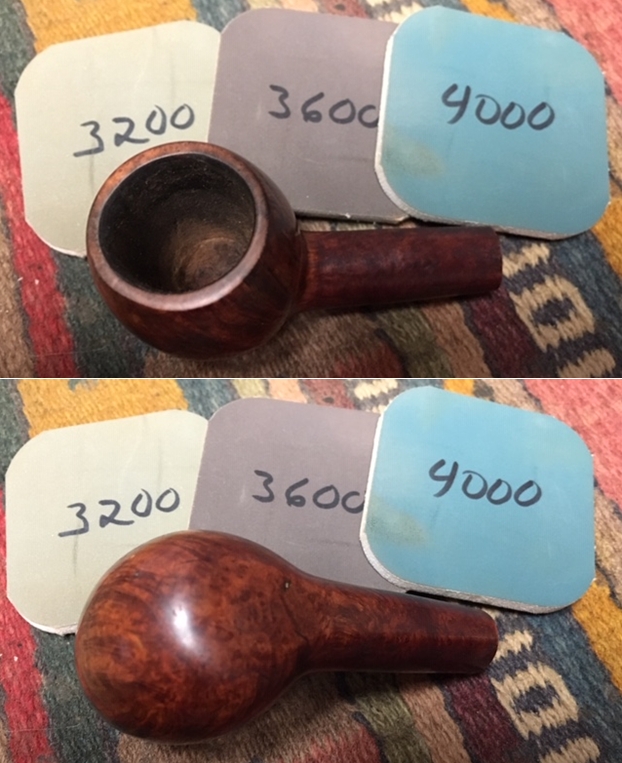
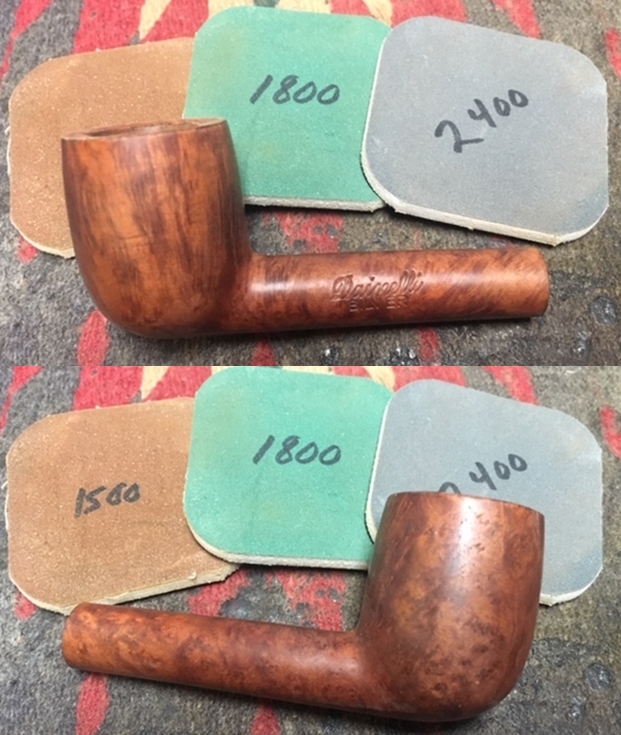
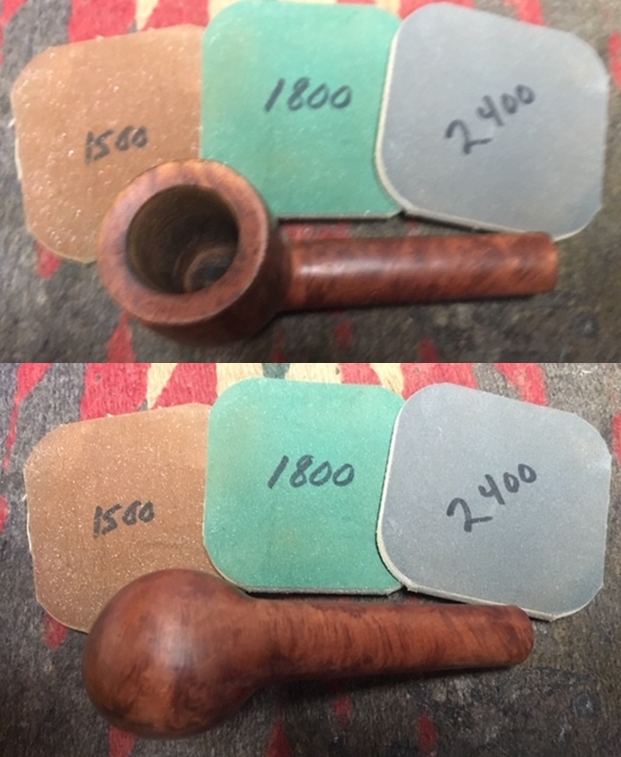
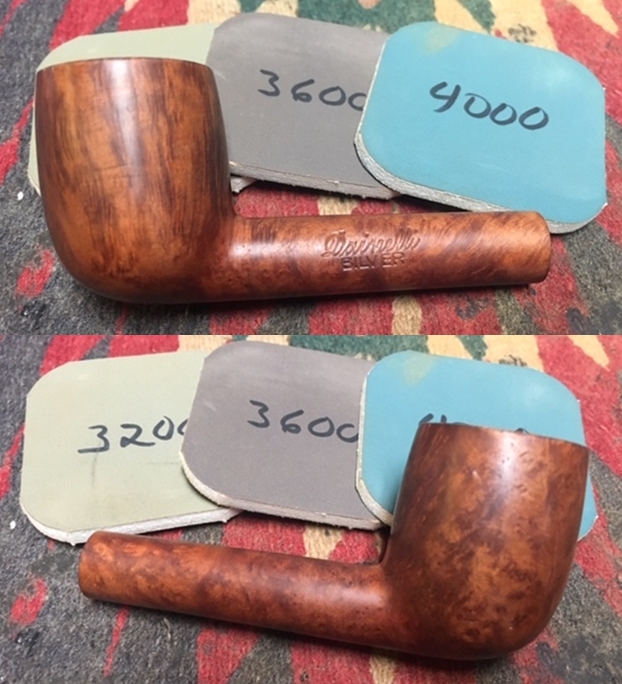
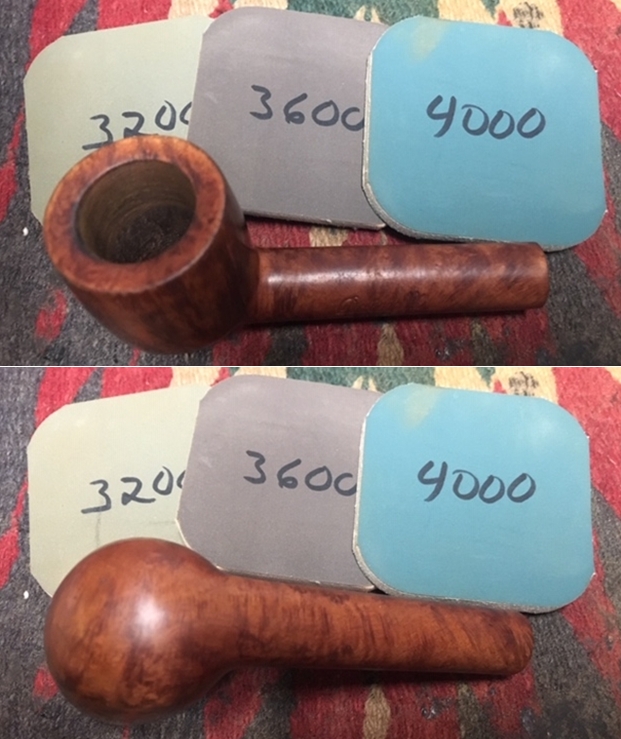
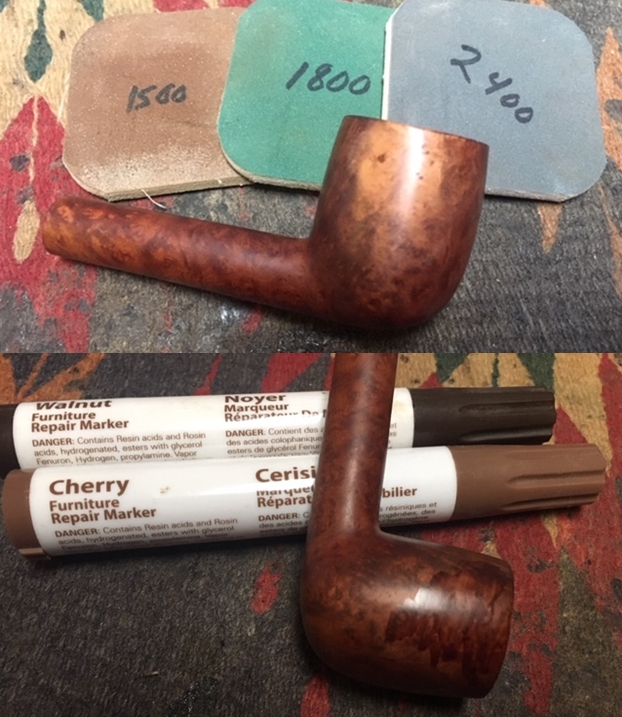
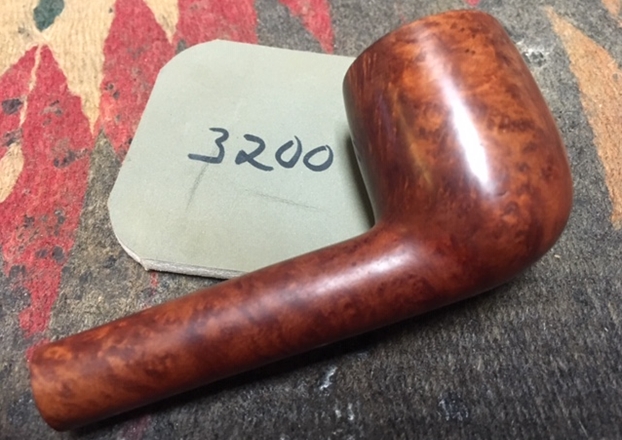
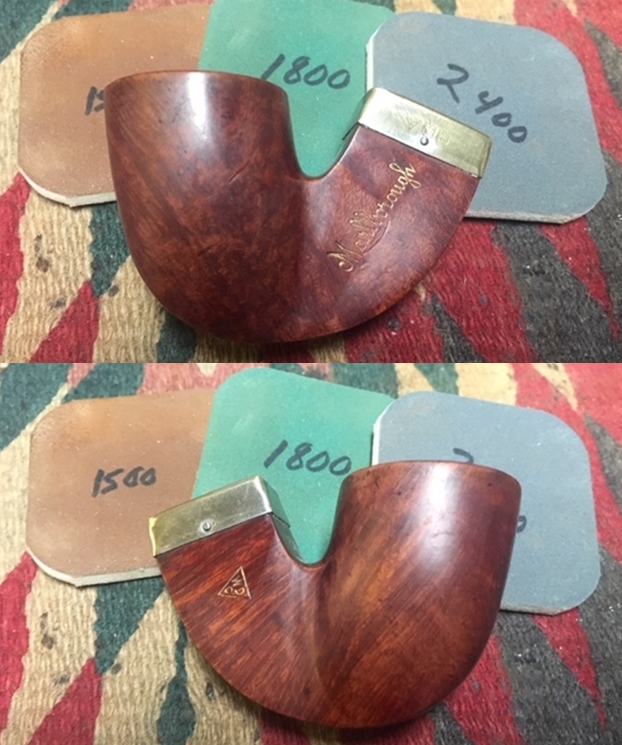
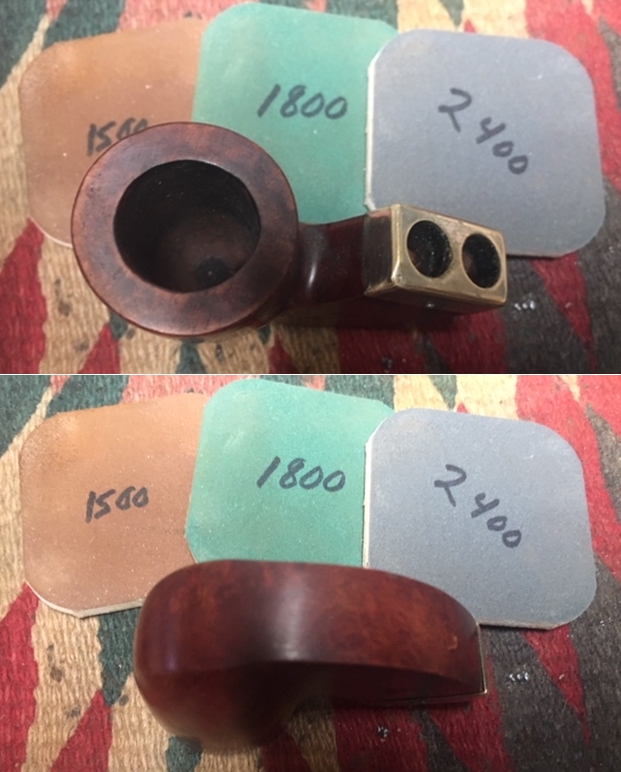
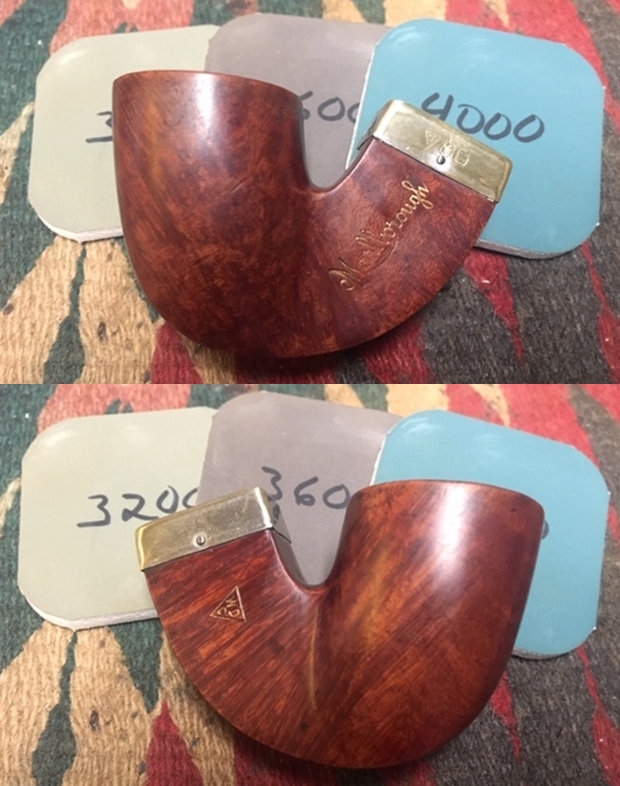
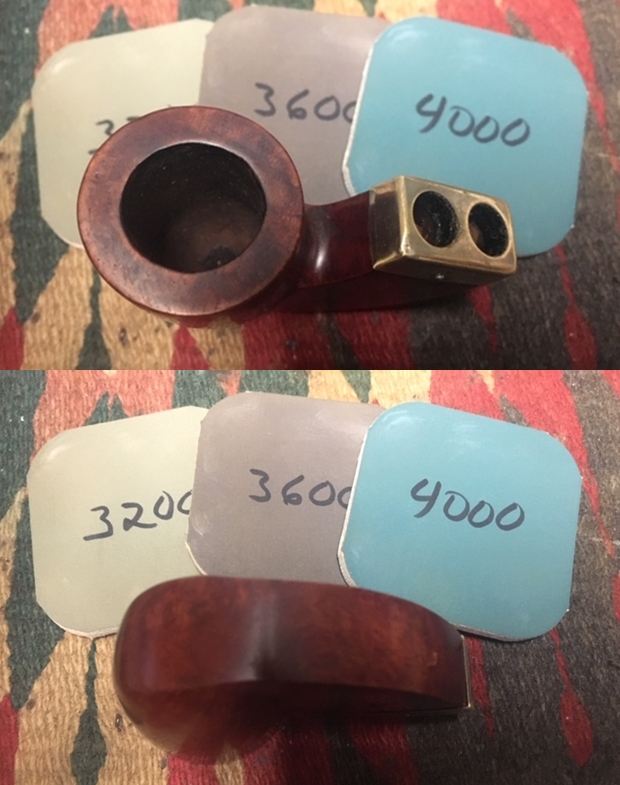
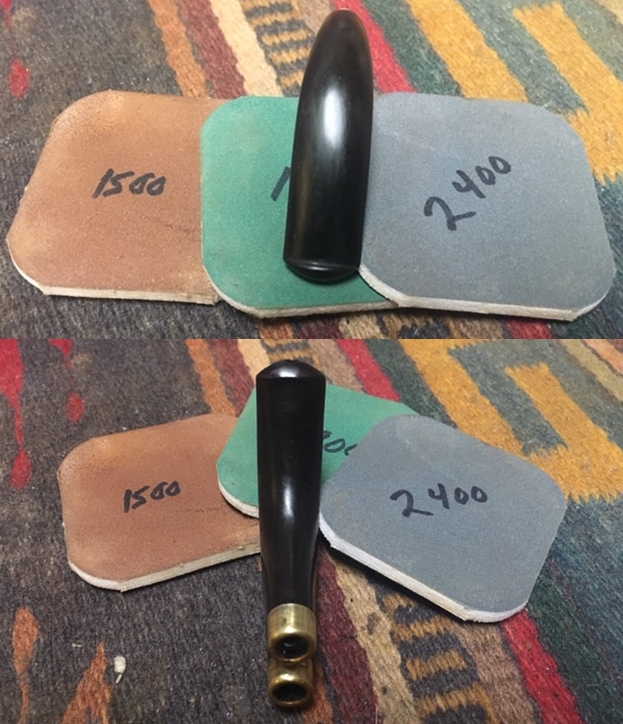
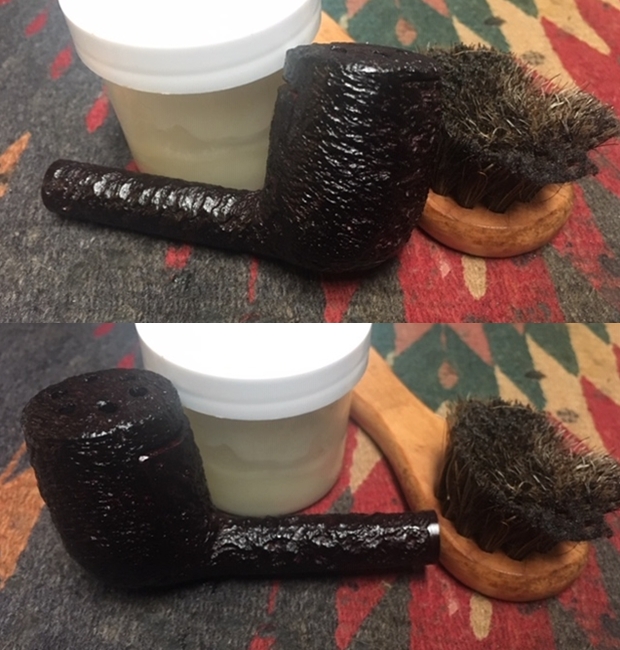
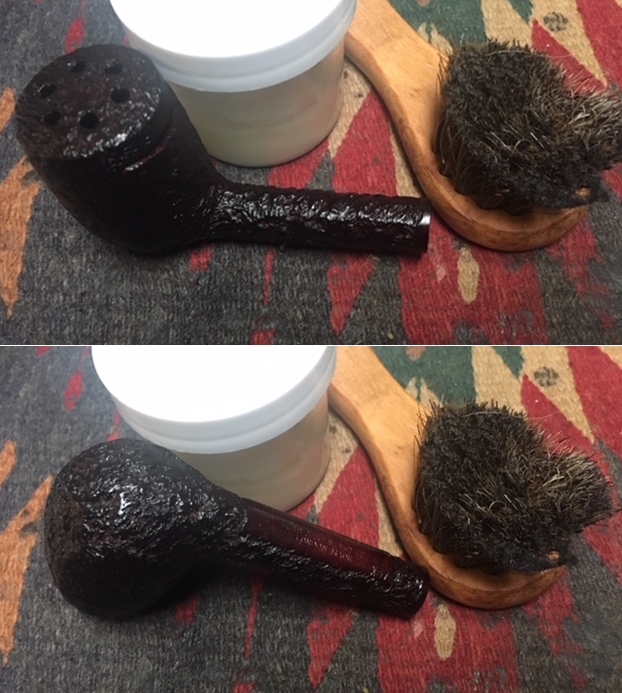
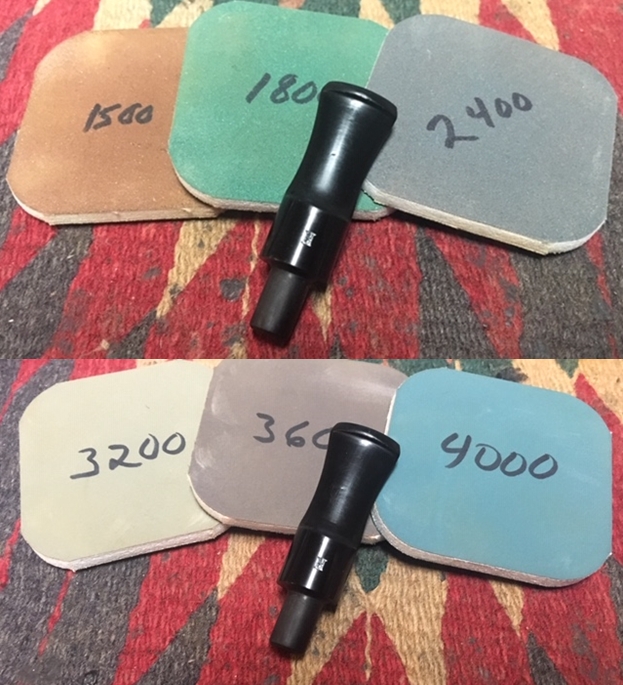
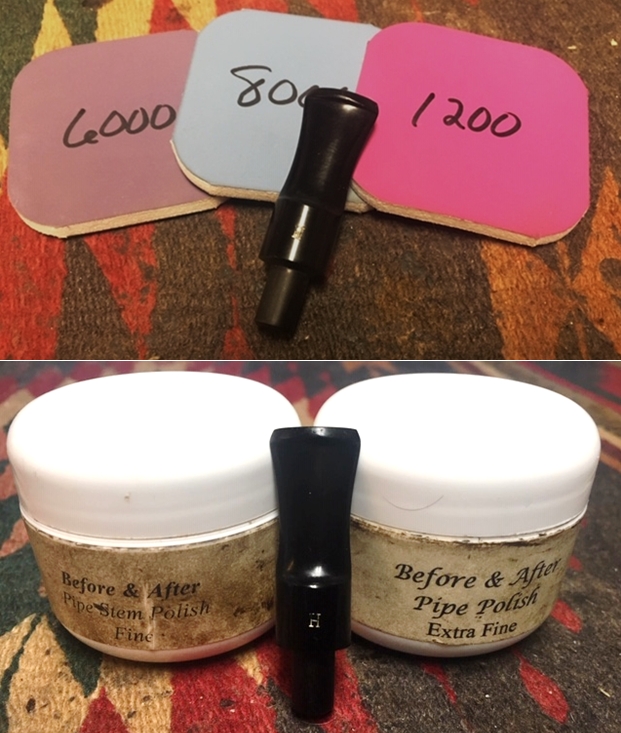
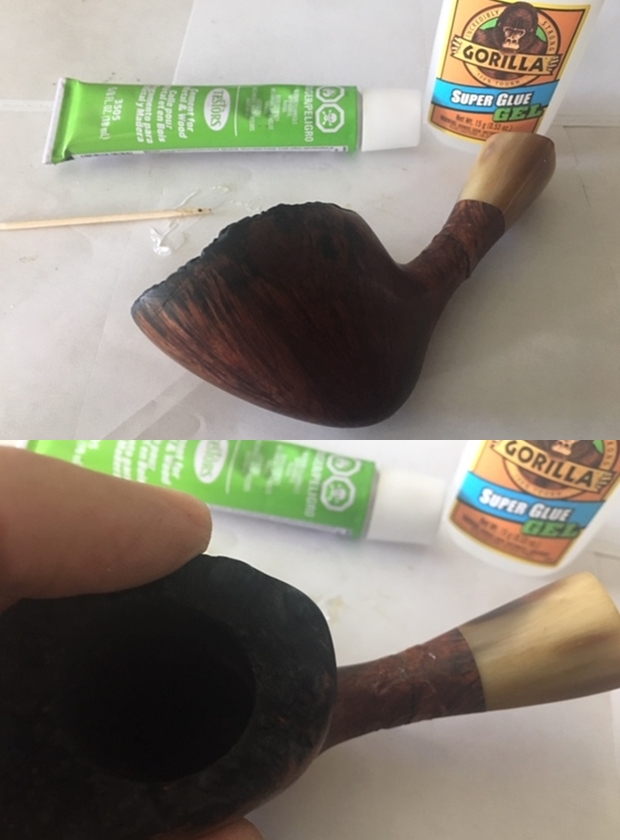
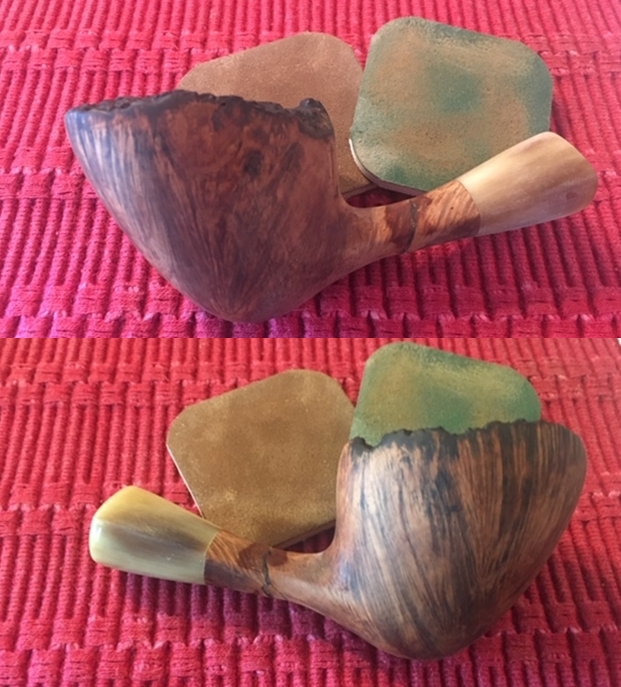
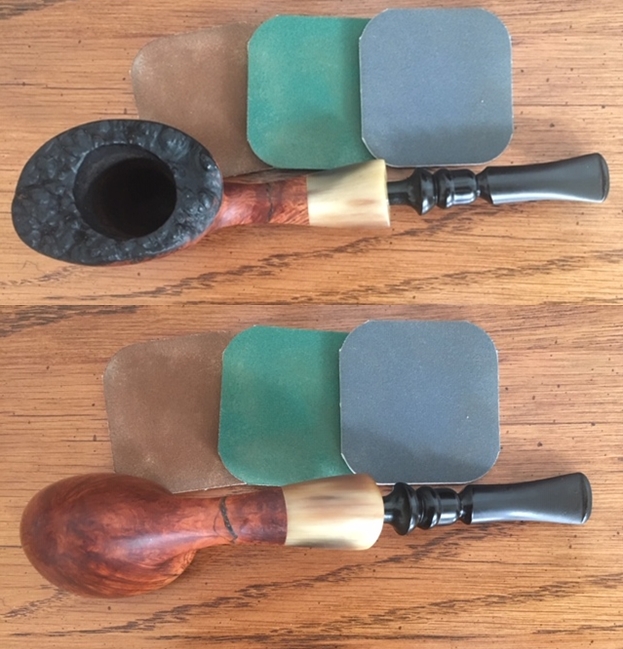
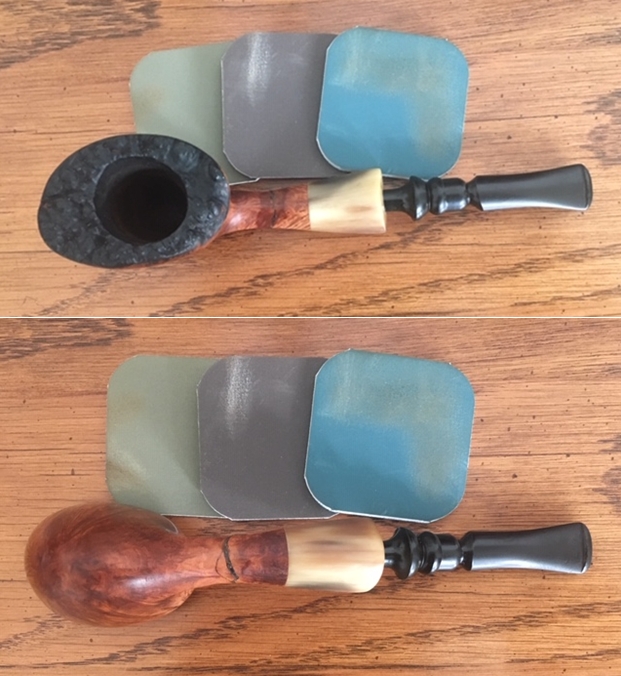
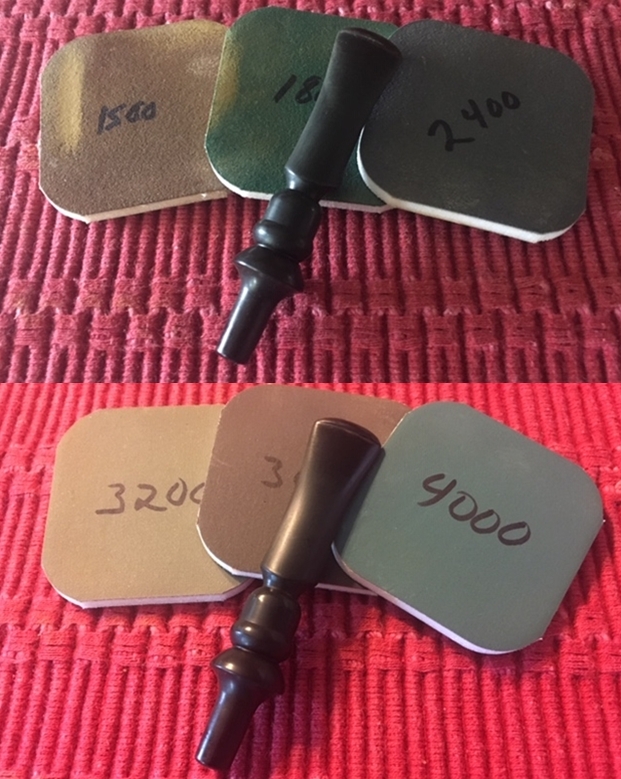
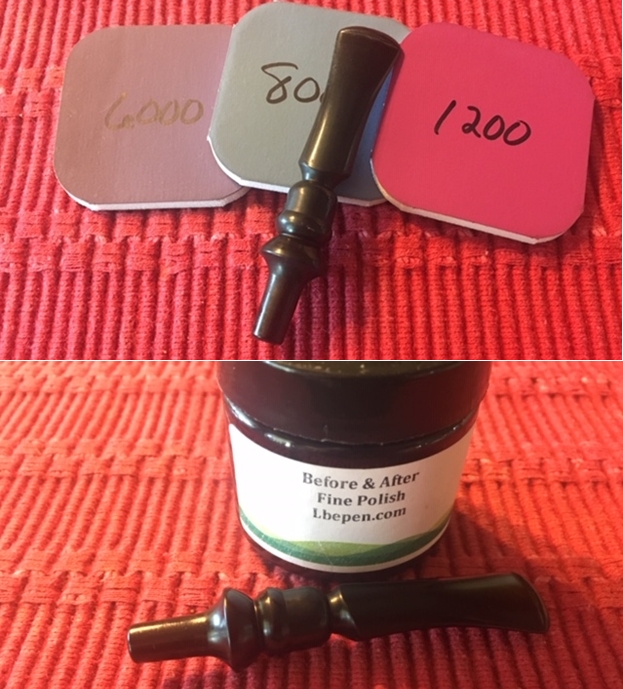
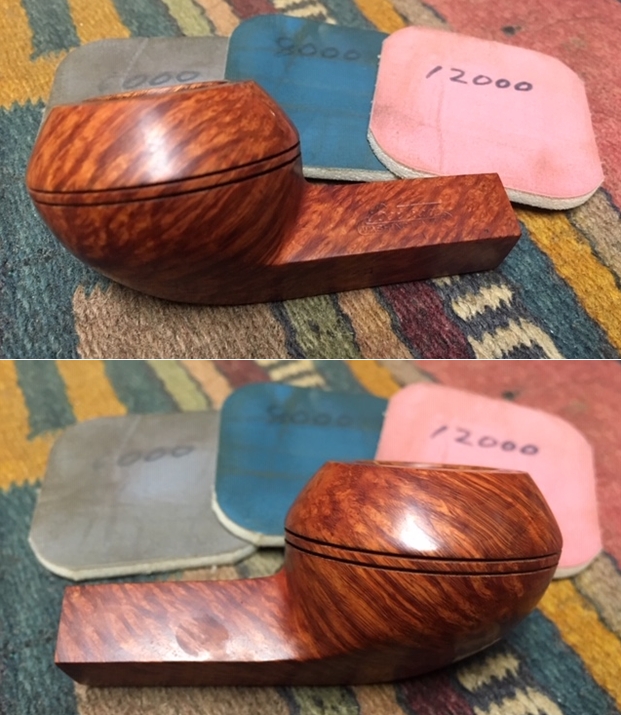
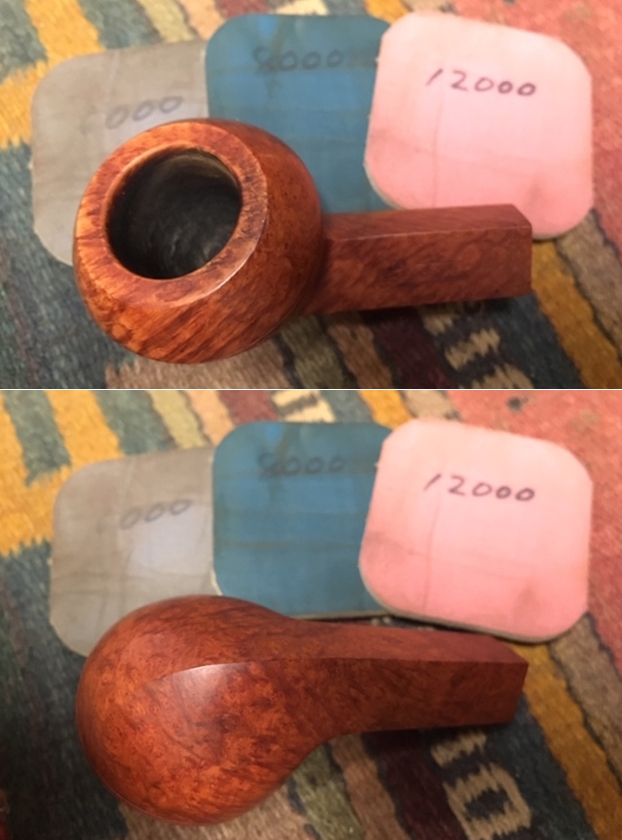
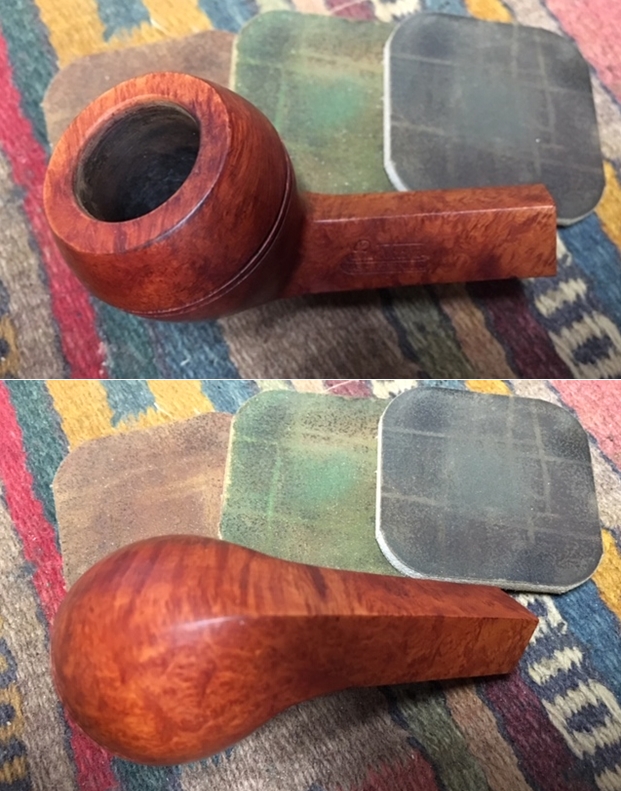
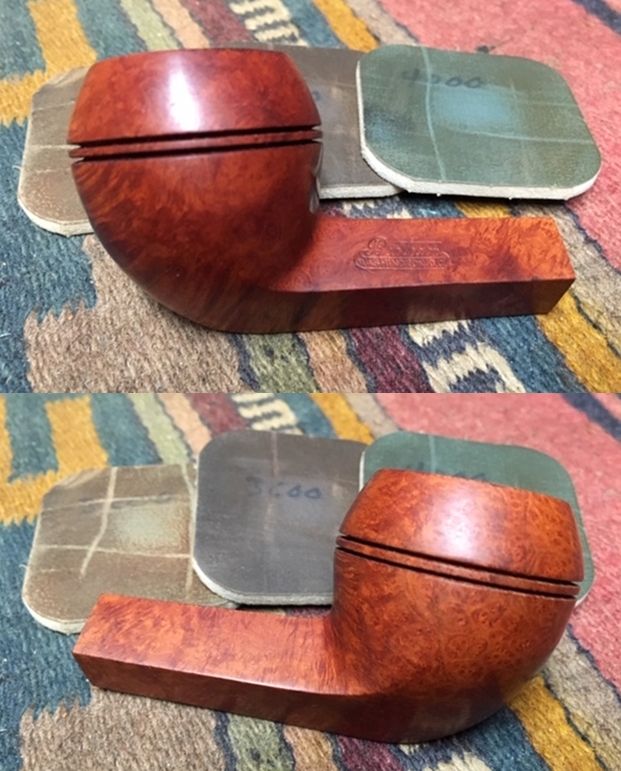
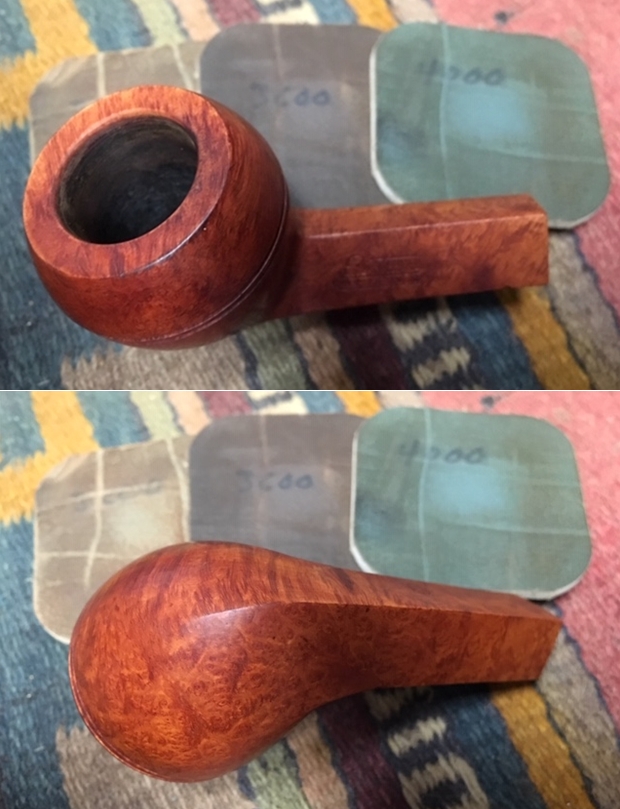
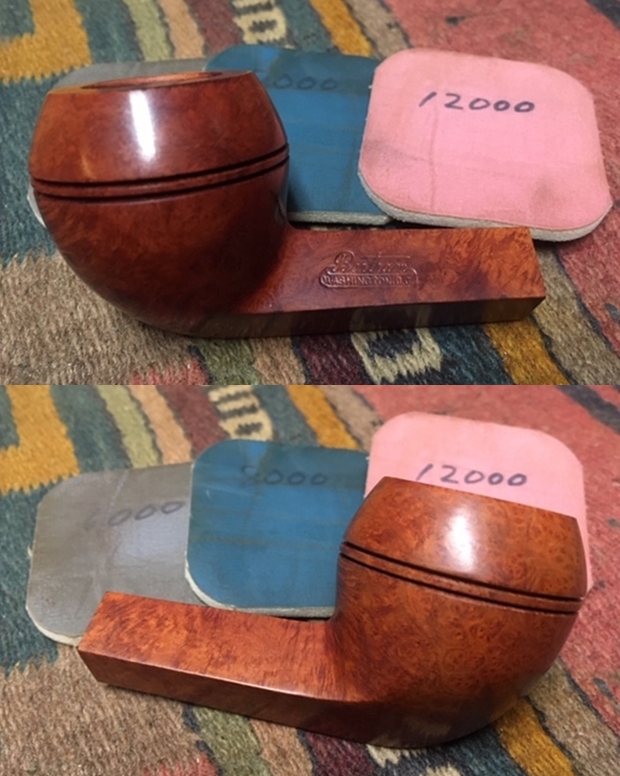
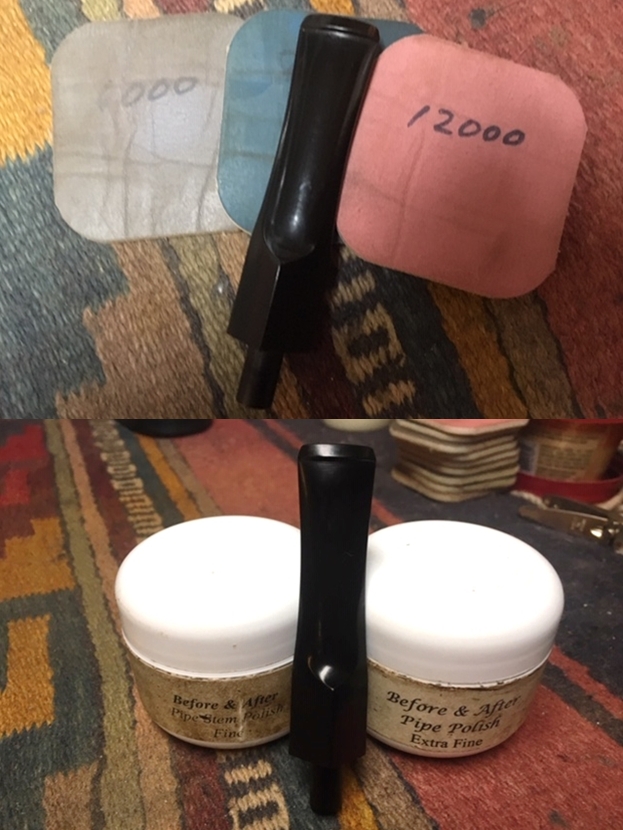
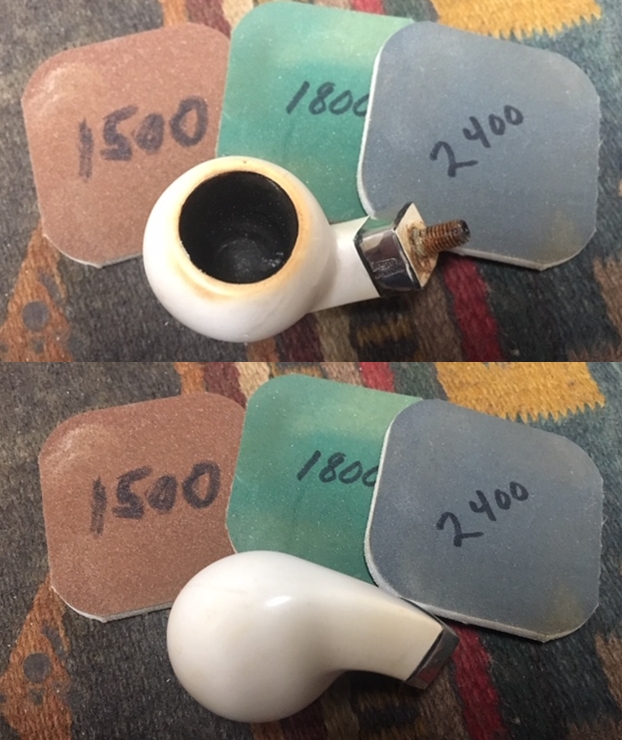
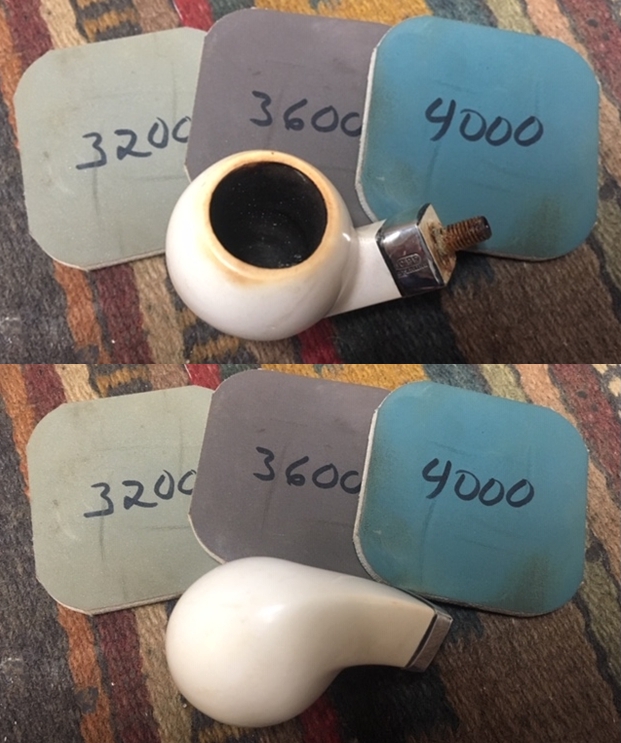
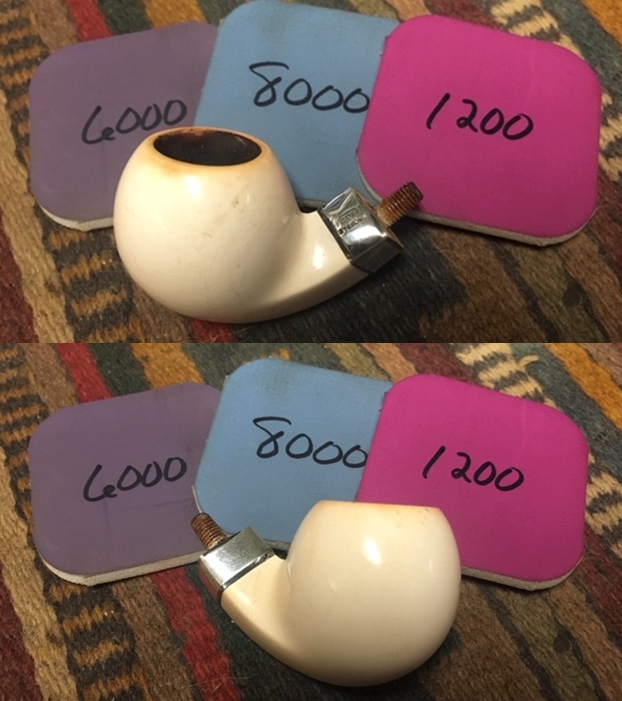
I polished the meerschaum bowl and rim top with micromesh sanding pads – wet sanding with 1500-12000 grit pads and wiping the bowl down after each pad. The bowl began to take on a real shine after each set of pads. 
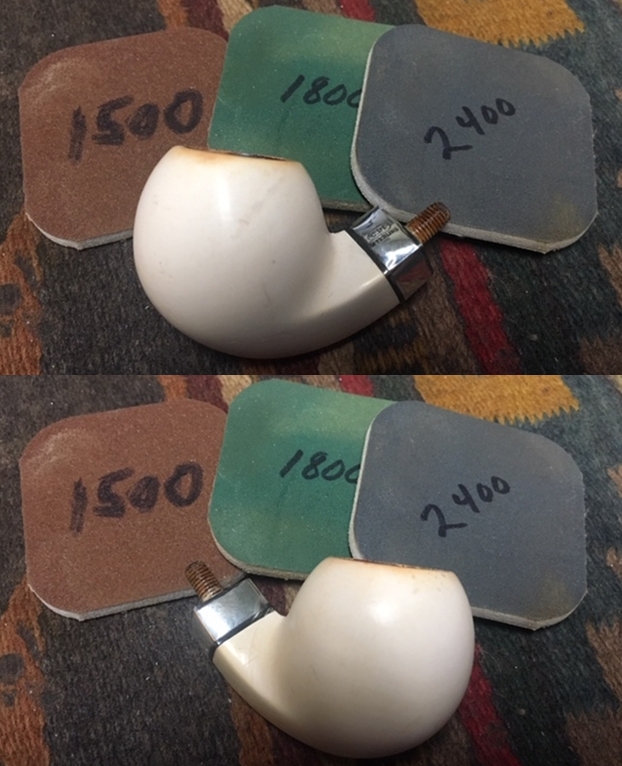
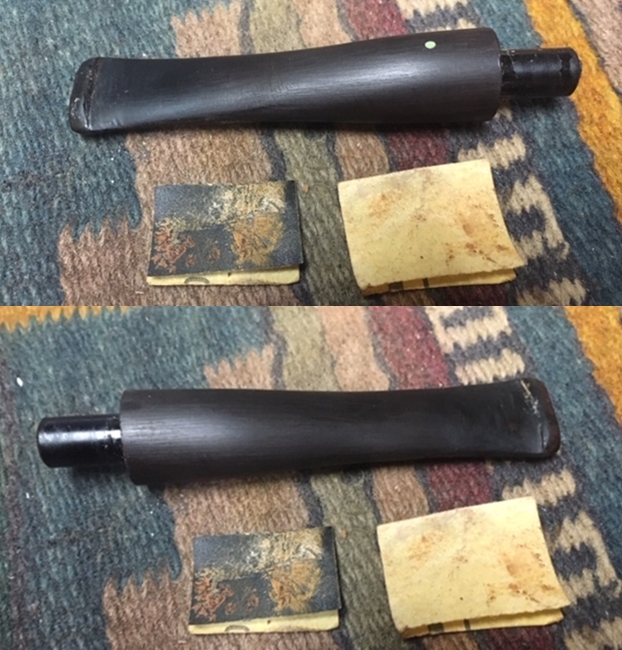
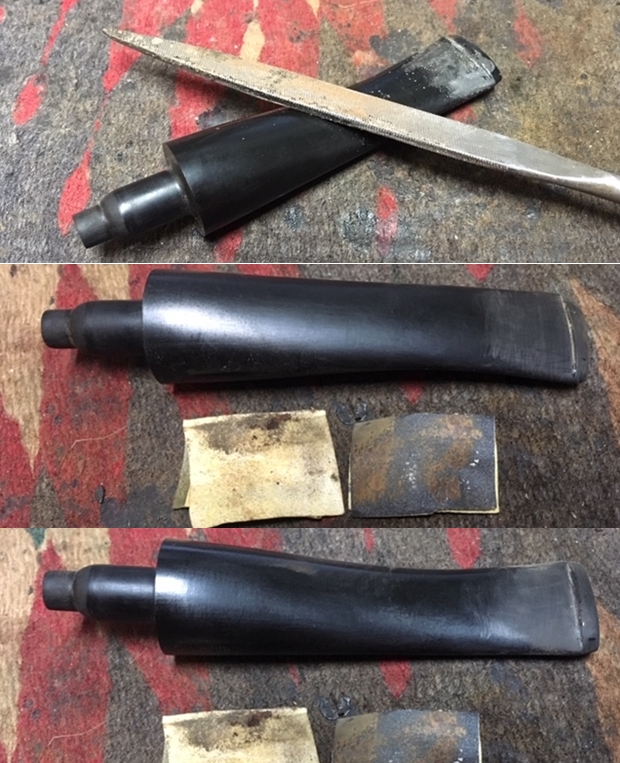
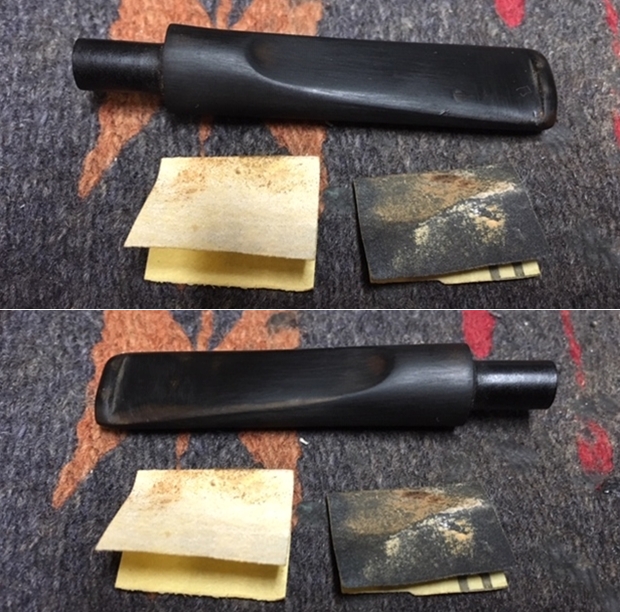
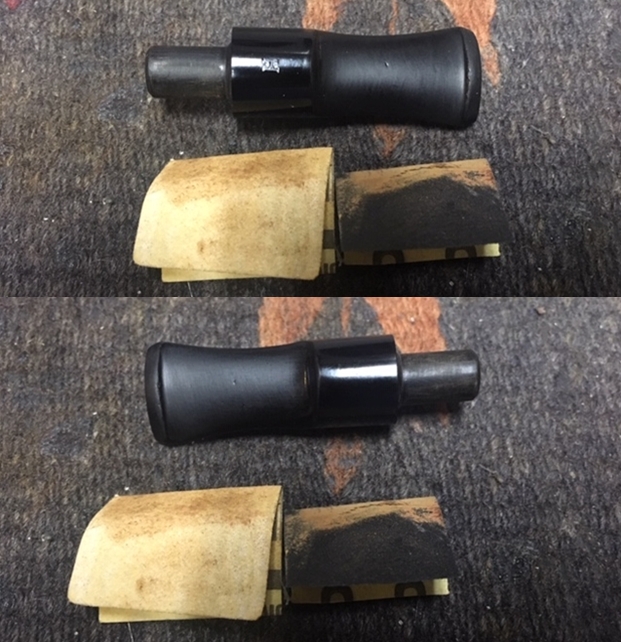
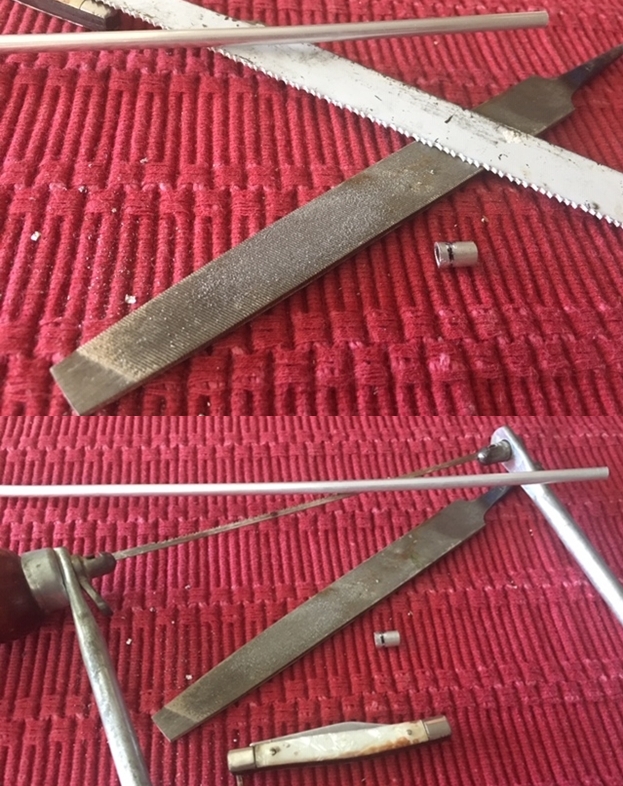
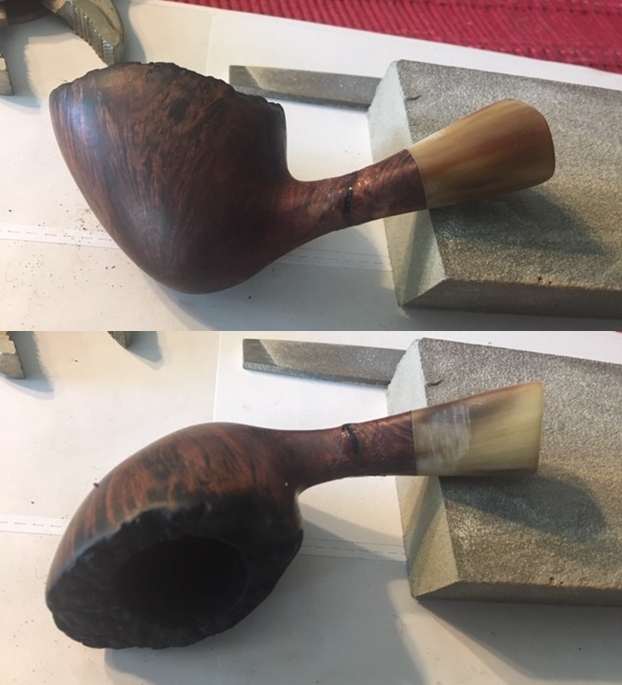
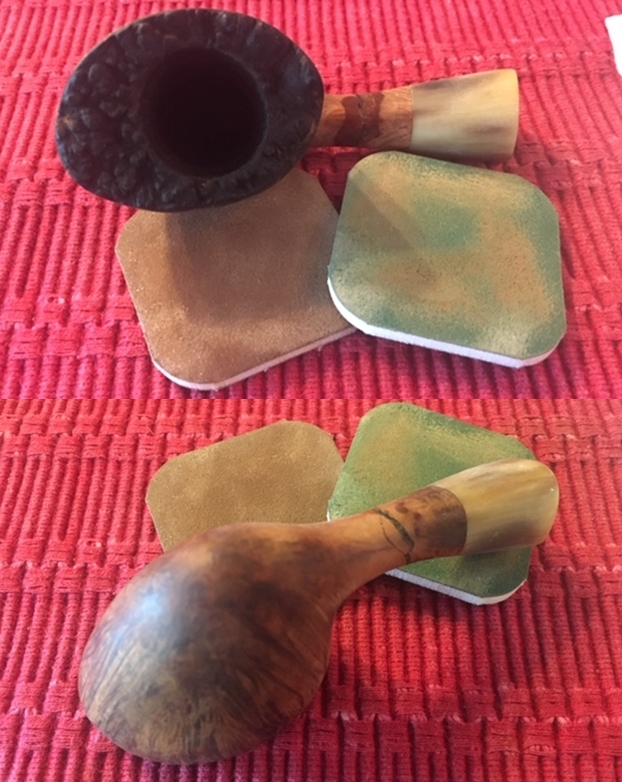
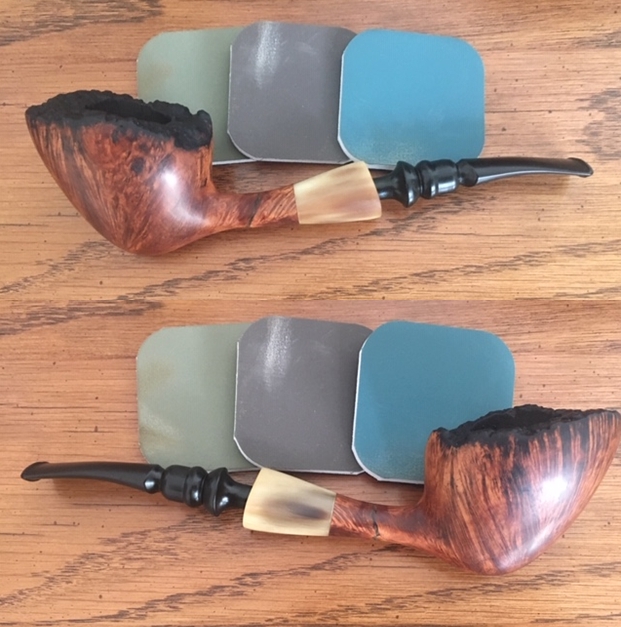
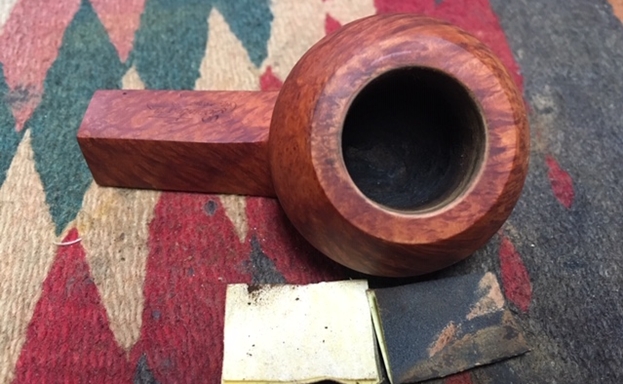
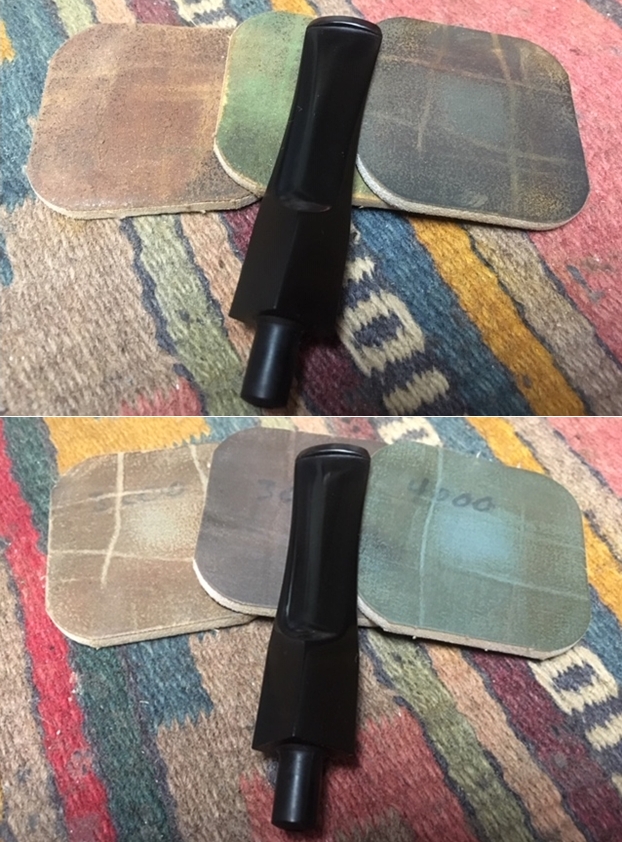
I set the bowl aside and went to work on the stem. The repairs had cured so I sanded them with a folded piece of 220 grit sandpaper to smooth out the surface of the repairs and blend them into the stem material – Bakelite or Redmanol. I polished it with 400 grit wet dry sandpaper to smooth out the scratches and begin the polishing process.
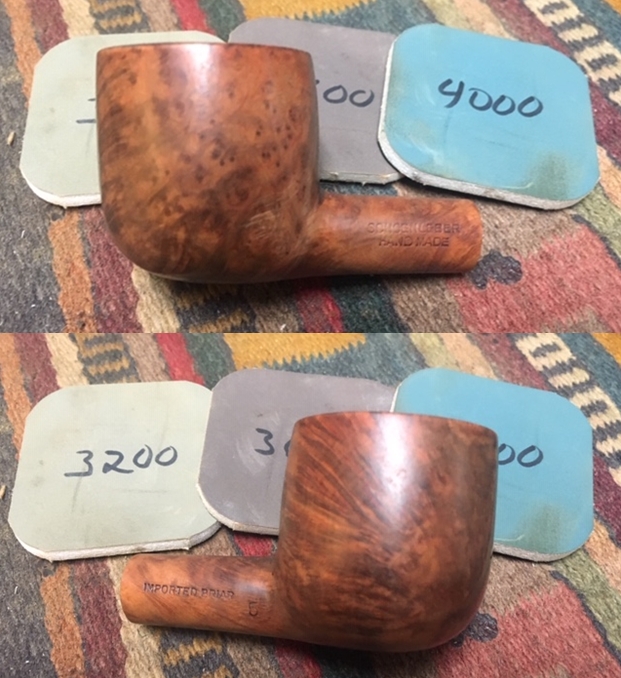
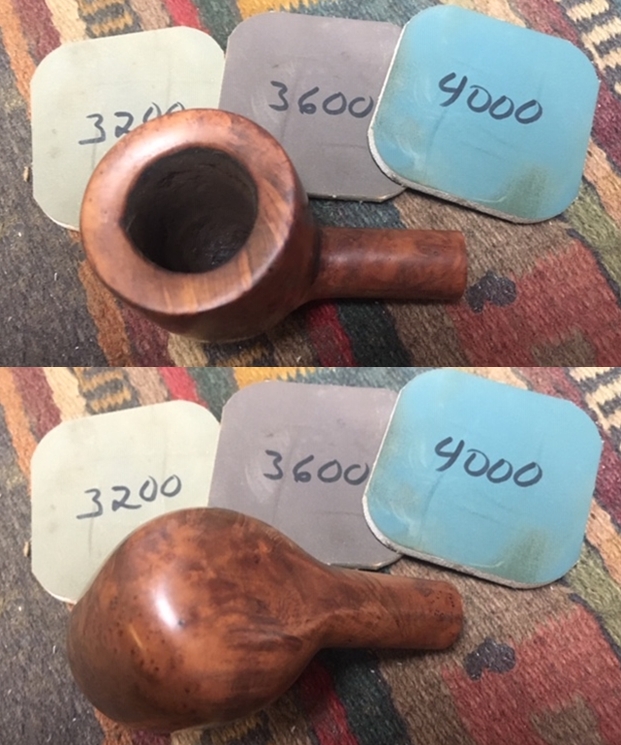
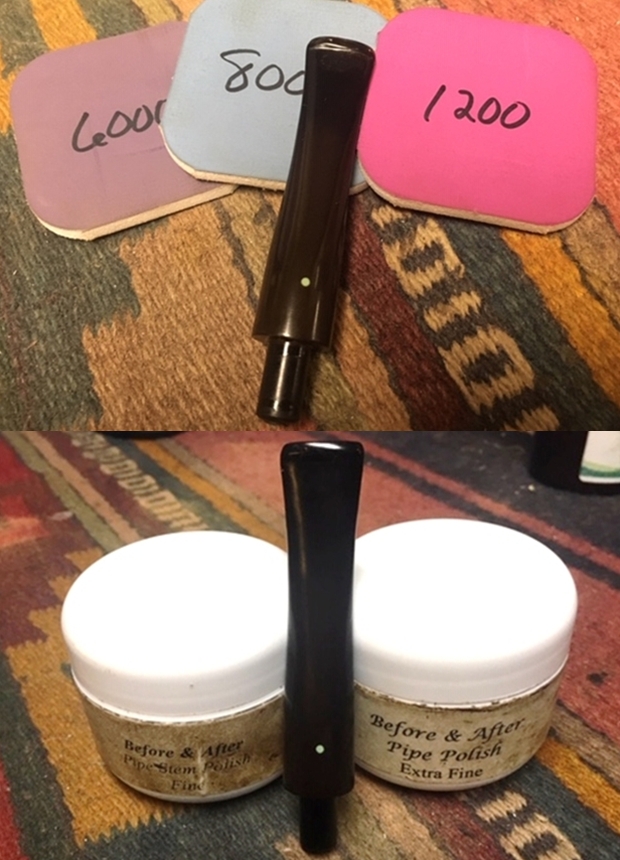
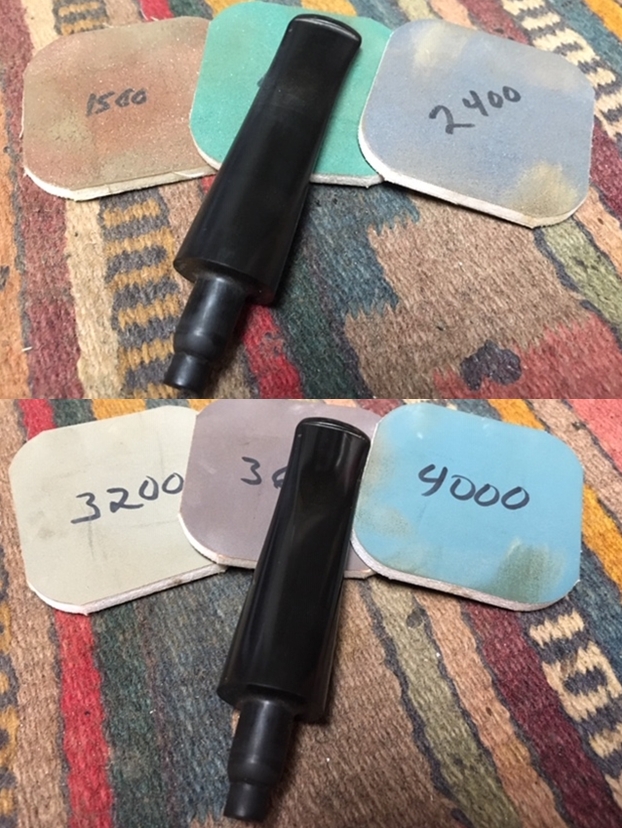
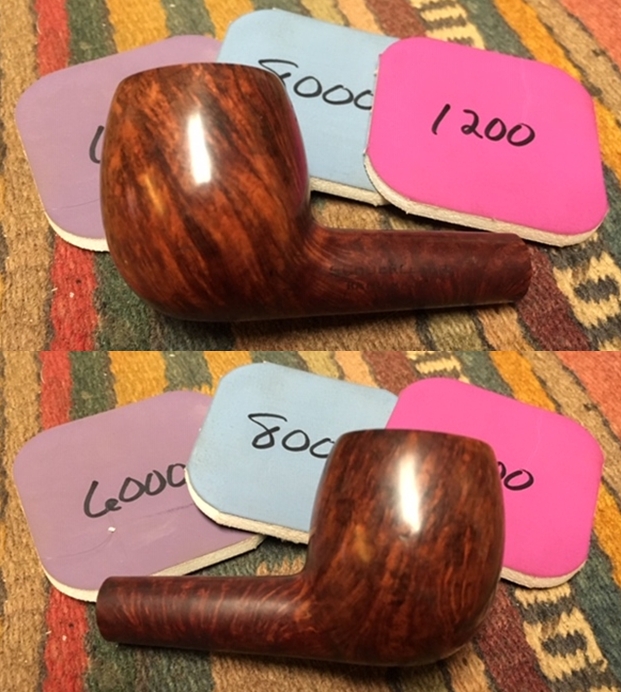
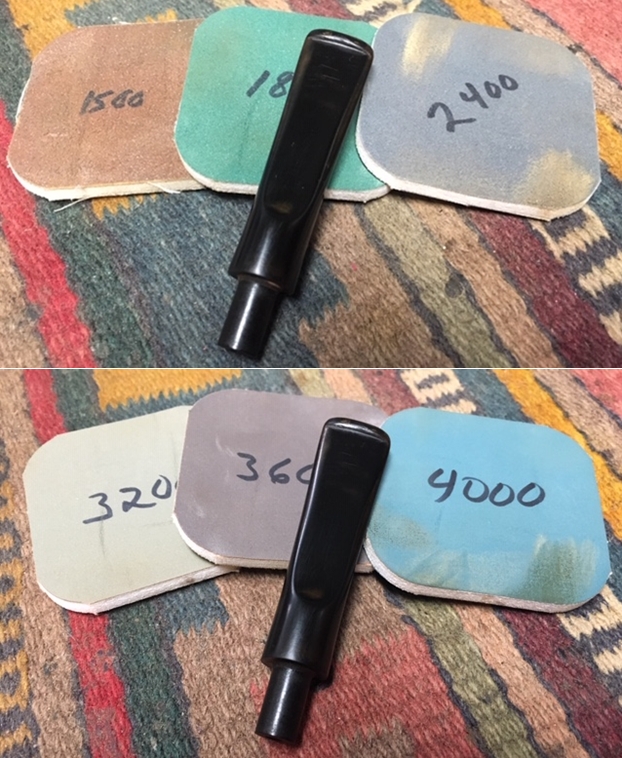
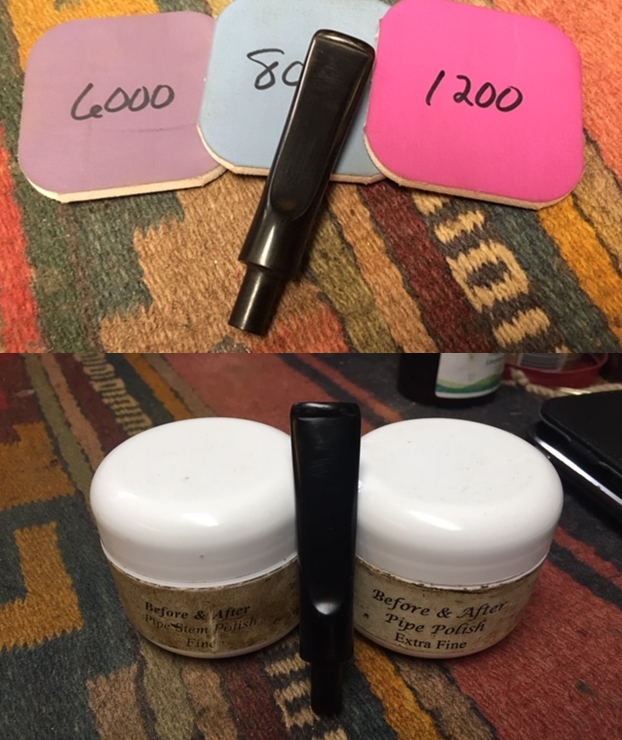
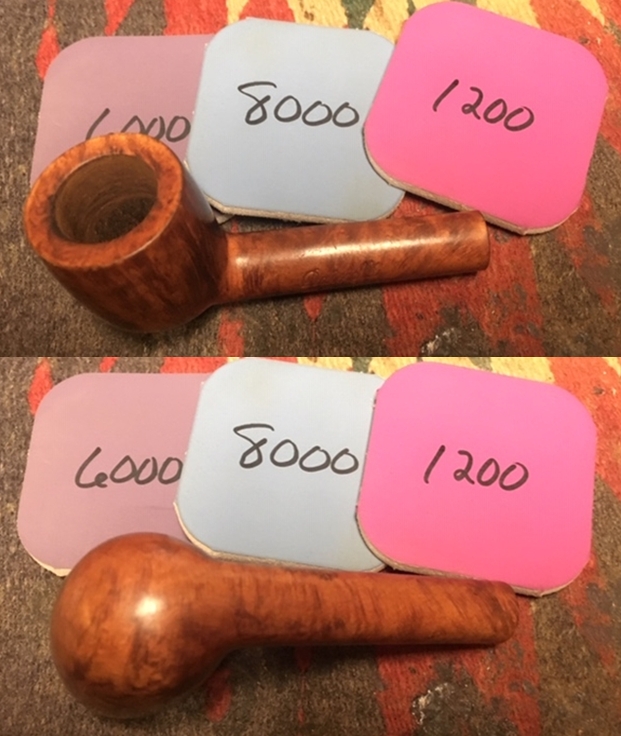
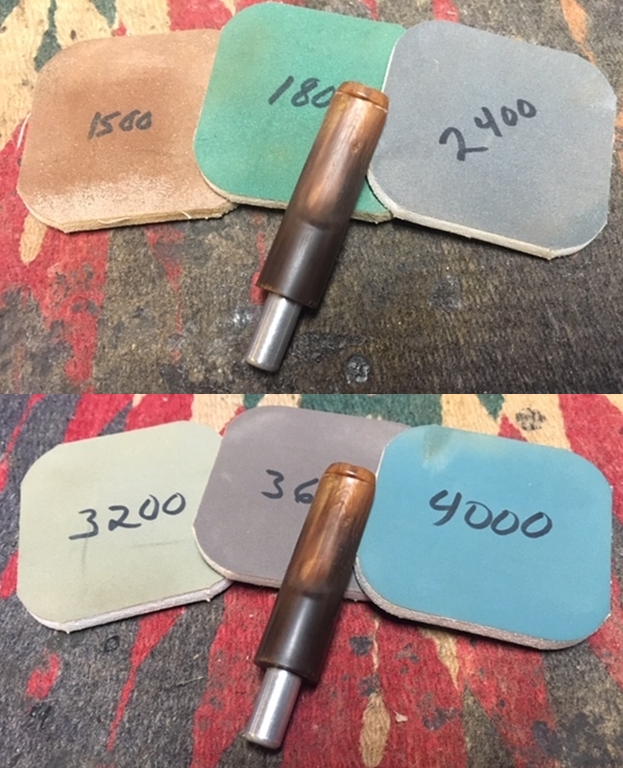
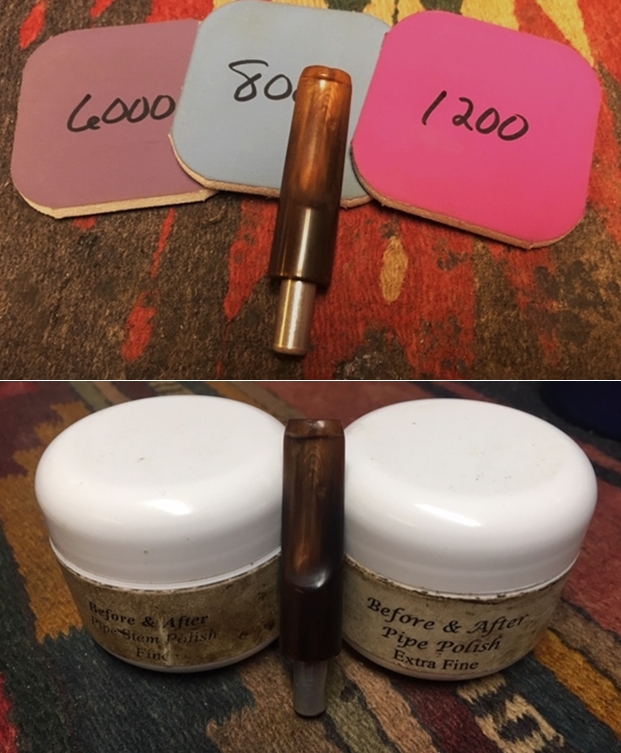
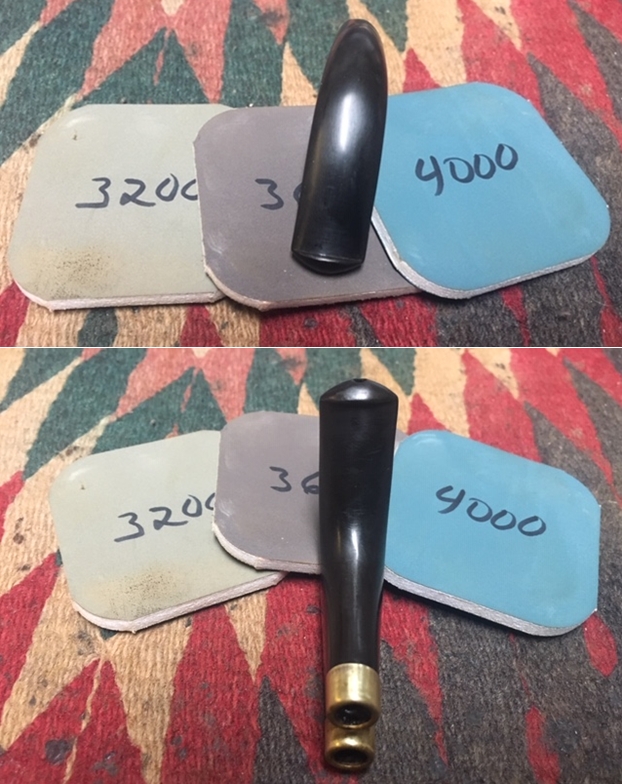
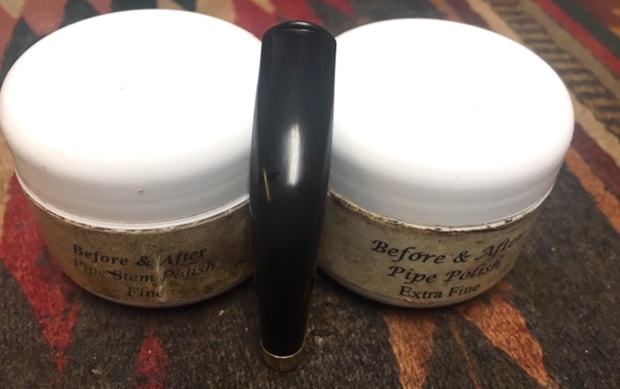
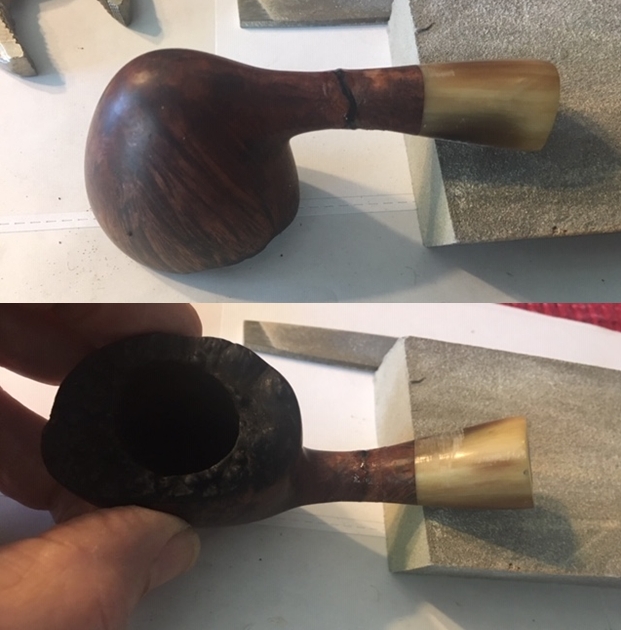
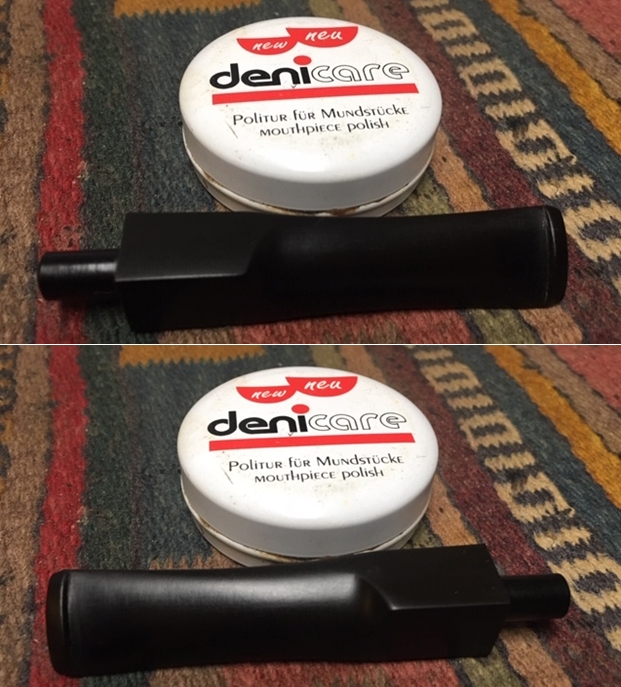
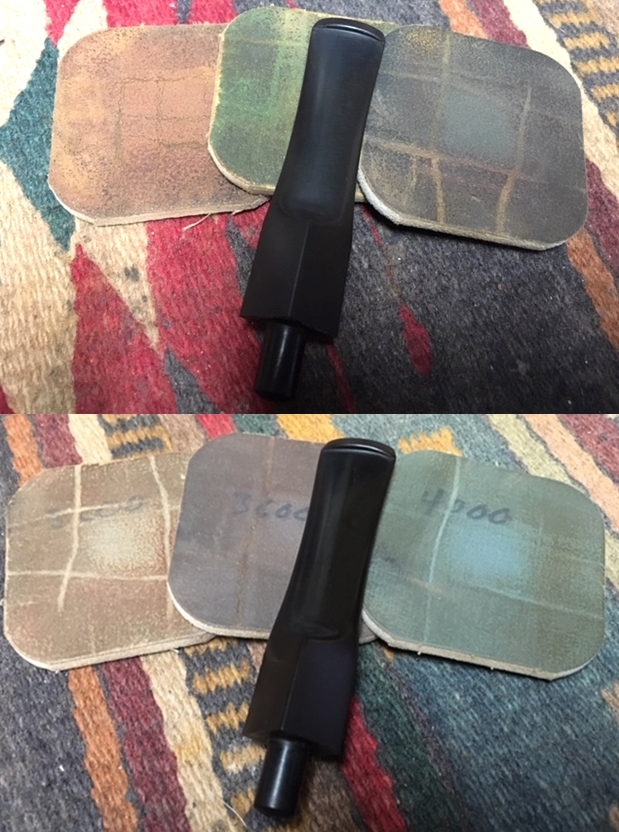
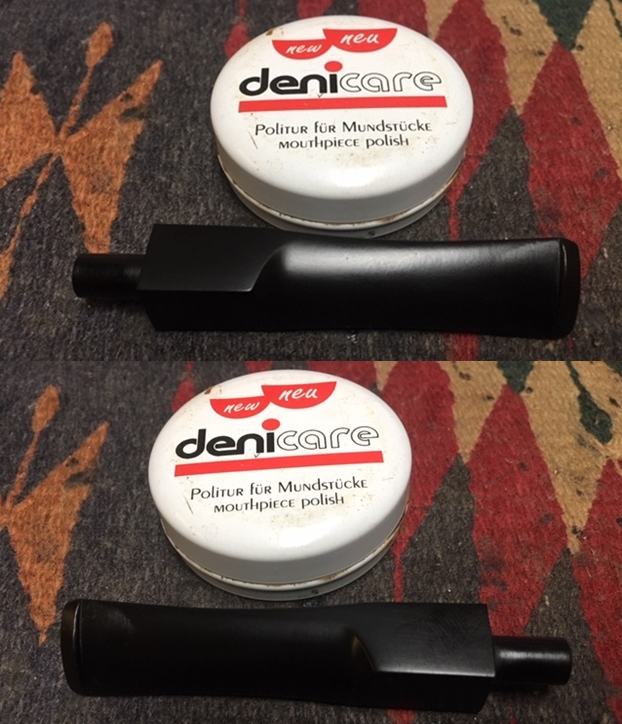
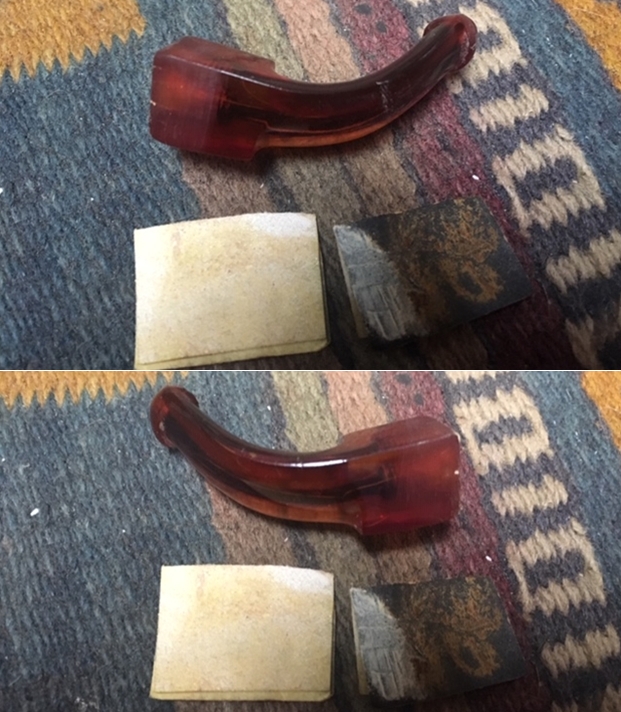
I polished the stem with micromesh sanding pads – wet sanding it with 1500-2400 grit pads and dry sanding it with 3200-12000 grit pads. I wiped it down with Obsidian Oil after each sanding pad. I gave it a final coat of Obsidian Oil after the final sanding pad and set it aside to dry. 
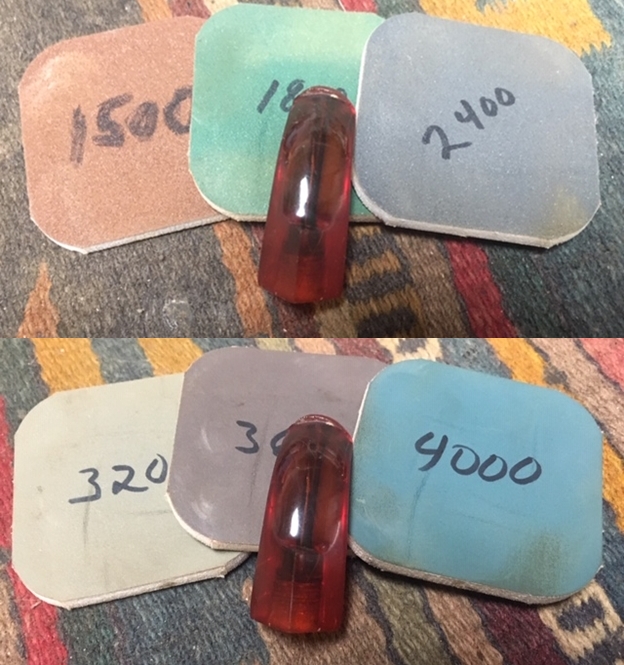
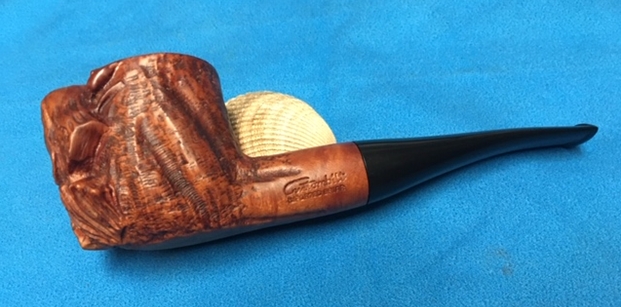
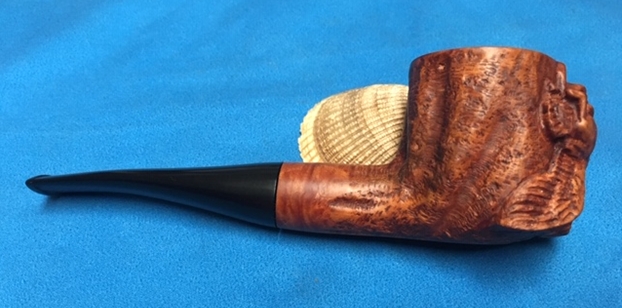
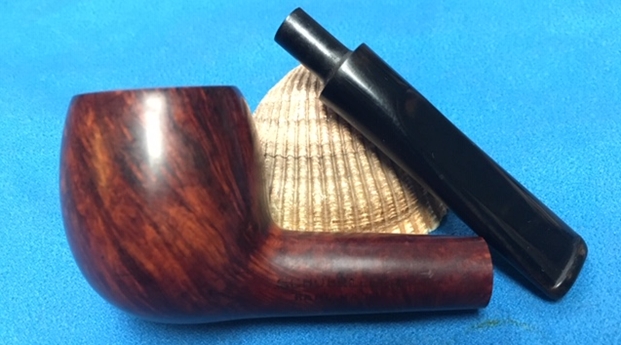
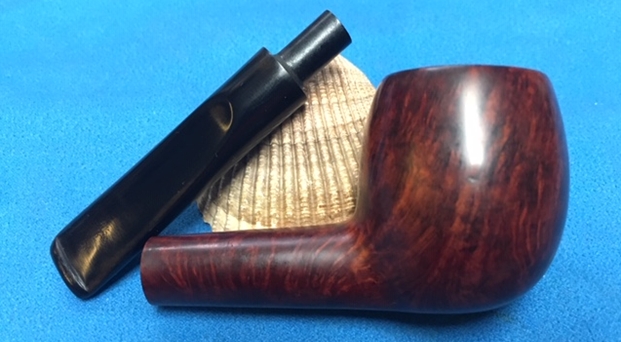
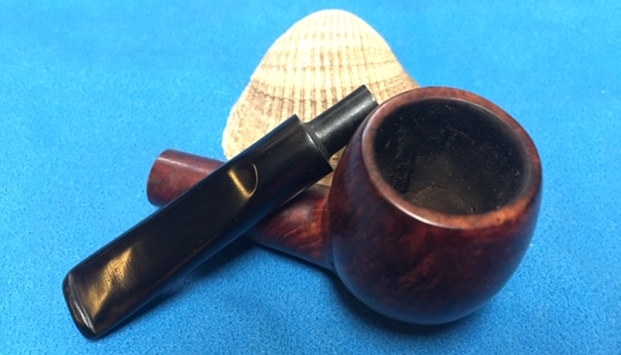
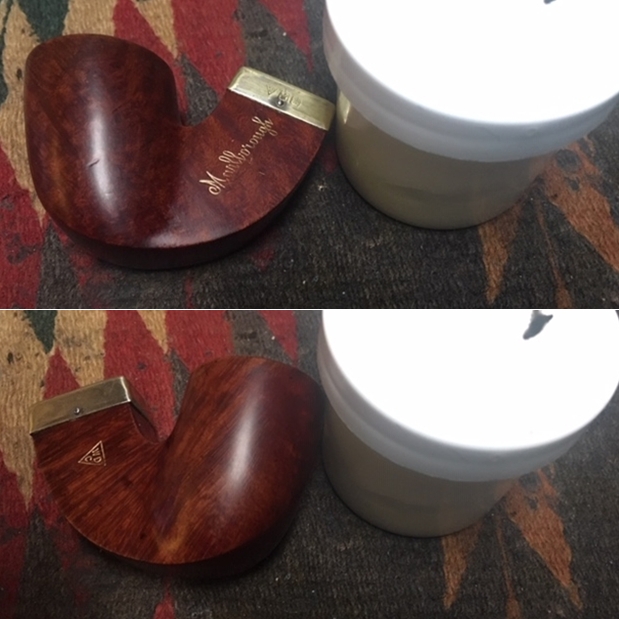
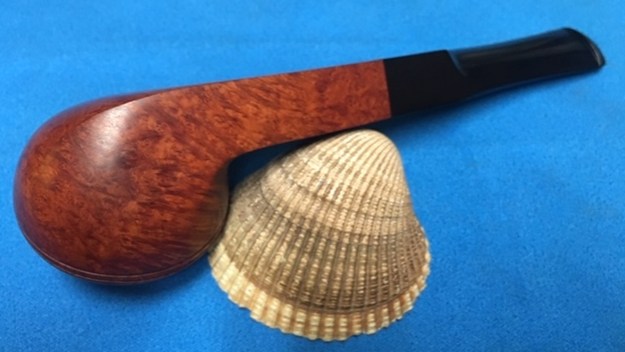
By now if you have read rebornpipes for very long you will have figured out that I love these old C.P.F. pipes. There is some serious thought that they were carved by European trained craftsman who were skilled pipemakers. These pipemakers were brought to the US by the Colossal Pipe Factory to make pipes. Many of the shapes, bands and stems have such high quality workmanship involved that I really think there is truth to this story. This is little bent Meerschaum with a Redmanol/Bakelite stem is a real beauty.

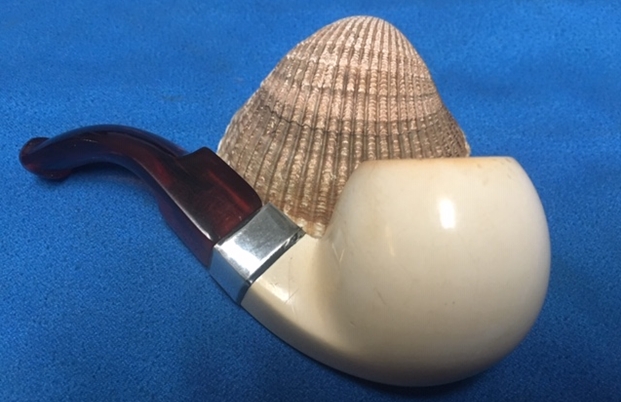
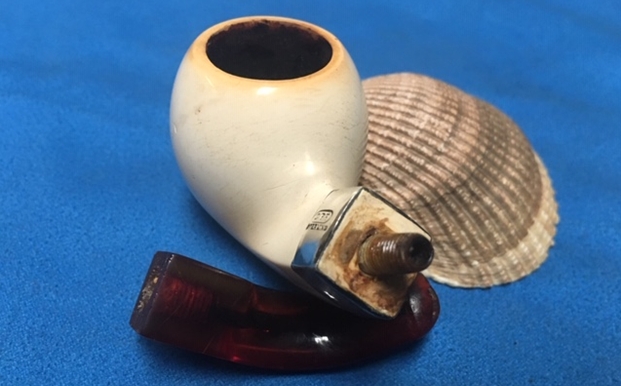
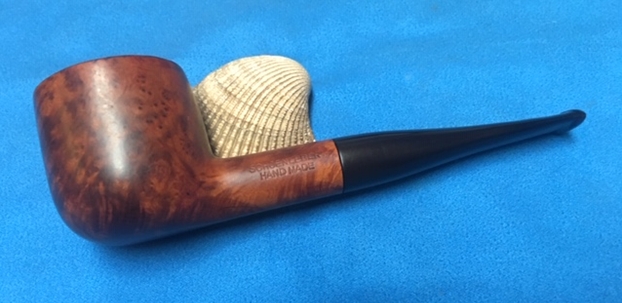
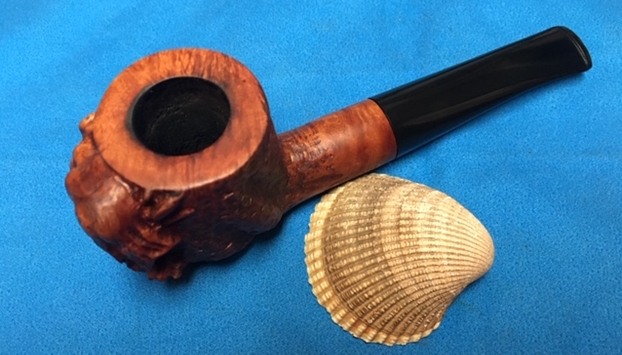
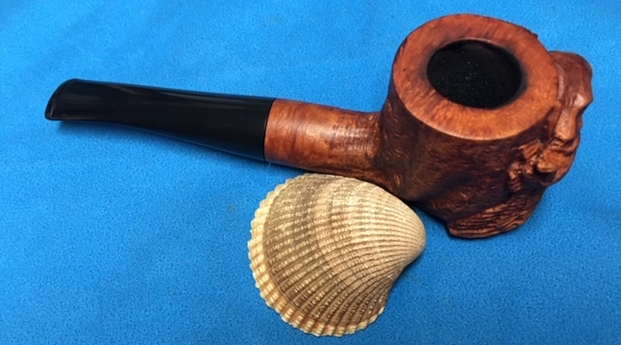
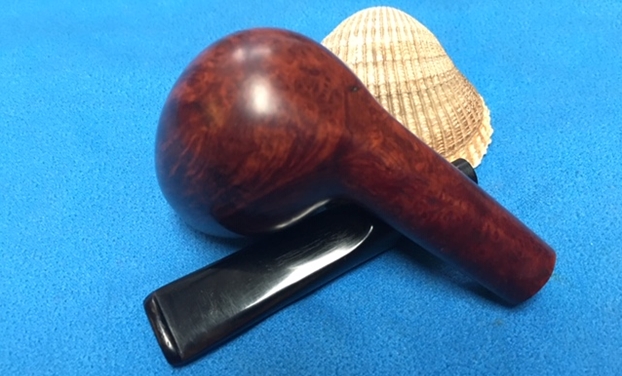
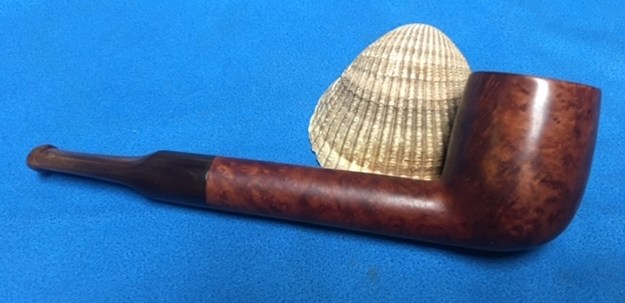
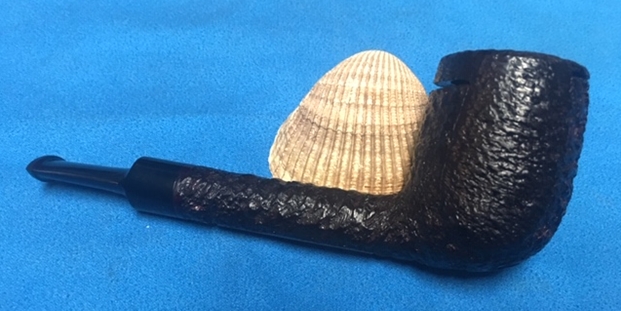
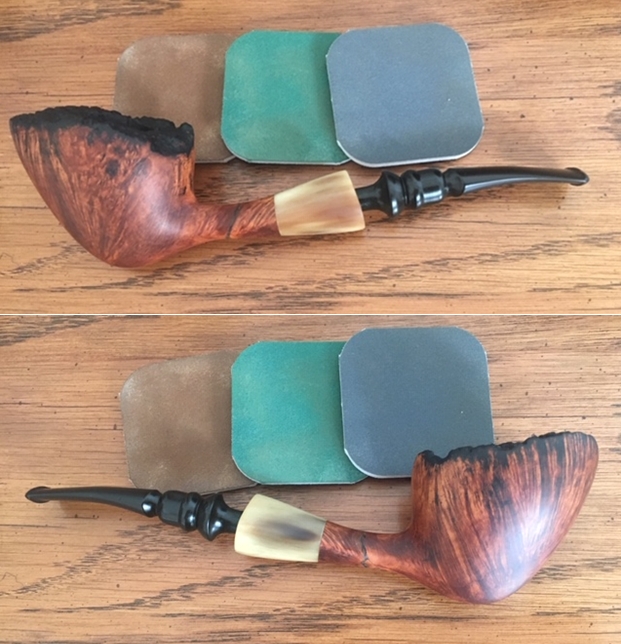
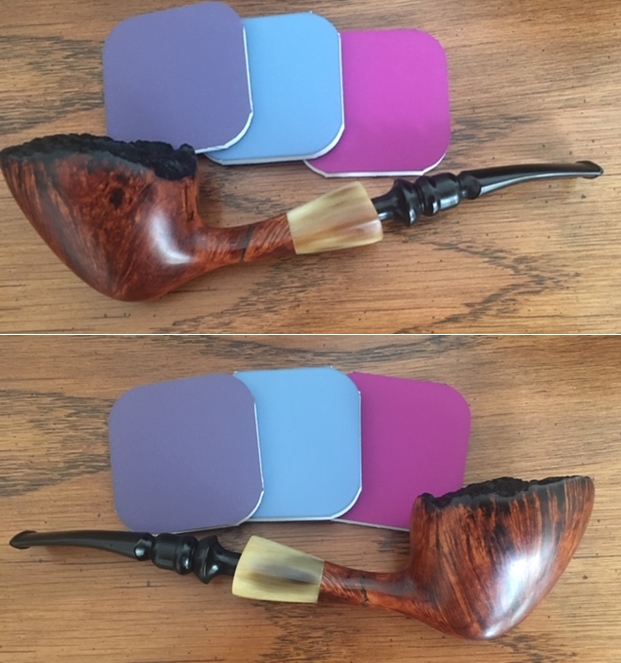
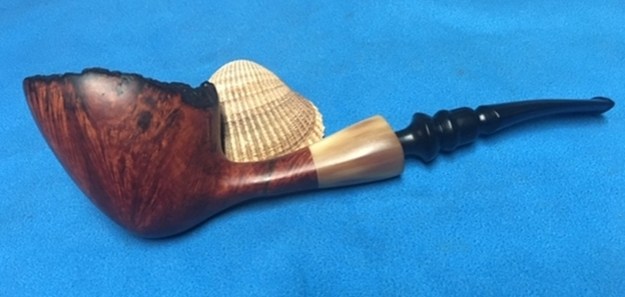
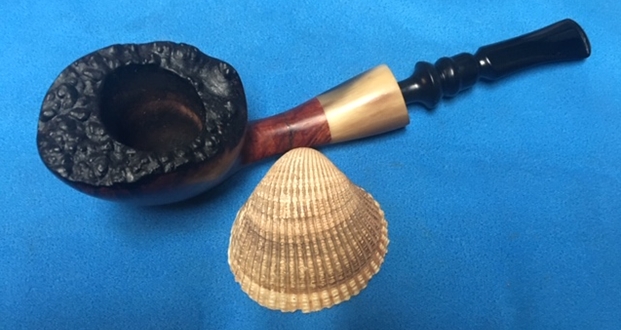
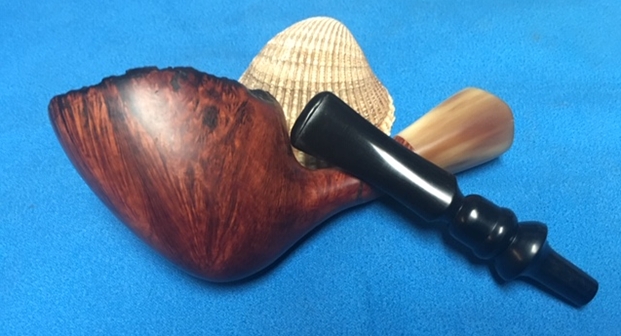
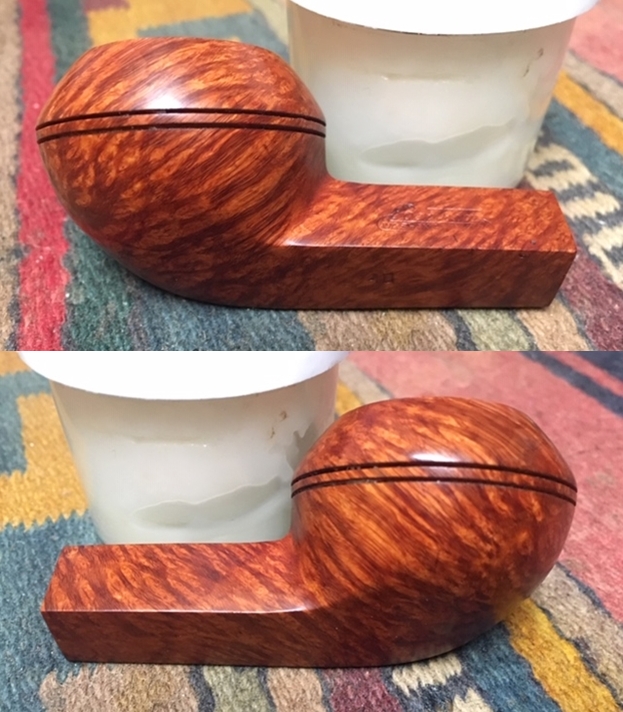
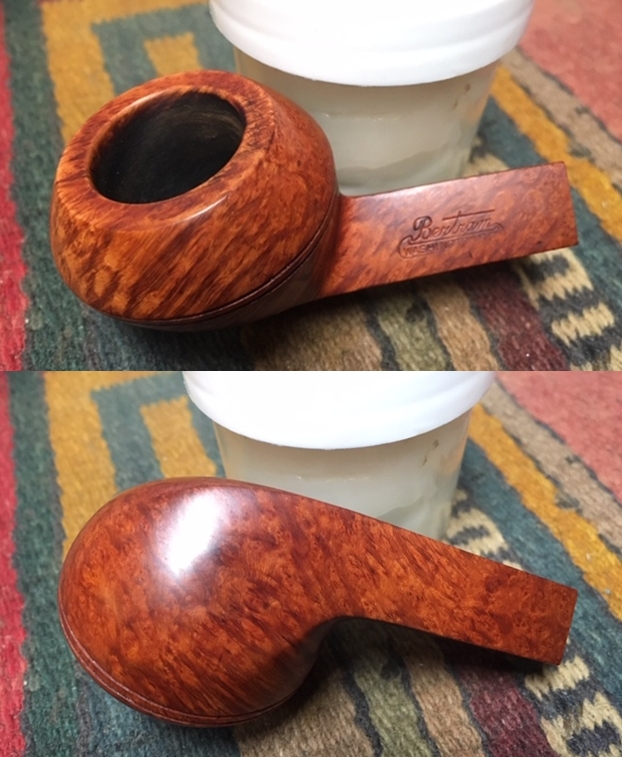
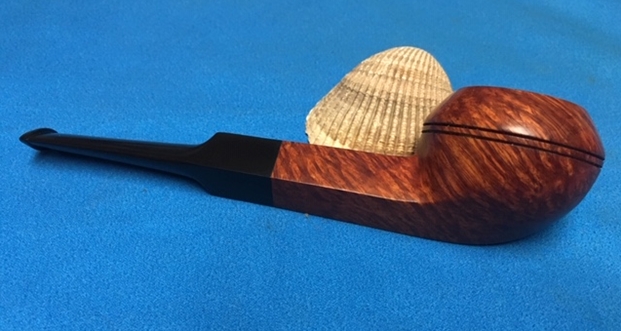
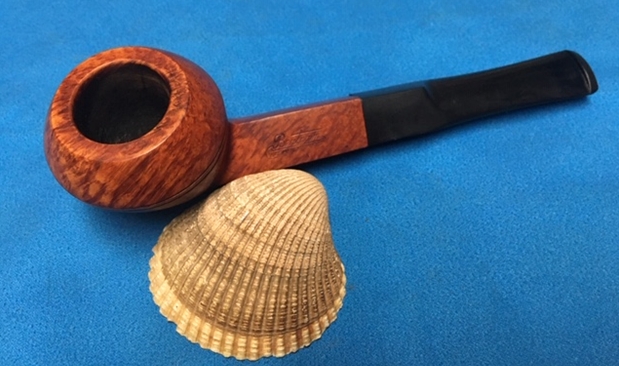
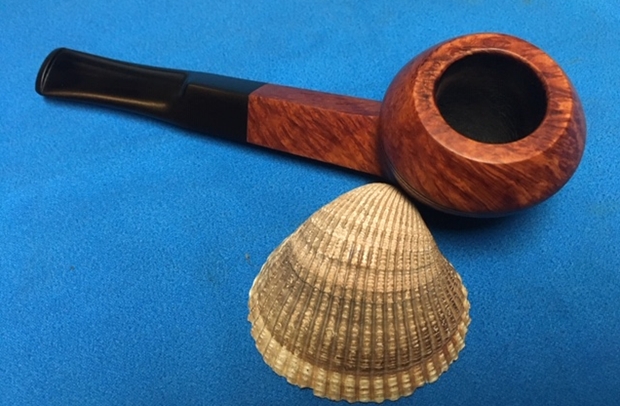
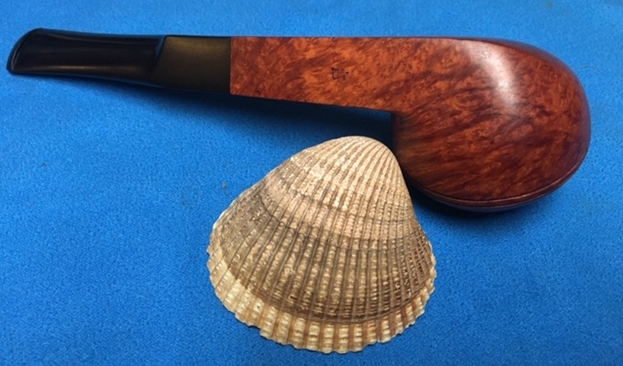
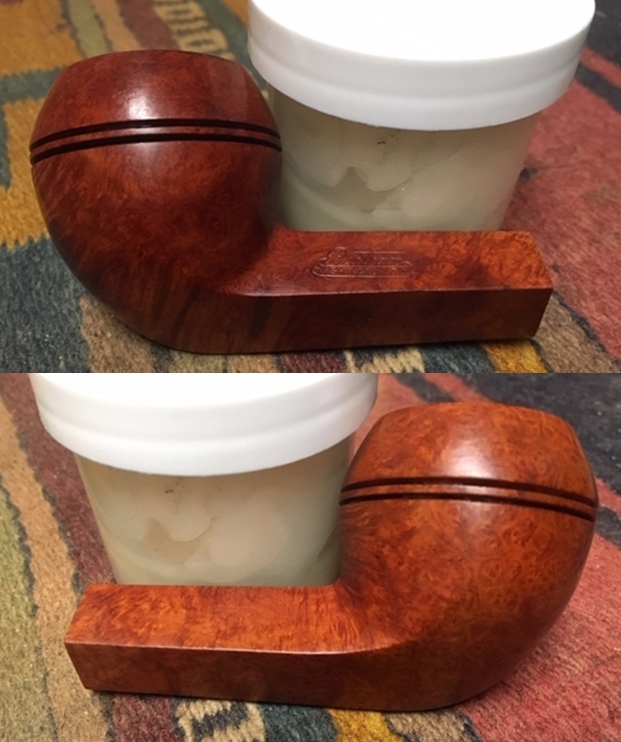
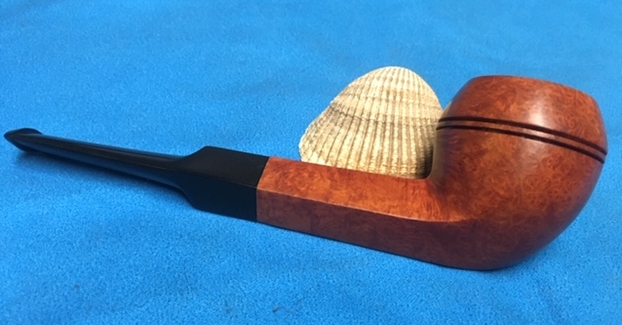
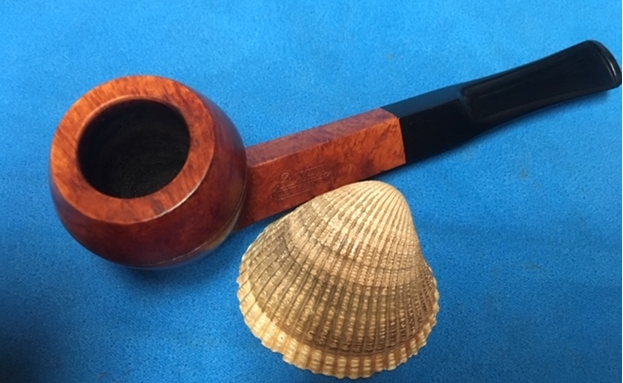
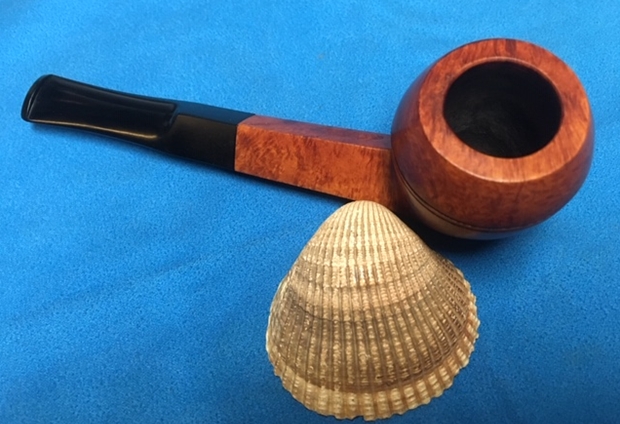
I screwed the bowl back on the base and carefully polished stem and the bowl with Blue Diamond polish on the buffing wheel carefully avoiding the stamping on the shank. I gave the stem multiple coats of carnauba wax. I hand rubbed the bowl with some beeswax. I buffed the pipe with a clean buffing pad to raise the shine. I hand buffed it with a microfiber cloth to deepen the shine. The pipe polished up pretty nicely. The pipe really alive with the buffing. The rich contrasting white of the meerschaum on the bowl works well with the polished red of the stem. The finished pipe has a rich look that is quite catching. Have a look at it with the photos below. The shape, finish and flow of the pipe and stem are very well done. The dimensions are Length: 3 3/4 inches, Height: 1 1/2 inches, Outside diameter of the bowl: 1 1/4 inches, Chamber diameter: 5/8 of an inch. This is another one that I will be adding to my collection. It fits in the C.P.F. niche group that I have been building. The shape and feel in the hand is perfect. Since this one is already well smoked it will be an easy pipe to load and fire up. Thanks for walking through the restoration with me as I restored and reworked this old bent meerschaum from 1884-1898. It is always a treat for me to work on a piece of pipe history especially when I have learned a bit of the story behind it.

Restoring another Schoenleber Hand Made – A 5 Pot


Blog by Steve Laug

The next pipe in the queue is another pipe from the batch of pipes I am cleaning up for Alex – this one is another Schoenleber Hand Made – a straight shank Pot shaped pipe with some beautiful grain around the bowl and shank. The pipe does not appear to have been stained but sports the same look as the Malaga pipes that I have been working on. The carver did a great job utilizing the block of briar to maximize the grain. The pipe is stamped on the left side of the shank and reads Schoenleber over Hand Made. On the right side of the shank it is stamped Imported Briar. On the right side next to the bowl/shank junction there is a number 5 which is either a shape number or size designation. The taper stem is vulcanite and has no marking or stamping. This is another nice looking piece much like many of the pipes Alex is picking up. The bowl had a thick cake and lava flow and some darkening on the rim top. The exterior of the briar was dirty with grime and dust. The stem had deep tooth marks and chatter on both sides near the button. The stem was oxidized and there was a thick coat of calcification on the stem for the first inch ahead of the button. The photos below give a glimpse of the pipe before clean up. I took a photo of the bowl and beveled rim top to capture the condition of the pipe before I started my cleanup work. There was significant darkening on the top of the inwardly beveled rim at the back of the bowl. The bowl had a thick cake that flowed over the rim top. The inner edge appeared to have some damage but the outer edge of the bowl appeared to be in excellent condition. The stem was in rough condition with deep tooth chatter and deep tooth marks on both sides of the stem near the button and on the button. I also took a photo of the right side of the shank to show the stamping. The stamping is readable in the photo below and is as noted above – Schoenleber over Hand Made. On the opposite side it reads Imported Briar. There is also a 5 at the shank/bowl junction on the right side. When I was working on the other Schoenleber pipes in Alex’s collection I had looked up information on the brand. I am quoting that information once again on the blog for this pipe. I quote the article in full (https://pipedia.org/wiki/Schoenleber).

Louis Schoenleber lived in North Arlington N.J. and was an Austrian immigrant and skilled artisan in pipe making. His hand carved pipes were available in his shop, ‘Schoenleber’s Newark Pipe Shop’, at 26 Branford Pl., Newark NJ, thought to open in the 1920’s. Schoenleber’s carried a full line of tobaccos as well as related pipe smoking accessories. It’s thought the shop operated until the late 1960’s, and Louis Schoenleber died in 1976. It’s also fairly certain they may have sold to other brands such as Jelling, also in Newark and are very similar in design and finish.

There was also an advertising card on the site that I have included below. It speaks to my assumptions about the curing process and the finishing process on the pipe. It also connects the pipe to Schoenleber’s Newark Pipe Shop in Newark, N.J. It also has a comment on the fact that pipes were made to order.I started the restoration by reaming the bowl with a PipNet pipe reamer and took the cake back to bare briar. I sanded the interior walls with 220 grit sandpaper wrapped around a piece of dowel.I scraped the rim top with the sharp edge of a pen knife to remove the thick lava coat. I sanded the remaining lava and darkening to the rim top rim with 220 and 400 grit sandpaper. I was able to remove the darkening and smooth out the rim top. I cleaned the mortise and the airway in both the shank and the stem with alcohol, cotton swabs and pipe cleaners. I scrubbed the mortise and airway until it was very clean and the pipe cleaners and cotton swabs came out clean.I polished the bowl and rim with micromesh sanding pads – wet sanding with 1500-12000 grit pads. I wiped the bowl down with a damp cloth pad after each pad to remove the sanding debris. I worked some Before & After Restoration Balm into the surface of the briar with my fingertips to clean, enliven and protect it. I let the balm sit for a little while and then buffed with a cotton cloth to raise the shine. With the bowl finished I set it aside and turned my attention to the stem. I painted the tooth marks in the stem with a Bic lighter to try to raise the deep marks. I scraped the surface with a knife and removed the buildup of calcified spittle and oxidation. I sanded it with 220 grit sand paper and wiped down the tooth marks and chatter with a cotton swab and alcohol. I dried it off with a cotton swab. I filled in the remaining tooth marks with black super glue and set it aside to dry.Once the repairs cured, I used a needle file to file the button edge to redefine it and give it a sharp edge. I lightly filed the button top and bottom to give it a smoother definition. The filing made the sanding a bit simpler as it took the excess material down to the surface.I sanded the filed stem surface with 220 grit sandpaper to remove the filing marks on both sides of the stem. I am happy with the stem surface once that was done. I started the polishing of the surface with 400 grit wet dry sandpaper. I polished the stem with micromesh sanding pads – wet sanding it with 1500-12000 grit pads. I wiped the stem down with a damp cloth after each pad. I further polished it with Before & After Pipe Polish – both Fine and Extra Fine. I wiped it down with a coat of Obsidian Oil and set it aside to dry. With both parts of the pipe finished I put the pipe back together and polished the bowl and the stem with Blue Diamond polish on the buffing wheel. I gave the bowl and the stem multiple coats of carnauba wax. I buffed the pipe with a clean buffing pad to raise the shine. I hand buffed it with a microfiber cloth to deepen the shine. The pipe polished up pretty nicely. The rich oil cured finish and the grain came alive with the buffing. The finish on the briar works well with the polished black vulcanite stem. The finished pipe is a well-proportioned, nicely grained ¼ straight Pot shaped pipe. Have a look at it with the photos below. The dimensions are Length: 5 1/2 inches, Height: 1 1/2 inches, Outside diameter of the bowl: 1 1/2 inches, Chamber diameter: 7/8 of an inch. This Schoenleber Hand Made 5 Pot will be going back to Alex soon to join his growing collection of American made pipes. Thanks for walking through the restoration with me on another of Alex’s pipes.

New Life for a Rich Era Custombilt Carved Figural Billiard


Blog by Steve Laug

I am not much of a figural pipe guy – whether meerschaum or briar. So I have left a lot of figurals behind on my hunts – bull pipes, horses, elk etc. So when I saw this one sitting in the display case, if you knew my predilection you would have expected me to leave it and walk away. But why didn’t I walk away? Well the answer is kind of complex. It truly has nothing to do with aesthetics because my dislike of figurals has not changed. But when I saw the stamping on the shank – Customobilt over Imported Briar and I saw the carved front of the bowl I knew I was dealing with a pipe that I had not seen before. In all the years that I have been hunting for pipes and restoring them I have never run across one of these. The “rarity” for me was the first thing that caught my eye. I knew nothing about the carver and to be honest I was not sure of the era of the pipe. I just thought, “Hmmm not seen that before” and grabbed it.

Here is what I saw with the pipe. The finish was dirty and oils and grime were deep in the rustication around the bowl. The carving on the front was dirty with dust in the crevices. The bowl had a thick cake and there was lava overflow on the back side of the rim top. There were some nicks and lava on the front portion as well. The finish had a bit of shine left to it, particularly on the shank – almost like a shellac or varnish coat. The stem did not fit all the way into the shank due to the tars and oils built up on the walls of the mortise. The stem was in good condition with just a few small tooth marks on the top and underside. It was dirty but not oxidized. I took some close up photos of the rim top, bowl and stem to show the condition of the pipe before I started the cleanup work. The bowl has a thick crumbly cake in it and the lava overflow is very thick. You can also see damage on the front inner edge of the bowl. The stem is not oxidized but is dirty and has some tooth marking on the top and underside near and on the button surface. The carving on the front of the bowl is very nicely done. It is a hunting dog with a duck in its mouth. The carving has enough detail to be interesting but is not over done.I also took a photo of left side of the shank to show the stamping. The stamping is readable in the photo below and is as noted above – Custombilt over Imported Briar. On the underside there is a small diamond at the shank/stem junction.I decided to pause and do a bit of research on the pipe to figure out when the figurals were carved and what era of Custombilt pipe making this one was made. It was a pretty simple project really as I have worked on quite a few over the years. I went first to a friend of mine from Holysmoke pipes from New York. He is a great resource on these 20th Century pipes. Here is what he said about the pipe:

During the Rich era, CB had a carved animal line. The diamond as well as other figures is one of the CB mysteries. Presumably, they were earlier pieces. Actually, the carved animal line was a bit cheaper in price than the regular CB line, costing in those days $7.50, while the regular ones were $10 or more. Most of these carvings were done by Hetzer Hartsock, who also did the super expensive special order carved ones. He was a famous carver in those days.

There was the lead I needed. A potential date and a name to check out. I turned to Pipedia to check out the stamping and confirm the era of manufacture (https://pipedia.org/wiki/Custom-Bilt). I quote from the pertinent section of the article.

In 1946, the name was changed to Custombilt after Mincer began an association with Eugene J. Rich, Inc. There were some big changes in advertising and distribution. The slogan “AS INDIVIDUAL AS A THUMBPRINT” began at this time as well.

This confirmed the information from Holysmokes Pipes and also gave me a starting date for the making of this pipe. It was made after 1946. Now it was time to get a read on the figural carvings. In the same article there was a great paragraph giving more information on Hetzer Hartsock.

A most interesting discussion in this chapter is the discussion of Hetzer Hartsock’s carved pipes, which included a special ‘Stalin/Roosevelt’ pipe. Hartsock also did carved heads and other figures. Carved head and other such pipes were very popular at the time. One 5 pipe set of Hartsock special carvings was “valued” at $5,000. Also during the Rich era, Custombilt had a carved animal line which were relatively inexpensive at $7.50 as compared to the regular line. There were also special orders available that cost up to $500.00. One wonders what difference could have caused such a radical change in price.

I am also including a few of the pipes that were shown as carved by Hartsock. They are unique and well carved. With that information in hand I was ready to start on this Hetzer Hartsock carved Custombilt Billiard. It is a hefty pipe and interesting to work on. I reamed the bowl with a PipNet pipe reamer to take the cake back to bare briar. I sanded it smooth with a piece of 220 grit sandpaper wrapped around a dowel.I used the Savinelli Fitsall Knife and a sharp pen knife to scrape the thick lava coat off of the rim and try to assess the damage.I used a small folded piece of 220 grit sandpaper to smooth out the inner edge of the rim and work on the remnant of lava on the rim top. Finally to remove the remaining lava I topped the bowl very gently on a topping board and 220 grit sandpaper then polished it with some 400 grit wet dry sandpaper. I scrubbed the rough briar with a tooth brush and undiluted Murphy’s Oil Soap. I worked it into the nooks and crannies – the crevices of the carving on the front of the bowl until the entire pipe had been scrubbed. I rinsed it under warm water and scrubbed as I removed the soap and the grime with it. I wiped down the spots of shiny varnish and white paint flecks on the briar with acetone on a cotton pad. At this point the bowl was looking pretty clean on the outside. With the externals cleaned and ready to work on further I took a break and cleaned out the interior. I scraped the inside of the mortise with a dental spatula to remove the tarry buildup on the walls. I scrubbed the mortise and the airway in the shank and stem with alcohol, cotton swabs and pipe cleaners. With both the inside and outside clean it was time to move on to rubbing the bowl down with Before & After Restoration Balm. I worked it into the surface of the briar with my fingertips and a horsehair shoe brush to clean, enliven and protect it. I let the balm sit for a little while and then buffed with a cotton cloth and shoe brush to raise the shine. Mark Hoover’s Balm is a product that I have come to appreciate and one I use on every pipe I have been working on. I set the bowl aside and turned my attention to the stem. The stem still did not fit correctly against the shank. In examining the mortise it appeared that it had a slightly different taper than the nozzle end on the tenon. I had to sand the tenon down at the step down to make it fit tight against the end of the mortise. I filled in the tooth marks on the top side of the button and the tooth mark on the underside near the button with clear super glue. When the repairs had cured I recut the edge of the button with a needle file. I sanded the repaired areas with 220 grit sandpaper to blend them into the surface. I started polishing using 400 grit sandpaper. I polished the stem with micromesh sanding pads – wet sanding it with 1500-12000 grit pads. I wiped the stem down with a damp cloth after each pad. I further polished it with Before & After Pipe Polish – both Fine and Extra Fine. I wiped it down with a coat of Obsidian Oil and set it aside to dry.  With both parts of the pipe finished I put the pipe back together. It really is an interesting old pipe carved around 1949 by Hetzer Hartsock. He did an amazing job capturing the dog holding the downed duck in its mouth ready to deliver it to the hunter. Very nicely done! I polished the stem and the majority of the briar (minus the carving) with Blue Diamond polish on the buffing wheel. I carefully gave the bowl multiple coats of Conservator’s Wax and the stem multiple coats of carnauba wax. I buffed the pipe with a clean buffing pad to raise the shine. I hand buffed the carved area with a shoe brush and the rest of the pipe with a microfiber cloth to deepen the shine. The pipe polished up pretty nicely. The rich finish and the grain came alive with the buffing. The finish on the briar works well with the polished black vulcanite stem. The finished pipe is a well-proportioned, large billiard with the unique carving on the front. Have a look at it with the photos below. The dimensions are Length: 6 inches, Height: 2 inches, Outside diameter of the bowl: 1 1/2 inches, Chamber diameter: 3/4 of an inch. This Custombilt carved figural is staying with me for a little while so I can take in and enjoy the carving. Thanks for walking through the restoration with me on this piece of Custombilt history. 

Rebirthing another Schoenleber Hand Made – A Petite Straight Apple


Blog by Steve Laug

The next pipe in the queue is another one from the batch of pipes I am cleaning up for Alex – this one is another Schoenleber Hand Made – a petite straight shank Apple with some beautiful grain around what appears to be an oil cured bowl and shank. The entire pipe has some beautiful birdseye, straight and flame grain around the bowl and shank. The pipe was filthy with overflowing lava but the grain peaked out under the grime. The carver did a great job utilizing the block of briar to maximize the grain. The pipe is stamped on the left side of the shank. It reads Schoenleber over Hand Made. On the right side next to the bowl/shank junction there is a number 3 which is either a shape number or size designation. The tapered stem is vulcanite and has no marking or stamping. This is another nice looking piece much like many of the pipes Alex is picking up. The bowl has a thin cake inside the bowl but the tars cover the thin rim top and run down the sides of the bowl. There some darkening on the rim top. The exterior of the briar was dirty with grime and dust. The oxidized vulcanite stem tooth marks and chatter on both sides near the button. The photos below tell the story and give a glimpse of the pipe before clean up. I took a photo of the bowl and rim to capture the condition of the pipe before I started my cleanup work. There was significant darkening and damage on the rim top and a thin cake in the bowl flowing over as lava on the thin top edge. The outer edge of the bowl appeared to be in good condition I would only be sure once I removed the lava. The stem was in decent condition under the thick oxidation and calcification on the surface. There was also some tooth chatter and tooth marks on both sides of the stem near the button. The button is also damaged by tooth marks.I also took a photo of left side of the shank to show the stamping. The stamping is readable in the photo below and is as noted above – Schoenleber over Hand Made. On the opposite side there is a 3 at the shank/bowl junction.I remember working on a Schoenleber pipe in the past and had a memory of the pipe being made for a shop in the New York area but could not remember much more than that. I quickly googled the brand to see what I could learn and found a link on Pipedia. Here is that link. I quote the article in full (https://pipedia.org/wiki/Schoenleber).

Louis Schoenleber lived in North Arlington N.J. and was an Austrian immigrant and skilled artisan in pipe making. His hand carved pipes were available in his shop, ‘Schoenleber’s Newark Pipe Shop’, at 26 Branford Pl., Newark NJ, thought to open in the 1920’s. Schoenleber’s carried a full line of tobaccos as well as related pipe smoking accessories. It’s thought the shop operated until the late 1960’s, and Louis Schoenleber died in 1976. It’s also fairly certain they may have sold to other brands such as Jelling, also in Newark and are very similar in design and finish.

There was also an advertising card on the site that I have included below. It speaks to my assumptions about the curing process and the finishing process on the pipe. It also connects the pipe to Schoenleber’s Newark Pipe Shop in Newark, N.J. It also has a comment on the fact that pipes were made to order.I reamed the bowl with a Savinelli Fitsall Pipe Knife to take the cake back to bare briar. The cake was thin but the lava over flow on the rim and down the bowl was heavy and dark. The rim top looked pitted and damaged. I sanded the internal walls of the bowl with 220 grit sandpaper wrapped around a piece of dowel.I lightly topped the bowl on a topping board with 220 grit sandpaper to remove the damage to the rim top and smooth out the thick lava coat. It did not take too much sanding to remove the damaged briar. I still need to smooth out the inner edge of the rim but the bowl looks pretty good.The filthy exterior of this pipe was perfect for me to continue experimenting with a new product from Mark Hoover of Before & After Products. This one is a product he labels briar cleaner and it has the capacity of absorbing grime and dirt from the surface of briar. I rubbed the bowl down with some of his Briar Cleaner to see how it would work in this setting. In speaking to Mark he noted that the product is completely safe to use. The main product is even FDA approved edible. I rubbed it onto the bowl and rim top with my finger tips and worked it into the grime and grit on the bowl. I let it sit on the pipe for about 5 minutes before I rubbed it off with a microfibre cloth. I rinsed it under warm running water to remove the residue. I was pleasantly surprised by how clean the surface on the bowl looked when I was finished. The mortise and the airway in the shank was filthy. There was a thick build up of tar and oils on the inside of the shank. I scraped the shank walls with a thin bladed knife until the briar was bare. I scrubbed the walls of the mortise and the airway in the shank and stem with pipe cleaners, cotton swabs and isopropyl alcohol until they were clean.I turned to polishing the bowl and rim with micromesh sanding pads – wet sanding with 1500-12000 grit pads. I wiped the bowl down after each pad to remove the sanding debris. My goal was to further remove the darkening on the both the rim top and the first half inch of the bowl. I worked some Before & After Restoration Balm into the surface of the briar with my fingertips to clean, enliven and protect it. I let the balm sit for a little while and then buffed with a cotton cloth to raise the shine. Mark Hoover’s Balm is a product that I have come to appreciate and one I use on every pipe I have been working on. With the bowl finished I set it aside and turned my attention to the stem. I sanded it with 220 grit sandpaper to remove as much of the oxidation as possible. I was also able to remove much of the damage to the surface of the stem on each side. There was a remaining tooth mark on the top and underside of the stem. The button surface also had some tooth marks. I forgot to take photos of the stem after sanding and before repairing. I wiped the stem surface down with a damp cloth and then filled in the tooth marks with clear super glue. I also rebuilt the top and underside of the button surface with clear super glue. Once the repairs cured, I sanded the filed stem surface with 220 grit sandpaper to blend the repairs into surface of the stem. I am happy with the stem surface once that was done. I started the polishing of the surface with 400 grit wet dry sandpaper. I polished the stem with micromesh sanding pads – wet sanding it with 1500-12000 grit pads. I wiped the stem down with a damp cloth after each pad. I further polished it with Before & After Pipe Polish – both Fine and Extra Fine. I wiped it down with a coat of Obsidian Oil and set it aside to dry. With both parts of the pipe finished, I polished the bowl and the stem with Blue Diamond polish on the buffing wheel. I gave the bowl and the stem multiple coats of carnauba wax. I buffed the pipe with a clean buffing pad to raise the shine. I hand buffed it with a microfiber cloth to deepen the shine. The pipe polished up pretty nicely. The rich finish and the grain came alive with the buffing. The finish on the briar works well with the polished black vulcanite stem. The finished pipe is a well-proportioned, nicely grained Classic Apple. Have a look at it with the photos below. The dimensions are Length: 5 inches, Height: 1 1/2 inches, Outside diameter of the bowl: 1 inch, Chamber diameter: 3/4 of an inch. This Schoenleber Hand Made Classic Straight Apple will be going back to Alex soon to join his growing collection of American made pipes. Thanks for walking through the restoration with me on another of Alex’s pipes.

Restoring a Dainelli Silver Lovat with a Horn Stem


Blog by Steve Laug

The next pipe on the work table was also in the bag with the C.P.F. pipes that I brought home from Idaho recently. This one is an interesting little Lovat. It is briar with a horn stem. The briar is in decent condition, just dirty from use and sitting. The stamping on the shank reads Dainelli over Silver. There is no other stamping on the shank. The bowl had been reamed previously by the seller but a thick coat was on the bottom of the bowl. The rim top was clean but was dried out. The grain was an interesting mix of straight, swirls, flame and birdseye. There were a few nicks in the briar on the sides of the bowl. The stem was horn and dried out. There was tooth chatter on both sides and a few deeper tooth marks just ahead of the button. The tenon on this one is aluminum and from my experience it is probably a pipe from the 40s war period. Horn stems made a reappearance during the vulcanite shortage in the war years. I took close-up photos of the bowl and rim top to capture the condition of the pipe when it arrived. The rim top look dried out but clean. The outer and inner edges of the rim look good but there are a few nicks in the outer edge. I took photos of the horn stem surface to show the oxidation and the chatter on both sides near the button. The tooth marks are visible next to the button on both sides.The next photo captures the stamping on the left side of the shank. It reads Dainelli over Silver. I took the stem off the shank and took a photo to show the metal tenon.This is the first pipe with this stamping that I have ever worked on. I am unfamiliar with the brand so some research was in order. I checked on Pipedia and Pipephil to see if there was any information on the brand. There was nothing listed on either site. I checked in “Who Made That Pipe” and once again came up empty. I turned to Lopes, “Pipes, Artisans and Trademarks and again the trail was dead. I broadened the search on Google to look for the brand and even associated it with pipe shops or tobacco companies and still there was not a link at all. It looked like I was not the only one who had never heard of the brand.

Given that information was not forthcoming I put a photo of the pipe on several Facebook Groups hoping someone might recognize the brand and give me a lead. I turned my attention to cleaning up the pipe. I wiped the bowl down with isopropyl alcohol on a cotton pad to remove the grime from the briar. It was not a bad looking pipe. I reamed the bowl with a Savinelli Fitsall Pipe Knife and scraped the cake out of the bottom of the bowl. The buildup on the bottom was thick and heavy. The pointed end of the knife allowed me to remove the remaining cake. I sanded the bowl walls with a piece of dowel wrapped with 220 grit sandpaper.I scrubbed out the internals of the pipe with pipe cleaners, cotton swabs and alcohol. It was a very dirty shank and mortise. I have found that stems with metal tenons seem to draw moisture and tars around the shank walls. I cleaned out the stem with pipe cleaners and alcohol. I used a cotton swab and alcohol to clean out the end of the tenon.I polished the bowl and rim top with micromesh sanding pads – wet sanding it with 1500-12000 grit pads. I wiped the bowl down with a damp cloth after each pad to remove the sanding debris. After the final sanding pad I hand buffed it with a cotton cloth to raise a shine. I am still experimenting with Mark Hoover’s Briar Cleaner to see what I think of it as a possible replacement for my usual Murphy’s Oil Soap scrub. I rubbed it onto the briar, working it into the grain. I wiped it off with a clean cloth. There was still a residue from the cleaner left behind and no matter how I rubbed it off it was hard to remove. I ended up rinsing it with warm water to remove it and dried it with a microfiber cloth. I am still not sure if this is will replace Murphy’s for me. I am committed to working with it. I took photos of the pipe at this point in the process. I really like Mark Hoover’s Before & After Restoration Balm for its restorative properties with dry briar. I worked it into finish of this Lovat with my fingertips to clean, enliven and protect it as I usually do at this point in the process. I let the balm sit for a little while and then buffed with a cotton cloth to raise the shine. The Restoration Balm really makes the grain stands out beautifully. After rubbing it down I noticed some deep dings and nicks in the briar on the right side of the bowl near the rim. I filled them in with clear super glue. When the repairs had cured I sanded them out with 220 grit sandpaper, polished them with 400 grit sandpaper and 1500-2400 grit micromesh sanding pads. I stained the area on the bowl with a Walnut and Cherry stain pen. Once it had cured I polished it with a 3200 grit micromesh sanding pad. I was able to blend the repair into the rest of the bowl. I set the finished bowl aside and turned my attention to the stem. I filled in the tooth marks and the areas where the horn was dry and delaminating. I set the stem aside to let the glue dry.Once the repairs had cured I used a needle file to reshape the button edge and flatten out the repairs. I sanded the stem surface with a folded piece of 220 grit sandpaper to smooth them out. I started the polishing with a folded piece of 400 grit sandpaper to smooth out the scratches. I polished the stem with micromesh sanding pads – wetsanding it with 1500-12000 grit pads. I wiped the stem down with Obsidian Oil after each pad. I polished it with Before & After Pipe Polish – both Fine and Extra Fine and gave it a final coat and set it aside to dry. I put the stem and bowl back together and buffed the pipe with Blue Diamond on the buffing wheel. I polished the briar and the stem until there was a rich shine. This Dainelli Briar Lovat has a classic shape and a rich finish that highlights the grain around the bowl. Once I buffed the pipe the grain popped. The striated horn stem had a rich glow after polishing. The finished pipe is actually quite a beauty in my opinion. The shape does not quite match a British shaped Lovat and has almost a French look to it. It is a beautifully grained Lovat that fits well in the hand and sits right in the mouth. Have a look at it with the photos below. The dimensions are Length: 5 inches, Height: 1 1/2 inches, Outside diameter of the bowl: 1 inch, Chamber diameter: 5/8 of an inch. If any of you have heard of the brand before let me know in the comments section below. I thank you ahead of time for any info you may give. Thanks for walking through the restoration with me as it was a pleasure to work on.

Cleaning up a gift WDC Marlborough Twin Bore Bent Briar


Blog by Steve Laug

One of the gifts I brought home from Pune, India and my visit with Paresh, Abha, Mudra and Pavni was one of his Grandfather’s unique pipes. It is an old timer that is very similar to a CPF Cromwell pipe that I restored previously. I referred to this very pipe in that blog. Here is the link to the blog on that pipe (https://rebornpipes.com/2017/07/01/out-damn-spots-a-c-p-f-cromwell-double-vertical-stem-bent-billiard/). Paresh’s Grandfather was obviously gifted this old pipe. It did not appear to have been smoked very much (unlike the other pipes that Paresh received from him). Like the C.P.F. pipes from this time period this WDC Marlborough has some real charm. It is on the petite side of things – 4 ½ inches long and 1 3/4 inches tall. It is not a bad piece of briar, a mix of grains. The brass/silver collar on the shank is stamped with faux hallmarks and the WDC triangle logo. The stem is the unusual part of the mix. It has two brass plated spigot tenons that fit into openings in the shank collar. The twin stems merge into one single airway. Looking at it I could not wait to examine it and see the internals in the mortise and shank. The finish was worn but the pipe looked like it still had some life in it. The left side of the shank is stamped in worn gold leaf Marlborough in script. The right side of the shank is stamped in gold leaf with the WDC Triangle logo. The stem is also stamped on the left side with the WDC triangle and SOLID RUBBER on the right side. I took photos of the pipe from a variety of angles to show the uniqueness and the condition before I started my cleanup work. I took some close up photos of the bowl top to show what it looked like before I started the cleanup work on it. I also included some close up photos of the stem to show the tooth marks and chatter on both sides. The finish looks very good with a little dust and debris on the briar.The stamping on the left side of the shank and stem is readable – Marlborough on the shank in gold leaf and WDC in a triangle on the stem. It is clear and readable. You can also see the hallmark and logo on the brass/silver band. The stamping on the right side of the shank and stem is also clear. The shank reads WDC in a triangle in gold leaf and the stem reads SOLID RUBBER. I took the stem out of the shank and took a photo of the parts of the pipe. You can see the dual ports in the shank and the dual ports in the stem. I turned to the previous blog on the CPF pipe to refresh my memory of the information I had found at that point in the processs (https://rebornpipes.com/2017/07/01/out-damn-spots-a-c-p-f-cromwell-double-vertical-stem-bent-billiard/). I quote from that blog and also include a diagram that I did on the airflow of the pipe.

I did some digging online and found a WDC Marlborough that had a similar configuration though far more boxy. It did not have the elegance that the C.P.F. does in my opinion. Playing around with the mechanics of the smoke and how it flowed through the stem I examined the dual mortise and the way the stem was laid out. I fed a pipe cleaner through the stem and found that natural flow of the cleaner was from the button through the top of the stem and into the top mortise. I could plug the lower tenon and the air was unobstructed from tenon to button. When I plugged the upper tenon and blew air through it I could feel it against my fingertip and then it made its way out the lower tenon. The airflow seems to have flowed against my finger and back a short distance to an opening between the two stems and out. From that I figured out that the smoker draws smoke through the upper mortise and into the airway on the stem. It flows into the bottom stem and mortise (which is a sump like the Peterson System pipes have) where moisture is collected and the smoke exits up the lower stem and into the button and into the mouth of the smoker. In my online search I found a photo of the Marlborough with the airpath drawn out as I conceived it in my words above. I drew the same kind of pattern on the C.P.F. to show how it appeared from my experiments. I used the link on the previous blog to go back and read the online forum about the Marlborough pipe. Here is the link to the Marlborough (http://pipesmagazine.com/forums/topic/wdc-marlborough-double-airway).Now that I had a bit of the back story on the pipe from Paresh’s Grandfather’s collection it was time to go to work on it. I polished the briar with micromesh sanding pads – wet sanding with 1500-12000 grit sanding pads. I wiped it down with a clean damp cloth after each pad. I brought back a package of Restoration Balm from Mark Hoover from Idaho. He included a sample of a new product that he was experimenting with called Briar Cleaner. It is to be used prior to scrubbing (possibly instead of scrubbing with Murphy’s Oil Soap) and to be followed up with the Balm. I decided to give it a try on the smooth finish of this pipe. I worked it into the finish with my fingertips and scrubbed it off with a soft cloth. I buffed the bowl with a microfiber cloth to dry and shine it. The product seemed to work well to lift the dirt and grime from the finish. I am still not sure if it a necessary extra step for me but I am working with it on the next few pipes. The photos below show the pipe after cleaning with the product. I used some Rub’n Buff Antique Gold to repair the gold fill in the stamping on both sides of the shank. I rubbed it on and pressed it into the stamping with a tooth pick. I buffed it off with a soft cotton pad and a microfiber cloth. The photos tell the story. I rubbed Before & After Restoration Balm into the briar and worked it in with my fingertips. I let the bowl sit while the Balm did its work on the briar. Once it had been sitting for a few moments I buffed it off with a soft cotton cloth. The photos show the bowl after the Balm had worked. After cleaning the exterior of the briar with Mark’s new product it was time to clean the internals. I scrubbed out the mortise and the airway in the shank and the stem with pipe cleaners, cotton swabs and isopropyl alcohol. I was surprised to find that the pipe was pretty clean. I was also surprised to see some of the dark stain coming out of the shank. It appears that the pipe may have been dip stained. I set the bowl aside and worked on the stem. I sanded out the tooth marks with 220 grit sandpaper and started the polishing with 400 grit sandpaper.I polished the stem with micromesh sanding pads – wet sanding with 1500-12000 grit pads. I wiped the stem down after each pad with Obsidian Oil. I interrupted the polishing after the 4000 grit pad and used Rub’N Buff Antique Gold to touch up the WDC Triangle stamp on the left side fo the dual stem. I cleaned off the excess Rub’N Buff gold and then continued polishing with 6000-12000 grit pads. I rubbed it down with Obsidian Oil after each pad. I used some new product that Mark Hoover put together – Before & After Restoration Balm that was made to work on vulcanite. It did a good job of polishing the vulcanite. I finished by polishing the stem with Before & After Pipe Polish – both Fine and Extra Fine. I wiped it down a final time with Obsidian Oil and set it aside to dry.I put the stem back on the shank and buffed it lightly with Blue Diamond on the buffing wheel. I hand buffed it with a microfiber cloth to raise a shine in the briar. The finish on the briar came alive with the buffing and took on a deep shine. I gave the bowl and stem several coats of carnauba wax and buffed it with a clean buffing pad and with a microfiber cloth. The finished pipe is shown in the photos below. It is an interesting little pipe measuring 4 1/2 inches in length, 1 3/4 inches in height. The outside diameter of the bowl is 1 1/4 inches and a chamber diameter of 3/4 of an inch. The unique design and the flow of air through the pipe make this a very interesting looking pipe. It is a beautiful, bent billiard with a double shank and stem. This pipe is staying with me as it is the background to the similar CPF Cromwell that I have in my personal collection. It is another beautiful old pipe that fits into my old US Made pipe collection. Thanks for reading the blog. Enjoy.

New Life for a Hurricane Standard Lovat


Blog by Steve Laug

The next pipe on the work table was one that I brought back from Jeff’s on this last trip. This was a pipe that came from one of the pipe lots Jeff picked up through the auctions he frequents. It was barely smoked and not even broken in. It was stamped Hurricane Standard over London Made and the shape number X37 on the underside of the shank. The finish is a combination of what appears to be rustication and sandblasting. It is stained with a dark brown/black stain. The finish was in very good condition other than being dirty. The windcap is made of briar and the finish matches the rest of the pipe. It tips toward the back of the bowl to reveal a smooth rim top and smooth panels under the cap on each side of the bowl. When the cap is opened the rim top is in perfect condition with no damage to the inner or outer edges of the bowl. The bowl had a light cake with tobacco remnants stuck on the sides. The black vulcanite stem had a lot more tooth marks and chatter on both sides than I would have expected considering the condition of the bowl. It did not sit in the shank well and I figured once I had cleaned it that would be solved. There was also an aluminum stinger in the tenon that I would remove and set aside. The pipe came in box marked as noted in the photos. I had a felt pipe sock here so I included that with the pipe. I took the following photos to show what pipe looked like before I started.I took the pipe out of the box and took photos of it before I started my restoration work on it. It looks very good. The briar cap and side panels are very different than the ones I have seen on previous Hurricane pipes that I have worked on. The Lovat shape works well with the pipe. The panels and cap blend in well with the finish around the bowl. It is a very striking looking Lovat that combines a briar wind cap that matches the rest of the bowl. I took some close up photos of the bowl top with the cap closed and open. You can see the debris in the bowl and the dirt on the top of the opened rim top. I also included some close up photos of the stem to show the tooth marks on both sides. The finish looks very good with a little dust and debris in the crevices and valleys of the finish. The stamping on the underside of the shank is clear and readable. It reads Hurricane Standard over London Made followed by the shape number code X37.I looked up the Hurricane Standard pipe on the Pipephil Site to see what I could find out about the maker (http://www.pipephil.eu/logos/en/logo-h4.html). I quote in full the information included in the sidebar of the listing.

Hurricane is not exactly a brand but rather a pipe type characterized by an integrated swivel cover. An H on the stem denotes a pipe produced by Orlik. These pipes were often made in collaboration with Nutt Products Ltd or were sometimes stamped for Roy Tallent Ltd.

I include a screen capture of the listing from Pipephil as well. Note the various brands that made a Hurricane pipe with the same style or similar style wind cap. Note also that the one I have is made by Roy Tallent Ltd. of Old Bond Street. It bears the same H stamp on the top of the saddle stem as the pipes in the photo below.From that link I did a bit of search for the Fortnum brand. I found a listing for the brand on Pipedia. It said: Fortnum & Mason, the famed London department store in operation since 1707, has among countless other products sold its own line of pipes. One of the most notable was Fortnum’s Windward, a “Hurricane” type pipe with a built in swiveling windcap. The pipe was made following the design of Frederick Hudes, who received a patent for the pipe in the U.S. numbered 2135179 in 1938 (https://pipedia.org/wiki/Fortnum_%26_Mason). I include the patent drawings below.Now that I had a bit of the back story on the Orlik made Roy Tallent Ltd. Hurricane Standard pipe it was time to go to work on it. I brought back a package of Restoration Balm from Mark Hoover from Idaho. He included a sample of a new product that he was experimenting with called Briar Cleaner. It is to be used prior to scrubbing (possibly instead of scrubbing) and to be followed up with the Balm. I decided to give it a try on the rusticated finish of this pipe. I worked it into the finish with my fingertips and scrubbed it off with a soft cloth. It left behind some grit that I rinsed off with some warm water. I buffed the bowl with a microfiber cloth to dry and shine it. The product seemed to work well to lift the dirt and grime from the finish. I am still not sure if it a necessary extra step for me or not but I am working with it on the next few pipes. The photos below show the pipe after cleaning with the product. After cleaning the exterior of the briar with Mark’s new product it was time to clean the internals. I scrubbed out the mortise and the airway in the shank and the stem with pipe cleaners, cotton swabs and isopropyl alcohol. I was surprised to find that the pipe was pretty clean. I was also surprised to see some of the dark stain coming out of the shank. It appears that the pipe may have been dip stained.I tipped the windcap back and cleaned up the walls of the bowl with a Savinelli Fitsall Pipe Knife. I scraped away the remnants of tobacco and the thin bands of cake. I sanded the bowl walls with 220 grit sandpaper wrapped around a piece of dowel. I rubbed Before & After Restoration Balm into the briar and worked it in with my fingertips and a horsehair shoe brush. I let the bowl sit while the Balm did its work on the briar. Once it had been sitting for a few moments I buffed it off with a soft cotton cloth and the shoe brush. The photos show the bowl after the Balm had worked.  I set the bowl aside and worked on the stem. I sanded out the tooth marks with 220 grit sandpaper and started the polishing with 400 grit sandpaper.I polished the stem with micromesh sanding pads – wet sanding with 1500-12000 grit pads. I wiped the stem down after each pad with Obsidian Oil. I interrupted the polishing after the 4000 grit pad and used a Testors White Acrylic Paint pen to touch up the H stamp on the top of the saddle stem. I cleaned off the excess paint and then continued polishing with 6000-12000 grit pads. I rubbed it down with Obsidian Oil after each pad. I finish by polishing it with Before & After Pipe Polish – both Fine and Extra Fine. I wiped it down a final time with Obsidian Oil and set it aside to dry. I put the stem back on the shank and buffed it lightly with Blue Diamond on the buffing wheel. I hand buffed it with a microfiber cloth to raise a shine in the briar. The finish on the briar came alive with the buffing and took on a deep shine. I gave the bowl several coats of Conservators Wax and buffed it with a shoe brush and with a microfiber cloth. The finished pipe is shown in the photos below. It is an interesting little pipe measuring 5 inches in length, 1 7/8 inches in height. The outside diameter of the bowl is 1 1/4 inches and a chamber diameter of 5/8 of an inch. The rustication/sandblast on the bowl shows interesting contrasts between the crevices and the high spots in the finish. It is a beautiful, classic shaped Lovat with a saddle stem. It will be a fun pipe to break in and enjoy. This one is staying with me as it is very different from the other Hurricane pipes that I have restored. Thanks for reading the blog. Enjoy.

New Life for a Broken Nording Danmark F Freehand


Blog by Steve Laug

In one of the bags of parts Jeff purchased there was a bowl and there was a piece of shank with a stem in place. We took all the parts out of the bag and were able to see that these two parts actually went together. The shank piece is stamped on the underside as follows: F over NORDING over DANMARK near the horn extension/shank union. The bowl shape follows the grain of the block of briar very well. The break in the shank was not a clean one – it was a mess. The inside of the airway was plugged with lava and tar. Someone had tried to repair the two parts by gluing them together with epoxy. As expected the repair did not hold. Jeff took photos of the pieces to show the extent of the damage to the pipe – it really was a stunning pipe originally. The shank was thin but the briar was thick enough. The nice piece of striated horn that made a shank extension was in excellent condition. There was a steel tube in the end of the horn where the stem sat in place to protect it from splitting when the stem was repeatedly inserted. The turned fancy stem was in good condition with some tooth marks on both sides but otherwise it was undamaged. There was a thick cake in the bowl and a heavy overflow of lava on the rim top.The next series of photos shows the two parts of the shank and the thick buildup of tars and oils in the shank interior and the broken briar around the shank. The next photos show the rim top and the thick cake in the bowl and the lava build up on the plateau top. The valleys and high spots are almost filled smooth with lava.Jeff also took photos of the sides and heel of the bowl to show the grain on the pipe. The finish is very dirty but the grain is quite beautiful. There are nicks and dents in the briar.The stamping on the shank portion of the broken pipe is readable but worn. The joint between the shank and the horn extension is very good – solid. The metal tube in the shank end provided the internal strength to hold this joint tight. It is interesting to note that the shank broke just ahead of the tube inside the shank. The stem appeared to be in good condition. The button was worn with tooth marks on the topside. There was some oxidation and wear on the surface near the button.Jeff reamed the bowl and cleaned up the plateau top with Murphy’s Oil Soap and a tooth brush. He scrubbed it until it was clean. He cleaned out the inside of the two parts of the shank with pipe cleaners, cotton swabs and alcohol until the airway was clear. He cleaned up the broken ends of the shank with a tooth brush and the soap. He rinsed off the bowl and shank and the airway with warm water. He dried it off and set it aside. He cleaned up the stem and let it soak in a bath of Before & After stem deoxidizer. He took it out of the bath and rinsed it off and cleaned out the airway with pipe cleaners and alcohol. When I arrived he showed me the parts. They were incredibly clean. I was excited to get started on the repair of the broken shank… so much so that I forgot to take pictures of the cleaned up parts of the pipe.

I picked up some tubing at Hobby Lobby and cut off a piece that was close to the length I needed to join the two parts of the shank together. I used a Sawsall blade and a hacksaw to cut a length from the tube. I used a metal rasp to flatten the end of the piece of tube and shorten it enough to fit into the two parts of the shank. I used the small blade on a pocket knife to open up the airway in the bowl end of the shank and to flare the end of the tube in the stem end of the shank.I used the hacksaw to rough up the surface of the tube so the glue would have a surface to bond to between the briar and the tube. I used some Testor’s Metal and Wood Glue to insert the tube into the bowl end of the shank. I used a tooth pick to press the glue into the area around the tube. I filled in the remainder of the gap with clear Gorilla glue.I used the tooth pick to put Gorilla Glue on the open ends of each piece of the shank. I coated the tube with some glue as well. I aligned the two parts and pressed the pieces together. I held them tightly in place until the glue set and the two parts were bound together. I filled in the repaired area with Gorilla Glue to smooth out the repair. I set the bowl aside to let the repair cure. Once the glue had cured and the shank was solid, I smoothed out the repair a medium and fine sanding block. I sanded the repaired area and glue with 1500 and 1800 grit micromesh sanding pads to remove the excess glue. I smoothed out the finish. I decided to use Mark Hoover’s Briar Cleaner at this point in the process to clean off the briar. It works to remove the dust and debris in the briar and leaving behind a clean piece of briar. I polished the bowl and horn shank extension with micromesh sanding pads – wetsanding with 1500-12000 grit sanding pads. I took photos of the pipe at this point in the process. It is a nice looking pipe for sure. At this point in the process I brought the pipe back to Vancouver. I sanded the repaired area with a folded piece of 220 grit sandpaper to blend it into the surrounding briar. I wanted to remove some of the darkened area around the repair so that I could polish it further and restain the shank to match the rest of the pipe.I polished the repaired area with micromesh sanding pads – wet sanding with 1500-2400 grit pads to polish out the sanding scratches. I polished it further with 3200-12000 grit pads. Once it was smooth I stained it with a Cherry stain pen to blend it into the rest of the pipe. The photos tell the story of the repair. I rubbed the bowl and shank down with Before & After Restoration Balm. I worked it into the briar and set it aside to dry. Once the Balm had been doing its work for a while I buffed it down with a microfiber cloth. The Balm cleaned, protected and enlivened the briar. The repaired shank was looking very good at this point in the process. I cleaned the pipe stem with a new version of Mark Hoover’s Before & After Restoration Balm that he had designed to work well on both the briar bowls and the vulcanite stems. I rubbed it into the surface of the stem with my fingertips and buffed it off with a microfibre cloth. I polished the stem with microfibre pads – wetsanding with 1500-12000 grit pads. I wiped it off with Obsidian Oil after each sanding pad. After the 12000 grit pad I polished it with Before & After Fine Polish and gave it a final coat of Obsidian Oil. I put the stem back on the pipe and took the pipe to the buffer. I carefully buffed the bowl and stem with Blue Diamond to polish the briar and the vulcanite. I wanted to get a shine but not risk damaging the pipe by having it fly off the wheel. Blue Diamond does a great job on the smaller scratches that remain in both briar and vulcanite. I gave the bowl and the stem several coats of carnauba wax and buffed the pipe with a clean buffing pad to raise the shine. I hand buffed it with a microfiber cloth to deepen the shine. The pipe polished up really nicely with a great contrasting stain look to the briar. The finished pipe is shown in the photos below. This is a beautiful Eric Nording F Freehand – the fancy turned stem and the horn shank extension give the pipe a great look. The polished black vulcanite stem looks really good with the rich browns standing out in the grain and the blacks of the plateau rim. The dimensions of the pipe are Length: 7 inches, Height: 2 inches, Outside diameter of the bowl: 1 ½ inches wide and 2 inches long, Chamber diameter: 7/8 of an inch. This pipe is truly a rebornpipe. The shank repair and inside tube that binds it together should last a long time. Thanks for walking with me through the repair and the restoration of this beauty!

Restoring a Beautiful Bertram Tiger Grain Bulldog 40


Blog by Steve Laug

It you have not read the previous blogs I have posted on this brand give them a read to get some background on the pipes in this lot. If you have not been hit with a box I am sure you have a hard time understanding how overwhelming it feels to look at the 200+ pipes that need to be restored. It is mind boggling for sure – but there is only one way to move ahead – 1 pipe at a time. I could not do it without Jeff’s help doing the clean up on the lot. If I had to do it all by myself it would be more than I handle moving through this many pipes. From his cleaned pipes I get to choose what I want to work on. Doing the work this way we have already cleaned about 70 pipes and I have restored around 40 of them. We are getting there slowly but surely.

This time I chose another Bertram Bulldog to work on. It has a diamond shank and a diamond saddle vulcanite stem. It has grade 40 number stamped on the left underside of the shank. The briar has some really interesting grain – almost tiger grain. It is beautiful. The exterior of the bowl looked good. Unlike the previous Bulldog this one either has no fills or they are well place and hidden. The bowl had a thick cake in the chamber with shards of tobacco stuck to the walls. The rim top had some darkening all around the bowl and thick lava overflow on the back top. It was hard to know what the inner edge of the bowl edge of the bowl looked like until the cake and lava were gone. The stem had some oxidation and tooth marks and chatter near the button on both sides. Jeff took some photos of the pipe before he began his cleanup work on it. Jeff took close-up photos of the bowl and rim to capture the condition of the pipe when it arrived. The rim top had a thick coat of lava and the bowl had a thick cake. You can see from the photos why it was hard to tell the condition of the inner edge of the rim.The picture of the bowl sides and the heel give a clear picture of the grain around the heel and the sides of the bowl. The bowl looks very good – maybe a small fill on the bottom right side of the bowl but cleaning will tell for sure. I am looking forward to seeing what is under all of the grime. The grain looks very interesting in these pictures and should look amazing when cleaned and polished.The next photos capture the stamping on the left side of the shank. You can see the Bertram Washington, D.C. stamp on the upper left side of the diamond shank and the grade 40 stamp on the left underside of the shank.The next two photos show the stem surface. They show the calcification, oxidation and the chatter on both sides near the button. There are light tooth marks on the stem near the button. There is some wear on the button edge.With each of the blogs that I have written on the Bertrams that I have worked on I have included the following information. If you have read it in past blogs, you can skip over it. If you have not, I have included the link to Bertram history and information. I would recommend that if you don’t know much about them take some time to read the background. I include a link to the write up on Pipedia (http://pipedia.org/wiki/Bertram). Bertram pipes were based out of Washington DC. They were popular among famous politicians and celebrities of the time. They made many products for them from FDR’s cigarette holders to Joseph Stalin’s favorite pipe. They were considered some of the best America had to offer till they finally closed their doors in the 70s. Bertram graded their pipes by 10s and sometimes with a 5 added (15, 25, 55 etc.), the higher the grade the better. Above 60s are uncommon and 80-90s are quite rare. I have worked on one 120 Grade billiard. I have several blogs that I have written on rebornpipes that give some history and background to Bertram pipes. (https://rebornpipes.com/2015/06/16/an-easy-restoration-of-a-bertram-grade-60-217-poker/).

I have included the following link to give a bit of historical information on the pipe company. It is a well written article that gives a glimpse of the heart of the company. http://www.streetsofwashington.com/2012/01/bertrams-pipe-shop-on-14th-street.html#

From this information I learned that all of these Bertrams were made before the closure of the shop in the 1970s. This Bertram Bulldog is the first of this squat Bulldog style that I have worked on. This pipe has a grade 40 which I think is a reflection on the beautiful grain.

Jeff is methodical in his cleaning regimen and rarely varies the process. He reamed the bowl with a PipNet pipe reamer and followed up with a Savinelli Fitsall pipe knife to remove the cake. He scrubbed out the mortise and the airway in the shank and the stem with alcohol, cotton swabs and pipe cleaners. He scrubbed the exterior of the bowl, rim, shank and stem with a tooth brush and Murphy’s Oil Soap to remove the oils and tars on the rim and the grime on the finish of the bowl. He rinsed it under running water. He dried it off with a soft cloth. He was able to remove lava build up on the rim top and you could see the great condition of the beveled rim top and edges of the bowl. He soaked the stem in Before & After Deoxidizer to remove the oxidation. I took photos of the pipe before I started my work on it. I took a close up photo of the rim top to show the condition of the bowl and rim after Jeff had cleaned up the grime and lava. Without the lava the rim looked very good with some darkening at the rear. The inner edge was a little rough on the back edge; otherwise it was in great condition. The stem photos show that the light oxidation is gone. The stem is in excellent condition with some light tooth marks and chatter on both sides near the button.I took photos of the stamping to show how it looked after the cleanup. The Bertram Washington DC is clear and readable though a bit faded on the right side of the stamp. The Grade 40 stamp is deep and clear.I cleaned up the darkening on the rim and smoothed out the damage on the back inner edge with a folded piece of 220 grit sandpaper. I cleaned up the sanding marks with 400 grit wet dry sandpaper. The first photo shows the rim when I started. The second shows the clean up of the inner edge and the darkening on the rim top. The third photo shows the finished rim top. I polished the bowl and rim top with micromesh sanding pads – wetsanding it with 1500-12000 grit pads. I wiped the bowl down with a damp cloth after each pad to remove the sanding debris. The grain began to stand out. After the final sanding pad I hand buffed it with a cotton cloth to raise a shine. I worked some Before & After Restoration Balm into the finish of the briar with my fingertips to clean, enliven and protect it. I let the balm sit for a little while and then buffed with a cotton cloth to raise the shine. The Restoration Balm really makes the grain stands out beautifully. The rich tiger grain really pops on this beauty! If you have not tried some why not give it a try. I sanded out the small tooth marks and chatter next to the button on both sides of the stem with a folded piece of 220 grit sandpaper. I sanded the stem with 400 grit wet dry sandpaper to remove the scratches. I polished it with Denicare Mouthpiece Polish to scrub out the scratches. I wiped it down with some Obsidian Oil and set it aside to dry. I polished out the sanding scratches with micromesh sanding pads – wetsanding it with 1500-12000 grit pads. I wiped the stem down with Obsidian Oil after each pad. I polished it with Before & After Pipe Polish – both Fine and Extra Fine and gave it a final coat and set it aside to dry. Jeff and I are gradually working through this 200+ lot dealing with each of the challenges they present one at a time. This one is Bertram’s take on a classic diamond shank straight Bulldog shape. It has probably the most stunning grain of any of the Bertrams I have worked on. I would call it a tiger grain. I put the stem and bowl back together and buffed the pipe with Blue Diamond on the buffing wheel. I polished the briar and the minute scratches still in the vulcanite of the stem until there was a rich shine. For a Bertram Grade 40 this pipe is quite stunning. I cannot find any sign of visible fills. It has a saddle stem on a diamond shank. The finish really has some interesting grain on a proportionally well carved pipe. Once I buffed the pipe the briar came alive and the swirling tiger grain popped with polishing. The black vulcanite stem had a rich glow. The finished pipe is well shaped Bulldog. This is another Bertram that feels great in the hand sits right in the mouth. Have a look at the finished pipe in the photos below. The dimensions are Length: 5 3/4 inches, Height: 1 1/2 inches, Outside diameter of the bowl: 1 1/2 inches, Chamber diameter: 3/4 of an inch. This is one that will stay with me for a while. The grain is captivating. Thanks for walking through the restoration with me as it was a pleasure to work on.

Restoring a Beautiful Bertram Long Shank Bulldog 20


Blog by Steve Laug

It you have not read the previous blogs I have posted on this brand give them a read to get some background on the pipes in this lot. If you have not been hit with a box I am sure you have a hard time understanding how overwhelming it feels to look at the 200+ pipes that need to be restored. It is mind boggling for sure – but there is only one way to move ahead – 1 pipe at a time. I could not do it without Jeff’s help doing the clean up on the lot. If I had to do it all by myself it would be more than I handle moving through this many pipes. From his cleaned pipes I get to choose what I want to work on. Doing the work this way we have already cleaned about 70 pipes and I have restored around 38 of them. We are getting there slowly but surely.

This time I chose a Bertram Bulldog to work on. It has a long, diamond shank and a diamond saddle vulcanite stem. It has grade 20 number stamped on the left underside of the shank. The briar has a mix of grains – straight, flame and birdseye. The exterior of the bowl looked really good. There was on large fill on the left underside of the shank near the bowl/shank junction that was chipped and rough. The bowl had cake in the chamber and the rim top had some darkening and lava overflow. It was hard to know what the inner edge of the bowl edge of the bowl looked like until the cake and lava were gone. The stem had some oxidation and tooth marks and chatter near the button on both sides. Jeff took some photos of the pipe before he began his cleanup Jeff took close-up photos of the bowl and rim to capture the condition of the pipe when it arrived. The rim top had a thick coat of lava and the bowl had a thick cake. You can see from the photos why it was hard to tell the condition of the inner edge of the rim.The pictures of the bowl sides and the heel give a clear picture of the grain around the heel and the sides of the bowl. Other than the one obvious large fill the bowl looks very good. I am looking forward to seeing what is under all of the grime. The large fill /flaw is visible in the second photo below. I have circled it in red so it easy to identify. The next photos capture the stamping on the left side of the shank. You can see the Bertram Washington, D.C. stamp on the upper left side of the diamond shank and the grade 20 stamp on the left underside of the shank. The photo below captures the nature of the flaw and damaged fill that I had noted above with the red circle. It is on the left underside of the diamond shank.The next two photos show the stem surface. They show the calcification, oxidation and the chatter on both sides near the button. There are light tooth marks on the stem near the button. There is some wear on the button edge.

With each of the blogs that I have written on the Bertrams that I have worked on I have included the following information. If you have read it in past blogs, you can skip over it. If you have not, I have included the link to Bertram history and information. I would recommend that if you don’t know much about them take some time to read the background. I include a link to the write up on Pipedia (http://pipedia.org/wiki/Bertram). Bertram pipes were based out of Washington DC. They were popular among famous politicians and celebrities of the time. They made many products for them from FDR’s cigarette holders to Joseph Stalin’s favorite pipe. They were considered some of the best America had to offer till they finally closed their doors in the 70s. Bertram graded their pipes by 10s and sometimes with a 5 added (15, 25, 55 etc.), the higher the grade the better. Above 60s are uncommon and 80-90s are quite rare. I have worked on one 120 Grade billiard. I have several blogs that I have written on rebornpipes that give some history and background to Bertram pipes. (https://rebornpipes.com/2015/06/16/an-easy-restoration-of-a-bertram-grade-60-217-poker/).

I have included the following link to give a bit of historical information on the pipe company. It is a well written article that gives a glimpse of the heart of the company. http://www.streetsofwashington.com/2012/01/bertrams-pipe-shop-on-14th-street.html#

From this information I learned that all of these Bertrams were made before the closure of the shop in the 1970s. This Bertram Bulldog with a long shank is the first of this style that I have worked on. This pipe has a grade 20 which I am sure takes into account the large fill that is present on the shank.

Jeff is methodical in his cleaning regimen and rarely varies the process. He reamed the bowl with a PipNet pipe reamer and followed up with a Savinelli Fitsall pipe knife to remove the cake. He scrubbed out the mortise and the airway in the shank and the stem with alcohol, cotton swabs and pipe cleaners. He scrubbed the exterior of the bowl, rim, shank and stem with a tooth brush and Murphy’s Oil Soap to remove the oils and tars on the rim and the grime on the finish of the bowl. He rinsed it under running water. He dried it off with a soft cloth. He was able to remove lava build up on the rim top and you could see the great condition of the beveled rim top and edges of the bowl. He soaked the stem in Before & After Deoxidizer to remove the oxidation. I took photos of the pipe before I started my work on it. I took a close up photo of the rim top to show the condition of the bowl and rim after Jeff had cleaned up the grime and lava. Without the lava the inward bevel on the rim looked very good with slight darkening at the rear. The inner edge was in great condition. The stem photos show that the light oxidation is gone. The stem is in excellent condition with some light tooth marks and chatter on both sides near the button.I took photos of the stamping to show how it looked after the cleanup. The Bertram Washington, DC is clear and readable as is the Grade stamp 20.The damaged fill/flaw on the underside of the diamond shank was the only significant issue with the pipe. I wiped it down with alcohol on a cotton swab then filled it in with clear super glue. Once the repair had cured I sanded it smooth with 220 grit sandpaper and with 400 grit wet dry sandpaper. It is fascinating to see that the fill or flaw follows the pattern of the grain perfectly and once it was sanded it blended in well with the grain on that portion of the bowl. I cleaned up the darkening on the rim and smoothed out the damage on the back inner edge with a folded piece of 220 grit sandpaper. I cleaned up the sanding marks with 400 grit wet dry sandpaper.I polished the bowl and rim top with micromesh sanding pads – wetsanding it with 1500-12000 grit pads. I wiped the bowl down with a damp cloth after each pad to remove the sanding debris. The grain began to stand out. After the final sanding pad I hand buffed it with a cotton cloth to raise a shine. I worked some Before & After Restoration Balm into the finish of the briar with my fingertips to clean, enliven and protect it. I let the balm sit for a little while and then buffed with a cotton cloth to raise the shine. The Restoration Balm really makes the grain stands out beautifully. If you have not tried some why not give it a try. I sanded out the small tooth marks and chatter next to the button on both sides of the stem with a folded piece of 220 grit sandpaper. I sanded the stem with 400 grit wet dry sandpaper to remove the scratches. I polished it with Denicare Mouthpiece Polish to scrub out the scratches. I wiped it down with some Obsidian Oil and set it aside to dry. I polished out the sanding scratches with micromesh sanding pads – wetsanding it with 1500-12000 grit pads. I wiped the stem down with Obsidian Oil after each pad. I polished it with Before & After Pipe Polish – both Fine and Extra Fine and gave it a final coat and set it aside to dry. Jeff and I are gradually working through this 200+ lot dealing with each of the challenges they present one at a time. This one is Bertram’s take on a classic long shank straight Bulldog shape. I put the stem and bowl back together and buffed the pipe with Blue Diamond on the buffing wheel. I polished the briar and the minute scratches still in the vulcanite of the stem until there was a rich shine. For a Bertram Grade 20 this pipe is quite stunning. I cannot find any sign of visible fills. The grain is sporadic but pretty. It has a saddle stem on a diamond shank. The finish really has some interesting grain on a proportionally well carved pipe. Once I buffed the pipe the briar came alive and the mixture of grain popped with polishing. The black vulcanite stem had a rich glow. The finished pipe is well shaped long shank Bulldog. This Bertram feels great in the hand sits right in the mouth. Have a look at the finished pipe in the photos below. The dimensions are Length: 6 inches, Height: 2 inches, Outside diameter of the bowl: 1 1/2 inches, Chamber diameter: 3/4 of an inch. Maybe this shape speaks to you and you want to add it to your collection. If you are interested let me know as I will be adding it to the store soon. Thanks for walking through the restoration with me as it was a pleasure to work on.