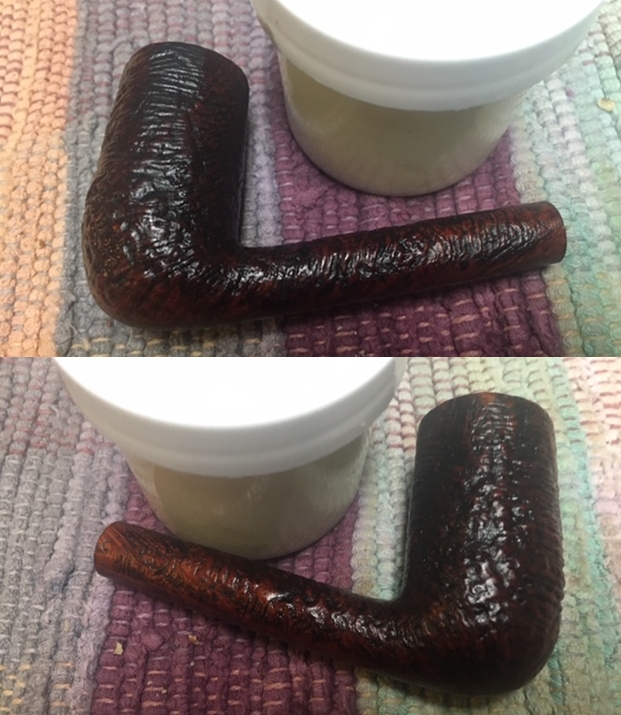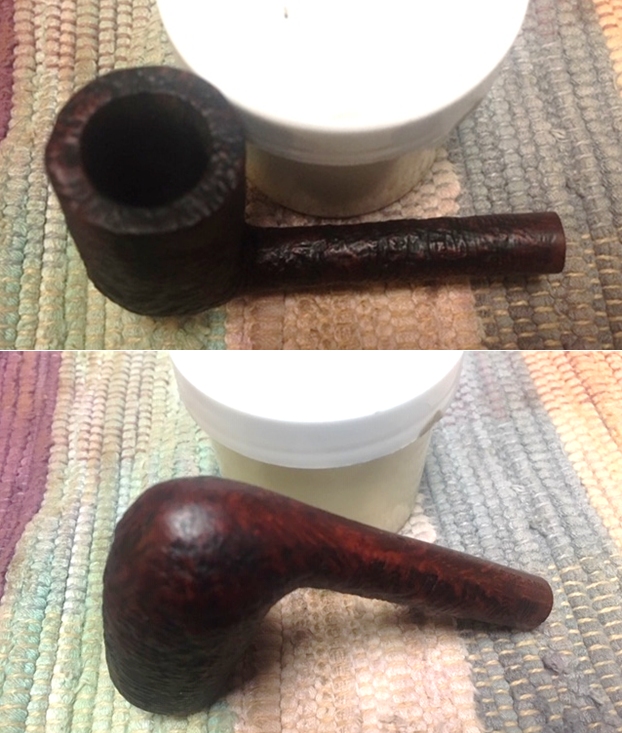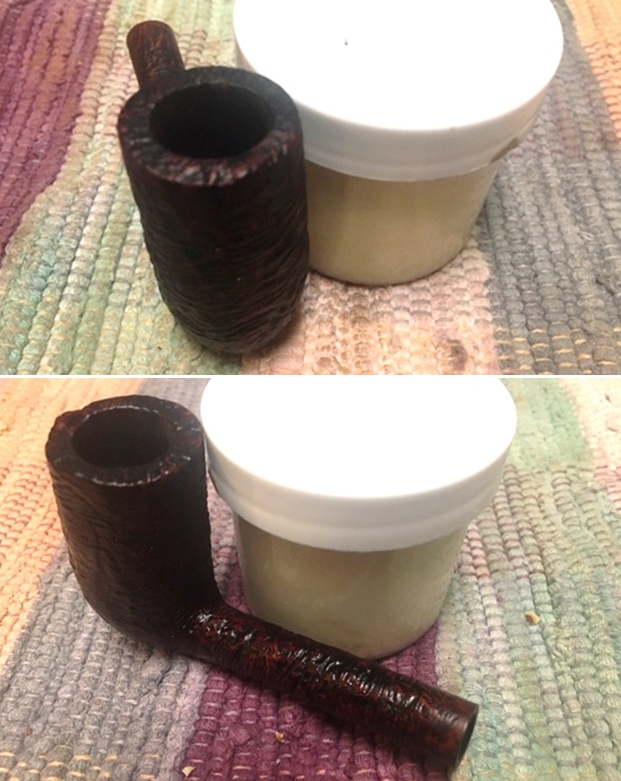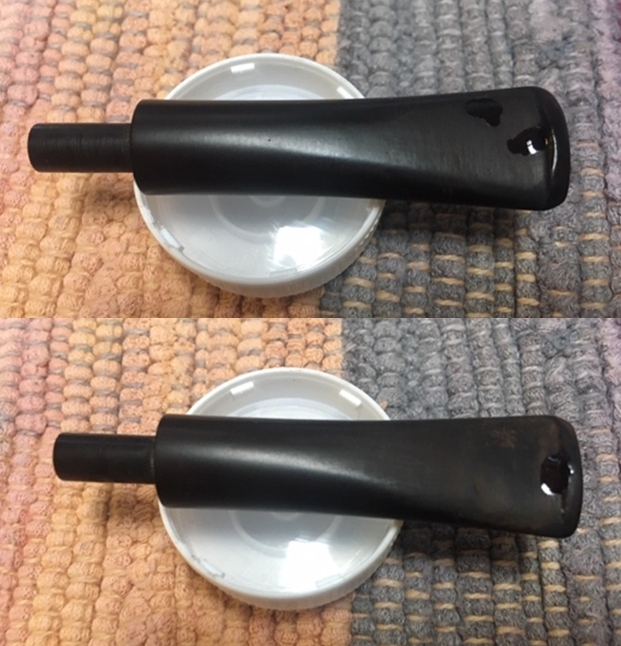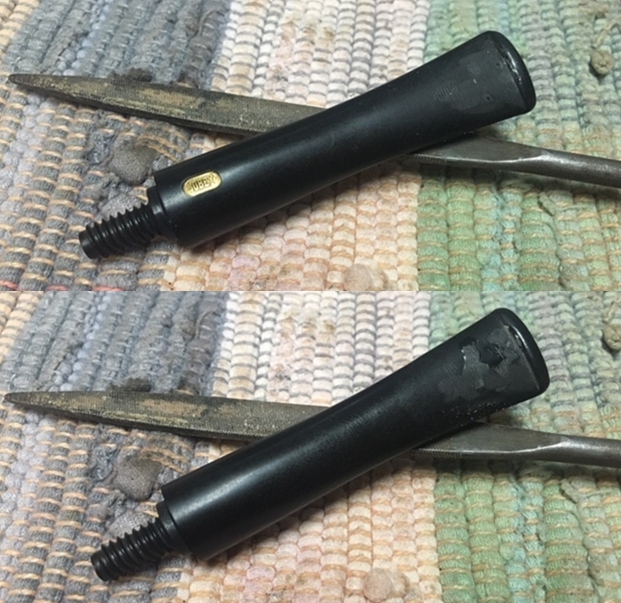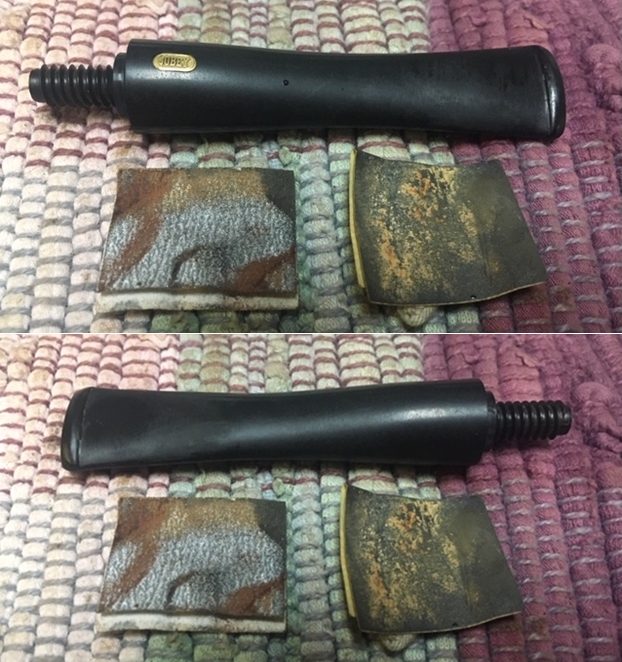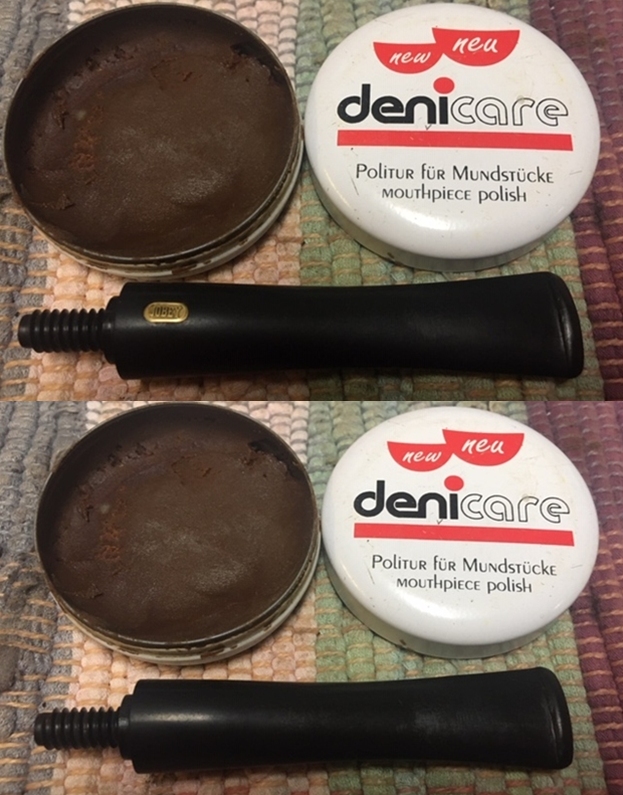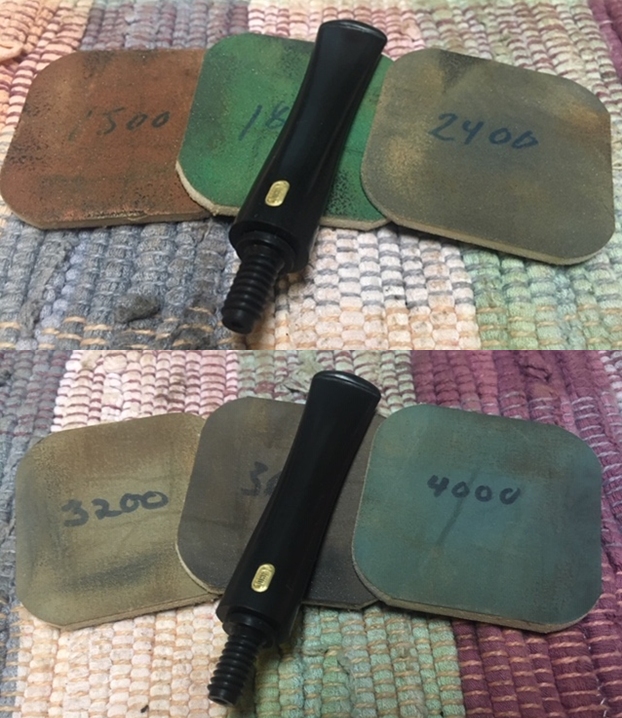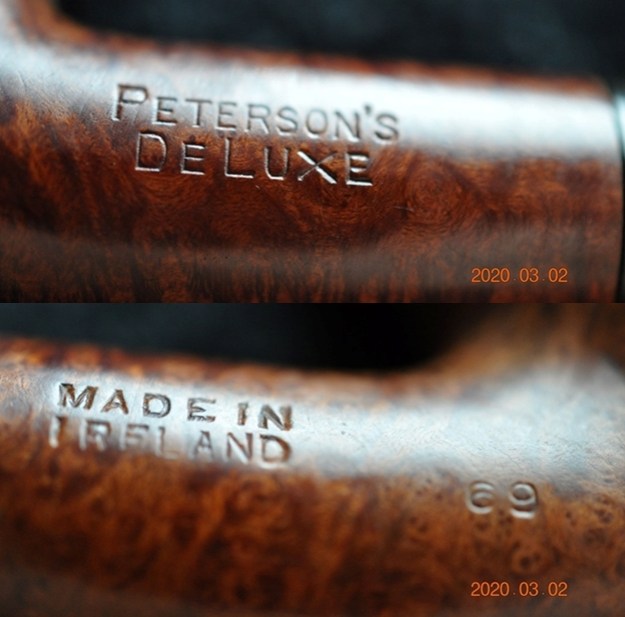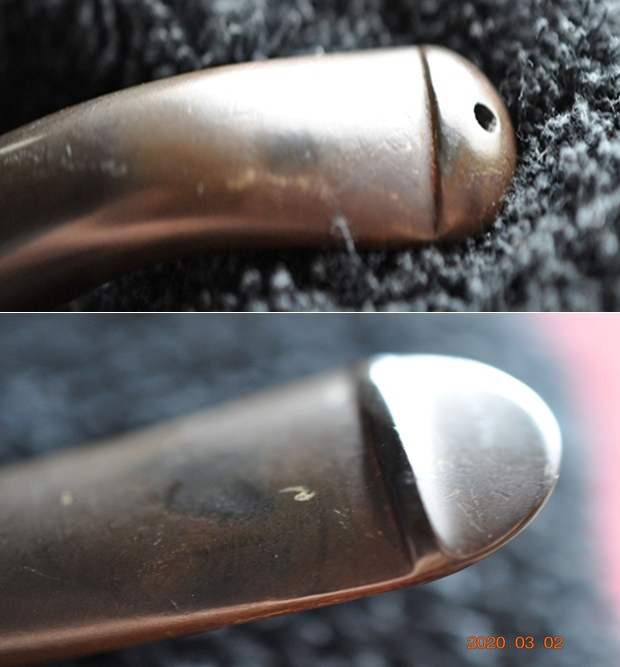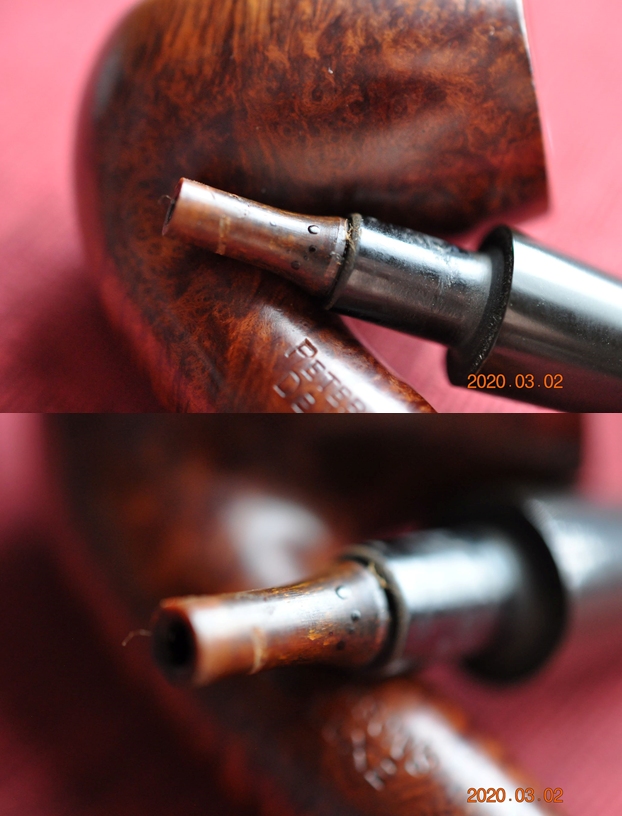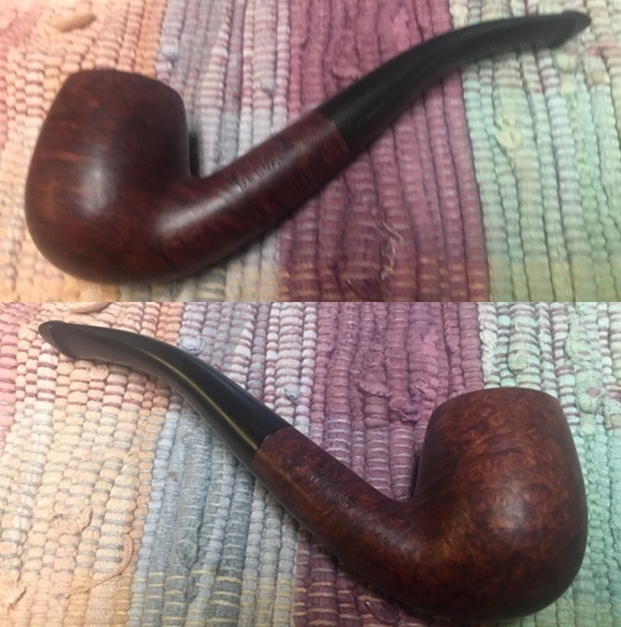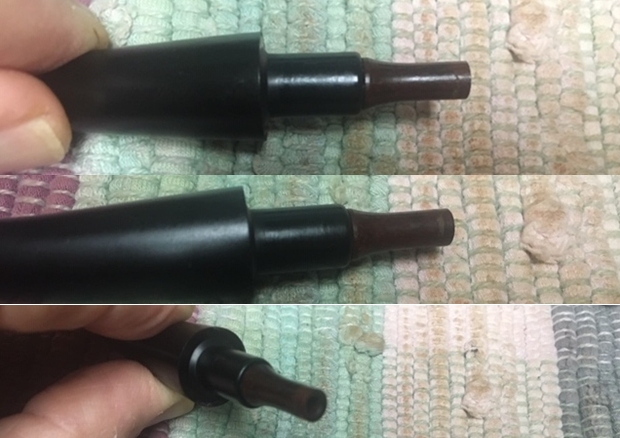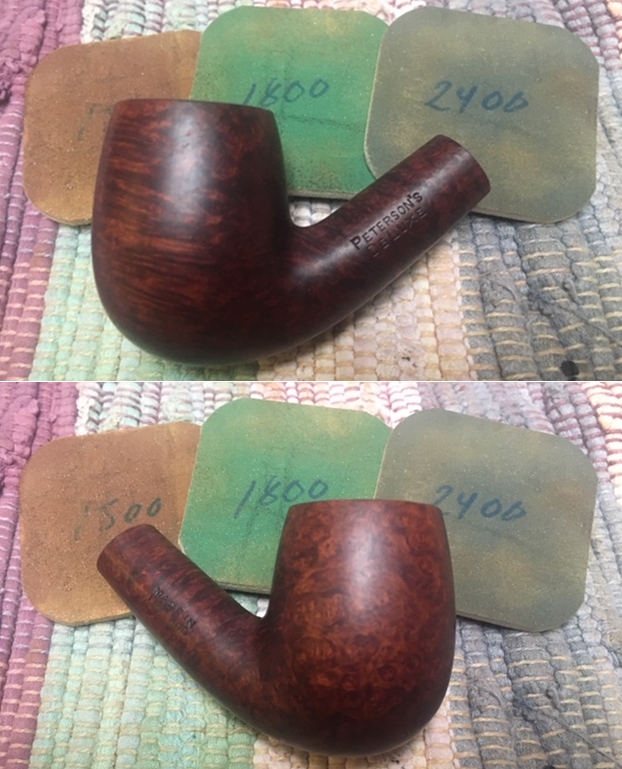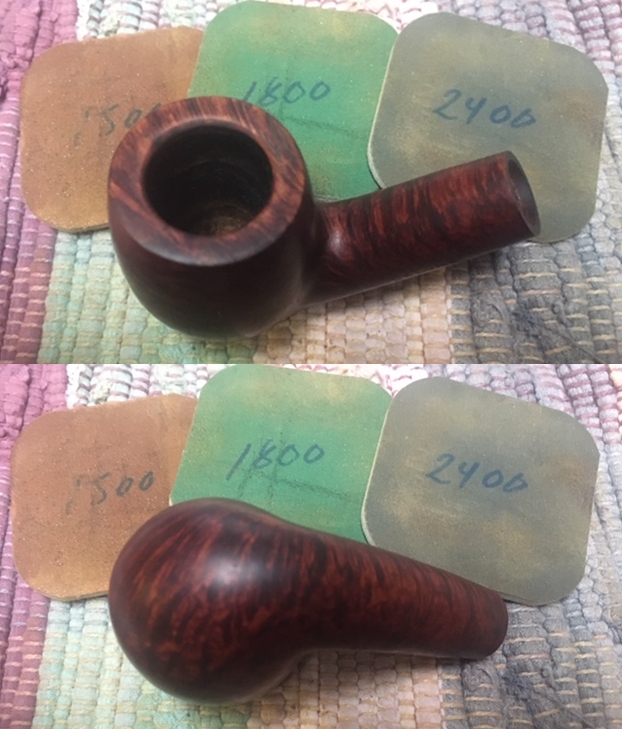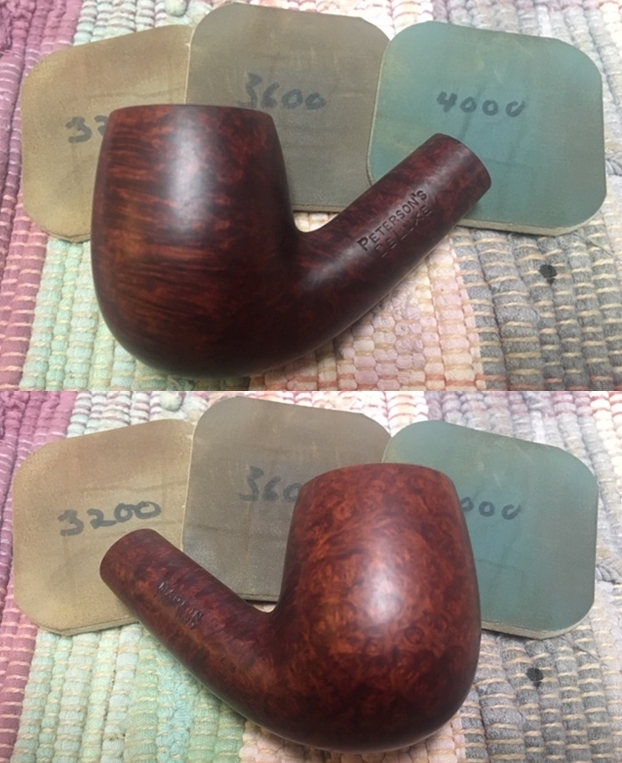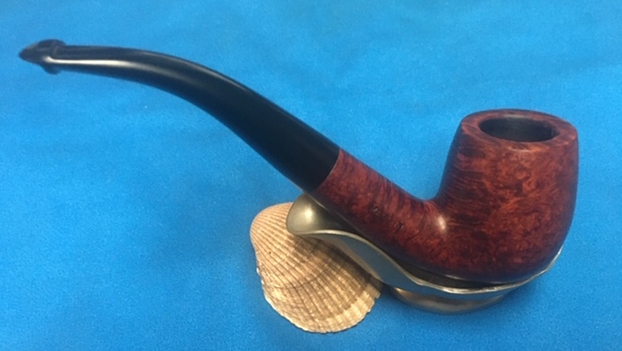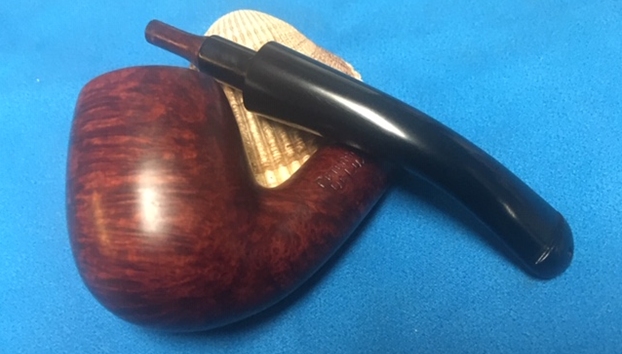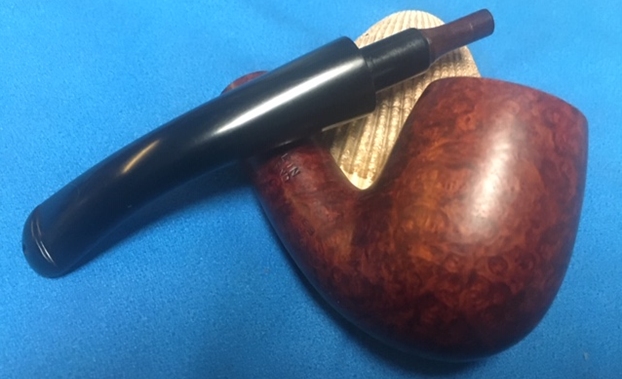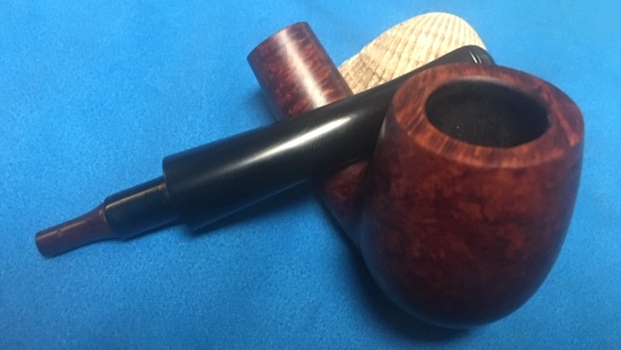
Tag Archives: bite marks

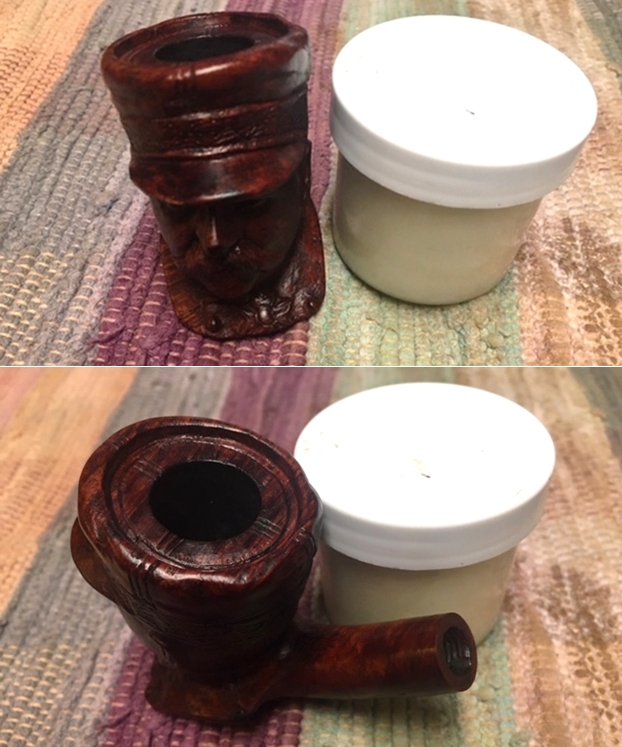
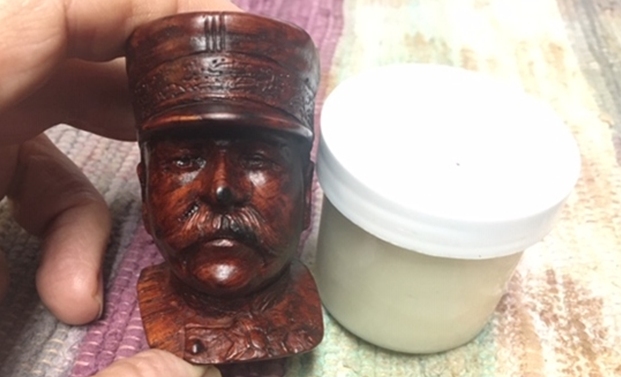
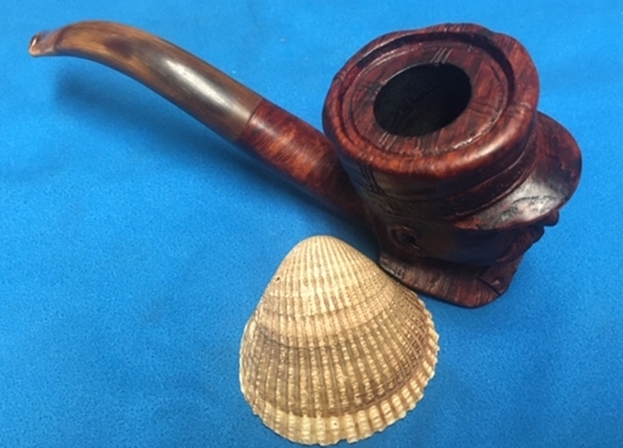
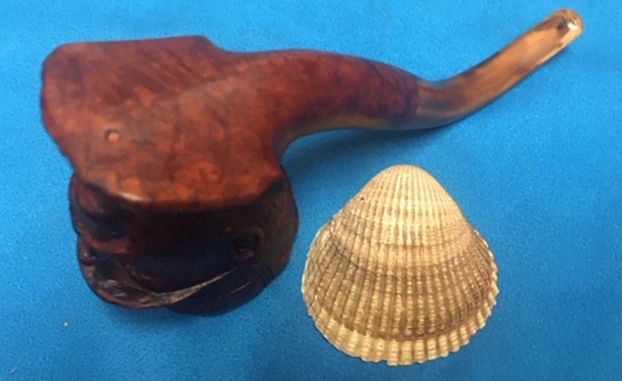
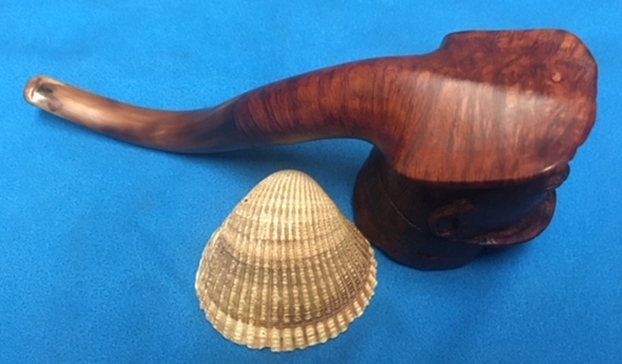
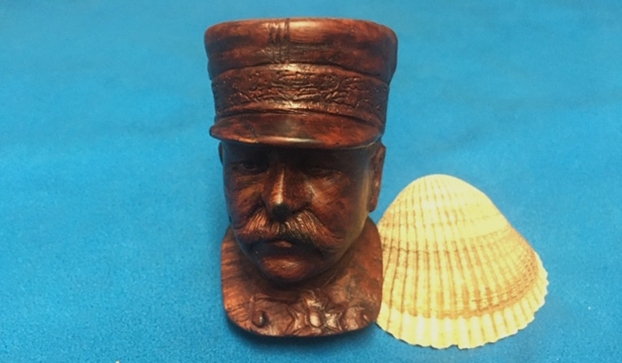
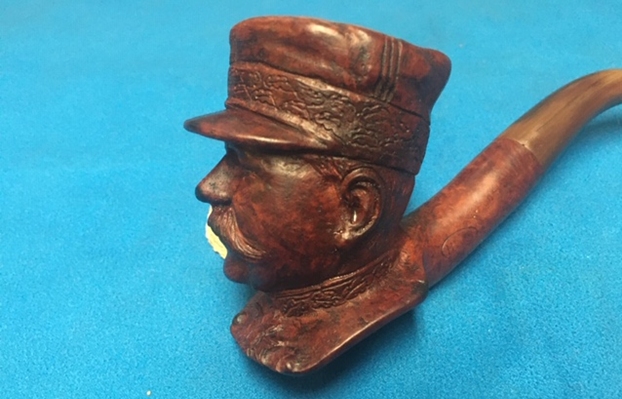
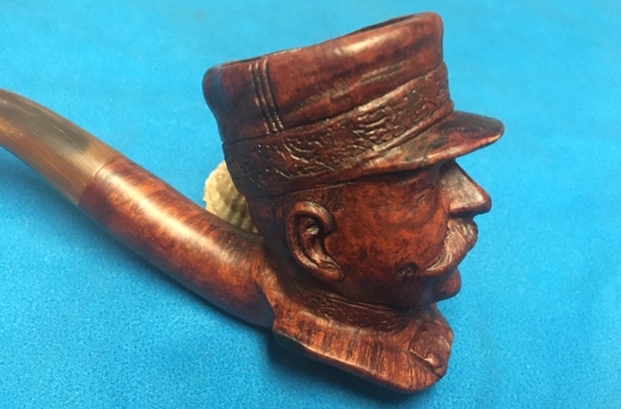
This is a restoration I have been waiting for – an HWB Modele Depose Figural Head


Blog by Steve Laug

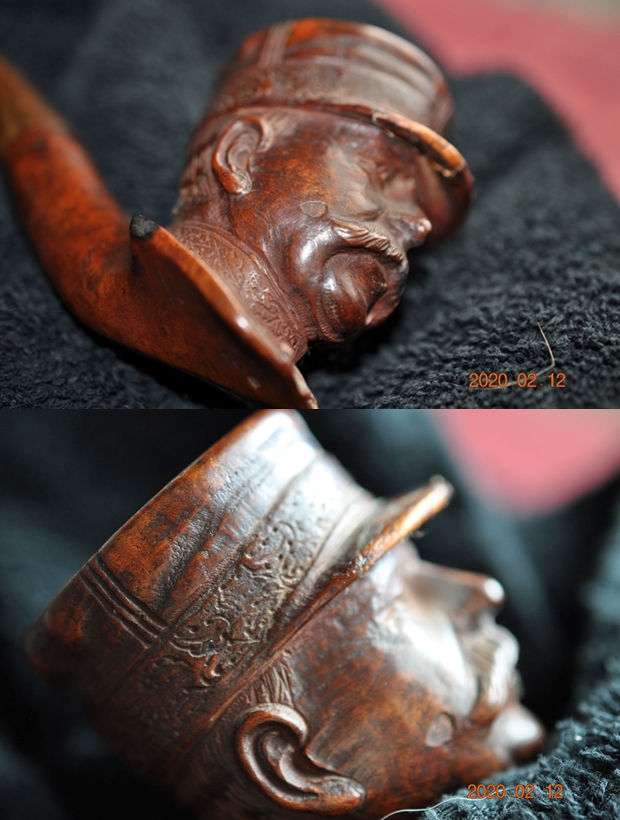
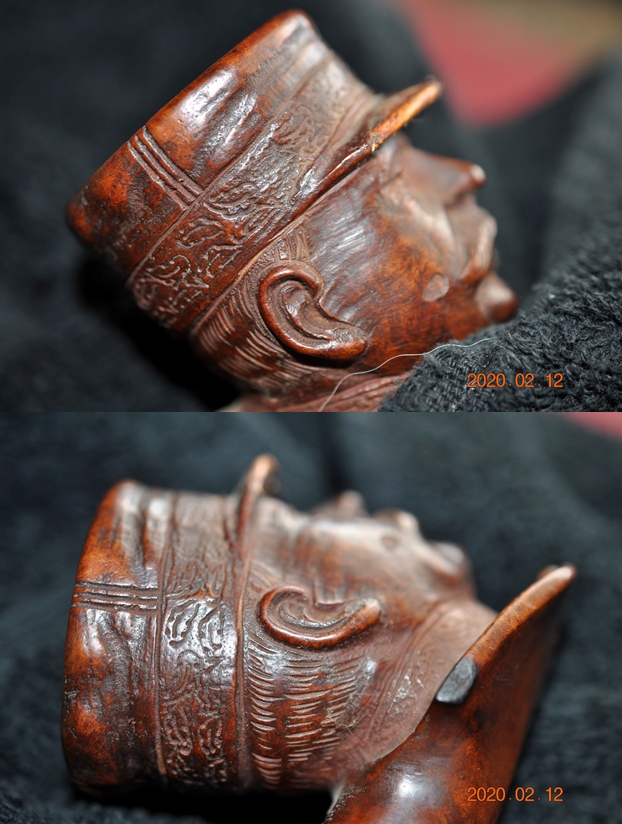
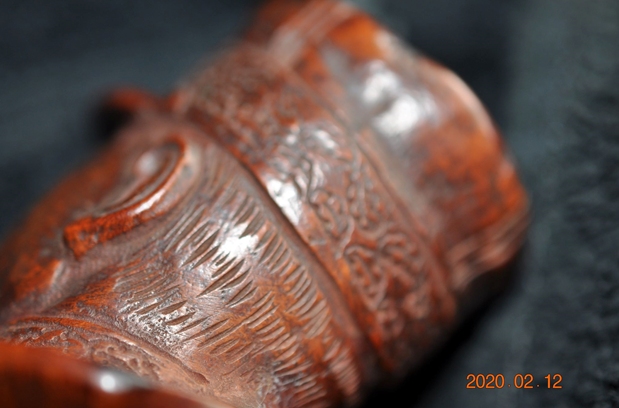
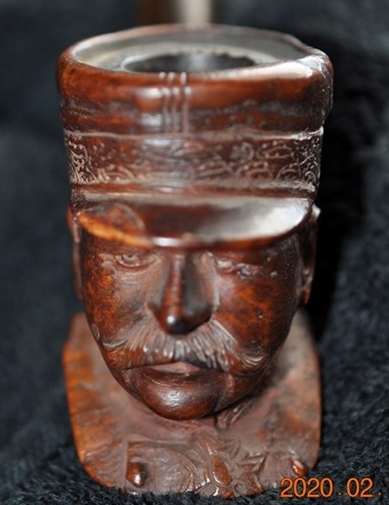
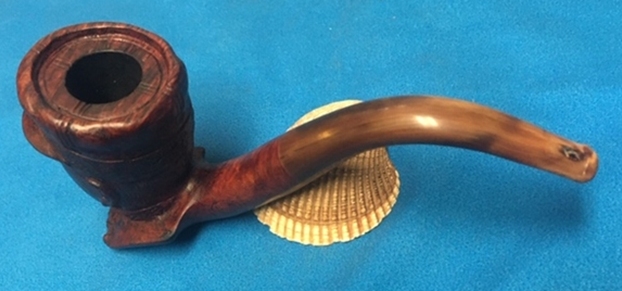
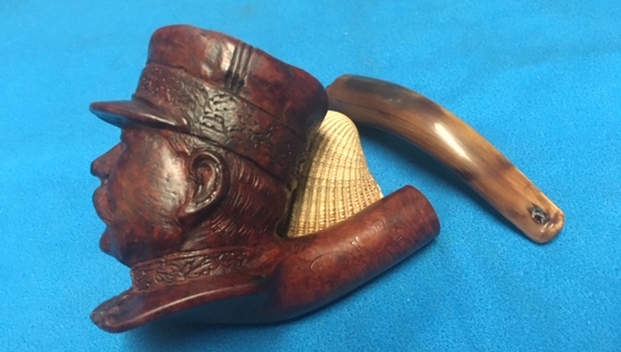
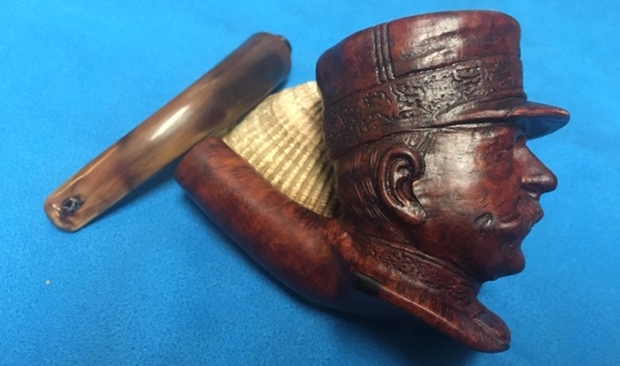
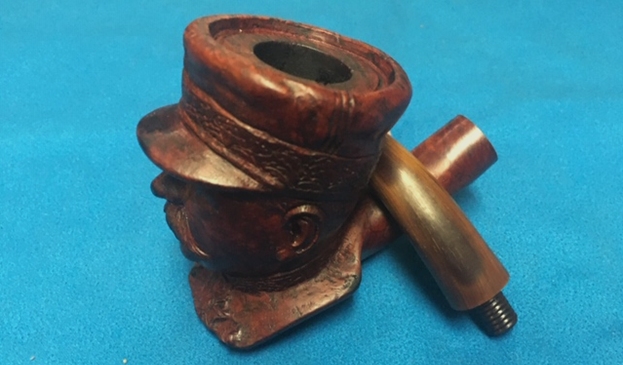
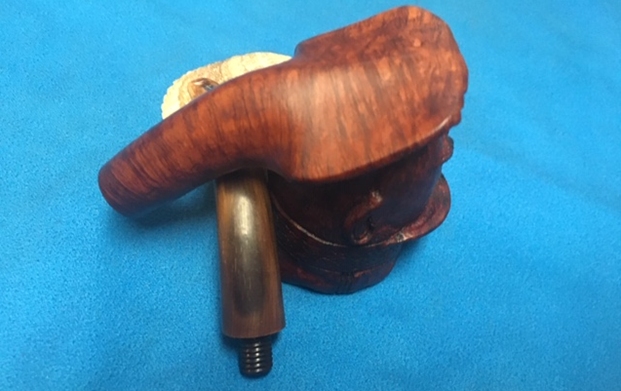
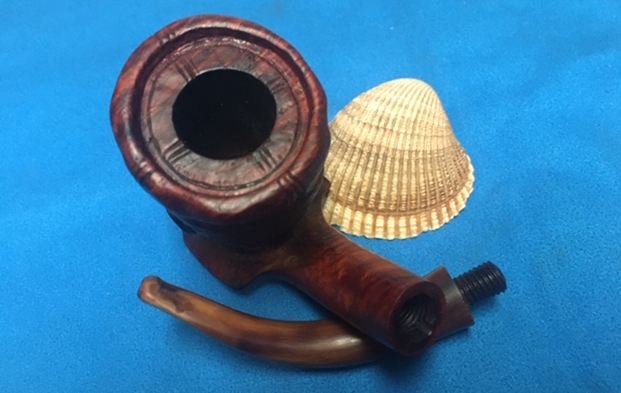
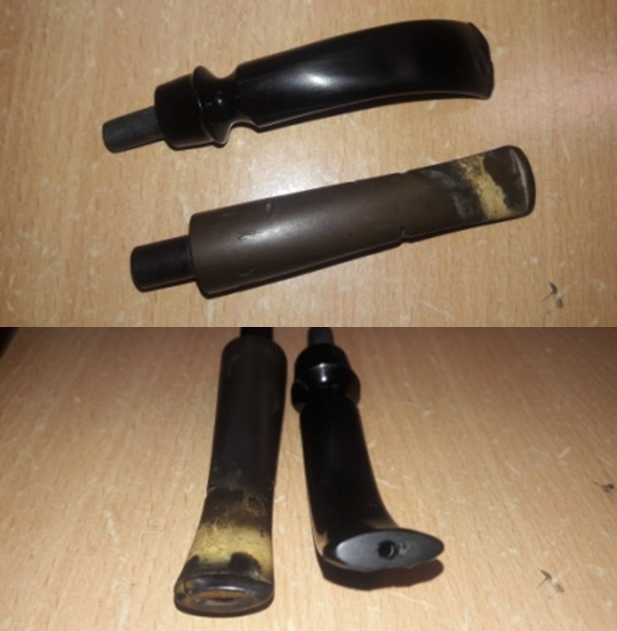
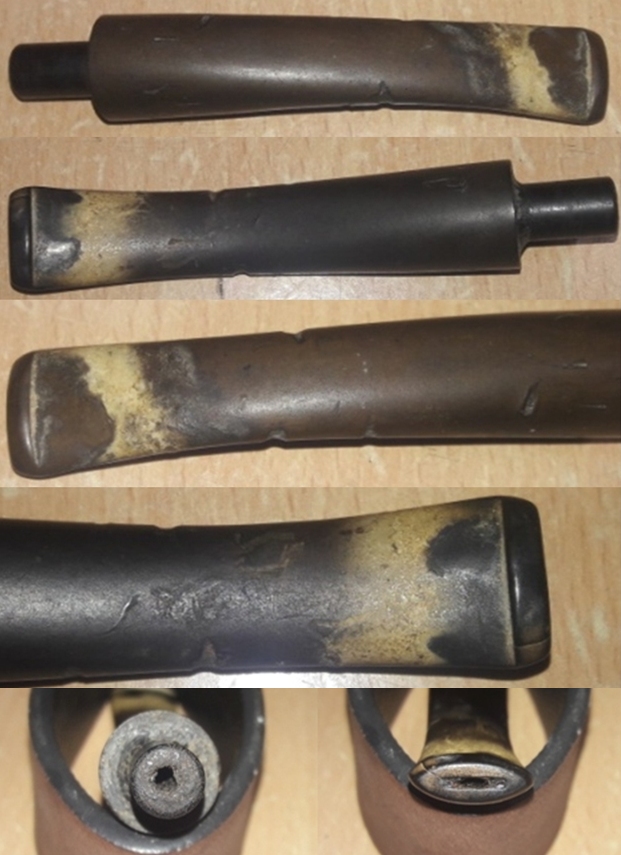
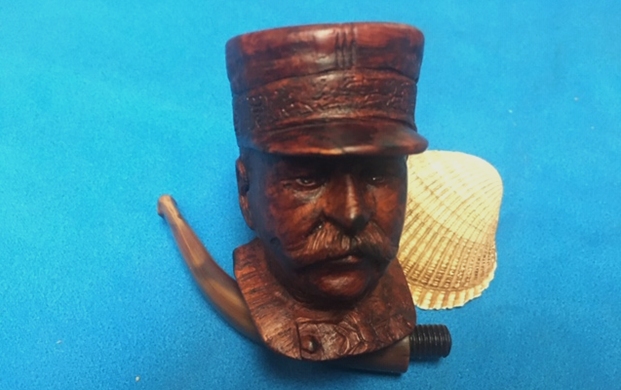
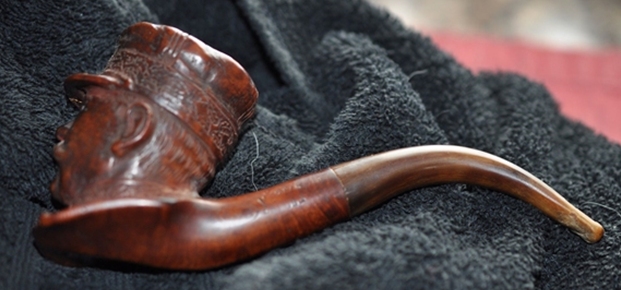
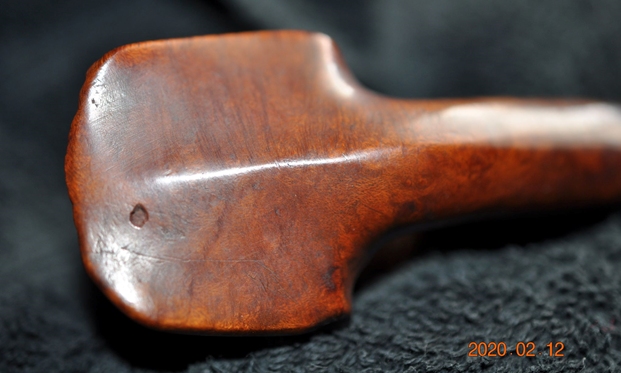
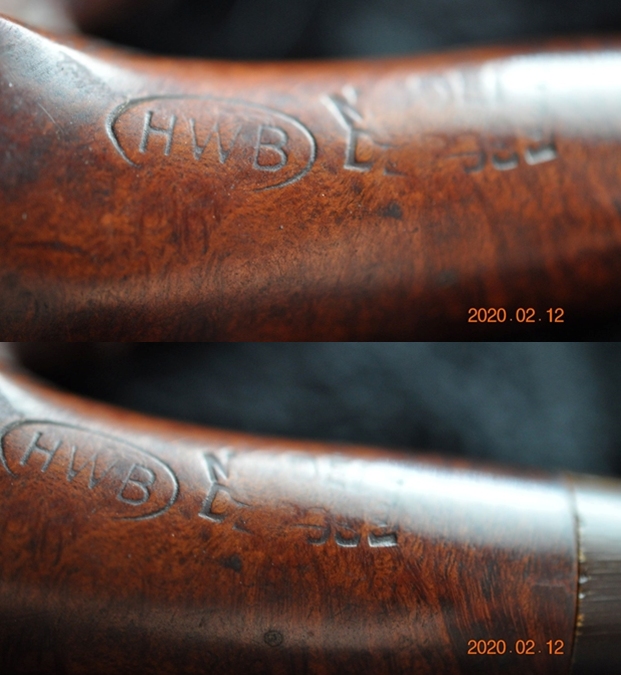
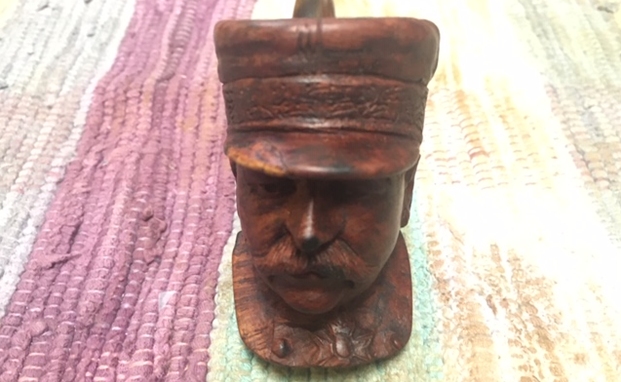
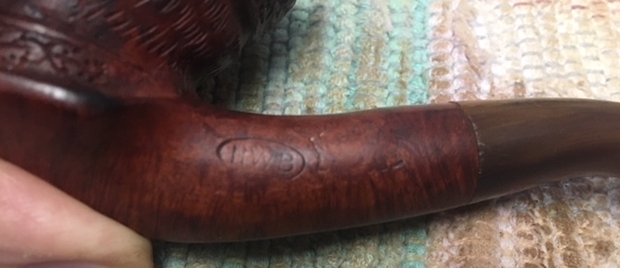
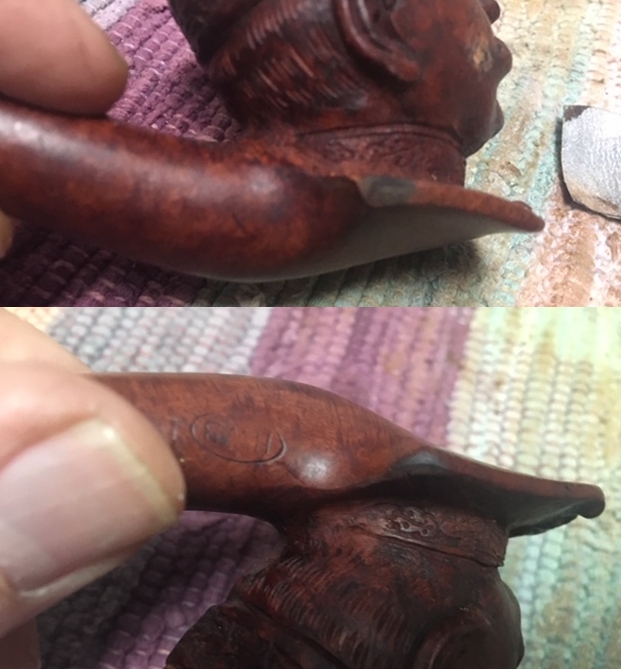
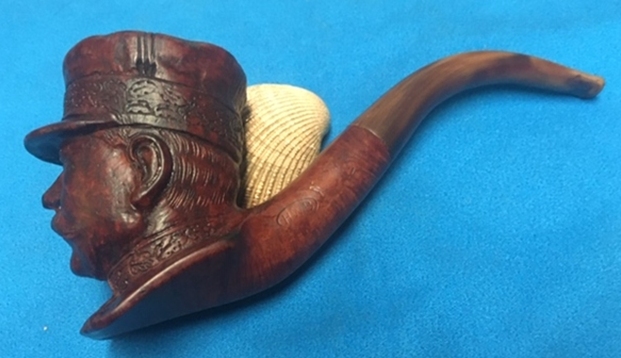
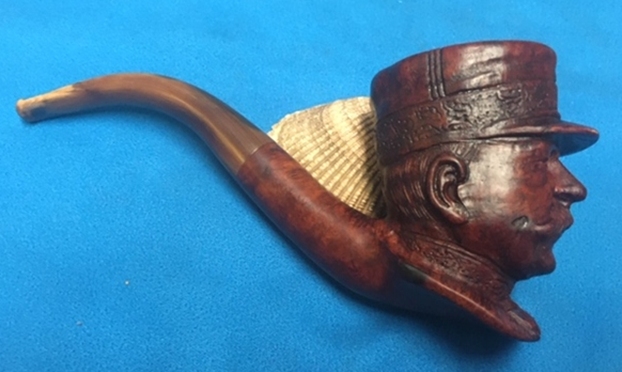
The next pipe on the worktable is an incredibly detailed carved figural head that has a lot of character in the well carved features that Jeff picked up from an auction in the Midwest of the US. It has a tapered horn stem that has a threaded tenon that screw into the shank. The finish is smooth under the carved head and the shank and heel of the bowl. There appears to be some nice grain around the bowl. The curves of the shank and stem give the pipe a sense of true dignity. The pipe is stained with various hues of brown. The pipe is stamped with HWB in an oval followed by Modele Depose on the left side of the shank. There is no other stamping on the bowl or shank of the pipe. The pipe is far from being a collectible decorative piece and was obviously an earlier pipeman’s favourite smoker. The finish was very dirty and tired looking with a lot of grime and oils ground into the sides of the bowl. There was a thick cake in the bowl overflowing with tars onto the rim top. There is also some darkening on the inner edge of the rim top. There was repaired damage on the bill of the hat and there were also burn marks on the back corners of the heel of the bowl. The tapered horn stem is heavily damaged with a crack in the left side near the shank junction and both the top and underside of the first inch of stem is well chewed with a bite through on the top side. The button is worn down and the sharp edge all but flattened. Because of the uniqueness of this particular pipe Jeff took a lot of photos of the pipe before he started his cleanup work. Jeff took photos around the bowl from various angles to show the well done carving on this pipe. You can see in the first photo below the repair that had been done to the right side of the bill of the hat somewhere in the pipe’s journey. It was well done and solid. Look at the details in the carving. The fancy hat band on the hat with the triple lines on the front/back/sides that are carried over the rim top are an example. Note the cross medal on the front of the collar. Note the features of the hair on the head and the moustache. It is a well carved piece of briar. Jeff captured the condition of the rim top. It is hard to see but the triple lines on the outer edges continue across the rim of the bowl. You can see the cake in the bowl and the lava build up on the rim top. It was a well-loved and oft smoked pipe.Jeff also took a photo of the heel of the bowl. The briar is quite beautiful as you can see. The base or heel is spade shaped and flows from the shoulders of the bust above. The base is not flat but it can be balanced as a sitter. Quite a beauty. You can also see the flaw in the briar toward the front of the bowl. He also took photos of the stamping on the shank. It includes an HWB in an oval followed by the words Modele Depose. I have been unable thus far to find out any information on the HWB brand but I did a quick search of the translation of Modele Depose. I included that below
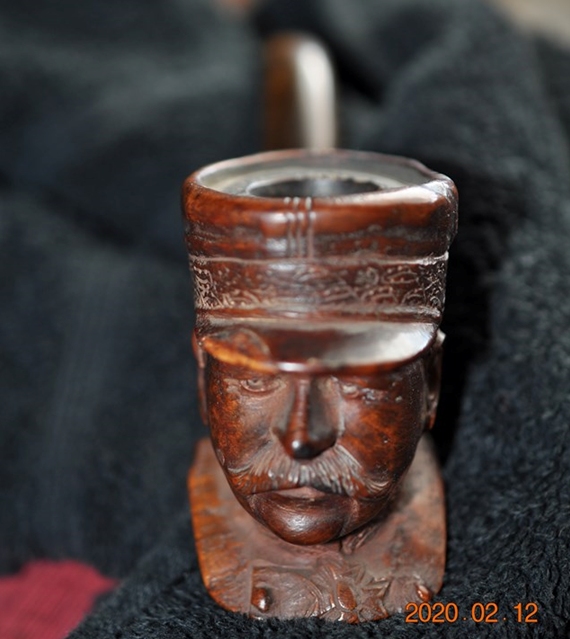
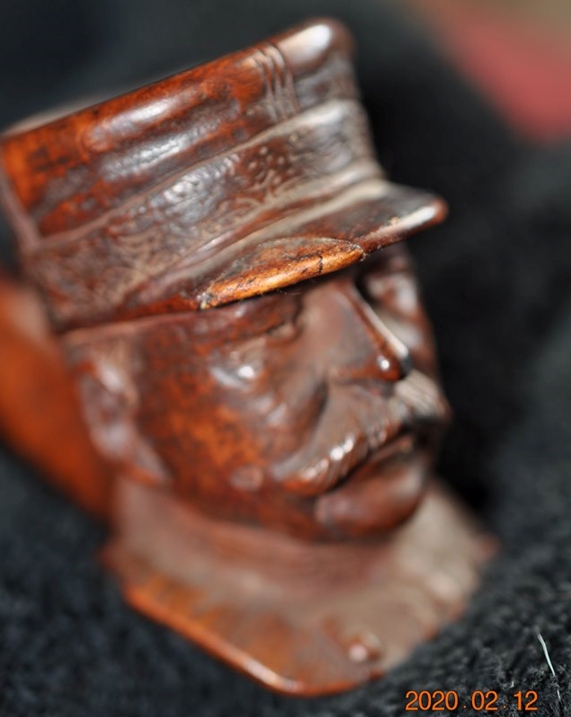
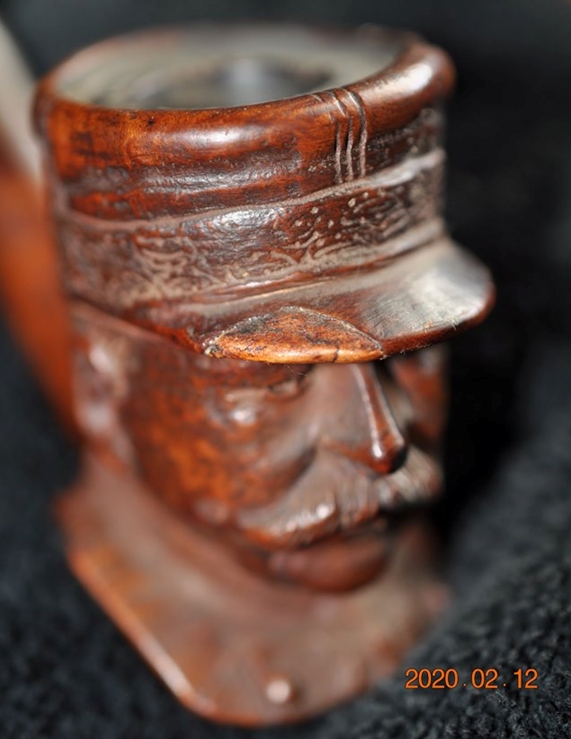
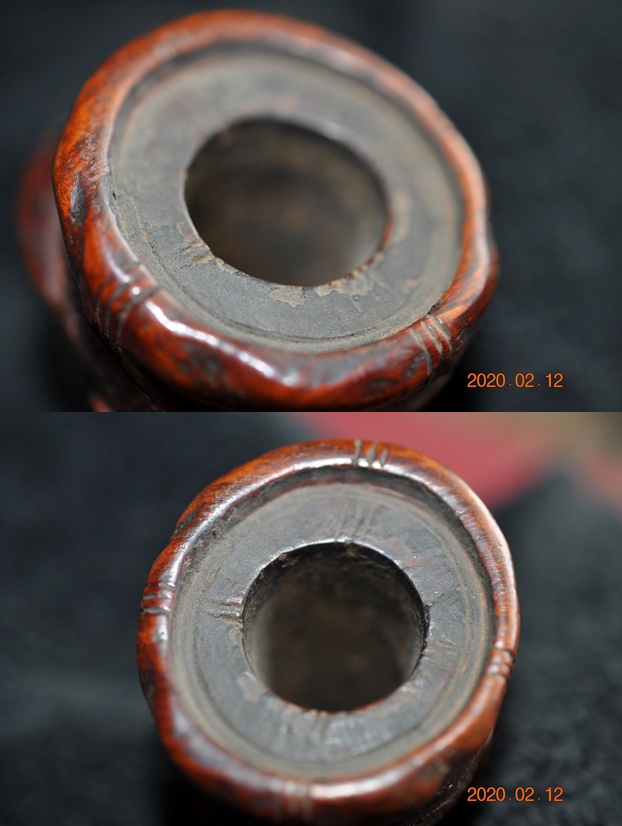
https://www.linguee.com/french-english/translation/mod%C3%A8le+d%C3%A9pos%C3%A9.html

Modèle Déposé noun, masculine it translates as registered design and less commonly as registered pattern.

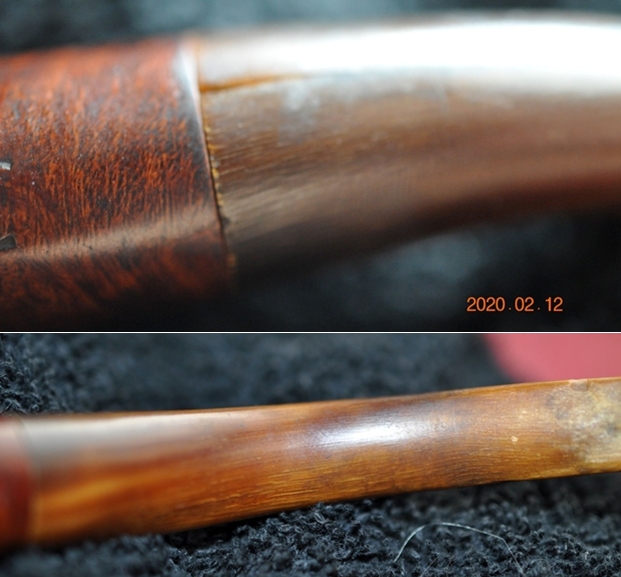
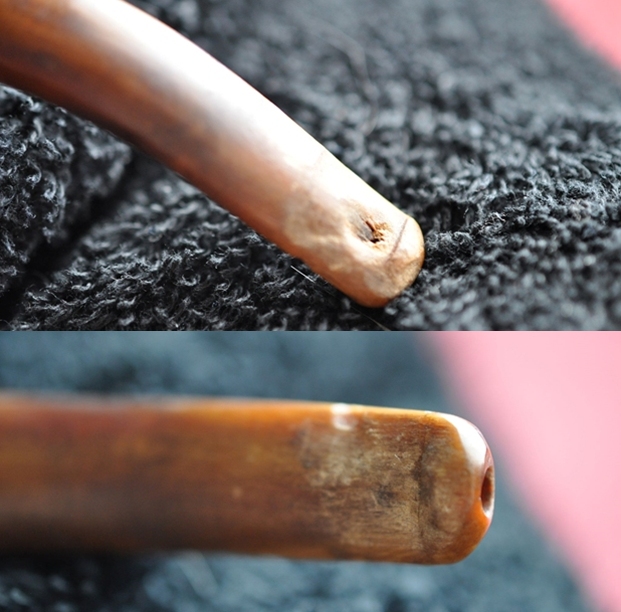
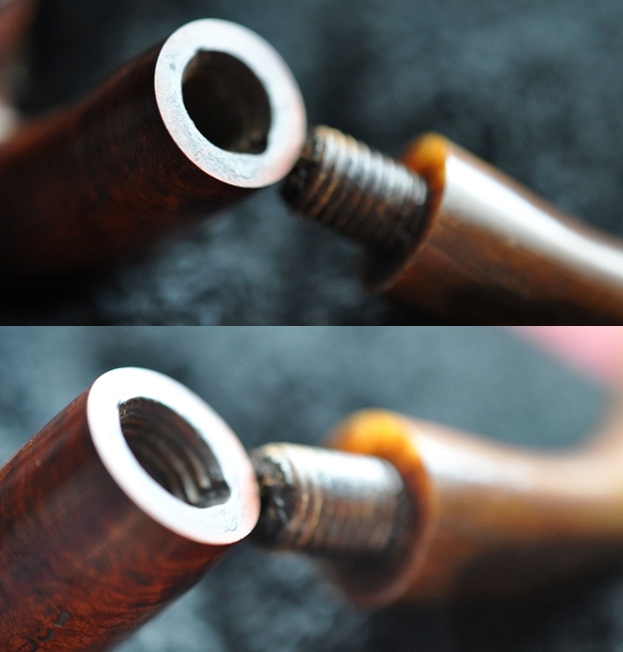
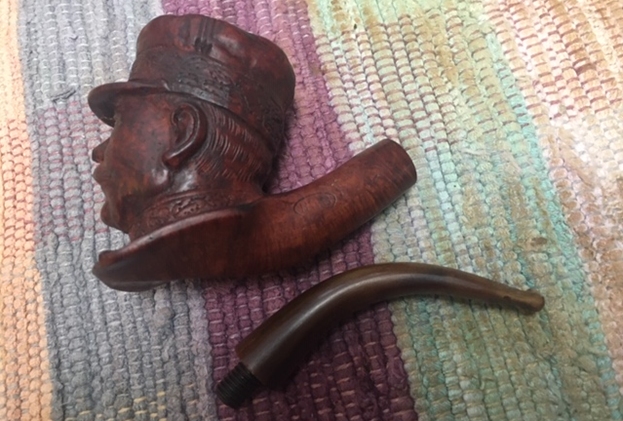
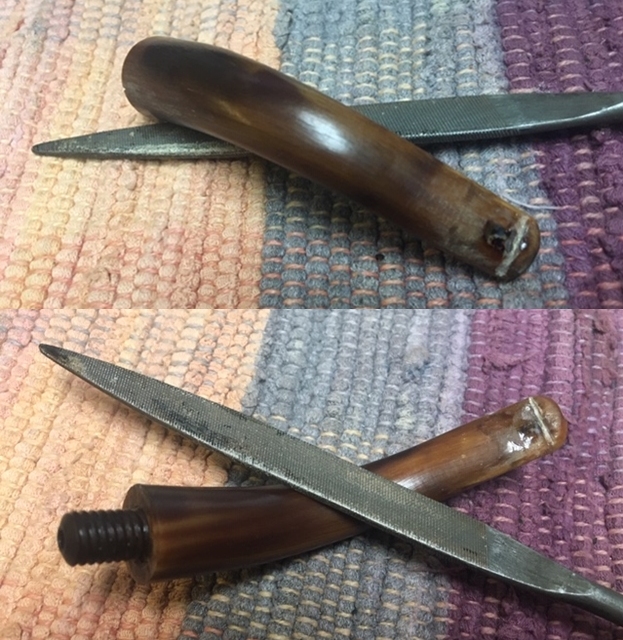
This is the first clue that leads me to think that the pipe is French made. As I examine the pipe and get input there will be more clues.The next photos reveal the well-used condition of the horn stem. It was very dry and had a crack at the shank/stem junction as seen in the first photo. The second photo shows a long view of the stem and you can see the striations of the horn on the underside. The final two photos below show the chewed end of the stem just ahead of the button. On the top side of the stem there is a hole all the way through to the airway below. There is quite a bit of damage to the stem that will need to be addressed. For his final photos of the pipe before cleaning Jeff unscrewed the stem from the shank and took pictures. The photos show the condition of mortise and tenon. It actually looks to be in excellent condition.Before turning to my restoration of the pipe I decided to see if I could figure out who the figure depicted. Both Jeff and I wondered if it was not General Charles de Gaulle. I posted a query for help on the Facebook group – Tobacco Pipe Restorers and received a lot of responses. The options included General De Gaulle of France, Philippe Pétain (the Lion of Verdun) France, Marshal Joseph Jacques Césaire Joffre of France, Marshal Ferdinand Foch of France, Otto von Bismarck of Germany and even a suggestion that it was a Victorian Baseball player. I thank each of those who responded as each one took me closer to a solution.
Here is what I have learned so far:

  1. The figure is probably French and definitely military.
  2. The figure is from the period of or directly after World War I.
  3. The figure was a hero of some sort, a key figure that was commemorated by the carving.

That is what I know so far. That is progress. During the night I received a response from Aaron Comsia on Facebook Tobacco Pipe Restorers Group that noted the medal around the neck of the figure. He included the following photo of French medal matching the one on the figure’s neck. I have included that below.The medal was another clue further confirming a French connection of both the figure and the pipe. The stamping pointed to France and the Medal on the neck of the figure pointed to France. Now I knew that I could eliminate the German figures and the Baseball player. That left me with four options – General de Gaulle, General Philippe Pétain, Marshal Ferdinand Foch and finally Marshal Joseph Jacques Césaire Joffre. I decided to find photos of these figures (some I picked up on the web and others were shared by those from the group who put the person forth in response to my question). I will work through them in order and narrow the field further.

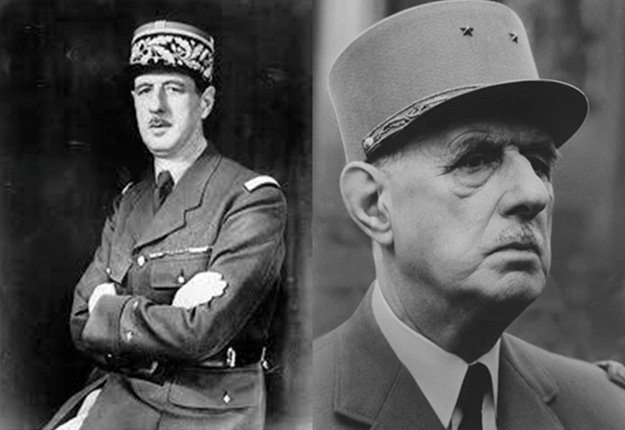
General Charles de Gaulle was the choice of three of four of the responders to my question for who people thought the figure represented. I found a younger and an older photo of General de Gaulle. Comparing these photos to the carved figural above I note some dissimilarities that take de Gaulle off the list. These include a longer narrower face, a smaller and thinner moustache and the large prominent nose. The carved figure had a rounder, fuller face and a thick moustache and a smaller nose. The hat is also different in these two photos and in others that I scanned on the web. I am as certain as I can be that the figure is not General Charles de Gaulle.
The second choice that came up more than once was General Philippe Pétain. He had been acknowledged as having saved the French Army in 1917 at Verdun. His exploits there earned the moniker ‘Lion of Verdun’. He was a prominent figure in French political and military history. During World War II he became part of the Viche Government (working with the Nazi’s in France). For many this would have made him a collaborator. Here are two photos of Pétain that I found online.Comparing these photos to the carved figural above I thought for some time that I had found the right historical character to match the pipe. Looking at the photo the hat is the same as the carved head. The nose and moustache are close for sure but there is some dissimilarity as well when I studied the face. The eyes on the photos are much closer set with the nose than on the figure. The jawline is also different in that the carved figure seems to have a more round chin and the upper jaw seem to extend over the lower much more than in the photos. Given those features and his connection to the Vichy Government I think I can rule out General Philippe Pétain personage of the carving. To be honest this was a hard one to let go of for me.

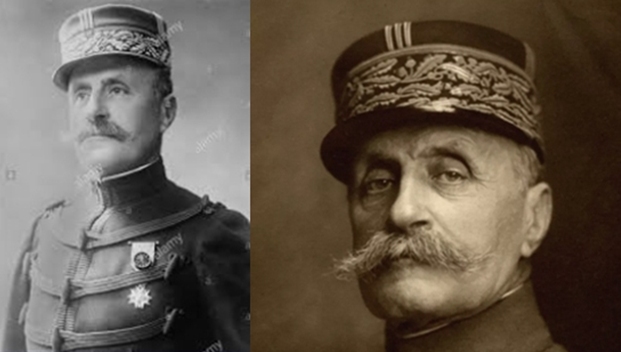
The third choice that came up several times was Marshal Ferdinand Foch. Marshal Foch was a noted French commander during World War I. One respondent on the group, Taeve Schaer commented that many carvers in St.Claude, France (they call themselves the cradle of pipemaking) did these pipes. Many of the carvings were of Marshal Foch. Several responders included the photo of Foch on the right. I found the second one and included them both here.Comparing these photos to the carved figural above I thought for some time that this was a good possibility. Taeve Schaer’s comment about many carved figural pipes of Marshal Foch were made in St. Claude. Looking at the photo the hat is the same as the hat on the carved head. The nose and moustache are close for sure but there is some dissimilarity as well when I studied the face. The drooping brows and eyes on the photos are different than those on the figure. The jawline is also different in that the carved figure seems to have a more round chin and the upper jaw seem to extend over the lower much more than in the photos. The cleft in the chin is also notably missing in the carving. The moustache is longer and more ragged than the cropped one on the carved figure. Given those features I think I can rule out Marshal Ferdinand Foch as the personage of the carving. This was easier to let go of than Pétain.
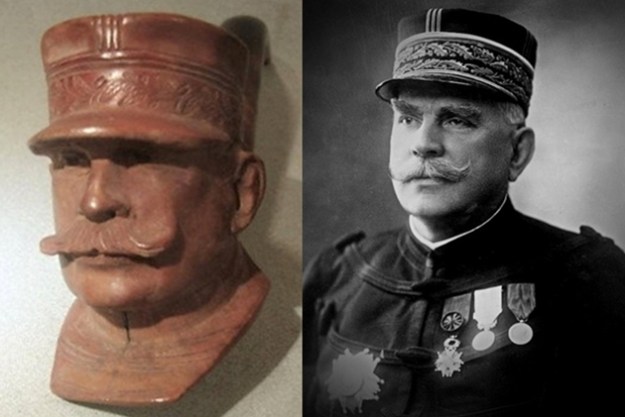
The fourth choice that came to me was that the figure was Marshal Joseph Joffre. Chris van Hilst suggested Joffre and included a photo of another carved figural pipe of Joffre from 1917. Marshal Joseph Jacques Césaire Joffre (12 January 1852 – 3 January 1931), was a French general who served as Commander-in-Chief of French forces on the Western Front from the start of World War I until the end of 1916. He is best known for regrouping the retreating allied armies to defeat the Germans at the strategically decisive First Battle of the Marne in September 1914.

I used the photo of the figural of Joffre and picture that I found online. I have included them both below. You can see the similarity between that figural and Joffre for sure. But did it match the figural that I was working on? I have included a frontal view of the figural I am working on below these two photos. What do you think?From my perspective the facial features match this choice the best. The jawline, the nose, the moustache, the set of the eyes and the hat as well as the medal on the chest of the figural and the picture of Joffre all point to the similarities between Joffre and the pipe that I have. I am convinced that the pipe is indeed Marshal Joseph Jacques Césaire Joffre. I am sure some of you will not be convinced but that is my logic.
I did some more reading about Joffre on Wikipedia (https://en.wikipedia.org/wiki/Joseph_Joffre). It included the previous information I included above but also the following:

…His political position waned after unsuccessful offensives in 1915, the German attack on Verdun in 1916, and the disappointing results of the Anglo-French offensive on the Somme in 1916. At the end of 1916 he was promoted to Marshal of France, the first such promotion under the Third Republic, and moved to an advisory role, from which he quickly resigned. Later in the war he led an important mission to the United States. His popularity led to his nickname Papa Joffre.

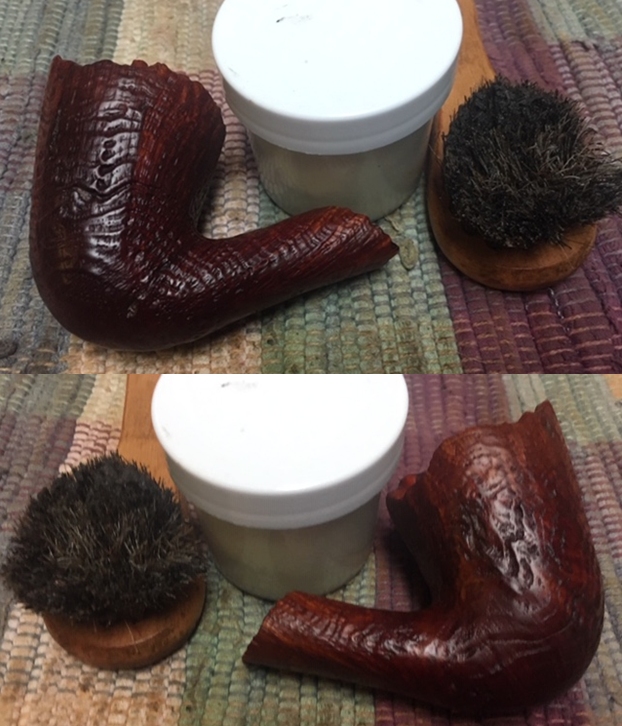
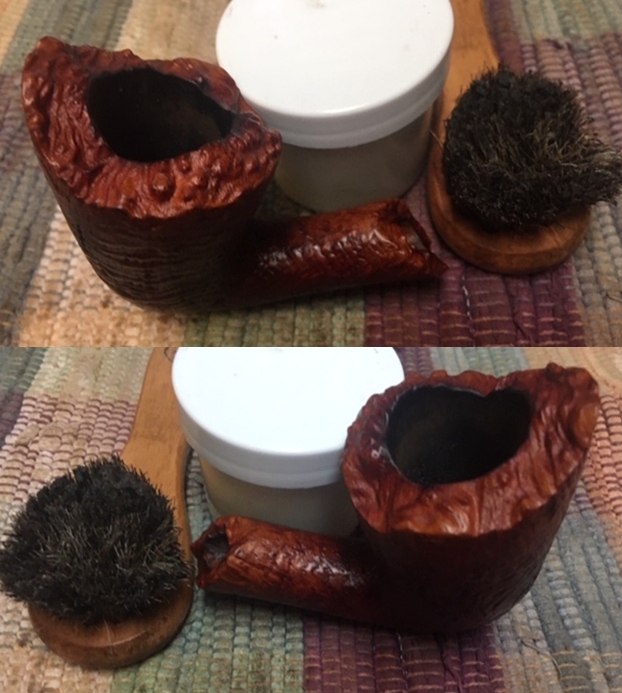
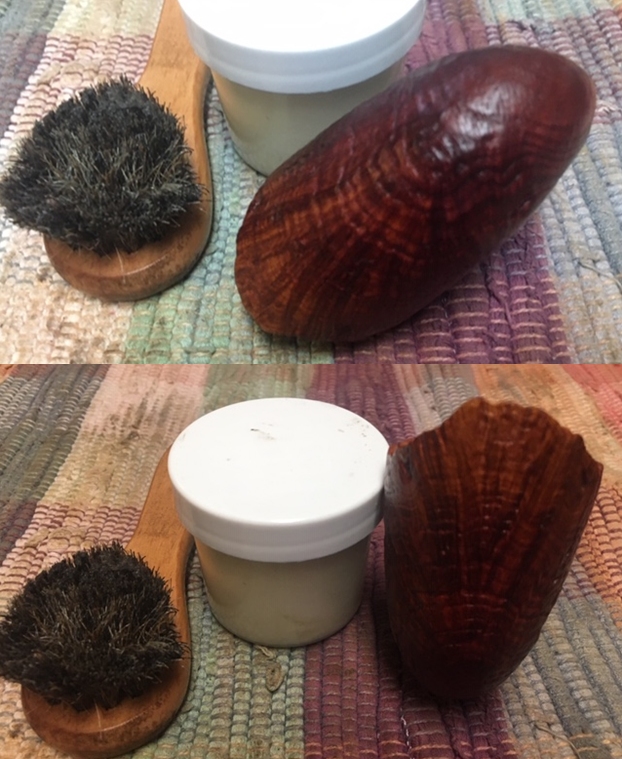
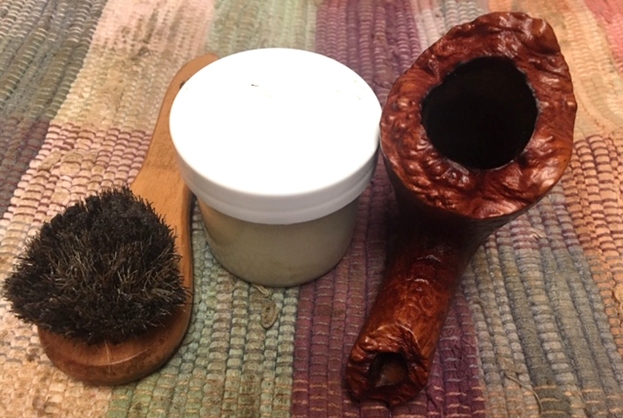
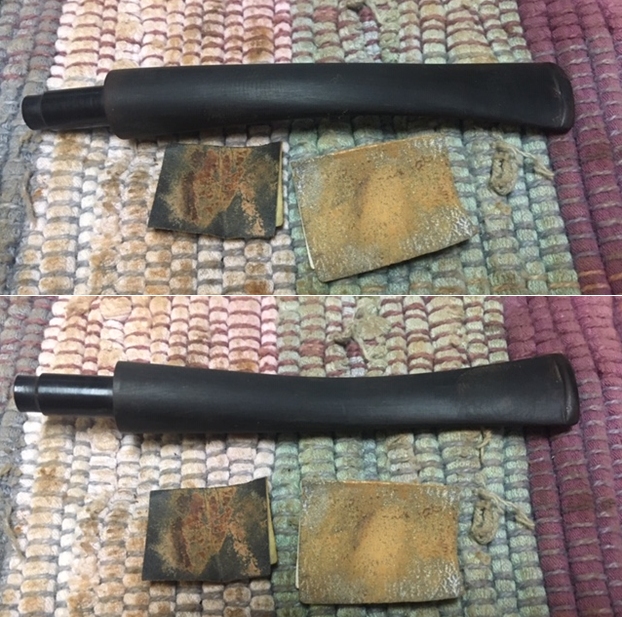
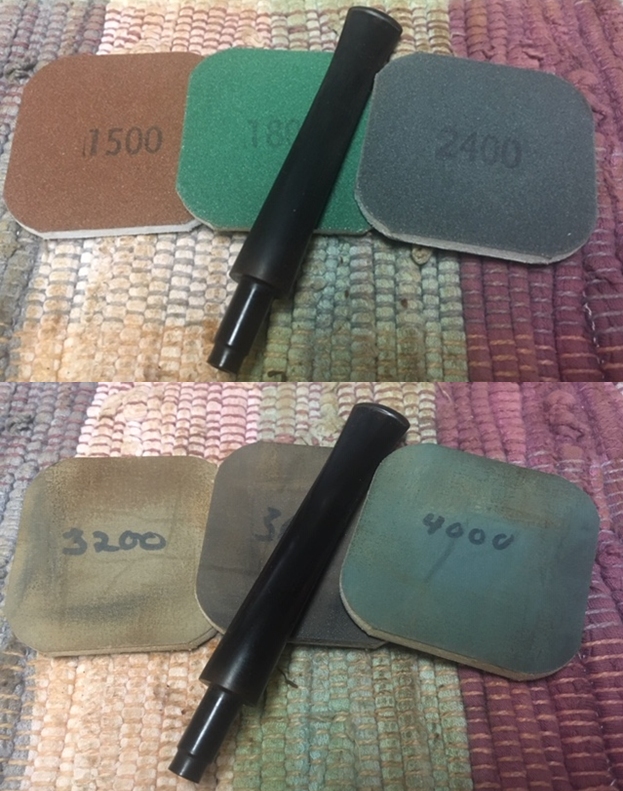
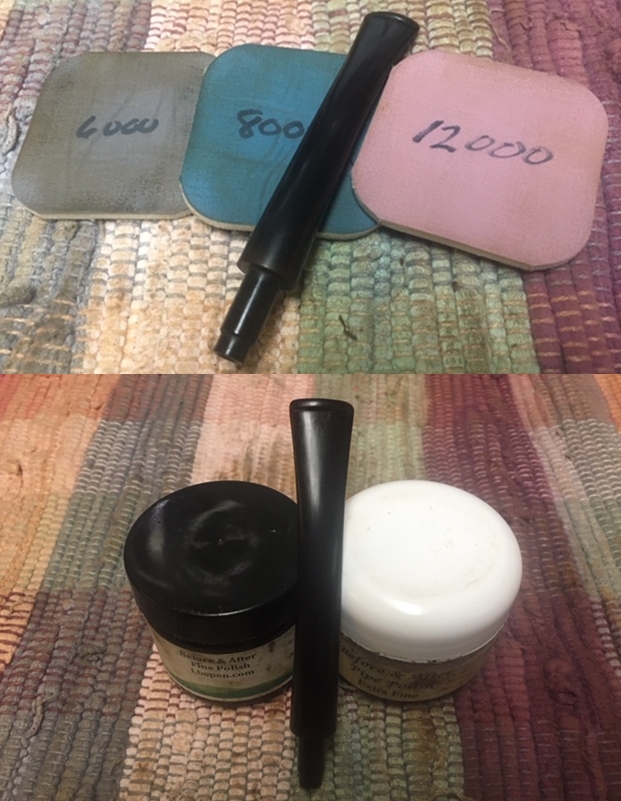
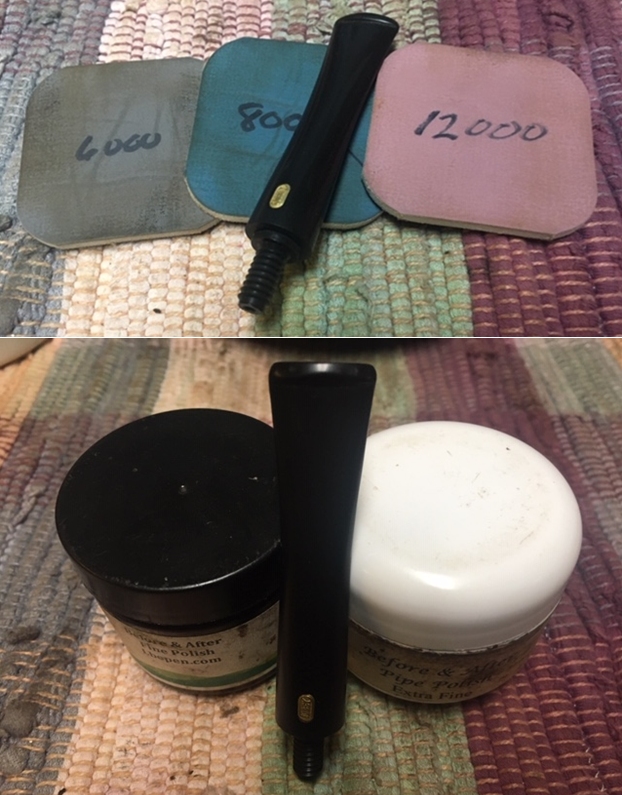
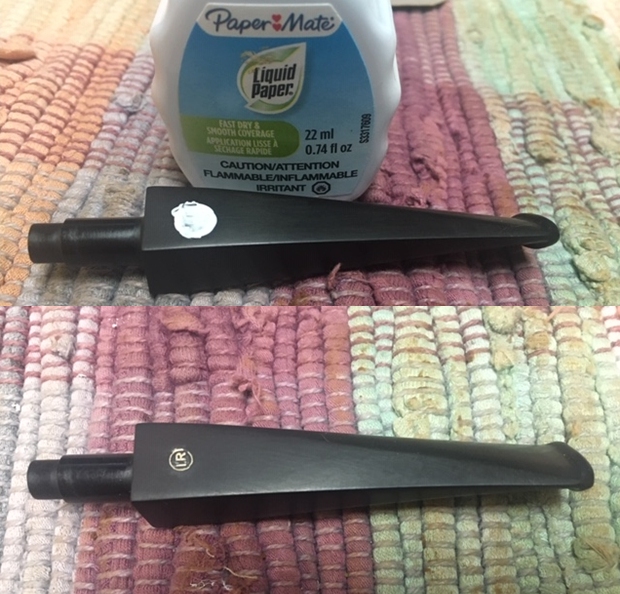
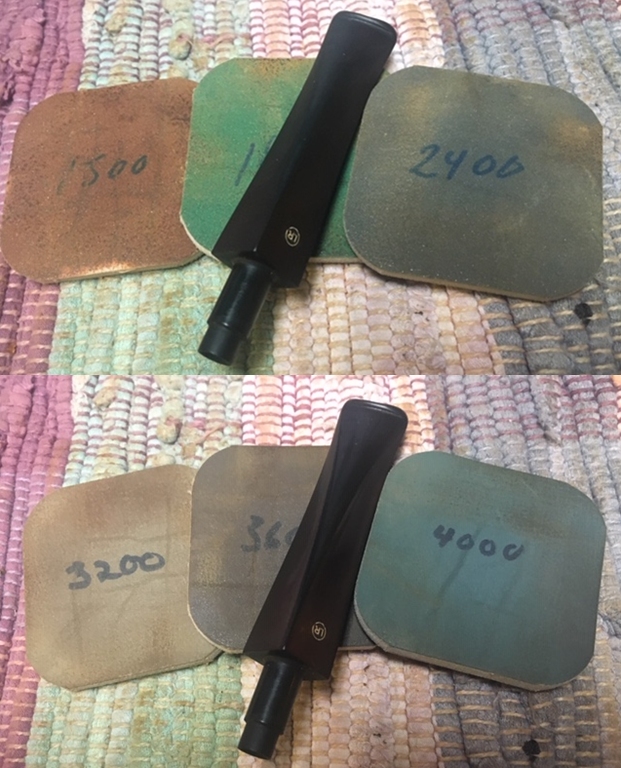
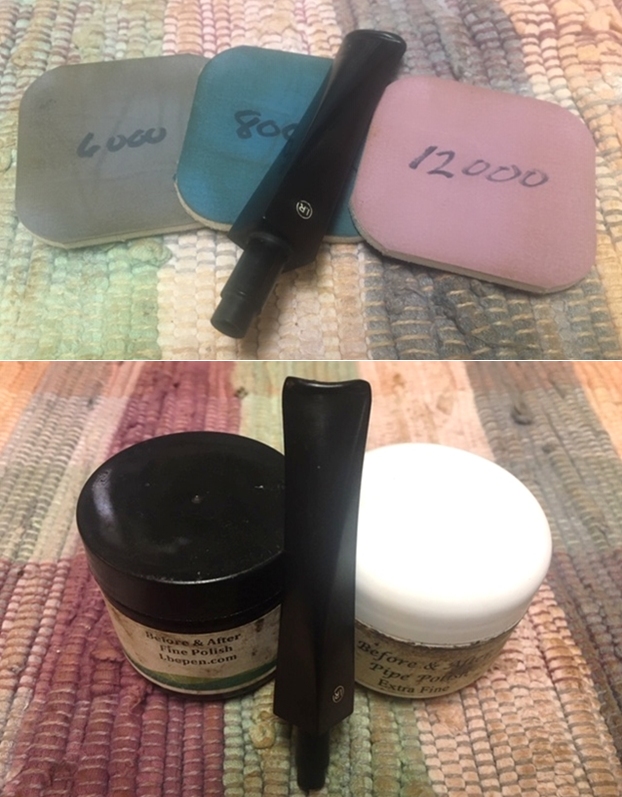
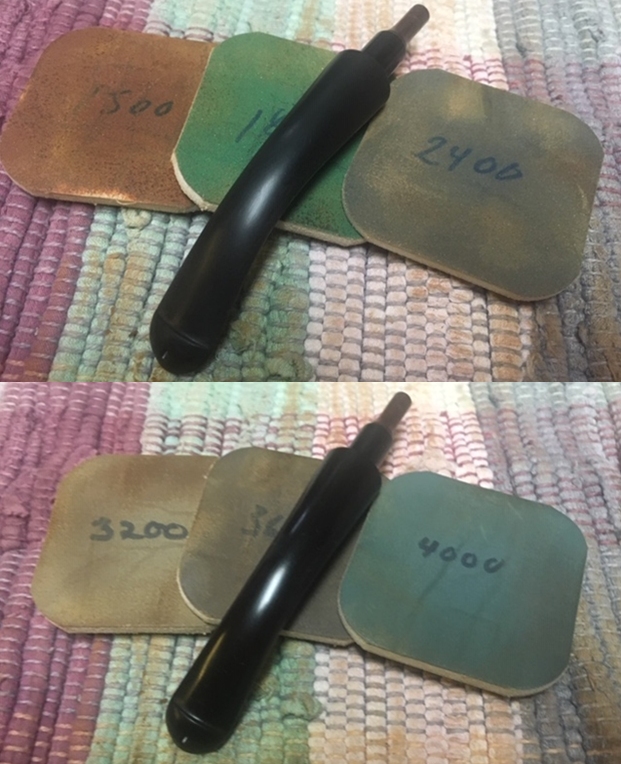
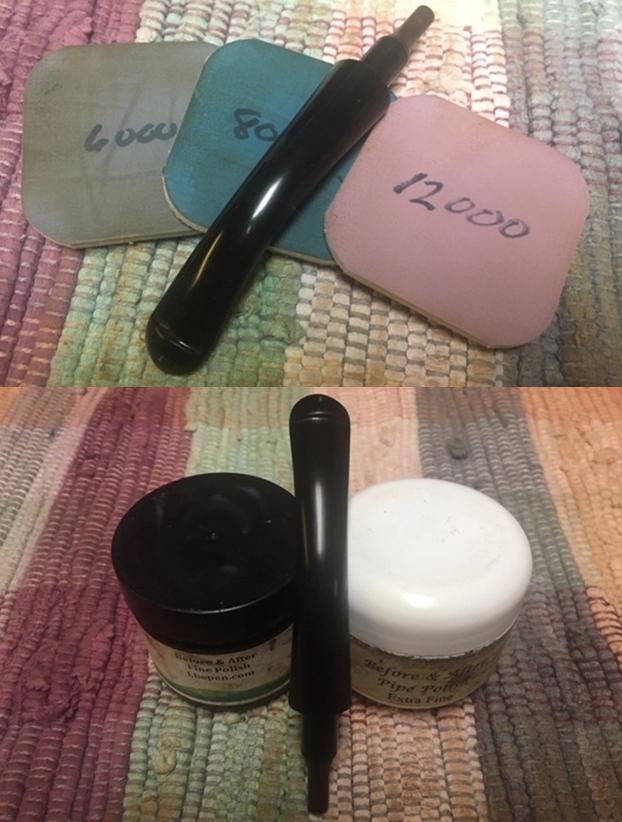
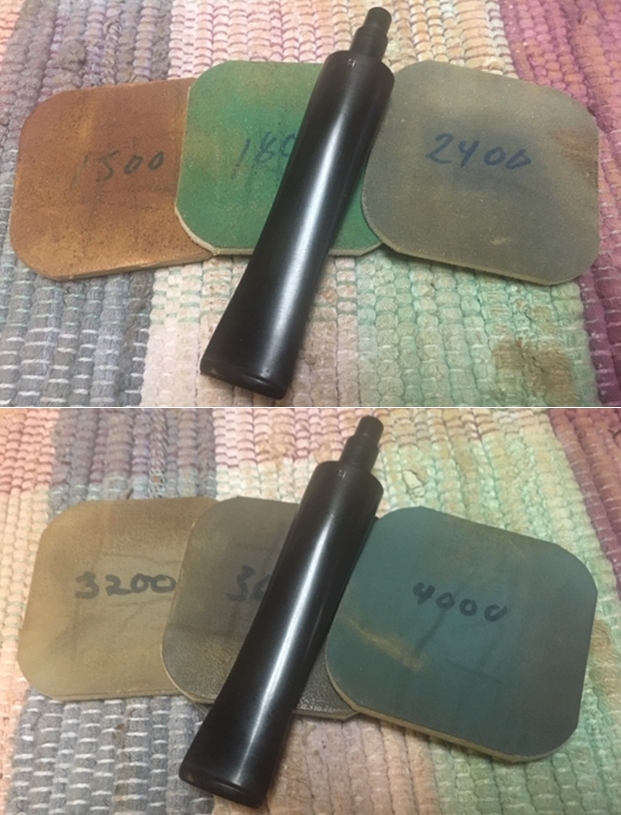
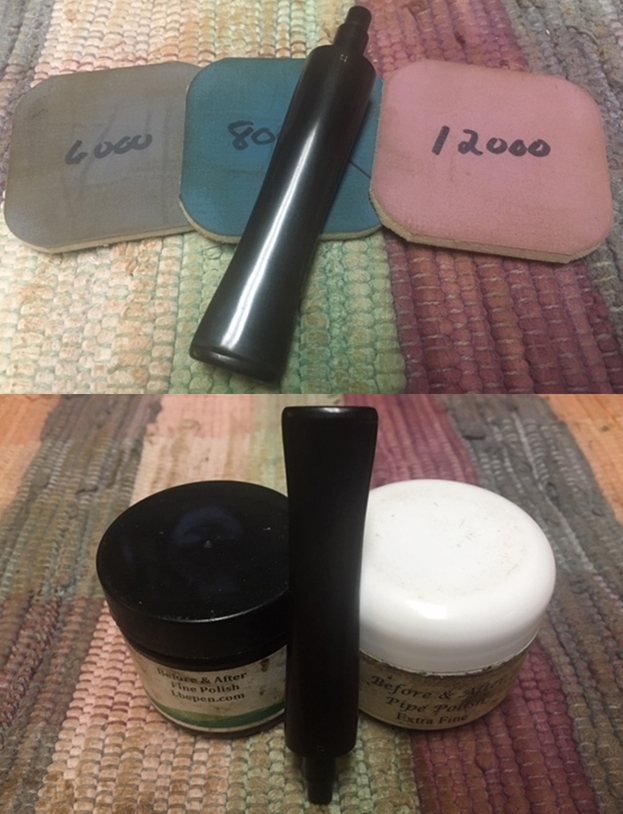
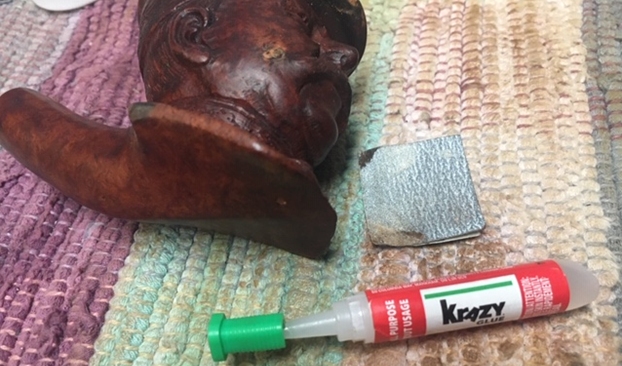
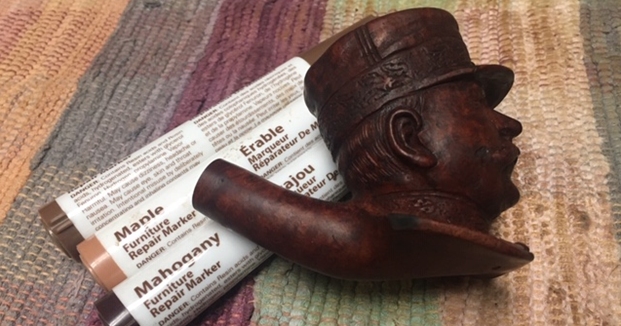
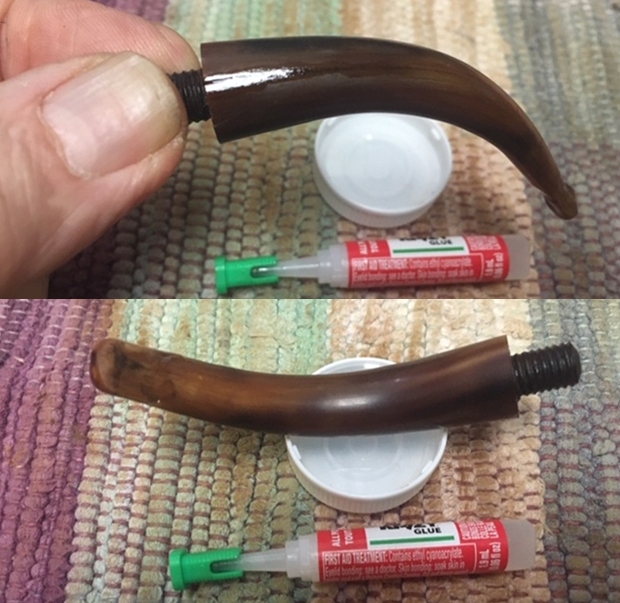
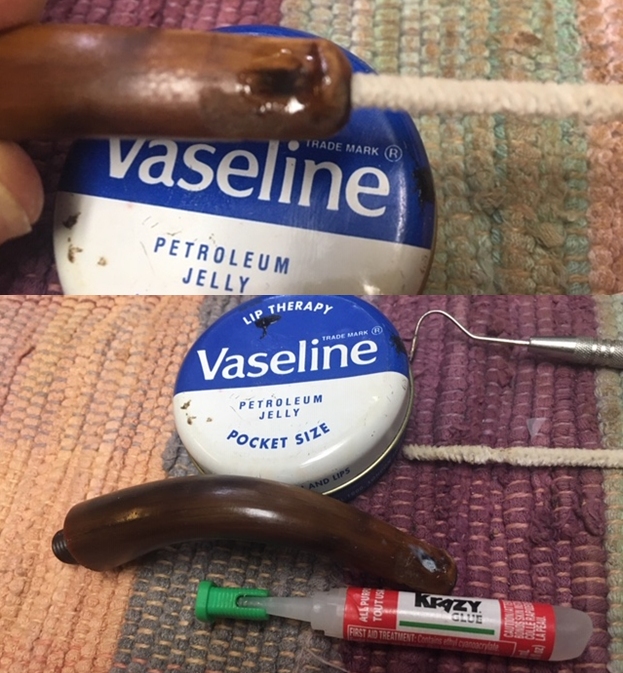
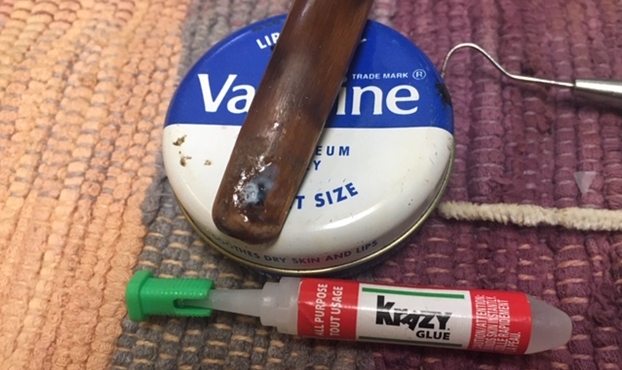
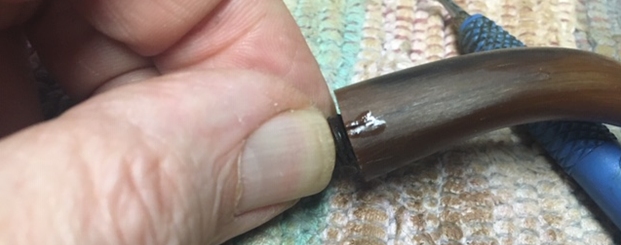
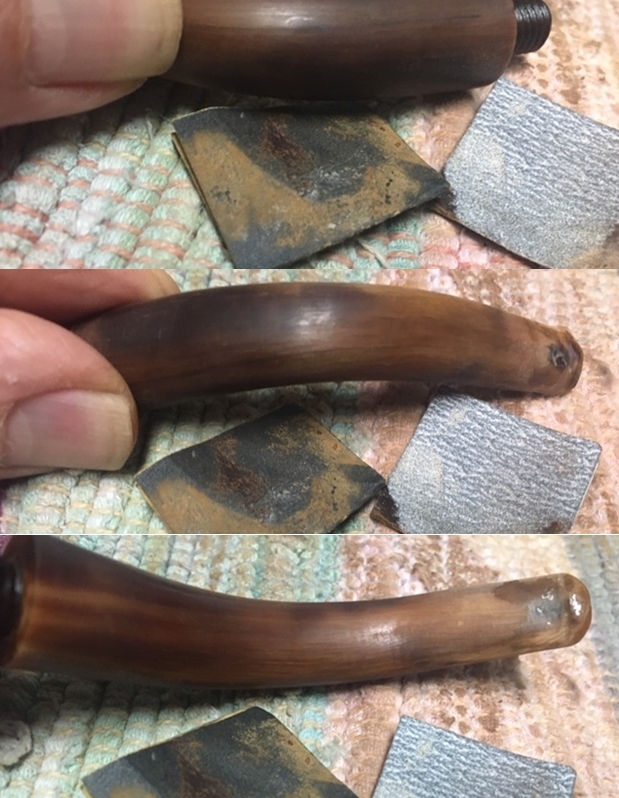
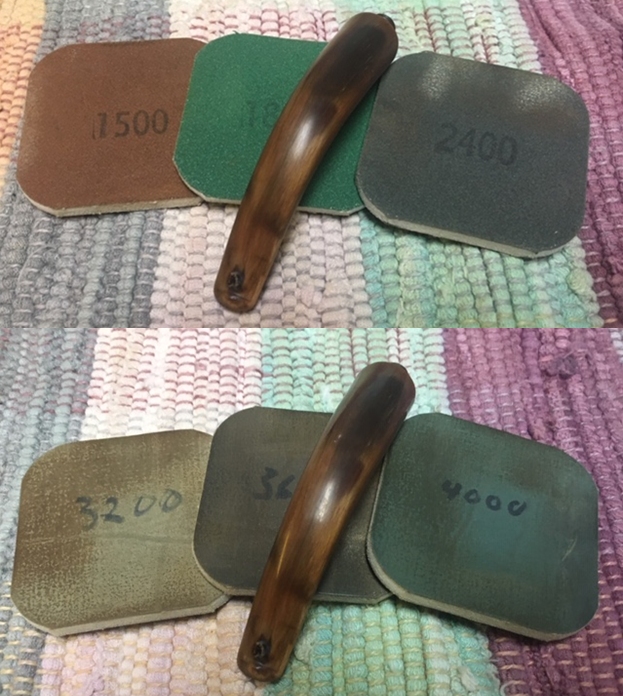
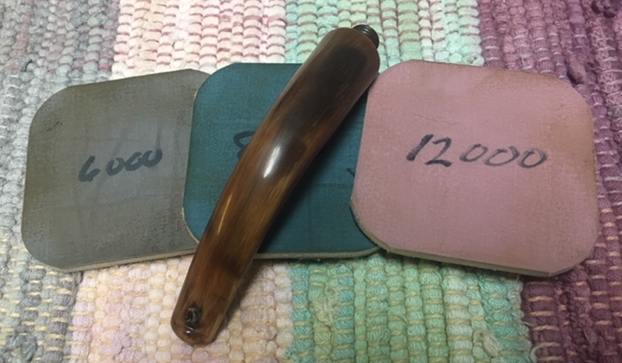
It makes good sense to me that a pipe carver in St. Claude with HWB would so beautifully capture the features of Papa Joffre. Now it was time to do my part of the restoration of this pipe. Jeff had done his usual thorough cleanup of the pipe. He had reamed it with a PipNet reamer and cleaned up the remnants with a Savinelli Fitsall reamer. He cleaned out the internals of the shank and stem with alcohol, cotton swabs and pipe cleaners. He carefully scrubbed the grime and oils off the surface of the briar with a tooth brush and undiluted Murphy’s Oil Soap. He rinsed it with warm water and dried it off with a soft towel. He set it aside to air dry before putting it back together. When he brought it to Oregon on a recent trip we made pre-COVID-19 I was stunned at how well it had cleaned up. I have wanted to work on it for a while now but somehow had mislaid it. I found it recently and brought it to the worktable. Here is what it looked like before I started. I took close-up photos of the bowl and rim top and stem to show how much better they looked. You can see the lines from the front, back and sides of the hat carried across the rim top. The briar is clean and quite beautiful to me. The issues with the pipe really involved the stem more than anything else. There was the split in the left side at the shank and the bit through and gnawing on the top and underside of the stem. The stem was really a mess and had been well used. That is where the lion’s share of my work would come.I took photos of the sides and front of the bowl to show the fine details of the carving now that it is cleaned up. The repair to the right front of the bill of the hat is also visible. It really is a well carved figural. I only wish I could find information on the initials HWB on the shank side. I took another photo of the stamping on the left shank side in hopes that it may register with a reader of the blog. I removed the stem from the shank and took a photo of the parts.Now it was time to start the restoration. I wanted to minimize the flaw on the right cheek. It appear to be damaged. I filled in with CA glue to lessen it slightly and feathered the edges with a corner of sandpaper. I used a folded piece of 220 grit sandpaper to smooth out and reduce the damage on the burned rear corners of the base. I touched up the repaired areas on the face, the heel edges and the bill of the hat with a mixture of Cherry, Maple and Mahogany stain pens. The three pens blended together to match the surround areas of the briar. I was happy with the look of the repairs.I worked some Before & After Restoration Balm into the surface of the briar with my fingertips and a horsehair shoe brush and q-tip to work it into the nooks and crannies of the carving. The product works to clean, enliven and protect the briar. I let the balm sit for ten minutes and then buffed the bowl with a cotton cloth to raise the shine. The photos show the carved bowl at this point in the restoration process. It almost looks oily at this point but that will soak into the briar as it sits while I work on the stem. I set the bowl aside at this point and moved on to address the issues with the stem. I cleaned out the crack on the left side of the stem and the chewed area on the underside of the stem and gave them both the first fill coat of clear CA glue. These were the straightforward repairs to the stem. I have found that clear super glue stabilizes the horn in damaged areas and binds split in the stem very well.The damage on the topside of the stem required more work. I greased a pipe cleaner with Vaseline and slid it into the airway in the stem. It plugged the bite through area on the top of the stem and would keep the glue from closing the airway. I put drops of super glue on the stem surface and after the first layer I removed the pipe cleaner. The bite through was sealed. I continued to layer on the glue repairs until the surface of the stem was even with the surrounding sound horn areas. I sprayed the area with an accelerator – and promptly was reminded why I did not do that normally! The glue dried WHITE… and it was ugly. I am not sure what the accelerator adds but what normally dries clear went white… now I had one more issue to address. I sanded the crack repair on the shank end of the stem with 220 grit sandpaper and was able to blend it in quite well. I filled in the very end of the crack with more glue. To remove as much of the whitening as I could I scraped the top file with a dental pick. I stained it with a maple stain pen and applied another coat of CA glue over the top of it. I added another layer of glue to the underside at the same time. The repair was looking better. You have to remember that the repair will always show at some level but to me darker is better than WHITE.Once the repair cured I used a needle file to redefine the sharp edge of the button and to flatten out the repair and begin to blend it into the surface of the stem. Ahhh… even though there is still a long way to go I feel like I am making some progress.I sanded out the repaired areas of the stem to blend them into the surrounding areas with a folded piece of 220 grit sandpaper. I started polishing the repairs with 400 grit wet dry sandpaper. The repair to the crack on the left topside of the stem looks very good and has blended in very well. The areas around the button look much better and with polishing will look even better. Progress is evident now.The stem was now ready to be polished. I use micromesh sanding pads to polish out the scratches in the horn. I find that wet sanding with 1500-12000 grit pads and wiping the stem down after each pad with Obsidian Oil enlivens and enriches the horn and a beautiful shine begins to appear that  really bursts forth with the last set of sanding pads. I polished it further with Mark Hoover’s Before & After Pipe Polish. I rub the Fine and Extra Fine polishes into the stem surface with my fingertips. I let it sit for a few moments and the buff the each polish off with a soft cotton cloth. I find that these polishes actually take the shine to another level. I finished my work on the stem by rubbing it down with a cloth impregnated with Obsidian Oil as it protects and enlivens the horn even more. I am pretty happy with the stem. It is highly functional and though far from what it was originally it looks really good to my eye. This has been an incredibly fun pipe to restore. The reading and history lessons learned in the process were great. The interactions with the various people on the Facebook Pipe Restorers Group were invaluable and enjoyable as well. It really was like having folks in my shop while I restored the pipe and I could ask questions. Thank you all!
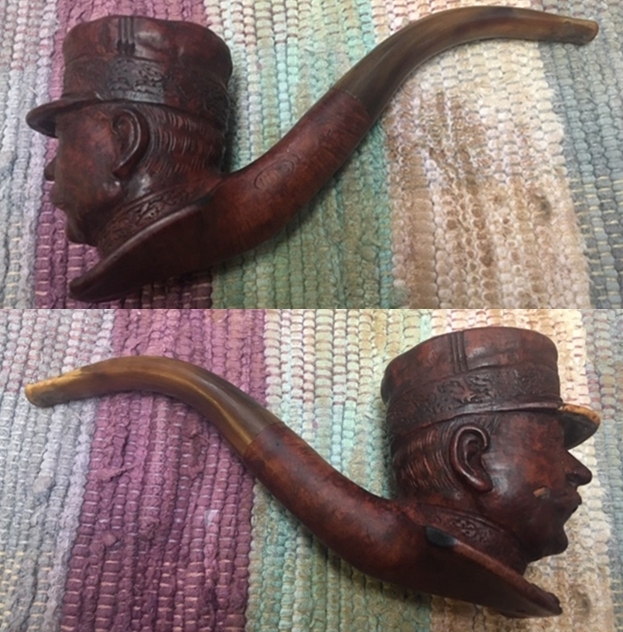
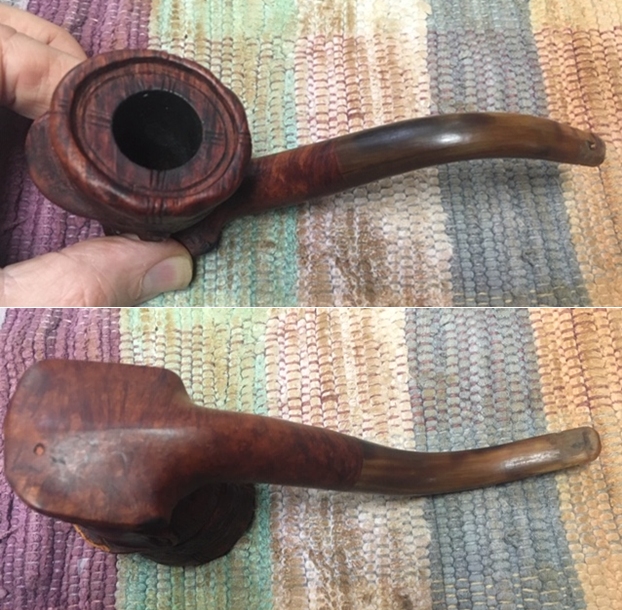
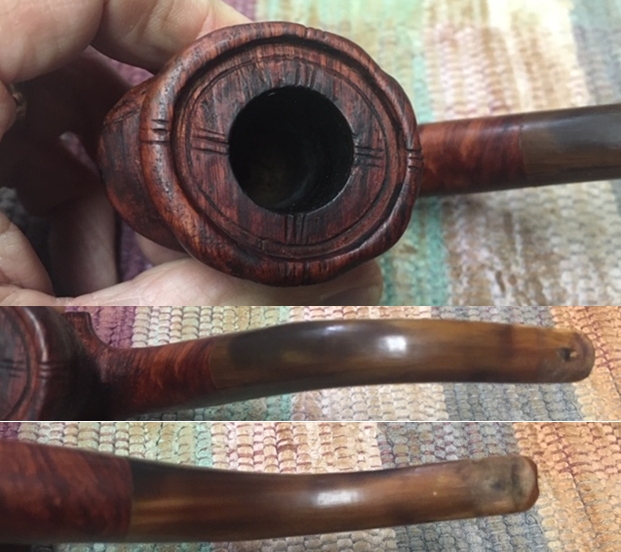
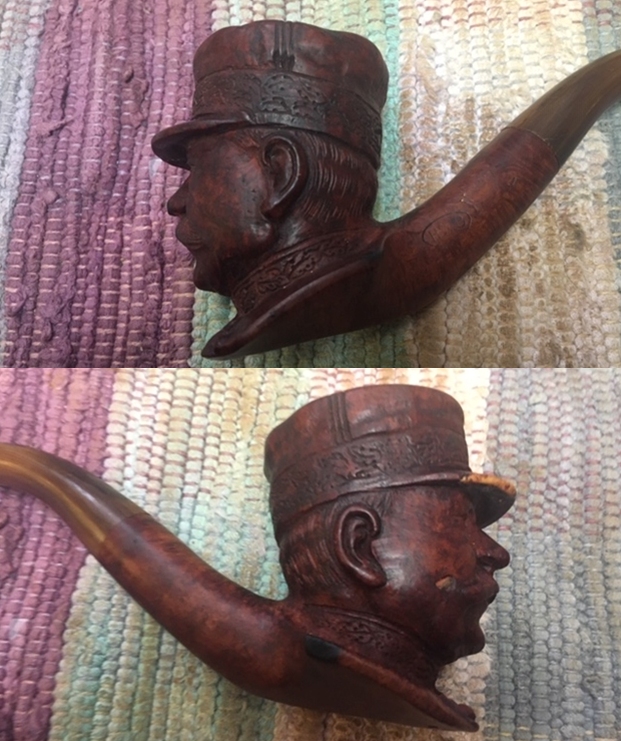
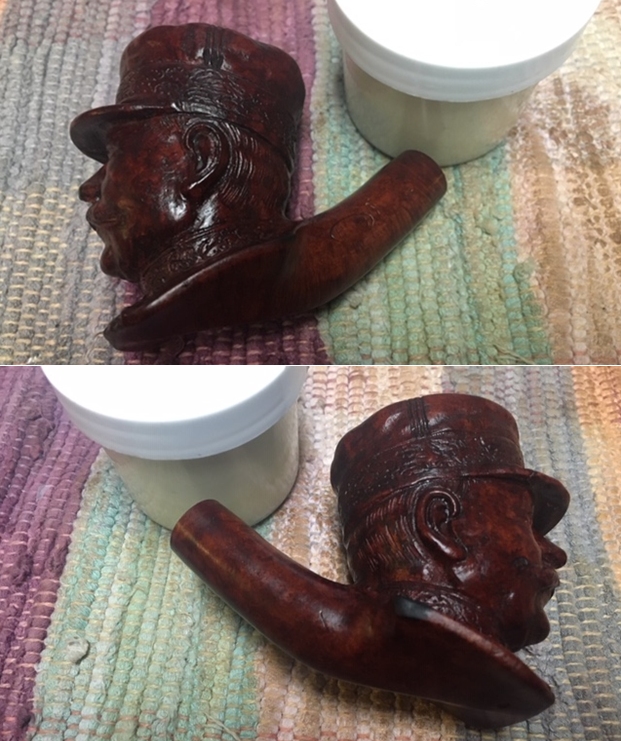
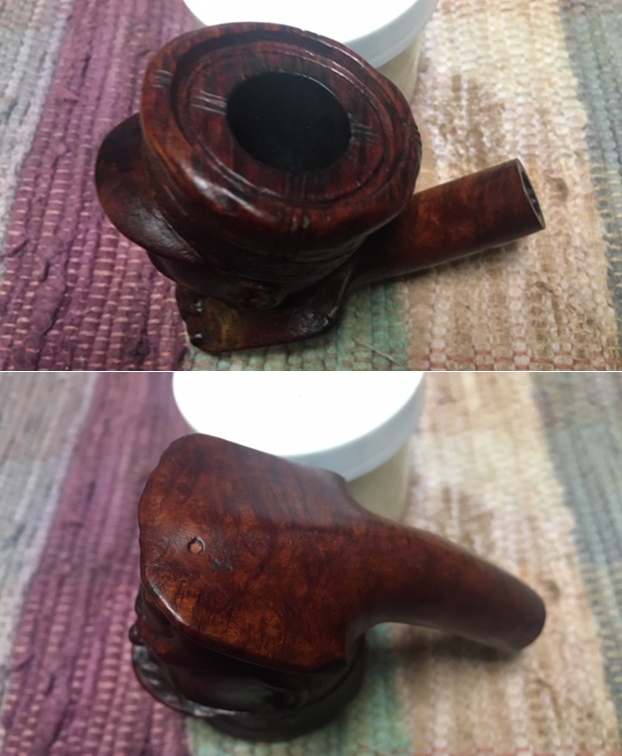
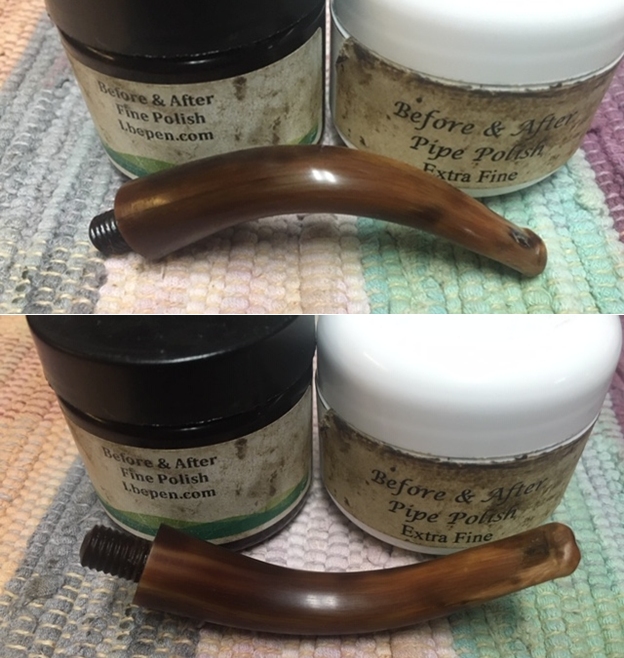
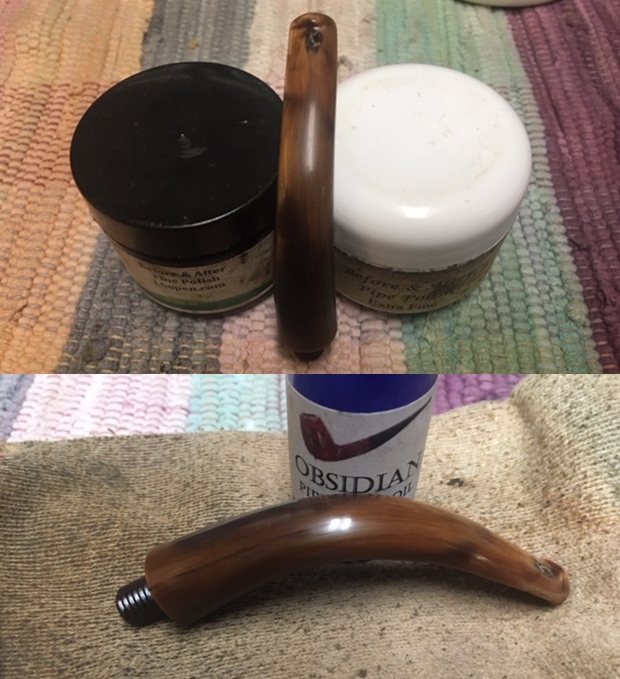
Now I was at one of the best parts of restoration for me – putting it all back together again and seeing how the pipe looks. I put the stem on the shank and carefully buffed the pipe with a lightly loaded buffing wheel of Blue Diamond polish. I wanted to be careful to not fill in the fine details with the polish but I wanted to get the benefit of a buff. I gave the bowl and stem multiple coats of Conservator’s Wax and buffed it with a clean buffing pad. I hand buffed it with a microfiber cloth to deepen the shine. The pipe really has come alive and the figure is so well done that I have found myself just stopping and studying the handiwork of the unknown HWB carver. The dimensions of the pipe are probably helpful to give perspective now. The length from the tip of the hat bill to the end of the button is 6 ½ inches, the height from the top of the hat to the edge of the French medal 2 ½ inches. The outside diameter of the bowl is 1 ¾ inches long by 1 ½ inches wide. The diameter of the chamber is ¾ of an inch. The photos below of the finished pipe tell the finished story. Papa Joffre will not be leaving me anytime soon. Way too much enjoyment in just observing it and turning it over in my hands! I am looking forward to loading and enjoying a bowl. If you have read through the entirety of this blog I want to thank you for your time.
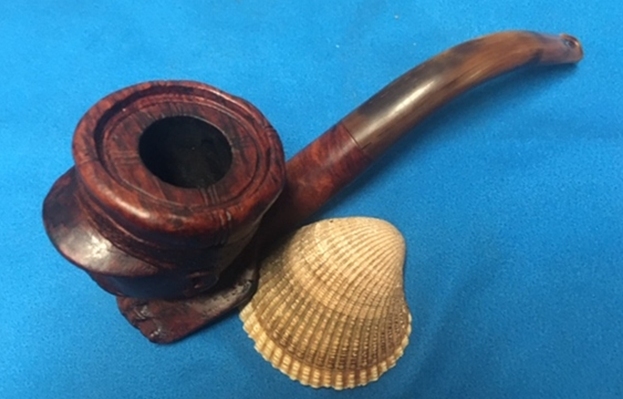
 

Restoring a Well Worn Dan Shape-Reformed 28 261 Sandblast Canted Chimney


Blog by Steve Laug

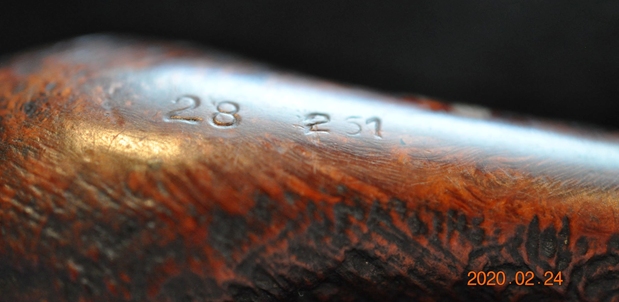
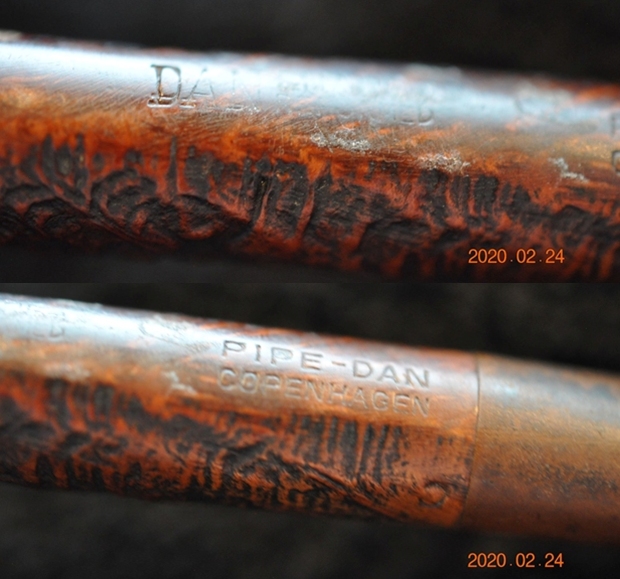
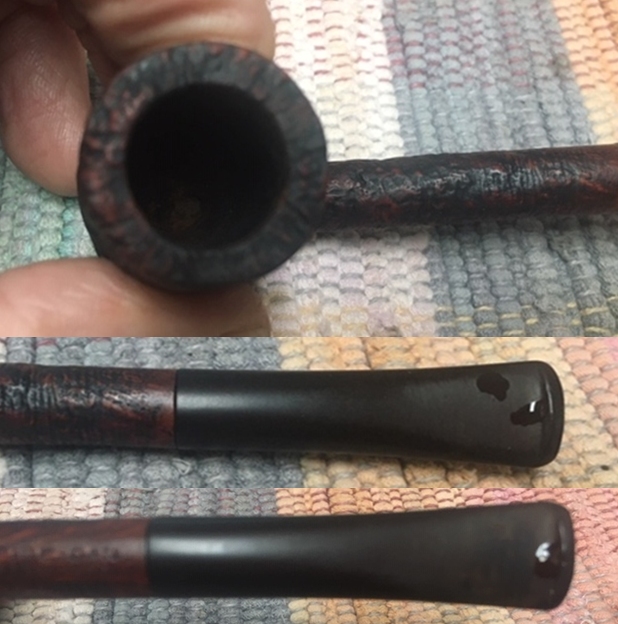
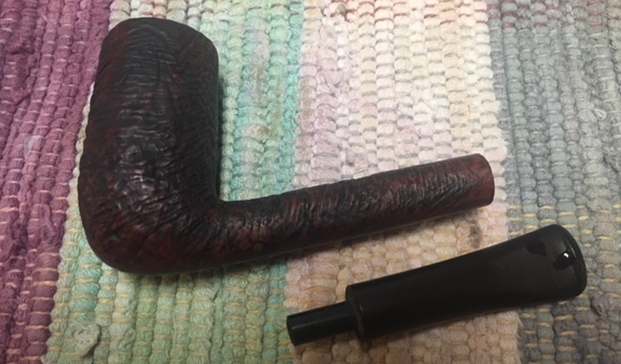
The next pipe on the worktable is an interestingly shaped pipe made by Pipe-Dan. It is a backward canted stack, tall and thin shank with a short lumberman style round vulcanite stem. The finish is an interesting mix of sandblast and rusticated. The bowl sides are horizontally rusticated and then sandblast over the top of the rustication. It gives the pipe a very unique finish. The rim top of the bowl bears the same combination of sandblast and rustication. The pipe is stained with black and various hues of brown. It truly is a beautiful finish. The pipe is stamped with a 28 on the heel of the bowl followed by 261. Next to that it is stamped DAN followed by Shape-Reformed. At the shank end it is stamped Pipe-Dan Copenhagen. The finish was very dirty and worn looking with a lot of grime and oils ground into the valleys and crevices of the blast. There was a thick cake in the bowl overflowing in lava filling in the rim top. The tapered vulcanite stem is heavily oxidized and had calcification over much carries on the twist of the shank. The stem looked very good. It is dirty with light tooth chatter on both sides near the button. Jeff took some photos of the pipe before he started his cleanup work. He took photos of the bowl and rim top to show their general condition. You can see the thick cake in the bowl. The cake and lava are so thick that it is not clear what the inner edge of the bowl looks like at this point. The lava also fills in the grooves and crevices in the finish of the rim top making it almost smooth. Jeff took some photos of the sides and heel of the bowl to give an idea of the unique finish that mixes sandblast and rustication giving the tall bowl a very tactile finish. You can also see the debris in the rustication around the bowl and rim. I cannot wait to see what it looks like once it is cleaned and polished. He took several photos of the stamping on the underside of the shank to capture it for me. It is clear and readable. It runs from the heel to the stem. It is 28 261 Dan Reformed-Shape followed by Pipe Dan Copenhagen. The vulcanite stem is a mess! It is heavily oxidized and there is calcification all over the stem from the button forward. There are also tooth marks and chatter on the stem on both sides. The button appears to be in good condition. The photos below show the condition of the stem.Before I started working on my part of the restoration I decided to do some research on the brand to see what I could learn. I turned first to PipePhil’s site to get a quick overview of the brand (http://www.pipephil.eu/logos/en/logo-p3.html). There found the following information. I am also including a screen capture of the pertinent section from the site.

Brand created in 1943. The shop (Danish name: Pibe-Dan) which closed in 1991 was run by H. Dan Christensen. He sometimes designed pipes but he is merely renowned for having helped young artisans like Tom Eltang, Preben Holm, Jes Phillip Vigen, Hans Hartmann…

Pipe-Dan let the pipe maker stamp his own name on a pipe along with the shop’s name.

There was one line on the page that stood out to me because it applied specifically to the pipe on the table today. I quote:

The line name “Shape-Reformed” means that a traditional shape had been redesigned.I turned then to Pipedia to get more history and background to the brand and potentially more information on the pipe (https://pipedia.org/wiki/Pibe-Dan). I quote the article in full as well I have included a photo from the site showing the storefront.

The House of Pibe-Dan was founded in Copenhagen in May, 1943, and was named for H. Dan-Christensen, nicknamed Pibe-Dan. Pibe-Dan (Pipe-Dan) unfortunately closed in 1991, but during the 48 years it was in business it was the ultimate place to find pipes by Danish masters.

Pibe-Dan would often let the pipemaker stamp his own name along with the company name… Pibe-Dan published its first catalog in the late 1950’s and, as was the case with W.O. Larsen, published it in English given their international customer base. While they sold pipes by Stanwell, Kriswill, Brakner and others, the classic pipe sold from Pibe-Dan was the Dan Shape-Reformed Pipe, which had a very tall vertical bowl, and were hand made of Corsican briar. Pibe-Dan claimed that the design was longer, drier, cooler and more even smoking. The Shape-Reformed was available in various lines including the Danois, Standard, Champion, Half Chimney and others.

At the same time, Pibe-Dan had a long history of also including pipes by Danish artisans in their catalog. Sixten Ivarsson’s Peewit, Oliphant, Ukulele and other shapes first appeared in Pibe-Dan’s catalog, and other artists who either began with or sold through Pibe-Dan include, among many others, Hans Hartmann, Gert Holbek, Sven Knudsen, Tom Eltang, Arne Nygaard, P. Holtorp, Poul Hansen, and Ph. Vigen, among others. The legendary Preben Holm sold pipes to the Pibe-Dan shop before his sixteenth birthday in 1963, and soon after was selling twenty to thirty pipes a week to the company, with Pibe-Dan setting the prices. This relationship continued until 1968.

From that information I learned that the line name “Shape-Reformed” means that a traditional shape had been redesigned. This shape was the classic pipe sold by the company. They described the pipe as having a very tall vertical bowl and hand made from Corsica briar. They claimed that the design was longer, drier, cooler and more even smoking. The Shape-Reformed was available in various lines.

Now I had a pretty good idea of how the pipe was stamped and made. With that information I moved forward to work on the pipe itself and see what I had to do with it. The bowl looked unbelievably good in light of where it started. The stem looked much better with just a few tooth marks on each side of the stem just ahead of the button. He had done his normal thorough clean up – reaming, scrubbing, soaking and the result was evident in the pipe when I unpacked it. I took photos of the pipe before I started my work on it. The shape and finish on this pipe is very unique.

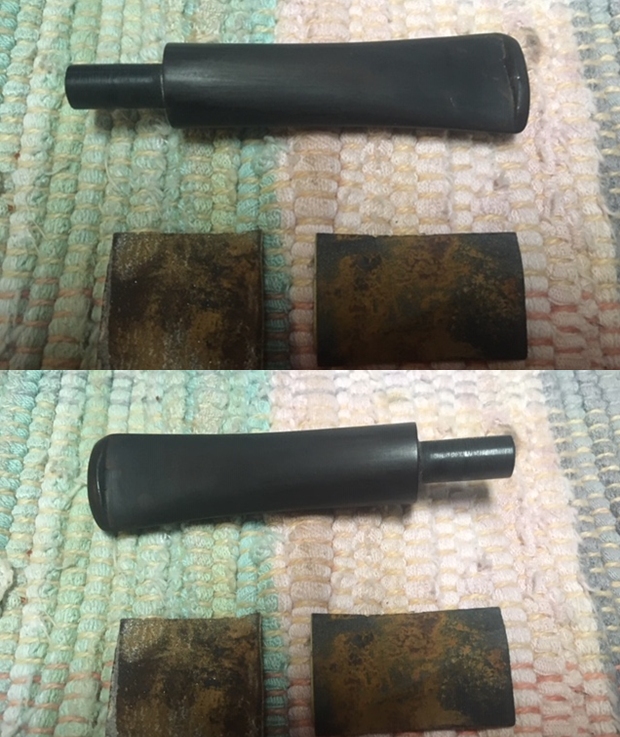
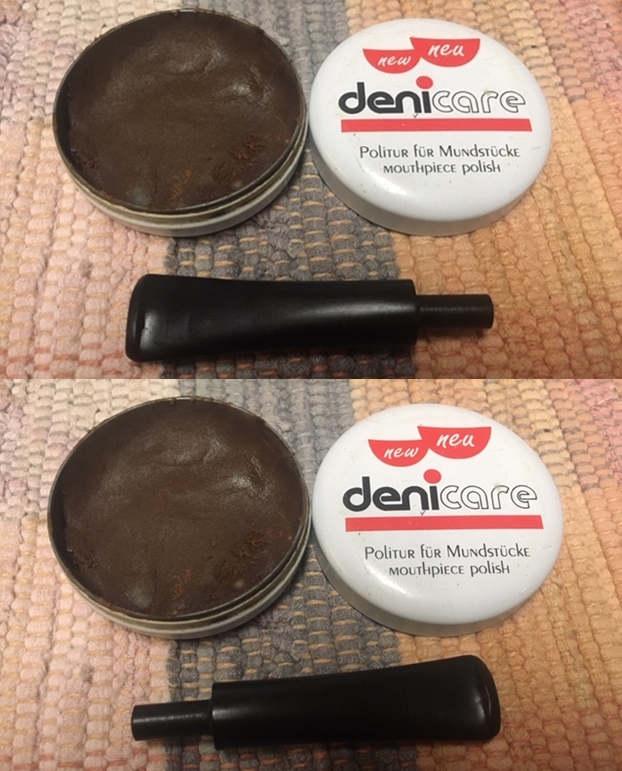
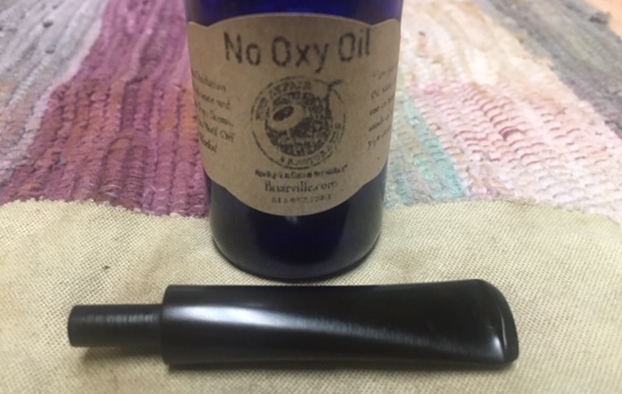
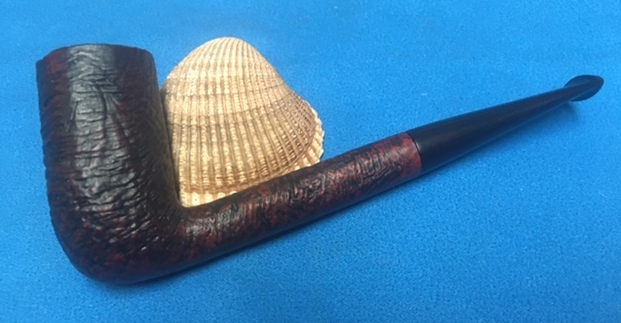
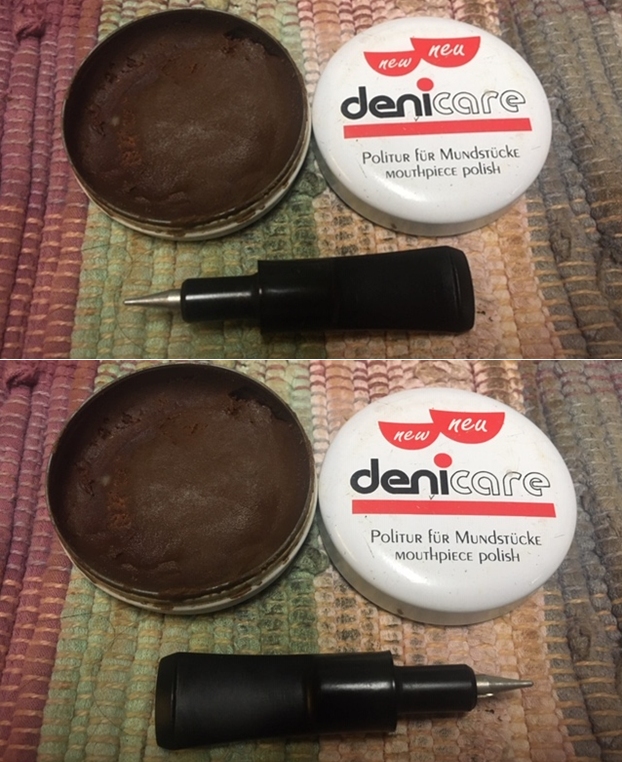
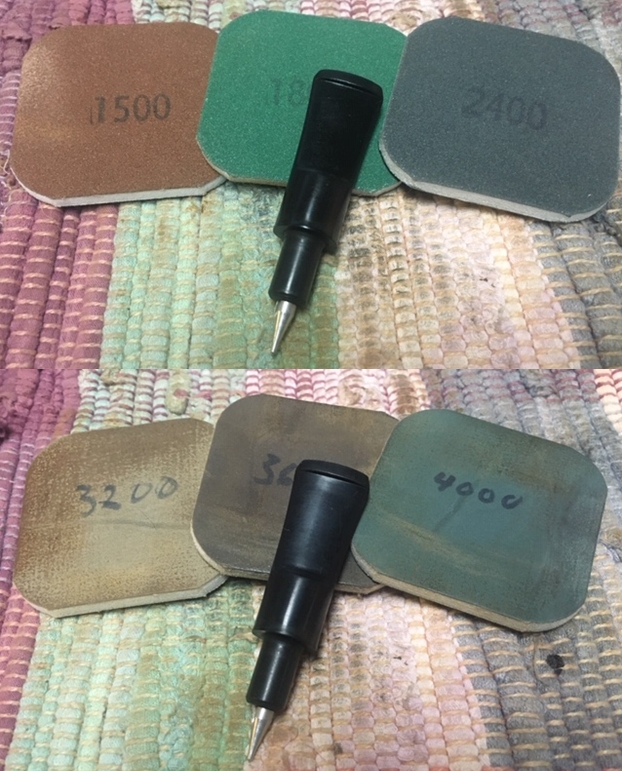
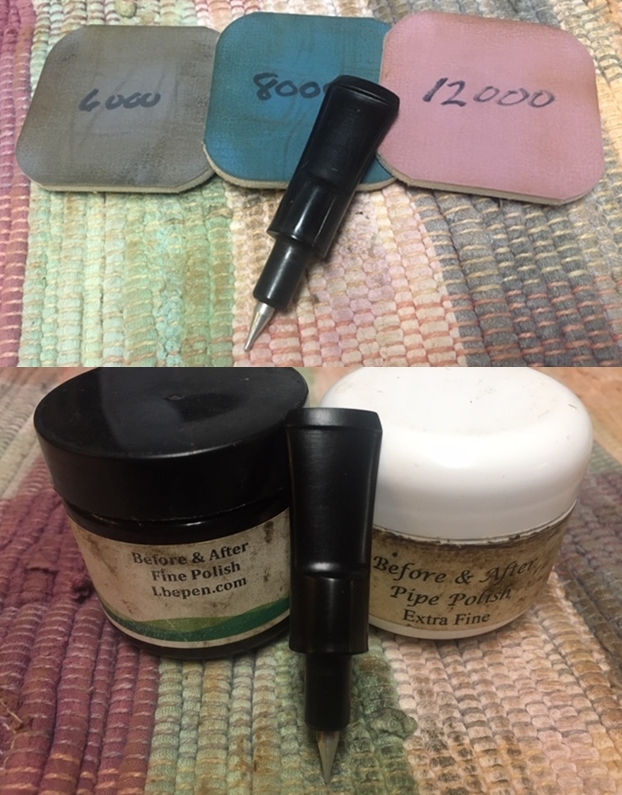
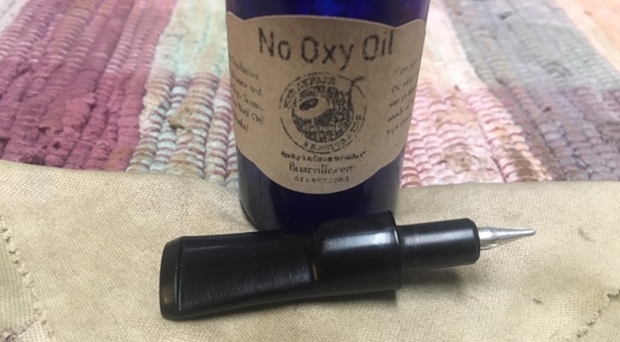
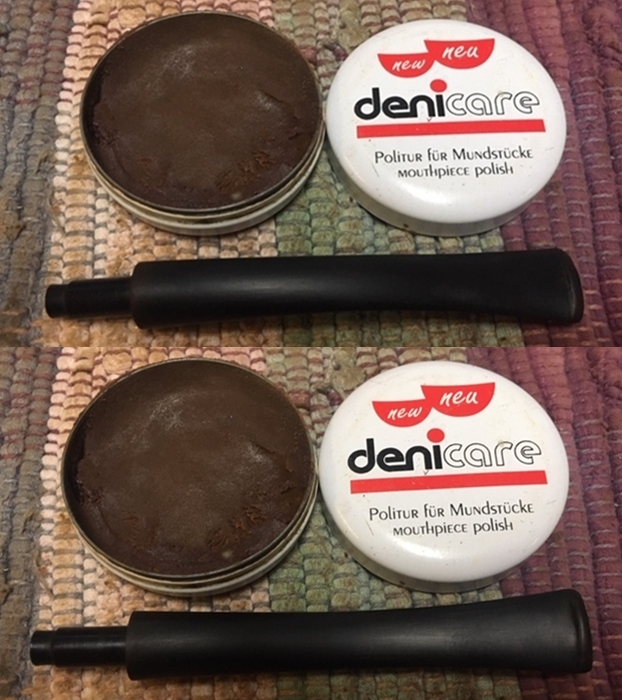
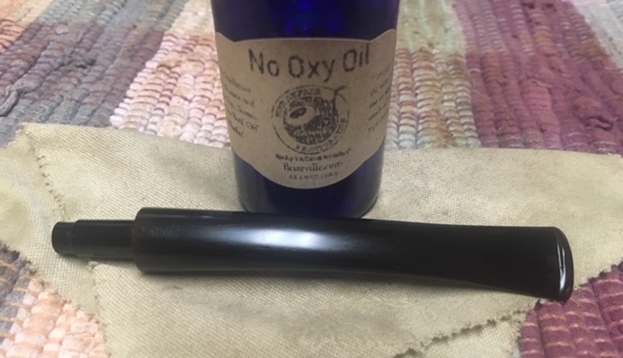
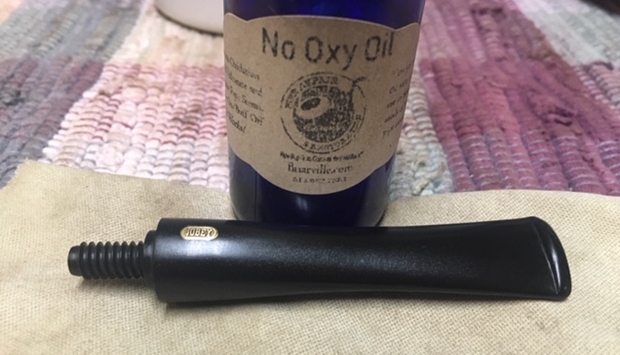
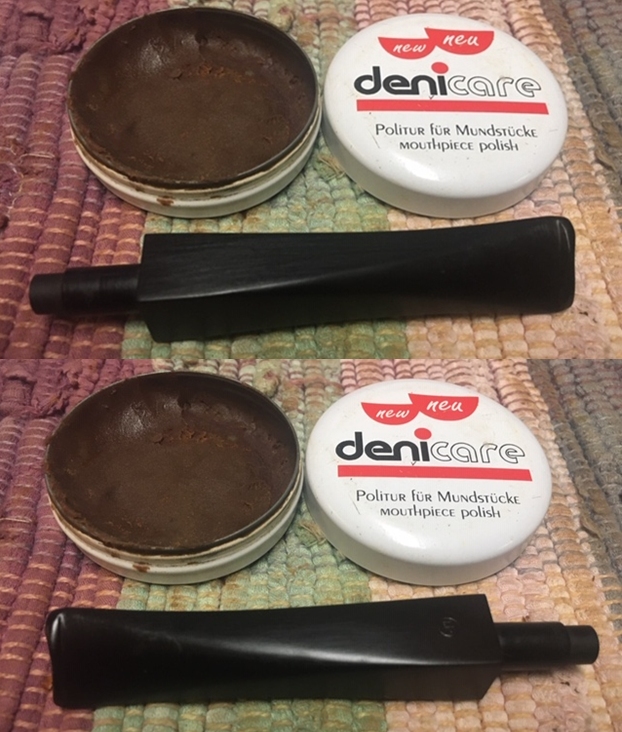
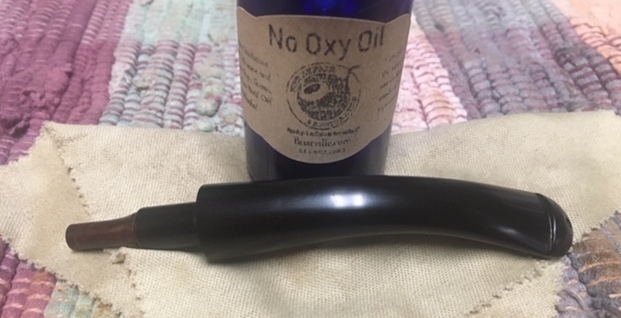
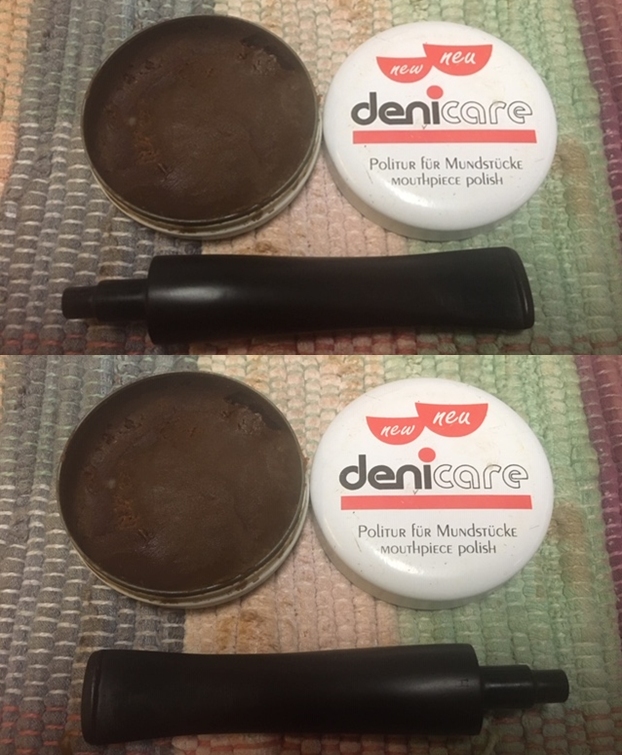
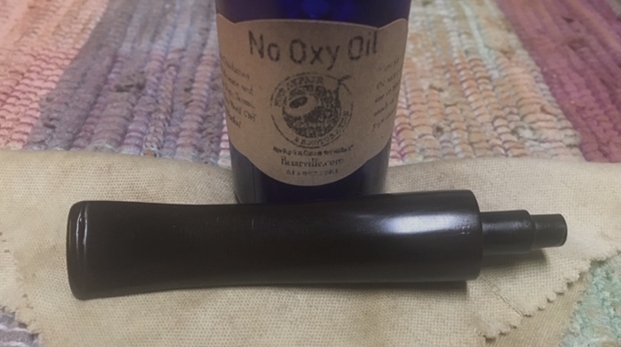
Just a word of explanation… I was excited to get started on this one so I did a repair on the tooth marks on the stem. I put a spot of superglue on both sides to fill the damaged areas. Then I recalled I did not take any  before photos. I went back and took the ones that follow! I took some photos of the rim top and stem. The rim top and bowl looked very good. He was able to clean up the thick lava as well as the cake in the bowl. The bowl and rim top look very good at this point. The close up photos of the stem shows that is it very clean. Remember my disclaimer above that I already filled in the deep tooth marks on the stem surface.I removed the stem from the shank and took a photo of the pipe at this point. You can clearly see the condition, size and shape of the pipe.I worked some Before & After Restoration Balm into the surface of the briar with my fingertips. The product works to clean, enliven and protect the briar. I let the balm sit for about ten minutes and then buffed with a cotton cloth to raise the shine. The photos show the bowl at this point in the restoration process. I had taken photos of the stem earlier when I had filled in the deep nicks/tooth marks on the top and underside in my rush to get started. Here are some close up photos to show the repaired areas.   When the repairs had cured I sanded the stem with a folded piece of 220 grit sandpaper to blend them into the surface of the stem and started polishing with 400 grit wet dry sandpaper. I polished the stem with some Denicare Mouthpiece polish – a red gritty paste that feels a lot like Tripoli. It works well to polish out some of the scratches. I find that it does a great job preparing the stem for polishing with micromesh sanding pads.  I polished the stem with micromesh sanding pads – dry sanding with 1500-12000 grit sanding pads. I wiped it down after each sanding pad with a cloth containing some Obsidian Oil. I finished polishing it with Before & After Pipe Stem Polish – both Fine and Extra Fine and buffed it off with a cotton cloth. I wiped the stem down with a coat of Briarville’s No Oxy Oil to protect the rubber and slow down oxidation. Putting this pipe back together was rewarding. The change in condition and appearance was remarkable. I put the stem back on the bowl and buffed the pipe lightly with Blue Diamond on the buffing wheel. I carefully avoided the stamping on the shank during the process. I gave the bowl multiple coats of Conservator’s Wax and the stem multiple coats of carnauba wax on the buffing wheel and followed that by buffing it with a clean buffing pad on the buffer. I hand buffed the pipe with a microfiber cloth to deepen the shine. The finished pipe is quite beautiful and is a uniquely shaped Danish pipe. The finish on the bowl combines various methods and stains to give it a living and tactile nature. It is very well done. Give the finished pipe a look in the photos below. I can only tell you that it is much prettier in person than the photos capture. The dimensions of the pipe are Length: 5 ¼ inches, Height: 2 inches, Outside diameter of the bowl: 1 inch, Chamber diameter: 5/8 of an inch. This interesting Dan Shape-Reformed Stack is a great looking pipe in great condition. Thanks for walking through the restoration with me as I worked over another beautiful pipe. I will be adding it to the rebornpipes store soon. If you want to add it to your collection send me an email or a message! Thanks for your time.
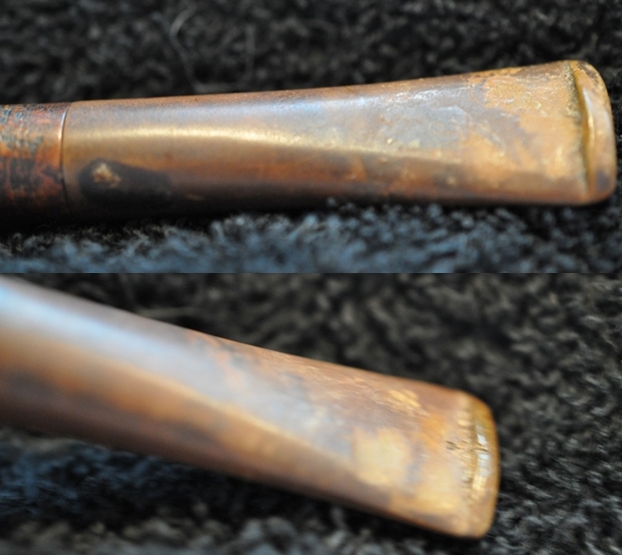


Continuing My Practice on Tenon Replacement… Working on a Connoisseur, NYC Pipe


Blog by Paresh Deshpande

Any learning consists of three phases; first is being taught, second is practice and the third phase is mastering!! Continuing on my learning curve, I wanted to practice replacing broken tenons on pipes to make them smoke worthy again.

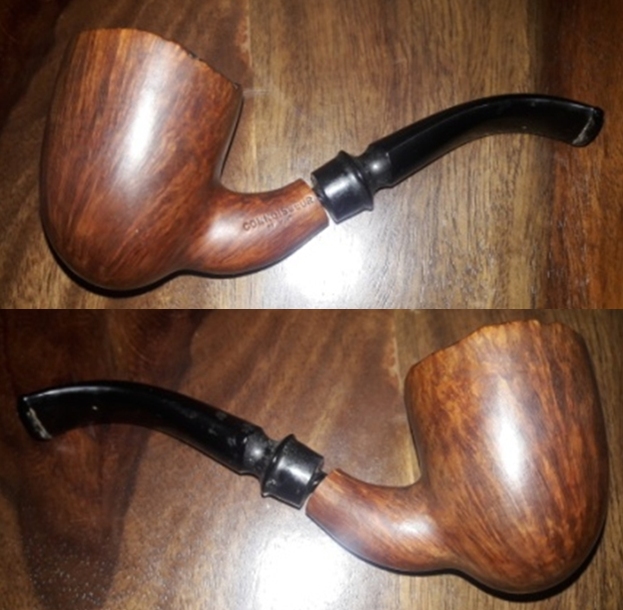
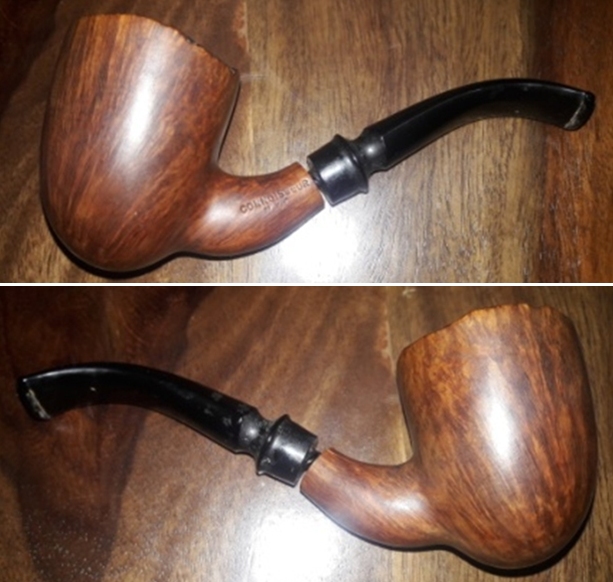
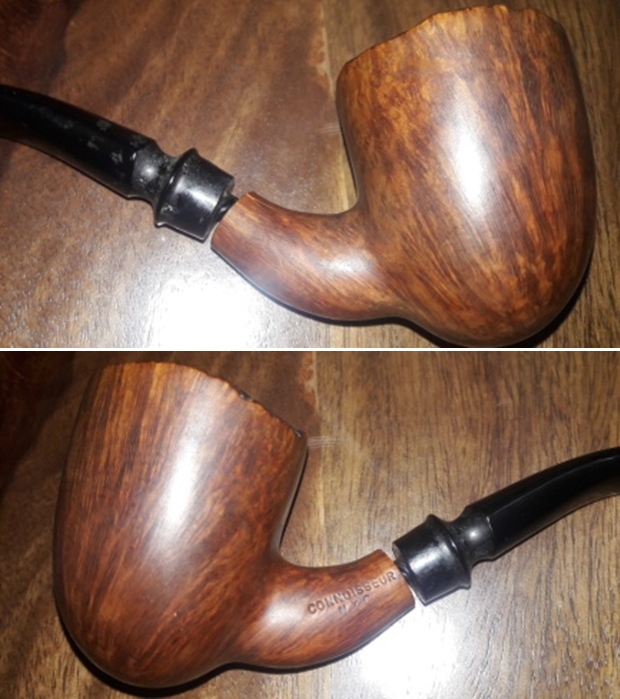
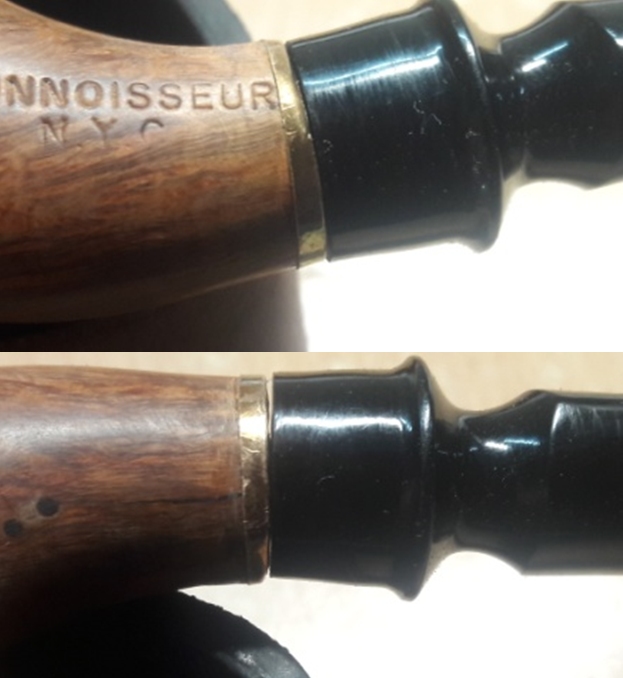
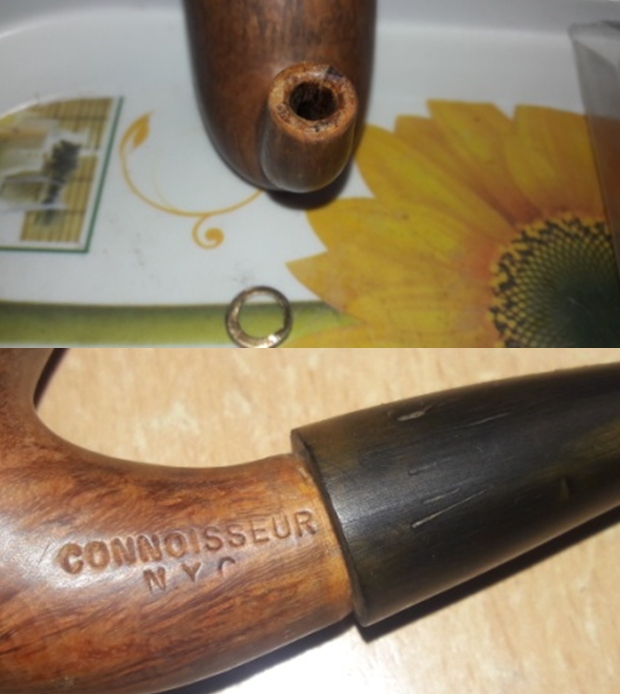
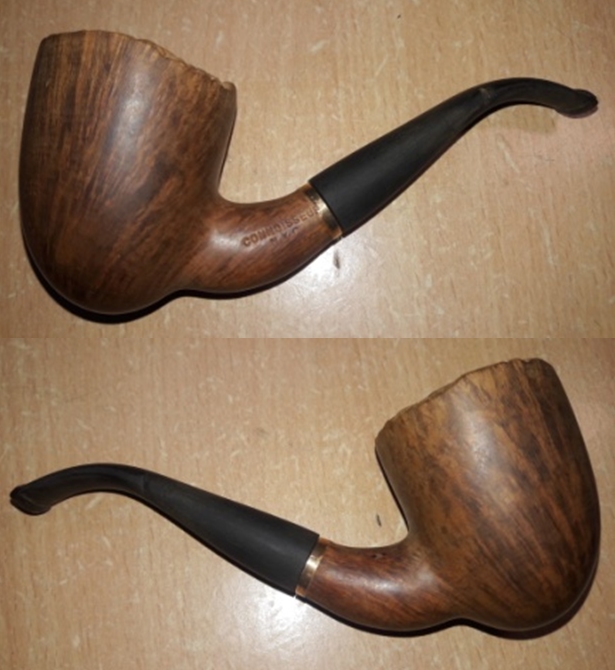
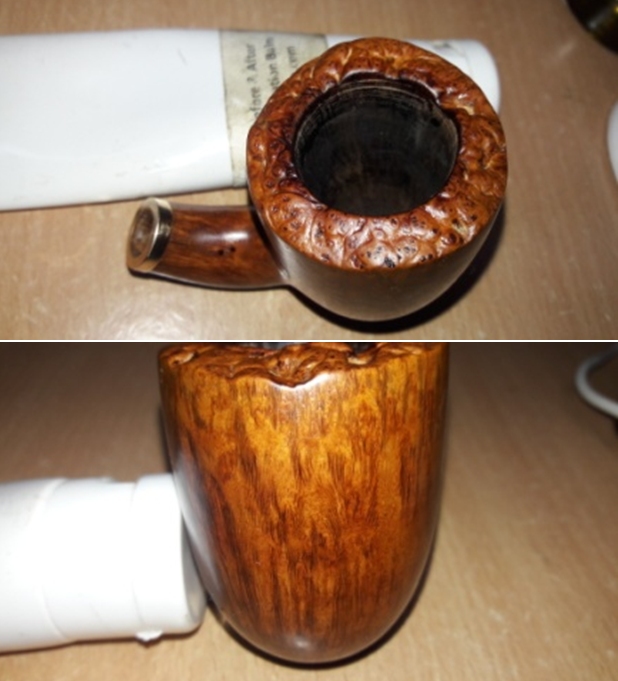
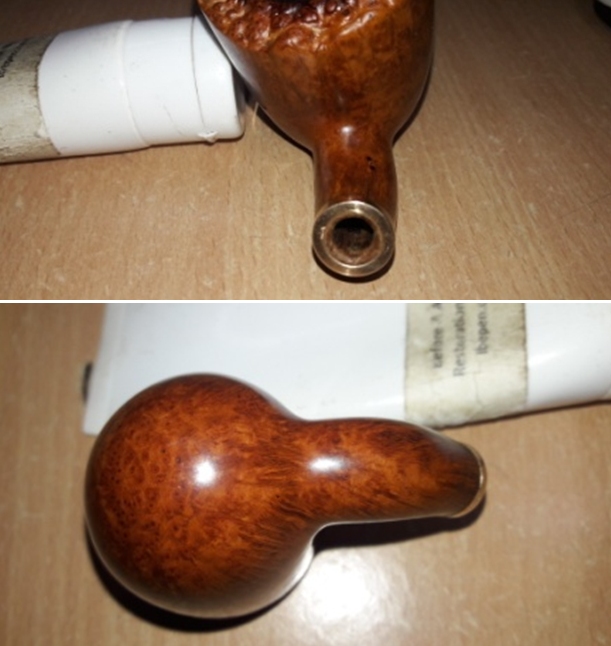
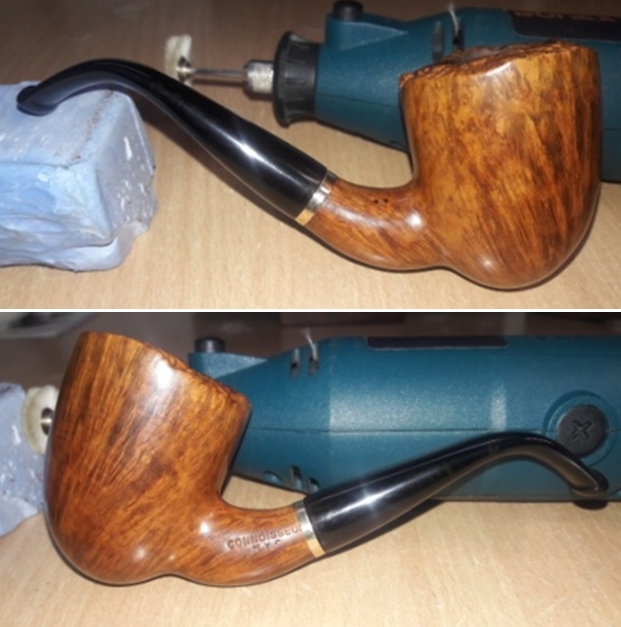
The pipe that I chose to practice on is a free hand that boasts of straight / flame grains all around the stummel with bird’s eyes on the heel of the bowl with a plateau rim top. It is stamped on the left of the shank as “CONNOISSEUR” over “N.Y.C.”. These stampings are crisp and easily readable. There is no other stamping seen on either the stummel or the stem. This is the first time that I am working on a Connoisseur and am keen to know more about this pipe brand, carver and also dating this pipe. As is my habit, the first site that I visit is rebornpipes where, over the years, it seems like Steve has chronicled almost all the pipes that were and are in existence. True enough, Steve has restored and researched a pipe from this maker. Here is the link for a detailed information on this pipe; https://rebornpipes.com/2015/05/23/restoring-an-ed-burak-connoisseur-tall-stack/

Further down the write up, he also gives out the dating methodology adopted by Ed Burak and the same is reproduced for immediate reference.

I also learned on Pipephil’s website (http://www.pipephil.eu/logos/en/about-en.html) that the stamping did indeed give some information that helped in identifying the period that a particular pipe was made. There I found that one may generally separate Connoisseur pipes’ date of manufacture into three periods.

From late 1960’s until 1974: no stampings
From 1974 until 1981: CONNOISSEUR over N.Y.C.
From 1981 on: CONNOISSEUR over N.Y.C. and Ed Burak’s signature.

Thus from the above information, it’s evident that this beautiful Connoisseur pipe in my hand is from the period 1974 to 1981!

INITIAL VISUAL INSPECTION
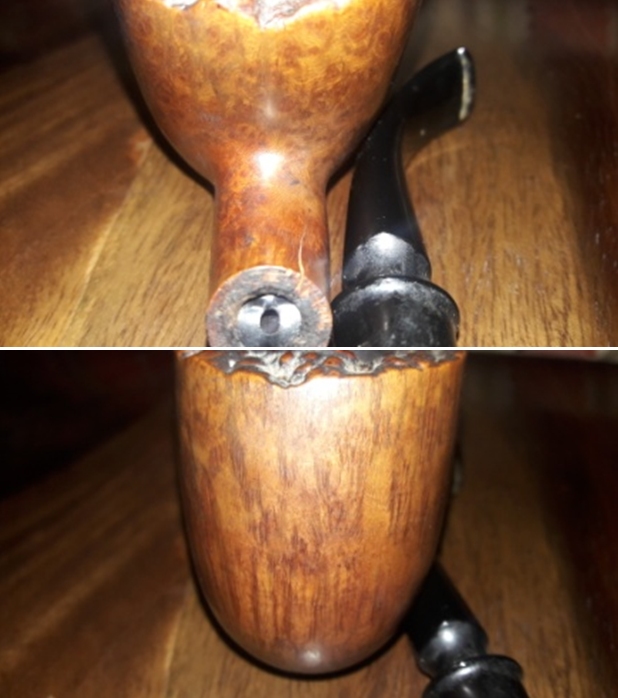
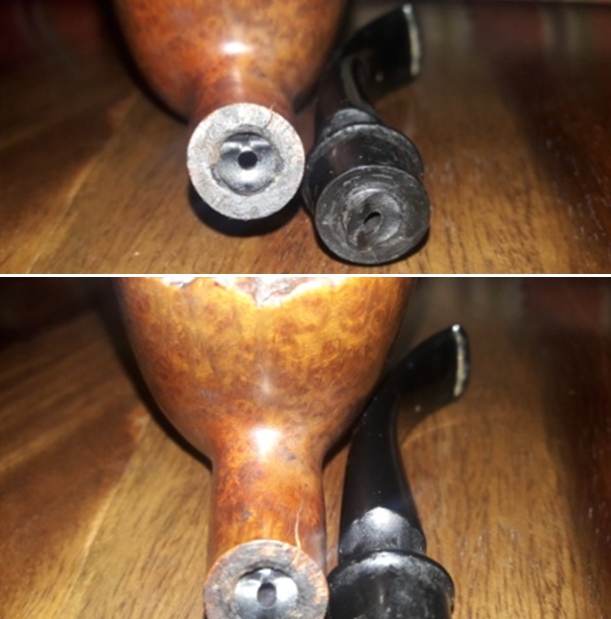
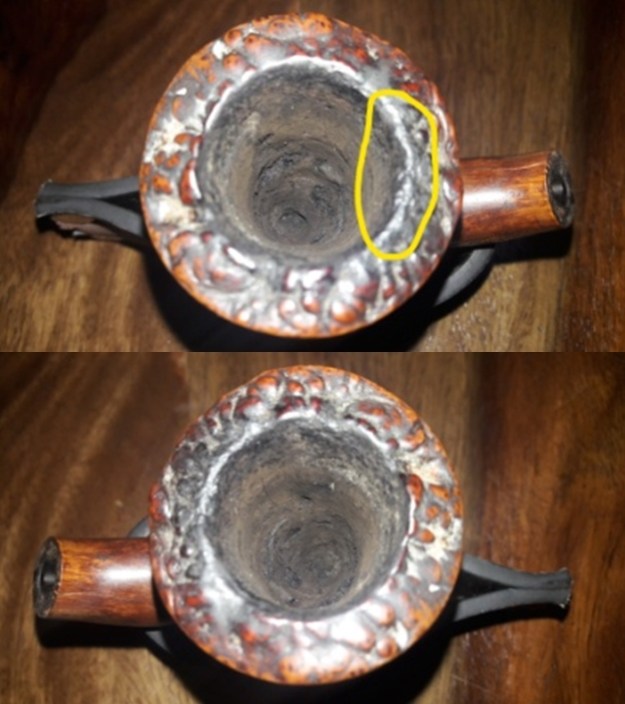
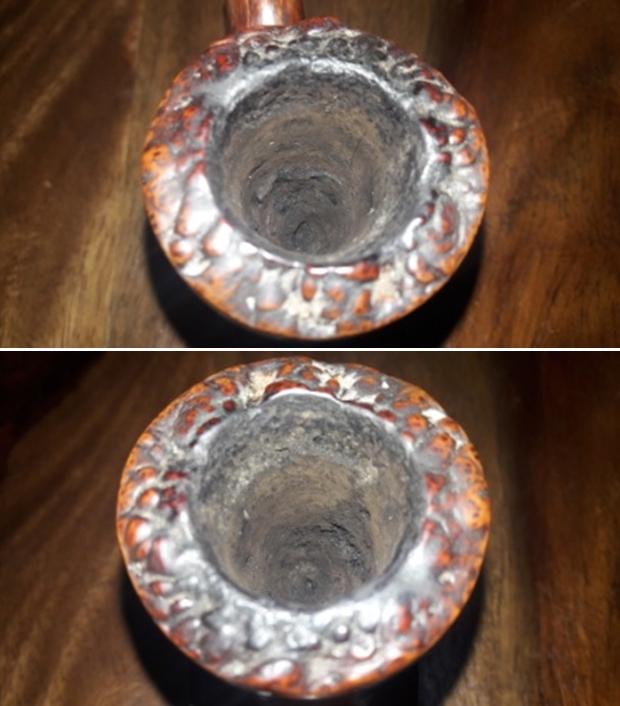
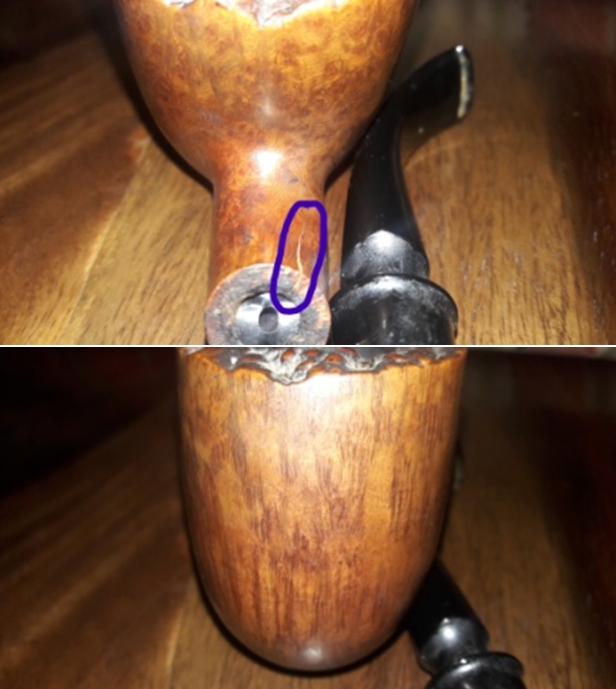
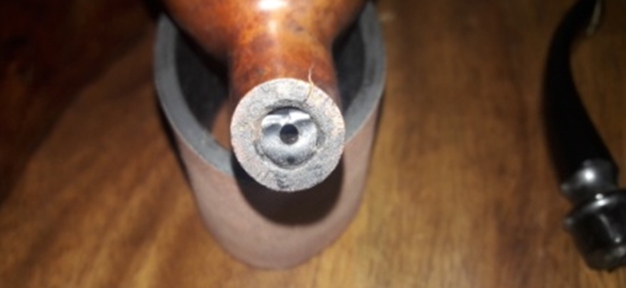
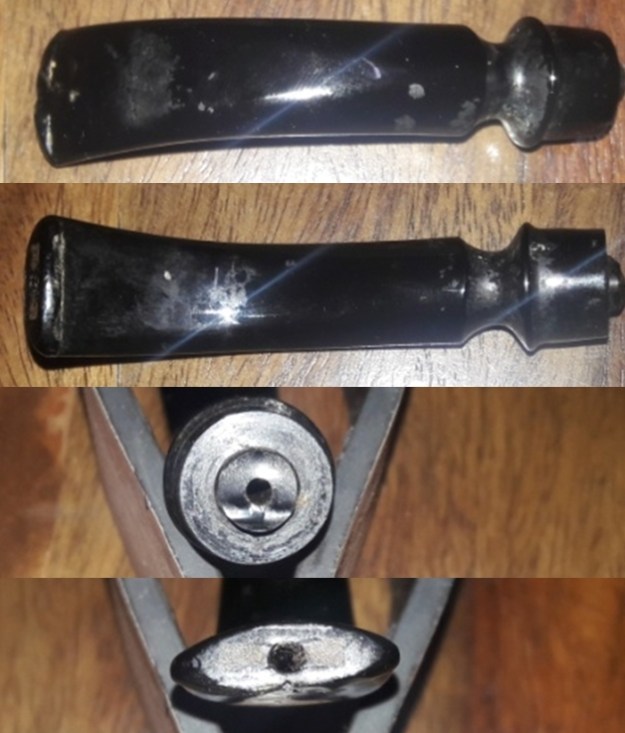
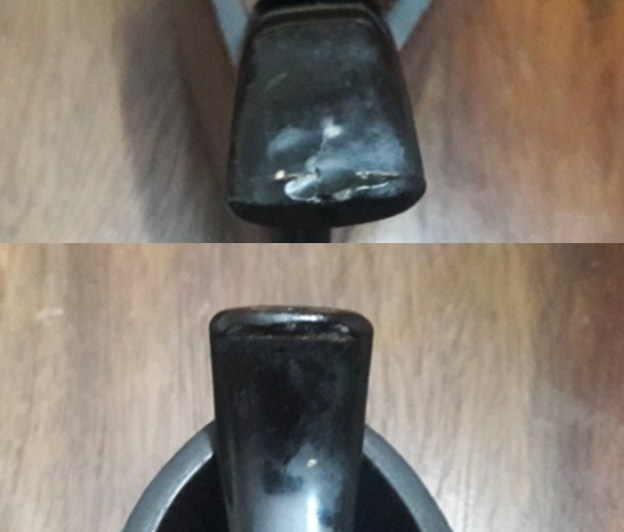
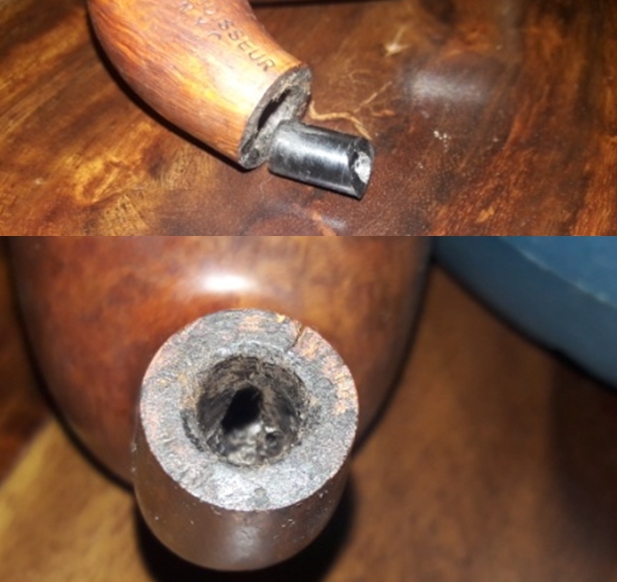
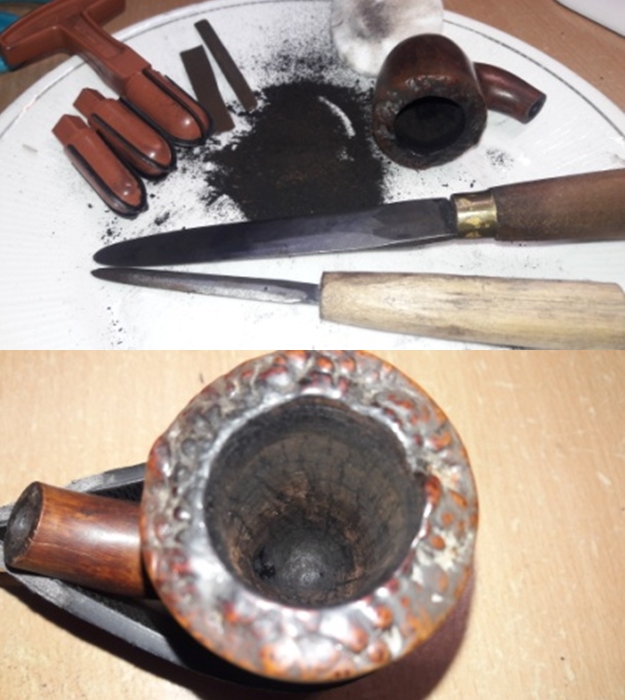
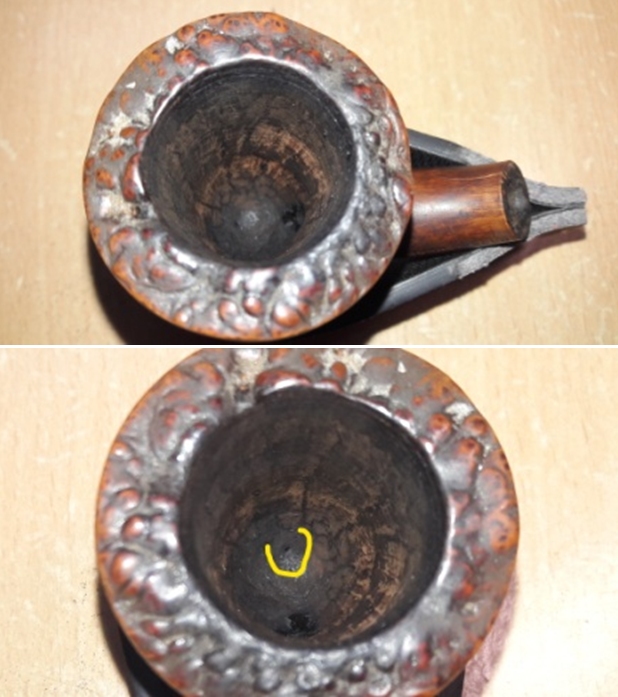
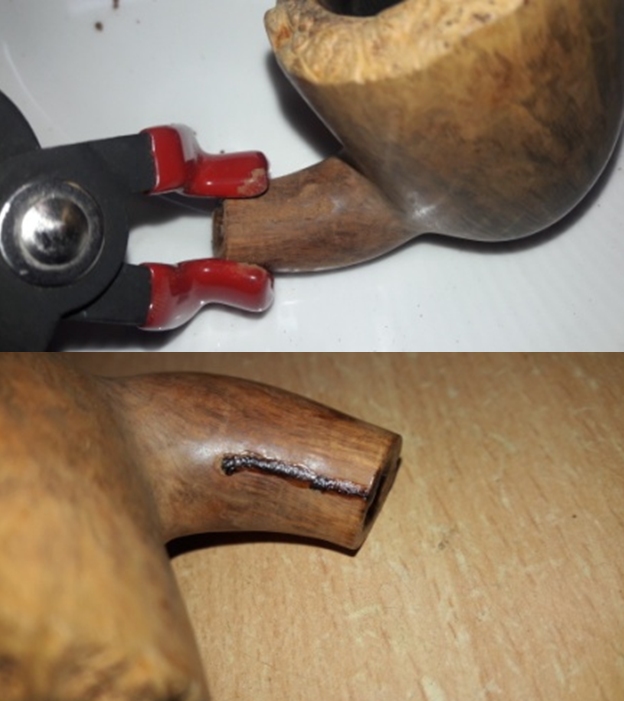
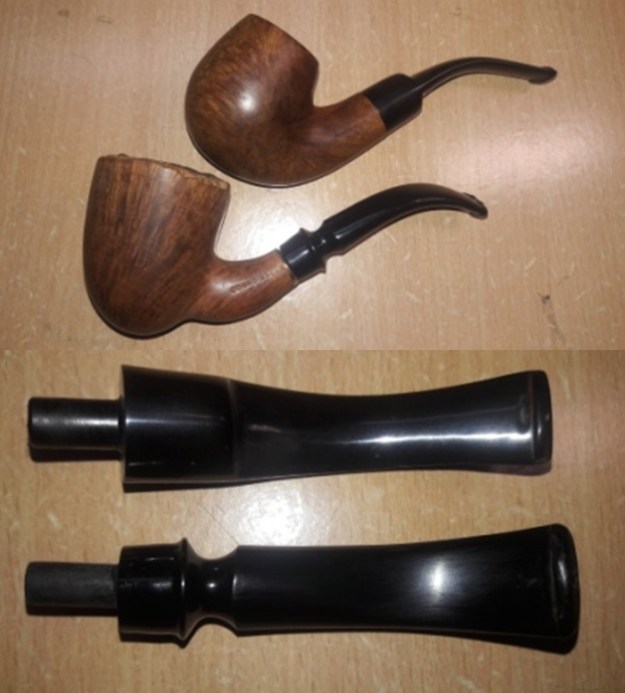
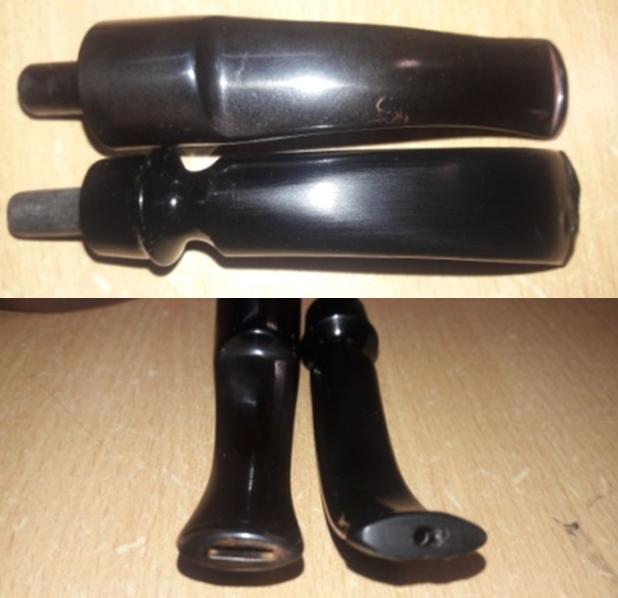
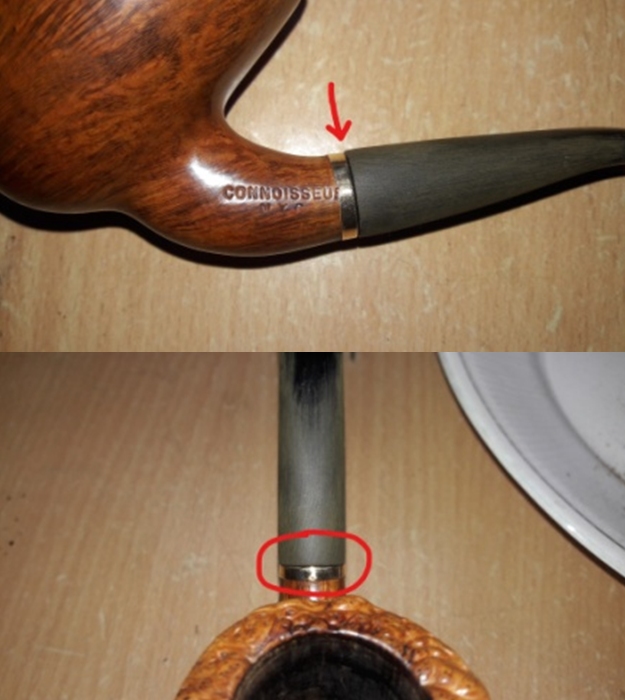
The first and foremost issue that I noticed and was aware of from the description given by the seller is that of the broken tenon. When I saw the pictures of this pipe for the first time, I had observed, apart from the most obvious broken tenon a number of other issues which presented a challenge of their own. The briar was natural and unstained. It had darkened slightly with age. This was how the pipe had reached me…discerning readers will easily make out other major issues that need to be addressed on this pipe. The chamber has a thick uneven layer of dry and hard cake with the inner rim edge showing darkening in 6 o’clock direction (marked in yellow). The condition of the inner walls of the chamber can be checked and ascertained only after the cake has been taken down to the bare briar. However, I do not envision any damage to the chamber walls. There is heavy lava overflow and debris embedded in the plateau of the rim top surface. The condition of the inner rim edge will be commented upon once the lava overflow has been removed. There are very strong and all pervading smells of old tobacco emanating from the chamber. Hopefully this issue should be addressed once the cake has been removed and the mortise is thoroughly cleaned. The stummel boasts of beautiful straight/flame grain all around and extend over the shank surface too!! The surface is covered in lava overflow, dirt and grime. The stummel briar is without a single fill and through all the dirt and grime, exudes a very high quality briar and craftsmanship. The foot of the stummel shows beautiful bird’s eye grains and is sans any damage. The slightly tapered end of the shank has the broken end of the tenon still embedded within. A prominent crack is visible over the shank on the right side. This pipe, in all probability, has suffered this catastrophic damage as a result of having fallen in stem down position. The mortise has the broken tenon stuck inside. I did try to wriggle it out with a screw driver, but the broken tenon wouldn’t budge. This will require more invasive technique. The heavy build up of cake in the chamber, dirty plateau rim top and the sorry condition of the stem all point towards a clogged mortise. This will be ascertained once the broken piece is removed from the shank end.The fancy stem has blobs of sticky oils and tars on both the surfaces as well as in between the nooks and crannies at the tenon end. There are significant tooth indentations on both the upper and lower buttons, to the extent that they would need to be rebuild completely. The slot just does not appear correct. It appears to be a orifice, but it is not a perfect round and  there are horizontal extensions on either side. Even this opening is clogged with old oils and tars. The broken tenon end of the stem is jagged and sharp at the place where the tenon has snapped. In my opinion, there is something which is not right about this stem. The quality of the stem is not something which is to be expected on a Connoisseur pipe. THE PROCESS
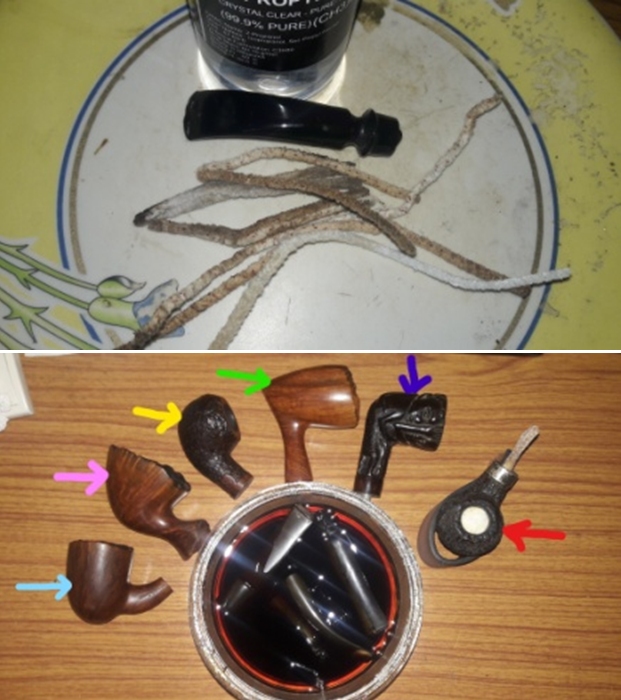
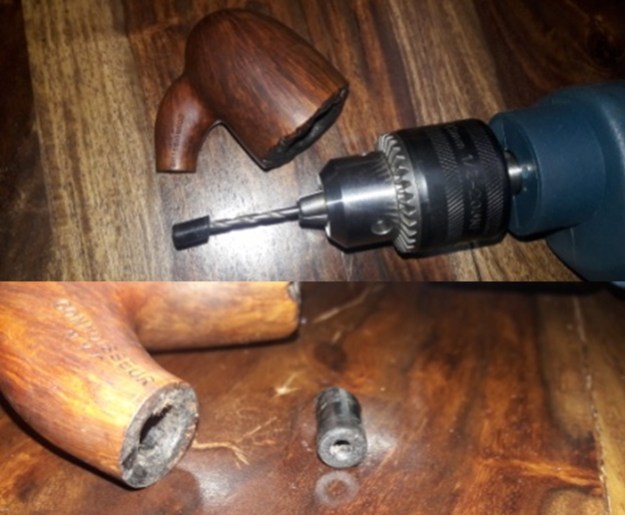
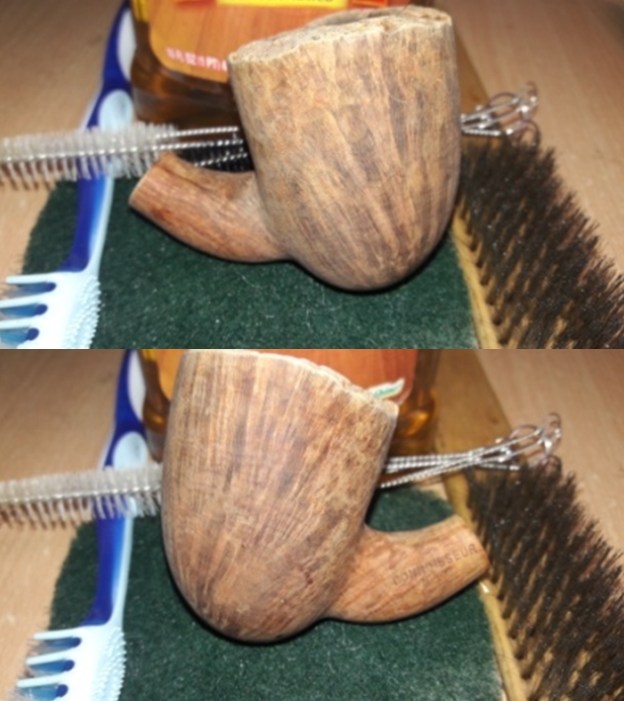
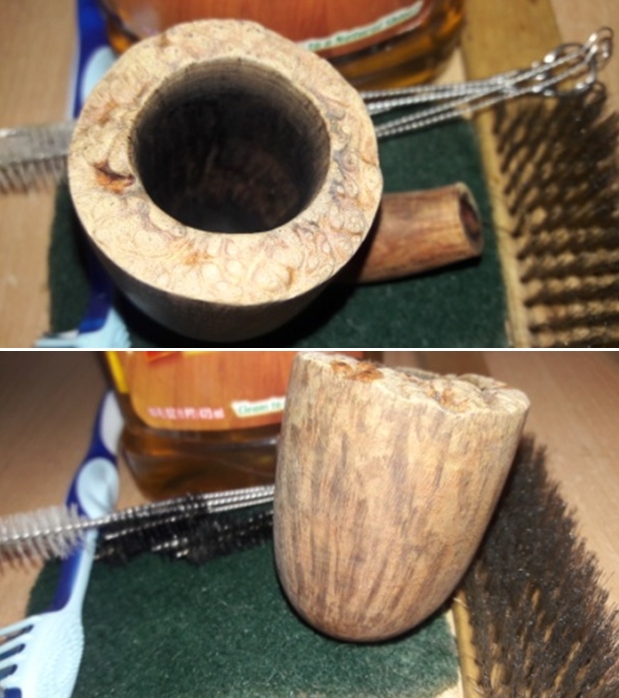
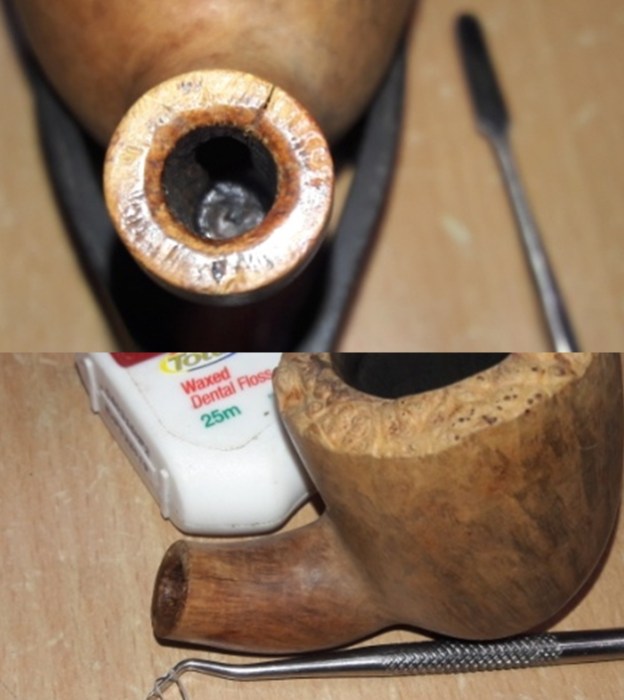
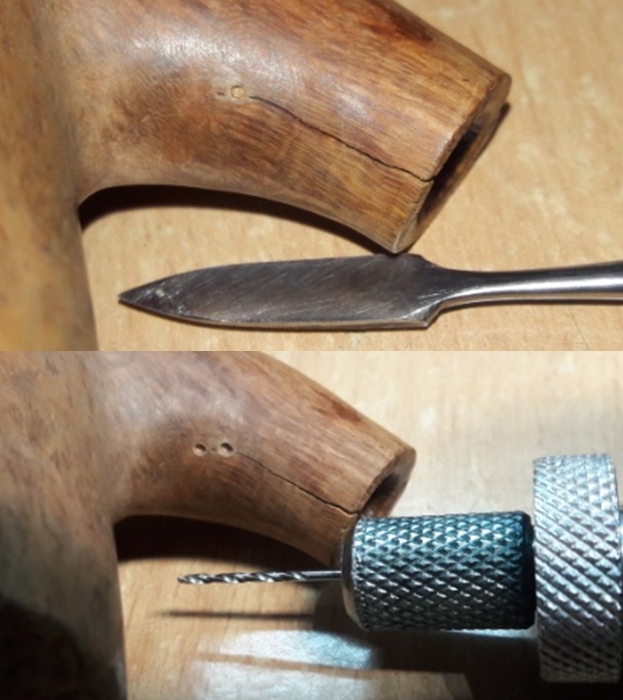
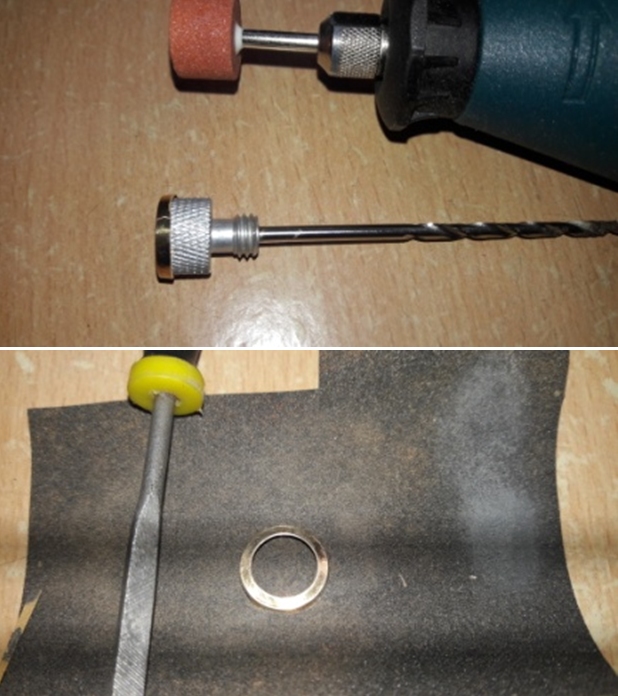
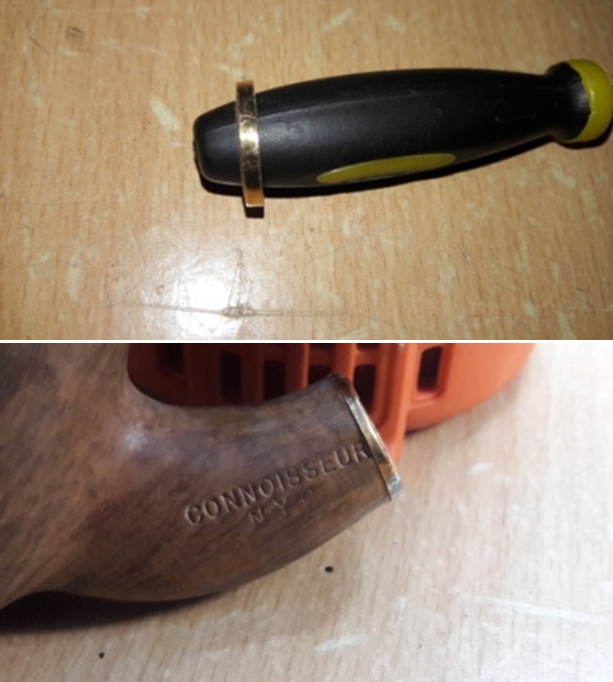
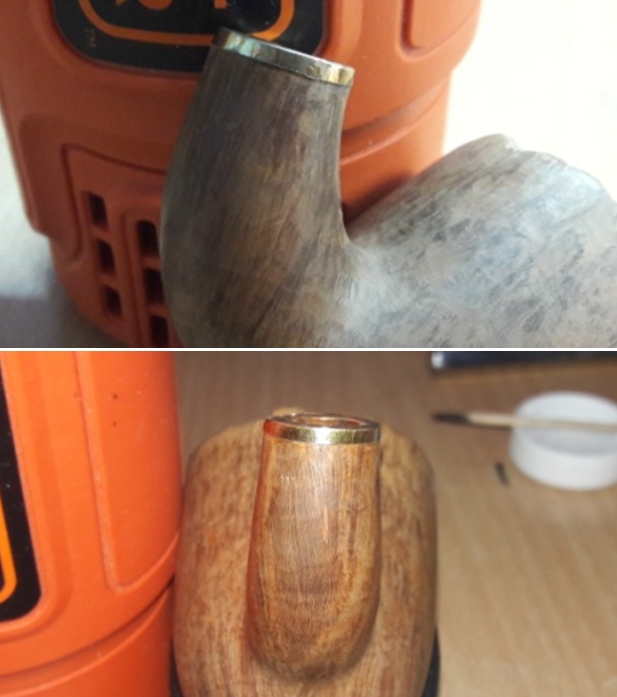
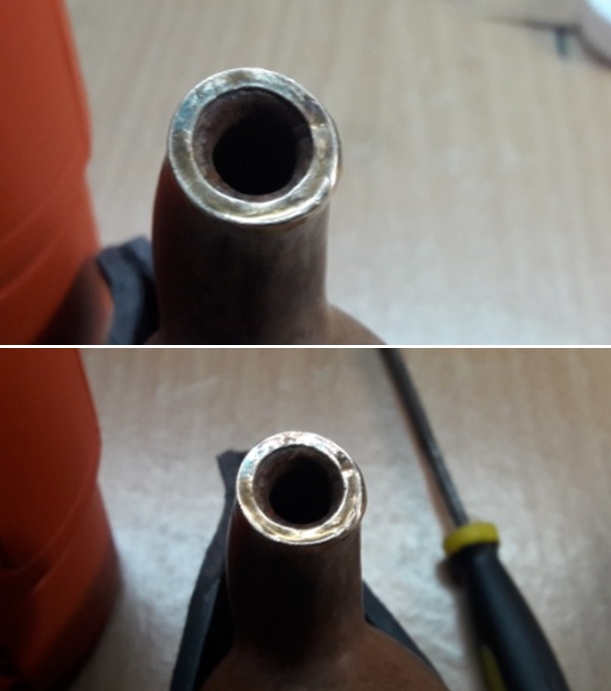
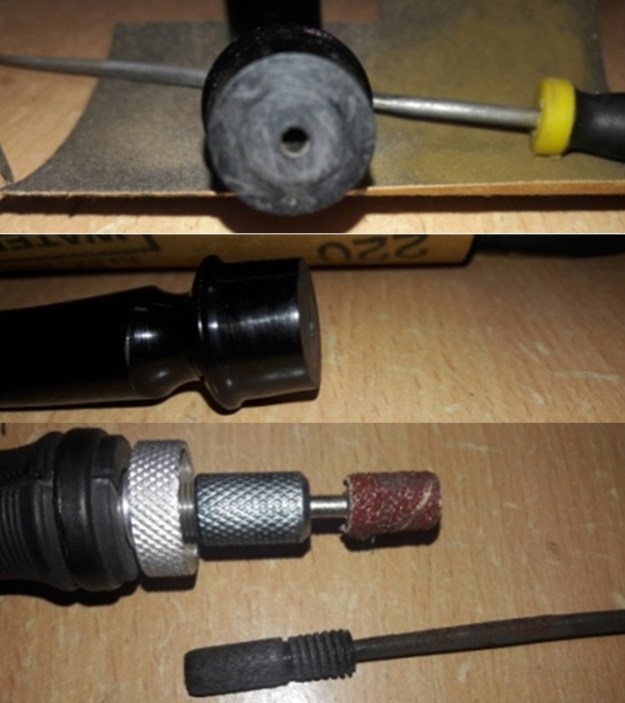
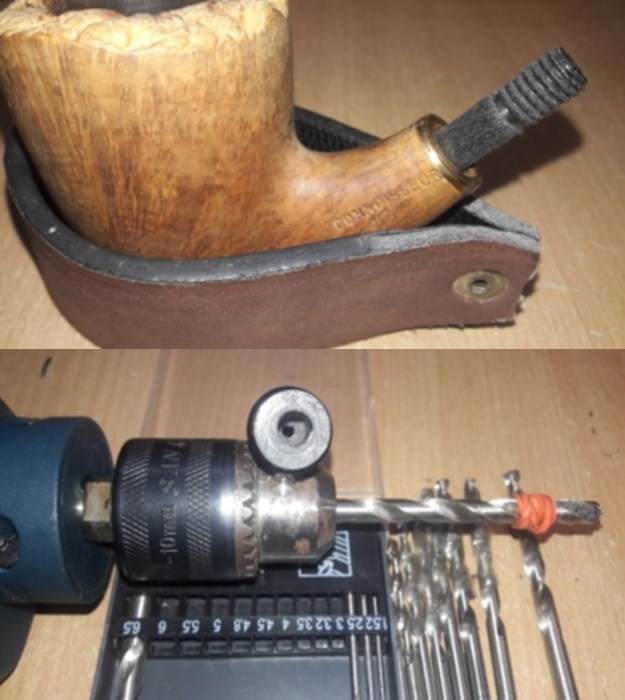
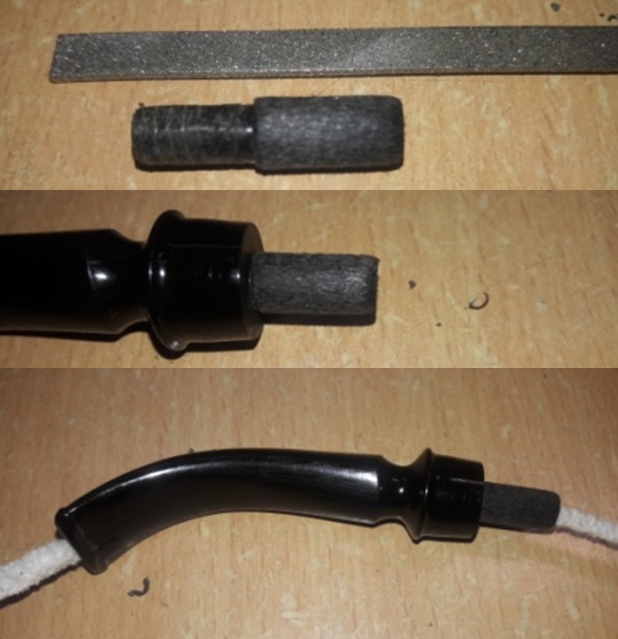
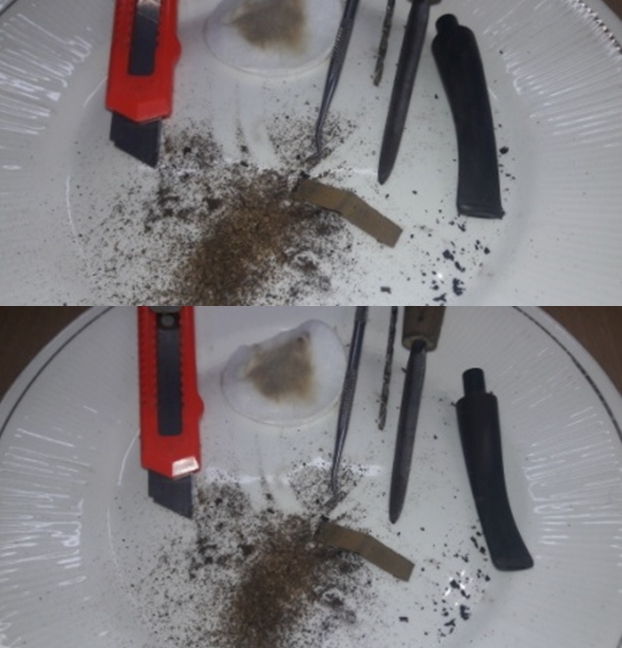
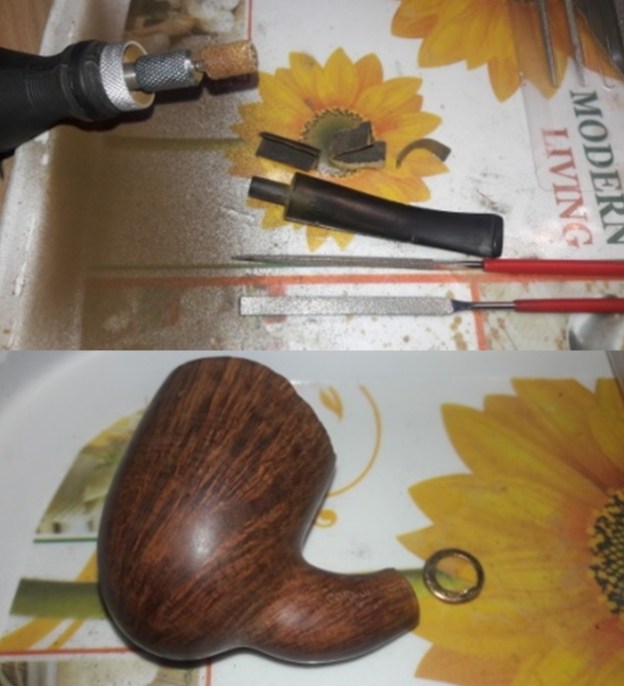
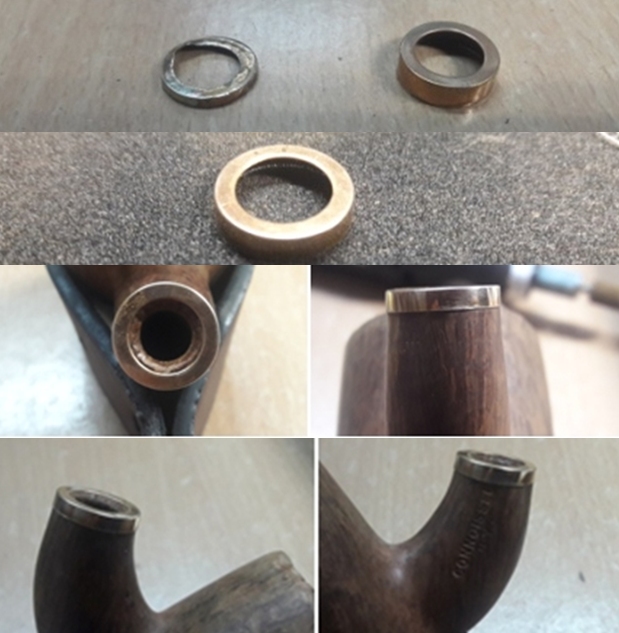
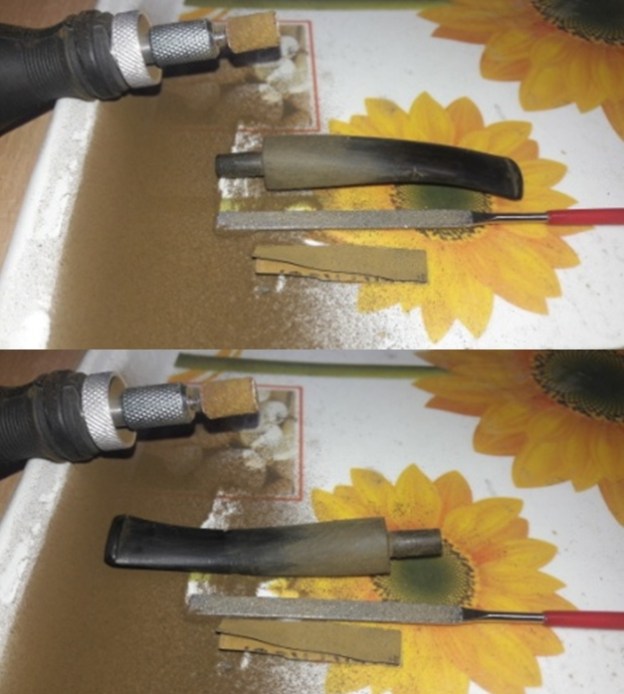
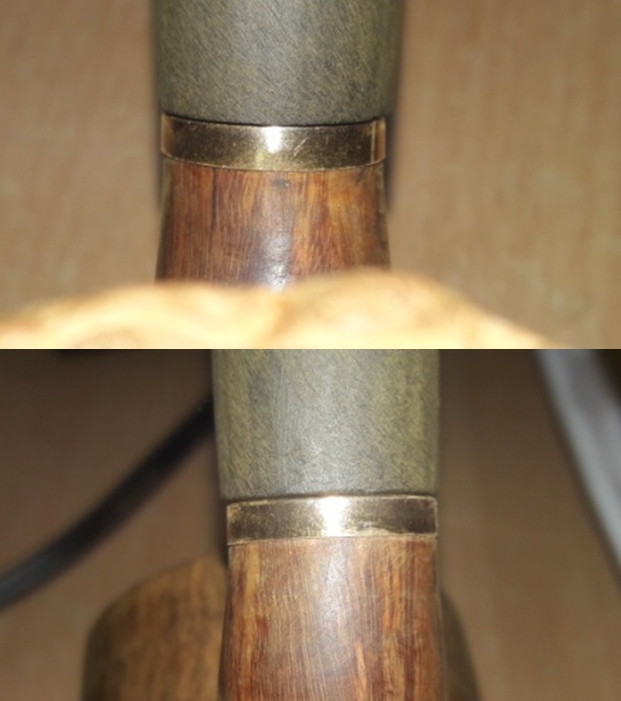
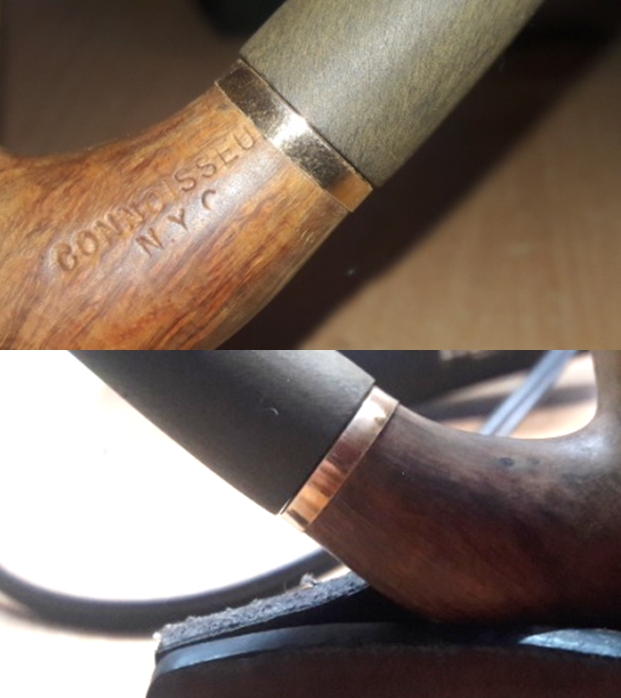
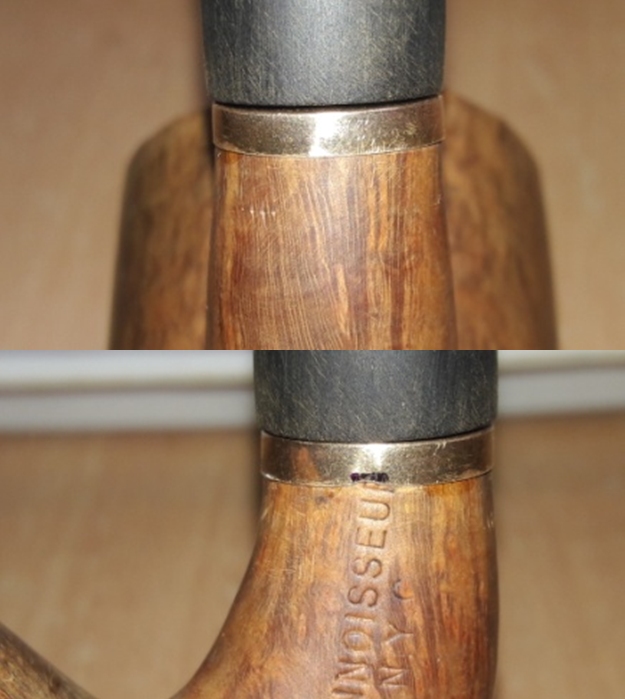
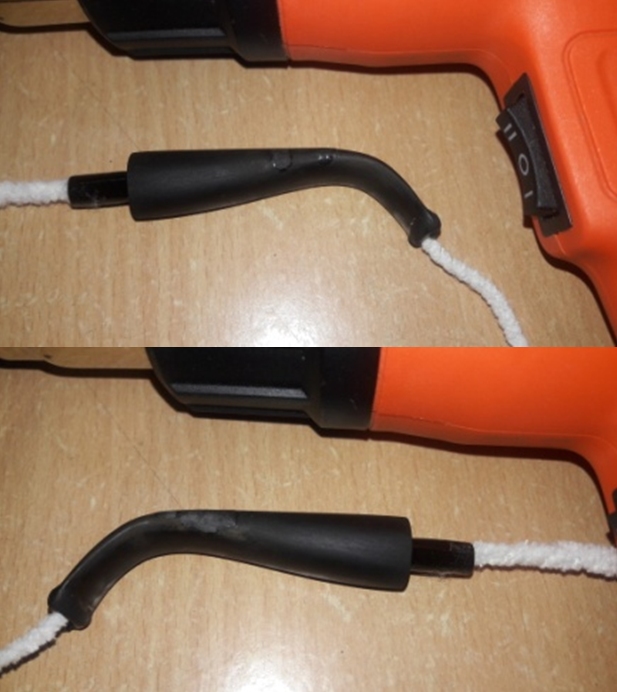
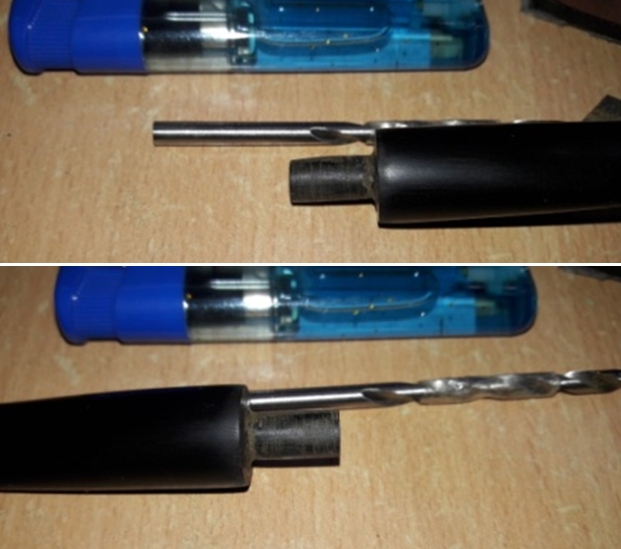
I began the process of refurbishing this pipe with cleaning the internals of the stem using pipe cleaners with isopropyl alcohol (99.9% pure) and dunking the stem in to “Before and After Deoxidizer” solution developed by my friend Mark Hoover. The solution helps to draw out heavy oxidation to the surface making its removal a breeze, while the minor oxidation is eliminated to a very great extent. I usually dunk stems of 5-7 pipes that are in-line for restoration and this pipe is marked in pastel blue arrow. I generally allow the stems to soak in this solution overnight for it to work its magic.With the stem soaking in the deoxidizer solution, I decided to remove the broken portion of the tenon from the shank. I select a drill bit that was slightly bigger than the tenon airway opening and mount it on my hand held drill. Very gently holding the drill absolutely straight, I give the drill machine a few forward turns. Once the drill bit is firmly embedded in to the broken tenon, I turn the drill machine in reverse. The reverse turns pull the broken end of the tenon out from the mortise. I breathe a sigh of relief as this is a very delicate step and a lot of things can go wrong if not executed with precision and patience. I further work the stummel, reaming the chamber with my PipNet reamer using head sizes 1 to 3. Using my fabricated knife, I further ream out the cake from places where the PipNet reamer could not reach and follow it with sanding the chamber walls with a 220 grit sand paper. I wipe the chamber with isopropyl alcohol and a cotton swab to remove all the carbon dust. This final cleaning of the chamber reveals a minor indentation in the wall opposite the draught hole, a result of over enthusiastic use of pipe cleaners to clean the mortise (marked in yellow semi- circle)!! Though not a major issue now, one will have to be careful with using pipe cleaners in future. Next, I clean the mortise with hard bristled and regular pipe cleaners dipped in isopropyl alcohol. I scrub the external surface of the bowl with undiluted Murphy’s oil soap and hard bristled tooth brush and dry it using paper towels and soft cotton cloth. I carefully clean the plateau rim top with a soft brass wire brush to remove the accumulated dirt and debris from the surface. Thereafter, I clean the mortise, plateau rim top and stummel surface with anti-oil dish washing soap on a shank brush and a tooth brush. The entire stummel, including the plateau rim top, cleans up nicely. I set the stummel aside to dry out naturally. The smells from the pipe, though reduced, are still very strong. Close observation of the stummel reveals the culprit to be the now moistened accumulated gunk in the mortise. Using my dental tools, I assiduously pick out and clean the mortise of all the gunk. I also clean the mortise with q-tips and alcohol. The amount of old grime that is scraped out from the mortise itself tells the story. The mortise is now clean and smells fresh.Moving ahead, I now address the crack that is seen on the right side of the shank, extending from the shank end to nearly half distance towards the stummel. Firstly, I clean off all the debris that is lodged in the crack using dental floss. The thin floss cleans the crack of all the dirt without widening it.I follow up this cleaning of the crack by marking the end points and turning points of the crack with a sharp dental pick. These marks help to guide the drill bit when drilling the counter hole. I take care that the drill is just sufficiently deep enough to arrest the further spread of the crack and not a through hole.I fill this crack with a mix of CA superglue and briar dust. To ensure a tight fill I clamp it down with pliers till the mix had cured, which by the way, is instantaneous!! Once the repair has cured for couple of hours, I sand it down with a flat needle file to achieve a rough match with the rest of the stummel surface. I fine tune the match with  220, 400 and 600 grit sand paper.To further stabilize the crack and prevent it from splitting again, I decide to place a band over the shank end. I select a band that is a tad bit smaller than the shank end diameter. When I place this band over the shank end, I realize that the last two letters of the stamping are being masked. I decide on grinding away the excess material from the band with my sanding drum mounted on a hand held rotary tool to a size which while being appropriate to stabilize the crack will not mask the stampings. The process is long and fraught with mistakes… The band has flown out of my hands a few times, since it can not withstand the stress of the sanding drum and is deformed , not to mention the time factor involved. However, through all these difficulties, I have prevailed to shape a band for the shank end. This is the pictorial depiction of the process and the result. Once I am satisfied with the fit, I heat the band with a heat gun in order to expand it and fix it over the shank end. I have avoided gluing it securely in place just in case I may have to revisit the entire process and go for a fresh band. Here is how the band fits over the shank end. Truth be told, I am not very confident that the band would be a success given the fitting of the band over the shank end. I set the stummel aside and decide to replace the tenon on the stem. I have explained in great detail the procedure that I have learnt and followed while replacing the tenon on a Preben Holm # 7 FH pipe. To avoid repetition of the process, I would request all to refer to the write up and other literature on the subject that is available on rebornpipes.

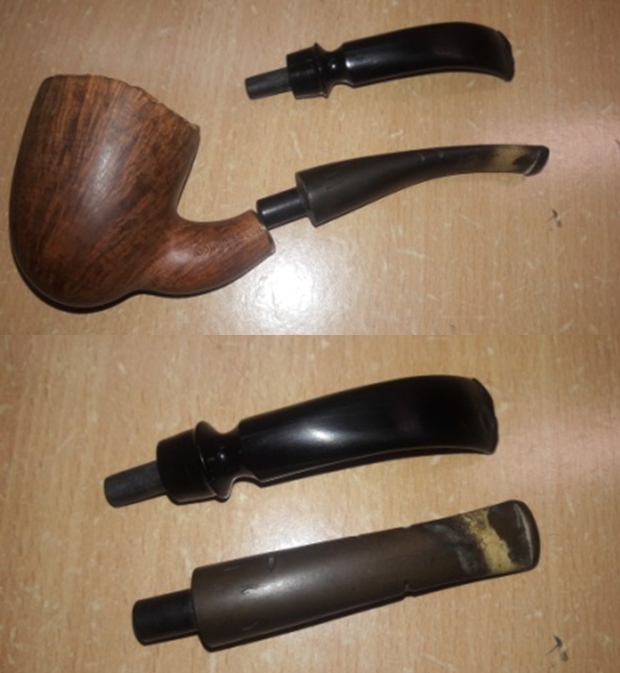
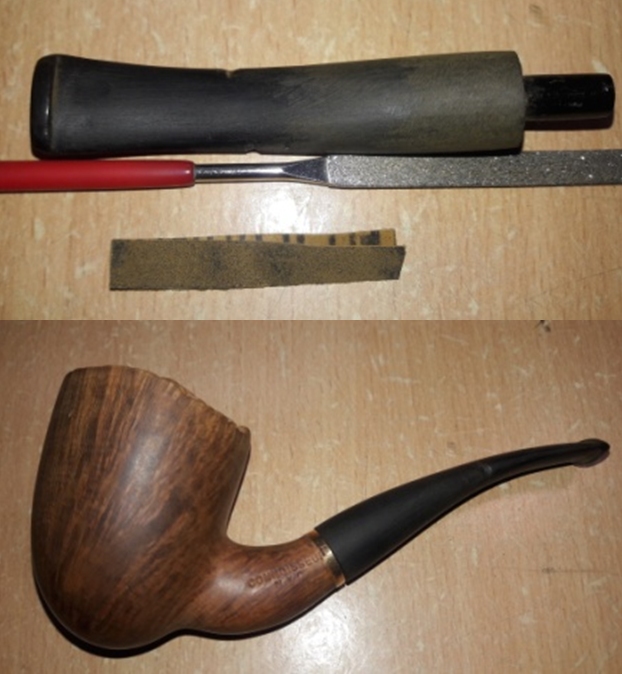
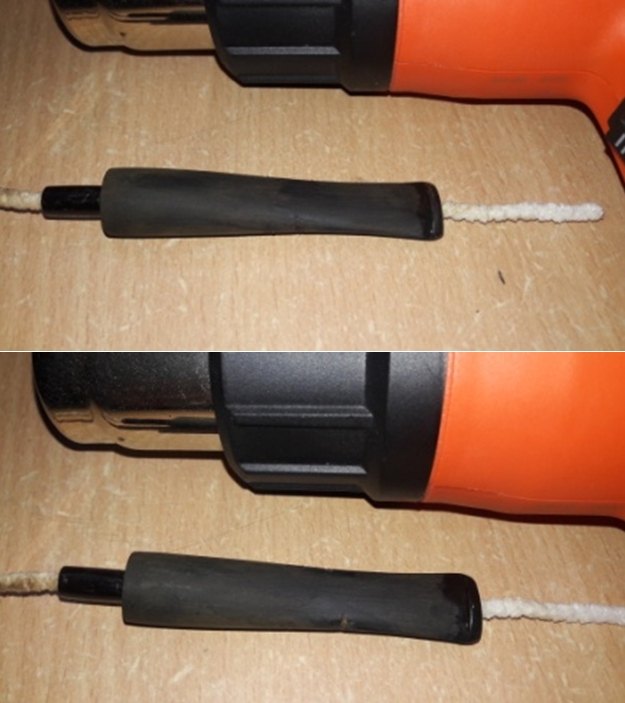
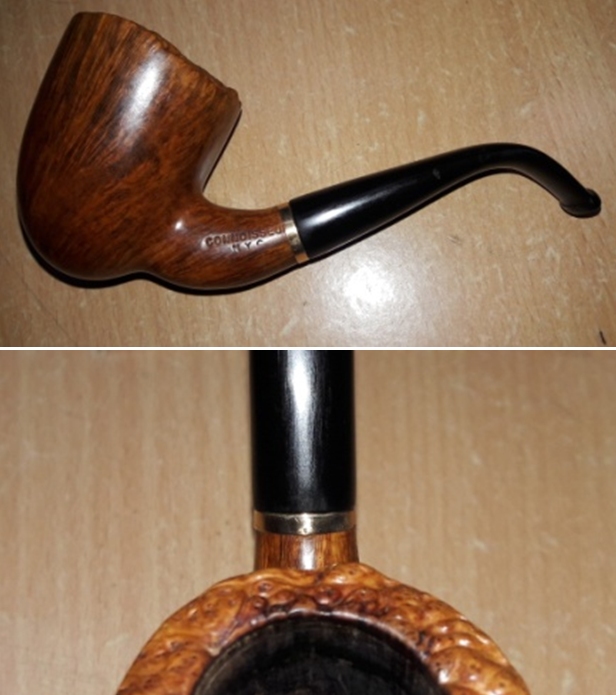
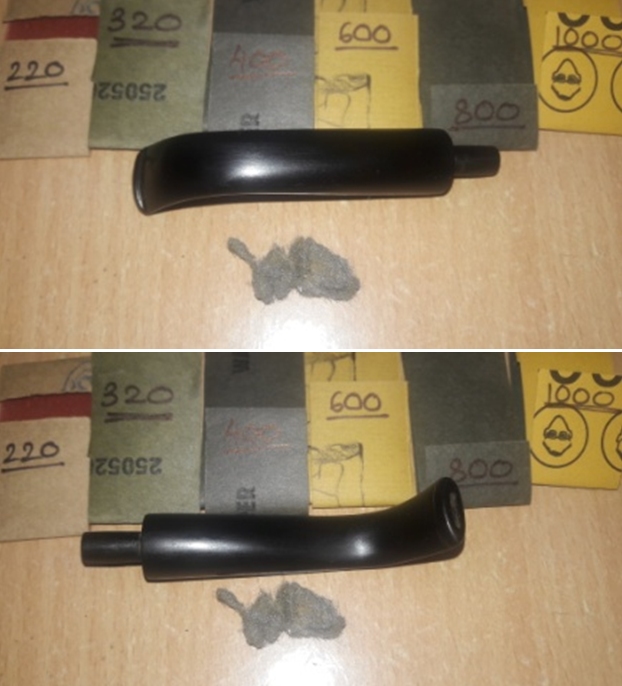
Given below are a series of sequential pictures explaining the procedure. Here I would also like to note that as I had mentioned earlier, the quality of the stem appeared circumspect and this was corroborated while drilling the stem air way to accommodate the new tenon. The plastic or some such low quality of the stem did pose a lot of resistance during the drilling and a straight drill was very difficult. However, my persistence has paid off and I am happy with the replaced tenon. Once the tenon is replaced, I try the fit of the stem in to the mortise. The fit though snug, reveals gaps and the seating of the stem in to the mortise is not flush. No amount of tweaking and minor adjustment by sanding of the tenon can ensure a flush seating. I feel that I have botched up the banding of the shank end and that is what has caused this issue. Here is how the seating appears after all the adjustments and tweaking. At this point in restoration, I shared pictures of this issue and then later in the day had a FaceTime chat with my Guru, Steve. Steve, with his vast experience and having worked on and researched a Connoisseur pipe before, immediately commented that the stem is not the right style for Connoisseur pipes and could be a replacement stem. I have another Connoisseur pipe (which awaits restoration) with a saddle stem in my collection and when the stem of this freehand was compared, it was no where near the quality that was seen on the other saddle stem. The pictures below show the difference in quality of the stem material and finish between the two pipes. Thereafter we discussed the shank band and he suggested to reband the shank end while going in for a completely new stem. Thereafter, we went through my can of spare stems and selected one that would be the best match for this pipe. Here are the pictures of the shortlisted stem. The slightly bent stem with all the calcification is the one that would replace the one that the pipe came with. The shortlisted stem, I am afraid, is not in the best of condition. The tapered slightly bent vulcanite stem is nearly the same length as the replaced one while being very thick at the tenon end. The quality of the re-replacement stem is very good. The stem is heavily oxidized with significant calcium deposition and deep tooth indentations in the bite zone on either surfaces of the stem. A couple of deep chips are seen along the seam on either sides as well as on the lower and upper surfaces of the stem. The button surfaces on either side has bite marks and the edges are equally damaged and deformed. The tenon and the horizontal slot shows heavy accumulation of oils, tars and gunk. All in all, the refurbishing and shaping of this stem presents a ton of effort and time.I begin the refurbishing and reshaping of the stem by first cleaning the stem, both internally and externally. With my fabricated knife and a paper cutter, I remove the entire calcium sediments from the bite zone. Using a dental tool, I dislodge all the dried oils and tars from the tenon and slot end. I clean the stem internals with pipe cleaners and shank brush dipped in isopropyl alcohol. I sand the entire stem surface with a folded piece of 150 grit sand paper to remove some oxidation as well as to even out some tooth chatter from the bite zone. Once the initial cleaning is done, I move ahead for shaping/sizing the stem. The tenon is too thick for the mortise and that is my start point. I mount a sanding drum on to my hand held rotary tool and sand the tenon till I achieve a rough fit in to the mortise. During the entire process, I frequently check the progress being made as I do not want to sand too much material from the tenon, making for a loose fit.I fine tune the fit of the tenon in to the mortise by hand sanding with flat head needle file and 180 grit followed by a 220 grit sand paper. The tenon attachment with the stem is shaped with a triangular needle file. I check the seating of the stem in to the mortise after I remove the shank band. The stem fit is nice and snug. Before I move to the final fit and shaping of the stem, I decide to reband the shank end. This time I select a band that was a snug fit as against a size smaller as I have done earlier. To reduce the thickness of the band, this time I manually sand it over a 150 grit sand paper instead of using my rotary tool and a sanding drum. It does take a long time, but the end result is much better. The last letter “R” has been masked, but I shall deal with it later (will I…?). I still have not glued the band in place, just to be on the safer side!!Now with the band in place, I move ahead with shaping and aligning the stem. The first thing that I proceed to do is to shave of the excess meat from the shoulders at the tenon end. Readers, when I say excess, please be aware that the word excess does not convey the quantum of excess… It  was hell of a lot of material to shave off!! I mount a 150 grit sanding drum on to the rotary tool and go to town sanding off the material from the shoulders of the stem. Once I have achieved a rough match, I use a flat head needle file to further match the fit. I progress to manual sanding with a 180 grit sand paper to fine tune the match. This is how the stem profile matches with the shank end of the stummel…not quite there but getting close. I feel that the mid region of the stem needs to be trimmed a bit and do so with a flat head needle file and a 180 grit sand paper. Here is where I have reached at this stage. Truth be told, eye balling the shape is not the easiest way to achieve the exact shape since I am always seeing it, shaping it and matching it. It’s something akin to optical illusion that I am experiencing. There is a bit of overhang at the shoulders of the stem and I need to shave off some more material from the area above it. Also a slight gap is seen at the lower end and on the left side of the stem that needs to be addressed. I decide to take a break from all the sanding of the stem and move on to shaping the stem to match the profile of the stummel. I insert a pipe cleaner through the stem’s air way to prevent it from collapsing once the stem is heated. I first straightened the stem by heating it with a heat gun. To impart the requisite bend, I try to adopt the technique that my friend, Dal Stanton of PipeSteward fame, uses and that is to draw a diagram marked with the plane of the stummel rim top, a parallel plane that is required, the present profile of the stem and thereafter, the exact place and shape of the bend that is needed. Well, it is an attempt that I made, but ended up eye balling the exact bend to be imparted. I heat the stem with my heat gun till the vulcanite becomes pliable and gives it the necessary bend. I hold it in place till the stem had cooled down a bit and thereafter, hold the stem under cold water for the bend to set. The next issue that is addressed is of the stem repairs. I insert a triangle shaped index card covered in transparent tape in to the slot. The tape prevents the mix of superglue and charcoal from sticking to the index card. I mix superglue and activated charcoal powder and generously apply it over the bite zone, including over the button. I also fill the couple of deep chips along the seam on either sides as well as on the lower and upper surfaces of the stem with the charcoal mix and set it aside to cure. Once the mix has cured, I remove the index card from the slot. While the stem fill is set aside to cure, I polish the stummel with micromesh pads, wet sanding with 1500 to 12000 pads. This time around, I do not repeat the mistake of polishing the plateau rim top as I had done with the PH # 3 earlier! I wipe the surface with a soft cloth at the end of the micromesh cycle. The stummel looks amazing with a deep shine and beautiful straight grains popping over the stummel surface. I rub a small quantity of “Before and After Restoration Balm” in to the briar. I rub this balm deep in to the nooks and crannies of the plateau rim top surface with my fingers and let it rest for a few minutes. The balm almost immediately works its magic and the briar now has a nice vibrant appearance with the dark brown hues of the grain contrasting with the rest of the stummel surface. I further buff it with a horse hair shoe brush. The appearance of the stummel at this stage motivates me further to complete this project at the earliest. I set the stummel aside and all that remains was to shape, align and polish the stem! Now motivated with the appearance of the stummel, I turn my attention to the stem repair. The fills have cured nicely and I move ahead and began the process of filing and shaping the button end with a flat head needle file. At this stage, I get in touch with Steve on Face Time and discuss the progress on the stem. He suggests that a slightly sharper bend to the stem from near the bite zone would accentuate the shape and flow of the shank with that of the stem. He also suggests that the profile of the stem near the shoulder and mid region needs to be more slender. So, it is back to heating the end of the stem with the heat gun and giving it the desired bend, of course, eyeballing it to the desired shape!As discussed with Steve, with a flat needle file, I shave off some more vulcanite from the shoulder and the mid region of the stem. I further sand the stem with 220, 320, 400, 600, 800 grit sand papers and finally with 0000 grade steel wool. I wipe the stem with a cotton pad dipped in alcohol to remove the resultant dust and rub some extra virgin olive oil onto the stem and set it aside to be absorbed.I polish the stem with micromesh pads, wet sanding with 1500 to 12000 grit pads. I rub a little extra virgin olive oil in to the stem at the end of the micromesh pads polishing cycle. I complete the polishing regime of the stem by rubbing a small quantity of Extra Fine Stem polish developed by my friend Mark Hoover, and giving it a final polish with a soft cotton cloth. The stem is now nice, smooth and shiny.To apply the finishing touches, I first mount a cotton cloth buffing wheel on to my hand held rotary tool and apply a coat of Blue Diamond to the stummel and the stem to polish out the minor scratches. Boy, am I glad to finally have reached the home run stretch to complete this project!! I shared these images with Steve for his comment. He suggested that the shoulder overhang needs to be reduced and under belly to be straightened out more.Well, here I was back with a flat needle file and 220 grit sand papers as against carnauba wax and rotary tool!! I again diligently worked on these issues, frequently checking for progress being made. Once I am satisfied that the shoulder overhangs and under belly issues have been resolved, I check the seating of the stem in to the mortise. The seating is canted backwards. I address this issue by heating the tenon and slightly pushing it upwards (that is, in the opposite direction). I check the seating and am quite pleased by the overall appearance of the stem and its seating. Thereafter, I go through the entire regime of sanding and polishing as explained above. At the end of the micromesh pads, I complete the polishing regime of the stem by rubbing a small quantity of Extra Fine Stem polish developed by my friend Mark Hoover, and giving it a final polish with a soft cotton cloth. The stem is now nice, smooth and shiny. With a cotton buffing wheel that I use for carnauba wax, I apply a coat of carnauba wax to the stummel and stem and continue to work on it till the complete coat of wax is polished out. I mount a clean cotton cloth buffing wheel and give the entire pipe a once over buff. I finish the restoration by giving the entire pipe a rigorous hand buffing using a microfiber cloth to deepen the shine further. The finished pipe is shown below. P.S. – This project was more tedious than I had anticipated, mostly because of my own faults and errors in judgement.  But then, isn’t this the fun part of being of the learning curve? I shall be avoiding the following in my future restorations:

(a) Using a band that is a tad smaller then the shank end diameter. I would rather use a band that has a snug and perfect fit over the shank end.

(b) Using a rotary tool with a sanding drum to get the band to the desired size. It’s better, safer and precise to manually sand the band on a sand paper.

(c) Clamping the shank end after filling a crack. I am not sure, but I think that the clamping down may have caused a slight deformation that had caused me such grief with the seating of the stem.

(d) Less reliance on “eye balling” for sizing and shaping…need to get on with hunting for a “PIMO TENON TURNING TOOL” and a set of “VERNIER CALIPERS”.

I am really fortunate to be in the process of learning the nuances of pipe restoration and cannot thank Steve enough for his support and guidance.

Thanks for your patience and looking forward to input about the write up. Cheers…

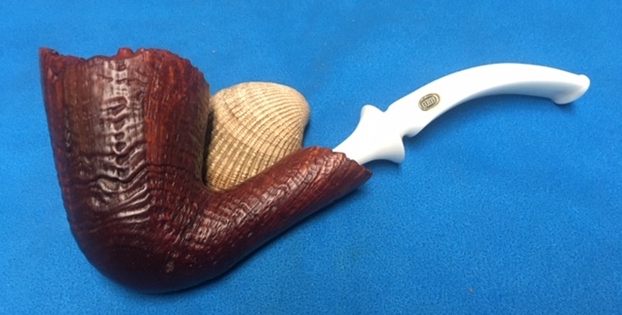
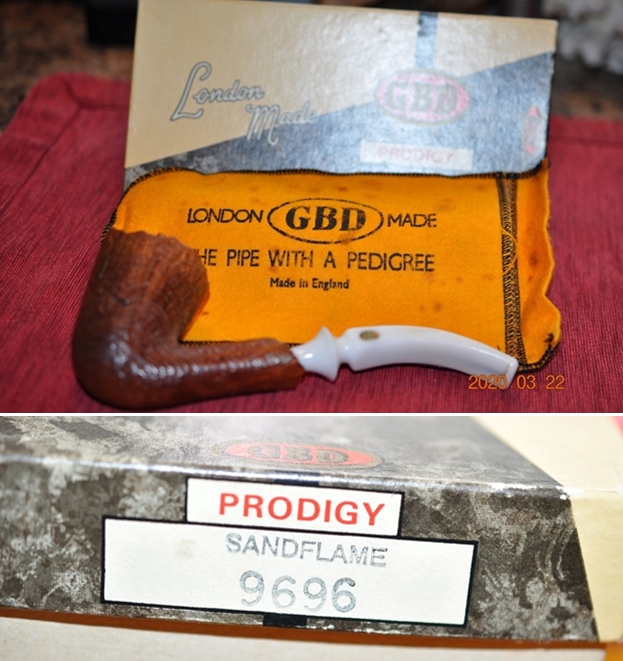
Look at this beauty – a GBD Prodigy Sandflame 9696 Freehand


Blog by Steve Laug

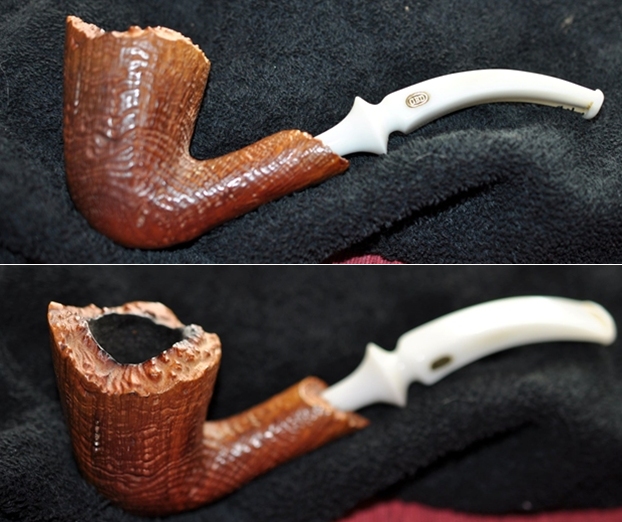
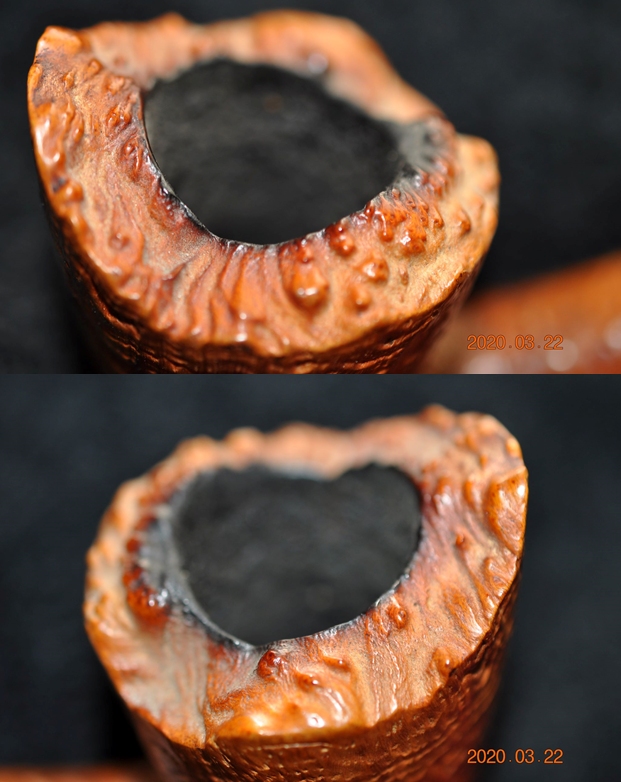
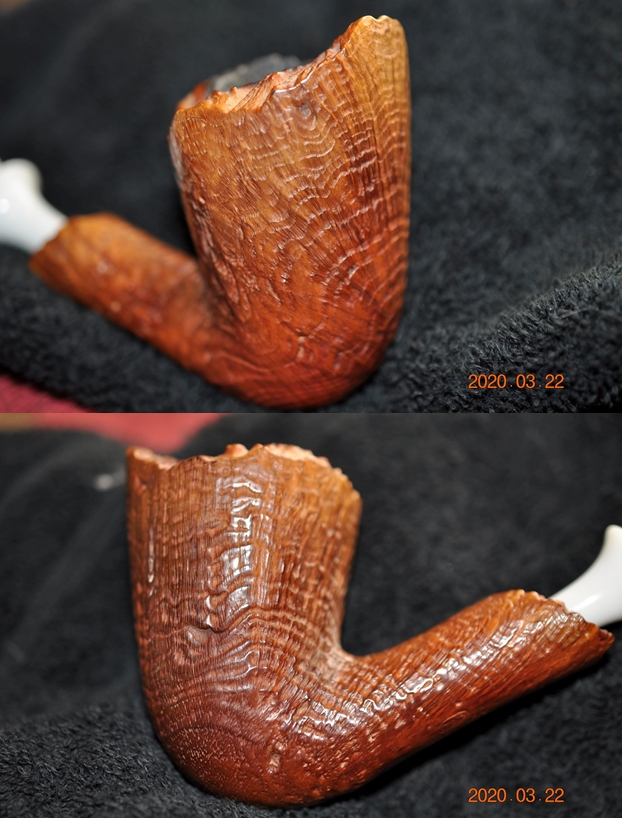
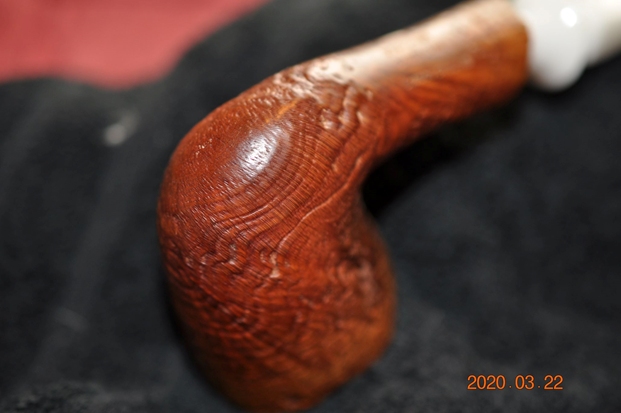
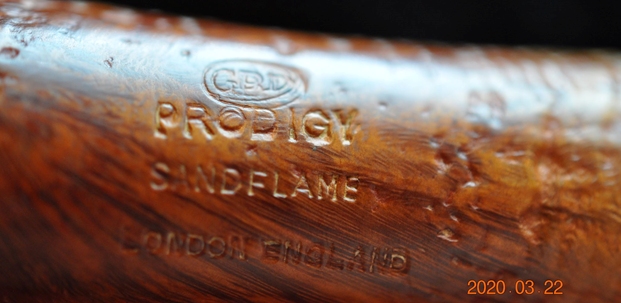
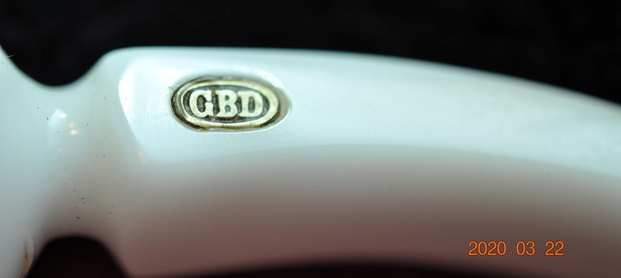
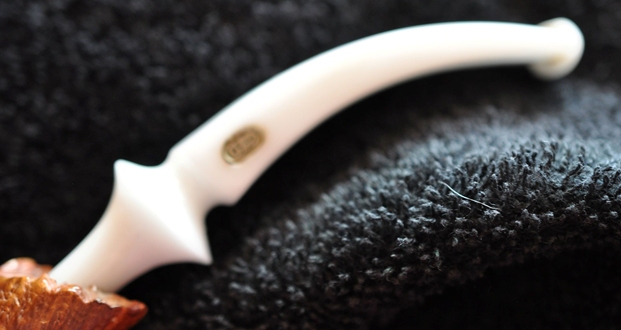
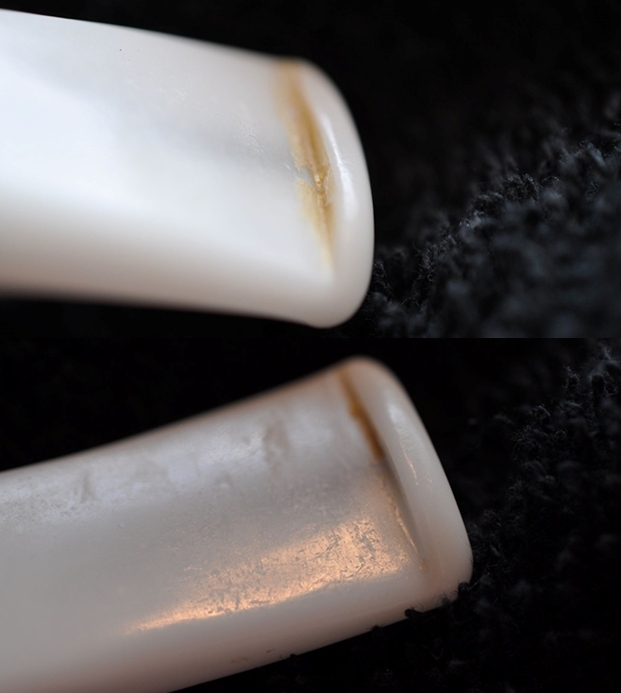
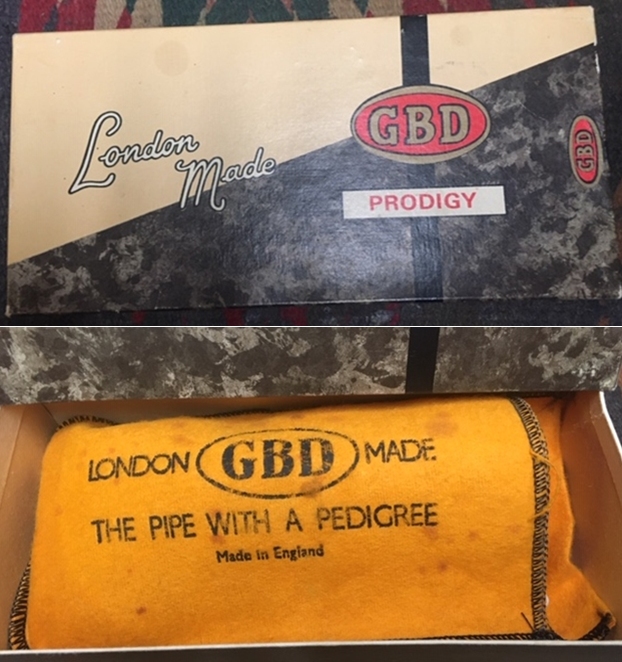
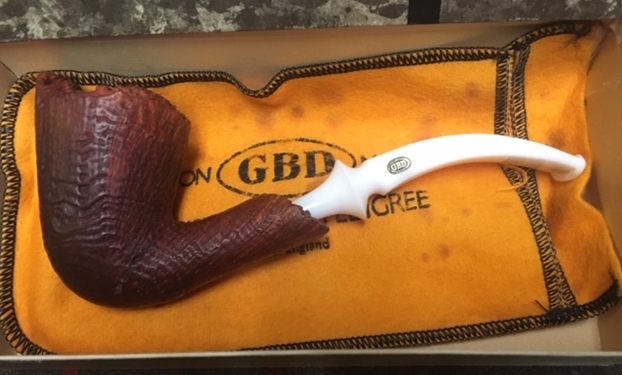
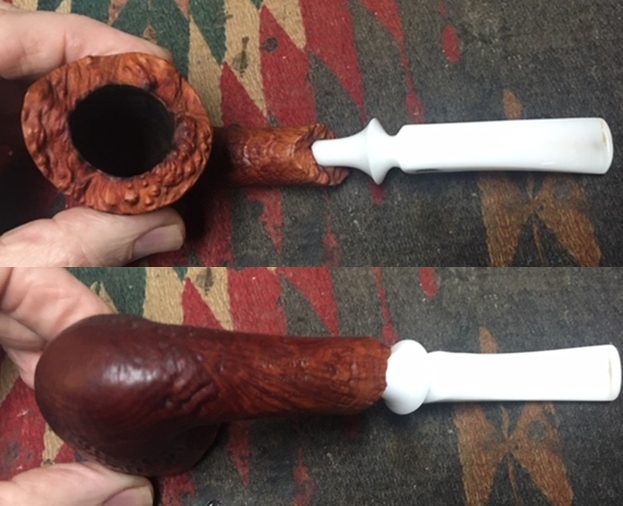
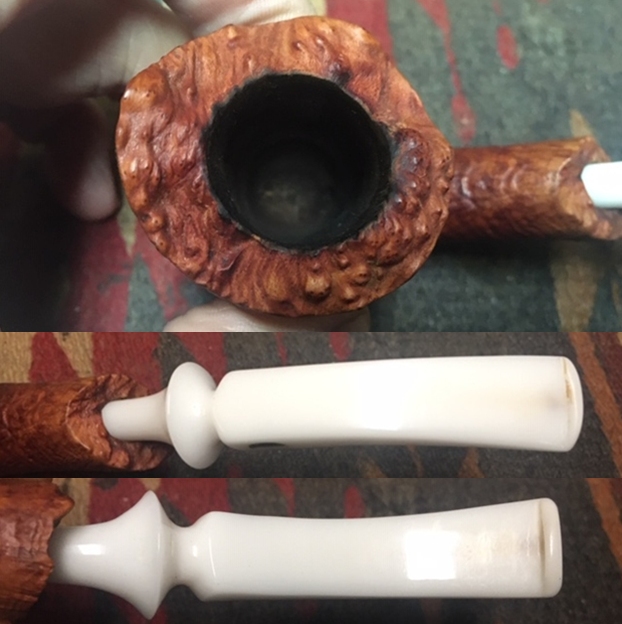
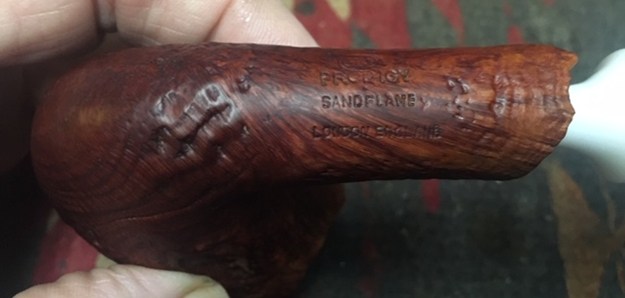
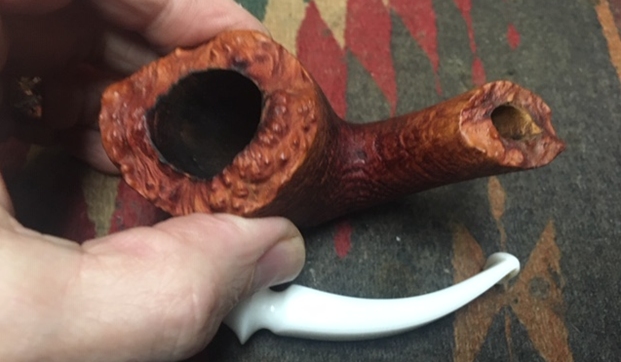
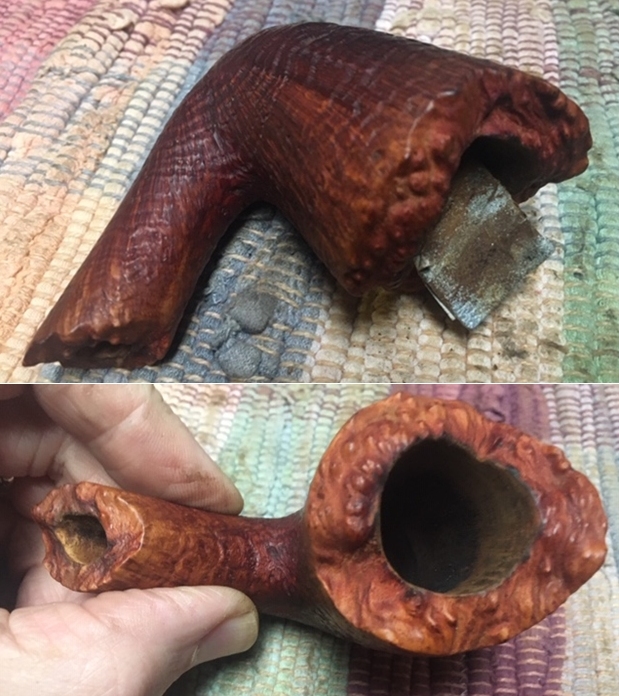
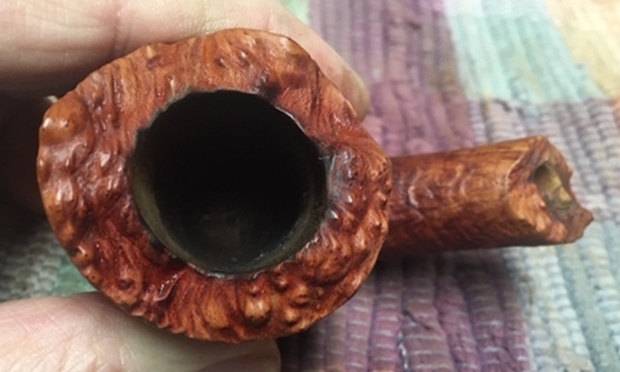
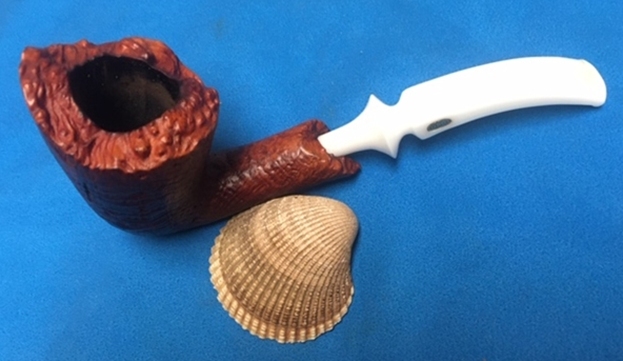
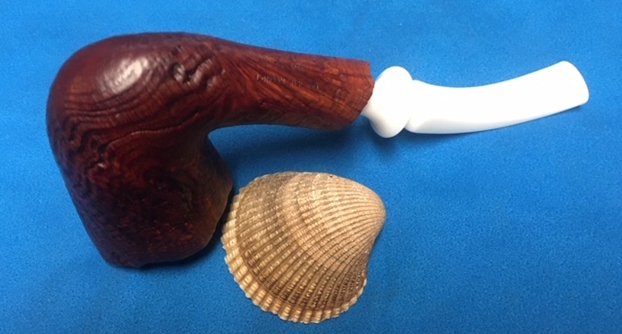
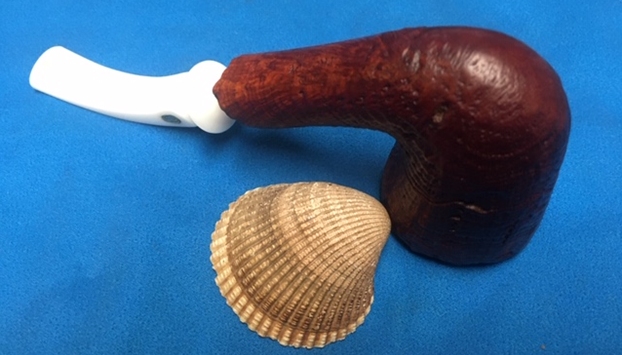
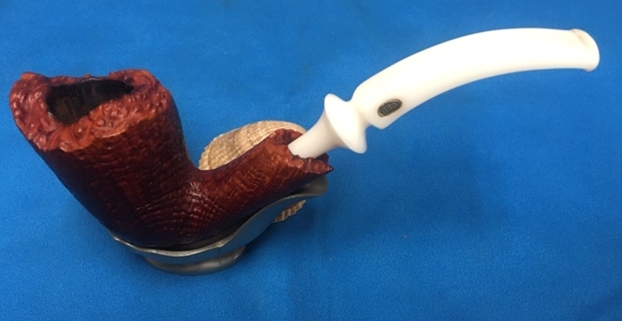
The next pipe on the worktable is one I have been looking forward to working on. It came in its original box as can be seen in the next two photos. The pipe was in a GBD pipe sock. The box was in great condition and read London Made GBD Prodigy. On the end of the box it reads Prodigy Sandflame 9696 which is the model and shape number. It is a nicely grained sandblast freehand with a white acrylic stem. Jeff took pictures of it as he unpacked it from the box.The pipe was in very good condition when he took it from the box. There were not a lot of issues to deal with in the cleanup and restoration. It is stamped on the underside of the shank GBD in an oval over Prodigy over Sandflame over London England. There was some darkening around the inner edge of the bowl, heavier toward the back side with a bit of darkening on the plateau top. There was a thick cake in the bowl that had remnants of tobacco stuck in it. The finish was dirty and there were spots of grime and oils. The white acrylic fancy saddle stem had a brass GBD roundel on the left side of the saddle. There were tooth marks on the top and underside ahead of the button. There was tooth chatter on both sides of the stem. There was some darkening in the airway of the stem at the button. Jeff took some photos of the pipe before he started his cleanup work. He took photos of the bowl and rim top to show their general condition. You can see the tars and darkening on the inner edge of the rim top. The cake in the bowl is thick and there is tobacco debris on the walls of the bowl. There were some shiny spots on the plateau rim top that would need to be cleaned off. The finish on the bowl is dull but still very stunning.Jeff took some photos of the sides and heel of the bowl to give an idea of the sandblast grain on this particular piece of briar. It is quite stunning with the plateau rim and plateau shank end. I cannot wait to see what it looks like once it is polished and waxed. He took a photo of the stamping on the underside of the shank to capture it for me. It is clear and readable. The GBD oval and the Prodigy line is double stamped. The rest of the stamping is clear and reads SANDFLAME over London England. He included the side of the stem with the brass GBD roundel on the left side of the saddle stem. This pipe has a classic freehand saddle stem that has a great profile. The white acrylic stem is in good condition other than tooth marks and chatter on the stem at the button. There is some darkening in button and airway. The photos below show the condition of the stem. I turned to Pipephil’s site to see if I could find any direct information on the Prodigy line and sadly there was nothing there regarding this line. I turned to Pipedia listing under GBD Model Information (https://pipedia.org/wiki/GBD_Model_Information) and read through that information. I found a description of the line that I include below.

Prodigy — England, unknown if also made in France: According to the 1976 catalog these were a limited production “oversize” line available in just a few shapes. Natural finish…

There was also a note at the bottom of the page that had a description of the pipe that I have in hand.

I also have an interesting Prodigy Sandflame, half bent tan sandblast free form with plateau top. I think it’s an unusual shape for a GBD…

I am pretty sure the pipe was GBD’s response to the Freehand craze of the 70’s but cannot prove that for sure. I moved forward to work on the pipe itself and see what I had to do with it. I decided to take photos of the opening of the box so you can experience looking at this pipe the way I did when I received it from Jeff. I opened the box, took out the sock and removed the pipe. It really is quite stunning to look at the first time. I took the pipe out of the box and turned it over in my hands to see it from various angles. I always do that to get a feel for what I am going to have to do with the pipe in my part of the restoration process. In this case there was little to do. The pipe had come back looking amazing. Even the stem which had the most issues to work on when I looked at the photos above looked like new, with most of the tooth chatter gone. There was some darkening in the airway, the button and on the end of the tenon that would need to be looked at a bit but I was impressed. Jeff had done his normal thorough clean up – reaming, scrubbing, soaking and the result was evident in the pipe when I unpacked it. I took photos of the pipe before I started my work on it. Just look at the sandblast grain on this Freehand pipe. It was quite beautiful! I took some photos of the rim top and stem. The rim top and bowl looked very good. The cake and lava overflow were gone and the inner rim looked better. Jeff had been able to get rid of most of the darkening and all of the lava and tars. The plateau rim top looked very good. The close up photos of the stem shows that it is a much cleaner. There was still some light tooth chatter and some darkening in the airway and button slot that I would try to minimize some more but it looked good.I took a photo of the stamping on the underside of the shank to show the condition after the cleanup. Often the stamping takes a hit with the cleaning and is lessened in it clarity. Jeff does a great job in leaving the stamping looking very good.I removed the stem from the shank and took a photo of the pipe at this point. You can clearly see the plateau on the shank end in the photos below. It is in great condition.I started my restoration work on this pipe by addressing the darkening on the inner edge of the bowl. I used a folded piece of 220 grit sandpaper to clean up the edge and followed that with a folded piece of 400 grit wet dry sandpaper. The finish rim top looked very good. I worked some Before & After Restoration Balm into the surface of the briar with my fingertips and a horsehair shoe brush to get in the nooks and crannies of the blast and the plateau on the rim top and shank end. The product works to clean, enliven and protect the briar. I let the balm sit for about ten minutes and then buffed with a cotton cloth to raise the shine. The photos show the bowl at this point in the restoration process. I set the bowl aside and turned my attention to the stem. I started by working on the tobacco staining on the white stem. I cleaned off the tenon end with a piece of folded sandpaper and was able to remove the majority of the stains. I worked on the inside of the button with a folded pipe cleaner and alcohol and remove all of the staining in the slot and button. I worked on the airway in the stem with alcohol and pipe cleaners going both directions and scrubbing. I also used some Soft Scrub on a pipe cleaner and worked it back and forth in the airway. While it is definitely better there is still some remaining stain. I sanded out the tooth chatter and blended in the repairs with 220 grit sandpaper and started to polish it with a folded piece of 400 wet dry sandpaper. Once it was finished it was smooth.I used some Denicare Mouthpiece Polish that I have in my kit to start polishing out some of the scratches and remaining stains on the surface of the stem. I rubbed it in with a cotton pad and my finger tip and buffed it off with a cotton pad.I polished the stem with micromesh sanding pads – dry sanding with 1500-12000 grit sanding pads. I wiped it down after each sanding pad with a cloth containing some Obsidian Oil. I finished polishing it with Before & After Pipe Stem Polish – both Fine and Extra Fine and buffed it off with a cotton cloth. Once again I love this part of the process when all of the parts come together and the pipe looks better than when we started the cleanup process. I put the stem back on the bowl and buffed the pipe lightly with Blue Diamond on the buffing wheel. I carefully avoided the stamping on the shank sides during the process. I gave the bowl multiple coats of Conservator’s Wax and the stem multiple coats of carnauba wax on the buffing wheel and followed that by buffing it with a clean buffing pad on the buffer. I hand buffed the pipe with a microfiber cloth to deepen the shine. The finished pipe is a real stunning example GBD’s response to the Freehand Craze of the 1970s. The sandblast grain and the way the shape follows it is very well done. This is the first Prodigy I have seen or worked on and I have worked on a lot of GBD pipes. Give the finished pipe a look in the photos below. I can only tell you that it is much prettier in person than the photos capture. The dimensions of the pipe are Length: 6 ½ inches, Height: 2 ¾ inches, Outside diameter of the bowl: 1 ¾ inches, Chamber diameter: 7/8 of an inch. This Made In London England Prodigy Sandflame 9696 Freehand is a great looking pipe in excellent condition. Thanks for walking through the restoration with me as I worked over another beautiful pipe. I was having a FaceTime chat with Paresh while I was working on this one and it will soon be heading to India to join his collection of Freehand pipes. Thanks for your time.
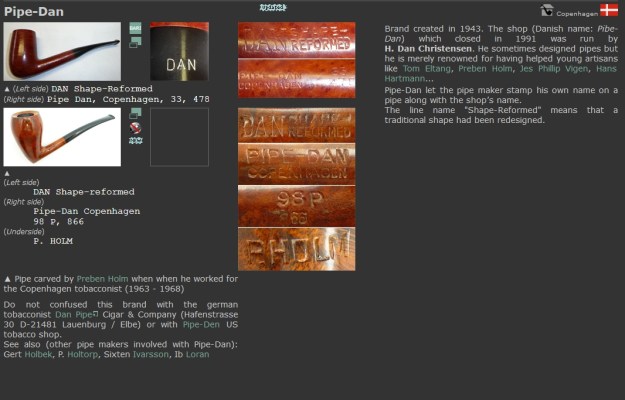
 

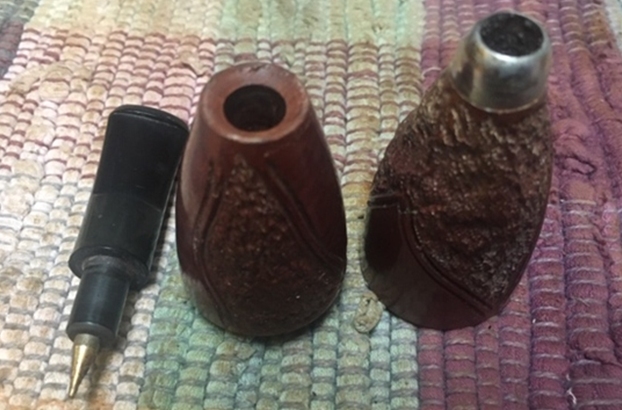
Cleaning up a lightly smoked Italian Made Zeppelin Style Cigar Pipe


Blog by Steve Laug

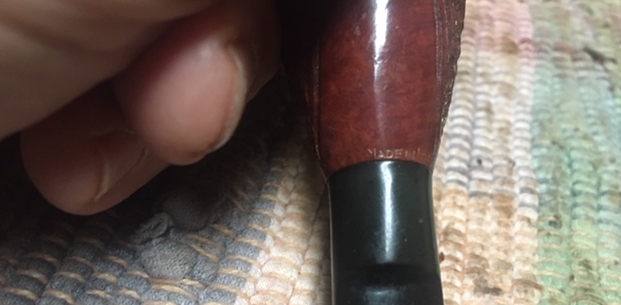
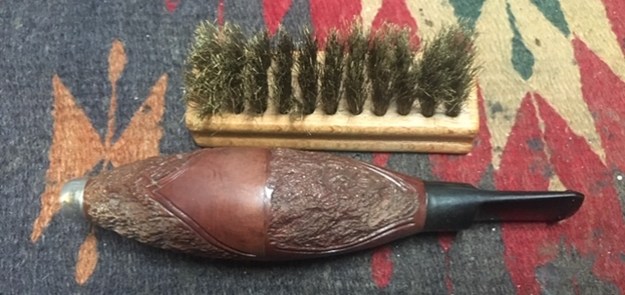
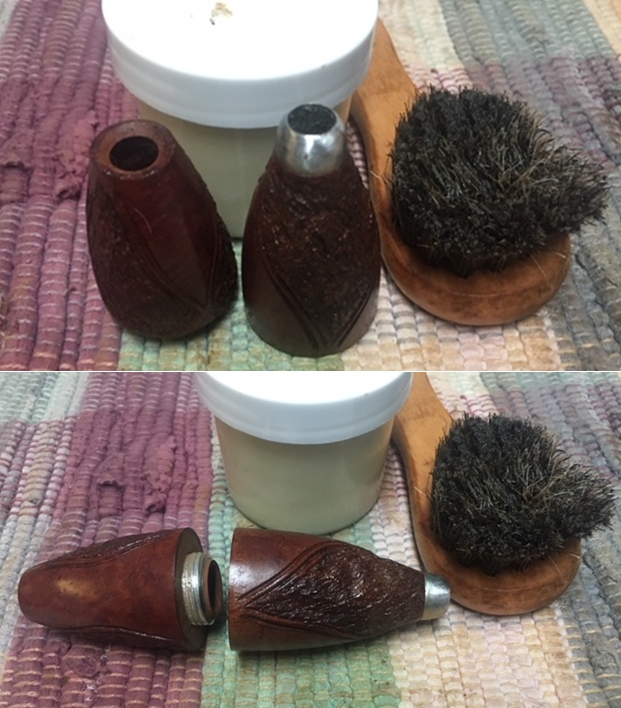
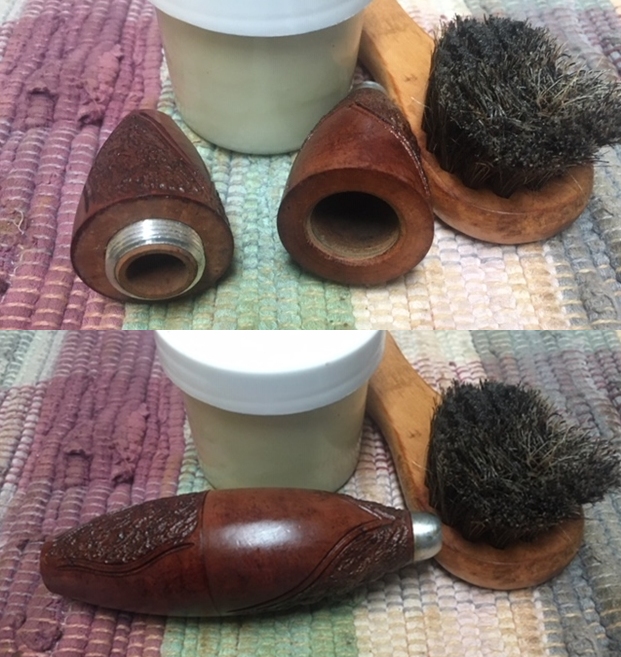
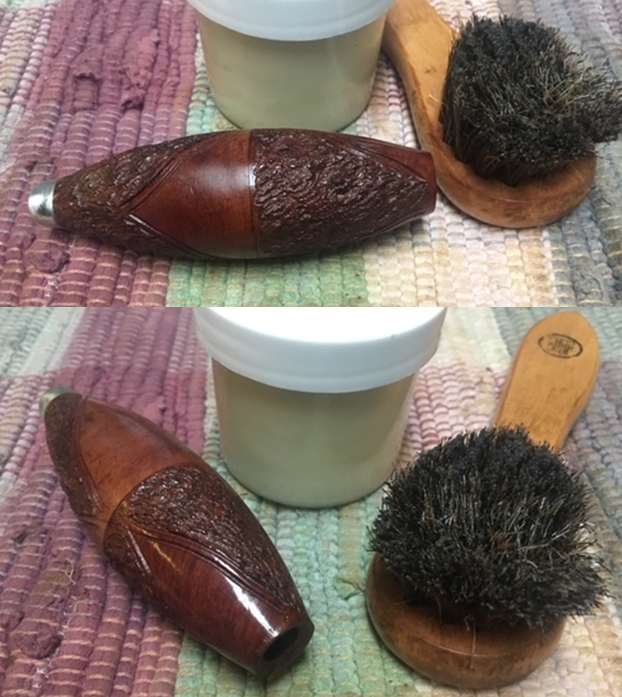
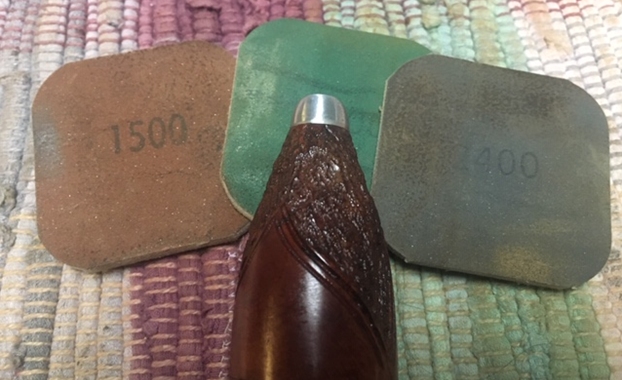
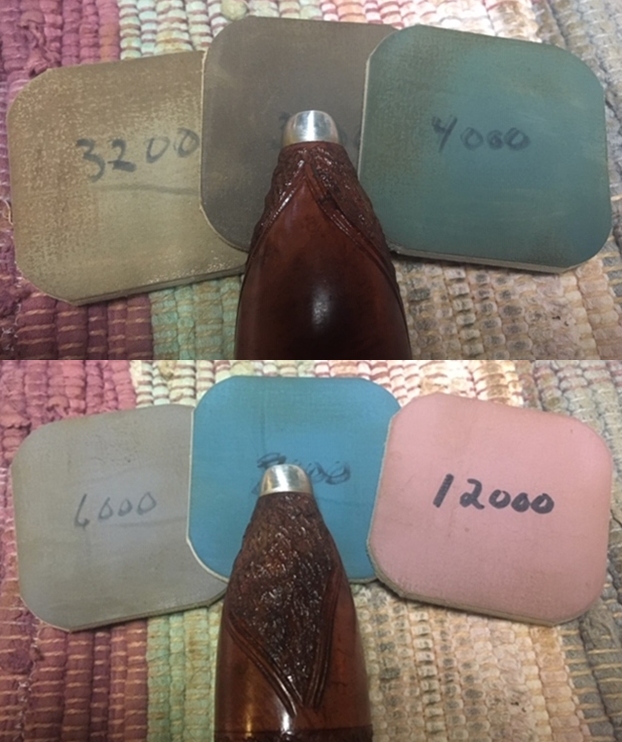
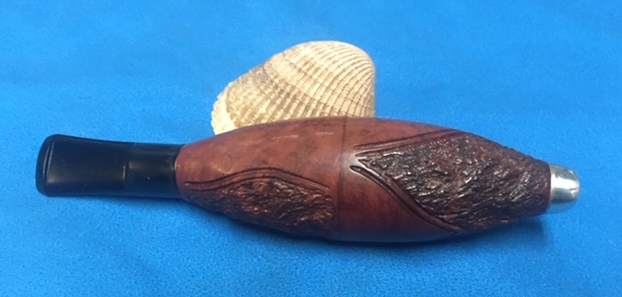
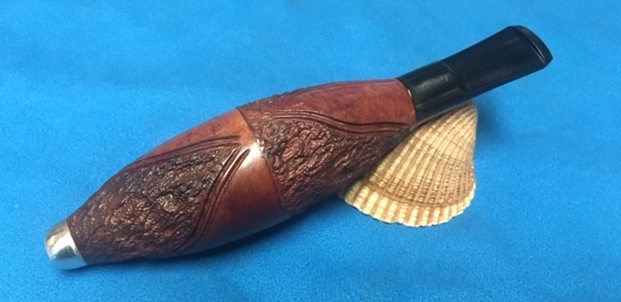
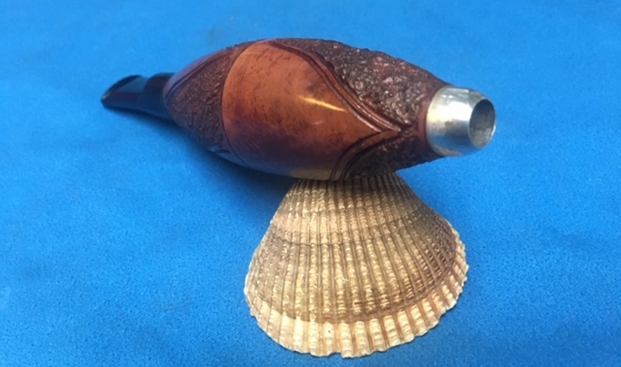
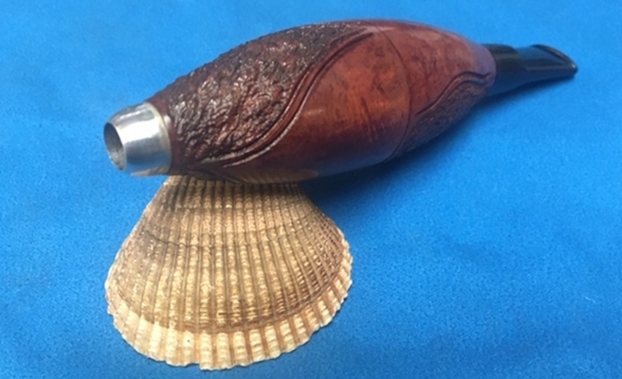
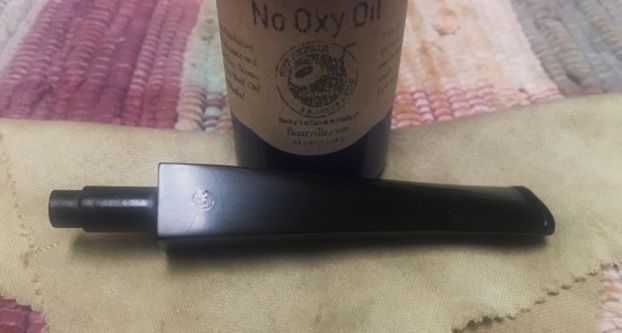
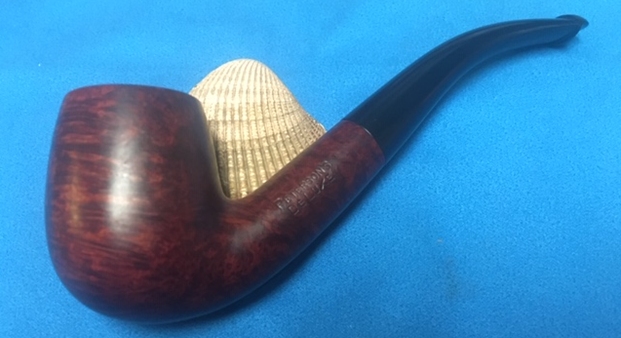
Jeff and I pick up a lot of pipes from a variety of places. The last time I visited him in Idaho I went through out boxes of pipes to be restored and picked out some unsmoked pipe that I could quickly spruce up and turn around on the rebornpipes store. This is another one of those pipes. It is called a Sparkless, Zeppelin or Cigar pipe. It unscrews in the centre of the pipe and the tobacco is stuffed in the cone side and then the pipe is screwed back together. I have yet to read a definitive description of how to light it. Some light it before putting it back together and others light it through the cone end. It remains a mystery to me! It has a vulcanite saddle stem. It is stamped Made In Italy around the thin band between the briar and the vulcanite stem. The pipe was lightly smoked and dusty from sitting around for a long time before coming to us. I say lightly smoked where actually I am not sure if a full bowl was ever smoked in it. It is impeccably clean on the inside with slight darkening in the bowl portion. The finish was a mix of smooth and rusticated in twists and turns around the bowl. It dirty but you can see the finish was okay. The nickel plated cone is oxidized but was not dented. The stem looked good but had some small nicks and scratches in the surface. Otherwise it was a great looking little pipe. It is a unique pipe for sure and well made. I took some photos of the pipe before I cleaned and polished it. I took a close-up photo of the nose cone of the pipe and of both sides of the stem. You can see the dust and debris in the rustication on the nose cone photo. That is how the rustication looks all around the bowl. The stem is scratched and dirty. It looks like it might have had a price tag sticker on it that left behind some stickiness. The smooth portions also seemed to have a light shellac or varnish coat on them that was flaking.I took the pipe apart and took some photos to show what I was trying to explain in the opening paragraph. You can see the front half is threaded in the briar. The mouthpiece end has metal threads over the briar. I removed the bit/stem from the other end and took a photo. It had a metal cone shaped stinger apparatus that is built into the tenon. It looks like it is pressure fit in place. I took a photo of the Made in Italy stamp on the shank end of the cone – just above the stem/shank junction. It is stamped on the smooth portion of the briar.I started my clean-up of the briar with a wire brush. I worked it over the rustications to remove the grime and grit and over the smooth areas to remove the loose varnish or shellac coat. I followed that with a quick application of a 1500 grit micromesh pad on the smooth parts of the pipe. When I was finished it looked dull but clean.I wanted give a little life to the bowl finish so I worked some Before & After Restoration Balm into the surface of the briar with my fingertips and a horsehair shoe brush to get it into the grooves of the rustication. The product works to clean, enliven and protect the briar. I let the balm sit for a little while and then buffed with a cotton cloth to raise the shine. The photos show the bowl at this point in the restoration process. I polished the nickel nose cone with micromesh sanding pads – dry sanding with 1500-12000 grit pads. I wiped it down after each pad with a damp cotton pad. The cone took on a rich shine. I set the bowl aside and turned my attention to the stem. The nicks were prevalent on the surface of the stem so I sanded them out with 220 grit sandpaper and started the polishing with 400 grit wet dry sandpaper.I rubbed the stem down with Denicare Mouthpiece Polish – a red Tripoli like gritty pasted that seems to work really well to smooth out the scratches and remove light oxidation. I don’t think the product is made anymore but it is a great one to use while I still have a bit of it around. I wiped it off with a cotton pad to polish the vulcanite.I polished the stem with micromesh sanding pads – dry sanding with 1500-12000 grit sanding pads. I wiped it down after each sanding pad with a cloth containing some Obsidian Oil. I finished polishing it with Before & After Pipe Stem Polish – both Fine and Extra Fine and buffed it off with a cotton cloth. I gave it a coat of Briarville’s No Oxy Oil to preserve and protect it. I put the pipe back together and buffed the pipe with Blue Diamond on the buffing wheel. I carefully avoided the stamping on the shank during the process. I gave the bowl multiple coats of Conservator’s Wax and the stem multiple coats of carnauba wax on the buffing wheel and followed that by buffing it with a clean buffing pad on the buffer. I hand buffed the pipe with a microfiber cloth to deepen the shine. The finished pipe is actually a nice looking unique. Give the finished pipe a look in the photos below. The dimensions of the pipe are Length: 5 ¼ inches, Height: 1 1/8 inches, Outside diameter of the bowl: 1 ¼ inch, Chamber diameter: 5/8 of an inch. This unique Zeppelin style Cigar Pipe is a well-made little pipe in great condition. Thanks for walking through the sprucing up process with me as I worked over another beautiful pipe. This one will be going on the rebornpipes store shortly. If you are interested in adding it to your collection let me know. Thanks for your time.
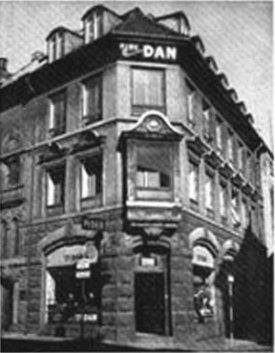


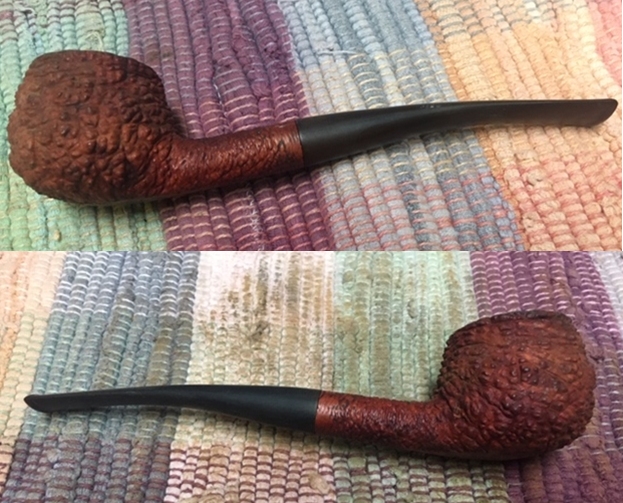
Restoring Jennifer’s Dad’s Savinelli Capri 313KS Root Briar Prince


Blog by Steve Laug

I decided to work on another of Jennifer’s Dad’s pipes. For the next pipe from the estate of George Rex Leghorn I have chosen a Savinelli Prince shaped pipe. You may not have read about this estate before, so I will retell the story. I received an email from Jennifer who is a little older than I am about whether I would be interested in her Dad’s pipes. My brother Jeff and I have been picking up a few estates here and there, so I was interested. Here is the catch – she did not want to sell them to me but to give them to me to clean up, restore and resell. The only requirement she had was that we give a portion of the sales of the pipes to a charity serving women and children. We talked about the organization I work for that deals with trafficking and sexual exploitation of women and their children and she decided that would be a great way to carry on the charitable aspect of her Dad’s character. With some great conversation back and forth she sent the pipes to Jeff and he started the cleanup process on them. Once he had finished cleaning them all he sent them to me to do my work on them.

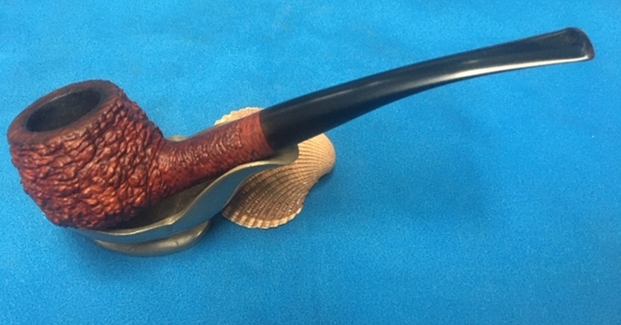
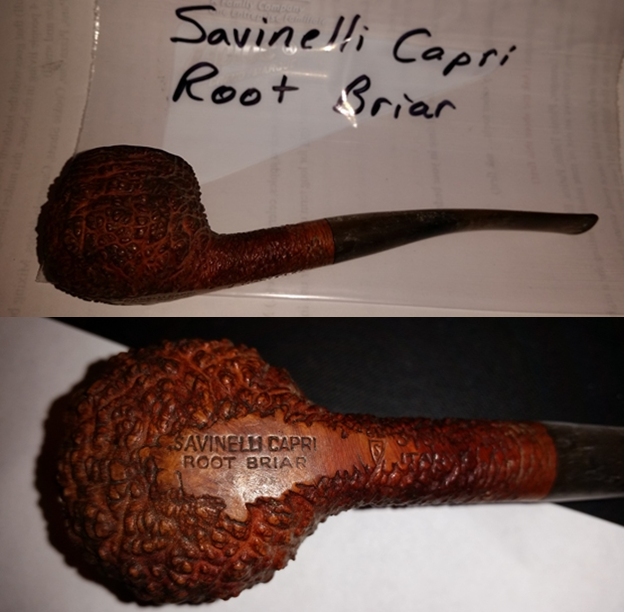
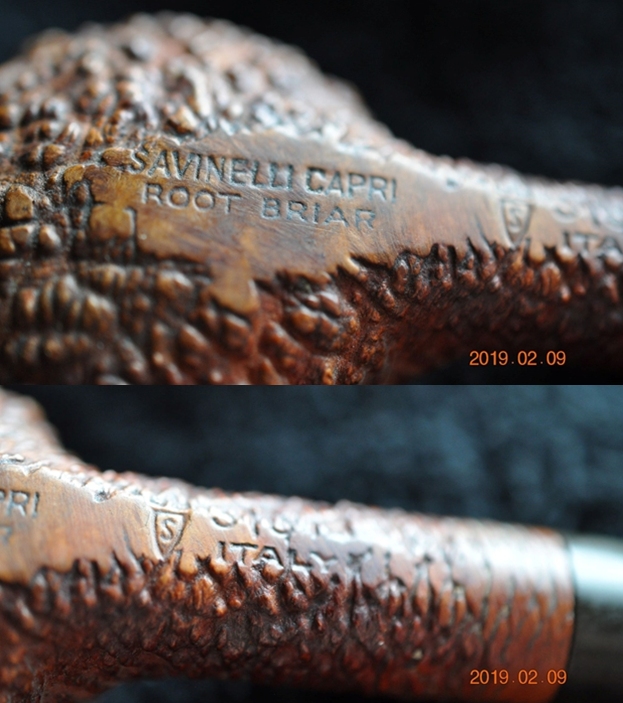
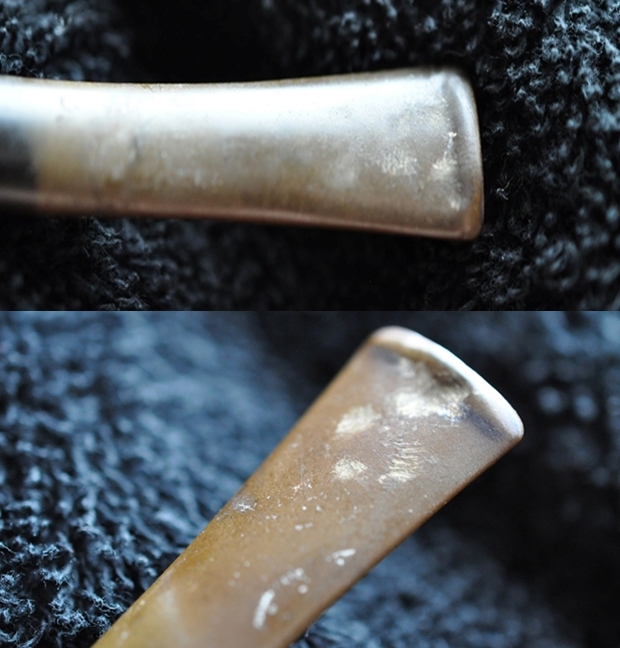
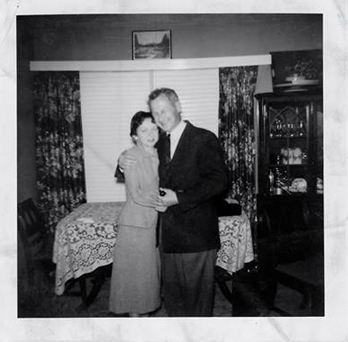
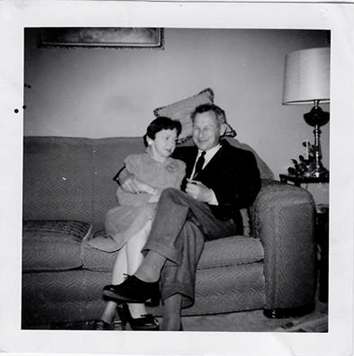
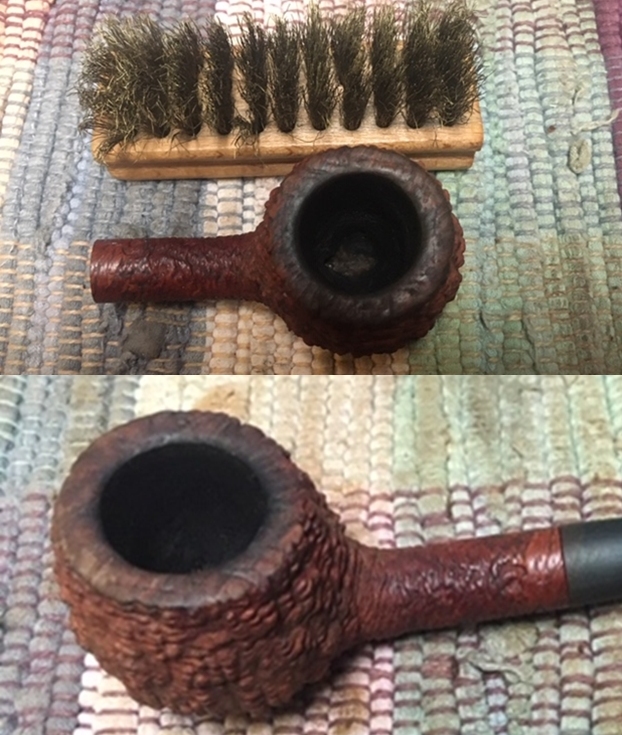
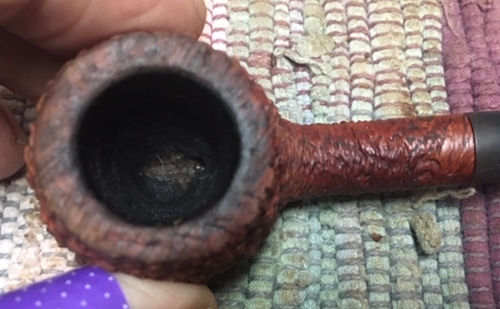
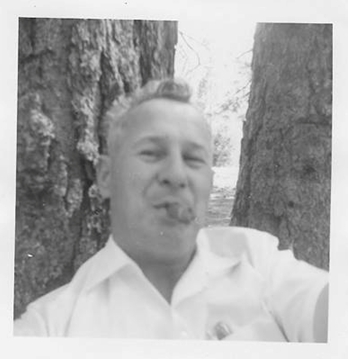
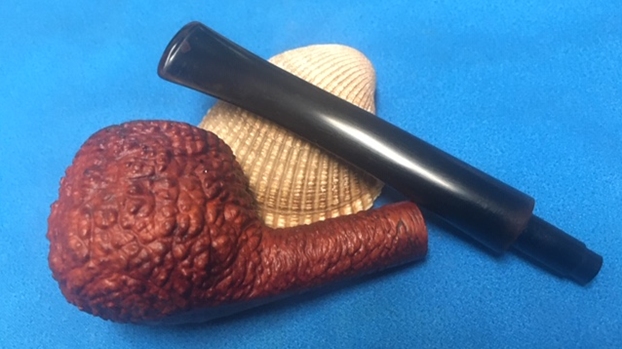
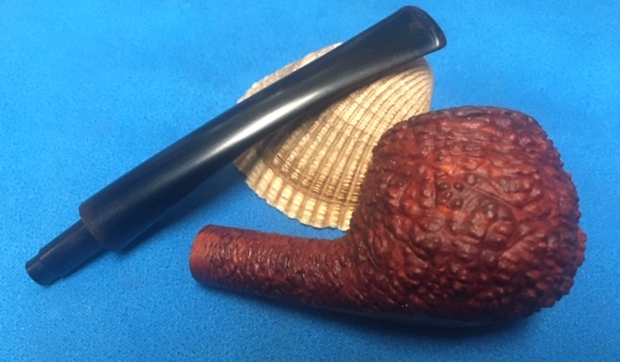
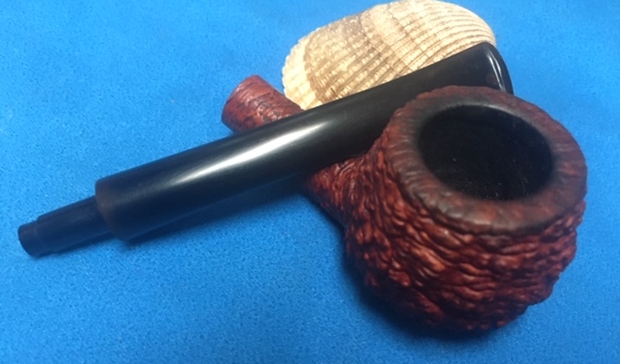
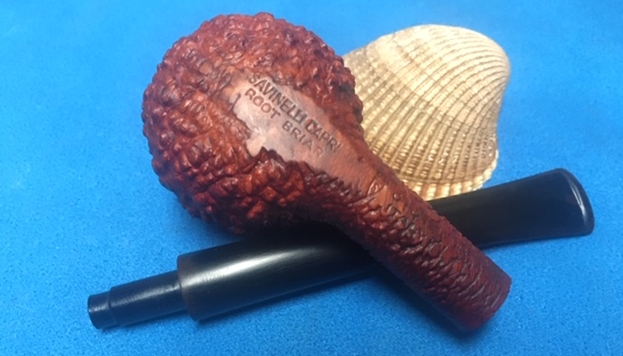
The pipe on the table is stamped on the underside of the bowl and shank on a smooth panel. On the heel of the bowl it is stamped Savinelli Capri over Root Briar. That is followed by The Savinelli “S” shield and Italy and the shape number that looks like 313KS but it hard to read as it is stamped in the rustication. The pipe has a Sea Rock or coral style rustication that I really like. The finish was very dirty, making it hard to see beyond that to the nice grain underneath that. There was a thick cake in the bowl and it had overflowed with lava onto the rim top. It was hard to know at this point the condition of the rim edges. The pipe was a dirty and tired looking old pipe. The stem was badly oxidized and there were George’s usual tooth marks and chatter on both sides just ahead of the button. It had been sitting in boxes for a lot of years and it was time to move ahead with the restoration. Jennifer took photos of the pipes she was sending. I have included the photos of this pipe below. When the box arrived from Jennifer, Jeff opened it and took photos of each pipe before he started his cleanup work on them. This pipe was another real mess but since it bore a coral finish which I like I could see some promise under all of the grime of the years. The shape was a Prince with the normal slightly bent stem. The briar appeared to be in good condition underneath the grime. The pipe really was covered with the grime and oils on the bowl sides from George’s hands. It left the finish looking mottled and dark on the high points. The bowl had a thick cake that had hardened with time. The lava overflow on the rim top filled in the rustication on the rim top. It was very thick but it could very well have protected the edges of the rim from damage. We won’t know what is under it until Jeff had cleaned it off. The stem was oxidized and there were deep tooth marks on both sides just ahead of the button. Jeff took photos of the pipe before he started working on it. I include those below.  Jeff took photos of the bowl and rim top to show the cake in the bowl and the lava build up on the rim top and dust and grime on the bowl. It was thick and hard but hopefully it had protected the rim and edges from damage. The lava coat looks horrible but it points to a well-used, favourite smoking pipe. Judging from the condition of George’s pipe I think it can be assumed that he was rarely without a pipe and that he seriously enjoyed smoking them. This was no exception. Jeff took a photo of the sides and heel of the bowl to show the condition of the finish – the grime and grit all over the sides and bottom of the bowl. The rustication is deep and dirty but it is interesting. This is a very tactile finish and one that I enjoy. Jeff took two photos of the stamping on the underside of the shank to capture all of it. It is very clear and readable other than the shape number 313KS which is in the rustication itself.    Jeff took photos of the top and underside of the stem showing the scratching, oxidation and tooth marks on the stem surface and button. The tooth marks are quite deep on both sides of the stem. Before I get on to cleaning up the pipe I thought I would once again include the tribute that Jennifer wrote to her Dad for the blog. She also sent some photos and an article that her Dad wrote for Jeff and me to be able to get a feel for him. I have included those below. Note in each of them that he is holding a pipe in his left hand. I asked her to also send me an email with a brief tribute to her Dad. Here is her tribute from an email to me.

Steve, I want to thank you again for accepting my dad’s pipes.  They were so much a part of my dad’s life that I could not simply discard them. But as his daughter, I was not about to take up smoking them either. *laughing* I think my dad would like knowing that they will bring pleasure to others.  I know that I do.

I’m not sure what to say about his pipes. I always remember Daddy smoking pipes and cigars.

First a bit about my dad. Though my father, George Rex Leghorn, was American (growing up in Alaska), he managed to join the Canadian Army at the beginning of WWII, but in doing so lost his American citizenship.  He was fortunate to meet a Canadian recruiting officer who told him the alphabet began with “A” and ended with “Zed” not “Zee”, and also told him to say that he was born in a specific town that had all its records destroyed in a fire.  When the US joined the war my dad, and thousands of other Americans who had made the same choice*(see the link below for the article), were given the opportunity to transfer to the US military, and regain their citizenship.

After WWII, my dad, earned his degree at the University of California Berkeley and became a metallurgist. There is even a bit about him on the internet.

He loved taking the family out for a drive, and he smoked his cigars on those trips. (As a child, those were troubling times for my stomach.)

I most remember my father relaxing in his favorite chair with a science fiction book in one hand and a pipe in the other… Sir Walter Raleigh being his favorite tobacco… and the pipes themselves remind me of him in that contented way.  If I interrupted his repose, he’d look up, with a smile on his face, to answer me.

It seemed he smoked his Briarwood pipes the most, though he had others.  At the time, it was only the Briarwood I knew by name because of its distinctive rough shaped bowl.  And it was the Anderson Free Hand Burl Briar, made in Israel, which I chose for his birthday one year, because I thought he might like that particular texture in his hand.

At least two of his pipes, he inherited from his son-in-law, Joe Marino, a retired medical laboratory researcher (my sister Lesley’s late husband)… the long stemmed Jarl (made in Denmark), and the large, white-bowled, Sherlock Holmes style pipe.  I believe Joe had others that went to my dad, but Lesley was only sure about those two.

The Buescher, corncob pipe my older sister Lesley bought for Daddy while on one of her travels around the States.

A note on the spelling of my sister’s name…

My dad met my mother, Regina, during WWII and they married in Omagh, Ireland.  My mother was English and in the military herself.  The English spelling of Lesley is feminine, and Leslie masculine, in the UK… just the opposite of here in the United States.  I guess my mom won out when it came to the spelling of the name…

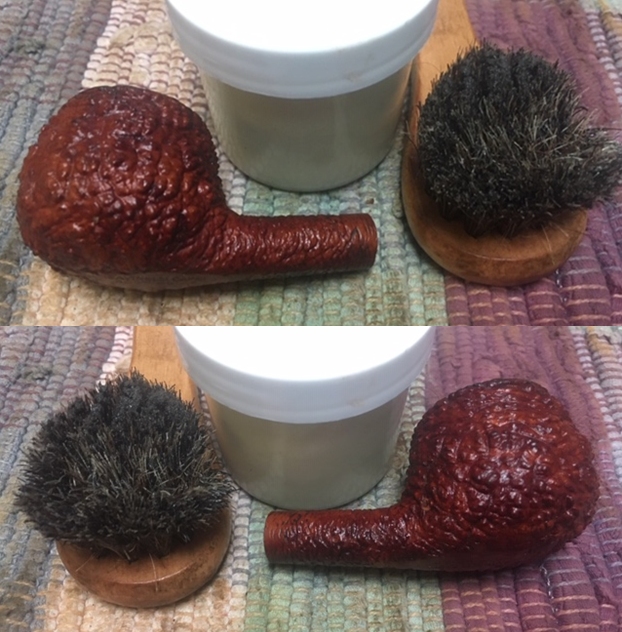
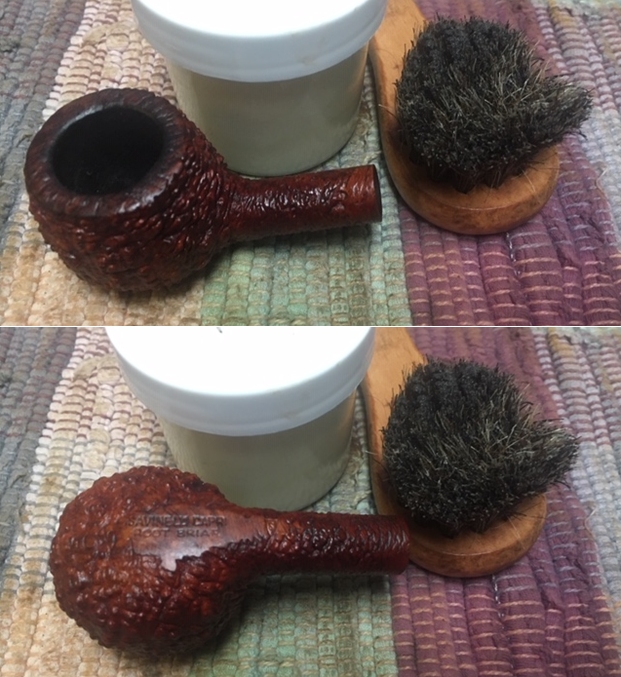
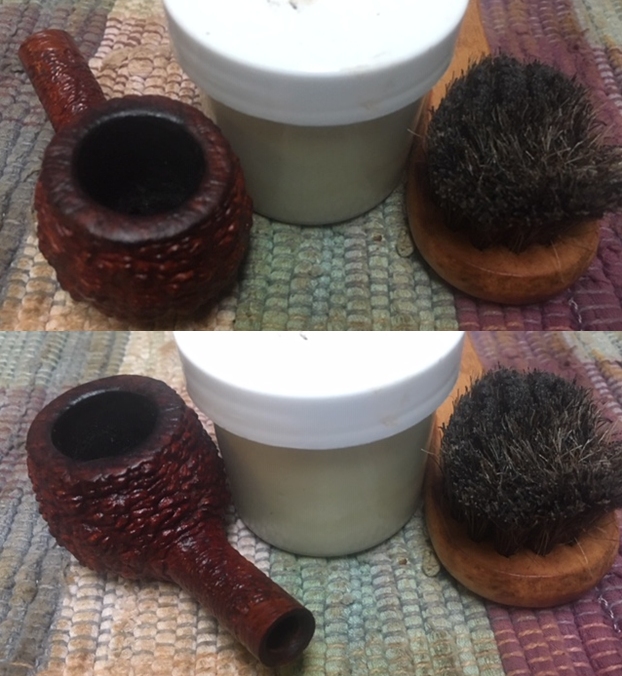
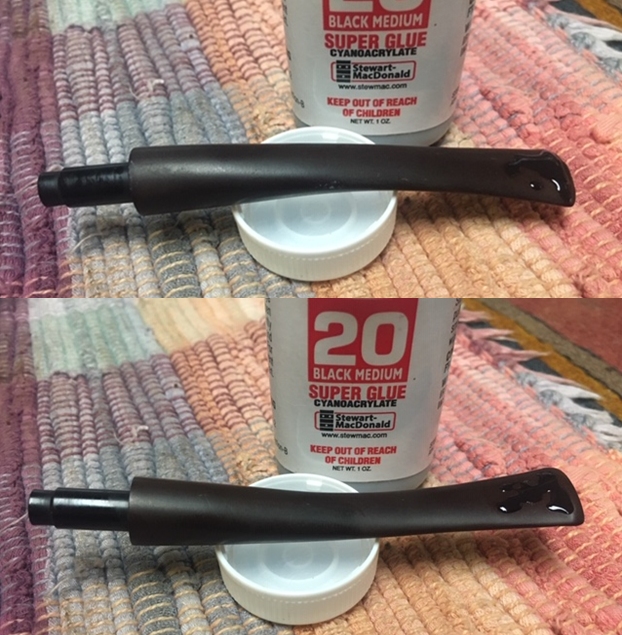
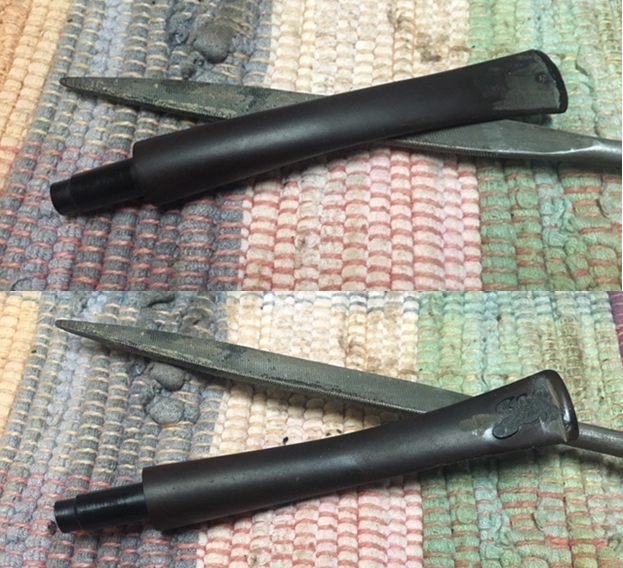
This pipe was a real mess just like the other ones in the collection. I was curious to see what it would look like when I unpack it. I was surprised at how good it looked. He reamed it with a PipNet pipe reamer and cleaned up the reaming with a Savinelli Fitsall Pipe Knife. He scrubbed out the internals with alcohol, pipe cleaners and cotton swabs until the pipe was clean. He scrubbed the exterior of the bowl with Murphy’s Oil Soap and a tooth brush to remove the grime and grit on the briar and the lava on the rim top. The finish on the bowl looked really good when I got it. The rim top looked much better and the inner and outer edges were looking good. Jeff had cleaned the internals and scrubbed the exterior of the stem and soaked them in Before & After Deoxidizer bath to remove the oxidation. The stem looked very good other than the deep tooth marks and chatter in the surface. When the pipe arrived here in Vancouver for the second stop of its restoration tour it looked very good. I took several photos of the pipe from the side and then got called away and did not finish taking photos. Here is what I have.   I forgot to take photos of the condition of the rim top and stem and when I came back to work on the pipe I just jumped in to do the restoration. I decided to clean up the darkening and smoothing of the rim top first. I used a brass bristle brush to work over the surface of the briar. When I was finished it looked better.     I worked some Before & After Restoration Balm into the finish of the bowl and the rim top and shank with my fingertips and a horsehair shoebrush to clean, enliven and protect it. I find that the balm really makes the briar come alive again. The contrasts in the layers of stain and the separate finishes really made the grain stand out. I let the balm sit for a little while and then buffed with a cotton cloth to raise the shine. The bowl really looks good at this point. I set the bowl aside and turned to the stem. I filled in the deep tooth marks with black super glue. I built up the edge of the button at the same time. I set it aside to dry. Once the repairs had cured I used a needle file to re-cut a sharp edge on the button on both sides and to flatten the repaired areas.  I sanded the stem to remove the oxidation that was on the surface and to smooth out the repaired areas. I used a folded piece of 220 grit sandpaper and a piece of 400 grit wet dry sandpaper. At this point the stem is looking better and the tooth marks are gone.  I rubbed the stem down with Denicare Mouthpiece Polish and a cotton pad to remove remnants of oxidation and to further blend in the sanding. The stem was showing some promise at this point in the process. I polished the stem with micromesh sanding pads – wet sanding it with 1500-12000 grit pads. I polished it further with Before & After Pipe Stem Polish – both fine and extra fine. I finished by wiping it down with Briarville’s No Oxy Oil and buffing it to a shine. Once again I am the part of the restoration that I always look forward to – the moment when all the pieces are put back together. I put the pipe back together and lightly buffed the bowl with Blue Diamond. I buffed the stem with a heavier touch with Blue Diamond on the buffing wheel. I gave the bowl multiple coats of Conservator’s Wax and the stem multiple coats of carnauba wax. I buffed the pipe with a clean buffing pad to raise the shine. I hand buffed it with a microfiber cloth to deepen the shine. It is fun to see what the polished bowl looks like with the combination of rustication and smooth finishes. The black vulcanite stem stands out as a shiny black contrast to the colours of the bowl. This little Capri Prince must have been a fine smoking pipe judging from the condition it was when we received it from Jennifer. Have a look at it with the photos below. The dimensions are Length: 6 inches, Height: 1 ¼ inches, Outside diameter of the bowl: 1 ¼ inches, Chamber diameter: ¾ of an inch. This is one that will go on the rebornpipes online store shortly. If you want to carry on the pipe trust of George Rex Leghorn let me know. Thank you Jennifer for trusting us with his pipes. Thanks to each of you who are reading this blog. Remember we are not pipe owners; we are pipemen and women who hold our pipes in trust until they pass on into the trust of the next generation.

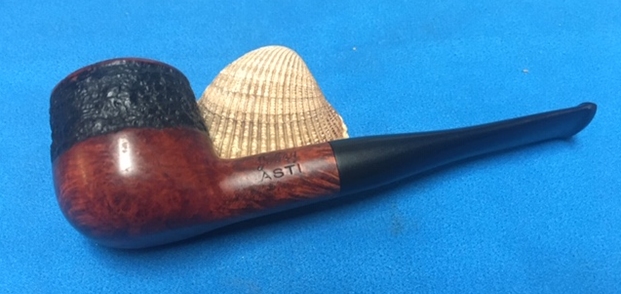
Restoring Jennifer’s Dad’s Jobey Asti 245 Pot


Blog by Steve Laug

I decided to change things up a bit and work on another of Jennifer’s Dad’s pipes. For the next pipe from the estate of George Rex Leghorn I have chosen a Pot shaped pipe. You may not have read about this estate before, so I will retell the story. I received an email from Jennifer who is a little older than my 64+ (65 now – sheesh, I forget how old I am) years about whether I would be interested in her Dad’s pipes. My brother Jeff and I have been picking up a few estates here and there, so I was interested. Here is the catch – she did not want to sell them to me but to give them to me to clean up, restore and resell. The only requirement she had was that we give a portion of the sales of the pipes to a charity serving women and children. We talked about the organization I work for that deals with trafficking and sexual exploitation of women and their children and she decided that would be a great way to carry on the charitable aspect of her Dad’s character. With some great conversation back and forth she sent the pipes to Jeff and he started the cleanup process on them. Once he had finished cleaning them all he sent them to me to do my work on them.

The pipe on the table is stamped on the left side of the shank Jobey over Asti. On the right side is the shape number 245. The tapered stem bears an inlaid brass Jobey oval. The pipe has an interesting mixed finish – smooth lower bowl and shank with a band of rustication and a smooth inwardly beveled rim top. The finish was very dirty, making it hard to see beyond that to the nice grain underneath that. There was a thick cake in the bowl and it had overflowed with lava onto the rim top. It was hard to know at this point the condition of the rim edges. The pipe was a dirty and tired looking old pipe. The stem was badly oxidized and there were George’s usual tooth marks and chatter on both sides just ahead of the button. It had been sitting in boxes for a lot of years and it was time to move ahead with the restoration. Jennifer took photos of the pipes she was sending. I have included the photos of this pipe below. When the box arrived from Jennifer, Jeff opened it and took photos of each pipe before he started his cleanup work on them. This pipe was a real mess but showed some promise under all of the grime of the years. The shape was a pot with the mixed finish as noted above and visible in the photo below. The briar appeared to be in good condition underneath the grime. The finish was spotty and seemed to be peeling which indicated to me that there was some sort of varnish or shellac coat on top of the finish. The pipe really was covered with the grime and oils on the bowl sides from George’s hands. The bowl had a thick cake that had hardened with time. The lava overflow on the rim top filled in much of the beveled rim top. It was very thick but it could very well have protected the rim from damage. We won’t know what is under it until Jeff had cleaned it off. The stem was oxidized and there were deep tooth marks on both sides just ahead of the button. Jeff took photos of the pipe before he started working on it. I include those below.  Jeff took photos of the bowl and rim top to show the cake in the bowl and the lava build up on the rim top and dust and grime on the bowl. It was thick and hard but hopefully it had protected the rim and edges from damage. The lava coat looks horrible but it points to a well-used, favourite smoking pipe. George must have enjoyed this old timer a lot judging from the condition of the pipe.   Jeff took a photo of the side and heel of the bowl to show the condition of the finish – the grime and grit all over the sides and bottom of the bowl. The rustication around the midbowl is deep and dirty but it is interesting.  The peeling varnish/shellac coat is also visible in the photos. Jeff took a photo of the stamping on the left and right sides of the shank. It is very clear and readable. On the left it reads Jobey Asti and on the right it reads 245. The top of the tapered stem has a brass inlaid Jobey oval logo.Jeff took photos of the top and underside of the stem showing the scratching, oxidation and tooth marks on the stem surface and button. The tooth marks are quite deep on both sides of the stem. I turned to Pipephil’s site for a quick review of the brand (http://www.pipephil.eu/logos/en/logo-j3.html). I quote a section of the post on the Jobey brand: These pipes are made in St Claude (France) by Butz-Choquin (Berrod-Regad group) since 1987. Before this date some were manufactured in England and Denmark (Jobey Dansk).

I turned then to Pipedia to gather further information regarding the brand and quote the first part of the article (https://pipedia.org/wiki/Jobey).

English – American – Danish – French… Sadly, solid information about Jobey is scant…

Probably established in England around 1920(?) the brand hiked into the USA later. In the course of time owner, distributor and manufacturer changed repeatedly. As far as is known the following companies have been involved with the brand:

George Yale Pipes & Tobacco, New York (1942)

Norwalk Pipe Co., New York (1949)

Arlington Briar Pipes Corp., Brooklyn (when?)

Hollco International, New York (1969).

Weber Pipe Co., Jersey City, NJ (1970’s)

The Tinder Box, (1970’s – 80’s).

Throughout decades Jobey pipes were mainly sold in the USA, Canada and England but remained almost unknown in continental Europe. The bulk of Jobeys was predominantly made according to classical patterns and mainly in the lower to middle price range. The predominant judgment of the pipe smokers reads: “A well-made pipe for the price.” So there is hardly anything very special or exciting about Jobey pipes although a flyer from ca. 1970 assures: “The briar root Jobey insists upon for its peer of pipes is left untouched to grow, harden and sweeten for 100 years. […] Jobey uses only the heart of this century old briar and only one out of 500 bowls turned measures up to the rigid Jobey specifications.” 99.80% of cull… that makes the layman marveling!

Before I get on to cleaning up the pipe I thought I would once again include the tribute that Jennifer wrote to her Dad for the blog. She also sent some photos and an article that her Dad wrote for Jeff and me to be able to get a feel for him. I have included those below. Note in each of them that he is holding a pipe in his left hand. I asked her to also send me an email with a brief tribute to her Dad. Here is her tribute from an email to me.

Steve, I want to thank you again for accepting my dad’s pipes.  They were so much a part of my dad’s life that I could not simply discard them. But as his daughter, I was not about to take up smoking them either. *laughing* I think my dad would like knowing that they will bring pleasure to others.  I know that I do.

I’m not sure what to say about his pipes. I always remember Daddy smoking pipes and cigars.

First a bit about my dad. Though my father, George Rex Leghorn, was American (growing up in Alaska), he managed to join the Canadian Army at the beginning of WWII, but in doing so lost his American citizenship.  He was fortunate to meet a Canadian recruiting officer who told him the alphabet began with “A” and ended with “Zed” not “Zee”, and also told him to say that he was born in a specific town that had all its records destroyed in a fire.  When the US joined the war my dad, and thousands of other Americans who had made the same choice*(see the link below for the article), were given the opportunity to transfer to the US military, and regain their citizenship.

After WWII, my dad, earned his degree at the University of California Berkeley and became a metallurgist. There is even a bit about him on the internet.

He loved taking the family out for a drive, and he smoked his cigars on those trips. (As a child, those were troubling times for my stomach.)

I most remember my father relaxing in his favorite chair with a science fiction book in one hand and a pipe in the other… Sir Walter Raleigh being his favorite tobacco… and the pipes themselves remind me of him in that contented way.  If I interrupted his repose, he’d look up, with a smile on his face, to answer me.

It seemed he smoked his Briarwood pipes the most, though he had others.  At the time, it was only the Briarwood I knew by name because of its distinctive rough shaped bowl.  And it was the Anderson Free Hand Burl Briar, made in Israel, which I chose for his birthday one year, because I thought he might like that particular texture in his hand.

At least two of his pipes, he inherited from his son-in-law, Joe Marino, a retired medical laboratory researcher (my sister Lesley’s late husband)… the long stemmed Jarl (made in Denmark), and the large, white-bowled, Sherlock Holmes style pipe.  I believe Joe had others that went to my dad, but Lesley was only sure about those two.

The Buescher, corncob pipe my older sister Lesley bought for Daddy while on one of her travels around the States.

A note on the spelling of my sister’s name…

My dad met my mother, Regina, during WWII and they married in Omagh, Ireland.  My mother was English and in the military herself.  The English spelling of Lesley is feminine, and Leslie masculine, in the UK… just the opposite of here in the United States.  I guess my mom won out when it came to the spelling of the name…

This pipe was a real mess just like the other ones in the collection. I was curious to see what it would look like when I unpack it. I was surprised at how good it looked. He reamed it with a PipNet pipe reamer and cleaned up the reaming with a Savinelli Fitsall Pipe Knife. He scrubbed out the internals with alcohol, pipe cleaners and cotton swabs until the pipe was clean. He scrubbed the exterior of the bowl with Murphy’s Oil Soap and a tooth brush to remove the grime and grit on the briar and the lava on the rim top. The finish on the bowl looked really good when I got it. The rim top looked much better and the inner and outer edges were looking good. Jeff had cleaned the internals and scrubbed the exterior of the stem and soaked them in Before & After Deoxidizer bath to remove the oxidation. The stem looked very good other than the deep tooth marks and chatter in the surface. When the pipe arrived here in Vancouver for the second stop of its restoration tour it looked very good. I took photos of the pipe before I started my part of the restoration. I took photos of the bowl and rim top to show how well it had cleaned up. The edges and top were very clean and in excellent condition. There was some darkening on the inner edge but it was still round. The rim top had some light nicks and dents. The stem had some deep tooth marks just ahead of the button.The stem was held in the shank with the Jobey link connector. I is pressed into the stem and threads into the shank. It makes it easily replaceable and also easy to align.I decided to clean up the darkening on the inner edge of the rim top and the dents and nicks on the top itself. I used a folded piece of 220 grit sandpaper to remove the damage and 400 grit wet dry sandpaper to smooth out the sanding. I was happy with the overall look. The finish will show as I polish the pipe with micromesh pad shortly.  I polished the briar with micromesh sanding pads – wetsanding it with 1500-12000 grit sanding pads. I wiped it down with a damp cloth after each sanding pad. It looked better after each pad and the top blended into the colour of the rest of the bowl without staining. I worked some Before & After Restoration Balm into the finish of the bowl and the rim top and shank with my fingertips and a horsehair shoebrush to clean, enliven and protect it. I find that the balm really makes the briar come alive again. The contrasts in the layers of stain and the separate finishes really made the grain stand out. I let the balm sit for a little while and then buffed with a cotton cloth to raise the shine. The bowl really looks good at this point.   I set the bowl aside and turned to the stem. I filled in the deep tooth marks with clear super glue. I built up the edge of the button at the same time. I set it aside to dry. Once the repairs had cured I used a needle file to cut a sharp edge on the button on both sides and to flatten the repaired areas. I sanded the stem to remove the oxidation that was on the surface and to smooth out the repaired areas. I used a folded piece of 220 grit sandpaper and a piece of 400 grit wet dry sandpaper. At this point the stem is looking better and the tooth marks are gone.  I rubbed the stem down with Denicare Mouthpiece Polish and a cotton pad to remove remnants of oxidation and to further blend in the sanding. The stem was showing some promise at this point in the process. I polished the stem with micromesh sanding pads – wet sanding it with 1500-12000 grit pads. I polished it further with Before & After Pipe Stem Polish – both fine and extra fine. I finished by wiping it down with Briarville’s No Oxy Oil and buffing it to a shine. Once again I am the part of the restoration that I always look forward to – the moment when all the pieces are put back together. I put the pipe back together and buffed the bowl and stem with Blue Diamond on the buffing wheel. I gave the bowl multiple coats of Conservator’s Wax and the stem multiple coats of carnauba wax. I buffed the pipe with a clean buffing pad to raise the shine. I hand buffed it with a microfiber cloth to deepen the shine. It is fun to see what the polished bowl looks like with the combination of rustication and smooth finishes. The black vulcanite stem stands out as a shiny black contrast to the colours of the bowl. While this is not one of my favourite finishes as it seems busy to me, it came out looking good. It is a light weight pipe that could be clenched and smoked while doing other things. It must have been a fine smoking pipe judging from the condition it was when we received it from Jennifer. Have a look at it with the photos below. The dimensions are Length: 5 ¼ inches, Height: 1 ½ inches, Outside diameter of the bowl: 1 ½ inches, Chamber diameter: ¾ of an inch. This is one that will go on the rebornpipes online store shortly. If you want to carry on the pipe trust of George Rex Leghorn let me know. Thank you Jennifer for trusting us with his pipes. Thanks to each of you who are reading this blog. Remember we are not pipe owners; we are pipemen and women who hold our pipes in trust until they pass on into the trust of the next generation.


Restoration of an Irwin’s 2007 London Made Bulldog


Blog by Steve Laug

Even with the COVID-19 warnings rolling in incessantly I am still working on pipes! It keeps my mind busy and focused. There is no reason to not enjoy the time alone at the work table bringing these old-timers back to life. After brief foray restoring pipes from several other estates I am back to Bob Kerr’s estate (his photo is to the left). If you have not “met” the man and would like to read a bit of the history of the pipeman, his daughter has written a great tribute that is worth a read. Because I have included it in over 65 restorations to date I thought that I would leave it out this time. Be sure to check out some of the recent Dunhill restoration blog (https://rebornpipes.com/2020/01/01/restoring-the-last-of-bob-kerrs-dunhills-a-1962-dunhill-bruyere-656-f-t-bent-billiard/).

The next pipe I have chosen from his estate is a classic Bulldog. Irwin’s London England 2007 Bulldog. The stamping on the shank is faint. On the left side of the shank it is stamped Irwin’s over London, England. On the right side of the shank it is stamped 2007 – which I am unclear of whether that was a date or shape number! Irwin’s was a seconds line of GBD. The finish is worn and dirty. Underneath the grime the finish looks to be good. There also did not appear to be any fills in the bowl or shank. There is a thick cake and lava overflow on the rim top.  There is damage on the top and edges of the rim and the bowl is out of round. The stem is oxidized with a faint IR logo on the left. There are tooth marks and chatter near the button, some calcification with damage to the button.  Jeff took photos of the pipe to show its general condition before he did his cleanup work.some photos of the pipe before he started his cleanup work. He took photos of the bowl and rim top to show their general condition. You can see the thick cake in the bowl with the lava overflowing on to the rim top. The inner edge of the bowl is beveled inward and thickly lava coated. It is not clear if there is damage to the bowl but it does appear to be slightly out of round.Jeff took some photos of the sides and heel of the bowl to give an idea of the grain on this particular piece of briar. It is amazing and I cannot wait to see what it looks like once it is polished and waxed. He took photos of the stamping on both sides of the shank to capture it for me. The first photo shows the left side of the shank and the stamping as noted above. The second shows the right side of the shank with the 2007 stamp. The final photo of the set shows the faint LR in a circle stamping on the left side of the diamond taper stem. This pipe has a diamond tapered stem that is heavily oxidizes and has some calcification on the button end. There seems to be some tooth marks and chatter on the top and underside.I turned to Pipephil’s site to get a quick overview of Irwin’s pipes. I remembered that they were a seconds of GBD pipes and this confirmed that (http://www.pipephil.eu/logos/en/logo-i.html). I have included a screen capture of the pertinent section from the site.I clicked on the link on the site to the section on GBD (http://www.pipephil.eu/logos/en/logo-gbd.html). There was a brief history as well as a list of GBD seconds. You will note that the Irwin’s brand is listed there. I turned to Pipedia and reread the history of the brand there. I also turned to the link on the shape numbers to see if I could clear up the question whether 2007 was a date or shape number. (https://pipedia.org/wiki/GBD_Shapes/Numbers). I found the section listing the 2007 as a straight bulldog with a diamond shank. I did a screen capture of that section and included it below: So now I knew with certainty that I was working on a GBD made Bulldog – straight, diamond stem. The 2007 was the shape number. The one thing I am not clear about is what mad this pipe a second and not a GBD regular. That information would not be forthcoming. I moved forward to work on the pipe itself and see what I had to do with it. It had come back looking far better than I expected. Even the stem looked remarkably good with most of the tooth chatter gone. I was impressed. Jeff had done his normal thorough clean up – reaming, scrubbing, soaking and the result was evident in the pipe when I unpacked it. I took photos of the pipe before I started my work on it. Just look at the grain on this pipe. Stunning! I took some photos of the rim top and stem. The rim top and bowl looked very good. The cake and lava overflow were gone. Jeff had been able to get rid of the darkening and lava and tars. The rim top had nicks and marks and the inner edge of the bowl was damaged and out of round. The close up photos of the stem shows that it is a much cleaner and better looking stem. The light tooth chatter was gone and the stem looked really good.I took some photos of the stamping on the shank sides to show the condition after the cleanup. Often the stamping takes a hit with the cleaning and is lessened in it clarity. Jeff does a great job in leaving the stamping looking very good.I started my restoration work on this pipe by addressing the out of round inner edge of the bowl and the damage to the rim top. I used a folded piece of 220 grit sandpaper to clean up the edge and clean up the bevel. The next series of photos tell the story of the work on the rim. The first photo shows the rim as it was when I started. The second shows the folded sandpaper when I worked it over. I smoothed out the sanding with a 1500 grit micromesh sanding pad (photo 3). The final photo in the series shows the rim top after the work. With the rim in order I started my polishing regimen on the bowl. I used nine worn micromesh sanding pads and dry sanded the bowl with 1500-12000 grit pads. I wiped the bowl down with a damp cloth after each pad. The bowl really shines by the final three pads. I worked some Before & After Restoration Balm into the surface of the briar with my fingertips to clean, enliven and protect it. I let the balm sit for a little while and then buffed with a cotton cloth to raise the shine. The photos show the bowl at this point in the restoration process. I set the bowl aside and turned my attention to the stem. I sanded out the tooth chatter and blended in the repairs with 220 grit sandpaper and started to polish it with a folded piece of 400 wet dry sandpaper. Once it was finished it was smooth.I used some Denicare Mouthpiece Polish that I have in my kit to start polishing out some of the scratches and remaining oxidation on the stem. I rubbed it in with a cotton pad and my finger tip and buffed it off with a cotton pad.I used some liquid paper to touch up the LR stamp on the left topside of the diamond stem. Once it dried I scraped the excess off with a tooth pick to show the renewed stamp on the stem.I polished the stem with micromesh sanding pads – dry sanding with 1500-12000 grit sanding pads. I wiped it down after each sanding pad with a cloth containing some Obsidian Oil. I finished polishing it with Before & After Pipe Stem Polish – both Fine and Extra Fine and buffed it off with a cotton cloth. I gave it a coat of Briarville’s No Oxy Oil to preserve and protect the stem. I don’t know how many times I have said this but I have to say it again with this pipe. I love it when I come to the end of a restoration and all of the parts come together and the pipe looks better than when we started the cleanup process. I put the stem back on the bowl and buffed the pipe with Blue Diamond on the buffing wheel. I carefully avoided the stamping on the shank sides during the process. I gave the bowl and stem multiple coats of carnauba wax on the buffing wheel and followed that by buffing it with a clean buffing pad on the buffer. I hand buffed the pipe with a microfiber cloth to deepen the shine. The finished pipe is a great looking British Bulldog made by GBD and sold as second – an Irwin’s 2007 shaped Bulldog. Once again the grain and the way the shape follows the grain is amazing. Give the finished pipe a look in the photos below. I can only tell you that it is much prettier in person than the photos capture. The dimensions of the pipe are Length: 5 ½ inches, Height: 1 ¾ inches, Outside diameter of the bowl: 1 ¼ inches, Chamber diameter: ¾ of an inch. This GBD made Irwin’s Bulldog is a great addition to someone’s rack that price will be very reasonable. Thanks for walking through the restoration with me as I worked over another beautiful pipe. This one will be will be going on the rebornpipes store shortly if you are interested in adding it to your collection. Thanks for your time.
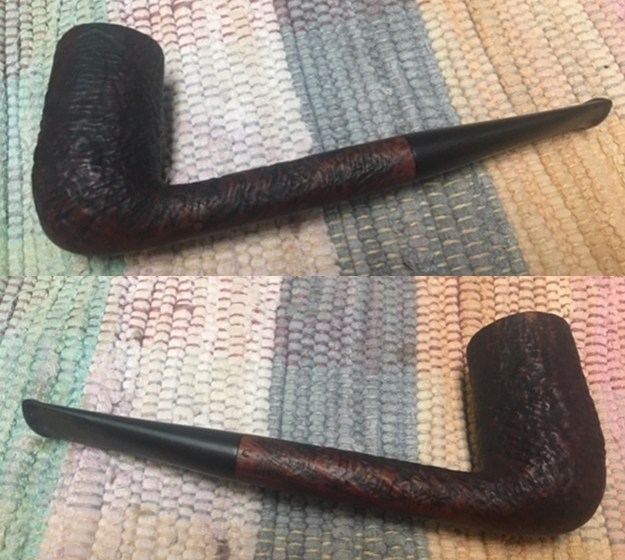
Restoration of a Made in Ireland Peterson’s Deluxe 69 Bent Billiard


Blog by Steve Laug

In the last box of pipes Jeff sent me there was one final pipe that was left to restore. This one is a Peterson’s 69 Bent Billiard. It is stamped on the left side of the shank Peterson’s Deluxe and on the right side it bears the 69 shape number near the bowl shank junction and Made in Ireland. It was a dirty pipe when we received it. There was a thick coat of lava on the rim top and some damage on the inner edge of the rim. The rim top had some nicks and dents in it that were quite deep. There was a thick cake in the bowl that had remnants of tobacco stuck in it. The finish was dirty and there were spots of grime and oils. The stem was oxidized and there were tooth marks on the top and underside ahead of the button. There was tooth chatter on both sides of the stem. Jeff took some photos of the pipe before he started his cleanup work. He took photos of the bowl and rim top to show their general condition. You can see the tars on the inner edge of damaged rim top. The cake in the bowl is quite thick and there is tobacco debris on the walls of the bowl. The finish on the bowl is dull but still very stunning. Jeff took some photos of the sides and heel of the bowl to give an idea of the grain on this particular piece of briar. It is amazing and I cannot wait to see what it looks like once it is polished and waxed. He took photos of the stamping on both sides of the shank to capture it for me. The first photo shows the left side of the shank and the stamping as noted above. The second shows the right side of the shank with the Made in Ireland stamp and shape number 69.This pipe has a classic Peterson’s P-lip stem that has some oxidation on the surface of the vulcanite that is quite deep. There seems to be some tooth marks and chatter on the top and underside.He removed the stem from the shank and took photos of the bone chimney screwed into the end of the tenon.I turned to Pipephil’s site to get a quick overview of the Peterson’s Made in Ireland pipes. (http://www.pipephil.eu/logos/en/logo-peterson.html).  I have included a screen capture of the pertinent section from the site. The summary to the right of the photos is always succinct and quite pointed. In this case it says that the Made in Ireland stamp refers to a Pipe of the Pre-Republic era (Before 1949). Notice the Country of Manufacture stamp in two lines and block letters.I turned to Pipedia and reread the history of the Peterson’s brand and focused on the Pre Republic Era (1915-1949). I quote from that article below:

…Around 1916, Peterson began stamping their pipes “Made in Ireland” in what is referred to as a block format…

Prior to 1920 it was rare for a country of origin to be stamped on the pipe, just Peterson’s Dublin on the band. After 1921/22, if it is stamped “MADE IN IRELAND” and the “Made in” is stacked over “Ireland” or “MADE IN EIRE” or several other forms, it was made between 1922 and 1938

Peterson initially graded their mass -produced System pipes, i.e., regular catalogue pipes (in descending order) “Deluxe,” “First Quality,” “0” grade, “2nd grade,” and “3rd grade.”

I moved forward to work on the pipe itself and see what I had to do with it. It had come back looking amazingly clean. Even the stem looked like new, with most of the tooth chatter gone. I was impressed. Jeff had done his normal thorough clean up – reaming, scrubbing, soaking and the result was evident in the pipe when I unpacked it. I took photos of the pipe before I started my work on it. Just look at the grain on this delicate pipe. Stunning! I took some photos of the rim top and stem. The rim top and bowl looked very good. The cake and lava overflow were gone and the inward beveled rim was very clean. Jeff had been able to get rid of the darkening and lava and tars. The rim top had nicks and marks and the inner edge of the bowl was damaged and out of round. The close up photos of the stem shows that it is a much cleaner and better looking stem. The light tooth chatter was gone and the stem looked really good.I took some photos of the stamping on the shank sides to show the condition after the cleanup. Often the stamping takes a hit with the cleaning and is lessened in it clarity. Jeff does a great job in leaving the stamping looking very good.I removed the stem from the shank and took a photo of the pipe at this point. Like other Peterson’s Deluxe pipes that I have worked on this stem had a bone chimney threaded into the tenon to extend into the lower part of the mortise and provides a funnel for drawing the smoke into the mouth of the smoker.I took photos of the bone extension and did some research into the design and purpose. I googled and found the following information:

I turned to the blog Peterson Pipe Notes (http://petersonpipenotes.org/tag/peterson-chimney/). There I came on an article on the chimney. I quote a part of that below and you can read more by going to the site.

I’ve seen a lot of old De Luxe Systems from Peterson, spanning most of the 20th century. I’ve seen a lot fewer Standard Systems. I understand from the book that the Standard Systems never had the bone (later aluminum) chimney. Were those System Standard stems just tapered all the way down? The current version has that little stepped tenon, and for the life of me, I can’t understand what that really achieves. If it’s just about increasing the length of the stem, wouldn’t a natural taper all the way down look better? I’m just wondering if you know when Standard Systems developed that tenon thing.

I then continued to read through the links that were shown. The next one was a discussion on the Pipesmagaizine about the bone tenon extension or chimney. It was a fascinating discussion and I am including pertinent portions here (https://pipesmagazine.com/forums/threads/need-help-bone-extension-on-a-pre-republic-peterson-straight-dublin-120f-delux.68650/).

…The extension was detailed in the patent application in 1894 (US519135A), although it doesn’t detail the material used or the fixture type. I read somewhere (unverified I’m afraid) that the chimney changed from bone to aluminum late 60s but, as with most things ‘Pete’, I don’t think this change happened overnight since I had a 1971 Deluxe with a bone chimney (it may have been scavenged from a different pipe, I guess). As others have said, trying to remove it if it is stuck will almost certainly break it. If you’re desperate, you can put a micro-screwdriver through two of the holes in the side and gently turn, but personally, I wouldn’t risk it…

…The third thing I want to call your attention to is the tenon extension. Traditionally (if not during the Dublin Era), tenons and mouthpieces have been of great importance to Peterson. This one, while molded and not a bone screw-in, features the extended “chimney” so crucial to correct tenon-mortise airflow for the P-Lip mouthpiece. The graduated bore of the P-Lip as well as this extension makes the pipe a “sub-System” (as we call it in the book), which means that it will perform considerably better than a traditional fishtail. This type of molded extension goes all the way back to the original molded-stem Patent mouthpieces, incidentally, and doesn’t seem to have disappeared (alas!) from the Peterson workshop until the 1950s. This may have been due in part to the fashion of implanting stingers, and not merely to brand amnesia, but whatever the reason, it is unfortunate…

…Here’s what the patent app says: (extension 10 is chimney, pocket 5 is sump) the stem and mouth-piece may be made round, oval or of any other desired shape. It will be seen that the tubular extension 10 extending into the pocket 5, not only serves to deflect the nicotine and other obstructions into the said pocket as well as to conduct the saliva into the latter, but that it will also serve effectually to prevent any obnoxious matter from the said pocket to return into the stem, even if the pipe be inverted; the annular space around said flange serving to receive the contents of the pocket in case the pipe should be tilted.

I found this a fascinating read. The chimney was an integral part of the airflow of a P-lip system.I started my restoration work on this pipe by addressing the out of round inner edge of the bowl and the damage to the rim top. I used a folded piece of 220 grit sandpaper to clean up the edge and give it a slight bevel and worked over the rough areas on the rim top with the same sandpaper. The finish rim top looked very good. All that remained was to polish it with micromesh.I started my polishing regimen on the bowl. I used nine worn micromesh sanding pads and dry sanded the bowl with 1500-12000 grit pads. I wiped the bowl down with a damp cloth after each pad. The bowl really shines by the final three pads. I worked some Before & After Restoration Balm into the surface of the briar with my fingertips to clean, enliven and protect it. I let the balm sit for a little while and then buffed with a cotton cloth to raise the shine. The photos show the bowl at this point in the restoration process. I set the bowl aside and turned my attention to the stem. I sanded out the tooth chatter and blended in the repairs with 220 grit sandpaper and started to polish it with a folded piece of 400 wet dry sandpaper. Once it was finished it was smooth.I used some Denicare Mouthpiece Polish that I have in my kit to start polishing out some of the scratches and remaining oxidation on the stem. I rubbed it in with a cotton pad and my finger tip and buffed it off with a cotton pad.I polished the stem with micromesh sanding pads – dry sanding with 1500-12000 grit sanding pads. I wiped it down after each sanding pad with a cloth containing some Obsidian Oil. I finished polishing it with Before & After Pipe Stem Polish – both Fine and Extra Fine and buffed it off with a cotton cloth. I gave it a coat of Briarville’s No Oxy Oil to preserve and protect the stem. I don’t know how many times I have said this but I love it when I come to the end of a restoration and all of the parts come together and the pipe looks better than when we started the cleanup process. I put the stem back on the bowl and buffed the pipe with Blue Diamond on the buffing wheel. I carefully avoided the stamping on the shank sides during the process. I gave the bowl and stem multiple coats of carnauba wax on the buffing wheel and followed that by buffing it with a clean buffing pad on the buffer. I hand buffed the pipe with a microfiber cloth to deepen the shine. The finished pipe is a real stunning example of an Irish Made Pre-Republic Deluxe 69. Once again the grain and the way the shape follows the grain is amazing. Give the finish pipe a look in the photos below. I can only tell you that it is much prettier in person than the photos capture. The dimensions of the pipe are Length: 6 inches, Height: 2 inches, Outside diameter of the bowl: 1 ¼ inches, Chamber diameter: ¾ of an inch. This Made In Ireland Pre-Republic shape 69 Peterson’s Deluxe is a great piece of pipe history that is in exceptional condition. Thanks for walking through the restoration with me as I worked over another beautiful pipe. This one will be staying in my collection for now while I think about what to do with it. Thanks for your time.
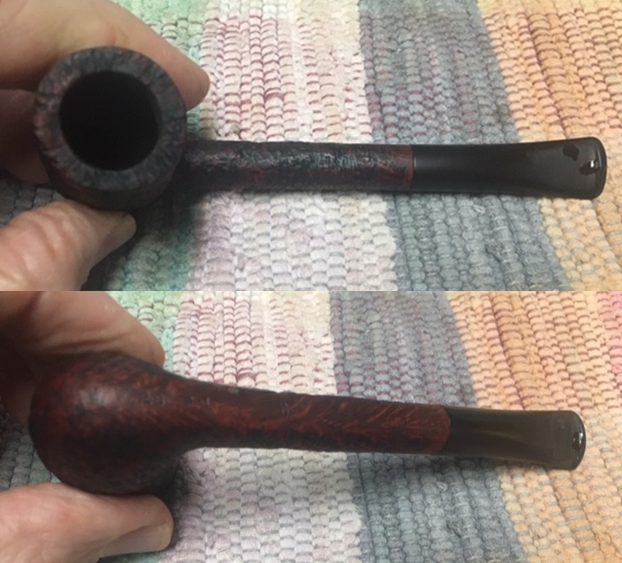
 

Restoring an Orlik H182 Hurricane Billiard


Blog by Steve Laug

I have worked on a few Hurricane pipes in the past so I was familiar with the brand on the work table next. This one is stamped Orlik Hurricane over Made in England on the left side of the shank and the shape number H182 is stamped on the right side of the shank. The one I did most recently was a Hurricane Lovat (https://rebornpipes.com/2019/07/13/new-life-for-a-hurricane-standard-lovat/). This one was different in that it was a smooth finished pipe. I also was stamped Orlik. There was some great grain around the bowl but there were also some fills on the left of the bowl near the flip cap. The Hurricane pipes always remind me of these Salt and Pepper shaker pipes that were the bread and butter of most tourist spots in the US. In the recesses of my memory it seems like we had a set from Yellowstone National Park…but Jeff may correct my memory. Whatever the case this is what comes to my mind when I see the Hurricane pipes.Now to the pipe at hand. The rim top under the cap was very dirty with lava overflow and there was a thick cake in the bowl. The finish was dirty with sticky spots on the bowl sides and shank. The Bakelite cover on the bowl had some small chips along the edges. With the cap opened the sides of the bowl were also very dirty. The airholes in the top of the cap were also filled in with tars and oils. The stem was heavily oxidized and there were tooth marks on both sides near the button. It was a dirty pipe. Jeff took photos of the pipe before he started to clean it. He took some photos of the rim top with the cover tip back and with it in place to show the general condition of the pipe. You can see the cake in the bowl and the lava on the rim in the photos. He followed those with photos of the cap in place. You can see the fills on the left side of the bowl along the cap edge. The final photo of this set shows the heel of the bowl and the grain that is visible there. He also took some photos of the stamping on both sides of the shank. They are clear and readable. There was also an H on the stem top that is faint but hopefully salvageable. The next series of photos give a clearer picture of the condition of the stem. The first photo below shows the full length and profile of the heavily oxidized and stained vulcanite stem. The second photos shows the calcification on the stem ahead of the button. The next two photos show the surface of the top and underside of the stem. You can see the light tooth marks and chatter both on the button surface and on the blade itself.
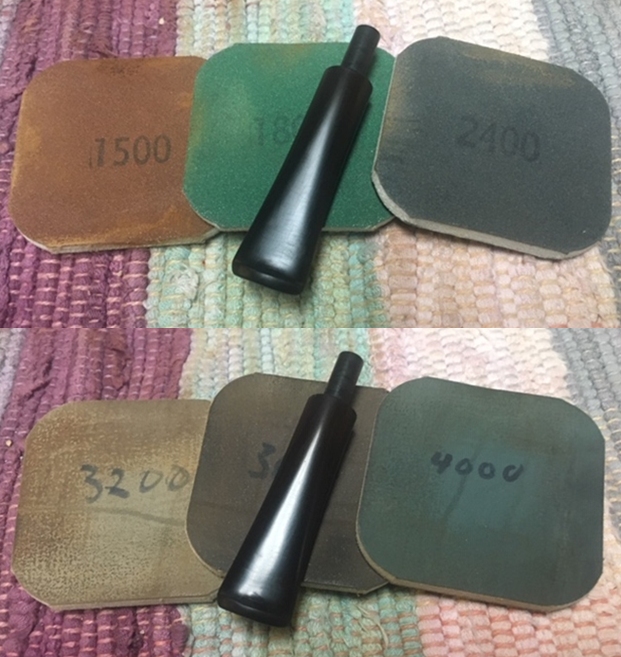
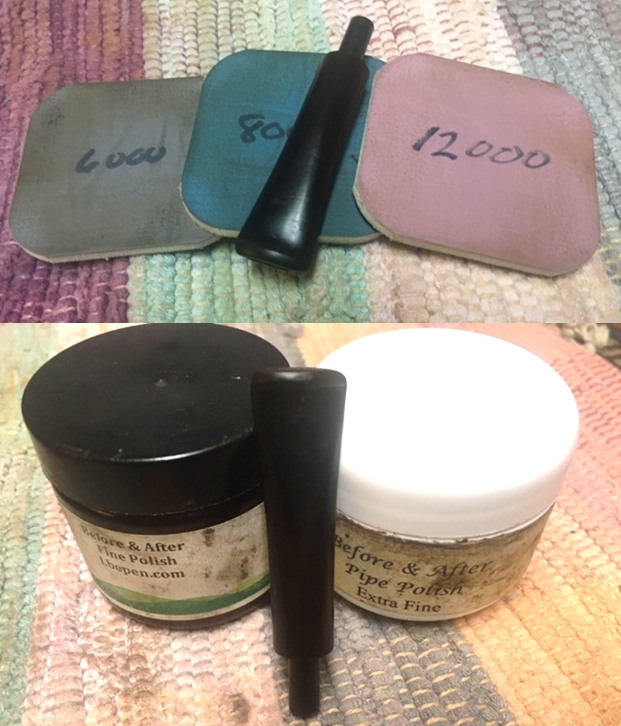
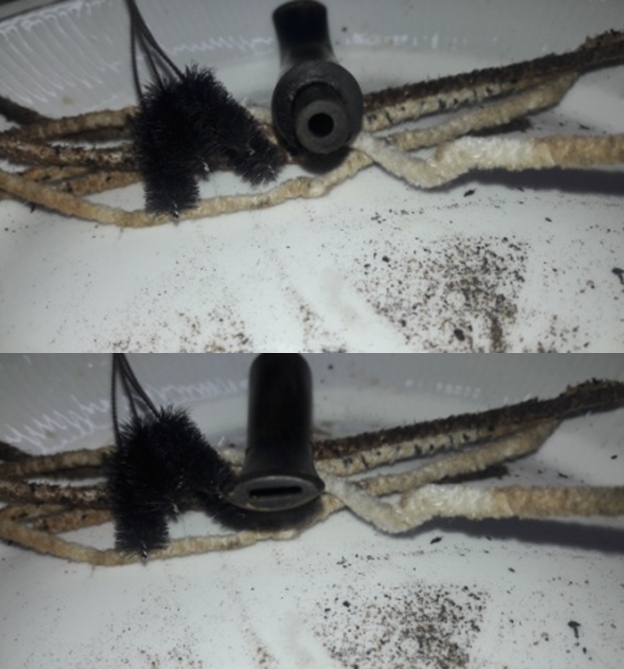
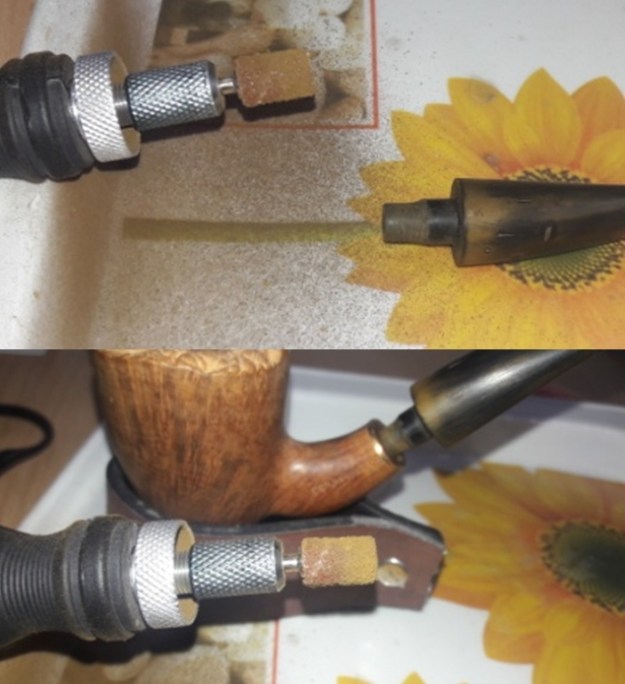
I am including the link to the last Hurricane pipe I worked on. Give the blog a read if you are interested (https://rebornpipes.com/2019/07/13/new-life-for-a-hurricane-standard-lovat/). I am quoting from the background information to the brand that I included in that blog. I also darkened a portion of the quote that pertains to the Orlik pipe I am working on now.

I looked up the Hurricane Standard pipe on the Pipephil Site to see what I could find out about the maker (http://www.pipephil.eu/logos/en/logo-h4.html). I quote in full the information included in the sidebar of the listing.

Hurricane is not exactly a brand but rather a pipe type characterized by an integrated swivel cover. An H on the stem denotes a pipe produced by Orlik. These pipes were often made in collaboration with Nutt Products Ltd or were sometimes stamped for Roy Tallent Ltd.

I include a screen capture of the listing from Pipephil as well. Note the various brands that made a Hurricane pipe with the same style or similar style wind cap. Note also that the one I have is made by Roy Tallent Ltd. of Old Bond Street. It bears the same H stamp on the top of the saddle stem as the pipes in the photo below.From that link I did a bit of search for the Fortnum brand. I found a listing for the brand on Pipedia. It said: Fortnum & Mason, the famed London department store in operation since 1707, has among countless other products sold its own line of pipes. One of the most notable was Fortnum’s Windward, a “Hurricane” type pipe with a built in swiveling windcap. The pipe was made following the design of Frederick Hudes, who received a patent for the pipe in the U.S. numbered 2135179 in 1938 (https://pipedia.org/wiki/Fortnum_%26_Mason). I have included the Patent drawings below. Armed with that information I moved forward to work on the pipe itself and see what I had to do with it. It had come back looking amazingly clean. Even the stem looked like new other than a few deep tooth marks. The Bakelite rim cap looked very good. I was impressed. Jeff had done his normal thorough clean up – reaming, scrubbing, soaking and the result was evident in the pipe when I unpacked it. I took photos of the pipe before I started my work on it. I took some photos of the rim top with the cap in place and with it tipped back. The rim top and bowl looked very good. The cake and lava overflow were gone and the Bakelite was very clean. The close up photos of the stem show that it is a much cleaner and better looking stem. There are some small deep tooth marks on both sides just ahead of the button and one mark on the top side of the button itself. To begin my part of the restoration work I decided to smooth out the three fills on the left side of the bowl near the edge of the flip cap. They are shown in the first photo below as three blackened dots running vertically along the cap. There rough to the touch and bumpy feeling. I sanded them smooth with a folded piece of 220 grit sandpaper and blended them into the surface. They still stick out but at least they are smooth!I decided to polish the briar and the Bakelite flip cap with micromesh sanding pads – wet sanding with 1500-12000 grit pads. I wiped the bowl and cape down after each pad with a damp cloth. The bowl begins to shine with the transition to each new pad. After the final polishing pad it looks great. I worked some Before & After Restoration Balm into the surface of the briar with my fingertips to clean, enliven and protect it. I also rubbed it into the Bakelite cap. I let the balm sit for a little while and then buffed with a cotton cloth to raise the shine. The photos show the bowl at this point in the restoration process. I set the bowl aside and turned my attention to the stem. The stem was very clean so I filled in the tooth marks and built up the button with clear super glue and set it aside to cure. Once it had cured I flattened out the repairs and sharpened the edge of the button with a needle file. I sanded out the tooth chatter and blended in the repairs with 220 grit sandpaper and started to polish it with a folded piece of 400 wet dry sandpaper. Once it was finished it was smooth.I used some Denicare Mouthpiece Polish that I have in my kit to start polishing out some of the scratches and remaining oxidation on the stem. I rubbed it in with a cotton pad and my finger tip and buffed it off with a cotton pad.The H stamp on the stem was quite faint but I thought that I might be able to get a bit of it to show. I put some Liquid Paper in the faint marks on the top of the stem and let them dry. I scraped off the excess and you can see the faint H in the second photo. While it is not perfect it is at least visible.I polished the stem with micromesh sanding pads – wet sanding with 1500-12000 grit sanding pads. I wiped it down after each sanding pad with some Obsidian Oil. I finished polishing it with Before & After Pipe Stem Polish – both Fine and Extra Fine and buffed it off with a cotton cloth. I gave it a coat of Briarville’s No Oxy Oil to preserve and protect the stem. This is a Hurricane Billiard with the Orlik stamp on the shank is a real beauty with a tapered black vulcanite stem. It has a great look and feel. I polished stem and the bowl with Blue Diamond polish on the buffing wheel. I gave the bowl, the Bakelite flip cap and the stem multiple coats of carnauba wax. I buffed the pipe with a clean buffing pad to raise the shine. I hand buffed it with a microfiber cloth to deepen the shine. The pipe polished up pretty nicely. The rich combination of browns of the briar and dark brown of the Bakelite took on life with the buffing. The rich colour of the briar works well with the polished vulcanite stem. I like the grain and finished look of this Hurricane pipe. Have a look at it with the photos below. The shape, finish and flow of the pipe and stem are very well done. The dimensions are Length: 6 inches, Height: 2 inches, Outside diameter of the bowl: 1 ¼ inches, Chamber diameter: ¾ of an inch. This English made Hurricane pipe is a unique piece of pipe history. Thanks for walking through the restoration with me as I worked over another beautiful pipe. This one will be going on the rebornpipes store in the English Pipe Making Companies section shortly if you would like to add it to your collection. Thanks for your time.