Blog by Steve Laug
Our four daughters gifted my wife Irene and I a trip to Palm Springs, California, US for our fortieth wedding anniversary mid-July. Little did we know that Palm Springs in July is about 120 degrees Fahrenheit – dry and hot. We flew into Palm Springs and stayed in Indio. We managed to arrange our days to do most of our shopping and hunting in the mornings to avoid the heat of the day. It was a great trip and an amazing time of celebration together. One of the days we drove to Palm Desert, a community between Palm Springs and Indio. We went through thrift shops, antique stores and department stores looking for pipes and tobacciana as well as gifts for our kids. As we drove through the main part of town I saw a sign on the left corner that said Palm Desert Tobacco. It was located at 73580 El Paseo in Palm Desert. I noted it and planned to go back a few days later.
When I got back to the condo we were staying at I looked up their website on my iPad. The link is: http://www.palmdeserttobacco.com/our-story.html. I read their history and have summarized it below. I have clipped portions of it here.
The Bruning family have been full service tobacconists selling the finest tobacco products and accessories in Southern California since 1969. Brothers Bert and Jack have operated Palm Desert Tobacco… in the Greater Palm Springs Area since 1983. Bert is a past president of the Tobacconist Association of America as well as a former board member of the Retail Tobacco Dealers of America…Originally, (the) locally owned and operated company was in San Diego, and…moved to Palm Desert in 1983…”Business has blossomed as we continue to seek out the finest in tobacco products and to offer great service to our customers.”
After spending time on their website I was more convince than ever to make sure I visited the shop before returning to Canada.
We did all of our other shopping and looking about and the day came for my visit to the shop. I was excited to see what it was like. We drove down El Paseo and found a parking place down the street from the shop. It was a hot day in Palm Desert – over 120ºF. I stopped outside the shop and took some photos of the exterior. The heat in the air was almost palpable and it was hard to get a focused photo from across the street. I love the looks of tobacco shops and over the years during my travels I have collected photos of the shops. I apologize for the blurriness of the first photo.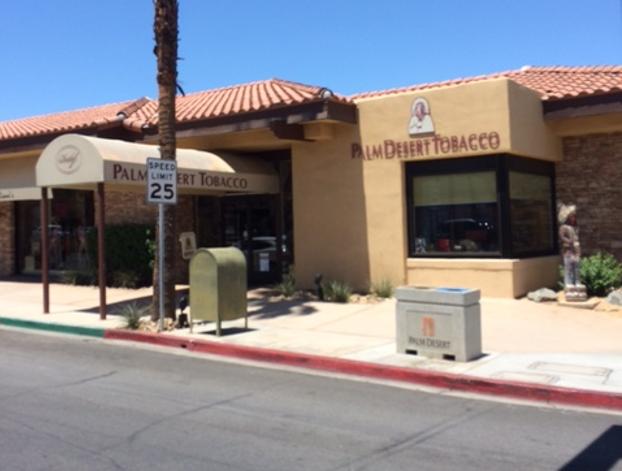 I crossed the street and took a closer picture of the front and the cigar store Indian standing on the corner. The lettering on the store sign appears to be out of focus but it is not – what you are seeing is the shadow of the letters on the wall behind the sign.
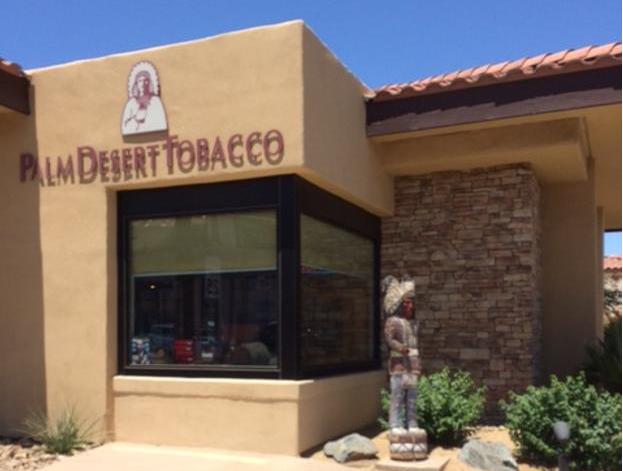 Passing through the doors into the air-conditioned interior was like stepping back into time in some ways. The aromas and sight of the old time tobacco shop were immediately present. In the back was a humidor with large variety of top cigar brands that the website says include Davidoff, Arturo Fuente, Opus X, Tatuaje, Illusione, La Flor Dominicana, Aging Room, Casa Magna Domus Magnus Montecristo, Royal Butera Vintage, Padron, Griffin, Ashton, and Diamond Crown. On the left was a relaxing smoking lounge that is available to members as well as those who purchase products that meet the minimum value. It was well set up with couches and chairs and was filled with smokers. On my right as I entered the door there was rack with their bulk pipe tobacco selections and an assortment of various tinned blends. Of course I stopped there to have a look.
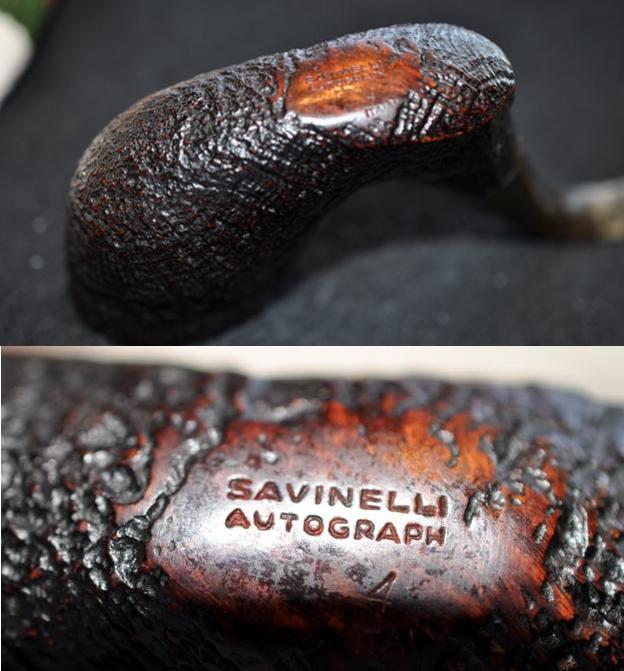
Walking into the shop the floor held many display cases with pipes, racks, lighters as well as cigar cutters, lighters and humidors. I took a few photos to give you an idea of the layout and the look of the displays within the shop. Somehow I missed the display case with the estate and new pipes. I was enamored examining the selection so I neglected to take some photos of that part of the shop. There were Dunhills, Comoys, GBDs, Sasienis, Charatans, Barlings, Petersons, Savinellis, Rossis, Amorellis, Vipratis, Mastro de Pajas, Castellos, Ascortis, Radices, Rattrays, Ser Jacopos, Stokkebyes, Bjarnes, Nordings, WO Larsens, Stanwells, Bentleys, Neerups, Chacoms, Butz-Choquins, Tom Eltangs as well as some American made pipes like those by Icarus and Briarworks. You can see why I got lost looking at the huge variety of pipes spilling over the shelves of display cases and on the wall behind the case. I went through some of the estate pipes and looked at GBDs and Comoys shapes that I had not seen before. They were beautifully restored by Bert. Excellent workmanship.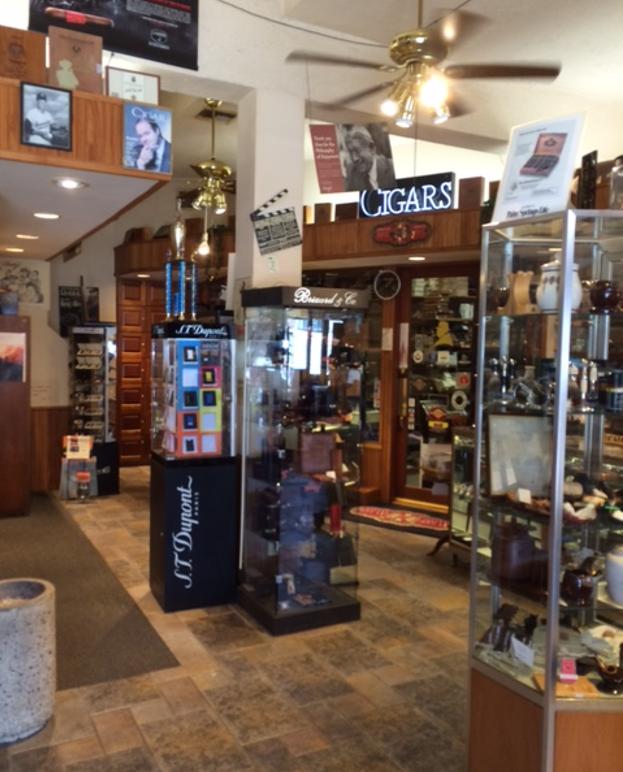 I made my way finally to the cash register. I did not want to make Irene wait for me to sit and have a bowl so I settled my account. At the cash out counter there were lots of interesting things as well. There was a rack of pipe obviously belonging to the brothers, pipe cleaners, lighters for pipes and cigars, and pipe and cigar tools. I could have stood looking for hours at the photos of famous customers lining the walls. It was a great shop with the air of an old time tobacco shop.
 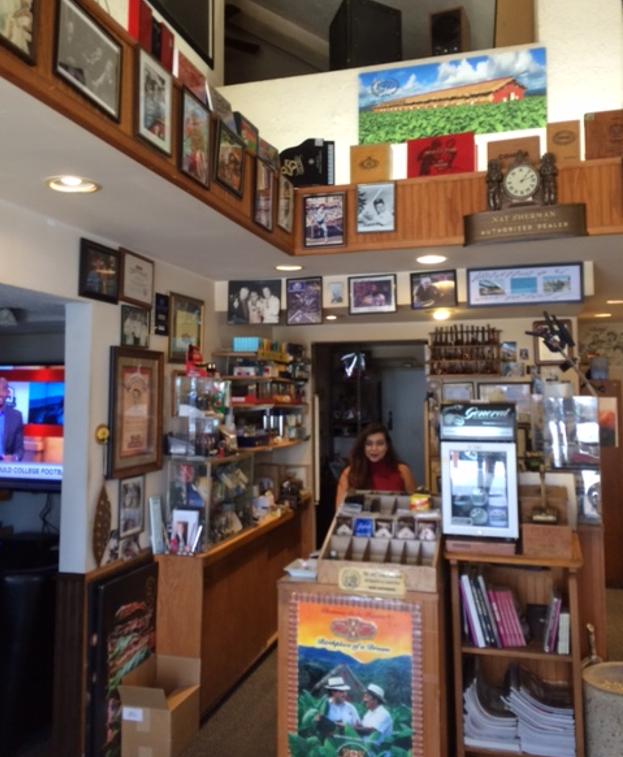 I took a photo of my purchases – they were put in a Palm Desert Tobacco shopping bag and the clerk threw in some wooden matches and a business card. I picked up two issues of Pipes and Tobacco Magazine (I found out later that one of them had an article on the very shop that I was visiting). I bought two bags of pipe cleaners, a tin of Balkan Sobranie and a 100 gram pouch of Crown Achievement.
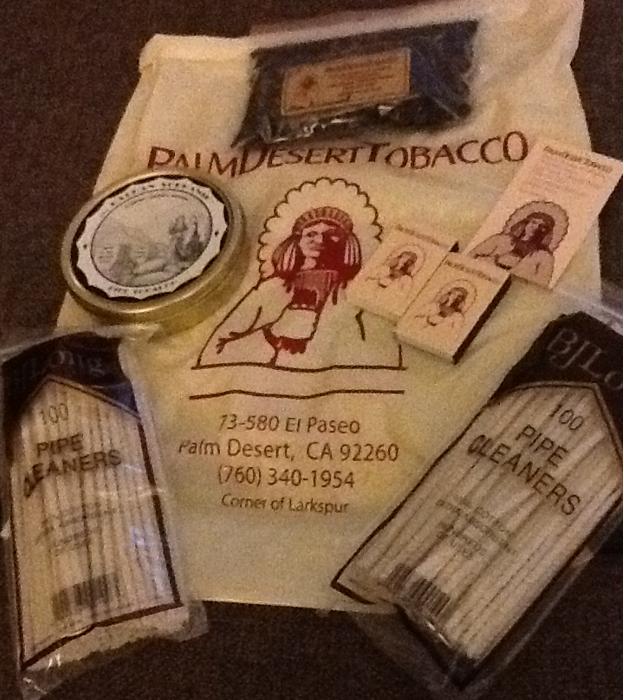
Since coming home I have read the magazines, used the pipe cleaners and begun to enjoy the pouch of tobacco. I have to say, if you are ever in Palm Desert, the Palm Desert Tobacco Shop is well worth a visit.


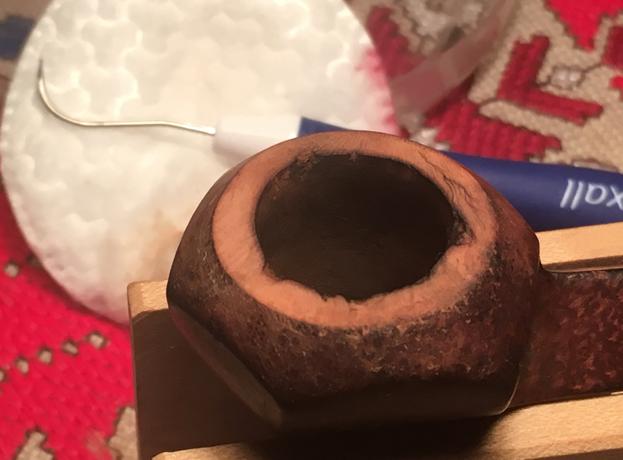


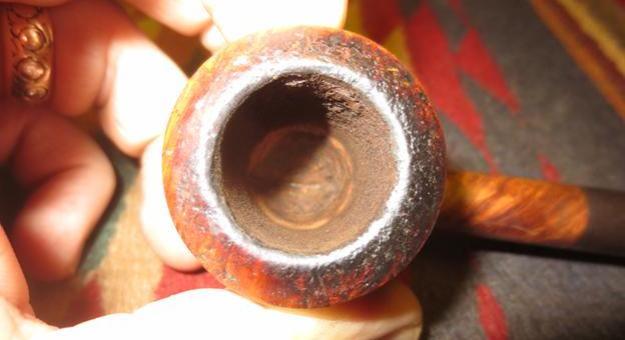


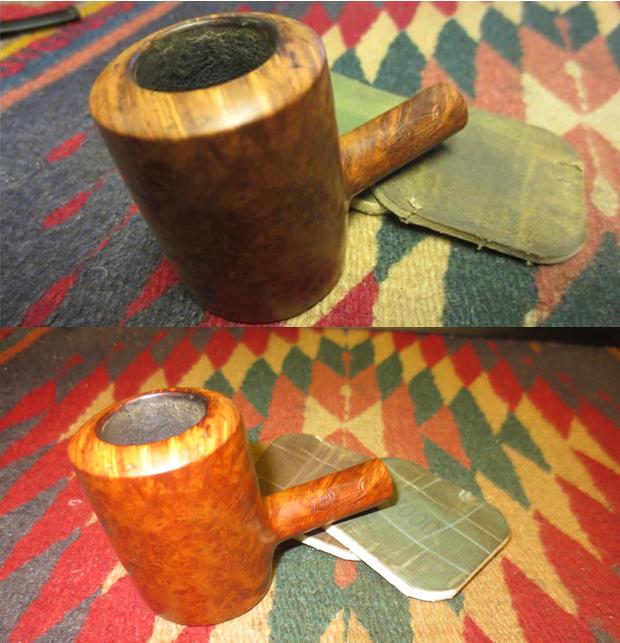


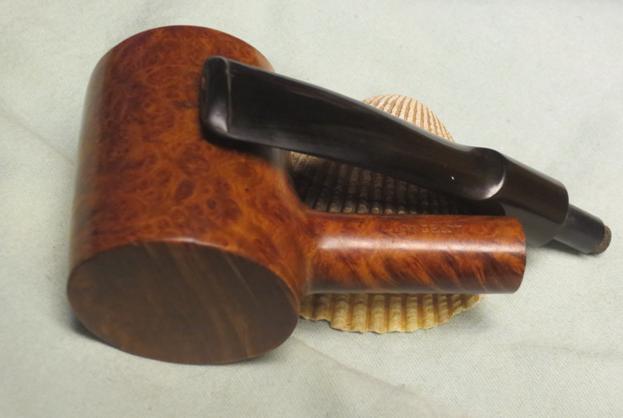
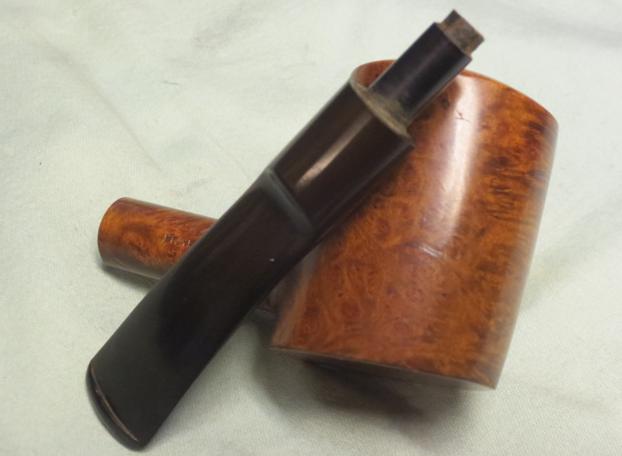
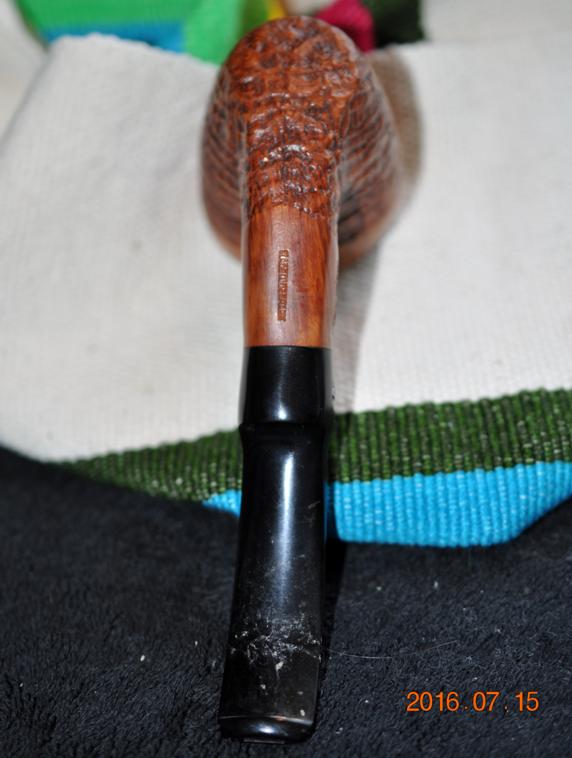


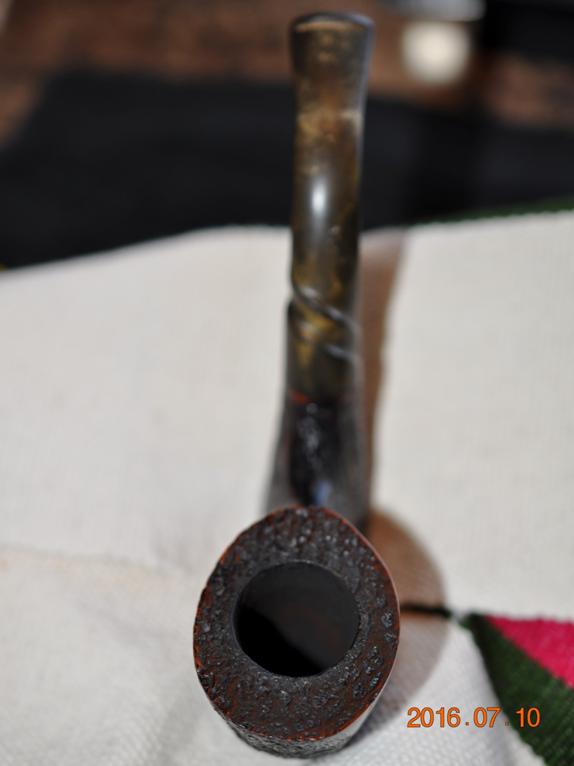


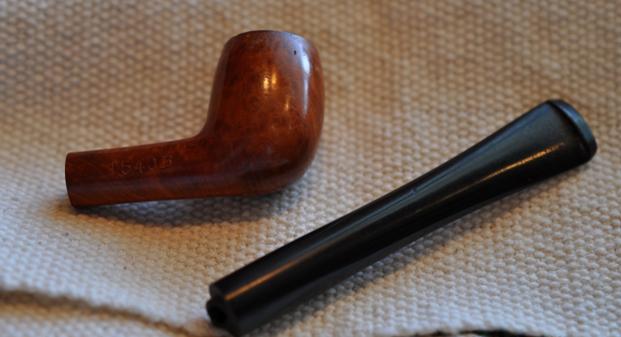


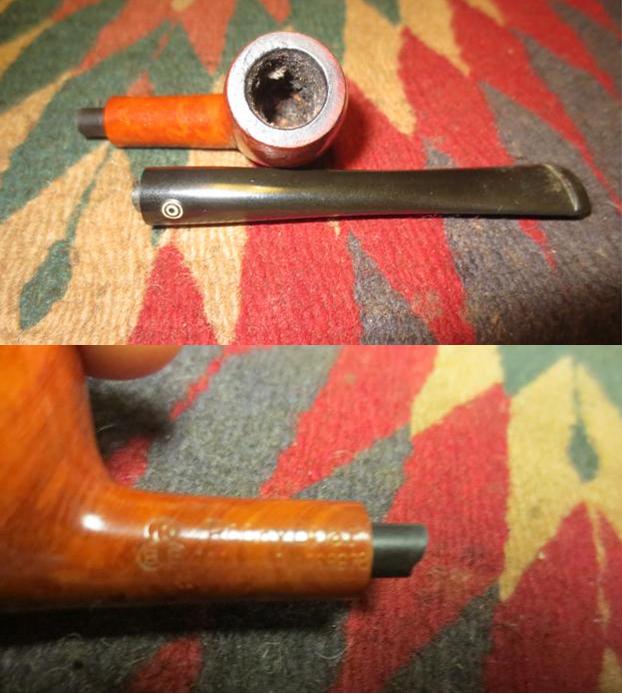


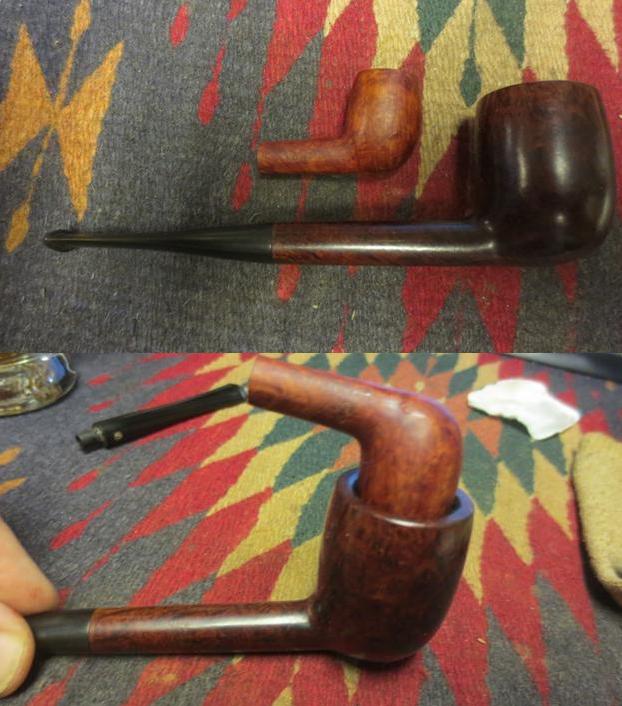


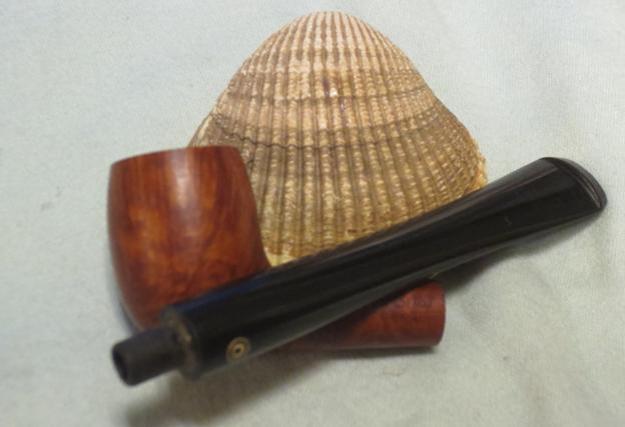
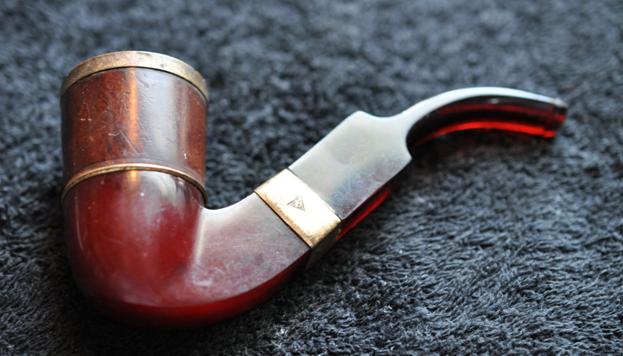
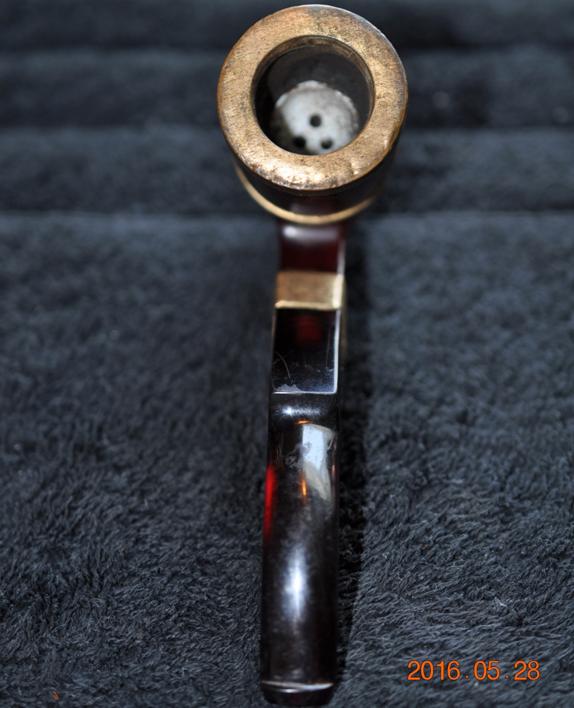

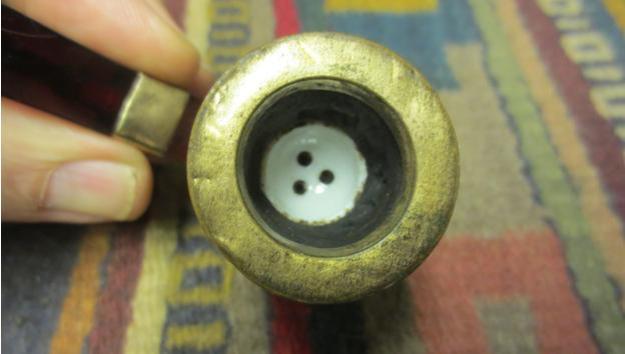

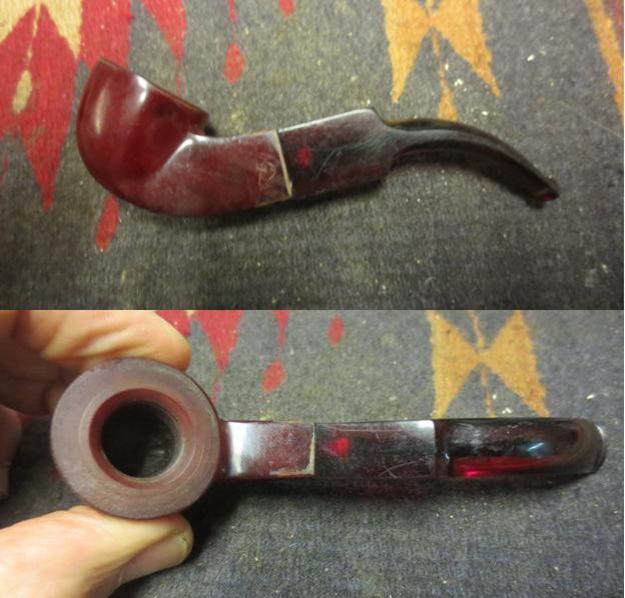


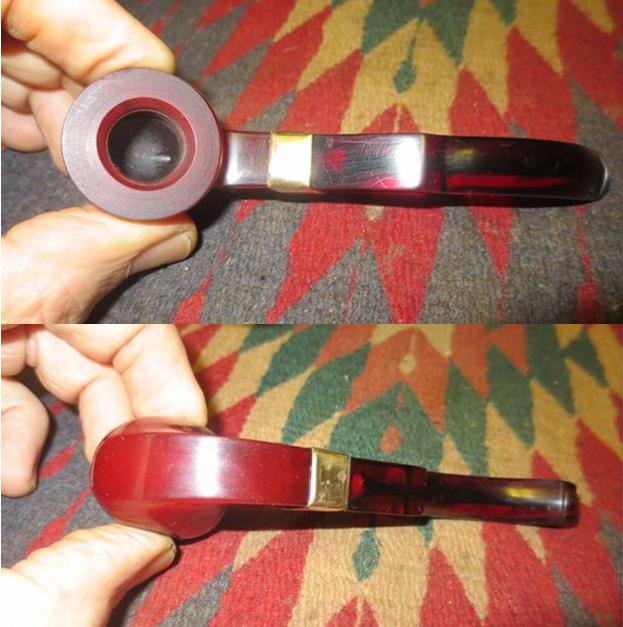
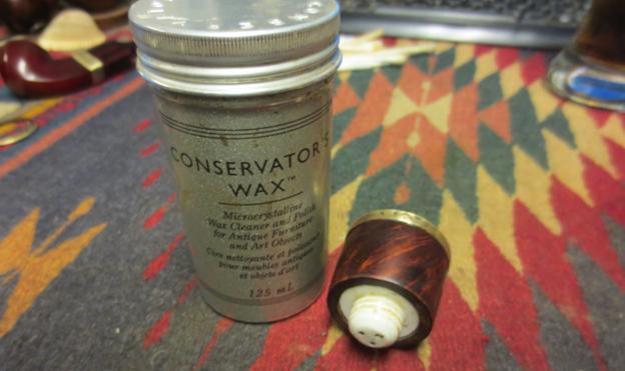

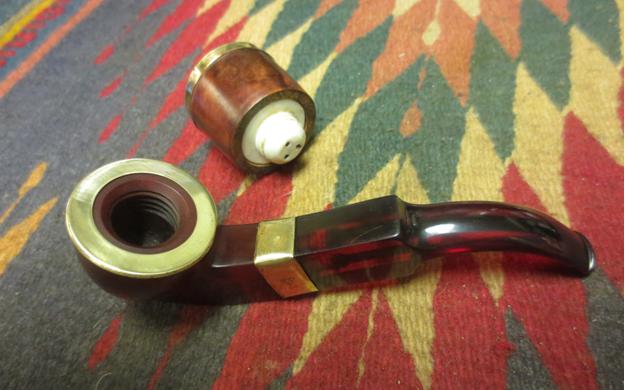

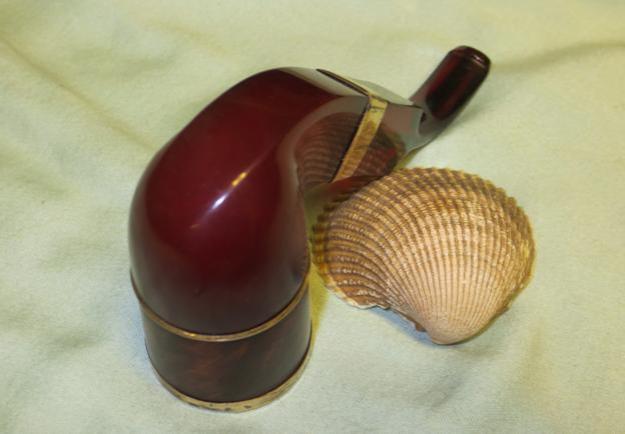
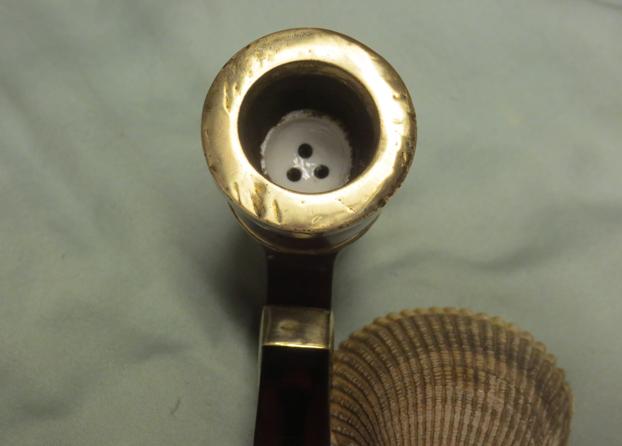
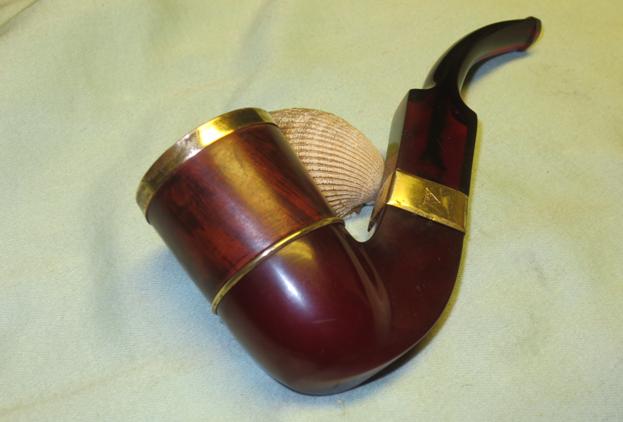


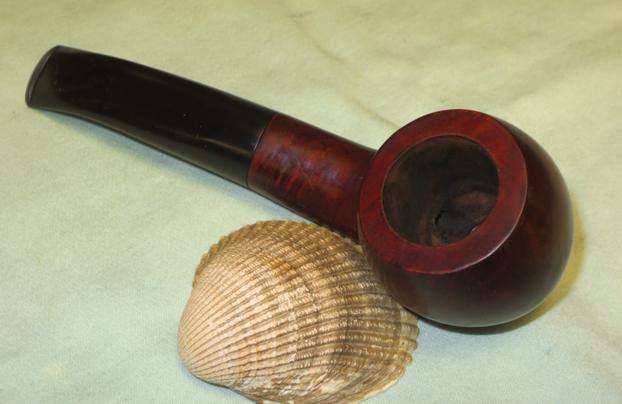
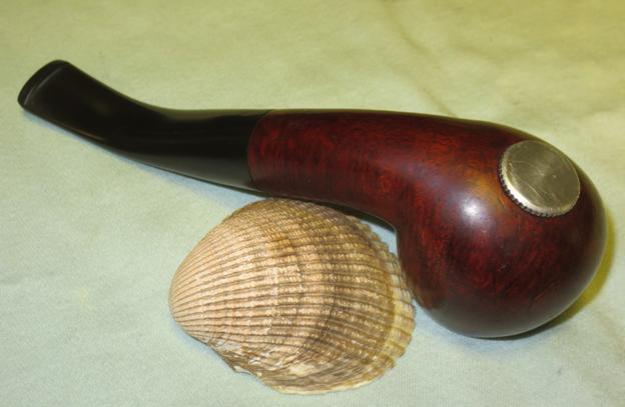
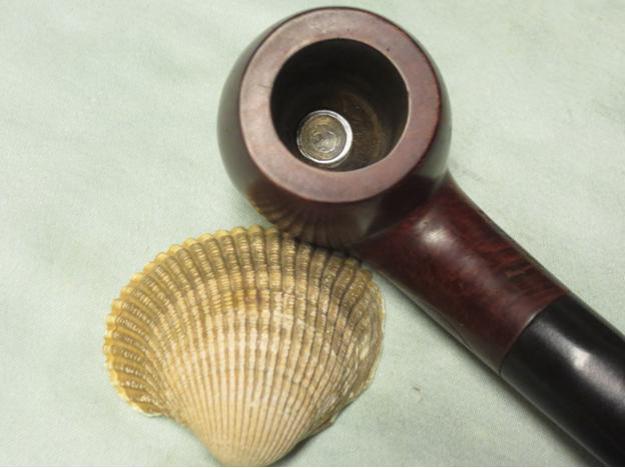
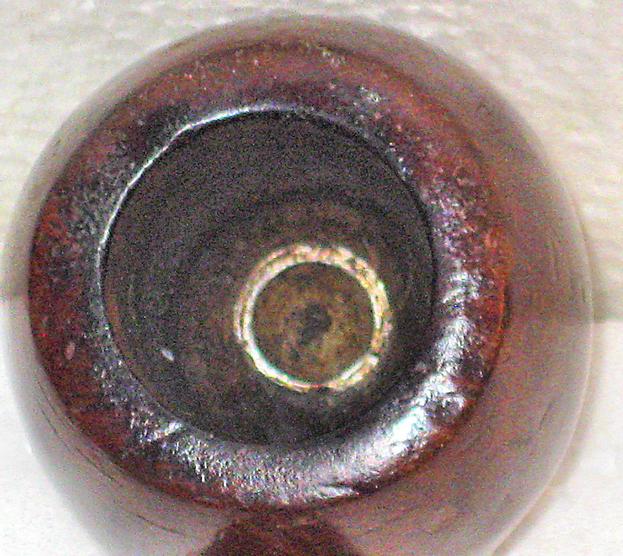
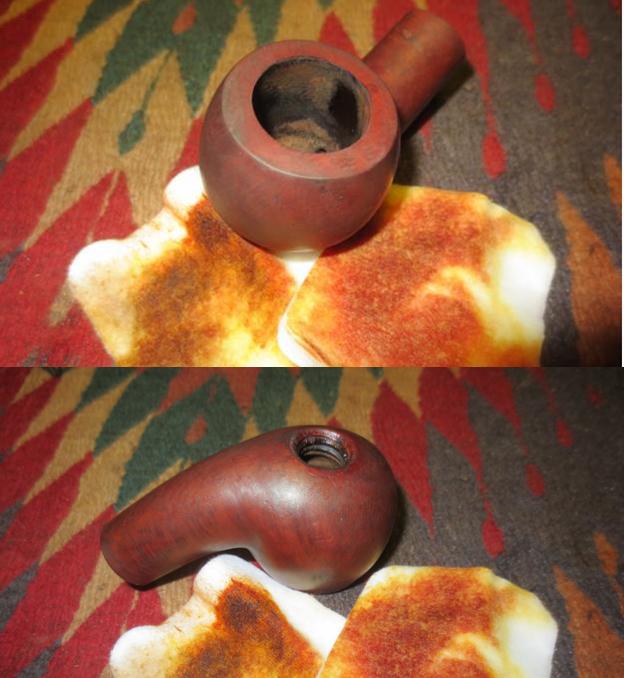
 The fourth and fifth pictures remove the mystery of the knurled edge on the bottom of the bowl that showed in the first photo. You can see in that photo of the bowl bottom that the silver disk looks like it was made to be rotated. We talked and my brother bid and won the pipe (I can’t wait for the pipe to get here so I can check this out). The fifth photo shows the inside of the bowl. The top of the disk appears to be a cup intruding into the bowl bottom. It was really odd looking.
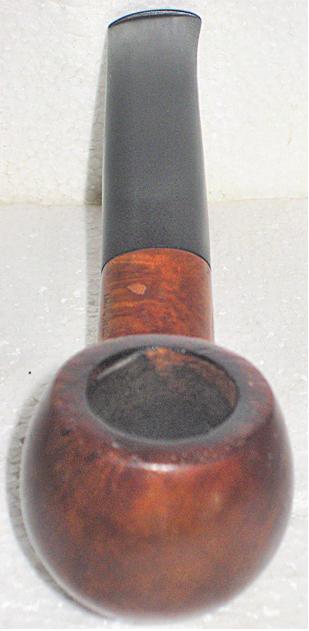
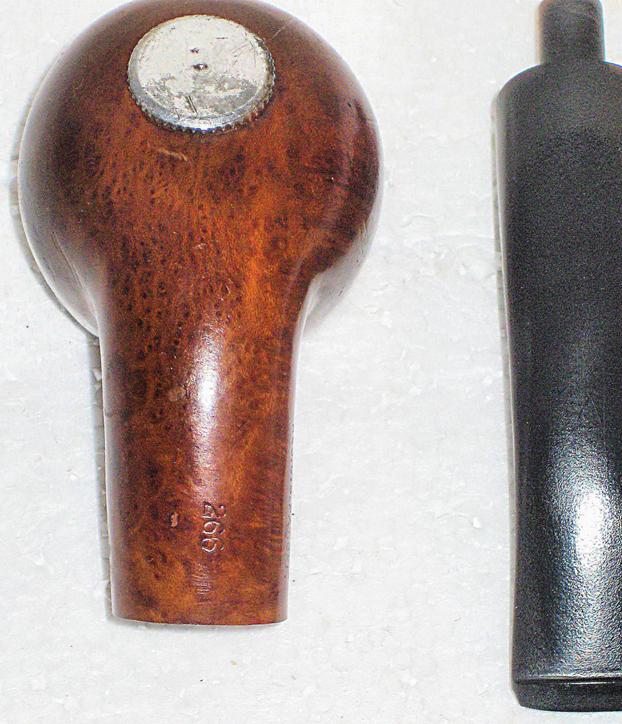
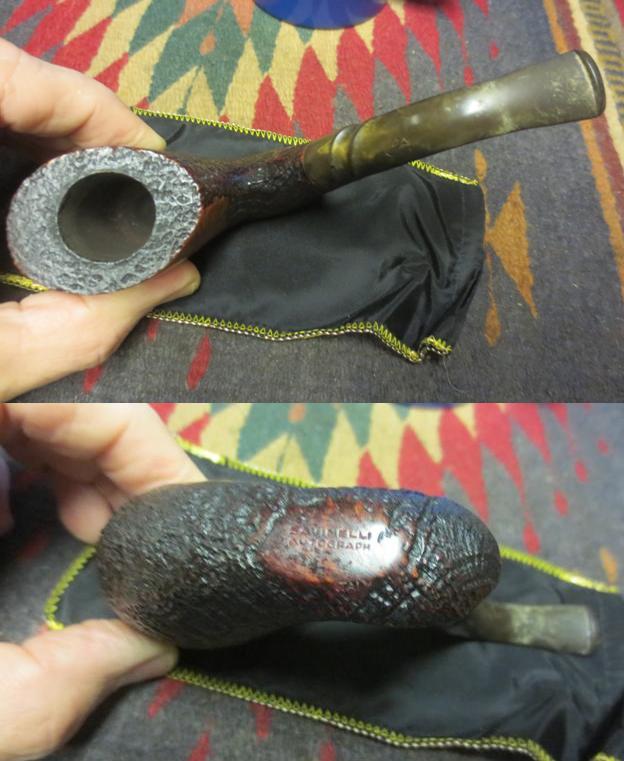
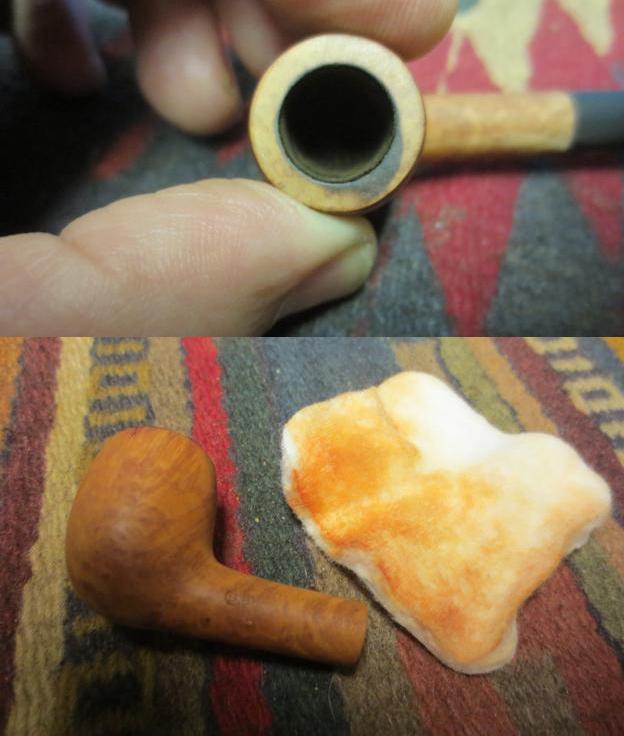
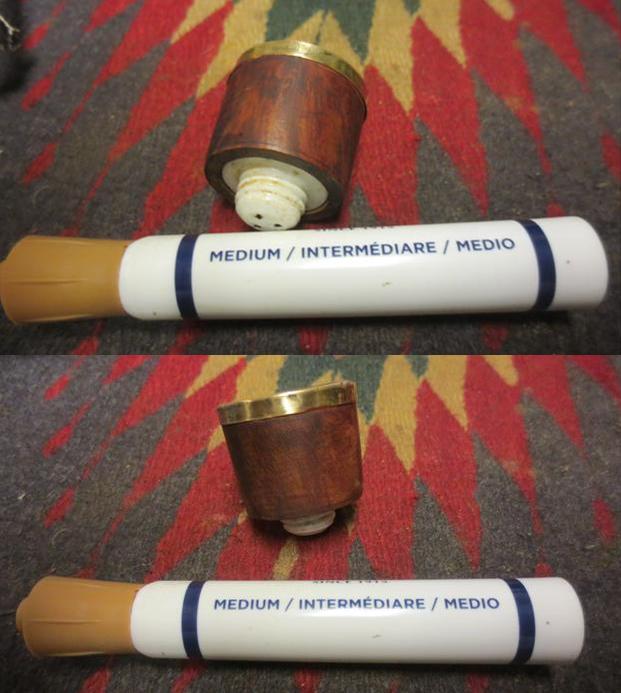
 That information was helpful on many levels. He did not however have any photos or drawings of the pipe or pictures of the advertisements. I wanted to know if the bottom “sump” as he called it was pressure fit or threaded and screwed into the briar. I wanted to know if the bottom of the bowl was damaged or if the “sump” sat as it was supposed to flush with the bottom. It was hard to tell from the photos. I wanted to know was the “wads” were that sat in the sump. From the look of the bowl bottom it appeared that the “wads” may well have been lozenges that fit in the curved cup and then sat flat in the bottom of the bowl. But what did they look like? More research would be needed to answer these questions. But at least the mystery of the knurled edge peaking from the first photo was solved. It was a single unit with a cup on the inside of the bowl. I could not wait to see this in person and “fiddle” with it.
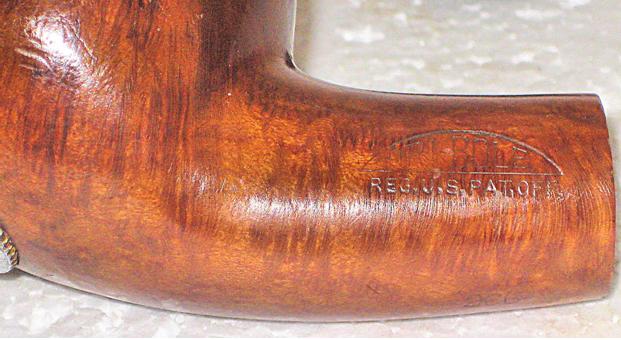 He gave the dimensions of the pipe as follows: overall length: 5 ½ inches, bowl height: 1 ½ inches, diameter of the bowl: 1 5/8 inches, bore diameter: 7/8 inches, bore depth: 1 1/8 inches and the weight: 44 grams or 1.6 ounces
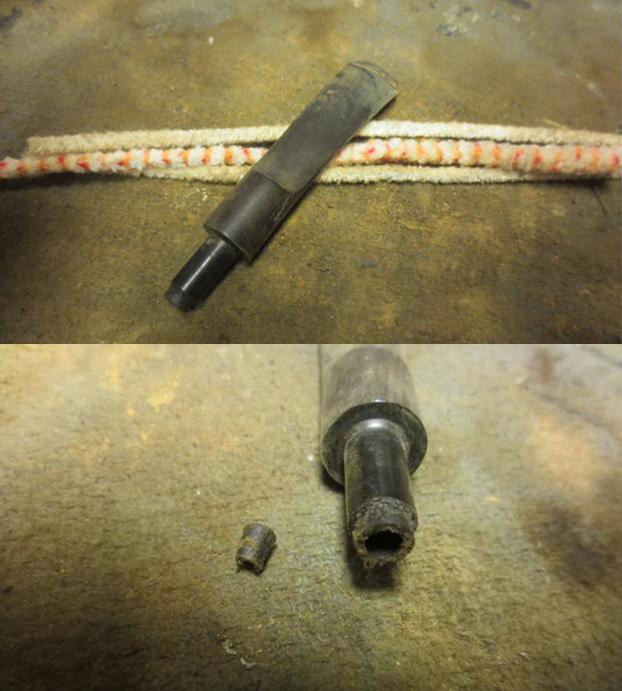
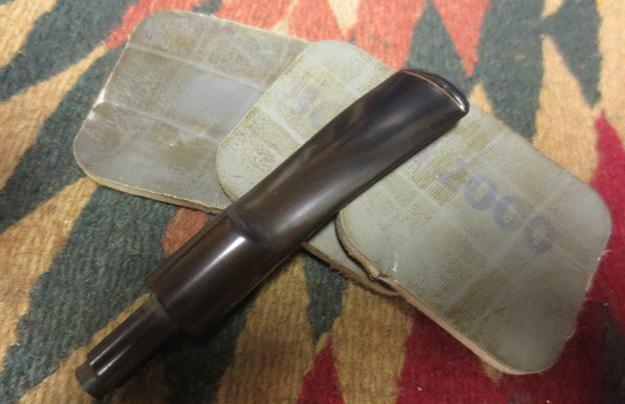
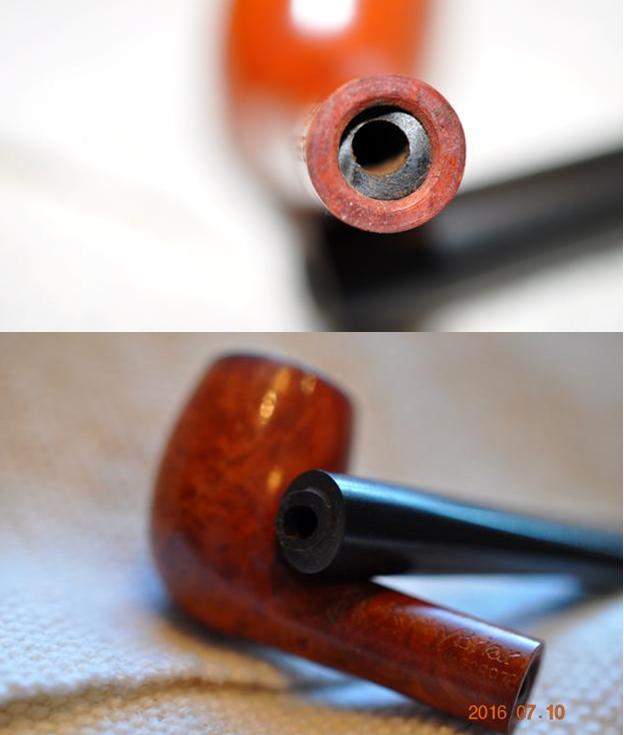
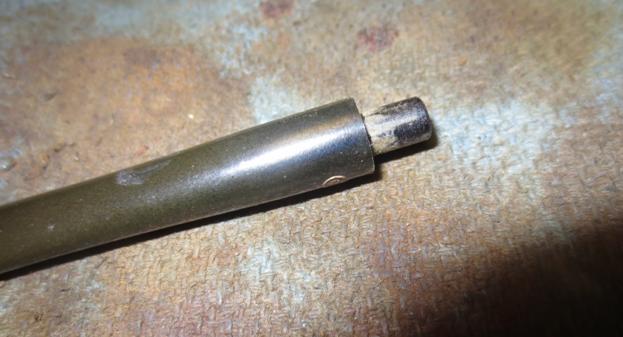
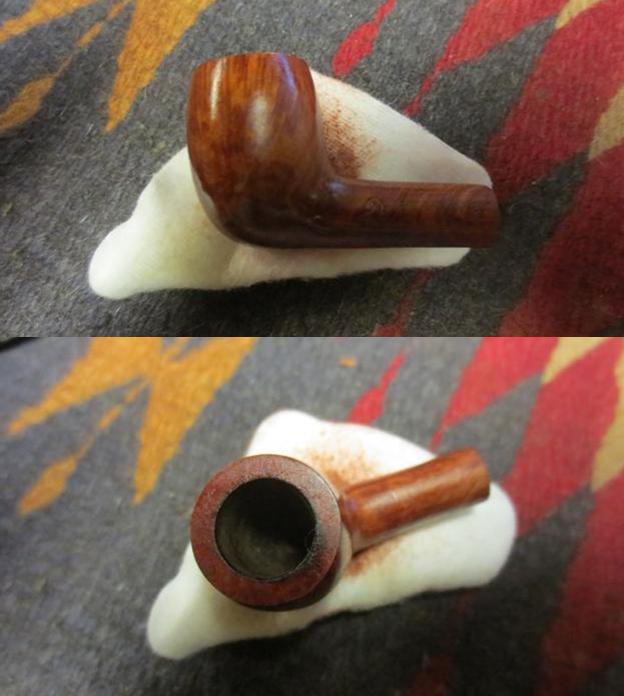
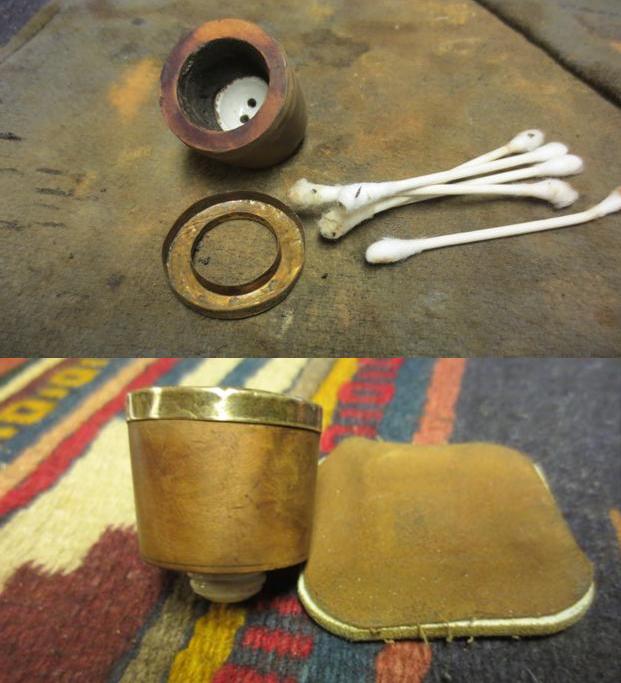
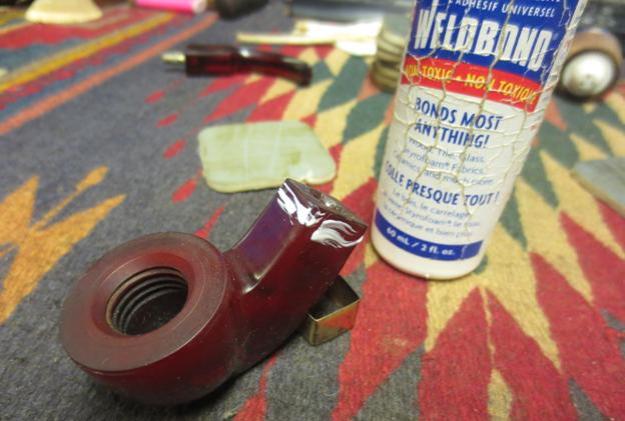
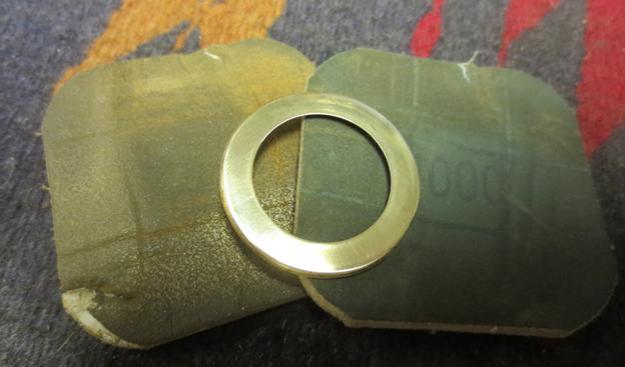
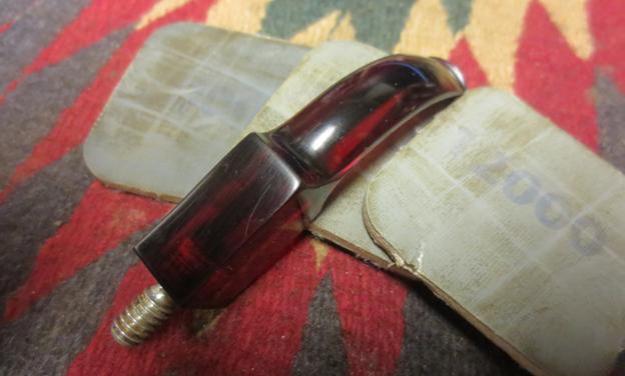
 I took it out of the alcohol bath and heated the disk with the flame of a lighter. I used a pair of pliers to hold tightly to the edge of the disk and I was able to twist it out of the bowl. Once it popped free I could undo it by hand. The first photo below shows the inside of the silver disk. The second shows the knurled outside.
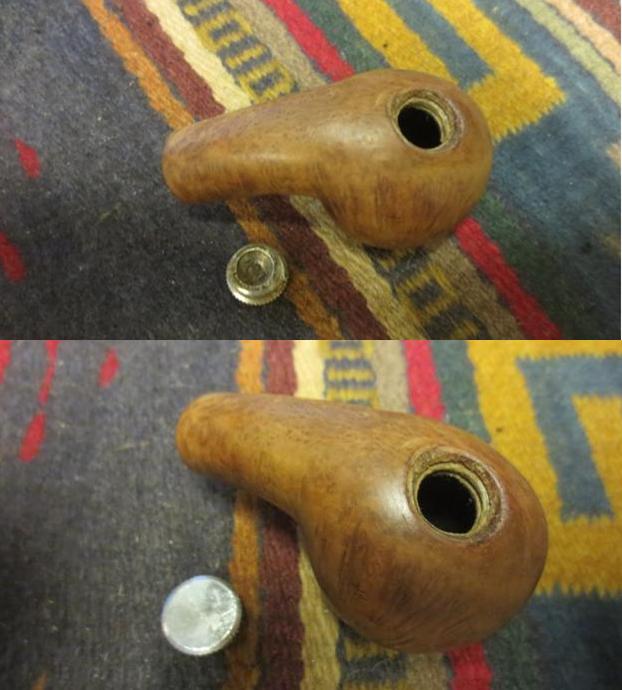 To remove the damage to the rim top and edges I topped the bowl on a topping board with 220 grit sandpaper.
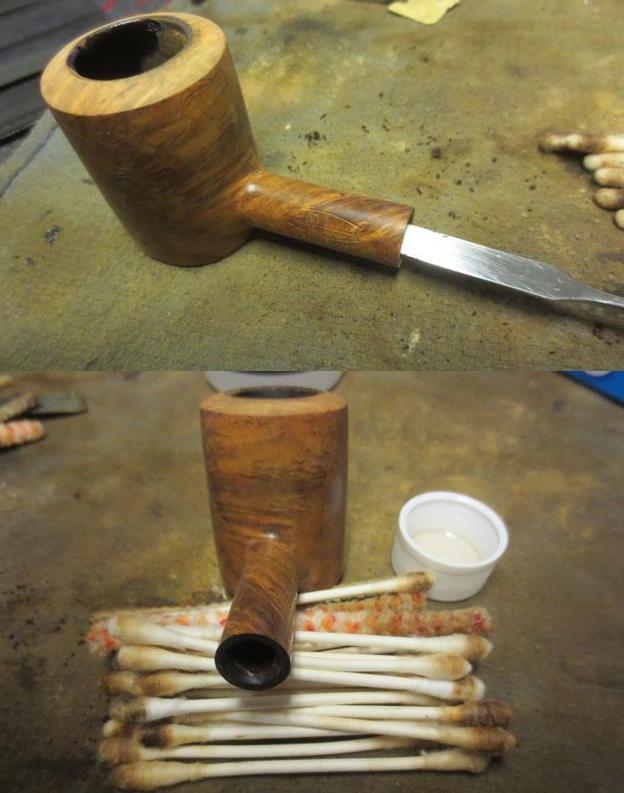
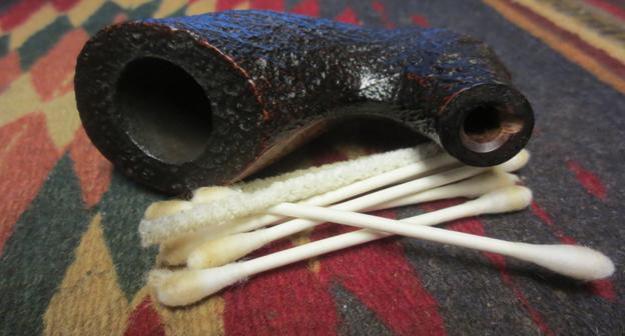
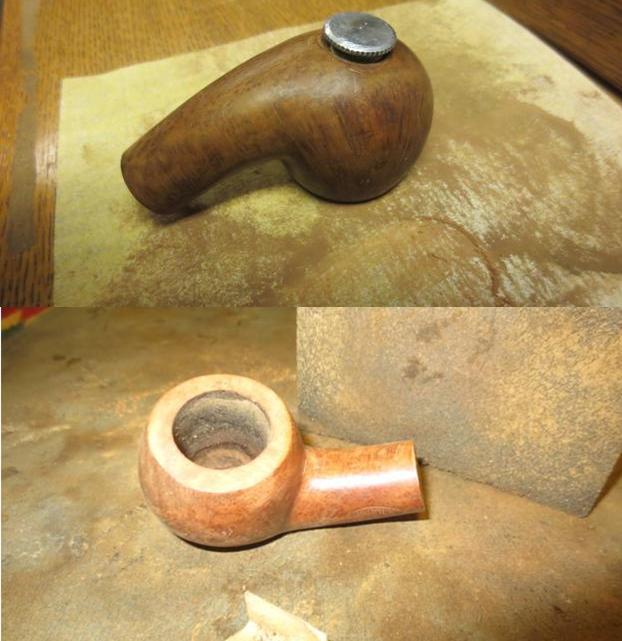 There were some nicks around the hole in the bottom of the bowl so I sanded those smooth with sandpaper and then cleaned out the threads in the briar with a cotton swab and alcohol.
 I used the brass bristle brush to scrub the threads and the cup on the disk. I cleaned it afterwards with cotton swabs and alcohol.
 I used a cotton swab to coat the threads on the disk with Vaseline and turned it into the bottom of the bowl. I wanted to make sure that I could easily turn the disk by hand.
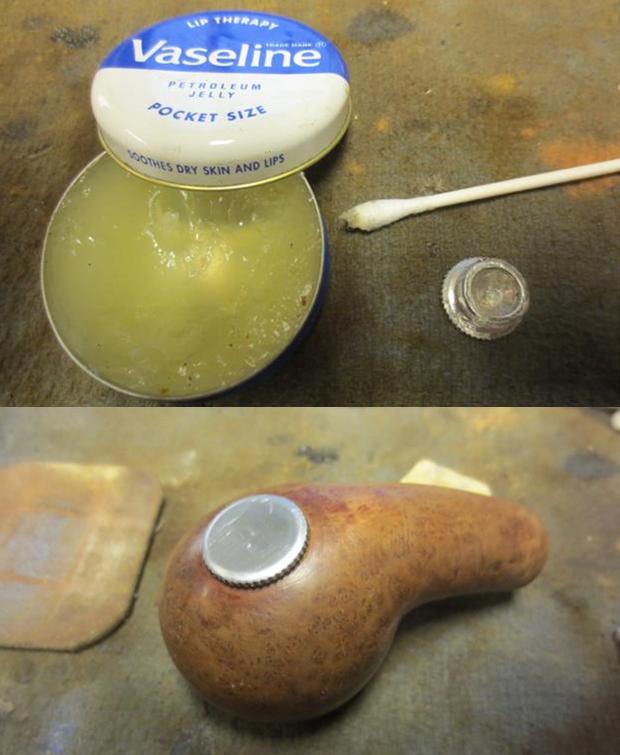 I cleaned out the internals with pipe cleaners, cotton swabs and alcohol. It was pretty clean thanks to my brother. It did not take too many to clean it out.
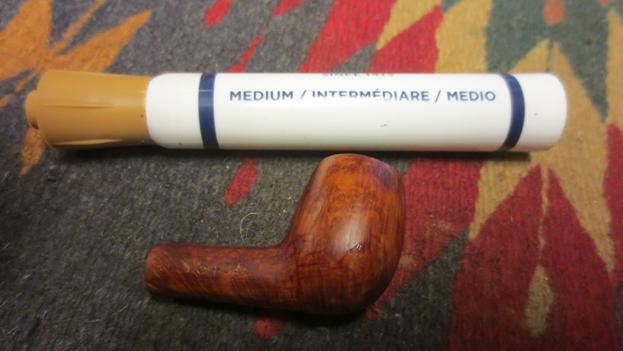
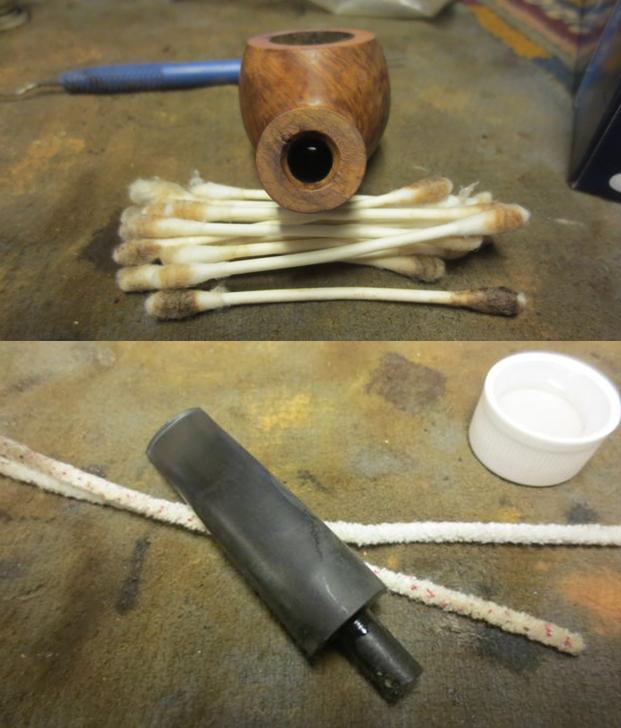 I sanded the bowl and stem with a medium and a fine grit sanding block. The pipe is beginning to look really good. I had to make a decision how far to sand the bowl and how many of the original dings and dents to remove without changing the “story” and character of this old timer.
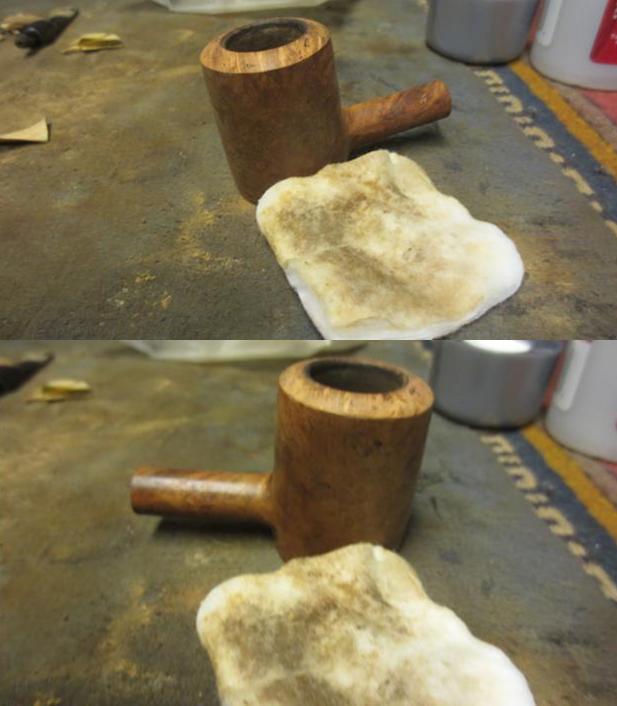
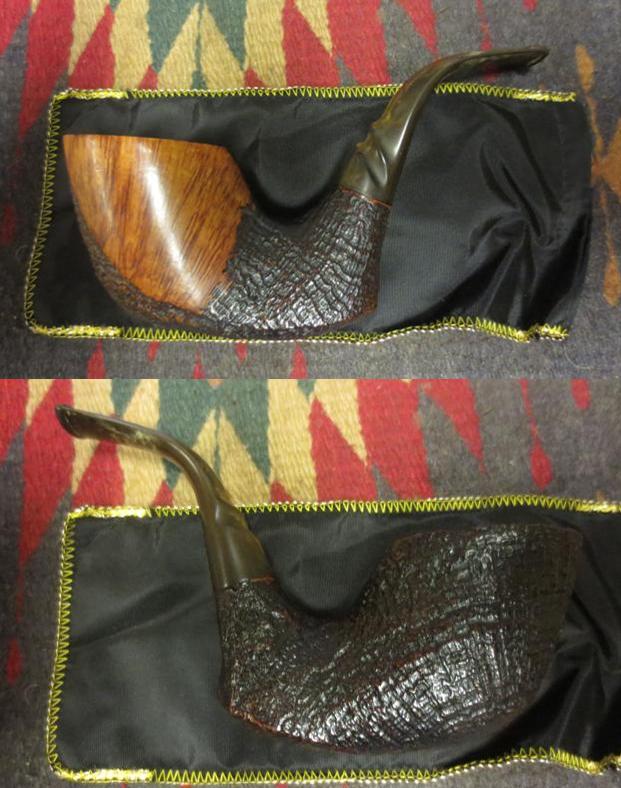
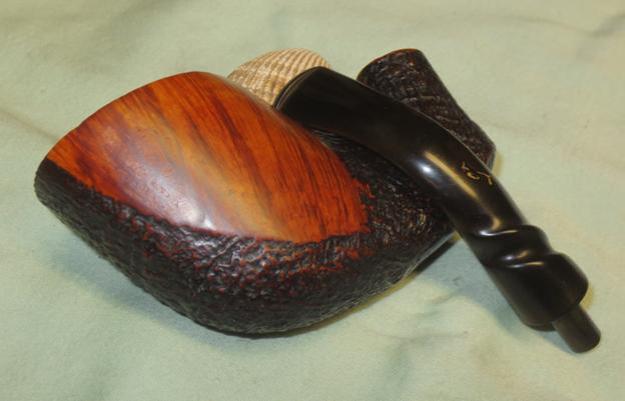
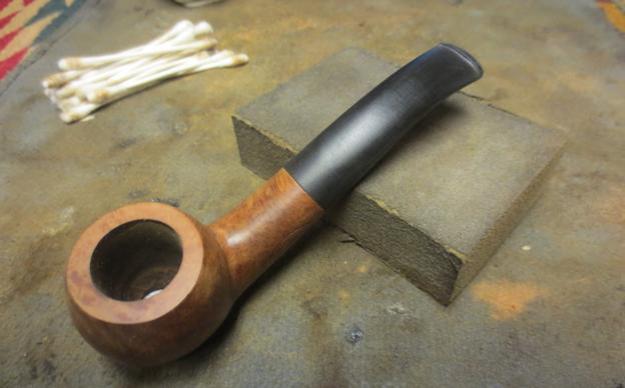 I heated the briar and then stained it with dark brown aniline stain cut by 50% with isopropyl alcohol. I flamed it to set the stain and repeated the process.
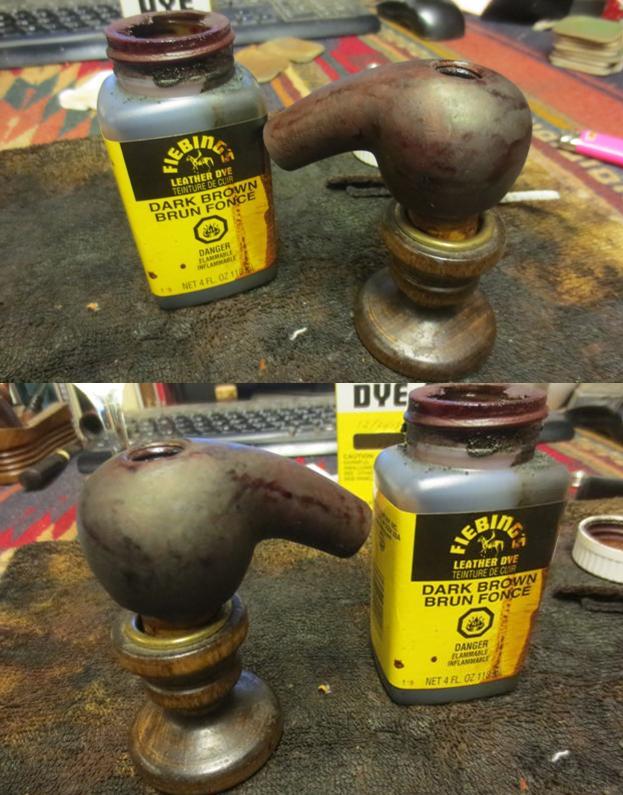 I wiped down the stain with alcohol dampened cotton pads to make it more transparent and make the grain stand out. At this point the fills stood out and I would need to address them a bit differently.
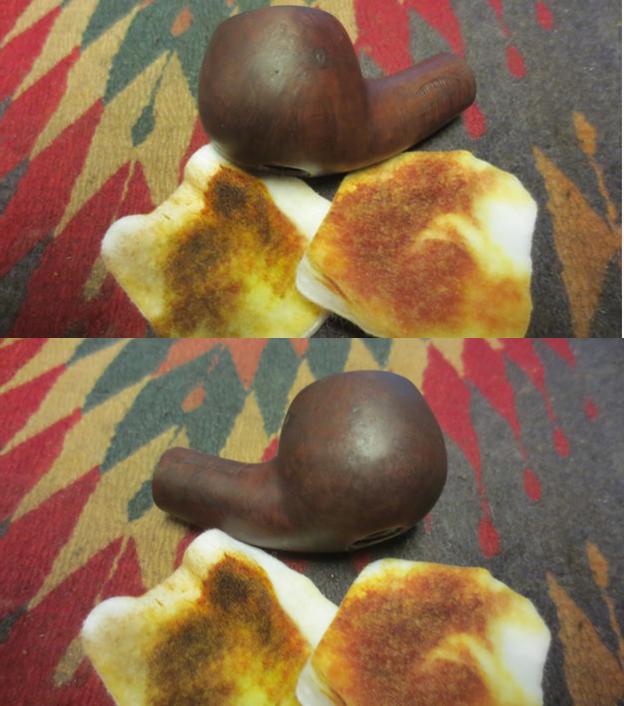
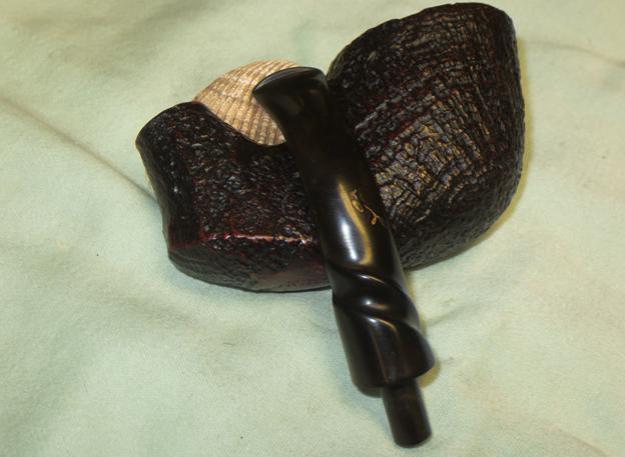
 I used a black Sharpie Permanent Marker to draw some lines across the fills and blend them into the grain on the pipe. I then chose to give the bowl a second contrast staining using a Cherry Danish Oil stain. I find that the combination of the black marker and the cherry stain blends the fills better than a brown stain. The combination of the brown and the cherry stains gives depth to the finish so I like using them together.
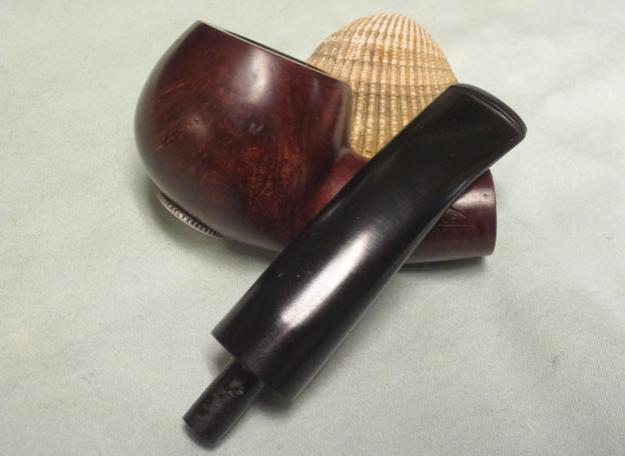
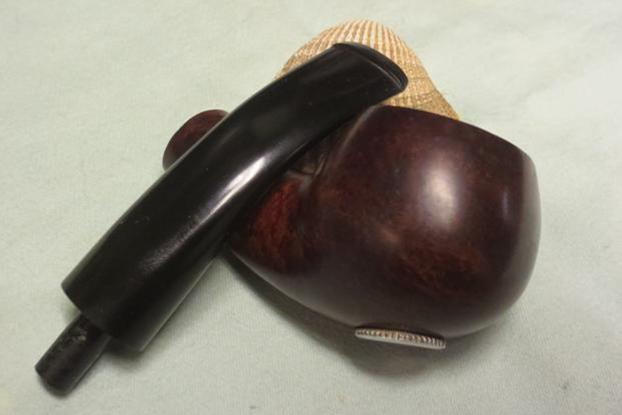
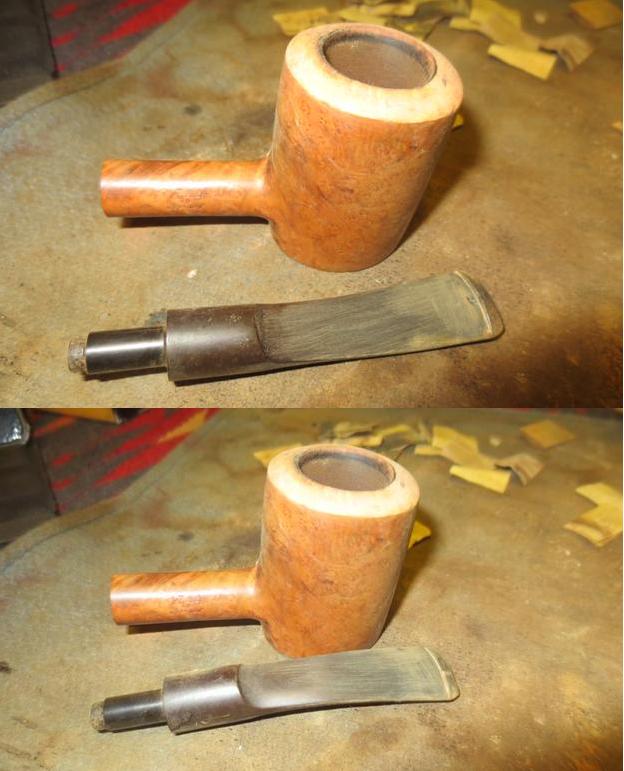
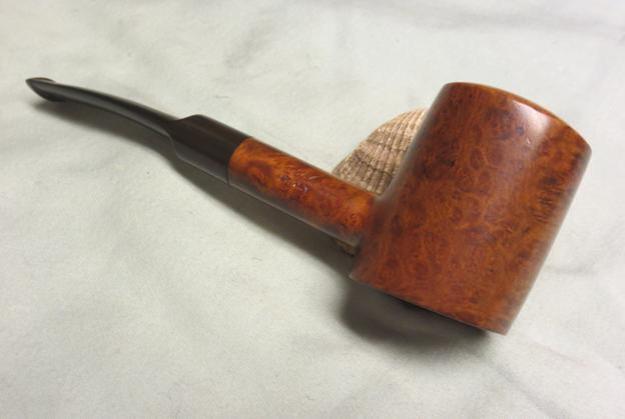
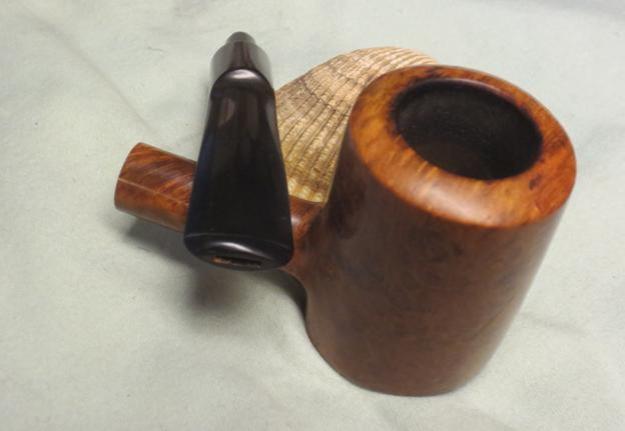
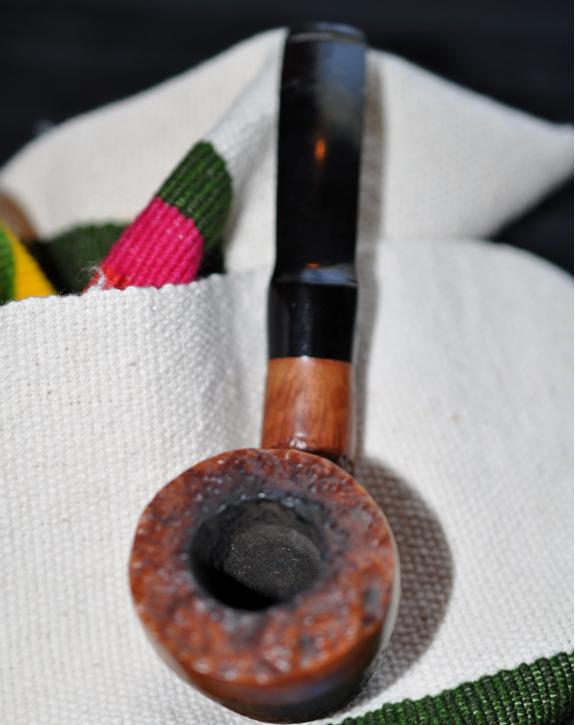
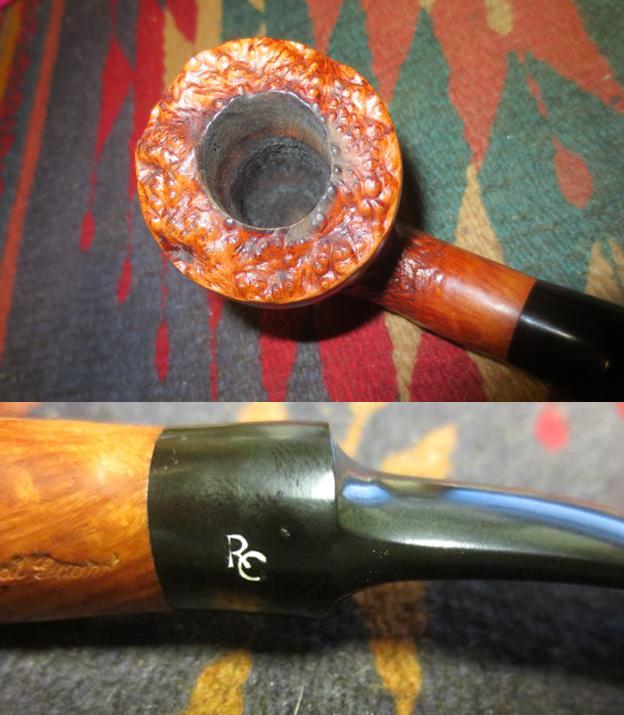
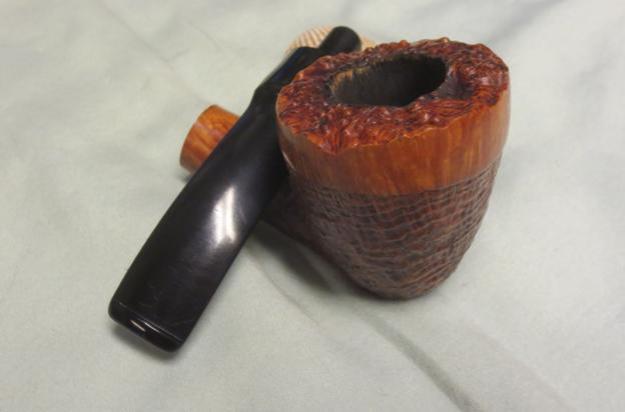
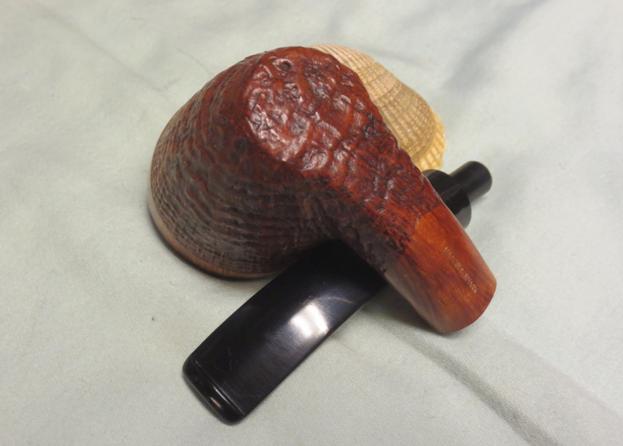
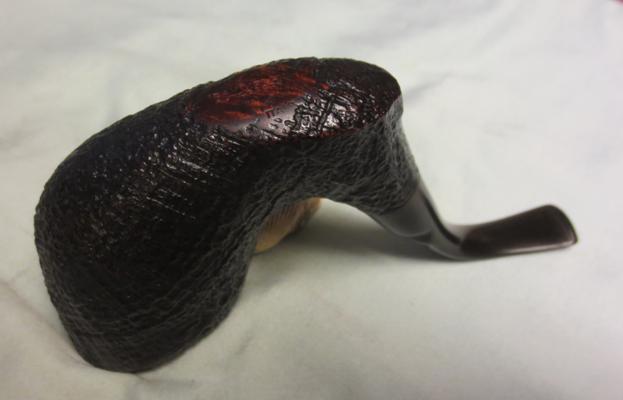
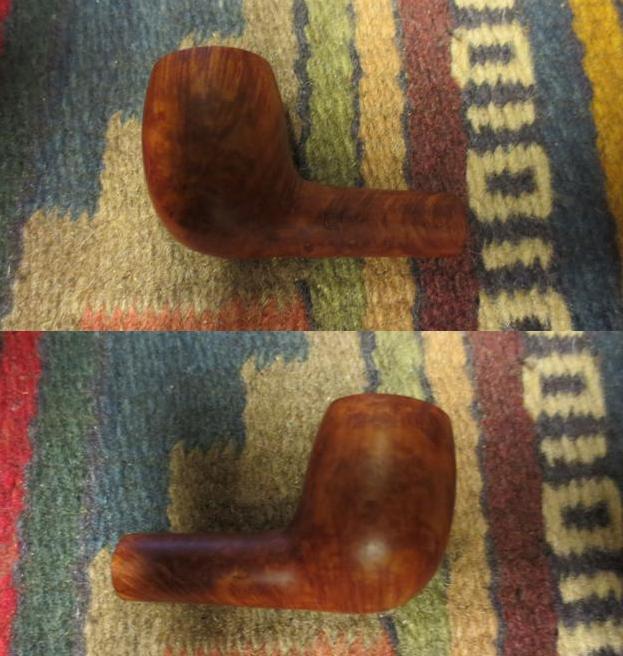
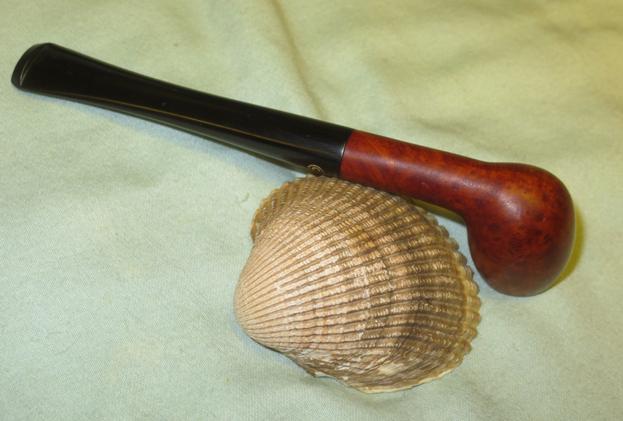
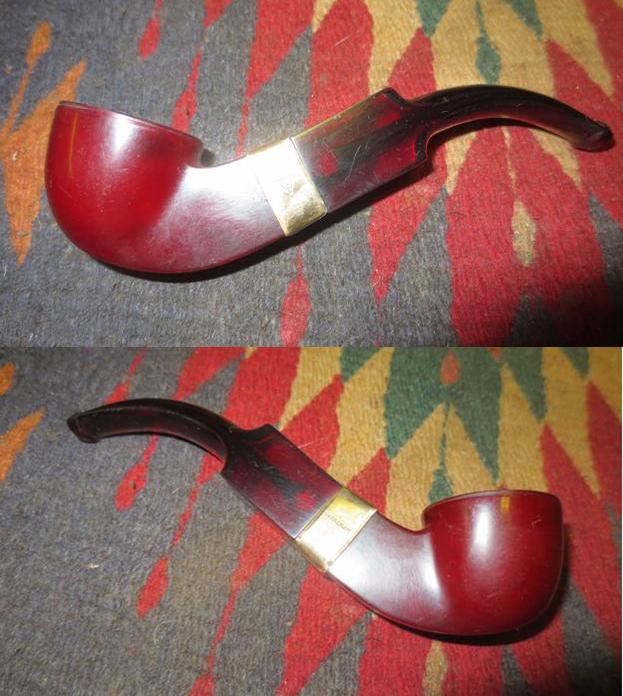
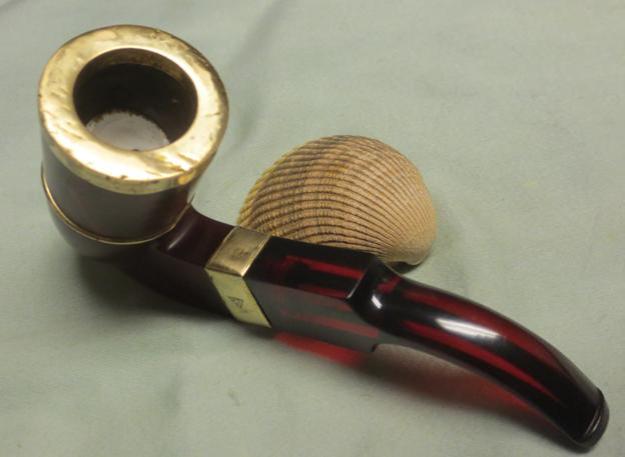
 Once the cherry Danish Oil stain dried (overnight) I buffed it lightly on the wheel with Blue Diamond and then gave the bowl a coat of carnauba wax. I hand buffed it with a microfibre cloth. You can see the small dings that I left in the bowl sides rather than change the look. I polished the silver disk with a silver polishing cloth. The next series of photos shows the bowl at this point in the process.
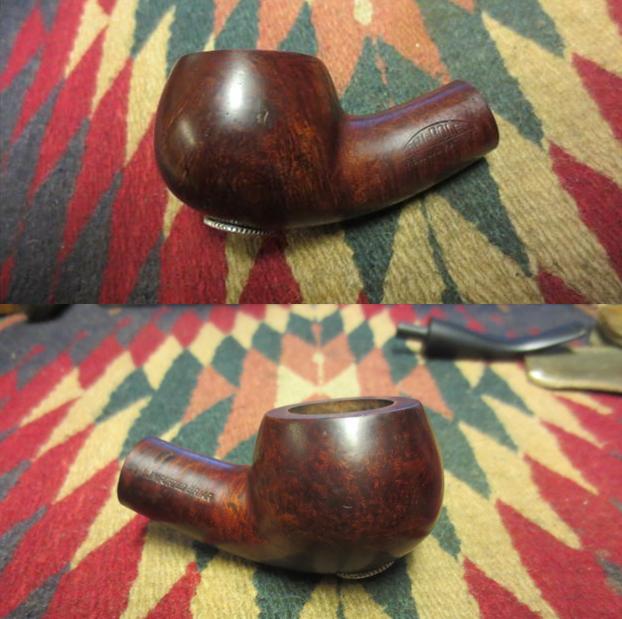
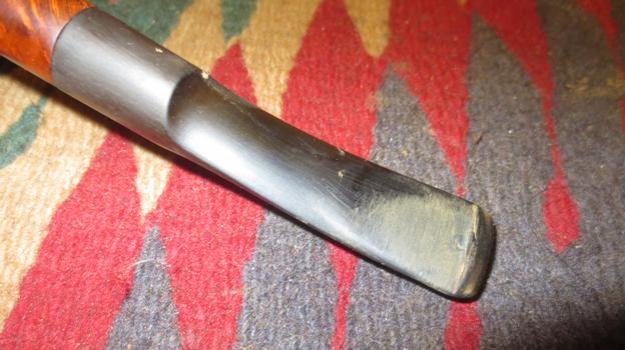
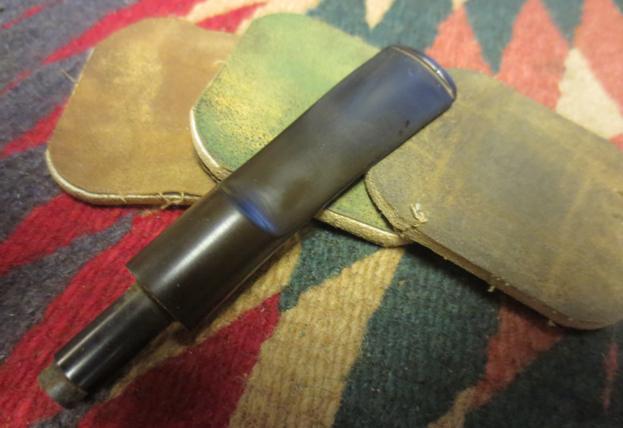
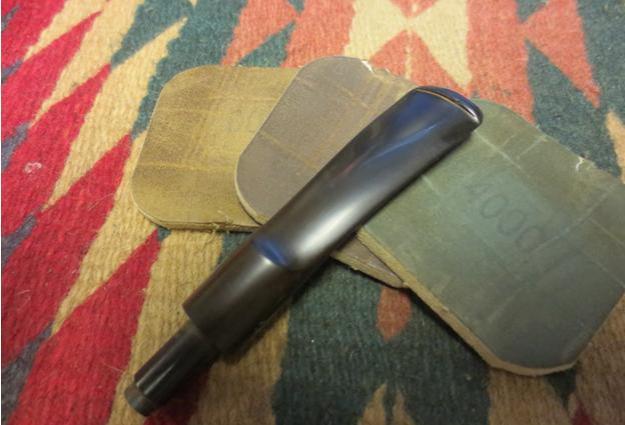
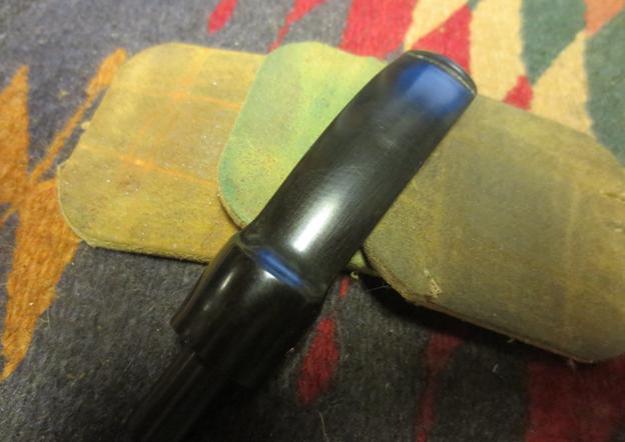
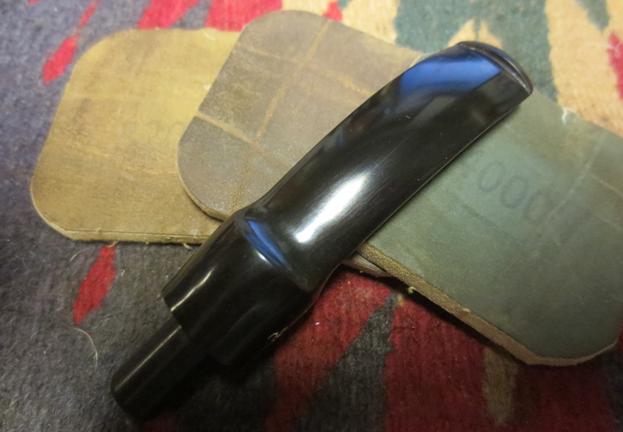
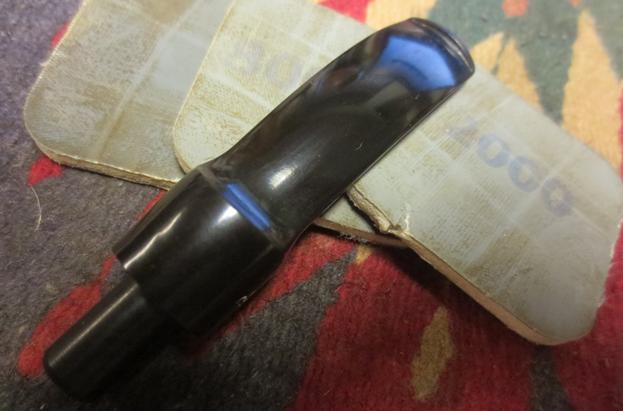
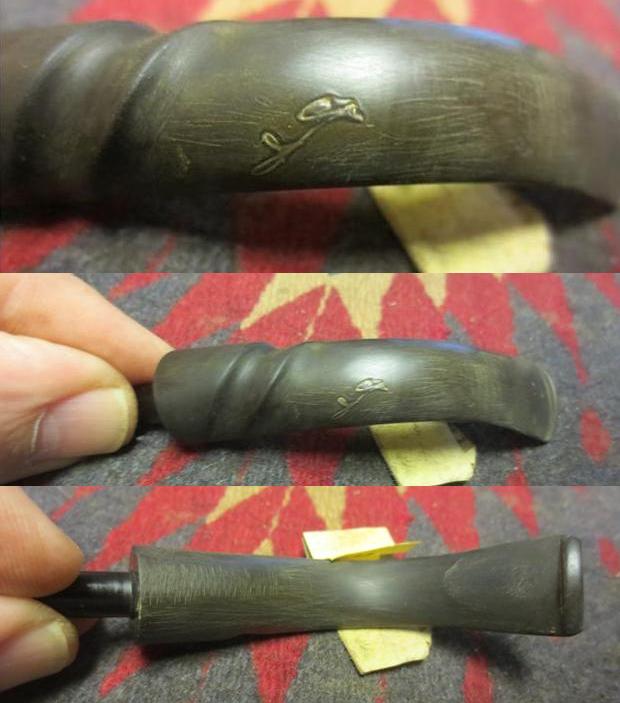
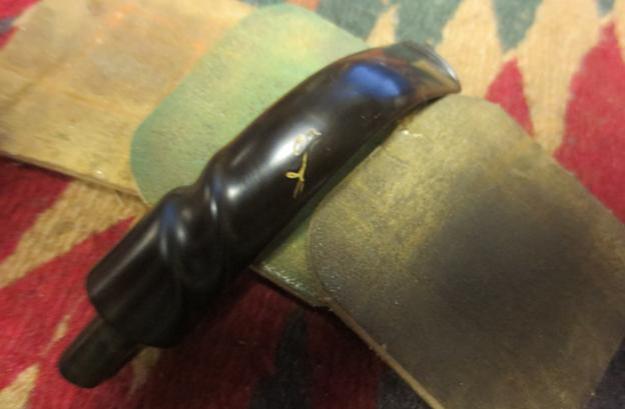
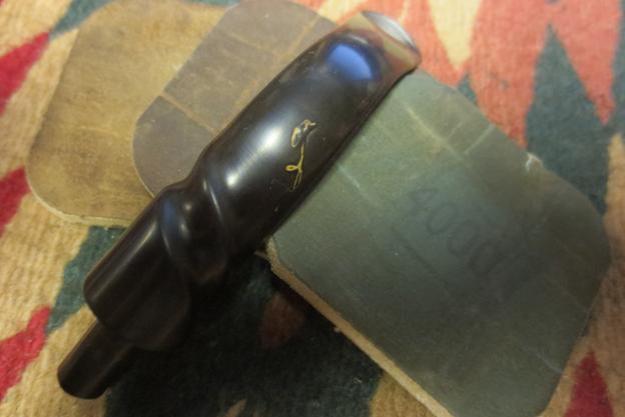
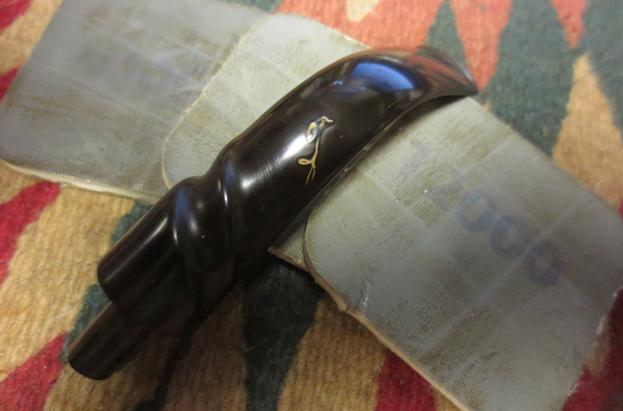
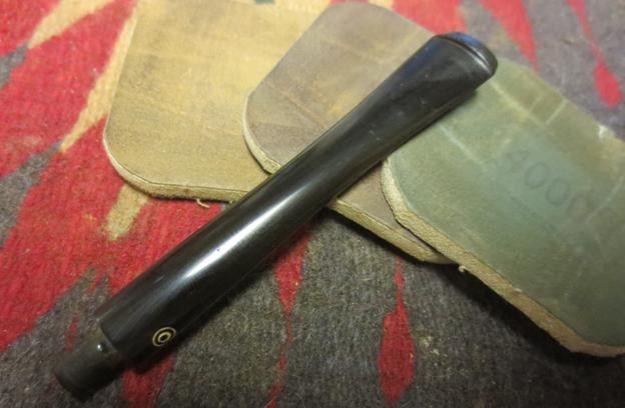
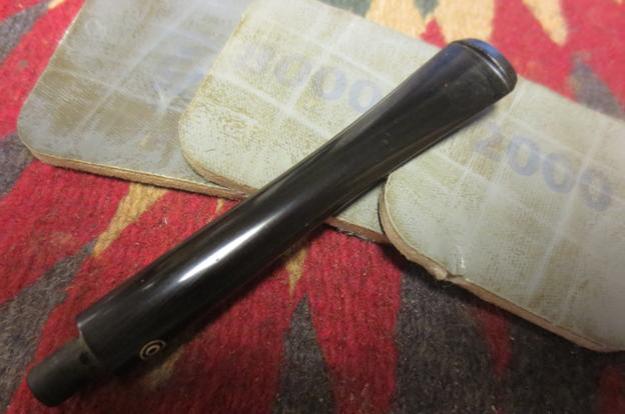
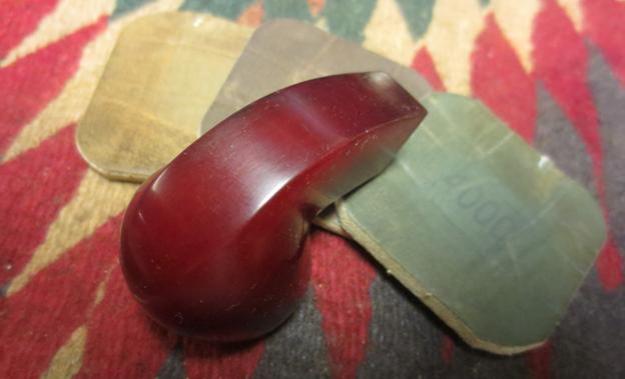
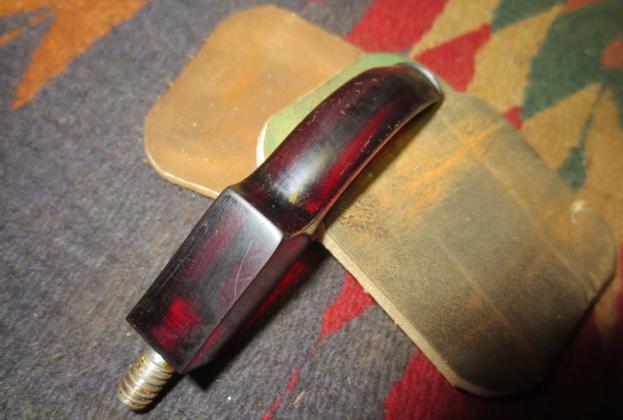
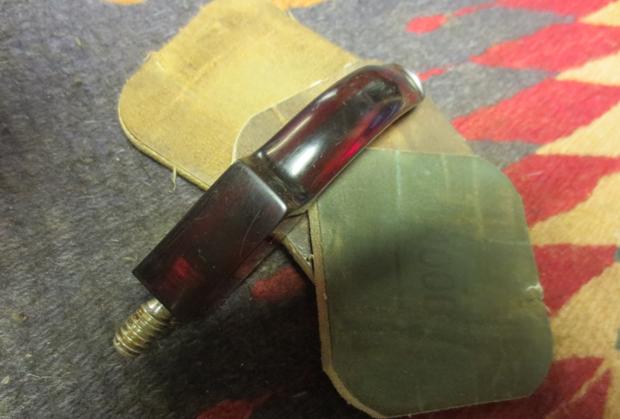
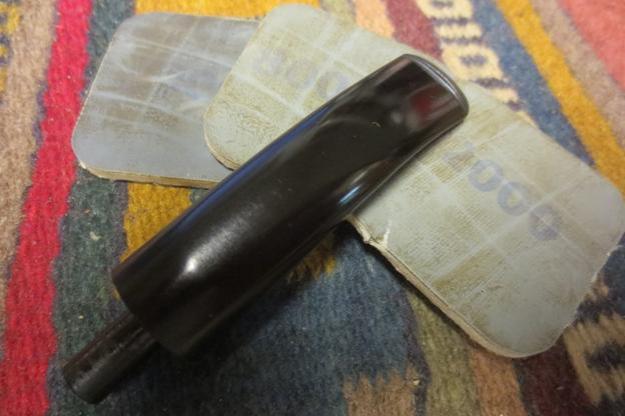
 I set the bowl aside and worked on the stem. The old hard rubber that was used on this stem was good quality. There was very little oxidation if any on it. The main issue was the pitting that covered the surface of the stem. I sanded it with 220 grit sandpaper to address the pitting and smooth out the surface and then began my normal sequence of micromesh sanding pads. Between each set of three grits (1500-2400, 3200-4000, 6000-12000) I rubbed the stem down with Obsidian Oil. I gave it a final coat of the oil and let it dry before I buffed the pipe.
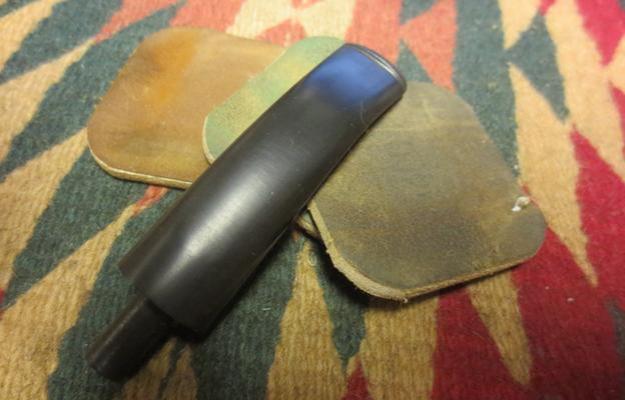
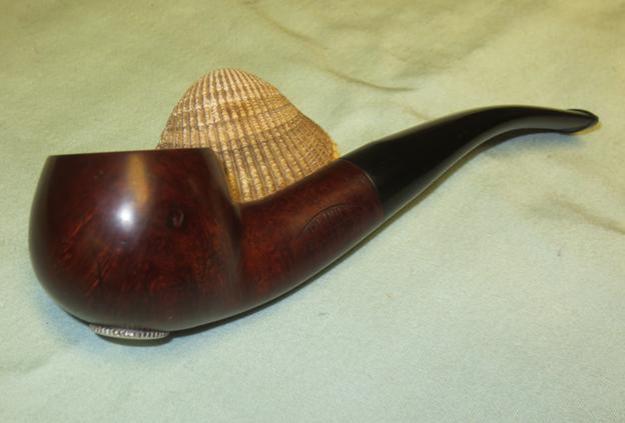
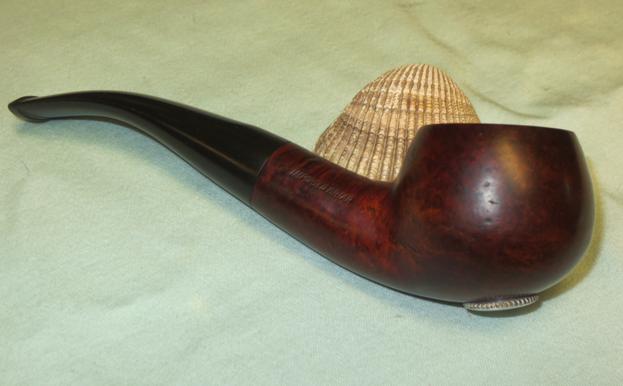
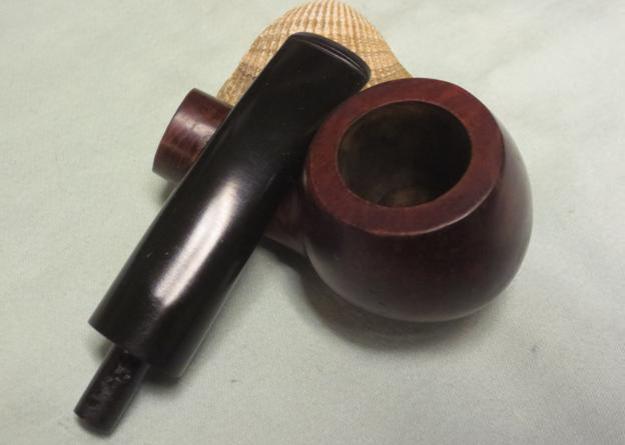
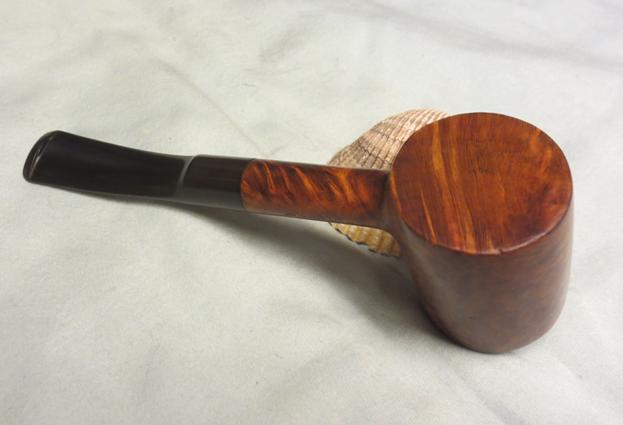
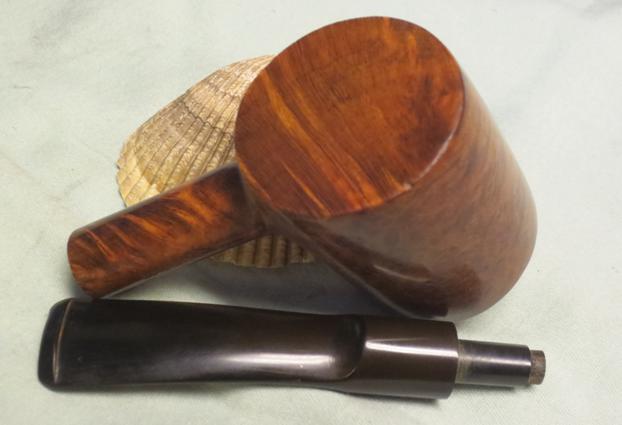
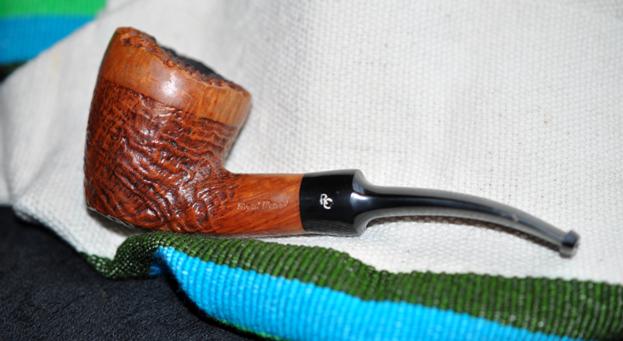
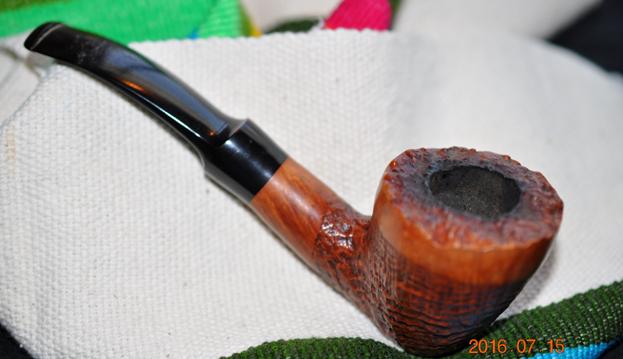
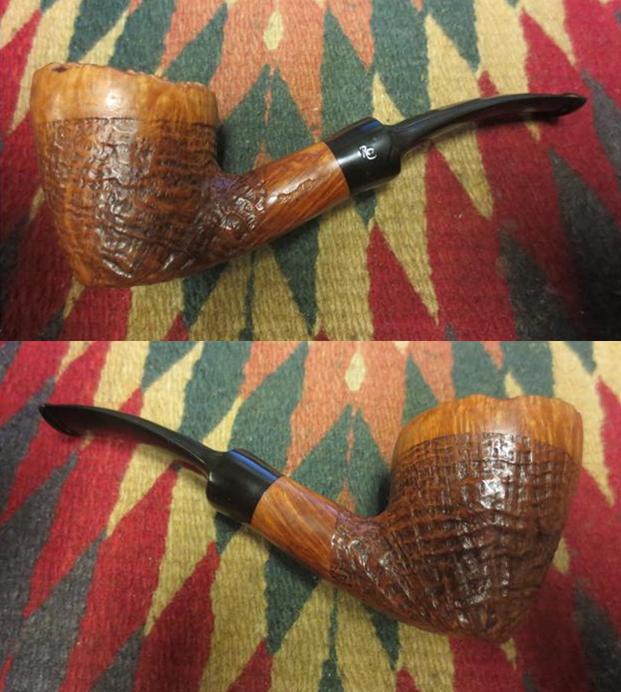
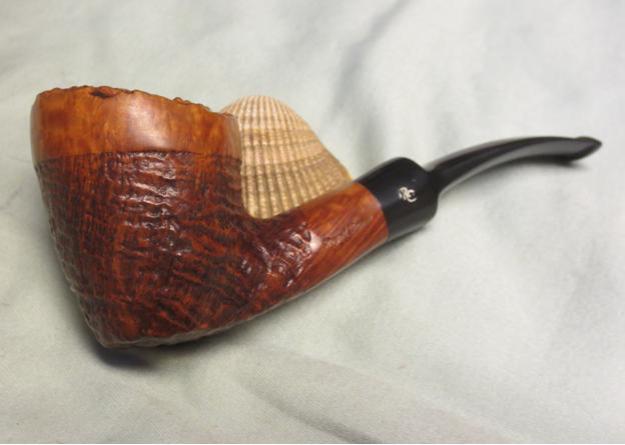
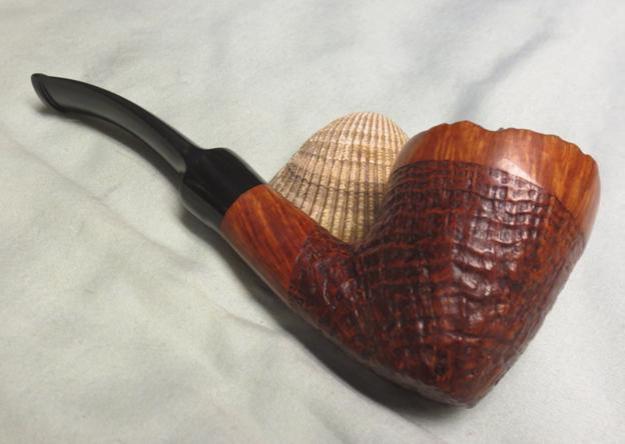
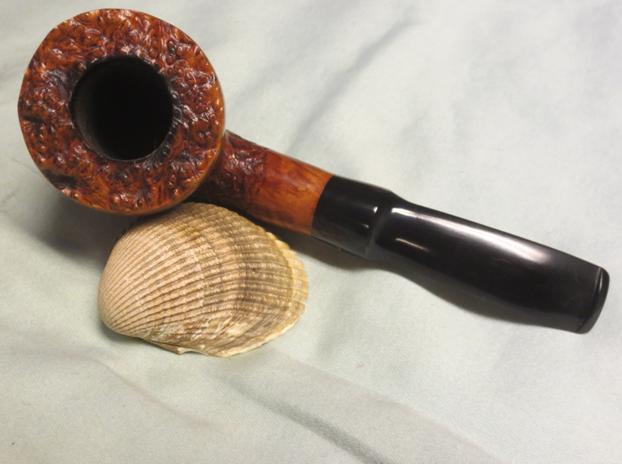
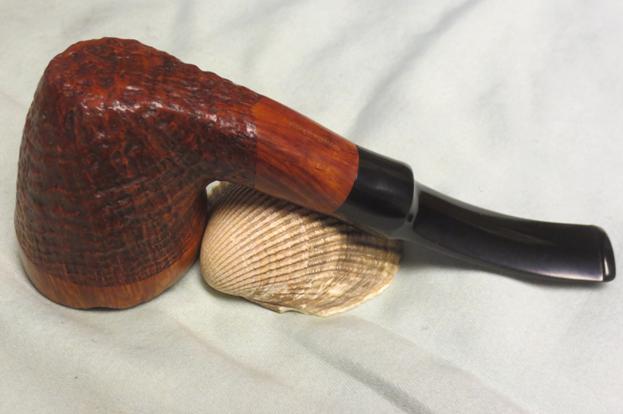
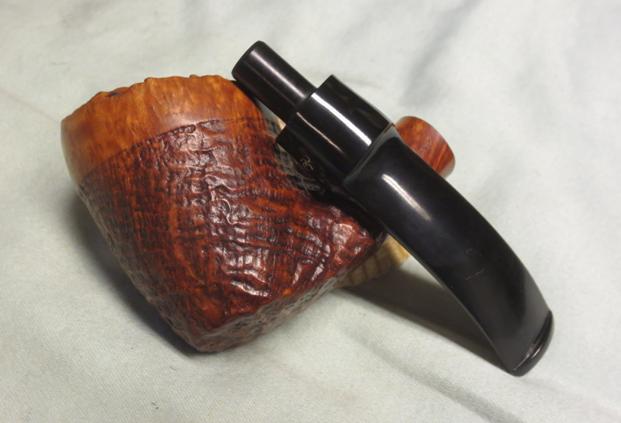
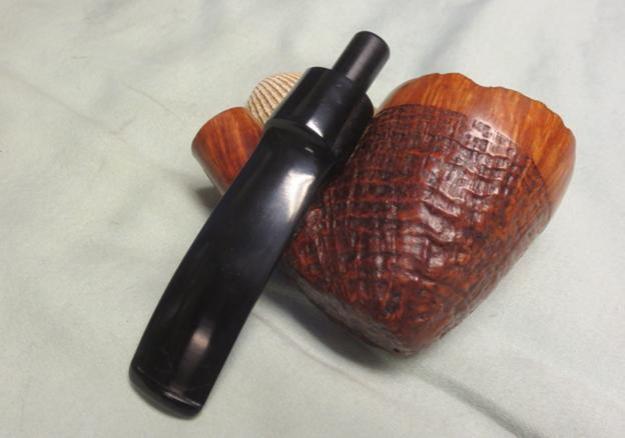
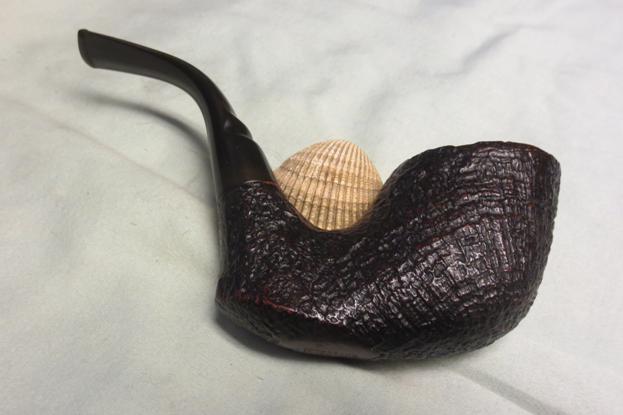
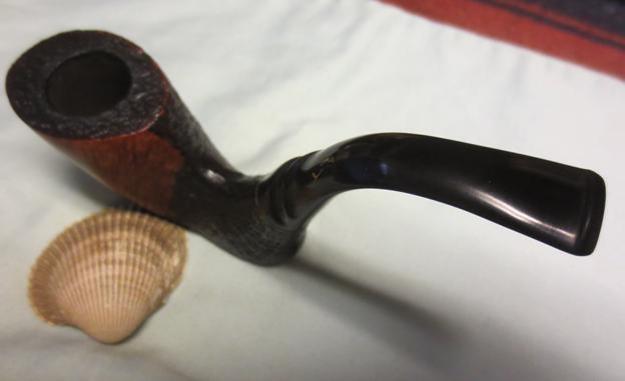
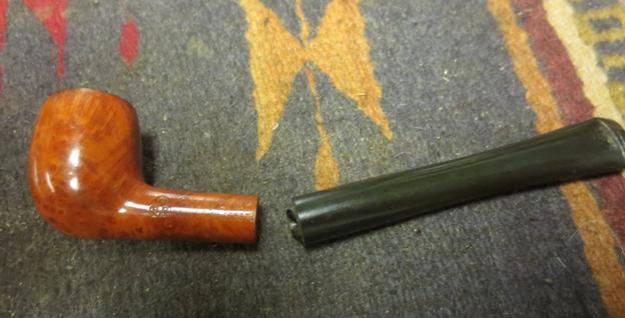
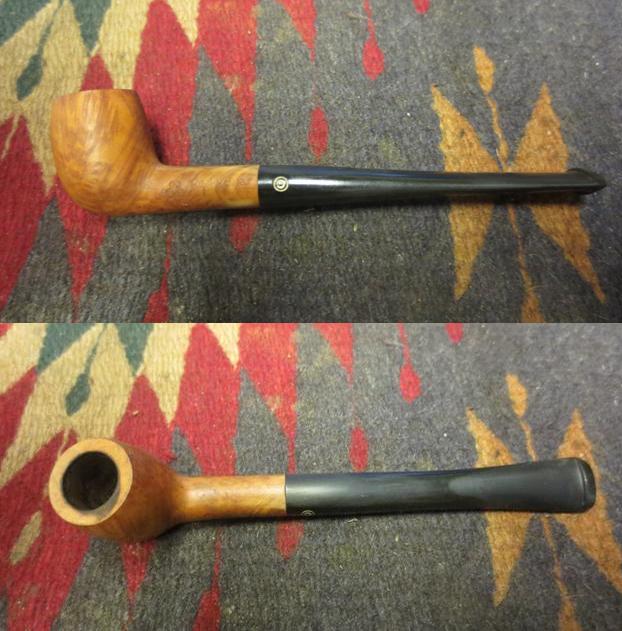
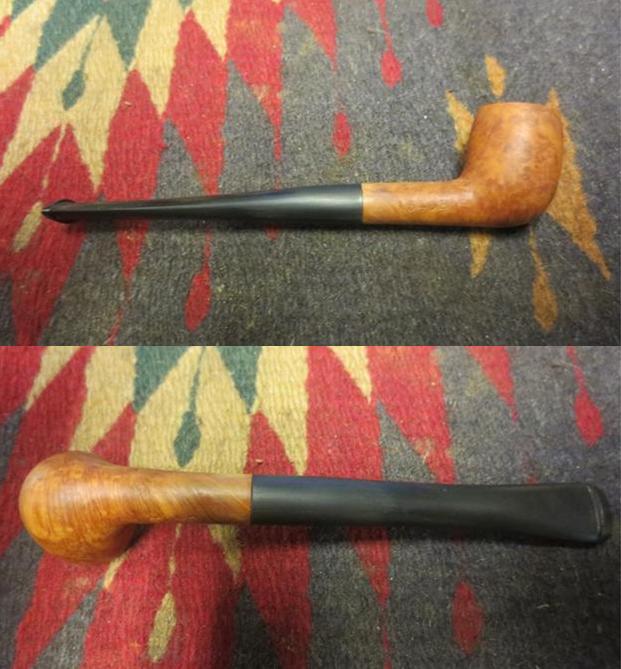
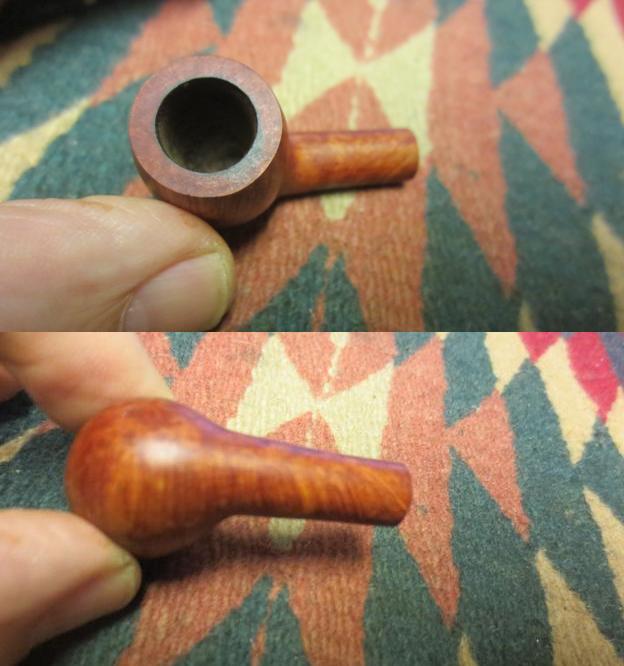
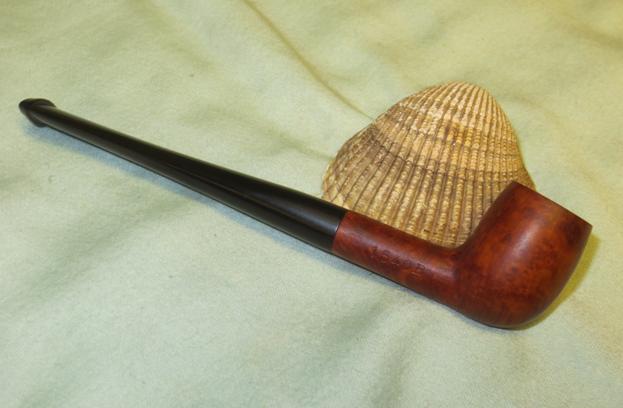
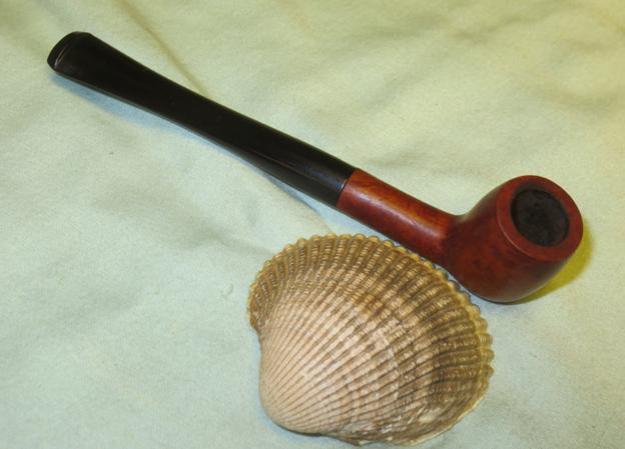
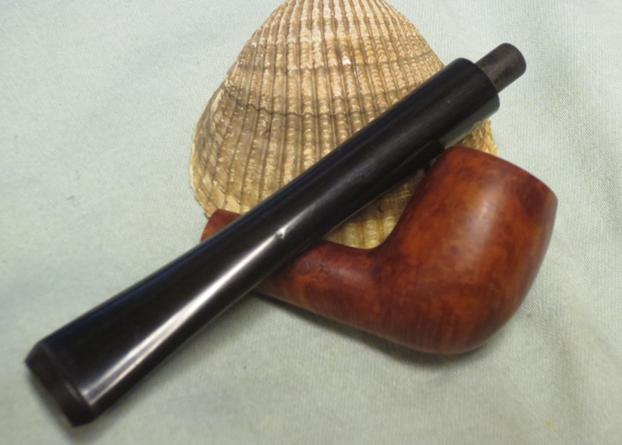
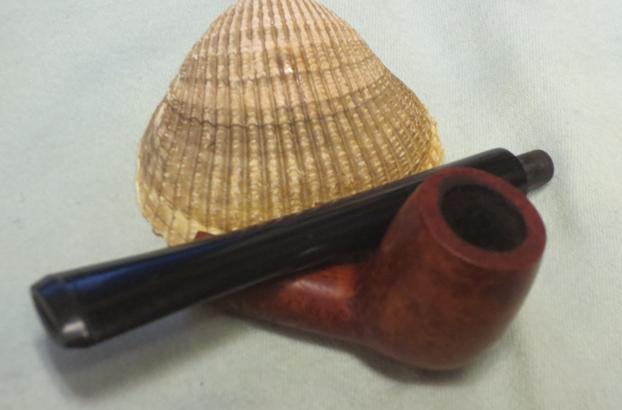
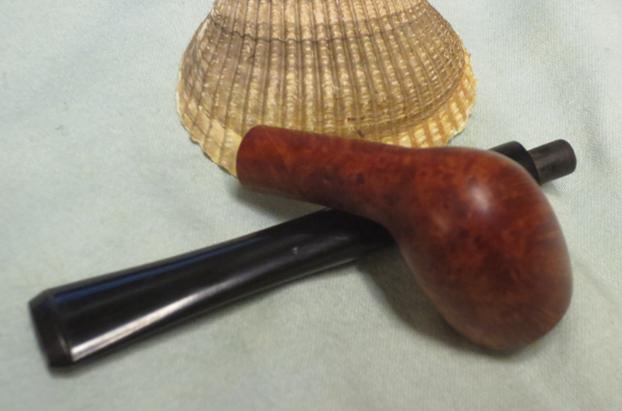
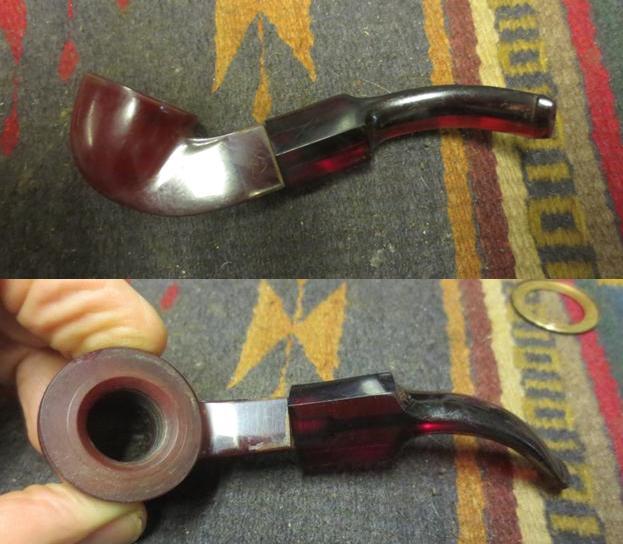
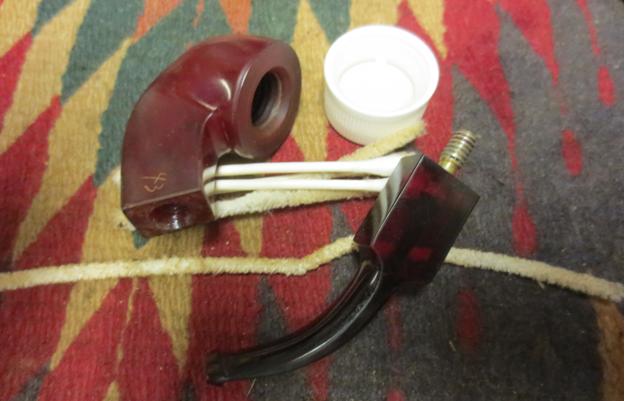
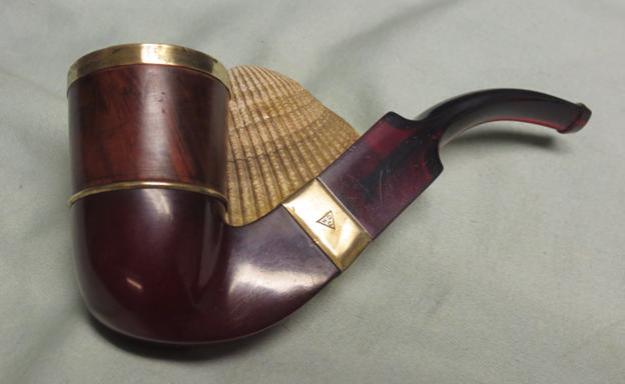
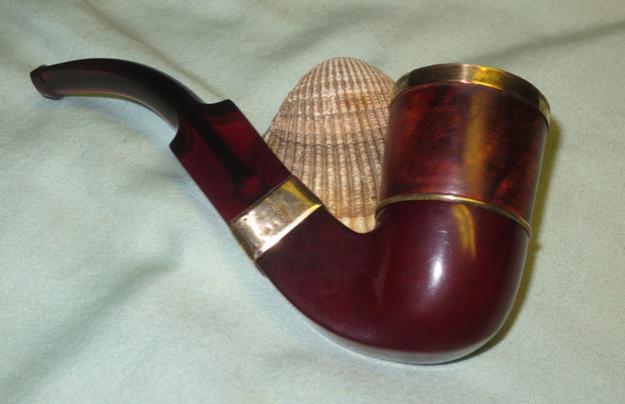
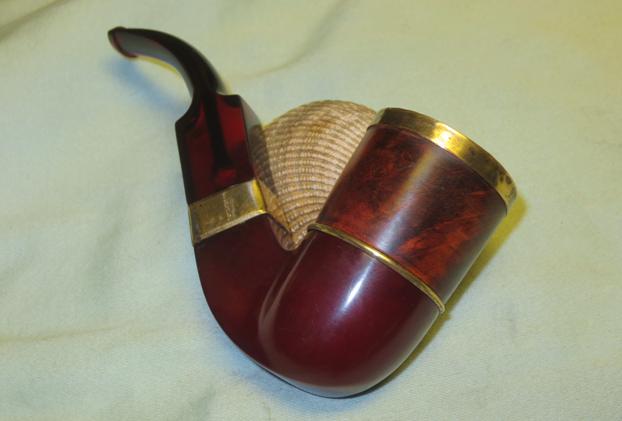
 I buffed the pipe and stem with Blue Diamond and gave it several coats of carnauba wax. I buffed it with a clean buffing pad to raise the shine. I hand buffed it with a microfibre cloth to put the finishing touches on the pipe. The finished pipe is shown in the photos below. Thanks for looking.