Blog by Steve Laug
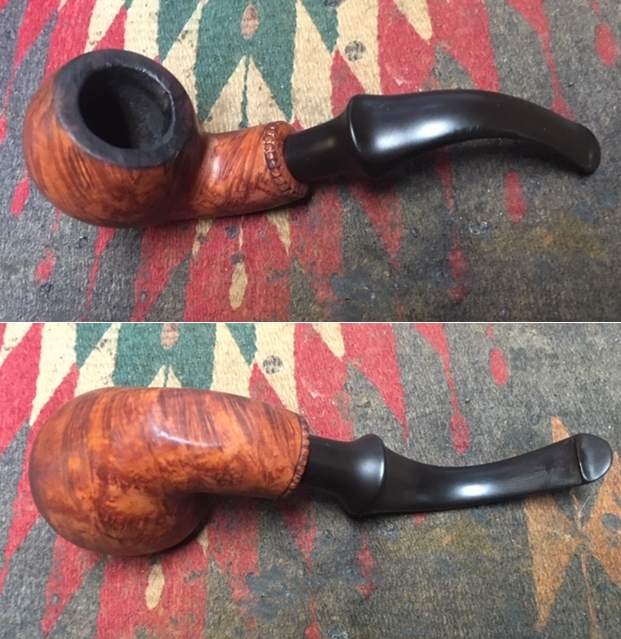
Not long ago I received an email from a lady named Pat on Vancouver Island about some pipes that she had that had belonged to her late husband as well as an old Gourd Calabash with a Meerschaum bowl that had belonged to her Great Grandfather. She sent me photos of the pipes and they were definitely interesting to me. There were some John Calich pipes and three other lower end pipes from her late husband and the cased Gourd Calabash. I was hooked and ready to be reeled in! After a few email exchanges we made a deal that was acceptable to us both. The payment was e-transferred to Pat and the pipes were shipped to me in Vancouver. Pat sent me two photos of the pipe before she shipped them to me.
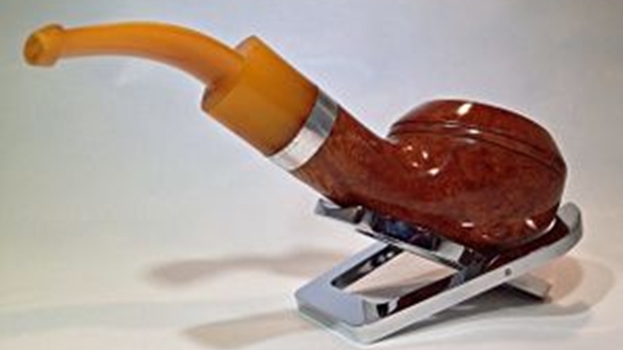
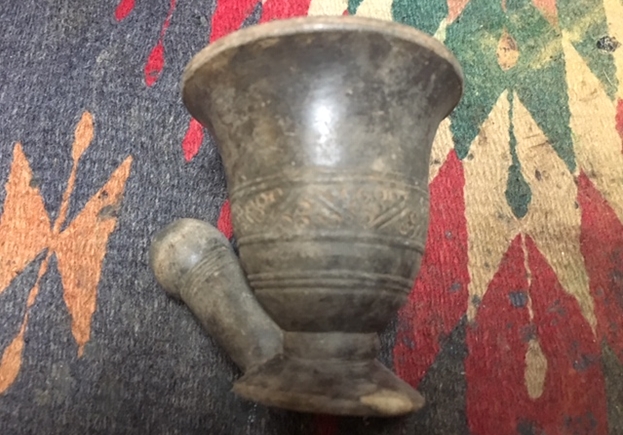
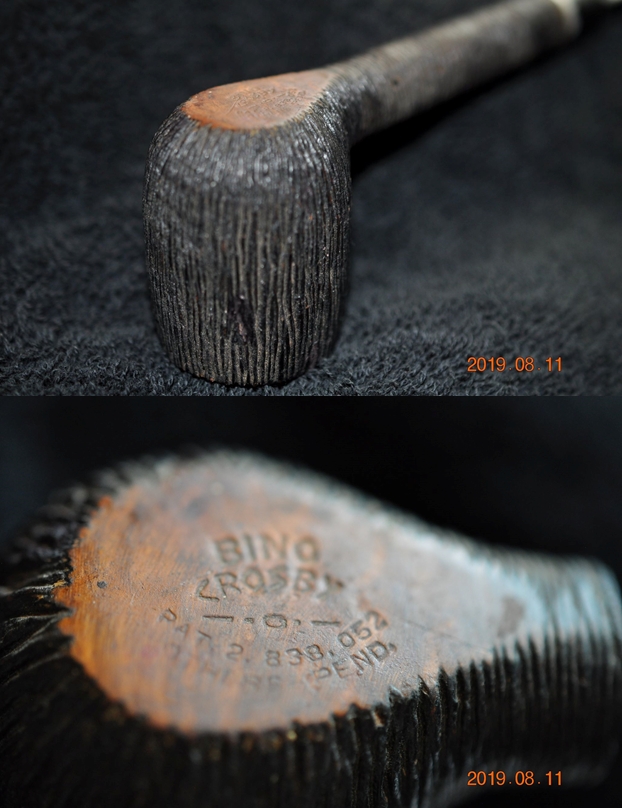
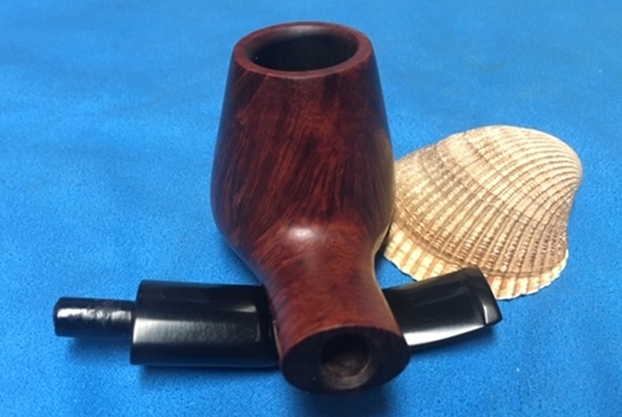
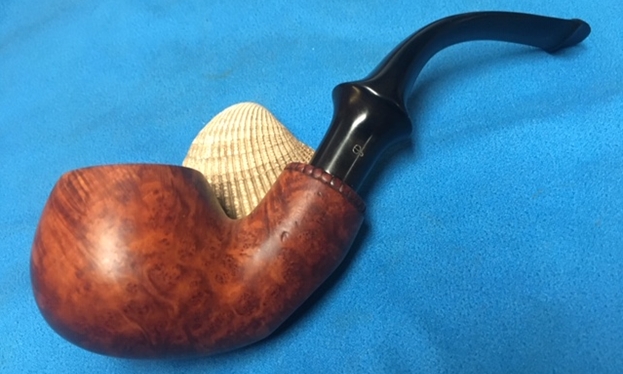
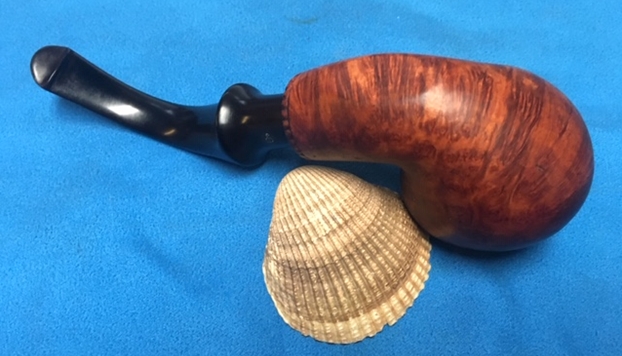
The first photo shows the cased pipe. The Gourd Calabash was a BBB as can be seen by the triangle stamped in gold on the cover of the case and the silver band in the photos below. The Gourd had some beautiful patina and had turned a rich reddish brown colour. There was a silver band on the shank with what looked like hallmarks. There was also a silver band around the top of the gourd under the meerschaum bowl insert. The bowl had a lot of colour and it had a ring around the meerschaum bowl. There were a couple of chipped areas on the lower ring of the bowl. The amber coloured stem looks intact and does not show any obvious damage. The colour of the stem and the cloudiness of the material makes me wonder if it truly amber or some form of ambroid. I will know soon enough.
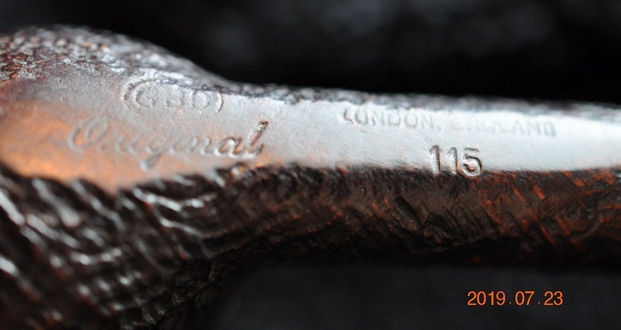
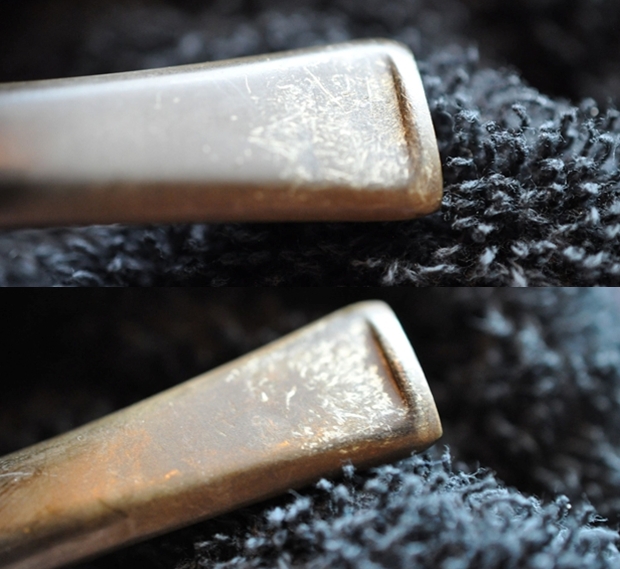
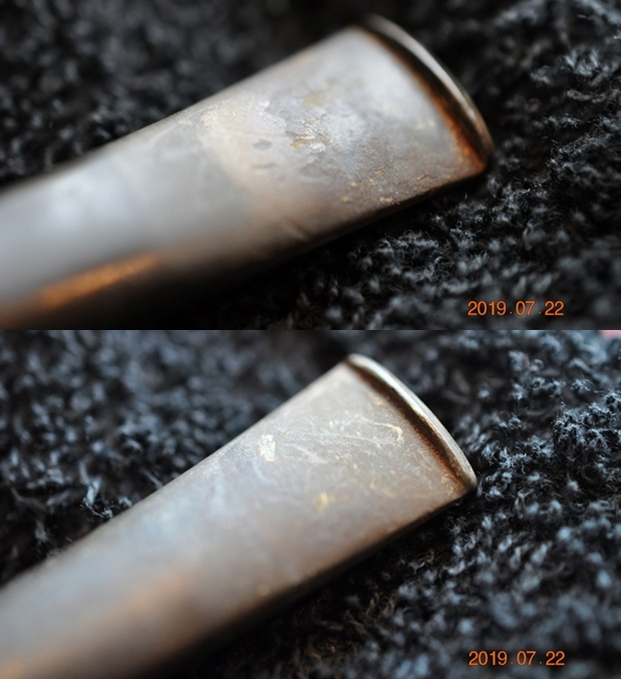
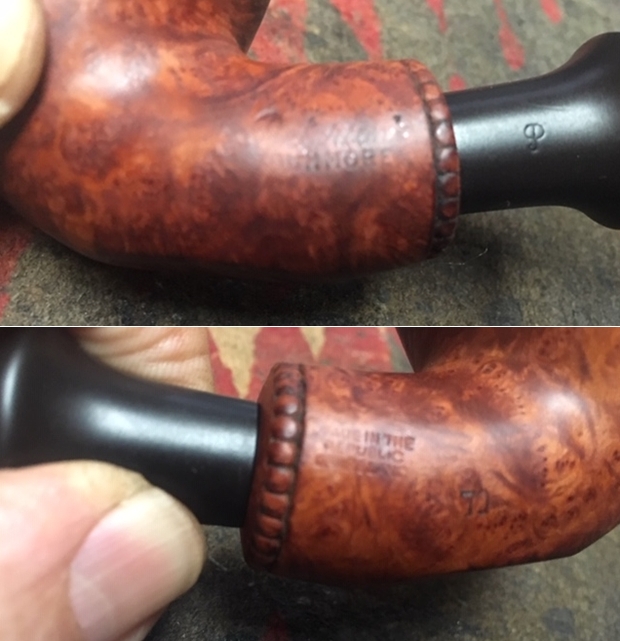
The second photo is a close up that shows the silver band on the shank of the pipe. It is in good condition and lightly tarnished. The stamping is very readable and it clearly showed the following marks: L-B and BBB in a triangle. There were also three hallmarks on the band. The first was an Anchor (which is the symbol for the Birmingham Assay Office). The second was a rampant lion (which is the symbol for .925 silver). The third one was the lower case letter “m” (which is the date letter that I would use to date the pipe as I worked on it). 

 I did some searching through the British Silver Hallmark Charts that are online. I went through them comparing them to the “m” stamp on the band. I found two possible dates for the stamp. On the shape charts that I use most of the time when I am looking for information on the date stamps there was a lack of clarity as to whether the “m” stamp pointed to 1853 or to 1911. I wanted to see if I could get any clarity from others who were familiar with silver bands on BBB pipes.
I sent a quick message to a Facebook Messenger Group that I am part of that includes others who collect BBB pipes. I posted a picture of the band with the hallmarks that I included above on the group. Both Paresh Deshpande and Victor Nadeo immediately answered that the pipe was from 1911 from the charts that they use. I responded with my question as to the shape of the cartouche (the frame) around the “m”. Pretty quickly after that Victor sent me the link to the chart that he uses and included a screen capture of the list from 1900-1917 shown to the left (http://www.silvercollection.it/englishsilverhallmarksBIR.html).
I quote Victor’s response: I think the frame (cartouche) is only slightly erased. But I’m pretty sure it’s really 1911. They’d hardly miss anything like that, as they passed an Assay Office, such a serious government agency. And in view of the frame around the other hallmarks, I think they leave no doubt that it’s a 1911.
That set the date for me. It also worked well with the L-B stamp which stood for Louis Blumfeld. That L-B stamp fits that time frame perfectly. Now I knew that the pipe was hallmarked to 1911 and that it was an old timer. I could not wait to see it once it arrived in Vancouver.
While I waited for Canada Post to deliver it I did a bit of reviewing on the history of the brand from Pipedia (https://pipedia.org/wiki/BBB). I quote some of the pertinent parts of the article below:
The initials once stood for Blumfeld’s Best Briars after Louis Blumfeld, who took over the management of the Adolph Frankau Company in 1856. After his death, the BBB gradually became known as Britain’s Best Briars. Soon to be the oldest English trademark in current use and the first pipe ever to have a registered trade mark. “Britain’s Best Briars”, often called BBB, is one of the oldest brands still in production and has always been the most popular foreign brand in Denmark. Earlier pipes included a metal rondel with a diamond shape including BBB imbedded in the stem top, and later post-Cadogan went to a stamped on logo, similar to the GBD pipes…
…Adolph Frankau & Co Ltd In 1847, Adolph Frankau arrived in London and quickly understood opportunities that the market of tobacco presented, in full expansion. He created the company “Adolph Frankau & Co” and became an importer of meerschaum pipes and supplies in connection with the tobacco. It takes under its wing young a 14 year old boy, Louis Blumfeld. The business thrives quickly until the death of Adolph Frankau in 1856. His widow prepares to sell the company.
Enter in scene Thomas Carlyle (1795-1881), author of “Hero and worship of the heroes”. This last advises with Mrs. Frankau not to sell, but to entrust the future of the company to the hands of the young person Louis Blumfeld, then 18 years old. Carlyle was to have a very high opinion of the Louis young person, and this confidence was justified by its assumption of responsibility of the business, its enthusiasm and its inexhaustible energy. Louis realizes quickly, like others, great potential of briar, from which the interest comes to be recognized.
Louis Blumfeld develops from the very start of important international trade, with a particular success in Canada, in Australia, in Zealand News, India and in the extrème Is Europe, in Switzerland and, with a special mention, in Denmark…
I took out my Briar Books Press reproduction of the Adolph Frankau & Co. BBB Catalogue XX from 1912 and did a bit of reading to see what I could find out from the source. Sure enough I found the pipe in the catalogue. It is marked as a Style X Genuine South African Calabash Pipe. Underneath the print of the pipe it reads First Quality, Picked Bowls, Push Cups, Best Ambroid Mouthpieces, Hall-Marked Silver Mounts in best Leather Case. You can see the two rings around the bowl insert, the silver band around top of the gourd and the silver band on the shank. It is also clear that the stem is marked as an Ambroid mouthpiece. The leather case is the same one as the one I am working on with the BBB logo on the top side of the case and the same latch setup as the case I have.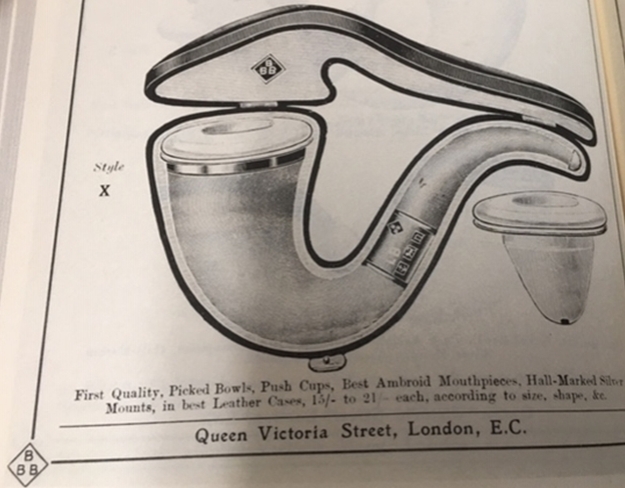 I now had a verification that the L-B stamp stood for Louis Blumfeld as I expected. He took over the company at the death of Adolph Frankau in 1856. He took the brand to its zenith as BBB (Blumfeld’s Best Briars and later Britain’s Best Briars). That time table fit the dating of this pipe very well. The 1912 Pipe Catalogue has the same pipe for sale. Now it was time to work on the pipe itself.
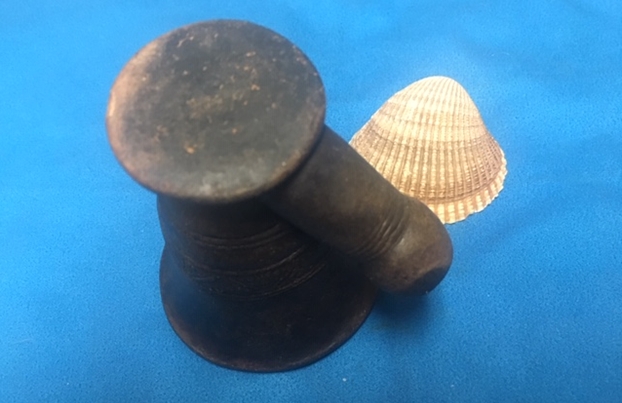
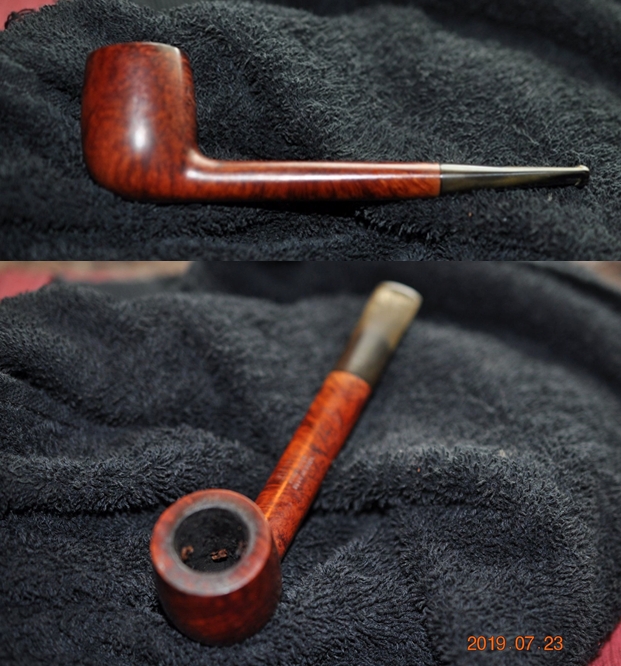
I brought the worn leather clad case to my work table and took some photos of it before I opened it and took out the pipe. It was worn but well made. Some of the leather was peeling but the brass hinges on the back edge and the flip clasp on the front were all in good order. I took photo of the unopened case to give you a sense of my own expectancy.
 I opened the case and took a photo of the pipe in the case. You can see the gold embossed stamp on the inside of the case – a triangle with BBB against the cream coloured lining.
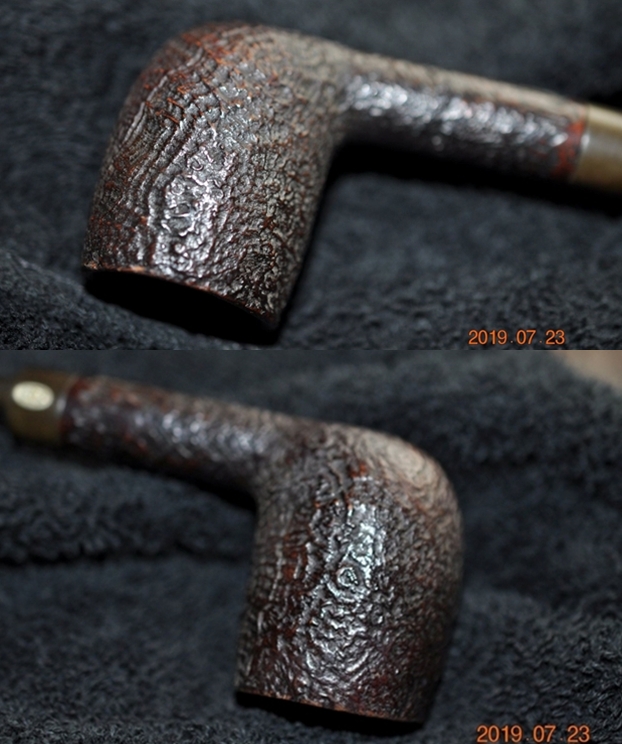
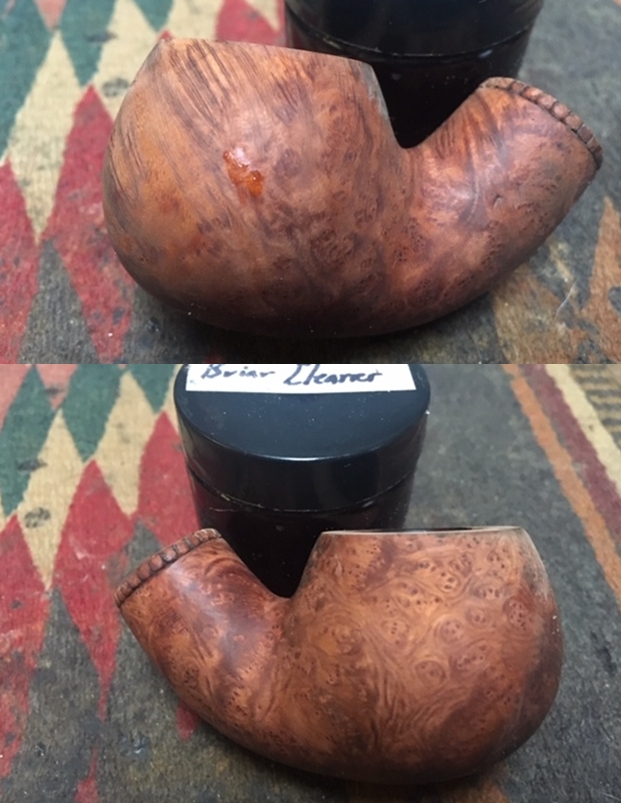
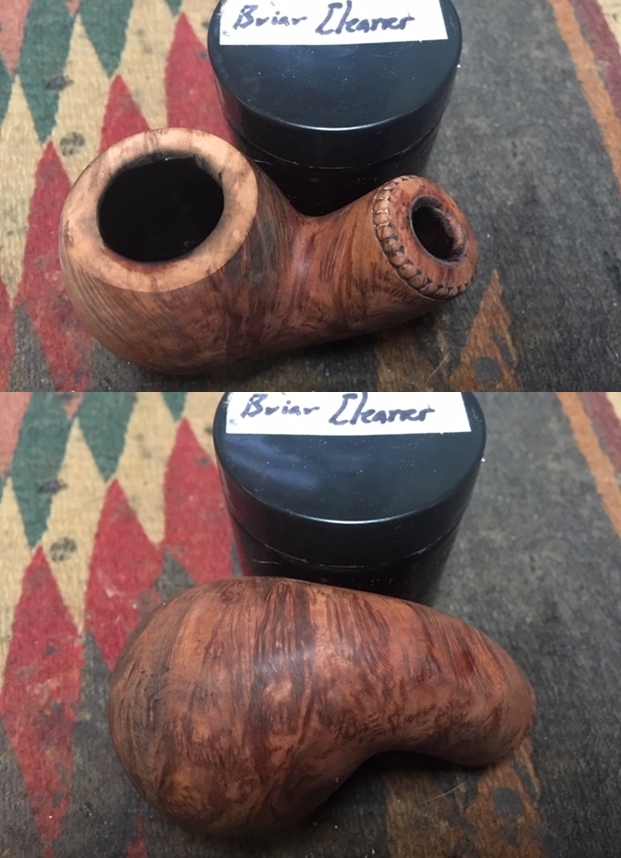
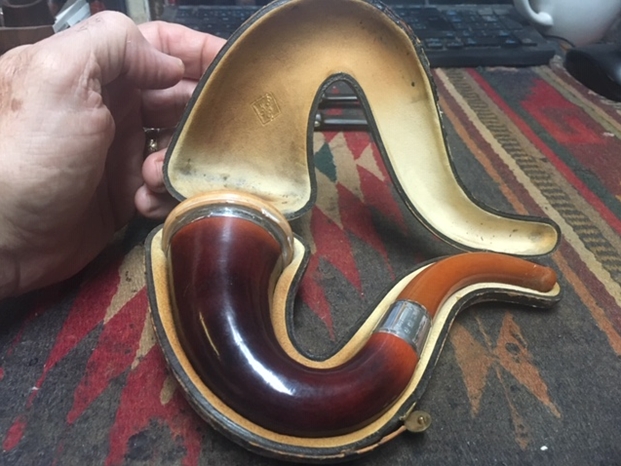 I took the pipe out of the case and did a quick assessment of the condition of the pipe. The gourd calabash was in excellent condition and showed a patina of solid use for the 100+ years that it has been in Pat’s family. The silver band around the top of the gourd and the band on the shank are clean but oxidized. The one around the rim top is more oxidized than the shank band. I think the shank band was polished for the photo that Pat sent me. The edges of the meerschaum cup looked very good except for two chipped areas on the bottom ring of the bowl. The upper edges of the bowl appeared to be in very good condition. The stem is in good condition other than tooth marks and chatter on the top and underside near the button. The rest of the stem is in excellent condition. As I examine the stem I am becoming convinced that it may not be amber.
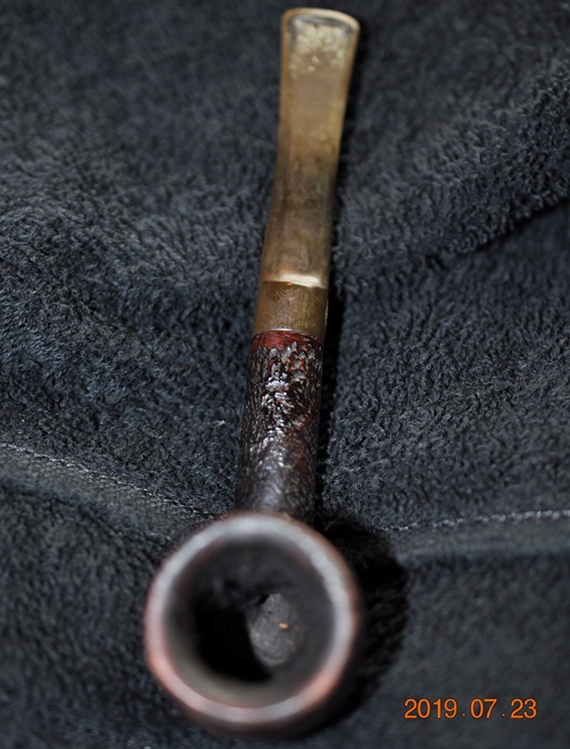
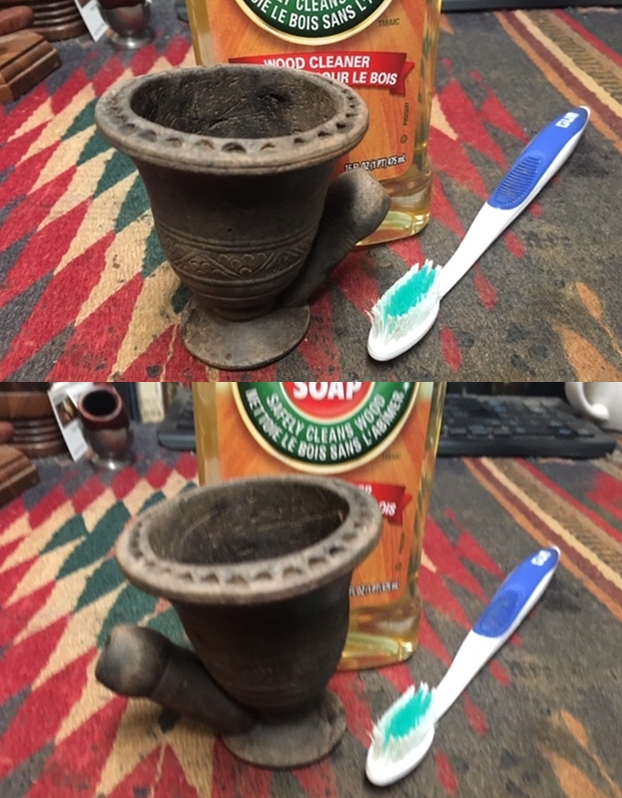
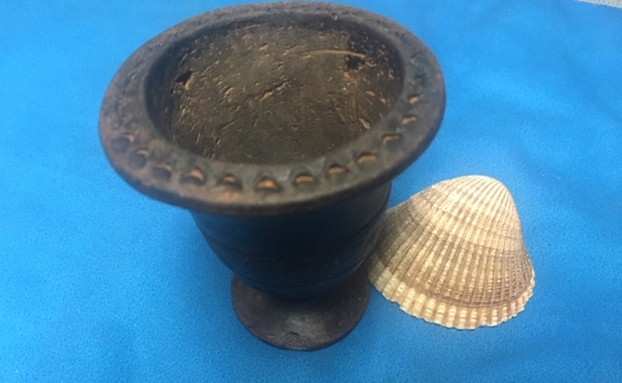
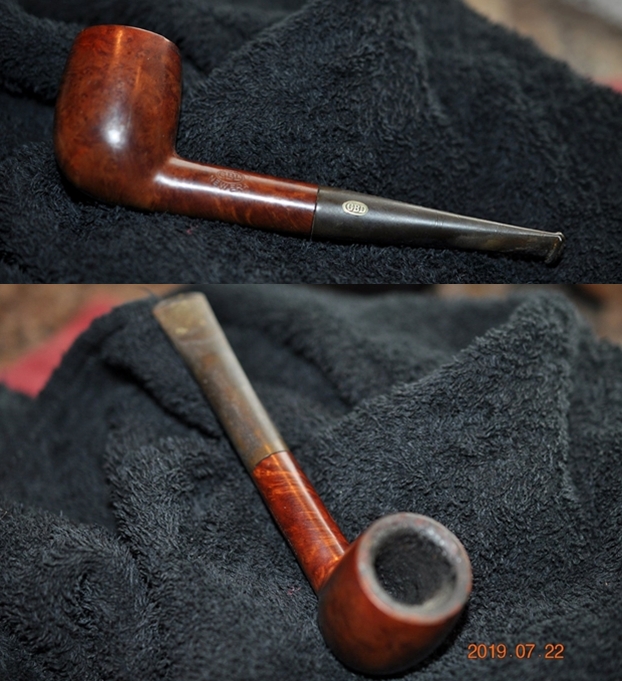
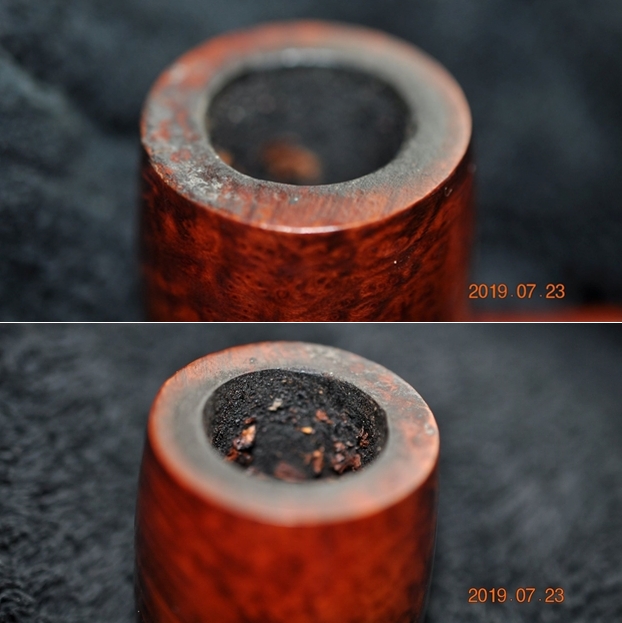
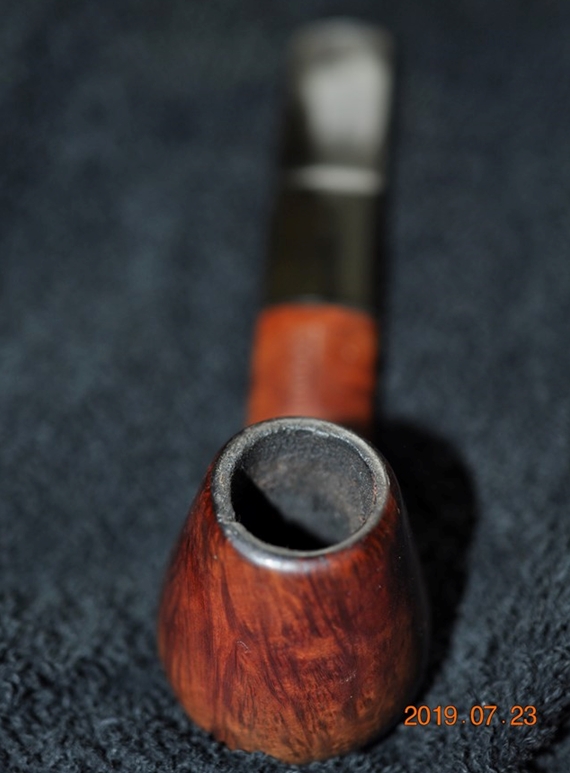
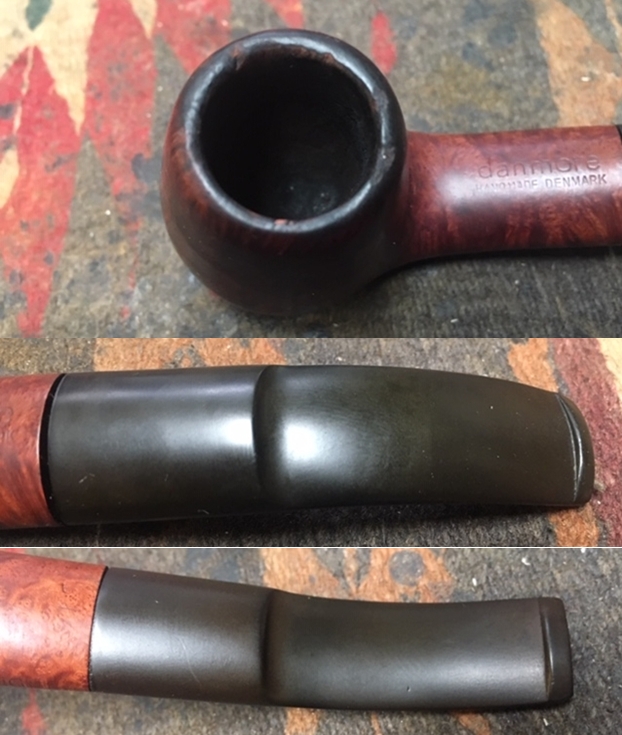
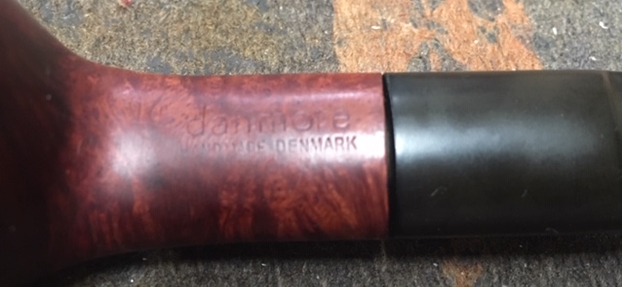
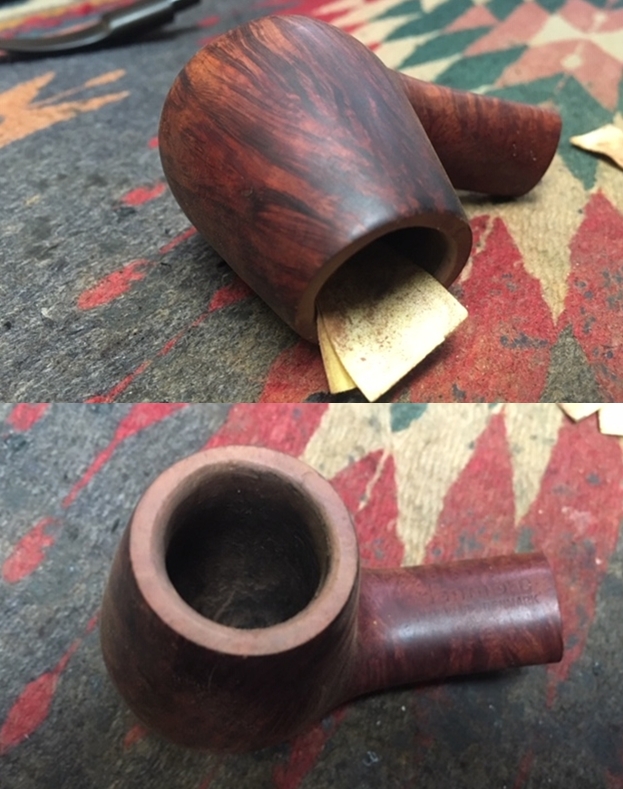
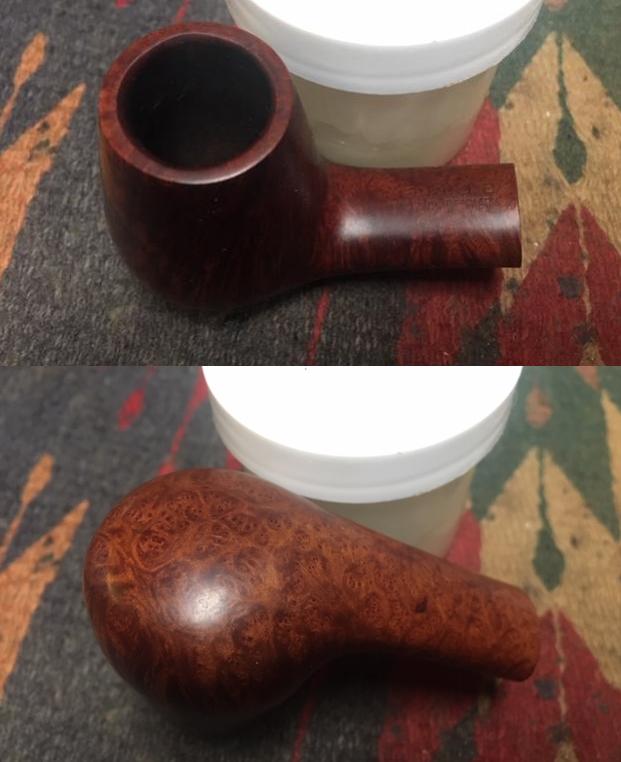
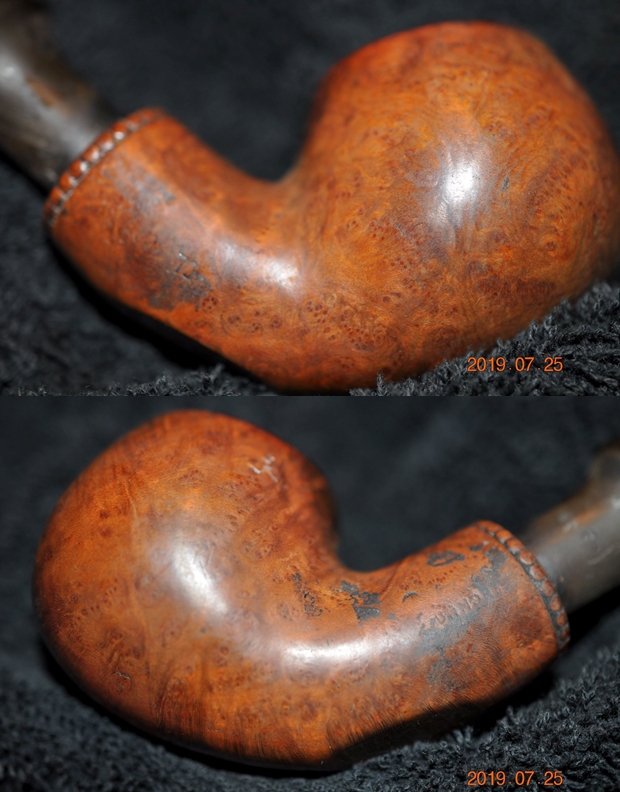
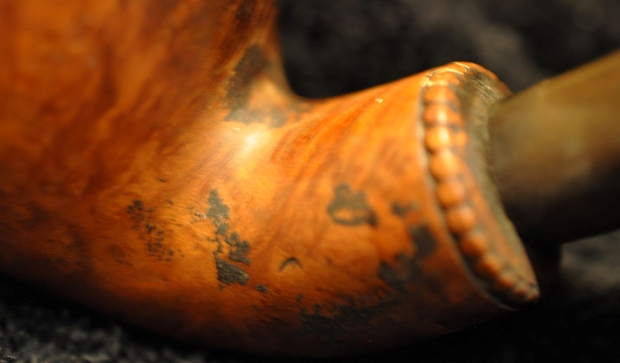
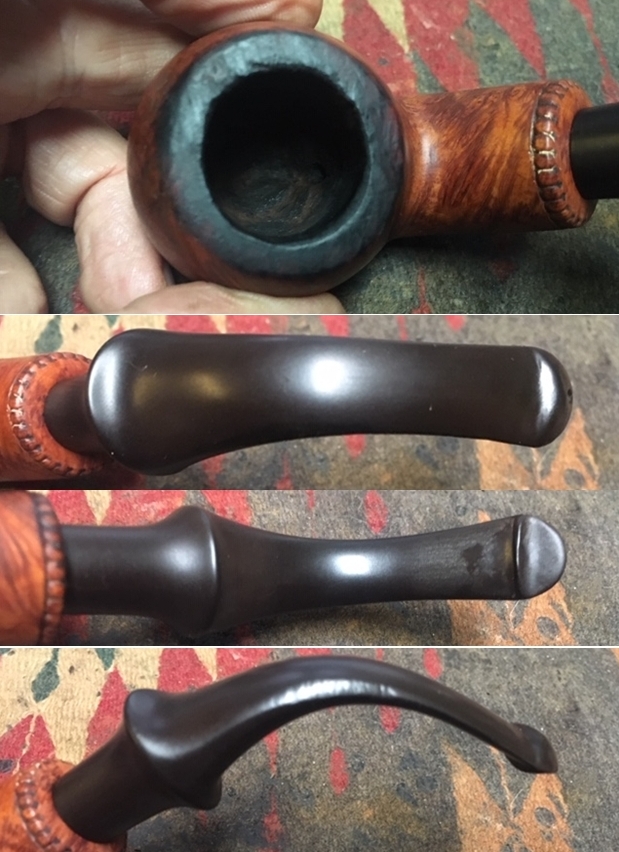
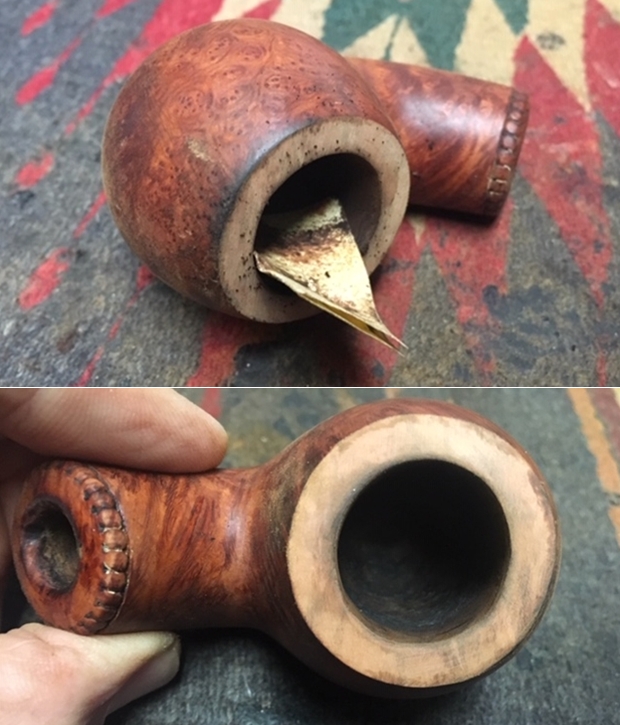
 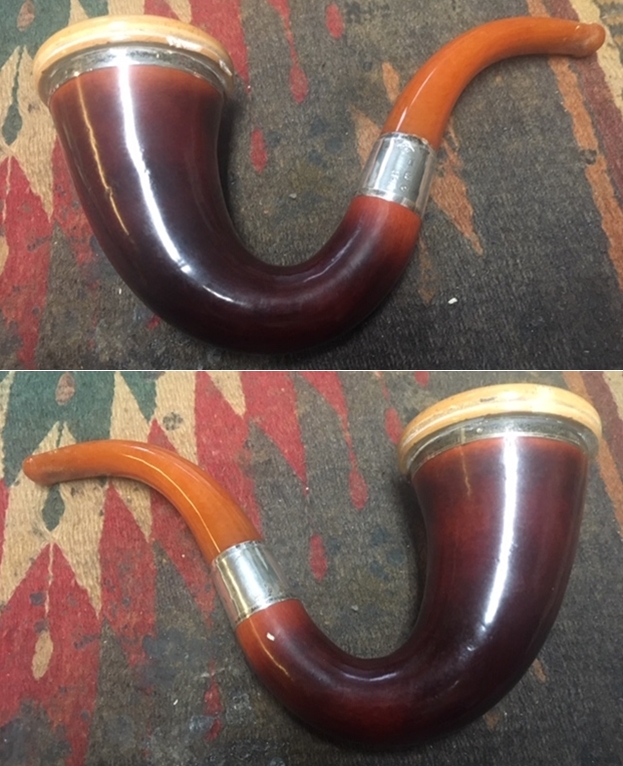 I took photos of the top of the bowl. There was a thick cake in the bowl that overflowed onto the rim top. It appears to me that the bowl was never cleaned during life of the pipeman who held in trust. The buildup of lava on the rim top was very thick and extended to the downward curve of meer cup on the edges. You can also see the tooth marks on the top and underside of the stem.
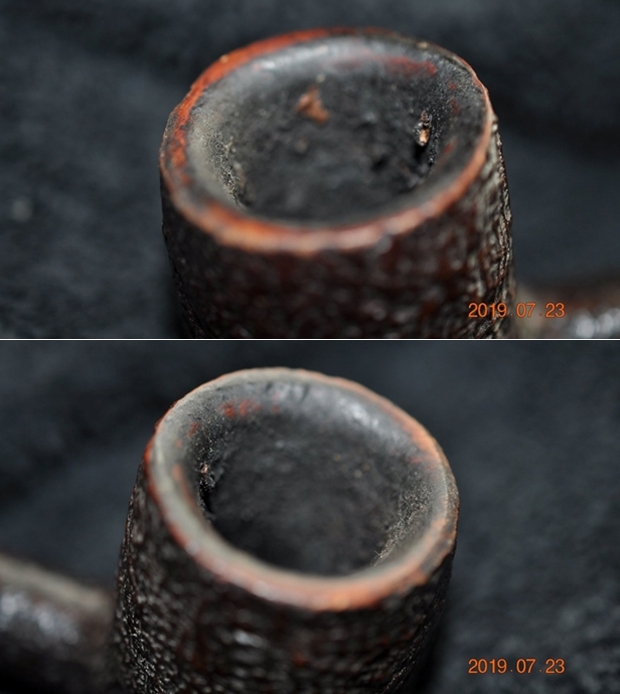
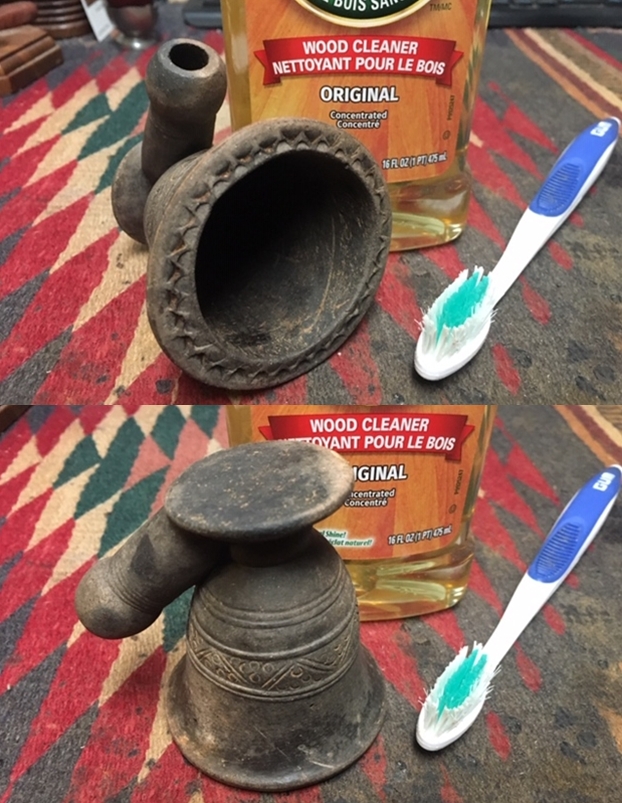
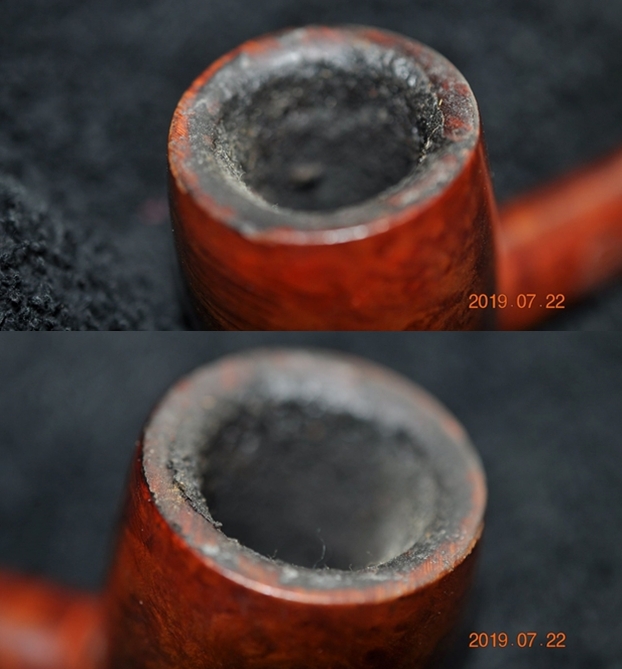
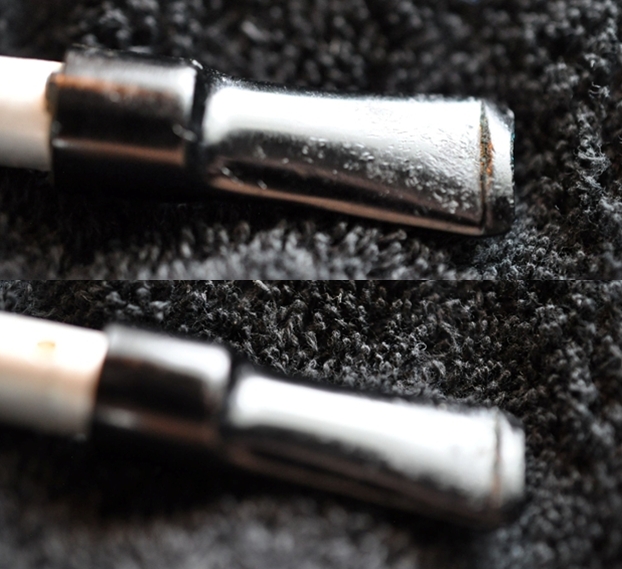
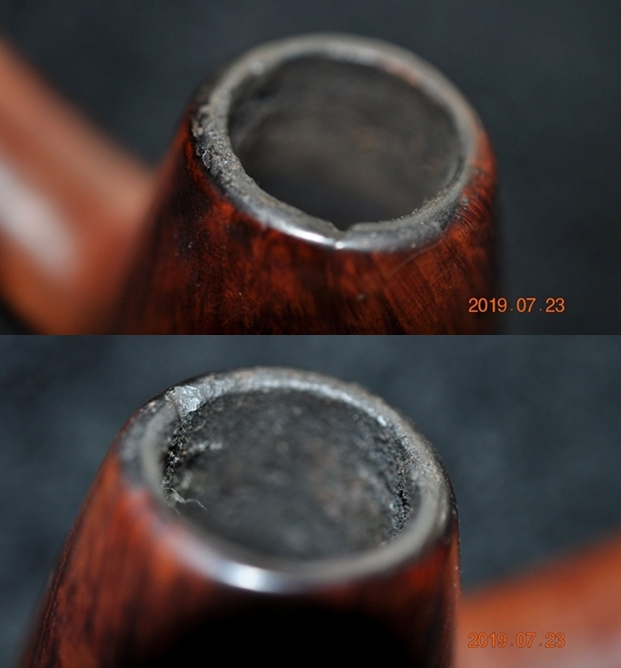
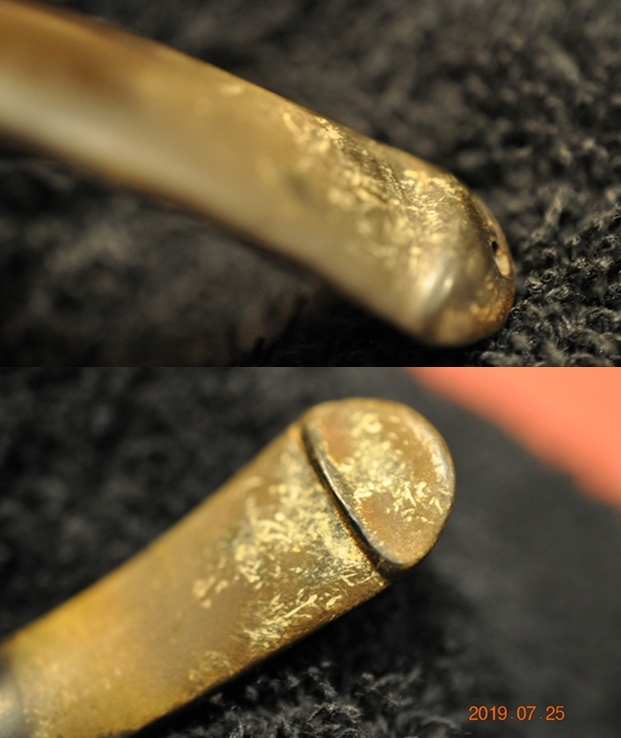
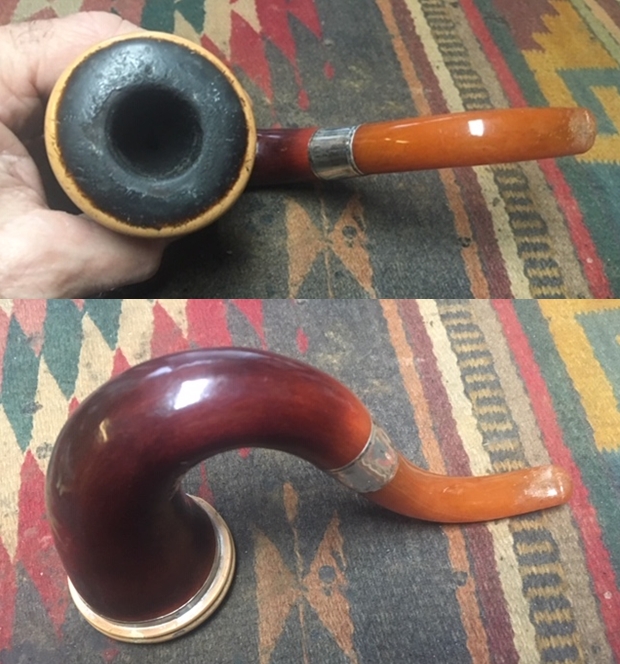 I took some close up photos of the bowl and rim to show the thickness of the cake and the lava on the rim top. The lava top was thick and you can see the layers and flakes on the top photo below. I also took close up photos of the stem to show the tooth marks and chatter in the surface of the stem. There is also some serious wear on the button edge. The look of the damage on the stem surface made me more uncertain that it was amber.
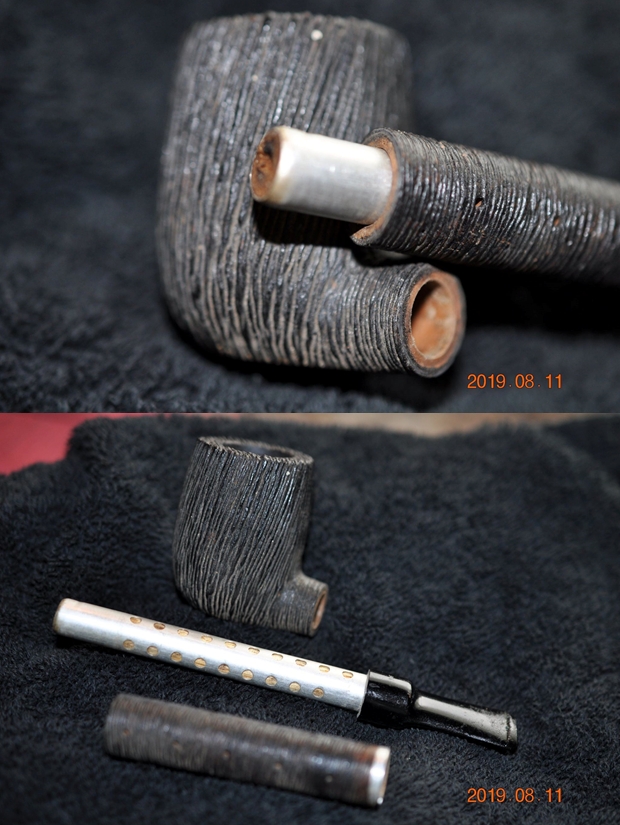
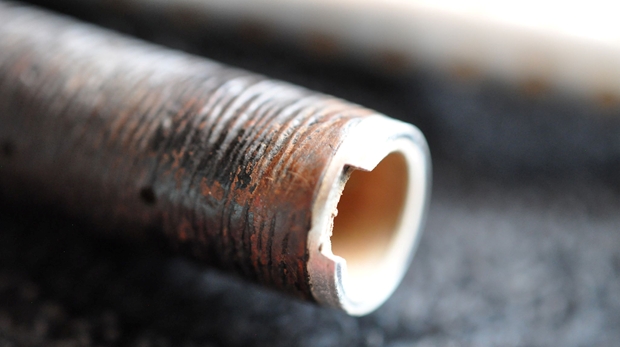
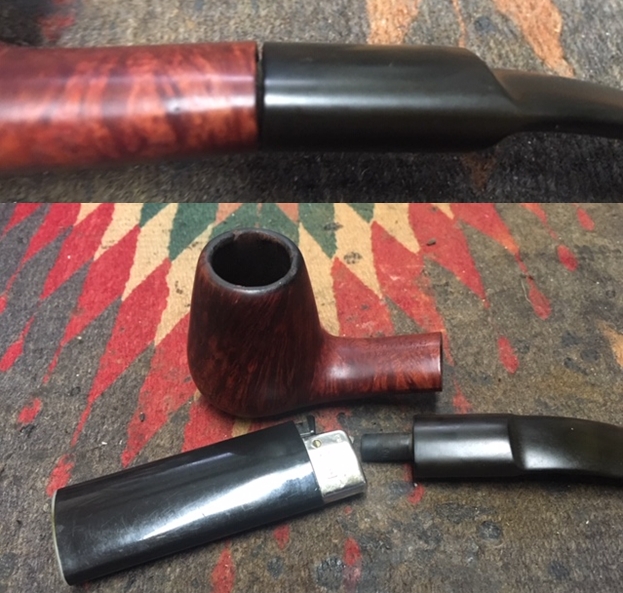
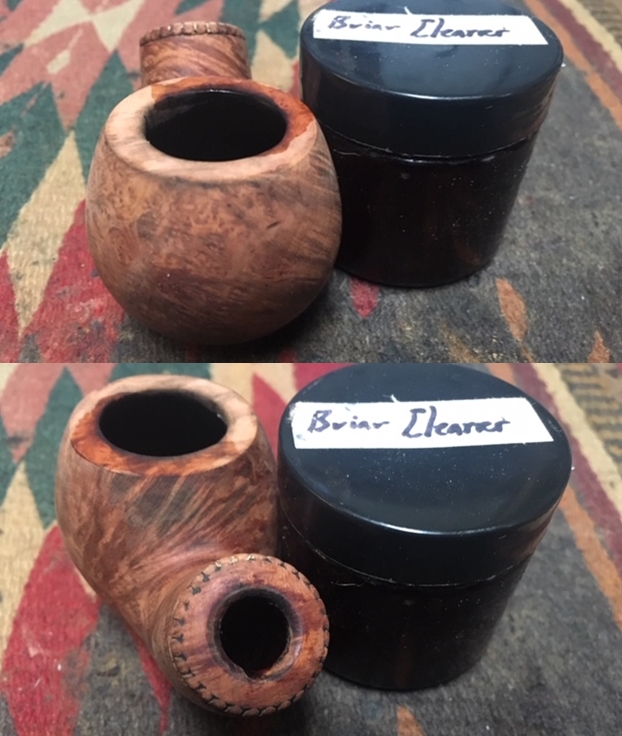
 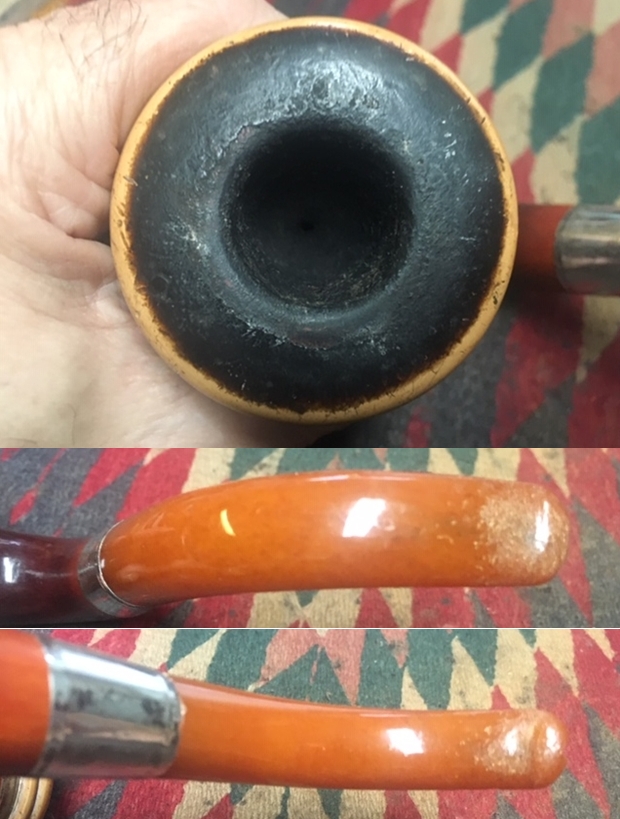 I unscrewed the stem from the shank and took a photo. The threaded bone tenon was anchored in the stem and screwed into the shank. The threads tenon was in excellent condition even though they were darkened from the tars of the tobacco.
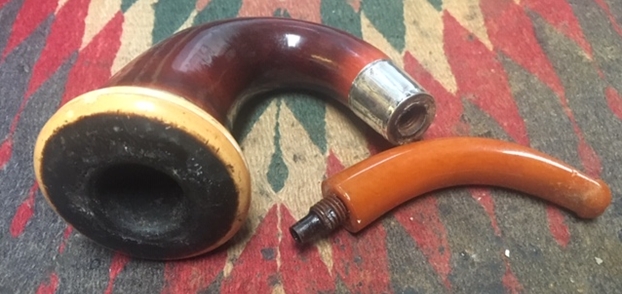 Once I had the date figured out and had a chance to look the pipe over I wrote a quick note to Pat and asked her if she would be willing to write a brief piece on her Great Grandfather. She was quick with her answer and sent me brief sketch, a photo and an article about her Great Grandfather. I include those now.
Hi Steve,
My great grandfather’s pipe was always a mystery. No one ever smoked it after he died, yet it got passed down through the generations. I always imagined it had magical powers like Sherlock Holmes’s pipe. When I was young, it sat beside my bed as I read The Hound of the Baskervilles. It has journeyed with me until your received it.
My great grandfather, John Milne Senior, immigrated to Canada from Scotland around 1875. He had a good sized farm on the edge of Toronto, Ontario in Weston (now a suburb), where he farmed and raised prize winning livestock, and raised 6 children. He was generous with extended family and neighbours supplying food during hard times in depression, and fresh garden produce for the local hospital during Second World War.
Attached is the only photo I have of him on top of his hay wagon on the farm. Also attaching an article written during the Second World War with details about the air show beside his farm, and his and my grandmother’s first flights in their 80’s. From all accounts he was a good hearted man that didn’t shy away from adventure.
Cheers,
Pat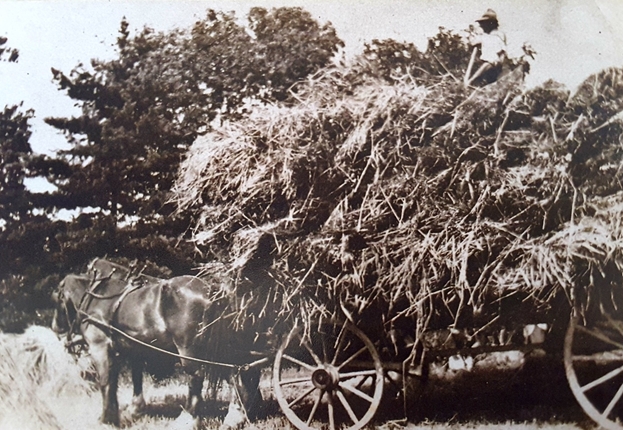
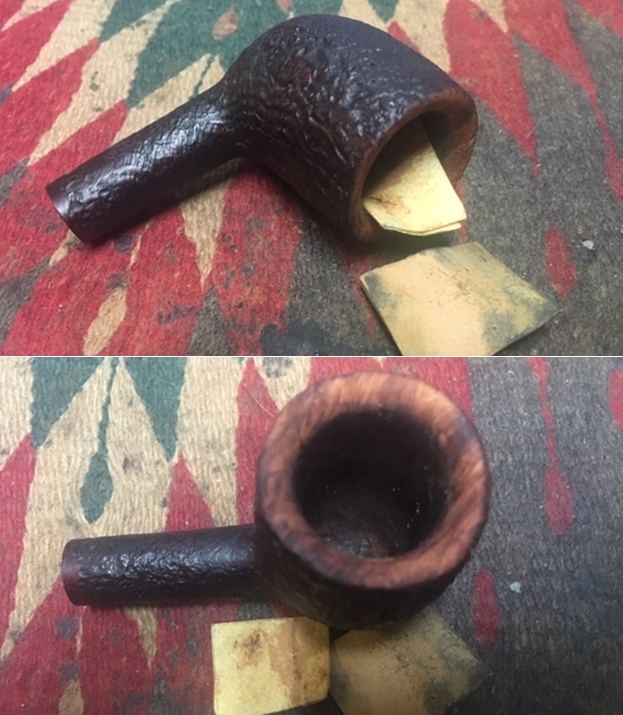
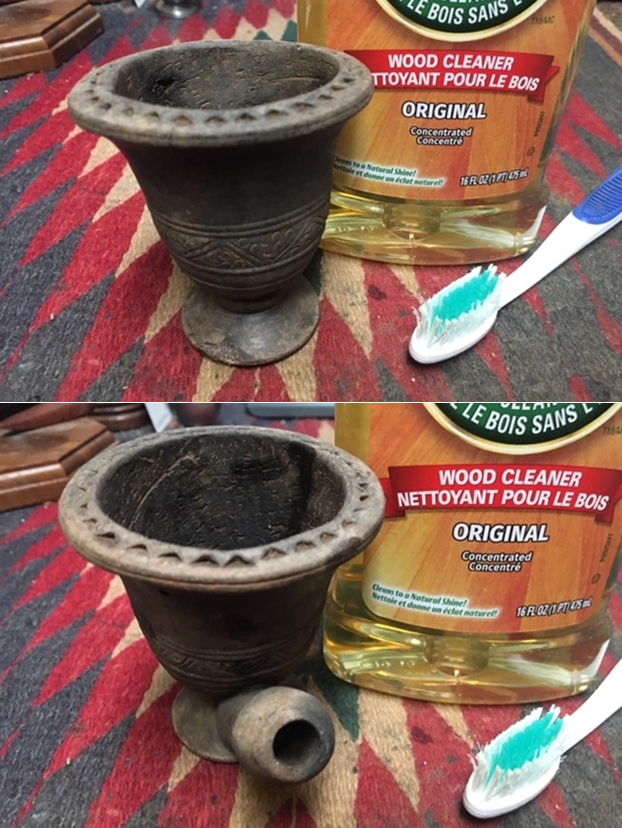
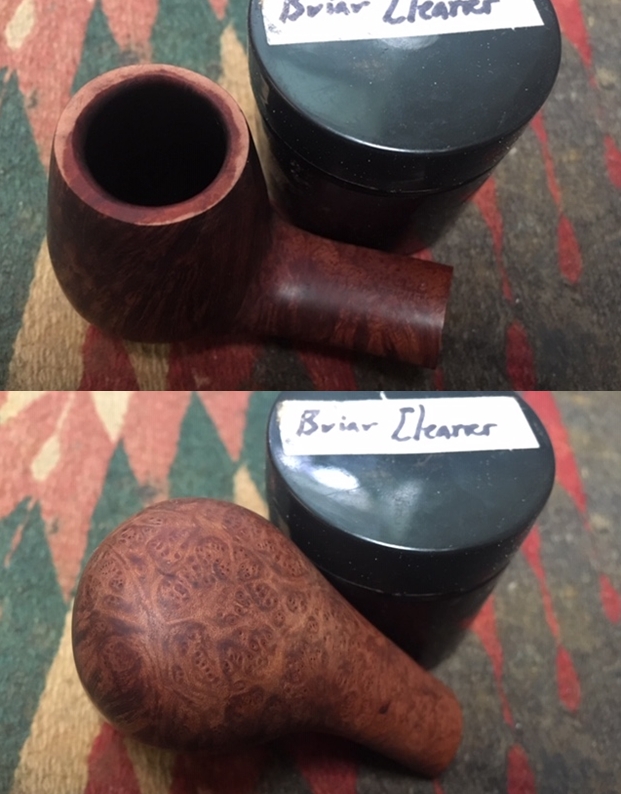
 Now that I had a pretty clear picture of John Milne Senior I was ready to start working on his pipe. As noted above in Pat’s email the pipe had been sitting unsmoked since his death. It was time to bring it back to life. I carefully reamed the bowl with a Savinelli Fitsall Pipe Knife. I scraped the cake back to the bare walls. I sanded the walls with a piece of dowel wrapped with 220 grit sandpaper to smooth out the interior of the bowl.
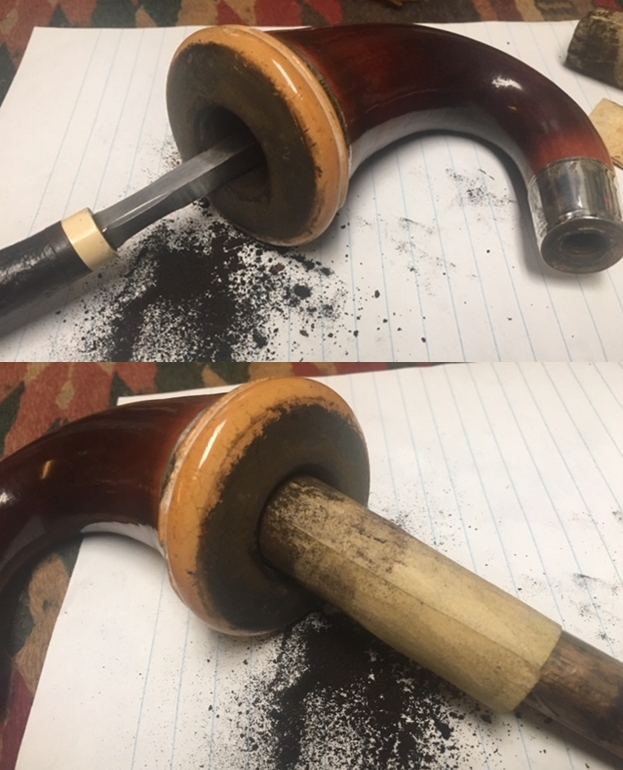 I carefully scraped the rim top with the edge of the Savinelli Fitsall Pipe Knife and a sharp pen knife. It took a while to scrape back the cake until I got to the meerschaum cap. I followed that up with a 1500 grit micromesh sanding pad to remove the remaining bits that were left on the top of the rim.
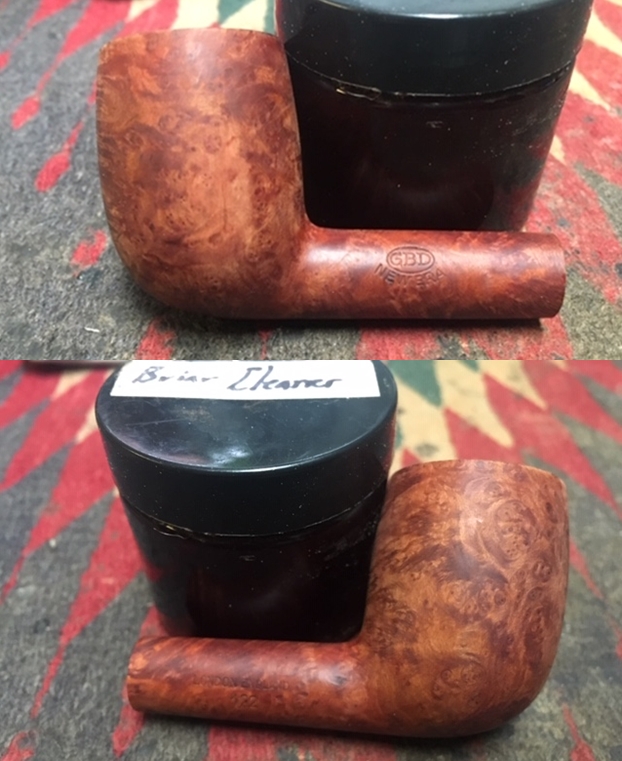
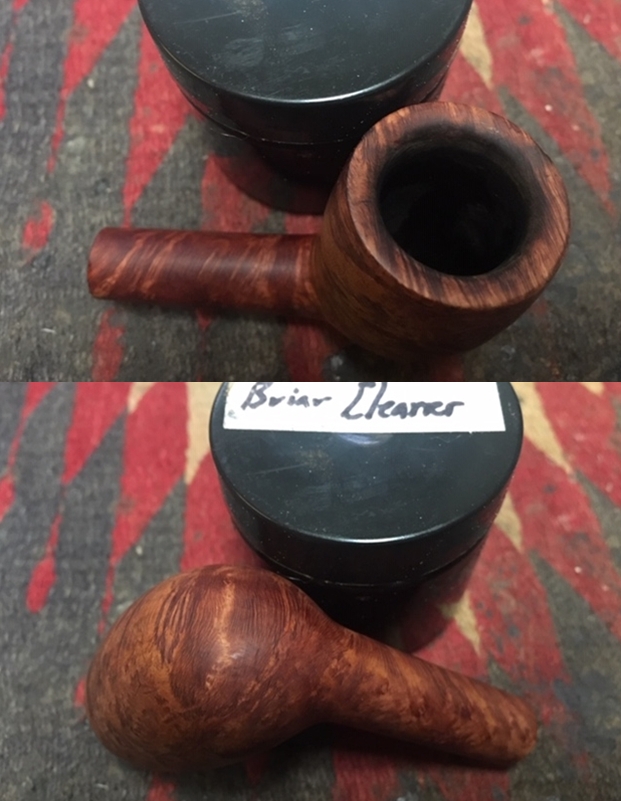
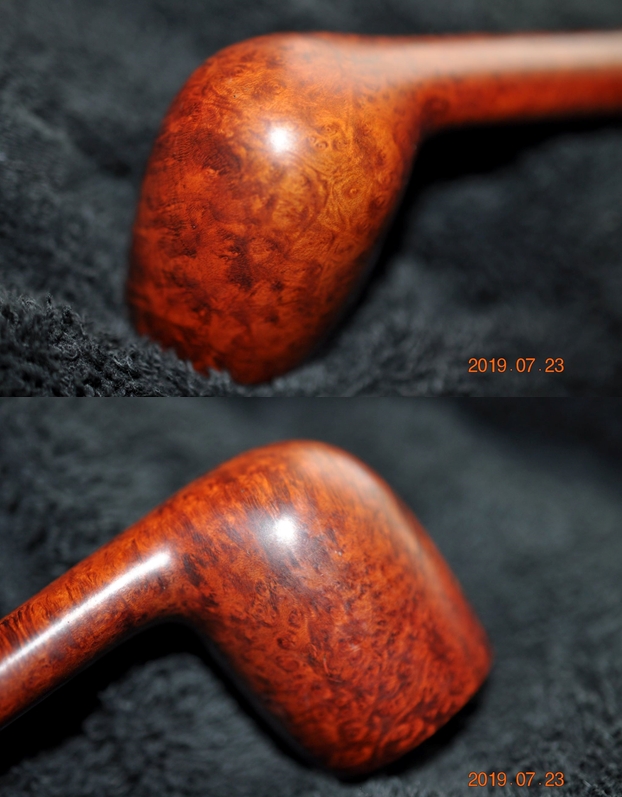
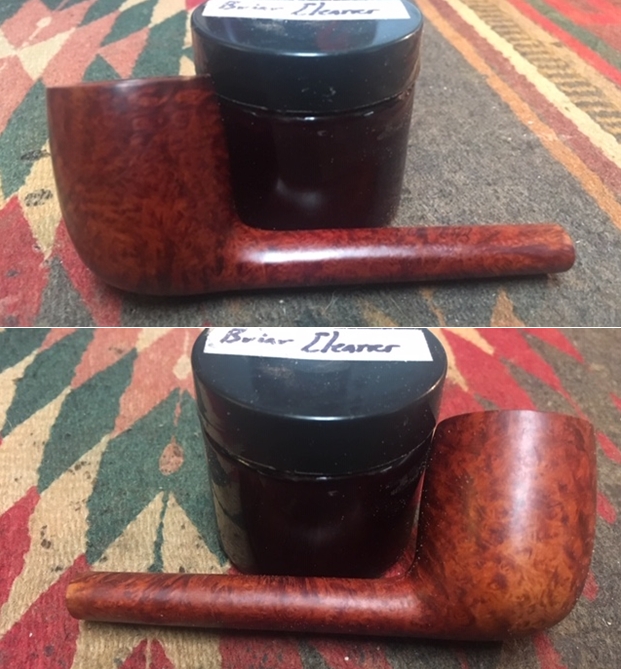
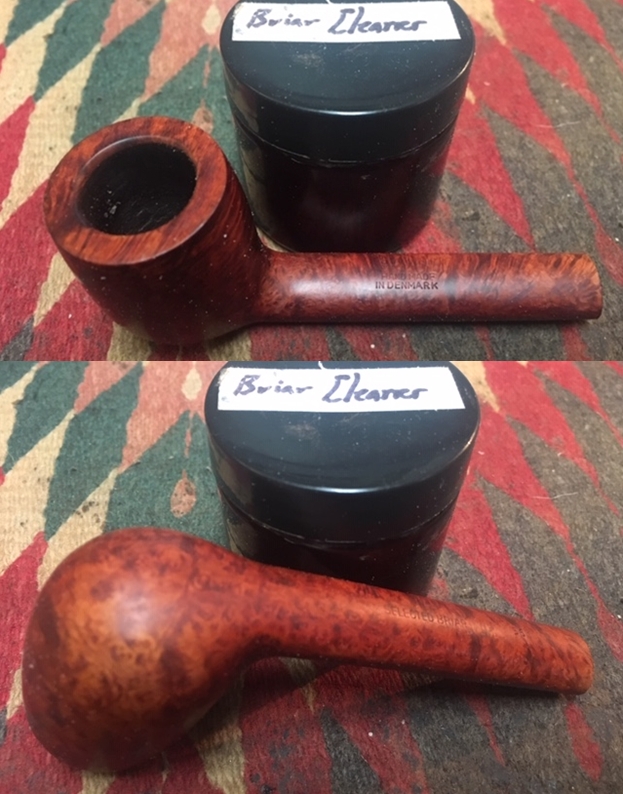
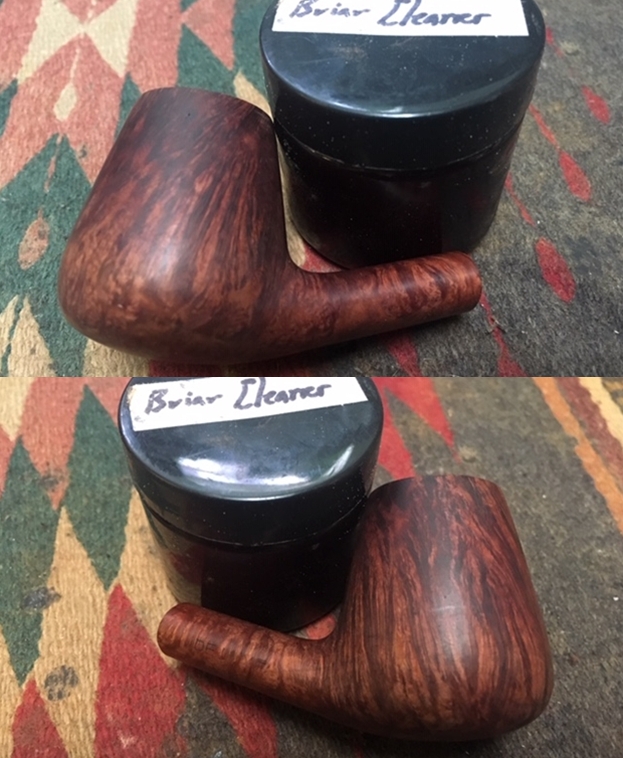
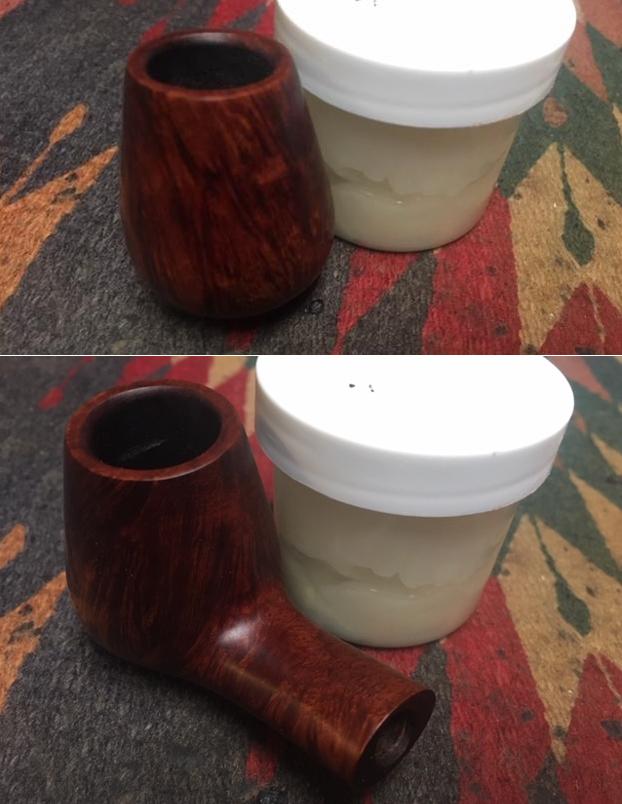
 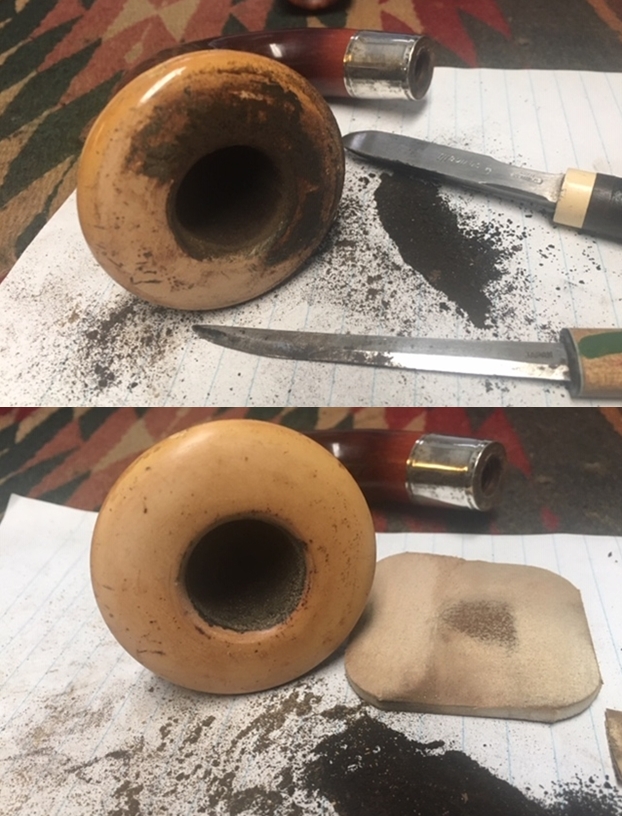 I scrubbed the cap of the bowl with Before & After Briar Cleaner. I have used it in the past on meerschaum and found that it does a great job removing the grime but leaving the patina in good condition.
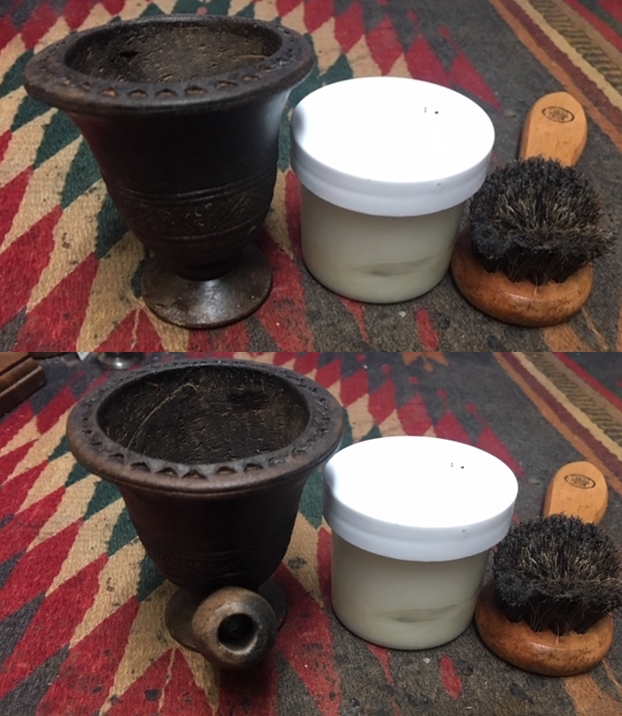
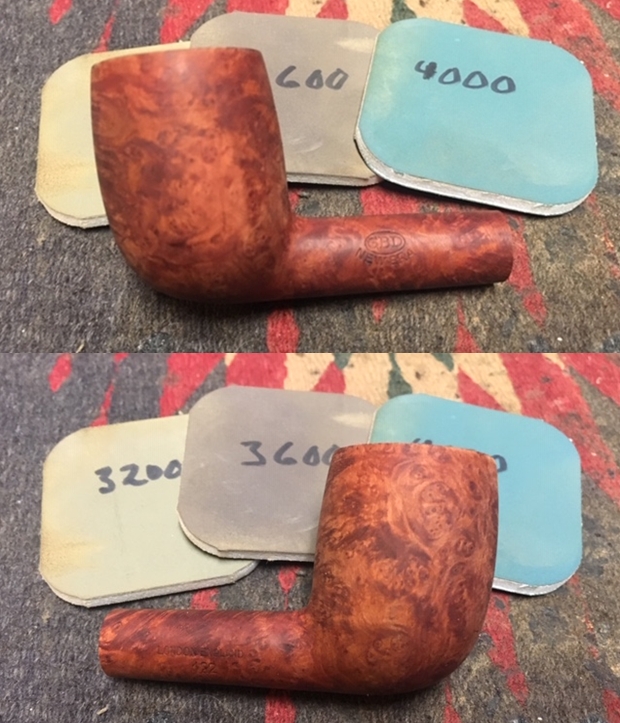
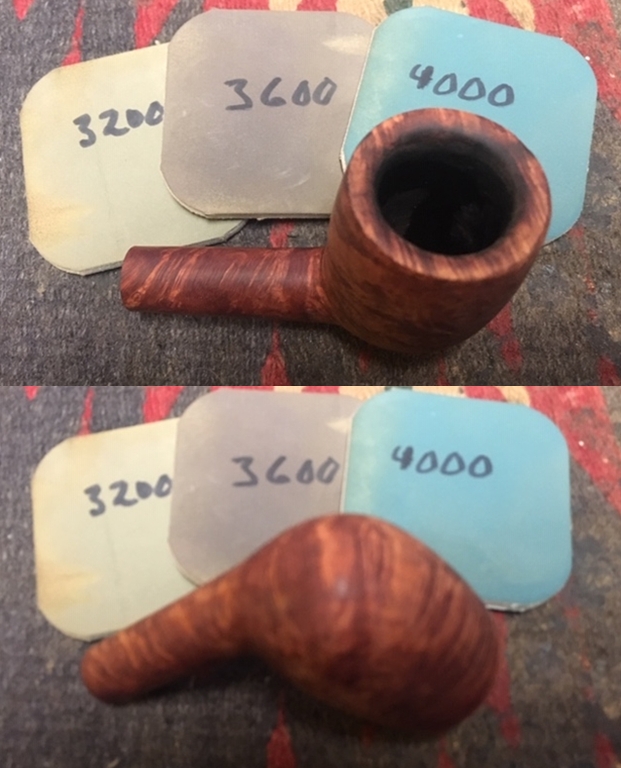
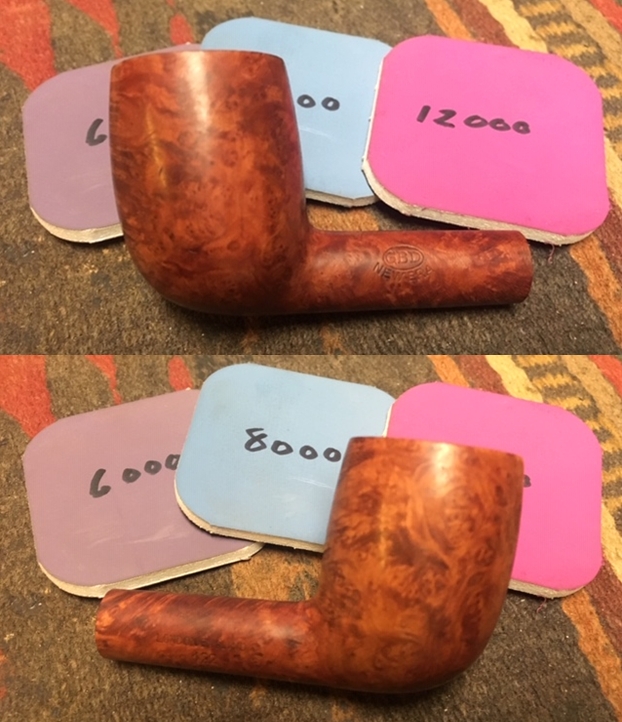
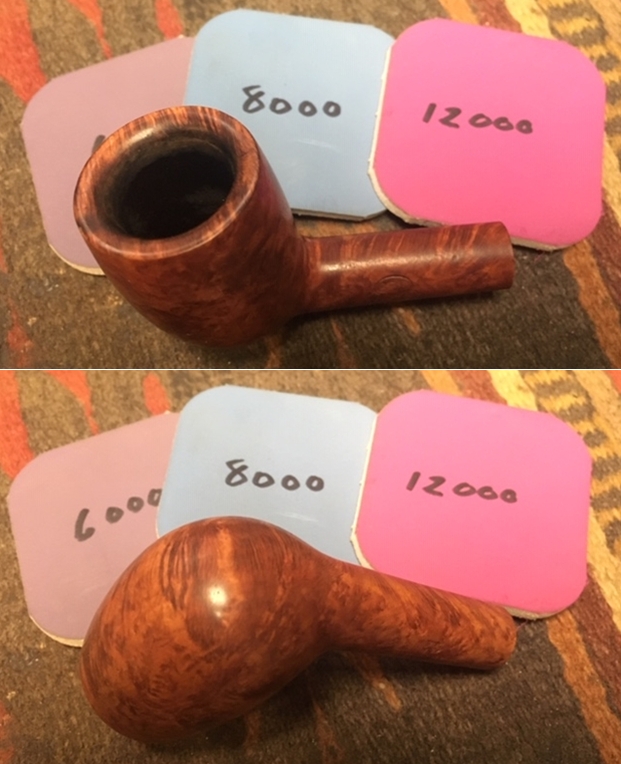
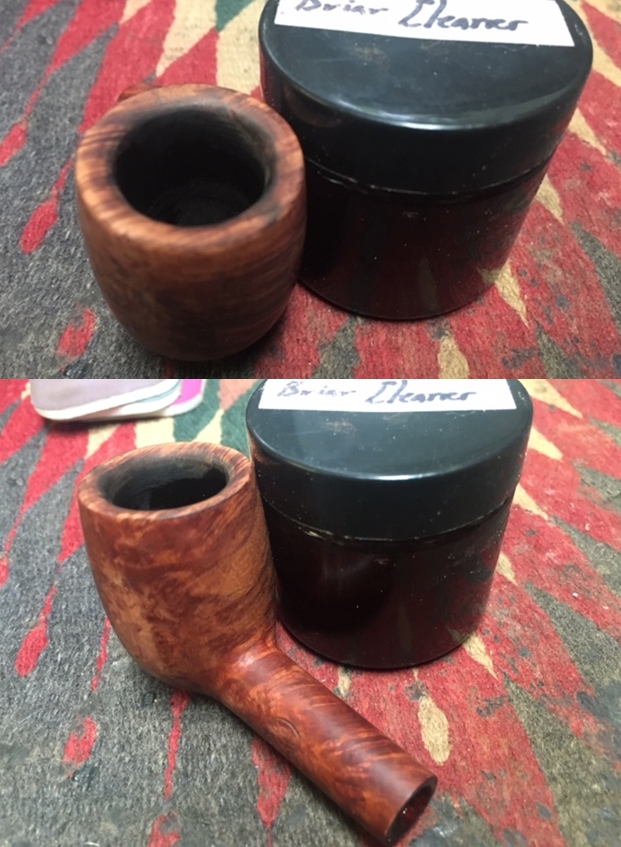
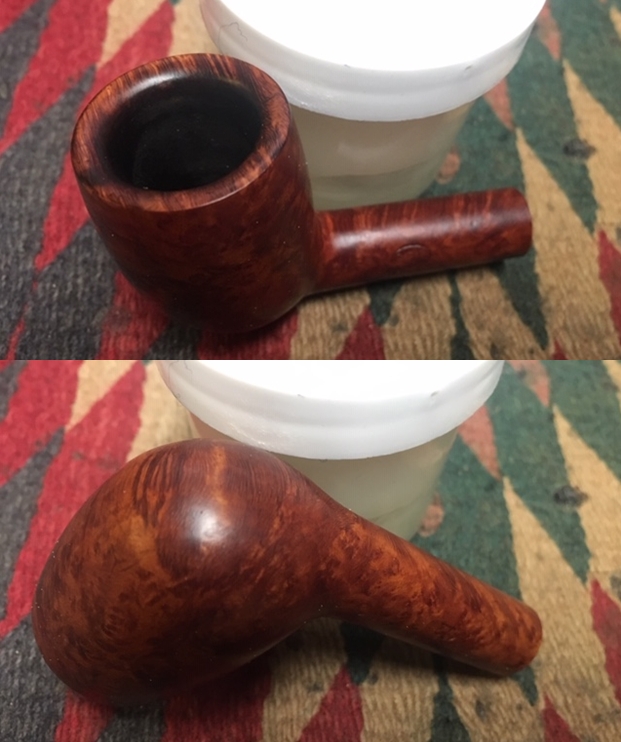
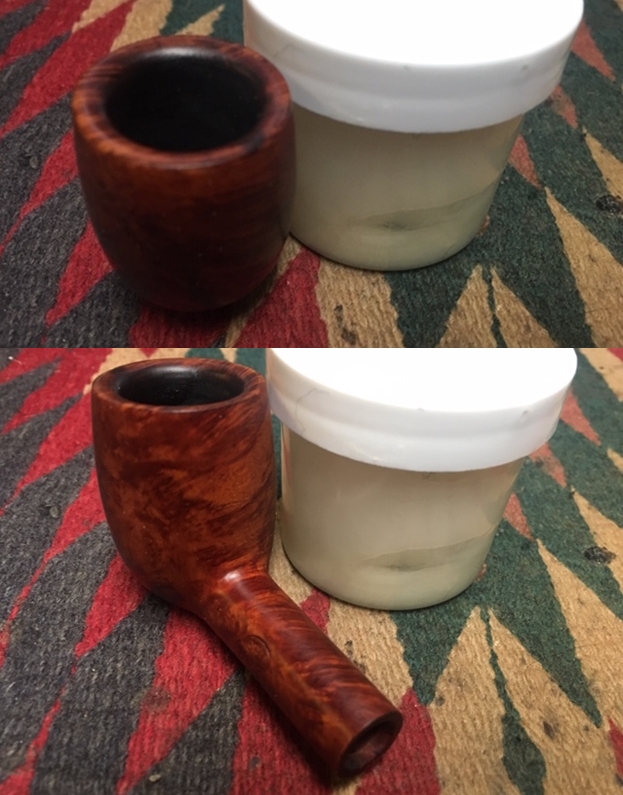
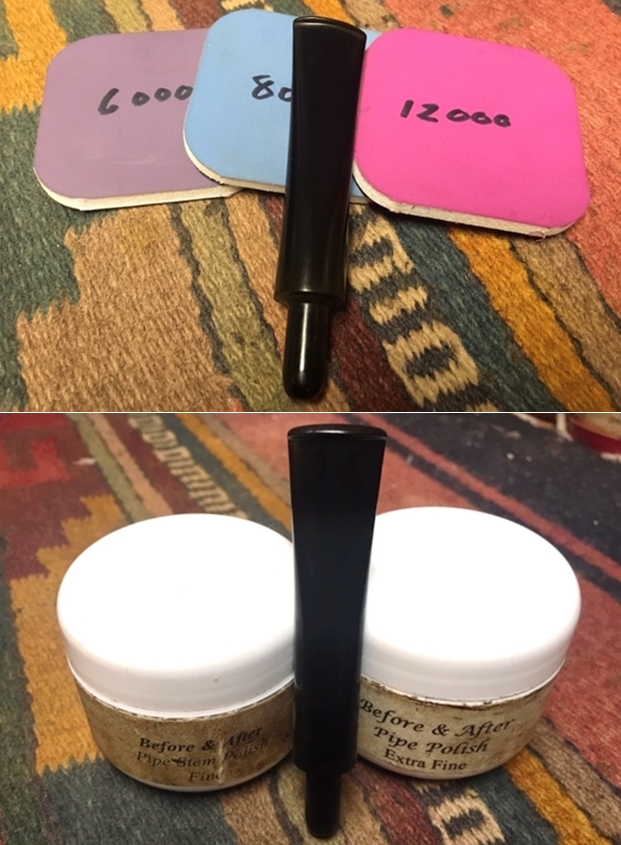
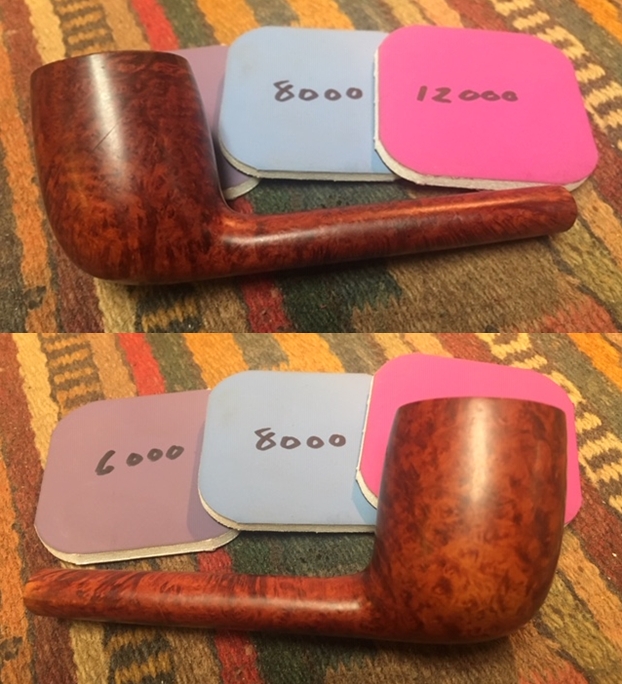
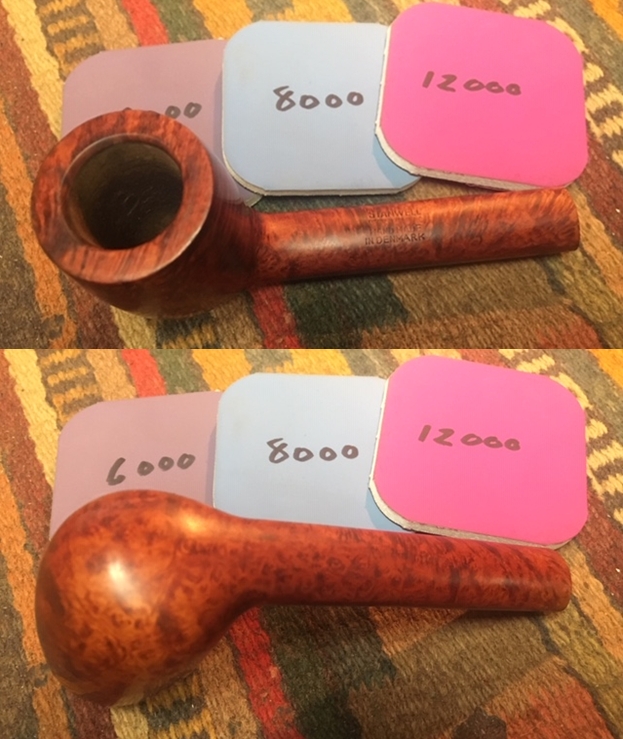
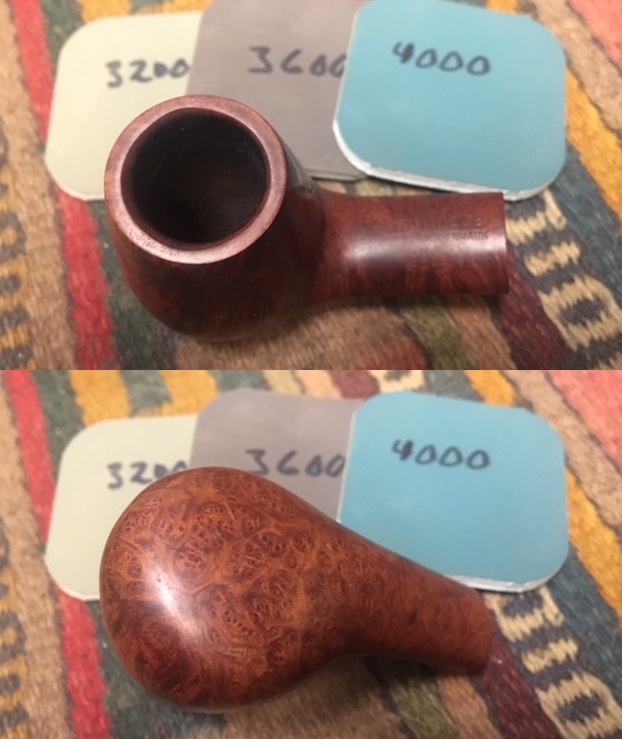
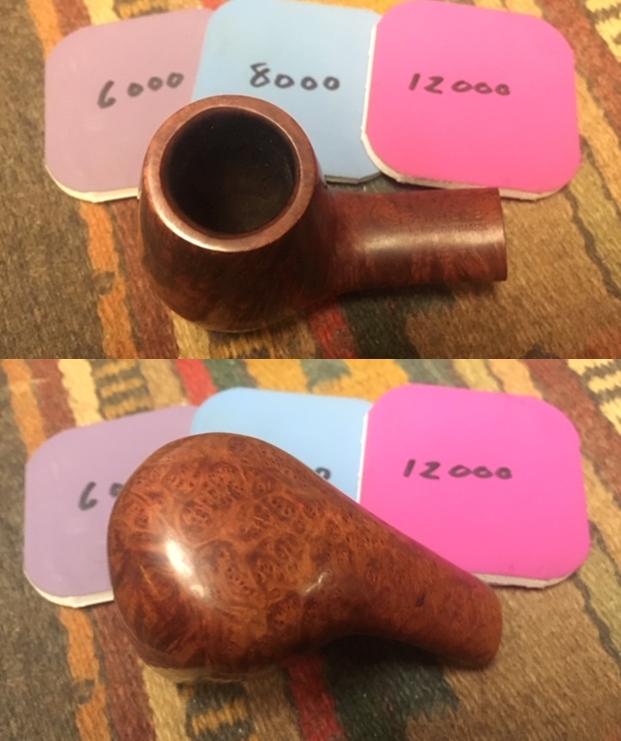
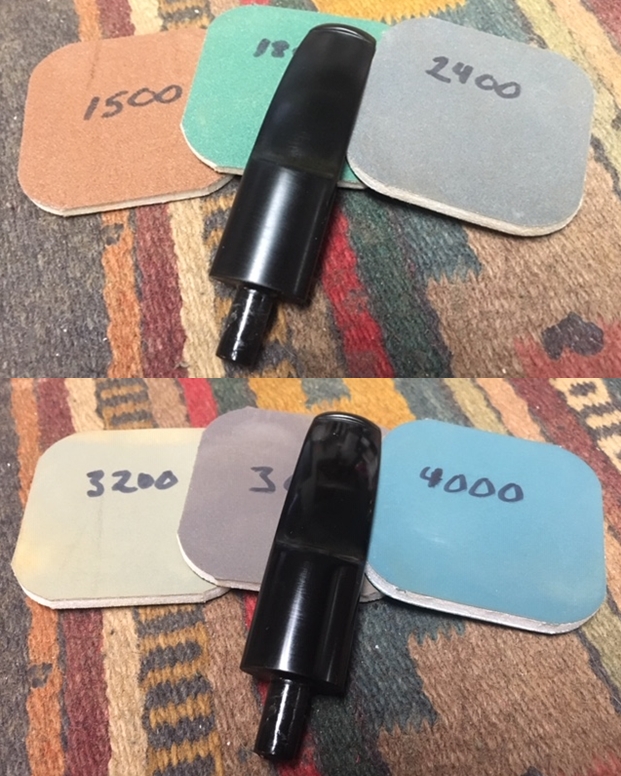
  I polished the cap and edges of the meerschaum bowl with micromesh sanding pads – wet sanding it with 1500-12000 grit pads. Each successive grit pad gave the meerschaum finish more of a shine. There were some nicks and scratches in the meer that I decided to leave as they are fitting of a pipe of this age.
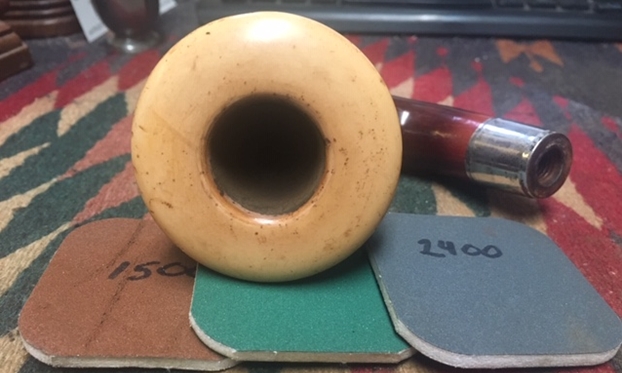
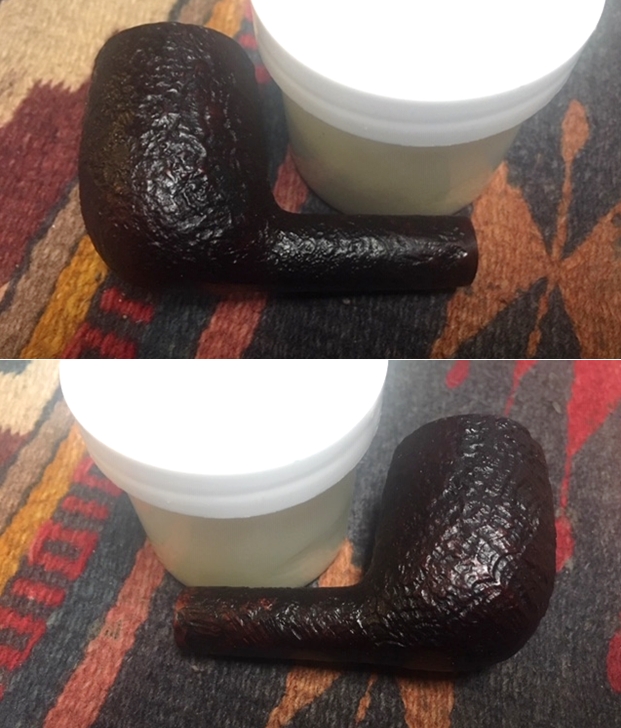
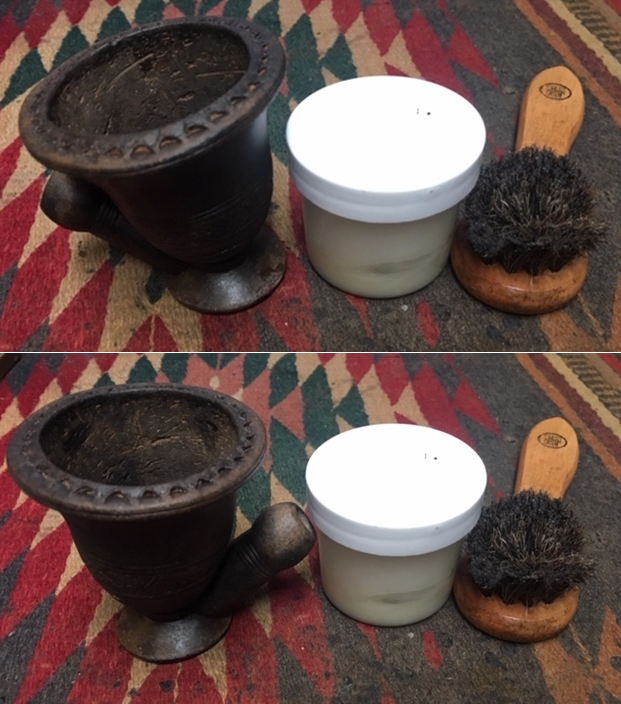
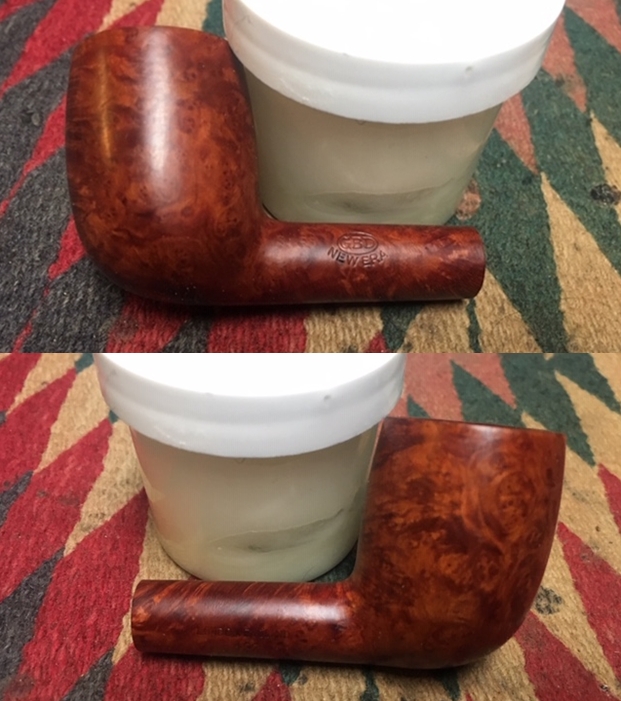
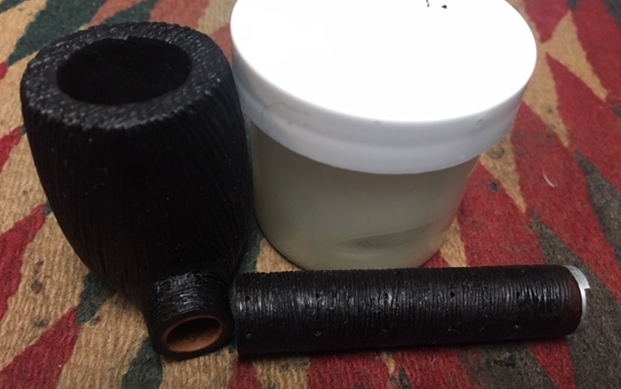
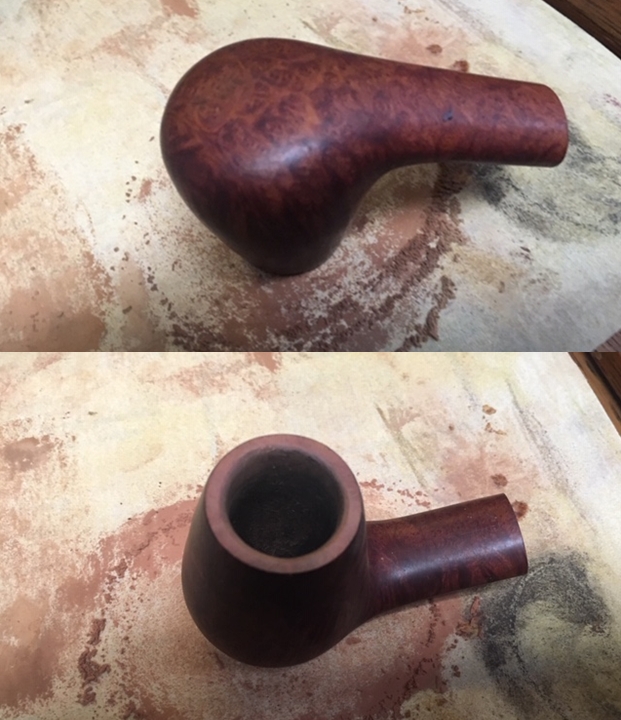
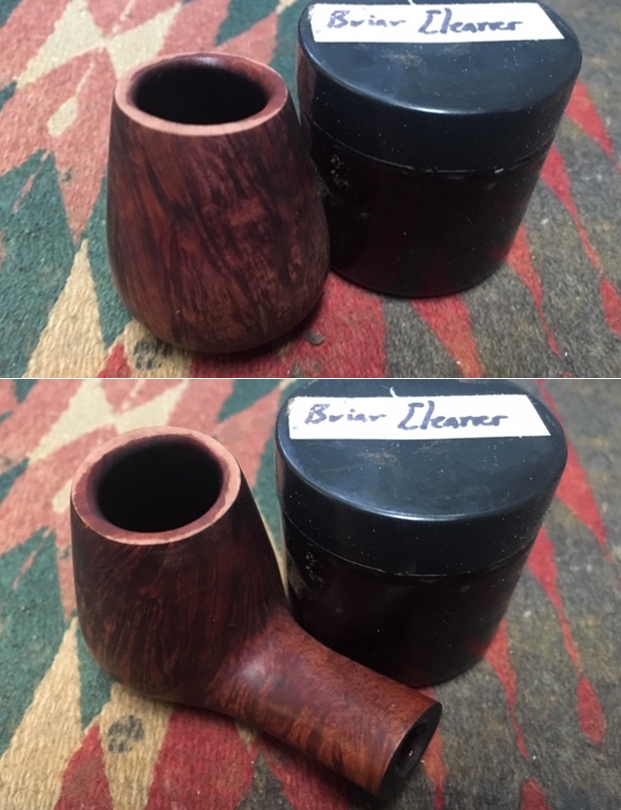
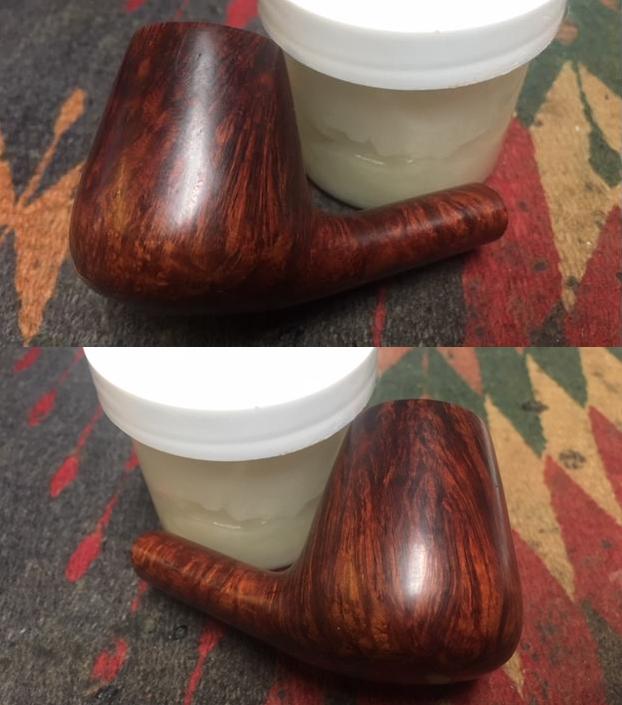
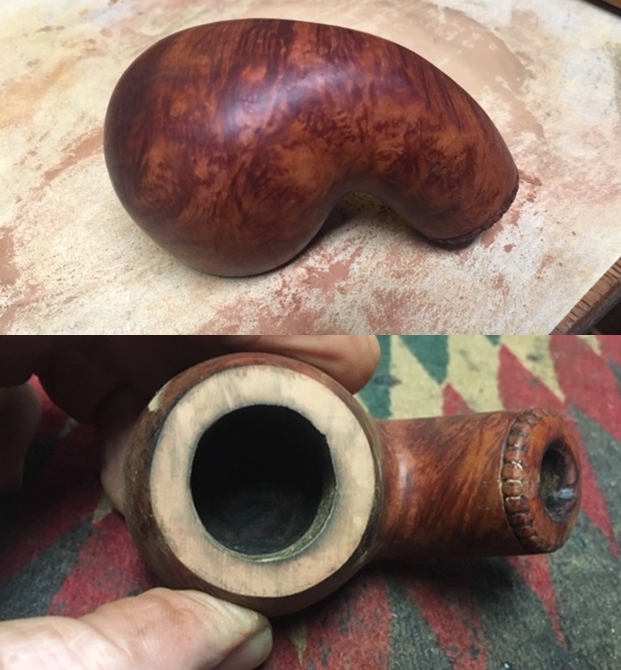
 I rubbed the Gourd Calabash bowl down with Before & After Restoration Balm. I worked it into the surface of the gourd with my fingertips to clean, enliven and protect it. I let the balm sit for a little while and then buffed with a cotton cloth to raise the shine. Mark Hoover’s Balm is a product that I have come to appreciate on a variety of bowls – briar, meer and gourd.
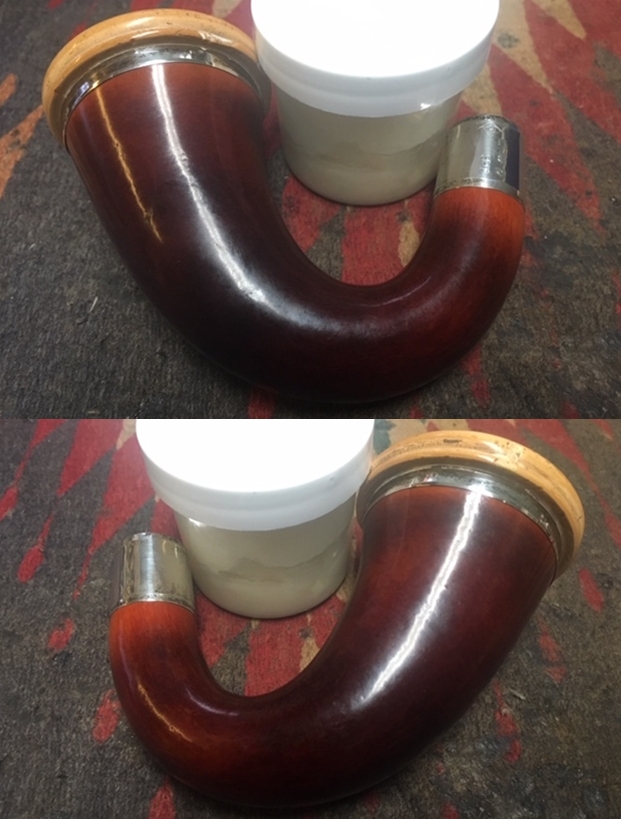

 I polished the silver on the rim of the gourd and the silver band on the shank with a jeweler’s polishing cloth until it removed the black tarnish that had built up around the silver. There are small silver brads holding the band around the top of the gourd.
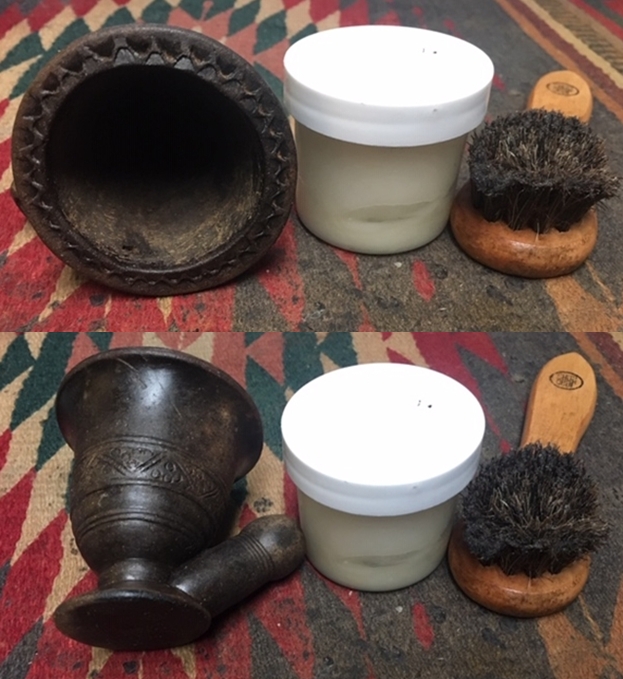
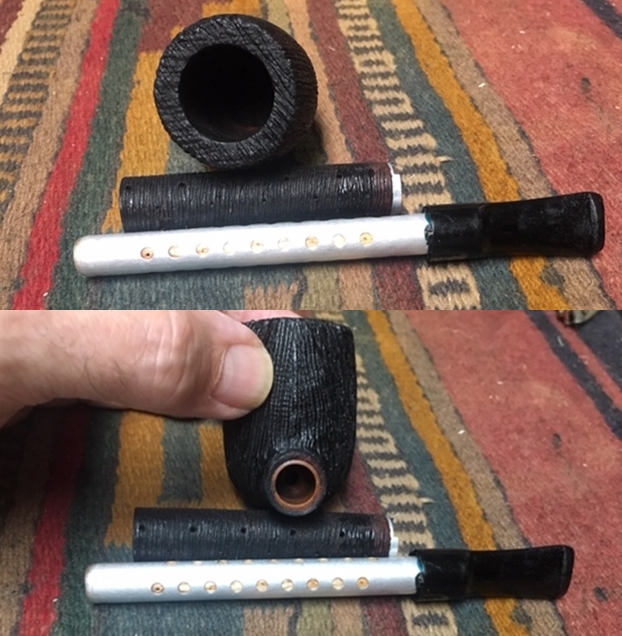
 With the externals cleaned it was time to work on the internals. I was not able to remove the meerschaum bowl so I left it in place and cleaned the gourd through the hole in the bottom of the bowl and up the shank. I used alcohol and pipe cleaners to remove the grime that was built up and worked on it until the cleaners came out clean and the gourd smelled fresh.
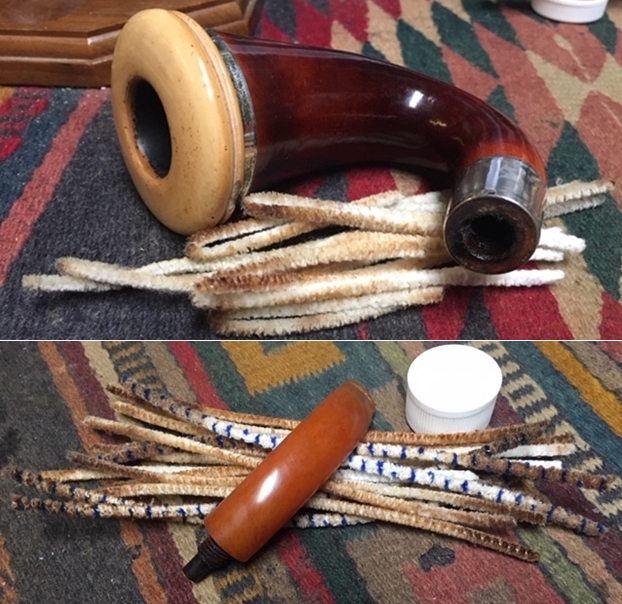 The more I handled and worked on the stem the more I was certain that I was dealing with something other than amber. From the BBB Catalogue from 1912 I knew that I was dealing with Ambroid which is in essence manmade amber. My first thought was that the Ambroid was Redmanol so I turned Pipephil to have a look at that product to see if they made material for BBB (http://www.pipephil.eu/logos/en/logo-r3.html). I found in a note below the photos said that BBB used Redmanol stems. I have included a screen capture of the section on pipephil’s site.
 I also noted there that L&H Stern used Redmanol as well. I turned to an article on Pipedia about about LHS pipes (https://pipedia.org/wiki/LHS). I found a picture of the exact stem colour as the BBB that I was working on. I quote:
LH Stern is known to every important wholesaler and jobber in the country. LHS manufactures a complete line of briar pipes. Ginmetto wood pipes are also made, as well as Redmanol goods, the man-made amber. The first substitute for amber. Everything, even down to the sterling silver and other metal trimmings are made under one roof.
Example with Redmanol Stem (man-made amber)
I checked the dates on Redmanol and it was developed and was linked to an article on Bakelite on Wikipedia (https://en.wikipedia.org/wiki/Bakelite).
Bakelite (/ˈbeɪkəlaɪt/ BAY-kəl-eyet; sometimes spelled Baekelite) or polyoxybenzylmethylenglycolanhydride was the first plastic made from synthetic components. It is a thermosetting phenol formaldehyde resin, formed from a condensation reaction of phenol with formaldehyde. It was developed by the Belgian-American chemist Leo Baekeland in Yonkers, New York, in 1907.
Bakelite was patented on December 7, 1909. The creation of a synthetic plastic was revolutionary for its electrical nonconductivity and heat-resistant properties in electrical insulators, radio and telephone casings and such diverse products as kitchenware, jewelry, pipe stems, children’s toys, and firearms.
It seems that the inventor of Bakelite ended up merging his company with Redmanol who developed a similar product. I now knew that the stem I was working on was Redmanol/Bakelite. The more I worked on it the more apparent it became that I was dealing with a manmade product rather than natural amber.
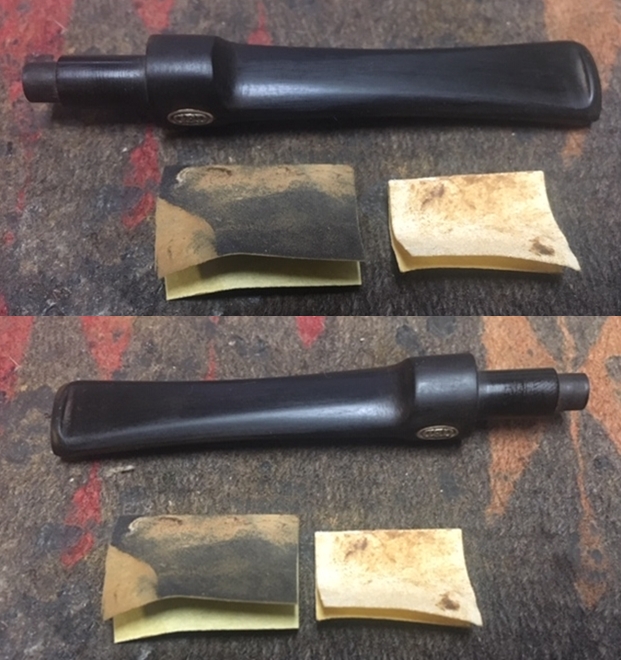
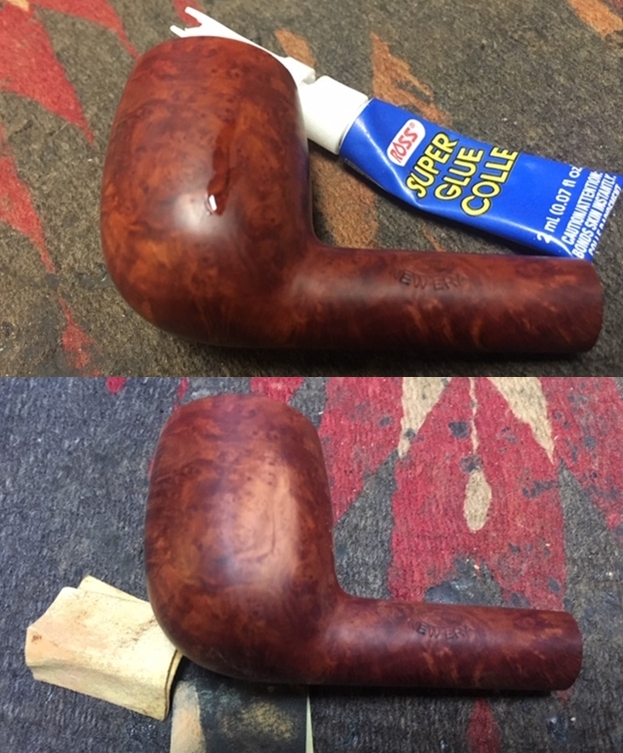
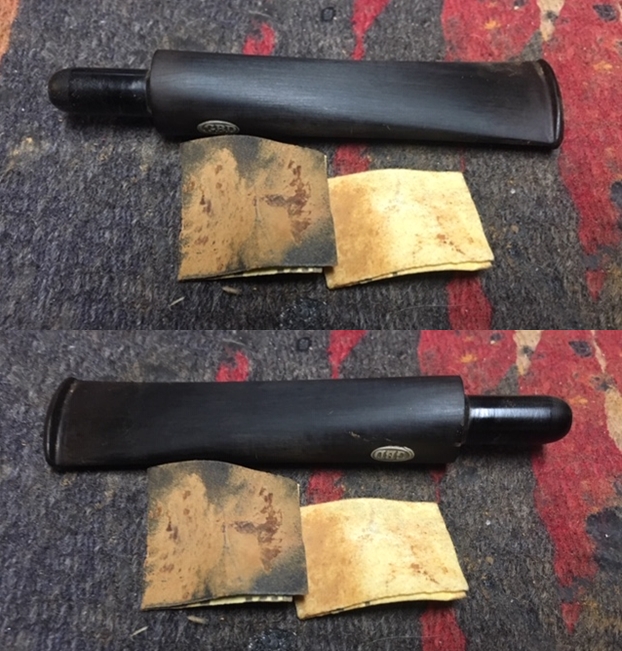
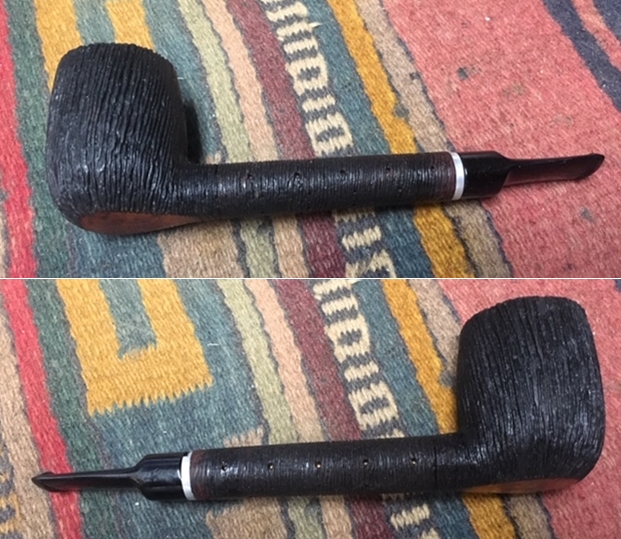
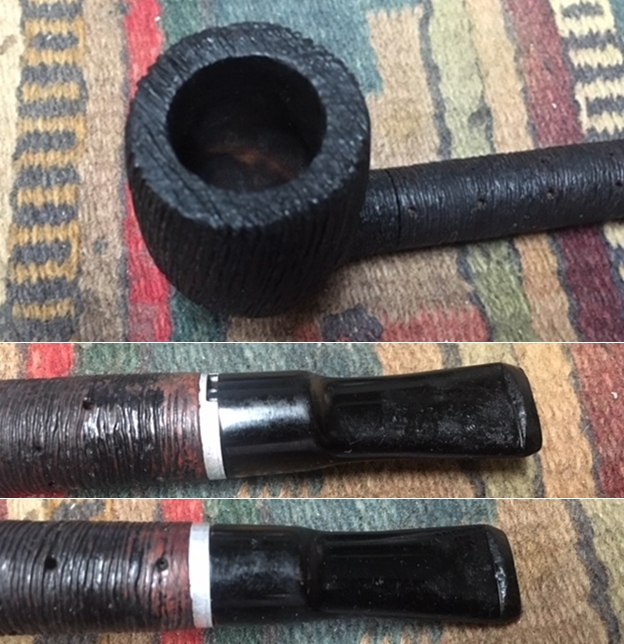
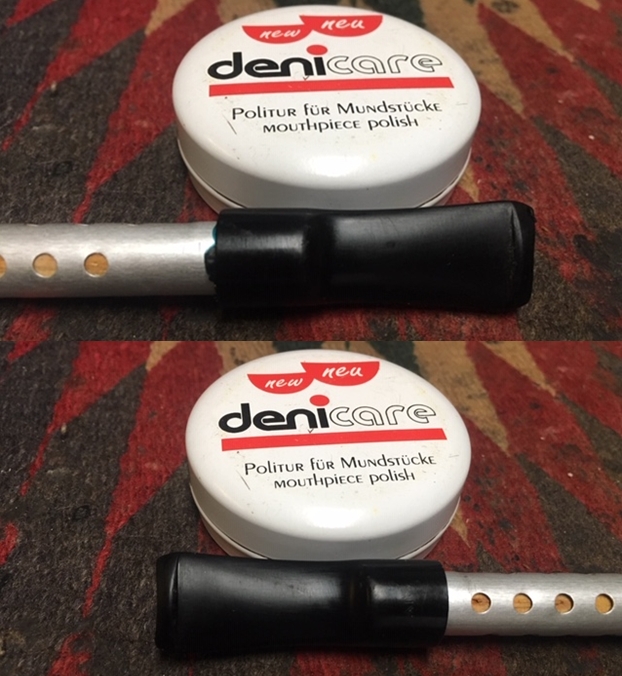
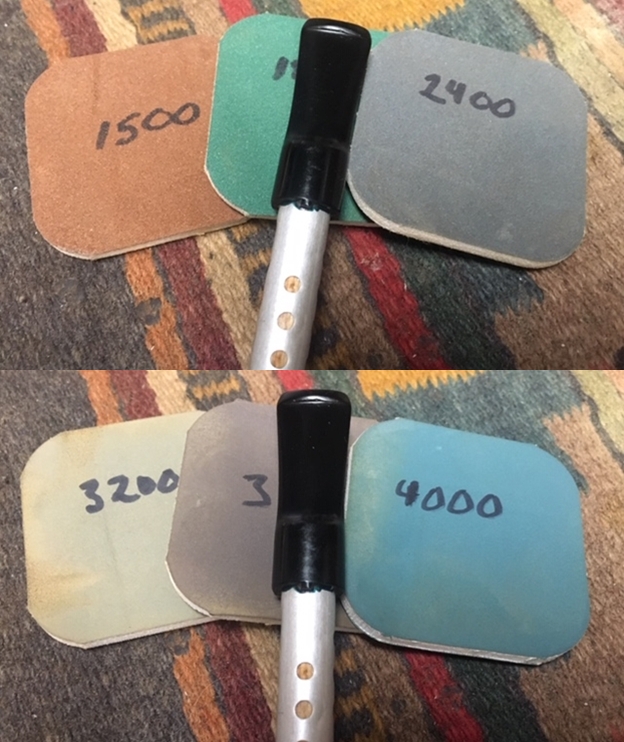
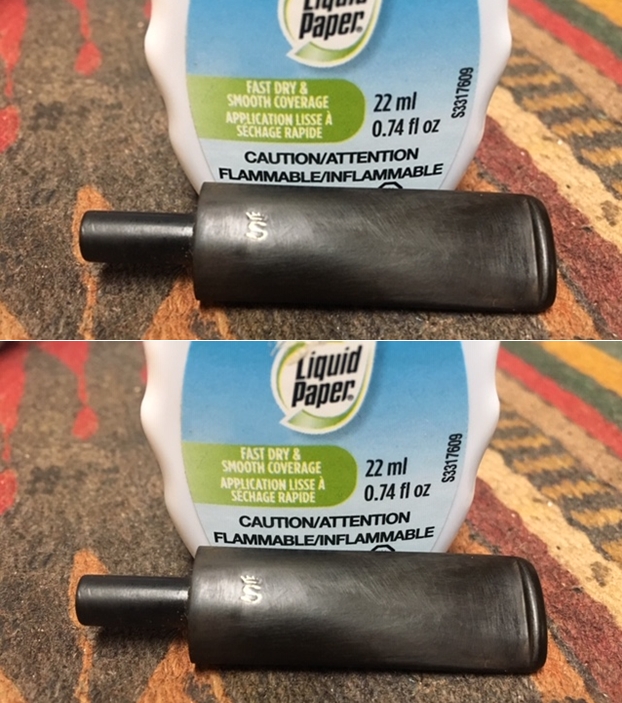
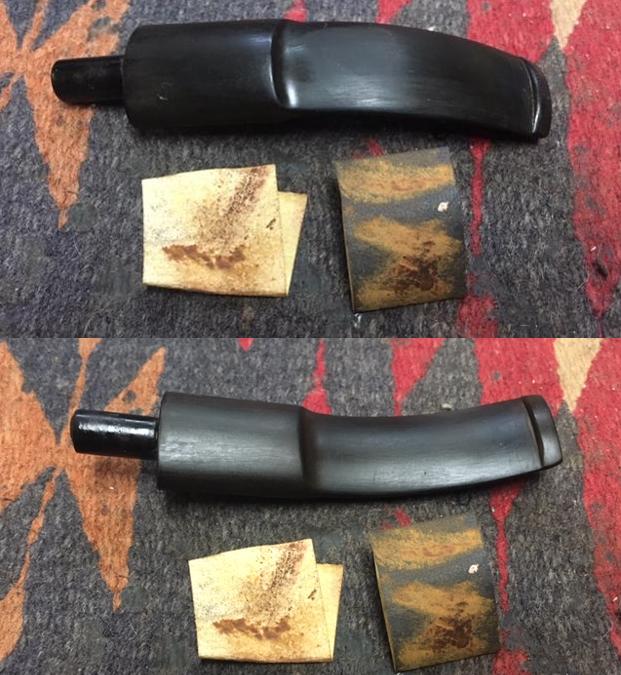
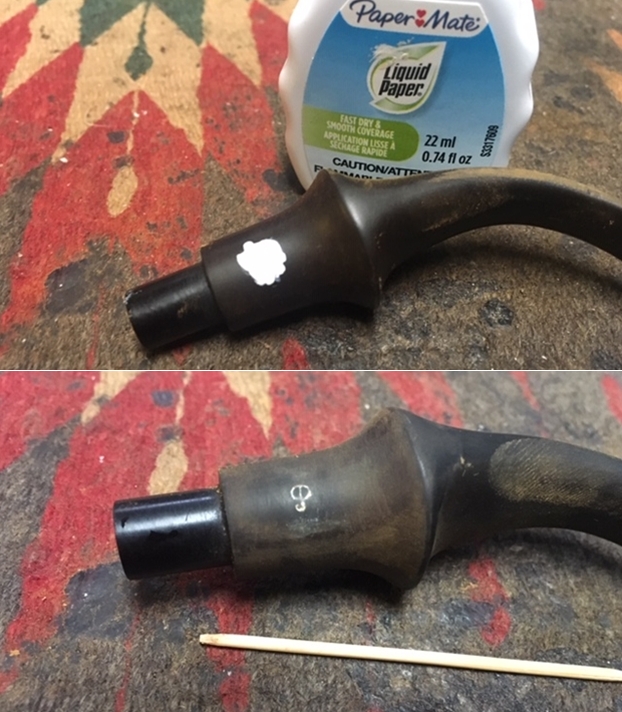
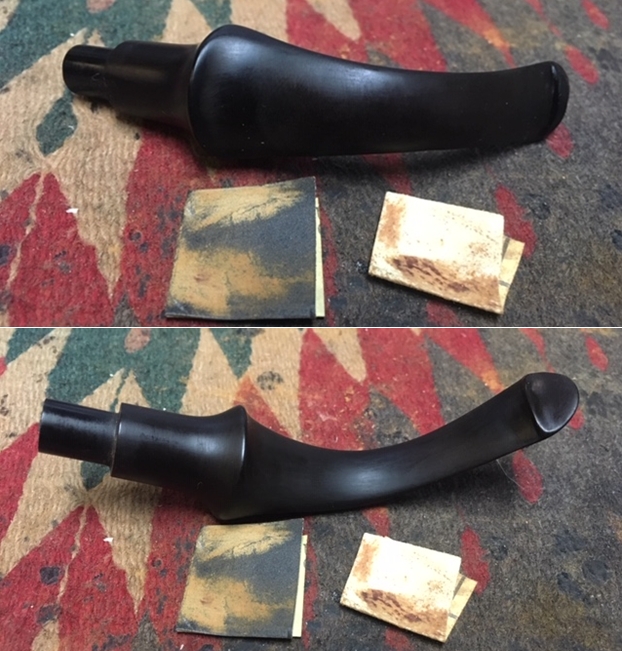
Armed with that information I turned my attention to the stem. I wiped the stem surface down with soap and water to remove any oils on the stem surface. I filled in the tooth marks with clear super glue and set the stem aside until the repairs had cured.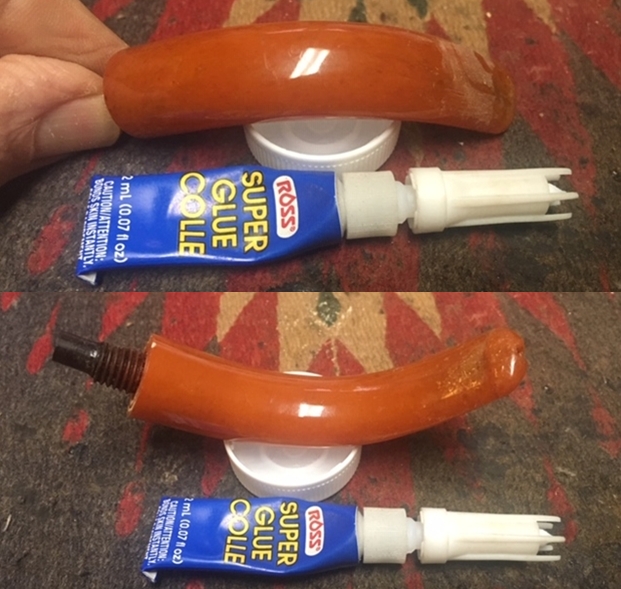 When the repairs had cured I sanded them smooth to blend them into the surface with 220 grit sandpaper and polished it with 400 grit wet dry sandpaper.
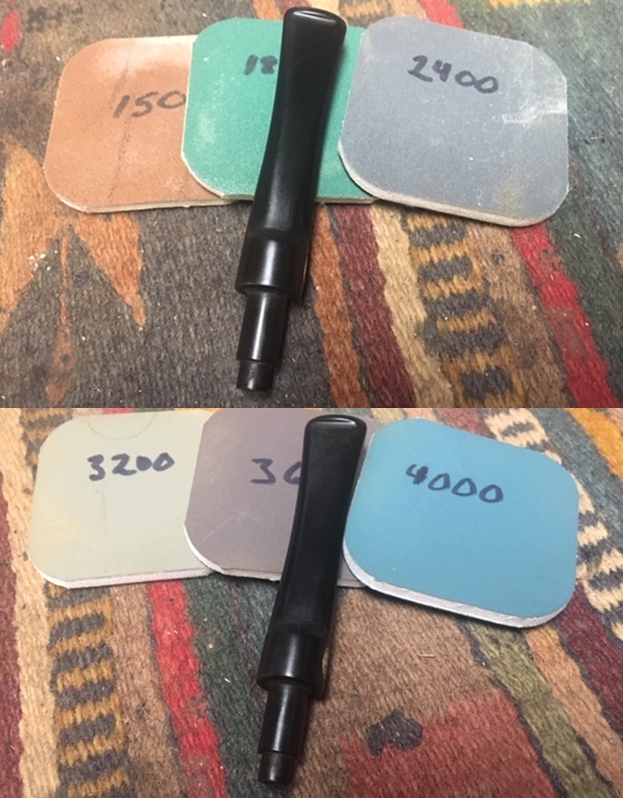
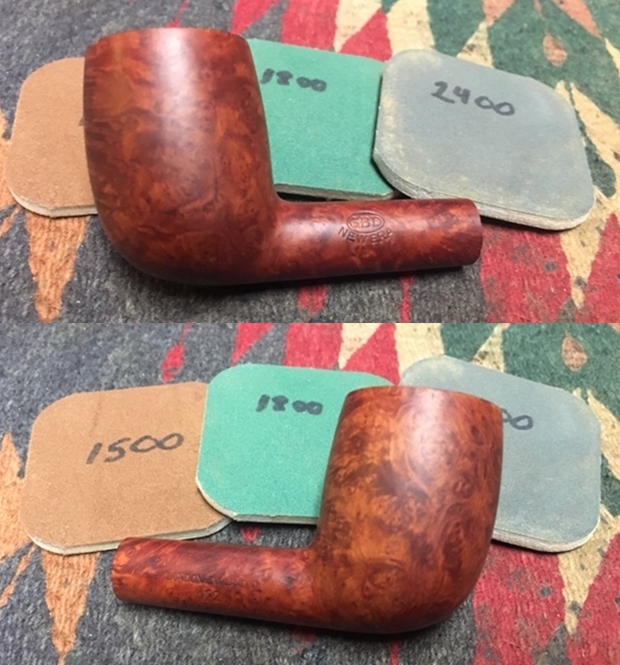
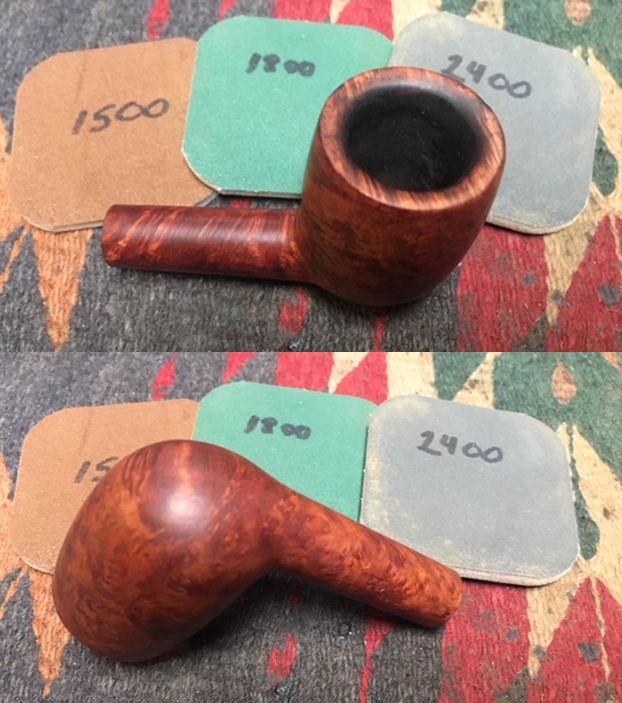
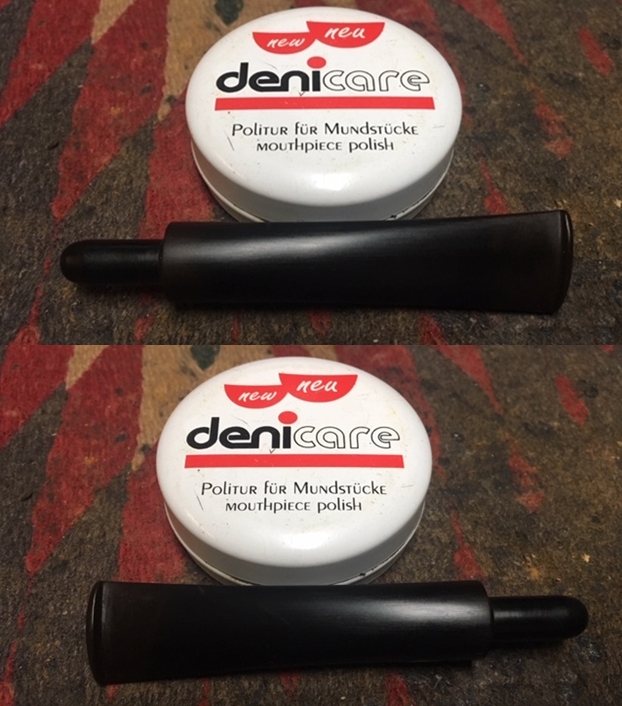
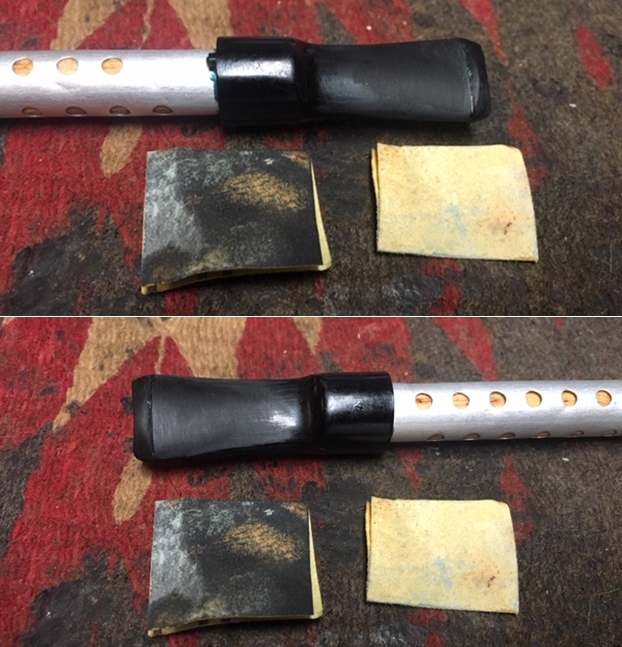
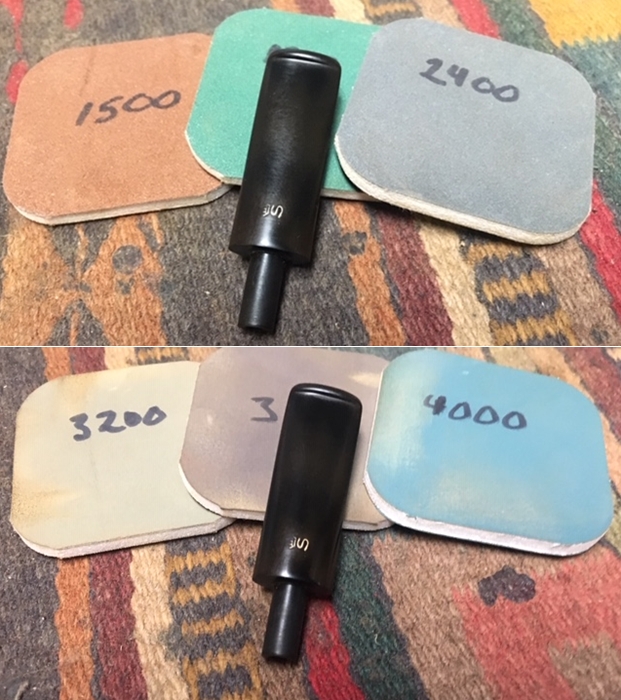
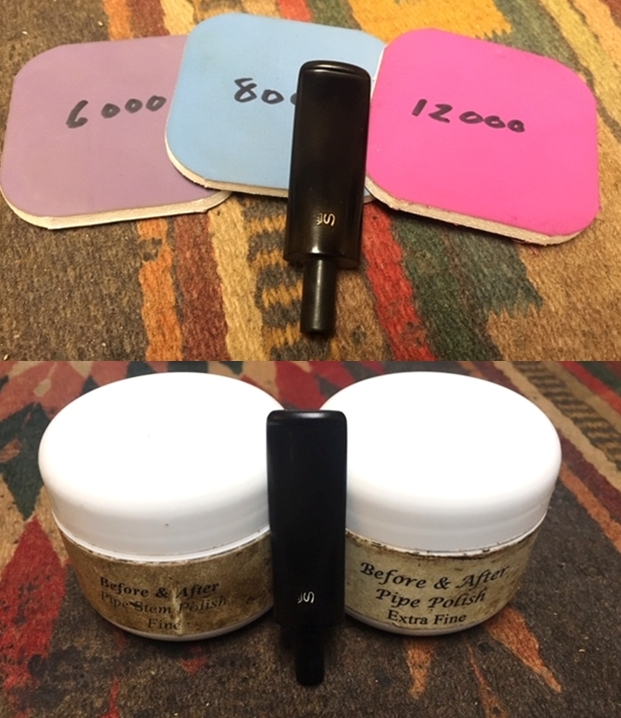
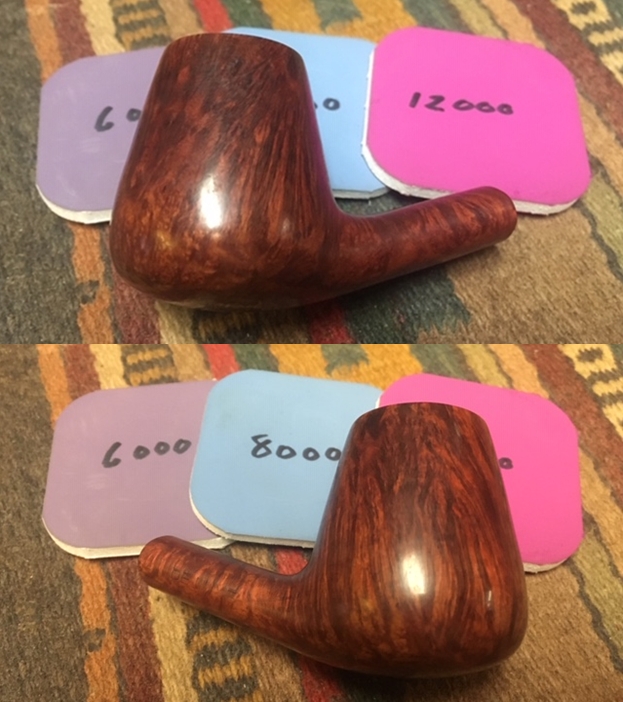
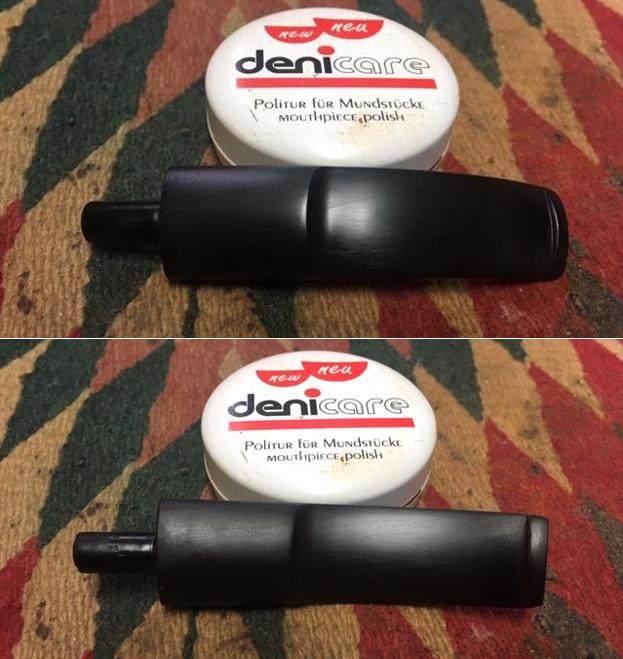
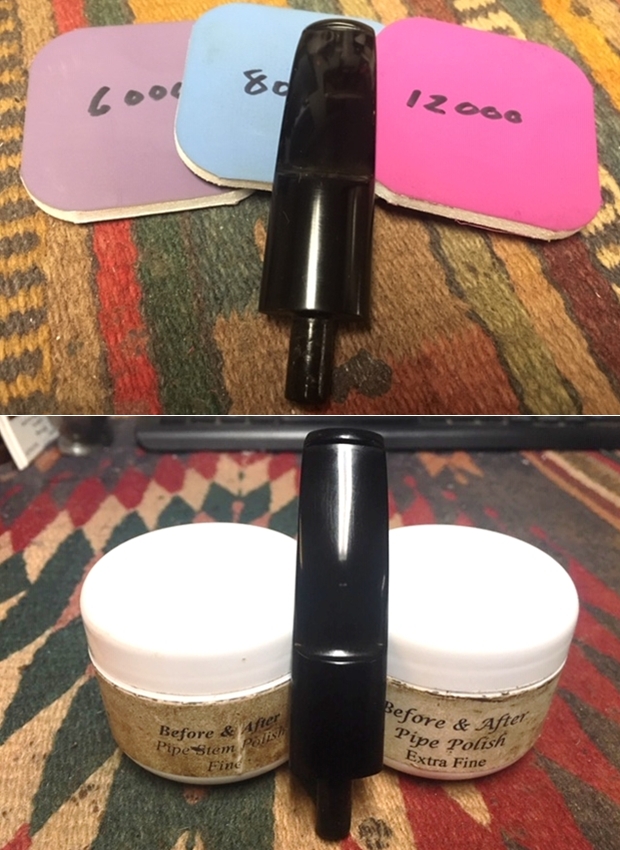
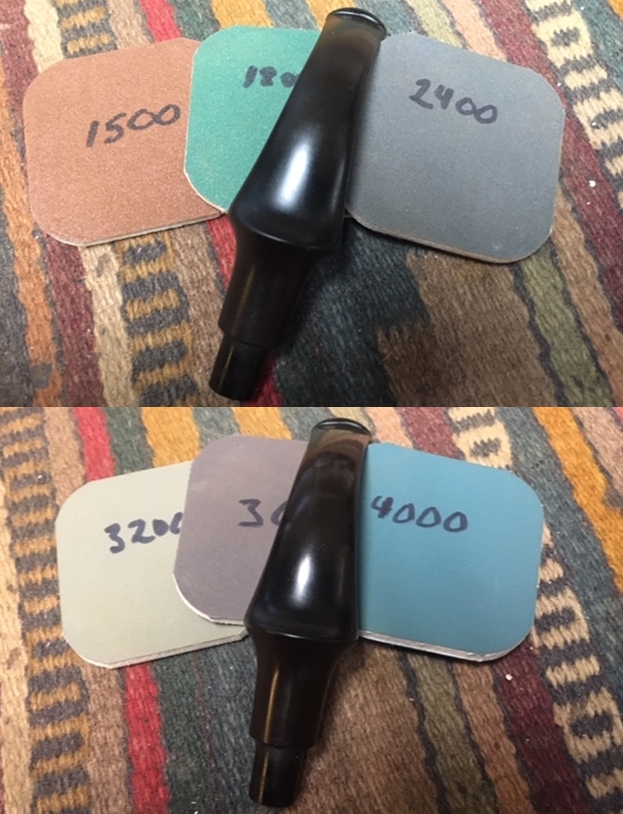
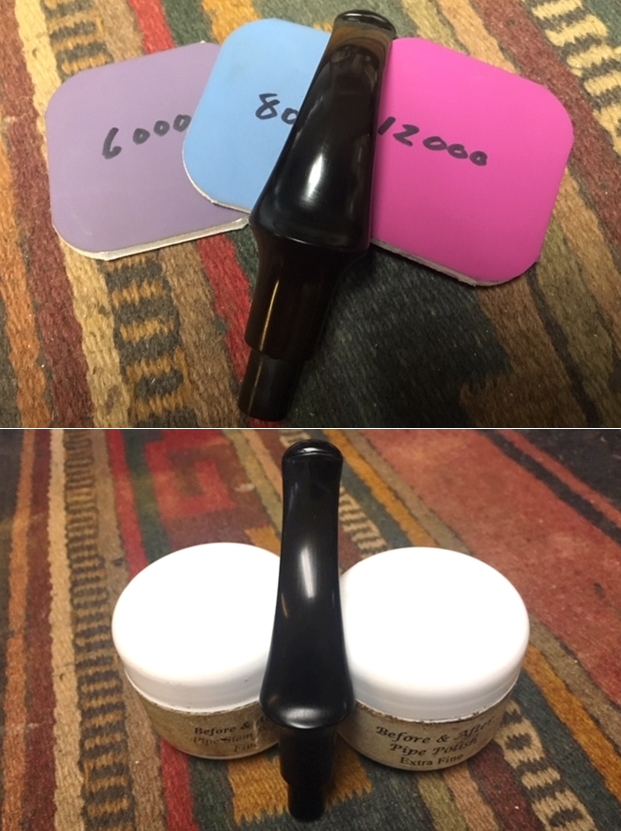
 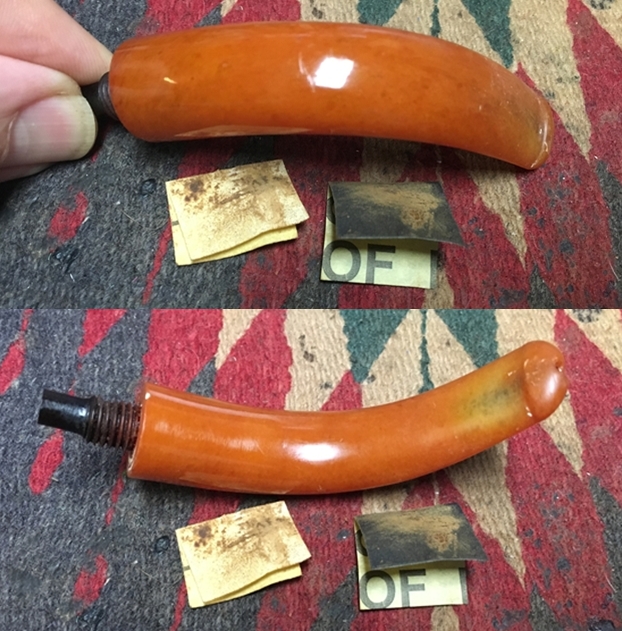 You can see the discolouration of the stem material from the sanding. It is pretty typical of Redmanol and Bakelite stem… I went on to polish the stem with micromesh sanding pads – wet sanding 1500-12000 grit sanding pads. I wiped the stem down after each sanding pad with Obsidian Oil. I gave it a final coat of Obsidian Oil after the last sanding pad.
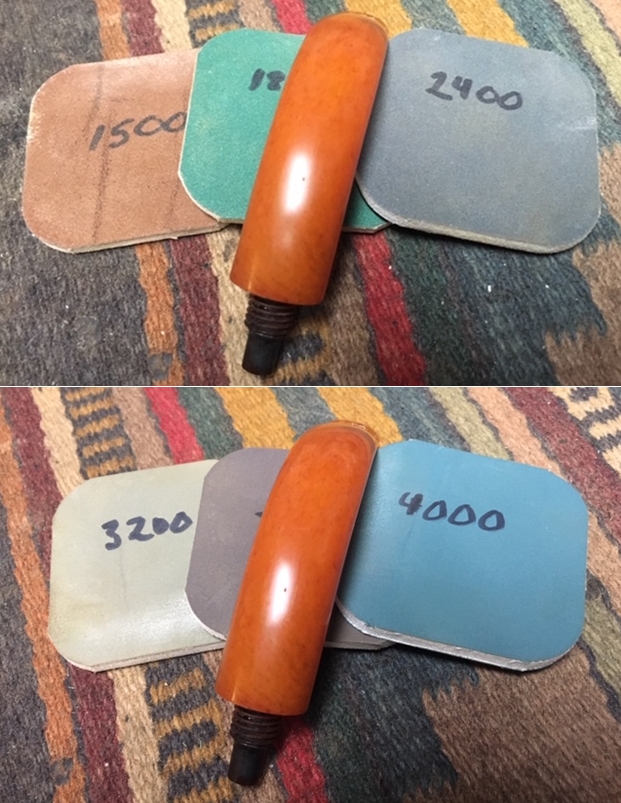
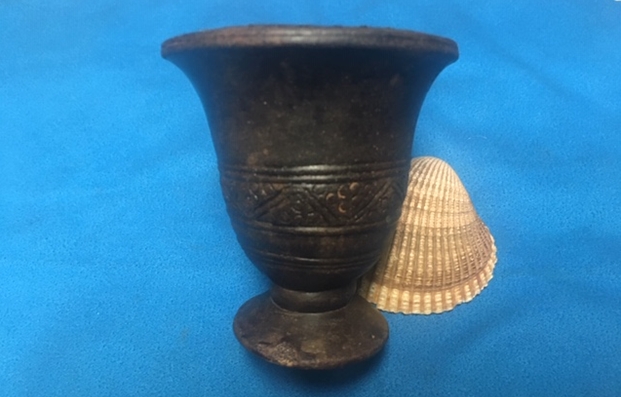
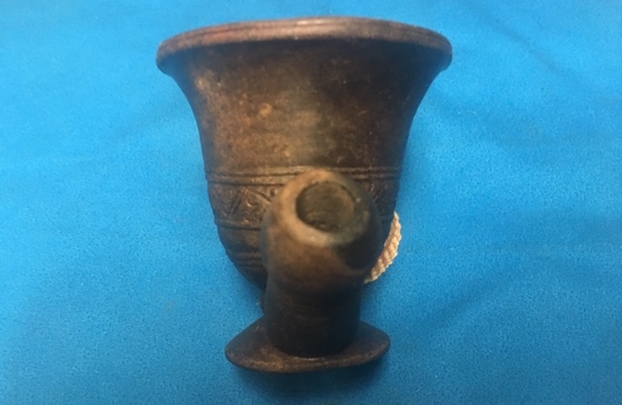
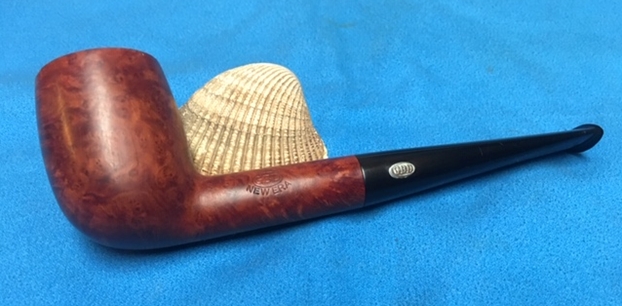
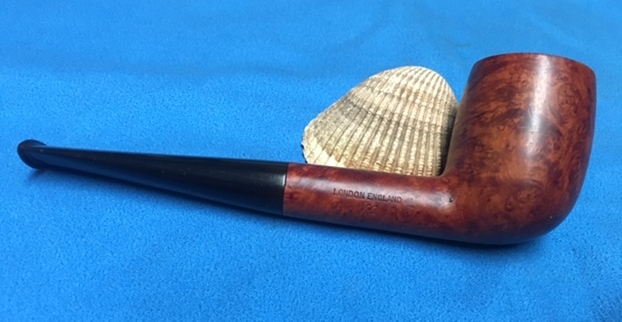
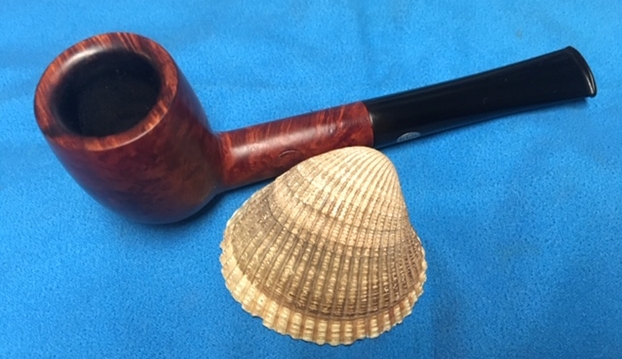
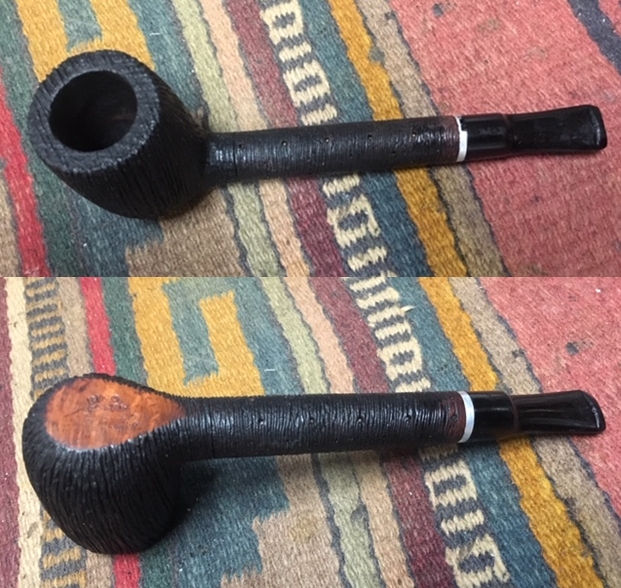
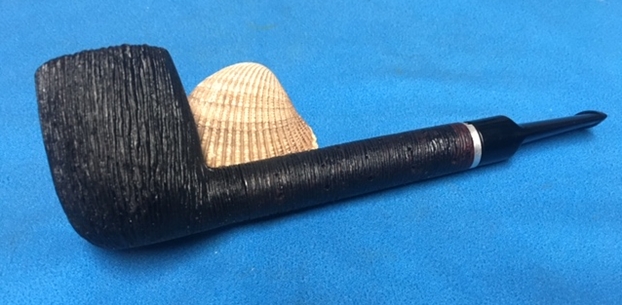
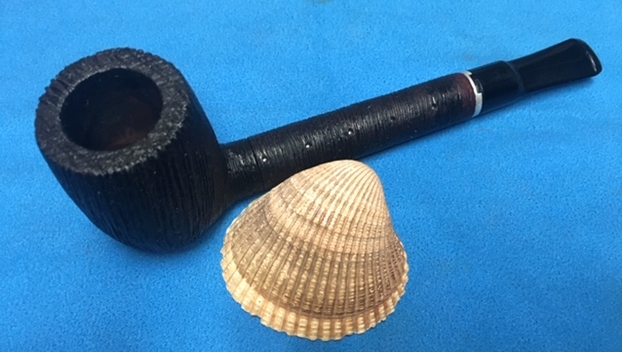
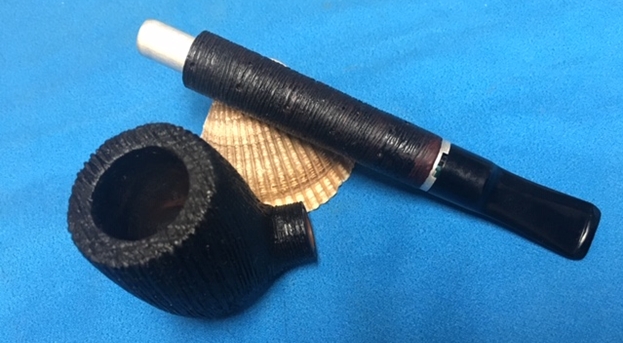
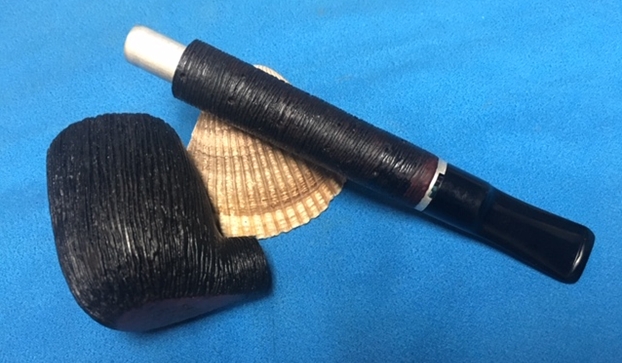
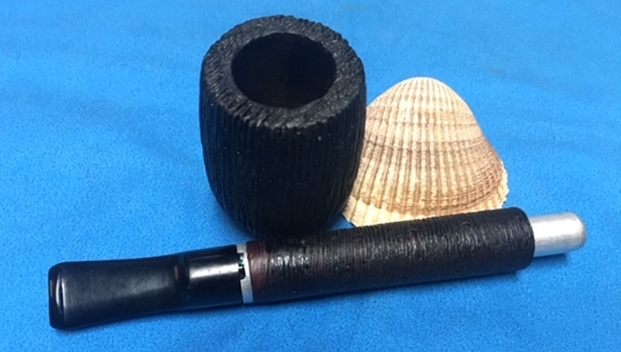
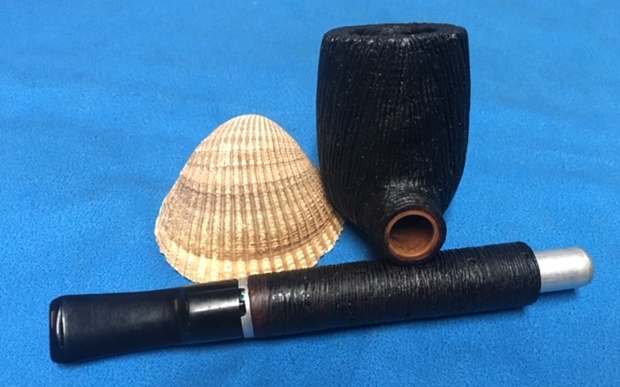
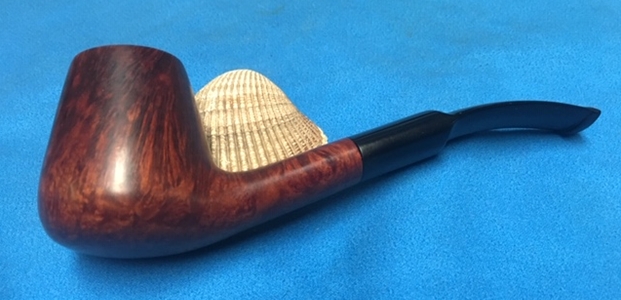
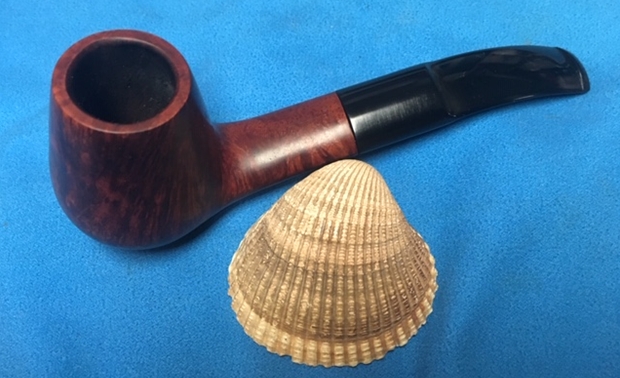
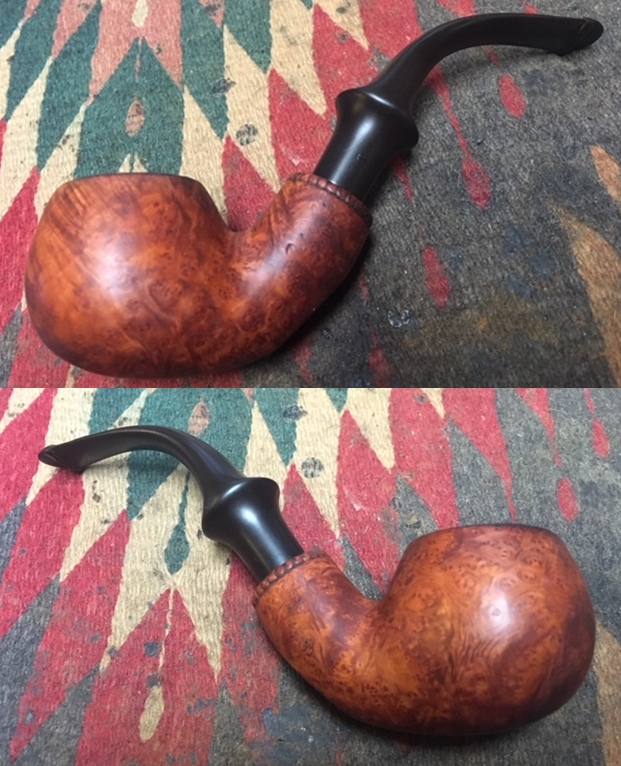
 BBB pipes have always been a favourite of mine. I love firing up a bowl in one and I love feel and craftsmanship that went into each of them. This 1911 Gourd Calabash is a beautiful example of the craftsmanship that went into each of the pipes that came out of Louis Blumfeld’s BBB factory. These calabash pipes put together the gourd from South Africa with a meerschaum cup from Turkey and a stem supplied by Redmanol. It is truly an international pipe that ended up in Canada on the farm of a Scottish immigrant and lived far beyond his life time in the hands of his granddaughter who cherished it and cared for it. I am honoured to carry on the trust of this noble calabash. I put the bowl and stem back together.
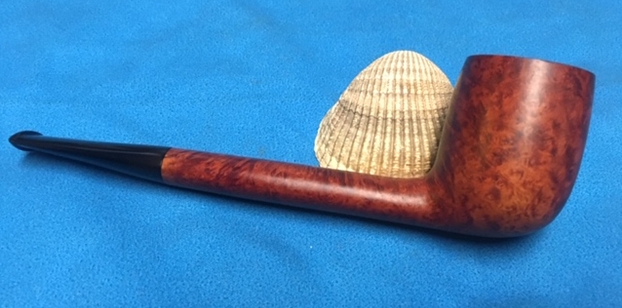
I carefully polished the bowl, the meer cap and stem with Blue Diamond to polish out the scratches in the briar and the vulcanite. I gave the gourd and stem multiple coats of carnauba wax. I buffed the pipe with a clean buffing pad to raise the shine. I hand buffed it with a microfiber cloth to deepen the shine. The pipe polished up pretty nicely. The rich reddish brown patina of the gourd, the shine of the aging meer, the silver band and ring and the Redmanol stem really popped with buffing showing the contrast colours of the pipe. The polished Redmanol stem went really well with the colours of the bowl. The rim top, though slightly damaged looked very good. This old BBB Gourd Calabash was another fun pipe to work on. It is an old timer that will hold a place in my BBB collection. The finished pipe is shown in the photos below. The dimensions of the pipe are Length: 7 inches, Height: 4 inches, Outside diameter of the bowl: 2 ¼ inches, Chamber diameter: ¾ of an inch. Thanks to John Milne Senior for his care of his pipe. Thanks to Pat for her care of it through the years and for passing it on to me to hold in trust as the next pipeman to own it. Thanks for reading this blog and my reflections on the pipe while I worked on it. This is an interesting estate to bring back to life. 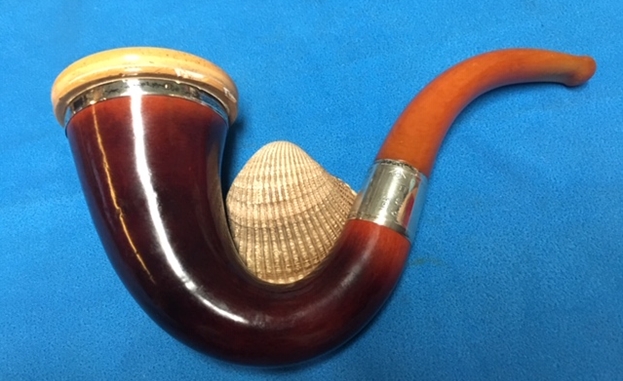


