by Steve Laug
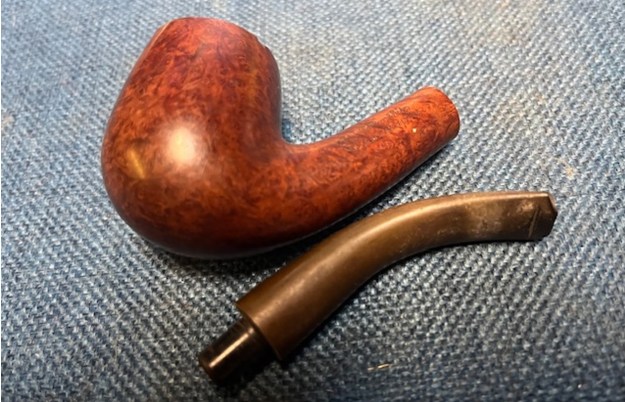
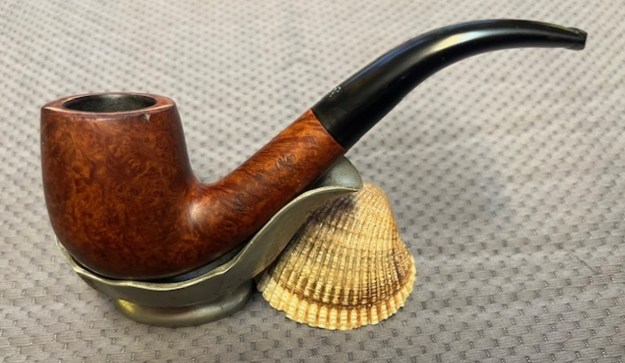
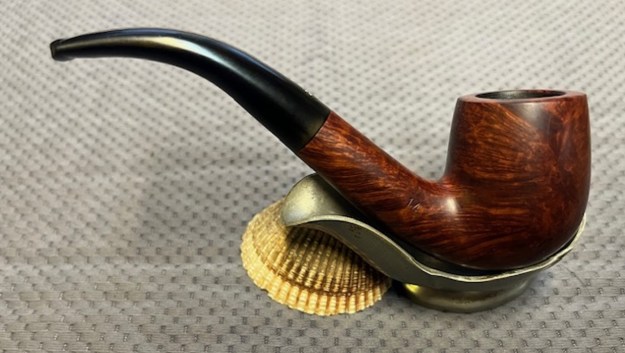
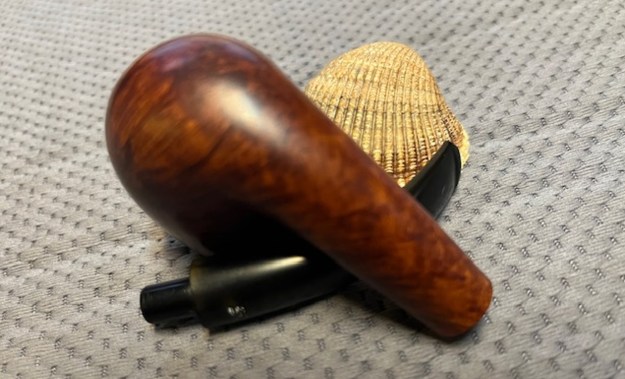
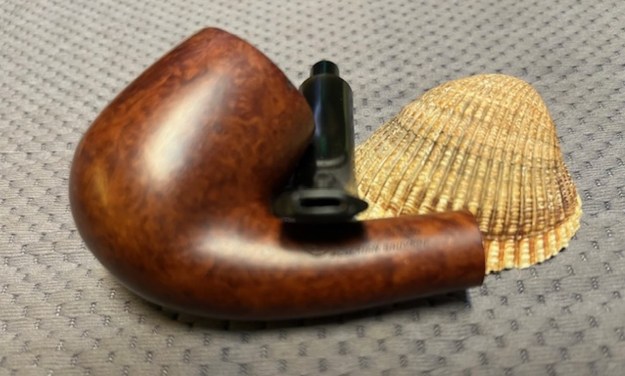
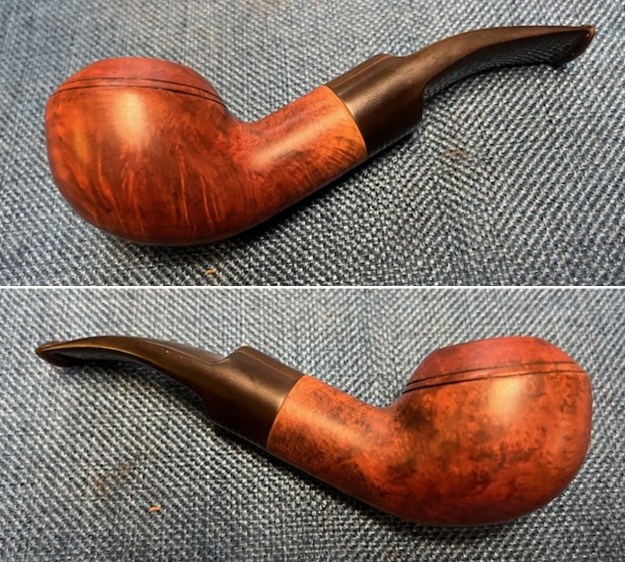
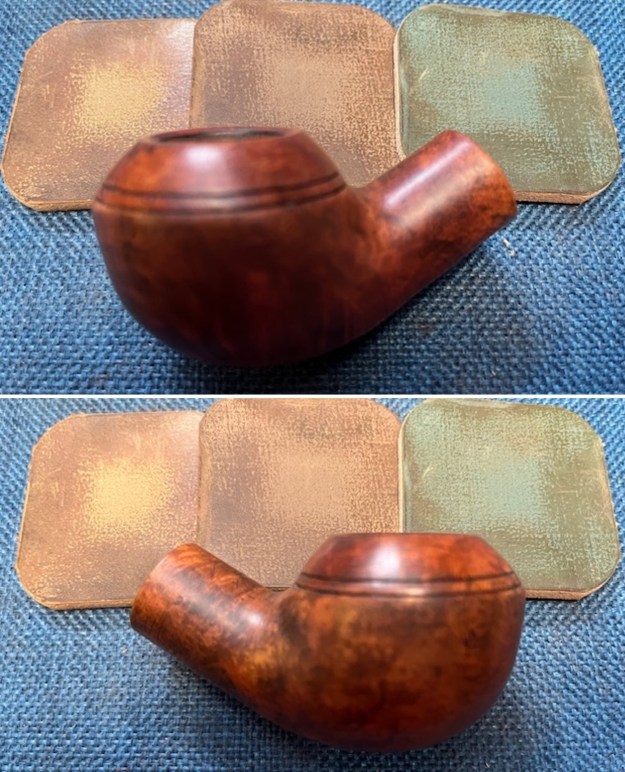
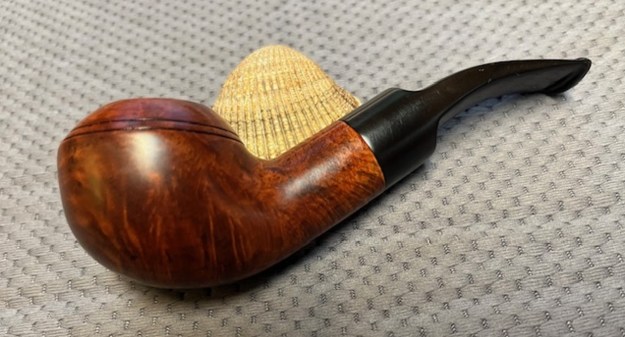
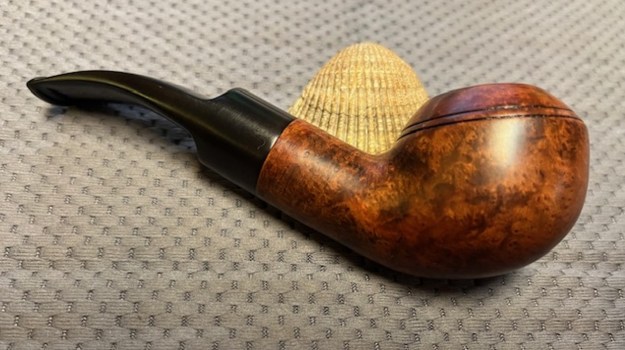
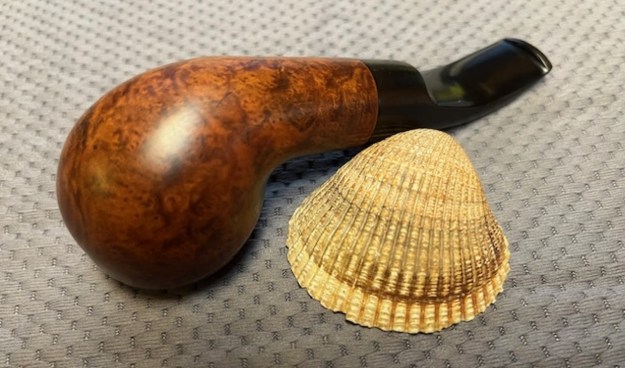
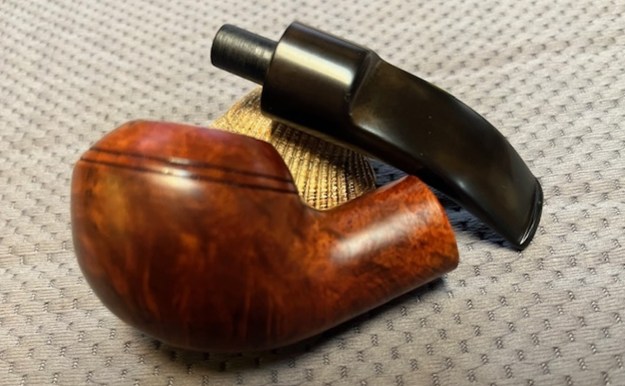
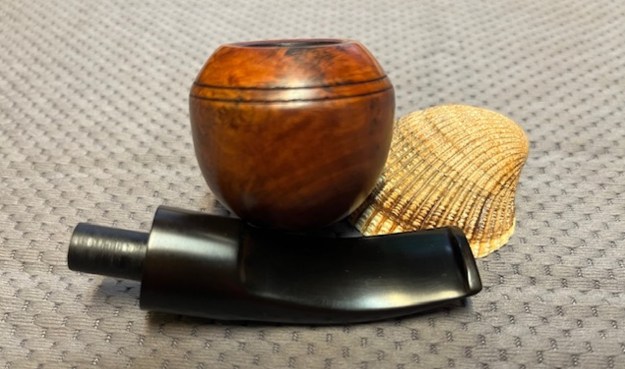
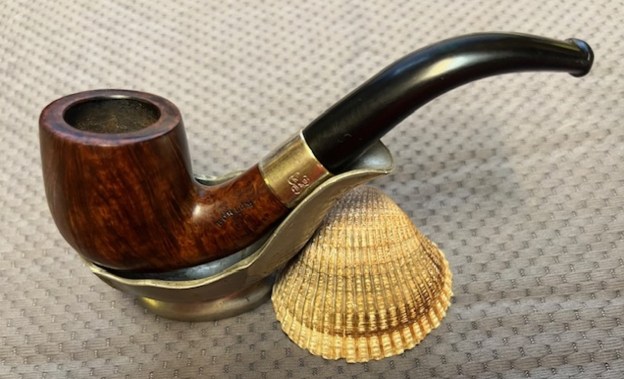
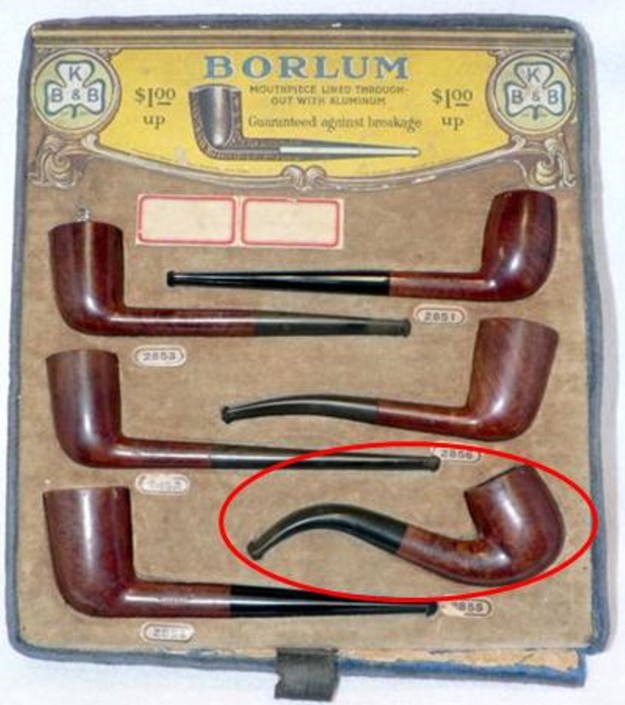
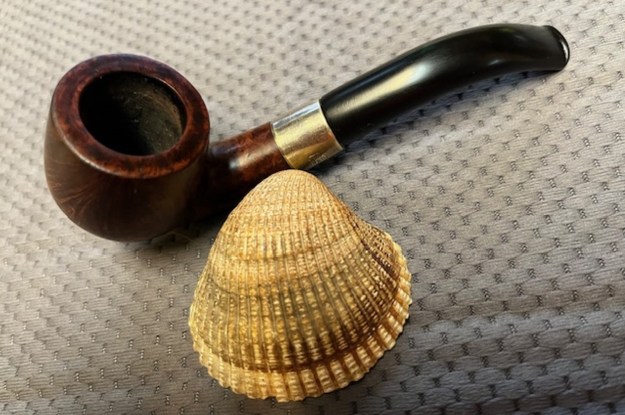
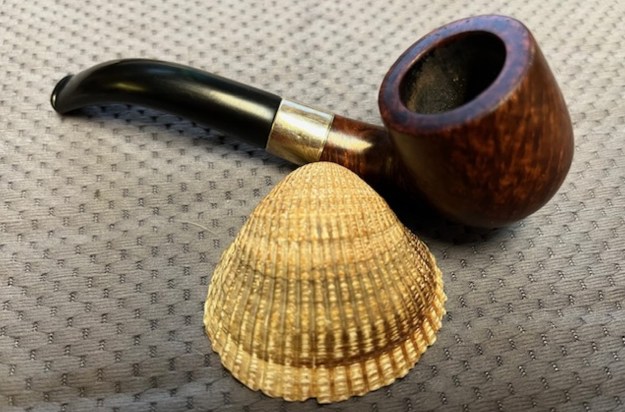
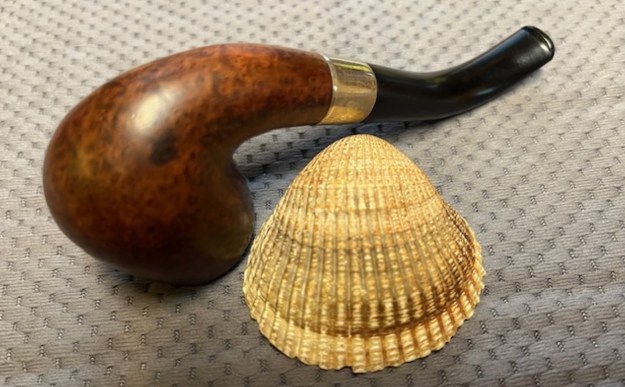
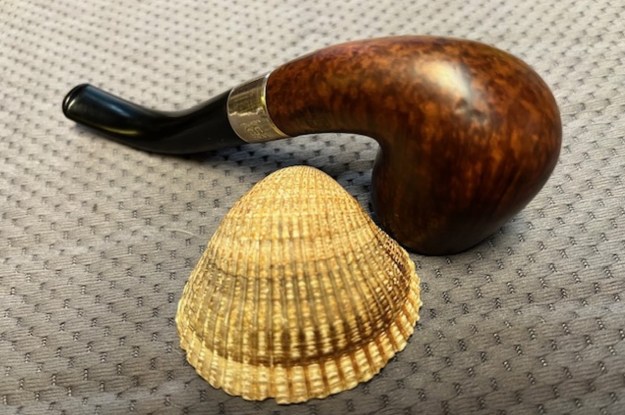
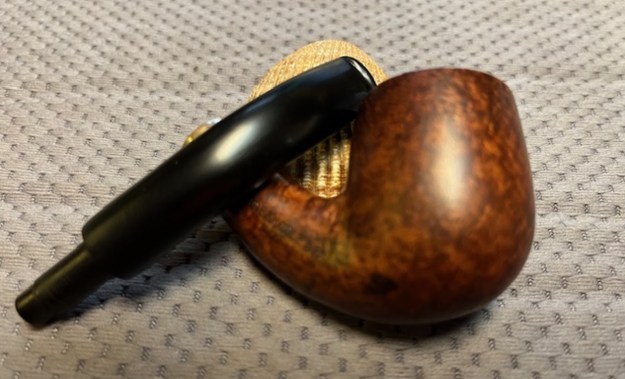
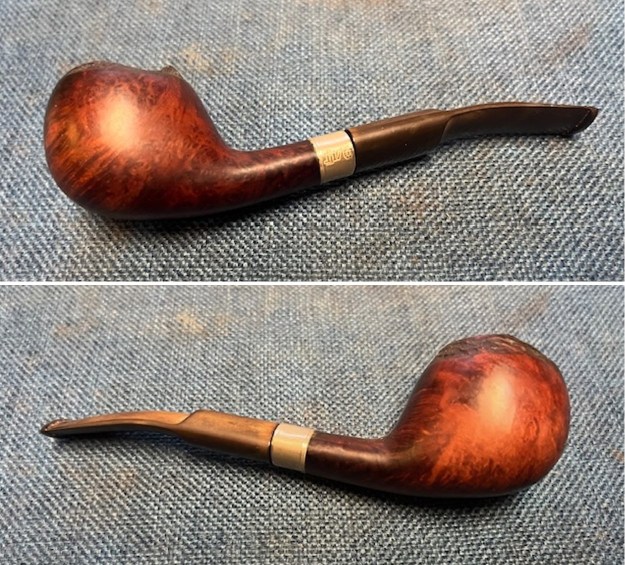
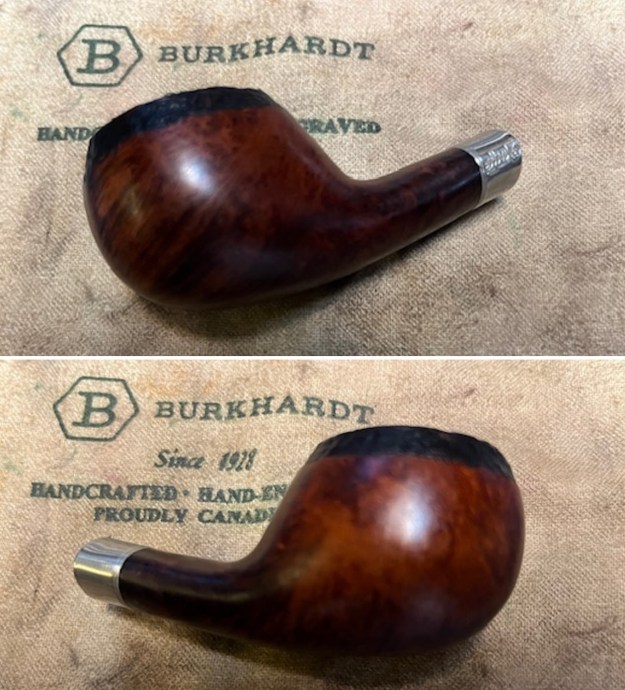
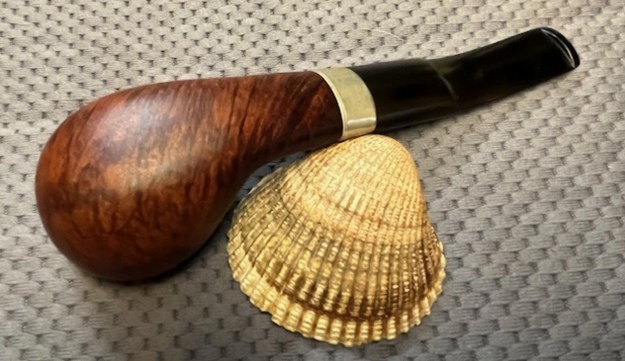
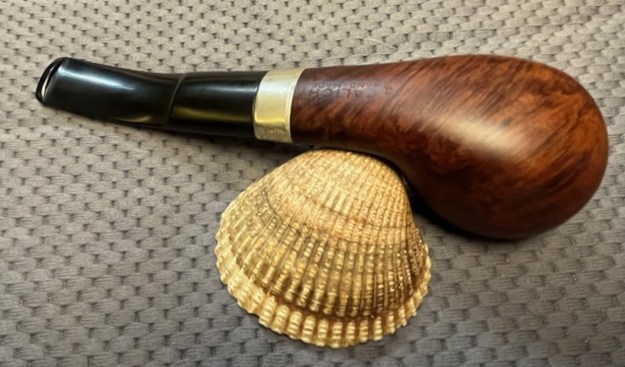
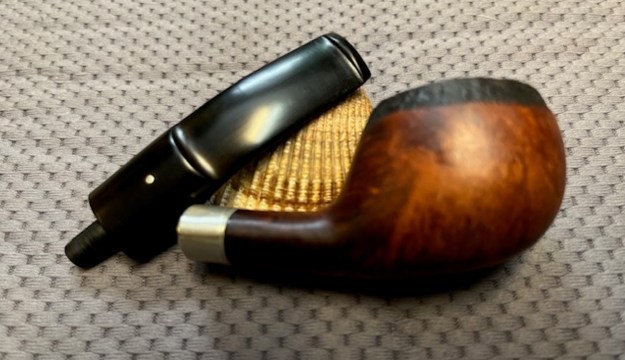
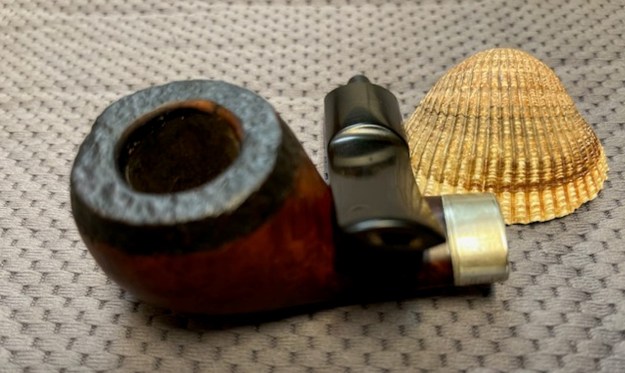
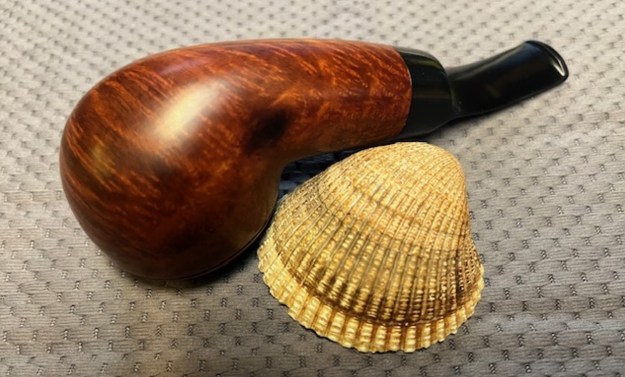
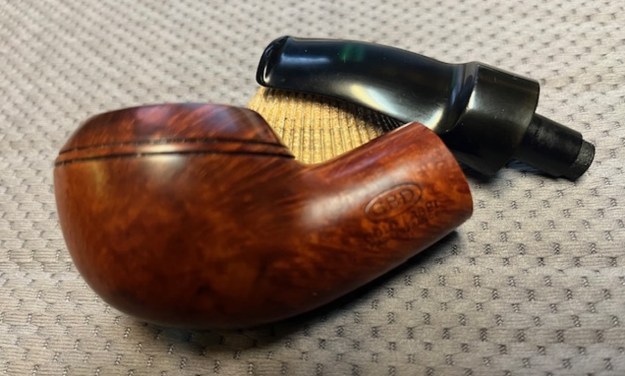
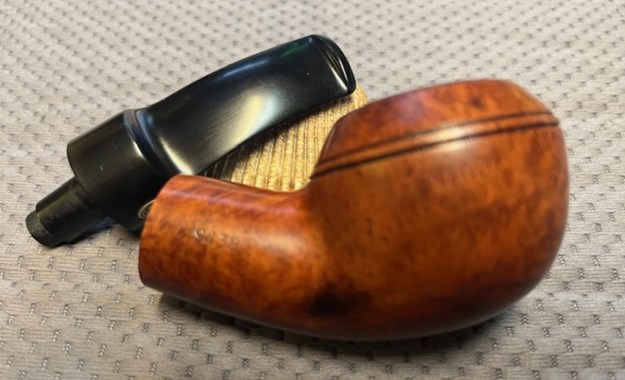
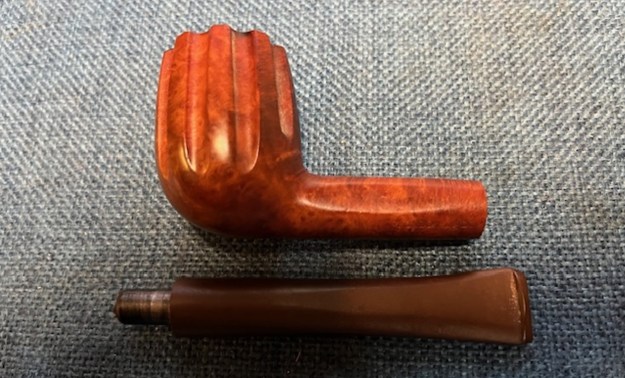
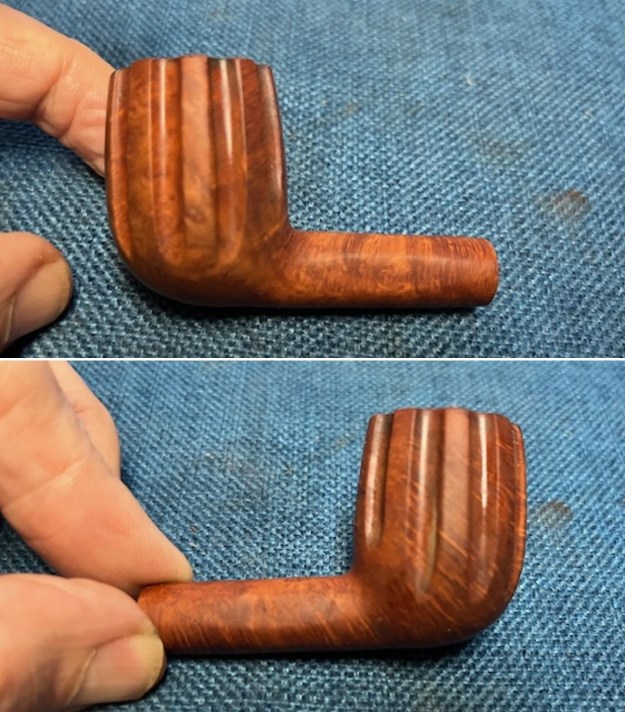
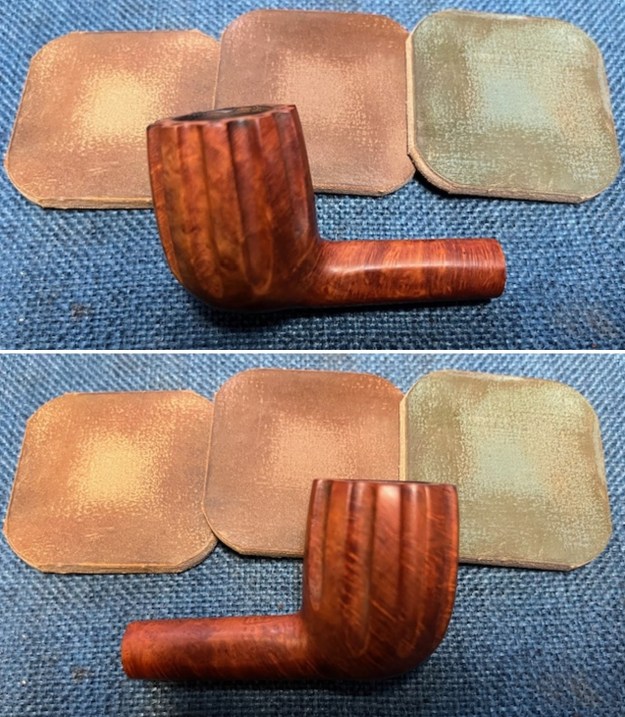
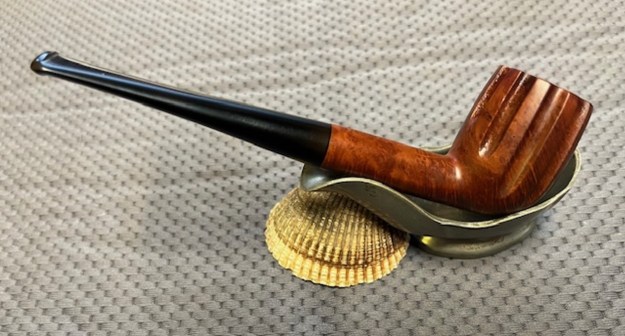
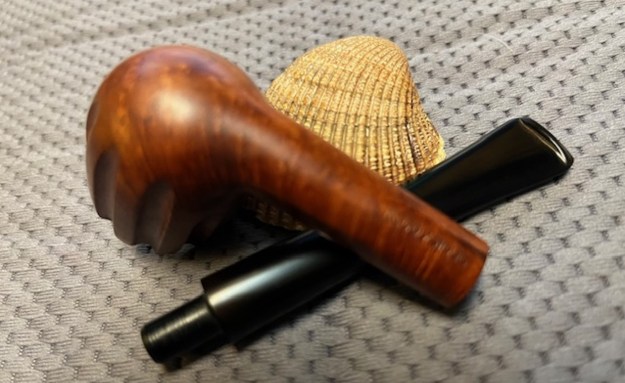
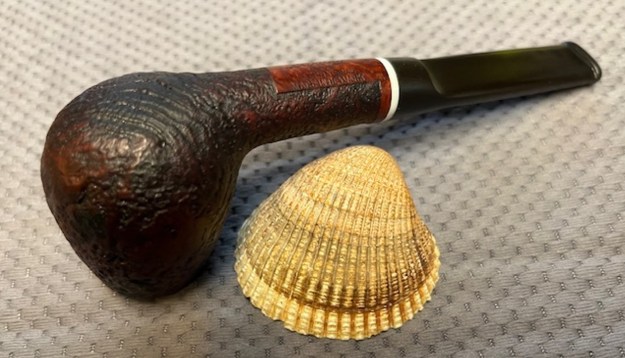
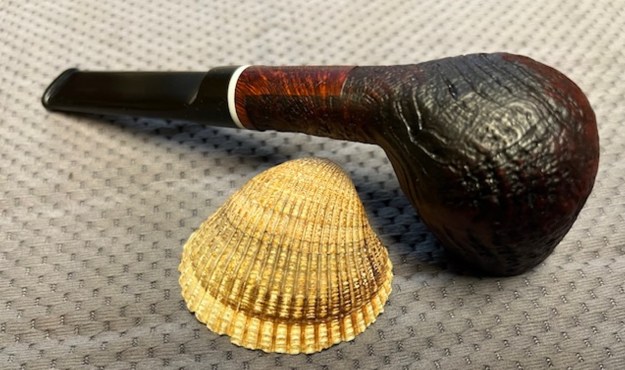
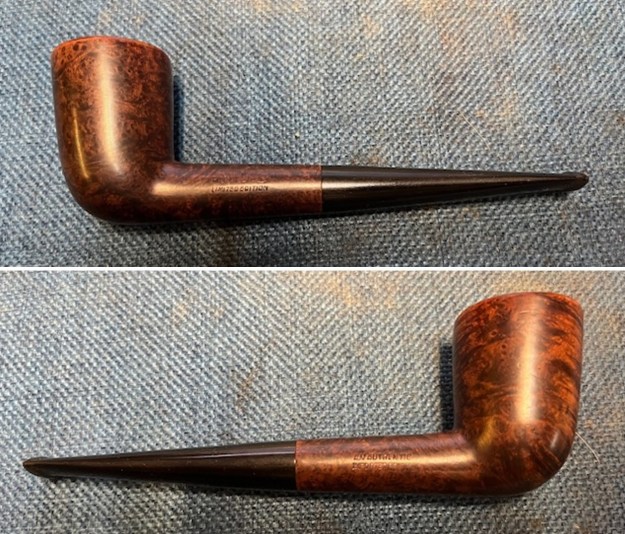
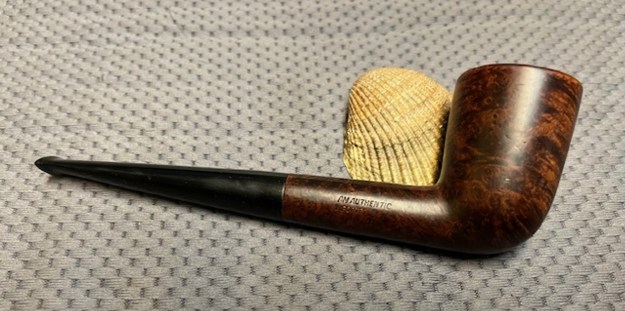
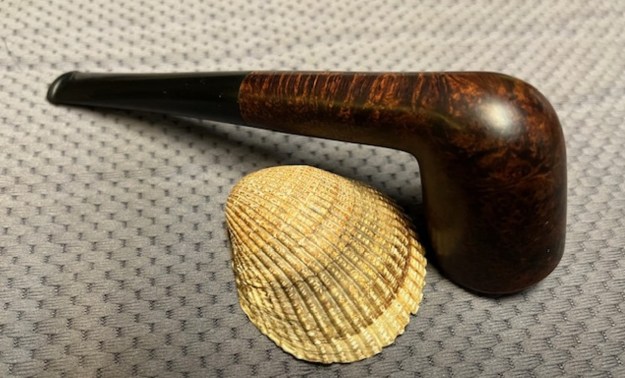
The next pipe I have chosen to work on is one that we picked up 04/16/2024 from a seller on Facebook Marketplace in Tacoma, Washington, USA. The pipe is an older style bent billiard with narrow vulcanite stem. The pipe is stamped on the left side of the shank with NEBPC in a pie shaped circle with a letter in each section. That is followed by Flagship in script [over] Algerian Bruyere. On the right side it is stamped with the shape number 14 at the bowl shank junction. The brand and stamping are the mystery to me. It is one I had not heard of before and had no idea of what the initials stand for. The smooth finish had some very nice grain but there was a lot of grime and oils ground into the finish around the bowl and the shank. The pipe was dirty but the rich stain highlighted the grain. There was a thick cake in the bowl overflowing in thick lava on the rim top. The inner edge looked quite good though the lava covered it. The outer edge was in good condition other than a nick on the left backside of the bowl. The stem is vulcanite and the shape and cut of the button leads me to think it is an older pipe. It has a stamp on the topside of the taper that is very hard to decipher with the oxidation and grime on the surface. It was oxidized and had tooth chatter and tooth marks on the top and underside ahead of the button. The marks on the stem next to the button lead me to wonder if the stem had been cut off and a new button cut. I am uncertain but probably will never know. The pipe showed a lot of promise but it was a mess. I took pictures of the pipe before I did my clean up work.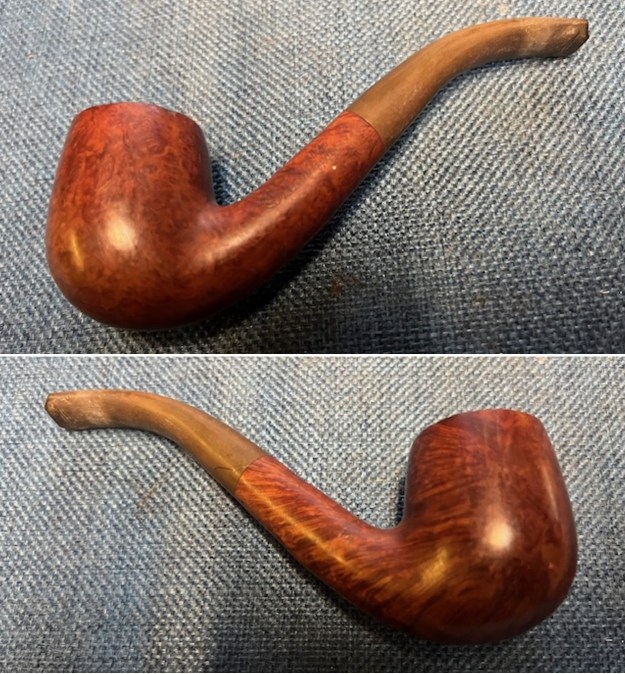
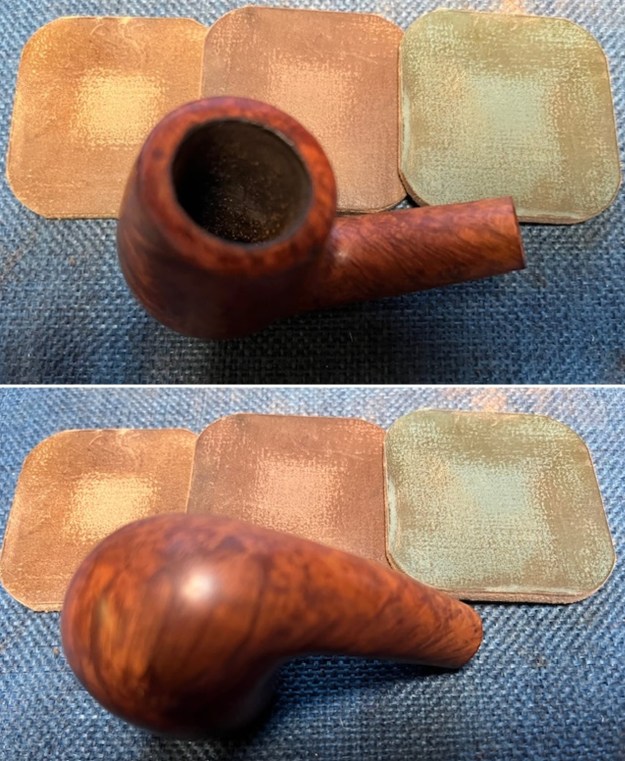
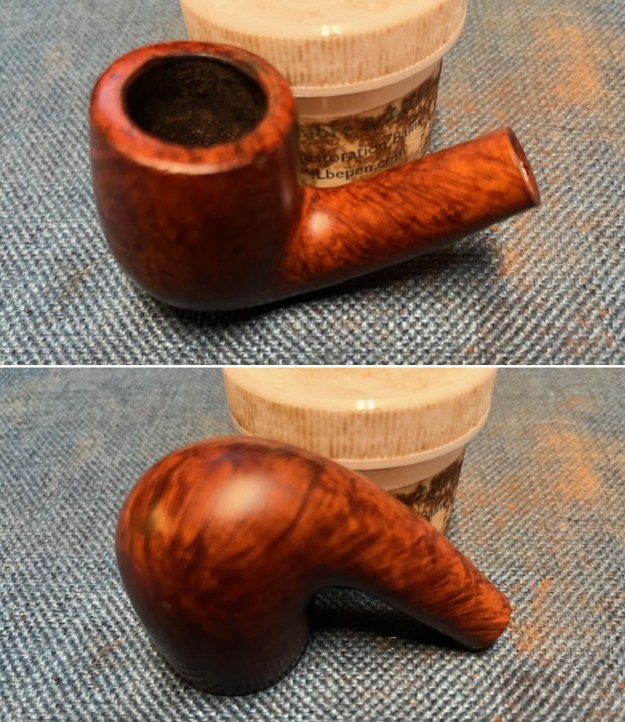
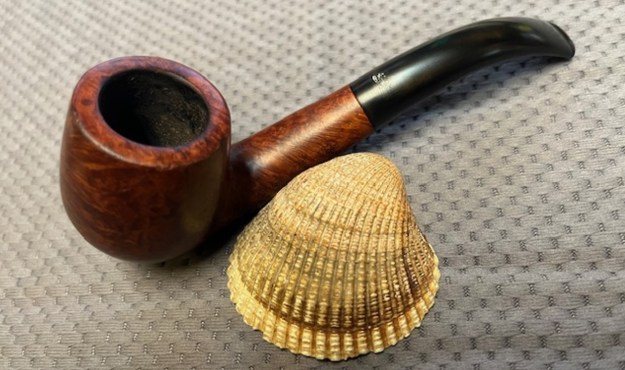
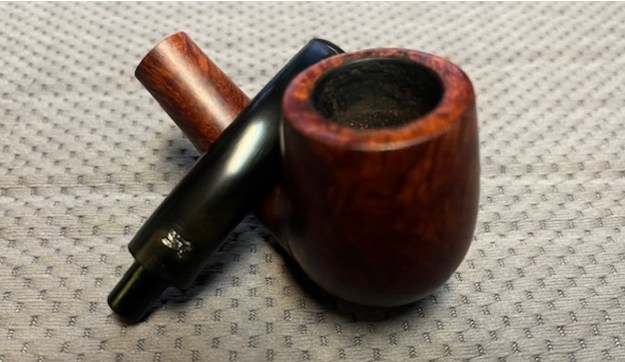
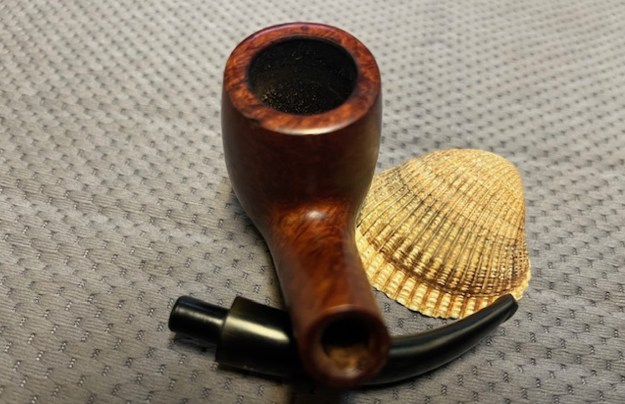
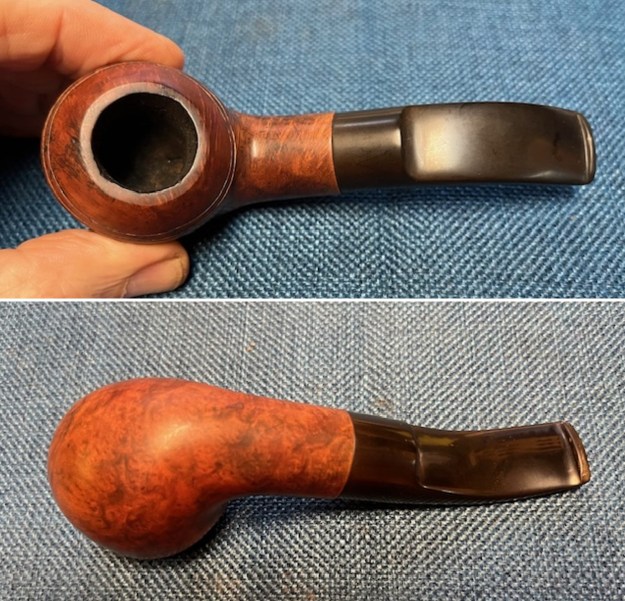
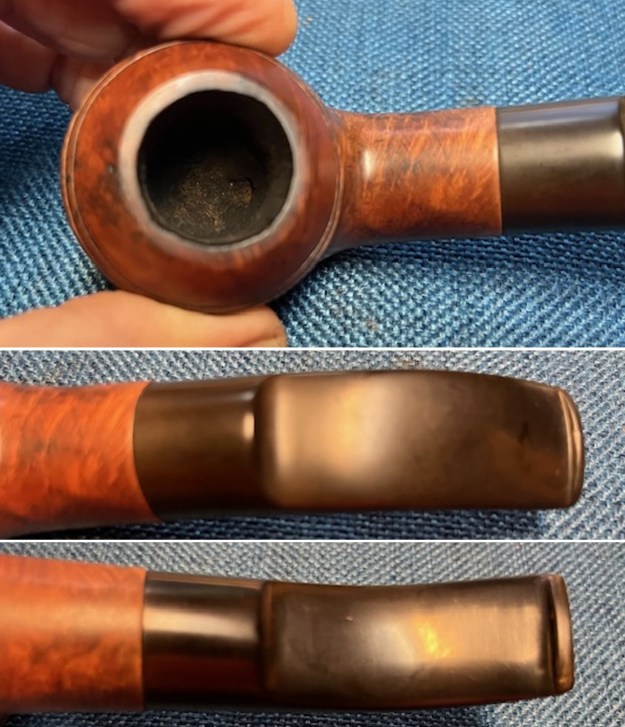
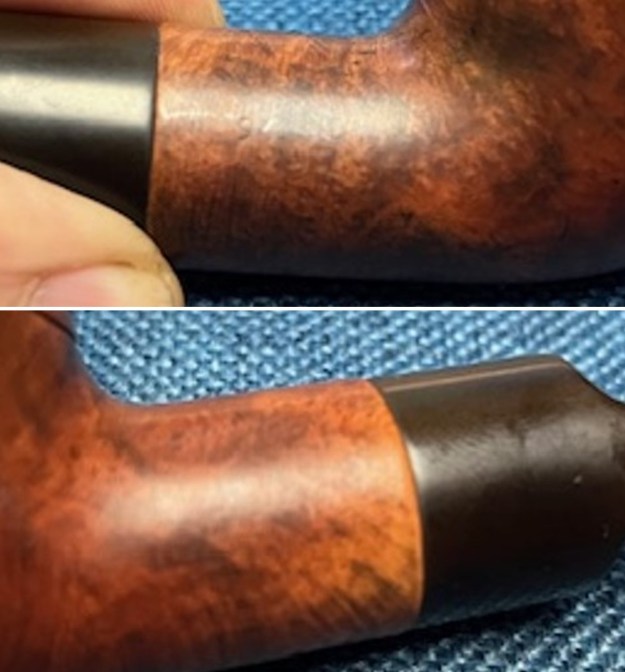
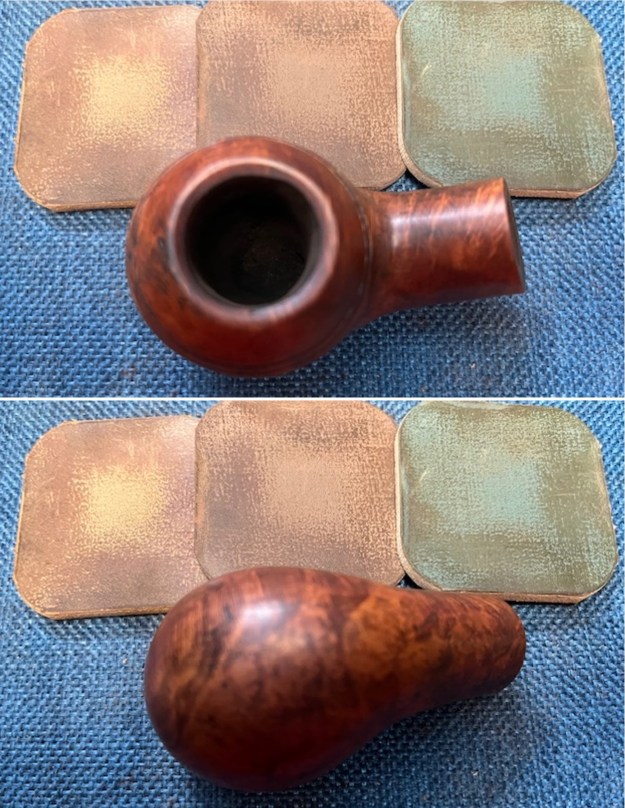
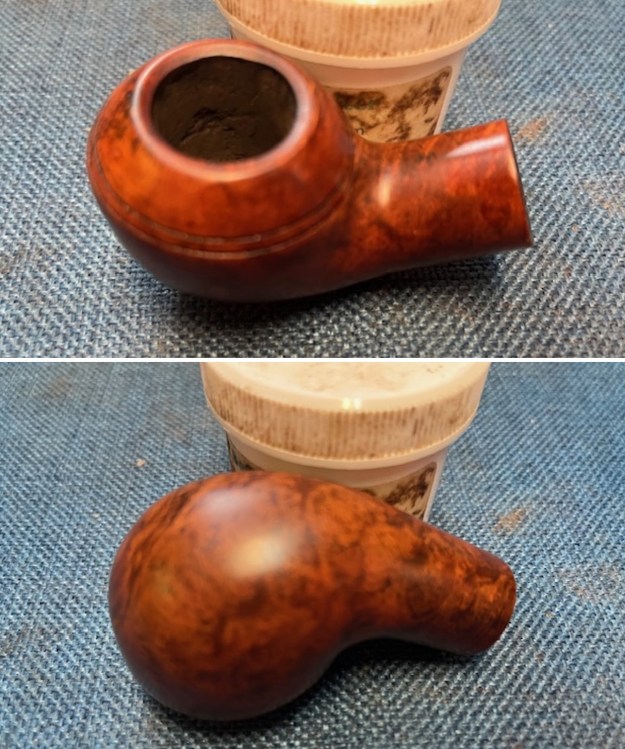
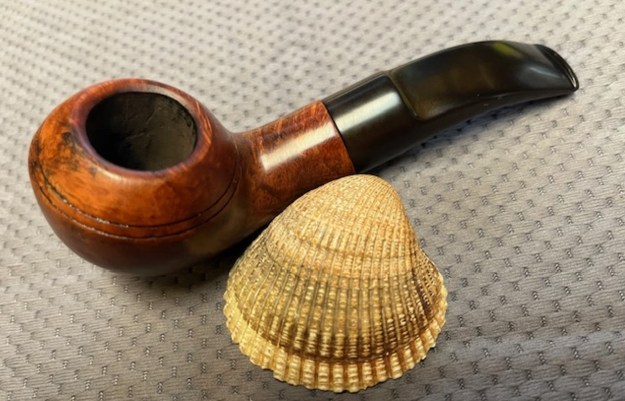
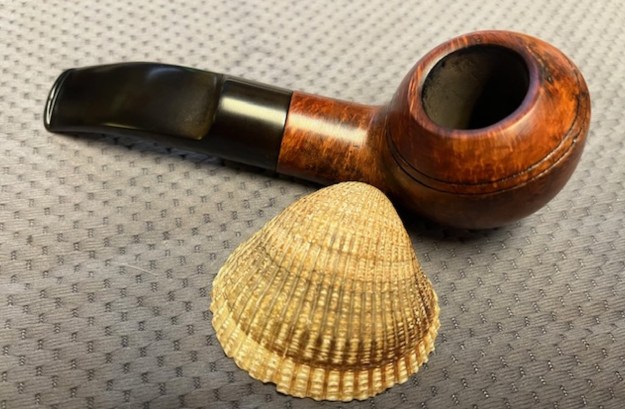
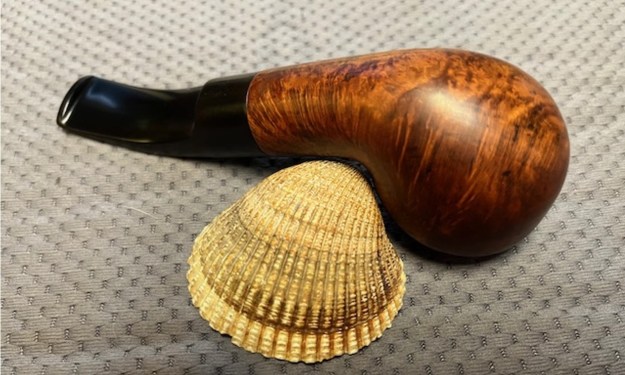
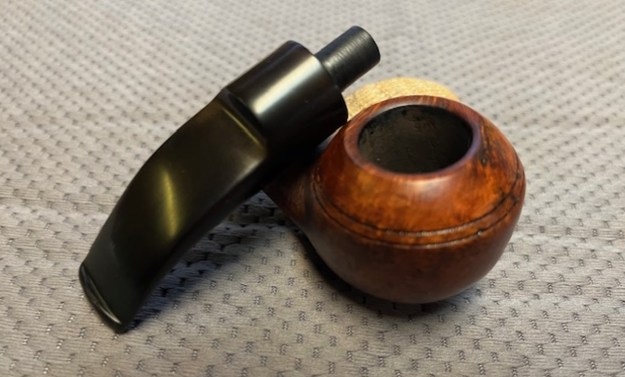
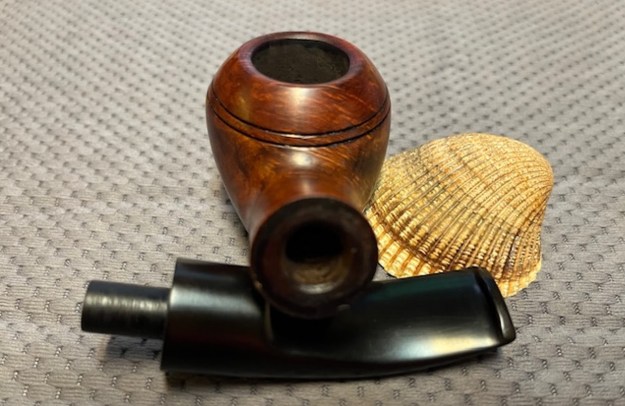
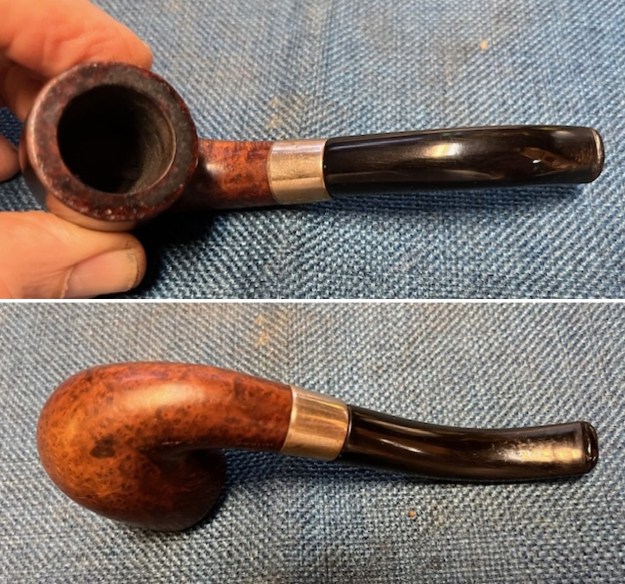
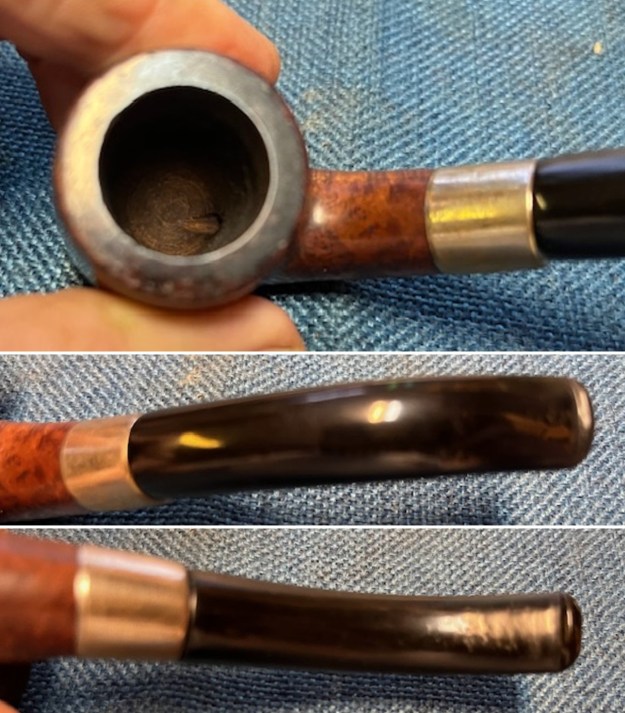
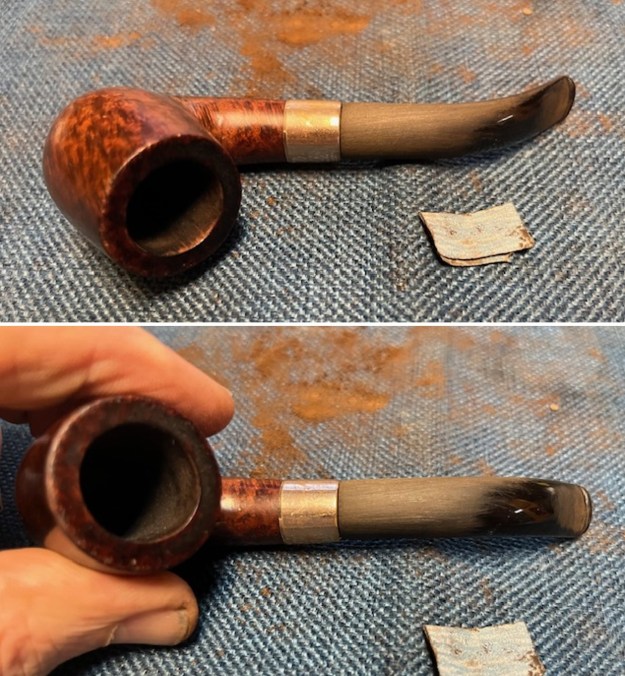
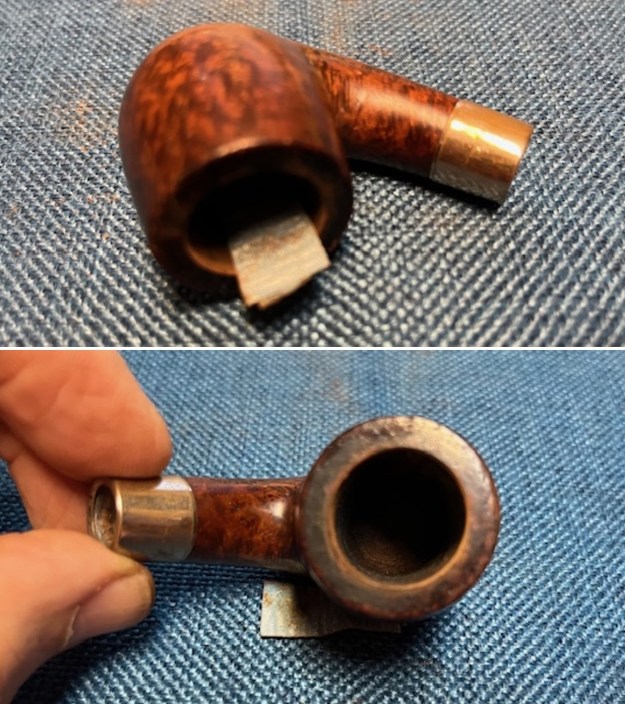
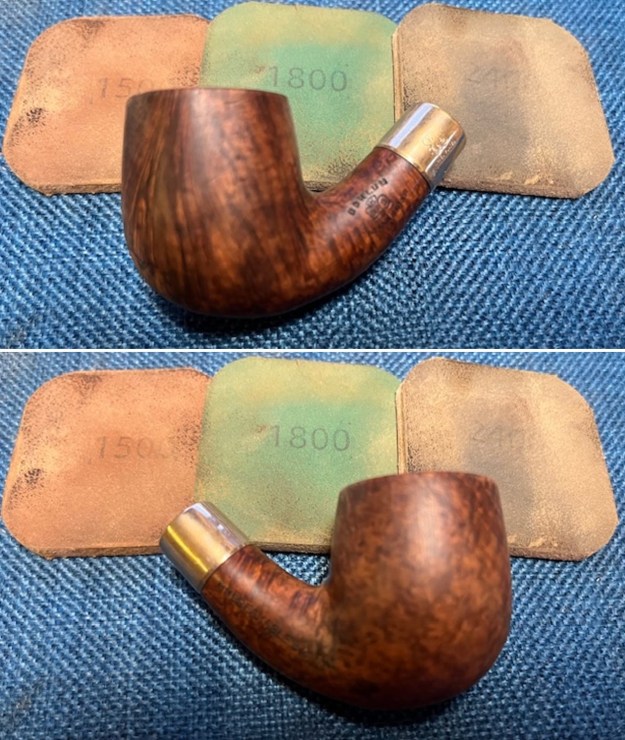
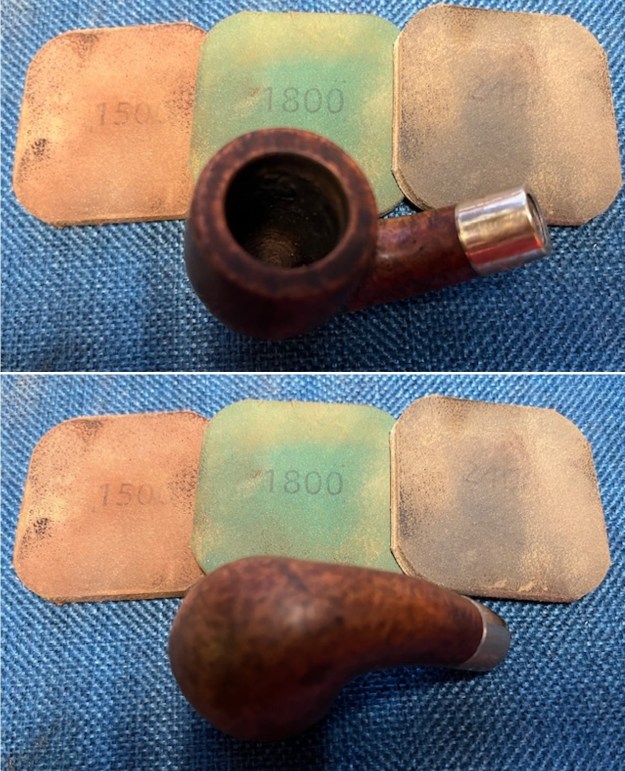
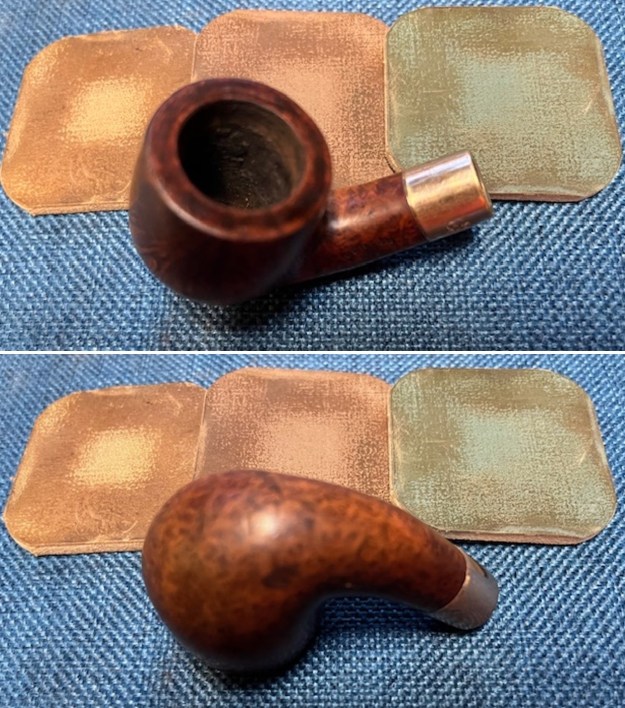
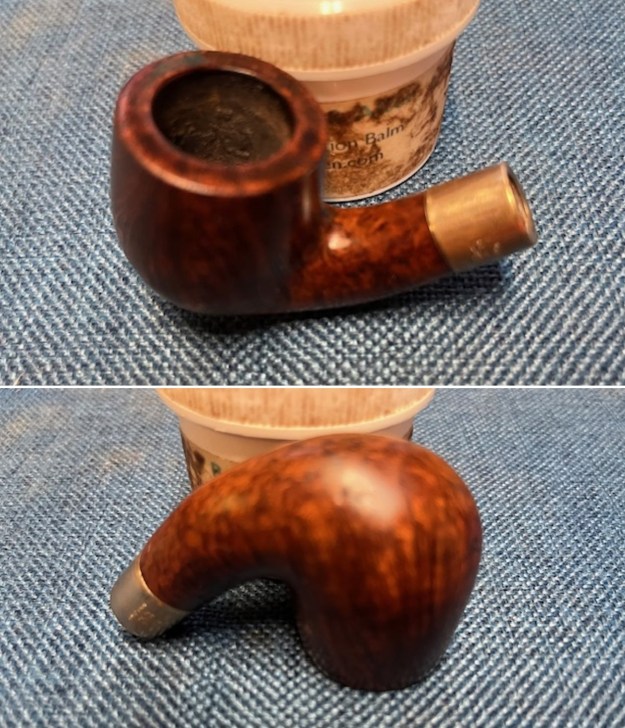
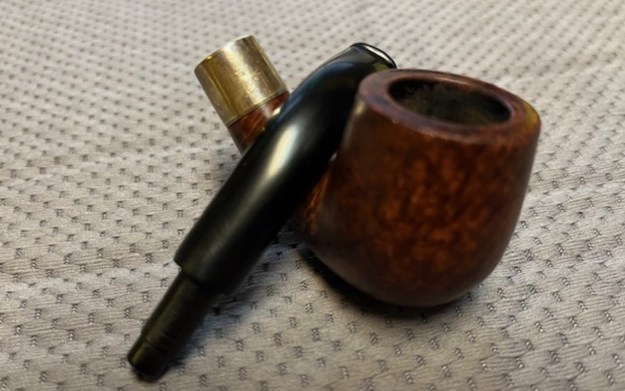
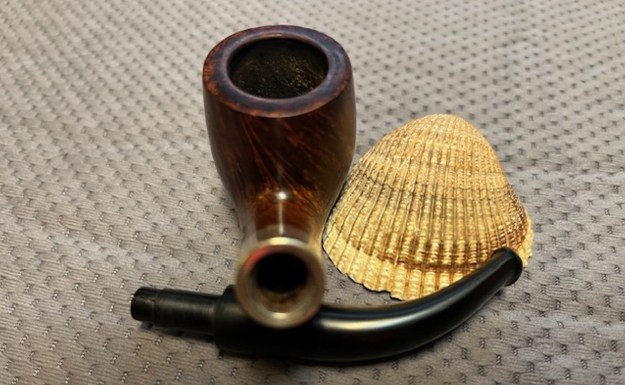
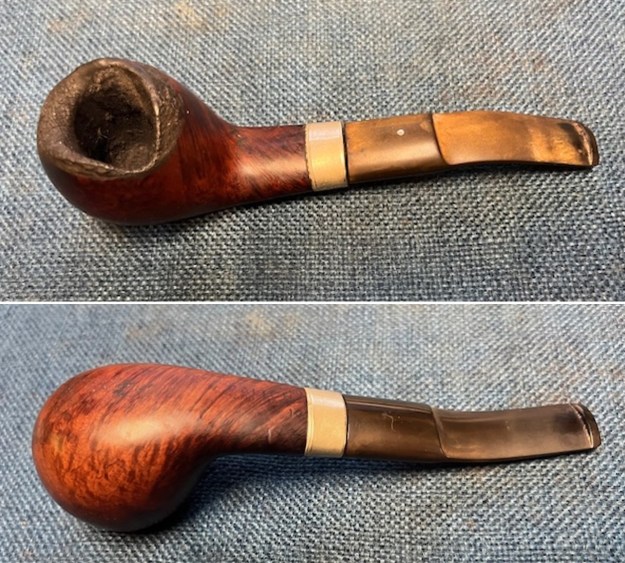
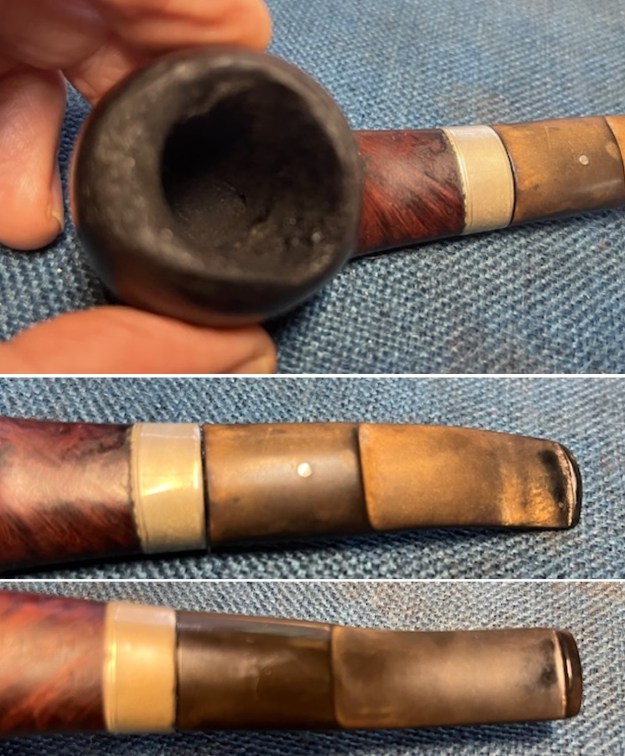
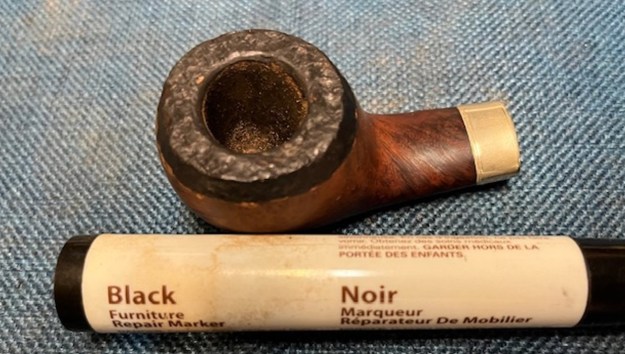
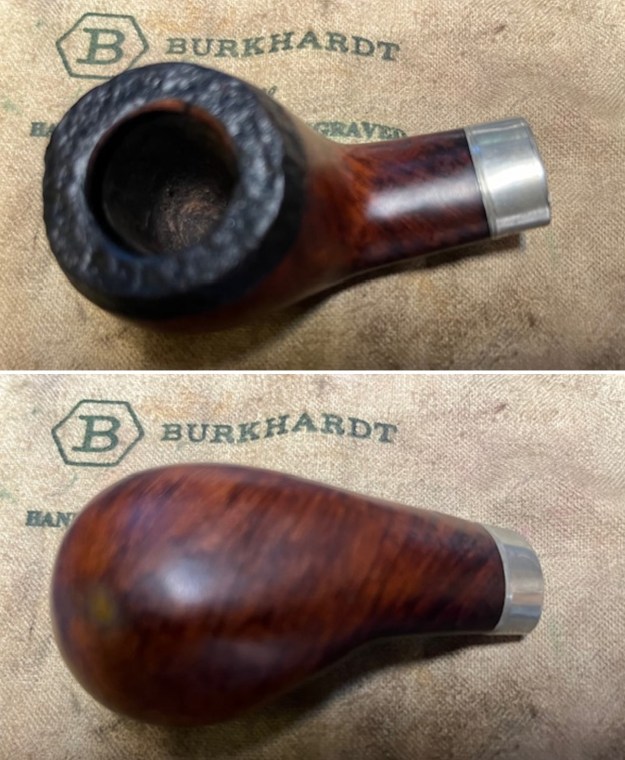
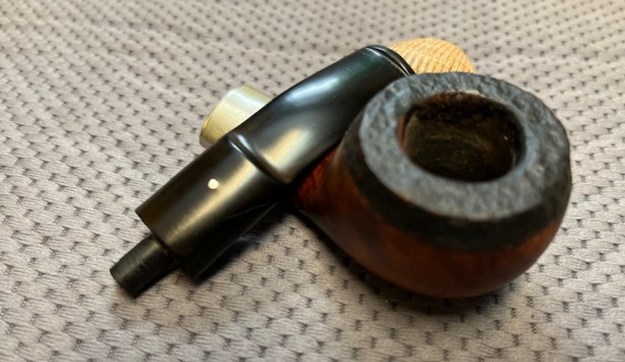
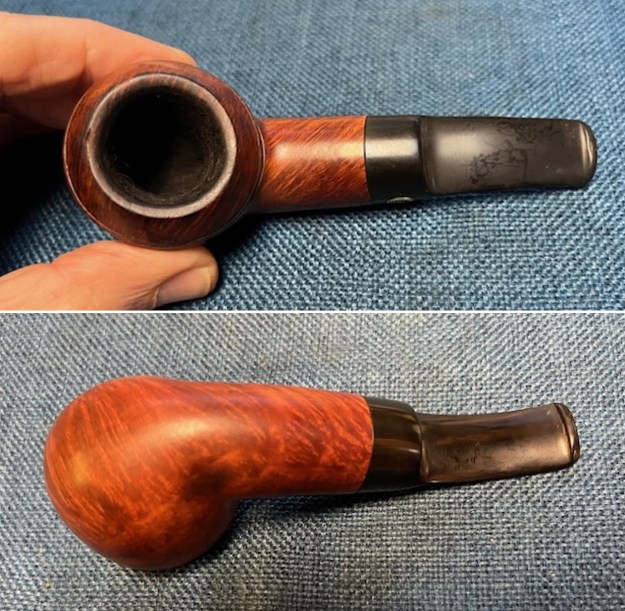
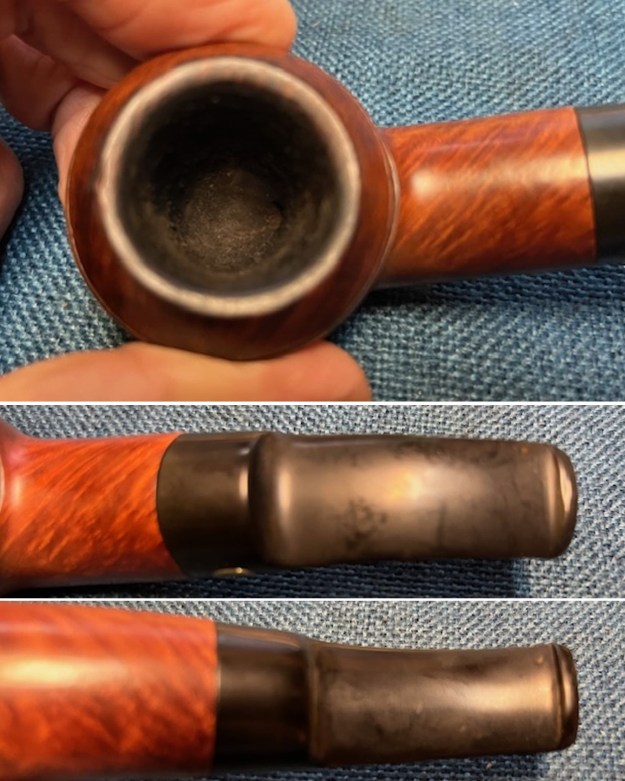
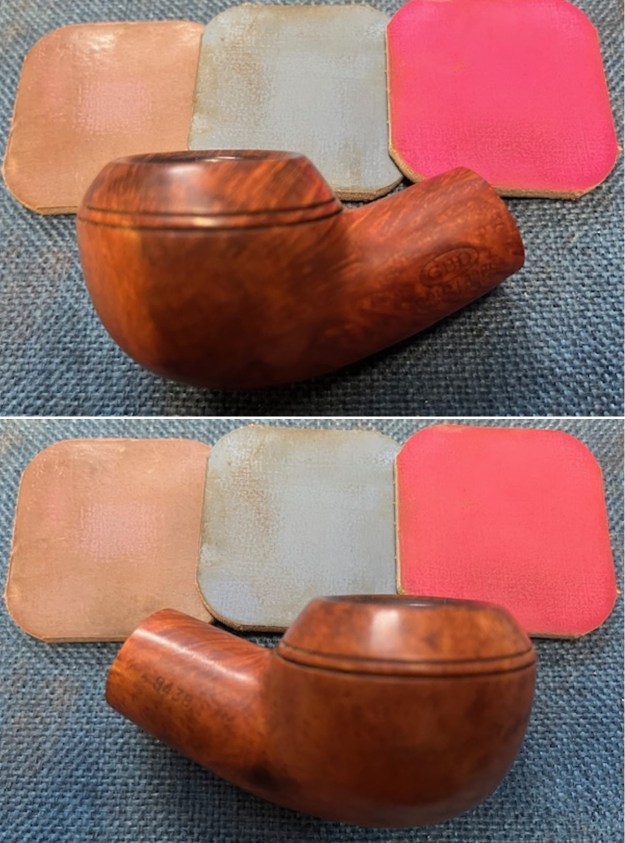
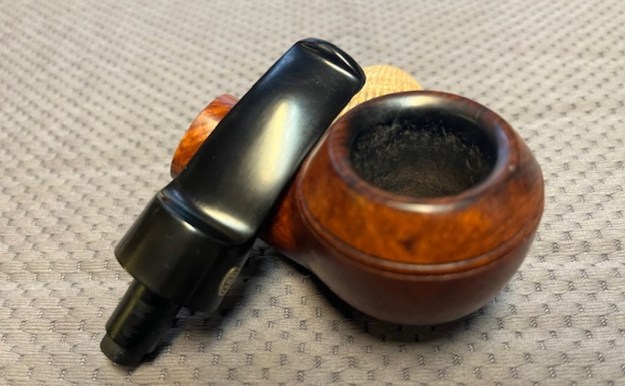
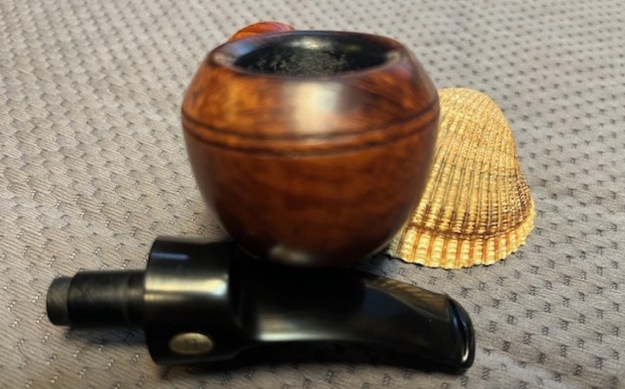
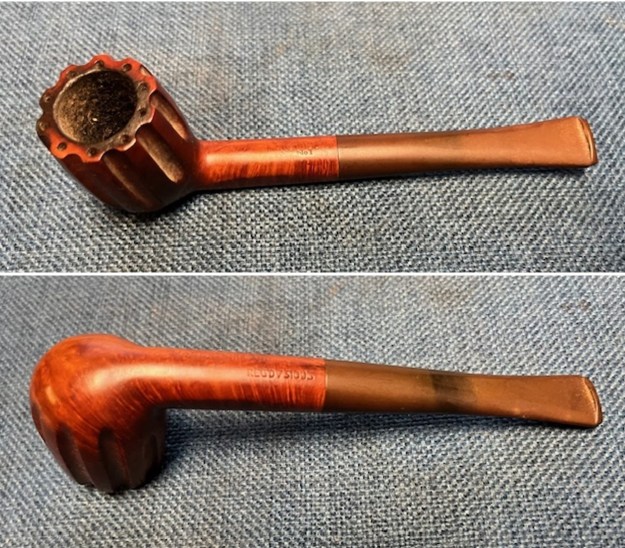
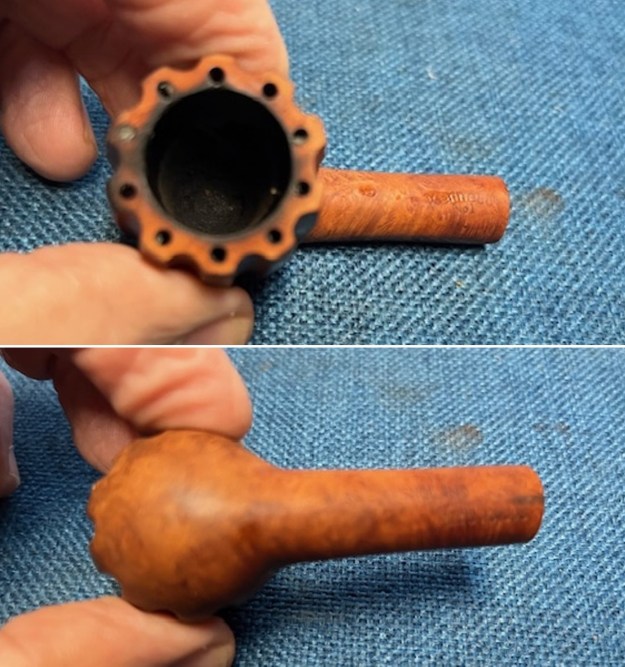
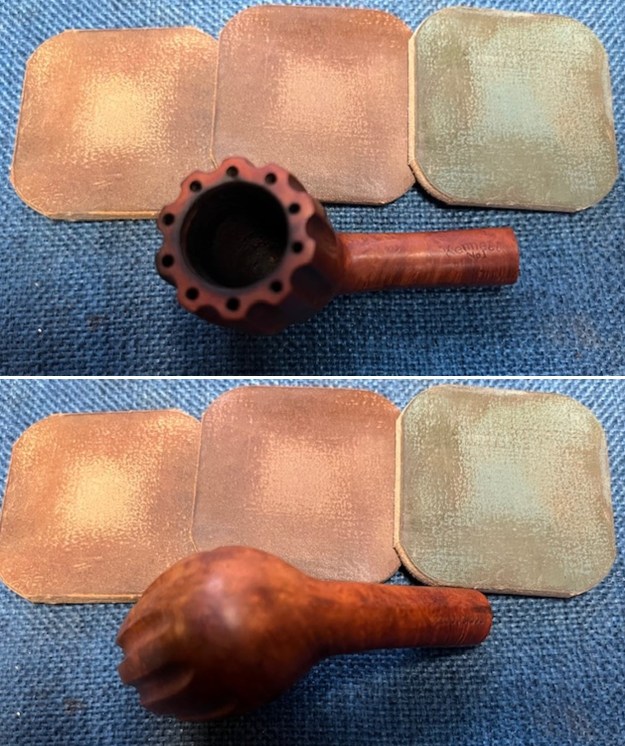
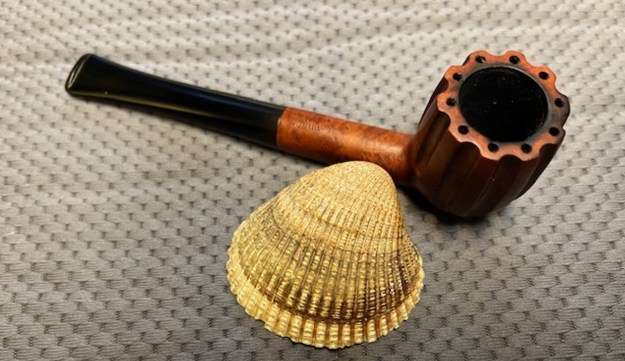
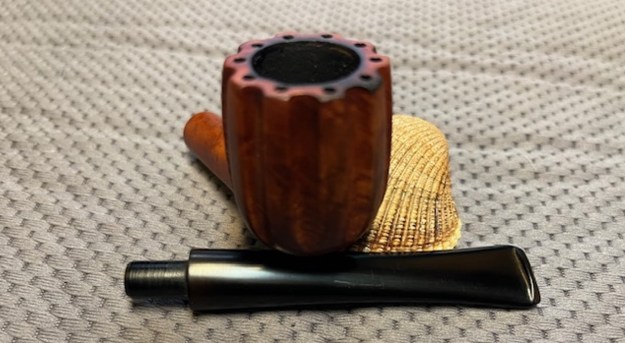
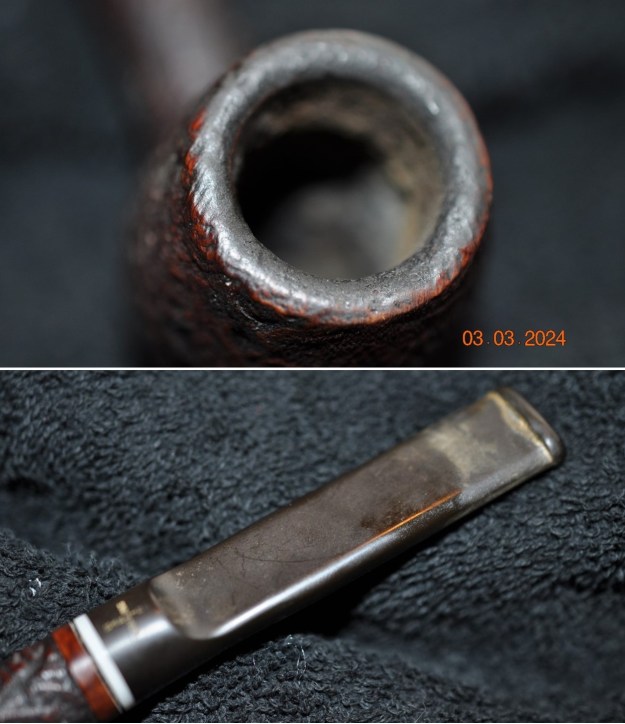
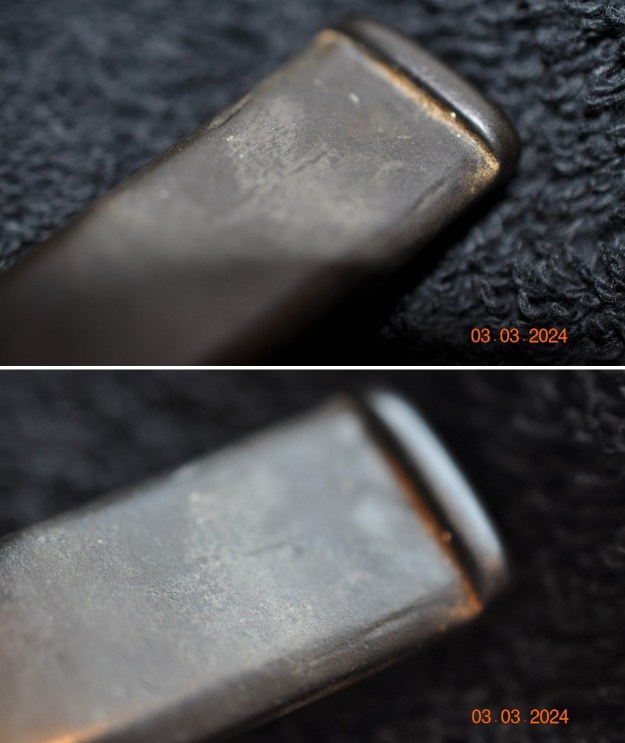
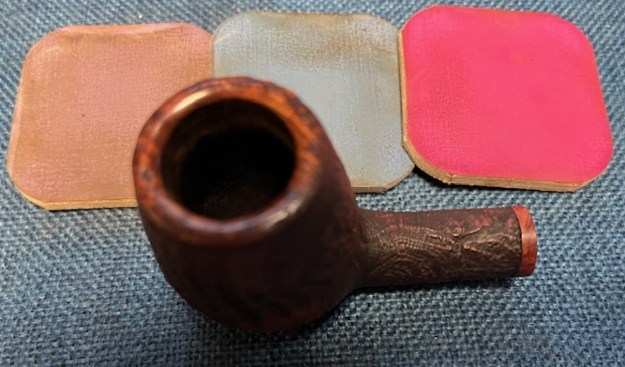
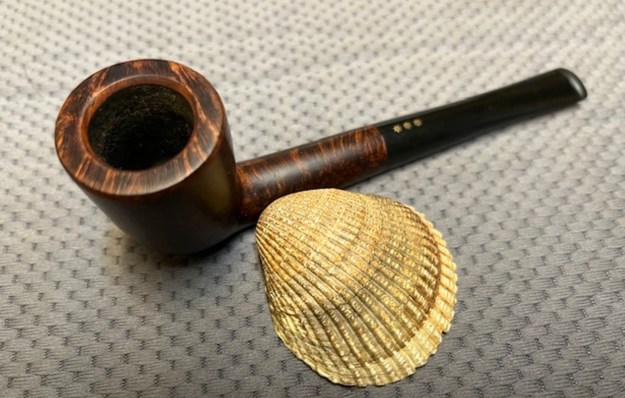
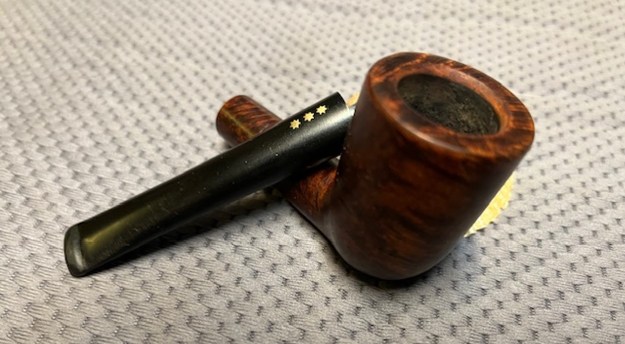
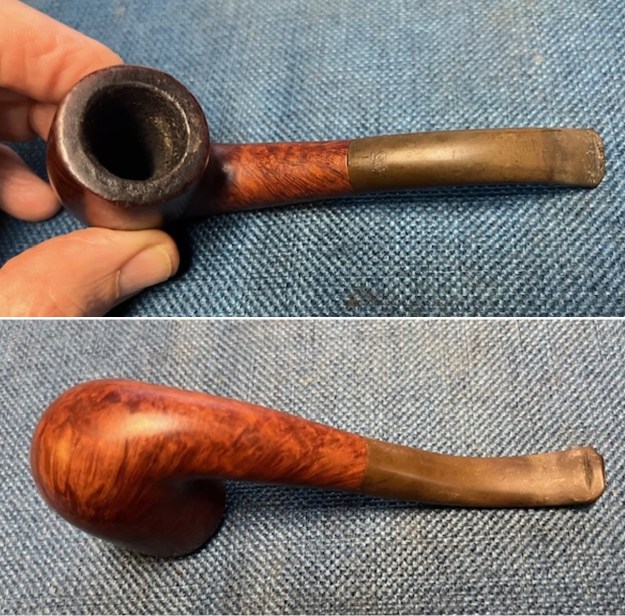 I took photos of the rim top and bowl as well as the stem surfaces to show the condition of the well smoked pipe. You can see the thick cake in the bowl and the lava on the inner edge and rim top. There is also some roughening on the inner edge but the out edge looked good. There was a small nick in the outer edge on the left backside. The stem was oxidized, calcified and had scratches, tooth chatter and marks on both sides ahead of the button.
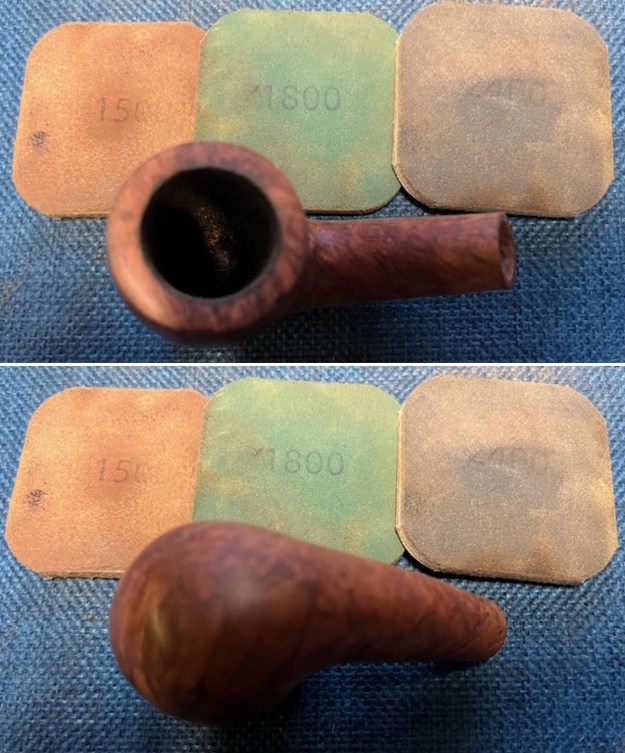
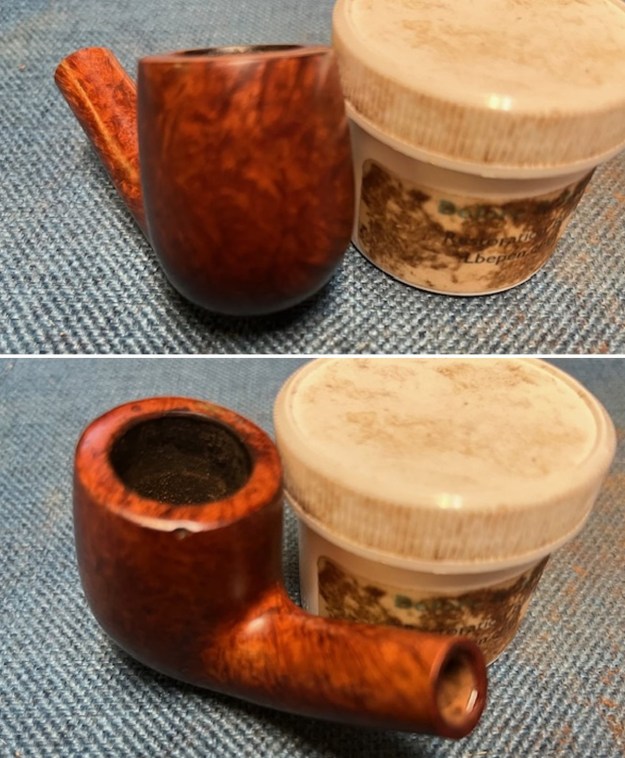
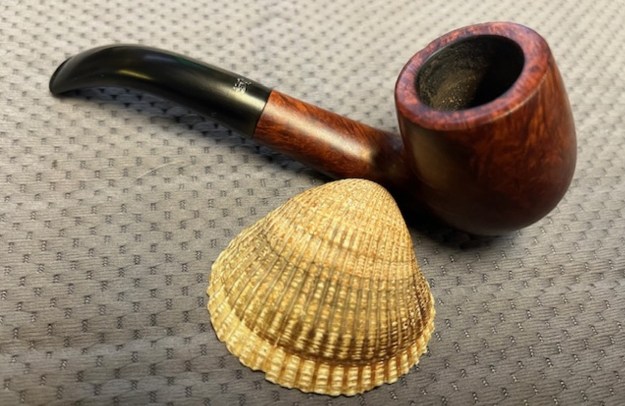
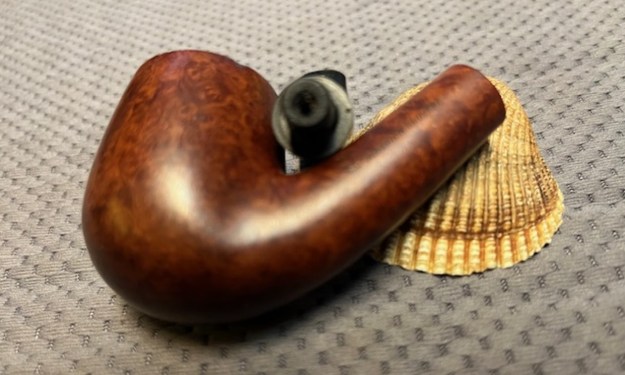
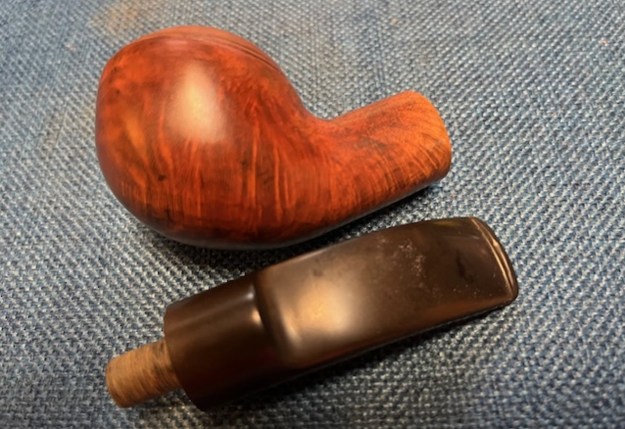
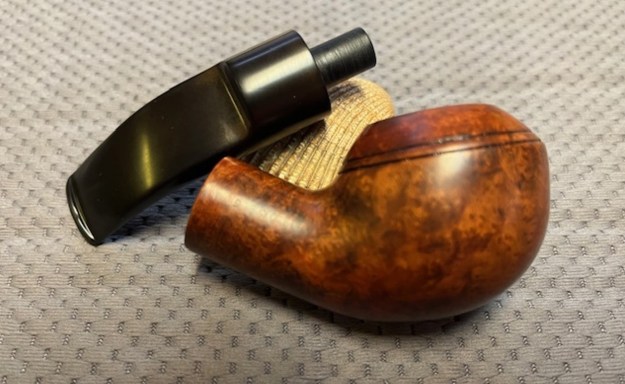
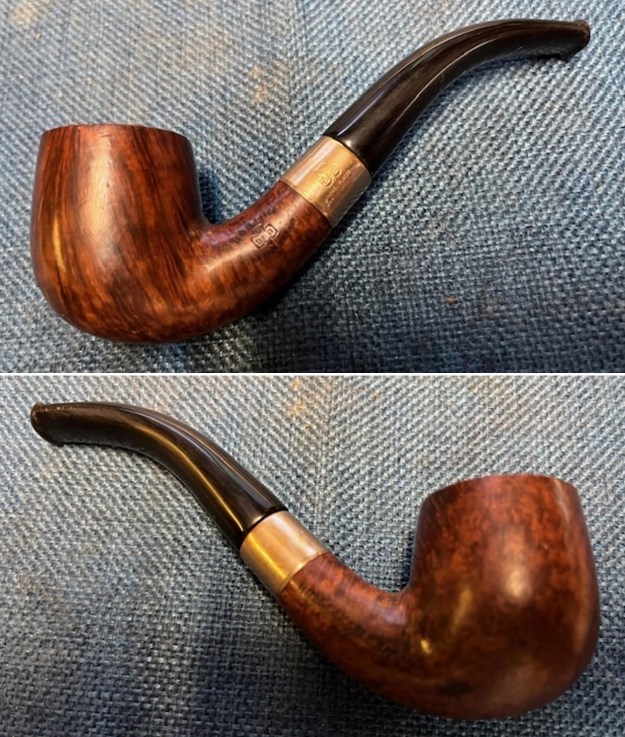
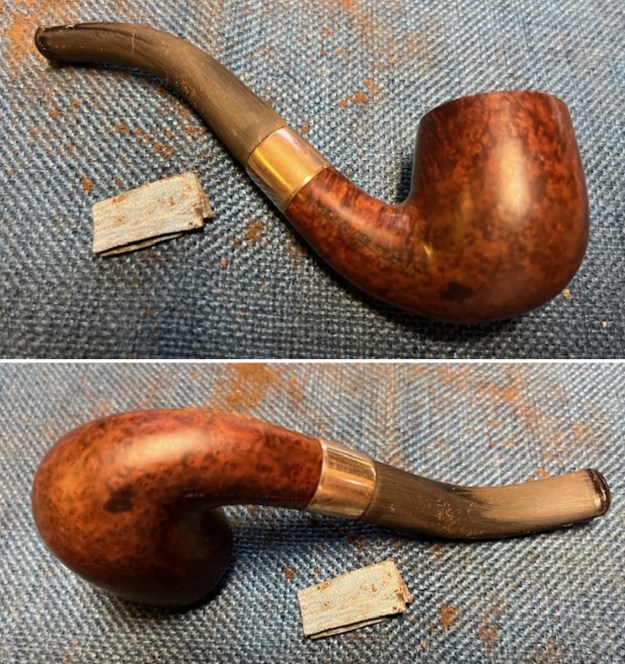
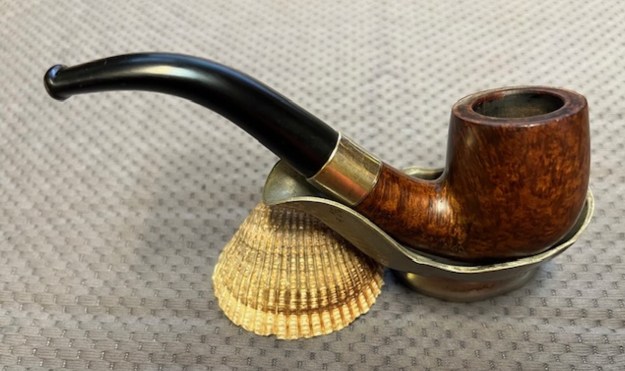
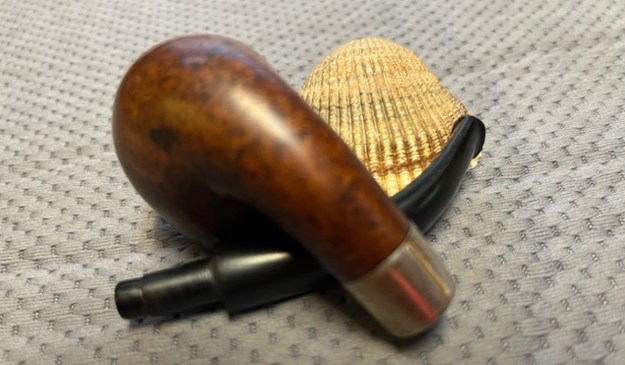
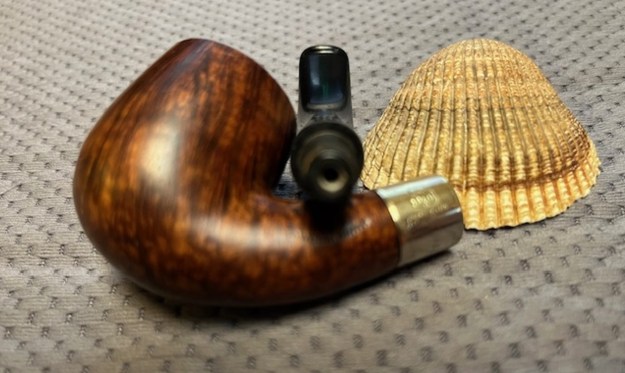
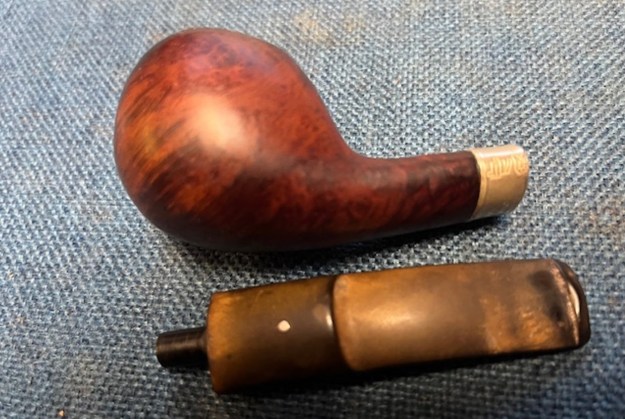
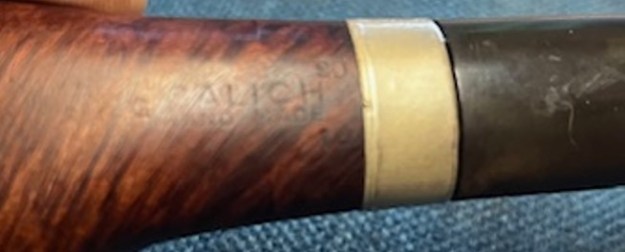
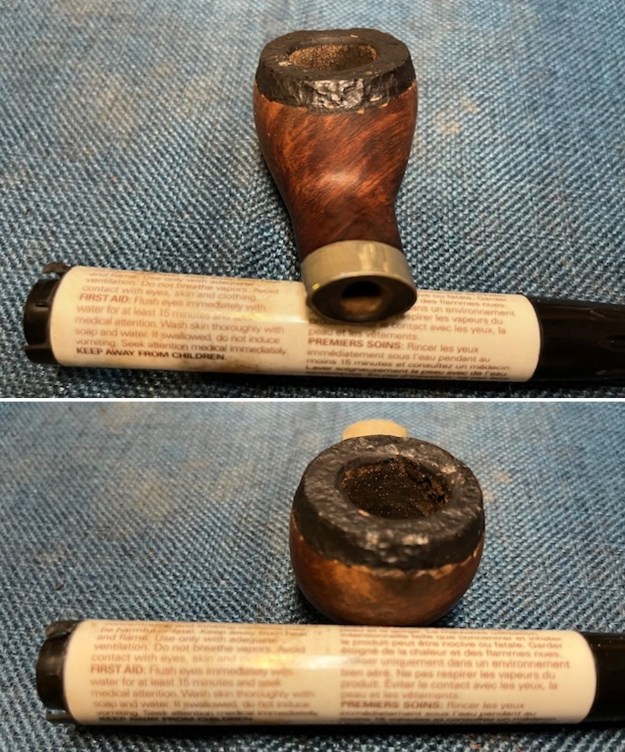
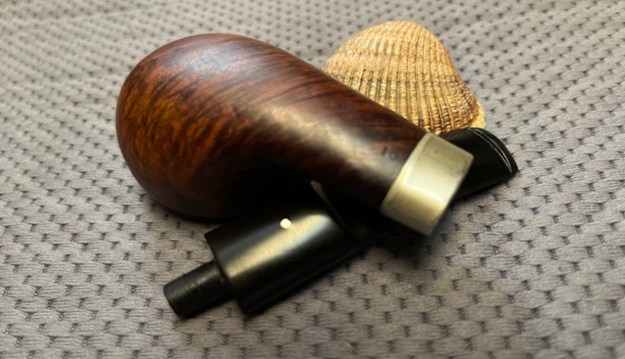
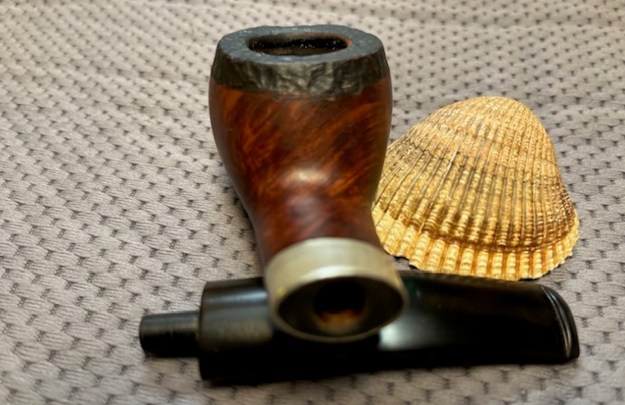
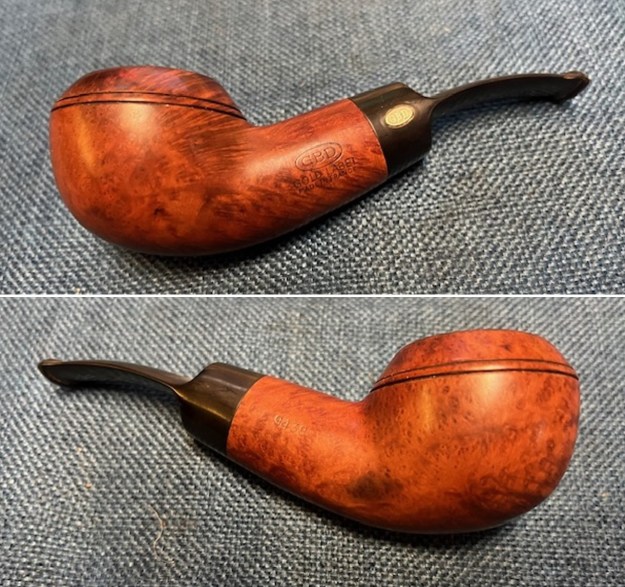
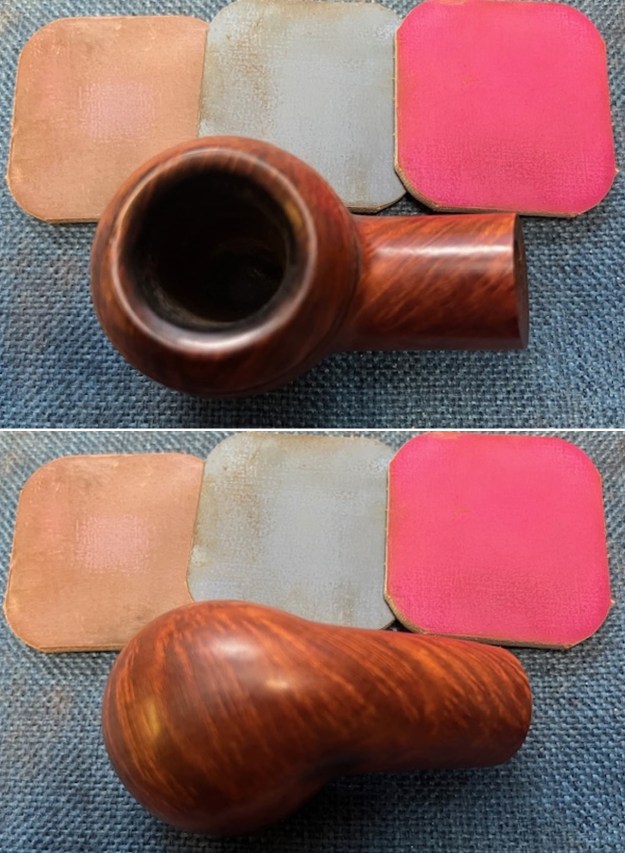
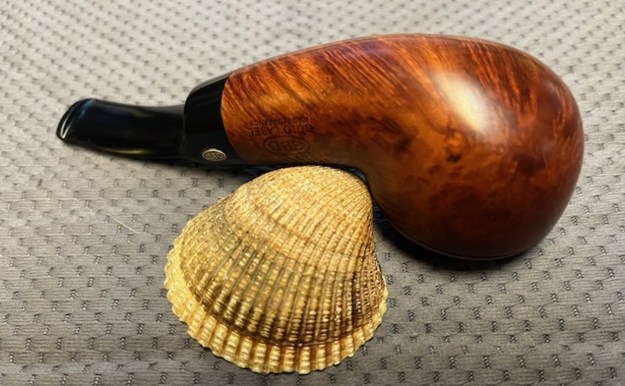
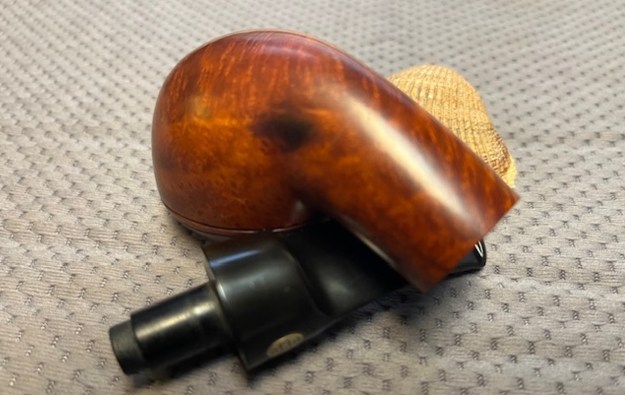
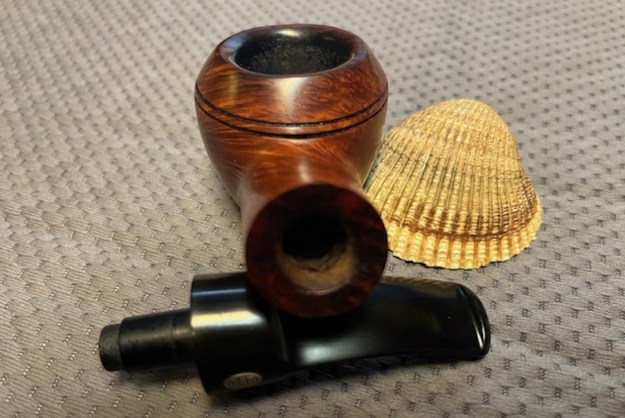
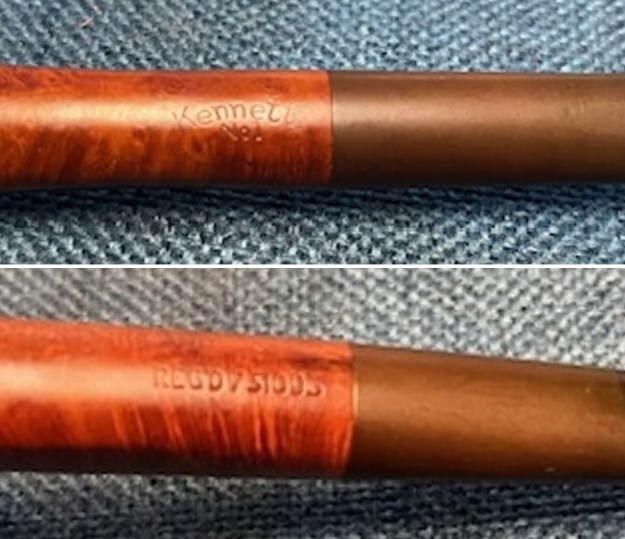
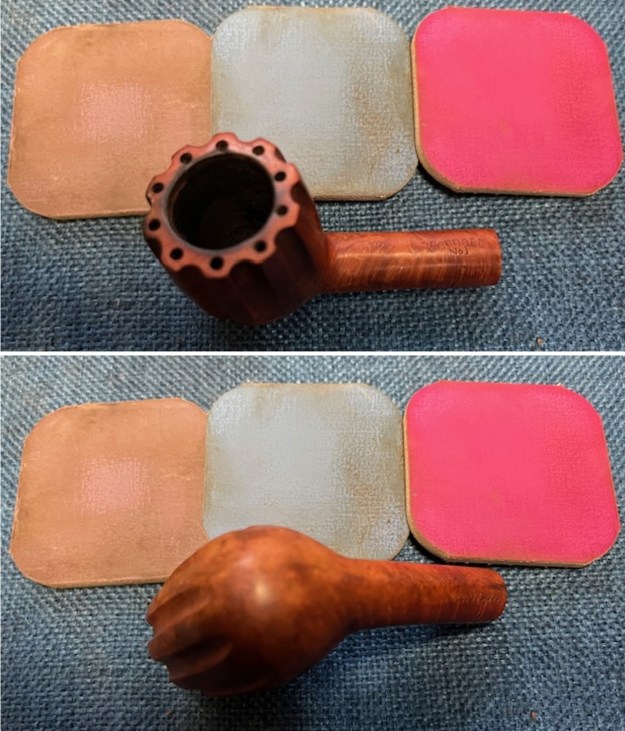
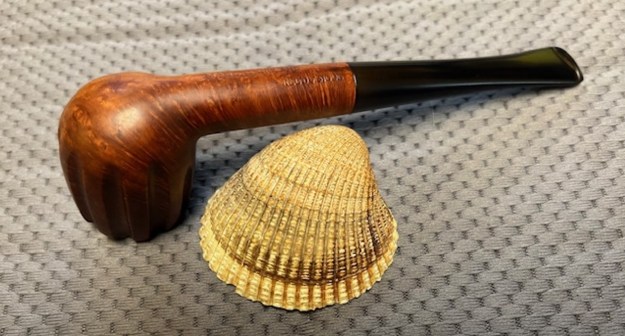
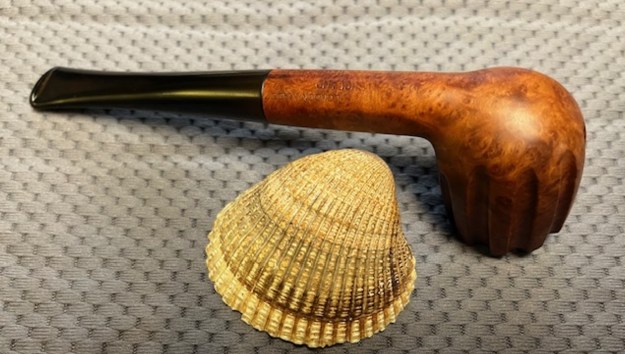
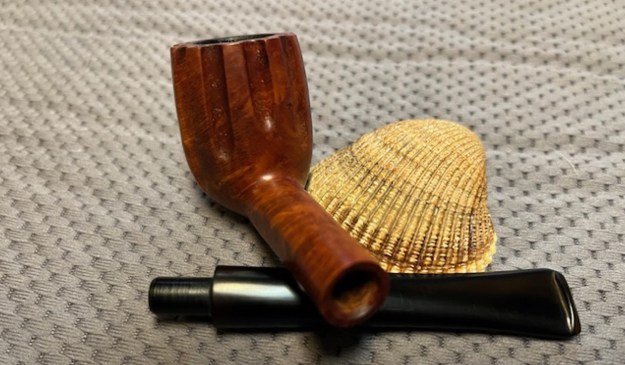
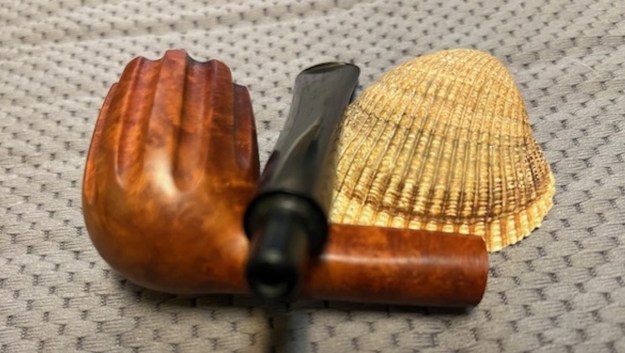
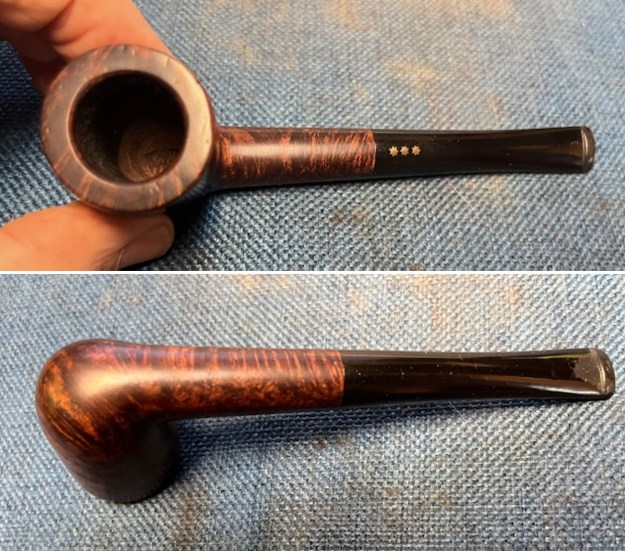
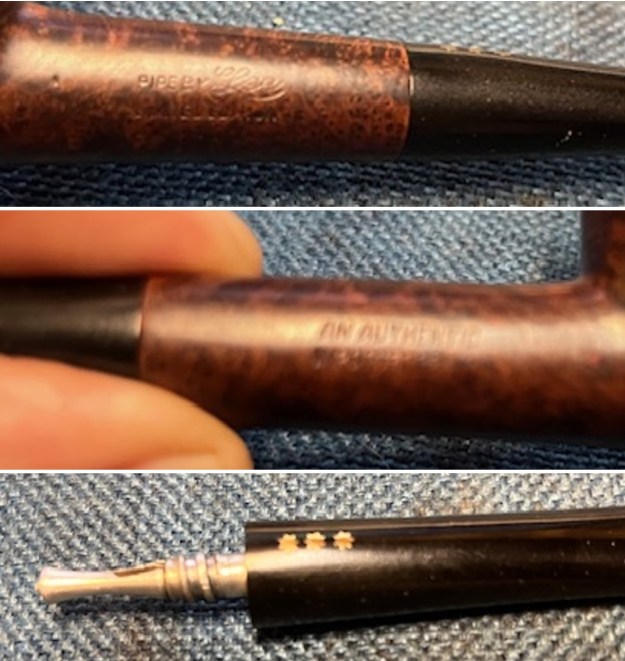
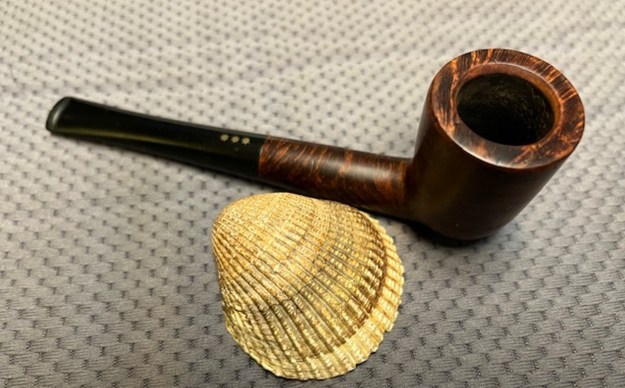
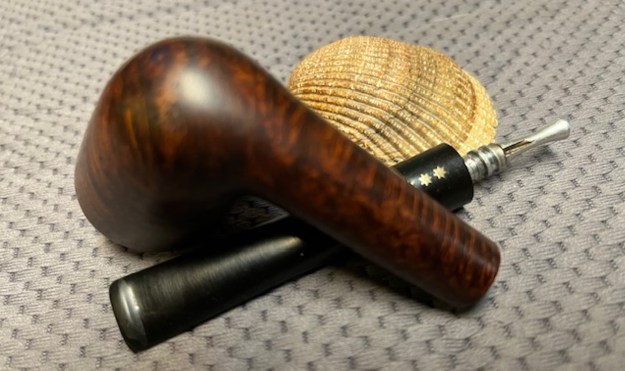
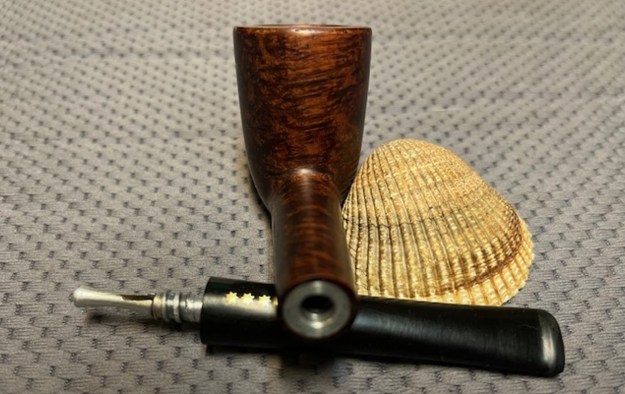
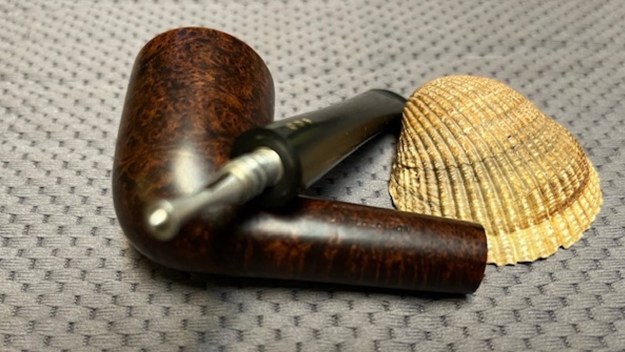
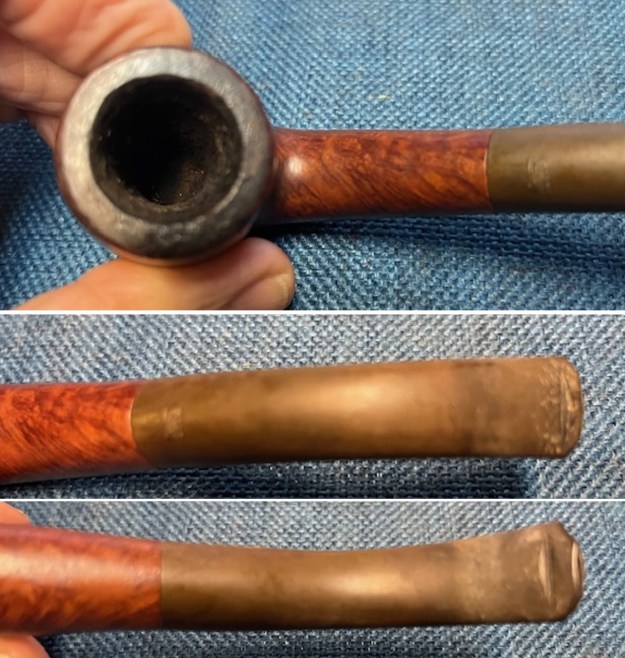 I took photos of the stamping on the sides of the shank and stem. On the left side it reads as noted above. On the right side it is stamped with the shape number 14. There is also some mark on the top of the tapered stem that I cannot decipher. I removed the stem from the shank and took a photo of the pipe to show its flow.
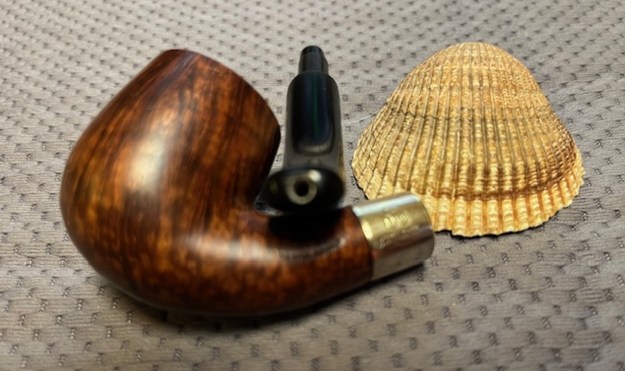
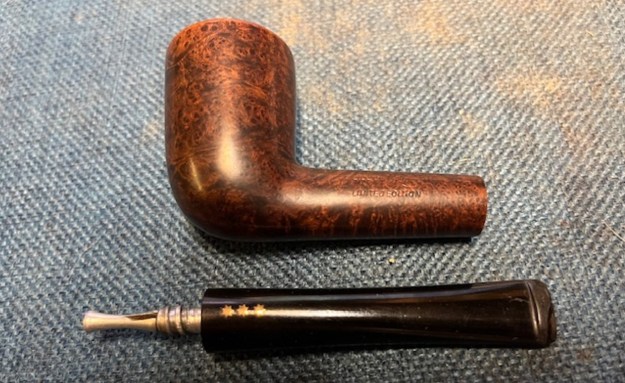
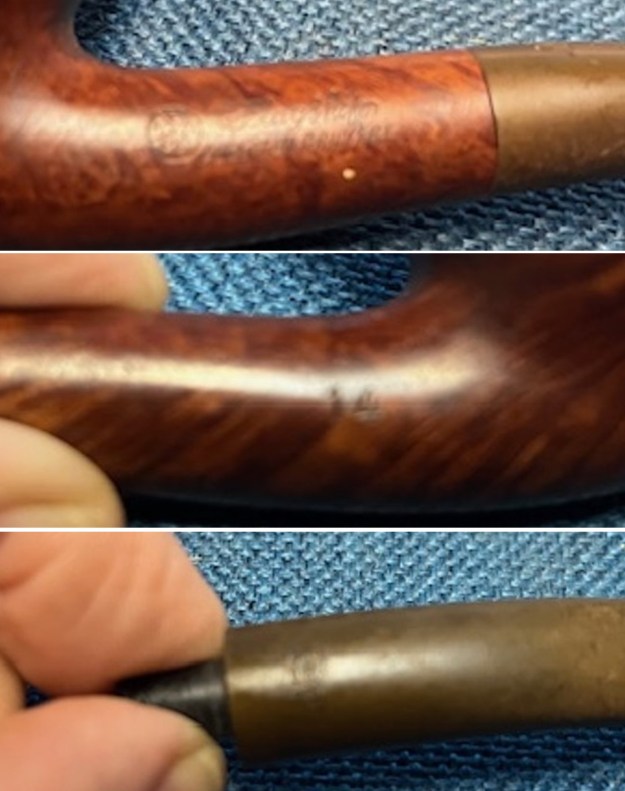
 I looked on Pipephil for both the circular pie shaped logo and the NEBPC Flagship stamping and found nothing. I also looked on Pipedia and again came up emptyhanded. I just felt like I was missing something in the search. I tried various interpretations of the NEBPC letters – Nebraska Pipe Club, New England Briar Pipe Club for two attempts and came up empty. I wrote to John Young who also does restoration and asked if knew of a Nebraska Pipe Club and he knew of nothing like that in his state. That left me still mystified.
I decided to do a search for the NEBPC on Google to see if I could interpret the meaning of the letters. I wondered what they stood for so I searched and came up with a thread on the brand on the pipesmagazine forums (https://pipesmagazine.com/forums/threads/i-love-this-pipe-but-who-made-it.48662/). There was quite a long discussion that gave some good information. Like the quote below by samcoffeeman on Apr 6, 2015
I got a hit! Was thinking it was NEBPC because of the order and PC meant pipe club perhaps. It actually means New England Briar Pipe Company. Another example here with some great info: LINK (link is disconnected) Kaywoodie also has a Canadian pipe shape #71 so there you go!
buroak replied the following:
The NEBPC made the Yello Bole line for KBB. That “Algerian Bruyere” stamp looks like the same one used on Yello Boles, too. What is strange is the two-digit code. Nice find!
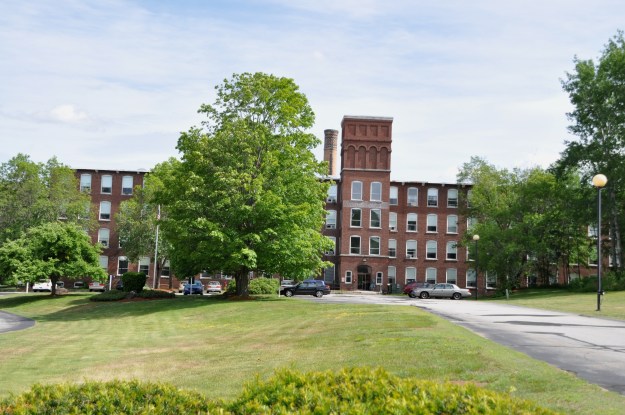
misterlowercase added some more information regarding the brand. He included links to the old factory where that pipe was made in Penacook New Hampshire, is still in use today,
http://pipedia.org/wiki/Yello-Bole
I turned to the second link first to have a look at the large photo first. It showed the large older building. Here is the link (https://debralavalley.files.wordpress.com/2009/11/dsc_0024sm.jpg).
I then turned to the pipedia article (http://pipedia.org/wiki/Yello-Bole) and found a great article on the history of the KBB/Yello-Bole pipe company.
History
In 1932 Kaufmann Bros. & Bondy (KB&B), est. 1851, expanded their program consisting of KB&B pipes, Reiss-Premier and Kaywoodie as the mainstay brand by introducing the Yello-Bole line. Yello-Bole was designed as an outlet for lower grade briar not used in Kaywoodie production.
At that time KB&B produced their brands in Union City and in West New York, both New Jersey. Deviating from that, Yello-Boles were manufactured by The New England Briar Pipe Company in Penacook, New Hampshire to use this KB&B subsidiary to capacity.
As briar was hardly had during World War II, the KB&B Company embarked on a project of domestically grown briar wood, called Mission Briar or manzanita early in 1941. The Pacific Briarwood Company, a subsidiary founded for this purpose, began harvesting the burls growing on the slopes of the Santa Cruz Mountains of California. Though this wood is botanically the same as briar form the Mediterranean countries, the smoking characteristics were not quite as good and the project was abandoned after the war.
Was it for that reason? Advertising from the 1940’s pictures the Yello-Bole “Honey Girl”, who gently urges the pipe smoker to smoke the pipe with “a little honey in every bowl.” In fact, honey was an ingredient of the material used to coat the inside of the bowl. It was said to provide a faster, sweeter break-in of the pipe.
In 1952, 101 years after the Kaufmann brothers had opened a small pipe shop in the Bowery section of New York City, Kaufmann Bros. & Bondy Company with all subsidiaries was purchased by an unknown company strange to pipe industry. (At least, the new owner was economical because the KB&B managers had to leave their luxurious bureaus on 630 Fifth Avenue, New York – the Rockefeller Center – for new rooms in the factory on 6400 Broadway, West New York.) This interlude ended after only 3 years in March of 1955, when S. M. Frank & Co. bought Kaufmann Bros. & Bondy, The Kaywoodie Company, Reiss-Premier Corp., The New England Briar Pipe Co. and – of course – Yello-Bole.
From the time of S.M. Frank’s purchase in 1955 until 1972 Yello-Bole was run as a separate company, as division of the parent. Through this period, Yello-Bole, same as Kaywoodie, had its own officers, sales force and maintained the production facilities in West New York. These 17 years were probably the most glorious years in Yello-Bole’s history.
I also found a listing in the business directory for the New England Briar Pipe Co. I have included that information below. I used the hints above to check on the shape number 14 in the Pipedia listing of Kaywoodie shape numbers (https://pipedia.org/wiki/Kaywoodie_Shape_Numbers). That gave me the information that the number 14 was a Full Bent Medium Billiard with a Taper Stem that was made between 1927-1972.
That information gave a range that the shape was made for Kaywoodie pipes. However, since the pipe made by the New England Briar Pipe Co., a company that ceased to exist in 1955, the pipe in hand was made prior to that time period. The pipe was made by the company in Penacook, New Hampshire. Now it was time to work on this old pipe that was no longer a mystery.
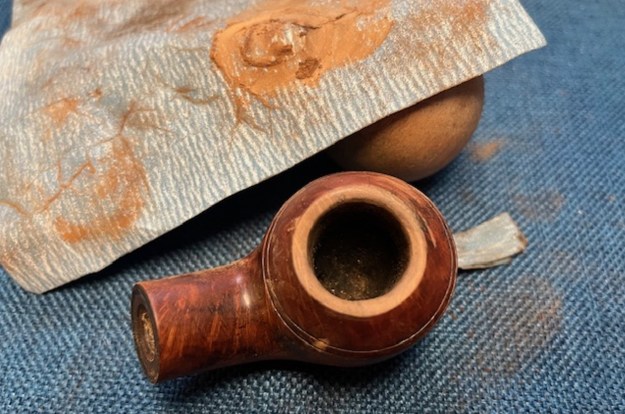
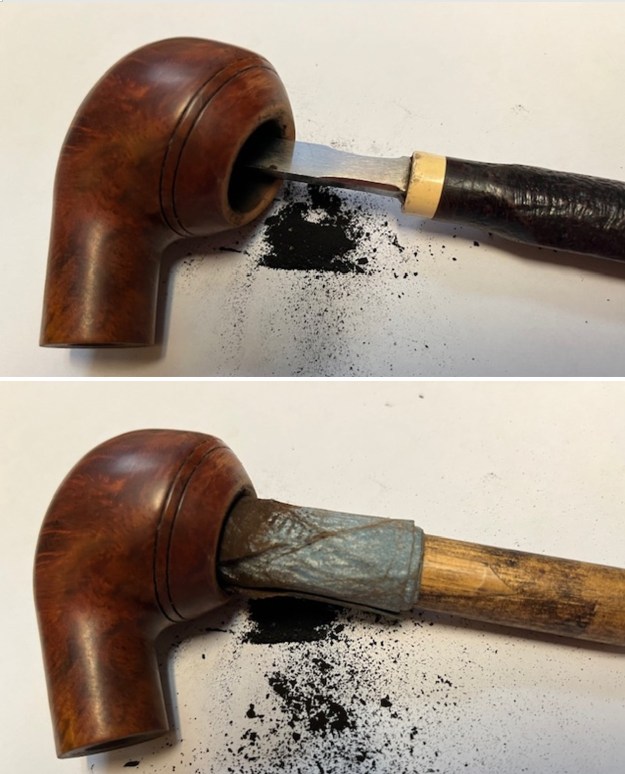
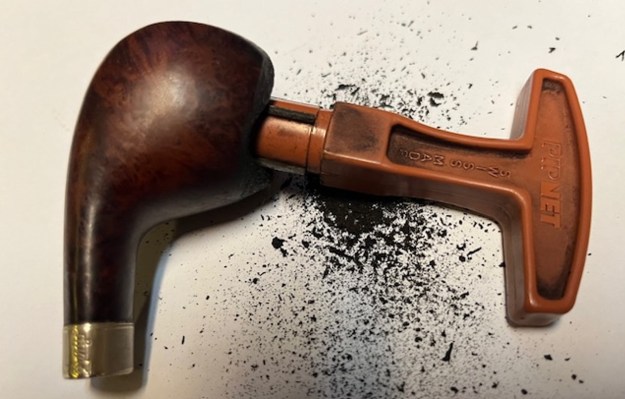
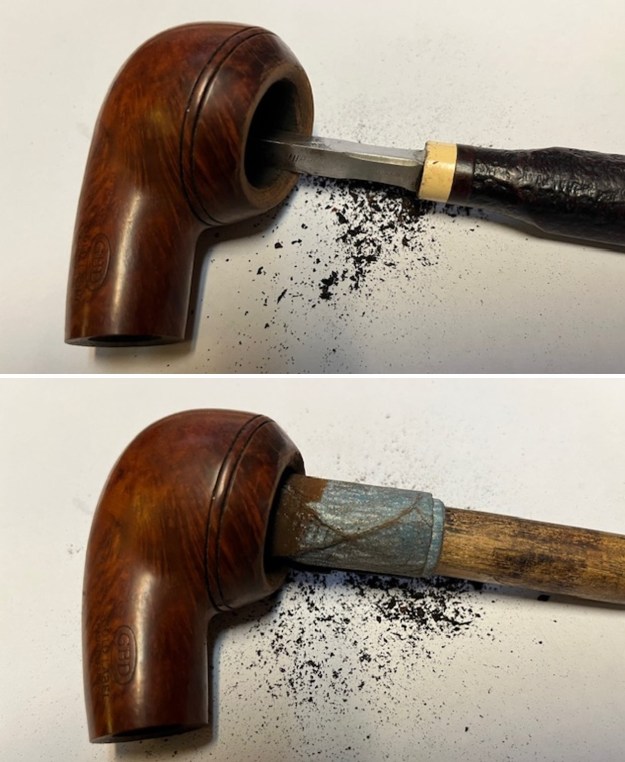
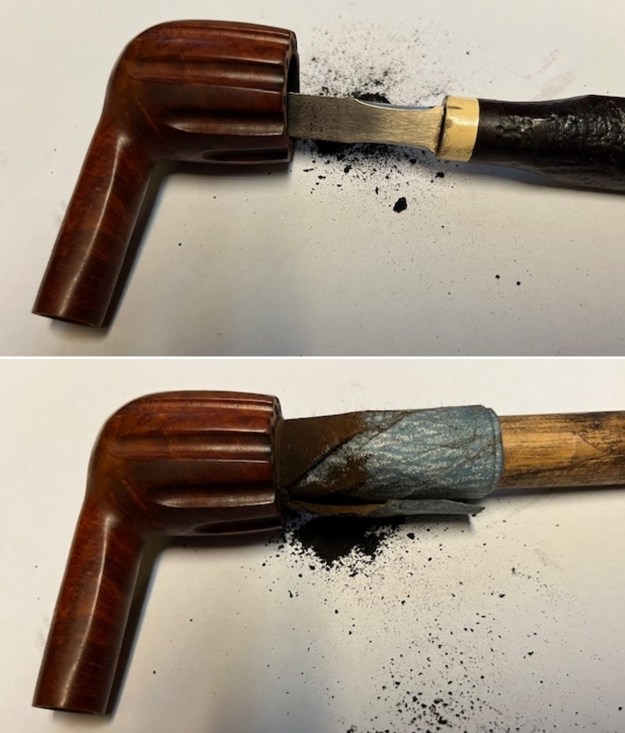
I started my work on the pipe reaming the bowl. I started by doing the work with a Pipnet Pipe Reamer and took the cake back to bare briar. I cleaned up the remnants around the bowl sides with a Savinelli Fitsall Pipe knife and then sanded the walls with 220 grit sandpaper wrapped around a piece of dowel. The walls were smooth and showed no burn damage. 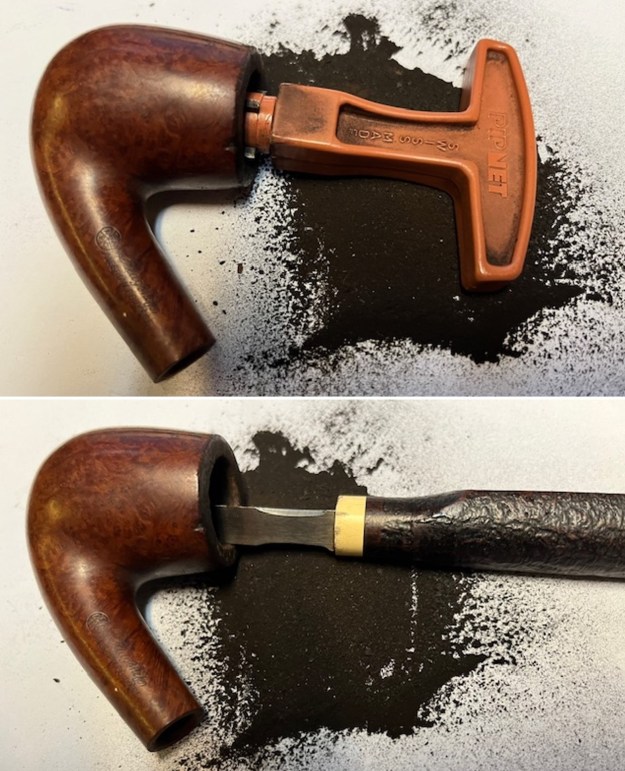
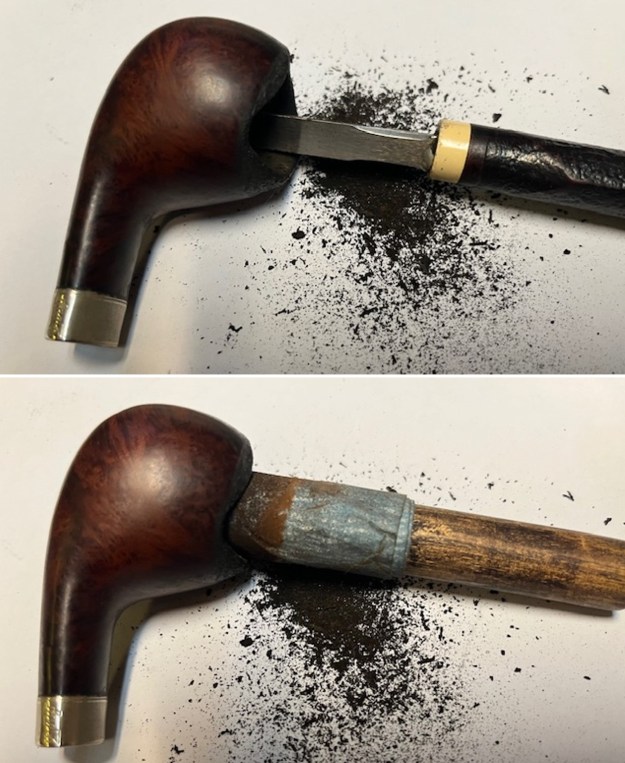
 I scraped the lava build up on the rim surface with the Savinelli Fitsall Pipe Knife. I was able to remove all of the thick lava. It still needed some thorough cleaning but it was looking better.
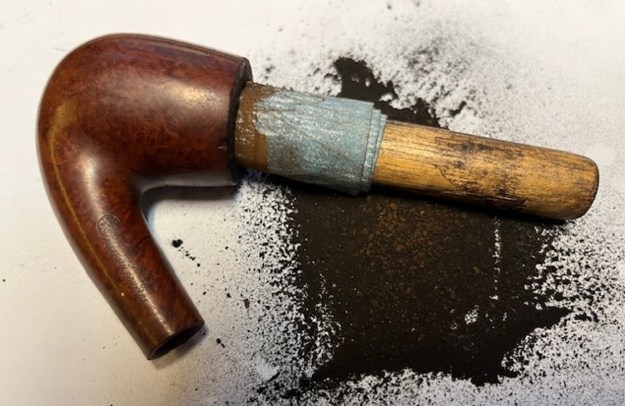
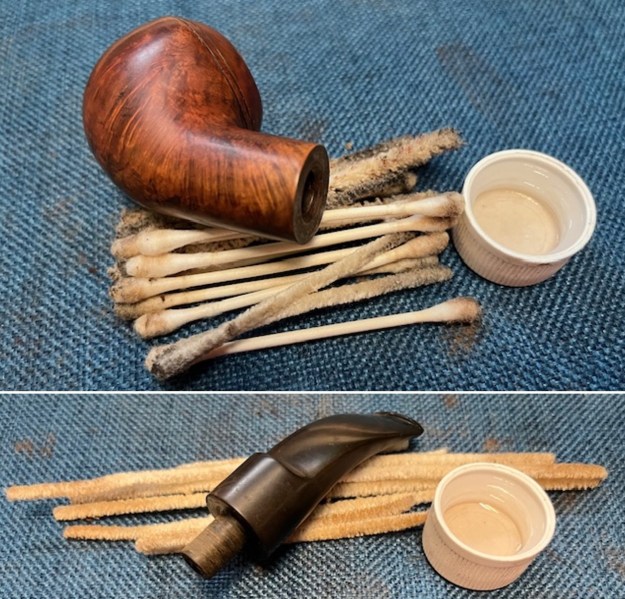
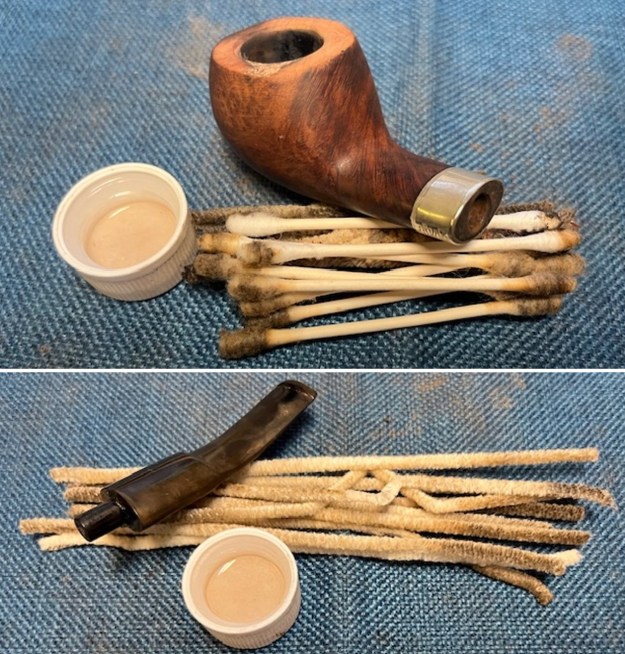
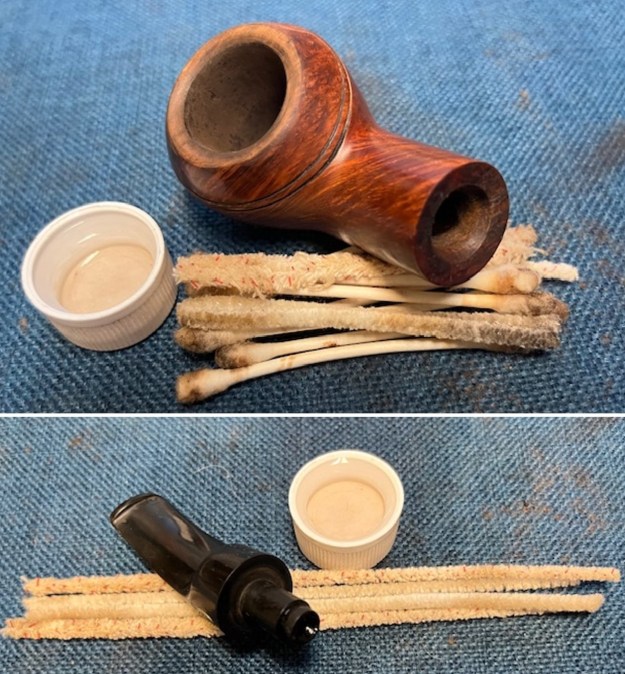
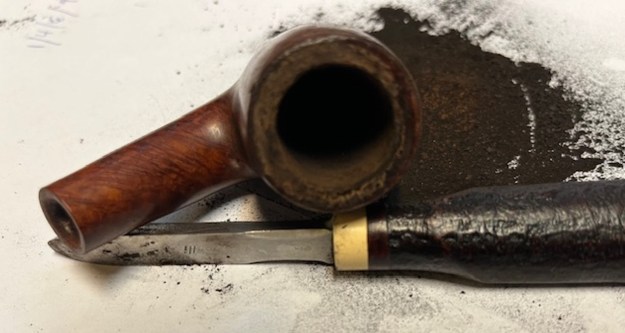 I scraped out the mortise with a small pen knife to remove the thick tars and oils. I cleaned out the interior of the shank, mortise and airway in the stem with pipe cleaners, cotton swabs and alcohol. It was a dirty pipe.
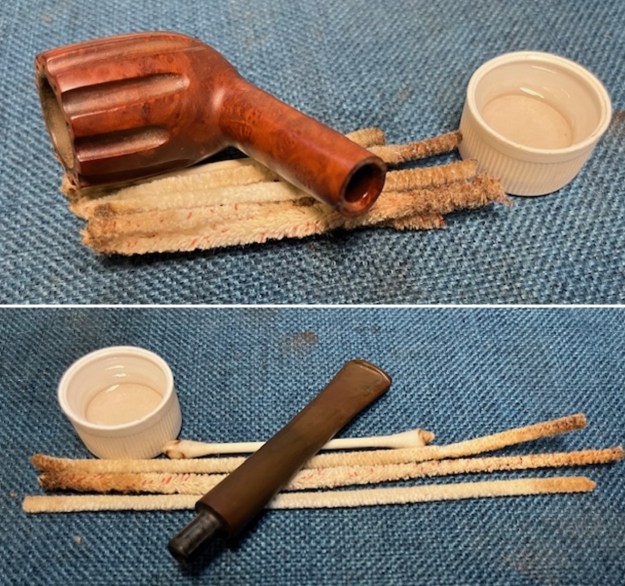
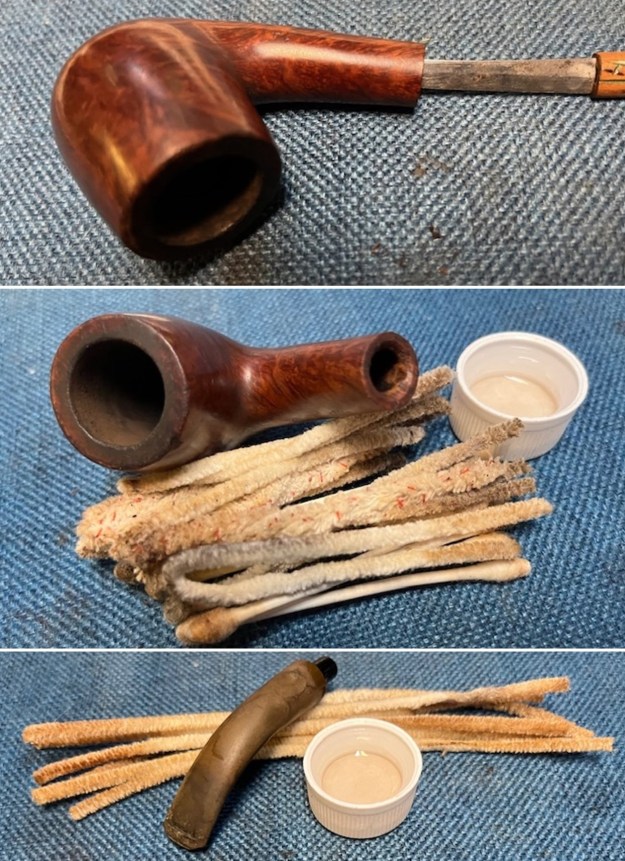 I scrubbed the externals of the pipe with undiluted Murphy’s Oil Soap and a tooth brush. I worked over the inside of the bowl at the same time. I rinsed it with warm water to remove the grime and debris. I dried it off with a soft cotton cloth and lightly buffed it with the cloth. It smelled very clean.
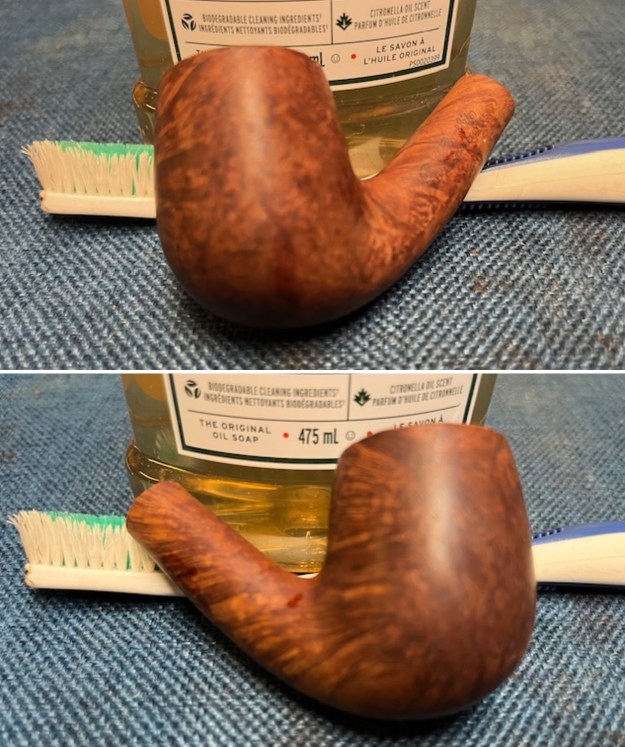
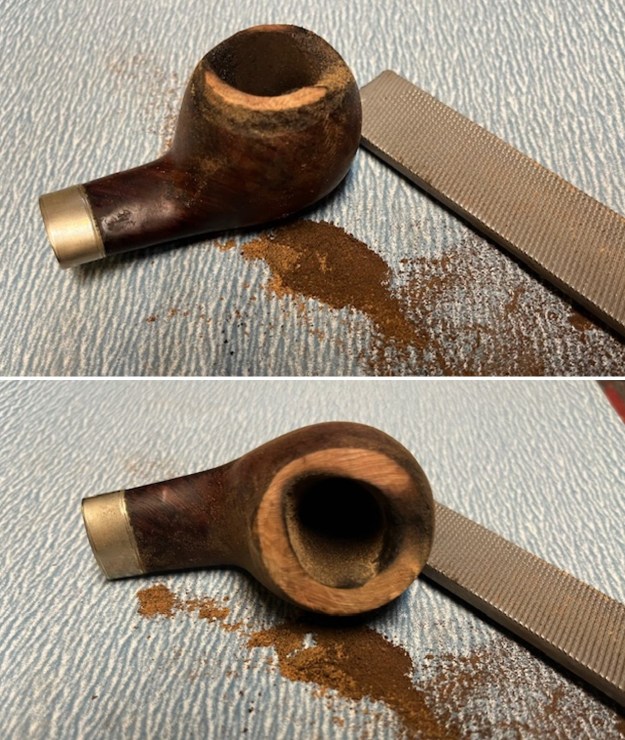
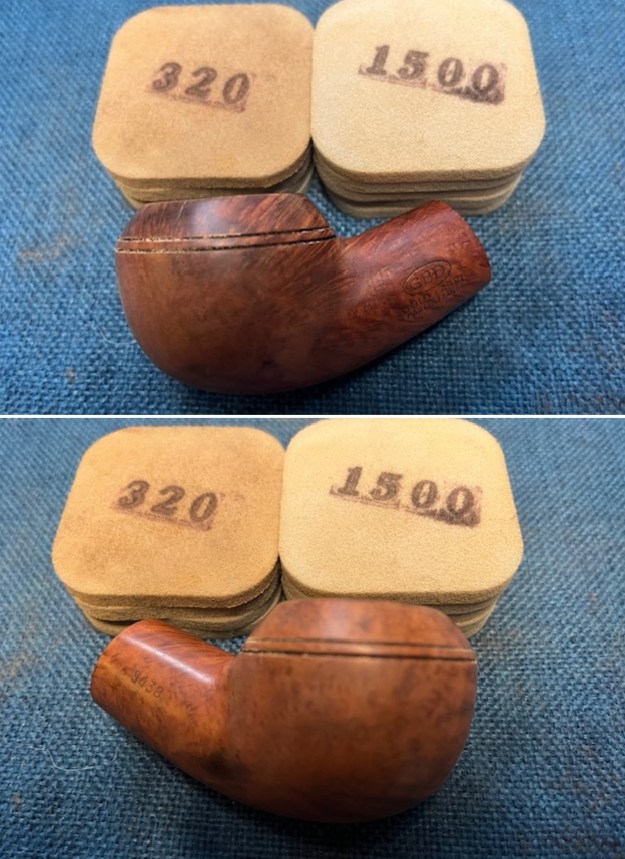
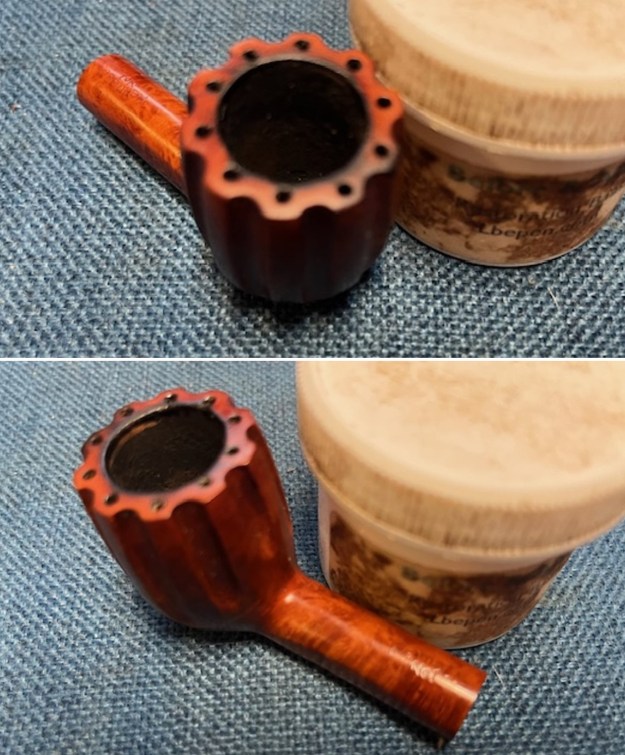
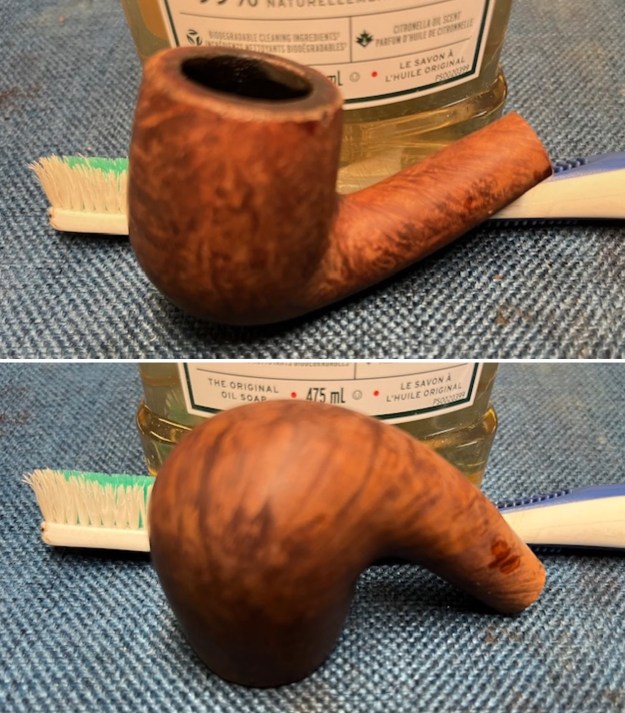 I used a 320 grit sanding pad to remove the remaining tars and oils on the rim top. I worked it over to clean up the top and prepare it for polishing with micromesh sanding pads.
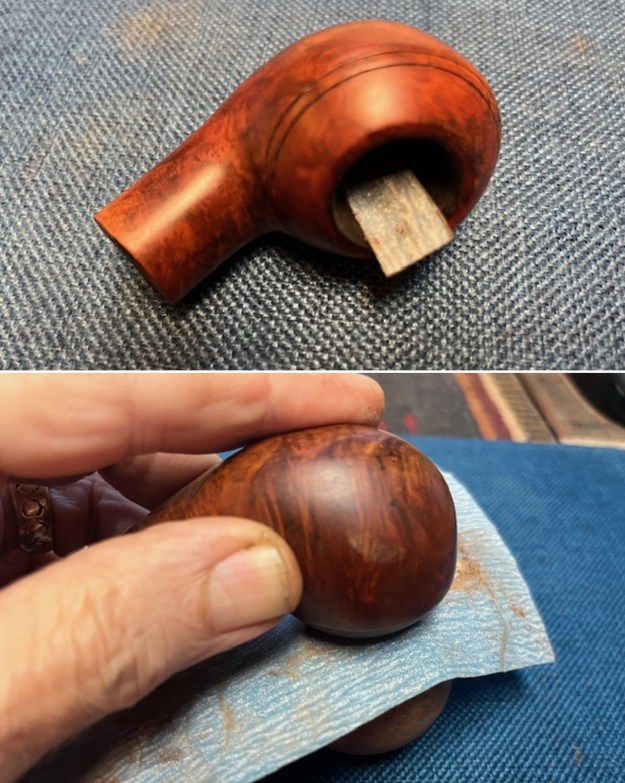
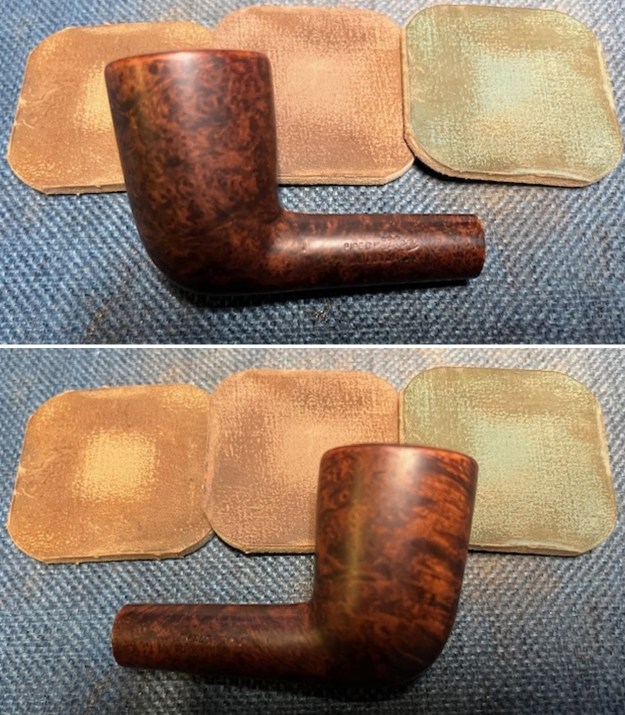
 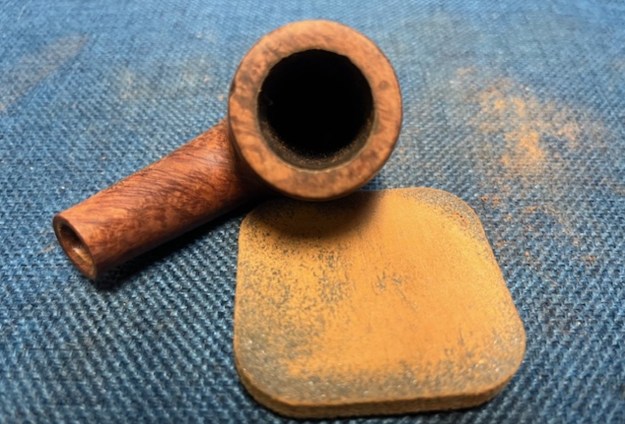 I polished the bowl with micromesh sanding pads – dry sanding with 1500-12000 grit pads. I wiped it down with a damp cotton pad after each sanding pad. The briar really took on a patina that began to look better with the polishing.
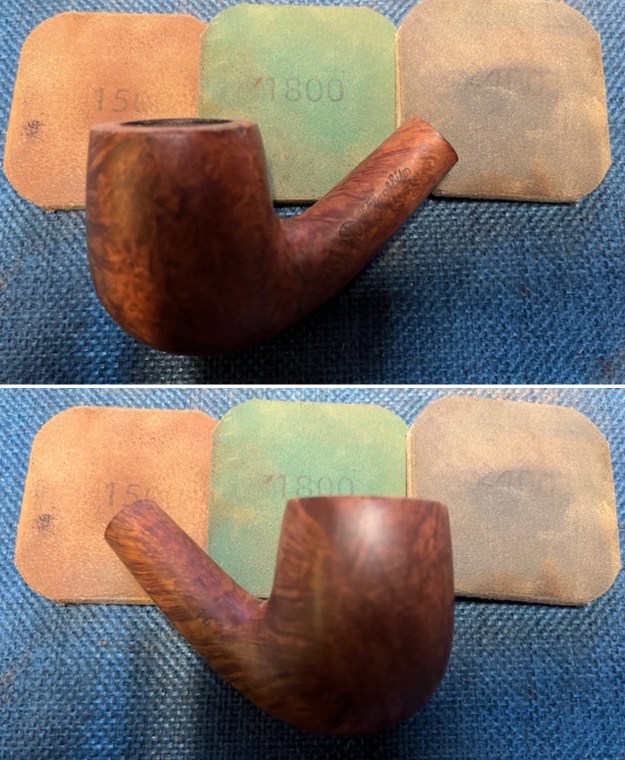
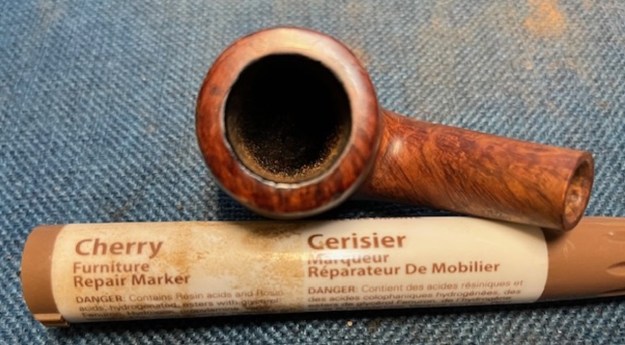
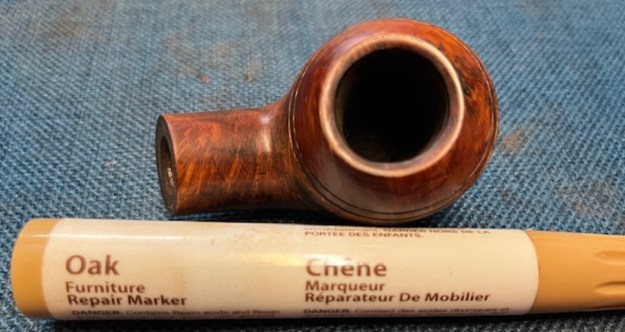
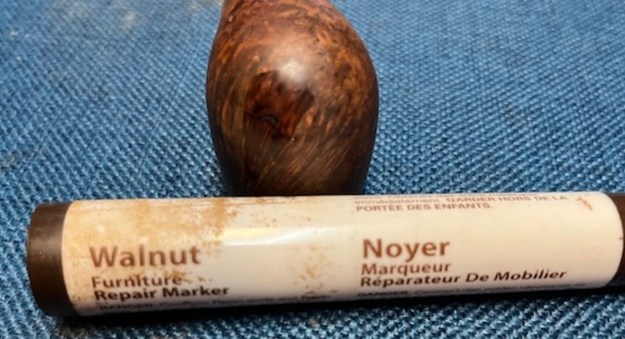
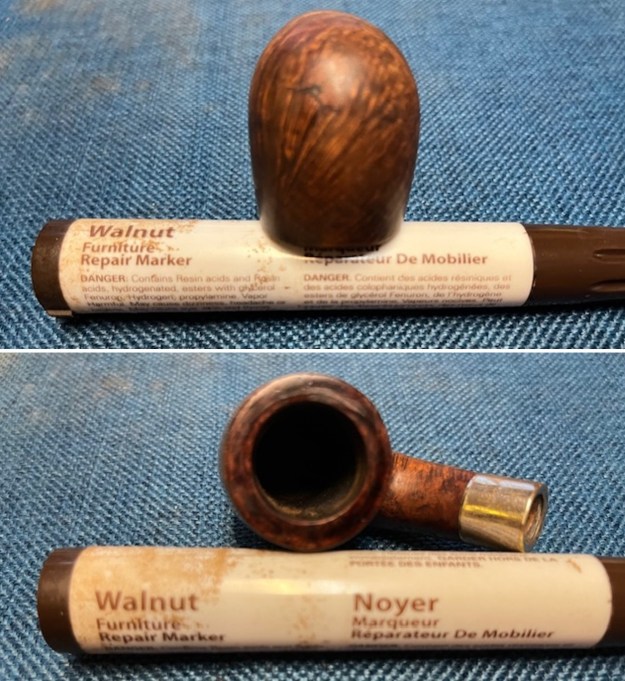
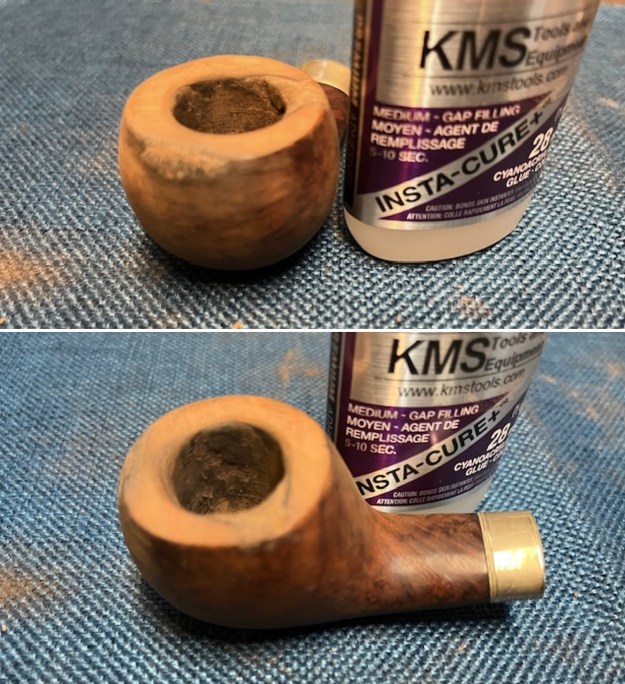
 I paused the polishing and used a folded piece of 220 grit sandpaper to smooth out the damage on the inner edge of the rim. It looked much better. Then I stained the rim top with a Cherry Stain pen. It matched the rest of the briar very well. With polishing it would be unrecognizable.
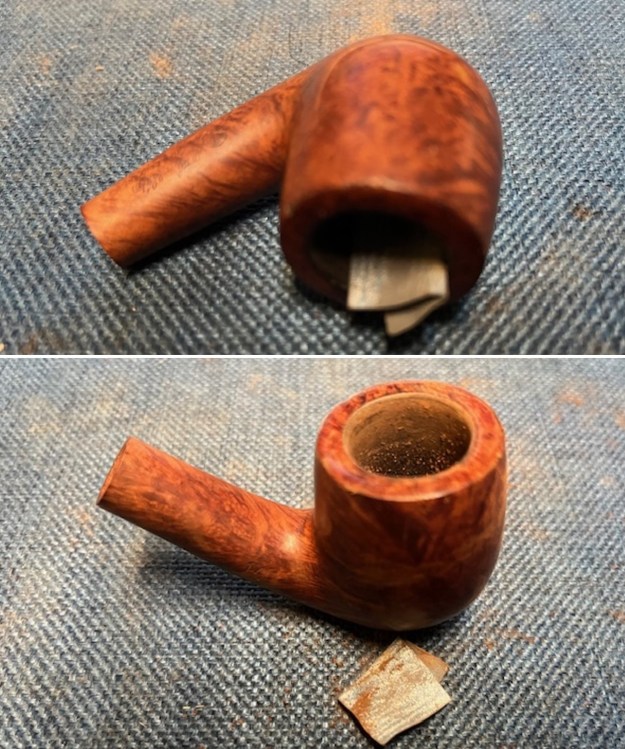
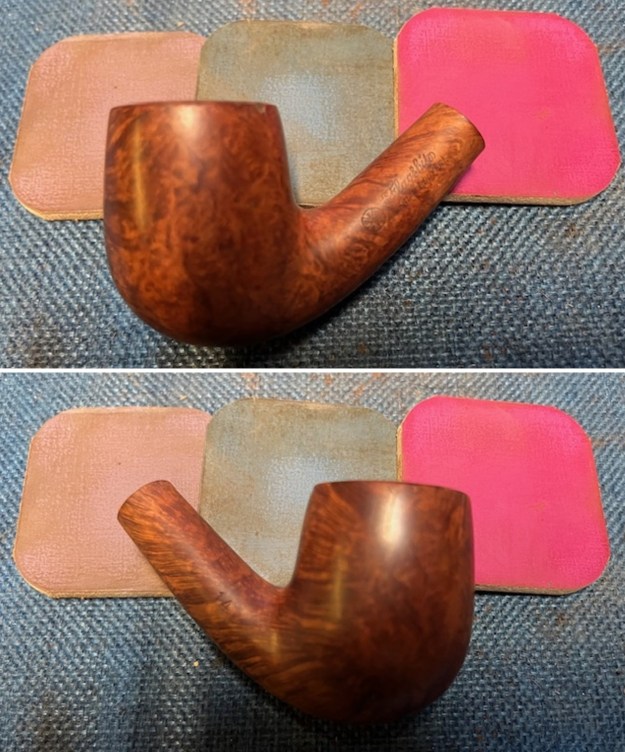
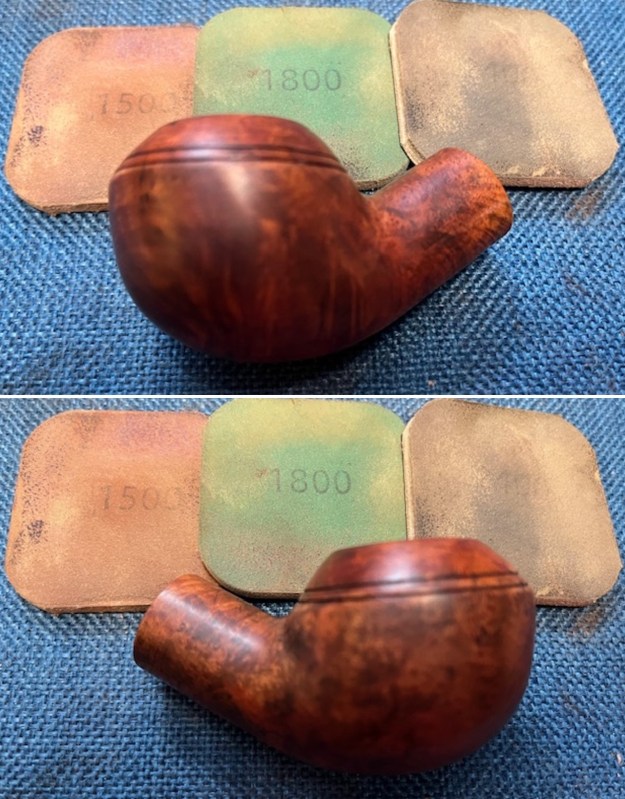
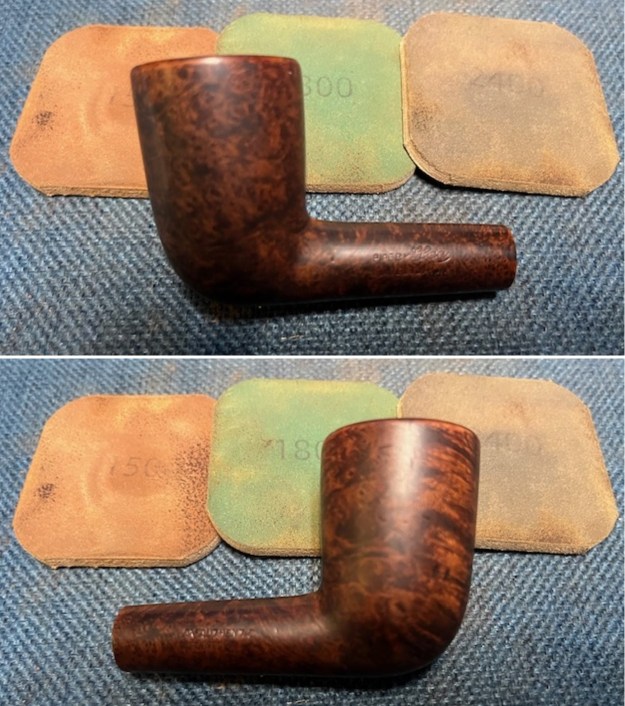
 I went back to the polishing process with the remaining micromesh sanding pads from 3200-12000 grit pads. The briar began to take on a rich shine.
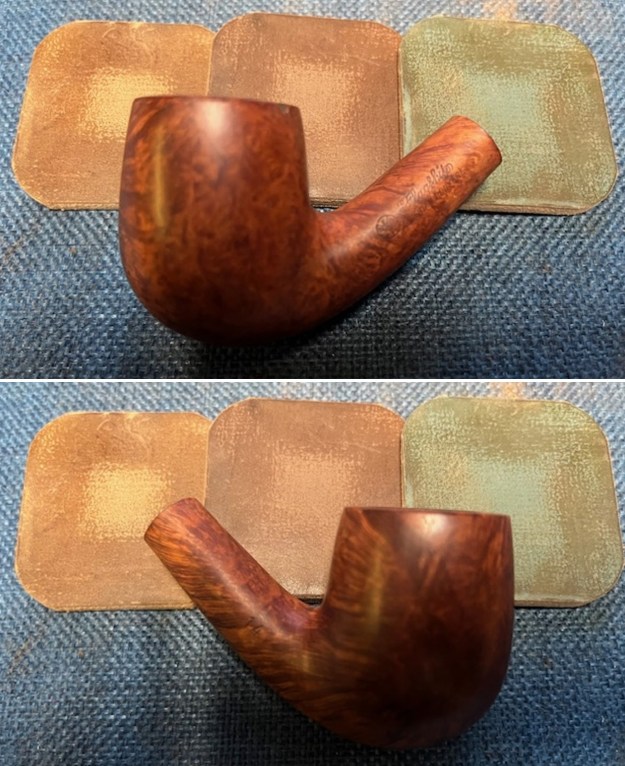
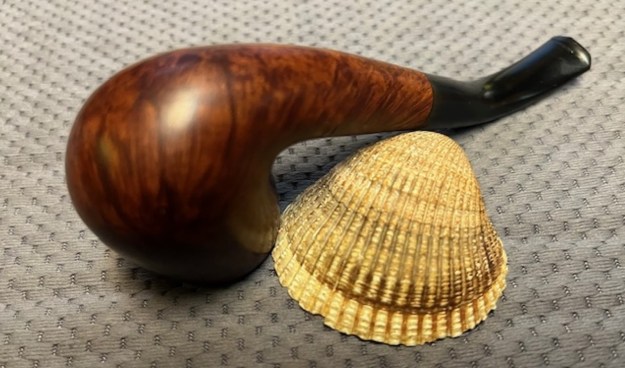
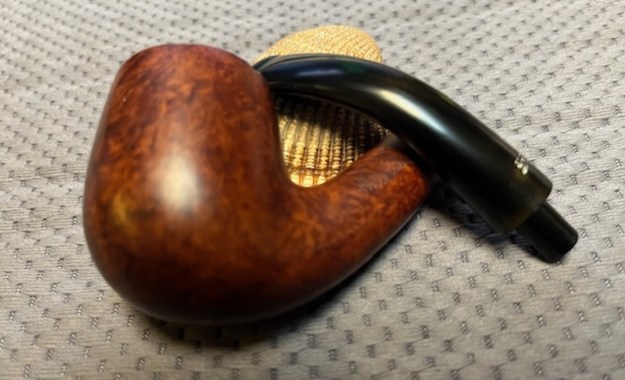
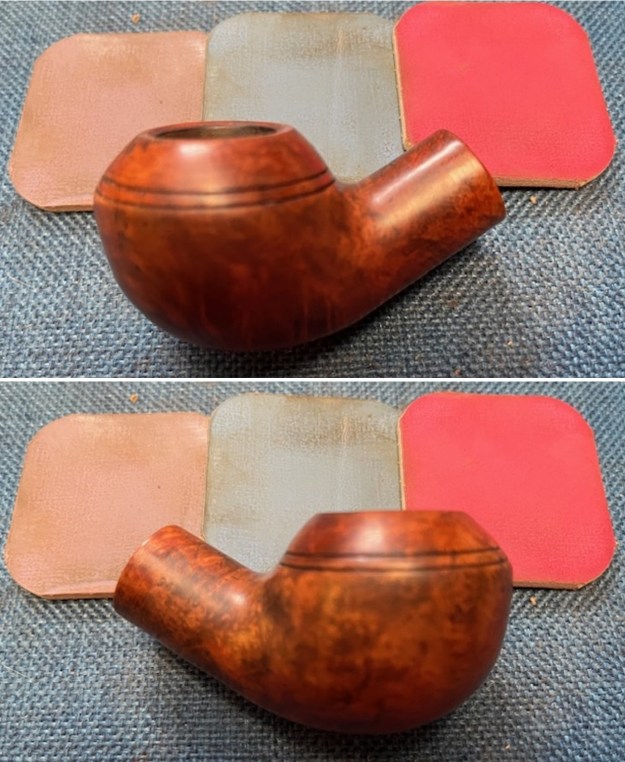
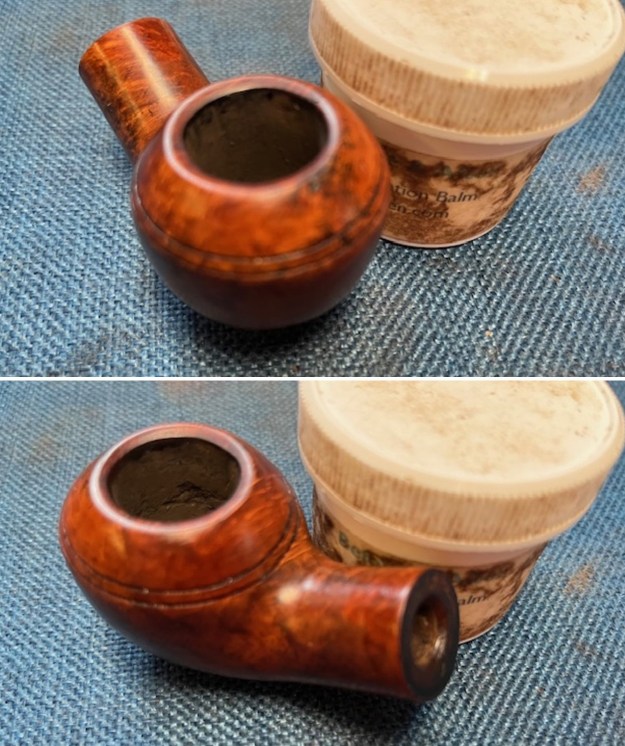
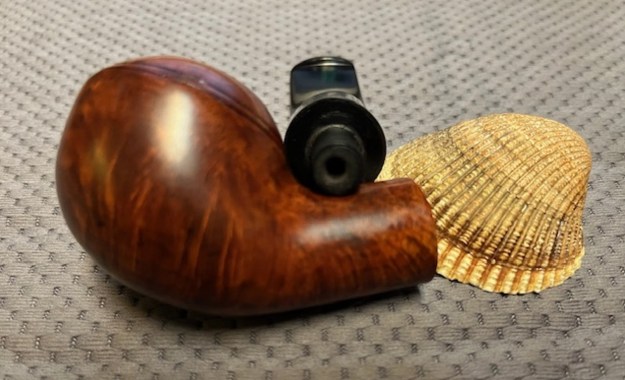
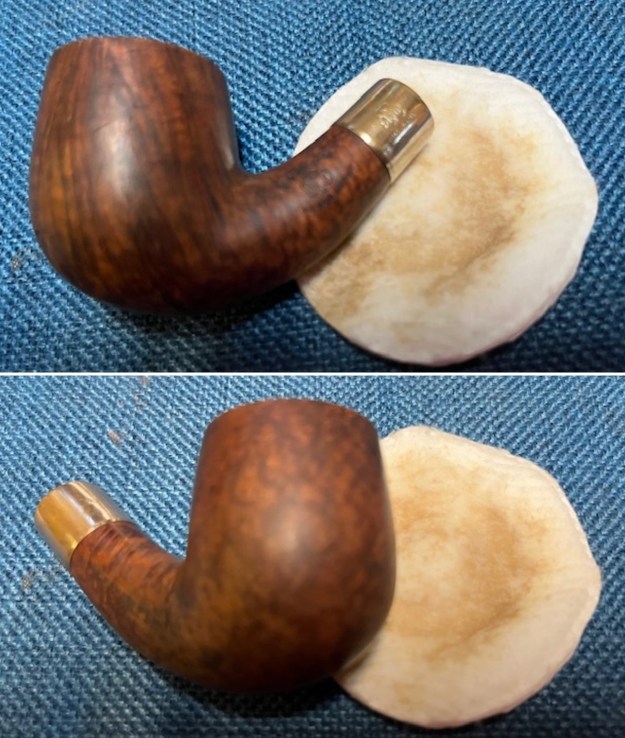
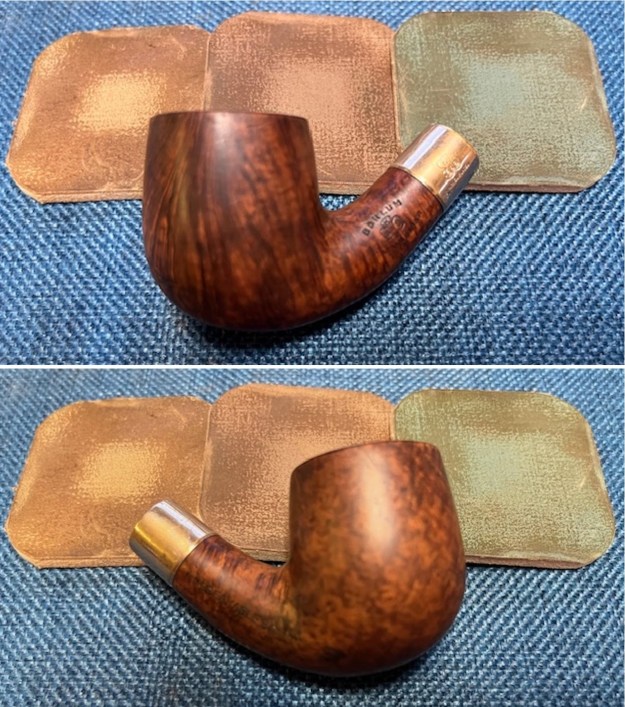
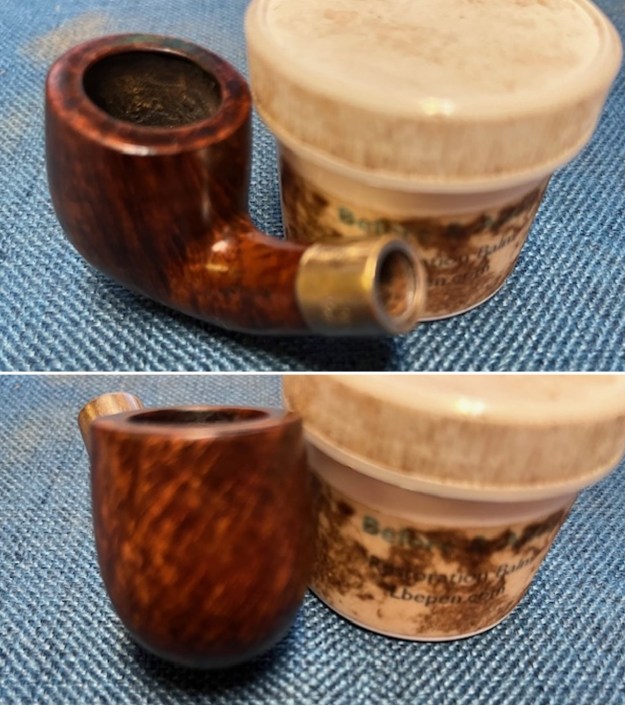
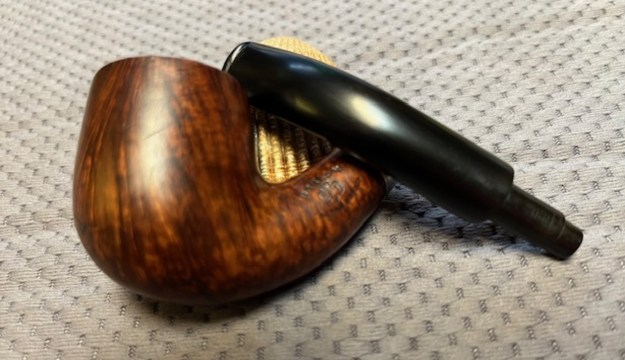
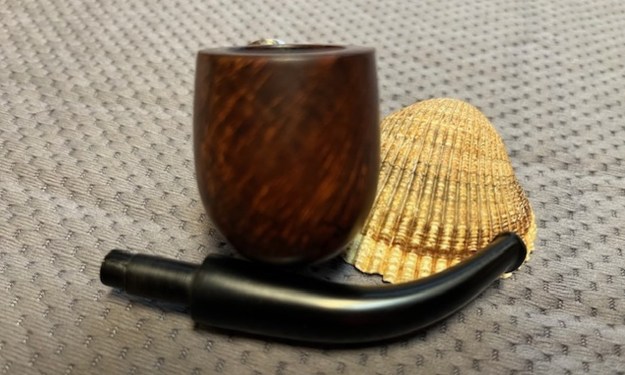
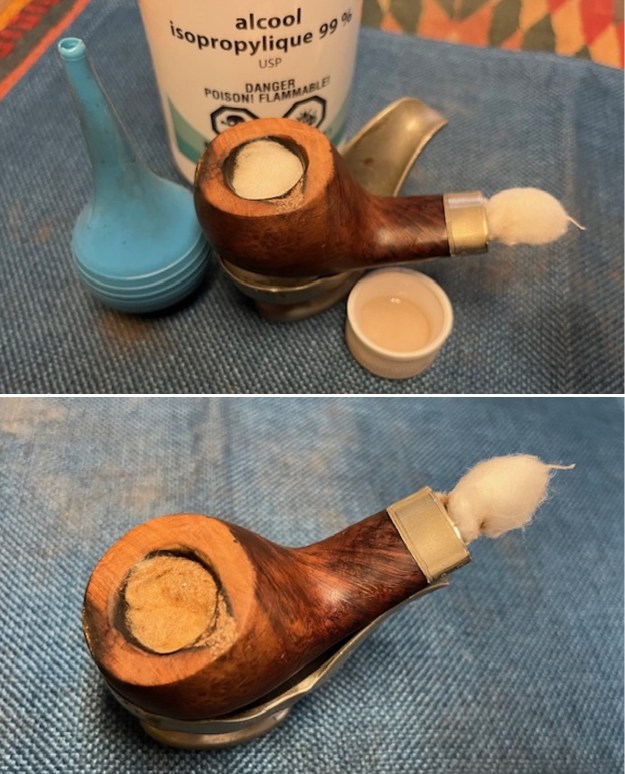
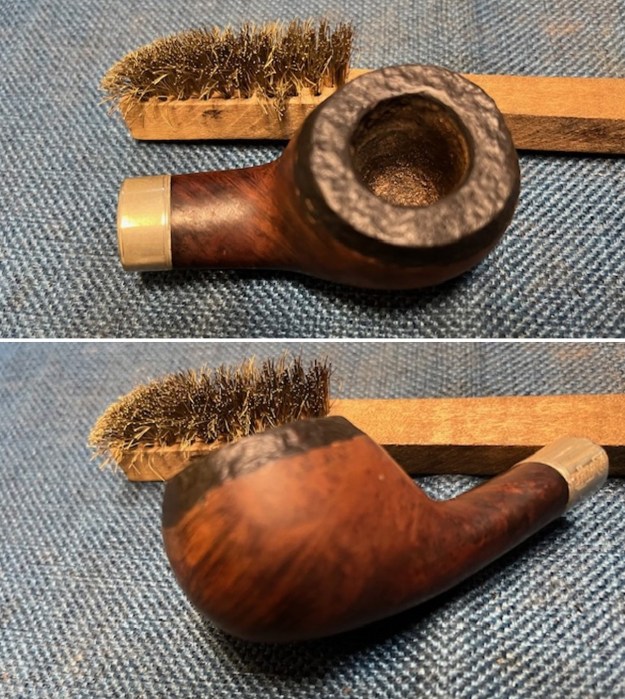
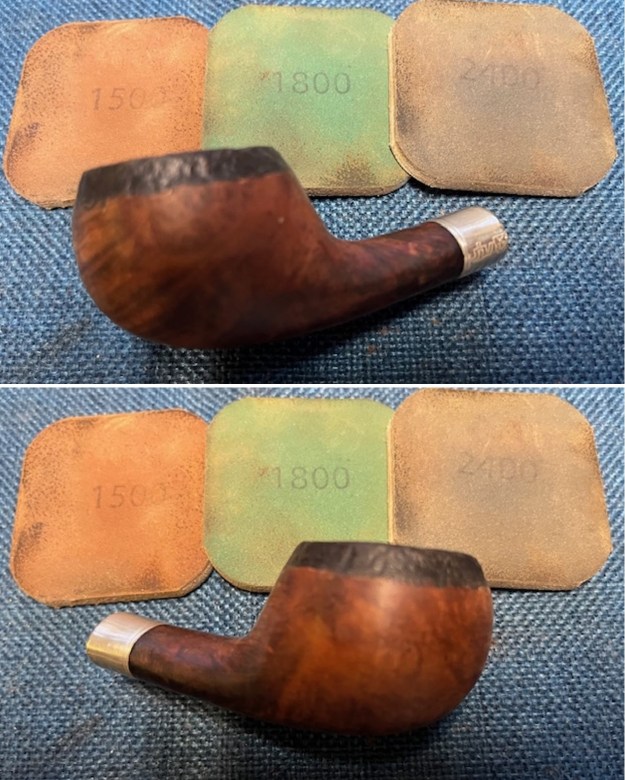
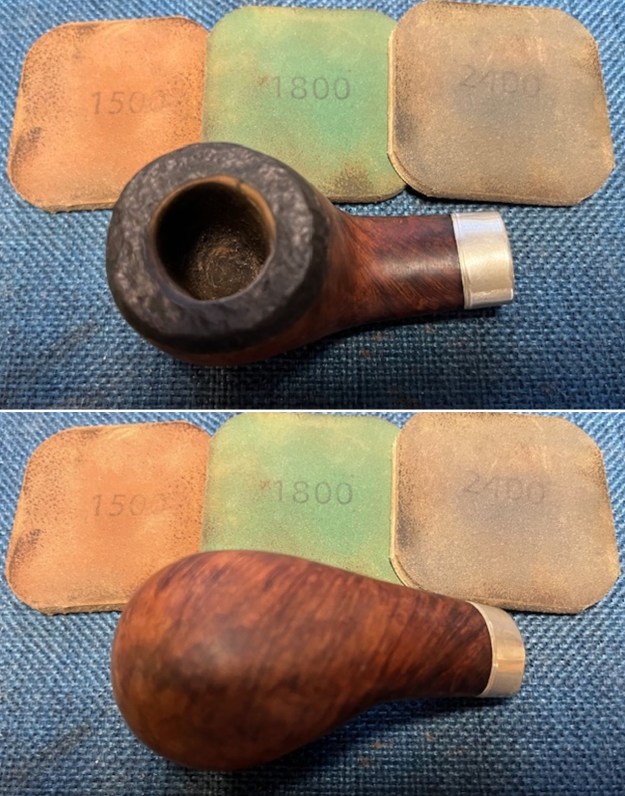
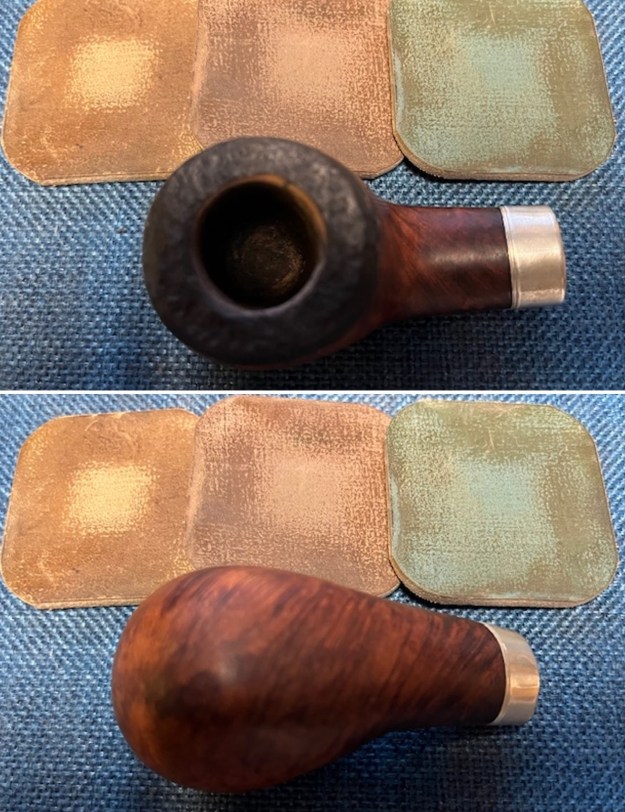
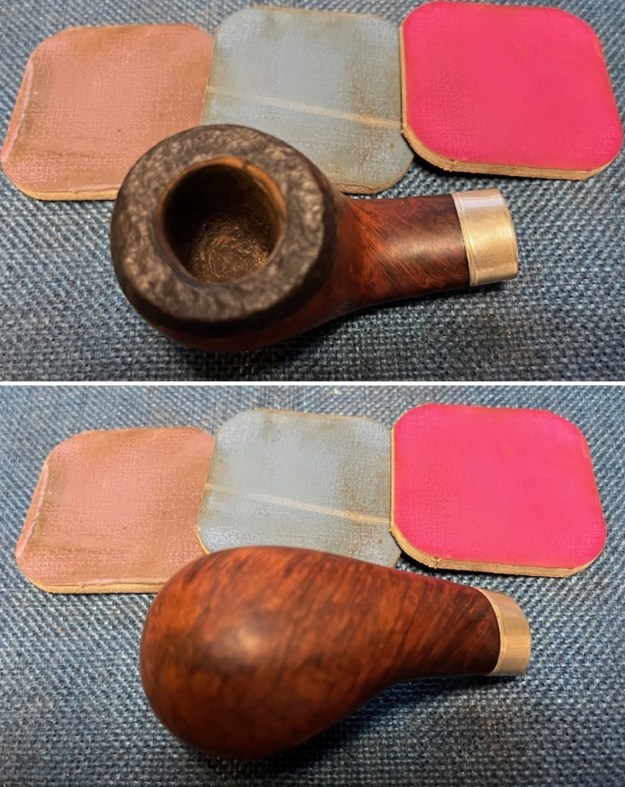
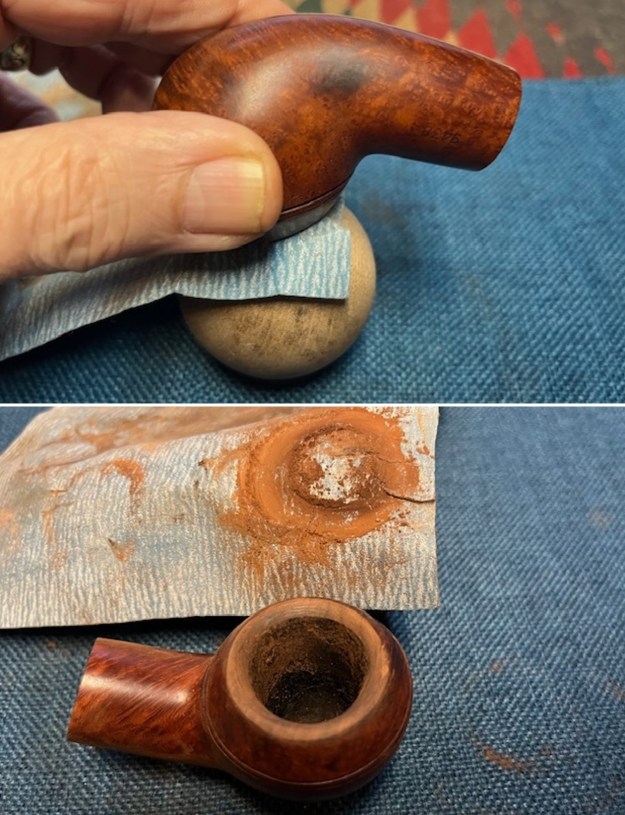
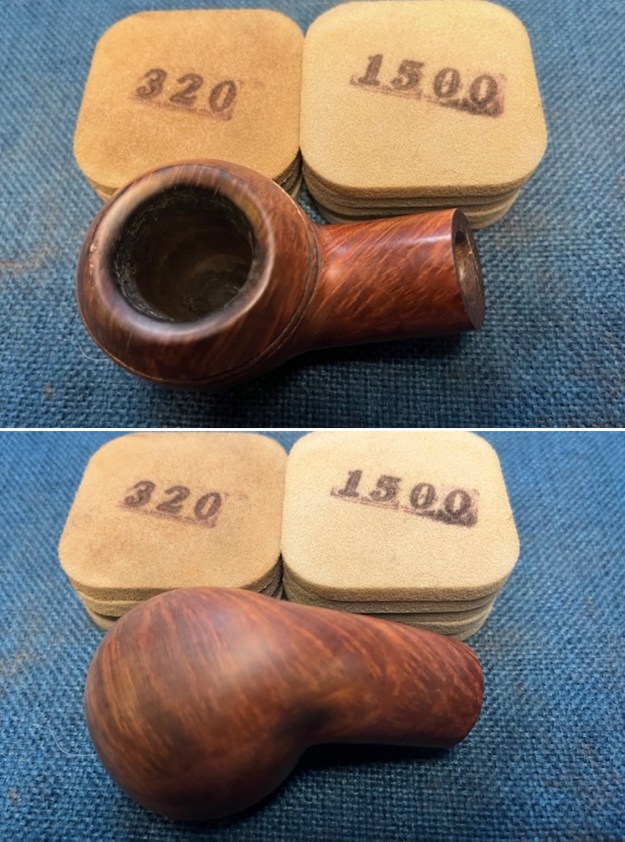
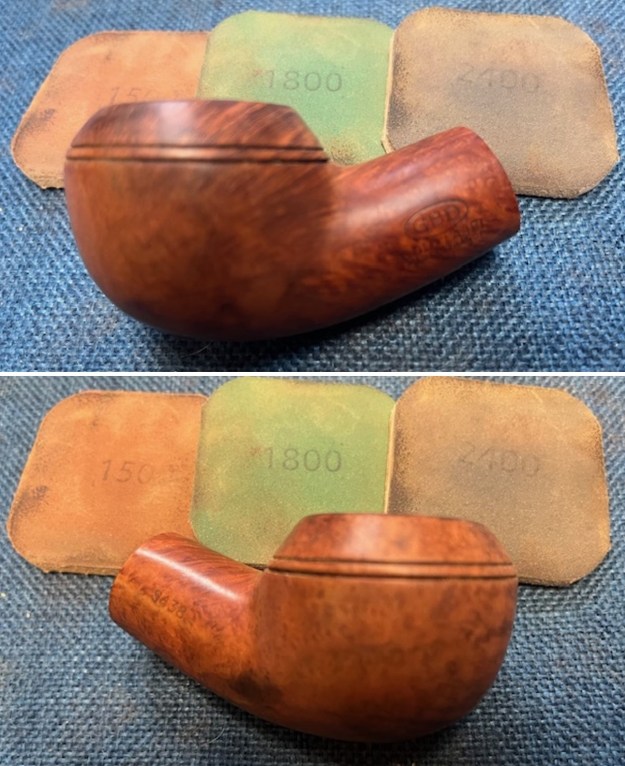
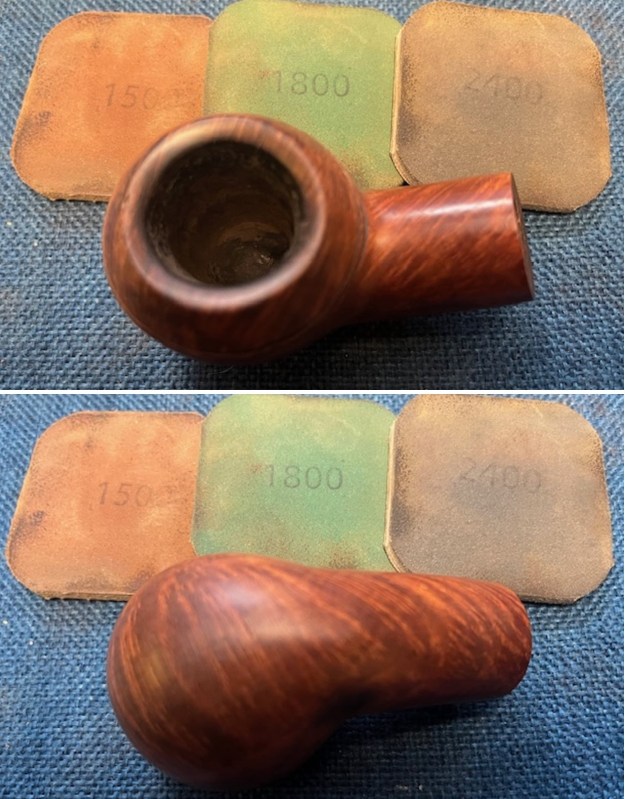
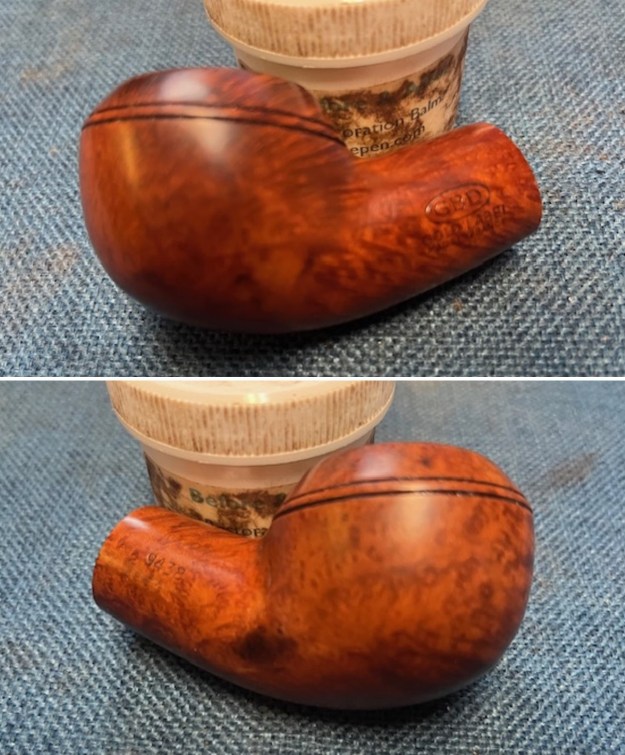
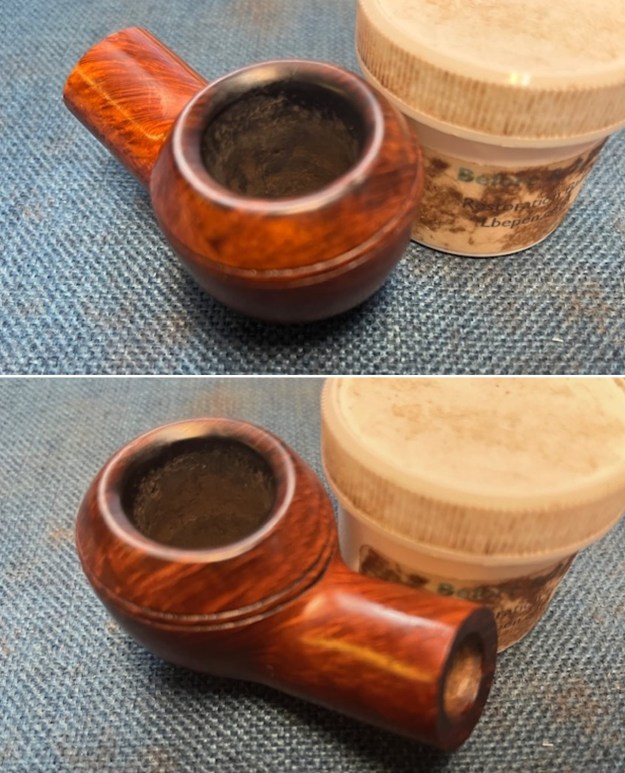
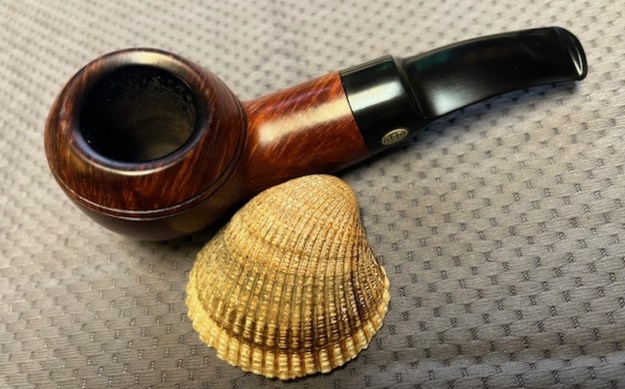
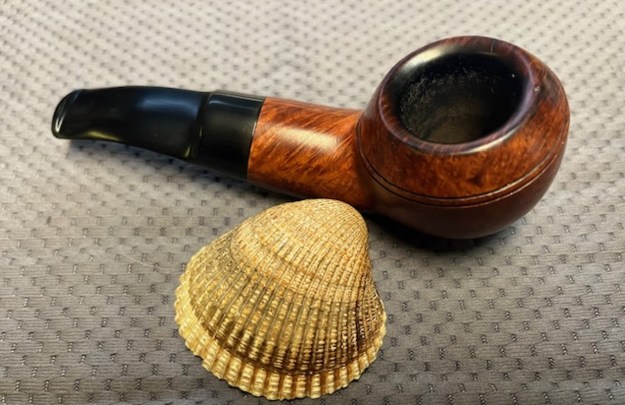
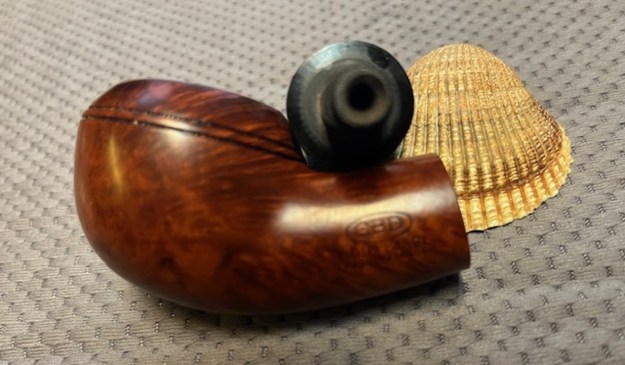
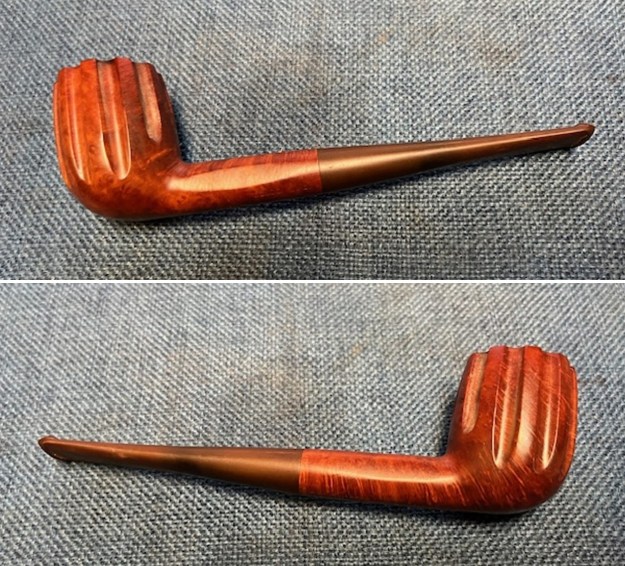
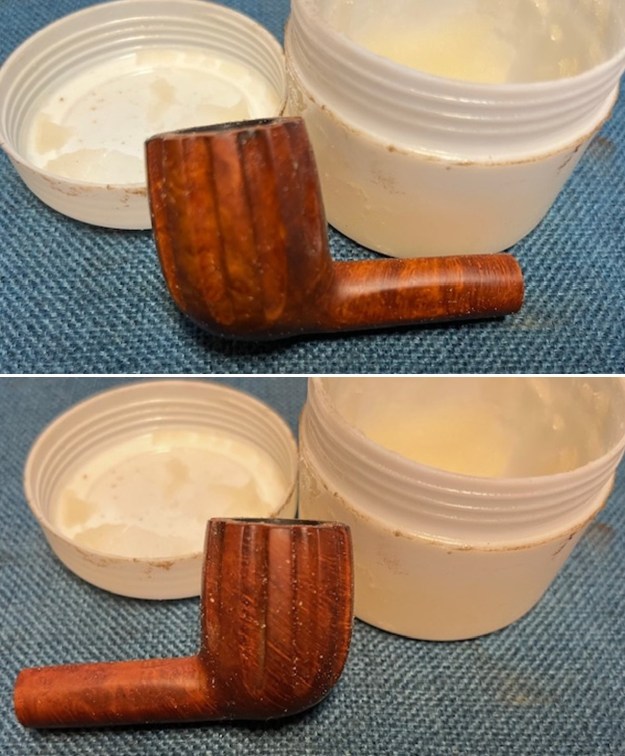
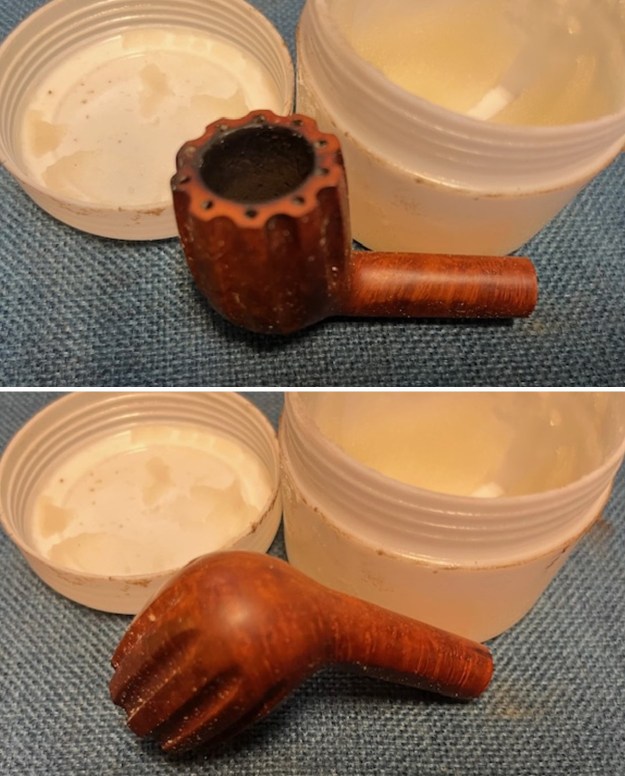
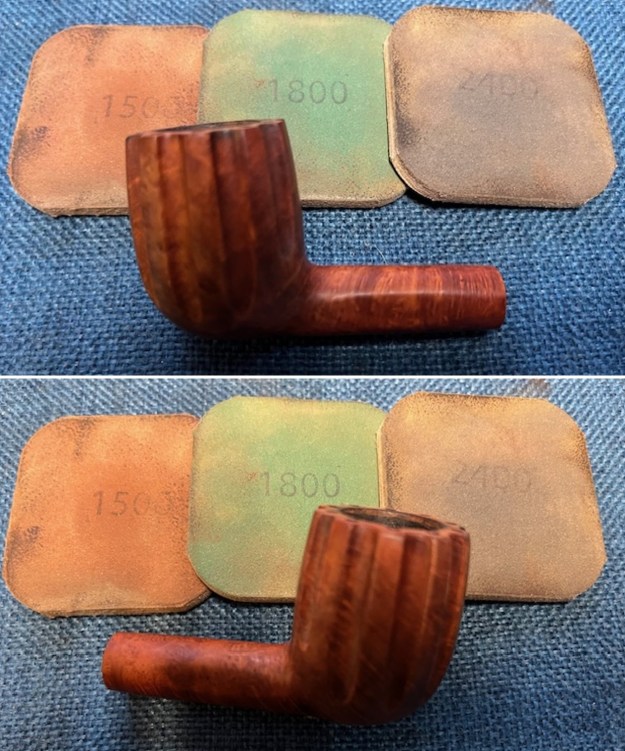
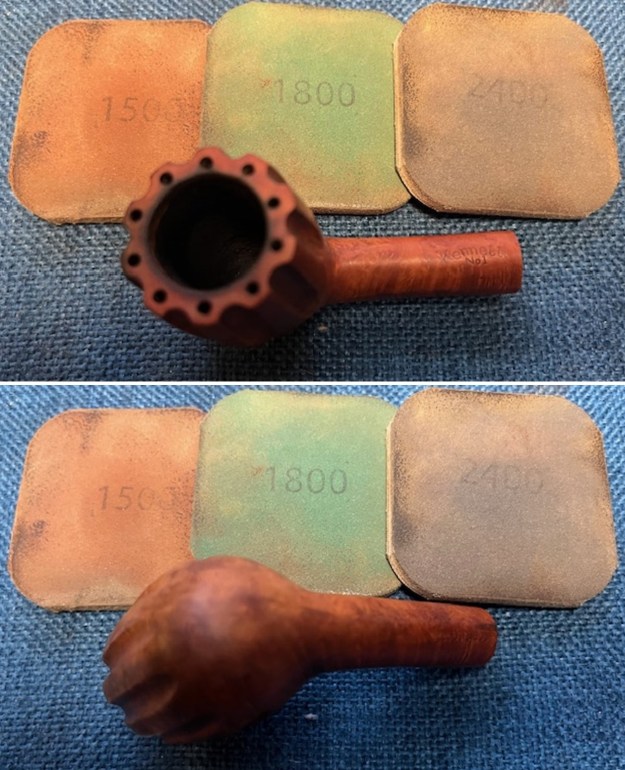
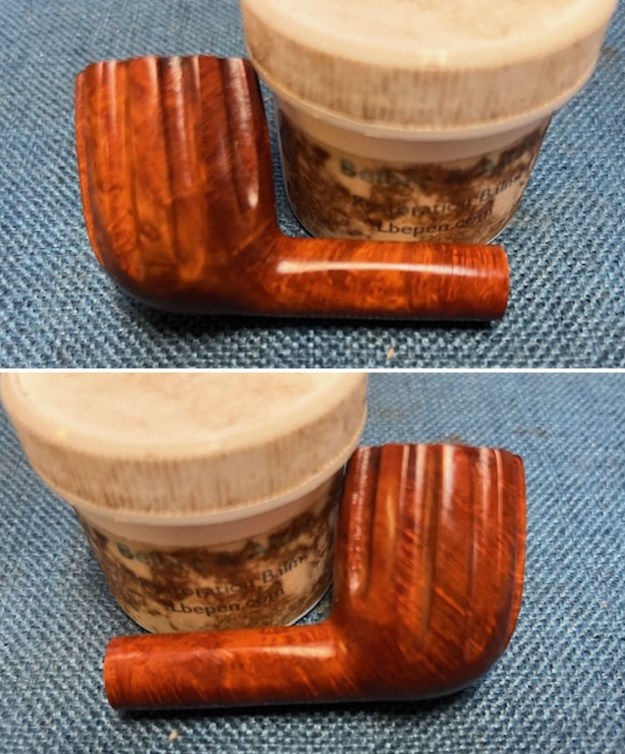
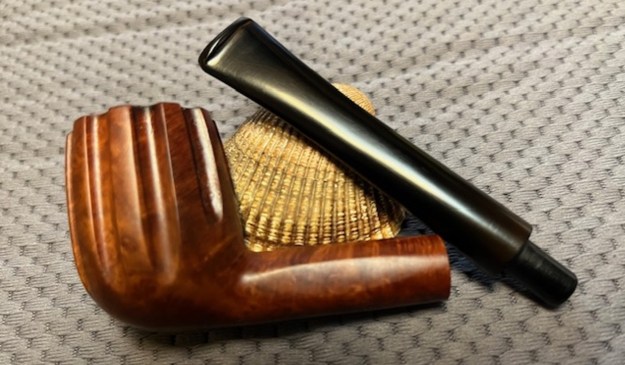
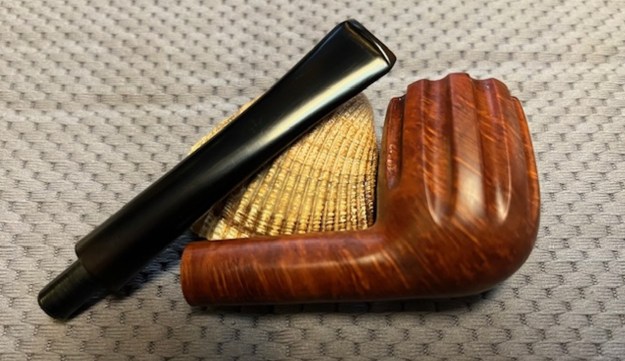
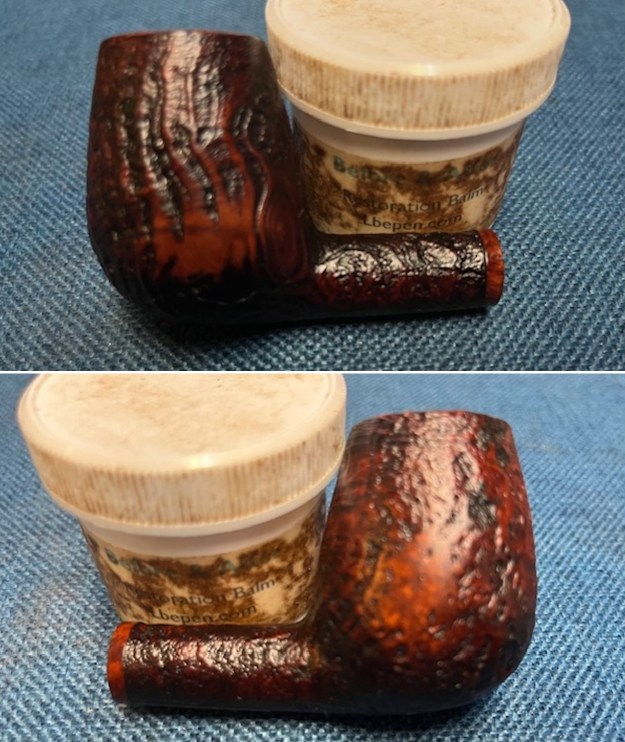
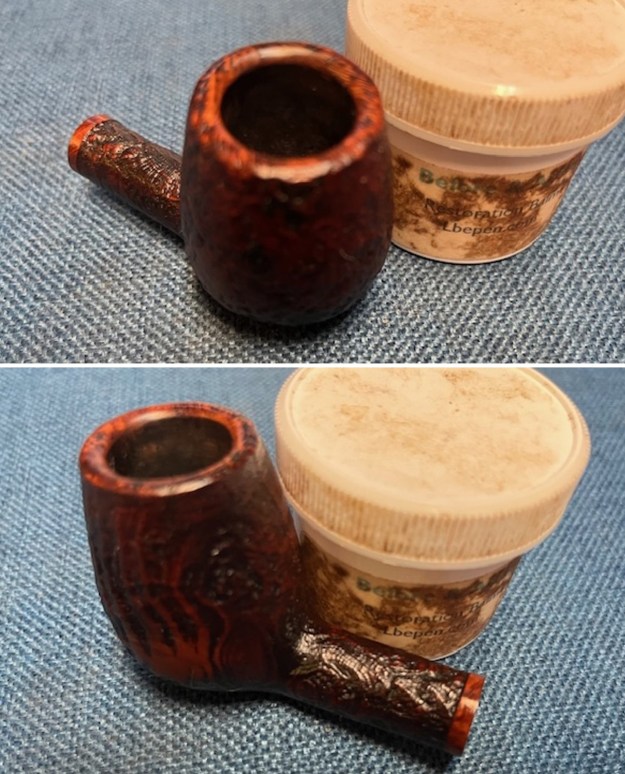
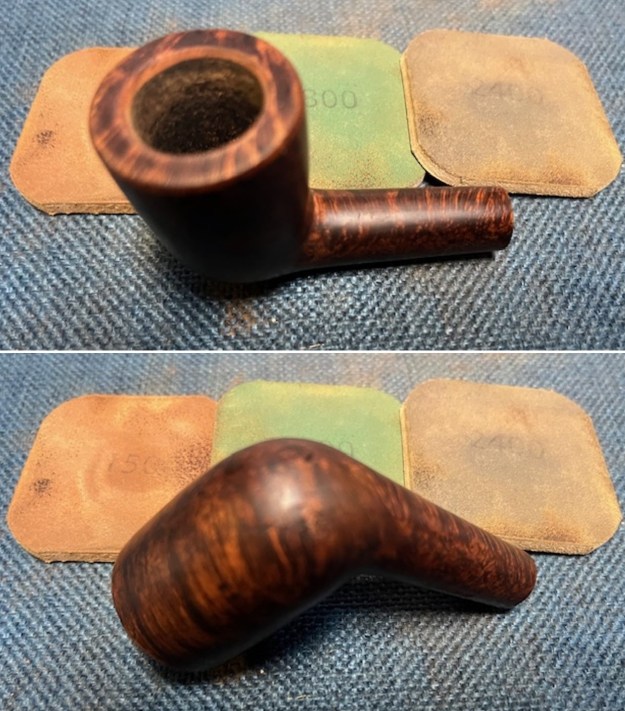
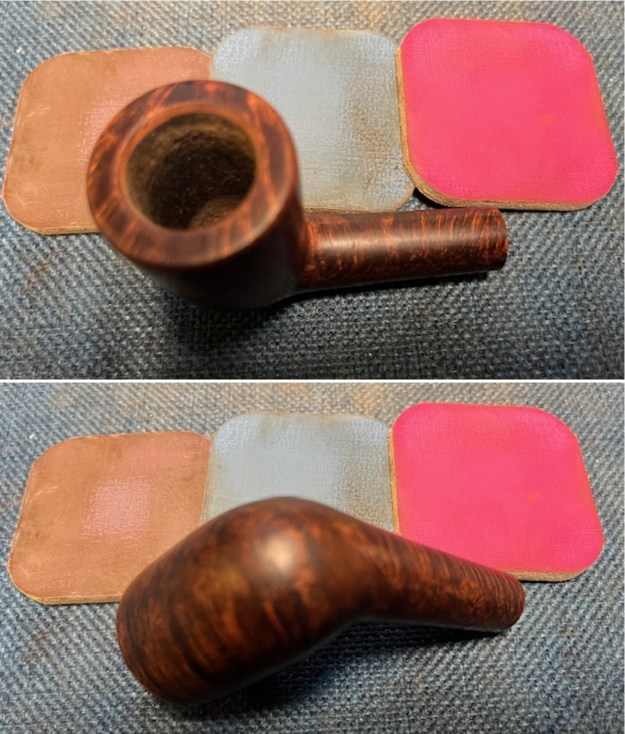
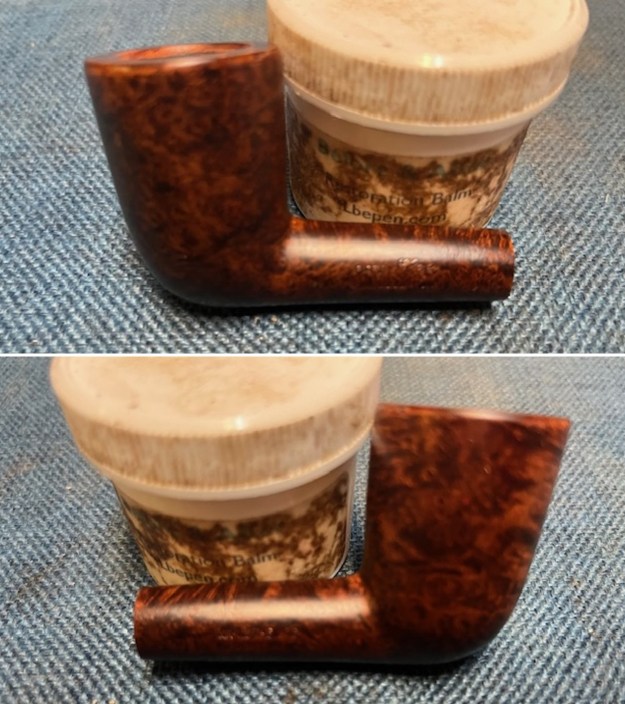
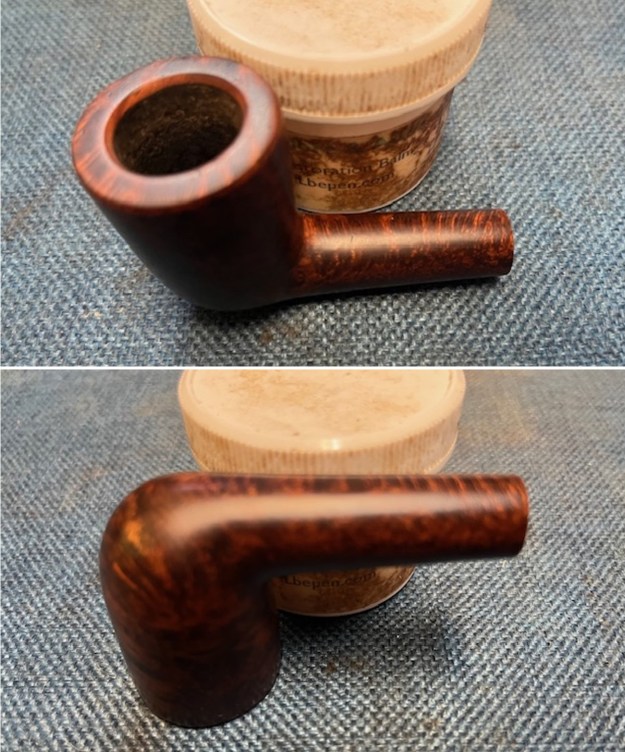
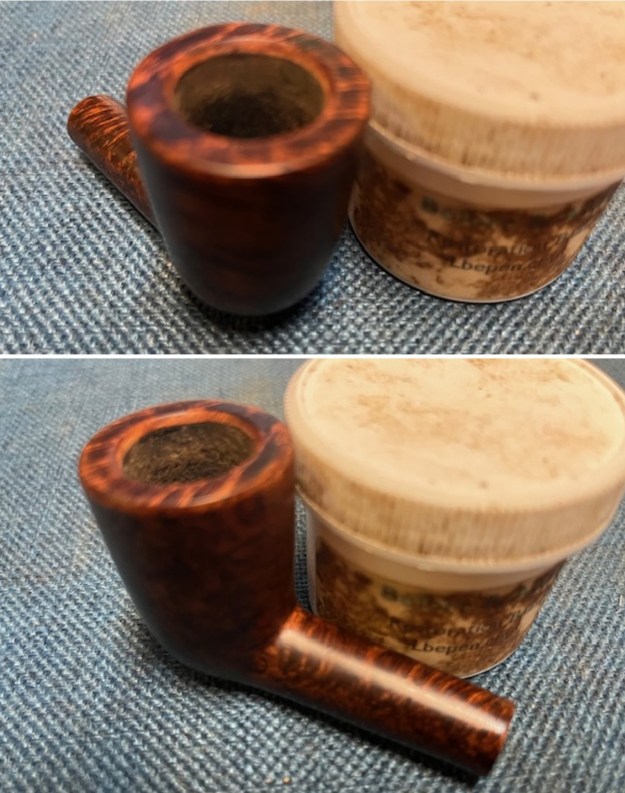
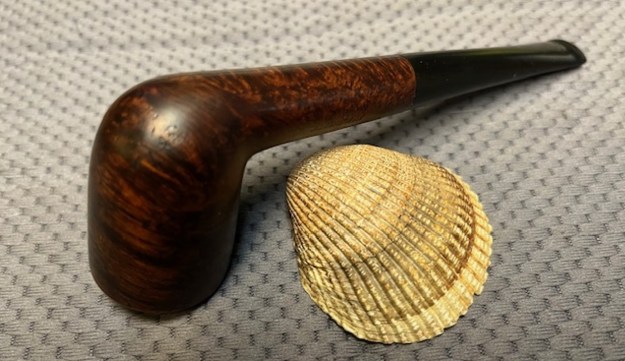
 I rubbed the bowl down with Before & After Restoration Balm. It is a paste/balm that works to deep clean the finish, enliven and protect the briar. I work it into the briar with my finger tips to make sure that it covers every square inch of the pipe. I set it aside for 10 minutes to let it do its work. I wiped it off with a soft cloth then buffed it with a cotton cloth. The briar really began to have a deep shine. The photos I took of the bowl at this point in the restoration. You see the shine that the briar has taken on and the way grain pops with the light buffing.
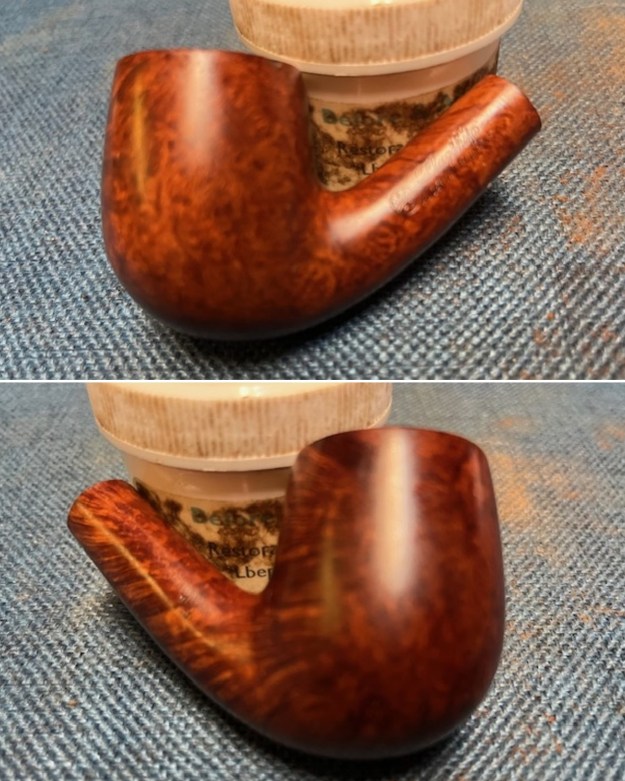
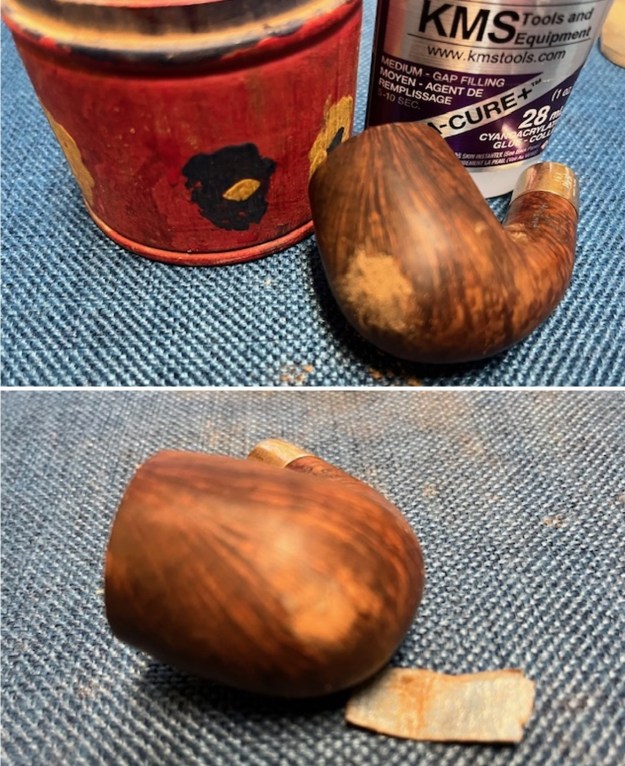
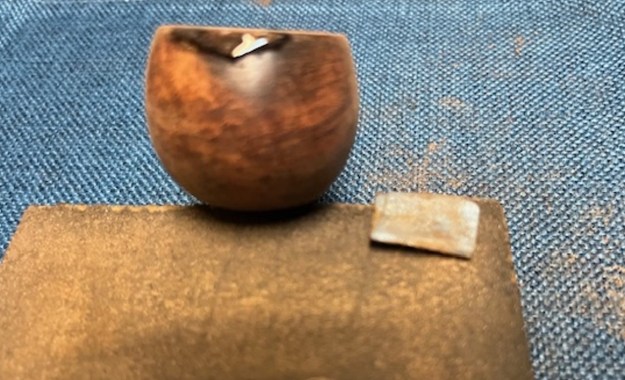
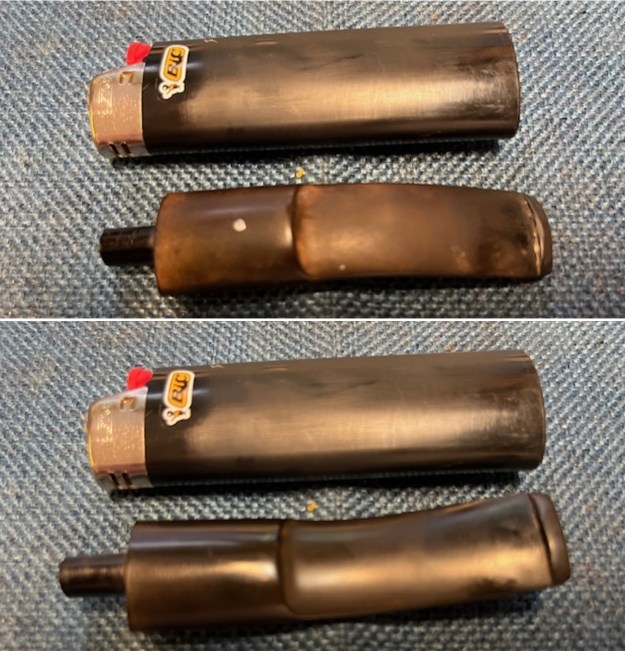
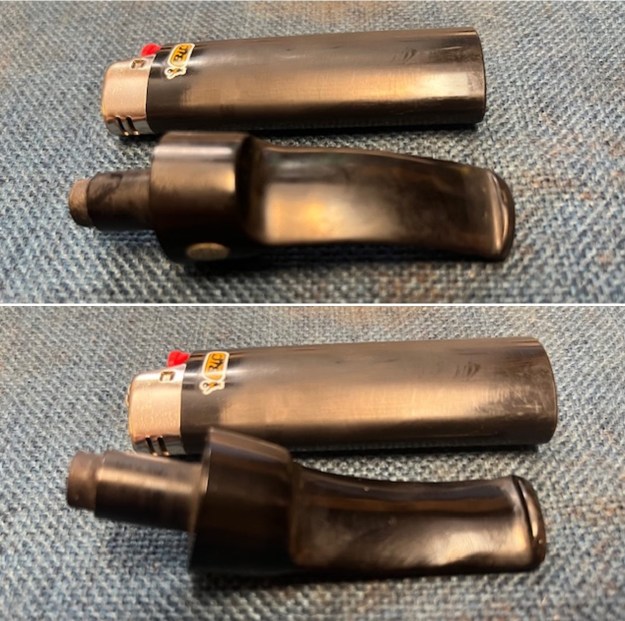
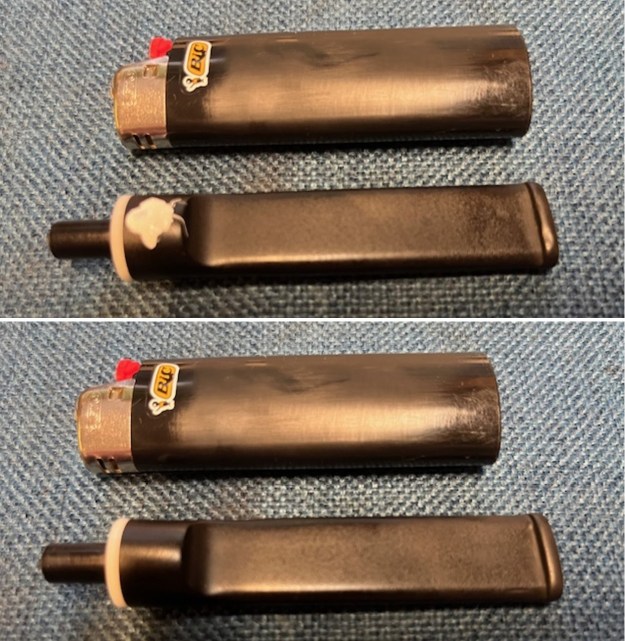
 I set the bowl aside and turned my attention to the stem. There was some damage on the stem top next to the button on both sides. I was not sure if it was tooth marks or file marks. The were deep cuts but the stem is quite thick at this point on both sides. I filled the spots in with black CA rubberized glue. I set the stem aside for the repairs to cure.
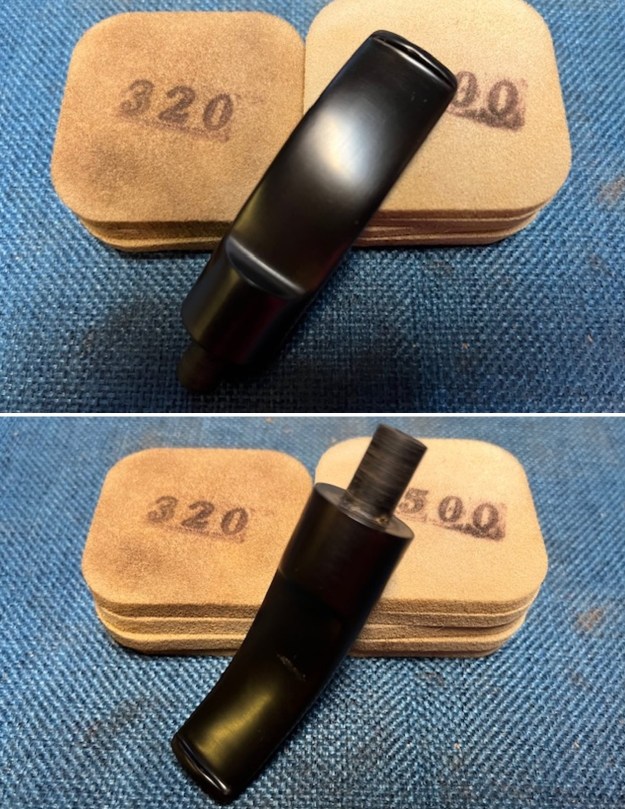
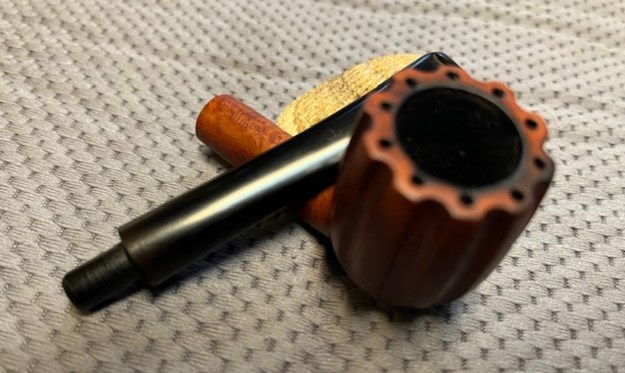
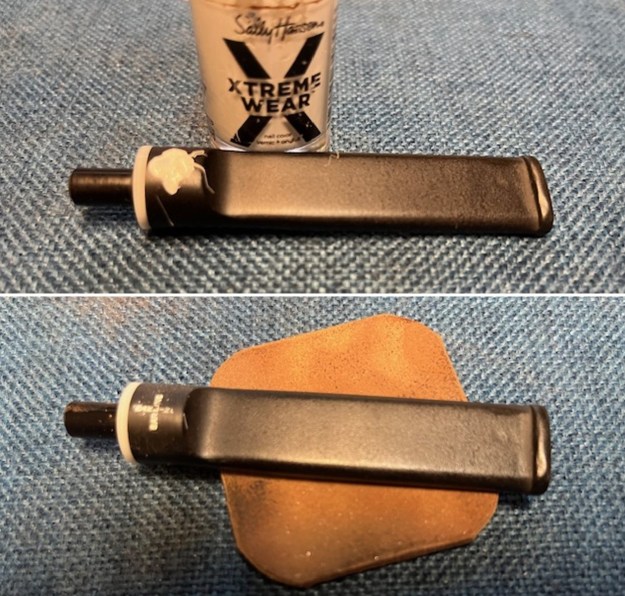
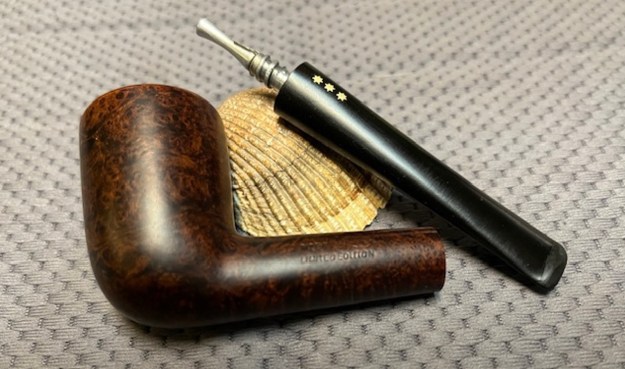
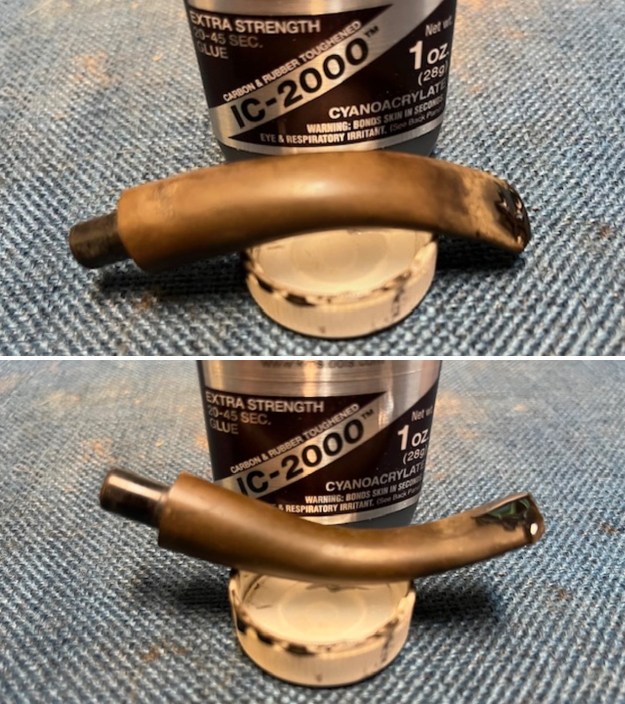 While it cured I touched up the blurry stamp on the top of the stem with white acrylic fingernail polish. Then I scraped away the excess white acrylic with a 320 grit sanding pad. It was fascinating to see that underneath the white acrylic the stamp was a train engine. It was very well stamped but faint in spots.
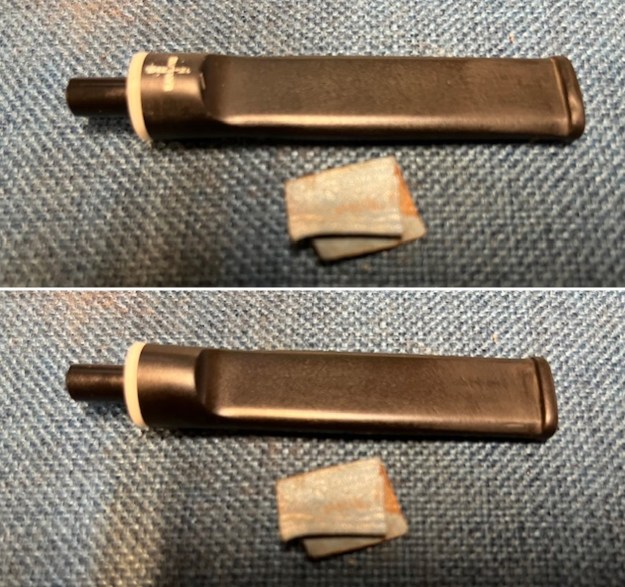
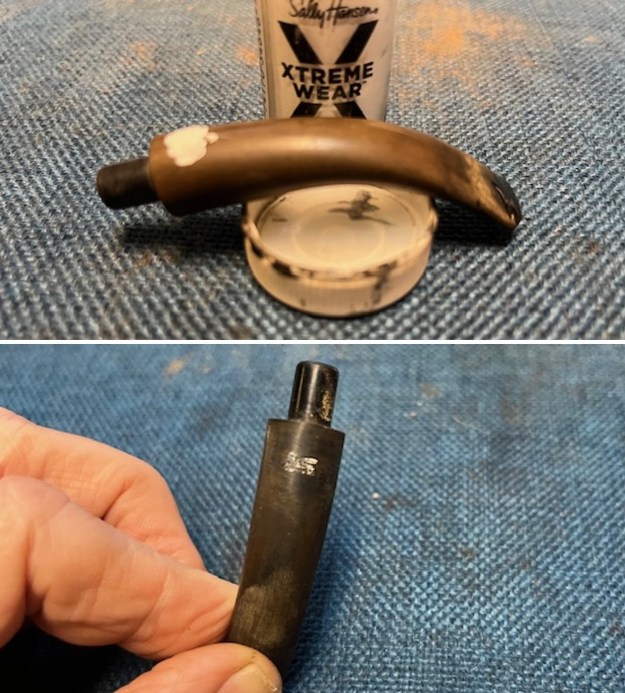 Once the repairs on the stem cured I used a file to flatten them and reshape the button on both sides. It was showing promise. I sanded the surface of the repair smooth with a folded piece of 220 grit sandpaper. I also sanded the oxidation on the stem surface at the same time. By the time I finished wit the reshaping and sanding the stem looked much better.
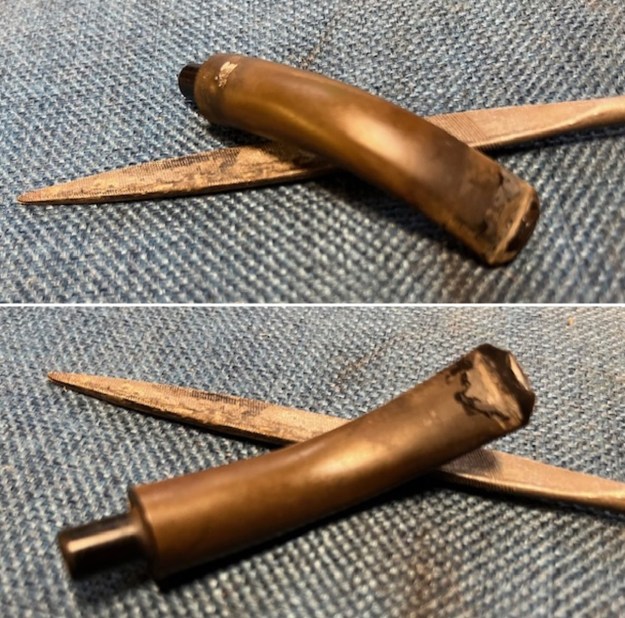
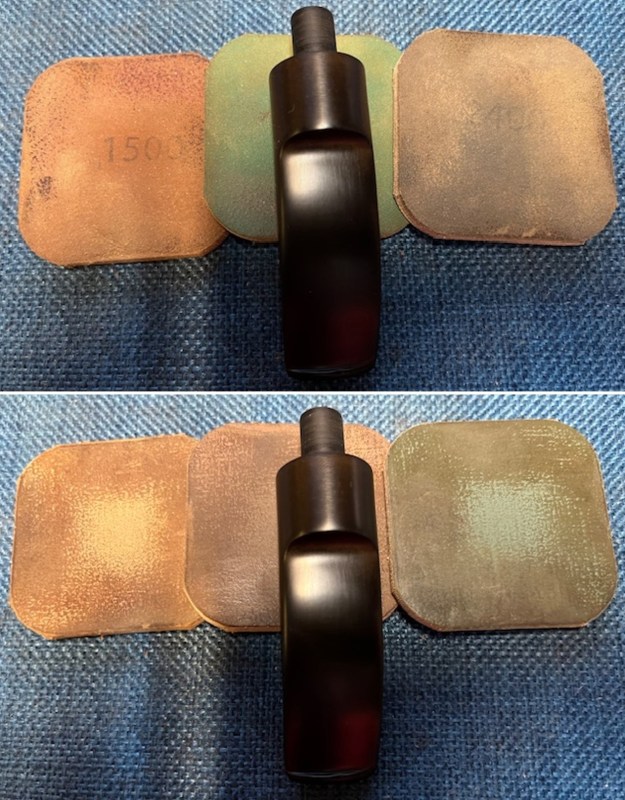
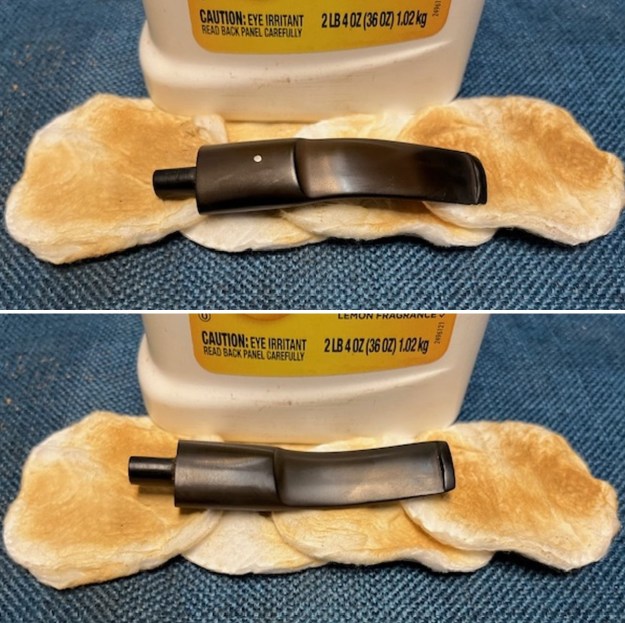
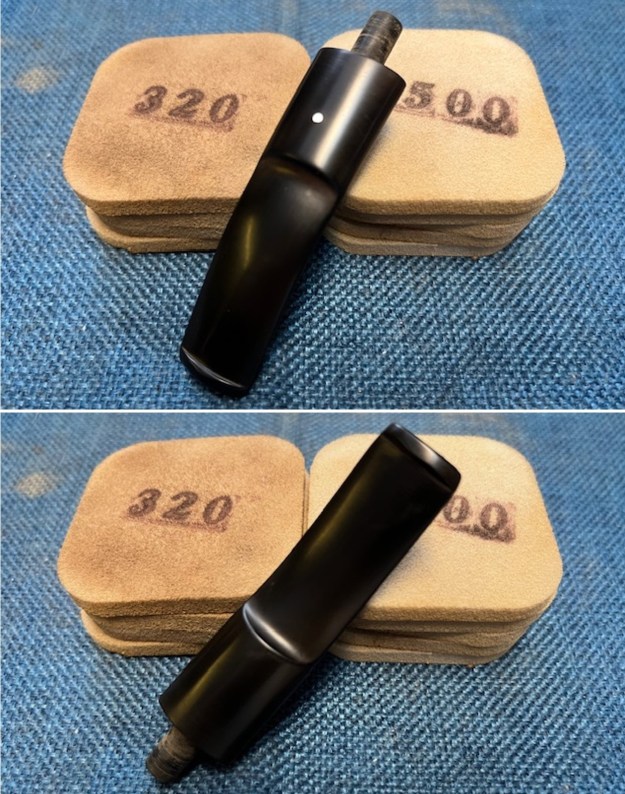
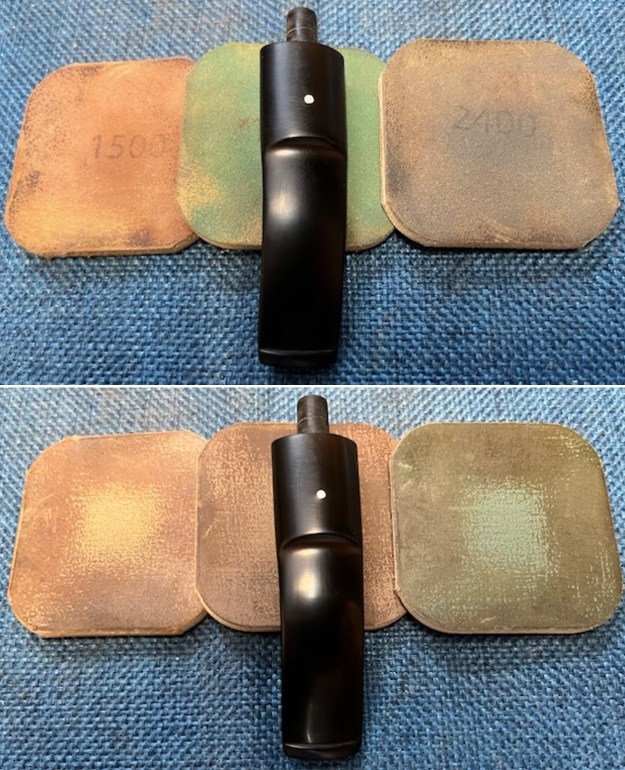
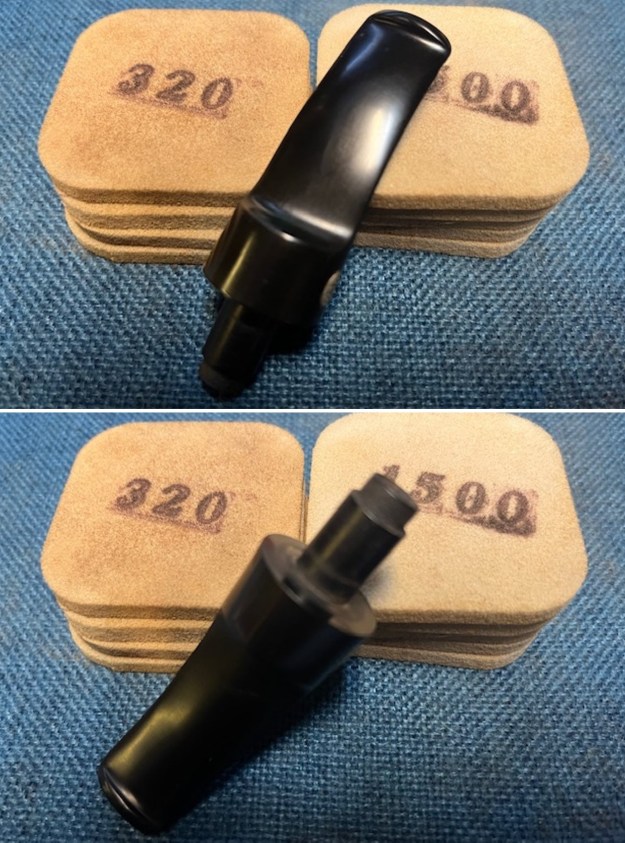
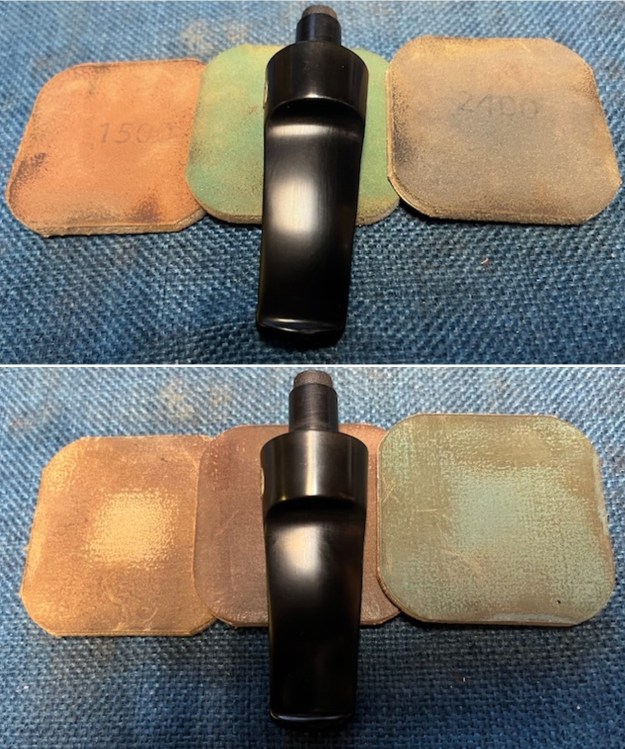
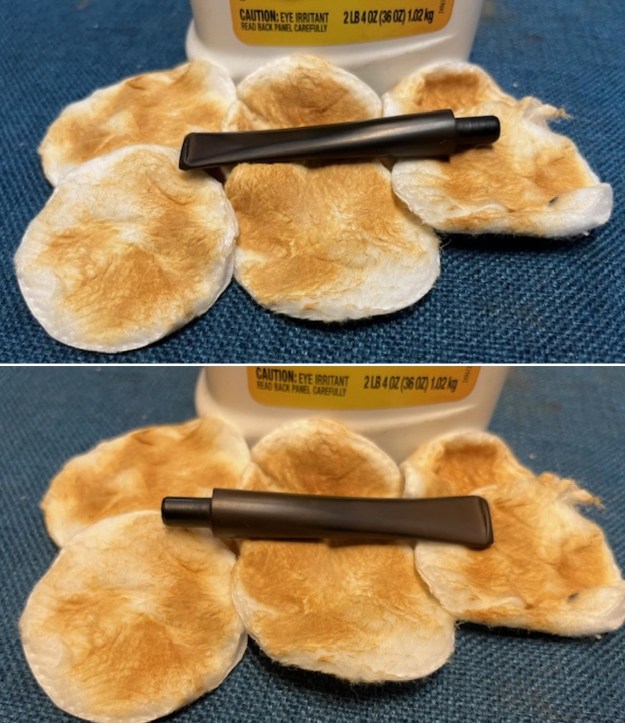
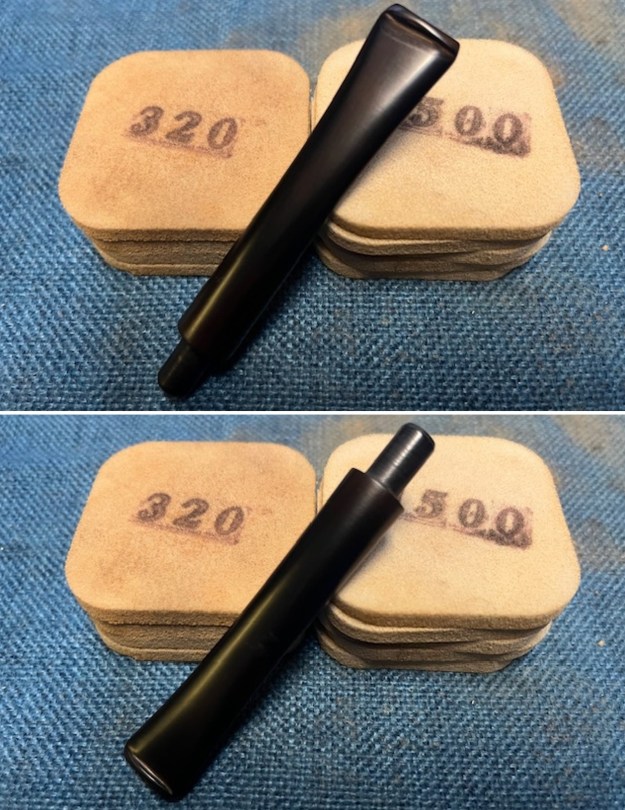
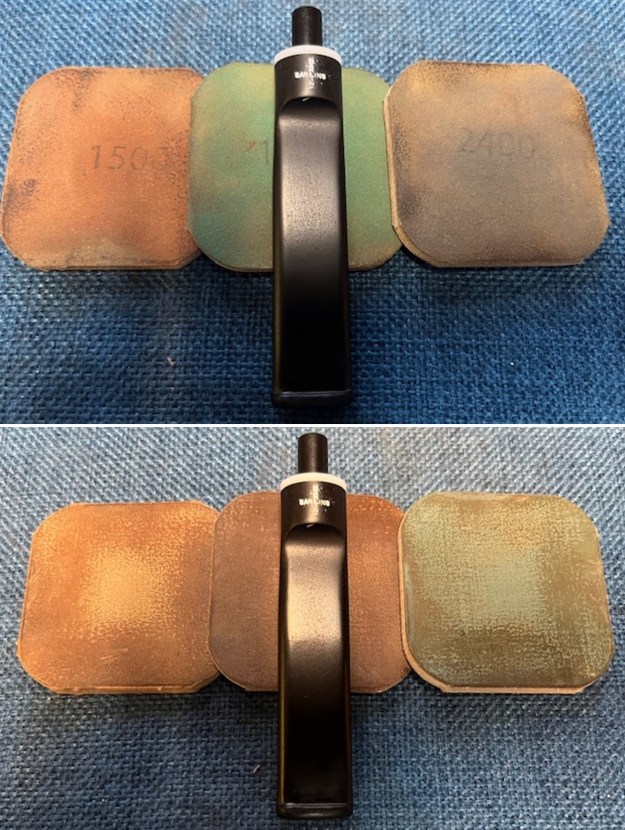
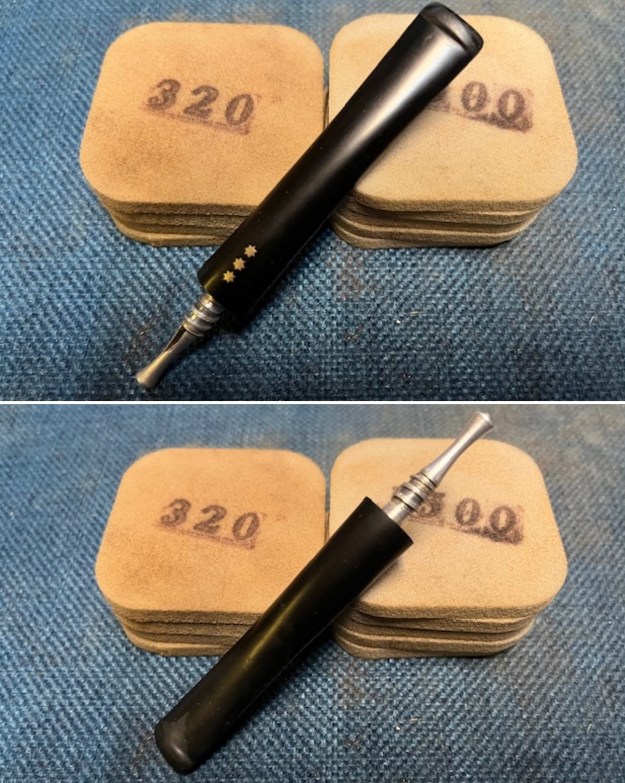
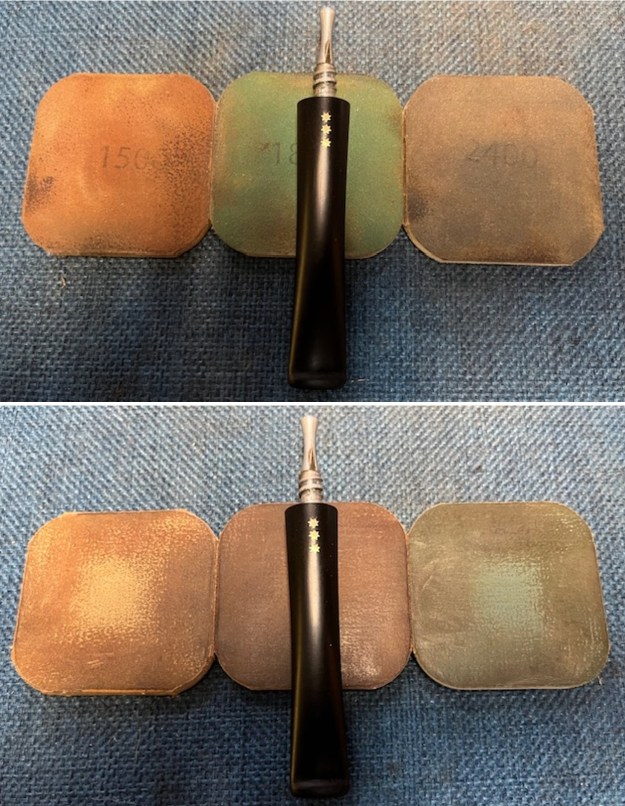
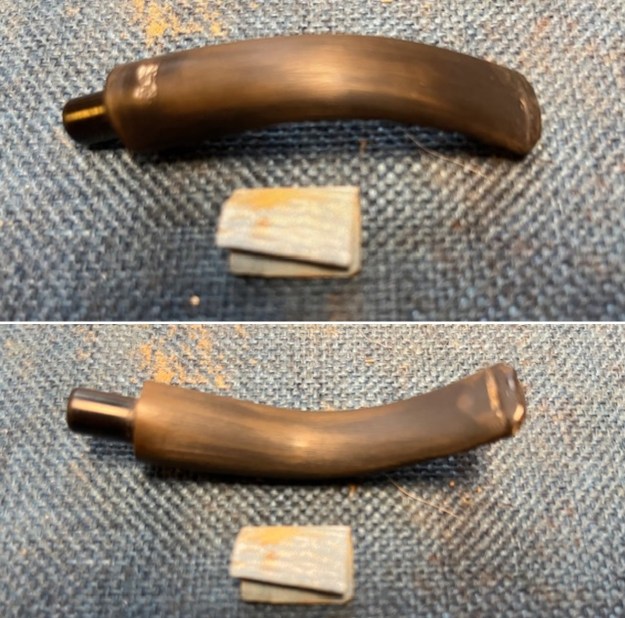 I sanded the stem with 320-3500 grit sanding pads to break up the remaining oxidation. I wiped it down after each sanding pad with an Obsidian Oil impregnated cloth. It began to look good.
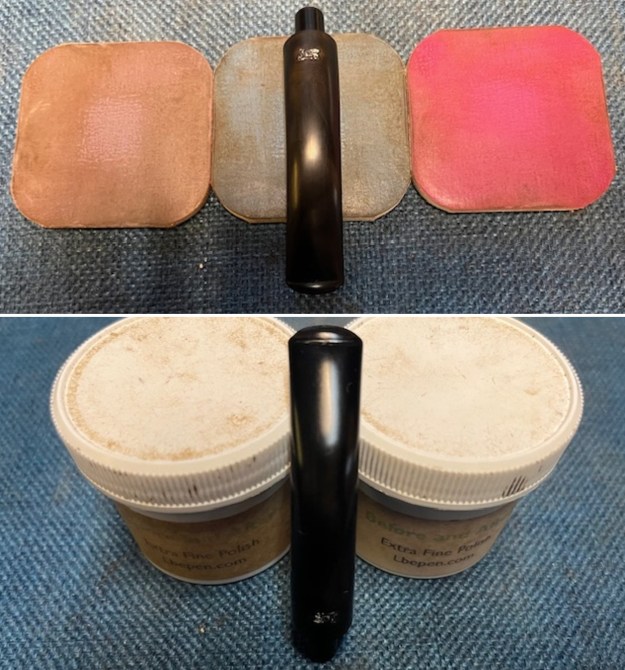
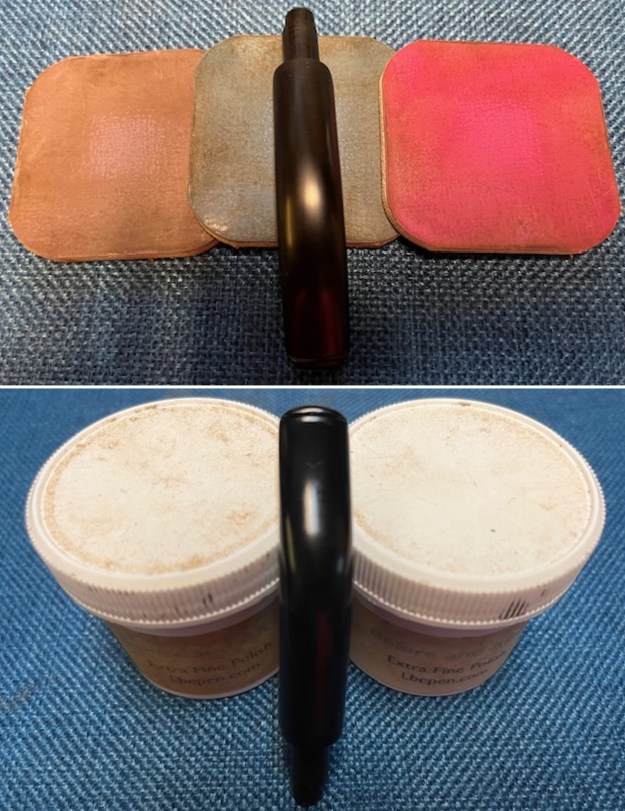
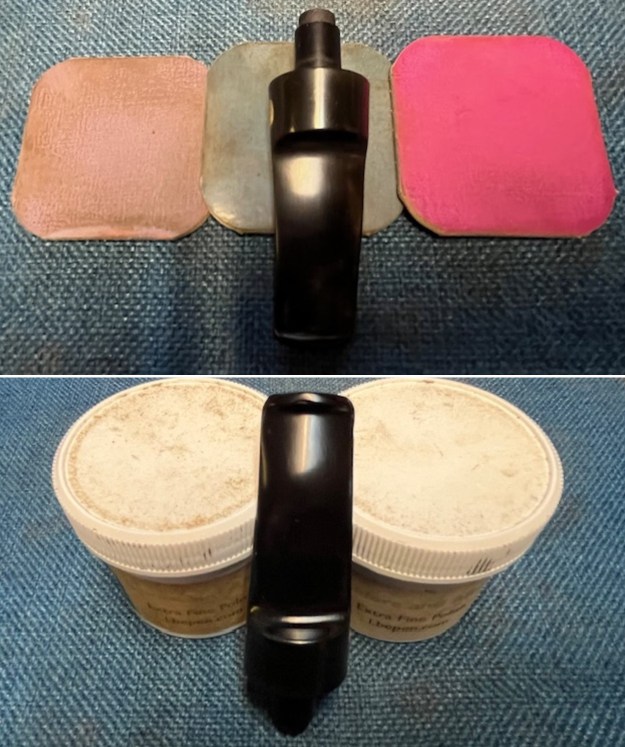
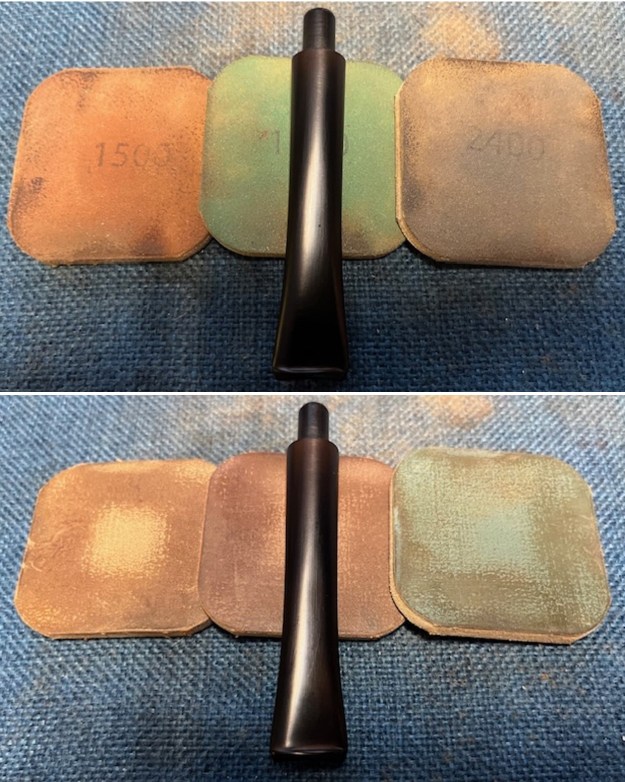
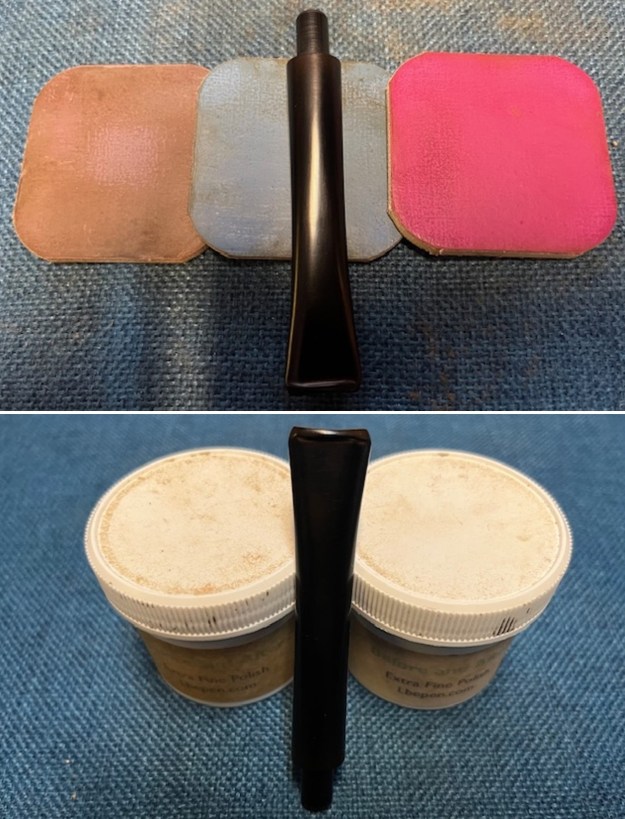
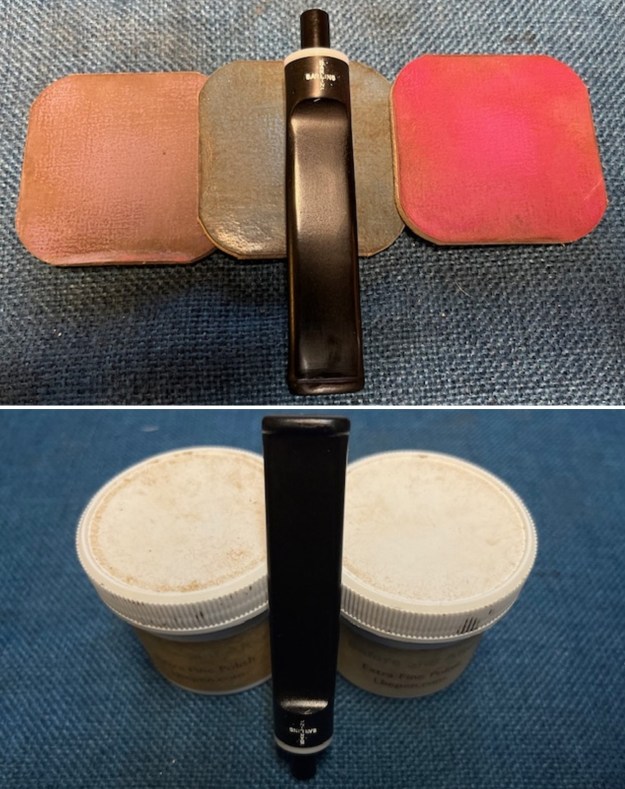
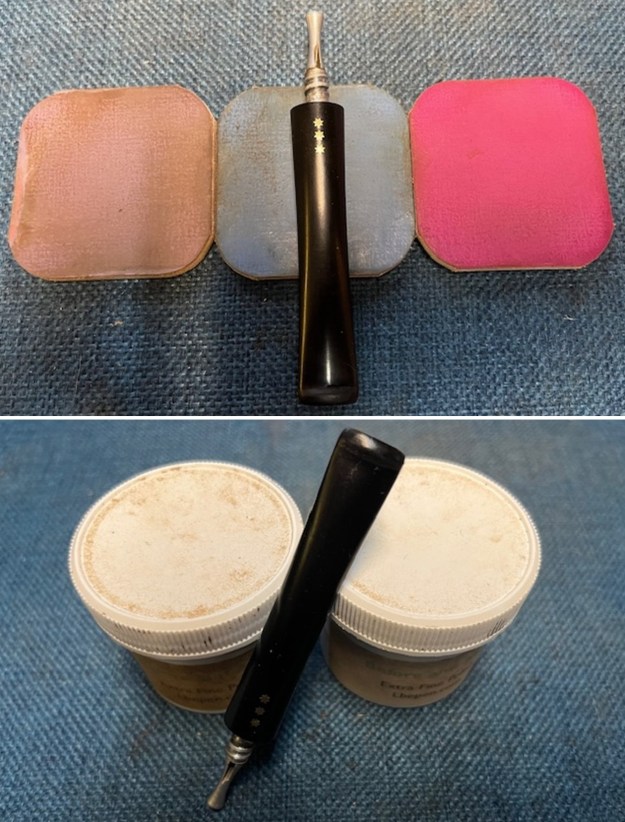
 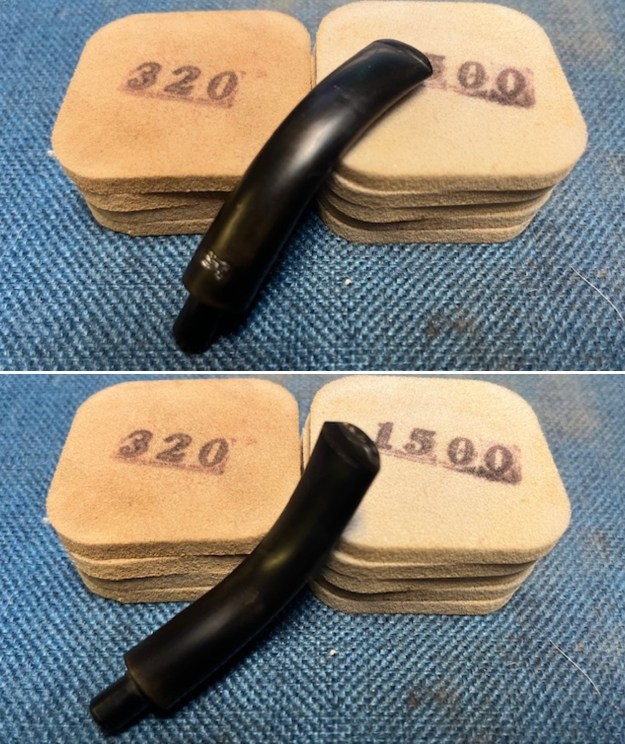 I polished the stem with micromesh sanding pads – dry sanding with 1500-12000 grit pads. I wiped the stem down after each sanding pad with Obsidian Oil. I polished it with Before & After Pipe Stem Polish – both Fine and Extra Fine. Once I had finished the polishing I gave it final coat of Obsidian Oil and set it aside to dry.
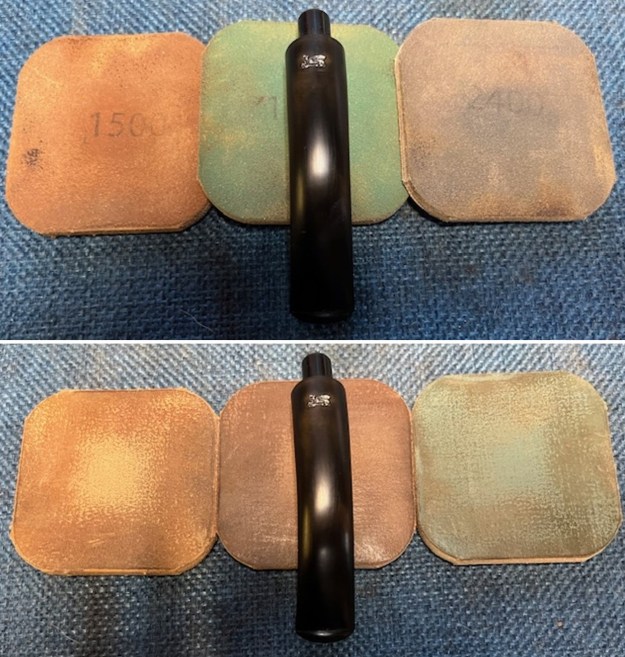
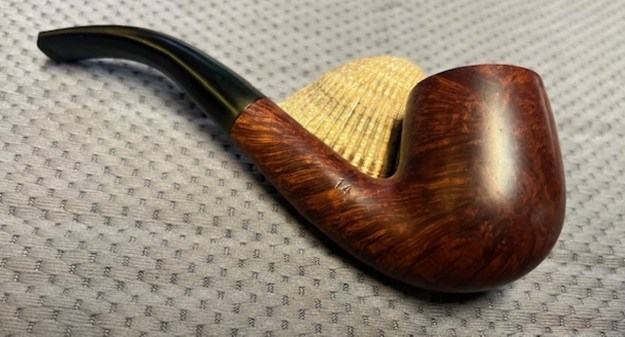
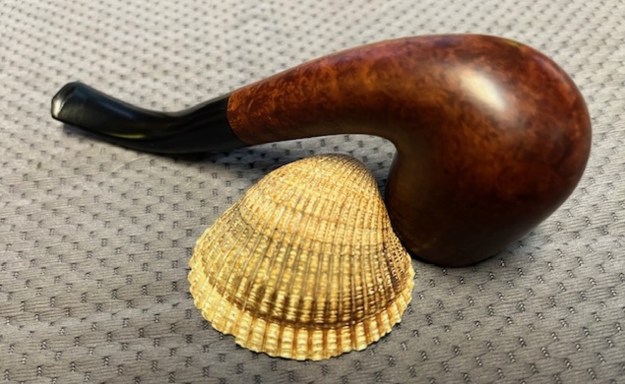
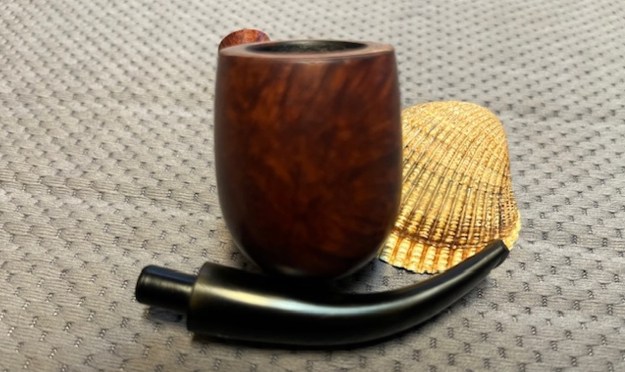
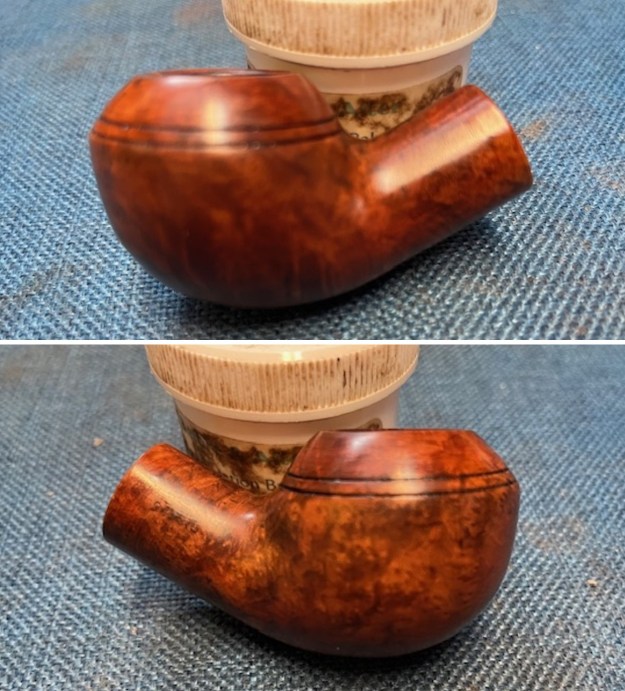
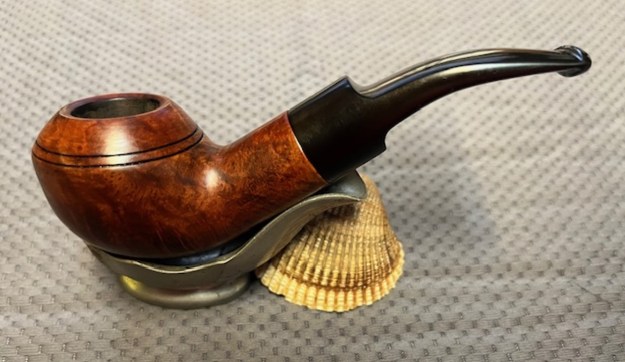
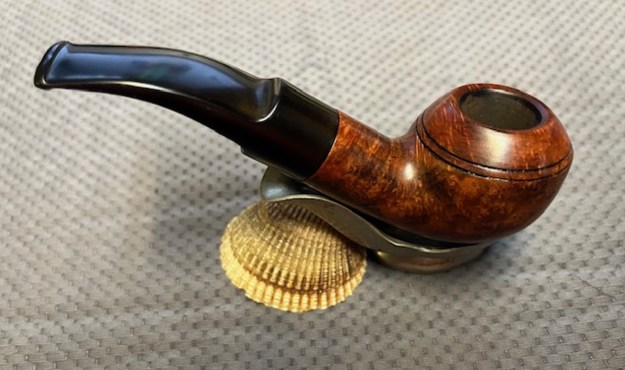
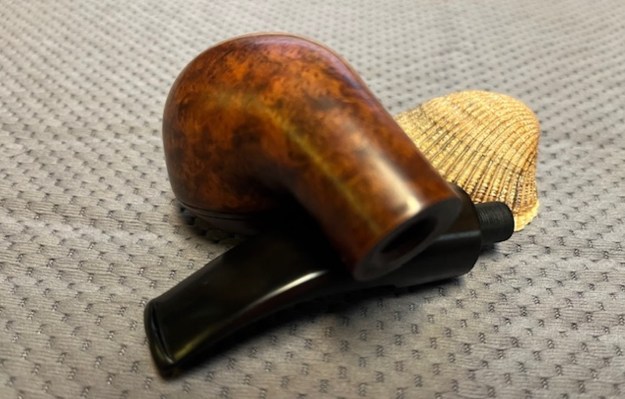
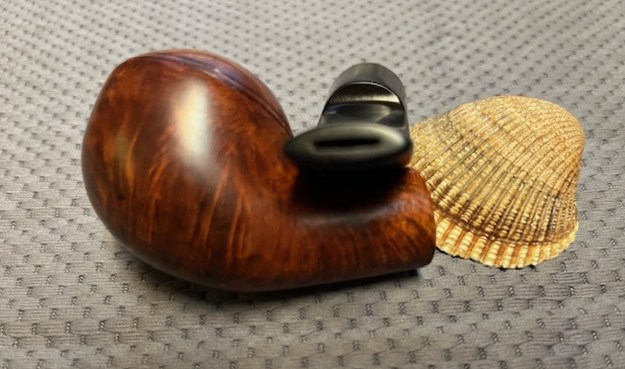
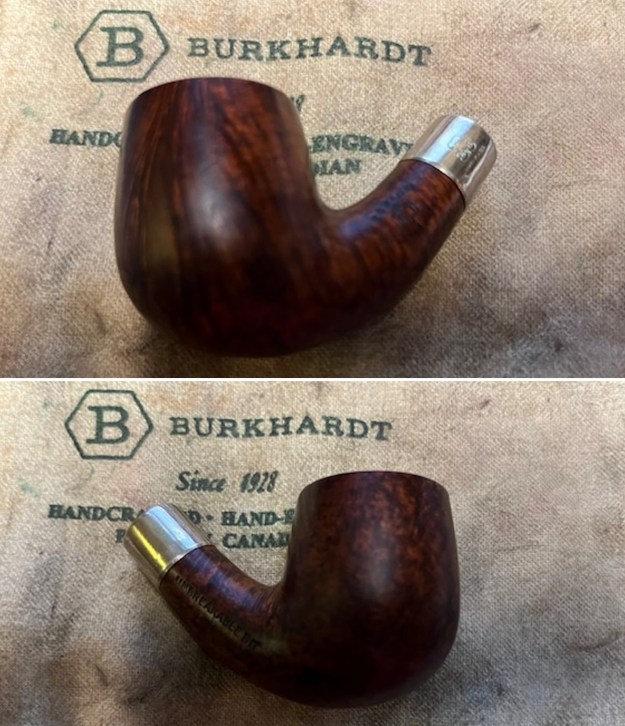
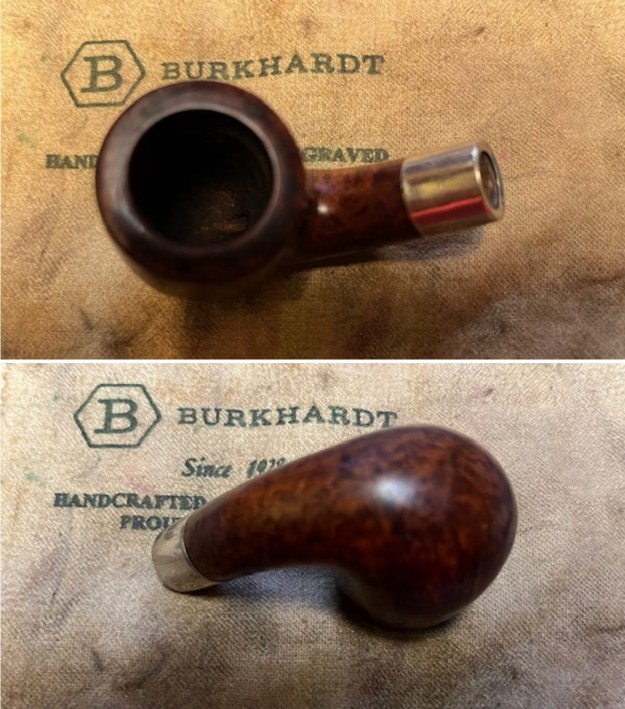
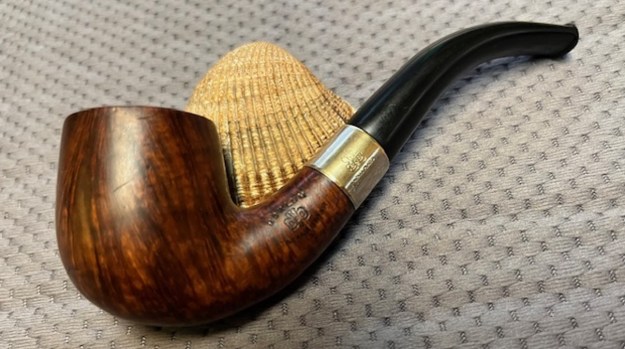
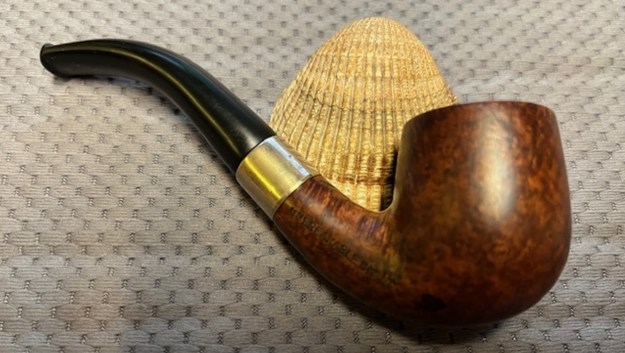
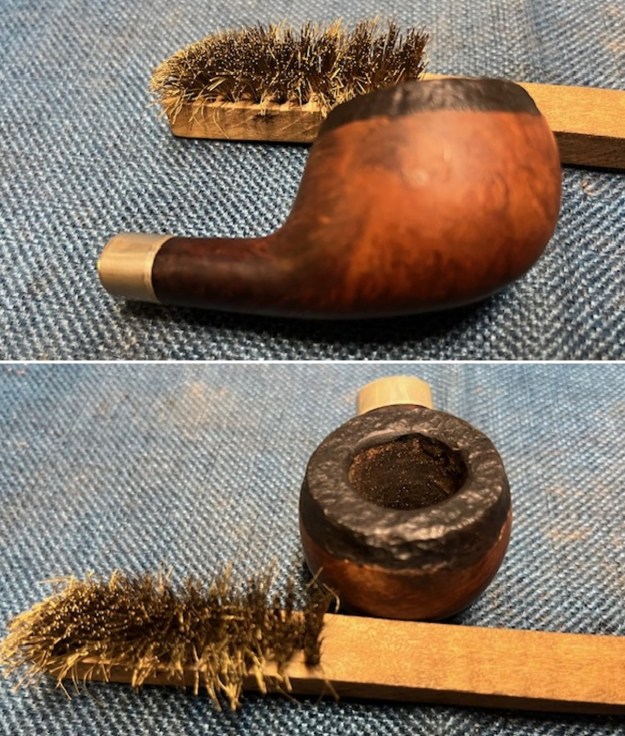
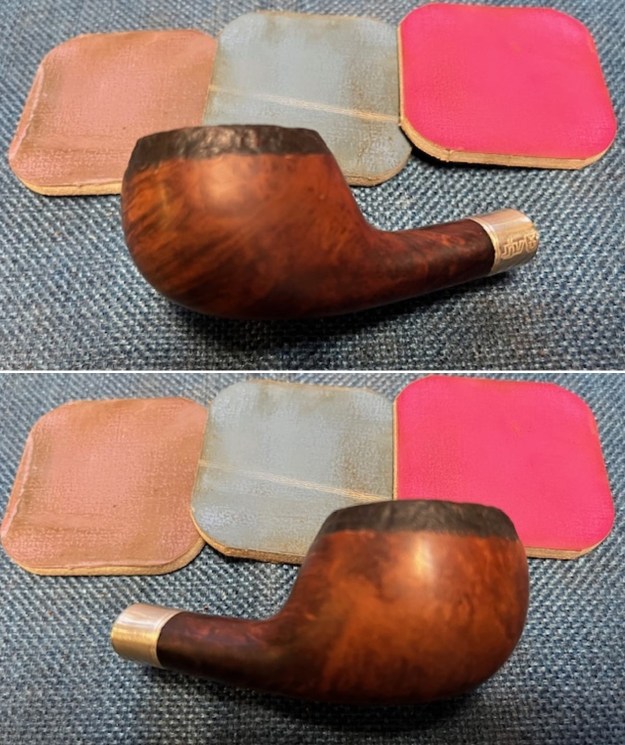
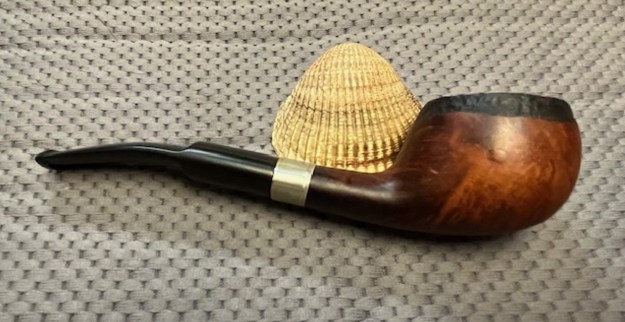
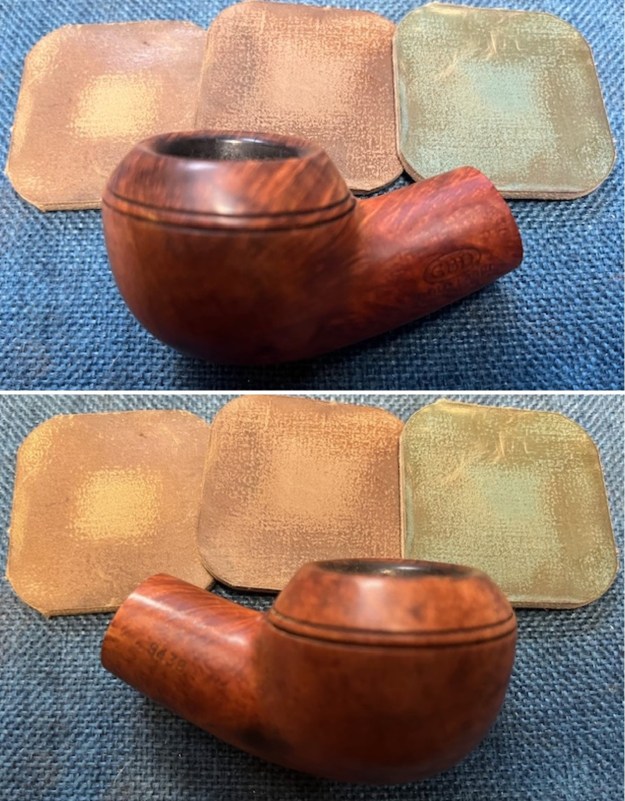
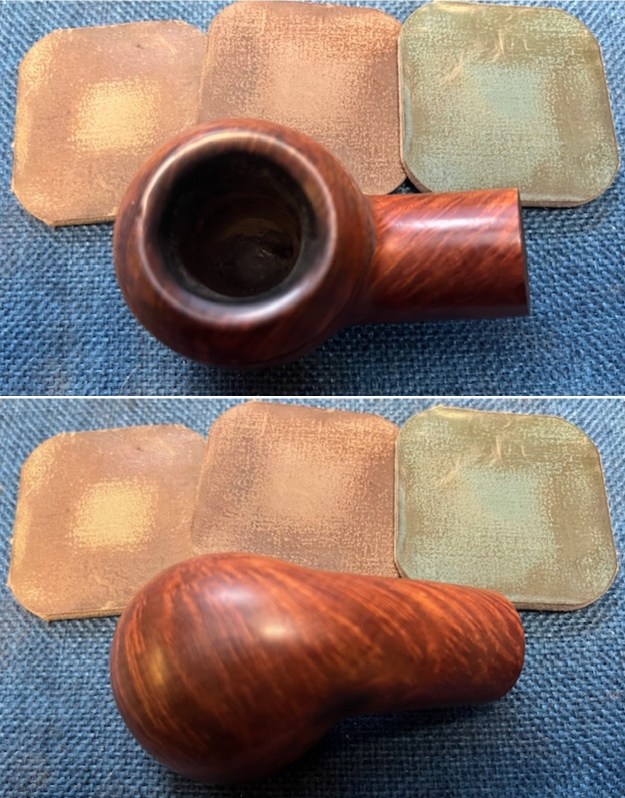
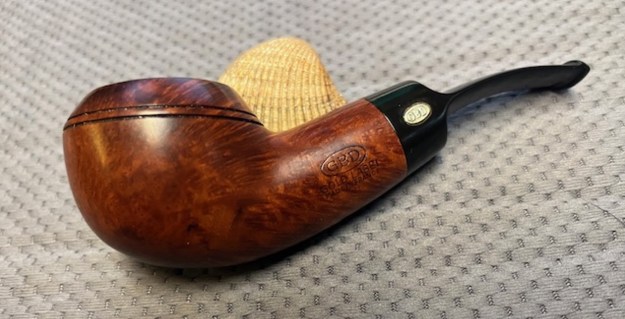
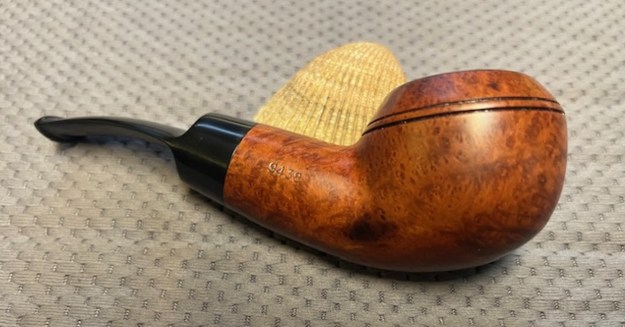
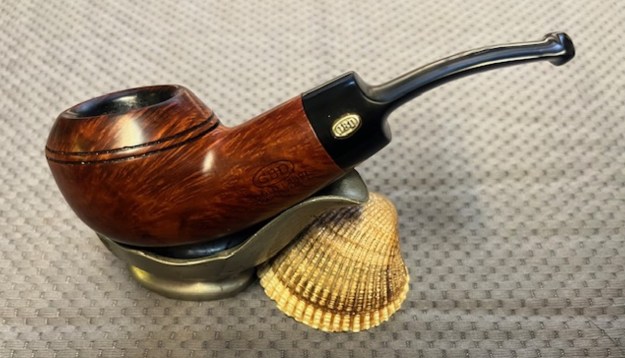
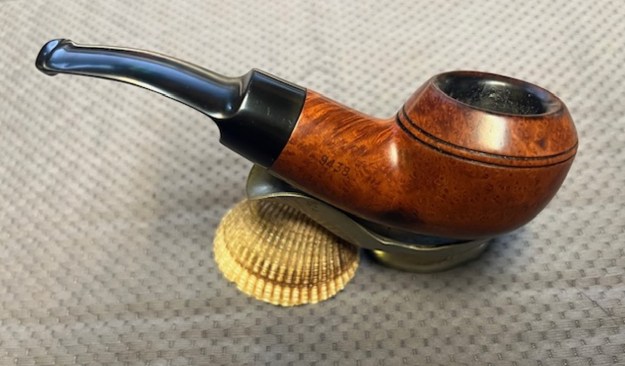
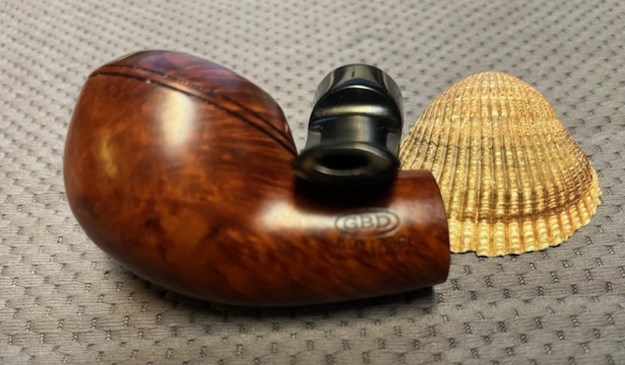
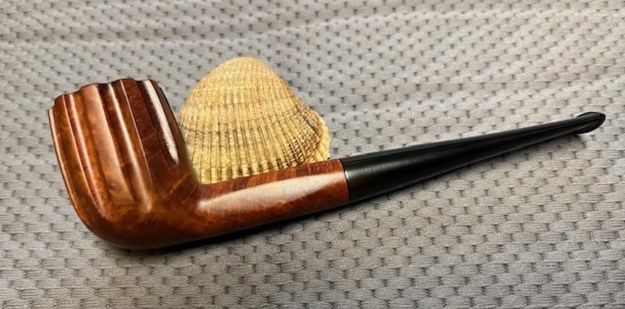
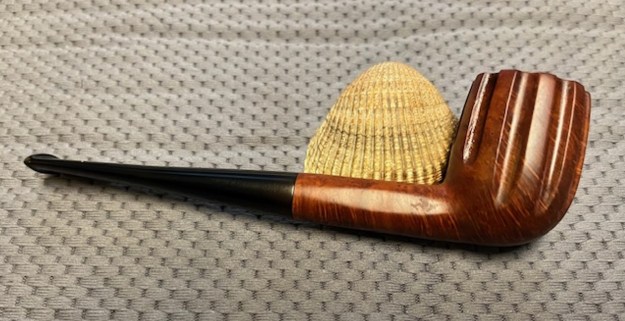
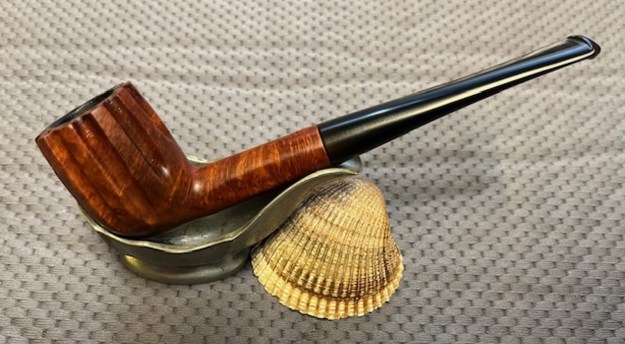
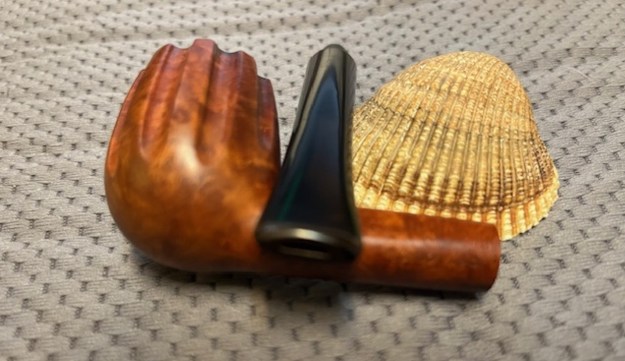
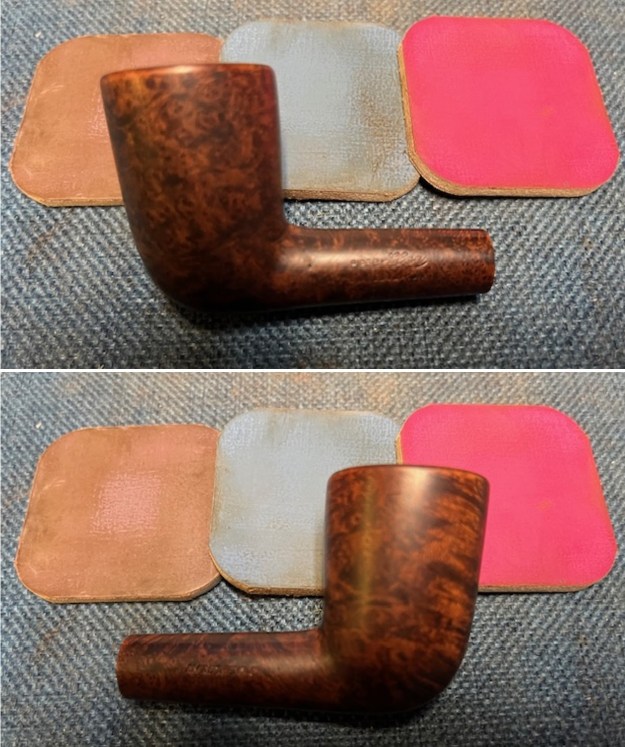
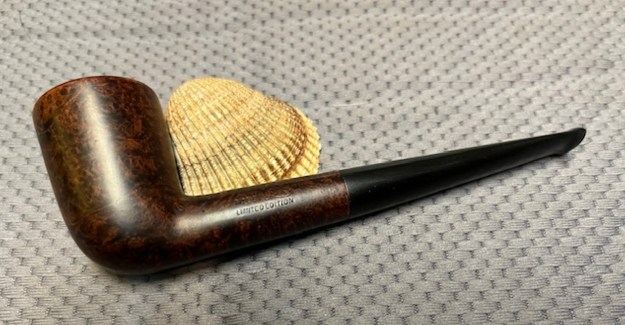
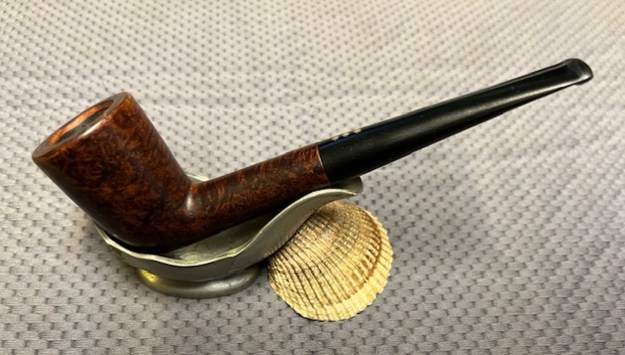
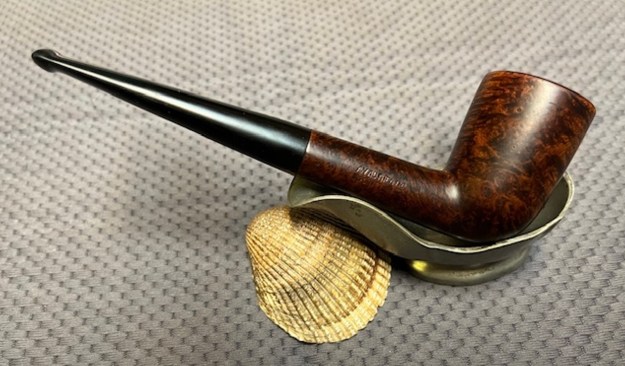
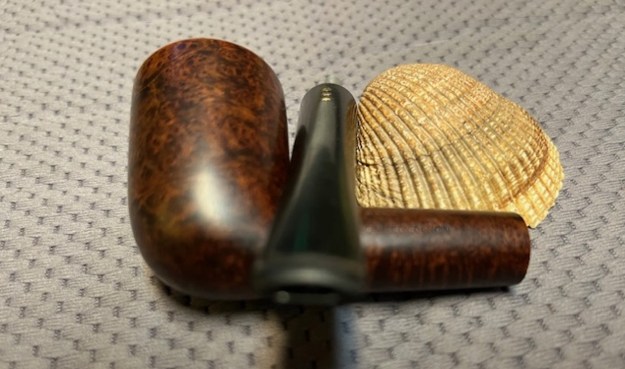
 I am glad to be on the homestretch on what was a mystery pipe when I started. I really am looking forward to the final look when I put a pipe back together, polished and waxed. I polished the bowl and stem with Blue Diamond to polish out the scratches in the briar and the vulcanite. I gave the bowl and the stem multiple coats of carnauba wax. I buffed the pipe with a clean buffing pad to raise the shine. I hand buffed it with a microfiber cloth to deepen the shine. The pipe polished up pretty nicely. The grain pops with the wax and polish. The shiny black vulcanite stem is a beautiful contrast to the browns of the bowl and shank. This NEBPC – New England Briar Pipe Company Flagship Algerian Bruyere Billiard was another fun pipe to work on. The pipe is comfortable pipe to hold in the hand. The finished pipe is shown in the photos below. The dimensions of the pipe are Length: 5 inches, Height: 1 ¾ inches, Outside diameter of the bowl: 1 ¼ inches, Chamber diameter: ¾ of an inch. The weight of the pipe is 1.45 ounces/41 grams. This NEBPC pipe was a fun one to work on with a great piece of history and connection with KB&B Yello-Bole. I will be adding it to the American (US) Pipe Making Companies Section on the rebornpipes store shortly. Thanks for reading this blog and my reflections on the pipe while I working on it.
As always, I encourage your questions and comments as you read the blog. Thanks to each of you who are reading this blog. Remember we are not pipe owners; we are pipemen and women who hold our pipes in trust until they pass on into the trust of those who follow us.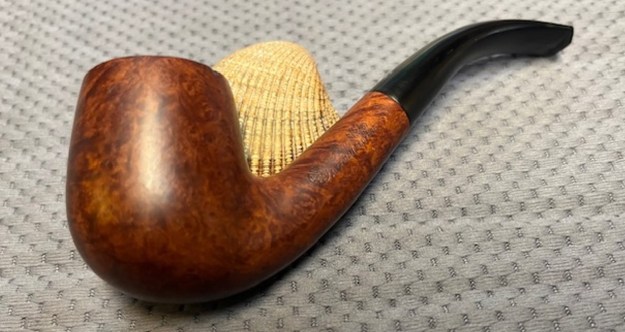

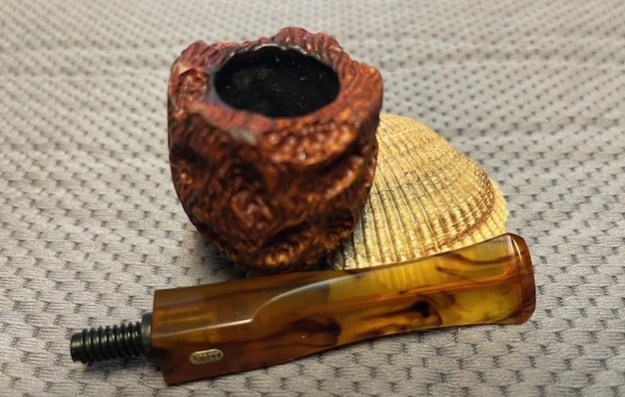
 Jeff took closeup photos of the bowl and rim top to clearly show the condition of both. The match what I described above. He also took photos of the stem to show the tooth marks and chatter on both sides ahead of the button.
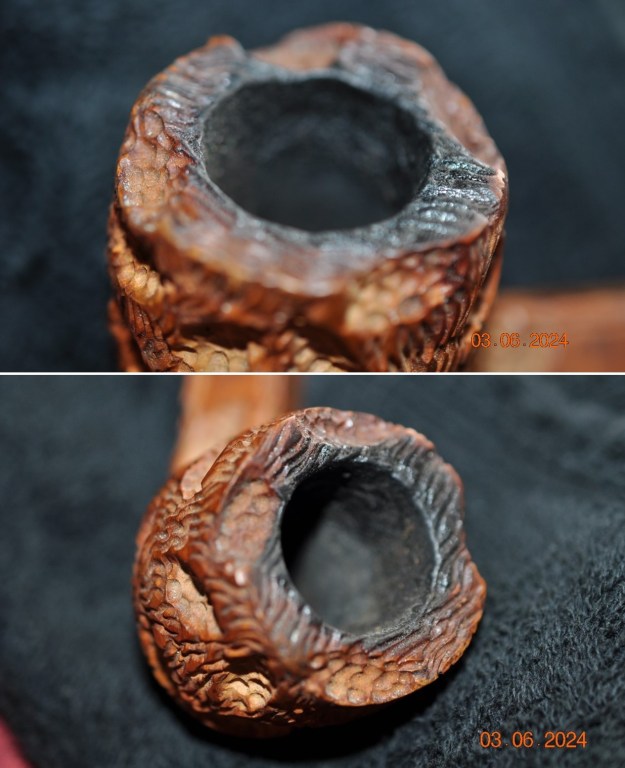
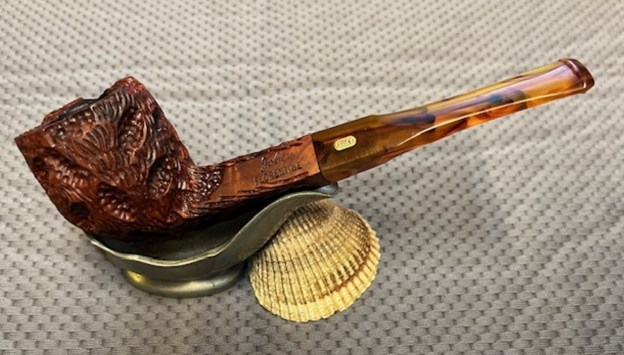
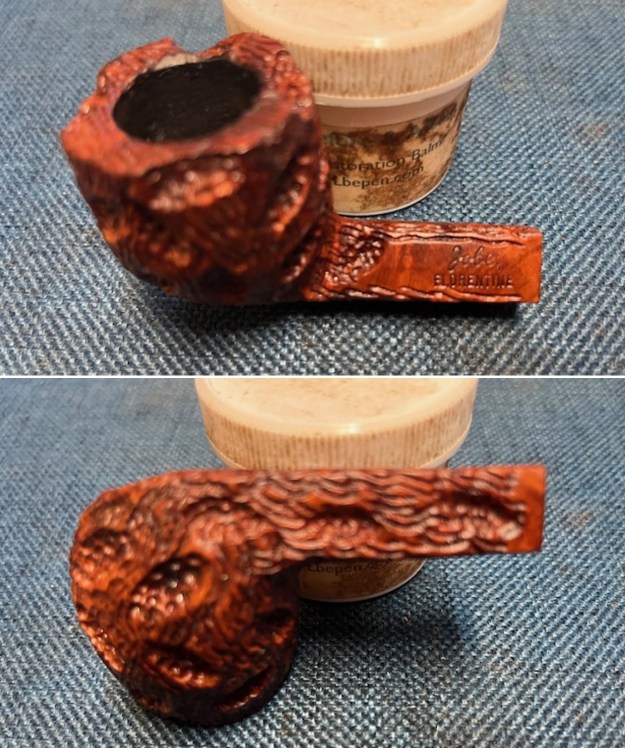
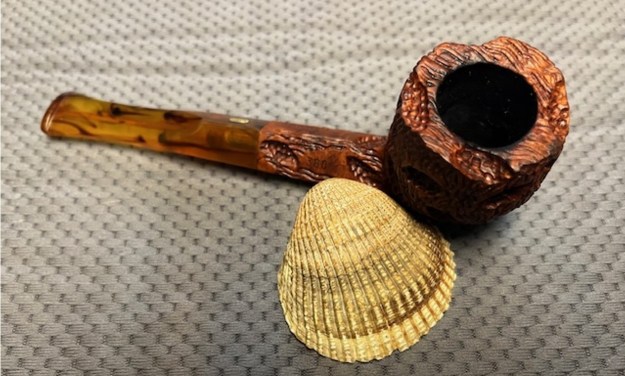
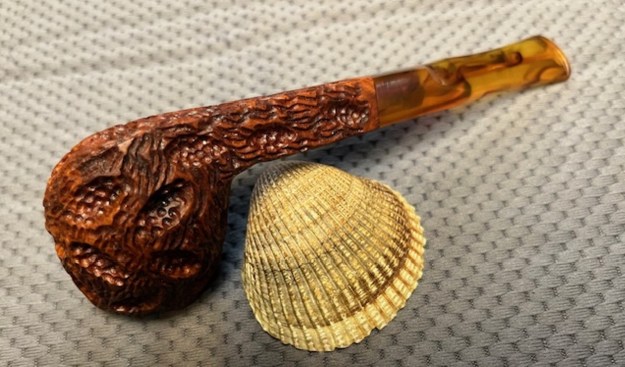
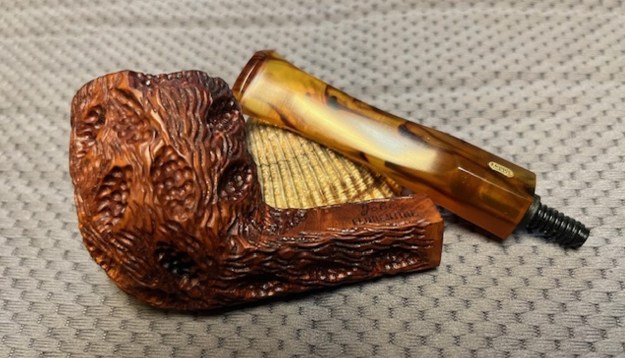
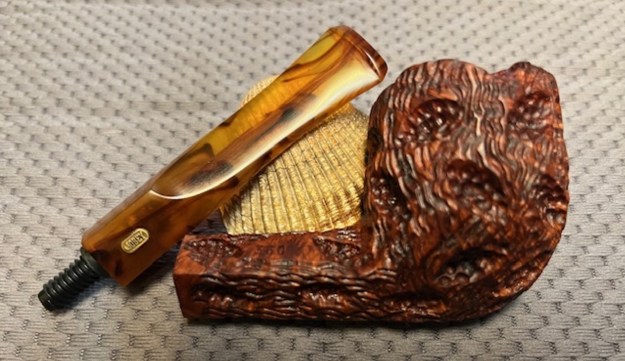
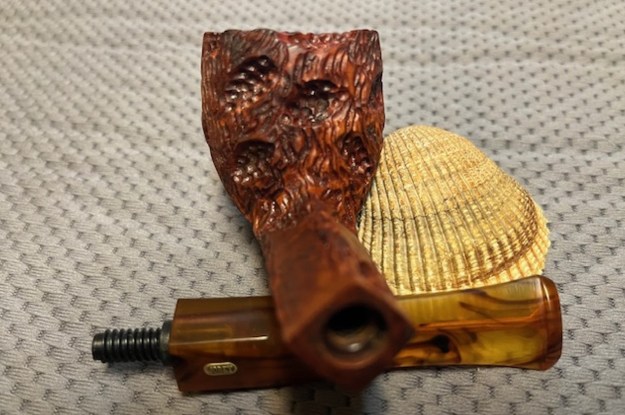
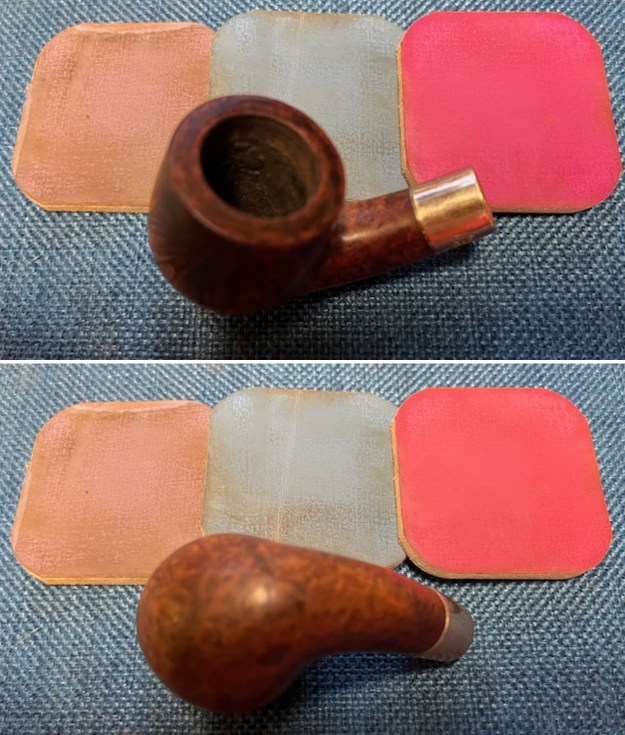
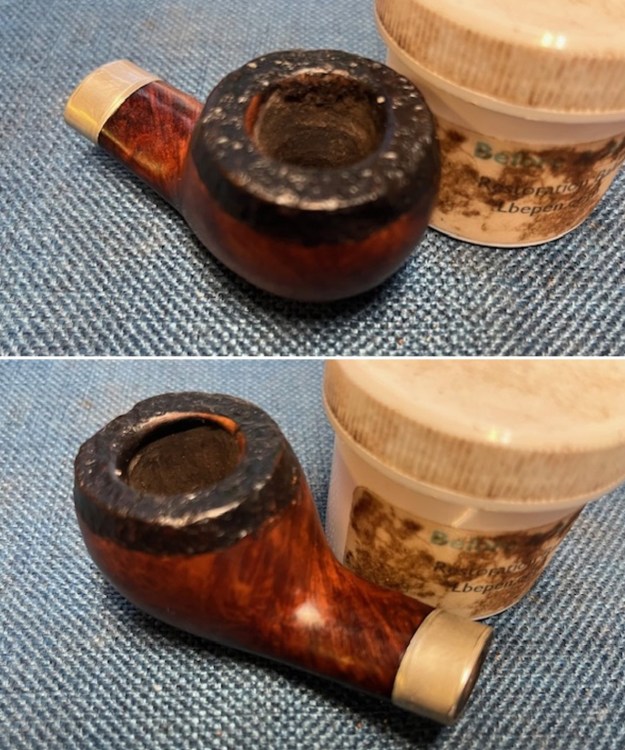
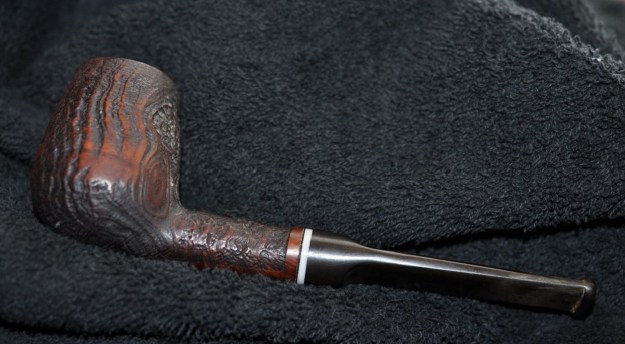
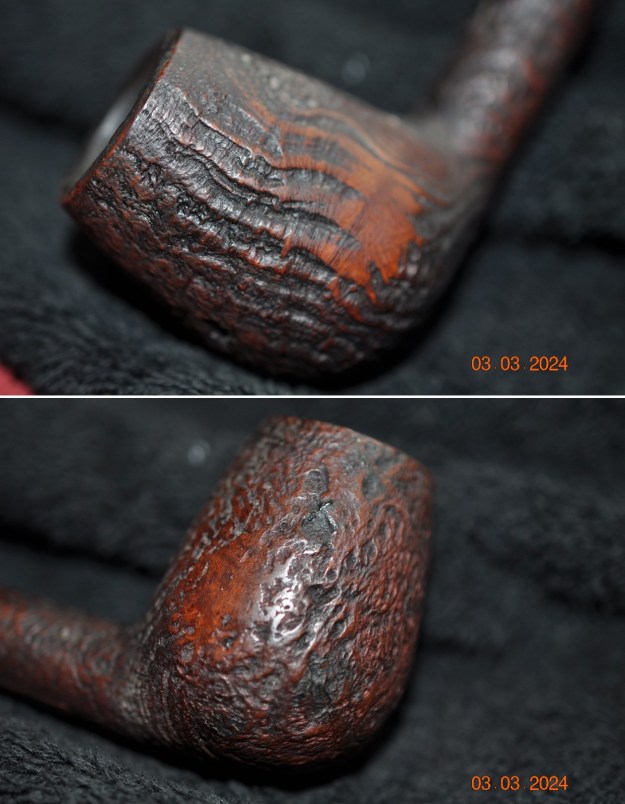
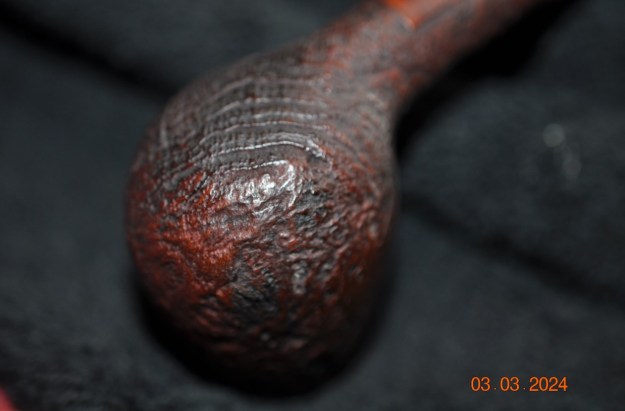
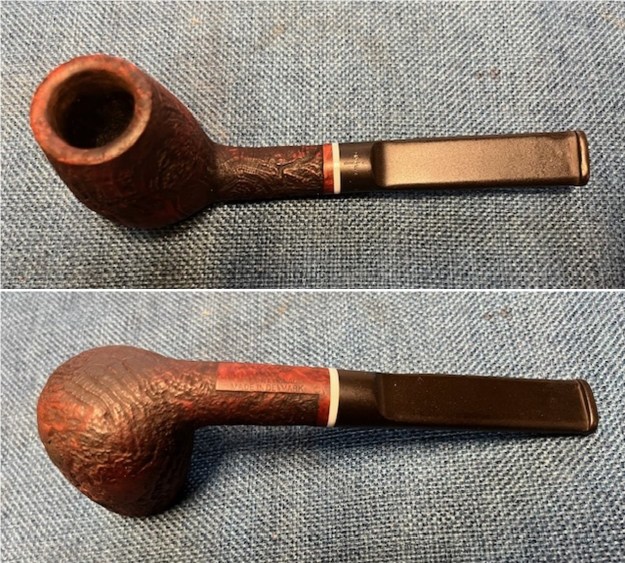
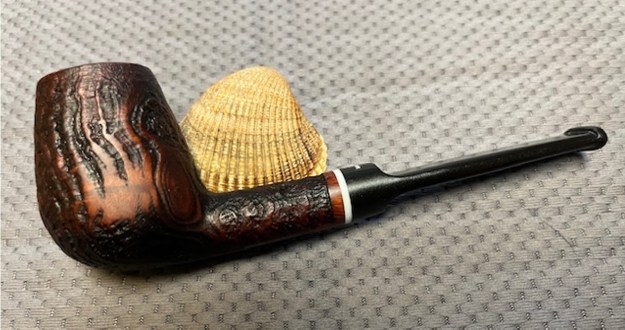
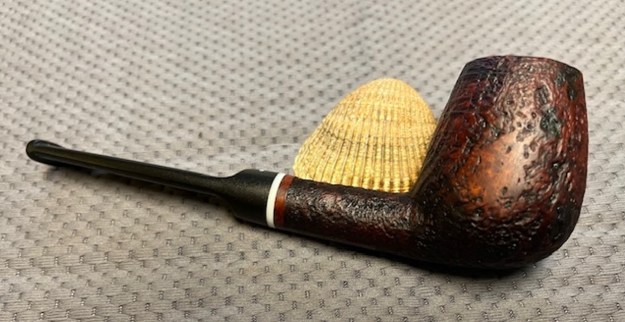
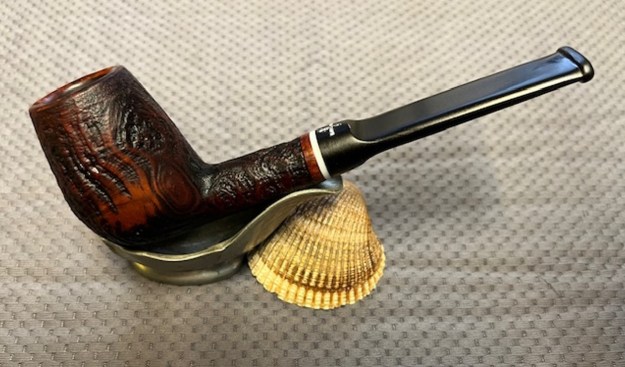
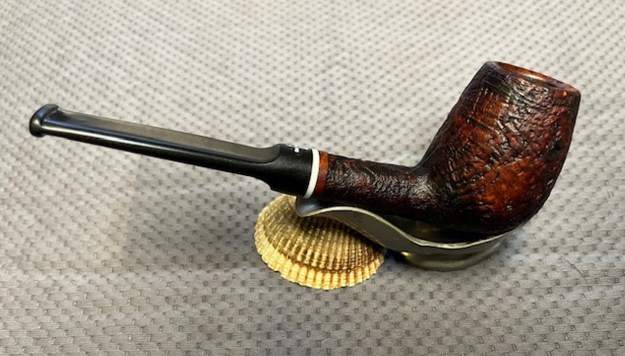
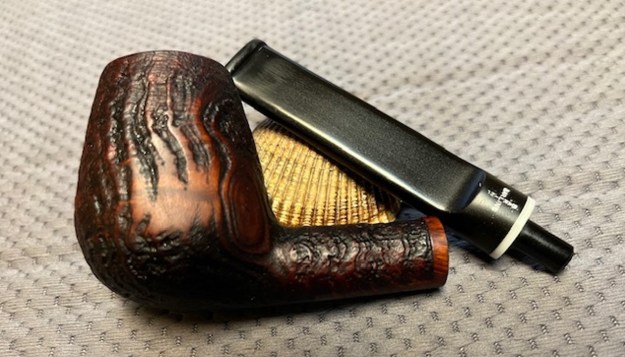
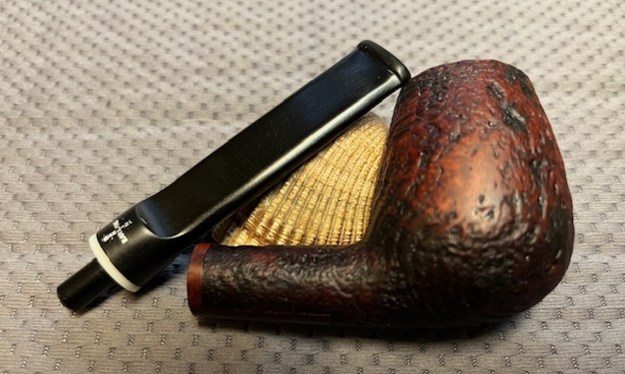
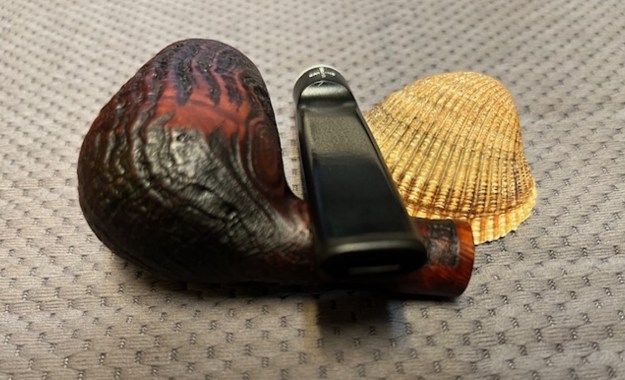
 He took photos of the finish around the sides of the bowl and the heel. You can see the tree bark rustication on the high parts and an almost leaf like pattern in the lower spots. It is a unique finish that is hard to clean but well worth the effort.
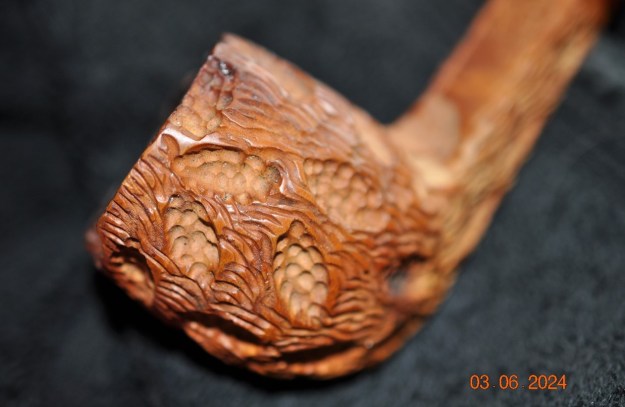
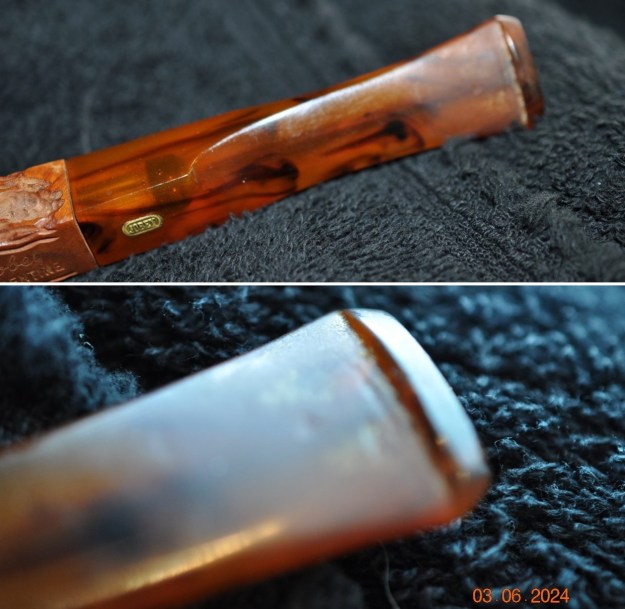
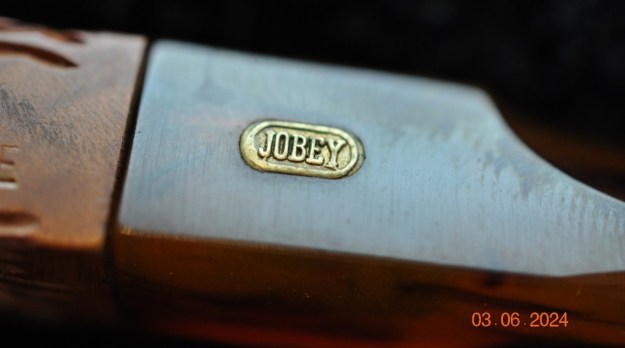
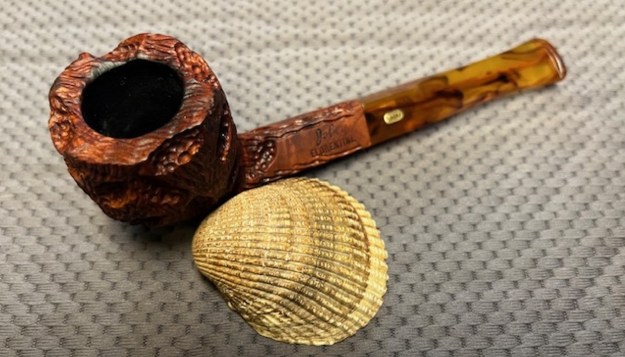
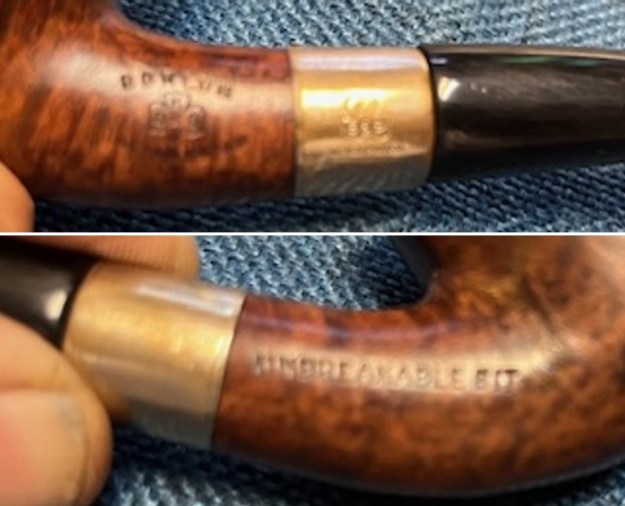
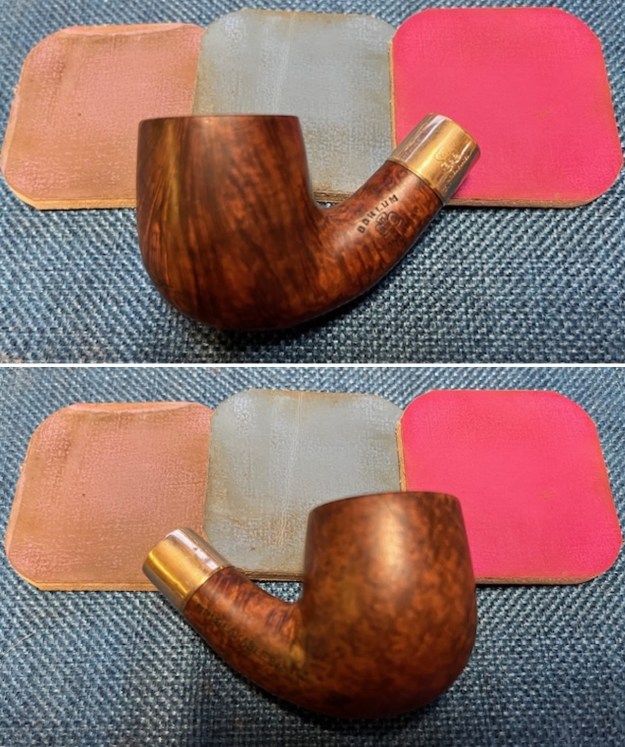
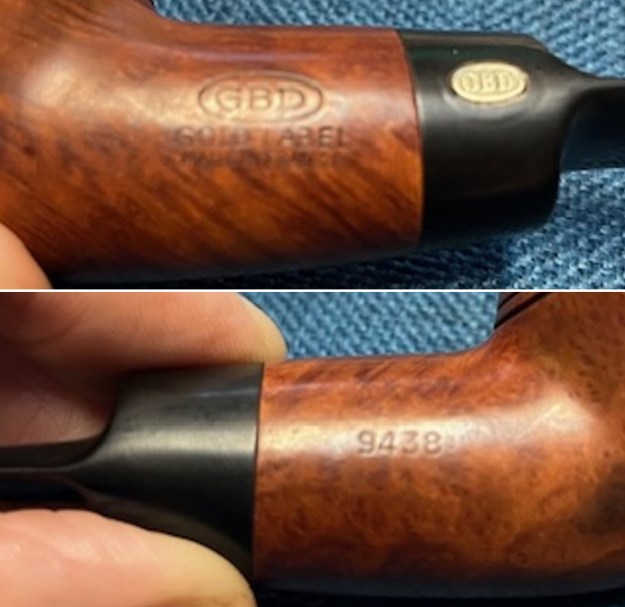
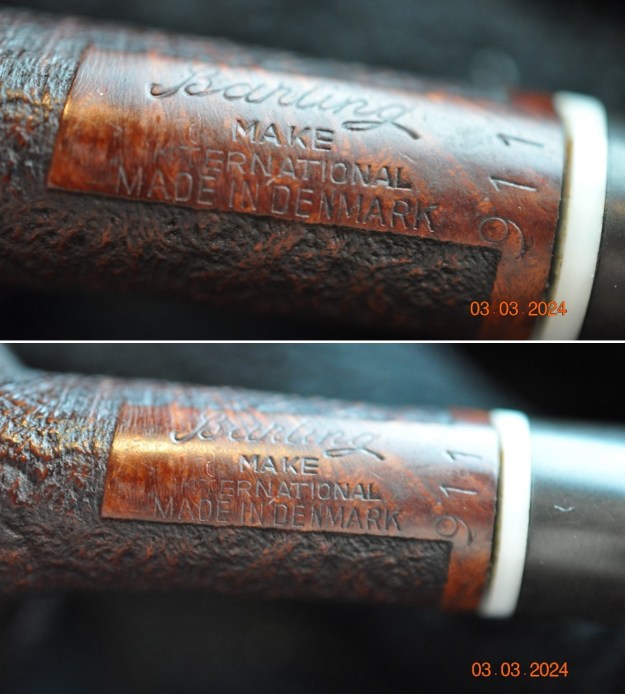
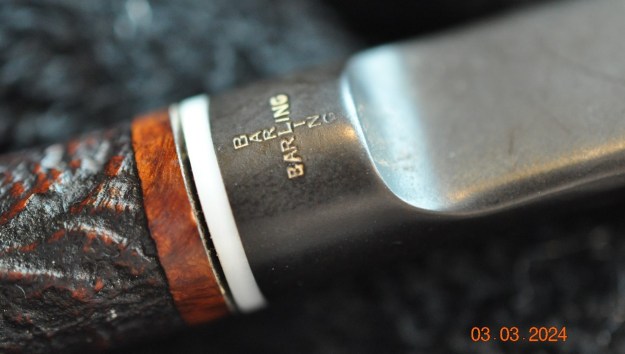
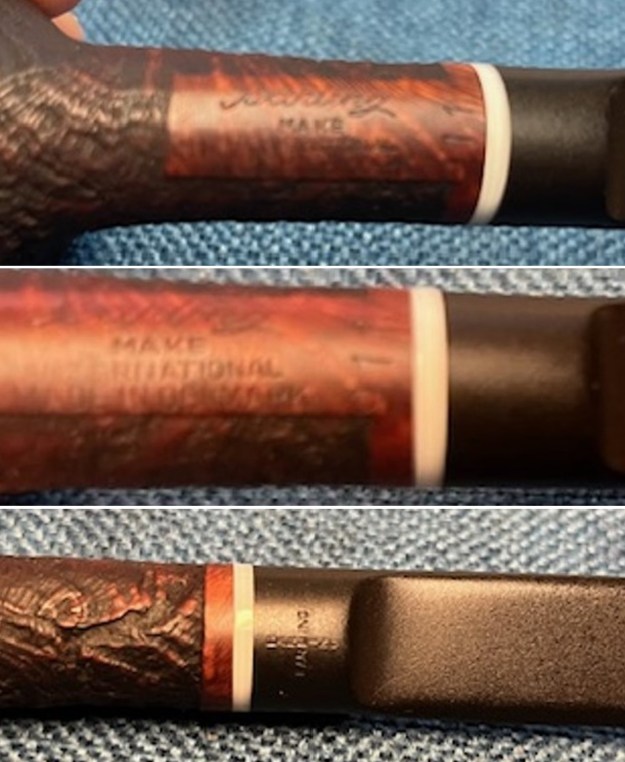
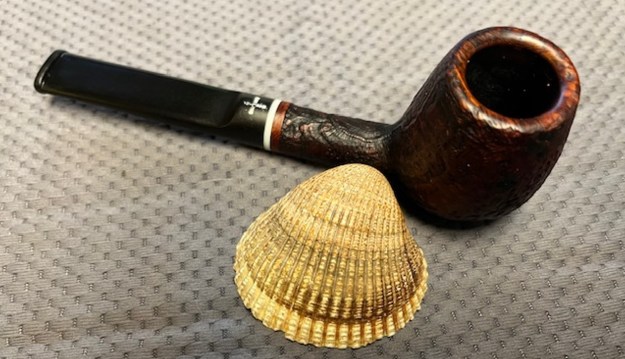
 The next photos of the stamping on the smooth panels on the sides of the shank show that it is clear and readable as noted above. The third photo shows the Jobey brass logo on the left topside of the saddle stem.
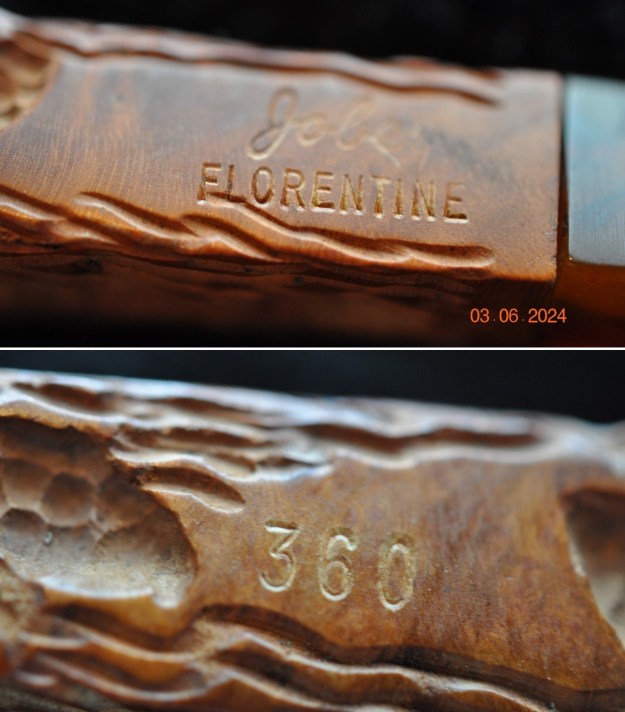
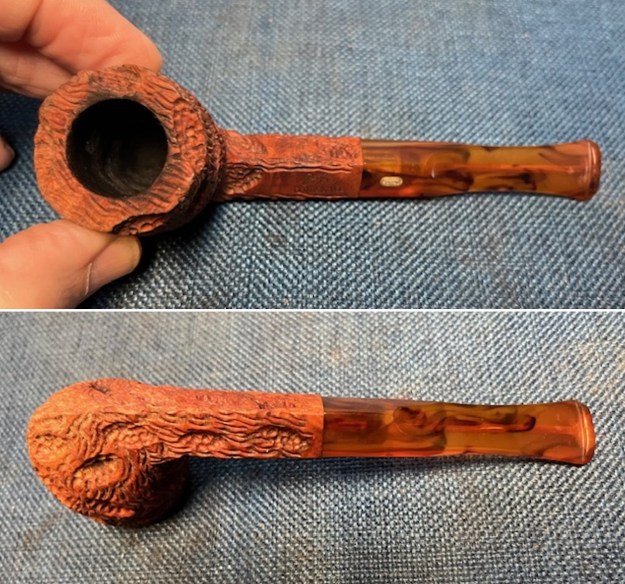
 Now it was time to look at it up close and personal. Jeff had removed the cake and the lava on the rim top. He had reamed the bowl with a PipNet Pipe Reamer and cleaned up the remnants with a Savinelli Fitsall Pipe Knife. He took the cake back to bare briar so we could check the walls for damage. He scrubbed the exterior of the bowl with Murphy’s Oil Soap and a tooth brush to remove the grime on the bowl and rim and was able to remove the lava and dirt. He cleaned out the interior of the bowl and shank with shank brushes, pipe cleaners, cotton swabs and alcohol until they came out clean. He cleaned the stem with Soft Scrub to remove the grime on the exterior. He cleaned out the airway with alcohol, cotton swabs and pipe cleaners. I took some photos of the pipe before I started my work on it today.
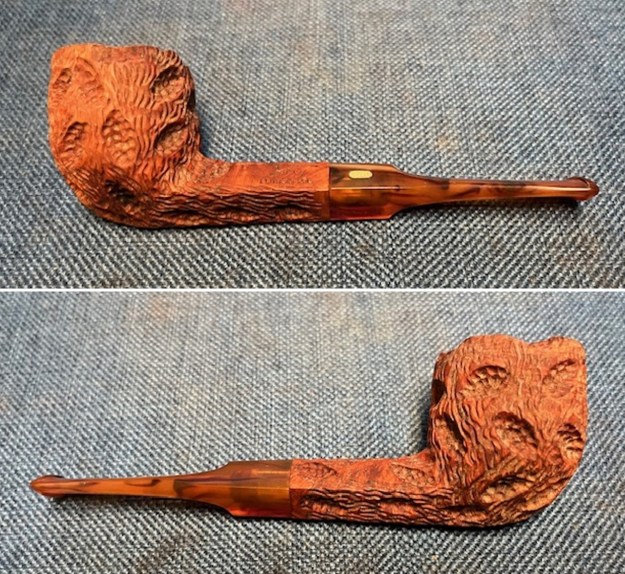
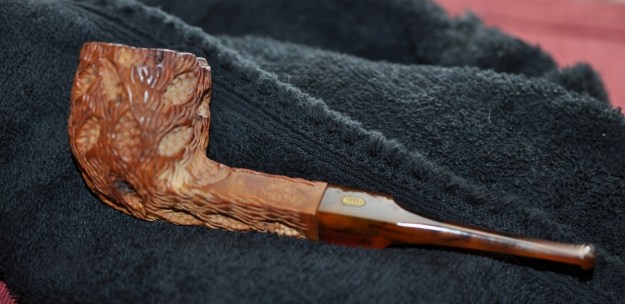
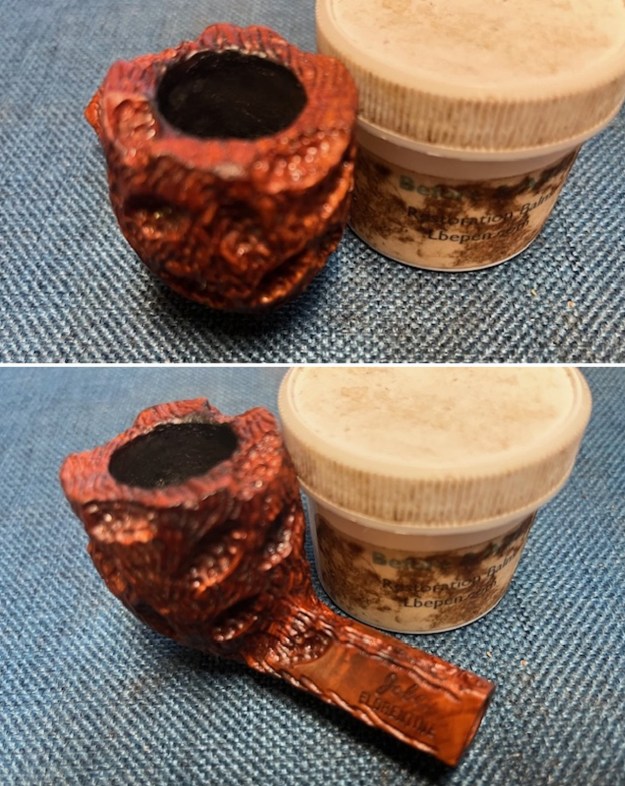
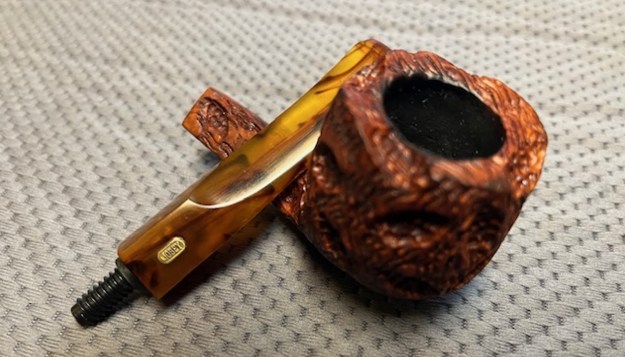
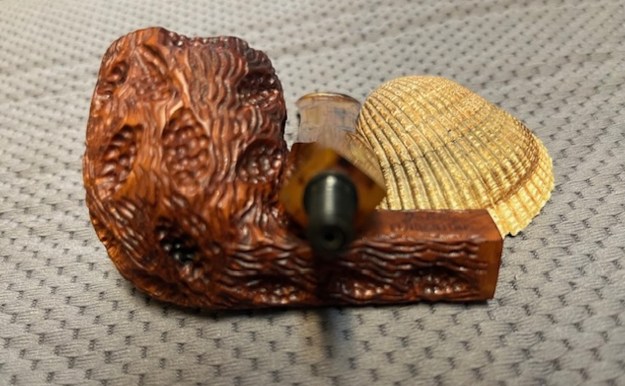
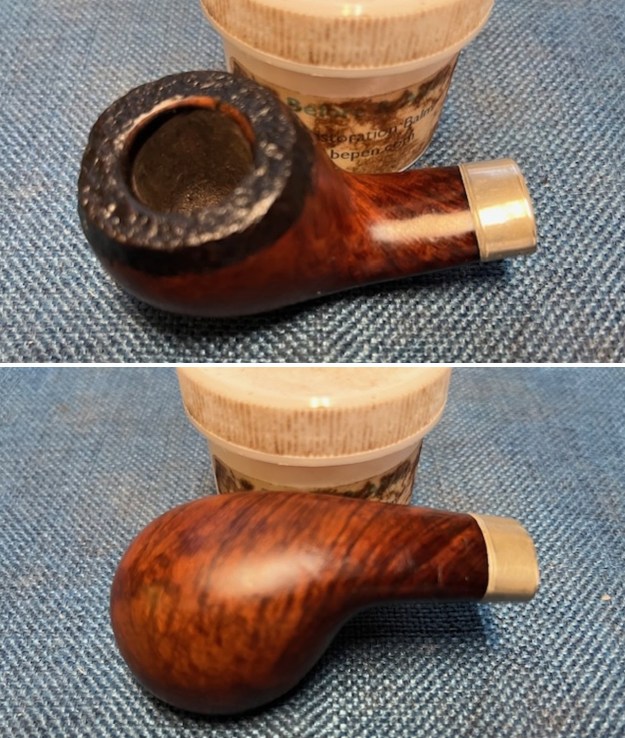
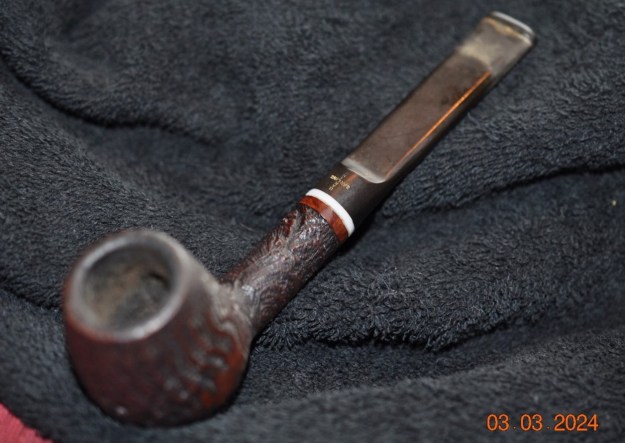
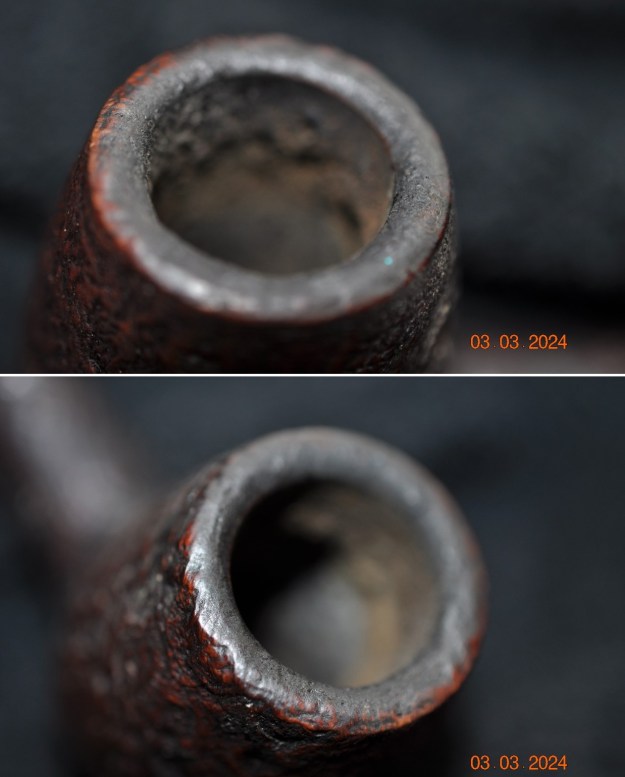
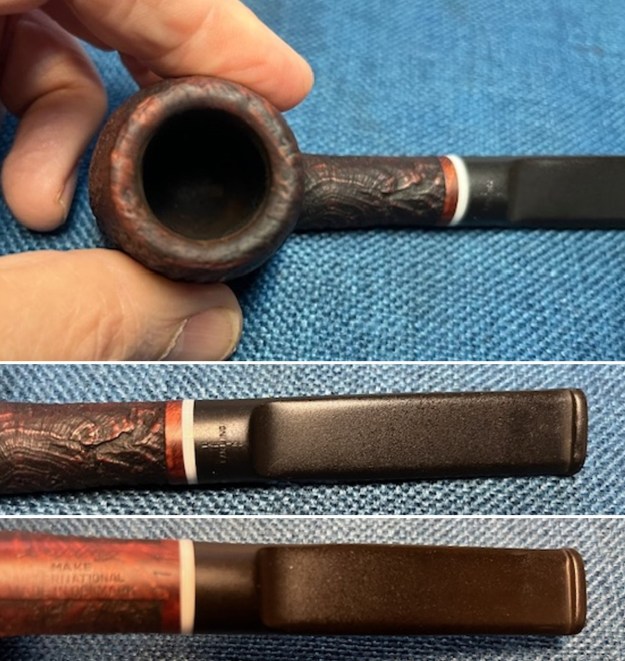
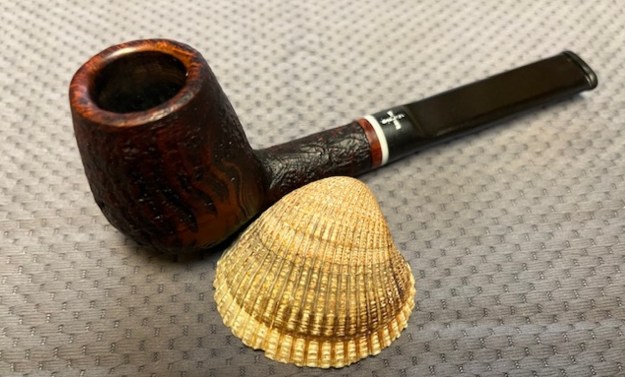
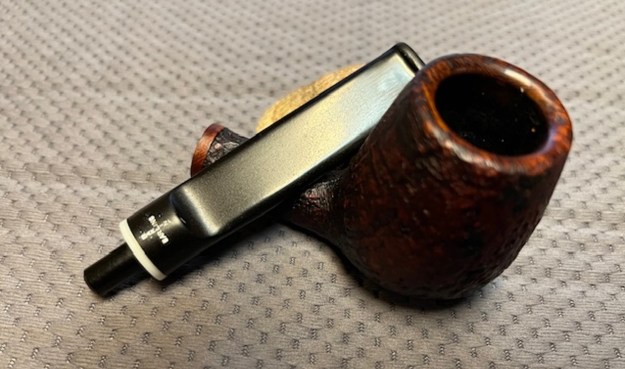
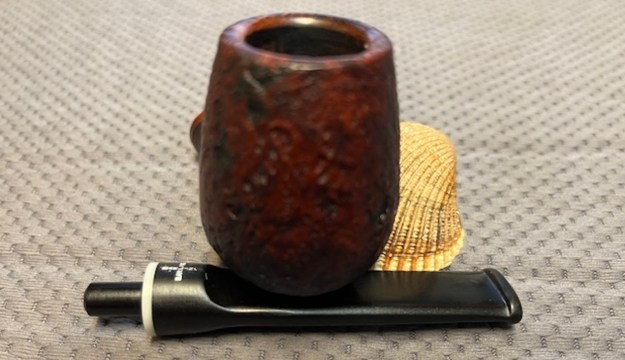
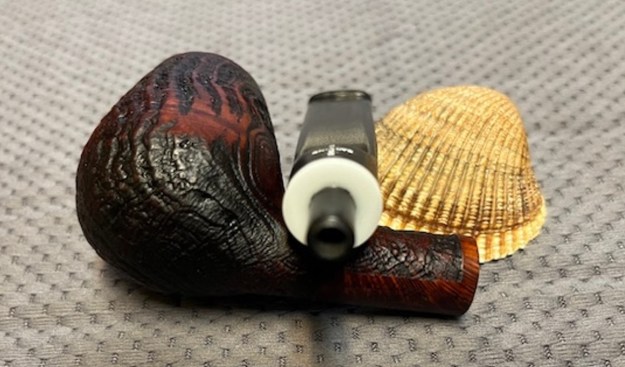
 I took a close up photo of the cleaned up rim top. The rim top and the inner edge look good. The bowl is clean and the walls are undamaged. There was still some darkening in the rustication but it was much better. The stem looks good with some tooth chatter and marks along the top and underside ahead of the button.
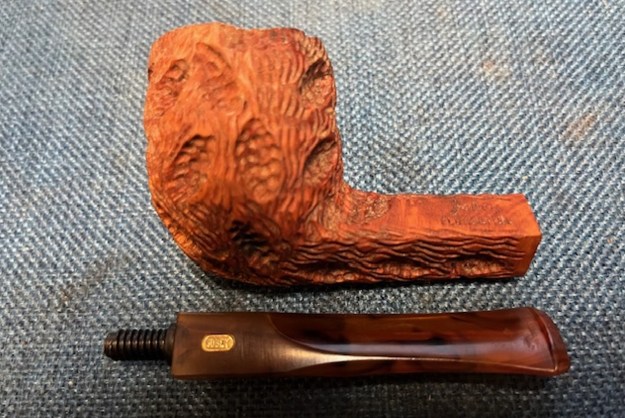
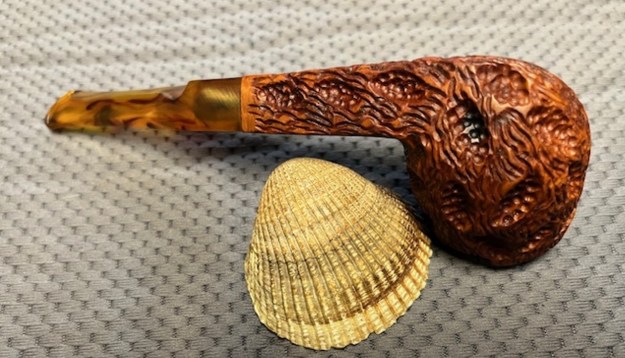
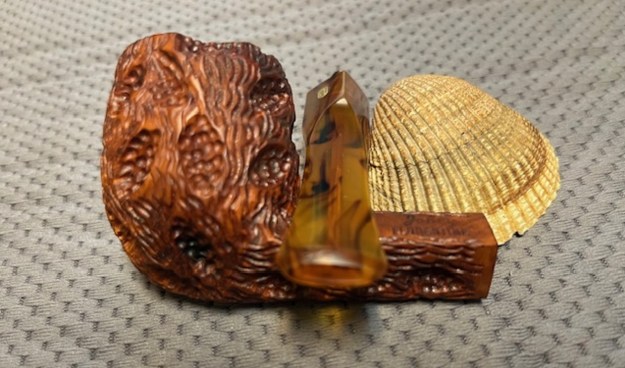
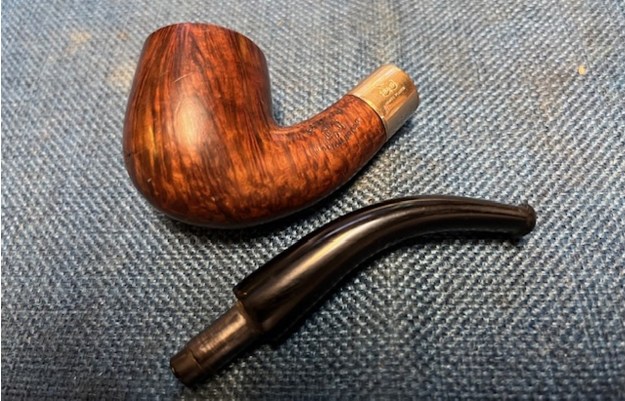
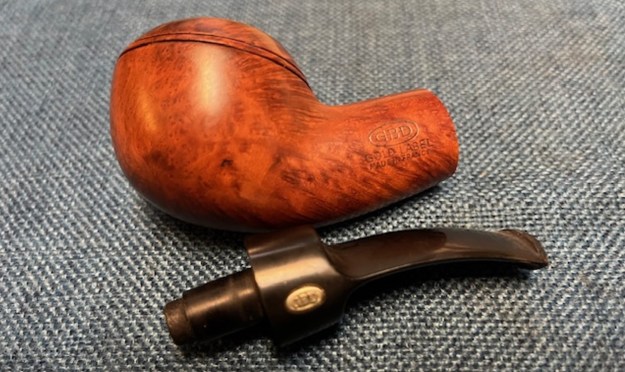
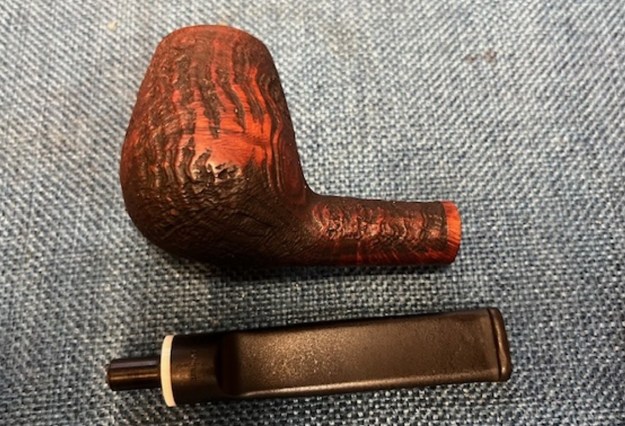
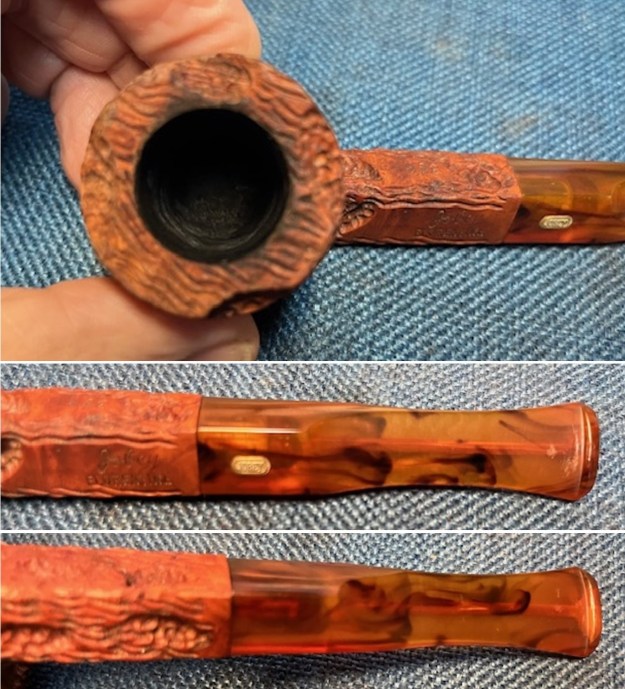 I took photos of the stamping on the shank sides. It is clear and readable as noted above. I took the stem off the pipe and took a photo. The diamond shank billiard is an attractive looking pipe with nice lines. The saddle stem shows tooth damage on the top and undersides of the stem.
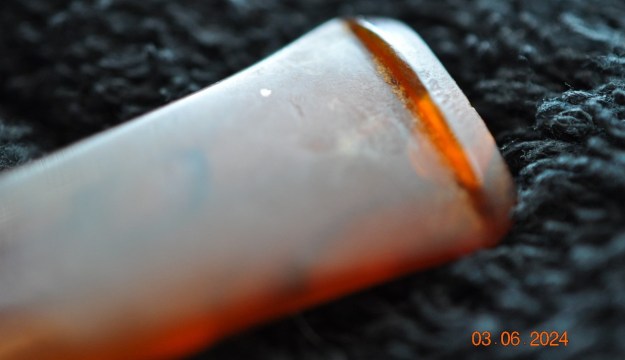
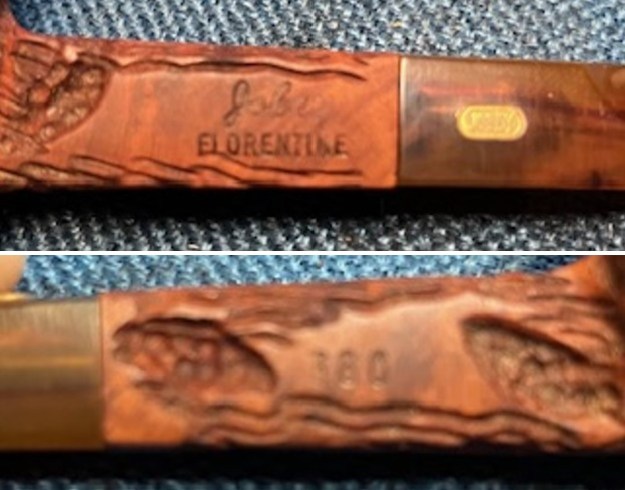
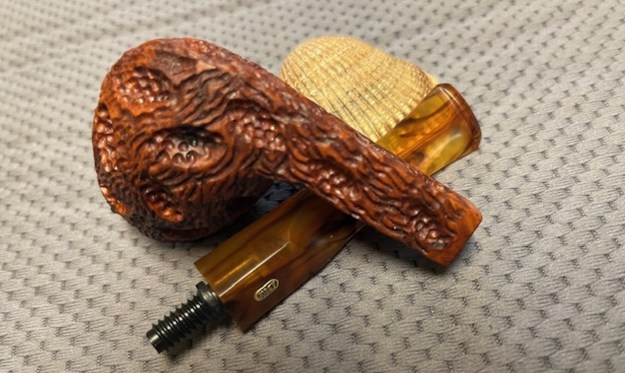
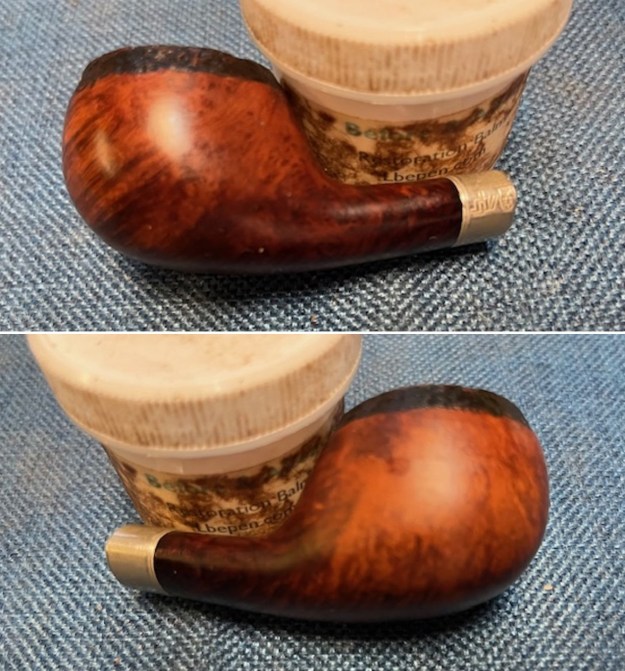
 I went over the rustication with a brass bristle wire brush to knock off any of the darkening on the grooves of the rim top and on the spots on both sides. It looked better. I rubbed the bowl down with Before & After Restoration Balm. I worked it into the surface of the briar with my fingertips and with a shoe brush to get deep in the rustication where it works to clean, restore and preserve the briar. I let it do its magic for 15 minutes then buffed it off with a cotton cloth. The pipe looks incredibly good at this point in the process.
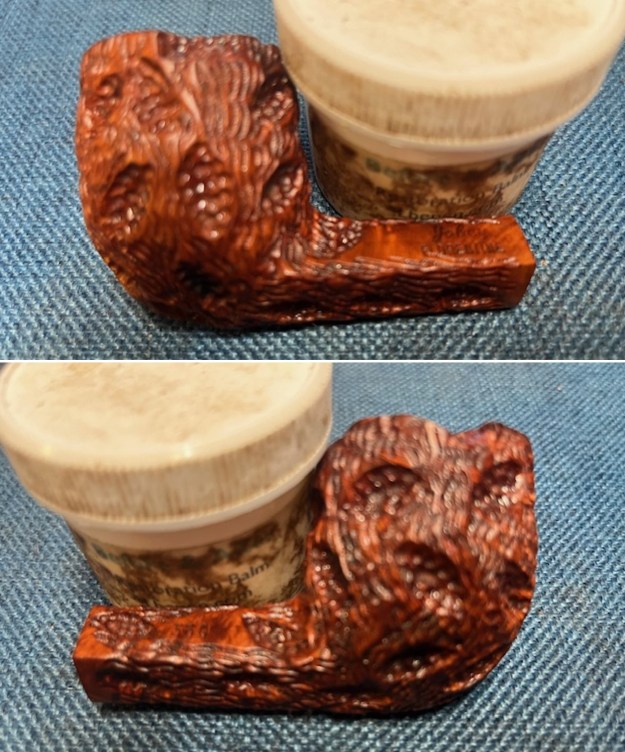
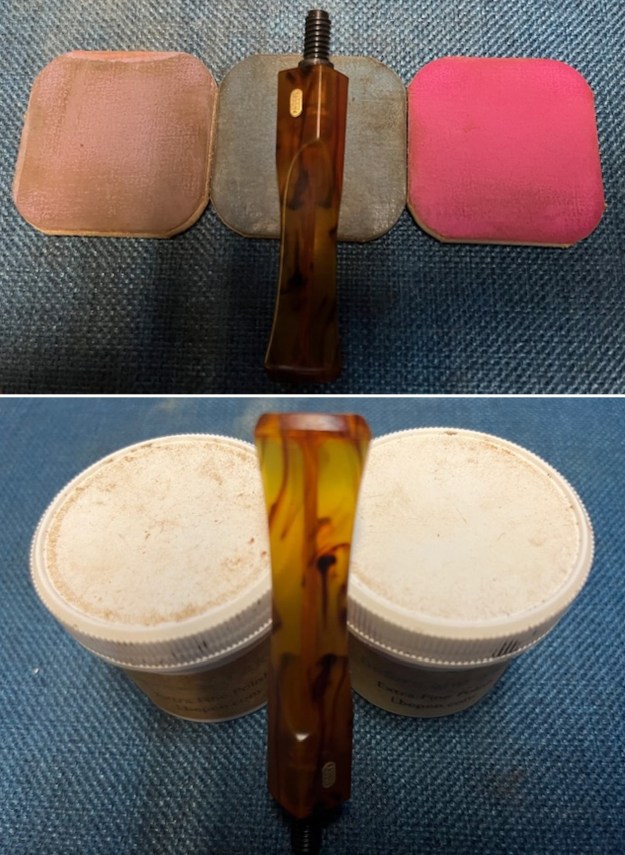
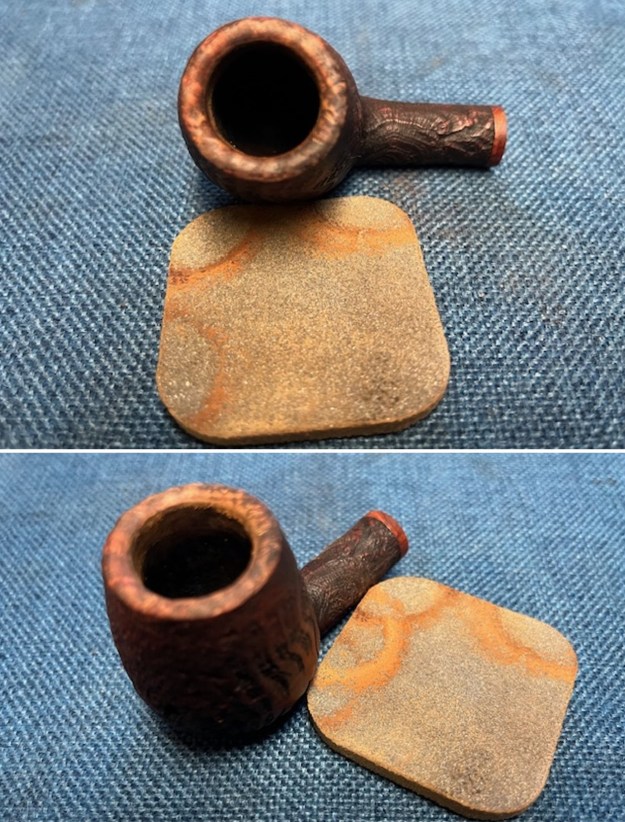
 I filled in the deep tooth marks ahead of the button on the top and underside of the stem with clear CA glue. I like this particular glue (KM Tools) as it is transparent and the colour underneath the repair comes through. It is also not brittle like other glues can be once it cures. I sanded the cured repairs flat with a folded piece of 220 grit sandpaper and the tooth marks and dents are taken care of.
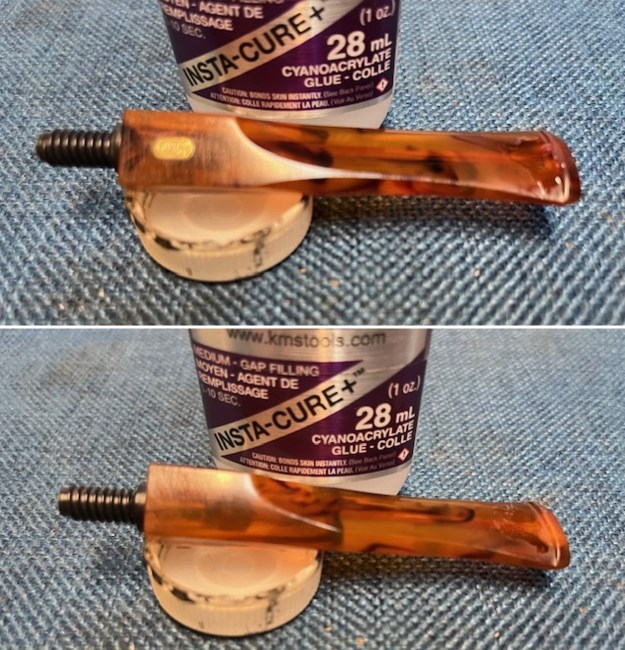
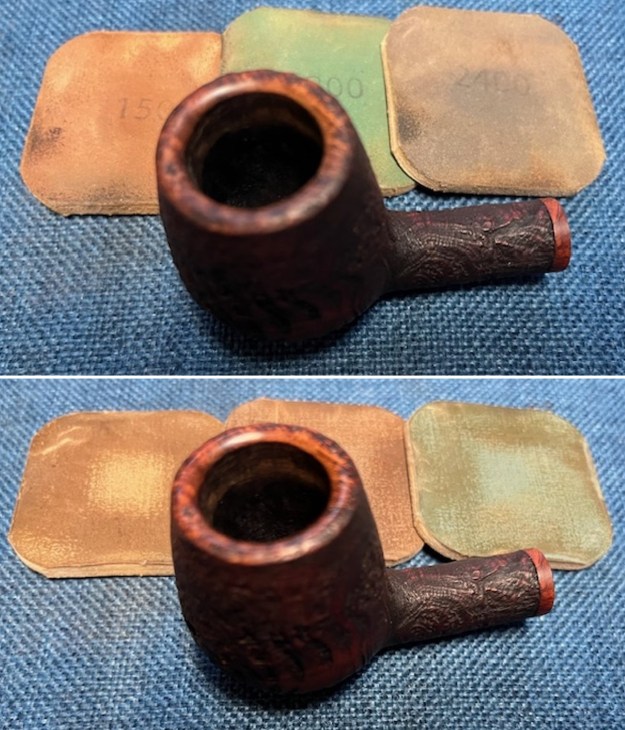
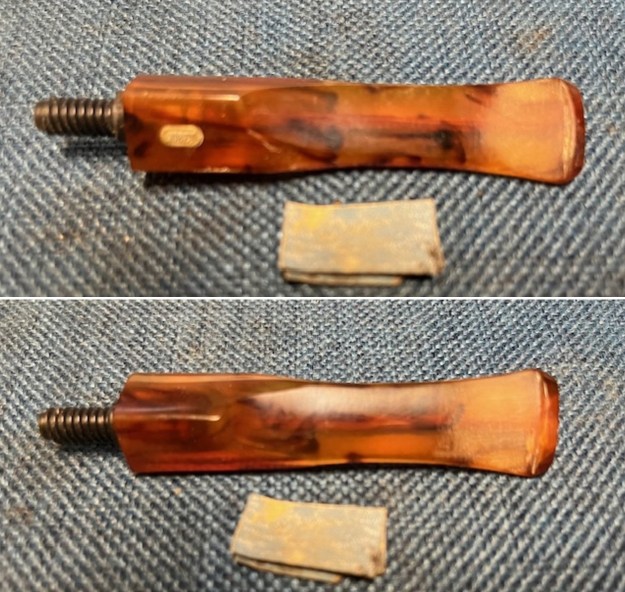 I started polishing out the scratch marks and smoothing the repairs with 320-3500 grit sanding pads. I wiped the stem down after each sanding pad with an Obsidian Oil impregnated cloth. It removes the dust and also gives the sanding pads some bite. By the final pad it was looking quite good. The tooth marks and dents were invisible.
 Following my usual process in restoration I polished the stem with micromesh sanding pads – dry sanding with 1500-12000 grit sanding pads. I wiped it down after each sanding pad with Obsidian Oil. I polished it further with Before & After Stem Polish – both Fine and Extra Fine. I gave it a final coat of Obsidian Oil and set it aside to absorb the oil.
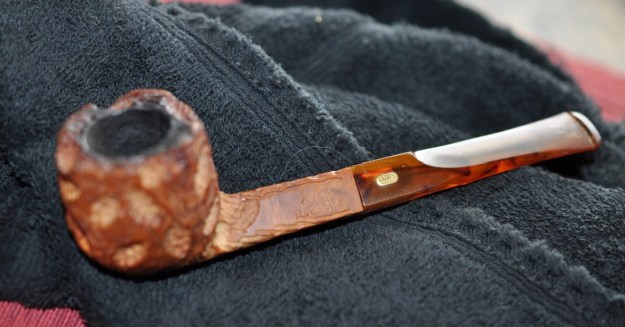
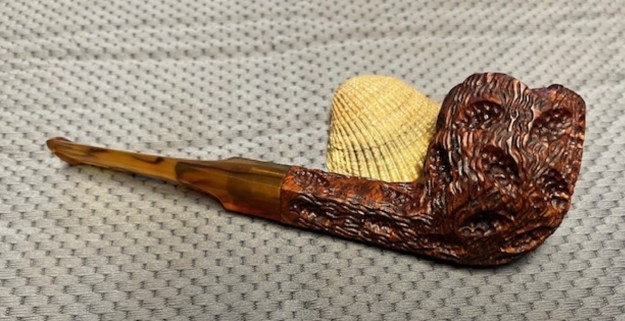
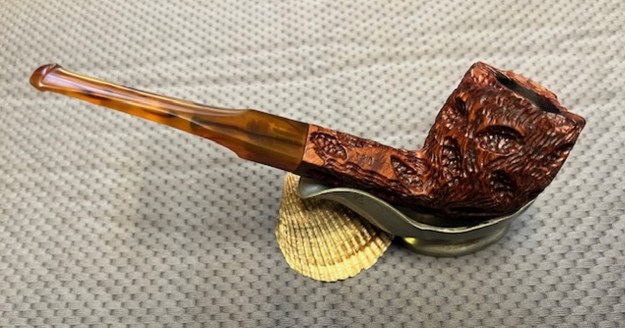
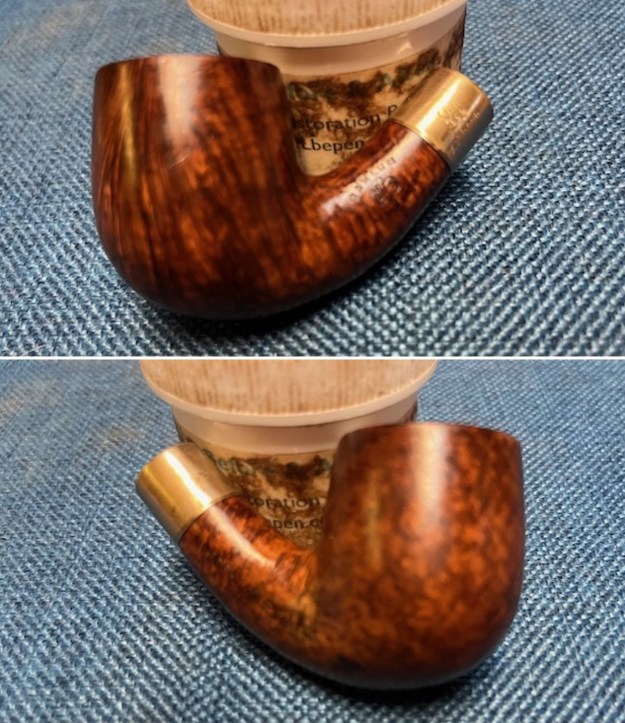
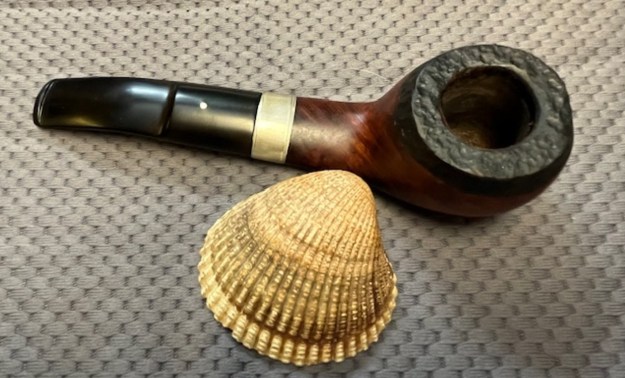
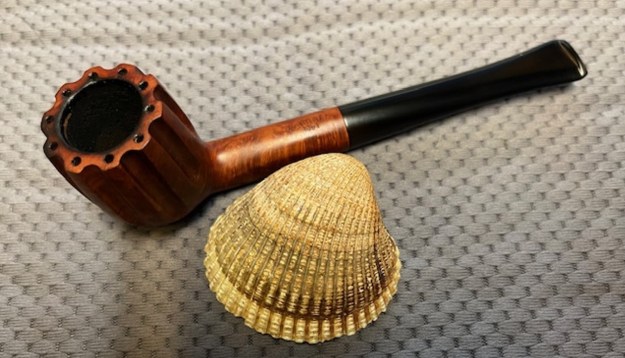
 The Jobey Florentine 360 Diamond Shank Billiard is finished other than the final waxing and buffing. I polished the stem with Blue Diamond to polish out the remaining small scratches and gave it several coats of carnauba. I polished the bowl and shank with Conservator’s Wax and buffed it with a shoe brush. I buffed the pipe with a clean buffing pad to raise the shine. I hand buffed it with a microfiber cloth to deepen the shine. The pipe polished up pretty nicely. The finished pipe is shown in the photos below. The dimensions are Length: 6 inches, Height: 2 inches, Outside diameter of the bowl: 1 ½ inches, Chamber diameter: ¾ of an inch. The weight of the pipe is 43 grams/1.48 ounces. I will be adding it to the rebornpipes store shortly in the American Pipemakers section. If you are interested in adding it to your collection email me at slaug@uniserve.com or send me a message on Facebook. Thanks for walking through the restoration with me as I worked over this uniquely rusticated Jobey Florentine Billiard.
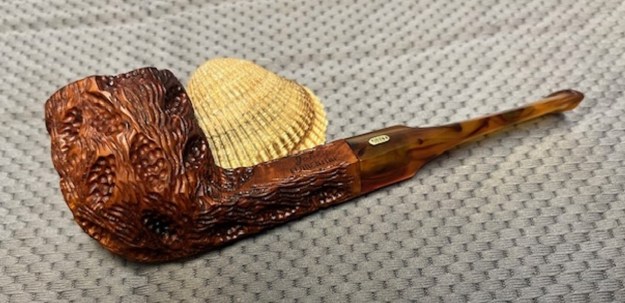


