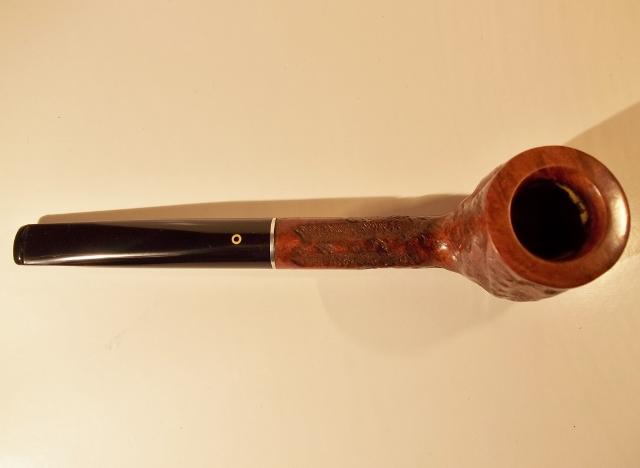
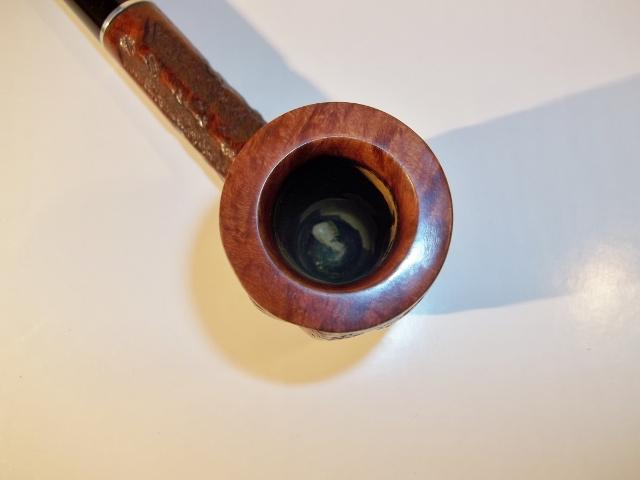
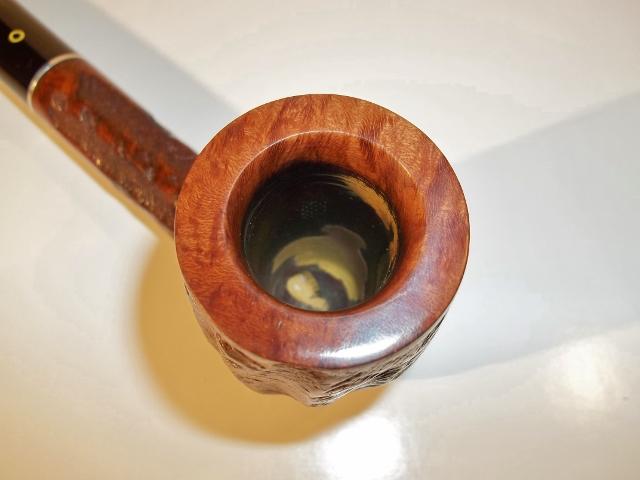
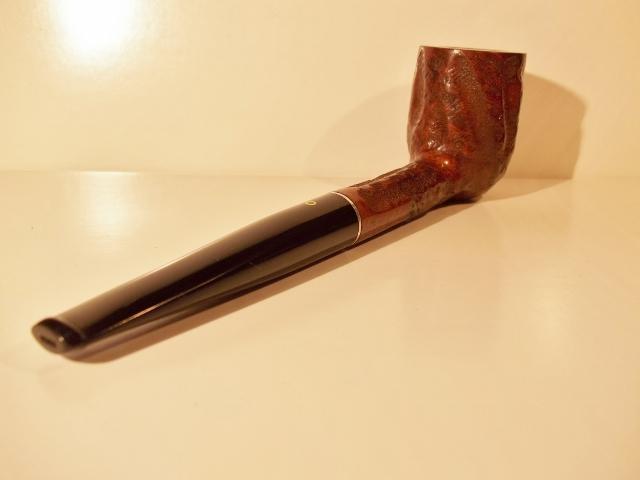
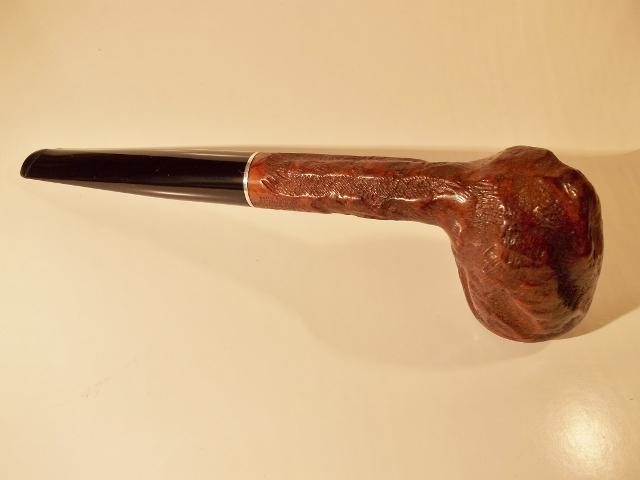
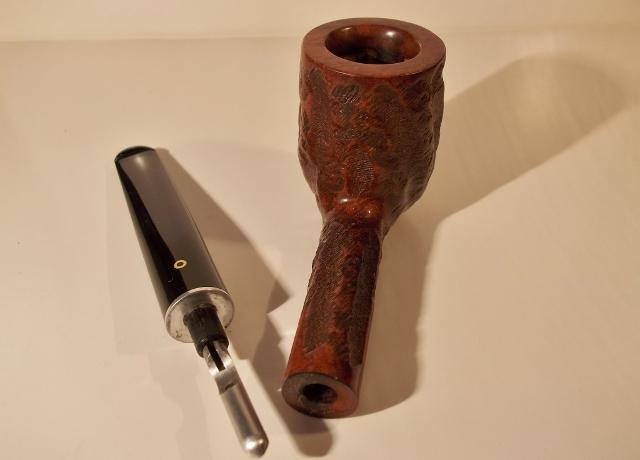
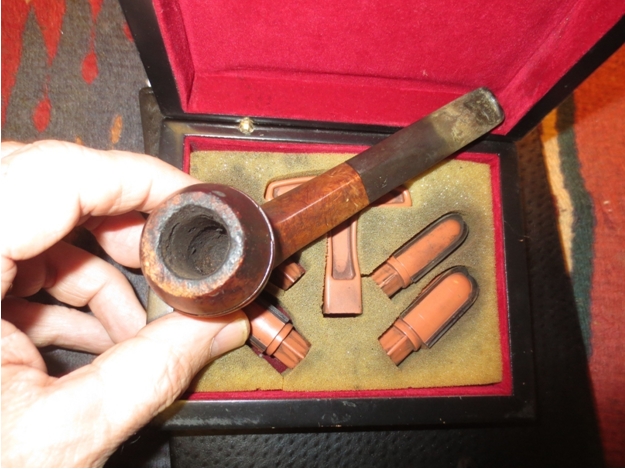
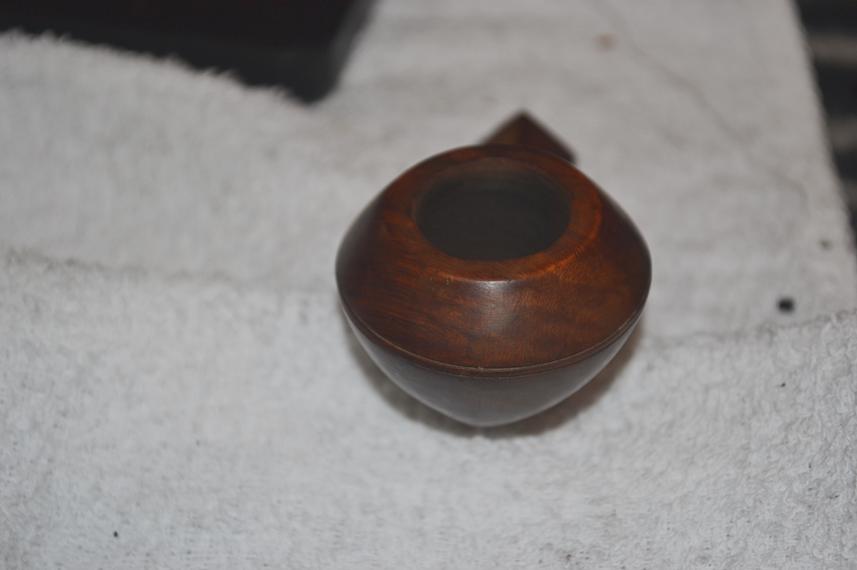
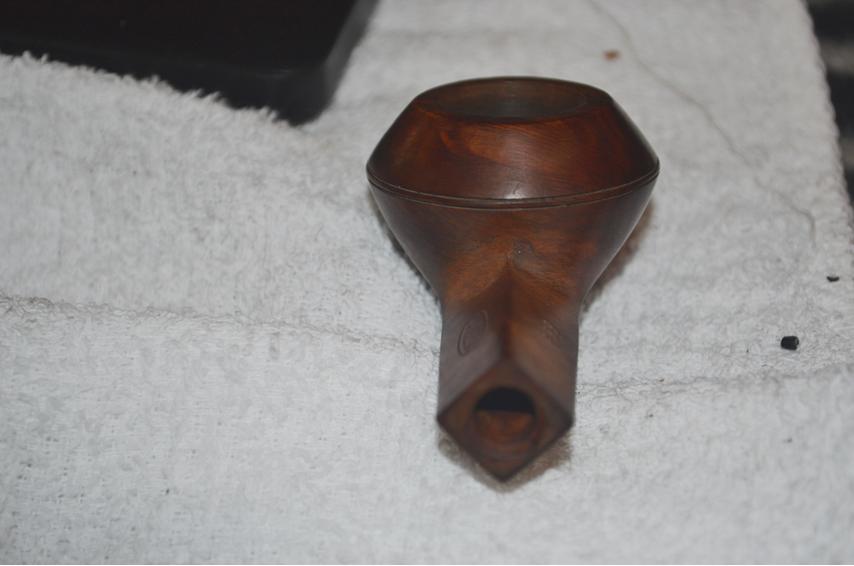
Another one from Mark Irwin on the Peterson Chubbies. This is Part 2 of his pieces on the Chubbies. Thanks Mark.
Peterson Chubbies, Part 2: The Old 9BC
3 Replies
Another one from Mark Irwin on the Peterson Chubbies. This is Part 2 of his pieces on the Chubbies. Thanks Mark.
Blog by Steve Laug
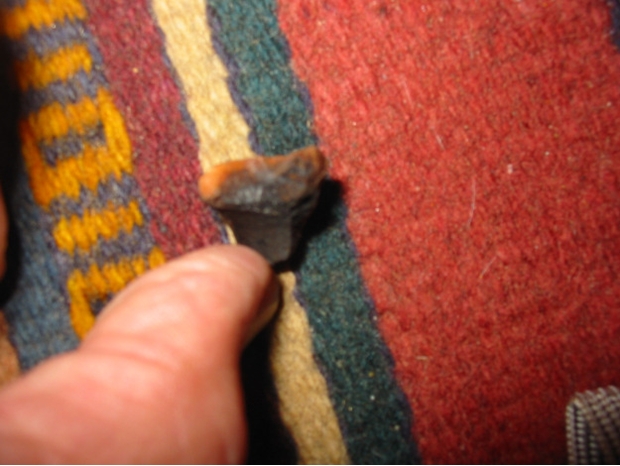
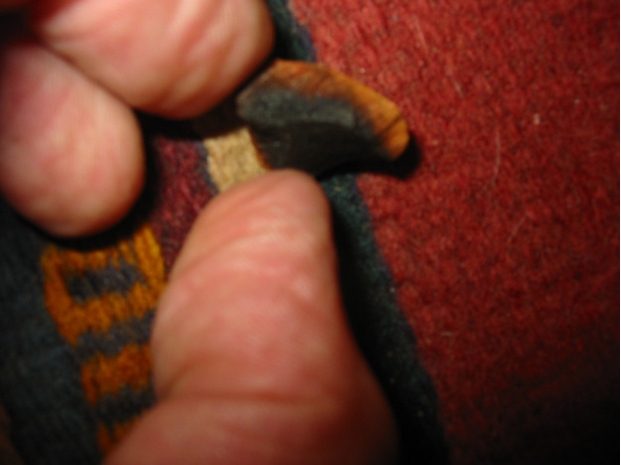
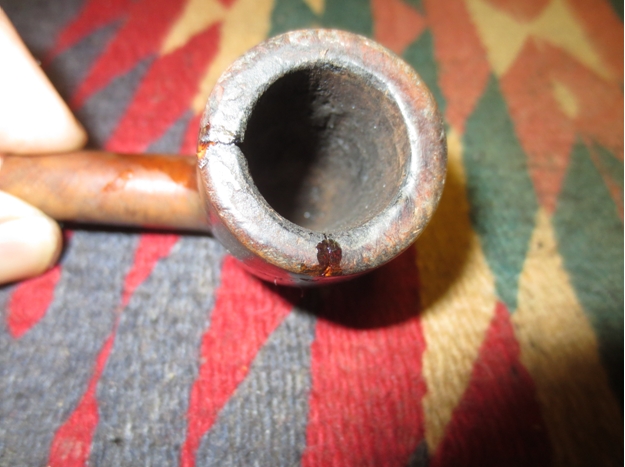
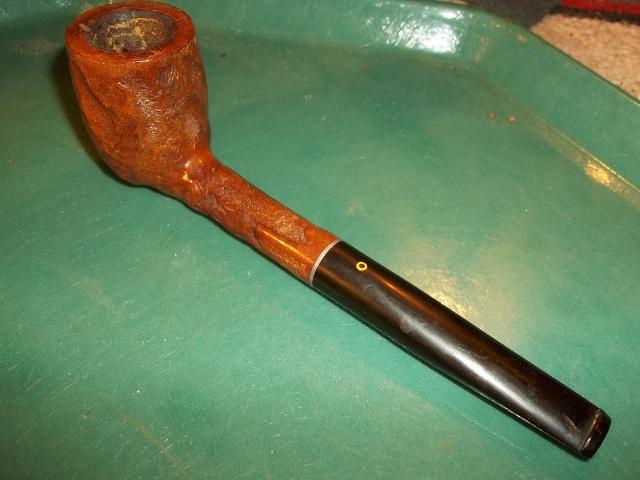
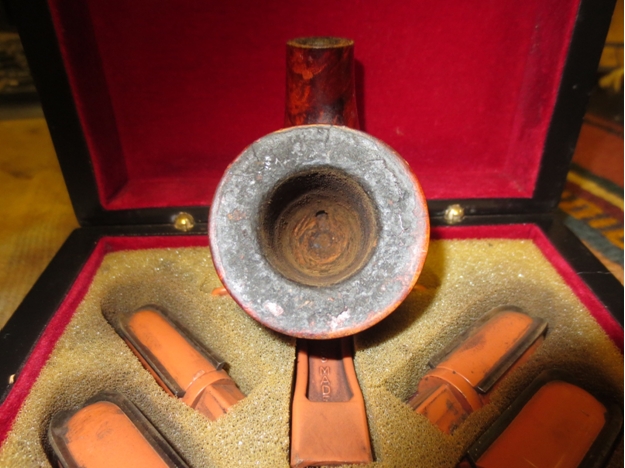
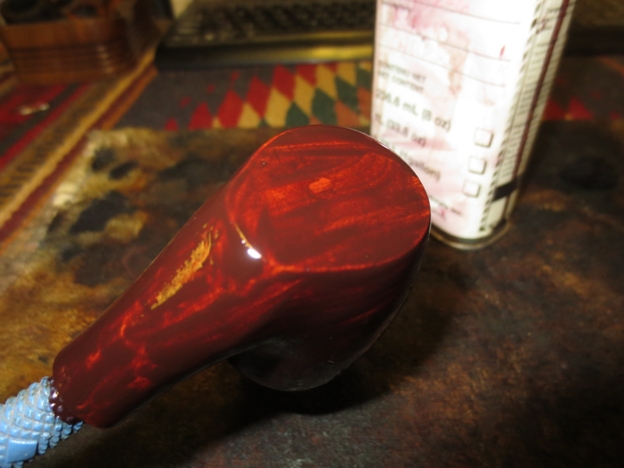
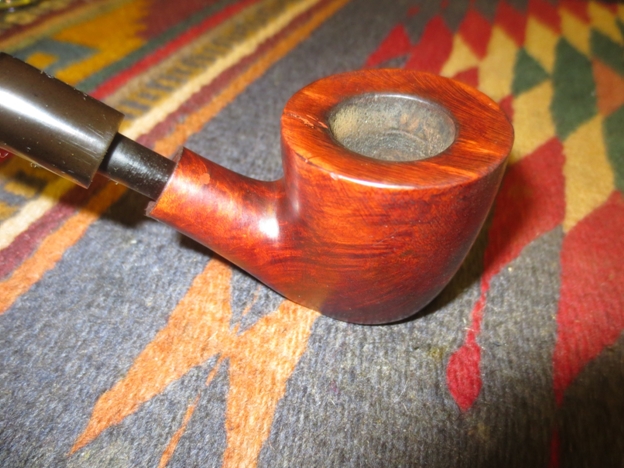
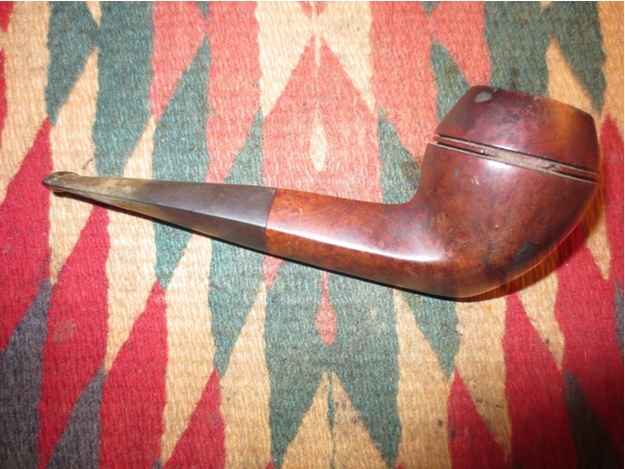
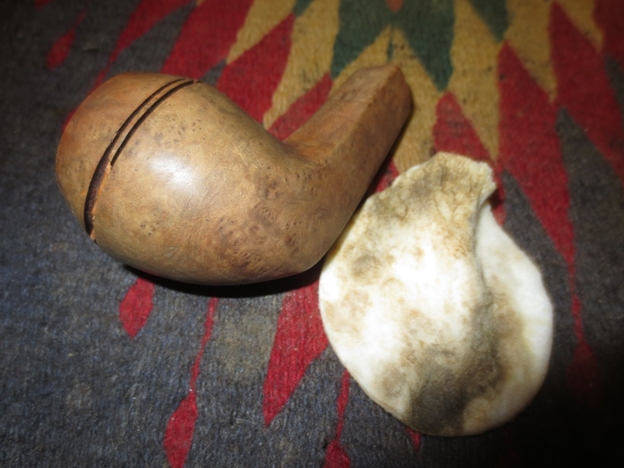
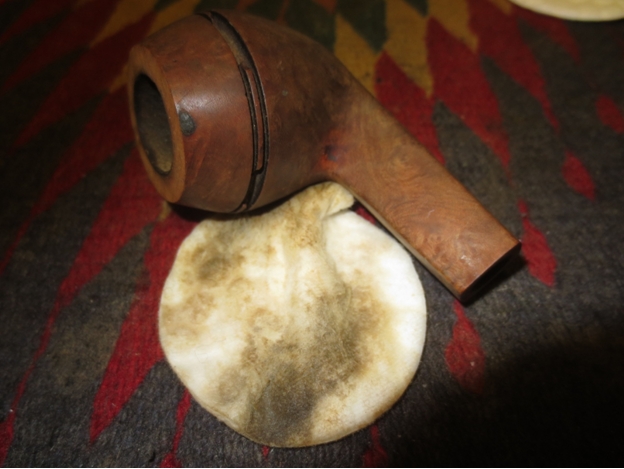
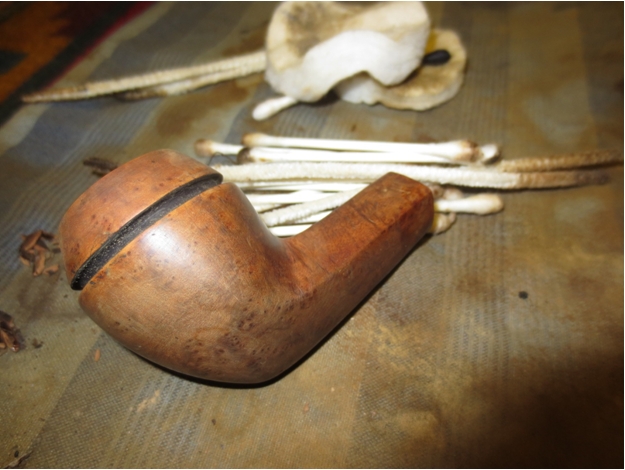
Having had a long week at work with nary a break in the busyness I needed a bit of a diversion on the weekend. I had an old Hardcastle’s Jack o’ London billiard in the cupboard that I probably should have thrown away but did not. I picked up the nice little billiard on one of my pipe hunts months ago. When I reamed it after I brought it home the bowl cracked and a large piece fell out of the right back side of the bowl. Up on examination it was on its way to being a burn out as the interior wall on the crack was charred and damaged. I took pictures of the bowl to show the damage at that time. For some reason I did not throw it away but rather put it in the cupboard and figured I could use the briar for other repairs.
But this weekend I took it out and decided to experiment with it and see what I could do with the damaged bowl. I debated whether to cannibalize it and save the parts or to rework it. I had already scavenged the stem and reused it on another Hardcastle’s pipe bowl that I restored so I only had the bowl. If the repair worked I would have to fit a new stem on the pipe before I could smoke it.
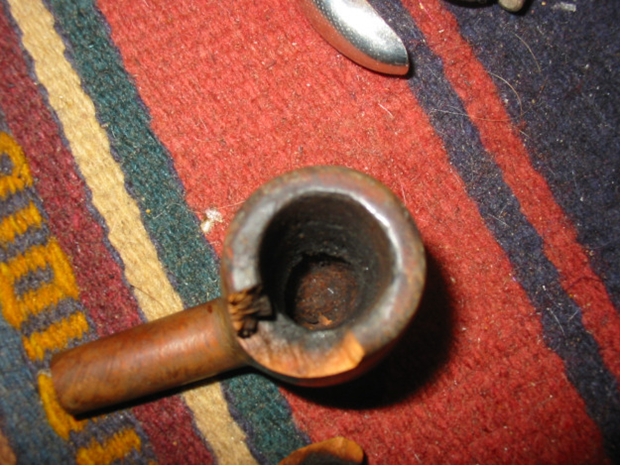
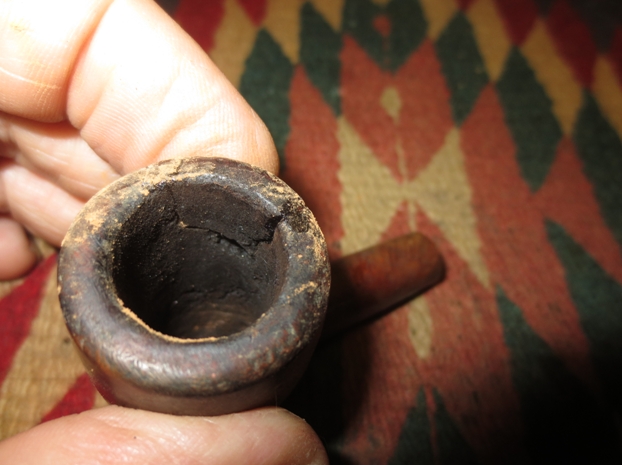
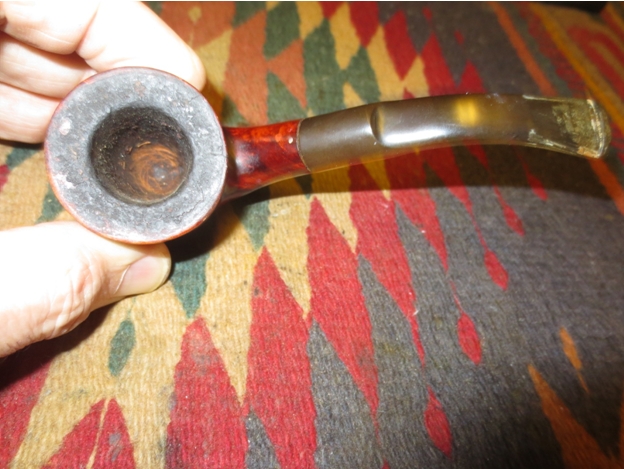
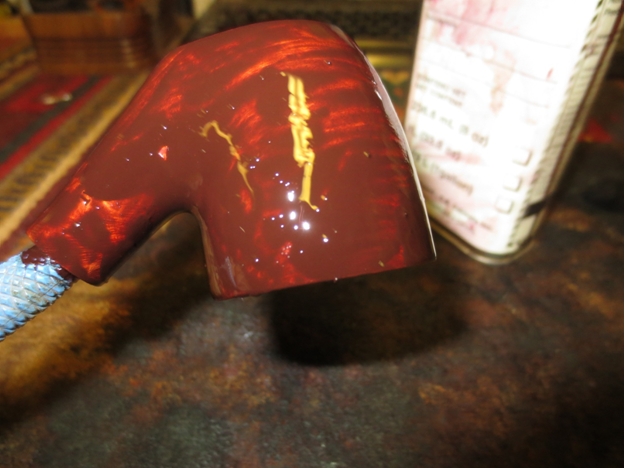
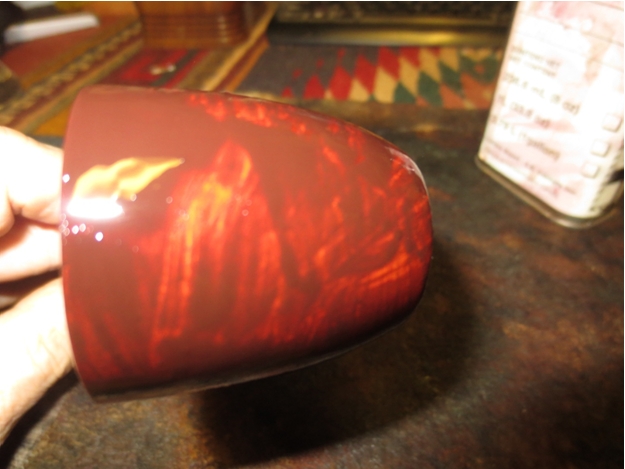
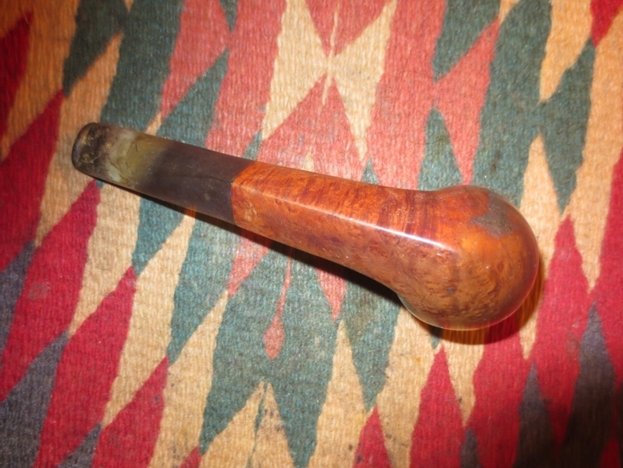
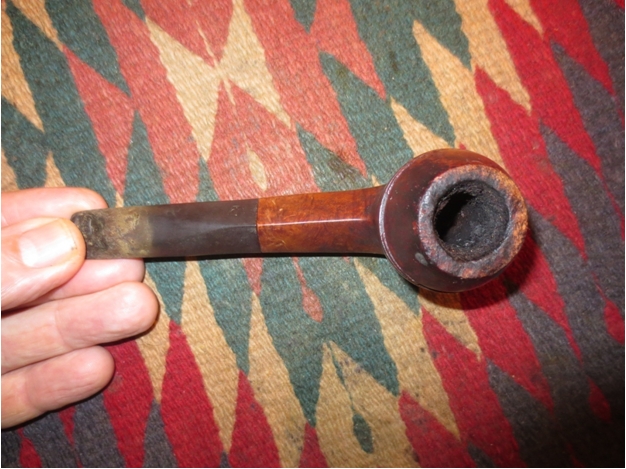
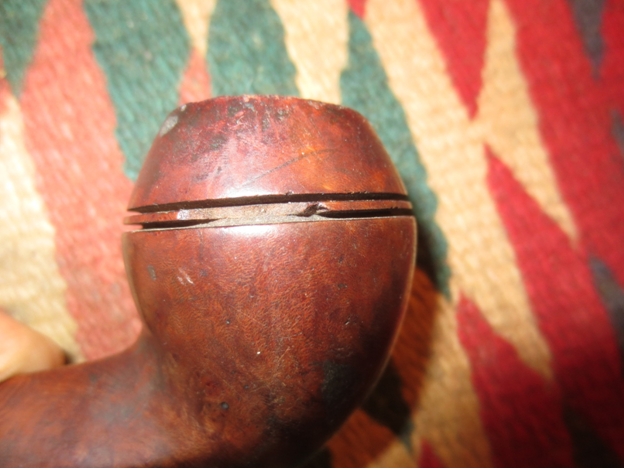
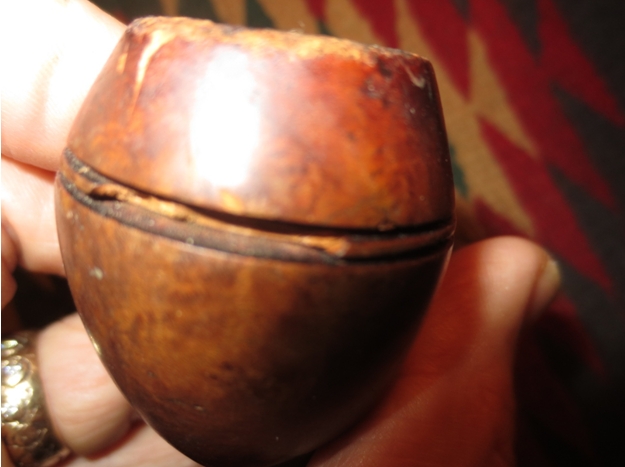
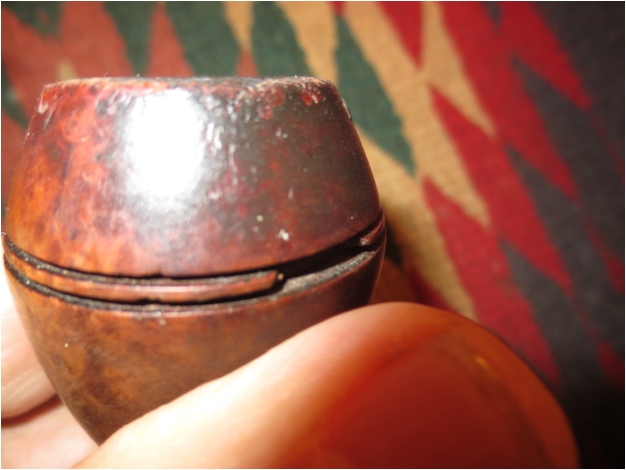
Here are some photos I took when the bowl cracked during the initial reaming. I took quite a few because I had not had that happen before in my experience. Looking at the photos you can clearly see the damage to both the remaining bowl and the chunk of briar that fell out. It was seriously damaged and one that I seriously considered throwing away that day. The rim was a mess as well besides being cracked and broken and the inner edge was out of round and the top beaten around the outer edge. The bowl was heavily caked and it looked to have been a good smoking pipe for the previous pipeman. There were even some fragments of unsmoked tobacco in the bottom of the bowl.

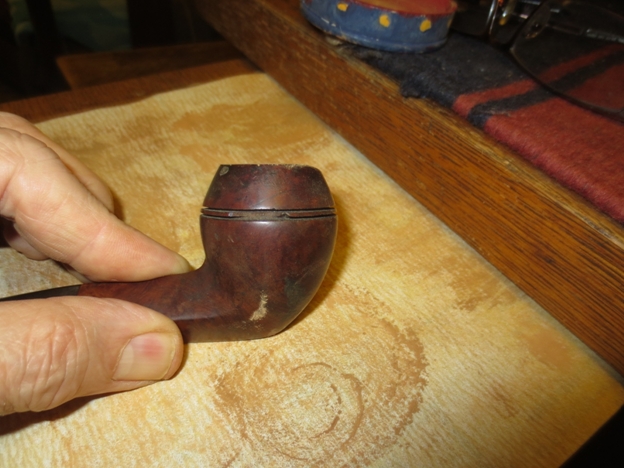
 Out of boredom and the need for something to keep my hands busy while my dog was being groomed I decided to experiment with repairs on the bowl. I cleaned up the broken pieces of the briar both the edges on the bowl and broken pieces with alcohol and cotton swabs and picked out any remaining loose pieces of briar or charred pieces of briar. I knew that I could easily patch the external side of the bowl and make it look acceptable but I was not sure what I would do with the internal side. I used a pen knife to scrape out the remaining cake in the bowl and to make sure there was no loose carbon that would get in the way of the repair before gluing in the piece. I applied clear super glue to both the bowl and the chunk of briar being careful to keep it out of the interior of the bowl and pressed the piece in place. In the photos below you can see how the glue ran down the exterior of the back side of the bowl but not on the inside.
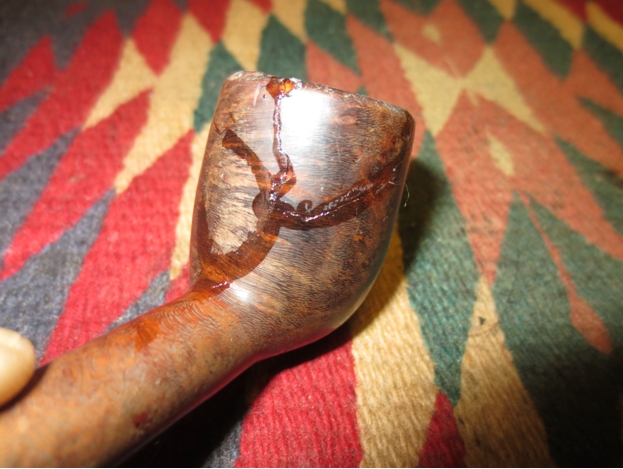
 I applied some more glue to the cracks on the outside of the bowl so that I could push briar dust into any spaces or chips in the briar between the pieces.
 With the chunk of briar glued in place and the external cracks patched it was time to look at the damage on the inside of the bowl and determine what to do. I know that in the past I have used J.B. Weld and Greg and others have used fireplace cement to repair the inside surfaces of the bowl but I had in mind a different experiment. Both the J.B. Weld and the fireplace cement dry and are neutral after curing. They are both impervious to heat or moisture but I wanted to see if I could use all natural substances and work a repair that would hold up. I knew that only time would tell if it actually worked but I figured that I had nothing to lose with this old pipe. If it did not work it would go back to the scrap yard and come back to life in repairs on other pipes. But if it did work I would have a useable yard pipe that I could smoke while working with little concern of damaging or ruining it in the process. Too me it was worth a try.
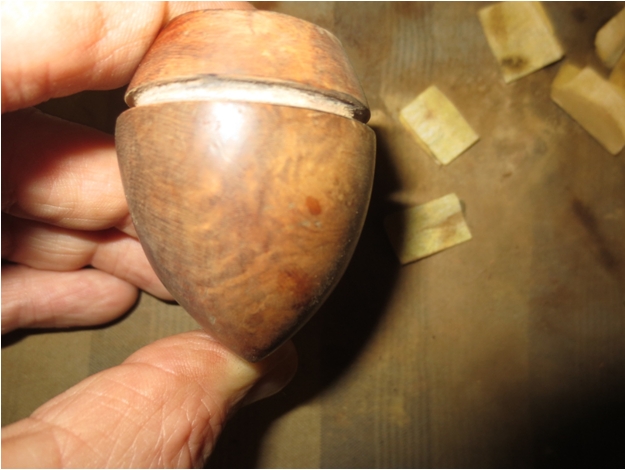
The next series of two photos show the inside of the bowl. The cracks and damage to the inside of the bowl was quite extensive. But it was still worth trying a repair.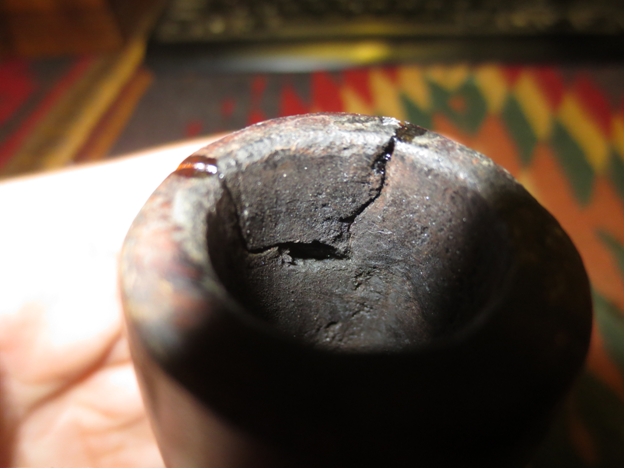
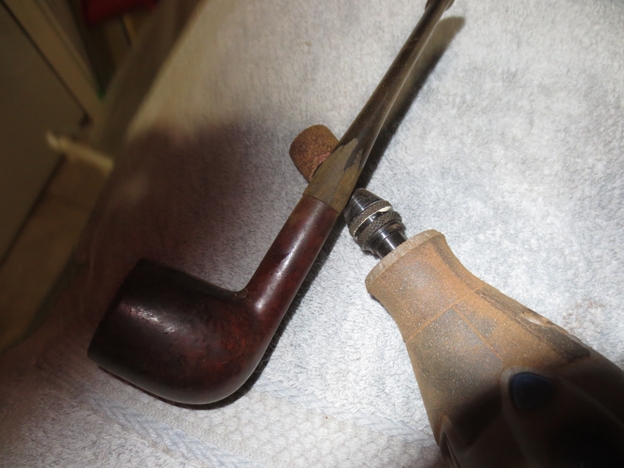
 I fit a stem on the shank from my can of stems with minimal sanding of the tenon for a good fit in the shank. The diameter of the stem would need to be adjusted but that would not be too much of a problem.
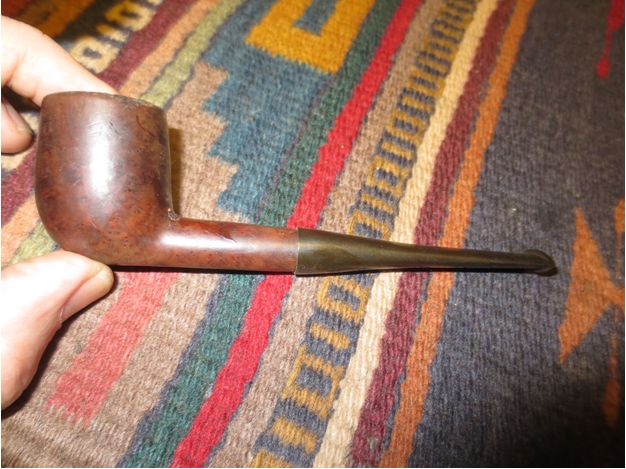

 The next two photos show the variation in diameter of the shank and the stem.
 I use a Dremel and sanding drum to take down the excess material as close to the shank as possible without damaging the shank. I also decided to use the Dremel and sanding drum on the overflow of super glue and briar dust on the outside of the bowl as I planned on sanding the bowl anyway.
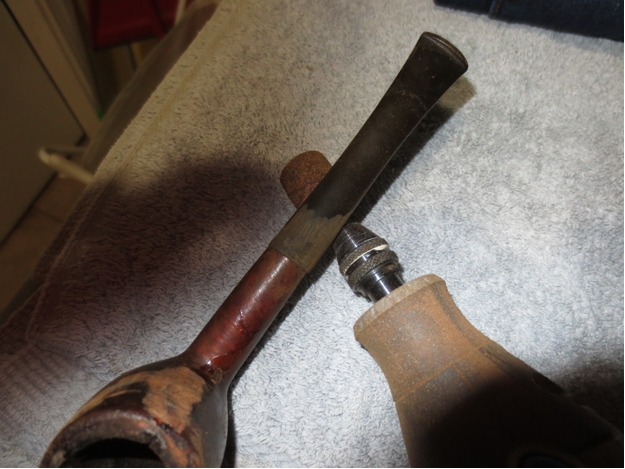

 Once I had the fit of the stem close and the majority of the glue and briar dust patch smoothed out I took it back to the work table and sanded both the bowl and the stem with 220 grit sandpaper to smooth out the scratches in the briar and the vulcanite.
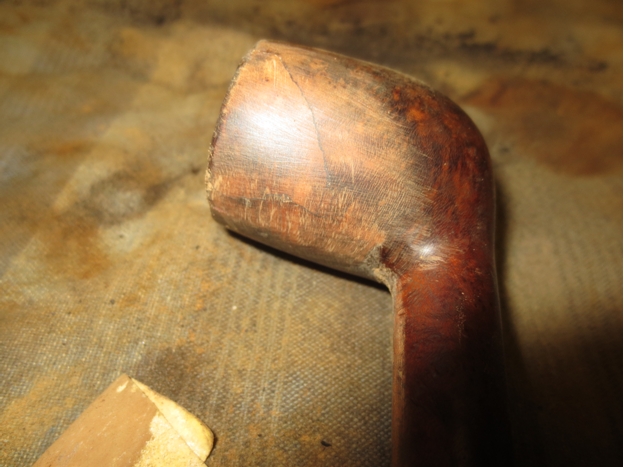
 The rim needed to be topped to smooth out the damage to the top and the outer edges. I set up the topping board with 220 grit sandpaper and pressed the bowl flat against the sandpaper. I sanded it in a circular motion until I had removed the damaged rim surface and the damaged out edge.
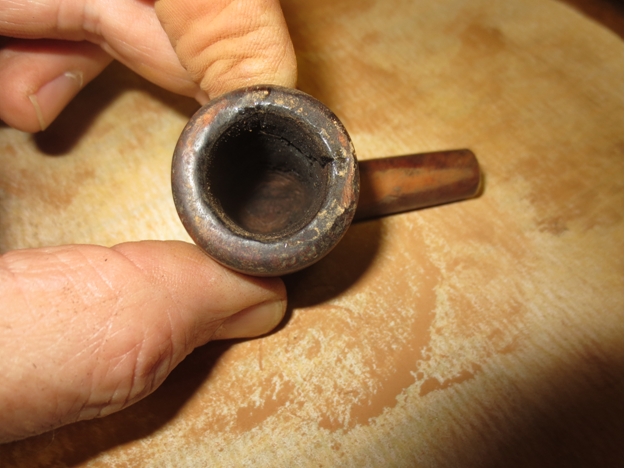
 I forgot to take a photo of the rim at this point but you can see in the photos of the staining that it is sharp and clean on the outer edge. I sanded the briar with a medium and a fine grit sanding sponge to minimize the scratches even more and then heated the bowl before I applied a dark brown aniline stain. I applied the stain, flamed it and repeated the process until I had good even coverage on the bowl.
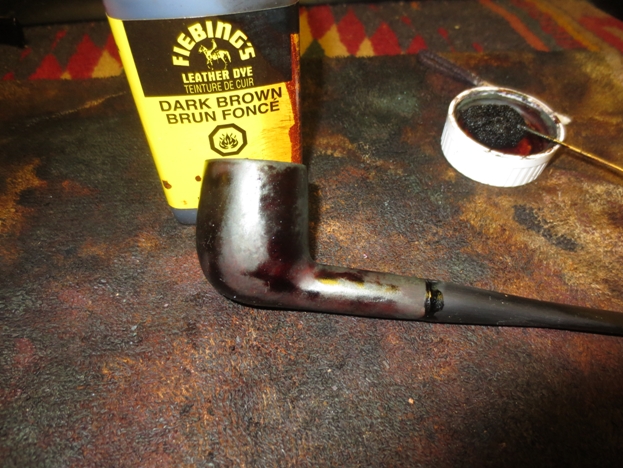
 The dark brown stain was quite opaque so I wiped down the bowl with isopropyl alcohol on cotton pads to remove and thin down the stain coat.
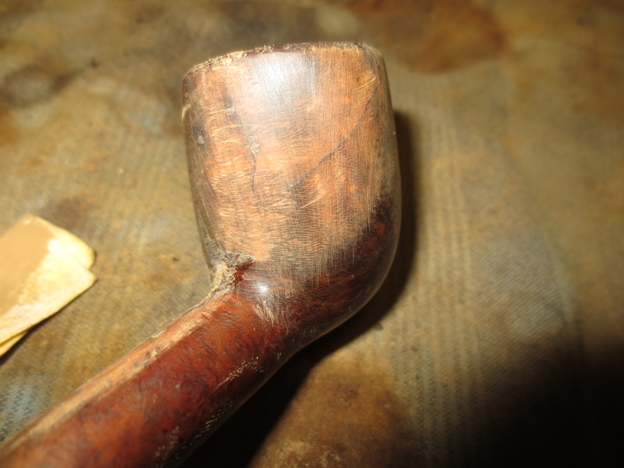
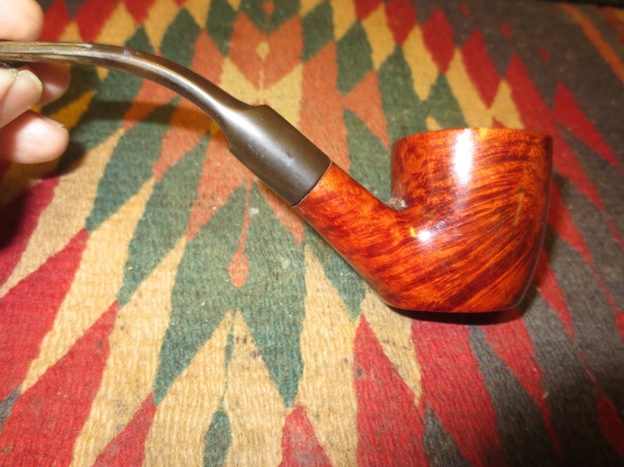
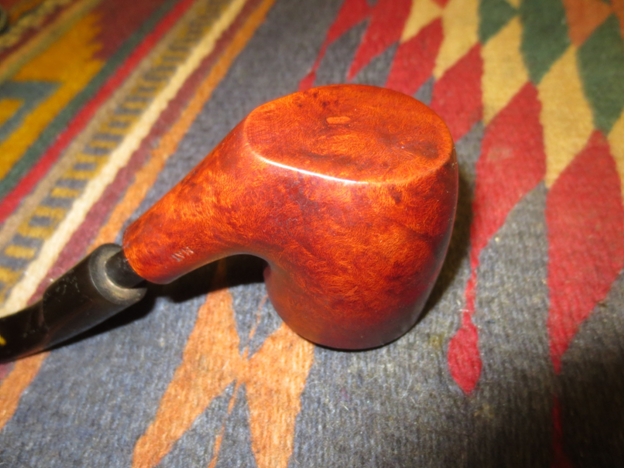
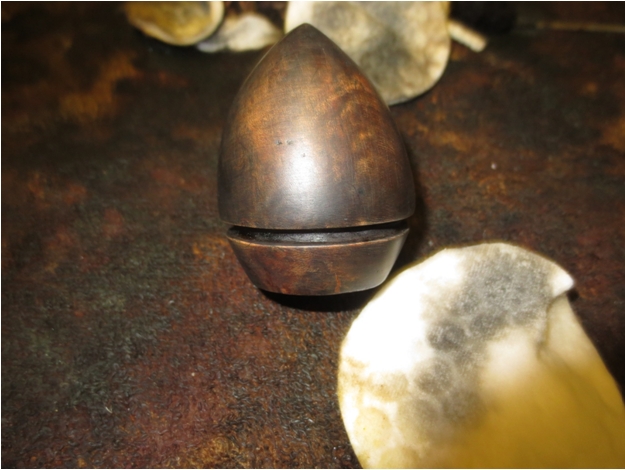
 The top of the rim can be seen in the next photo. The damage to the rim top has been minimized and the surface is smooth. There is still some damage on the inner edge but that will be addressed when I do the internal repairs to the bowl walls.
 I buffed the bowl with Red Tripoli and then wiped it down again with alcohol. The colour was just what I was looking for at this point in the process. It was a rich brown stain that allowed the grain – birdseye and mixed to show through the finish. It also did a decent job covering the repair to the other side of the bowl.


 I buffed it again with White Diamond to raise the shine. The stem still needed some fine tuning for a better fit against the shank and some sanding to remove the oxidation and scratches but the pipe was beginning to look good.
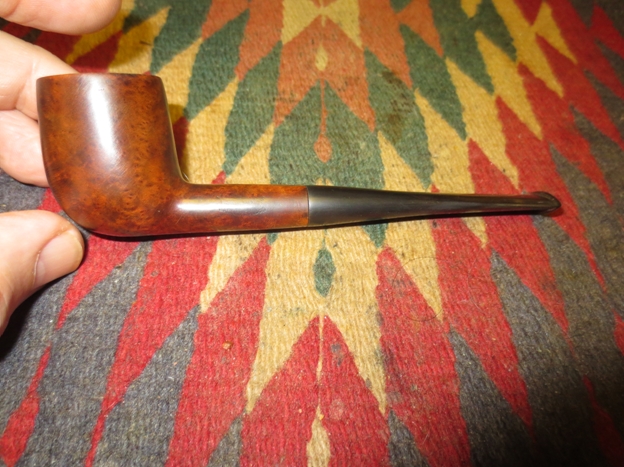

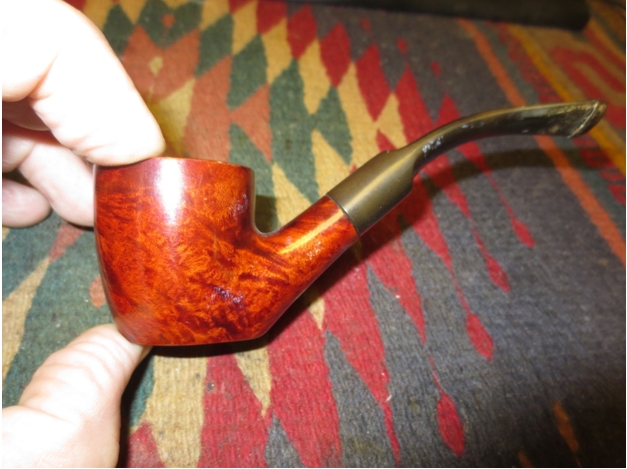
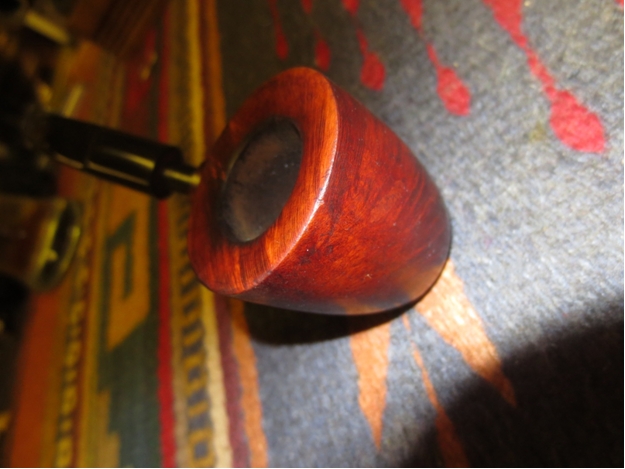
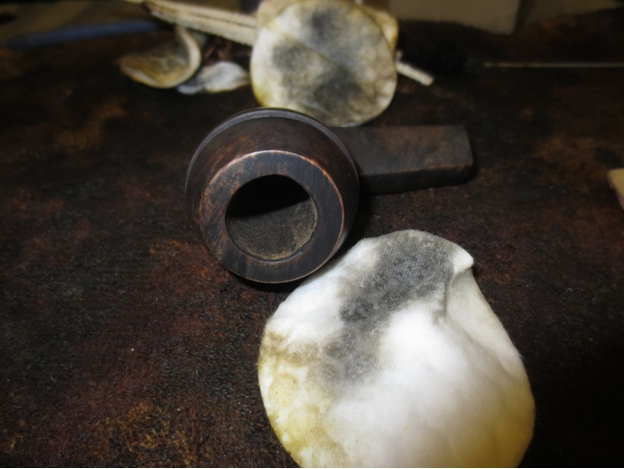
 I took the next close up photos to show the work that still needed to be done on the rim and the look of the repairs on the right side of the bowl. The bowl surface and rim surface was very smooth but still needed to be sanded with micromesh pads to take out the scratches and polish the briar to a deep shine.
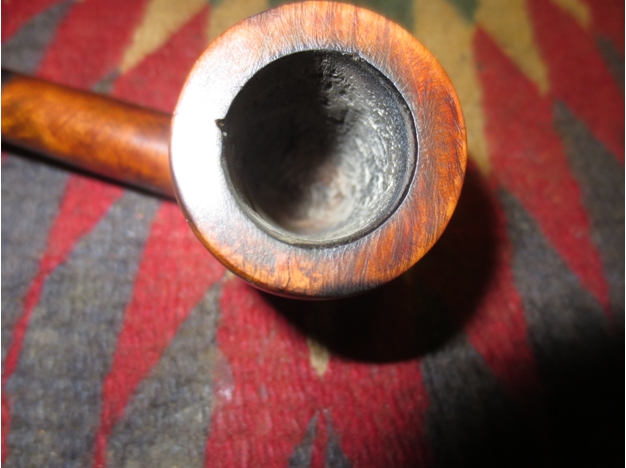
 With exterior at a good place to take a break it was time to address the inside of the bowl. I mixed a batch of pipe mud using cigar ash and water. I mixed it to a thicker than usual consistency so that I could press it into the damaged area of the bowl wall. I did not want it runny or soupy but I still wanted it wet enough that the mud was well mixed and would stick. I painted it on the wall in the damaged area with a folded pipe cleaner and pressed it into the cracks with the spoon end of a pipe nail. I also pressed it in with the end of my finger. I repeated the application of the mud until the surface of the wall was smooth and showed no pits or divots. I set the bowl aside to dry over night as I wanted the mud to harden and also wanted to see if it was solidly stuck in the damaged areas.
 In the morning, after curing over night I inspected the patch on the inside of the bowl. I used my dental pick to make sure that the patch was well set in the divots in the wall of the bowl and then smooth out the surface with a pen knife.
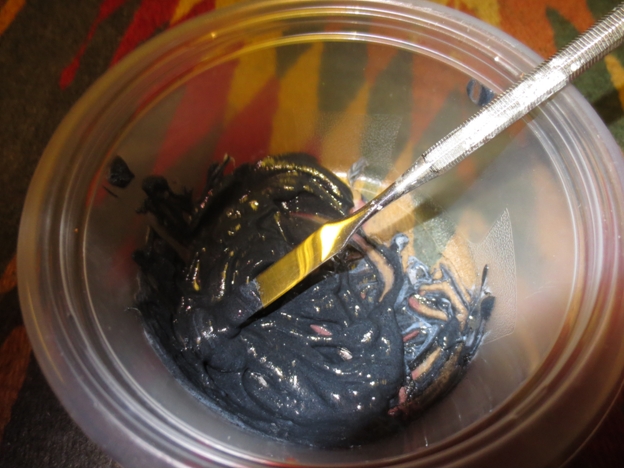
 I let it dry for about four more hours while I did other things and then decided to mix a batch of bowl coating to paint the bowl interior. I mix a batch of bowl coating using sour cream and activated charcoal powder. I use a finely ground powder that comes in capsules.
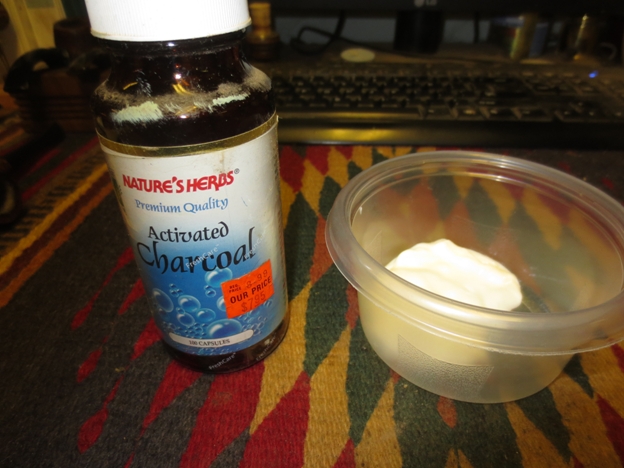
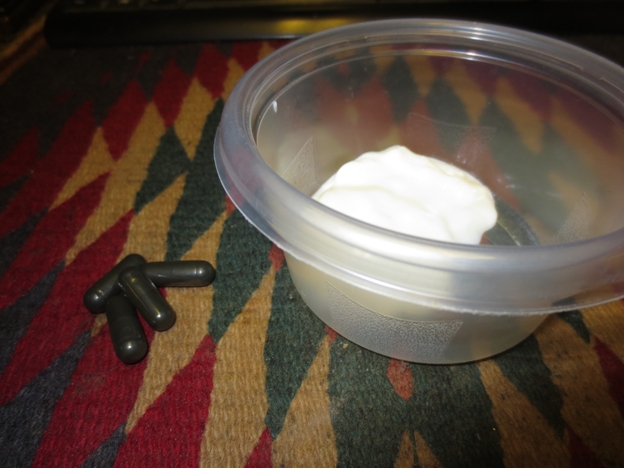 I take apart the capsules and dump the charcoal powder into the sour cream.
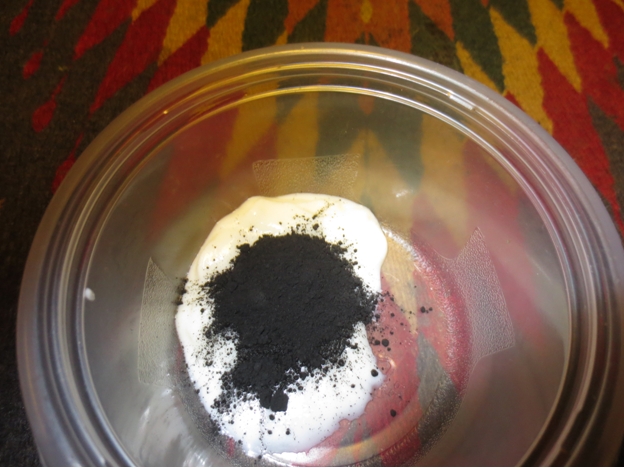 I use a dental spatula to mix the charcoal and sour cream into a black paste. I work the paste until all the sour cream and charcoal are combined.
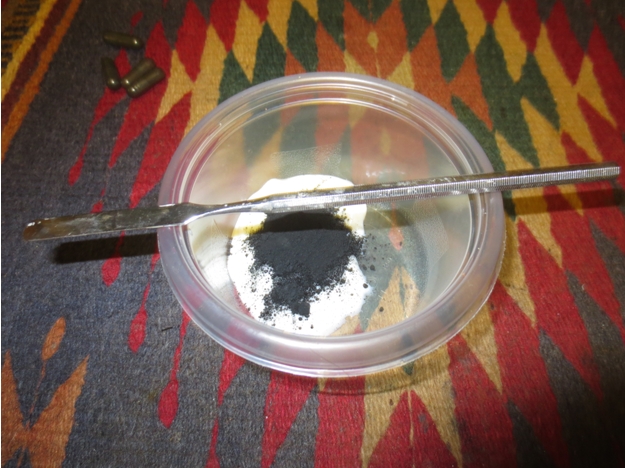
 I used the spatula to apply the paste to the walls of the pipe and then smoothed it out using a folded pipe cleaner.
 The entire bowl is coated with the paste and after smoothing it out with the pipe cleaner looks like a dark grey almost black coating around the sides and bottom of the bowl. I put a pipe cleaner in the airway so that I would not get the paste in the airway when smoothing it out.
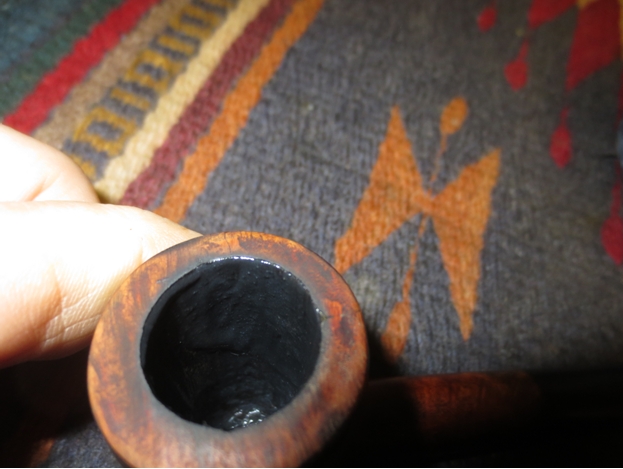

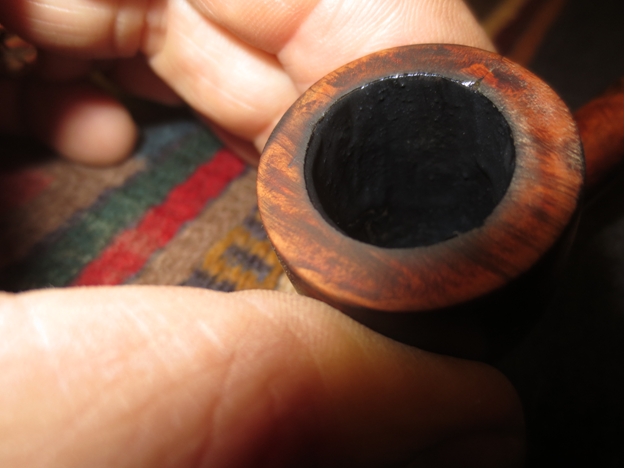 I wiped down the top of the rim with a bit of saliva on a cotton pad and then set the bowl aside to let the coating cure. Once the coating cured it would provide a protective layer over the bowl interior and facilitate the buildup of a new cake.
While the bowl coating was drying I worked on the stem. I sanded it with 220 grit sandpaper with a plastic washer between the shank and stem to smooth out the transition between the two. When I had finished sanding the stem with the 220 grit sandpaper I sanded it with a medium and a fine grit sanding sponge.


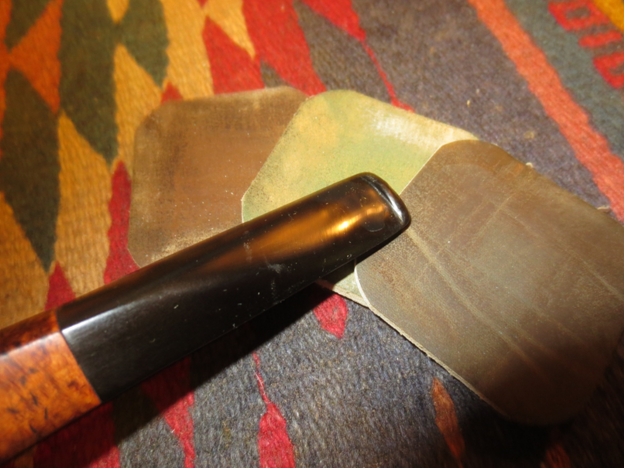
 I wet sanded the stem with 1500-2400 grit micromesh sanding pads to minimize the scratches.
 I dry sanded the stem with 3200-4000 grit micromesh sanding pads and then buffed the stem with Red Tripoli to further polish the stem.
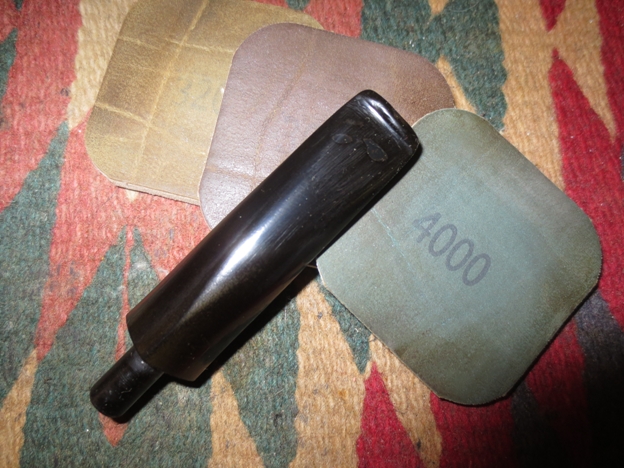
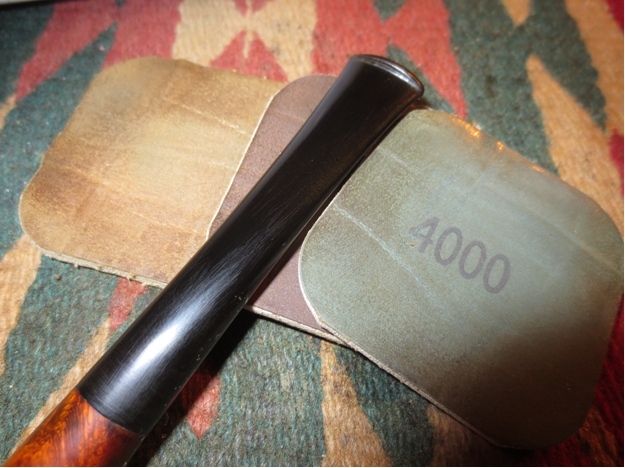 I brought it back to the work table and dry sanded it with 6000-12,000 grit sanding pads. I buffed the stem with Blue Diamond on the wheel and then rubbed it down with Obsidian Oil and let it soak in.
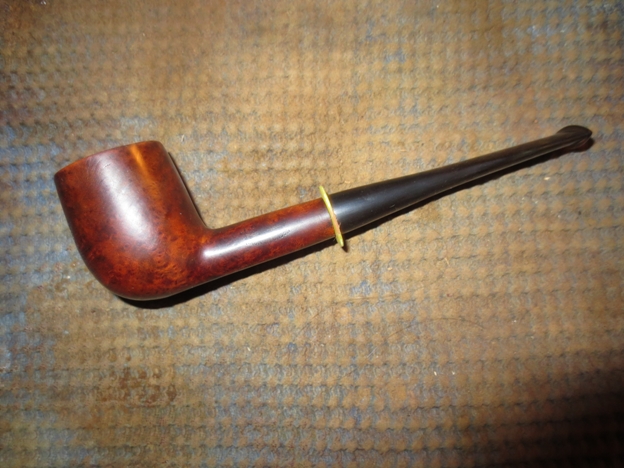
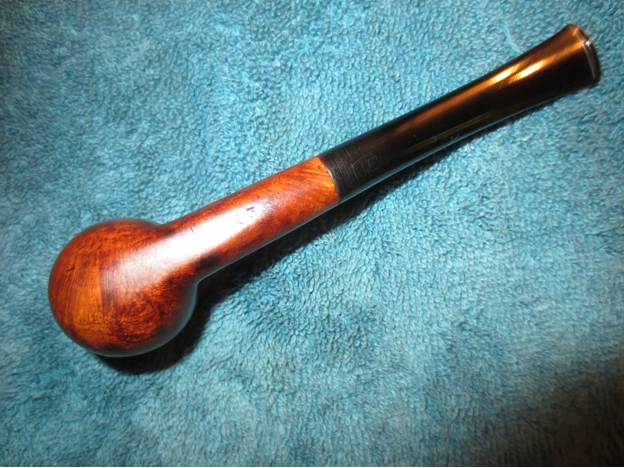
 I sanded the bowl and shank with micromesh sanding pads – wet sanding 1500-2400 grit pads and dry sanding with 3200-12,000 grit pads. I buffed the bowl with Blue Diamond to polish the briar. There are some fine scratches that seem to be around the junction of the shank and stem. I buffed it with Red Tripoli again and with White Diamond and then with Blue Diamond. I polished the stem and bowl with carnauba wax and buffed it to a shine with a clean buffing pad to raise the shine. The finished pipe is shown in the photos below.


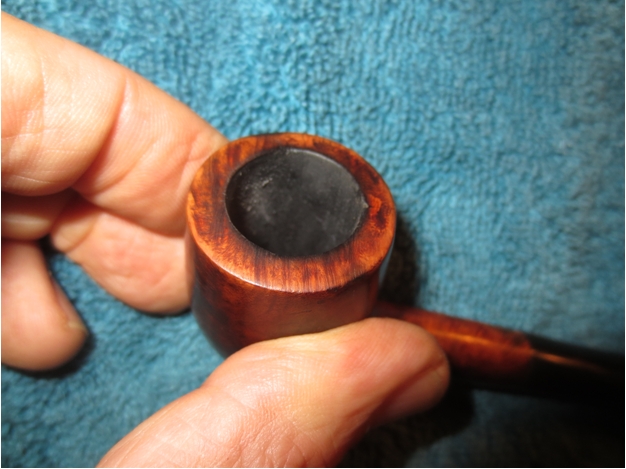
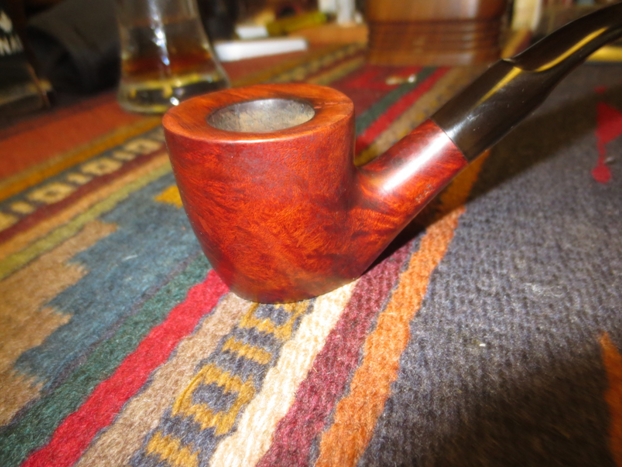
 The next photos are close up pictures of the repair. They also that the carbon/sour cream bowl coating has dried and is a dark grey colour. The cracks on the exterior are smooth to touch and do not feel like cracks. The repairs to the top of the rim still show as a red coloured spot at the back of the rim. The stain took to the patch a little lighter than the rest of the bowl. It is smooth to the touch but still shows. The internal bowl coating has dried to the touch and gives a nice coat that is cover the repairs on the bowl wall. The carbon bowl coating has small particles of carbon in the finish. These will provide something for the new cake to bind to when it is smoked. All that remains is to let the coating cure for a few days and then load a bowl and smoke it.
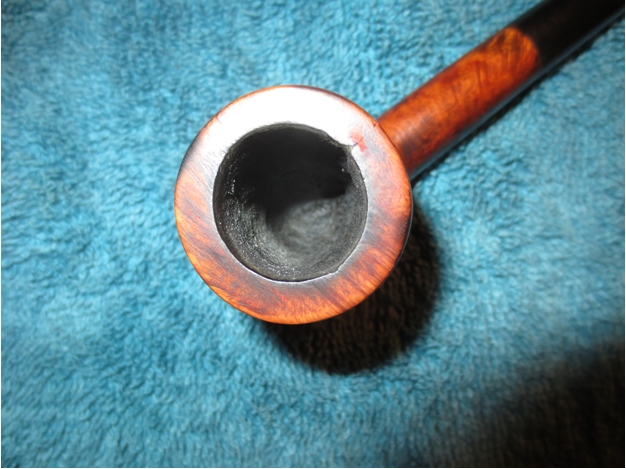


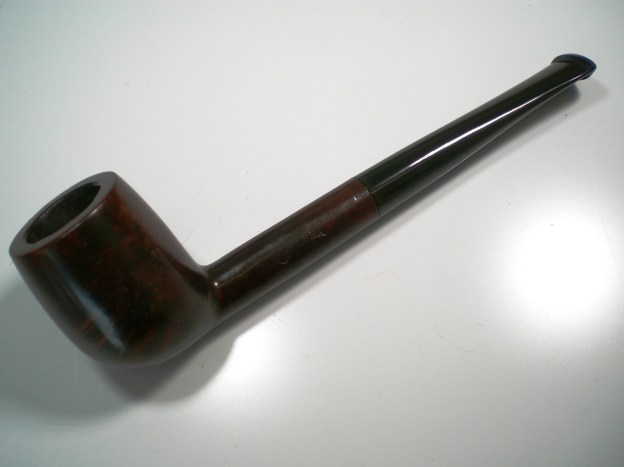
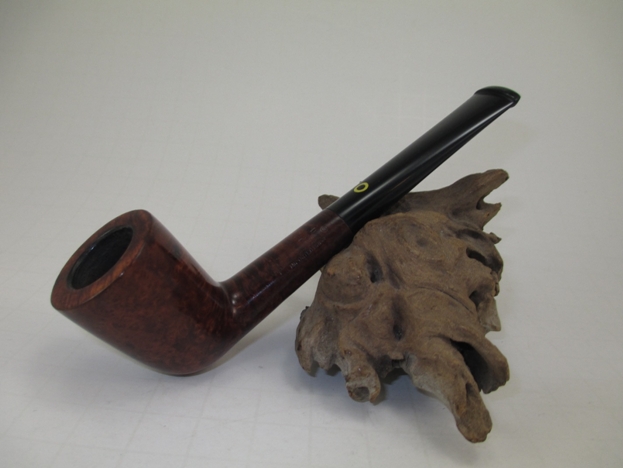
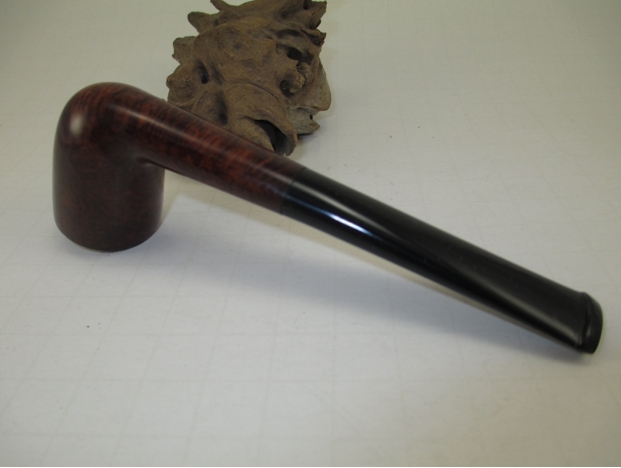
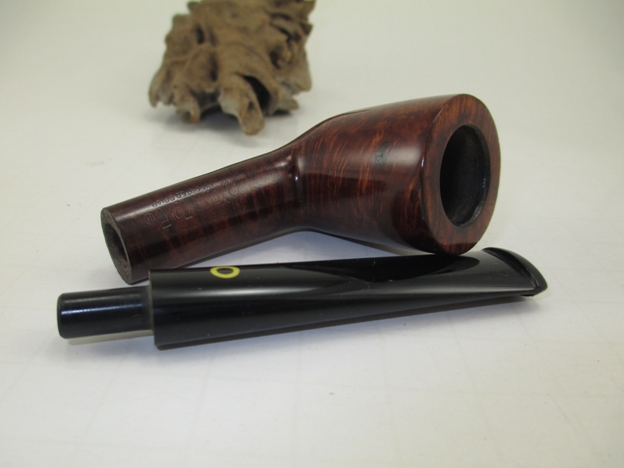
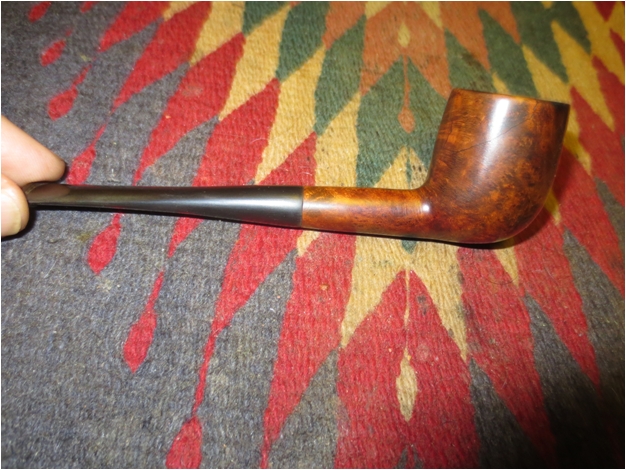
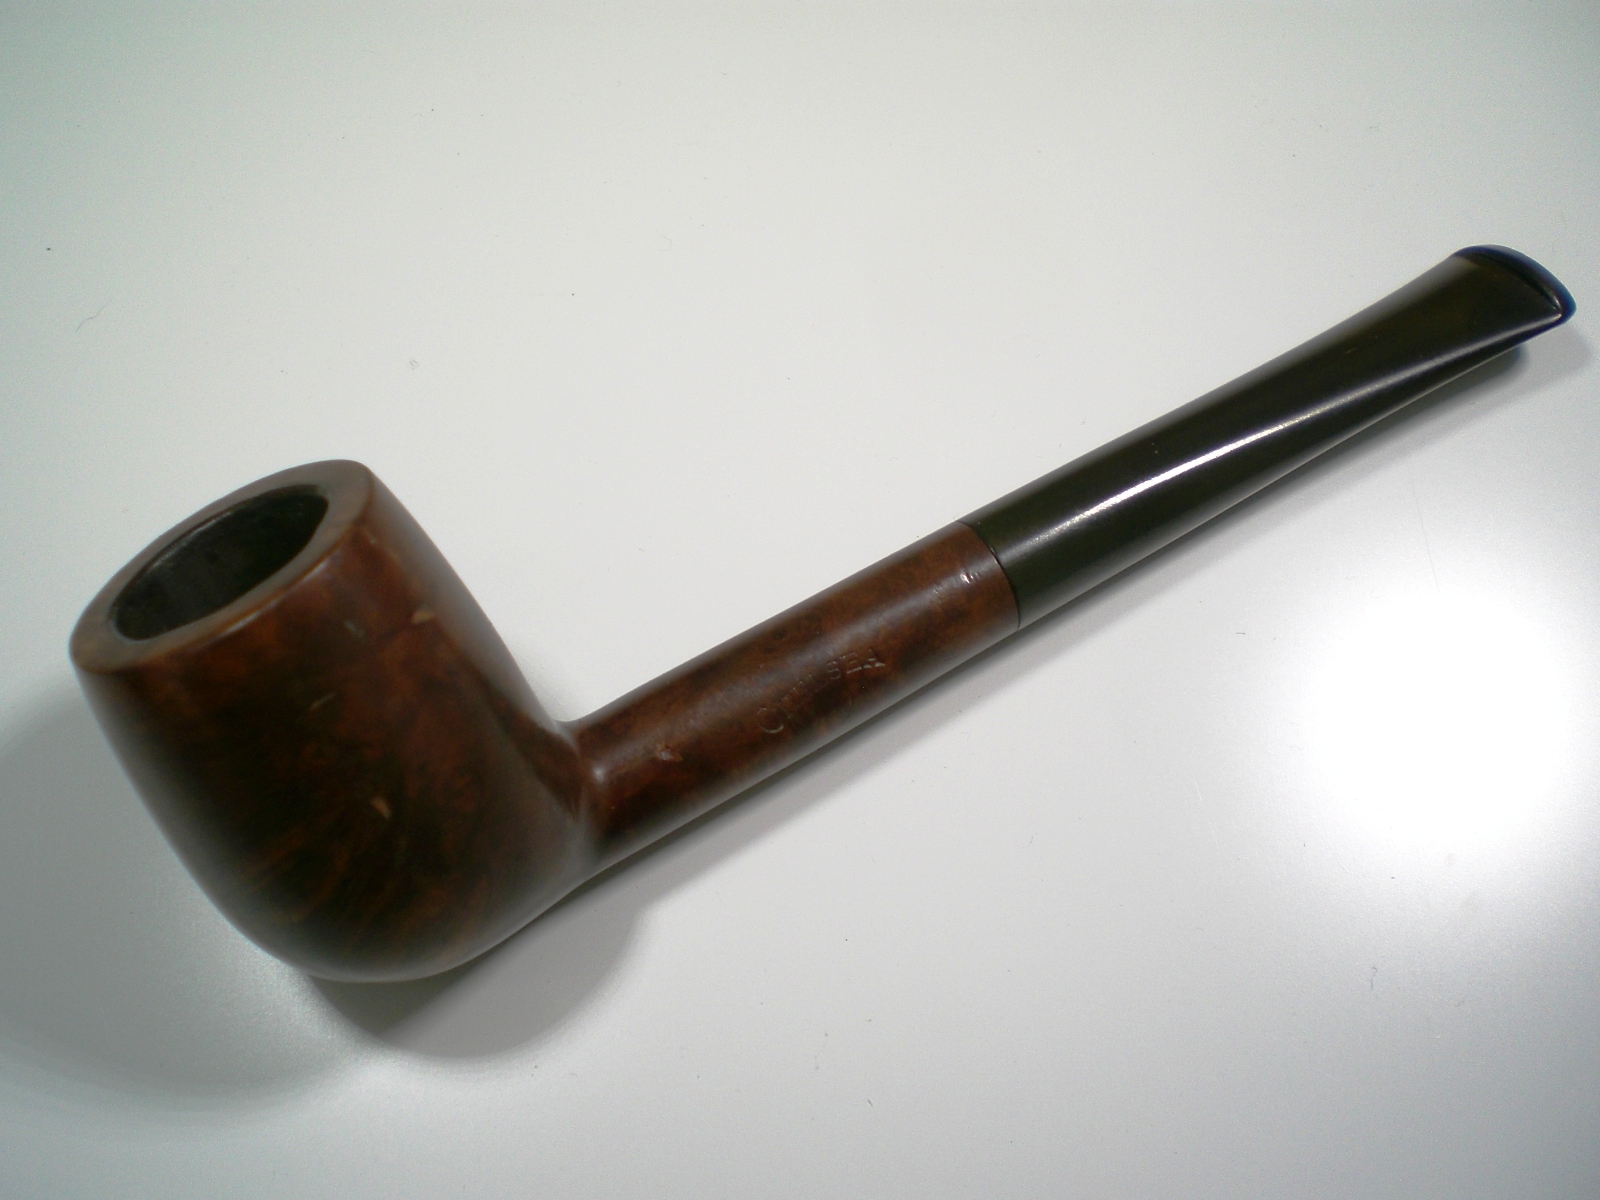
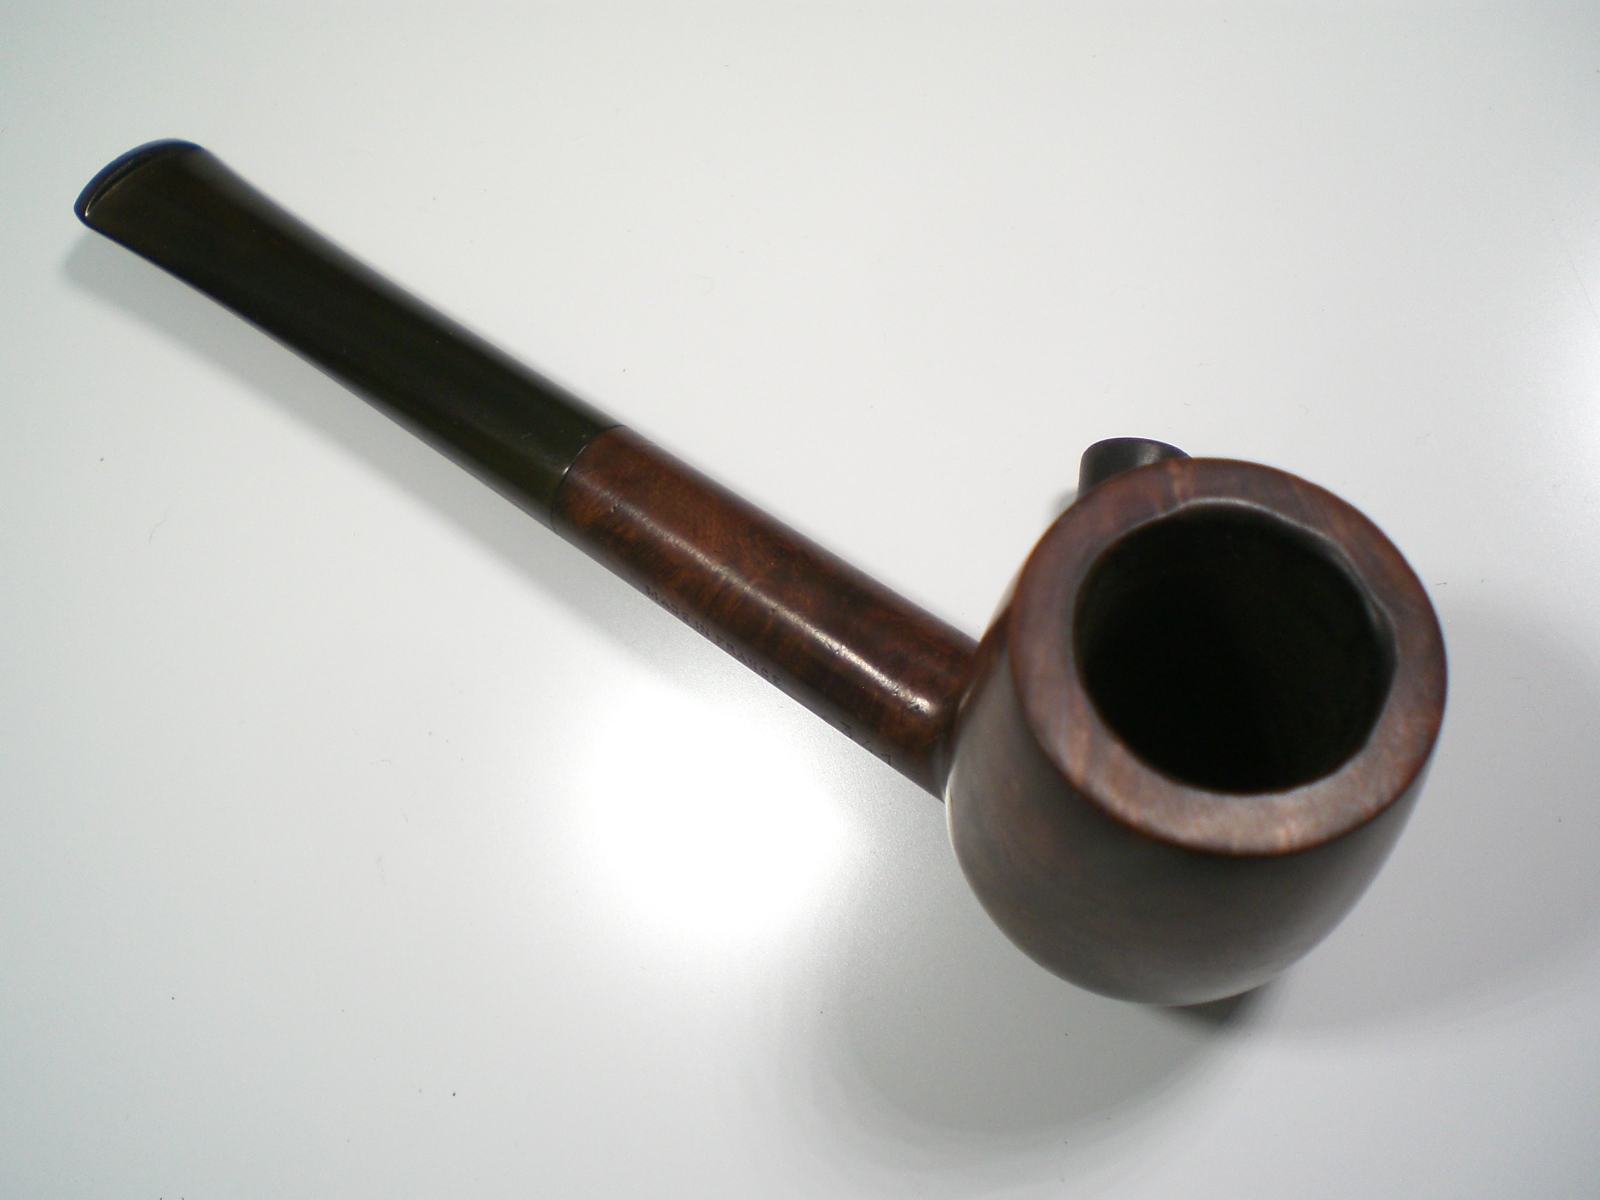
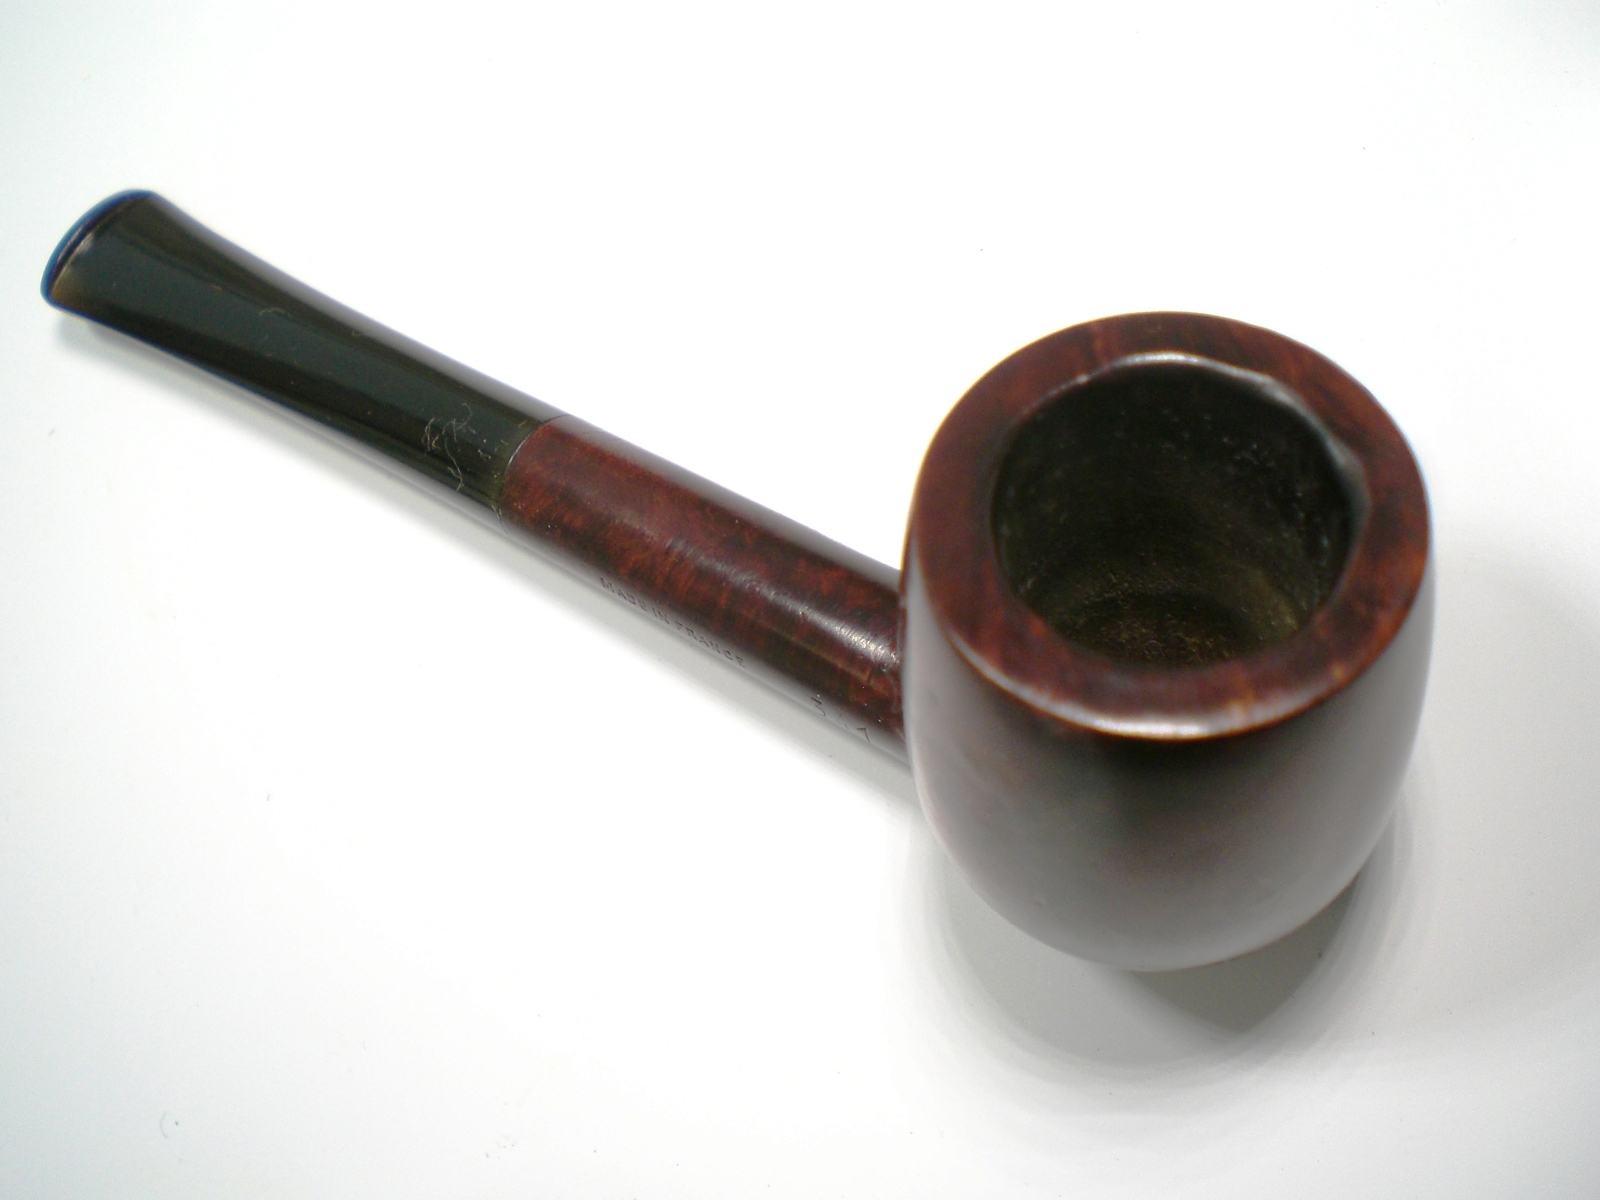
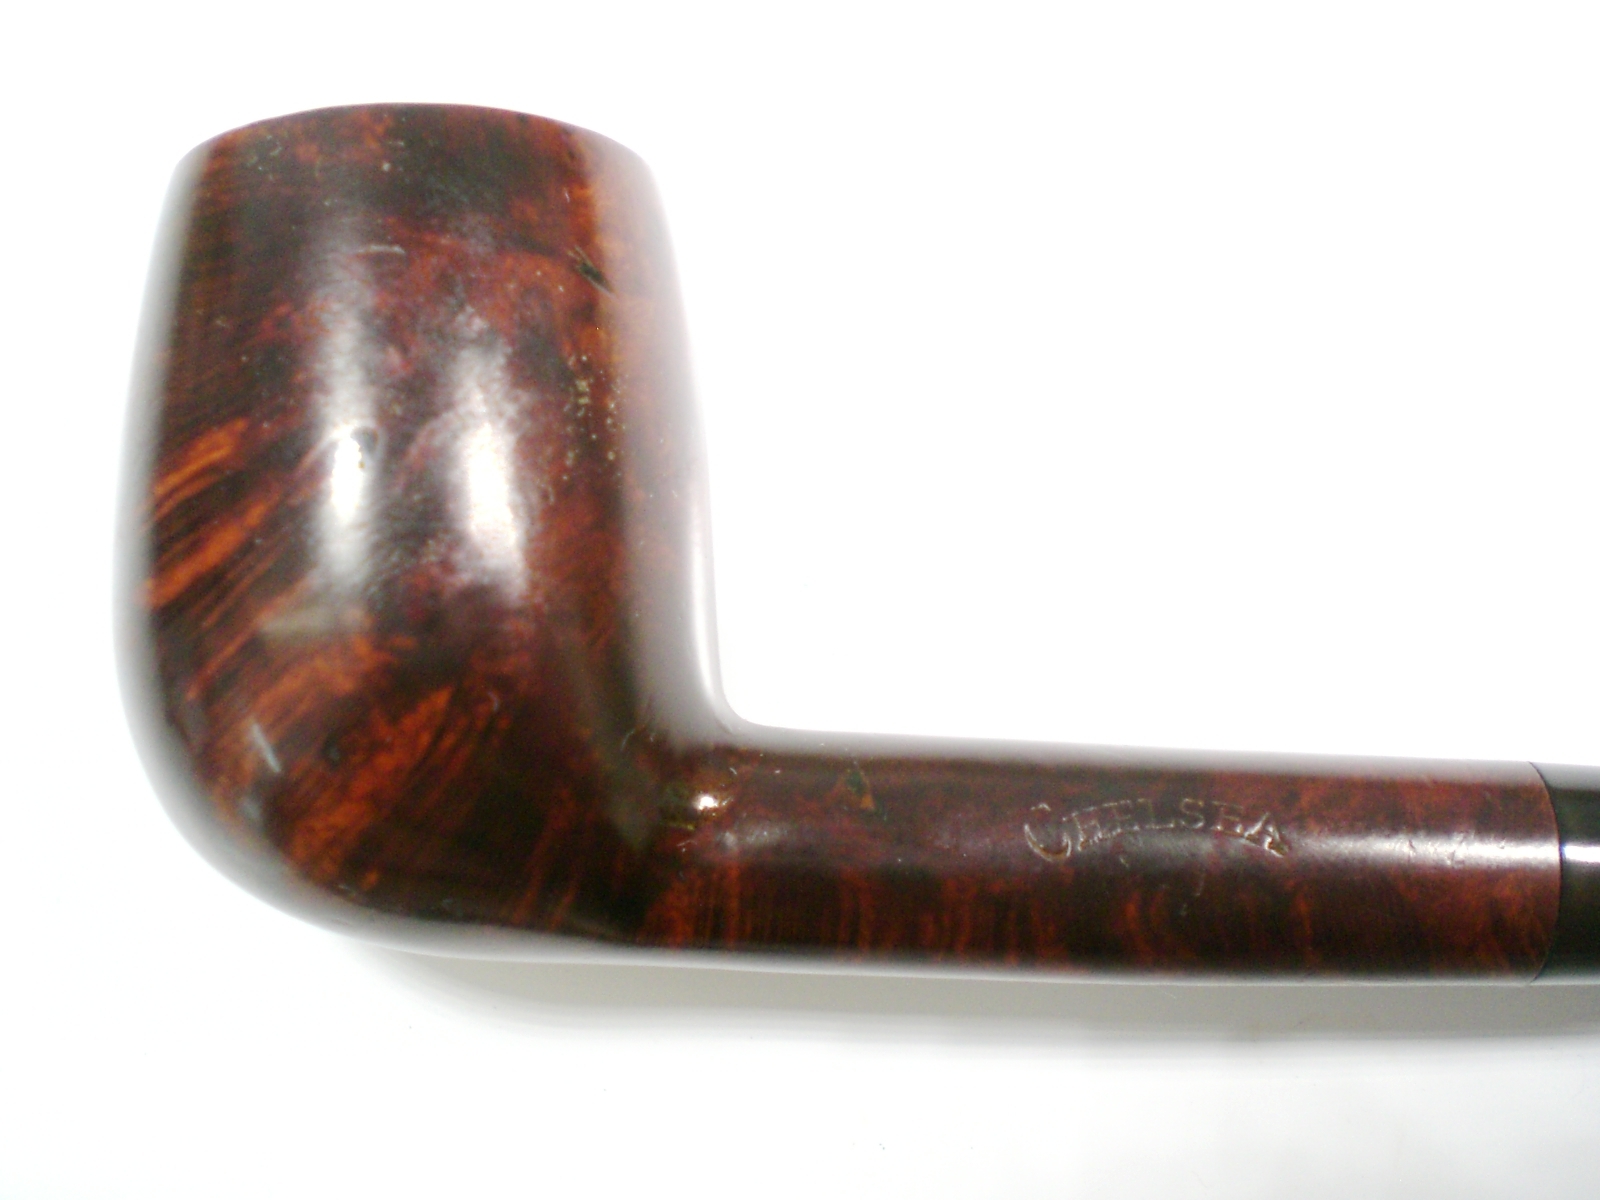
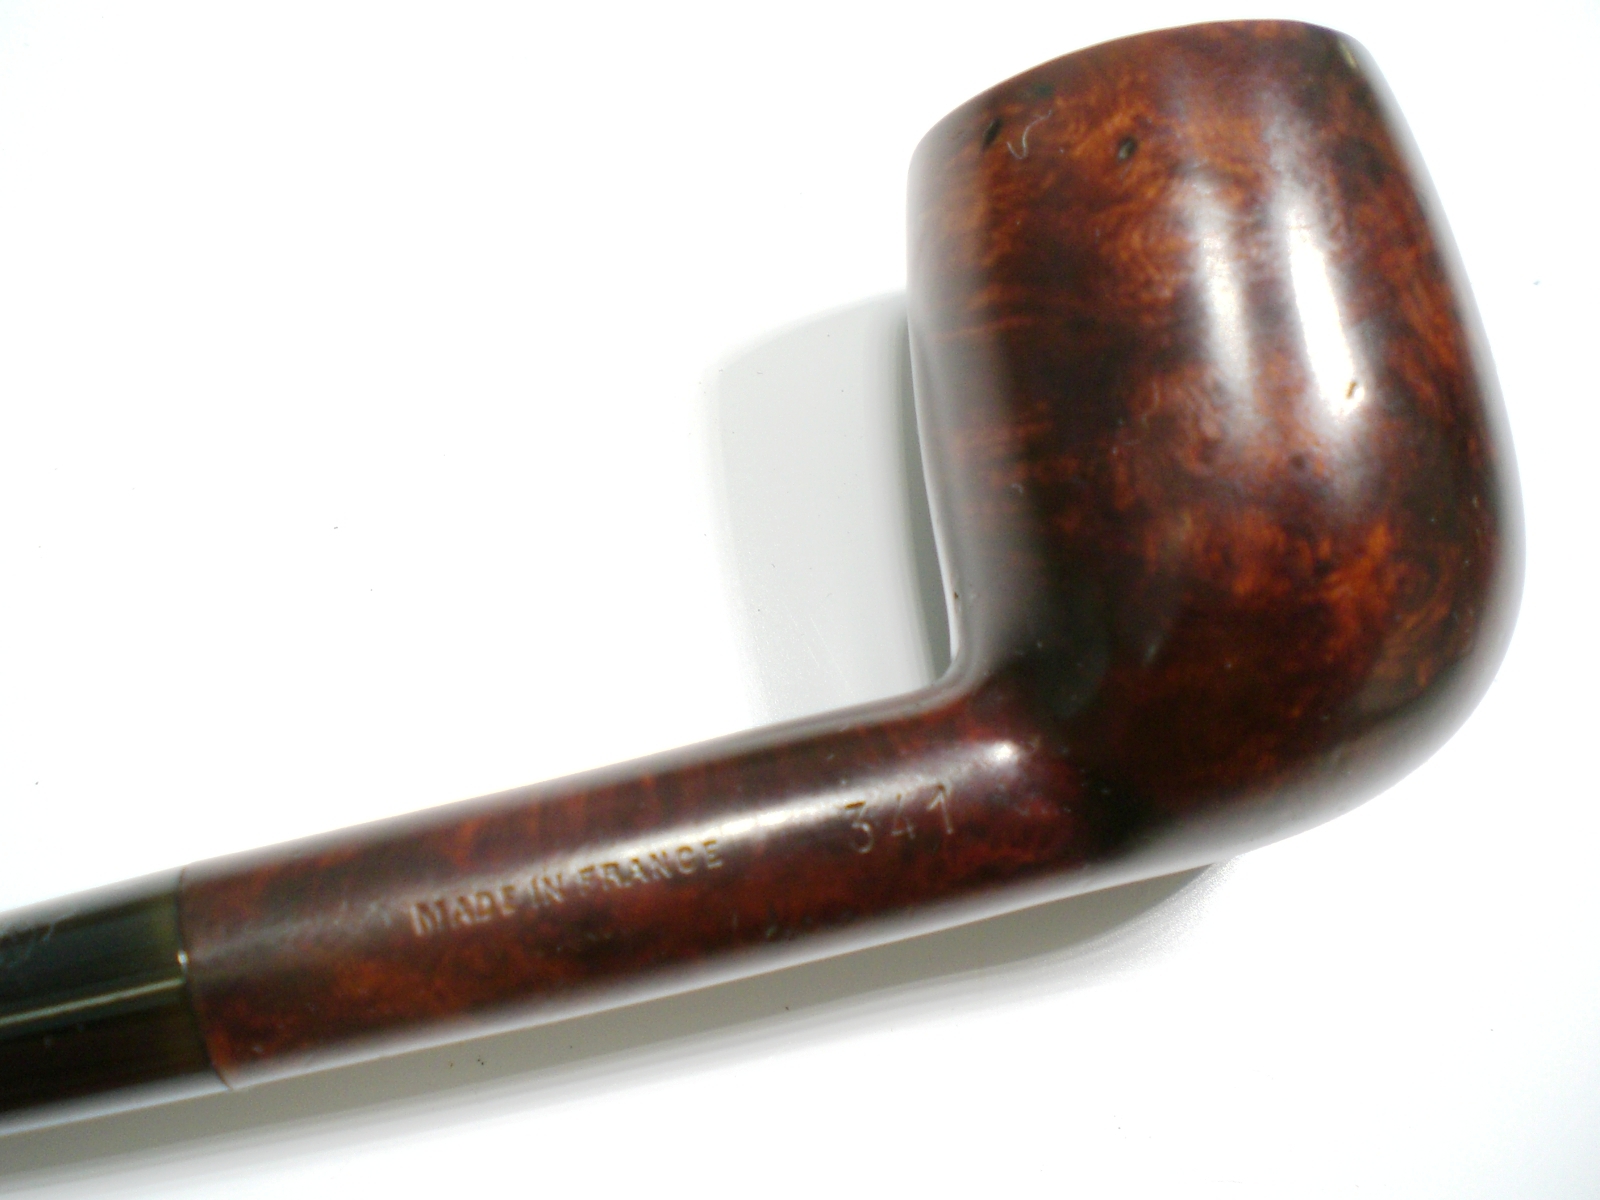
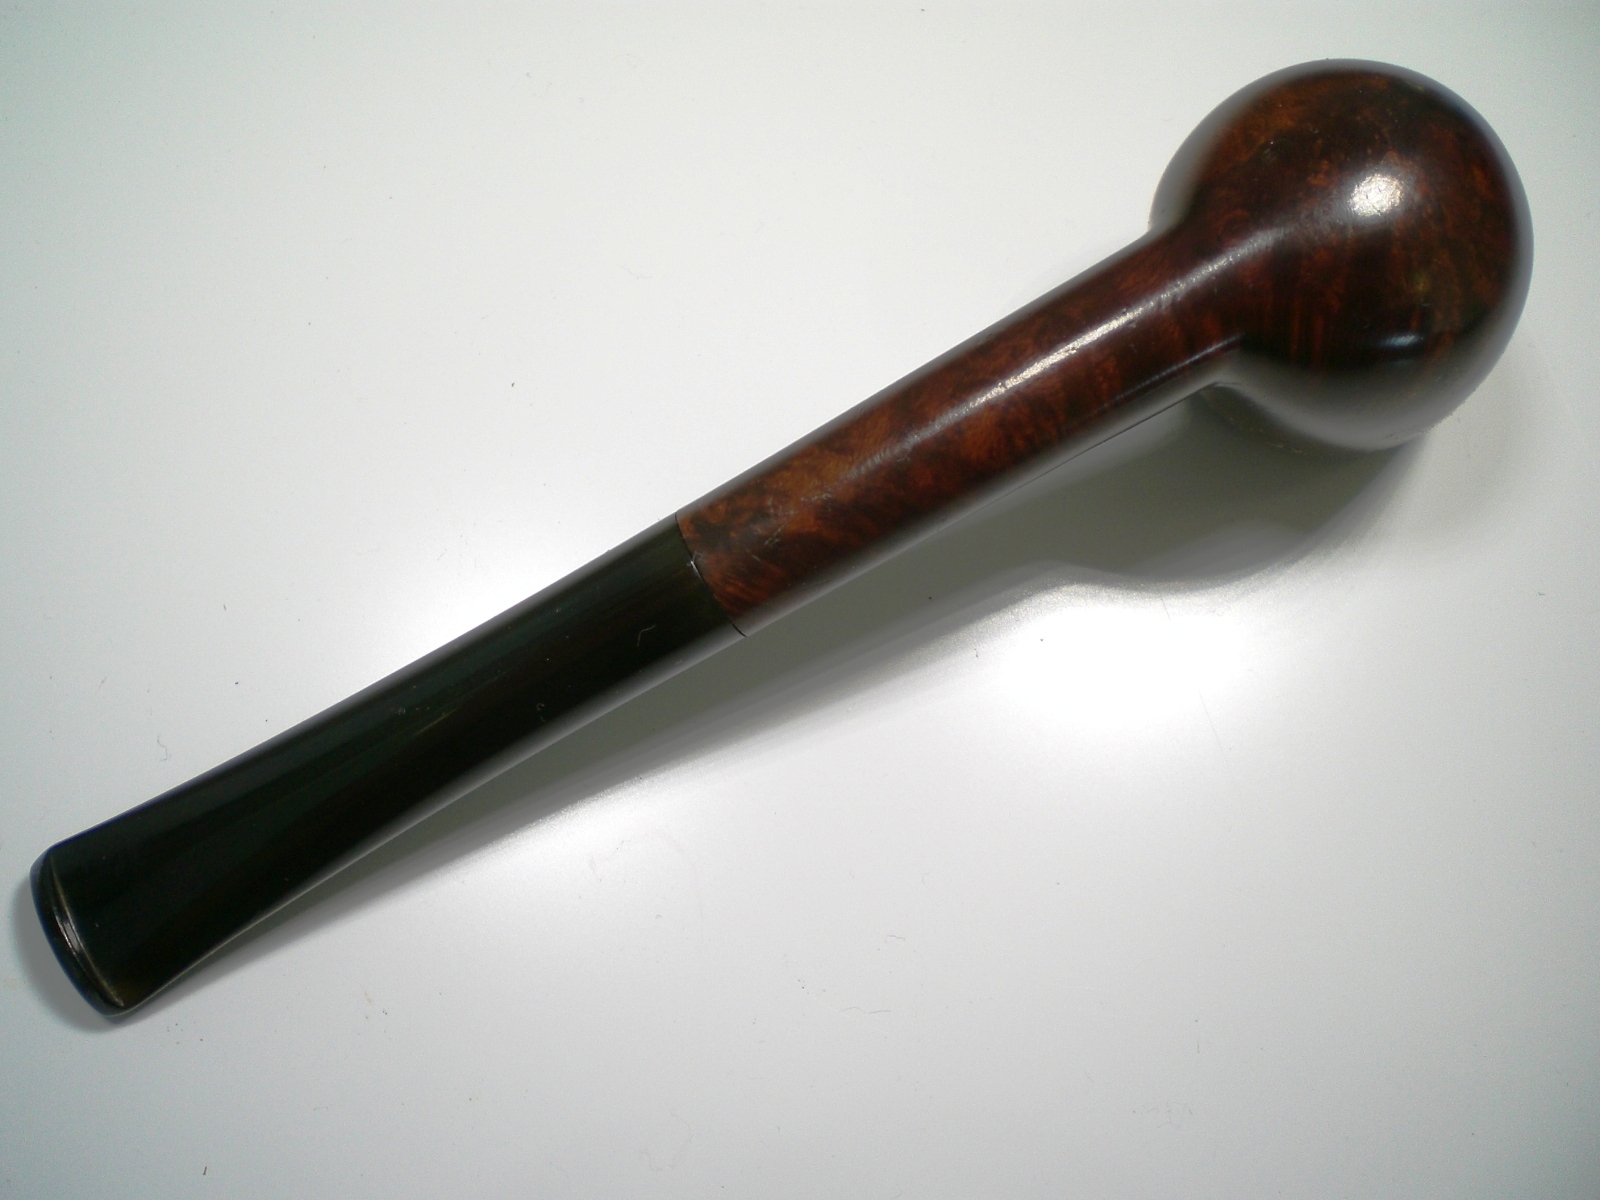
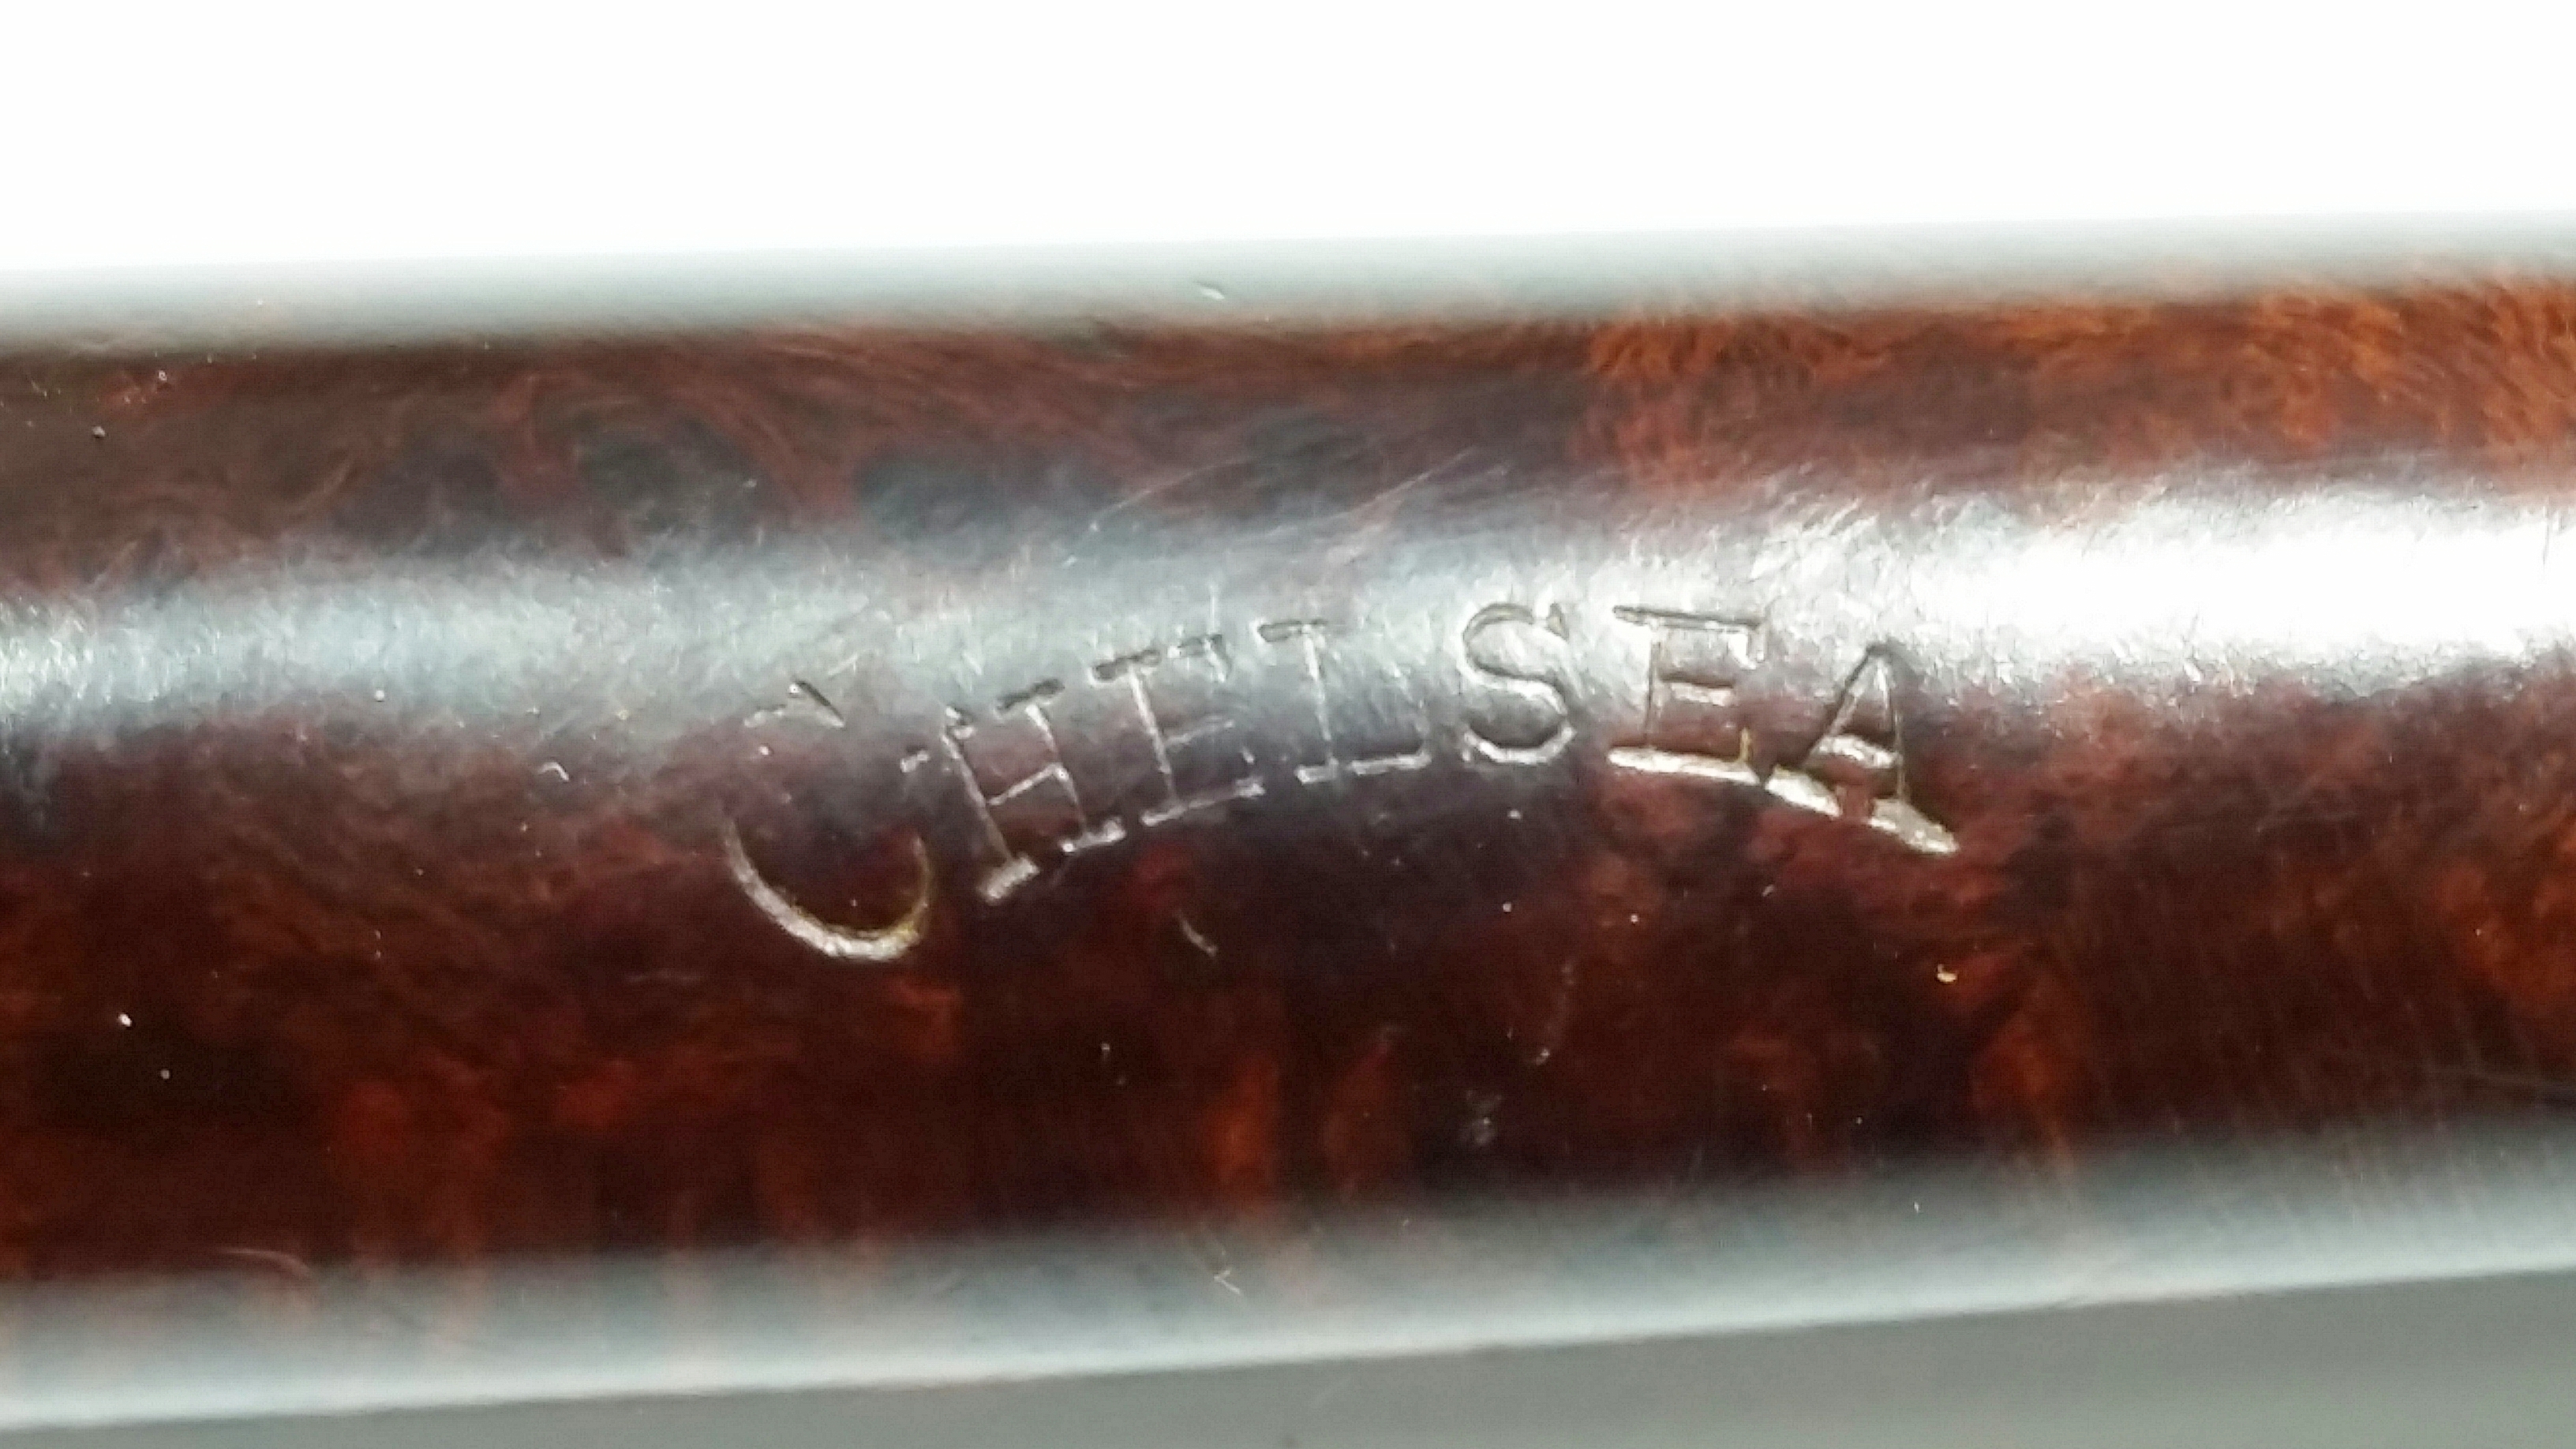
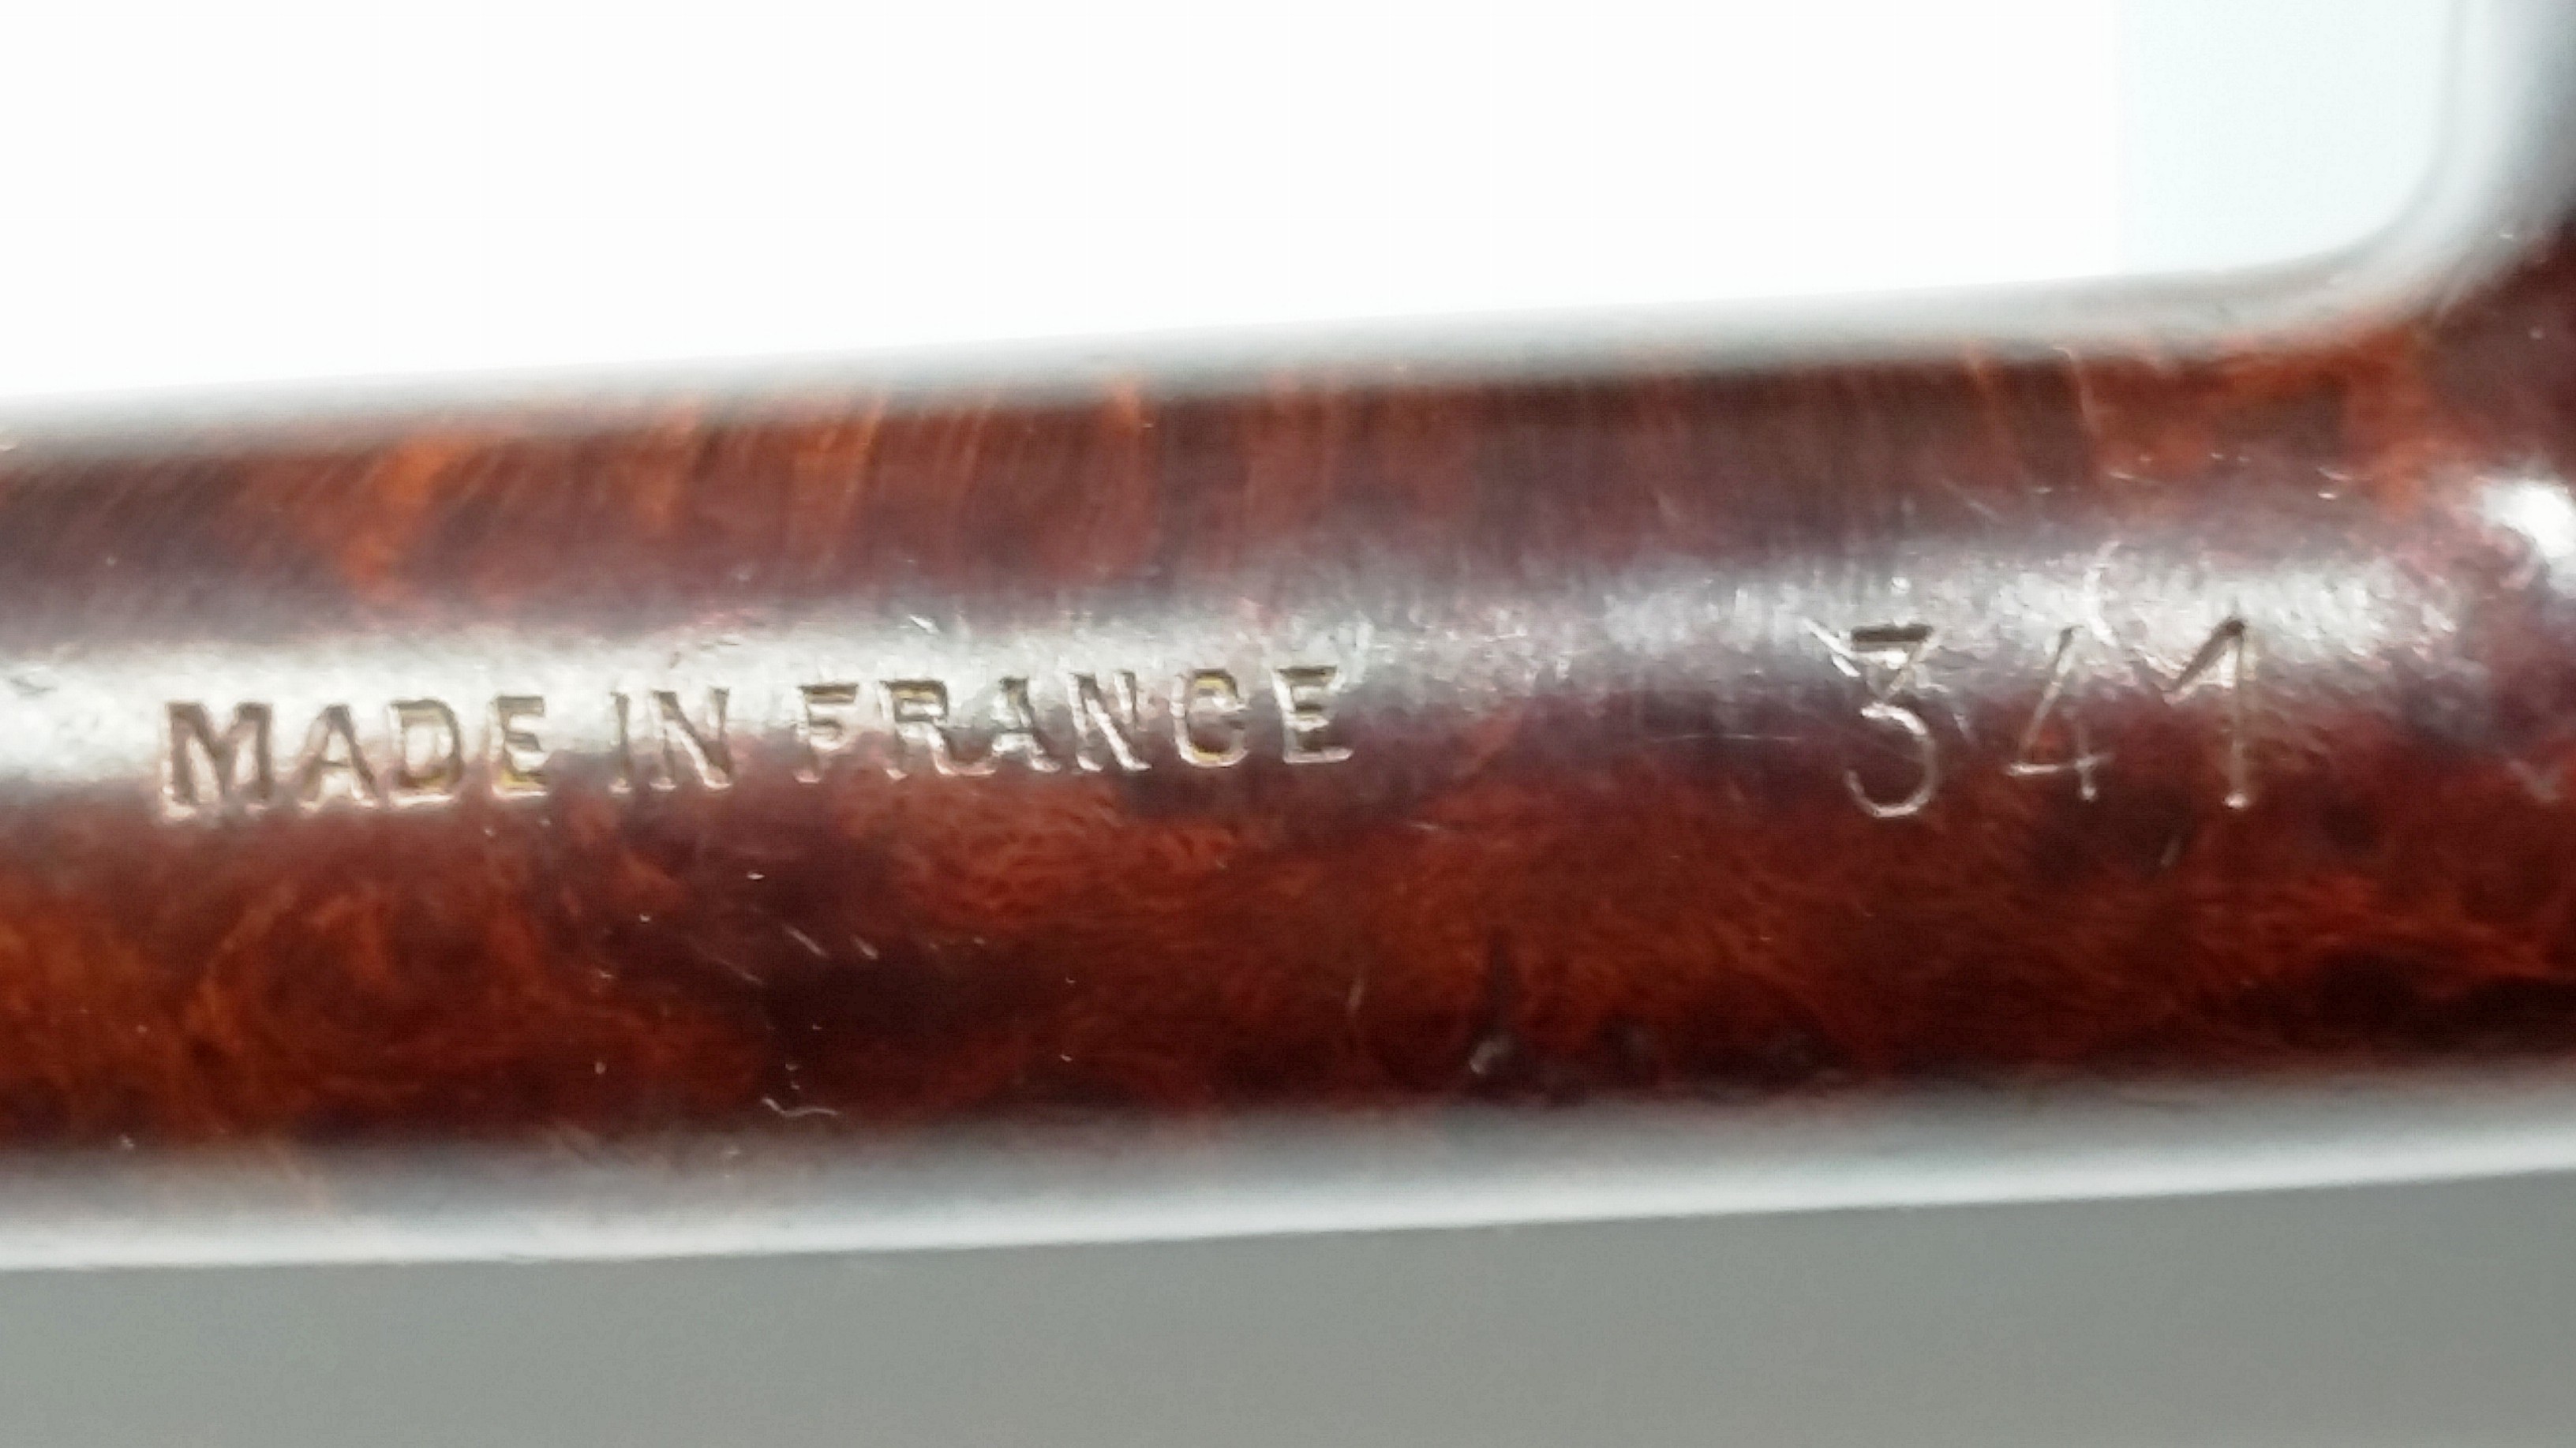
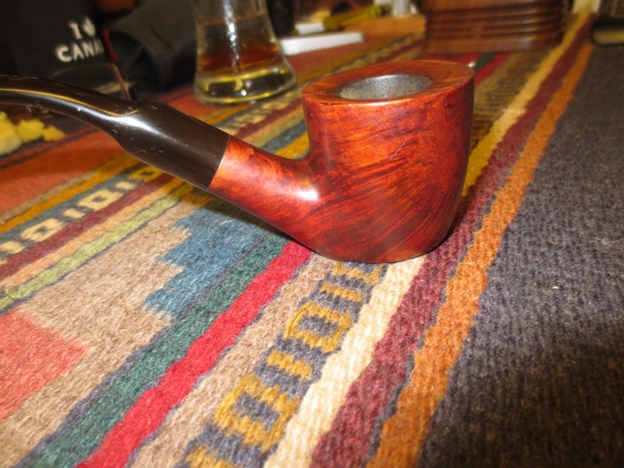
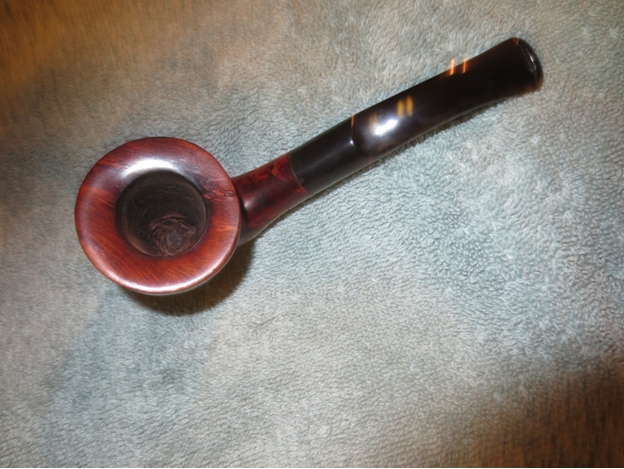
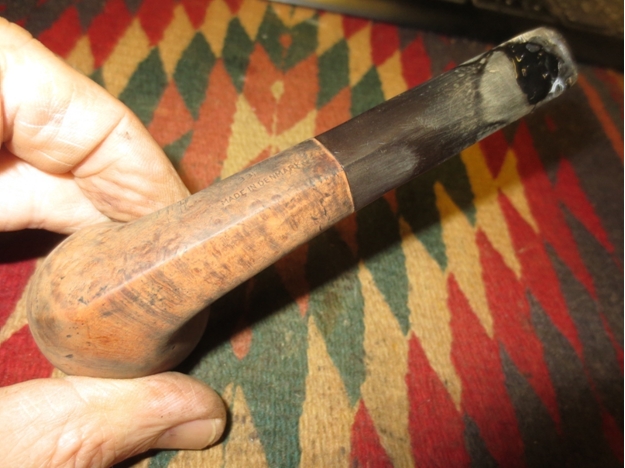
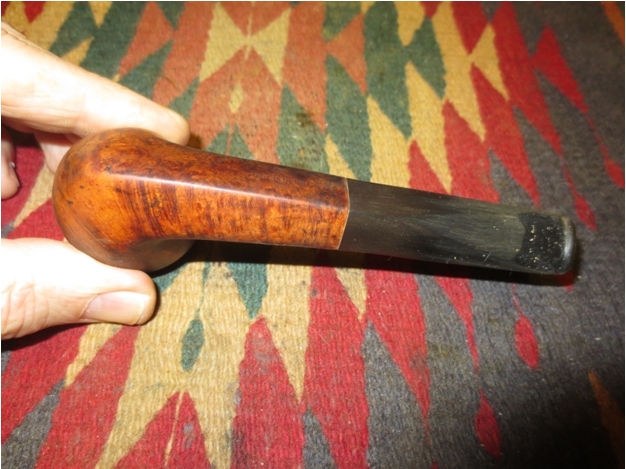
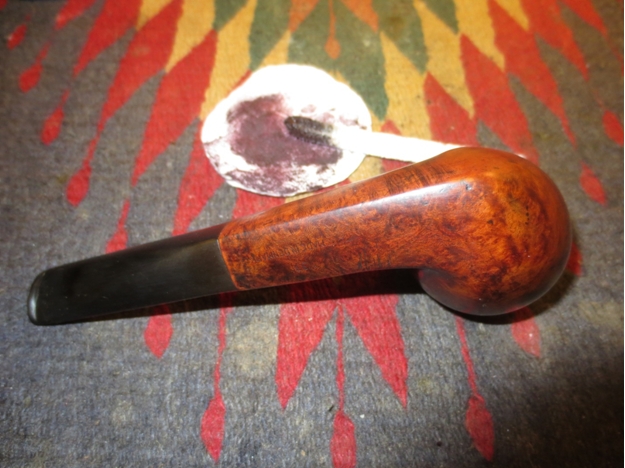
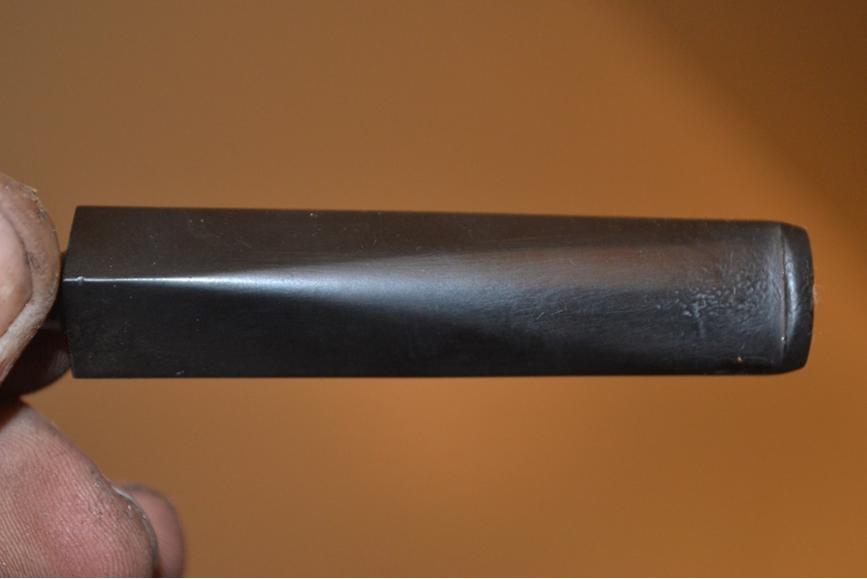
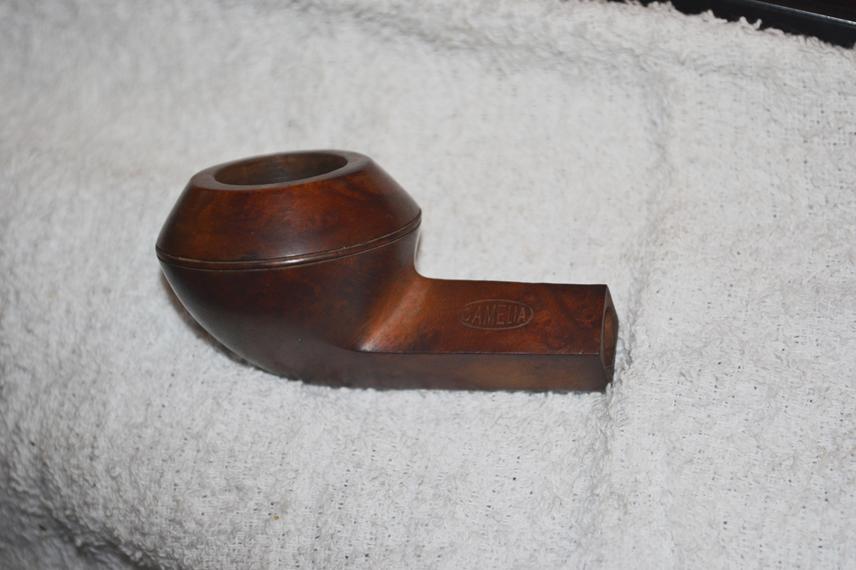
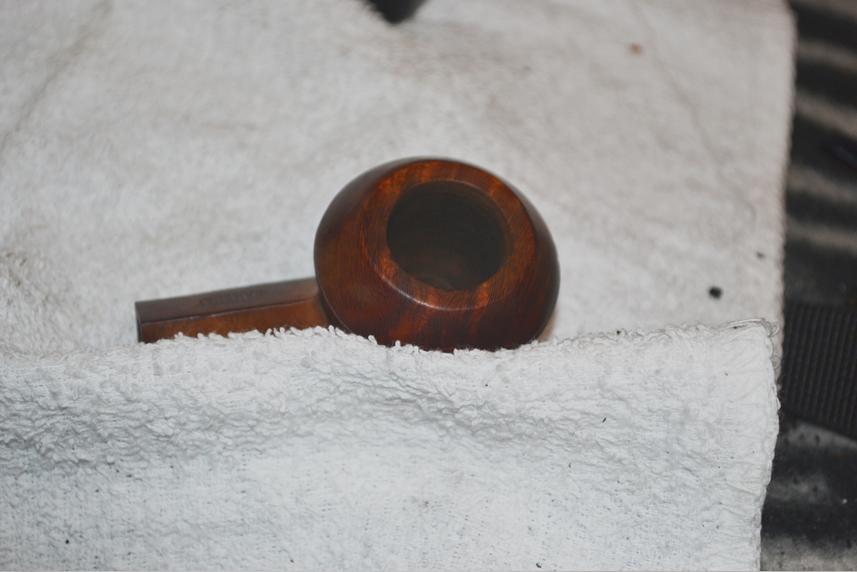
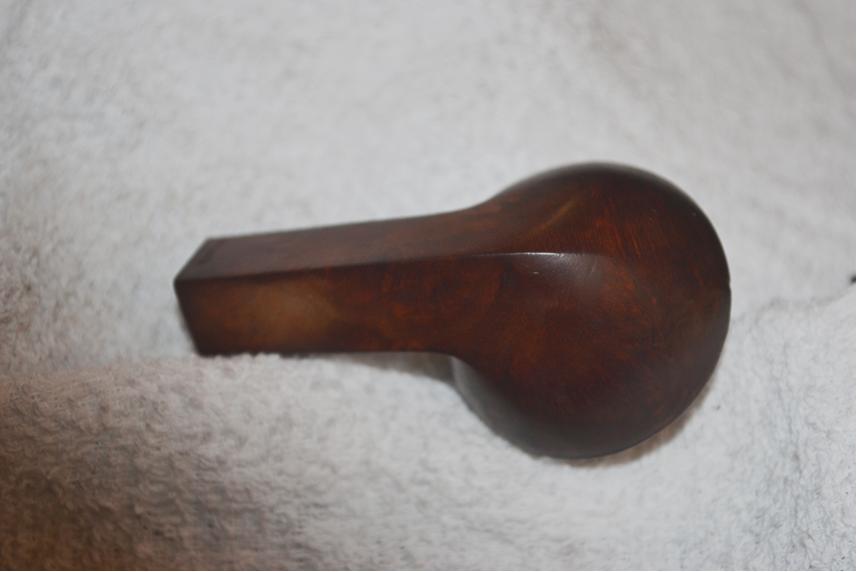
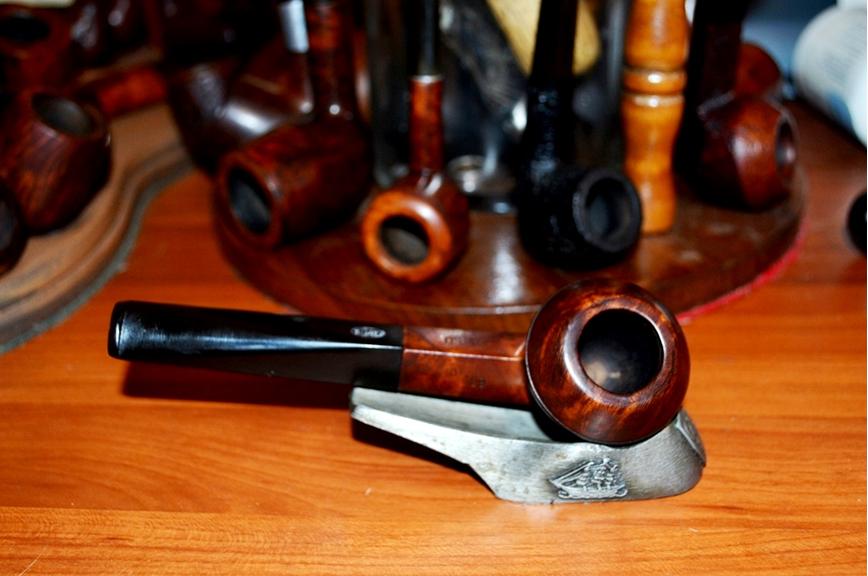
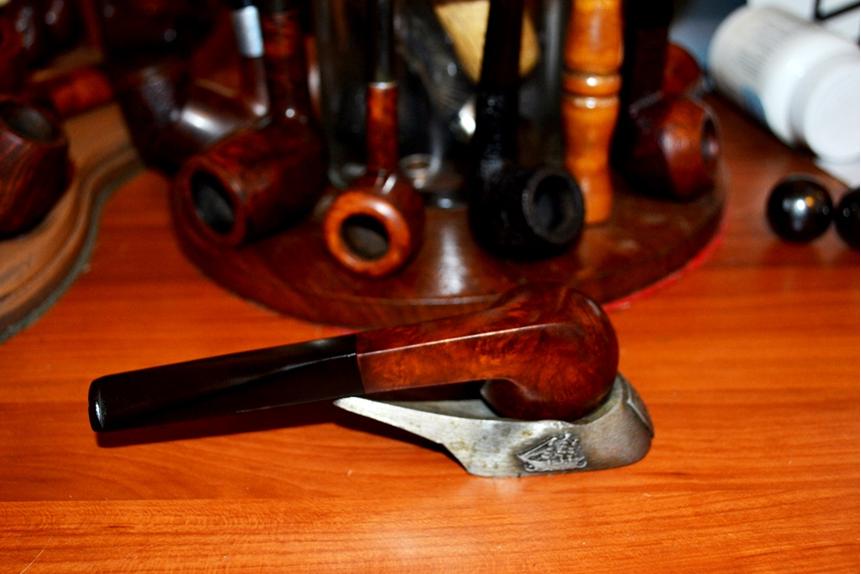
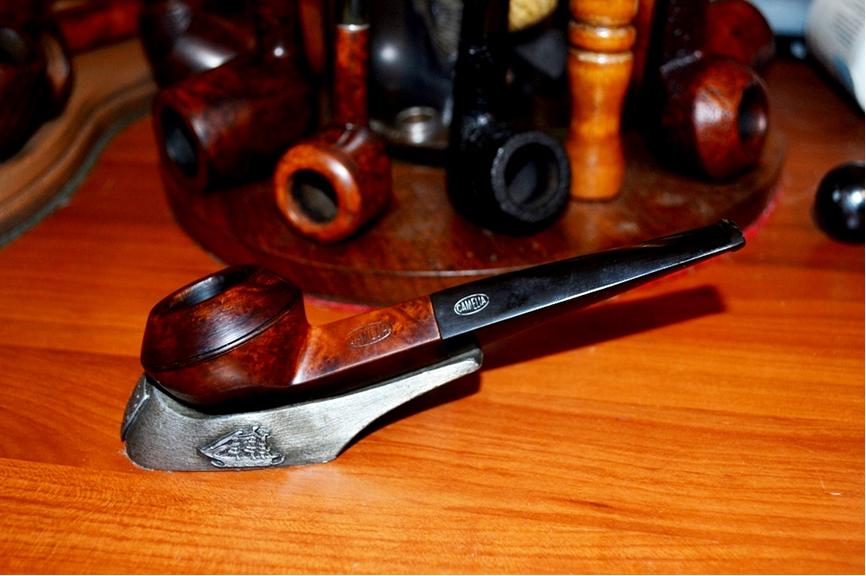
My youngest daughter’s name is Chelsea and she is married to a fine young man who also enjoys a pipe. He’s received several of my restorations in the past few years. A few months ago, I stumbled across this “Chelsea” stamped pipe and decided it would be part of his birthday present this year. He and my wife share the same day in April, so I can never forget his special day.
The pipe is stamped “Chelsea” and “Made in France 341”. I’ve seen references to the Chelsea brand as being an Comoy’s second and indeed the shape 341 is listed on their shape chart as a small billiard. I was unable to find a Comoy’s version of this shape anywhere on the web. The stem material and finish definitely have a Comoy’s feel.
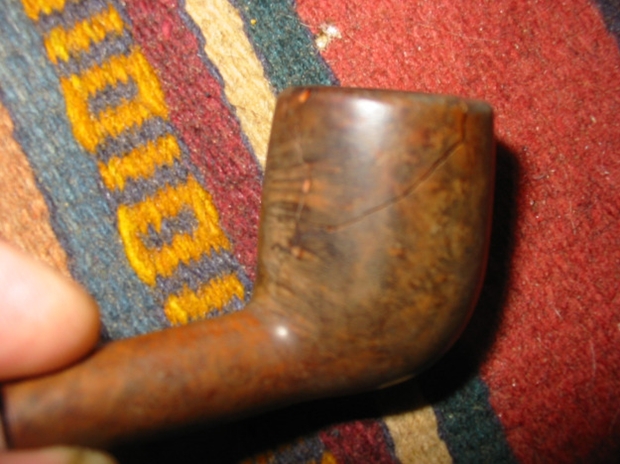
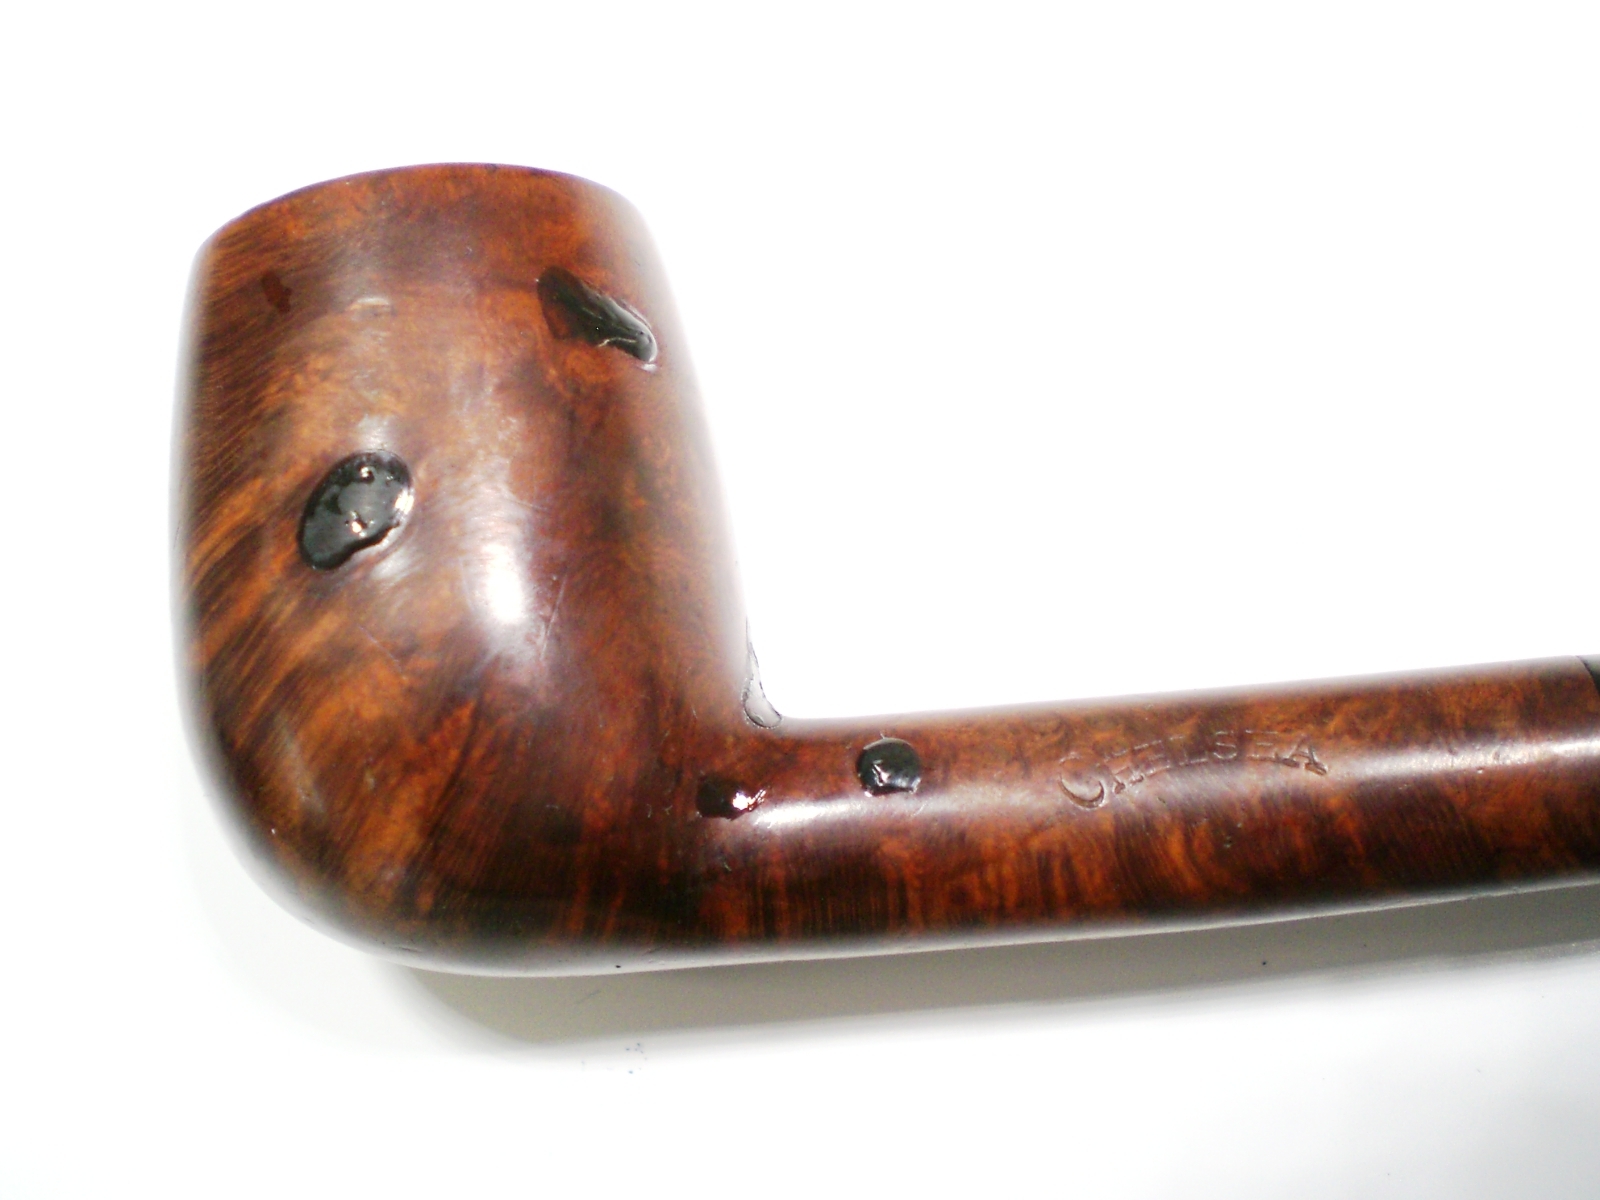
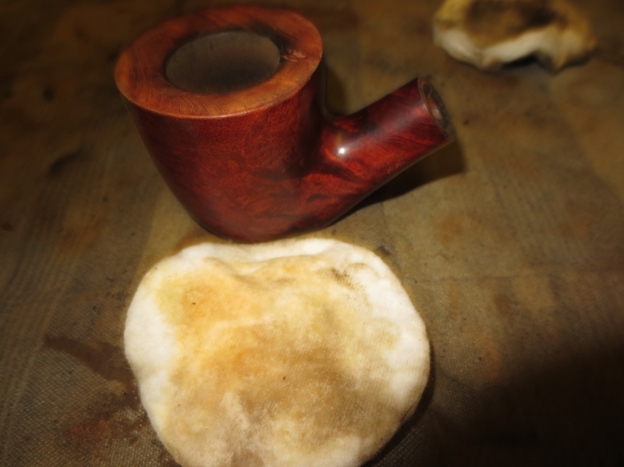
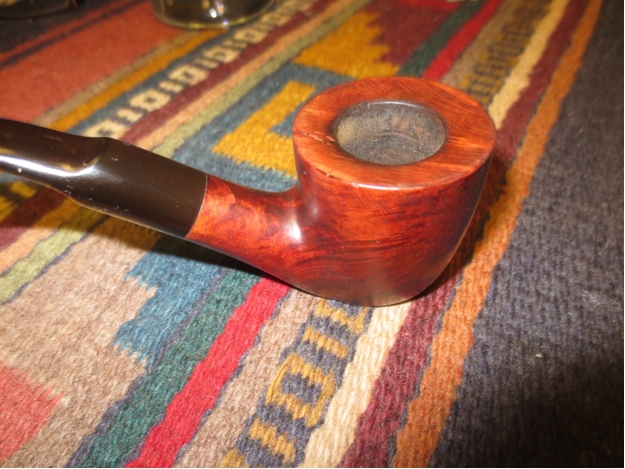
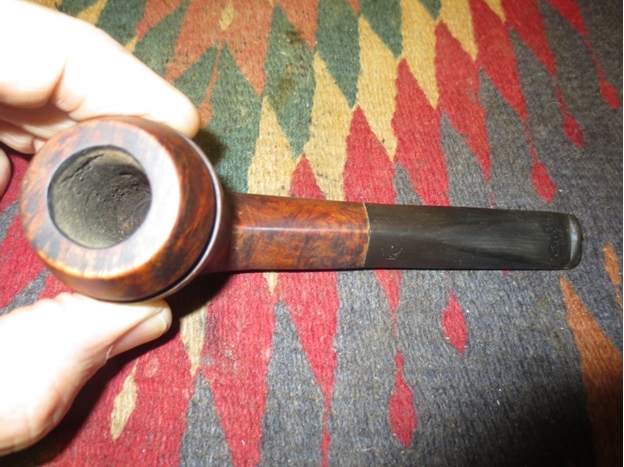
The pipe was in good shape, but some light oxidation and a very mild cake. The bowl had several ugly fills.


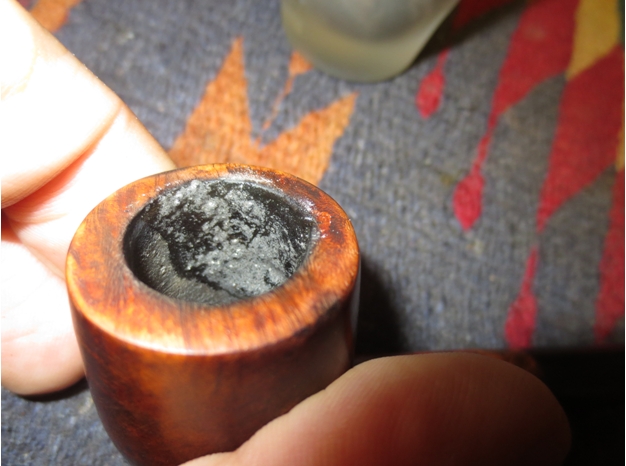
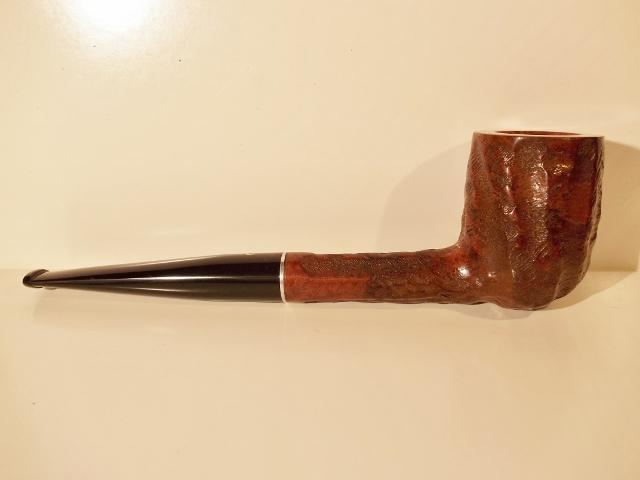
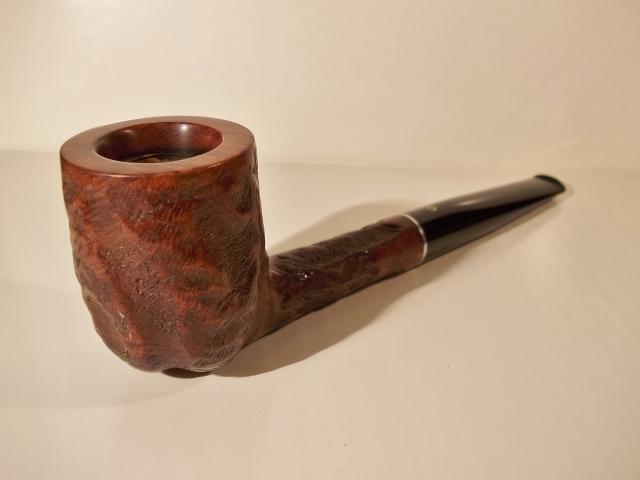
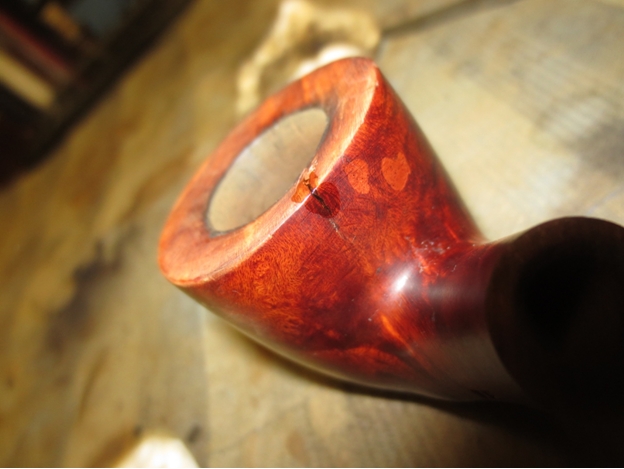
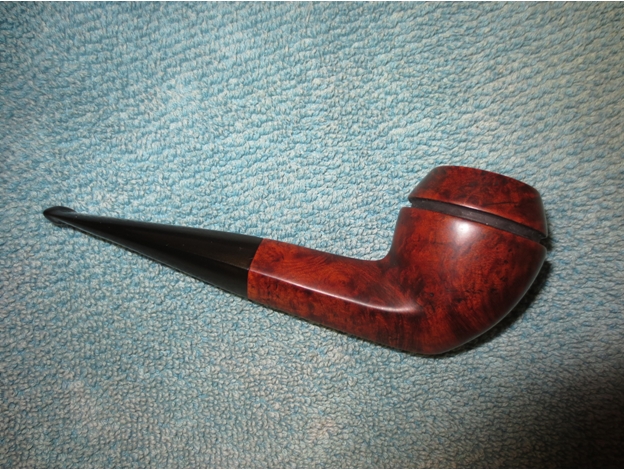
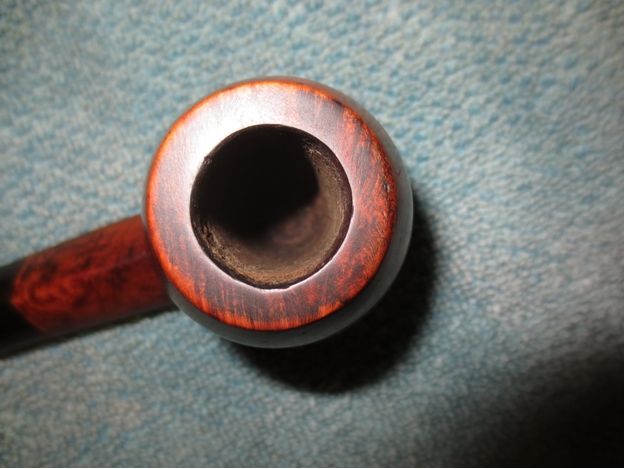
After the pipe was reamed, I used a small dental pick to remove the fill material. I put several drops of the black superglue on those spots and applied a spritz of accelerator (I still have not acquired a proper application tool for the accelerator). I used 800 grit paper to sand smooth the glue spots, than up to 1500 wet paper. The second picture shows the spots sanded smooth.
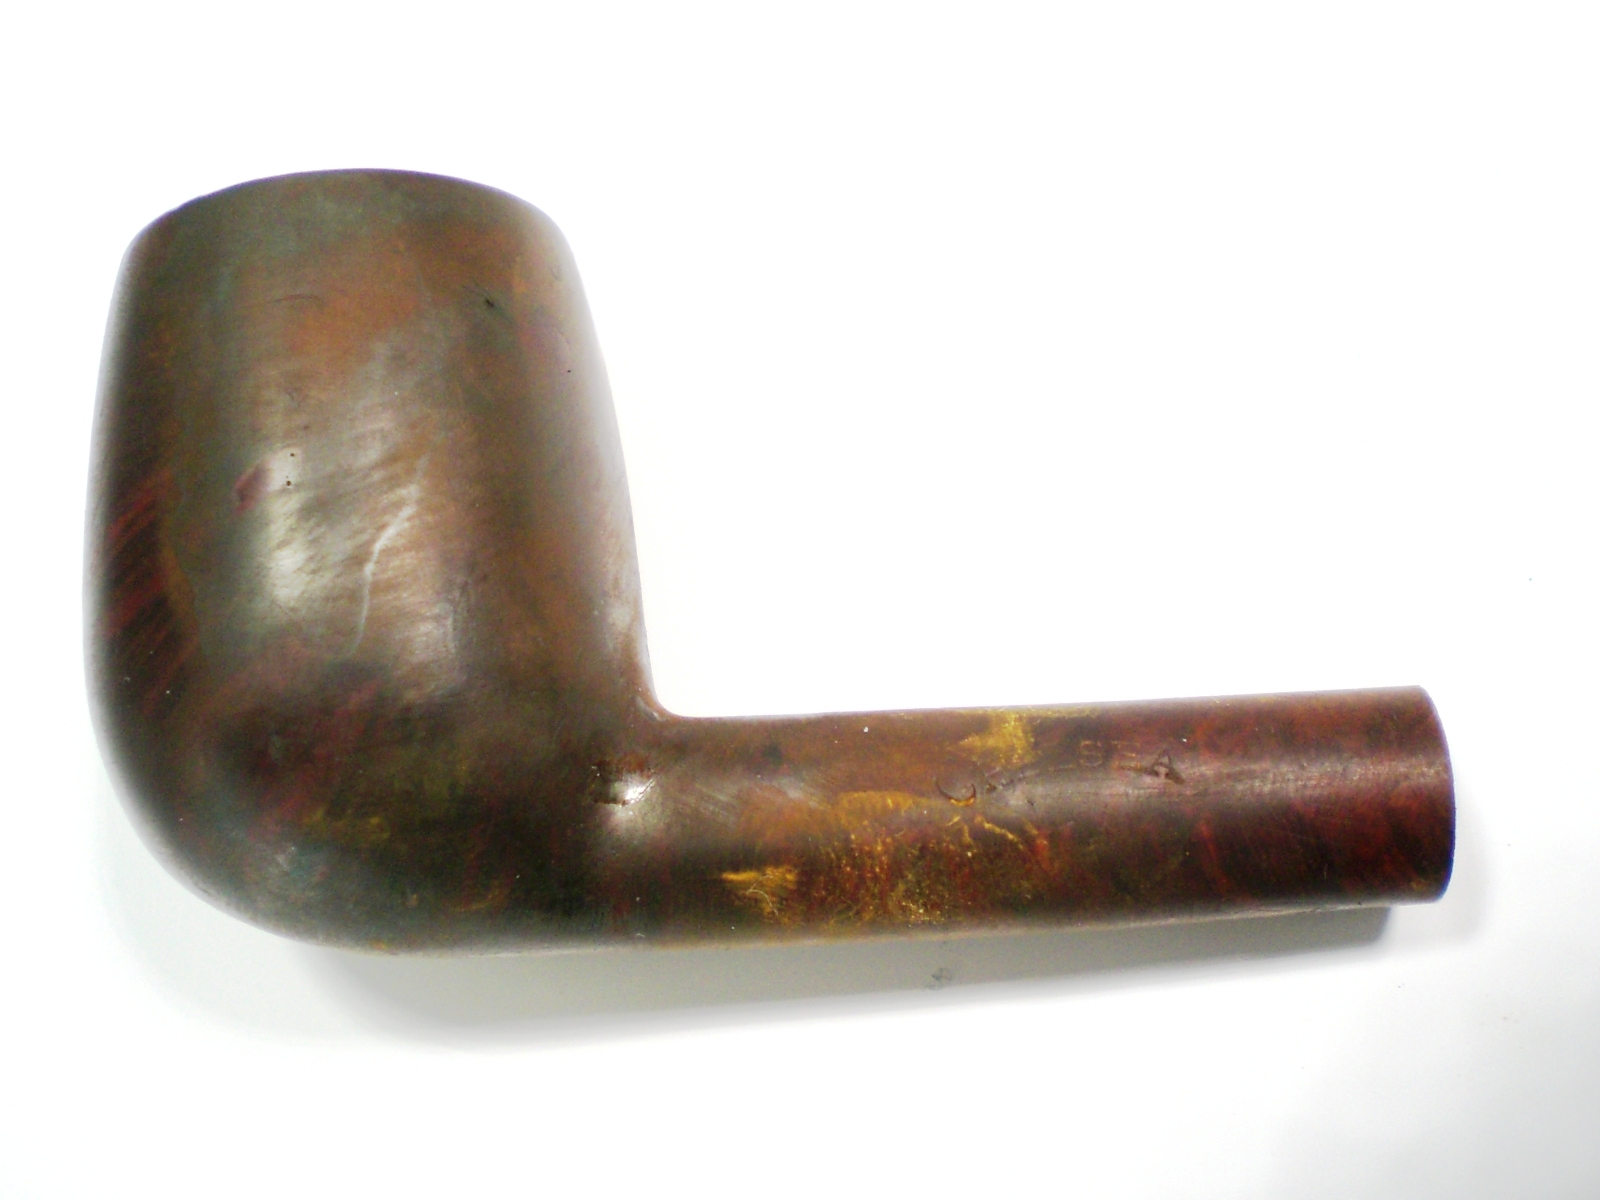
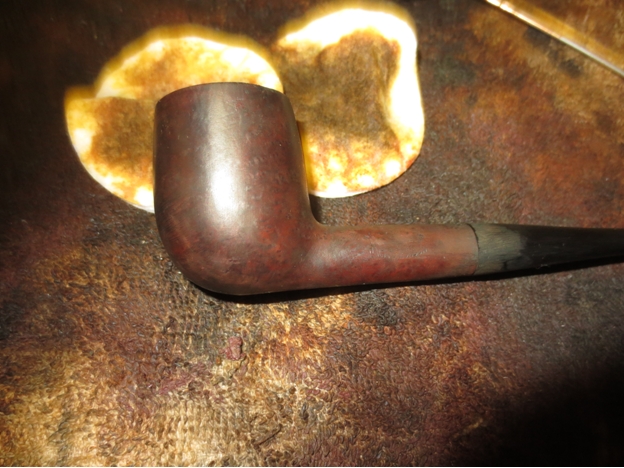
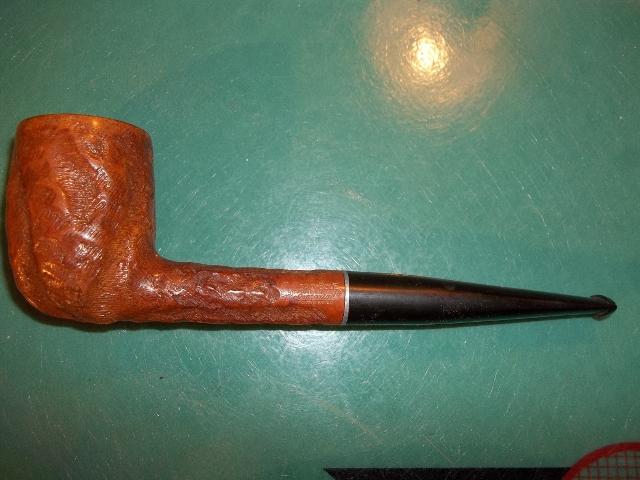
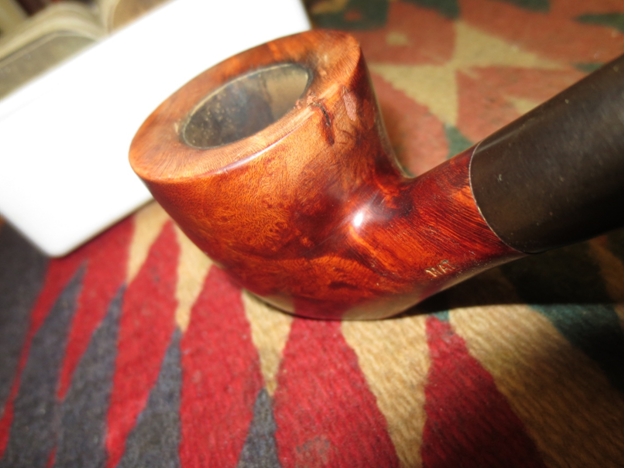
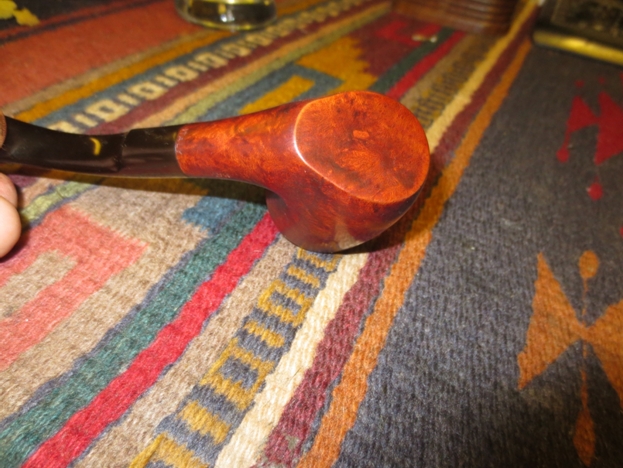
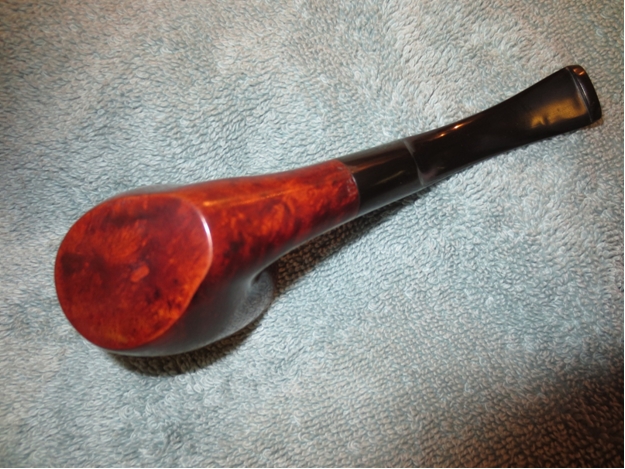
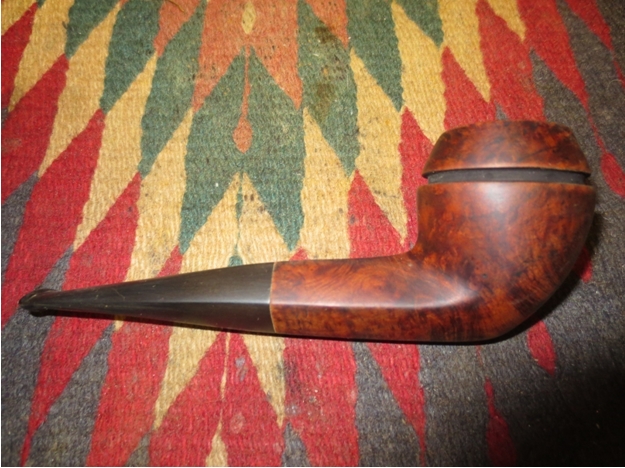
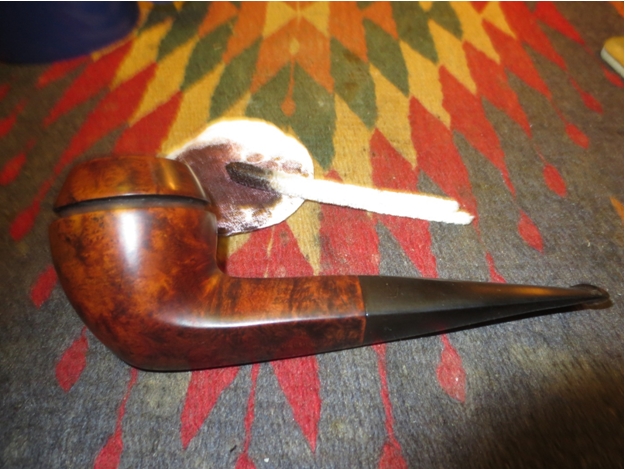
I applied a Medium Brown Fieblings stain to the bowl and set it with a match. After it dried, I buffed it out with some Tripoli and then White Diamond to smooth out the stain color. This hid the fills nicely.
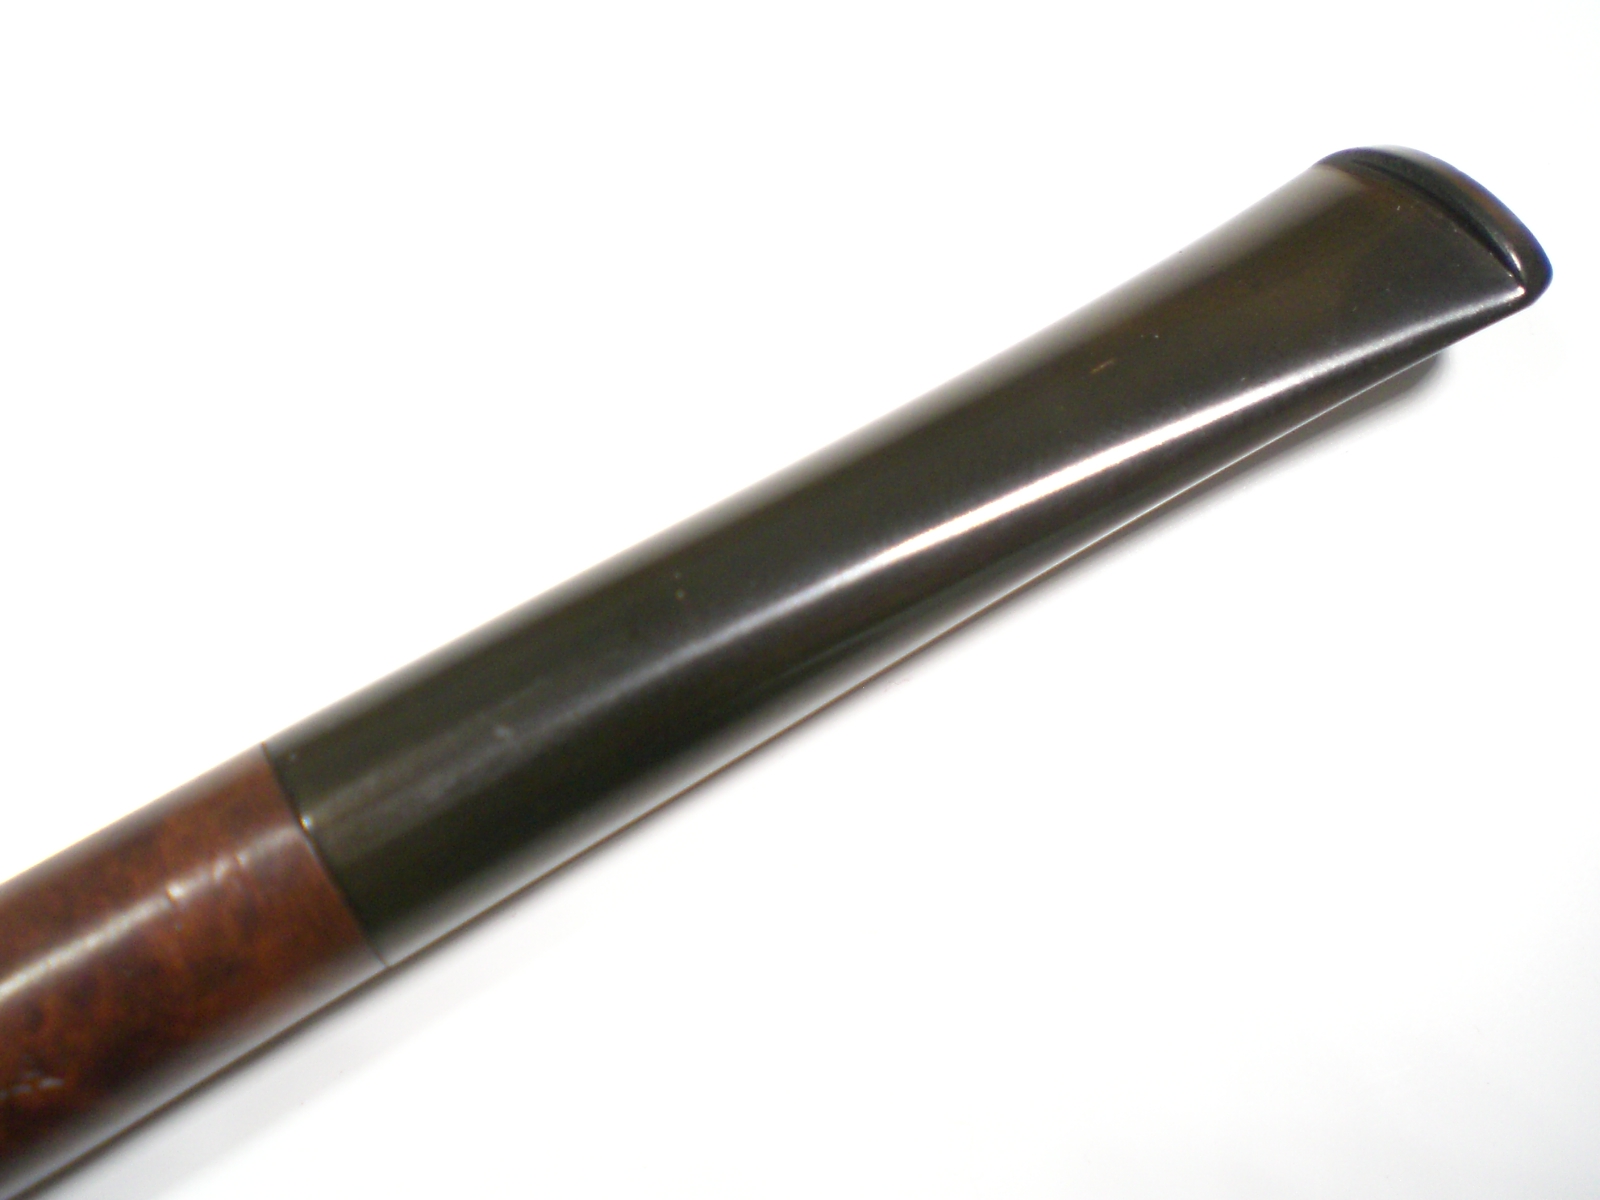
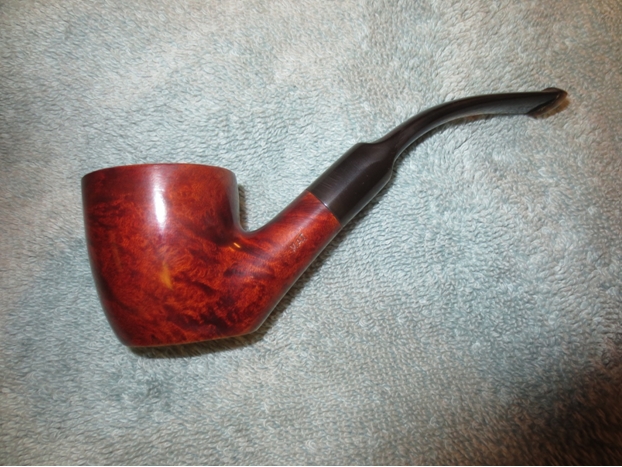
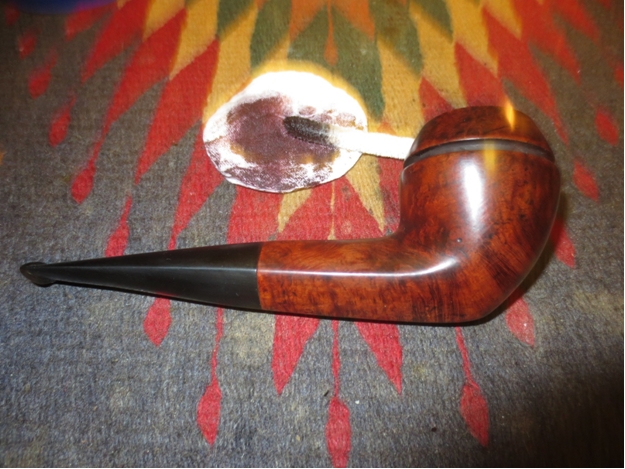
The stem was an easy fix, first using some 800 grit paper to remove the mild oxidation. Then up thru 1500 and 2000 grade wet papers, followed by 8000 and 12000 grade micromesh. The mounted on the briar, the stem was buffed with White Diamond and Meguiars Plastic polish. The bowl was buffed with several coats of carnuba wax.
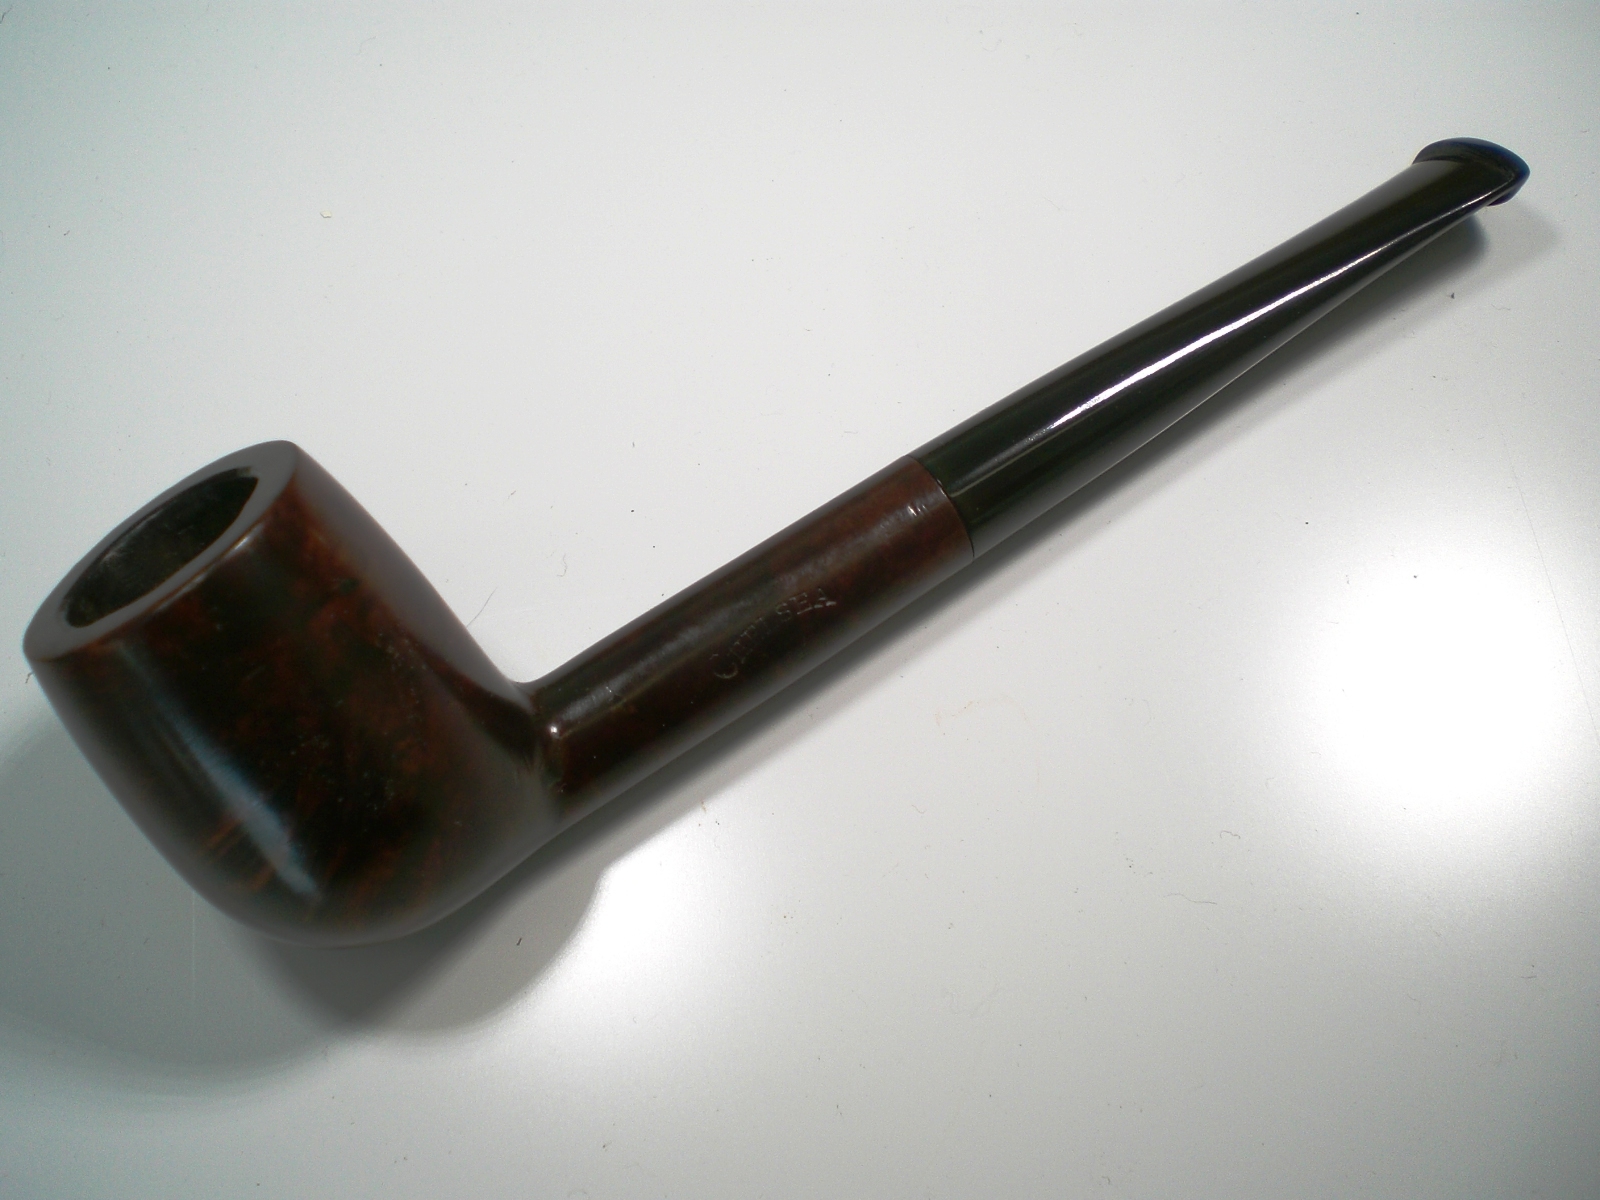

My daughter and son-in-law live in New Orleans, so the pipe will be packed and sent out in the mail tomorrow. I wish that I could be there to celebrate with him person, but we’ll see him soon.
Blog by Troy Wilburn
I picked up this huge pipe from a friend of mine on the Dr. Grabow Collectors Forum. This pipe isn’t a magnum it’s a howitzer! It is 7 ½ inches long and has an almost 2 ½ inch tall bowl. The pipe was nice but had some issues. The top of the rim and the inner edge had been hacked up. The stem also has some heavy nicks and dings in it. It was really clean though and I had very little to do as far as getting the inside clean.
Here are some photos of the pipe before I worked on it.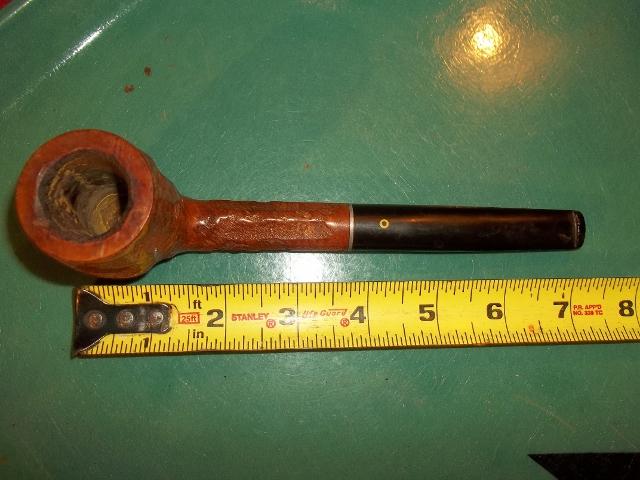

 As I stated above the top of the rim and the inner edge were badly hacked.
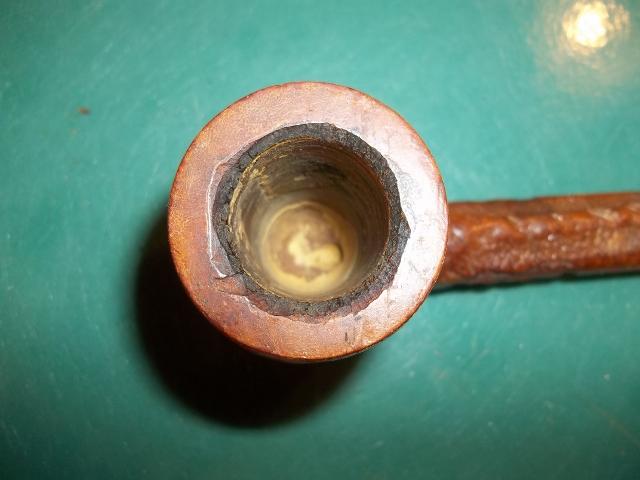 I began by working on the rim. I topped it and made a large concave inner rim. I don’t know if it came like this from the factory or not but it has one now. I took it down with 80 grit sandpaper and then a lot of sanding with 120 grit sandpaper.
 After I had finished rough shaping the rim I did LOTS and LOTS more sanding from 400 grit sandpaper all the way up to 2000 grit sandpaper. I used mineral oil as a lubricant for the sandpaper and also to bring out the colour of the natural wood.
 I soaked the stem in alcohol and then scrubbed it with a green scouring pad. I cleaned it out with pipe cleaners.
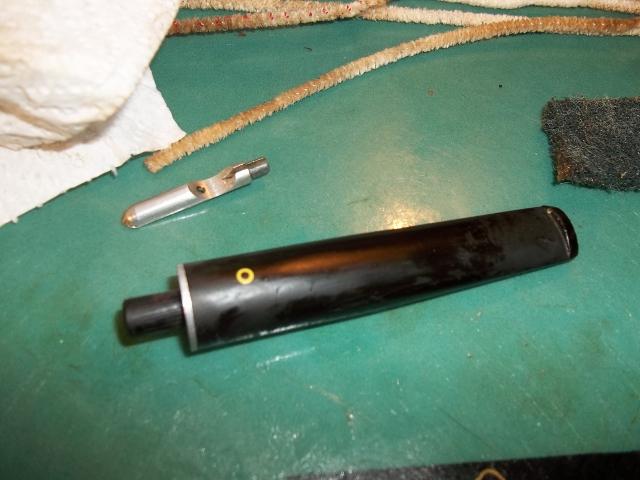 The stem had several tooth marks and gouges on the top and the bottom side next to the button.
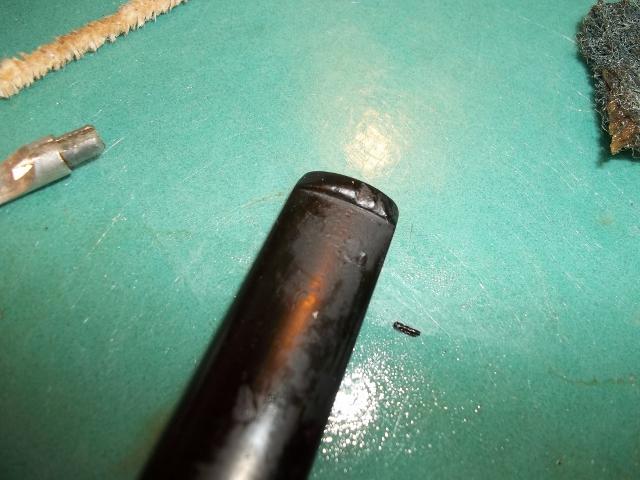
 I filed out the tooth marks and reshaped the button.
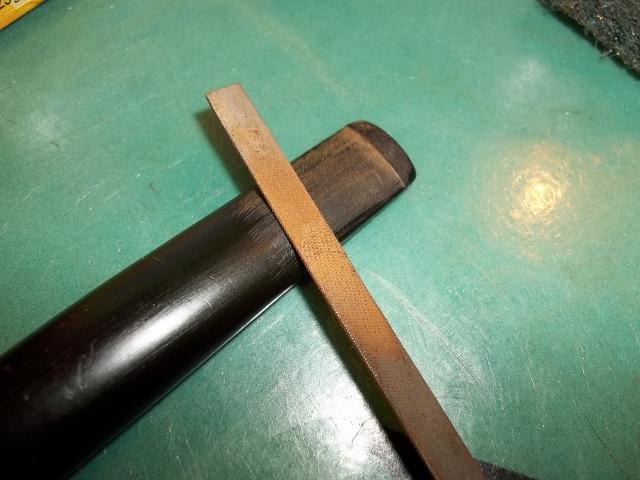 Here is a little trick that some of you may know, but I came up with it in working on the last few pipes. I thought I would share it here. After filing the stem I take a lighter and work the flame back and forth across the file marks. The heat from the lighter helps to blend in the file marks and makes it easier to sand them out.
Here is a photo of the stem before I used the lighter. Here is a photo of the stem after using the lighter.
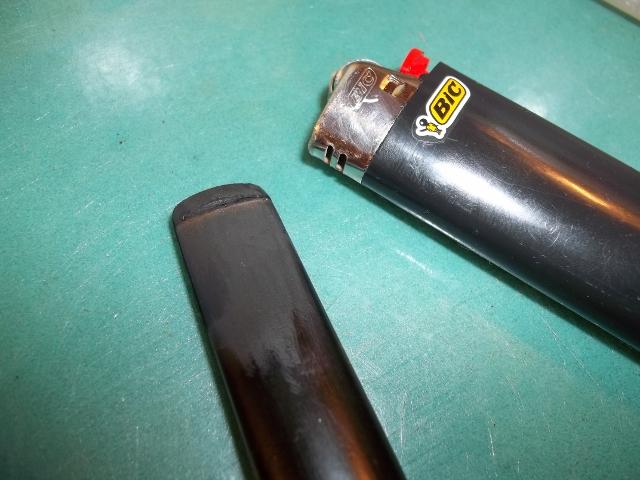 I buffed the rim with Brown Tripoli a few times to get rid of the fine sanding marks. I could not get the pads into the concave inner rim so I waxed it by hand with paste wax several times.
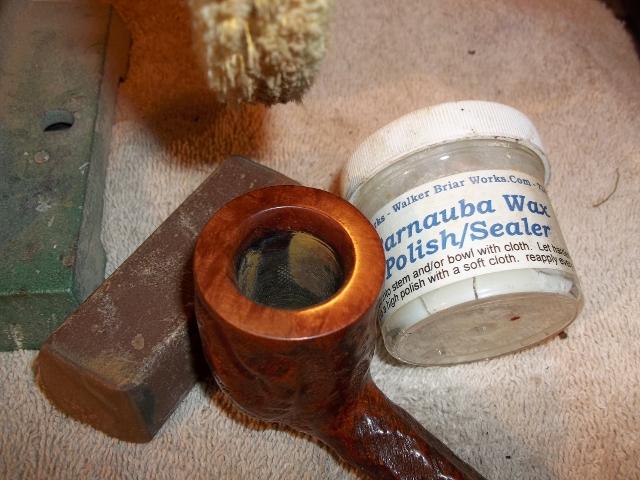 With the initial sanding and cleaning of the stem done, I still had a lot more sanding to do. There were lots of scratches and dings in it. I began sanding with 400 grit sandpaper and worked my way up to 2500 grit sandpaper.
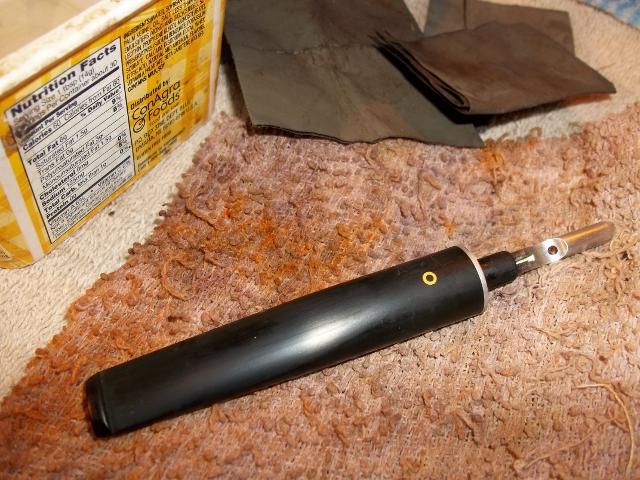 I put the stem back on the bowl and got it ready for the final buffing and waxing.
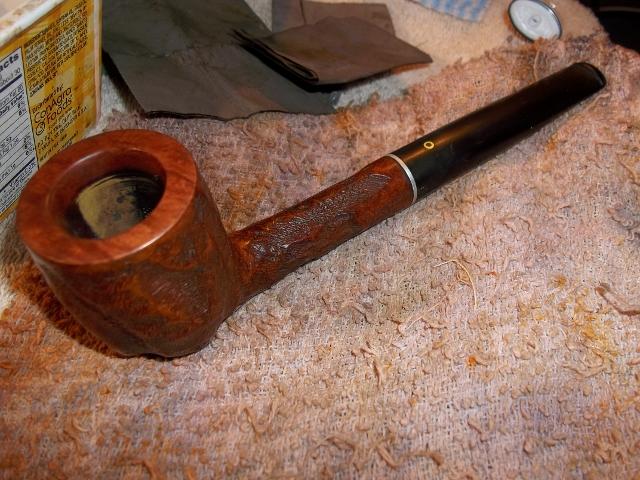 Here are photos of the pipe after it had been buffed and polished.
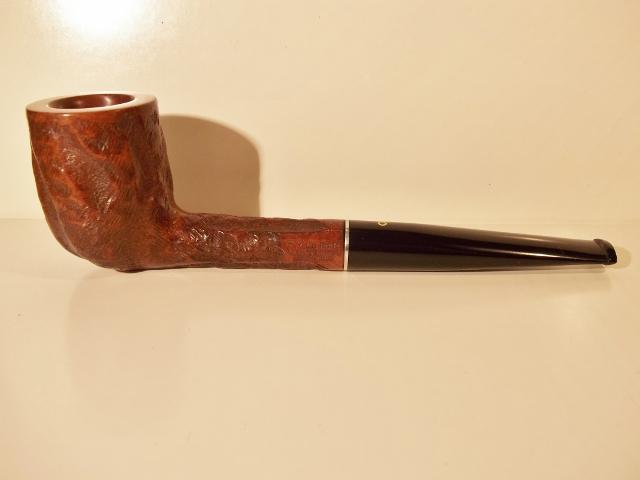


 To give an idea of the size of this pipe and put it in perspective here is a photo of it next to a Yello Bole Hand Made Poker I have. As most of you would know, a Hand Made is not a small pipe by any means. This billiard almost dwarfs it.
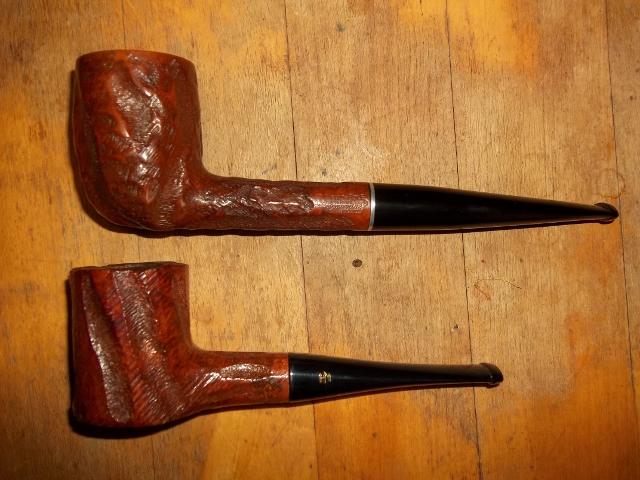
Blog by Steve Laug
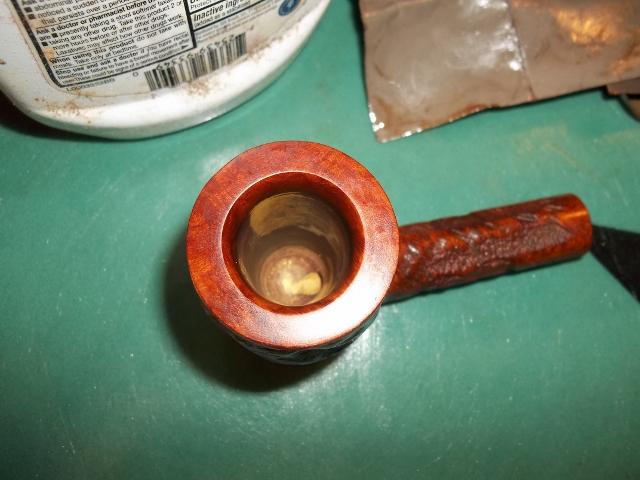
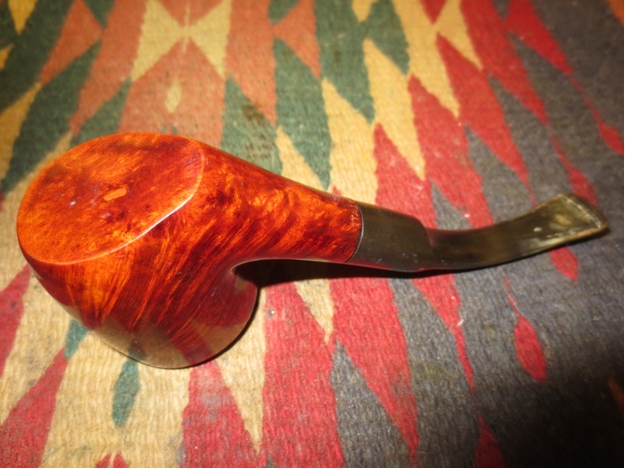
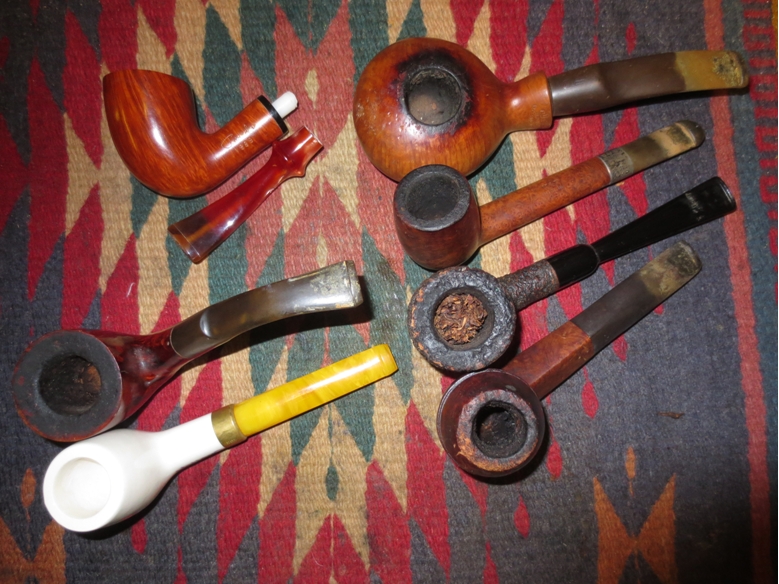
I am finally working on the last of the pipes that I picked up on craigslist – a sitter that is stamped MAT and Italy. It was my least favourite shape in the lot. I left it to the very end to work on. It is shown in the photo below in the middle of the left column. It was a bit of a mess. The stem was stuck in the shank and was oxidized. It also had some tooth chatter. Once again there was the calcification on the stem that comes when a softie is left in place on the stem. The bowl had a shiny varnish finish but that was dulled with a lot of tars and oils. The rim was caked with a very hard, thick coat of tars and oil – lava over flow from the bowl. The bowl itself was caked. There were quite a few fills in the bowl on bottom and on the back side of the bowl near the shank. There was also an area of fills on the top of the rim and a small crack that had been filled on the back side of the bowl near the rim.
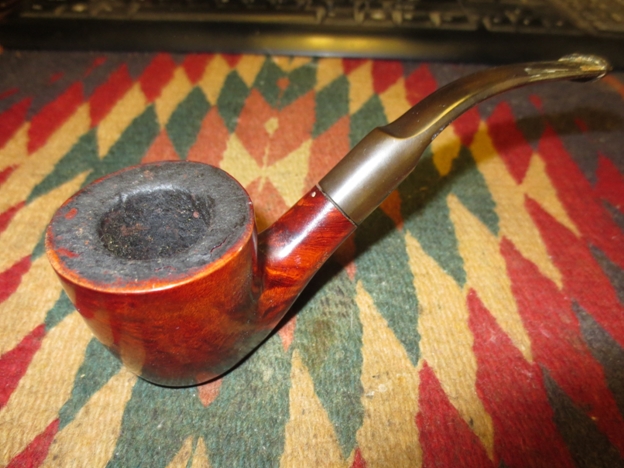
 I put the pipe in the freezer for an hour to loosen the stem. After an hour of cooling I was able to twist the stem out of the shank. I was a little surprised to find a very short – ½ inch stinger in the end of the tenon.
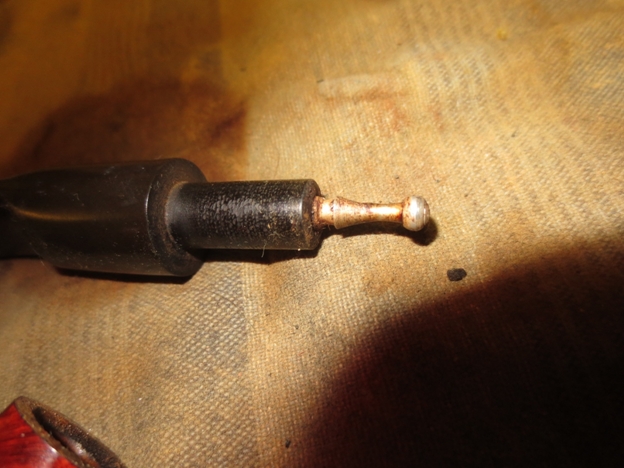 I heated the stinger with a lighter and then twisted it out of the tenon with a pair of pliers on which I had wrapped tape around the jaws. This tape prevented the jaws from damaging the aluminum stinger.
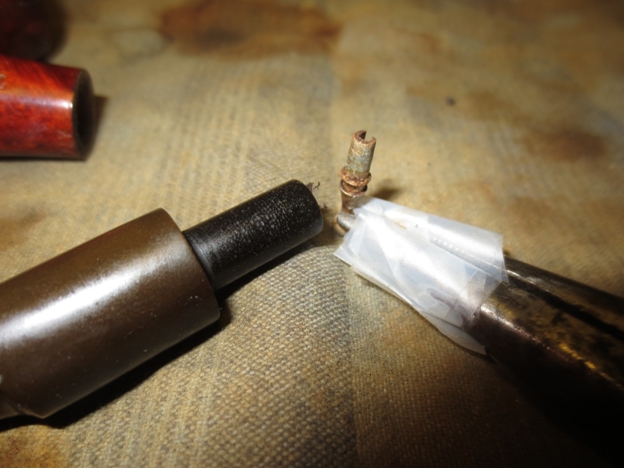 I set the stem aside and reamed the bowl with a PipNet reamer. I used three of the four cutting heads to remove the cake from the bowl. With the small crack on the back edge of the bowl I wanted to expose the interior of the bowl and check out the interior for cracks.
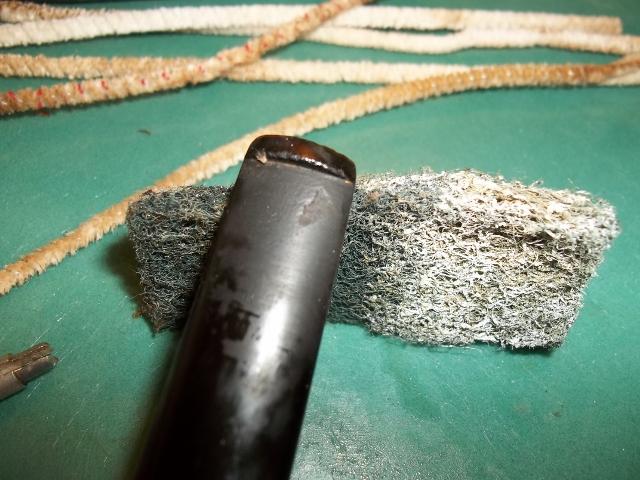
 To remove the hard lava from the rim I used a sharp blade pressed flat against the rim to scrape away the buildup. I scraped and then wiped it down with alcohol to soften the tars. I continue until I had removed the cake. In doing so I found that just above the crack on the back of the bowl was an area of several small fills that were on the rim.
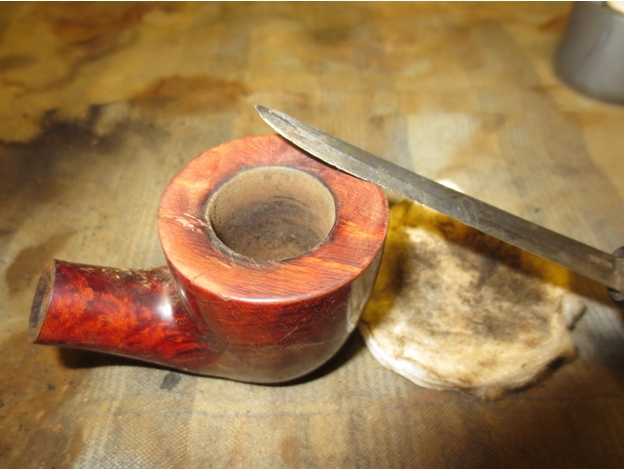 I scrubbed the surface of the bowl with acetone on cotton pads to remove the varnish that was on the finish. I wanted to get underneath that finish so that I could do a repair on the small crack and also get to the surface of the briar. I personally do not like the thick varnish coats that are on some pipes.

 I cleaned out the small crack with a dental pick and alcohol. I drilled a tiny hole at the bottom of the crack to stop it from spreading. Once it was clean I stuffed briar dust into the crack and then dripped some super glue on to the rim and the side of the bowl to fill in the crack.
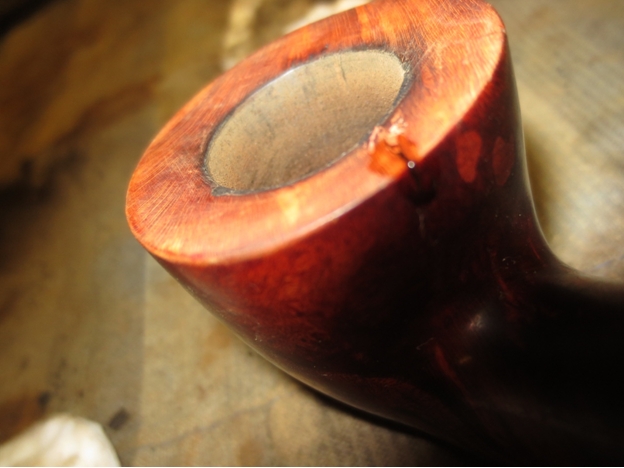
 I sanded the rim and the repaired area with 220 grit sandpaper and then with a medium and a fine grit sanding sponge to smooth out the surface. I cleaned out the shank and the stem with pipe cleaners, cotton swabs and alcohol.
 I sanded the stem with 220 grit sandpaper to remove the tooth chatter and light tooth marks. I also sanded it to remove the oxidation. I followed that by sanding with a medium and a fine grit sanding sponge.
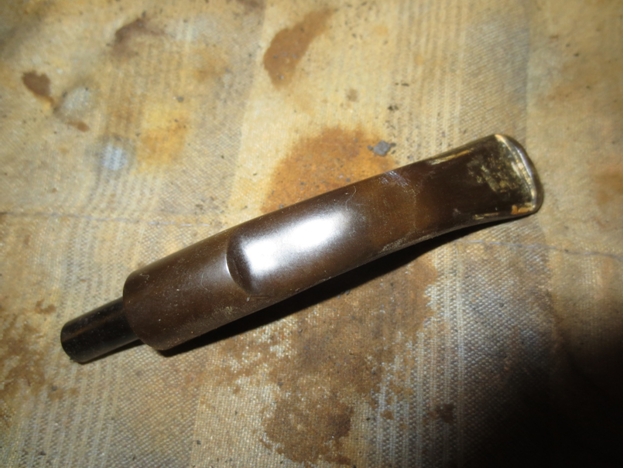
 I buffed the stem with red Tripoli to break through the oxidation. I sanded the stem with micromesh sanding pads – wet sanding with 1500-2400 grit pads.
 I rubbed the stem down with Obsidian Oil and then buffed it a second time. I dry sanded with 3200-12,000 grit micromesh sanding pads.
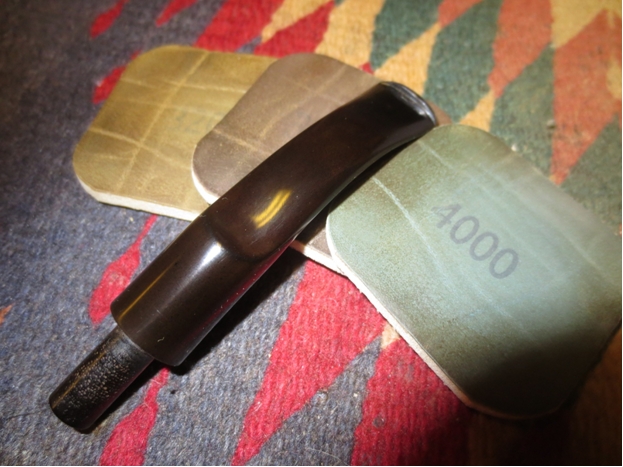
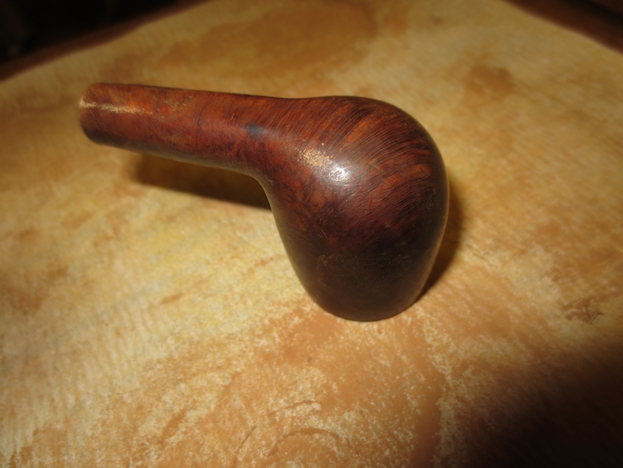
 I used some dark cherry stain that I had on hand – this stain is a water based stain and matched the colour of the original bowl. I applied the stain with a folded pipe cleaner and once I had covered the bowl I let it sit for a few moments before wiping it off.

 I wiped down the pipe with a cotton cloth to remove the excess stain and give it a light hand buff.
 I buffed the pipe and stem on the buffing wheel using pads charged with red Tripoli and with Blue Diamond. I gave the pipe multiple coats of carnauba wax and then buffed it with a clean flannel buffing pad to give it a shine. The finished pipe is shown below.
Blog by Steve Laug
I am in the midst of a particularly labour intensive restoration of a Royal Danish 33 Bulldog. It was in very rough shape but having met the old timer who it originally belonged to I decided to make the extra effort to bring it back to life. It was obviously a favourite pipe of his and he as much as said so. I think it was the only one of the lot that he felt bad about letting go of when he sold me the lot. Often I will take time to read some of my favourite blogs during lunch break at work or even when I come home to help me unwind from a long day. I read before I pick up a pipe to work on or restore and find that it helps focus my attention. Yesterday at lunch I came across an article by Alan Chestnutt on his blog on his website Reborn Briar Estate Pipes that really resonated with what I was feeling as I worked on the particular pipe. He called the work he does as a pipe restorer – “saving the pipes”. I think that is a particularly poignant description of the work on this Royal Danish 33 Bulldog that I picked up in the lot from craigslist. It is shown in the first photo below at the bottom middle of the photo. In the second photo it is in the right hand column at the bottom of the photo.
 The old timer was a well loved pipe and obviously a good smoking pipe. It was in rough shape. In fact it was in the roughest shape of the lot. The photos below show the state of the pipe when I brought it to the work table. The finish was rough and dirty with lots of scratches and dents in it. The rim was shot. The front side was worn down from beating out dottle when the smoke was finished. The drop from the height at the back of the bowl to the height at the front was over ¼ inch and the surface was chewed up. The outer edge of the bowl on the front was obliterated. The rim surface was beat up as well. There were thick marks of tar or oil on the sides of the bowl and rim that were sticky. The bowl was heavily caked. The double ring around the bowl was damaged. Over ½ of the briar between the rings was broken and missing. The stem was oxidized and chewed. The topside of the stem had deep dents near the button that went up almost a half an inch. On the underside the tooth marks were even deeper and there was a hole in the stem where it had been gnawed through. Around the stem was calcification that is common pipes that have had a softie bit on the stem. I think the old timer who had this pipe slipped the softie bit over the damage so he could keep smoking his favourite pipe.
 The next series of photos show the thickness of the cake, the extent of the damage to the rim and the missing pieces of the briar between the double rings around the cap of the bowl.
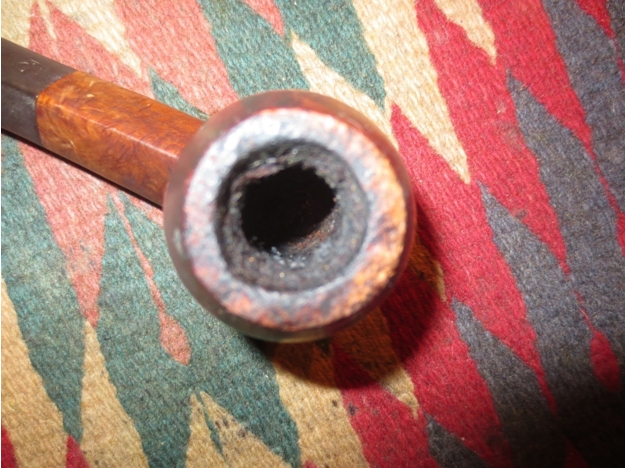
 I reamed the bowl with a PipNet reamer starting with the smallest cutting head and working up to a head that was almost the same diameter as the bowl. I took the cake back to a very thin layer on the bowl.
 I decided to sacrifice some of the height of the bowl to give back some dignity to the tired bowl. I topped the bowl in stages on a topping board. The back side of the rim was significantly higher than the front of the bowl so I started by leveling out the bowl height all the way around the bowl. I brought the back side down to the same height as the damaged portion.
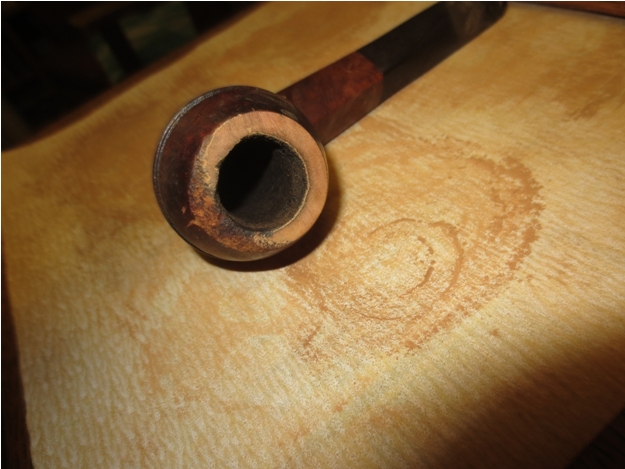

 Once the height was even all the way around the bowl it was time to work on the front edge damage. At this point in the topping process I pressed the bowl down on the topping board with even pressure front and back and moved it on the sand paper in a circular motion.
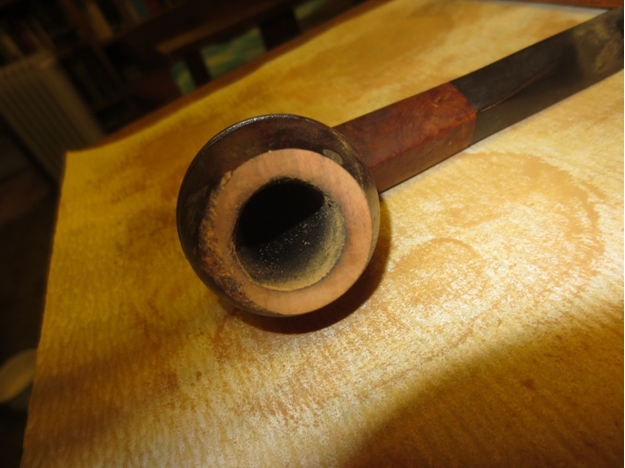 I continued sanding until the damage on the front top of the rim was minimized. There was still damage on the front of the bowl that would need to be addressed to smooth out the damage to the bowl. I wiped the bowl down with acetone on a cotton pad to remove the sticky oils and tars spots on the bowl sides. I also cleaned up the damaged area on the front of the bowl so that I could repair it.
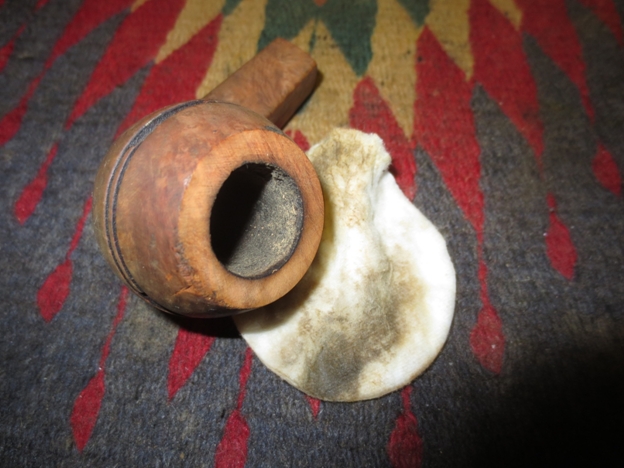
 I dripped some super glue into the damaged surface and then pressed briar dust into the glue. I then gave it a top coat of super glue as well. In the photo below you can see the repaired edge and the repair to the gouges and damage on the bowl front.
 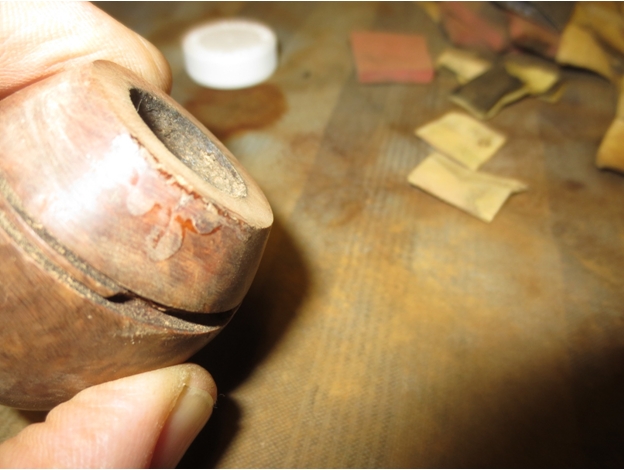 I sanded the repaired area with 220 grit sandpaper and then with a medium and a fine grit sanding sponge to blend the repair into the surface of the briar. The next photo shows the same spot on the bowl after sanding the repair. The second photo below shows the top view of the rim repair. The dark/shiny edge at the bottom of the photo is the super glue repair.
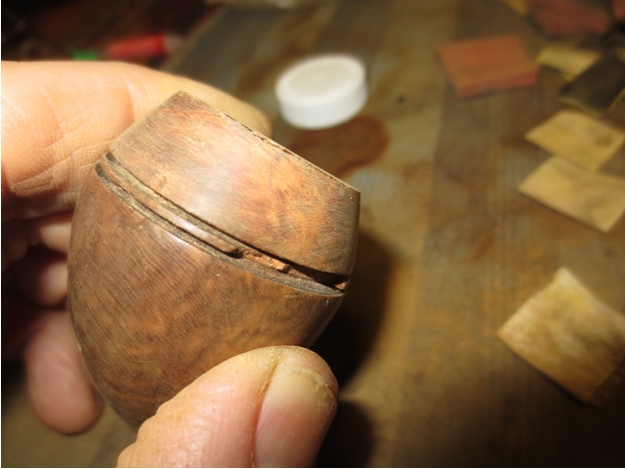
 I tried to fill in the damaged briar between the double rings around the bowl. I filled in the areas with briar dust and super glue but when I tried to re-score the two lines the fills fell out of the ring. After several failed attempts to build up the centre I finally decided to remove the centre from between the two rings. I used a sharp knife to lift out the centre portion all the way around the bowl. With that gone I used a folded piece of 220 grit sandpaper to sand the surface smooth in the groove. I also sanded it with the sanding sponges to remove the scratching.
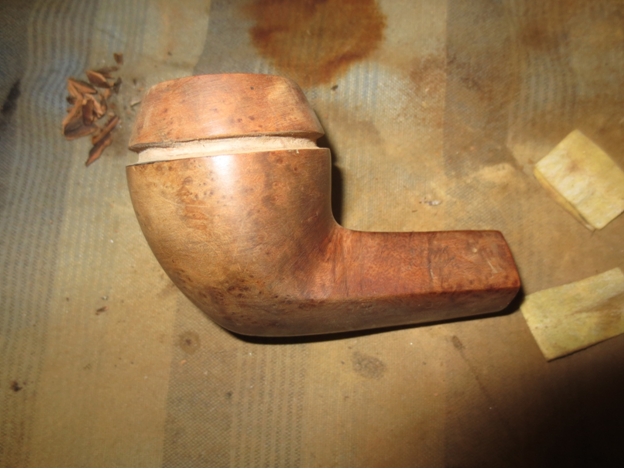

 I decided to stain the groove to highlight it rather than hide it. I used a black aniline stain and applied it, flamed it and repeated the process until I had the coverage in the groove that I wanted.
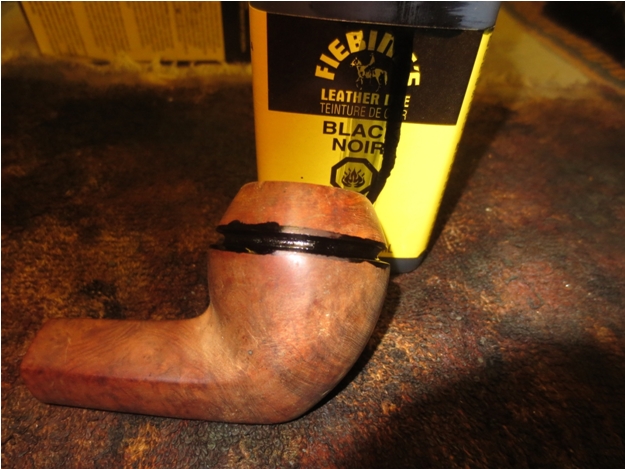
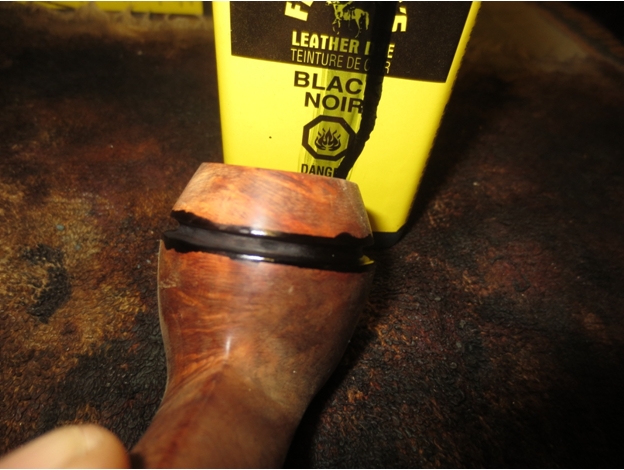
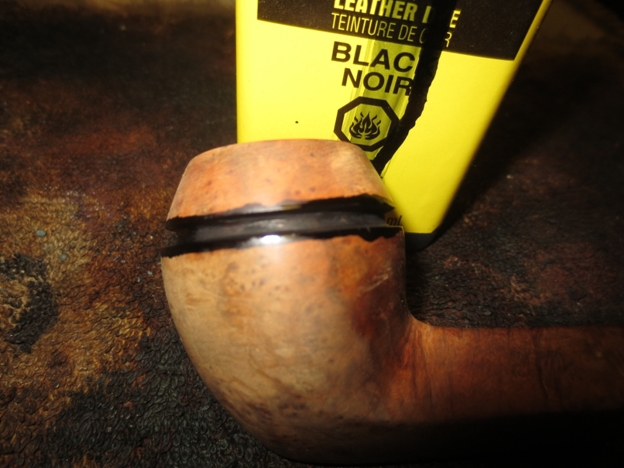 I sanded the bowl sides around the groove to remove the spillage of the stain. I worked on the bowl until the black was confined to the groove and the top and bottom edges. The more I sanded the bowl the more I liked the grain that I was seeing come through. There was some great flame grain, birdseye and mixed grain on the bowl and shank.
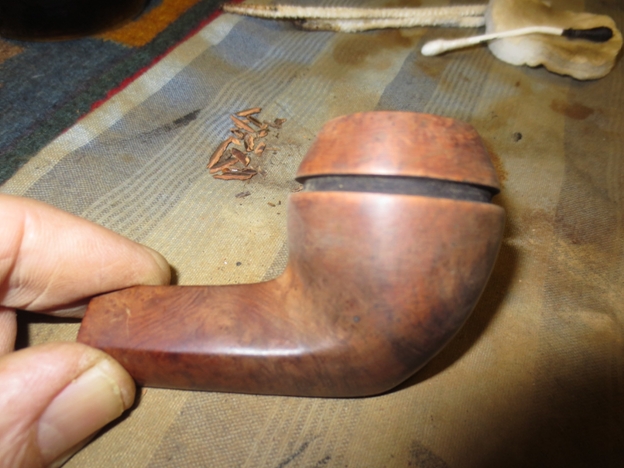


 I decided to do a contrast stain on the rest of the bowl to highlight the grain and contrast with the black stain in the groove. I heated the briar and stained it with a black aniline stain. I applied it and flamed it, and repeated it a second time. Once it was dry to touch I wiped the bowl down with alcohol and then with acetone on cotton pads to remove the black stain from the surface of the briar and leave it in the grain.
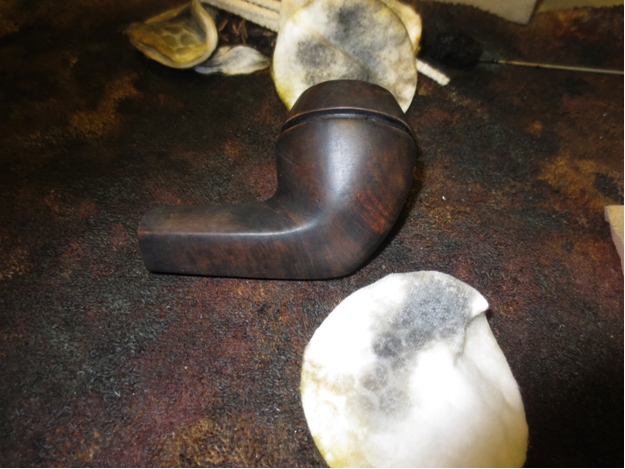

 I set the bowl aside to dry for awhile so I could work on the damage to the stem. I sanded the stem with 220 grit sandpaper to remove the oxidation and to clean up the calcification around the damaged areas of the top and underside of the stem.
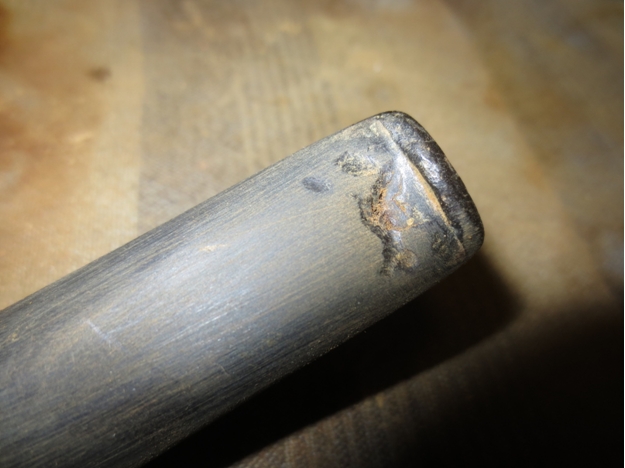
 I wiped the stem down with alcohol to clean the surface of the stem so I could apply the superglue patch. I used a dental pick to remove debris and damage vulcanite. I greased a pipe cleaner with Vaseline and inserted it in the button underneath the hole in the stem. I built up the area around the hole with black super glue. I sprayed it with an accelerator to allow me to add a second and third coat to the repair to the hole. I then flipped the stem and repaired the deep tooth marks on the top of the stem. I filled them and also sprayed them with the accelerator.
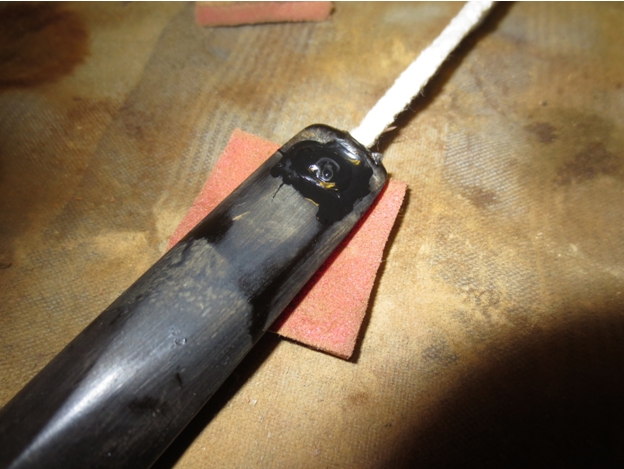
 Once the stem patch was dry to touch I put the stem back in place on the bowl and sanded the bowl with a medium and a fine grit sanding sponge to remove more of the black stain. I also used a fine grit sanding block. The next four photos show the bowl with the black removed and the grain patterns highlighted.
 I set the pipe aside for the night and let the stem repairs cure over night. In the morning I sanded the patched areas with 220 grit sandpaper and with a medium and fine grit sanding sponge. I rubbed the bowl down with a light coat of olive oil to see what contrast would look like. I really liked the overall look of the bowl with the contrast. Seeing this I knew what contrast stain colour I would use on the next stain coat.
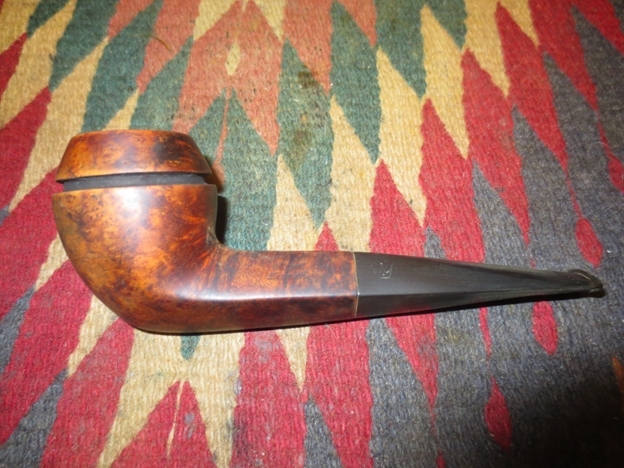
 There were still small pits in the patches on the top and bottom repairs. I find that when I use an accelerator the spray causes these bubbles that once dry pop and leave pits in the surface of the finish. I sanded the stem surface some more with 220 grit sandpaper to smooth it out and then added another coat of black super glue. When it dried I sanded it again to bring it smooth. In the next two photos you can still see some small pits in the finish.
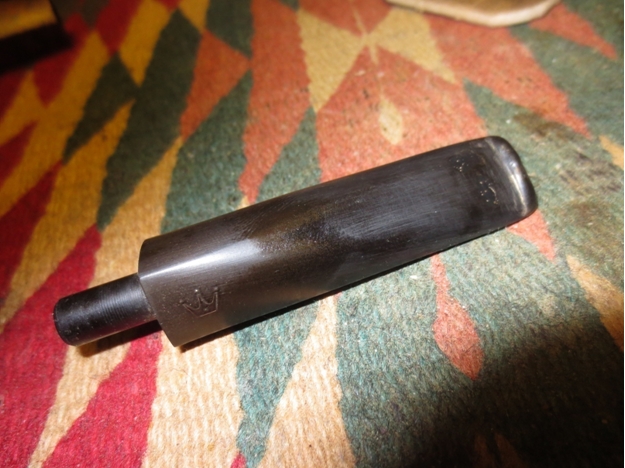
 I repeated the process of filling in the pits and then finished by using some clear super glue which dries more quickly and brushing it over the pitted areas on the stem. Once I had that done I sanded the stem with micromesh sanding pads. I wet sanded with 1500-2400 grit pads. The surface was significantly smoother but the patches still showed through the finish.
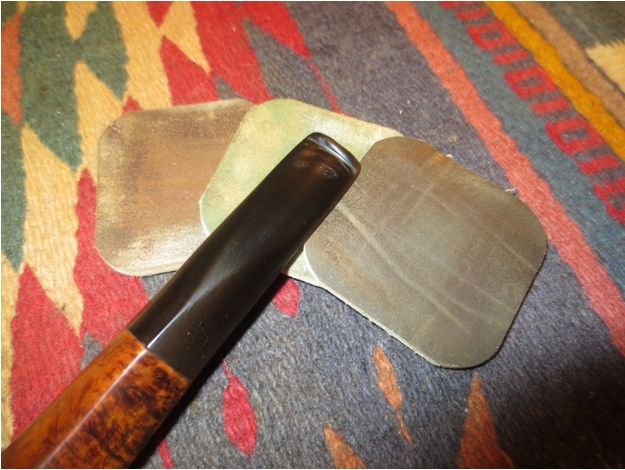
 I dry sanded with 3200-4000 grit micromesh pads and rubbed the stem down with Obsidian Oil. Once it dried I repeated the sanding with the same pads. The patches are still visible but are gradually blending into the surface of the vulcanite.
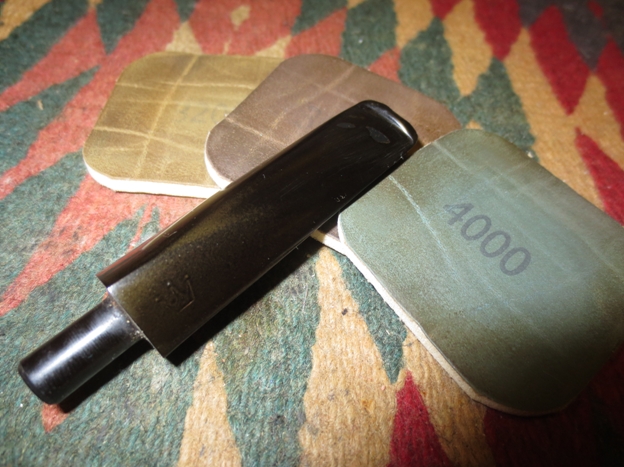
 I buffed the stem with red Tripoli to remove the scratches in the rubber and to further blend the patches. I then took it back to the work table and dry sanded it with 6000, 8000 and 12,000 grit micromesh pads. I rubbed it down with another coat of Obsidian Oil and set it aside until it was absorbed.
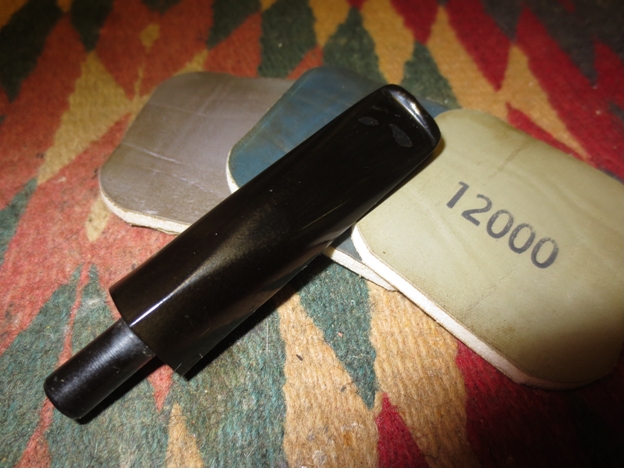 I rubbed the stem down with Scratch X2.0 to polish the scratches. It is a plastic polish and blemish remover that is used on acrylic/plastic headlamps. It worked wonders in removing the remaining scratches in rubber stem material. I then buffed the stem with Blue Diamond on the buffing wheel and gave it several coats of carnauba wax. I buffed it with a clean flannel buff to raise the shine shown in the next two photos.
 After finishing the stem it was time to give the bowl its contrast coat of stain. I used an oxblood aniline stain. I applied it with a folded pipe cleaner to keep it out of the groove around the bowl. I flamed it, reapplied it to the briar and flamed it again.
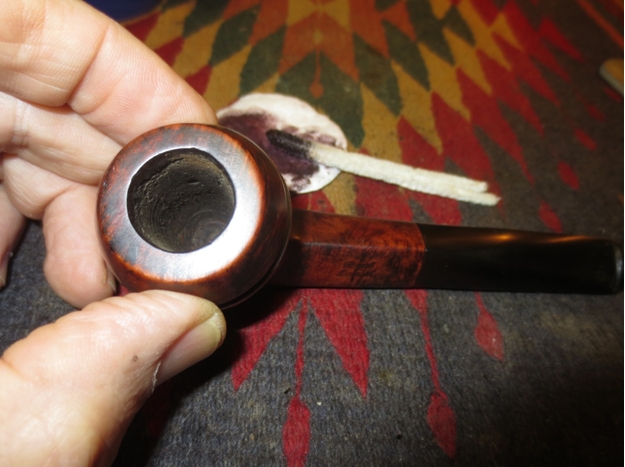
 I buffed the stem and bowl with Blue Diamond and then gave the entire pipe several more coats of carnauba wax. I buffed the pipe with a clean flannel buff. The finished pipe is shown below. I think that Alan Chestnutt’s definition of the restoration process as Saving the Pipe accurately describes the work that went into restoring this beauty. The finished pipe ready to fire up and be enjoyed for many more years to come.
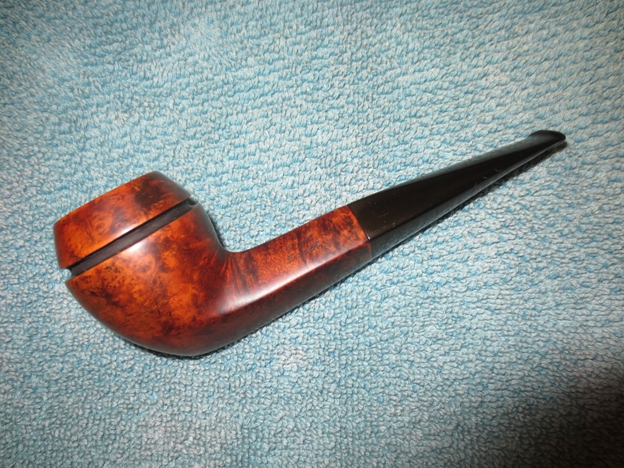


Blog by Alan Chestnutt
I often spend a bit of time several days a week reading some of my favourite blogs during my lunch break at work. I regularly check Alan Chestnutt’s Reborn Briar Estate Pipe website and read some of his articles. I always find some food for thought and often come across kindred ideas that have been rattling around in my head. This was the case yesterday when I went through older articles that Alan had posted. It captured very clearly something I was thinking about as I worked on a particular pipe that I had bought from a pipeman who was a stroke survivor. It obviously had been his favourite pipe and I wanted to bring it back to life. The phrase that Alan used that caught my attention as I read was a simple phrase he used to describe the work he does as a pipe restorer – “Saving the pipes”. I am reblogging this here on rebornpipes as for me it captures the heart of why I work on old briar. Without further introduction here is Alan’s article. Thanks Alan.
The first time I heard the phrase “Saving The Pipes” was on a YouTube video made by TPC (Tobacco Pipe Collectors). This phrase has stuck in my mind ever since. As a pipe restorer, I feel that I am doing exactly that “Saving The Pipes” – but why is this such a vital role in the pipe smoking hobby?
An estate pipe is one that has been used and cherished by a previous pipe smoker. They may not always have been maintained to a standard that we come to expect today, but a little love and TLC can restore it to its former glory. Many estate pipes did not receive a high level of care and attention because in the heyday of pipe smoking, the pipe collection of a smoker may have been limited to one!
I remember my father with his one Falcon pipe. When the smoke was finished, the ash was knocked out and the pipe was refilled an hour later for the next smoke. Sometimes the ash wasn’t even emptied out and fresh tobacco was just loaded on top of it.
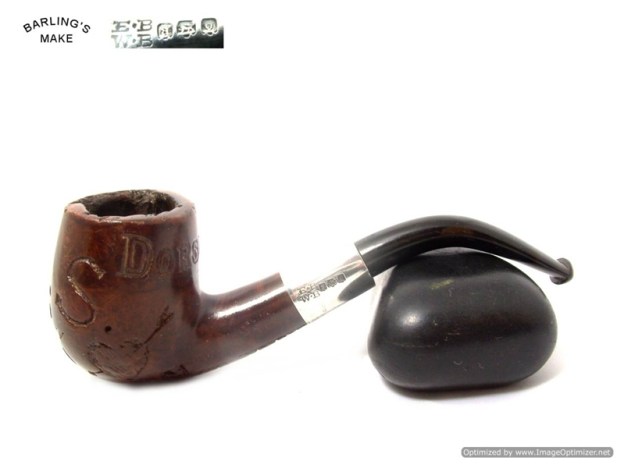
Anyone today who is a non-smoker finding a pipe like that may well throw it in the trash can and that would be a crying shame. These old pipes have a history, a story to tell. I have a pipe I am about to restore at the minute. It is a 1st World War officer’s pipe which has had the walls carved by the soldier during the war.Some might say these carvings have ruined a good Barling’s Make pipe, but I disagree. From the carvings, I have been able to establish the regiment of the soldier, where he was trained and where he fought. I am sure that pipe could tell some tales if it could talk. And despite the carvings, the bowl of the pipe is in solid condition – so now we have a smokeable Barling’s Make pipe which were considered at that time to be the best smoking pipes in the world, with a tremendous history attached to boot. There is no question that the craftsmanship, and the quality of the briar, is celebrated as superior in the first half of the twentieth century. Many people will look at these old pipes and consider them junk. It is my role to take someone else’s junk and restore it to as like new condition as possible. This creates a pipe that can be passed on to a new smoker. A pipe with a history, a pipe with many stories to tell, a pipe with well dried out and cured briar that will smoke dry and a pipe from the heyday of manufacture for this great hobby.
When you buy an estate pipe, you will probably spend less than on a new pipe, so there are savings to be made. Take this pipe and have a quiet conversation with yourself. Imagine the hand of the owner that held it before you. Where did he live, what did he do for a living, what stories could he tell you? Fill the pipe with tobacco, light it, sit back and think of former owners. Raise a bowl in their honour and savour the smoke. An old estate pipe will have outlived its previous owner, and when well restored and looked after, may well outlive you also, to be passed into someone else’s hands who will be thinking about your life.
So for a value for money, good quality pipe with a story to tell, why not consider adding a few estate pipes to your collection. You will be glad you did, and I can continue to “Save The Pipes”.
Here is the link for the article above article. Be sure to wander around the site as Alan and his son Adam do stellar work. http://estatepipes.co.uk/shop/saving-the-pipes
Guest Blog by Robert M. Boughton
Member, North American Society of Pipe Collectors
http://www.naspc.org
http://www.roadrunnerpipes.com
http://about.me/boughtonrobert
Photos © the Author
My oldest pipe, my dearest girl,
Alas! Which shall it be?
For she has said that I must choose,
Betwixt herself and thee.
Farewell, old pipe; for many years
You’ve been my closest friend,
And ever ready at my side
Thy solace sweet to lend.
No more from out thy weedy bowl,
When fades the twilight’s glow,
Will visions fair and sweet arise
Or fragrant fancies flow.
No more by flick’ring candlelight
Thy spirit I’ll invoke,
To build my castles in the air
With wreaths of wav’ring smoke.
And so farewell, a long farewell–
Until the wedding’s o’er,
And then I’ll go on smoking thee,
Just as I did before.
― Edmond Day, “A Bachelor’s Soliloquy,” in Bain Jr., John, ed., “Tobacco in Song & Story,” 1896
INTRODUCTION
Aware of my sometimes peculiar use of quotes to lead into blogs, I ask that you try to follow this reasoning behind the above description of a somewhat disingenuous if humorous plan. As a recovered alcoholic (which is not to say cured), I have not found it necessary to return to the certainty of the lifestyle I led until my last drink of the life-deadening liquid, for persons of my nature, 27 years and a few months ago. Still, I remember with a cringe the oft-quoted “Lips that touch wine shall never touch mine,” a slight adjustment of the popular slogan of the Temperance Movement in the late 19th and early 20th centuries, that I used to hear with frequency in certain circles.
I always recoiled from the notion as being too Puritanical for my liking. Likewise, as a bachelor, I still (or perhaps more so now, given the socio-political incorrectness of enjoying tobacco, even a pipe) encounter the ultimatum of choosing my great, sundry pleasures derived from these marvelous instruments of relaxation and contemplation, or someone with whom to share my life. Being somewhat obdurate when push comes to shove, so to speak, I have no trouble saying fare thee well to all who spur the ominous prognostication of the inevitable disaster of any proposed relationship founded upon such Draconian conditions.
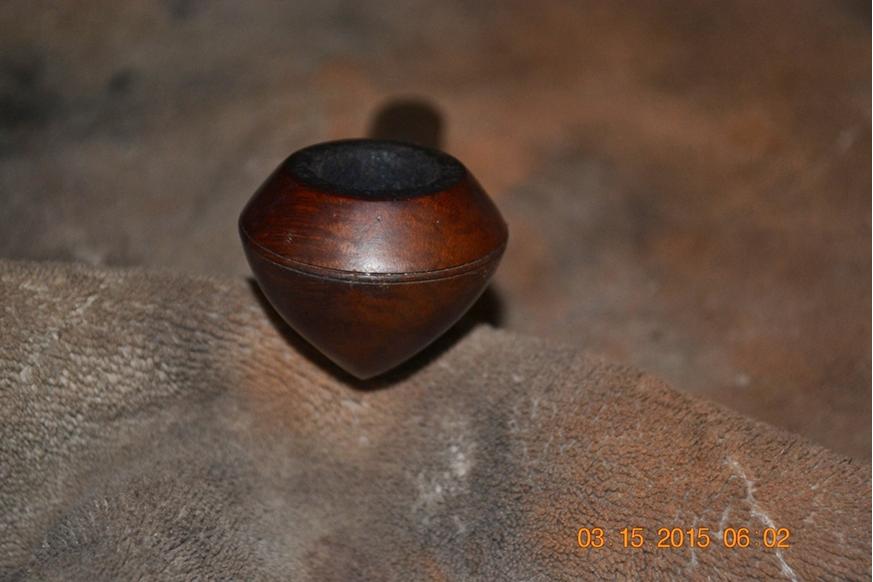
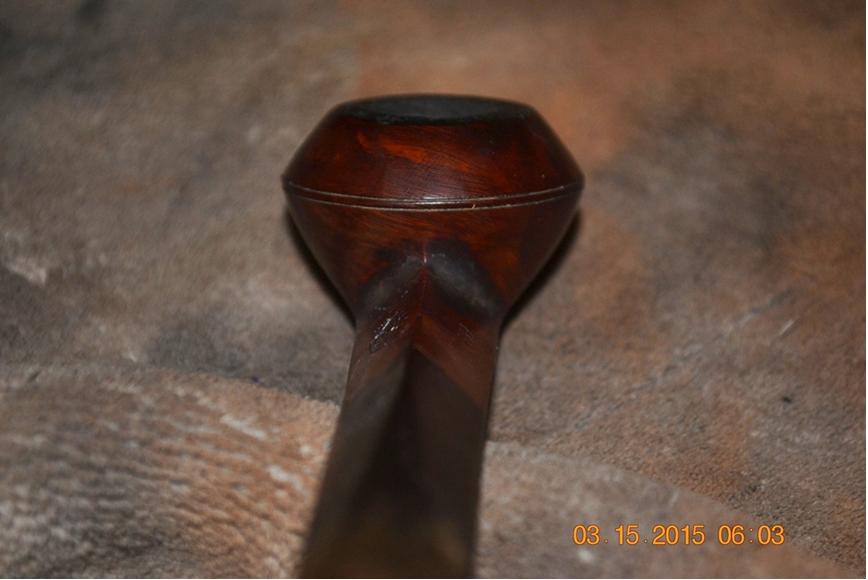
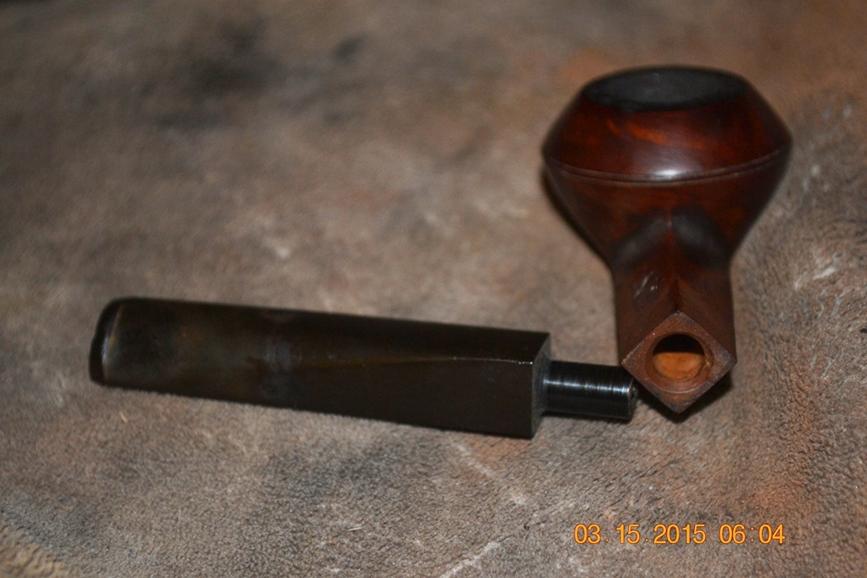
Thus, coming upon the quote in an old collection devoted to the comforting qualities of fine tobaccos, I made a mental connection with the habits of many former drinkers to eschew even those who are able to enjoy liquor socially and responsibly, and their cohorts in the dating war who substitute tobacco use as the evil enemy. People of these sorts are deluded by their recruiters. And while, again, I do not condone the deceptive behavior suggested by the English-speaking but now apparently almost forgotten poet, I do understand his hunger to enjoy all of life’s appetites, and I find it somehow French in attitude, and by association à propos to my sentiments for this lovely example of the elegant Camelia straight smooth bulldog #699, originating in France of excellent lineage, being, according to Pipedia, an obsolete line of pipes once made by GBD.
[There is, by the way, an anonymous, very funny spoof on Hamlet’s famous soliloquy, called “The Bachelor’s Soliloquy,” available at http://www. monologuearchive.com/a/anonymous_001. html.]
THE RESTORATION
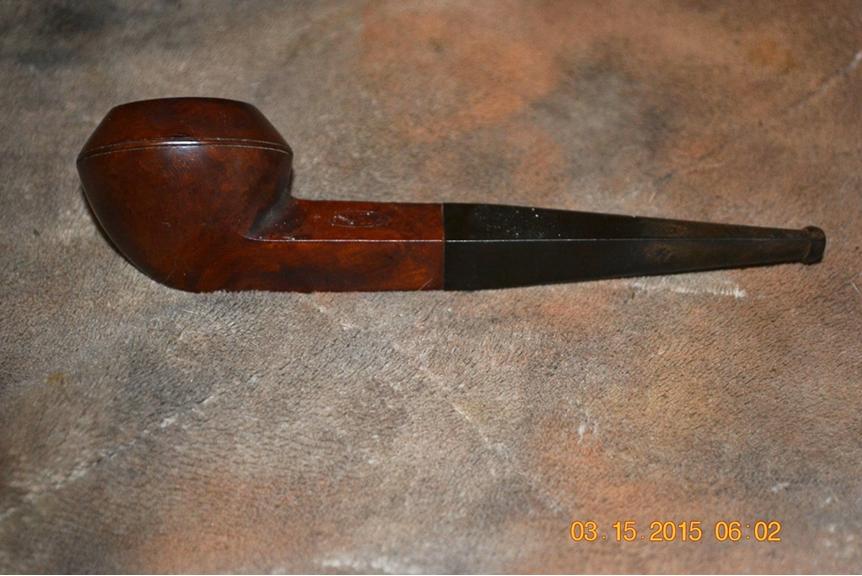

 While the stem sloughed off its inner and outer impurities in an OxiClean soak, I turned to the briar. The rim burn was removed with greater than usual ease using super fine steel wool, and the chamber cake crumbled almost as fast with a few turns of a 17mm reamer followed by 150-grit sandpaper, then 320.
I removed the stem from its soak and rinsed it before wiping off the residue and cleaning the air hole with a soft, thick cleaner. The resulting evidence made clear that a large area, on both sides below the bit, required more work before applying the micromesh.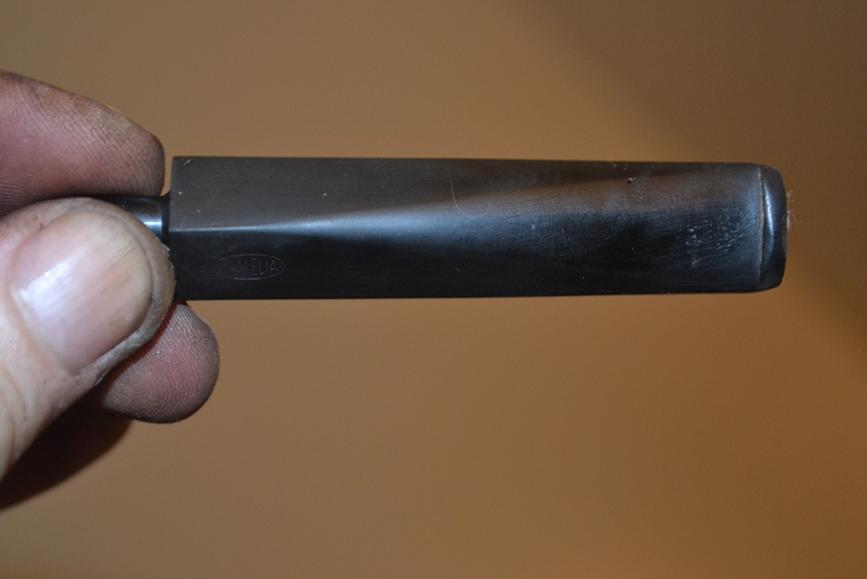
 And so I reattached the stem to the shank and retorted the pipe before finishing the stem with light work using 320-grit paper on the scratched areas before a four-stage micromesh progression from 1500-4000.
I gave the briar a bath and saw no major scratches or other blemishes. My next step of micro-meshing the wood the same way I did the stem turned out to be a waste of a few minutes, but what the heck.
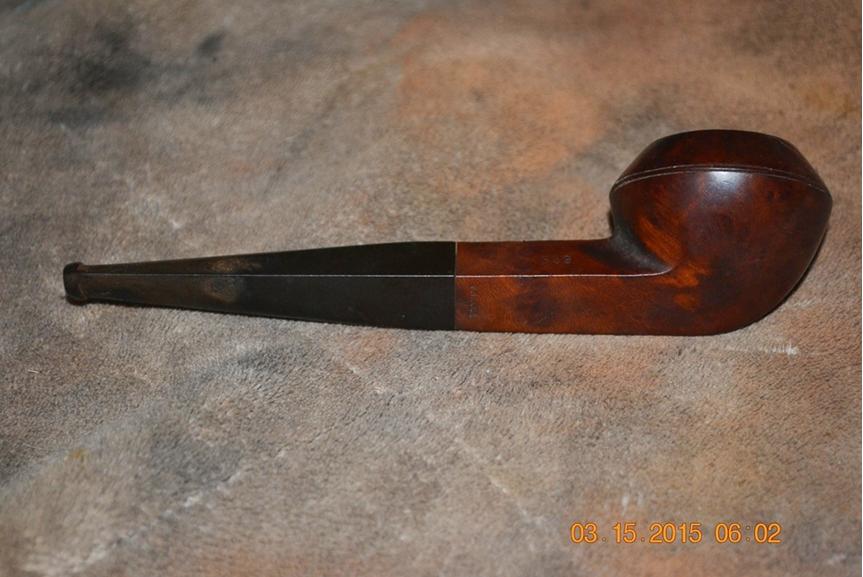
 Granted, based on the original color of the pipe, it was already prepared for polishing with the buffers. But I seem to draw over-dark-stained pipes with unnatural frequency. I don’t think I’m alone in appreciating as much of the good grain every pipe has to offer. Therefore, I got out a small piece of the super fine steel wool to ease away a shade or two of the stain. Of course, when I could see the result I wanted, I had to re-micromesh the whole outer briar again and apply a light brown stain to the shank and lower bowl up to the bulldog line and inward curve of the top. Flaming that part and letting it cool before using 3600 micromesh to remove the film of char, I applied burgundy stain to the curved top and rim of the bowl and flamed it, and after the cool-down period I wiped it gently with the micromesh also. The effect produced was subtle but still there for the discerning eye.
Ready for the electric buffers, I took the two pieces of the Camelia from my living room work substation to the bedroom/workroom proper. For the stem, I followed my former practice of buffing with white and red Tripoli followed by White Diamond, one after the other, as I incorrectly understood they were to be applied. Then I buffed the briar with the same compounds and wax except for the red Tripoli, and including a double carnauba wax. The Camelia straight, smooth bulldog was the last pipe I worked on with this procedure because of a comment by my friend and mentor, Chuck, when I showed him the pipe. He had been asked by another member of our pipe club why my pipes appeared duller than his when compared side by side on the same table. Chuck’s close inspection of the Camelia then revealed streaking of the finishes, and he was able to deduce the reason.
Armed with my new understanding of how to run the stem and briar over a clean buffer on the wheel between coats, I returned home later and began by putting both parts to an unused replacement pad to clear off the excess previous waxes and repeated the series of buffs, using the clean pad after each. After the re-buffs, I filled in the Camelia brand mark on the stem with a white china marker.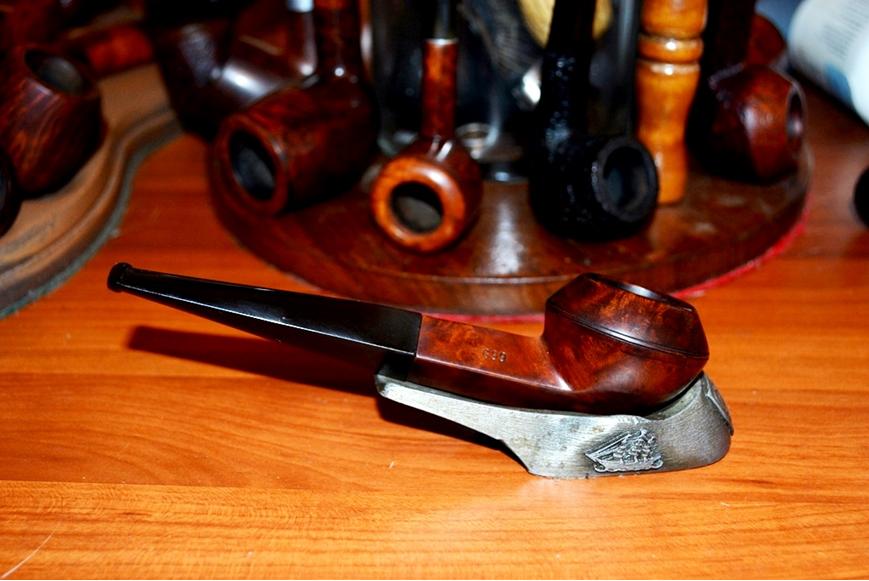
 CONCLUSION
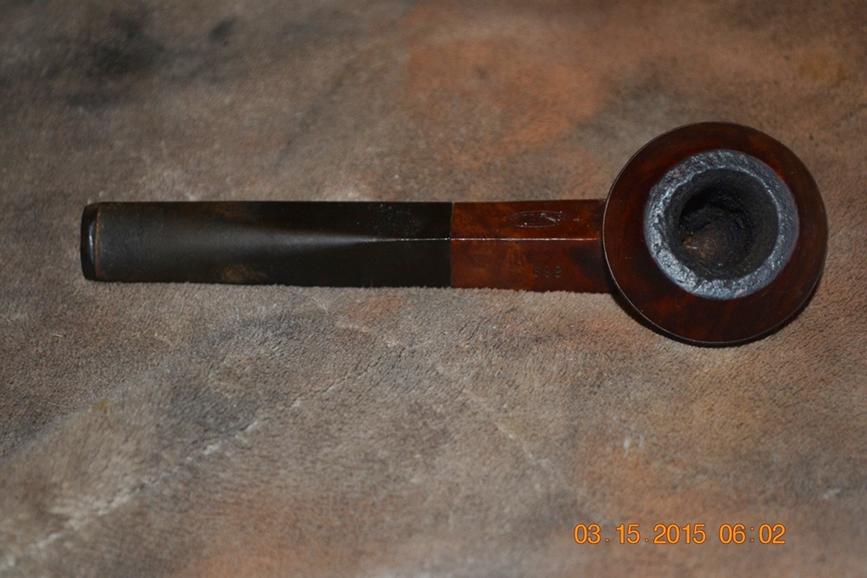
The entire pipe, from bowl to bit, glowed with a far brighter and unyielding finish. Showing Chuck the new and improved completed Camelia, he smiled after the quick look-over that is necessary when nothing is wrong, and asked with obvious excitement, “Was I right? Doesn’t that simple step make all the difference in the world?”
Yes, Chuck, you were right. And the world is a little bit better as a result.
Blog by Steve Laug
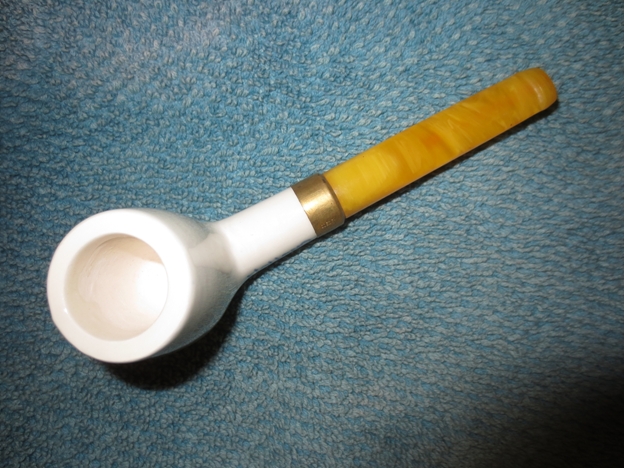
Having restored several older Goedewaagen Double Walled Ceramic pipes in the past when I found that I had an unsmoked billiard in the craigslist lot I was excited to see how it looked “new”. It is shown at the bottom of the left column in the photo below. The pipe is white ceramic with a blue Delft style look to it painted and cured into the ceramic on the side of the shank and on the front of the bowl. The bowl front has a painting of a man in the stocks and people standing in front of him mocking him during his suffering. On the left side of the shank it reads Holland. The brass end cap is stamped Goedewaagen and Made in Holland. The stem is acrylic and looks a lot like some of the older ones that I have the have amber stems.
The pipe was made by an old Dutch pipe making house. Here is the link to their website. Have a look at the history page on the site. It gives detailed background on the pipe. The link is in Dutch but can be translated through Google Translate. http://www.goedewaagen.nl/goedewaagen/. I have a cutaway diagram of the double walled ceramic that helps give and idea of how it looks.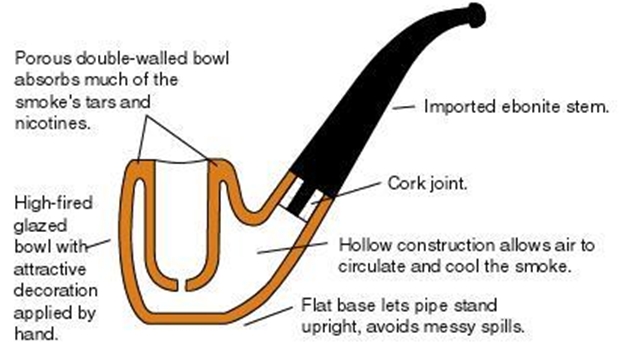 I took a few photos of the unsmoked pipe to keep a record of an unsmoked version of the double walled ceramic pipe.
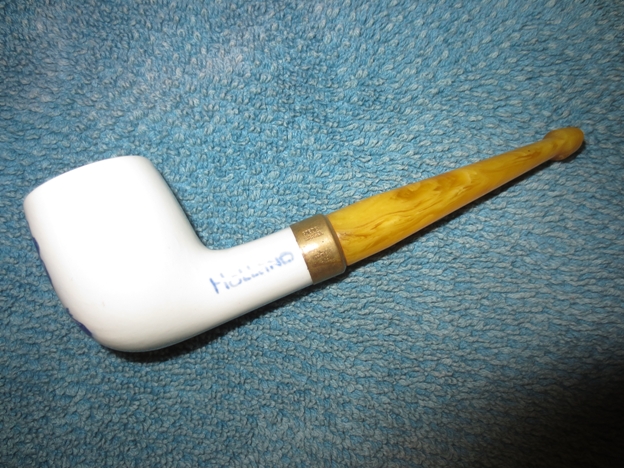

 I took a close up of the bowl so that the air hole in the bottom of the bowl is clearly visible.
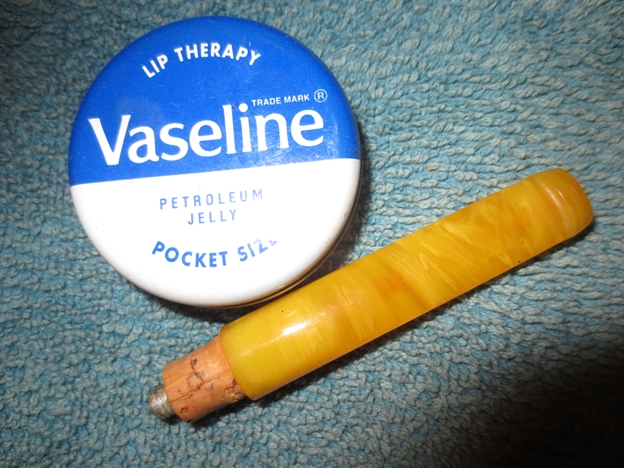
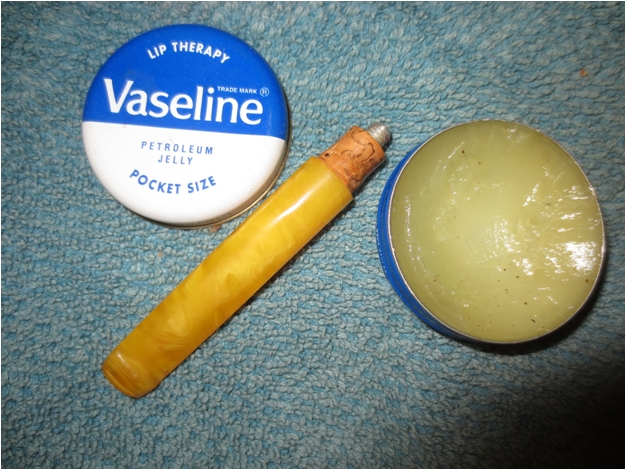
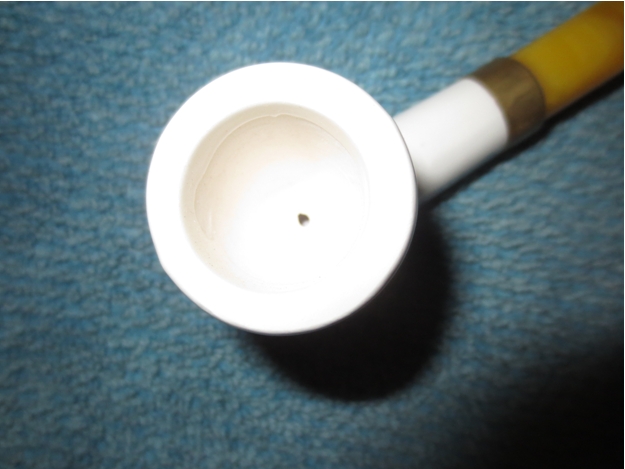 I also took a photo of the cork gasket on the tenon of the stem. It was quite dry so I rejuvenated it with a rub down of Vaseline. Once the Vaseline was absorbed it fit smoothly into the shank. The cork was soft and springy again as it was when it was freshly cut.
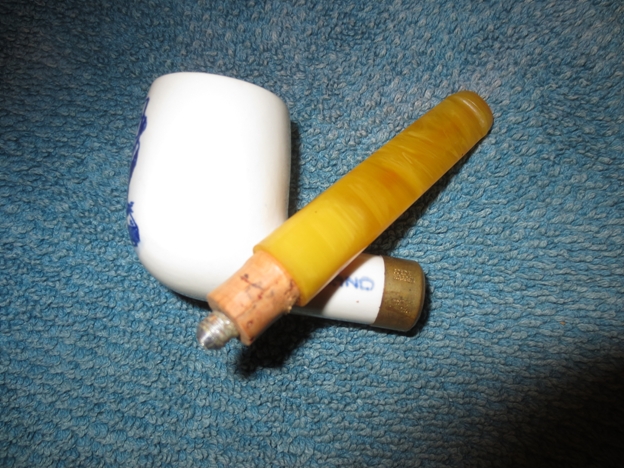
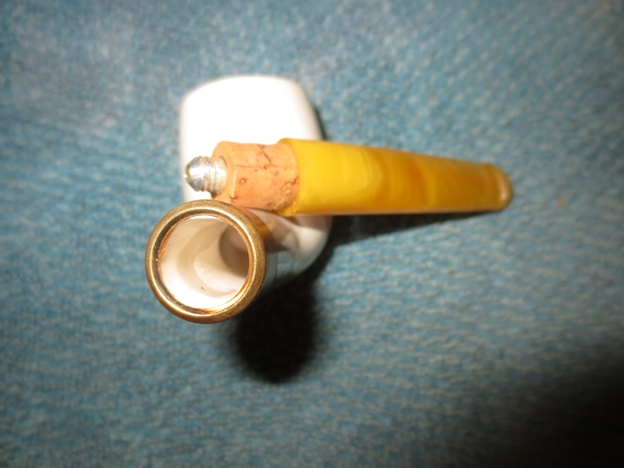
 The end cap is brass and is stamped “Goedewaagen” over “Made in Holland”.
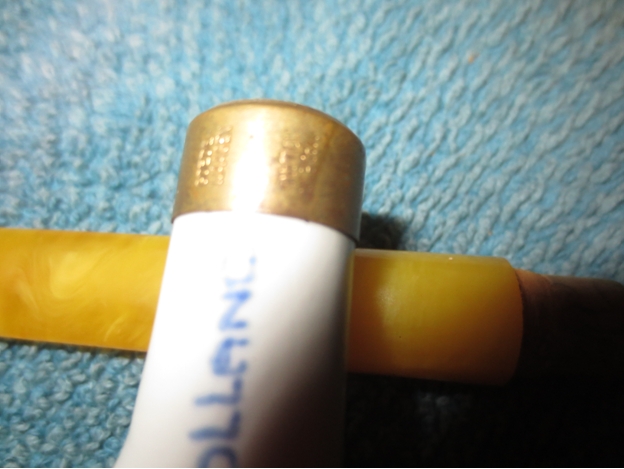 One day I will load up a bowl and smoke it for the first time but for now it will sit in my pipe rack as an unsmoked example of the Goedewaagen pipe.
Blog by Andrew Selking
In my quest to corner the market on pre-war Yello Bole pipes, I snagged this nice little oval shank Dublin. It’s between a group one and group two size, my smallest reamer head only fits about half way into the bowl. The best part is the pipe had not suffered serious abuse. It had some tar on the rim, along with a few nicks and a small tooth mark on the back of the stem. Here is what it looked like when I got it. You will notice the varnish, in a lot of cases a finish like that is to cover up imperfections in the briar. So it was with a little trepidation that I dropped the bowl into the alcohol bath.
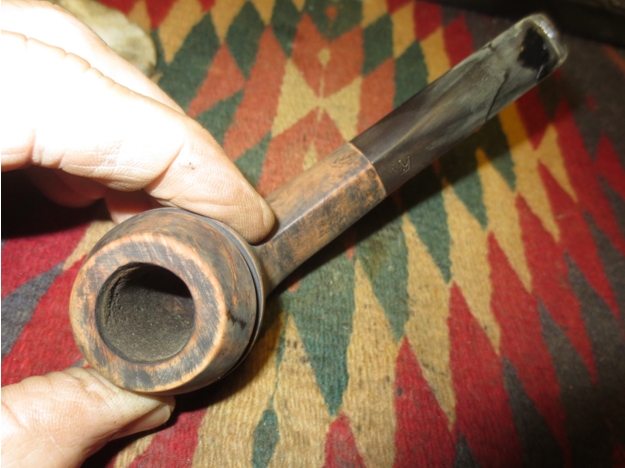
 While the bowl marinated, I soaked the stem in Oxyclean. Next I reamed the bowl. As I mentioned earlier the reamer head didn’t fit all the way down, so I carefully removed the remaining cake with a small pen knife (which you can see in the corner of the picture) and a dental pick.
 Next up the retort. Judging from the stinger I didn’t expect a dirty pipe.

 The stem was a little dirtier, but a second retort cleared it up nicely.
 With the internals sorted, I could now see what lurked under the varnish. I used 0000 grit steel wool and acetone to remove the tar on the rim and the varnish.
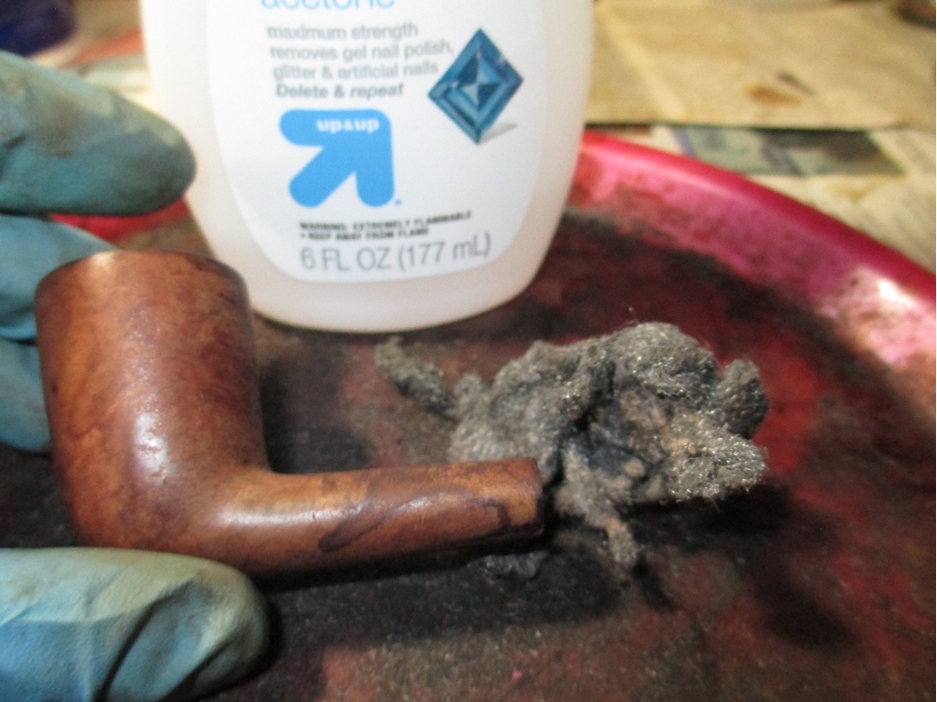 I was pleased to only find a single fill.
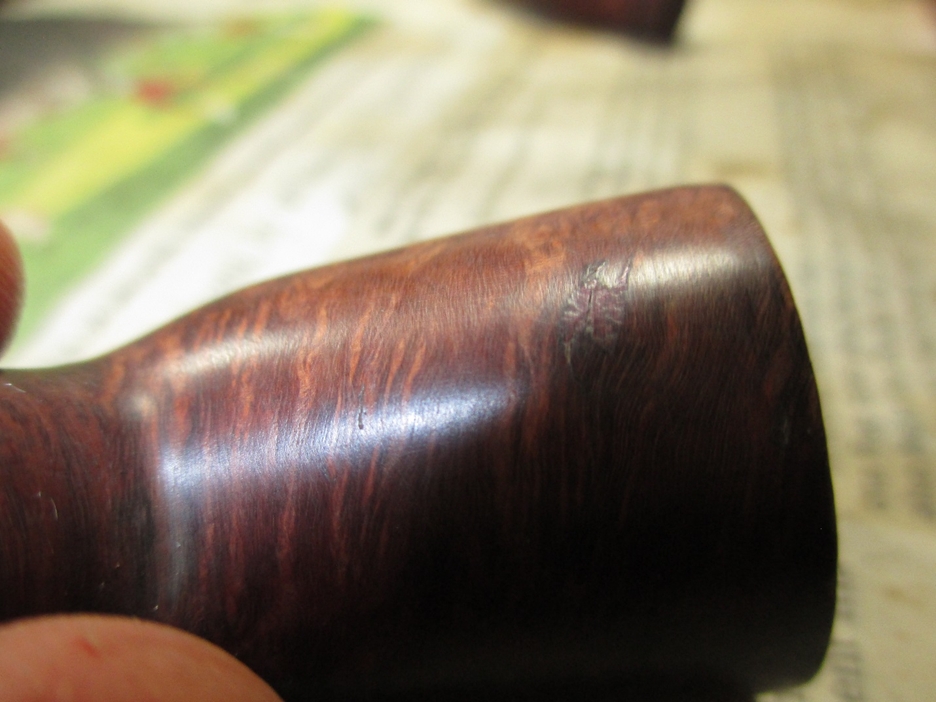 It was the pink putty though, and I hate pink putty, so it had to go.
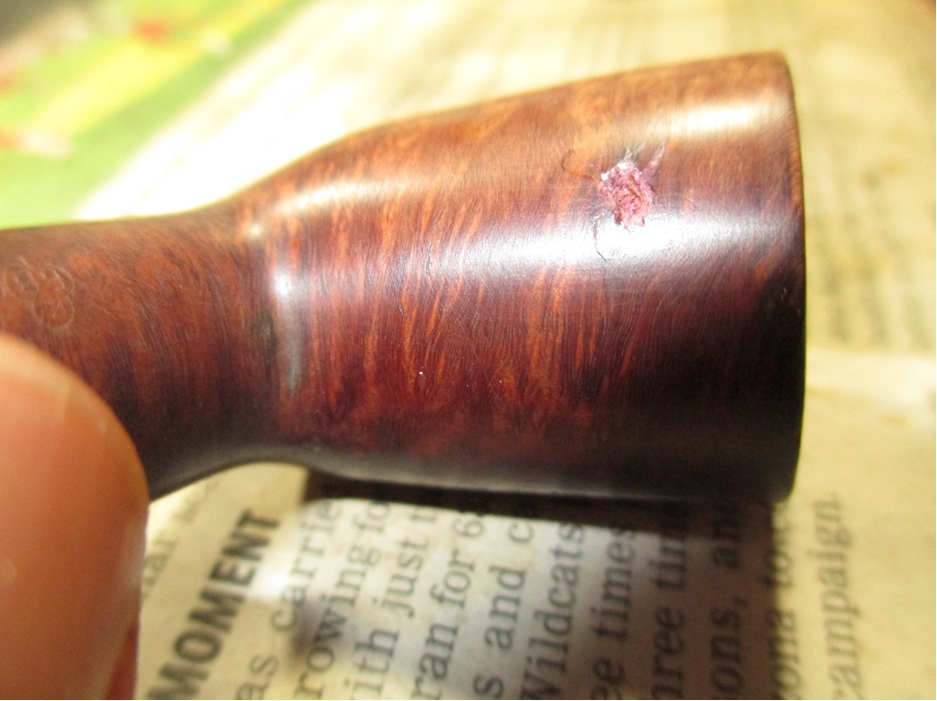 I’ve tried as many different techniques for fixing fills as I can think of. My current technique is to use a push pin to spread a small amount of CA glue into the hole, next I pack it full of briar dust, followed by a drop of CA, followed by a drop of accelerator. The nice thing about using accelerator is you can work the repair right after drying off any remaining accelerator. Here is what the repair looked like before sanding.
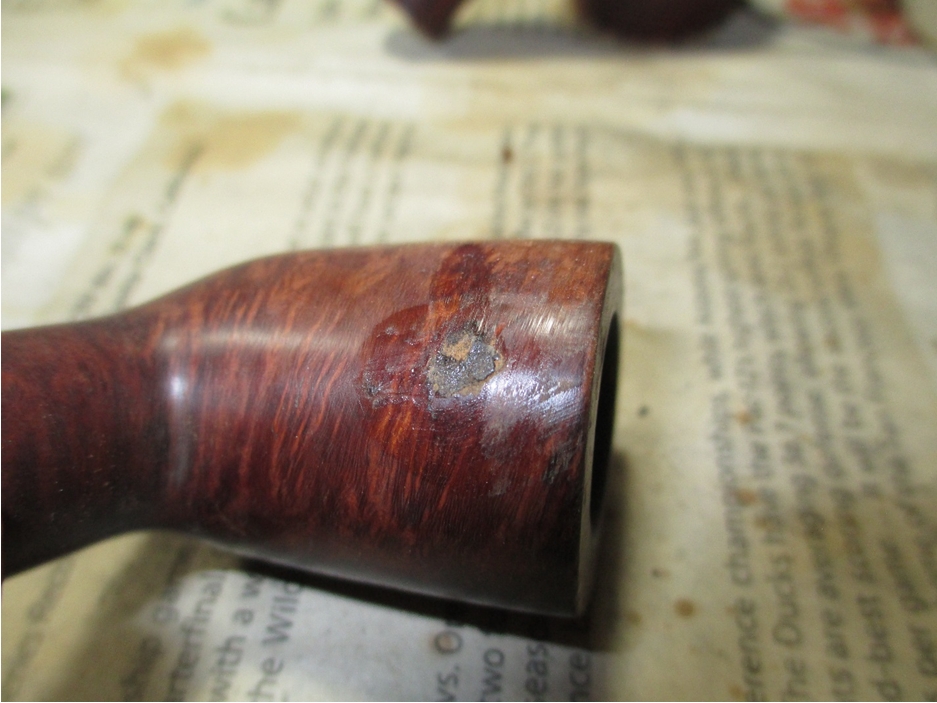 Next I tackled the oxidation on the stem. I used 400 grit wet/dry with water followed by 1500, 1800, and 2400 grit micro mesh pads with water. I always hold a washer over the tenon to prevent rounding the shoulders of the stem. Here is the stem after removing oxidation.
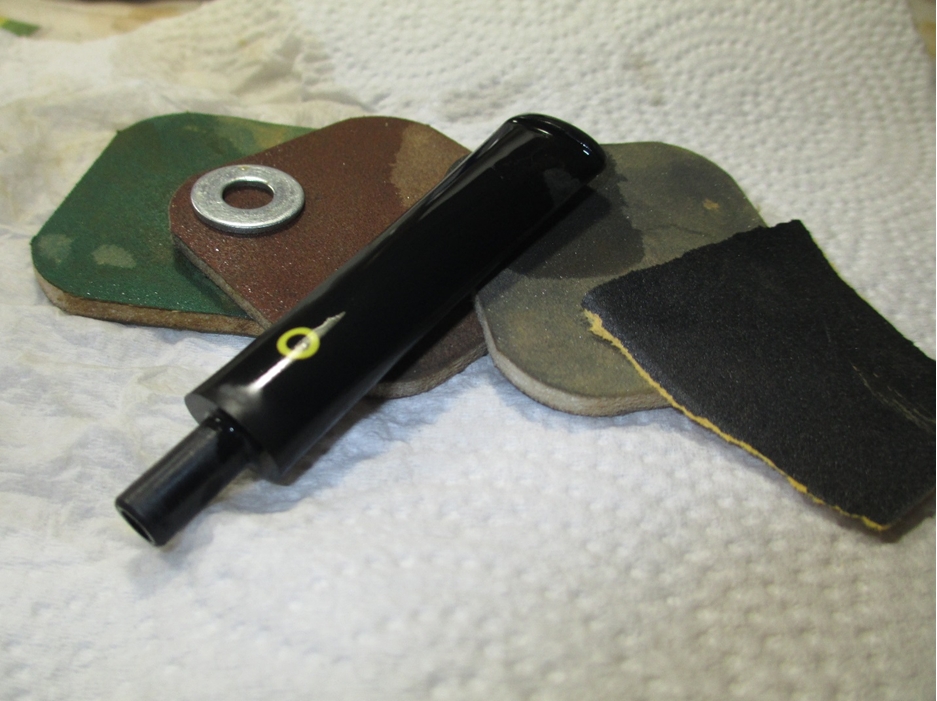 I still had the tooth mark on the bottom of the stem to fix, so I mixed up some clear CA and finely ground charcoal dust and applied it with my push pin. You may notice the yogurt container, I use that to mix the glue and charcoal. When it gets too dirty I throw it away and get a new one.
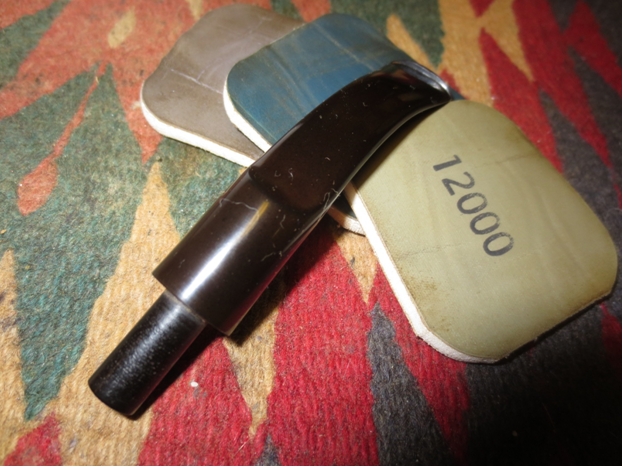
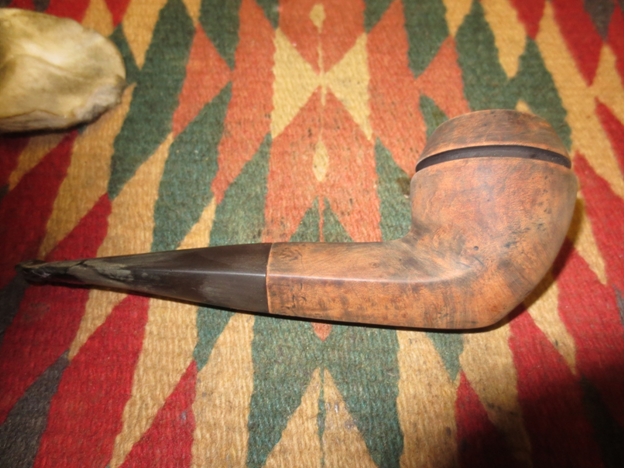
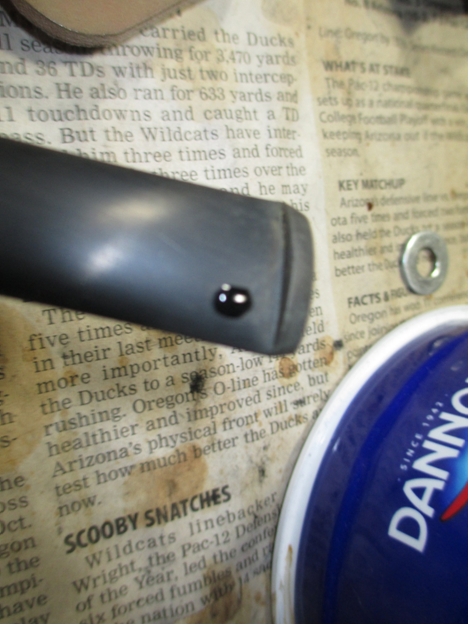 I used 400 grit sand paper to shape the fill, followed by 1500-2400 grit micro mesh. I usually don’t use water when sanding down fills. I removed the top coat of finish on the bowl with a progression of 1500 to 2400 grit micro mesh pads. Next I used 3200 to 12,000 grit micro mesh pads to polish the entire pipe. You will again notice the washer on the stem. Here is the pipe ready for final polish.
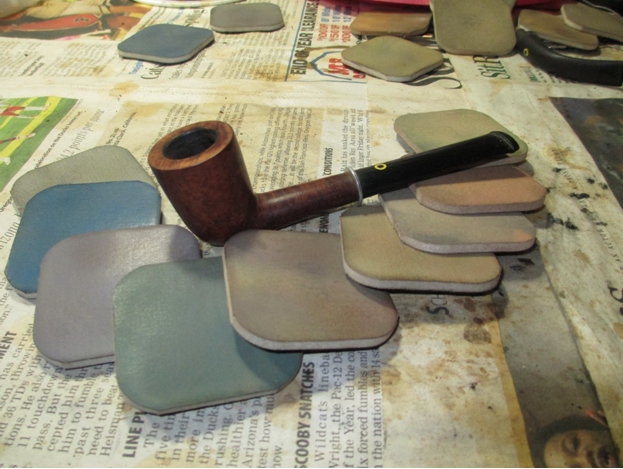 I used my rotary tool with white diamond and carnauba wax on the stem.
 I took the bowl to the buffer and used white diamond and carnauba wax on it as well. Just a word of caution when using a buffer, hold onto whatever you’re buffing with both hands.
Here is the final result. Thanks for looking.