Category Archives: Pipe Refurbishing Essays

Essays and pictorial essays on the art of refurbishing

Bringing a Comoy’s Grand Slam 5 Straight Bulldog Back to Life


Blog by Steve Laug

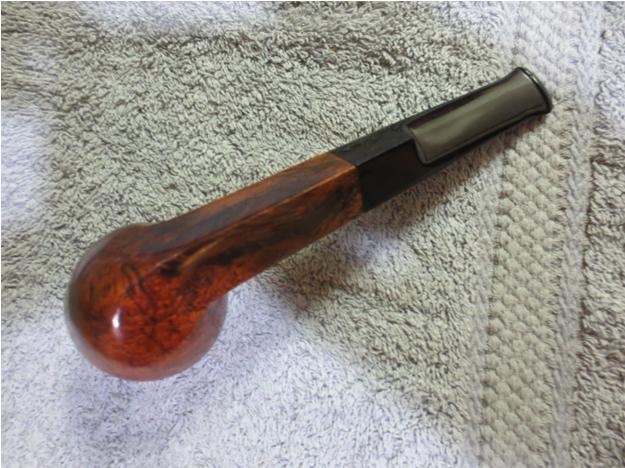
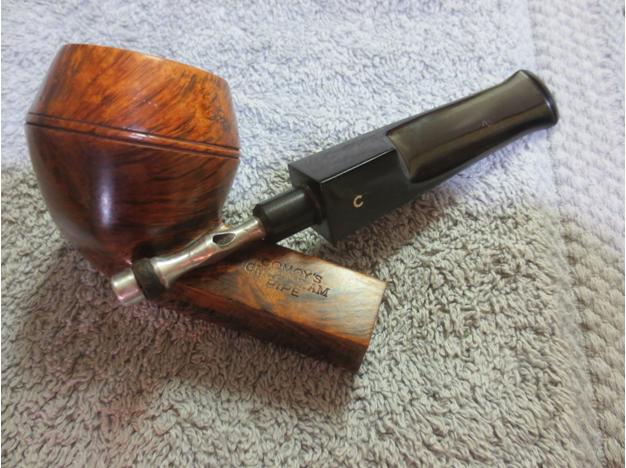
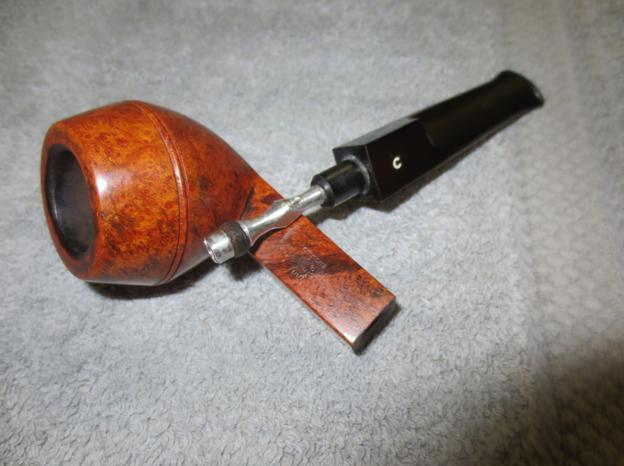
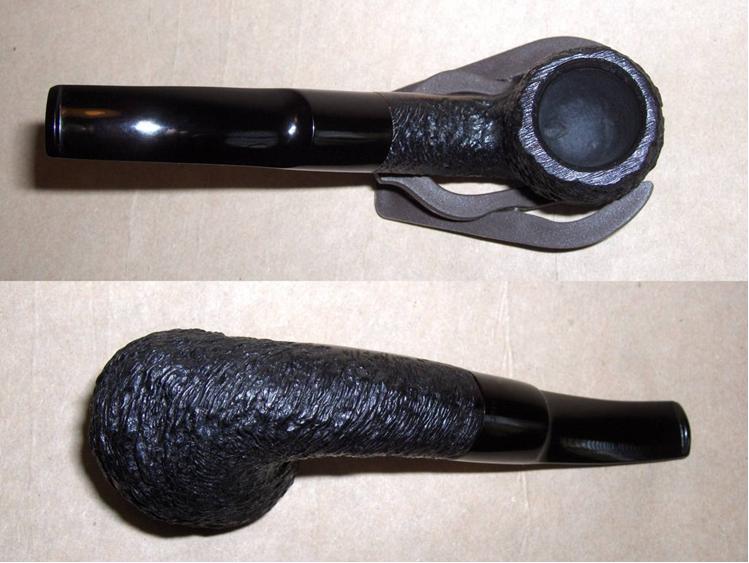
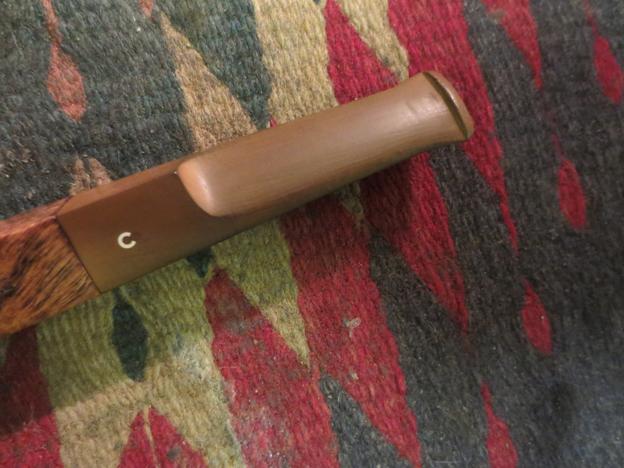
The next pipe on my worktable was a Comoy’s Bulldog. Personally, I think Comoy’s nailed the straight bulldog shape better than most others. It is a perfect bulldog shape and it is a pleasure to hold and smoke. The stamping on the left side of the shank reads Comoy’s over Grand Slam over Pipe. On the left underside of the shank next to the stem it is stamped X7. On the right topside it is stamped in the classic circle reading Made in London with the “in” in the centre of the circle. Underneath the circle it reads England. Further up that side of the shank is a number 5 stamped almost next to the bowl. I examined the C-inlay on the stem to see how it was made. I have learned over time and through research on these pipes that if it’s been applied in three steps, then it was made pre-1980. This one was indeed a three-step C-inlay. Thus I knew it was made earlier than 1980.Comoy1
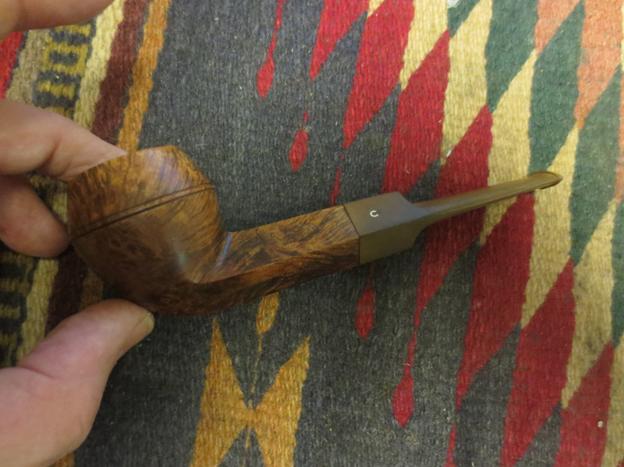
Comoy2 Like all of the pipes I work on, I took a moment to give the pipe a quick assessment. Before I even start the clean up and restoration I take time to look it over to make sure I see what I have to deal with on a particular pipe. The examination helps me to plan how I am going to address the issues on this particular pipe. The Comoy’s pipe was definitely in need of some TLC. The original finish on the Grand Slam Pipe line was rich and full of life. The contrast of dark stain that highlights the grain and the top coat of stain that varies from a rich red to a dark golden combine together to give a very beautiful finish. There were no major dents in the briar that needed to be addressed, though there was a small one in the shank near the stem junction on the sharp edge on the right side that could not be repaired. The briar itself was lifeless and faded looking dull and flat. There was some dirt and grime on it and particularly at the bowl shank junction.Comoy3 The rim had a thick coating of tars on top and some minimal damage to the inner bevel. The bowl had a light cake and seemed to have been reamed recently. It would need to be tidied up.Comoy4
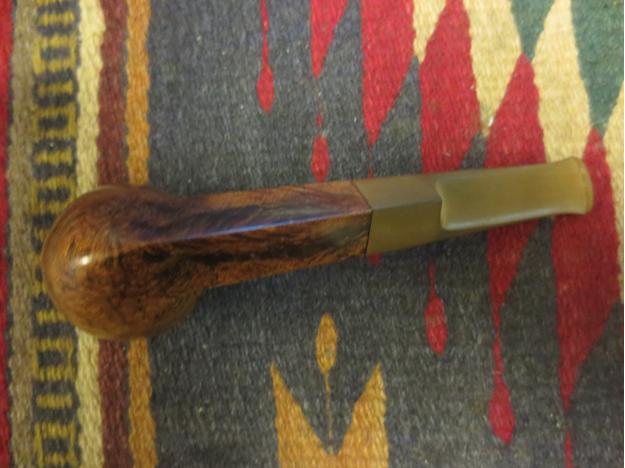
Comoy5 The stem was badly oxidized and had tooth marks on the top side and the underside near the button. The slot was partially plugged and would need to be opened.Comoy6
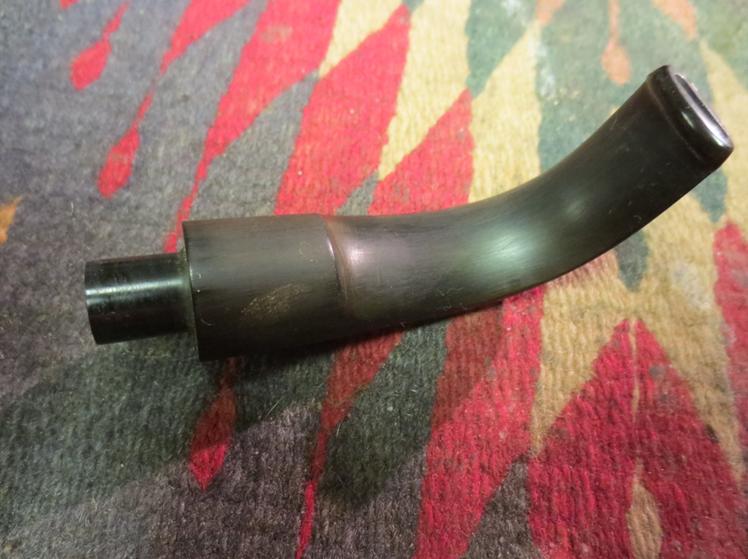
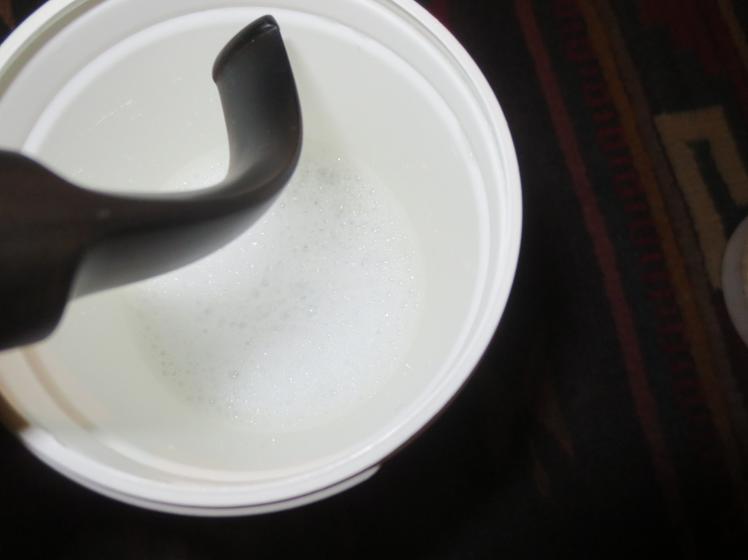
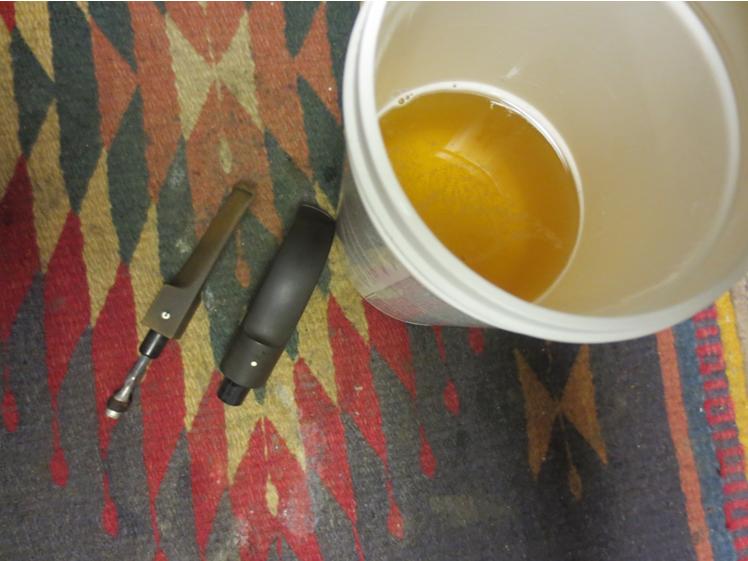
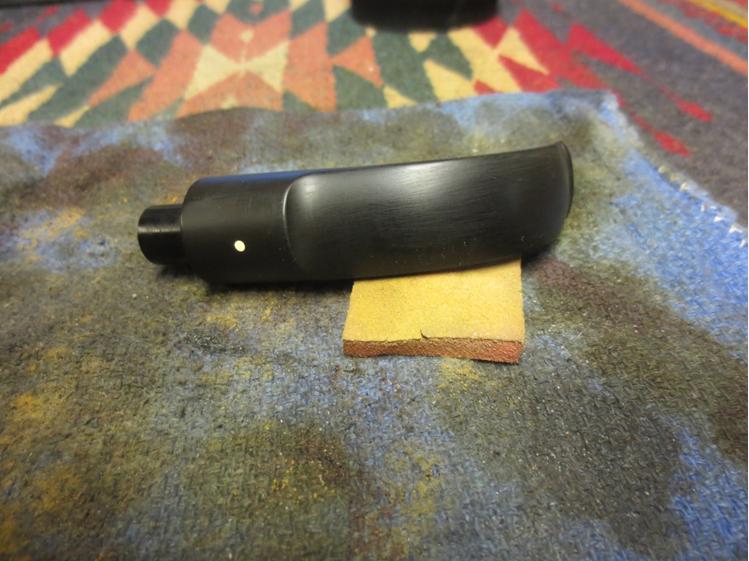
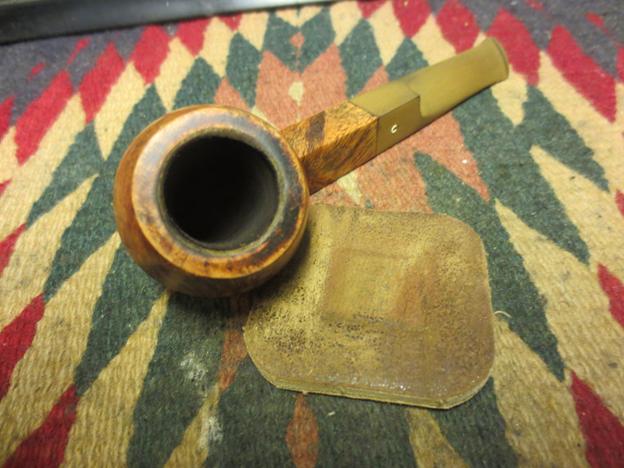
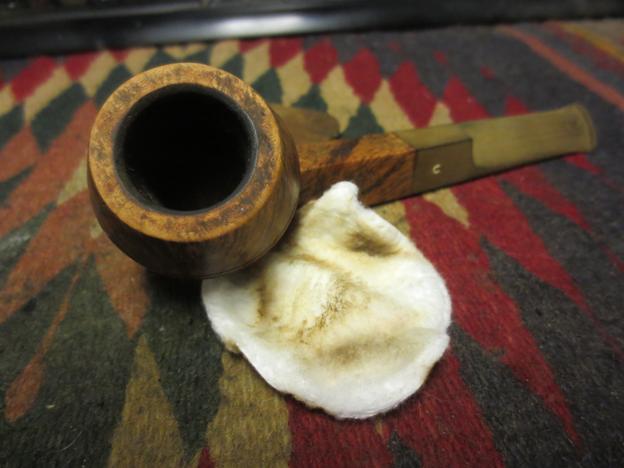
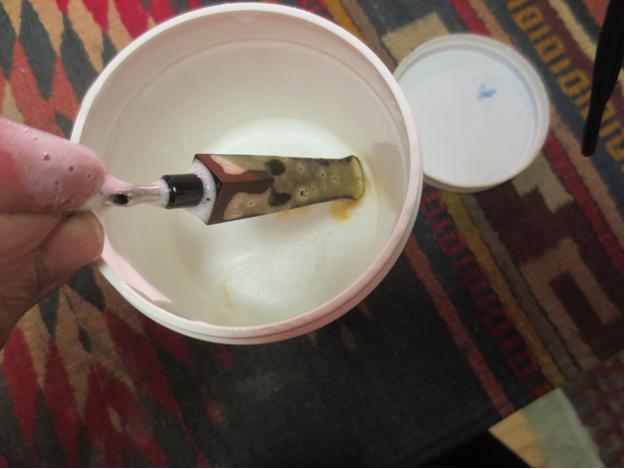
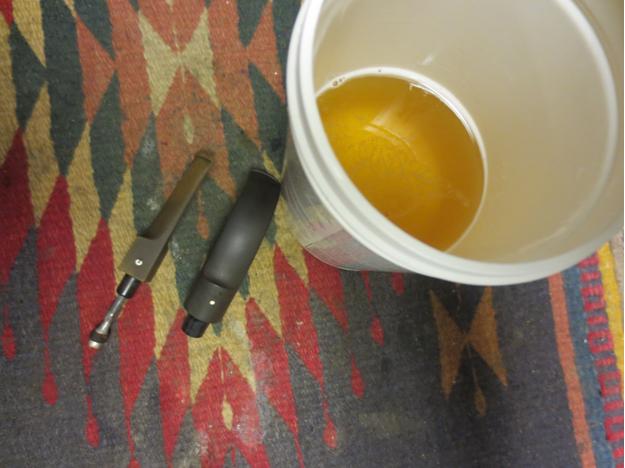
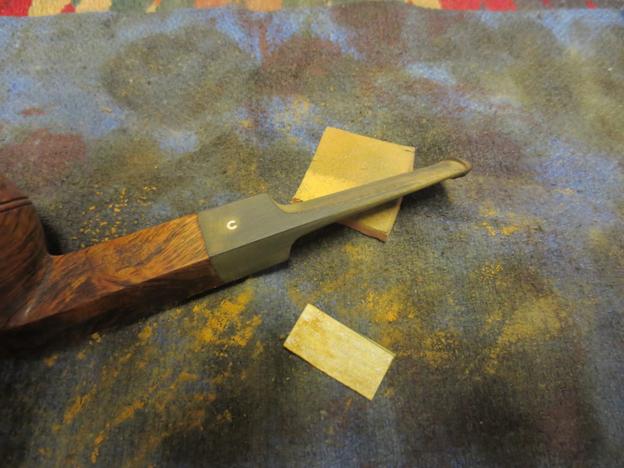
Comoy7 I cleaned up the bowl with a wipe down of alcohol on a cotton pad to remove the dirt and grime and begin to soften the tars on the rim. I gave it a light sanding with 1500 grit micromesh sanding pads.Comoy10 Then I wiped it down once more with the alcohol and cotton pads. The buildup was just about gone. Just a little more scrubbing and the rim was finished.Comoy11 I lightly sanded the stem with a medium grit sanding sponge to loosen the oxidation and then dropped it in a bath of Oxyclean to soak overnight. In the photo below you can see the oxidation begin to run off the stem into the white bubbles of the Oxyclean mixture.Comoy8 The next morning when I took it out of the bath the mixture was yellow with the oxidation. I dried off the stem with a coarse cotton towel to remove the softened oxidation. The stem was much cleaner and black of the vulcanite was beginning to show.Comoy9 I put the stem on the shank and sanded it with 220 grit sandpaper followed by a medium grit sanding sponge to remove the oxidation that had come to the surface after the soak.Comoy12
Comoy13

Comoy14

Comoy15 I wiped it down with Obsidian Oil and then took the following photos of the stem to show the progress so far.Comoy16

Comoy17

Comoy18 I cleaned out the deep tooth mark on the underside of the stem with a dental pick and then a cotton pad and alcohol. Once it was clean I used clear super glue to make a patch on the marks. I over filled the repair so that it would dry and not shrink too much requiring a second coat.Comoy19 I set the repaired stem aside to dry for the day while I was at work. After work I sanded it smooth with 220 grit sandpaper and then with a medium and a fine grit sanding sponge. When the surface of the repair matched the stem material the sanding was finished. I then used a flat blade screw driver to unscrew the end of the stinger in the tenon. The cap on the end held a replaceable leather washer in place. Once the cap was off I was able to remove the washer. I then used a pair of needle nose pliers on which I have covered then ends with a thick wrapping of scotch tape. This provides a cushion when grabbing onto metal. The stingers in the Grand Slam were threaded and I heated the metal tenon until the goop holding it tight was loose. I turned it with the pliers until it was free of the tenon.Comoy20 With all of the parts removed from the stinger I cleaned it with a soft bristle brass tire brush to clean off the tars. I cleaned out the interior of the stinger with pipe cleaners, cotton swabs and alcohol. I used the brass brush to also clean the threads on both ends of the stinger. When I had them cleaned I used coated the threads on the front of the stinger with a light coat of Vaseline to protect it and lubricate them when I turned the cap onto the end. I had cleaned it with some soap and warm water and then used the Vaseline to give it some life. With it all cleaned and lubricated I put it back together and set it aside while I cleaned the shank and the stem.Comoy21 I used the drill bit on the KleenReem pipe reamer to clean out the airway from the end of the mortise to the bottom of the bowl. It had almost closed off with the tars. The draught on the shank was very constricted. Once I had run the bit through it several time cleaning out the buildup the draught was open and unrestricted. I cleaned out the shank and airway with alcohol on cotton swabs and pipe cleaners. Once they came out clean the shank was finished and ready for the stem.Comoy22
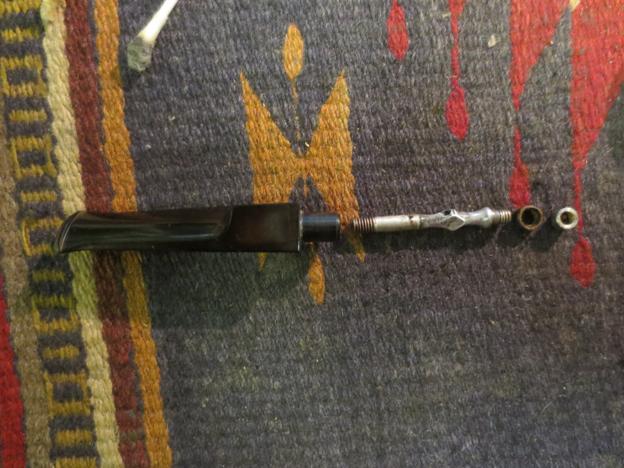
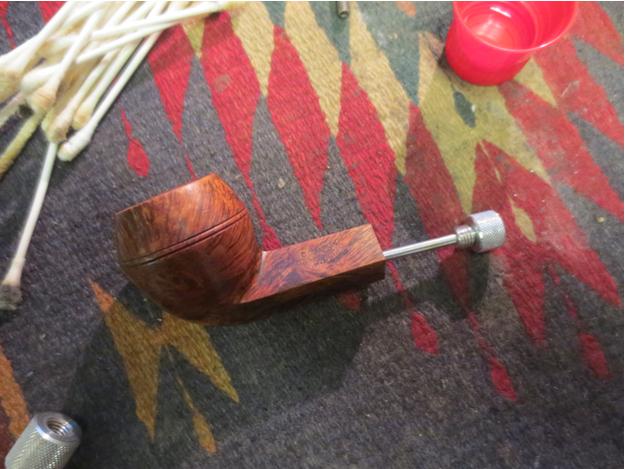
Comoy23 I cleaned out the stem with pipe cleaners and cotton swabs while I had the stinger out. I was able to remove all of the buildup in the stem and then put it all back together again. The stinger end was lubricated and then threaded back into the tenon. It sits quite deep in the tenon and has a small flange that sits against the tenon end. Here are some photos of the stinger in place in the stem.Comoy24
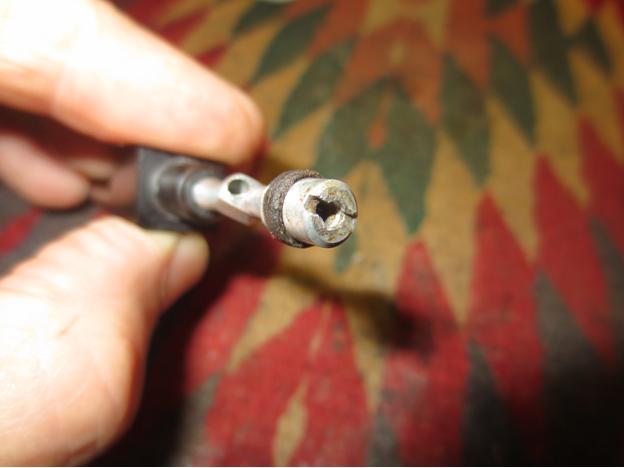
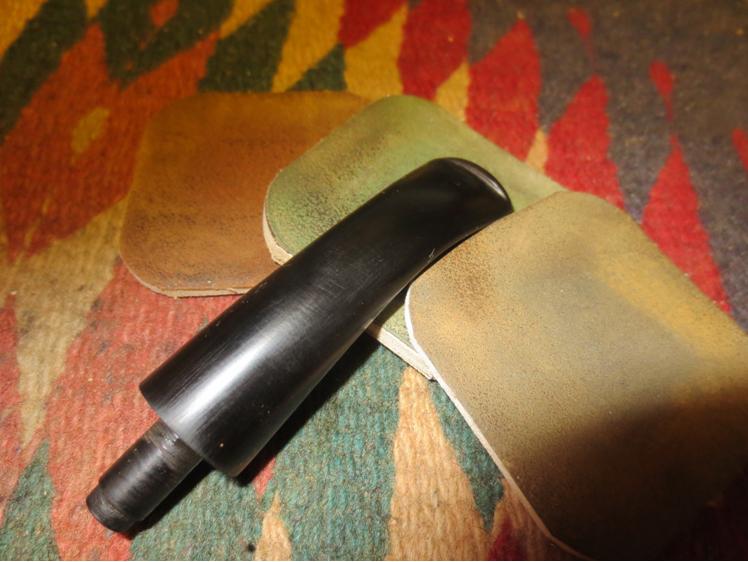
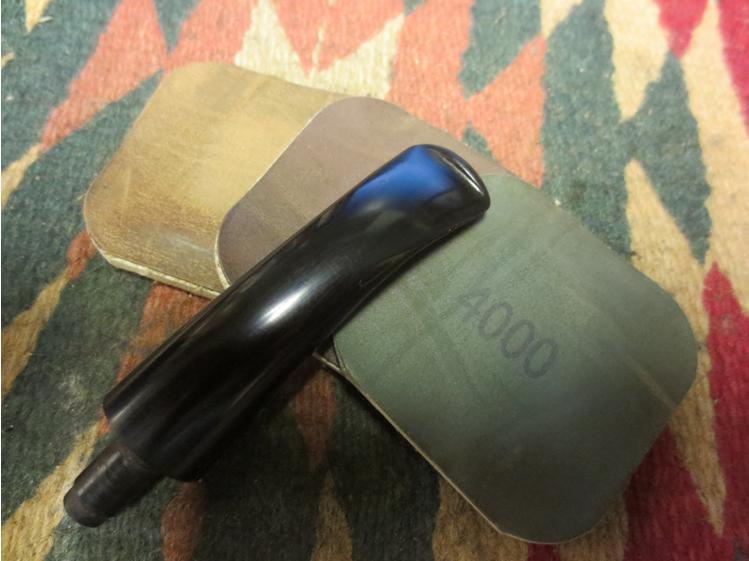
Comoy25 I used a 1500 grit micromesh pad to further polish the aluminum of the stinger. I sanded the stem with micromesh sanding pads – wet sanding with 1500-2400 grit pads and dry sanding with 3200-4000 grit pads. Between the first set of three pads and after the second set I rubbed the stem down with Obsidian Oil. When it dried I buffed the stem with White Diamond on the wheel to polish the vulcanite. I brought it back to the worktable and gave it a further coat of Obsidian Oil.Comoy26

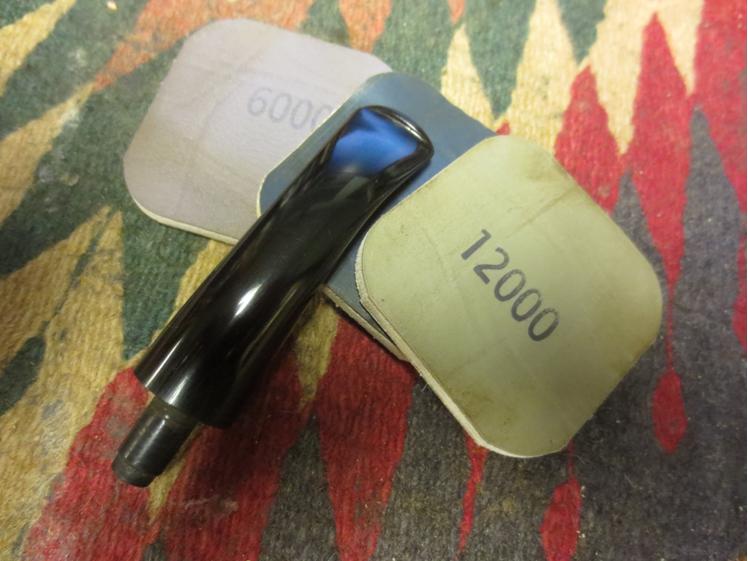
Comoy27 I finished dry sanding with 6000-12,000 grit micromesh sanding pads. I rubbed the stem down a final time with Obsidian Oil and buffed it with Blue Diamond Plastic Polish on the buffing wheel.Comoy28 I buffed the pipe with Blue Diamond and then gave it multiple coats of carnauba wax. Between each coat of wax I buffed it with a clean, soft flannel buffing pad to raise the shine. The photos below show the finished pipe. It is cleaned, polished and ready for that next inaugural smoke.Comoy29
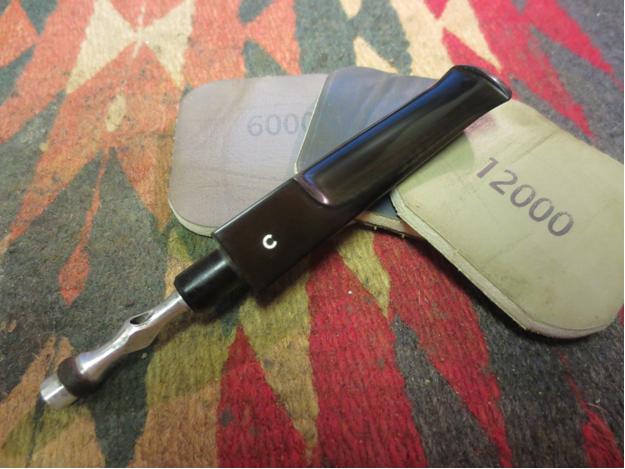
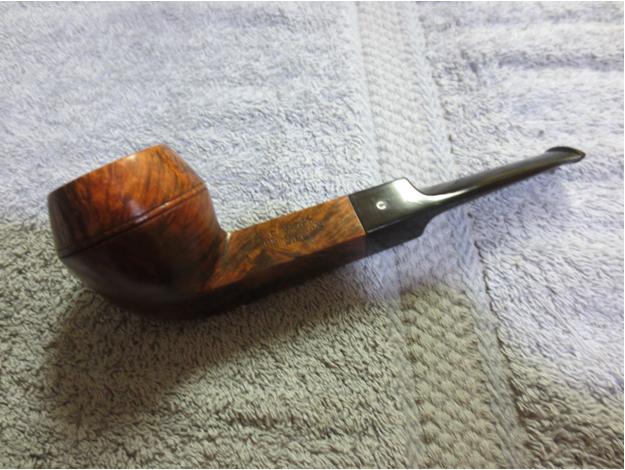
Comoy30

Comoy31

Comoy32

Comoy33

Comoy34

Comoy35 Thanks for looking.

Midterm Exam #2: Repairing the Leaky Airway on a Champion Deluxe


Blog by Anthony Cook

It’s exam day again. I didn’t get much sleep, but I did have a good breakfast of Pop-Tarts and leftover ramen. So, let’s do this! This time, the exam is based on a bent brandy shaped Champion Deluxe.

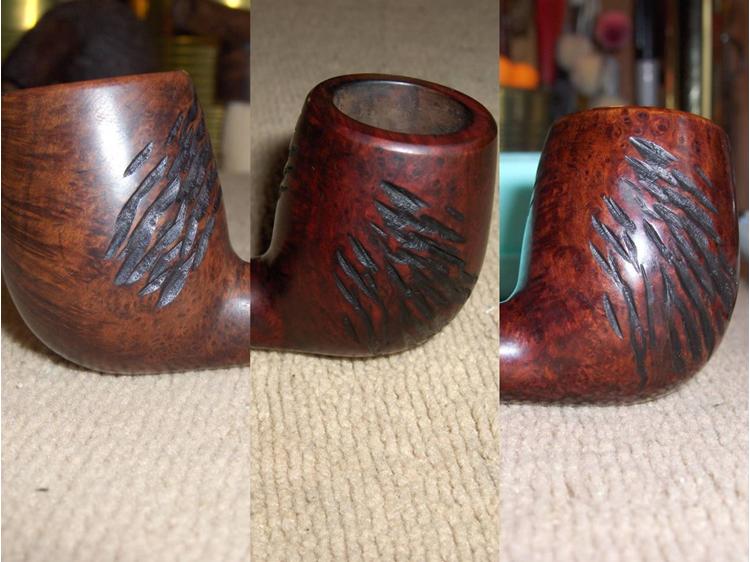
PipePhil provides a little info on the Champion brand:Champ1 The pipe I’m working with has shank stamping and a stem logo that is identical to the middle pipe in the above graphic. The country of origin for the brand is listed as Switzerland, but there must be some French connection. The word “FRANCE” is stamped across the bottom of the shank-end of the stem on my pipe. You can see the pipe for yourself in the photos below, which were taken shortly after its arrival.Champ2 I was really pleased with this one when it arrived. I really liked the size, shape, and rustication pattern. As I turned it over in my hands, it seemed to be in pretty good condition. There were no major cracks or gouges, only a generous amount of grime on the stummel, one or two nicks on the rim, and a little oxidation on the stem. I thought it would clean up nicely and was beginning to look forward to working on it.

Then, I pulled the stem out to check the internals and cringed…Champ3 The airway was drilled so high that it actually penetrated the top of the mortise and only a very thin layer of briar remained between it and the surface of the shank. In fact, the wood was so thin that it had either cracked from heat/moisture expansion or had been punctured by the rustication tool. If you look closely, you can see in the second image that the alcohol from a dampened pipe cleaner would seep out of the airway to the surface of the shank.

I didn’t have the confidence at the time to attempt to repair something as essential and delicate as an airway. So, I reamed the bowl, scrubbed the inside of the shank and stem clean, and then dropped it back into the box where it’s been withering away for several months. So, today I pulled it back out for my second midterm exam.

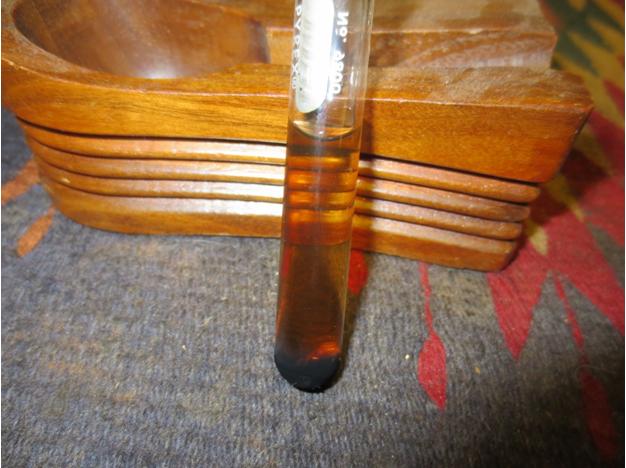
The airway needed to be sealed before doing anything else. If that wasn’t successful any other work would be pointless. So, I clamped the stummel upside-down in my bench vise using a couple of foam strips to cushion it. I tried to make sure that the airway was as level to the ground as possible. Then, I applied super thin CA inside the airway with an applicator bulb. Since I couldn’t really see inside the shank and bowl, I had previously measured the length of the airway and marked it off on the applicator with a strip of tape. This, along with a slow and steady hand, kept me from dribbling the CA into the bowl.Champ4 Once I was sure that the glue was completely dry, I used 240-grit and 320-grit sanding needles to smooth out any lumps and bumps that the glue may have created in the airway. Then, I prepared my initial test of the patch. I dampened a pipe cleaner with alcohol and inserted it into the airway. I couldn’t see any seepage, but just to be sure I pulled out my jeweler’s loupe to give it a closer inspection. Still nothing. The patch had passed its first test.Champ5 I set up a retort for the next test. If there were any open fissures in the shank, the evaporation from the boiling alcohol would surely seep through. I flushed the shank 10-12 times before setting the pipe aside to cool. The color of the alcohol in the tube is a testament to the merits of a retort. It’s not filthy by any means, but remember, this is a pipe that I once thought was clean.

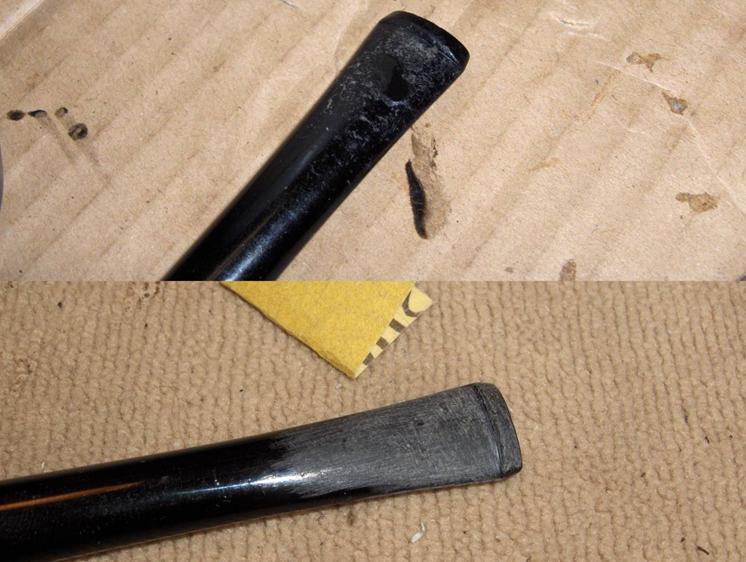
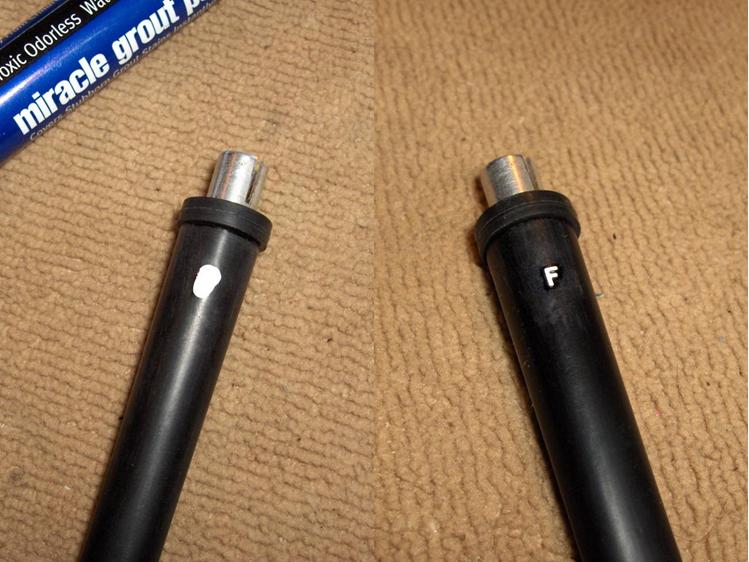
While the pipe rested, I closely inspected the shank to see if the patch had held. Success! I found no moisture seepage at all. The patch was doing its job and the worst part of the exam was over!Champ6 After another dozen or so flush with the retort the alcohol in the tube was almost completely clean. I let the pipe cool, and then gave it a final, quick scrub the wrap up the internal cleaning.Champ7 I placed the stem into a bath of warm water and Oxyclean and let soak for about an hour before I scrubbed it down with cubes cut from a Magic Eraser pad to remove the oxidation. Once the stem was clean, I applied a black CA glue patch to the remaining dents. I put a drop of activator on the patches to speed up the drying and they were ready to be worked again in about ten minutes. I sanded out the patches with 220-grit (the bottom image in the picture below), 320-grit, and 400-grit paper. Then, I gave the entire stem a light sanding with 600-grit paper to remove any minor scratches.Champ8 The paint in the stem logo was cracked and flaking. So, I picked out the loose paint, and then I began to fill in the area around the logo with a grout pen begin restoring the logo. I was a little worried about how well this was going to turn out since the recessed stamp was very narrow and shallow. I let the “paint” dry for about 20 minutes before carefully sanding it down with 1200-grit paper and I thought that it came out surprisingly well in the end. I finished up work on the stem by lightly sanding it with 1200-grit paper to even everything out, and then polished with micro-mesh pads 1500-12000.Champ9 The stem was finished and the clock on the wall was ticking. Some of the other guys were already turning in their papers. So, it was time to start wrapping things up. I mixed up a 3:1 stain solution of isopropyl alcohol and Fiebing’s black dye and applied it to the stummel. Then I buffed the entire stummel with red Tripoli before sanding out the scratches around the stamping with 400-grit, 600-grit, and 1200-grit sandpaper.Champ10 Then, I applied a 3:1 dilution of Fiebing’s cordovan before polishing the stamping area with micro-mesh pads 3200-12000. I reattached the stem and gave the entire pipe a light buff with white diamond, and waxed the pipe with Halcyon II for the stummel and a few coats of carnauba for the stem. Finally, I applied a bowl coating to promote cake growth, and then turned the exam in with my fingers crossed.

The photos below show how it finally turned out. For some reason, in these photos the cordovan and black blend together in the rusticated areas making them appear much darker. When you have the pipe in hand the cordovan is much more evident. I don’t know why that is. Man, I hope we aren’t being graded on our photography skills as well.Champ11

Champ12

Champ13

Champ14

Champ15 But, wait..!

Okay, I realize that this is a little unusual for an exam, but I’d like to make a bit of a revision. You see, when I ran my first bowl through this Champion the draw was extremely poor and it gurgled so badly that it sounded like an aquarium. To be honest, this wasn’t unexpected. The misalignment of the airway between the mortise was so extreme that it couldn’t help but create a lot of turbulence, and therefore a lot of moisture. I couldn’t let that stand. So, I took the stem back to the worktable to tweak it a little.

I clamped the stem in the vice and used a Dremel to cut off the stepped end of the tenon. You can see the piece I removed lying on top of the vice in the photo below.Champ16 After that, I sanded the face of the tenon smooth and level, and then used a tapered abrasive point in the Dremel to begin funneling the airway. I kept the airway lubricated with mineral oil to prevent the friction from burning or melting the vulcanite. The abrasive point opened up the end of the airway to a 3/16” diameter but transitioned it down to the 1/8” diameter of the original airway. Then, I used 240-grit and 320-grit sanding needles to make sure the transition was smooth. Finally, I used a round abrasive point to create a ¼” diameter chamfer on the tenon face around the airway and the sanding needles again to round off any of the sharp edges. In the picture below, the left image shows the step that I removed balanced on top of the stem for comparison; the right image shows the completed tenon after being reworked.Champ17 I was eager to try it out and the results were amazing for such a simple modification. The bowl smoked all the way to the bottom with no gurgle at all; even when I intentionally tried to build up steam by puffing rapidly (it was for the sake of science). After the pipe had cooled, I removed the stem and found a lot of moisture in the mortise. So, the extra space below the airway was acting like the sump/well of a system pipe. Very cool. The pipe was once again looking good and smoking well. My second exam was in the bag.

Spiffing up a KBB Blue Line Bakelite Poker 1908-1914


Blog by Troy Wilburn

Here is my old KBB I got from EBay after some light cleaning and buffing. I had found out these were quite rare and was lucky to win the bid on it.

I was thinking after some initial research that these pipes were from around 1910 – early 1920s. Seems it’s a little older than I thought. I got this info from a Kaywoodie and early KBB collector who has had several Blue Lines.

“Your pipe is made by Kaufman Brothers and Bondy, or KB&B, which later (1915) created the Kaywoodie line we all know. But this pipe is Pre-Kaywoodie, as they were making pipes under the KB&B branding from about 1900 to 1914. Bakelite was invented in 1907, so this pipe was likely made from 1908 to 1914, as the Bakelite was quite the technological wonder of the time, and was used in many products (still in use today). These “Blue Line Bakelite” pipes are rare pieces, seldom seen.”

All Blue Lines came with a case but sadly the one for this one is missing. Most pics I’ve seen so far of the Blue Lines, the metal banding has stampings of Sterling Silver and KBB. Mine has none and I don’t believe it’s silver (I think nickel as I could not get all the discoloration from it). Mine may be a lower priced model.

The pipe as it arrived.Blue1 The pipe was in remarkable shape for its age. It was not caked up and the pipe was nice and clean, ready to smoke. All I did was go over it very lightly with some 2500 grit and 000 steel wool over the banding lightly. Then I applied some light buffing and a new coat of wax. The pipe was too original to mess with much .The stem has a gorgeous red color that was bought out with a little brown and then white Tripoli before waxing.Blue2

Blue3

Blue4

Blue5

Blue6

Blue7 The stampings are very nice for a 100 year old pipe. As you can see it looks like it was repaired once. The repair looks quite old in person and don’t think it was done anytime recently.Blue8

Blue9 It’s a smaller poker. It is in between the size of a Medico Poker and a Dr.Grabow 85 Poker. It’s around 4 11/16 inch long with a 1 1/2 tall bowl. I will probably dedicate it to my new favorite flake tobacco.Blue10

Reworking one of my own


Blog by Steve Laug

I don’t remember when I carved this pipe I do know it was one of the first I carved. It was a kit and the plateau was on the bottom of the bowl. I did the work with a Dremel and sanding drum. The stem was the one that came in the kit and I just used it. Over the years, probably in the neighbourhood of ten years, I smoked it infrequently but enough to know that it delivered a decent smoke. Looking at it the other day I noticed that it had a thin cake in the bowl so I obviously smoked it more than I remember. When I took it out of the rack the fit of the stem to the shank irritated me. It was a sloppy fit and slightly rounded at the shoulders. The diameter of the shank and the stem were not matched. On and on went the list of imperfections that stood out to me when I looked at it. I love the shape of the bowl, my odd rustication on the bottom of the bowl and shank and the look and feel of the bowl in my hand. But the stem had to go.apple1

apple2

apple3

apple4 I had a little time on my hands so I went through my can of stems and found a stem that was thicker looking and about ½ inch shorter. I fit the tenon in the mortise and the fit against the end of the shank was tight and clean. Personally I liked the chubbier stem and the compact look it gave the pipe. To me it just seemed to work with this bowl. The stem was larger in diameter than the shank so it needed to be brought down to a clean transition between the two.apple5

apple6

apple7

apple8 I worked on the stem diameter with emery cloth and sandpaper taking off the excess material and adjusting the fit to the shank.apple9

apple10 When the fit was better I sanded the stem and the shank with medium and fine grit sanding sponges to minimize the scratches.apple11

apple12 Once I had the fit correct and the transition smooth I took the photo below. I needed to restain the shank when I was finished to match the bowl.apple13 I used a light brown stain pen to match the stain on the bowl. I stained it and hand buffed it out to blend it in. Once the stain was buffed I set up my heat gun and heated the stem to adjust the bend slightly. In the original stem there was an abrupt down turn that did not work for me. I heated the stem and rebent it. Afterward I took the next series of photos to show the state of the pipe after the rebend.apple14

apple15

apple16

apple17 With the stem bent the angle I wanted it was time to polish the stem. I sanded it with a fine grit sanding sponge and the used micromesh sanding pads to finish it. I wet sanded with 1500-2400 grit pads and then rubbed it down with Obsidian Oil. When the oil had been absorbed I dry sanded it with 3200-4000 grit pads. Each successive grit of pad raised more shine in the vulcanite. I rubbed it down again with oil and then continued dry sanding it with 6000-12,000 grit pads. When I finished I rubbed it down a final time with the oil and let it dry.apple18

apple19

apple20 When it dried I took it to the buffer and buffed it with Blue Diamond Plastic polish and then gave the pipe multiple coats of carnauba wax. I finished by buffing it with a clean flannel buff to give it a finished shine. This one is going as a birthday present to a friend of mine. I gave him a choice of pipes that I had made and he chose this one. It is a great smoking pipe and I think he will enjoy it.apple21

apple22

apple23

apple24

apple25

apple26 It seems that the work never seems to be finished on the pipes I have carved. I always seem to see one more adjustment, one more tweak to get it just right. Ah well, at least I am done with this one. Thanks for looking.

Restoring a 1967 Dunhill Oom Paul 591


Blog by Steve Laug

The next one to my work table was a Dunhill Oom Paul 591. It was a Dunhill shape that I had not seen before. The stamping on the left side showed the shape number 591 next to DUNHILL over BRUYERE. On the right side of the shank it was stamped Made in England7 and next to that Circle 4A designating the size of the pipe. From several sources I was able to ascertain that the pipe was made in 1967. The finish on this one was in good shape. There was a light build up on the top of the rim and there was an uneven cake in the bowl. There were some small dents in the sides of the bowl but not enough for me to steam them out and risk harming the original finish. The stem would not fit down into the shank. In the pictures below you can see how far it would go into the mortise. I removed the stem and the mortise was dirty and black. The stem was oxidized and had some minimal tooth chatter on the underside near the button. There was also a shallow tooth mark on the underside amidst the chatter.Dun1

Dun2

Dun3

Dun4 I cleaned out the shank with pipe cleaners, cotton swabs and isopropyl alcohol until the swabs came out clean. I cleaned the airway to the bowl and gave the bowl a light reaming to remove the uneven build up. I scrubbed down the rim and removed the light build up that was there and polished the bowl with carnauba on the buffer.Dun5 I lightly sanded the stem with a medium grit sanding sponge to loosen the oxidation and with 220 grit sandpaper to remove the tooth chatter and small dent.Dun6

Dun7

Dun8

Dun9 I mixed up a batch of oxyclean and put the stem in the bath to soak overnight.Dun10 In the morning I took the lid off the container and removed the stem. The water had turned amber coloured. The oxidation had risen to the surface of the stem and I rubbed most of it off with a coarse cloth. I cleaned out the stem with alcohol and pipe cleaners and used the dental pick to clean out the slot on the stem.Dun11 I sanded it with a medium and a fine grit sanding sponge to remove the softened oxidation.Dun12 Then it was time to polish it with the micromesh sanding pads. I wet sanded with 1500-2400 grit pads and dry sanded with 3200-12,000 grit pads. I rubbed the stem down with Obsidian Oil between each set of three pads. I buffed the stem with red Tripoli after I finished with the 2400 grit pad and with White Diamond after the 12,000 grit pad.Dun13

Dun14

Dun15 There were still some scratches that showed up in the bright light of the flash so I worked it over again with the last set of pads and then buffed it with Blue Diamond Plastic Polish on the wheel. I finished by giving the bowl and stem multiple coats of carnauba wax and then buffing it with a clean, soft flannel buffing pad to raise the shine. The finished pipe is shown below. Somehow in the photos the fluorescent lights lend the photo a yellow tint that I normally do not get. The stem is absolutely shiny and black and the bowl is a rich oxblood red. It is ready to be smoked and enjoyed.Dun16

Dun17

Dun18

Dun19

Dun20

Dun21

Dun22 Thanks for looking.

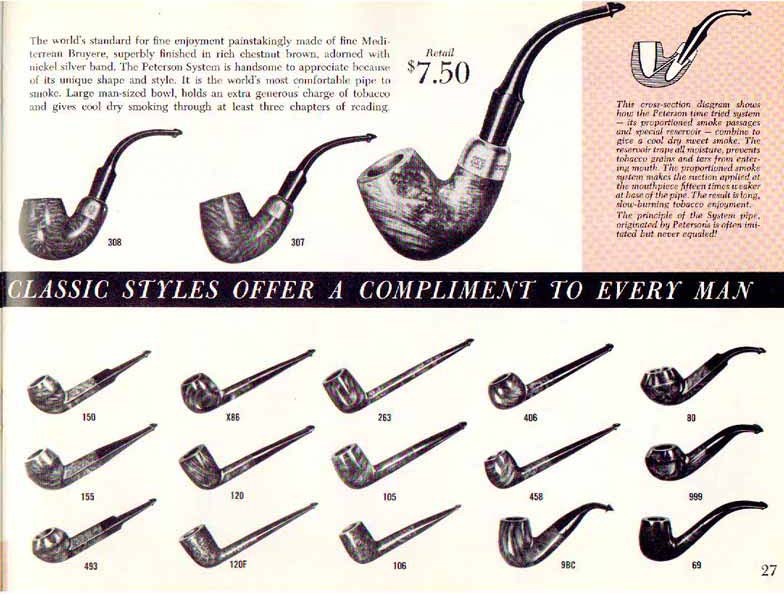
Peterson 9BC “Kapruf” (Pre ’59)


This isn’t a restoration, but I hope you will indulge my fascination with the Peterson 9BC shape.

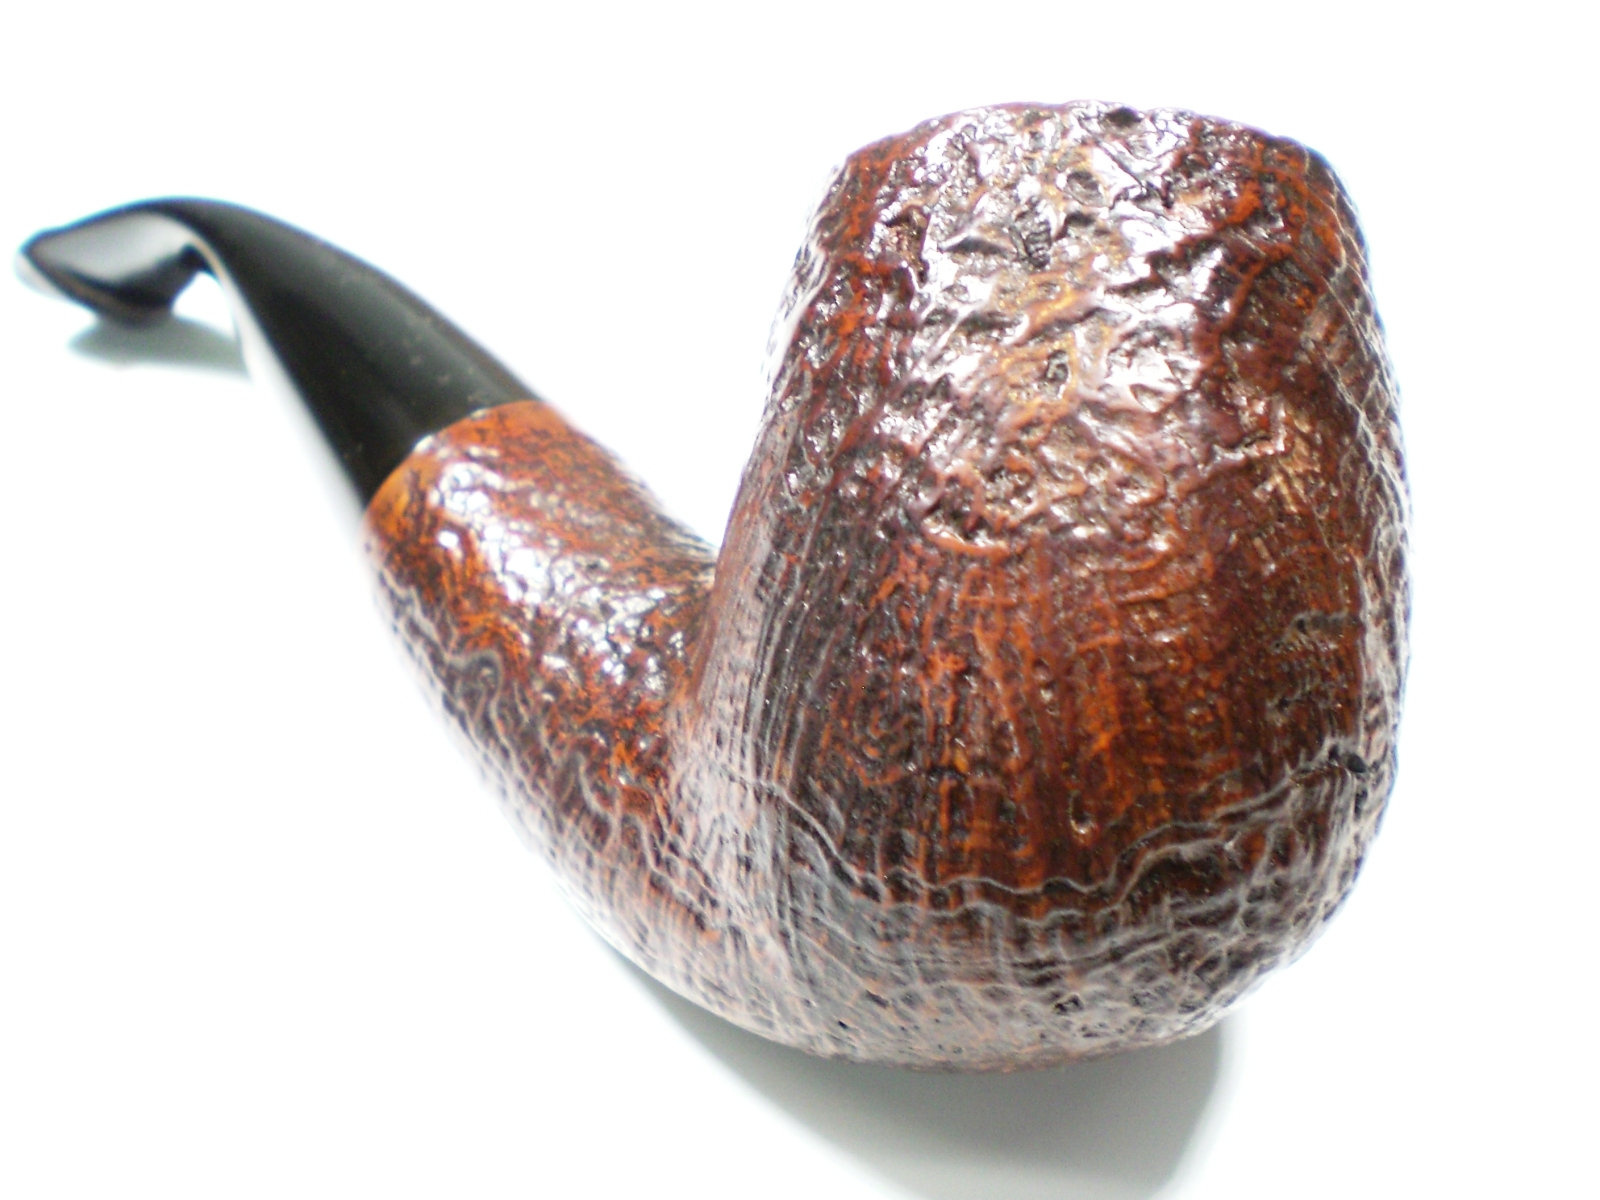
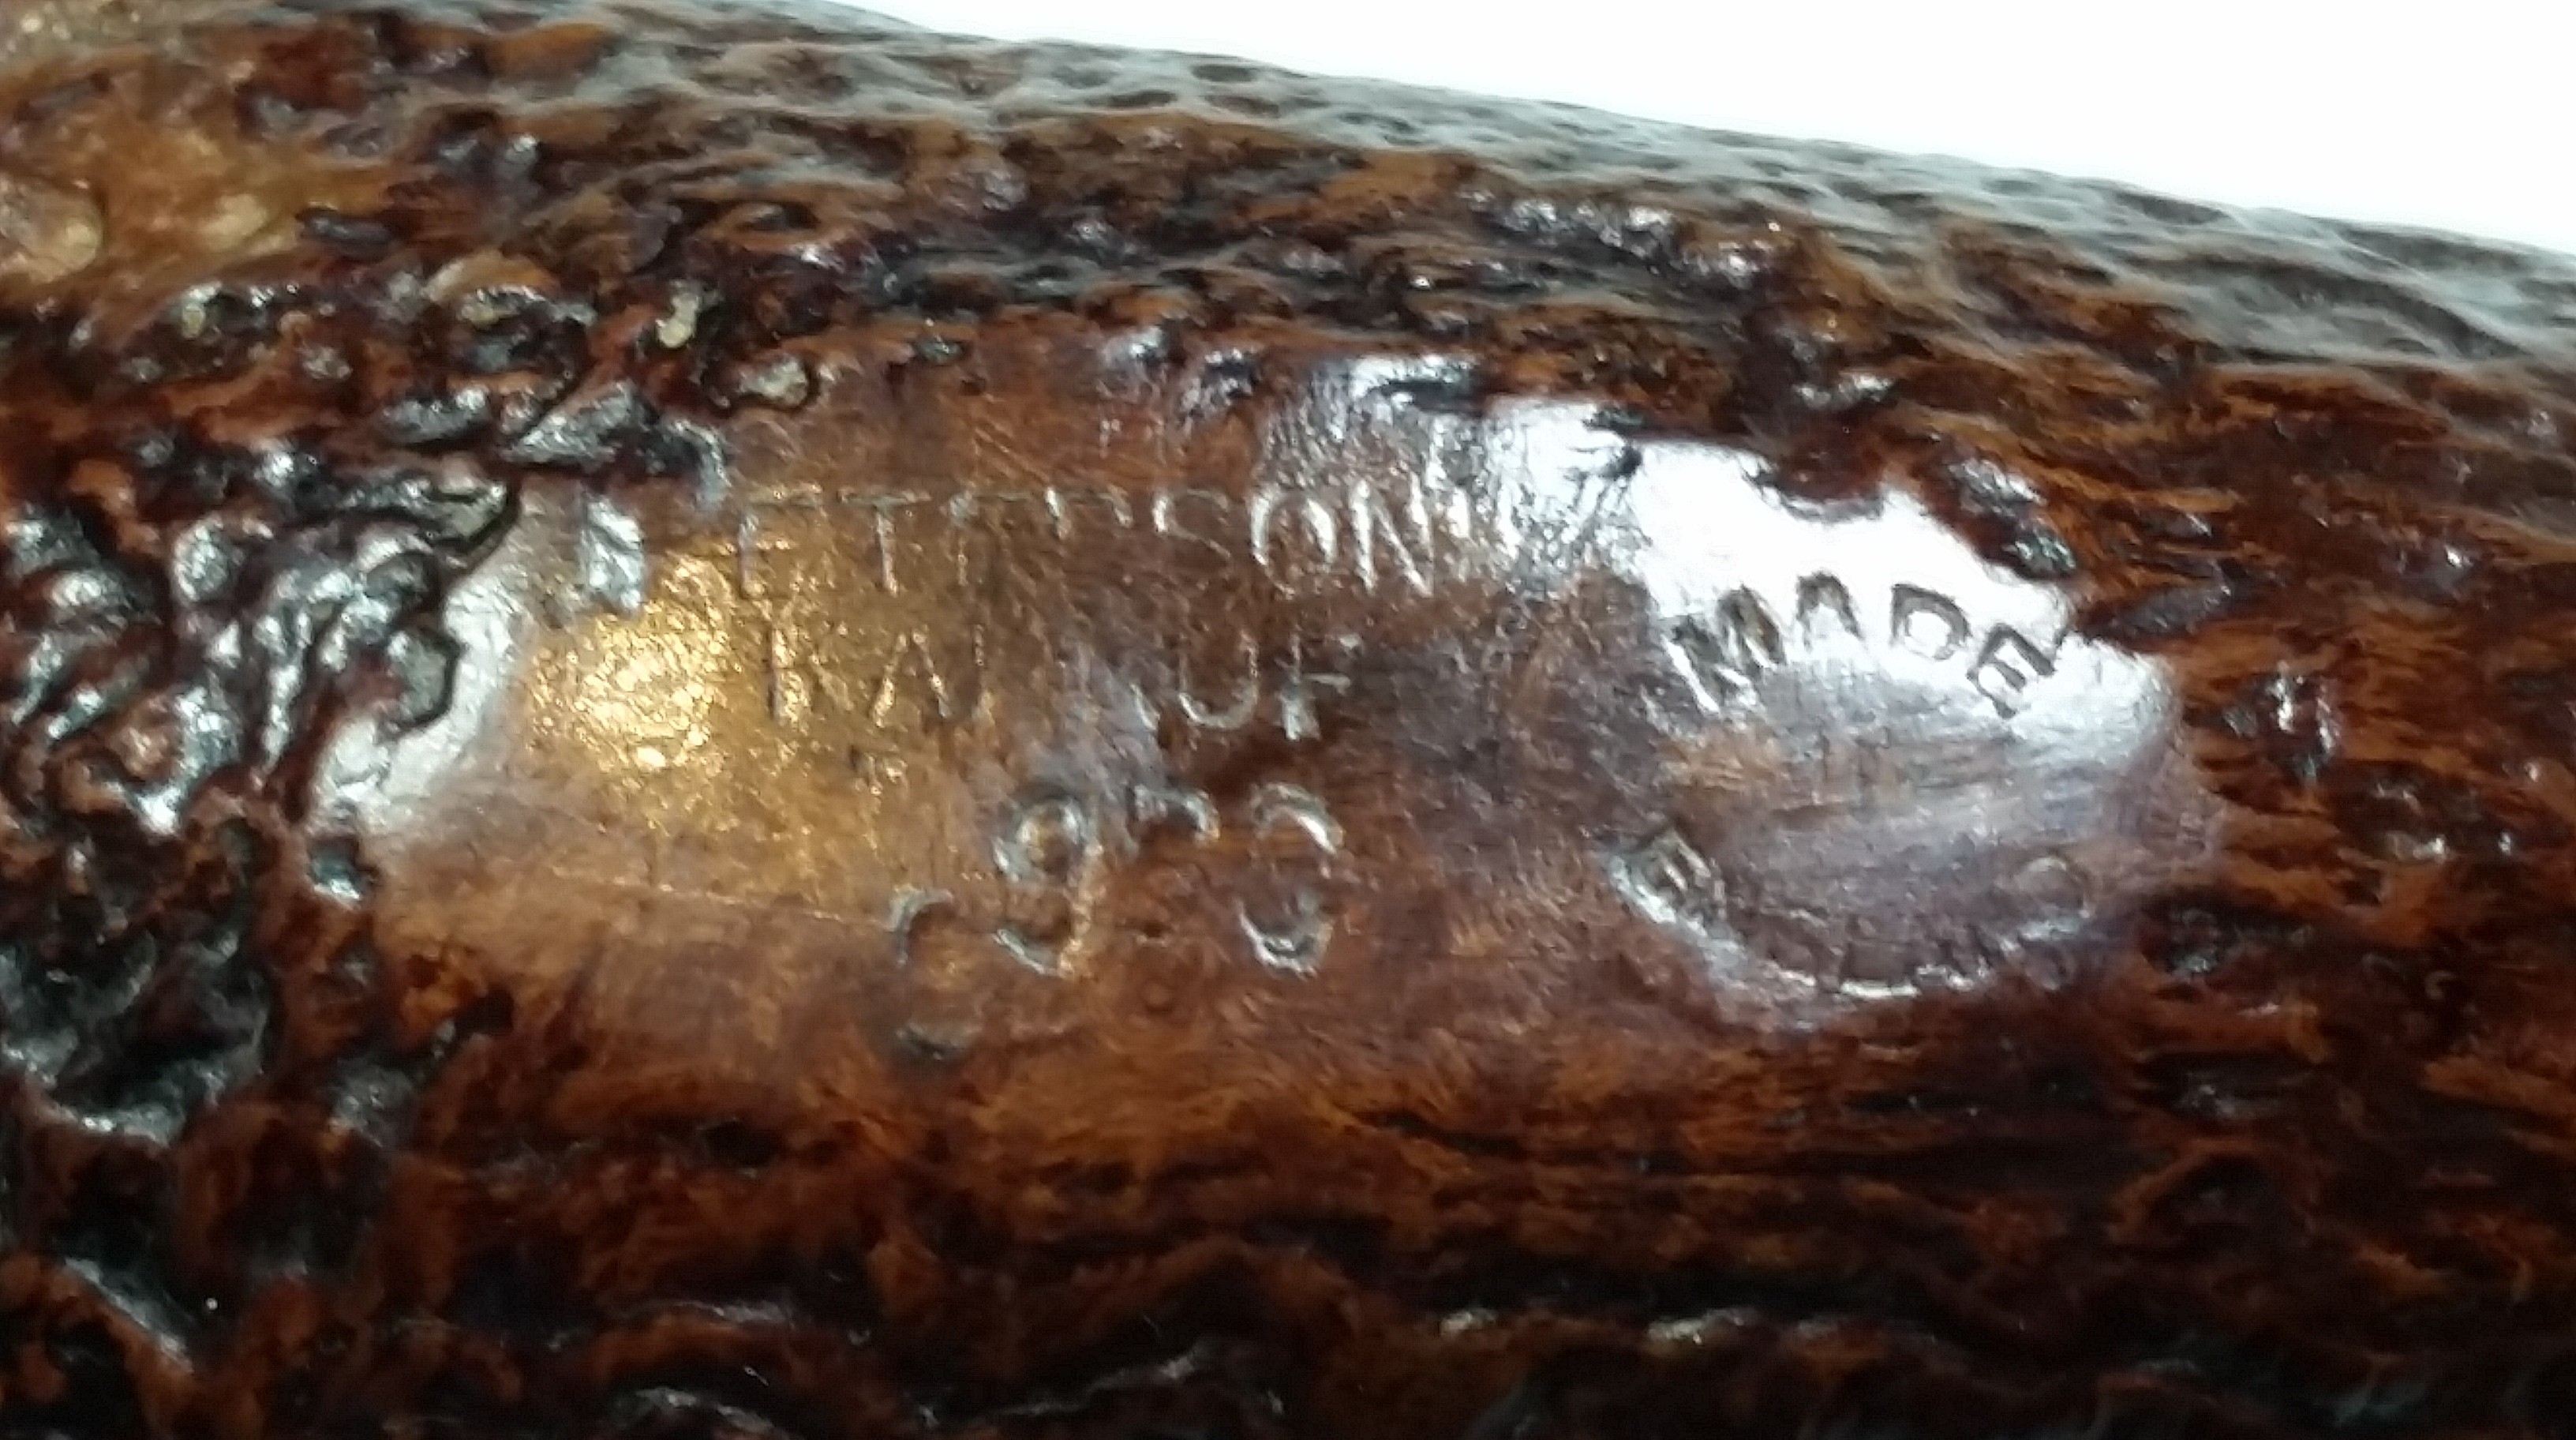
I enjoy collecting different finishes for my preferred shape and recently, the Peterson 9BC has caught my attention as of late. I found this “Kapruf” finish pipe on Ebay (via infamous seller Shinypipes…) and made an offer that was accepted. 9BC shapes don’t show up that often, but curiously, the seller had not identified the model in the ad, which was to my advantage. They had the pipe incorrectly listed as a “Pre-Republic, 1940’s-1950 era pipe. The stamping is worn but completely legible with the naked eye. The round “Made in England” stamp was reportedly used up to 1959, at least by the Pipepedia article.

I didn’t know much about the Kapruf line. It is described in a 1960’s catalog as:

Quote :
A fine sandblast finish distinguishes this range of light natural grained pipes with their distinctive red colouring. Very popular with sportsmen.

The second page shows the 9BC shape.

Peterson_Page- Rogers Catalog 1957

1965-Peterson-Catalogue - Kapruf Line

This one has a little grain and some flaws that would have otherwise been fills on a smooth pipe. It has plenty of character, that is for sure.

Peterson_9BC_Kapruf_Gallery

Peterson_9BC_Kapruf (2)

Peterson_9BC_Kapruf (4)

Peterson_9BC_Kapruf (3)

Peterson_9BC_Kapruf (1)

Peterson_9BC_Kapruf_Nomenclature

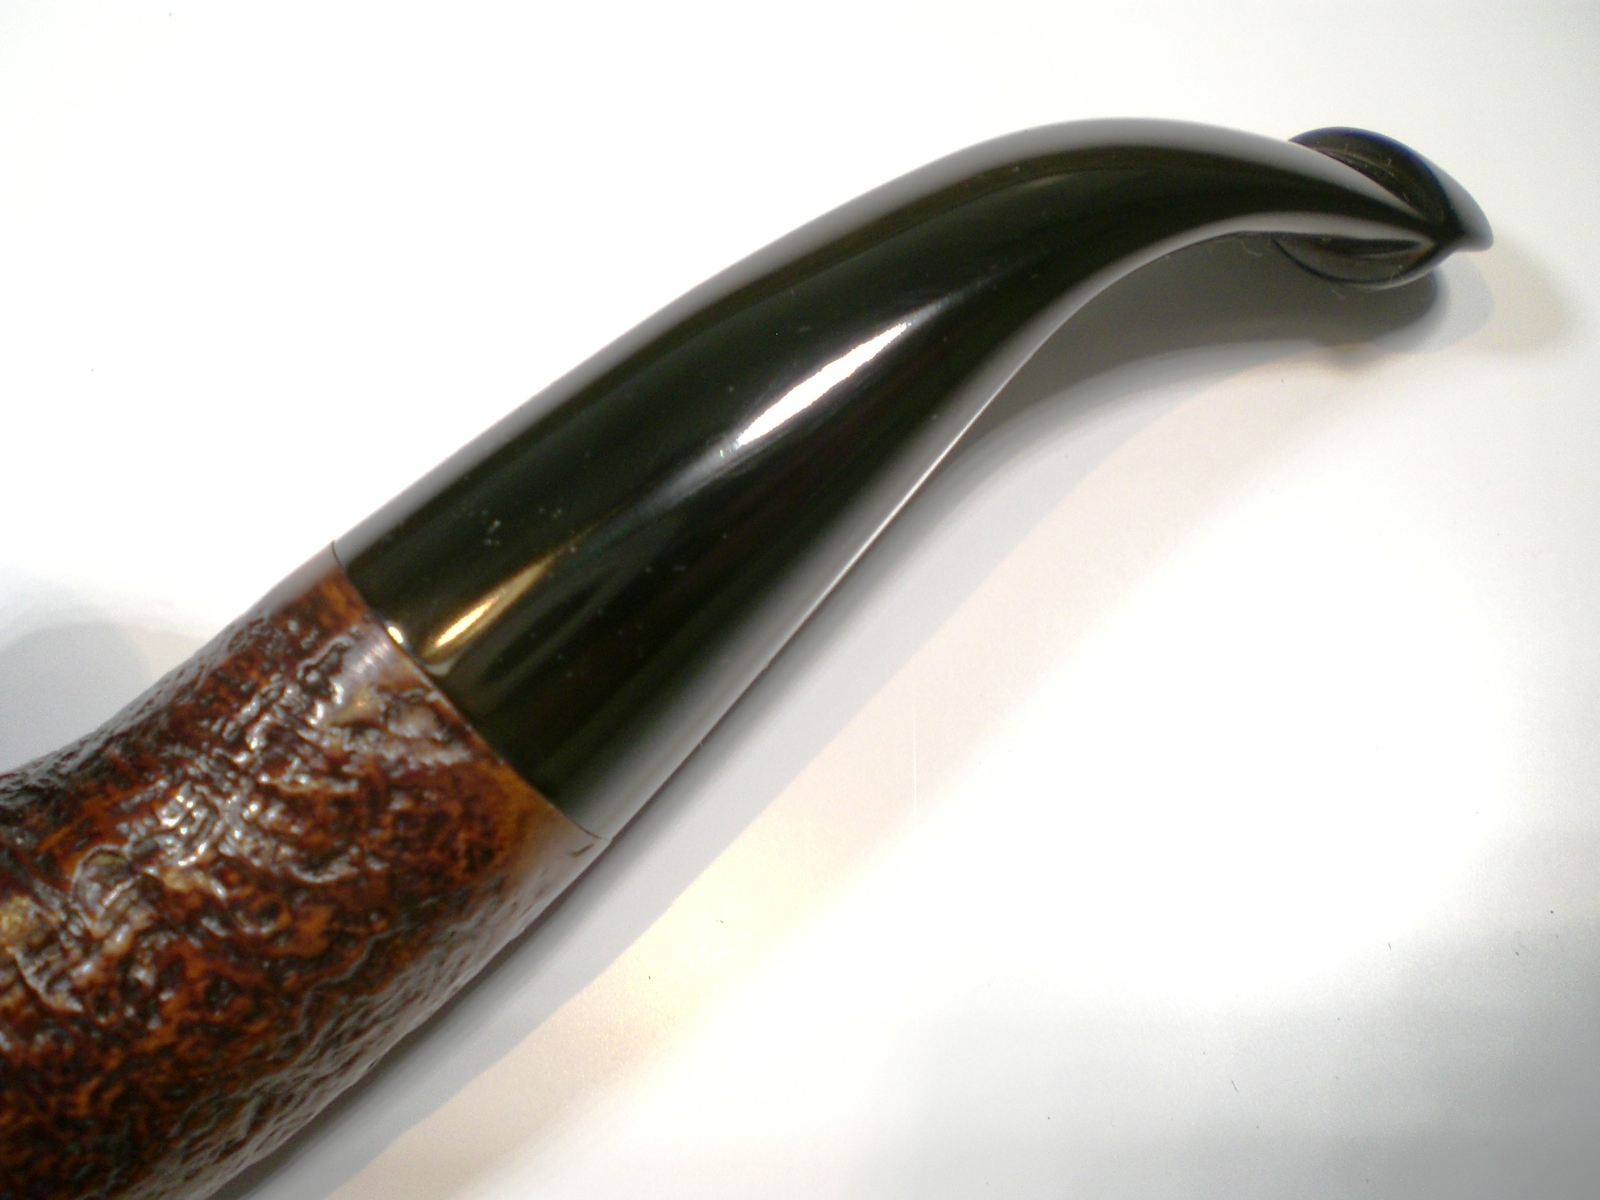
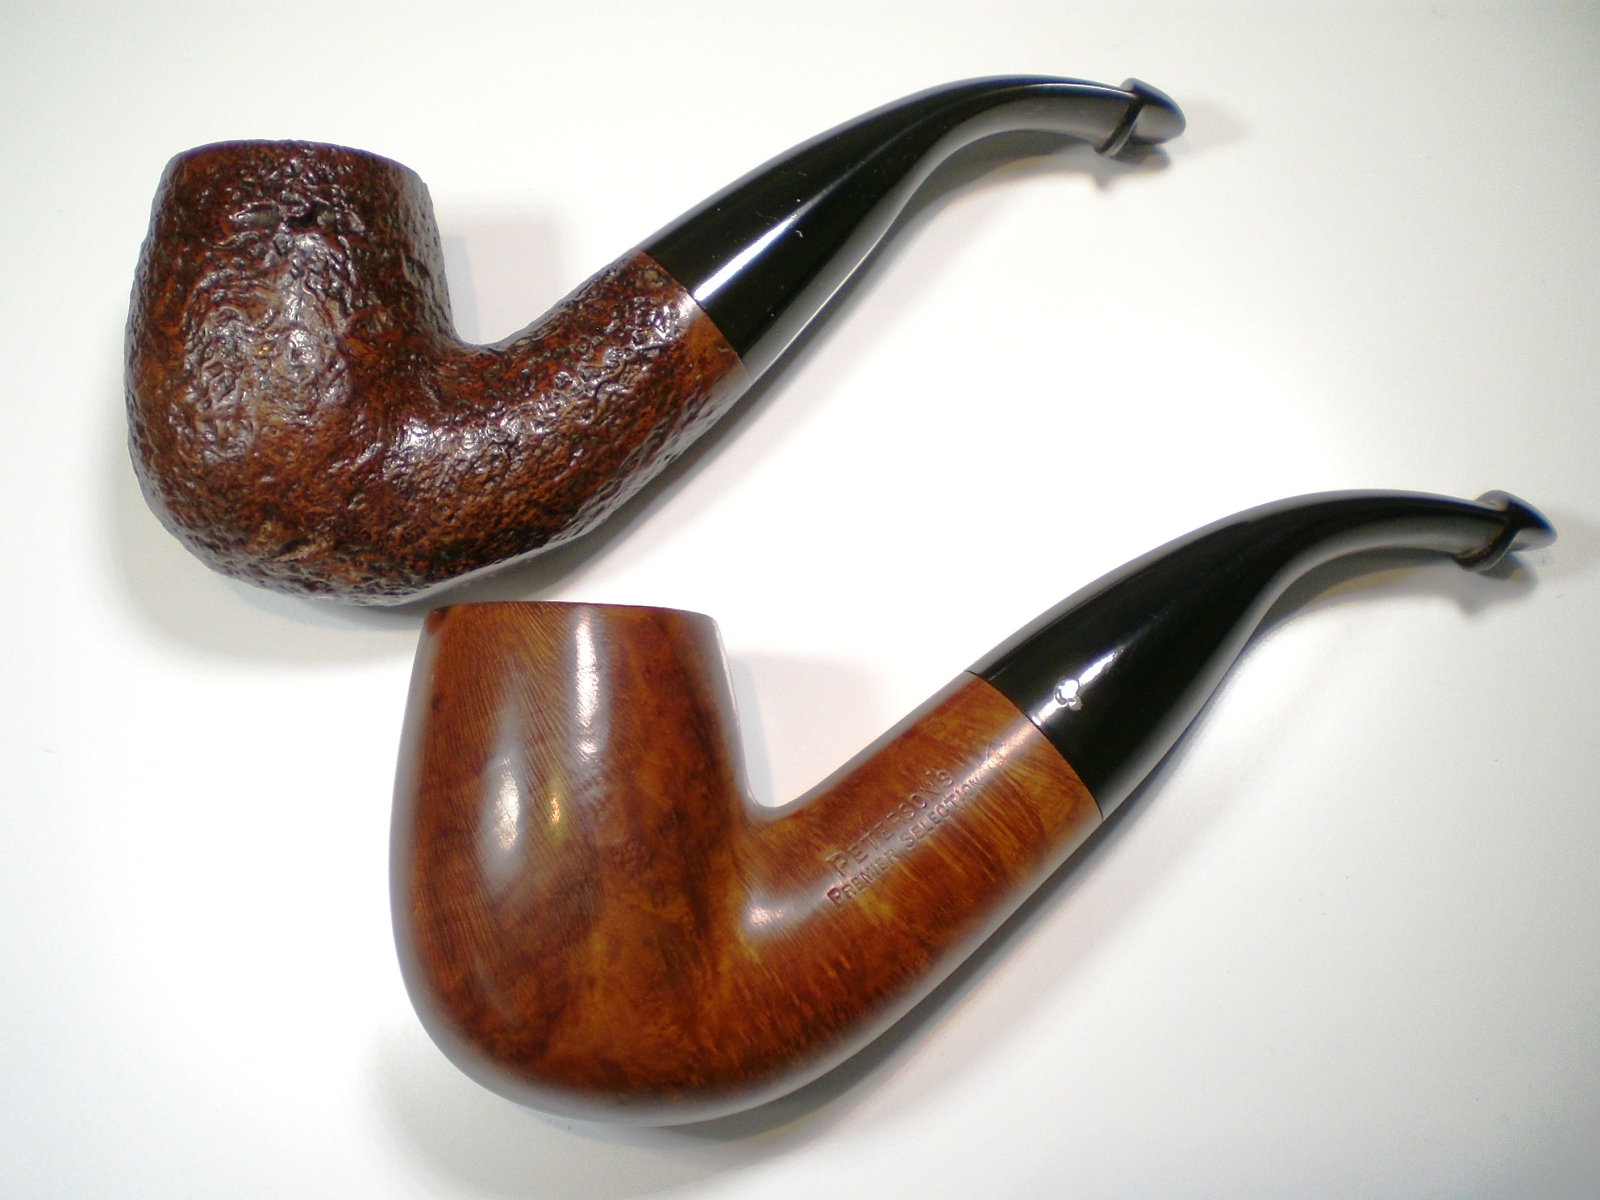
Compared with my other 9BC (Premiere Selection), this one is incrementally smaller in all dimensions and 67 grams vs. 72 for the smooth pipe. The P on the stem is long gone (as were most I’ve come across, save my smooth) but the robust p-lip button has the same profile as the smooth pipe.

Peterson_9BC_Kapruf (5)

Restoring an Ascorti Business KS Bent Brandy with a broken stem


Blog by Steve Laug

The next pipe that I have on my work table was an Ardor Business KS Bent Brandy with severe damage to the end of the stem. The bowl still had some unsmoked tobacco in the bottom half and the cake was crumbly and concentrated around the middle of the bowl. The top portion of the bowl had a light cake. The bottom portion was fairly clean. The shank and stem were dirty with a lot of black tars and oils. The mortise was black and the airway from the bowl entered the mortise quite high. Part of it was actually above the mortise – very different angle of drilling. The tenon was flared on the end so that the smoke was funneled into the stem. The finish was in excellent shape – the rustication had a reddish top coat over a dark brown/black undercoat. Even the rim was clean and undamaged.As1

As2

As3

As4 The stem has the same stepped look as the Caminetto Business pipe that I just completed. The saddle portion of the stem was flawless. The top of the stem and the underside were damaged near the button. There was a large chunk of the Lucite missing on the underside and there were some deep tooth marks on the top side. The button itself was gnawed on as well on the top side. I had some choices to make with regard to this stem. Should I try a patch on the large missing chunk from the stem or should I cut of the stem and reshape a new button? That was the big question on this stem. I took the next two close-up photos to give a clear idea of how badly the stem was damaged.As5

As6 I measured the length and took pictures to get a feel for the look of the pipe with the present stem length and with the shortened length. When I had a good picture in my mind of how it would look I used my Dremel and sanding drum to remove the damaged portion of the stem and cut it back to where the undamaged stem material would allow me to shape a new button and slot.As8

As9 I took the next photos of the pipe with the shortened stem to see what it looked like with 1/2 of an inch cut off the length.As10

As11 I took the next two photos of the cut off end to show how I had worked the Dremel to give it a straight edge. Once I took it back to the work table I would work on cutting in the edge of the button and start giving it shape.As12

As13 I used some black super glue to fill in the deep tooth marks that remained on the stem and also ran a small band of super glue along the area where the button would eventually be cut.As14

As15 When the glue dried I used a flat blade needle file to cut the sharp edge of the button on the end of the cut back stem.As16

As17 I used a knife edged needle file to carve back the thickness of the stem to the newly cut straight edge. I wanted a taper from the bend back toward the sharp edge. It takes some work to carve back Lucite, as it is significantly harder than vulcanite.As18

As19 As I examined the end of the stem I realised that I did not have enough thickness to the material on the top and bottom of the airway. It would not allow me to go deep enough to have a good edge on the button. I decided to build it up and created the button thickness I needed. I used a mix of activated charcoal dust mixed with black super glue to make a putty like substance that would stick to the stem.As20 Using a suggestion from Andrew Selking, I wrapped the end of the stem with scotch tape to create a straight edge to work against when I put the putty on the stem. I then gave the stem a light coat of black super glue and then used the dental pick to press the charcoal and super glue mix on the stem end against the scotch tape. I used a flat dental trowel to flatten the material in place and save some sanding for myself.As21 When the repair was hard to the touch I removed the scotch tape and found that I had a fairly thick button built up on the stem end and that it had a pretty sharp edge to it.As22

As23 I sanded the newly built button with 220 grit sandpaper to begin shaping it. I would have to use the needle files to sharpen the edge of the button and then sand the new button to shape it more like the one on the Caminetto stem that I had worked on previously. I was using it as the pattern for the shape and look of this one.As24

As25 When I had it shaped as much as I could without damaging it I set it aside to cure over night and then worked on the bowl. I used the dental pick to remove the remaining third of a bowl of tobacco that was in the pipe.As26 Once that was gone the bowl needed a good reaming. The shape and detail of the cake in the bowl can be seen in the next photo.As27 I used the PipNet Reamer with the smallest cutting head to start reaming the bowl and worked my way up to the third cutting head which was the closest I had to the diameter of the bowl. It was a deep bowl and took time to remove all of the cake. The middle portion of the bowl had a hard cake. I worked it with the second cutting head until I finally was able to cut through it. I used the third head to work the cake back to bare briar. I also used a sharp pen knife to clean out the area in the bottom third of the bowl where the cutting head left behind a ridge of cake.As28

As29 The next day I did not get to work on the stem as it was a heavy day at work and we had meetings into the late evening so the stem sat for two days. When I finally got the time to work on it I decided to start with shaping the slot and the button from the end view. I started by sanding the end of the stem with 220 grit sandpaper to smooth out the end and give me a flat canvas for cutting the slot with needle files.As30 I began to work on the airway with an oval shaped needle file to begin to open the airway and create a flare in the slot.As31 I also used and fatter oval needle file and a round file to further open the lot and the flare in the end. It took a lot of file work to get it to the place that is shown below. You can begin to see the Y shaped slot taking form. There is still a lot of filing and sanding to do at this point.As32 I worked on the slot area with the needle files for probably 1 hour at this point and the photo below shows the result of the methodical filing and shaping. It is coming along but needs to be more open and the top and bottom edges of the slot need to be smoothed out around the air hole.As33 I folded a piece of 220 grit sandpaper when I was able to insert it in the newly cut slot and worked on the shape and smoothness of the Y. I also sanded the face of the button to remove the scratches and marks that were there. The second photo below shows the shape of the slot and the button. It is very close to the one I was copying on the Caminetto.As34

As35 I finished the end of the stem and the slot with micromesh sanding pads. I wet sanded with 1500-2400 grit pads and dry sanded with 3200-12,000 grit pads. I buffed the end of the stem with White Diamond. The finished slot is shown below.As36 After I finished shaping the button and the slot from the end view it was time to work on the top and bottom edges and the overall look of the new button from both points of view. I sanded them with 220 grit sandpaper to shape and flatten them and then used a flat needle file to sharpen the edges on both sides. I really wanted the new button to look seamlessly part of the stem. It took a bit of work to sculpt it to the right shape. I then sanded it with a medium and a fine grit sanding sponge. When I was finished with the shaping and sanding I began to work on it with micromesh sanding pads. I wet sanded with 1500-2400 grit pads concentrating on the flat surfaces and the sharp edges first and finishing with the end of the button and slot.As37 The wet sanding revealed more scratches and a bit more shaping that was needed to the edge of the button so I worked it over again with the medium and fine grit sanding sponges before going back and repeating the wet sanding with the first three grits of micromesh pads. I rubbed the stem down with some Obsidian Oil and when it dried, I dry sanded it with 3200-4000 grit micromesh.As38 I dry sanded with the last three grits of micromesh – 6000, 8000 and 12,000 grit pads. I rubbed the stem down with Obsidian Oil and let it dry before taking it to the buffer.As39 I buffed the stem with Blue Diamond plastic polish on the wheel and then gave the stem several coats of carnauba wax. I finished by buffing it with a soft, clean flannel buff to raise the shine. I gave the bowl a light buff with the carnauba and also with the soft flannel buff. The finished pipe and reshaped button is shown in the photos below.As40

As41

As42

As43

As46

As47

As48 Thanks for looking.

Midterm Exam #1: Repairing a Cracked Bowl on a Pre-1956 Medico Billiard


Blog by Anthony Cook

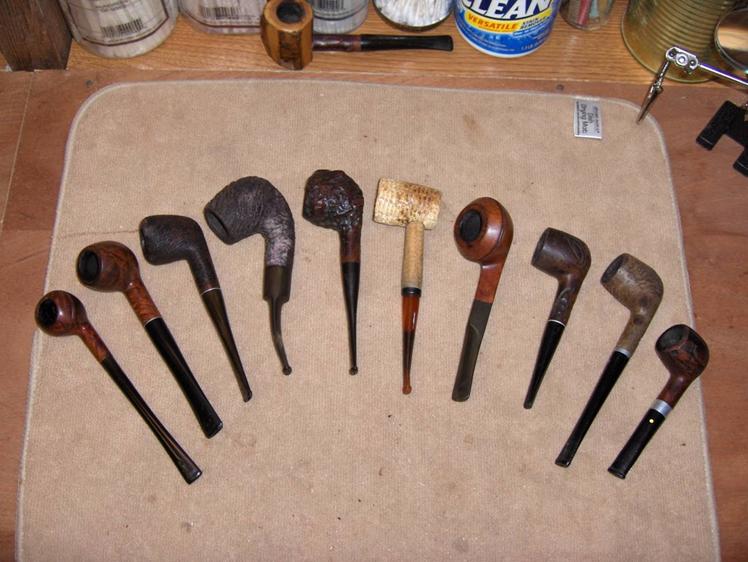
Anthony1 The photo above represents the start of my first semester at the University of Reborn Pipes (by the way, Steve, we need T-shirts, a mascot, and a fight song). It was taken several months ago and it shows the first batch of pipes that I had collected for restoration practice. It’s a motley crew to be sure, but I have a special fondness for each of them. You never forget your first, as they say.

I’ve completed the restoration of the majority of these since the photo was taken (sadly, I failed the cob test, but it was rigged I tell you), but four of them were placed back into the box after cleaning and have remained there. Those four had issues that required either tools, materials, or experience that I just didn’t have at that point. Over time, other pipes attracted more of my attention and those remainders continued to linger in the dark and gather dust once again.

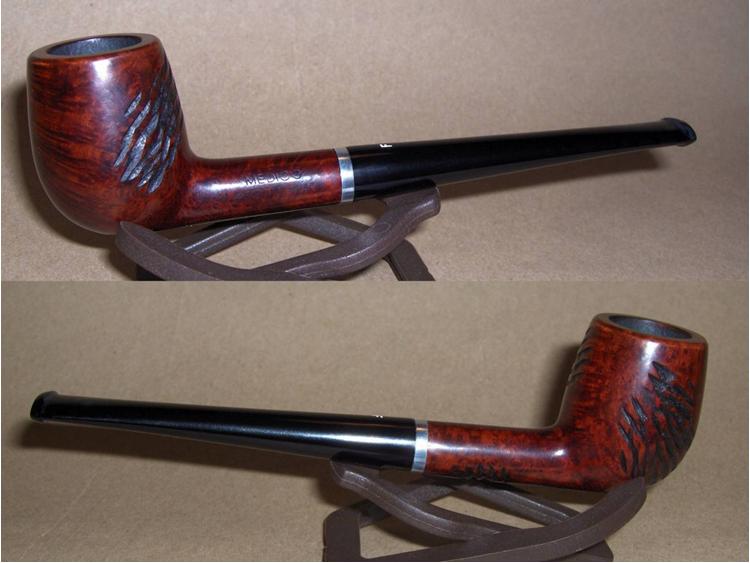
Now that I’ve acquired a few credit hours, I thought it might be time to drag them back out into the light; sort of as midterm exams to see if I’ve learned anything. The pipe that is second from the right in the group photo above is the one that I selected for my first exam.Anthony2 It’s an unnamed Medico billiard. The stamping on the shank reads simply “MEDICO” over “IMPORTED BRIAR” and the stem bears the “F” stamp found on some older Medicos. I learned from Dave Whitney, author of Old Briar, that the “F” stamp was probably discontinued in 1955, which gave me some idea of the pipe’s age.
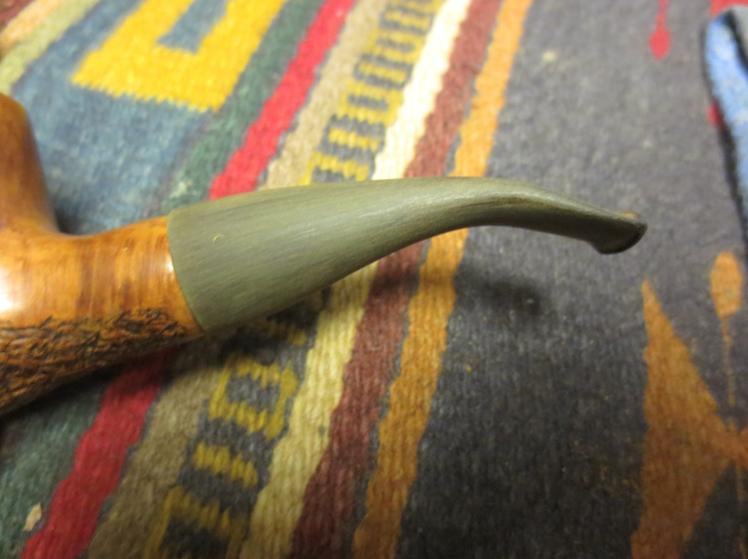
The main reason that this one was shuffled back into the box was because of the extensive damage to the bowl. There were large fills within the carved rustication on the right side and several cracks had developed in the area both outside and inside the bowl. I discovered during cleaning that at least one of them penetrated completely into the chamber.

Below, you can see more of the original pictures that I took of the pipe shortly after it arrived. I had not done anything with it other than ream the bowl at the time these photos were taken.Anthony3

Anthony4

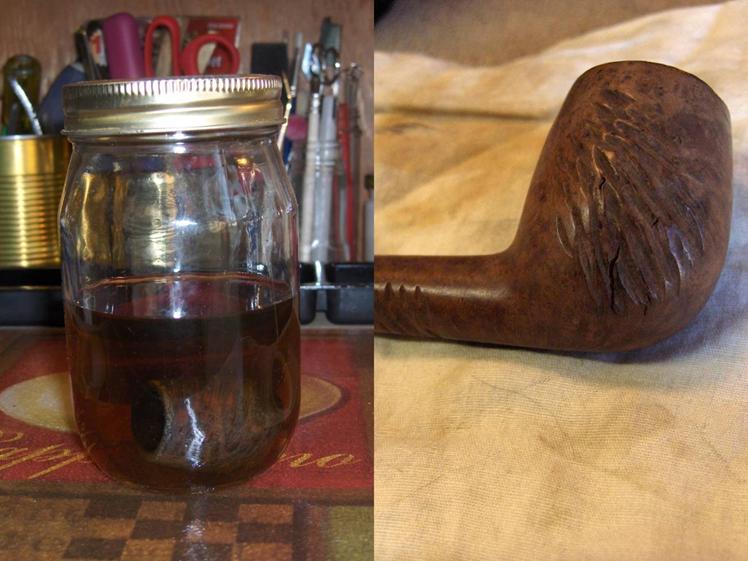
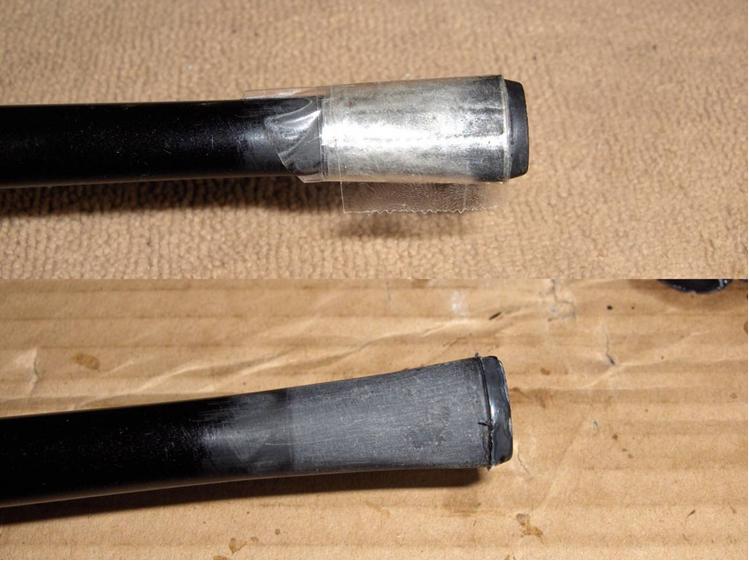
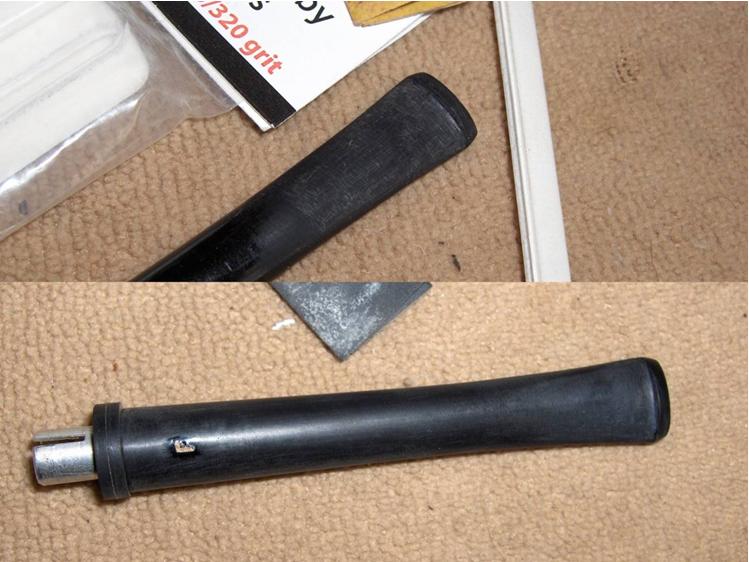
Anthony5 As I mentioned, I had already cleaned the internals of the pipe before dropping it back in the box. So, I started work by dropping the stummel into a jar of alcohol to soften the lacquer finish. The metal ferrule at the end of the shank was loose enough to fall off. So, it was removed it and set aside. After a couple of hours, I removed the stummel from the bath and wiped it down with a cotton cloth. Then, I used acetone and #0000 steel wool to remove the lacquer coating. I also picked out the pinkish-orange putty from the fills, and then used the pick to scrape any loose or charred wood from the cracks.Anthony6 A lot of scratches and gouges were revealed once the rim was clean. So, I set up my topping surface and lightly sanded the majority of the blemishes away using 220-grit and 320-grit sandpaper.Anthony7 I mixed together powdered pumice, activated charcoal, and sodium silicate to make a bowl patch. After protecting the airway with a pipe cleaner, I applied a small amount of the patch mix directly to the cracks with a flat toothpick and firmly tamped to push it into the cracks. Then, I used the scoop on my pipe tool to apply a thin layer across the entire area for protection.Anthony8 Next, I addressed the cracks and pits on the outside of the bowl by filling them with a few layers of briar dust and CA glue. I applied the glue with the end of a toothpick to avoid getting glue into the carved areas as much as I could. After the patches had dried, I sanded them down with 220-grit and 320-grit sandpaper. The same progression of grits was used to put a slight chamfer on the outside of the rim to remove the gouges that remained there. While I was working the bowl, I also sanded the chamber patch smooth with 400-grit paper.Anthony9 I sat the stummel aside for a time to pay some attention to the stem. There was a lot of chatter near the button and tooth dents on both sides of the stem. I applied black CA glue (medium thickness) to the dents with a toothpick and dripped a couple of drops of activator over it to set it up quickly. When it was completely dry, I sanded out the glue patch and leveled the chatter with 220-grit paper. The two photos below show the patch before and after rough sanding.Anthony10 While I was working, I decided that I didn’t like how worn and rounded the edge of the button had become. So, I decided to build a new, sharper edge. I wrapped clear packing tape around the stem to mask it just below the button. I built up the layers until it was the depth that I wanted my new button to be. Then, I used a flat toothpick to “paint” black CA glue (thick) along the edge of the mask and dripped activator over it when I was satisfied with the coverage. Before the glue could completely set up, I quickly peeled the tape away to reveal my new (although rough at this point) button edge.Anthony11 I used 220-grit paper and a sanding file to start shaping the button, and then 320-grit and 400-grit to refine the button shape and further blend the patch area. I also used 400-grit paper to remove the unsightly (to my eyes) molding seams along the sides of the stem. I placed a rubber washer over the tenon to preserve the sharp edge of the stem face and lightly sanded the entire stem with 600-grit and 1200-grit paper.Anthony12 The stem logo was in fair condition, but the paint was cracked and discolored. So, I filled it in using a grout pen and carefully sanded off the excess with 1200-grit paper. The grout paint left a slight, white residue smeared around the logo, but that would be removed with further polishing.Anthony13 Before polishing the stem, I rubbed it down with a drop of mineral oil, let it sit for a couple of minutes, and wiped it away. I hoped that this would moisturize the surface a bit and maybe prevent some of the nylon fiber splintering that always seemed to leave behind fine scratches in the finished stem. Then, I polished with micro-mesh pads 1500-grit to 12000-grit. I added a second and third drop of oil between 2400/3200 and 4000/6000 pads. I was pretty pleased with the results. The final stem was much more blemish-free that the previous nylon stems I’ve worked on.
With the stem finished up, I returned to the metal ferrule that I had set aside earlier. I gave it a once over with #0000 steel wool, and then polished it with Semichrome polishing paste and a soft cloth. I buffed of the excess with my Dremel and a small buffing wheel to give it a nice shine.Anthony14 Back to the stummel, I applied a 3:1 mixture of isopropyl alcohol and Fiebing’s black dye, hand-buffed the stummel with a soft rag to remove the excess, and then used 600-grit paper to remove the scratches and most of the dark stain except for inside of the carved rustications and what had set into the grain. I also made small adjustments to the width and angle of the rim chamfer with the sandpaper to make sure that it was even all the way around.

Next, I applied a 3:1 stain solution of isopropyl alcohol and Fiebing’s dark brown, buffed off the excess by hand, and lightly sanded the entire stummel with 1200-grit sandpaper to smooth the surface and soften the edges of the rim. Then, I applied a 3:1 solution of ox blood stained and hand buffed again.

Finally, I polished the stummel with micro-mesh pads 1500-2400 before applying a 4:1 mahogany dye mix. I wiped the stummel down with an alcohol dampened cloth until I achieved a dark copper color and finished up by polishing with the remaining micro-mesh grits.Anthony15 Then it was time to put all of the pieces back together and give the pipe the final touches. I reattached the ferrule to the stummel with some 5-minute epoxy. When that had set, I applied a bowl coating mix of sour cream and activated charcoal to help promote the cake formation in the repaired chamber. I let that dry for about two hours before reattaching the stem and taking the pipe to the buffer. I buffed the stummel and stem with White Diamond, and then I gave the pipe several coats of carnauba wax.

With all of that done, I turned in my first exam. I’m feeling pretty good about it, but I never really know how I’ve done on these things until the grades finally come back. I’m not going to worry about it now, though. I still need to cram for the second exam. It’s going to be a long night.Anthony16

Anthony17

Anthony18

Anthony19

Different methods for removing a ghost from a pipe


Blog by Steve Laug

The latest pipe I worked on came with a stubborn ghost so I was forced to use almost all the tools in my arsenal for removing the ghost. As I worked through the various procedures that I use I thought it would be helpful to spell out each method individually for ease of reference. Some of the pipes I work on are quite easy to clean and merely take pipe cleaners, cotton swabs and alcohol. Most though need a thorough reaming and cleaning. Other like the one in the photos below take a lot of elbow grease and a lot of different methods to remove the ghosts and deliver a clean smelling pipe.
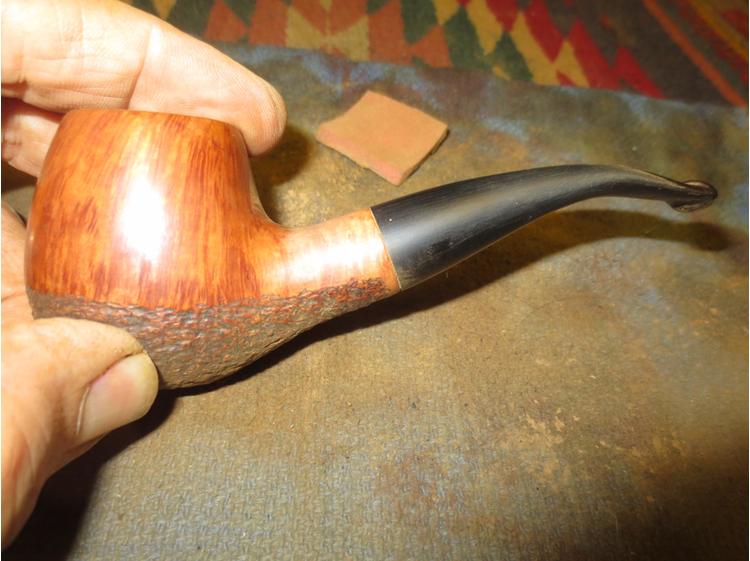
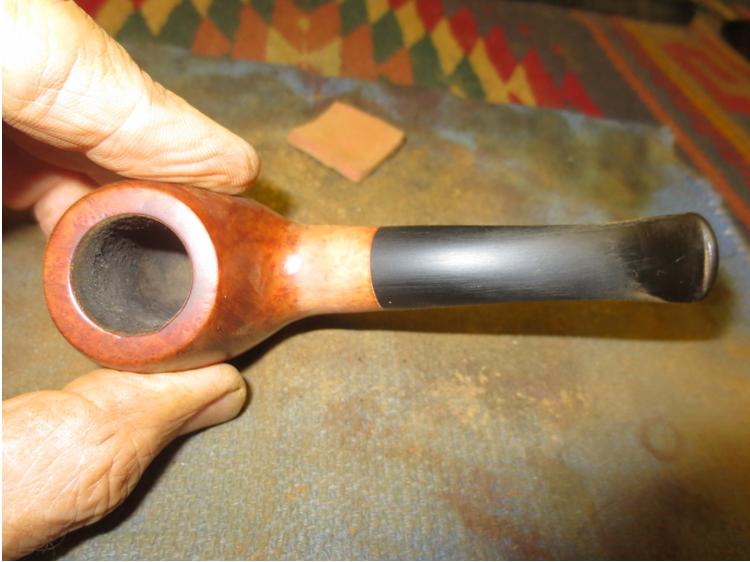
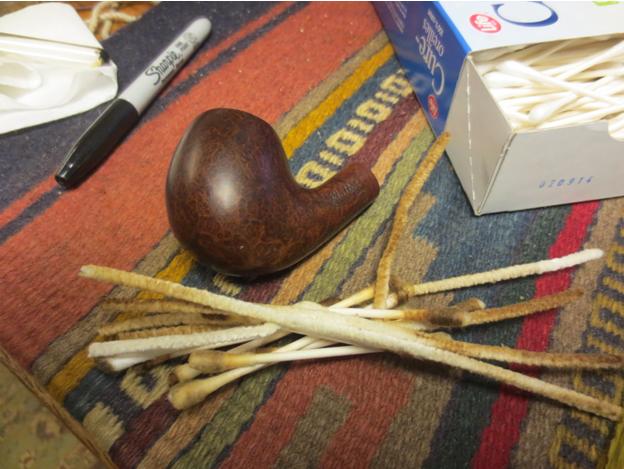
1. Thorough cleaning and reaming – the first method is by far the one I use the most. I have found that 9 times out of 10 I ream the pipe with a PipNet reamer with four different sized cutting heads. I generally start with the smallest head and work my way up to a cutting head that is close to the size of the bowl. I will finish any portion left behind with a sharp pen knife. I use cotton swabs, pipe cleaners and isopropyl alcohol to scrub out the shank and bowl as well as the stem. This method works well on many of the lightly smoked pipes that I clean out. I also find that those pipes used to smoke straight Virginia tobaccos or Virginia Perique tobaccos are the cleanest and generally do not have a ghost. The worst for tars and buildup are the pipes used for aromatics. Those smoked with English/Balkan blends are somewhere in between.Cam8

Cam9

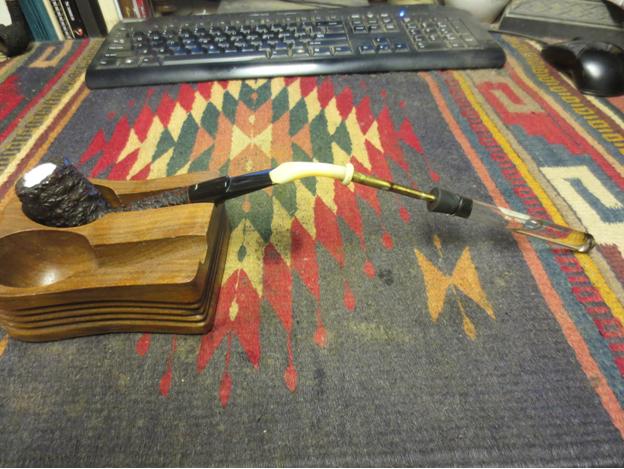
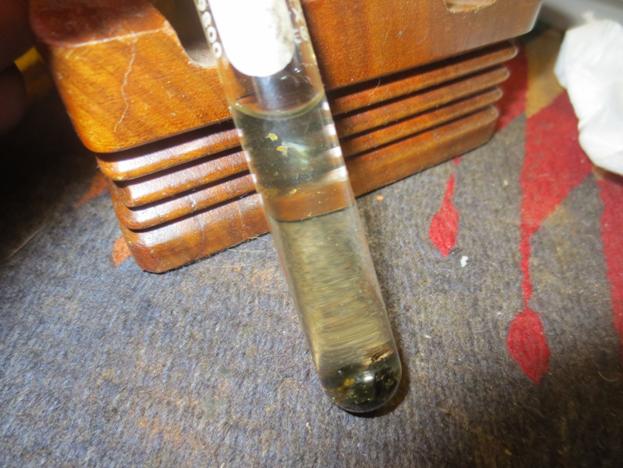
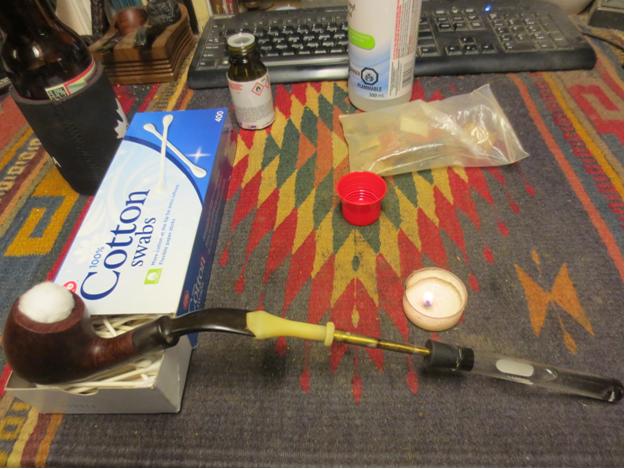
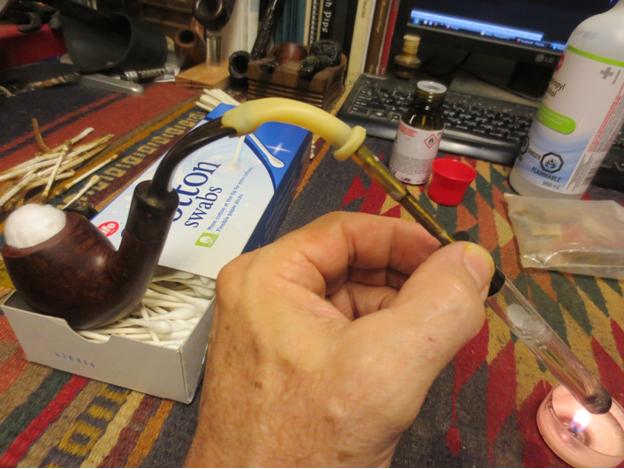
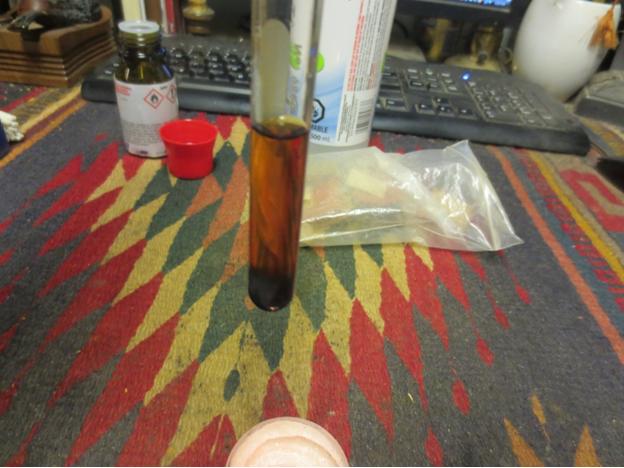
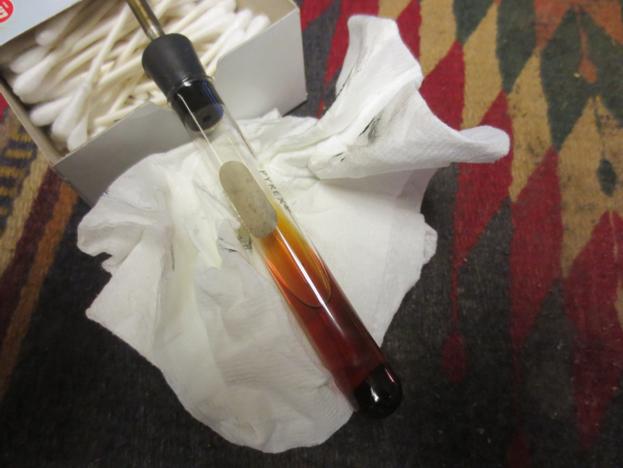
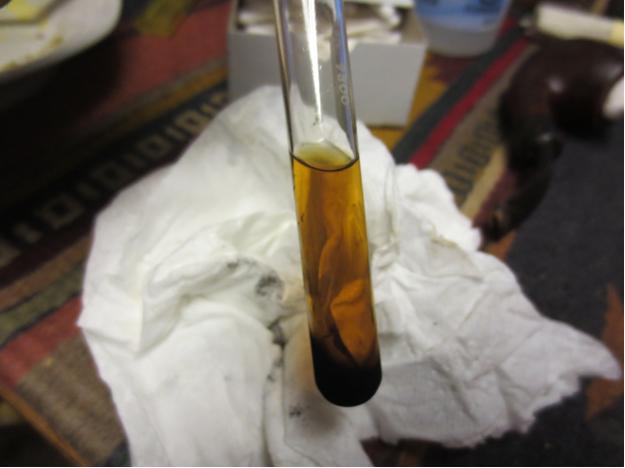
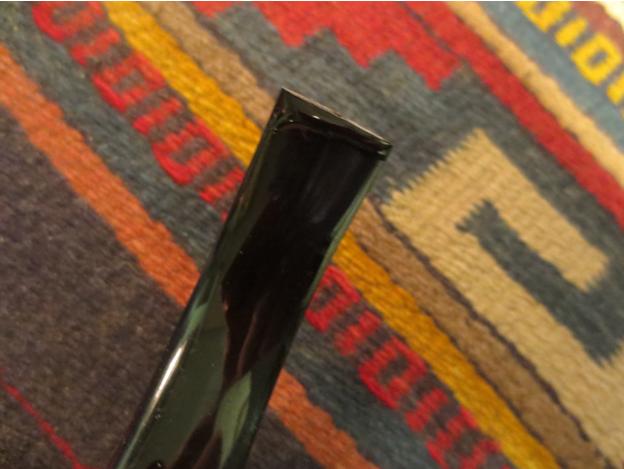
Cam15 2. Retort – The second tool in the kit is a retort. A retort is a simply made tool that includes a test tube, cork, a connector and surgical tubing. The surgical tubing is stretched over the stem or inserted in the shank (see Andrew Selking’s posts). A cotton ball is stuffed into the bowl and alcohol put in the test tube. Canned heat, an alcohol lamp or a candle is used to heat the alcohol to boiling and it is pushed through the stem, shank and bowl. When the test tube is removed from the heat source the cooled alcohol returns to the test tube. It carries with it tars and oils that have been boiled out of the pipe. I have found that I have to often repeat this process several times before I get a clear alcohol back in the cooled tube. I am currently working on a pipe that I have used the retort on four times and just now am getting a clear alcohol return in the test tube. Once I remove the cotton ball and the tubing I use pipe cleaners, cotton swabs and alcohol to remove any remnants of tars and oils. Once the pipe dries out the retort has generally removed all but the most stubborn ghosts and leaves the pipe smelling clean.Cam10
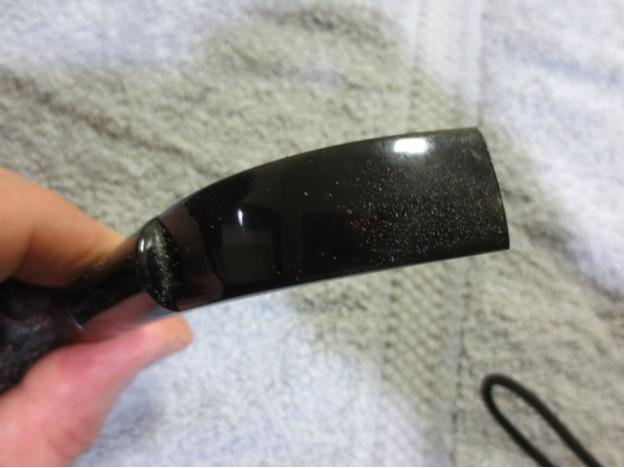
Cam11

Cam12

Cam13

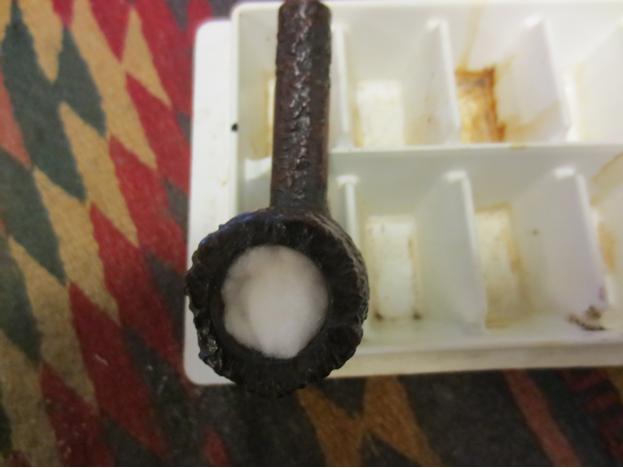
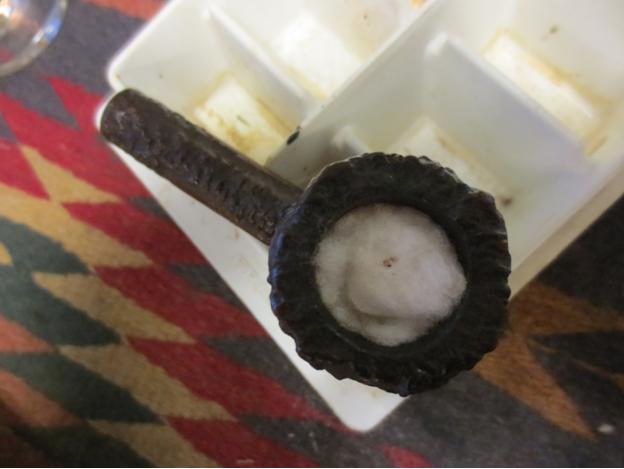
Cam14 3. Cotton ball and alcohol treatment – This treatment is one that I use instead of the salt and alcohol treatment that many have written about. Sometimes I use this method instead of a retort – if the pipe has a ghost but is not terribly dirty. Other times I use it along with a retort. I stuff the bowl full of cotton balls all the way to the bottom. I stick a cotton swab in the shank to plug the airway or in some cases put a rubber stopper or cork in the end of the shank. I use a rubber ear syringe to fill the bowl with alcohol. I used 99% isopropyl alcohol and fill it until the cotton is covered. As it evaporates I add more alcohol to the bowl. The alcohol generally goes into the shank as well and draws the oils and tars into the cotton balls in the bowl. I leave the pipe sitting in an old ice cube tray over night or until the cotton is darkened. Then I remove the cotton balls and repeat the process until the cotton remains white. Once the bowl is empty I use pipe cleaners, cotton swabs and alcohol to clean out any remaining oil and tars in the bowl and shank.Cam16

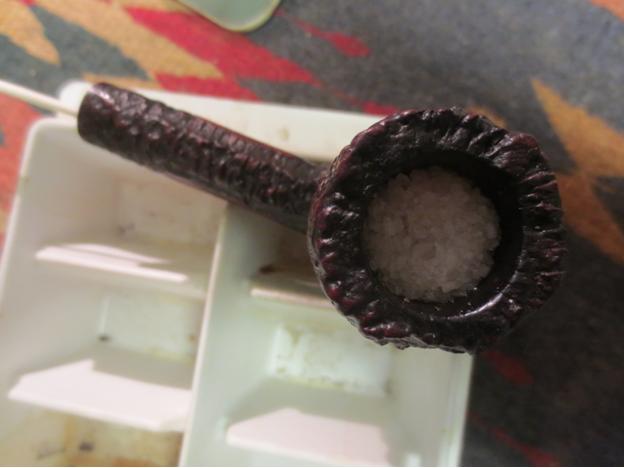
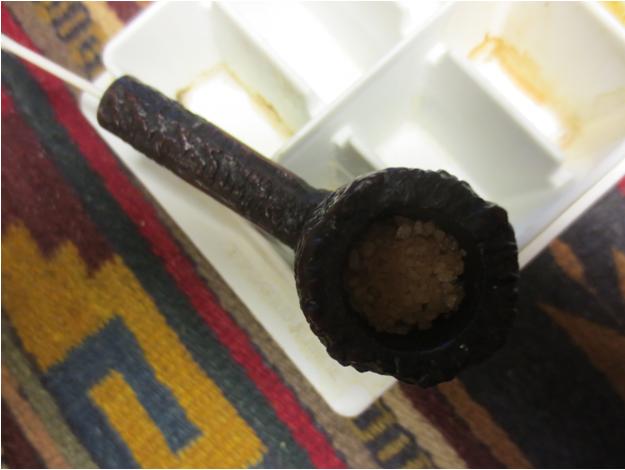
Cam18 4. Kosher salt and alcohol treatment – The salt and alcohol treatment is a variation on the above method. I used it for years and had no issues with pipes that I did the treatment on. Many have spoken of split shanks and bowls cracking after this treatment and will not use it. I have never had a problem so I continue to use it on stubborn bowls and ghosts. I use a Kosher sea salt that is in rock salt form and fill the bowl with it. I then use the rubber ear syringe to fill the bowl with alcohol. I prepare the shank in the same way either plugging it with a cork or stopper or even a cotton swab. I let the alcohol run into the shank and then set the pipe in the ice cube tray overnight. The alcohol wicks out the oils and tars from the briar and turns the salt dark. In the bowl in the pictures I had already used a retort and the cotton ball and alcohol treatment. The salt and alcohol treatment drew out more oils that were left. I empty the darkened salt from the bowl and then clean out the bowl and shank with alcohol, cotton swabs and pipe cleaners. The key is thoroughly flush out the salt with the alcohol and pipe cleaners/cotton swabs. I let the pipe dry for three or more days before I smoke a bowl in it.Cam19

Cam20

Cam21 5. Cotton ball and white vinegar treatment – This treatment is also a variation on the alcohol/salt and alcohol/cotton ball treatment. Instead of using alcohol as the liquid in the bowl I use white vinegar. I have found that it works wonders to draw out the tars and oils that are left behind by the alcohol. I also use it to freshen the foulest bowl. No need to rinse the bowl afterwards as the vinegar evaporates leaving behind a faint smell. I stuff the bowl with cotton balls and then fill it using an ear syringe. Like the previous methods I leave the pipe sitting overnight. I remove the cotton balls and clean out the bowl and shank with alcohol, pipe cleaners and cotton swabs to remove any remaining oils.Cam17 6. Activated Charcoal and heat treatment – The final option is to fill the bowl with activated charcoal pieces (I pick them up from aquarium shops or from the pet area at Walmart) and set it in a metal pan in the oven on the lowest heat setting that is available. The heat softens the oils and they are drawn out into the charcoal. I usually leave it in the oven for 15-30 minutes though could probably leave it in longer. I then dump out the charcoal and clean the bowl and shank with alcohol, pipe cleaners and cotton swabs.

The last pipe I worked on I used all of the methods other than the charcoal one. I may still have to use that as there is a faint ghost remaining in the pipe. For most of the pipes I work on a combination of one or two of the above methods accomplish the task. Only the most stubborn need to use all of them. Experiment with the methods and let us know what works for you and also any variations you might have adapted to improve the methods. Pass on what you have learned as for me that is the best part of the hobby – learning from another refurbisher what works for them.

Cleaning and Restoring a Blatter of Montreal Bent Egg


Blog by Steve Laug

When I received this Blatter of Montreal Egg pipe I sat down and looked it over carefully to assess what would need to be done to restore it. The finish was very dirty and worn but underneath the dirt and oils there was some amazing grain. On the right side of the bowl, near the top there was a fill that had popped out and left a large divot in the briar. The size of the missing fill distracted from really seeing the beauty of the pipe. Looking at the top of the bowl I could see that the inner edge of the rim was slightly out of round and the rim had been previously topped. Both the stain and the topping were not even. The outer edge of the rim had been rounded from sanding and was no longer a clean sharp edge. Sometime ago the bowl had been reamed and a broken uneven cake left on the sides of the bowl. The airway at the bottom of the bowl had a groove carved from the opening across the bowl bottom that appeared to come from using too heavy a hand with a pipe cleaner over the years.

The stem was in good shape in terms of not having any tooth damage or chatter. The button was still quite sharp and distinct like the other Blatter pipes that I have cleaned. It was oxidized and somewhere along the way someone had sanded or buffed the stem with it removed from the pipe. The edges of the stem at the shank junction had rounded shoulders and because of that the fit against the shank was not perfect. The diameter of the shank was slightly larger than the stem due to the rounded shoulders. There would need to be some work done on that area to reduce the damage though I am not sure that it can all be removed. I find this kind of rounding of the shoulders on the stem or the shank on pipes that have been overbuffed or worked on by someone new to the refurbishing hobby.

I took the pipe apart to look at the internals of the stem and the shank. The shank has an interesting design. The mortise ends with a slight ridge and then the airway drops into a kind of sump/or chamber to capture the moisture – kind of like the Peterson system pipes. This chamber had the airway drilled toward the top end. It was filled with a lot of black sticky tar and oil. It would take a lot of scrubbing to clean that area. The mortise itself was pretty clean. The end of the tenon was almost clogged with the buildup around the end. The same was true of the slot in the end of the tenon. It was reduced in size by about half. The stem would also take some work to clean out the thick build up inside.Blatter1

Blatter2

Blatter3

Blatter4 The next photo shows a close up of the area of the missing fill. It is quite large and will need to be repaired.Blatter5 I scrubbed the bowl with cotton pads and isopropyl alcohol to remove the grime and prepare the missing fill for repair. I picked out the loose particles from the area and scrubbed it down again.Blatter6 I filled the hole with larger particles of briar dust and then filled it with superglue. I added more briar particles to the top of the repair.Blatter7 I sanded the repair with 220 grit sandpaper to remove the excess and smooth out the patch. The size of the patch can be seen in the next photo. The larger particles of briar dust worked differently than the fine dust I used in the past.Blatter8 I used a folded piece of sandpaper to bevel the inner edge of the rim to take care of the damage that had made it out of round. Beveling the rim inward took care of the damage and brought the rim back into round.Blatter9 I sanded the rim with a medium and a fine grit sanding sponge and also sanded the repaired area on the side of the bowl. Each successive grit of sanding sponge smoothed out the repair and blended it into the bowl.Blatter10 Once the patch was sanded smooth I scrubbed the bowl down with acetone on a cotton pad to remove the rest of the finis and the remaining wax buildup on the bowl. The birdseye briar was stunning on the left side of the bowl.Blatter11

Blatter12

Blatter13 I also scrubbed the top of the rim with the pads and found that the work on the rim had really cleaned up the look of the pipe from the top.Blatter14 I worked on the rounded shoulders of the stem. First I sanded it with 220 grit sandpaper blending the flow of the shank with the stem. The key was to reduce the shoulder rounding without changing the shape of the shank. Once I had the transition as smooth as I could make it I sanded it with a medium and a fine grit sanding sponge. The finished shank/stem transition can be seen in the next series of photos.Blatter15

Blatter16

Blatter17

Blatter18 With the repair finished on the side of the bowl and the transition smoothed out at the stem/shank junction it was time to give it a coat of stain to blend it in with the rest of the briar. I used a dark brown stain touch up pen to work on those two points on the bowl.Blatter19

Blatter20 I probably should have done this sooner, but I chose not to. The bowl had already been reamed but I wanted to clean up the reaming job and try to smooth it out. I used a PipNet reamer and chose a cutting head that fit the bowl tightly and removed the odds and ends of broken cake left in the bowl.Blatter21 I then set up the topping board to repair the round outer edges of the rim. It did not take too much topping to make that edge sharp and clean once again instead of rounded. I finished sanding the rim afterward with a medium and a fine grit sanding block to remove the scratches left behind by the 220 grit sandpaper.Blatter22

Blatter23 I used the same dark brown stain pen to stain the rim. I applied the stain until the coverage was acceptable. I lightly buffed the bowl with White Diamond to smooth out the stained areas and blend them into the rest of the bowl.Blatter24

Blatter25

Blatter26

Blatter27 With the externals finished on the bowl it was time to address the internals. The airway in the stem and shank and the sump in shank all were filthy. I decided to use a retort on the pipe. I set up the test tube and connector to the stem and then stuffed the bowl with a cotton ball before boiling the alcohol through the bowl and stem.Blatter28

Blatter29 I boiled the alcohol through the bowl and shank the first time and the alcohol came out a dark brown.Blatter30 I took the retort off the stem and ran pipe cleaners and cotton swabs and alcohol through the shank and stem. While they were definitely cleaner there was still a lot of “sludge” present.Blatter31 I set up the retort and boiled another tube of alcohol through the bowl. This time the alcohol was definitely lighter but still dark.Blatter32 I emptied the tube and boiled a fresh tube through for the third time. While it was definitely getting lighter it was still brown.Blatter33 I ran a fourth tube of alcohol through the stem and shank and finally it came out clear. This was one dirty pipe. I used pipe cleaners, cotton swabs and alcohol to finish cleaning the shank and stem. I used the dental pick to clean out the edges of the slot on the button. With the internals clean I turned my attention to the stem. I sanded it with 220 grit sandpaper and then with the medium and fine grit sanding sponges. Using those I was able to remove the oxidation on the surface.Blatter34

Blatter35

Blatter36 I switched to micromesh sanding pads. I wet sanded with 1500-2400 grit sanding pads and rubbed the stem down with Obsidian Oil.Blatter37 Afterwards I buffed it with White Diamond to polish the stem and lessen the scratches. I dry sanded the stem with 3200-12,000 grit micromesh sanding pads and rubbed the stem down with Obsidian Oil between the 4000 and 6000 grit pads. I also gave it a final rub down with Obsidian Oil after the 12,000 grit pad.Blatter38

Blatter39

Blatter40 I buffed the pipe with Blue Diamond Plastic Polish and then gave it several coats of carnauba wax. I buffed it to a shine and then used a clean flannel buff to raise the shine. The finished pipe is shown in the photos below. I have also included a photo of the repaired rim. Note the repaired fill on the right side of the bowl. The pipe is cleaned, polished, repaired and ready to smoke. I think it is a beautiful pipe in one of my favourite shapes. Blatter41

Blatter42

Blatter43

Blatter44

Blatter45 Thanks for looking.