Blog by Steve Laug
It is the last day of my Christmas/New Year holidays. Tomorrow I go back to work so I am taking some time today to work on more pipes. My wife and kids are convinced it is an illness but at least it keeps me out of their way! I am taking another break from the Bob Kerr estates since I have already finished 14 of them. They are piled in boxes around my basement shop and need to look at something different from the Dunhills of his estate. Though this picture is not from today the posture today remains the same, I am still working under the watchful eye of my buddy and Shop Foreman, Spencer. He has seriously enjoyed having me at home with him the past two weeks. His life is pretty much laying on a blanket by my feet while I am fiddling with pipes. At 14+ years old my fiddling does not faze him much him, he just wants to make sure I stay put with him in the basement. He snoozes, comes over to me now and then to smack my leg and beg for a treat and then retreats to nap again. He really is company in the shop and keeps me mindful to get up and move around now and then. As you might have figured out from the title I am working on another pipe from Italy. This is the second Savinelli Autograph 3 (the second pipe down in the photo below). It reads Savinelli over Autograph on the left side of the shank. On the right side of the shank it is stamped Italy. The underside shank is sandblasted while the rest of the pipe is smooth. The vulcante stem is stamped with the autograph. The pipe came to me in a lot of five pipes that I bought from a pipeman in Florida. The other pipes in the lot were the two Mastro de Paja that I have worked on already, these two Savinelli Autographs and a Bacchus Carved and Cased Meerschaum. I decided to work on the second Autograph next as it was different from the last run of straight billiards that I have been working on these past weeks.
  I had the fellow in Florida send the pipes to my brother Jeff in Idaho for the cleanup work. He does a great job and expedites my restoration process a lot. He took the following photos of the pipe before he worked his magic on them.
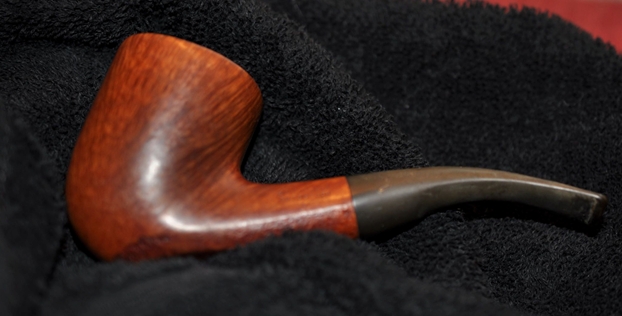
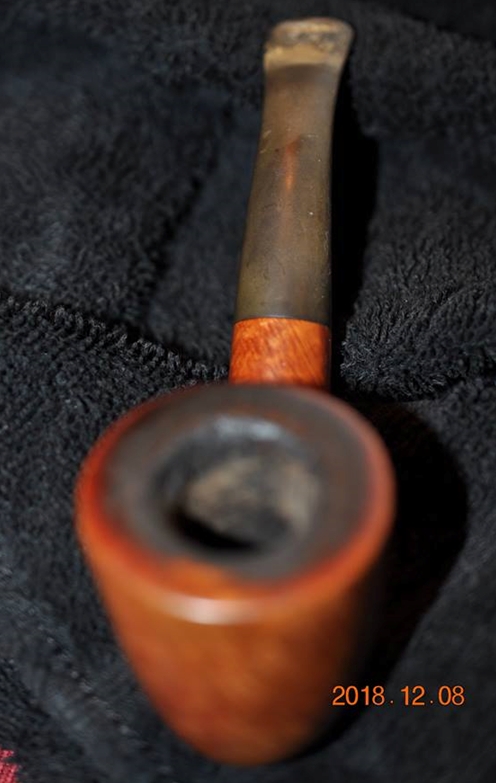 Like his other pipes this second Savinelli Autograph 3 pipe must also have been a terrific smoker because the bowl was pretty clogged up with cake and lava flowing over the rim top. It really was a mess and the cake was hard from sitting. The Florida pipeman had laid aside his pipe some 15-20 years earlier and it had been in storage. It was going to take some work to clean out that bowl and be able to see what the rim looked like underneath the layer of lava.
 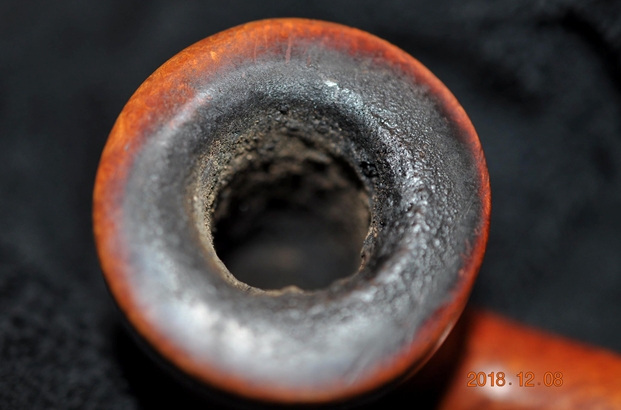 The rest of the bowl looked dirty but the amazing grain shone through. Jeff included photos of the side and bottom of the bowl to give a good idea of what it looked like. The last photo shows the sandblast finish on the bottom of the bowl and shank.
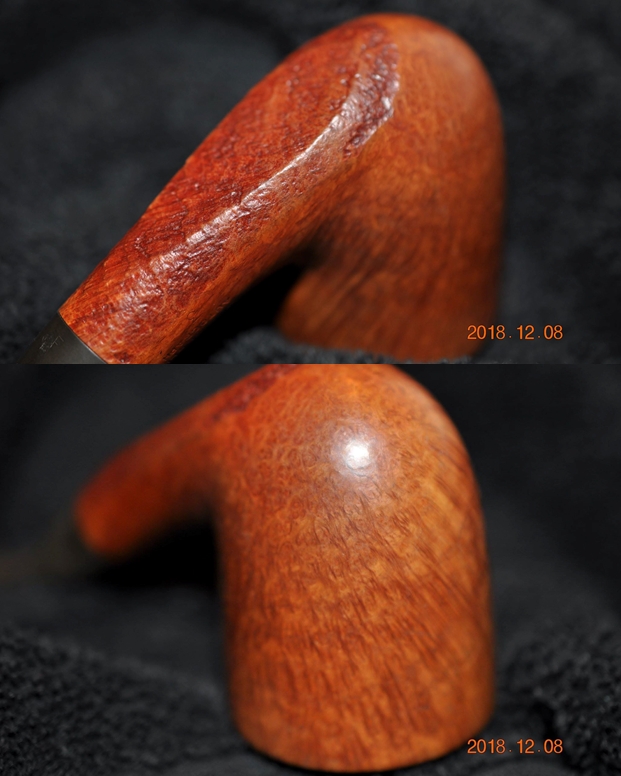
 Jeff also included some photos of the stamping on the shank sides. The stamping on the left side of the shank was quite clear though the 3 stamp was fainter. The stamping on the right side – Italy was readable but quite faint.
 The vulcanite stem was in excellent condition. It was made for the Savinelli Balsa filter system or for their 9mm filter. It was dirty and had light tooth chatter but no deep tooth marks in the stem surface. The button also looks pretty good but I would know more once it arrived in Vancouver.
 The Autograph stamp on the left side of the taper stem was in pretty decent condition.
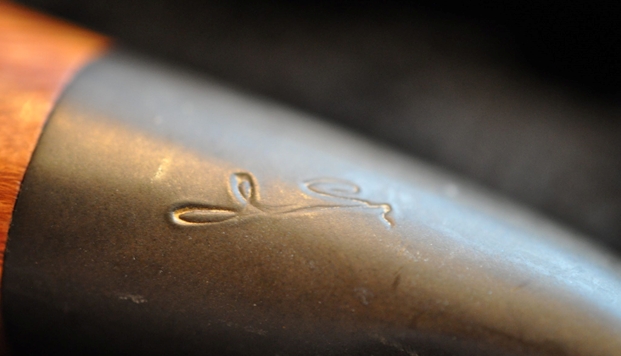 Jeff cleaned the pipe with his usual thoroughness – reaming the bowl with a PipNet pipe reamer and cleaning up the remnants with a Savinelli Fitsall Pipe Knife. He scrubbed the internals of the bowl, shank and stem with alcohol, cotton swabs and pipe cleaners. He scrubbed the exterior with Murphy’s Oil Soap to clean off the dust and grime on the finish. The rim top looked very good under the thick lava coat. There were just a few nicks and scratches to deal with. The inside of the bowl itself looked great. The stem was in great shape other than a bit of tooth chatter. I took photos of the pipe when it arrived here.
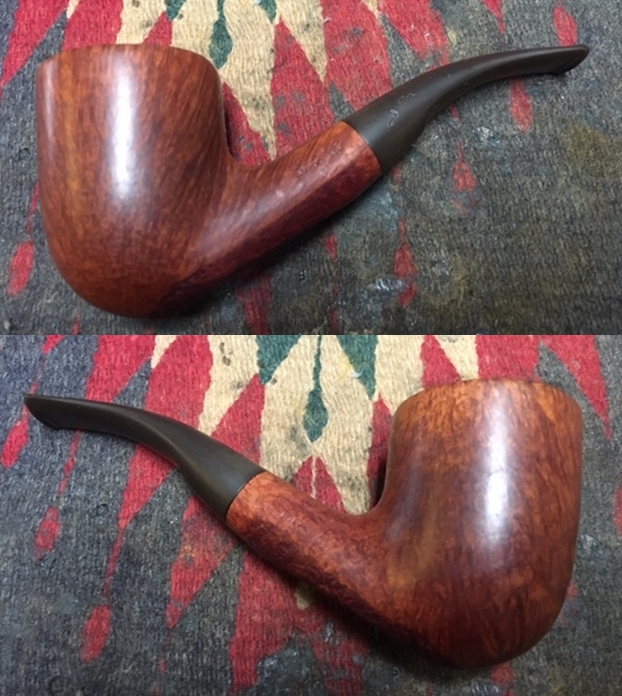
 I was a bit surprised when I took of the stem and had a closer look at it. Turns out that this stem is also a filter stem and made for a 9mm filter or for a Savinelli Balsa Filter system. I found photos of the system online and have included them here. If you choose not to use a filter there is an adapter that can be purchased to fill in the tenon in place of the filter.
 I took some close up photos of the rim top, bowl and stem to show what they looked like after Jeff’s cleanup. It is a startling difference. The rim top will take some work to take care of the damage. There is some rim darkening along the beveled inner edge and on the top of the bowl. There were also nicks and scratches on the smooth surface of the rim top. The stem was oxidized and there were tooth marks and chatter on both sides near the button.
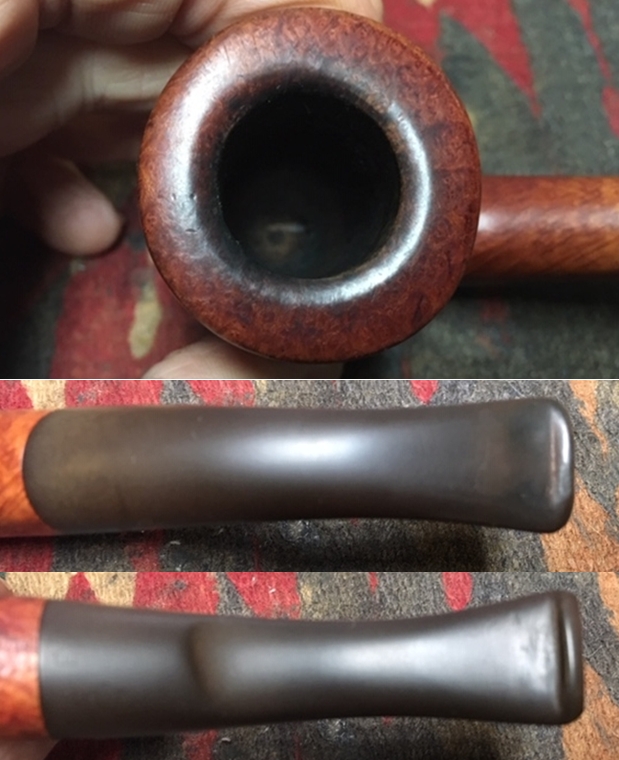 I have included the information I included on the previous Autograph blog so that you can do a quick review on this line of Savinelli pipes.
I turned first to the Pipephil website (http://www.pipephil.eu/logos/en/logo-savinelli1.html) to get a brief overview of the Autograph line. There I found out that the Autographs were hand made and unique. The Autograph Grading system is ascending: 3, 4, … 8, 0, 00, 000.
I turned then to Pipedia to get a more background on the Autograph line. I had the outline I needed from pipephil for the pipe but wanted more (https://pipedia.org/wiki/Savinelli). I quote in part from the article on that site.
 While Savinelli’s serially produced pipes account for around 98% of annual production, the marque also creates a number of artisanal, handmade pieces as well. The Autographs, the Creativity line, and the Mr. A. line are all the result of Savinelli’s unique handmade process, with the Autographs reflecting the larger Freehand aesthetic, the Creativity line delving into more complex hand carving, and the Mr. A. line sidestepping the standard shape chart for remarkable and unusual pipes.
All of the briar for Savinelli’s Autographs and other freehand pipes is sourced specifically for those pieces. While the majority of the marque’s serial production is made from extra grade ebauchon blocks, Savinelli keeps a separate supply of Extra Extra plateau blocks for Freehands. This variety of briar is much larger, and of a higher quality, which explains why so many Autographs and Savinelli handmades are naturally larger designs.
These handmade pieces are shaped much like traditional Danish Freehands: they are shaped first and drilled second. Using this method, Savinelli’s team of artisans is able to showcase their own creativity, as it maximizes flexibility and facilitates a more grain-centric approach to shaping. The resulting Freehand designs are at once both a departure from the marque’s classical standard shapes, yet very much still “Savinelli” in their nature—i.e. proportioned so that the bowl is the visual focus when viewed from the profile, juxtaposed by the comparatively trim lines of the shank and stem. To provide a little more insight into the differences between Savinelli’s standard production and freehand lines, Luisa Bozzetti comments:
“When we choose to make Freehand pipes we must stop production on the standard shapes. The process for Freehands is much more involved and takes much more time. Finding the best people from the production line and pulling them to make Freehands is challenging since it’s not an assembly line, but rather a one or two man operation.
After the rough shaping of the stummel, we must get together and brainstorm which style of stem will be paired before the pipe can be finished since we do not use pre-shaped stems. All accents and stems for the Freehands are cut from rod here in the factory. A lot of care goes into the few pieces lucky enough to make the cut; to end up with a certain number of Autographs, for instance, means that many, many more will be made, and only the few will be selected.”
The quality control process for Savinelli handmades is even more rigorous than that employed in the standard lineup. Many blocks are started and later discarded because of pits or defects. While Savinelli’s briar sourcing is a constant process, working with some of Italy’s top cutters to ensure only the finest and most suitable blocks make their way to the factory, it’s impossible to source plateau briar that’s completely free from flaws. That’s just nature. Savinelli creates the standard for quality by working through the rough (a very high-quality rough, mind you) to find that shining diamond with the potential to become a Savinelli handmade.
It looks like the Autograph 3 I am working is pretty high in the hierarchy of the line. This Autograph is more typical of the ones that I have worked on in the past though it does not have the unique twist to the vulcanite stem. The pipe is a nice straight grain all around the bowl sides with birdseye on the top of the rim. The bottom of the shank is sandblasted and looks very good in that location.
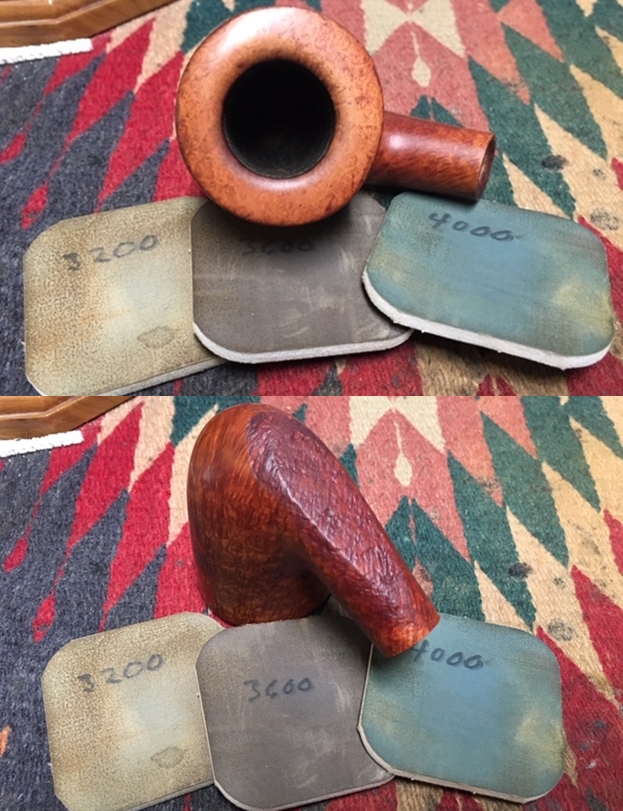
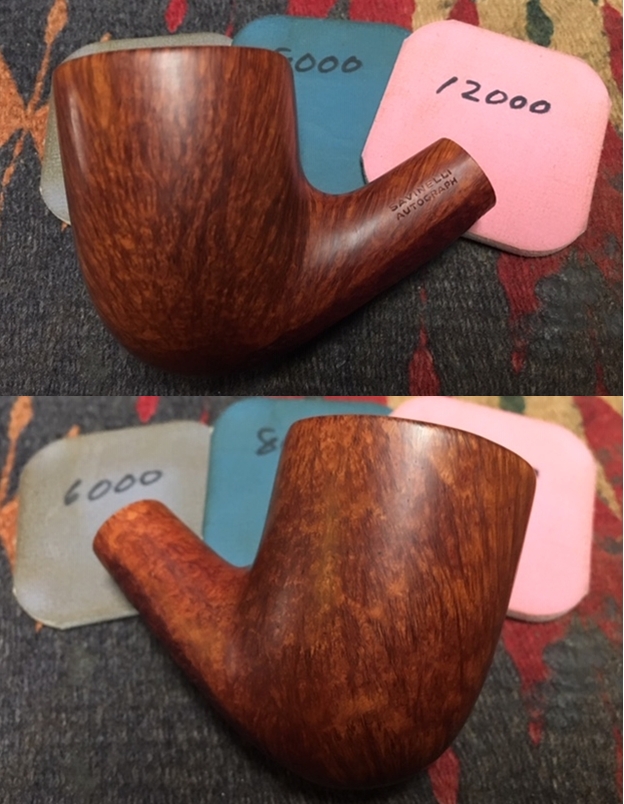
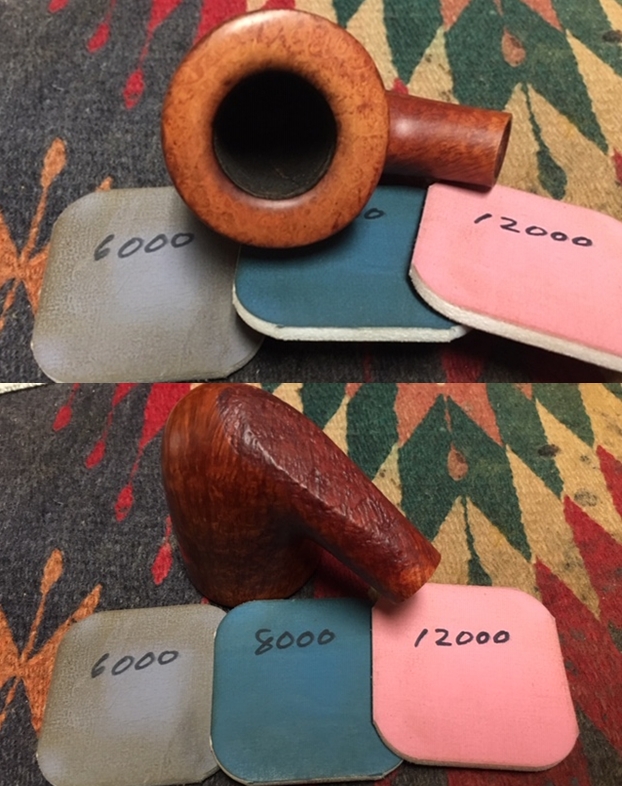
Armed with that information on the brand it was time to work on the pipe. I decided to begin by addressing the damage to the rim top and inner edge. I sanded it with 220 grit sandpaper to remove the darkening and the damage to the rim surface. The rim really needed to have the damaged areas smoothed out and blended into the rest of the briar.  I polished the freshly sanded rim top and the rest of the briar with micromesh sanding pads to remove the scratches and to try to lighten the finish a bit – wet sanding with 1500-2400 grit pads and dry sanding with 3200-12000 grit pads. I wiped the briar down after each pad to remove the sanding dust and get a sense of the how the finish was developing. The photos show the progress.


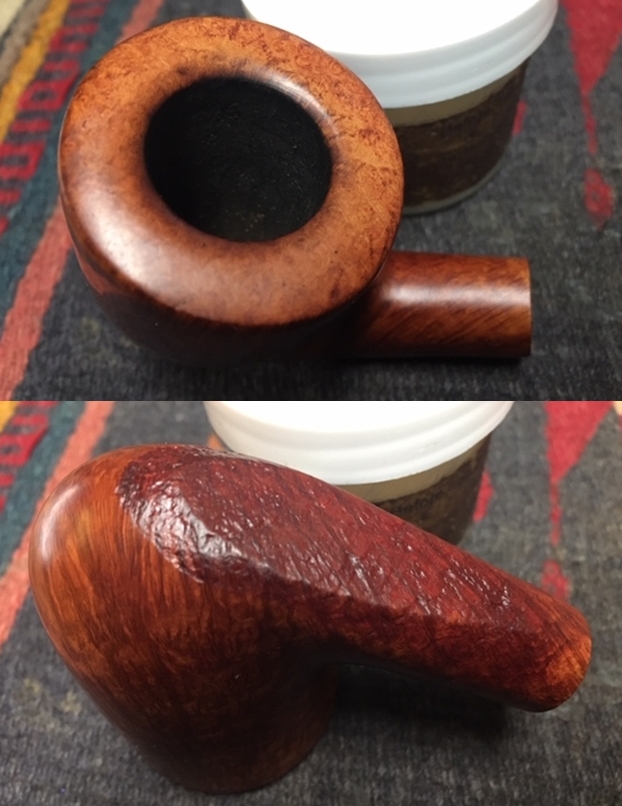
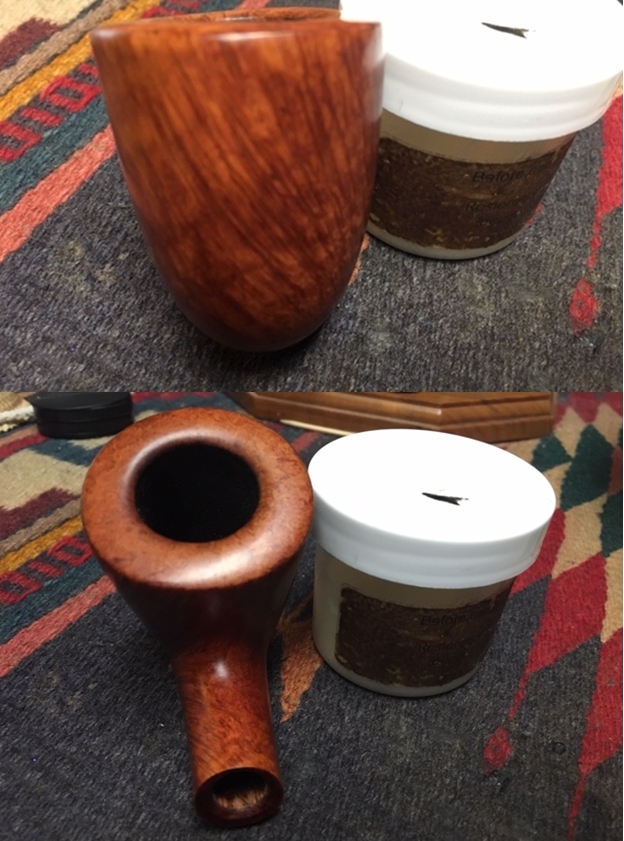
 I worked some Before & After Restoration Balm into the briar on the bowl and the rim top. I worked it into the surface of the briar with my fingertips to clean, enliven and protect the wood. I kept it clear of building up in the twin groove around the bowl below the bowl cap. Once the bowl was covered with the balm I let it sit for about 20 minutes and buffed it off with a soft cotton cloth and then polished it with a microfiber cloth. I took photos of the pipe at this point in the process to show what the bowl looked like at this point.
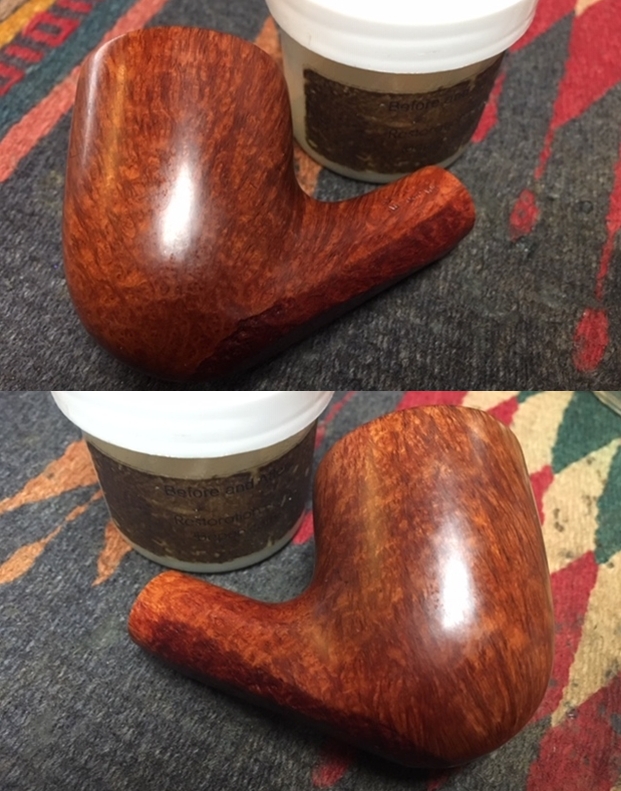
 I used an Oak stain pen to blend the colour of the rim top to match the rest of the bowl. I rubbed it down with some of the Restoration Balm to even out the finish.
 I set the bowl aside and worked on the stem. I sanded out the tooth marks and worked on removing the oxidation on the stem with 220 grit sandpaper. I carefully avoided sanding the autograph stamp on the left side of the stem.
 I polished the stem with Denicare Mouthpiece Polish to take out the oxidation at the button edge and on the end of the mouthpiece. I also worked hard to scrub it from the surface of the stem at the tenon end and around the stamping on the left side of the shank.
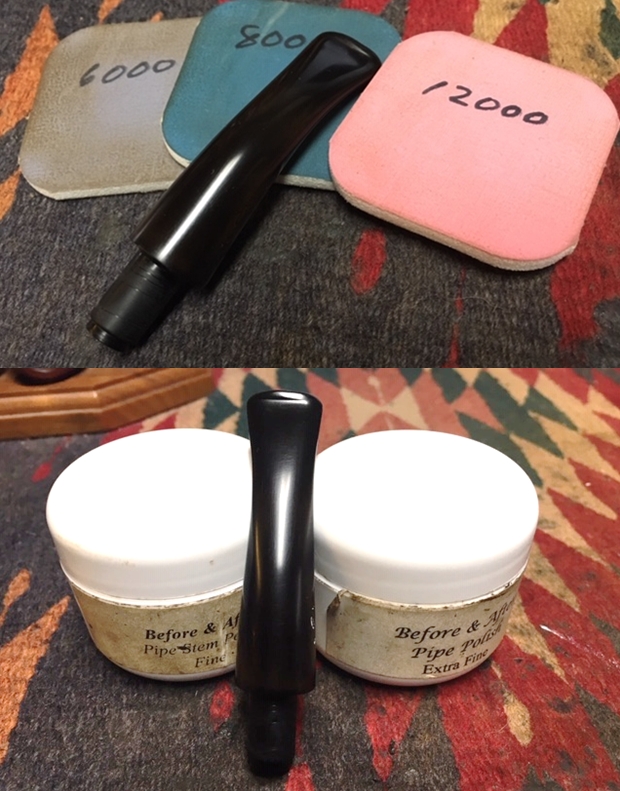
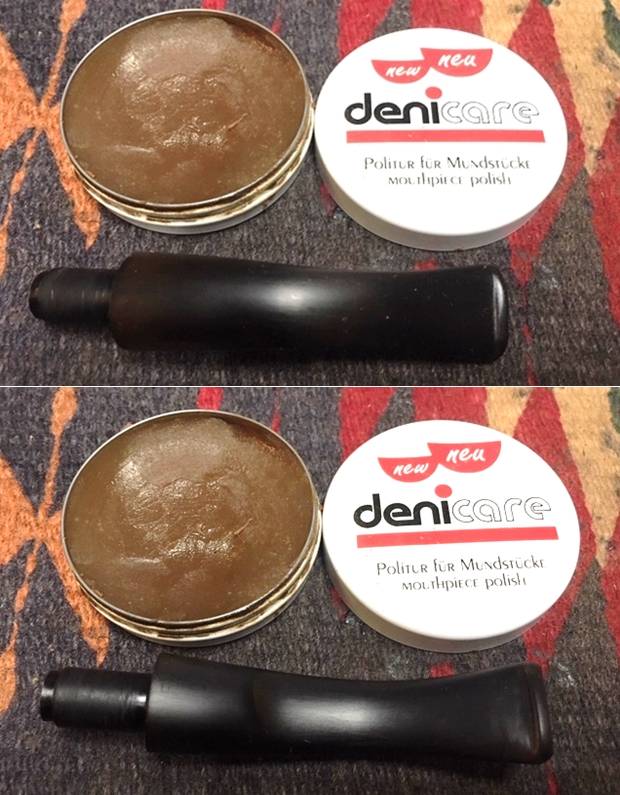 I wet sanded the stem with 1500-2400 grit micromesh sanding pads. I was able to remove it. I dry sanded it with 3200-12000 grit pads to polish it further. I wiped it down with a damp cloth after each sanding pad. I finished polishing the stem with Before & After Pipe Polish – both Fine and Extra Fine polishes. I wiped the stem down with a damp cotton pad afterwards and buffed it with a soft microfiber cloth.
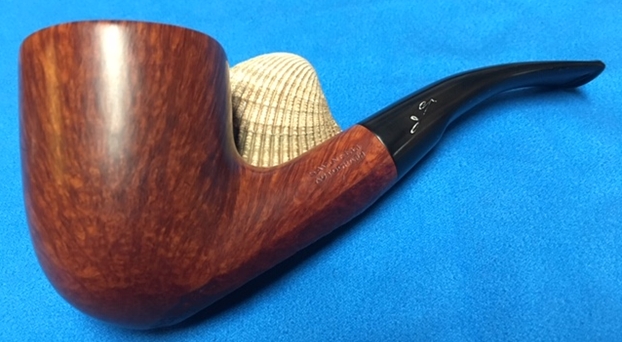
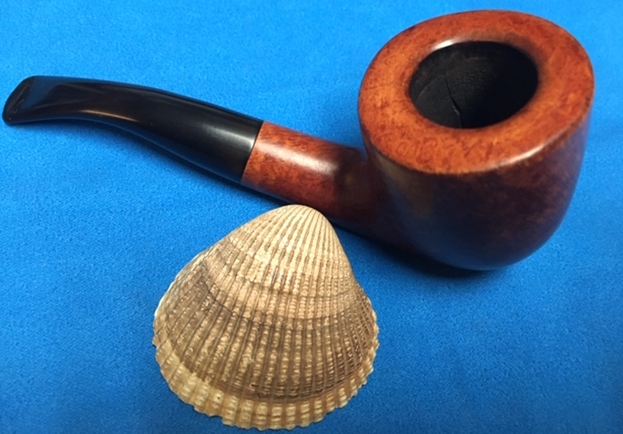
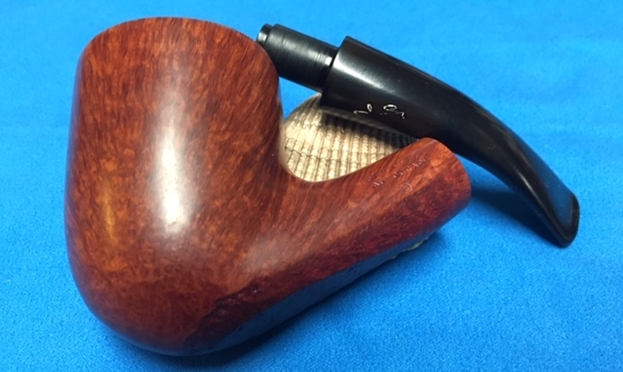
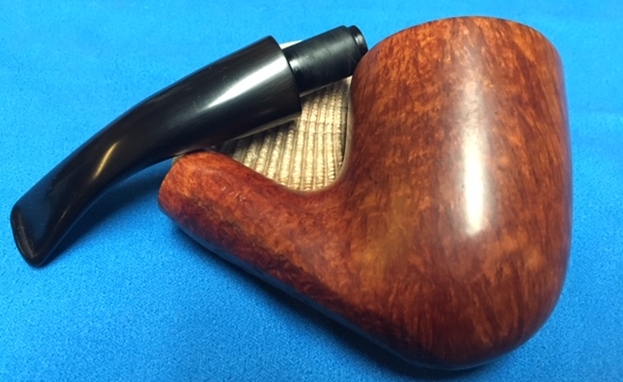
 I touched up the stamping on the stem side using a white out pen. I let it dry and buffed it off with a micromesh sanding pad. The photos tell the story. The stamping is still visible with some places that are quite weak.
 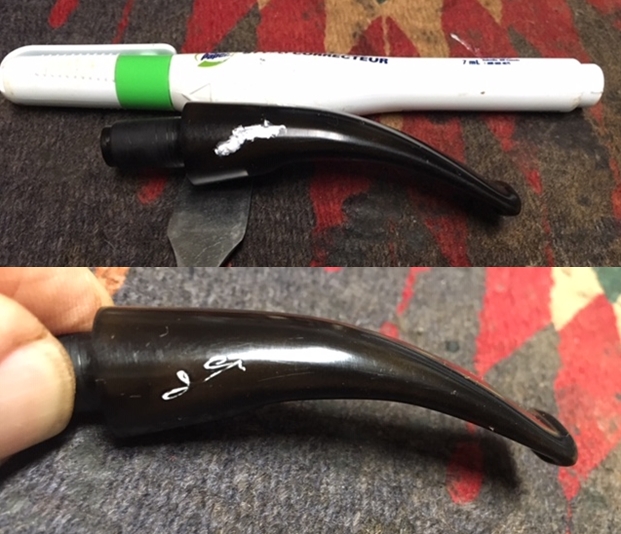 I put the bowl and stem back together. I polished the bowl and stem with Blue Diamond to polish out the scratches in the briar and the Lucite. I gave the bowl and stem multiple coats of carnauba wax. I buffed the pipe with a clean buffing pad to raise the shine. I hand buffed it with a microfiber cloth to deepen the shine. The pipe polished up pretty nicely. The contrast of the beautiful dark and medium browns of the briar with the polished black vulcanite Savinelli Balsa Filter system stem is quite stunning. The mix of straight grain and flame grain around the bowl and shank combined with the birdseye on the rim is quite remarkable. This is another beautiful pipe that is for sure. The finished pipe is shown in the photos below. The dimensions of the pipe are Length: 5 1/2 inches, Height: 2 1/4 inches, Outside diameter of the bowl: 1 3/4 inches, Chamber diameter: 7/8 of an inch. I have restored quite a few Autographs over the years and this estate is another rare beauty. I will be putting it on the rebornpipes store shortly. Thanks for walking through the restoration with me. It was a great break away from the estates that await me. Cheers.