Blog by Steve Laug
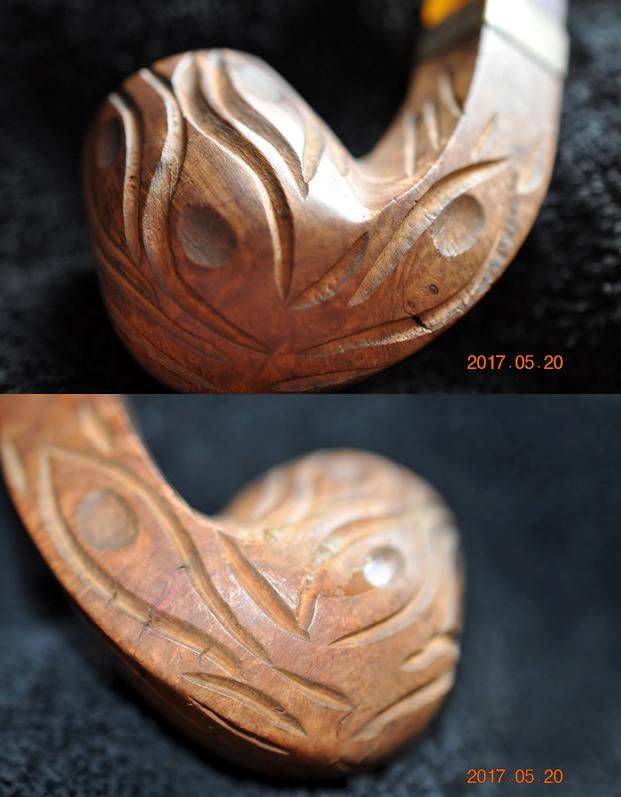
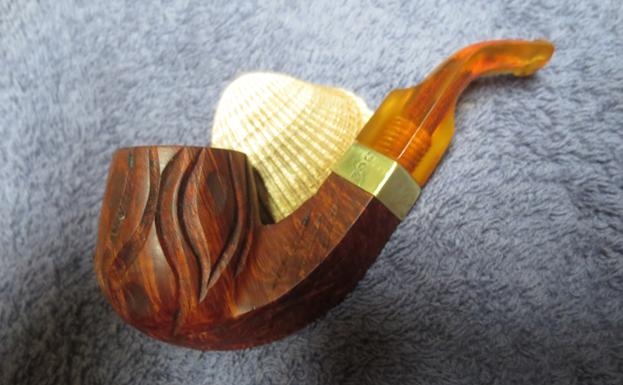
Something about the shape of this old meerschaum canted Dublin or Zulu that caught my brother’s eye so he picked it up and added it to the lot he was cleaning up to send my way. The worn red leather case had gold letters embossed on the edge just above and below the latch. At first I thought Echt Bernstein was the brand name but after a bit my high school German kicked in and I realised that it was not. The name was German and it read on the top edge of the case Echt Bernstein which means Genuine Amber and on the lower edge read Echt Naturmeerschaum which translates as Genuine Natural (Block) Meerschaum. The pipe is quite probably of Austrian origin and could have been made by Strambach. That is not provable because the pipe is not marked at all. But the German stamping on the fitted case lends itself to that idea. I looked up Strambach on Pipedia to see if there were any hints about the pipe I had in hand (https://pipedia.org/wiki/Strambach). I quote from that article some of the pertinent information.
In 1904 Edmund Jolitschke founded a company that, at the begining, produced cigar and cigarette mouthpieces and later meerschaum pipes. In 1922, Robert Strambach became the leader of the company and he expanded the business. He produced meerschaum pipes and Calabash pipes, and he developed a system to produce the meerschaum mass (this is a convolute of small sepiolite pieces, grinded down, and pressed together with a bonding agent). In 1974, Edith Corrieri succeeded to her father. She is a master-turner, and today, she is the only producing high quality calabashes and meerschaum pipes in Europe…
…(ed. quoting Edith Corrieri, current owner) My company was started in 1904 by my uncle Edmund, and in 1922 my father Robert took over the firm. In the following fifty years my father expanded the firm with many ideas e.g. he developed a special technique to transform raw meerschaum into workable material (so-called meerschaum masse), the secret formula to which he revealed to me shortly before his death. As I was the only child I had the chance in 1974 to become one of the first females in the field of pipe making. After three years of training I received a diploma as Master of Pipemaking. Today we are the only manufacturer of Meerschaum and Calabash Pipes in the European Union and are still making our pipes according the same age-old formula. In 1981 STRAMBACH PIPE CO. was awarded the Austrian “State Seal” for exceptional quality.”
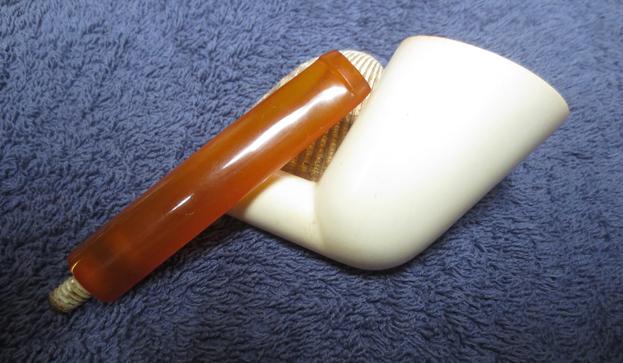
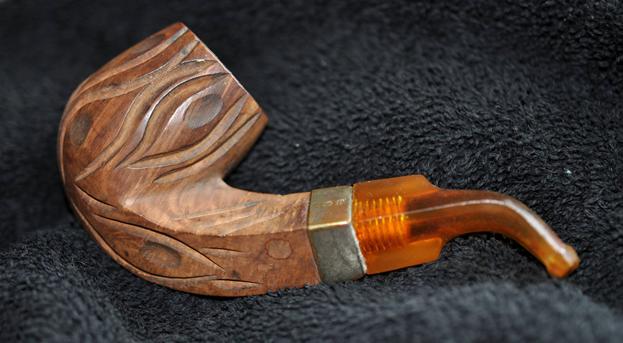
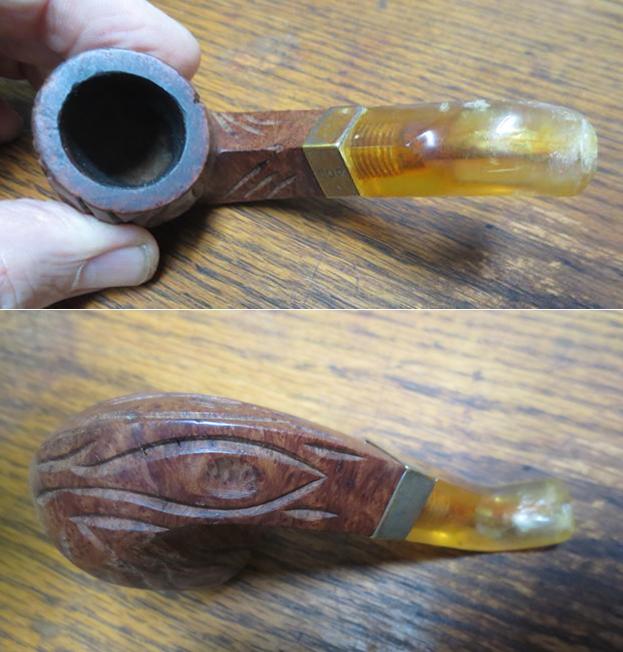
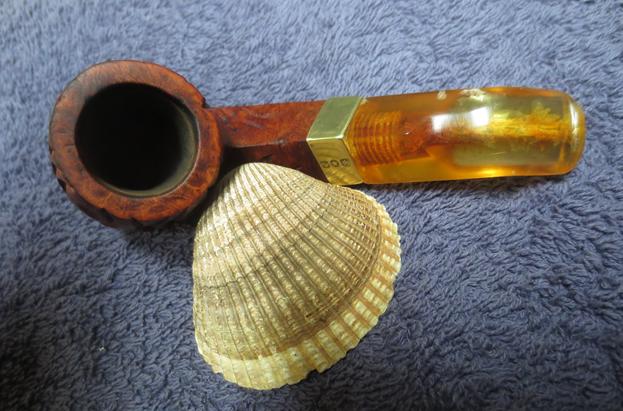
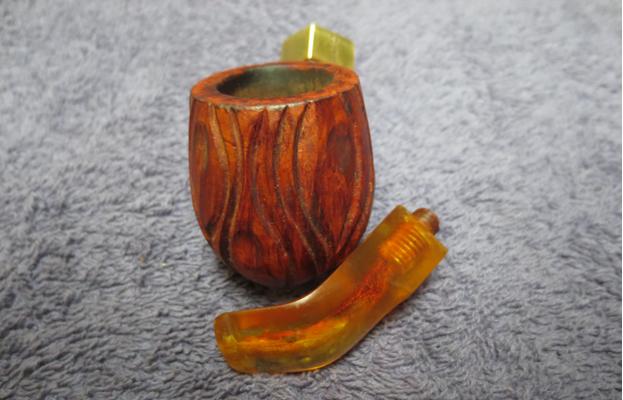
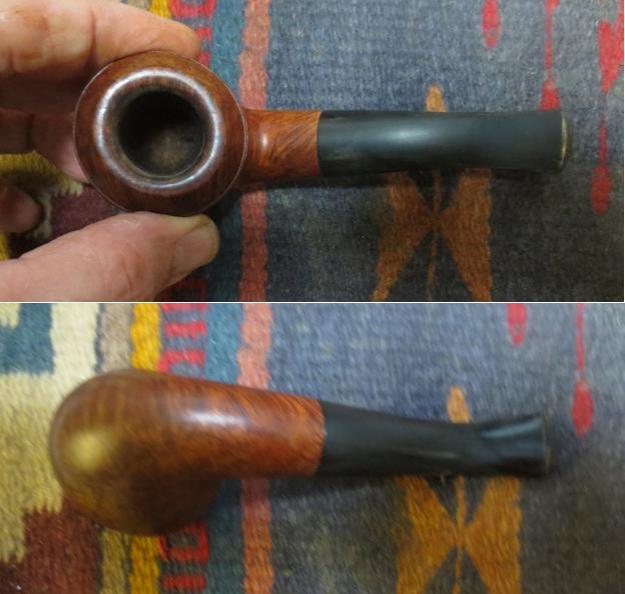
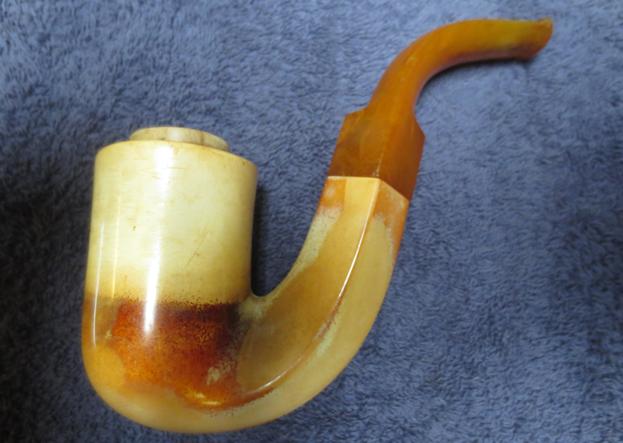
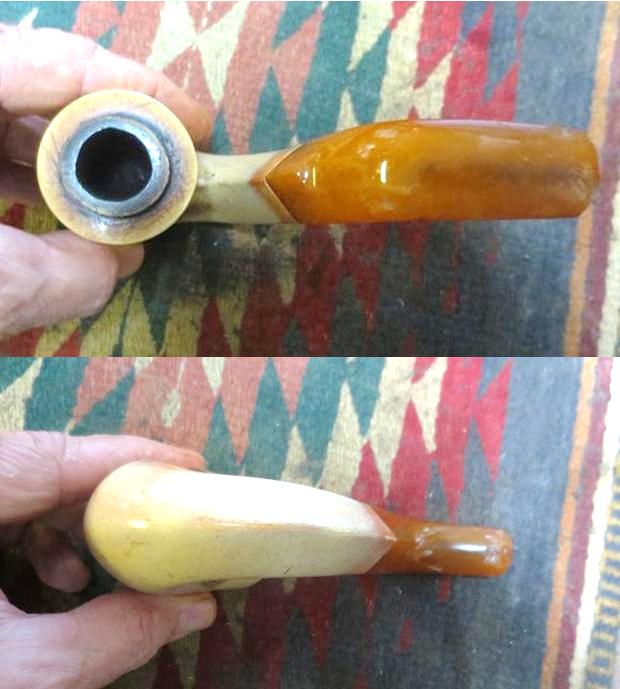
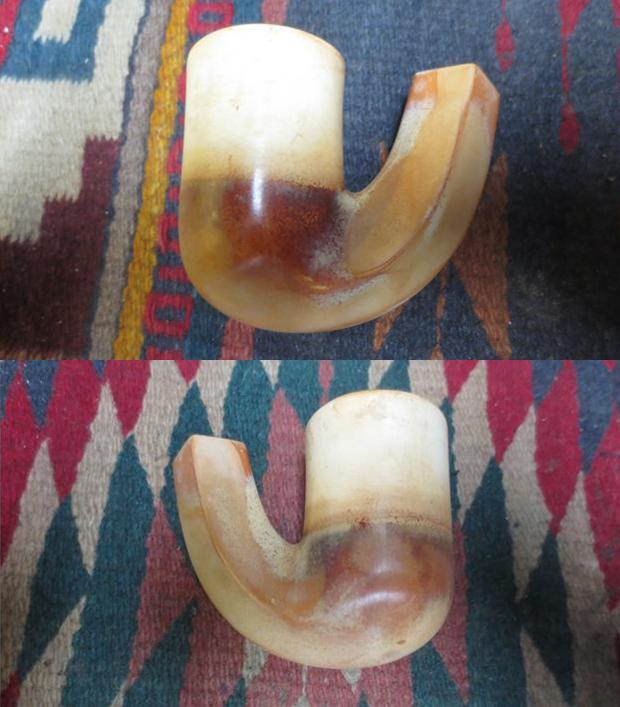
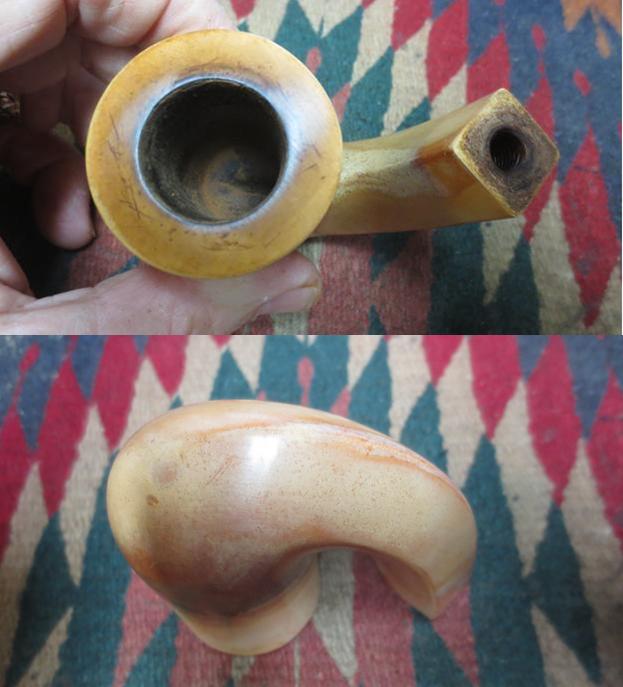
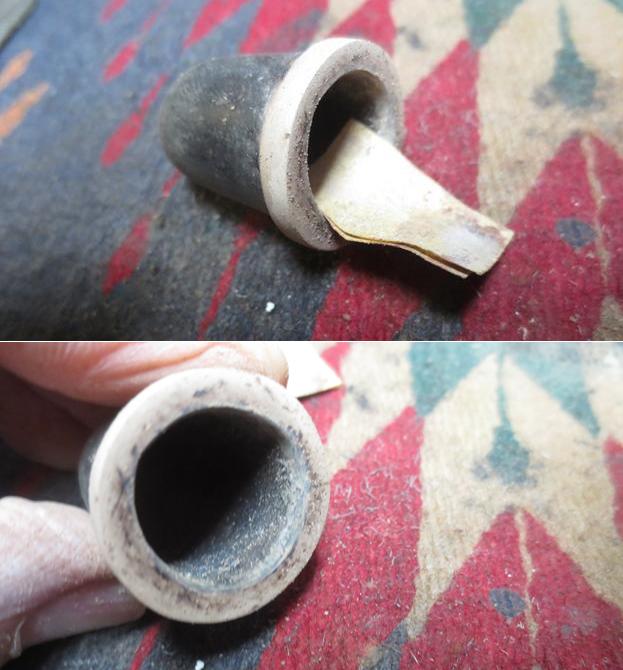
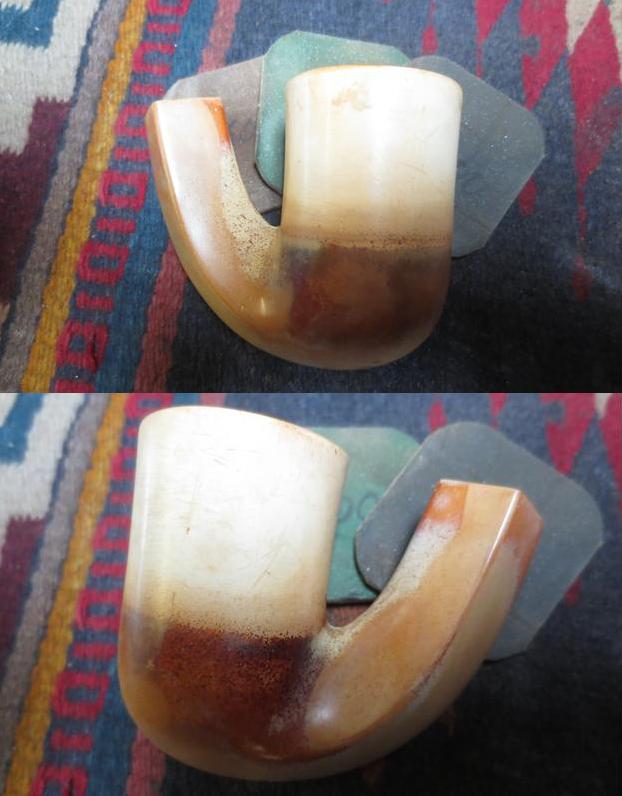
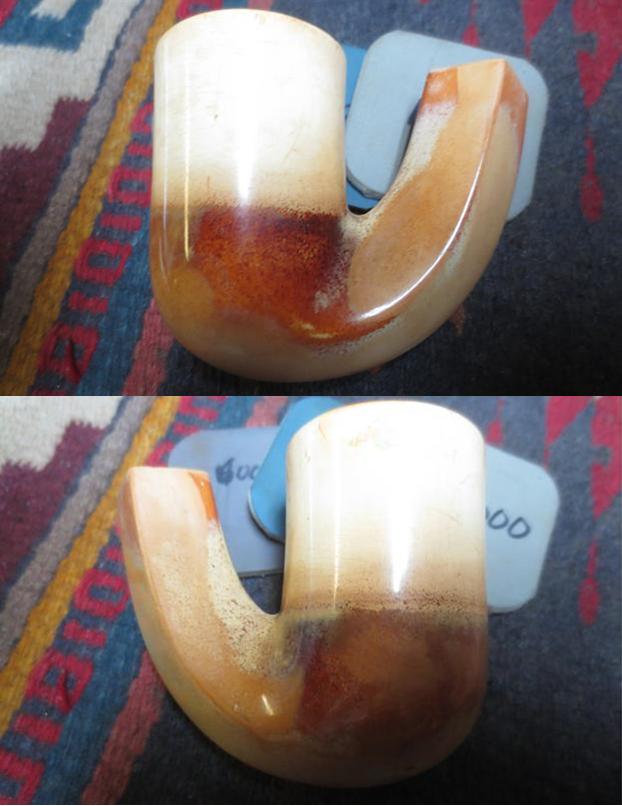
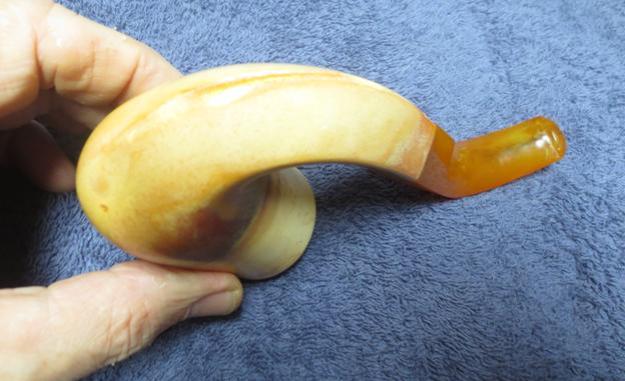
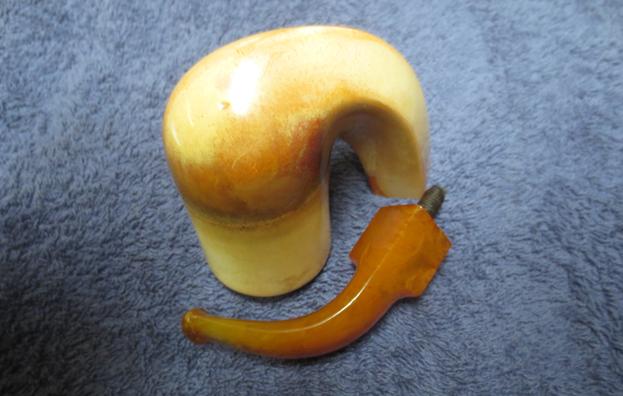
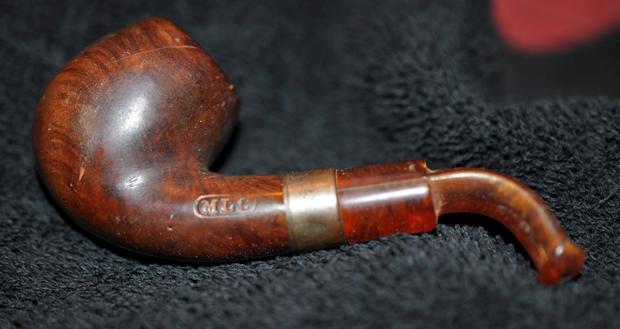
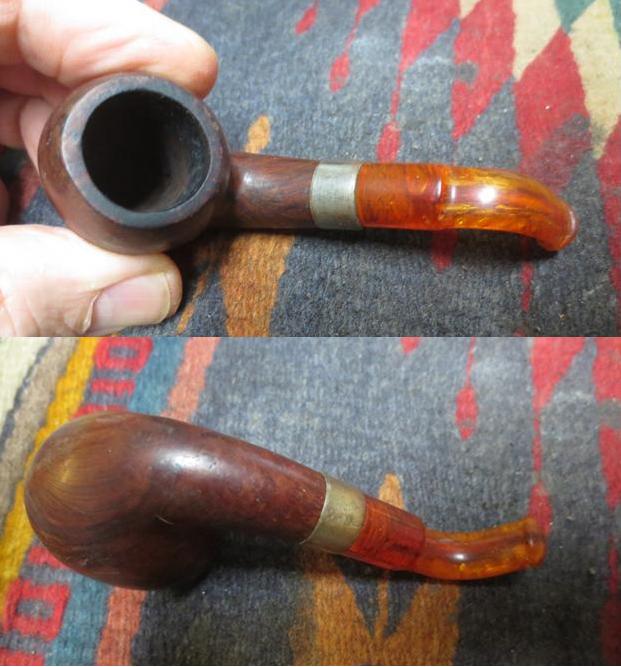
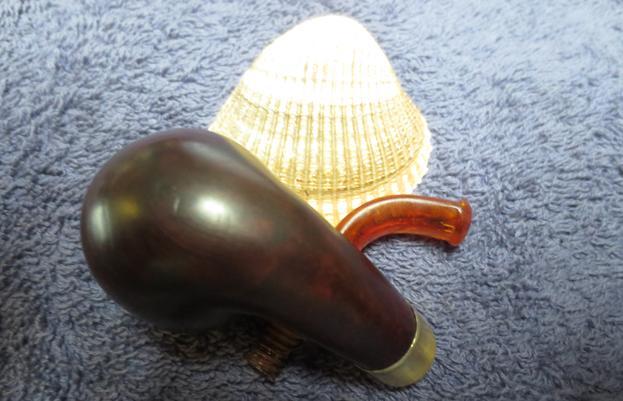
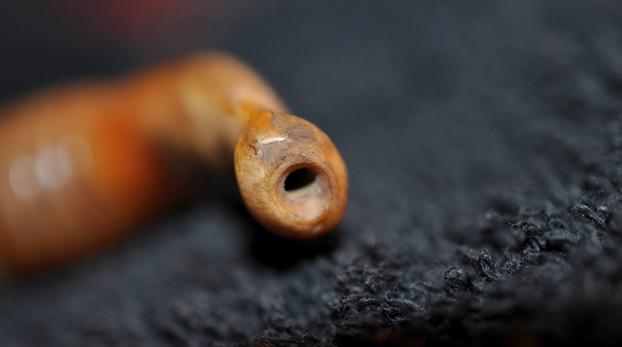
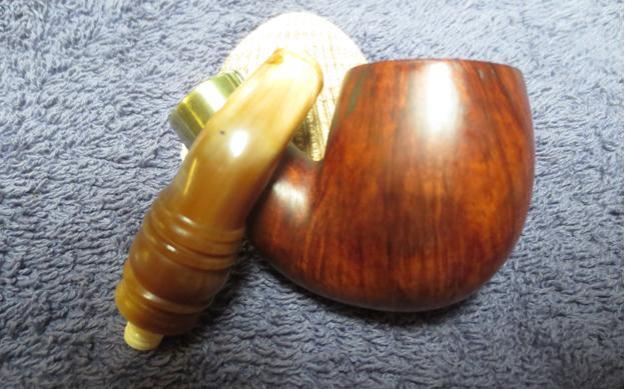
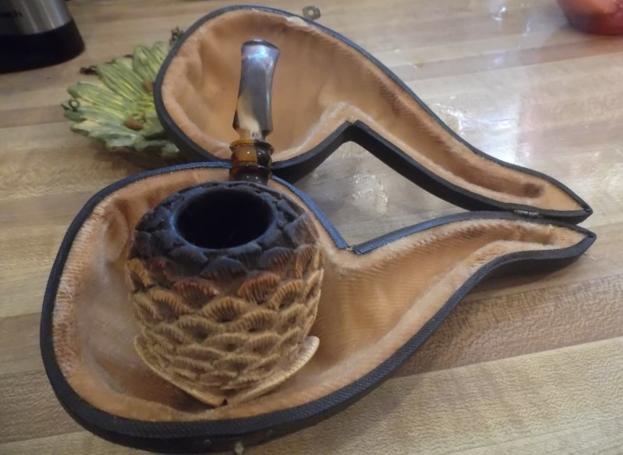
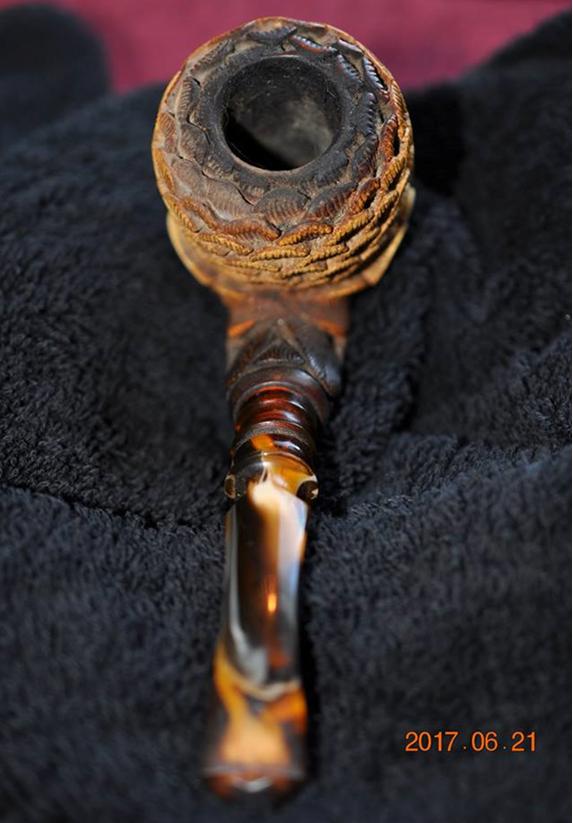
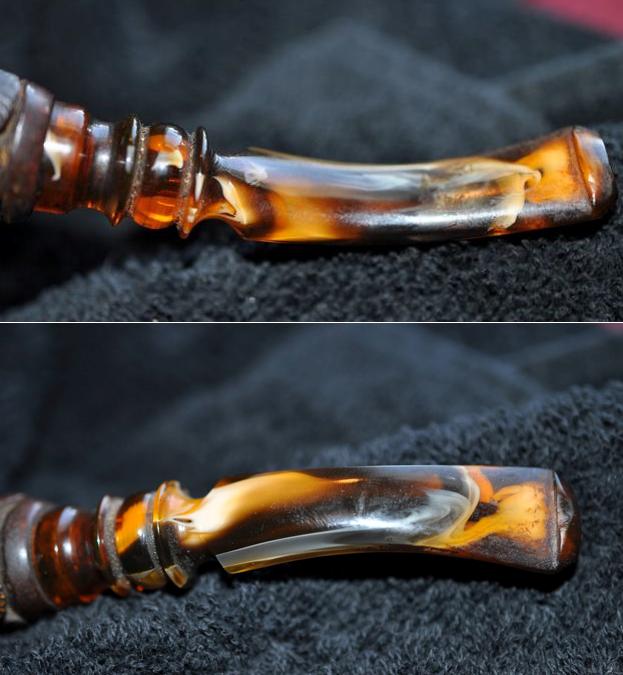
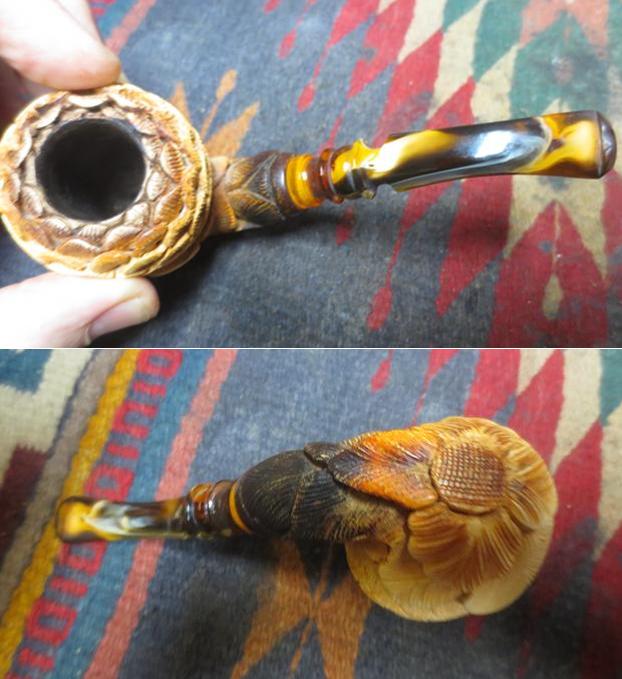
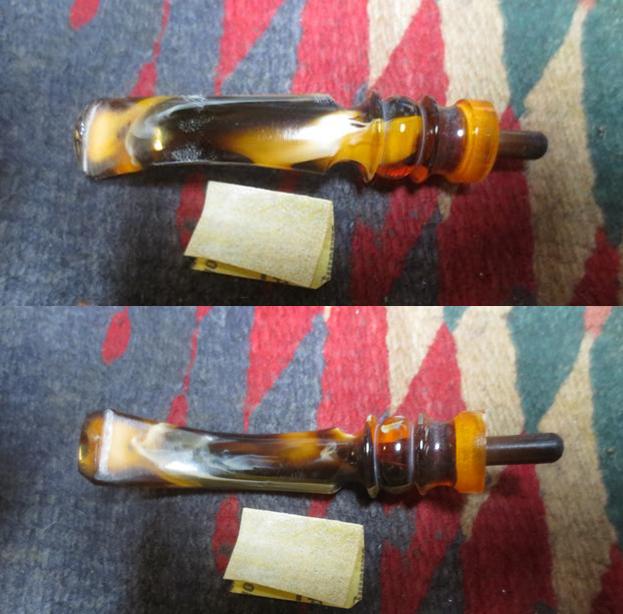
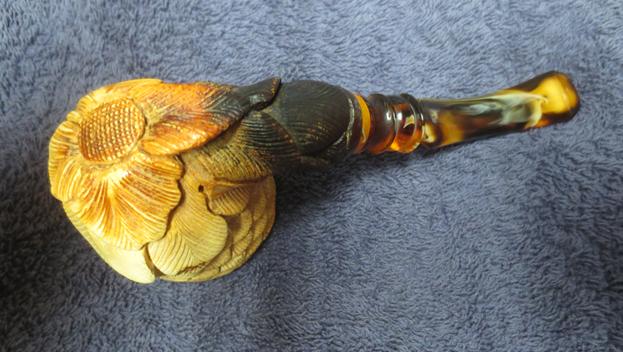
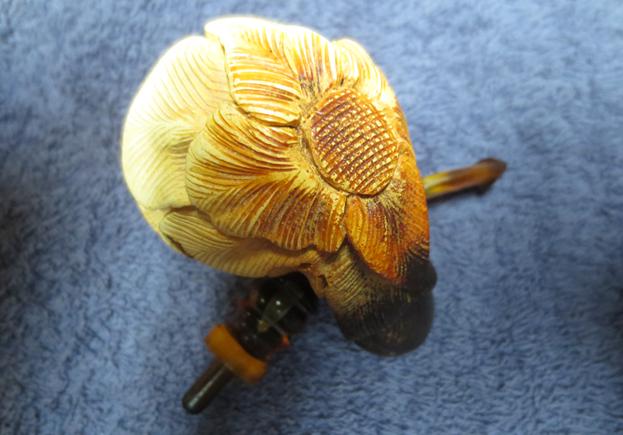
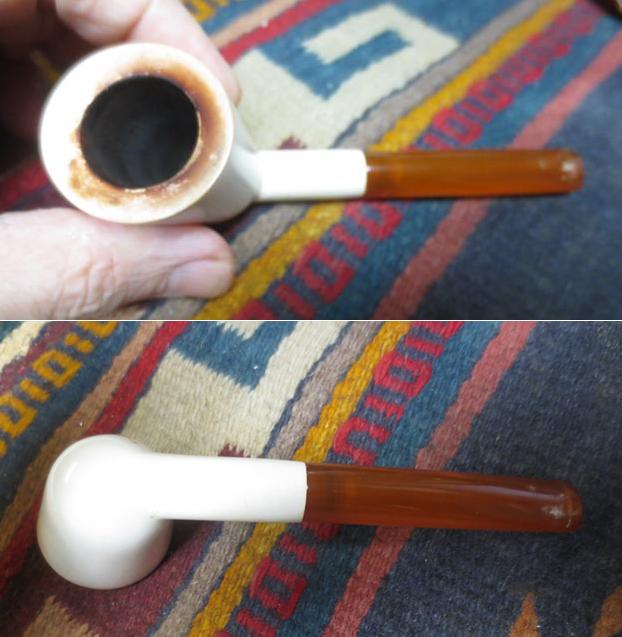
Jeff took photos of the pipe as he opened it and removed it from the case. All of the previous and the following photos were taken before he cleaned up the pipe. Inside the lid of the case it read in English the same thing that had been stamped on the exterior of the case – Real Block Meerschaum in an arc over a six point star and Genuine Amber in an arc under the star.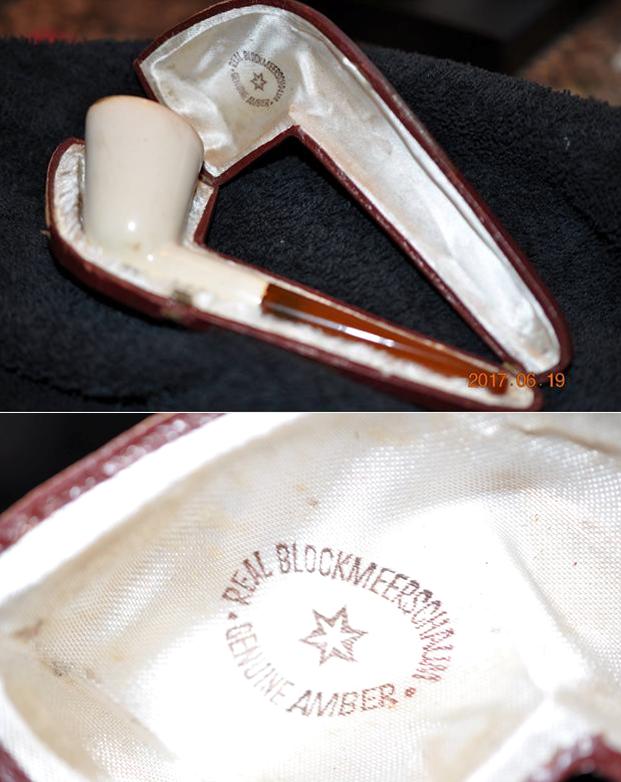 Jeff removed the pipe from the case and took some photos of it fresh from the case. The shape of the bowl was quite beautiful and there was colour beginning to happen on spots on the bowl and rim edge. The rim was exceptional dirty with a lava overflow from the cake that had formed in the bowl. The stem appeared to be a replacement – not genuine amber but an acrylic amber that obviously had been added later in the life of the pipe. The stem showed tooth marks and chatter on both the top and underside near the button. The slot in the button was not smooth but looked to be much like the slot cut in stem blanks that I purchase currently. The shape and the colour seem older but I cannot be certain of that. I know that it is not Bakelite as the colour goes all the way down into the bite marks and does not lighten as it goes deeper.
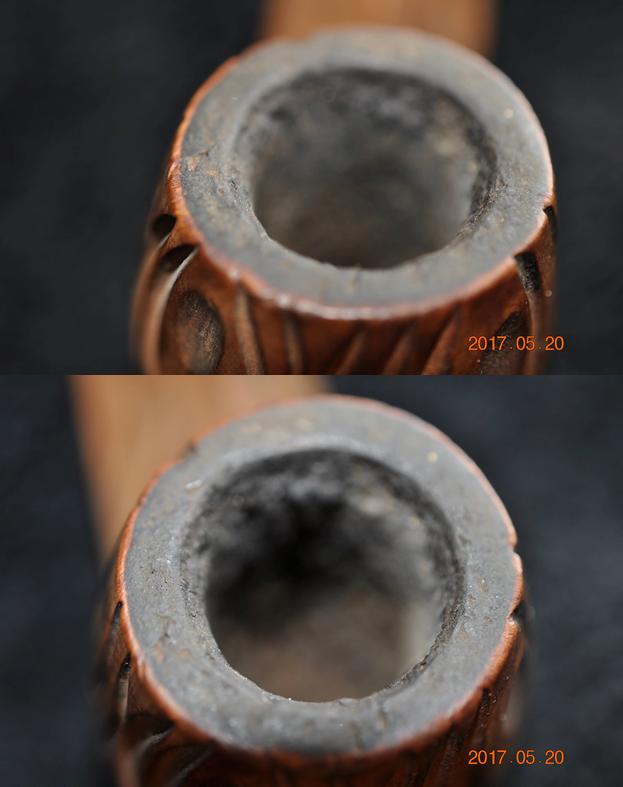
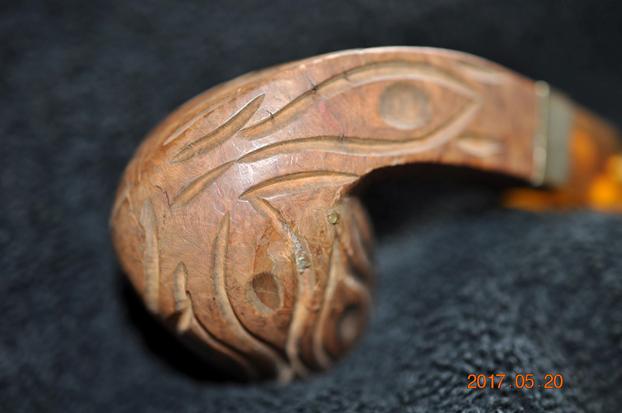
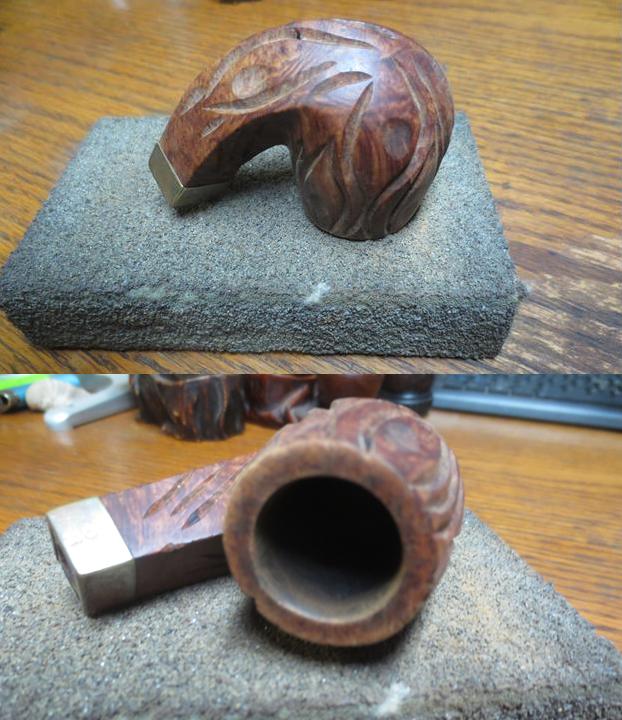
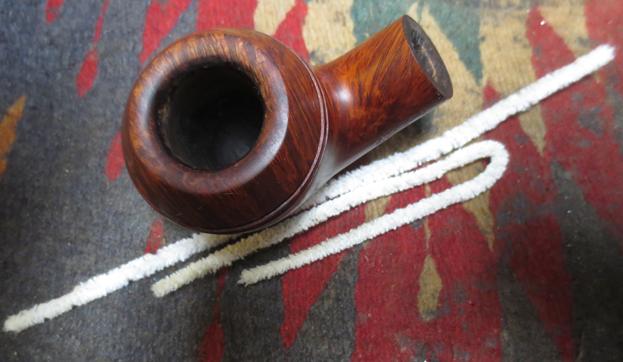
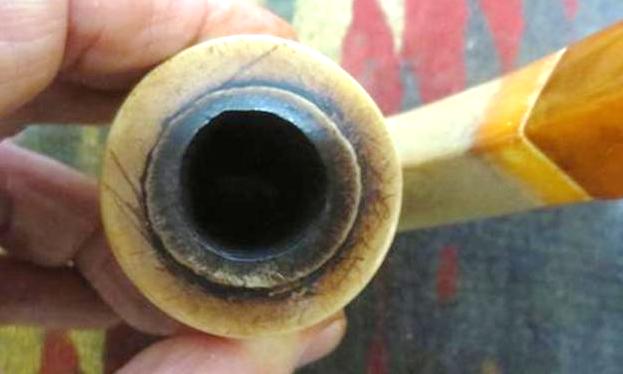
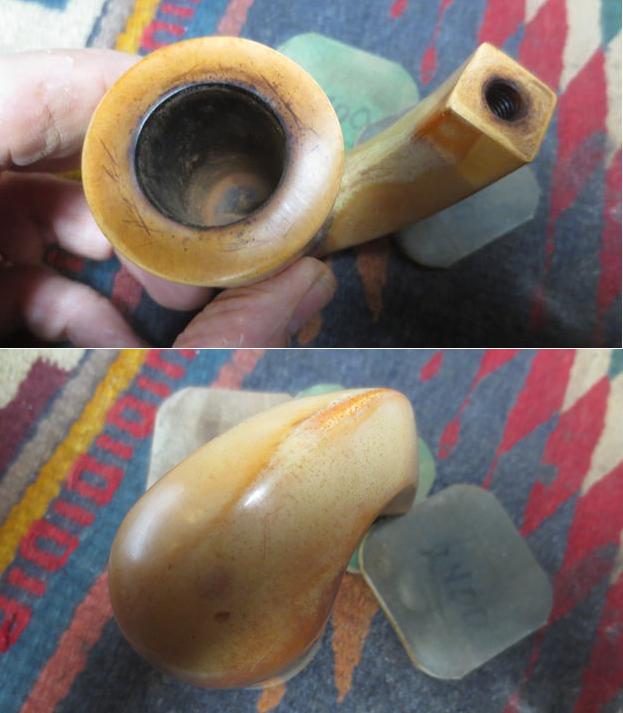
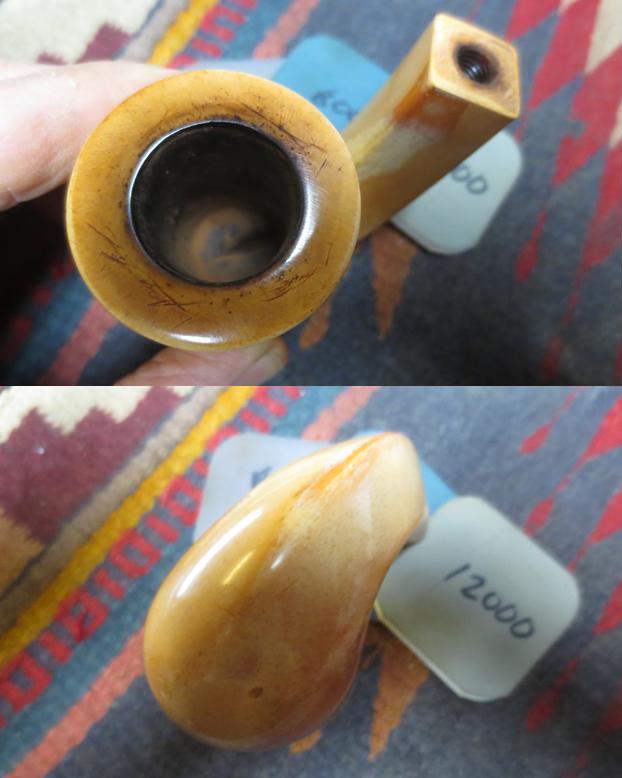
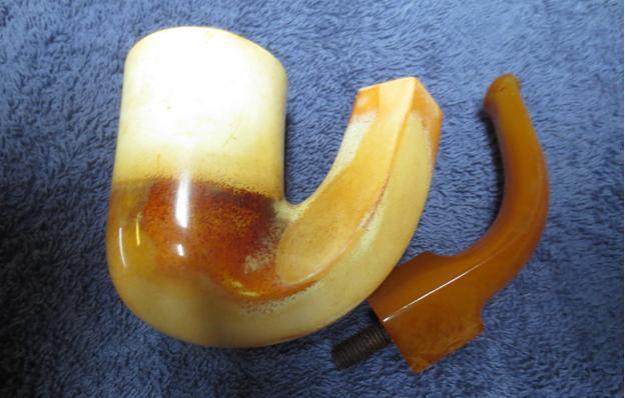
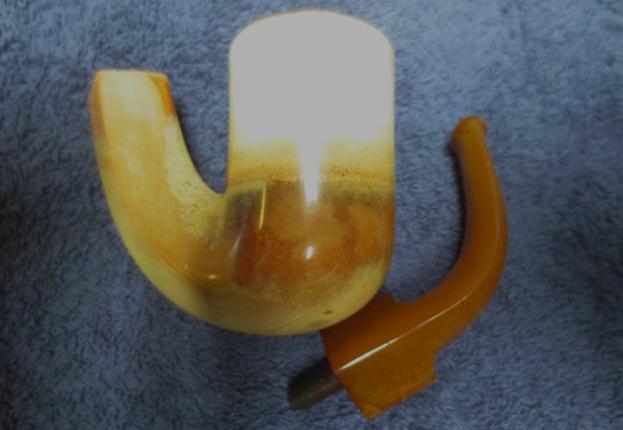
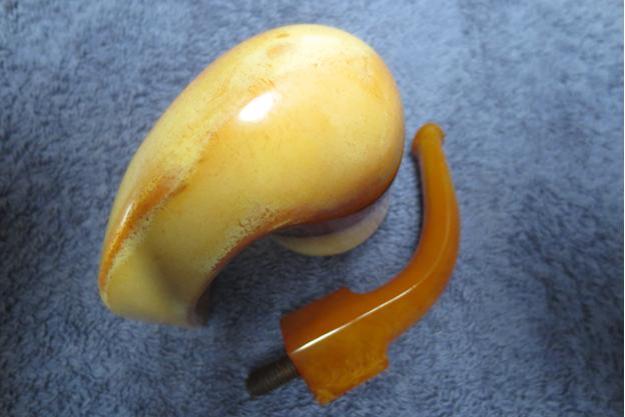
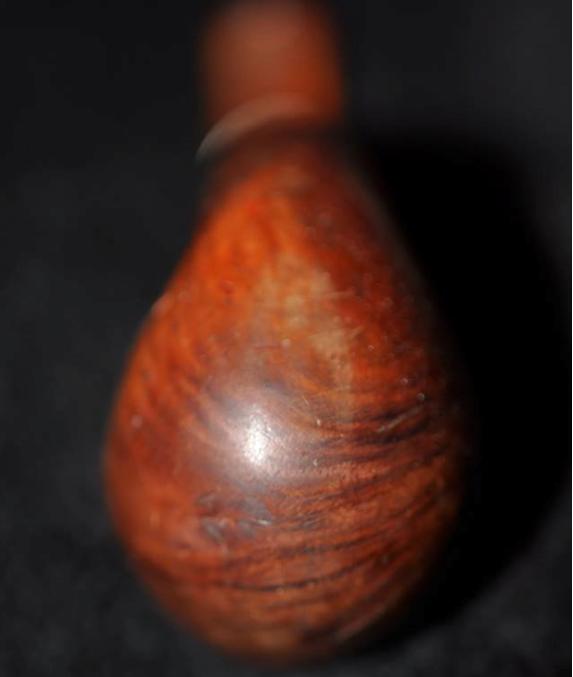
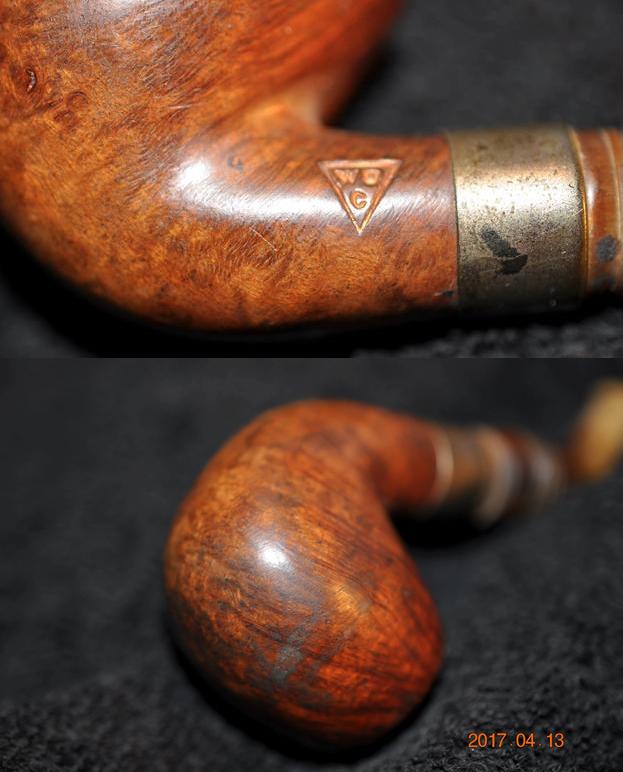
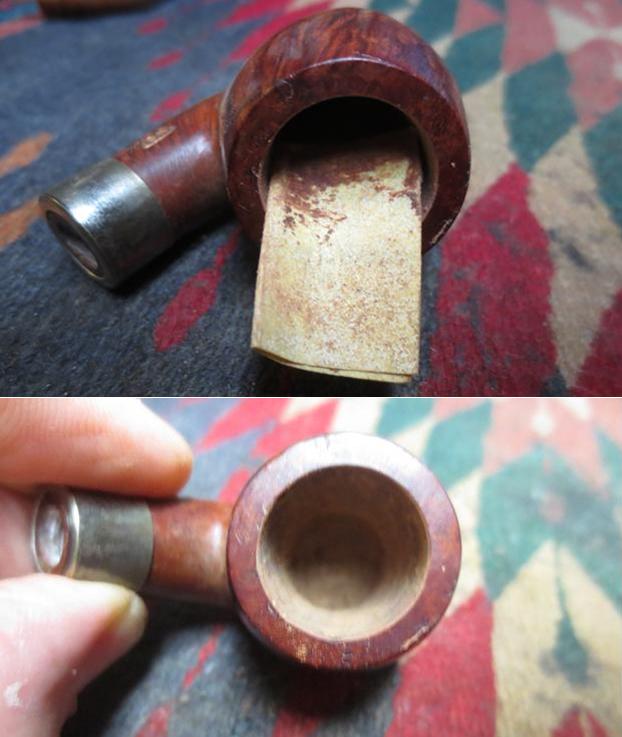
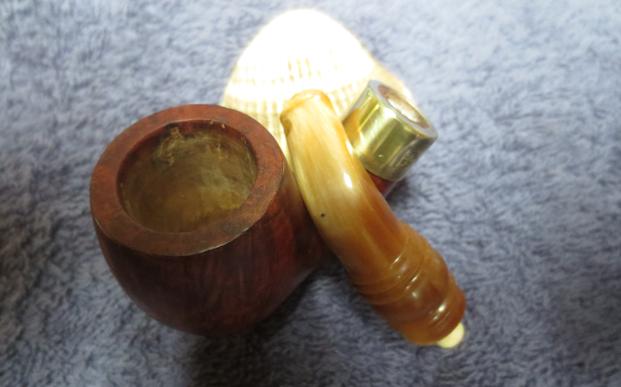
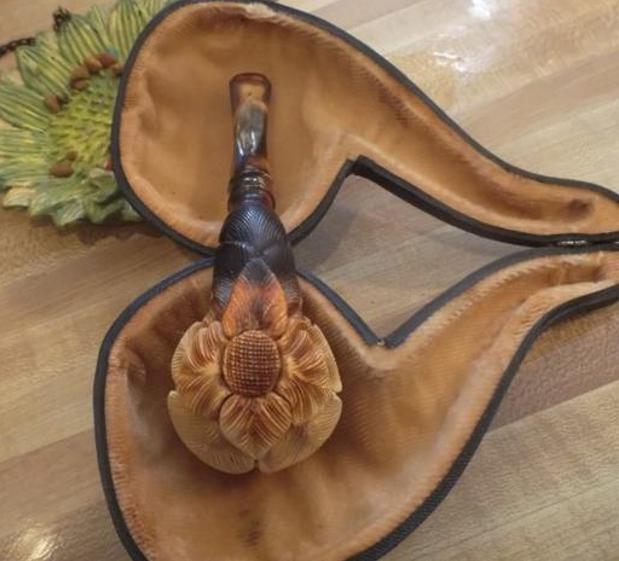
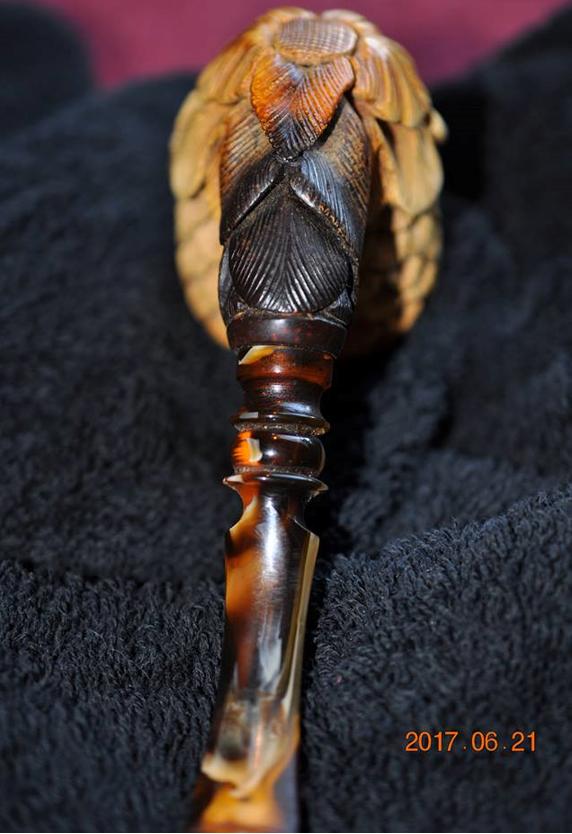
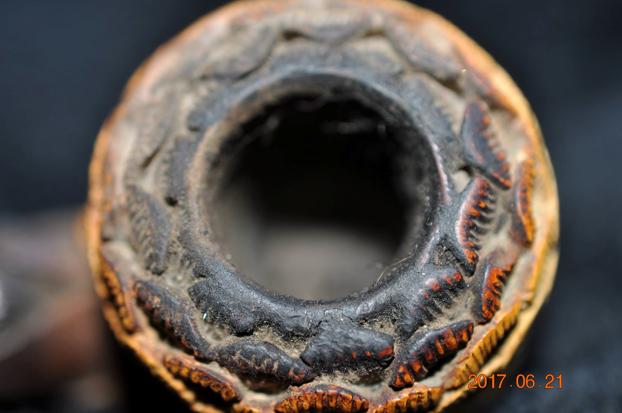
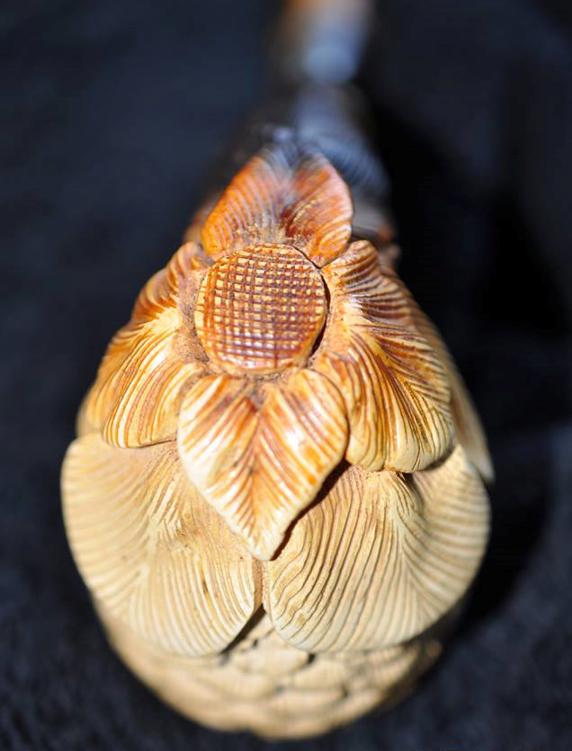
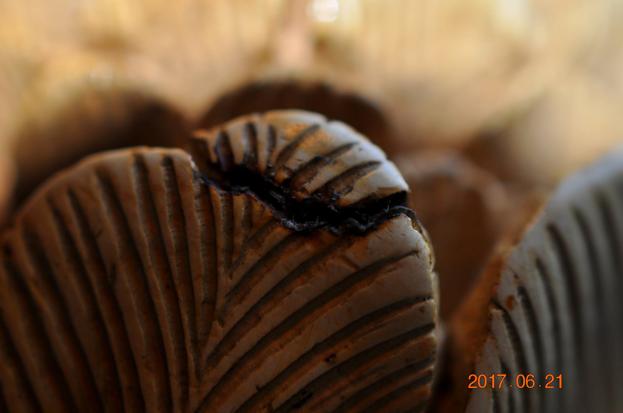
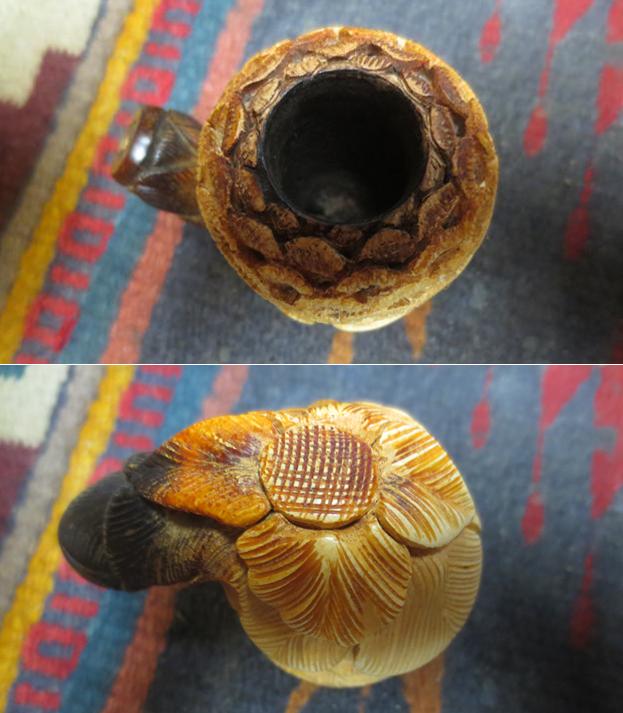
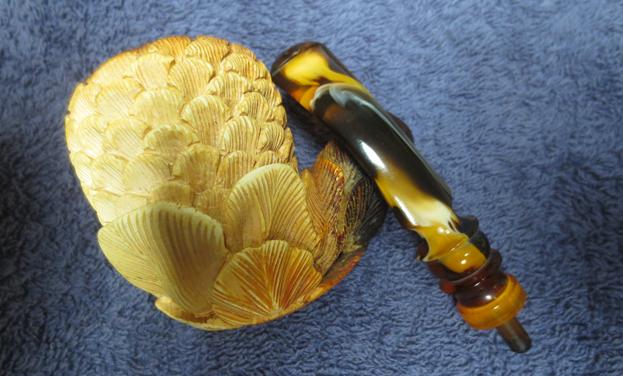
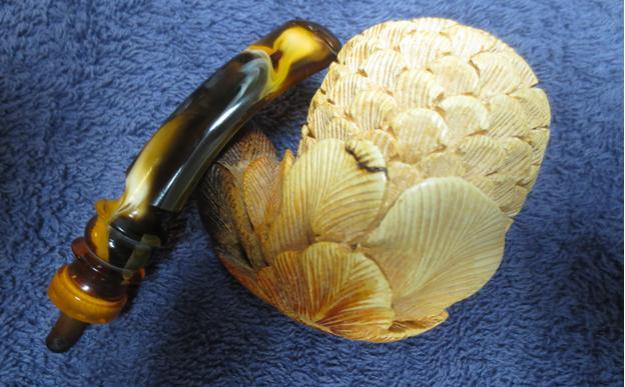
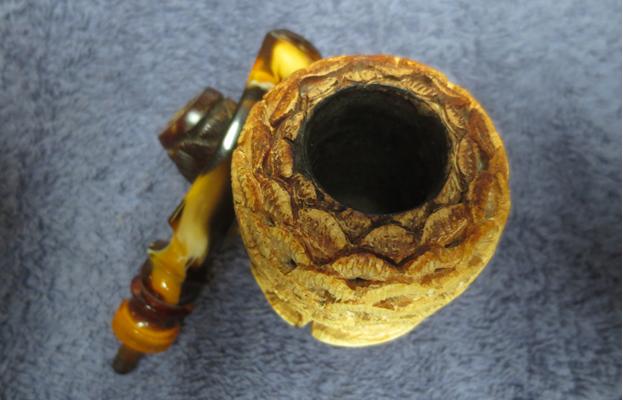
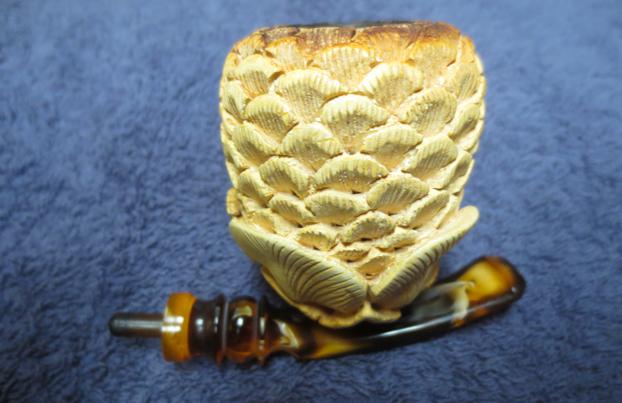
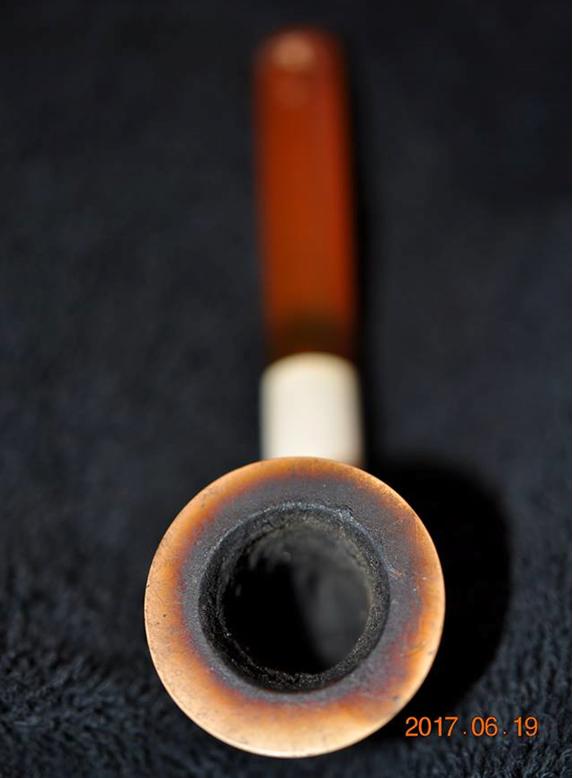 Jeff took a close up photo of the rim top to show the build up and the darkening – not colouration of the meerschaum but burn and tars that was on the surface of the meer. The second photo below shows the shape of the bottom of the bowl. The meerschaum is quite clean and shows little scratching and damage. The smooth and gentle curves show a quality of carving that is not seen too much in more current production meers.
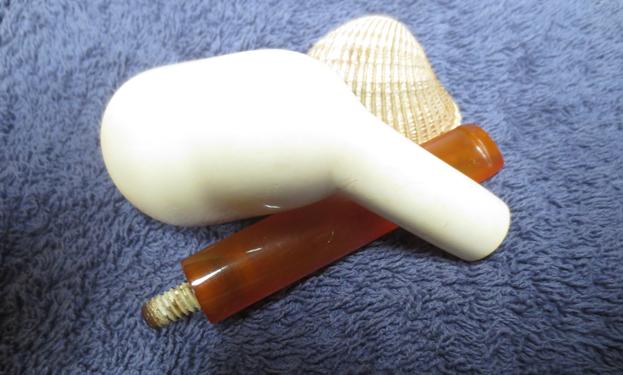
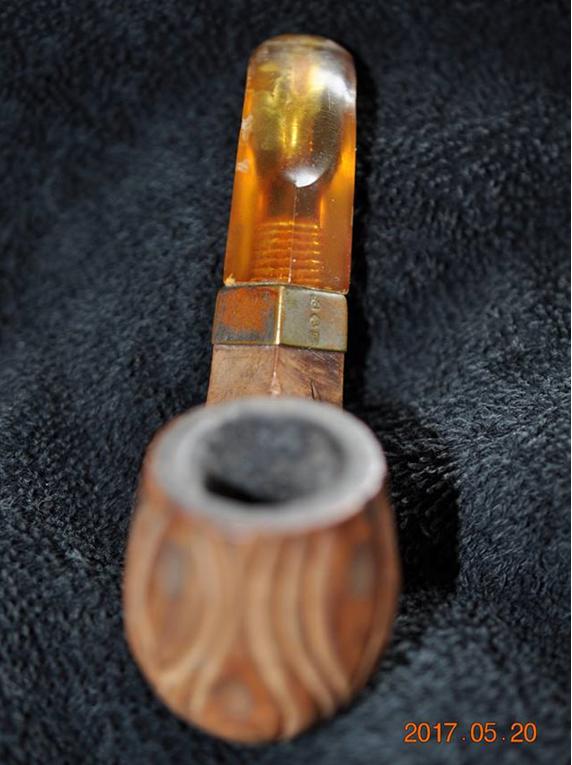
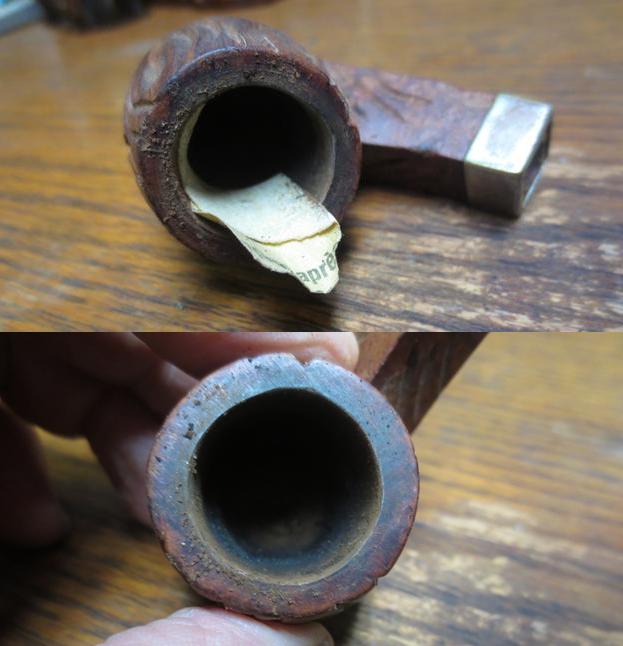
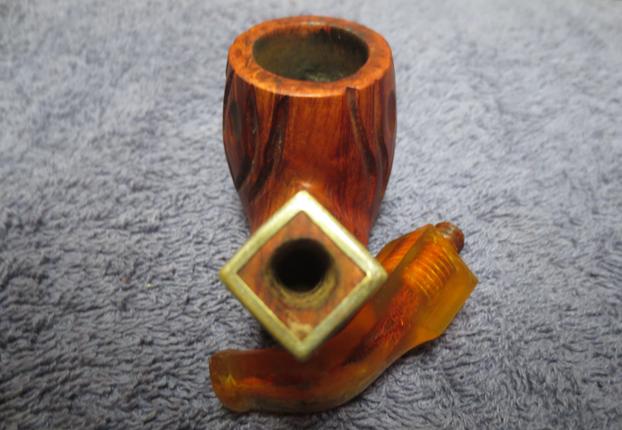
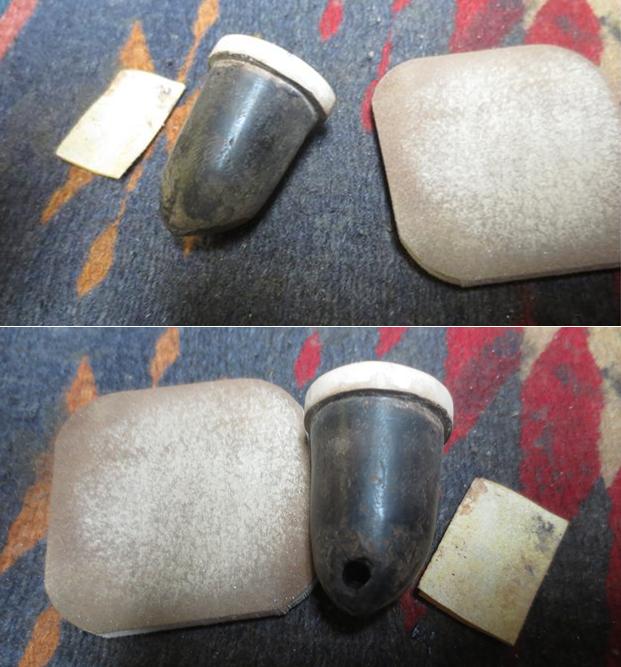
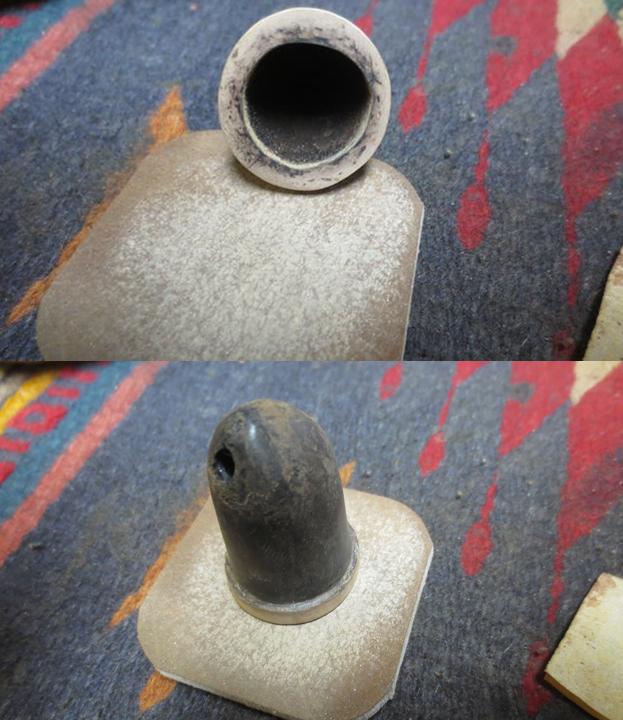
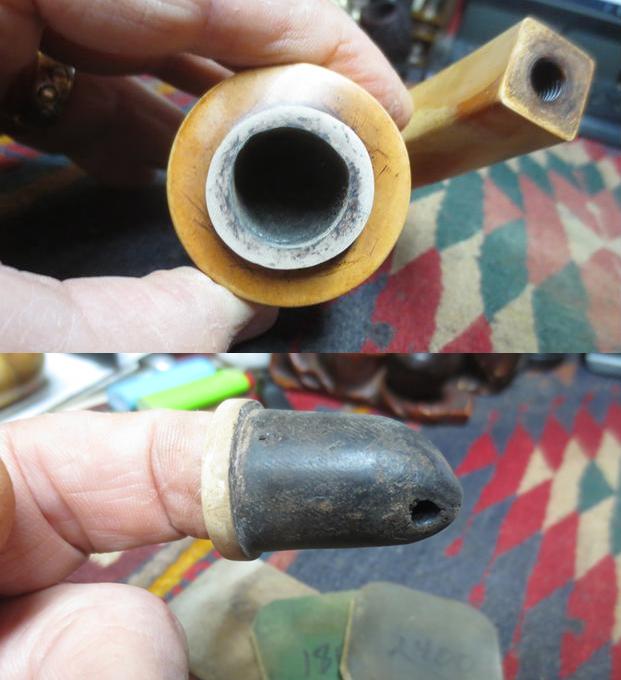
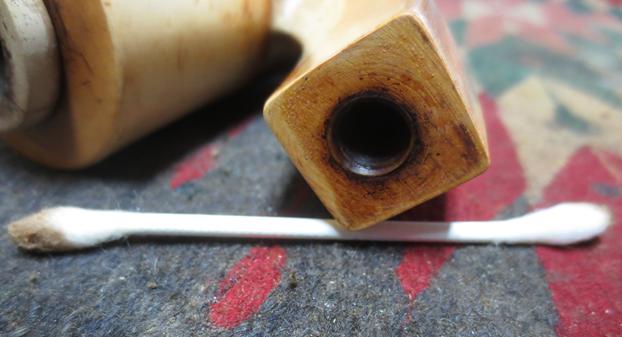
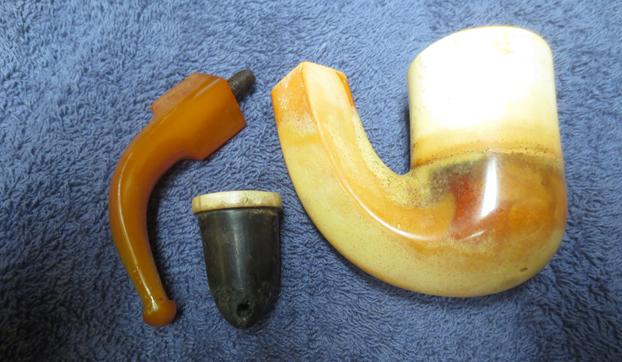
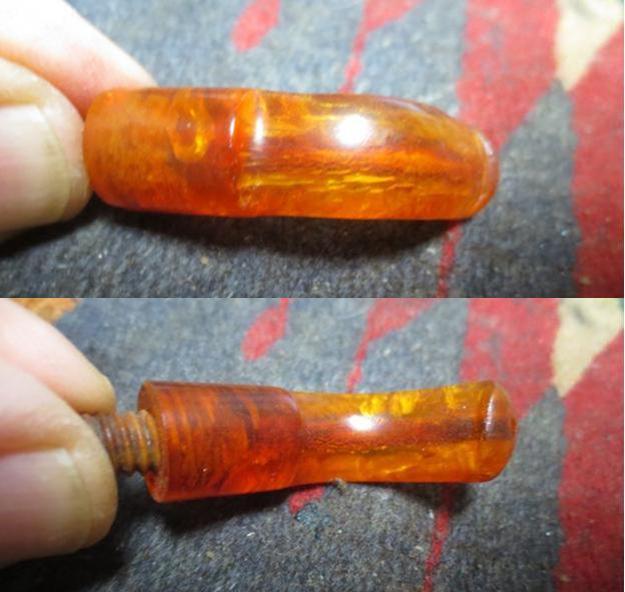
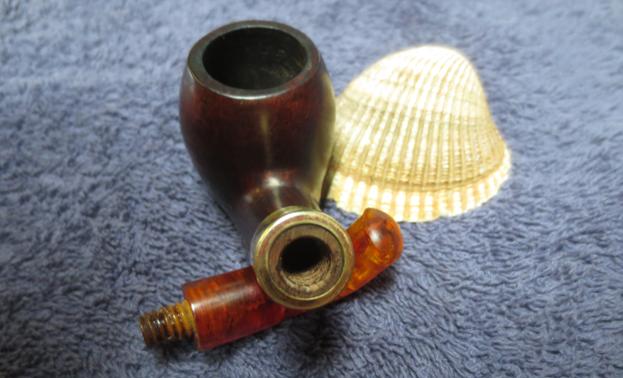
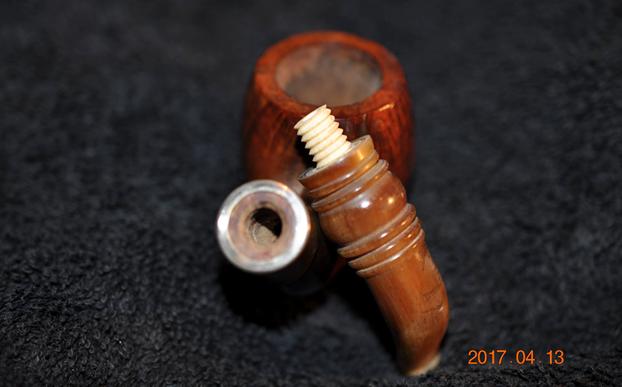
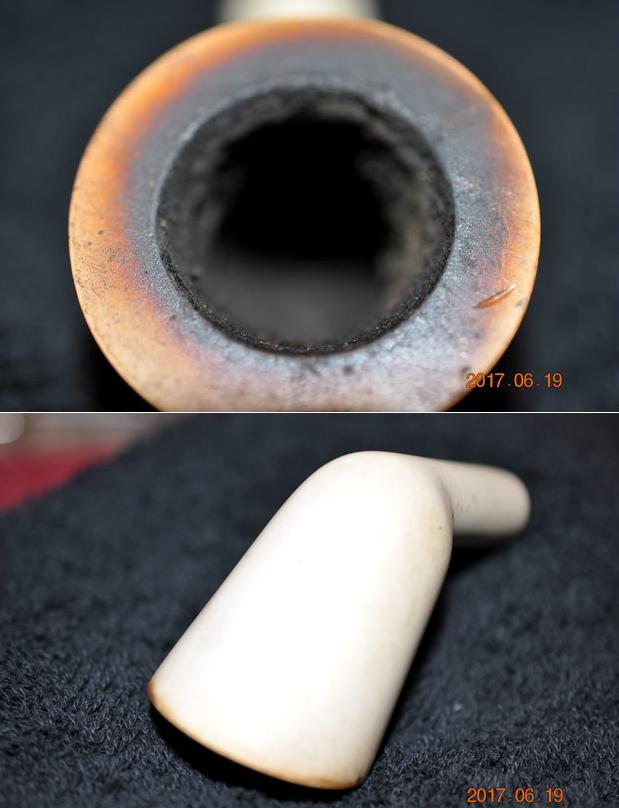 The tenon on the pipe is a metal threaded tenon that screws directly into the mortise of the meerschaum and directly into the stem. The tenon has the same threads on both ends so it is reversible and interchangeable. It was incredibly dirty and caked with tars, oils and debris. The airway in the tenon was quite plugged with the tars.
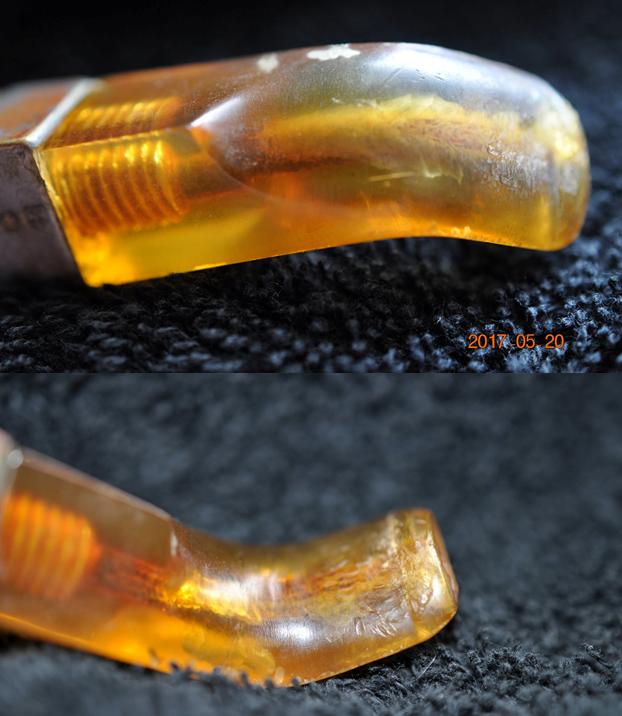
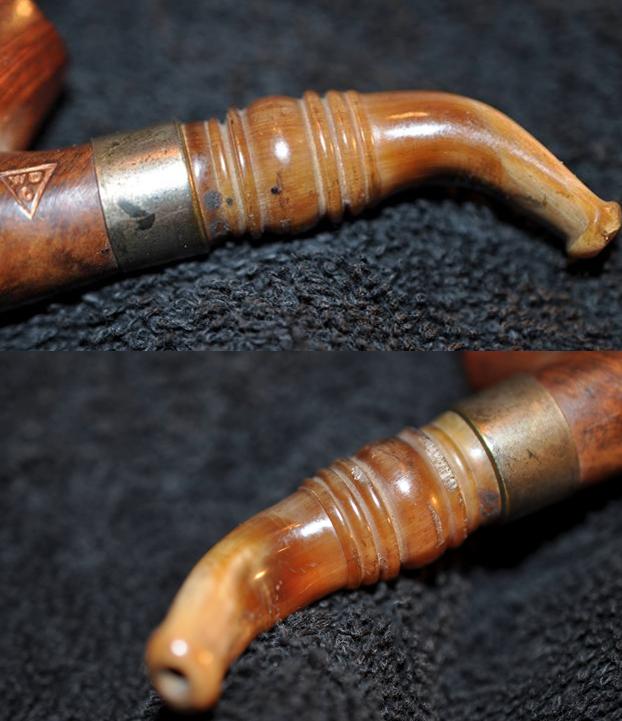
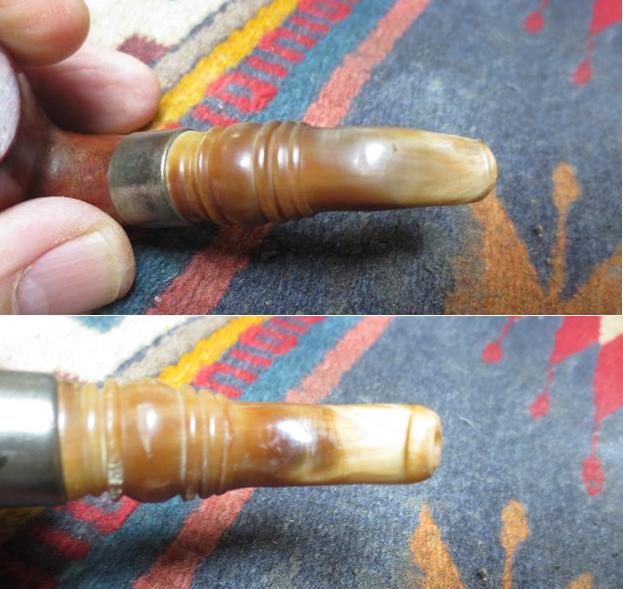
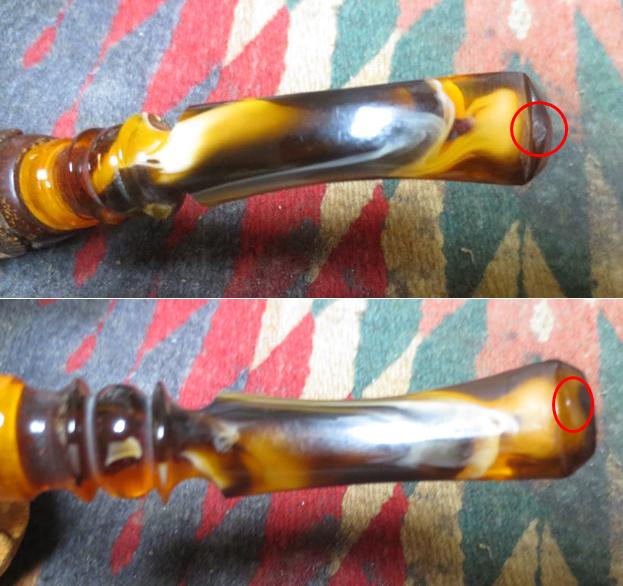
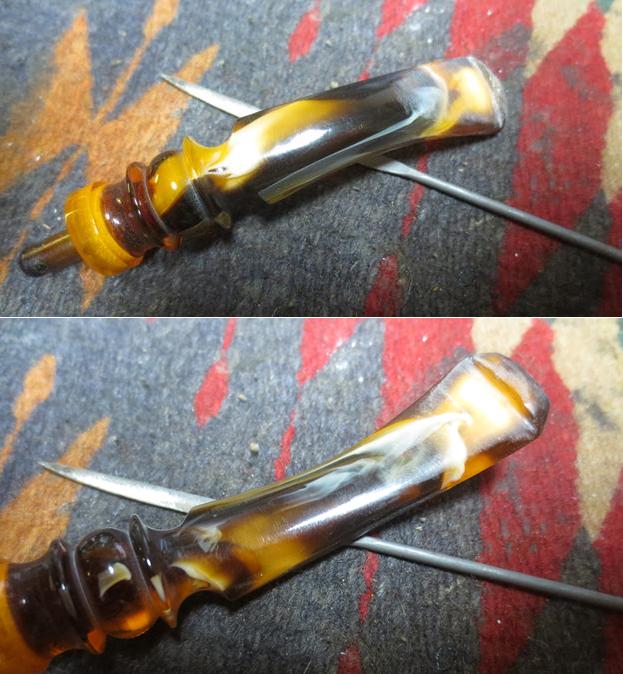
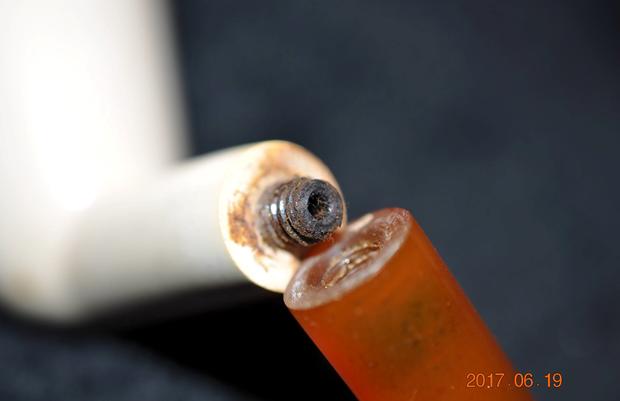 The stem itself had tooth chatter and marks on both the top and the underside near the button. In the photos it appears to be white but in reality as the stem is cleaned up the acrylic material is the same colour all the way through the bite marks.
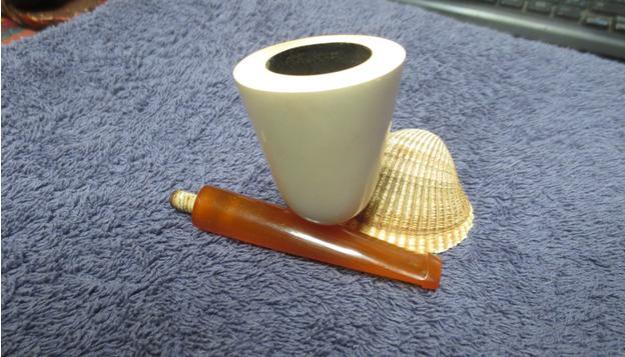
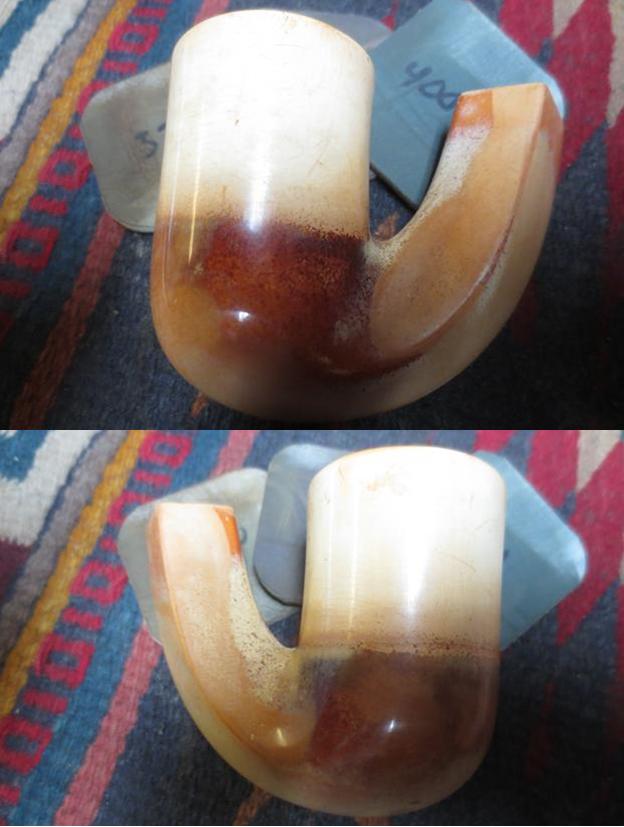
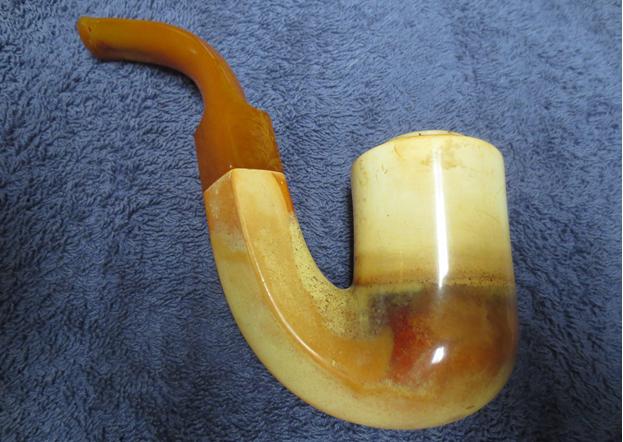
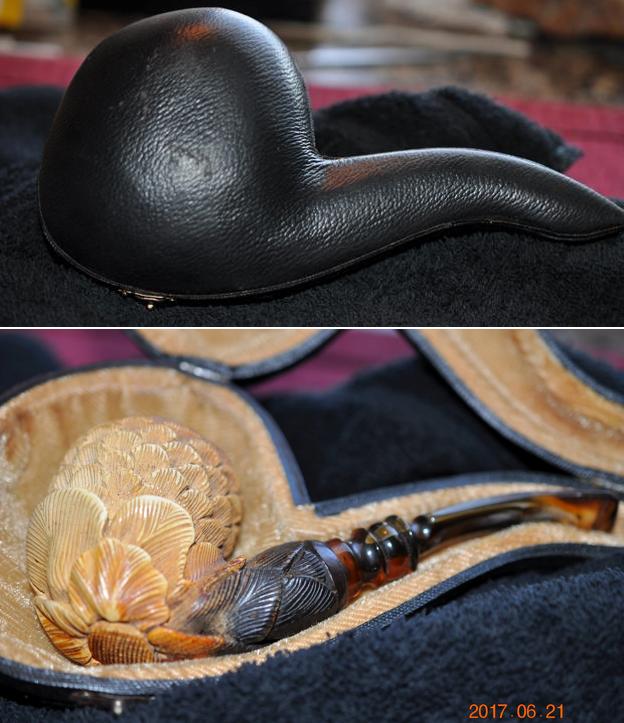
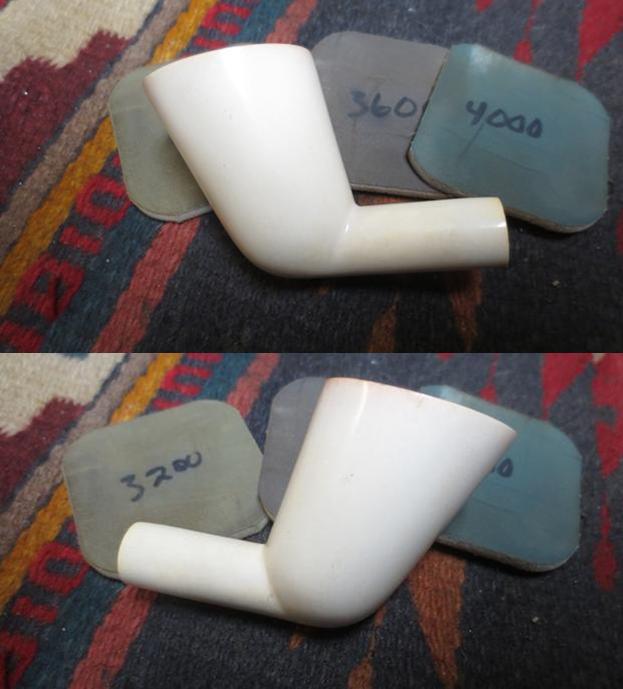
 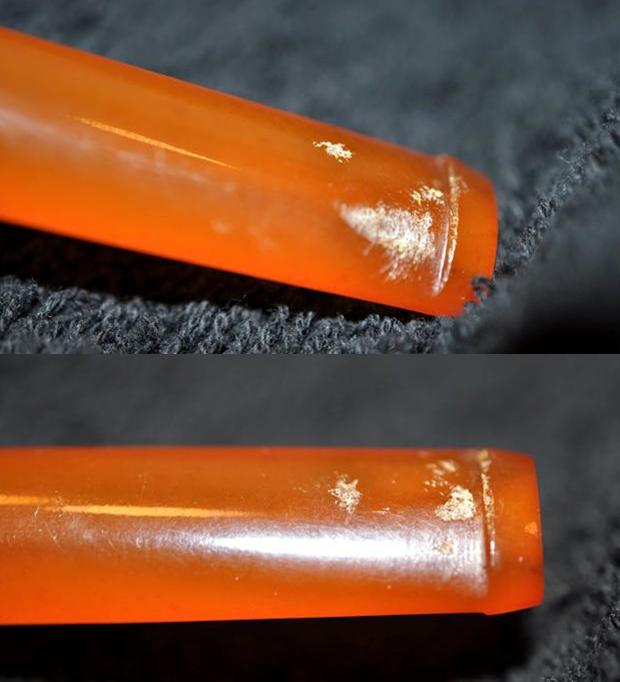 Jeff cleaned the pipe with his usual thoroughness – he reamed the bowl and cleaned out the internals with alcohol, cotton swabs and pipe cleaners. He scrubbed the exterior with Murphy’s Oil Soap. And worked over the rim top to remove the cake and lava on the surface of the meerschaum. He also removed the marks and grime that was on the exterior of the bowl and shank. When it arrived in Vancouver it was in clean shape and ready to be restored. I took some photos of the before I started to work on it to show its condition.
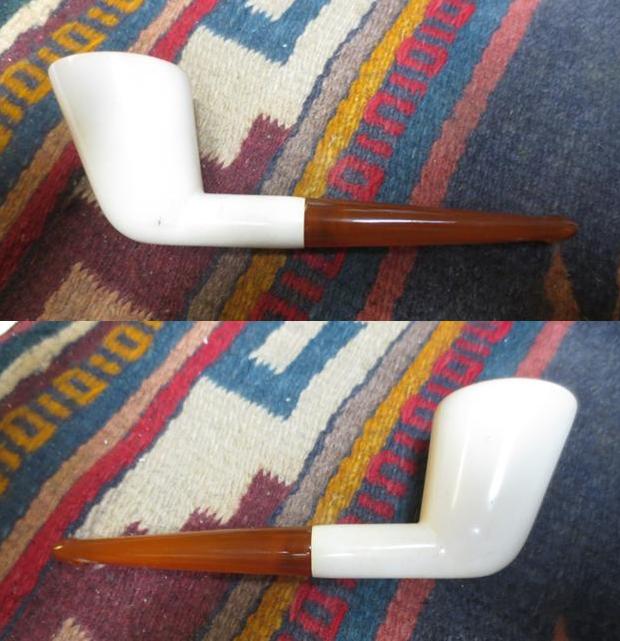
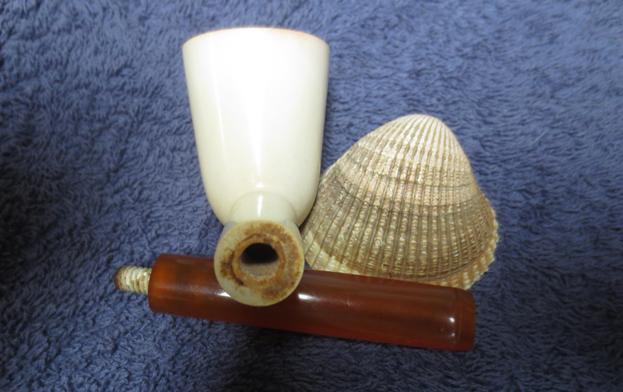
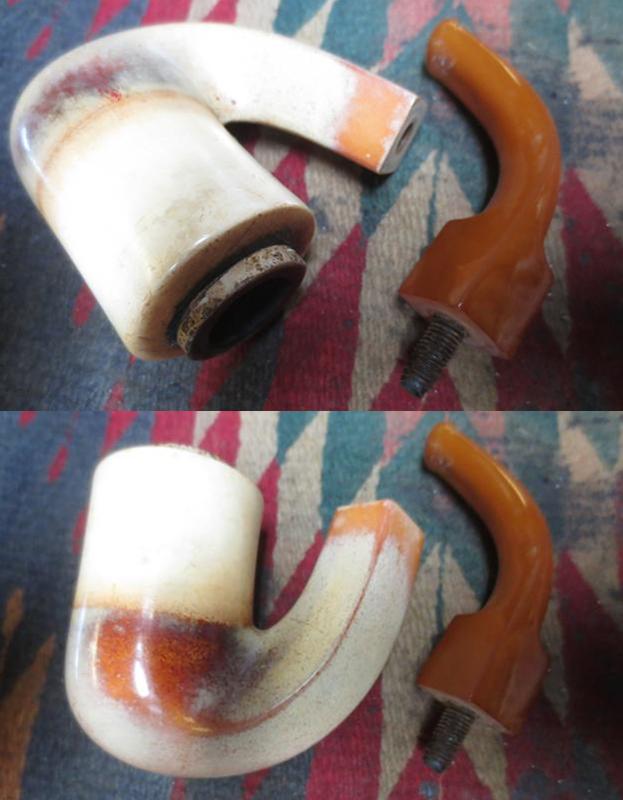
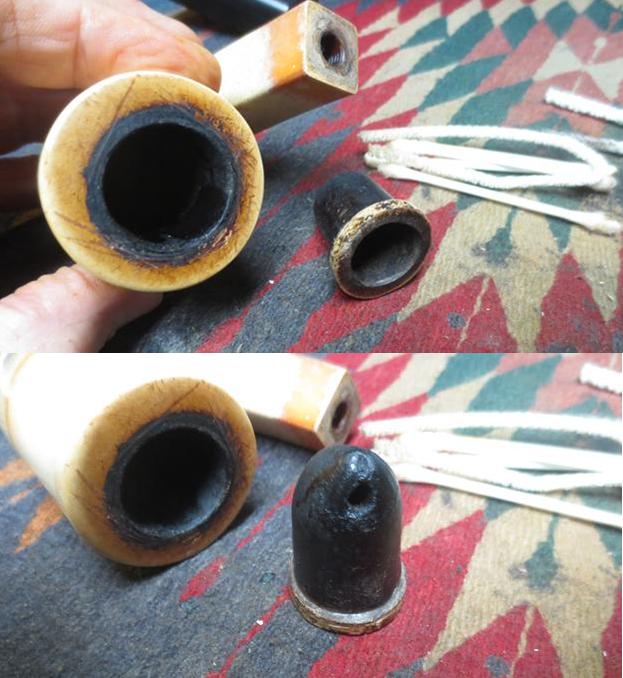
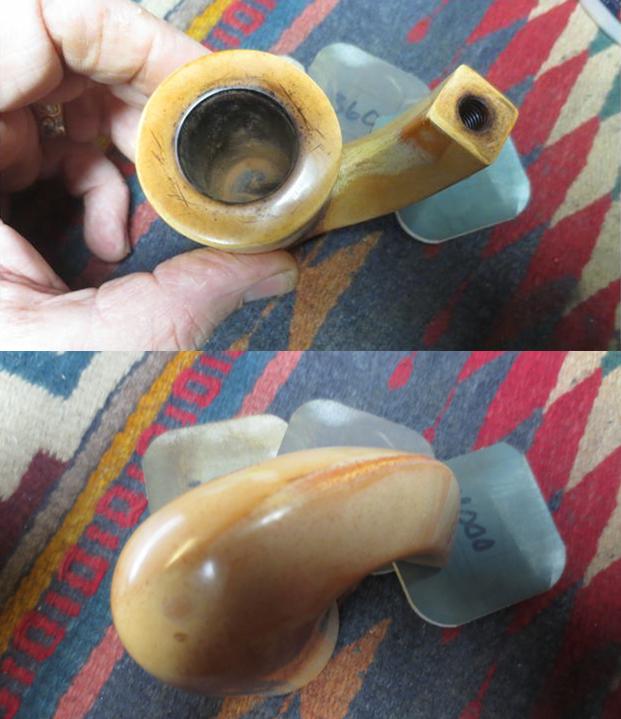
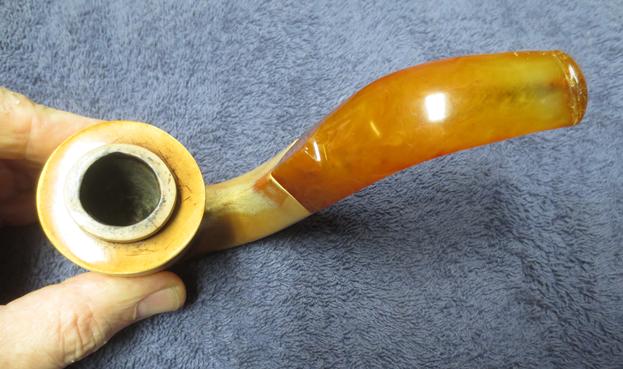
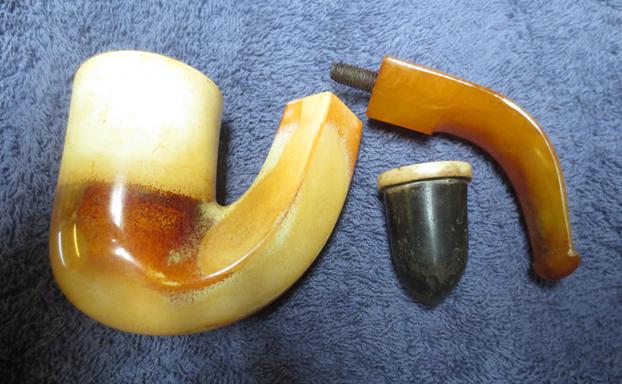
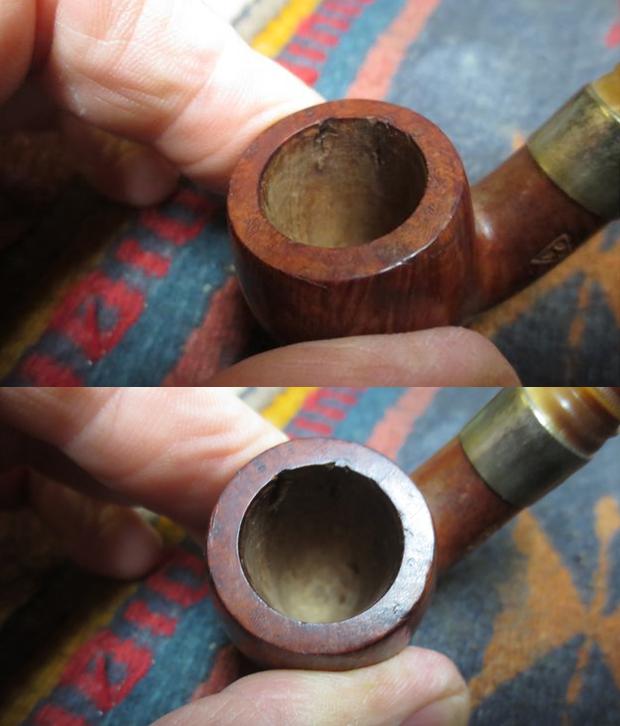
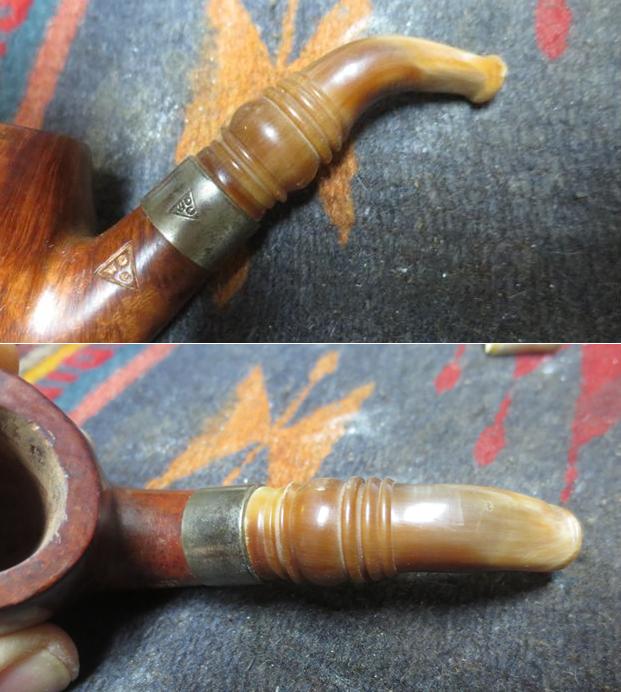
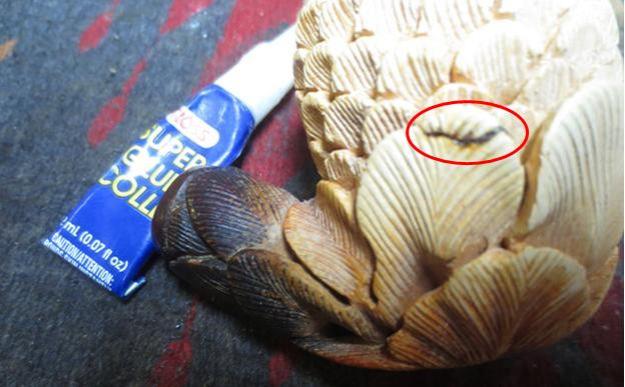
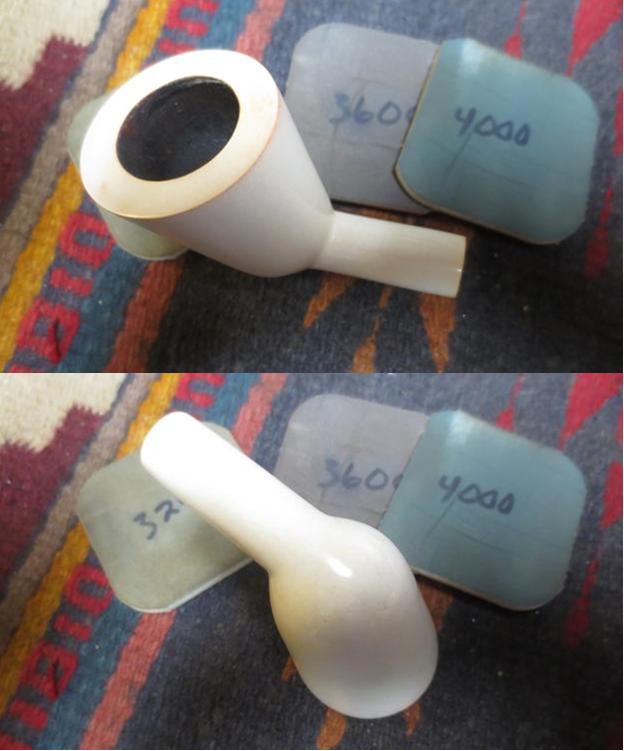
 While Jeff was able to remove the tars and lava buildup on the rim top there was still some debris and buildup on the surface. As I examined it I could see that it sat on top of the rim surface rather than down in the meerschaum itself. The surface of the meer was smooth and undamaged so cleaning off the layer on the rim top should come off easily.
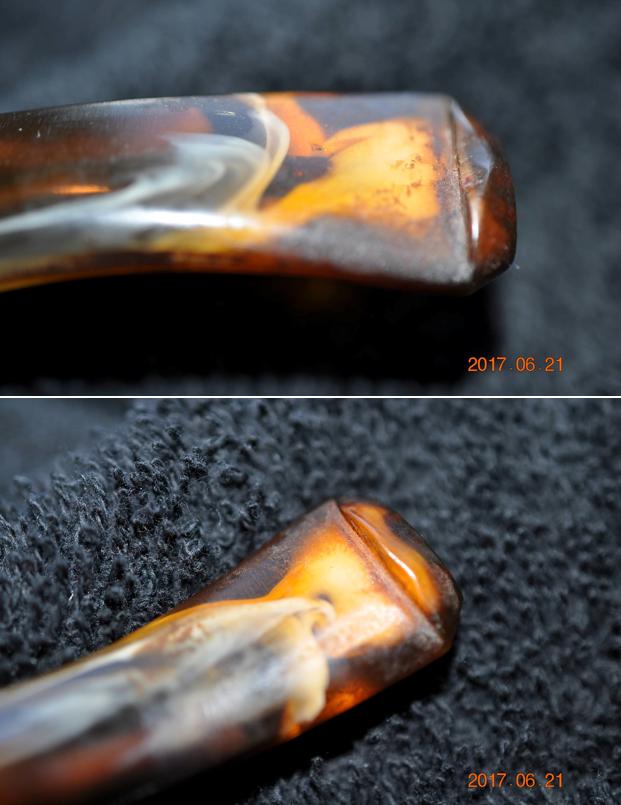
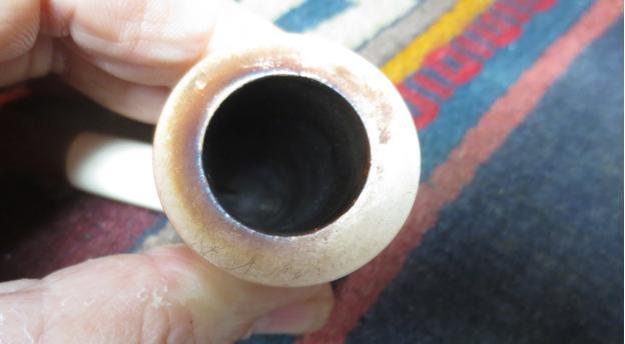 Jeff was also able to remove the debris around the bite marks in the top and underside of the stem surface. You can see from the photos that the stem material remains the same deep into the marks.
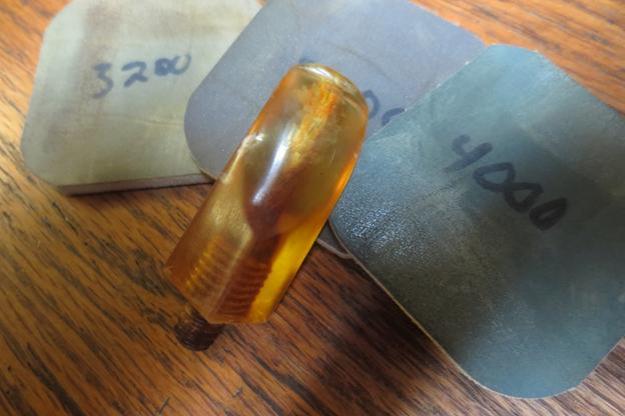
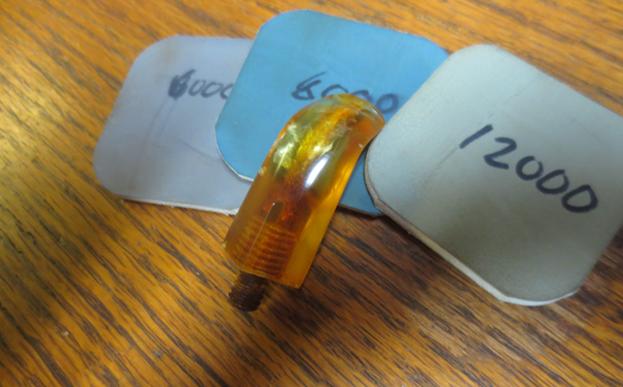
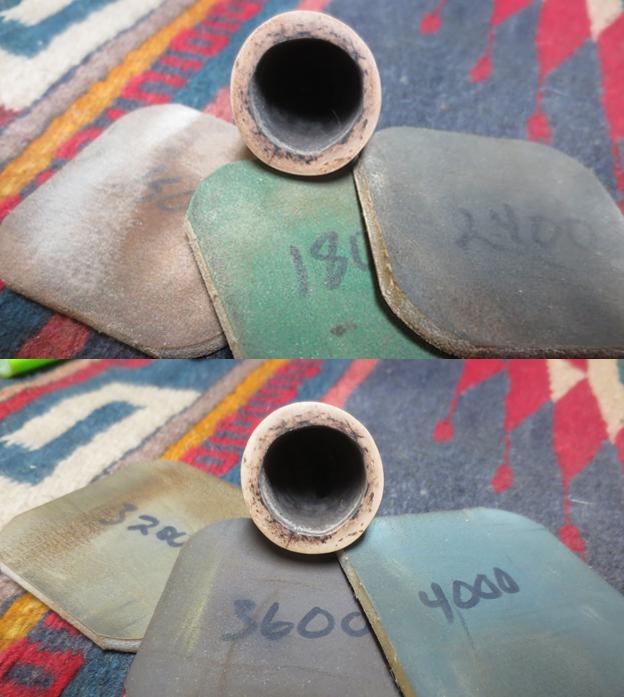
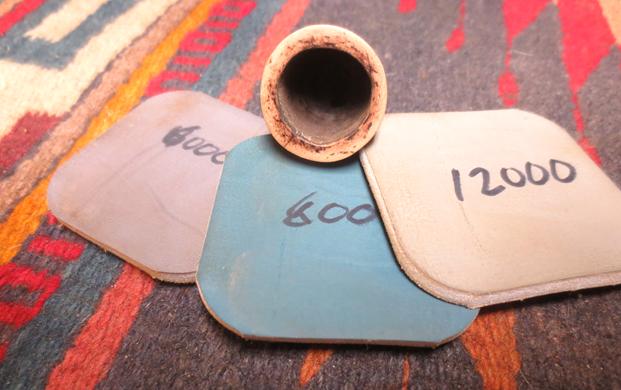
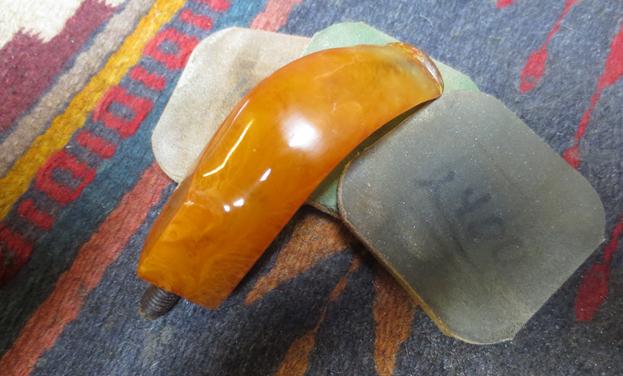
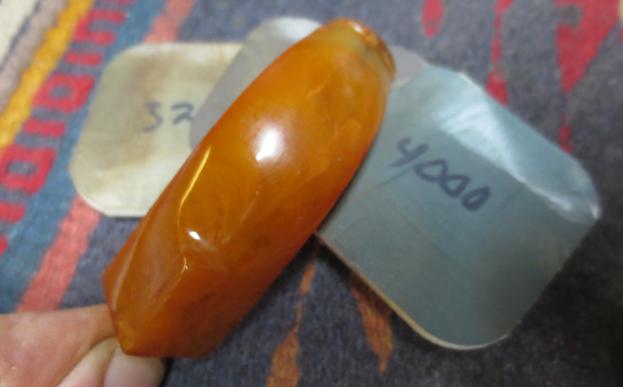
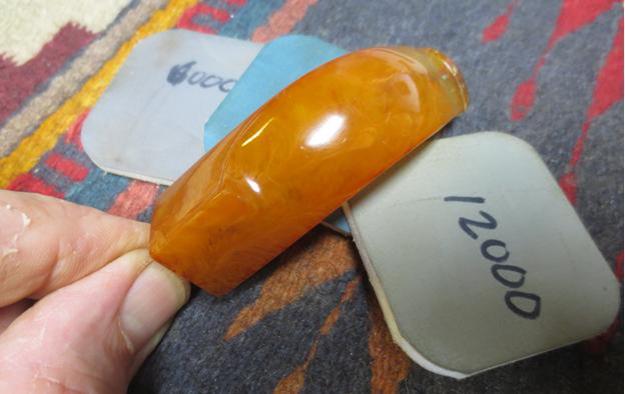
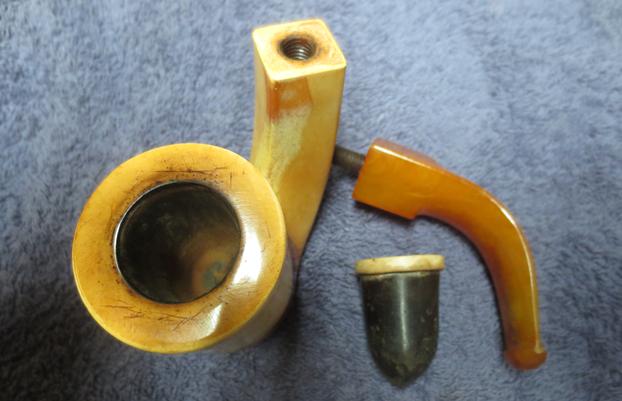
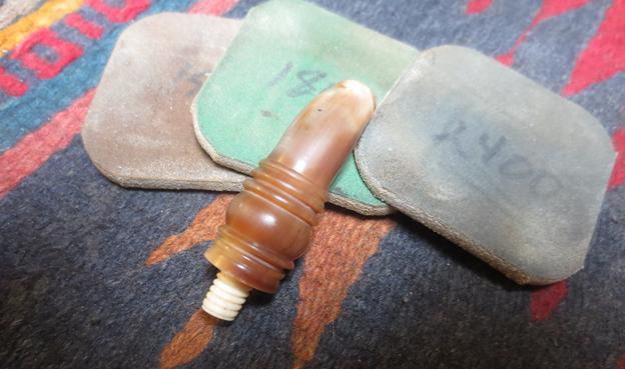
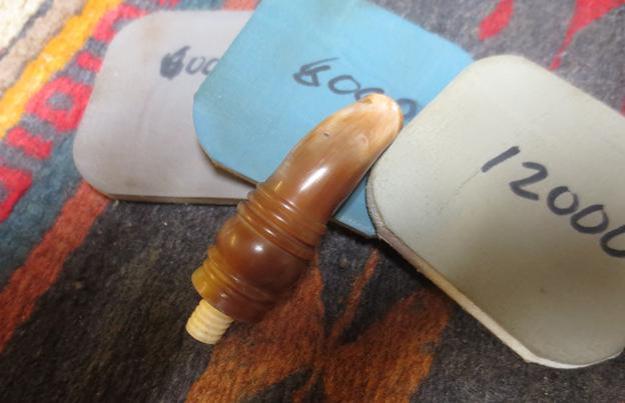
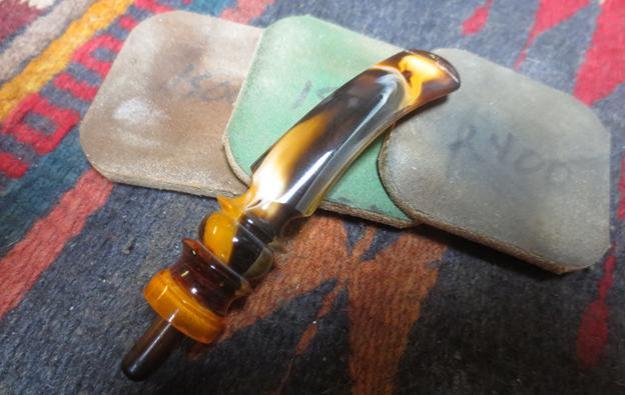
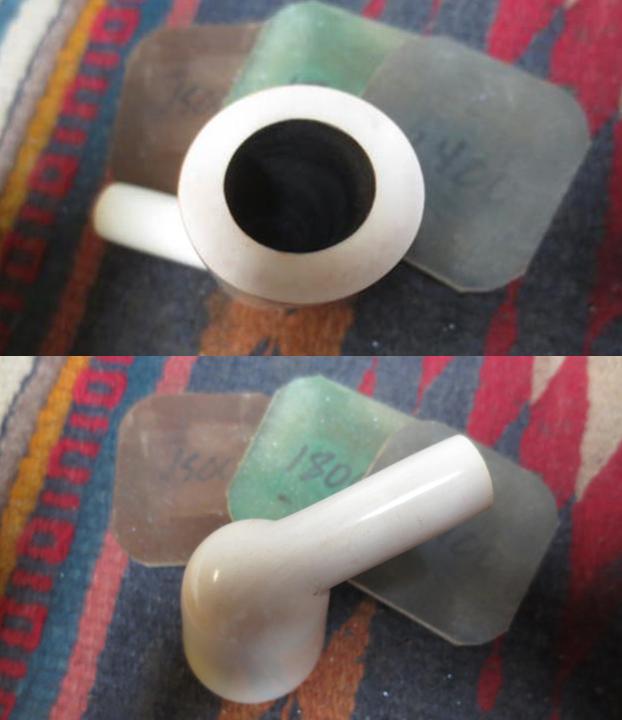
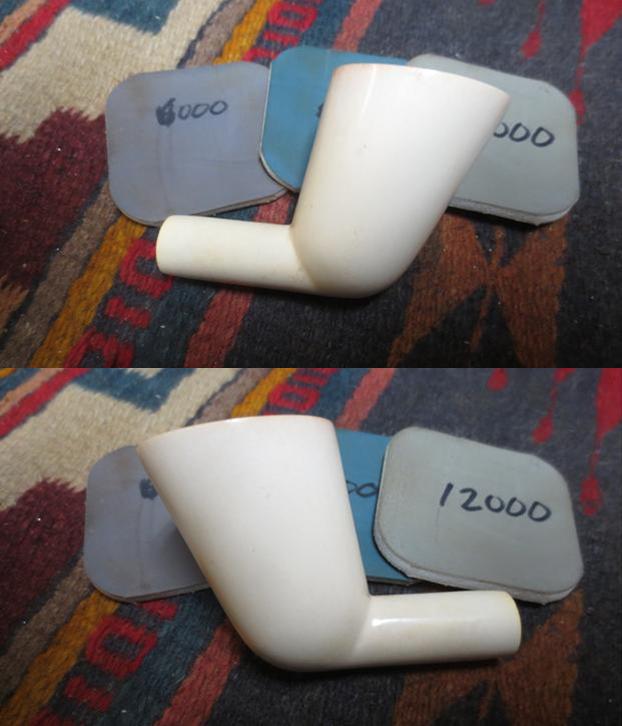
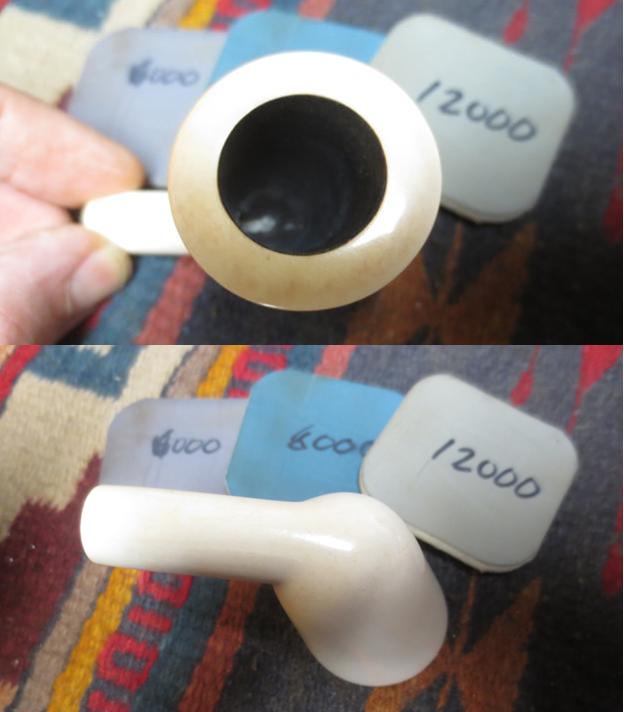
 I used a fine grit sanding sponge to gently top the bowl. It is a flat surface and I turned the bowl into the sanding sponge. I carefully kept the rim flat against the surface of the sanding block. I worked it on the sanding block until all of the remaining buildup was gone. I polished the bowl and rim with micromesh sanding pads – wet sanding with 1500-2400 grit pads. I wiped the meer down with a damp cotton pad. I dry sanded it with 3200-12000 grit pads and wiped it down with the damp cotton pad after each micromesh pad. The photos below tell the story.
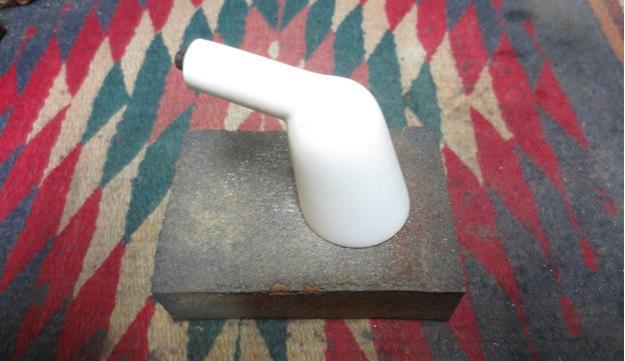

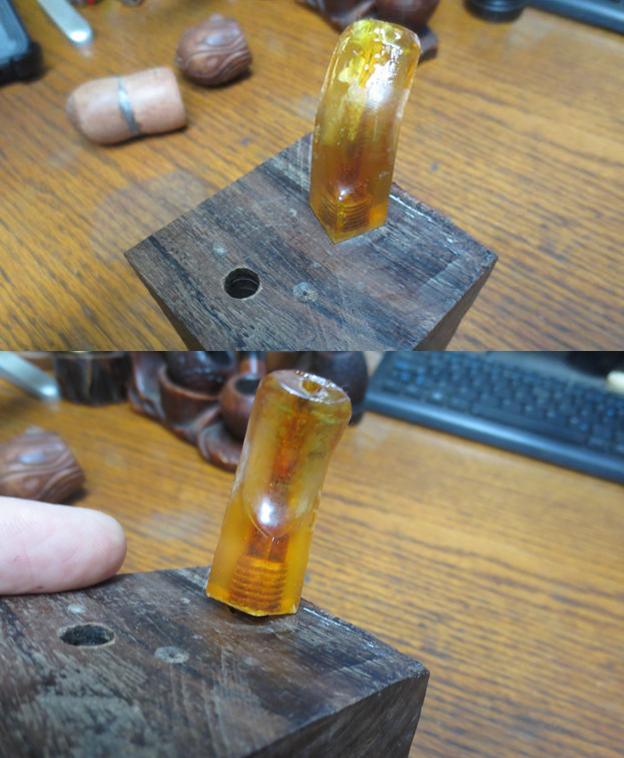
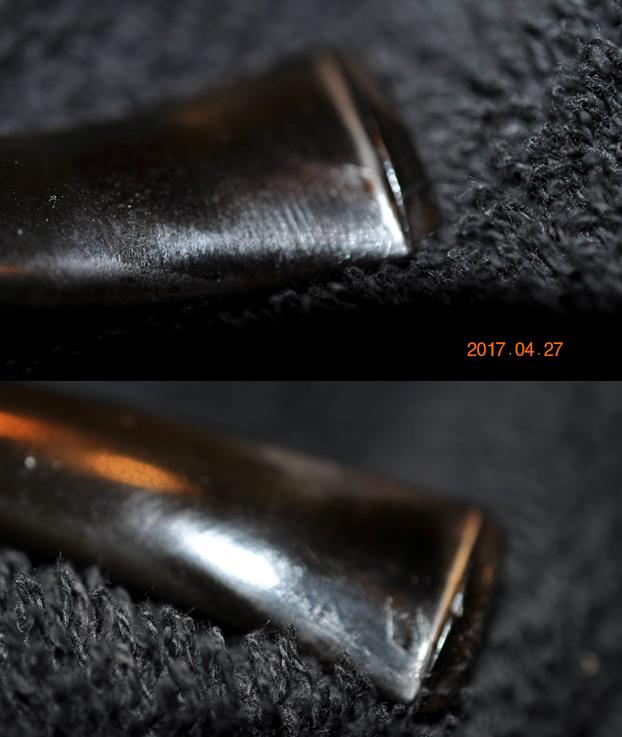
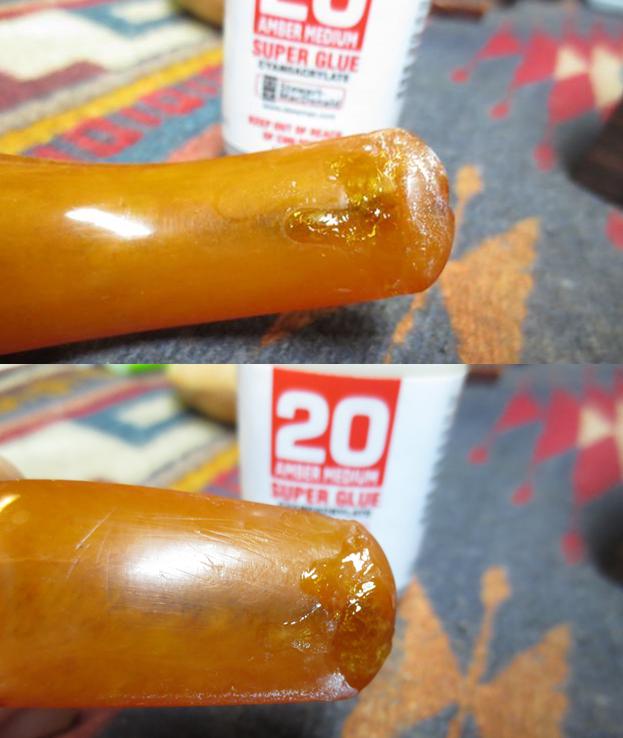
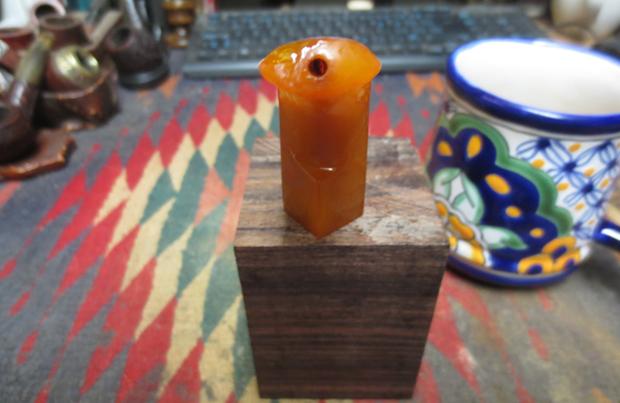
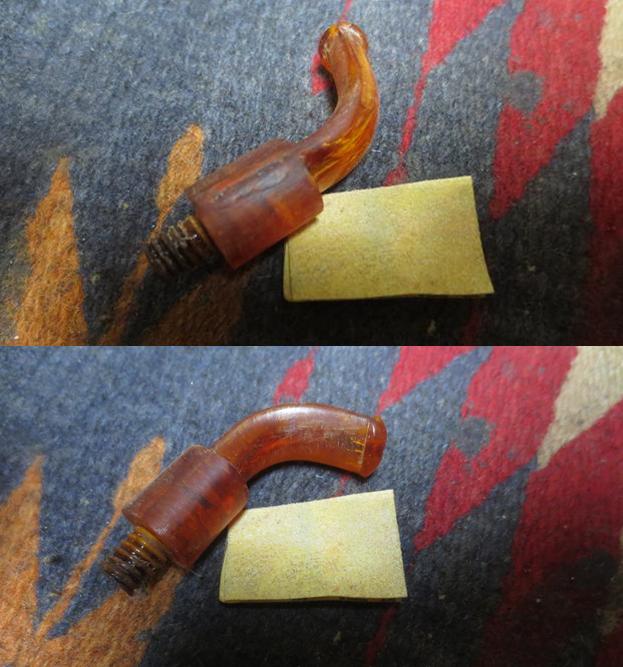
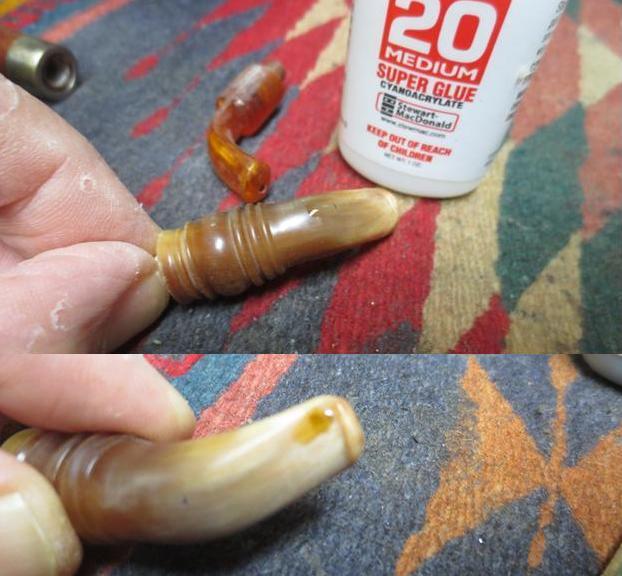
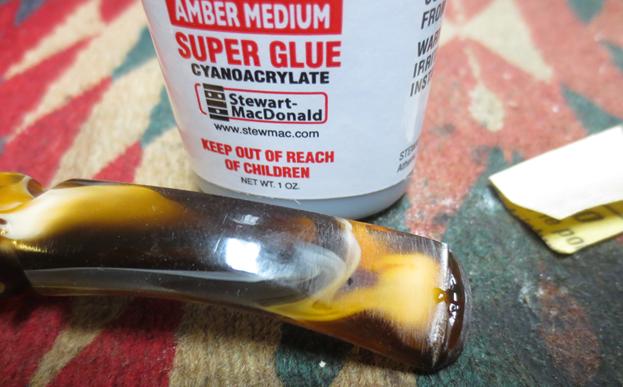
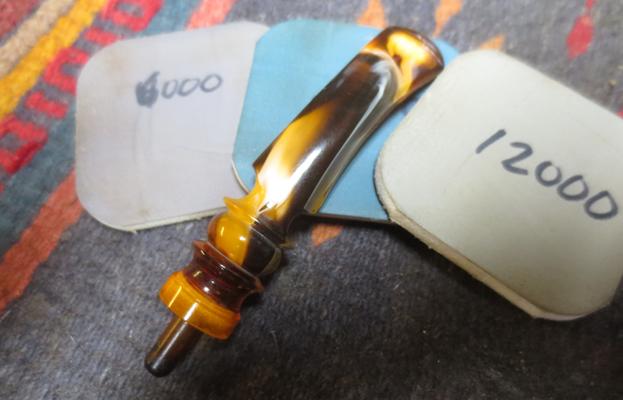
 I lightly sanded the area around the tooth marks to provide a rough surface to provide a surface for the repair to bond to the stem material. I cleaned out the tooth marks with a dental pick and alcohol on a cotton swab to remove any debris on the surface. I repaired both sides of the stem with amber super glue and set the stem aside to dry in the block of ebony.
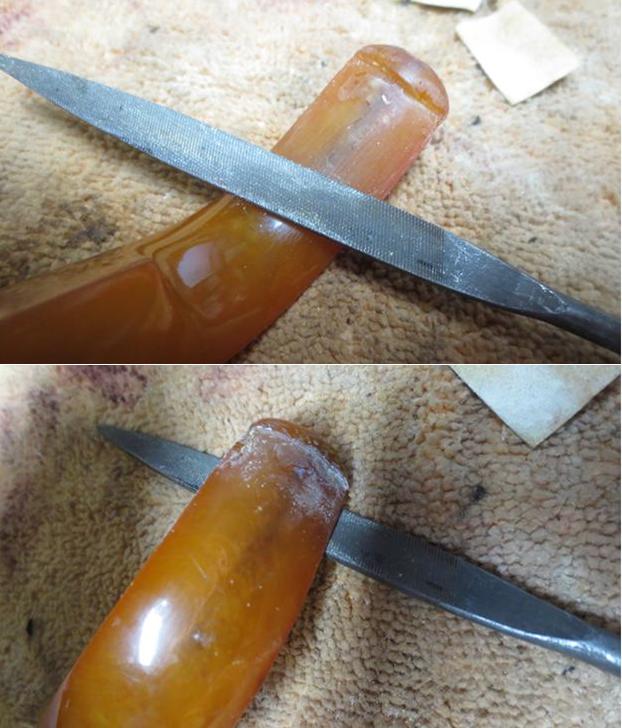
 When the glue had cured I filed the repairs close to the surface of the stem and sanded them with 220 grit sandpaper to blend them into the surface. The repair on the underside of the stem still showed some damage so I refilled it with amber superglue and smoothed out the repair. When it dried I sanded it with 220 grit sand paper. The third photo below shows the underside after the touch up repair was blended into the stem surface.
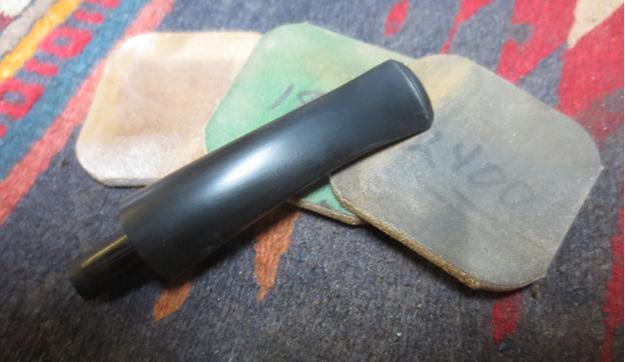
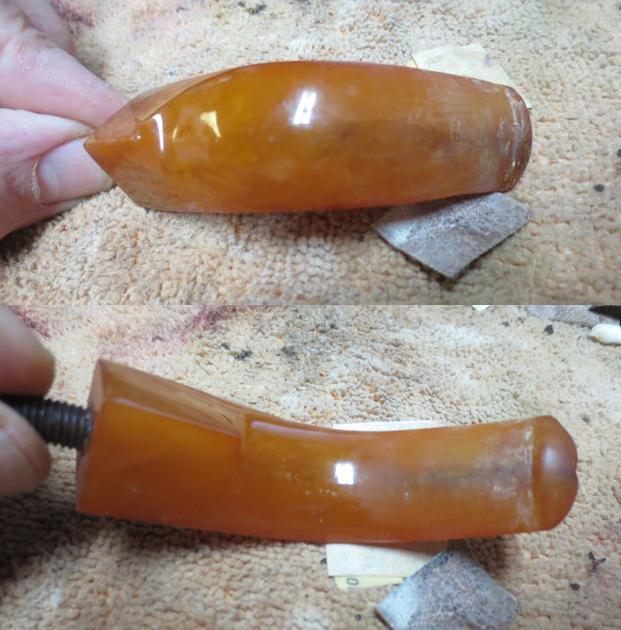
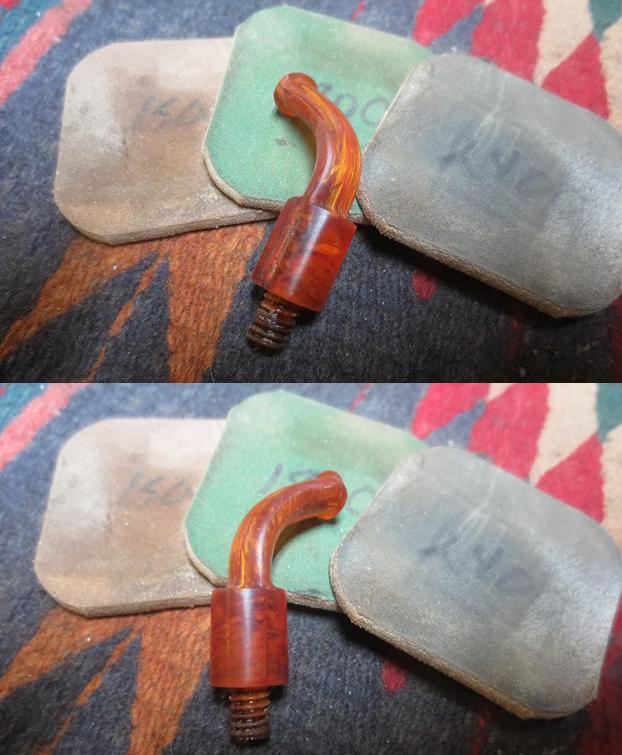
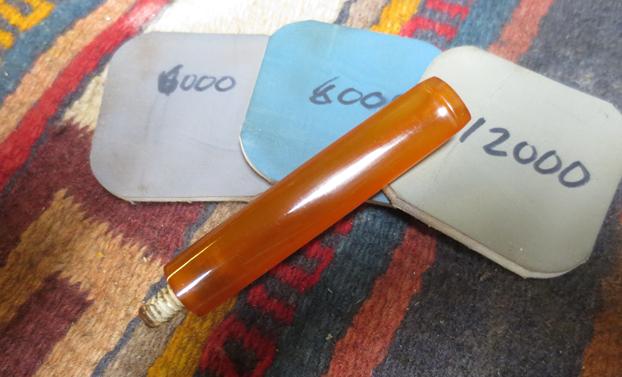
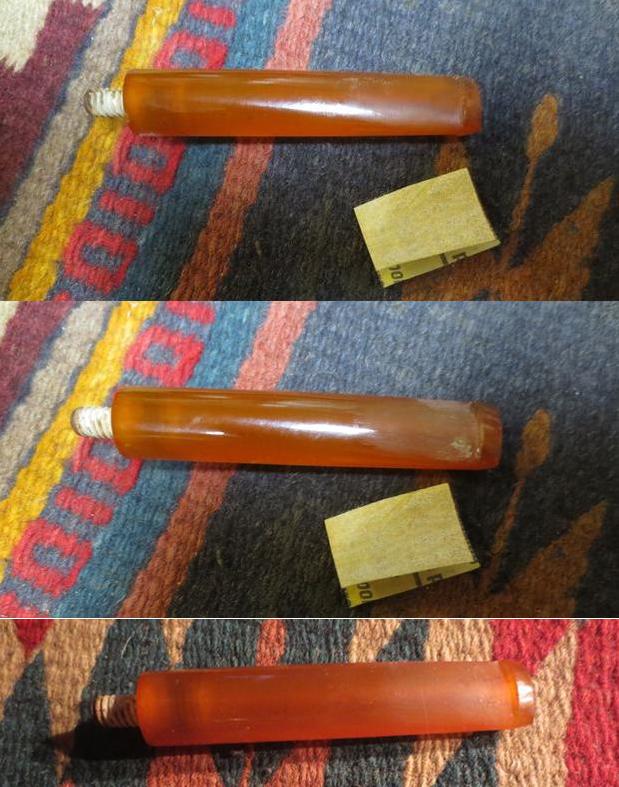 I polished the stem with micromesh sanding pads – wet sanding with 1500-2400 grit pads and wiping it down after each pad with Obsidian Oil. I dry sanded it with 3200-12000 grit pads and continued to wipe it down after each pad. When I had finished polishing it with the 12000 grit pad I gave it a final coat of oil and set it aside to dry.
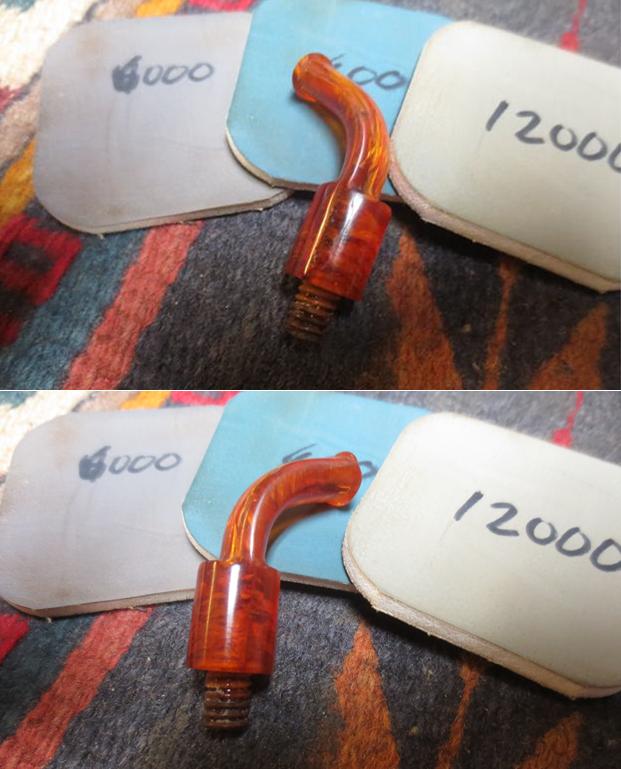
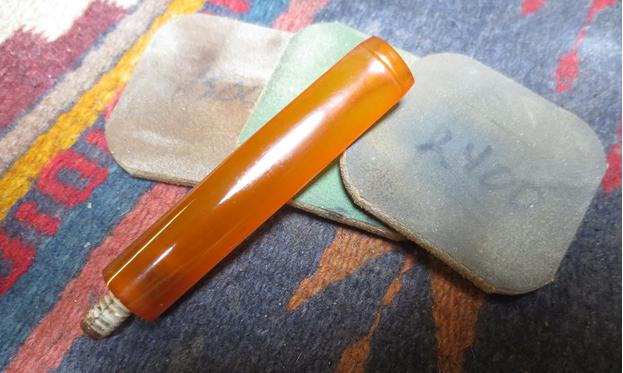

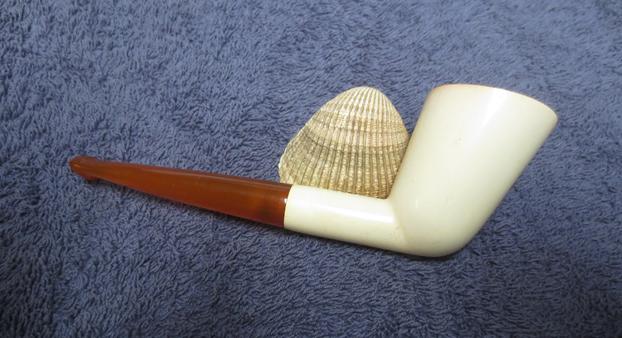
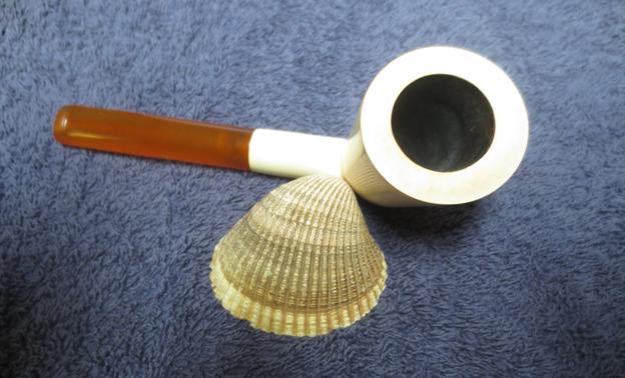
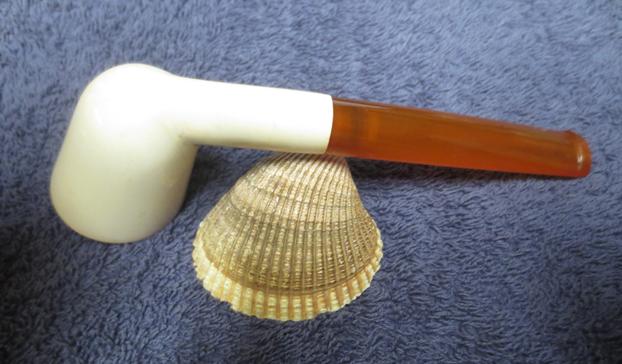
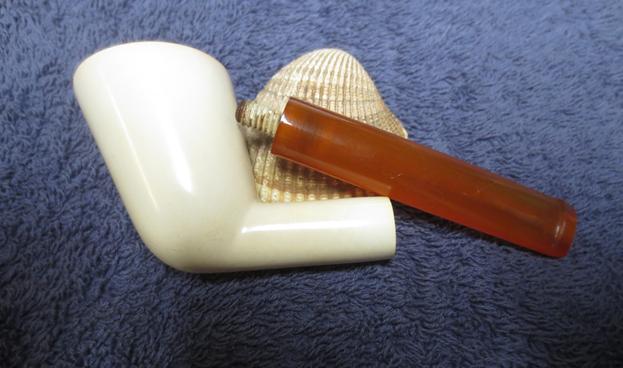
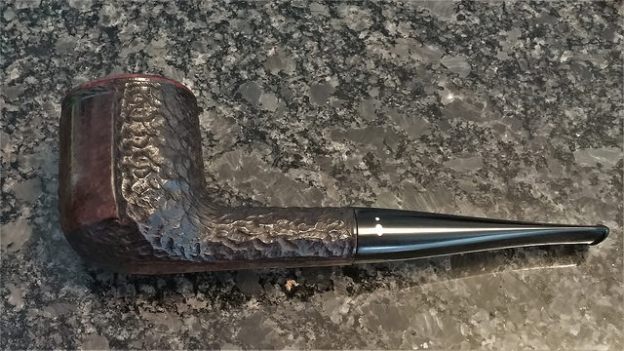
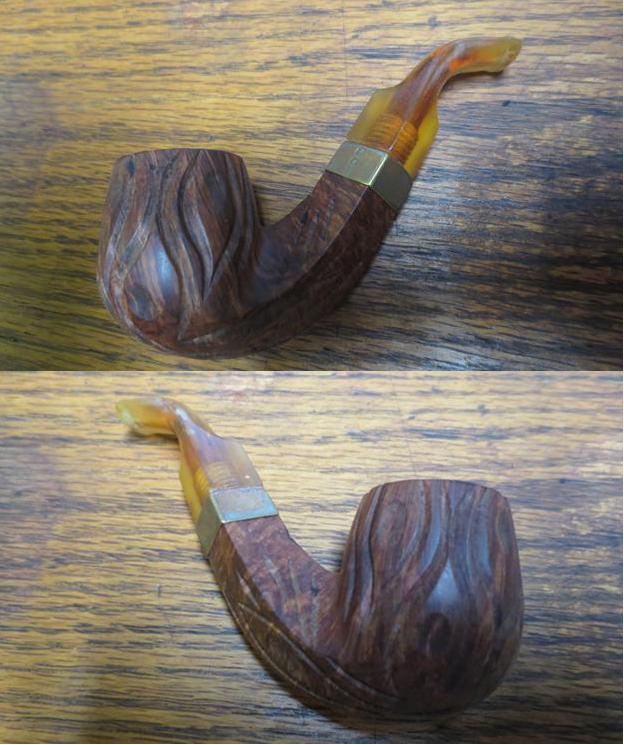
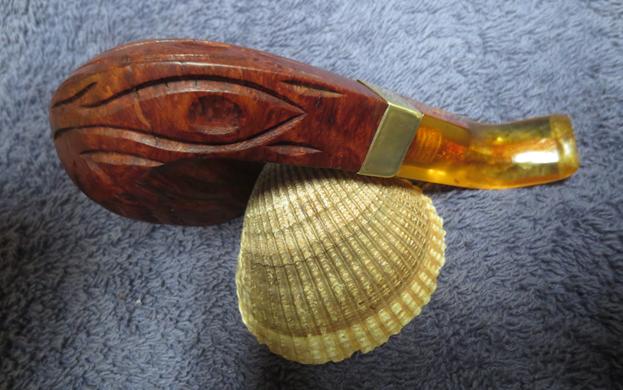
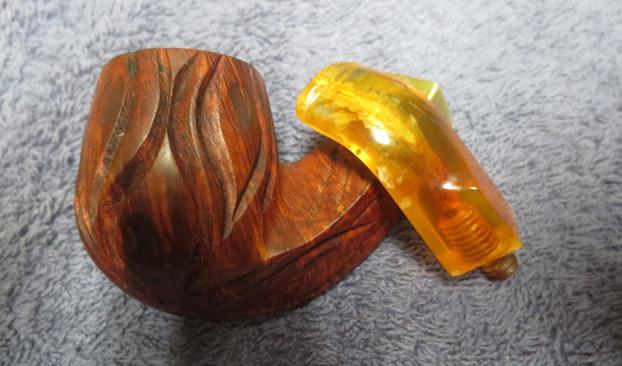
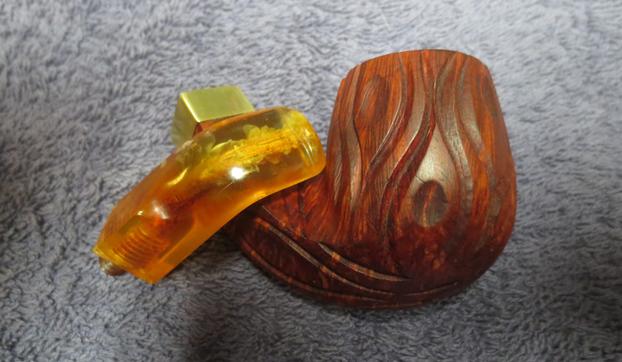
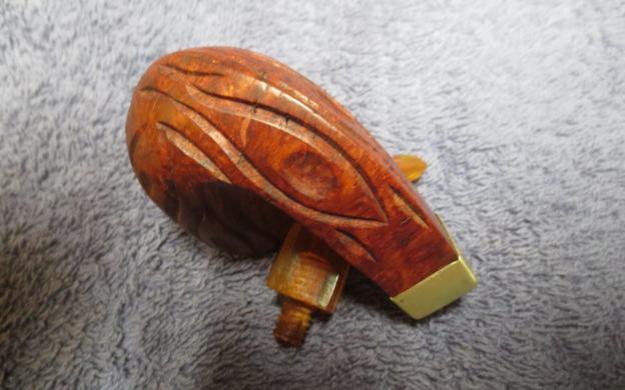
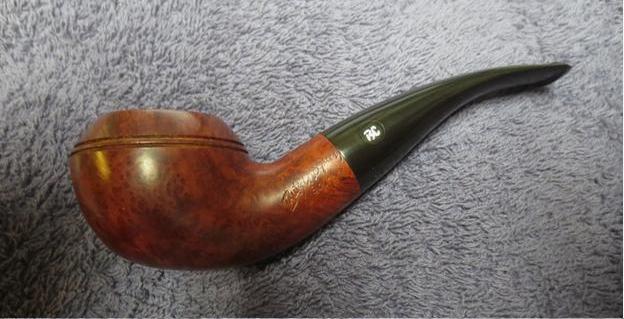
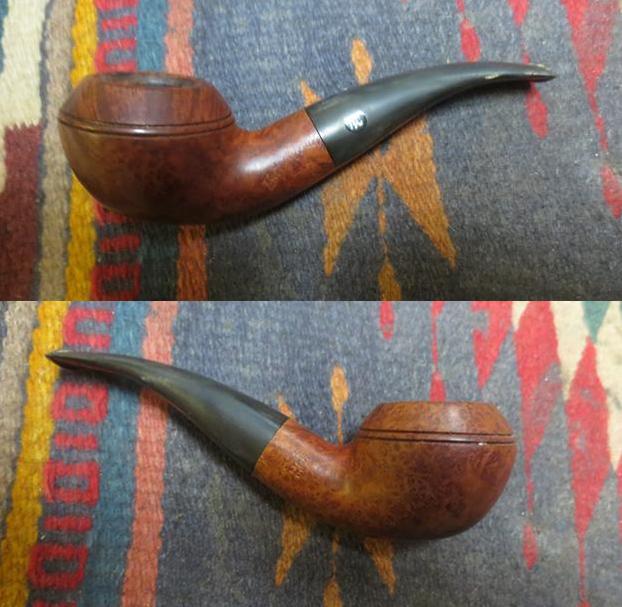
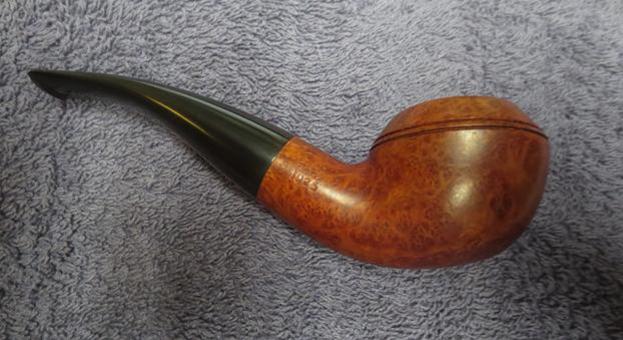
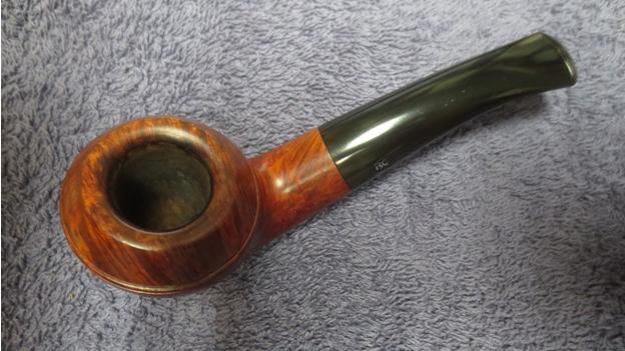
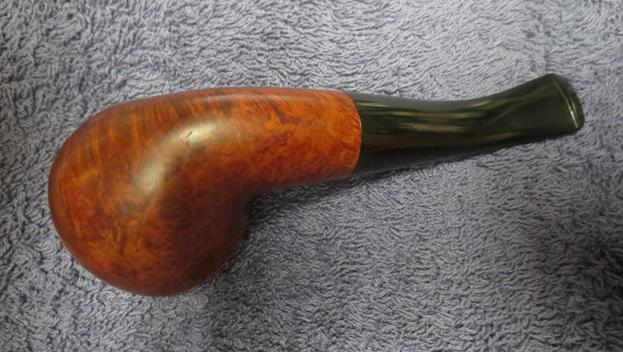
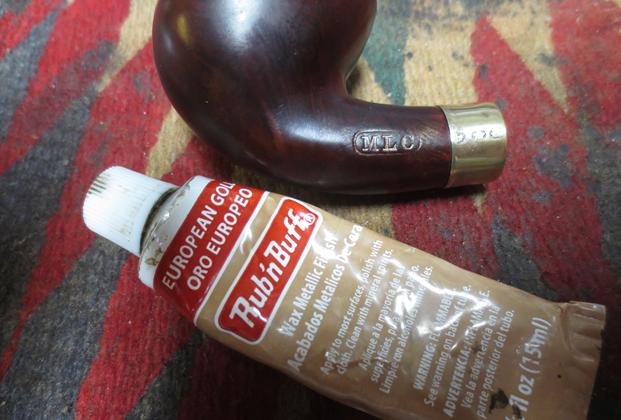
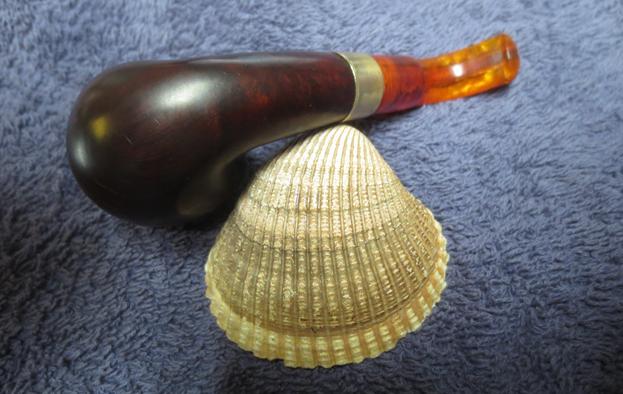
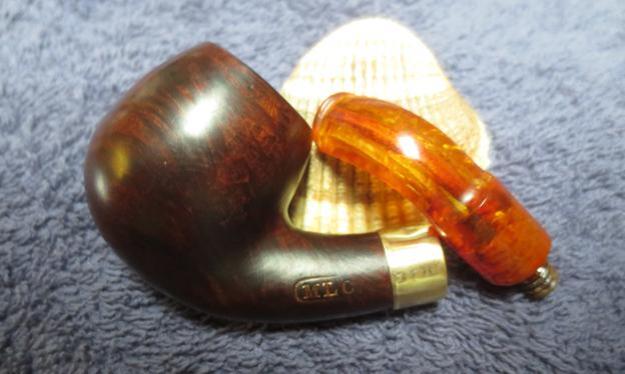
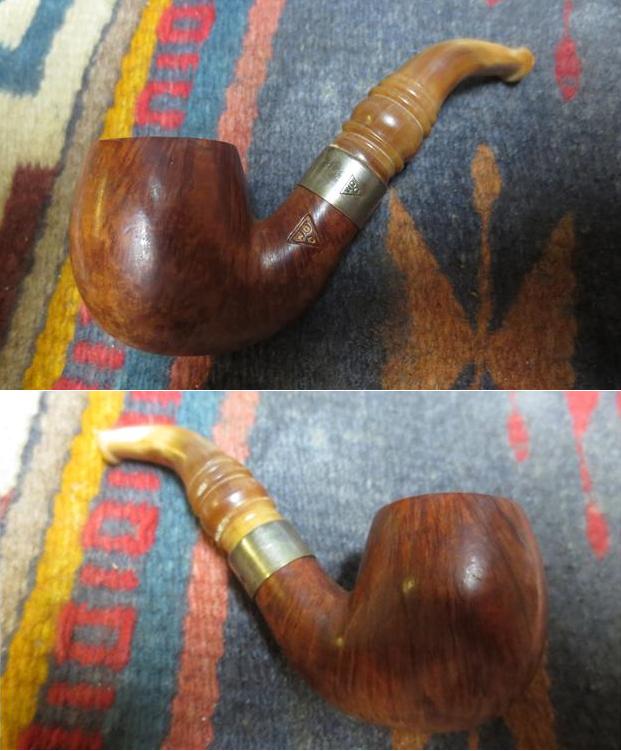
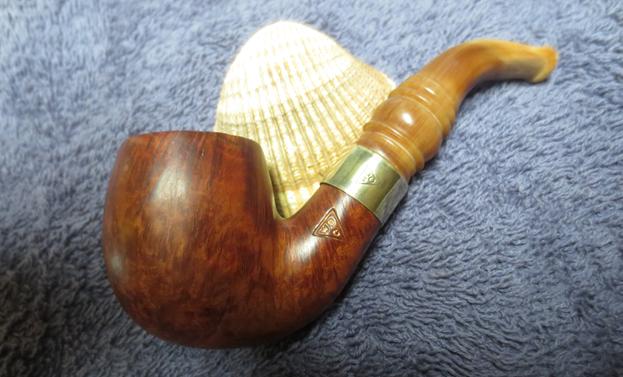
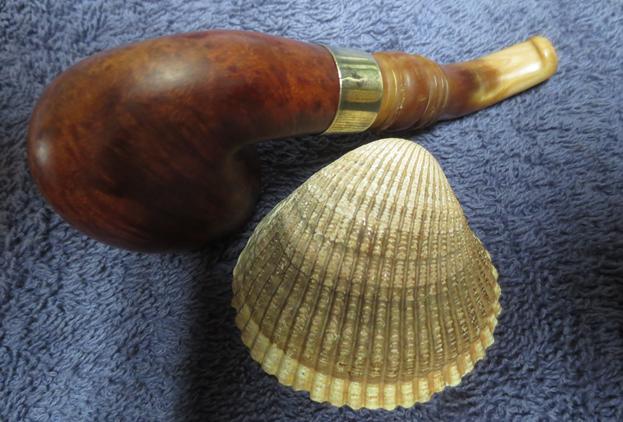
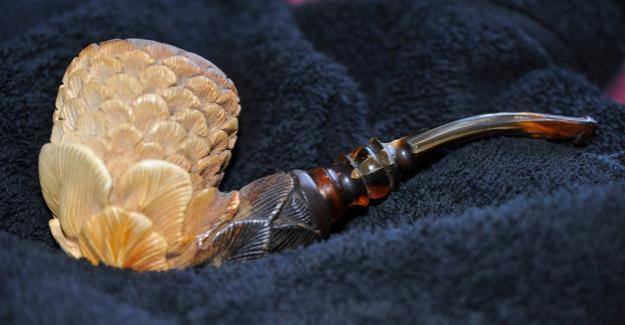
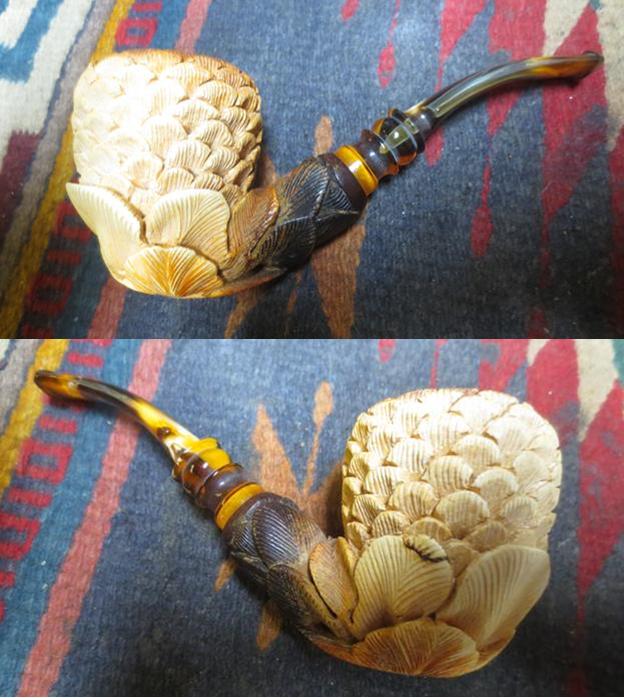
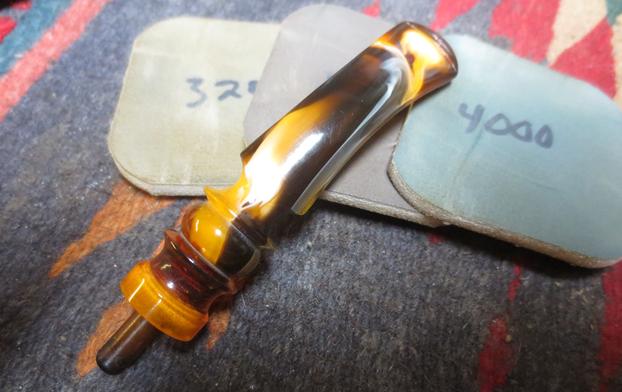
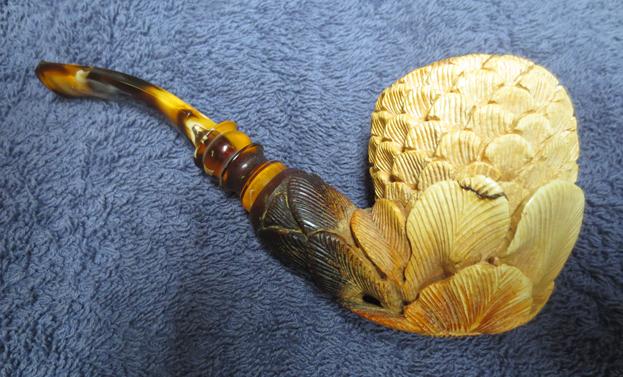
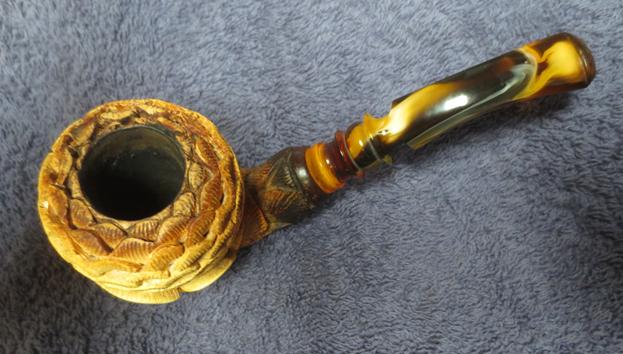
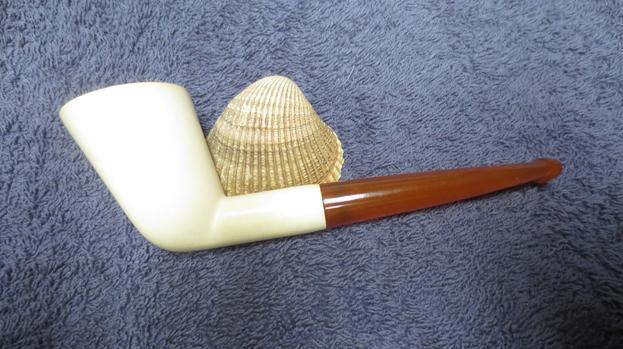
 I put the stem back on the pipe and buffed the bowl and stem lightly with Blue Diamond polish on the buffing wheel. I gave the stem multiple coats of carnauba and the bowl several coats of Clapham’s Beeswax Polish. I buffed the pipe with a clean buffing pad to raise a shine and hand buffed it with a microfiber cloth to deepen the shine. The dimensions on this pipe are Length: 5 ½ inches, Height: 2 inches, Bowl diameter: 1 ½ inches, Chamber diameter: 3/4 inches. The photos below show the finished pipe. It looks far better in person than in these photos. If you are interested in adding the pipe to your collection contact me at slaug@uniserve.com or send me a message on Facebook. It will be going on the rebornpipes store shortly. Thanks for looking.