Blog by Steve Laug
When we saw this older case and pipe for sale on eBay we were under the assumption that the pipe in the case was an older WDC pipe. The age of the case and the pipe appeared to match in the photos posted by the eBay seller. The case was in decent shape on the left side and the right side had a ripped part missing near the stem end. The covering on the case was leather. The hinge and clasp mechanism were in good condition. The green velvet lining looked worn. The stamp on the inside the top of the case was readable but worn. It read WDC in the triangle and over Genuine Briar. 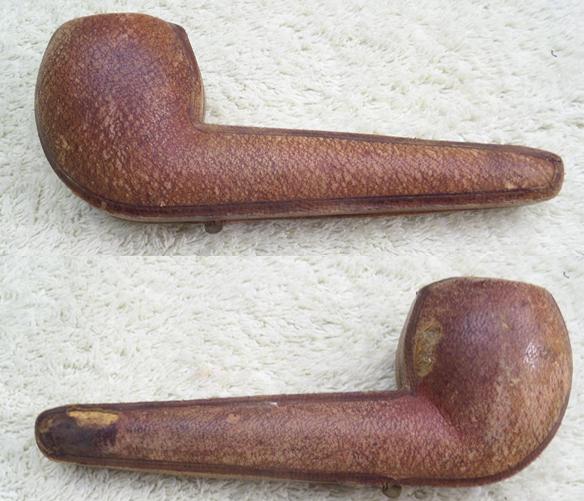 The finish on the briar was worn looking and the stem looked like it was covered with white calcification over the length of the stem all the way around.
 The bowl was thickly caked with a thick coat of lava overflowing onto the rim. It was so thick that it was hard to tell if the outer and the inner edges of the rim were in good condition. Underneath it may well have a lot of nicks and the bowl could easily be out of round.
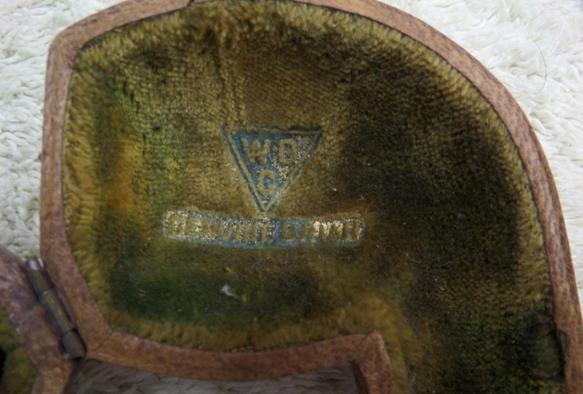
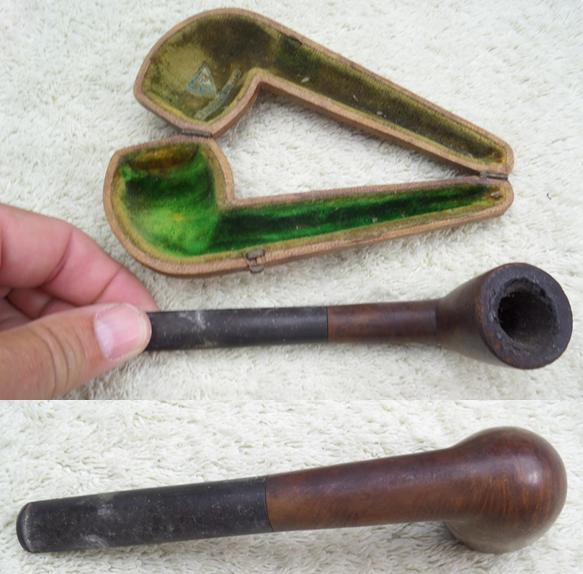 The seller included some close up photos of the stamp on the inside cover of the case. You can see the WDC triangle logo over Genuine Briar. They also included close up photos of the stamping on the left and right sides of the shank. It is very hard to read the lettering in the photos. It looks like the left side is stamped with something over Special Pat. On the right side what is readable is Italian Briar. The rest of the stamping was not readable in the photos.
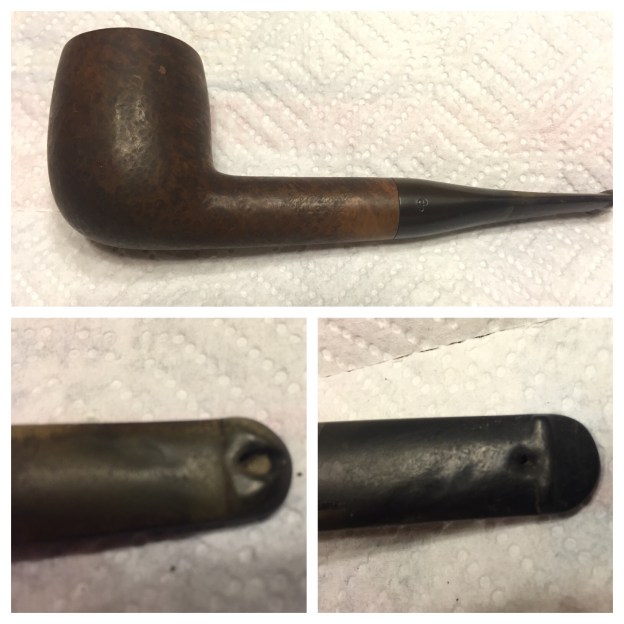
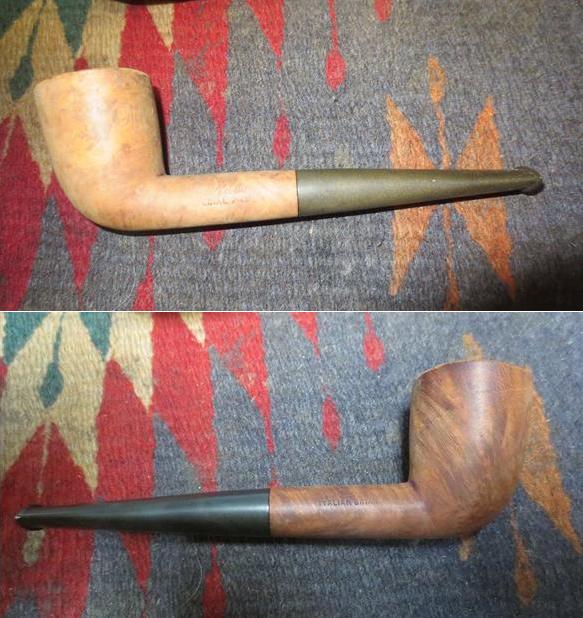
 When the pipe arrived in Idaho my brother took photos of the pipe before he cleaned it up. The finish was certainly a mess and there was a lot of grime and build up on the bowl and the shank. There also appeared to be some nice grain peering through the grime.
 He took some close up photos of the rim and the front of the pipe. The overflow of lava and the cake in the bowl was very thick. The outer edge of the rim was rounded and showed some damage. The frontal photo shows a dent at the front top of the bowl that goes diagonally across the bowl. I have circled it in red to show the location of the dent.
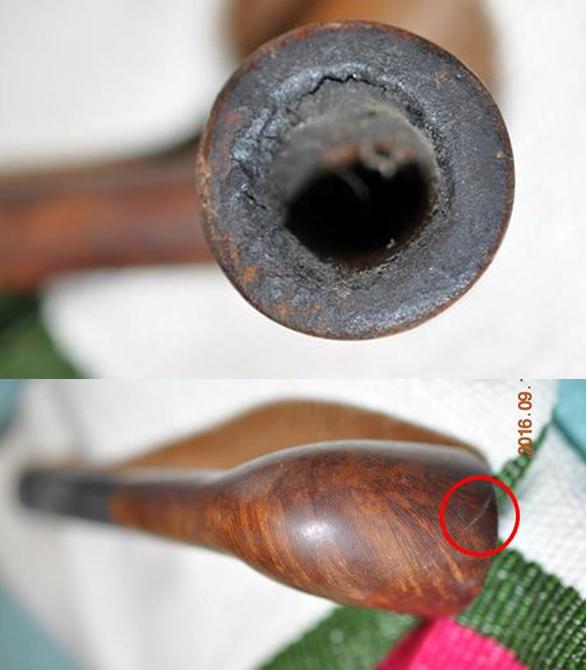 He also took photos of the stamping for me. On the right side of the shank there appeared to be an oval with the letters stamped MLC in the centre. On the left side it seems to read “The Nuvo” over Special Pat.
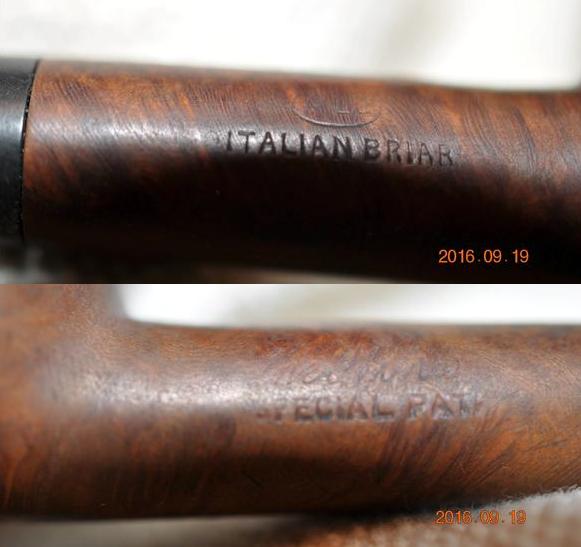 The closes up photos of the white substance on the stem surface show the condition of the stem and looks almost crystalline.
 I took some photos of the pipe when it arrived in Vancouver and I brought it to the work table to begin the restoration. My brother had done an amazing job cleaning up the dirty finish and the white on the stem. He had reamed the bowl clean of the thick cake. He also removed the thick lava on the rim top.
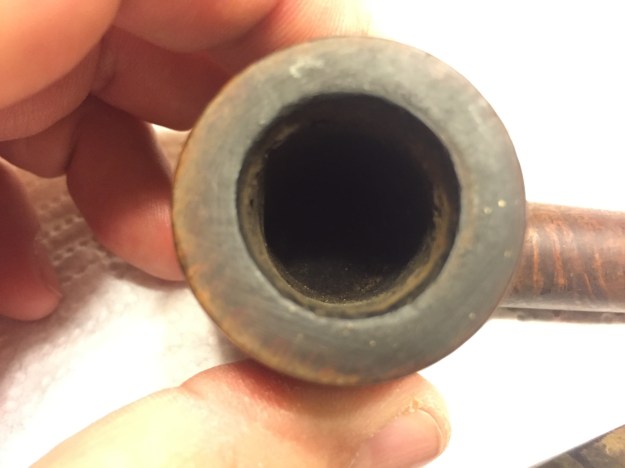
 I took a close up photo of the bowl and rim to show the condition. My brother had been able to remove all of the cake and the tar. The outer edge of the rim was rounded and had dents. The inner edge was missing chunks and the bowl was out of round. The top of the rim had nicks and dents and was also in rough shape.
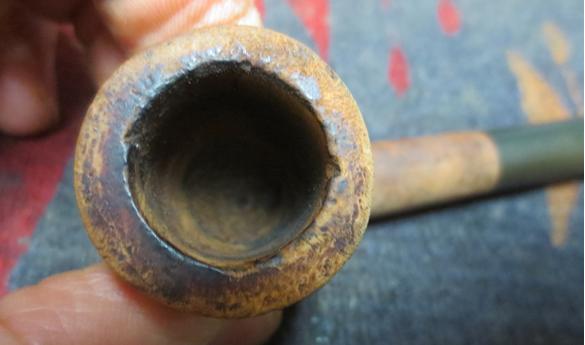 The stem looked to be in decent condition. The high quality rubber of the stem was pitted and lightly oxidized. The style of the button added to my idea that I was dealing with an older pipe.
 I was able to clearly read the stamping on the pipe once I had it in hand. It read “The Nuvo” over Special Pat. on the left side of the shank. On the right side it was stamped with an MLC in an oval over Italian Briar. I was not familiar with th name on the pipe or the Oval MLC stamp. I looked my copy of “Who Made that Pipe” and found that The Nuvo was made by M. Linkman Company in 1914. The MLC logo in the oval stood for M. Linkman Company.
I looked the brand up on Pipedia (https://pipedia.org/wiki/M._Linkman_%26_Co) and found that M. Linkman Company name was said to stand for Mary Linkman & Company. Mary Linkman was the mother of Louis B. Linkman, originator of the Dr. Grabow pipe. This Chicago company produced both meerschaums and briars. I also looked on the PipePhil Logos and Stampings site (http://www.pipephil.eu/logos/en/logo-l4.html) and found that the M. Linkman and Co. was established by Louis B. Linkman and August Fisher in 1898. The company closed down in the 1950s and the Dr Grabow branch was sold to Henry Leonard and Thomas Inc. There was also a note that early Linkman’s pipes were stamped MLC in an oval.
I now knew that the pipe I had in hand was an early Linkman’s pipe rather than one made by WDC. That meant that the case and the pipe did not match.
I decided to try to clean up the inside edge of the bowl before I topped it. I wanted to remove as much of the damage to the inner rim as I could to better see how much of the rim top I would need to remove with the topping action. I used a rolled piece of 220 grit sandpaper wrapped around my finger to sand the inner edge of the bowl. When I finished sanding the edge there were still some deep gouges in the edge of the rim at the back and the front of the bowl. The bowl was also out of round and seemed to be thinner on the right side than the rest of the bowl.
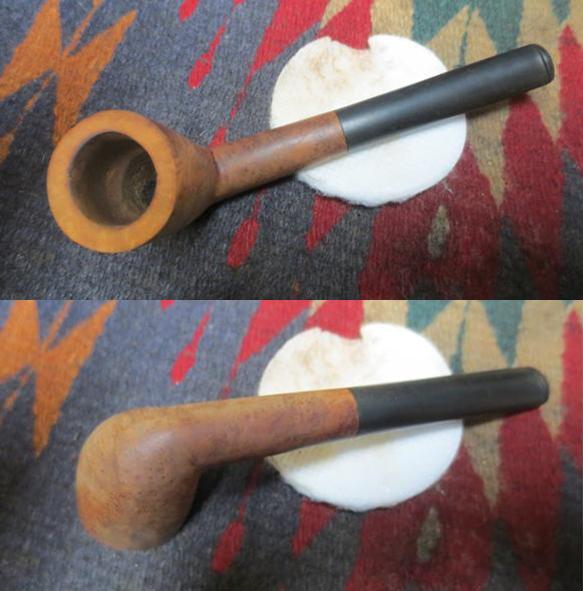
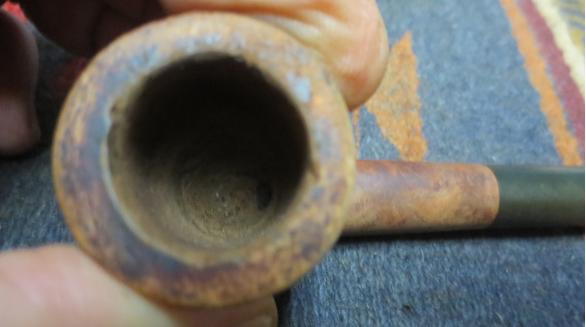 I topped the bowl rim on a topping board with 220 grit sandpaper. I worked on it until I had removed all of the damage to the rim top and also removed the damage to the outer edge of the rim and also what was on the inner edge. In the second photo you can see that much of the damage to the inner edge of the rim was removed. I still needed to bevel that edge to smooth out the damage.
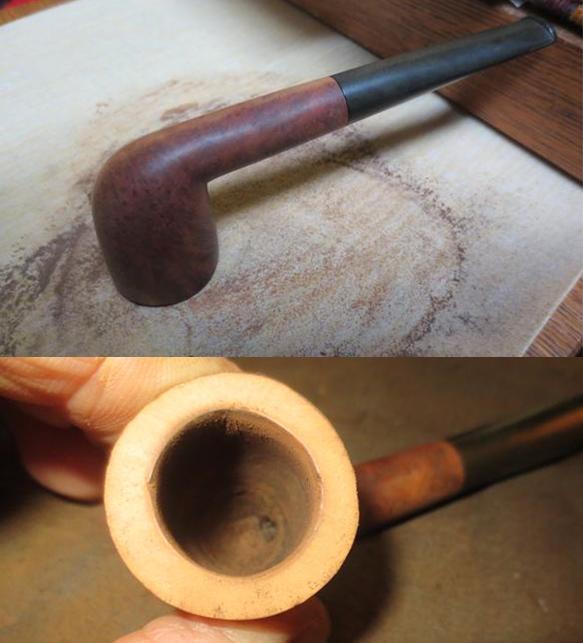 I used a folded piece of 220 grit sandpaper to sand the edge of the bowl. I worked it over until I had removed the damaged areas on the front and the back side of the rim edge. I also worked to make the bowl round once again.
 I sanded the rim edges and the top of the rim with 1500-4000 grit micromesh sanding pads once i had the bowl in round. I scraped the inside of the mortise with a dental pick to remove the hard chunks of tar that were collected on the inside walls of shank. Once I had removed all of the hardened buildup I scrubbed out the mortise and the airways in the shank and the stem with pipe cleaners, cotton swabs and alcohol until the oils and tars were gone.
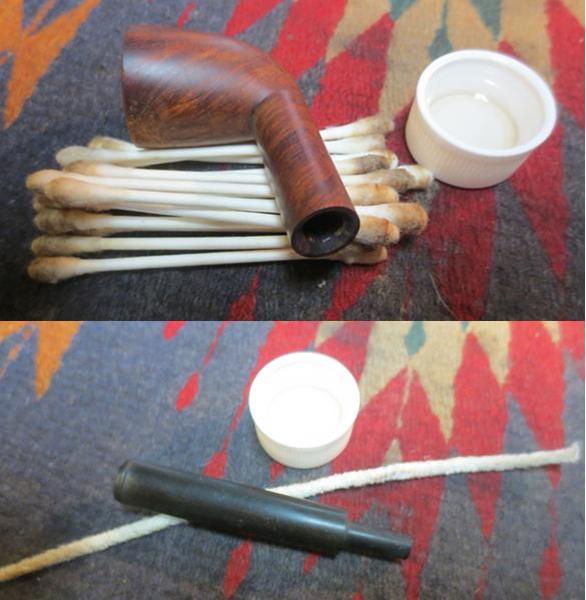 I wiped down the exterior of the briar with acetone on a cotton pad to remove all of the residual dirt and grime from the topping and cleaning. I wanted the surface to be clean and oil free in preparation for the new stain coat that I would give it.
 I thinned some dark brown aniline stain by 50% with isopropyl alcohol (need to put in an order for more stain). I applied it to the bowl with a folded pipe cleaner. I flamed the stain to set it and repeated the process until the coverage on the bowl and shank were an even medium brown colour.
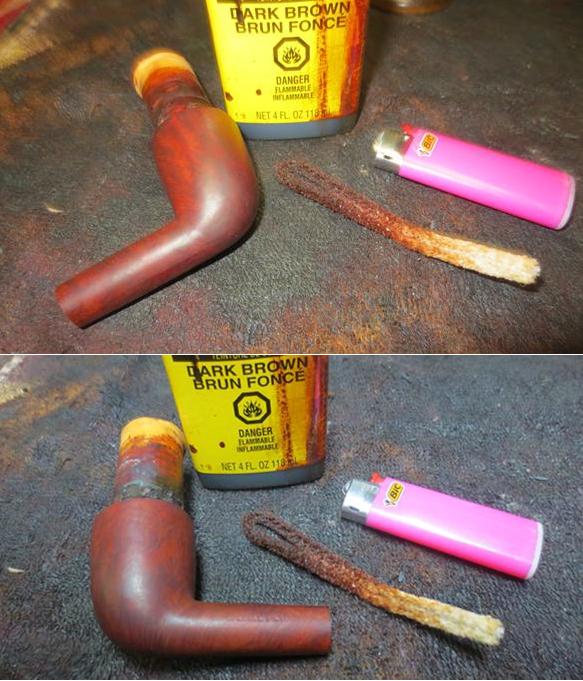
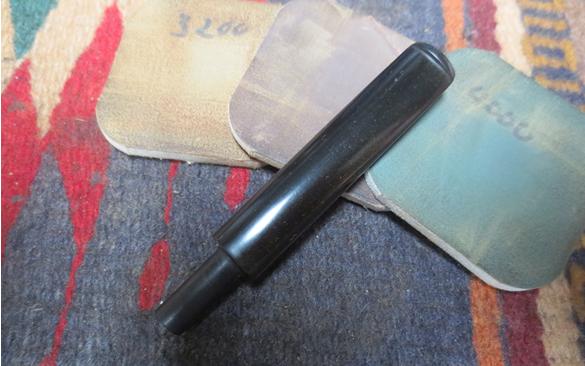
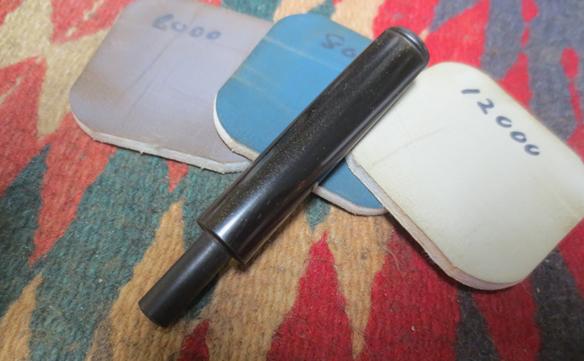
 I set the bowl aside to let the stain cure and turned my attention to working on the stem. I sanded it with 220 grit sandpaper to remove the light oxidation and smooth out the pitted surface of the stem. I polished it with micromesh sanding pads – wet sanding it with 1500-2400 grit pads and dry sanding it with 3200-12000 grit pads. I rubbed the stem down with Obsidian Oil after each set of three sanding pads. I gave it a final coat of oil after the third set of pads and set it aside to dry.
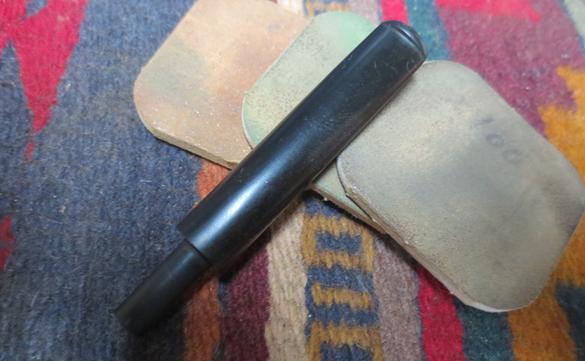
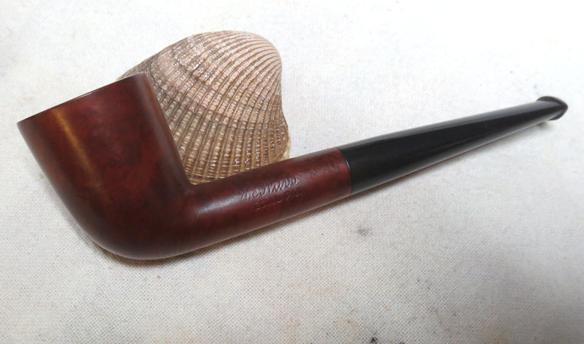
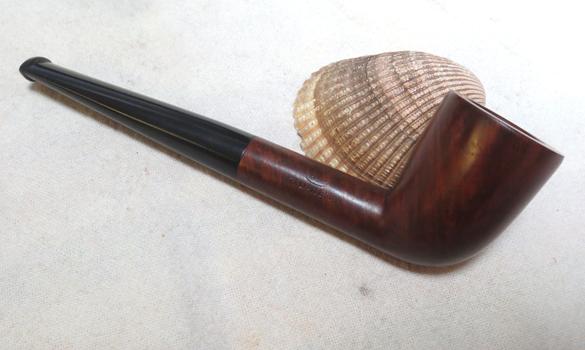
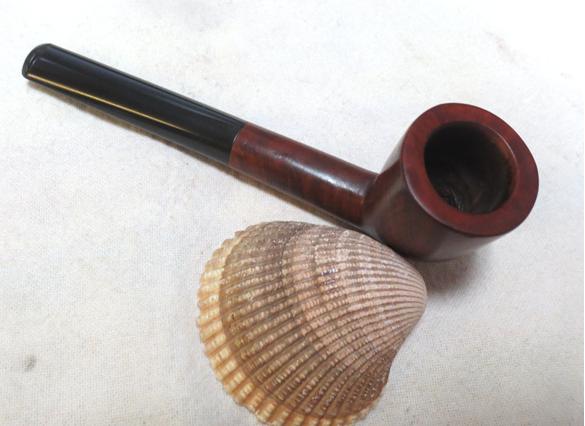
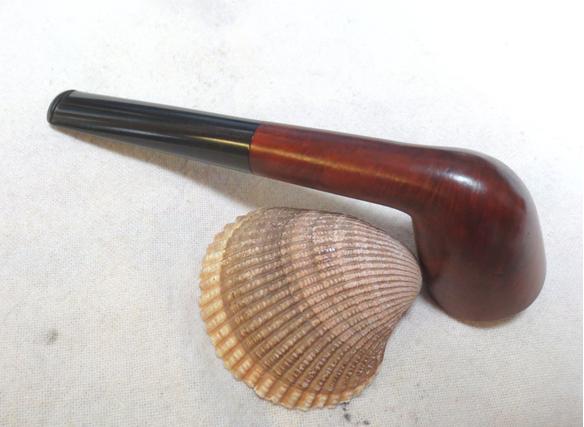
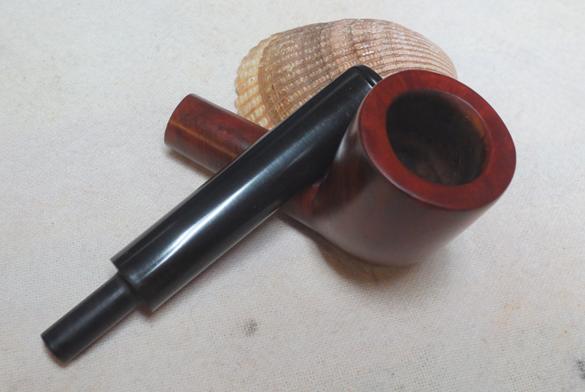
 I put the stem back on the pipe and buffed it with Blue Diamond on the buffing wheel. I took precaution to not buff the stamping on the shank sides. I gave the bowl and stem multiple coats of carnauba wax to protect it. I buffed it with a clean buffing pad to raise a shine. I hand buffed it with a microfibre cloth to deepen the shine. The finished pipe is shown in the photos below. I am happy with the way it turned out. The look and finish of the pipe turned out very well. Thanks for walking with me through the process.