Blog by Steve Laug
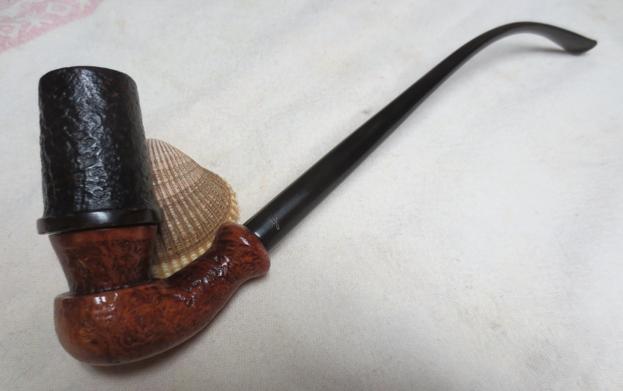
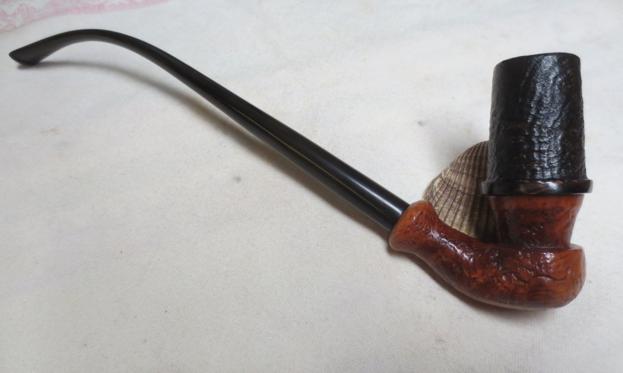
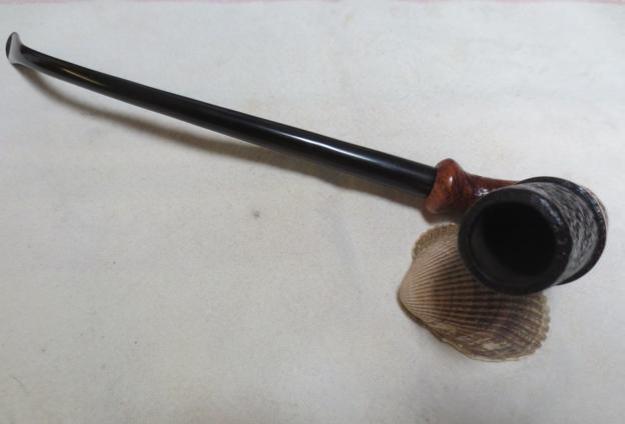
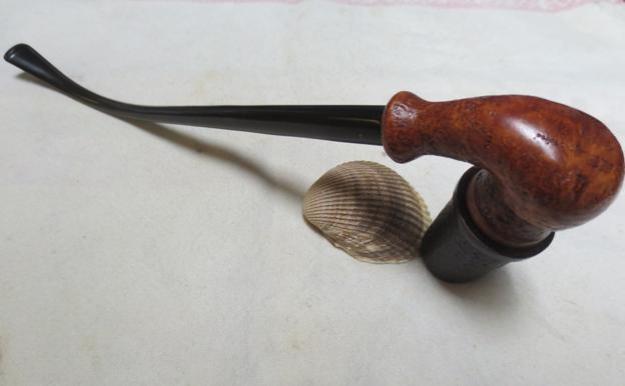
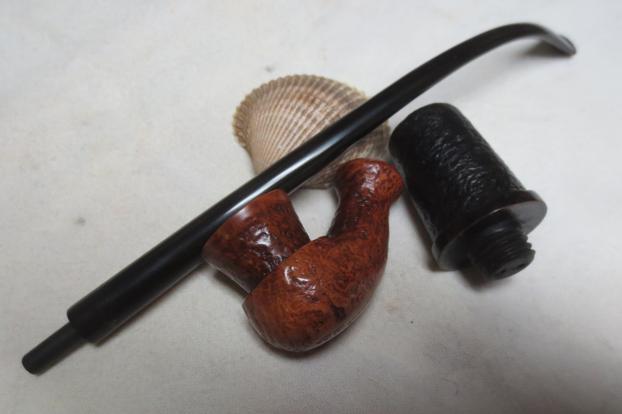
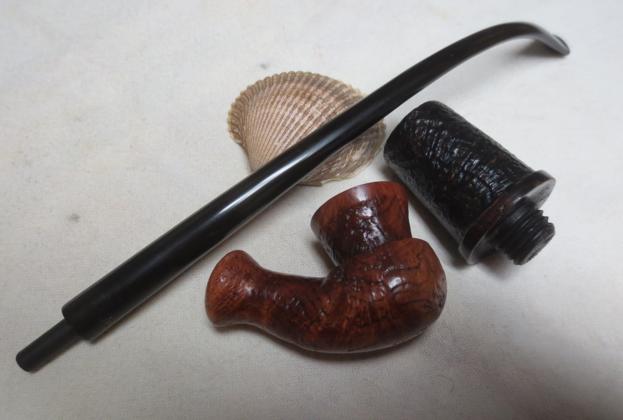
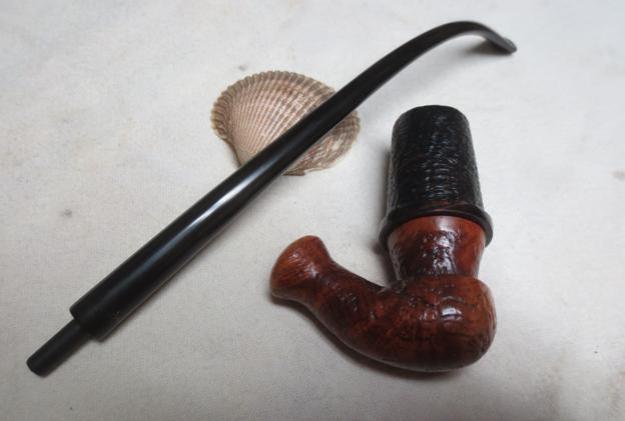
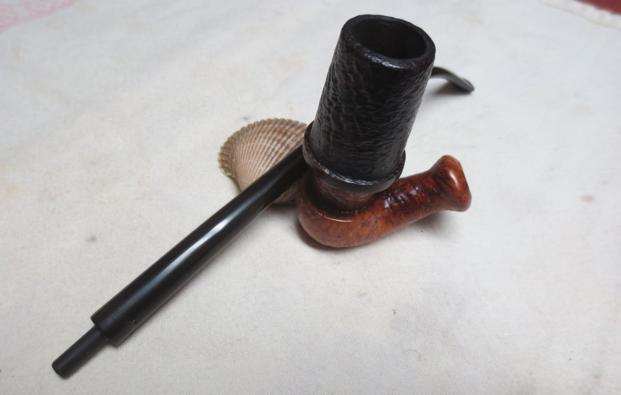
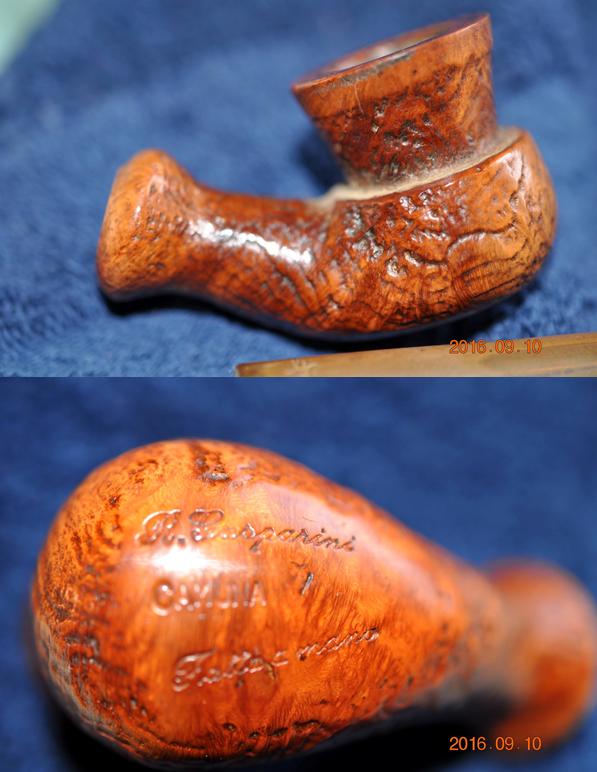
My brother Jeff has an eye for unusual pipes that he thinks might intrigue me. He outdid himself this time. He found an odd three-part pipe – a base, a bowl and stem that I would classify as a churchwarden. It is about 10 inches long and the bowl is 3 inches tall but at the same time it is dainty, delicate and artsy. It is not a heavy pipe and the thin pencil stem and the bowl and base make it seem smaller than it is. The first two photos below show the unique shape and you can get a sense of how the pipe is both big and delicate at the same time.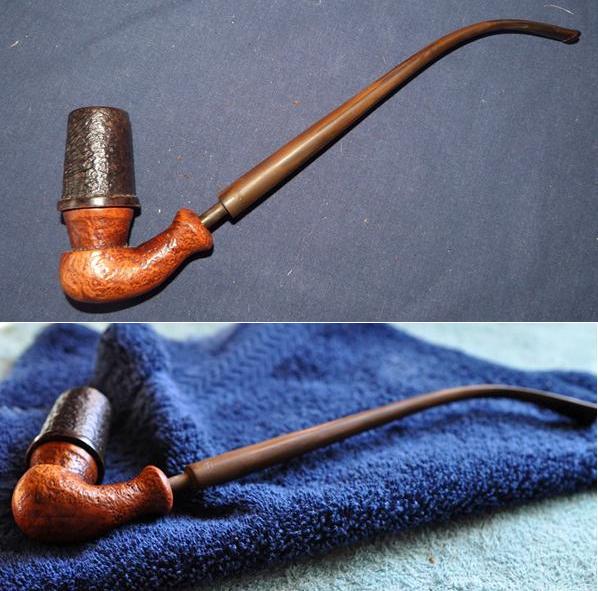 The next photos give a sense of the artistry of the pipe. The base is stained a light brown and has a shallow sandblast finish. The end of the shank is rounded. The stem should sit against the shank end but the mortise needs to be cleaned and the oxidation on the tenon needs to be removed to make that happen. The bow is threaded and screws into the base. It has a contrasting dark brown and medium brown stain coat that gives contrast in the deeper blast and also with the base.
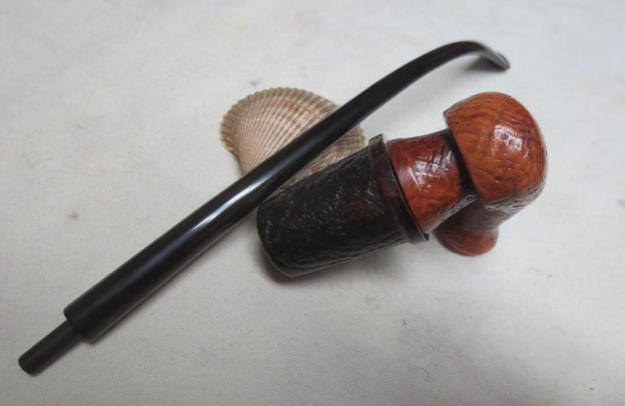
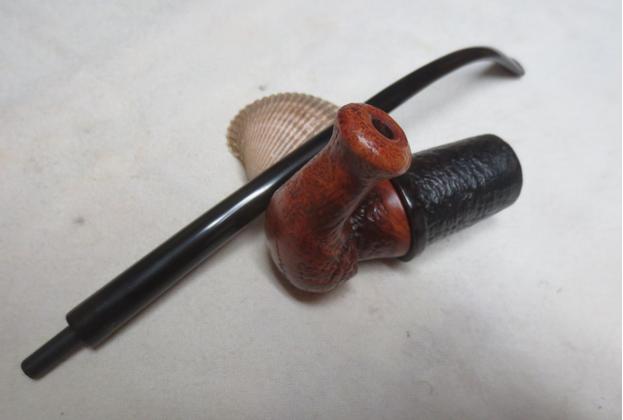
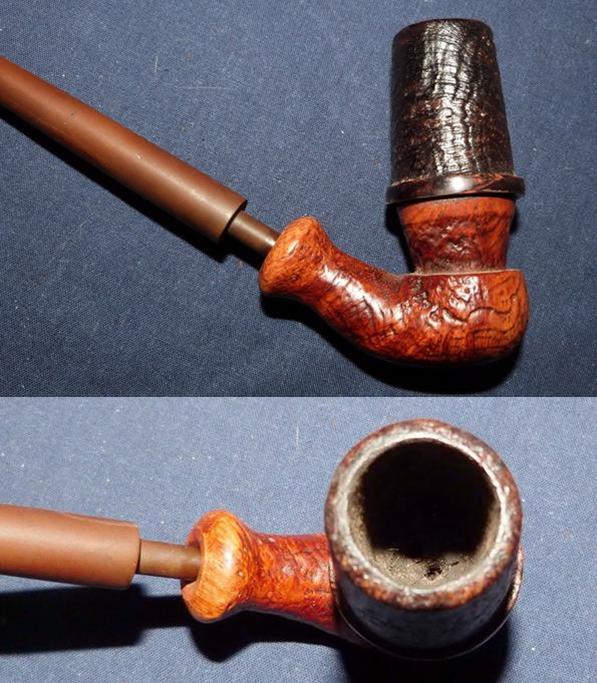
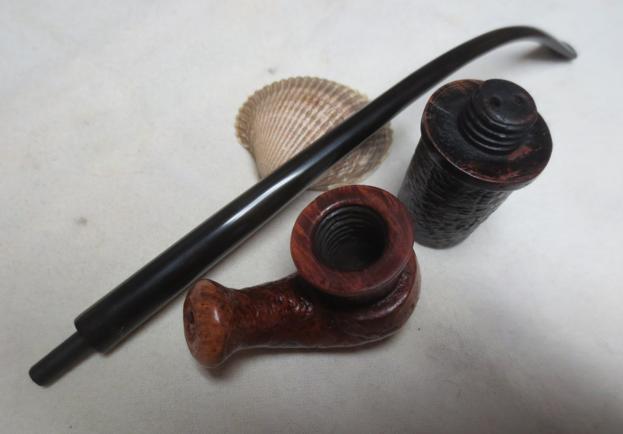
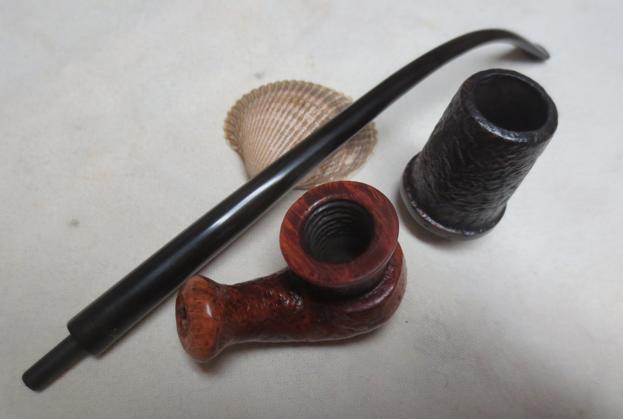
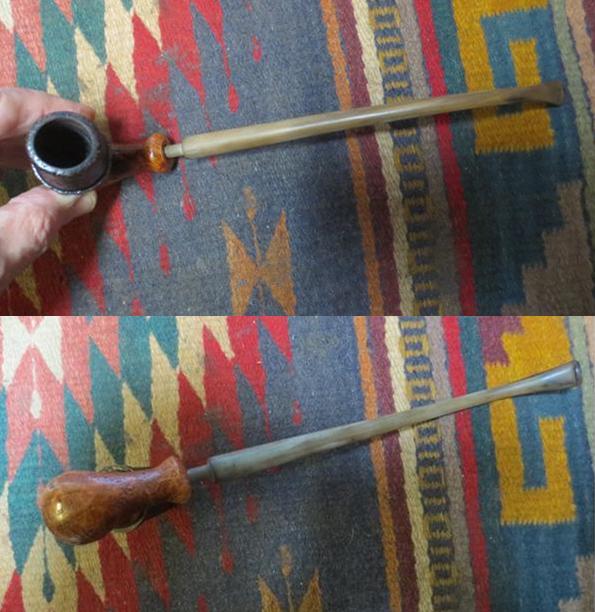
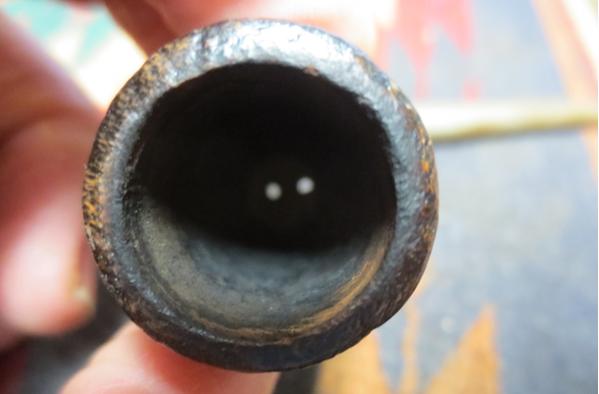
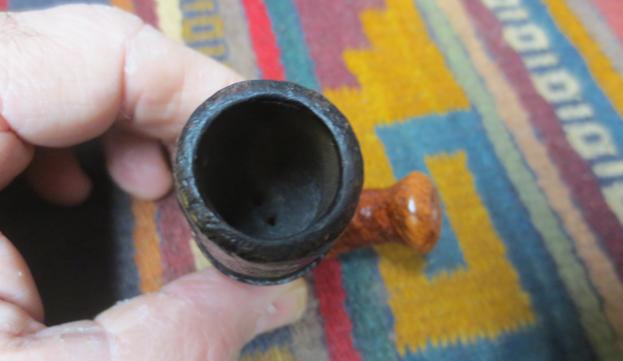
 The next photos are close up pictures of the bowl and base. The first shows the bowl removed from the base. You can see from the photo that the bowl is threaded to be screwed into the base. The base and the bowl are dirty. The bottom of the bowl has two air holes that go into the bowl. The one toward the bottom of the photo below shows that a chunk of briar has broken away from the side of the hole and the threaded portion.
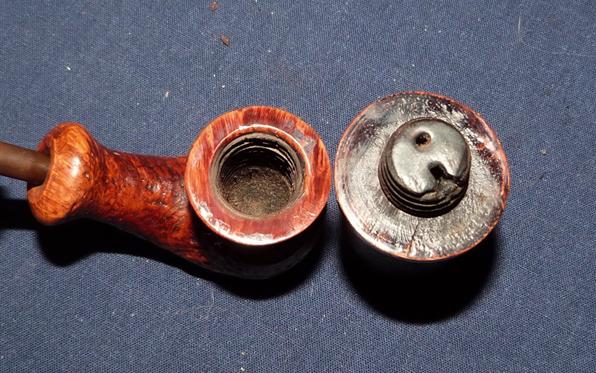 The second and third photos show the inside of the base and the cake and rim of the bowl. It is dirty but the rim and base are in excellent condition. There is some build up on the area of the base where the rim sits. It will need to be cleaned. To me it looks like it is a combination of dust and wax.
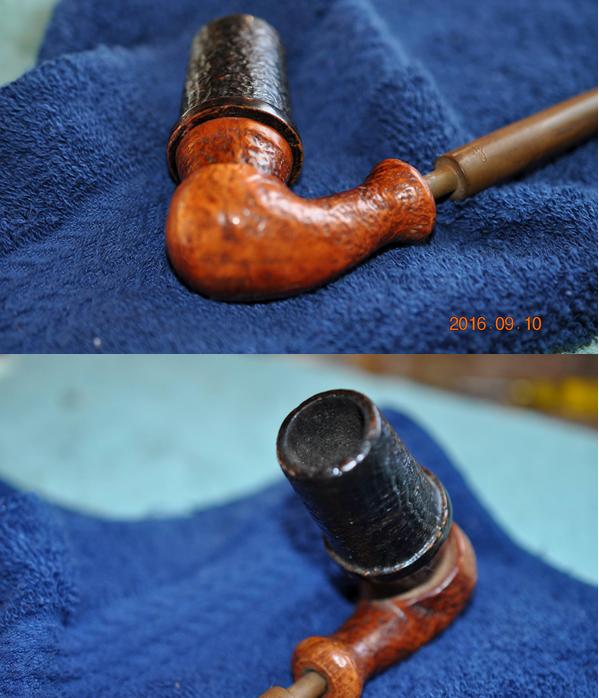
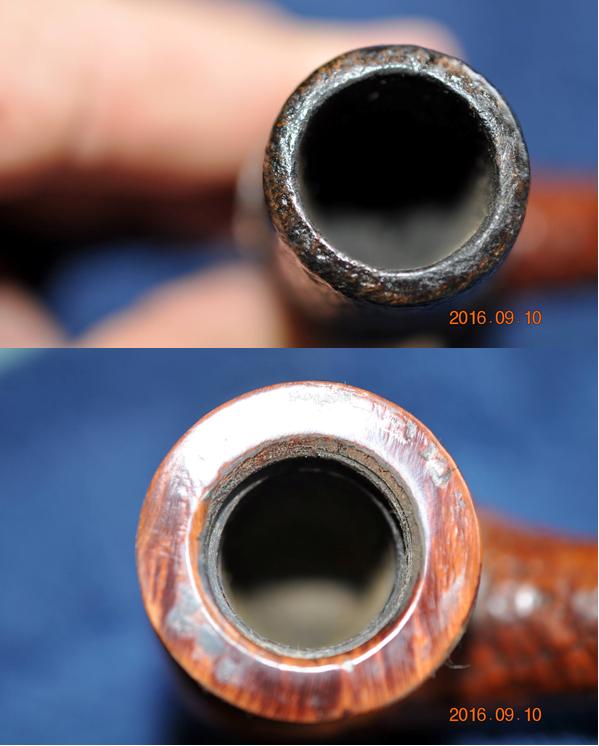 The next two photos give a clear picture of the damage to the base of the threaded portion of the bowl. You can see the damage on the outer edge of the tip and to the threads. It looks like a chunk of briar has broken free and a lot of debris and tars have filled in the damaged area.
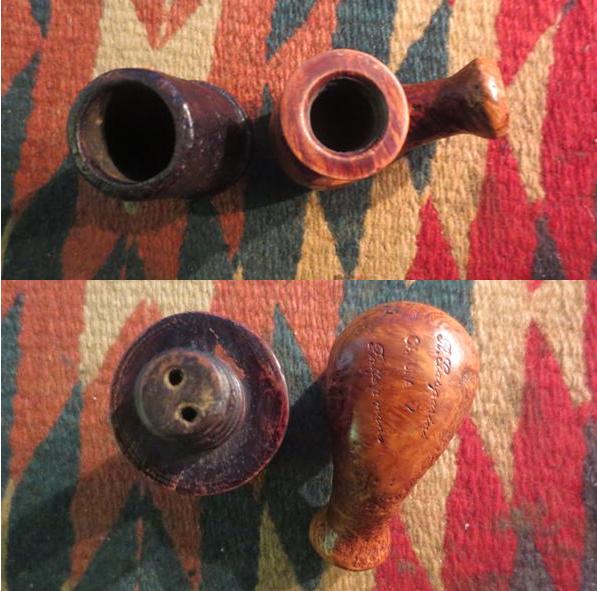
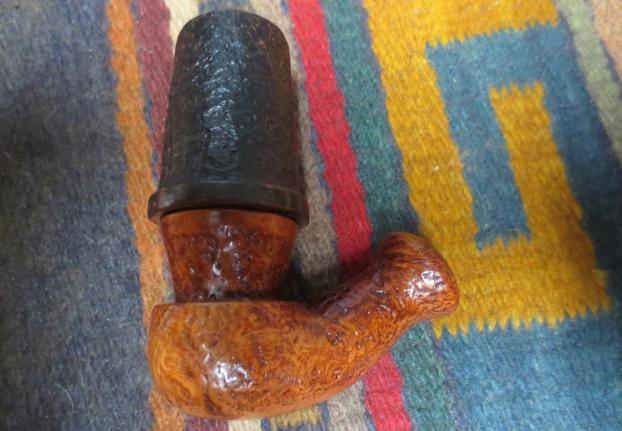
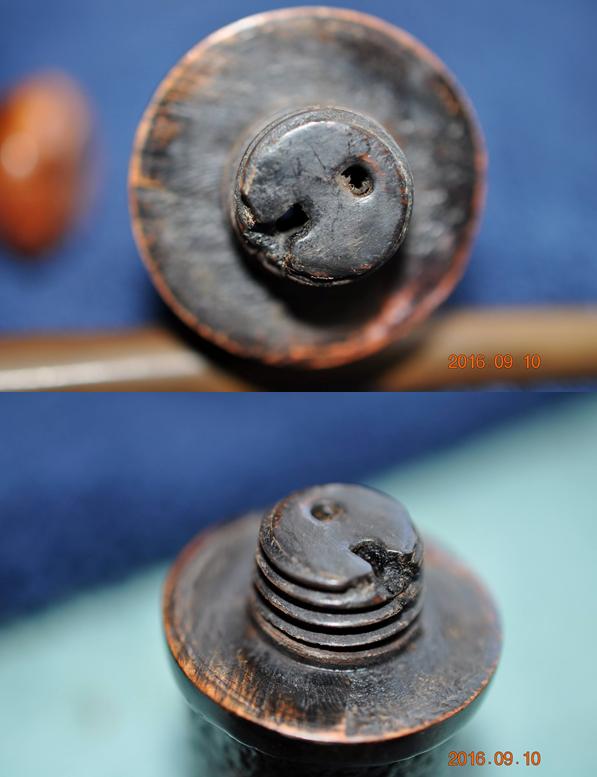 The next photos show the base and the bowl from different angles. The grain and the blast is quite nice and the contrast of stains on the bowl look really good in contrast to the lighter stained base. The fourth photo shows the stamping on the bottom of the base. It reads R. Gasparini over CALUMA over script that reads “Fatta A Mano” which translates as Made by Hand.
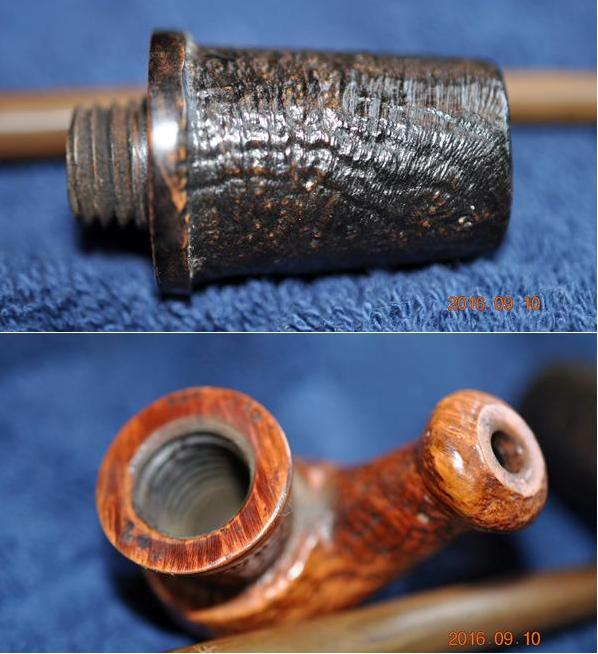
 The next photos show the stem with the tooth chatter and marks on the top and bottom side near the button. They also show the oxidation and the loss of colour in the G script logo on the side of the stem.
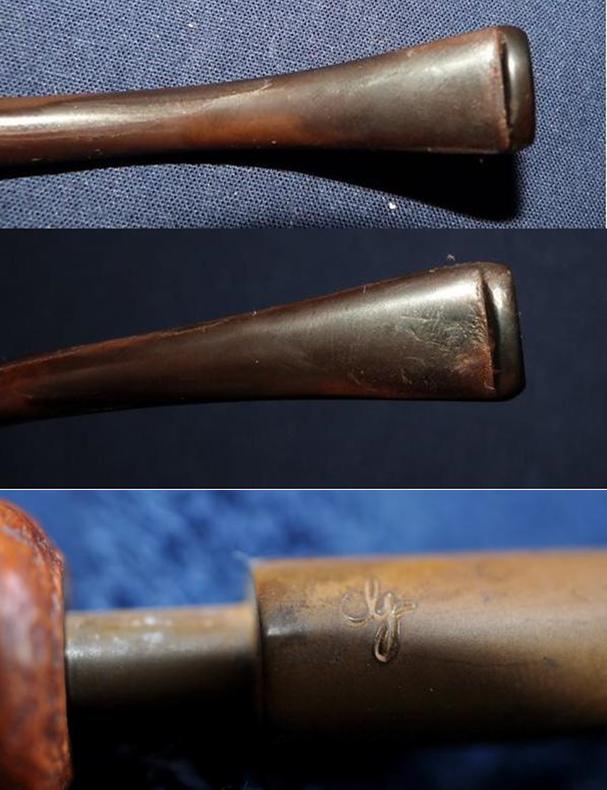 I know nothing about Gasparini brand so I looked up the website of the brand and found that the “Fatta a mano” stamped signified a particular freehand style line that Gasparini did. Here is the link to their website http://www.mgasparini.it/en/category-product/hand-made/.
I also looked up the brand on Pipedia. There is a lot of the history of the brand there for those who want to read the article in full. Here is the link: https://pipedia.org/wiki/Gasparini. I quote from that article in part.
“In 1938 Mario Gasparini, with his wife Ida, took his first steps into the world of the pipe. Today his daughter, Marisa Gasparini, sits at his desk. Since 1977 Marisa and her husband, and now her daughter, carry on the tradition of her family…”
“At the beginning of 1950’s, the building, that still today hosts the production department, was enlarged. In 1971 the offices and the warehouse were moved from Milan (where they were situated for marketing purposes) to Luvinate.”
“During those years the skilled workers and our direct partners have always followed the history of the Gasparini factory, becoming very fond of it and devoting themselves, with care and love, to the making of each pipe, with the personal fantasy and skills of the artist…”
“…The cycle of manufacture is basically divided into two separate branches. Pipes from the first branch (my addition, ed.) the “Fatta a Mano” and “da Collezione” are completely hand made, rigorously produced from the best selected briar; the estrus(?) and fantasy of our masters is surely more evident in these series of pipes.”
“The other branch is (my addition, ed.) …Serial pipes are partially machine made (the bowl, shank and drilling) and they are divided into various categories based on the quality and finish.”
“…during the years we have always made the creation of unique pieces for the series “Fatta a Mano” (Hand Made) and “per Collezionisti” (for collectors).”
At the bottom of the Pipedia article there was an email address for contacting the Gasparini Company with any questions that need to be addressed to them. I took the opportunity last evening to write an email to them regarding the age and provenance of the pipe I had in hand. I also included a photo of the pipe’s condition and look when I got it from my brother. This morning I received a reply from none other than Marisa Gasparini herself. Here is her email in full:
Dear Steve,
The pipe you have is a very old pipe that we produced 35 years ago about, and we made only few pieces.
It’s very different from the normal pipes and we have made in the time other interesting pipes, quite original that we keep in our warehouse.
If you are interested I can send you some photos for next week so you can understand what I mean for original.
I would like to know where you bought that pipe, thanks a lot and best regards,
Marisa Gasparini
That gave me some incredibly helpful information. The pipe in my hand is approximately 35 years old and there were only a few of them made at that time. She is going to send me some photos of some of the original pipes next week. I will post them as an addendum to this blog when I receive them. I wrote Marisa back immediately thanking her and answering her question as to where I found the pipe.
Now I had a feel for the age and provenance of the pipe and I was ready to work on it. I took some photos of it before I worked on it. My brother had done the majority of the clean up work on the bowl, base and shank before he sent it to me. He had reamed it and cleaned out the airways in the bowl, base, shank and stem. He scrubbed the externals and remove a lot of the waxy grime that had collected on the bowl over the years. It looked pretty good when I received it.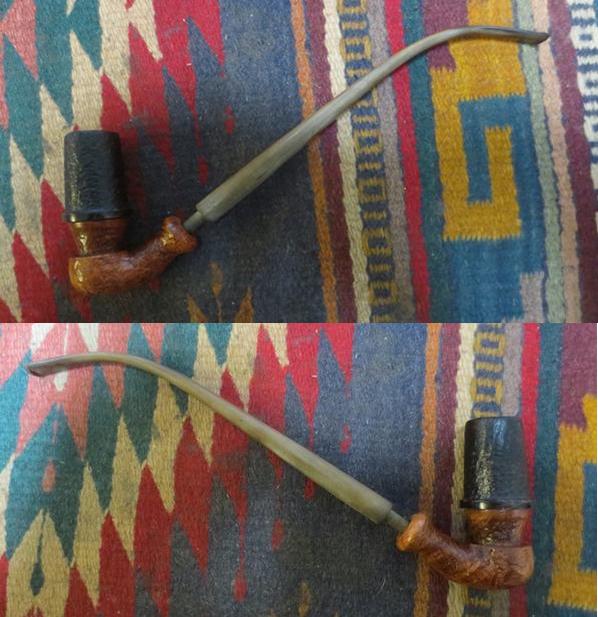
 I took the stem out of the pipe and unscrewed the bowl from the base and took some photos of the pipe before I worked on it.
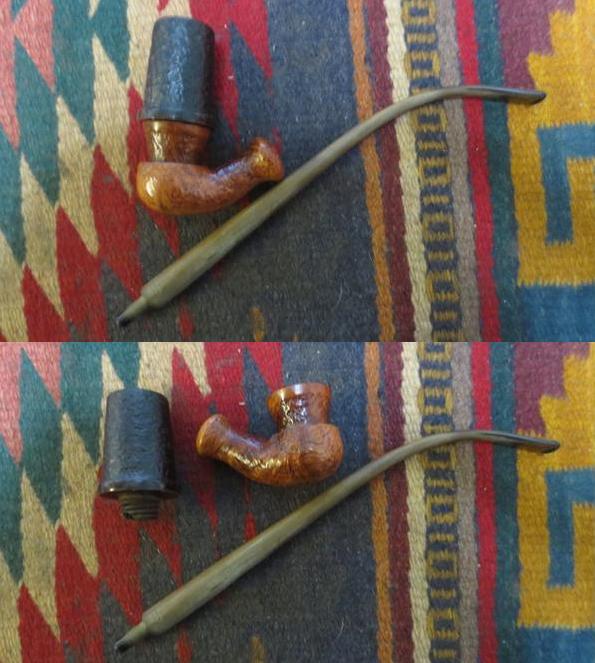
 I took a photo of the stamping on the bottom of the base to give an idea of how that look – it is the only smooth portion on the base other than the rounded shank end.
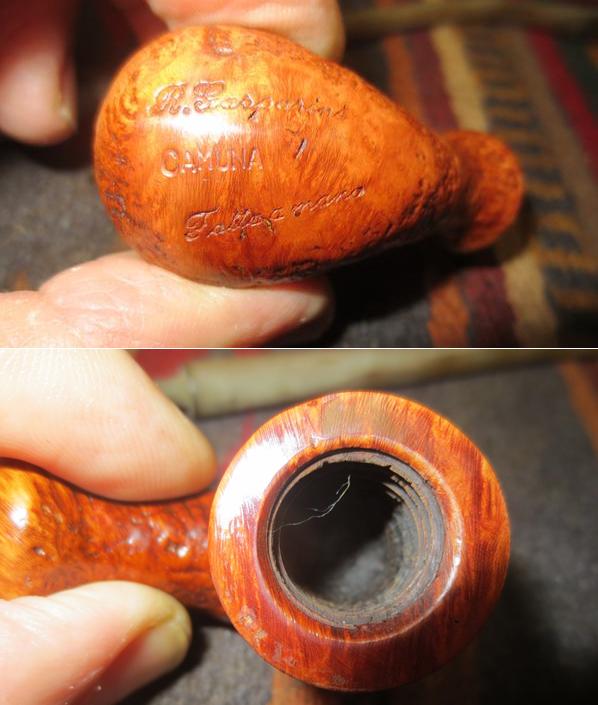 I took some photos of the damage to the bottom of the bowl on the threaded portion to show what it looked like with the oils and tars removed. I took a top down photo to show the cleaned bowl and also the twin airways in the bottom of the bowl.
 I cleaned up the reaming with a Savinelli Pipe Knife and scraped out the bits of cake that still were on the walls and at the bottom of the bowl.
 I wiped down the bottom of the bowl and the damaged area with alcohol on a cotton swab and cotton pad in preparation for repairing the damage. I used clear super glue and briar dust to build up the area of the missing chunk of briar. I was careful to keep the airway open. I layered the glue and the dust until it was smooth.
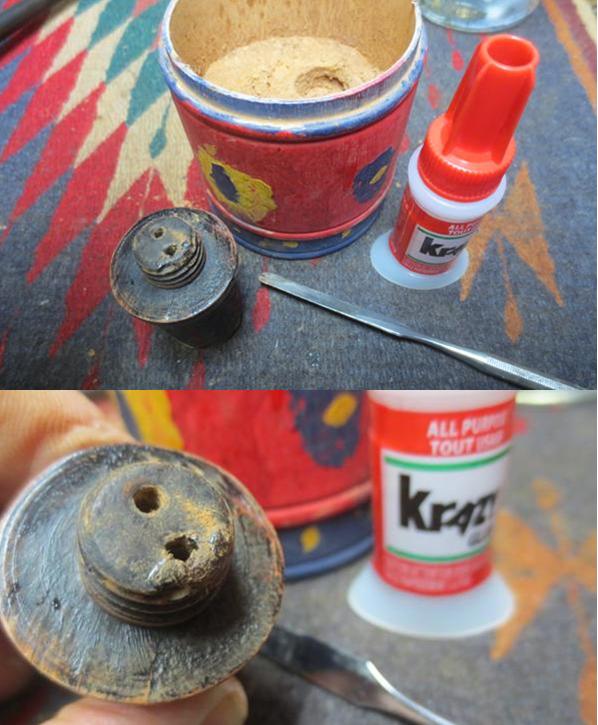 I used the sanding board to lightly “top” the bottom of the bowl and smooth out the repaired area. After I took the second photo below I used needle files to retrace the threads on the damaged area of the bowl.
 I gave the bowl and base several coats of Conservator’s Wax and buffed them with a shoe brush. The photos below show the bowl and base at this point in the restoration.
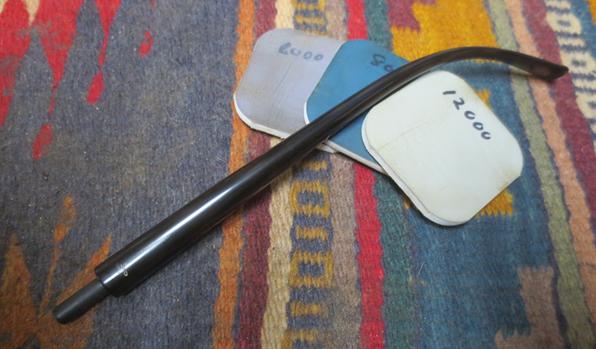
 I turned my attention to the oxidation on the stem. I lightly sanded it with 220 grit sandpaper to remove the surface oxidation and remove the tooth marks and chatter from the area around the button. I ran a long pipe cleaner through the stem just to check for debris and oils but my brother had done a great job with the airways. I scrubbed the stem with Before & After Pipe Stem Deoxidizer and the with the Fine and Extra Fine Pipe Stem Polish. I was able to get the majority of the oxidation off the stem.
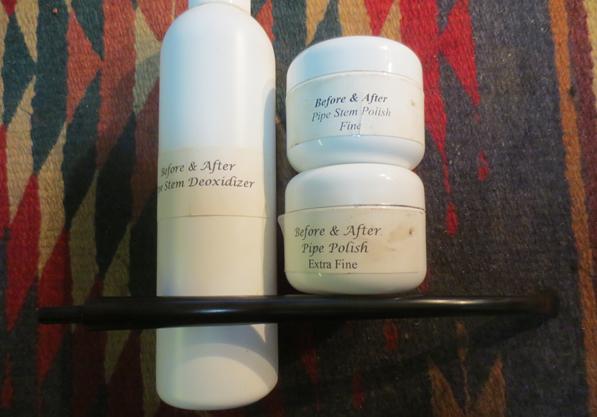 I did a touch up on the “G” logo on the stem with white model paint and a fine bristle artist’s brush. When it dried to touch I used a 1500 grit micromesh sanding pad to remove the excess paint and polish the end of the stem.
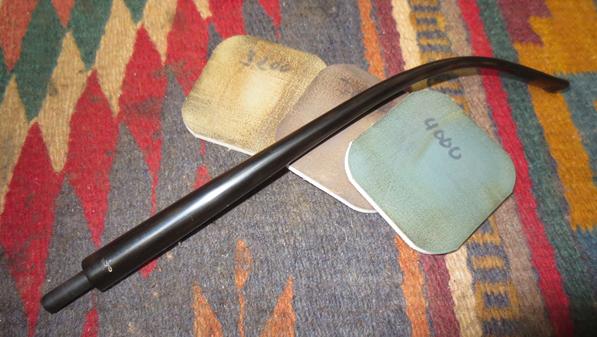
 I polished the stem with micromesh sanding pads – wet sanding with 1500-2400 grit pads and dry sanding with 3200-12000 grit pads. I rubbed the stem down with Obsidian Oil after each set of three pads. After the final set I buffed it with Blue Diamond on the wheel and gave it a last rub down with Obsidian Oil. I set the stem aside to let the oil dry. I buffed the stem with carnauba wax and with a clean buffing pad to raise the shine.
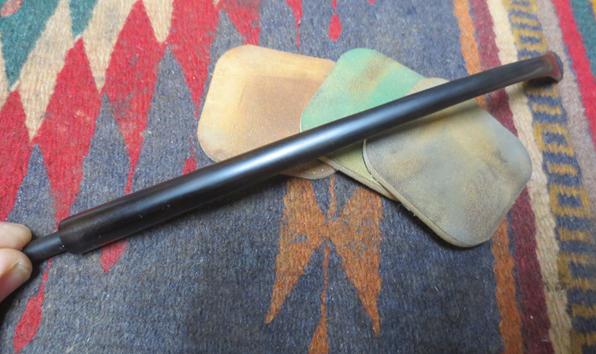
 I lightly buffed the bowl and base with Blue Diamond and then gave it a light coat of carnauba, being careful to not let it build up in the grooves and crevices of the sandblast. I buffed it with a clean buffing pad to raise the shine.
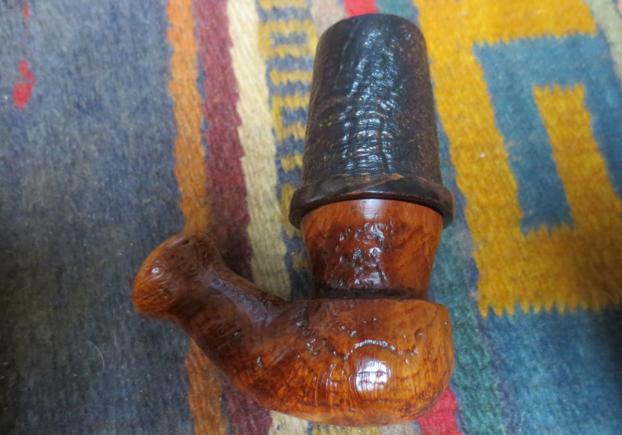
 I put the pipe back together and gave it a final buff with a clean buffing pad to shine it. I hand buffed it with a microfibre cloth to deepen the shine. The finished pipe is shown in the photos below. I took photos of the pipe as a whole and also taken apart in the various configurations. I am really pleased with the finished pipe and look forward to giving it a smoke. To me it is a very “Gandalfian” looking pipe and feels great in the hand and the mouth. Thanks for walking with me through the history and the process of bringing the pipe back to life.