Monthly Archives: November 2014

Chris Askwith “Hand Finished”


Blog by Al Jones

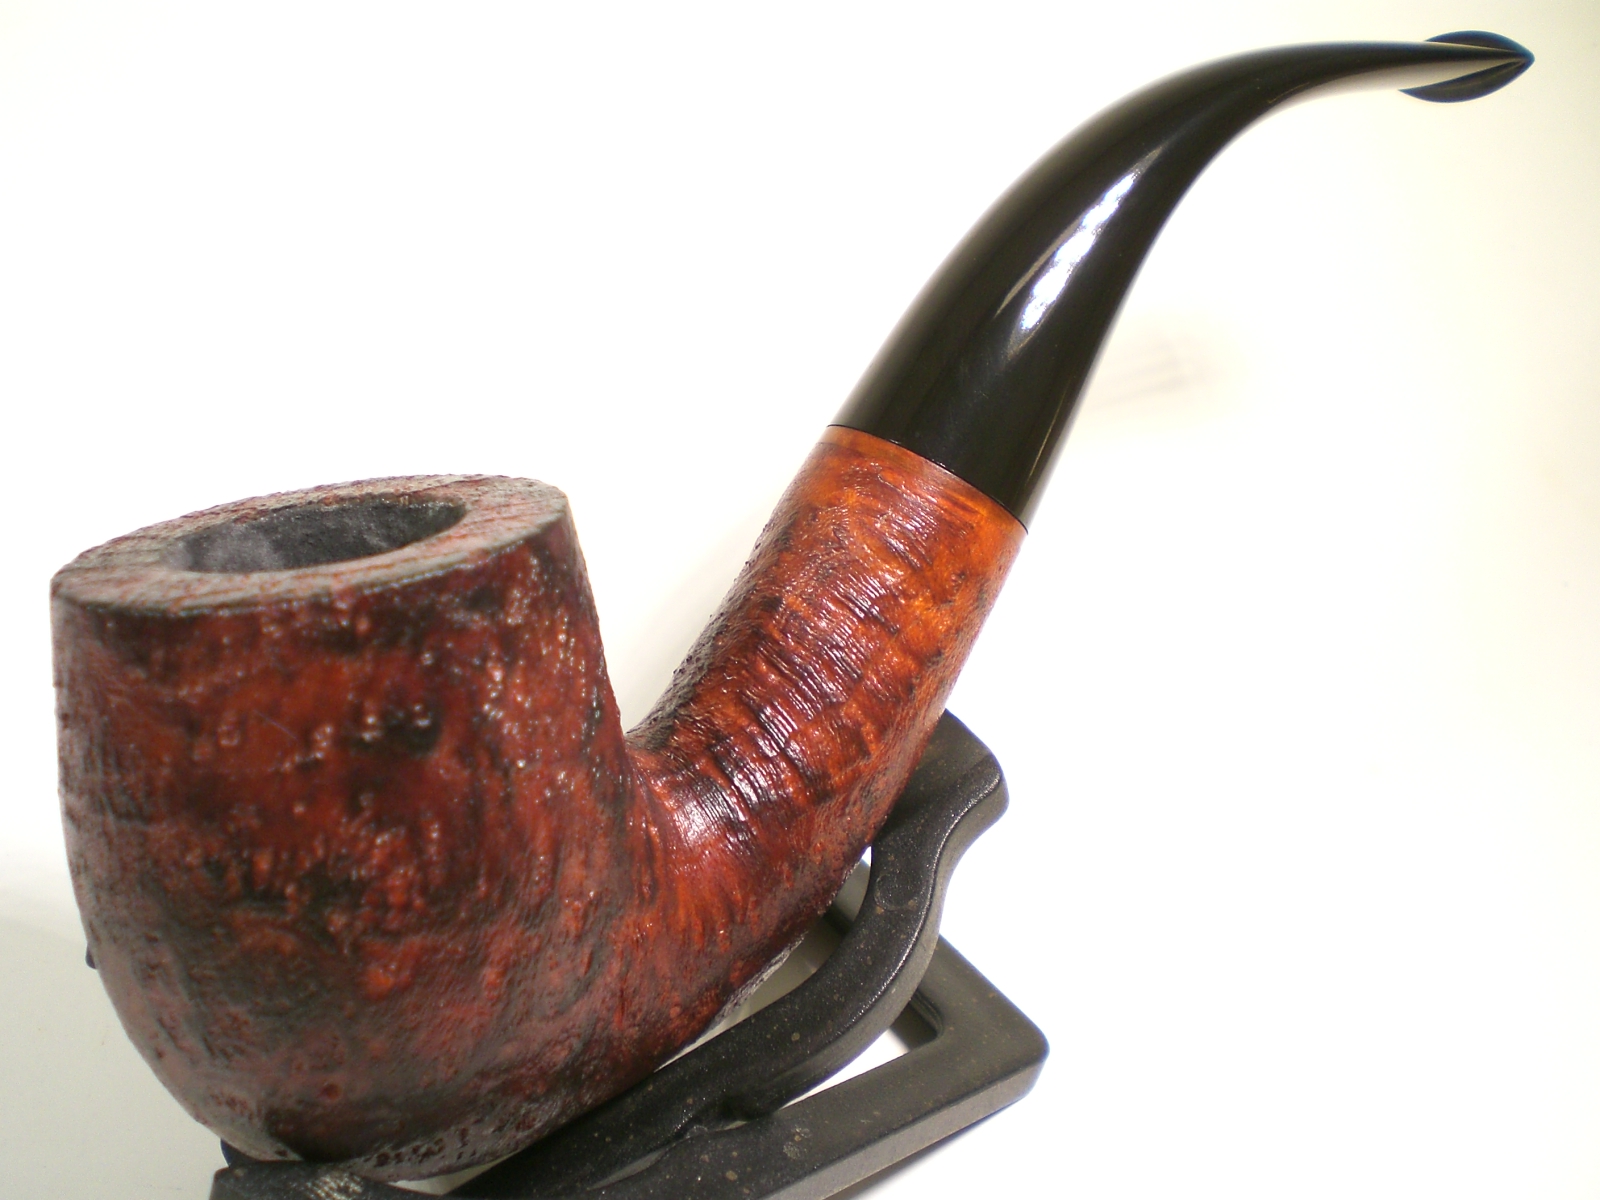
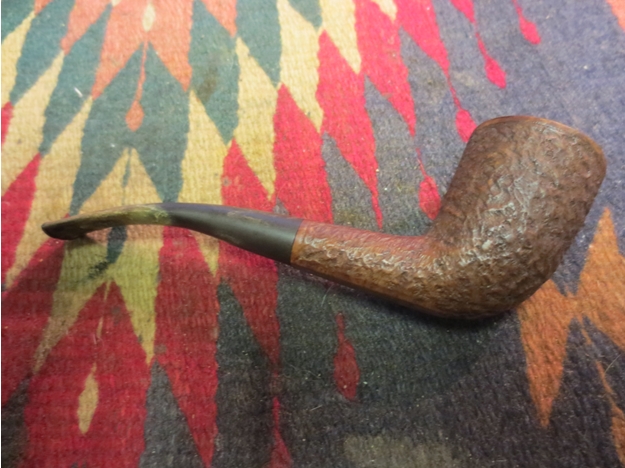
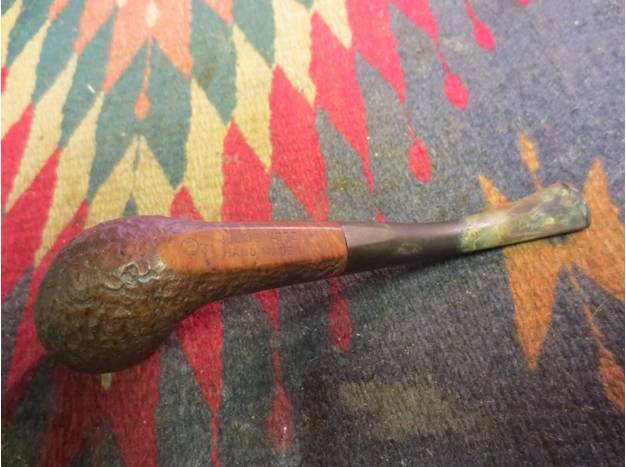
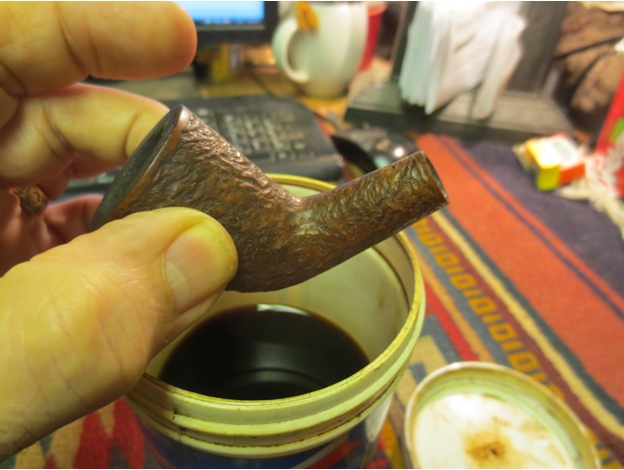
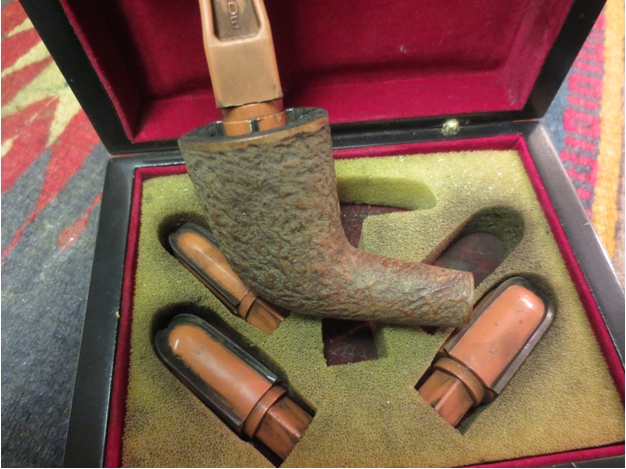
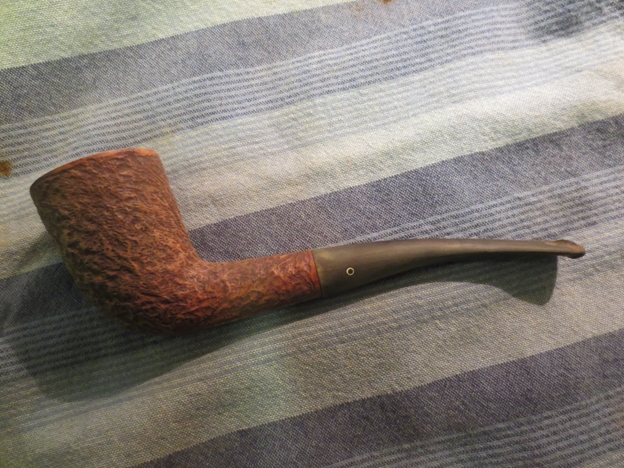
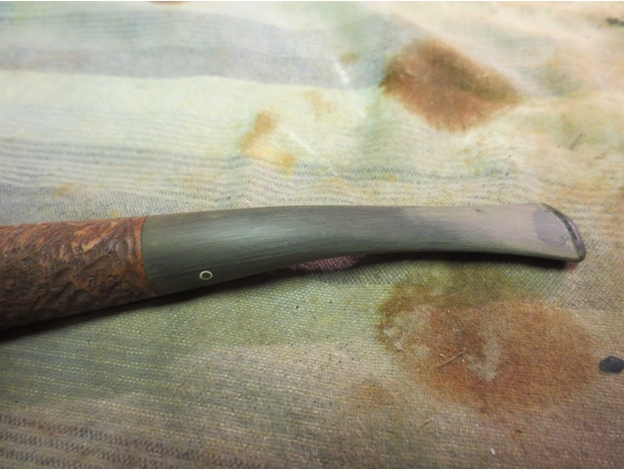
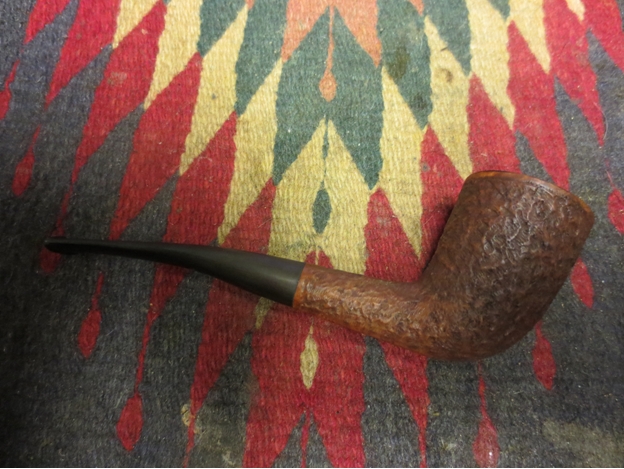
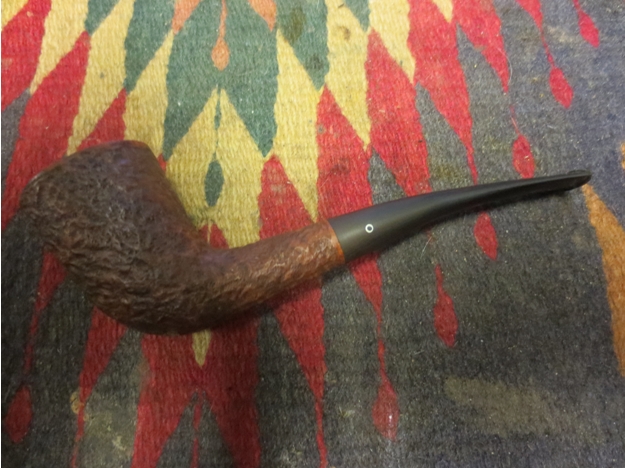
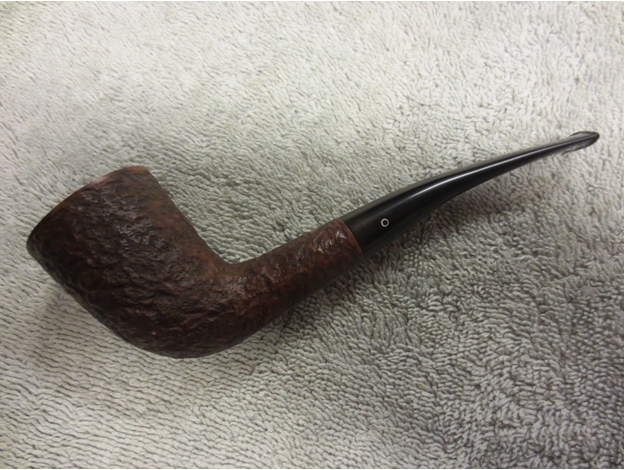
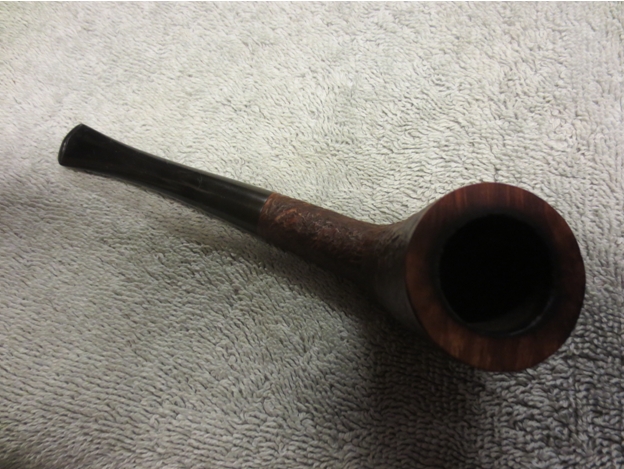
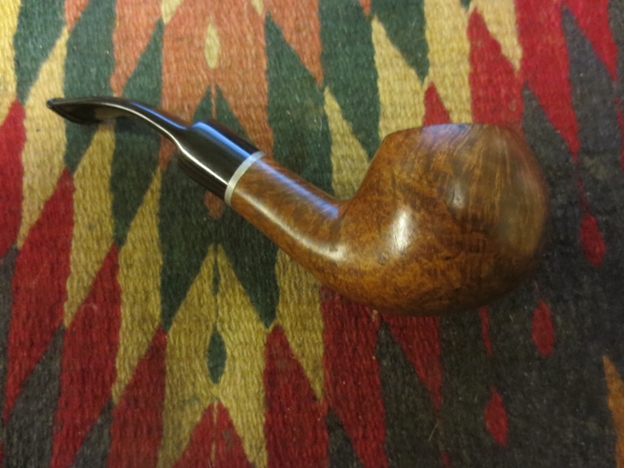
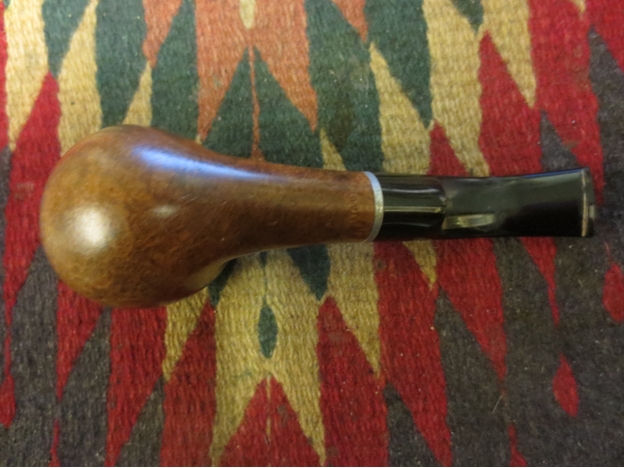
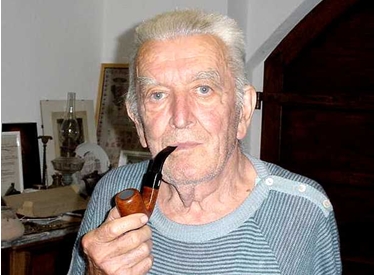
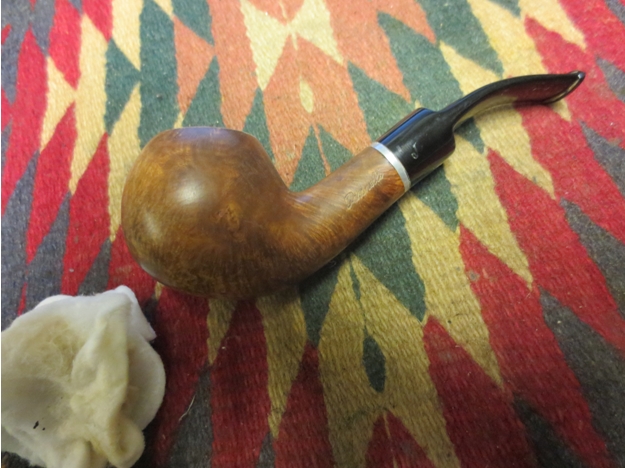
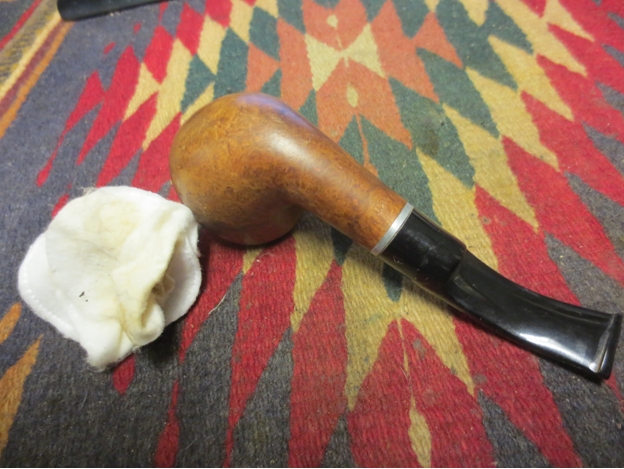
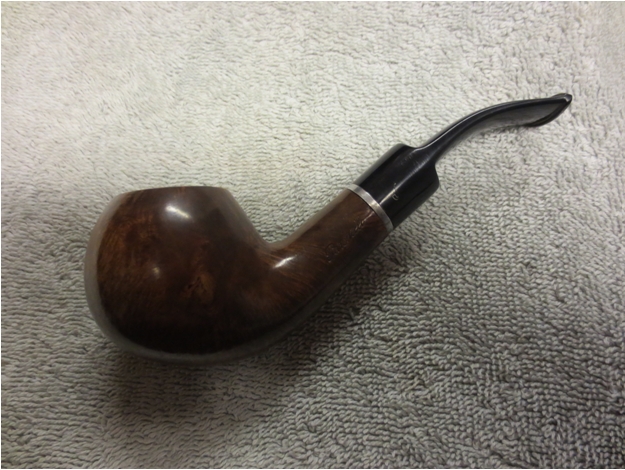
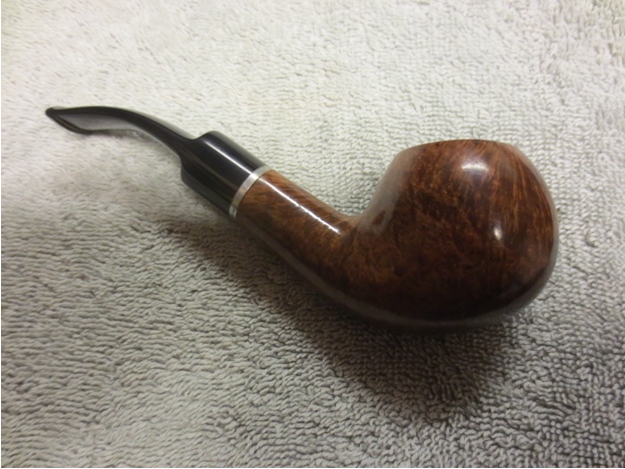
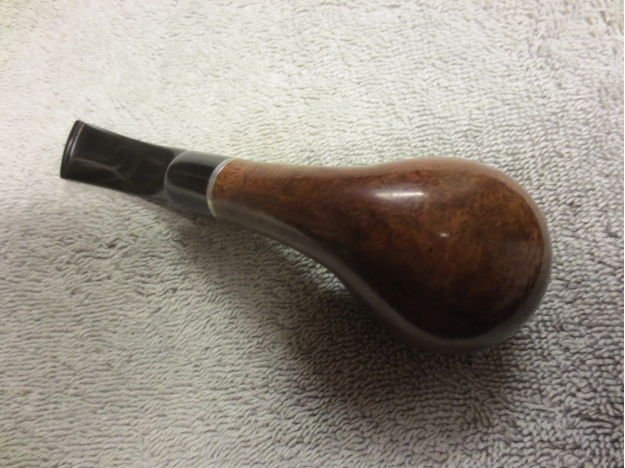
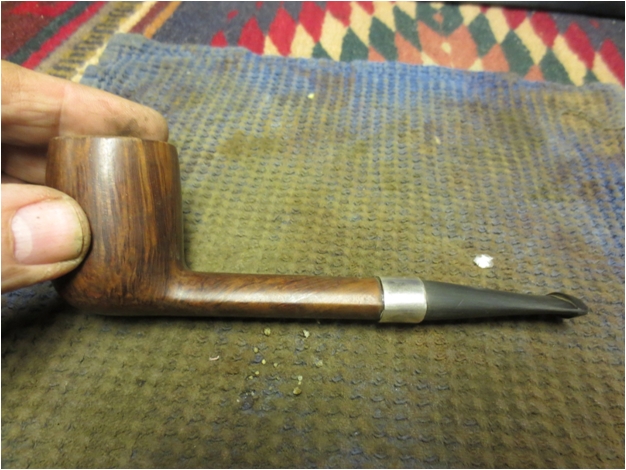
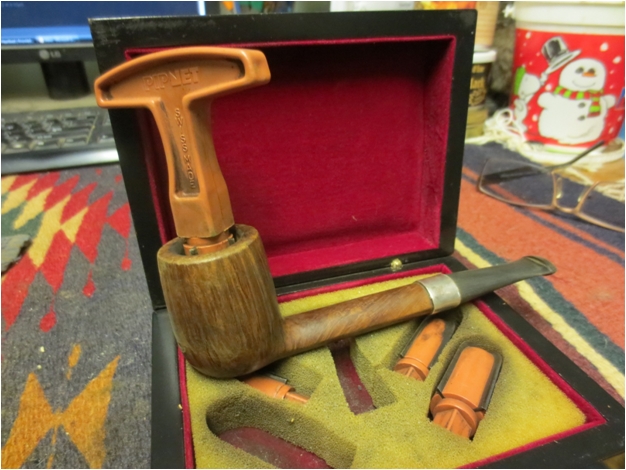
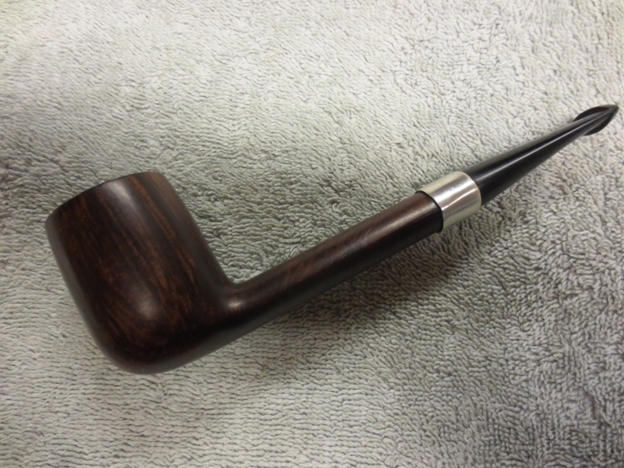
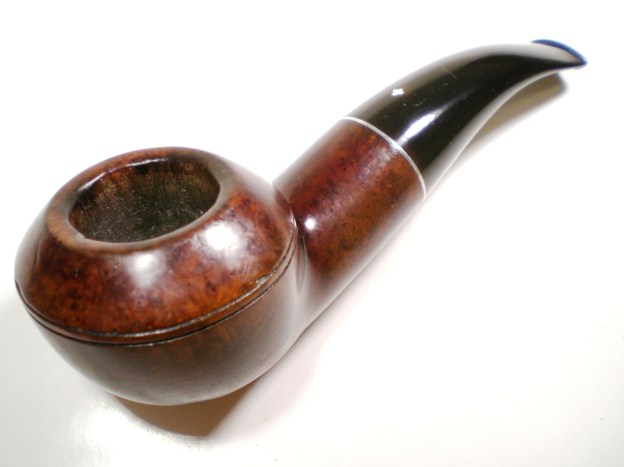
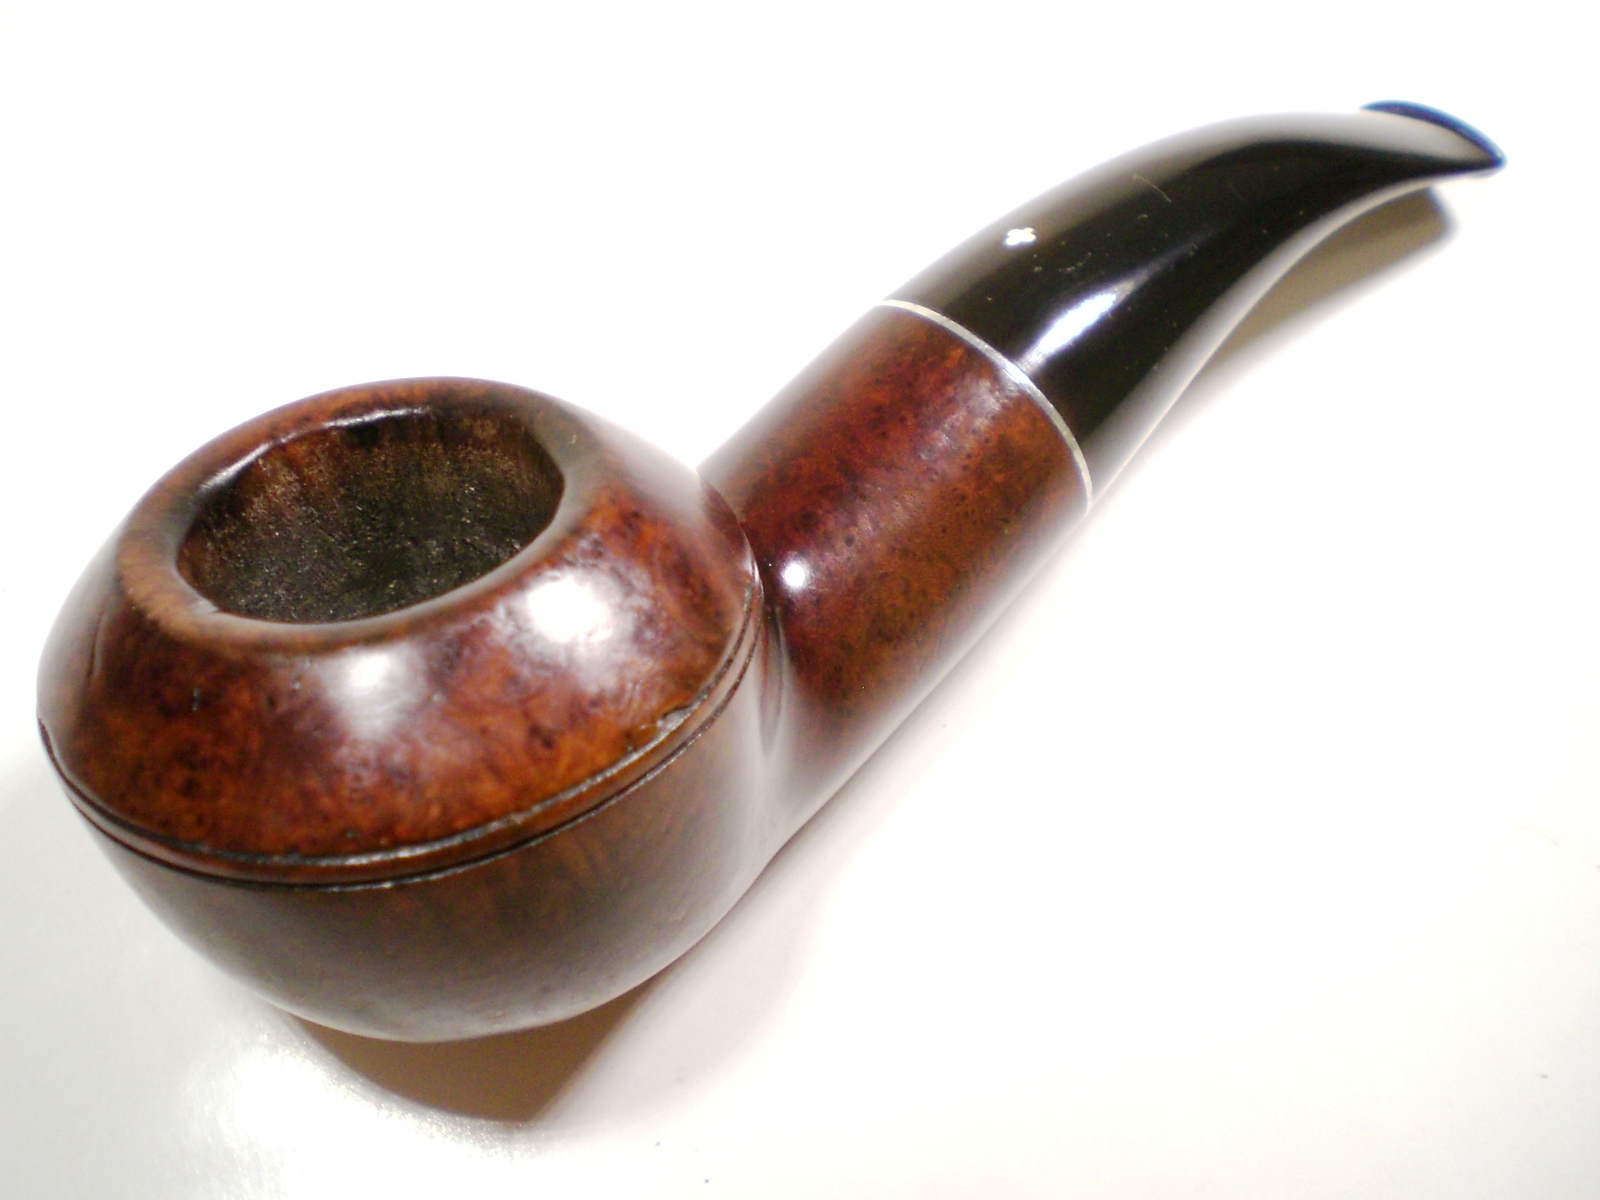
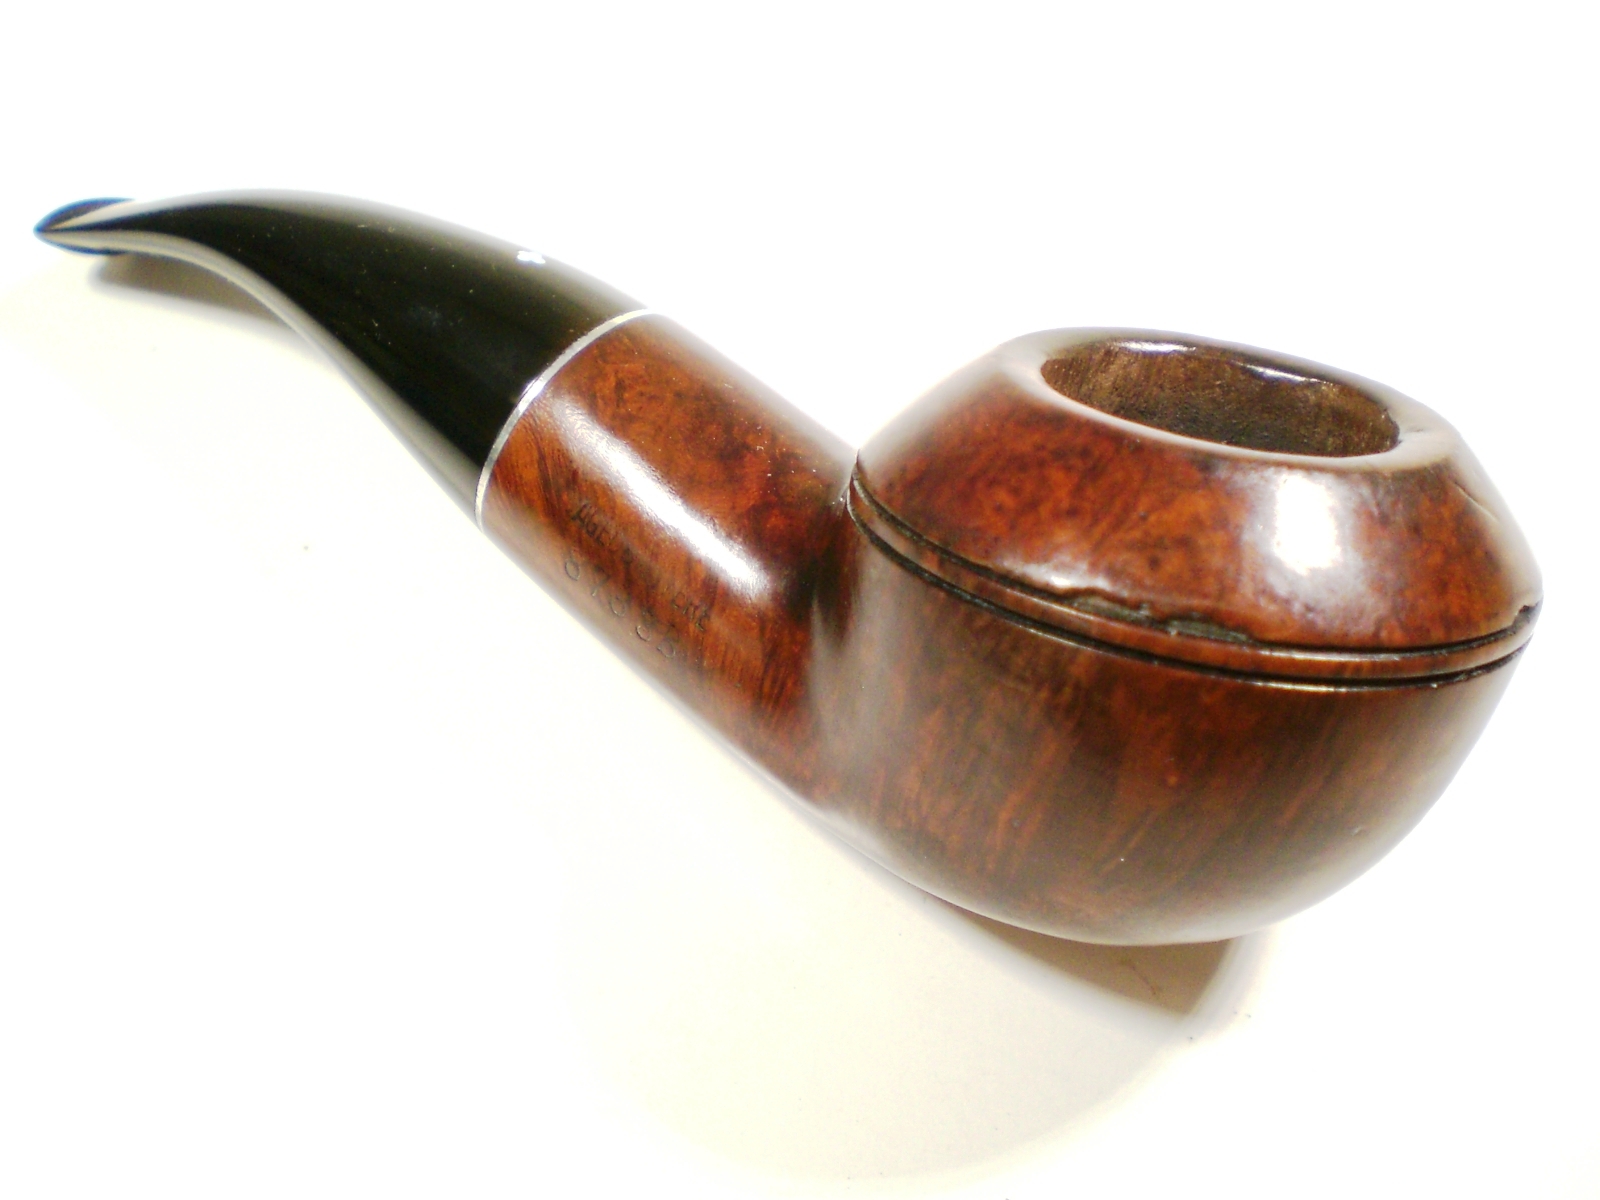
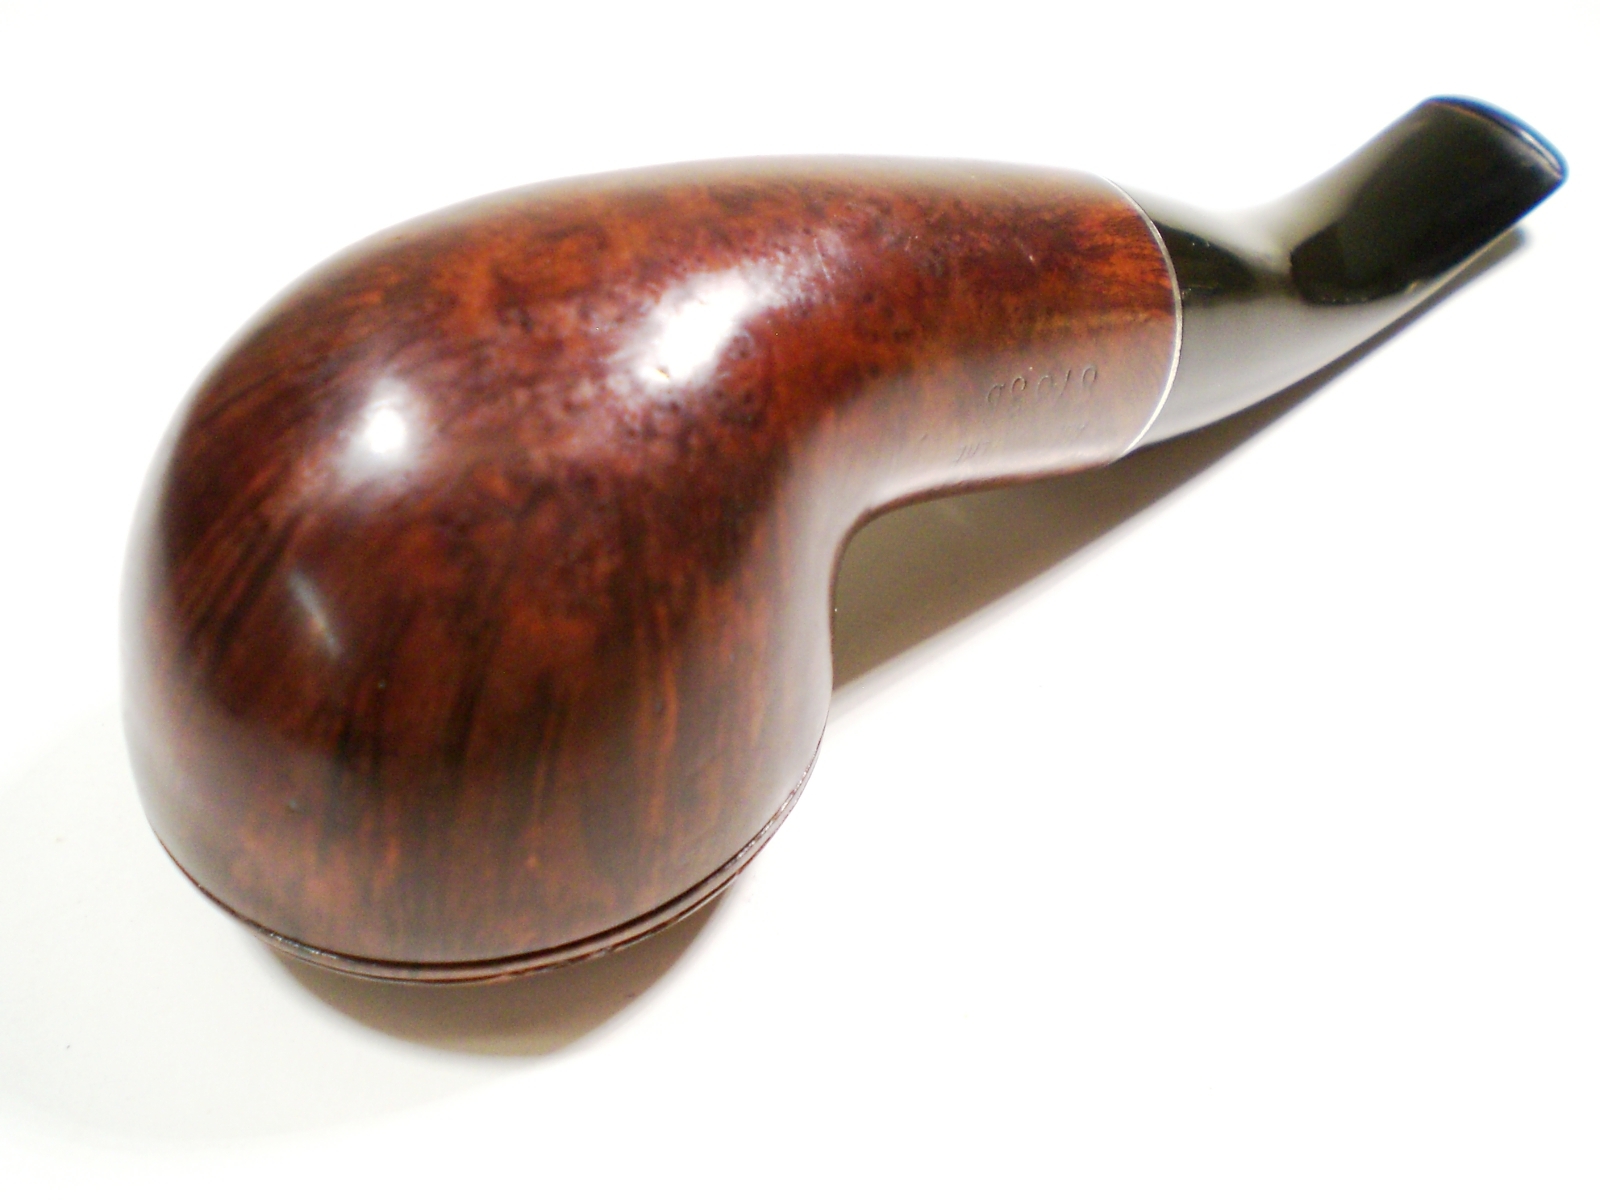
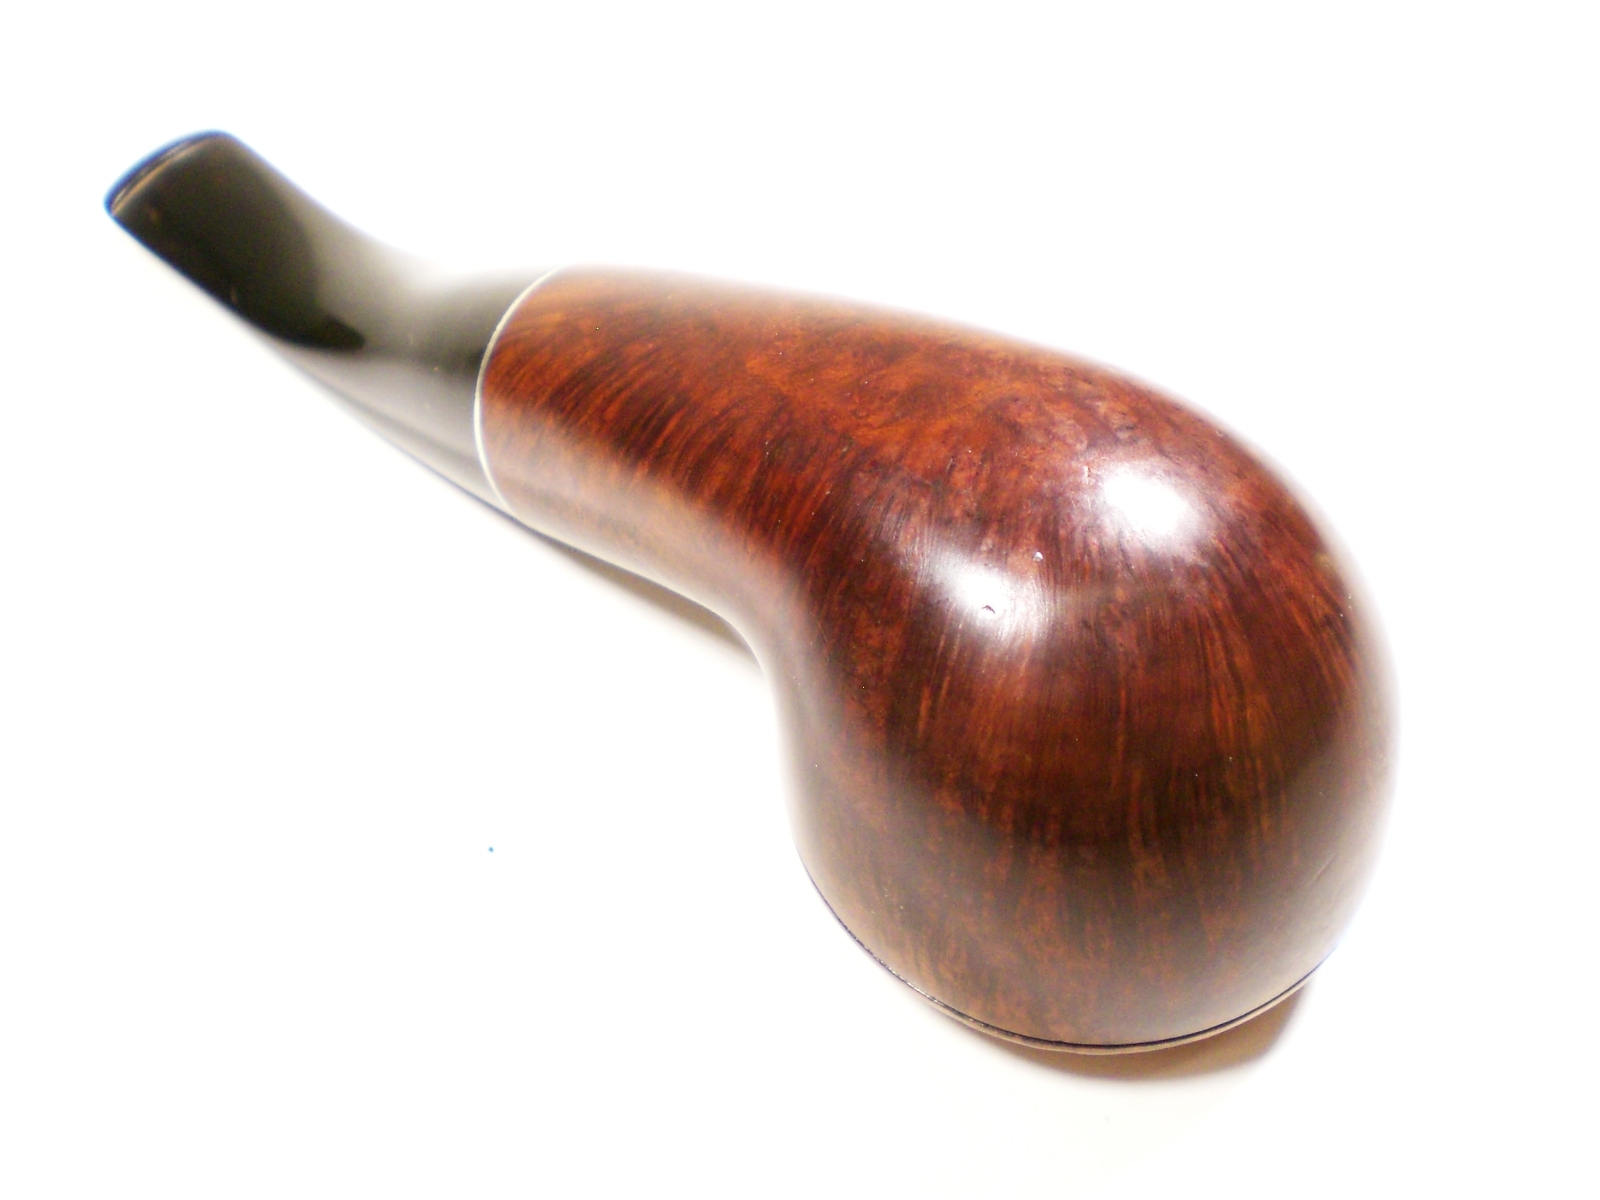
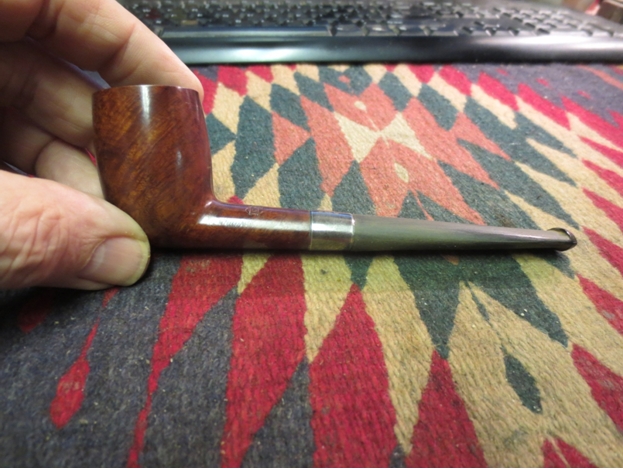
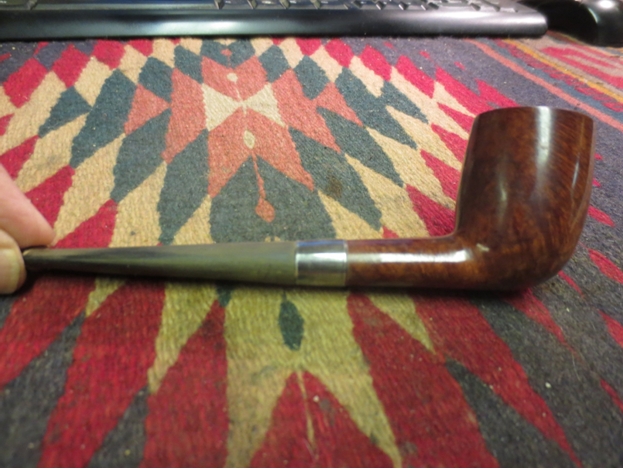
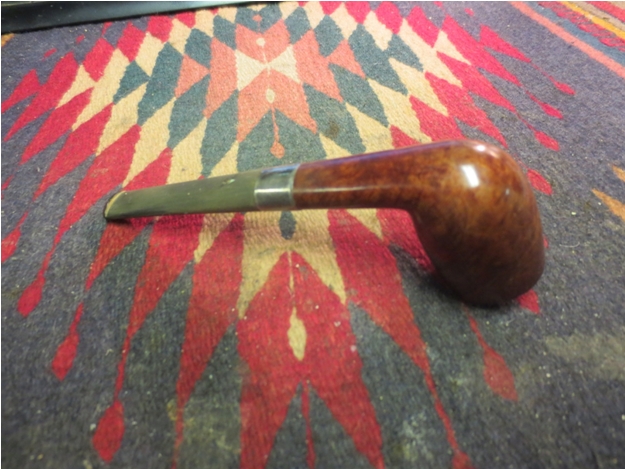
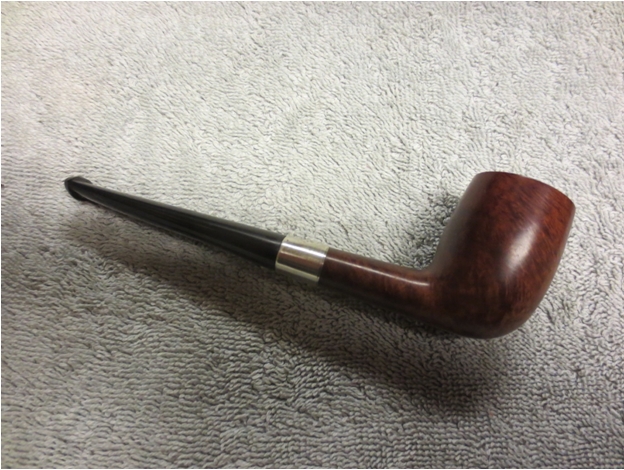
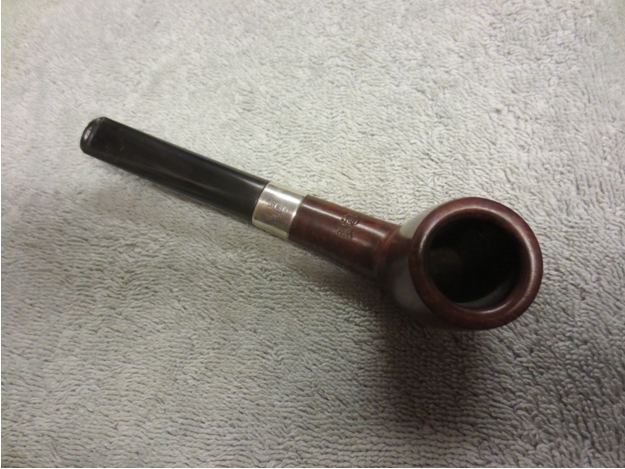
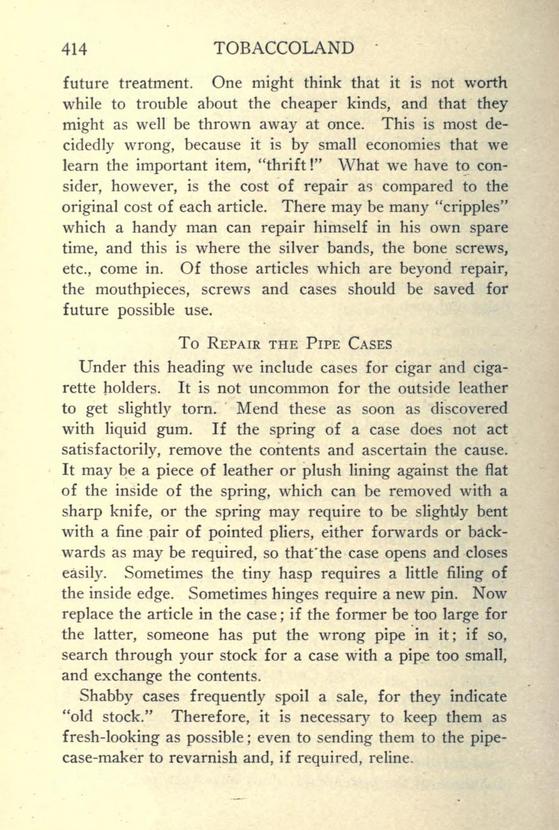
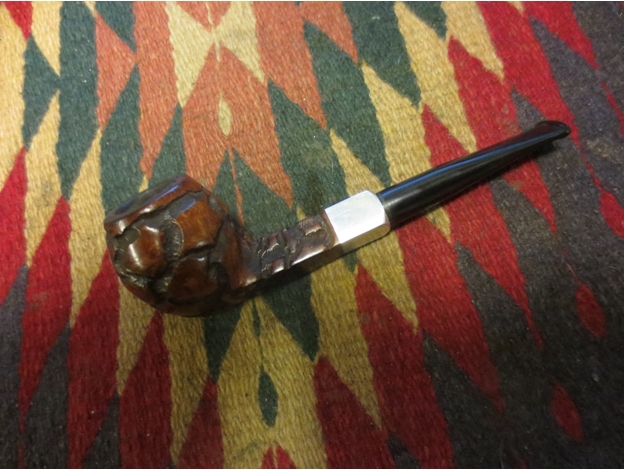
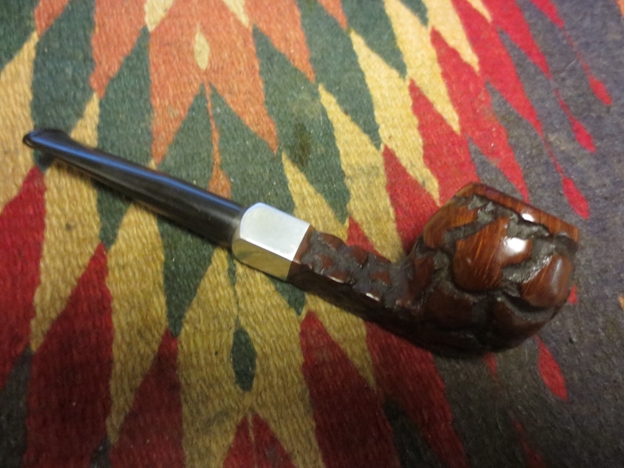
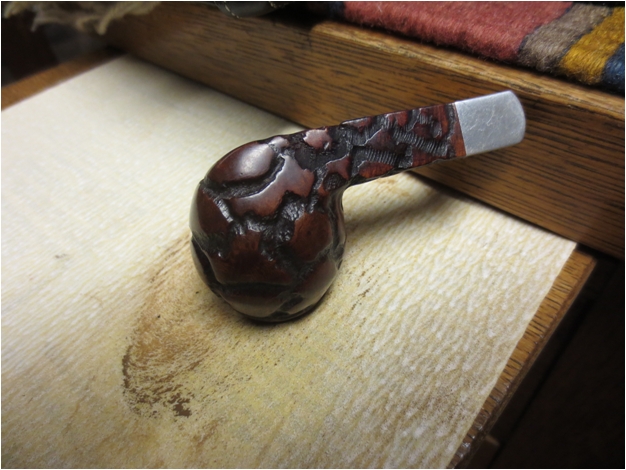
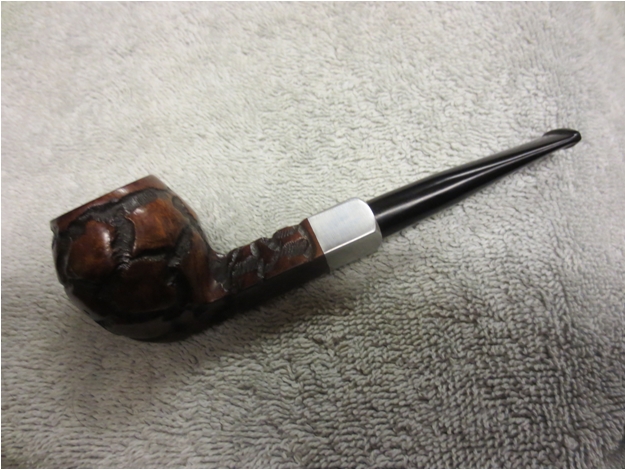
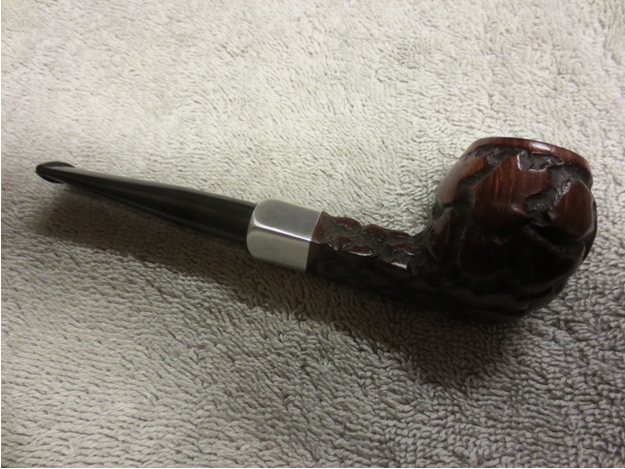
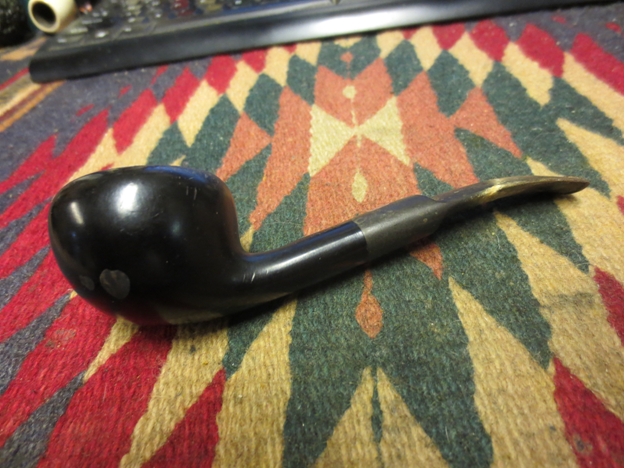
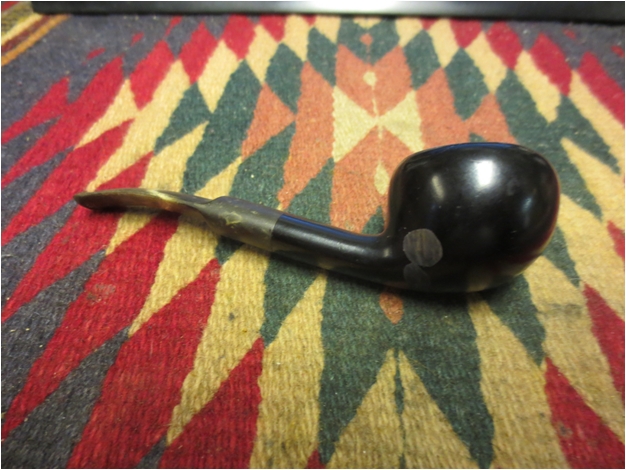
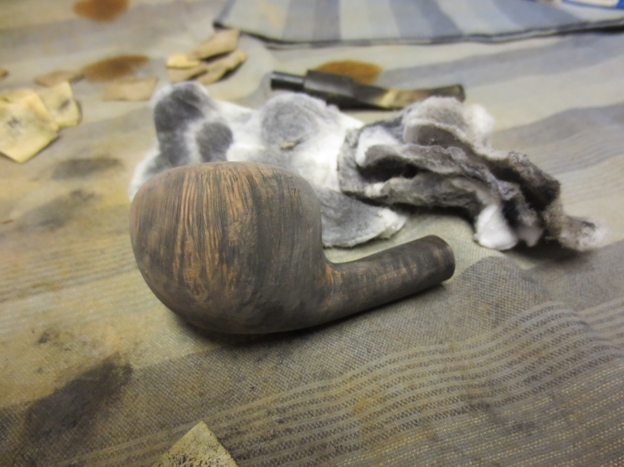
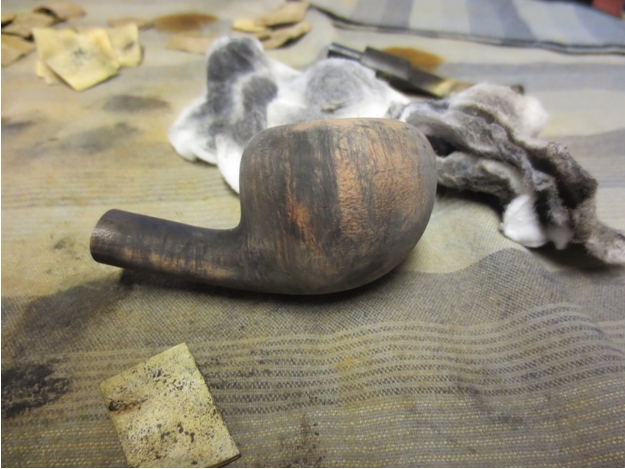
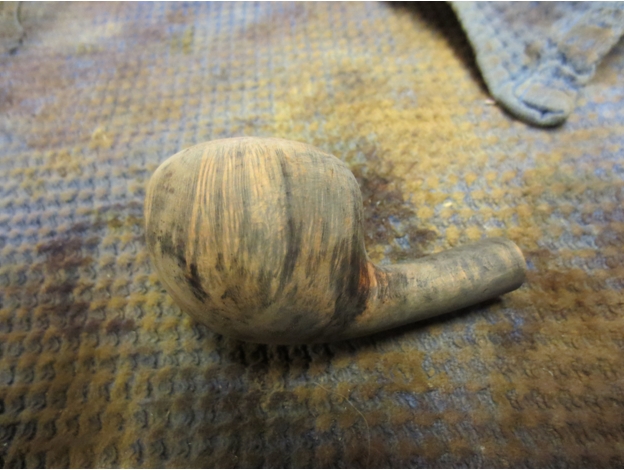
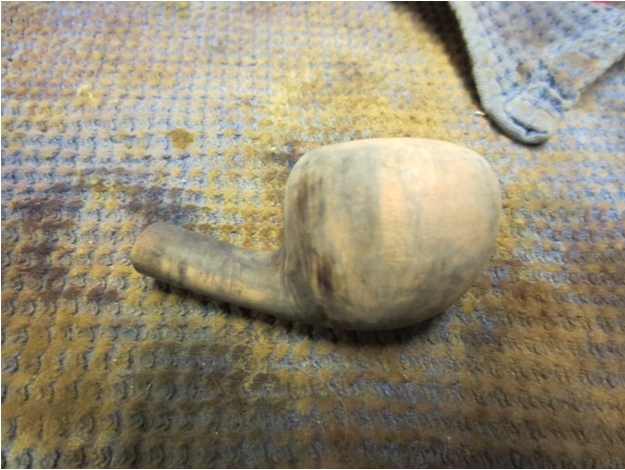
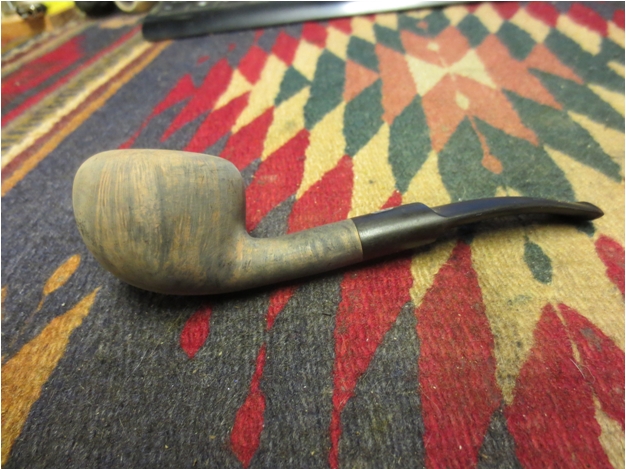
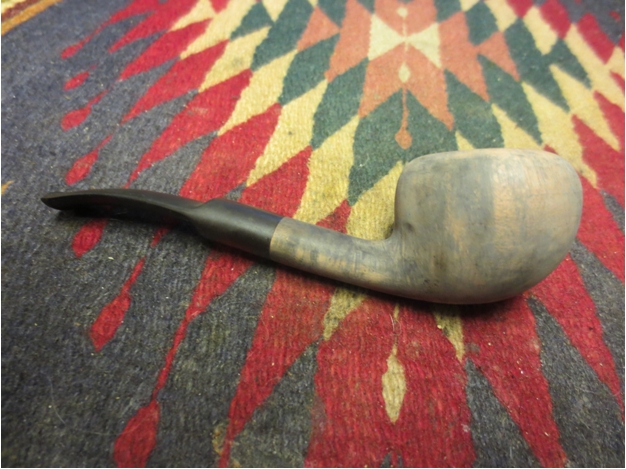
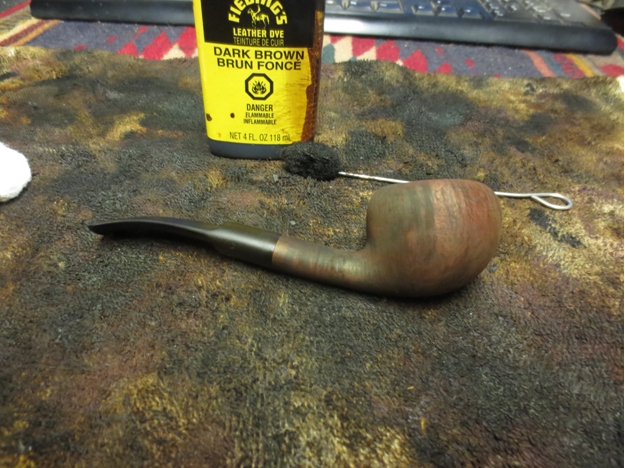
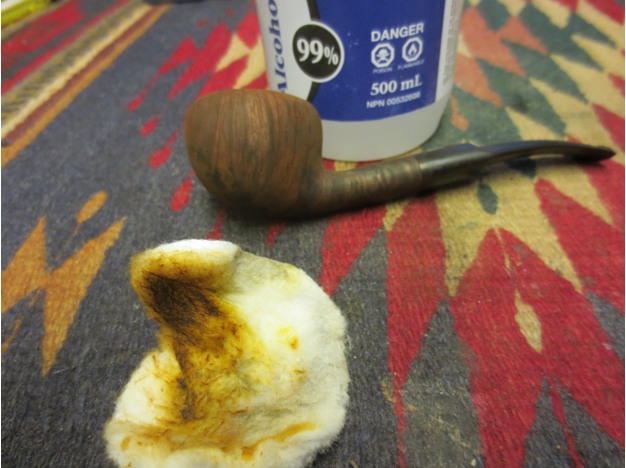
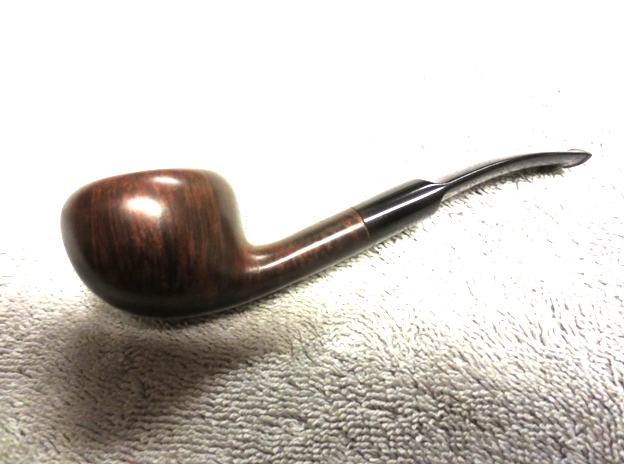
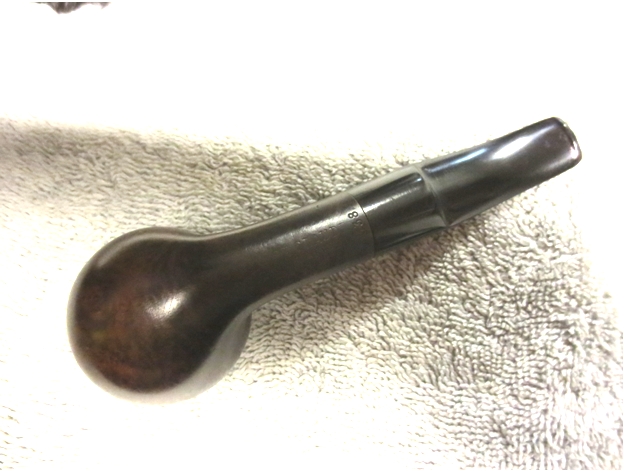
I have admired the work of British pipe artisan, Chris Askwith work for some time now.  He recently released a new line called “Hand Finished” pipes, at very reasonable prices.   This new line came up on a SmokersForum.uk thread and this bent Billiard caught my eye.  It had that classic British profile that I love.

I’ve had the pipe for about six weeks not and thought that I would share my observations.

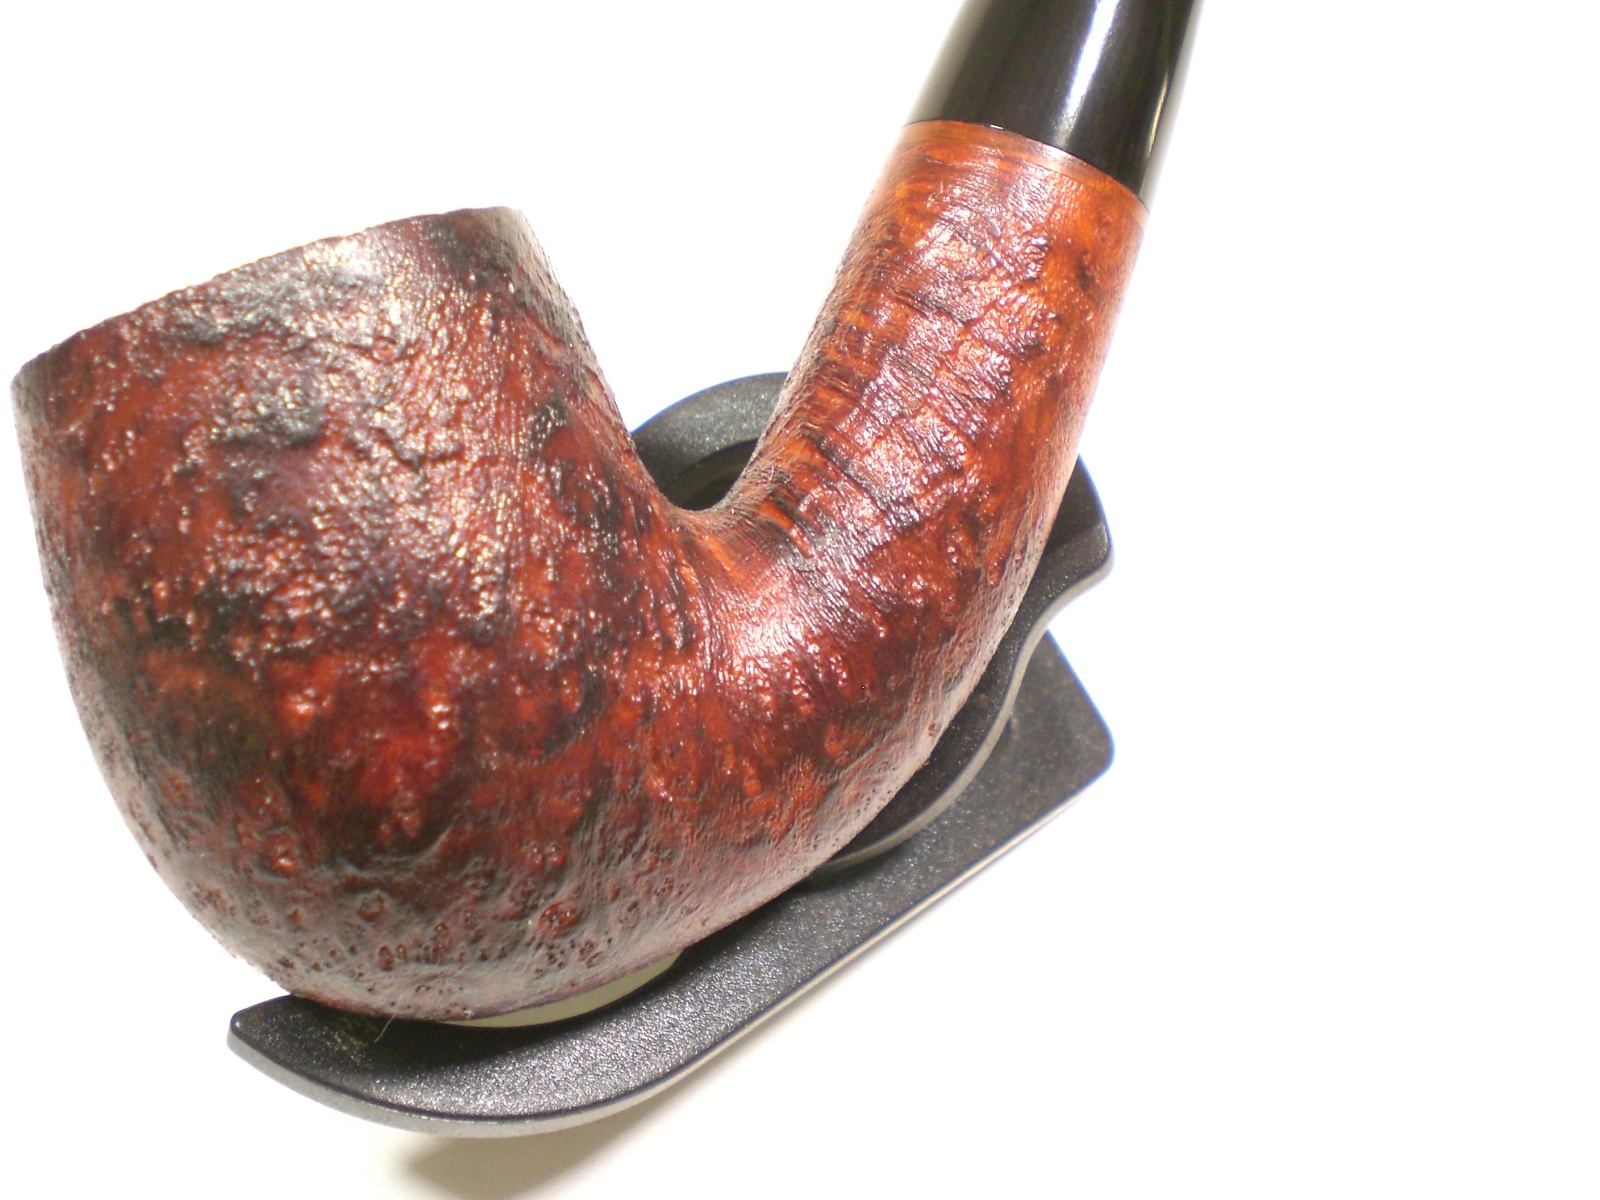
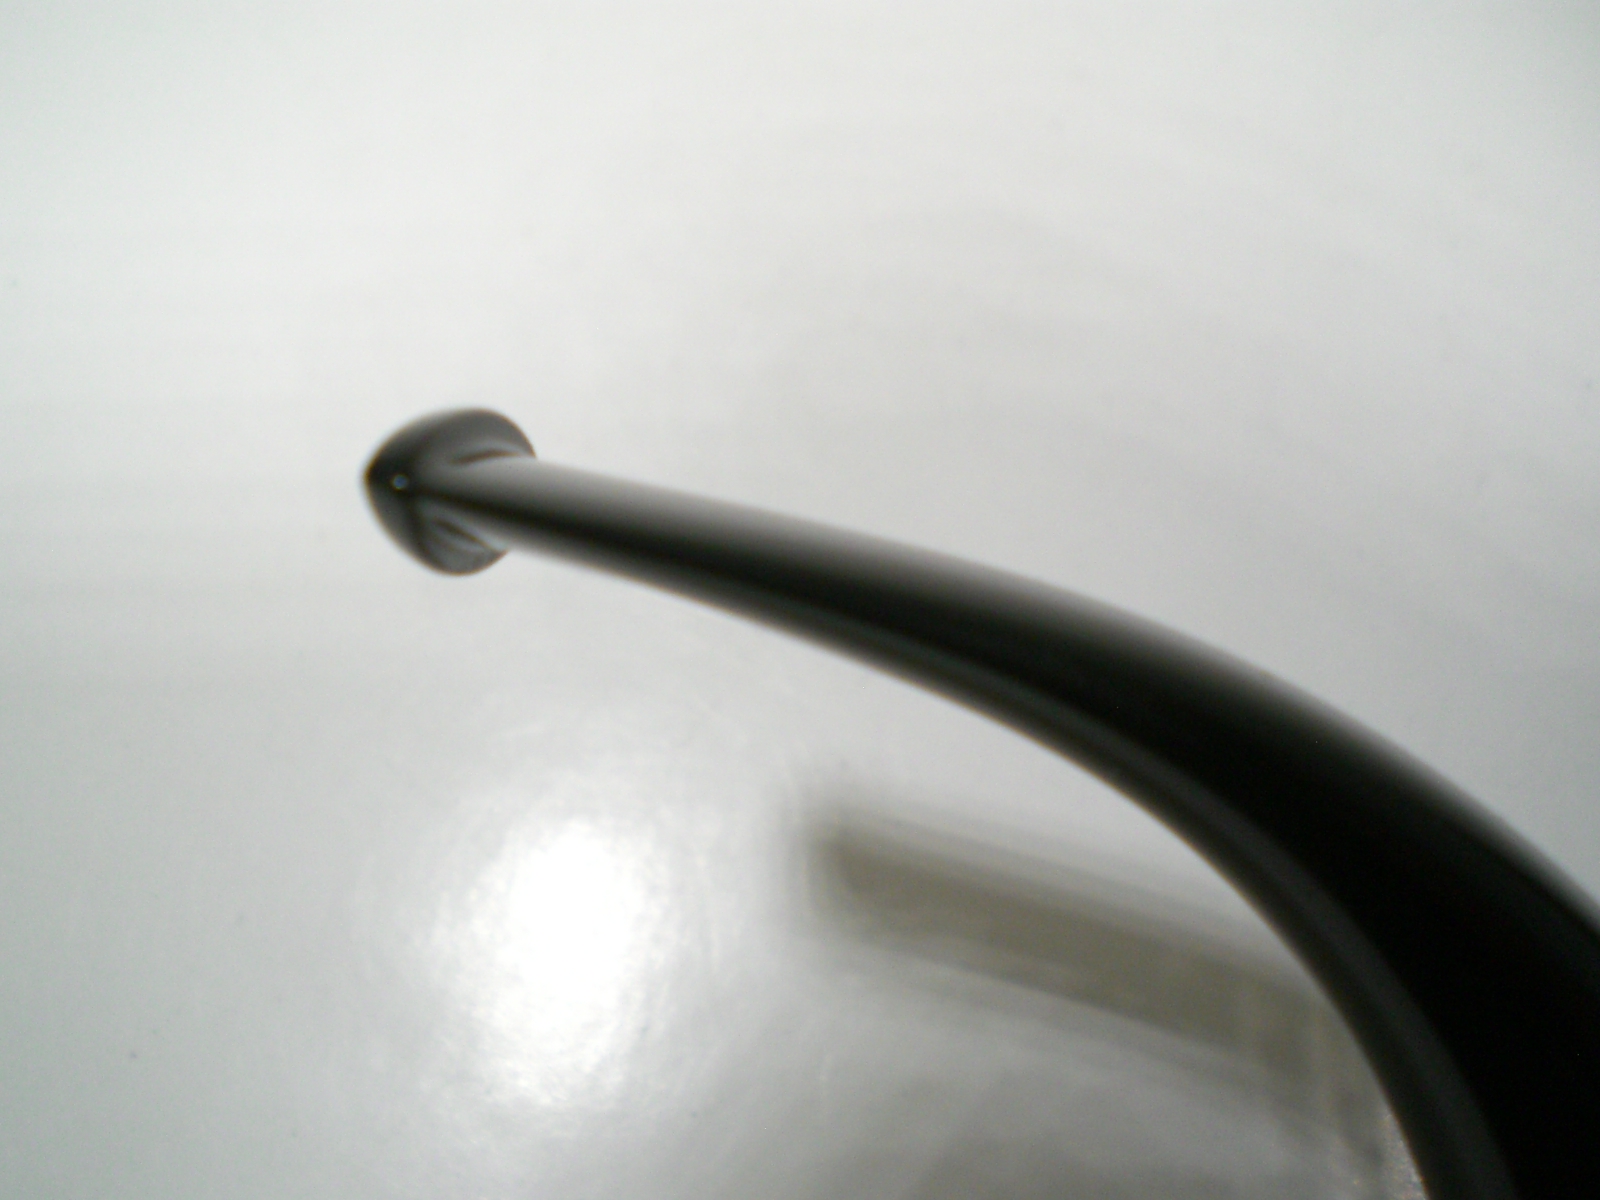
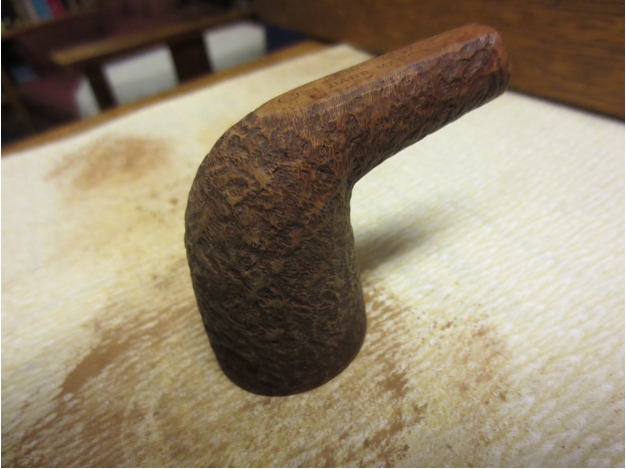
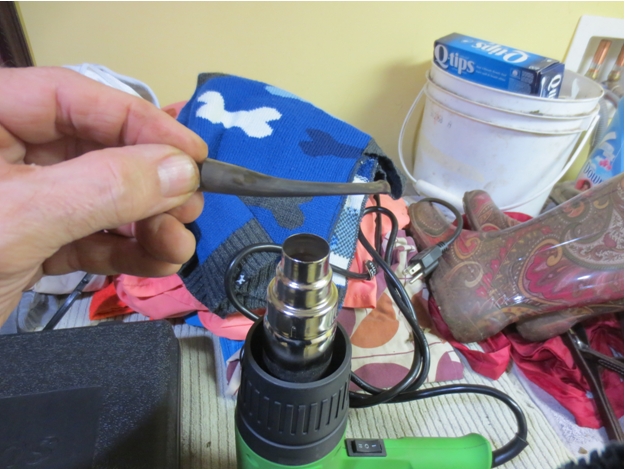
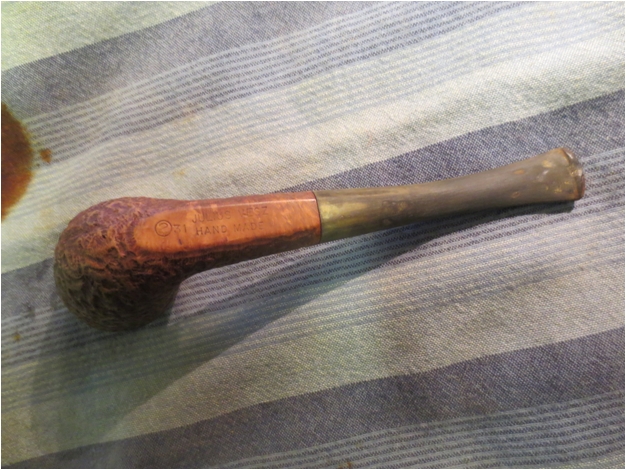
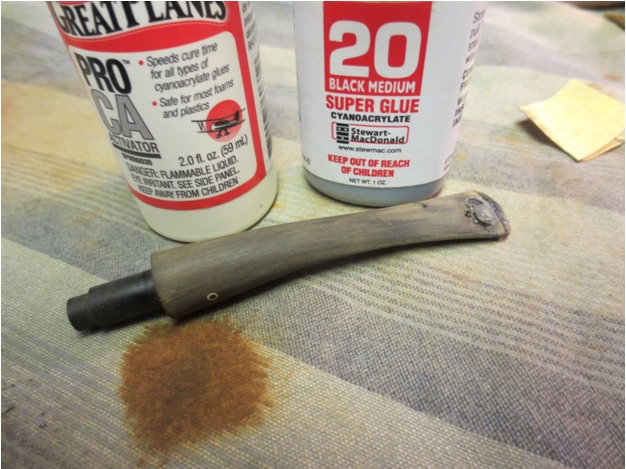
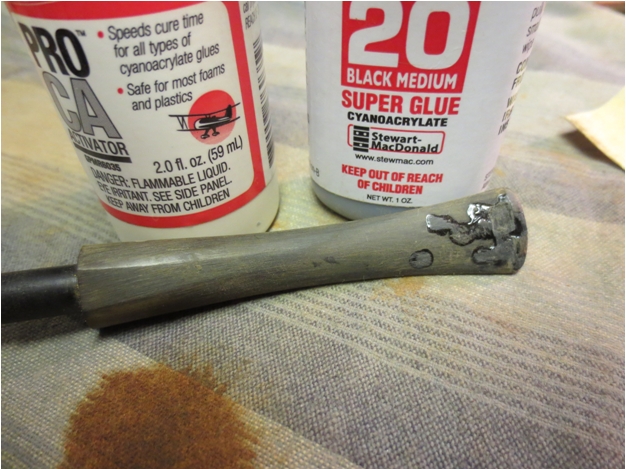
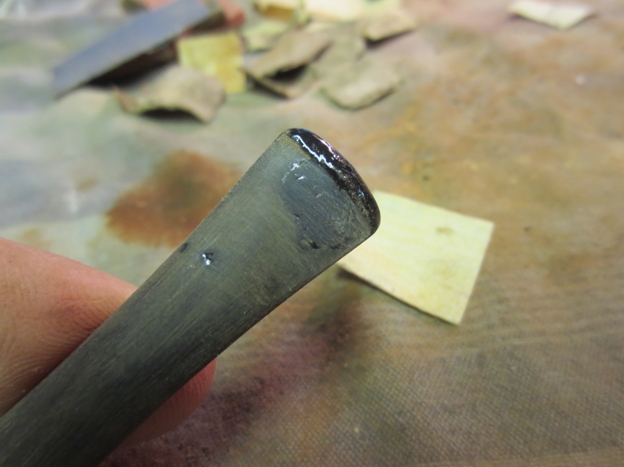
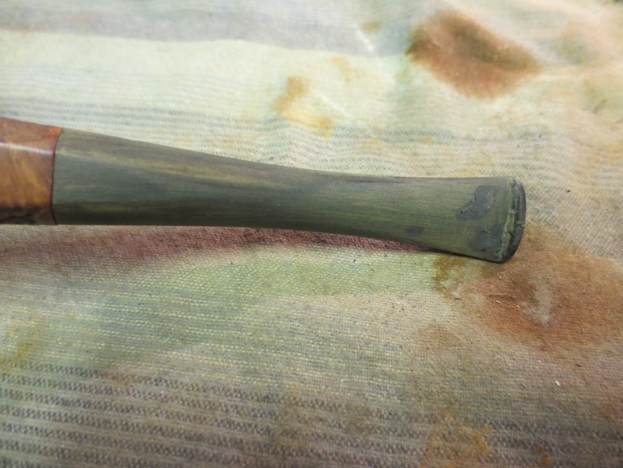
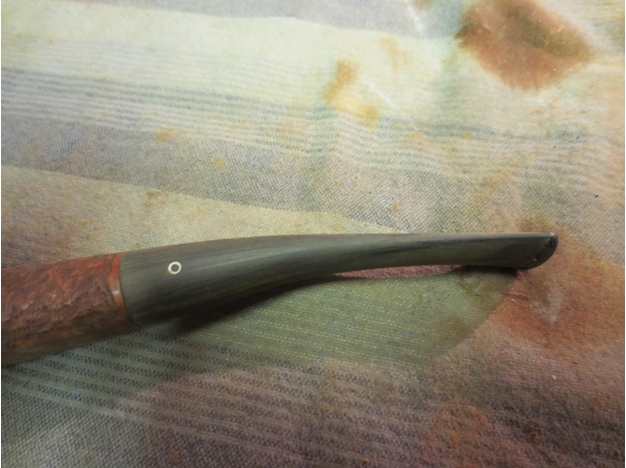
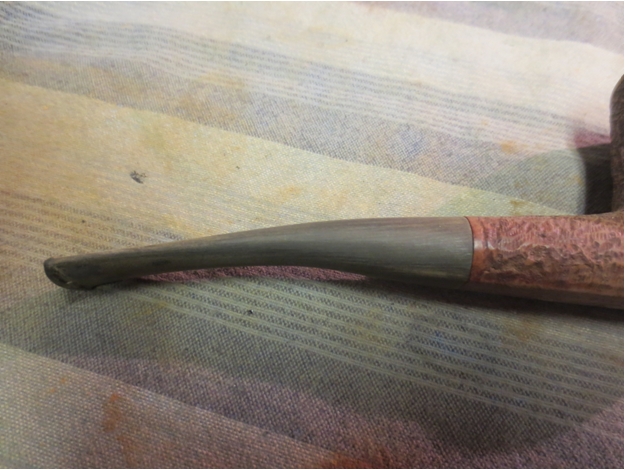
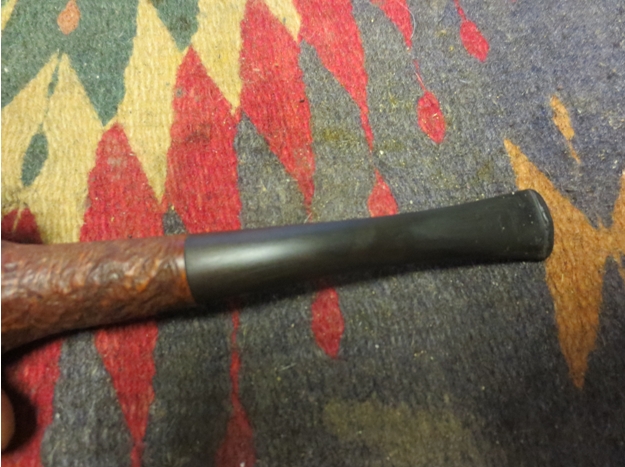
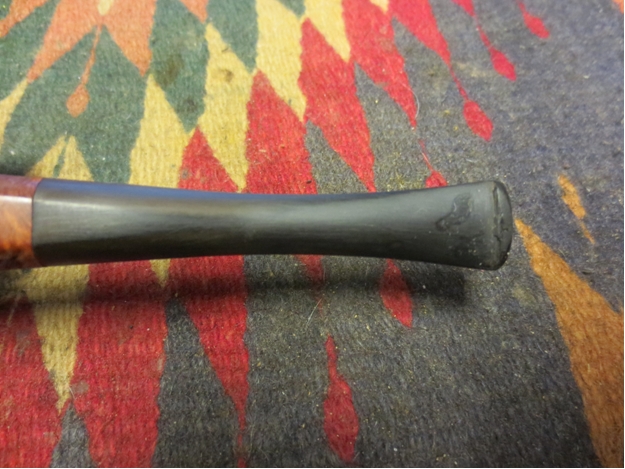
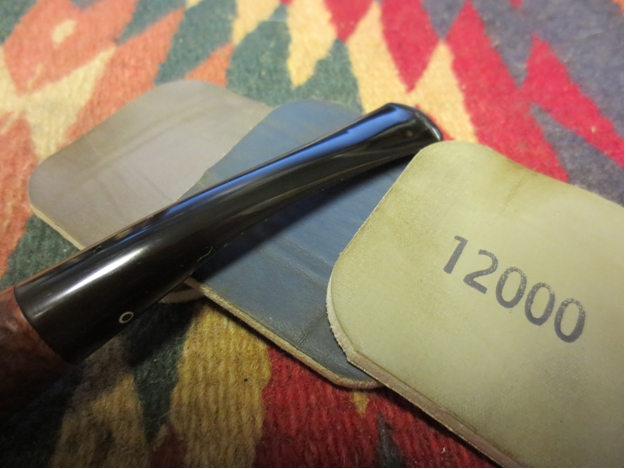
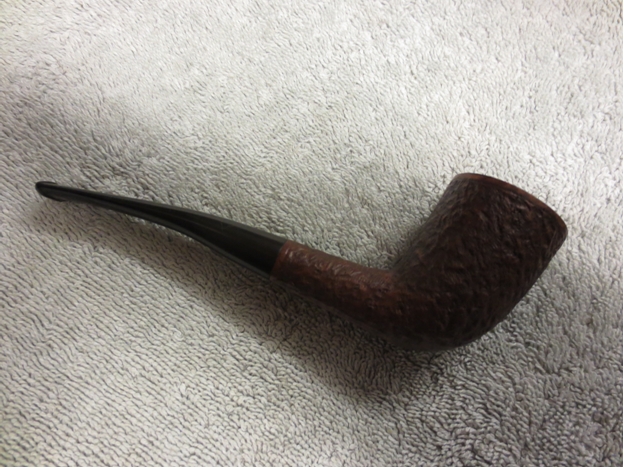
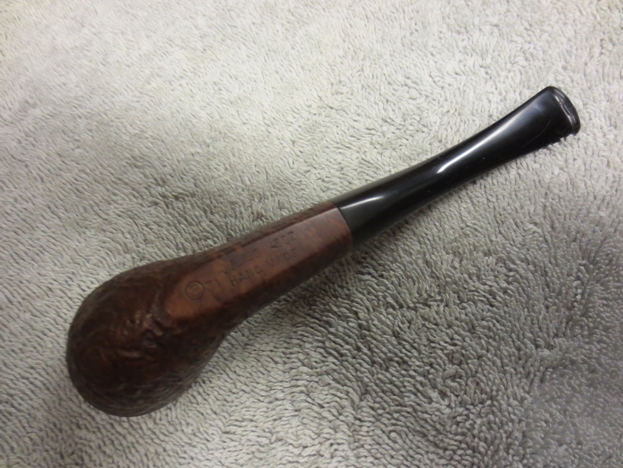
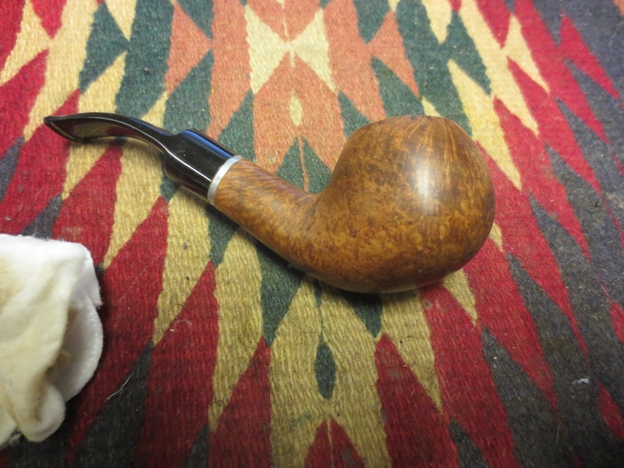
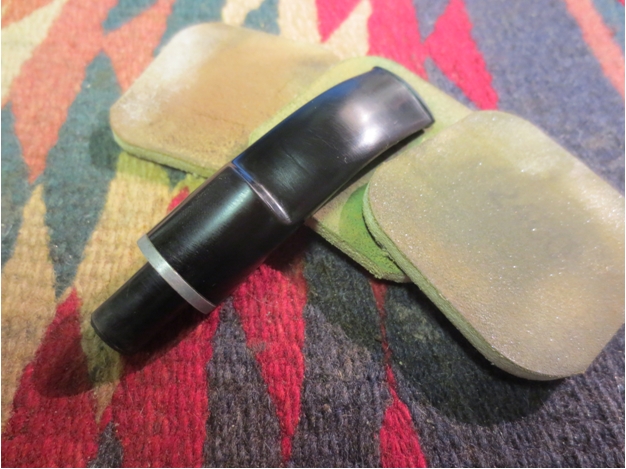
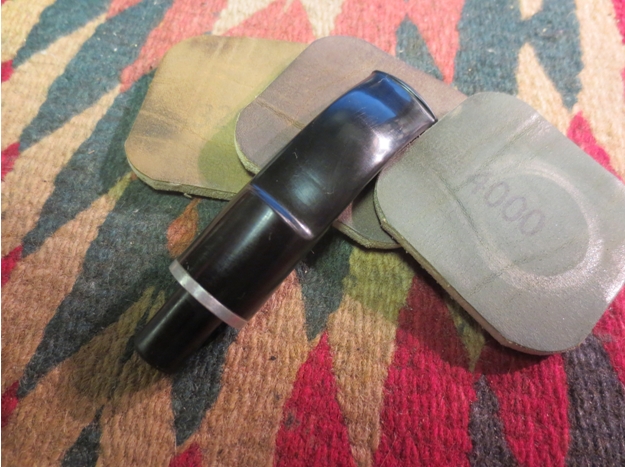
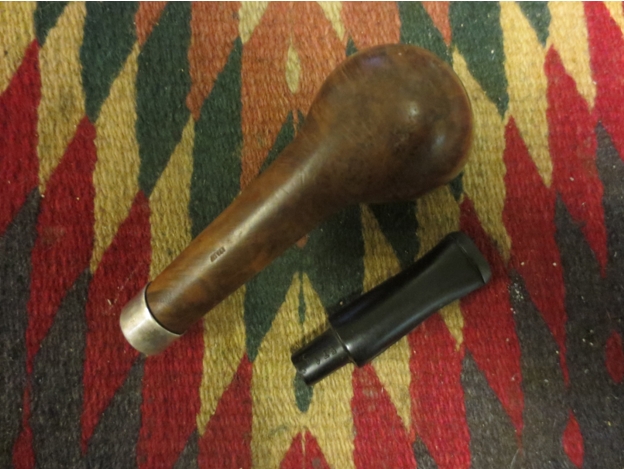
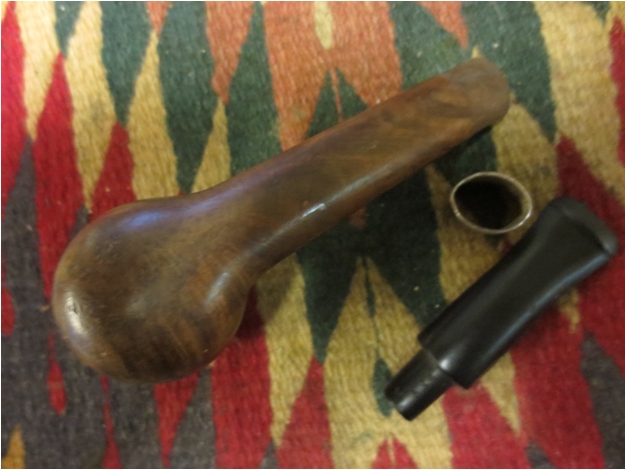
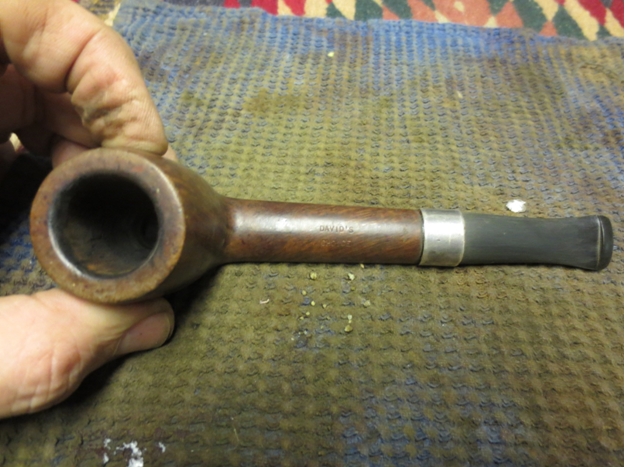
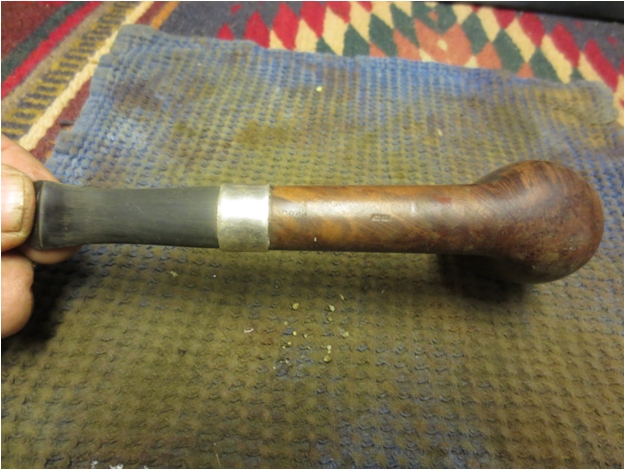
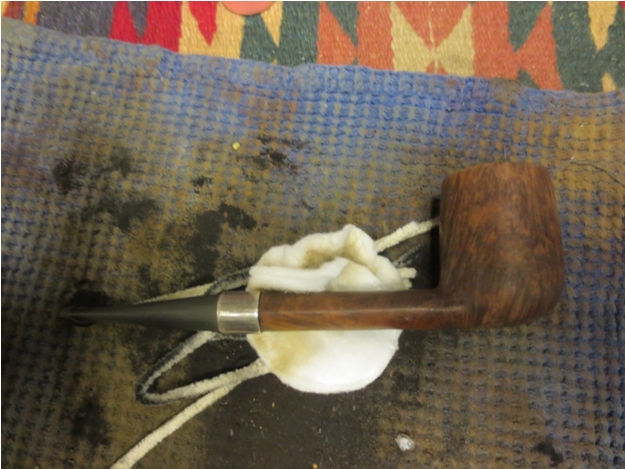
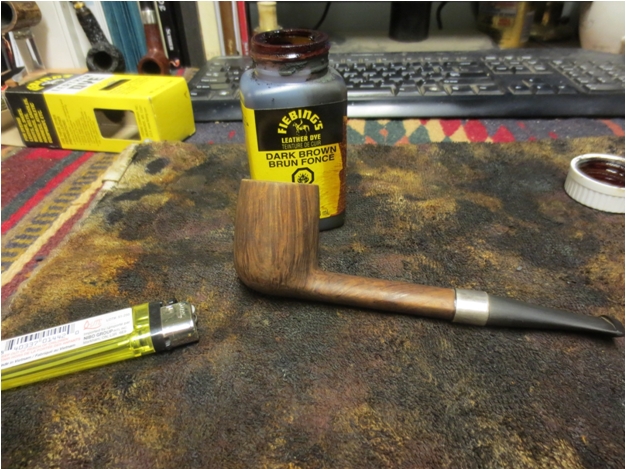
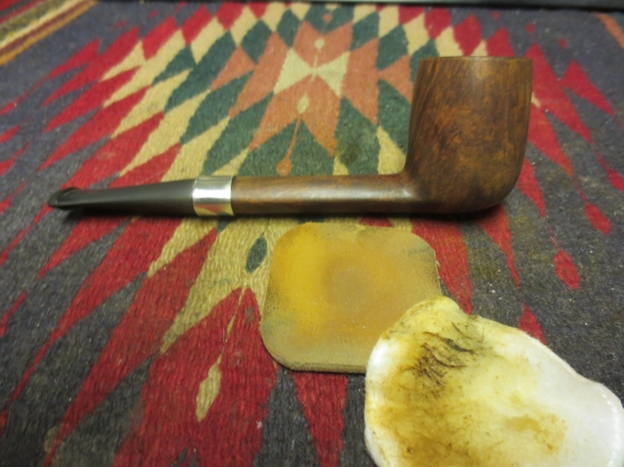
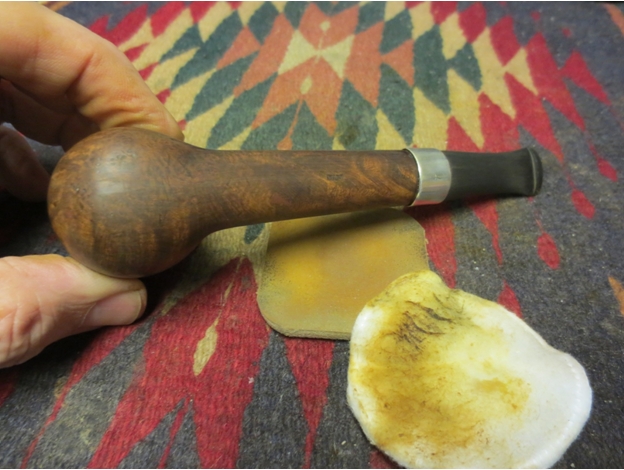
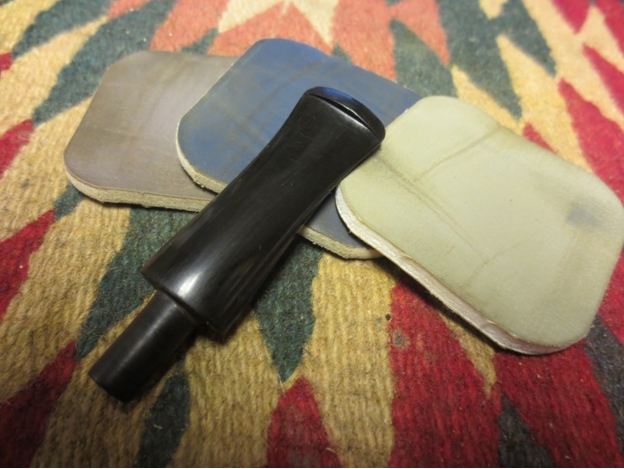
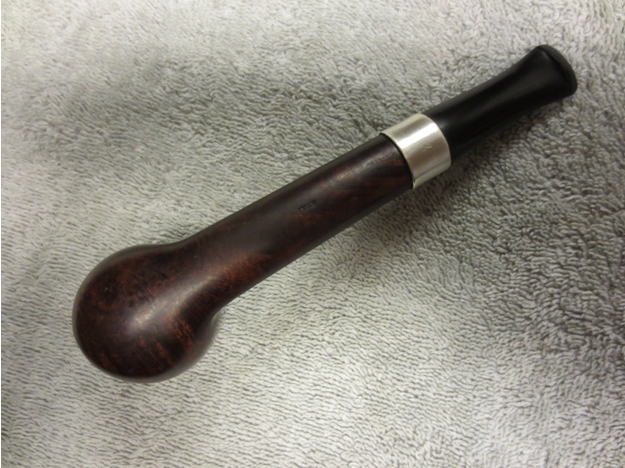
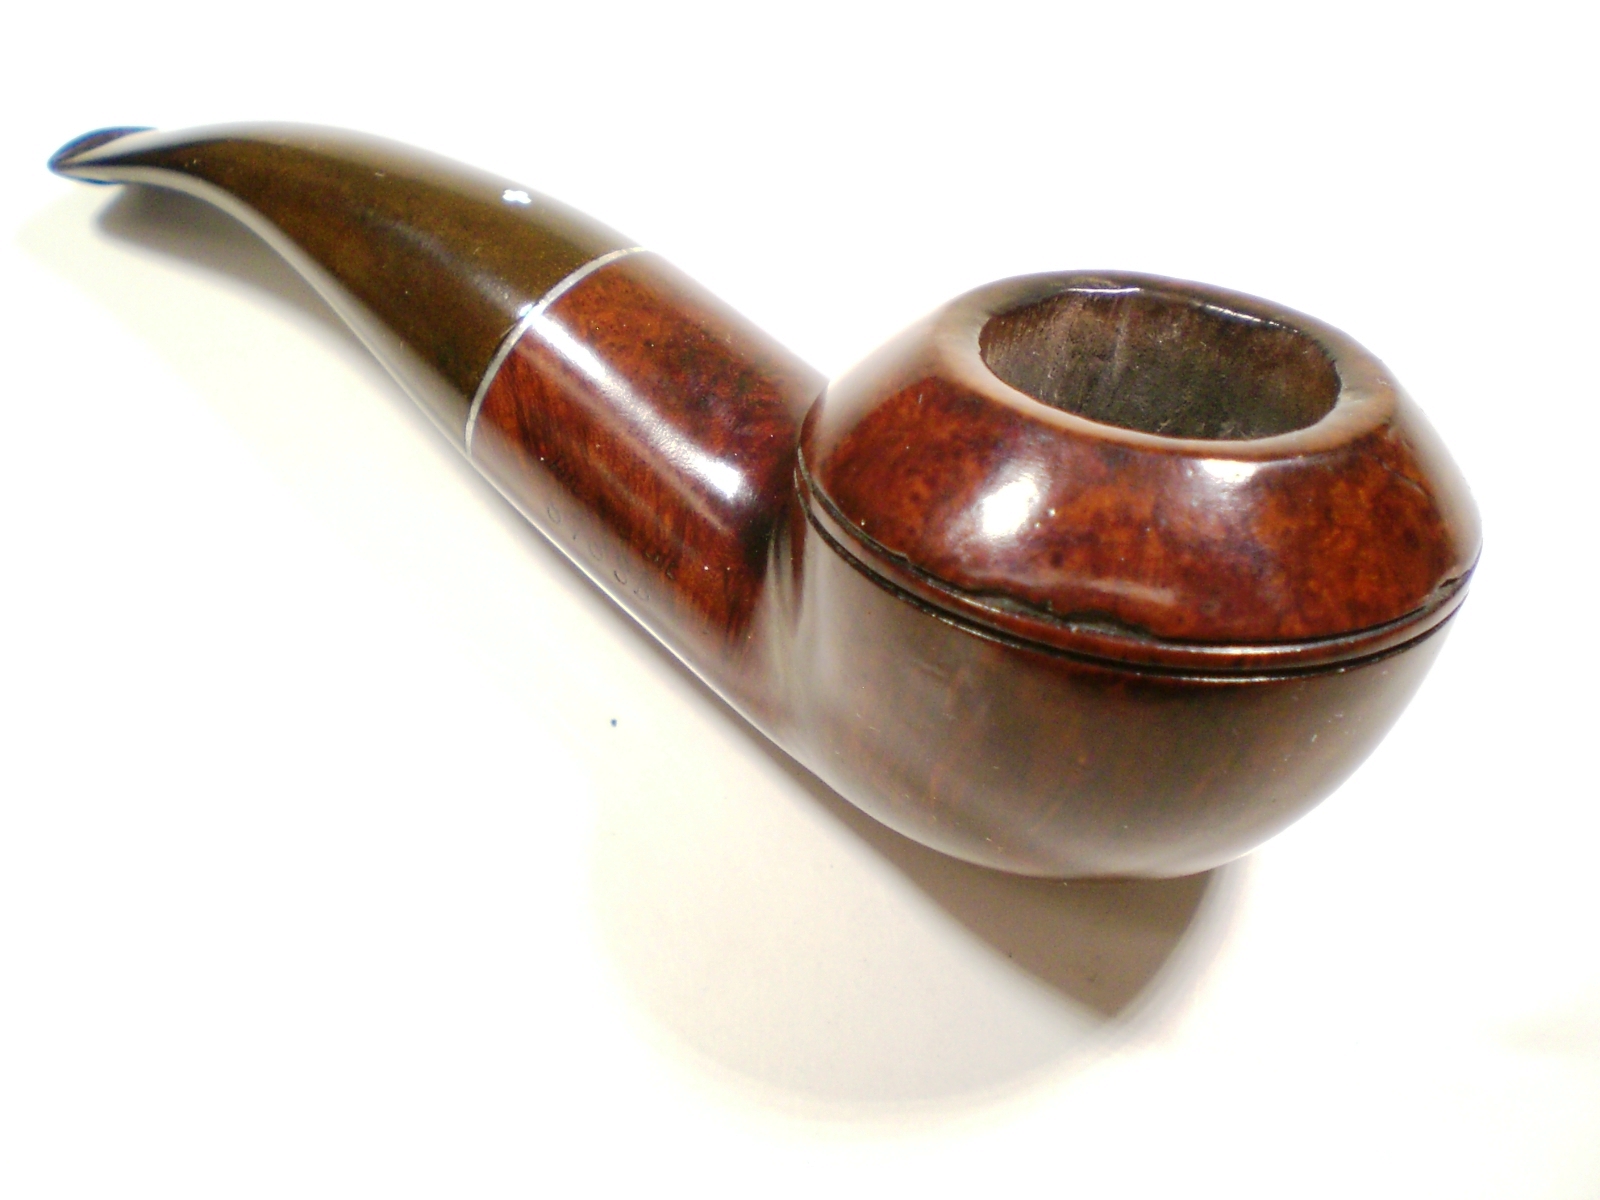
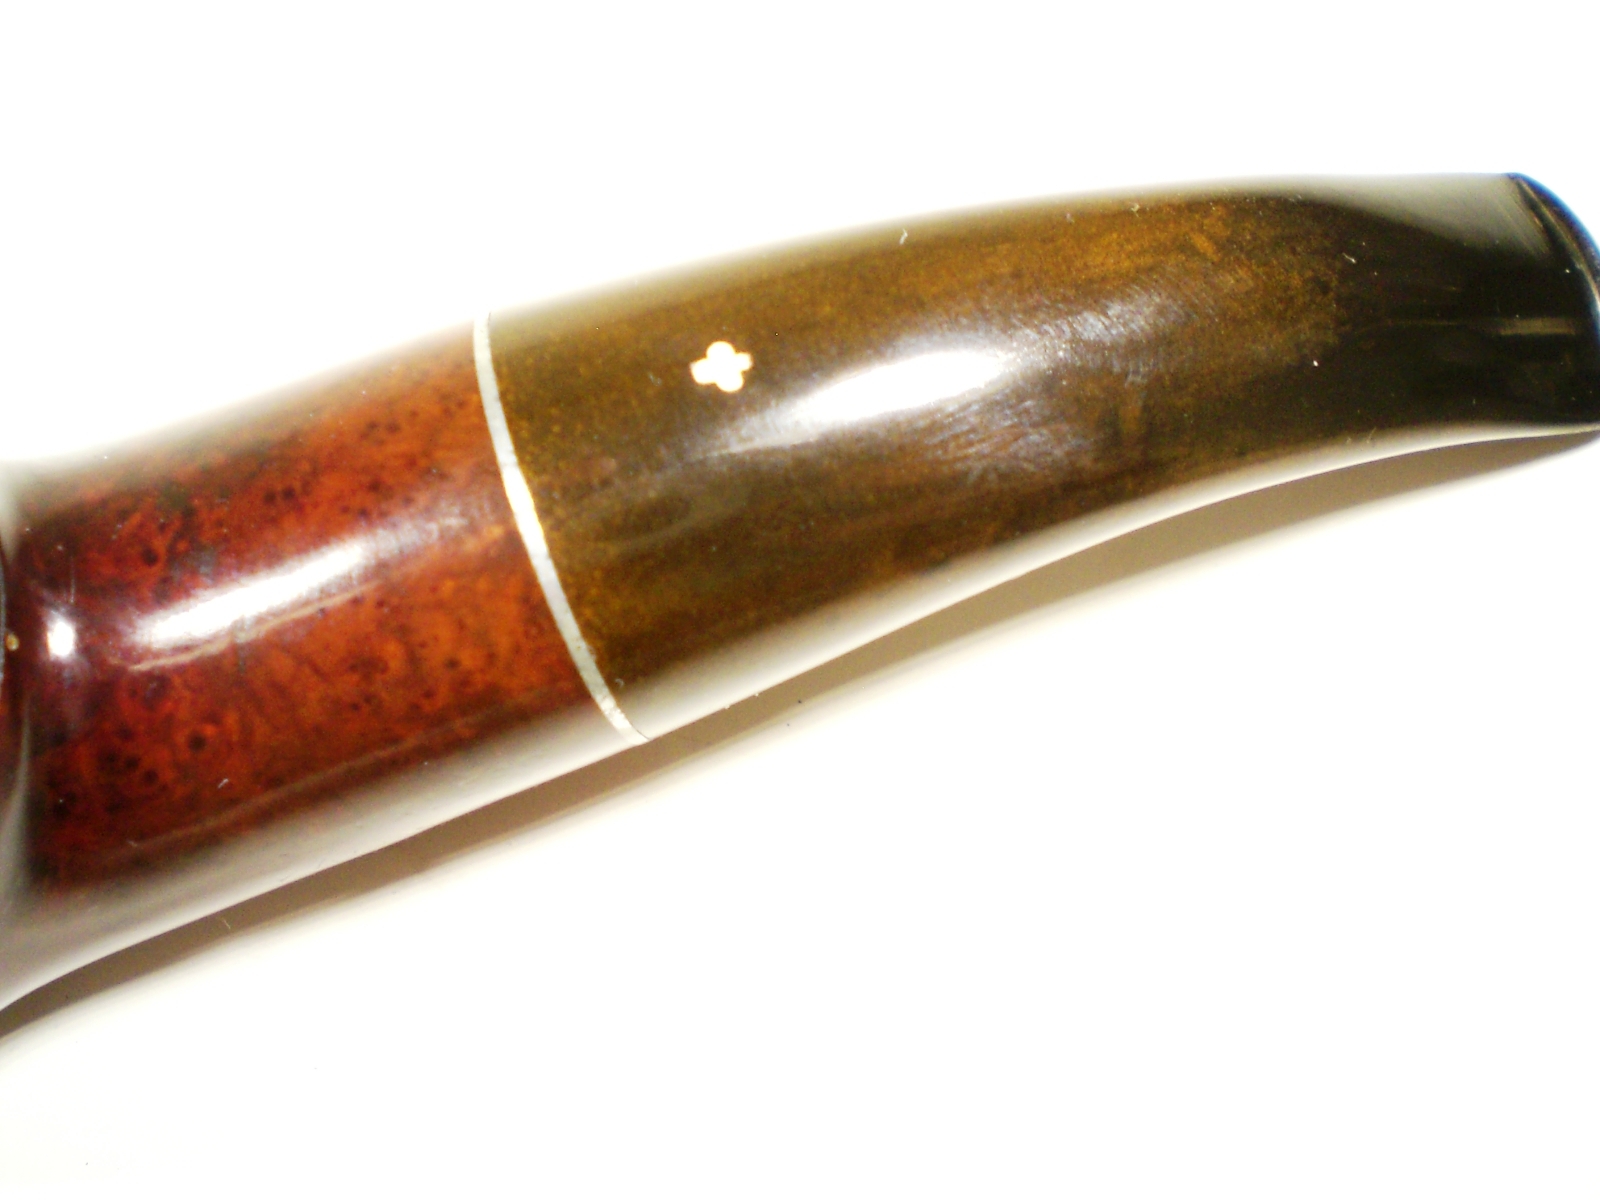
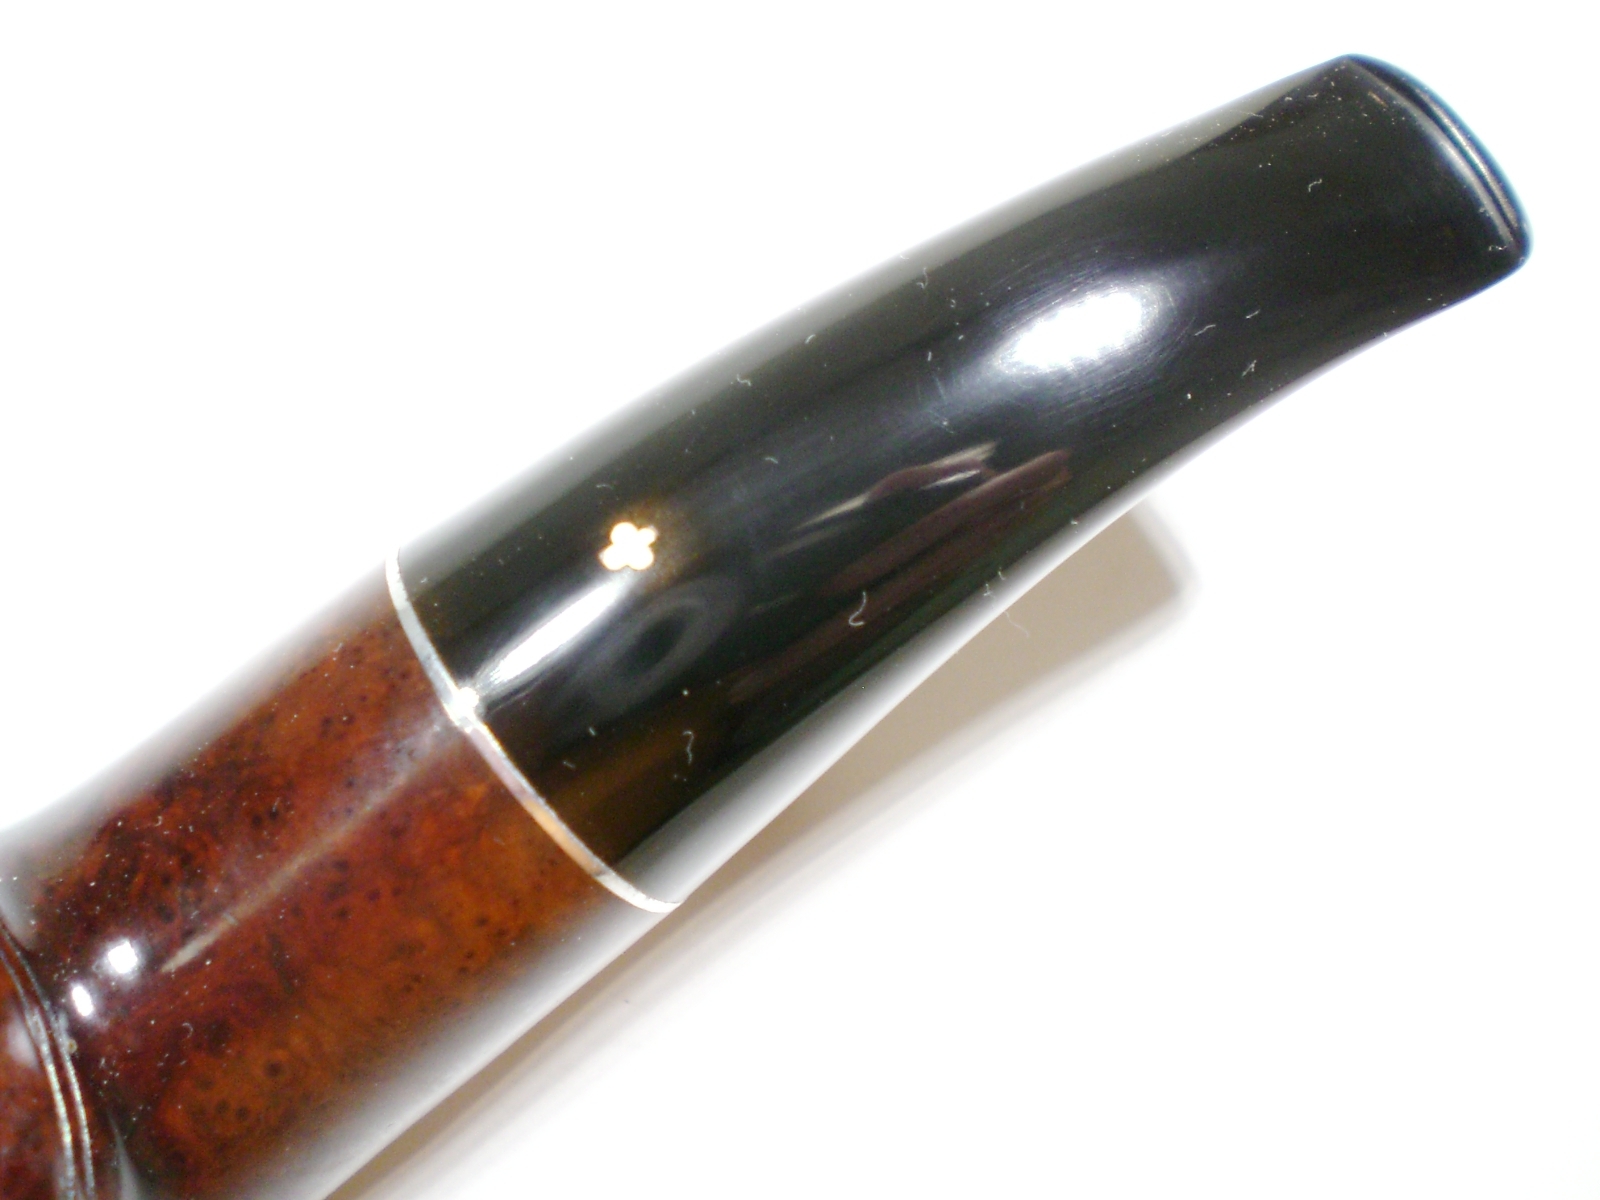
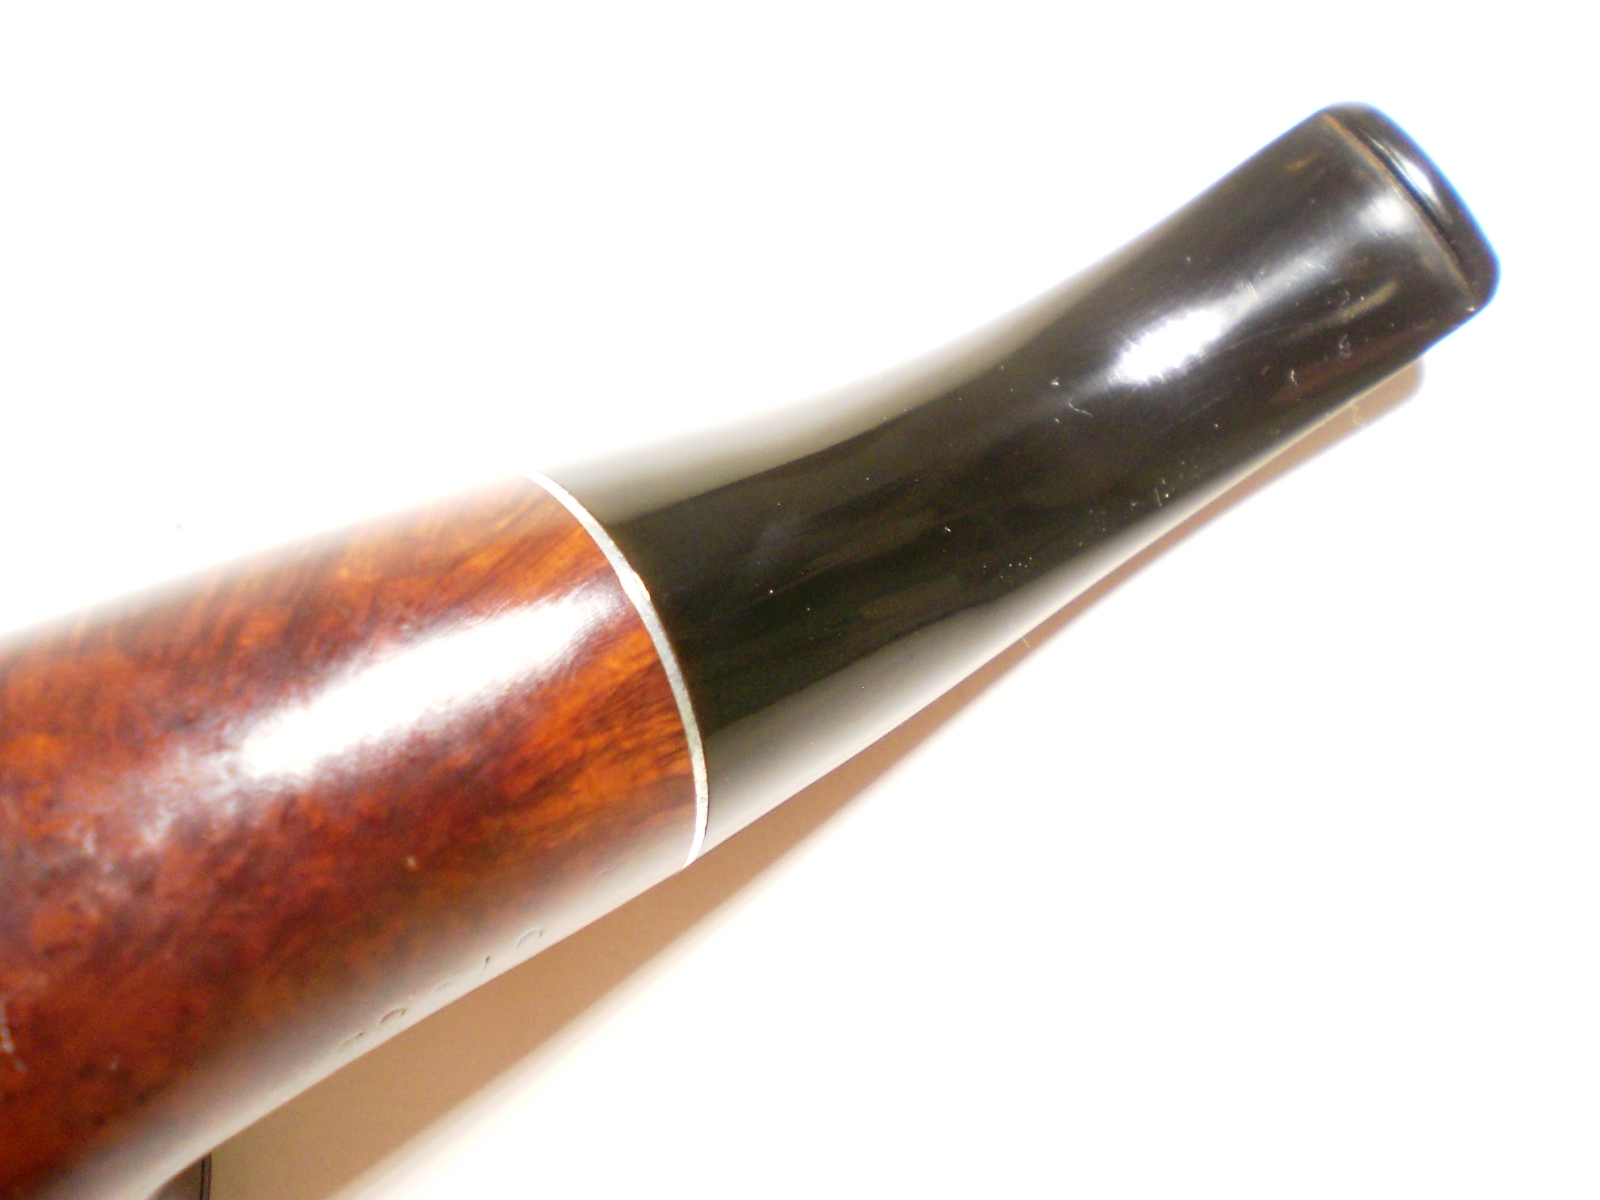
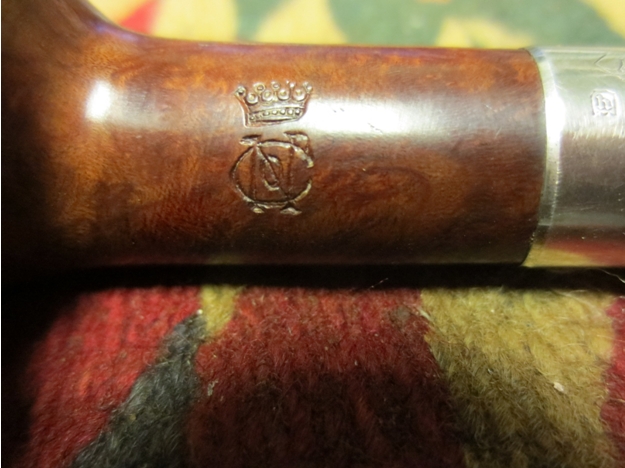
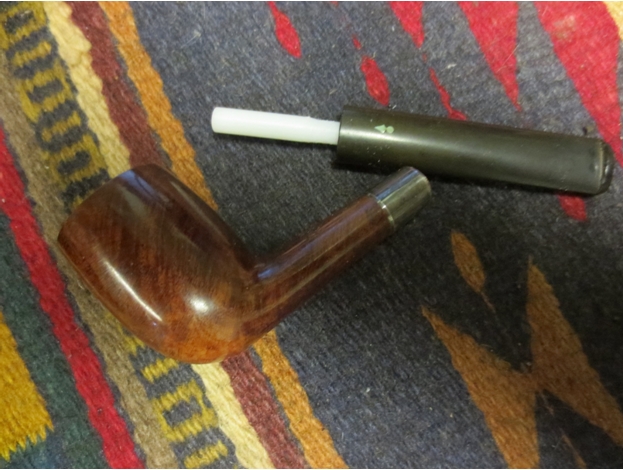
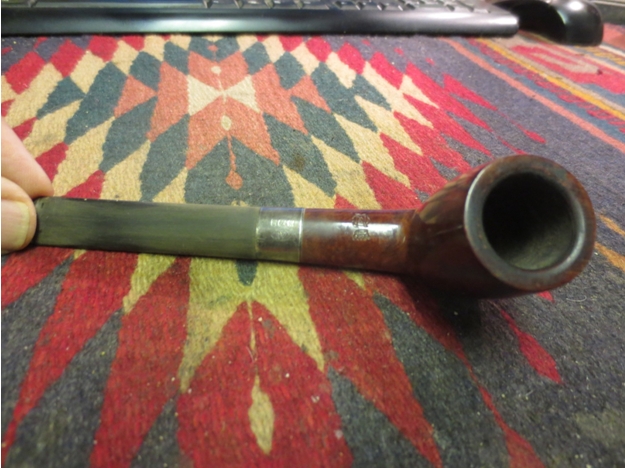
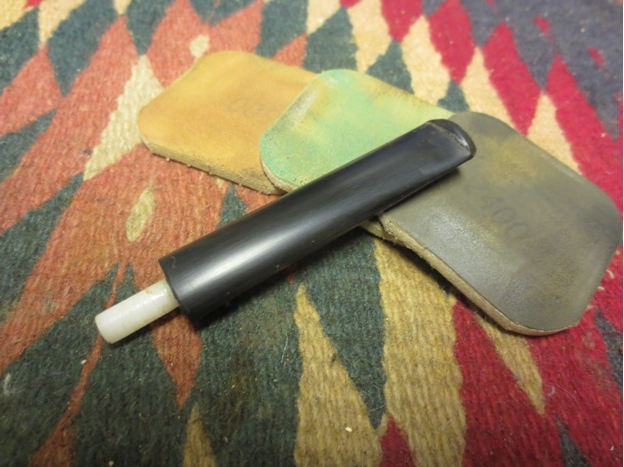
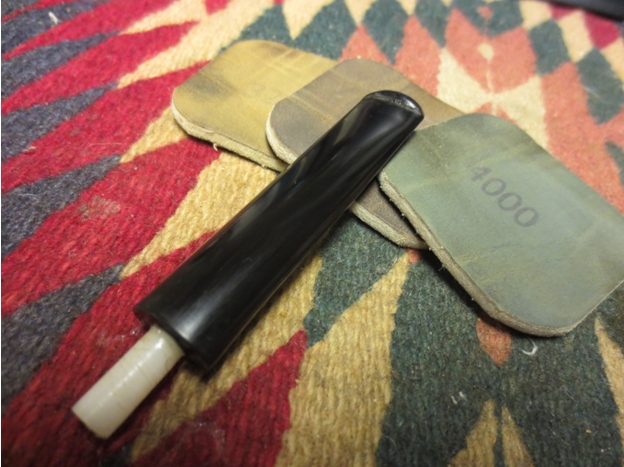
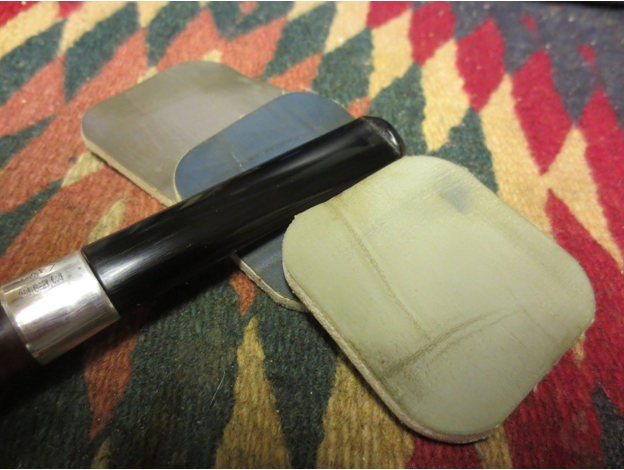
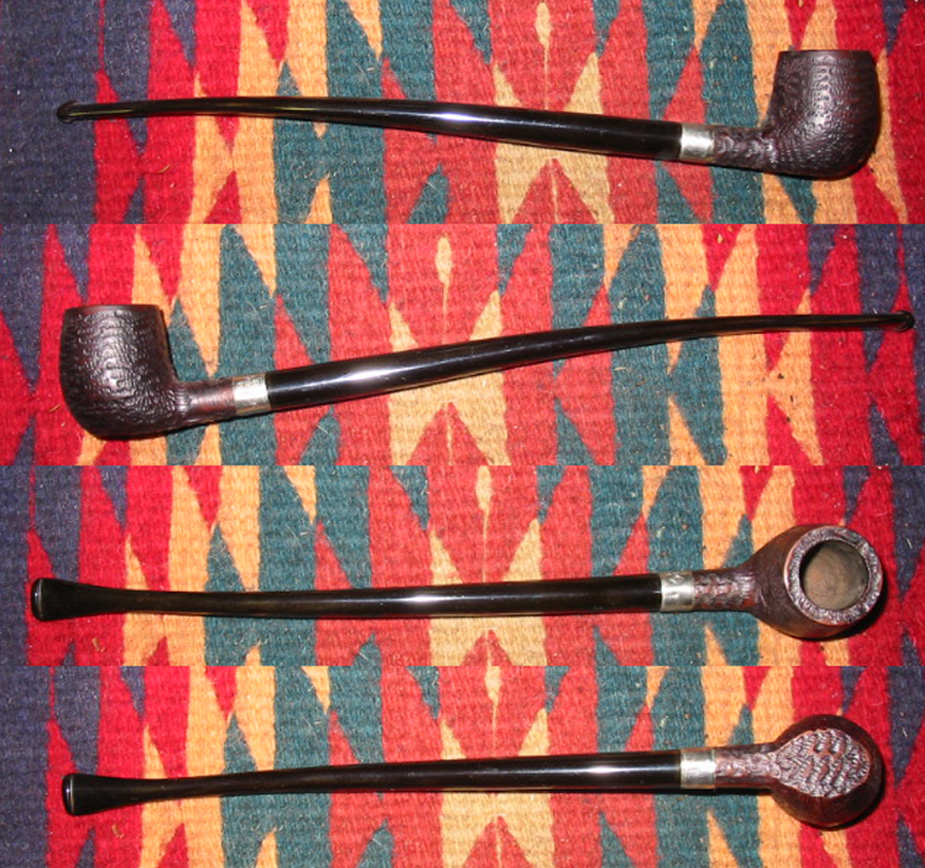
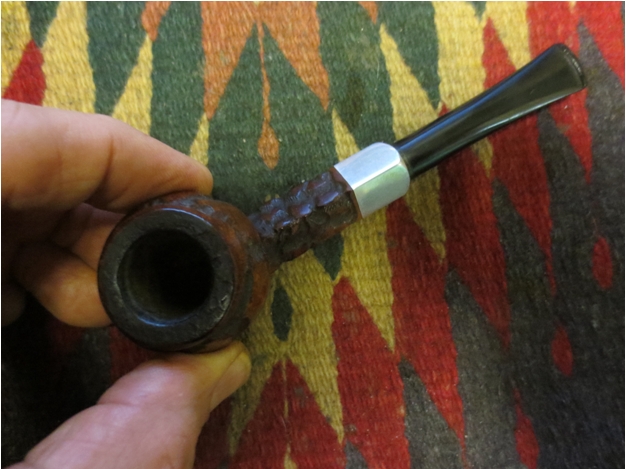
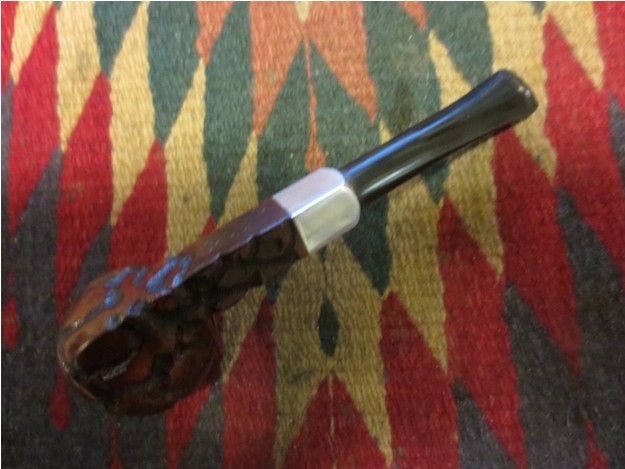
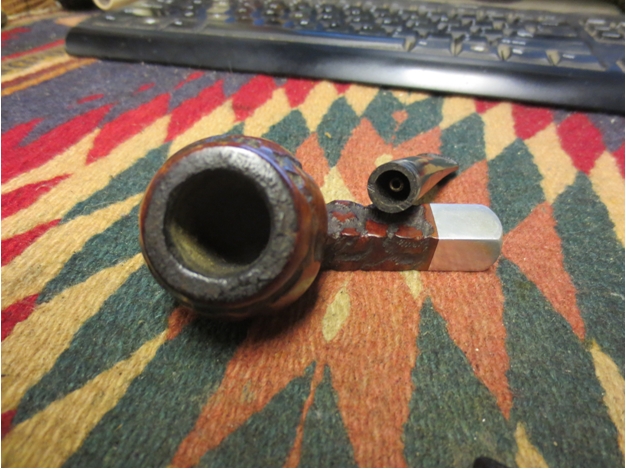
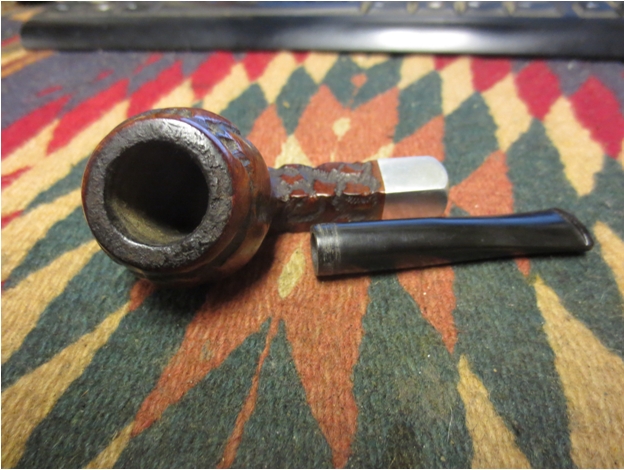
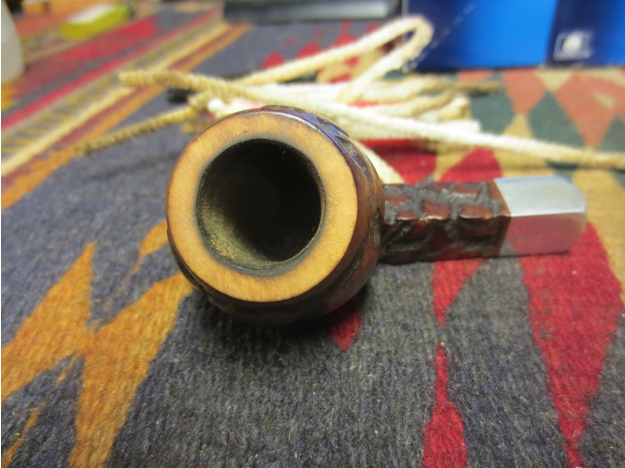
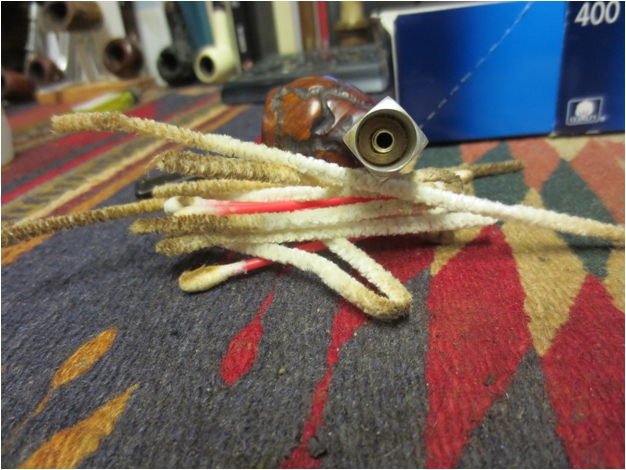
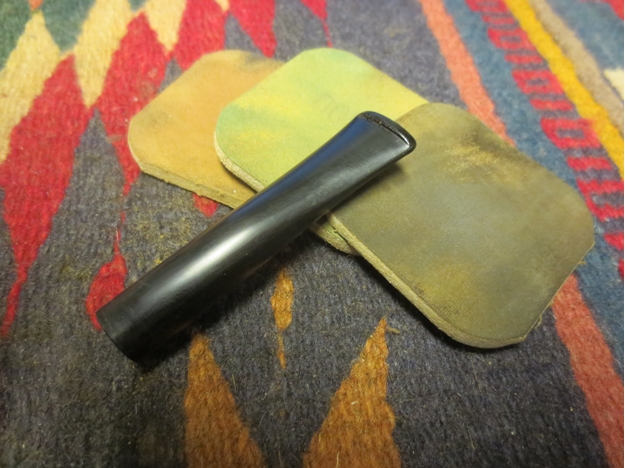
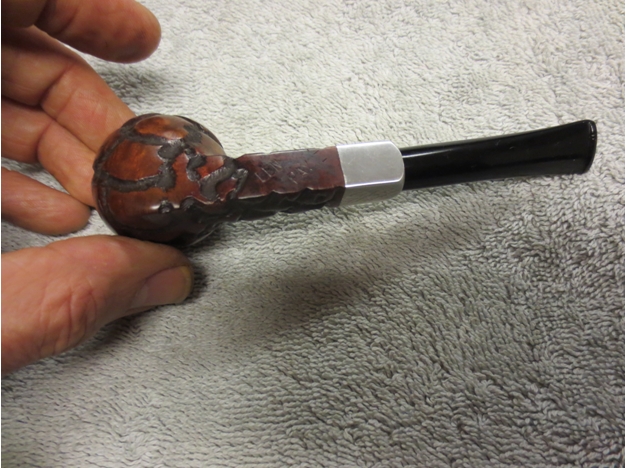
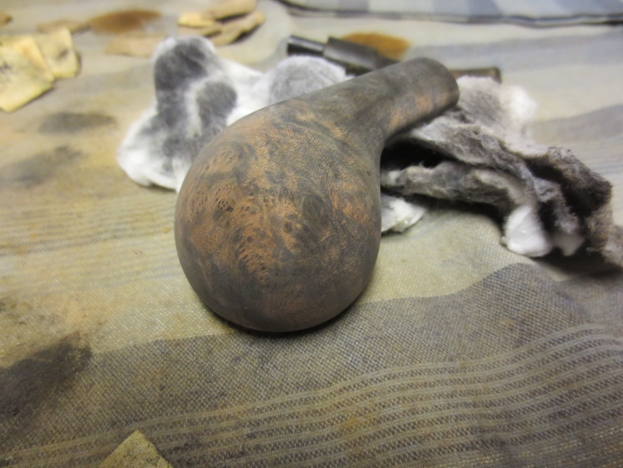
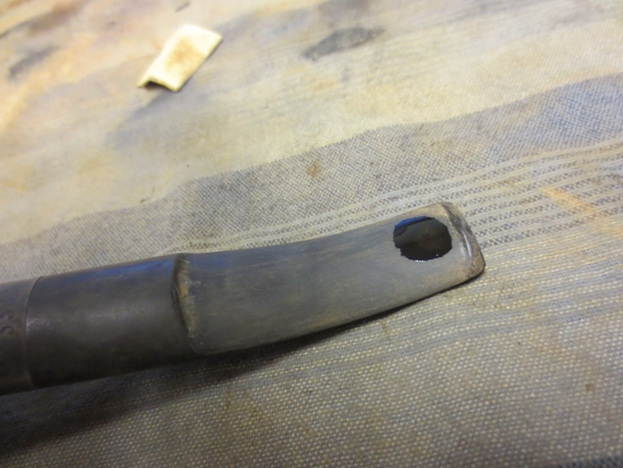
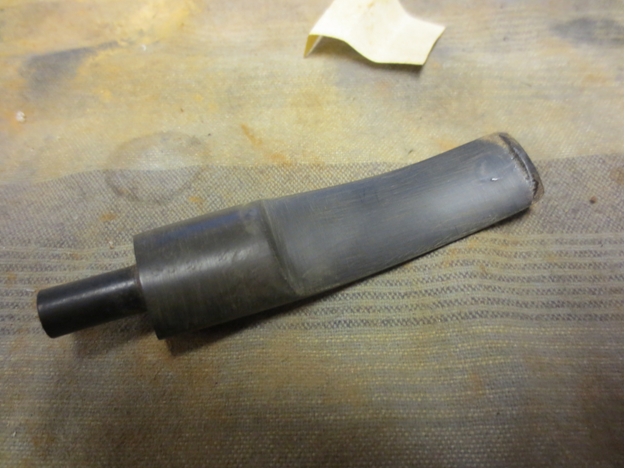
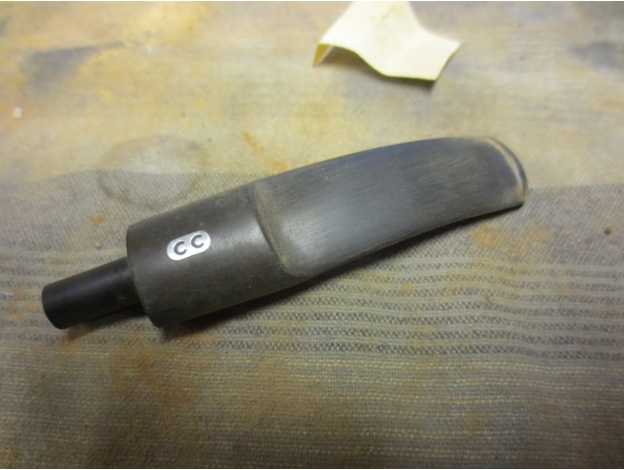
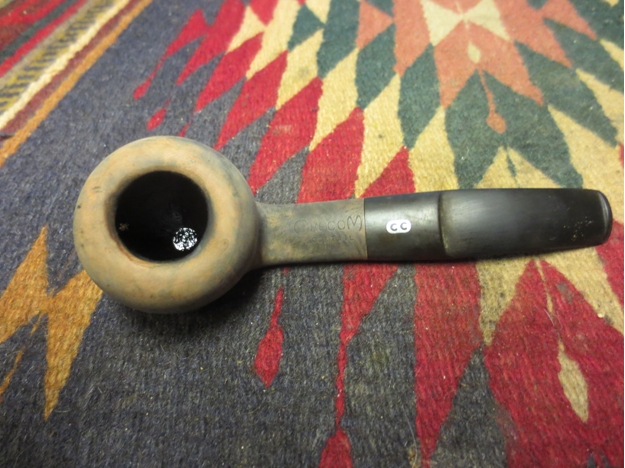
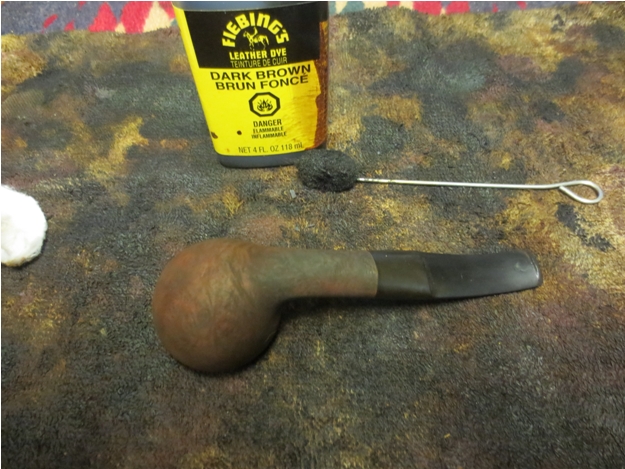
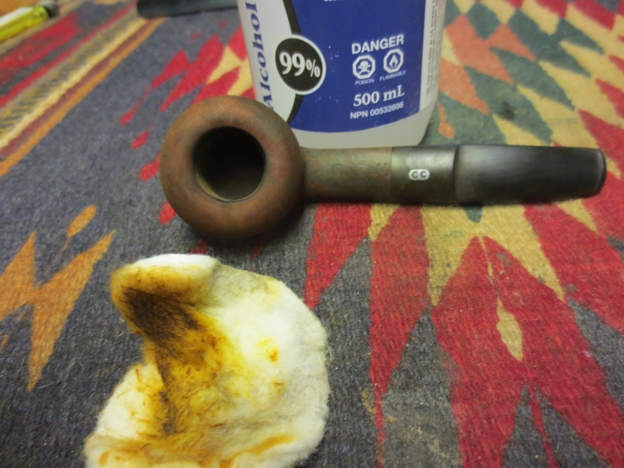
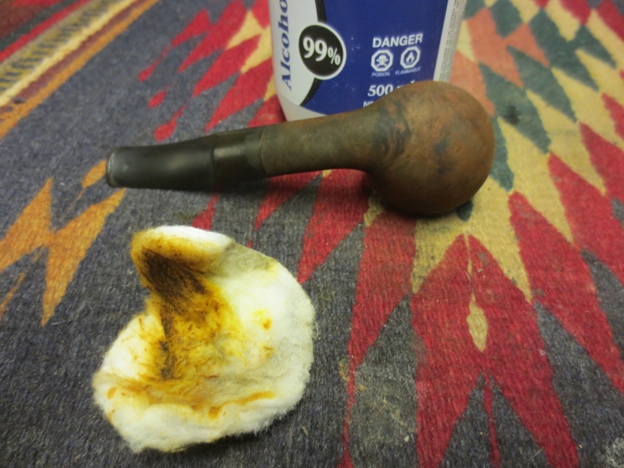
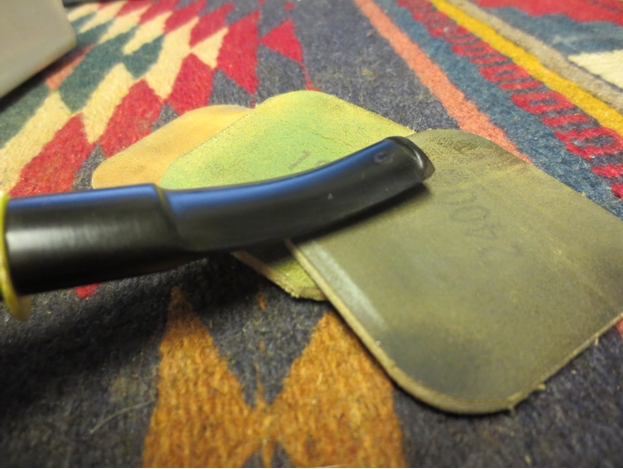
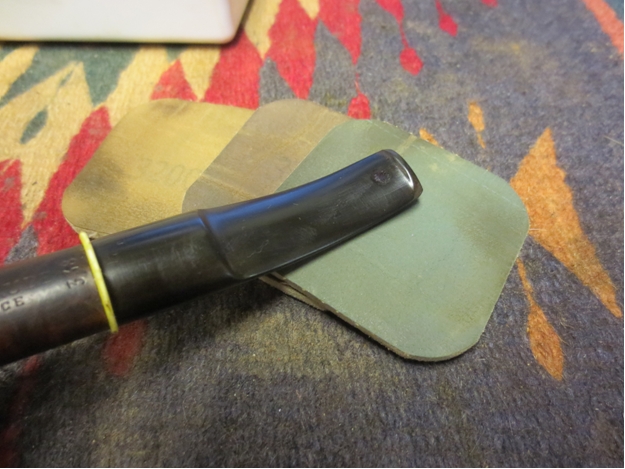
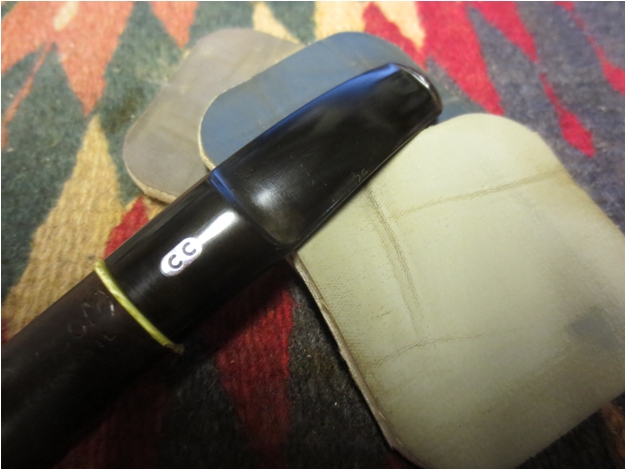
Chris makes the “Hand Finished” line from a stock of old English briar. The stem material varies, and this one is vulcanite.  This was also from some old German stock that he found. The stem fitment is perfect.  The slim, fish-tail button, is sublime and just to my liking.  The shape and feel is similar my older Sasieni pipes.  The stem has a great mouth feel and Chris reports it doesn’t oxidize in use (one concern that I had).  I find the blast work and stain to be very appealing.

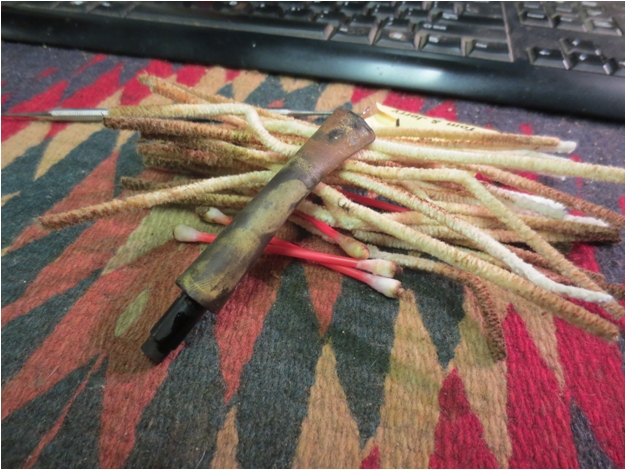
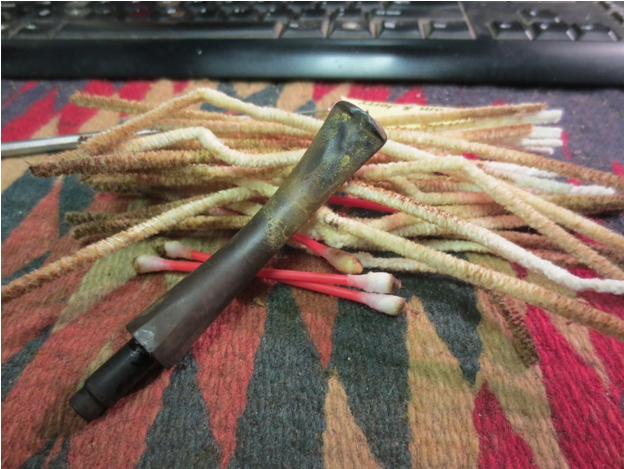
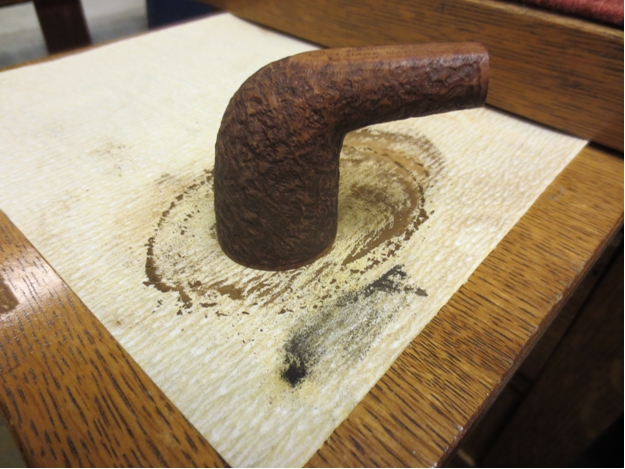
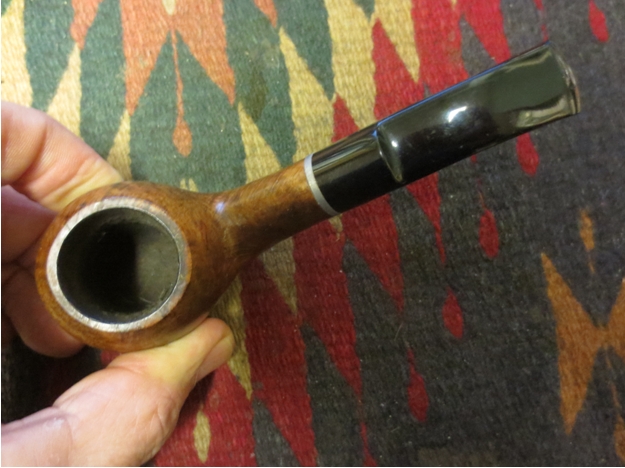
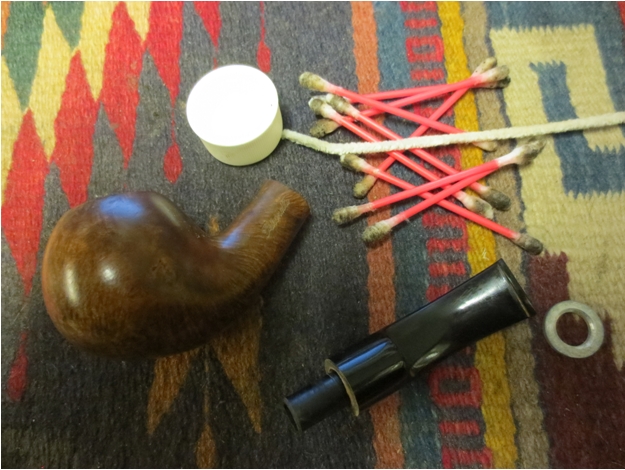
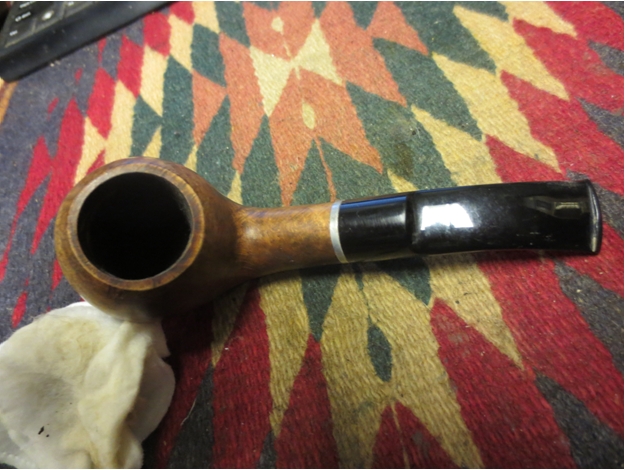
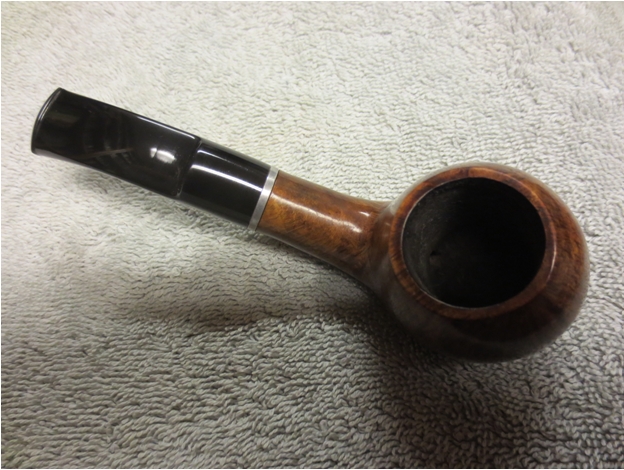
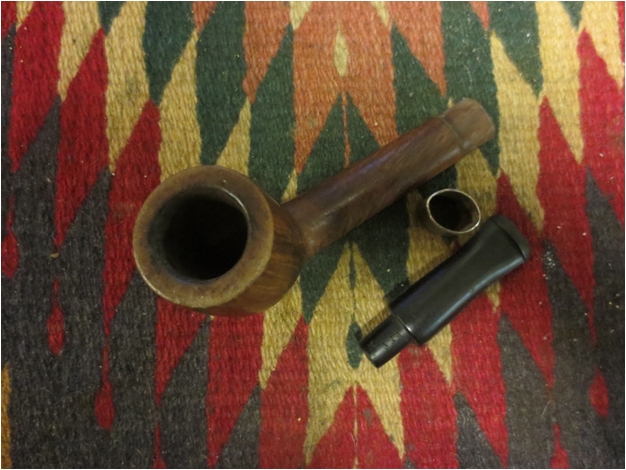
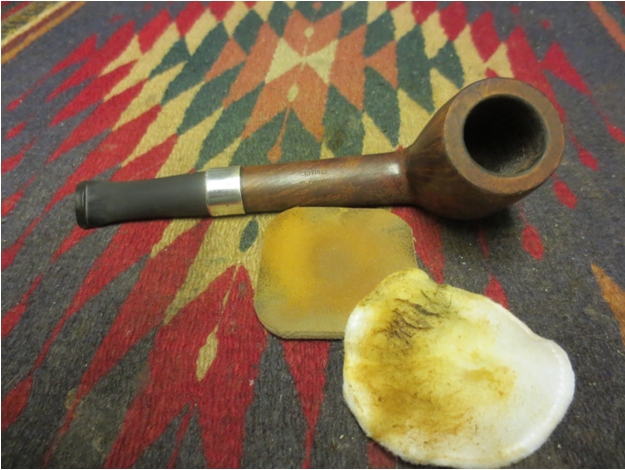
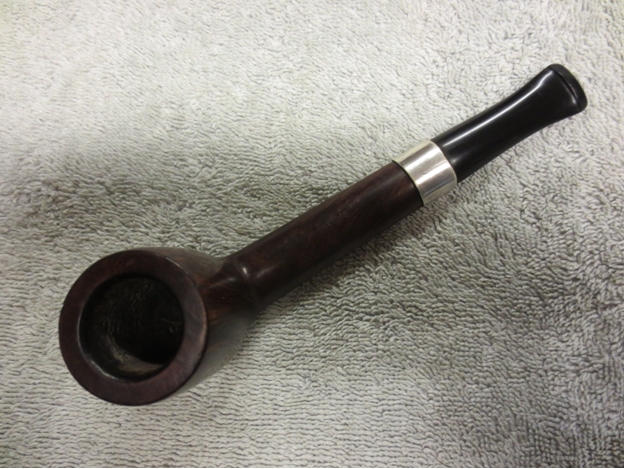
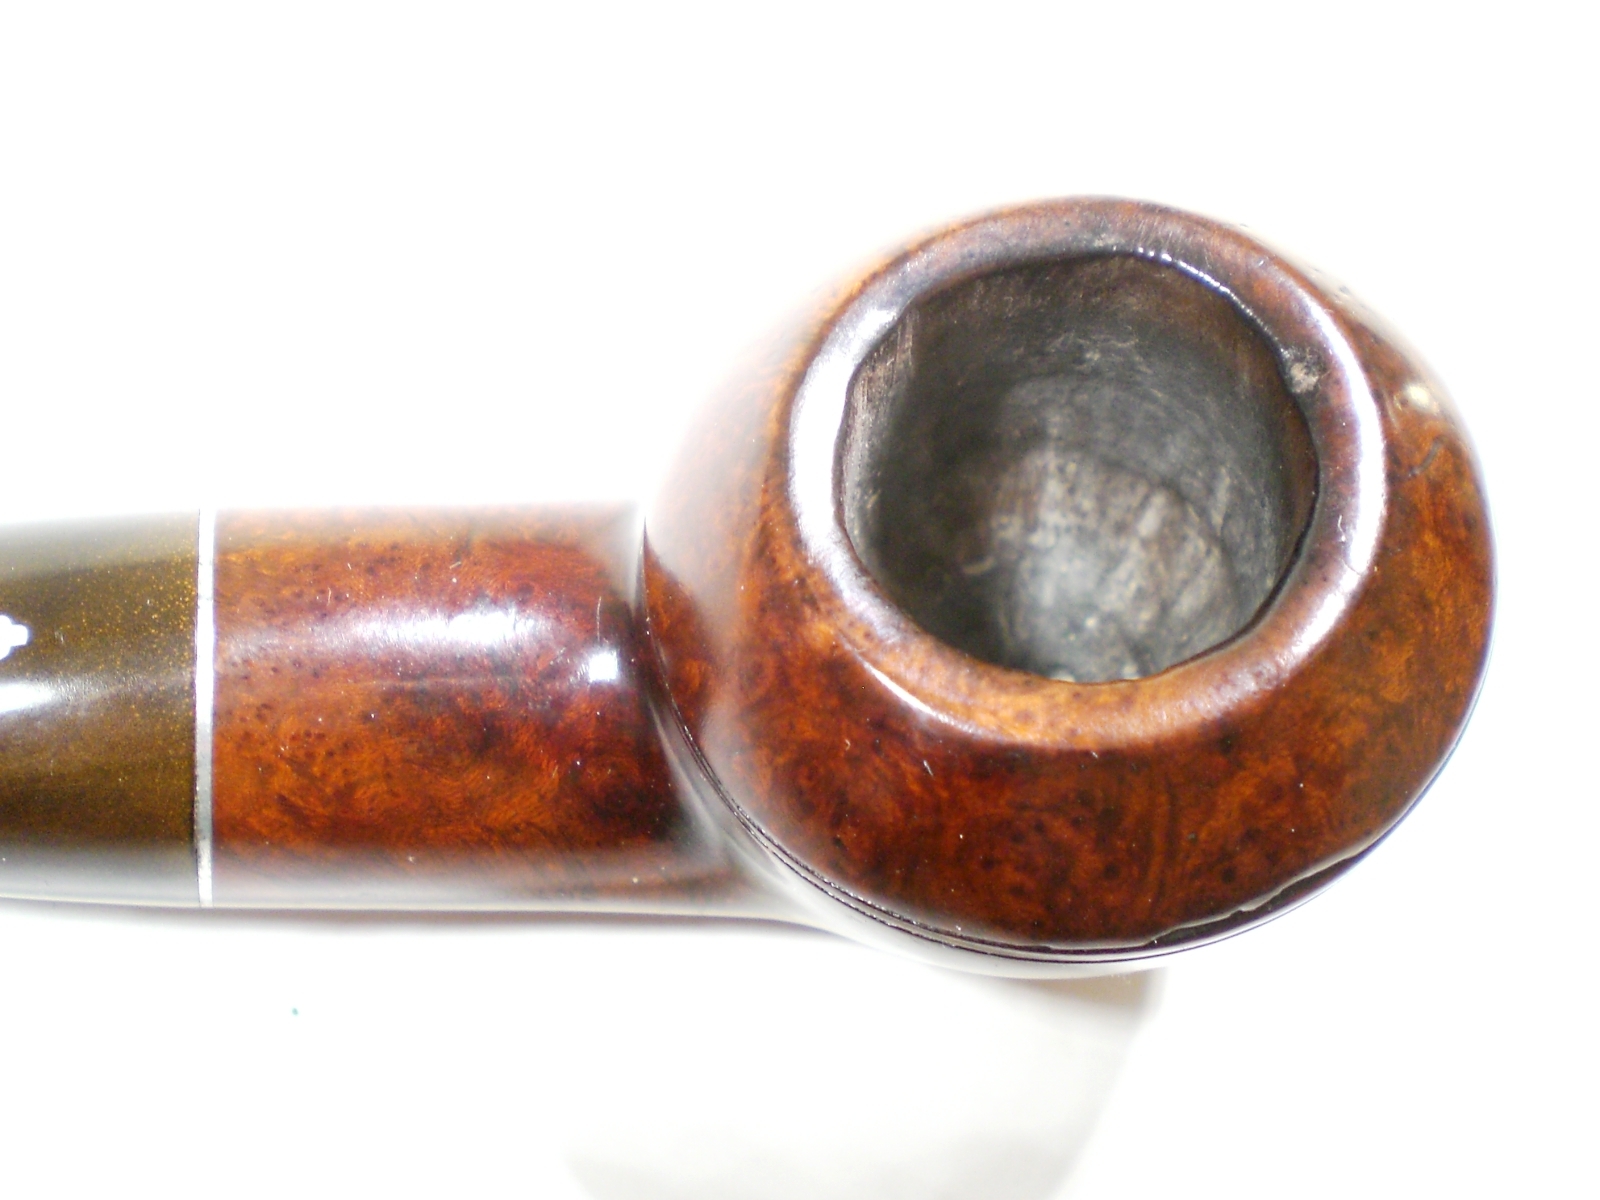
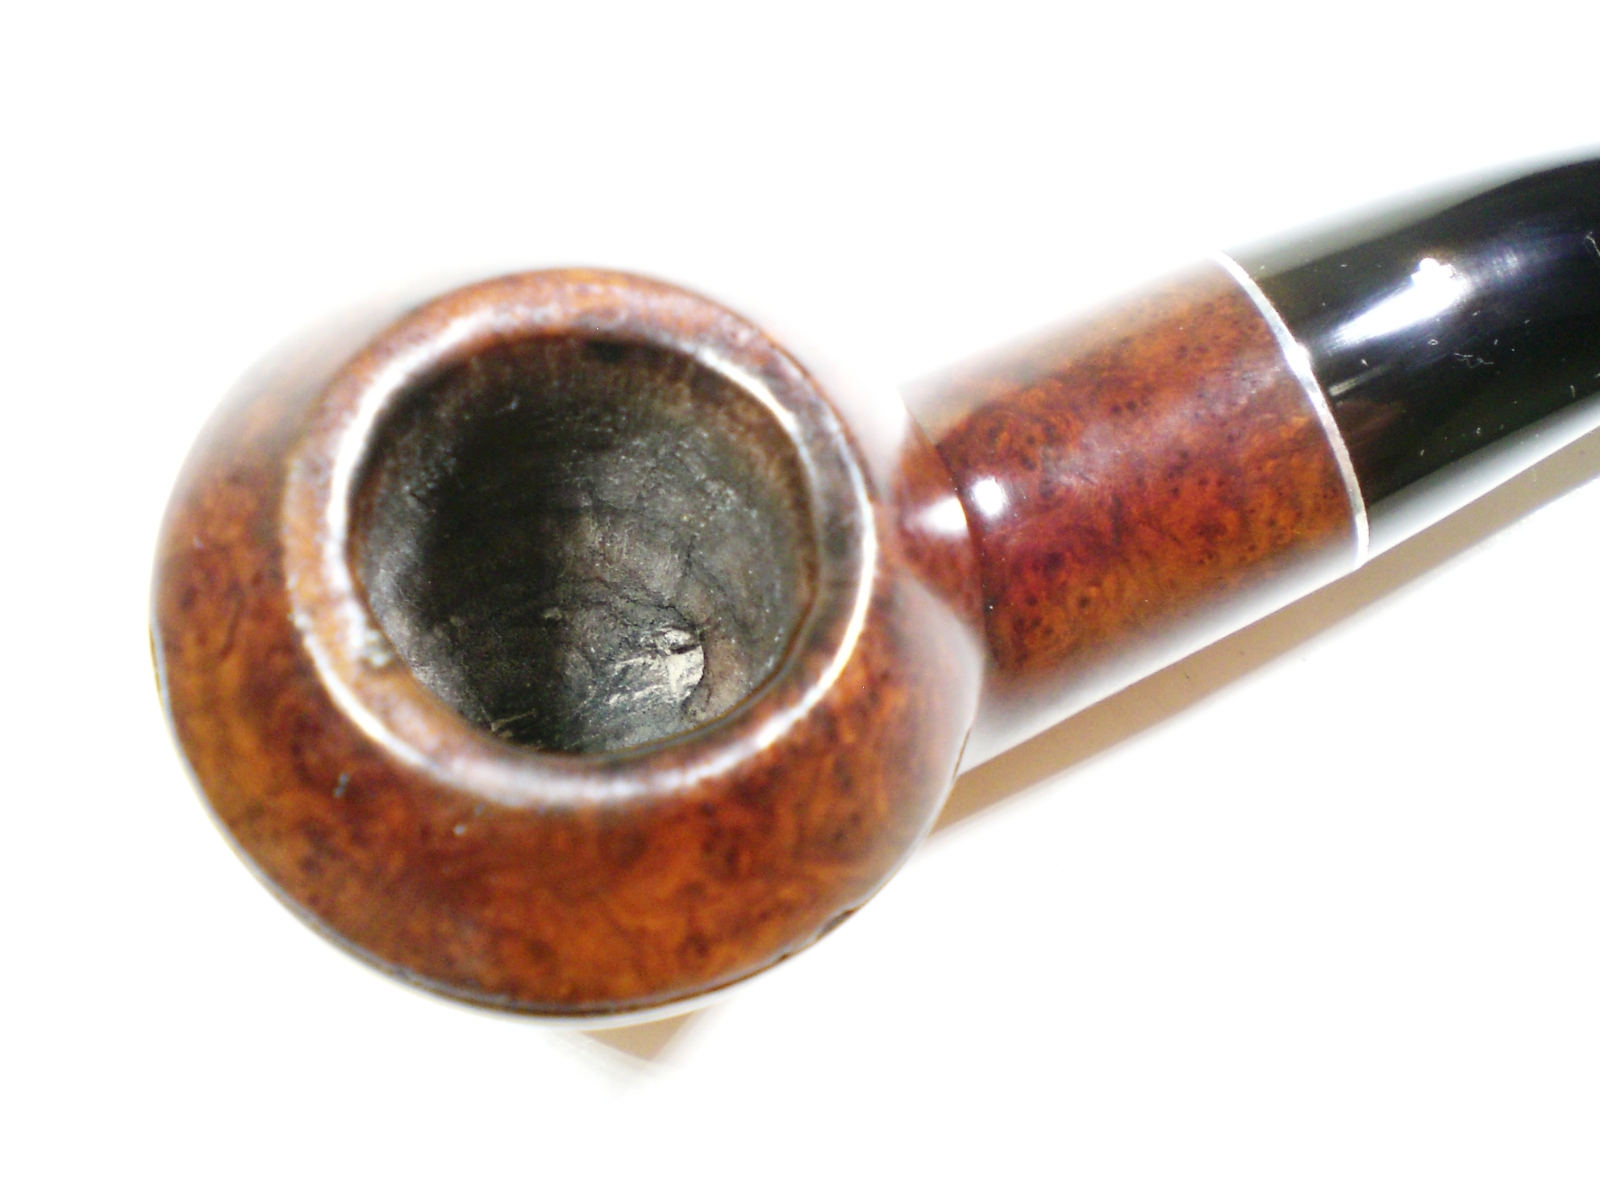
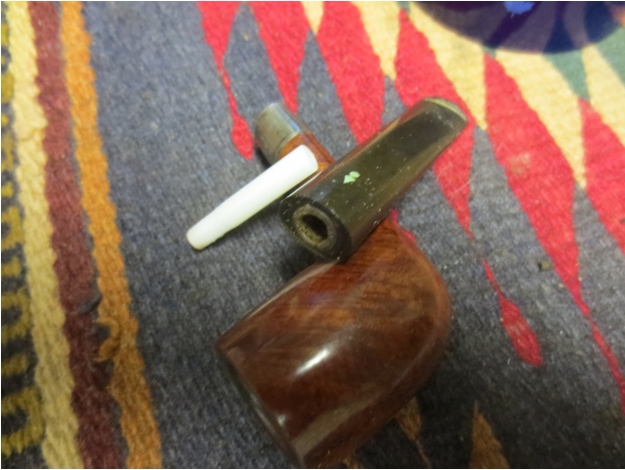
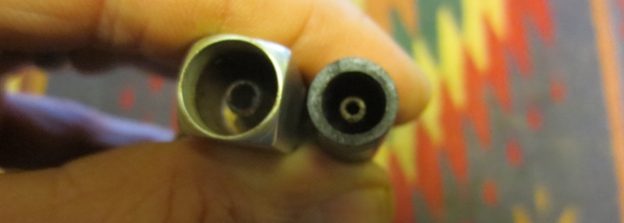
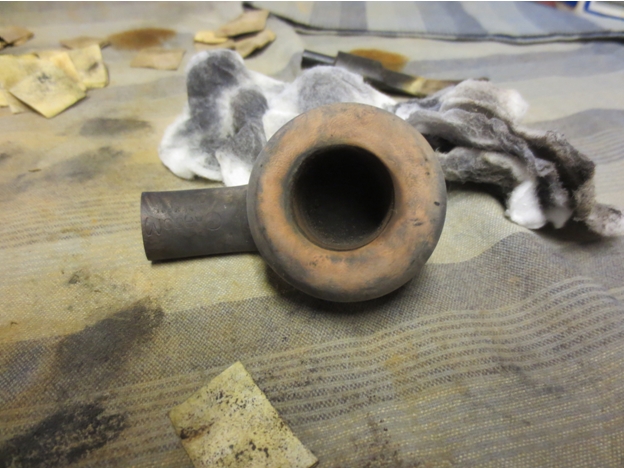
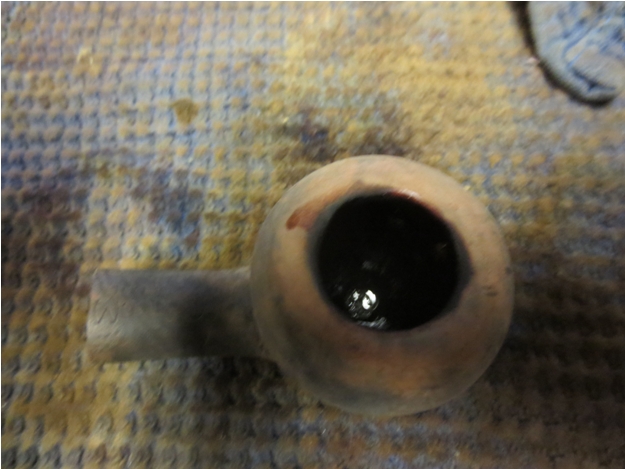
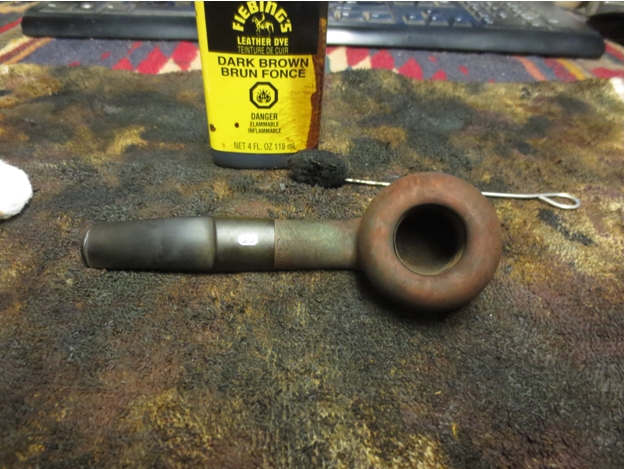
I was a little concerned as the pipe will not pass a cleaner. As I suspected, Chris said the strummels were pre-drilled, so he had to work within those shaping confines. I am happy to report, that after two smokes, the pipe was dry as a bone and cool. The wall thickness is also just to my preference.

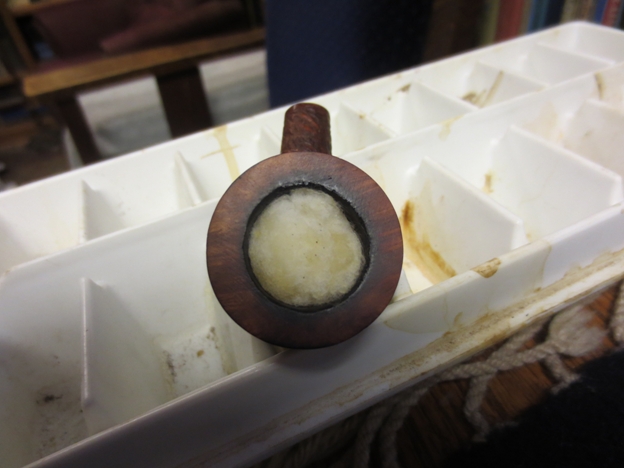
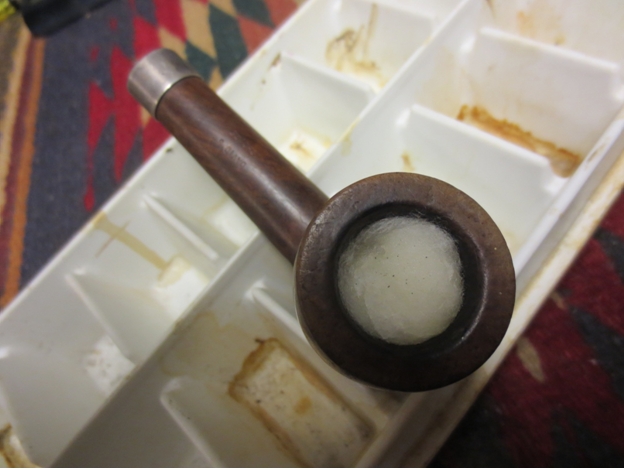
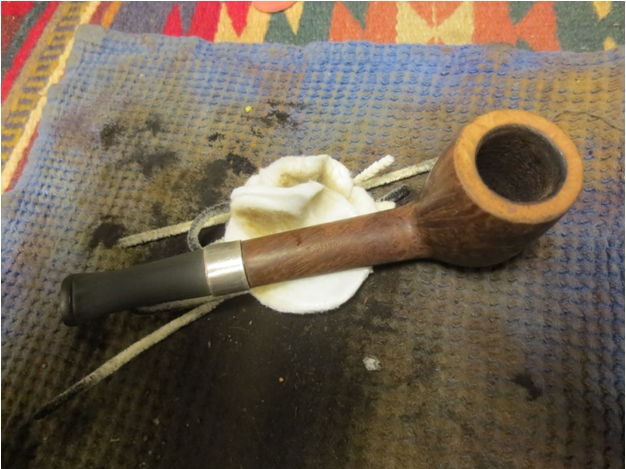
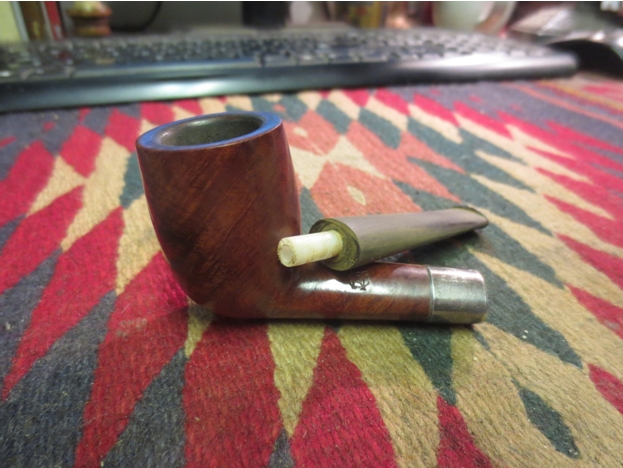
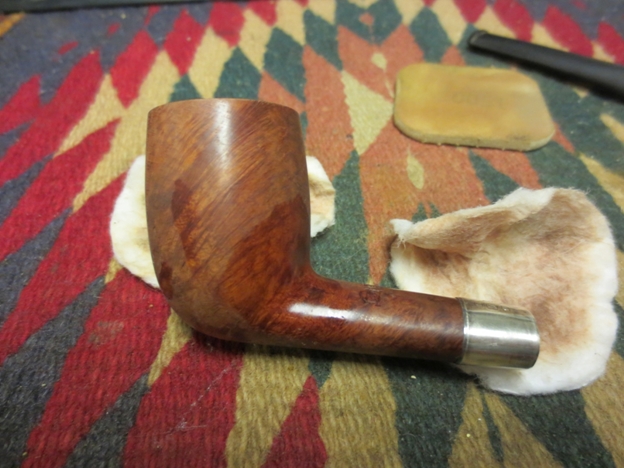
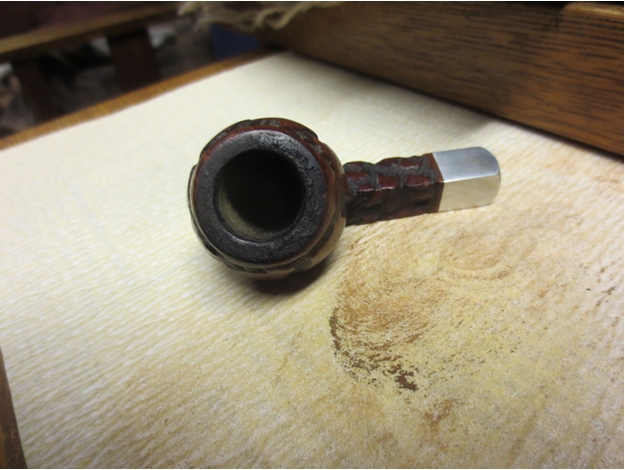
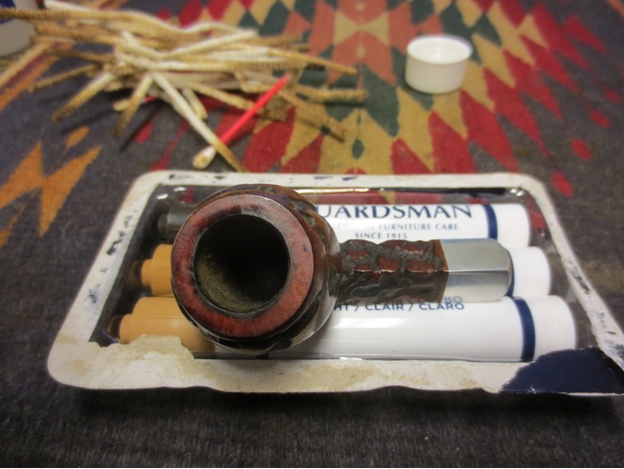
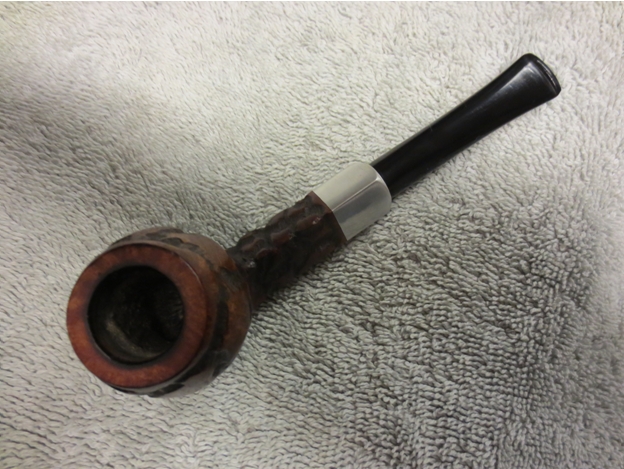
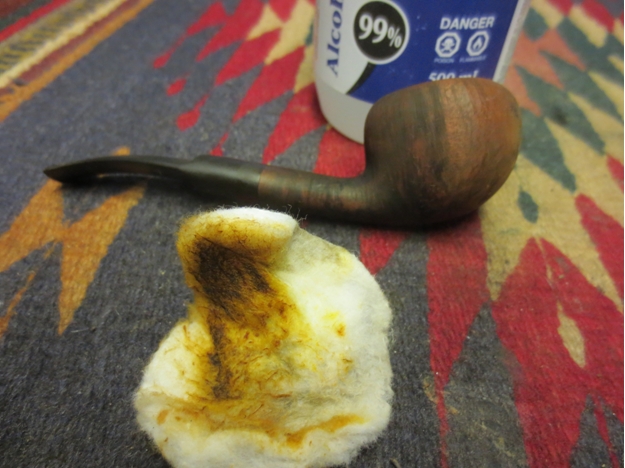
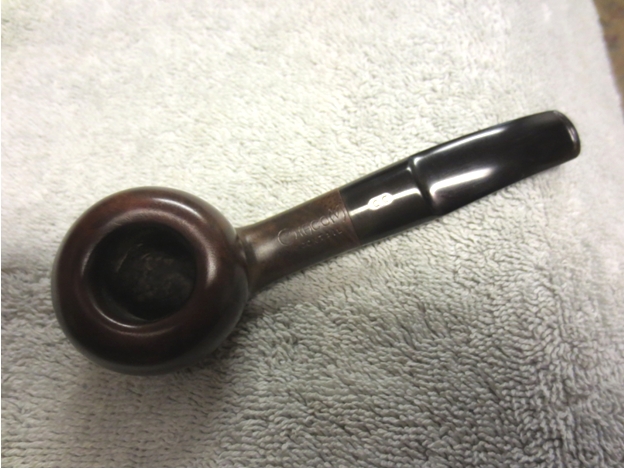
Chris uses a bowl coating, but I found it to be flavor neutral and the pipe broke in almost immediately.  This is my second new pipe purchased this year with a  bowl coating.  I now consider myself a fan of bowl coatings, if they are created in this manner.

Ordering was smooth and easily completed via email. It was pleasant to have some interaction with the maker.   In email communications, Chris tells me that he is still learning to work with this supply of strummels and was appreciative of my feedback.

I’ve been smoking this pipe fairly regularly (2/3 times per week) and it is quickly becoming a favorite.  I had it with me at the recent Richmond CORPS show and several pipe club meetings.  The folks I’ve shown it to seemed impressed.  In fact, this pipe seems to end up in my bag for the various pipe club nights I attend.  The draw is open, but it is not fussy about the way it needs to be packed.   Typically, a bowl is a one match affair with no moisture, so a cleaner is not required.  The way it smokes, the shape and weight all conspire to make a pipe that really works for my needs.  This pipe has definitely whetted my appetite for a future Chris Askwith “Hand Made” pipe.

Chris_Askwith_Hand-Finished_Gallery Chris_Askwith_Hand-Finished (4) Chris_Askwith_Hand-Finished (3) Chris_Askwith_Hand-Finished (6) Chris_Askwith_Hand-Finished (5)

Rode Hard Put Away Wet – A Tired Julius Vesz shape 31 Zulu/Canted Dublin


Blog by Steve Laug

When I walked by the display case in the antique mall and saw the classic Vesz finish and the O logo on the stem I knew I was looking at one of Julius’ pipes. It was in very rough shape. The stem was covered on the topside and underside from the button forward for about an inch with a lot of dents and bite marks. On the topside there was a bite through – not large, more of a pinhole sized hole. There was also a lot of calcified buildup on the stem. The stem was over bent and the flat bottom of the bowl and shank did not rest on the desk top when laid down. The stem arch kept it from happening. The button and crease had were also worn. The rest of the stem was oxidized. The bowl finish was dirty and worn with white paint spots on the bowl. The stem was very tight and hard to remove but when I did remove it the tars on the end of the tenon were thick. The inside of the stem was so filled that the airway was virtually clogged. The slot on the end of the stem was plugged but for a hole the size of a pencil lead.Vesz1 Vesz2 The rim was damaged and worn from tapping it out on hard surfaces. There were large dents and worn areas. The inner edge was blackened and on first glance looked to have burned damage. It was hard to tell for sure but it also looked to be slightly out of round due to the damage to the inside edge. The bowl was heavily caked with a concrete like carbon build up. I tried to ream it and found it too hard to cut as it stood. The inside of the shank had heavy carbon and tar buildup.Vesz3 The pipe is stamped on the flattened bottom of the shank. Toward the front of the bowl it is stamped Circle 3 which denotes the price point of the pipes. Julius stamped them 1-6 to denote the price. That is followed by the shape number – in this case 31. The final stamping is Julius Vesz over Hand Made.Vesz4 To soften the concrete like cake so that I could ream it more easily without damaging the briar I put the bowl into an alcohol bath to soak for a while. I also wanted to remove the grime from the rustication on the bowl and the soak would facilitate that.Vesz5 While the bowl soaked I worked on the stem. I cleaned the inside of the stem with cotton swabs, pipe cleaners and isopropyl alcohol. I also sanded the calcification with 180 grit sandpaper and 220 grit sandpaper to remove the build up from the surface of the stem. The tooth marks are very evident in the photos below.Vesz6 Vesz7 I took the bowl out of the alcohol bath to ream it and found that indeed the alcohol had softened the cake enough to make reaming a very easy task. I reamed it with a PipNet reamer starting with the smallest cutting head and working up to the size of the diameter of the bowl.Vesz8 I topped the bowl and removed the damaged surface of the rim. I set up a topping board and used 220 grit sandpaper to gently and carefully remove the damage. I sanded the bowl in a circular pattern on the board as I find that doing so does not leave as deep scratches in the finish. Once I had removed the damage I could see the state of the inner edge of the rim. It had some darkening but it was still solid. There were no deep burned areas that needed to be removed.Vesz9 Vesz10 Vesz11 I set up a heat gun and heated the bent stem to reduce the bend to a point where the pipe would sit up right on the flat bottom of the shank and bowl. I also heated the tooth dents to raise them as much as possible before I sanded them.Vesz12 Vesz13 Once the stem was heated and flexible I inserted it in the shank and pressed down on the bend to adjust the bend to allow the bowl to sit without falling over. The tooth marks did lift quite a bit and are visible in the last two photos of the foursome below.Vesz14 Vesz15 Vesz16 I sanded the stem with 220 grit sandpaper and then with medium and fine grit sanding sponges to clean up the dents as much as possible. The surface needed to be cleaned and prepped for the work of filling the dents with black super glue. I washed down the dents with alcohol to remove the sanding dust. I filled the holes and built up the dents in the button lip with black super glue until they were overfilled, then sprayed them with the accelerator to harden the glue. I sanded the fills with 180 grit sandpaper and then with 220 grit sandpaper to begin the process of smoothing them and blending them into the surface of the vulcanite.Vesz17 Vesz18 I continued to sand with the 220 grit sandpaper to shape the crease and the button as well as the surface of the patches until they were at the same level as the surface of the stem.Vesz19 Vesz20 I sanded the stem after that with a medium and a fine grit sanding sponge to further blend it into the stem surface. It took a lot of sanding to blend it into the surrounding vulcanite.Vesz21 Vesz22Vesz23 Vesz24 I rubbed down the stem with Obsidian Oil to make the scratches and trouble areas very visible. I also rubbed down the bowl with olive oil and wiped it off and set it aside overnight to let the oil be absorbed into the wood. In the morning I took the following set of two photos to show the state of the pipe when I began to do the finishing work on it. Vesz25 Vesz26 I sanded the stem with fine grit sanding sponges to clean it up further and remove the deeper scratches. I then sanded it with micromesh sanding pads – wet sanding with 1500-2400 grit pads and dry sanding with 3200-12,000 grit pads. I rubbed it down with Obsidian Oil between each set of three pads. I finished the stem work by buffing the stem with White Diamond on the wheel to finish the polish. I gave it several coats of carnauba wax and buffed it with a soft flannel buff to raise the shine.Vesz27 Vesz28 Vesz29 Vesz30 Vesz31 The bowl had a heavy ghosting of aromatics – it was overwhelming and no matter how many times I cleaned it the smell remained. I filled the bowl with cotton balls, pressed them down and then filled the bowl with isopropyl alcohol with an ear syringe until the cotton was soaked. I set the pipe bowl in an old ice-cube tray that holds it upright and let the alcohol and cotton do their work to pull out the oils from the briar and sweeten it. I have moved more and more toward using cotton instead of coarse salt. It seems to work just as well and is less of a mess in the clean up stage.Vesz32 I let the pipe sit with the alcohol and cotton balls for about three hours. The photo below shows the oils that were drawn out of the bowl. The cotton turned a yellow-brown and was almost dry.Vesz33 I took the cotton balls out of the bowl and cleaned the shank and bowl with pipe cleaners. I put the stem back in place on the pipe and gave the pipe a hand polish with some Halcyon II Wax. I hand buffed it with a shoe brush to raise the shine. The finished pipe is shown below. The look and feel of the pipe is far better than when I started. The repairs to the stem and button worked well and blended in nicely to the stem. The topping of the bowl removed the damaged portion and the blackening of the inner edge of the rim is merely a character trait. This is one that will stay in my collection. It smells sweet and is ready to smoke.Vesz34 Vesz35 Vesz36 Vesz37

Restoring a Paronelli Bent Apple


Blog by Steve Laug

I picked up a large bent apple-shaped pipe from one of the antique shops I visited on my journey in Alberta. It is a filter pipe with a Lucite stem and a metal spacer between the shank and stem. The spacer was loose and would need to be glued in place. The stem had sticky gum on it from the sales tags that were on the pipe. There is a stylized pipe stamped on the left side of the saddle portion of the stem. The bowl had a light cake on the top 1/3 of the bowl and some darkening on the rim itself. There was no damage to the rim or the briar of the bowl. The piece of briar used had some great grain on the right side and the back and front of the bowl. The left side had a bald spot but overall the pipe had some nice grain. There is one fill on the back side of the bowl midway between the top edge and the junction of the bowl and shank. The finish was covered with a glossy varnish coat that was dirty, worn and had darkened in some spots on the bowl. The stamping was quite simple – Paronelli on the left side of the shank in script and on the underside of the shank next to the stem is ITALY. I was drawn to the shape as I had not heard of the brand before.Par1 par2 Par3 Par4 Before I started working on it I did a bit of digging on the web to see what I could find out about the brand. I found quite a few oddly painted Paronelli pipes and quite a few in wild colours with appliqués. But I did not immediately find anything on just simple briar pipes. Finally I found Paronelli pipes listed on http://www.theitalianpipe.com/artisans/paronelli.htm

Par5I copied the picture of Alberto Paronelli to put a name with the face for this pipe. The following is adapted from the site.

“Alberto Paronelli, now in his eighties, is undoubtedly one of the true fathers of the art of pipe design and craft. He continues to design and make briar and clay pipes. Many world-famous pipe makers, such as Tommaso Spanu, are indebted to him for their knowledge and fame. Among his endless achievements are the founding of the International Pipe Academy, the Pipe Museum in Gavirate (Italy), and the publication of the now out of print magazine called “La Pipa” (The Pipe).”

I reamed the bowl with a PipNet reamer and took back the cake on the top 1/3 of the bowl back to bare wood. I cleaned out the shank and the tenon/filter area with cotton swabs, pipe cleaners and alcohol. I scrubbed until they came out clean. I cleaned the metal spacer and reglued it to the stem. I wiped down the bowl and stem with alcohol to remove the gummy substance on the stem and on the sides of the bowl.Par6 Par7 Once I had the inside of the bowl, shank and stem clean I worked on the finish of the bowl. I decided to try to remove the shiny varnish finish so that I could clean off the dirty and worn areas. I wiped it down with acetone on cotton pads until I had cut through the finish. I sanded it with a medium grit sanding sponge to further break up the varnish and then wiped it again with the acetone.Par8 Par9 Par10 Par11I worked on the stem with micromesh sanding pads – wet sanding with 1500-2400 grit pads and dry sanding with 3200-12,000 grit pads. I rubbed the stem down with Obsidian Oil between each set of three sanding pads. Fortunately the Lucite stem was in excellent shape other than some minor scratching so it cleaned up quite easily. I reapplied the logo on the side of the stem with white out and lightly buffed the pipe stem with White Diamond when I had finished. I gave the stem multiple coats of carnauba wax and set it aside while I worked on the bowl.Par12 Par13 Par14 I buffed the bowl with White Diamond and then rubbed it down with a light coat of olive oil. I wiped the oil on and then off again and let it sit overnight. In the morning I buffed the bowl with White Diamond once again and then gave the pipe several coats of carnauba wax and buffed it with a soft flannel buff. The finished pipe is shown below. I will either have to get a 9mm converter to fill the open tenon or put a filter in place. I have some filters that I picked up in Europe when I was there that fit perfectly so that may well do the trick with this one.Par15 Par16 Par17 Par18

UPDATE: The pipe is on its way as a gift to a young pipeman to add to his growing rotation. Hope you enjoy this one Justin.

Giving new life to a Savinelli Product – a David’s Choice Canadian


Blog by Steve Laug

I have written about the restoration and restemming of the first pipe bowl I picked up while on a recent trip. It was found in an antique shop in Nanton, Alberta. It was an old AF Billiard from 1923. The second pipe bowl I found at the same shop is the focus of this refurbishing article. It is stamped on top of the shank with the words David’s Choice and stamped on the underside Italy and barely visible under the repair band Savinelli Product. The repair band was loose and when it was removed the shank had a crack on the bottom side. At the bowl shank junction there is also a small crack that extends back along the shank for almost an inch. It does not appear to go through the shank to the airway but it is visible. The rim of the pipe was clean but the outer edge was damaged and the top edge was badly dented. The finish on the bowl was gone and the briar, though it had stunning grain, was lifeless looking. The bowl was clean in the top ½ inch – looking to have been reamed. The rest of the bowl was badly caked to the point that a pencil would stand in the bottom half unaided. There was no room for additional tobacco. Surprisingly the shank was clean. The stem was long since gone but I found a stem blank in my stem can that would work very well with the pipe.Sav1 Sav2 Sav3 Sav4 Sav5 Sav6 The cake was like concrete in the bottom half of the bowl. I could not cut through it with either the PipNet or the KleenReem pipe reaming tools. I filled the bowl with cotton balls and then used an ear syringe to fill the bowl with isopropyl alcohol. I let it sit for several hours while I worked on fitting the stem.Sav7 Sav8 I used the Pimo Pipe Turning tool to reduce the diameter of the tenon and cut a clean edge against the stem. I sanded it by hand to get it to the proper diameter to fit the shank. I still needed to fit the stem to the angles of the shank and make the lines straight and clean from shank to button. I fit it on the pipe and took some photos to get an idea of what I needed to sand.Sav9 Sav10 I took the cotton balls out of the bowl and then reamed the bowl. The alcohol softened the hard cake and it came out more easily. I finished scraping the bowl with a sharp knife to take out the remnant of cake. I sanded the stem with 220 grit sandpaper to reduce the stem to fit the shank. I glued the band in place on the shank with an all-purpose wood glue.Sav11 Sav12 Sav13 Sav14 Sav15 I wiped down the bowl with acetone on cotton pads to remove the remaining finish from the briar. I would eventually stain the briar – not sure at this point what colour I would use but I wanted to have a clean surface for the stain. I also lightly topped the bowl with a topping board and 220 grit sandpaper to remove the damaged top and edges of the rim.Sav16 Sav17 Sav18 I heated the briar with a heat gun to open the pores in the briar to receive the stain and then used a dark brown aniline stain. I applied it and flamed and repeated the process until I had an even coverage over the surface of the bowl. In the past I have thinned the stain to lighten it but have lately just applied it and then wiped it down with alcohol and cotton pads to lighten it after staining.Sav19 Sav20 Sav21 I sanded the bowl and shank with a 1500 grit micromesh sanding pad to further lighten the finish and then wiped it down a further time with the alcohol wet pads.Sav22 Sav23 Sav24 Sav25 I sanded the stem with 220 grit sandpaper and medium and fine grit sanding sponges. I wet sanded with 1500-2400 grit micromesh sanding pads and dry sanding with 3200-12,000 grit pads. I rubbed the stem down with Obsidian Oil after each set of three pads. Once I had finished sanding I buffed the stem with White Diamond. I polished the band with silver polish and gave it a light buff with White Diamond as well.Sav26 Sav27 Sav28 I put the stem back on the pipe and buffed it all again with White Diamond and gave it a several coats of carnauba wax. I buffed it with a soft flannel buff to raise the shine. Though this old warhorse of a pipe has seen much use, the new finish and restored, rebanded and restemmed pipe should give many more years of service. It is cleaned and ready to load with its inaugural bowl. Though the pictures do not show it the pipe is a large one – it is 6 inches long with a bowl that is 2 inches tall. The diameter of the bore is 7/8 inches. It will certainly be a long smoke – and if the build of cake left behind by the previous owner tells any tales it will be a good smoking pipe.Sav29 Sav30 Sav31 Sav32

Kaywoodie 8783B Drinkless Restoration (1935-1938)


Blog by Al Jones

The Shape 8783B is one of my favorite Kaywoodie shapes.  This shape is more common in the Supergrain grade and this is the first one I’ve seen available in the Drinkless grade.   This shape is almost identical in shape and size to my Comoys 499 Extraordinaire, but is significantly lighter at 54 grams.

Kaywoodie introduced the Drinkless grade in 1935.  The four digit shape stamp was last used in 1938.  This one has the four hole stinger with a large ball.  It is also my first vintage Kaywoodie with the “Reg No 213598” and “Drinkless” stamps on the stinger.  These details make it easy to date the manufacture of the pipe between 1935 and 1938.  “Drinkless” grade pipes seem to have nicer grain patterns than Supergrain pipes.  This one has some straight grain radiating around the bowl with birdseye on the bowl top.

The pipe was advertised as cleaned and polished.  But as you can see from these picture, there was still considerable oxidation on the stem.  The briar had some bruises with some rim darkening and one dent on the bowl top.

Kaywoodie_8783B_Drinkless_Before Kaywoodie_8783B_Drinkless_Before (2) Kaywoodie_8783B_Drinkless_Before (1) Kaywoodie_8783B_Drinkless_Before (3)

Kaywoodie_8783B_Drinkless_Before (11)

The nomenclature was worn, but visible to the naked eye.  This pipe is stamped Aged Bruyère with Drinkless over Kaywoodie.  Kaywoodie switched to the “Imported Briar” stamp in 1936, so it is possible that this pipe could be from 1935.  There are overlaps between years, so there is no definitive way to determine the exact year.

Kaywoodie_8783B_Drinkless_Before (8) Kaywoodie_8783B_Drinkless_Before (9)

The bowl appeared to be reamed and cleaned, but I soaked it with alcohol and sea salt just to be sure.  The stem presented a problem as it was completely blocked.  Using a piece of heavy copper wire, I was able to push out some dirty pipe cleaner debris and clear the stem.  The detail work and funneling on the button end is very impressive and comparable to Comoys buttons of that era.

I was able to partially lift the dent from the bowl top with steam.  I heat an old kitchen knife heated with a propane torch pressed onto a wet cloth over the dent.  I then removed some of the rim darkening with a worn piece of 8000 grade micromesh sheet.  The briar was then buffed with several coats of carnuba wax.  I was careful to stay away from the worn nomenclature to avoid any more damage.

The oxidation on the stem was pretty stubborn.  The stem appeared to have had some of the oxidation buffed or sanded off.   I started with 600 grit wet paper, then progressed thru 800, 1000, 1500 and 2000 grades.  I then used 8000 and 12000 grade micromesh sheets.  The stem was then buffed with White Diamond rouge.

Below is the finished pipe.

Kaywoodie_8783B_Drinkless_Gallery Kaywoodie_8783B_Drinkless_Finished (3) Kaywoodie_8783B_Drinkless_Finished (2) Kaywoodie_8783B_Drinkless_Finished (4) Kaywoodie_8783B_Drinkless_Finished (8) Kaywoodie_8783B_Drinkless_Finished (7) Kaywoodie_8783B_Drinkless_Finished (6)


An Old 1923 Adolph Frankau Billiard Restemmed and Restored


Blog by Steve Laug

On a recent road trip to Alberta I drove over 3300 kilometres and stopped along the way at antique shops and antique malls to look for old pipes to add to my refurbishing box. I am always on the lookout for old pipes that show promise or will make good additions to my own collection. In one of the shops in Nanton, Alberta I found an old billiard and a Savinelli Made Canadian pipe bowl. Both bowls were missing their stems. The billiard bowl was stamped with a stacked lower case o and an N with C over the top of it. Above the stamped letters was a crown. There was no other stamping on the briar. I have looked around the web for this stamping and have not been able to find out who made the pipe from the stamping and the logo on the shank. The photo below gives a clear picture of the stamping on the top of the oval shank. If it looks familiar to any of you reading this article please post the information in the replies at the bottom of the page.A1 There was also a band on the shank that was factory installed. It was not a repair band or one that was added at a later date. The sterling silver band also bore stamping. On the top of the shank band there was an AF in a hexagon stamped in the silver. That AF stamping seems to point to the pipe being made by Adoph Frankau and Company as far as I can ascertain. Stamped underneath the AF there were three hallmarks in the silver. These hallmarks included the following – each of them was in a cartouche. The first was a letter h, the second was a lion, and the third was a lion’s head. The stamping and the order in which they were stamped identifies the silver band on the pipe in the following order – the h is the year 1923, the lion is the stamp for sterling silver and the third stamp, the lion’s head is the stamp for the city of London. The close up photo below shows the stamping on the silver band.A2The finish on the bowl was worn and spotty but otherwise was in good shape. The rim was slightly darkened but did not have any tarry build up. The bowl interior was clean and appeared to either have been reamed or lightly smoked. The shank had a threaded mortise and would have taken a threaded tenon. I went through my can of stems and found a stem that was oval and of a similar diameter as the shank. It had a broken off tenon that needed to be sanded smooth to flatten it against the face of the stem. With some sanding and cleaning up it would fit the shank well. Once I had faced the stem I drilled the remainder of the old broken tenon out of the stem and fit a piece of Delrin tenon into the hole. The piece of Delrin was too long and I cut it off with a hacksaw. The tenon was not threaded to fit in the threaded mortise however the diameter would make a snug fitting push tenon. The diameter of the stem was slightly larger than the shank and band so it would need to be sanded to remove the excess material.A3 A4 I cut of the tenon piece and then glued it into the drilled out stem with superglue. I sanded the stem to adjust the diameter of the oval to make the fit more precise.A5 When the stem was in place the fit was better with the logo side of the stem facing down. I decided to sand that side to fit it against the shank. The inlaid logo was not set too deeply into the vulcanite and with sanding it would be easy to remove. Once I had sanded it with 220 grit sandpaper to remove the excess vulcanite I fit it in the shank to get an overall look at the pipe with stem. More sanding would be necessary to get the fit perfect against the band and shank.A6 a7 a8 A9 To further shape the stem I removed it from the shank and sanded it some more with 220 grit sandpaper and then with a medium and a fine grit sanding sponge. I sanded the stem until the diameter matched that of the shank. I sanded the tooth marks next to the button on the top and bottom of the stem. The photo below shows the shaped and sanded stem. All tooth marks and damage to the stem was removed in the sanding and the stem was ready to polish.A10 I wiped down the bowl with acetone on a cotton pad to remove the spotty finish on the bowl. It took some scrubbing to remove the varnish coat on the pipe. I scrubbed the silver band with silver polish and wiped it down with a silver polishing cloth.A11 A12 A13 I sanded the stem with micromesh sanding pads – wet sanding with 1500-2400 grit pads and dry sanding with 3200-12,000 grit pads. I sanded the tenon smooth as well. I rubbed the stem down with Obsidian Oil after each set of three sanding pads. I buffed the stem with White Diamond to further polish it and then gave it several coats of carnauba wax and buffed it with a soft flannel buffing pad to raise the shine. A14 A15 A16 I buffed bowl with White Diamond on the buffer and then gave it multiple coats of carnauba wax to protect and polish it. I then buffed it with a soft flannel buff to give it a shine. I put the stem back in place on the shank and the buffed the pipe a final time. The finished pipe is shown in the next set of four photos below. It is ready to smoke with its inaugural bowl. It will be a treat to fire up this lightly smoked pipe from 1923.A17 A18 A19 A20

Tobaccoland, Chapter 37 the Pipe Repairing Department – by Carl Avery Werner


Blog by Chris Chopin and Steve Laug

Chris Chopin, a reader of and writer for rebornpipes sent me a link to an old chapter on pipe repair that he thought I would enjoy reading. He was right, I love it. It is a chapter from the book Tobaccoland, by Carl Avery Werner. It is Chapter 37 and is entitled “The Pipe Repairing Department”. It is a great read and well worth taking the time to reflect on if you are one who, like me, loves to repair and bring old pipes back to life. I wanted to pass it on to all of you who read the blog so I converted the entirety of the chapter into photos so that I could post the pages on the blog for you to read. If you would like to read it in PDF format click on the link below and download it in that format http://library.albany.edu/preservati…rt7_chpt37.pdf.
Werner Werner1 Werner2 Werner3 Werner4 Werner5 Werner6 Werner7 Werner8 Werner9 Werner10 Werner11 Werner12 As usual with me, one thing leads to another and I wanted to read more of Werner’s book. Having read the chapter on pipe repair I was intrigued enough to do some digging to see if I could find the book as a whole. I wanted to read more of Werner’s Tobaccoland and see if the rest of it was as enjoyable and entertaining. I was able to find the following link to a full online version of the book https://archive.org/stream/tobaccolandbooka00wernuoft#page/n9/mode/2up.

Helping fulfill the “Gandalfian” Dreams of a Hungarian Friend


Blog by Steve Laug

Last month Laci, a friend from Hungary, came to our offices for training and work related ventures. We spent quite a bit of time together in training sessions over the course of his stay in Vancouver. Each day I picked him up at the bed and breakfast where he was staying and drop him off again in the evening. We talked, walked and ate together. The first day he was here he was sitting in my office next to my desk and we were planning our week. At this point in the visit I was utterly unaware that he was a pipe smoker. He noticed the pipe on my desk and asked about it. I told him about my love of restoring old pipes and all things pipes and tobacco. We started talking about pipes and tobacco and he shared what he liked to smoke and what pipes he had in his collection. He was by and large an aromatic smoker as he liked the sweet tastes that came with the tobaccos.

That evening we went out to dinner near his bed and breakfast and continued the conversation we had begun at the office. He spoke of the friends he had in Budapest who he met with to enjoy a pipe and the conversations to be had while smoking their pipes. He talked about the pipe he had and what shapes he particularly like. The conversation was no different from a hundred other conversations that I have had with pipe smokers around the world. You can probably fill in the blanks of the conversation and pretty accurately because I am sure you have had the same conversations yourself. Eventually the conversation came around to the types of pipe he dreamed of one day owning. He spoke of liking apple-shaped pipes whether bent of straight. He spoke of his dream of one day acquiring a Lord of the Rings style churchwarden pipe and smoking some LOTR tobacco. He said it like this “…the ultimate dream of mine is something like what Gandalf had…” At the moment he had no plan or date in mind for acquiring the pipe but he knew he wanted to get one.

We parted company that evening and I went home and looked in my pipe cabinet. I had several churchwarden pipes in my collection and most of them I smoke regularly. But there was one that I rarely picked up. There was nothing wrong with it but I don’t often pick up a CW to smoke and the one I made with the pipe I had purchased the day my eldest daughter was born always seems to get the attention. I took it out of the cupboard and turned it over in my hands. I waxed it again with a new coat of carnauba wax and buffed it with a soft flannel buff. It is stamped either VI-RA or VERA but it is hard to be certain of the spelling. I have hunted down both names online and in my reference books and have not found any information on the brand. The stem is vulcanite and the bowl is a sturdy briar with a rusticated finish. The base of the bowl was flattened so that the pipe can be set down on the desk or table and it remains upright. The stain is a medium brown with some black undertones. It was clean and had only been smoked once or twice since I bought it.

The pipe was my first churchwarden. I had been looking for one for quite a while and I purchased the pipe at an antique mall in Langley, British Columbia many years ago for a pretty decent price. The stem was badly oxidized and the bowl was dirty and worn. The finish was gone and the stain was spotty. I cleaned and restained the bowl with the brown stain. I polished and waxed the stem. The shank had a small crack in it on the right side so I pressure fit it with a nickel band. The band really sets off the pipe nicely and gives it a touch of class.VarioWarden Several days later Laci came to our home for dinner with the family and I presented him with his wished for churchwarden. I wish I had taken a picture of the look on his face when he took it in his hands and turned it over to take in all he could. He was excited with his new pipe. I included some tobacco with the pipe to further meet his wish – a Tolkien LOTR blend from Burlington on Whyte Tobacconist of Edmonton, Alberta called Longbottom Leaf. It is a gentle aromatic with a delightful smell in the bag and a great room note for those who are in the room when it is smoked.

The next morning he brought his pipe to work and we were able to take a walk along the Fraser River and smoke our pipes. He packed a bowl of the Longbottom Leaf in the CW and entered the world and realm of LOTR. We walked for about a half hour and then settled on a park bench overlooking the river to enjoy the rest of our bowls. We walked back to the office when we had finished quite satisfied with the day. I could tell that once he went home this new pipe would occupy a central place in his pipe collection. I gave him several other tobacco samples to take home with him including one made by Robert Boughton who writes on the blog. These will be shared with his Hungarian pipe smoking cadre the next time they gather.

Laci, if you happen to read this post let us know how the pipe is smoking for you. Give us a glimpse of the folks you smoke the pipe with and be sure to give them our greetings.

Restoring A Len Payne Twin Bore System Bulldog


Blog by Steve Laug

When I saw the rusticated bulldog shaped pipe in the display case at the Alberta antique mall I could not help but want to have a look at it. I asked the clerk to open the display case for me to have a closer look at it. The aluminum shank end look too substantial to be just an end cap or ferrule like Peterson’s and other older pipes have used for years. In fact it reminded me of some of the South African Keyser Hygienic pipes that I have in my collection. It had that kind of weight to the aluminum. The stem also had the same kind of look. It was a large diameter military mount stem that pushed into the shank end opening.

Once the clerk took it out of the case I looked at the underside of the diamond shank to see if it was a Keyser pipe – it wasn’t! It was stamped Len Payne. Now I was wondering. In the past I had written about pipes by Len Payne on the blog https://rebornpipes.com/2013/11/16/a-pipe-maker-i-had-never-heard-of-leonard-payne-pipes/. But I had not seen one with this kind of apparatus on the shank. I am including the quote below from Mike Glukler of Briar Blues that gives a quick summary of the brand. Not the bold italicized sentence in the paragraph below that applies to this pipe.

Leonard Payne was based in B.C. for many years. He came to Canada from England. He had shops in Surrey, B.C. and Kelowna, B.C. Interesting fellow. Gruff as the day is long. When you bought a pipe it was handed to you in a paper bag. No sock, no box. Most of his pipes carried a “carburetor” system at the shank/stem junction. Another Payne idea was his shanks. Almost all his pipes were two pieces. He’d turn the bowl and shank, then cut off the shank and reattach with glue (not always with the same piece of briar, so many did not match grains). His thinking was that the shank being the weakest link, if cut and glued would never break and thus “correcting” the weakest link. You may find his pipes on E-Bay on occasion listed as an L. Cayne. The P in his stamping looks more like a fancy upper case C…- Michael J. Glukler

I removed the stem from the shank to look inside and found the carburetor system that Mike refers to in the above quote. The inside of the shank was aluminum so the end cap fit over the outside of the shank and was inset into the interior and formed a collection chamber for moisture. It was dirty with oils and tars. In the centre of the chamber was a tube that extended half the distance up the shank to the end. In the stem was an aluminum tube that was smaller in diameter than the shank tube and when the stem was inserted the stem tube fit in the shank tube. The tube thus formed a straight line from the bottom of the bowl to the end of the stem.Payne1 The Payne inner tube system differed from the Keyser system in that the two tubes interlocked and formed a seamless tube from bowl to button. In the Keyser system the tube in the stem had a downward angle and the one in the shank was shorter. The tubes did not meet or join. Rather the air was swirled around the aluminum chamber and then drawn upward into the downward point tip of the stem tube. In the cutaway drawing below you can visualize the Payne stem with the shank tube extended further into the shank and the stem tube inserted into the shank tube when the stem was in place.keyser The stem itself in this case was a twin bore stem where the airway split into a Y and ended in the button with two holes – one on either side of the button. The theory was it made a more bite proof stem.Payne2 So while the externals and stem appeared to be the same the internals were markedly different in their execution.

The bowl itself was clean but the rim was dirty and damaged with small dents and places that could not be steamed out. The bowl would need to be lightly topped. The finish on the rusticated bowl was in great shape with little wear. The grooves had been stained with a dark brown and the high smooth parts were stained with a lighter brown stain to make a contrast. The aluminum shank cap was scratched and dull. The interior of the pipe was very dirty. The stem was high-grade vulcanite and was lightly oxidized and coated with a sticky substance like price sticker glue. There were no bite marks in the surface and under the grime it was clean. The button had the twin bore system and was also clean and undamaged.Payne3 Payne4 Payne5 Payne6I took the pipe apart so that I could clean the internals and work on the top of the rim. The beauty of this old pipe was that it did not need to be reamed as it was clean inside the bowl. The next two photos show the diameter of the military stem and the overall look of the stem.Payne7 Payne8 I set up the topping board and the 220 grit sandpaper in order to lightly top the rim of the Payne. I pressed the rim against the board and moved it in a circular motion to remove the damage to the rim and the hard buildup.Payne9 Payne10 Payne11 I cleaned out the inside of the end cap insert to remove the tars and oils with alcohol, folded pipe cleaners, and cotton swabs. I cleaned out the airway with pipe cleaners and alcohol.Payne12I used the Guardsman stain pens to stain the rim. I started with the lightest stain and moved to the darkest stain. I wanted to match the stain on the rim to the stain of the bowl. Once it was dry I buffed it with White Diamond and then lightly wiped it off with alcohol on cotton pads to lighten it slightly to get a more correct match.Payne13 The stem was in good shape and did not have any bite marks or tooth chatter. I sanded it with micromesh sanding pads. I wet sanded it with 1500-2400 grit pads and dry sanded with 3200-12,000 grit pads. In between each set of three pads I rubbed the stem down with Obsidian Oil.Payne14 Payne15 Payne16 I waxed the stem with carnauba wax and buffed it with a soft flannel buffing pad to raise the shine. I sanded the aluminum end cap with the micromesh pads to polish the metal and remove the scratches. Once the aluminum shone I waxed the bowl and stem with carnauba and buffed it with a soft flannel buffing pad. The finished pipe is shown below. It is ready to load up and smoke with its inaugural bowl of tobacco. I am wondering how the tube system works in delivering a cool smoker and how the smoke compares to the Keyser Hygienic pipes. Time will tell.Payne17 Payne18 Payne19 Payne20

Stripping a Chacom Cocktail Pipe and giving it a new look


Blog by Steve Laug

My son-in-law and I dropped off his wife and two of my other daughters at the shopping mall and made our way to the pipe hunting turf. He found a nice Peterson Dunmore and I picked up this little Chacom. I love the shape of the bowl. It is an oval shanked pipe with stamping on both the top and the underside. On top it is stamped Chacom over Cocktail and on the underside it is stamped St. Claude over France and 338 next to the stem shank junction. The bowl was caked and quite dirty. The top of the rim while undamaged by dents or chips was thickly covered with tars and oils. The finish was shot – the black paint, kind of shiny dress black, was peeling and large spots on the finish were missing. The stem was dirty, oxidize, and covered with a calcification for the first inch of the stem. There was tooth chatter on the top and bottom of the stem and on the underside it had some tooth dents that would need to be addressed.Chacom 1 Chacom 2 Chacom 3 Chacom 4 I reamed back the cake to the bare briar with a PipNet pipe reamer. I used both the first and second sized cutting heads to ream the cake back. This time it was not hard but rather it crumbled when the blades of the reamer touched them.Chacom 5 I put the bowl in an alcohol bath overnight and let it soak. In the morning I took it from the bath and found that the finish was unphased by the soak. I had run out of acetone for removing the finish but I borrowed some fingernail polish remover from my daughter. It was a peach flavoured wash with added vitamin E. I figured that neither the pipe nor I would mine the smell of fresh peaches as I scrubbed down the finish. The peach aroma made the acetone removal of the painted finish not only quick and easy but made it smell like peach cobbler! Wow. I used a lot of cotton pads soaked in the acetone to remove the paint and clean up the finish. I sanded the bowl with 220 grit sandpaper but did not sand the shank as I did not want to damage the stamping on the top and the bottom. I went over the sanded bowl with a medium and fine grit sanding sponge.Chacom 6 Chacom 7 Chacom 8 Chacom 9 I dropped the bowl into an alcohol bath to soak out the deep stain and remove some more of the paint that held on fast. While it soaked I worked on the stem. I sanded it with 220 grit sandpaper to remove the calcification and oxidation and then wiped it down with alcohol. I was able to remove the tooth chatter from the top side but the bottom side still had a deep tooth mark. I sanded it and opened up the edges of the mark. I wiped it down with alcohol and then filled it in with black superglue and sprayed it with accelerator.Chacom 10 I sanded the patch with 180 and 220 grit sandpaper and then with the sanding sponges to blend it into the surface of the stem.Chacom 11 Chacom 12 I removed the bowl from the alcohol bath after it had soaked for about an hour. I dried it off with a soft rag and took the following four photos to give a clear idea of where it stood at this point in the process of removing the finish. The peach flavoured acetone and the isopropyl alcohol had done their magic and the paint was gone!Chacom 13 Chacom 14 Chacom 15 Chacom 16 I let the bowl dry and continued to work on the oxidation on the stem. I sanded the bowl lightly with a medium and fine grit sanding sponge and then wiped it down with a cotton pad and alcohol to remove the dust. I put the stem back on the bowl and took the pictures below to show the progress toward the new look of this old dress pipe.Chacom 17 Chacom 18 Chacom 19 I used a folded piece of 220 grit sandpaper to rework the inner edge of the rim. It had originally had a slight bevel toward the bowl and I wanted to clean that up and redefine it. Once that was completed I wiped the bowl down a final time with the alcohol and prepared it for staining. I decided to use a dark brown aniline stain to work with the black highlights on the grain. I applied the stain, flamed it and reapplied and flamed it again.Chacom 20 Chacom 21 Chacom 22 Chacom 23When the stain dried I wiped it down with isopropyl alcohol on a cotton pad to remove some of the opacity of the colour and to try to make it more transparent. The next four photos show the pipe after the wipe down.Chacom 24 Chacom 25 Chacom 26 Chacom 27I took the pipe to the buffer and buffed it with White Diamond, being careful to avoid buffing the stamping on the shank. I am careful not to damage that in the process of the restoration. Once buffed the stamping really shows up again. Now it was time to work on the stem some more and get rid of the oxidation and scratches. I use a plastic spacer between the shank and the stem to protect the shank and to allow me to sand the stem without rounding the shoulders. I sanded with 220 grit sandpaper, medium and fine grit sandpaper and then used micromesh sanding pads. I wet sanded with 1500-2400 grit pads and dry sanded with 3200-12,000 grit pads. I rubbed it down with Obsidian Oil between each set of three pads.Chacom 28The tooth repair on the underside of the stem is smooth and even. However, when I sprayed it with the accelerator it left a white centre to the patch. I have not had that happen before but it is all the way through the patch. I will live with it for now, but one day may pick it out and redo it to remove that aspect of the patch.Chacom 29 Chacom 30 Chacom 31 Chacom 32I continued to sand the stem as the photos highlighted areas that still showed oxidation. Once I had that removed I buffed the stem with White Diamond and gave it multiple coats of carnauba wax. I wiped the bowl down once again with isopropyl alcohol on a cotton pad to further lighten the brown stain and highlight the contrast with the remaining black stain in the grain. I buffed it with White Diamond and then gave it several coats of carnauba. I buffed the entire pipe with a soft flannel buff to give it a shine and set it aside for an inaugural smoke – either later today or early this week. The finished pipe is shown below.Chacom 33 Chacom 34 Chacom 35 Chacom 36