Tag Archives: vulcanite

A tale of two pipes- restoring a pair of vintage cased meerschaum pipes – Part 1 (A)


Blog by Paresh Deshpande

Recently I had purchased a few pipes on eBay and this time the delivery was effected without any issues from the Seller. All the Sellers had described the pipes just as they are received, items were well packed and shipping was record quick making this a nice experience (far cry from all my previous experiences on eBay!). I shared the pictures of the pipe haul with members of my Pipe Club and this pair of cased Meerschaum called out to one of the founding members of the club and more importantly a dear friend of mine.

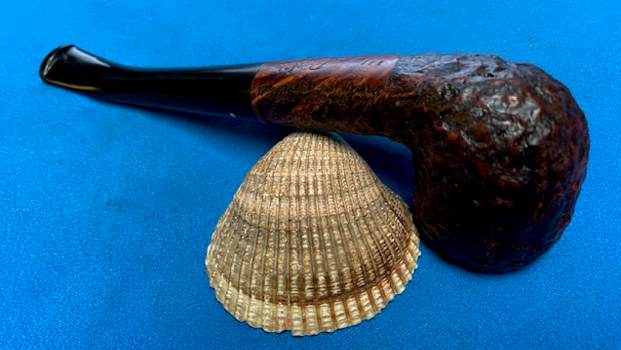
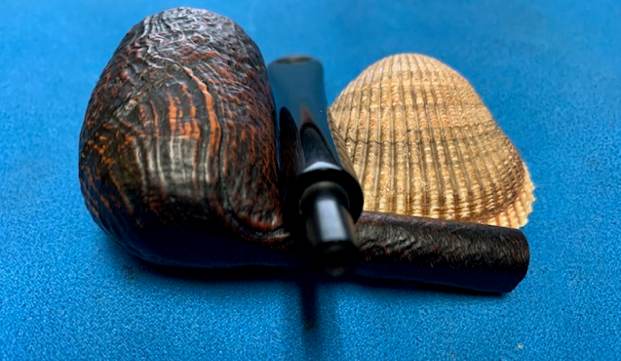
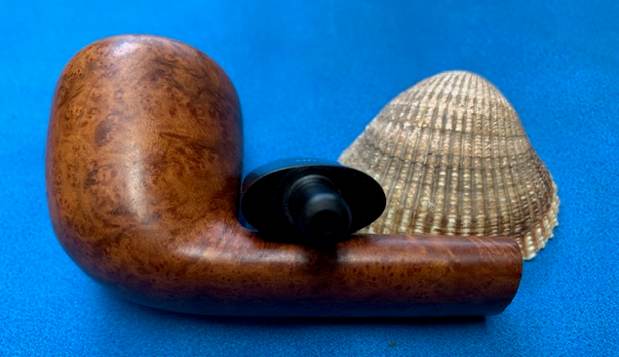
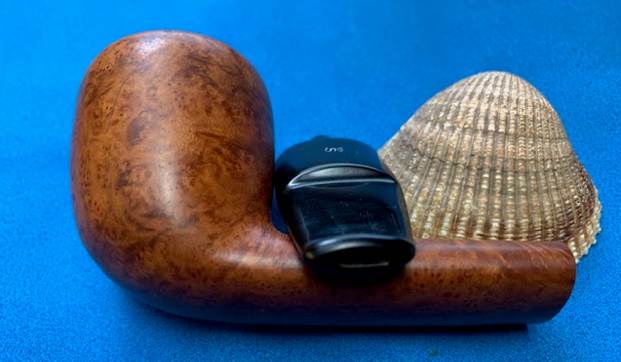
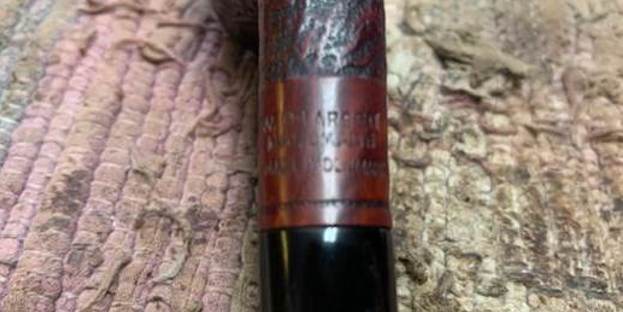
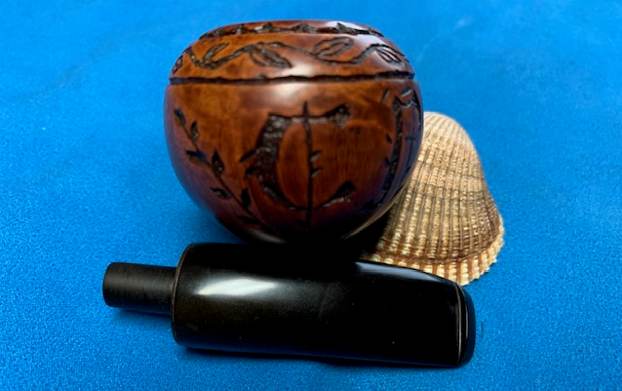
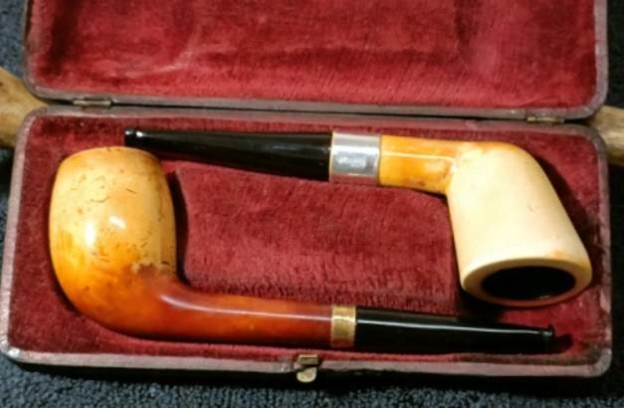
Looking at the pipe set, it is apparent that these pipes had seen many a summers, many a number of repair jobs more so to the stem including splicing and many ages of (mis?)use. The case consists of two Meerschaum pipes; a Dublin and a Billiard (or maybe a Tulip or even an Apple shape!!!). There are no visible stampings or markings either on the pipe or on the hard leather case except a small note with c.1920’s written on it (well, again veracity of this note cannot be established and needs to be considered with a pinch of salt, or rather a handful of salt!). This makes it impossible to firmly establish the provenance of this pipe set. However, the overall feel, appearance and quality make me want to believe that small little note. Here are a couple of pictures of the cased set of meer as it sits on my table. Though both the pipes were worked on simultaneously, for the sake of brevity and convenience of explaining the process and how issues that cropped up on one pipe affected the other, I shall divide the write up in to two parts.

Part 1: Dublin
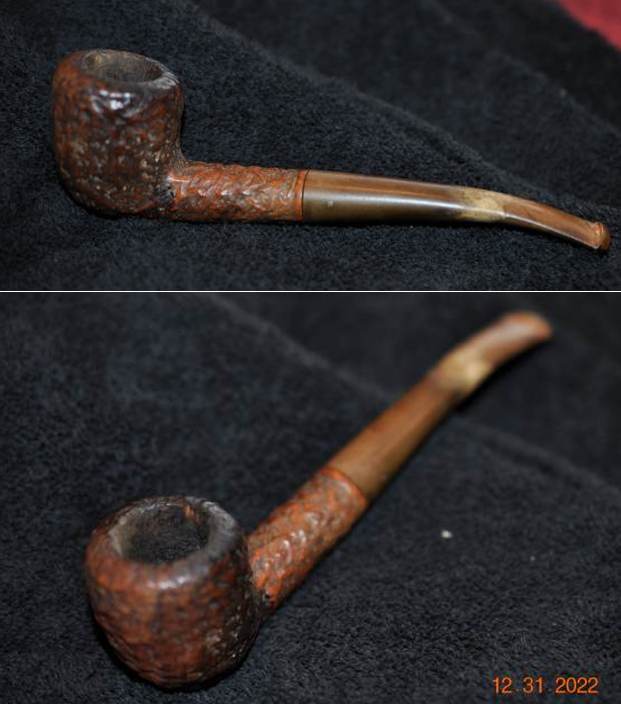
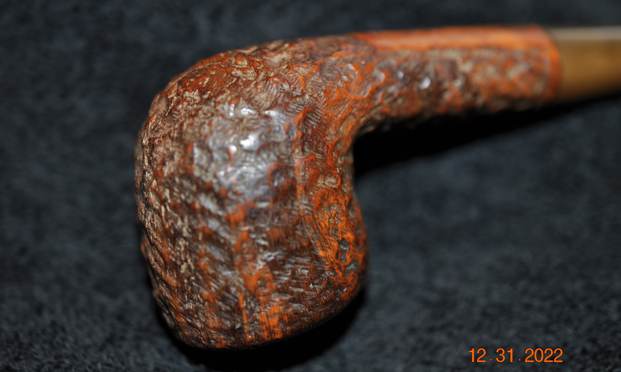
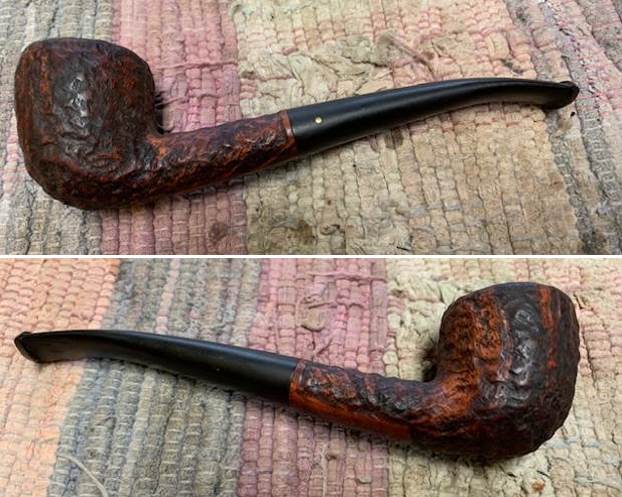
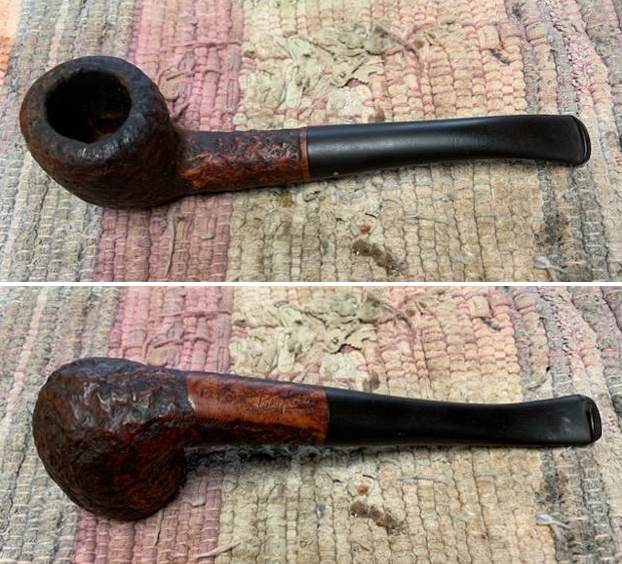
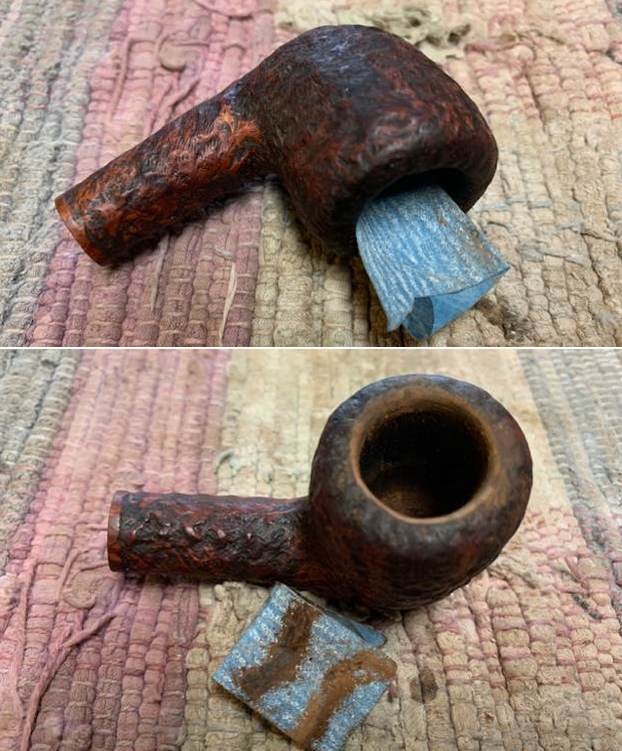
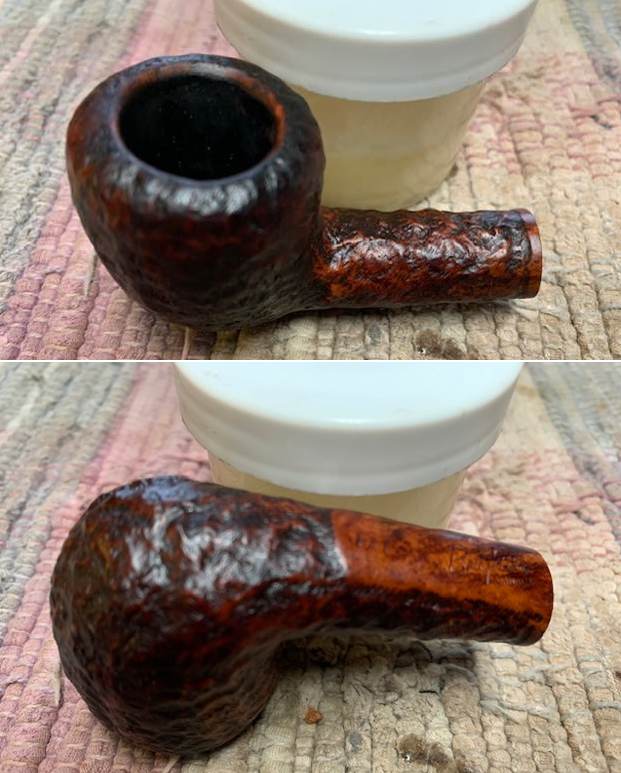
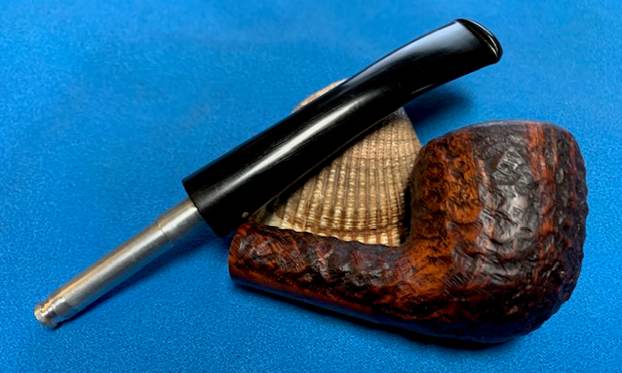
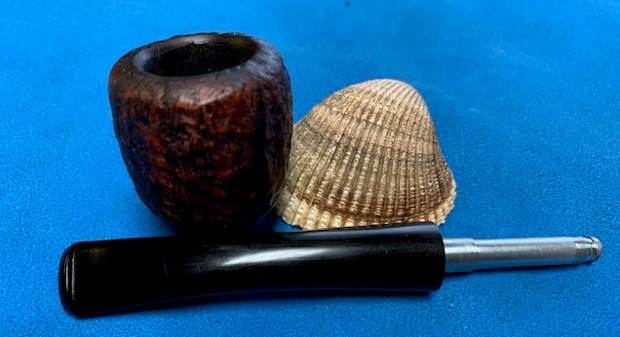
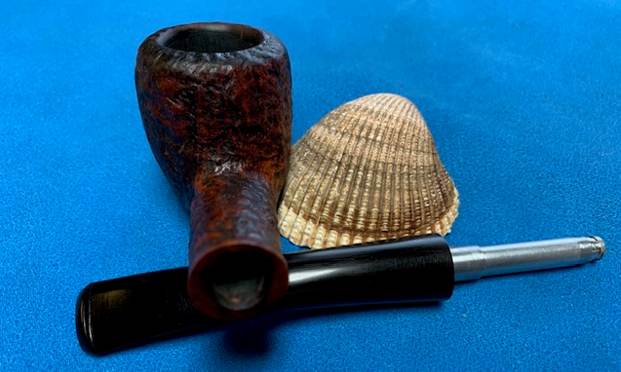
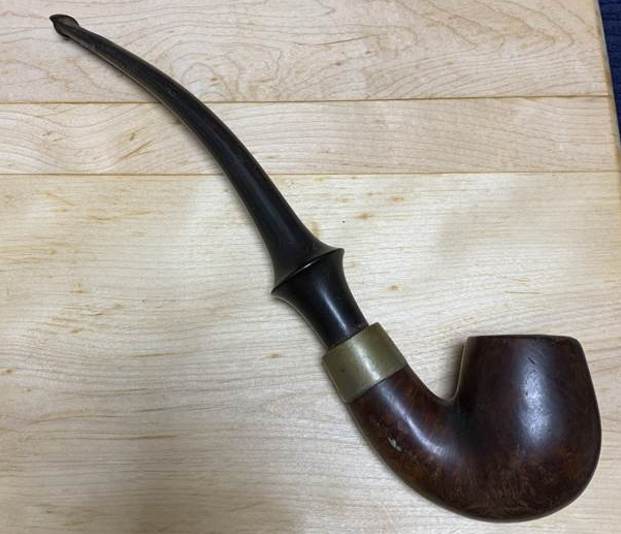
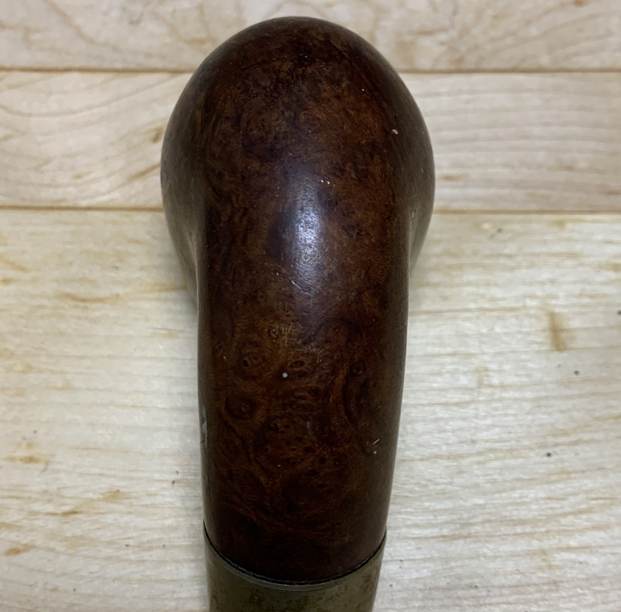
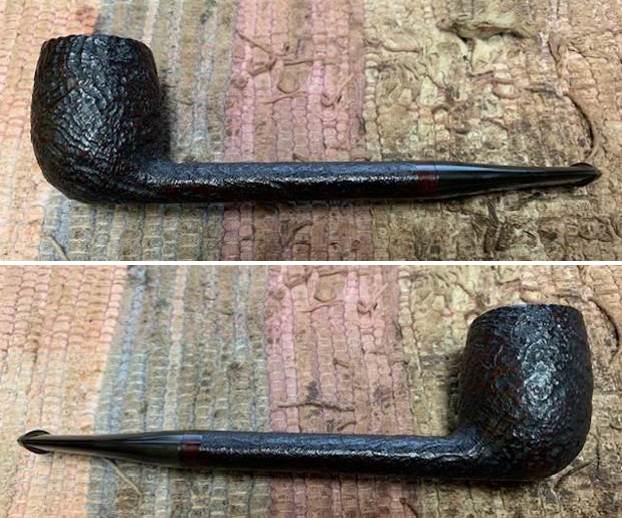
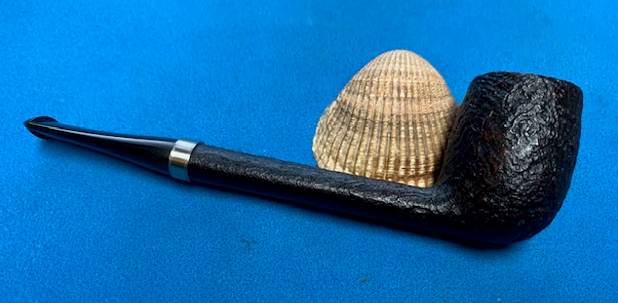
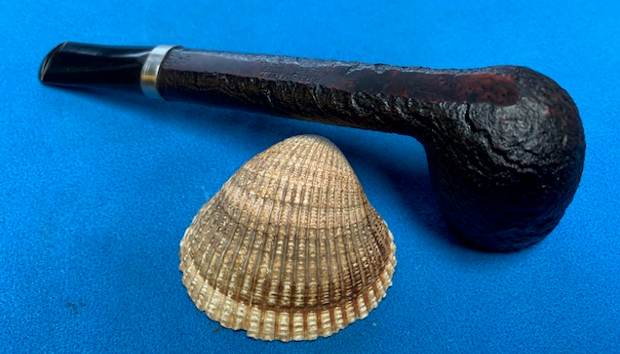
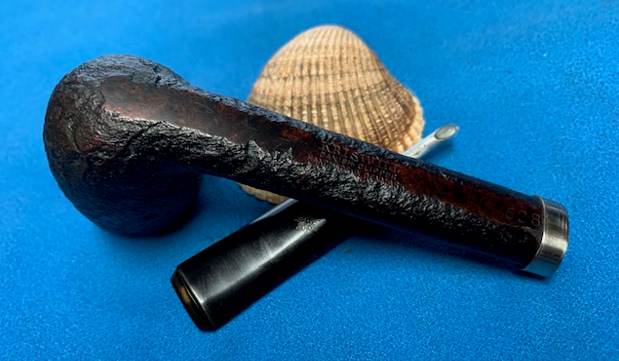
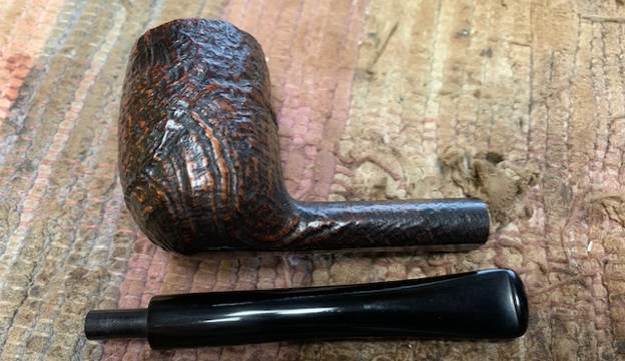
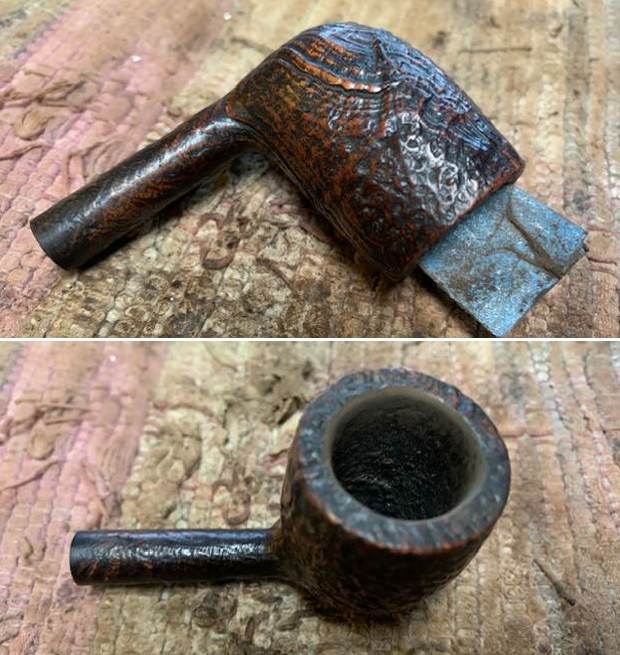
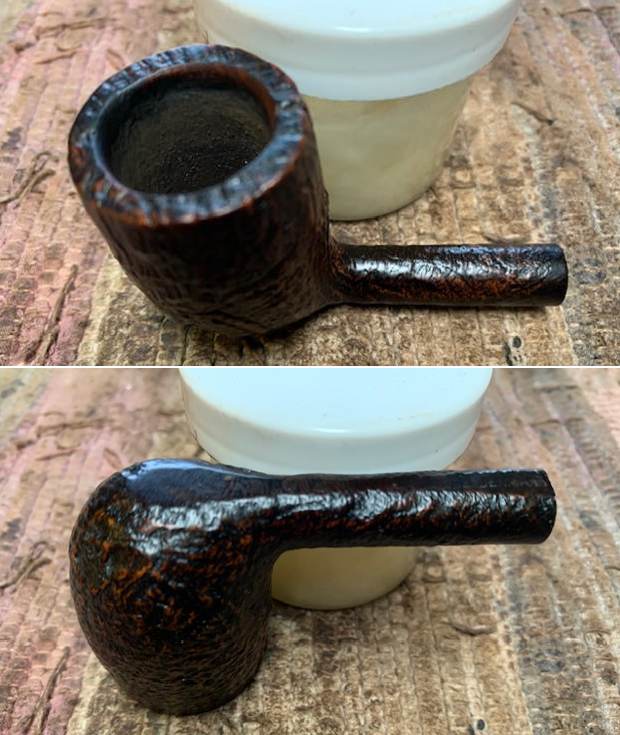
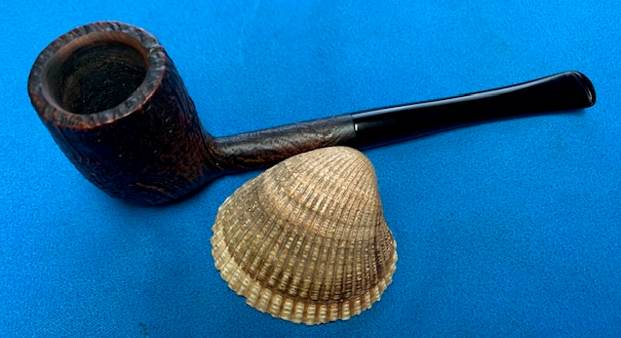
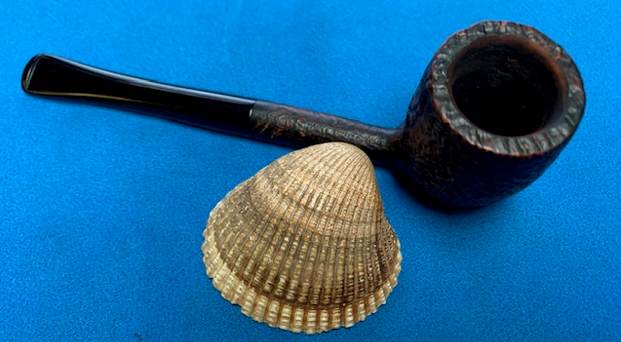
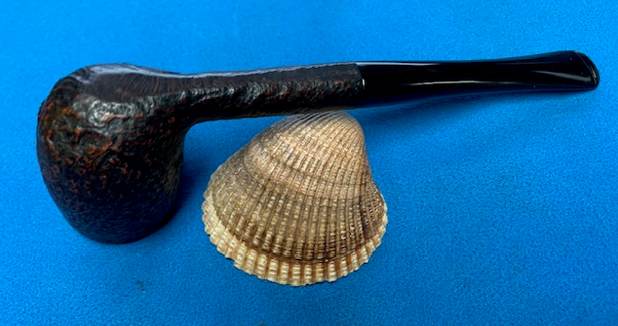
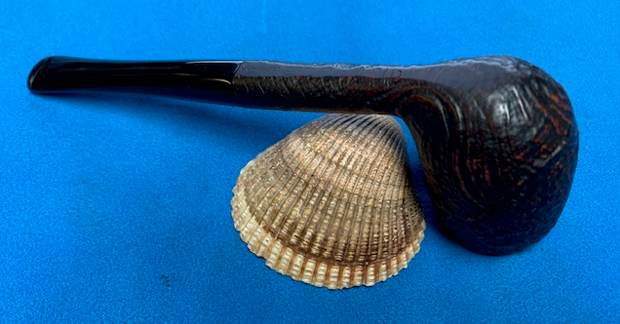
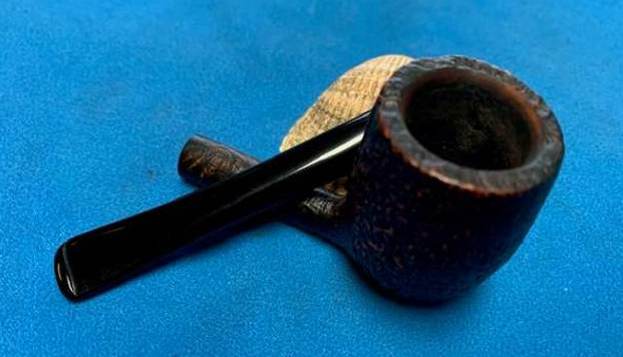
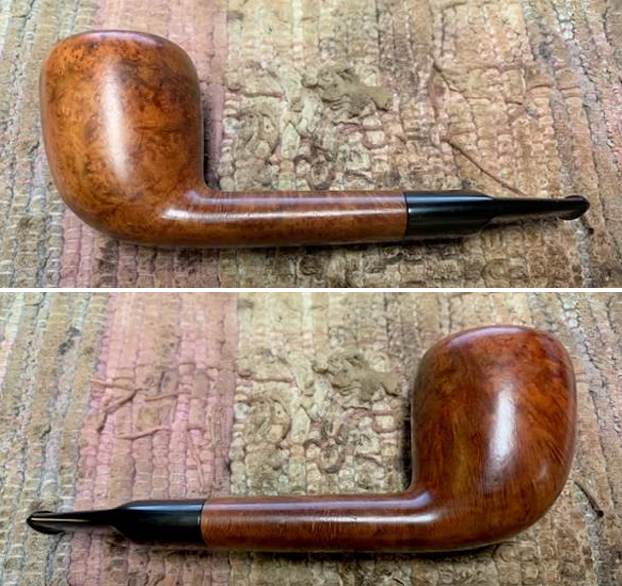
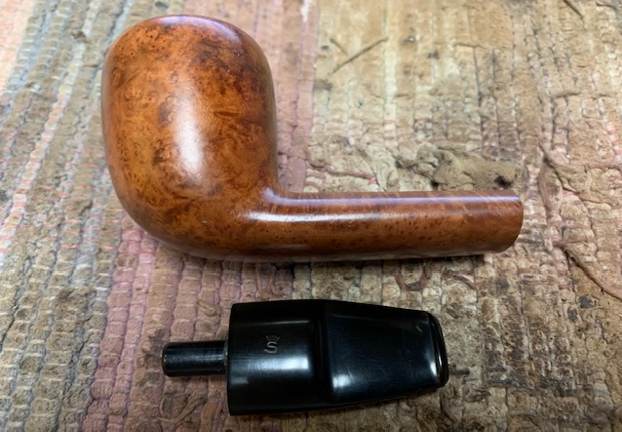
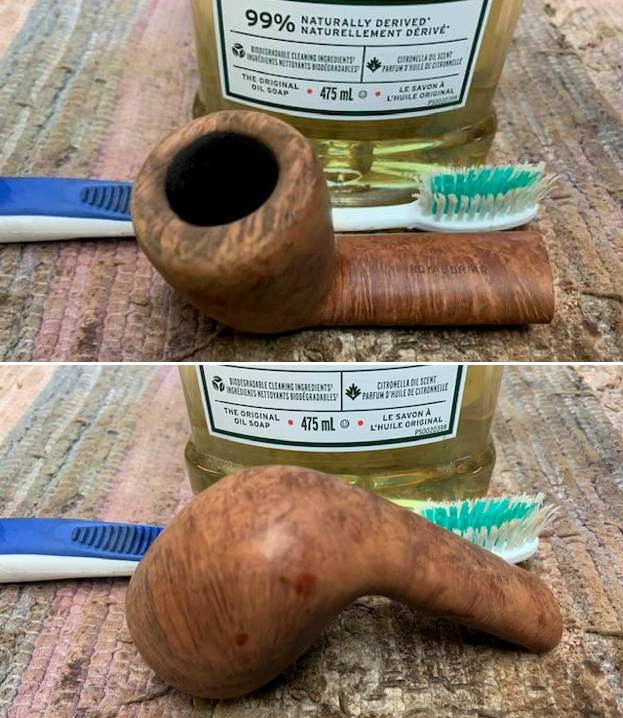
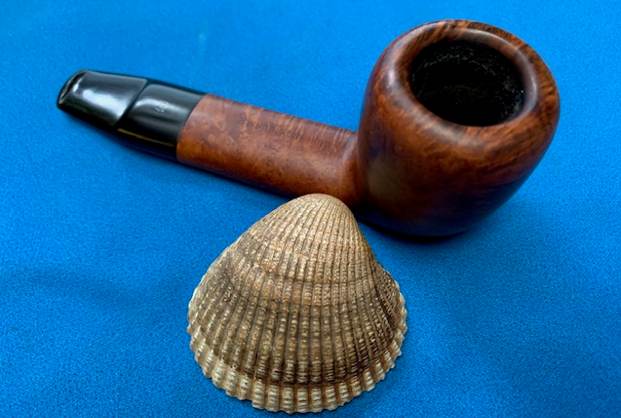
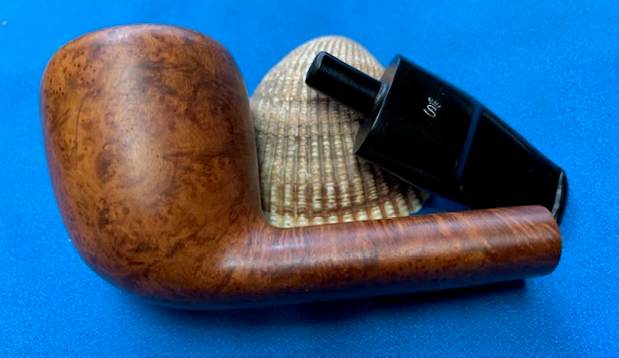
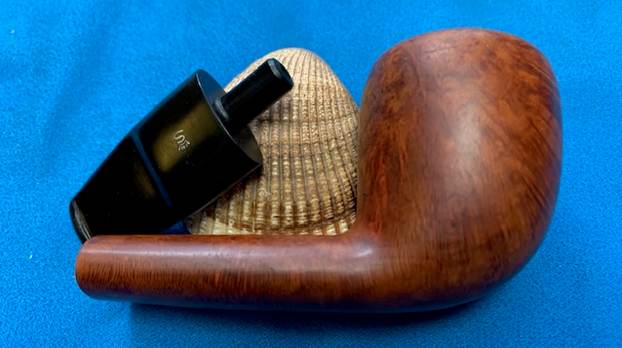
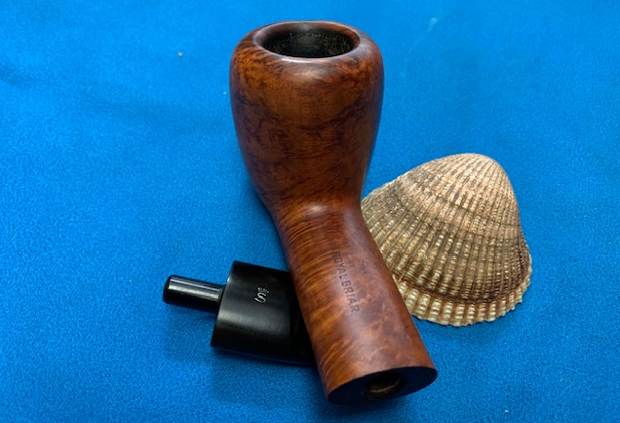
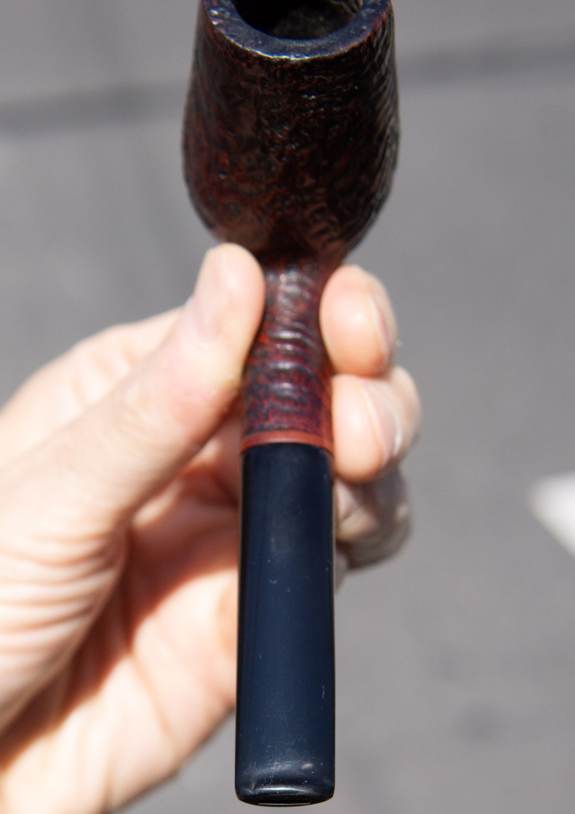
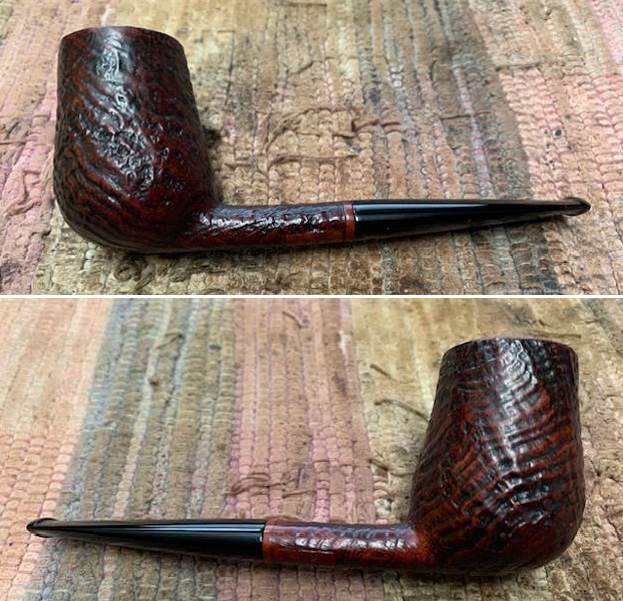
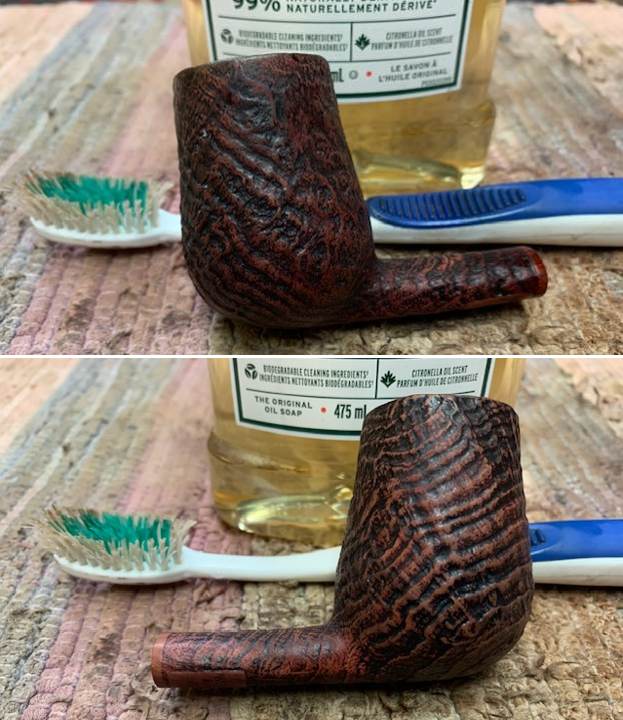
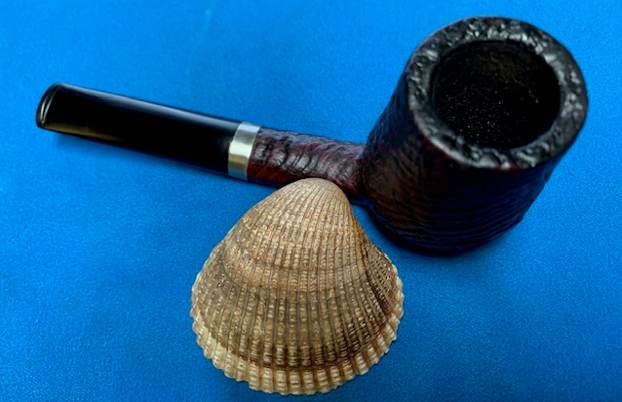
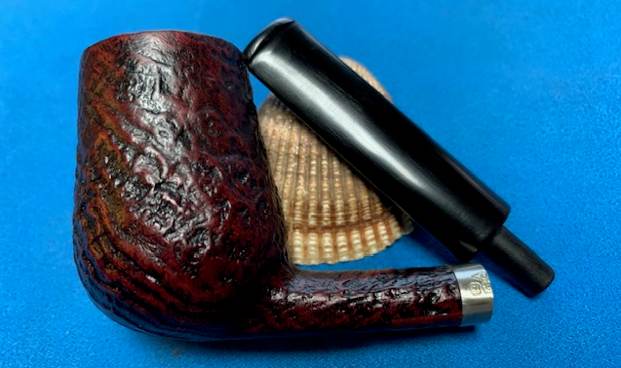
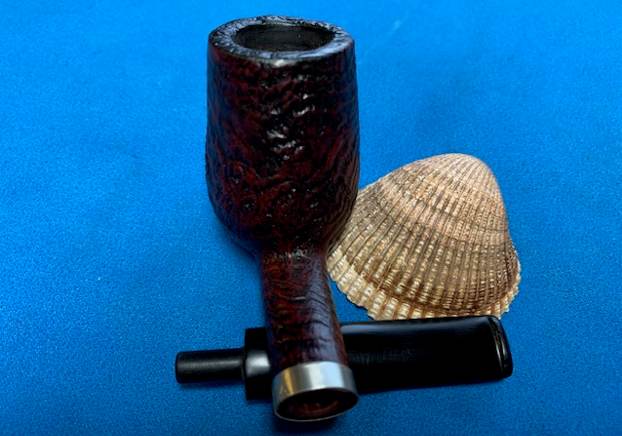
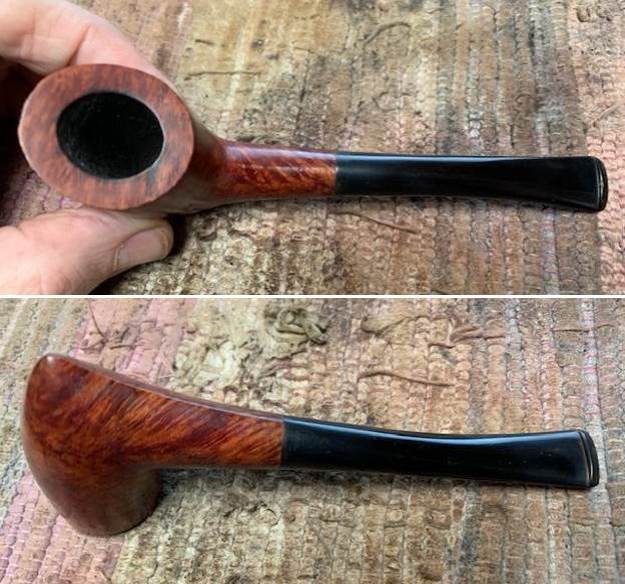
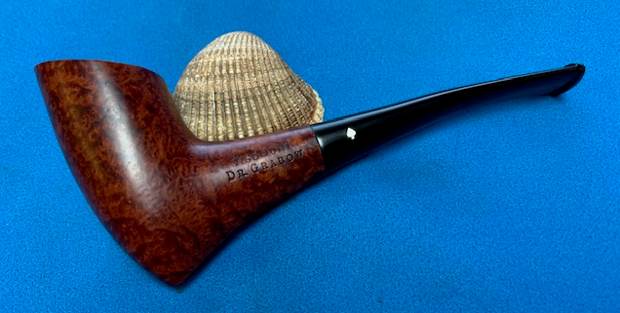
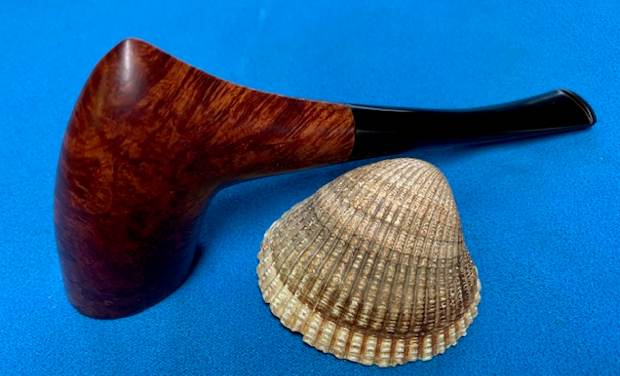
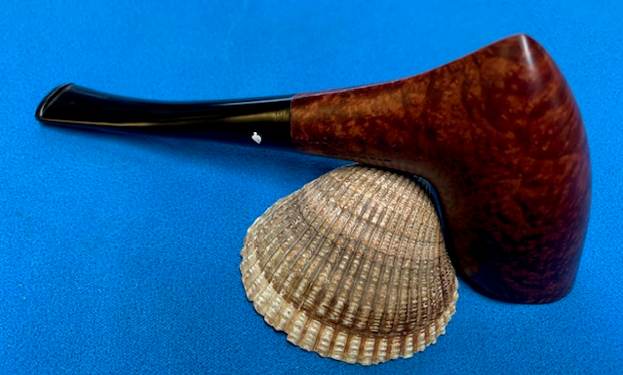
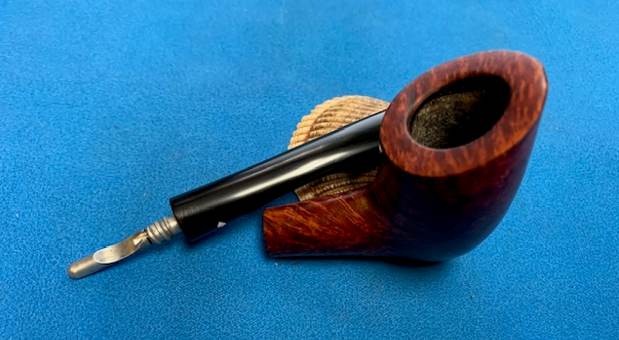
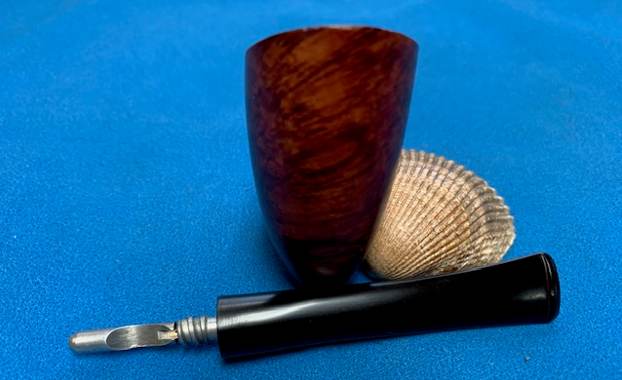
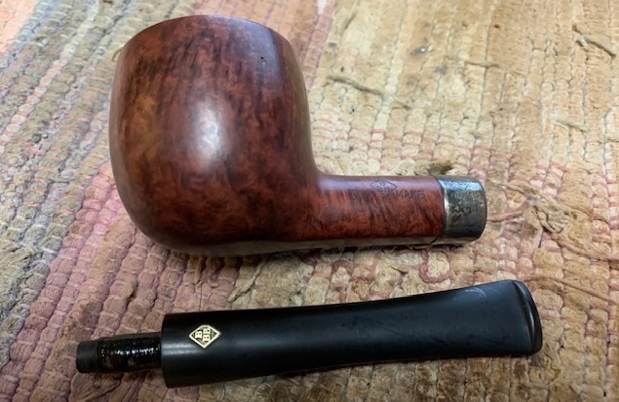
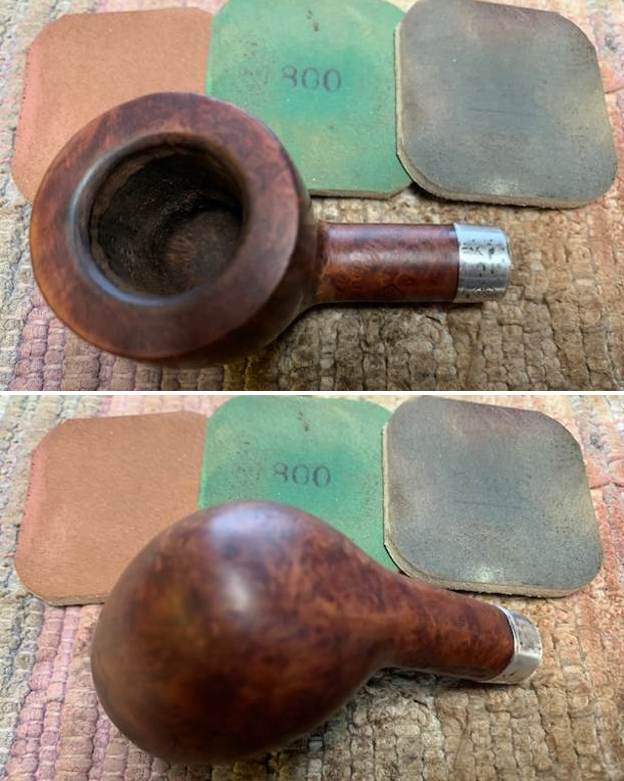
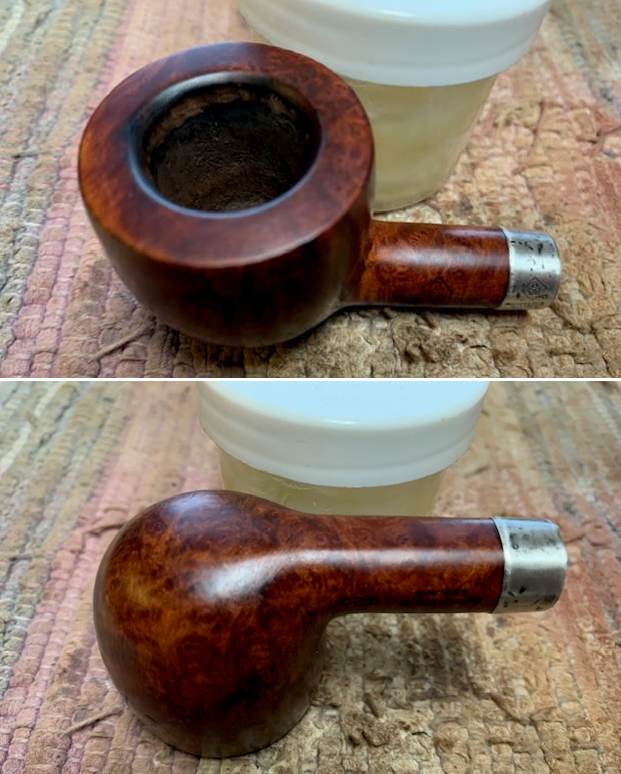
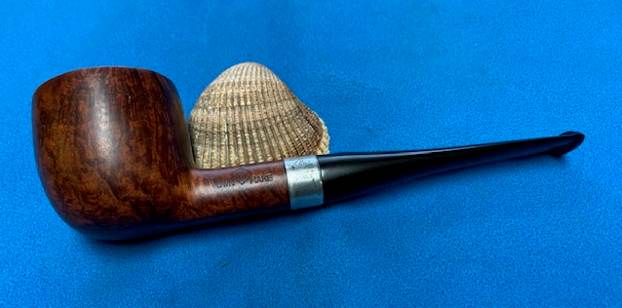
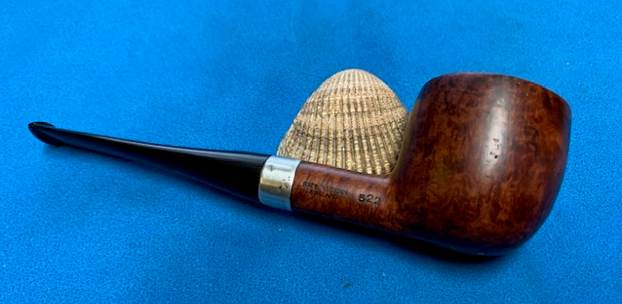
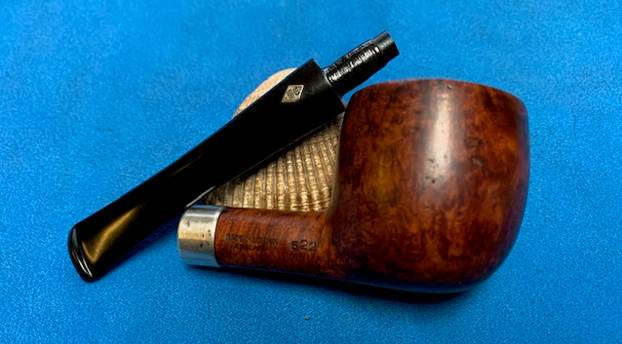
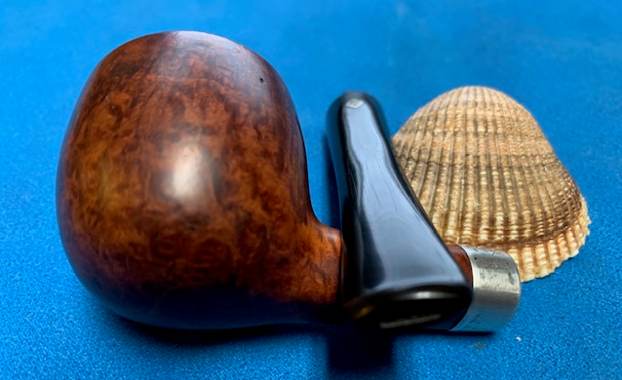
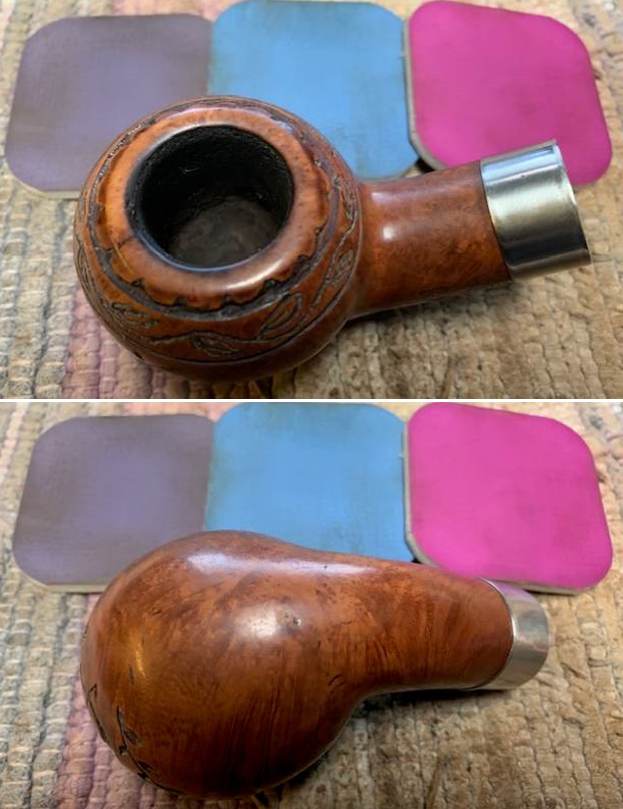
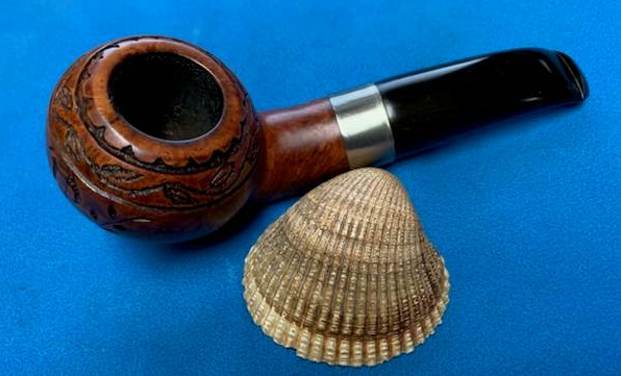
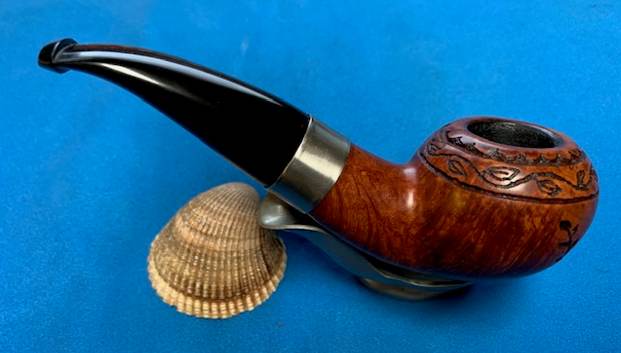
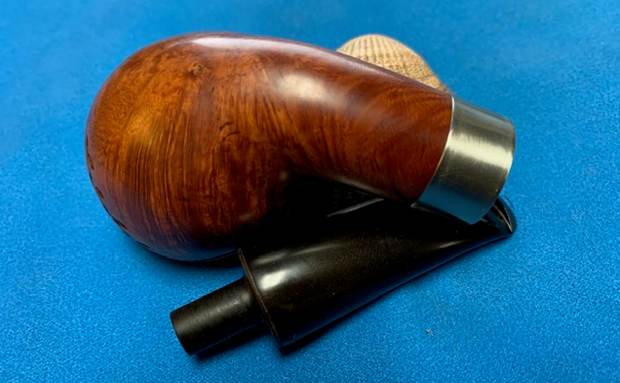
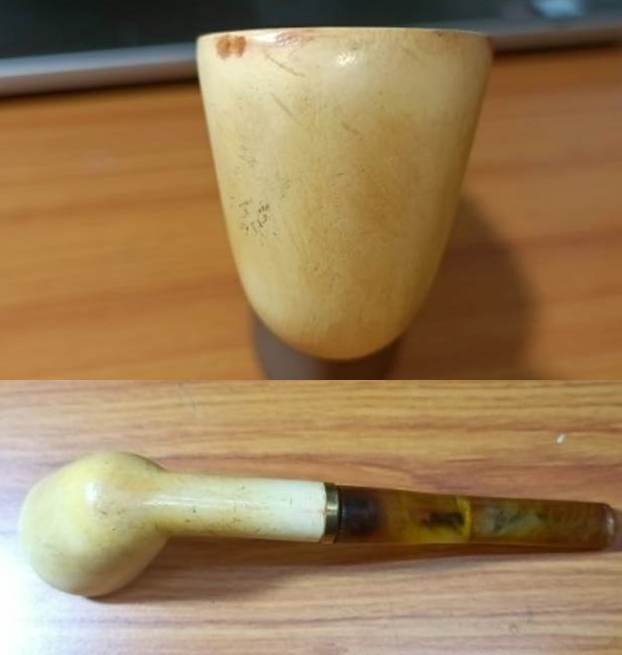
The Dublin shaped meerschaum pipe is in pretty good condition with a thin layer of cake in the chamber. The rim top surface is clean and in good condition with no dents or dings over the rim edges. The major issue on this pipe is with the stem. Somewhere down the line during its previous innings, the Amber stem on this pipe must’ve broken in half and was repaired using a multicolored acrylic or cheap plastic stem spliced in to place at the tenon end. The seating of the tenon in to the shank end is very loose and barely holds the walls of the mortise. This seems to be the main reason why this pipe was so sparingly used as evidenced by the thin layer of cake in the chamber. The following pictures will give a general idea of the condition of this pipe as it sits on my workbench. Detailed Inspection
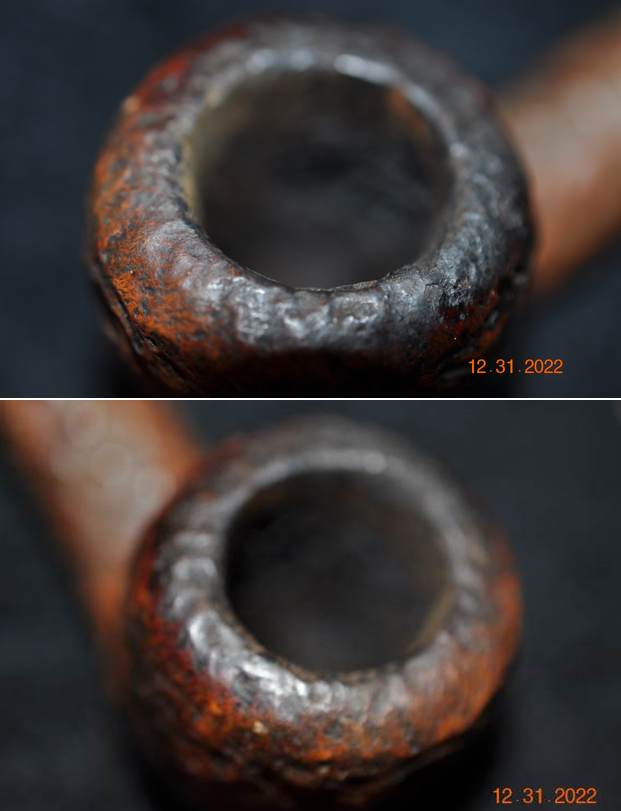
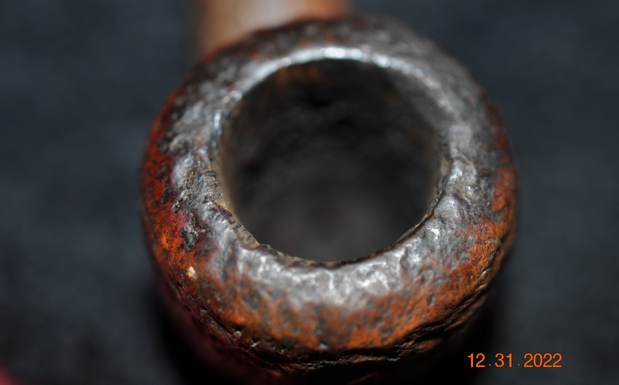
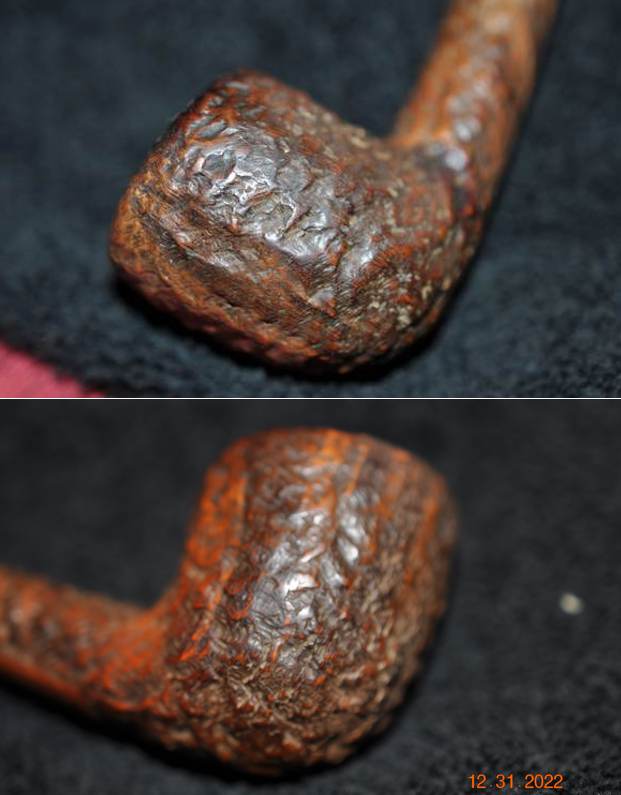
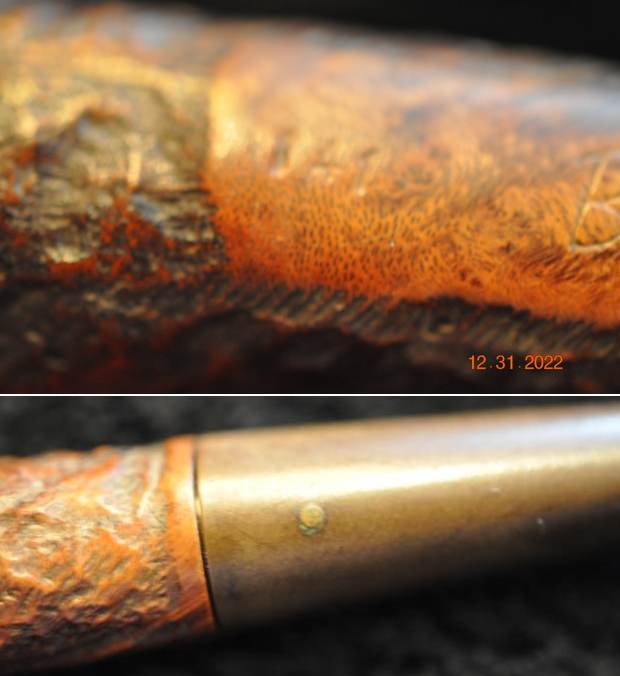
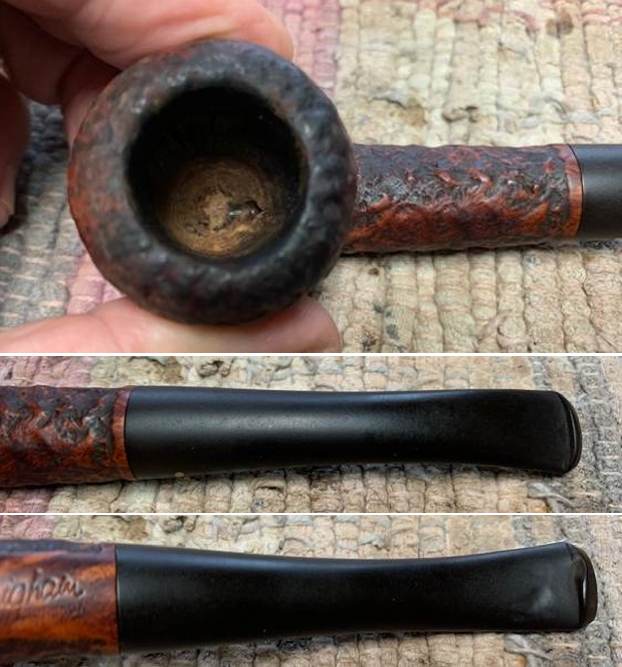
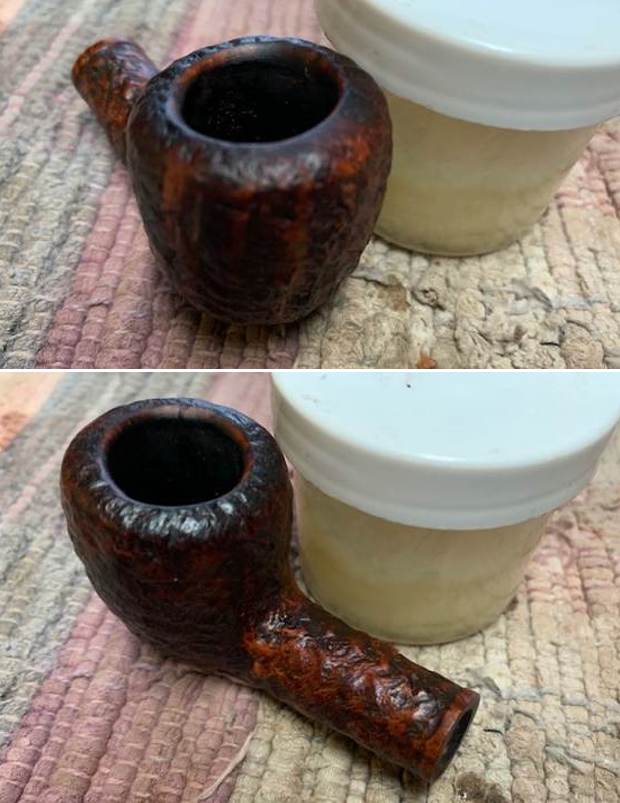
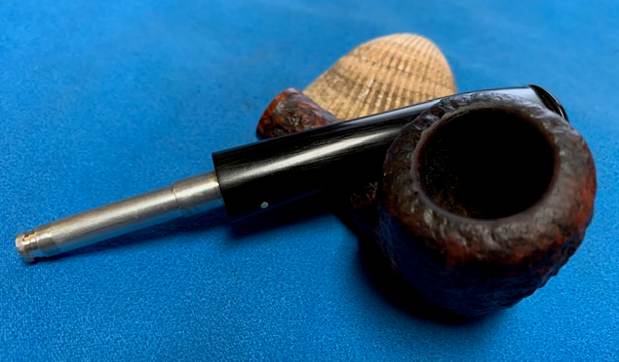
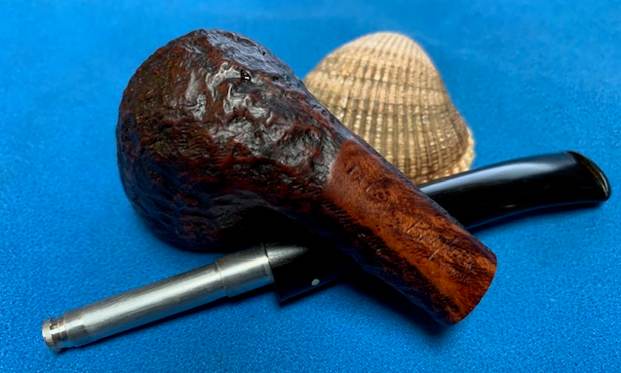
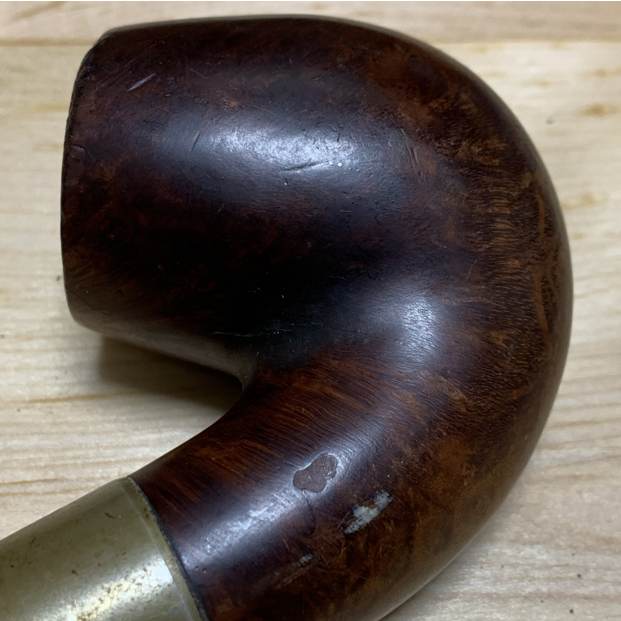
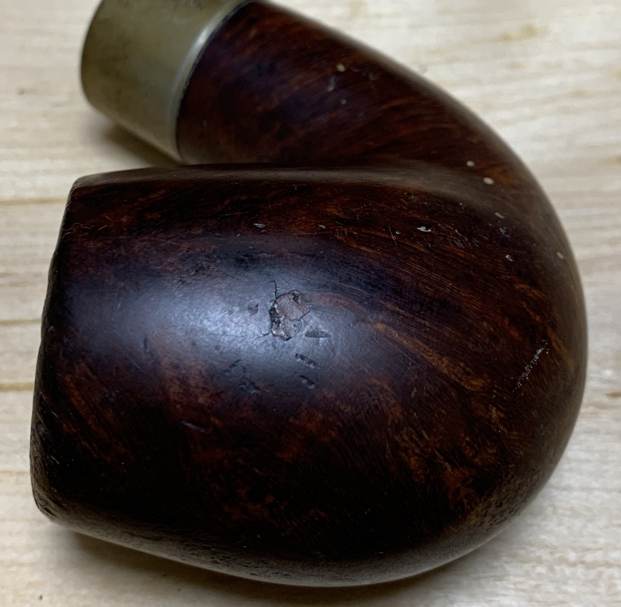
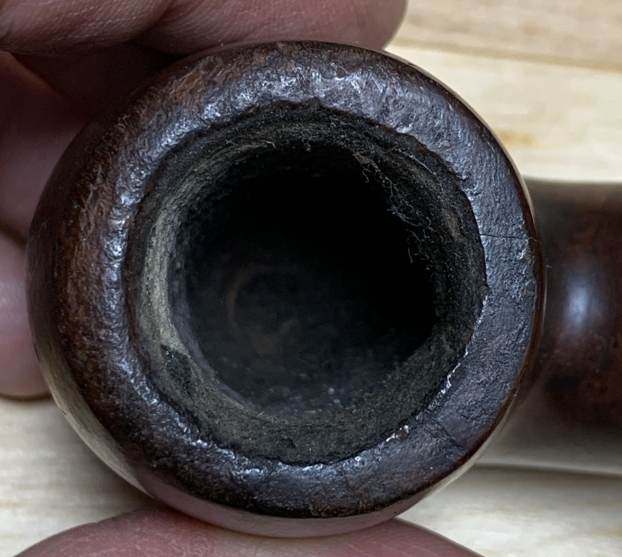
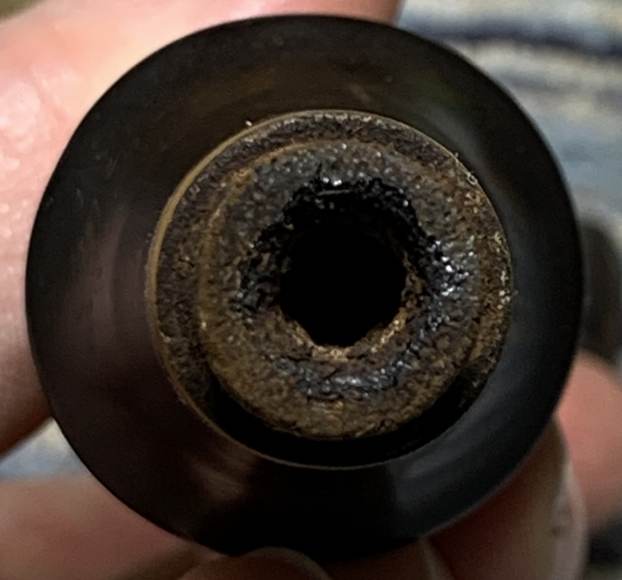
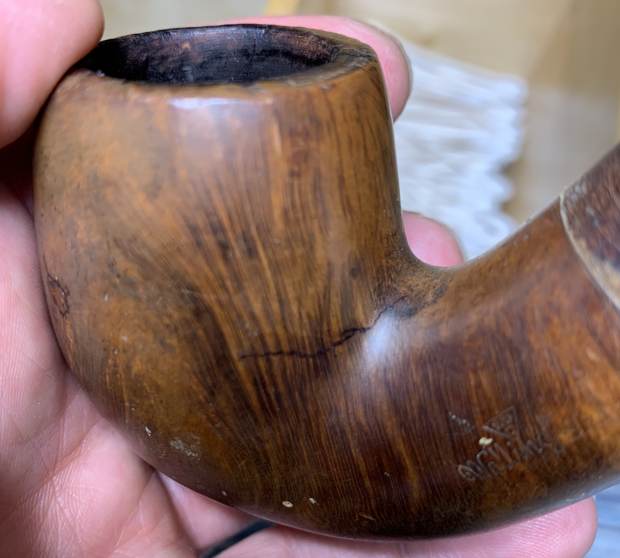
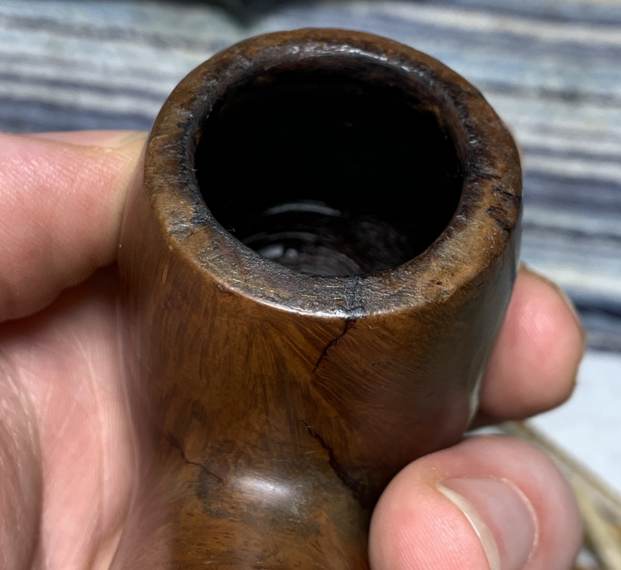
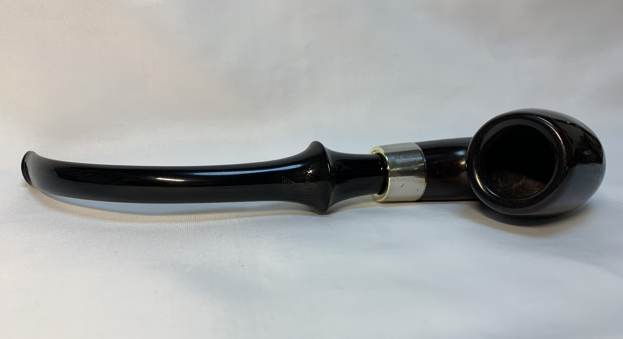
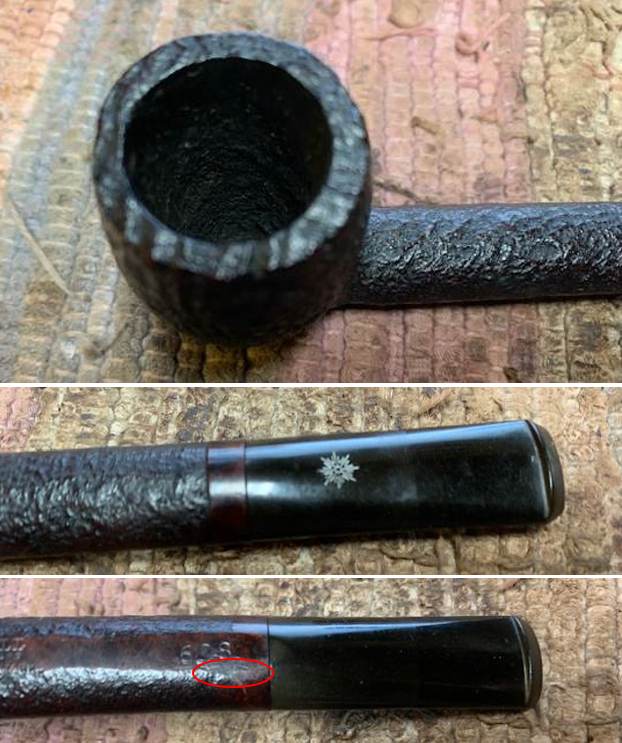
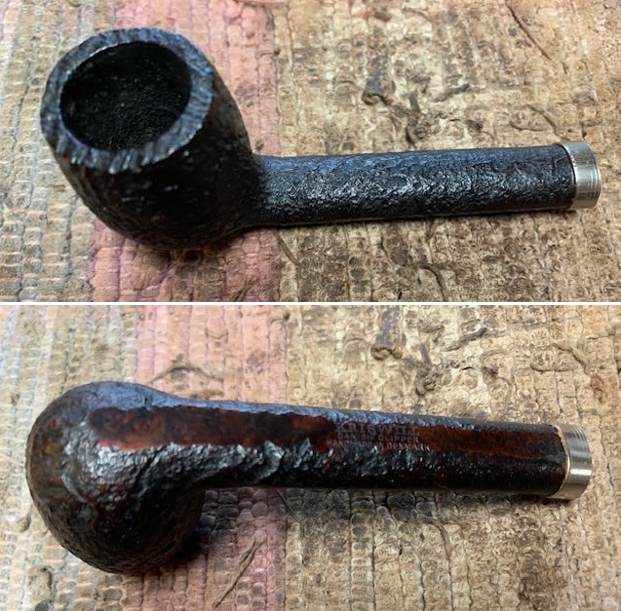
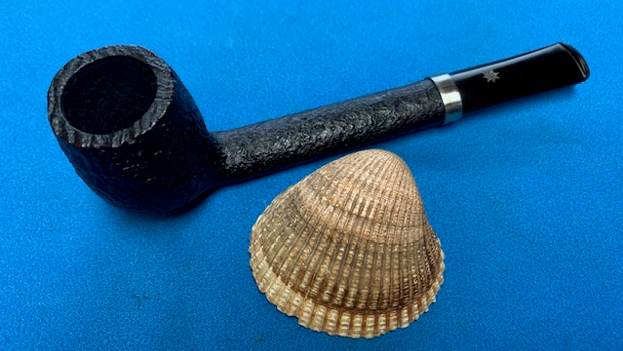
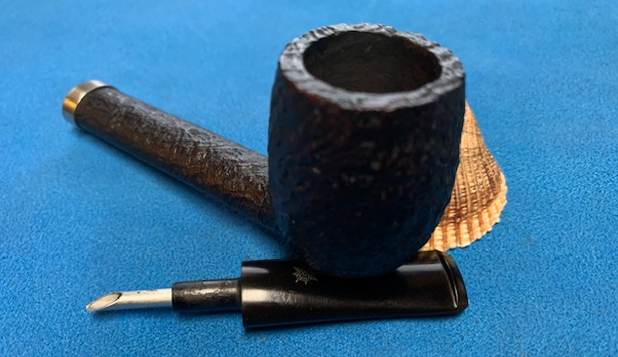
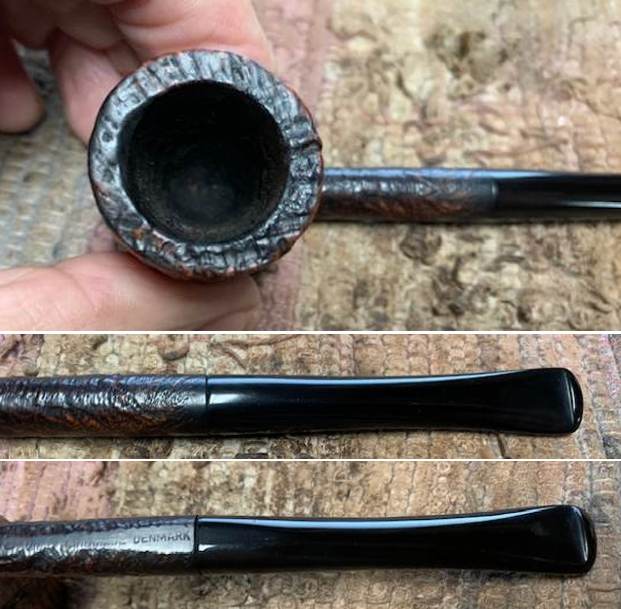
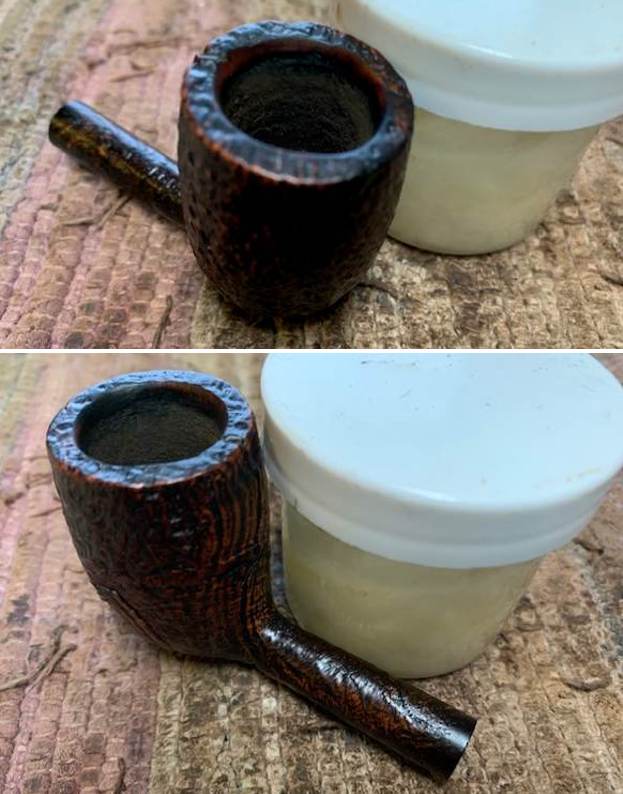
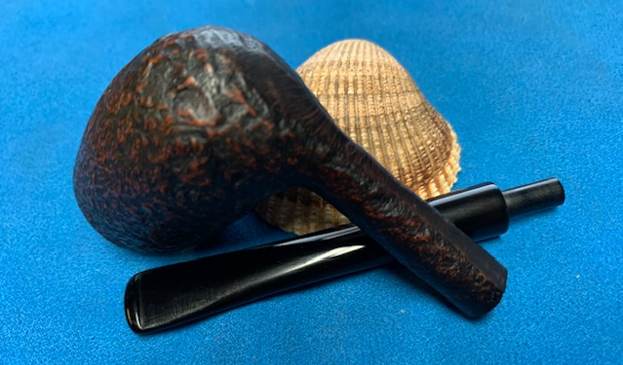
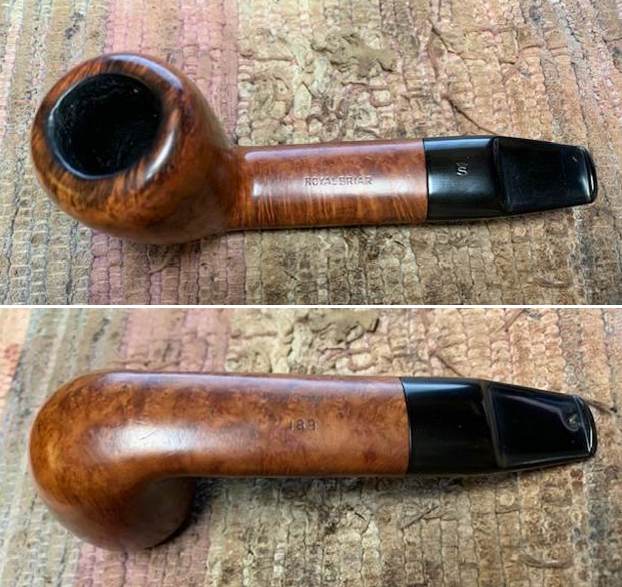
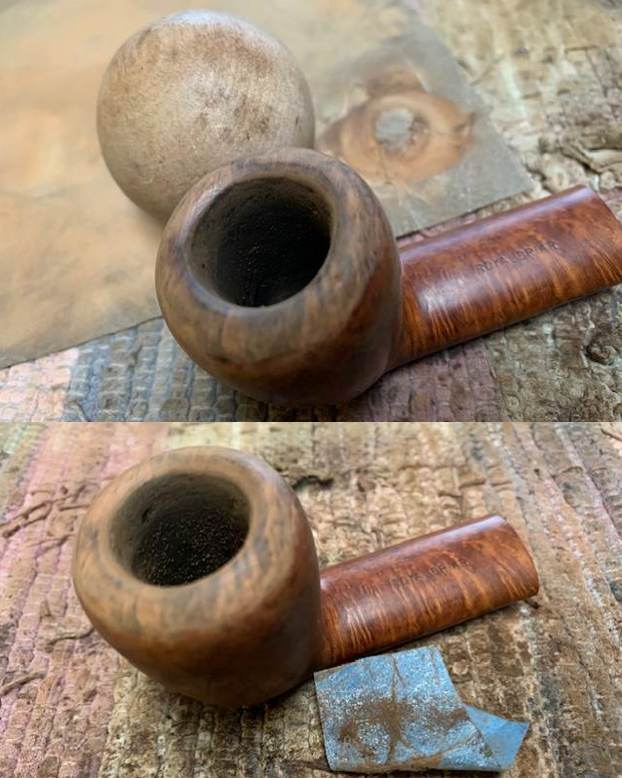
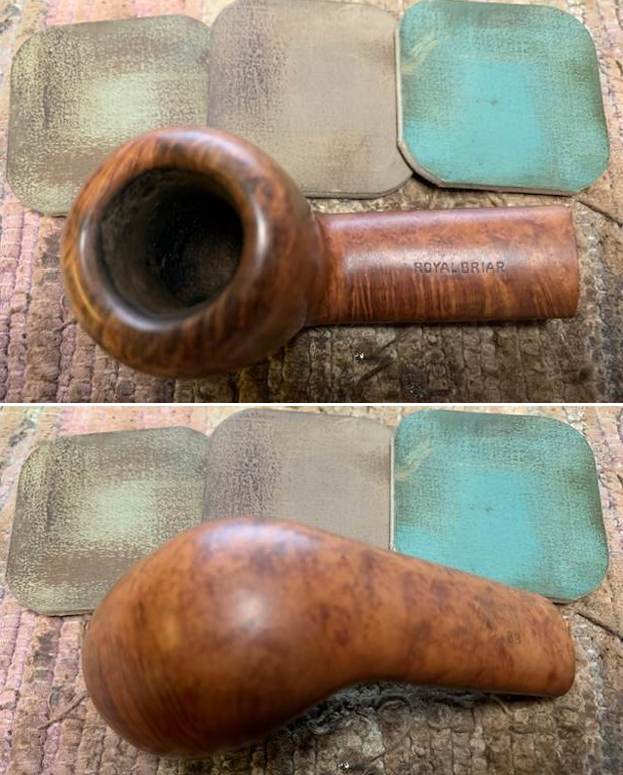
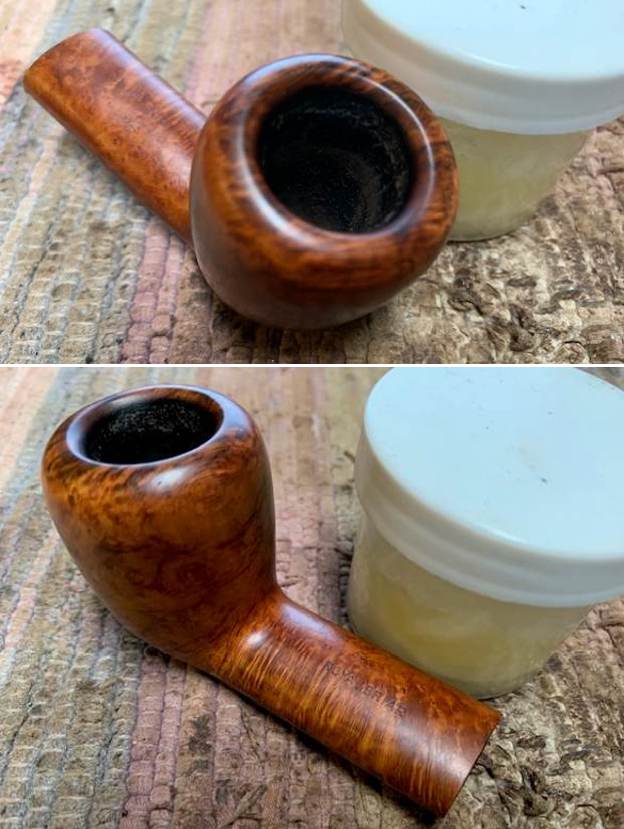
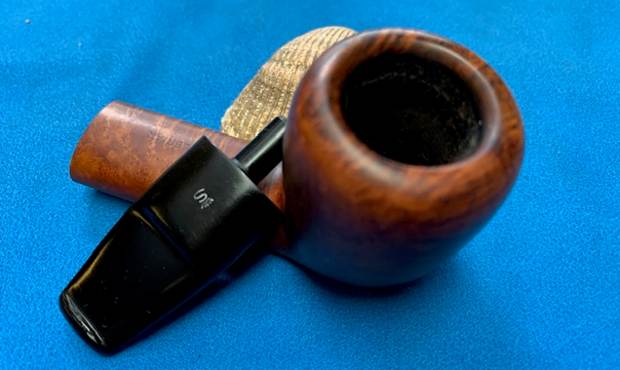
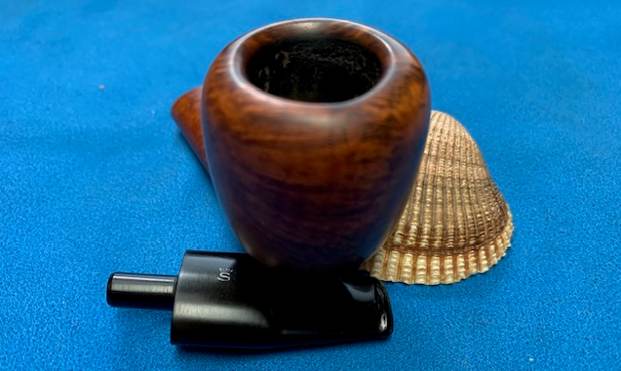
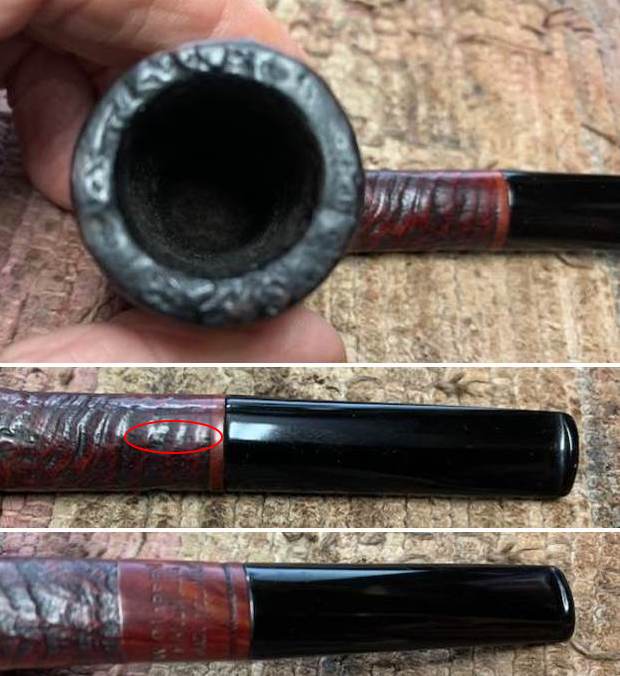
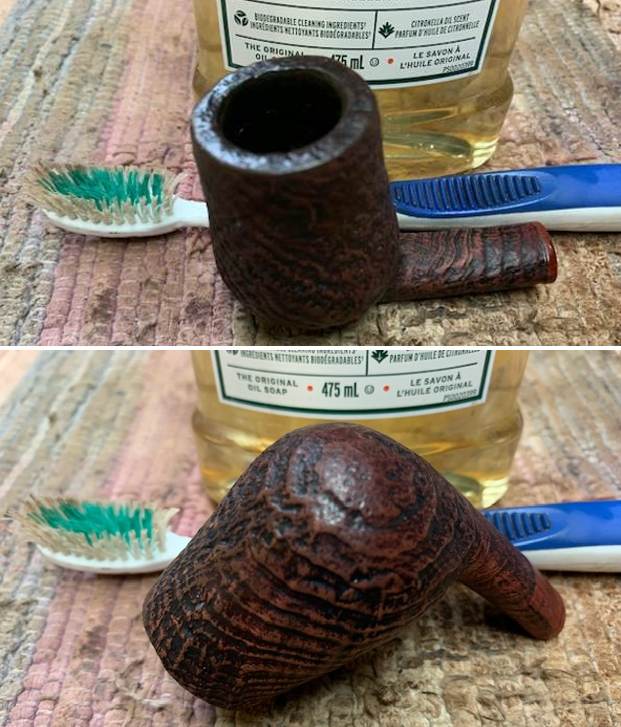
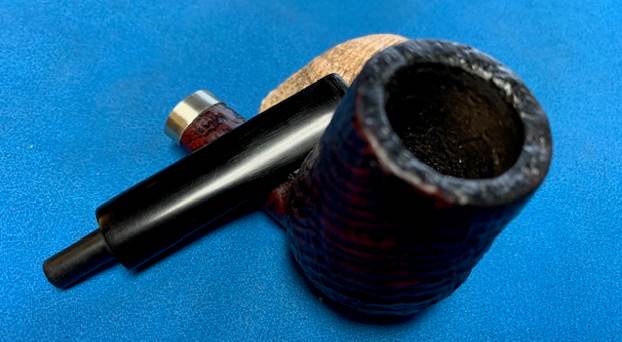
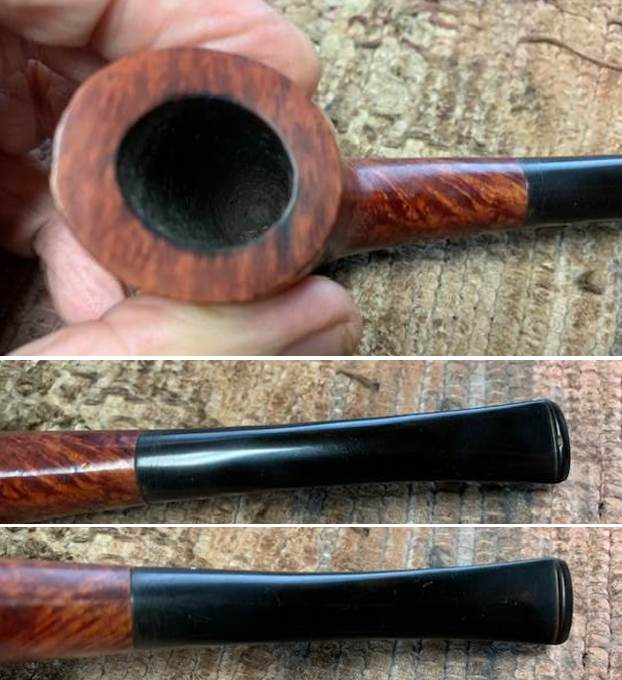
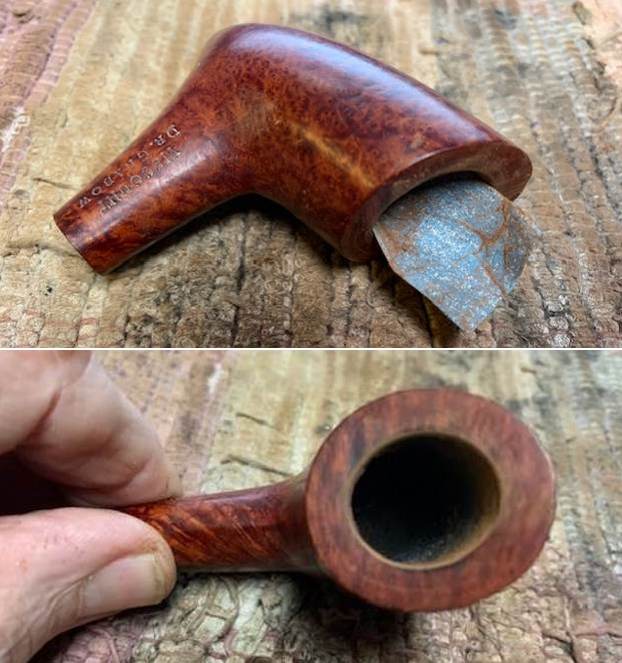
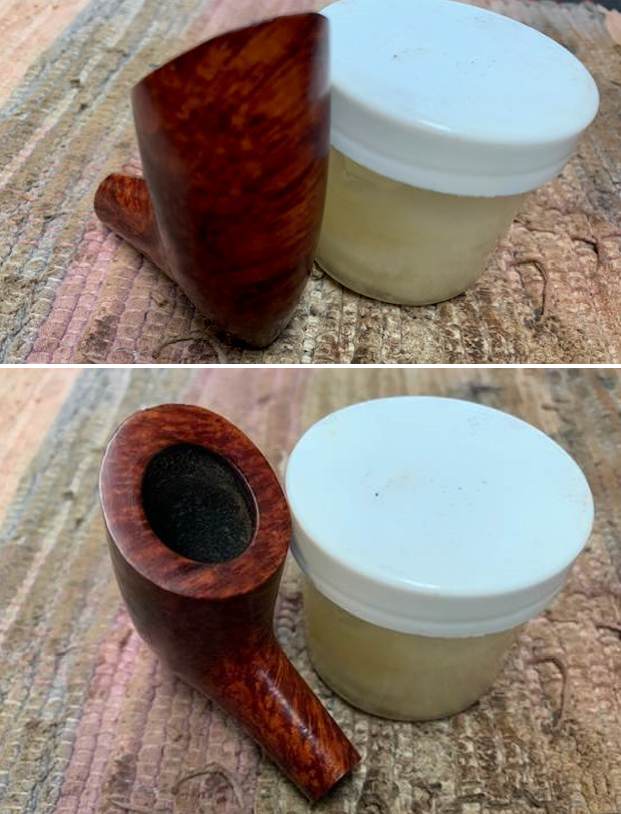
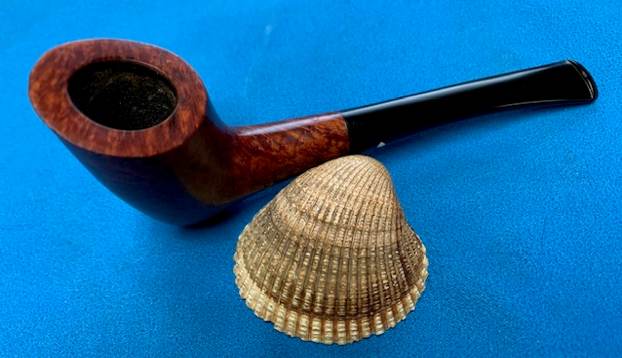
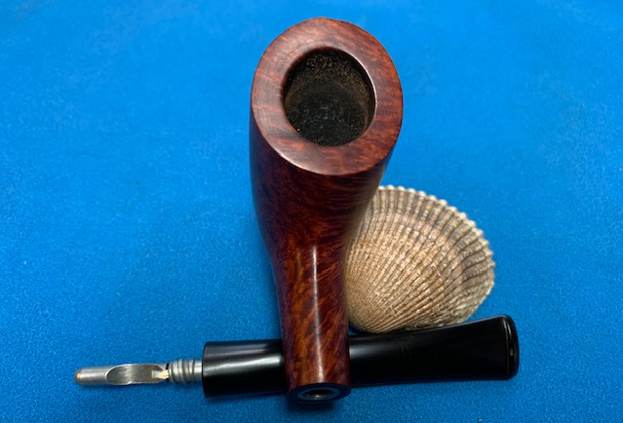
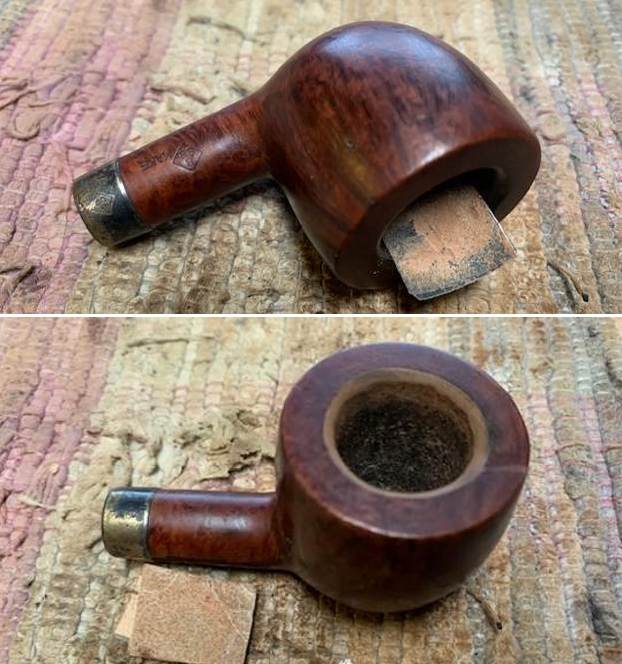
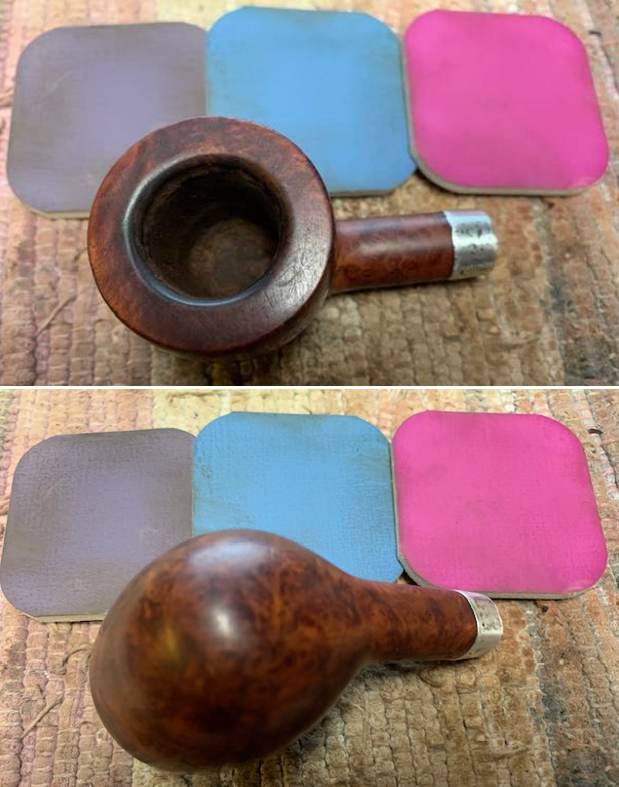
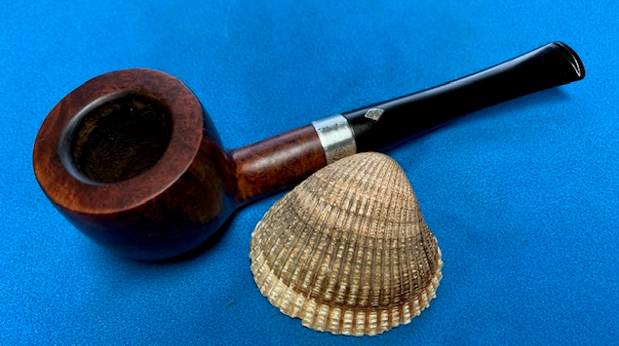
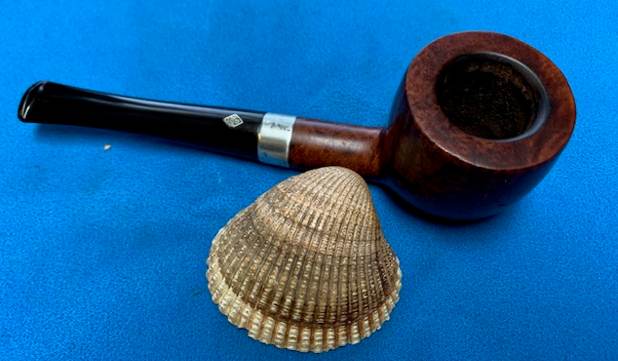
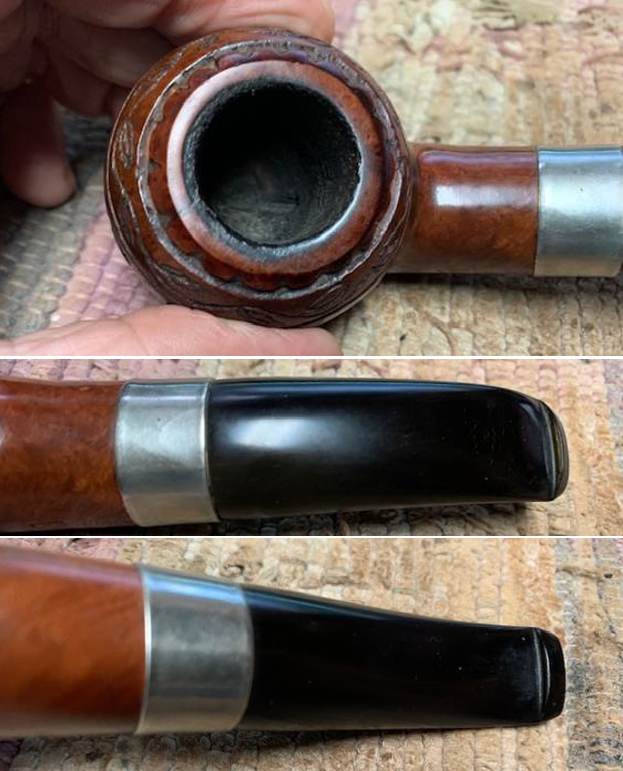
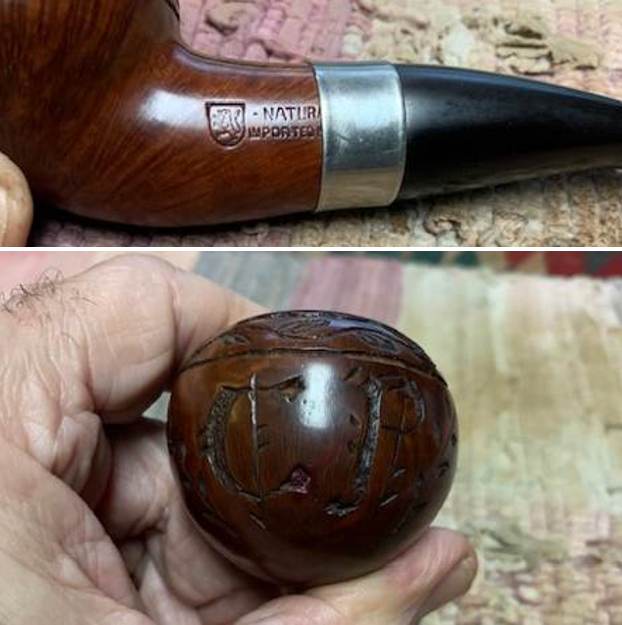
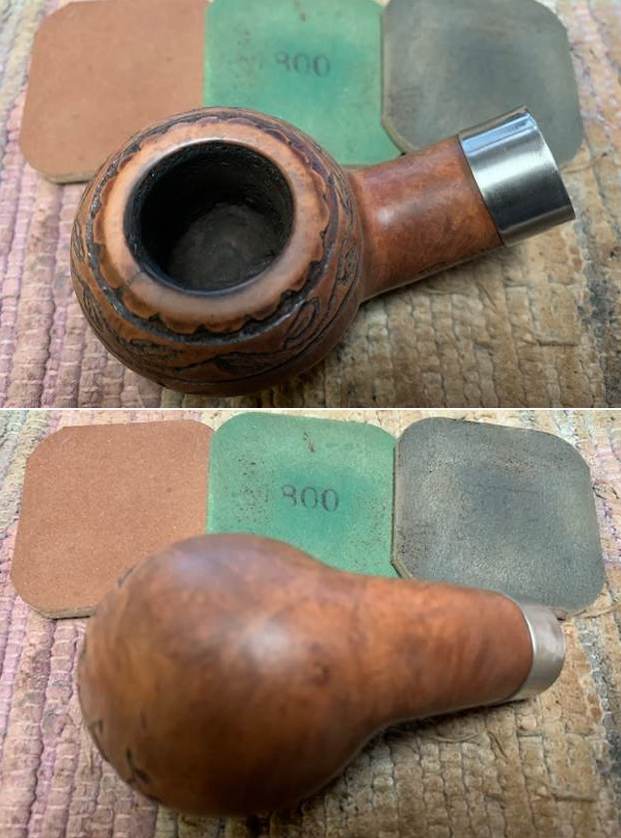
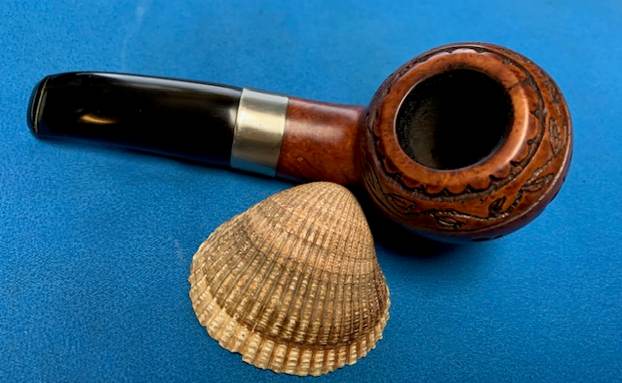
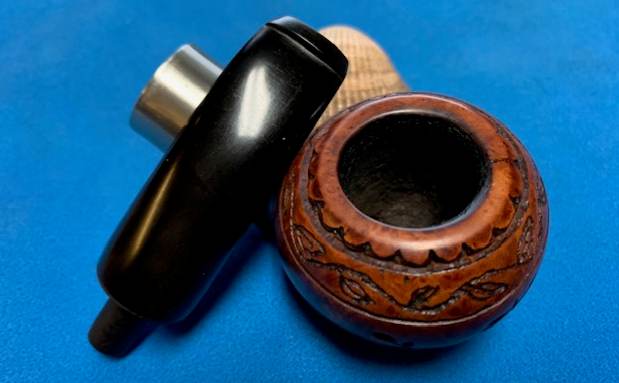
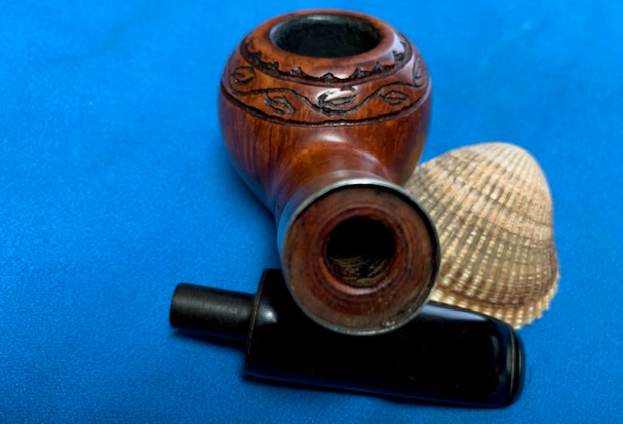
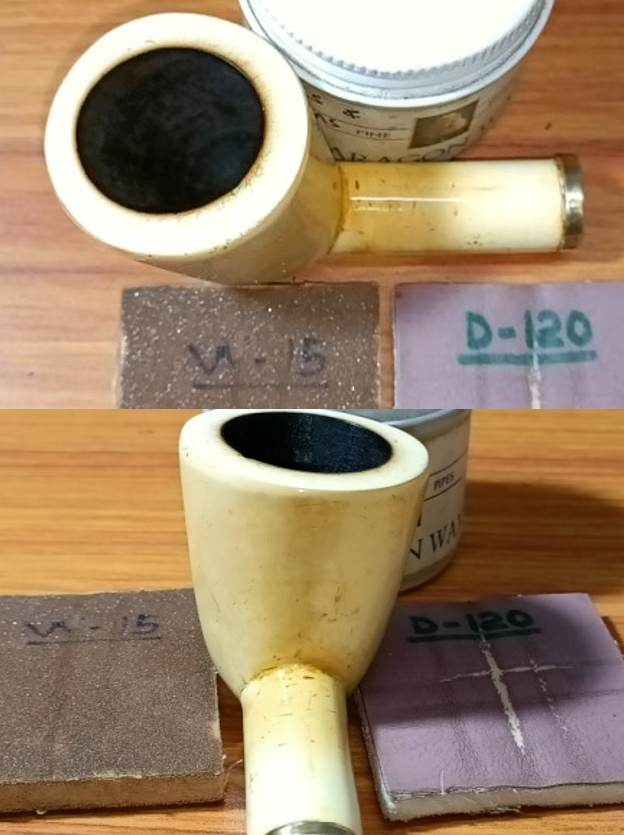
The chamber is clean with a thin layer of even cake. The rim top surface is clean and in pristine condition without any dents and dings over the rim top. The inner and outer rim edges are smooth, even and without any darkening along the edges. The rim appears thinned out in 12 o’clock direction along the outer rim edge. I think it is the design feature which has the stummel in a slight inwards turn near the upper surface. However, the chamber itself is perfectly rounded. 
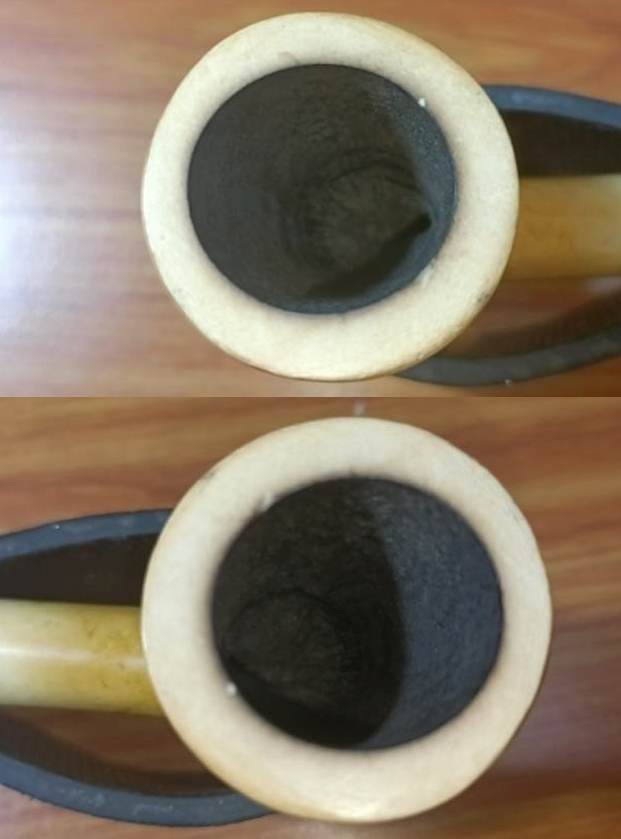
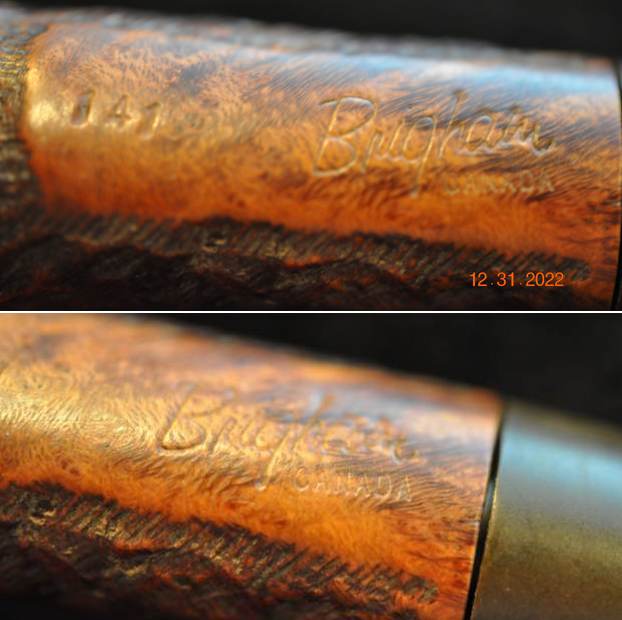
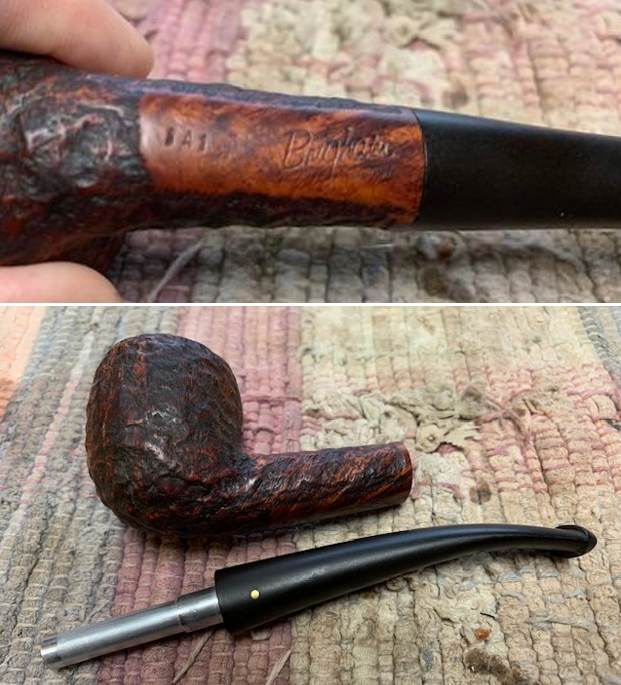
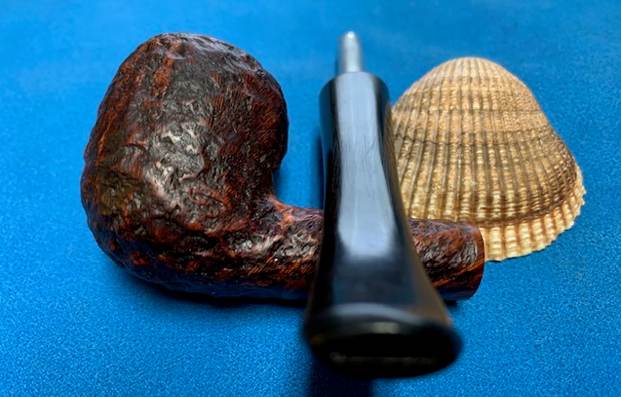
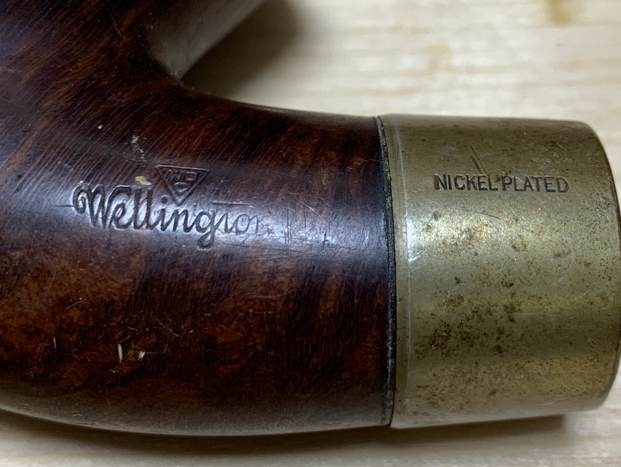
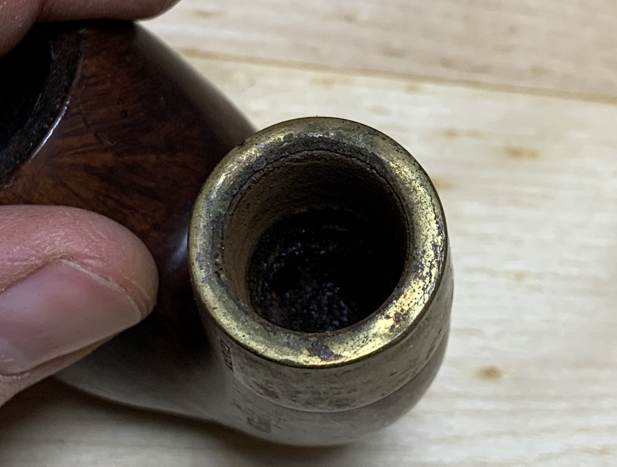
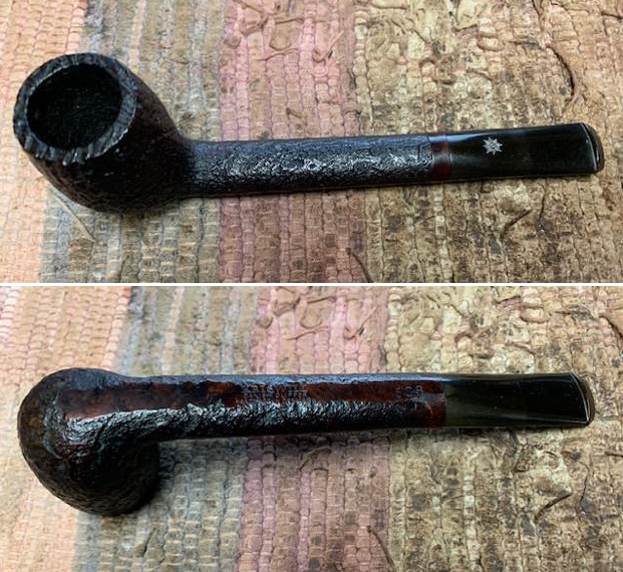
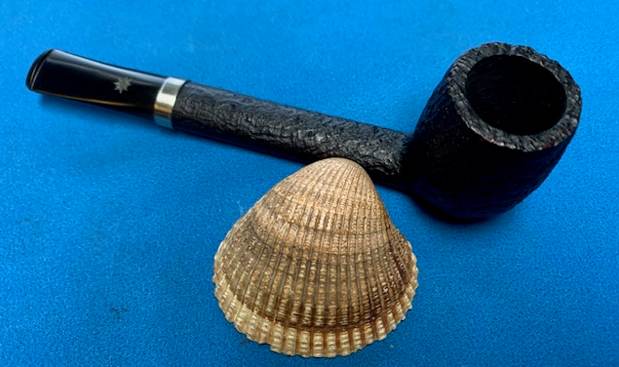
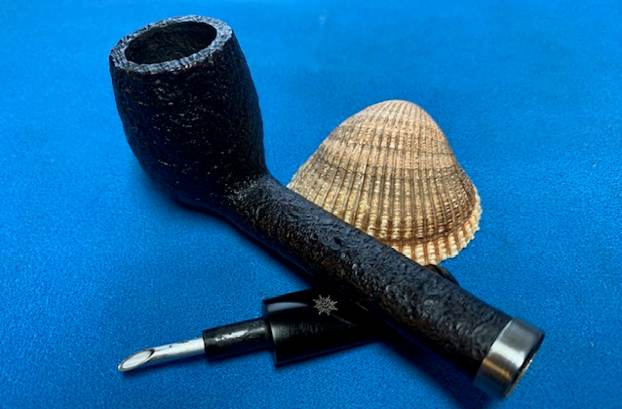
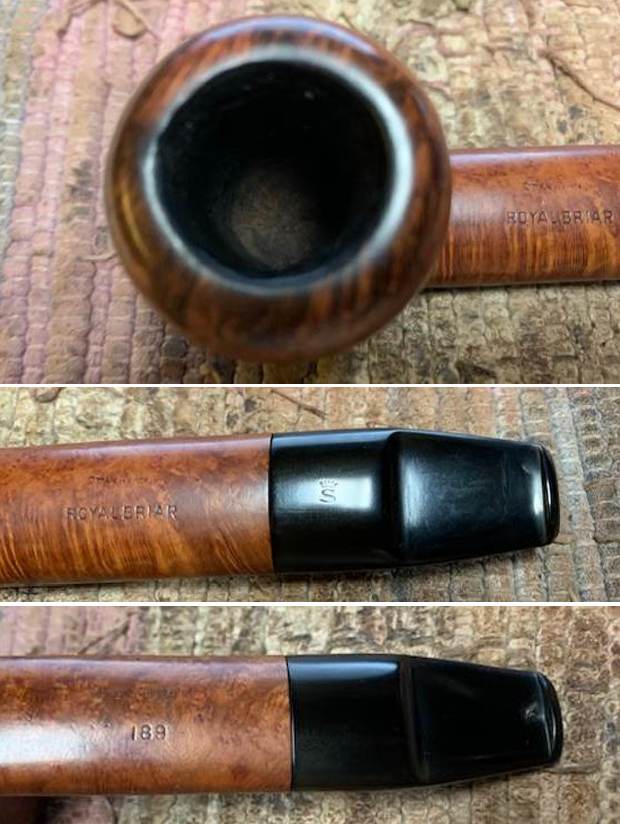
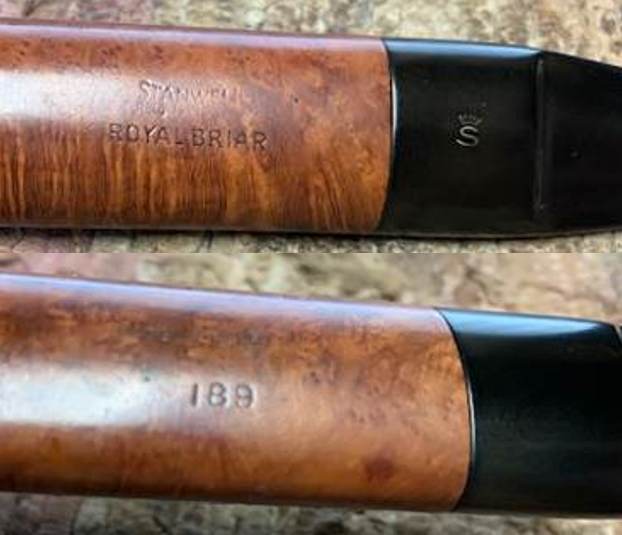
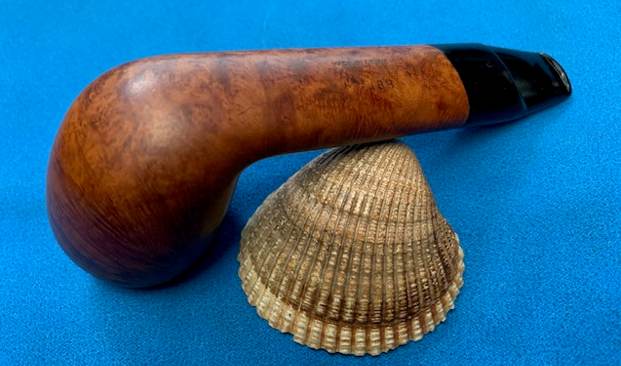
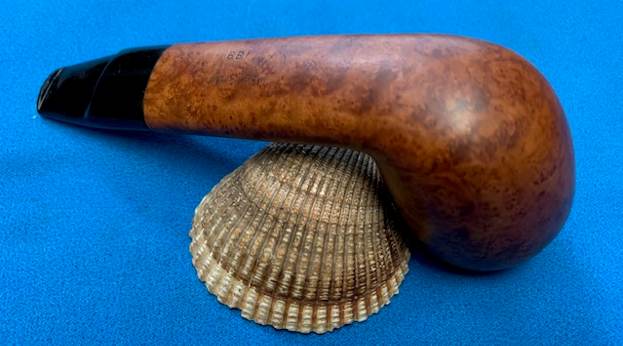
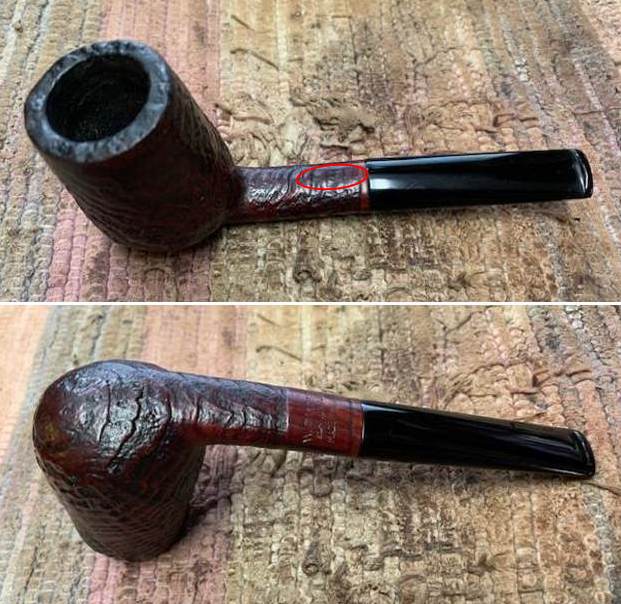
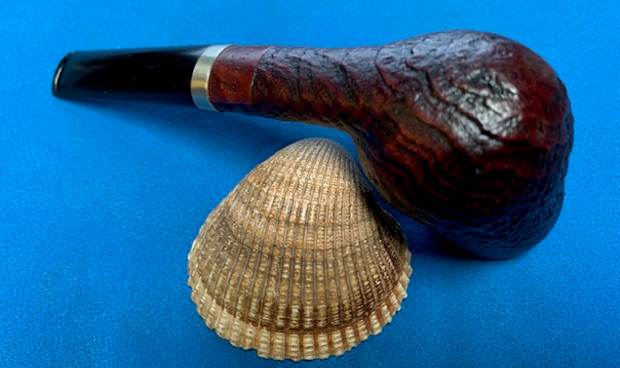
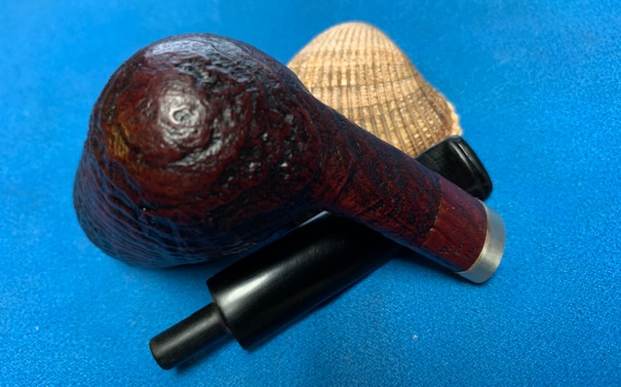
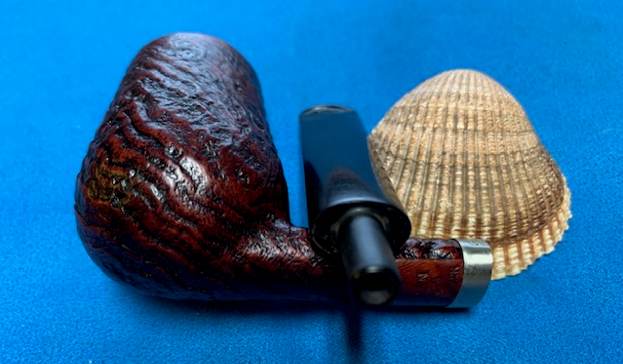
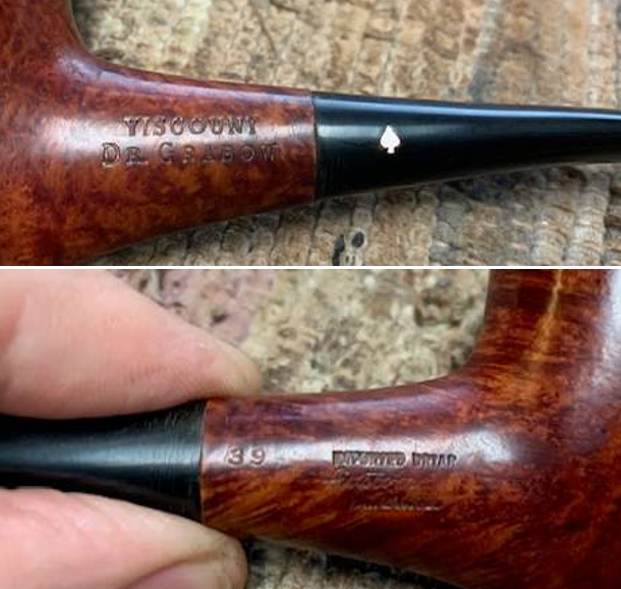
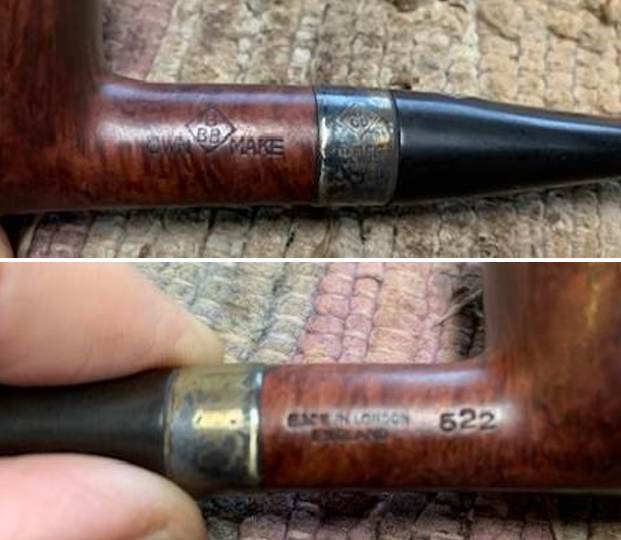
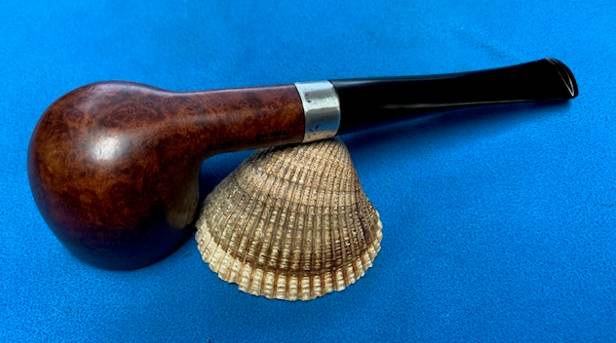
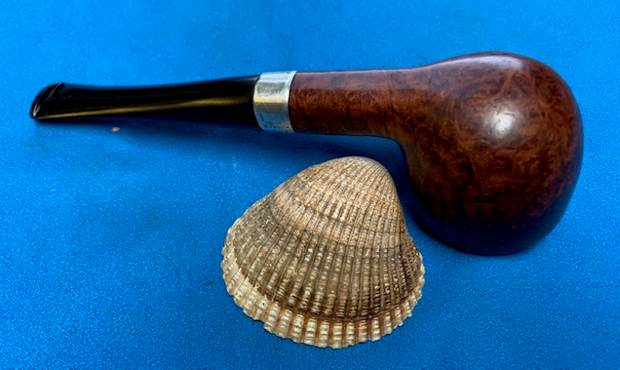
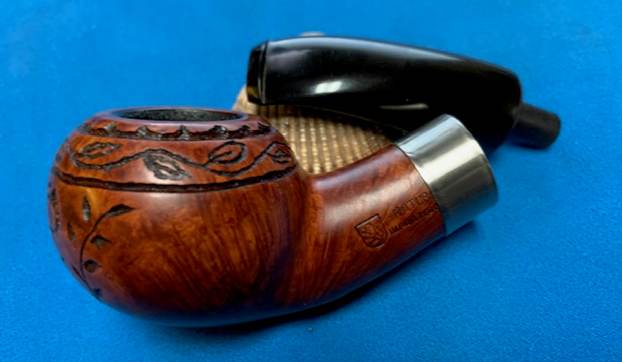
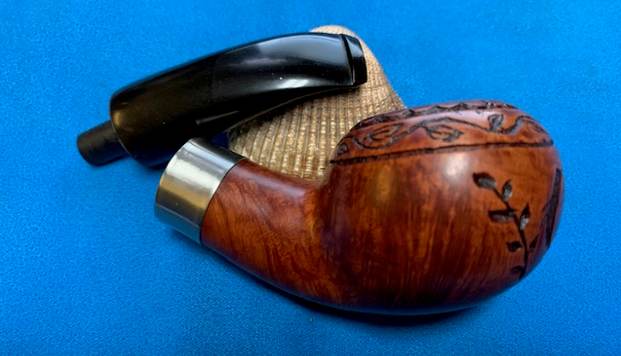
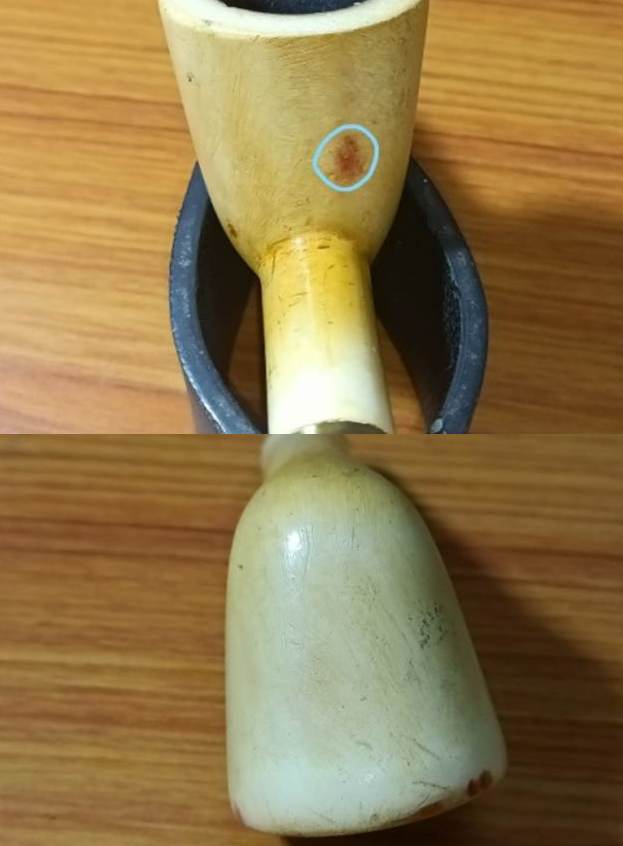
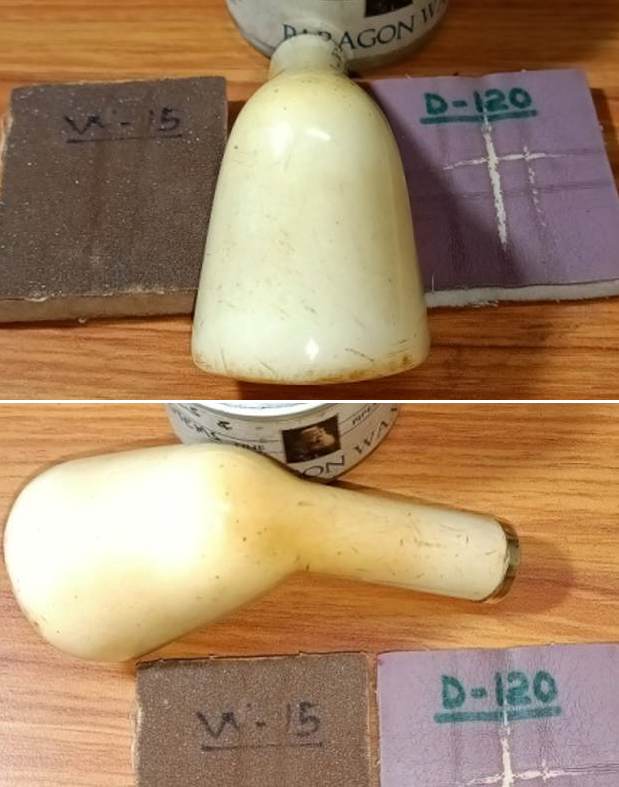
The stummel surface shows a few scratches, but none serious enough to draw away your attention from the beauty of the bowl. The inward turning shape to the upper surface of the stummel that I have mentioned above is indicated by green arrows. There are a couple of dark spots over the stummel surface and encircled in pastel blue. The shank end shows residual white tape and is indicative of an earlier repair work to the shank end. The band, though identical to the other pipe in this set, appears to be fixed after the pipe was completed. The white Teflon tape, in all probability, was used to tighten the seating of the threaded tenon in to the mortise. However, this was an utter failure as the tenon is too loose in the mortise and is the reason for this pipe being so sparingly used. 
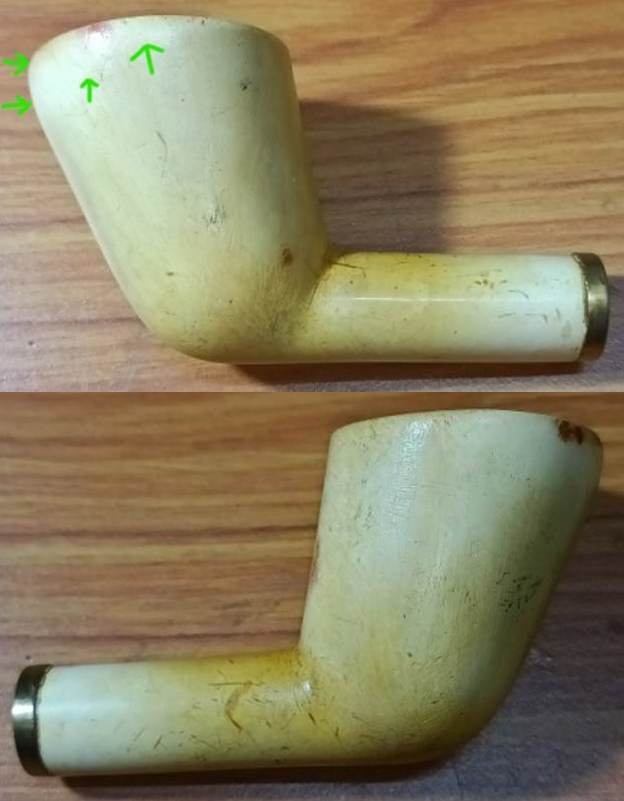
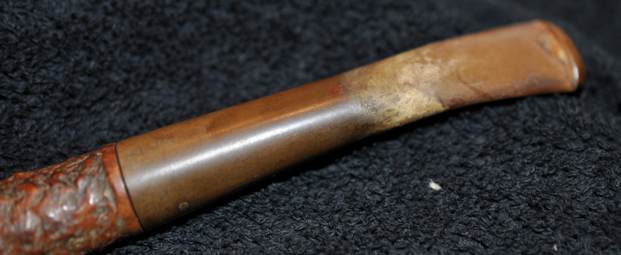
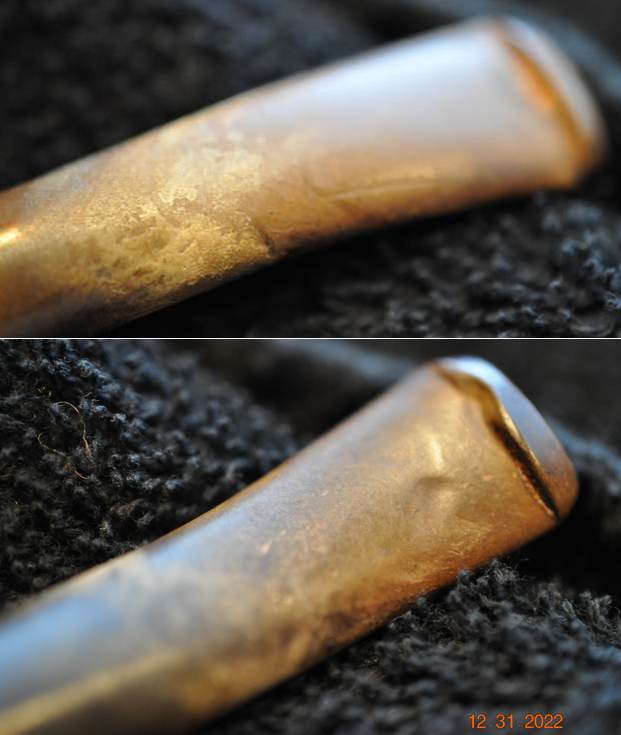
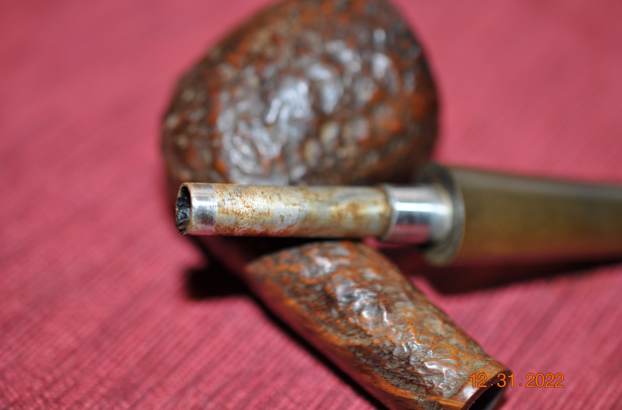
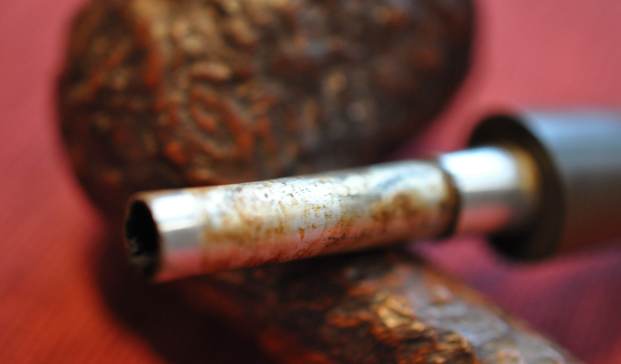
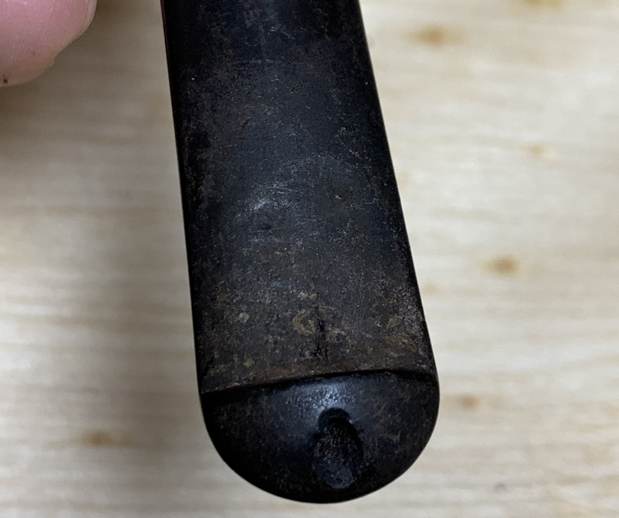
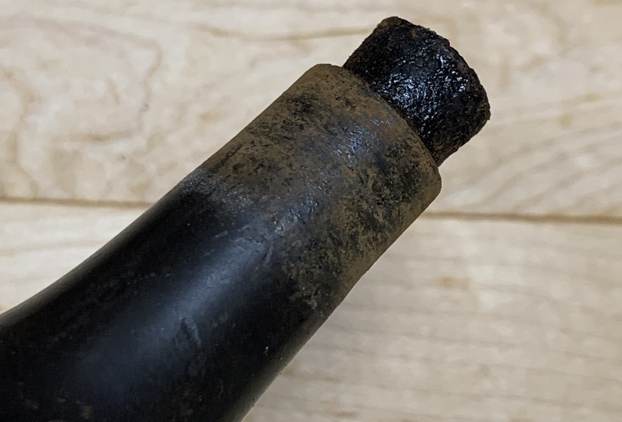
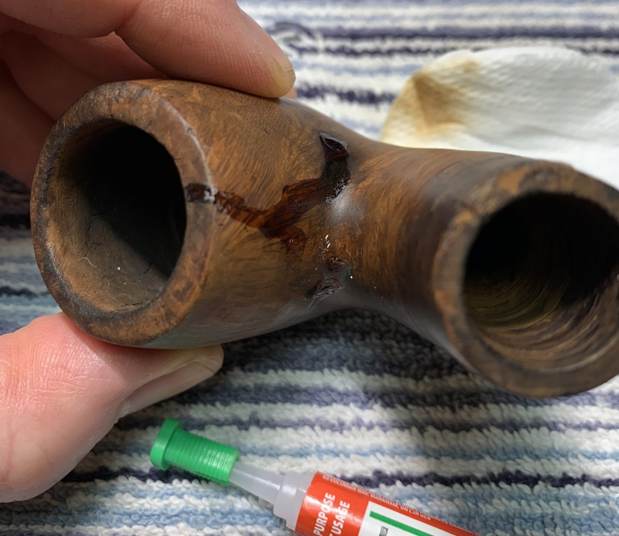
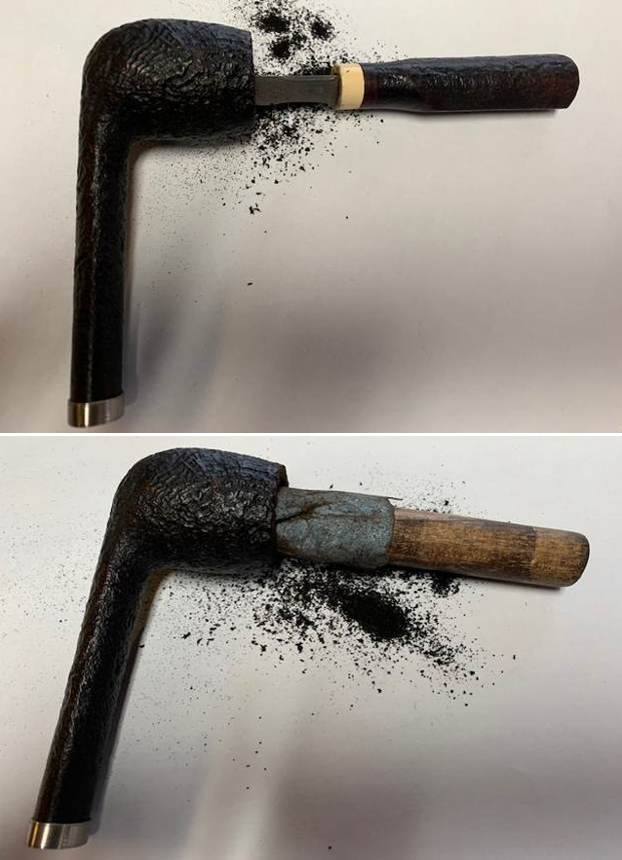
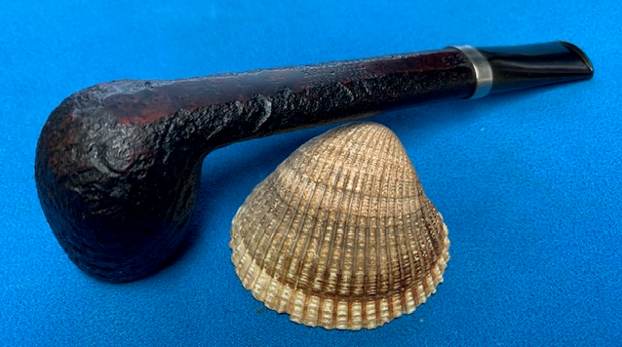
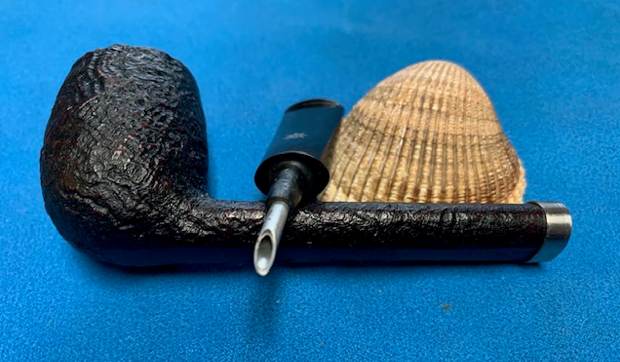
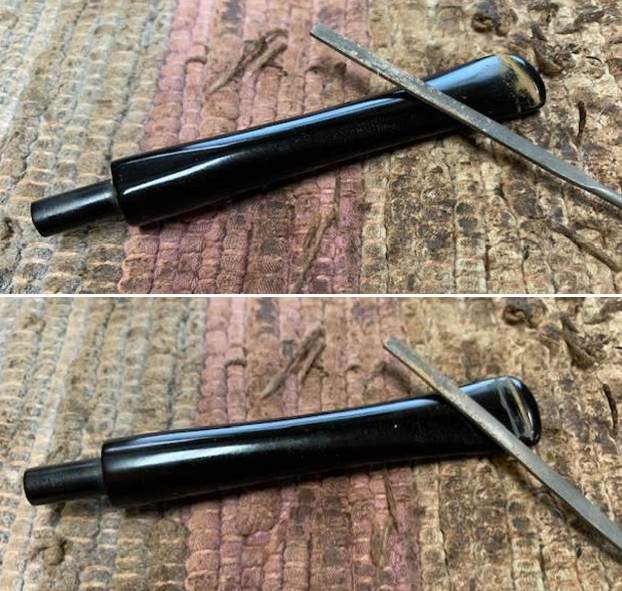
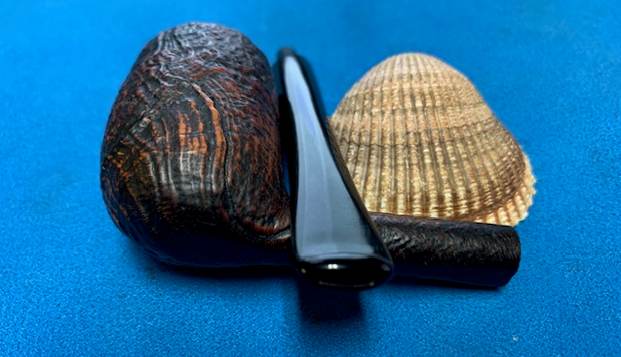
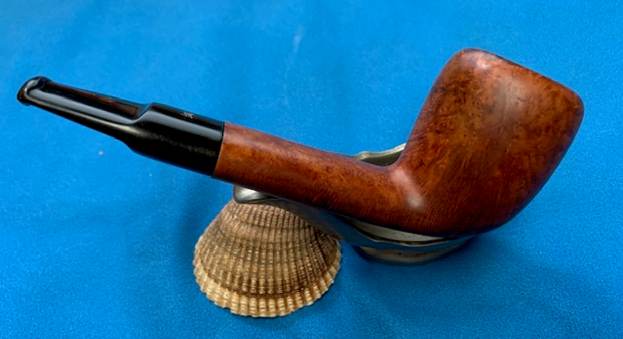
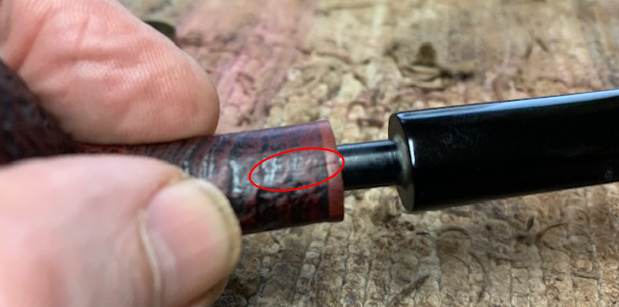
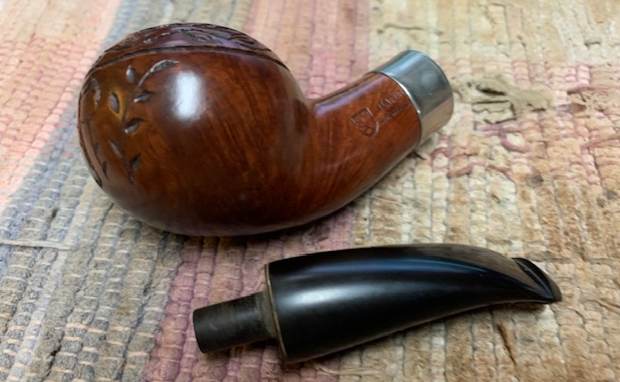
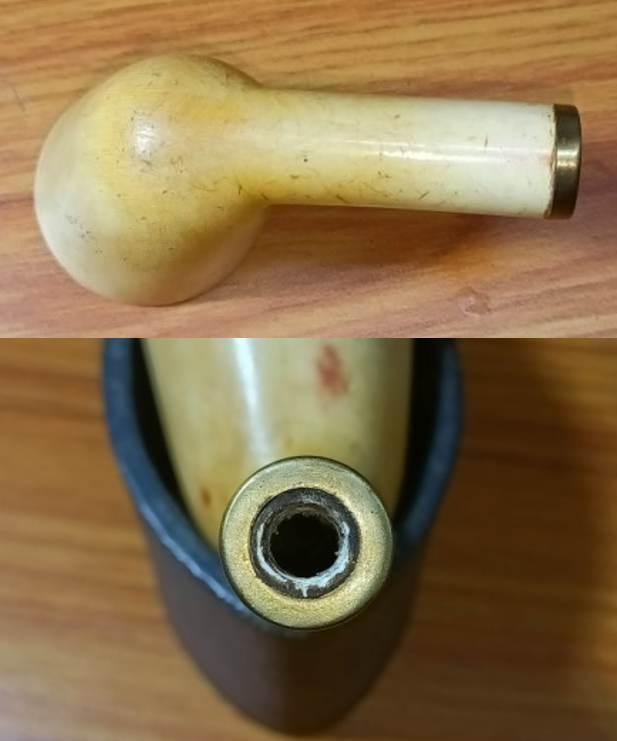
The stem is where maximum repair work is required. The stem has been spliced and repaired previously with the rounded slot end made of Amber while the tenon end is a similar colored variegated acrylic or plastic stem. The joint is easily discernible and is encircled in Red. Though the stem airway is aligned, the stem shape is not. The mismatched stem shape is indicated by green. The tenon is too short and filthy and very loose fitting in the shank. The slot end has tooth indentations and chipped surface. Given the present condition of the stem and its seating in to the mortise, I shall be replacing the stem itself to make it both functional and aesthetically appealing to the eye (that’s what the intention is!). The Process
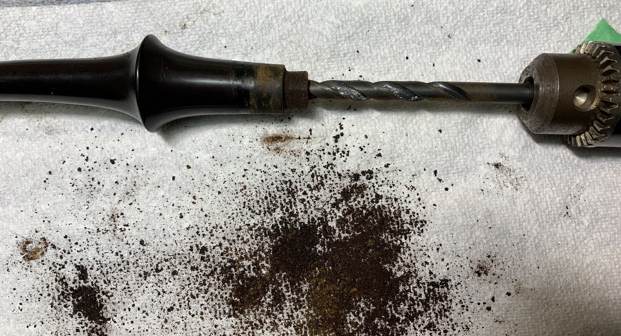
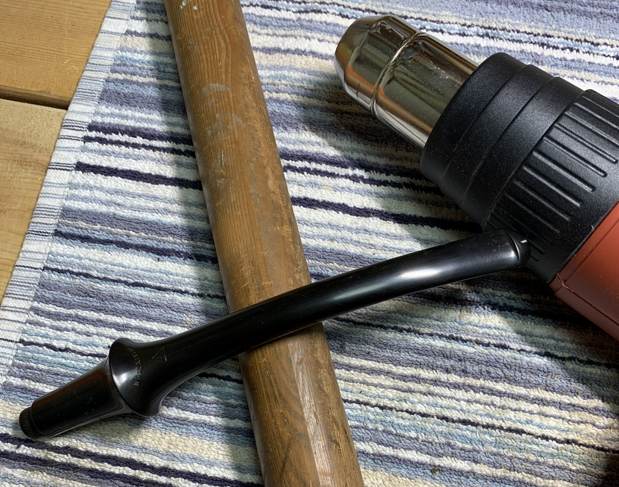
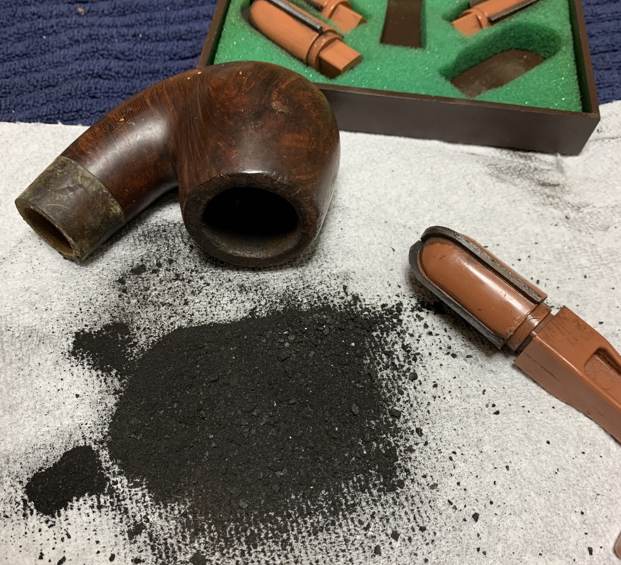
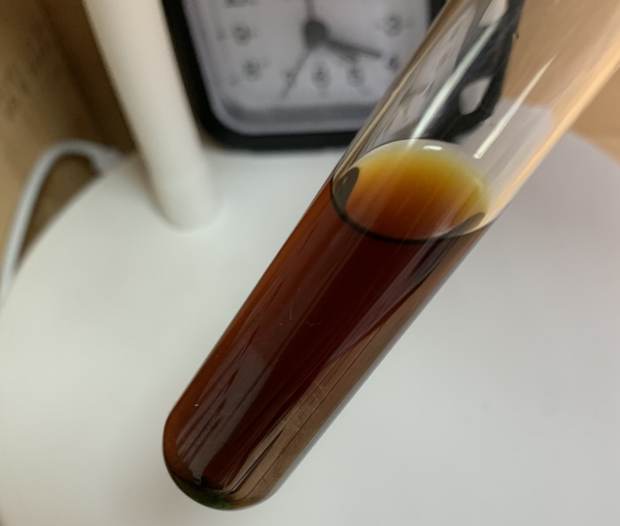
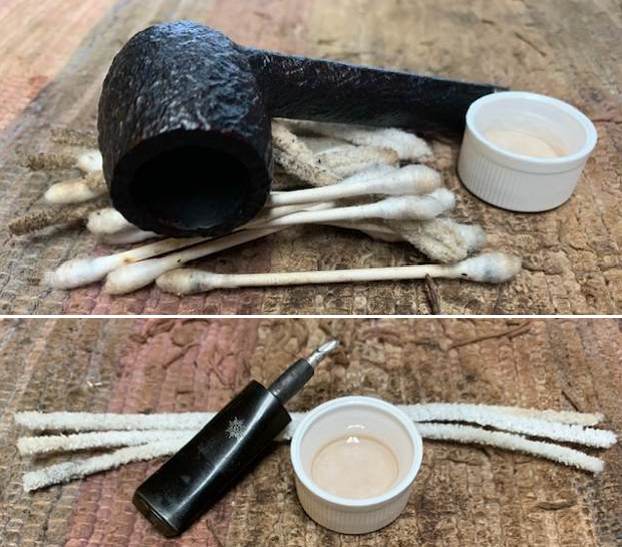
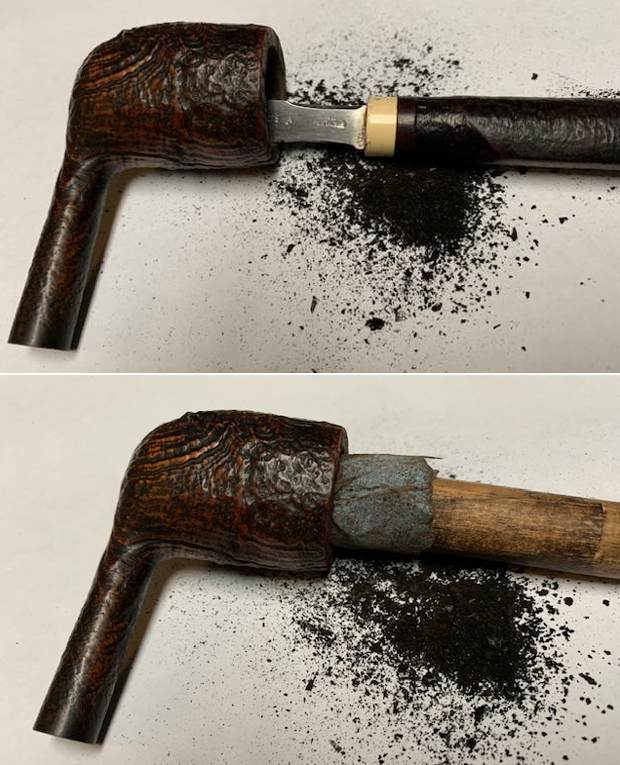
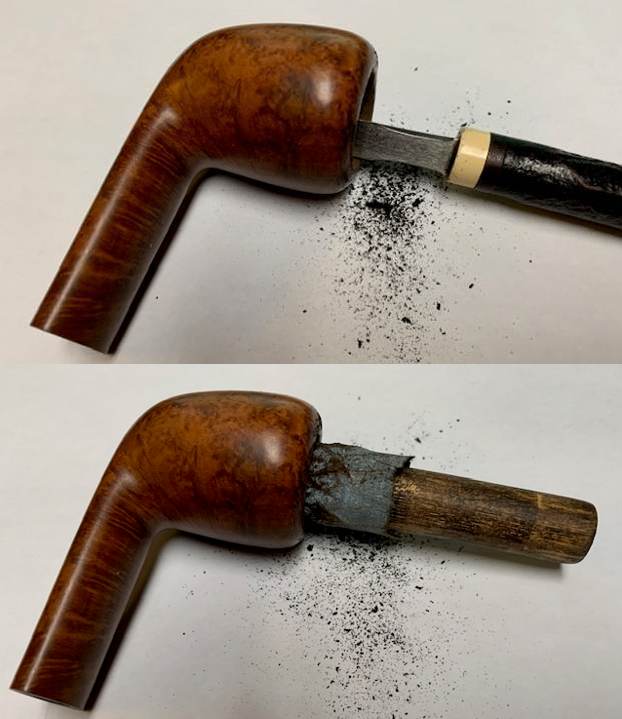
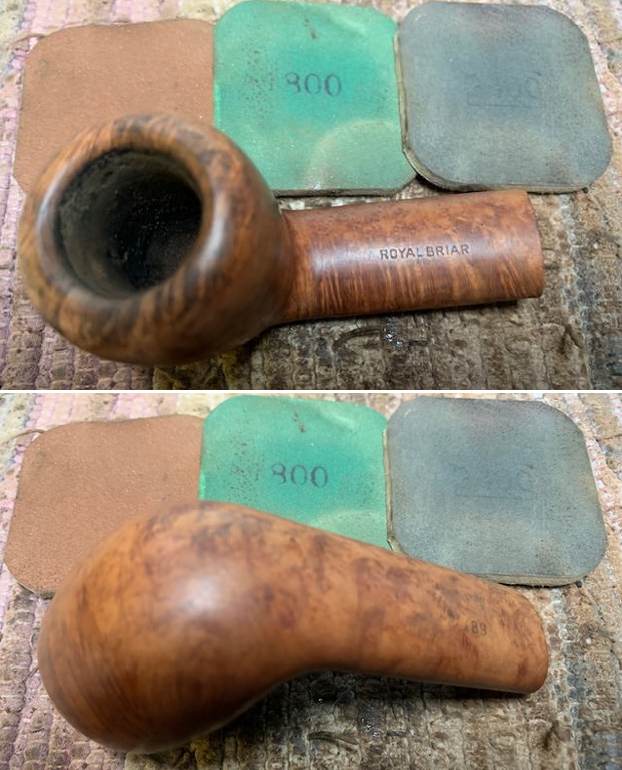
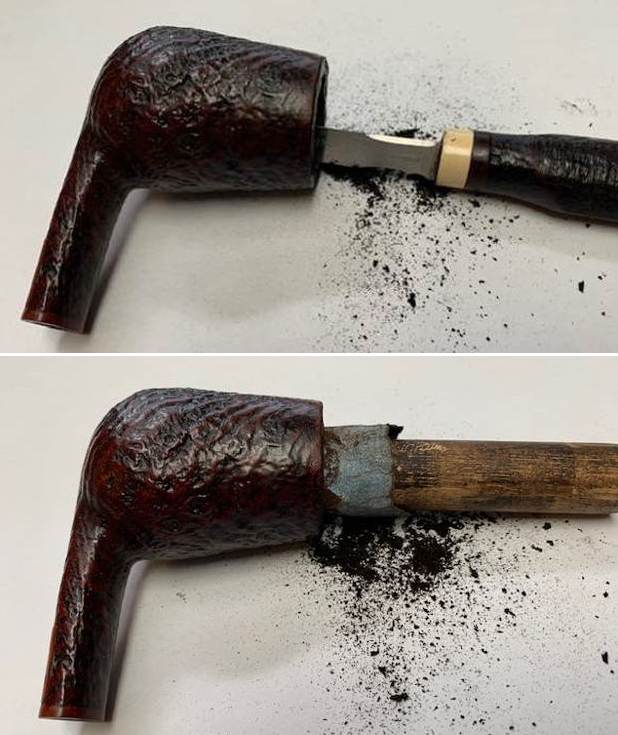
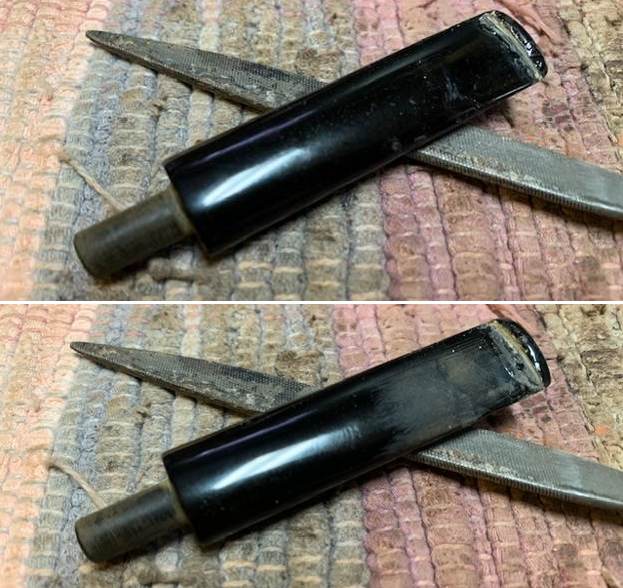
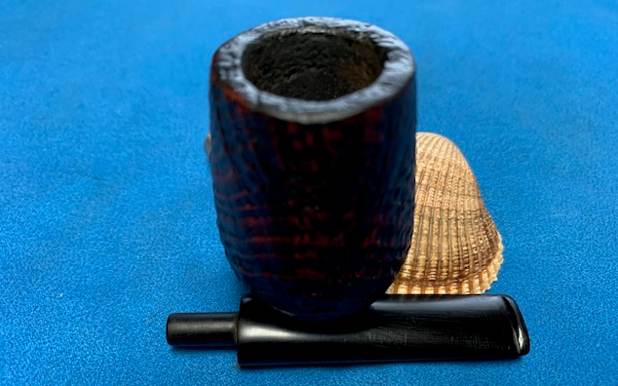
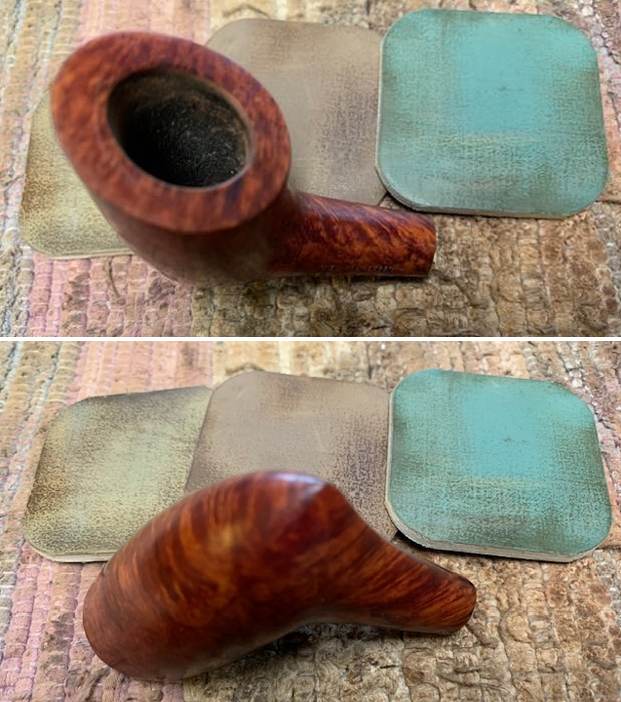
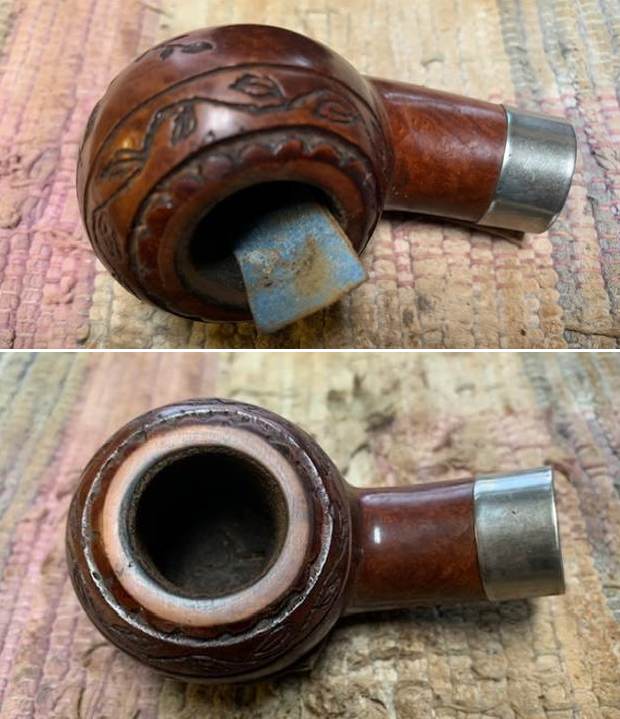
I started this project by reaming the chamber with my smaller fabricated knife and scraped out all the carbon from chamber. I used a 220 grit sand paper, pinched between my thumb and forefinger, to sand the inner walls of the chamber of the pipe. Once I had reached the bare walls, I wiped the chamber with a cotton pad dipped in isopropyl alcohol. This removed all the residual carbon dust and also rid the chamber of all ghost smells. 
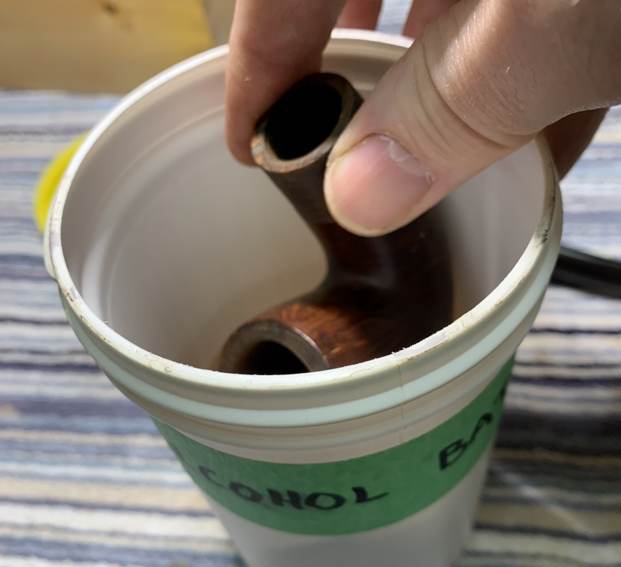
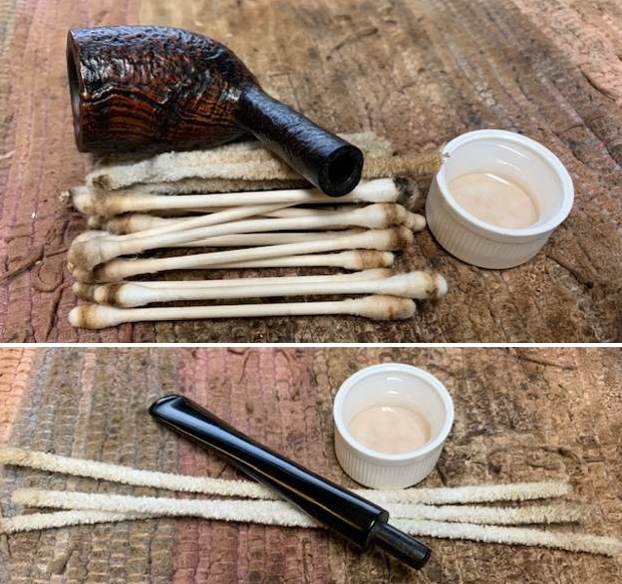
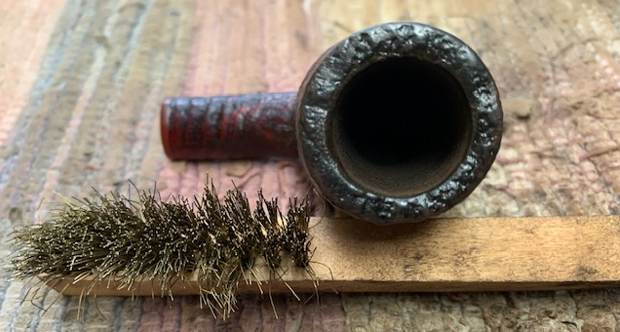
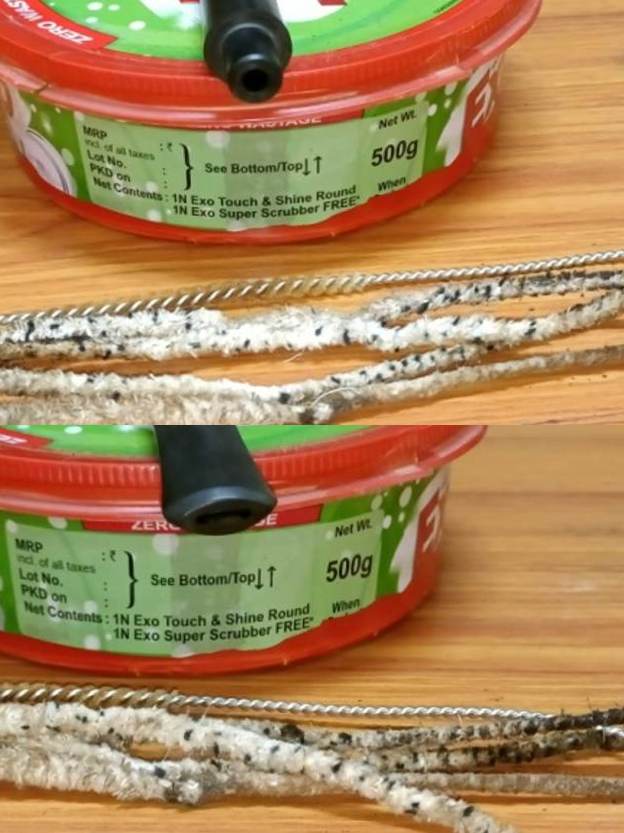
I followed it up by cleaning of the mortise and air way of the pipe using hard bristled and regular pipe cleaners, q-tips dipped in alcohol. The mortise and the draught hole were given a final clean with shank brushes dipped in alcohol. I dried the mortise with a rolled paper napkin. The shank internals and the draught hole are now nice and clean with an open and full draw.
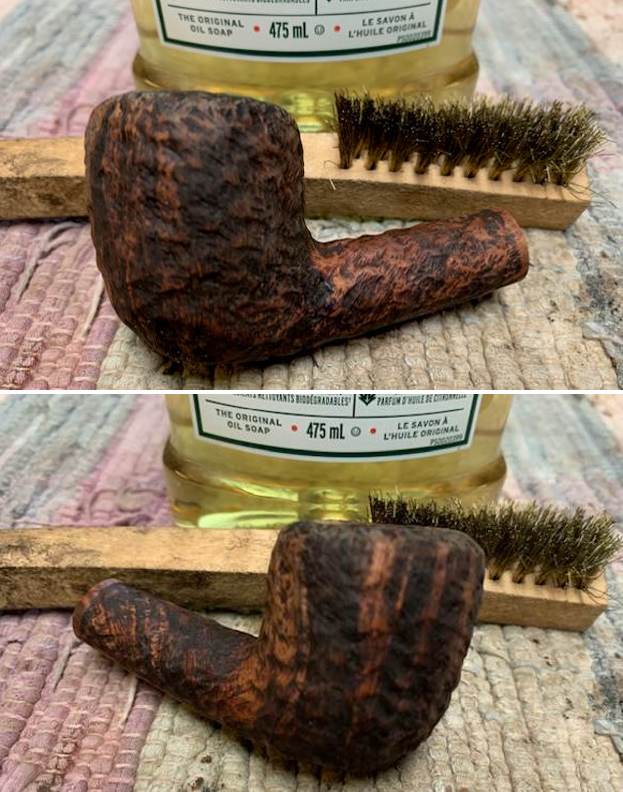
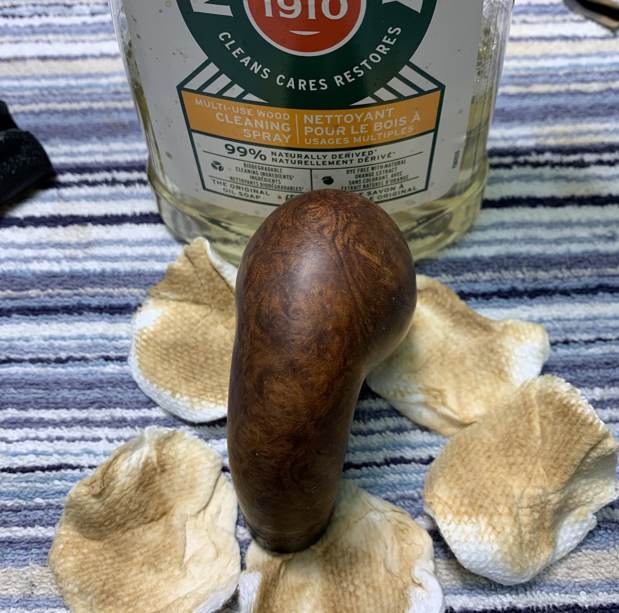
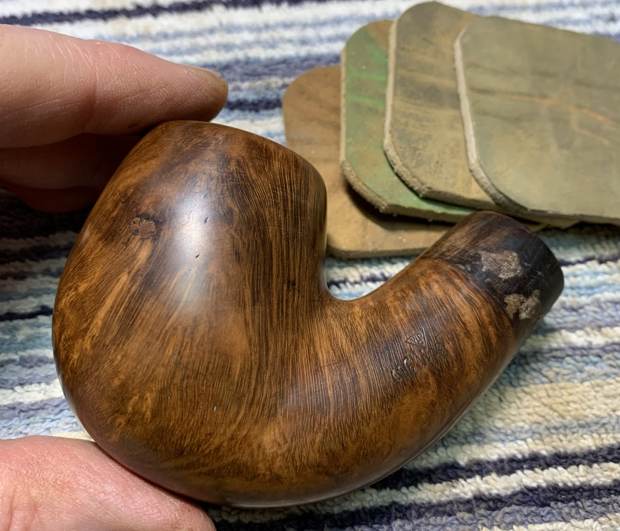
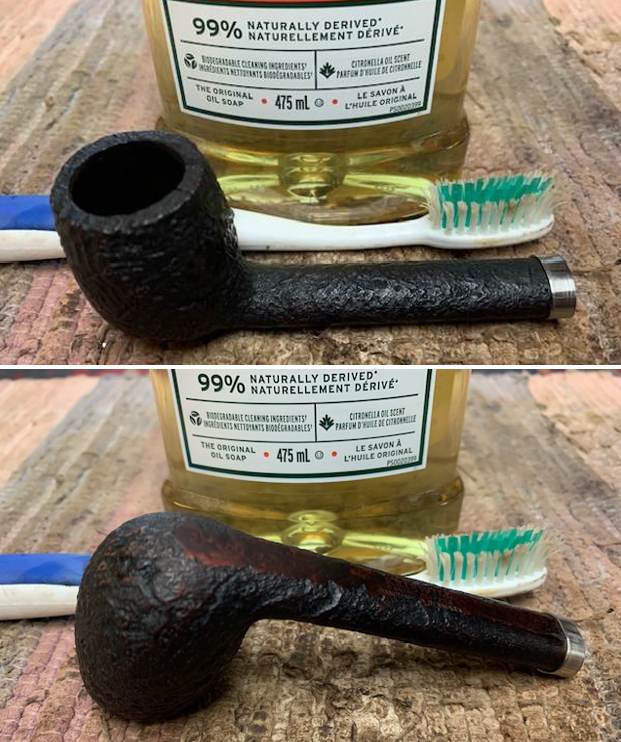
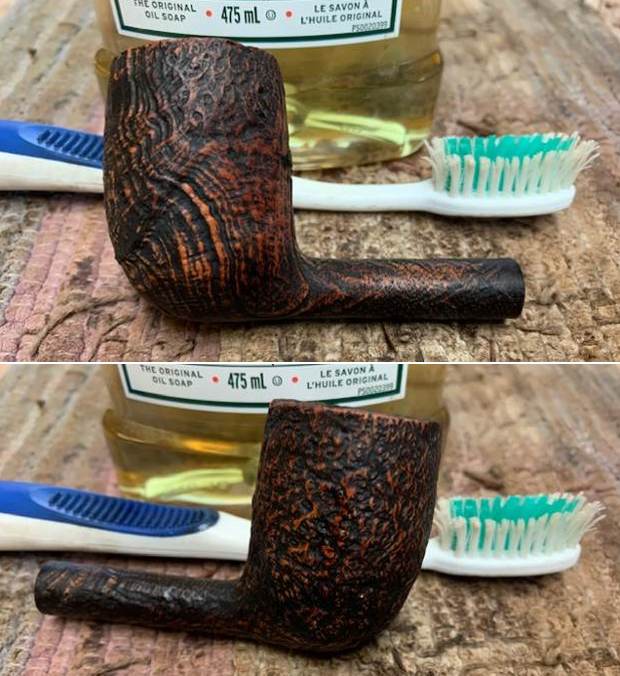
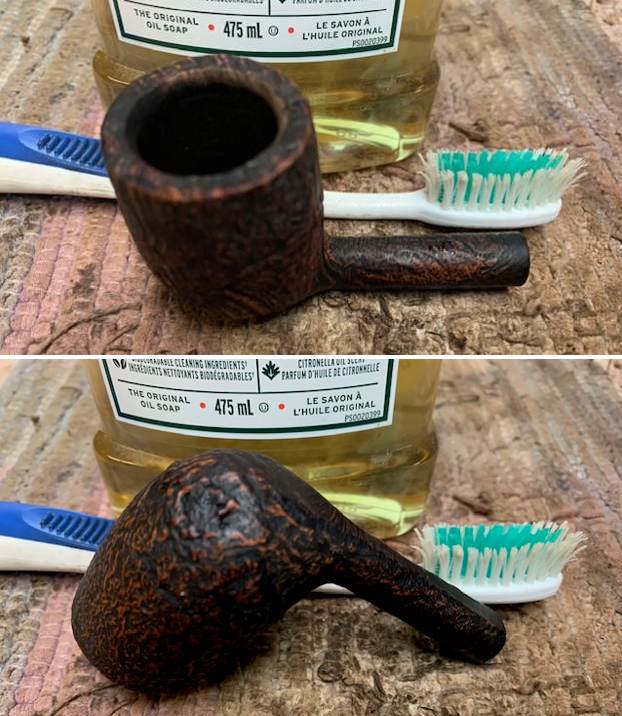
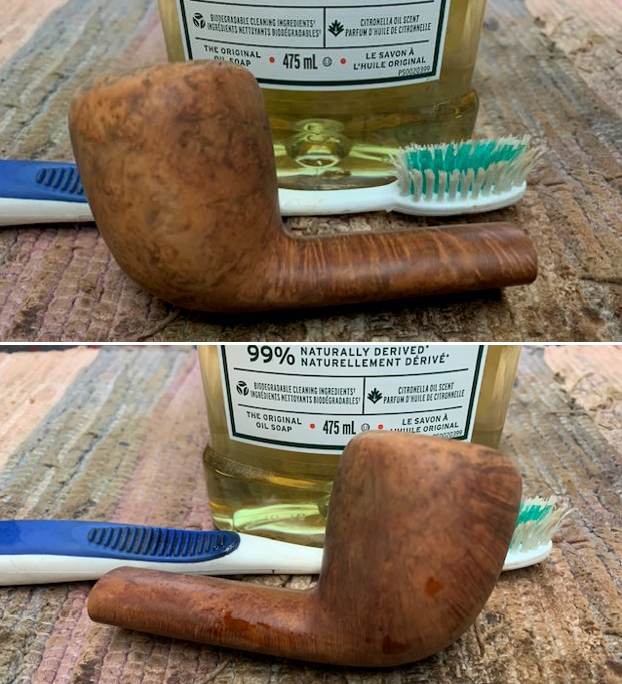
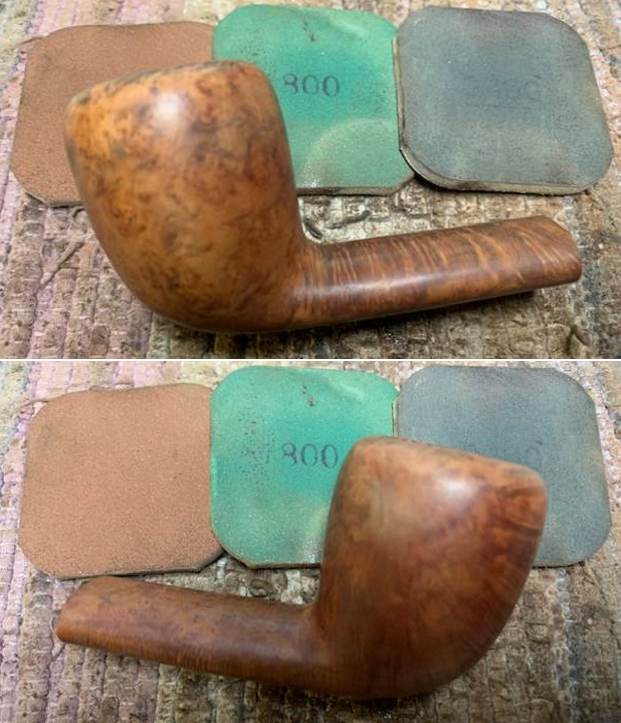
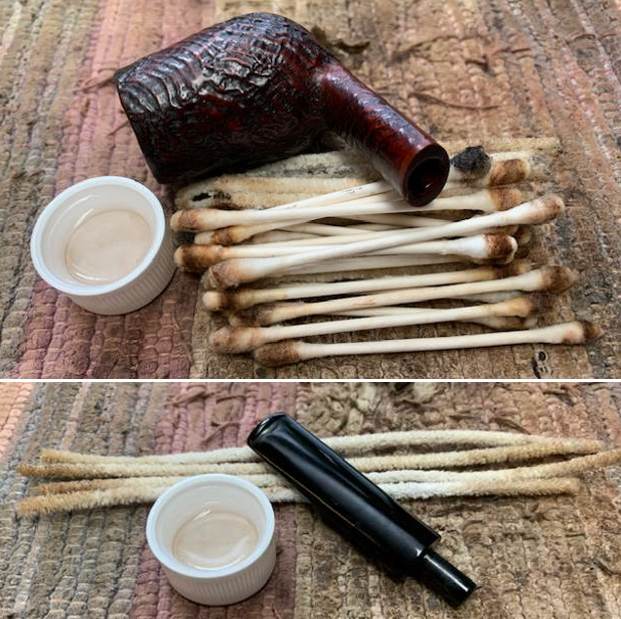
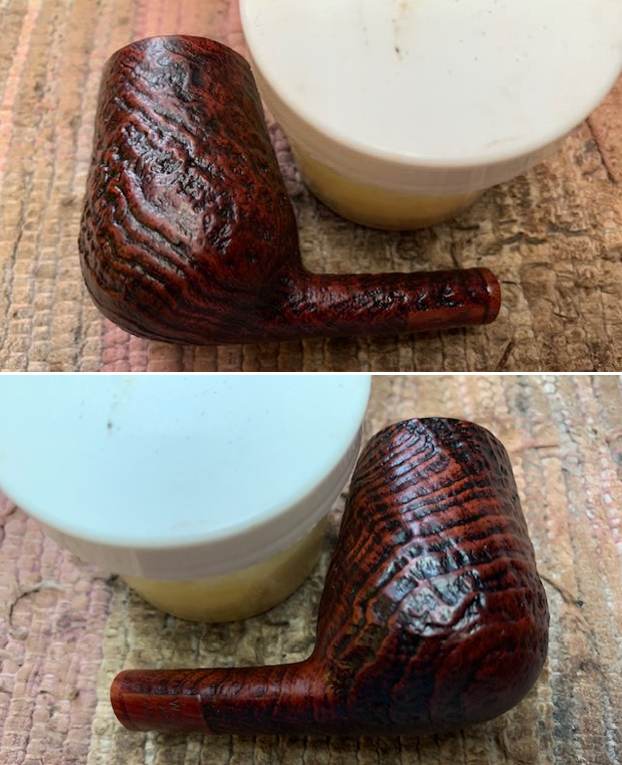
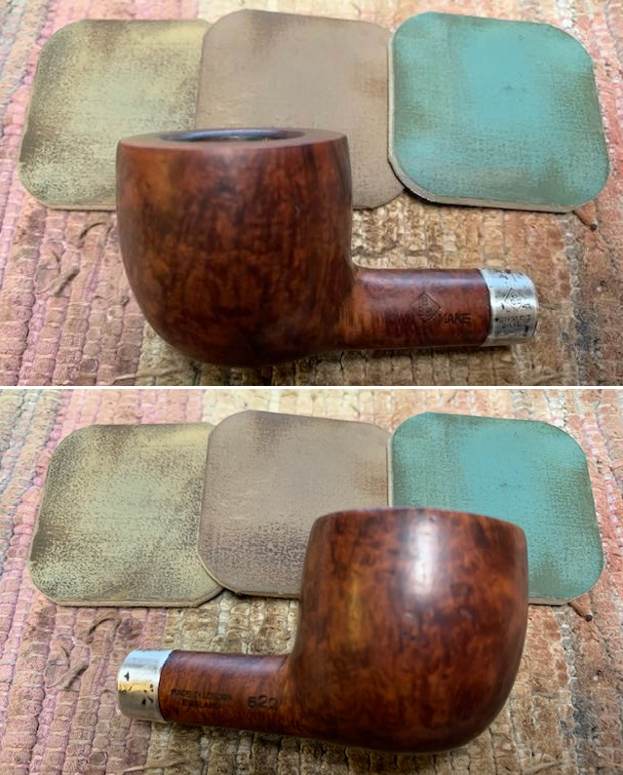
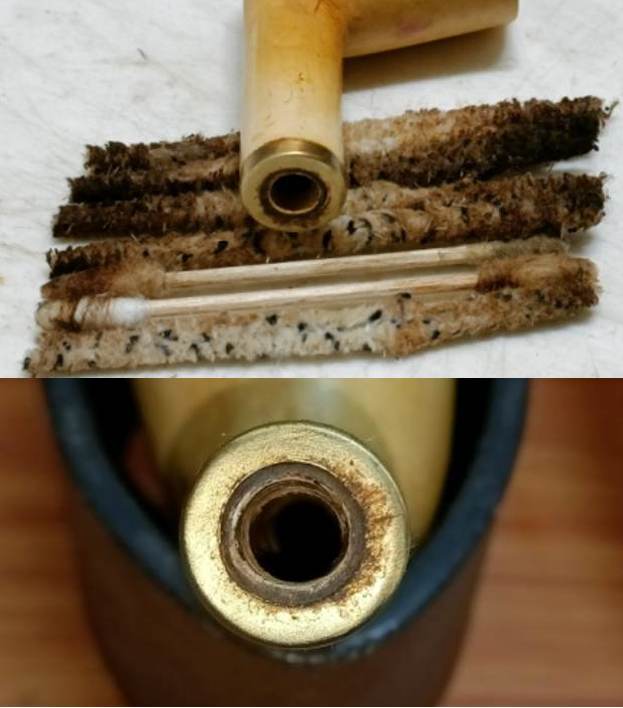
I cleaned the external surface of the Meerschaum bowl with Murphy’s Oil soap and cotton swabs. I wiped the bowl surface with a moist cloth to remove the soap and grime that remained on the surface. The stummel surface cleaned up nicely. The scratches and dents and dings over the stummel surface are now clearly visible and will be addressed to an extent when the stummel is polished using the micromesh pads. 
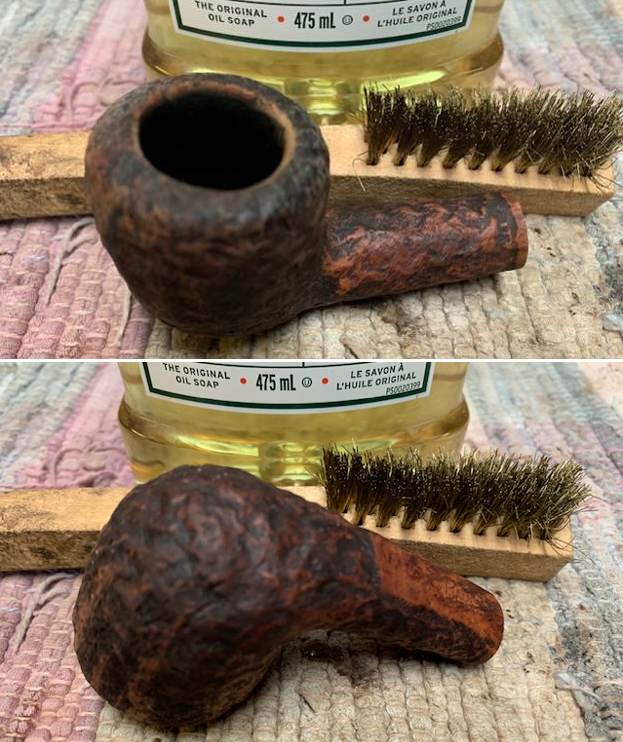
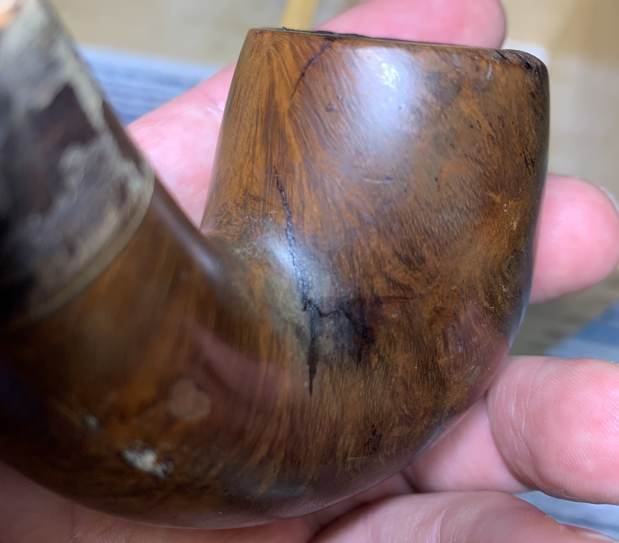
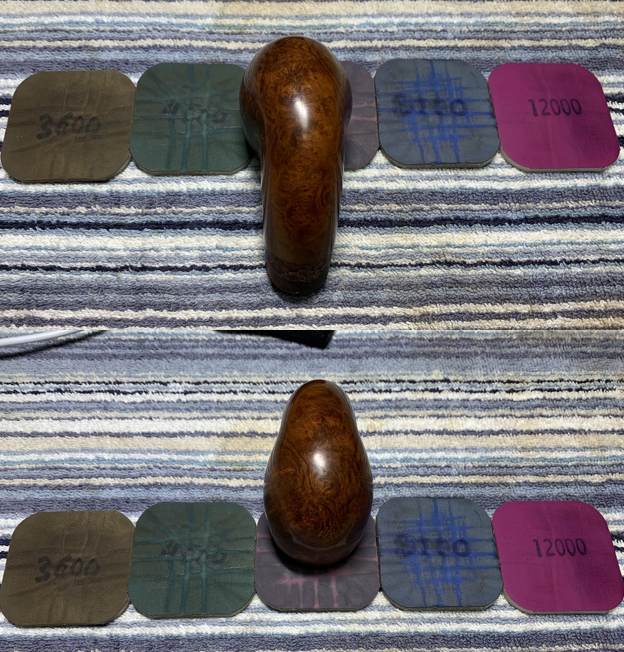
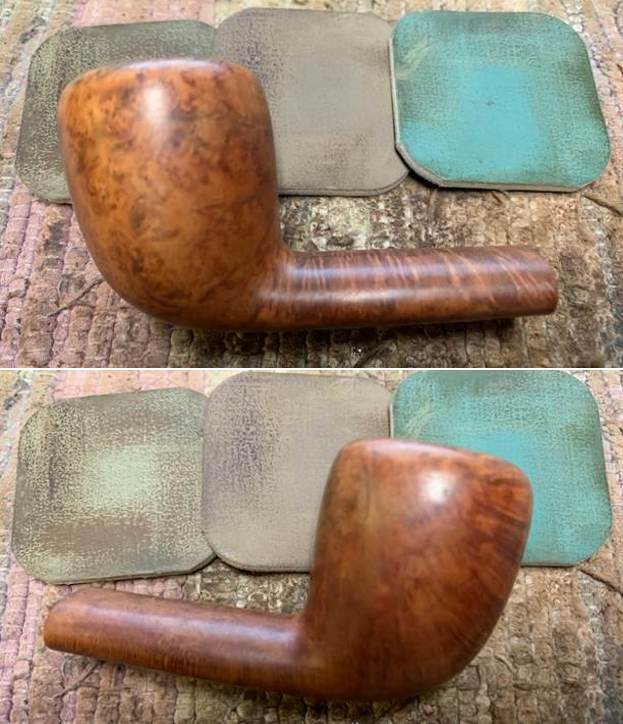
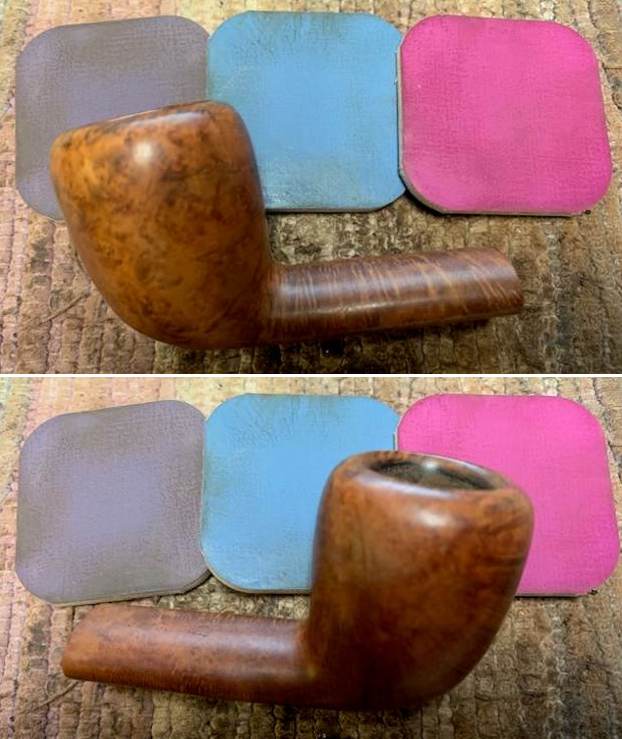
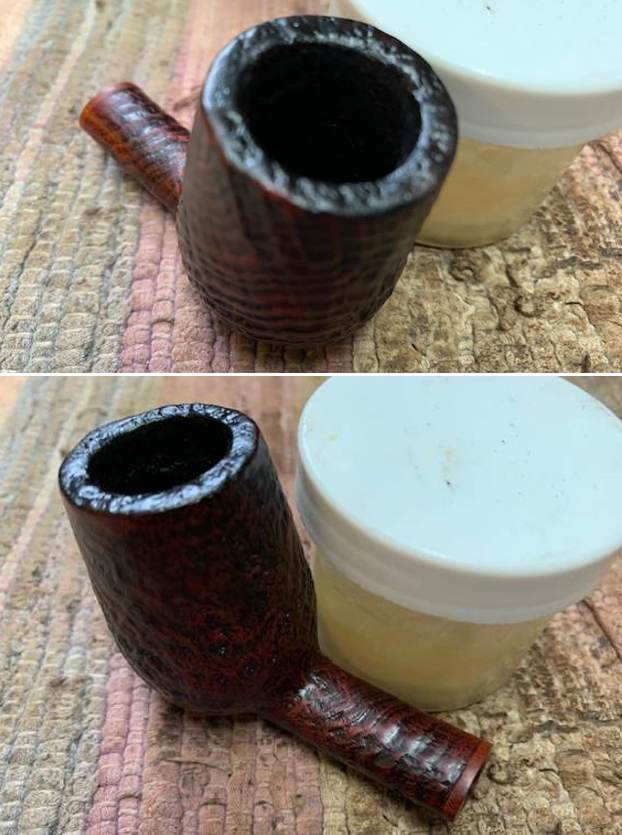
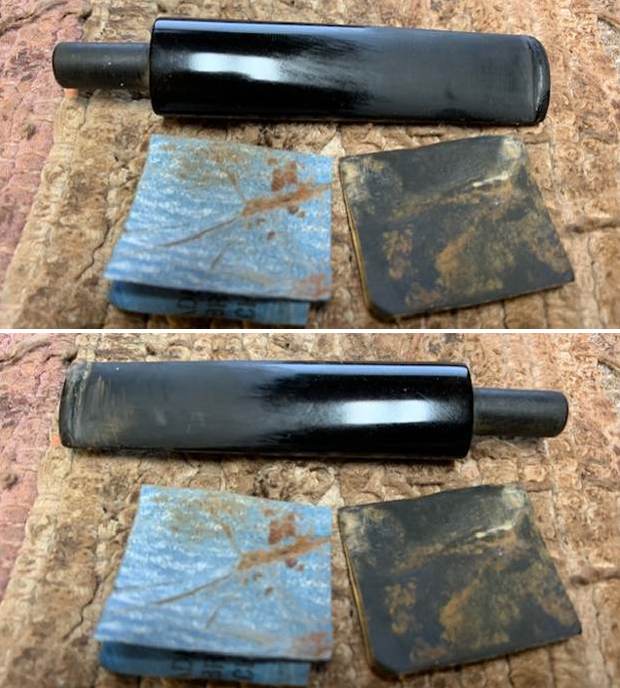
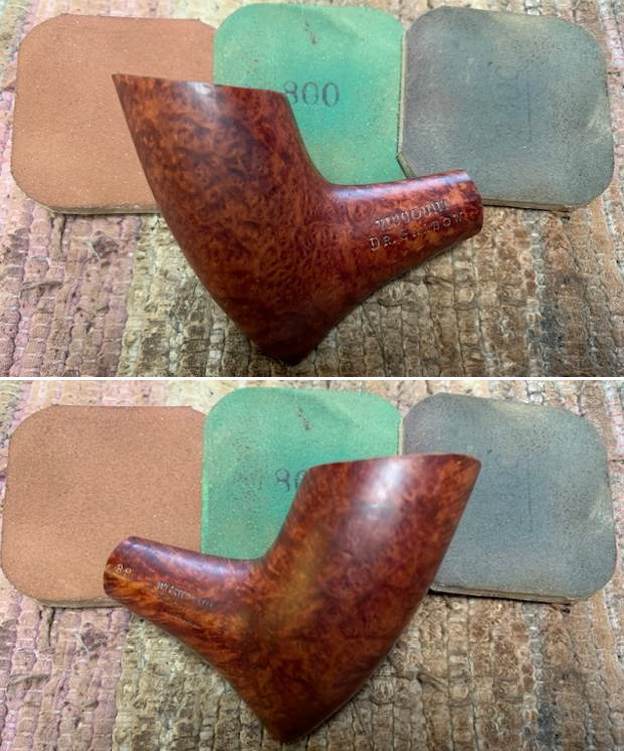
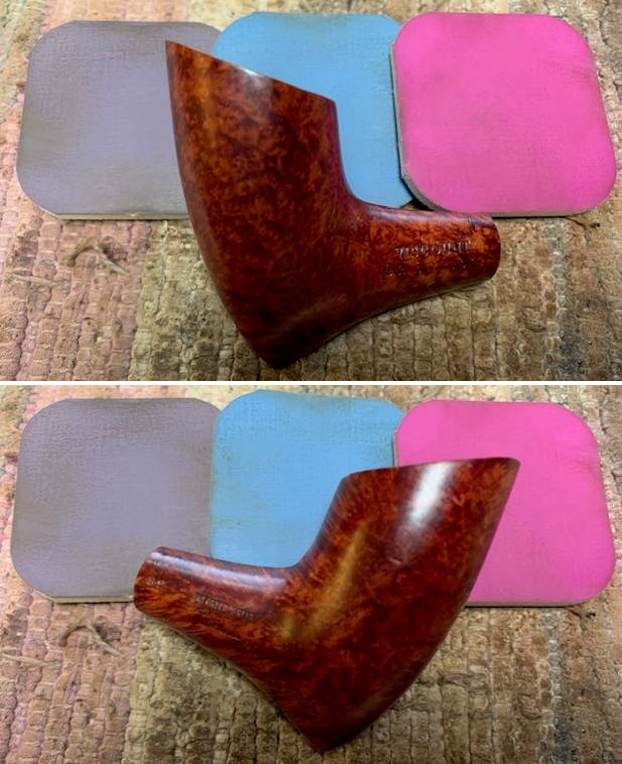
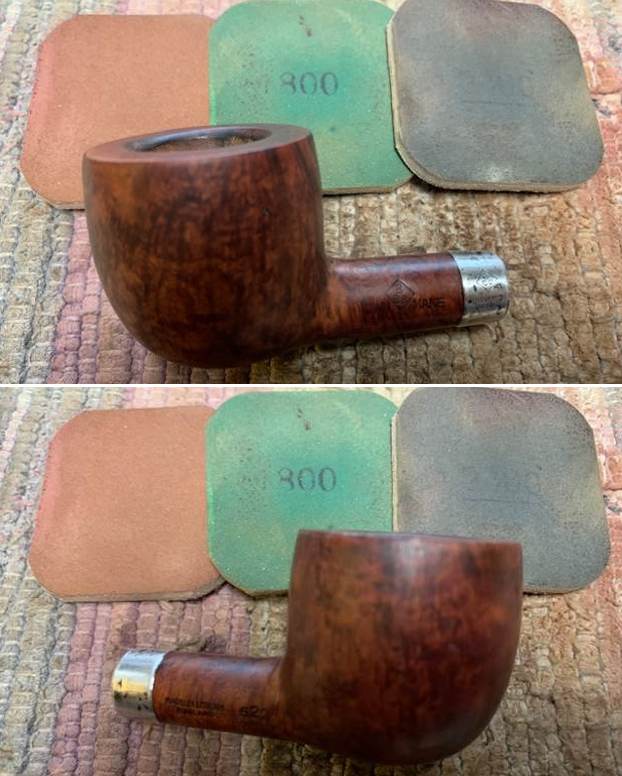
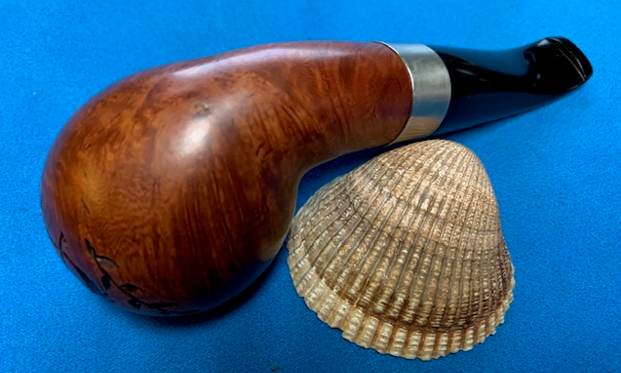
I polished the rim top surface and rim edges with micromesh pads. I then went on to dry sand the entire stummel with 1500-12000 grit pads and wiped the bowl down with a damp cloth to remove the dust that was left behind by the sanding. I had planned to minimize the scratches but not necessarily remove them. These lacerations and dings must have had a history and I wanted to preserve it. Once I was done with the micromesh cycle, I applied a small quantity of Paragon wax and vigorously polished it off with a microfiber cloth. The stummel now has a nice deep shine to it. 
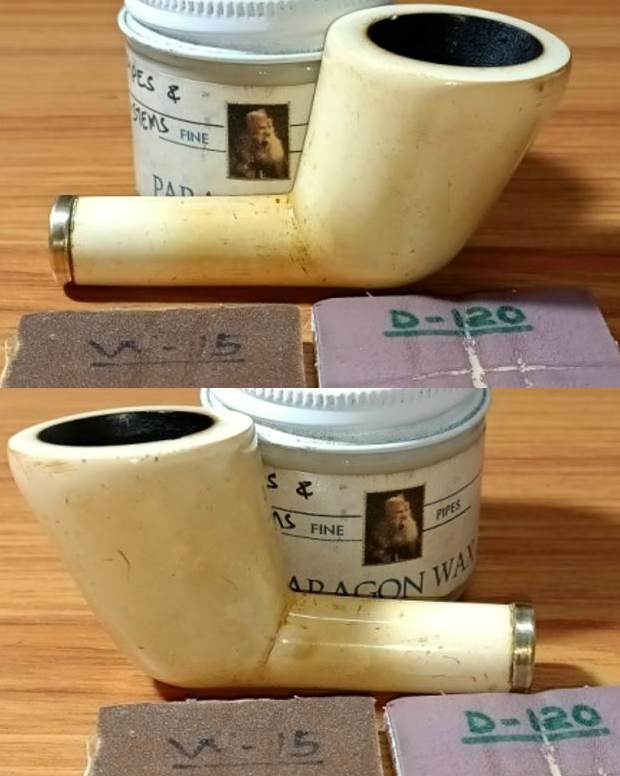
Next I decided to address the stem repairs or rather stem replacement since the damage to the already repaired stem was far too extensive and yet it would not make this pipe fully functional since the tenon was too loose and too short. The stem that I selected is a beautiful yellow acrylic stem that perfectly matched the shank face diameter. I selected a Delrin tenon that perfectly threaded in to the mortise for a snug fit.
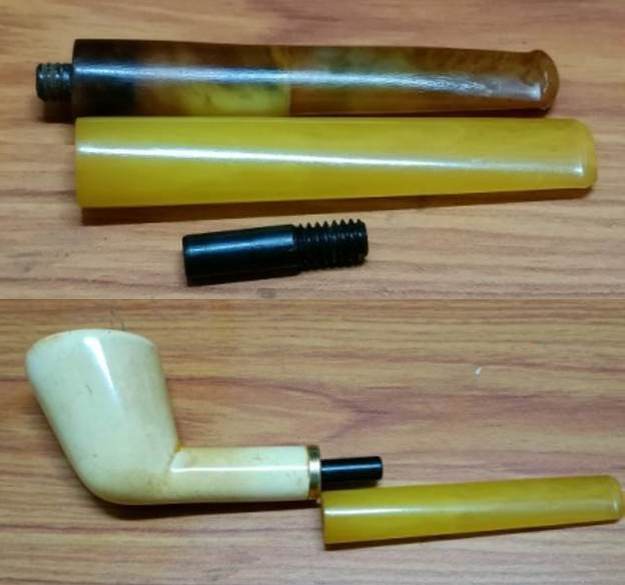
Now it was necessary to down size the smooth end of the tenon to fit in to the stem face. I mounted a 150 grit sanding drum on to my hand held rotary tool and sand down the smooth end of the tenon till I had achieved a rough seating of the tenon in to the stem face. My previous experience has taught me an invaluable lesson; “SAND ONCE AND CHECK TWICE”!! Once I had achieved a rough seating, I got down to the arduous and time consuming task of manually sanding down the smooth portion of the tenon with a folded piece of 220 grit sandpaper till I had achieved a perfect seating of the tenon in to the stem. Here I was extra careful and vigilant while sanding the sides of the tenon and frequently checked the alignment of the tenon airway with the stem airway and finally through the shank airway and right through the draught hole.   
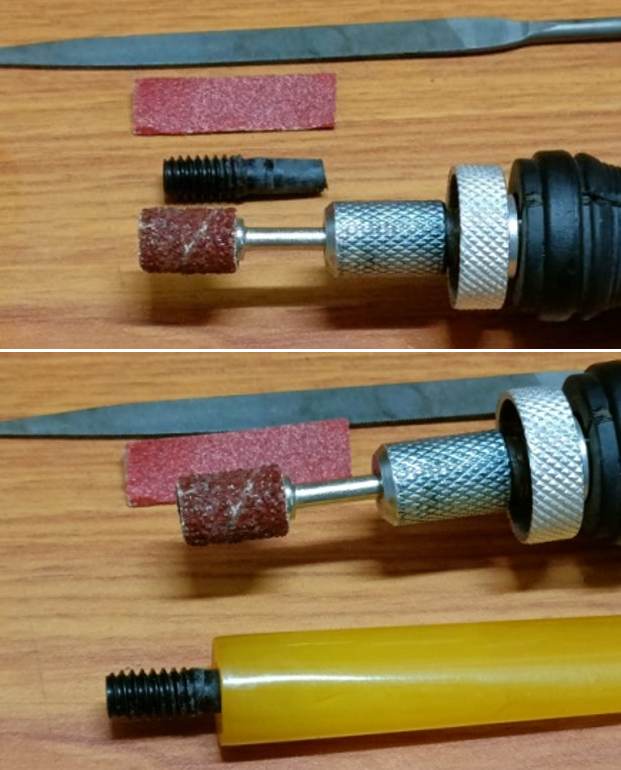
Once I was sure that the tenon, stem and shank face and airways are all aligned and seated flush, I glued the tenon in to the stem. I took some time to admire the overall appearance of the pipe and I like it very much.
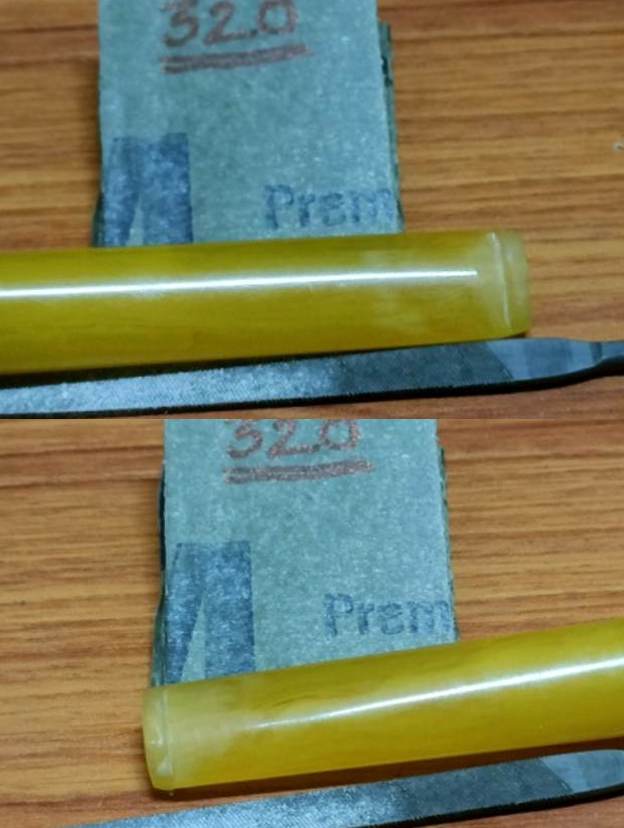
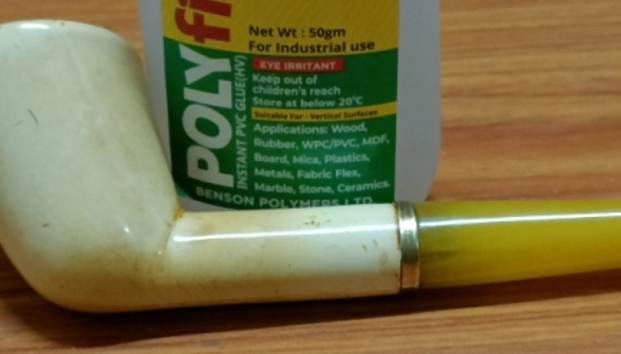
Next on the agenda was to match the length of the replacement stem with that of original stem. Using needle file and 150 grit sand paper, I sand the slot end of the replacement stem till I achieved a perfect length match. Even though it took me a few man hours and lots of efforts, I was able to achieve the desired length. I checked the seating of the pipe in to the case and noted with satisfaction that the case closed without any gaps. However, in achieving the desired length, the button edges on the new stem were sanded down. This necessitated rebuilding of button edges on the new stem.
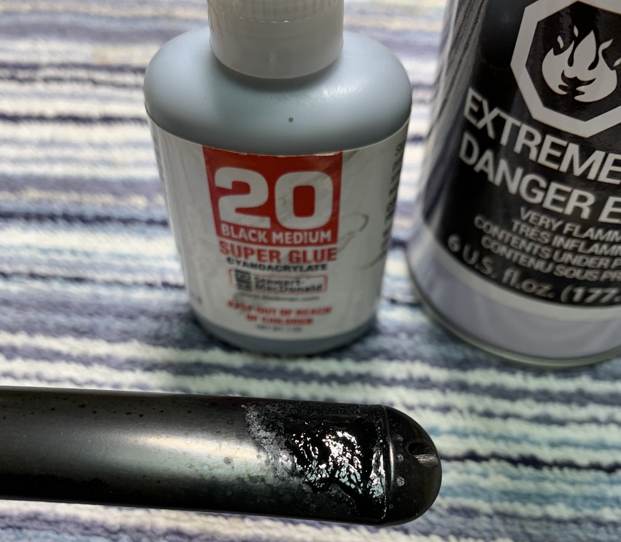
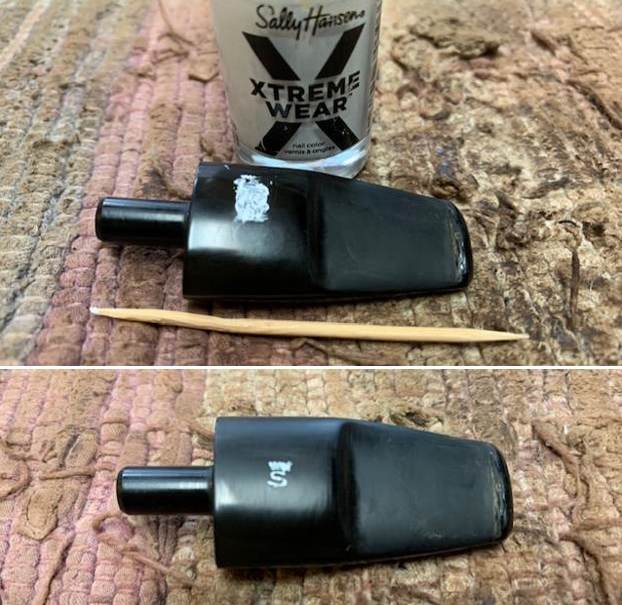
With clear CA superglue, I rebuild the buttons using layering technique. Once the glue had hardened, using a needle file, I roughly shaped the buttons and further fine tuned the buttons using a piece of 330 grit sandpaper. The slot end at this stage is rounded and the horizontal slot needs to be carved. I marked the center line on either sides of the orifice and using a slot file, I carved out a horizontal slot. The stem looks good at this stage.Next the stem was subjected to a full cycle of polishing using micromesh pads.
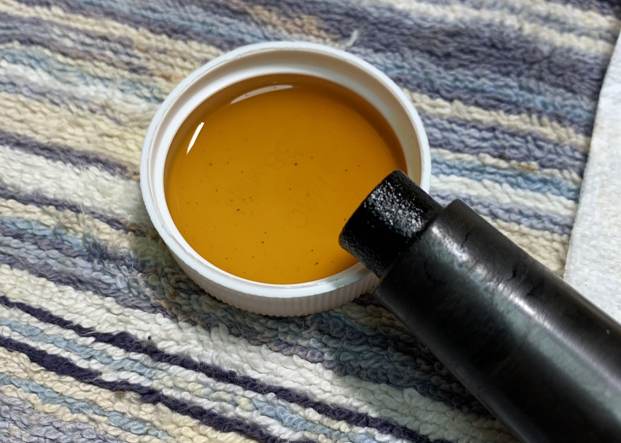
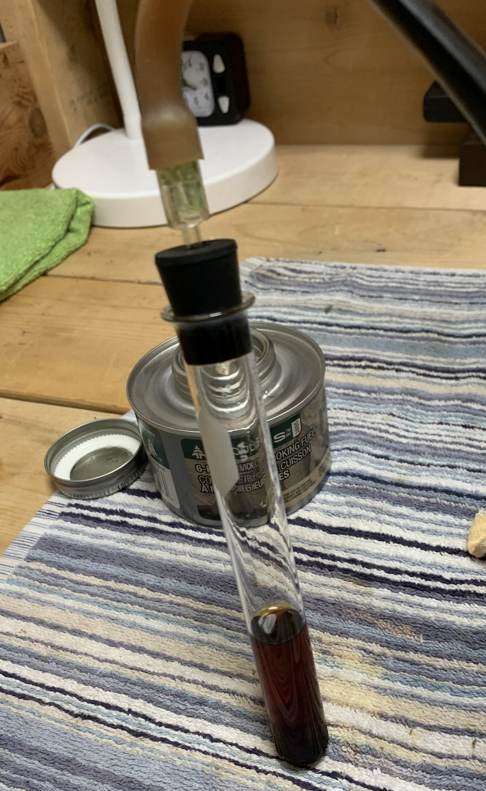
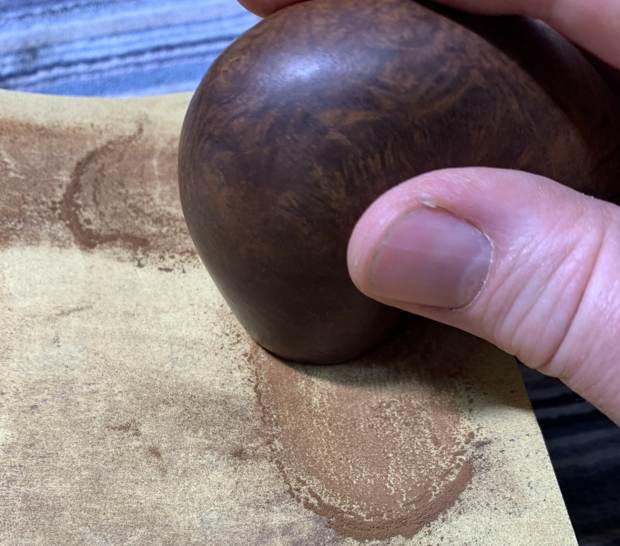
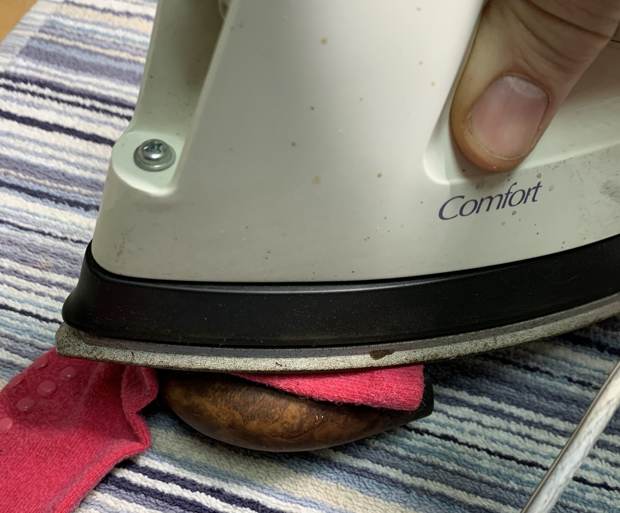
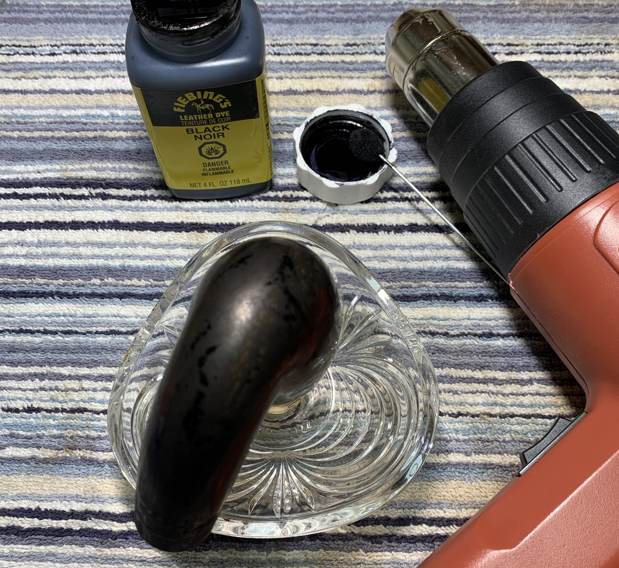
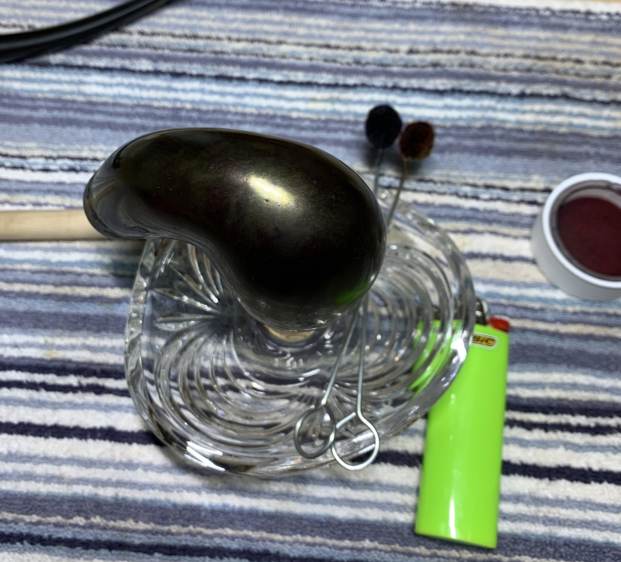
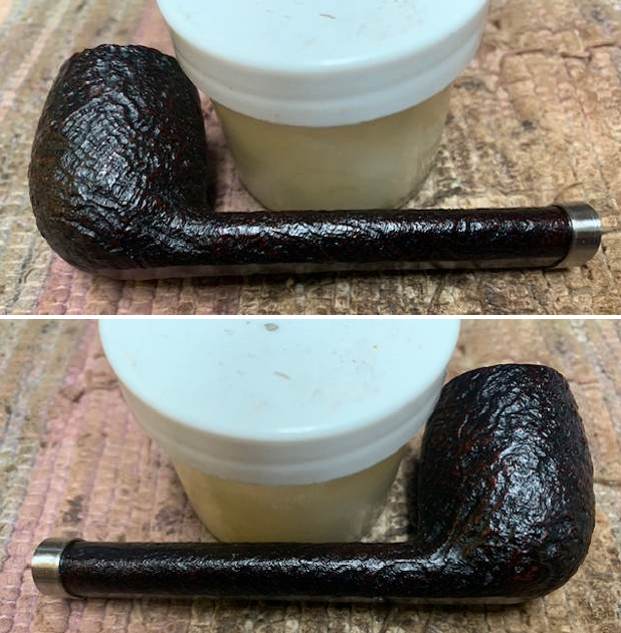
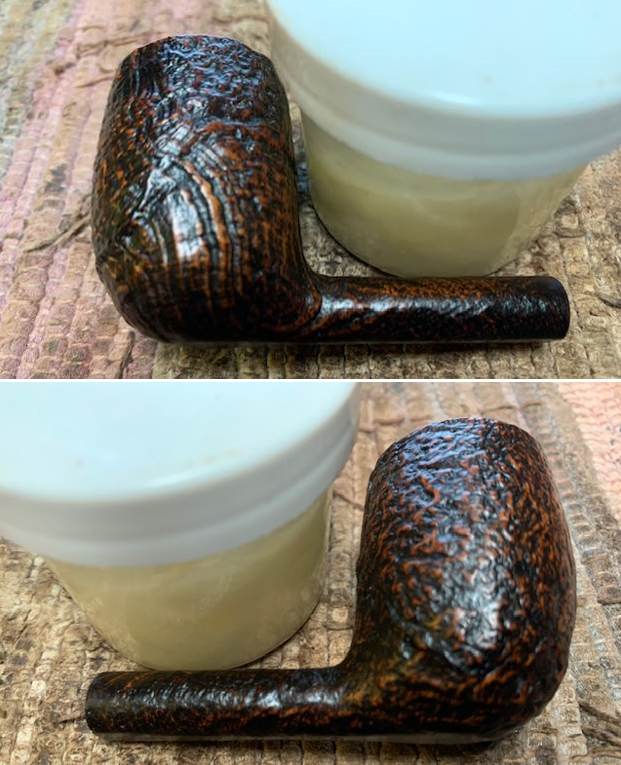
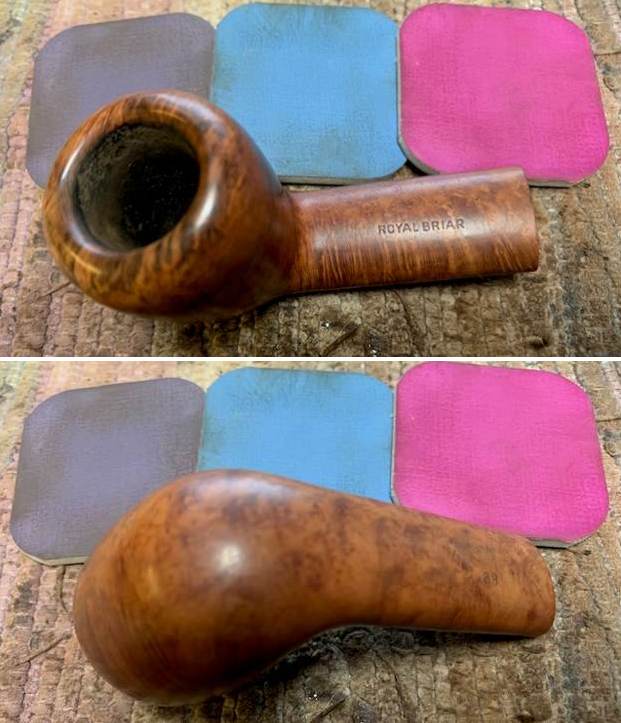
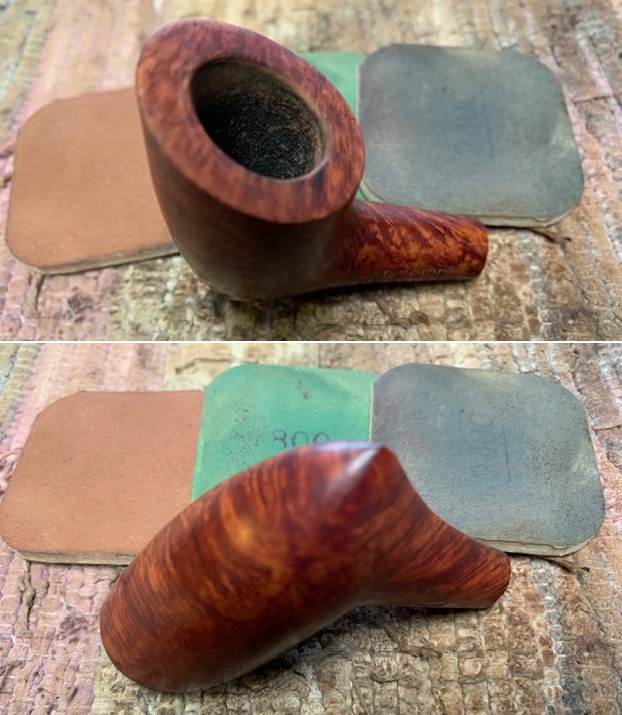
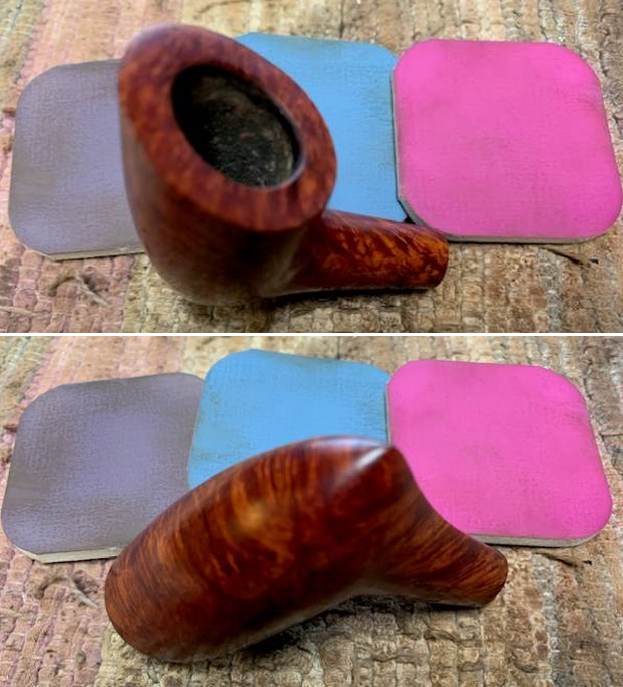
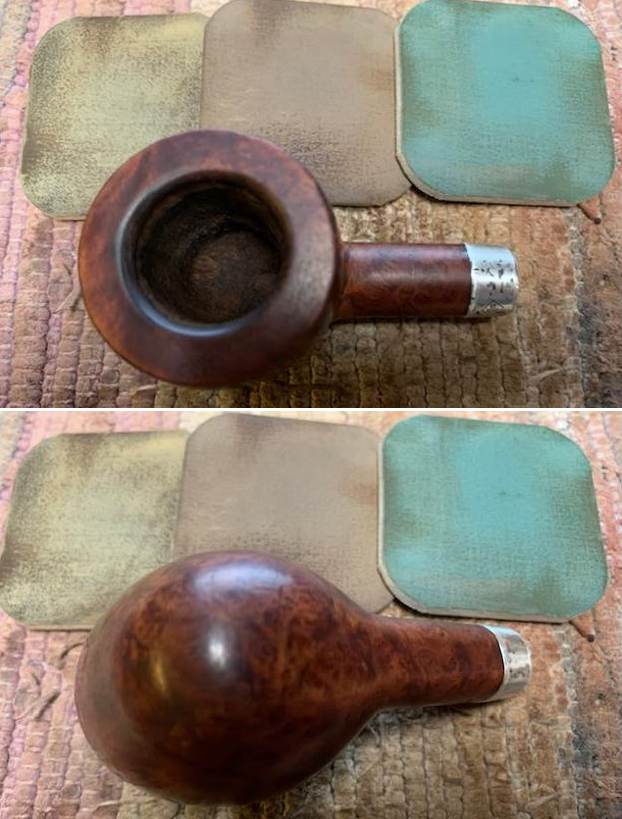
With the shaping and polishing of the replacement stem completed, I turned my attention back towards the stummel. I gave a beeswax polish to the meerschaum bowl. I assembled the equipment and materials that would be needed during the process viz heat gun, paper towels, q-tips and a Katori, a steel container graciously lent by Abha from her kitchen and of course, beeswax. I stuffed the chamber with cork to prevent inadvertent seepage of the melted beeswax into it. Next, I melted a sufficient quantity of beeswax in the katori using my heat gun and thereafter heated the stummel. Using a folded pipe cleaner, I completely coated the stummel with the wax and continued the application till the surface was saturated with the beeswax and set the stummel aside to absorb the wax. I reheated the stummel with the heat gun about 20 minutes later and let the excess wax either be absorbed or drip off from the stummel surface. I rubbed off the excess wax with a soft cotton cloth and brought a deep shine to the surface with a microfiber cloth. With the replacement stem all shaped and aligned and the bowl waxed and polished, I had completed the refurbishing of this pipe from the cased pair and set the pipe aside.

However, little did I know at this stage that all the man hours and efforts that I had put in making this replacement stem to make this pipe aesthetically beautiful and functionally sublime would come to a naught due to certain challenges that I was presented with while working on the second pipe from the set. I shall cover those aspects in Part- II of the write up. It will suffice to say here that I had to discard this stem and fabricate a new vulcanite stem from scratch.

PART-I (B)
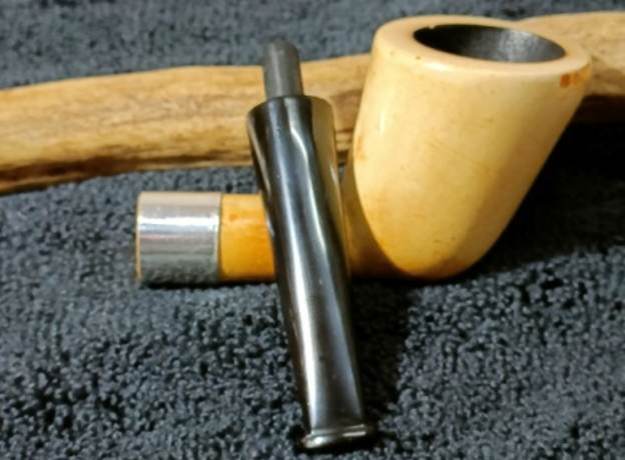
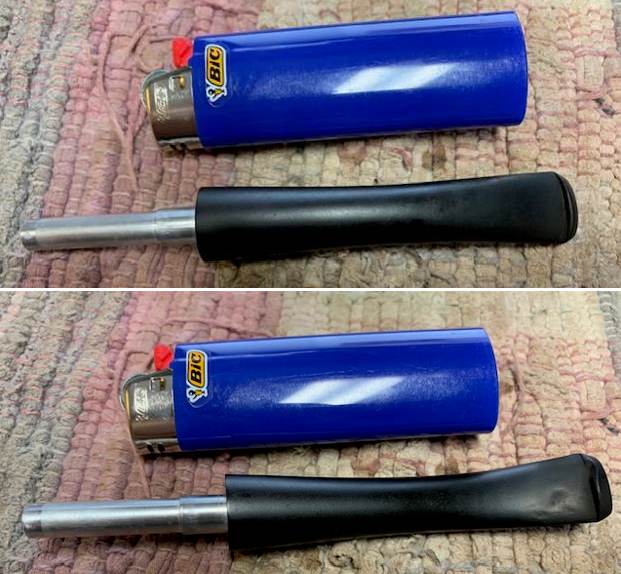
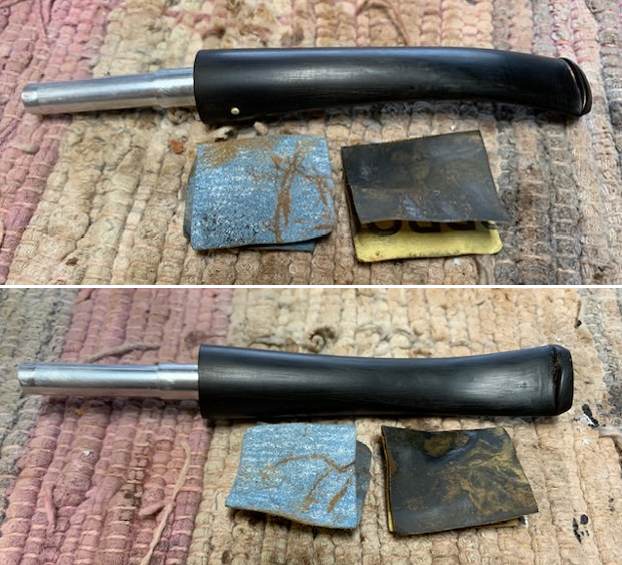
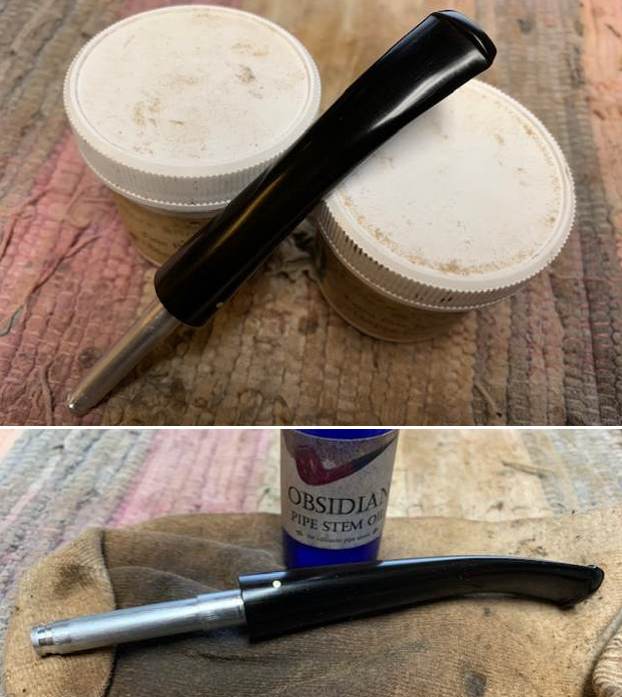
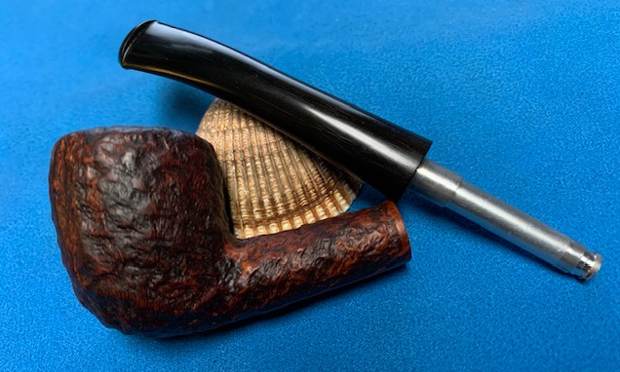
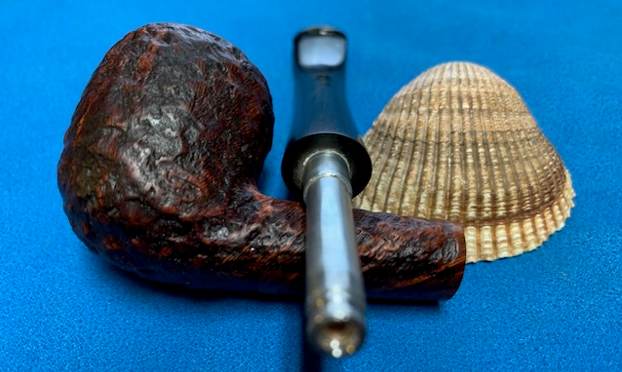
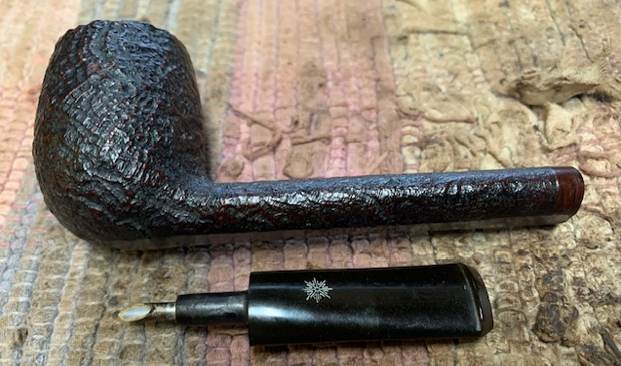
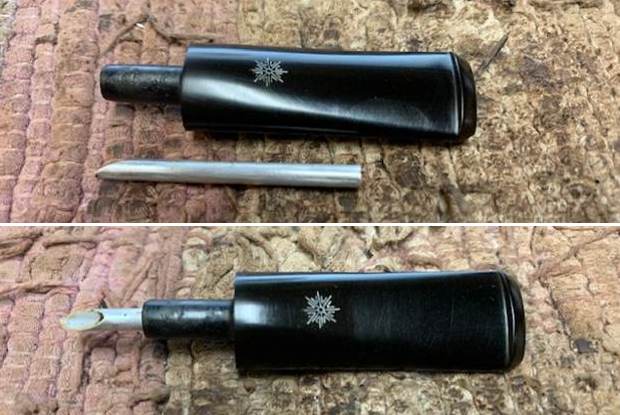
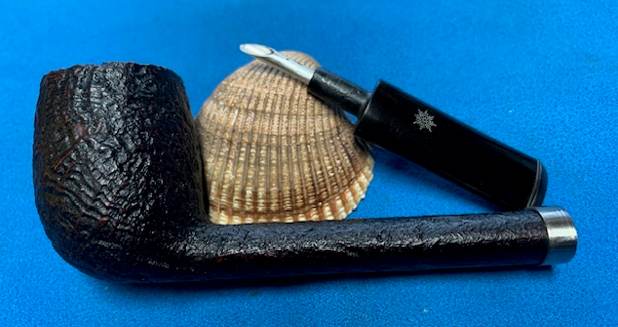
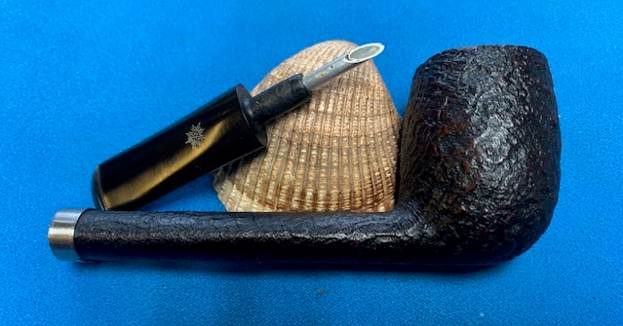
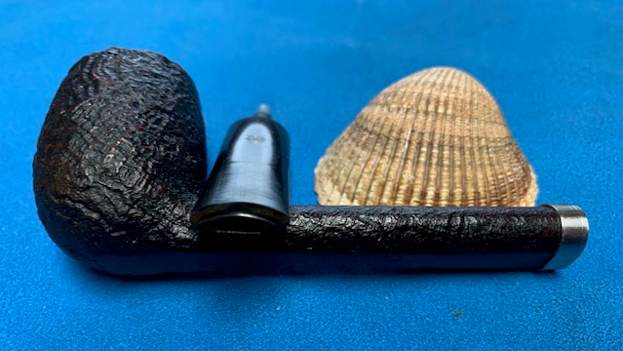
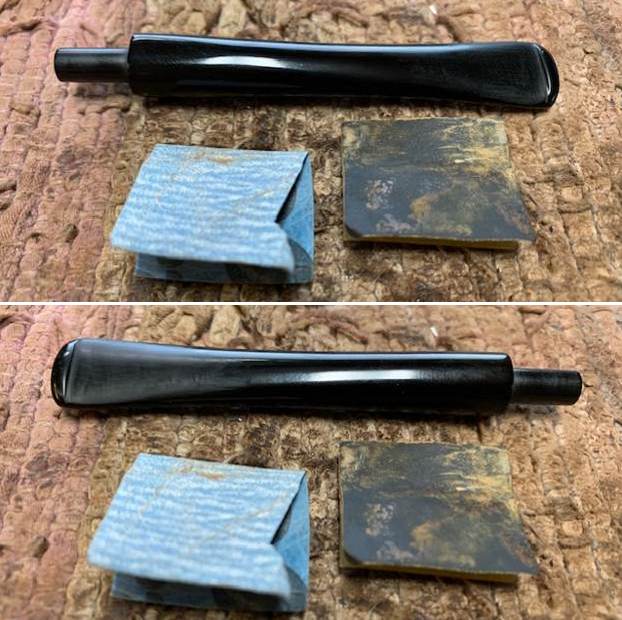
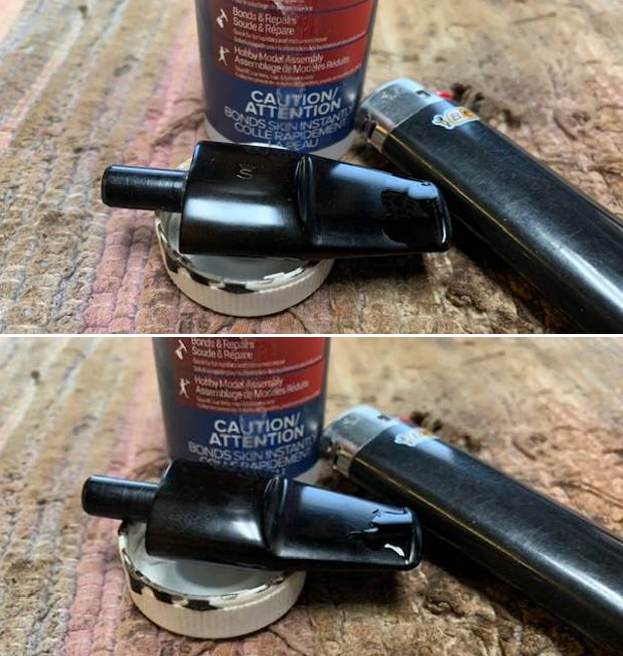
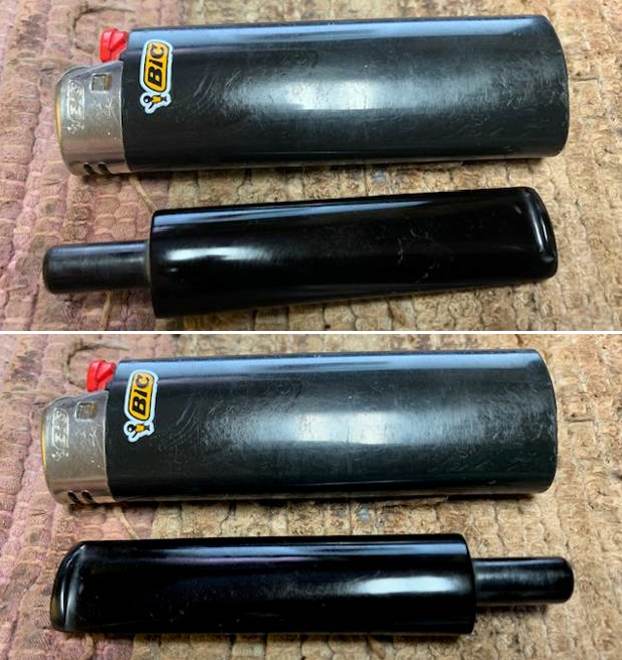
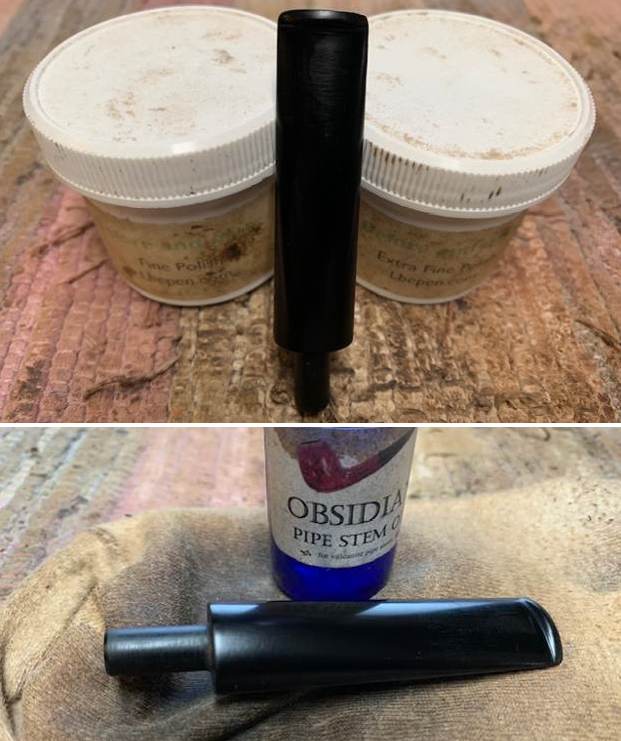
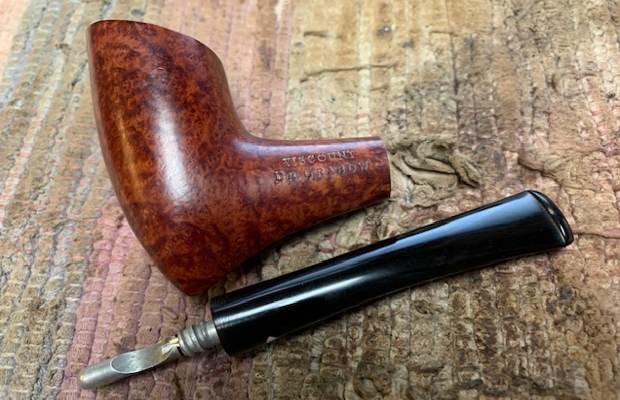
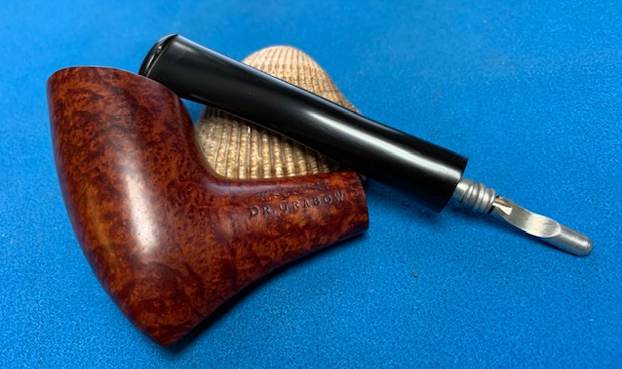
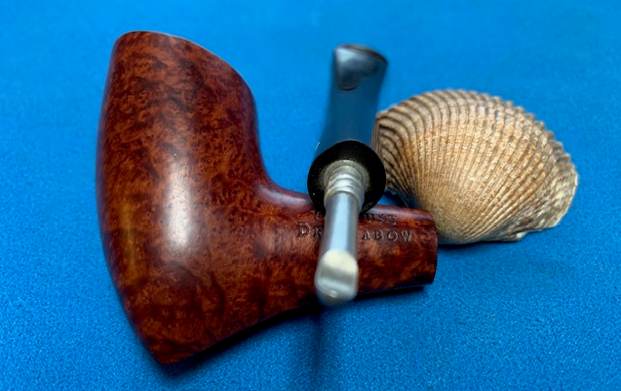
Now that I have decided to match the stem on this pipe to the vulcanite stem that I had fabricated on the second pipe from the set, I first selected a vulcanite stem that would more or less be a perfect match to the butterscotch yellow acrylic stem that was made earlier. I would need to shape the flare at the slot end to a nice smooth taper (indicated by yellow lines), reshape the slot end to an orifice with old style rounded buttons and would need to greatly reduce the diameter of the tenon (indicated by red arrows) for a snug fit in to the mortise. Once that was achieved, I would need to clean and polish the vulcanite to a nice black shine. Here is a picture to give you an idea of both the stems.First I removed the metal stinger from the tenon end by heating it with the flame of a match light and pulling it out with a pair of nose pliers. I followed this with cleaning the stem internals using anti-oil dish washing soap on a thin shank brush and rinsing it under warm running water. I ran a couple of pipe cleaners through the airway to completely remove any residual traces of soap and also to dry it out. With a 150 grit sanding drum mounted on my hand held rotary tool, I sized down the tenon to achieve a rough match with the mortise size. I fine tuned the seating of the tenon in to the mortise by sanding it further with a 180 grit sand paper till I had achieved a snug fit.
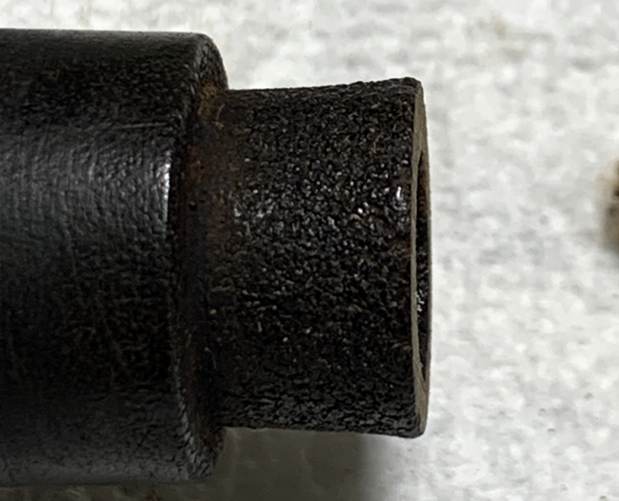
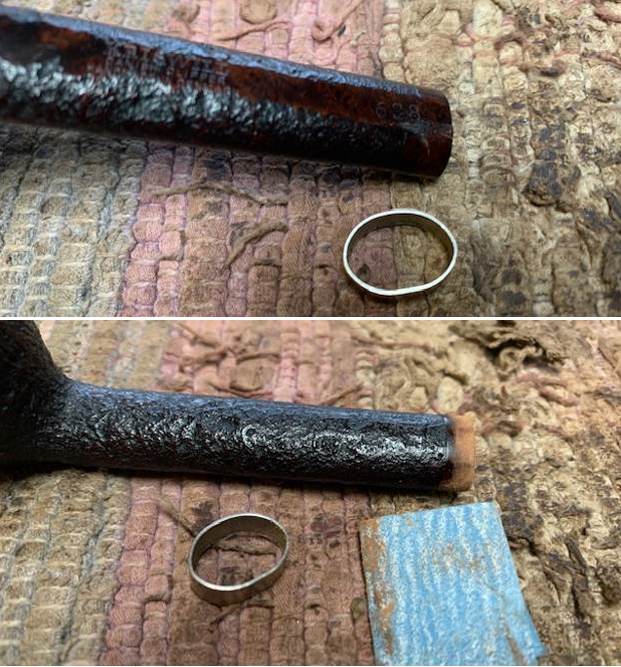
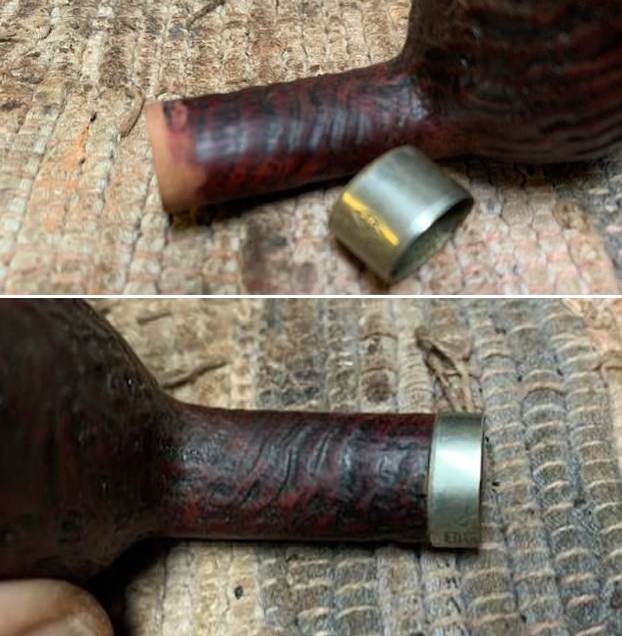
As I was trying out the seating of the tenon in to the mortise a second time, the brass ring separated from the shank end with threaded portion of the mortise while revealing a minor crack at the shank end (unfortunately, in my haste to address the newly presented challenge, I missed out on taking pictures of the damaged shank end). The problems are continually mounting unabated!!

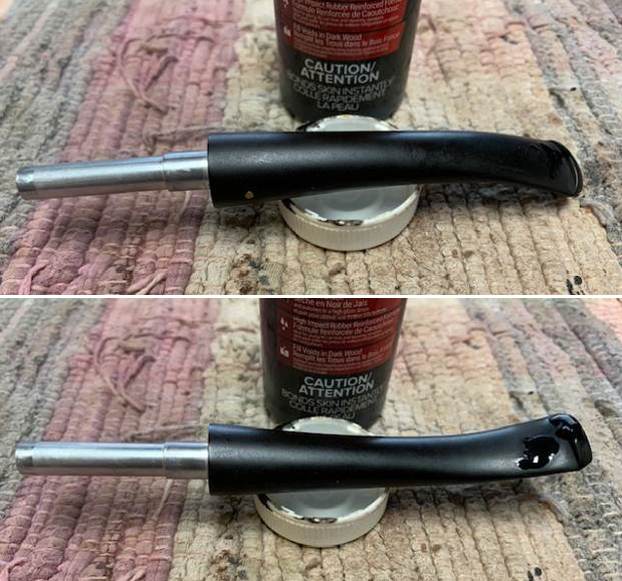
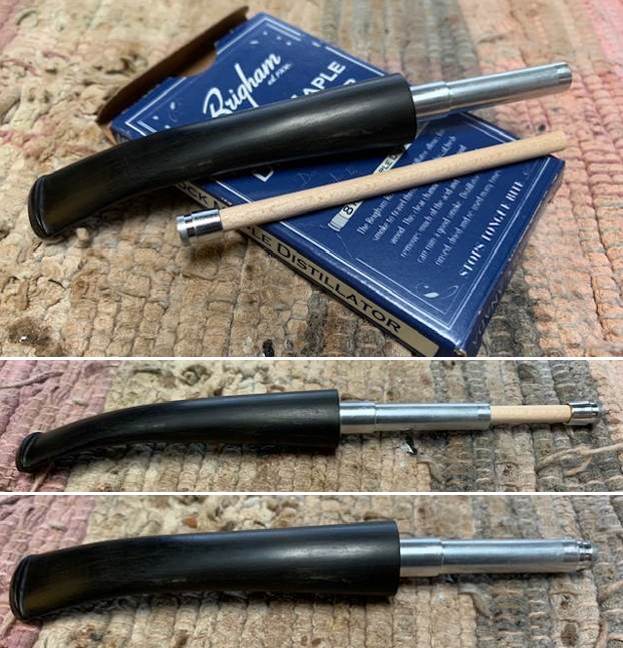
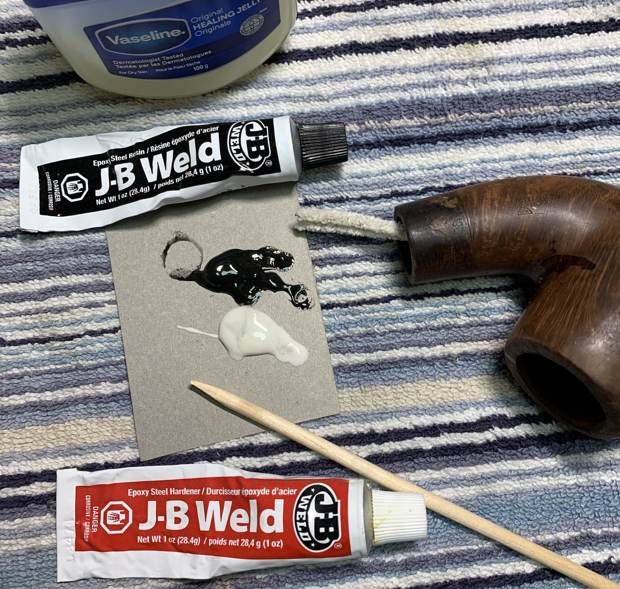
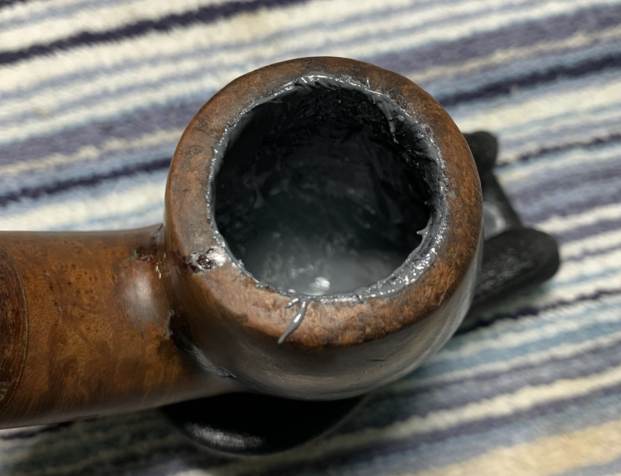
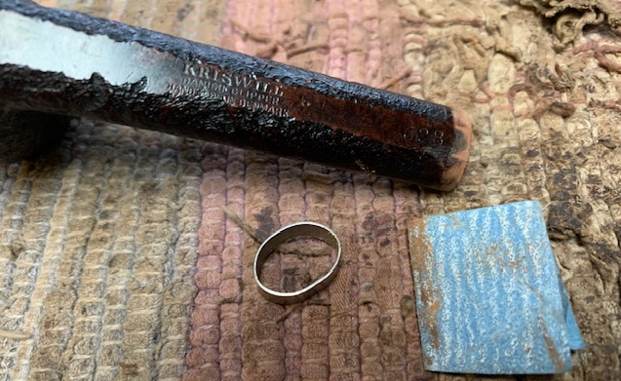
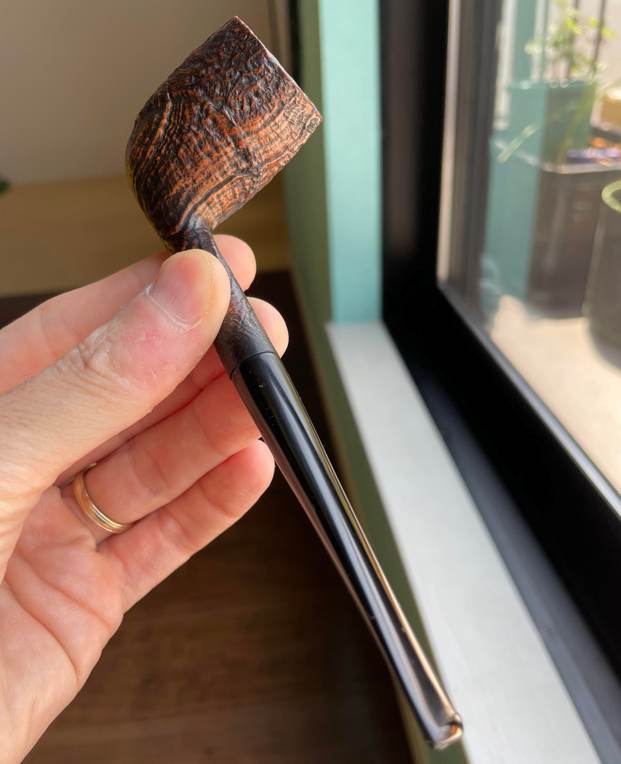
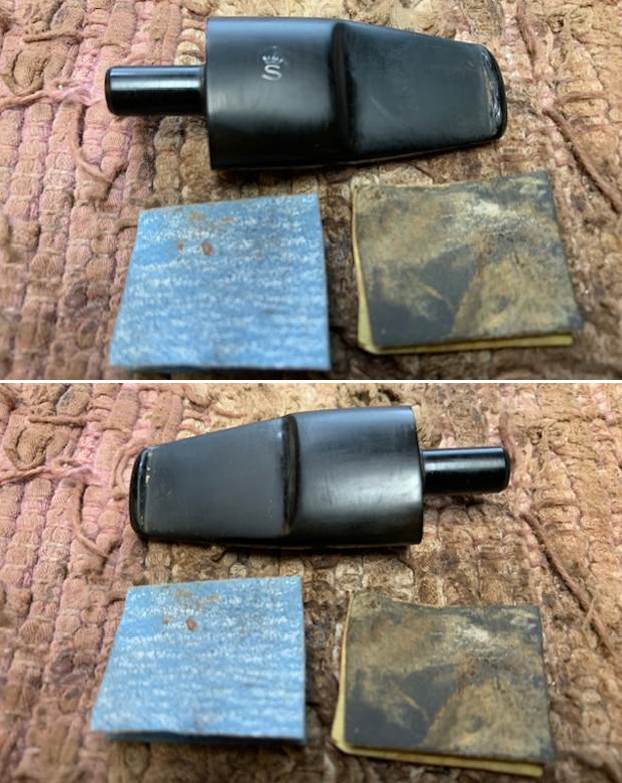
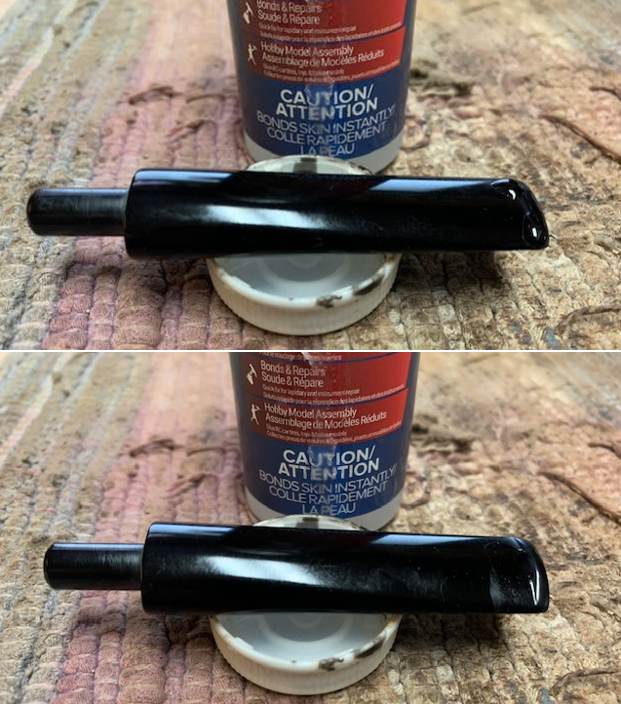
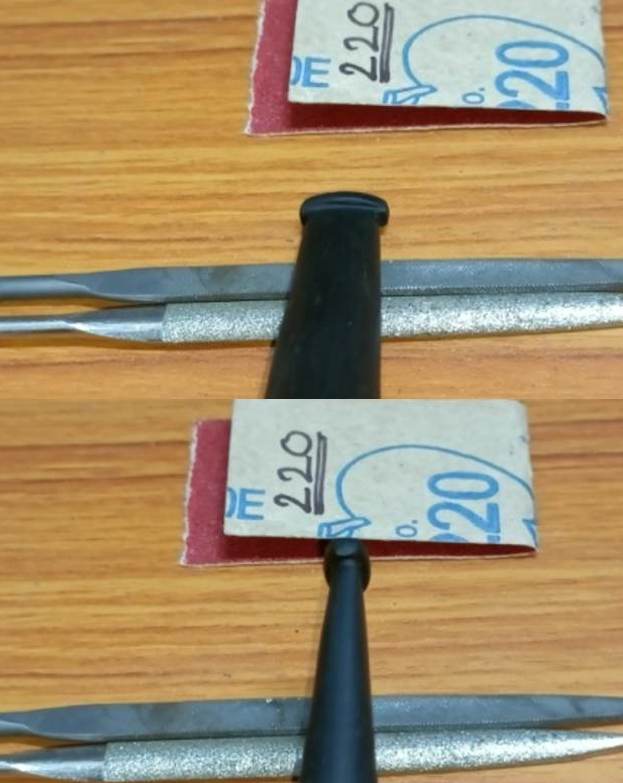
Luckily, I had a Sterling silver band that I previously got made from a local silversmith which perfectly fit the shank end. I filled the crack with thin CA superglue. Once the glue had seeped in to the crack and hardened completely, I attached the band over the shank end with CA superglue and set it aside for the repairs to cure.Now I turned my attention back to the stem. The tenon mod was completed and next I decided to address the extra flare at the slot end of the replacement stem. I wanted an old style stem with an orifice to match the correct time period of 1920s and had achieved it to a certain extent on the billiards pipe from the set. I cut about half an inch off the slot end. This achieved two aims; firstly, the flare was reduced and secondly, I now had an orifice at the slot end. I further evened out the cut surface by sanding the surface over a 220 grit sand paper.Thereafter began the arduous task of eyeballing and filing with flat/ semi-circular needle files. It did a take long time and lots of elbow grease to achieve a rough desired shape. I further fine tuned the rough edges and shape by sanding the stem surface using a 220 grit sand paper. 
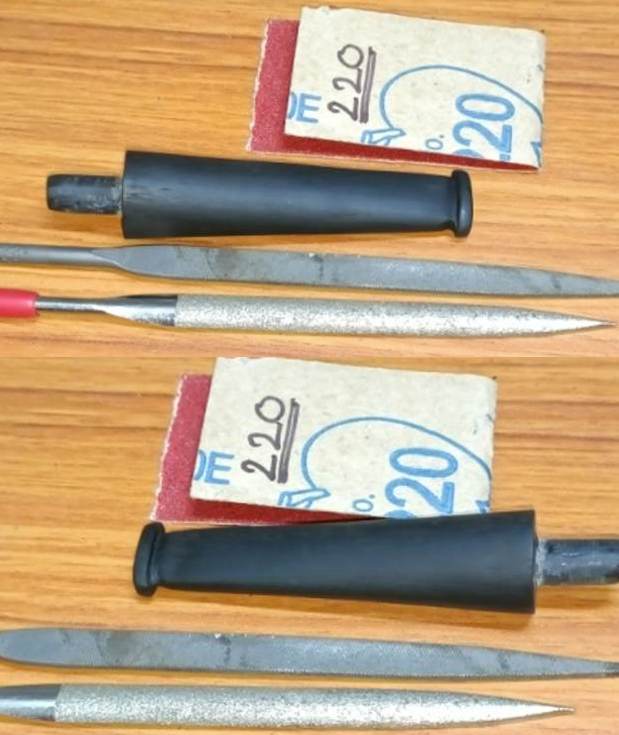
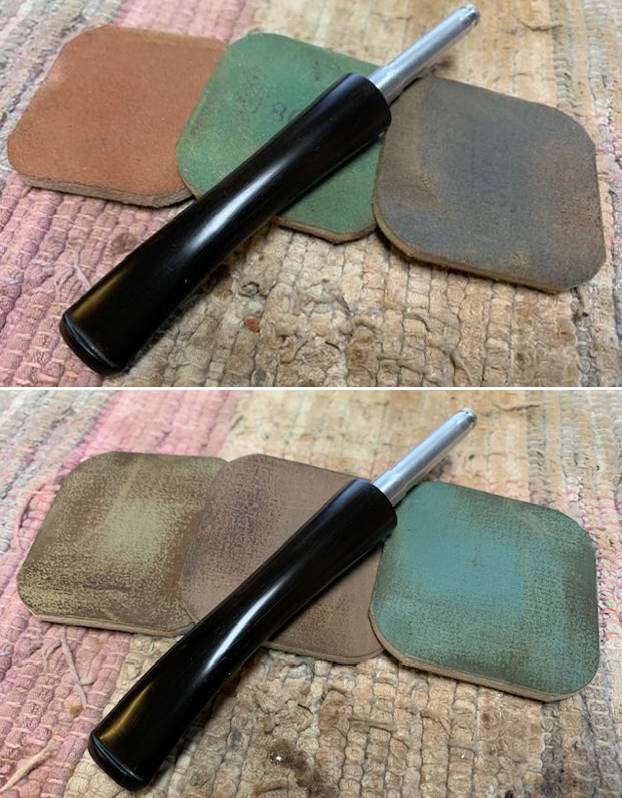
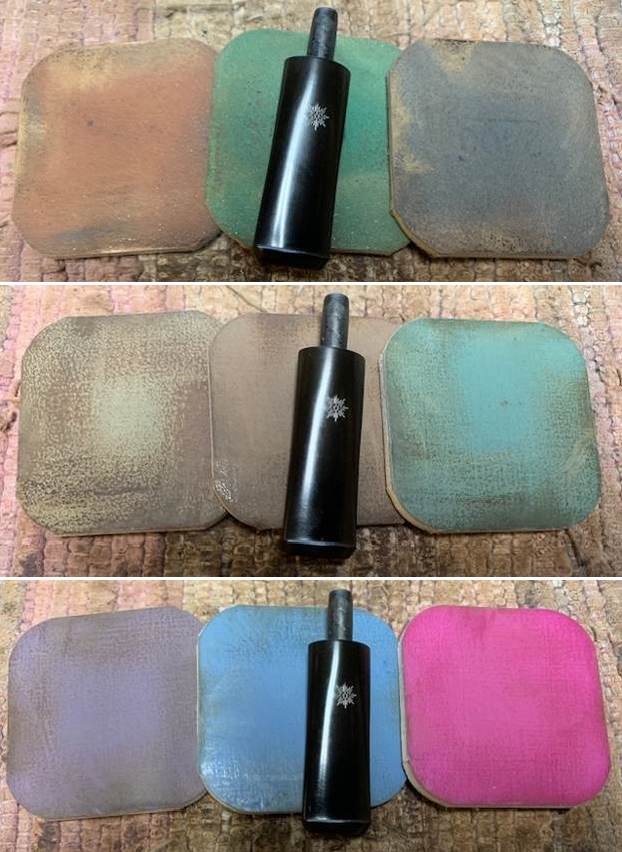
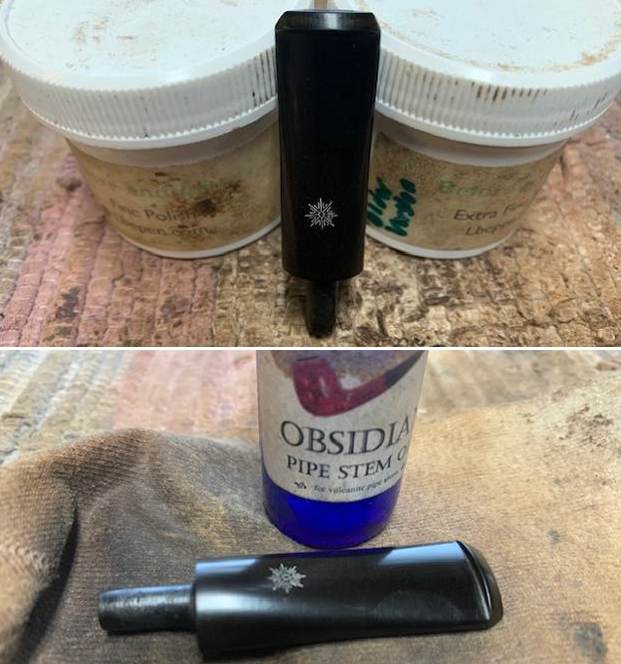
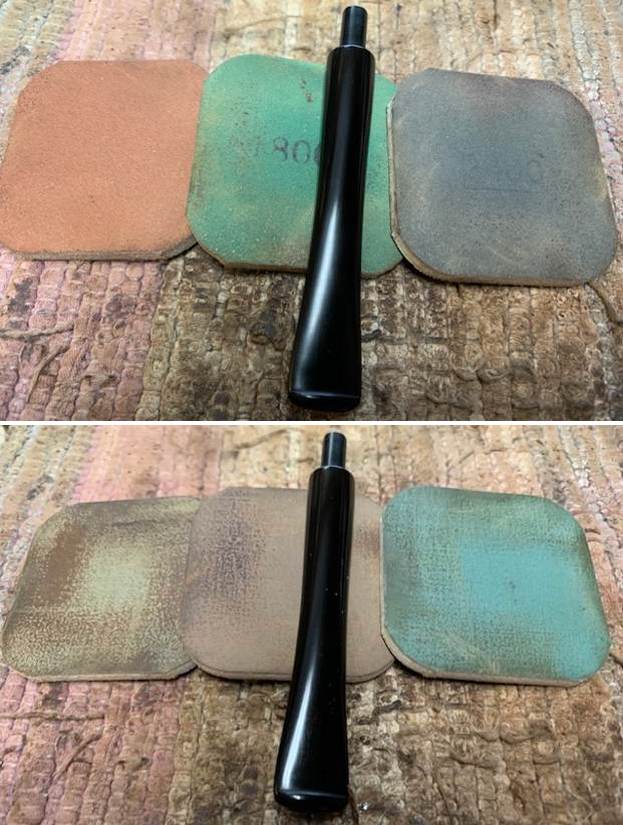
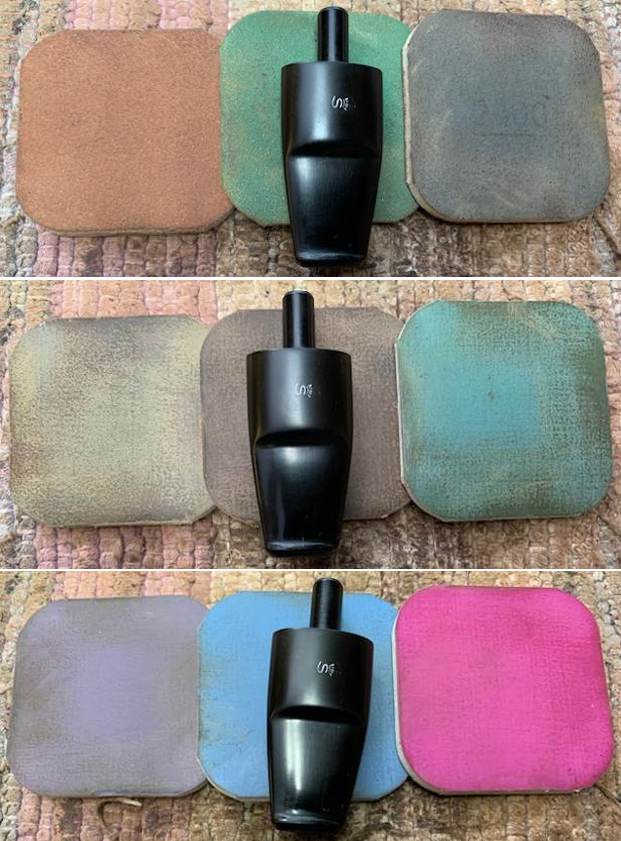
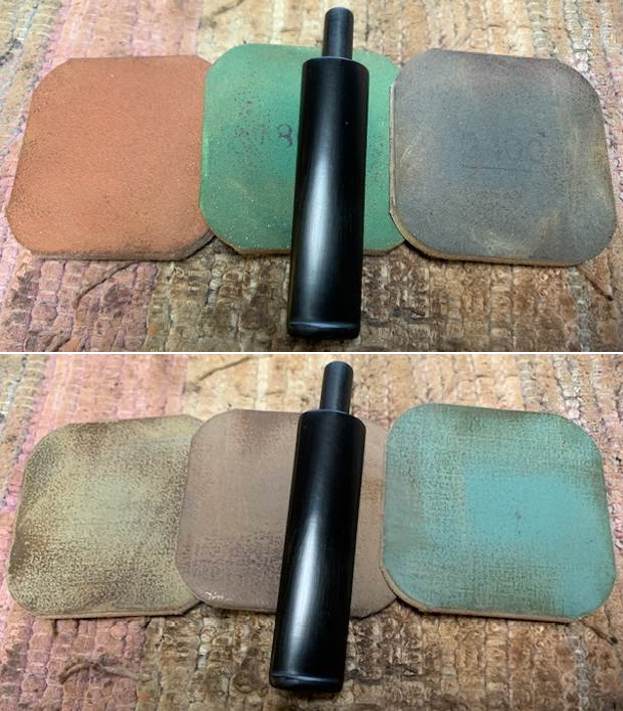
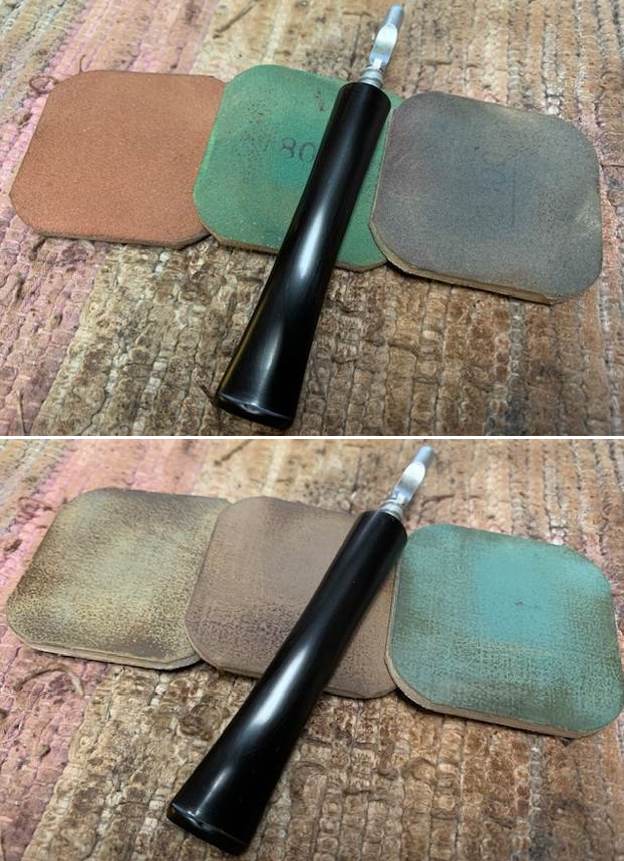
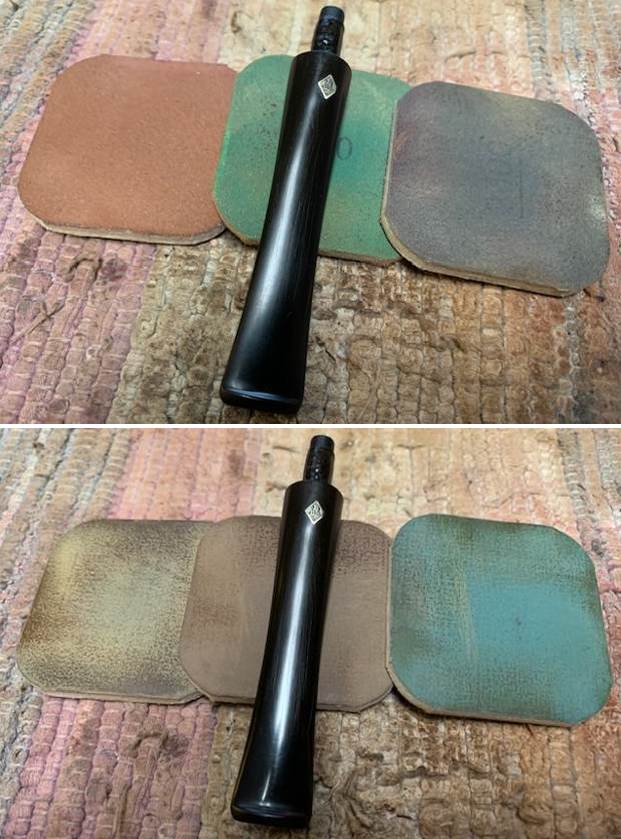
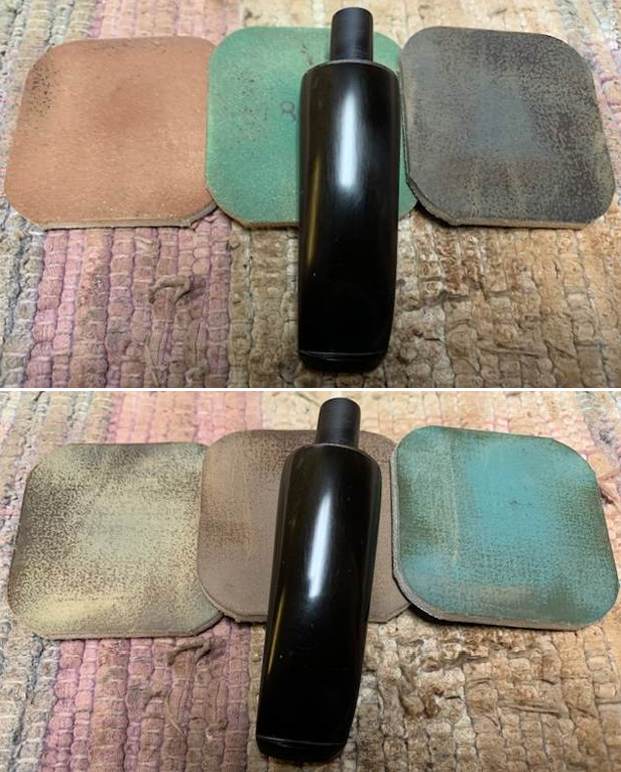
Next, I wet sand the entire stem with 600, 800, 1000, 1500 and 2000 grit sand papers. This progressive use of higher grit sandpapers helps to, firstly,  reduce the sanding marks left behind by the more abrasive ones, secondly, completely eliminate the oxidation while imparting a clean shine to the stem surface. Thirdly, this also helped to even out the sanding marks left behind by the flat needle files. I applied a little EVO and set the stem aside for a few minutes.
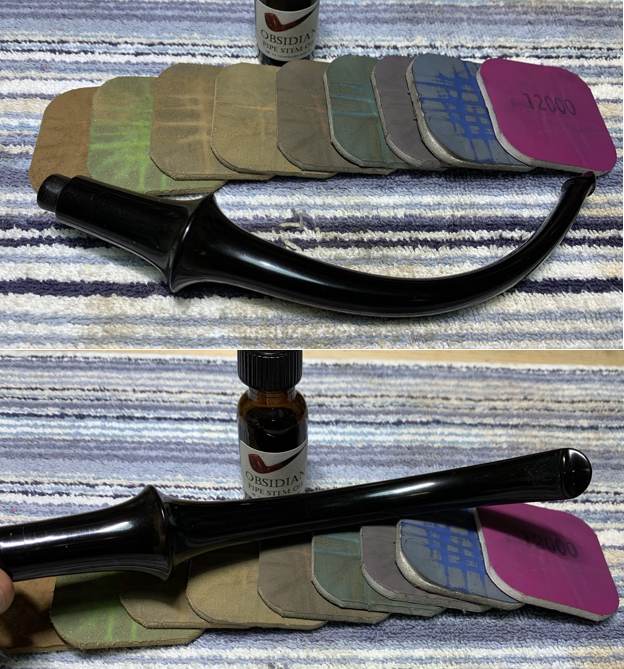
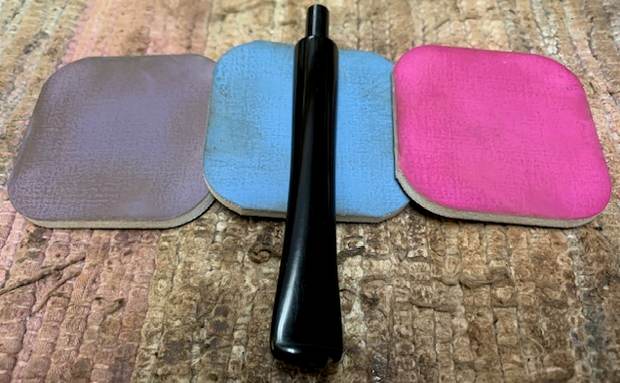
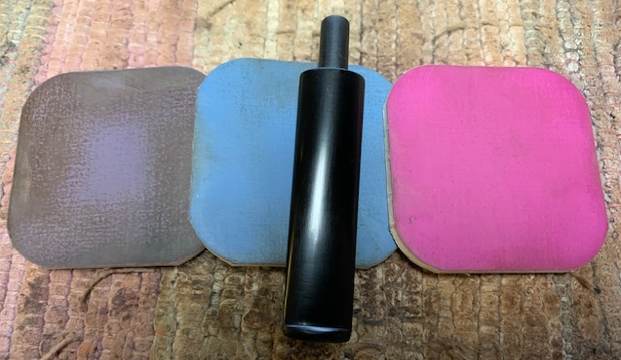
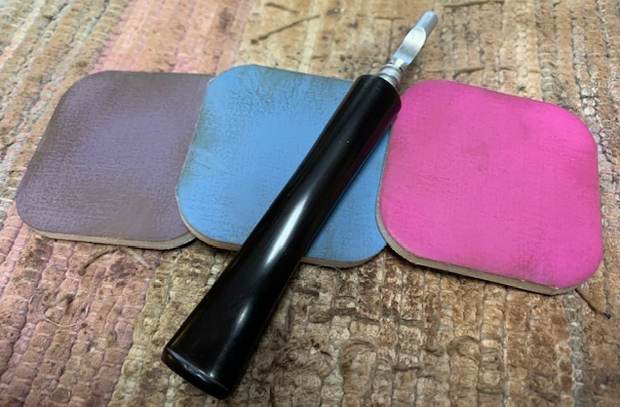
I went through the 1500 to 12000 grit micromesh pads to wet sand the stem. The stem now has a nice deep shine along the entire stem surface. I rubbed a small quantity of EVO and set the stem aside for the oil to hydrate the stem surface.
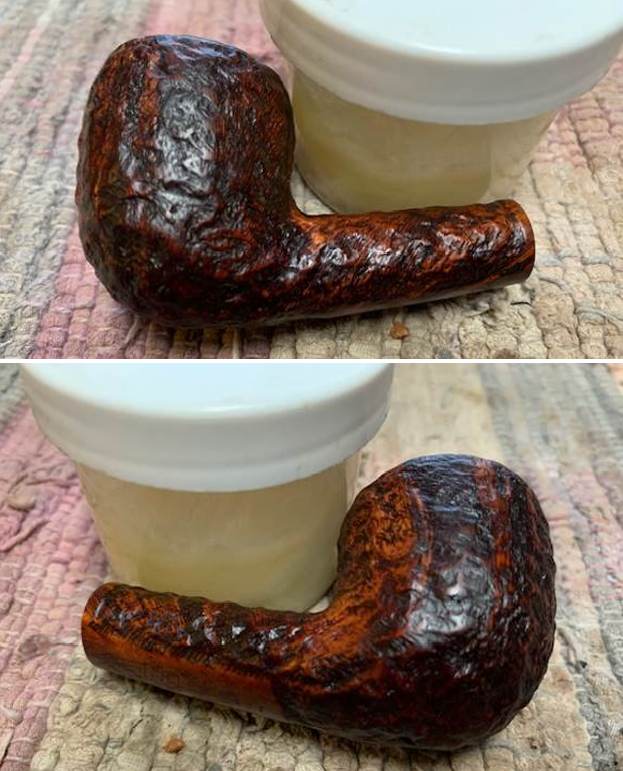
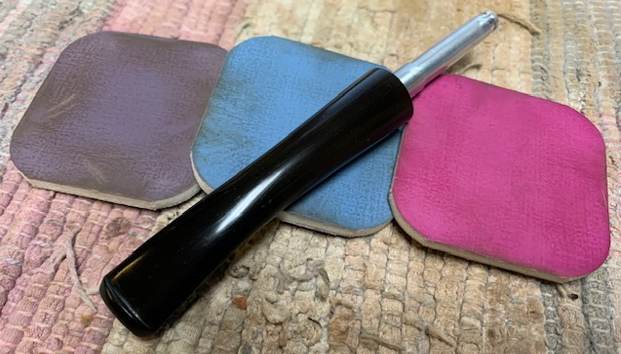
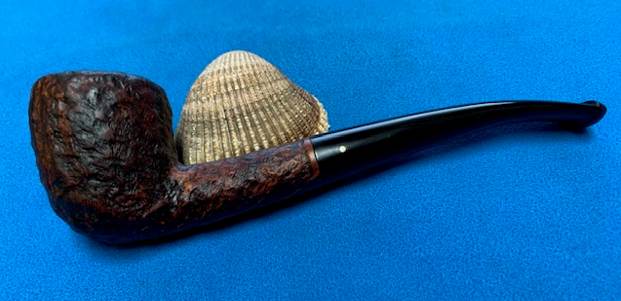
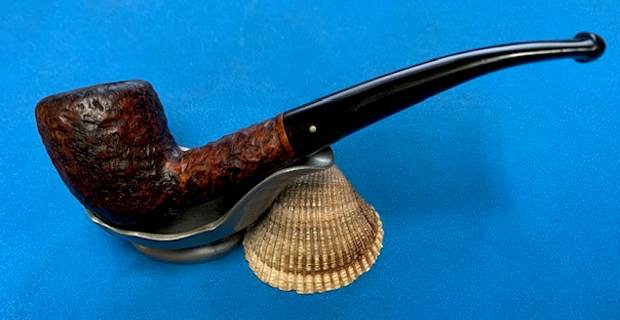
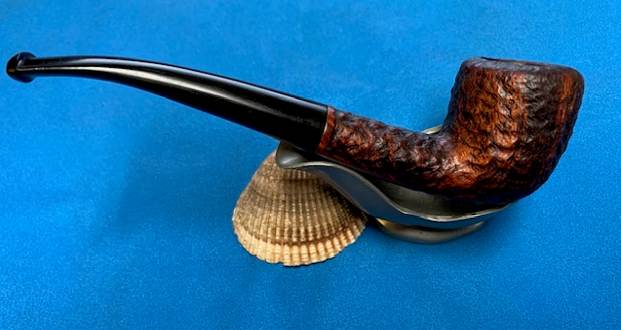
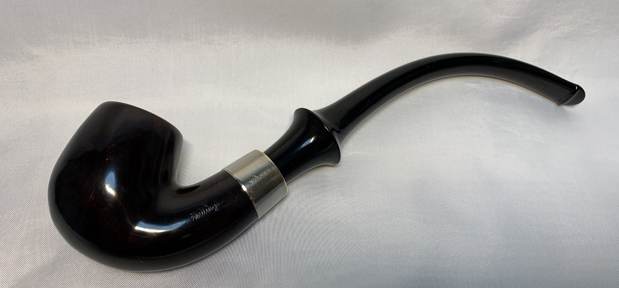
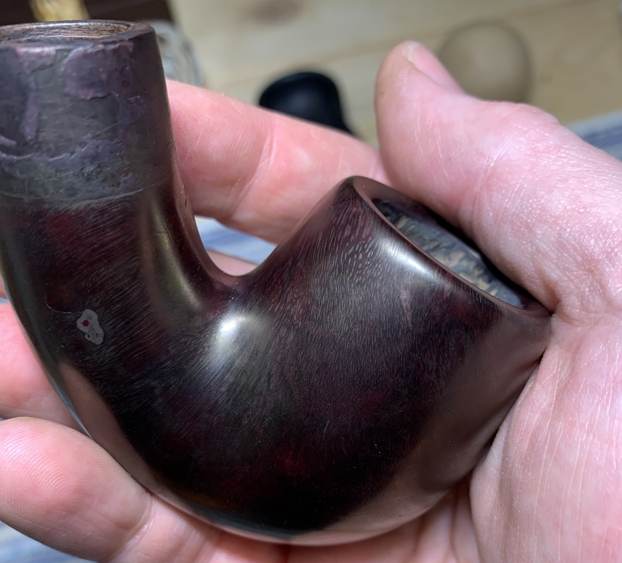
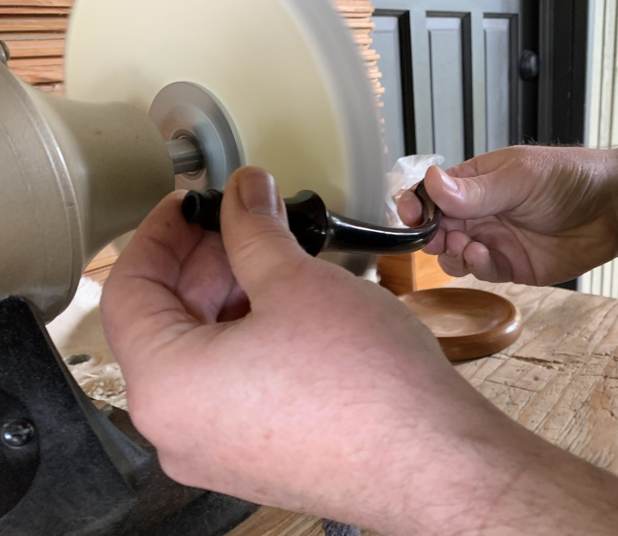
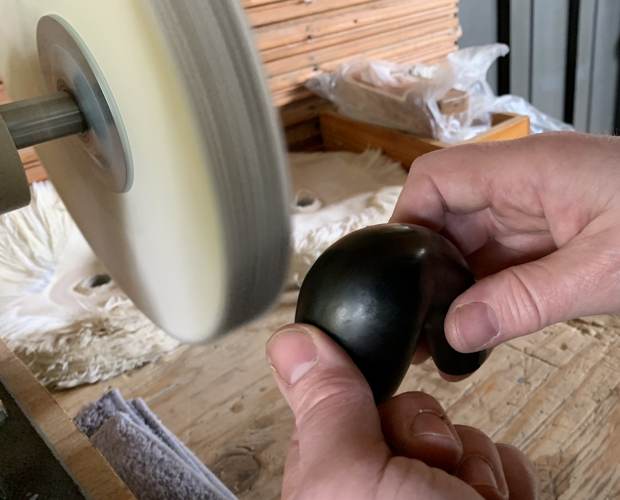
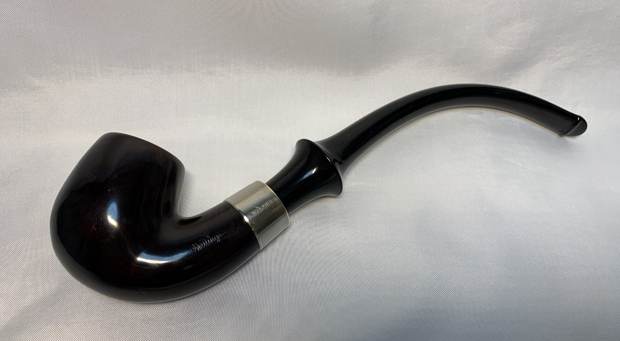
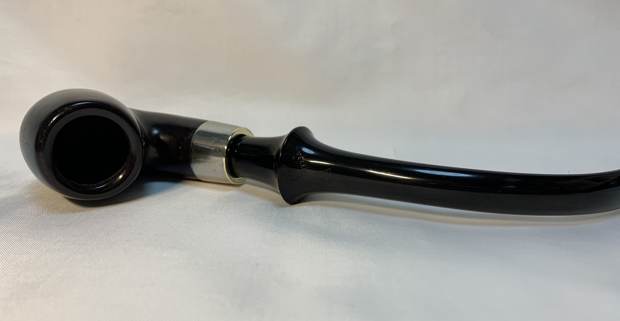
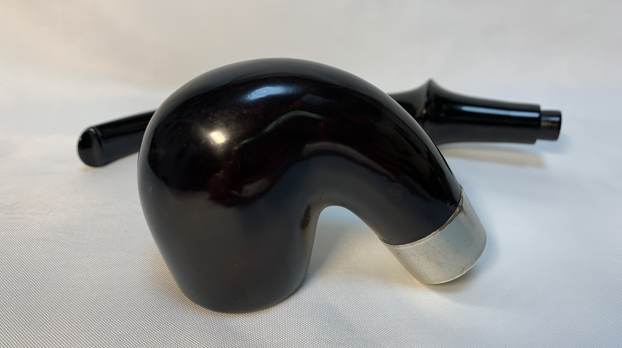
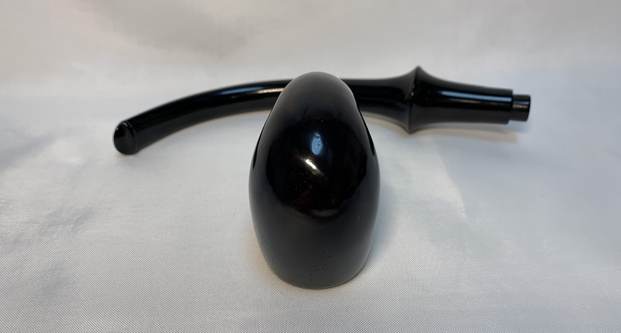
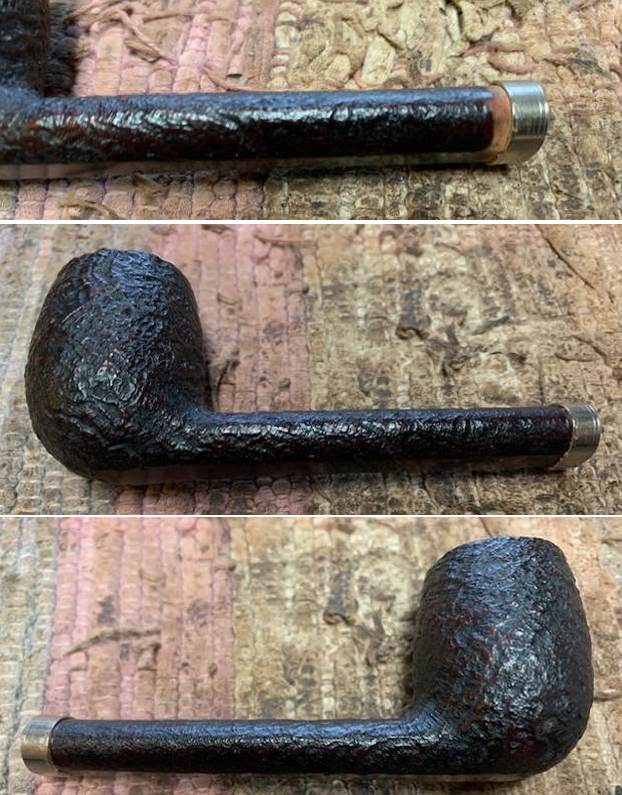
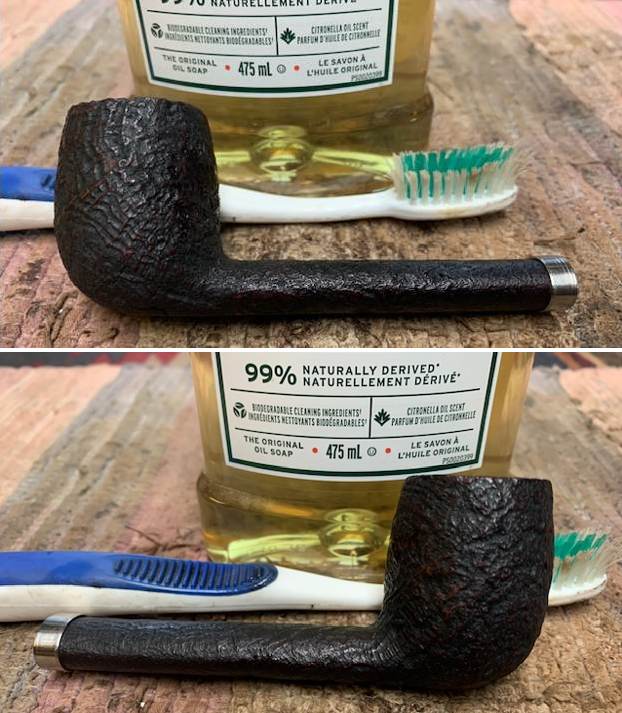
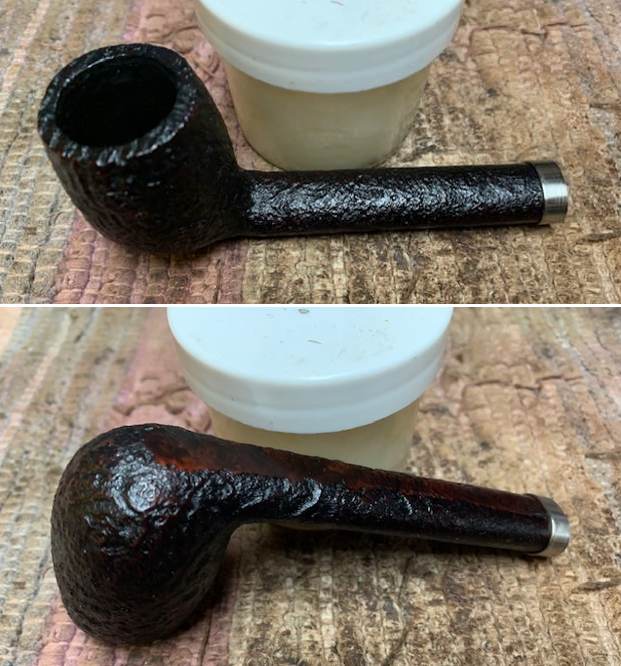
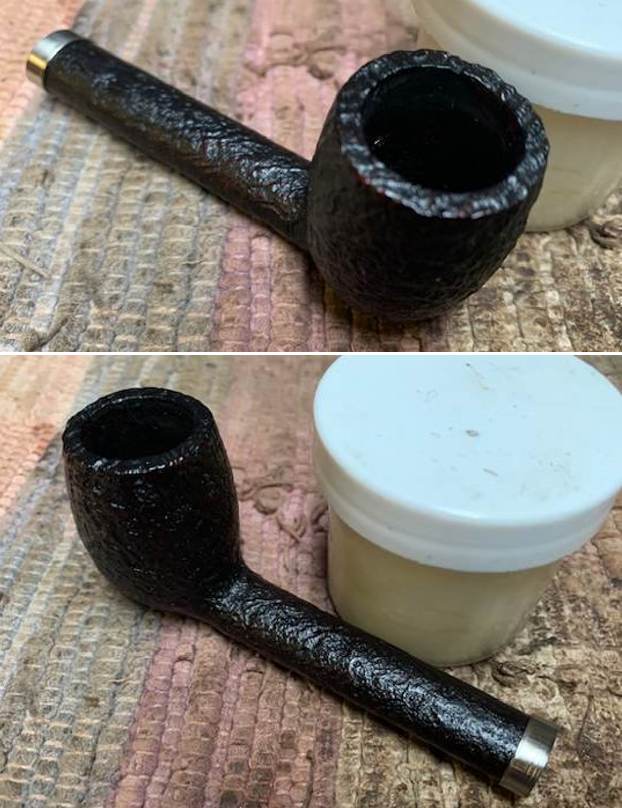
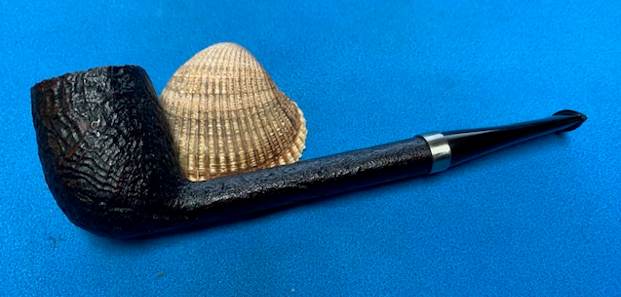
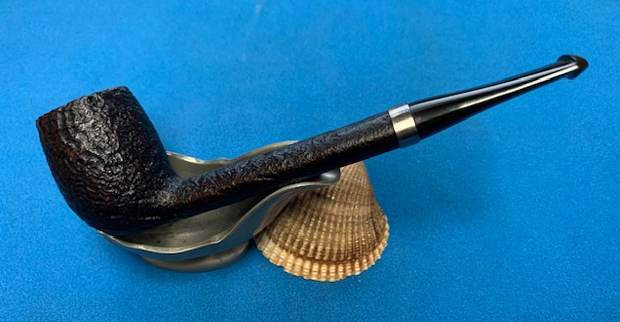
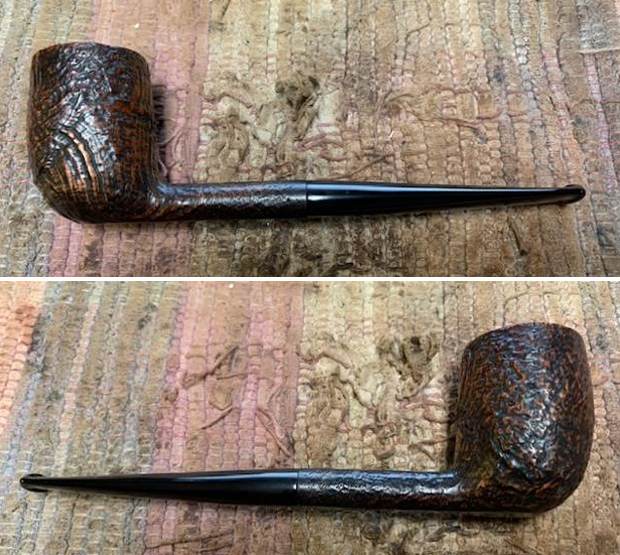
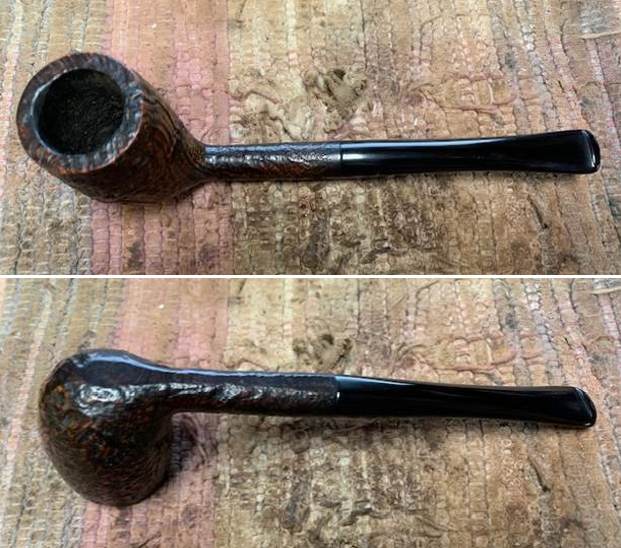
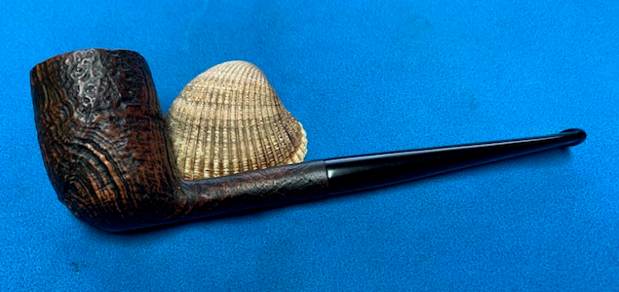
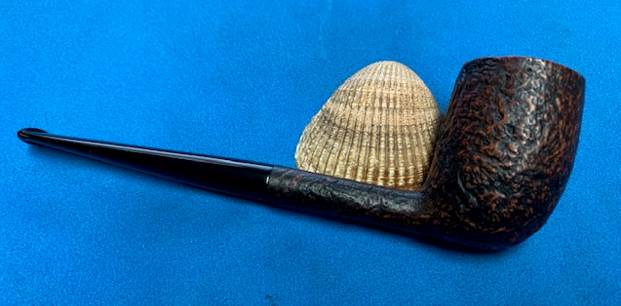
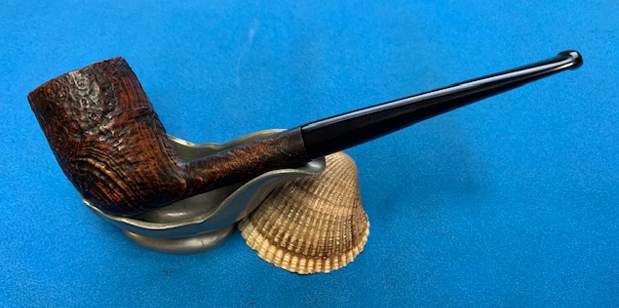
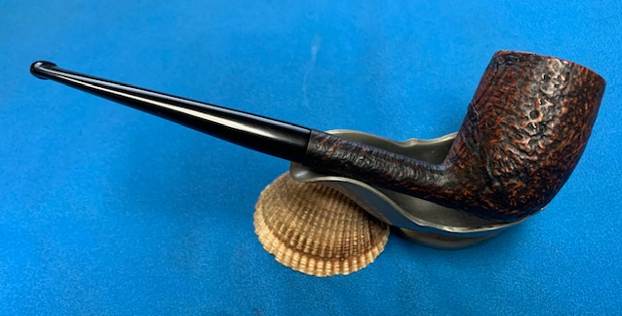
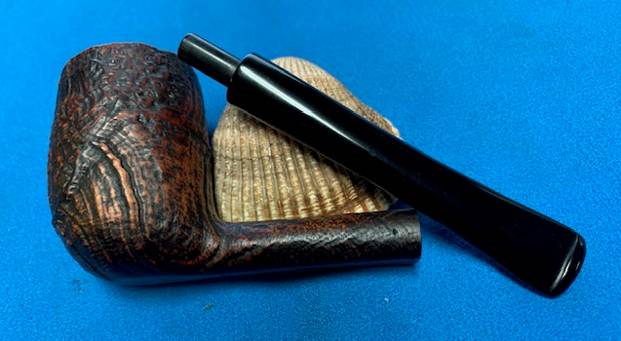
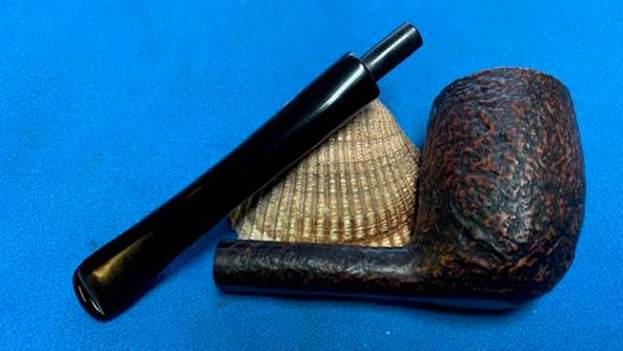
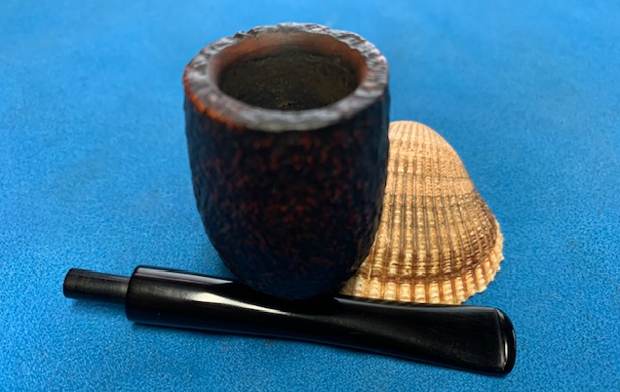
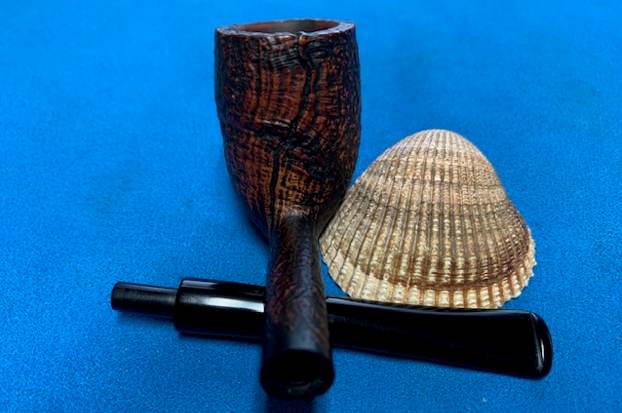
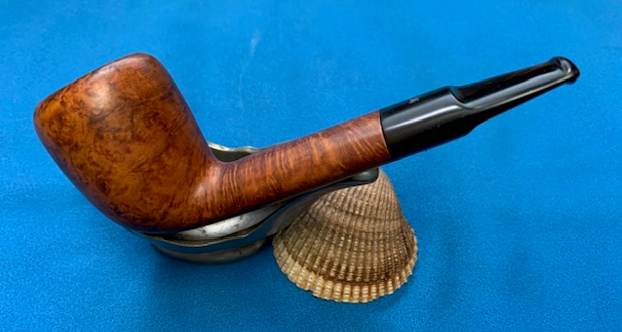
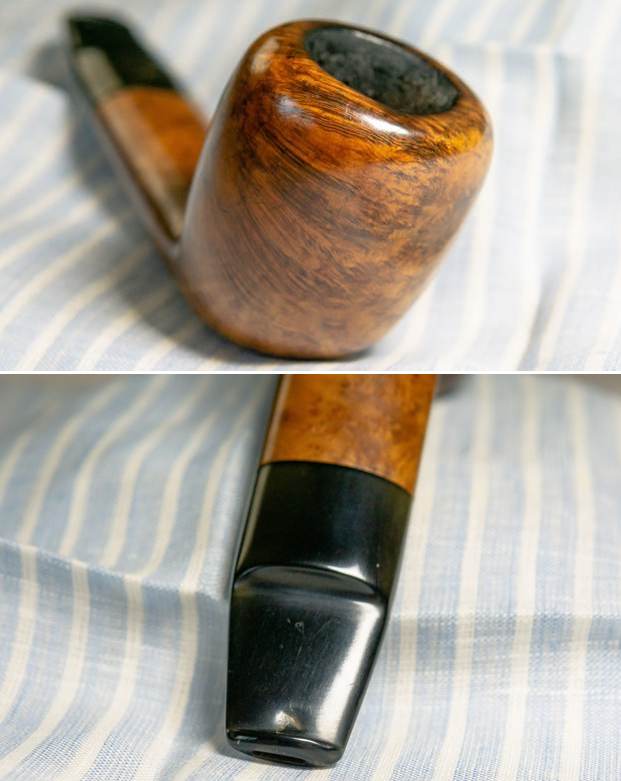
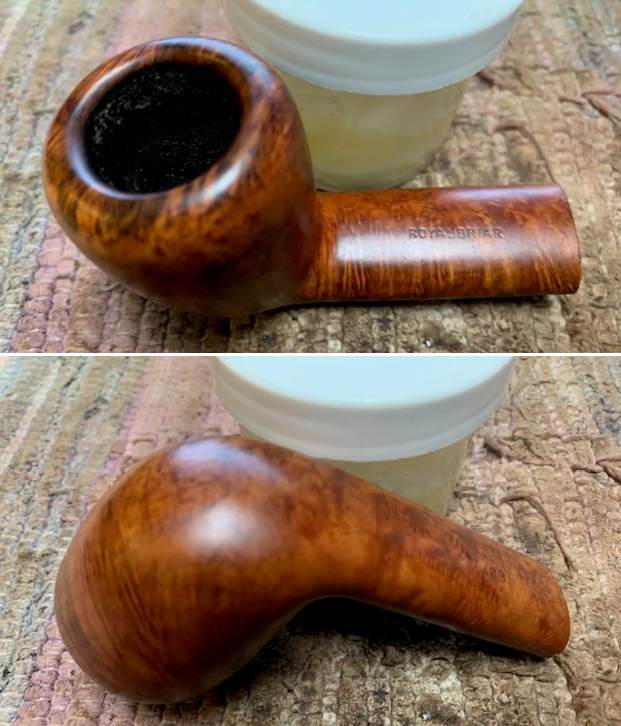
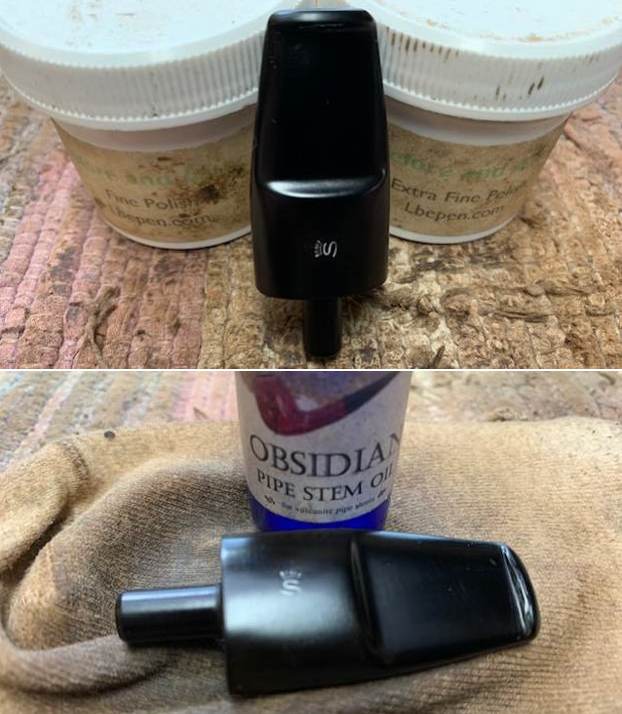
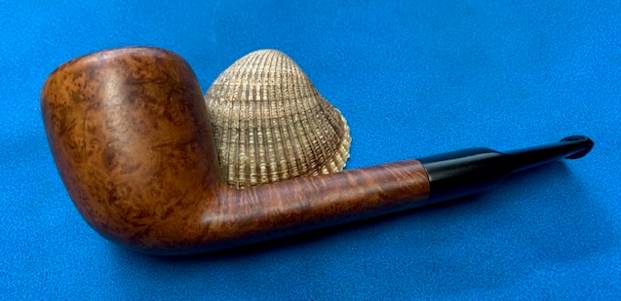
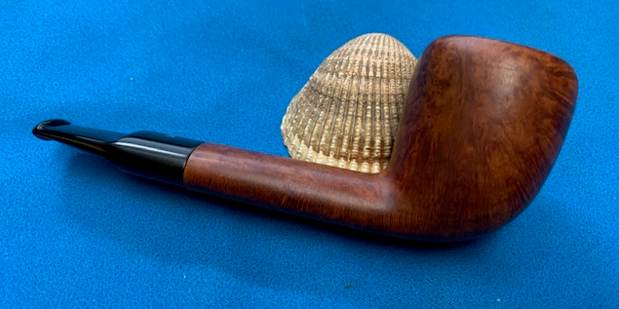
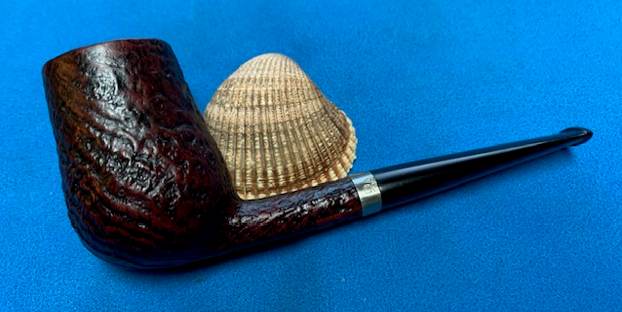
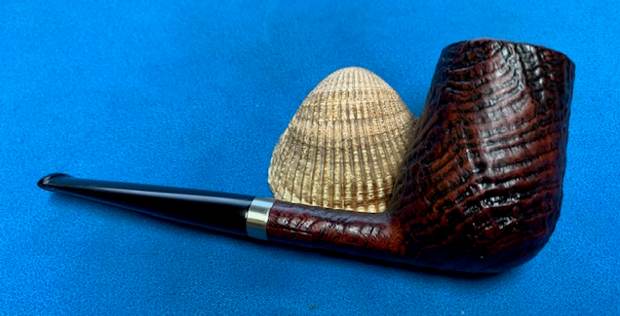
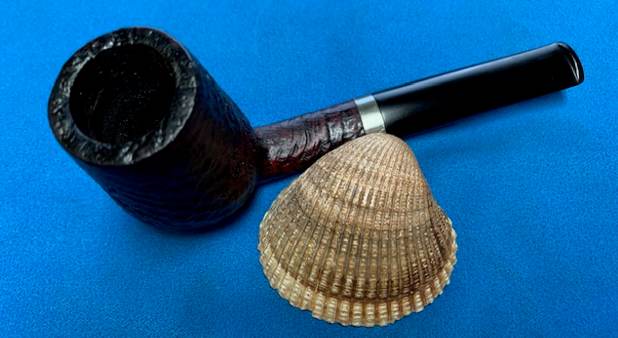
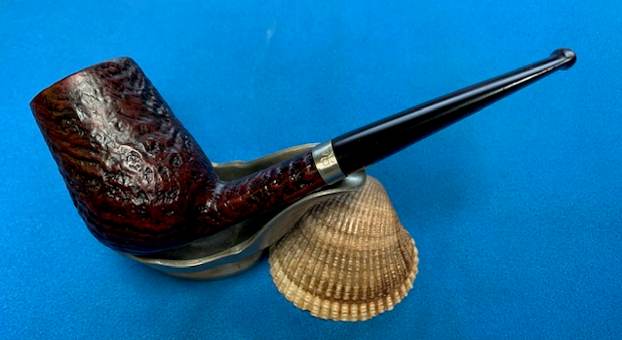
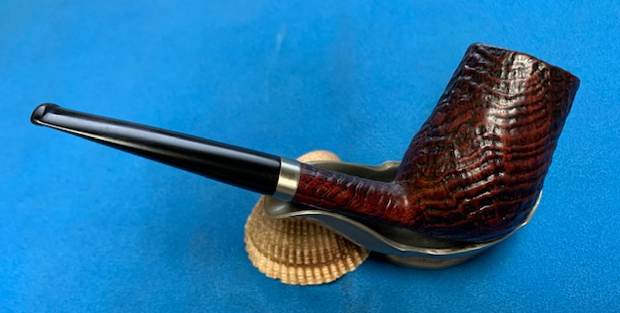
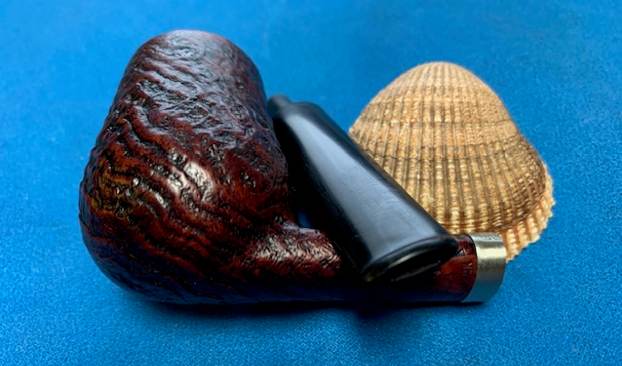
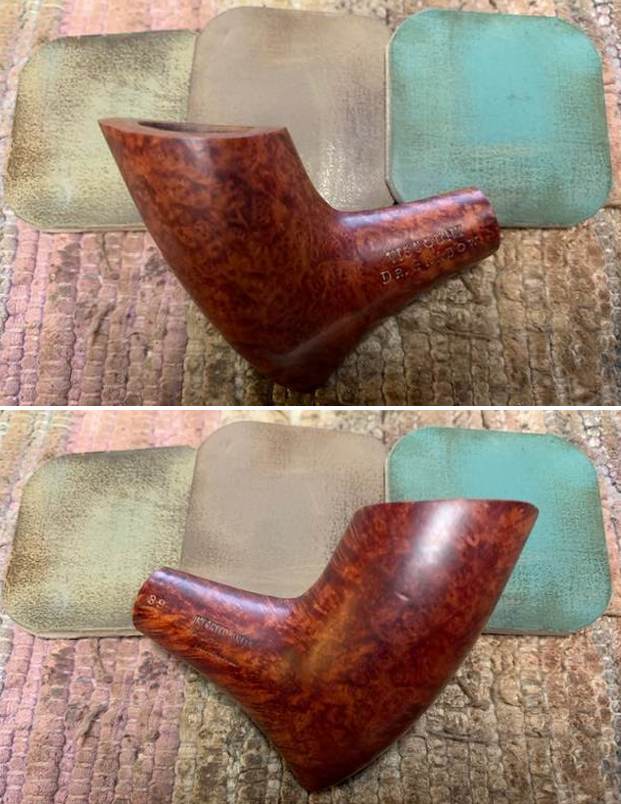
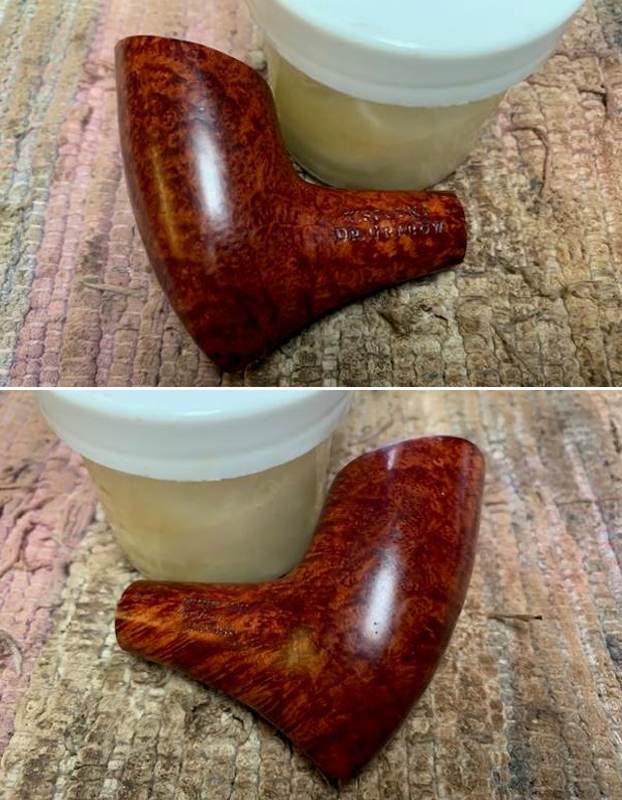
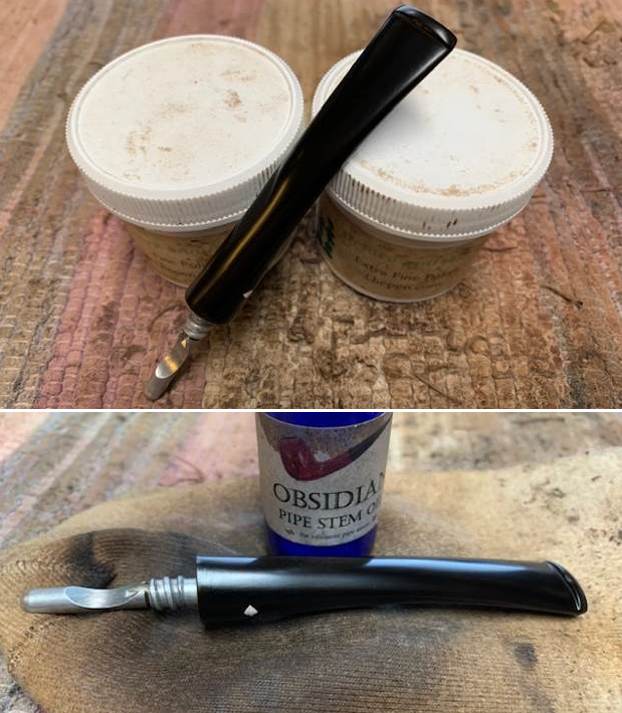
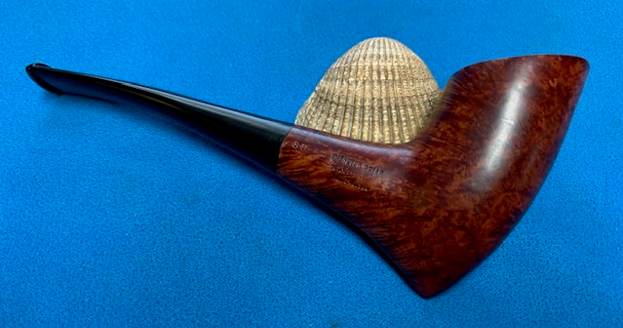
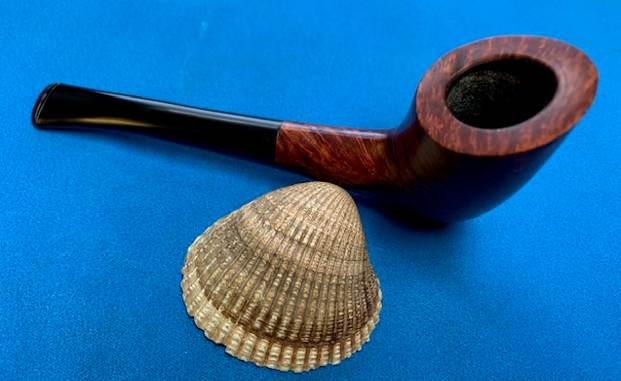
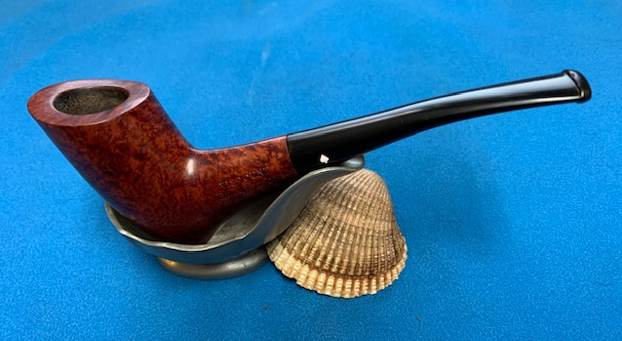
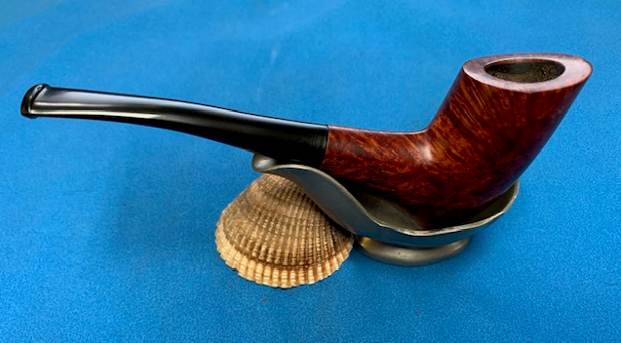
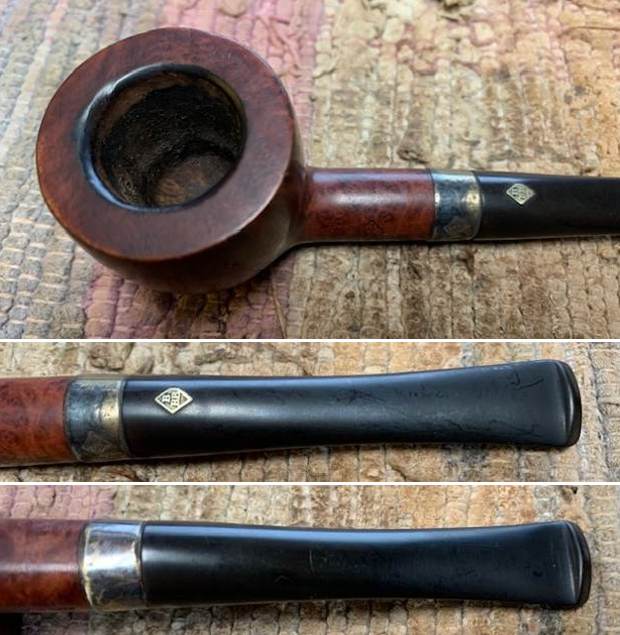
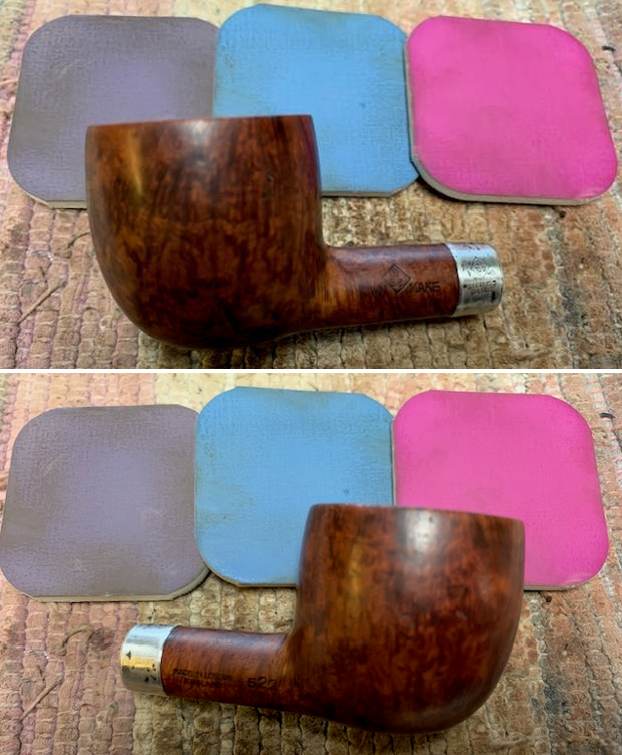
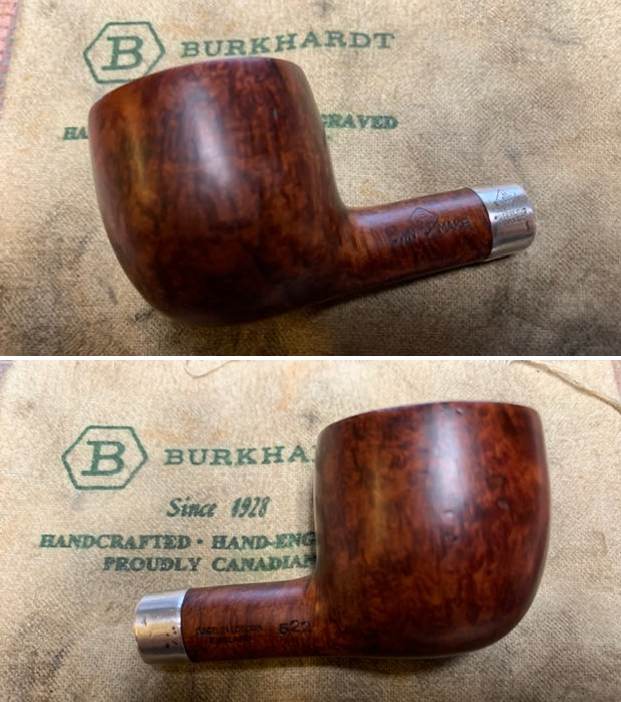
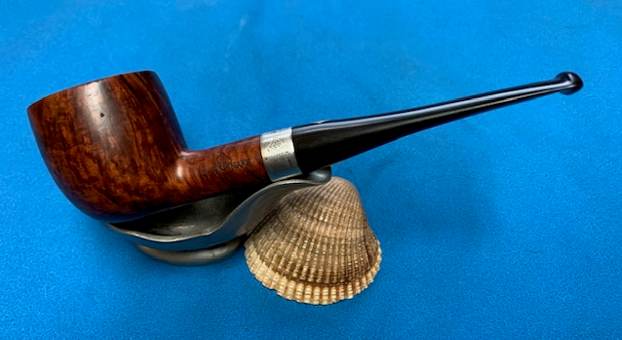
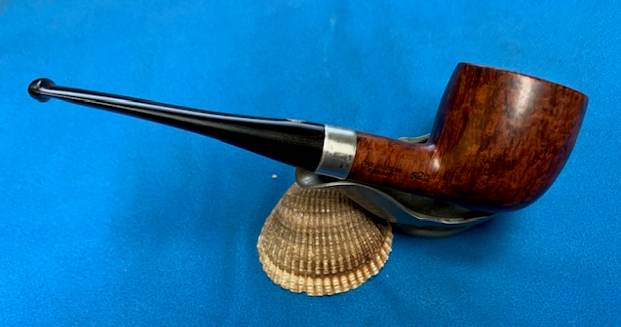
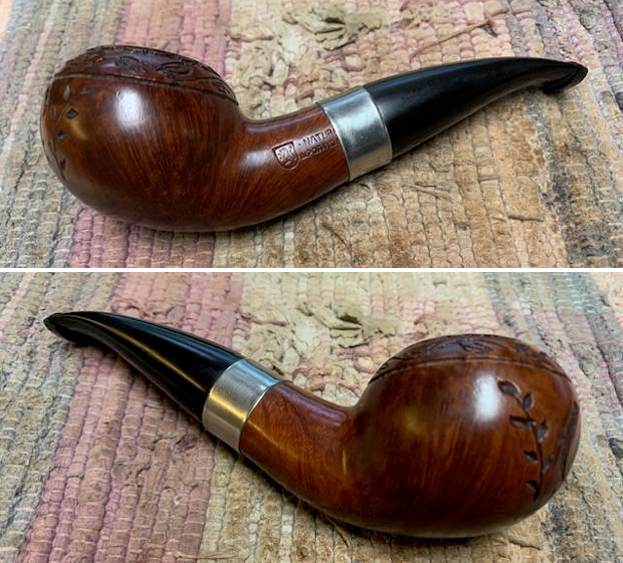
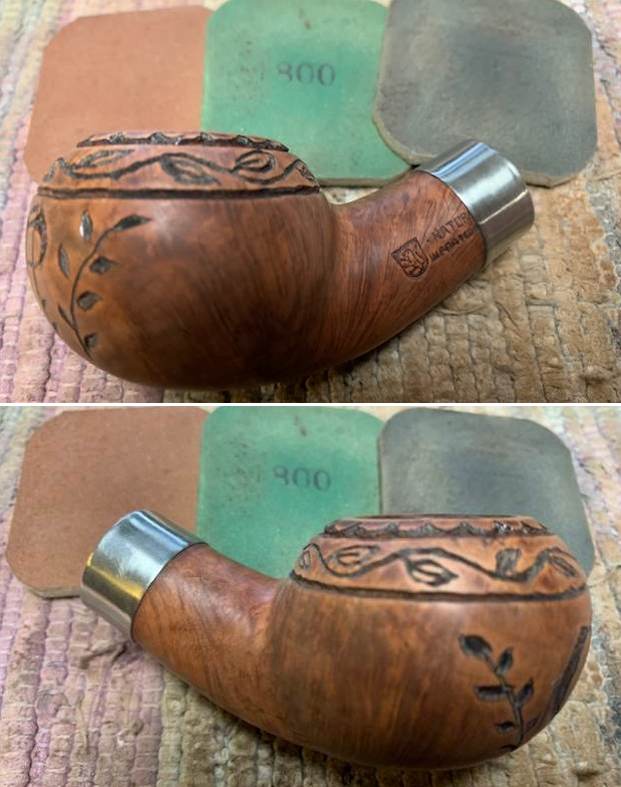
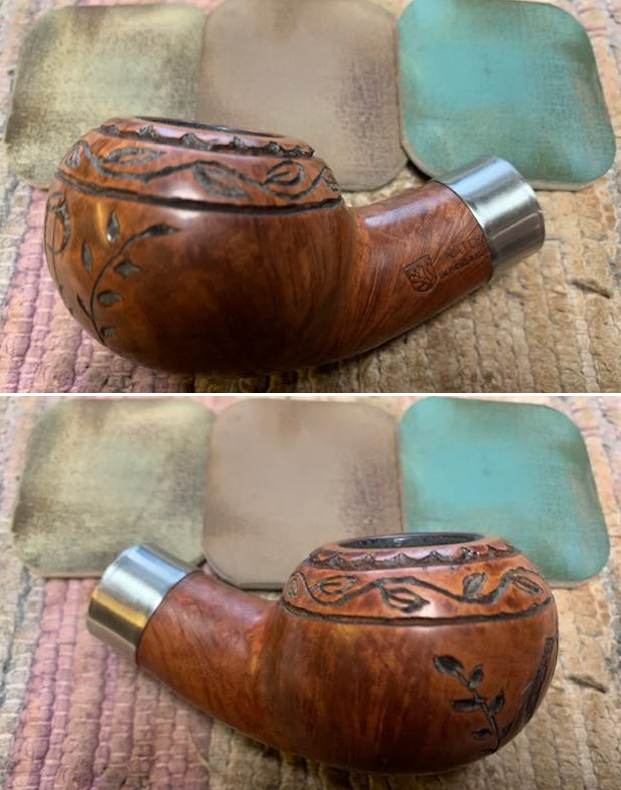
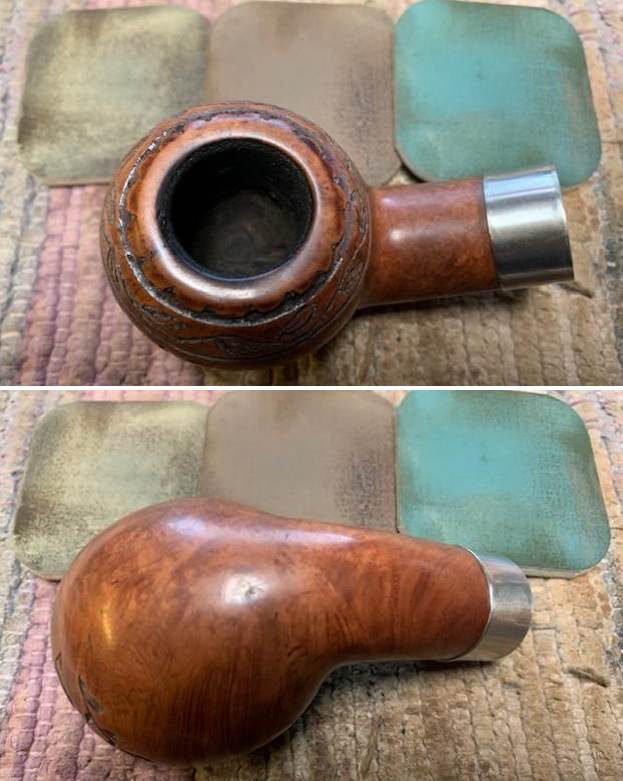
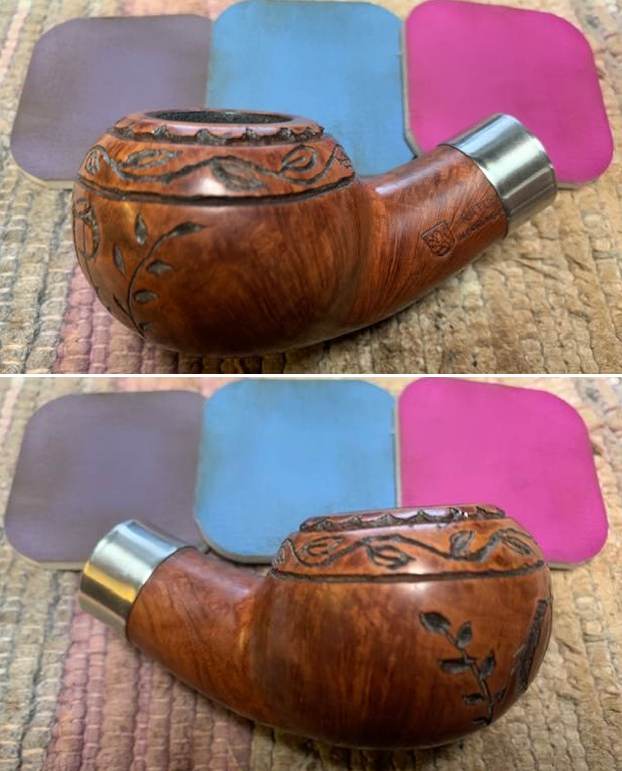
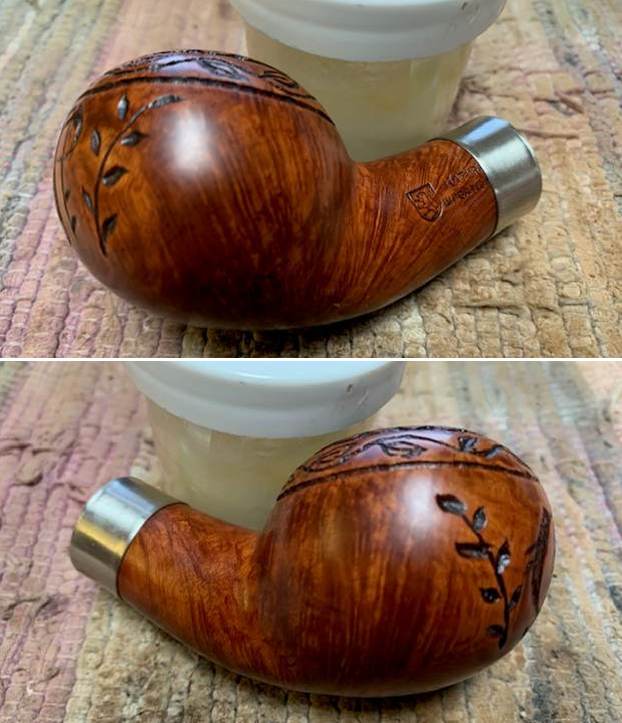
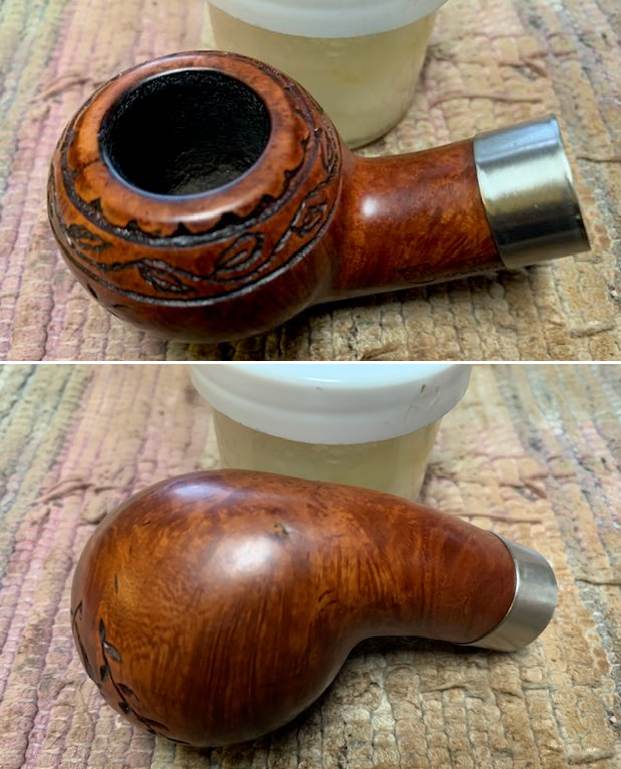
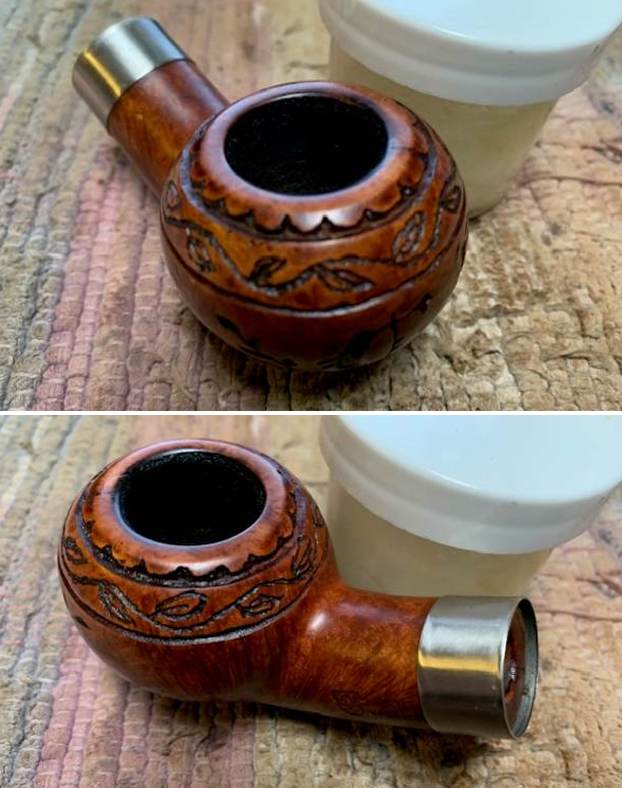
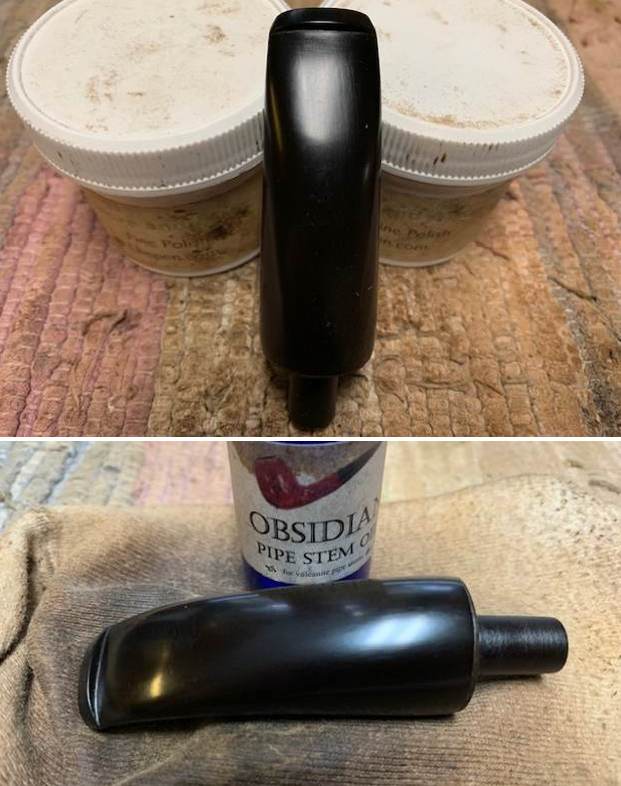
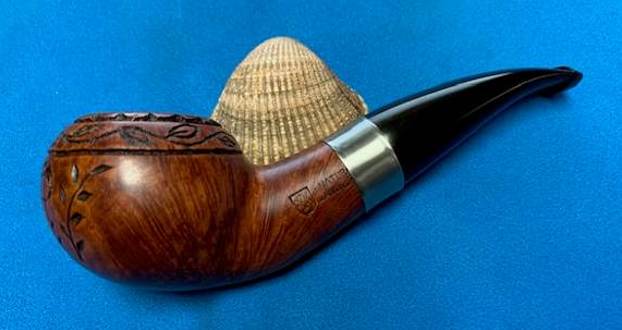
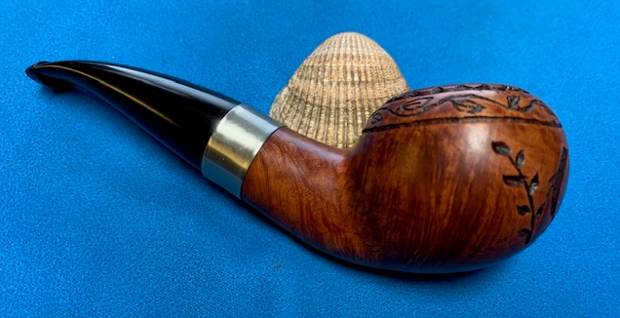
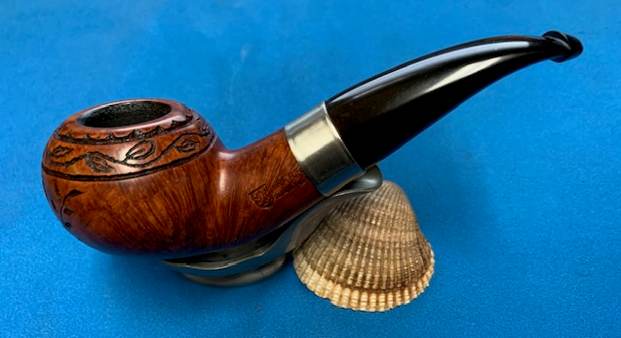
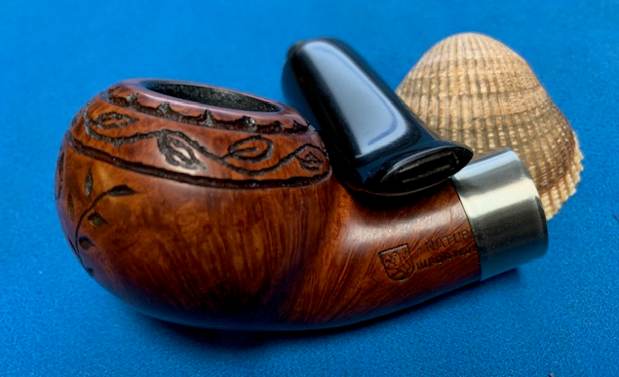
To finish the restoration of this pipe, I polished the stem with Blue Diamond compound and subsequently with carnauba wax using my hand held rotary tool. I once again vigorously buffed the stummel with microfiber cloth to bring a deep shine. The finished pipe actually looks much attractive in person than in the pictures below.

A Brigham Canada 141 Rusticated Acorn Reborn


Blog by Steve Laug

The next pipe I have chosen to work on is a nice looking rusticated ¼ bent acorn with a black vulcanite stem. We picked it up on 09/12/2021 from an auction in Wilkes Barre, Pennsylvania, USA. The stamping on the underside of the shank has the shape number 141 on the heel of the bowl followed by Brigham in script [over] CANADA. The vulcanite stem has a single brass dot inserted on the left side. The pipe is a nice looking pipe with a medium brown finish that highlights the grain under the rustication. The ¼ bent vulcanite stem works very well with the bowl. It is light weight and comfortable pipe to hold. Jeff sent me the following photos of the pipe to show the condition it was in before he worked on it.

This is what I saw when I looked over the pipe.

  1. The finish shows darkening of hand oils and some thick grime ground into the finish around the bowl sides. The medium brown stain is dull and the grain is obscured around the bowl sides and shank
  2. The rusticated rim top was very dirty with darkening and lava ground into the rustication to point that it was almost smooth. The inner edge of the bowl was unclear but seemed to show some damage under the lava coat.
  3. There was a moderate cake in the bowl. The bowl itself was very dark and dirty. Once the bowl was cleaned up we could confirm the condition of the bowl walls.
  4. The vulcanite taper stem was filthy with oxidation, calcification and tooth marks and chatter on both sides. There were some deeper tooth marks on the underside ahead of the button.
  5. There is a brass single dot on the left side that identifies it as a Brigham pipe. It is tarnished and almost invisible in the oxidation of the stem. The tenon is a Hard Rock Distillator system that holds a maple filter and it is tarred and heavily dirty.

To summarize what I saw – this Brigham Canada 141 Acorn is a well made pipe. The bowl and stem are very dirty which says to me that the pipe was someone’s favourite pipe. The look and feel of the pipe in the hand is great. It should clean up very well. Here are photos of the pipe taken before Jeff started the clean up.  Jeff took close up photos so that I could have a clearer picture of the condition of the bowl, rim edges and top. The rim top photos confirm my assessment above. The cake in the bowl is thick – covering the walls of the bowl. The rim top has thick lava coat and has some darkening on the inner edge and is heavier toward the back of the bowl. The inner edge looks like it might be damaged. This is what I look for when assessing a pipe. I look forward to viewing it in person after the clean up work. The stem is very oxidized with thick calcification on the last half of the stem and there are tooth marks and chatter on both sides ahead of the button. Instead of telling you what I see in the next photos of the sides of the bowl and the heel I want to hear from you. Tell me what you see? What does the finish look like to you? Are there any visible problems or issues that stand out to you? Are the cracks or scratches in rusticated finish of the bowl? Are there visible flaws or fissures in the briar? What does the finish look like? Is there a pattern to it? Any visible issues on the heel of the bowl? These questions should help you to see what I am looking for when I see these photos.  Jeff removed the stem from the shank and took photos of the distillator aluminum tenon. There was no maple filter in the tenon so the tube was filled up with tars and oils. The outside of the tube is also covered with tars as well. He took photos of the stamping on the underside of the shank. On the heel it is stamped with the shape number 141. That is followed by Brigham in script [over] Canada. The vulcanite stem has the brass pin in the left side of the taper. What stands out for you in the photos of the stamping? What do you look for in the stamping? It is dirty but what do you see underneath the grime on the surface of the briar? I am also including the information from Pipedia’s article on Brigham pipes. It is a great read in terms of the history of the brand (https://pipedia.org/wiki/Brigham_Pipes). Charles Lemon (Dadspipes) is currently working on a book on the history of the brand. Until that is complete this article is a good summary. I have included it below.

Roy Brigham, after serving an apprenticeship under an Austrian pipesmith, started his own pipe repair shop in Toronto, in 1906. By 1918 the business had grown to include five other craftsmen and had developed a reputation across Canada for the high quality of workmanship. After repairing many different brands of pipes over the years, Roy noted certain recurring complaints by pipe smokers, the most common referred to as “tongue bite”. Tongue bite is a burning sensation on the smoker’s tongue, previously thought to be due to the heat of the smoke (i.e. a “hot smoking pipe”).

He soon began manufacturing his own pipes, which were lightweight, yet featured a more rugged construction, strengthening the weak points observed in other pipes. The problem of tongue bite intrigued him, and he decided to make overcoming it a future goal.

About 1938, Roy’s son Herb joined him to assist in the business. The business barely survived the great depression because pipes were considered to be a luxury, not a necessity, and selling pipes was difficult indeed. In approximately 1937 [1], after some experimentation, Roy and Herb discovered that tongue bite was in fact a form of mild chemical burn to the tongue, caused by tars and acids in the smoke. They found that by filtering the smoke, it was possible to retain the flavour of the tobacco and yet remove these impurities and thereby stop the tongue bite.

Just as Thomas Edison had searched far and wide for the perfect material from which to make the first electric light bulb filaments, Roy & Herb began experimenting with many materials, both common and exotic, in the quest for the perfect pipe filter. Results varied wildly. Most of the materials didn’t work at all and some actually imparted their own flavour into the smoke. They eventually found just two materials that were satisfactory in pipes: bamboo and rock maple. As bamboo was obviously not as readily available, rock maple then became the logical choice.

They were able to manufacture a replaceable hollow wooden tube made from rock maple dowelling, which when inserted into a specially made pipe, caused absolutely no restriction to the draw of the pipe, yet extracted many of the impurities which had caused tongue bite. The result was indeed a truly better smoking pipe…

I then turned to a second article by Charles Lemon called, “A Closer Look at the Dots, Dates, and Markings of Brigham Pipes” to be able to pin down the time frame that the pipe was made in and to help interpret the stampings and shape number on the pipe. Here is the link to his article. (https://pipedia.org/wiki/Brigham_Pipes_%E2%80%93_A_Closer_Look_at_Dots,_Dates_and_Markings

I have dubbed the decades between 1980 and 2000 the Late Canadian Era, a period that saw several changes at Brigham that are of note to the collector. First, the traditional 8-grade pinning system (the famous Brigham “Dots” which denoted the quality of the pipe) was changed to a 7-grade system to simplify pinning (more on this below), and the Norsemen and Valhalla series were merged to form the President Series, which represented the very finest pipes coming out of the Toronto factory. Early pipes from this era (left, below) are stamped with a shape number and “Brigham” over “Canada”; later pipes (late 1980s+, on right below) are stamped simply with a shape number and the Brigham logo.

I have included the photos and headings on the photos below.

Late Canadian Era Stamps1980-85 1990s

With the information from Charles’ message and the chart above that he included I knew what I was dealing with in terms of the stamping and the age of this pipe. I learned that this Late Canadian Era was made between 1980-1985. The pipe is a Brigham Standard (1-Dot) 141 Acorn. Now it was time to work on the pipe.

I am sure many of you will shake your head and ask maybe even out loud, “Why is he including this again?” However, please remember that the point of these blogs is not to wow your with the work or make you shake your heads but I want you to know the details of the work we do so you can do your own. Back in 2020 Jeff wrote a blog about his cleaning process. I am including a link to that now so you can see what I mean about his process. Do not skip it! Give it a read (https://rebornpipes.com/2020/01/20/got-a-filthy-estate-pipe-that-you-need-to-clean/). Here is the introduction to that blog and it is very true even to this day.

Several have asked about Jeff’s cleaning regimen as I generally summarize it in the blogs that I post rather than give a detailed procedure. I have had the question asked enough that I asked Jeff to put together this blog so that you can get a clear picture of the process he uses. Like everything else in our hobby, people have different methods they swear by. Some may question the method and that is fine. But it works very well for us and has for many years. Some of his steps may surprise you but I know that when I get the pipes from him for my part of the restoration they are impeccably clean and sanitized. I have come to appreciate the thoroughness of the process he has developed because I really like working on clean pipe!

For the benefit of some of you who may be unfamiliar with some of the products he uses I have included photos of three of the items that Jeff mentions in his list. This will make it easier for recognition. These three are definitely North American Products so you will need to find suitable replacements or order these directly on Amazon. The makeup pads are fairly universal as we were able to pick some up in India when we were with Paresh and his family.

In the blog itself he breaks his process down into two parts – cleaning the stem and cleaning the bowl. Each one has a large number of steps that he methodically does every time. I know because I have watched him do the work and I have seen the pipes after his work on them. He followed this process step by step and when the pipe got to me it was spotlessly clean and ready for my work. The inside of the stem, shank and bowl were clean and to me that is an amazing gift as it means that my work on this end is with a clean pipe! I cannot tell you how much difference that makes for my work.

  1. The finish cleaned up quite well but there was still some darkening of hand oils in the finish around the bowl sides. The medium brown stain is clean and the grain around the bowl sides and shank
  2. The rusticated rim top was clean and the lava was cleaned out of the grooves and hollows of the rustication. The inner edge of the bowl showed some rough areas but was very clean.
  3. The cake was cleaned out of the bowl. The bowl very clean and the bottom of the bowl was raw briar. The bowl walls were smooth and there was no checking or burn damage.
  4. The vulcanite taper stem was very clean and the oxidation and calcification were gone. The tooth marks and chatter on the topside looked better. There were some deeper tooth marks on the underside and on the button.
  5. There is a brass single dot on the left side that identifies it as a Brigham pipe. It looks better and once it is polished with shine. The tenon is a Hard Rock Distillator system that holds a maple filter is very clean.

Hopefully the steps above show you both what I look for when I go over the pipe when I bring it to the work table and also what I see when I look at the pipe in my hands. They also clearly spell out a restoration plan in short form. My work is clear and addressing it will be the next steps. I took photos of the whole pipe to give you a picture of what I see when I have it on the table. This is important to me in that it also shows that there was no damage done during the clean up work or the transit of the pipe from Idaho to here in Vancouver. I carefully went over the bowl and rim top to get a sense of what is happening there. In this case once the rim top and edges were cleaned the rim top looked better. The inner edge was damaged and was the bowl was slightly out of round. I also went over the stem carefully. The fit to the shank is snug and the transitions are smooth. There were some tooth marks and chatter on the surface of the stem and the button on the underside. The vulcanite stem surface was clean and looked better. I took photos of the rim top and stem sides to show as best as I can what I see when I look at them. I always check to make sure that the clean up work did not damage the stamping on the shank sides in any way. It is in excellent condition and is very clear and readable. I love just looking at the lay of the pipe and the proportion of the hand made pipes. I took the pipe apart to get a sense of what was in the mind of the pipe maker when he crafted the pipe. The photo shows its beauty in flow and shape.I started my work on the pipe by dealing with the damaged inner edge of the bowl. I used a folded piece of 220 grit sandpaper to clean up the edges and to give the rim edge a slight bevel to hide the damage. It looked much better when I had finished. I rescrubbed the bowl and shank with undiluted Murphy’s Oil Soap and a brass bristle wire brush. I rinsed it with hot water to remove the remaining grime in the briar. The Tiger Striped stain on the pipe looks amazing.     I rubbed down the bowl and shank with Before & After Restoration Balm. It is a paste/balm that is rubbed into the surface of the briar. The product works to deep clean the finish, enliven and protect the briar. I worked it into the briar with my finger tips and a horsehair shoe brush. I let it sit for 10 minutes then wiped it off with a soft cloth then buffed it with a cotton cloth. The briar really began to have a deep shine in the briar and the rustication showed depth. The photos I took of the bowl at this point mark the progress in the restoration. It is a gorgeous pipe.    I set the bowl aside and turn to work on the stem. I painted the stem surface with the flame of a Bic lighter to lift the tooth marks. I was able to lift the majority of them significantly. The deep marks on the underside of the stem did not completely come up and neither did the deep mark in the button edge on the underside. I filled them in with black CA glue and set the stem aside for the repairs to cure. Once hardened I used a small file to flatten out the repairs and reshape the button edge on the underside. I sanded them smooth with 220 grit sandpaper and started polishing it with 600 grit wet dry sandpaper. I fit the aluminum tenon/Distillator holder with a Hard Maple filter tube. It fits in the aluminum tube and fits snug against the tube end.I polished the stem with micromesh sanding pads – 1500-12000 grit sanding pads and water to wet sand the stem. I wiped it down after each sanding pad with Obsidian Oil on a cotton rag after each sanding pads. I know that many say Obsidian Oil does nothing for acrylic stems, but I find it does two things – first it gives some protection to the stem from buildup and second it give the sanding pads bite in the polishing process. After finishing with the micromesh pads I rub the stem down with Before & After Fine and Extra Fine stem polish as it seems to really remove the fine scratches in the vulcanite. I rub the Fine Polish on the stem and wipe it off with a paper towel and then repeat the process with the Extra Fine polish. I finish the polishing of the stem down with a final coat of Obsidian Oil and set the stem aside to let the oil absorb. This process gives the stem a shine and also a bit of protection.The final steps in my process involve using the buffer. I buffed the bowl and stem with Blue Diamond to polish out the light scratches in the briar and the vulcanite. I gave the bowl multiple coats of Conservator’s Wax and the stem multiple coats of carnauba wax. I have found that I can get a deeper shine if I follow up the wax buff with a buff with a clean buffing pad. It works to raise the shine and then I hand buff with a microfiber cloth to deepen the shine. It is always fun for me to see what the polished bowl looks like with the polished stem. It really is a nice pipe. The rusticated finish around the bowl sides and shank looks great with the vulcanite stem. The Brigham Canada Acorn 141 feels great in my hand. It is a well balanced pipe. Have a look at it with the photos below. The dimensions are Length: 6 inches, Height: 1 ¾ inches, Outside diameter of the bowl: 1 ¼ inches, Chamber diameter: ¾ of an inch. The weight of the pipe is 1.31 ounces/37 grams. It is a beautiful pipe that I will soon be adding to the rebornpipes store in the Canadian Pipemakers Section. If you would like to add it to your collection let me know. It should be a great smoking pipe.

Hopefully the style of writing of this blog is helpful to you in some way. In it I wanted to show both what I am looking for and how I move forward in addressing what I see when work on a pipe. Let me know if it is helpful to you. It is probably the most straightforward detailed description of my work process that I have done. As always I encourage your questions and comments as you read the blog. Thanks to each of you who are reading this blog. Remember we are not pipe owners; we are pipe men and women who hold our pipes in trust until they pass on into the trust of those who follow us.

Major Repairs to a WDC Wellington Jumbo


Blog by Kenneth Lieblich

There are some pipes that are so rough that they are an entire pipe-restoration course in and of themselves. This is one of those pipes. It is a WDC Wellington Jumbo and it came to me in a lot of pipes from the USA. Recently, a customer of mine commissioned me to restore this pipe I readily agreed – because I didn’t know what I was getting myself into! The story of this pipe’s repair is a long one and it includes so many different elements that one can learn a lot just by reading. This pipe also reminded me that sometimes the wear-and-tear of the years needs to remain on a pipe as part of its story. I managed to bring great beauty back to this pipe, but it would always retain signs of its harsh past. This is one Wellington that did NOT win at Waterloo. The pipe in question was made by the William Demuth Company of New York (hence, WDC). I read a blog Steve wrote on a Wellington Jumbo back in 2020 to learn more about the pipe’s background. I was directed to the Pipedia page on WDC and it has a lot of good information, including a great flyer which had a photo of some of the Jumbos.From Pipedia is a Wellington ad and another from 1915, courtesy of Pipephil: The Wellington is a charming pipe, but it had a number of significant issues. It might be most clear for you, dear reader, if I enumerate the issues, one-by-one, and we can address them in due course. There was a tremendous amount of work to do on this pipe, so I got to it. I divided up the problems into three categories: the stem, the ferrule/band, and the stummel.

1.  I began by cleaning some of the filth on the outside of the stem with some Murphy’s Oil Soap on cotton rounds. This removed some of the surface staining.
2. The stem’s insides were absolutely clogged with filth. Steve told me that the Wellingtons are notorious for this, and I learned the hard way just how true that was. I actually used a drill bit (by hand) to break into the encrusted gunk in the stem. Then, I started cleaning the inside with isopropyl alcohol, Q-tips, and pipe cleaners. This took a long while. The inside was terribly dirty and it took an awful lot of cotton. 3. Due to the size of the stem, I had to use churchwarden-size pipe cleaners, but this was just not doing enough to progress the process. I decided to plug up the bore-end, filled the stem with alcohol, and let it sit for a while – in the hope that it would loosen some of the gunk. This was mildly successful but insufficient. So, I then opted to use my tube brushes with alcohol and this worked quite well, dislodging some of the filth I couldn’t otherwise get to. It was clear that the pipe would require a retort, but that would have to wait until later. 4. The tenon end was burnt to a crisp from overuse and, more specifically, overheating. I sanded this down in order to even it out. I didn’t want to over-sand it, but I couldn’t just leave it as it was. 5. There was considerable oxidation, but the stem was too large to fit in my deoxidation fluid container. As a result, I had to do this by hand. I used SoftScrub with some cotton rounds and, as you can see, lots of revolting colour came off the stem. As expected, this took a lot of elbow grease, but I got it to a reasonable state.6. The area of the stem just above the button was chomped as badly as I’ve ever seen and the vulcanite had actually ruptured at some point. Also, the bore hole was damaged. I used a BIC lighter to try and lift some of those dents, but very little (if anything) was lifted. I brought out my cyanoacrylate adhesive and I applied it liberally to the affected areas – including the bore. I used some accelerant to get the glue going, and then moved on. 7. I began the lengthy process of sanding and shaping the cyanoacrylate repairs. I used small files and both 220- and 400-grit sandpapers to remove the excess adhesive. Once I had shaped it the way I wanted it, I then used all nine Micromesh pads (1,500 through 12,000 grit) to bring out the lovely black lustre on the stem. I also used Obsidian Pipe Stem Oil in between each pad scrubbing. Hey –we’re finally making some progress!8. Halfway through the MicroMesh process, I paused to fix yet another problem with the stem: it had straightened over time and needed to be bent back into its correct shape. Essentially, I wanted the end of the stem to be close to parallel with the rim of the bowl. I brought out my heat gun and heated the vulcanite stem in order to make it malleable. The heat gun is very powerful – it does not take long! When it was soft, I gently curved the stem over a wooden dowel. The dowel provides a firm surface and a proper curve. Once I had the bend I wanted, I left the stem to cool and set itself in place.9. On to the ferrule – which was thoroughly corroded and discoloured from years of mistreatment. Somewhat to my surprise, the ferrule came off very easily and required no special effort. I began by cleaning the metal with some SoftScrub on cotton rounds. This was quite good at removing the unsightly bits.10. I sanded the inside of the ferrule with 220-grit sandpaper in order to remove the old glue and debris that came from the shank. This would provide a better surface for re-gluing later.

11. I used some of my MicroMesh pads (only 3,600-12,000) to eliminate some of the minor scratches on the metal. It also gave a nice shine which clearly hadn’t been seen for decades.

12. I used a jewelry cloth to give the final polish to the nickel. This ferrule would always retain some small dents etc. from its hard life, but it looks much improved.

13. On to the stummel – this is where the lion’s share of the work was. The insides (both bowl and shank) were overwhelmed with cake and tar and anything else you’d care to mention. The bowl really needed to be reamed, so I used the KleenReem too to scrape off as much built-up cake. Sadly, this just wasn’t sufficient – I had to go to the next step to get things moving.14. I threw the stummel in my alcohol bath in the hope that it would loosen some of the incredibly hard residue inside the bowl. After 24 hours, this worked a bit, but not enough. It was time for the nuclear option.15. I put a sanding drum (and a couple of other bits) on my Dremel and carefully began removing the old stuff. This is not an option that I use regularly. The risk of oversanding is high and that can be an even bigger problem. However, I worked slowly and cautiously. Generally, I prefer to sand the chamber down to bare briar. When restoring, it is important to ensure that there is no damage to the briar under the cake. There are a few situations when I might leave some cake in the bowl, but not today. Sadly, there were definitely some hidden flaws to the briar on this pipe. I’ll come back to that later.16. Just like the bowl, the shank was absolutely disgusting. It had never been cleaned – or, not for many decades. I started cleaning the inside with isopropyl alcohol, Q-tips, and pipe cleaners. This took a while. The inside was very dirty and required and extraordinary number of Q-tips and pipe cleaners. Eventually some cleanliness came to it.

17. I decided to de-ghost the pipe in order to remove any lingering smells and dirt of the past. I thrust cotton balls into the bowl and the shank and saturated them with 99% isopropyl alcohol. I let the stummel sit overnight. This caused oils, tars and smells to leach out into the cotton. The bowl was supposed to be nice and clean after this, but this was no ordinary pipe.18.  At this point, it seemed sensible to set up a retort and further clean this whole pipe out. I put the stem and stummel back together and used my pipe retort system. This system uses boiling isopropyl alcohol and a vacuum (a void, not the household appliance) to clean the interior of a pipe. As you can see by the brownish colour of the alcohol, the retort worked well – although it took many changes of alcohol to get it clean. I managed to extract lots of otherwise inaccessible filth from inside the pipe. 19. Now that the pipe was clean, I wanted to have a closer look at the state of the briar, inside and out. For this, I scrubbed the outside of the stummel with Murphy’s Oil Soap on some cotton pads. That removed any latent dirt that blighted the wood. No surprise: there was lots.20. Several tiny cracks appeared on the outside of the stummel and I needed to address them. The first step in dealing with this was to ensure that the crack would not continue to creep after I had repaired it. To that end, I took a micro-drill bit, inserted it in my Dremel, and very carefully drilled a hole at the ends of the cracks. Since the cracks were not deep and did not go right through the wood, I did not drill all the way through. I then repaired the cracks by allowing cyanoacrylate adhesive to seep into them and then letting the glue cure. 21. Alas, there were also cracks inside the bowl. But beyond that, significant gouges were there from some prehistoric reaming tool. Removing the cake in the bowl did feel like an archaeological dig, so there were bound to be some surprises in the briar. The solution to this problem is always a tricky one: epoxy. I prepared some J.B. Weld epoxy and filled the cracks and gouges, ensuring that the epoxy was evenly spread throughout the bowl. Of course, I did plug the draught hole with a folded pipe cleaner (coated in Vaseline) to make sure none of the epoxy made its way up there. Once done, a good 24 hours was needed to ensure that the epoxy was properly set. 22. Burn marks and an uneven surface blighted the rim of the pipe and it needed to be redone. There was a lot of damage to the rim and the front edge had been bashed in, presumably from banging out dottle over the years. In order to remove the damage, I “topped” the pipe – that is to say, I gently and evenly sanded down the rim on a piece of 220-grit sandpaper. This is always a tricky business – I want to find the balance between removing old burns and maintaining as much of the pipe as possible.23. The rim needed some more help since the bowl opening was badly out of round. To fix this, I took a solid wooden sphere, wrapped some 220-grit sandpaper around it, and sanded the inner edge of the rim. In addition to this, I also sanded down the outside of the bowl, near the rim, so as to minimize the visual effect of the bashed edge. I sand all the way around to ensure that the pipe retains its look.24. As mentioned earlier, there were a few dents in the briar. I dug out my iron and a damp cloth to try to raise the nicks. The hot and moist steam can often cause the wood to swell slightly and return to shape. There was some movement in the wood, which was good. The repair was not perfect, but the remaining wounds would be improved by sanding.25. There were two significant fills on the bowl. They were large enough that I would not be able to make them disappear entirely, but I wanted to make them solid and smooth, and meld into the rest of the wood. I fixed them up with a mixture of cyanoacrylate adhesive and briar dust.

26. Next, I used all nine Micromesh pads (1,500 through 12,000 grit) all over the stummel to make it lovely and smooth. 27. Having completed that, it was time for staining. My customer wanted a deep, dark burgundy colour. First, I brought out my heat gun and spent a couple of minutes thoroughly heating the wood, so it would be as receptive as possible to the stain, to give the best results. I applied Fiebing’s Black Leather Dye with a cotton dauber. I flamed it with my BIC lighter and let it set. This dye is alcohol-based, so I used isopropyl alcohol to wipe down the pipe and remove excess stain. I coated it again with Fiebing’s Oxblood Leather Dye, flamed it again, and let that set too. I stained and flamed the pipe another two times (once with black, once with oxblood), always making sure I warmed the pipe with my heat gun first. 28. Now that the epoxy had fully cured, I gently sanded the inside of the bowl to provide a rough surface for what was to come next. I coated the entire inside of the bowl with a mixture of activated charcoal and my wife’s homemade yogurt. Once hardened, this provided a good, slightly rough surface for a new cake to build. 29. At long last, I was off to my bench buffer to put the final touches on this pipe. I first gave it a thorough going-over with White Diamond compound. Following that, several coats of carnauba wax created a beautiful, glossy seal on the pipe and some closure to this long and involved repair. The lovely shine made the wood look beautiful! I know that the new owner will enjoy smoking it for many years to come. I hope you enjoyed reading the story of this pipe as much I as I did restoring it. The approximate dimensions of the pipe are as follows: length 9½ in. (240 mm); height 6½ in. (165 mm); bowl diameter 1⅝ in. (41 mm); chamber diameter 1 in. (25 mm). The weight of the pipe is 3 oz. (86 g). If you are interested in more of my work, please follow me here on Steve’s website or email me directly at kenneth@knightsofthepipe.com. Thank you very much for reading and, as always, I welcome and encourage your comments.

Repairing a cracked shank and Restoring a Kriswill Danish Clipper 628 Canadian


Blog by Steve Laug

Not long ago I worked a trade with a fellow for these five pipes in exchange for one that I had here. He sent me photos of the pipes and the deal was struck. The pipes he sent are as follows from bottom to top. There is a W.O. Larsen sandblast oval shank Brandy with a hairline crack in the shank and with tooth marks on the button on both sides, a Bertram Cutty that I had traded with him earlier, a Kriswill sandblast Canadian with a cracked shank, a Viby pencil shank Billiard and a Stanwell Royal Briar wide oval shank Dublinesque Freehand with burn damage on the rim edges and top around the bowl and deep tooth marks on the stem.The next of these I chose to work on today is the last of the group a sandblast Kriswill Danish Clipper Canadian. It is the middle pipe shown in the photo above. It is a great looking sandblast piece with a thin oval shank and normal sized bowl. The blast reveals some interesting grain patterns around the bowl and the shank. The rim top was in good condition and there was some darkening and burn damage on the front inner edge. The outer edge of the rim is in good condition. The bowl had a light cake in the bowl and smells of good Virginia tobacco. There was some grime and grit ground into the surface of the finish. The stamping on the underside of the shank reads Kriswill [over] Danish Clipper [over] Handmade in Denmark. That is followed by the shape number 628. There was a small hairline crack in the underside of the shank level with the shape number and ending just below the 2 in the shape stamp. The stain is dark brown and oxblood and goes well with the thin taper stem. Once it is cleaned up and polished the grain around the bowl and shank will shine. The stem is in good condition with some light oxidation on both sides ending mid-stem which seems to point to having been smoked with a Softee Bit. The surface just ahead of the button looks good and shows no tooth damage. The button edge looks good on both sides. I took photos of the pipe before I did my clean up work on it to show its condition. The photos confirm what I noted above regarding the condition of the bowl and the stem. It a nice looking pipe that will look better when it is finished. I took close up photos so that I could have a clearer picture of the condition of the bowl, rim edges and top. The rim top photos confirm my assessment above and show that it is in excellent condition. The cake in the bowl is quite moderate and smooth. You can also see the condition of the outer and the inner edge. They appear to be in great condition. I circled the crack on the underside of the shank in red. The stem is in excellent condition with a bit of oxidation ahead of the button mid stem. This is what I look for when assessing a pipe.I took a photo of the stamping on the underside of the shank. It is a readable as noted above.I took the stem off the bowl and took a photo of the pipe to give a sense of proportion of the pipe. You can also see shape of the pipe and some interesting grain around the bowl and shank. There is an aluminum inner tube in the end of the tenon.I decided to do some work on the stamping of this pipe to get an idea of the time period it was carved. I turned to Pipephil’s site for a quick overview of the brand (http://pipephil.eu/logos/en/logo-k3.html). I have included a screen capture of the brand below. From that I knew that the pipe I was working on was post 1970 because of the stamping and the star on the stem.There was also a side bar that gave further information on the brand. It established an end date for the pipe I was working on. It was made before the late 1970s when the company went bankrupt. I knew that it was made between 1970-1978/79. I quote below

Kriswill is a brand of Kriswork Briar Trading, in Kolding (Denmark) established about 1955. Some of Kriswill pipes were designed by Sigvard Bernadotte, Swedish prince and brother to the late Queen Ingrid of Denmark. He collaborated with his Danish partner Acton Bjørn. When the company went bankrupt in the late 1970s it was on a level with Stanwell. Dan Pipe Cigar & Company (Hafenstrasse 30 D-21481 Lauenburg/Elbe, Ge) bought the rights to use the name and it is Holmer Knudsen and/or Poul Winsløw who make the Kriswill line.

Pipedia has a great history write up on the brand (https://pipedia.org/wiki/Kriswill). It gives a great summary of the history. There was also a shape chart included on the site and the shape number 28 Canadian is shown below which is the same shape as the 628 I am working on. It is the third one down on the Kriswill Golden Clipper chart on the far right of the screen capture below.From the background information on the brand I knew that it was made between 1970-1978/79 prior to the bankruptcy of the company in the late 70s. With that out of the way it was time to work on the pipe. 

Sometimes I alter my pattern in restoration to deal with an immediate issue that calls out to me. I decided in this case to deal with the crack in the shank before cleaning up the pipe. I went through my bands and found this band that would work well on the oval shank. It was a round band that I shaped to fit well. The crack in the shank had been repaired prior with super glue and pressed together. I did not need to deal with that again. I sanded the end of the shank with 220 grit sandpaper and removed some of the diameter of the shank to make for a snug fit with the band. The band was just the right depth to not cover any of the stamping on the shank. I heated the band and pressed it onto the shank end. It worked well and covered the sanded portion and bound the repaired crack together. I took photos of the band in place on the shank end. It looks very good and you can see the scratches in the band that I will need to deal with.After the banding I reamed the bowl with a Savinelli Fitsall Pipe Knife. I followed that up by sanding the bowl walls with 220 grit sandpaper wrapped around a piece of dowel. I cleaned the internals of the shank and the stem with 99% isopropyl alcohol, cotton swabs and pipe cleaners. I scrubbed it until the shank was clean and the smell was much cleaner smelling.I scrubbed the external surface of the briar with a tooth brush and undiluted Murphy’s Oil Soap. I scrubbed it until the finish was clean and then rinsed it off with warm running water to rinse off the soap and the grime from the finish. I dried it off with a soft cloth and took photos of the pipe. I applied some Before & After Restoration Balm to the briar. It is a paste/balm that is rubbed into the surface of the briar. The product works to deep clean finish, enliven and protect the briar. I worked it into the briar with my finger tips and a shoe brush. I let it sit for 10 minutes to do its work. I wiped it off with a soft cloth then buffed it with a cotton cloth. The briar really began to have a deep shine and the grain shone through. The photos I took of the bowl at this point mark the progress in the restoration. It is a gorgeous pipe. I set the bowl aside and turned my attention to the issues with the vulcanite stem. I polished the stem with micromesh sanding pads – 1500-12000 grit sanding pads and water to wet sand the stem. I wiped it down after each sanding pad with Obsidian Oil on a cotton rag after each sanding pads. But I find it does two things – first it gives some protection to the stem from oxidation and second it give the sanding pads bite in the polishing process.   I polished the aluminum inner tube with micromesh sanding pads and then put it in place in the tenon. It is shiny and looks new.After finishing with the micromesh pads I rub the stem down with Before & After Fine and Extra Fine stem polish as it seems to really remove the fine scratches in the vulcanite. I rub the Fine Polish on the stem and wipe it off with a paper towel and then repeat the process with the Extra Fine polish. I finish the polishing of the stem down with a final coat of Obsidian Oil and set the stem aside to let the oil absorb. This process gives the stem a shine and also a bit of protection.The final steps in my process involve using the buffer. I put the Kriswill Danish Clipper 628 Canadian back together and lightly buffed the bowl and stem with Blue Diamond to polish the finish. I polished the vulcanite stem at the same time to polish out the scratches. I gave the bowl multiple coats of Conservative Wax and the stem multiple coats of carnauba wax. I have found that I can get a deeper shine if I follow up the wax buff with a buff with a clean buffing pad. It works to raise the shine and then I hand buff with a microfiber cloth to deepen the shine. It is always fun for me to see what the polished bowl looks like with the polished stem. It really is a nice pipe. The finish around the bowl sides and shank looks great with the rich combination of brown stains. The Kriswill Danish Clipper Canadian feels great in my hand. It is a well balanced pipe. Have a look at it with the photos below. The dimensions are Length: 5 ¾ inches, Height: 1 ½ inches, Outside diameter of the bowl: 1 1/8 inch, Chamber diameter: ¾ of an inch. The weight of the pipe is 1.09 ounces/31 grams. It is a beautiful pipe that functions as a sitter due to the wide heel on the bowl. I will soon be adding to the rebornpipes store in the Danish Pipemakers section. If you would like to add it to your collection let me know. It should be a great smoking pipe. As always I encourage your questions and comments as you read the blog. Thanks to each of you who are reading this blog. Remember we are not pipe owners; we are pipe men and women who hold our pipes in trust until they pass on into the trust of those who follow us.

Restoring a Benni Jorgensen Handmade Viby Pencil Shank Billiard


Blog by Steve Laug

Not long ago I worked a trade with a fellow for these five pipes in exchange for one that I had here. He sent me photos of the pipes and the deal was struck. The pipes he sent are as follows from bottom to top. There is a W.O. Larsen sandblast oval shank Brandy with a hairline crack in the shank and with tooth marks on the button on both sides, a Bertram Cutty that I had traded with him earlier, a Kriswill sandblast Canadian with a cracked shank, a Viby pencil shank Billiard and a Stanwell Royal Briar wide oval shank Dublinesque Freehand with burn damage on the rim edges and top around the bowl and deep tooth marks on the stem.The next of these I chose to work on today is the Viby 018 Pencil Shank Billiard. It is the second pipe down from the top of the photo above. It is a great looking sandblast piece with a very thin shank and normal sized bowl. The blast reveals some interesting grain patterns around the bowl and the shank. The rim top was in good condition and there was some darkening and burn damage on the front inner edge. The outer edge of the rim is in good condition. The bowl had a light cake in the bowl and smells of good Virginia tobacco. There was some grime and grit ground into the surface of the finish. The stamping on the underside of the shank reads 018 (shape number I believe) followed by Viby. That is followed by Handmade Denmark. The stain is medium/dark brown and goes well with the thin taper stem. Once it is cleaned up and polished the grain around the bowl and shank will shine. The stem is in good condition with some tooth marks on it. The surface just ahead of the button is worn on both sides. The button edge looks good on both sides. I have included a photo of the pipe that was included in the exchange of emails while we struck a deal. It is good looking pipe.I took photos of the pipe before I did my clean up work on it to show its condition. The photos confirm what I noted above regarding the condition of the bowl and the stem. It a nice looking pipe that will look better with a bit of work on the stem and bowl.   I took close up photos so that I could have a clearer picture of the condition of the bowl, rim edges and top. The rim top photos confirm my assessment above and show that while there is some darkening and burn damage on the front top and inner edge. The cake in the bowl is quite moderate and smooth. You can also see the condition of the outer and the inner edge. They appear to be in great condition. The bowl is slightly out of round on the front inner edge. The issues with the stem are visible in the photos on both sides. The sharp edge of the button is worn down and will need to be recut. This is what I look for when assessing a pipe. I took a photo of the stamping on the underside of the shank. It is a little faint but readable as noted above.I took the stem off the bowl and took a photo of the pipe to give a sense of proportion of the pipe. You can also see shape of the pipe and some interesting grain around the bowl and shank. Before I started my work on this pipe I turned to Pipephil’s site (http://pipephil.eu/logos/en/logo-b4.html) to the section on Benni Jørgensen. I knew that the Viby pipe was made by Benni and it was a matter of question whether it was a Benni second or another line by Benni. I quote from the section on Pipephil below.

Artisan: Benni Jørgensen is a professional pipemaker since 1980. He worked for W.O. Larsen for 25 years. He sells his pipes under his own brand (Benni Pipes) since 2000. Lasse Skovgaard Jorgensen is his son.

I turned then to Pipedia (https://pipedia.org/wiki/Benni_Pipes) and read the brief history of Benni’s craftsmanship. It is a great read and is full of connections between and the big name Danish carvers who worked in W.O. Larsen’s workshop. Give the article a read as it is well worth the time. There was no specific information on the Viby Line of pipes. The one I am working on is a handmade pipe and looks very good.

Now it was time to work on the pipe itself. I started my work on this one by reaming the bowl with a Savinelli Fitsall Pipe Knife. I followed that up by sanding the bowl walls with 220 grit sandpaper wrapped around a piece of dowel.  I cleaned the internals of the shank and the stem with 99% isopropyl alcohol, cotton swabs and pipe cleaners. I scrubbed it until the shank was clean and the smell was much cleaner smelling. Before scrubbing the bowl exterior I decided to clean up the darkening and the burn damage on the rim top and inner edge of the bowl. I used a folded piece of 220 grit sandpaper give the bowl a light inward bevel and remove the darkening and the damage as much as possible. It looks much better.I scrubbed the external surface of the briar with a tooth brush and undiluted Murphy’s Oil Soap. I scrubbed it until the finish was clean and then rinsed it off with warm running water to rinse off the soap and the grime from the finish. I dried it off with a soft cloth and took photos of the pipe. I applied some Before & After Restoration Balm to the briar. It is a paste/balm that is rubbed into the surface of the briar. The product works to deep clean finish, enliven and protect the briar. I worked it into the briar with my finger tips and a shoe brush. I let it sit for 10 minutes to do its work. I wiped it off with a soft cloth then buffed it with a cotton cloth. The briar really began to have a deep shine and the grain shone through. The photos I took of the bowl at this point mark the progress in the restoration. It is a gorgeous pipe. I set the bowl aside and turned my attention to the issues with the vulcanite stem. I used a small file to reshape the button edge redefine it. I sanded the file marks smooth with 220 grit sandpaper and started the polishing with 600 grit wet dry sandpaper. The stem surface and button looked much better. I continued polishing the stem with micromesh sanding pads – 1500-12000 grit sanding pads and water to wet sand the stem. I wiped it down after each sanding pad with Obsidian Oil on a cotton rag after each sanding pads. But I find it does two things – first it gives some protection to the stem from oxidation and second it give the sanding pads bite in the polishing process. After finishing with the micromesh pads I rub the stem down with Before & After Fine and Extra Fine stem polish as it seems to really remove the fine scratches in the vulcanite. I rub the Fine Polish on the stem and wipe it off with a paper towel and then repeat the process with the Extra Fine polish. I finish the polishing of the stem down with a final coat of Obsidian Oil and set the stem aside to let the oil absorb. This process gives the stem a shine and also a bit of protection.The final steps in my process involve using the buffer. I put the Benni Jorgensen Handmade Viby Pencil Shank Billiard back together and lightly buffed the bowl and stem with Blue Diamond to polish the finish. I polished the vulcanite stem at the same time to polish out the scratches. I gave the bowl multiple coats of Conservative Wax and the stem multiple coats of carnauba wax. I have found that I can get a deeper shine if I follow up the wax buff with a buff with a clean buffing pad. It works to raise the shine and then I hand buff with a microfiber cloth to deepen the shine. It is always fun for me to see what the polished bowl looks like with the polished stem. It really is a nice pipe. The finish around the bowl sides and shank looks great with the rich combination of brown stains. The Viby Pencil Shank Billiard feels great in my hand. It is a well balanced pipe. Have a look at it with the photos below. The dimensions are Length: 5 ¾ inches, Height: 1 ¾ inches, Outside diameter of the bowl: 1 ¼ inch, Chamber diameter: ¾ of an inch. The weight of the pipe is .95 ounces/27 grams. It is a beautiful pipe that functions as a sitter due to the wide heel on the bowl. I will soon be adding to the rebornpipes store in the Danish Pipemakers section. If you would like to add it to your collection let me know. It should be a great smoking pipe. As always I encourage your questions and comments as you read the blog. Thanks to each of you who are reading this blog. Remember we are not pipe owners; we are pipe men and women who hold our pipes in trust until they pass on into the trust of those who follow us.

Restoring a Stanwell Royal Briar Regd. No 689-48 Dublinesque Freehand 189


Blog by Steve Laug

Not long ago I worked a trade with a fellow for these five pipes in exchange for one that I had here. He sent me photos of the pipes and the deal was struck. The pipes he sent are as follows from bottom to top. There is a W.O. Larsen sandblast oval shank Brandy with a hairline crack in the shank and with tooth marks on the button on both sides, a Bertram Cutty that I had traded with him earlier, a Kriswill sandblast Canadian with a cracked shank, a Viby pencil shank Billiard and a Stanwell Royal Briar wide oval shank Dublinesque Freehand with burn damage on the rim edges and top around the bowl and deep tooth marks on the stem.The next of these I chose to work on today is the Stanwell Royal Briar 189 at the top of the photo above. It is a classic Stanwell shape with a some nice grain around the bowl and the shank. The rim top was in good condition and there was some darkening and burn damage on the front inner edge. The outer edge of the rim is in good condition. The bowl had a light cake in the bowl and smells of good Virginia tobacco. There was some grime and grit ground into the surface of the finish. The stamping on the topside of the shank reads Stanwell [over] Regd. No. 689-48 [over] Royal Briar. On the underside it is stamped Made in Denmark [over] the shape number 189. The stain is light/medium brown and goes well with the oval vulcanite saddle stem. Once it is cleaned up and polished the grain around the bowl and shank will shine. The stem is in good condition with some tooth marks on it. The surface just ahead of the button is damaged with some deep bite marks on both sides. The button edge looks good on both sides. I am including several of the photos that were sent to me for viewing. The first shows the front of pipe and the grain around the front. It also gives a look inside the bowl and shows the cake. The second shows the marks on the stem surface that I spoke of above. The third photo shows the pipe from the button forward on the bowl. I took photos of the pipe before I did my clean up work on it to show its condition. The photos confirm what I noted above regarding the condition of the bowl and the stem. It a nice looking pipe that will look better with a bit of work on the stem and bowl.   I took close up photos so that I could have a clearer picture of the condition of the bowl, rim edges and top. The rim top photos confirm my assessment above and show that while there is some darkening and burn damage  on the front top and inner edge. The cake in the bowl is quite moderate and smooth. You can also see the condition of the outer and the inner edge. They appear to be in great condition. This is what I look for when assessing a pipe. The bowl is still round and other than being in a used condition it is in great shape. The issues with the stem are visible in the photos on both sides ahead of the button and on the button itself. I took a photo of the stamping on the underside of the shank. It is clear and readable as noted above.I took the stem off the bowl and took a photo of the pipe to give a sense of proportion of the pipe. You can also see shape of the pipe and some interesting grain around the bowl and shank.Now it was time to work on the pipe itself. I started my work on this one by reaming the bowl with a Savinelli Fitsall Pipe Knife. I followed that up by sanding the bowl walls with 220 grit sandpaper wrapped around a piece of dowel.    I cleaned the internals of the shank and the stem with 99% isopropyl alcohol, cotton swabs and pipe cleaners. I scrubbed it until the shank was clean and the smell was much cleaner smelling.  Before scrubbing the bowl exterior I decided to clean up the darkening and the burn damage on the rim top and inner edge of the bowl. I used some 220 grit sandpaper and a wooden ball to give the bowl a light inward bevel and remove the darkening and the damage. I finished by cleaning it up a bit further with a folded piece of 220 grit sandpaper. It looks much better. I scrubbed the external surface of the briar with a tooth brush and undiluted Murphy’s Oil Soap. I scrubbed it until the finish was clean and then rinsed it off with warm running water to rinse off the soap and the grime from the finish. I dried it off with a soft cloth and took photos of the pipe. I polished the briar with micromesh sanding pads. I choose to dry sand the briar rather than wet sand it. Again it is a matter of personal preference. I prefer to use the pads dry and find they work very well on the briar. I sand with each pad (9 in total) and group them by threes for ease of reference. I wipe the bowl down after each pad with a damp cloth to remove the sanding debris and check the briar. I love seeing the developing shine on the briar as I move through the pads which is why I include so many photos of this step.     I applied some Before & After Restoration Balm to the briar. It is a paste/balm that is rubbed into the surface of the briar. The product works to deep clean finish, enliven and protect the briar. I worked it into the briar with my finger tips. I let it sit for 10 minutes to do its work. I wiped it off with a soft cloth then buffed it with a cotton cloth. The briar really began to have a deep shine in the briar and the grain shone through. The photos I took of the bowl at this point mark the progress in the restoration. It is a gorgeous pipe. I set the bowl aside and turned my attention to the issues with the vulcanite stem. I “painted” the surface of the stem with the flame of a Bic Lighter to lift the tooth marks in the stem surface on both sides as well as the button edges where the marks were deepest. I was able to lift the marks significantly and filled in the remaining marks with clear CA glue. I set the stem aside to allow the repairs to cure. Once the repairs cured, I used a small file to reshape the button edge and flatten them. I sanded them smooth with 220 grit sandpaper and started the polishing with 600 grit wet dry sandpaper. The stem surface and button looked much better. I touched up the Crown S stamping on the top of the saddle portion of the stem with white acrylic fingernail polish. I worked it into the stamp with a tooth pick. I scraped off the excess with the tooth pick. It was ragged looking but readable. When I started polishing, it would clean up well. I continued polishing the stem with micromesh sanding pads – 1500-12000 grit sanding pads and water to wet sand the stem. I wiped it down after each sanding pad with Obsidian Oil on a cotton rag after each sanding pads. But I find it does two things – first it gives some protection to the stem from oxidation and second it give the sanding pads bite in the polishing process.    After finishing with the micromesh pads I rub the stem down with Before & After Fine and Extra Fine stem polish as it seems to really remove the fine scratches in the vulcanite. I rub the Fine Polish on the stem and wipe it off with a paper towel and then repeat the process with the Extra Fine polish. I finish the polishing of the stem down with a final coat of Obsidian Oil and set the stem aside to let the oil absorb. This process gives the stem a shine and also a bit of protection. The final steps in my process involve using the buffer. I put the Stanwell Royal Briar 189 Freehand back together and lightly buffed the bowl and stem with Blue Diamond to polish the finish. I polished the vulcanite stem at the same time to polish out the scratches. I gave the bowl and the stem multiple coats of carnauba wax. I have found that I can get a deeper shine if I follow up the wax buff with a buff with a clean buffing pad. It works to raise the shine and then I hand buff with a microfiber cloth to deepen the shine. It is always fun for me to see what the polished bowl looks like with the polished stem. It really is a nice pipe. The finish around the bowl sides and shank looks great with the rich combination of brown stains. The Stanwell Regd. No. 689-48 Royal Danish Freehand feels great in my hand. It is a well balanced pipe. Have a look at it with the photos below. The dimensions are Length: 5 inches, Height: 1 ¾ inches, Outside diameter of the bowl: 1 ½ inch, Chamber diameter: ¾ of an inch. The weight of the pipe is 1.55 ounces/45 grams. It is a beautiful pipe that functions as a sitter due to the wide heel on the bowl. I will soon be adding to the rebornpipes store in the Danish Pipemakers section. If you would like to add it to your collection let me know. It should be a great smoking pipe. As always I encourage your questions and comments as you read the blog. Thanks to each of you who are reading this blog. Remember we are not pipe owners; we are pipe men and women who hold our pipes in trust until they pass on into the trust of those who follow us.

Refreshing a Handmade in Denmark W.O. Larsen Sandblast Brandy


By Steve Laug

Not long ago I worked a trade with a fellow for these five pipes in exchange for one that I had here. He sent me photos of the pipes and the deal was struck. The pipes he sent are as follows from bottom to top. There is a W.O. Larsen sandblast oval shank Brandy with a hairline crack in the shank and with tooth marks on the button on both sides, a Bertram Cutty that I had traded with him earlier, a Kriswill sandblast Canadian with a cracked shank, a Viby pencil shank Billiard and a Stanwell Royal Briar wide oval shank Dublinesque Canadian with burn damage on the rim edges and top around the bowl and deep tooth marks on the stem.The first of these I chose to work on today is the Hand Made W.O. Larsen Sandblast Brandy at the bottom of the photo above. It is a classic Larsen Brandy shape with a beautiful, deep and tactile sandblast around the bowl and the shank. The rim top were in good condition and the blast had some darkening but no lava in the blast. The bowl has a light cake in the bowl and smells of good Virginia tobacco. The inner edge of the rim is in good condition. The blast is quite clean with no grime and little dust ground into the surface of the finish. The stamping on the underside of the shank reads W.O. Larsen [over] Handmade [over] Made in Denmark. The stain is a mix of dark and medium browns and goes well with the oval vulcanite stem. Once it is cleaned up and polished the blast will highlight the grain around the bowl and shank. The stem is in good condition with some tooth marks on it. The button area and the surface just ahead is damaged. There are bite marks on the button surface on both sides. The button edge has been flattened and worn with tooth marks on the underside. I am including two of the photos that were sent to me for viewing. The first shows the right side of pipe and the second shows the marks on the stem surface that I spoke of above. I took photos of the pipe before I did my clean up work on it to show its condition. The photos confirm what I noted above regarding the condition of the bowl and the stem. It a nice looking pipe that will look better with a bit of work on the stem, the cracked shank and bowl. I have circled a short crack in the top of the shank with red in the top photo below. It is hairline and fine but it is very present.I took close up photos so that I could have a clearer picture of the condition of the bowl, rim edges and top. The rim top photos confirm my assessment above and show that while there is some darkening. However, I missed the tars and lava build up on the sandblast rim top. The cake in the bowl is quite moderate and was very smooth. You can also see the condition of the outer and the inner edge. They appear to be in great condition. This is what I look for when assessing a pipe. There is no visible burn damage at this point. The bowl is still round and other than being in a used condition it is in great shape. The small crack in the shank is circled in red below. The issues with the stem are visible in the photos on both sides ahead of the button and on the button itself.I took a photo of the stamping on the underside of the shank. It is clear and readable as noted above.I took the stem off the bowl and took a photo of the pipe to give a sense of proportion of the pipe. You can also see shape of the pipe and some interesting grain in the blast on the briar.I have worked on quite a few W.O. Larsen pipes that are well made Danish takes on classic shapes. Several of them have been Brandy shaped pipes. This sandblast Canadian has a bowl that is almost a Brandy shape. Here is a link to the blog describing the background and history of the brand (https://rebornpipes.com/2021/10/25/restoring-a-sandblast-canadian-hand-made-designed-by-w-o-larsen-super-tan-65/). I quote from that blog in information that follows.

I turned to Pipephil (http://www.pipephil.eu/logos/en/logo-l2.html) to get a quick view of the brand once again. I did a screen capture of the site’s information and have included that below. The pipe I am working on is a W.O. Larsen as it is stamped similarly to the ones in the photos. I quote from the sidebar below:

In the 1960s Ole Larsen, owner of the Copenhagen tobacco store, retails pipes carved by Sixten Ivarsson, Poul Rasmussen, Sven Knudsen or Peter Brakner. Faced with the success and urged by Sven Bang (store manager), Sven Knudsen and Former (Hans Nielsen) are successively hired to carve pipes in the basement of the shop at the beginning and in the old Larsen cigar factory afterwards. Carver like Teddy Knudsen, Tonni Nielsen, Jess Chonowitch, Peter Hedegaard work a while in this context. When Nils, son of Ole Larsen, succeeds his father he acquires the Georg Jensen pipe factory to focus on less expensive pipes. This turns out to be an error ending with the sale of W.O. Larsen trademark to Stanwell. The famous tobacco shop at Strøget, Amagertorv 9 closed down for good on Dec 31, 2004. Do not confuse W.O. Larsen with: Jorgen Larsen

I turned to Pipedia (https://pipedia.org/wiki/W.%C3%98._Larsen) for a quick read. The site is worth reading the history of the shop and the brand and its influence on Danish pipe carving. I quote a portion of the article below:

The workshop of W.Ø.Larsen

W.Ø.Larsen is Denmark’s oldest and probably most famous pipes and tobacco store, placed in the center of Copenhagen on the main pedestrian street, Stroget. If you visit Copenhagen and do a “pipe crawl” this store is a must. In the beginning of the 1960’s the store began to sell Danish hand-made pipes, especially those of Poul Rasmussen. This went very well and Poul Rasmussen could not keep up with the demand. W.Ø.Larsen, with their dynamic business manager Svend Bang (who later started his own pipe business), decided to establish their own workshop in rooms next to the store.

The first manager of the pipe workshop was Sven Knudsen, but he soon left to make pipes under his own name. The next manager was Hans Nielsen, also known as “Former” (named after the late British actor George Formby, whom he was said to resemble. Coincidentally, in Danish, “Former” means “shapes”). Under the management of Former the workshop grew and W.Ø.Larsen pipes became a prominent name abroad. Among the prominent pipemakers educated here were Else Larsen (Denmark’s first female pipemaker),Poul Ilsted, Ph. Vigen, Teddy Knudsen, Tonni Nielsen, and Peter Hedegaard.

Typical for the W.Ø.Larsen School were semi-classic shapes, meaning classic shapes, but with slight differences, often bring a little more full or round. The pipes often had lower center of gravity. A typical billard would have a bowl shaped more like a pear and the connection between the bowl and the shank would be clearly distinguished. Yellow and orange were colors more widely used for the finishes.

What I learned from the research is that the pipe is a W.O. Larsen pipe made by one of the famous carvers who worked in the shop. It is a beautiful pipe in both shape and finish.

Now it was time to work on the pipe itself. I started my work on this one by reaming the bowl with a Savinelli Fitsall Pipe Knife. I followed that up by sanding the bowl walls with 220 grit sandpaper wrapped around a piece of dowel.I scrubbed the rim top with a brass bristle wire brush to knock of the lava and tars in the blast on the rim top. Once it was scoured with the brass it looked significantly better.I cleaned the internals of the shank and the stem with 99% isopropyl alcohol, cotton swabs and pipe cleaners. I scrubbed it until the shank was clean and the smell was much cleaner smelling.I scrubbed the external surface of the sandblast briar with a tooth brush and undiluted Murphy’s Oil Soap. I scrubbed it until the finish was clean and then rinsed it off with warm running water to rinse off the soap and the grime from the finish. I dried it off with a soft cloth and took photos of the pipe. I applied some Before & After Restoration Balm to the briar. It is a paste/balm that is rubbed into the surface of the briar – both smooth and rusticated finishes. The product works to deep clean the nooks and crannies of finish, enliven and protect the briar. I worked it into the briar with my finger tips and a horse hair shoe brush. I let it sit for 10 minutes to do its work. I wiped it off with a soft cloth then buffed it with a cotton cloth. The briar really began to have a deep shine in the briar and the grain shone through. The photos I took of the bowl at this point mark the progress in the restoration. It is a gorgeous pipe.     I decided to repair the cracked shank next. The first photo shows the crack. I inserted the tenon partially in the shank to make the crack visible and took a photo. I have circled it in red so that it is clear. I cleaned up the crack and pushed a pinhole with an awl into the end of the crack to stop it. I pressed some CA glue into the crack held it together until the glue cured. I reduced the diameter of the shank end with a folded piece of 220 grit sandpaper. I found a nickel band and used a Dremel and sanding drum to remove the excess nickel on the band until the end was flush against the shank end. I cleaned up the sharp edge with a folded piece of 220 grit sandpaper. I heated it with a lighter and pressed it in place against a hard wood surface. I took photos of the band before I fit it and after it was on the shank end. It looks very good at this point. I set the bowl aside and turned my attention to the issues with the vulcanite stem. I “painted” the surface of the stem with the flame of a Bic Lighter to lift the tooth marks in the stem surface on both sides as well as the button edges where the marks were deepest. I was able to lift the marks significantly and filled in the remaining marks with clear CA glue. I set the stem aside to allow the repairs to cure. Once the repairs cured, I used a small file to reshape the button edge and flatten them. I sanded them smooth with 220 grit sandpaper and started the polishing with 600 grit wet dry sandpaper. The stem surface and button looked much better. I continued polishing the stem with micromesh sanding pads – 1500-12000 grit sanding pads and water to wet sand the stem. I wiped it down after each sanding pad with Obsidian Oil on a cotton rag after each sanding pads. But I find it does two things – first it gives some protection to the stem from oxidation and second it give the sanding pads bite in the polishing process.   After finishing with the micromesh pads I rub the stem down with Before & After Fine and Extra Fine stem polish as it seems to really remove the fine scratches in the vulcanite. I rub the Fine Polish on the stem and wipe it off with a paper towel and then repeat the process with the Extra Fine polish. I finish the polishing of the stem down with a final coat of Obsidian Oil and set the stem aside to let the oil absorb. This process gives the stem a shine and also a bit of protection.  The final steps in my process involve using the buffer. I put the W.O. Larsen Handmade Brandy back together and lightly buffed the bowl and stem with Blue Diamond to polish the blast without filling in the grooves in the finish. I polished the vulcanite stem at the same time to polish out the scratches. I gave the bowl multiple coats of Conservator’s Wax and the stem multiple coats of carnauba wax. I have found that I can get a deeper shine if I follow up the wax buff with a buff with a clean buffing pad. It works to raise the shine and then I hand buff with a microfiber cloth to deepen the shine. It is always fun for me to see what the polished bowl looks like with the polished stem. It really is a nice pipe. The finish around the bowl sides and shank looks great with the rich combination of brown stains. The W.O. Larsen Sandblast Brandy feels great in my hand. It is a well balanced pipe. Have a look at it with the photos below. The dimensions are Length: 5 ½ inches, Height:  2 inches, Outside diameter of the bowl: 1 ¼ inch, Chamber diameter: ¾ of an inch. The weight of the pipe is 1.41 ounces/40 grams. It is a beautiful pipe that functions as a sitter due to the wide heel on the bowl. I will soon be adding to the rebornpipes store in the Danish Pipemakers section. If you would like to add it to your collection let me know. It should be a great smoking pipe. As always I encourage your questions and comments as you read the blog. Thanks to each of you who are reading this blog. Remember we are not pipe owners; we are pipe men and women who hold our pipes in trust until they pass on into the trust of those who follow us.

Moving another one of my own – a Dr. Grabow Viscount 39 Pickaxe


Blog by Steve Laug

This is another pipe that I have taken out of my personal collection as I just do not use enough to warrant keeping it. This pipe was one that I purchased long ago but have no memory where it came from. I don’t think I ever smoked it to be honest. It is a pipe I should have smoked as it is attractive enough but did not. It is time to move it on to someone who will enjoy it. The airway in the shank and the mortise are very clean. The smooth finish and rim top were in good condition but it is dull and lifeless looking. The inner edge of the rim is in good condition. The stamping on the pipe on the left side of the shank reads Viscount [over] Dr. Grabow. On the right side it is stamped with the shape number 39 next to the shank. That is followed by Imported Briar [over] Adjustomatic [over] Pat.2461905. The finish is a medium brown. Once it is polished the grain will show clearly. The colour of the stain goes well with the vulcanite stem. There is a white spade Grabow logo on the left side of the stem. There is a threaded metal tenon and stinger apparatus on the stem. The stem is in excellent condition with no tooth chatter or marks on it. It is dirty from sitting in my cupboard but otherwise looks good. I took photos of the pipe before I did my clean up work on it to prepare it for you.   I took a photo of the bowl and rim top to verify the description above. The rim top looks good. There is a little darkening around the inner edge but otherwise it is in good shape. The vulcanite stem looks quite good on both sides. I took photos of the stamping on the sides of the shank. It is clear and readable as noted above.I took the stem off the bowl and took a photo of the pipe to give a sense of proportion of the pipe. You can also see shape of the pipe and some interesting grain on the briar. I used a folded piece of 220 grit sandpaper to clean up the darkening on the inner edge of the bowl. Once finished it looked much better.The shank and mortise were very clean and a quick run through with a pipe cleaner proved all that was necessary. I polished the rim top and the briar with micromesh sanding pads – dry sanding with 1500-12000 grit pads. I wiped the bowl down with a damp cloth after each sanding pad to remove the dust and debris. I gave the bowl and shank a coating of Before & After Restoration Balm. I worked it into the surface of the briar with my fingertips to clean, enliven and protect the briar. I let the balm sit for 15 minutes and then buffed with a cotton cloth to raise the shine. The photos show the bowl at this point in the restoration process.   I set the bowl aside and turned my attention to the stem. I polished it with micromesh sanding pads – 1500-12000 grit sanding pads and water to wet sand the stem. I wiped it down after each sanding pad with Obsidian Oil on a cotton rag after each sanding pads. But I find it does two things – first it gives some protection to the stem from oxidation and second it give the sanding pads bite in the polishing process.     After finishing with the micromesh pads I rub the stem down with Before & After Fine and Extra Fine stem polish as it seems to really remove the fine scratches in the vulcanite. I rub the Fine Polish on the stem and wipe it off with a paper towel and then repeat the process with the Extra Fine polish. I finished polishing the stem with a final coat of Obsidian Oil and set the stem aside to let the oil absorb. This process gives the stem a shine and also a bit of protection.   This Dr. Grabow Viscount 39 Pickaxe turned out to be a great looking pipe. With polishing, the grain shines through clearly. The thin vulcanite taper stem is in excellent condition and works great with the polished briar. I put the stem back on the bowl and carefully buffed the pipe with Blue Diamond on the buffing wheel using a light touch on the briar. I gave the bowl and stem multiple coats of carnauba wax on the buffing wheel and followed that by buffing the entire pipe with a clean buffing pad. I hand buffed the pipe with a microfiber cloth to deepen the shine. The finished Dr. Grabow Viscount Pickaxe fits nicely in the hand and feels great. Give the finished pipe a look in the photos below. The dimensions of the pipe are Length: 5 ¾ inches, Height: 2 ½ inches, Outside diameter of the bowl: 1 ¼ inches, Chamber diameter: ¾ of an inch. The weight of the pipe is 34 grams/1.20 ounces. It is a great looking pipe that I will soon be adding it to the rebornpipes store in the American Pipemakers Section. If you are interested in adding it to your collection let me know Thanks for reading this blog and my reflections on the pipe while I worked on it.

Moving another one of my own – a silver banded BBB Own Make 522 Pot


Blog by Steve Laug

This is another pipe that I have taken out of my personal collection as I just do not use enough to warrant keeping it. This pipe was one that I purchased long ago but have no memory where it came from. I don’t think I ever smoked it to be honest. It is a pipe I should have smoked as it is attractive enough but did not. It is time to move it on to someone who will enjoy it. The airway in the shank and the mortise are very clean. The smooth finish and rim top were in good condition but it is dull and lifeless looking. The inner edge of the rim has a bit of damage on the right side toward the front. The stamping on the pipe on the left side of the shank reads BBB in a diamond flanked on either side by Own (left) and Make (right). On the right side it is stamped Made in London [over] England followed by the shape number 522. There is a Sterling silver band on the shank that is cosmetic as there are no cracks. It is stamped with the BBB in a diamond logo [over] Sterling Silver. It is tarnished and has some small dents in the surface. The finish is a medium brown. Once it is polished the grain will show clearly. The colour of the stain goes well with the black vulcanite stem. There is a BBB Diamond brass inset logo on the top of the stem. The stem is in excellent condition with no tooth chatter or marks on it. It is dirty form sitting in my cupboard but otherwise looks goo. I took photos of the pipe before I did my clean up work on it to prepare it for you.    I took a photo of the bowl and rim top to verify the description above. The rim top looks good other than the burn mark on the inner edge at the right front of the bowl. The Sterling band is also very tarnish and dark in the photos. I also took photos of the stem surface showing how clean it was on both sides.I took photos of the stamping on the sides of the shank. It is clear and readable as noted above. The stamping on the Sterling Band though dirty and tarnish is also very readable. I took the stem off the bowl and took a photo of the pipe to give a sense of proportion of the pipe. You can also see shape of the pipe and some interesting grain on the briar. I decided to start my work on the bowl by dealing with the burn damage on the front inner edge of the bowl. I used a piece of folded 220 grit sandpaper to give the edge a slight bevel all the way around the bowl to blend in the damage. Once finished, it looked quite good. The shank and mortise were very clean and a quick run through with a pipe cleaner proved all that was necessary. I polished the rim top and the briar with micromesh sanding pads – dry sanding with 1500-12000 grit pads. There was a small sandpit on the front of the bowl about mid-bowl. I wiped the bowl down with a damp cloth after each sanding pad to remove the dust and debris. I gave the bowl and shank a coating of Before & After Restoration Balm. I worked it into the surface of the briar with my fingertips to clean, enliven and protect the briar. I let the balm sit for 15 minutes and then buffed with a cotton cloth to raise the shine. The photos show the bowl at this point in the restoration process. I polished the silver band with a jeweler’s cloth to remove the tarnish and oxidation. It took some elbow grease but the cloth works to clean and protect the silver from further tarnishing. It looks significantly better than when I started. I set the bowl aside and turned my attention to the stem. I polished it with micromesh sanding pads – 1500-12000 grit sanding pads and water to wet sand the stem. I wiped it down after each sanding pad with Obsidian Oil on a cotton rag after each sanding pads. But I find it does two things – first it gives some protection to the stem from oxidation and second it give the sanding pads bite in the polishing process.   After finishing with the micromesh pads I rub the stem down with Before & After Fine and Extra Fine stem polish as it seems to really remove the fine scratches in the vulcanite. I rub the Fine Polish on the stem and wipe it off with a paper towel and then repeat the process with the Extra Fine polish. I finished polishing the stem with a final coat of Obsidian Oil and set the stem aside to let the oil absorb. This process gives the stem a shine and also a bit of protection.  This BBB Own Make 522 Pot turned out to be a great looking pipe. With polishing, the grain shines through clearly. The black vulcanite stem is in excellent condition and works great with the polished briar. The polished silver is a touch of class. I put the stem back on the bowl and carefully buffed the pipe with Blue Diamond on the buffing wheel using a light touch on the briar. I gave the bowl and stem multiple coats of carnauba wax on the buffing wheel and followed that by buffing the entire pipe with a clean buffing pad. I hand buffed the pipe with a microfiber cloth to deepen the shine. The finished BBB Own Make Pot fits nicely in the hand and feels great. Give the finished pipe a look in the photos below. The dimensions of the pipe are Length: 6 inches, Height: 1 ½ inches, Outside diameter of the bowl: 1 ½ inches, Chamber diameter: 7/8 of an inch. The weight of the pipe is 43 grams/1.52 ounces. It is a great looking pipe that I will soon be adding it to the rebornpipes store in the British Pipemakers Section. If you are interested in adding it to your collection let me know Thanks for reading this blog and my reflections on the pipe while I worked on it.

Moving another one of my own – a Natural Imported Briar Folk Art Carved Rhodesian


Blog by Steve Laug

This is another pipe that I have taken out of my personal collection as I just do not use enough to warrant keeping it. This pipe was one that I purchased long ago from an Antique shop in Aldergrove, British Columbia. I still remember seeing it in the case and asking to have a look at it. It was just a bowl, a stummel as the stem was long lost. It was interesting in that it had some folk art style carving around the rim top and the front of the bowl. It has the letters CP carved on the front of the bowl intertwined with vines. There are also vines twined around the bap of the Rhodesian bowl and almost a flower petal on the top. I remember restemming it with a taper stem and possibly banding it though I am not sure of that. The band seems to be cosmetic as I cannot see any cracks from the shank end. It is a pipe I should have smoked but did not. From what I can see I actually never loaded a bowl to enjoy. It is a little bigger than what I like so it was ignored. It is time to move it on to someone who will enjoy it. The airway in the shank and the mortise are very clean. The smooth finish and rim top were in good condition. There is darkening on the inner edge of the rim that I never cleaned up. The finish was a little dull but it is a beauty. The stamping on the pipe is partially covered by the band. On the left side of the shank it has a shield with a rampant lion in it. That is followed by the stamp Natural [over] Imported Briar. On the right side there is no stamping. The finish is a medium brown and with polishing should make the grain show clearly. The finish goes well with the thick vulcanite taper stem. The stem is in excellent condition with no tooth chatter or marks on it. I took photos of the pipe before I did my clean up work on it to prepare it for you. I took a photo of the bowl and rim top to verify the description above. The rim top and edges are in okay condition. There is some burn damage and chipping on the inner edge of the bowl but otherwise it looks good. The outer edge is in good condition and the flower petal carving looks very good. I also took photos of the stem surface showing how clean it was on both sides. I took photos of the stamping on the side of the shank. It is so faint as to be almost unreadable. It has a shield with a rampant lion followed by NATURAL [over] Imported Briar. The nickel band covers part of the stamping though it is readable. The second photo shows the CP carved into the surface of the briar. I took the stem off the bowl and took a photo of the pipe to give a sense of proportion of the pipe. You can also see shape of the pipe and some interesting grain on the briar.I decided to address the darkening and nicks around the inner edge of the bowl with a folded piece of 220 grit sandpaper. I gave the rim edge a slight bevel to minimize the darkening and the damage. It looked significantly better when I finished.The shank and mortise were very clean and a quick run through with a pipe cleaner proved all that was necessary. I polished the rim top and the briar with micromesh sanding pads – dry sanding with 1500-12000 grit pads. There was a nick on the front top left side that looks like a crack but it is not. It a gouge caused by a blade. I wiped the bowl down with a damp cloth after each sanding pad to remove the dust and debris. I gave the bowl and shank a coating of Before & After Restoration Balm. I worked it into the surface of the briar with my fingertips and a horsehair shoe brush to clean, enliven and protect the briar. I let the balm sit for 15 minutes and then buffed with a cotton cloth to raise the shine. The photos show the bowl at this point in the restoration process. I set the bowl aside and turned my attention to the stem. I polished it with micromesh sanding pads – 1500-12000 grit sanding pads and water to wet sand the stem. I wiped it down after each sanding pad with Obsidian Oil on a cotton rag after each sanding pads. But I find it does two things – first it gives some protection to the stem from oxidation and second it give the sanding pads bite in the polishing process.   After finishing with the micromesh pads I rub the stem down with Before & After Fine and Extra Fine stem polish as it seems to really remove the fine scratches in the vulcanite. I rub the Fine Polish on the stem and wipe it off with a paper towel and then repeat the process with the Extra Fine polish. I finished polishing the stem with a final coat of Obsidian Oil and set the stem aside to let the oil absorb. This process gives the stem a shine and also a bit of protection.  This Natural Imported Briar Rhodesian turned out to be a great looking pipe. The natural finish on the pipe is in excellent condition and works great with the polished vulcanite taper stem. I put the stem back on the bowl and carefully buffed the pipe with Blue Diamond on the buffing wheel using a light touch on the briar. I gave the bowl and stem multiple coats of carnauba wax on the buffing wheel and followed that by buffing the entire pipe with a clean buffing pad. I hand buffed the pipe with a microfiber cloth to deepen the shine. The finished Natural Rhodesian fits nicely in the hand and feels great. Give the finished pipe a look in the photos below. The dimensions of the pipe are Length: 5 ½ inches, Height: 1 ¾ inches, Outside diameter of the bowl: 1 ¾ inches, Chamber diameter: 7/8 of an inch. The weight of the pipe is 71 grams/2.50 ounces. It is a great looking pipe that I will soon be adding it to the rebornpipes store in the American (US) Pipemakers Section. If you are interested in adding it to your collection let me know Thanks for reading this blog and my reflections on the pipe while I worked on it.