Blog by Steve Laug
 Not long ago I worked a trade with a fellow for these five pipes in exchange for one that I had here. He sent me photos of the pipes and the deal was struck. The pipes he sent are as follows from bottom to top. There is a W.O. Larsen sandblast oval shank Brandy with a hairline crack in the shank and with tooth marks on the button on both sides, a Bertram Cutty that I had traded with him earlier, a Kriswill sandblast Canadian with a cracked shank, a Viby pencil shank Billiard and a Stanwell Royal Briar wide oval shank Dublinesque Freehand with burn damage on the rim edges and top around the bowl and deep tooth marks on the stem.
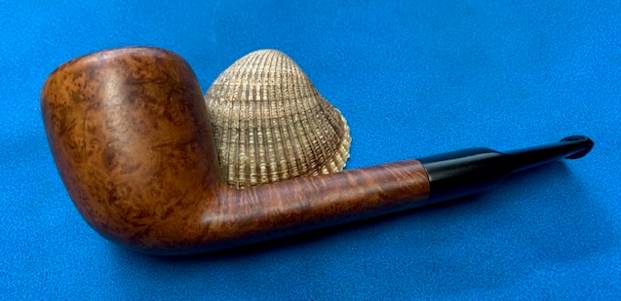
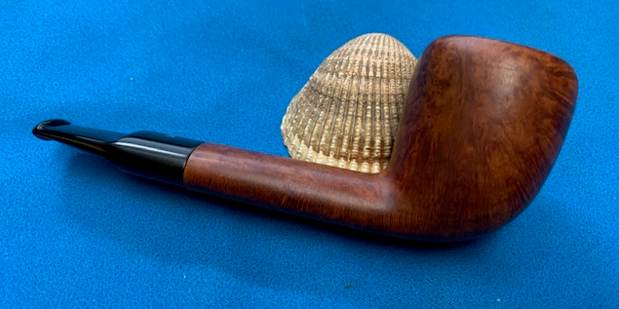
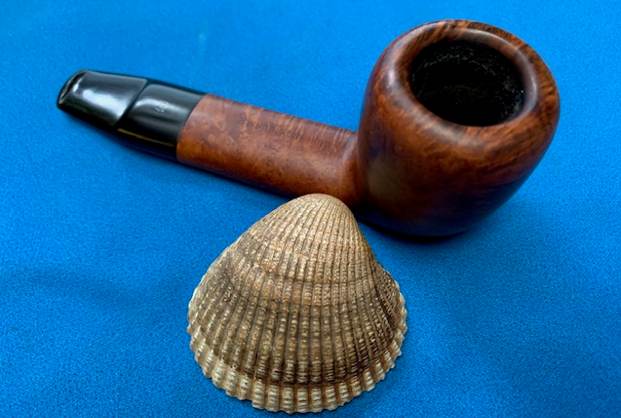
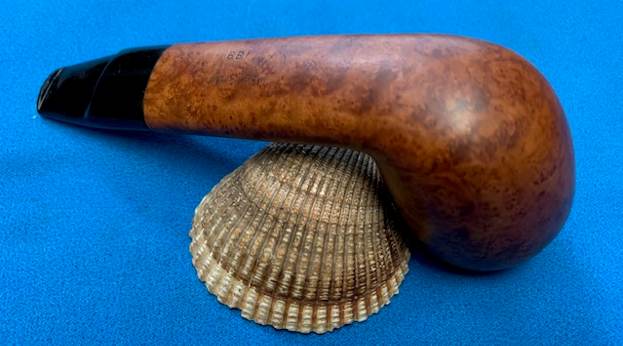
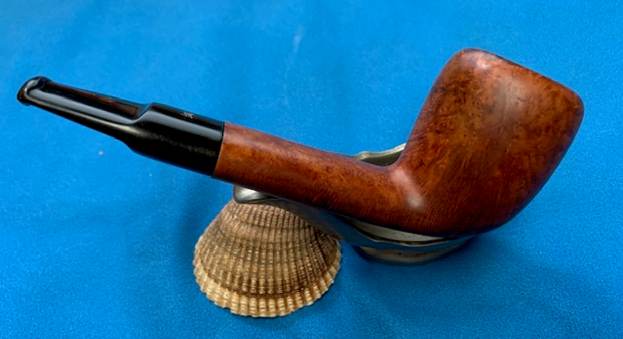
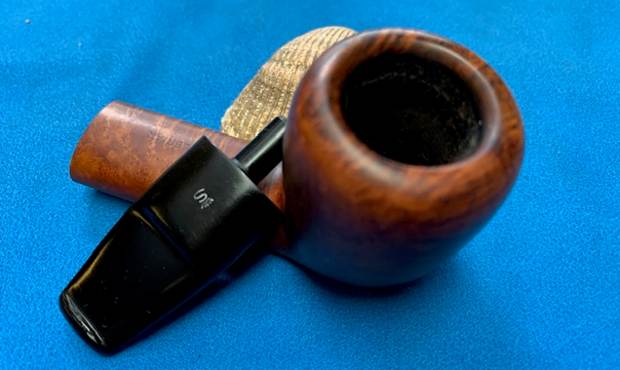
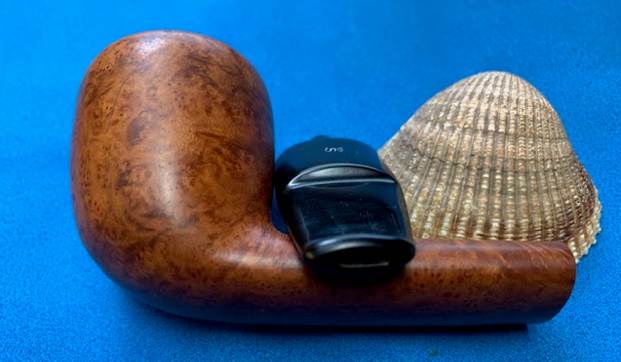
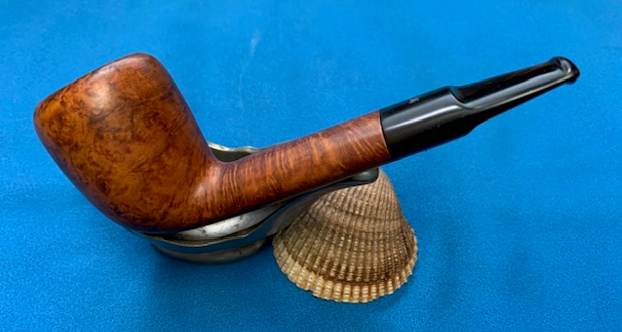
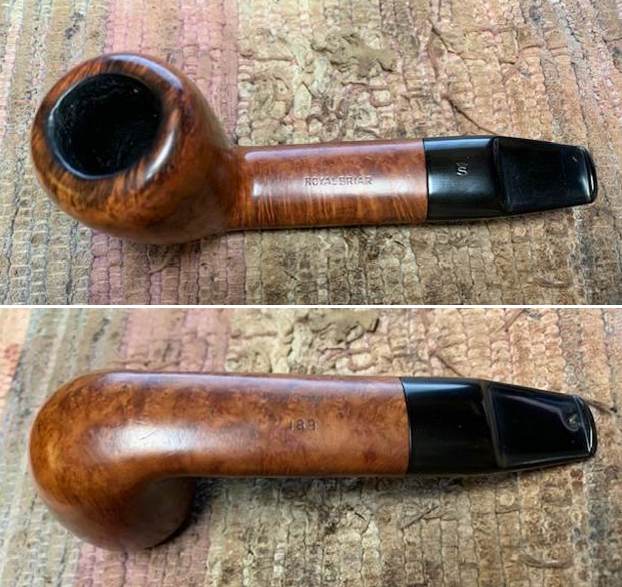
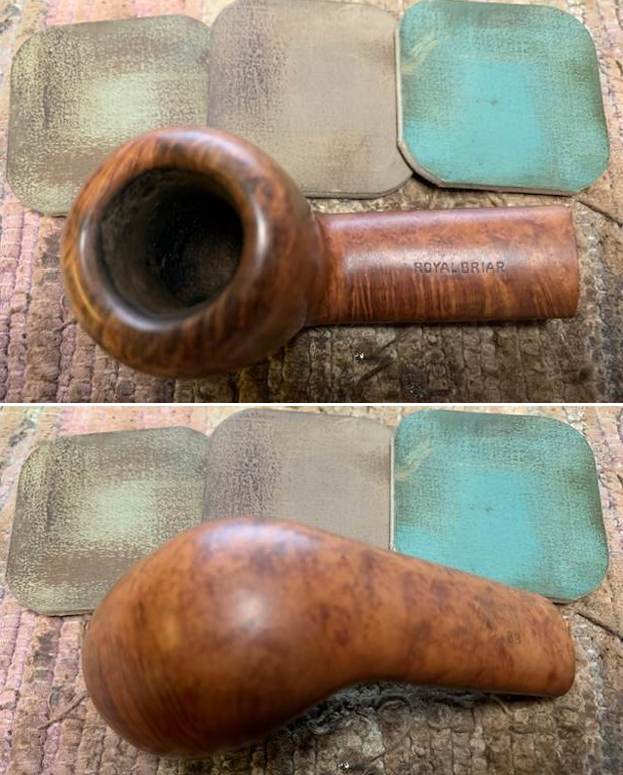
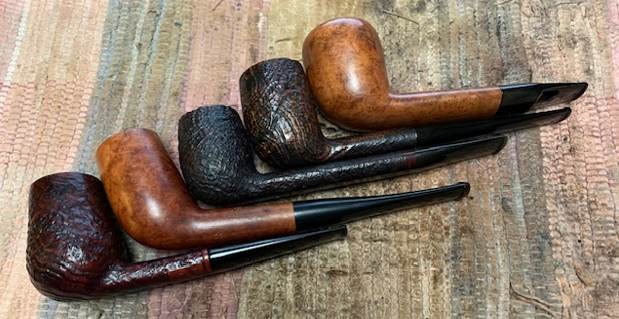 The next of these I chose to work on today is the Stanwell Royal Briar 189 at the top of the photo above. It is a classic Stanwell shape with a some nice grain around the bowl and the shank. The rim top was in good condition and there was some darkening and burn damage on the front inner edge. The outer edge of the rim is in good condition. The bowl had a light cake in the bowl and smells of good Virginia tobacco. There was some grime and grit ground into the surface of the finish. The stamping on the topside of the shank reads Stanwell [over] Regd. No. 689-48 [over] Royal Briar. On the underside it is stamped Made in Denmark [over] the shape number 189. The stain is light/medium brown and goes well with the oval vulcanite saddle stem. Once it is cleaned up and polished the grain around the bowl and shank will shine. The stem is in good condition with some tooth marks on it. The surface just ahead of the button is damaged with some deep bite marks on both sides. The button edge looks good on both sides. I am including several of the photos that were sent to me for viewing. The first shows the front of pipe and the grain around the front. It also gives a look inside the bowl and shows the cake. The second shows the marks on the stem surface that I spoke of above. The third photo shows the pipe from the button forward on the bowl.
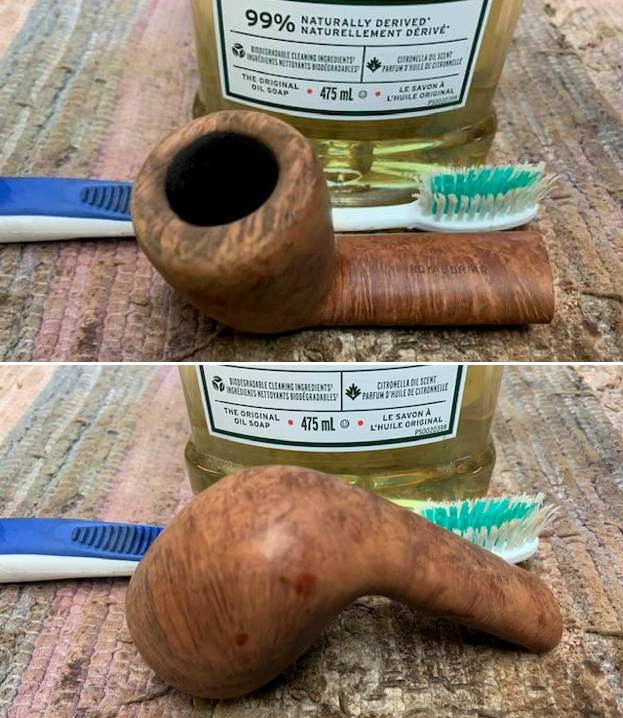
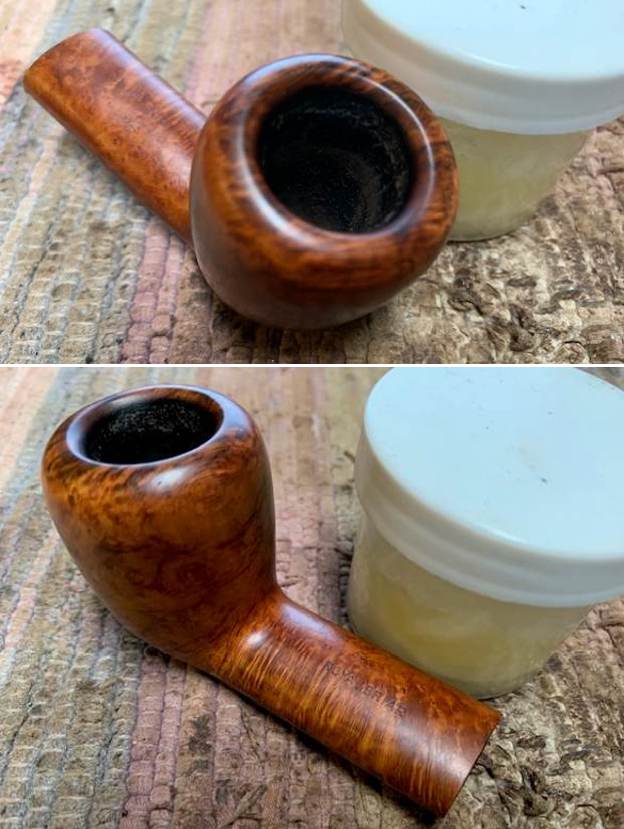
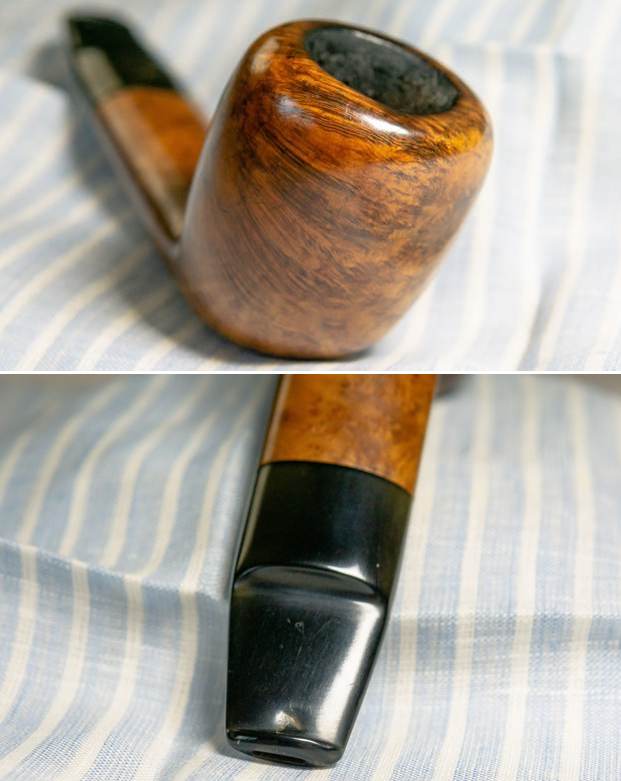
 I took photos of the pipe before I did my clean up work on it to show its condition. The photos confirm what I noted above regarding the condition of the bowl and the stem. It a nice looking pipe that will look better with a bit of work on the stem and bowl.
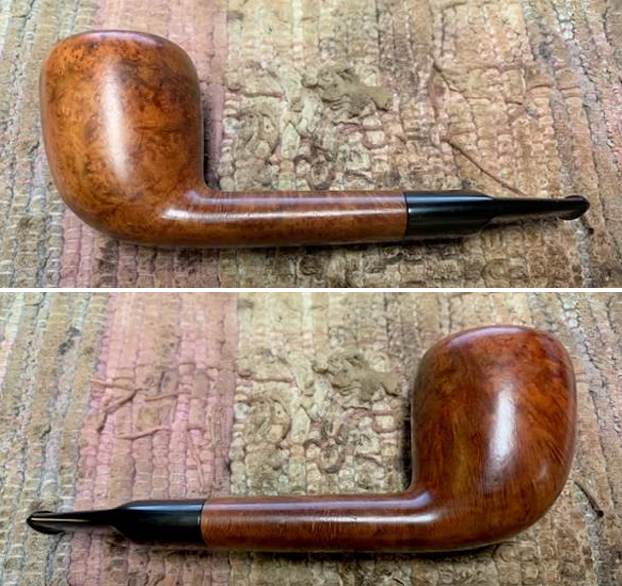
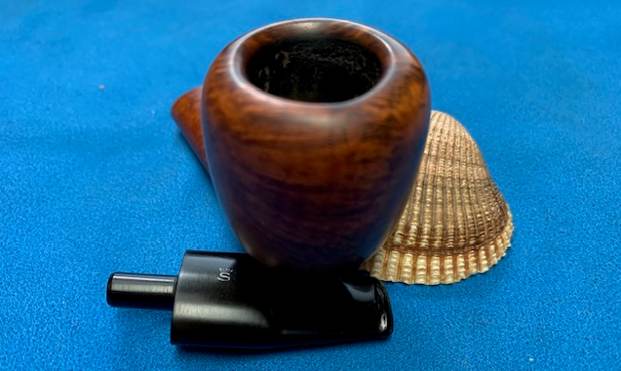
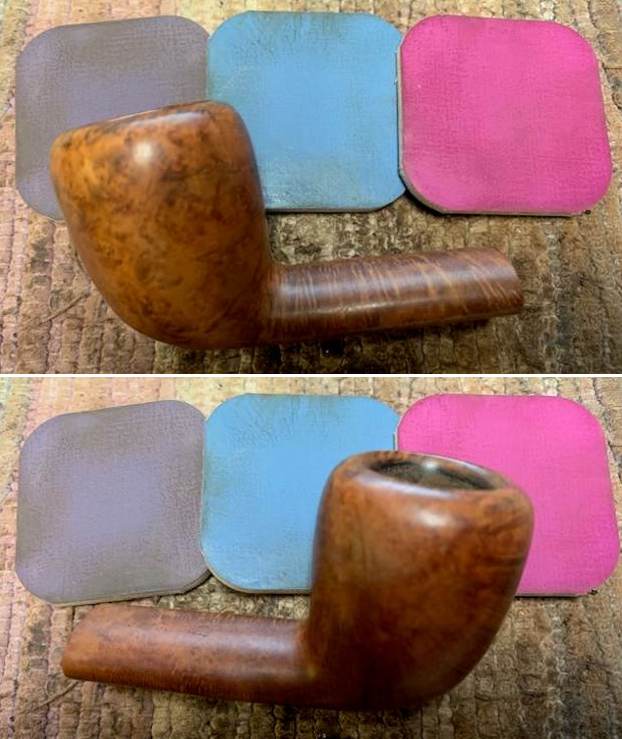
 I took close up photos so that I could have a clearer picture of the condition of the bowl, rim edges and top. The rim top photos confirm my assessment above and show that while there is some darkening and burn damage on the front top and inner edge. The cake in the bowl is quite moderate and smooth. You can also see the condition of the outer and the inner edge. They appear to be in great condition. This is what I look for when assessing a pipe. The bowl is still round and other than being in a used condition it is in great shape. The issues with the stem are visible in the photos on both sides ahead of the button and on the button itself.
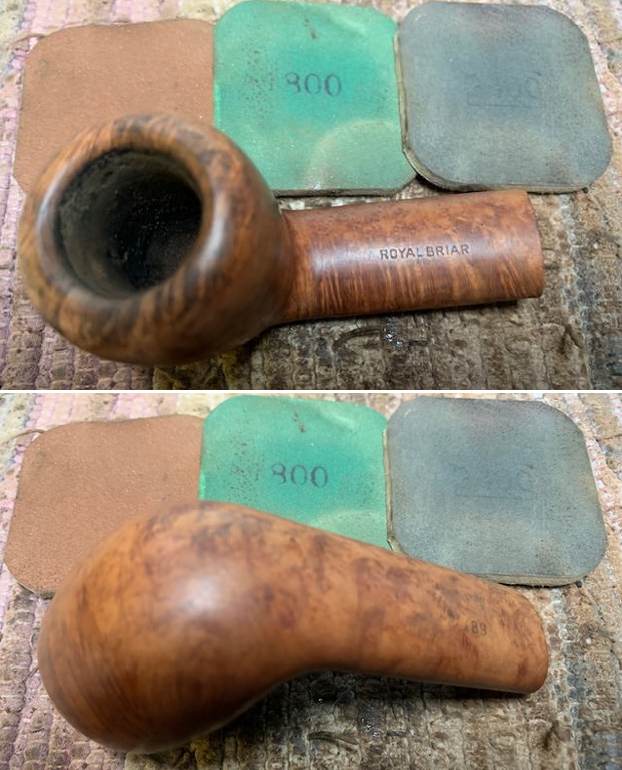
 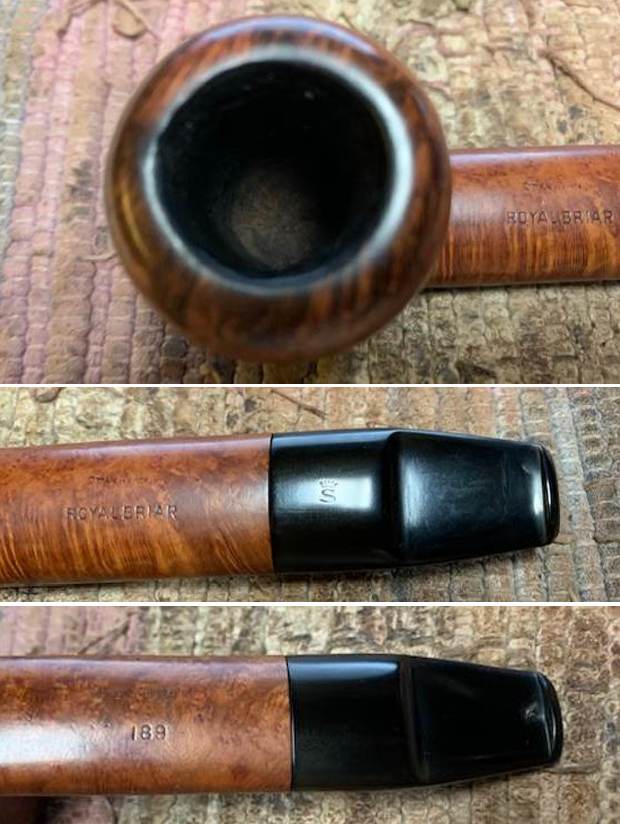 I took a photo of the stamping on the underside of the shank. It is clear and readable as noted above.
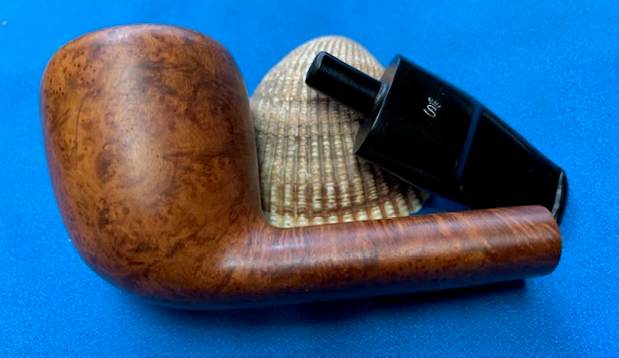
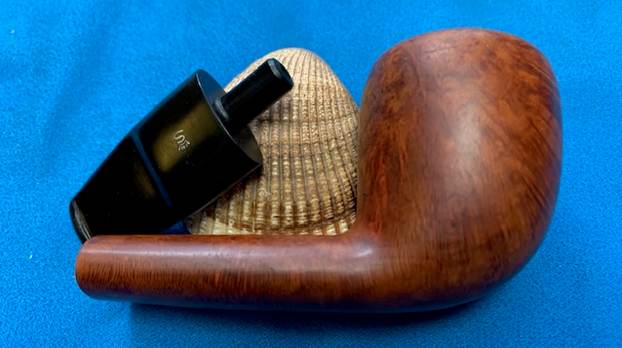
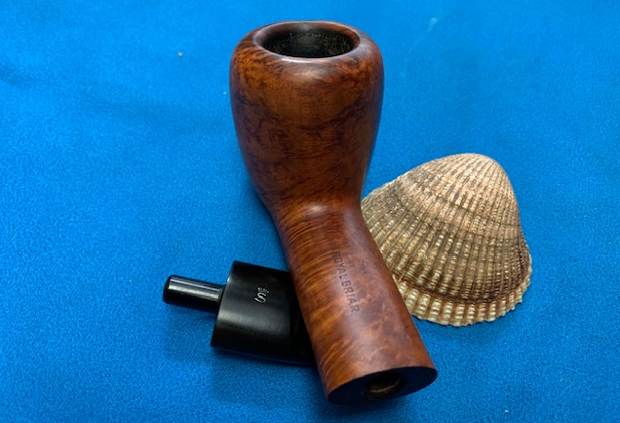
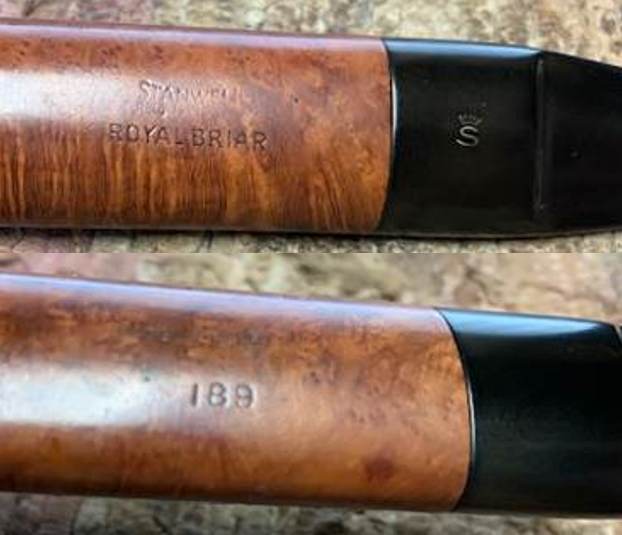 I took the stem off the bowl and took a photo of the pipe to give a sense of proportion of the pipe. You can also see shape of the pipe and some interesting grain around the bowl and shank.
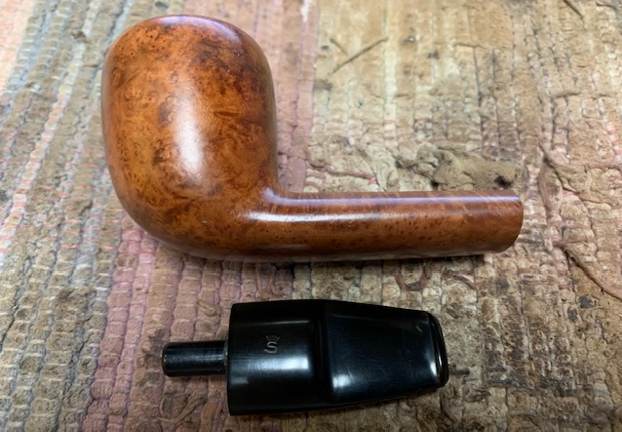 Now it was time to work on the pipe itself. I started my work on this one by reaming the bowl with a Savinelli Fitsall Pipe Knife. I followed that up by sanding the bowl walls with 220 grit sandpaper wrapped around a piece of dowel.
 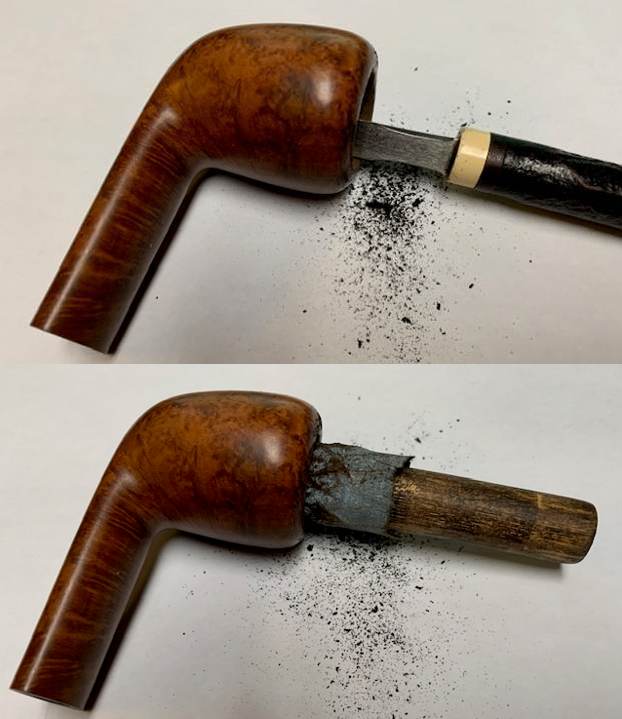 I cleaned the internals of the shank and the stem with 99% isopropyl alcohol, cotton swabs and pipe cleaners. I scrubbed it until the shank was clean and the smell was much cleaner smelling.
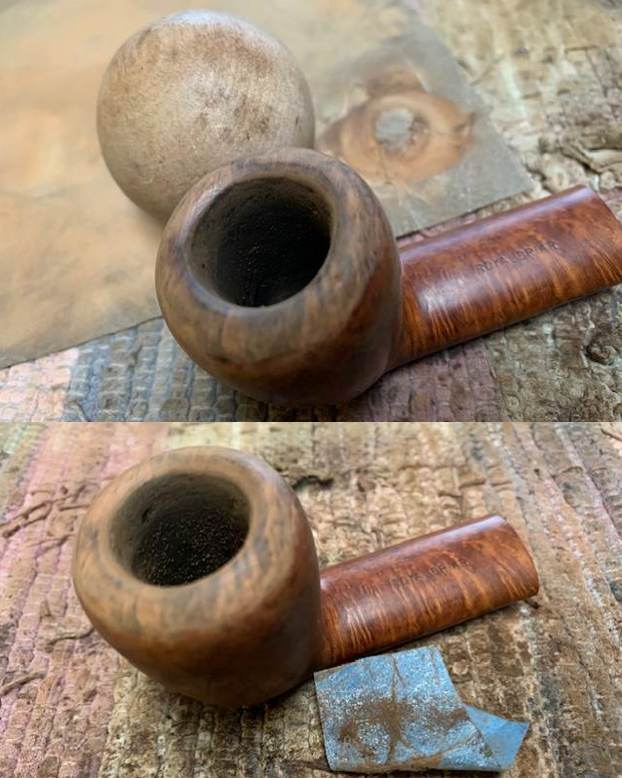
  Before scrubbing the bowl exterior I decided to clean up the darkening and the burn damage on the rim top and inner edge of the bowl. I used some 220 grit sandpaper and a wooden ball to give the bowl a light inward bevel and remove the darkening and the damage. I finished by cleaning it up a bit further with a folded piece of 220 grit sandpaper. It looks much better.
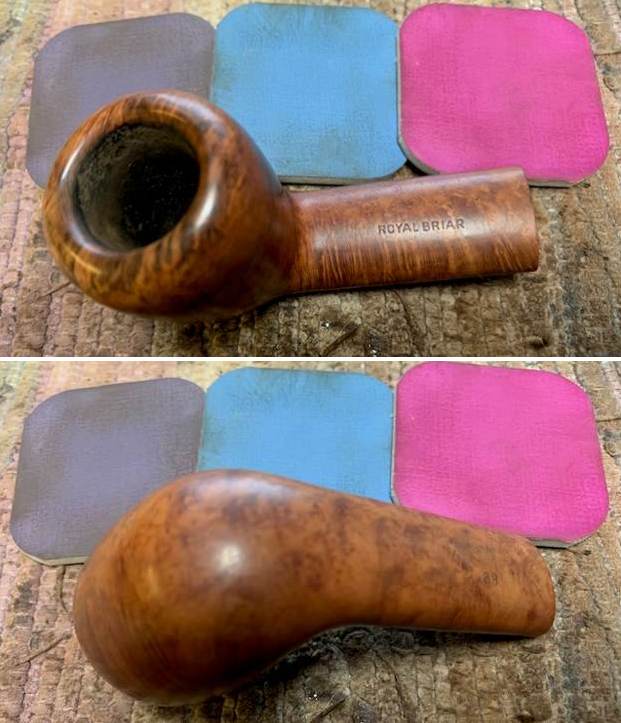
 I scrubbed the external surface of the briar with a tooth brush and undiluted Murphy’s Oil Soap. I scrubbed it until the finish was clean and then rinsed it off with warm running water to rinse off the soap and the grime from the finish. I dried it off with a soft cloth and took photos of the pipe.
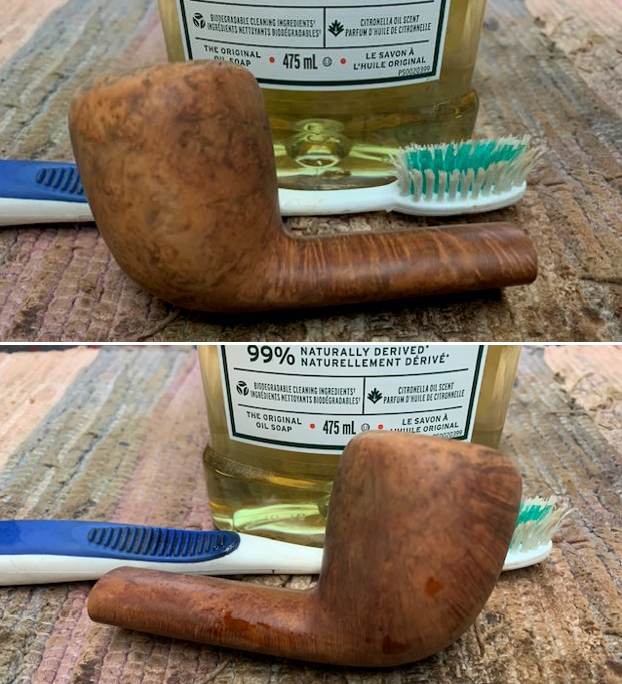
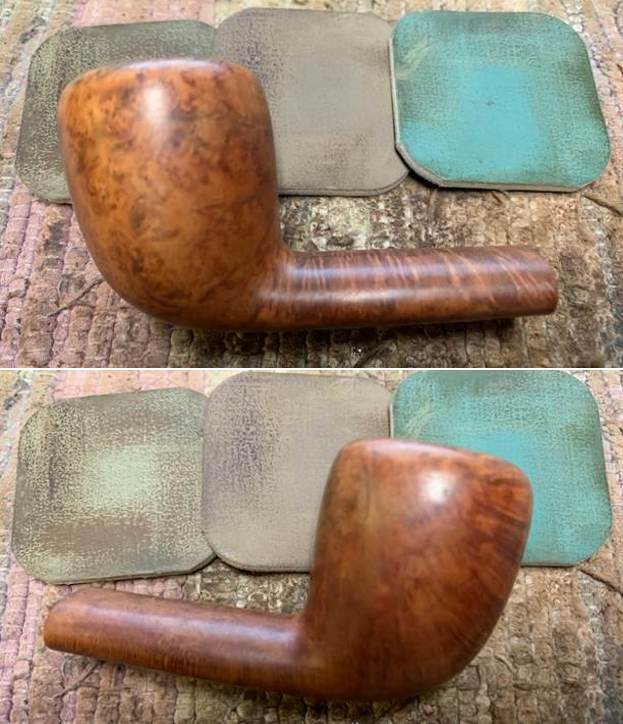
 I polished the briar with micromesh sanding pads. I choose to dry sand the briar rather than wet sand it. Again it is a matter of personal preference. I prefer to use the pads dry and find they work very well on the briar. I sand with each pad (9 in total) and group them by threes for ease of reference. I wipe the bowl down after each pad with a damp cloth to remove the sanding debris and check the briar. I love seeing the developing shine on the briar as I move through the pads which is why I include so many photos of this step.
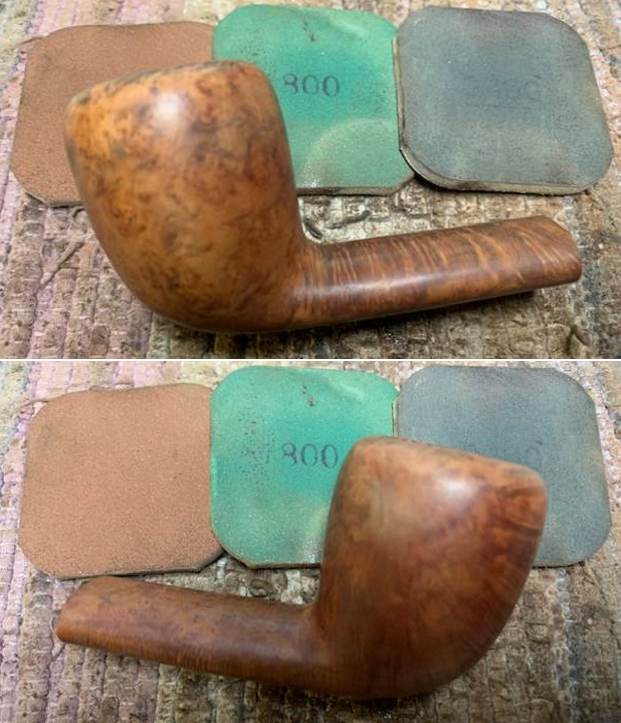
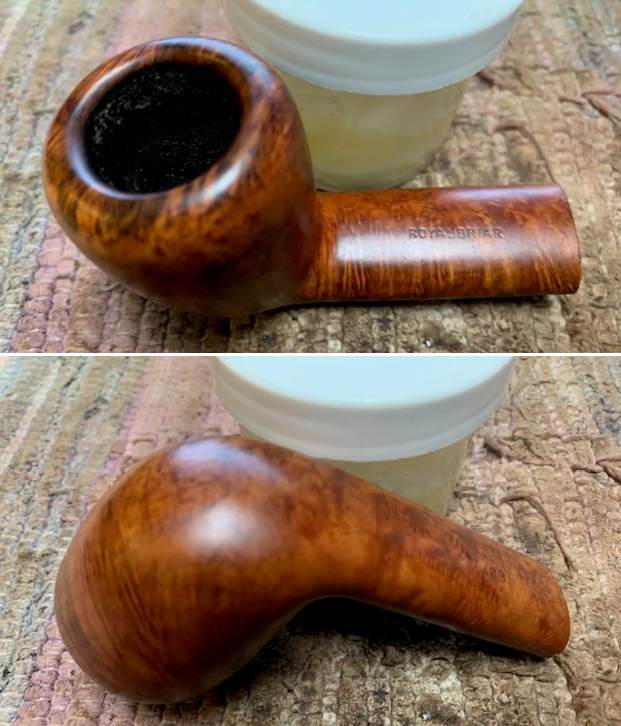
 I applied some Before & After Restoration Balm to the briar. It is a paste/balm that is rubbed into the surface of the briar. The product works to deep clean finish, enliven and protect the briar. I worked it into the briar with my finger tips. I let it sit for 10 minutes to do its work. I wiped it off with a soft cloth then buffed it with a cotton cloth. The briar really began to have a deep shine in the briar and the grain shone through. The photos I took of the bowl at this point mark the progress in the restoration. It is a gorgeous pipe.
 I set the bowl aside and turned my attention to the issues with the vulcanite stem. I “painted” the surface of the stem with the flame of a Bic Lighter to lift the tooth marks in the stem surface on both sides as well as the button edges where the marks were deepest. I was able to lift the marks significantly and filled in the remaining marks with clear CA glue. I set the stem aside to allow the repairs to cure.
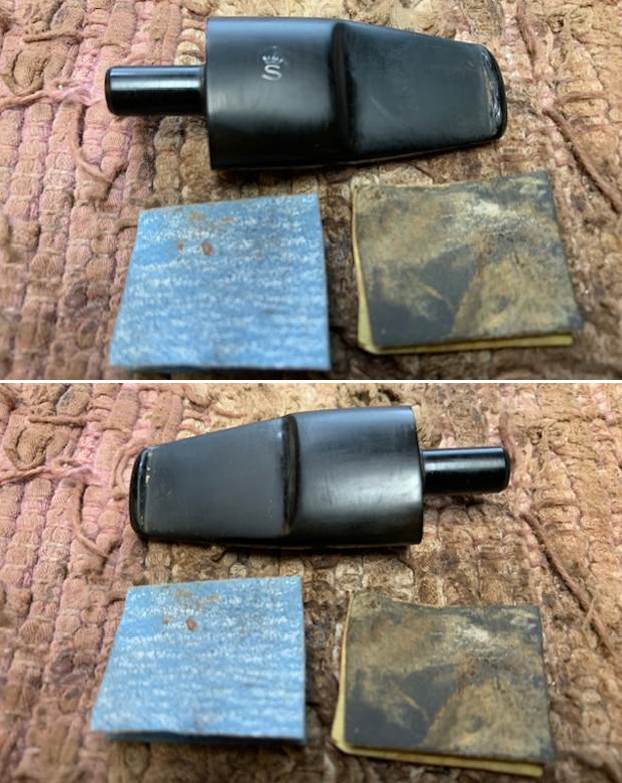
 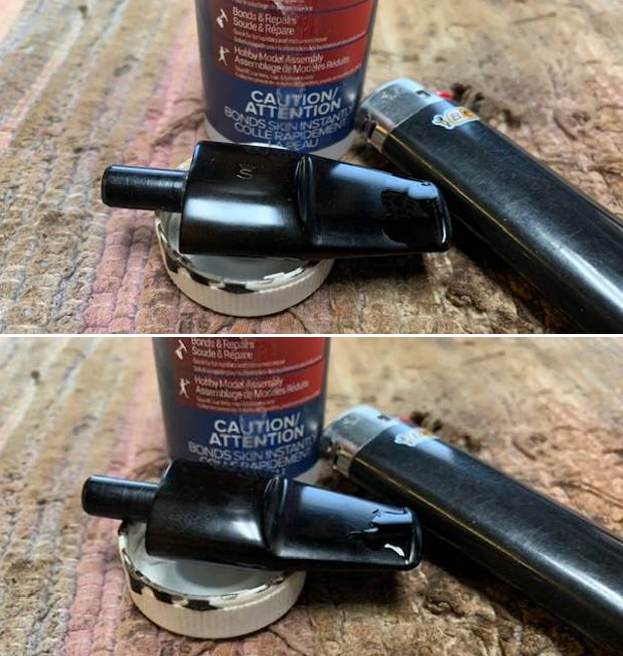 Once the repairs cured, I used a small file to reshape the button edge and flatten them. I sanded them smooth with 220 grit sandpaper and started the polishing with 600 grit wet dry sandpaper. The stem surface and button looked much better.
 I touched up the Crown S stamping on the top of the saddle portion of the stem with white acrylic fingernail polish. I worked it into the stamp with a tooth pick. I scraped off the excess with the tooth pick. It was ragged looking but readable. When I started polishing, it would clean up well.
 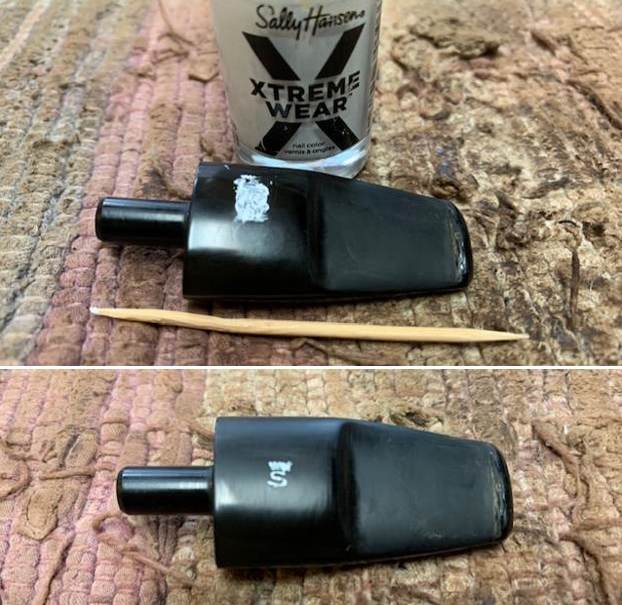 I continued polishing the stem with micromesh sanding pads – 1500-12000 grit sanding pads and water to wet sand the stem. I wiped it down after each sanding pad with Obsidian Oil on a cotton rag after each sanding pads. But I find it does two things – first it gives some protection to the stem from oxidation and second it give the sanding pads bite in the polishing process.
 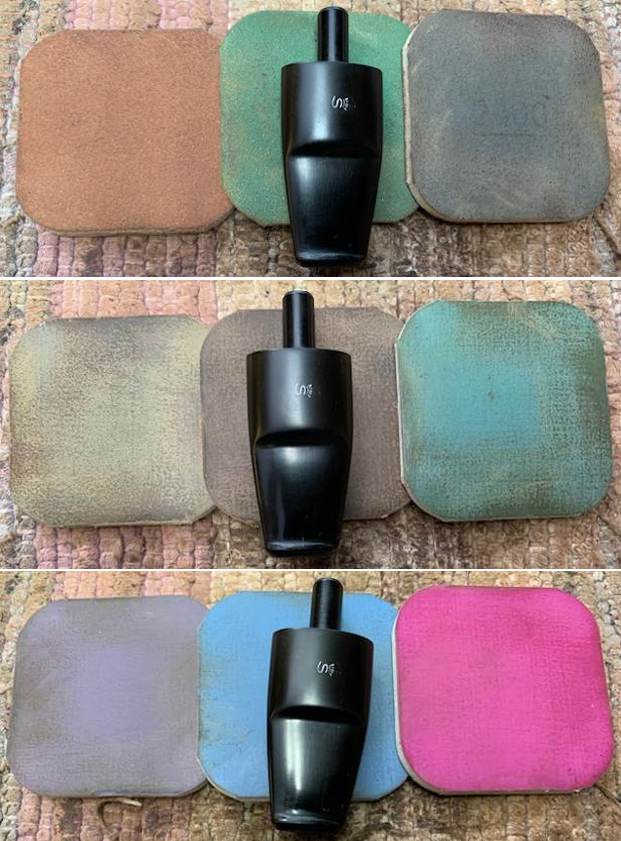 After finishing with the micromesh pads I rub the stem down with Before & After Fine and Extra Fine stem polish as it seems to really remove the fine scratches in the vulcanite. I rub the Fine Polish on the stem and wipe it off with a paper towel and then repeat the process with the Extra Fine polish. I finish the polishing of the stem down with a final coat of Obsidian Oil and set the stem aside to let the oil absorb. This process gives the stem a shine and also a bit of protection.
 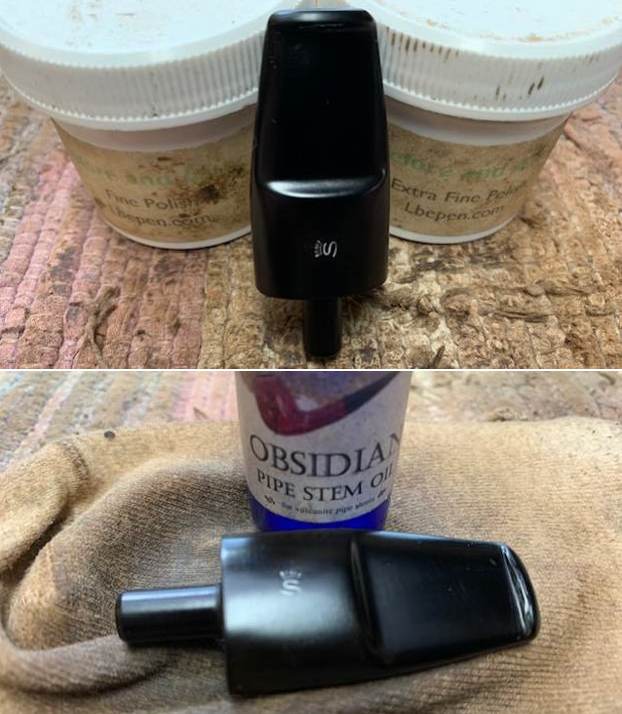 The final steps in my process involve using the buffer. I put the Stanwell Royal Briar 189 Freehand back together and lightly buffed the bowl and stem with Blue Diamond to polish the finish. I polished the vulcanite stem at the same time to polish out the scratches. I gave the bowl and the stem multiple coats of carnauba wax. I have found that I can get a deeper shine if I follow up the wax buff with a buff with a clean buffing pad. It works to raise the shine and then I hand buff with a microfiber cloth to deepen the shine. It is always fun for me to see what the polished bowl looks like with the polished stem. It really is a nice pipe. The finish around the bowl sides and shank looks great with the rich combination of brown stains. The Stanwell Regd. No. 689-48 Royal Danish Freehand feels great in my hand. It is a well balanced pipe. Have a look at it with the photos below. The dimensions are Length: 5 inches, Height: 1 ¾ inches, Outside diameter of the bowl: 1 ½ inch, Chamber diameter: ¾ of an inch. The weight of the pipe is 1.55 ounces/45 grams. It is a beautiful pipe that functions as a sitter due to the wide heel on the bowl. I will soon be adding to the rebornpipes store in the Danish Pipemakers section. If you would like to add it to your collection let me know. It should be a great smoking pipe. As always I encourage your questions and comments as you read the blog. Thanks to each of you who are reading this blog. Remember we are not pipe owners; we are pipe men and women who hold our pipes in trust until they pass on into the trust of those who follow us.