Blog by Paresh Deshpande
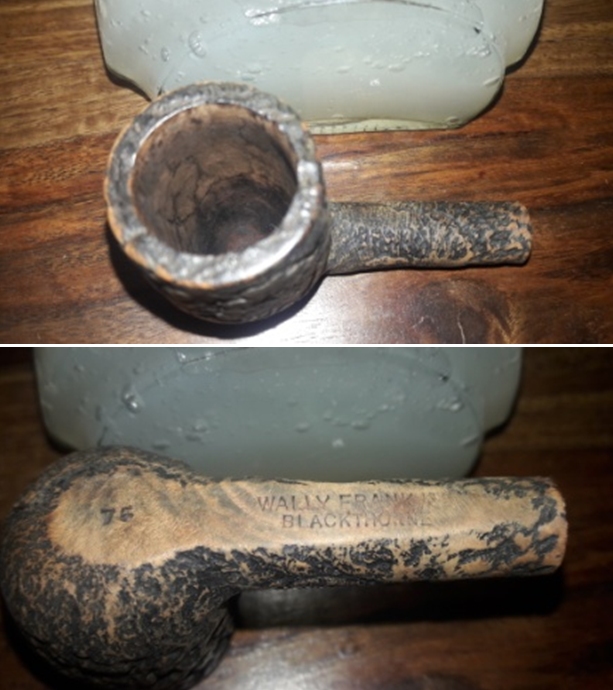
I had randomly selected four pipes to work on since I prefer to put a few pipe stems together in the “Before And After” Deoxidizer solution that has been developed by Mark Hoover. I have completed the restoration of two of these pipes, a Wally Frank “BLACKTHORNE” sandblast billiard and another also a Wally Frank stamped Natural Unvarnished Bulldog with two dots.
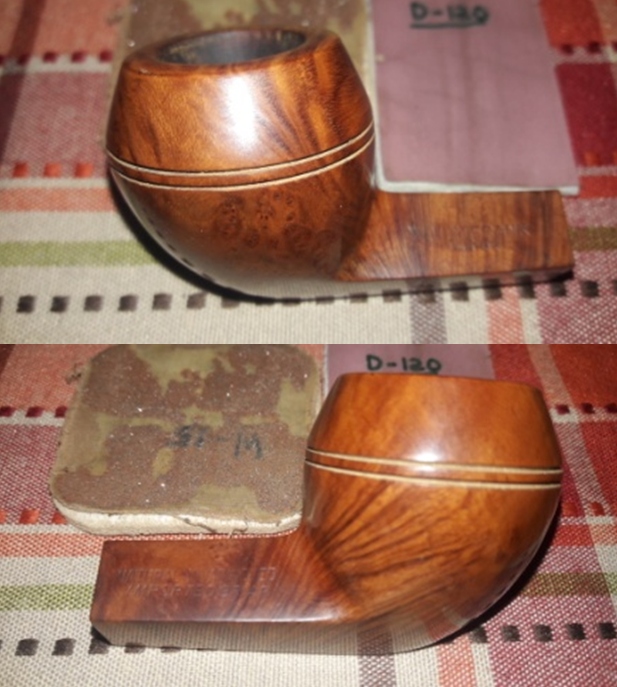
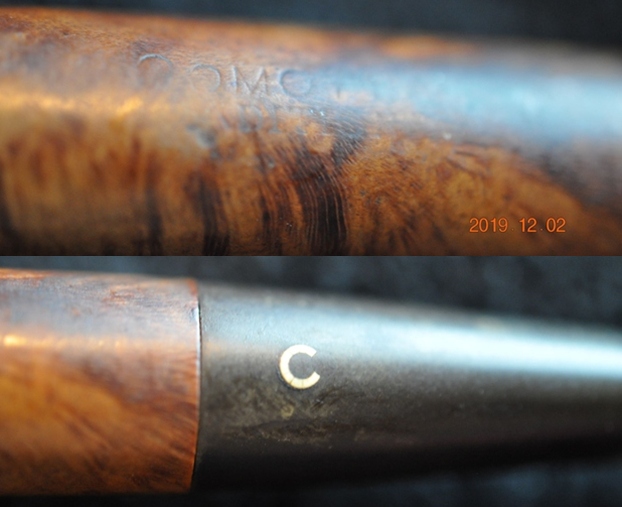
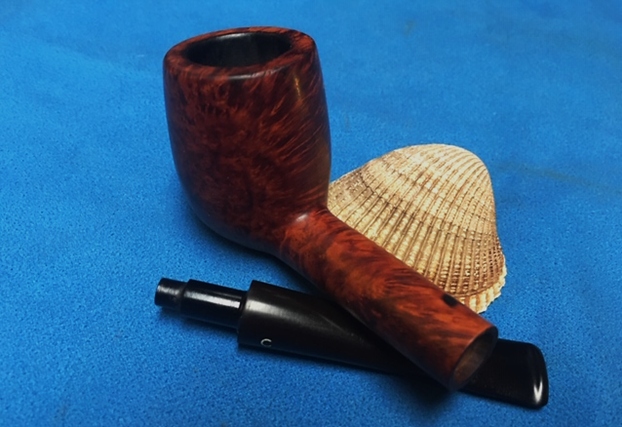
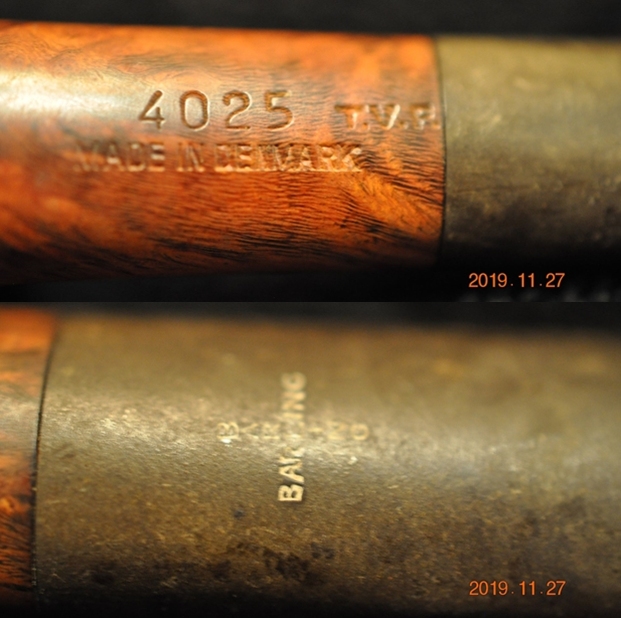
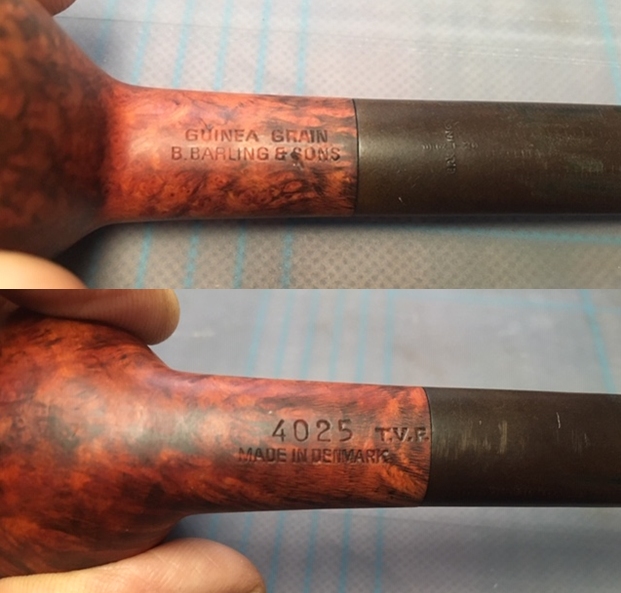
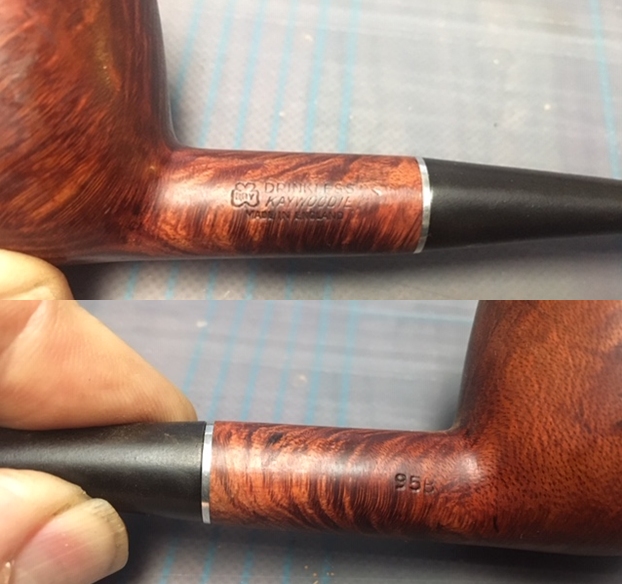
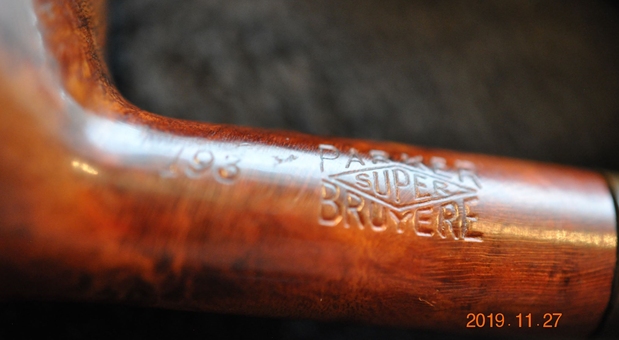
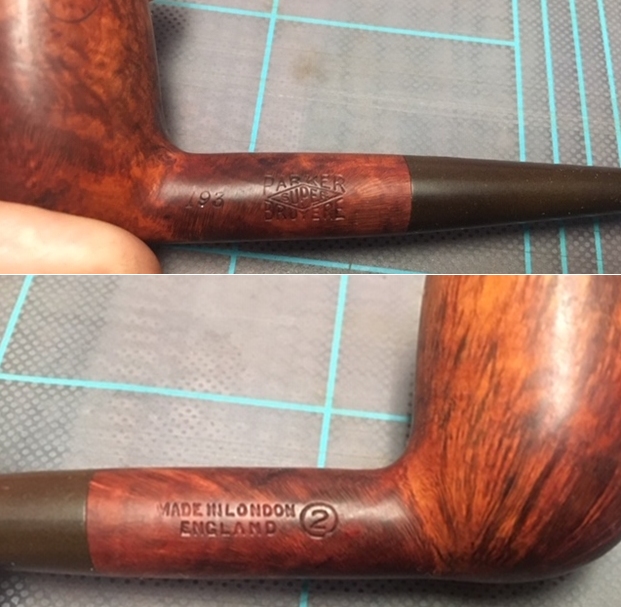
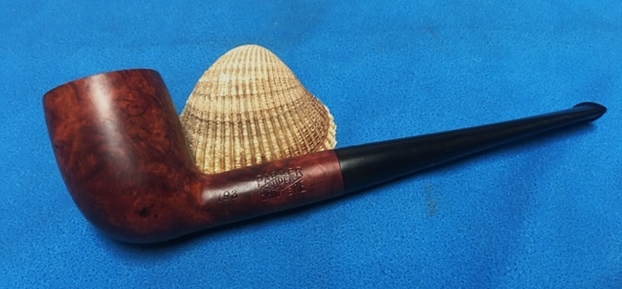
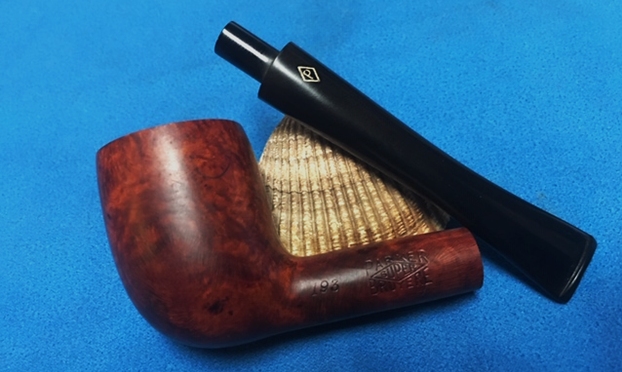
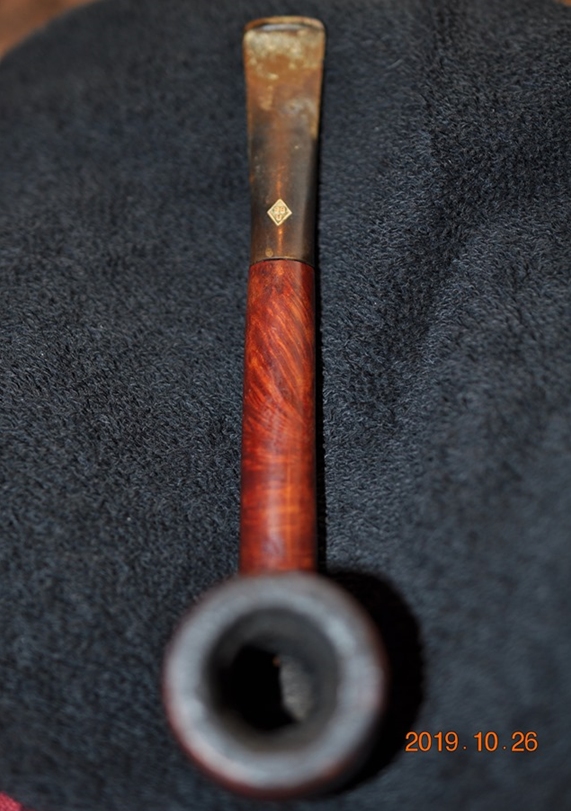
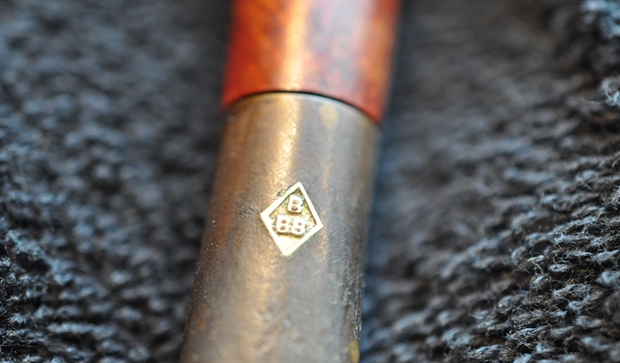
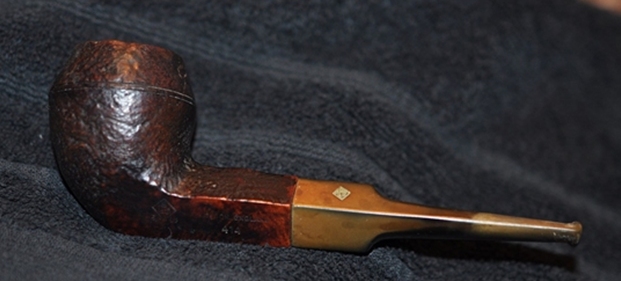
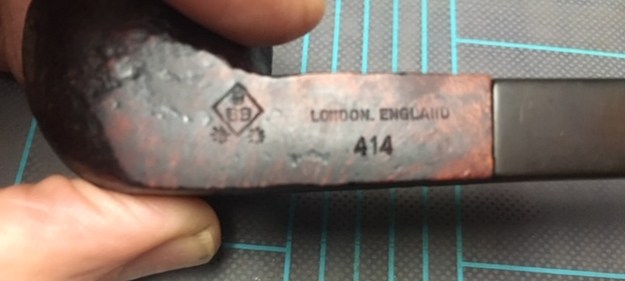
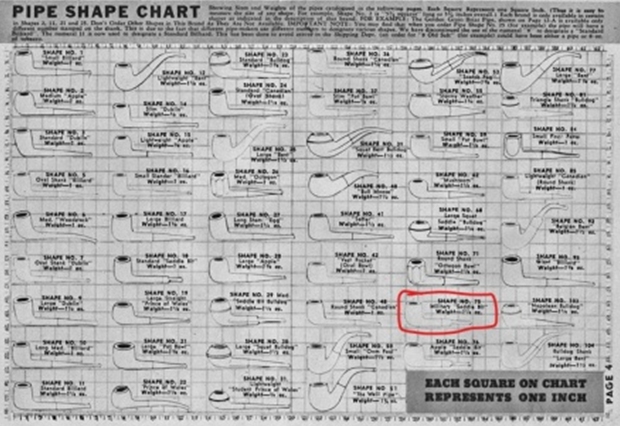
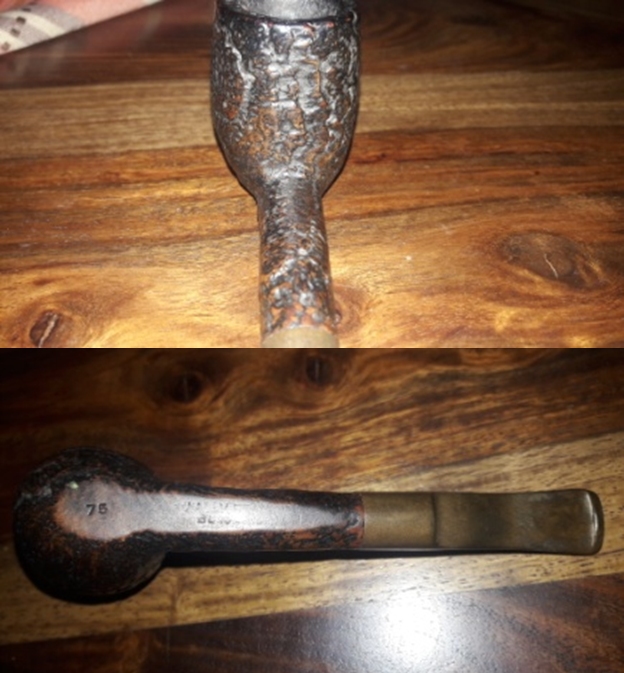
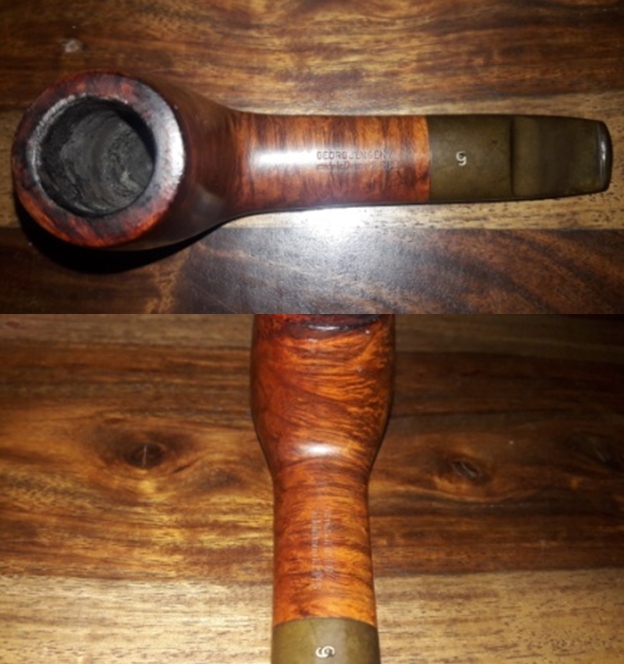
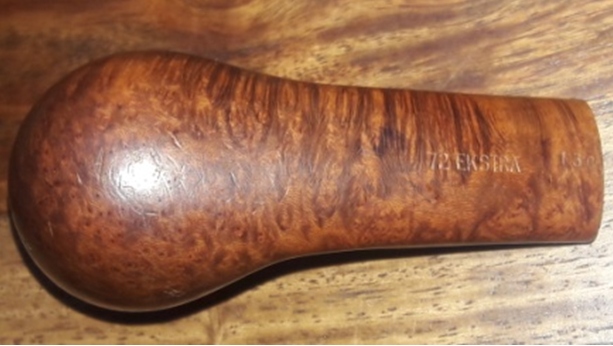
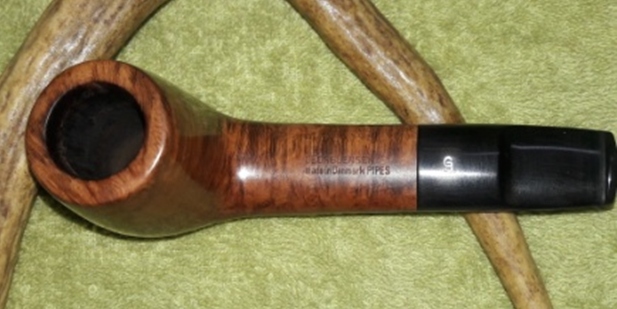
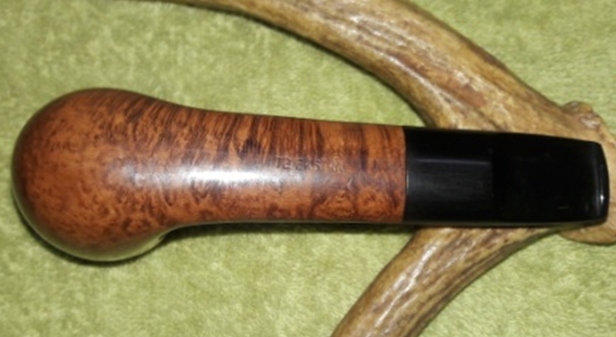
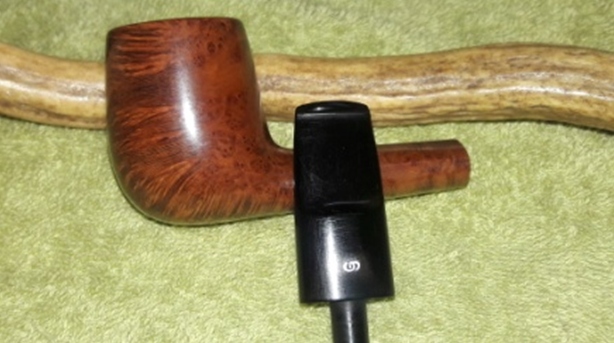
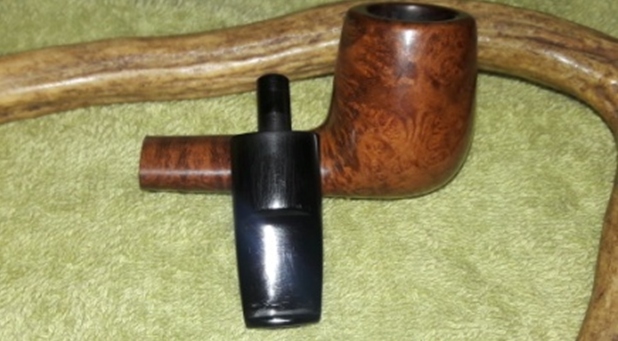
The third pipe that I decided to work on is not a classic Lovat or its variants, a Lumberman or a Canadian, but I would prefer to call it short compact Lumberman. This pipe is stamped on the upper smooth oval shank surface as “GEORG JENSEN” over “made in Denmark PIPES” and on the bottom of the shank surface as “72 EKSTRA” followed by shape code “130” towards the shank end. The stampings are all crisp and deep. The high quality vulcanite diamond saddle stem bears the logo of interlinked letters “GJ”. The smooth briar, shape and quality of the stem all oozed high quality.
 This would be the first Georg Jensen pipe that I have worked on and thus my curiosity was piqued as I have worked on and handled pipes from Denmark made by carvers like Preben Holms, Nording, Soren etc, but never a Georg Jensen pipe. I first searched rebornpipes and came across a catalogue uploaded by Jacek A. Rochacki. However, the pipe on my work table finds no mention of it in the brochure. The article has an interesting snippet of information that is reproduced below.
* “our” Georg Jensen – the pipe maker is not this famous Georg Jensen – Danish designer, silversmith and sculptor.
Here is the link to the article
https://rebornpipes.com/2014/04/13/georg-jensen-pipe-brochure-jacek-a-rochacki/
Having hit a wall here, I turned my attention to pipedia.org to gather background information about the carver and his work. Here is the link to the write up on Georg Jensen and a brief of the carver that I have reproduced from the site.
https://pipedia.org/wiki/Georg_Jensen
The Georg Jensen pipe factory was founded by Per Georg Jensen and his wife in 1954, in Kopenhagen, Denmark. Since the 80s the company is under the management of his daughter Lis, and his son with the same name, Per Georg Jensen. The company manufactured around 2,000 factory pipes per year. Among the top of the line pipes are hand carved special editions and free hands.
Top of the Line models of Georg Jensen have vulcanite or ebonite stems, factory pipes usually have acrylic stems.
Factory pipes (in increasing quality) were marked:
Danish Sand Achat / Amber Red Flame / Red Skin Sunrise / Orange extra / Starline Contrast / Bicolour / Harmon Excellent / Masterpiece
Pipes were commonly marked (in increasing quality) with: MODEL + MODEL NUMBER + “Made in Denmark”, GJ stamp in red on the stem. MODEL NUMBER + “Georg Jensen” in italic or fancy font.
Extremely rare and collectible freehands were marked with:
“Straight Grain” and a number that discerns the grading from 1 (lowest) to 13 (highest).
Special edition pipes were marked with: MODEL + MODEL NUMBER + “Handmade in Denmark” + GJ stamp in white on the stem.
The factory closed down in 2001 when Per Georg Jensen (jr) became “Tobacco Professor” for MacBaren Tobacco house.
Well, again there are no matching grades for the factory pipes or similarity in commonly marked pipes and it definitely is not a freehand pipe!!
I surf the net and visited Smokingpipes.com which has been some excellent source of information on pipe brands and found an exact same pipe as that is currently on my work table with the shape and stampings matching to the T. However, the details that were available were similar to that I had read on pipedia.org. Given below is the link to the site.
https://www.smokingpipes.com/pipes/estate/denmark/moreinfo.cfm?product_id=284941
I have not been able to accurately pinpoint the period that this pipe was made in or the grading of this pipe in Georg Jensen line up, so any assistance in this regard is welcome and highly appreciated.
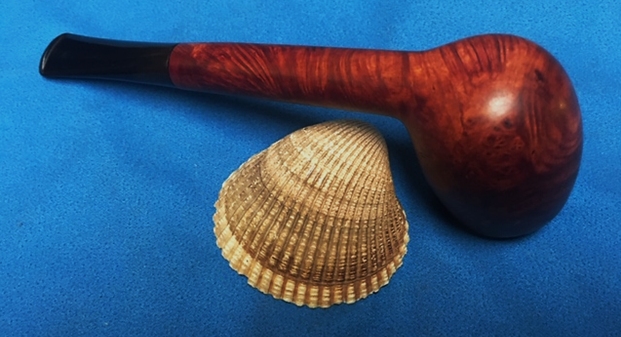
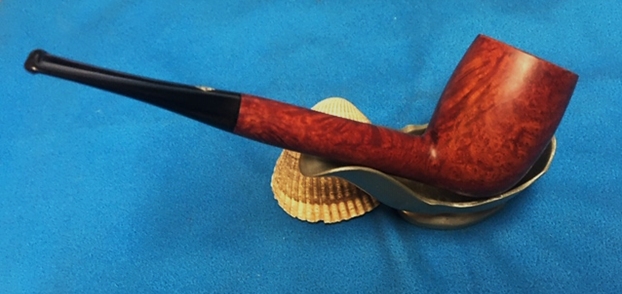
Initial Visual Inspection
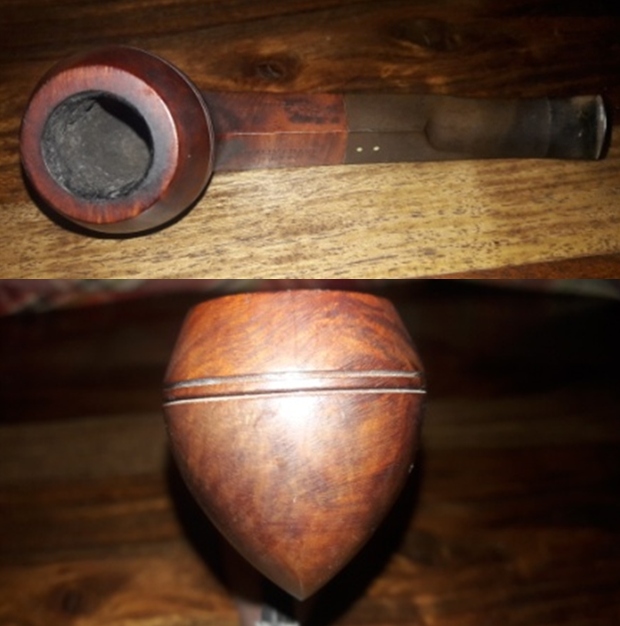
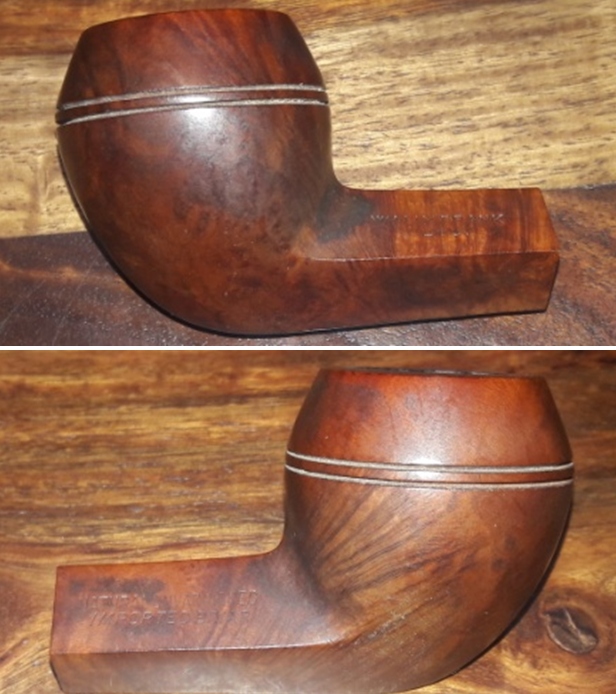
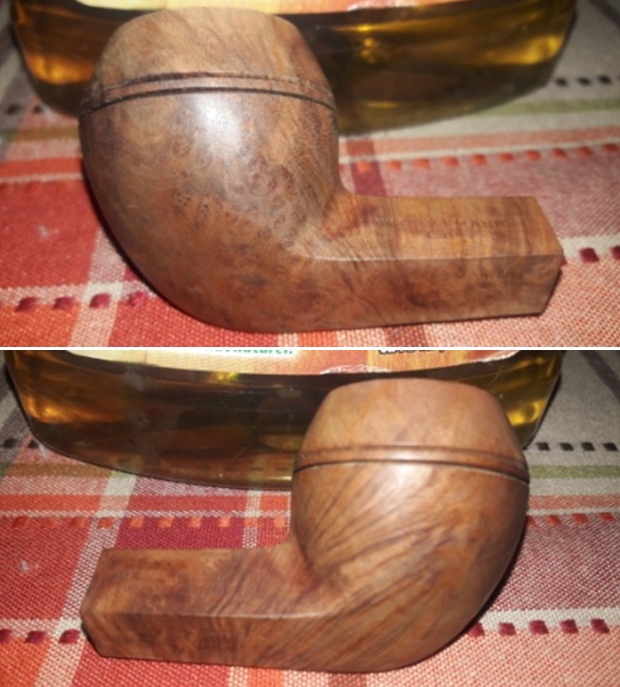
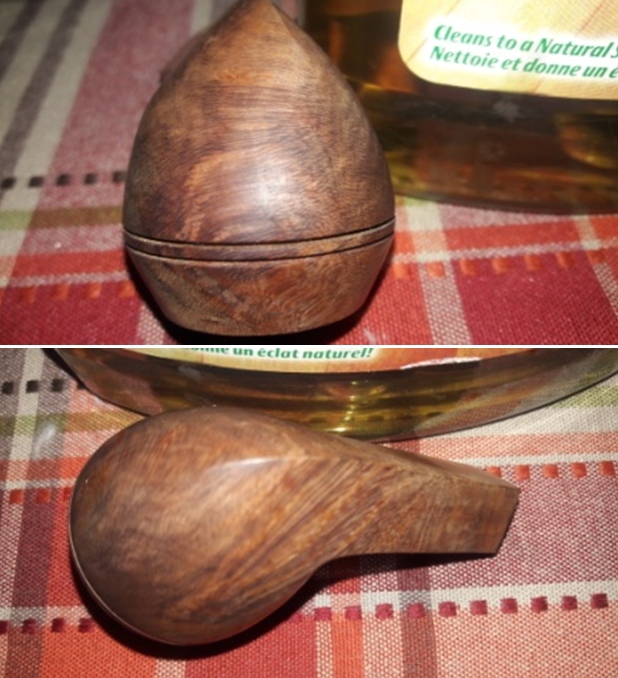
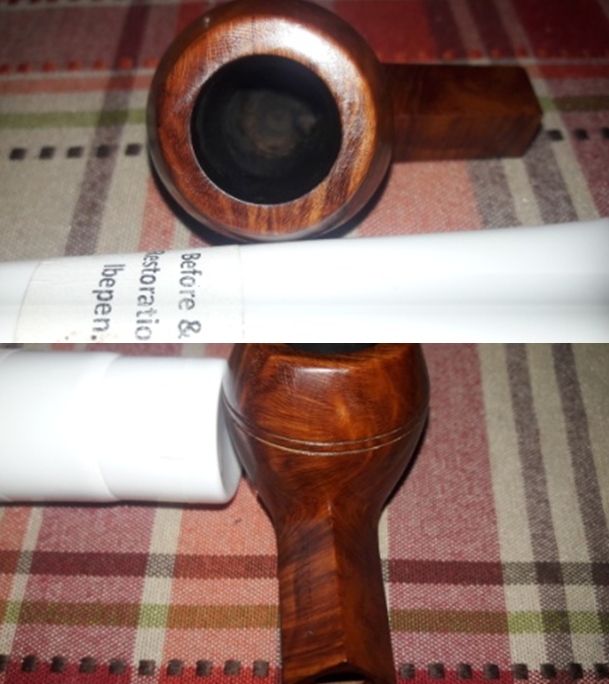
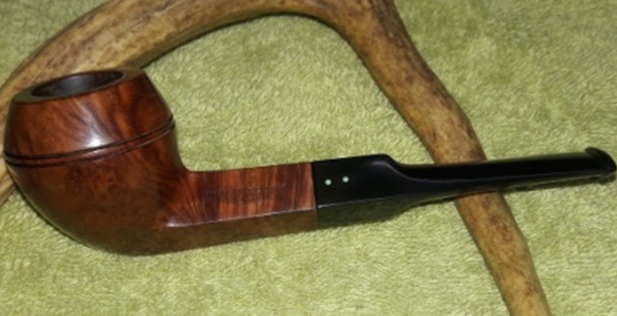
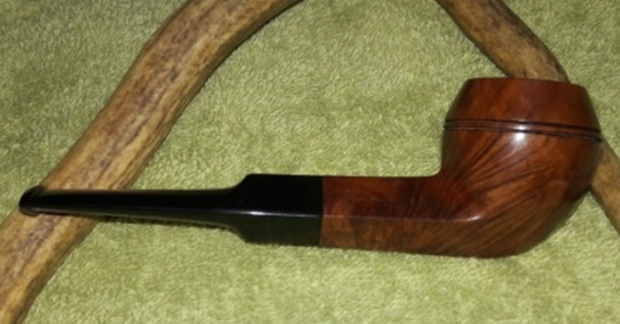
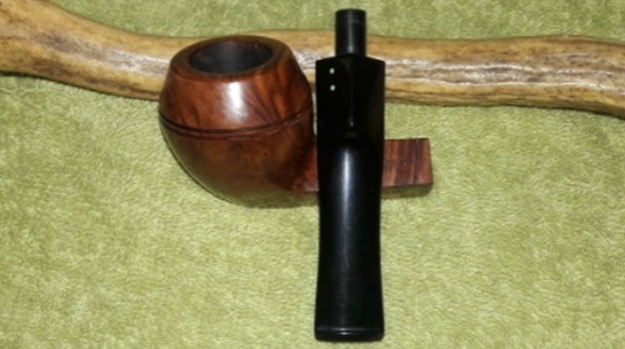
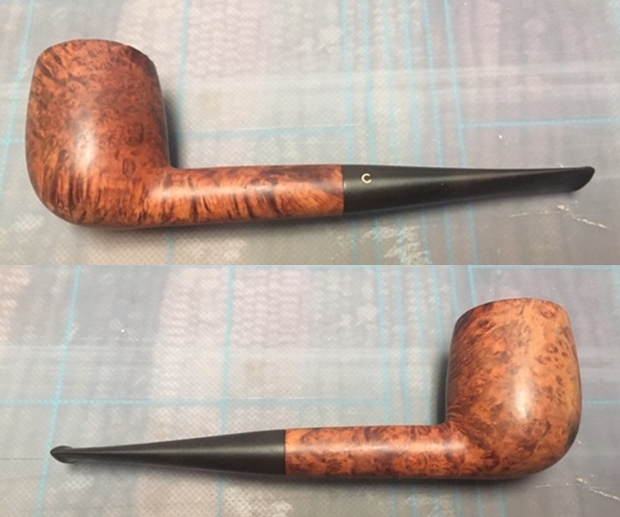
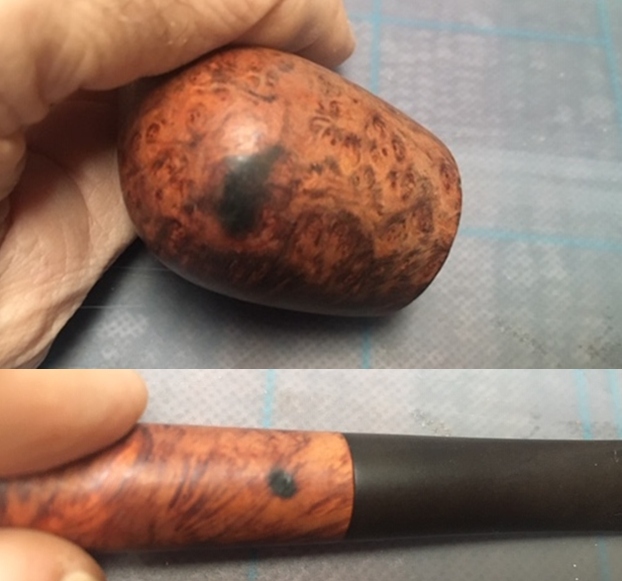
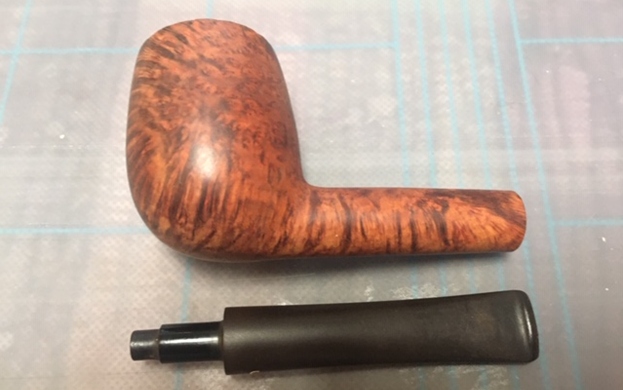
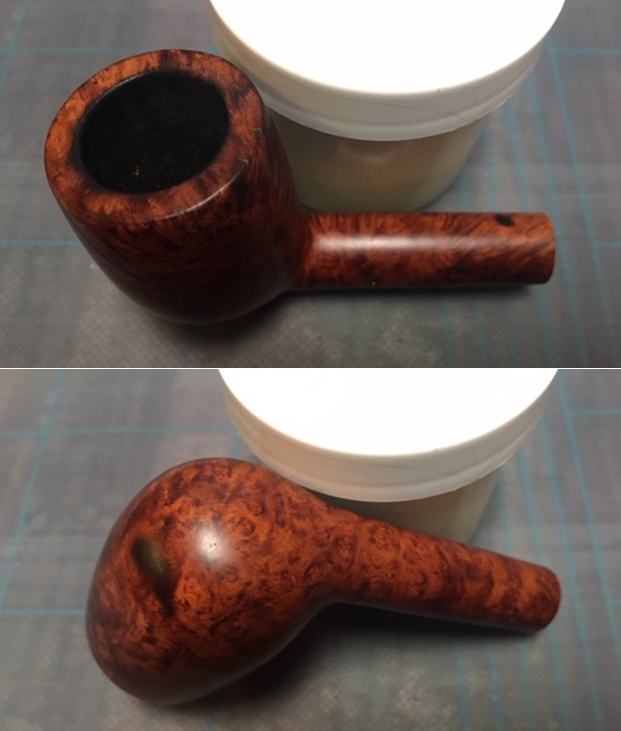
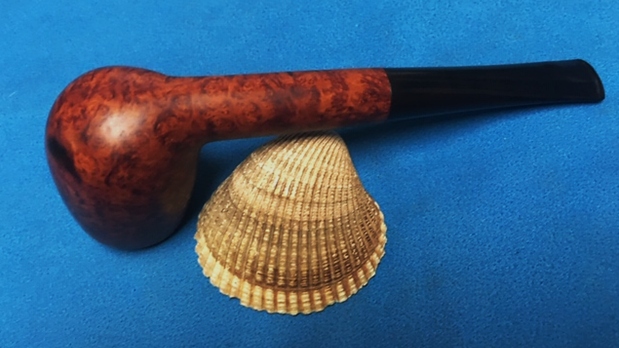
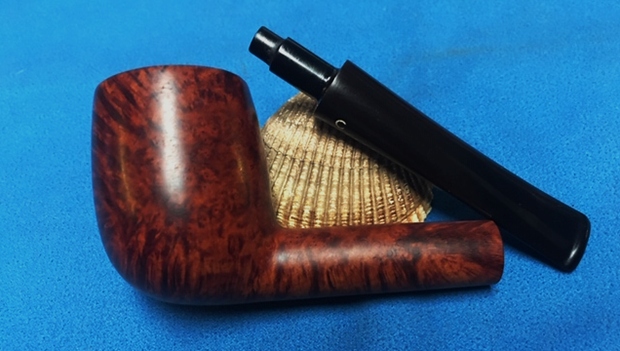
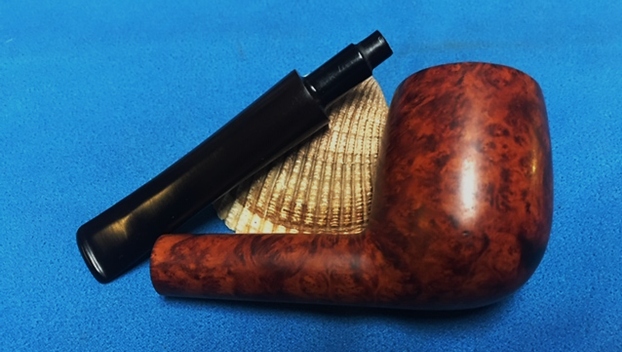
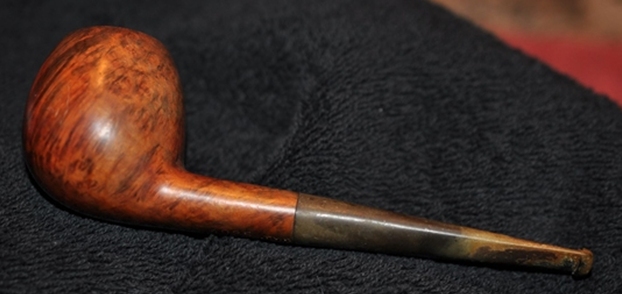
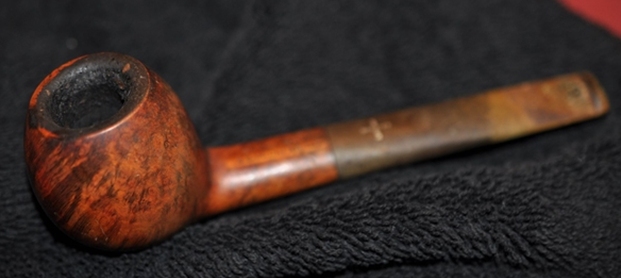
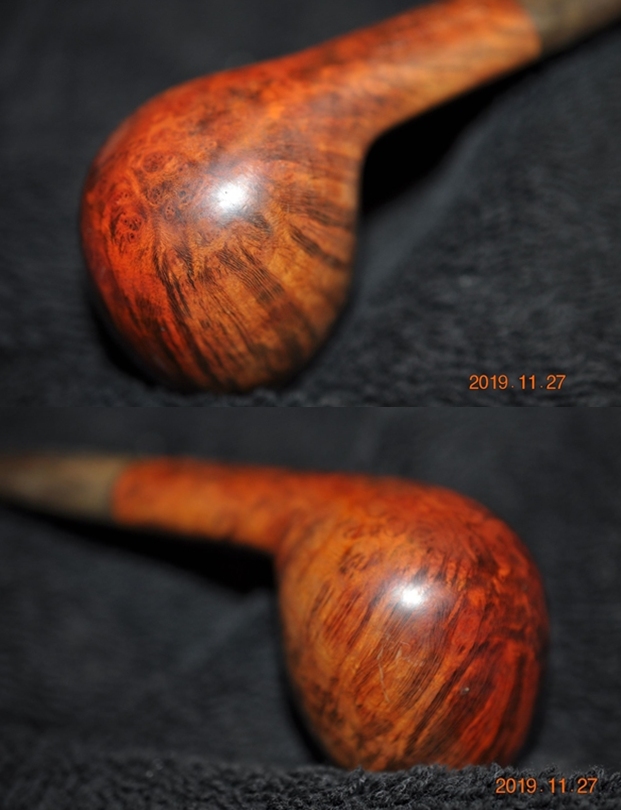
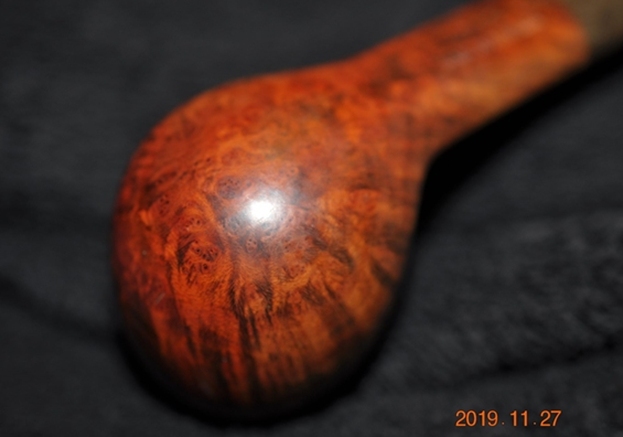
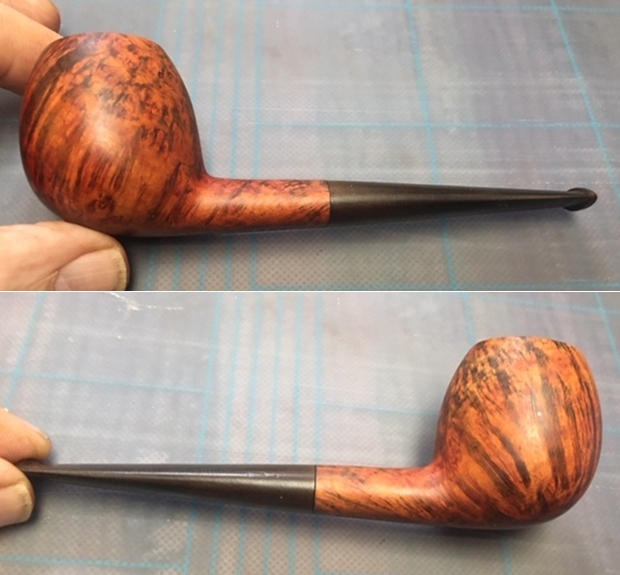
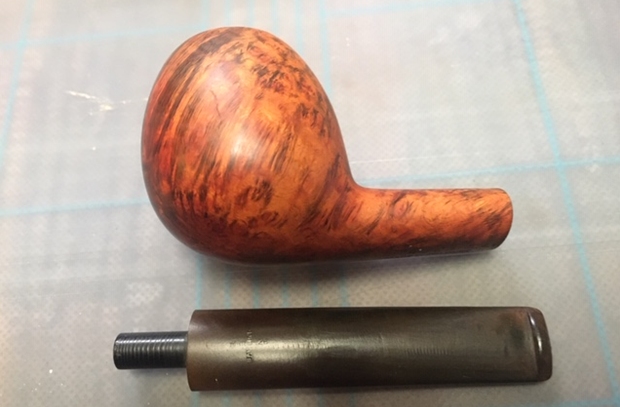
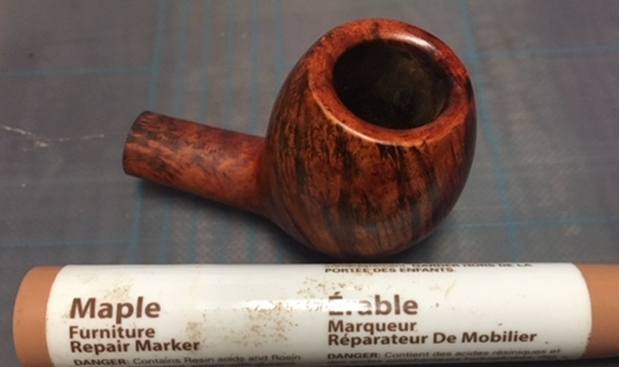
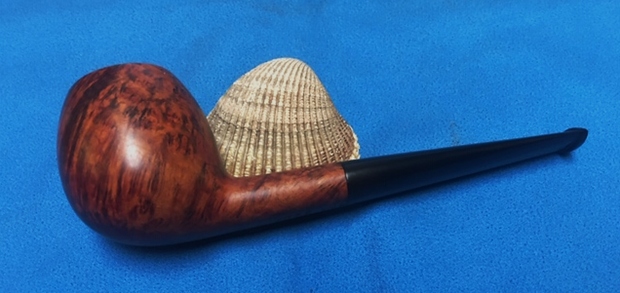
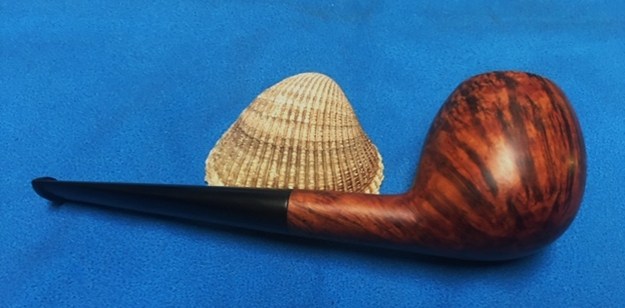
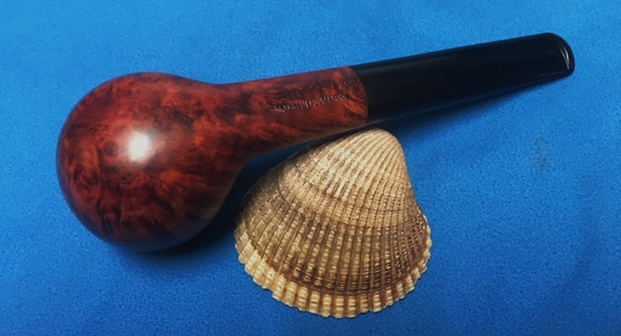
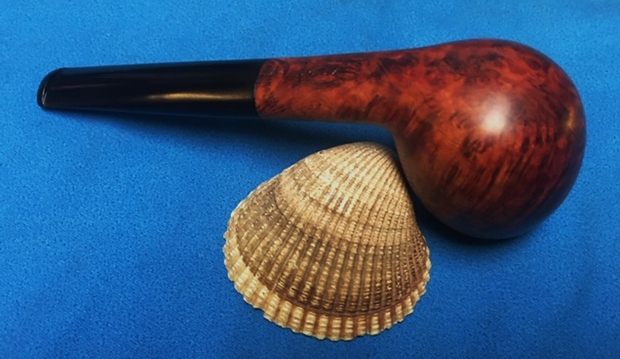
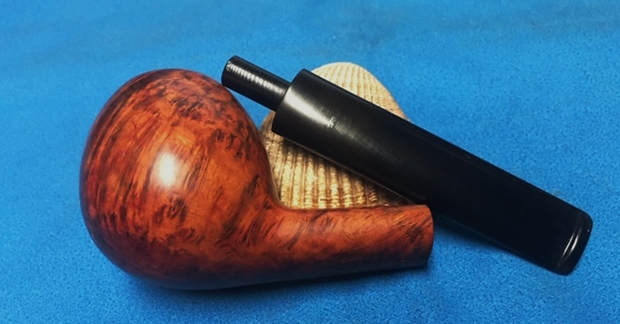
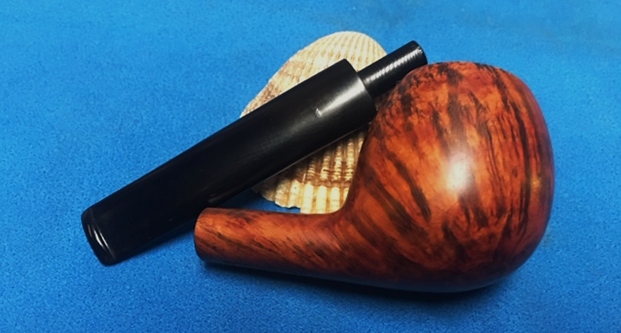
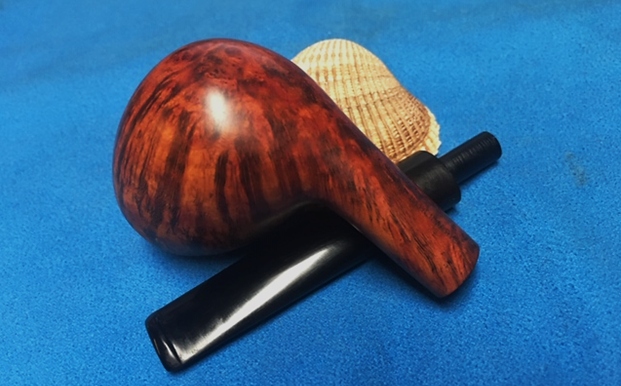
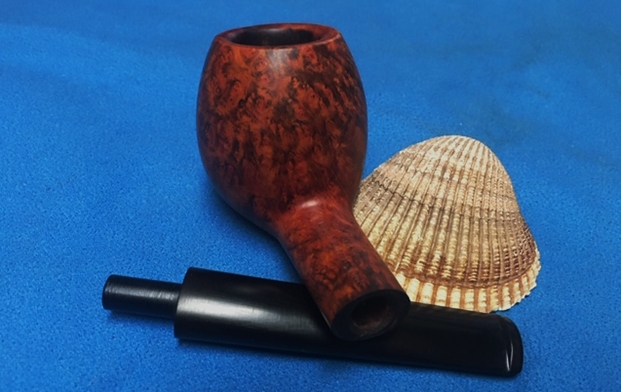
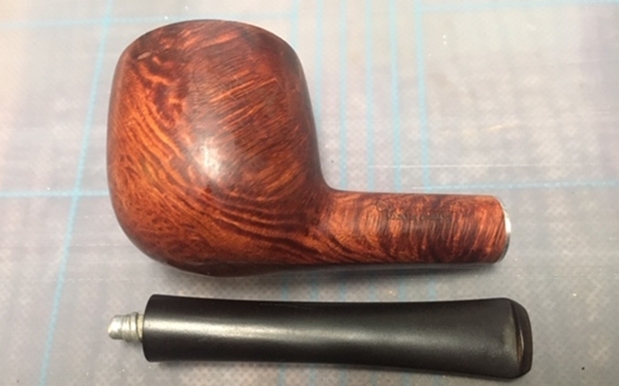
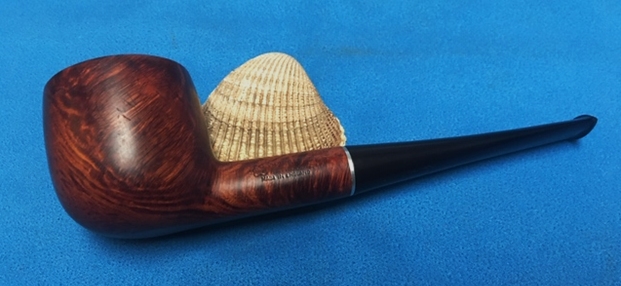
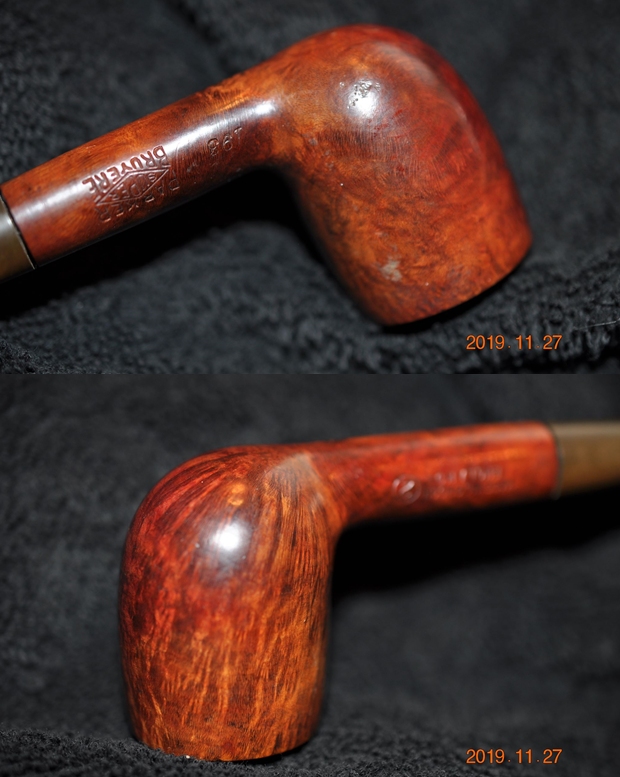
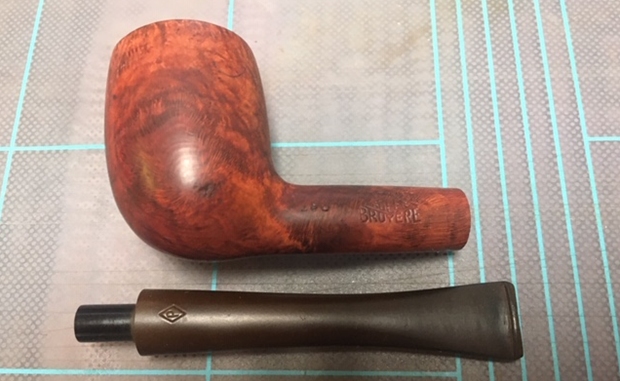
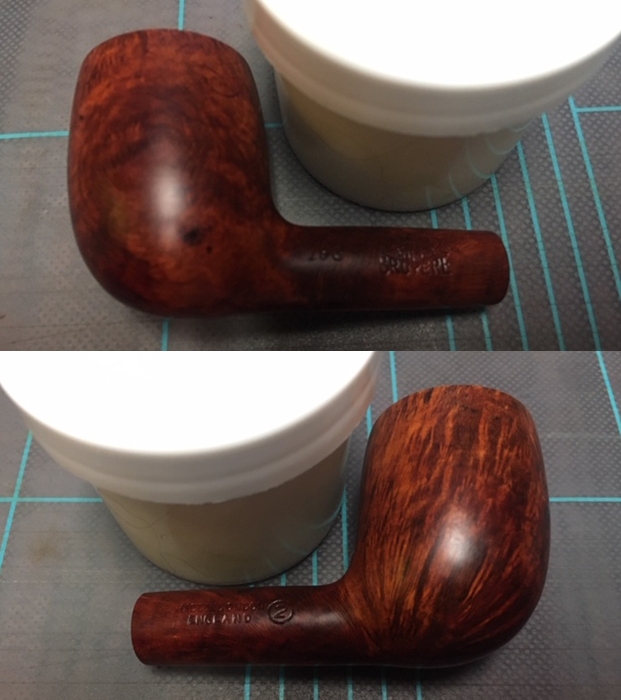
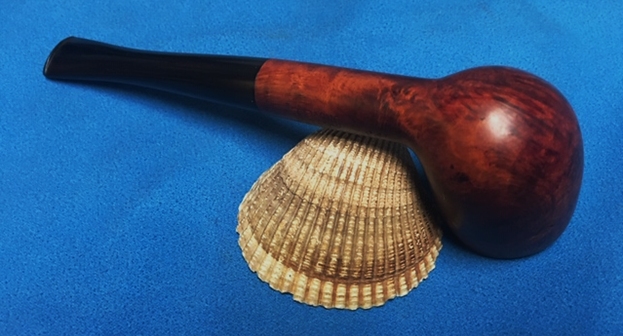
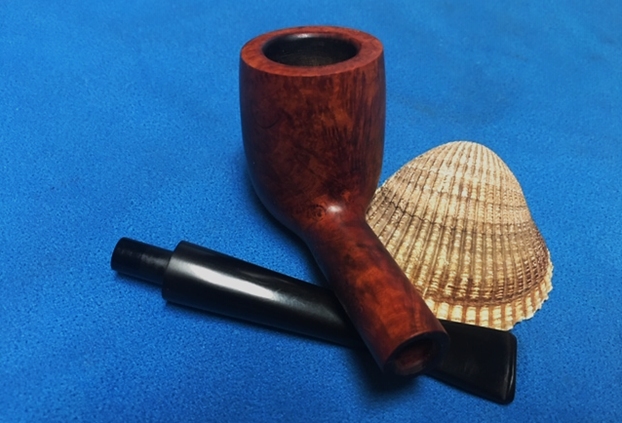
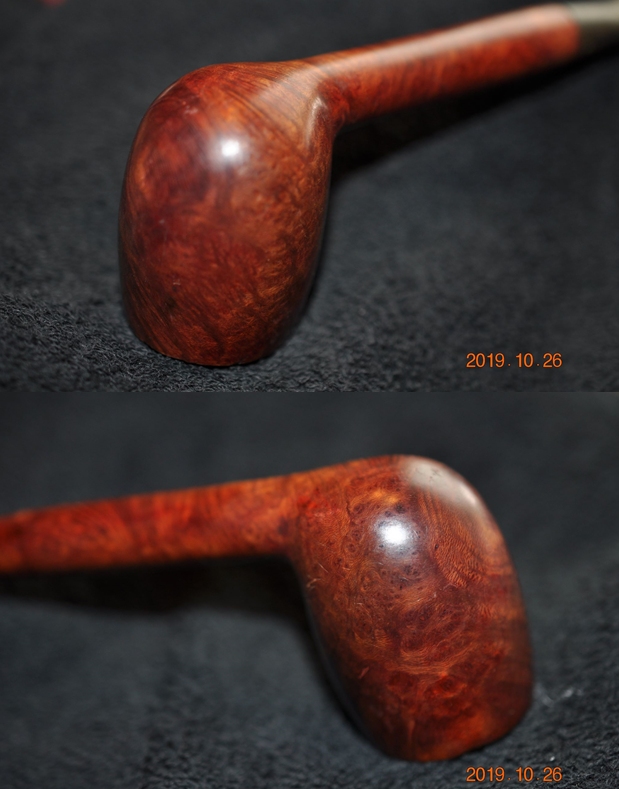
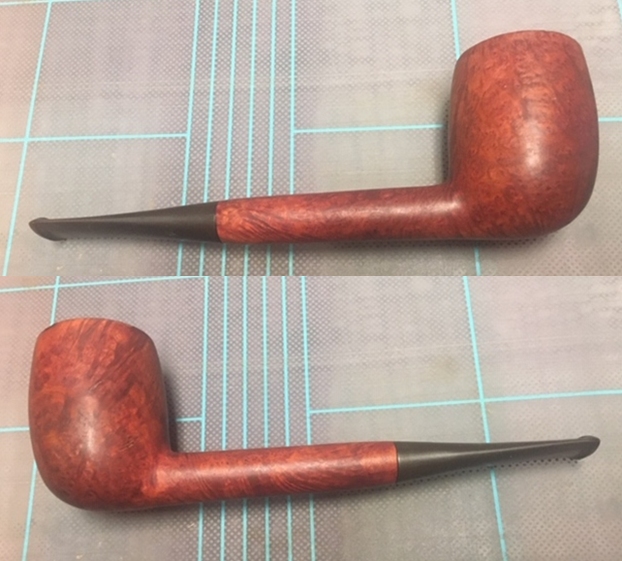
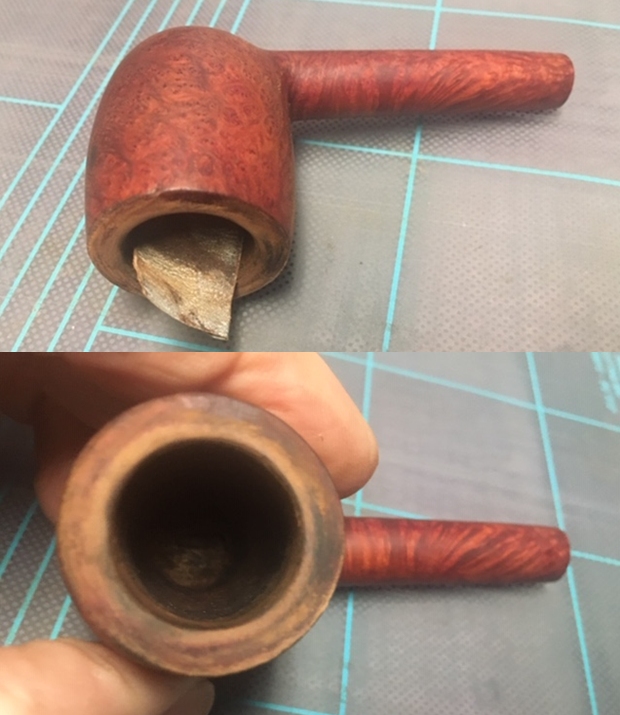
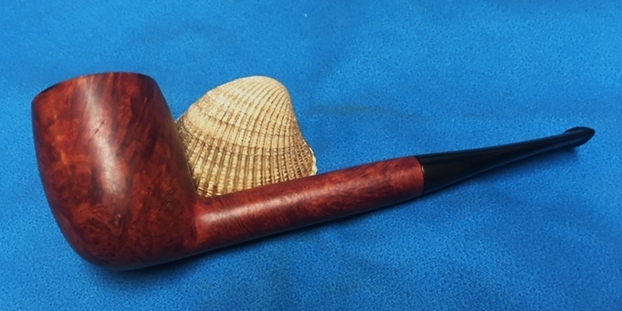
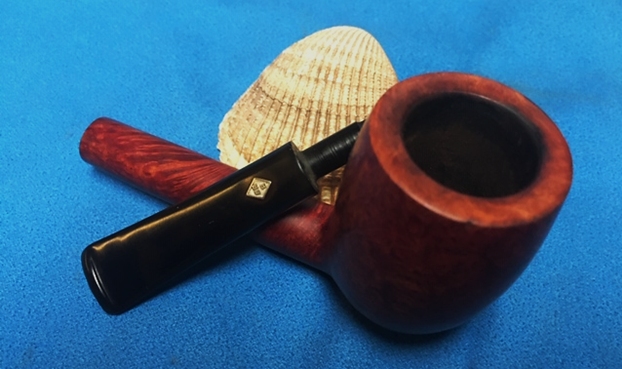
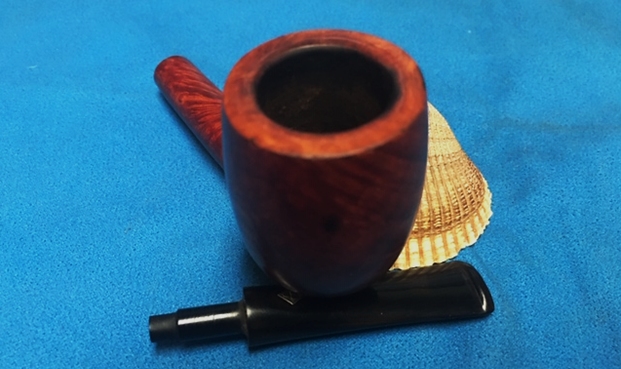
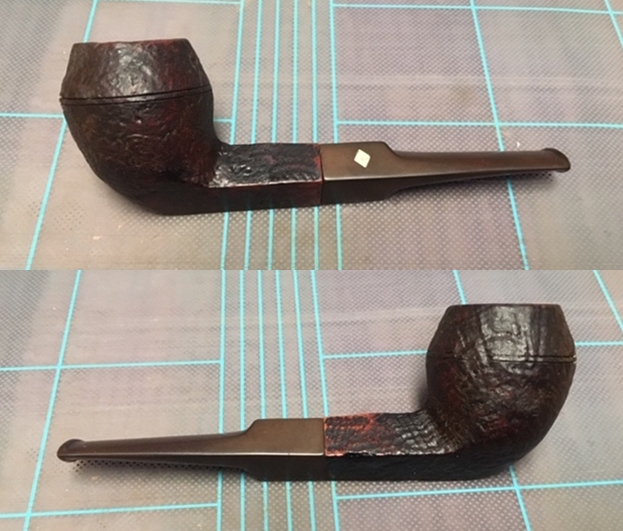
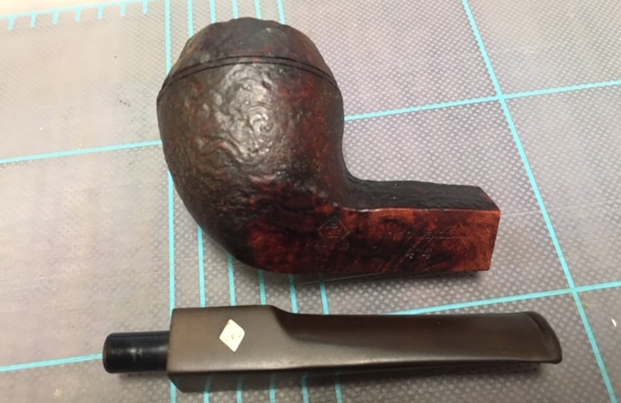
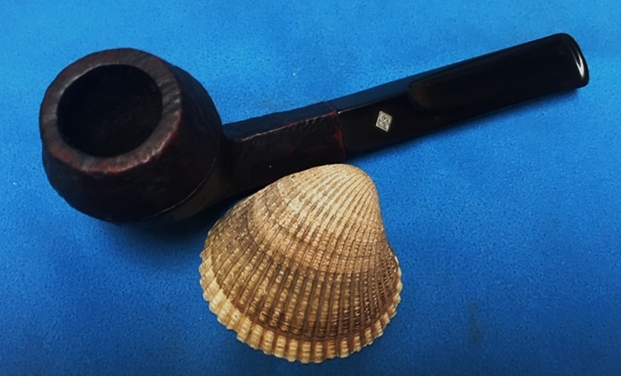
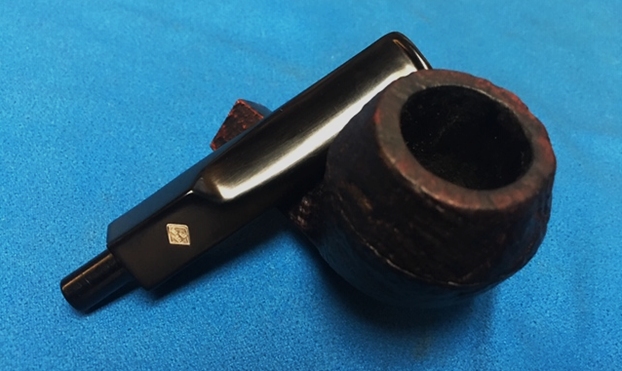
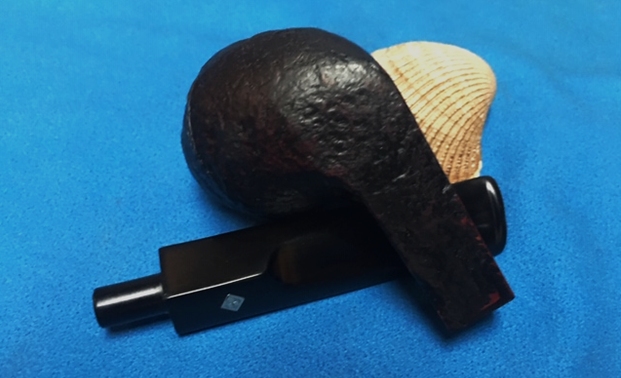
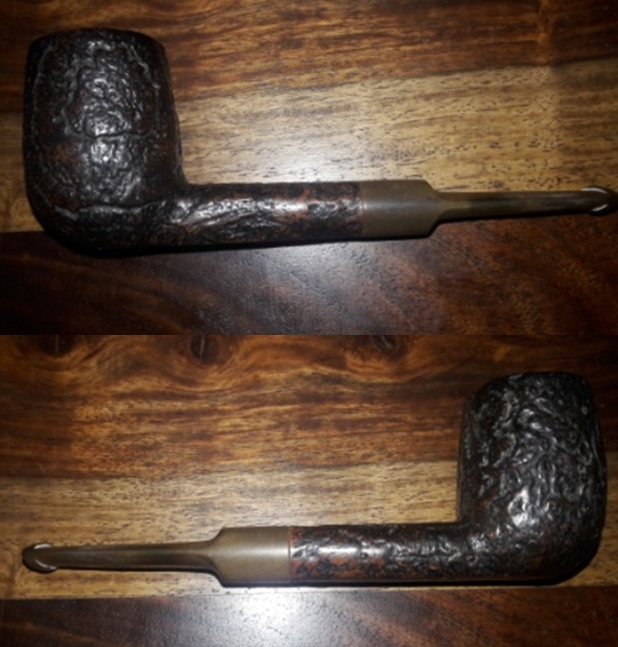
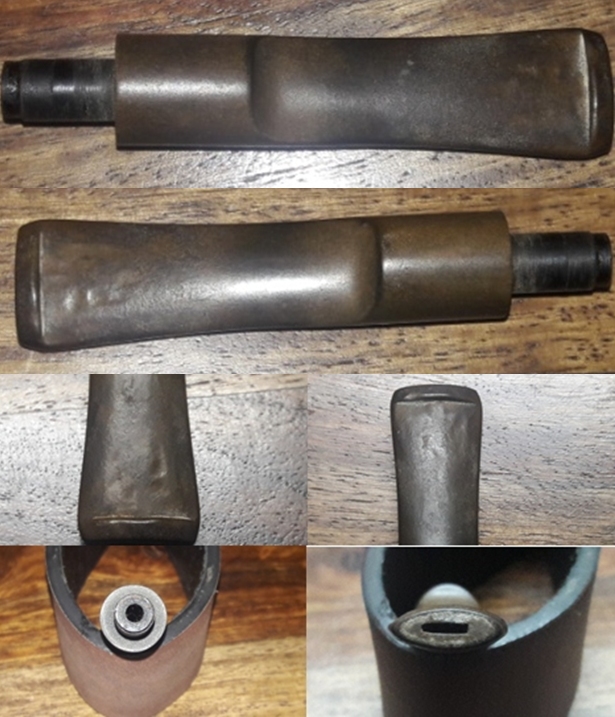
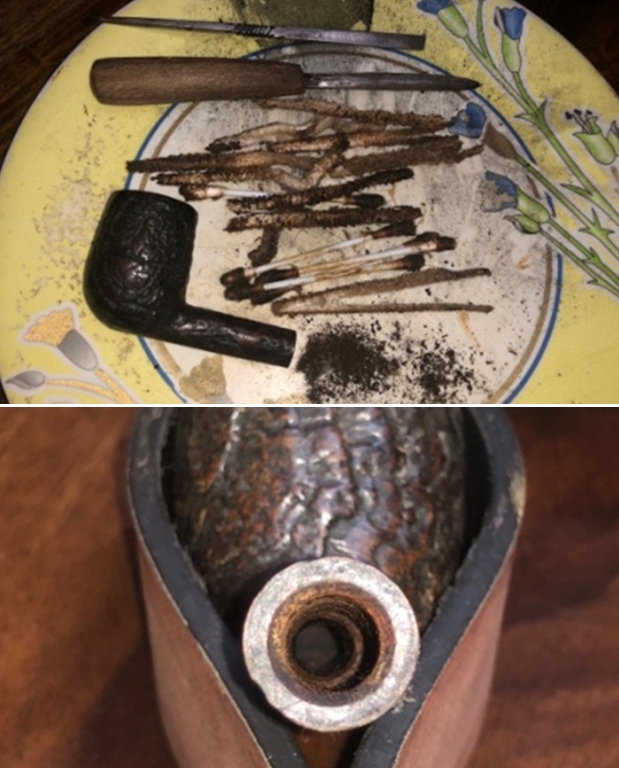
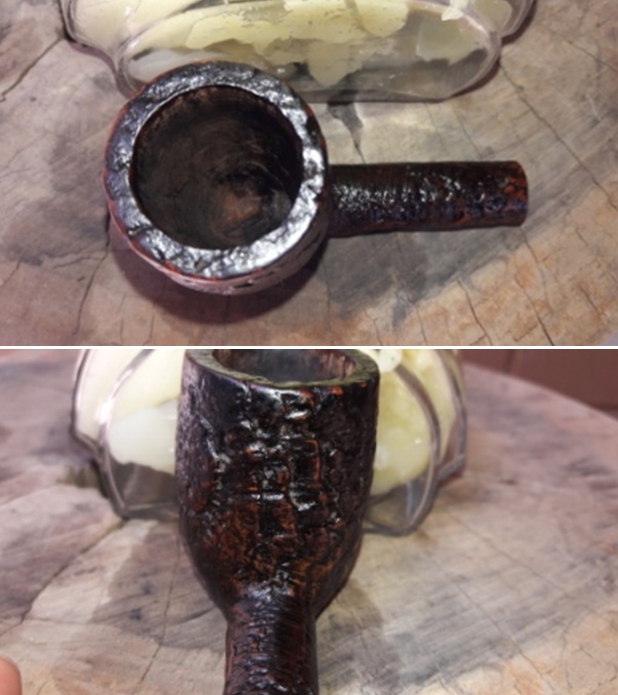
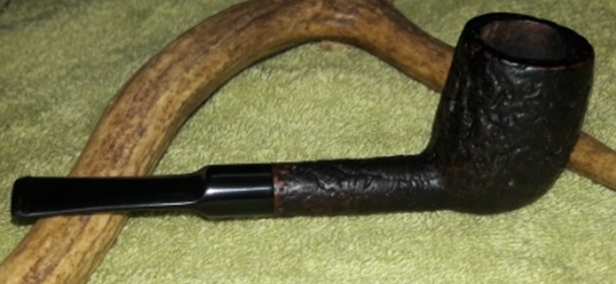
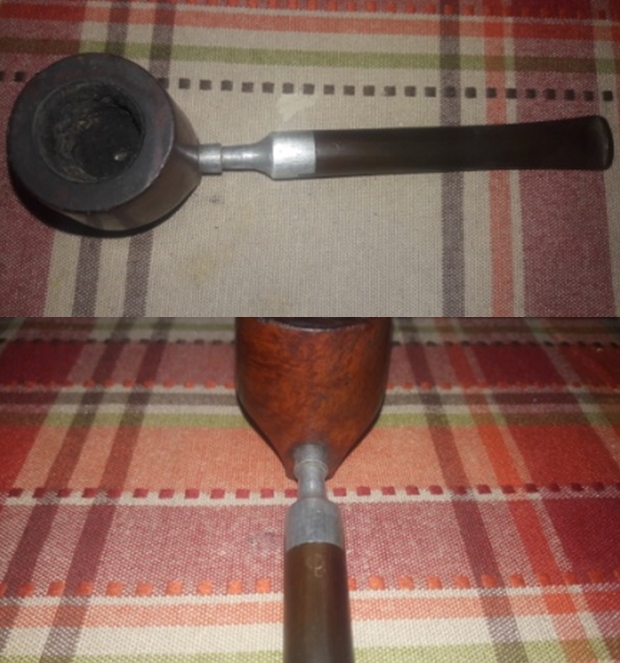
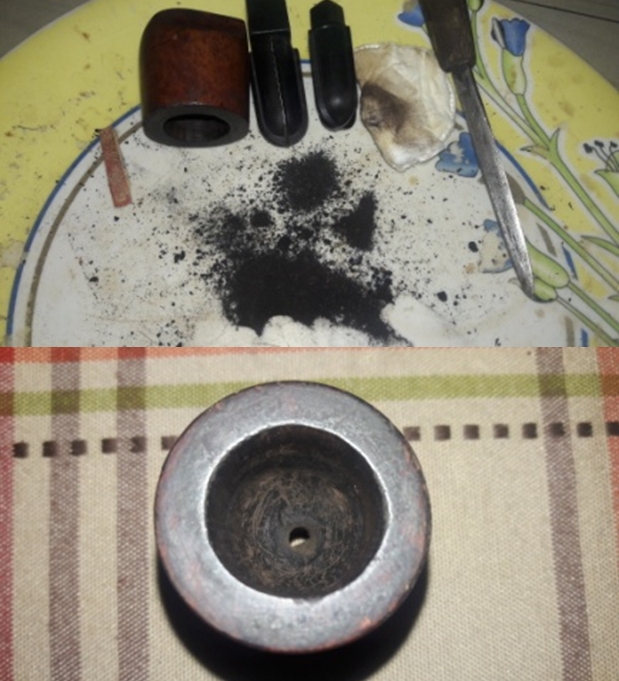
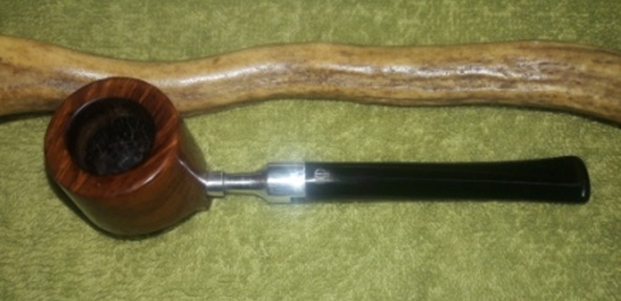
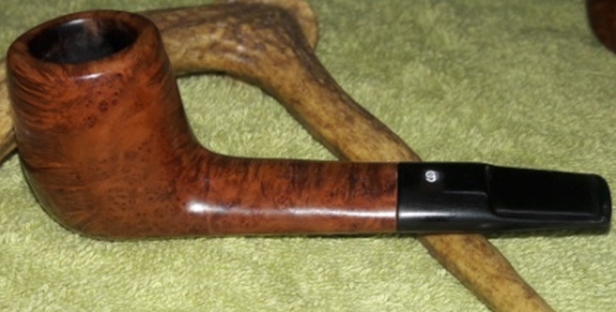
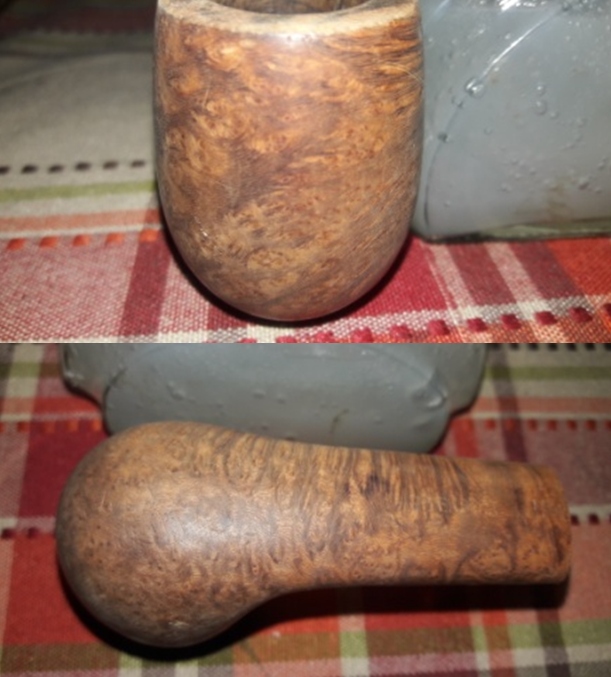
This pipe has a compact size with an oval shank and short saddle stem akin to a Lumberman. However the compact size of the pipe with a shorter shank length compels me to designate this shape as a short Lumberman. The stummel boasts of some beautiful cross grains to the front and back of the bowl and shank. The stummel is covered in dirt and grime of the overflowed lava. There is not a single fill in the briar which speaks of high quality selection of the briar. There is a decent layer of cake in the chamber and some damage is seen to the rim top surface. The stem is heavily oxidized with a few deep bite marks to the button edge in the bite zone. Here is how the pipe appears as it sits on my work table.
 Detailed Inspection Of The Pipe And Observations
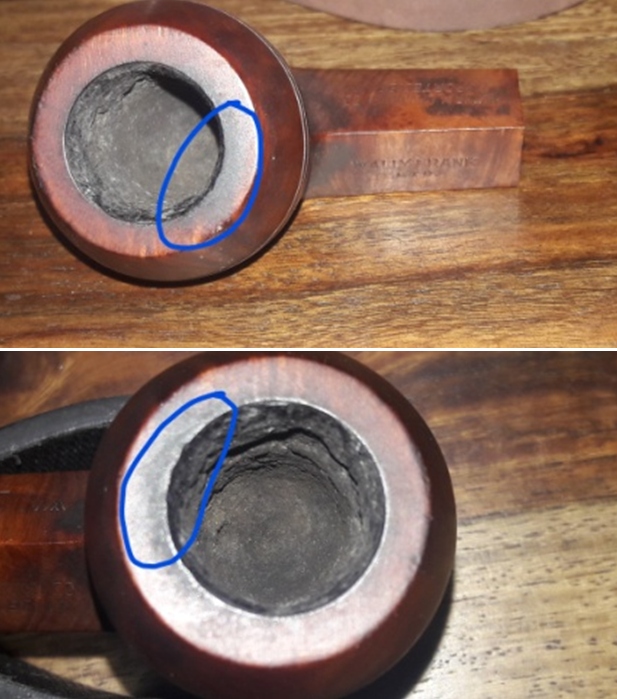
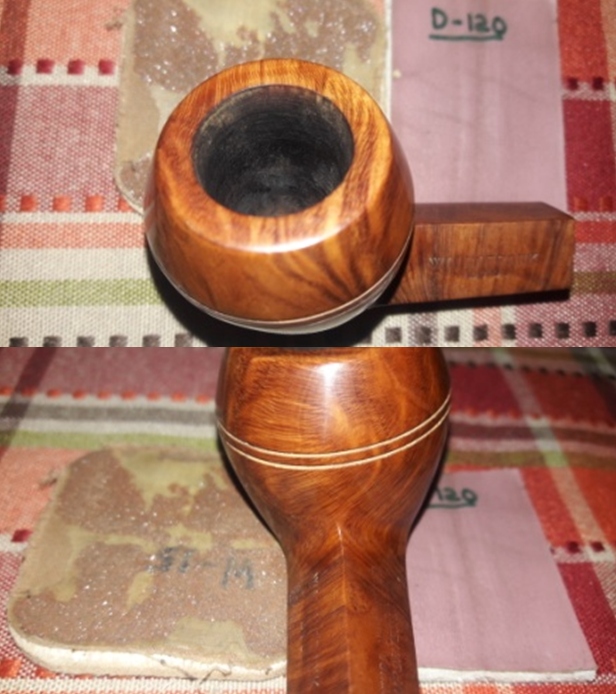
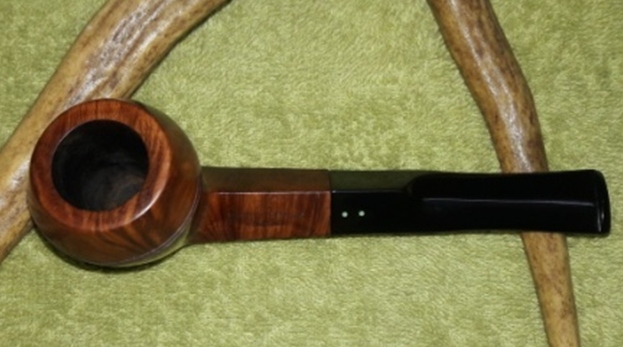
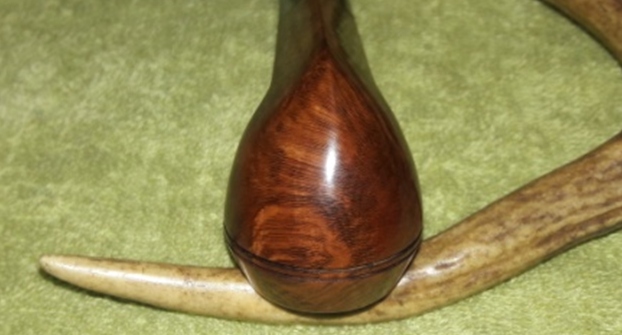
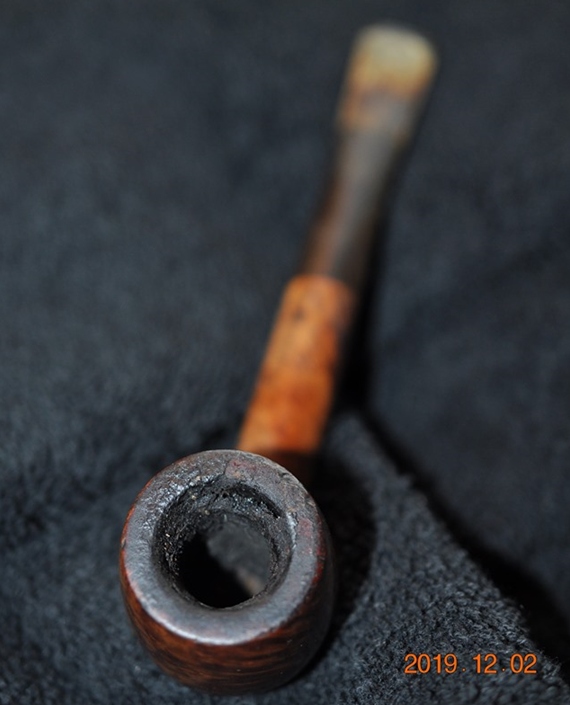
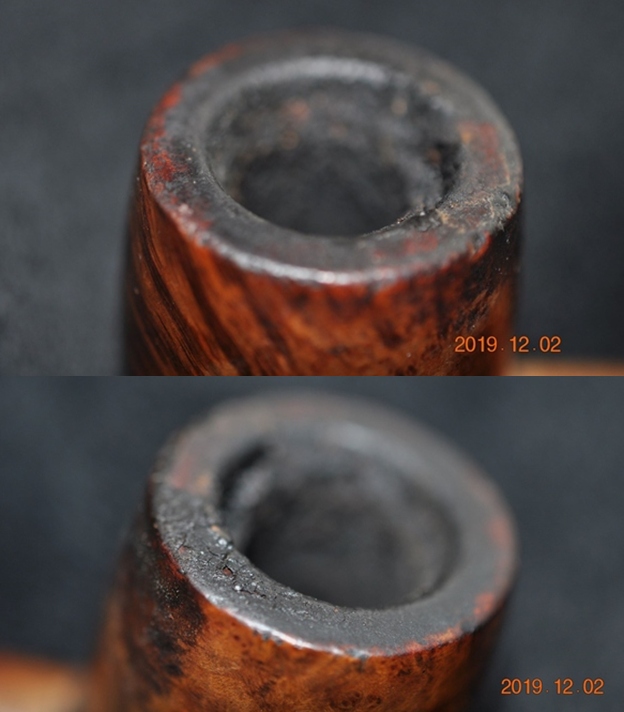
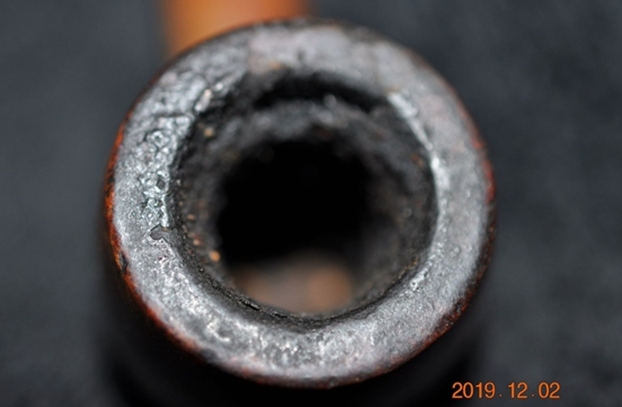
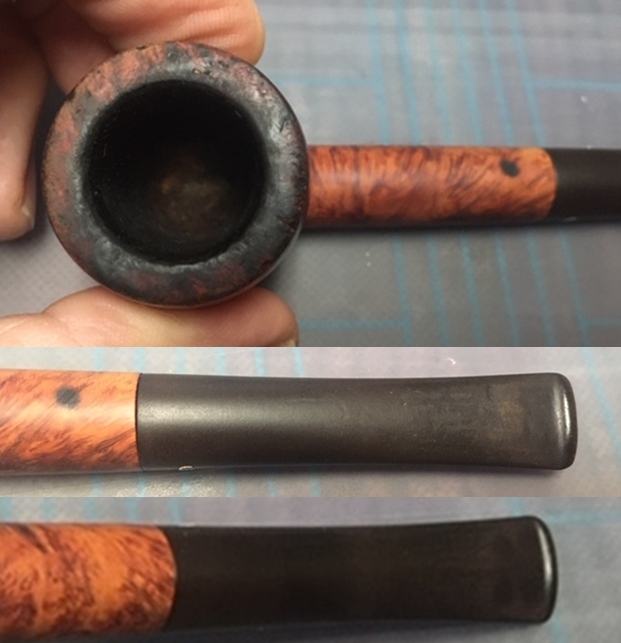
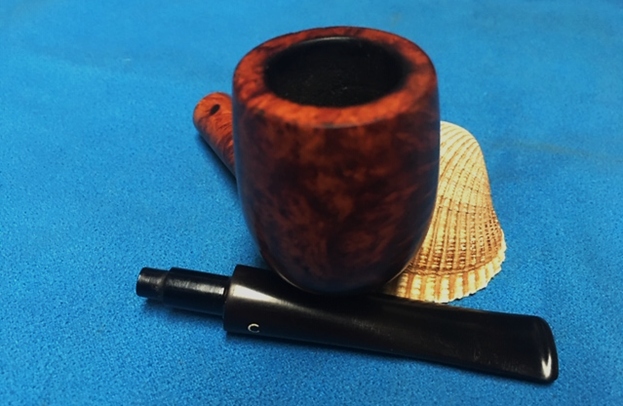
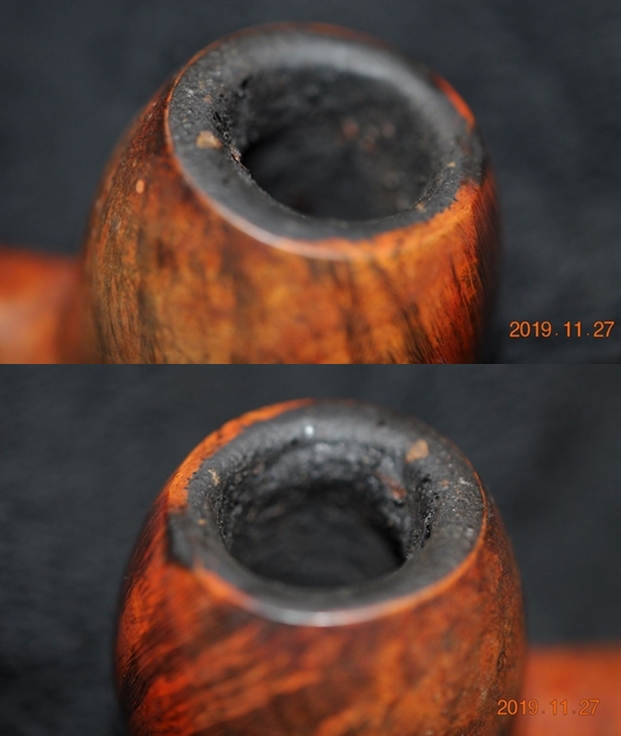
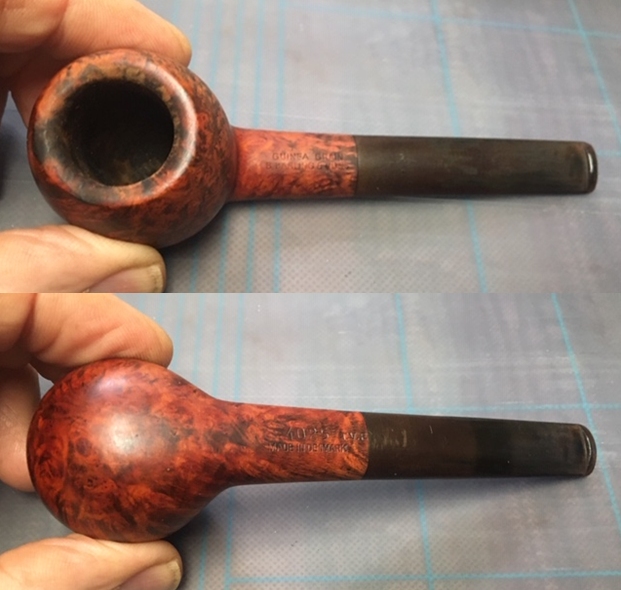
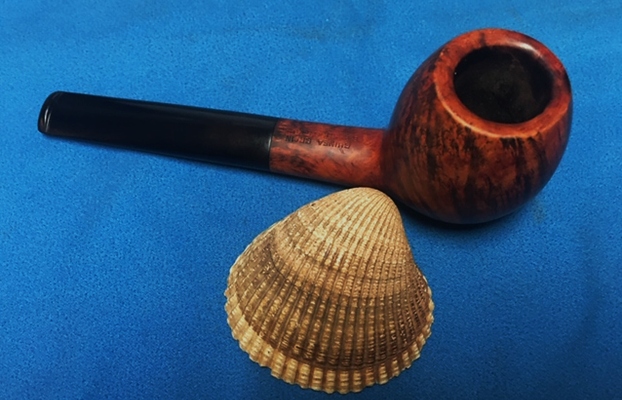
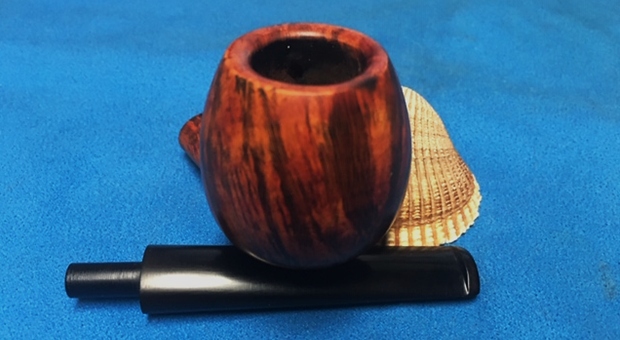
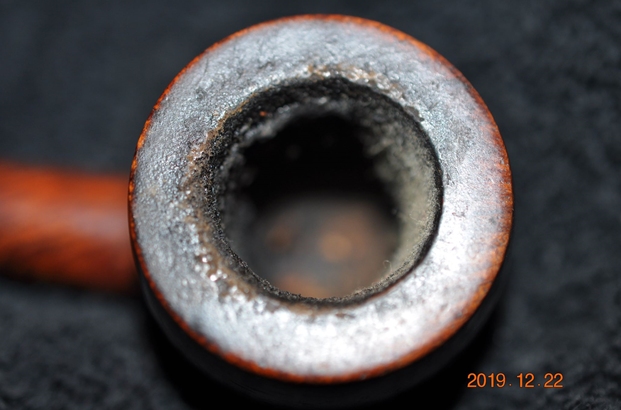
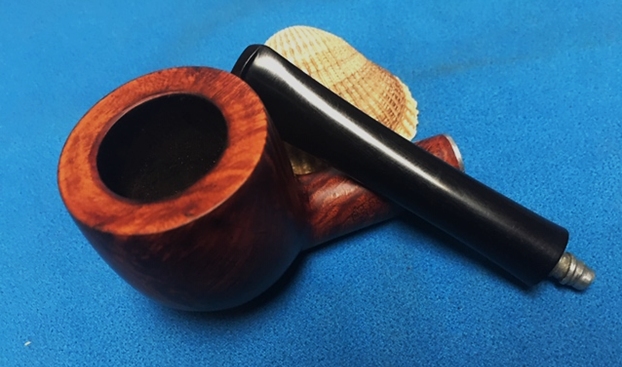
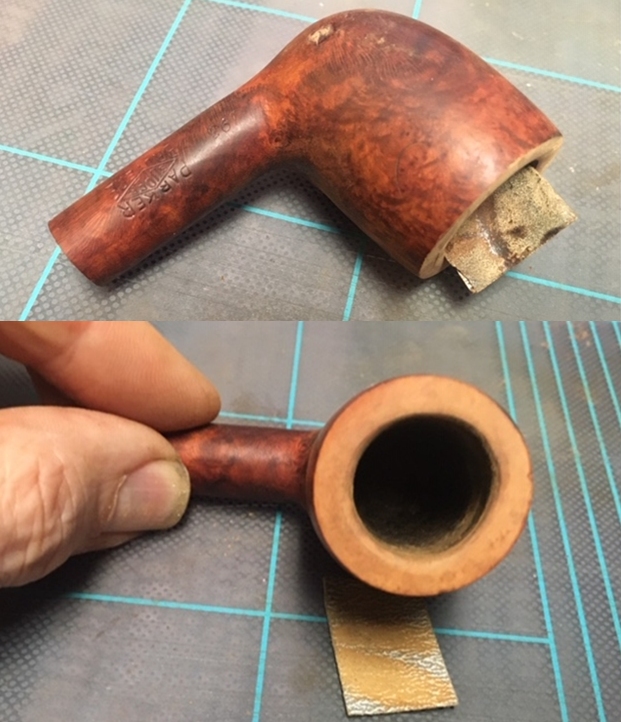
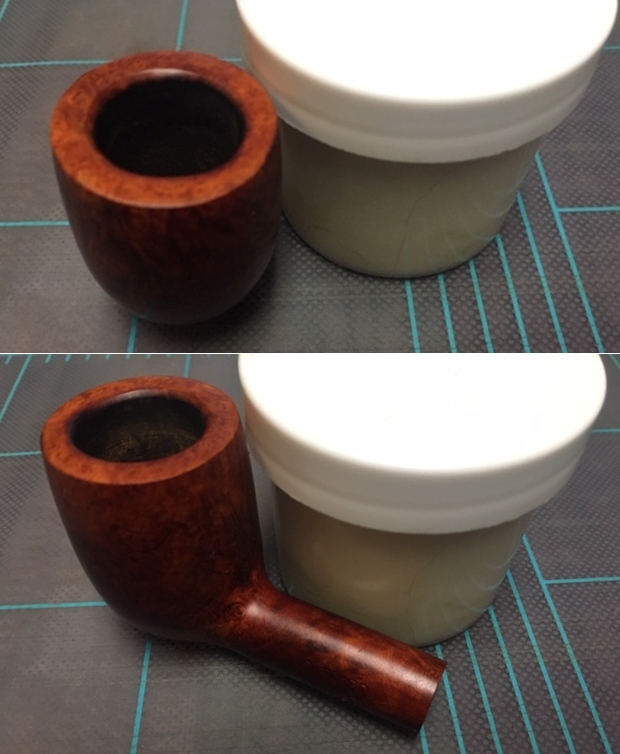
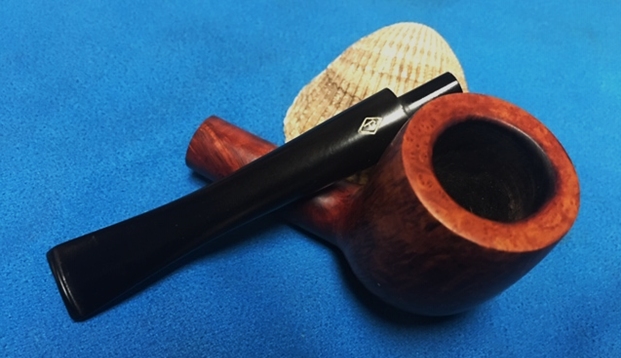
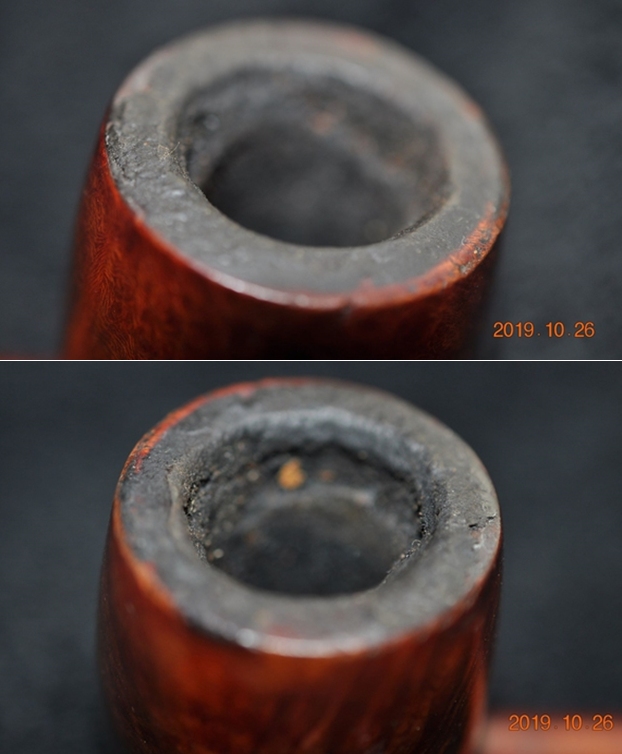
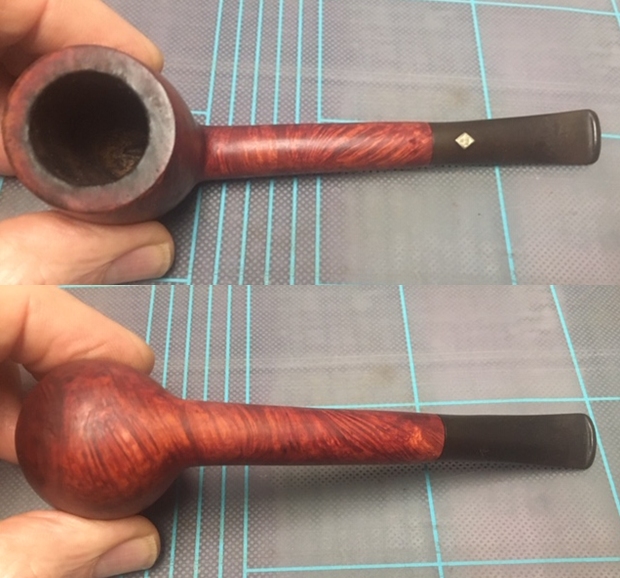
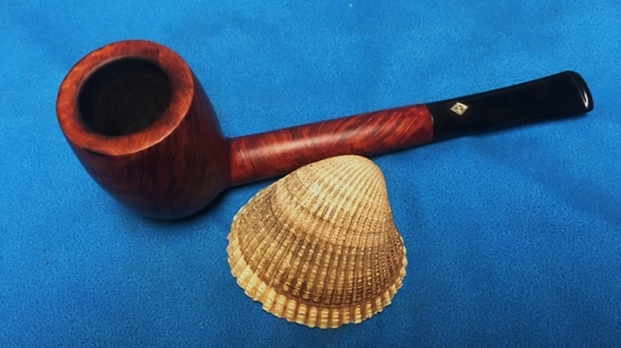
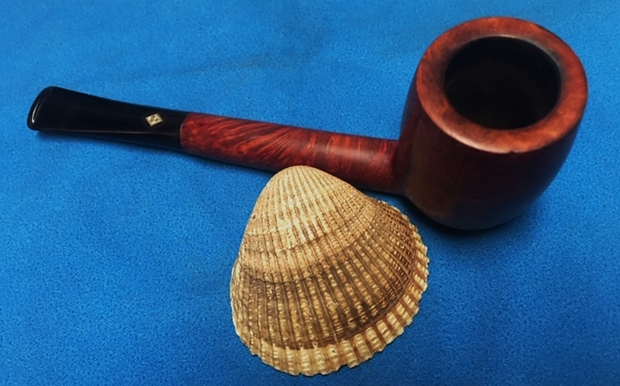
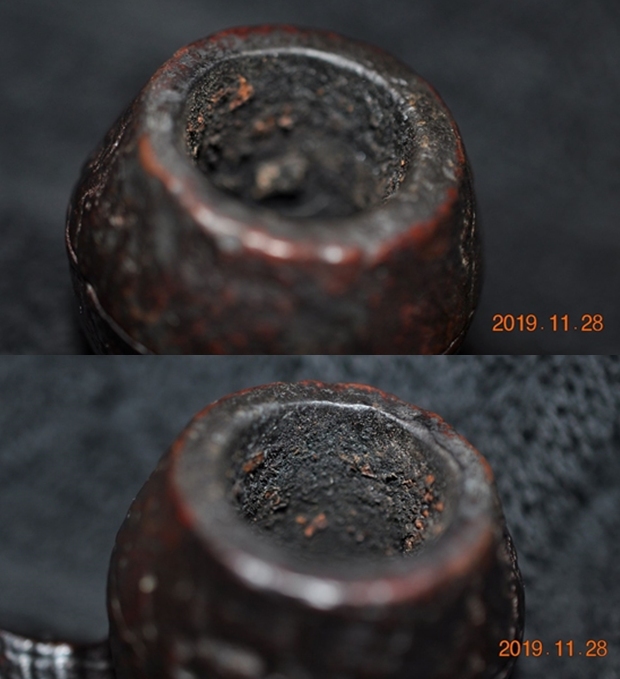
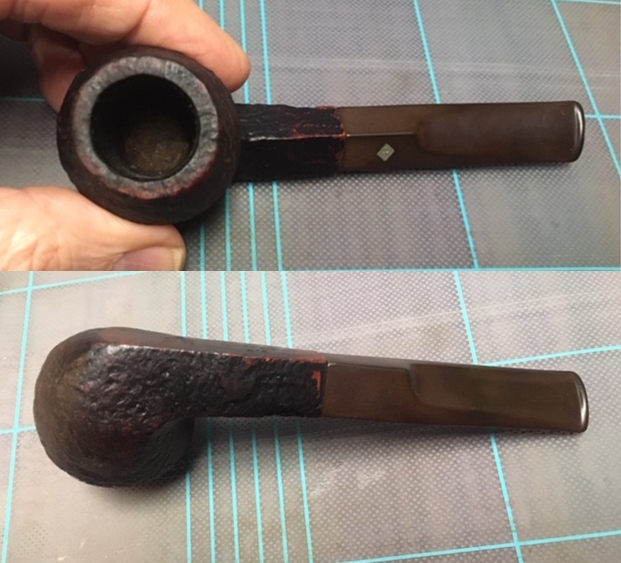
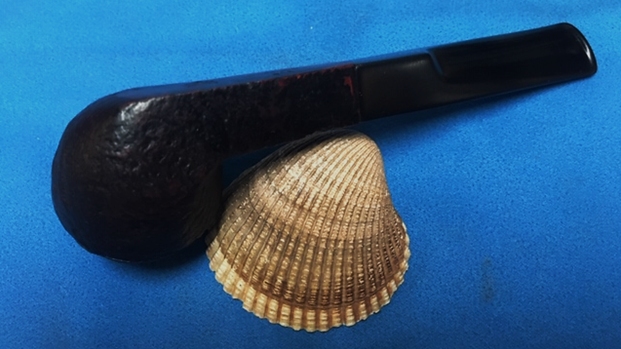
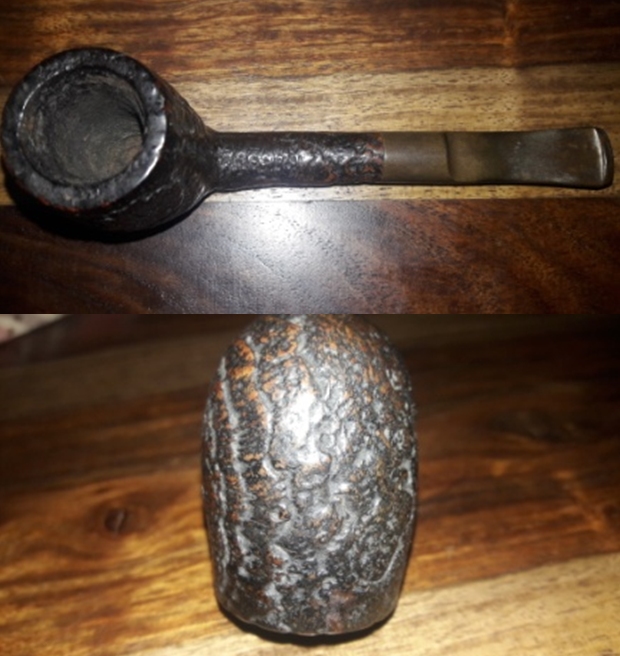
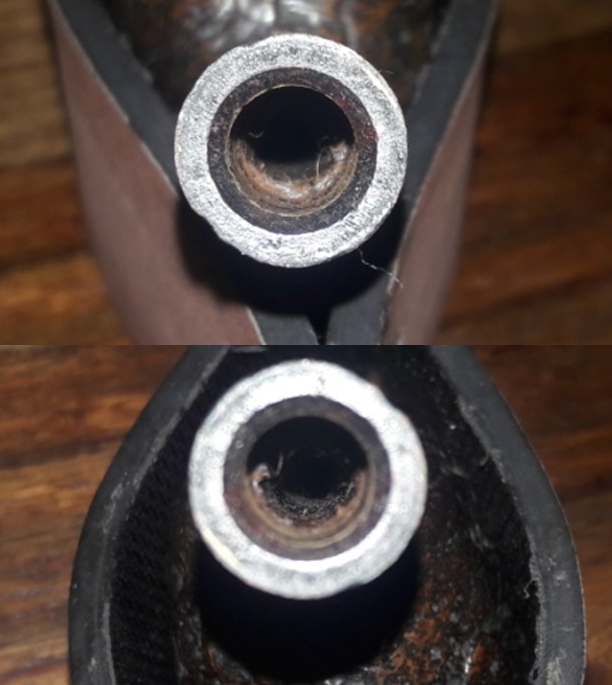
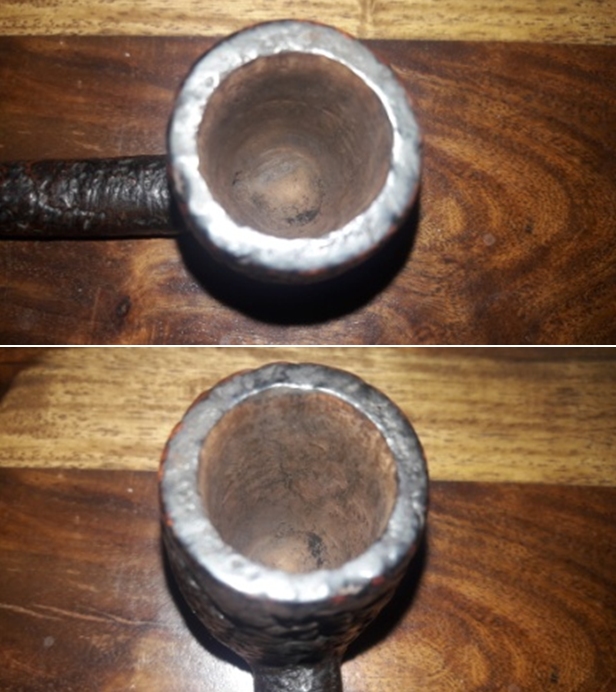
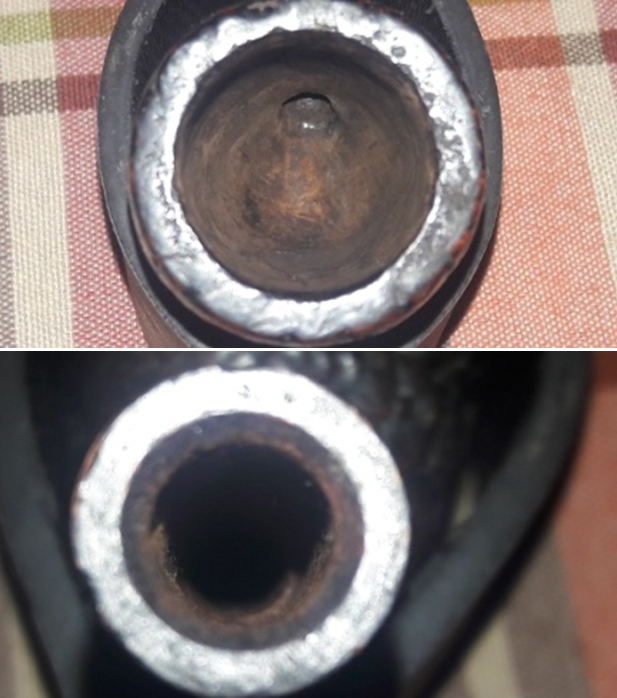
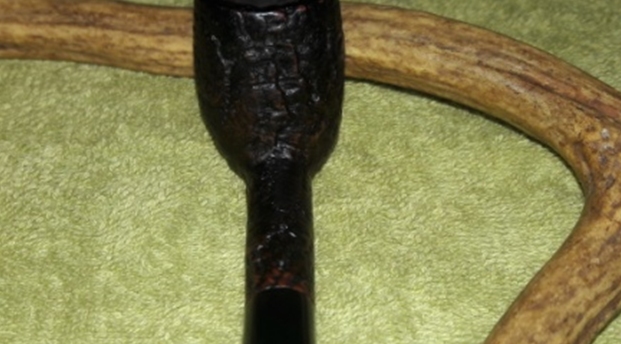
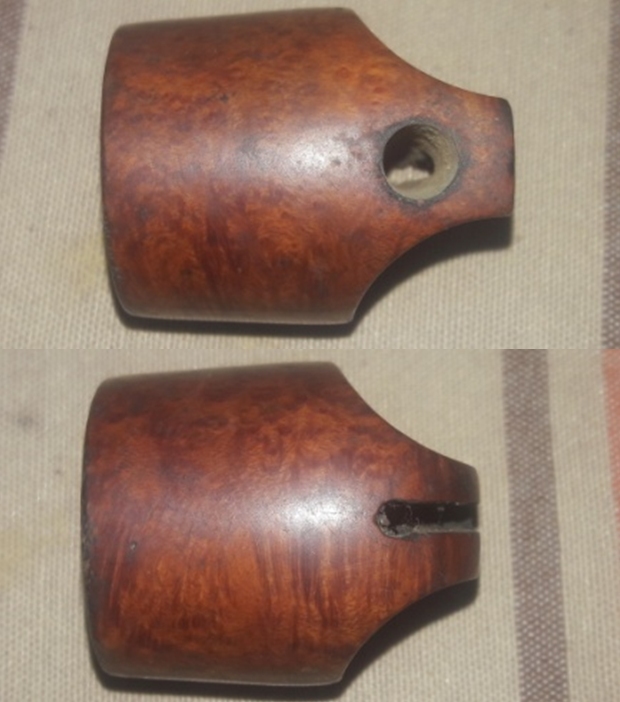
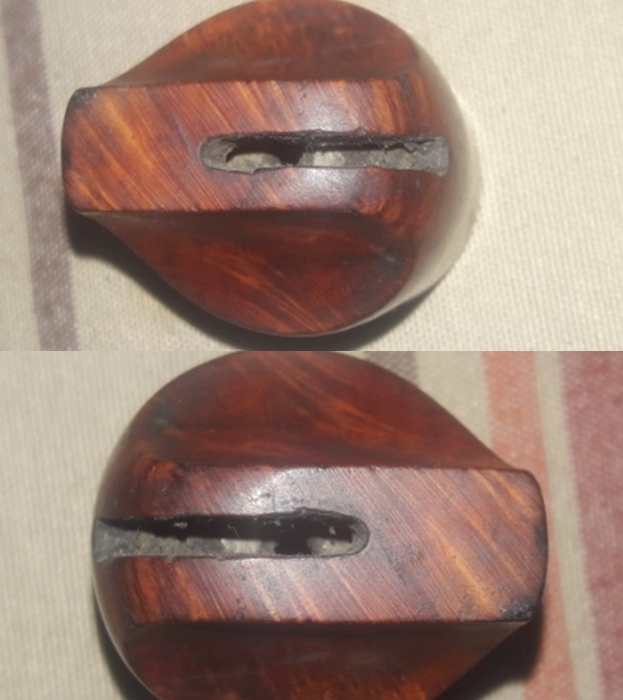
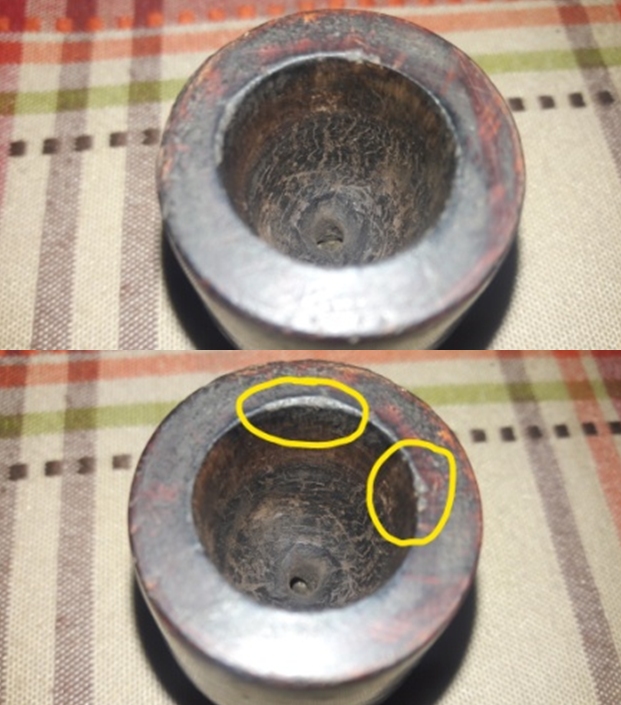
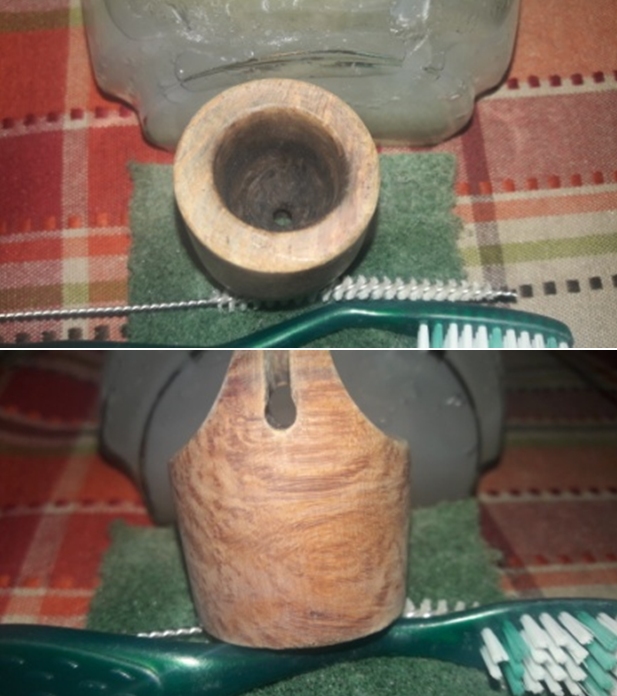
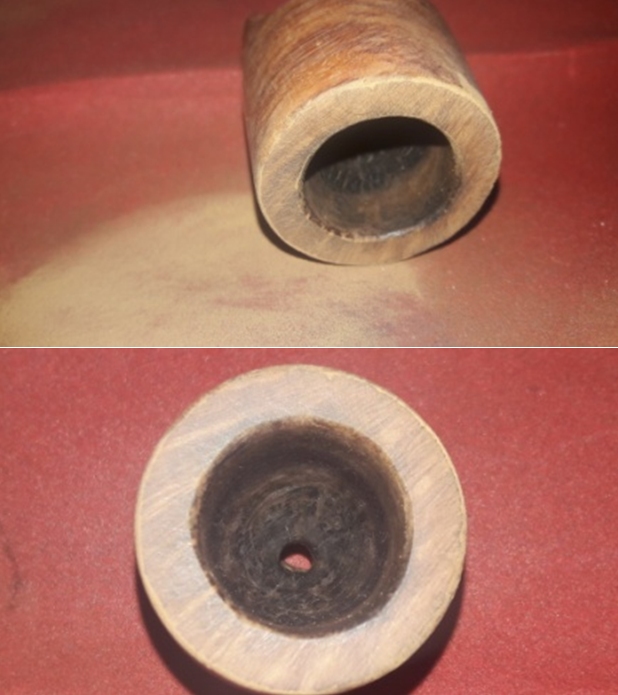
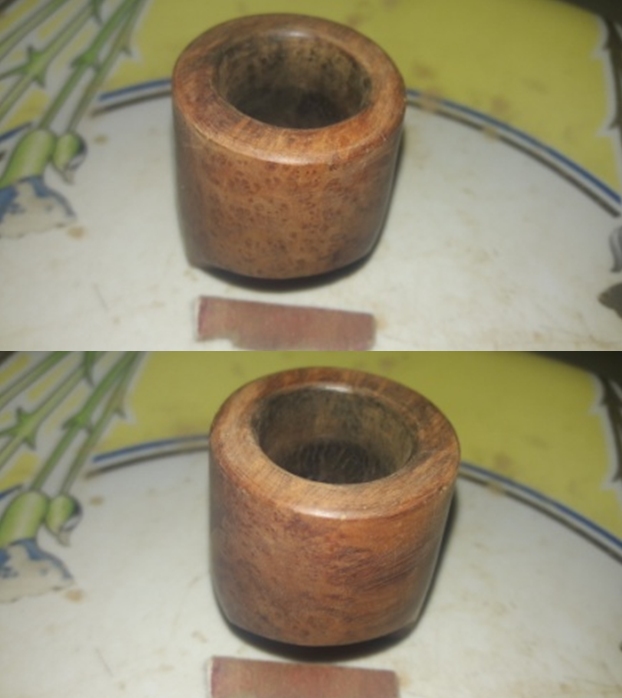
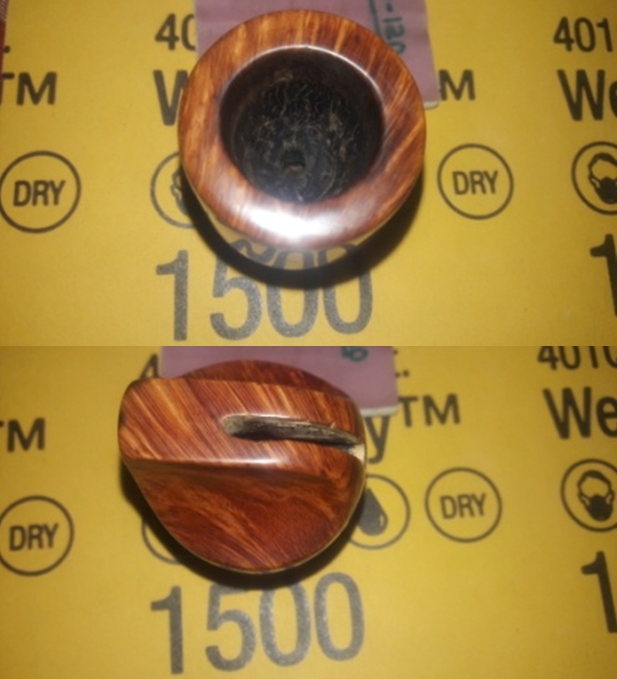
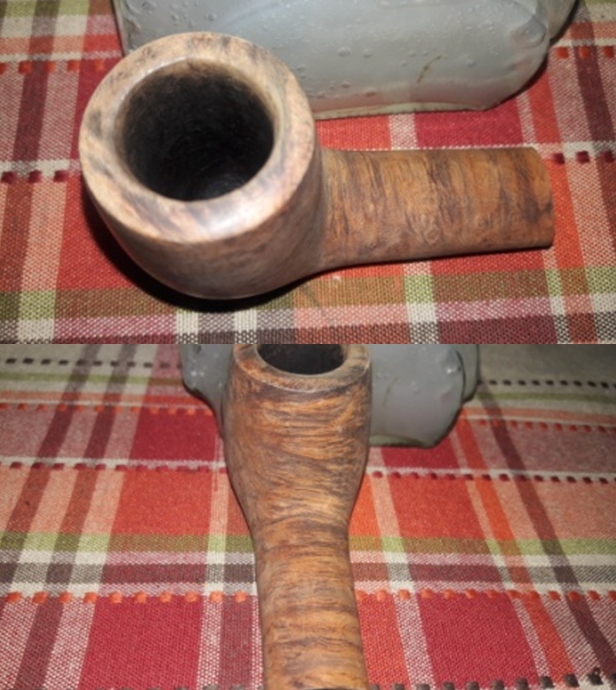
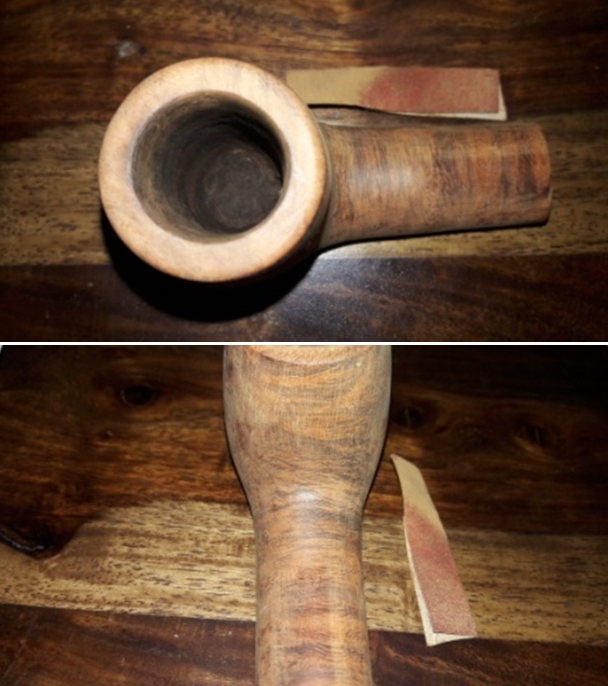
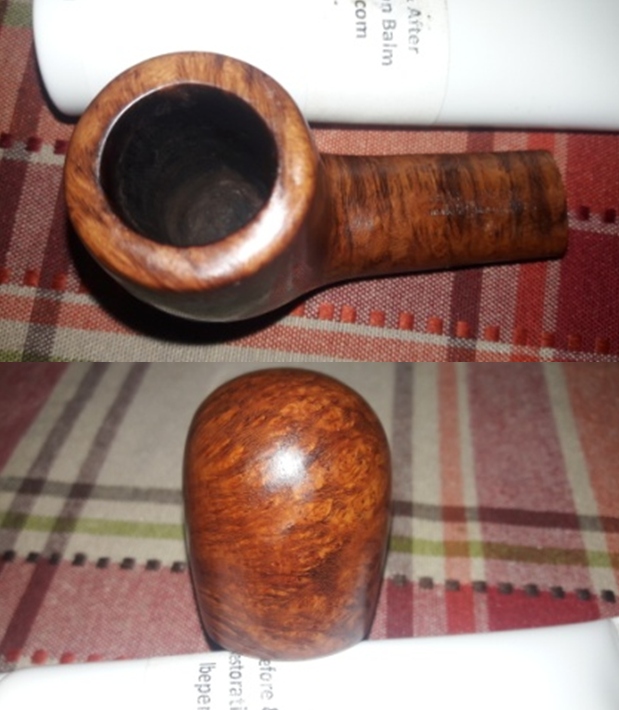
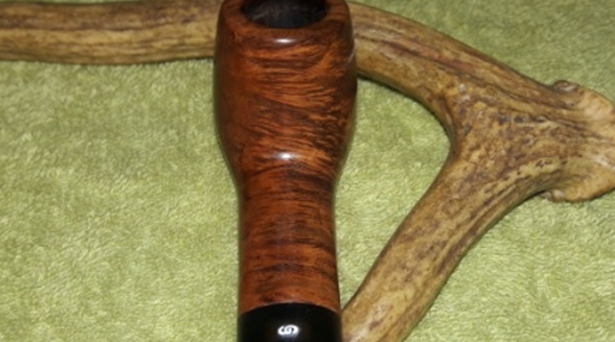
The bowl is slightly off round with a decently wide rim and a depth of about 1 7/8 inches. The draught hole is in the center and at the bottom of the chamber. The chamber has an uneven layer of thick crumbly cake. The smooth outward sloping rim top surface is severely damaged with dents/ dings and covered in lava overflow, dirt and grime. The inner front rim edge has suffered a few blows on a hard surface resulting in a dented and chipped edge surfaces to the between 12 o’clock and 2 o’clock direction and the same in enclosed in a yellow circle. The outer rim edge too has some minor dents in the 6 o’clock direction. The condition of the inner walls of the chamber can be commented upon after the cake has been taken down to the bare briar. There is a sweet smell in the chamber which is not very strong. The stummel appears solid to the touch all around and hence I do not foresee any serious damage to the walls in the form of burnout/ deep heat fissures/ lines or pits. The darkened inner rim edge may be charred further than anticipated and the same will be confirmed after the surface has been thoroughly cleaned. I need to resort to topping the rim top in order to address the damage to the surface. The ghost smells should reduce once the cake from the chamber is removed and the shank has been cleaned. 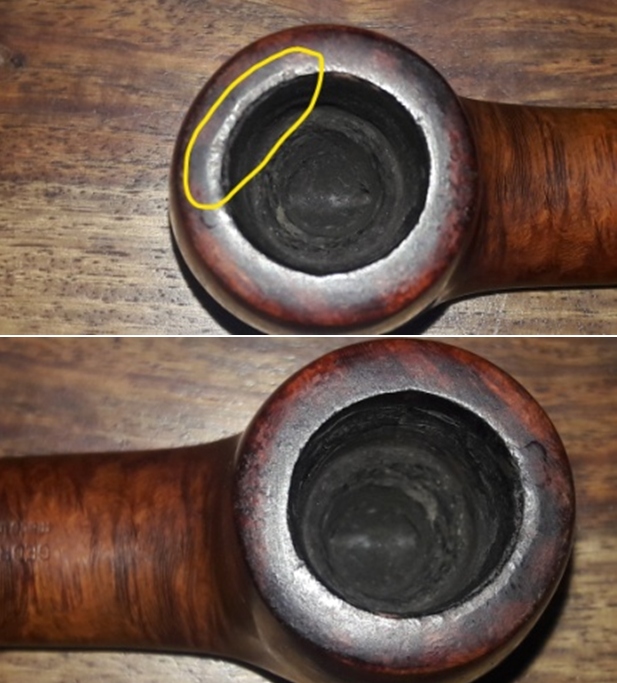
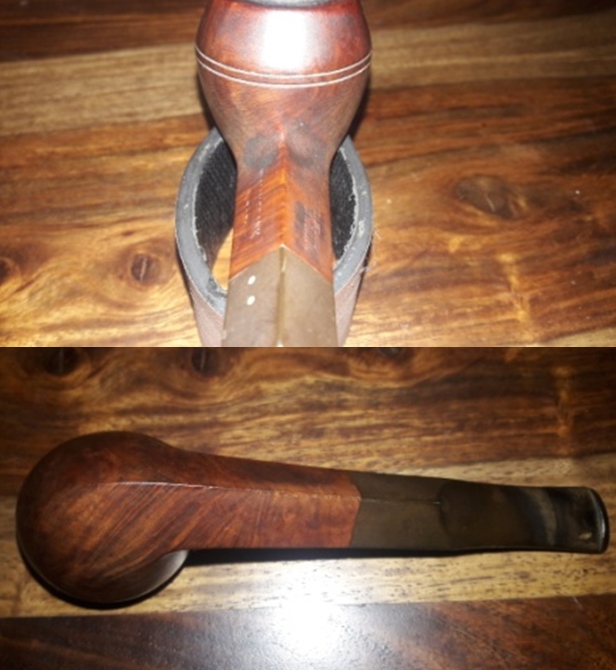
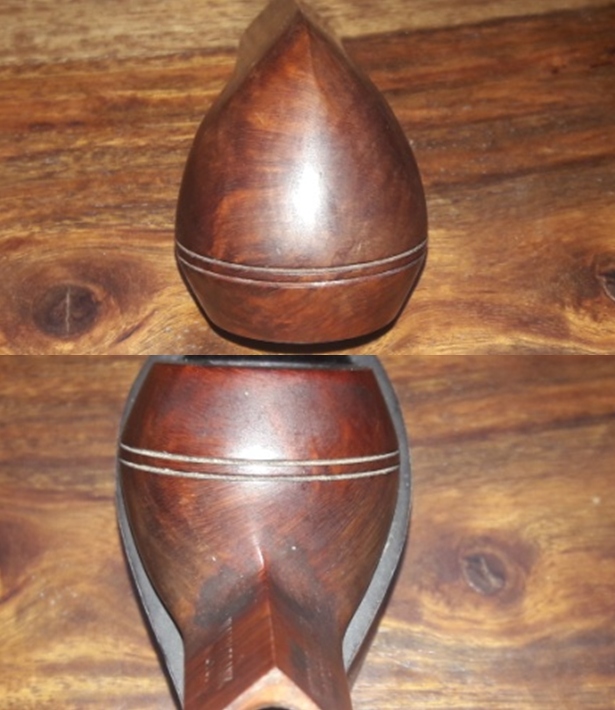
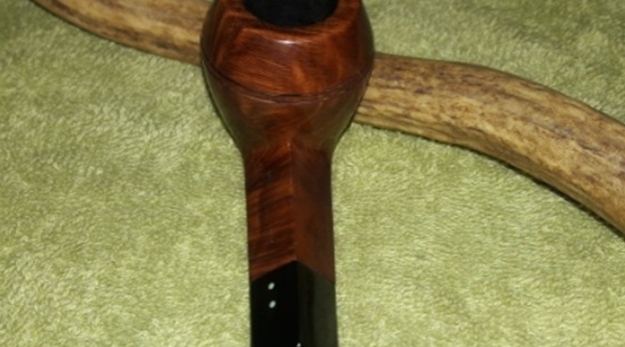
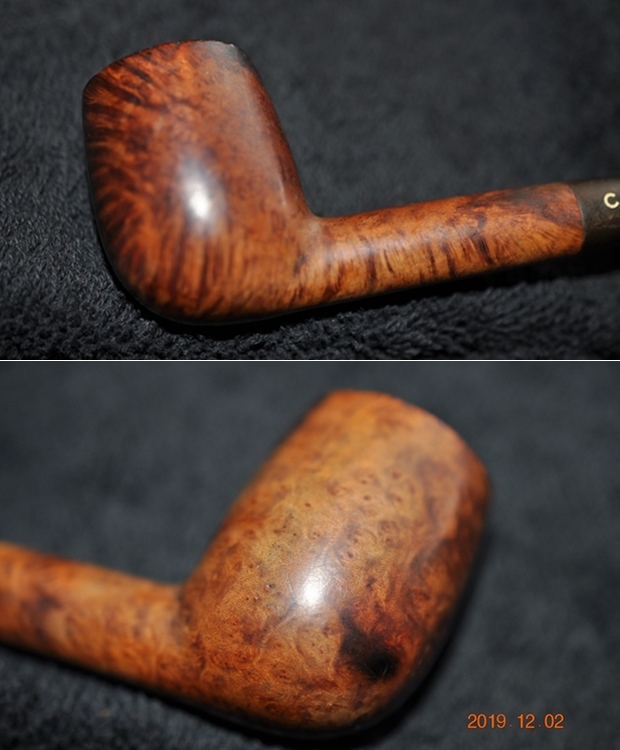
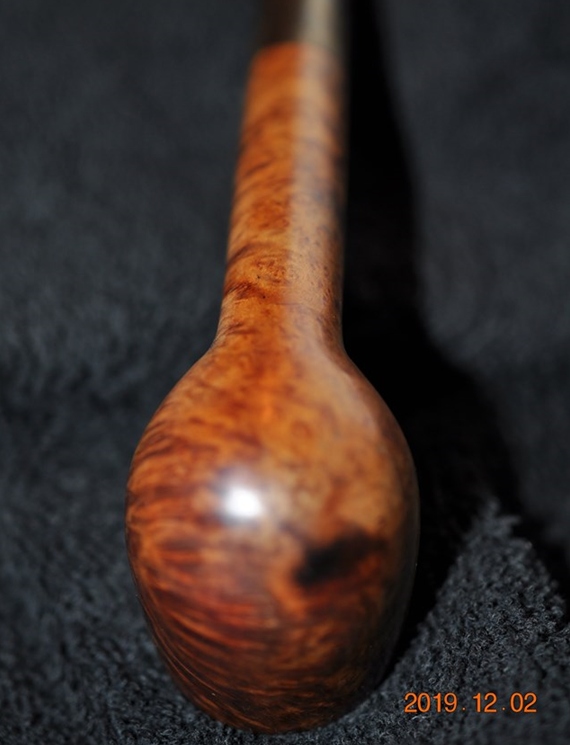
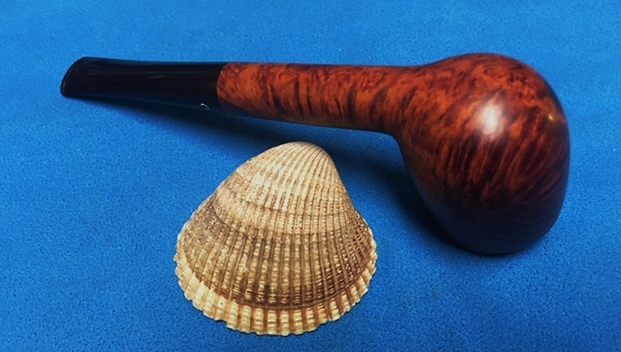
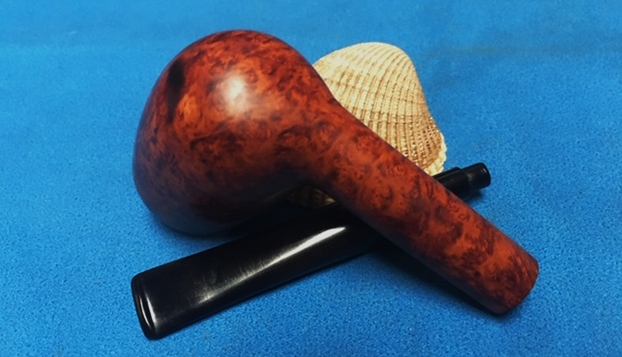
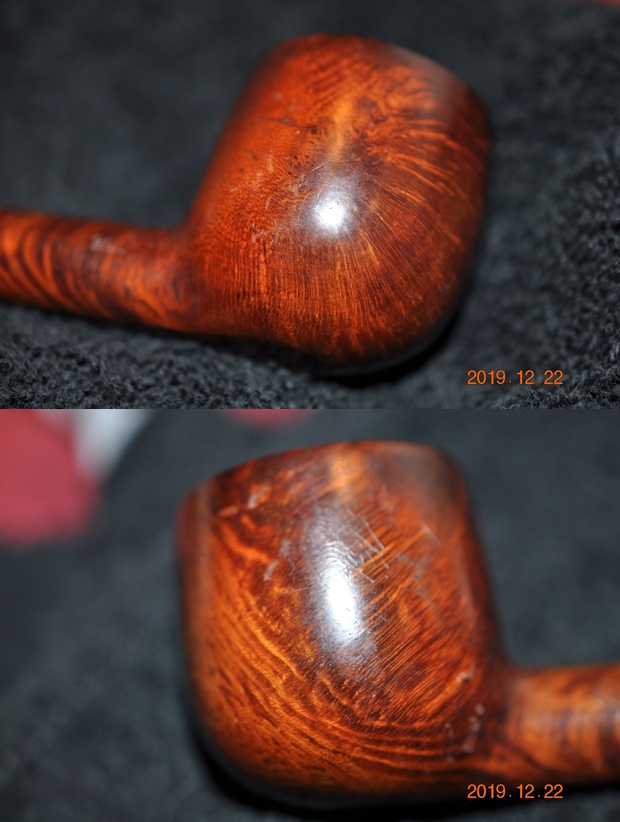
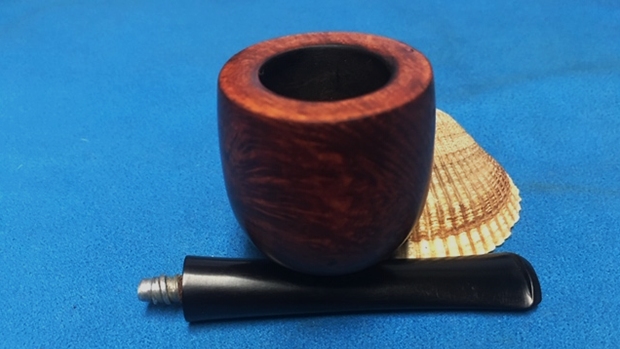
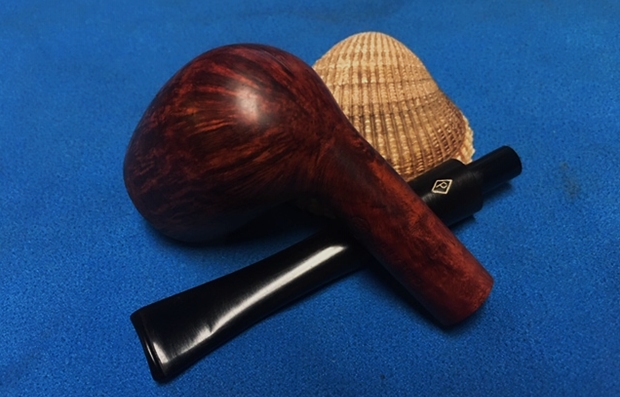
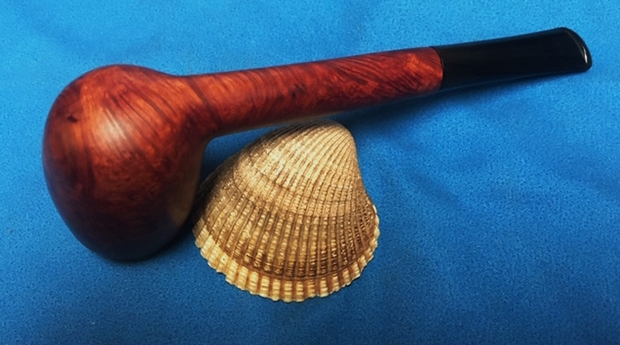
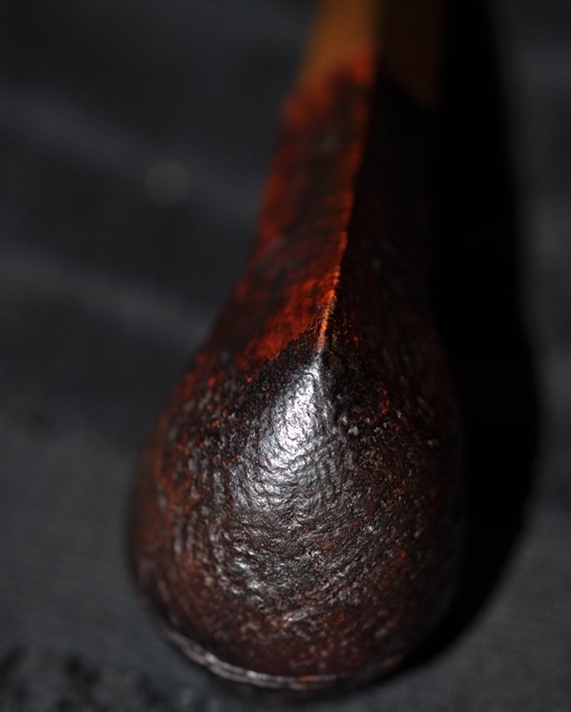
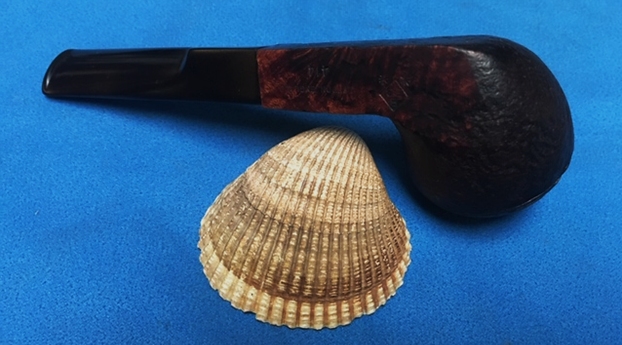
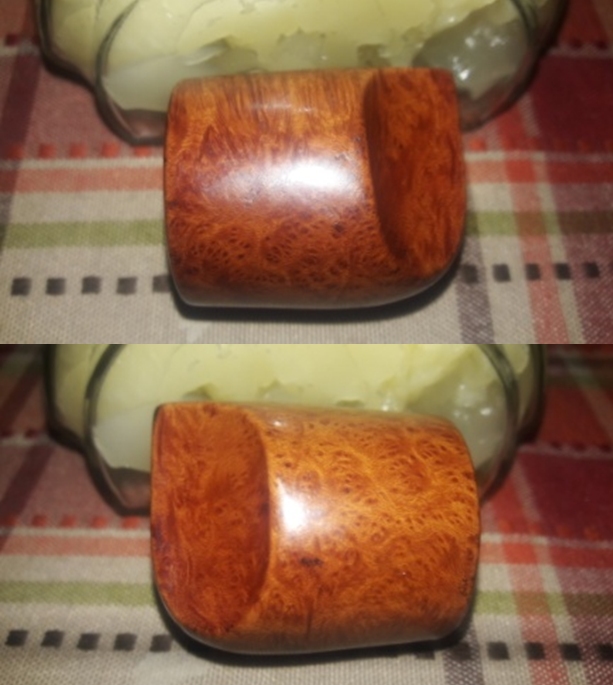
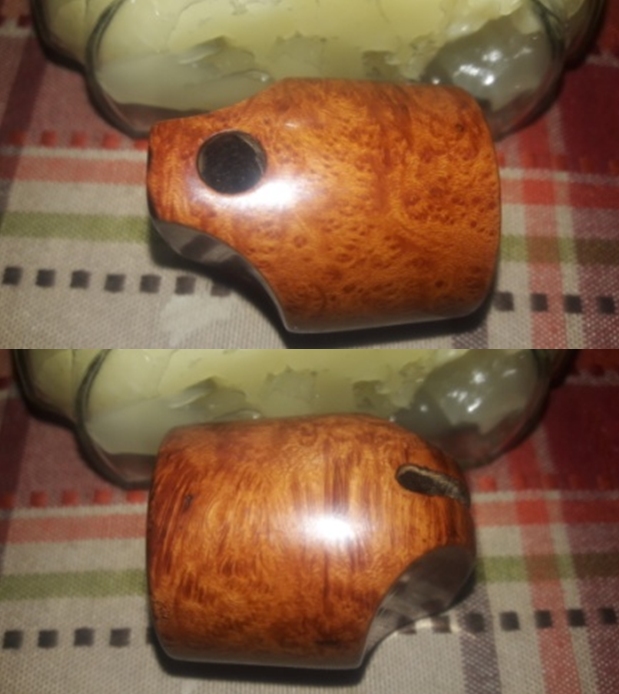
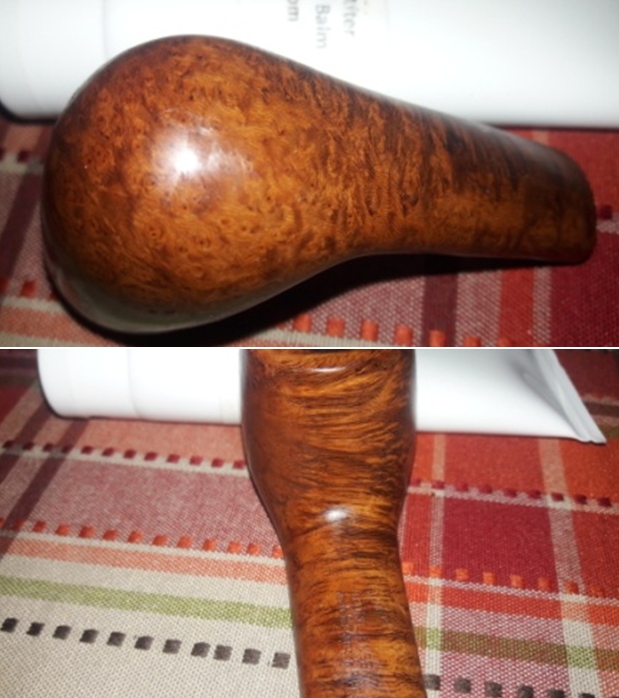
 The smooth stummel surface is covered in dust and grime through which one can make out the beautiful cross grains to the front and back of the bowl and shank. The stummel surface is peppered with scratches, dents and dings on the either sides of the stummel, over the foot and to the front and back of the stummel, probably due to likely falls during its time with the previous piper. However, there is not a single fill in the entire stummel, signifying very high quality of briar used in carving this pipe. The briar is looking lifeless and bone dry. I shall need to sand the stummel surface with sand papers to remove and minimize the scratches, dents and dings. Once the stummel has been thoroughly cleaned, these damages will be more apparent. Thorough cleaning and rising under warm water of the stummel surface should highlight the grain patterns. Micromesh polishing will further help minimize these dents and scratches to some extent.
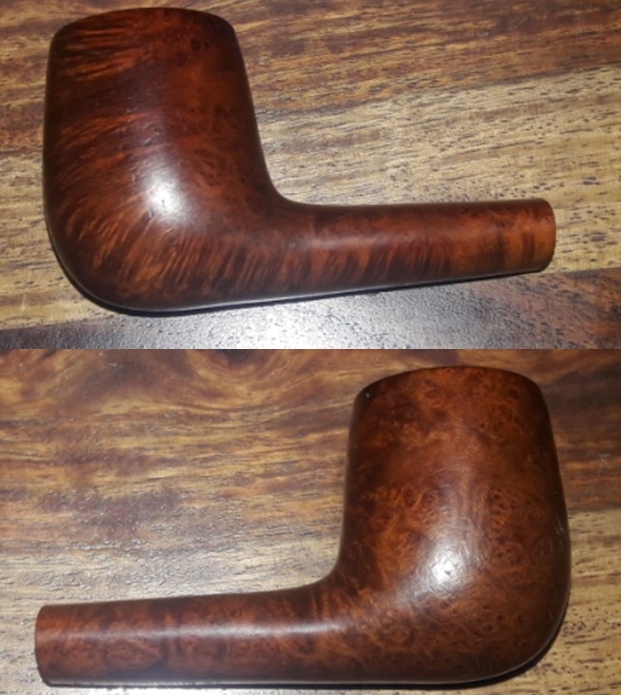

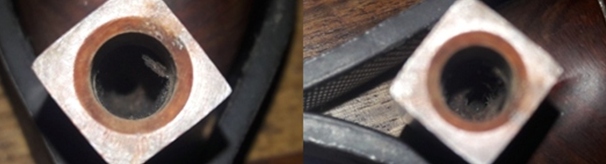
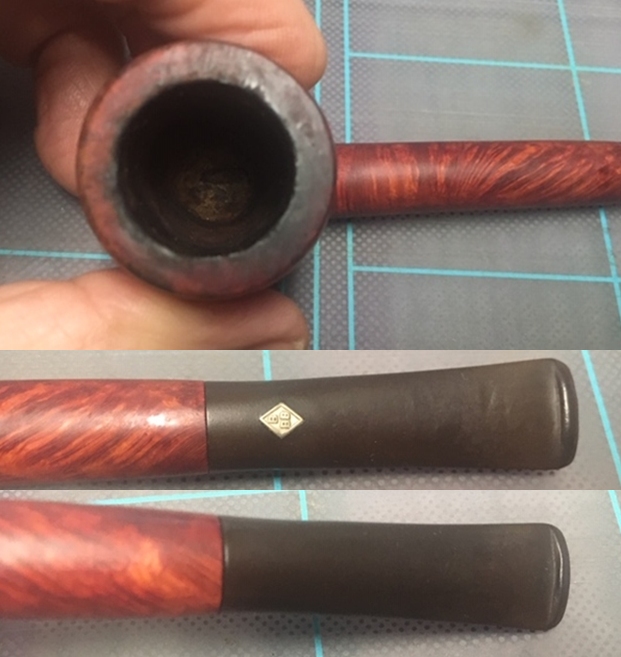
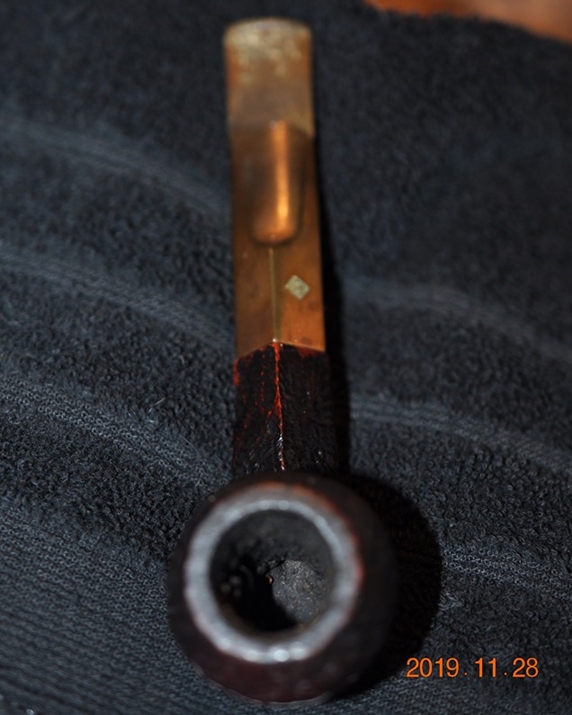
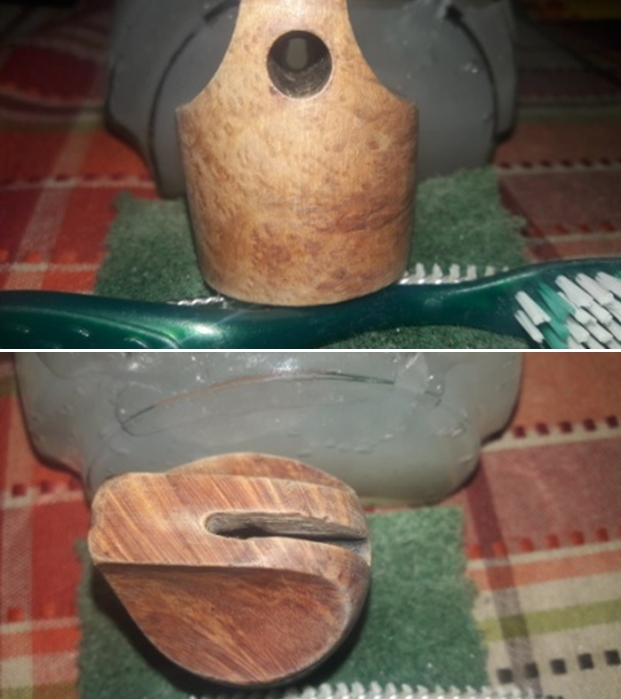
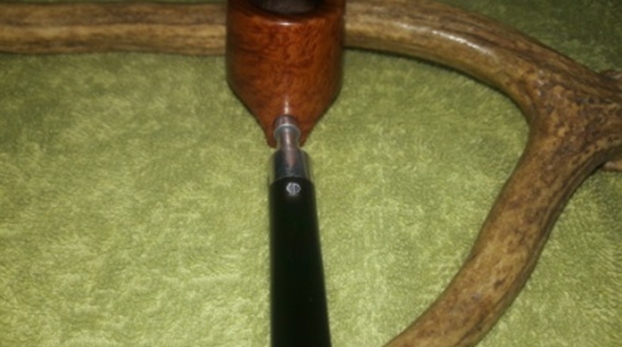
 The mortise shows accumulation of oils, tars and gunk and the air flow is not full and smooth.
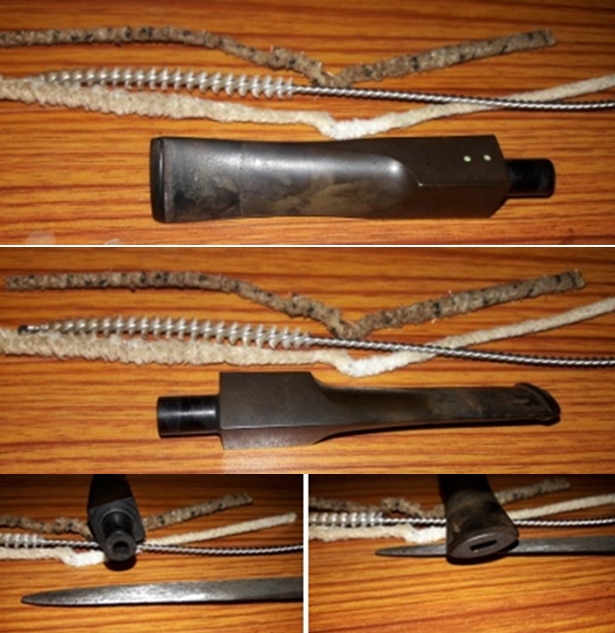
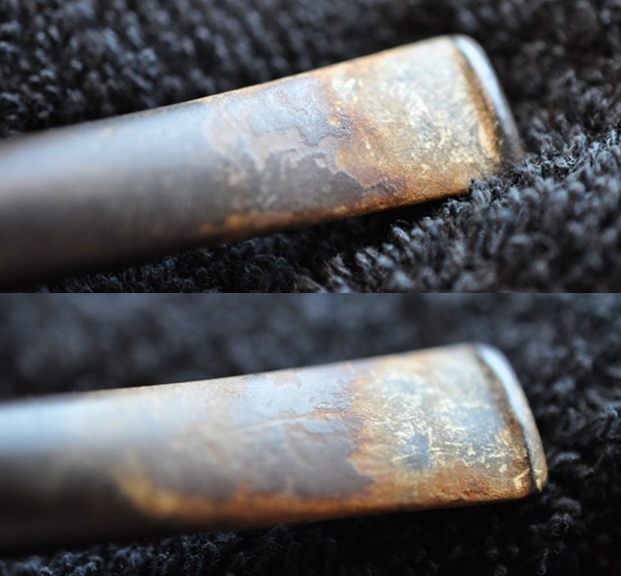
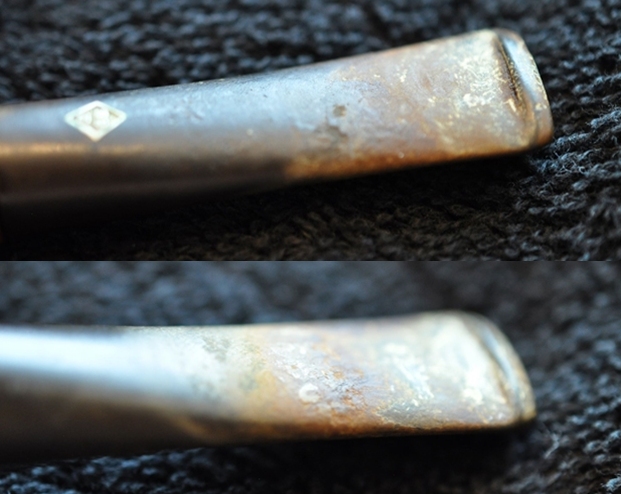
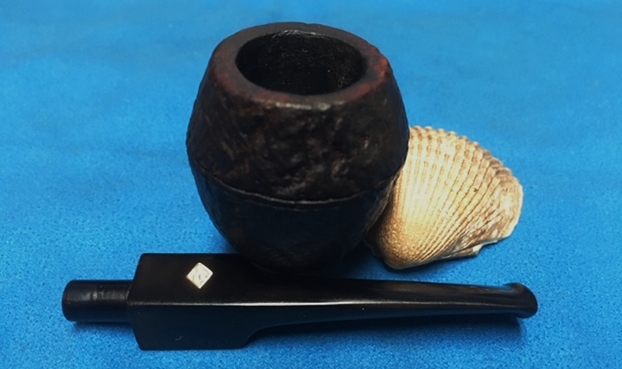
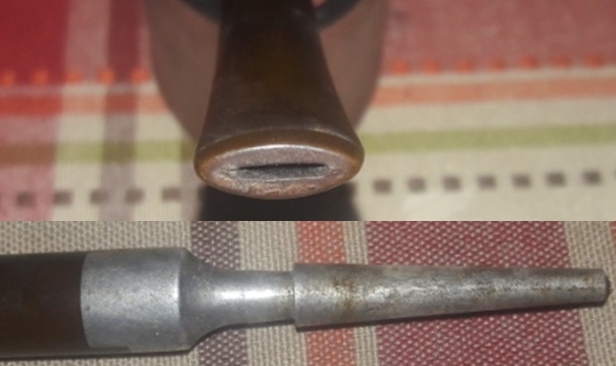
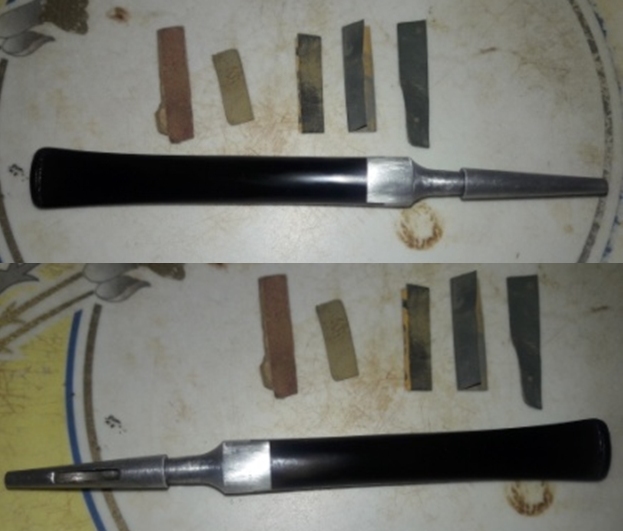
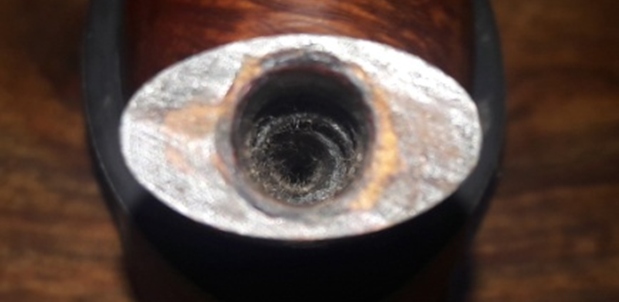 The high quality vulcanite saddle stem is so heavily oxidized that it appears brownish green in color! Some minor tooth chatter and light tooth marks over the button edge is seen on the upper surface of the stem. There are a couple of very deep bite marks on the lower stem surface that have completely damaged the button edge. These issues are nothing serious to address. The lip edge on both sides is damaged and would necessitate a rebuild followed by reshaping. The tenon has accumulated ash and oils/ tars that have dried out on the inside as well as on the outside. The horizontal slot has scratch marks which will have to be addressed. The bite marks will be raised to the surface by heating to the extent possible and further will be filled using charcoal and CA superglue mix.
  The Process
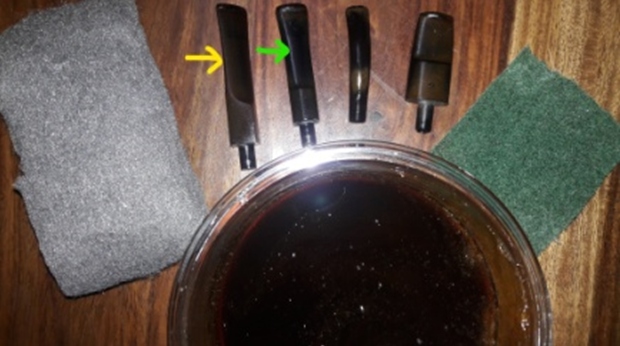
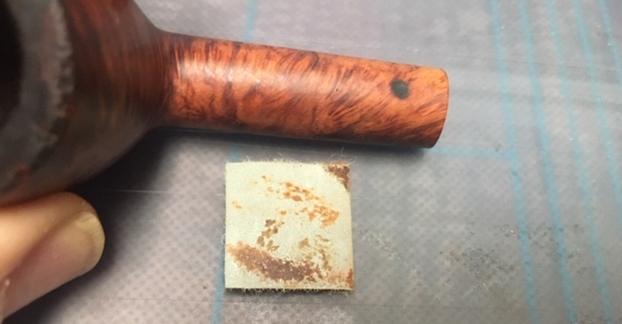
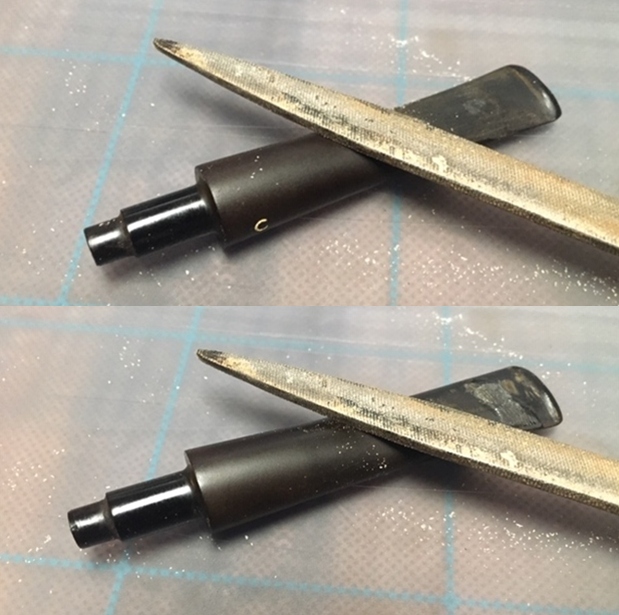
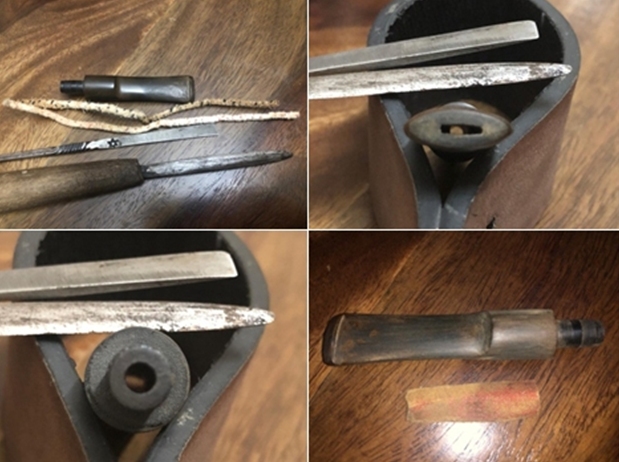
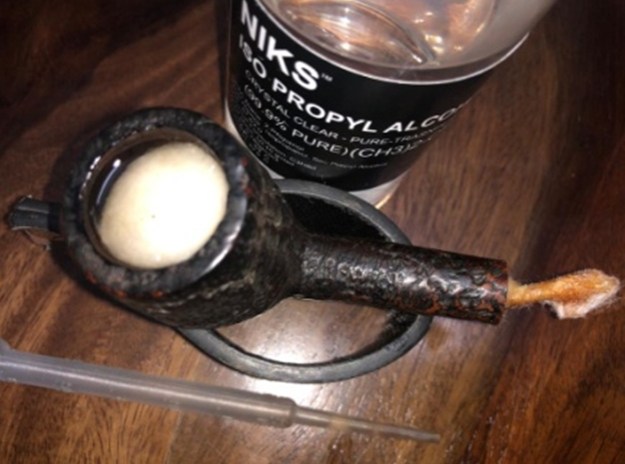
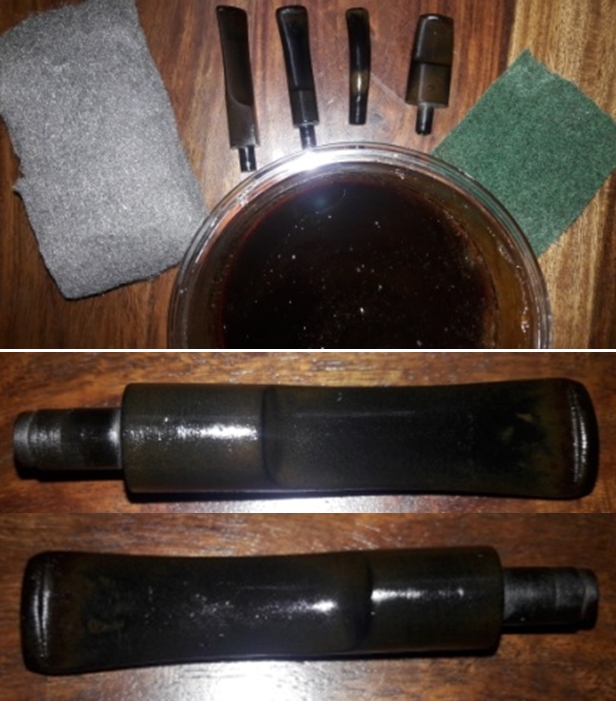
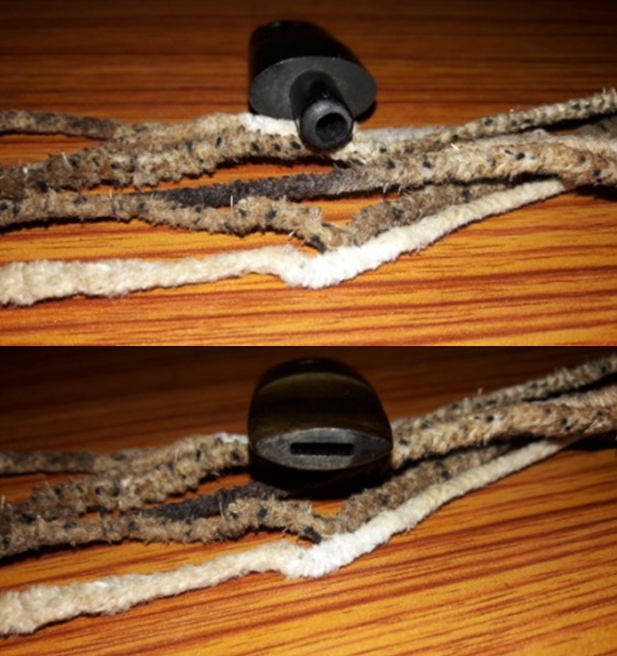
I started the restoration of this pipe by first cleaning the internals of the stem with bristled pipe cleaners and 99.9% pure isopropyl alcohol. I scraped out the dried oils and tars from the tenon end with my fabricated knife and also removed the dried oils and tars from the slot end. I followed it up by sanding the entire stem with a folded piece of 220 grit sand paper to remove the surface oxidation. It has been our (Abha, my wife and self) experience that sanding a stem before dunking it in to the deoxidizer solution helps in bringing the deep seated oxidation to the surface which in turn make further cleaning a breeze with fantastic result. 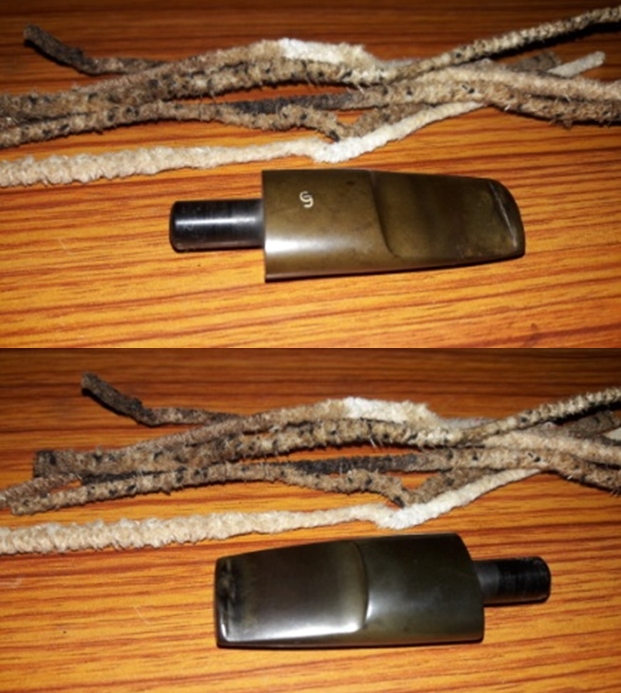
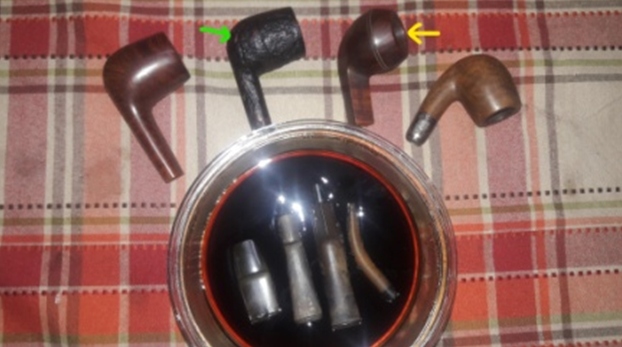
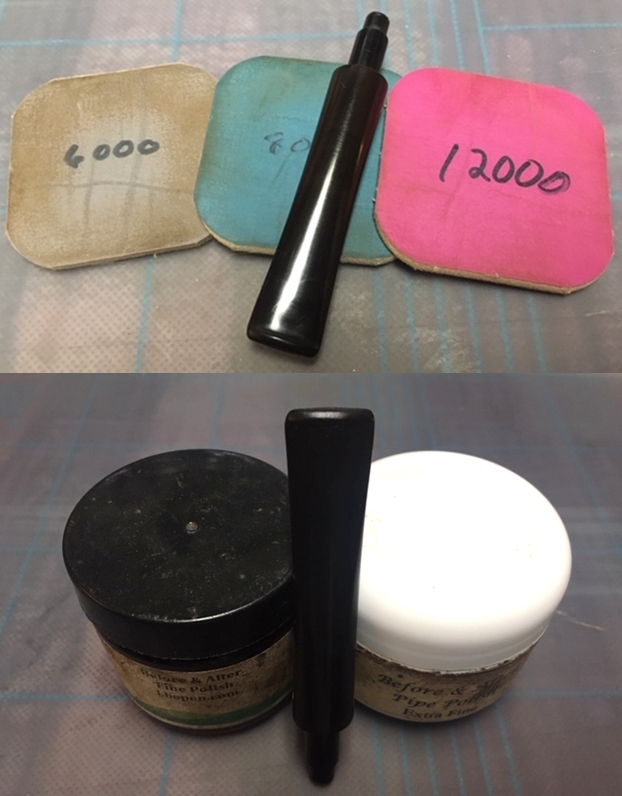
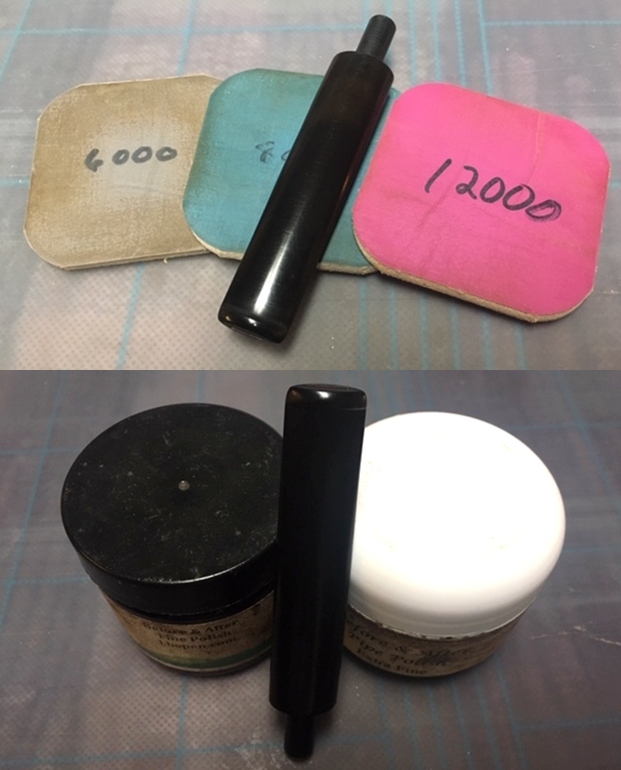
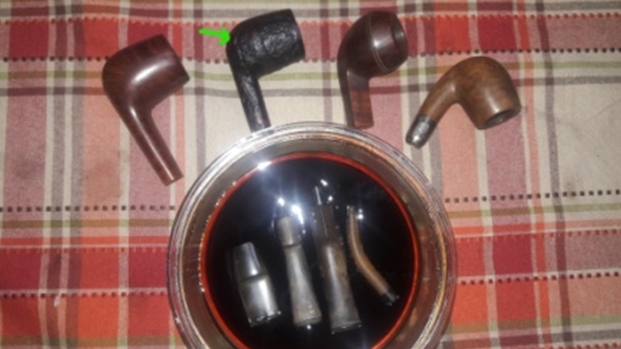
 I dropped the stem in to “Before and After Deoxidizer” solution developed by my friend Mark Hoover. The solution helps to draw out heavy oxidation to the surface, making its further removal a breeze, while the minor oxidation is eliminated to a very great extent. The initial sanding helps to draw out the complete oxidation as the sanding opens up the stem surface that has been initially covered with oxidation. I usually dunk stems of 4-5 pipes that are in-line for restoration and this pipe is marked in pastel blue arrow. I generally allow the stems to soak in this solution overnight to do its work.
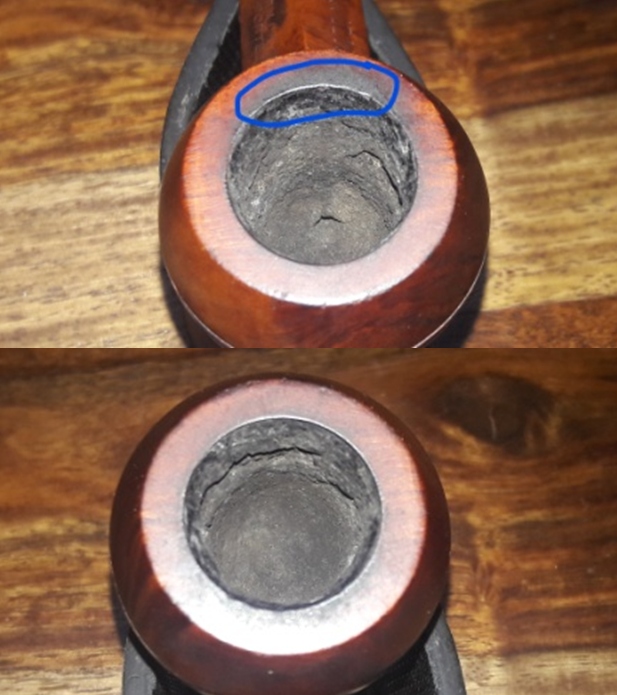
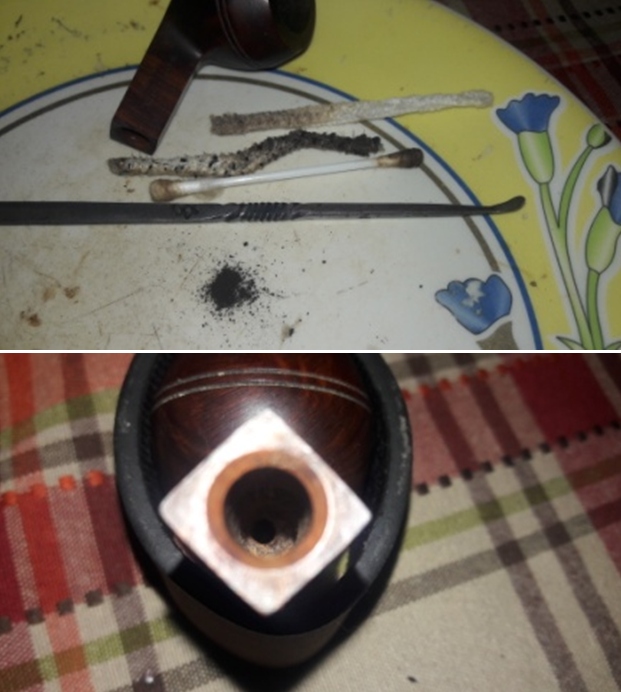
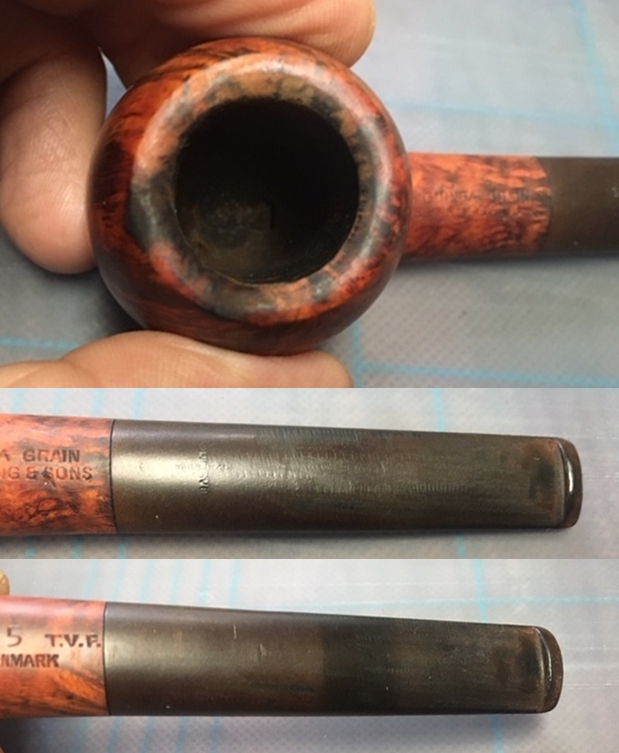
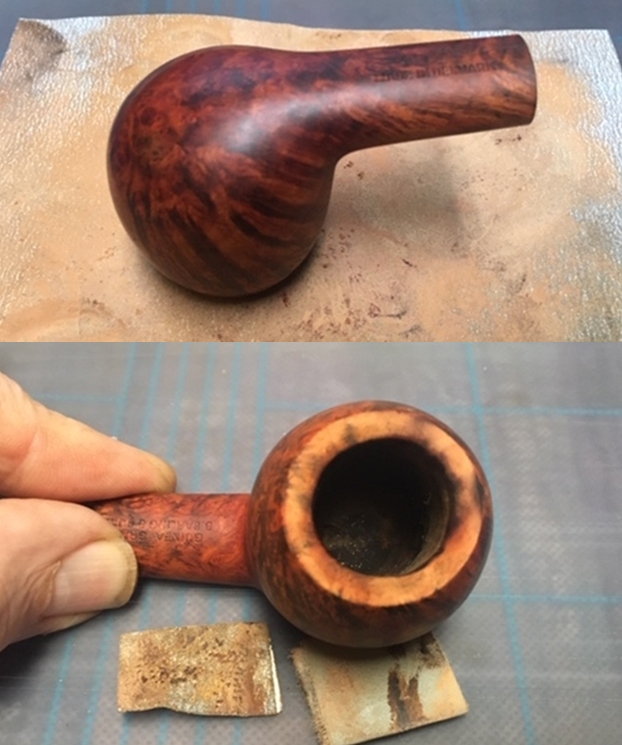
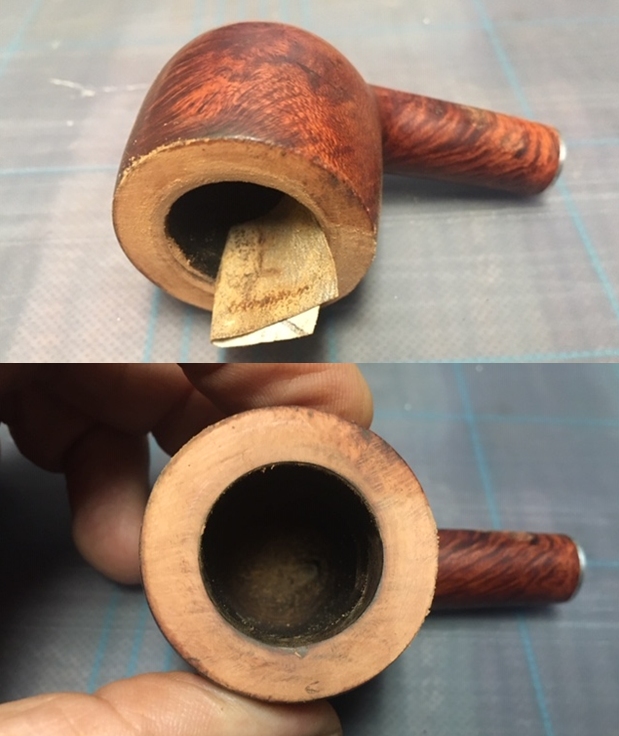
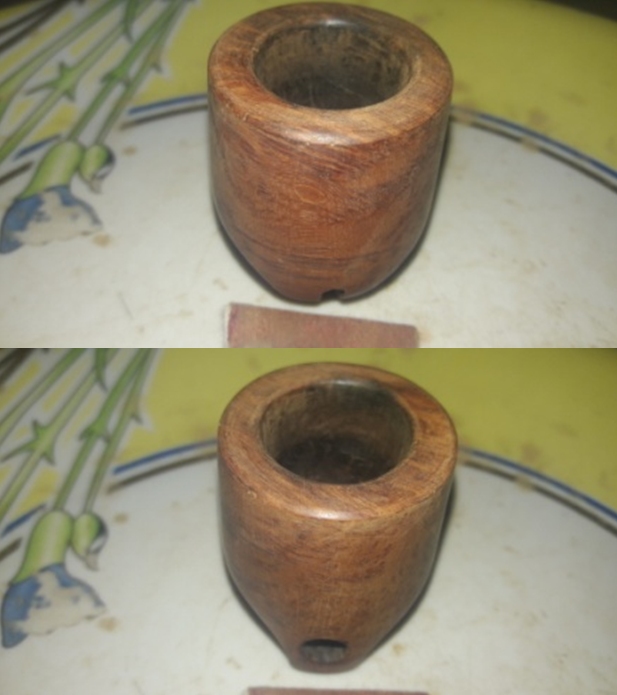
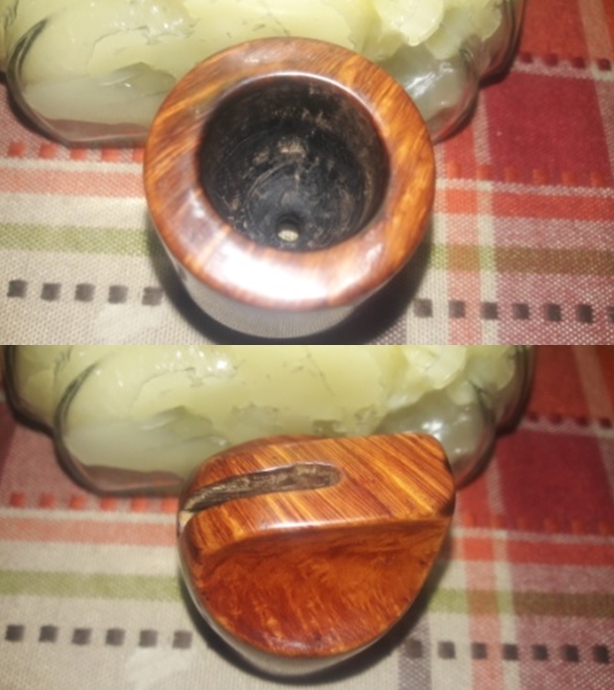
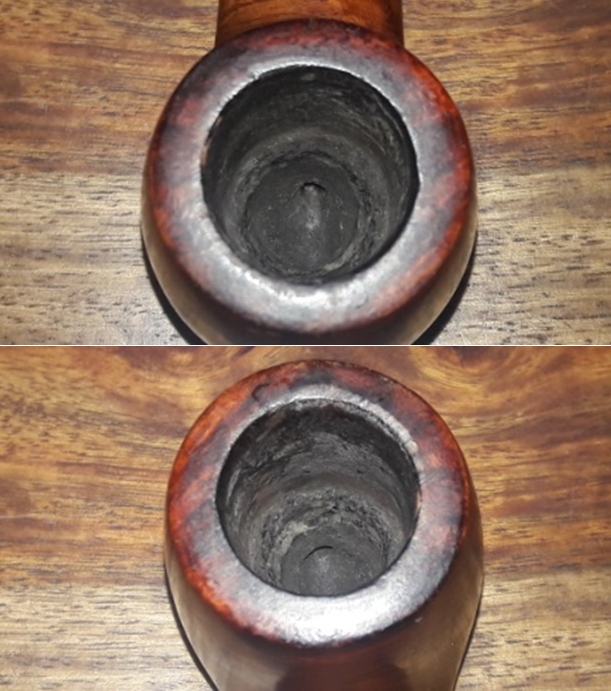
 While the stem was soaking in the deoxidizer solution, I worked on the stummel by first reaming the chamber with size 3 Castleford reamer head. I further scraped the chamber walls with my fabricated knife to remove the remaining carbon deposits where the reamer head could not reach. I scraped out the lava overflow from the rim top surface, especially from the area in the 12 o’clock direction. Once the cake was reamed back to the bare briar, I used a 150 grit sand paper followed by 220 grit sand paper to remove all the traces of remaining cake and also to smooth out the inner walls of the chamber surface. Finally, to remove the residual carbon dust, I wiped the chamber with a cotton pad wetted with 99.9% pure isopropyl alcohol. The chamber walls are sans any damage. The inner rim edge has a number of nicks which were revealed after the lava overflow was removed from the rim top. Thankfully the inner rim was not charred under the lava overflow. The ghost smells are negligible and may further reduce after the shank/ mortise are thoroughly cleaned.
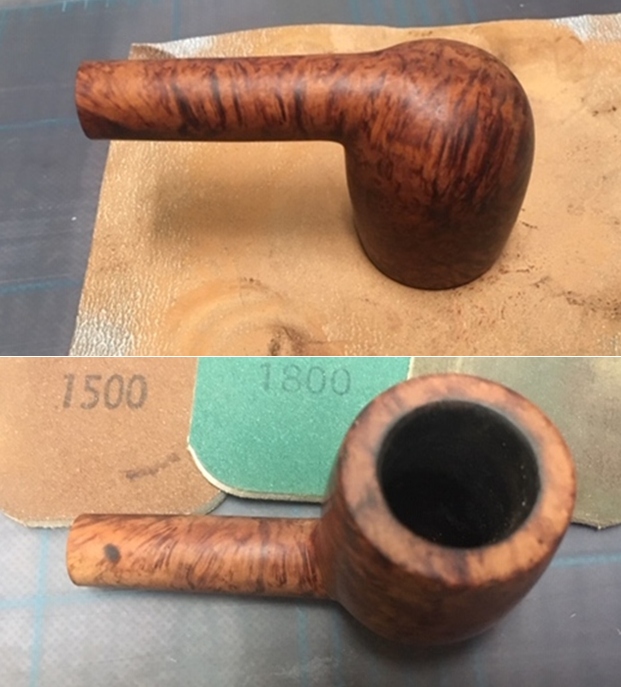
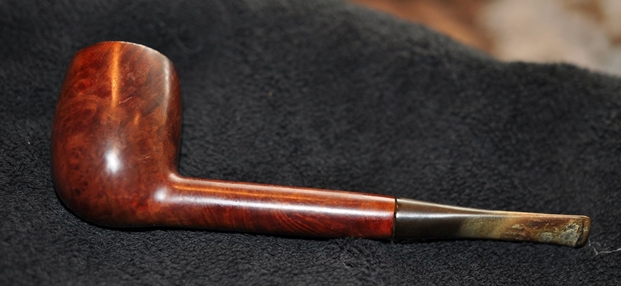
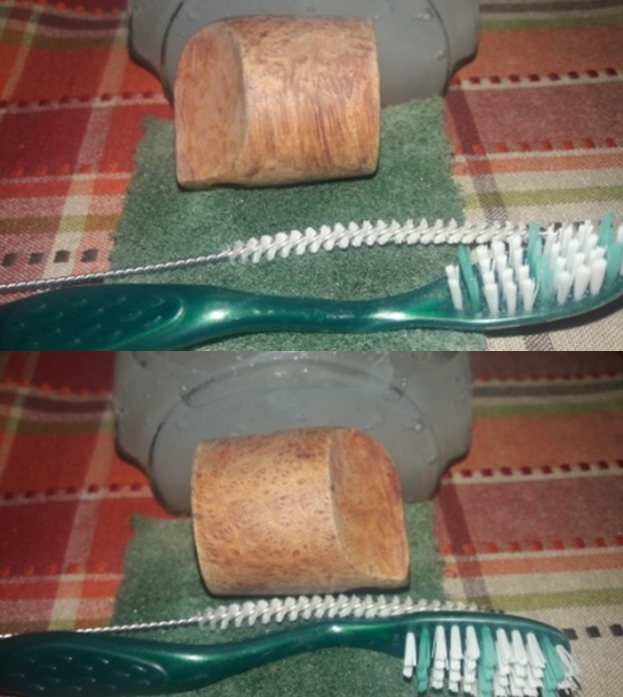
 With the bowl internals clean, I move to clean the exterior of the stummel. I used a hard bristled tooth brush and Briar Cleaner, a product that has been developed by Mark Hoover, to scrub the stummel and rim top. I set the stummel aside for 10 minutes for the product to draw out all the grime from the briar surface. After 10 minutes, I washed the stummel under running warm water with anti oil dish washing detergent till the stummel surface was clean and dried it using paper towels and soft cotton cloth. I simultaneously cleaned the shank internals with the detergent and hard bristled shank brush and set the stummel aside to dry out naturally. The stummel surface has cleaned up nicely with the beautiful grain patterns on full display.
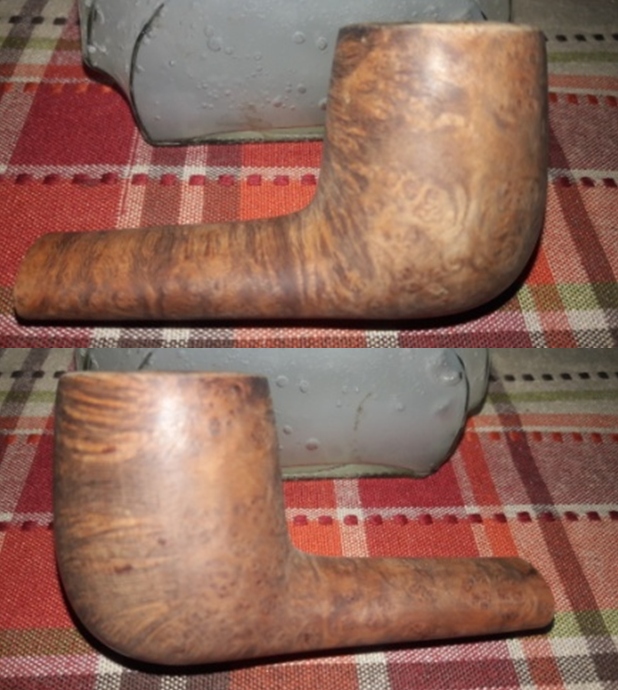
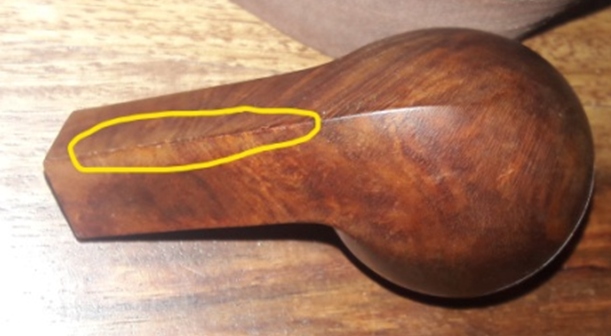
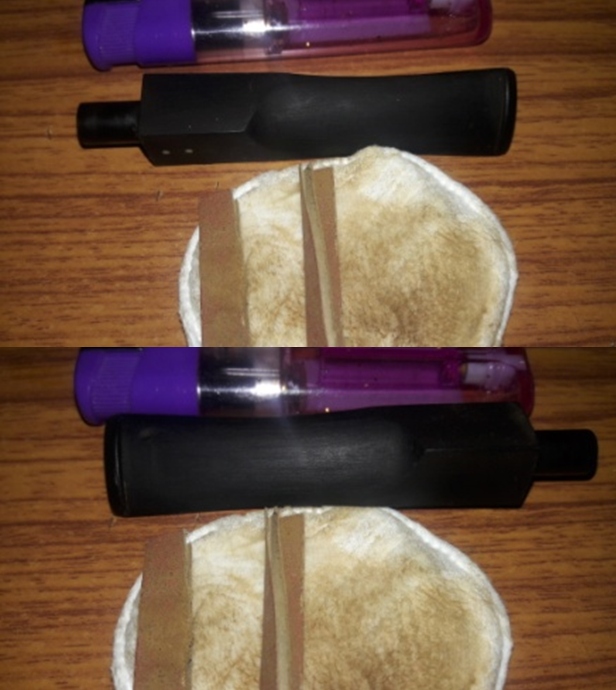
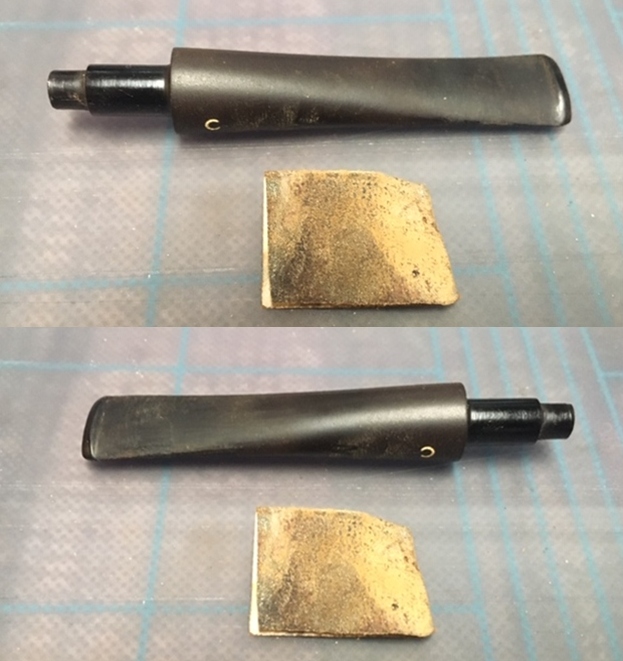
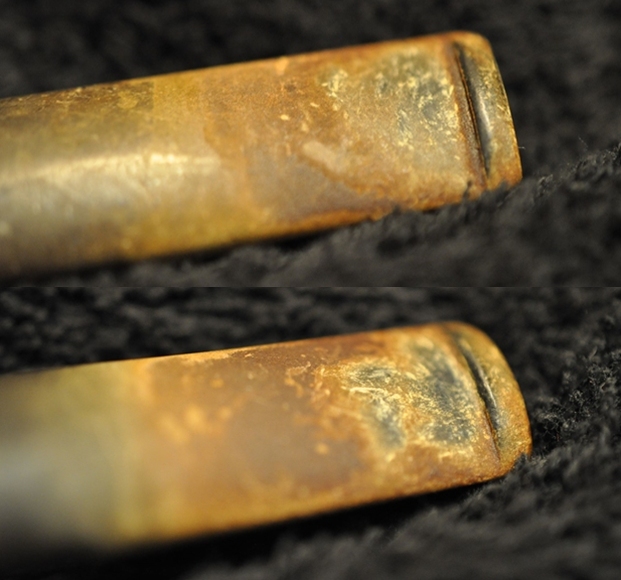
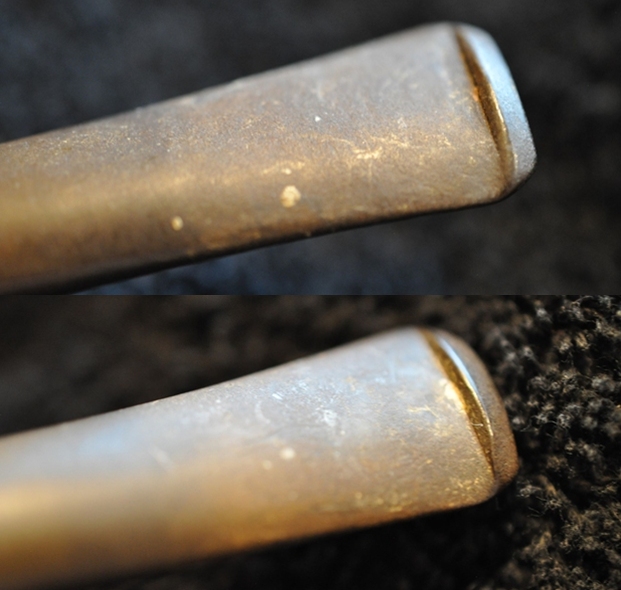
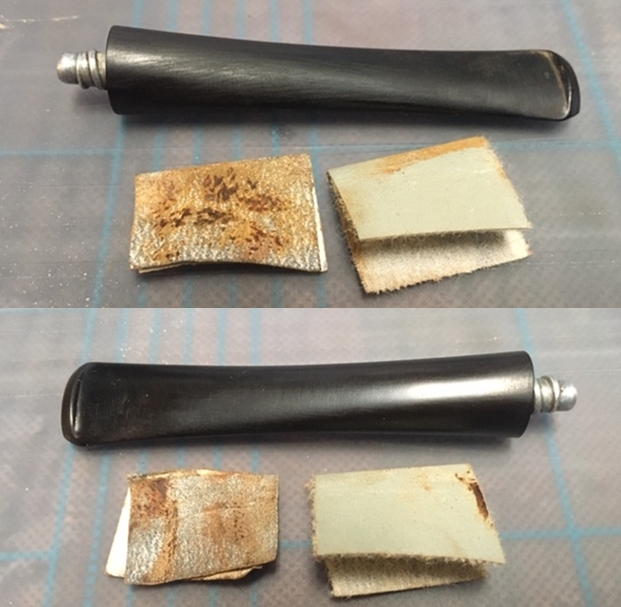
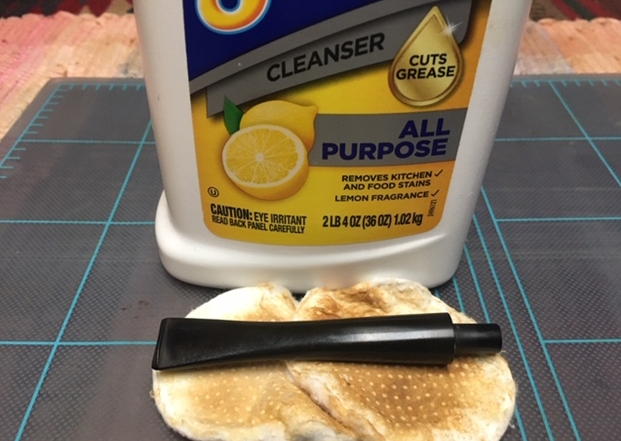
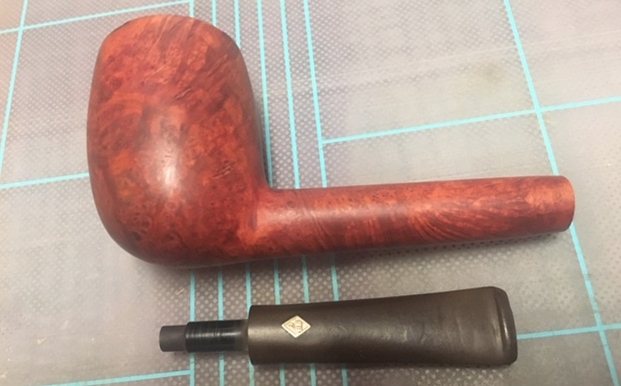
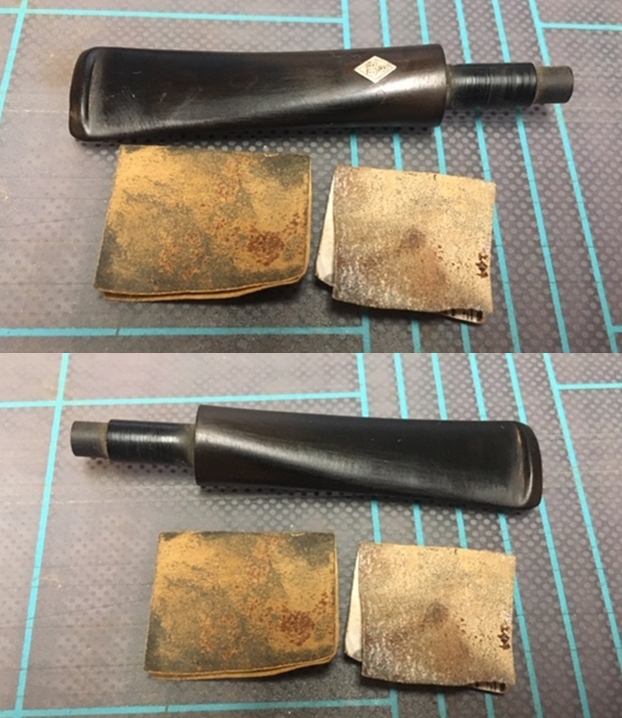
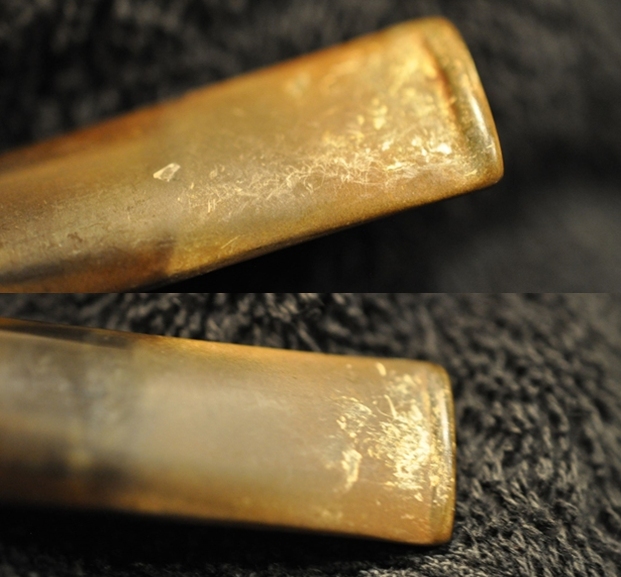
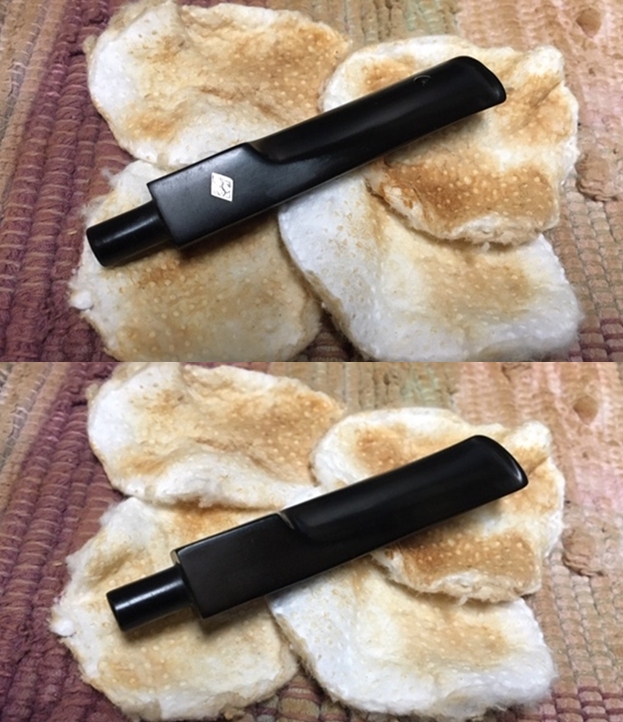
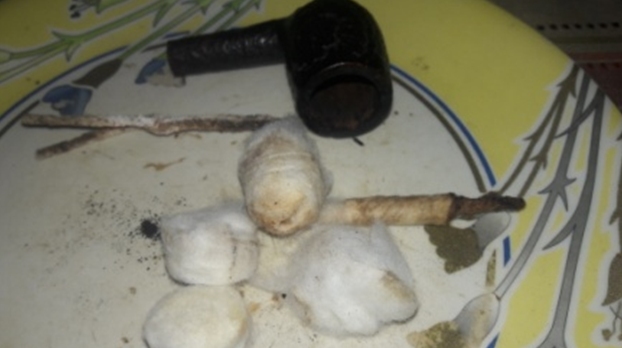
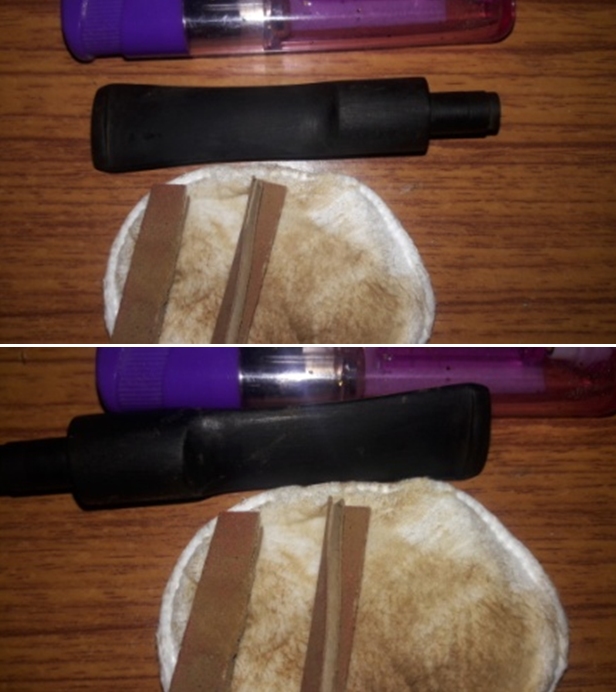
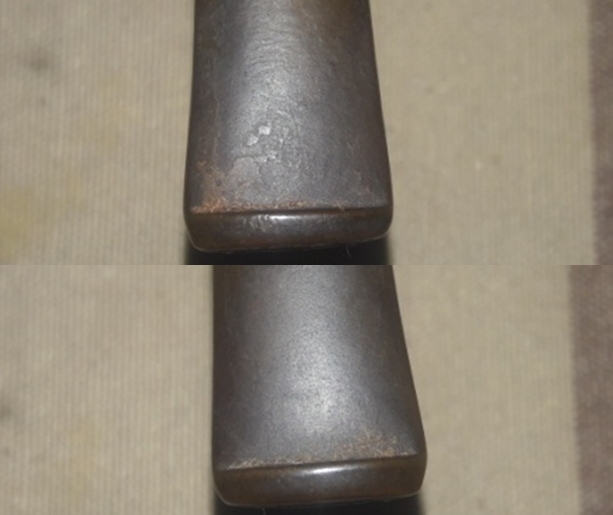
 While the stummel was drying, the next morning, Abha removed the stems (stem indicated with pastel bue arrow is the one being worked on) that had been soaking in the deoxidizer solution overnight. She cleaned the stem and the stem airway under running warm water and scrubbed the raised oxidation from the stem surface using a scotch brite pad and the airway with a thin shank brush. She further removed the oxidation by scrubbing the stem with 0000 grade steel wool and applied a little EVO to rehydrate the stem. This now gives a clearer picture of the extent of depth of the bite marks as can be seen in the pictures below. These will definitely require a fill. The oxidation is deep and stubborn and can be seen over the stem surface and in the concave of the saddle, as dirty brown coloration. I need to further sand the stem to completely remove the oxidation.
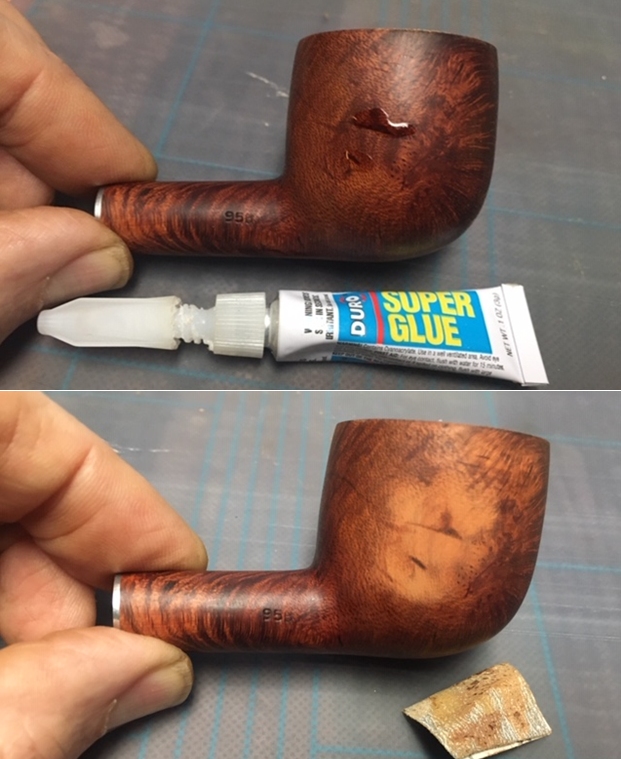
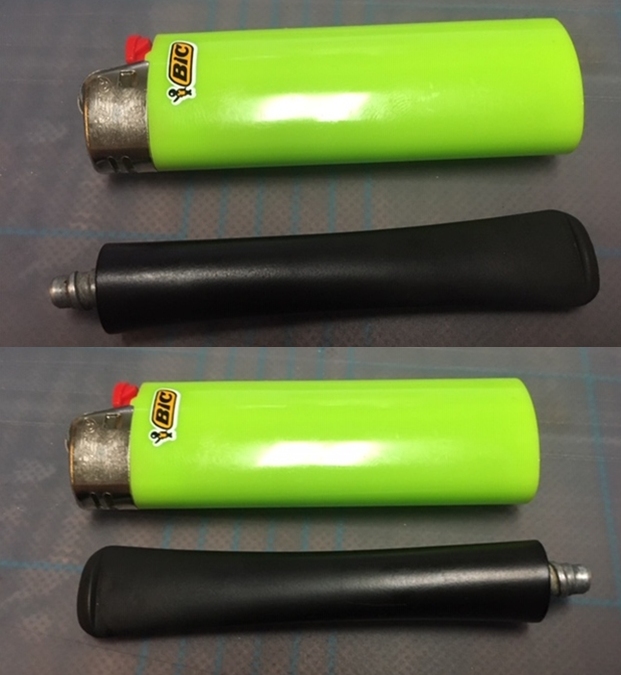
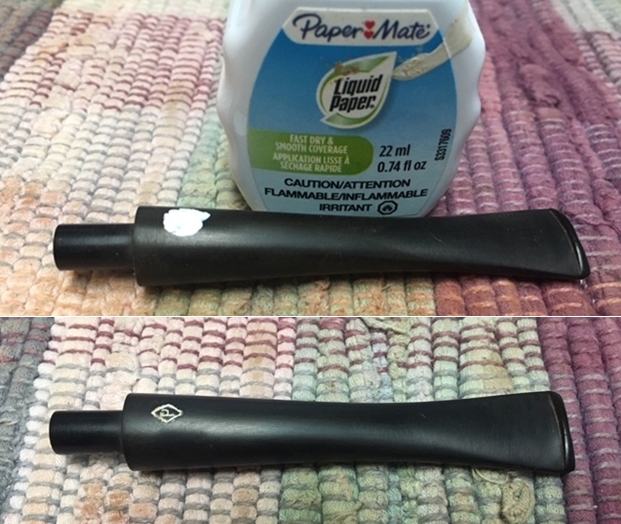
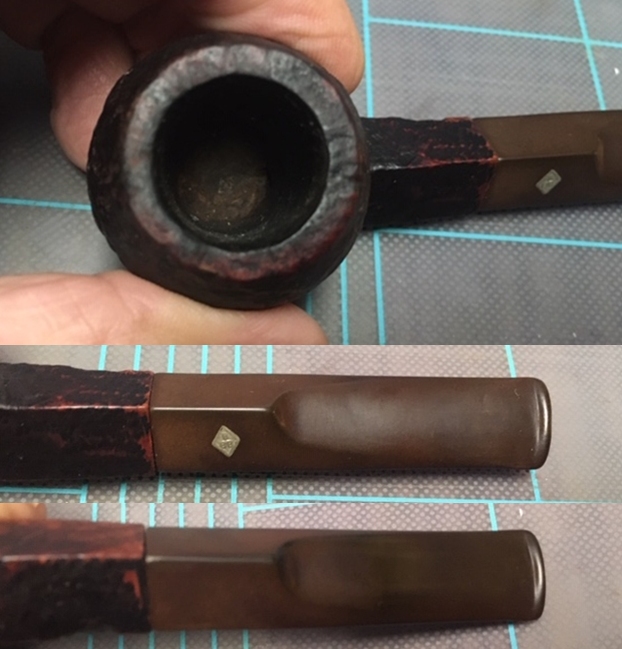
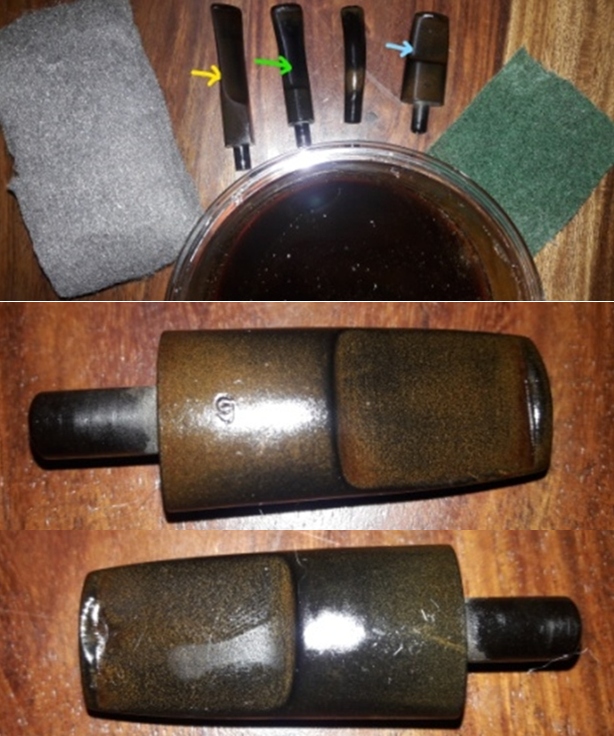 I used a 220 grit sand paper to sand the stem and remove all the oxidation that was raised to the surface. This step further reduced the tooth chatter and bite marks present on the stem. I wiped the stem with Murphy’s Oil soap on a cotton swab. This helps in cleaning the stem surface while removing the loosened oxidation. Using a lighter, I flamed the surface of the stem. This helped in raising some of the tooth chatter and bite marks to the surface as vulcanite has a property to regain its original shape on heating. I used a white correction pen to highlight the stem logo. I smeared the correction ink over the logo and once dried, I shall gently wipe out the excess ink. The remaining tooth chatter and bite marks would be addressed subsequently by filling it with a charcoal and superglue mix.
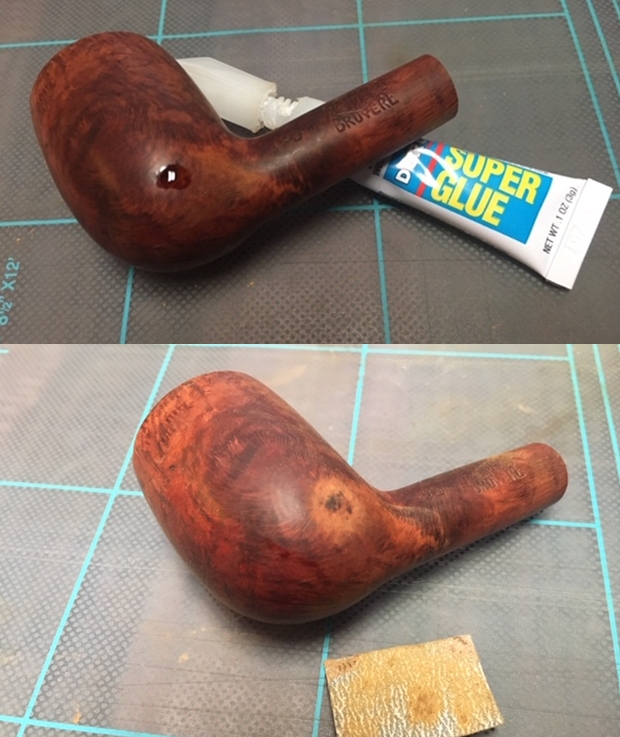
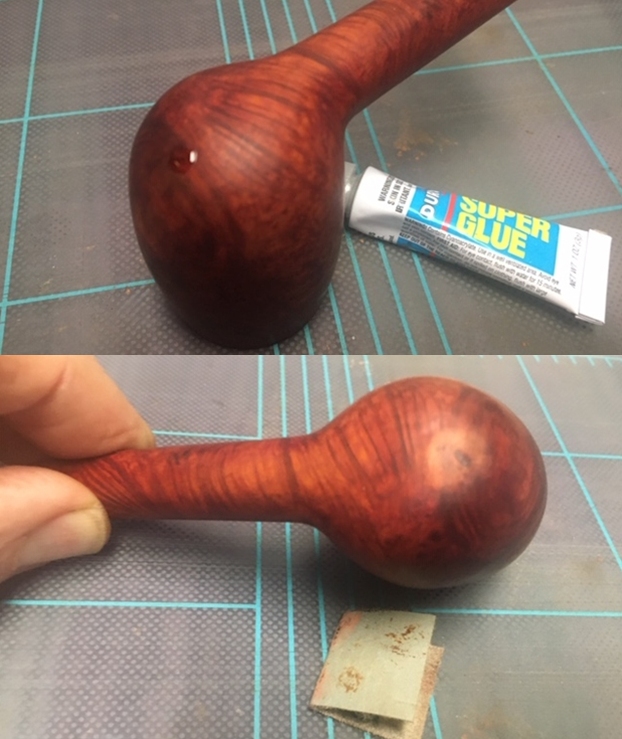
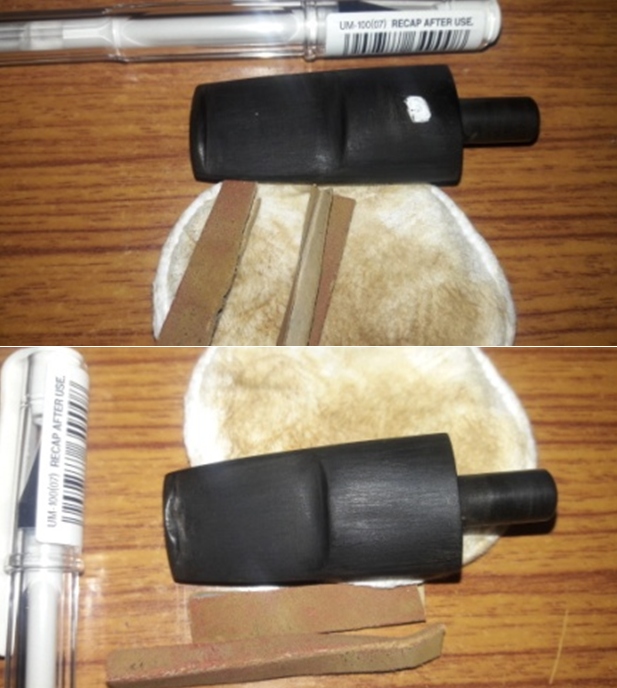 I addressed the deeper tooth chatter and bite marks by filling them up with a mix of activated charcoal and CA superglue. Once I had applied the mix, I set it aside to cure overnight. Once the fill has hardened, I shall file and sand the fills to match the surface of the stem and sharpen the button edges on either surface.
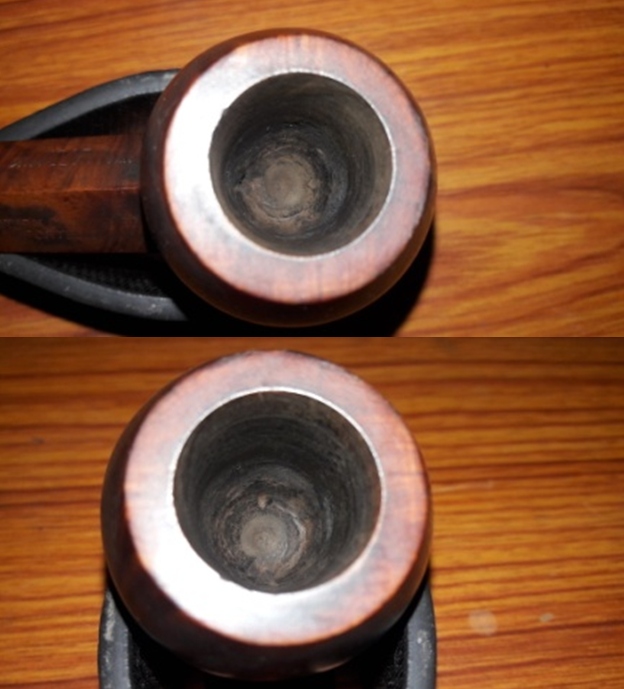
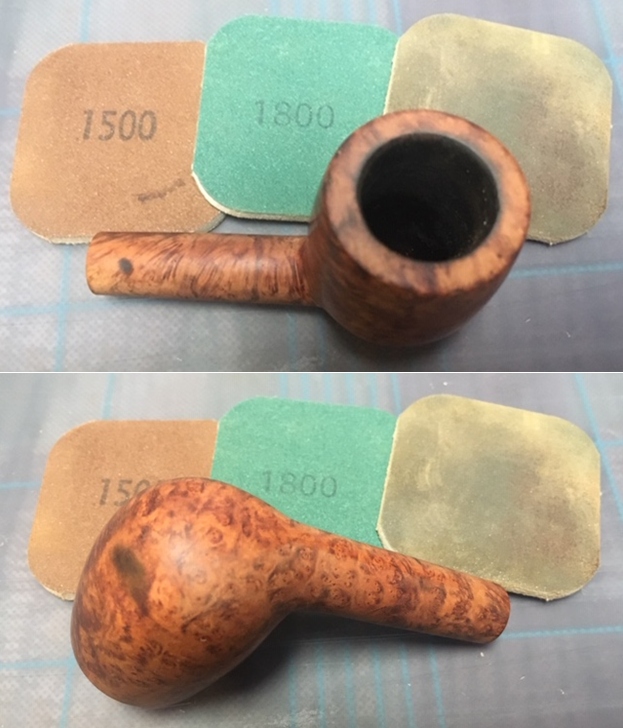
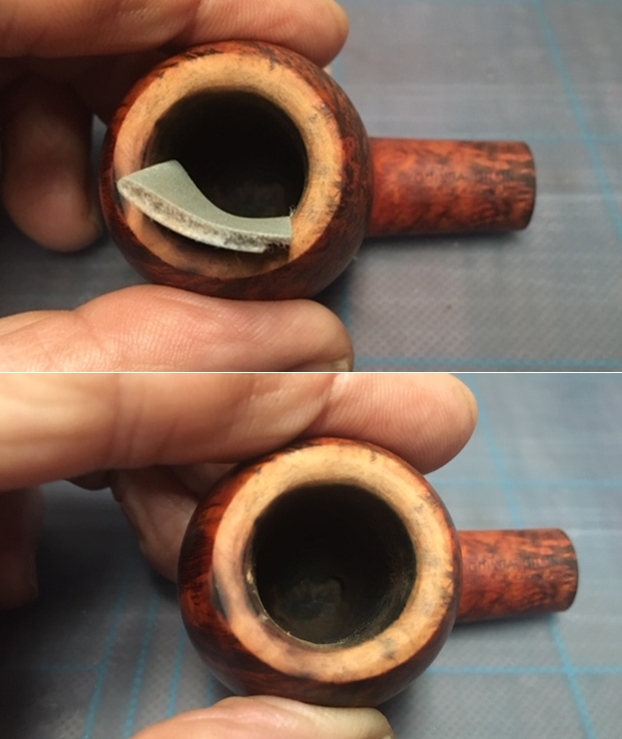
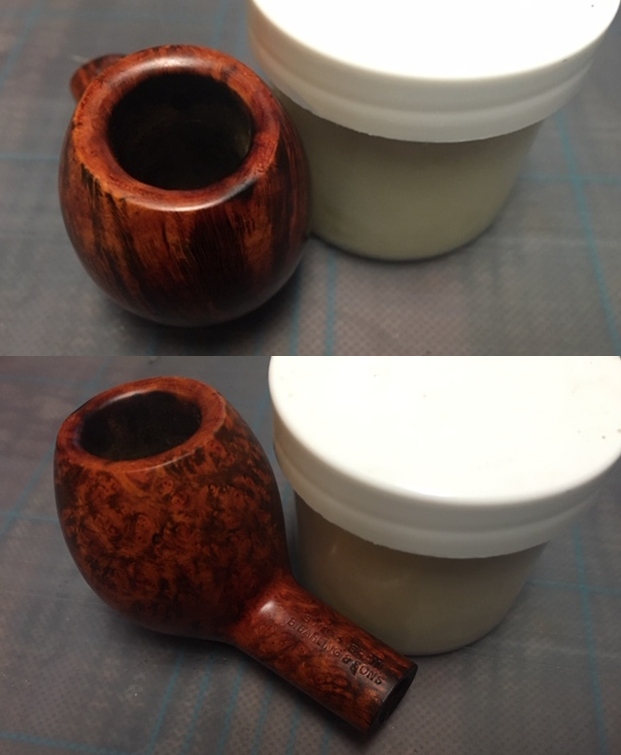
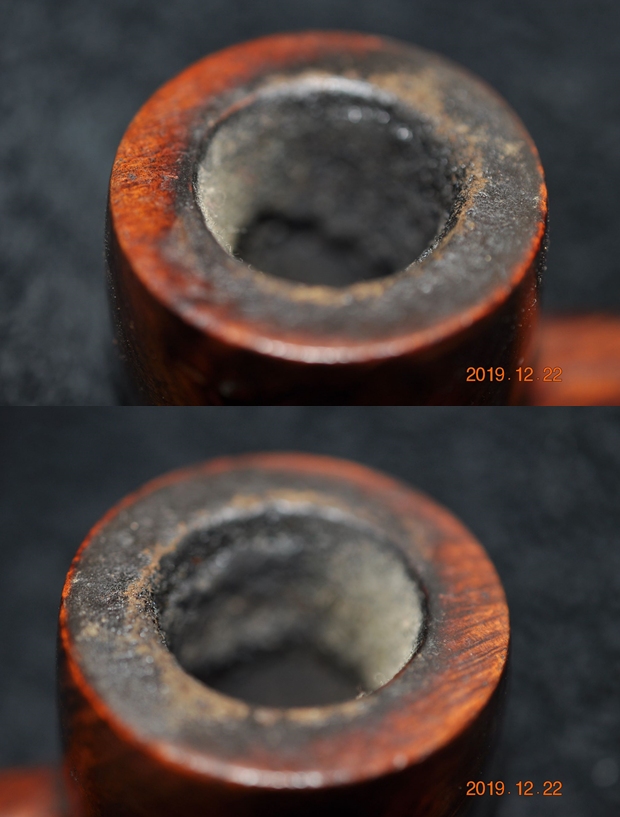
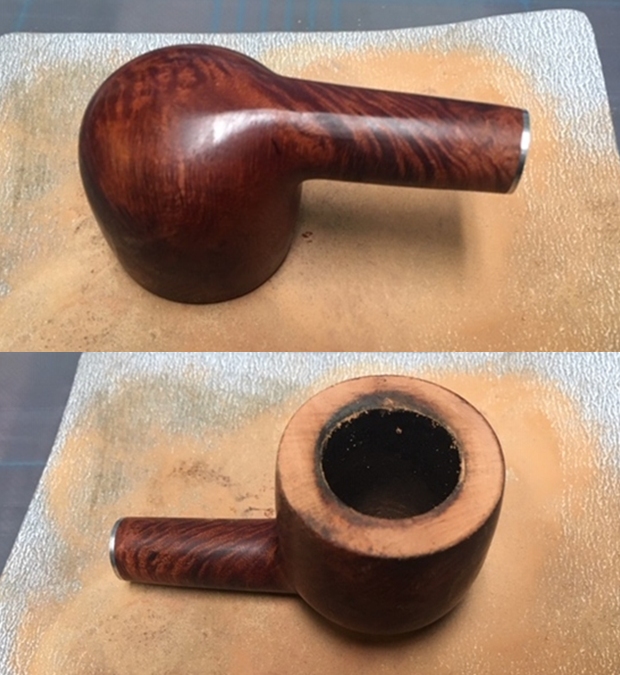
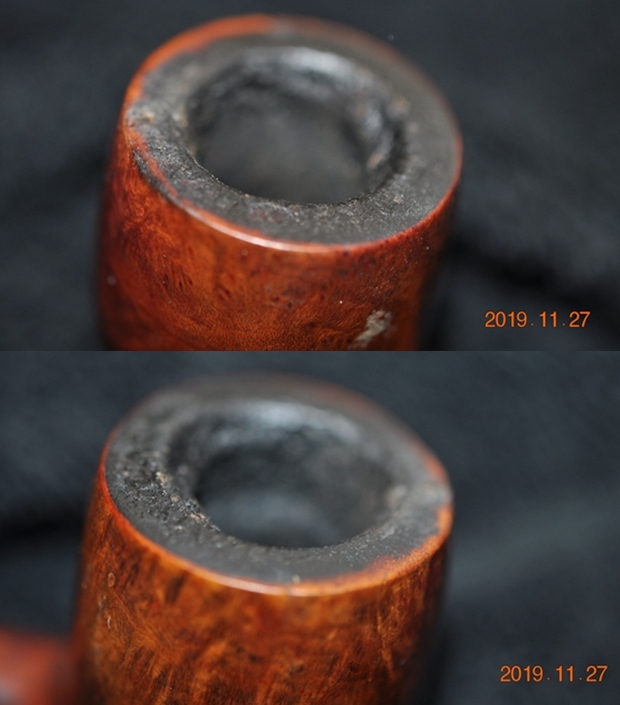
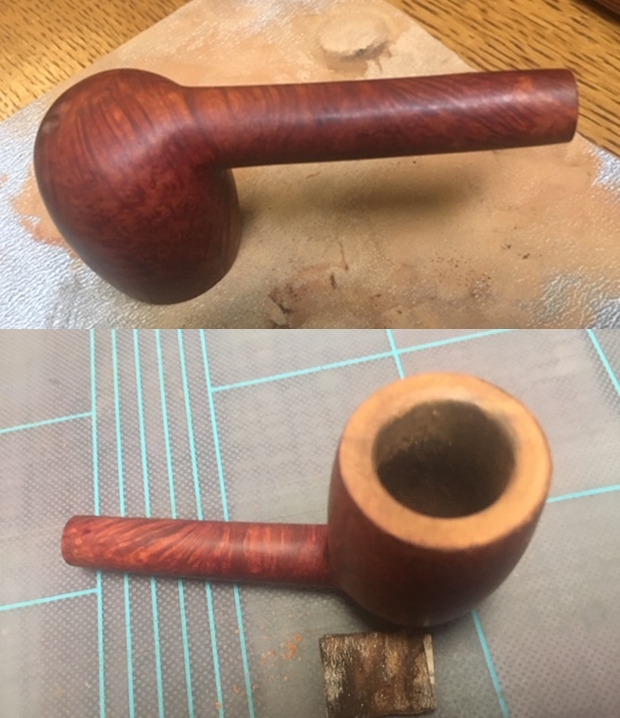
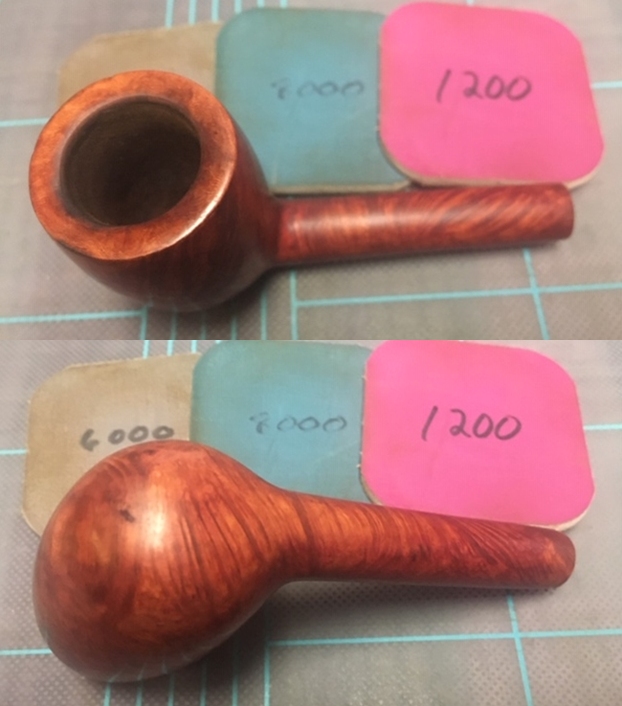
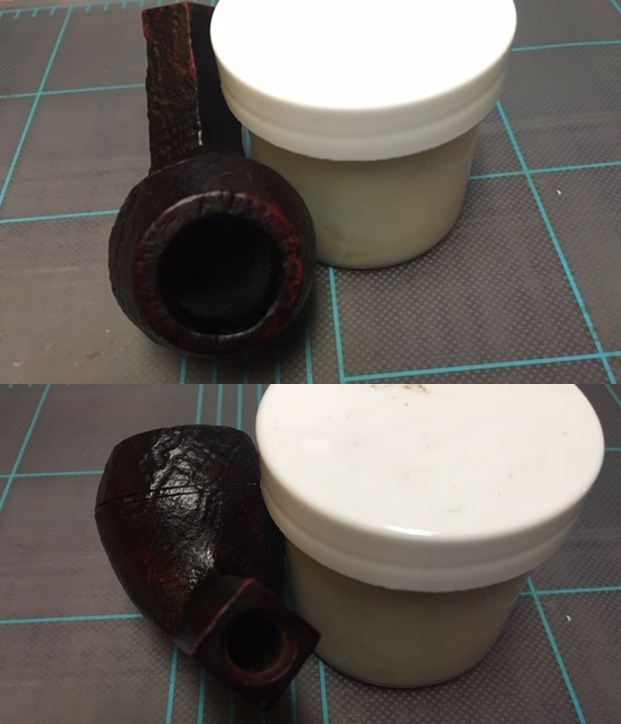
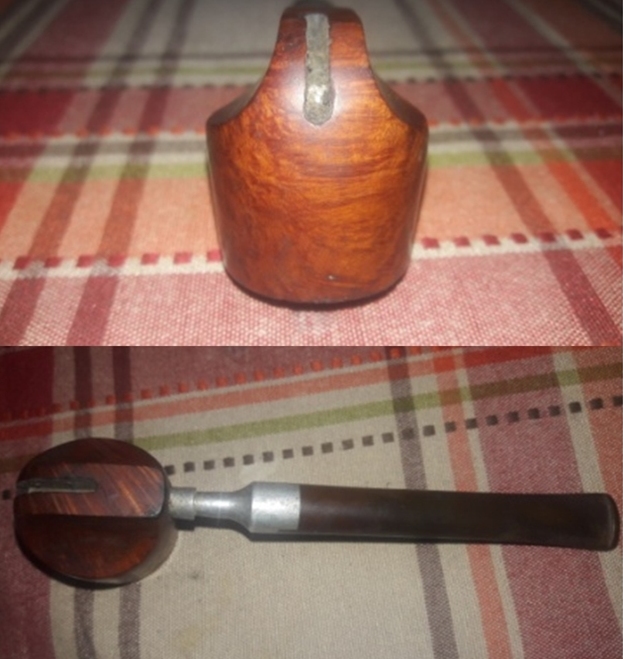
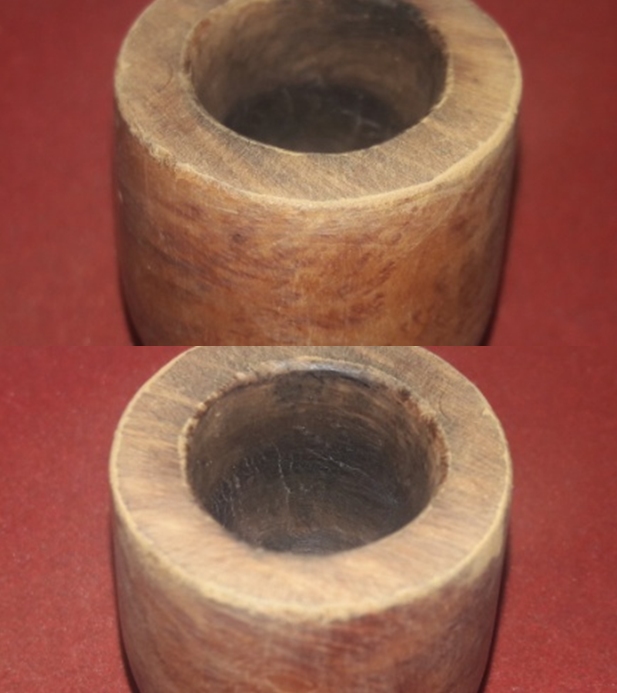
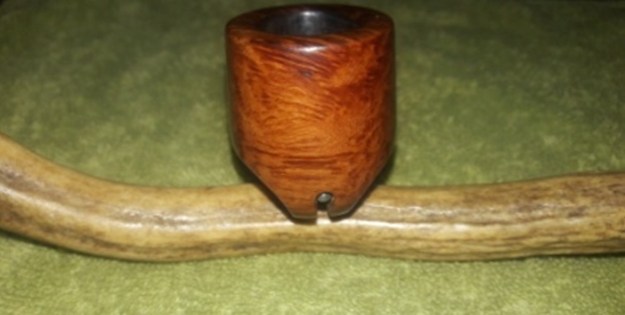
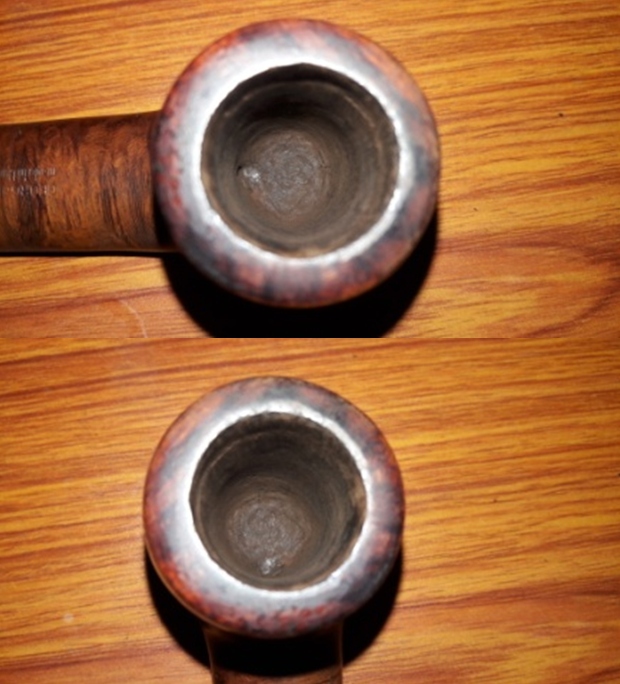
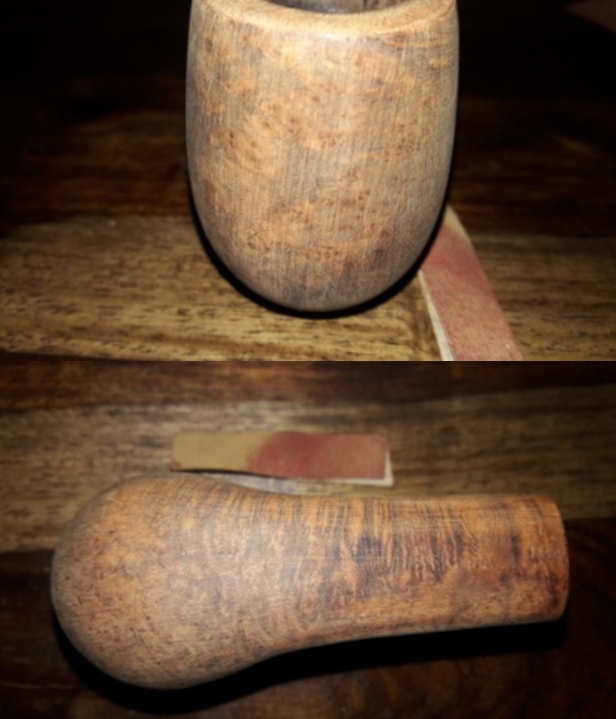
 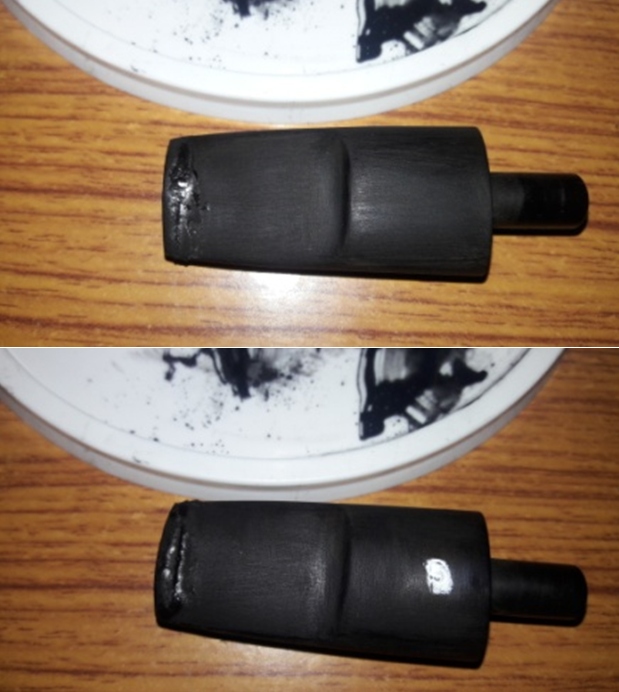 With the fills in the stem set aside to cure, I turned my attention back to the stummel. It was time to address the nicks, dents/ dings over the rim top and uneven inner rim edge. I decided to top the rim top surface, a process for which I have an aversion. However, it is a necessary evil if the rim top and rim edges are heavily damaged. I top the rim on a square piece of 220 grit sand paper, frequently checking for the progress. Once I was satisfied that the rim top is evenly smooth and also the damage to the inner (in 12 o’clock and 2 o’clock direction) and outer (dents in the 6 o’clock direction) rim edge has been reduced, I stopped the process of topping. Here is how the rim top surface appears at this point in restoration. The process of topping has flattened the rim top which originally had a slight OUTWARD slant from the inner rim edge. A few minor nicks to the inner and dings to the outer edge are still visible. I shall address these issues by hand sanding the edges to create a slight bevel to both the inner and outer edges.
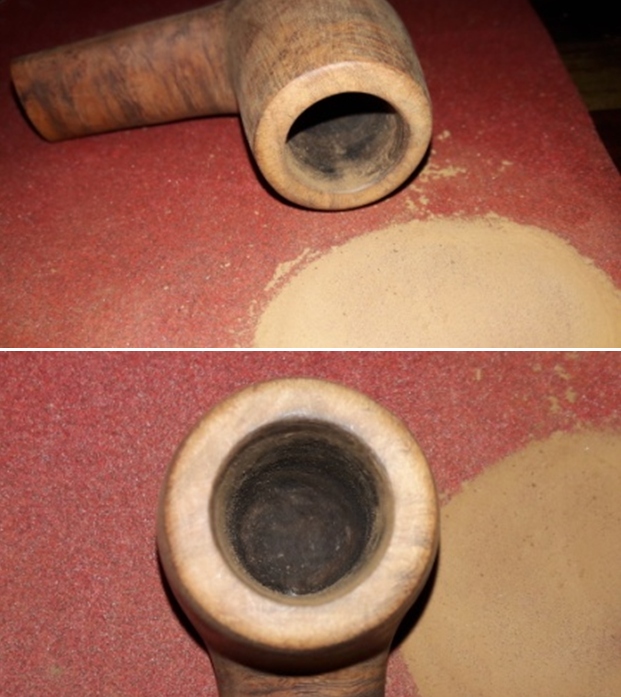 With a folded piece of worn out 180 grit sand paper pinched between my thumb and forefinger, I create a very slight bevel to the inner edge. This helped to remove the remaining nicks from the inner edge. With the same grit sand paper, I created a bevel to the outer edge while at the same time with outward movement of the sand paper, gave a slight outward slope from the inner edge. The rim top surface and the edges look very neat at this stage.
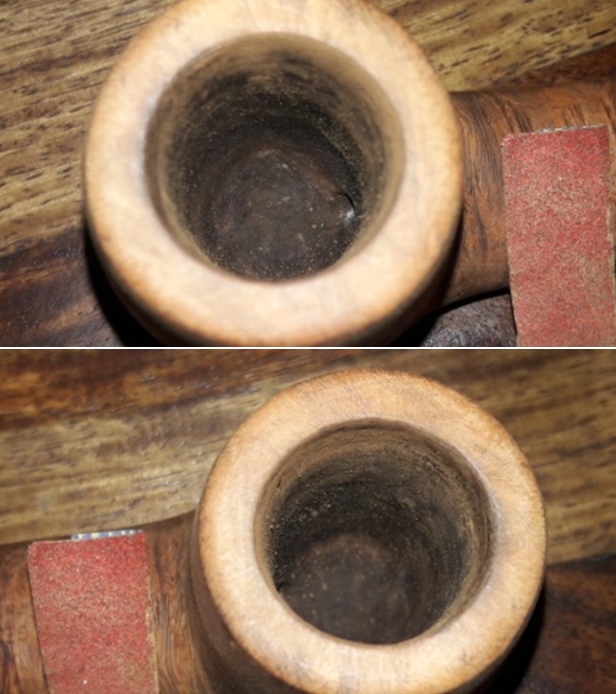
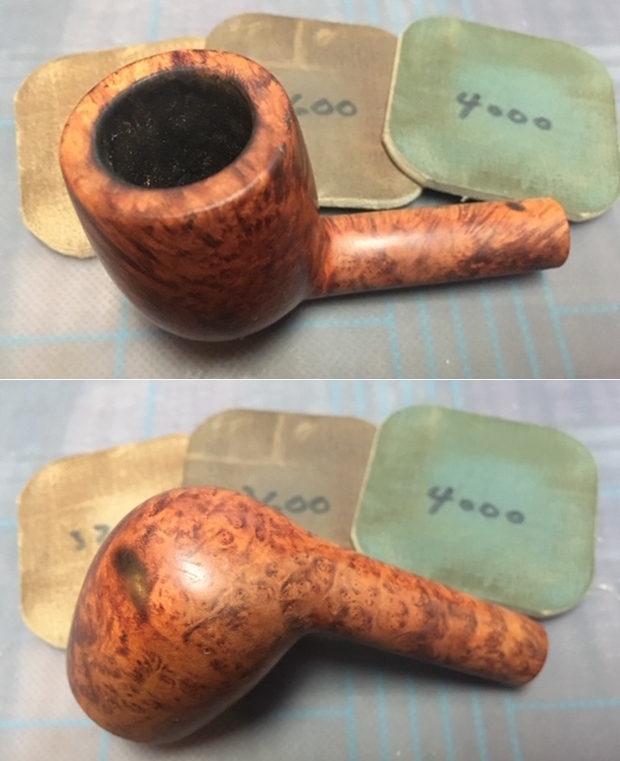
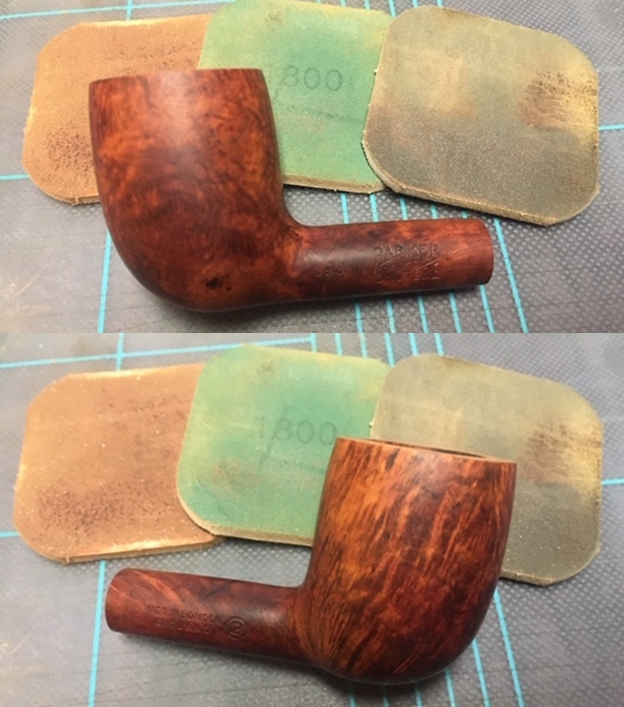
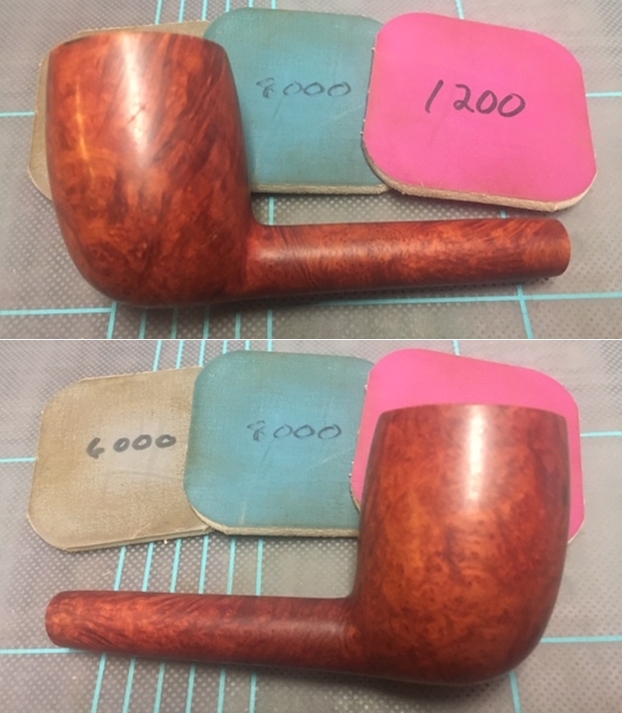
 Next I addressed the numerous scratches and dings to the stummel surface. I sand the stummel surface with a piece of 220 grit sand paper to remove/ minimize the scratches over the stummel surface. Though 95% of the scratches and dings have been eliminated, there still remains few very minor dings that are remnants of the deeper ones. I accept these dings as part of this pipe’s journey till date.
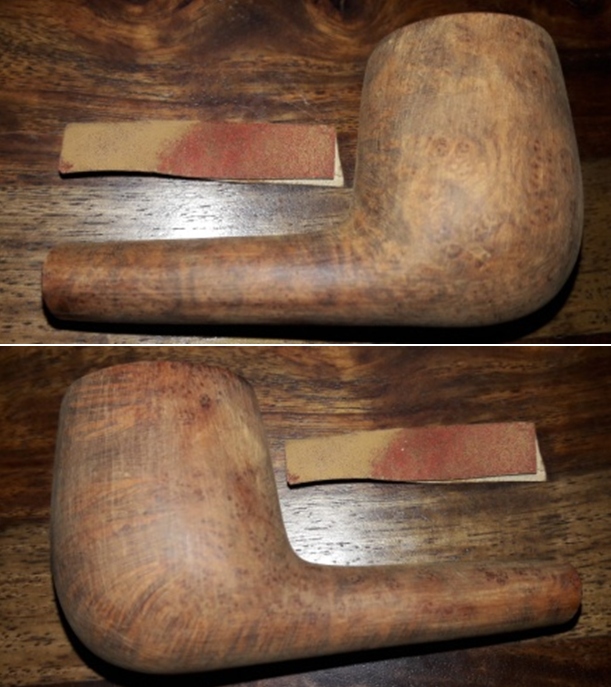
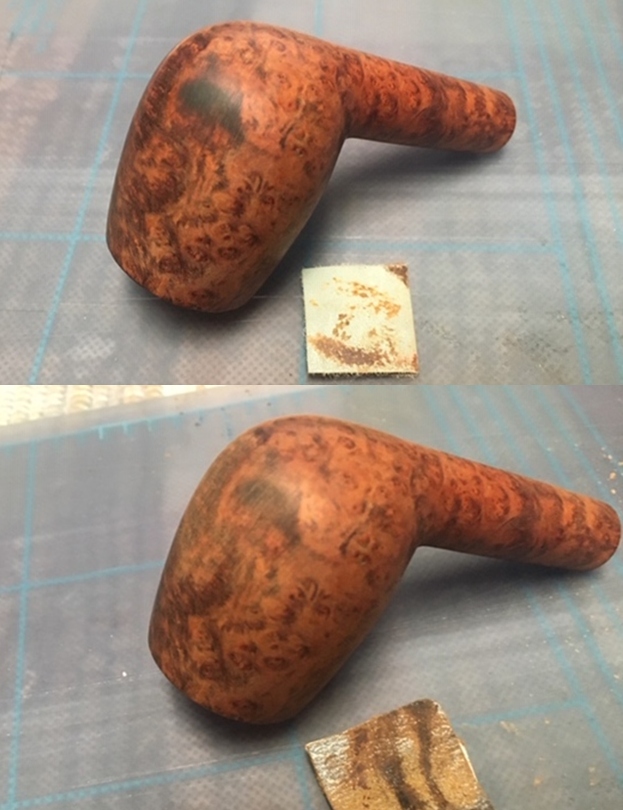
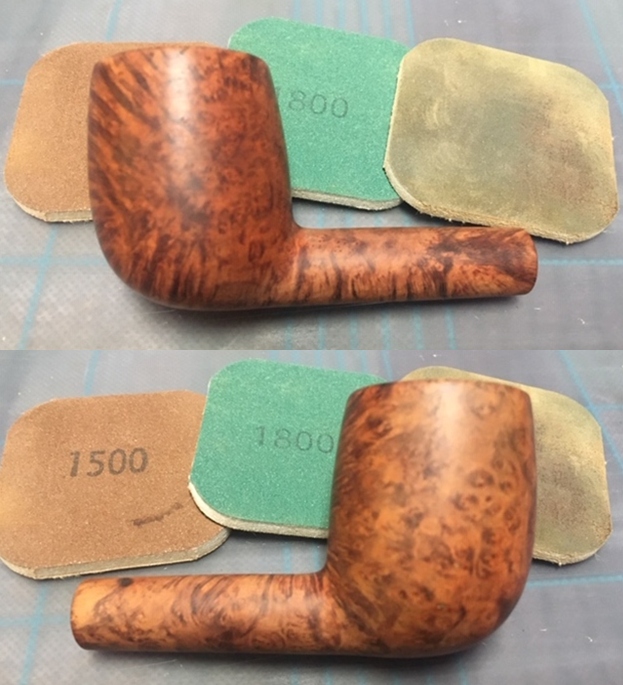
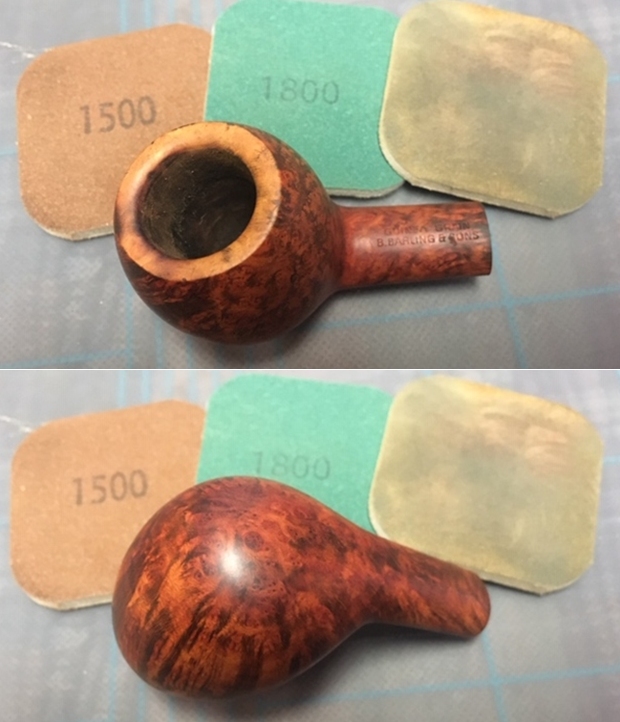
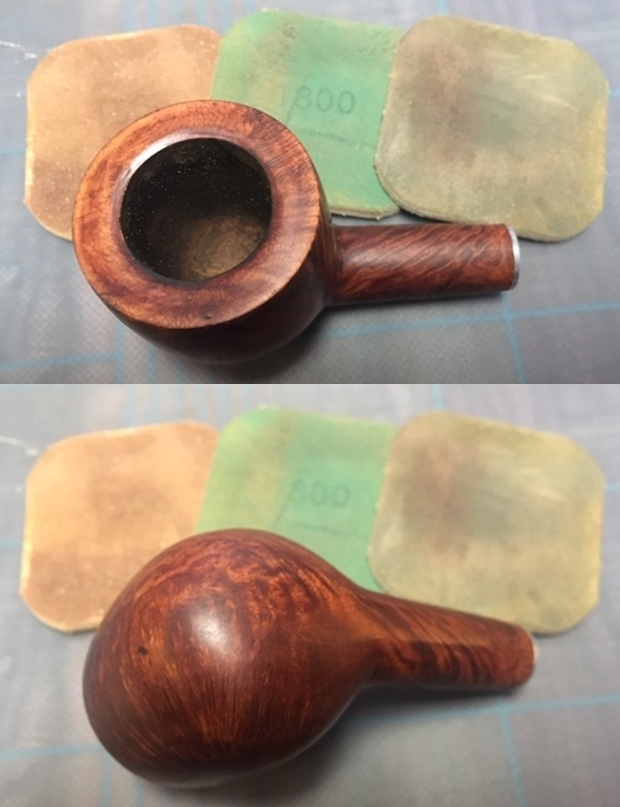
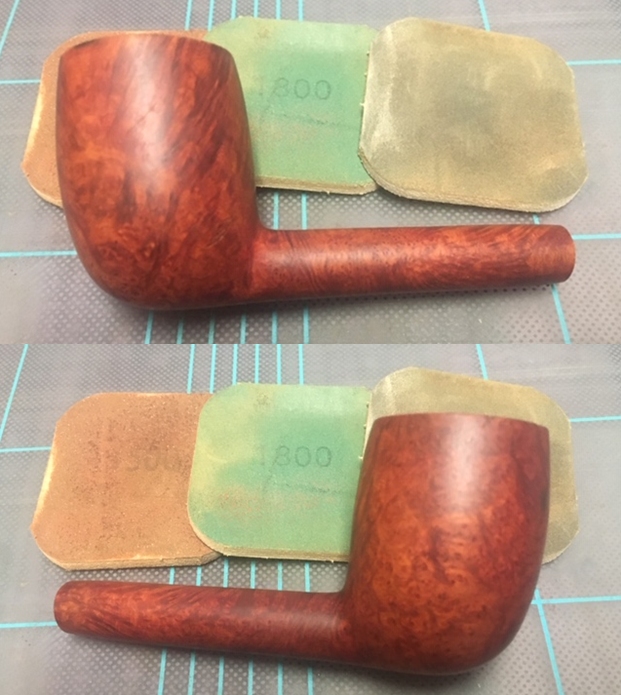
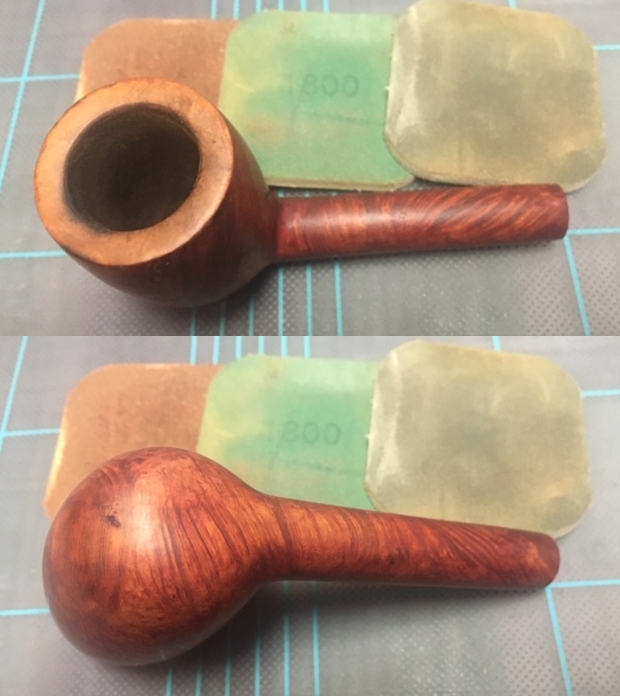
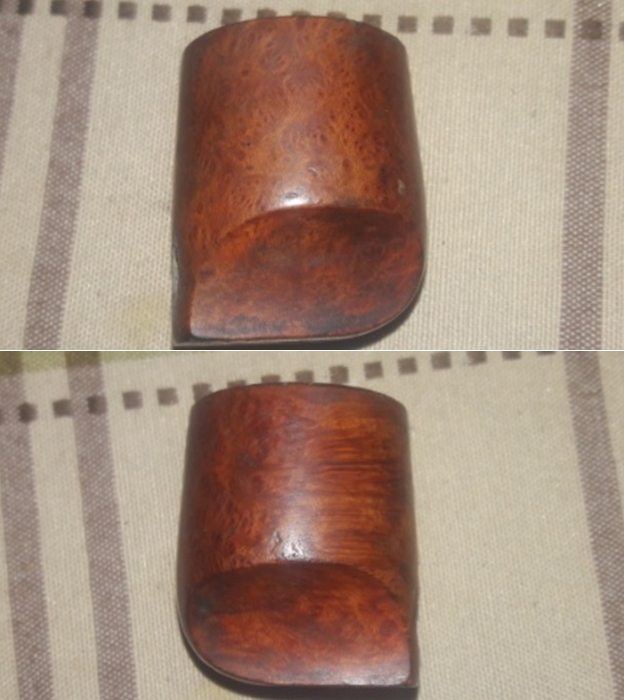
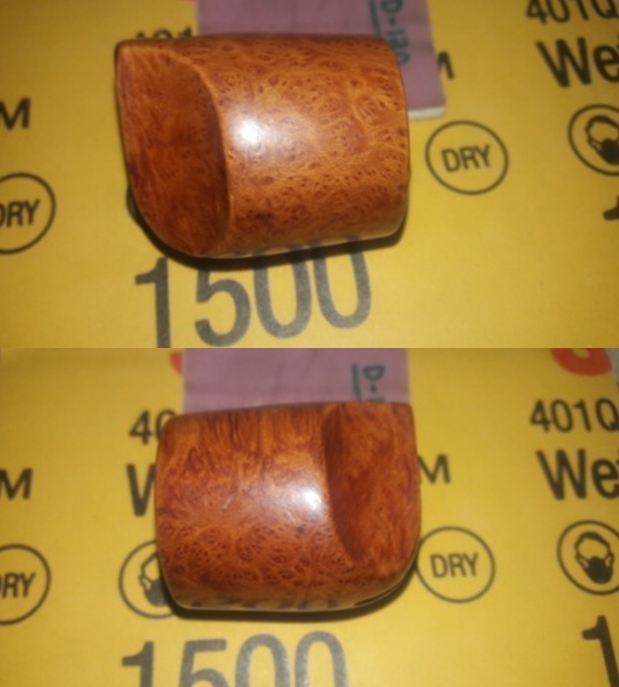
 I followed it by wet sanding the stummel with 1500 to 12000 grit micromesh pads, wiping frequently with a moist cloth to check the progress. I really like the looks of the stummel at this point in restoration. The grains and the clean lines of this piece of briar is really appreciable.
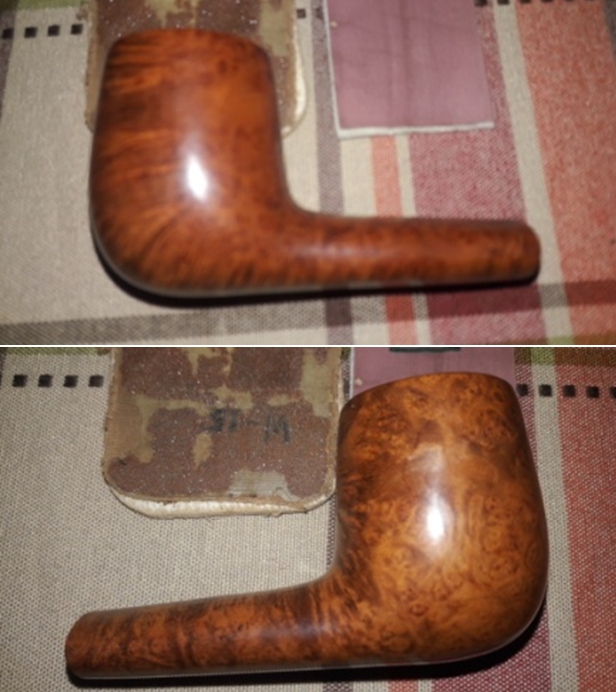
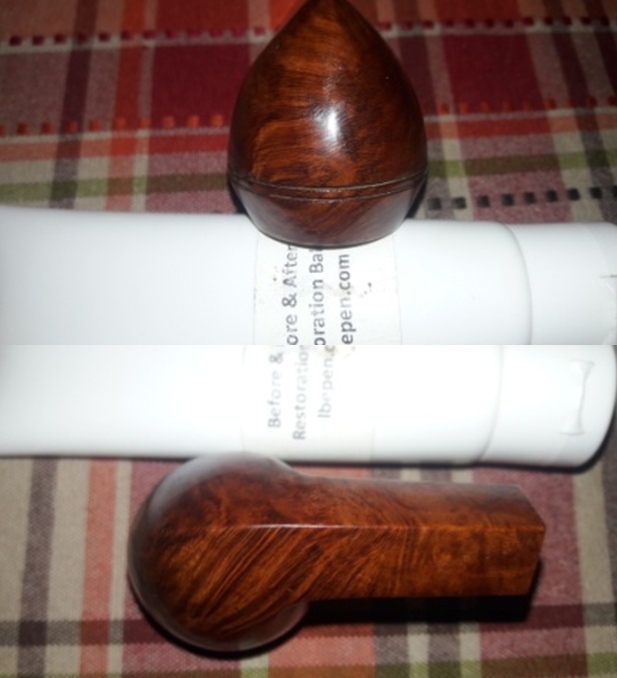
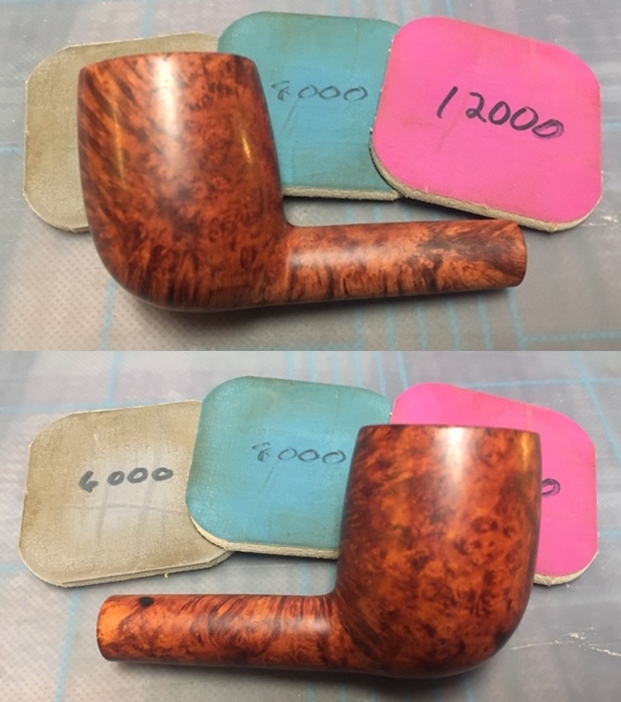
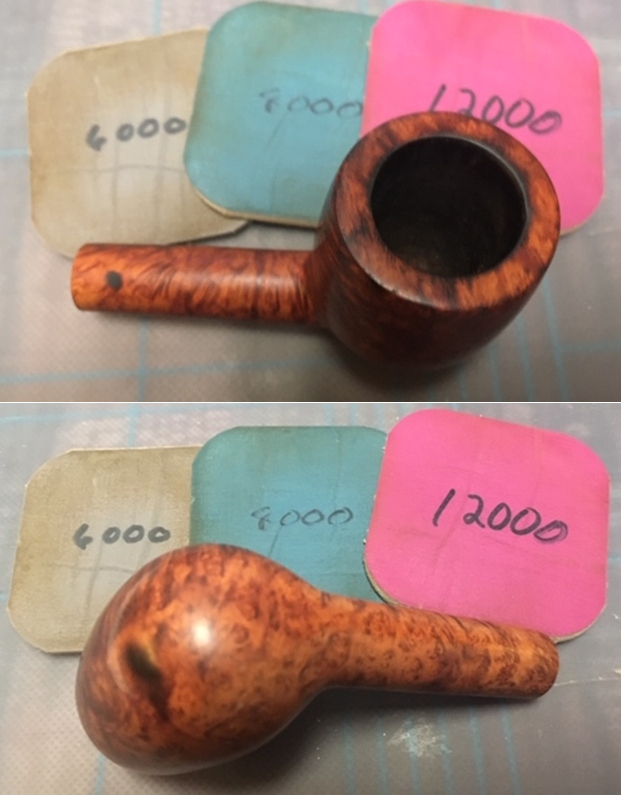
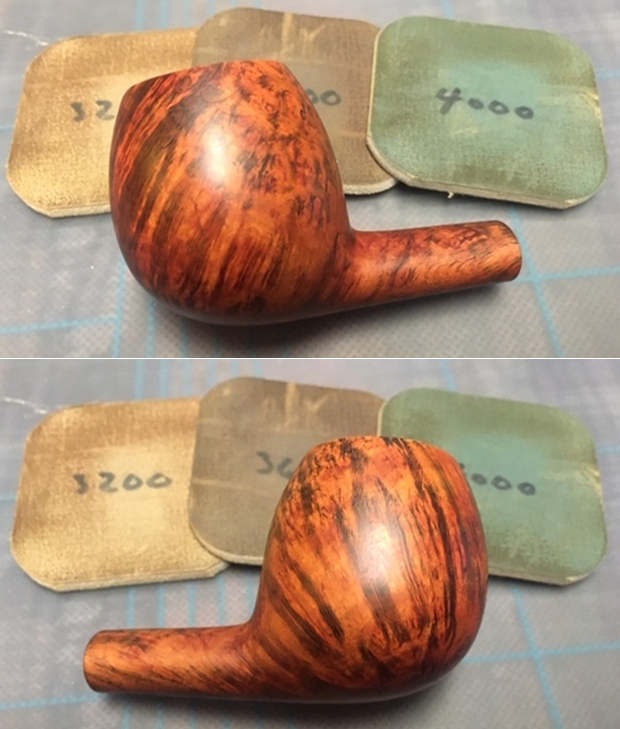
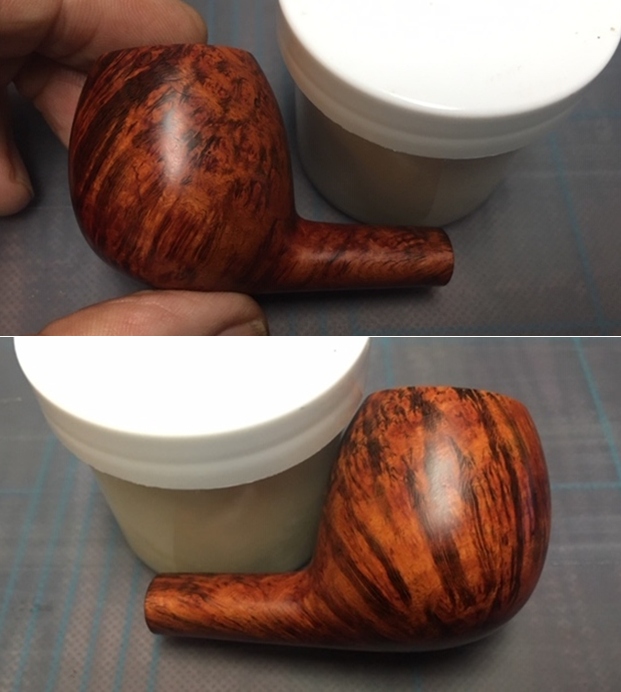
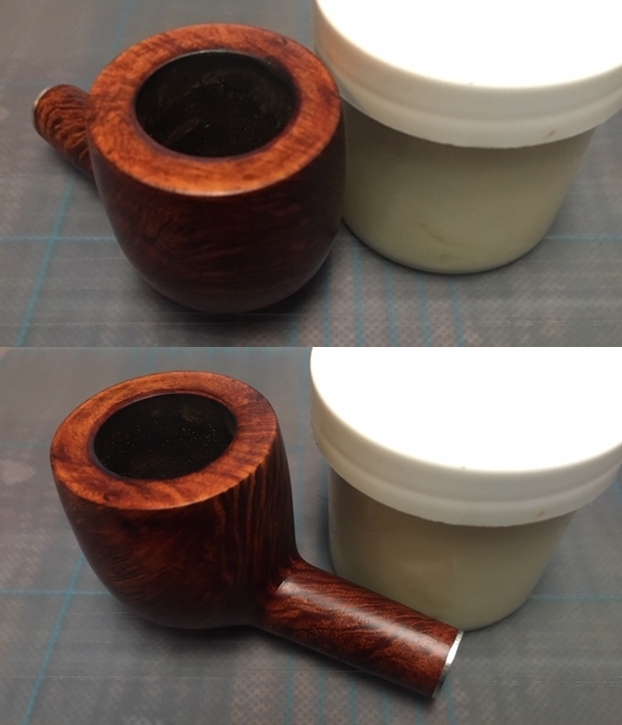
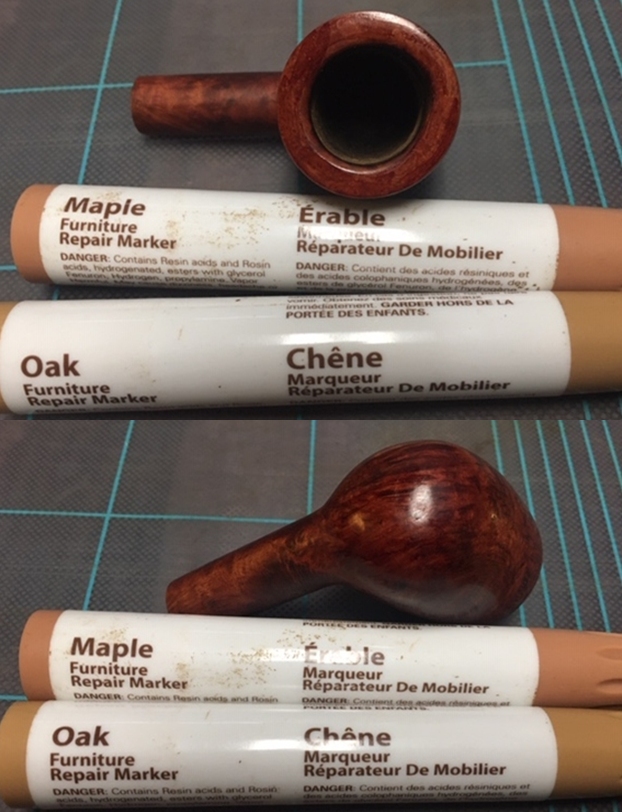
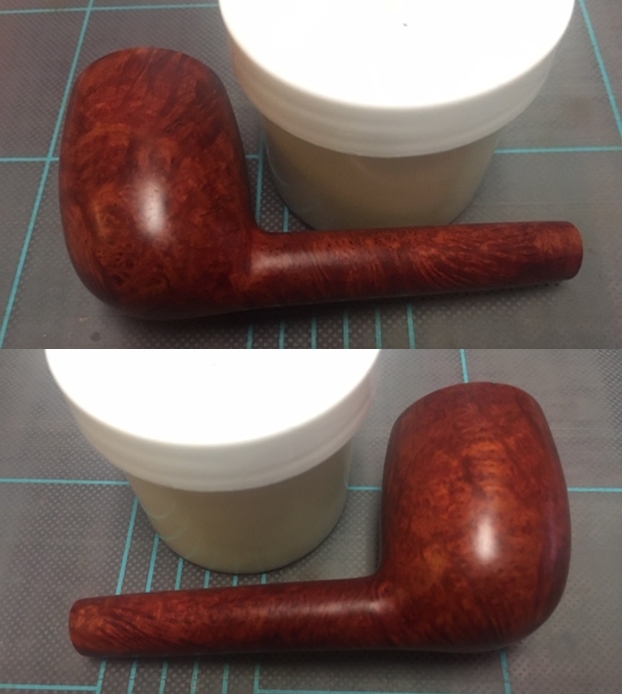
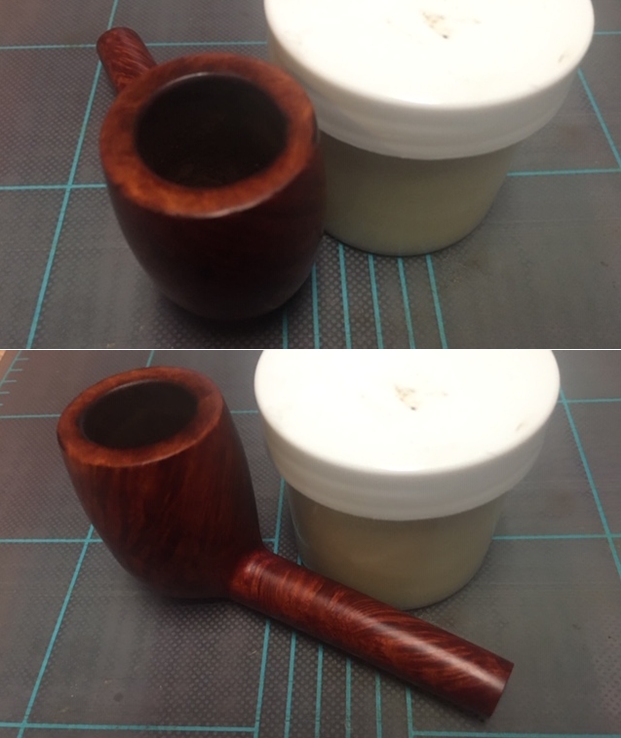
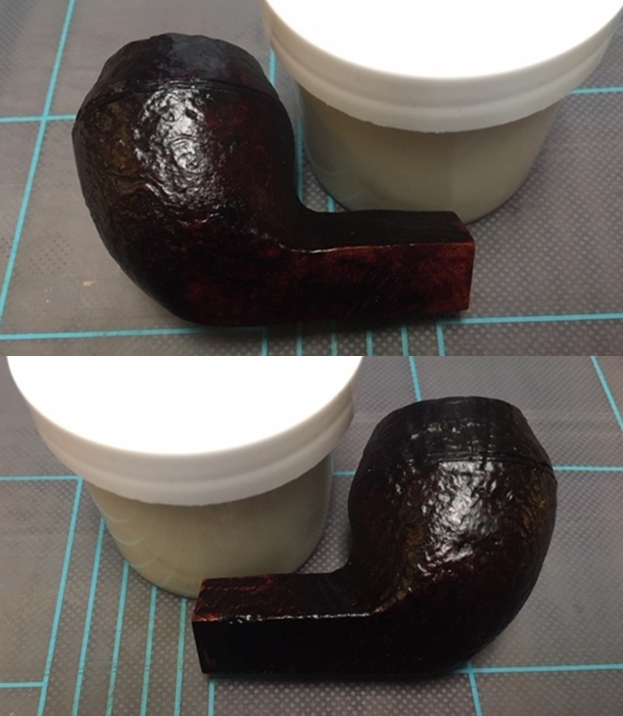
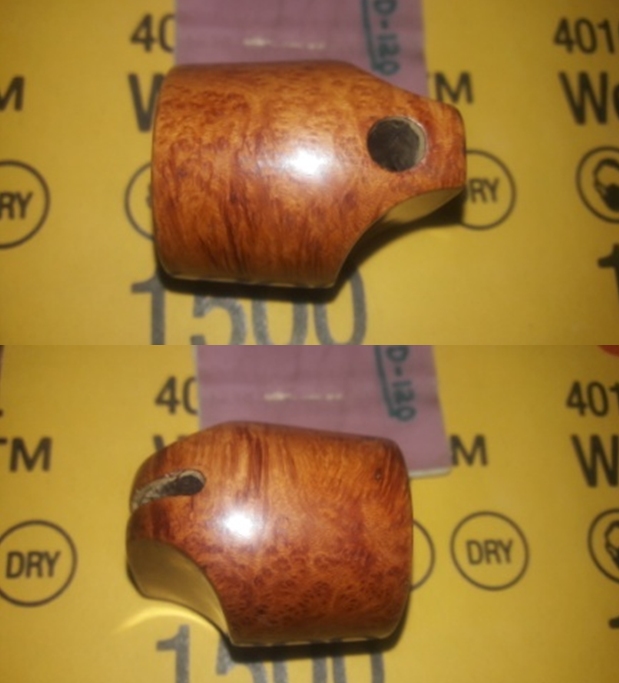
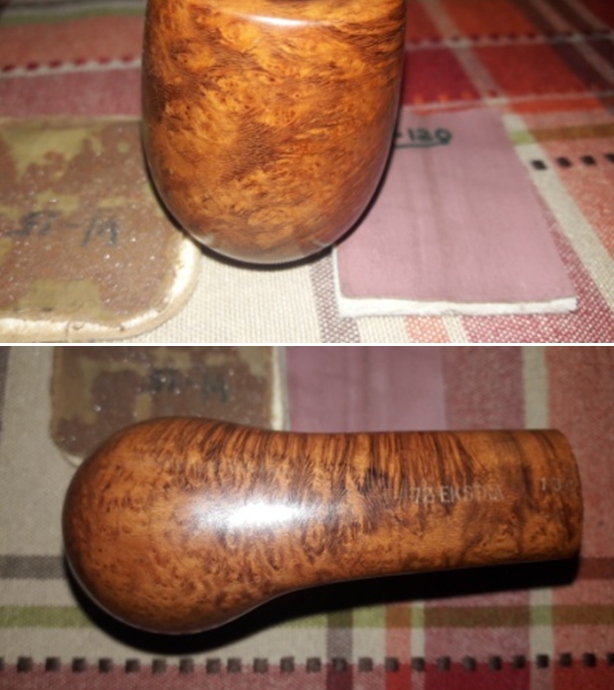 Next, I rubbed a small quantity of “Before and After Restoration Balm” deep in to the briar with my finger tips and let it rest for a few minutes. The balm almost immediately works its magic and the briar now has a nice vibrant appearance with the beautiful grain patterns displayed in their complete splendor. I further buffed it with a horse hair brush. The contrast of the dark browns of the flame and cross grains with the natural finish of the rest of the stummel adds an interesting dimension to the appearance of the stummel which may be insufficiently described in words and be rather seen in person.
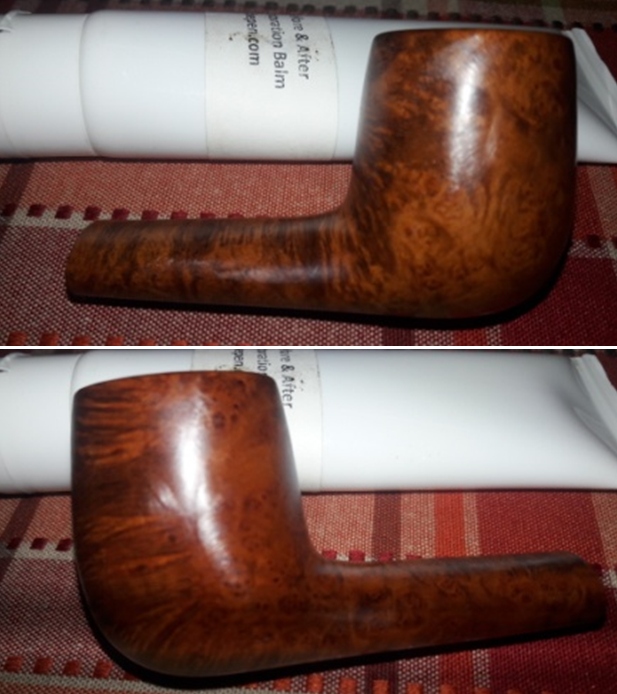
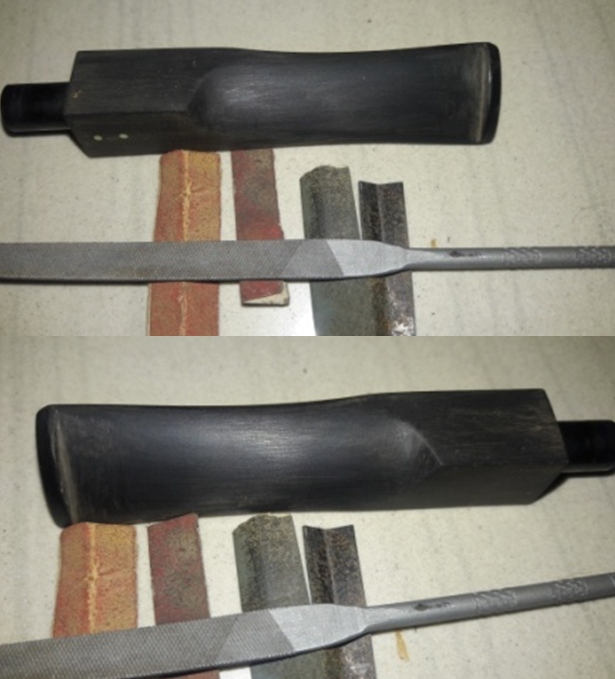
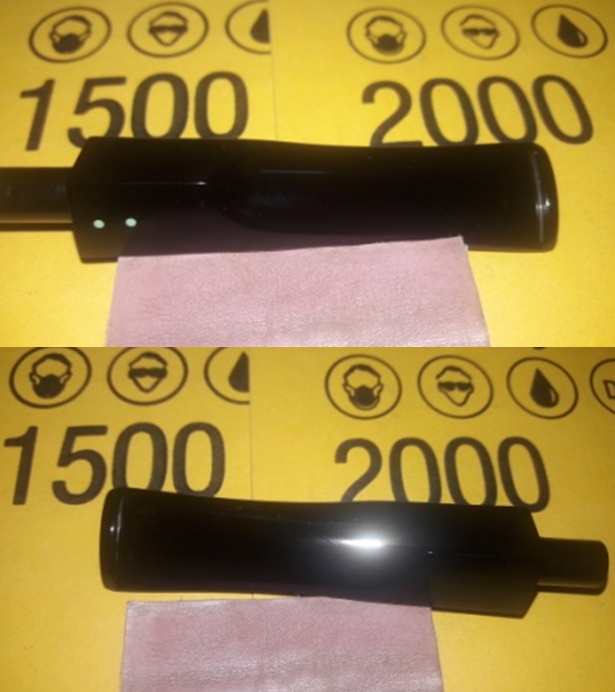
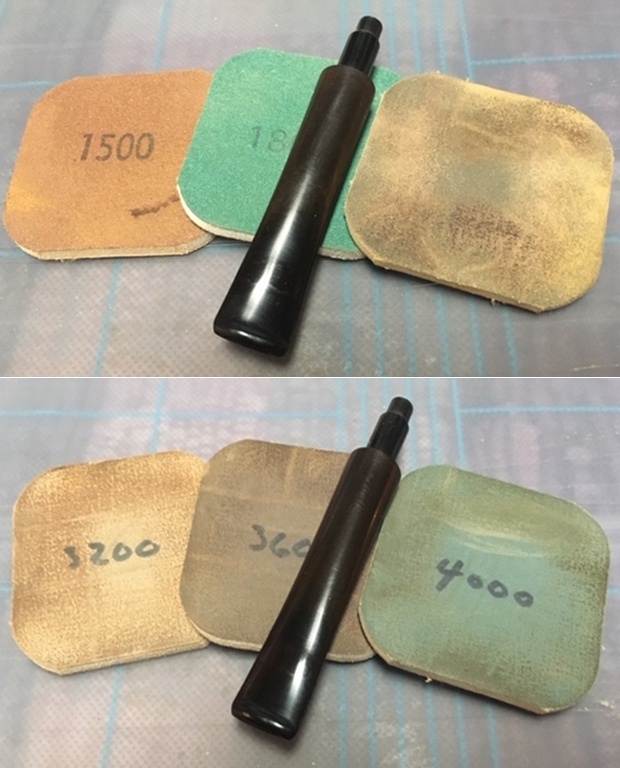
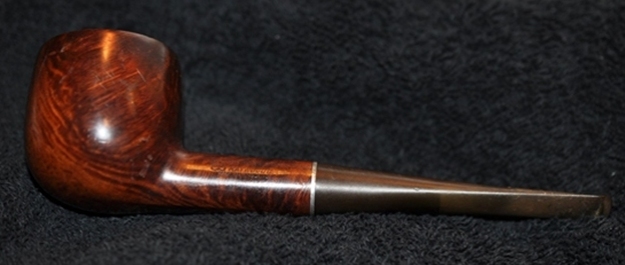
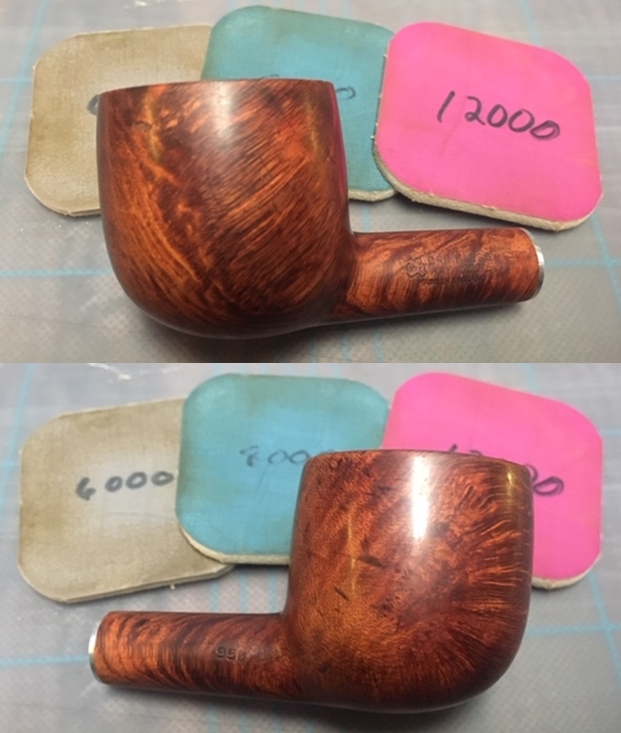
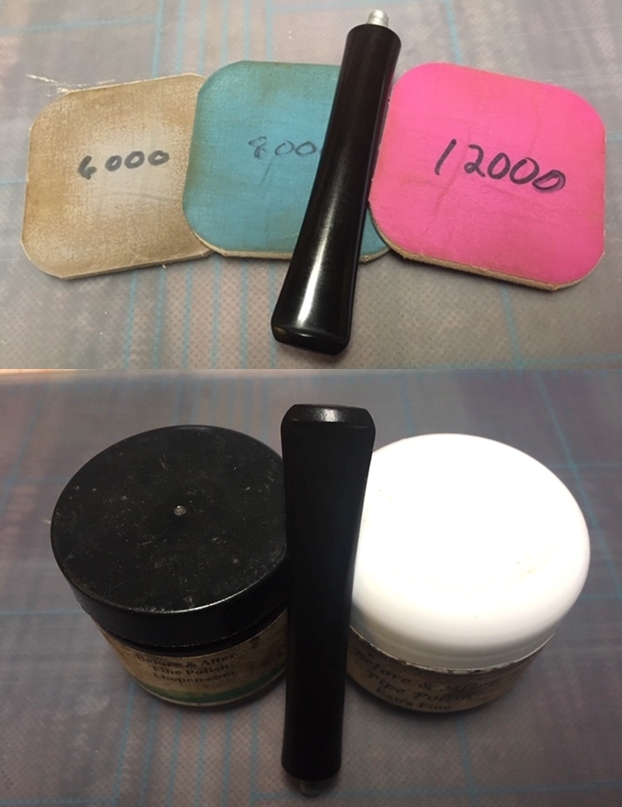
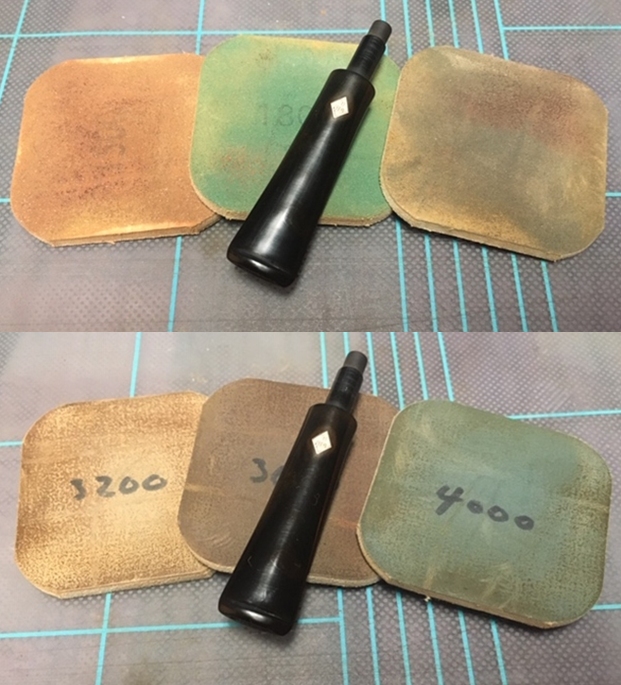
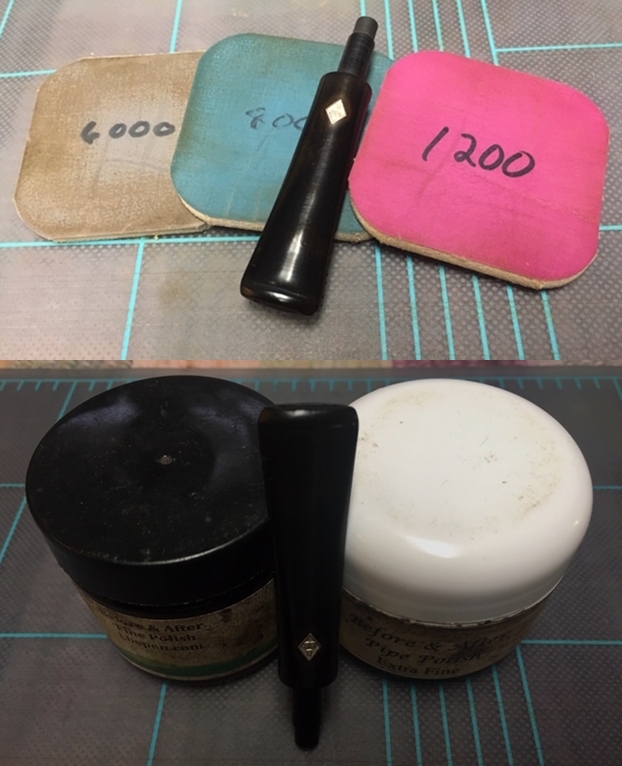
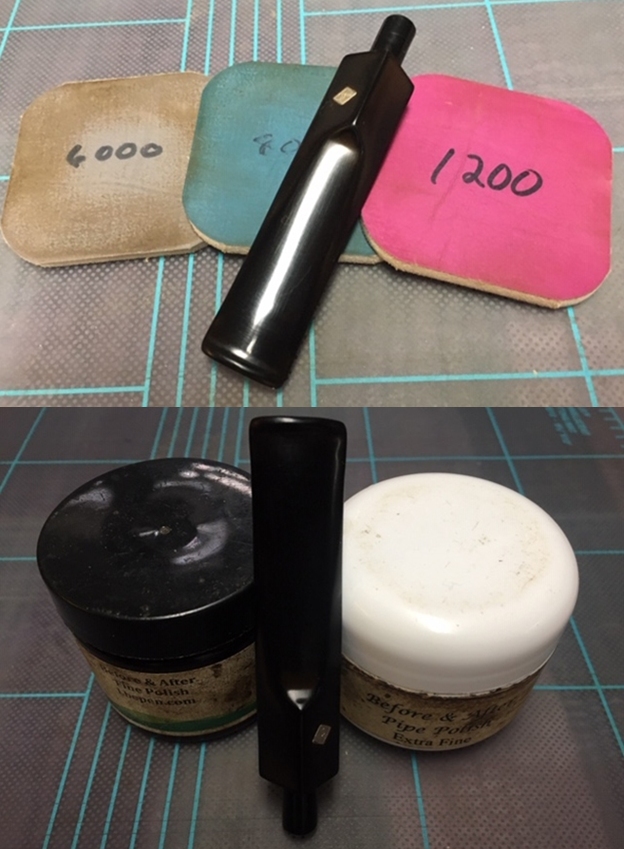
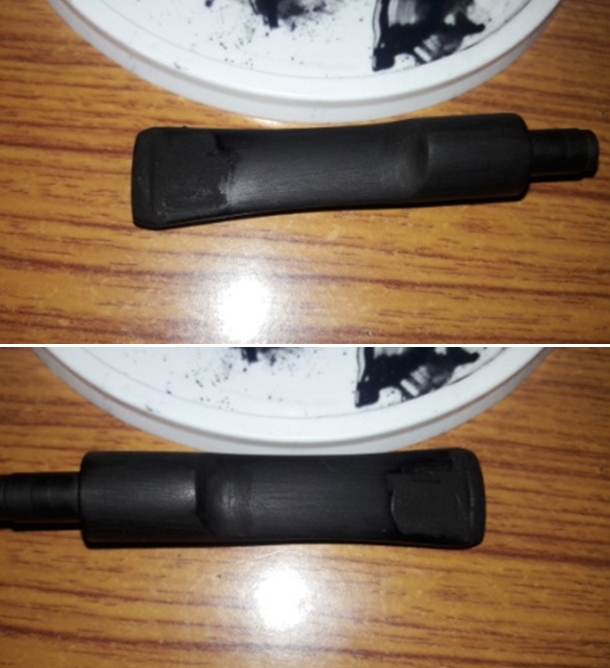
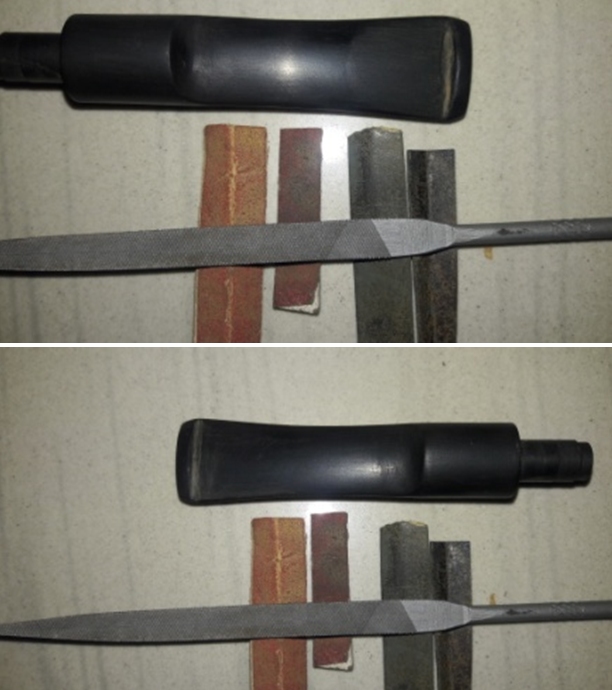
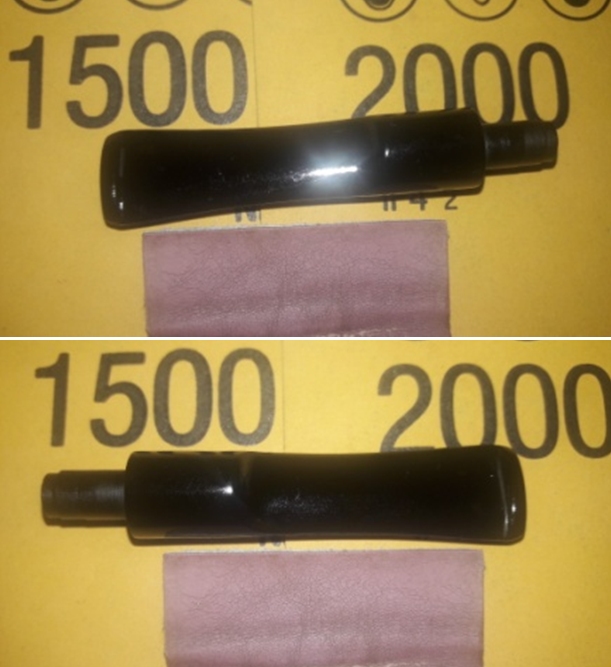
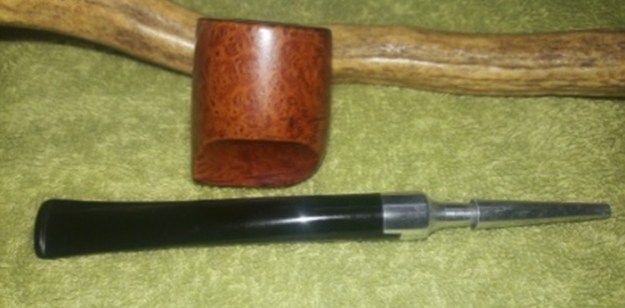
 With the stummel rejuvenation almost complete, save for the final wax polish, I worked the stem. The fill had hardened and with a flat head needle file, I worked on the filling till I had achieved a rough match with the surrounding surface and had sufficiently sharpened the button edges. For a better blending, I further sand the entire stem with 220 followed by 400, 600 and 800 grit sand paper. This helps to reduce the scratch marks left behind by the more abrasive 220 grit paper. To bring a deep shine to the vulcanite stem, I polished the stem, wet sanding with 1500 to 2000 grit sandpapers followed by further wet sanding with 3200 to 12000 grit pads. I wiped the stem with moist cloth after each pad and rubbed it down with Extra Virgin Olive oil to rejuvenate the vulcanite. The finished stem is shown below. The oxidation on this stem was the deepest and the most difficult to remove of all the pipes that I have worked on till date and I have worked on quite a few disastrous stems!! At one point in time, I had to resort to a 150 grit sand paper, the most abrasive one that I have in my inventory. The scratch marks left behind by the sand paper are still visible in the pictures but not noticeable in person (if that’s any consolation…)
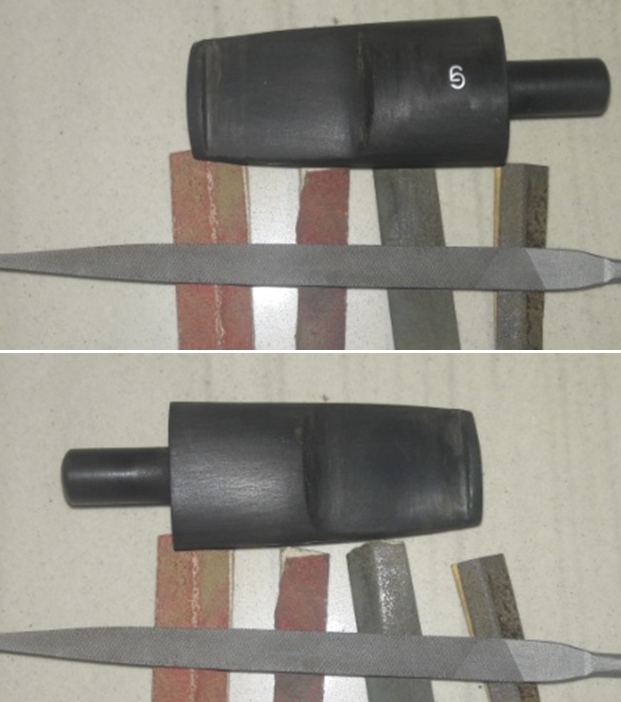
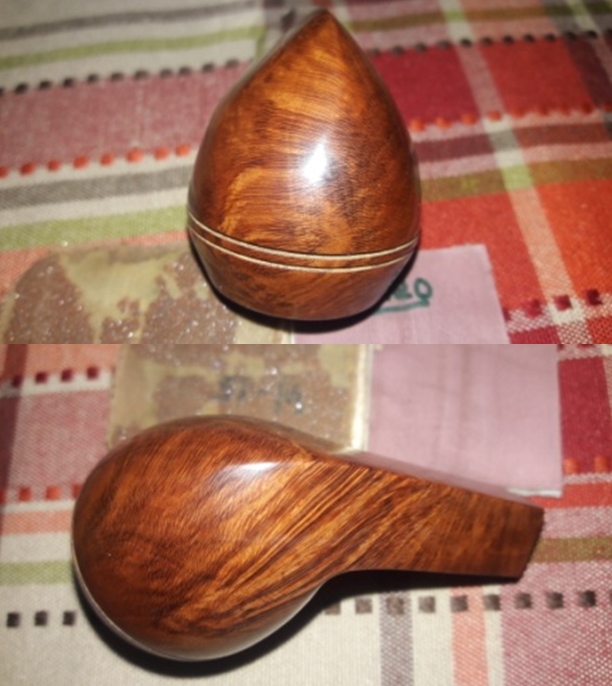
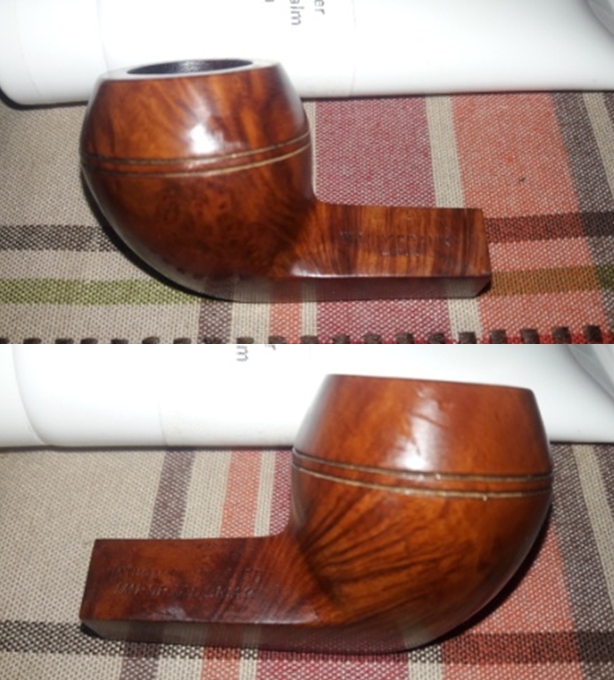
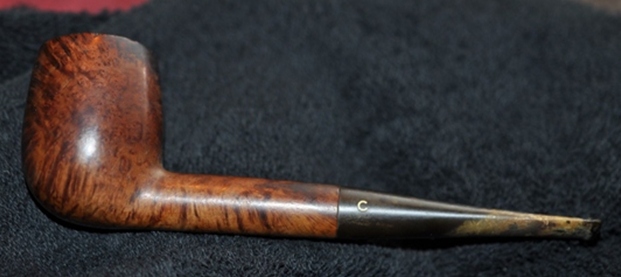
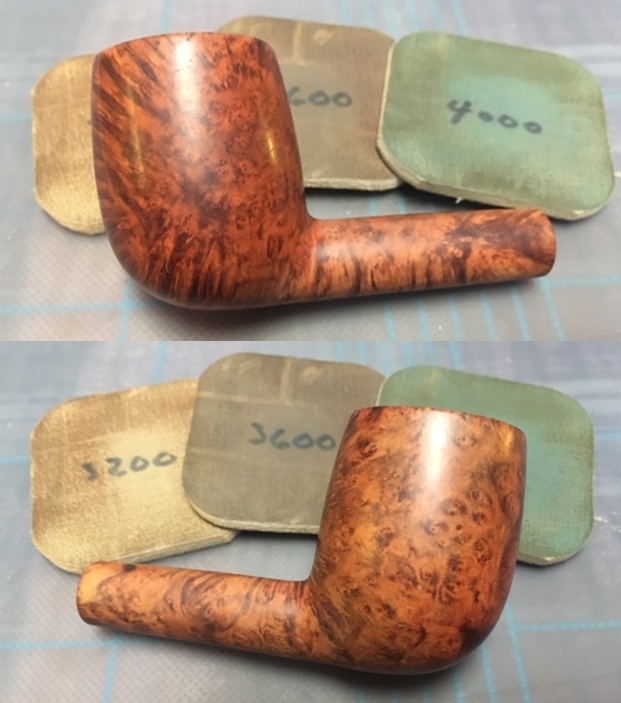
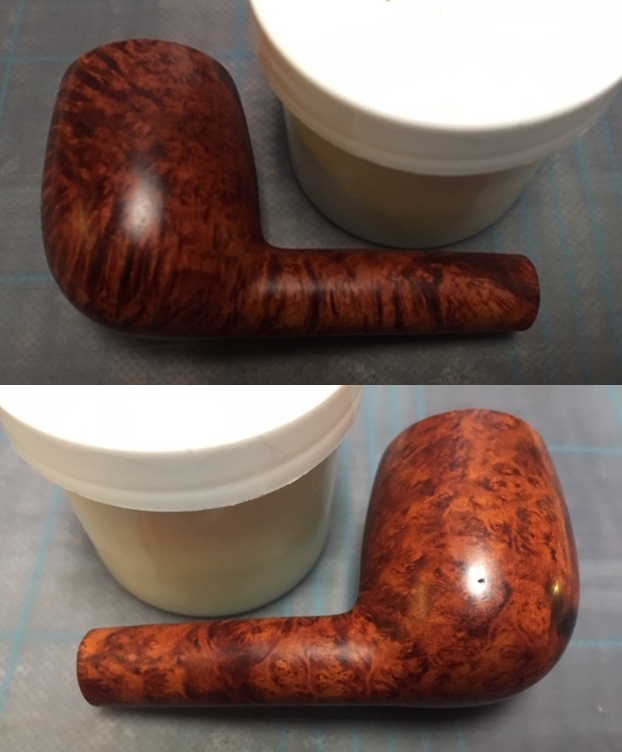
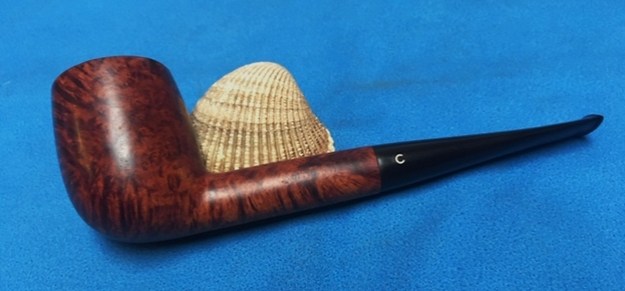
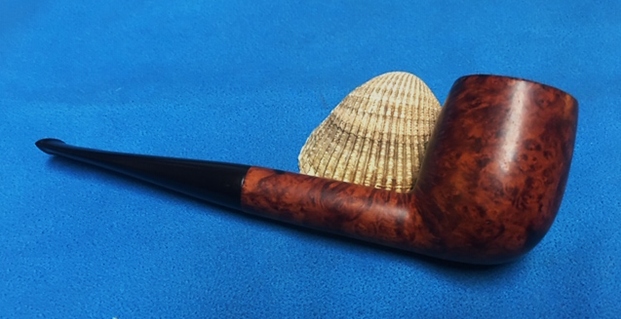
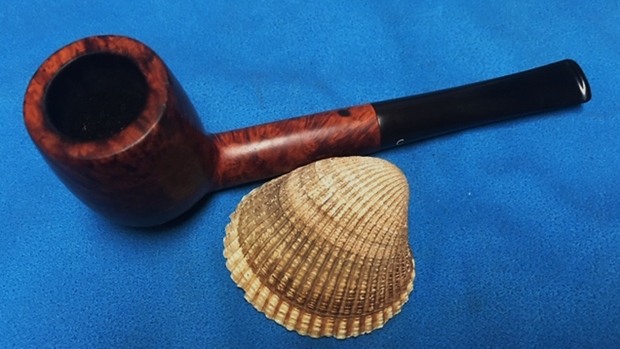
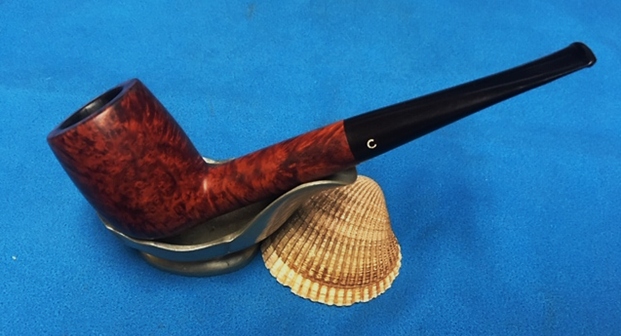
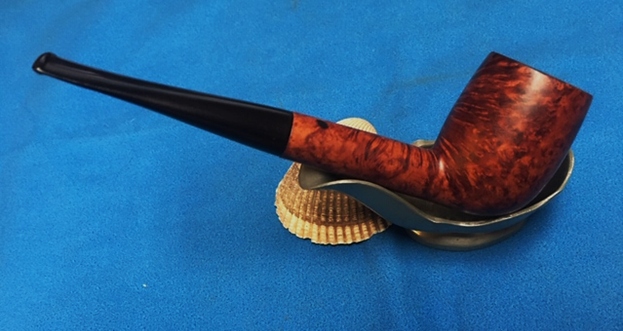
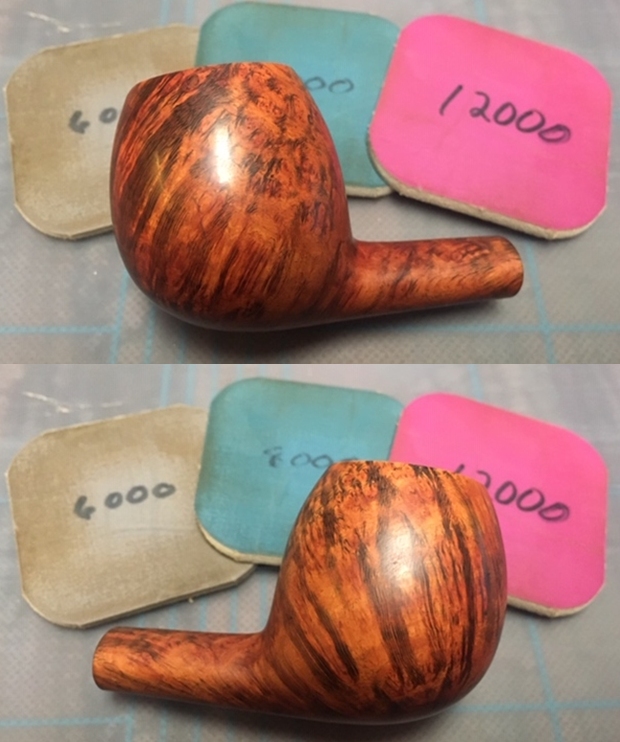
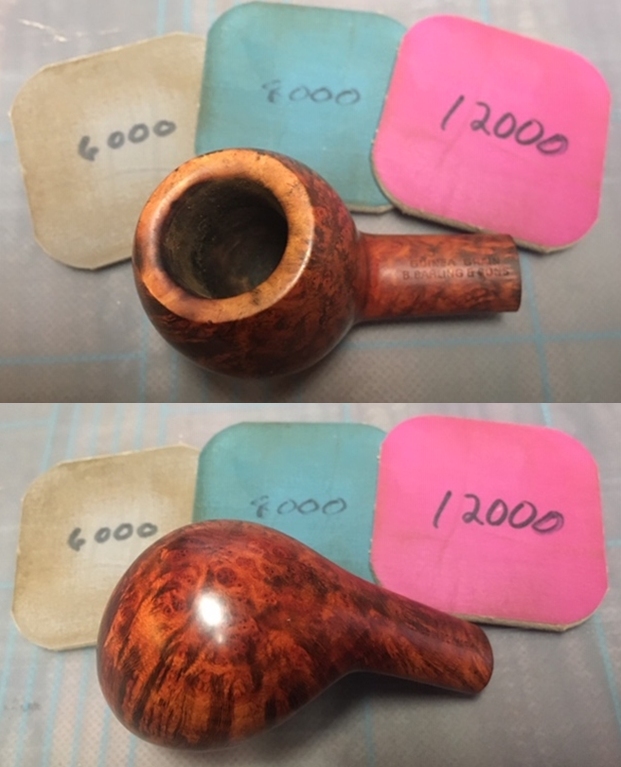
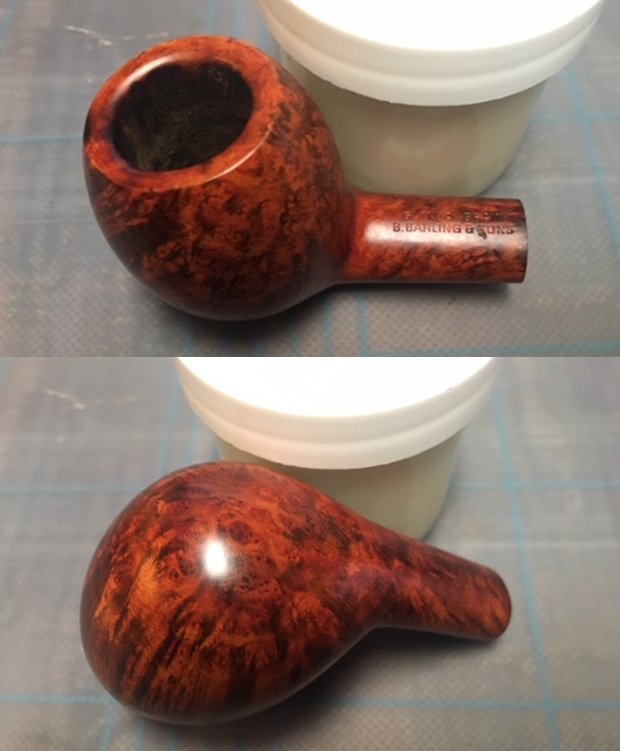
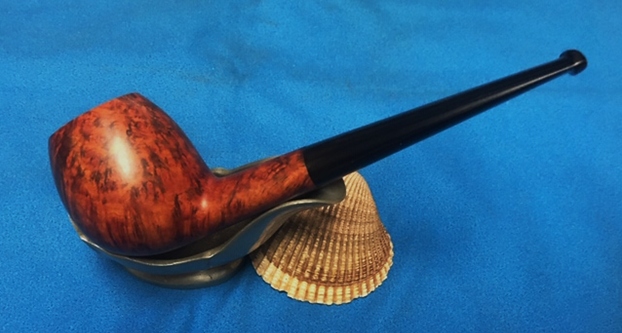
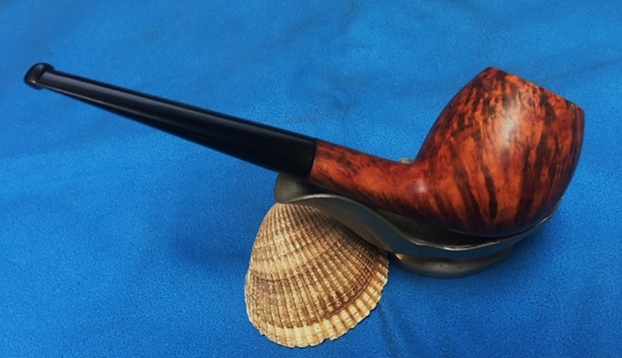
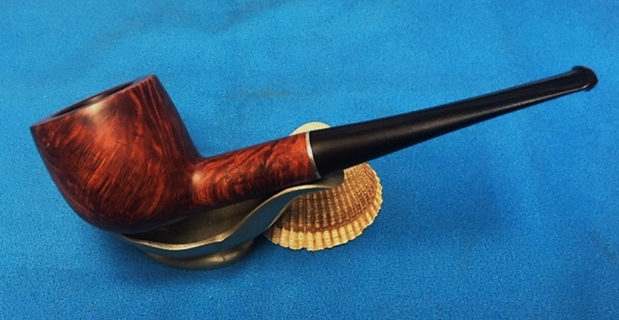
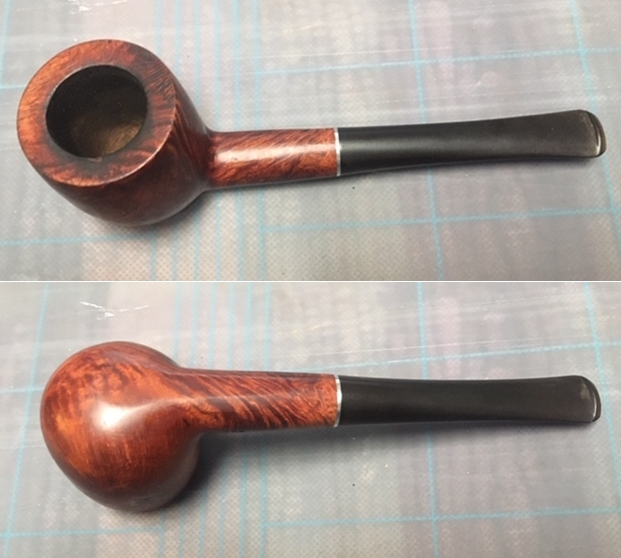
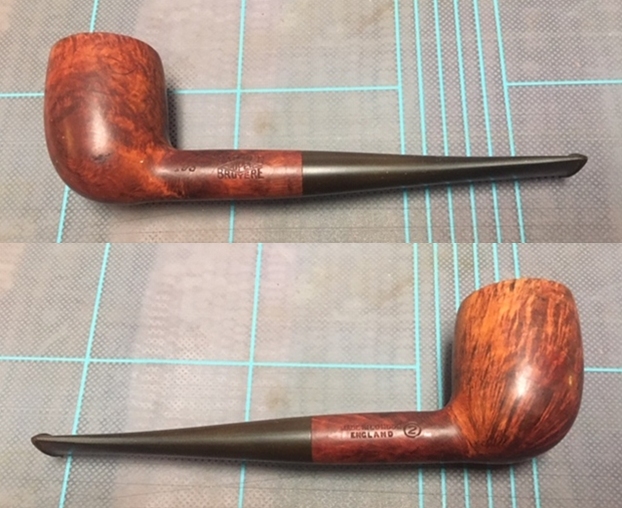
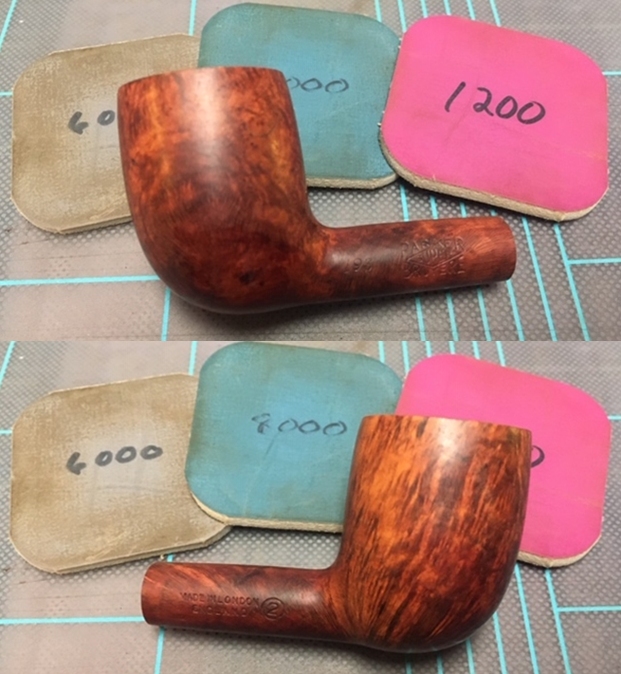
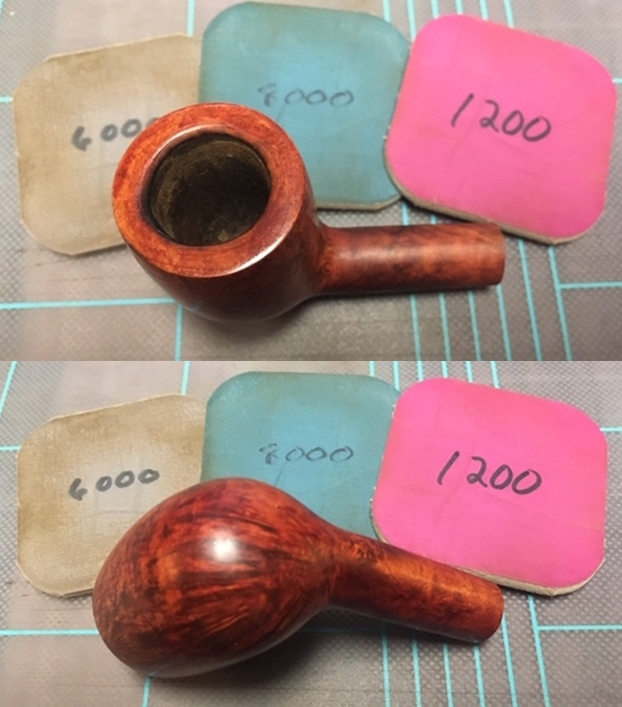
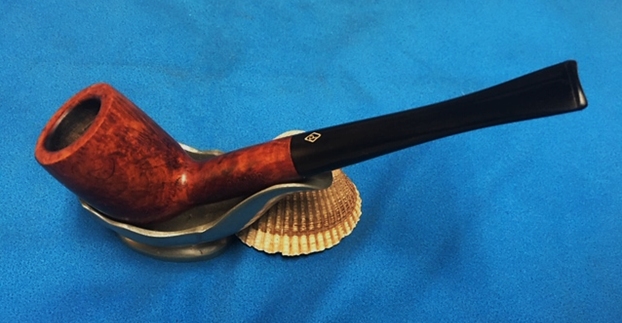
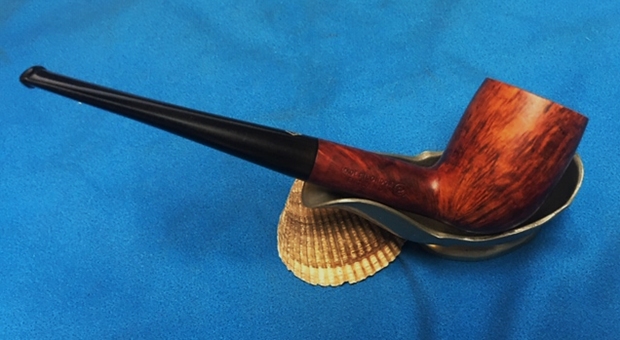
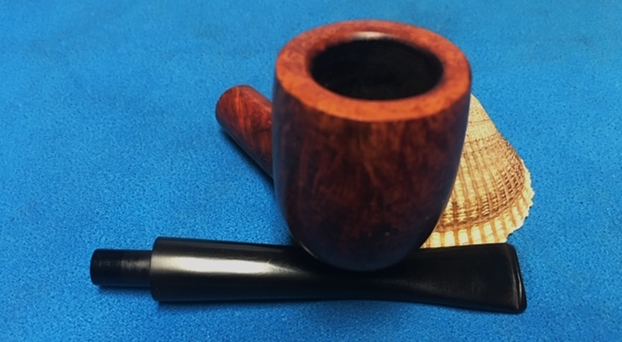
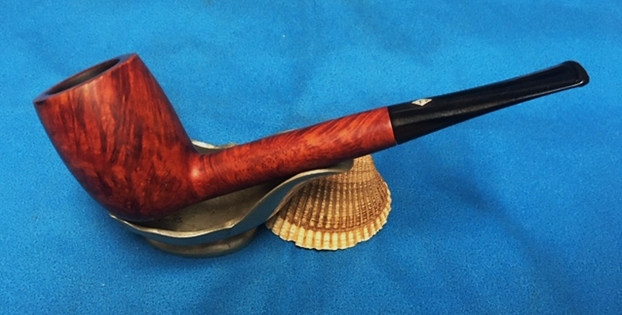
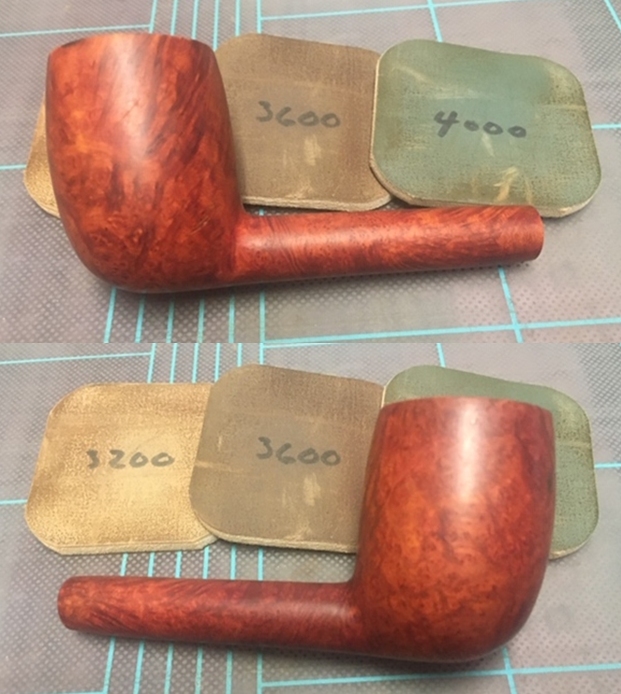
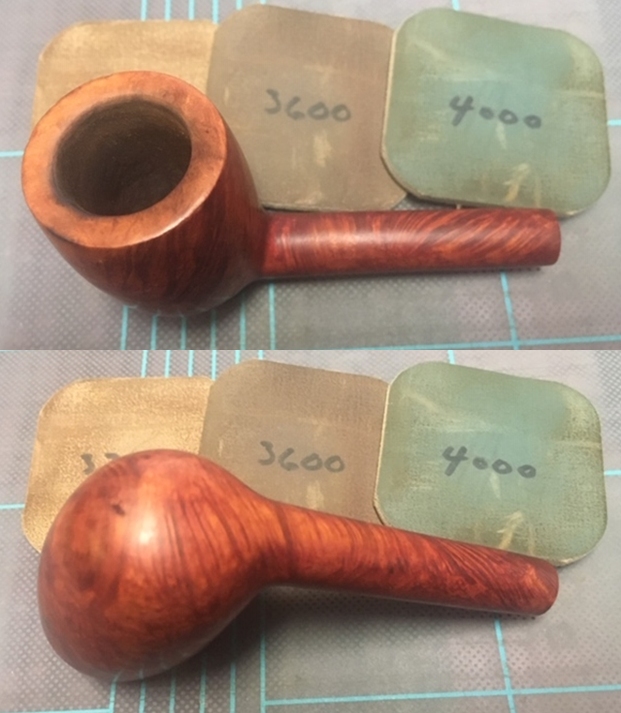
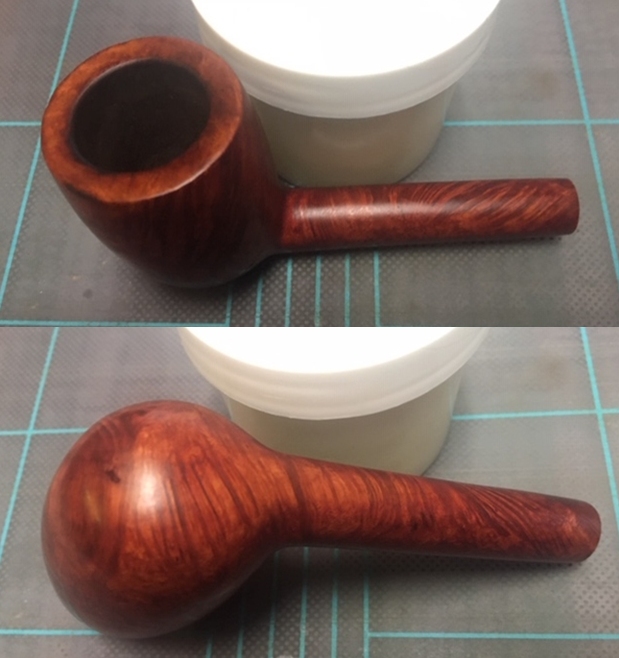
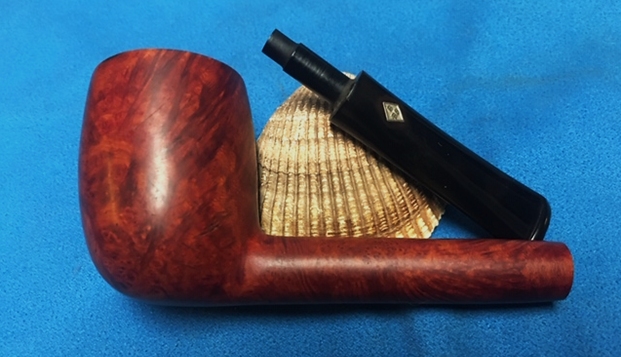
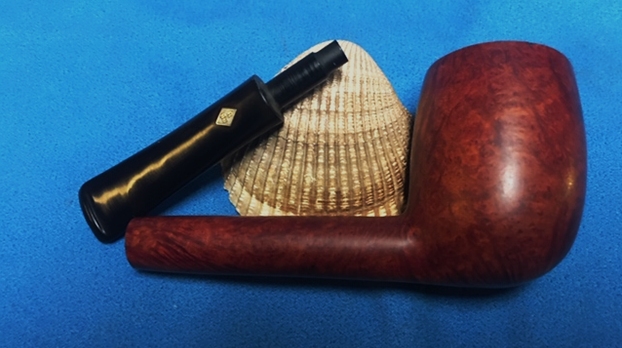
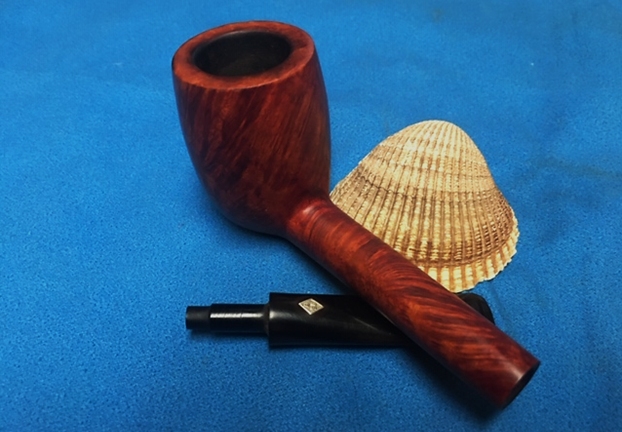
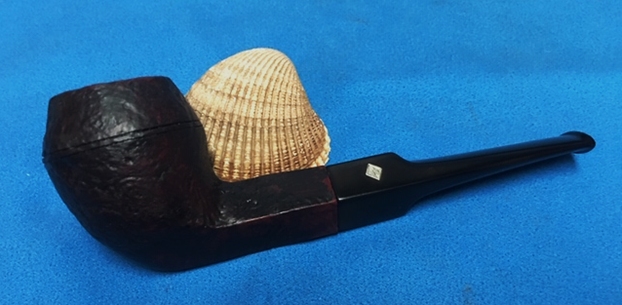
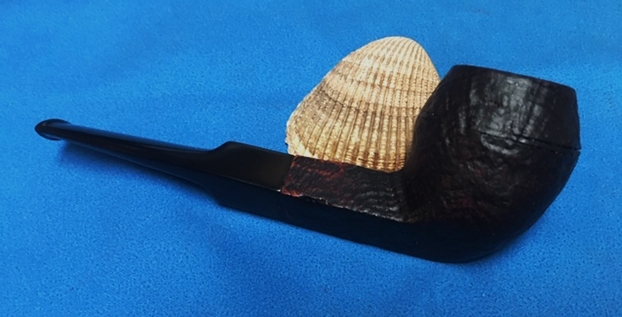
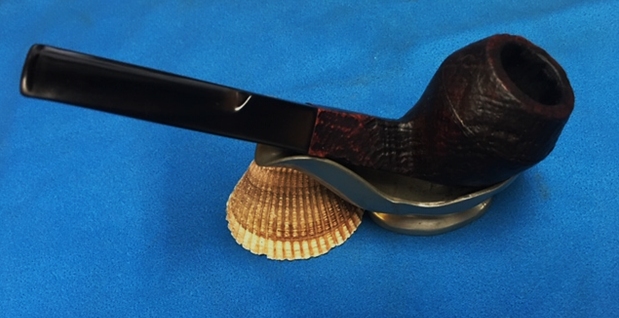
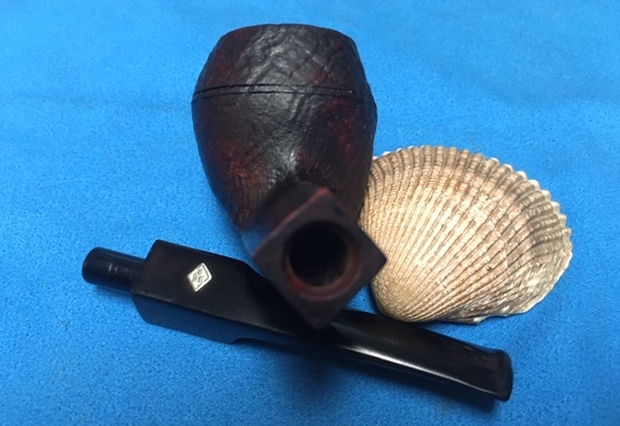
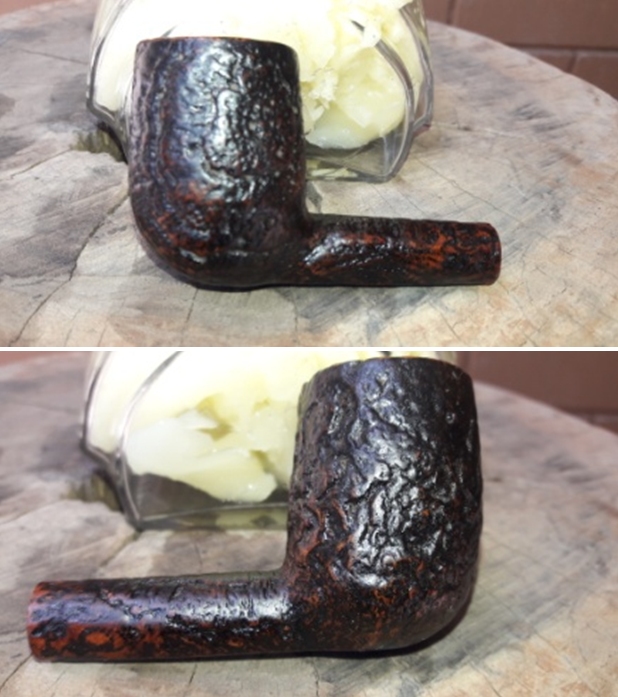
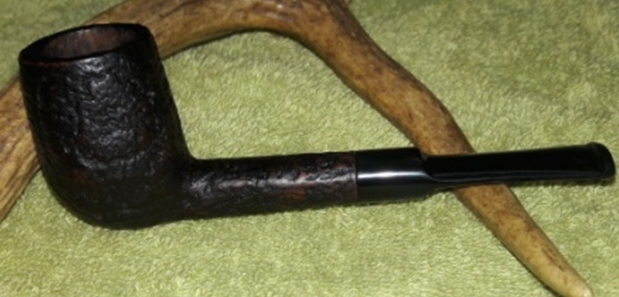
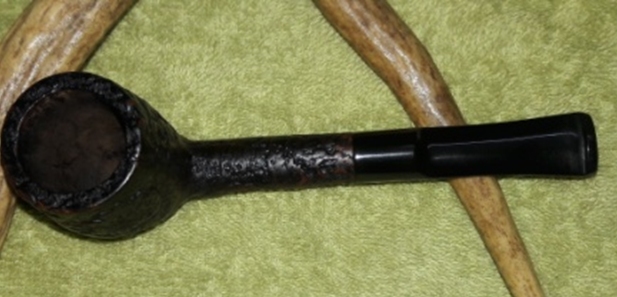
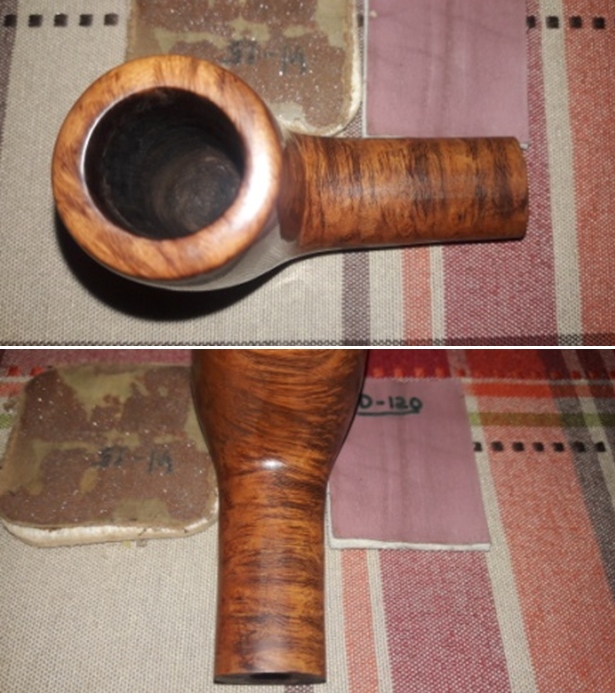
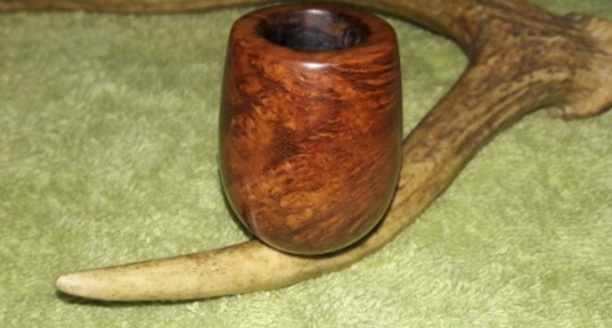
 I have now reached the homestretch in this restoration project. To complete the restoration, I mount a cotton cloth buffing wheel on to my hand held rotary tool and polished the stummel and stem with Blue Diamond compound. This compound helps to remove the minor scratch marks that remain from the sanding. I mount another cotton buffing wheel that I have earmarked for carnauba wax and applied several coats of the wax. I finished the restoration by giving the entire pipe a rigorous hand buffing using a microfiber cloth to raise the shine further. The finished pipe looks amazingly beautiful. The finished pipe is as shown below.
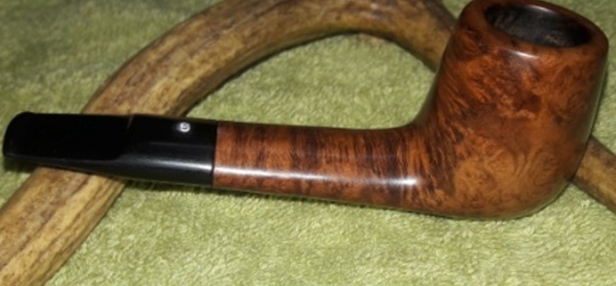

 P.S. In my last write up a question “Why do I enjoy bringing these old battered and discarded pipes back to life?” had popped up in my mind.
Well, the first and foremost reason that I enjoy this hobby is because I enjoy smoking a pipe and it being an instrument of joy for me, is of utmost importance. Thus, bringing these instruments of enjoyment back to life from obscurity to function as it was intended to be gives me immense pleasures. I am sure the readers will understand this reasoning.
I wish to thank each one for sparing their valuable time to read through this write up and each one is my prayers. Stay home…stay safe!!