Tag Archives: vulcanite

A Simple Restoration Of An Inherited BBB “Thorneycroft” # 637 Sandblast Billiard


Blog by Paresh Deshpande

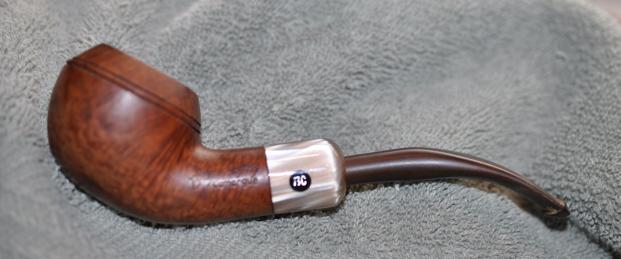
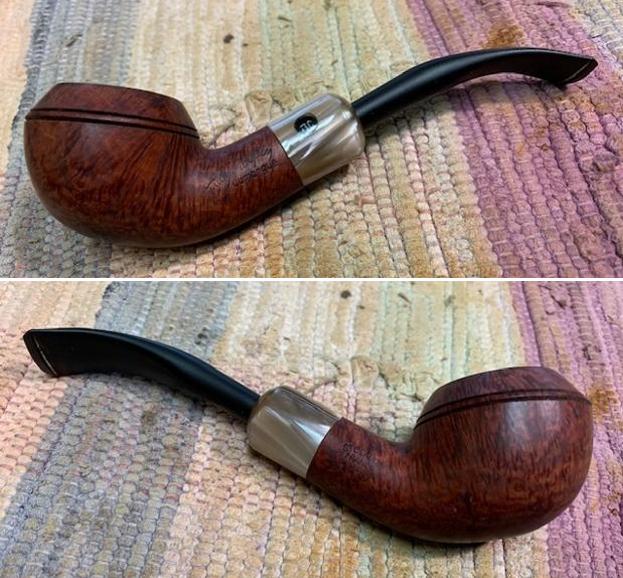
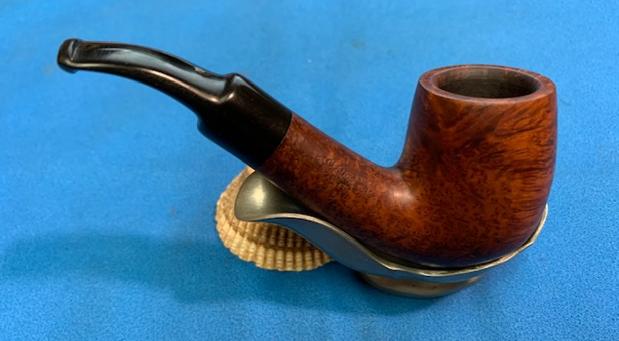
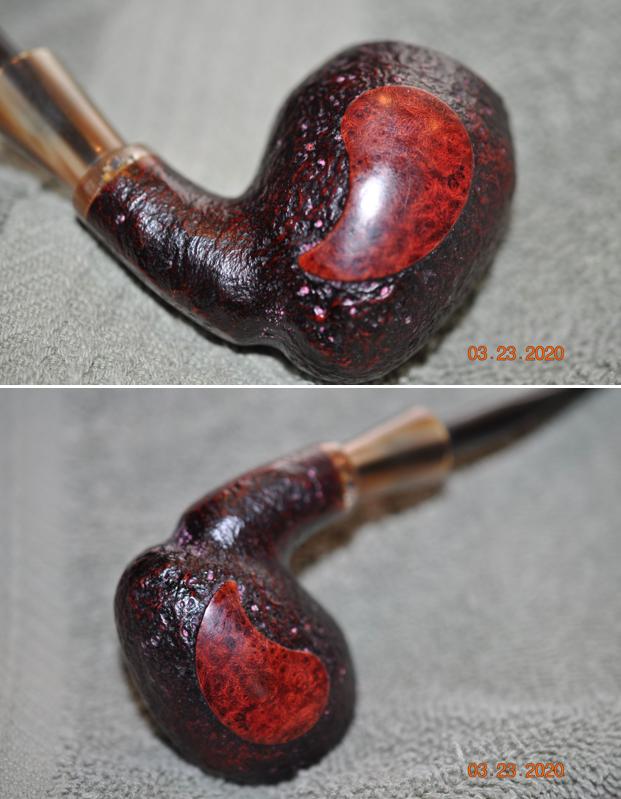
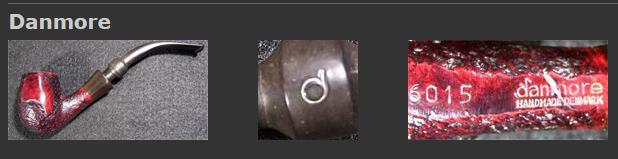
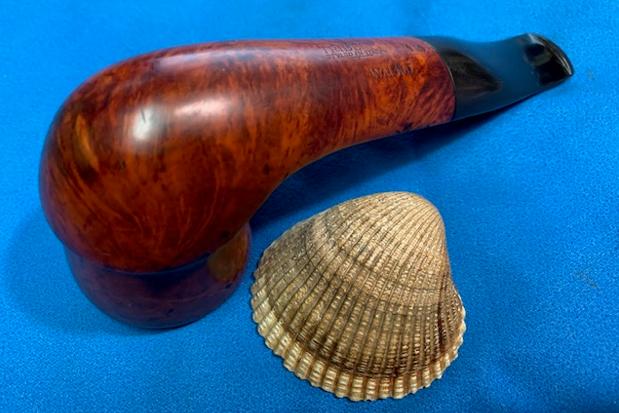
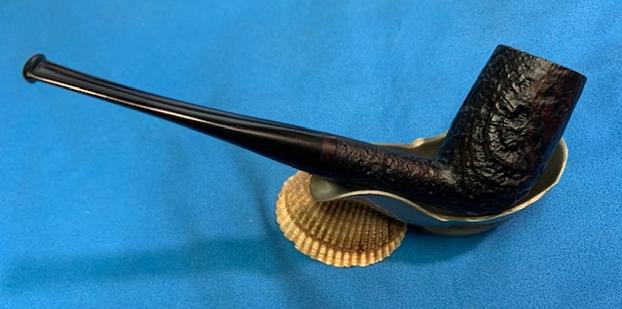
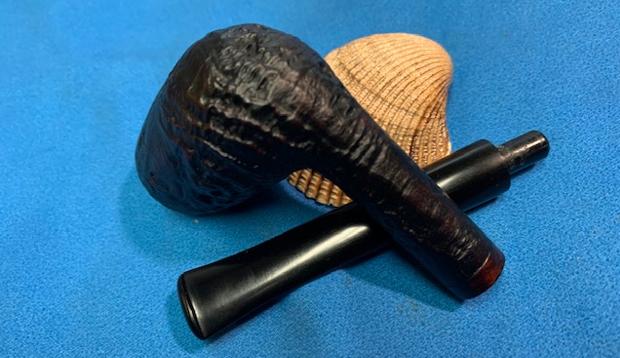
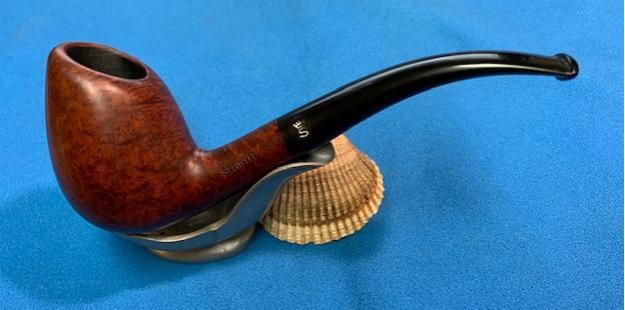
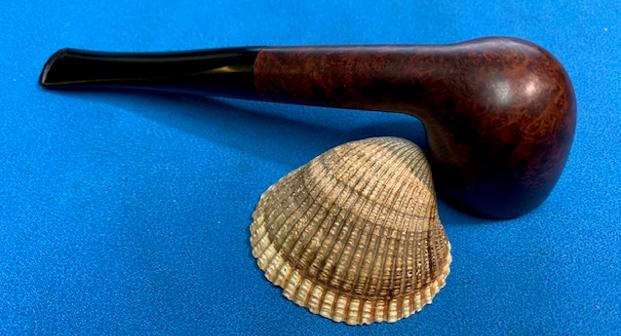
I love my classic shaped pipes and one such pipe from my inheritance is now on my work table. It’s a classic tapered stem Billiard with a deep scraggy sandblasted stummel. The moment I picked it up, I knew this could be a Barling’s “Fossil” or some English brand. The sandblast, quality of the stem and the briar all oozed quality. The stem logo of BBB in brass rhombus did bring an inadvertent smile on my face. I love this brand and have a few BBBs in my collection.

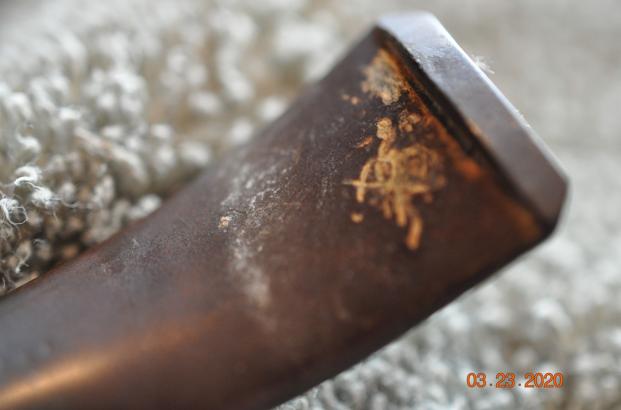
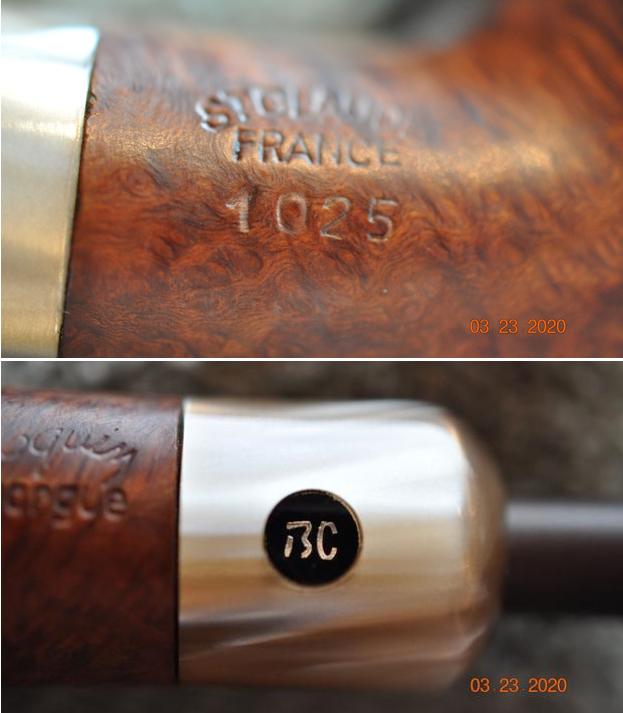
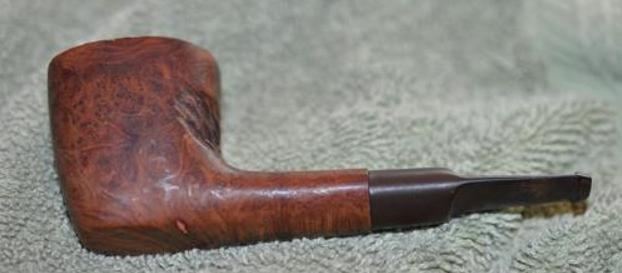
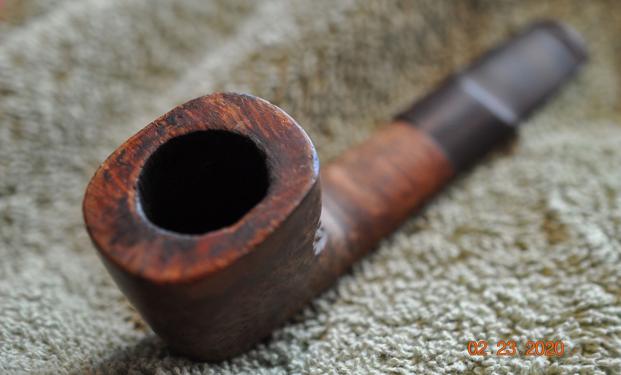
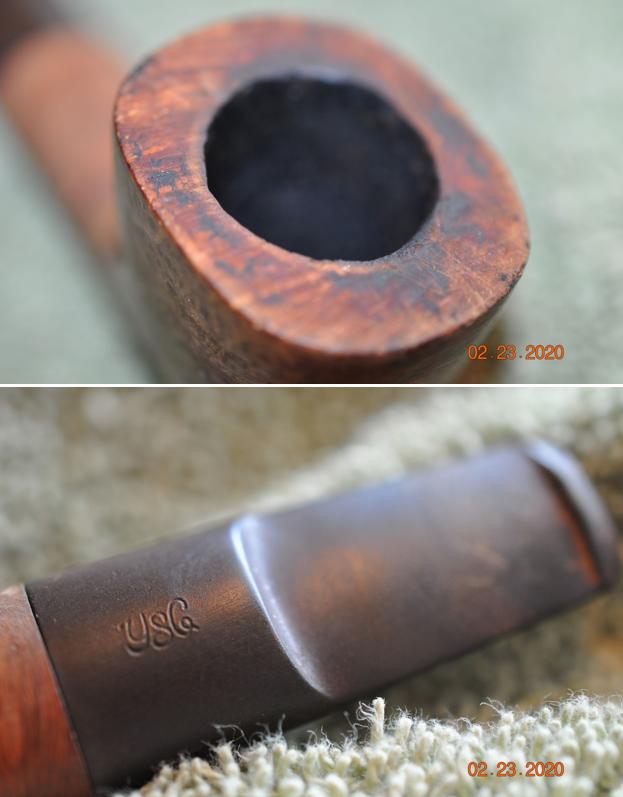
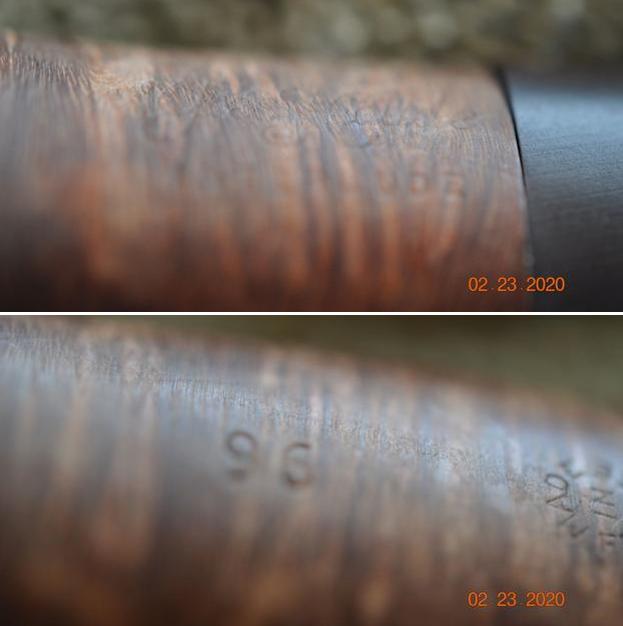
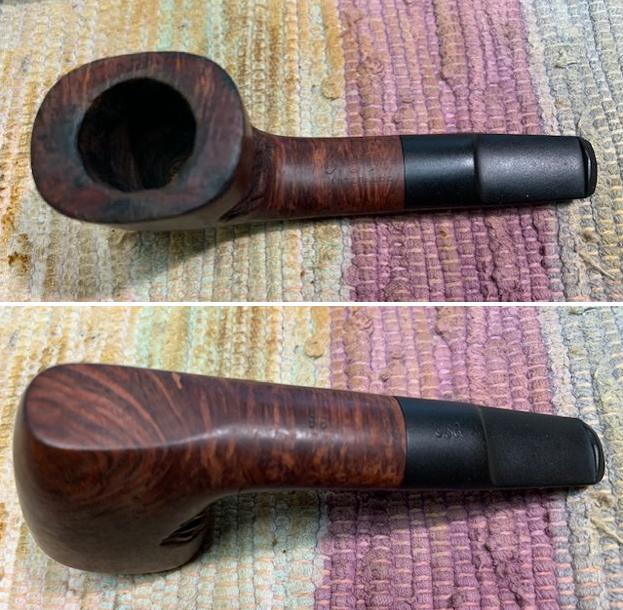
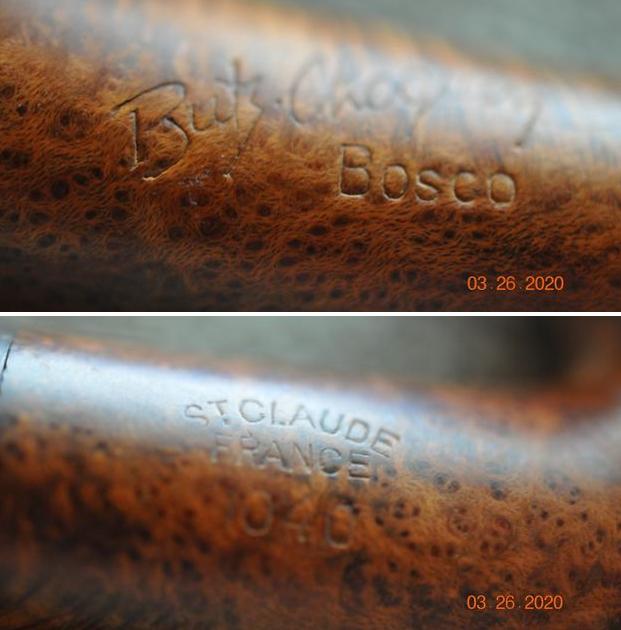
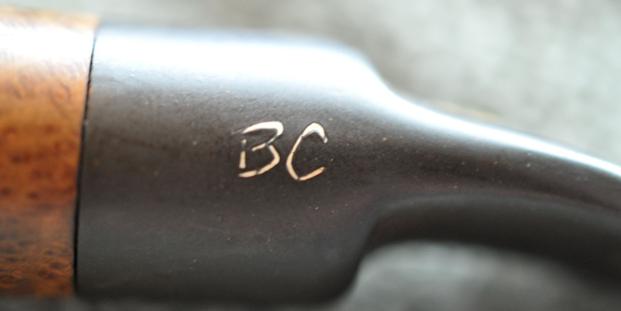
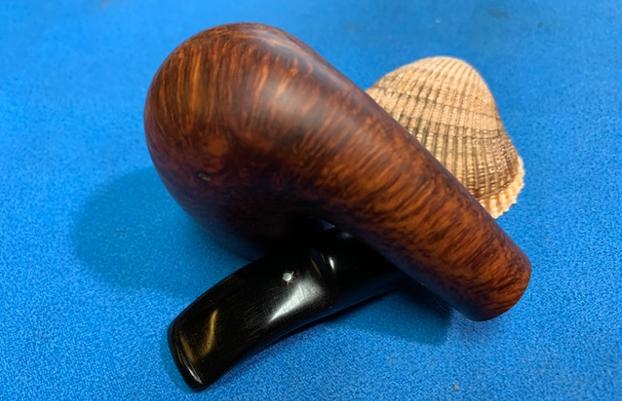
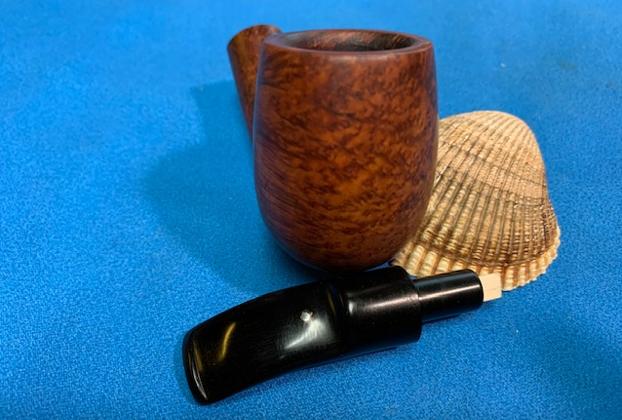
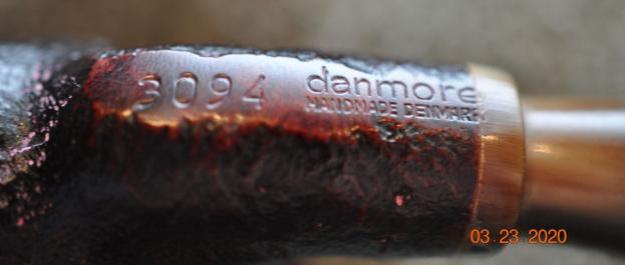
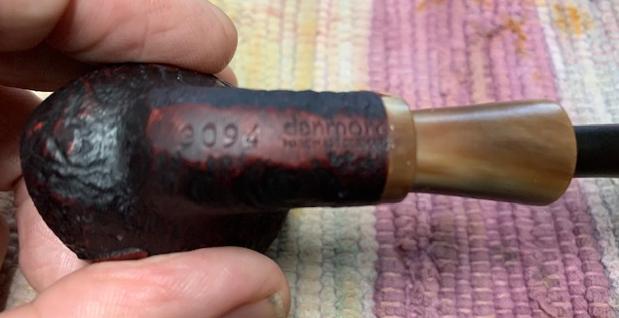
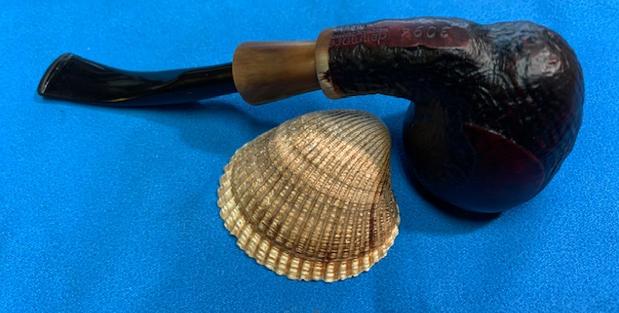
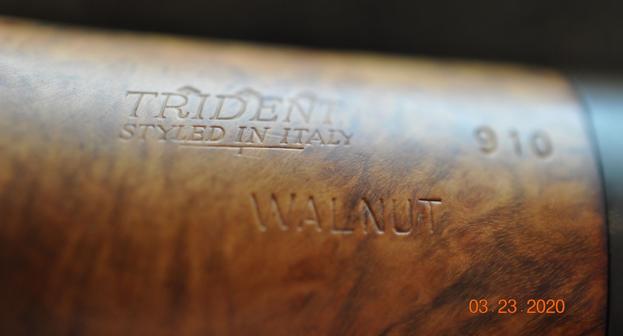
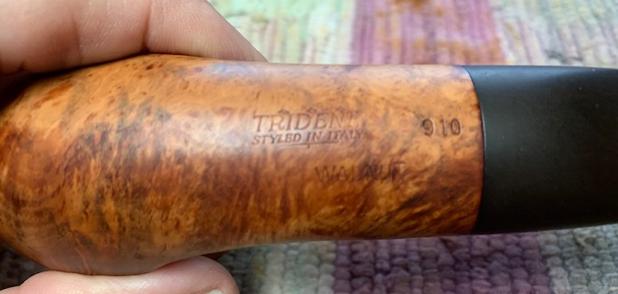
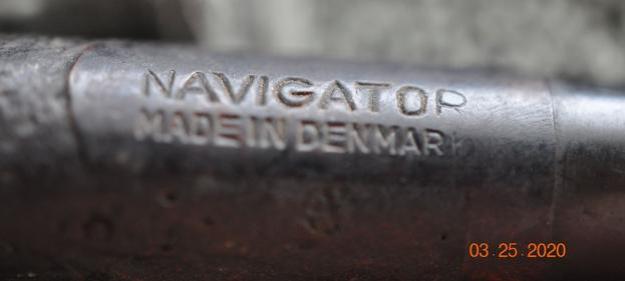
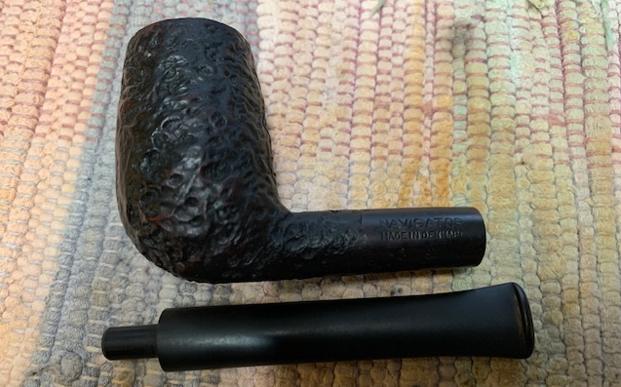
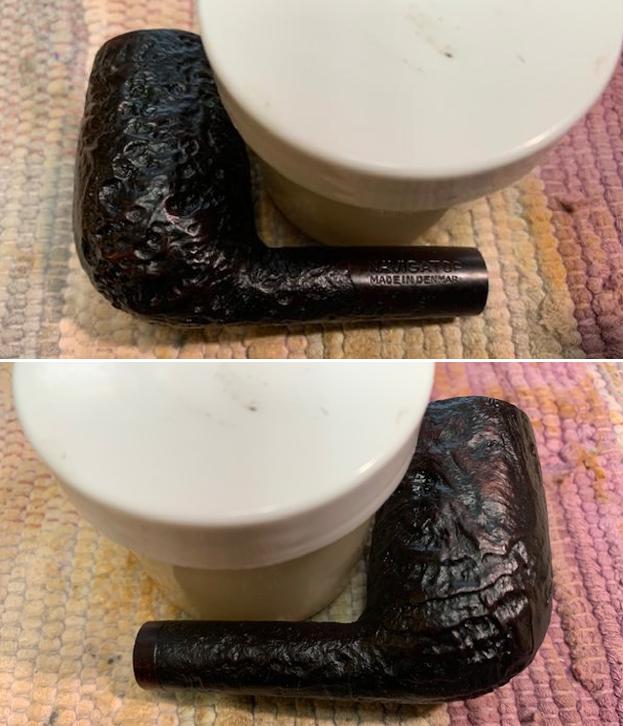
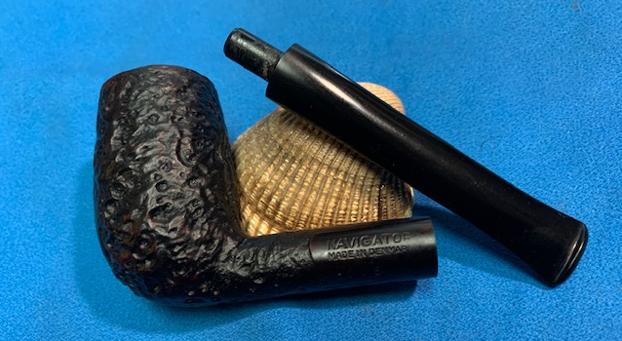
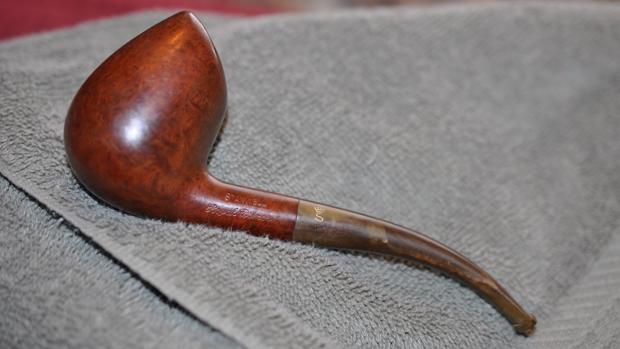
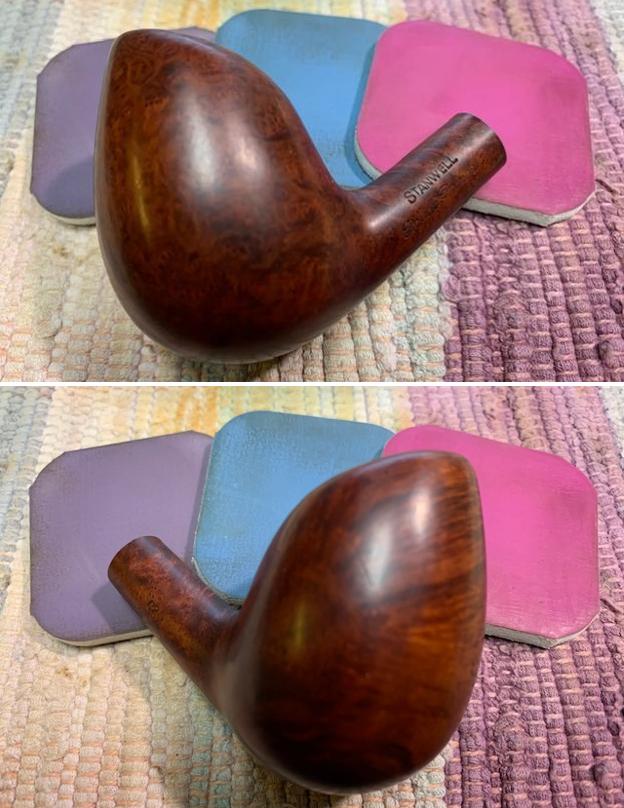
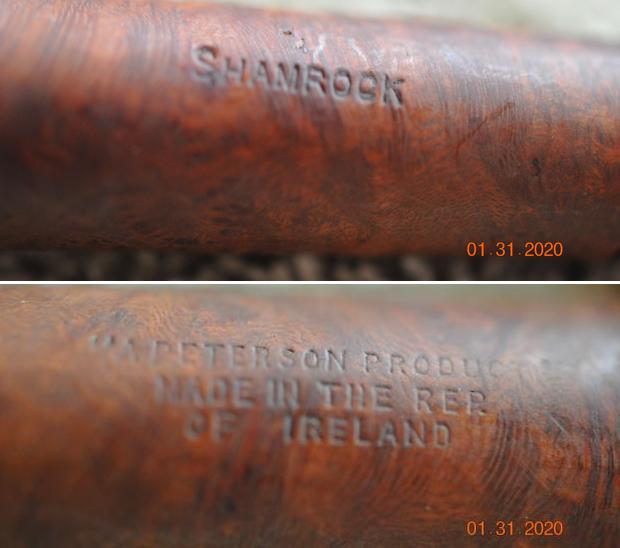
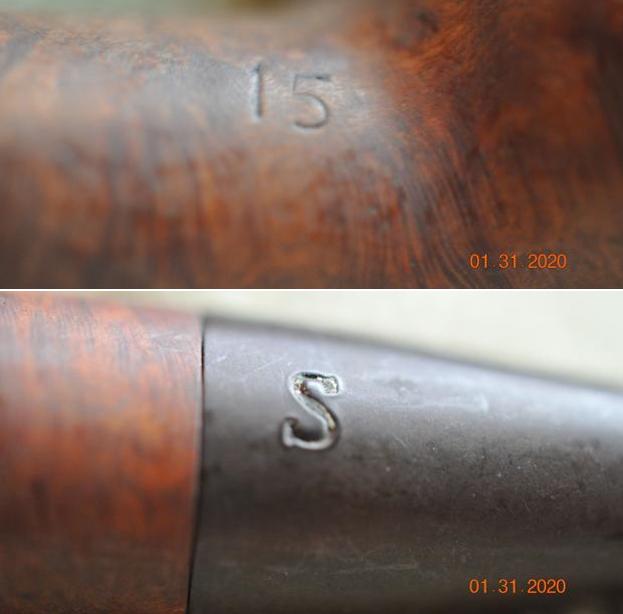
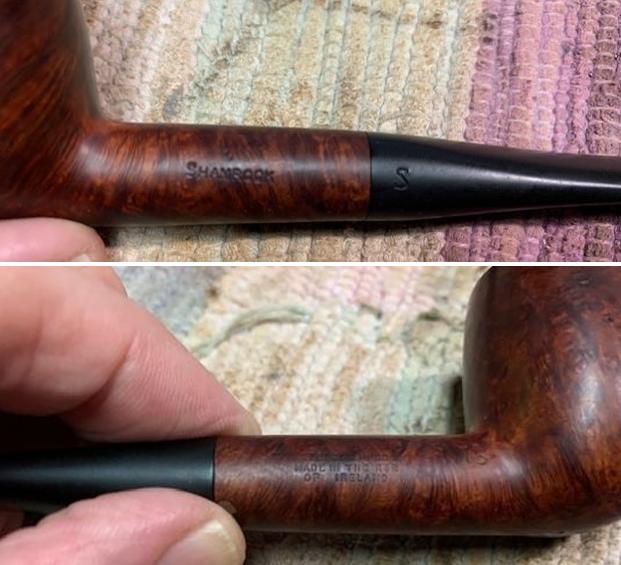
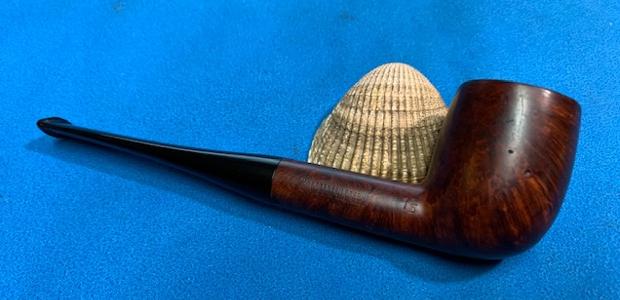
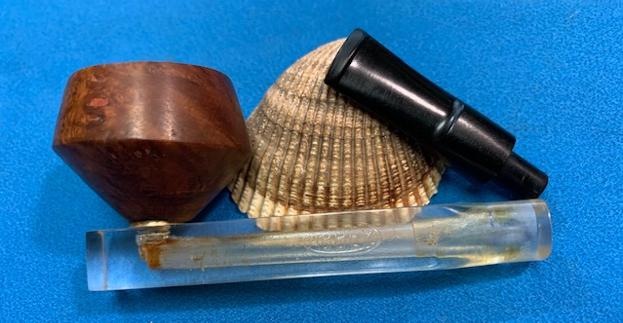
The pipe is a classic Billiard shaped sitter with deep craggy sandblast that feels tactile in the hand. It has a medium sized bowl and is very light in weight. This pipe is stamped on the bottom smooth surface of the shank with shape code #637 at the foot followed by “BBB” in a rhombus with “OWN MAKE” on either side in block capital letters. Further towards the shank end on the same smooth surface, it is stamped as “THORNEYCROFT” over “LONDON ENGLAND”. The high quality vulcanite tapered stem bears the trademark inlaid BBB brass diamond logo on the upper surface of the stem. The stampings are all crisp and clear.  If you are interested to know anything about BBB pipes, look no further than rebornpipes.com!! This is Steve’s favorite brand and he has been researching and collecting BBB pipes for decades. I visited rebornpipes and sure enough there was a write up on “History of BBB Pipes”! Here is the link to the blog (https://rebornpipes.com/2012/08/05/history-of-bbb-pipes/).

I had worked on a BBB 2 Star “SPECIAL” pipe and had extensively read about the brand and its various lines through the years which also helped in dating BBB pipes. Here is the link to the write up with a request to the esteemed Readers to refer to the write up for detailed information on the brand and dating of BBB pipes (Restoring a 2 Star BBB “Special” # 395 | rebornpipes).

The information reproduced below places the pipe to be made between 1950 and 1960.
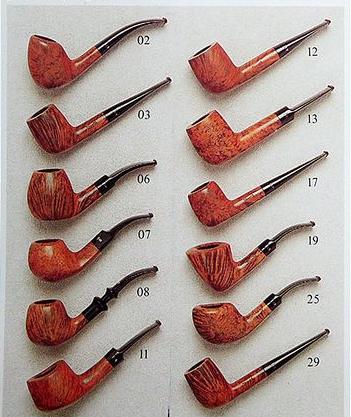
During the middle of 1950s and 1960s, BBB lines were comparatively stable. The top pipes of the line were stamped Own Make “Rare Grain”, followed by Own Make “Virgin”, Own Make “Walnut” and finally Own Make “Thorneycroft”.

Armed with the above information, I moved ahead with initial inspection of the pipe…

Initial Visual Inspection
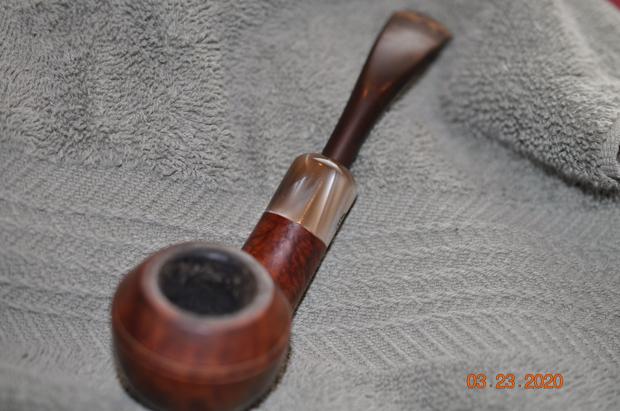
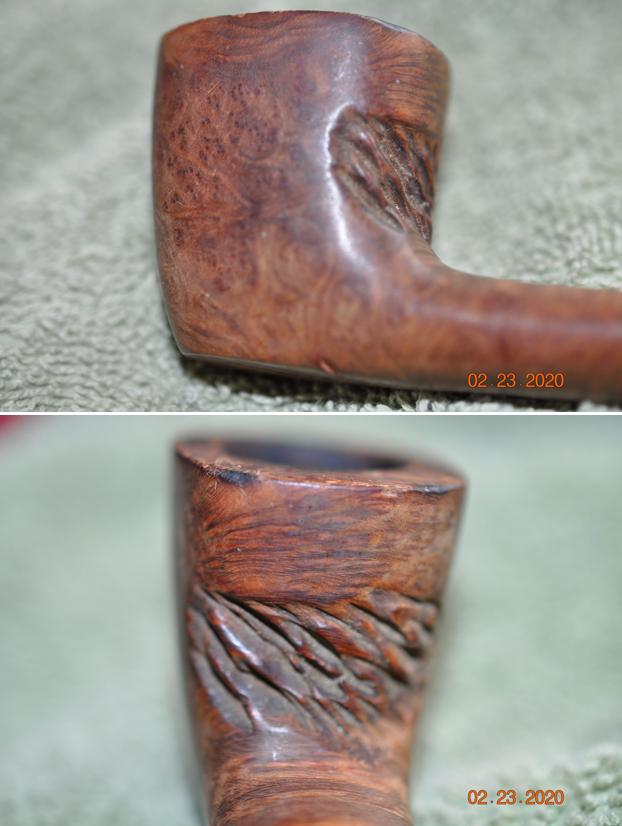
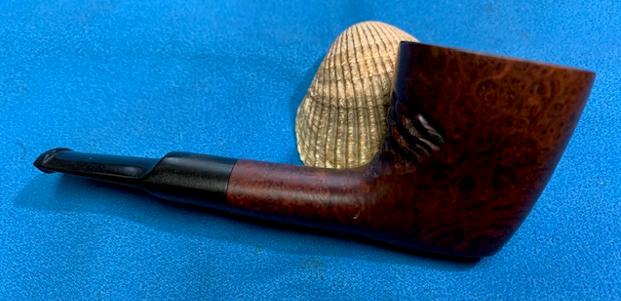
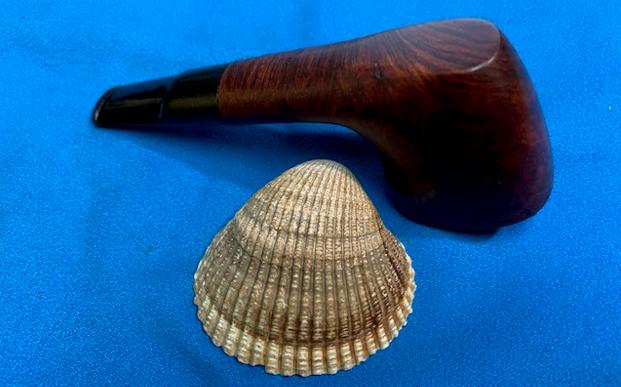
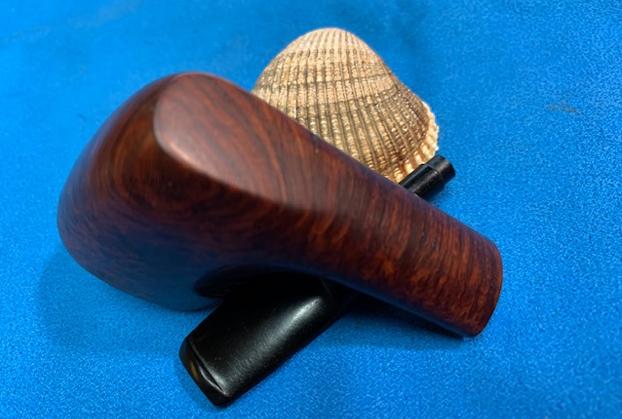
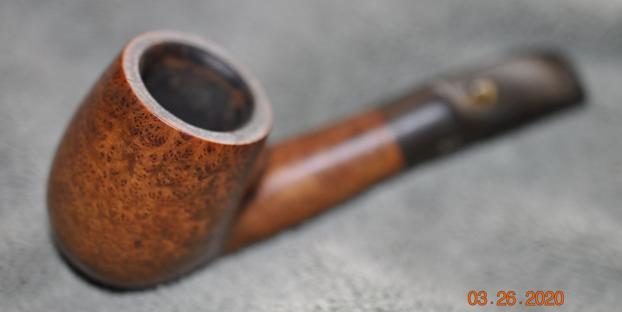
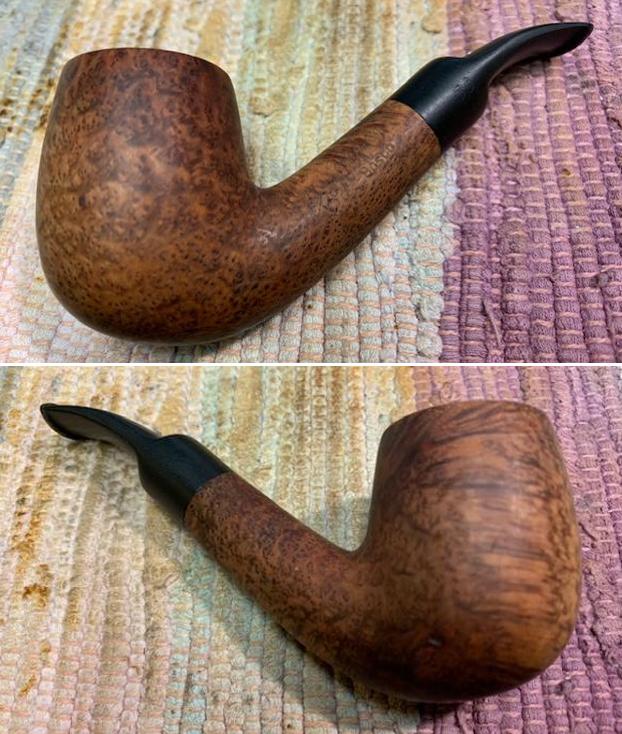
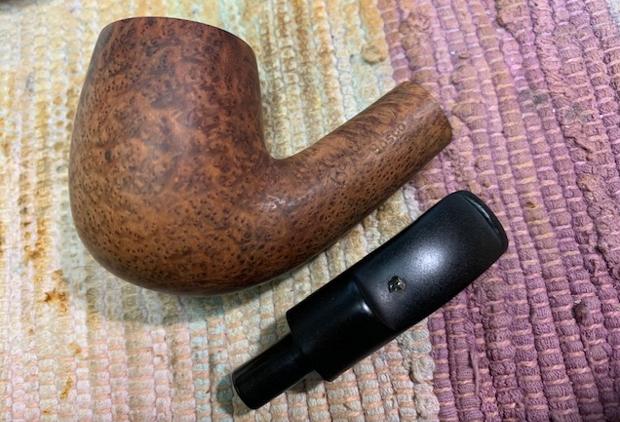
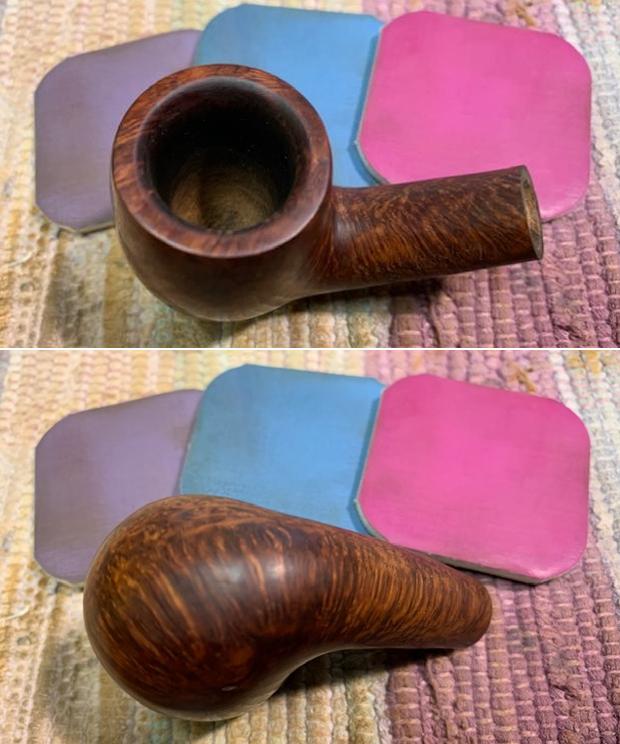
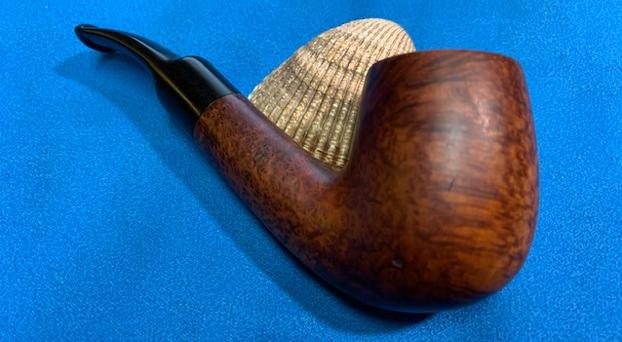
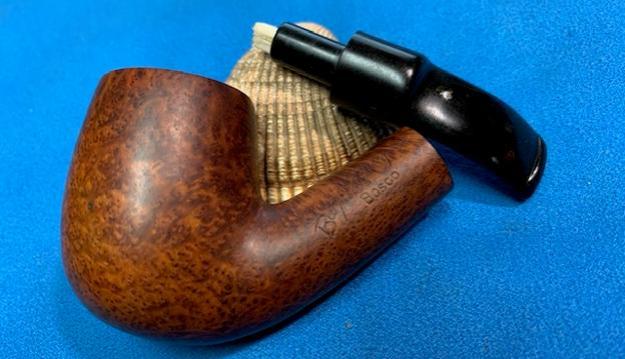
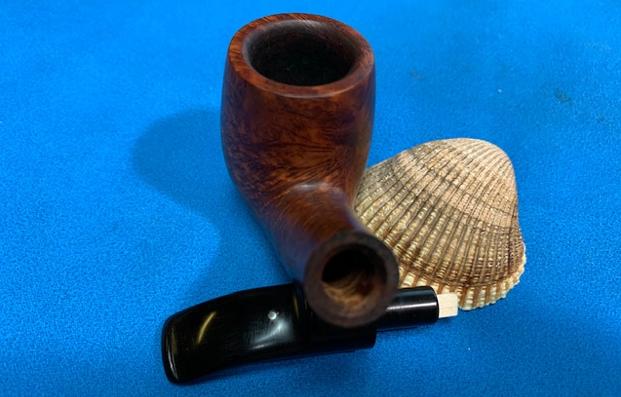
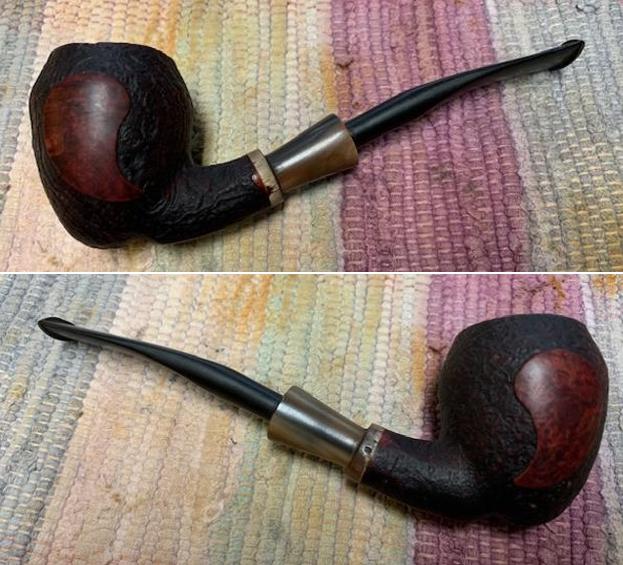
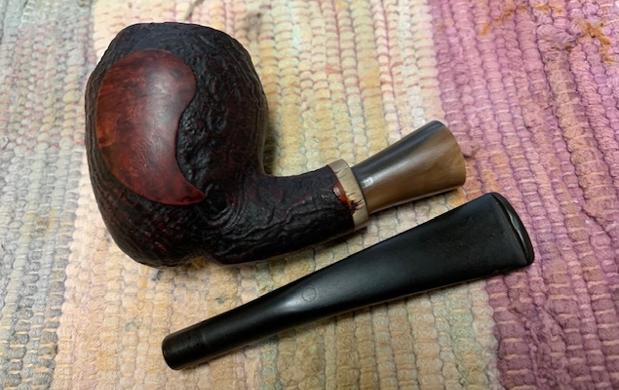
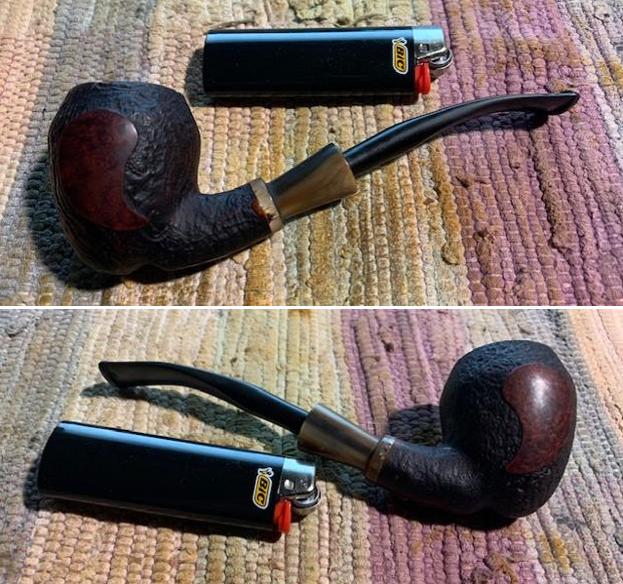
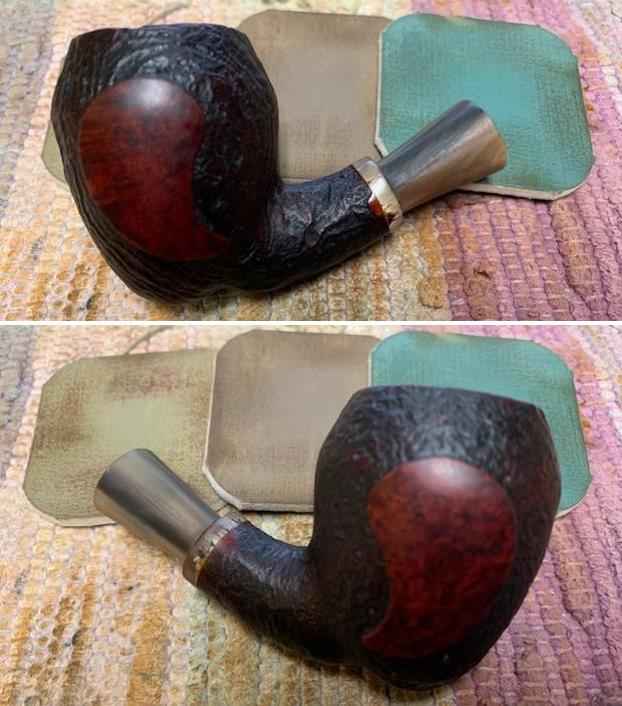
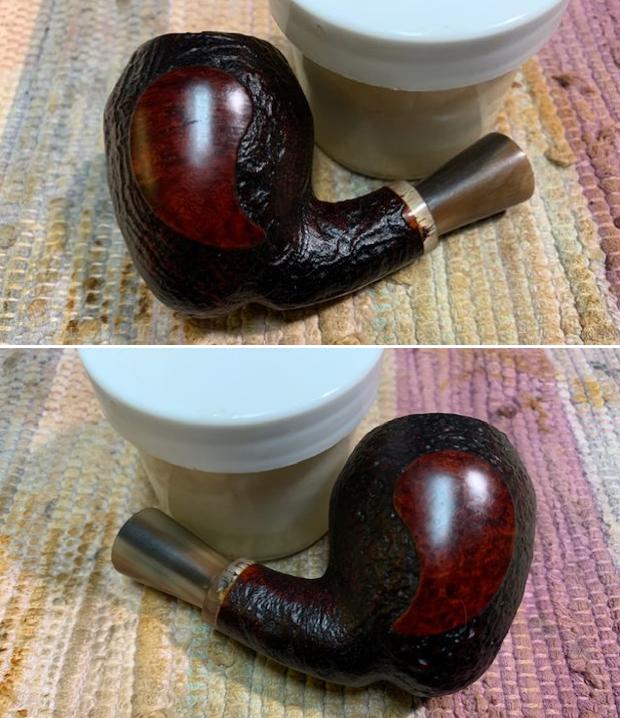
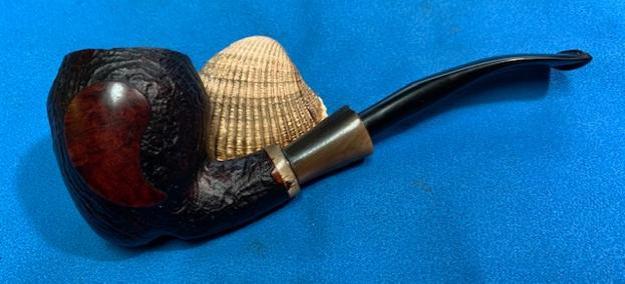
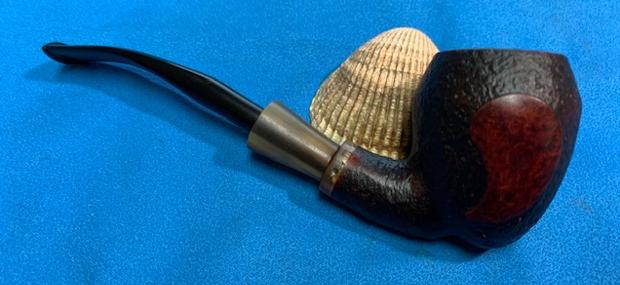
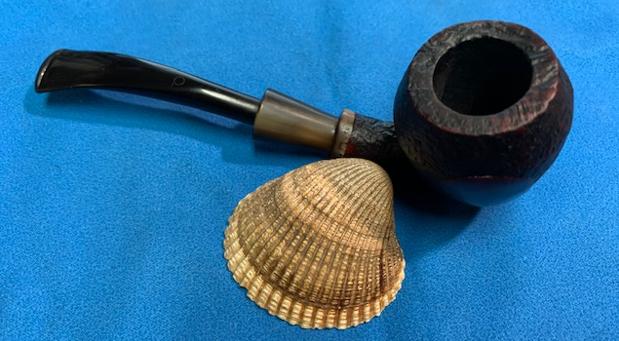
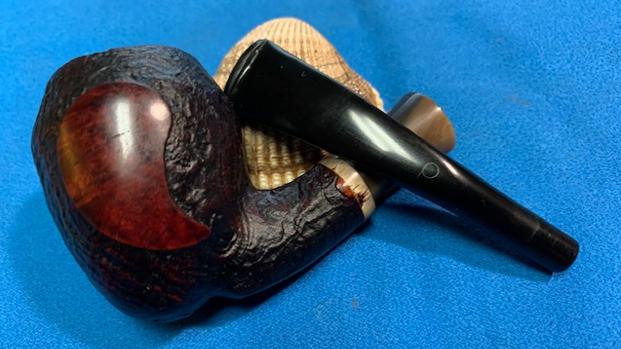
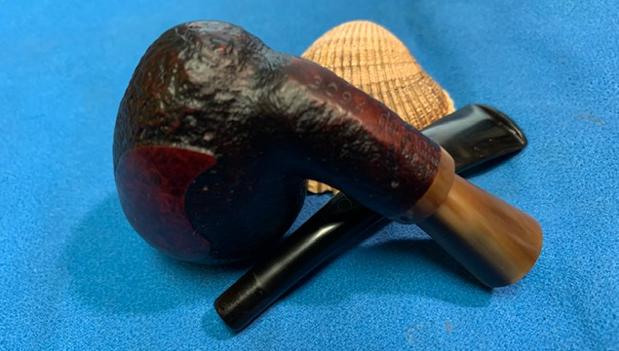
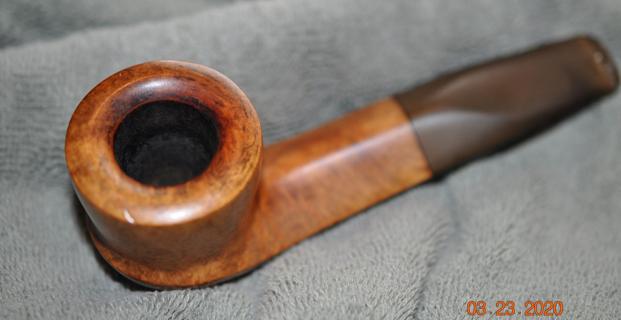
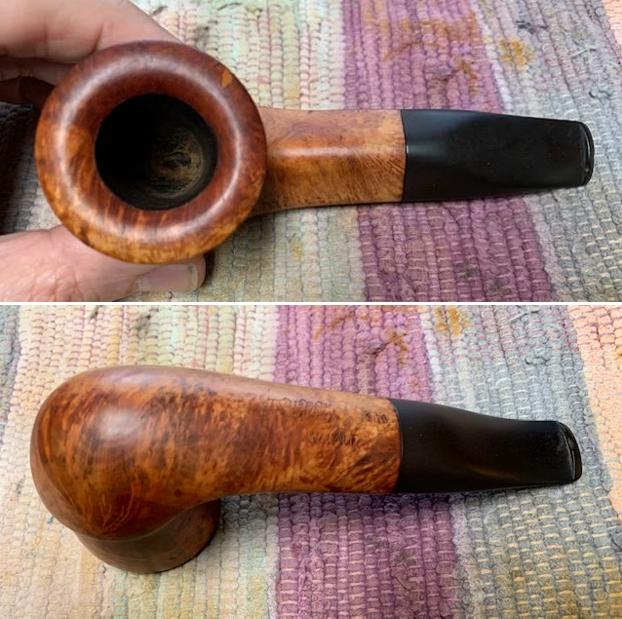
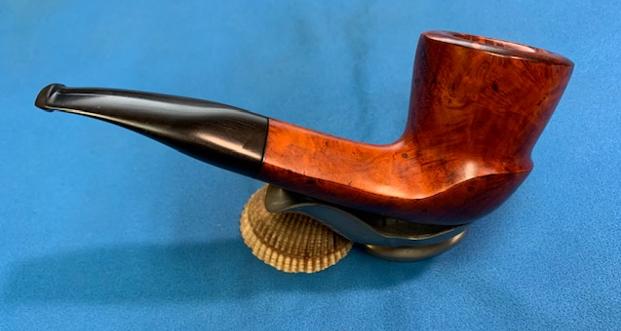
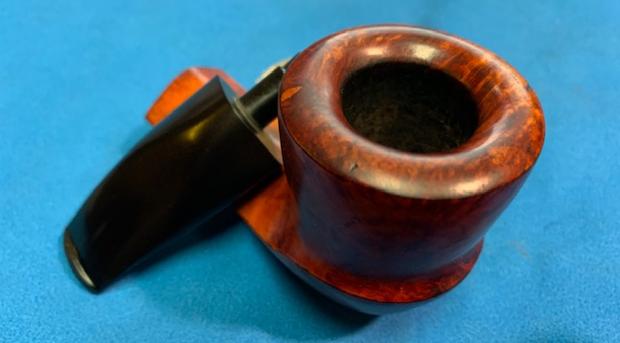
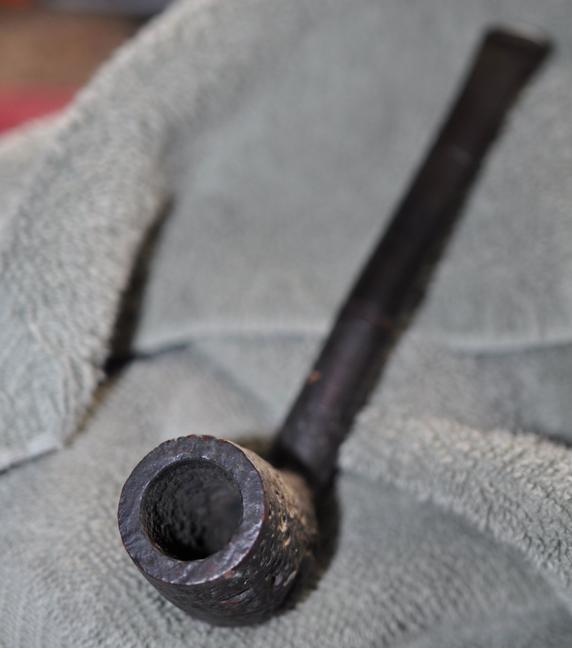
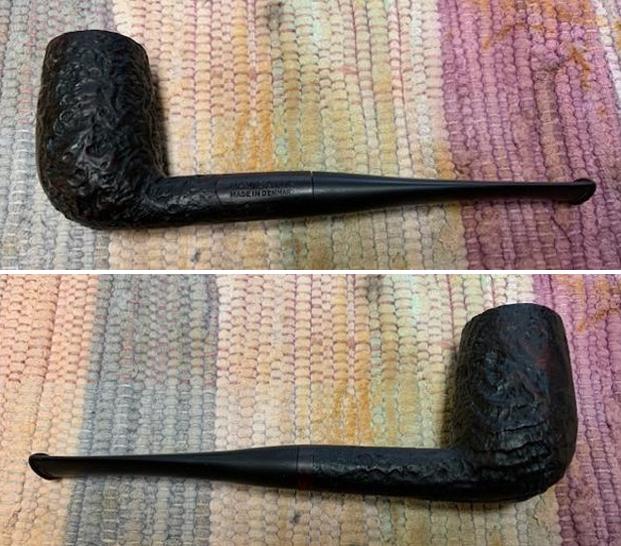
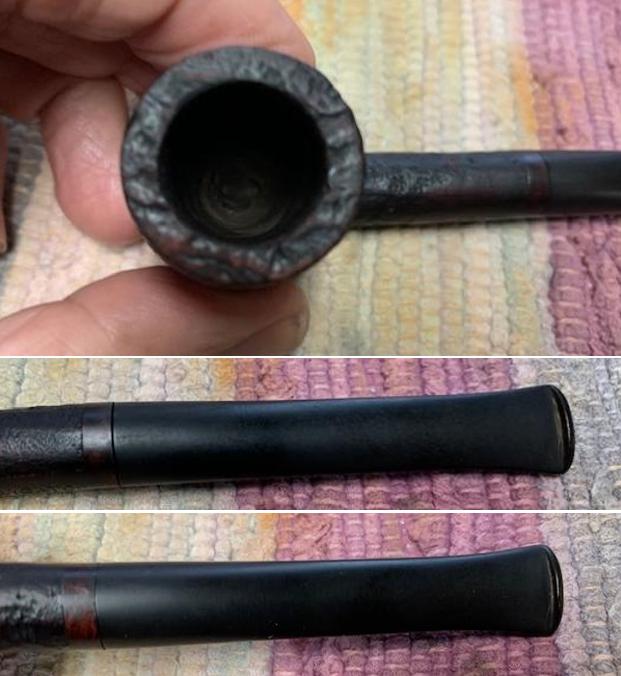
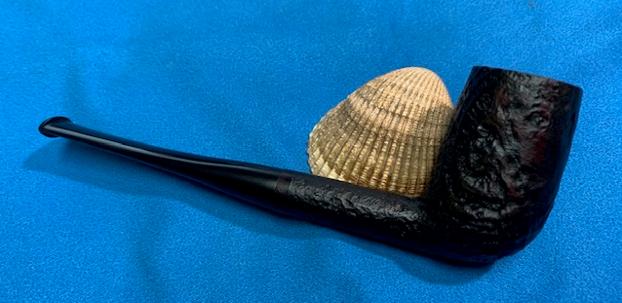
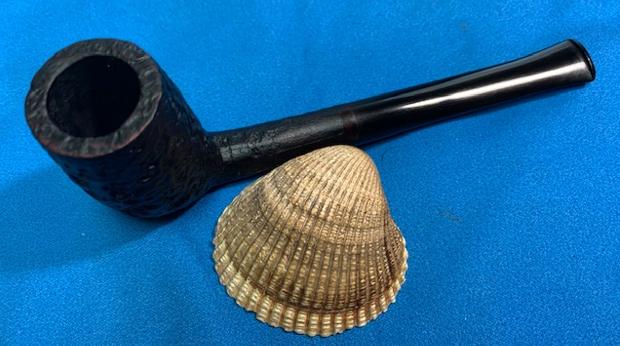
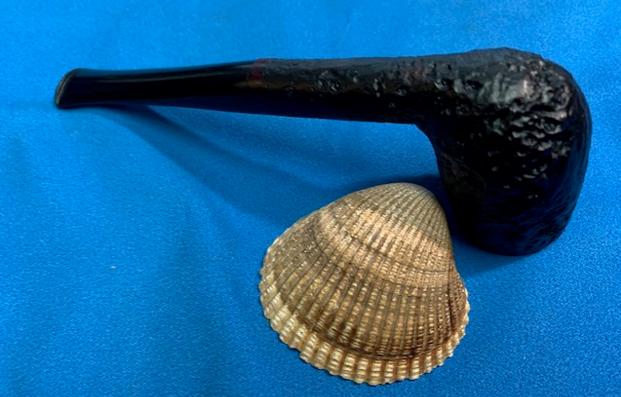
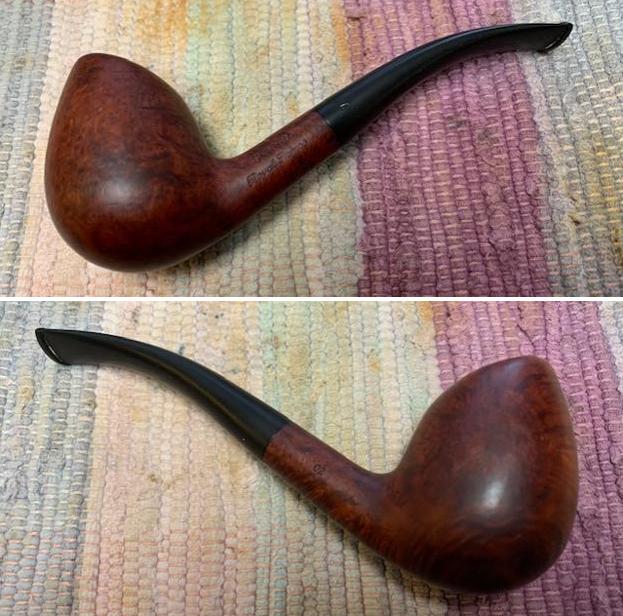
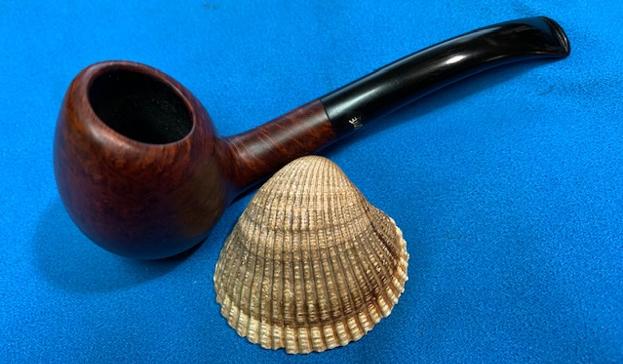
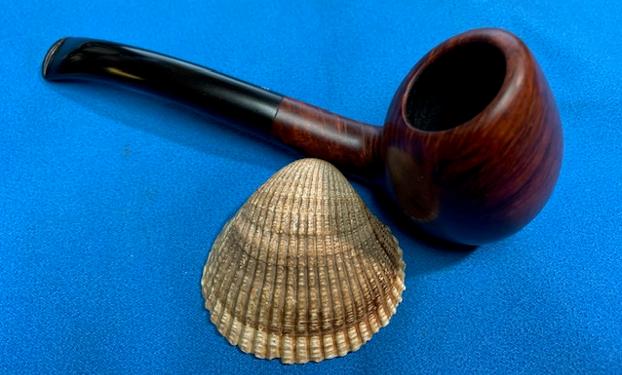
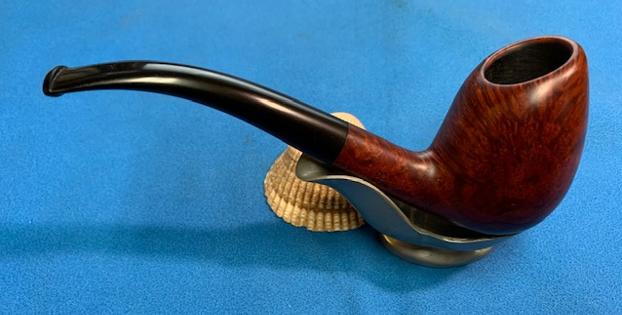
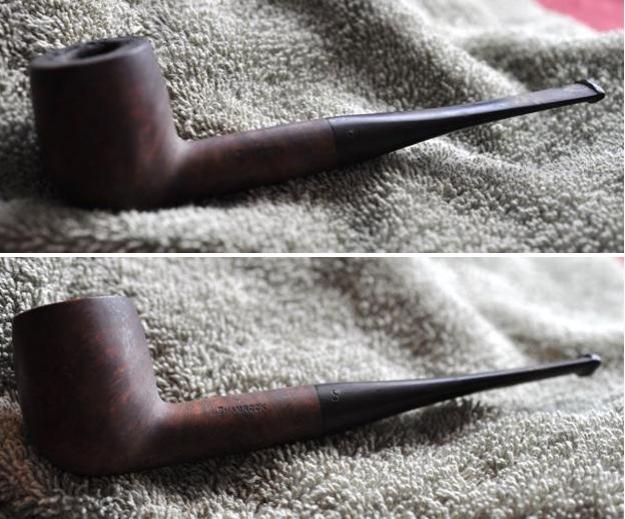
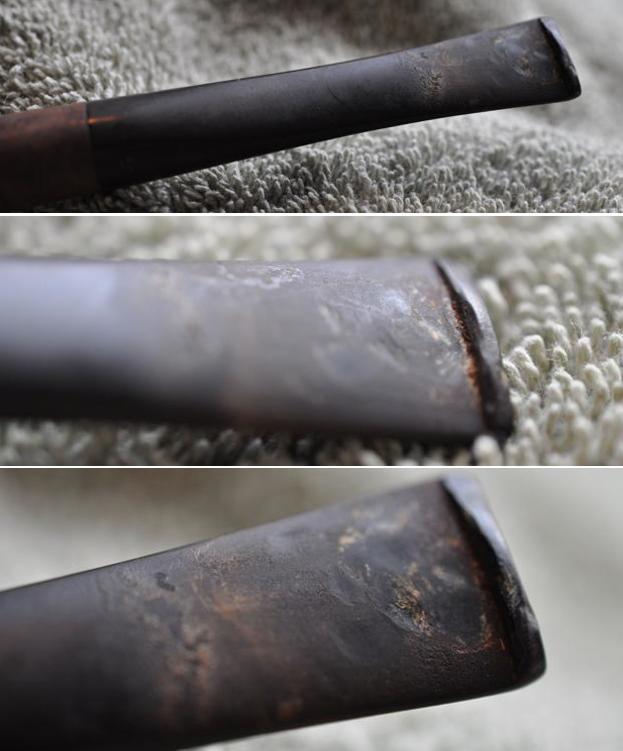
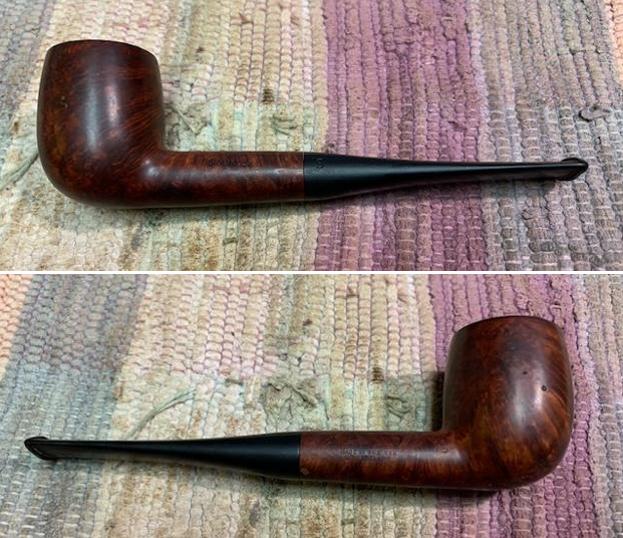
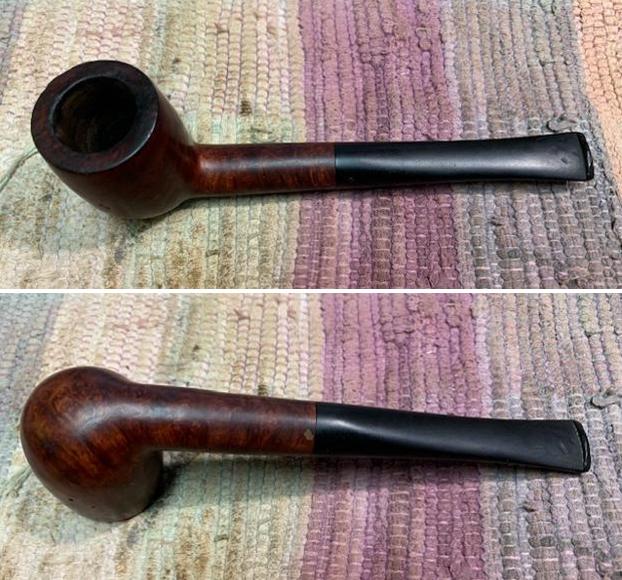
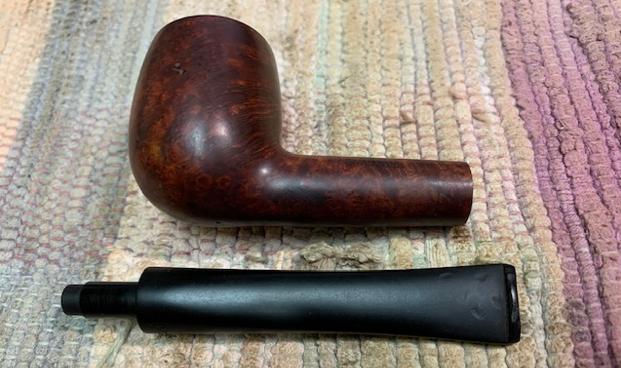
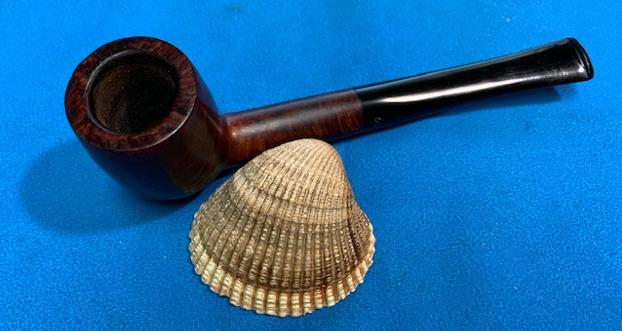
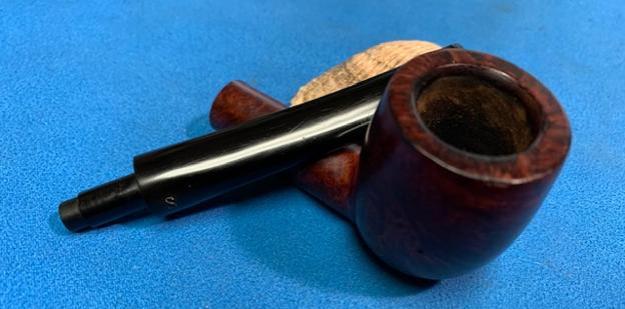
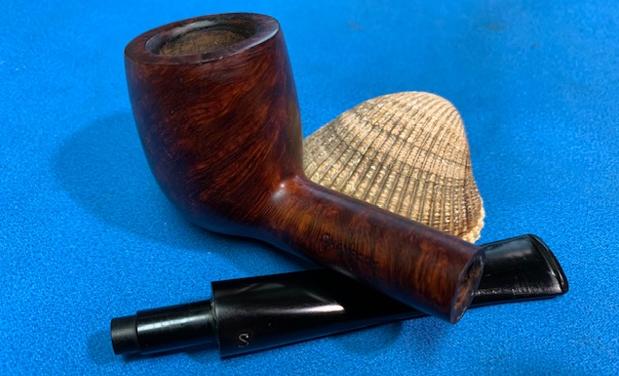
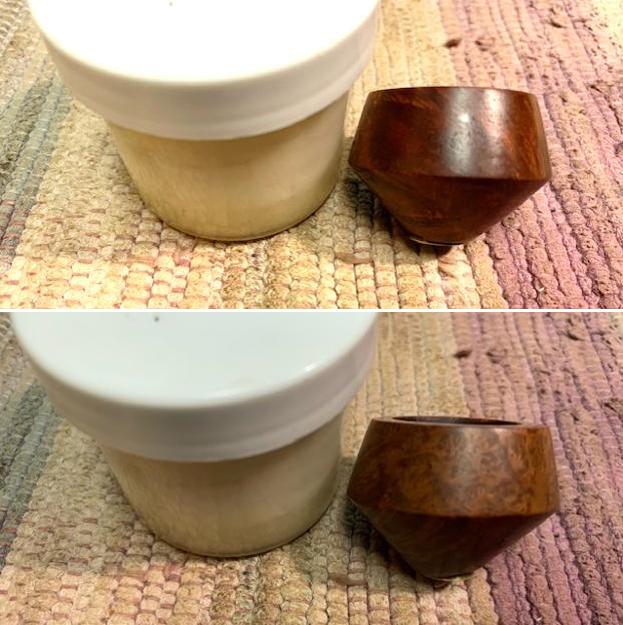
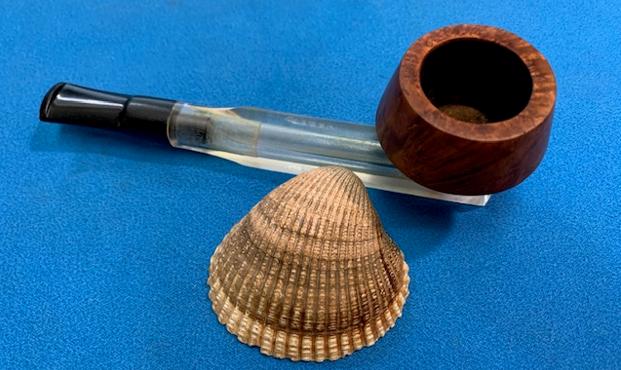
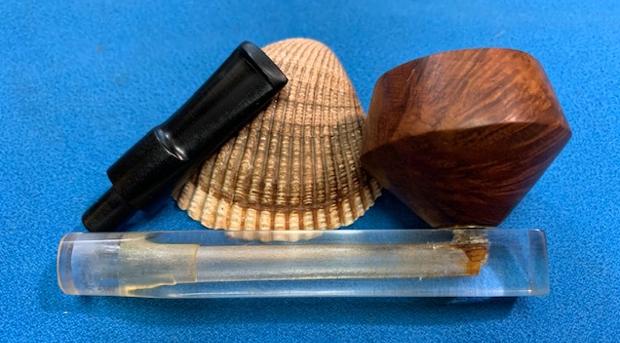
The deeply sandblasted saddle stem sitter is covered in dirt, dust and grime. There is a thick layer of cake in the chamber and the mortise shows accumulation of dried old oils and tars. The tapered vulcanite stem is heavily oxidized and the bite zone is peppered with minor tooth chatter on both the surfaces. There are a few deep bite marks on either surface in the bite zone with what appears to be a cracked button edge on the lower surface. Here is how the pipe appears as it sits on my work table. Detailed Inspection Of The Pipe And Observations
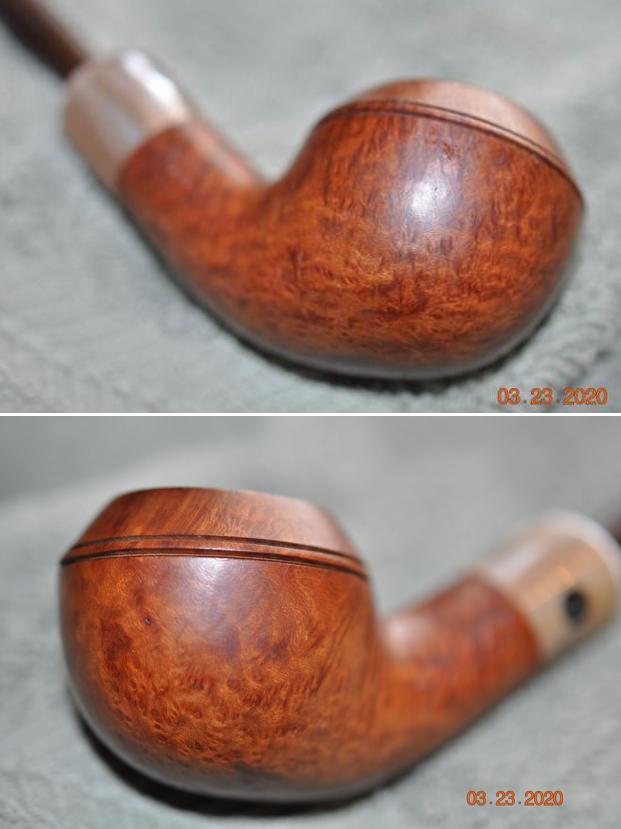
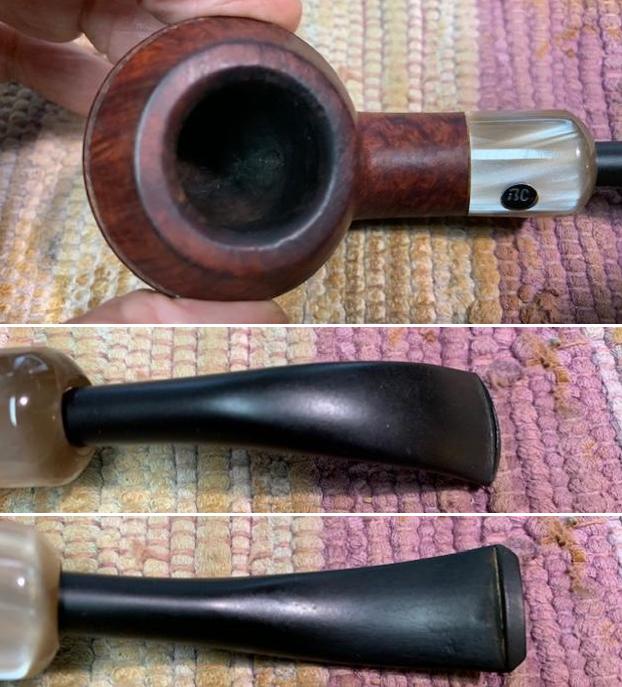
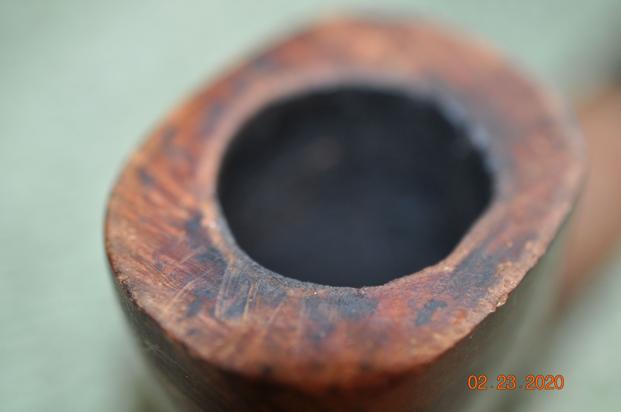
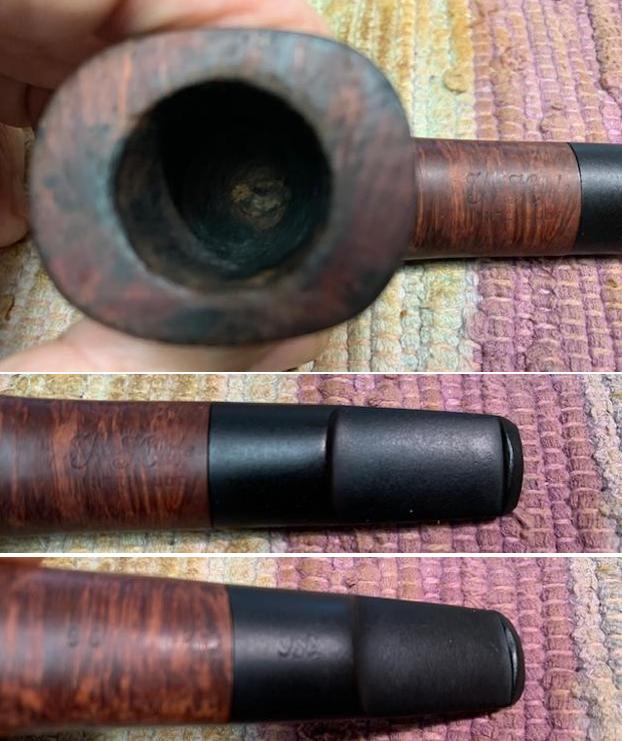
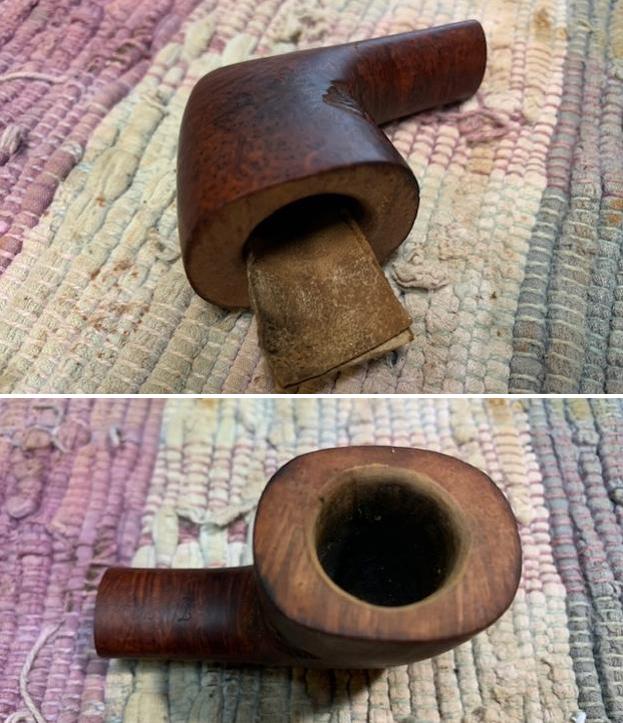
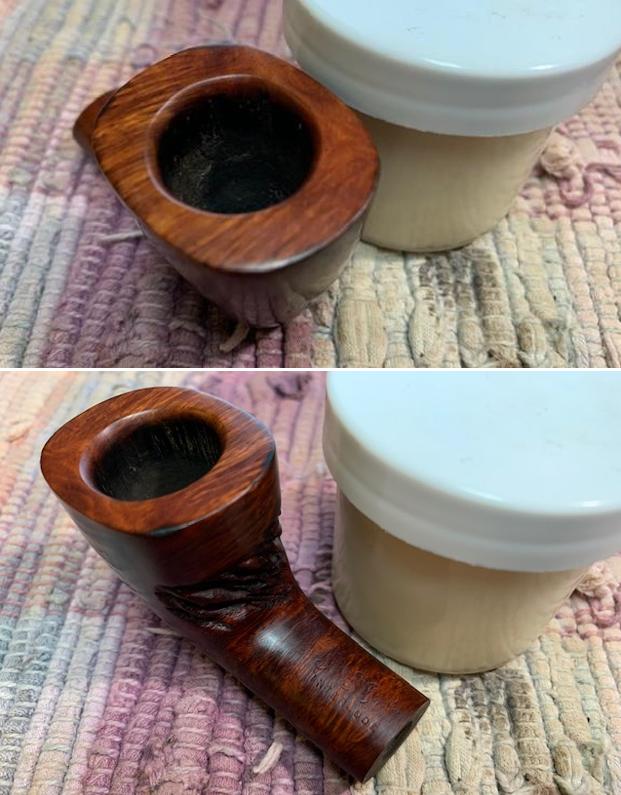
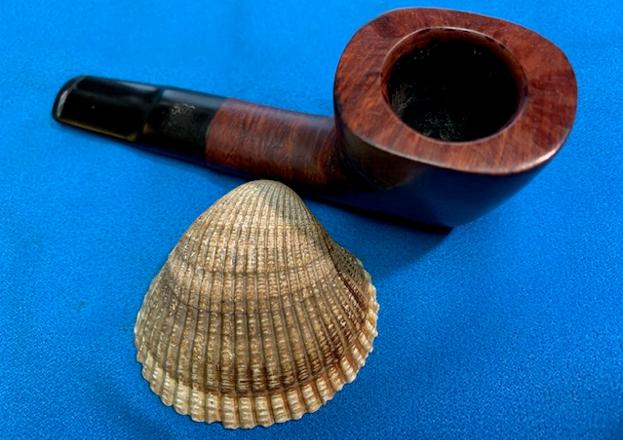
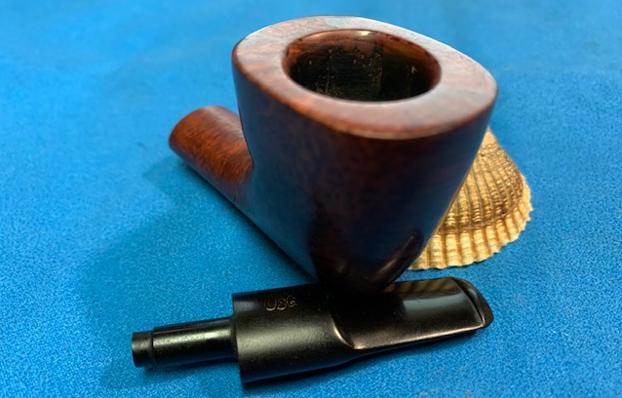
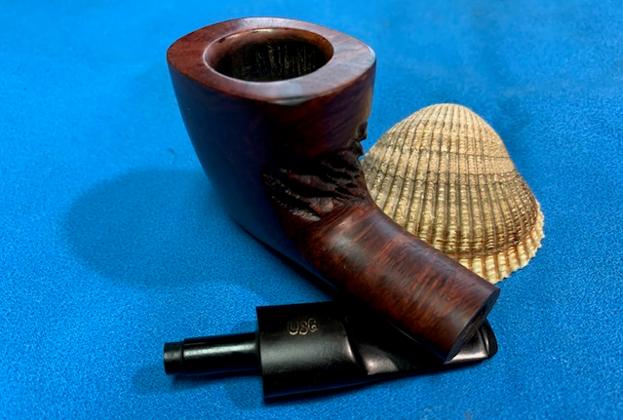
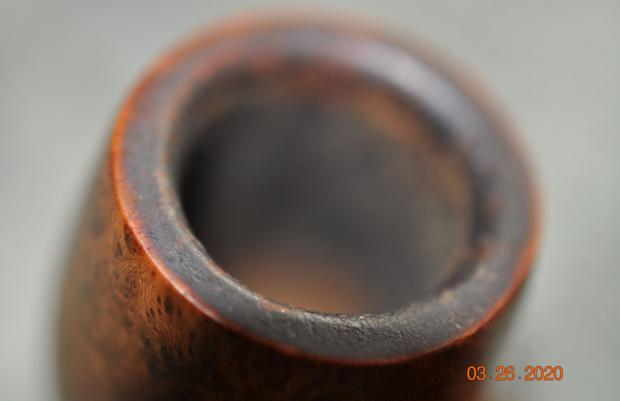
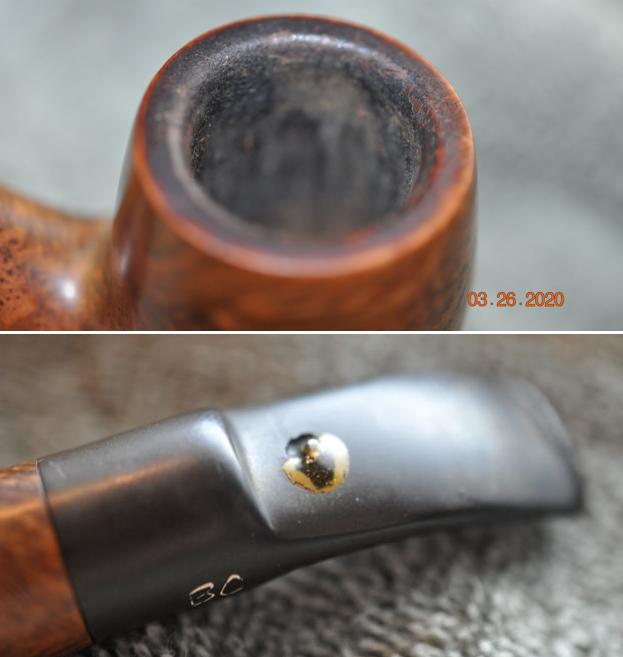
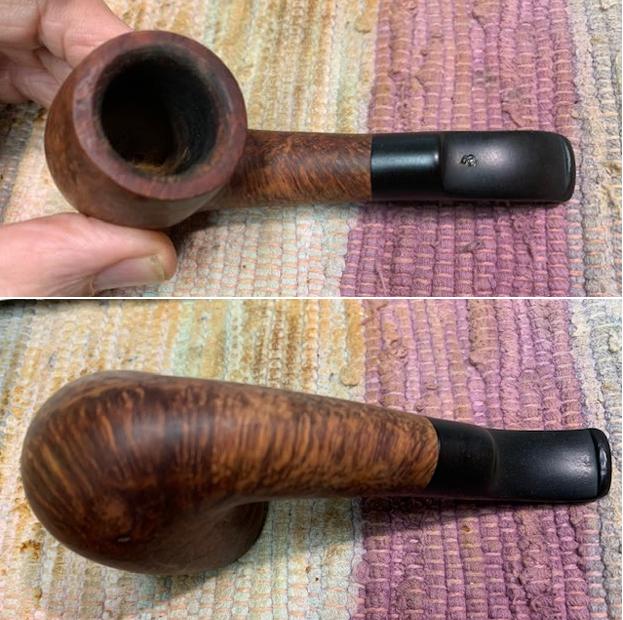
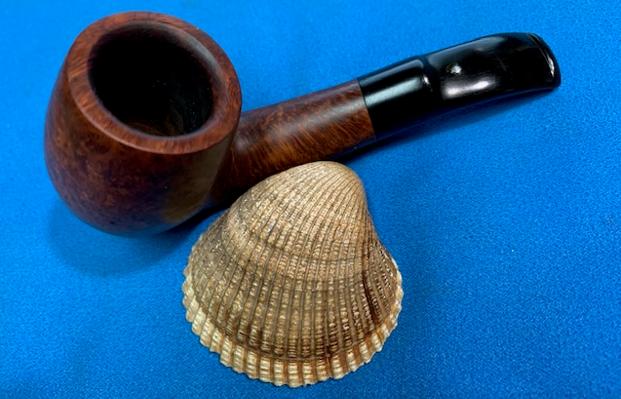
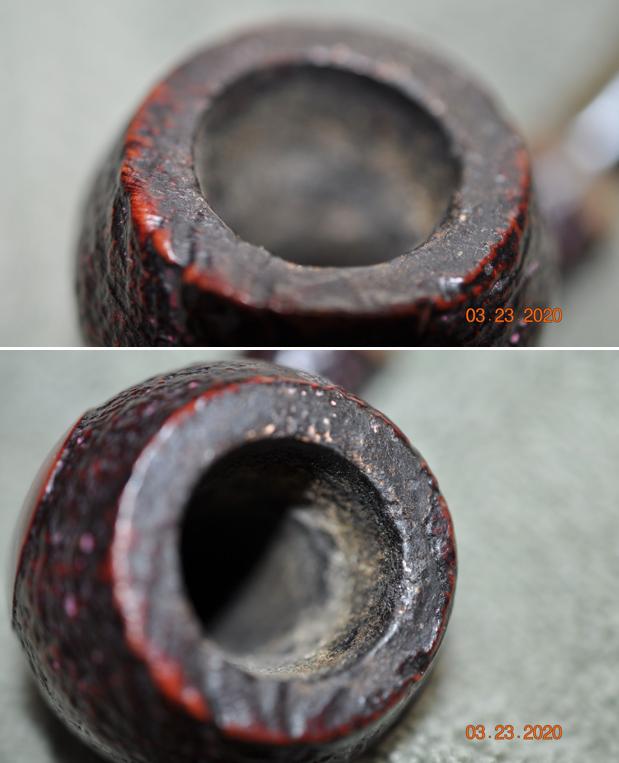
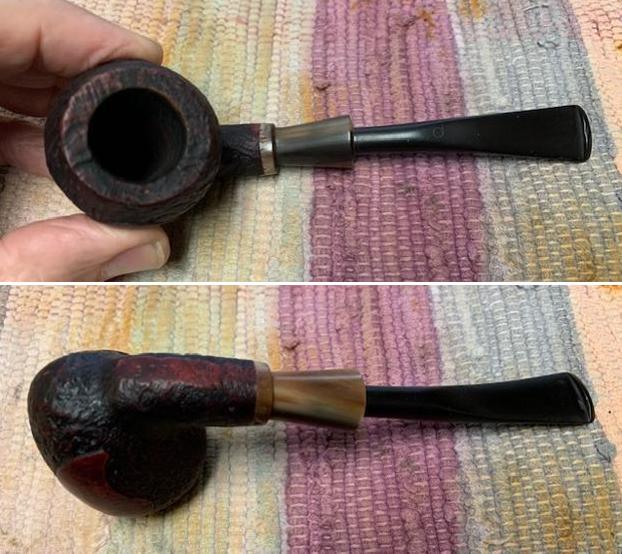
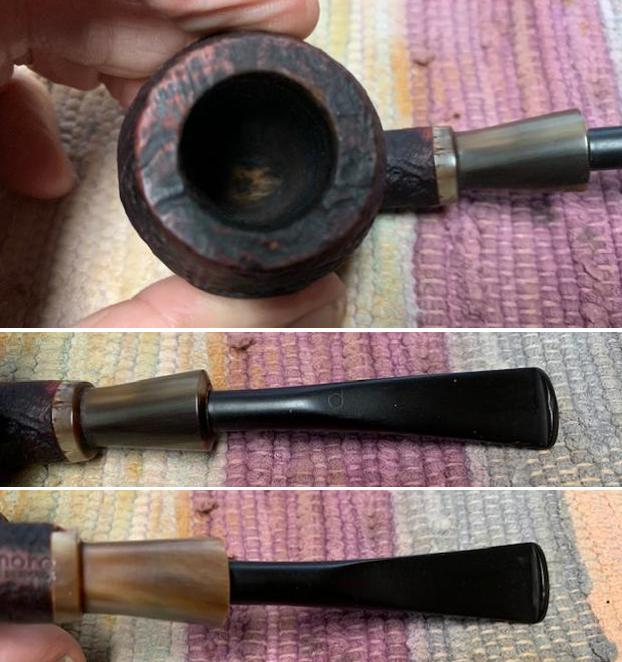
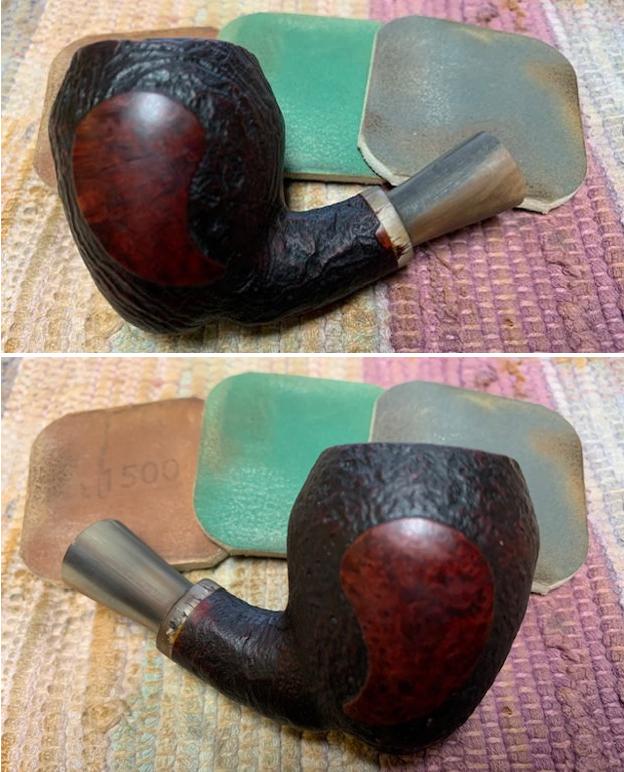
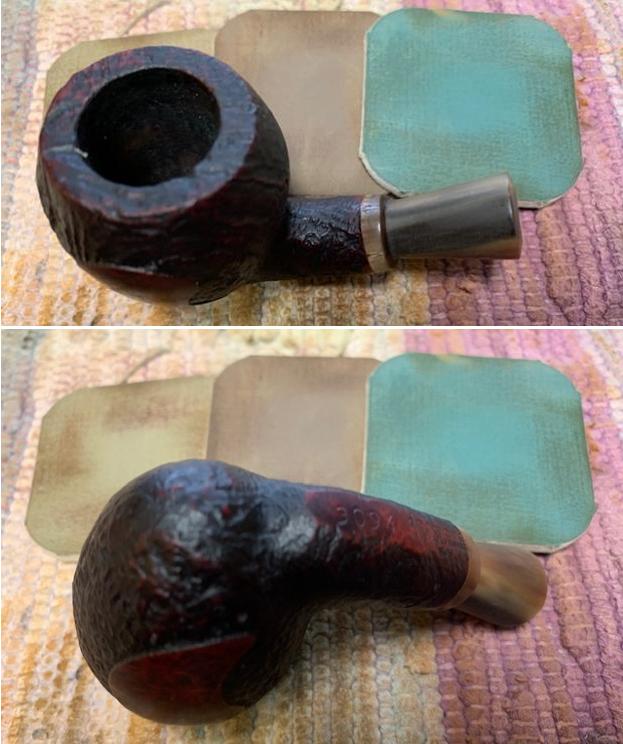
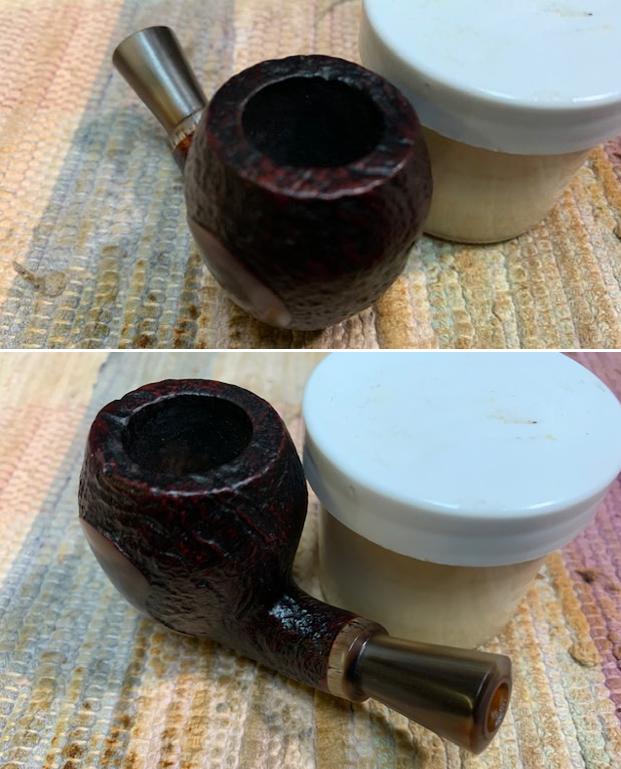
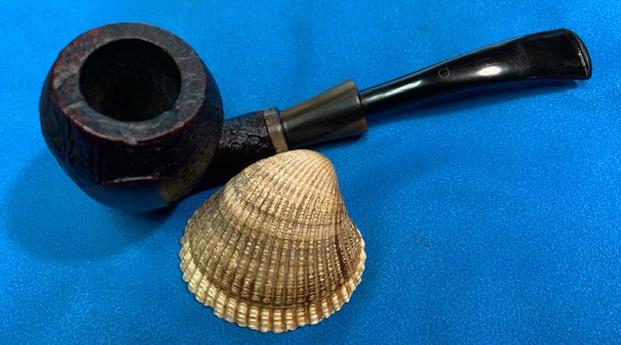
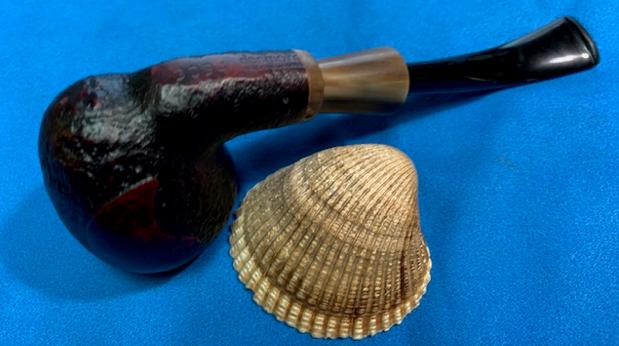
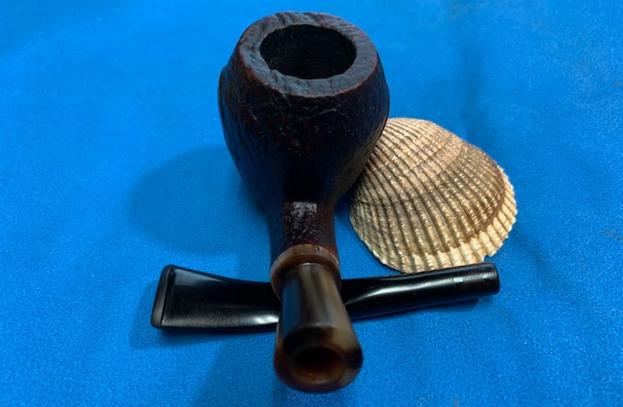
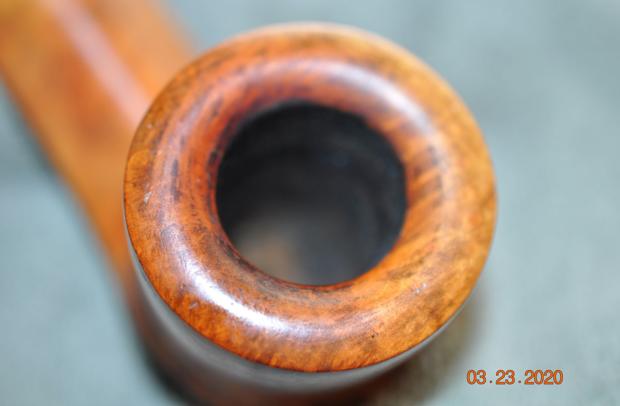
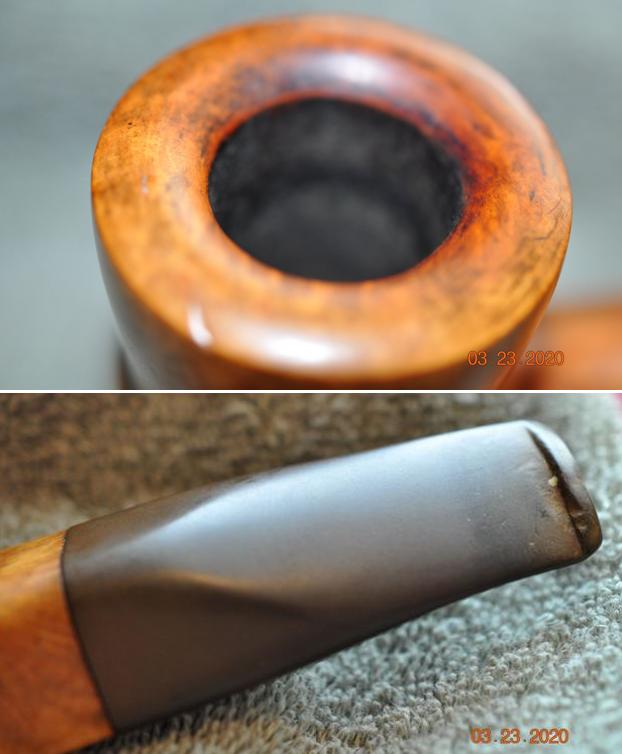
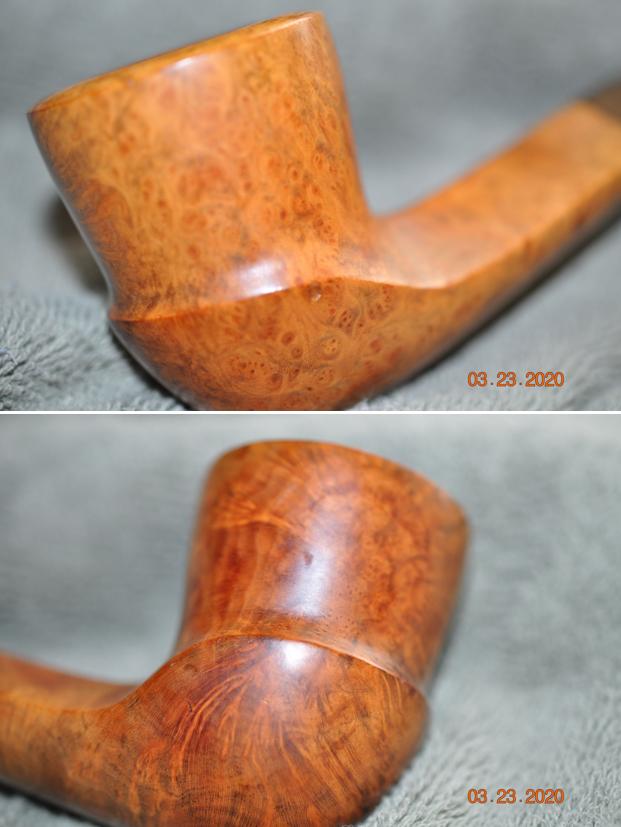
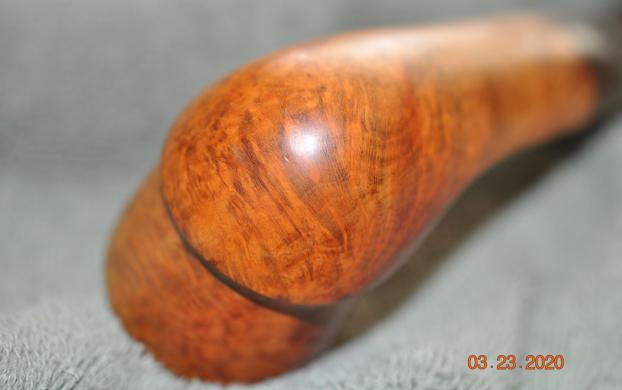
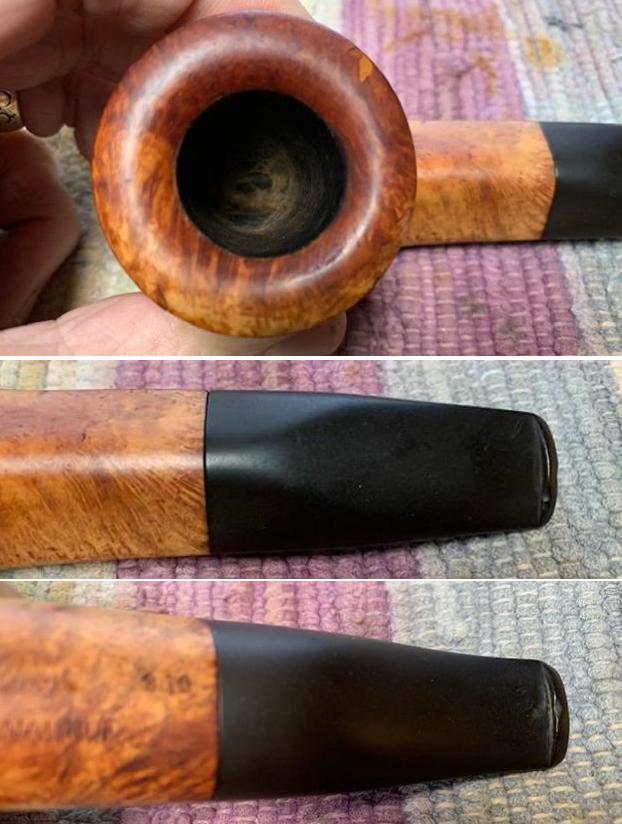
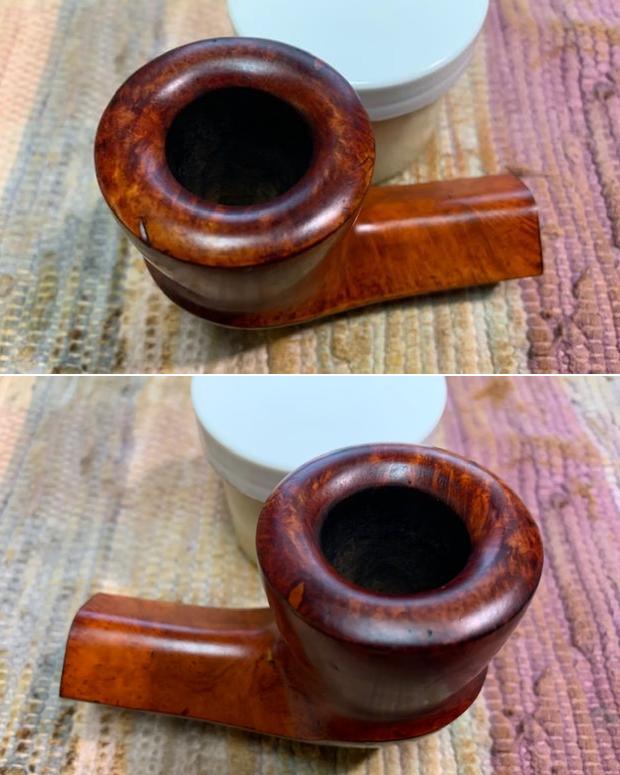
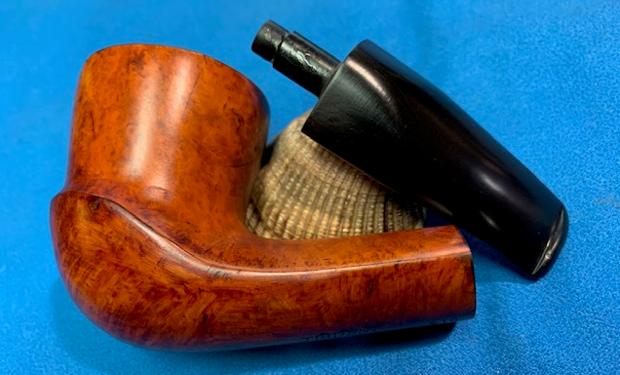
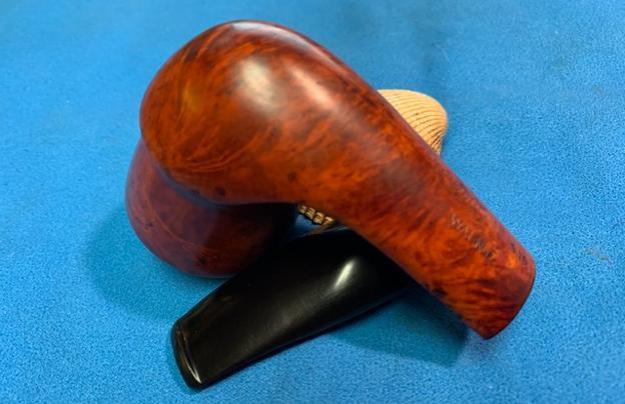
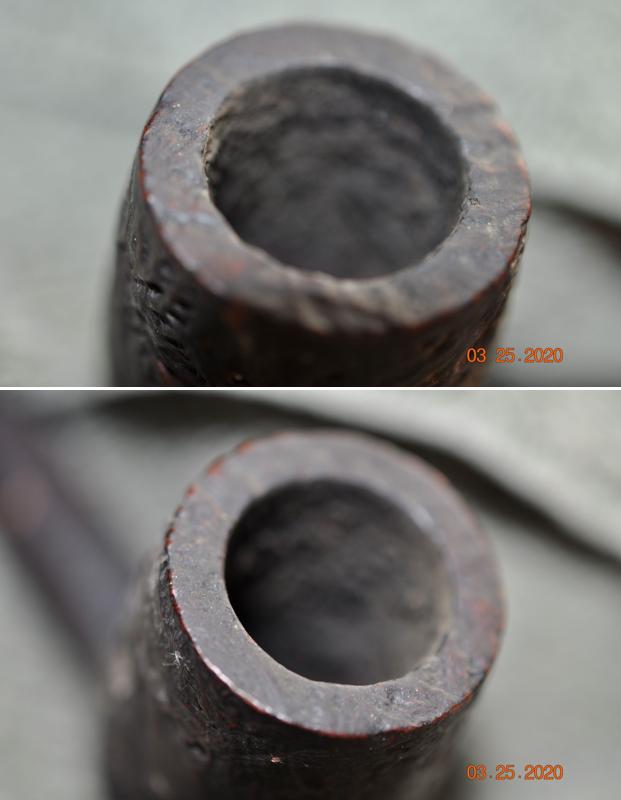
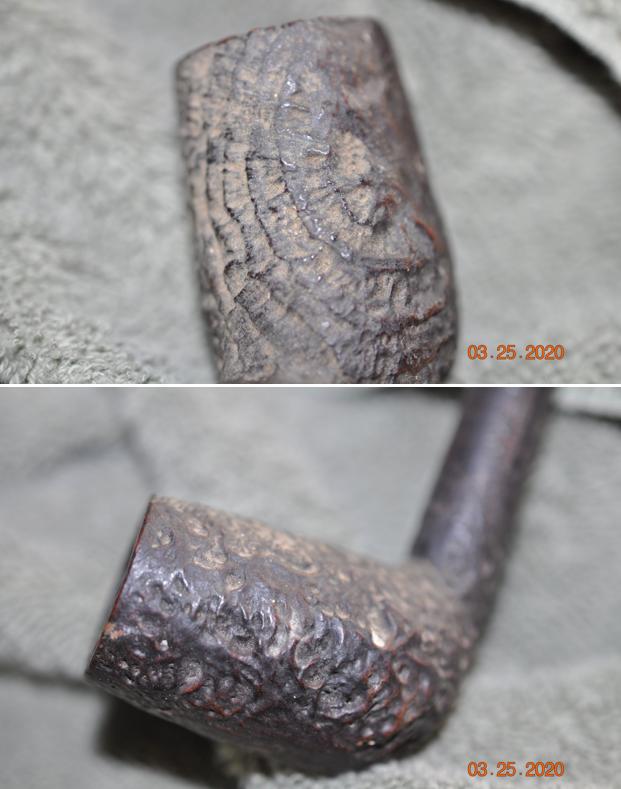
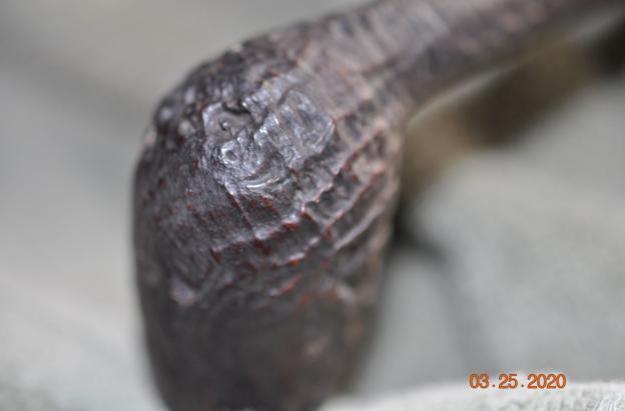
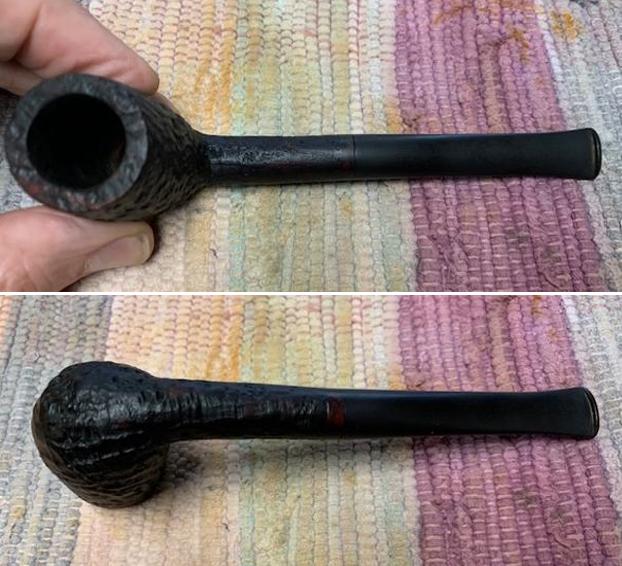
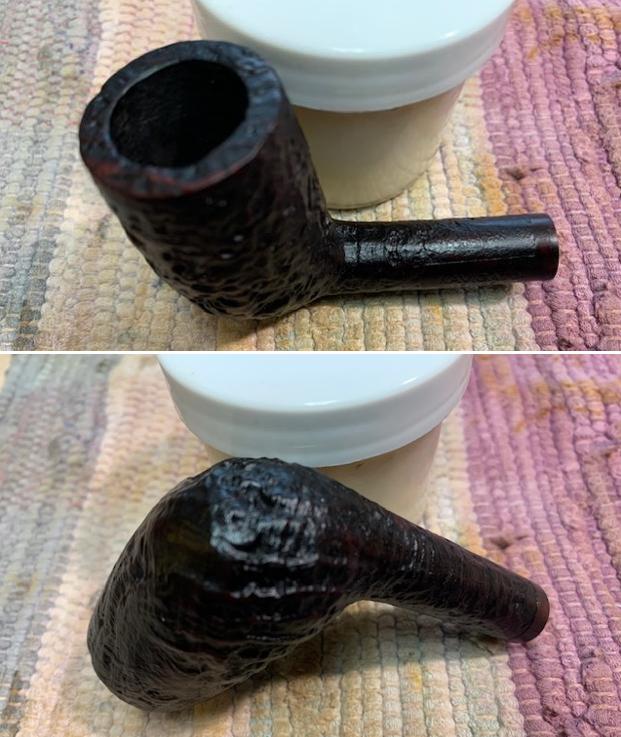
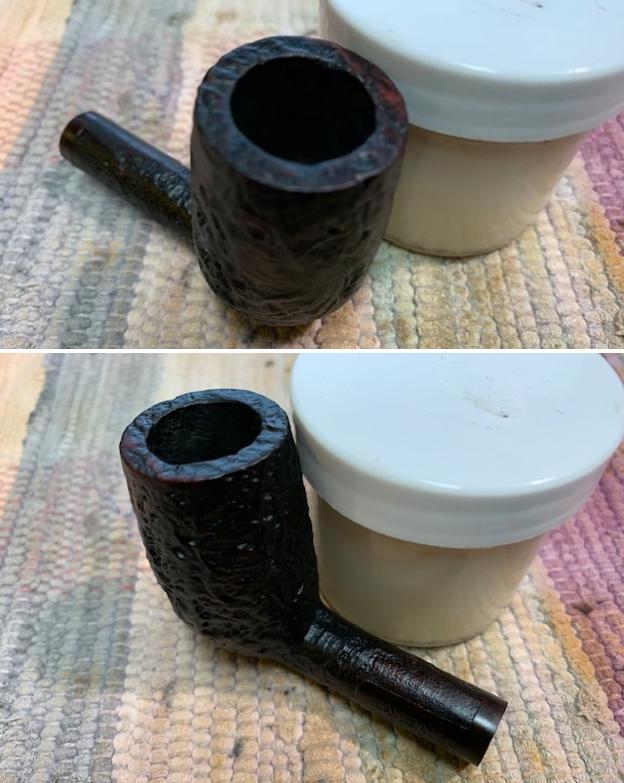
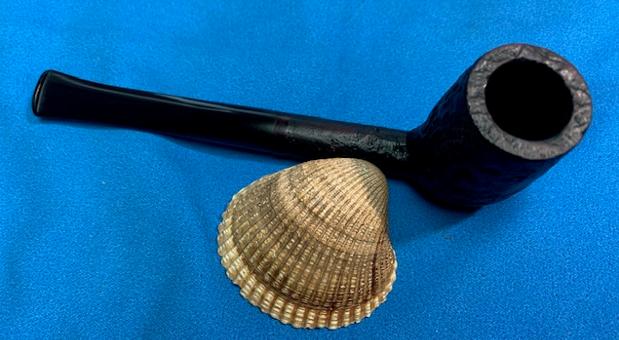
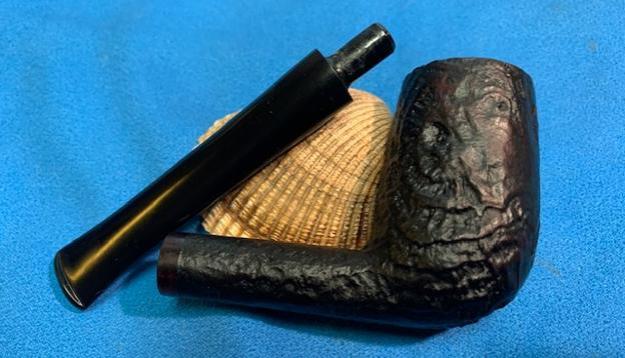
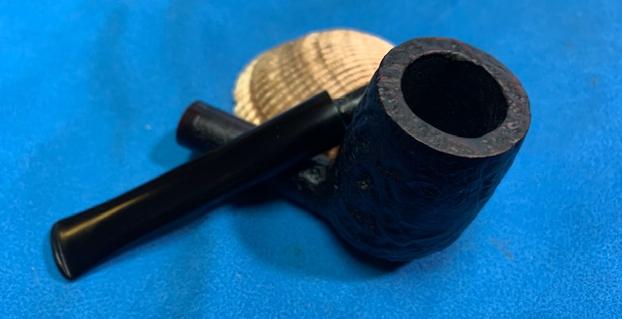
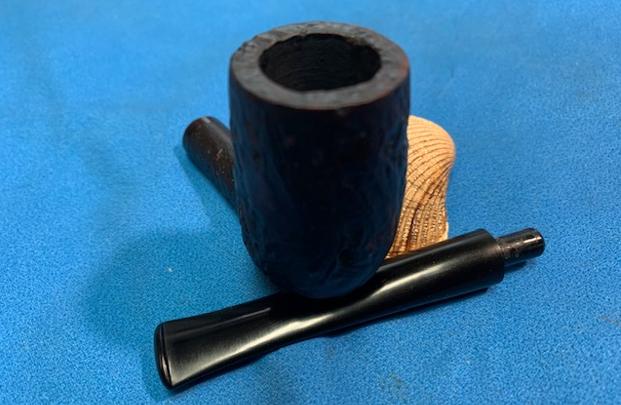
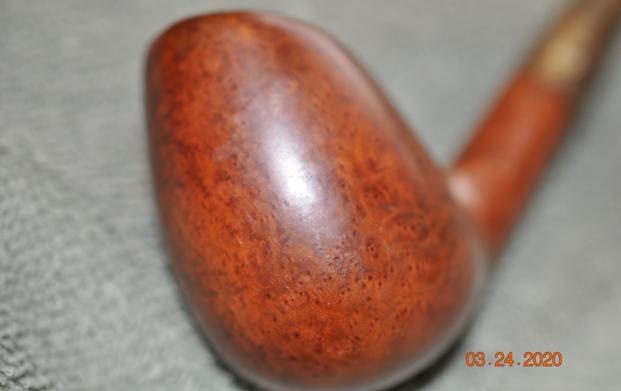
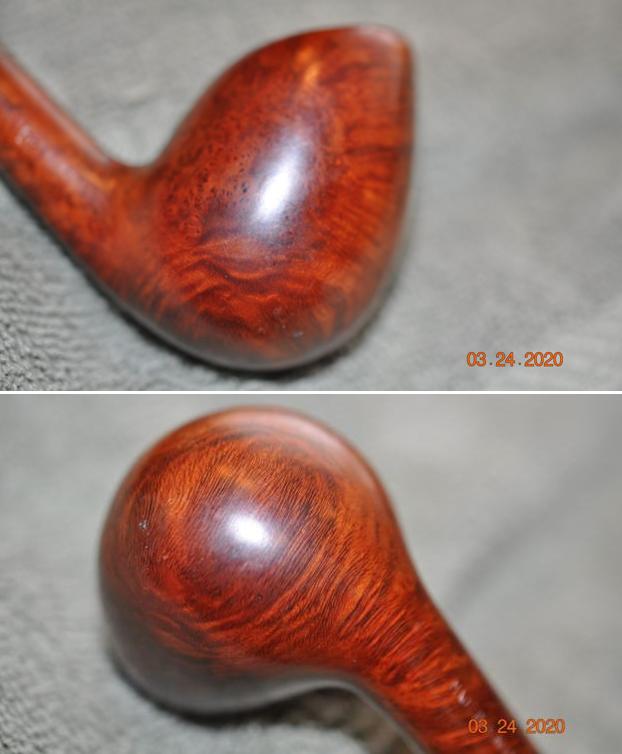
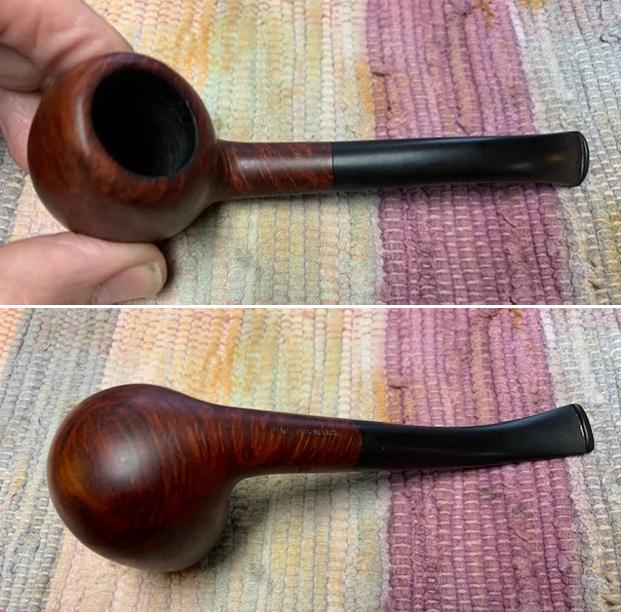
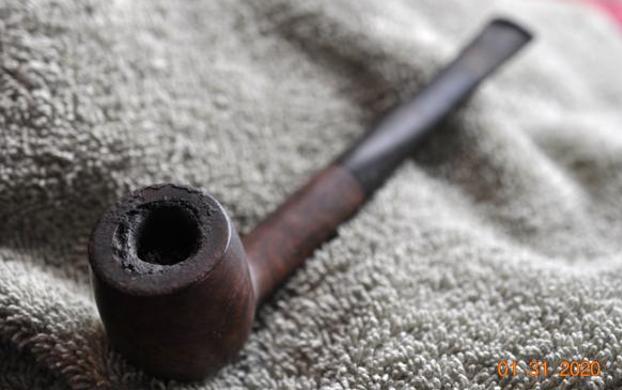
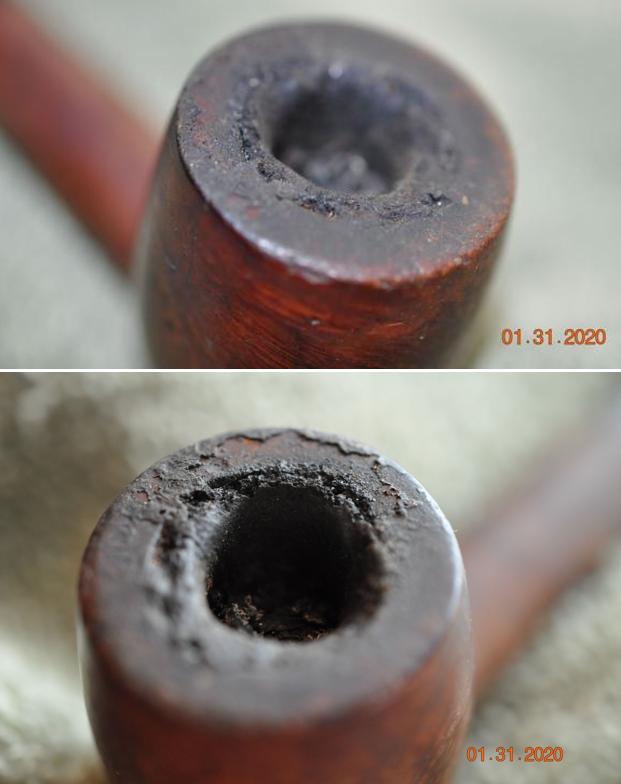
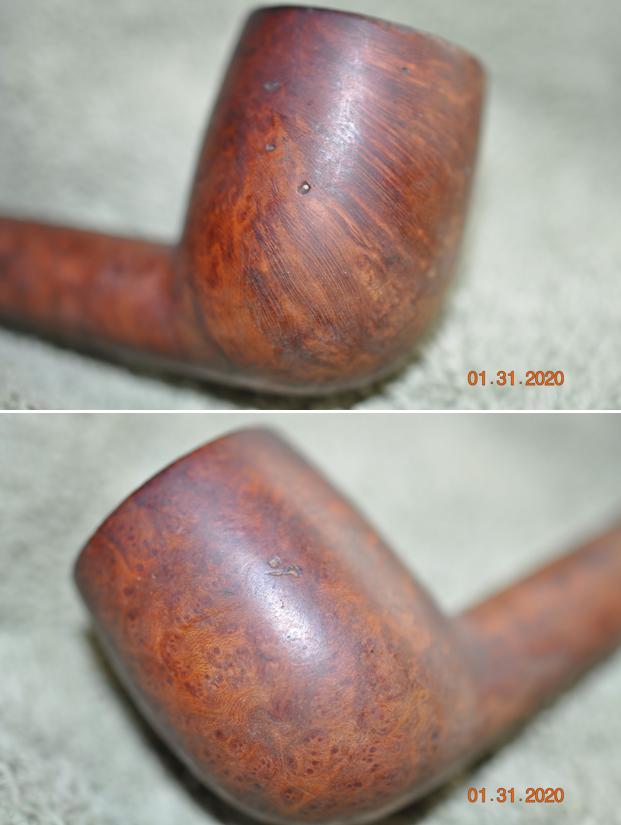
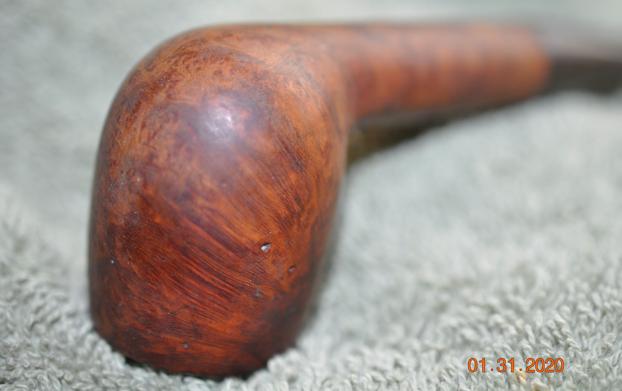
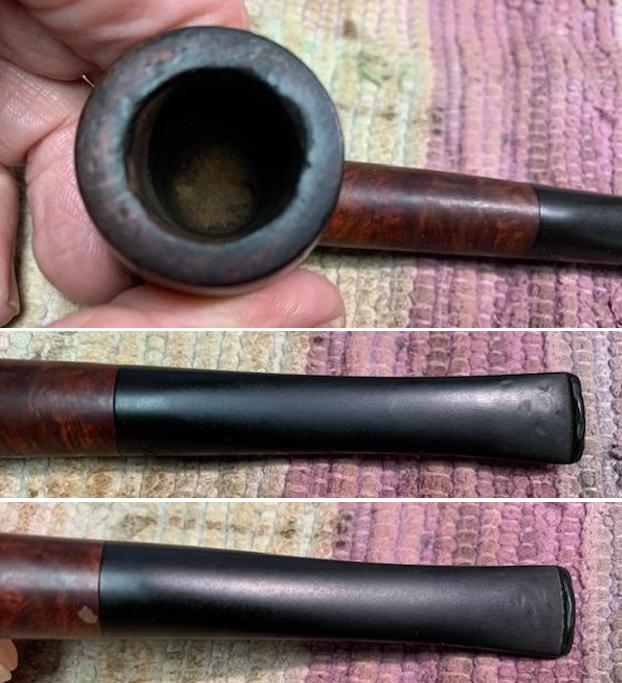
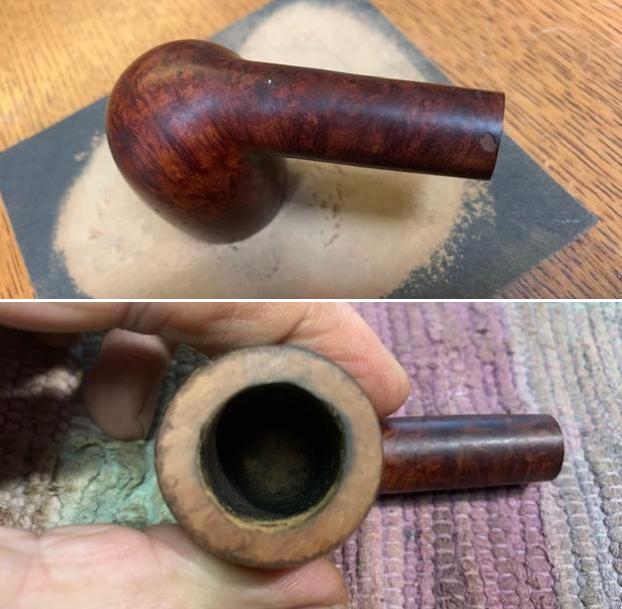
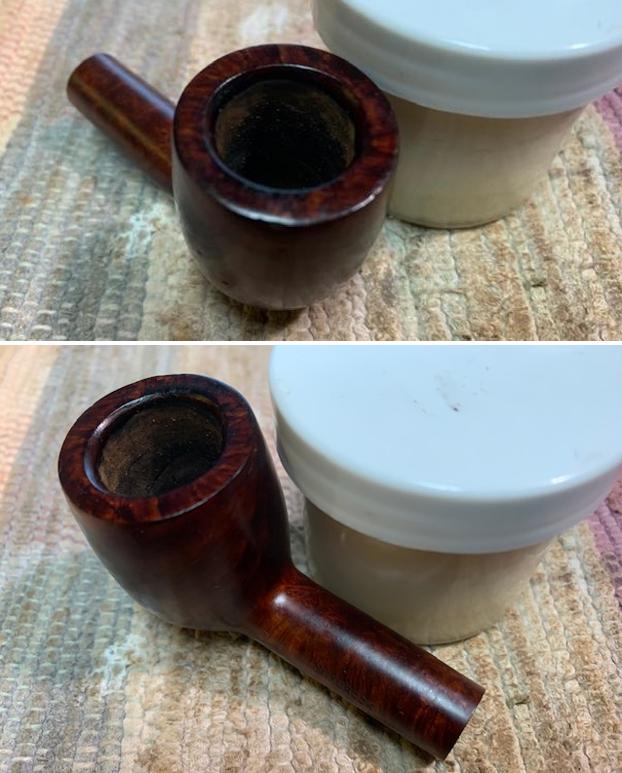
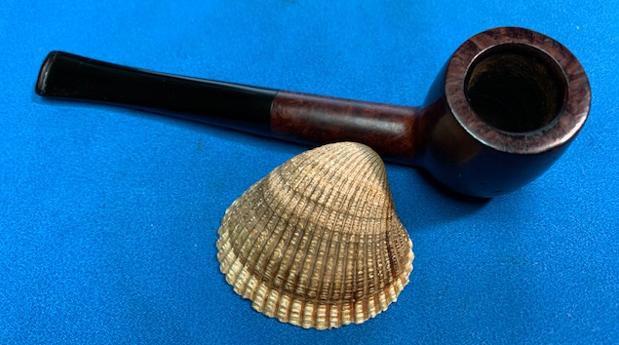
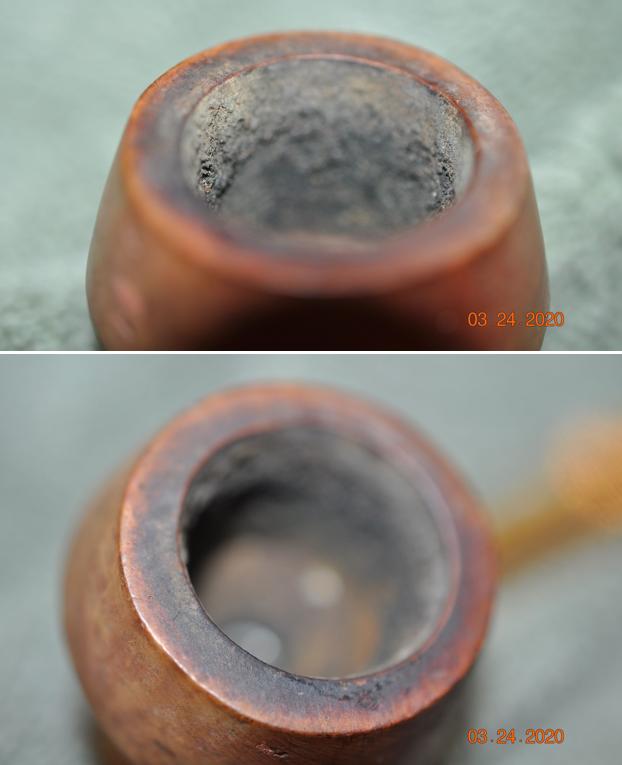
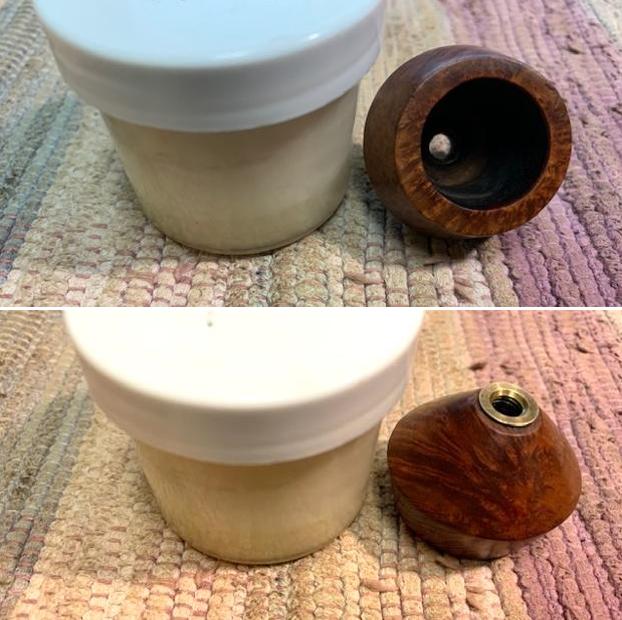
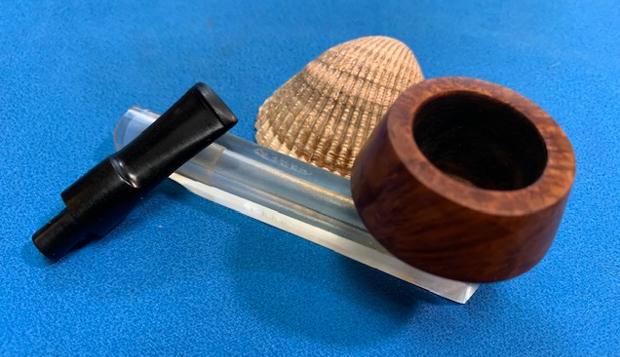
The bowl is nicely rounded with a chamber depth of about 2 inches. The chamber has a layer of thick cake that is slightly thicker in the bottom half of the chamber. The sandblasted rim top surface has worn out (or not?) and now appears shallow blasted/smooth in most places. The inner and outer rim is in pristine condition, save for suspected minor darkening of the inner edge in 1 o’clock direction. The condition of the inner walls of the chamber can be commented upon after the cake has been taken down to the bare briar. The chamber has strong smells from the old tobaccos. The draught hole is in center at the bottom of the chamber with a nice wide open airway and this makes me believe that it should smoke smooth to the last morsel of tobacco in the chamber. The stummel, all around appears solid to the touch and hence I do not foresee any serious damage to the walls in the form of burnout/ deep heat fissures/ lines or pits. I may have to resort to the salt and alcohol treatment of the chamber if the ghost smells do not reduce after the cake has been removed and the shank internals are thoroughly cleaned.The crevices in the sandblasted surface are filled with dust, dirt and grime from all the years of smoking and storage. The fact that the grooved patterns are dusty and filled with dirt is accentuated more due to the brown and black hues on the stummel and the shank. The briar looks lifeless and bone dry and has taken on dirty grey hues. The mortise shows accumulation of oils, tars and gunk and the air flow is not full and smooth. I need to be careful while cleaning the shank bottom surface to preserve the stampings on this pipe. Thorough cleaning and rising under warm water of the stummel surface should highlight the grain patterns, depth and cragginess of the sandblast. 
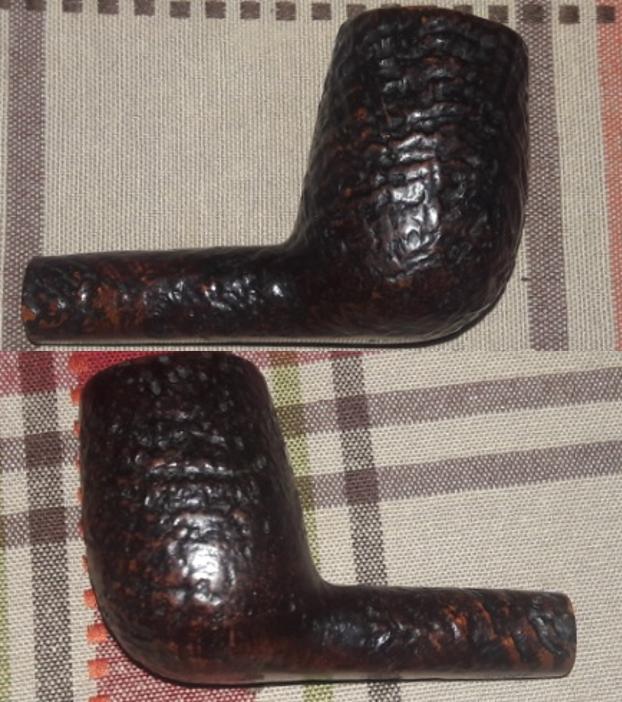
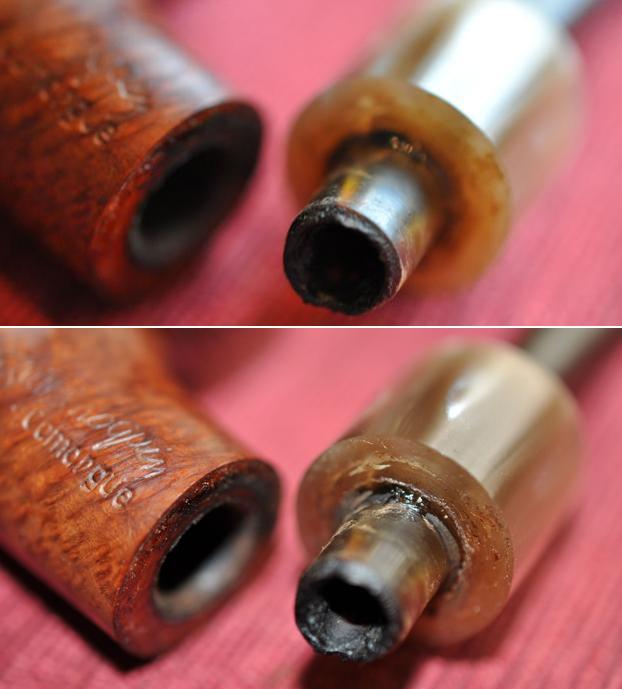
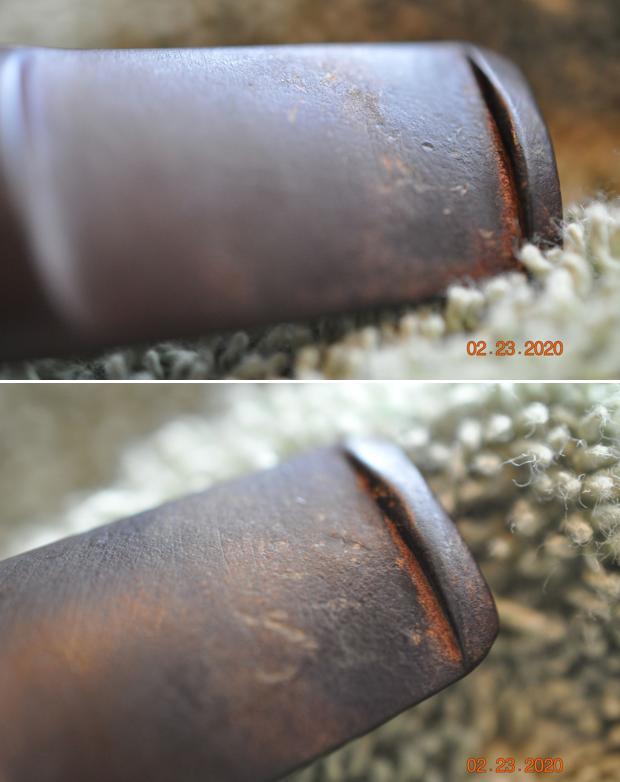
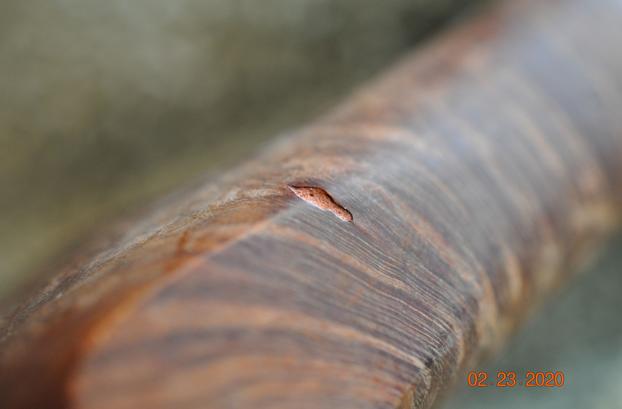
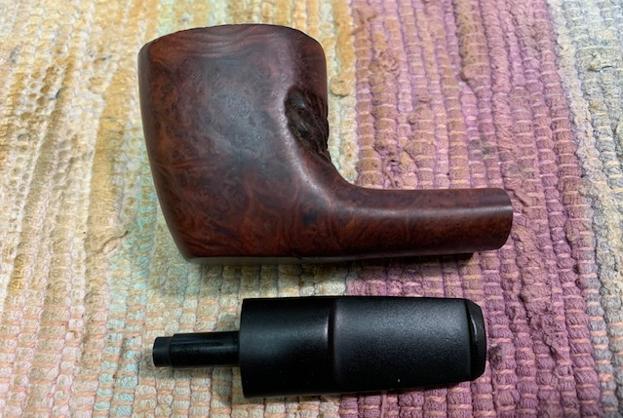
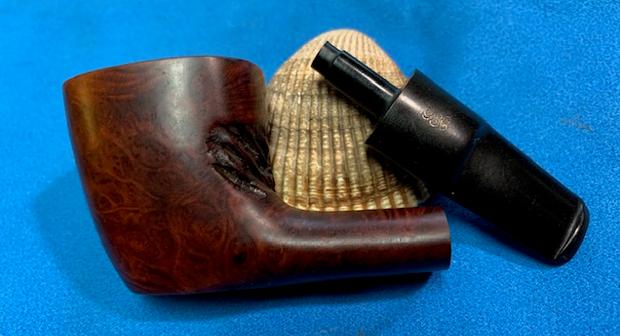
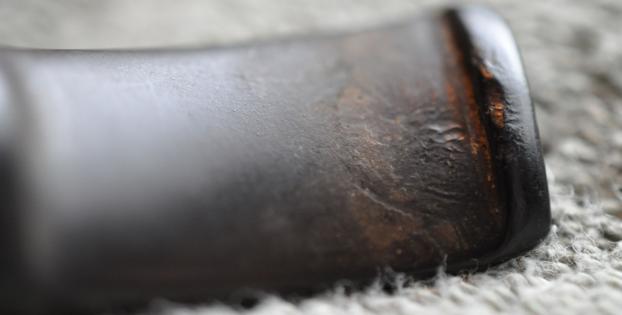
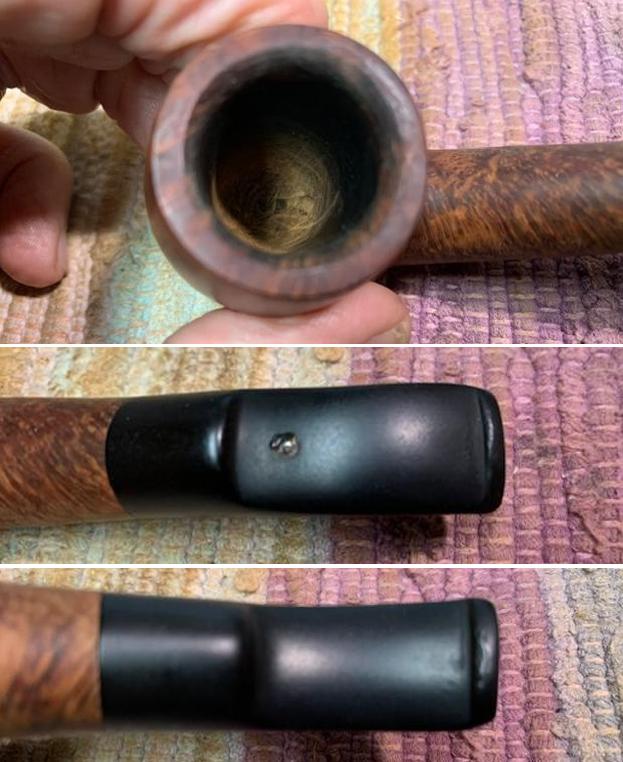
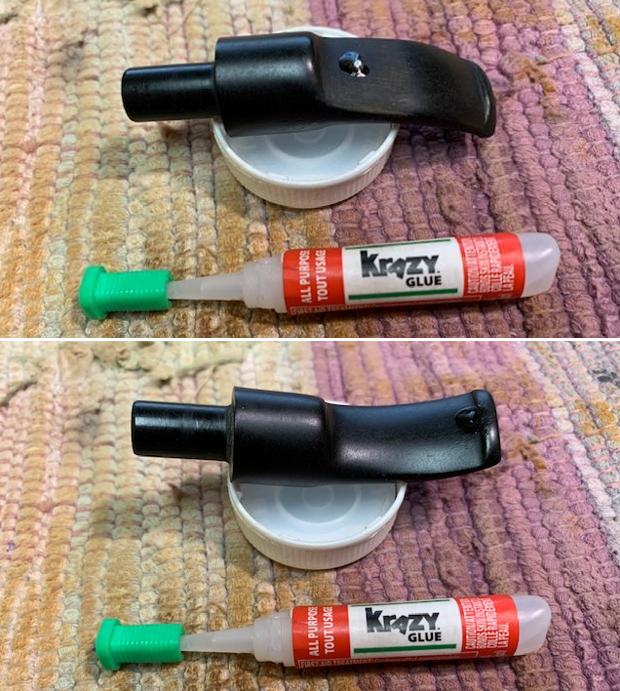
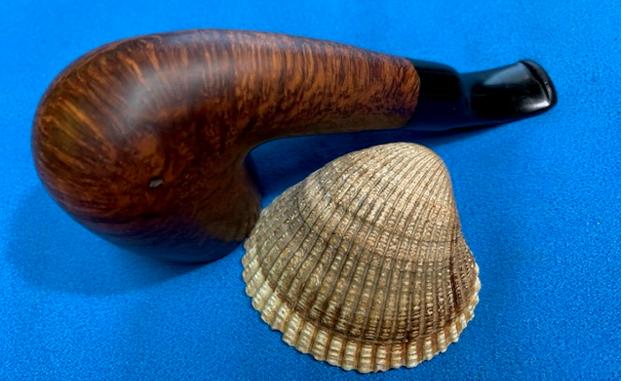
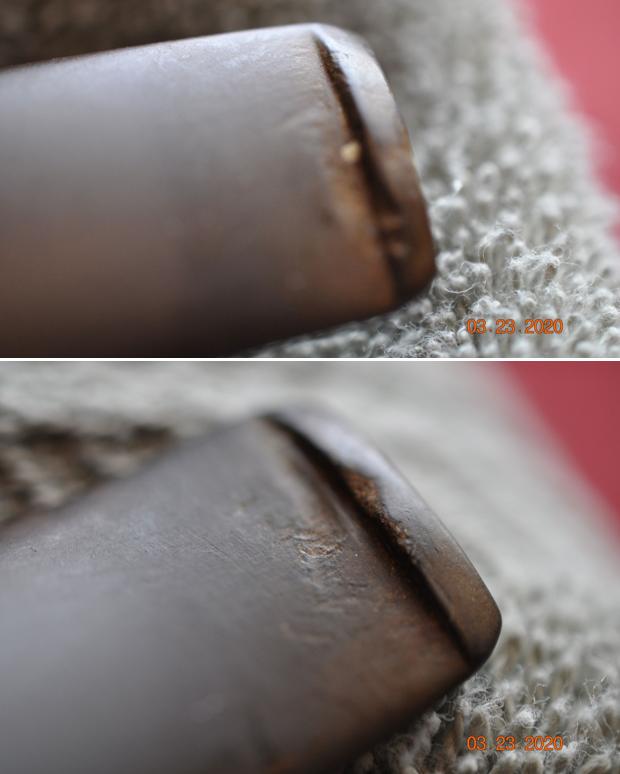
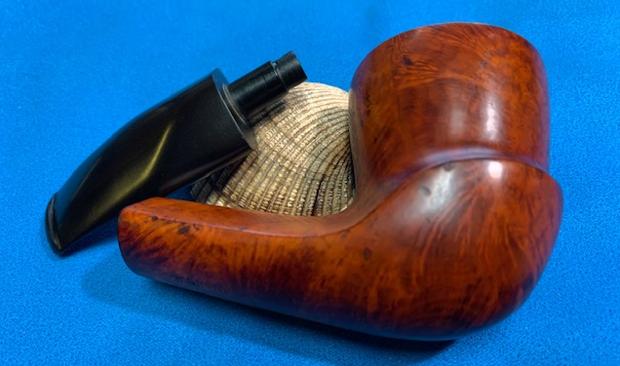
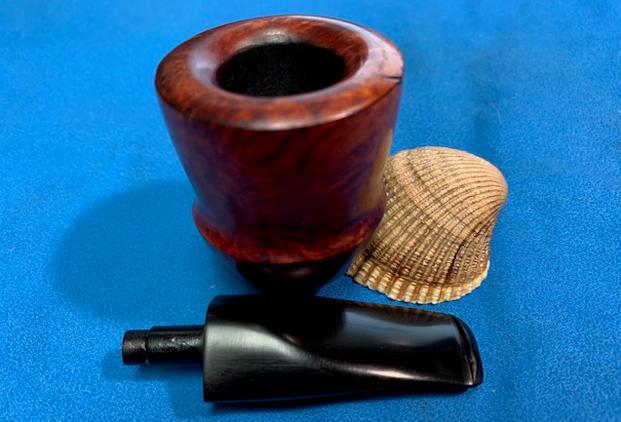
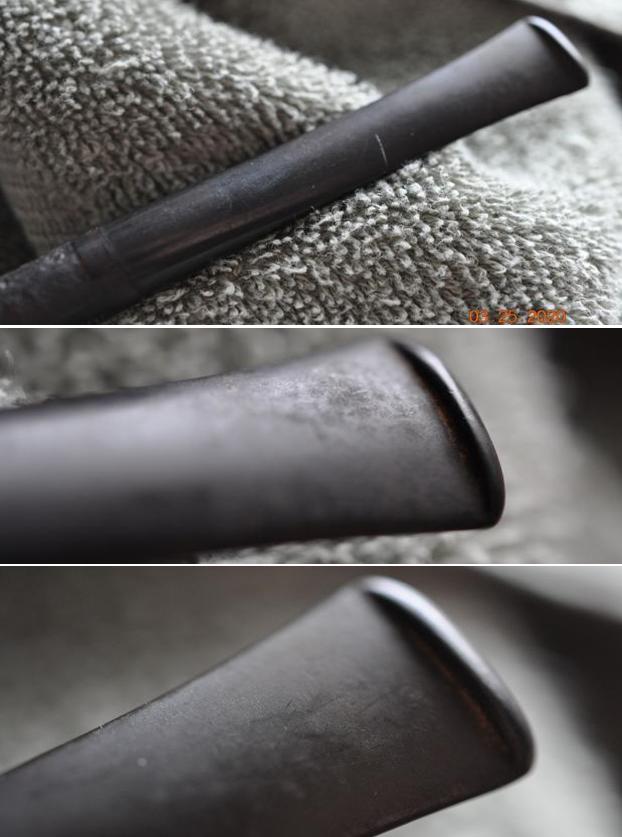
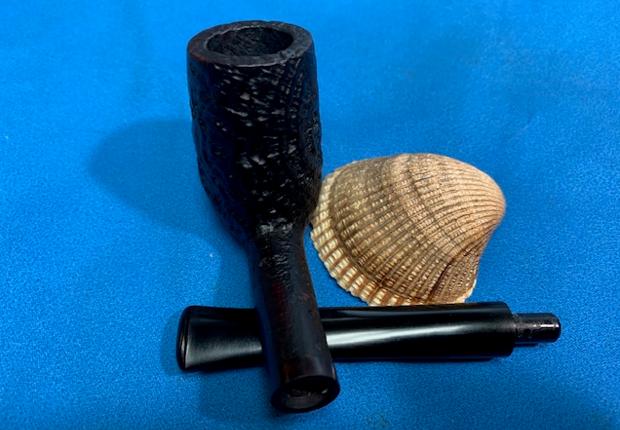
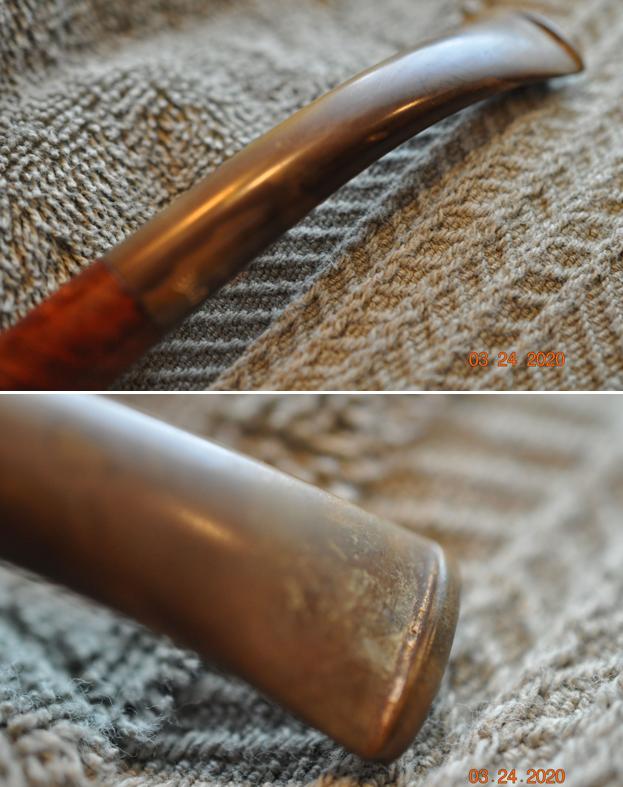
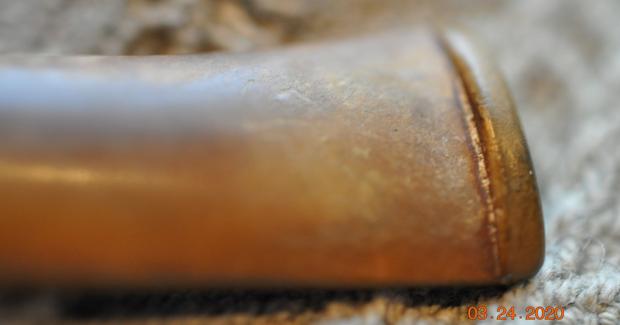
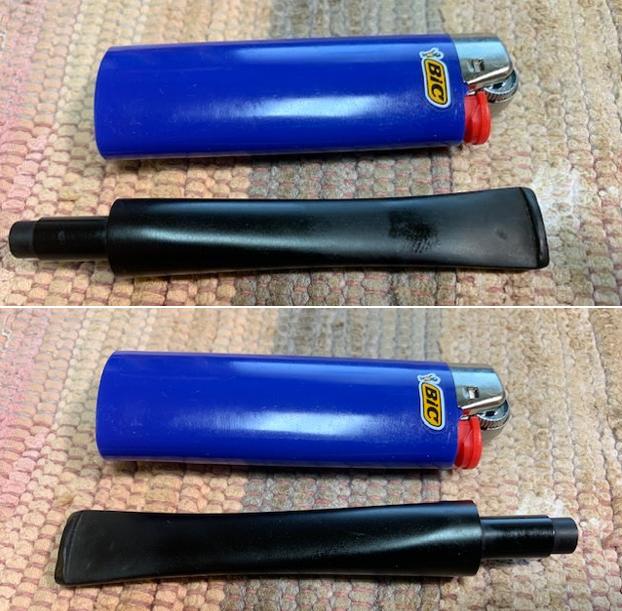
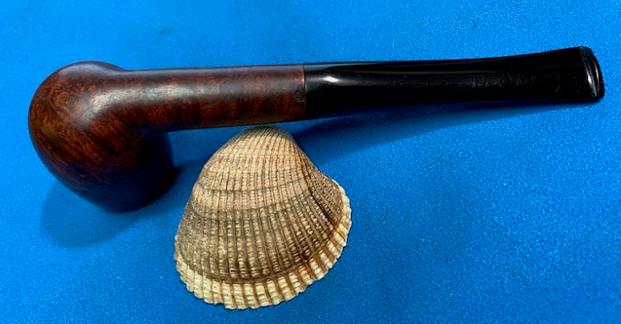
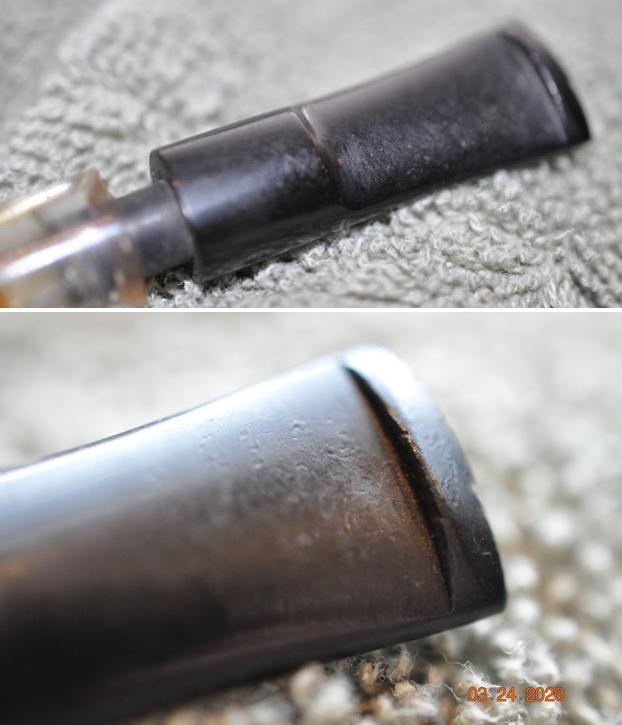
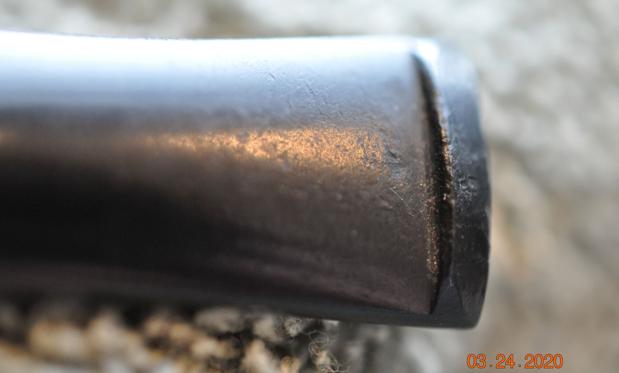
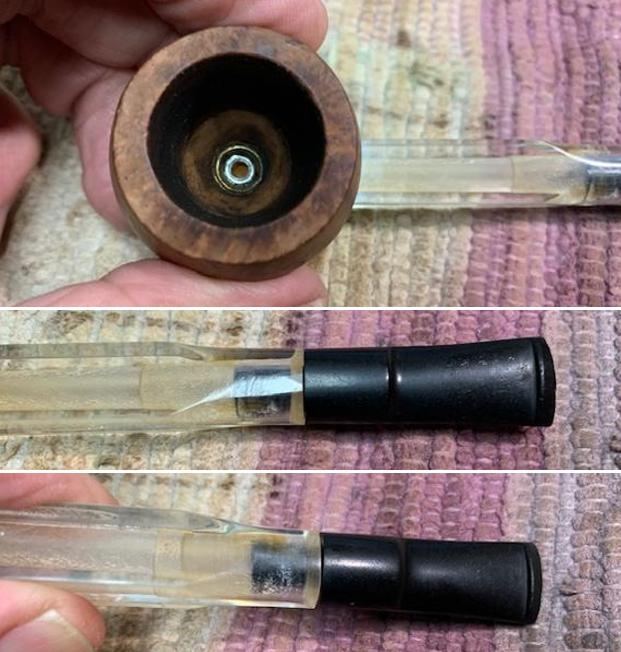
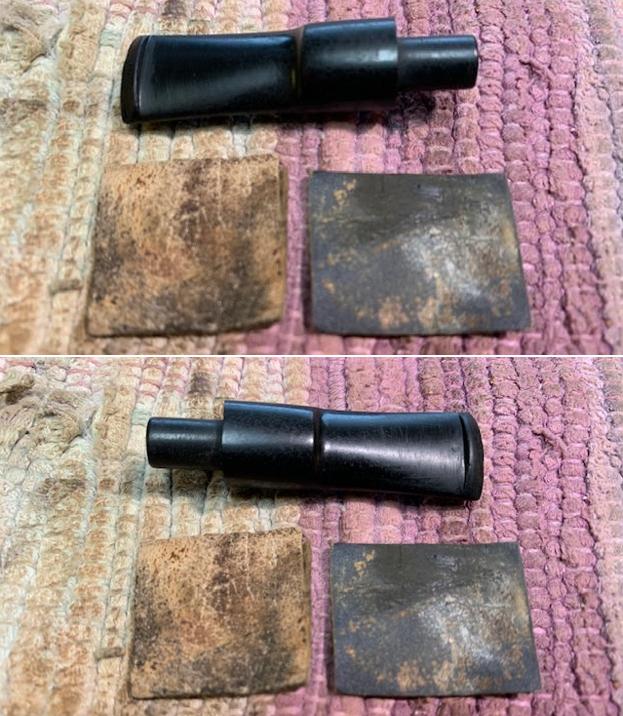
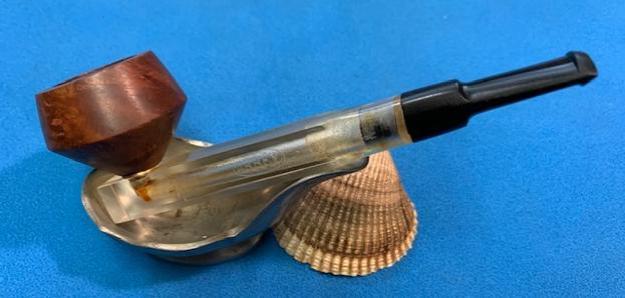
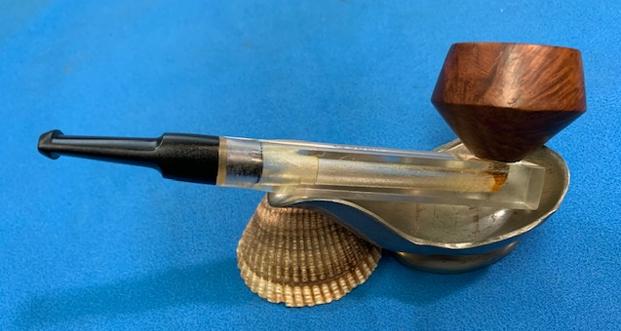
The high quality straight vulcanite stem is so heavily oxidized that it appears brownish green in color. Some minor tooth chatter and deep bite marks are seen on both surfaces of the stem in the bite zone along with minor calcium deposits. This issue should not be a major headache to address. The lip edge on both sides has minor bite marks and would need to be reconstructed and reshaped. A crack across the button edge on the lower surface is seen (encircled in pastel blue) and would need to be addressed. The tenon has accumulated ash and oils/ tars that have dried out on the inside as well as on the outside. The horizontal slot has tar deposits which will have to be cleaned. The tooth chatter and the bite marks will be raised to the surface by heating and the deeper tooth indentations will be filled using charcoal and CA superglue mix.The Process
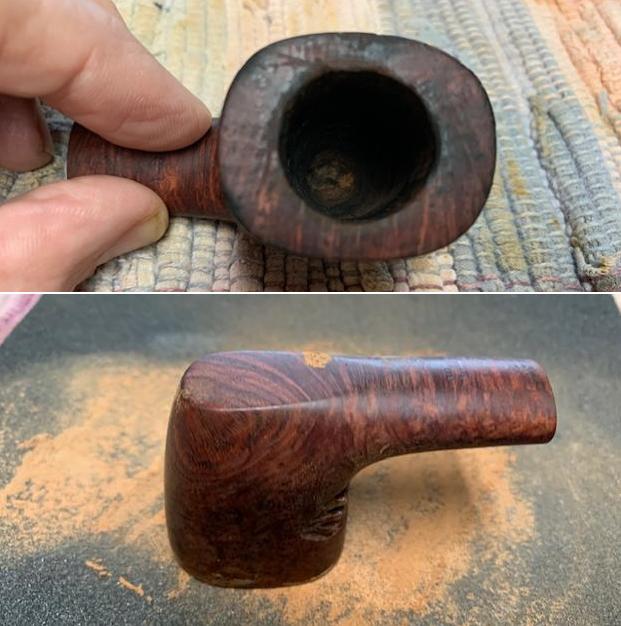
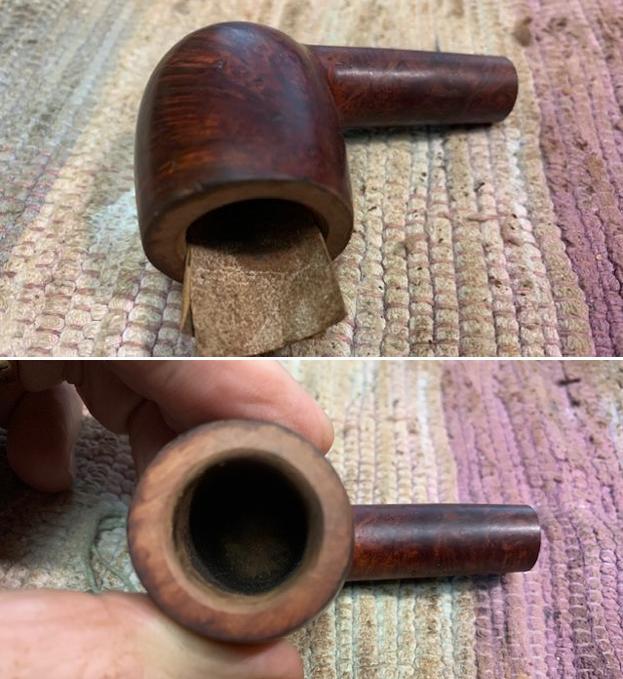
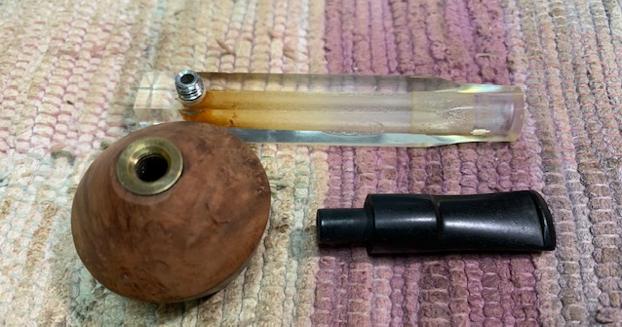
I started the restoration of this pipe by first reaming the chamber with size 1, 2 and 3 Castleford reamer heads. I further scraped the chamber walls with my fabricated knife to remove the remaining carbon deposits. Once the cake was reamed back to the bare briar, I used a 150 grit sand paper followed by 220 grit sand paper to remove all the traces of remaining cake and also to smooth out the inner walls of the chamber surface. Finally, to remove the residual carbon dust, I wiped the chamber with a cotton pad wetted with 99.9% pure isopropyl alcohol. The chamber walls are sans any damage. The smells from the chamber are greatly reduced and would be completely eliminated once the shank internals are thoroughly cleaned.
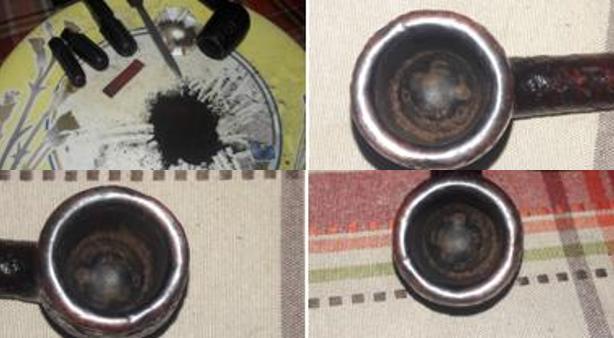
This was followed by cleaning the mortise pipe cleaners and shank brush dipped in isopropyl alcohol. I scraped the walls of the mortise with my fabricated knife to remove the dried oils and tars. Though this further eliminated trace of old smells from previous usage, I will continue further cleaning of the shank internals while cleaning the external surface of the stummel. 
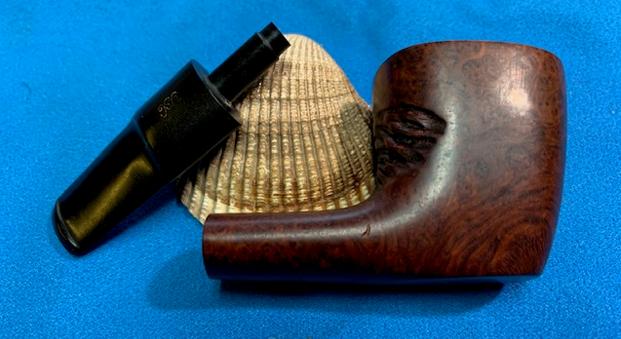
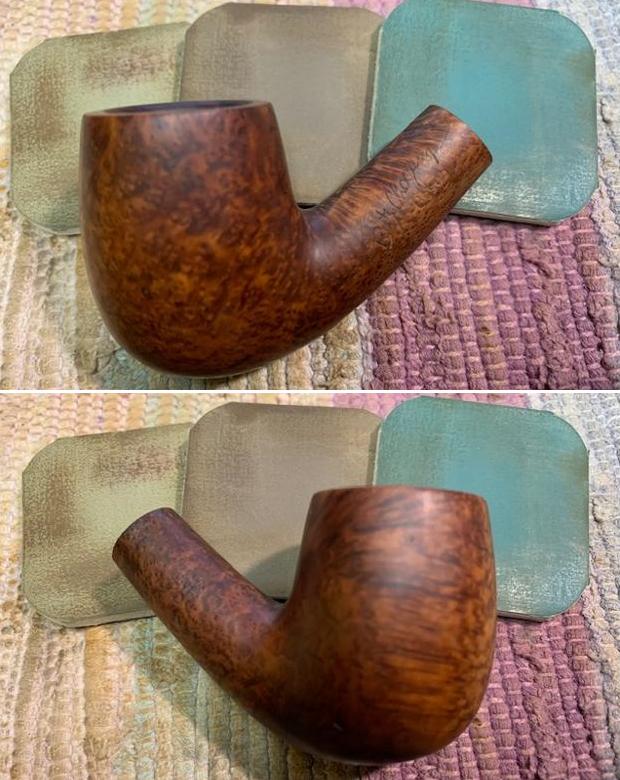
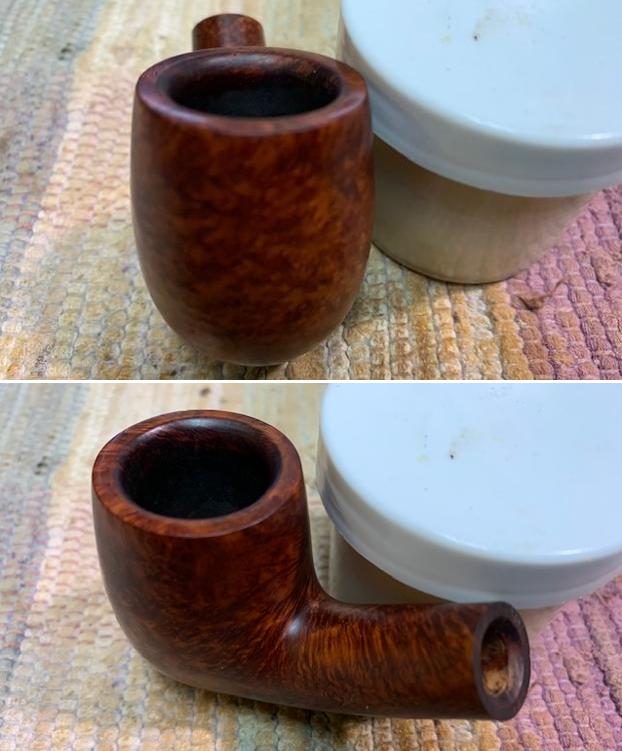
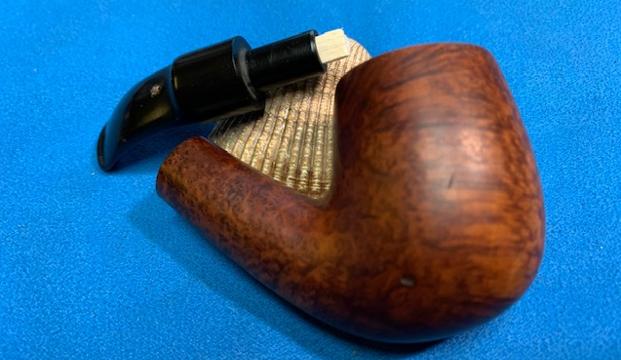
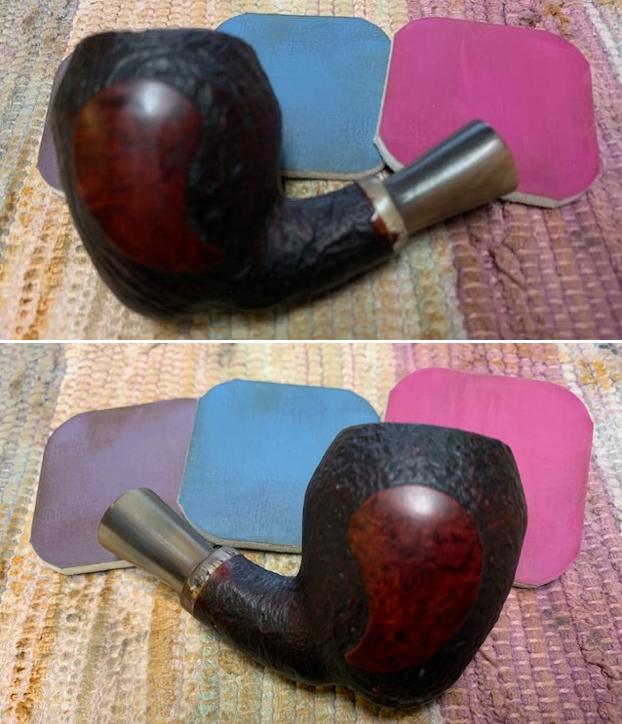
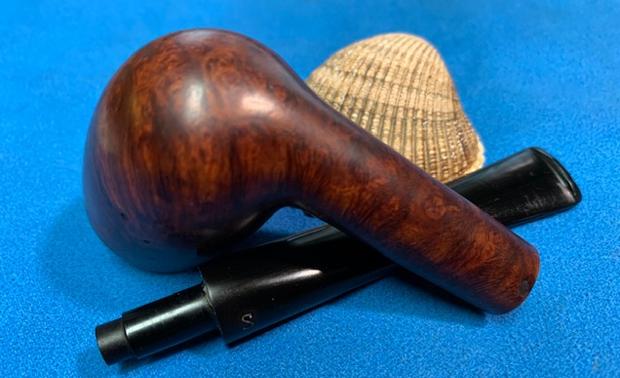
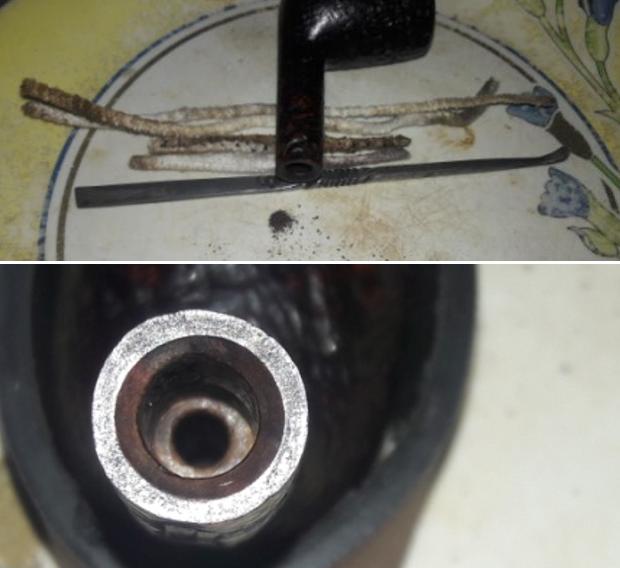
Next, I moved to clean the exterior of the stummel. I generously applied “Briar Cleaner”, a product that has been developed by my friend Mark Hoover, to the external surface of the bowl and the sandblasted rim top surface. It works similar to Murphy’s oil soap and needs to be applied to the stummel surface and set aside for 5-10 minutes. The product pulls out all the dirt and grime to the surface making further cleaning easy. I am quite happy with this product. I used a hard bristled tooth brush to scrub the stummel and rim top with the solution. After the scrub with Briar cleaner solution, I washed the stummel under running warm water with anti oil dish washing detergent till the stummel surface was clean and dried it using paper towels and a soft cotton cloth. I deliberately cleaned the sandblasted rim top with hard bristled toothbrush and set the stummel aside to dry out naturally. I simultaneously cleaned the shank internals with the detergent and hard bristled shank brush. The stummel surface has cleaned up nicely with the intricate sandblast patterns on full display. The shank internals too are nice and clean. The brown hues of the raised portions of the sandblast contrast beautifully with the black of the rest of the stummel. These brown hues will darken considerably once the stummel briar is rehydrated and rejuvenated using the balm and subsequent wax polishing. The rim top surface has cleaned up nicely to reveal pristine inner and outer rim edges, though lighter in color as compared with the rest of the stummel surface. The ghost smells are completely eliminated at this stage. 
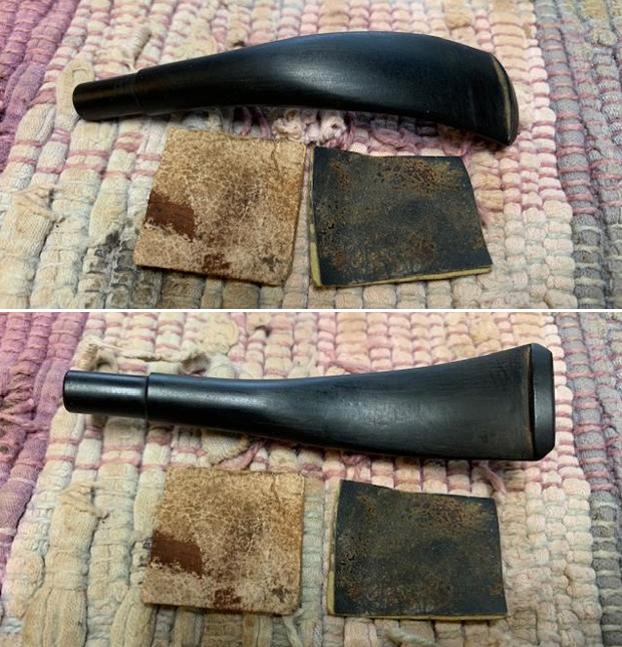
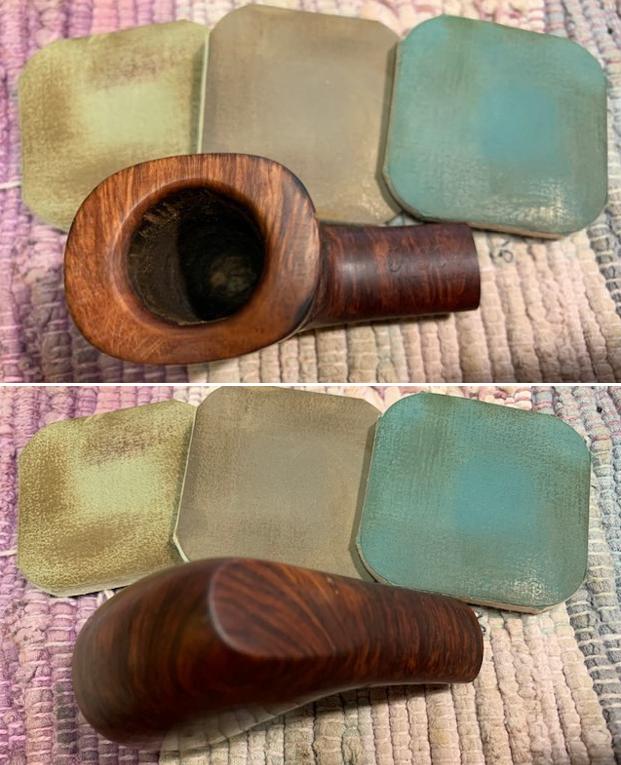
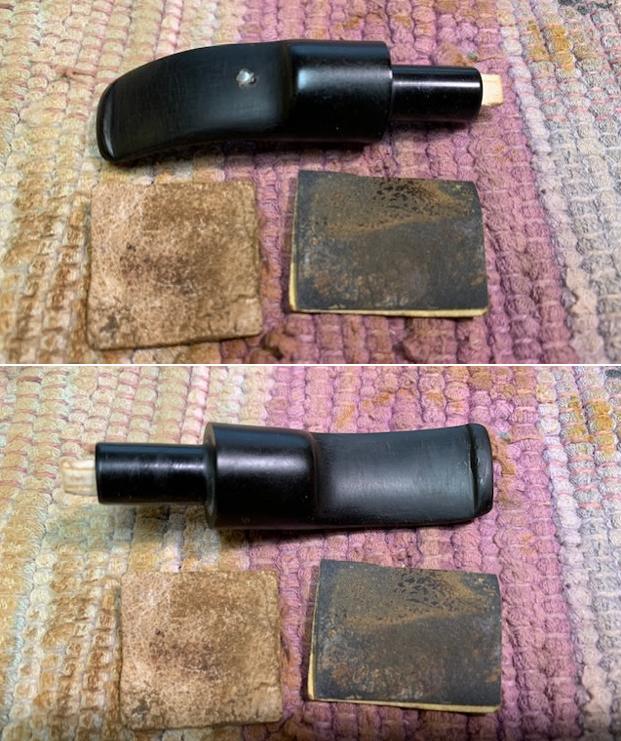
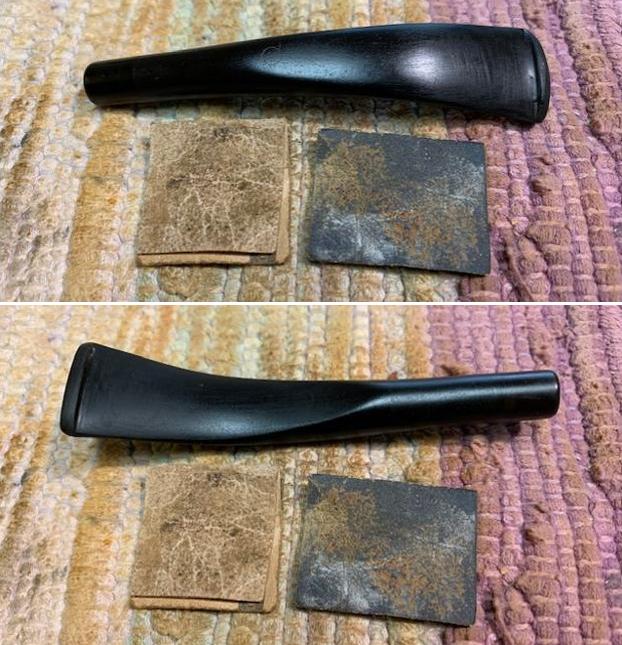
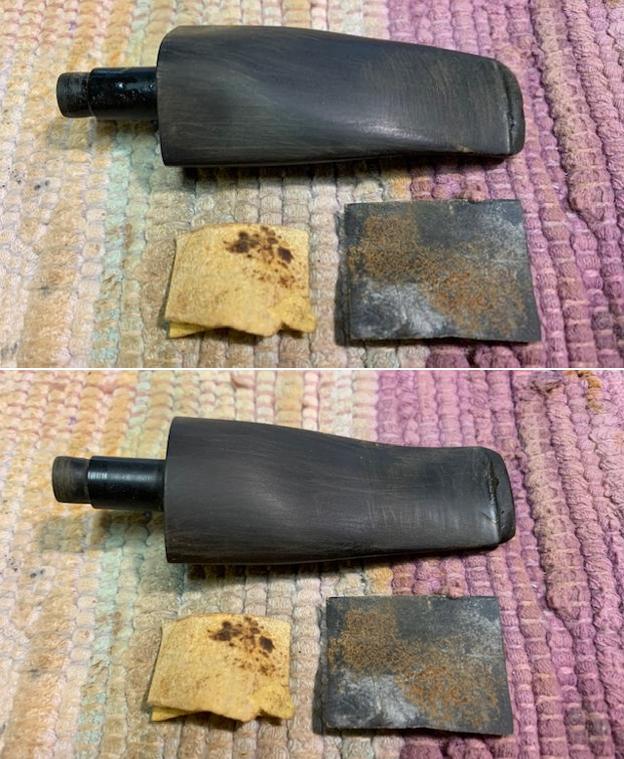
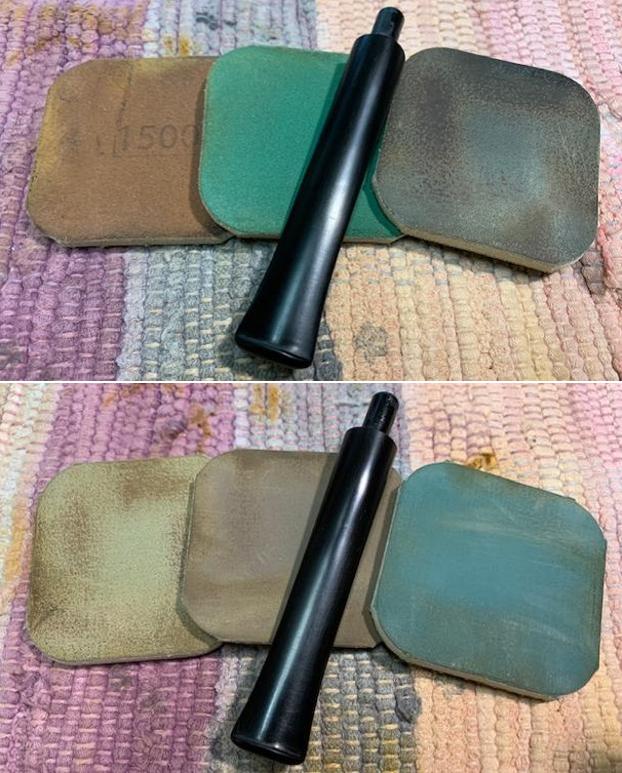
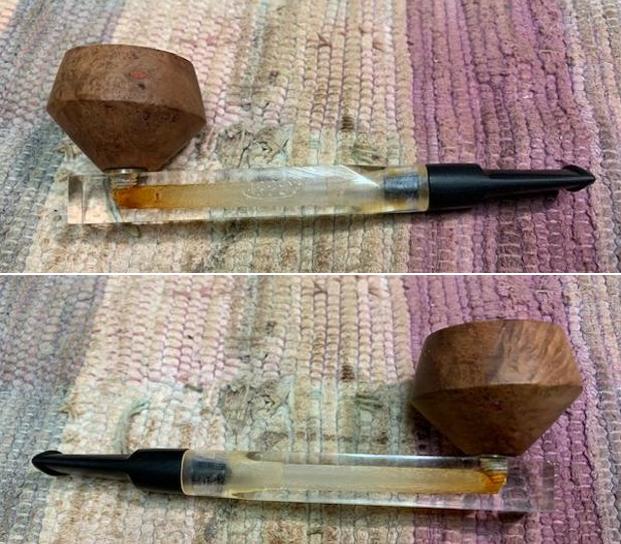
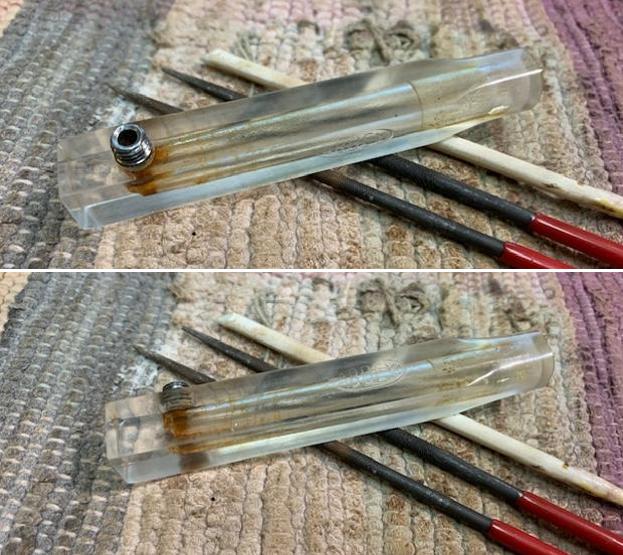
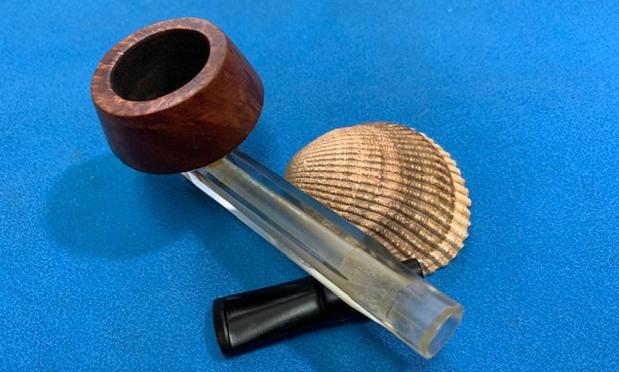
I began the stem repairs by first cleaning the internals of the stem with bristled pipe cleaners and 99.9% pure isopropyl alcohol. I scraped out the dried oils and tars from the tenon end with my fabricated knife and also removed the calcified deposits from the bite zone. I followed it up by sanding the entire stem with a folded piece of 220 grit sand paper to remove the surface oxidation. It has been our (Abha and my) experience that sanding a stem before dunking it in to the deoxidizer solution helps in bringing the deep seated oxidation to the surface which in turn makes further cleaning a breeze with fantastic results.
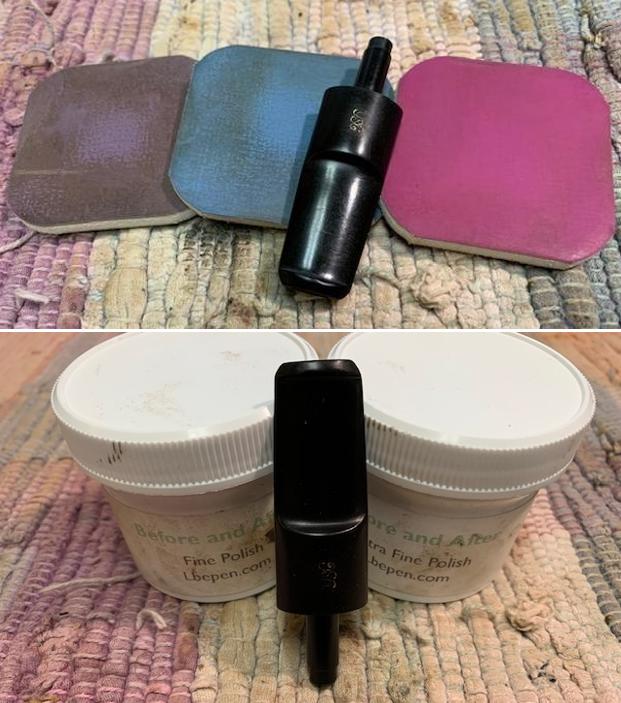
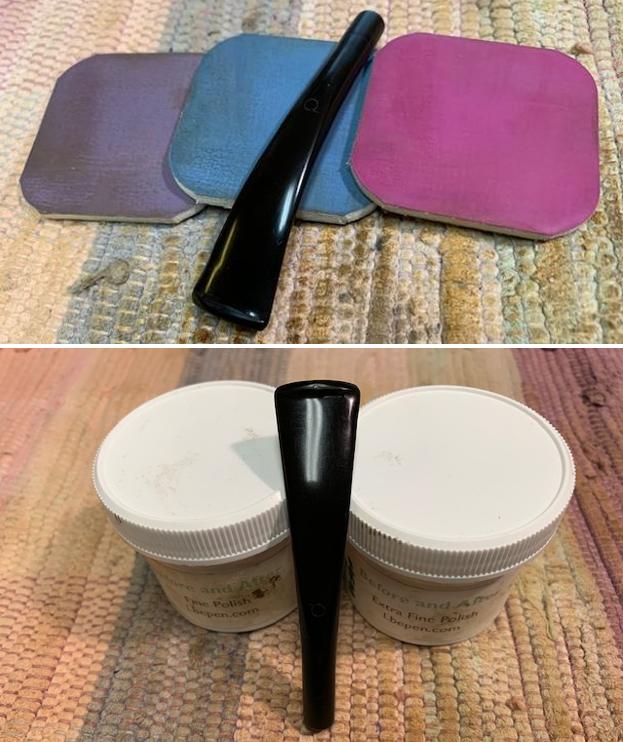
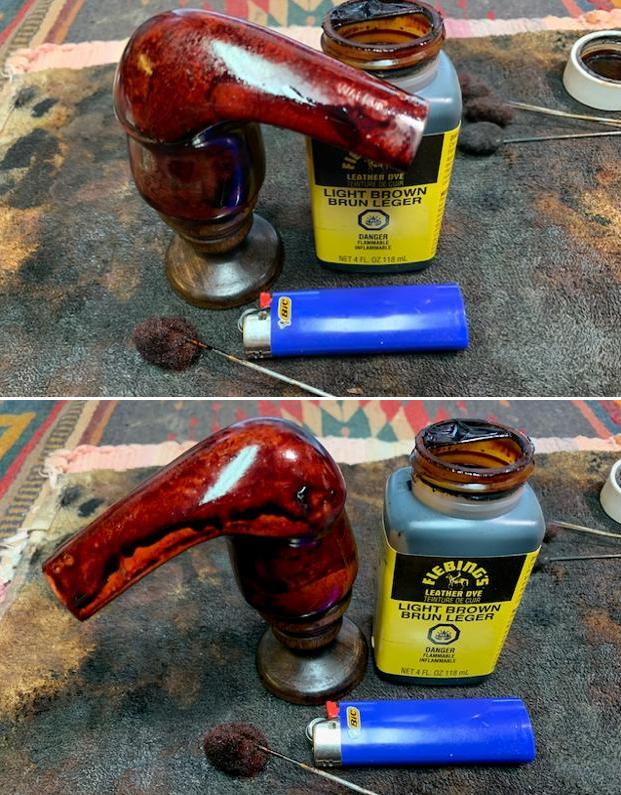
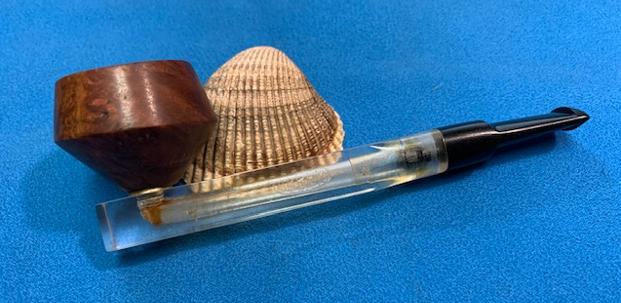
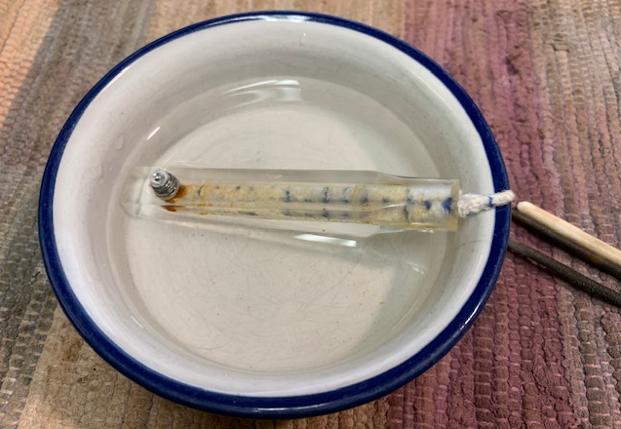
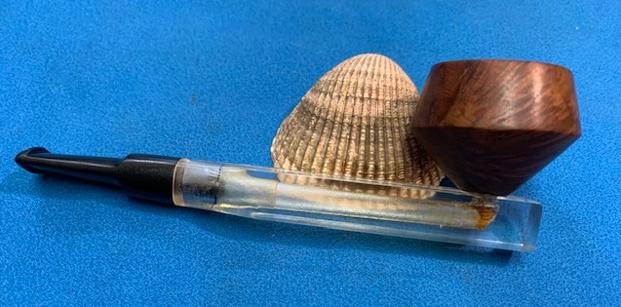
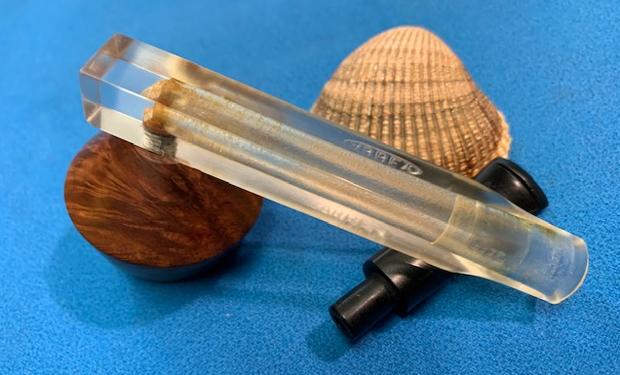
I dropped the stem in to “Before and After Deoxidizer” solution developed by my friend Mark Hoover. The solution helps to draw out heavy oxidation to the surface, making it’s further removal a breeze, while the minor oxidation is eliminated to a very great extent. The initial sanding helps to draw out the complete oxidation as the sanding opens up the stem surface that has been initially covered with oxidation. I usually dunk stems of 4-5 pipes that are in-line for restoration and this pipe is marked by a yellow arrow. I generally allow the stems to soak in this solution overnight to do its work.
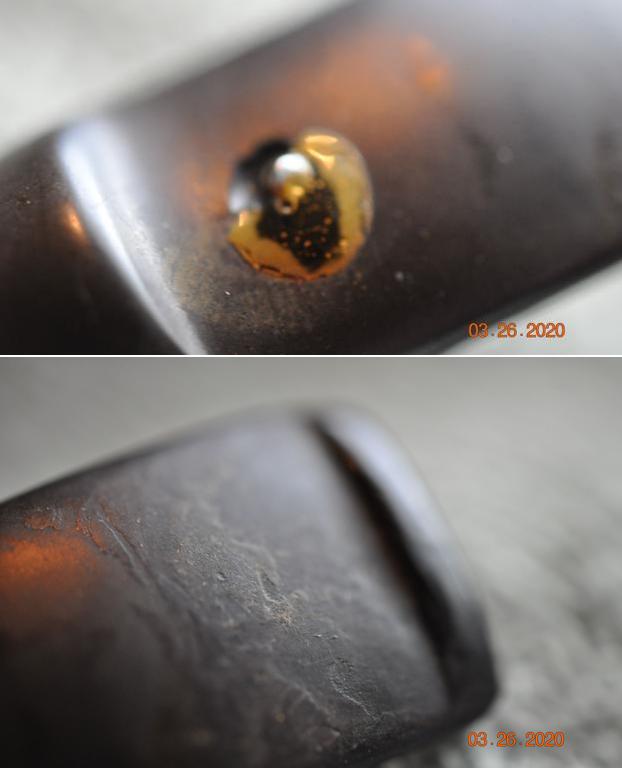
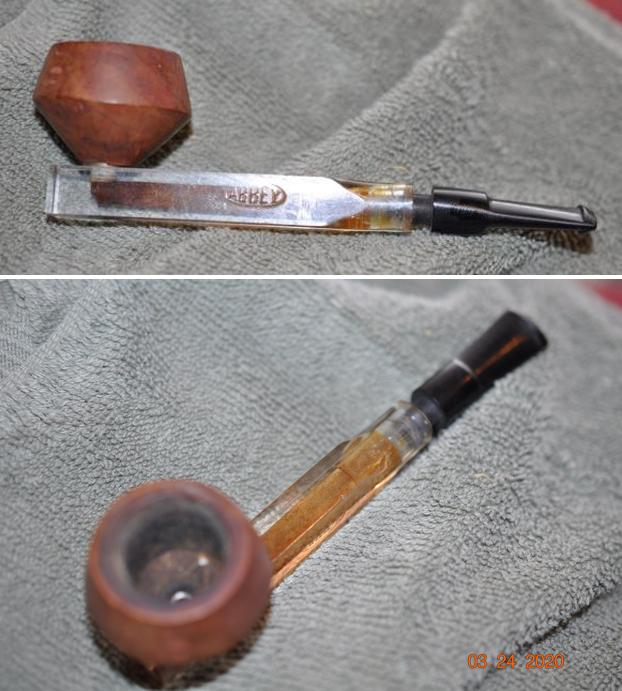
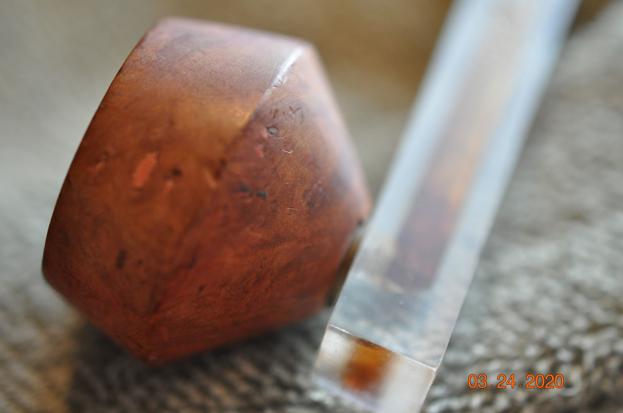
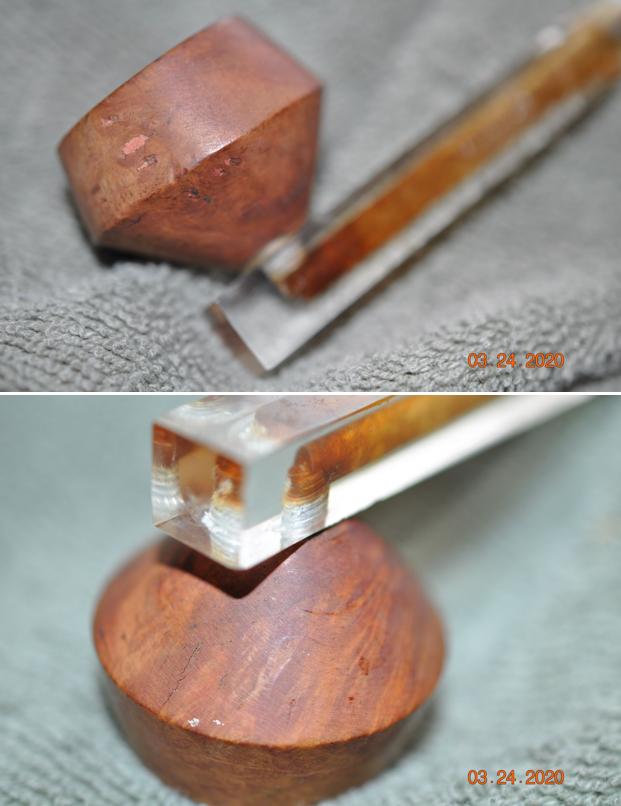
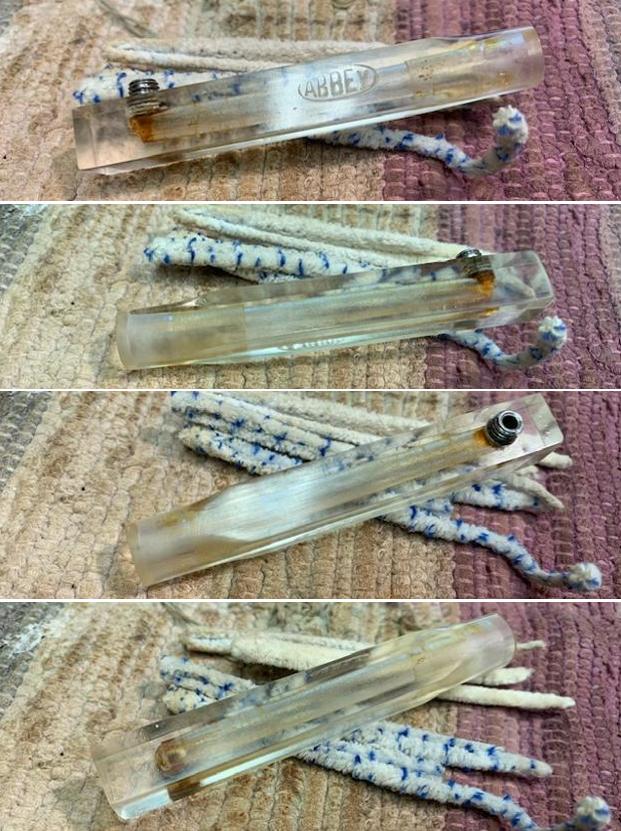
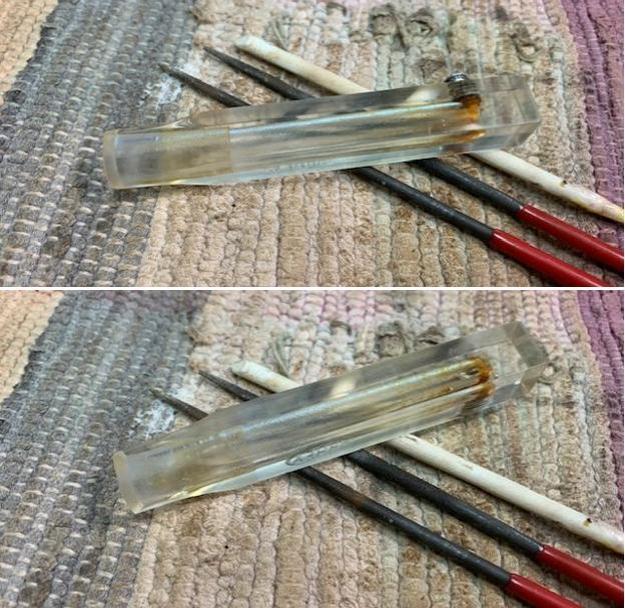
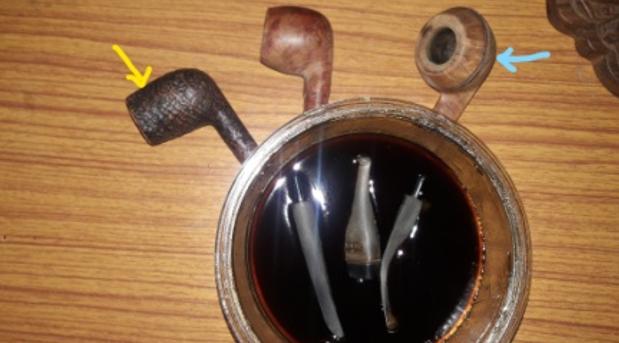
The next morning, Abha removed the stems that had been soaking in the deoxidizer solution overnight. She cleaned the stem and the stem airway under running warm water and scrubbed the raised oxidation from the stem surface using a Scotch Brite pad and the airway with a thin shank brush. She further removed the oxidation by scrubbing the stem with 0000 grade steel wool and applied a little EVO to rehydrate the stem. This now gives a clearer picture of the extent of crack as can be seen in the pictures below. These will definitely require a fill.
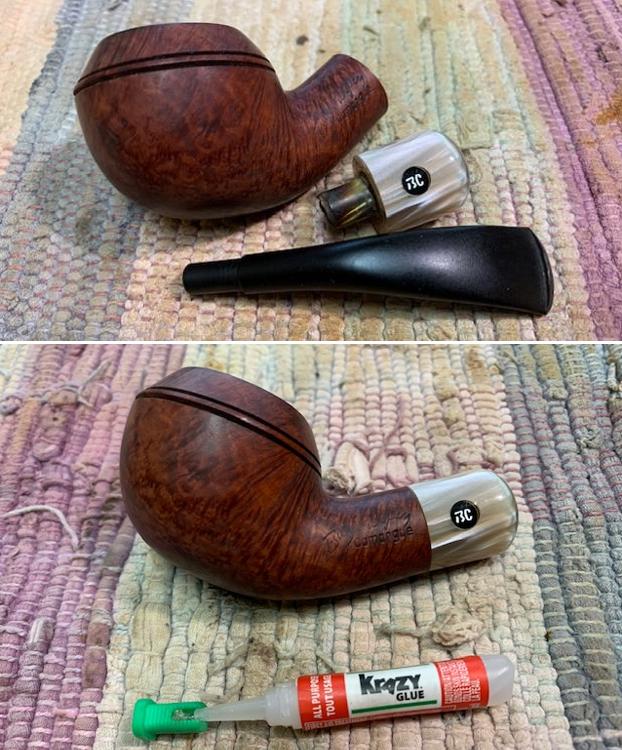
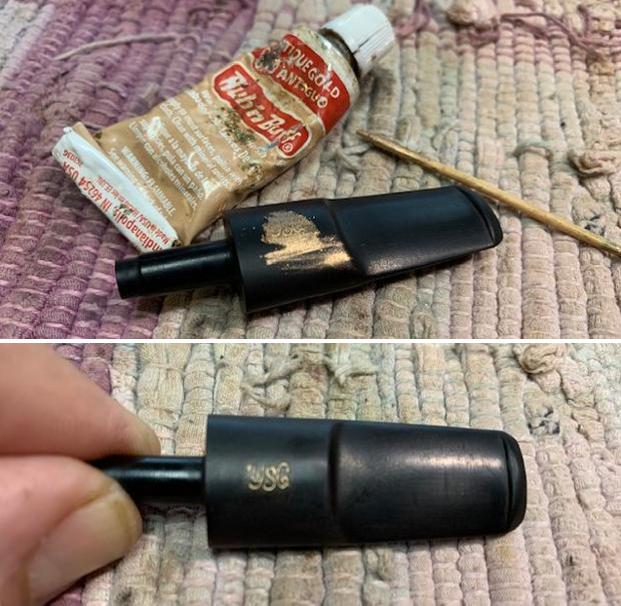
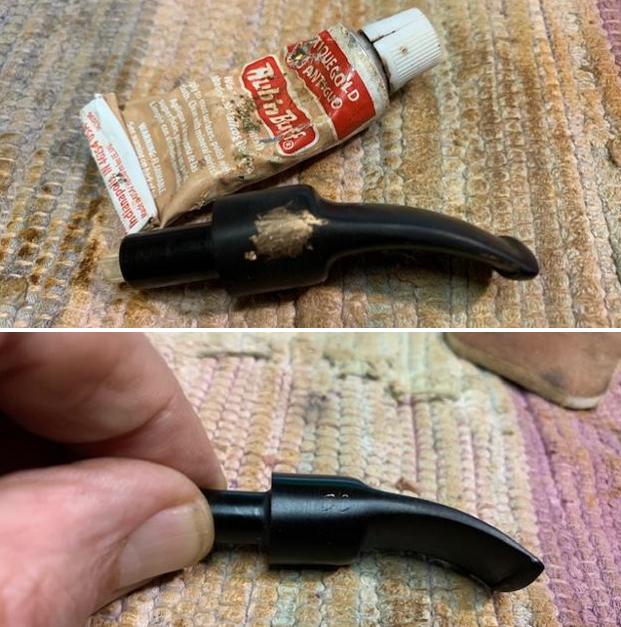
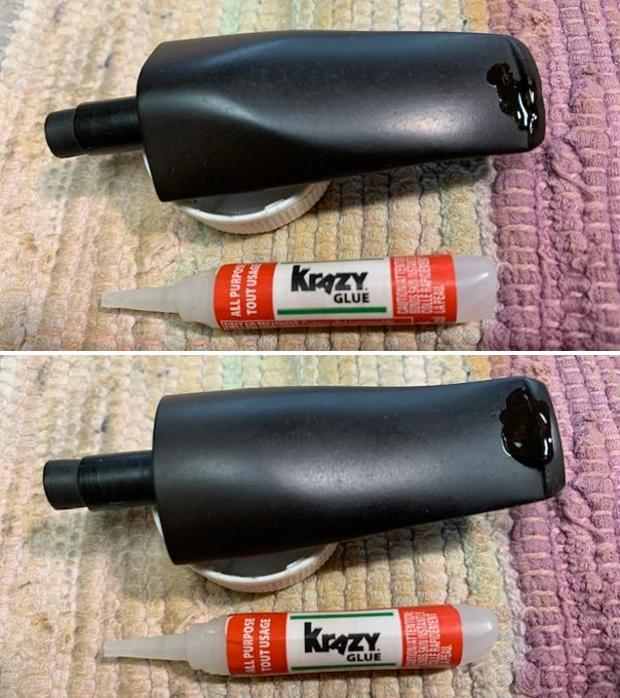
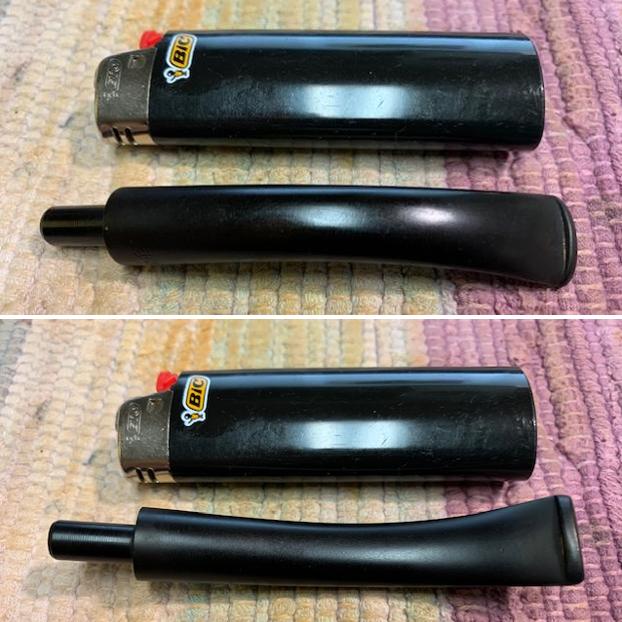
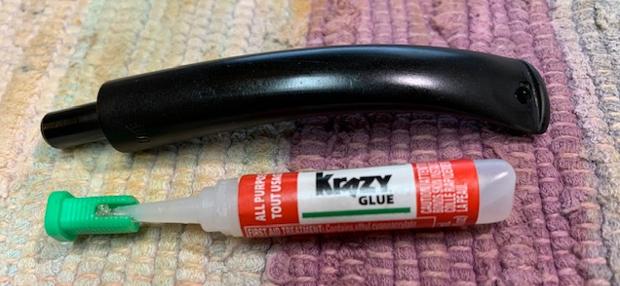
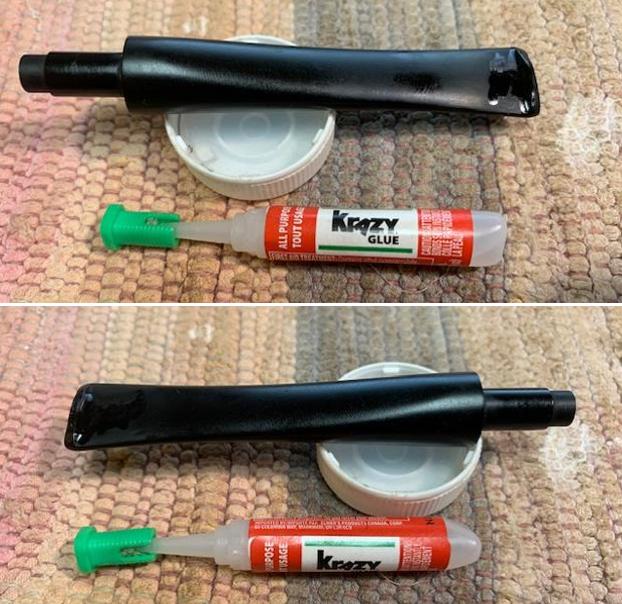
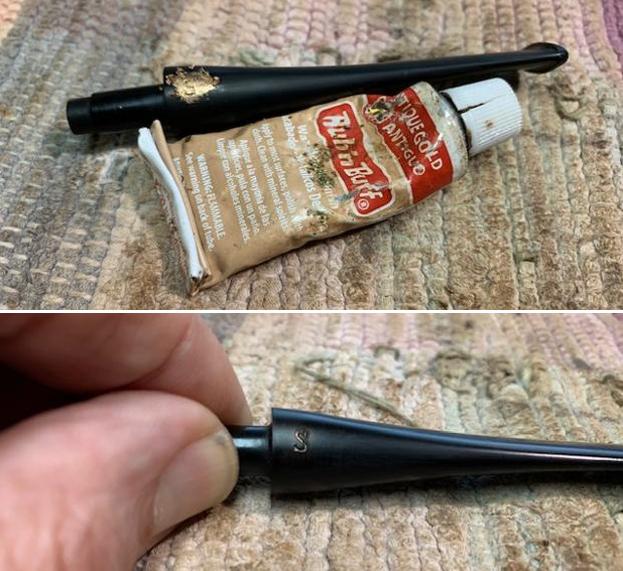
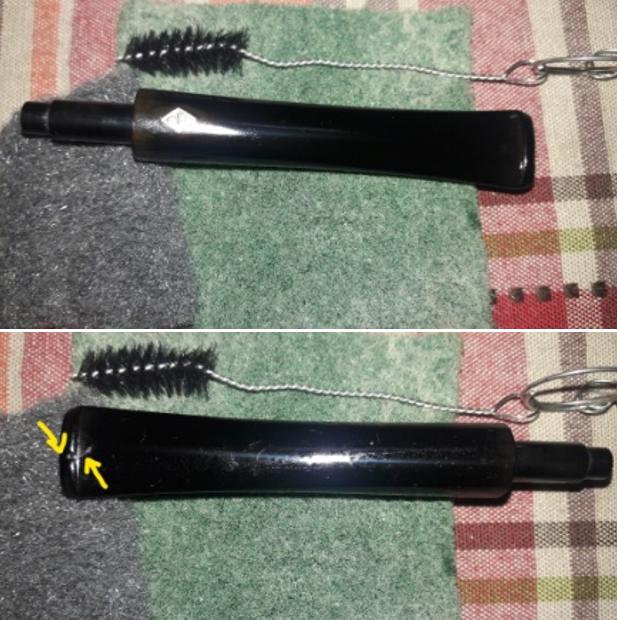
I used a 220 grit sand paper to sand the stem and remove all the oxidation that was raised to the surface. This step further reduced the tooth chatter and bite marks present on the stem. I wiped the stem with Murphy’s Oil soap on a cotton swab. This helps in cleaning the stem surface while removing the loosened oxidation. Using a lighter, I flamed the surface of the stem. This helped in raising some of the tooth chatter and bite marks to the surface as vulcanite has a property to regain it’s original shape on heating. I addressed the crack over the lower button and the button edges by filling them up with a mix of activated charcoal and CA superglue. I applied a slightly thick layer over the lip which I will later sanded down to create a defined edge. Once I had applied the mix, I set it aside to cure overnight. My apologies for bungling on taking pictures, but the readers will get a picture of the process in general. 
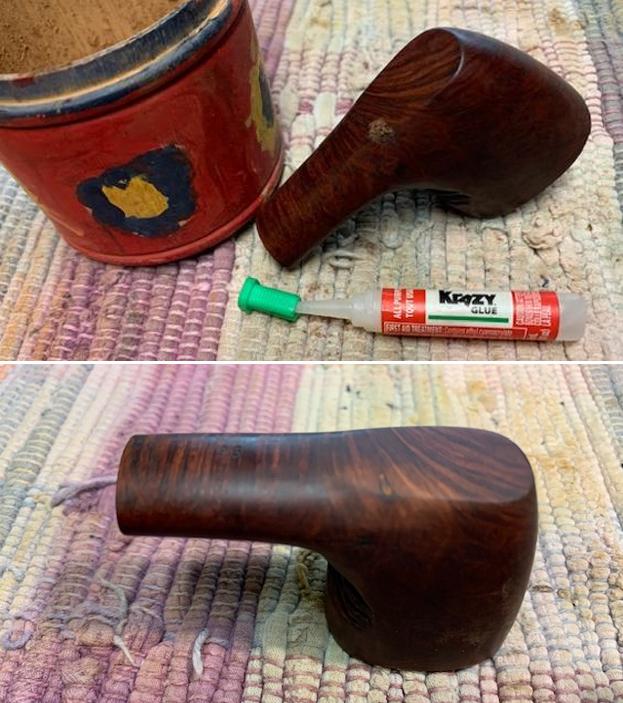
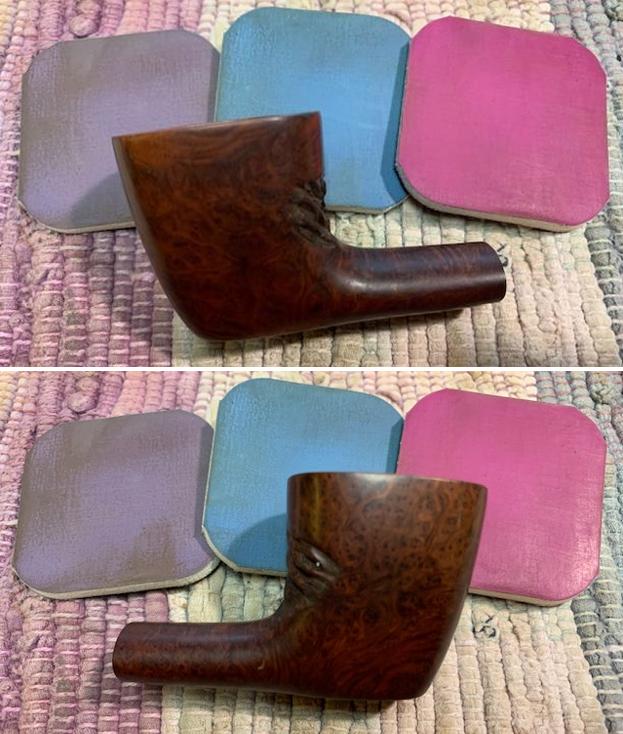
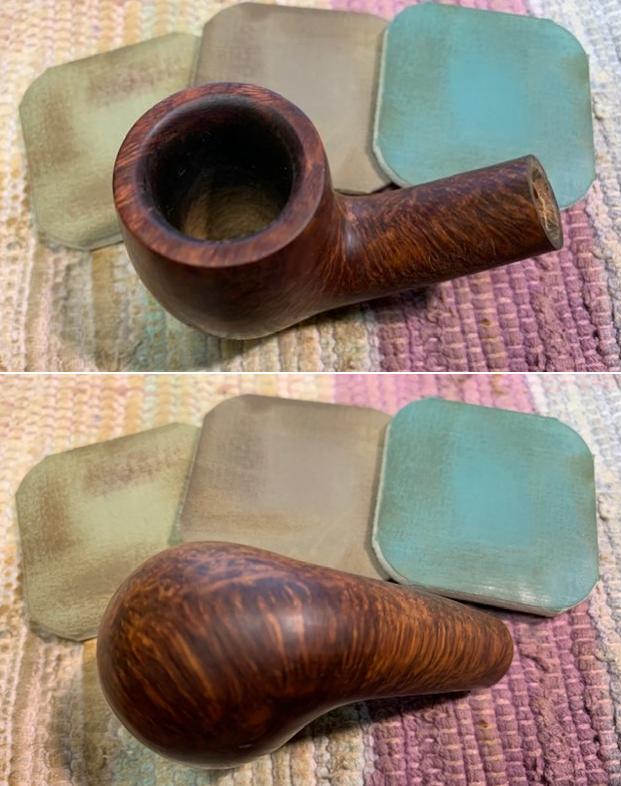
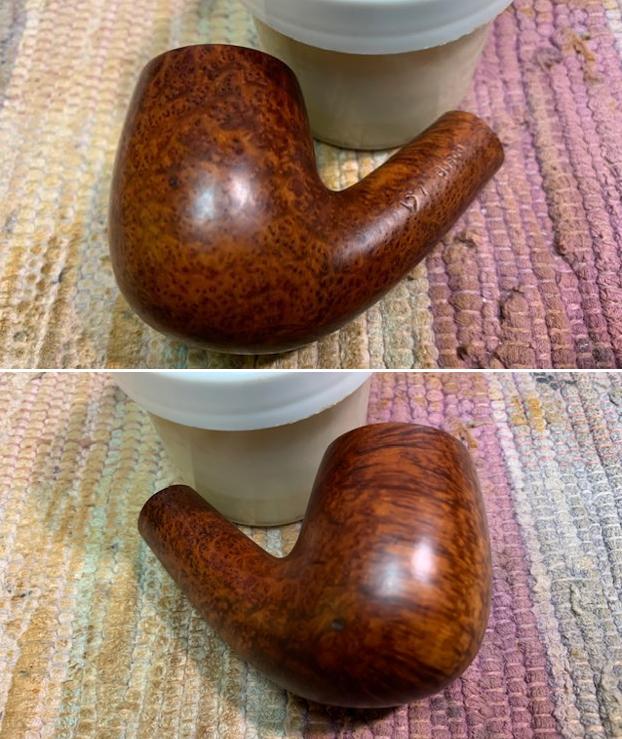
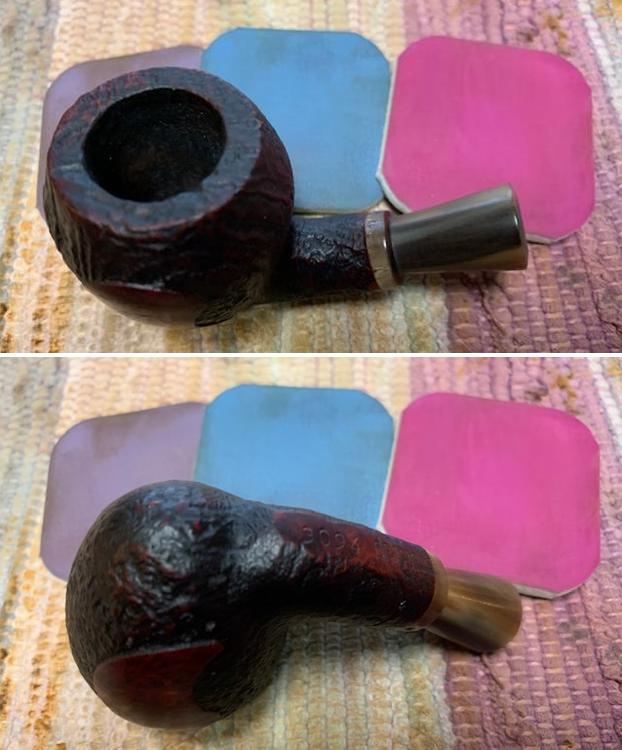
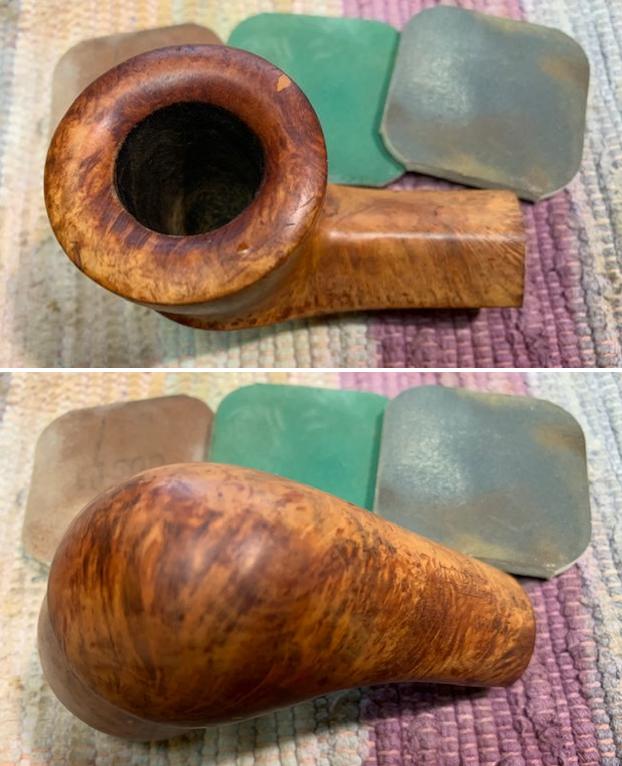
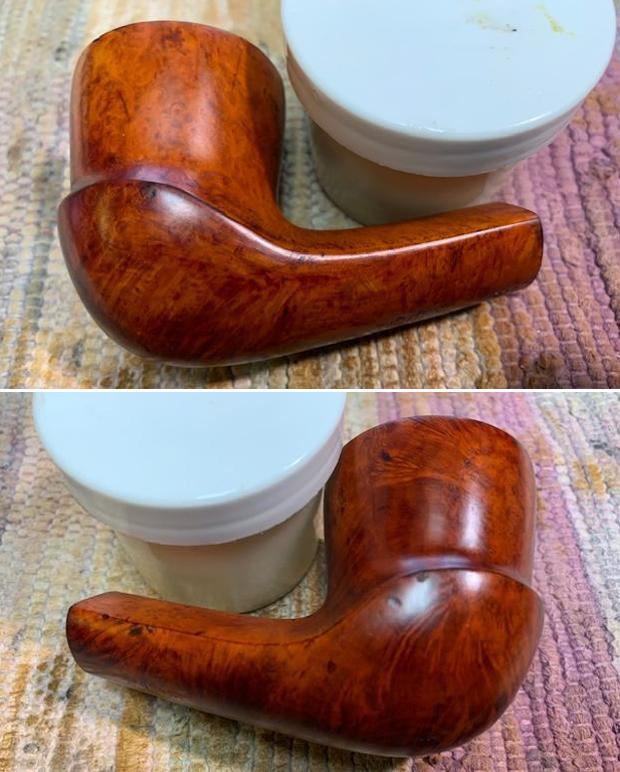
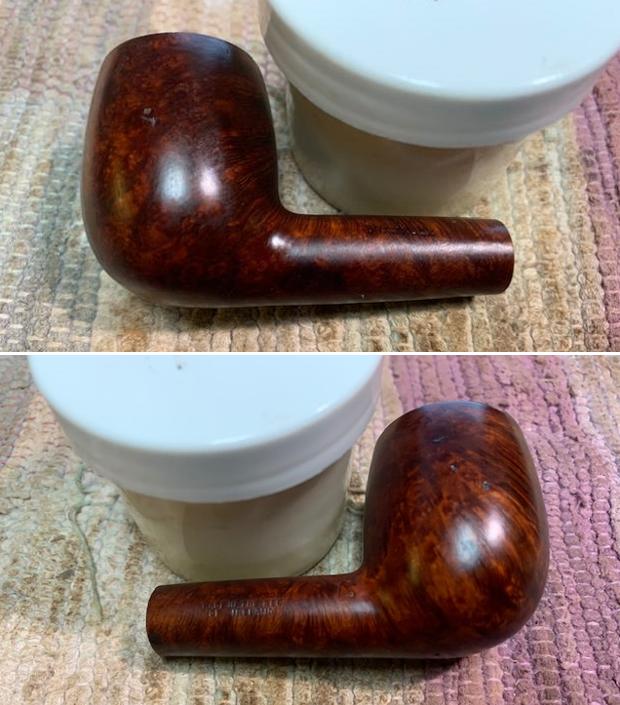
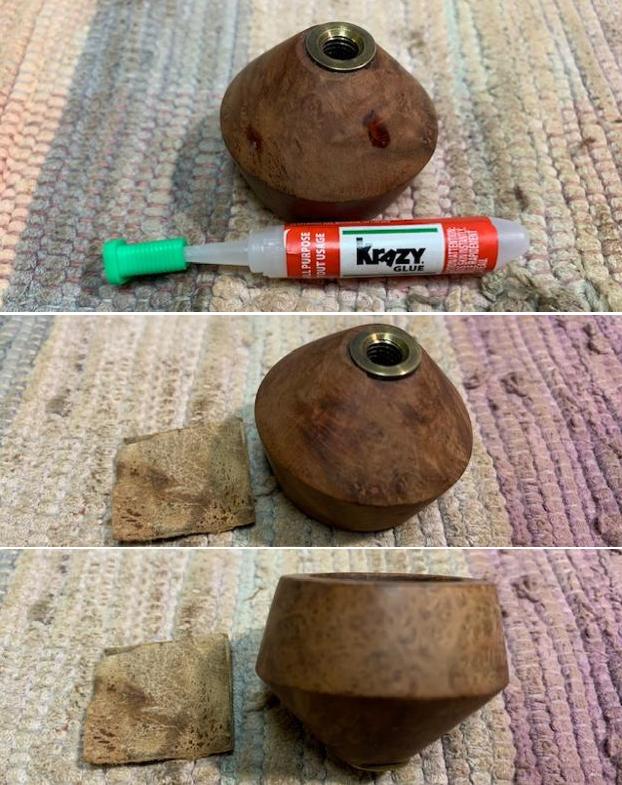
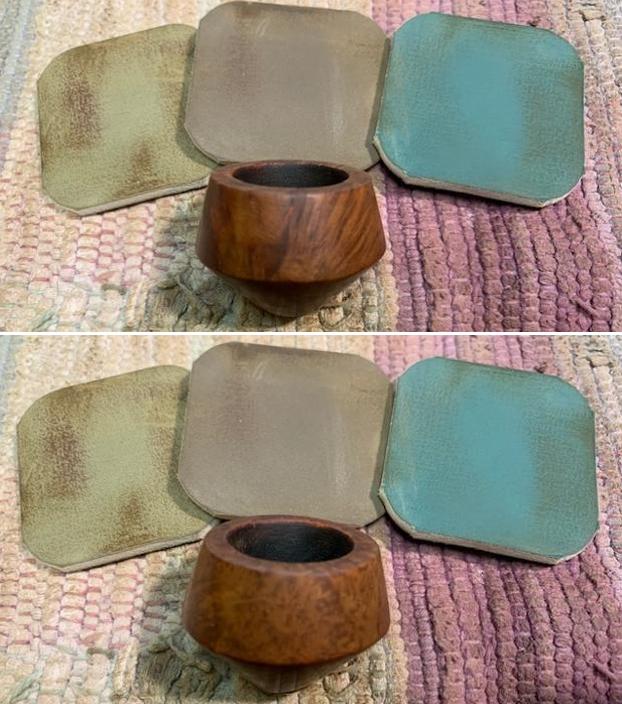
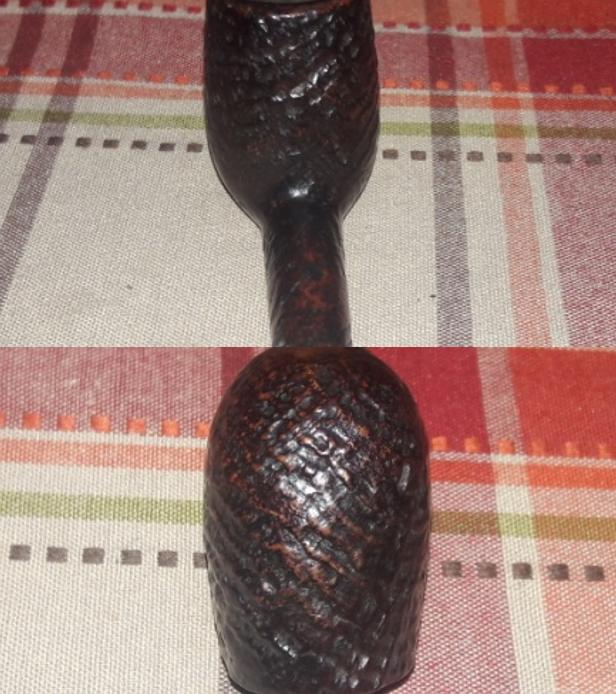
While the stem repairs were curing, I rubbed generous quantity of “Before and After Restoration Balm” in to the stummel surface with my finger tips, working it deep into the sandblasts and let it rest for a few minutes. I rubbed the balm into the sandblasted rim top surface too. The balm almost immediately works it’s magic and the briar now has a vibrant appearance with the beautiful sandblast patterns displayed in their complete splendor. The contrast of the dark browns of the raised sandblast with the dark black of the rest of the stummel adds an interesting dimension to the appearance of the stummel. I further buffed it with a horse hair brush. As I was taking close up pictures of the stummel, I observed a webbing of very minute heat lines to the front of the chamber wall (indicated by yellow arrows). Though not an issue if the pipe is smoked gently, it may lead to a burnout subsequently in the hands of an enthusiastic smoker. I shall give a thin protective bowl coating of yogurt and activated charcoal. This will firstly prevent the burning tobacco coming in direct contact with the briar and secondly aid in faster cake build up.  
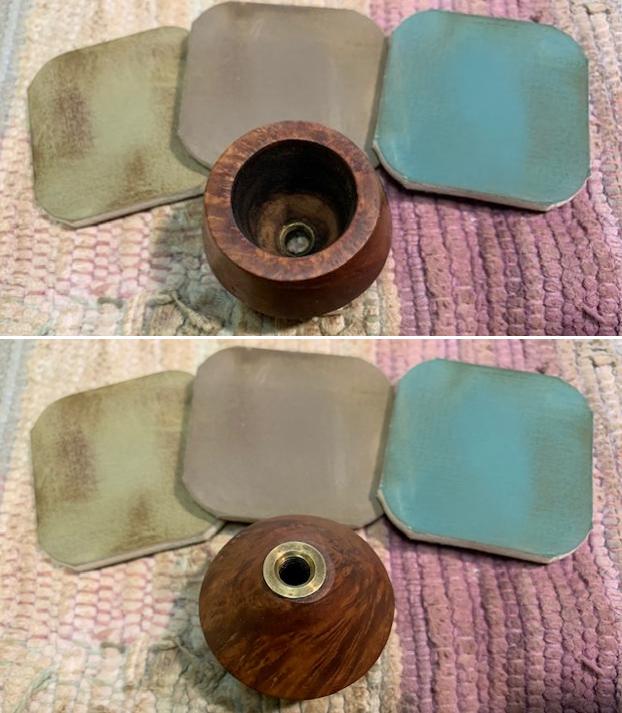
I addressed this issue by mixing activated charcoal and plain yogurt to a thicker consistency, just enough that it would spread easily and applied it evenly all along the chamber walls after inserting a folded pipe cleaner through the draught hole to keep it open. Once dry and set, this will not only protect the walls but also aid in faster buildup of cake.
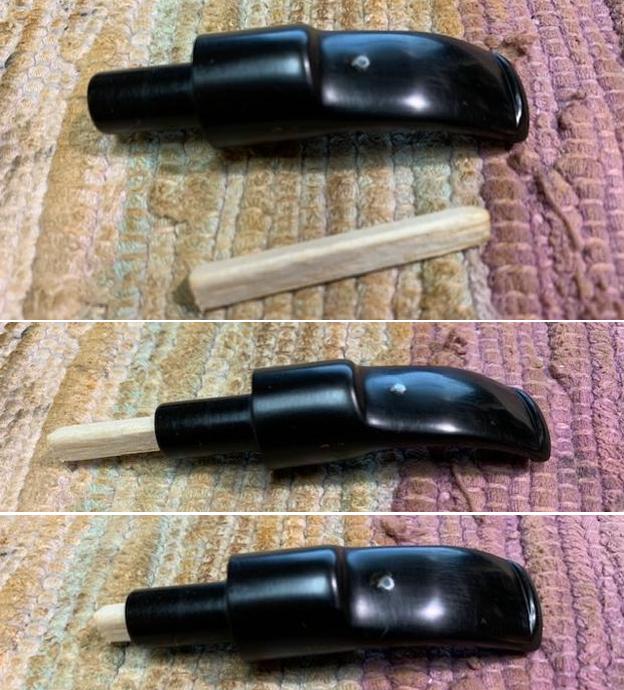
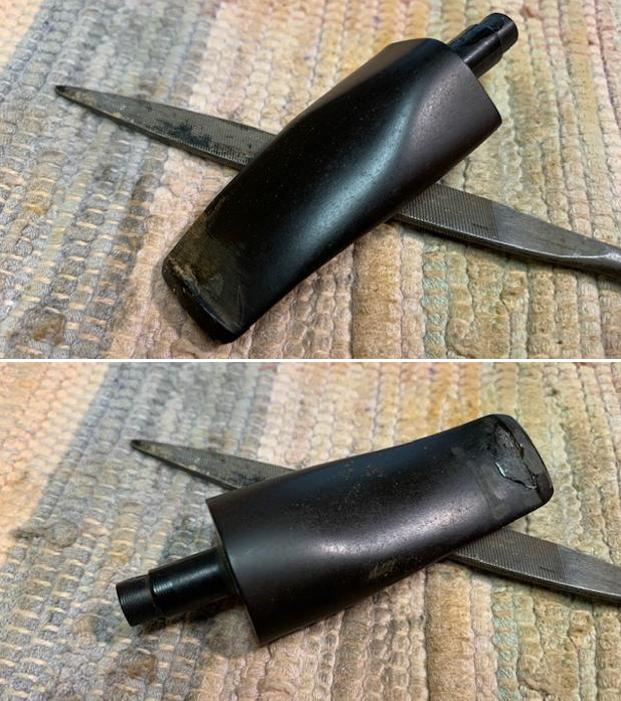
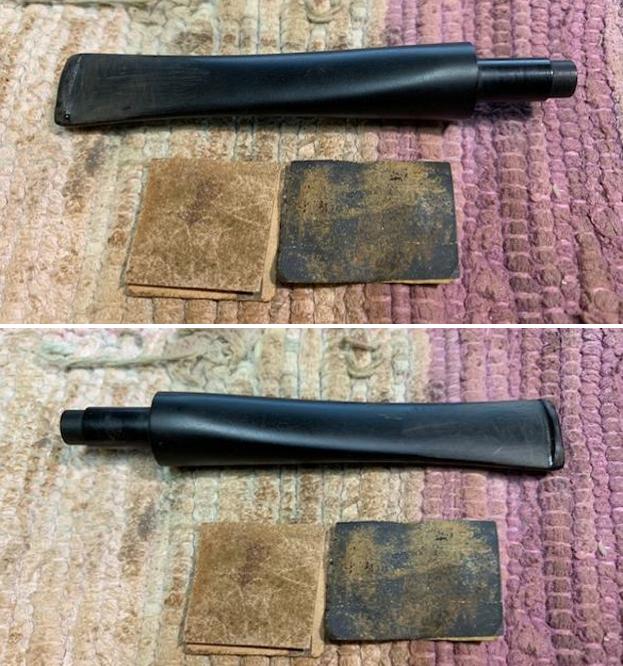
With the stummel rejuvenation almost complete, save for the final wax polish, I worked the stem. The fill had cured and with a flat head needle file, I worked on the filling till I had achieved a rough match with the surrounding surface and had sufficiently sharpened the button edges. For a better blending, I further sanded the entire stem with 220 followed by 400, 600 and 800 grit sand papers. This helps to reduce the scratch marks left behind by the more abrasive 220 grit paper. 
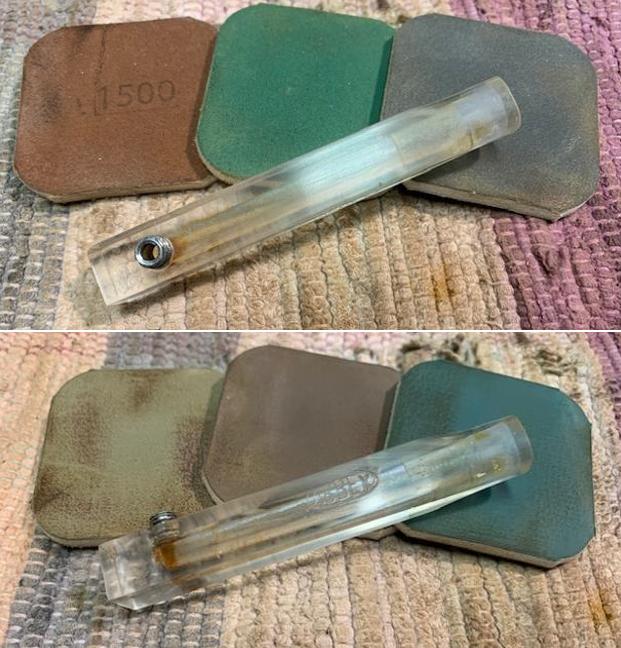
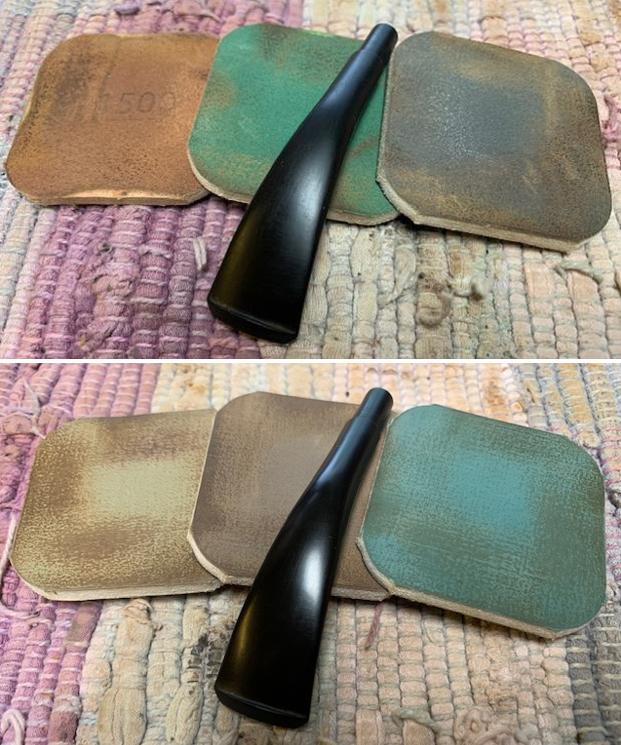
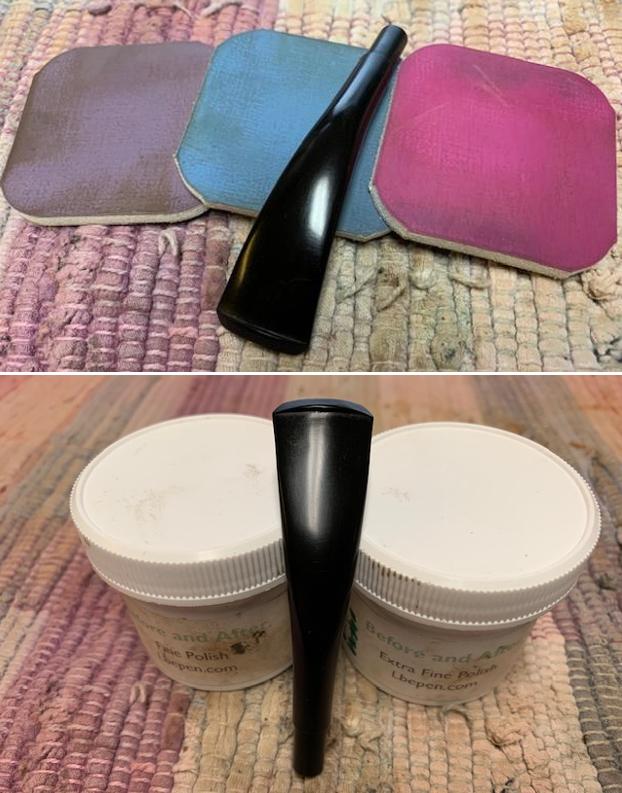
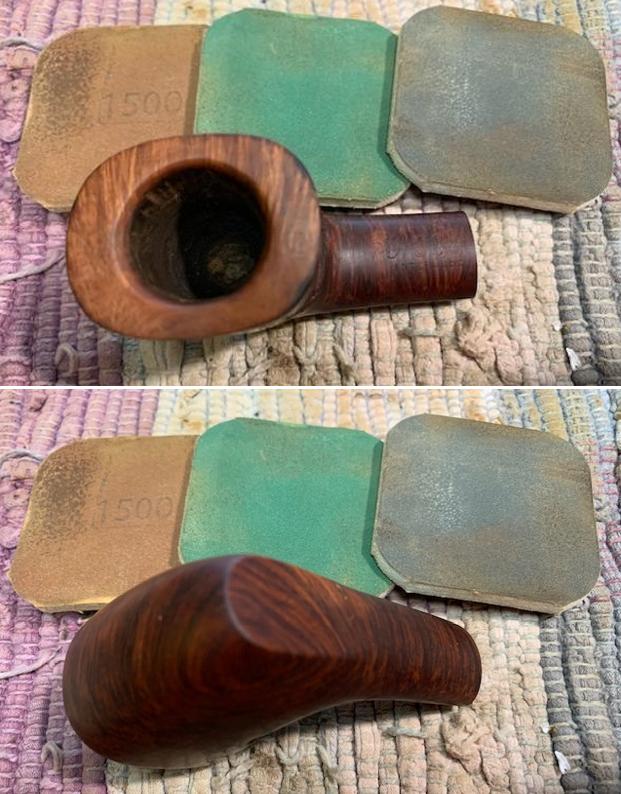
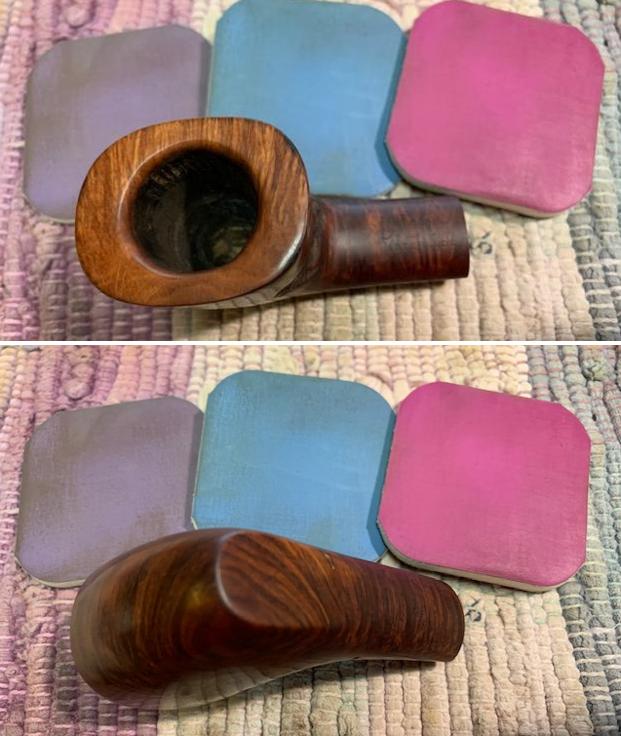
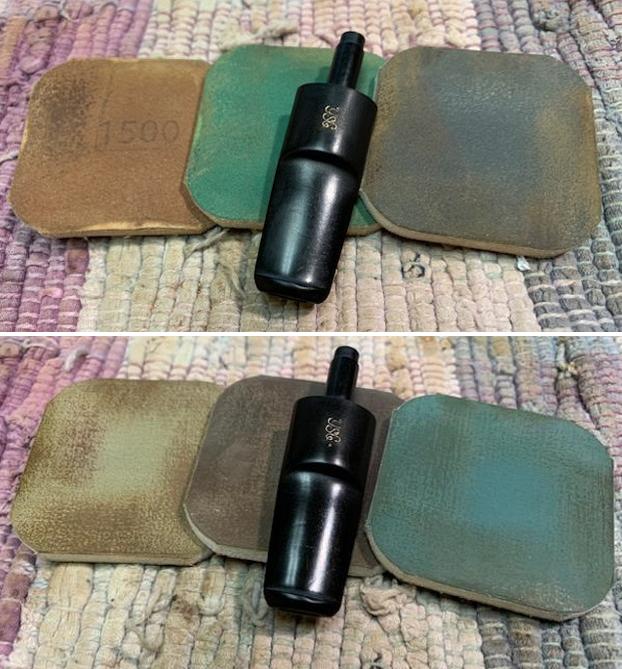
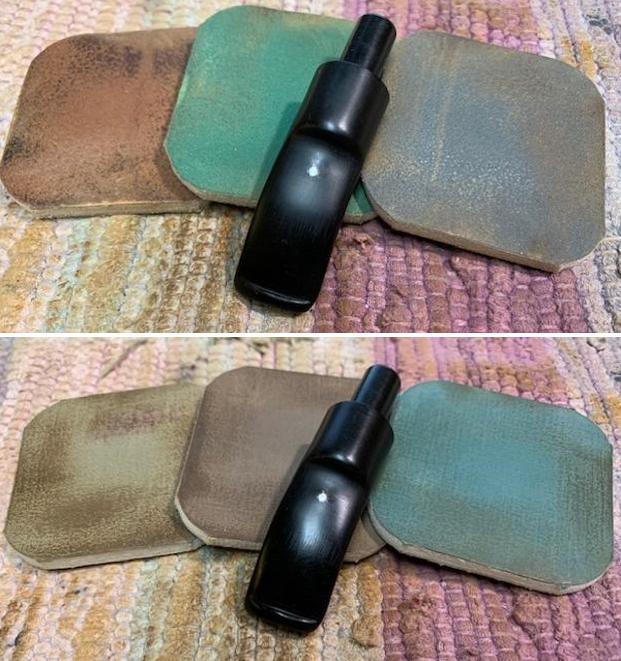
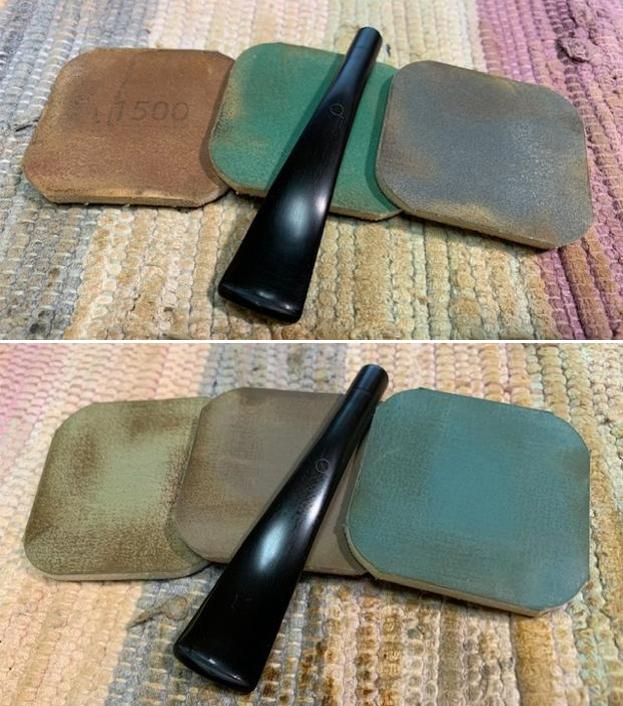
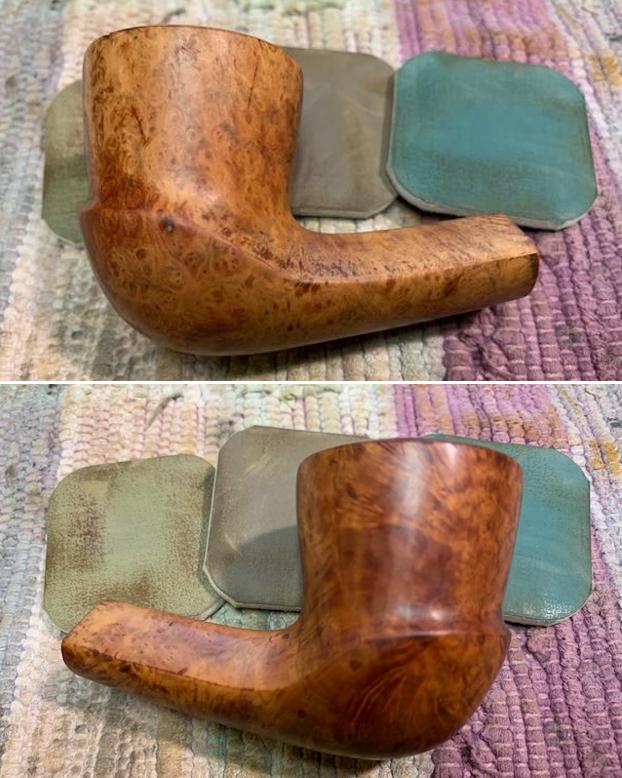
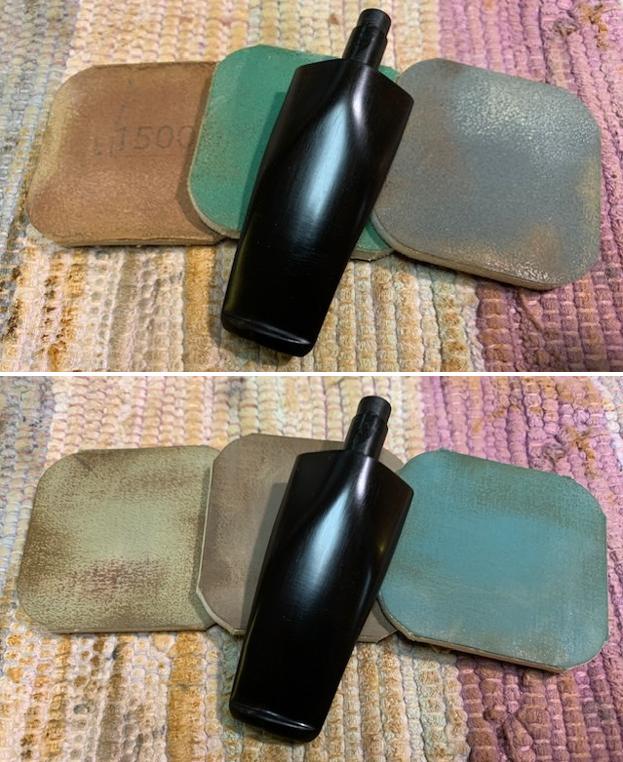
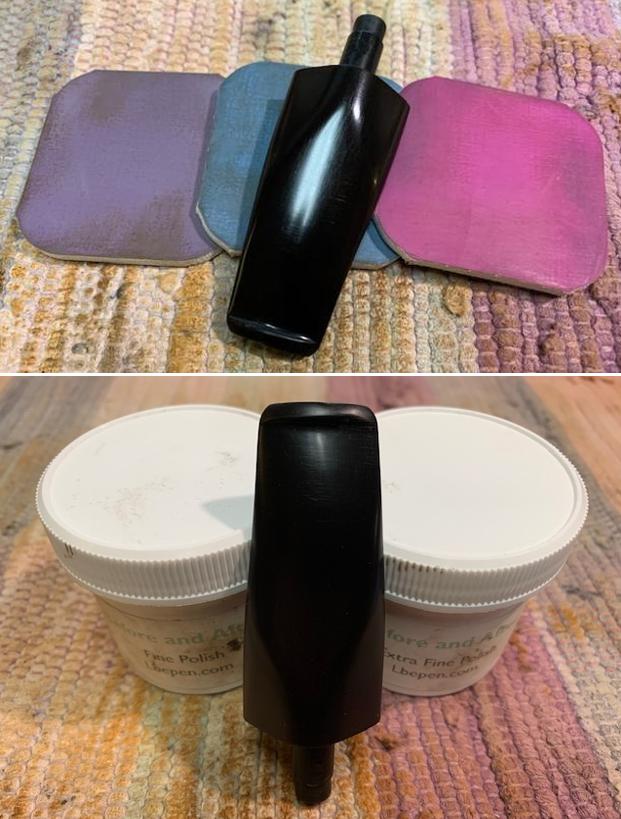
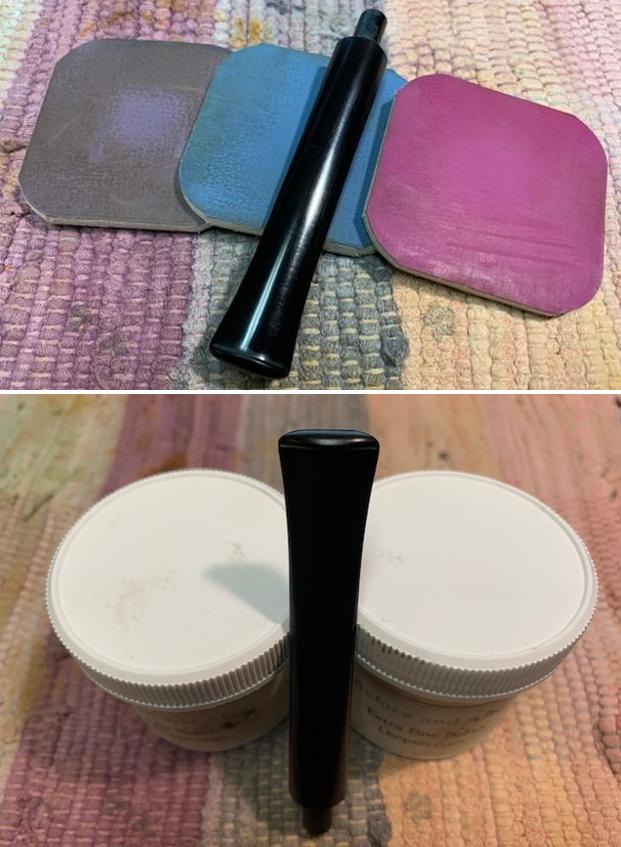
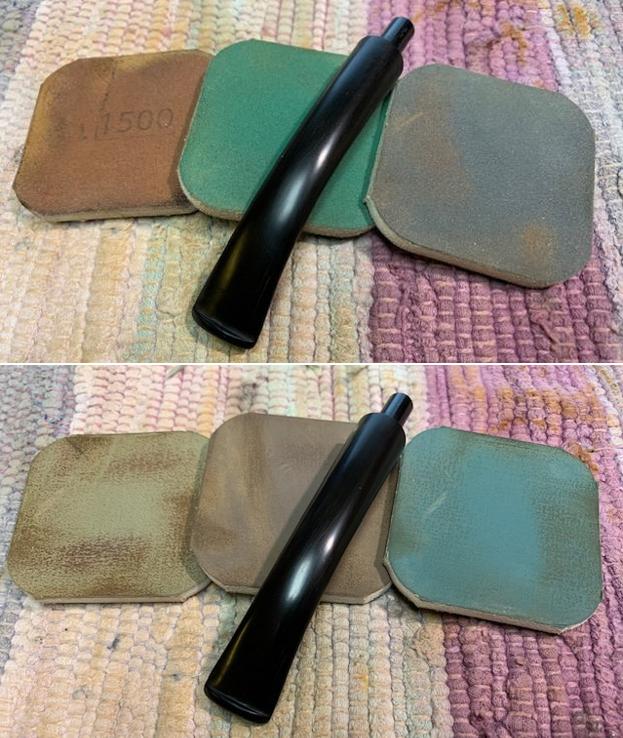
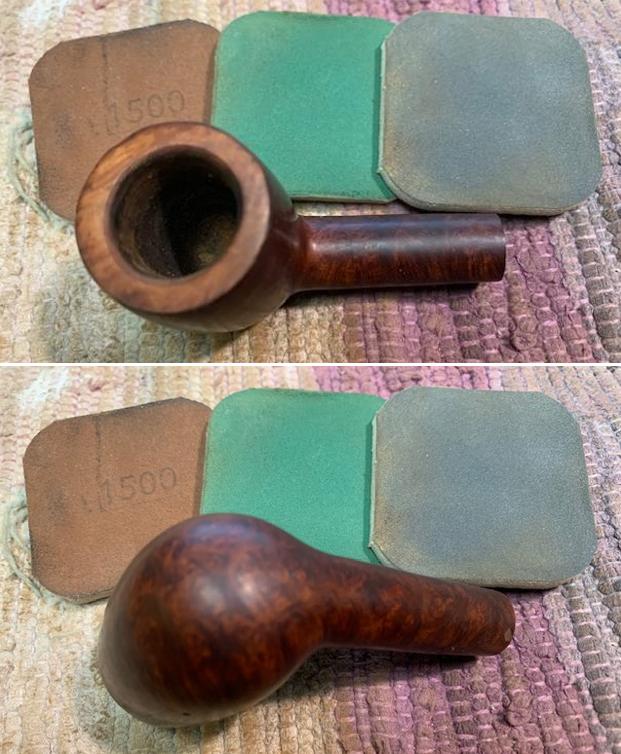
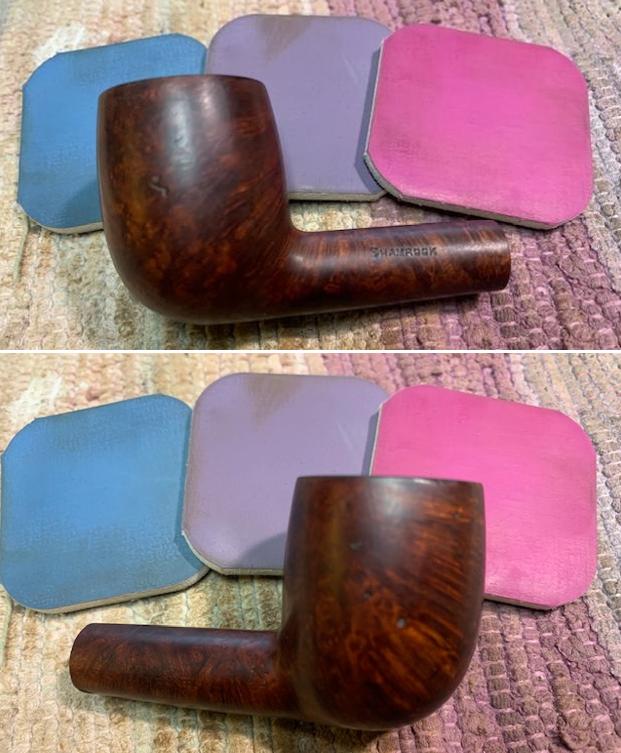
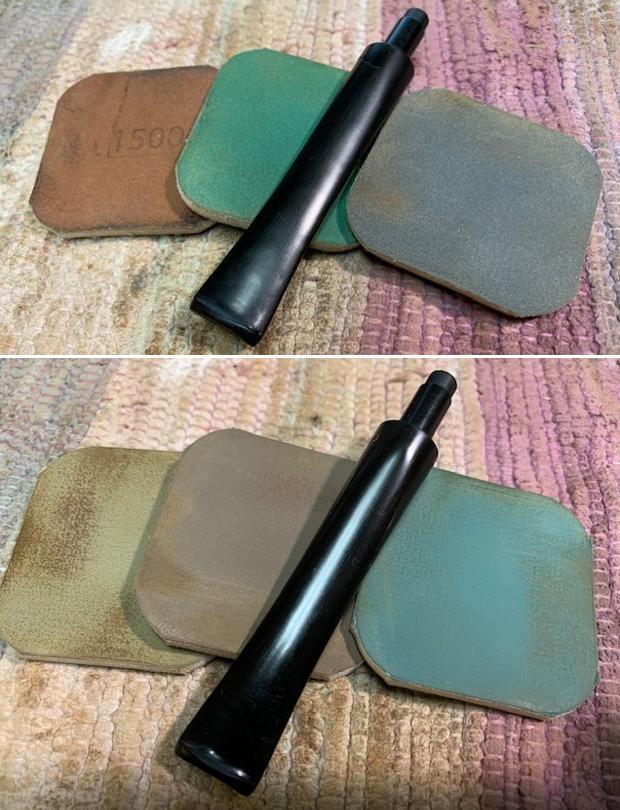
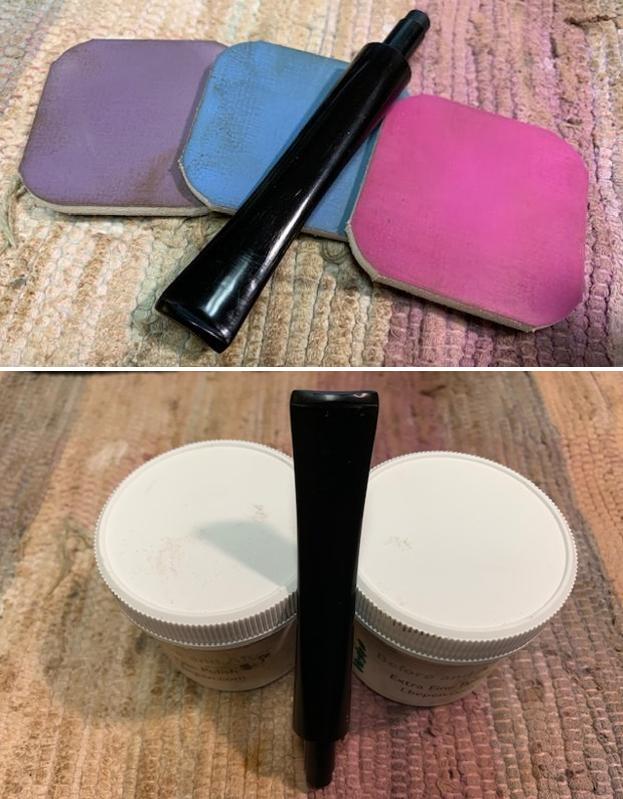
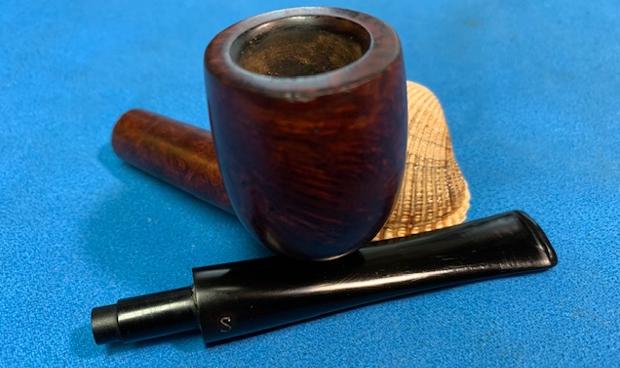
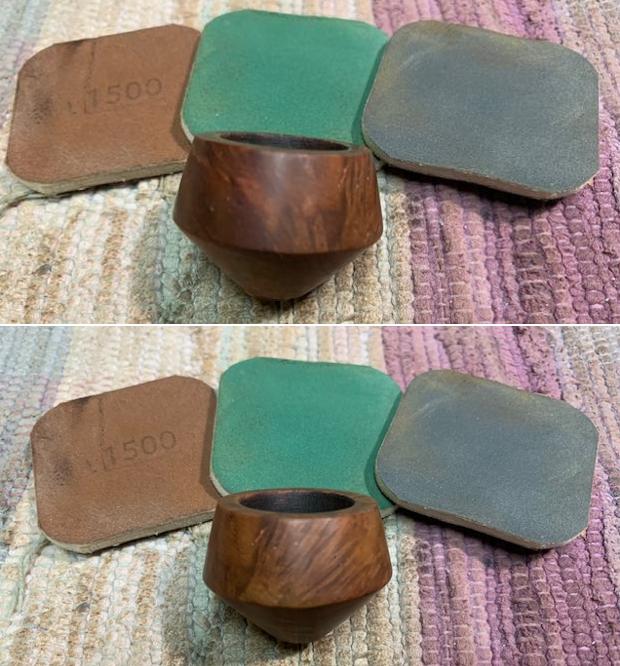
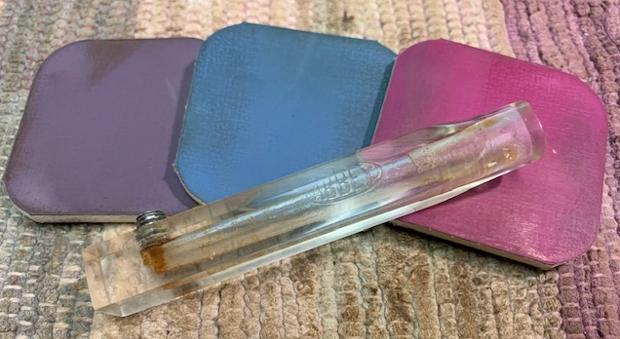
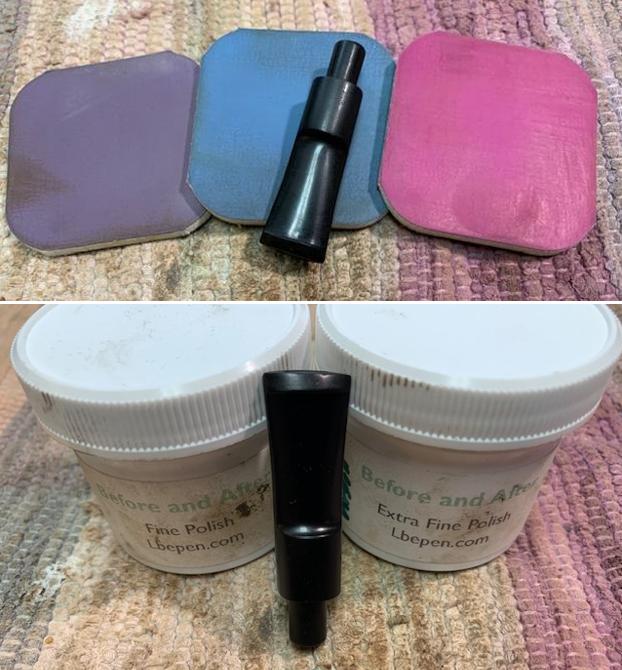
To bring a deep shine to the vulcanite stem, I went through the complete set of micromesh pads, wet sanding with 1500 to 2000 grit sandpapers and dry sanding with 3200 to 12000 grit pads. I wiped the stem with moist cloth after each pad and rubbed it down with Extra Virgin Olive oil to rejuvenate the vulcanite. The finished stem is shown below.
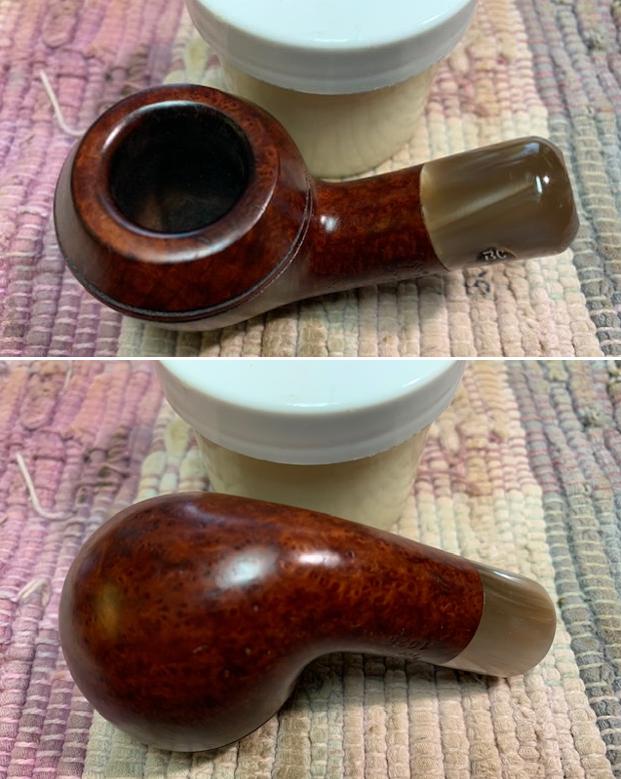
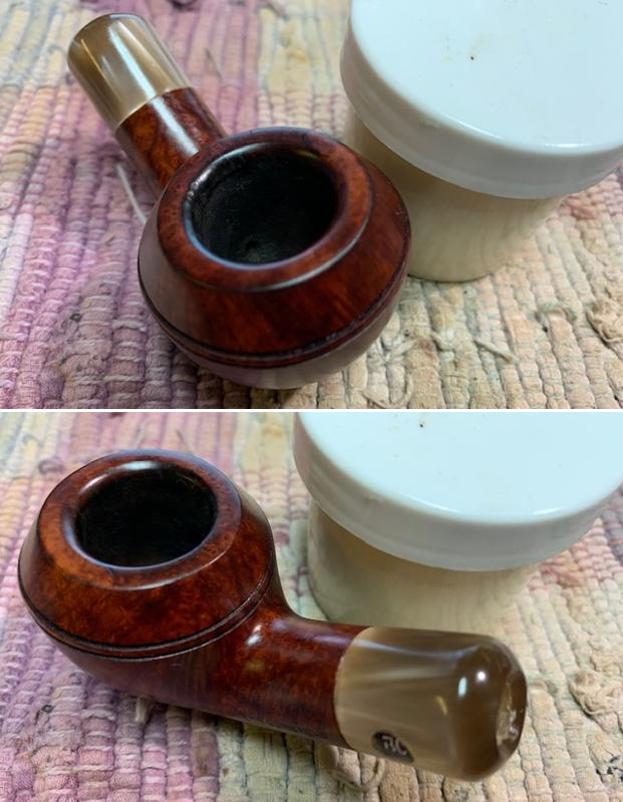
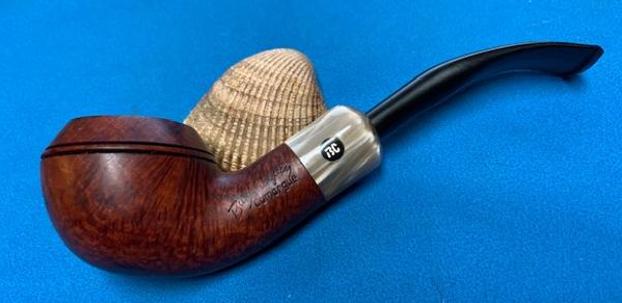
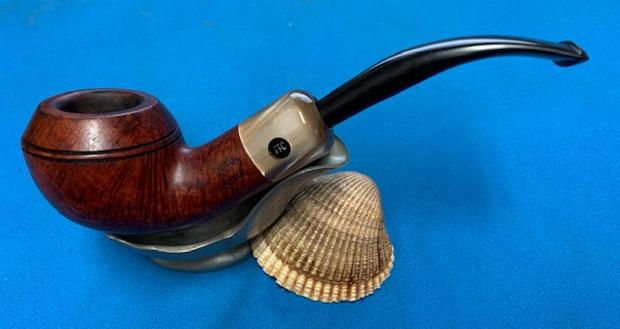
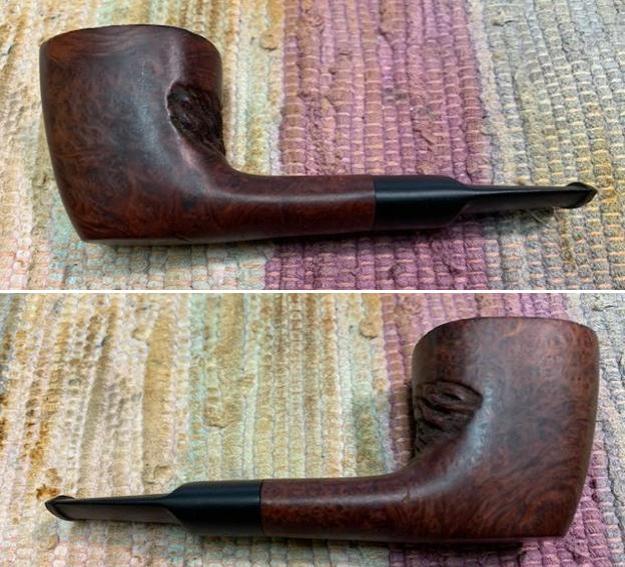
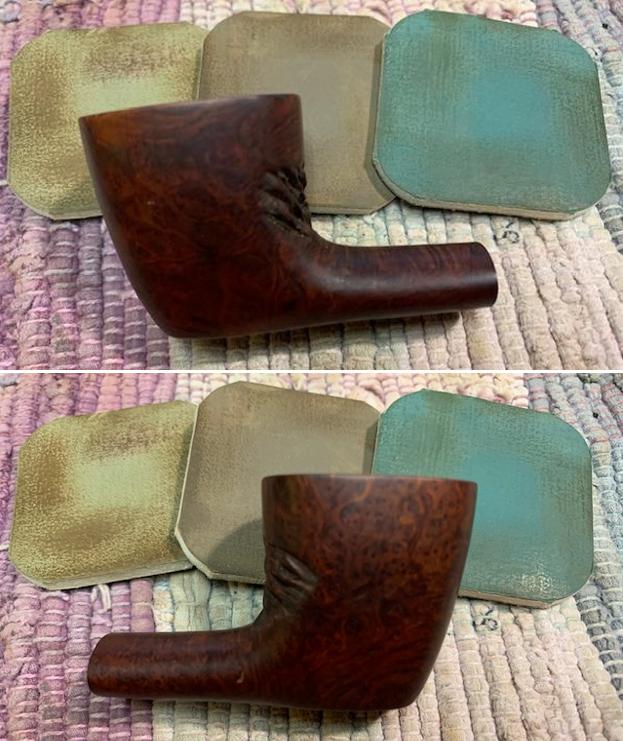
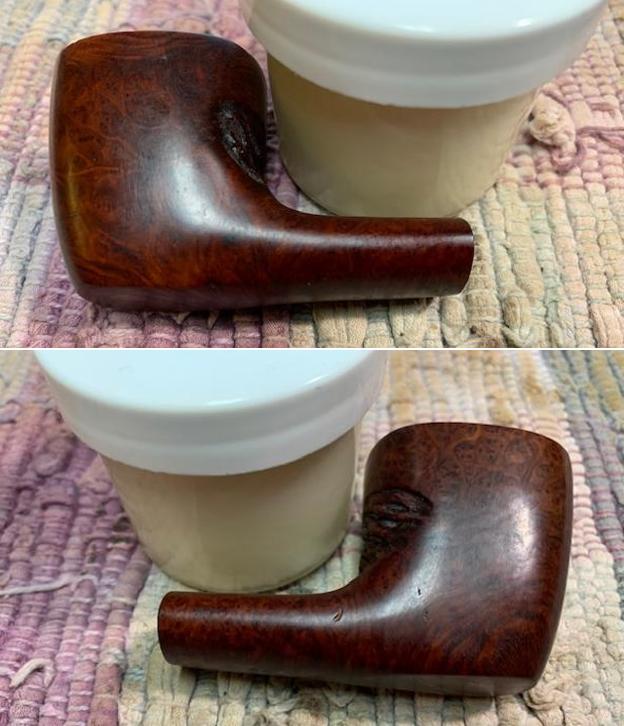
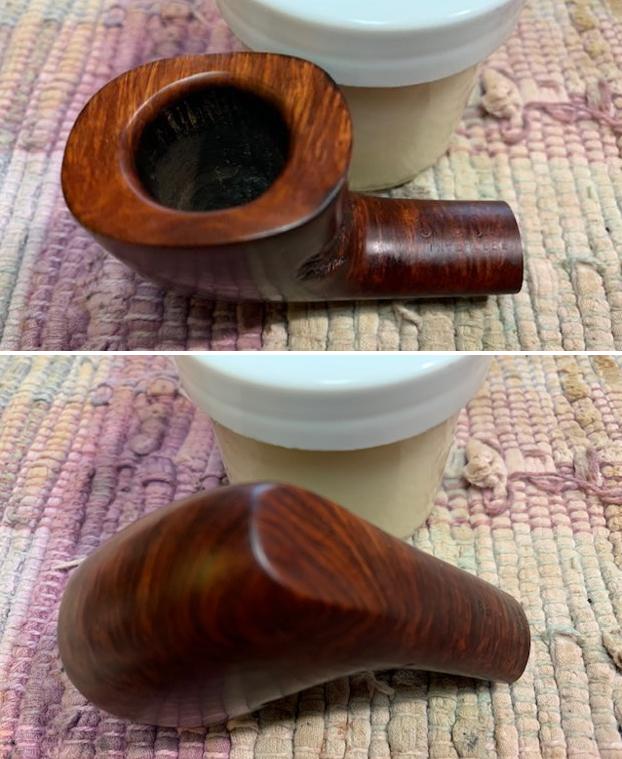
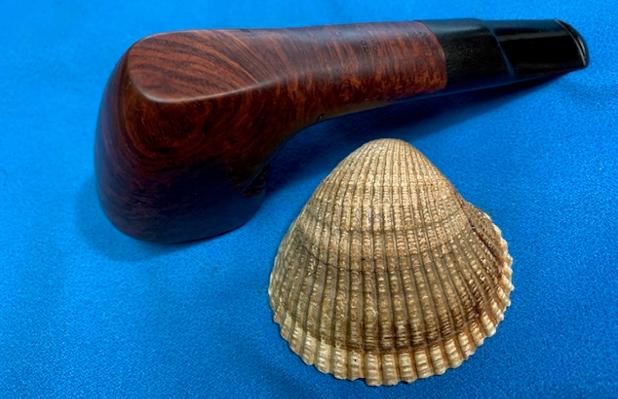
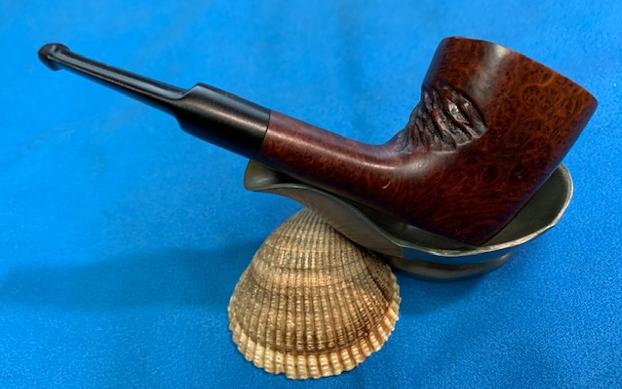
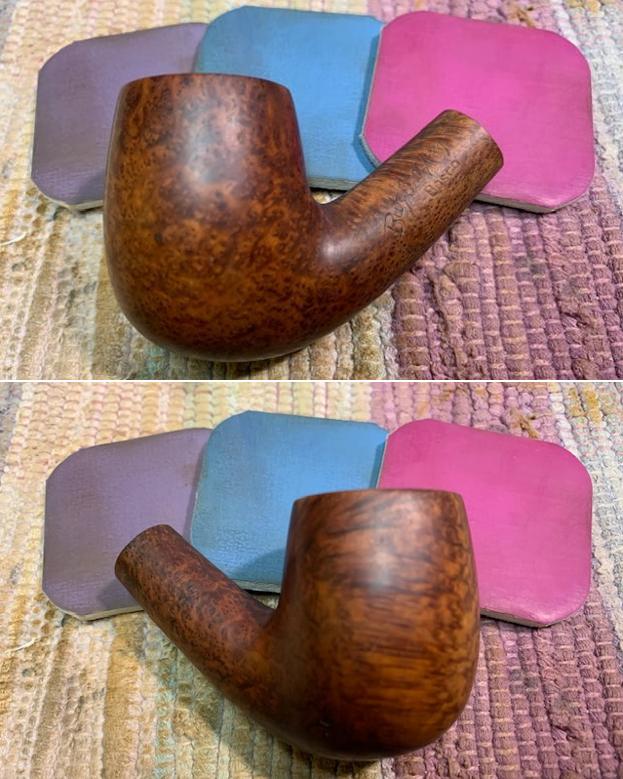
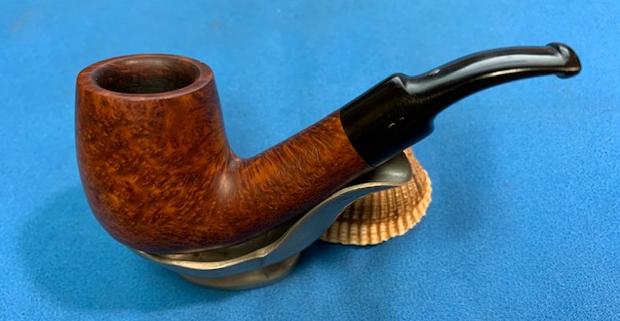
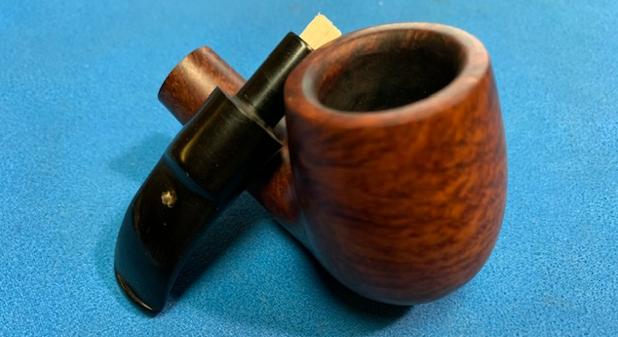
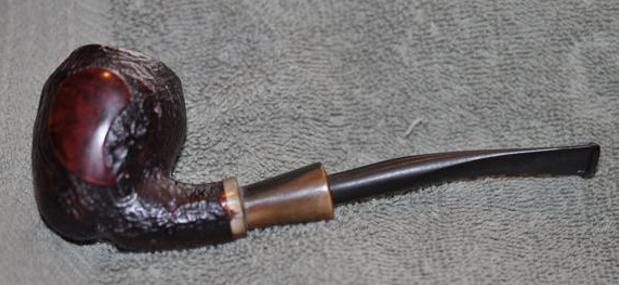
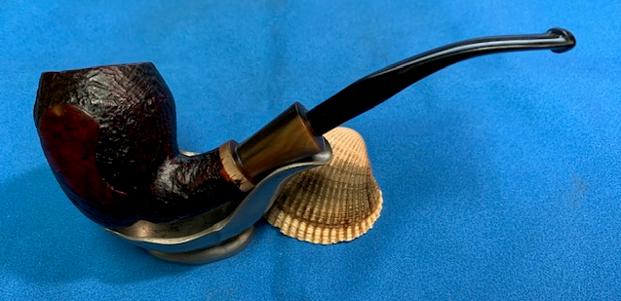
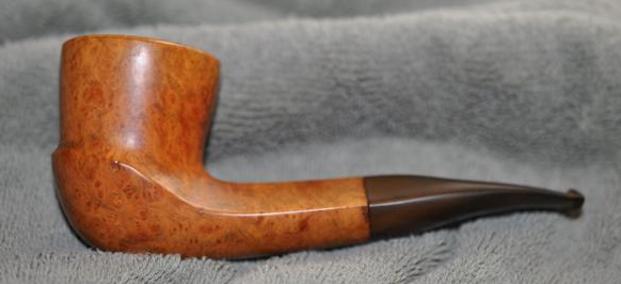
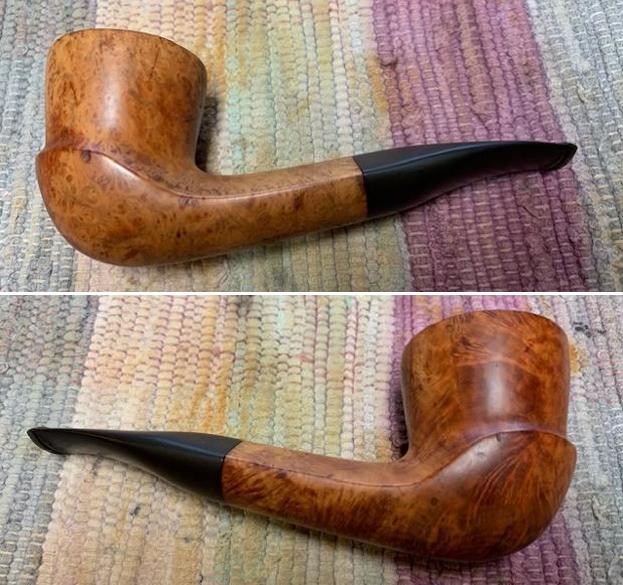
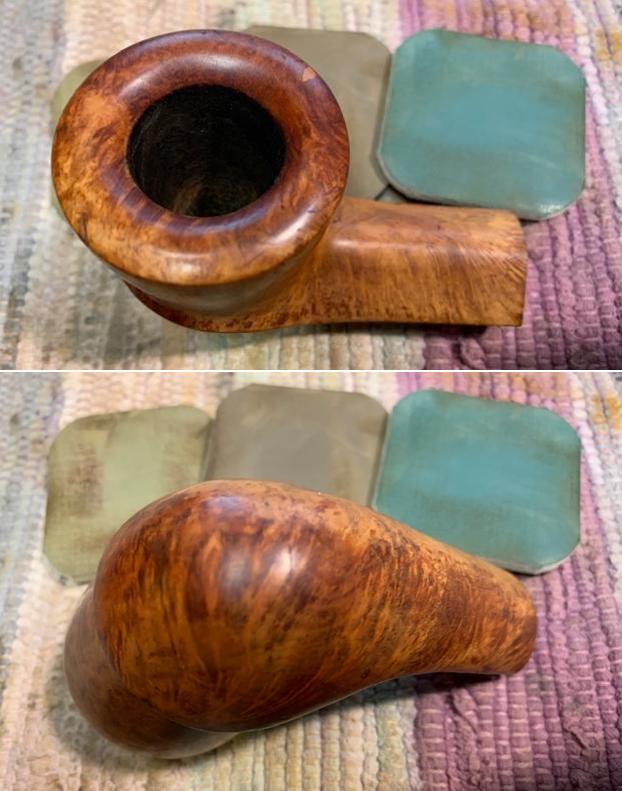
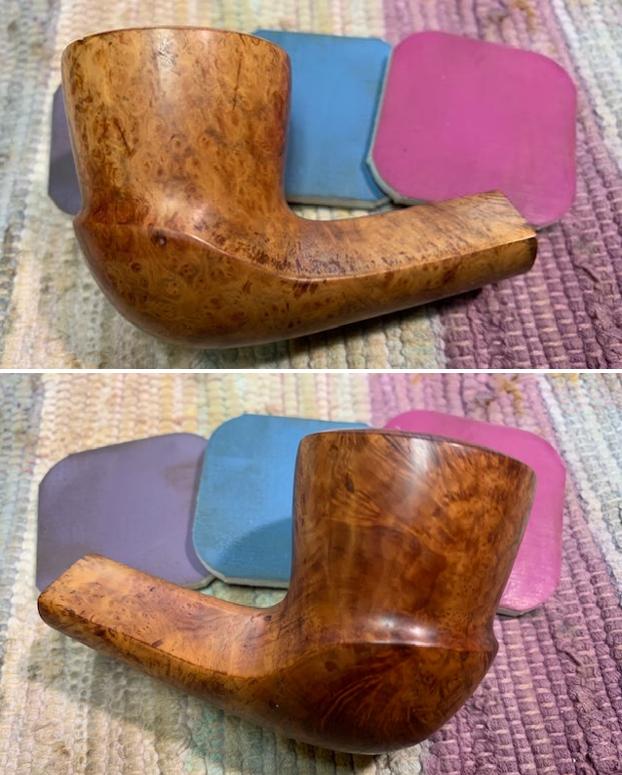
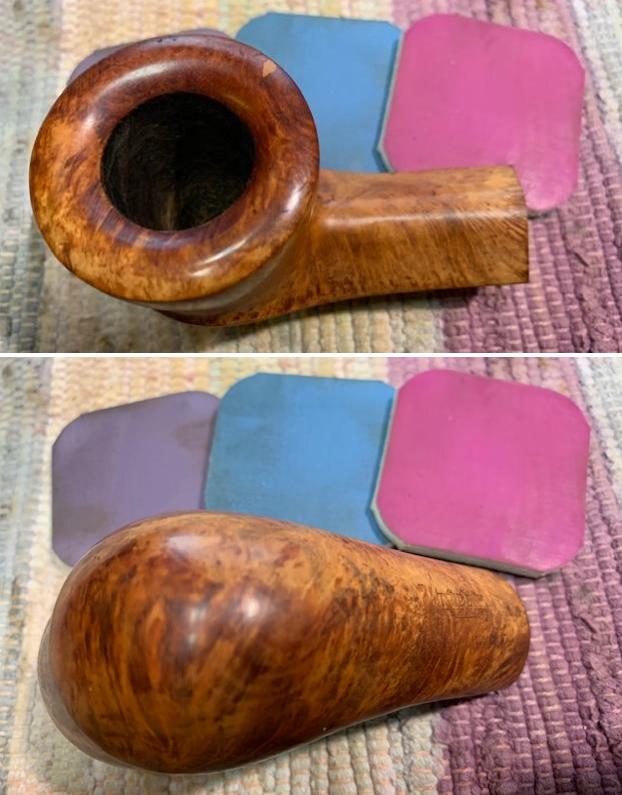
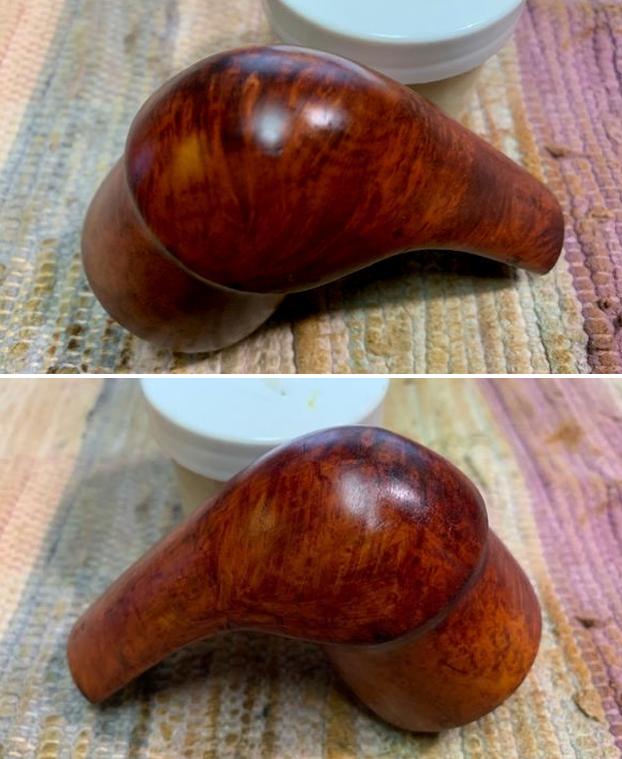
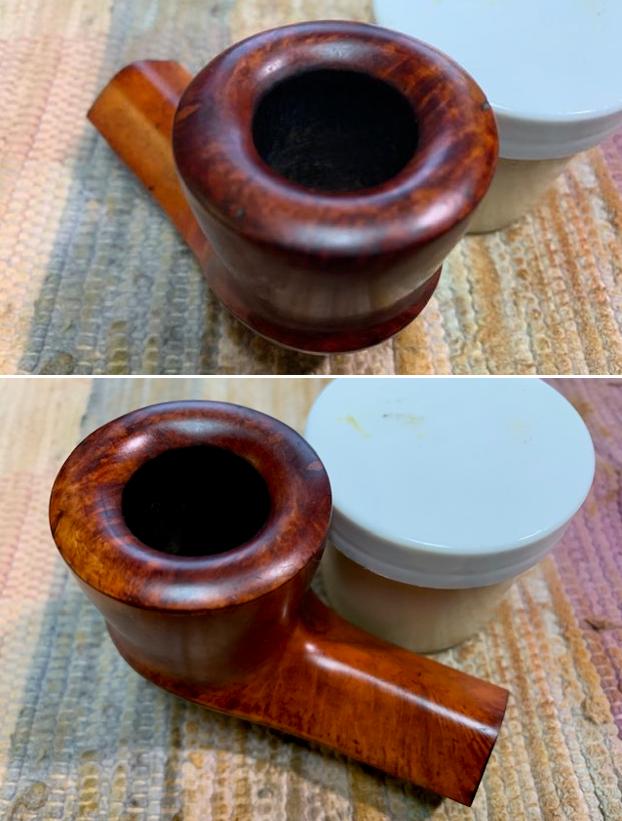
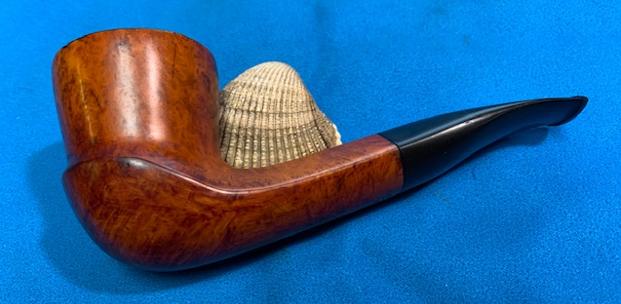
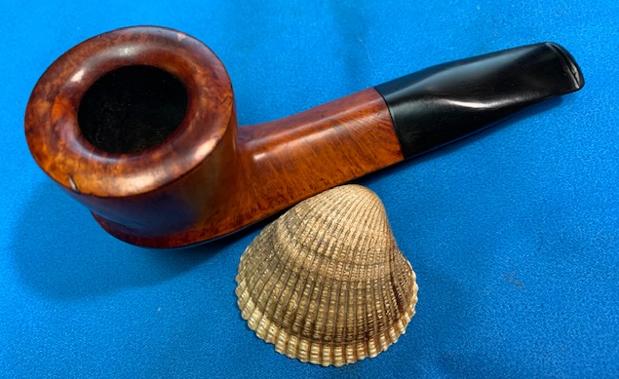
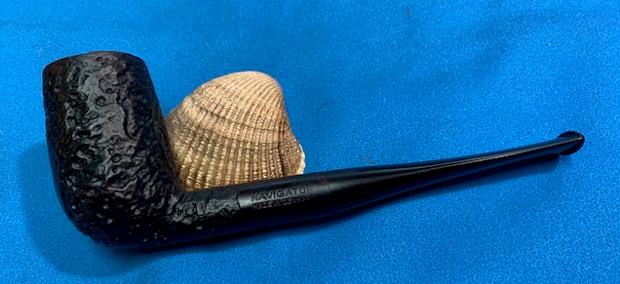
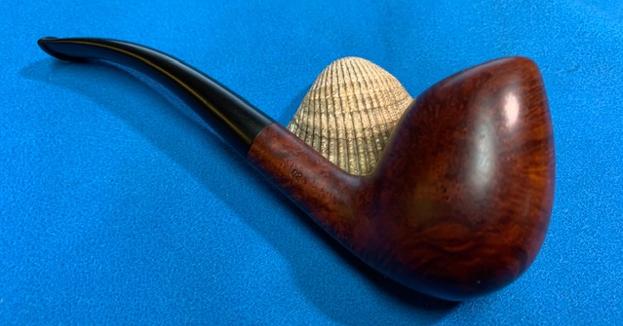
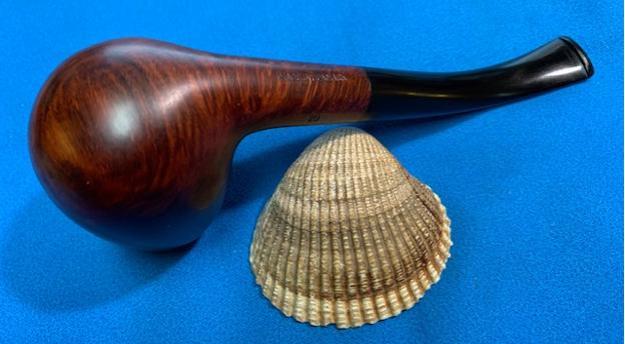
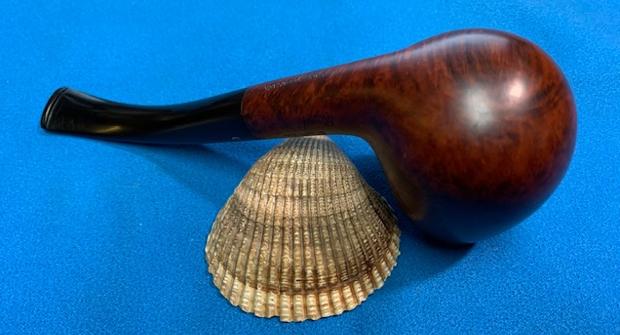
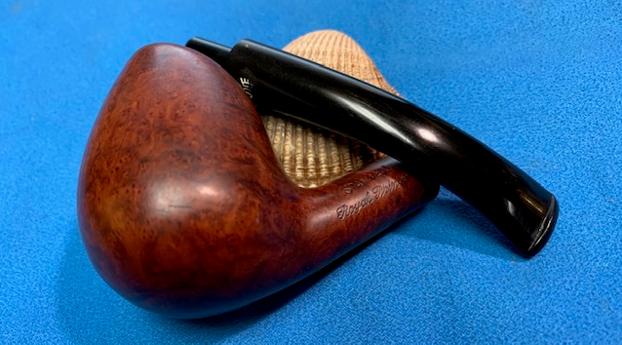
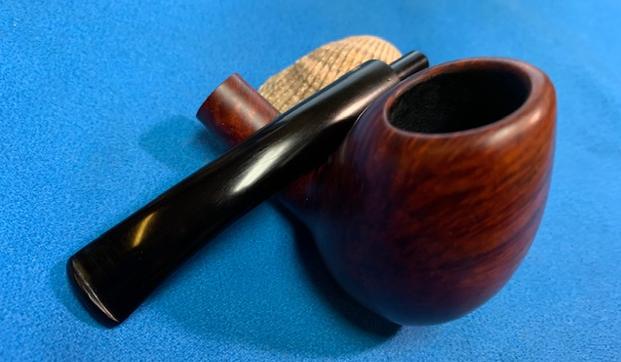
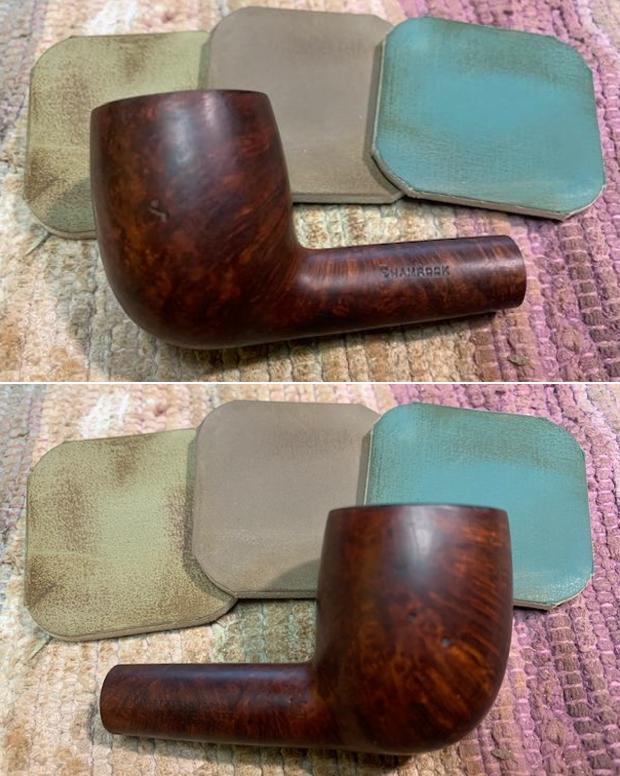
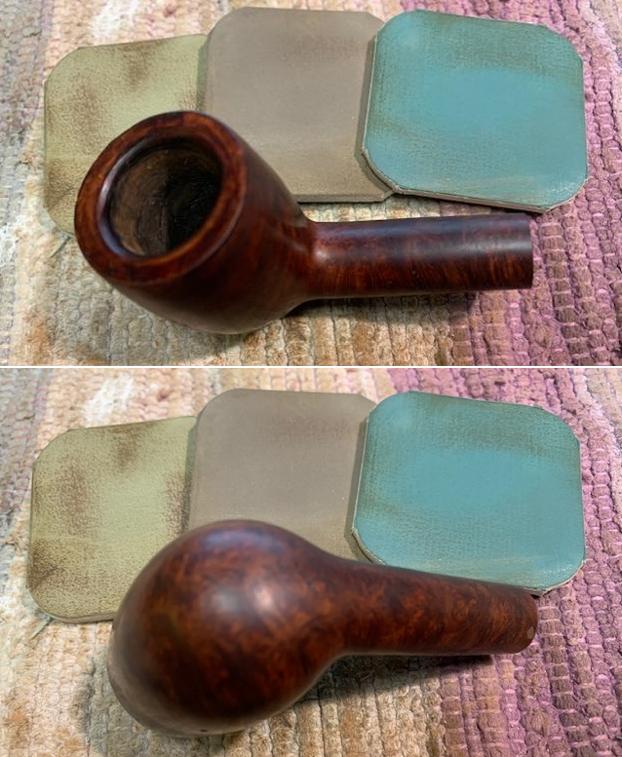
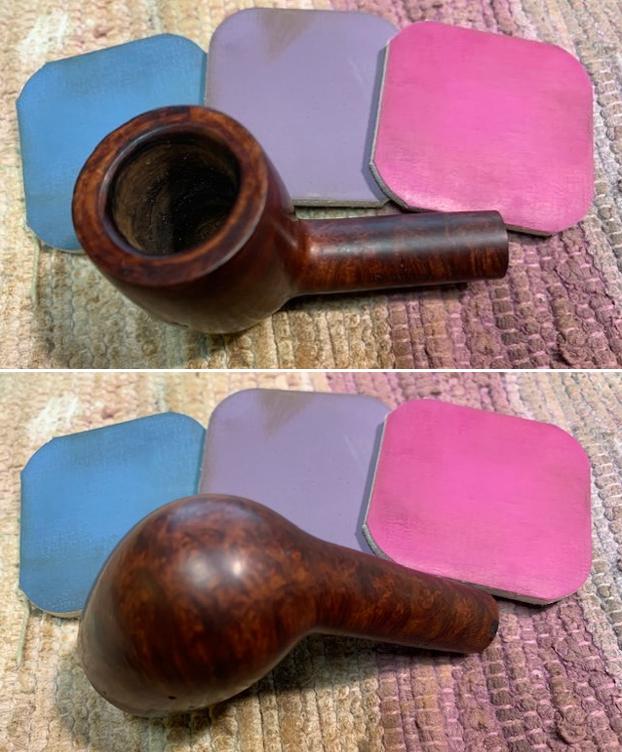
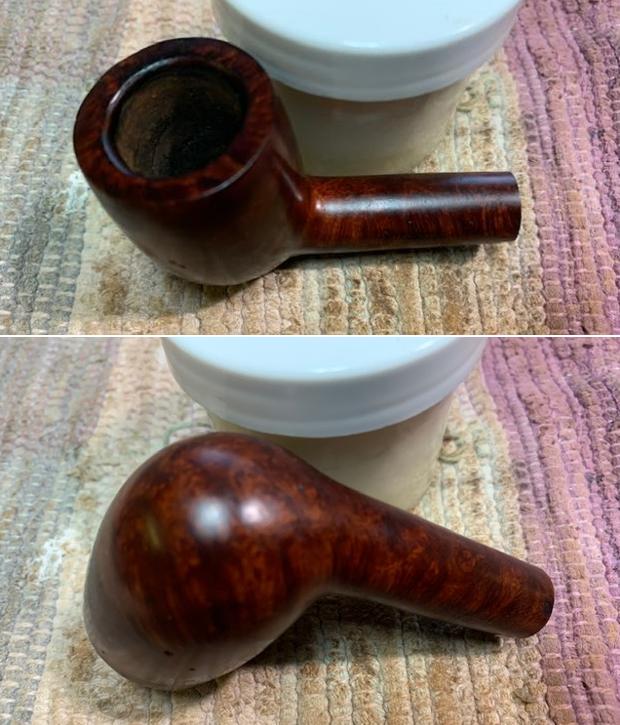
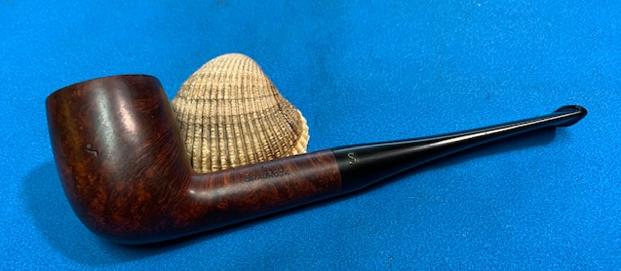
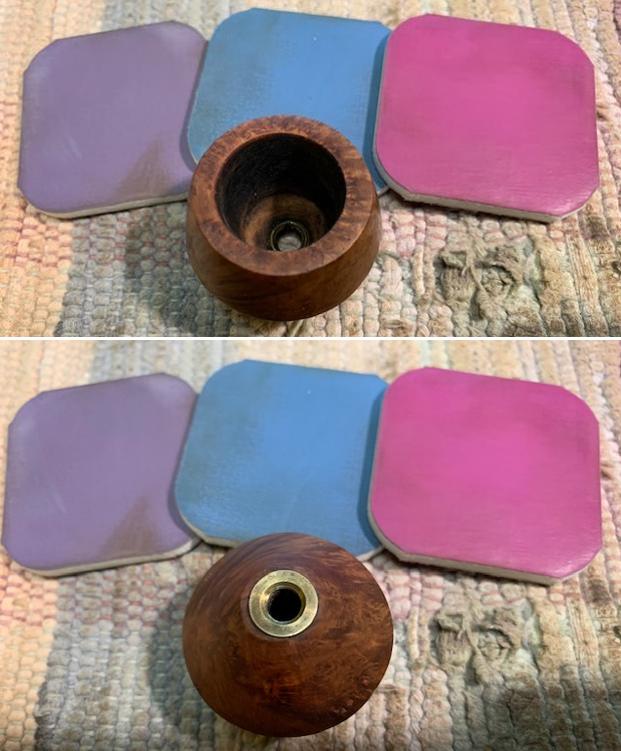
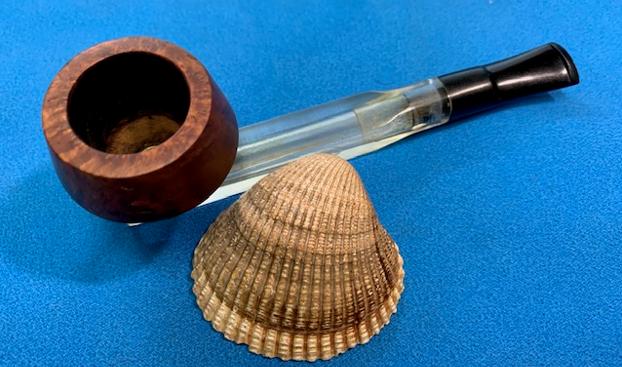
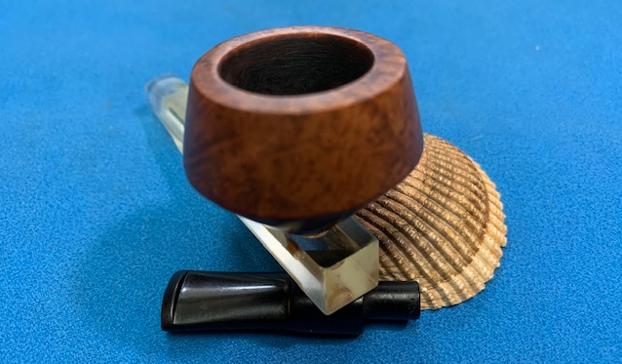
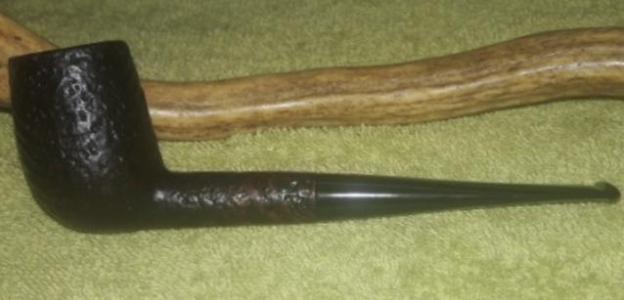
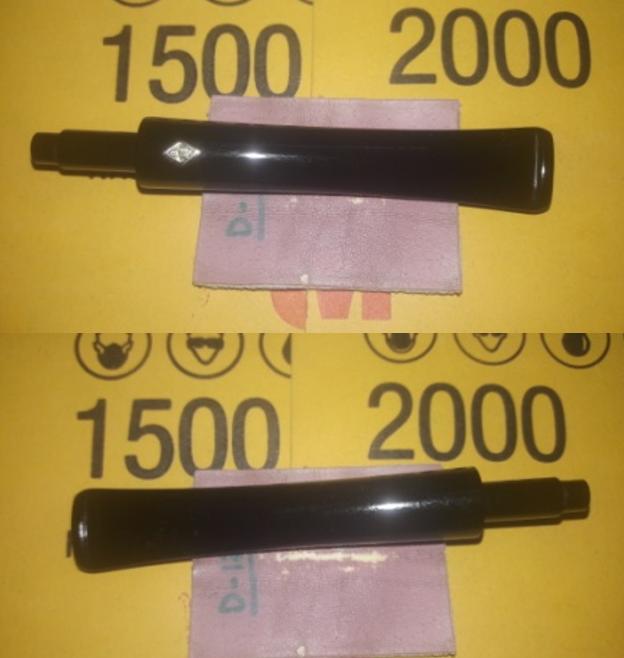
To complete the restoration, I mounted a cotton cloth buffing wheel on to my hand held rotary tool and applied several coats of carnauba wax. I finished the restoration by giving the entire pipe a rigorous hand buffing using a microfiber cloth to raise the shine further and remove any residual wax from in between the sandblasts. The finished pipe looks amazingly beautiful and is now ready for its long second innings with me. I only wish it could share with me the stories of its past years while I enjoy smoking my favorite Virginia blend in it or maybe just keep admiring it !! The finished pipe is as shown below. P.S. – A few weeks earlier, there was another pipe that I had restored (WALLY FRANK Ltd “BLACKTHORNE”) and one which required a bowl coat of activated charcoal and yogurt. It was while I coated the chamber walls of this pipe that I coated the walls of the chamber of BLACKTHORNE pipe to protect them by helping in a speedy formation of cake. Apologies for the missing pictures though…

I wish to thank each one for sparing their valuable time to read through this write up and praying for the health and safety of you and your loved ones. Stay home…stay safe!!

This was a Stunning Butz-Choquin Camargue 1025 Rhodesian once it came back to life


Blog by Steve Laug

The next pipe on the work table came to us from an antique mall in Logan, Utah, USA early in 2021. The pipe is a classic looking Butz-Choquin that has a marbleized acrylic shank extension.  The pipe is stamped on the sides of the shank. On the left side of the shank it reads Butz-Choquin [over] Camargue and on the right side it reads St. Claude [arched over] France [over] the shape number 1025. The stain is a mix of browns that contrasts well with the marble like shank extension. The finish was very dirty with grime ground into the finish making it hard to see beyond that to the grain underneath. There was a thick cake in the bowl and it had overflowed with lava onto the rim top and edges. It was hard to know at this point the condition of the rim edges. The stem was vulcanite and was a military mount fish tail stem. The stem had no stamping or identifying marks on it. Jeff took photos of the pipe before he started working on it. I include those below. He took photos of the rim top to show the thick cake and the thick lava coat on the beveled edge and onto the top. It is hard to know what the condition of the rim top and edges is like under that thick lava. It is an incredibly dirty pipe but obviously one that was a great smoker. The shank extension looks good and is acrylic. The stem has tooth marks and chatter on both sides ahead of the button. He took photos of the sides and heel of the bowl to show the beautiful grain around the bowl and the condition of the pipe. You can see the grime ground into the surface of the briar.     He took a photo of the stamping on the sides of the shank. It is clear and readable as noted above. He also captured the BC stamp on the shank extension. The shank extension was loose on the shank and had come unglued. It was filthy and the glue was dried and the extension came off. Jeff took photos of the parts.    I remembered that I had worked on a Camargue pipe by Butz-Choquin before so I turned to the blog and did a search (https://rebornpipes.com/2020/10/24/fresh-life-for-a-butz-choquin-camargue-bent-rhodesian-sitter/). I quote from that blog and also from one that Dal Stanton wrote.

Dal Stanton had written a blog on his restoration of a Camargue pipe for rebornpipes in the past (https://rebornpipes.com/2019/12/04/rejuvenating-a-fancy-french-butz-choquin-camargue-1683-prince/). I turned to that now for a quick review of the history of the line. I quote:

I’ve worked on several Butz Choquin pipes which is based in the French pipe center of St. Claude.  Here is a brief overview of the BC history from http://www.pipephil.eu/logos/en/logo-butzchoquin.html

The origin of the brand reaches back to 1858 when Jean-Baptiste Choquin in collaboration with his son-in-law Gustave Butz created their first pipe in Metz (France). Since 1951 Butz-Choquin Site officiel Butz Choquin, pipes de Saint-Claude Jura. BC pipe de bruyere luxe is a brand of the Berrod-Regad group (Saint-Claude, France).

Jean Paul Berrod managed the company from 1969 to 2002 when he retired and sold the corporate to Mr Fabien Gichon. Denis Blanc, already owner of EWA, took over the S.A. Berrod-Regad in 2006.

The BC line, ‘Camargue’ is not an old line as a simple search on the internet turns up several examples of classic pipe shapes with the ‘Camargue’ stamp, but unique to each is the acrylic shank extension and the military mounted stem.  This example is a Dublin shape from (https://www.smokingpipes.com/pipes/estate/france/moreinfo.cfm?product_id=189826).Dal had also done some research on the name Camargue that I have included below. For me this kind of information adds colour to the restoration that I am working on.

…The name of the line, ‘Camargue,’ I discovered is a treasured nature reserve on the southern coast of France between Montpellier and Marseille – two beautiful venues which I’ve had the opportunity to visit. A Wiki article was very helpful in describing the area that this BC line is commemorating (https://en.wikipedia.org/wiki/Camargue).

With an area of over 930 km2 (360 sq mi), the Camargue is western Europe’s largest river delta. It is a vast plain comprising large brine lagoons or étangs, cut off from the sea by sandbars and encircled by reed-covered marshes. These are in turn surrounded by a large cultivated area.
Approximately a third of the Camargue is either lakes or marshland. The central area around the shoreline of the Étang de Vaccarès has been protected as a regional park since 1927, in recognition of its great importance as a haven for wild birds. In 2008, it was incorporated into the larger Parc naturel régional de Camargue.

The Camargue is home to more than 400 species of birds and has been identified as an Important Bird Area (IBA) by BirdLife International.[8] Its brine ponds provide one of the few European habitats for the greater flamingo. The marshes are also a prime habitat for many species of insects, notably (and notoriously) some of the most ferocious mosquitos to be found anywhere in France. Camargue horses (Camarguais) roam the extensive marshlands, along with Camargue cattle (see below).

The native flora of the Camargue have adapted to the saline conditions. Sea lavender and glasswort flourish, along with tamarisks and reeds…It was time to work on the pipe. As usual Jeff had done a thorough cleanup on the pipe. He reamed the bowl with a PipNet pipe reamer and followed up with a Savinelli Fitsall pipe knife to remove the cake. He scrubbed out the mortise and the airway in the shank and the stem with alcohol, cotton swabs and pipe cleaners. He scrubbed the exterior of the bowl, rim, shank and stem with a tooth brush and Murphy’s Oil Soap to remove the oils and tars on the rim and the grime on the finish of the bowl. He rinsed it under running water. One of the benefits of this scrub is that it also tends to lift some of the scratches and nicks in the surface of the briar. He dried it off with a soft cloth. He cleaned the internals and externals of the stem with alcohol, pipe cleaners and cotton swabs. He soaked the stem in Briarville’s Pipe Stem Deoxidizer and rinsed it off with warm water and cleaned out the airway in the stem with alcohol. This Rhodesian pipe actually was quite stunning! I took a photo of the rim top and stem to show the condition. The rim top looked very good. There was some darkening on the rim top and the inner edge of the bowl. The loose shank extension would need to be aligned and glued. The vulcanite stem had light tooth chatter and marks on both sides ahead of the button and on the button edges. I removed the stem and the extension from the shank and took a photo of the pipe to give a sense of the whole. It is a nice looking pipe that should clean up very well.  I aligned the extension in the shank and glued it in place with clear CA glue.    I polished the briar with micromesh sanding pads – wet sanding with 1500-12000 grit pads and wiped down the bowl after each sanding pad. I rubbed the bowl and shank down with Before & After Restoration Balm. I worked it into the surface of the bowl sides and shank with my fingertips. I worked it into the twin rings around the bowl cap with a horsehair shoe brush. The product works to clean, enliven and protect the briar. I let the balm sit for a little while and then buffed with a cotton cloth to raise the shine. The Balm did its magic and the grain stood out. I set the bowl aside and turned my attention to the stem. I sanded the tooth chatter and marks with 220 grit sandpaper and started the polishing process with 400 grit wet dry sandpaper. I polished the vulcanite stem with micromesh sanding pads – 1500-12000 grit pads. I wiped it down with Obsidian Oil after each sanding pad. I used Before & After Pipe Polish – both Fine and Extra Fine to further polish the stem. The photo below shows the polished stem.     This nicely grained Butz Choquin Camargue 1025 Rhodesian with a vulcanite military bit stem is a great looking pipe now that it has been restored. The briar is clean and really came alive. The rich brown stains gave the grain a sense of depth with the polishing and waxing. The grain really popped. I put the vulcanite stem back on the bowl and carefully buffed the pipe with Blue Diamond on the buffing wheel using a light touch on the briar. I gave the bowl and the stem multiple coats of carnauba wax on the buffing wheel. I buffed the pipe with a clean buffing pad to raise the shine. I hand buffed the pipe with a microfiber cloth to deepen the shine. The finished Butz Choquin Camargue Rhodesian is a beauty and feels great in the hand and looks very good. Give the finished pipe a look in the photos below. The dimensions of the pipe are Length: 5 ¾ inches, Height: 1 ½ inches, Outside diameter of the bowl: 1 ¾ inches, Chamber diameter: ¾ of an inch. The weight of the pipe is 50 grams/1.76 oz. The pipe will be going on the rebornpipes store soon. It will be in the section on French Pipe Makes if you would like to add it to your collection.Thanks for reading this blog and my reflections on the pipe while I worked on it. There are many more to come!

This Beat up Yves St. Claude Interlude 96 Pocket Pipe Needs an Interlude


Blog by Steve Laug

The next pipe on the work table came to us from a fellow in Brazil, Indiana, USA earlier this year. It is a small pocket pipe with flat sides and an oval shank. There is some nice grain on the bowl and there is carved pattern on the back side of the bowl. The rim top is pretty beat up and has some ground in grime and lava build up. The inner edge of the rim is in rough shape and there is damage and burn marks on the outer edge as well. The finish on the bowl is very worn and dirty but there is still something intriguing about the pipe even with the grime on the surface of the briar. There is a large shrunken fill on the left side of the heel of the bowl. This pipe is stamped on the topside of the shank and reads Yves St. Claude [over] Interlude. On the underside of shank it has the shape number 96 followed by the Made in France circular COM stamp. There was a stylized YSC stamped on the top of the oval saddle stem. The pipe is heavily smoked with a moderate cake in the bowl that has been poorly reamed. There were some tooth marks and chatter on both sides of the stem near the button. The pipe is in a condition that is a challenge to bring back to life. Jeff took photos of the pipe before he started his cleanup. He took photos of the rim top to show the condition of the top and edges of the bowl. It is a heavily smoked and well worn older pipe that must have been someone’s favourite. The stem had tooth marks and chatter on both sides ahead of the button.He took photos of the sides and heel of the bowl to show the interesting grain around the bowl and the condition of the pipe. He also captured the carving on the back of the bowl. It is a unique looking pipe. He took a photo of the shrunken fill on the left side of the heel of the bowl. It was a large fill that had chipped and left a pit.He took photos of the stamping on the sides of the shank. It is clear and readable as noted above. He also took photos of the YSC stamp on the left side and Hand Cut on the right side of the taper stem.   I turned first to a blog I had written on the restoration of previous YSC pipe that I received (https://rebornpipes.com/2020/04/23/next-on-the-table-an-yves-st-claude-marbre-75-bulldog/).

In the previous blog that I cited above I had found several references to Yves Grenard, trained in Comoy’s England factory, purchasing the Chacom plant in St. Claude. He managed the factory and it passed on to his son afterward. The shape of this Yves St. Claude pipe makes me believe that it may have been made by Chacom in France with the stamping bearing Yves name.

I turned back to Pipephil’s site to have a look at what was listed there and did a screen capture of the section (http://www.pipephil.eu/logos/en/logo-y.html).I turned to Pipedia and in the listing of French Brands and Maker I found a connection of the brand to Chapuis-Comoy and that the YSC brand was made primarily for Tinder Box (https://pipedia.org/wiki/French_Pipe_Brands_%26_Makers_U_-_Z). I followed that up by turning to the Chapuis-Comoy article from Pipedia (https://pipedia.org/wiki/Chapuis-Comoy).

French factory, in St. Claude. It began with Francois Comoy who, in 1825, was making pipes in boxwood and other types, as well as in clay, for the armies of Napoleon. In 1856, the Comoy factory was the first to produce briar bowls at St. Claude. In 1870, Francois’s grandson, Henri Comoy (1850-1924) was taken prisoner in Switzerland whilst serving in the French army during the Franco-Prussian war, where he found his cousins, the Chapuis. This meeting produced the idea of an association, which only became a reality in 1922, with the creation of Chapuis-Comoy. After Henri’s death, his sons Paul and Adrien, took over the company with the support of their cousins, Emile and Louis Chapuis Sr., and in 1928 they created the Chacom brand.

In 1932, due to the economic crisis at Saint-Claude, the factory merged with La Bruyère, adopting that name, and becoming one of the biggest pipe companies in the world, with 450 workers. Louis Chapuis Jr., joined the company in 1938 and Pierre Comoy in 1947. The name Chapuis-Comoy returned in 1957 (125 workers), due to the success of the Chacom brand in France. In 1971, the London factory (see Comoy’s) became independent, and Yves Grenard, second cousin to Pierre, took over Saint-Claude, and is still running it. Between 1987 and 2001, the factory, which employed over 40 people, joined the Cuty-Fort Enterprises SA holding and, in 1994, included the Ropp brand it its catalog.

Reminded about the Chacom connection for the YSC brand it was now time to turn to the pipe itself and do my part of the work. As usual Jeff had done a thorough cleanup on the pipe. He reamed the bowl with a PipNet pipe reamer and followed up with a Savinelli Fitsall pipe knife to remove the cake. He scrubbed out the mortise and the airway in the shank and the stem with alcohol, cotton swabs and pipe cleaners. He scrubbed the exterior of the bowl, rim, shank and stem with a tooth brush and Murphy’s Oil Soap to remove the oils and tars on the rim and the grime on the finish of the bowl. He rinsed it under running water. One of the benefits of this scrub is that it also tends to lift some of the scratches and nicks in the surface of the briar. He dried it off with a soft cloth. He cleaned the internals and externals of the stem with alcohol, pipe cleaners and cotton swabs. He soaked the stem in Briarville’s Pipe Stem Deoxidizer and rinsed it off with warm water and cleaned out the airway in the stem with alcohol. Other than the damaged rim top and edges the pipe looked good. Strangely, I did not notice I had put the stem on upside down until I looked through these pictures. I have the YSC stamp on the underside of the stem rather than the top! Oops. I will fix that.I took a photo of the rim top and stem to show the condition (though it is a little blurry it is clear enough to see the damage). The edges of the bowl are in rough condition. The oval vulcanite saddle stem had tooth chatter and marks on both sides ahead of the button and on the edges. The stamping on the sides of the shank is faint but readable as noted above.       I removed the stem from the shank and took a photo of the pipe to give a sense of the whole. It is unique looking pipe that is carved with a notch for the thumb of either hand when it is wrapped around the bowl. I started working on the pipe by topping the damaged rim top on a topping board with 180 grit wet dry sandpaper. I wanted to minimize the damage to the rim top and the inner and outer edges as much as possible. I used a folded piece of 180 grit sandpaper to clean up the inner edge and give it a slight bevel. I repaired the flaw on the left side of the heel of the bowl with briar dust and super glue. Once it dried I sanded it smooth with 220 grit sandpaper to blend it into the surrounding briar.  I sanded it with micromesh sanding pads, wet sanding with 1500-12000 grit sanding pads and wiping it down with an alcohol dampened pad after each sanding pad. I rubbed the bowl and shank down with Before & After Restoration Balm. I worked it into the surface of the bowl sides and shank with my fingertips to clean, enliven and protect the briar. I let the balm sit for a little while and then buffed with a cotton cloth to raise the shine. The Balm did its magic and the grain stood out.   I set the bowl aside and worked on the stem. I touched up the YSC stamp on the top of the saddle stem with Antique Gold Rub’n Buff working it into the stamp with a tooth pick. I buffed it off with a soft cloth.   I polished the vulcanite stem with micromesh sanding pads – 1500-12000 grit pads. I wiped it down with Obsidian Oil after each sanding pad. I used Before & After Pipe Polish – both Fine and Extra Fine to further polish the stem. The photo below shows the polished stem. This nice smooth finished Yves St. Claude Interlude 96 Pocket Pipe with a vulcanite saddle stem is a great looking pipe. The rich medium brown finish and the black stem work really well together. The briar is clean and really came alive. The rich medium brown stain gave the grain a sense of depth with the polishing and waxing. The grain really popped. I put the stem back on the bowl and carefully buffed the pipe with Blue Diamond on the buffing wheel using a light touch on the briar. I gave the bowl and the stem multiple coats of carnauba wax on the buffing wheel. I buffed the pipe with a clean buffing pad to raise the shine. I hand buffed the pipe with a microfiber cloth to deepen the shine. The finished YSC Interlude Pocket Pipe is a beauty and feels great in the hand and looks very good. Give the finished pipe a look in the photos below. The dimensions of the pipe are Length: 4 ½ inches, Height: 1 ¾ inches, Outside diameter of the bowl: 1 ¼ inches wide x 1 ½ inches long, Chamber diameter: ¾ of an inch. The weight of the pipe is 36 grams/1.27 ounces. If you are interested in adding it to your collection let me know. I will be adding to the French Pipe Makers section of the rebornpipes store shortly. Thanks for reading this blog and my reflections on the pipe while I worked on it.

What an Odd Little Butz Choquin Bosco 1040 Snub Nose Bent Billiard


Blog by Steve Laug

The next pipe on the work table came to us from an antique mall in Logan, Utah, USA early in 2020. It is a unique snub nose bent Billiard with cross grain and birdseye grain and has a short saddle vulcanite stem. The bowl has a rich medium brown colour combination that highlights grain. The pipe has some grime ground into the surface of the briar. It really has some stunning grain on the bowl and shank. This pipe is stamped on the sides of the shank. On the left it reads Butz Choquin [over] Bosco. On the right it read St. Claude [over] France [over] the shape number 1040. There is a moderate cake in the bowl and a thick overflow of lava on the rim top and edges. The rim top looks good but it is hard to be certain with the lava coat. The saddle stem has BC stamped on the left side. There is also a strange metal pin in the top below the saddle stem. It had been filled in with a clear/golden epoxy that was chipped and broken. I have no idea if this is original or some previous pipe owner’s addition. There were some tooth marks and chatter on both sides of the vulcanite stem near the button. The pipe looks to be in good condition under the grime. Jeff took photos of the pipe before he started his cleanup. He took photos of the rim top to show the thick cake and the thick lava coat. It is hard to know what the condition of the rim top and edges is like under that thick lava. It is an incredibly dirty pipe but obviously one that was a great smoker. The stem is another strange part of the pipe. It is short and stubby but is original. It has that odd pin and gold epoxy on the top of the stem. The stem also has tooth marks and chatter on both sides ahead of the button. The stem was made for a 6mm filter.He took photos of the sides and heel of the bowl to show the beautiful grain around the bowl and the condition of the pipe. You can see the grime ground into the surface of the briar as well as the sandpits. He took a photo of the stamping on the sides of the shank. It is clear and readable as noted above. He also captured the BC stamp on the saddle stem. I wondered about the name of the pipe and did a quick Google search on the word as a name. the search turned up the following:

Italian: topographic name for someone living or working in a wood, from Late Latin boscus ‘shrub’, ‘undergrowth’ (of Gallic or Germanic origin), or a habitational name from a place named with this word.

It turns out to be a fitting name for a pipe made of the shrub Briar! I like the connection but I am not certain that it is what is referred to… but it could be right?

I turned then to Pipephil’s site to look at the Butz Choquin write up there and see if I could learn anything about the line (http://www.pipephil.eu/logos/en/logo-butzchoquin.html). There was a nothing listed for the Bosco pipe but there was a short history of the brand that is worth a read.

I looked up the Parker brand on Pipedia to see if I could find the Butz-Choquin Bosco Line (https://pipedia.org/wiki/Butz-Choquin). There was nothing that tied directly to the line I am working on. There is a detailed history of the brand there that is a good read.

It was time to work on the pipe. As usual Jeff had done a thorough cleanup on the pipe. He reamed the bowl with a PipNet pipe reamer and followed up with a Savinelli Fitsall pipe knife to remove the cake. He scrubbed out the mortise and the airway in the shank and the stem with alcohol, cotton swabs and pipe cleaners. He scrubbed the exterior of the bowl, rim, shank and stem with a tooth brush and Murphy’s Oil Soap to remove the oils and tars on the rim and the grime on the finish of the bowl. He rinsed it under running water. One of the benefits of this scrub is that it also tends to lift some of the scratches and nicks in the surface of the briar. He dried it off with a soft cloth. He cleaned the internals and externals of the stem with alcohol, pipe cleaners and cotton swabs. He soaked the stem in Briarville’s Pipe Stem Deoxidizer and rinsed it off with warm water and cleaned out the airway in the stem with alcohol. This odd little pipe actually was quite stunning! I took a photo of the rim top and stem to show the condition. The rim top looked very good. The rim top and the inner edge of the bowl had darkening and the varnish coat had peeled. The vulcanite saddle stem had light tooth chatter and marks on both sides ahead of the button and on the button edges.I removed the stem and the extension from the shank and took a photo of the pipe to give a sense of the whole. It is a nice Straight Grain Billiard that should clean up very well.   I polished the briar with micromesh sanding pads – wet sanding with 1500-12000 grit pads and wiped down the bowl after each sanding pad.    I rubbed the bowl and shank down with Before & After Restoration Balm. I worked it into the surface of the bowl sides and shank with my fingertips to clean, enliven and protect the briar. I let the balm sit for a little while and then buffed with a cotton cloth to raise the shine. The Balm did its magic and the grain stood out.     I set the bowl aside and turned my attention to the stem. I filled in the tooth marks near the button and the pitting around the pin in the top of the stem. Once the repairs cured I used a small file to flatten out the repairs and start to blend them into the stem surface. I sanded the repairs with 220 grit sandpaper and started the polishing process with 400 grit wet dry sandpaper. I used Rub’n Buff Antique Gold to fill in the BC stamp on the left side of the saddle stem. I rubbed it on with a cotton swab and buffed it off with a cotton pad. The stamp is faint but readable.   I polished the vulcanite stem with micromesh sanding pads – 1500-12000 grit pads. I wiped it down with Obsidian Oil after each sanding pad. I used Before & After Pipe Polish – both Fine and Extra Fine to further polish the stem. The photo below shows the polished stem.     While working on the stem I decided to see what would fit in the wide open tenon. It was obviously drilled for a 6mm filter. I did not have any, but I did have a Savinelli 6mm Balsa wood filter. Some how a pipe with the name Bosco (shrub/wood) just matched that style of filter. I fit it in place. Then it dawned on me that the pin on the top of the stem was made to keep the filter from going to deep in the stem. It worked well.   This nicely grained Butz Choquin Bosco 1040 Bent Billiard Nosewarmer with a vulcanite saddle stem is a great looking pipe now that it has been restored. The briar is clean and really came alive. The rich brown stains gave the grain a sense of depth with the polishing and waxing. The grain really popped. I put the vulcanite stem back on the bowl and carefully buffed the pipe with Blue Diamond on the buffing wheel using a light touch on the briar. I gave the bowl and the stem multiple coats of carnauba wax on the buffing wheel. I buffed the pipe with a clean buffing pad to raise the shine. I hand buffed the pipe with a microfiber cloth to deepen the shine. The finished Short Butz Choquin Bent Billiard is a beauty and feels great in the hand and looks very good. Give the finished pipe a look in the photos below. The dimensions of the pipe are Length: 4 ¼ inches, Height: 2 inches, Outside diameter of the bowl: 1 ¼ inches, Chamber diameter: ¾ of an inch. The weight of the pipe is 41grams/1.45oz. The pipe will be going on the rebornpipes store soon. It will be in the section on French Pipe Makes if you would like to add it to your collection.Thanks for reading this blog and my reflections on the pipe while I worked on it. There are many more to come!

This Mixed Finish Danmore 3094 Acorn is a Unique Piece


Blog by Steve Laug

I am enjoying an evening free to work on a few pipes. The next pipe on the table came from an antique mall in Logan, Utah, USA in March of 2021. Even though the finish was a dirty and worn it had an interesting mixed finished bowl with smooth patches on the sides of the bowl and a nice sandblast showing through the grit and grime of the years. On the underside of the shank it was stamped with the shape number 3094 followed by Danmore [over] Hand Made in Denmark. The pipe is an acorn shaped bowl with a horn shank extension. The finish is filthy with grime and oil ground into the briar of the bowl and shank sides. The bowl had a thick cake and there was an overflow of lava on the top and edges of the rim. The horn shank extension had some nicks and chips in the band next to the sandblast. The stem was a vulcanite military bit stem that fit snugly in the horn shank extension. There was the faint remnant of stamping on the topside of the stem. The vulcanite was oxidized, calcified and had tooth marks and chatter on both sides ahead of the button. The bend in the stem had also straightened over time. Jeff took some photos of the pipe to show its overall condition before he started his cleanup work. He took photos of the rim top and bowl to give a clear picture of the thickness of the cake and the lava and dust ground into the finish of the rim top and edges. There is dust and debris stuck to the walls of the bowl clearly visible in the photos. He also took photos of the top and underside of the stem to show the oxidation, chatter and tooth marks.Jeff took photos of the sides and heel of the bowl to give a picture of what the briar around the pipe looked like. There was some definite wear on the red and brown stains on the pipe as well as scratches and marks on the smooth portions. There is a nice sandblast grain under the grime and thick debris. The horn ring around the shank end had been sand blasted along with the briar and had some marks showing the blast in the horn.He took a photo of the stamping on the side of the shank. It clearly reads as noted above.I turned to Pipephil to learn who made Danmore pipes (http://www.pipephil.eu/logos/en/logo-d2.html). I have included a screen capture of the pertinent section on the site. It links the pipe to Kriswill. The pipe pictured below is a similar in style to the one that I am working on. The stem and horn shank extension are different but the stamping is very similar. I turned to Pipedia (https://pipedia.org/wiki/Danmore) for further information about the brand. I quote the article in full below.

Danmore was founded by Hans Sørensen in the early 1970s, and produced pipes from that time until the early 1980s, at one point having up to 30 employees. The pipes were sold in the first Dan Pipe catalog. In the early 1980’s, however, production ceased in Denmark due to labor costs, and the company’s production was outsourced to Italy and Spain, and they began to also make pipecleaners and smokers articles.

Sørensen focused on the pipecleaner side of the concern, and eventually bought a share in the factory in the Far East making them. Today the company, owned by Hans’ sons Jesper and Lars Sørensen, no longer makes pipes, and instead makes only pipe cleaners under the name Danmore Hobby Aps, selling only to hobby and craftshops in Denmark and Scandinavia.

Hans Sørensen passed away in 2012. The Sørensen family continues to own the trademarks for the use of the Danmore name in relation to pipes, matches, and tobacco.

I knew that I was working on a pipe made by Hans Sørensen between early 1970s and the early 1980s.Production ceased in Denmark at that time and moved to Italy and Spain. The pipe I am working on is stamped Hand Made in Denmark that leads me to that conclusion. Now it was time to work on the pipe.

Jeff had reamed the bowl with a PipNet Pipe Reamer and cleaned up the remnants with a Savinelli Fitsall Pipe Knife. He scrubbed the exterior of the bowl with undiluted Murphy’s Oil Soap with a tooth brush. He worked over the debris on the rim top and was able to remove it. He rinsed it under running warm water to remove the soap and grime. He scrubbed the horn shank extension at the same time. He cleaned out the inside of the shank and the airway in the stem with alcohol, cotton swabs and pipe cleaners. He soaked the stem in Briarville’s Pipe Stem Deoxidizer and rinsed it off with warm water. He scrubbed the stem with Soft Scrub and cotton pads to remove remaining oxidation on the stem. He rinsed it with warm water and dried it off. I took photos of the pipe once I received it. It really looked good and the bowl was in excellent condition.    The rim top and the inner edge of the rim looked very good. The stem had a few tooth marks and chatter on both sides near the button.I took a photo of the stamping on the underside of the shank. It was clear and read as noted above. I removed the stem and took a photo of the pipe to give a sense of the whole. I “painted” the stem with the flame of a Bic lighter to soften the vulcanite and give the stem a bend that matched the flow of the bowl. It looked much better once I had given it a slight bend.I polished the smooth panels on the bowl sides and the horn shank extension and band with micromesh sanding pads. Dry sanding it with 1500-12000 grit pads and wiping it down after each pad with Obsidian Oil. I rubbed the bowl and shank down with Before & After Restoration Balm. I worked it into the surface of the bowl sides and shank with my fingertips. The product works to clean, enliven and protect the briar. I let the balm sit for 15 minutes and then buffed with a cotton cloth to raise the shine.I filled in the deep tooth marks on the stem surface with clear CA glue and set it aside to cure. Once it had hardened I sanded the surface smooth with 220 grit sandpaper and started polishing the stem with 400 grit wet dry sandpaper. I polished the vulcanite stem with micromesh sanding pads – 1500-12000 grit pads. I wiped it down with a damp cloth after each sanding pad. I used Before & After Pipe Polish – both Fine and Extra Fine to further polish the stem. This beautiful Mixed Finish – Sandblast/Smooth panel Danmore 3094 Acorn with a horn shank extension and a military vulcanite stem is a great looking pipe now that it has been restored. I put the stem back on the bowl and carefully buffed the pipe with Blue Diamond on the buffing wheel using a light touch on the briar. I gave the bowl and the stem multiple coats of carnauba wax on the buffing wheel and followed that by buffing the entire pipe with a clean buffing pad. I hand buffed the pipe with a microfiber cloth to deepen the shine. The finished Danmore 3094 Acorn fits nicely in the hand and the tactile finish feels great. Give the finished pipe a look in the photos below. The dimensions of the pipe are Length: 6 inches, Height: 2 inches, Outside diameter of the bowl: 1 ¼ inches, Chamber diameter: ¾ of an inch. The weight of the pipe is 45grams/1.59oz. I will be adding it to the rebornpipes store shortly in the Danish Pipe Makers Section. Thanks for reading this blog and my reflections on the pipe while I worked on it. There are many more to come!

A British Connection for an Italian Made Trident Walnut 910 Cup and Saucer


Blog by Steve Laug

I am enjoying an evening free to work on a few pipes. The next pipe on the table came from an antique mall on 03/05/21 in Logan, Utah, USA. It is a uniquely shaped Italian made pipe that reminds me of a Lorenzo made pipe. The shape and style are much the same as those pipes. This large pipe has a smooth finish on an Italian take on a classic cup and saucer shape. On the underside of the shank it was stamped Trident [over] Styled in Italy [over] Walnut. That is followed by the shape number 910. The finish is filthy with grime and oil ground into the briar of the bowl and shank sides. The bowl was lightly caked and there was some darkening and light lava on the top and edges of the rim. The shank was triangular and the tapered stem followed that shape. There was no stamping or logo on the stem surface. The stem was oxidized and had tooth marks and chatter on both sides ahead of and on the surface of the button. Jeff took some photos of the pipe to show its overall condition before he started his cleanup work. He took photos of the rim top and bowl to give a clear picture of the condition of the bowl and rim top. There is dust and debris stuck to the walls of the bowl clearly visible in the photos. He also took photos of the top and underside of the stem to show the oxidation, chatter and tooth marks. Jeff took photos of the sides and heel of the bowl to give a picture of what the briar around the pipe looked like. There is an interesting grain patterns under the grime and thick debris.    Jeff took photos of the stamping on the left and underside of the shank. It clearly reads as noted above. I turned first to Pipephil’s site to get a quick summary of the background of the Trident pipe. (http://pipephil.eu/logos/en/logo-t8.html). This is fascinating to me as the pipe I have is stamped with the same Trident stamp but is also stamped Styled in Italy. It also had the same matte finish. I vaguely remember a connection between Comoy’s and Lorenzo pipes in Italy. This pipe really has the look of a Lorenzo. Now to dig a bit more deeply.

I turned to Pipedia to see what else I could learn about the brand and found a brief but fascinating article on the brand (https://pipedia.org/wiki/Lorenzo). I quote a part of the article that gives the link to Comoy’s that I had remembered.

In 1983 Lorenzo Tagliabue came to bitter grief: his little daughter, the only child, died of cancer. He lost all interest in the business and retired still in 1983, leaving no heirs who wished to continue the business. Lorenzo Pipes was licensed for and continued for a shorter period by Comoy’s of London (Cadogan / Oppenheimer Group). Then Lorenzo Pipes almost disappeared and Lorenzo Tagliabue passed away in 1987.

But this wasn’t the end. In 1988 Riccardo Aliverti and his wife Gabriella purchased all rights to the Lorenzo trademark from the Tagliabue family and production of the renown Lorenzo Pipes resumed.

The Aliverti family is involved in pipemaking since Romolo Aliverti, the father of the current owners, joined the Lana Brothers in 1920. He later reached the rank of technical director. No wonder that his son Riccardo showed an interest in pipe making. Riccardo began learning the pipemaking trade in 1954 at the age of fourteen under his father’s watchful eyes and succeeded him as technical director upon his father’s retirement in 1973.

Today the third generation of the Aliverti family is working for the company. Massimo Aliverti, Riccardo’s son, has been with the company as sales director since 1991. He works closely with his father and knows all phases of production. Massimo has established a broad customer base for Lorenzo around the world.

I knew that I was working on a Lorenzo made pipe from the period of time (1983) when Comoy’s (Cadogan) managed the brand for them. Now it was time to work on the pipe.

Jeff had reamed the bowl with a PipNet Pipe Reamer and cleaned up the remnants with a Savinelli Fitsall Pipe Knife. He scrubbed the exterior of the bowl with undiluted Murphy’s Oil Soap with a tooth brush. He worked over the debris on the rim top and was able to remove it. He rinsed it under running warm water to remove the soap and grime. He cleaned out the inside of the shank and the airway in the stem with alcohol, cotton swabs and pipe cleaners. He soaked the stem in Briarville’s Pipe Stem Deoxidizer and rinsed it off with warm water. He scrubbed the stem with Soft Scrub and cotton pads to remove remaining oxidation on the stem. He rinsed it with warm water and dried it off. I took photos of the pipe once I received it. Other than the burned area on the rim top and edge it really looked good and the bowl itself was in excellent condition. The rim top and the inner edge look very good. There is a large solid fill on the right side of the rim top near the back of the bowl. The stem had a few tooth marks and chatter on both sides near the button.I took a photo of the stamping on the underside of the shank. It was clear and read as noted.   I removed the stem and took a photo of the pipe to give a sense of the whole. I decided to start my work on this pipe by polishing the briar with micromesh sanding pads – wet sanding with 1500-12000 grit pads to remove the scratching and polishing the fills on the bowl sides and rim top.I stained the briar with a light brown aniline stain and flamed it to set it in the grain. I repeated the process until the coverage was acceptable.I wiped off the excess stain with alcohol on a cotton pad to even out the colour. When it was the way I wanted I rubbed the bowl and shank down with Before & After Restoration Balm. I worked it into the surface of the bowl sides and shank with my fingertips and a horsehair shoe brush to get into the nooks and crannies of the rustication. The product works to clean, enliven and protect the briar. I let the balm sit for 15 minutes and then buffed with a cotton cloth to raise the shine.I set the bowl aside and turned my attention to the stem. I filled in the deep tooth marks on both sides with clear CA glue. Once the repair cured I reshaped the button and flattened the surface of the stem with a small file. I sanded the repairs smooth with 220 grit sandpaper and started polishing the stem with 400 grit wet dry sandpaper. I polished the stem with micromesh sanding pads – wet sanding with 1500-12000 grit pads. I wiped it down with a damp cloth after each sanding pad. I used Before & After Pipe Polish – both Fine and Extra Fine to further polish the stem.   This Trident Walnut 910 Italian Design Tea Cup with a taper vulcanite stem is a great looking pipe now that it has been restored. I put the stem back on the bowl and carefully buffed the pipe with Blue Diamond on the buffing wheel using a light touch on the briar. I gave the bowl and the stem multiple coats of carnauba wax on the buffing wheel and followed that by buffing the entire pipe with a clean buffing pad. I hand buffed the pipe with a microfiber cloth to deepen the shine. The finished Trident Walnut Tea Cup fits nicely in the hand and feels great. Give the finished pipe a look in the photos below. The dimensions of the pipe are Length: 6 inches, Height: 2 ½ inches, Outside diameter of the bowl: 1 ¾ inches, Chamber diameter: 7/8 of an inch. The weight of the pipe is 75grams/2.65oz. I will be adding it to the rebornpipes store shortly in the Italian Pipe Makers Section. Thanks for reading this blog and my reflections on the pipe while I worked on it. There are many more to come!

Look at the Deep Sandblast on this Navigator Stack


Blog by Steve Laug

I am enjoying an evening free to work on a few pipes. The next pipe on the table came from a fellow in Brazil, Indiana, USA in March of 2020.. Even though the finish was a dirty and worn it had a deep and rugged sandblast showing through the grit and grime of the years. On the left side of the shank it was stamped Navigator [over] Made in Denmark. The pipe is a stack, or what some would call a tall billiard. The finish is filthy with grime and oil ground into the briar of the bowl and shank sides. The bowl had a moderate cake and there was an overflow of lava on the top and edges of the rim. The stem was a vulcanite taper stem that fit snugly in the shank but seemed to have been held in place by a worn out piece of green painter’s tape. There did not appear to be any stamping on the sides of the stem. The vulcanite was oxidized, calcified and had tooth marks and chatter on both sides ahead of the button. Jeff took some photos of the pipe to show its overall condition before he started his cleanup work. He took photos of the rim top and bowl to give a clear picture of the thickness of the cake and the lava and dust ground into the finish of the rim top and edges. There is dust and debris stuck to the walls of the bowl clearly visible in the photos. He also took photos of the top and underside of the stem to show the oxidation, chatter and tooth marks. Jeff took photos of the sides and heel of the bowl to give a picture of what the briar around the pipe looked like. There is a rugged sandblast grain under the grime and thick debris. Jeff removed the stem from the shank and took a photo to show the wrap of green painter’s tape that held the stem in place in the shank.He took a photo of the stamping on the side of the shank. It clearly reads as noted above. I turned first to Pipephil’s site to get a quick idea of who made the Navigator pipe. I had a hunch it was Kriswill but I wanted to confirm that (http://www.pipephil.eu/logos/en/logo-n1.html). I have included a screen capture of the pertinent section on the site. It links the pipe to Kriswill. The pipe pictured below is a lot like the one that I am working on. The stem does not have the logo on it though it is the same shape. I followed the link to the Kriswill brand on the site (http://www.pipephil.eu/logos/en/logo-k3.html#kriswill). The side bar there included some helpful information that I have included below.

Kriswill is a brand of Kriswork Briar Trading, in Kolding (Denmark) established about 1955. Some of Kriswill pipes were designed by Sigvard Bernadotte, Swedish prince and brother to the late Queen Ingrid of Denmark. He collaborated with his Danish partner Acton Bjørn. When the company went bankrupt in the late 1970s it was on a level with Stanwell. Dan Pipe Cigar & Company (Hafenstrasse 30 D-21481 Lauenburg/Elbe, Ge) bought the rights to use the name and it is Holmer Knudsen and/or Poul Winsløw who make the Kriswill line. Nørding, on its side, bought the plant and introduced a Kriswell line. Kriswill’s seconds: Danish Crown, Navigator. Kriswill’s sub-brand (for a short time): Lillehammer.

Pipedia confirmed the status of the brand as a second made by Kriswill but really did not add further information.

I knew that I was working on a Kriswill second labeled Navigator. Judging from the blast on the bowl it is hard to imagine why this is a second. Now it was time to work on the pipe.

Jeff had reamed the bowl with a PipNet Pipe Reamer and cleaned up the remnants with a Savinelli Fitsall Pipe Knife. He scrubbed the exterior of the bowl with undiluted Murphy’s Oil Soap with a tooth brush. He worked over the debris on the rim top and was able to remove it. He rinsed it under running warm water to remove the soap and grime. He cleaned out the inside of the shank and the airway in the stem with alcohol, cotton swabs and pipe cleaners. He soaked the stem in Briarville’s Pipe Stem Deoxidizer and rinsed it off with warm water. He scrubbed the stem with Soft Scrub and cotton pads to remove remaining oxidation on the stem. He rinsed it with warm water and dried it off. I took photos of the pipe once I received it. It really looked good and the bowl was in excellent condition.    The rim top and the inner edge of the rim looked very good. The stem had a few light tooth marks and chatter on both sides near the button.I took photos of the stamping on the sides of the shank. It was clear and read as noted above. I removed the stem and took a photo of the pipe to give a sense of the whole. The pipe was in such good condition when it got here that I did not need to do any further cleaning. I rubbed the bowl and shank down with Before & After Restoration Balm. I worked it into the surface of the bowl sides and shank with my fingertips. The product works to clean, enliven and protect the briar. I let the balm sit for 15 minutes and then buffed with a cotton cloth to raise the shine. I set the bowl aside and turned my attention to the stem. I polished the tooth marks and chatter out of the vulcanite stem with micromesh sanding pads – 1500-12000 grit pads. I wiped it down with a damp cloth after each sanding pad. I used Before & After Pipe Polish – both Fine and Extra Fine to further polish the stem.  This beautiful Sandblast Kriswill Navigator Stack with a taper vulcanite stem is a great looking pipe now that it has been restored. I put the stem back on the bowl and carefully buffed the pipe with Blue Diamond on the buffing wheel using a light touch on the briar. I gave the bowl multiple coats of Conservator’s Wax and the stem multiple coats of carnauba wax on the buffing wheel and followed that by buffing the entire pipe with a clean buffing pad. I hand buffed the pipe with a microfiber cloth to deepen the shine. The finished Kriswill Navigator Stack fits nicely in the hand and the tactile finish feels great. Give the finished pipe a look in the photos below. The dimensions of the pipe are Length: 5 ½ inches, Height: 2 inches, Outside diameter of the bowl: 1 inches, Chamber diameter: 5/8 of an inch. The weight of the pipe is 32grams/1.09oz. I will be adding it to the rebornpipes store shortly in the Danish Pipe Makers Section. Thanks for reading this blog and my reflections on the pipe while I worked on it. There are many more to come!

Look at the Birdseye Grain on this Stanwell Royal Prince 02 Bent Egg


Blog by Steve Laug

I am enjoying an evening free to work on a few pipes. The next pipe on the table came from an online auction on 02/18/21 in Upland, California, USA. Even though the finish was a dirty and worn it had some amazing grain showing through the grit and grime of the years. On the left side of the shank it was stamped Stanwell [over] Royal Prince. On the right side it is stamped with the shape number 02. On the underside it is stamped Made in Denmark. The pipe is a bent egg and as the shape number identifies. The finish is filthy with grime and oil ground into the briar of the bowl and shank sides. The bowl had a thick cake and there was an overflow of lava on the inner edge of the rim. The stem was a bent vulcanite taper stem that fit snugly in the shank. It had the Stanwell Crown S faintly stamped on the left side of the stem. The vulcanite was oxidized, calcified and had tooth marks and chatter on both sides ahead of the button. Jeff took some photos of the pipe to show its overall condition before he started his cleanup work. He took photos of the rim top and bowl to give a clear picture of the thickness of the cake and the lava and dust ground into the finish of the rim top and edges. There is dust and debris stuck to the walls of the bowl clearly visible in the photos. He also took photos of the top and underside of the stem to show the oxidation, chatter and tooth marks. Jeff took photos of the sides and heel of the bowl to give a picture of what the briar around the pipe looked like. There is some stunning grain under the grime.He took photos of the stamping on the sides of the shank. It read as noted above and is clear and readable. I turned first to Pipephil’s site to get a quick idea of when this pipe line was made and where it stood in the Stanwell hierarchy. I found nothing (http://www.pipephil.eu/logos/en/logo-stanwell.html).

I also turned to Pipedia’s article on Stanwell but it did not add any further information. It is a great read in terms of the history of the brand (https://pipedia.org/wiki/Stanwell).

I turned to the section on Stanwell shapes and numbers on Pipedia to see if I could identify the designer (https://pipedia.org/wiki/Stanwell_Shape_Numbers_and_Designers). Finally I found a bit of help there. It stated that the shape number 02 came in two versions – a Freehand, oval bowl and stem designed by Sixteen Ivarsson and a Bent Egg Shaped Bowl sloping top and full mouthpiece. Now I knew that I was dealing with the second. There was also a catalogue photo that I have included below that shows the shape 02 at the top left of the photo.

With that information in hand I knew what I was dealing with in terms of the shape of the pipe. I am pretty sure it is a pipe that was made in the 80s or 90s. I was not certain but that is my educated guess. Now it was time to work on the pipe.

Jeff had reamed the bowl with a PipNet Pipe Reamer and cleaned up the remnants with a Savinelli Fitsall Pipe Knife. He scrubbed the exterior of the bowl with undiluted Murphy’s Oil Soap with a tooth brush. He worked over the debris on the rim top and was able to remove it. He rinsed it under running warm water to remove the soap and grime. He cleaned out the inside of the shank and the airway in the stem with alcohol, cotton swabs and pipe cleaners. He soaked the stem in Briarville’s Pipe Stem Deoxidizer and rinsed it off with warm water. He scrubbed the stem with Soft Scrub and cotton pads to remove remaining oxidation on the ferrule and the stem. He rinsed it with warm water and dried it off. I took photos of the pipe once I received it. It really looked good. The rim top and the inner edge of the rim showed some nicks and marks after the cleaning. The stem had a few small tooth marks and chatter on both sides near the button. I took photos of the stamping on the sides of the shank. It was clear and read as noted above.I removed the stem and took a photo of the pipe to give a sense of the whole. I decided to address the damage to the inner edge of the bowl first. I used a folded piece of 220 grit sandpaper to smooth out the damage and clean up the edge. I was pleased with the reshaped rim top and edge. I polished the briar with micromesh sanding pads – dry sanding with 1500-12000 grit pads and wiping it down after each pad with a damp cloth. I rubbed the bowl and shank down with Before & After Restoration Balm. I worked it into the surface of the bowl sides and shank with my fingertips. The product works to clean, enliven and protect the briar. I let the balm sit for 15 minutes and then buffed with a cotton cloth to raise the shine.I “painted” the stem surface on both sides with the flame of a lighter to lift the tooth marks. I was able to lift all of them on the underside of the stem but one of them on the topside remained. I filled it in with clear super glue. Once the repair cured I smoothed it out and also the tooth chatter on the underside with 220 grit sand paper. I started the polishing with 400 grit wet dry sandpaper.I touched up the stamping on the top of the stem. It was a Stanwell Crown S logo. Parts of it were faint but I was able to get some of the stamping to show up with the Paper Mate Liquid Paper White.I polished the vulcanite stem with micromesh sanding pads – 1500-12000 grit pads. I wiped it down with a damp cloth after each sanding pad. I used Before & After Pipe Polish – both Fine and Extra Fine to further polish the stem. This beautiful Stanwell Royal Prince Sloped Bent Egg with a taper vulcanite stem is a great looking pipe now that it has been restored. I put the stem back on the bowl and carefully buffed the pipe with Blue Diamond on the buffing wheel using a light touch on the briar. I gave the bowl and the stem multiple coats of carnauba wax on the buffing wheel and followed that by buffing the entire pipe with a clean buffing pad. I hand buffed the pipe with a microfiber cloth to deepen the shine. The finished Stanwell Royal Prince Bent Egg fits nicely in the hand and feels great. Give the finished pipe a look in the photos below. The dimensions of the pipe are Length: 6 inches, Height: 2 inches, Outside diameter of the bowl: 1 ¼ inches, Chamber diameter: ¾ of an inch. The weight of the pipe is 46grams/1.62oz. I will be adding it to the rebornpipes store shortly in the Danish Pipe Makers Section. Thanks for reading this blog and my reflections on the pipe while I worked on it. There are many more to come!

What a Mess! A Peterson’s Product Shamrock 15 Billiard


Blog by Steve Laug

The next pipe was an absolute mess and one that obviously had been “ridden hard and put away wet”. There was little room in the bowl for tobacco and the finish and condition was abysmal. I am pretty sure it came from a classic old time pipeman who smoked a pipe until it was no longer usable and then pitched it for a new on. It was definitely a stranger to any cleaning! This one is a smooth Billiard that has a rich coloured finish around the bowl sides and shank. It came to us on 07/24/18 from a sale in Lickingville, Pennsylvania, USA. The finish is almost bland looking it is so dirty it was hard to know what to expect once it was cleaned. It was stamped on the  left side of the shank and read SHAMROCK. It was stamped to the right of the shank and reads “A PETERSON’S PRODUCT” over MADE IN THE REP. [over] OF IRELAND (3 lines) with the shape number 15 next to the bowl. It was filthy when Jeff brought it to the table. There was a very thick cake in the bowl and lava on the rim top and the inner edge of the bowl. The cake was thick and overflowing so much it was hard to know what the edge looked like. The stem was stamped with the letter S on the left side. It was oxidized and had tooth marks and chatter on the top and underside on and near the button. Jeff took photos of the pipe before his cleanup work. Jeff took photos of the rim top and stem to show the general condition of the pipe. The bowl is so heavily caked it is impossible to know the condition of the edges under the lava overflow. There was still dottle in the bowl from the last smoke of the pipe. The stem is oxidized and grimy. It has some tooth marks on the top and underside near and on the surface of the button itself. Jeff took photos of the bowl sides and heel to show the grain that was around this bowl. You can see the sandpits and nicks in the briar in the photos below. Even so, it is a nice looking pipe.He took photos of the sides of the shank to show the stamping. The stamping is readable in the photos below and is as noted above. I am including the link to the Pipedia’s article on Peterson pipes. It is a great read in terms of the history of the brand (https://pipedia.org/wiki/Peterson).
I turned to “The Peterson Pipe” by Mark Irwin and Gary Malmberg to get some background on the Peterson’s Shamrock Pipe. On page 312 it had the following information.

Shamrock (c1941-2009) Originally stamped SHAMROCK with no brand name, an inexpensive line first described in George Yale (New York) mail order booklet in 1941, imported by Rogers Import. The line was actively promoted beginning in ’45, aggressively promoted in US by Rogers from early ‘50s when they registered the Shamrock logo with US Patent Office, claiming propriety since ’38. Over the years offered with P-lip or fishtail mouthpiece, with or without nickel band, with or without shamrock logo on the band, with or without S stamped in white or later in gold on mouthpiece. Appearing in 2008 as unstained smooth and rustic, fishtail mouthpiece with gold impressed P on the stem. COMS of MADE IN over IRELAND (C1945-1965), MADE IN IRELAND forming a circle (c1945-1965), “A PETERSON’S PRODUCT” over MADE IN IRELAND (c1945-1965), MADE IN THE over REPUBLIC over OF IRELAND (c1948-1998). Model is always difficult or impossible to date.

Judging from the description above, the pipe I am working on is stamped with the stamp noted in red above. It reads “A Peterson’s Product” over Made in Ireland which narrows the date to between approximately 1948-1998. It is just stamped SHAMROCK with no brand name as an inexpensive a fish tail stem. Now it was time to work on the pipe.

I was utterly surprised when I took this pipe out of the box and compared it to the before photos. Jeff had done a great job cleaning up the pipe as usual. He reamed the pipe with a PipNet reamer and cut back the cake back to the bare briar. He cleaned up the walls with a Savinelli Fitsall Pipe Knife. Surprisingly the walls looked unscathed from the heavy cake. He scrubbed the interior of the bowl and shank with pipe cleaners, cotton swabs and alcohol to remove the tars and oils. He scrubbed the exterior of the pipe with Murphy’s Oil Soap and a tooth brush to remove the grime from the finish. He worked on the rim top lava and darkening with the soap and tooth brush. He scrubbed the inside of the stem with alcohol and pipe cleaners. He scrubbed the exterior of the stem with Soft Scrub and then soaked it in Briarville’s Deoxidizer. He washed it off with warm water to remove the Deoxidizer. The pipe looked far better when it arrived. The cleaned up rim top revealed a very damaged inner edge and top. It was both burned and nicked from what appeared to be a quick ream somewhere in its life with a knife. I took some close up photos of the rim top to show how well it had cleaned up and the damage to the inner edges around the bowl. I also took close up photos of the stem to show the tooth marks on the surface near and on the button itself. I took photos of the stamping on the sides of the shank. It reads as noted above. I removed the stem and took a photo of the pipe to have a look at the parts and overall look.I started my work on this pipe by topping the bowl and reworking the damage to the inner edge. I topped the bowl on a piece of 220 grit sandpaper on a topping board. Once I had it smooth I used a folded piece of 220 grit sandpaper to give the inner edge of the bowl a slight bevel to accommodate the burned areas and blend them into the surrounding briar.I polished the briar with micromesh sanding pads – dry sanding with 1500-12000 grit sanding pads. I wiped the bowl down with a damp cloth after each sanding pad.I interrupted the polishing with the micromesh pads after the 2400 grit pad. I stained the rim top with a Maple, Cherry and Walnut stain pen to blend it into the surrounding briar. Then I continued on my polishing of the briar with 3200-12000 grit micromesh sanding pads. I worked some Before & After Restoration Balm into the surface of the briar with my fingertips to clean, enliven and protect the briar. I let the balm sit for 15 minutes and then buffed with a cotton cloth to raise the shine. The photos show the bowl at this point in the restoration process. I set the bowl aside and “painted” the stem surface with flame of a lighter to lift the tooth marks in the surface. It worked well. I filled in the remaining tooth marks with clear CA glue and set the stem aside to cure. Once it had cured I sanded them smooth with 220 grit sandpaper and started the polishing with 400 grit wet dry sandpaper.From the description I read and quoted above I knew that the stem stamp could well have been gold. I used some Rub’n Buff Antique Gold to fill in the stamp. I worked it into the stamp with a tooth pick. I buffed it off with a soft cloth.I polished the stem with micromesh sanding pads – wet sanding with 1500-12000 grit sanding pads. I wiped it down after each sanding pad with Obsidian Oil. I polished it with Before & After Pipe Stem Polish – both Fine and Extra Fine. I am excited to finish this Older “A Peterson’s Product” Shamrock 15 Straight Billiard. I put the pipe back together and buffed it with Blue Diamond on the buffing wheel. I gave the bowl and the stem multiple coats of carnauba wax. I hand buffed the pipe with a clean buffing pad to raise the shine. It is fun to see what the polished bowl looks like with beautiful mixed grain all around it. Added to that the black vulcanite fish tail stem was beautiful. This smooth Classic Shamrock 15 Billiard is great looking and the pipe feels great in my hand. It is light and well balanced. Have a look at it with the photos below. The dimensions are Length: 5 ¾ inches, Height: 1 ¾ inches, Outside diameter of the bowl: 1 ¼ inches, Chamber diameter: ¾ of an inch. The weight of the pipe is 34grams/1.20oz. It is a beautiful pipe and one will end up on the rebornpipes store in the Irish Pipe makers section. Check there if you want to add it to your collection. Let me know via email or message. Thanks for walking through the restoration with me as I worked over this pipe. Thanks to each of you who are reading this blog.

Sometimes you come across something that just has to be restored!


Blog by Steve Laug

The next pipe on the table is a pipe that fits that. I remember when Jeff found it on one of his hunts in Utah. He called me and showed it to me on Facetime. It was one of those that we both just had to have. Not because it is a thing of beauty or a spectacular pipe by a well known pipe maker. It is not any of those things or even any number of other descriptions. It is just one that grabbed us and in our thinking deserved to be restored. It reminded us both of a Kirsten pipe. The square shank is made of Lucite and has a metal threaded nipple on the top that the bowl screws onto. The bowl is briar with a few fills around the sides and the base of the bowl. It has a brass threaded fitting in the bottom that screws onto the nipple. The shank tapers down into a vulcanite saddle stem with a regular push tenon. There was no clean out on the bowl end of the shank. It is a bit of an odd looking pipe but one that I understand the attraction. Can you imagine watching the smoke swirling up the clear shank while you smoke it? It must have been a fun pipe to smoke.

We purchased it from an antique mall in Utah earlier this year. The briar bowl is natural coloured that has developed some patina. The base/shank is clear Lucite that is stained with tobacco juices. It was stamped on the left side and read Abbey in an oval. It was in filthy condition when Jeff brought it to the table which to me means that it must have been a good smoking pipe. There was a thick cake in the bowl and lava and debris rim top and the inner edge of the bowl. The vulcanite stem was lightly oxidized and had light tooth marks and chatter on the top and underside on and near the button. Jeff took photos of the pipe before his cleanup work to give a picture of its condition.   Jeff took photos of the bowl, rim top and stem to show the general condition of the pipe. The bowl is heavily caked and the rim top and edges have a thick lava overflow on the beveled inner edge of the bowl and on the rim top. The stem has grime and tooth marks on the top and underside near the button.Jeff took some photos of the bowl sides and heel to show the grain that was around this bowl. It is a nice looking pipe.He took photos of the sides of the shank to show the stamping and the tobacco stains in the Lucite. The stamping is readable in the photos below and is as noted above.Jeff took the bowl off the acrylic shank and took photos of the threaded metal nipple/tenon that held the bowl on the shank top.I turned to Pipephil and Pipedia and there was no listing for the brand. That always leaves me a bit unsatisfied as I really want to know about the maker of a brand. I then checked on a site that I often refer to on metal and other odd pipes – Smoking metal. It generally has some interesting info on odd brands (http://www.smokingmetal.co.uk/index.html). Once again there was nothing there on Abbey pipes.

I always scroll through and look for something similar. In this case I found one that is somewhat like the Abbey pipe. It is a Lenox pipe (http://www.smokingmetal.co.uk/pipe.php?page=82). Here is the description of the Lenox:

Department : STEM OF OTHER MATERIALS & Screw through bowl. Hard to see the purpose of this one. There would be no signifacant extra cooling and there is no end plug to remove for ease of cleaning. LENOX in LUCITE molded into top of shank… These pipes were certainly on sale in 1951. Overall length 5 5/8 inch (143 m/m). The site also included some photos that I am including below to show the similarity. There were a lot of similarities to the pipe I am working on.
1. The threaded bowl with a metal nipple in the Lucite base.
2. The metal insert in the base of the bowl that threads onto the nipple.
3. A Lucite shank/base stamped with the name
4. The fact that there was no clean out on the shank end
5. The standard tenon and vulcanite stem

Now it was time to work on the pipe.

Jeff had done a great job cleaning up the pipe as usual. He reamed the pipe with a PipNet reamer and cut back the cake back to the bare briar. He cleaned up the walls with a Savinelli Fitsall Pipe Knife. He scrubbed the interior of the bowl and shank with pipe cleaners, cotton swabs and alcohol to remove the tars and oils. He scrubbed the exterior of the pipe with Murphy’s Oil Soap and a tooth brush to remove the grime from the finish. He worked on the rim top and edge to remove the lava and darkening with the soap and tooth brush. He scrubbed the inside of the Lucite shank and stem with alcohol and pipe cleaners. He scrubbed the exterior of the stem with Soft Scrub and then soaked it in Briarville’s Pipe Stem Deoxidizer. He washed it off with warm water to remove the Deoxidizer. The pipe looked much better than when we picked it up. There was still some tobacco staining in the shank end that needs to be worked on. But over all it looked very good when it arrived here. I took some close up photos of the rim top and also of the stem surface. The rim top and the inner edge looked very good. The stem was clean and the tooth marks and chatter were visible.I took a photo of the stamping on the left side of the shank. You can see that it is stamped as noted above. It is clear and readable.I took the pipe apart and took a photo of the parts. It is a good looking pipe and has some nice looking grain and rustication around the bowl.I started work on the pipe by repairing the damaged fills in the bowl sides and cap. I filled them in with clear CA glue. Once the repair cured I sanded the repairs smooth with 220 grit sandpaper to blend them into the surrounding briar. I polished the briar with micromesh sanding pads – dry sanding the bowl with 1500-12000 grit pads and wiping them down with a damp cloth to remove the debris. The bowl started to look great.The briar came out looking very good so I worked some Before & After Restoration Balm into the surface of the briar with my fingertips. The product works to clean, enliven and protect the briar. I let the balm sit for 15 minutes and then buffed with a cotton cloth to raise the shine. The photos show the bowl at this point in the restoration process.I set the bowl aside and turned my attention to the Lucite shank/barrel. I wanted to see if I could remove any more of the tobacco stains from the inside of the shank. I used pipe cleaners and Soft Scrub without little success because Jeff had already scrubbed it with that product. I soaked it in a bath of vinegar with a pipe cleaner in the airway as suggested by Dal Stanton in several of his restorations. I scrubbed the shank with several pipe cleaners after the bath and took quite a bit of the stain out. I then used several needle files and a sanding stick to work on the hard areas.I was able to remove more of the staining with that method. While it was far from perfect the combination worked well enough to remove more of the staining.I polished the Lucite barrel with micromesh sanding pads – sanding with 1500-12000 grit pads and wiping it down with Obsidian Oil between pads. It really shined after the polishing.I sanded out the tooth marks and chatter on the top and underside of the stem ahead of the button with 220 grit sandpaper and started polishing it with 400 grit wet dry sandpaper.I polished the stem with micromesh sanding pads – wet sanding with 1500-12000 grit sanding pads. I wiped it down after each sanding pad with Obsidian Oil. I polished it with Before & After Pipe Stem Polish – both Fine and Extra Fine.I am excited to finish this interesting Abbey Lucite Shanked Pipe. I put the pipe back together and buffed it with Blue Diamond on the buffing wheel. I gave the bowl, shank and the stem multiple coats of carnauba wax. I hand buffed the pipe with a clean buffing pad to raise the shine. It is fun to see what the polished bowl looks like with the grain popping all around the bowl. Combining the briar bowl with the clear Lucite barrel/shank and the black vulcanite saddle stem makes this a beautiful pipe. This smooth “Kirsten-like” pipe is nice looking and the pipe feels great in my hand. It is light and well balanced. Have a look at it with the photos below. The dimensions are Length: 5 inches, Height: 1 ¾ inches, Outside diameter of the bowl: 1 ¼ inches, Chamber diameter: 7/8 of an inch. The weight of the pipe is 30grams/1.06oz. It is a beautiful pipe and one that will be on the PIPES FROM VARIOUS MAKERS – CZECH, BELGIAN, GERMAN, ISRAELI, SPANISH PIPEMAKERS ALONG WITH METAL PIPES section of the rebornpipes store soon. If you are interested in adding it to your collection let me know. Thanks for walking through the restoration with me as I worked over this pipe. Thanks to each of you who are reading this blog.