Blog by Dal Stanton
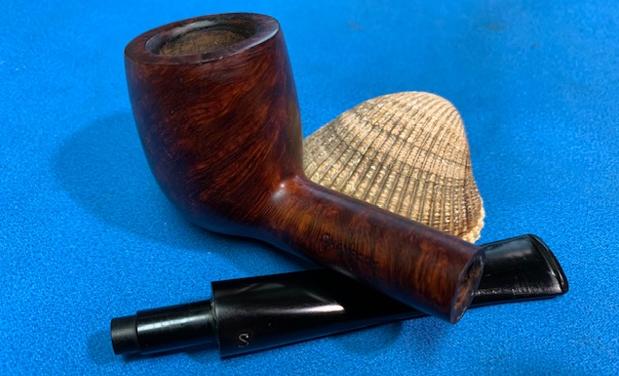
Darren has commissioned a number pipes from the For “Pipe Dreamers” Only! collection benefiting the Daughters of Bulgaria – helping women and girls who have been trafficked and sexually exploited. I am grateful for this! The first pipe restored for Darren came out beautifully (See: An Amazing Transformation of a Bruyere Extra Paneled Billiard). Of all the pipes that Darren has commissioned, the one on the worktable now was the most difficult to choose. I know this for certain because it took Darren several weeks finally to hear the whisper of a specific pipe for his youngest daughter, Lina.
God made fathers, I believe, with a special place in their hearts for daughters. This coupled with the fact that Lina’s 18th birthday was on the horizon and in addition to this was Darren’s desire to continue a guarded family tradition where Dad gifts a pipe to each of his children at their 18th birthday. A gifted pipe contributes to part of a rite of passage into adulthood. Of course, when Darren shared this information with me in one communication, my response was to ask more questions about the tradition and about Lina – her personality, aspirations, etc., so that the pipe and its write up would in some small way reflect what was important to Darren and celebrate Lina’s life and her 18th birthday.
Darren’s response about his youngest daughter’s pipe was tentative. He wrote: As for my daughter’s pipe, I’m uncertain. For her siblings, I found appropriate p-lip Peterson pipes, making it easier for them to try different tobaccos alongside dad, and then discussing flavors. Unlike my other two, Madeleine (but she prefers Lina) said she has no interest in smoking the pipe (she knows) she’ll receive. Her birthday is August 1, but the timing is less important than the day it is given.
Darren went on to write that Lina was unique, not only because she is the extrovert of the family, but that she has also grown to be a stronger person because of a hair loss condition she was diagnosed with at age four, alopecia totalis. Later he sent a short essay Lina had written for a college application where she described the challenges she encountered with this condition and how she responded. I repeat some excerpts of what Lina wrote – an amazing story:
 Everyone experiences obstacles in their life. We may not have control over when or what these hurdles will be, but we do get to choose how we respond to them. Alopecia Universalis became part of my story when I was four years old, and my mom noticed a patch of hair missing on the top of my head. Alopecia is an autoimmune disease that puts my immune system in hyper-drive and causes it “fight” against my hair, thinking it is unhealthy, like a virus or bacteria that it needs to attack. Imagine waking up and seeing gobs of hair on your pillow in the morning. Take that further and think of how scared you’d be to see clumps of hair falling off your head while you applied shampoo in the shower. I was young, and I did not understand what was happening to me. I had no idea how my friends would react to it, and I hated it when people stared at me, thought I was a boy, or assumed I was losing my hair because of cancer….
My parents worked hard to help me figure out how I wanted to handle my hair loss, what made me most comfortable; I tried wigs, hats, and bandanas, but nothing seemed to be the right fit for me. As an active young child, and eventually a student-athlete, wigs were way too hot and impractical. I would often just rip them off whenever I began to overheat, causing people who did not know I had Alopecia to startle a bit. Eventually, I realized that I did not want to wear anything extra and that none of those things made me feel more normal….
God gave me this disease because He knew I could handle it. He has given me the strength to know and believe that He made me in His image, and I am perfect in His eyes. It is not always easy, but I am bald; I have accepted it, and I have chosen to rock it! Even though it seemed impossible at the beginning, I can now be someone people look up to because I am strong and happy. I want to be an inspiration to others. At first, it was so weird, but now it is normal to me, just another character trait. It has been so long since I had hair that for my family and friends, it [Strength? No hair? What?] is just … me.
Through this disease, I have learned that I do not have to allow an obstacle to stop me, I can overcome them, and I can turn them into something useful. I will not let Alopecia stop me from doing anything. I have learned to think of it as something that makes me unique rather than an inconvenience. I like being different. I think it is pretty cool that I walk around bald every day; nothing can stop me.
With my request to include Lina’s story in this write up, Darren sent Lina’s photo. The photo beautifully portrays the bold extroversion Darren described about his unique daughter, but more foundational were Lina’s words revealing the unyielding trust in God that buttressed that boldness – a special young lady.
 My response to Darren was to propose one of the pipes that he had already commissioned as possibly matching Lina’s personality. Here is some of what I said:
…Your daughter is gold too 😊. To have grown up with the hair condition and to overcome it with what appears, great style and grace, is in itself a beautiful thing…. Her apparent extroverted ‘in your face’ spunk and attitude, to me fits well with the reputation of Lorenzo. Lorenzo, among not only Italian pipes, has the reputation of being on the ‘edge’ in design… There is no doubt, the Lorenzo walks with a bit of swagger…. I look forward to hearing from you.
Since I wanted to work on Lina’s pipe next, I was hopeful of a quick response from Darren regarding his thoughts about the Lorenzo. Finally, some days later, after he again searched the ‘Dreamers’ collection 😊, another pipe finally whispered Lina’s name to dad. Darren wrote that the German made VAUEN would be a good fit because, like the Petersons he had given to his other 2 children, the VAUEN sported a P-lip stem.
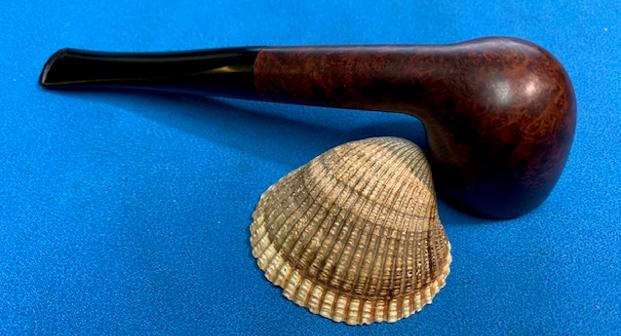
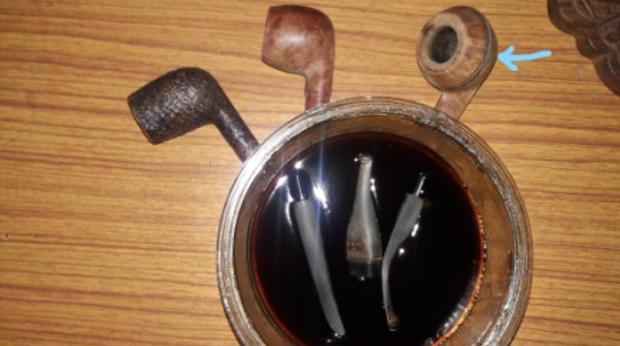
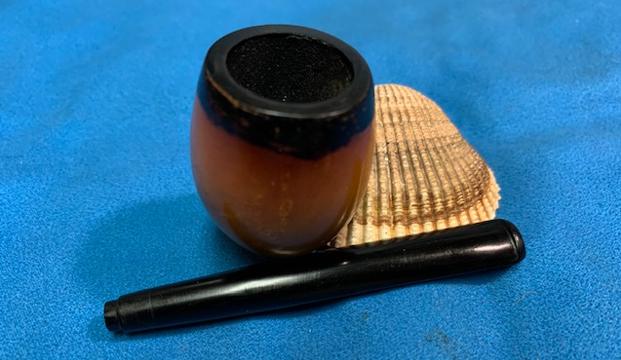
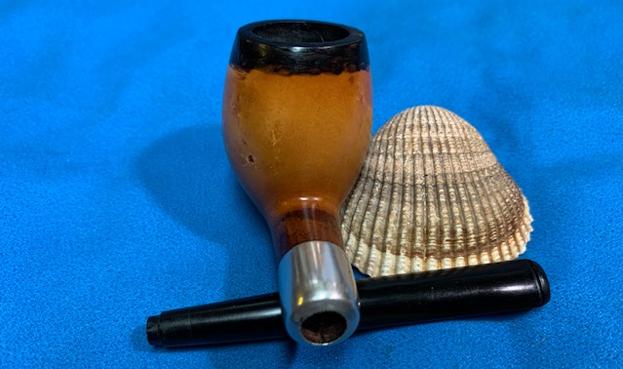
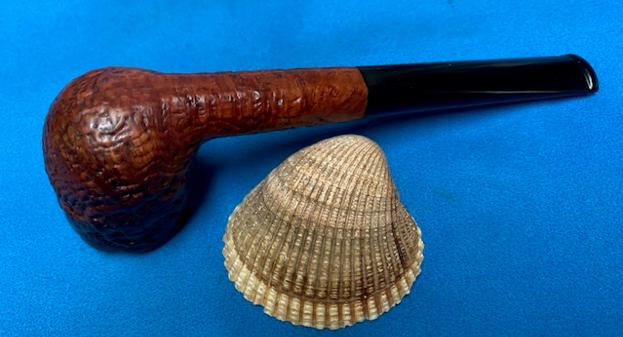
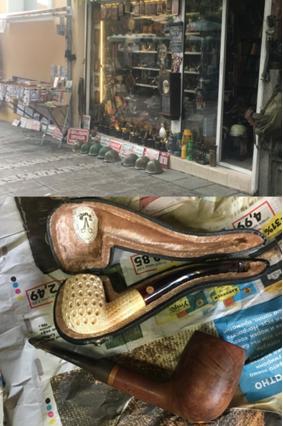
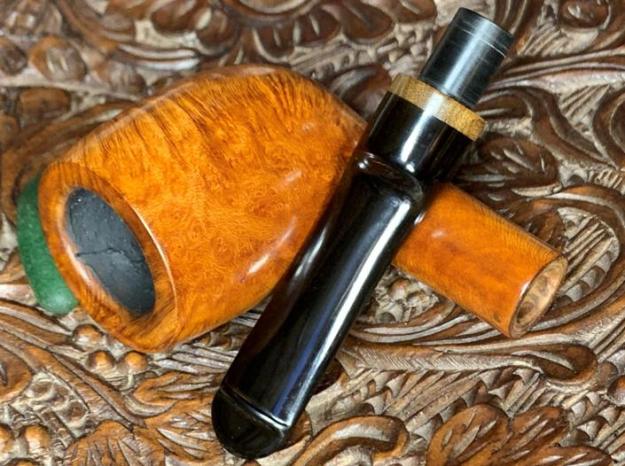
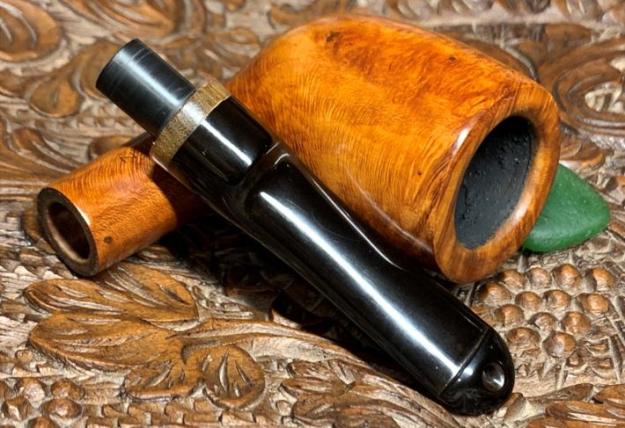
I found the VAUEN in August of 2017 when my wife and I were enjoying holiday on the Bulgarian Black Sea coast in the city of Burgas. I found it at a favorite second-hand/antique store on the main walking street. The VAUEN is pictured with an Altinay Meerschaum Teardrop Lattice which has already found a new home with a happy steward.
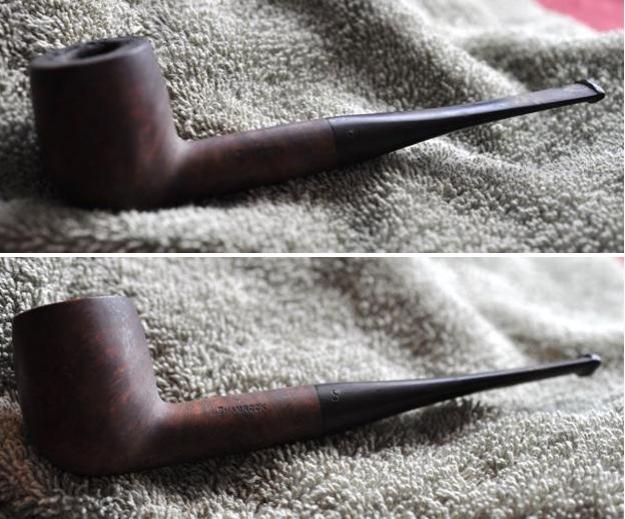
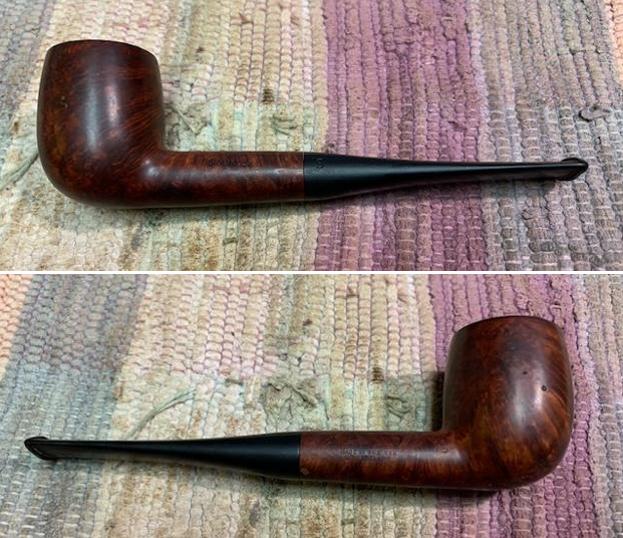
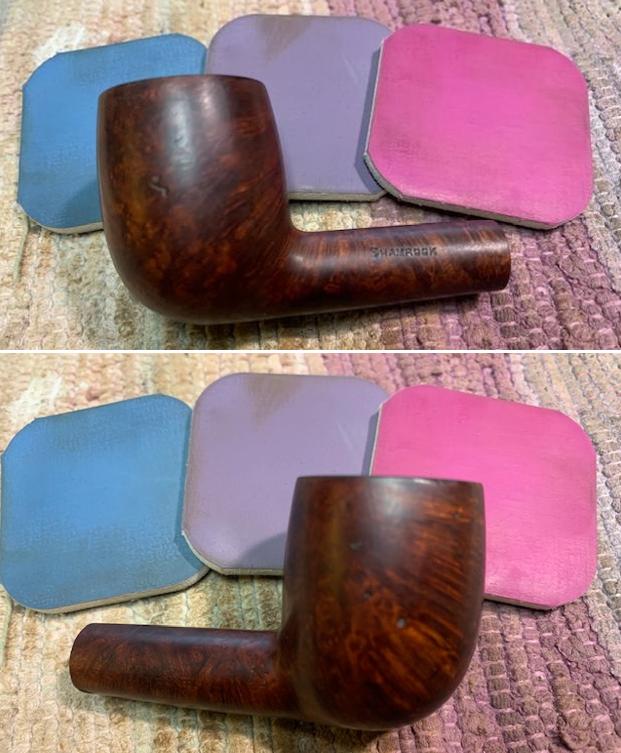
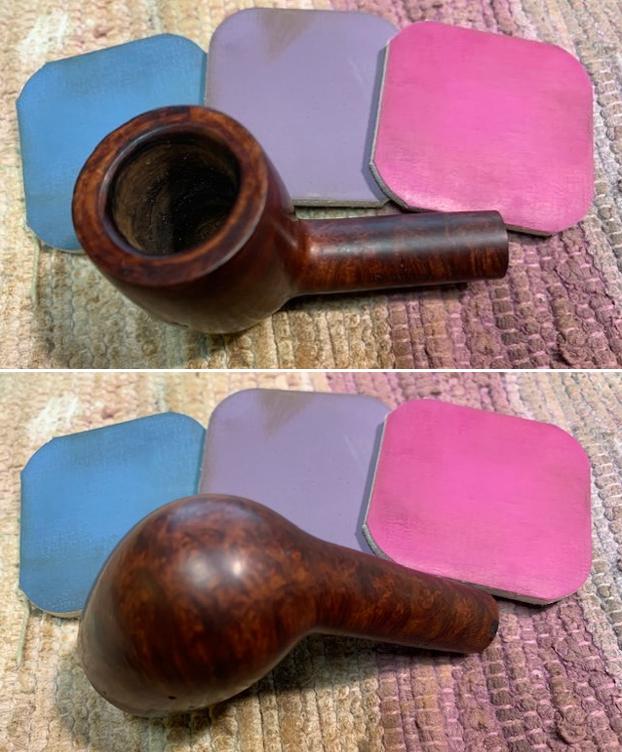
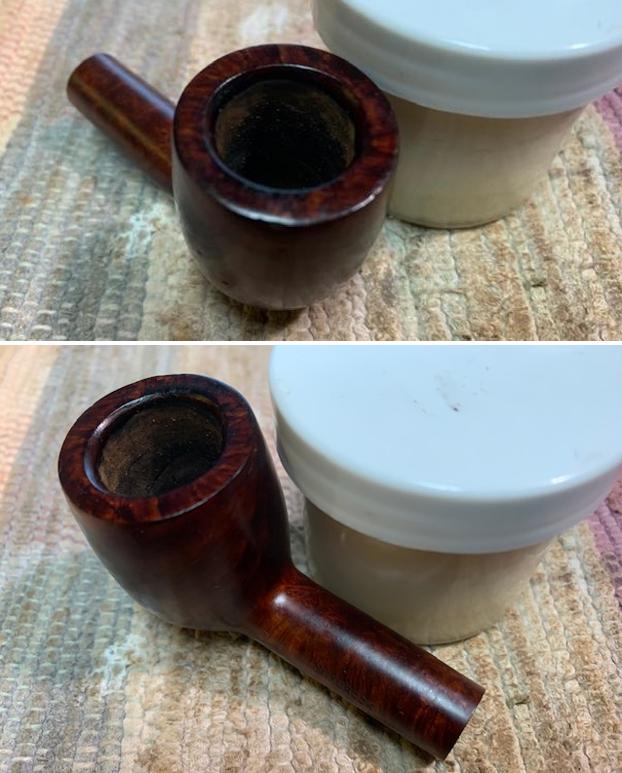
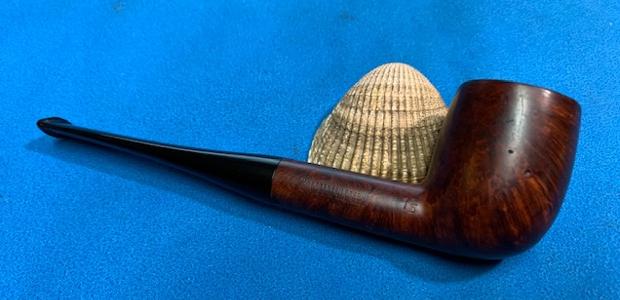
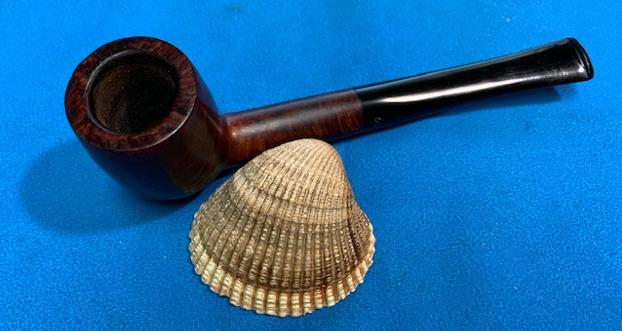
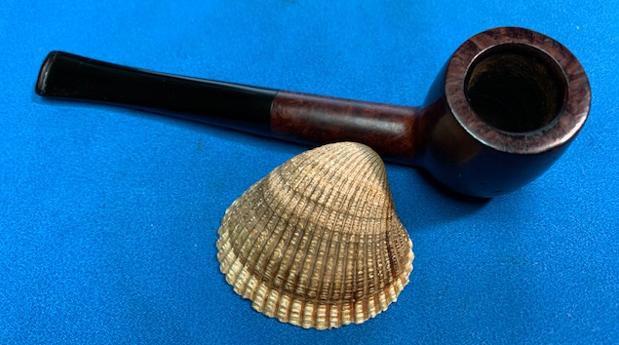
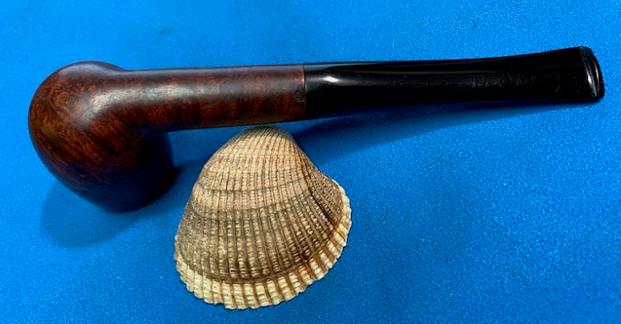
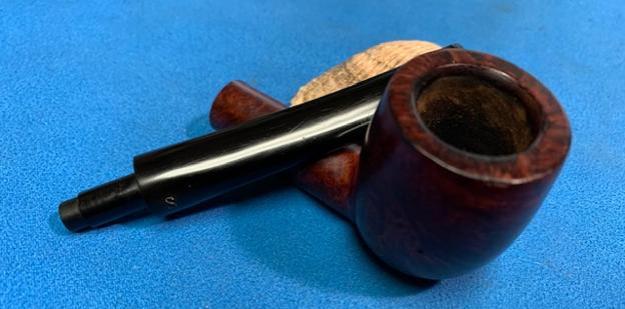
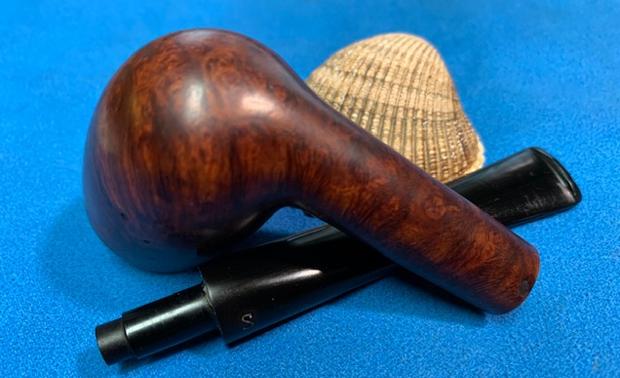
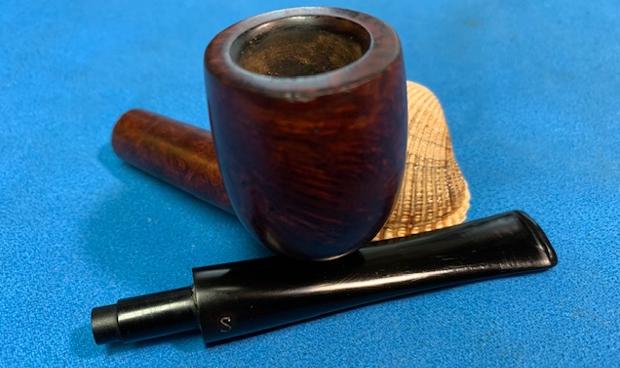
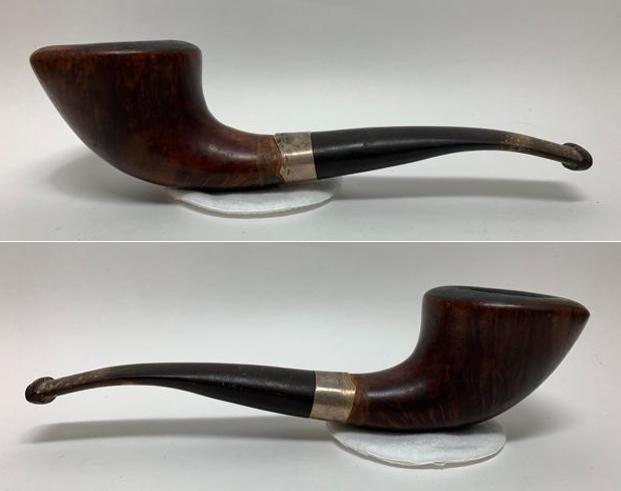
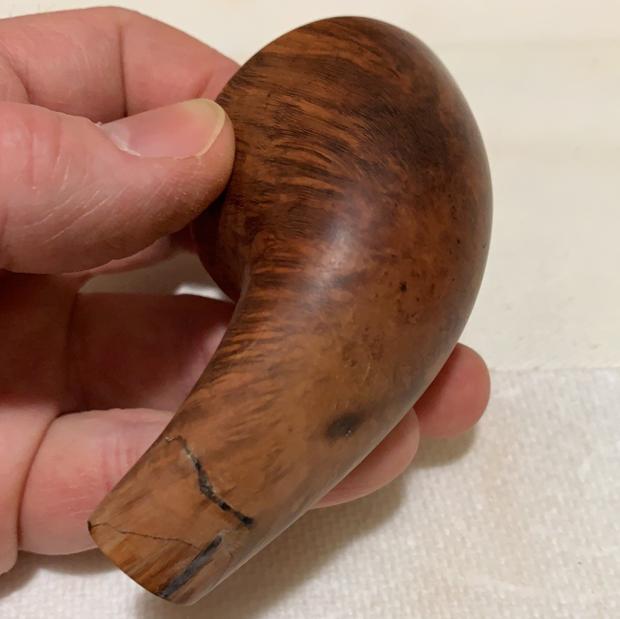
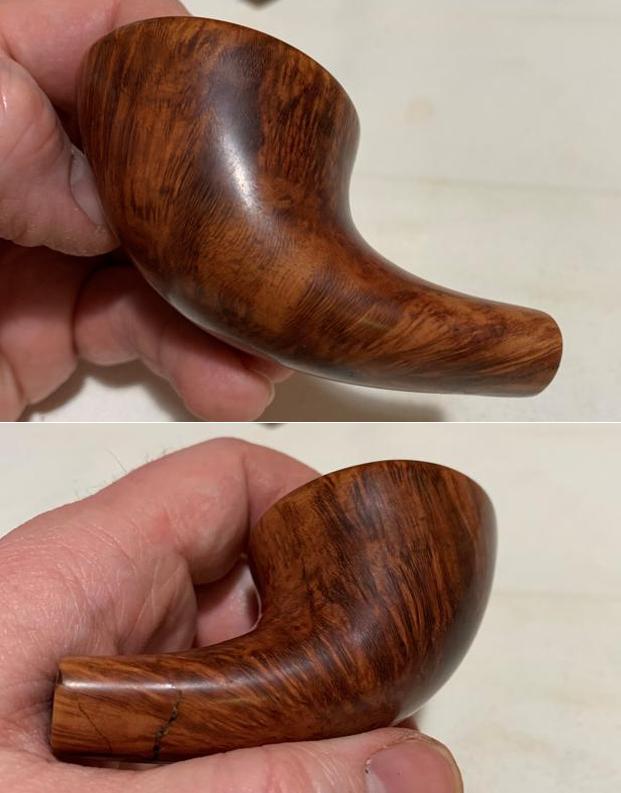
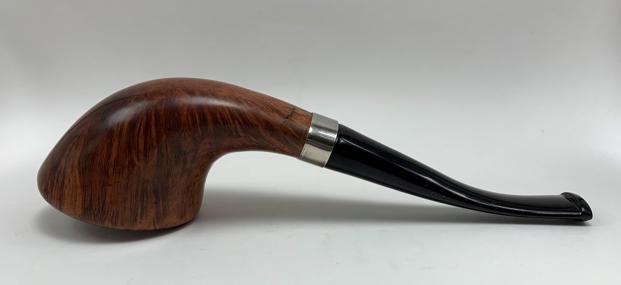
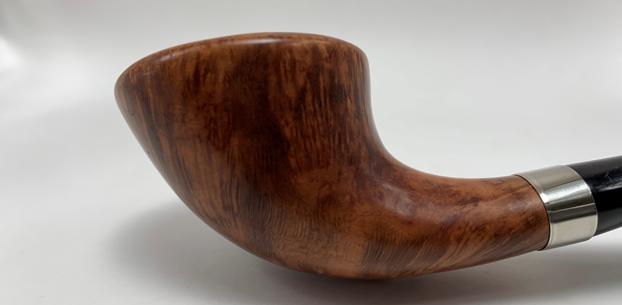
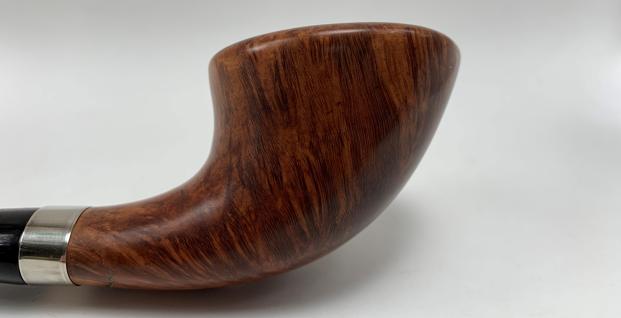
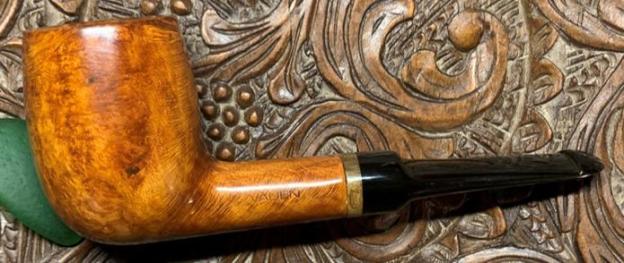
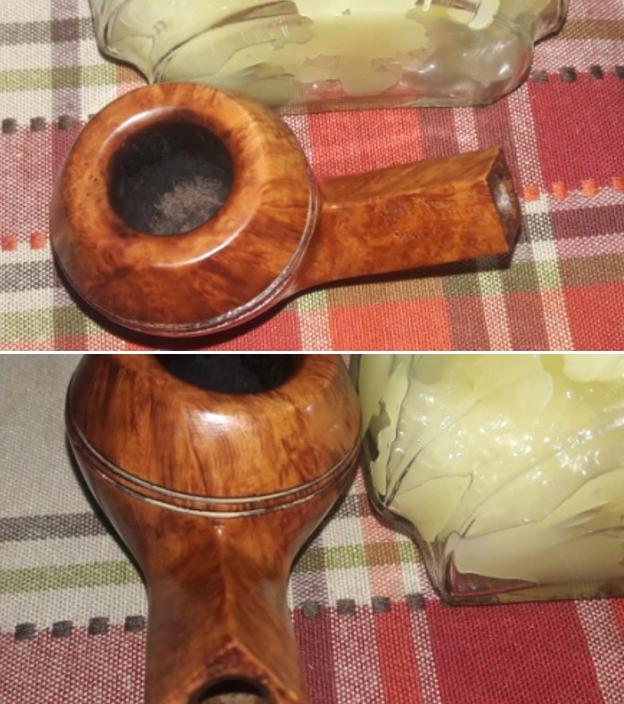
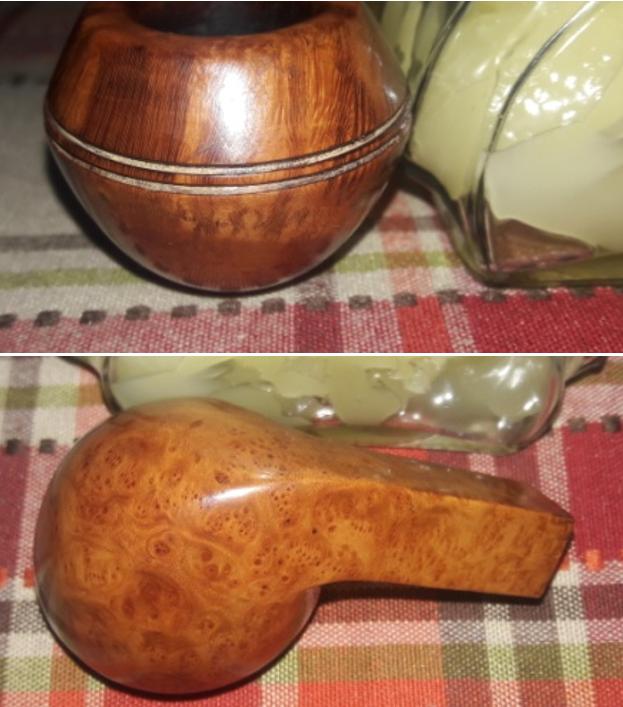
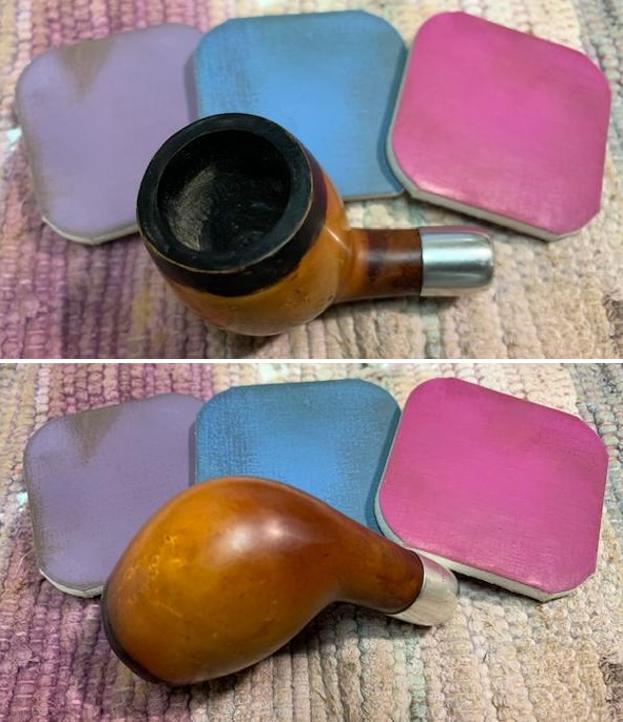
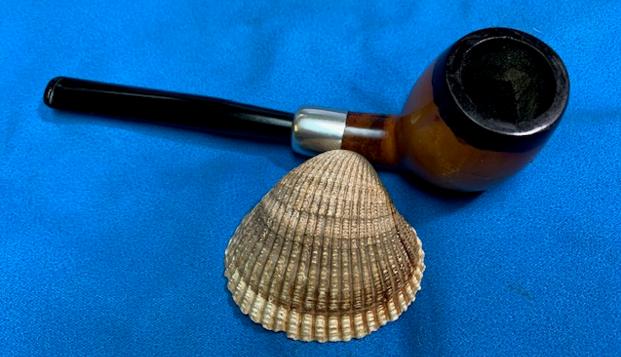
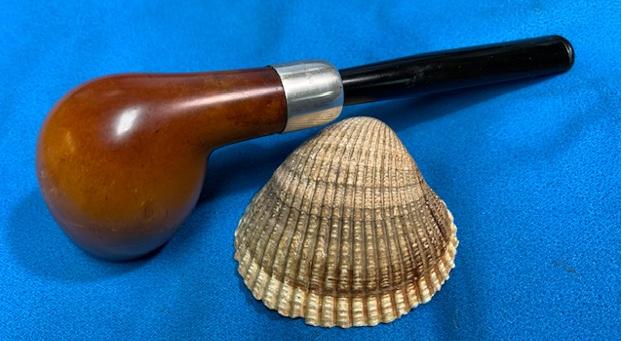
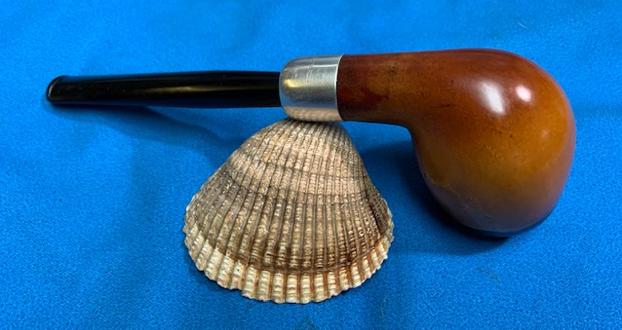
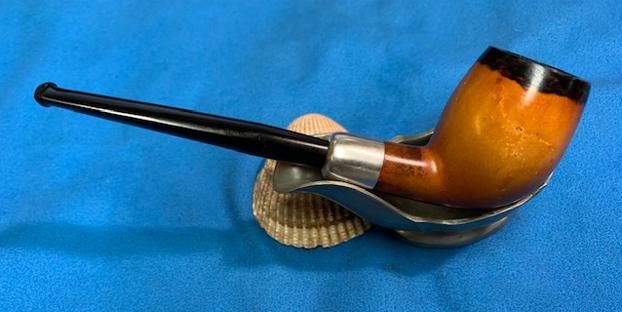
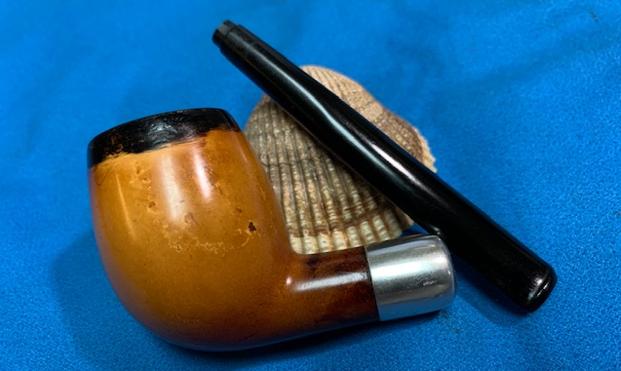
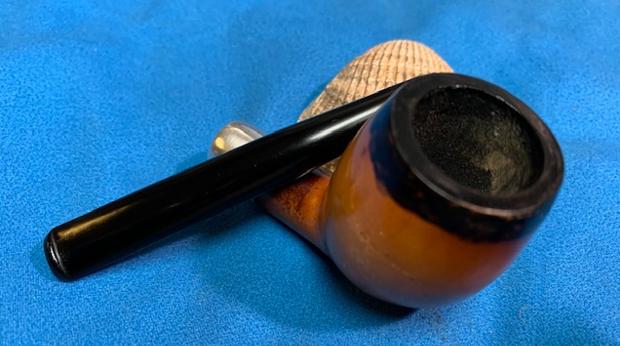
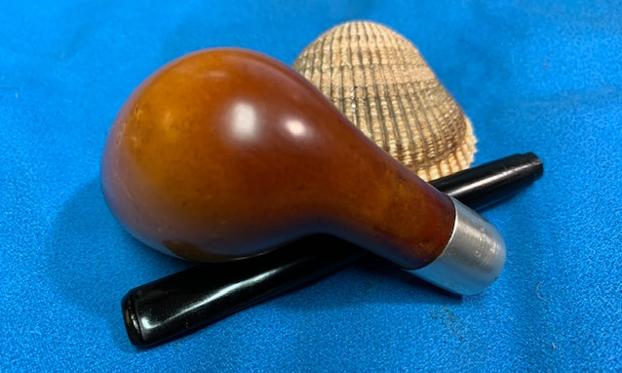
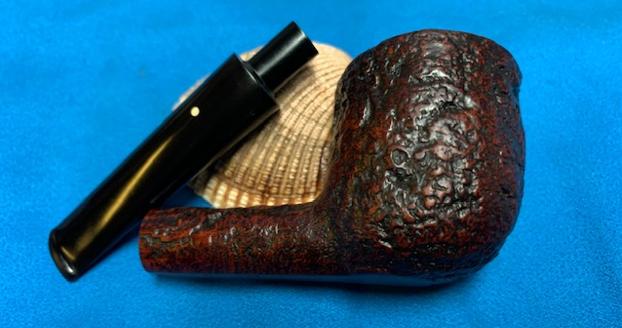
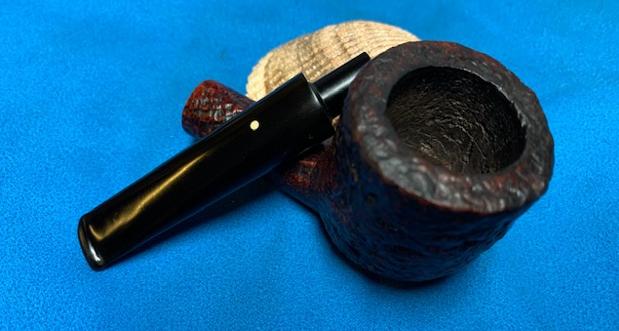
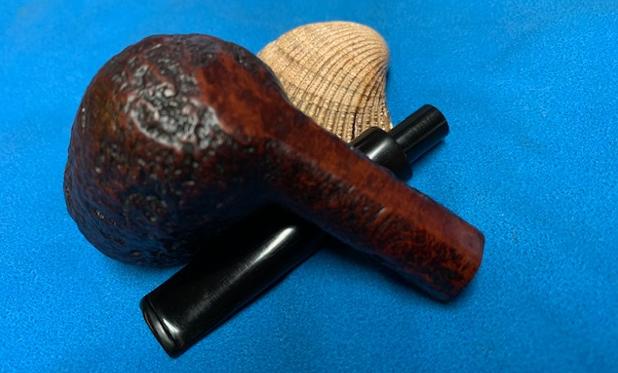
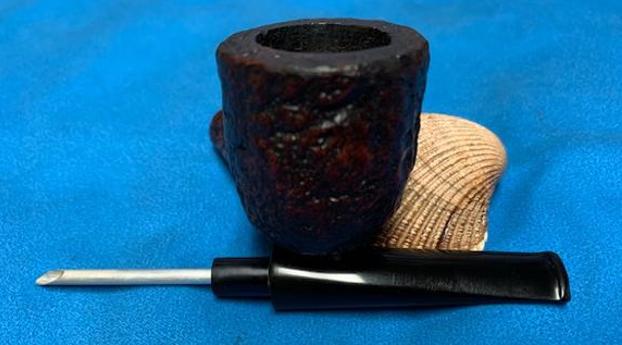
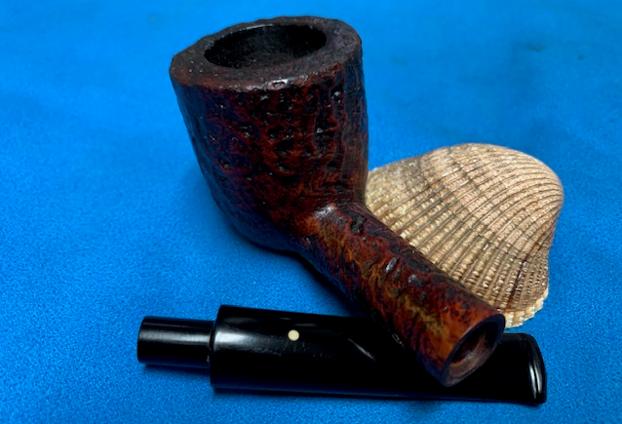
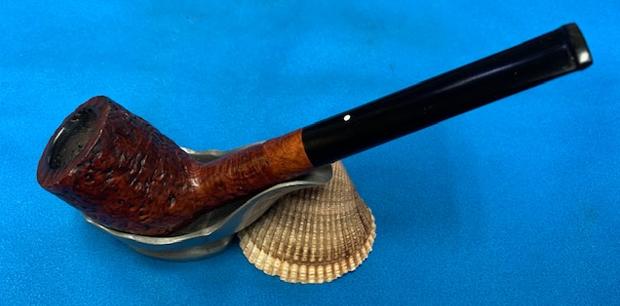
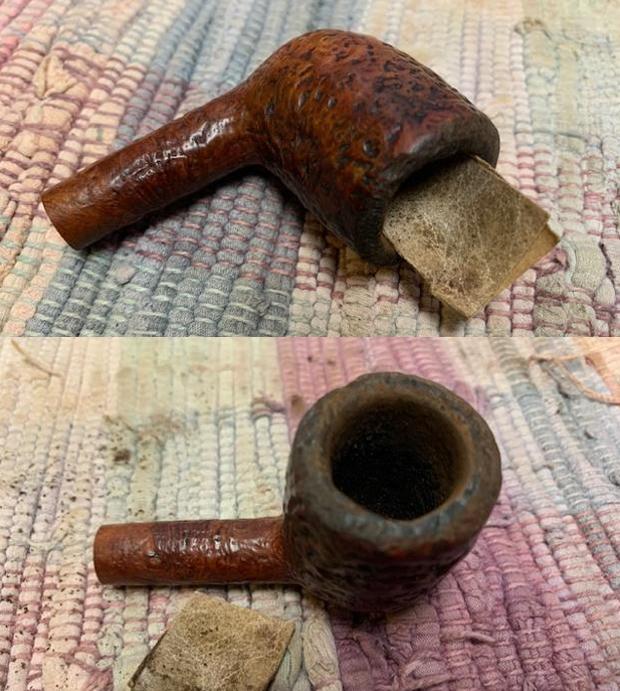
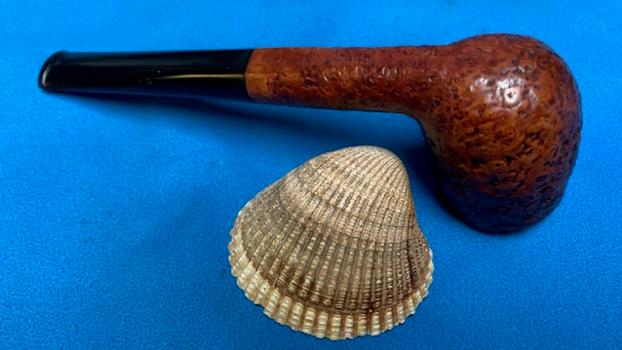
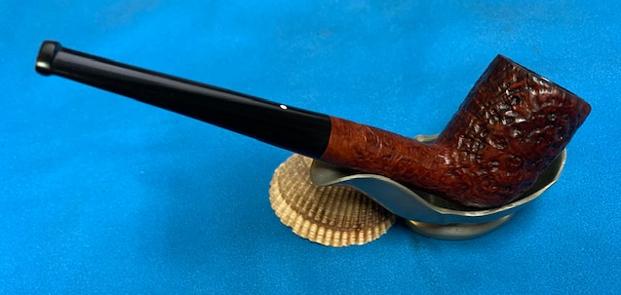
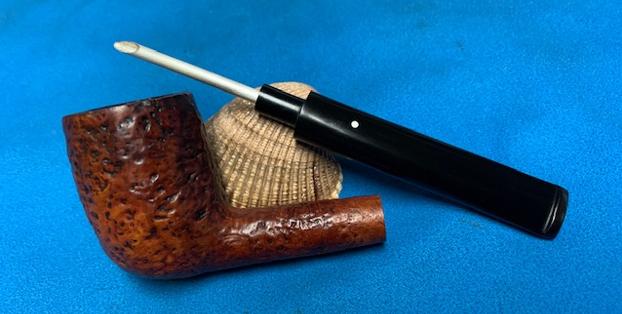
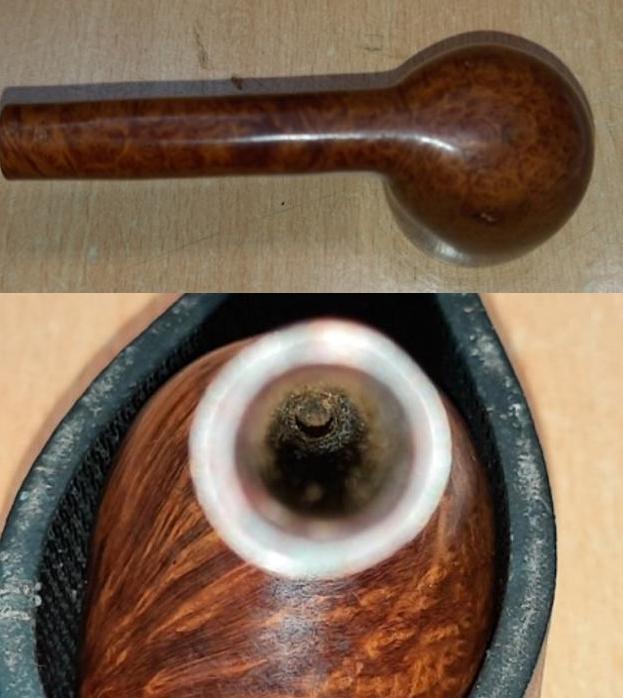
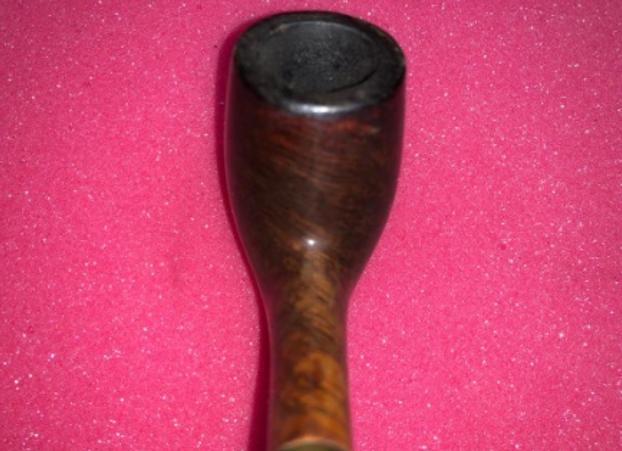
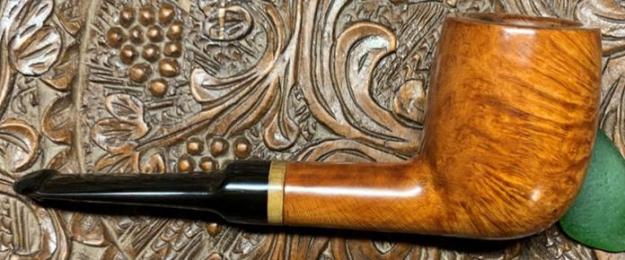
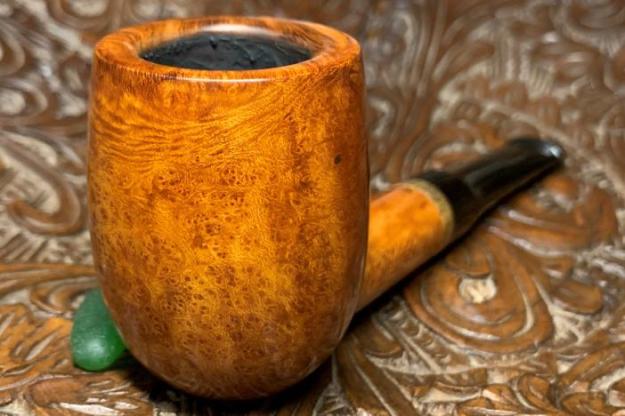
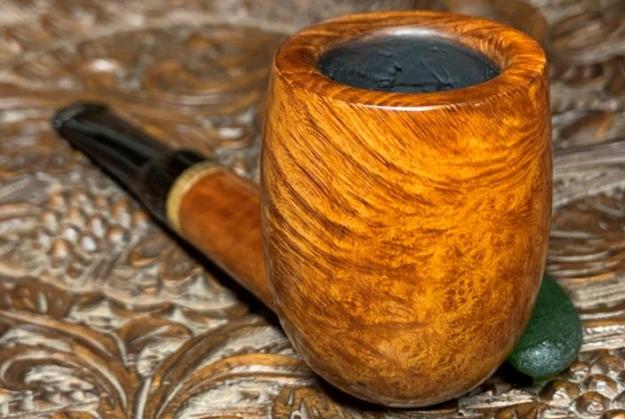
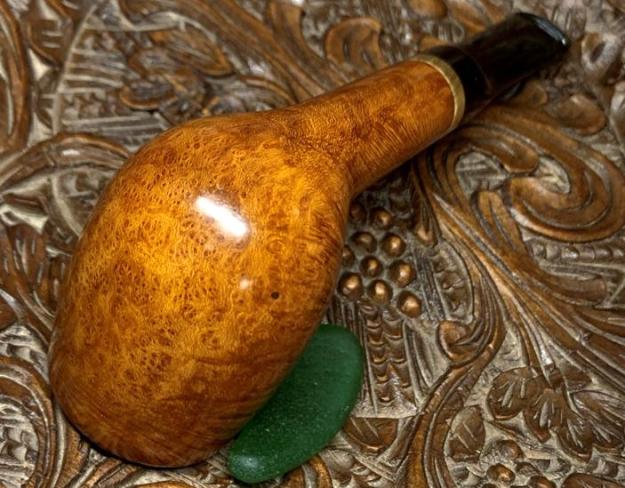
Here are a few pictures of Lina’s VAUEN that dad commissioned for her 18th birthday:
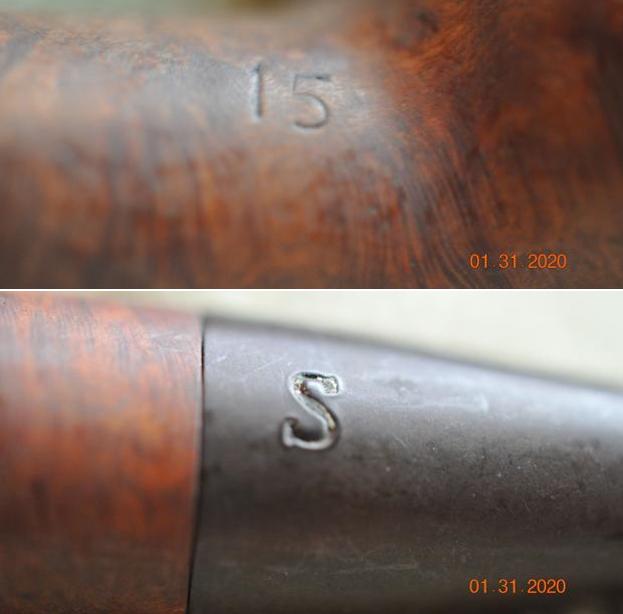
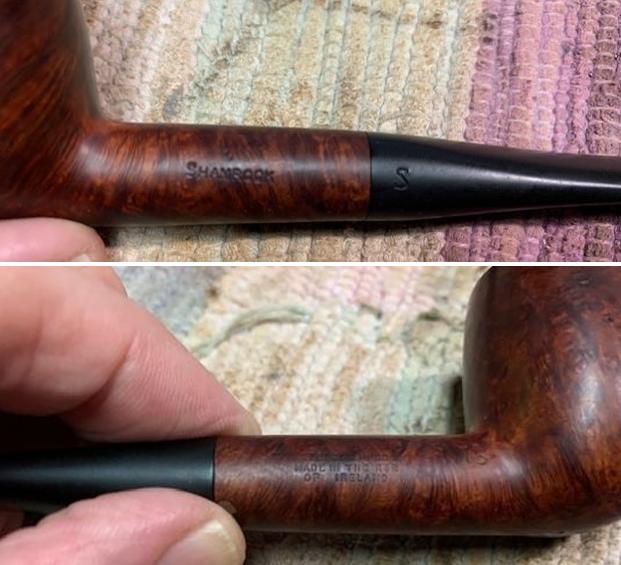
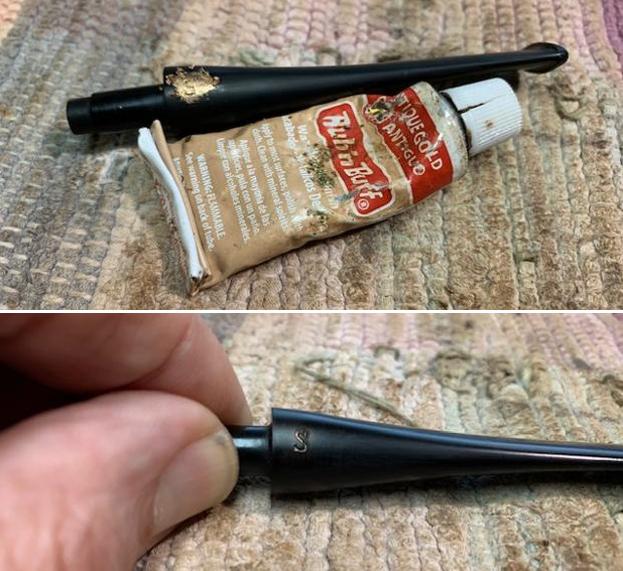
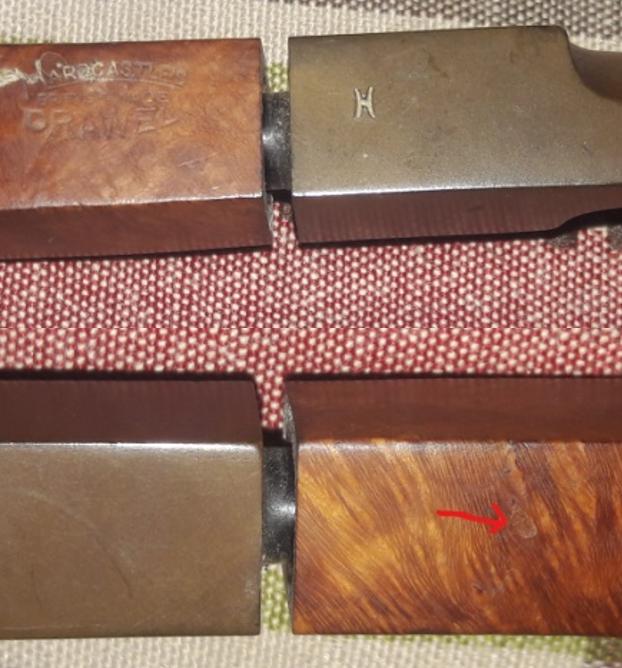
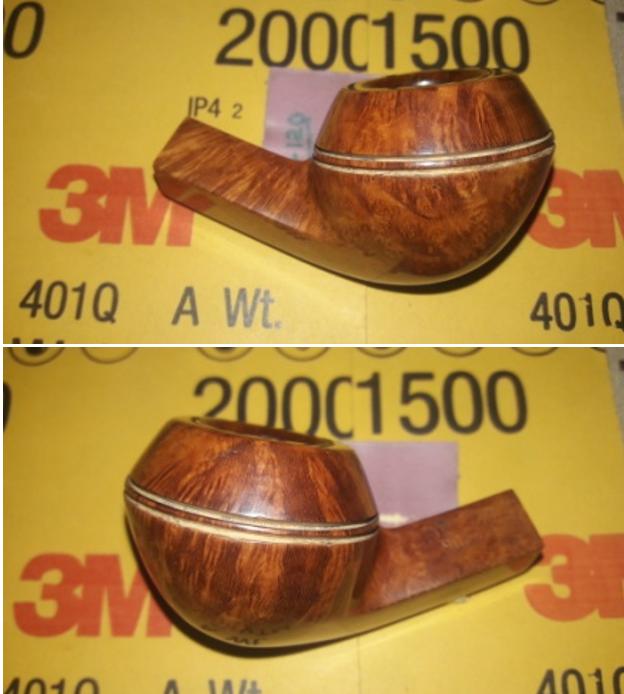
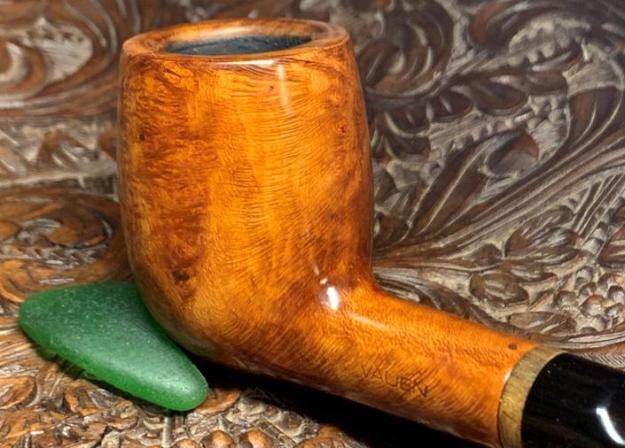
 The nomenclature is clear and crisp. Stamped on the left flank of the shank is ‘VAUEN’. Stamped on the underside of the shank is 6294, the shape number VAUEN has assigned to this hefty Billiard.
 This is my first opportunity working on a pipe marked with VAUEN. Pipedia’s article about VAUEN included a link that went directly to VAUEN’s English language website from which Pipedia’s information seems to have come in part. I was interested to see that VAUEN is a long-time name in pipe production based in Nuremberg, Germany. My first impression of the website revealing German quality and precision was, ‘Wow!’ The current pipes displayed are sharp and modern – an attractive blending of modernistic and classical tradition. I clipped these pipes as a sampling of pipes currently available and reflecting the style of today’s VAUEN. Looking through the site I did not find anything like Lina’s VAUEN, and I saw no P-lips. This clues me in that models with P-lip stems are perhaps a thing of the VAUEN past – but how far back did P-lips cease to be part of the VAUEN presentation? I found no answer for this.
 One other observation looking at VAUEN’s offerings – they have produced and have available an exceptional line of pipes called, AUENLAND. Google Translate helped me to crack the translation which brought on a smile, ‘Shire’. The Shire line is described with bowls made of briar, stems of beechwood and with an acrylic mouthpiece. Here are a few ‘Shire’ pipes which one would find hobbits, wizards, dwarfs, and kings in waiting, smoking across Middle Earth.
 Amazingly, Pipephil.eu (See: The Lord of the Rings) devotes an entire stand-alone article describing how VAUEN has perfected the ‘selling of a dream’ as a market strategy. Producing the ‘Shire’ line of pipes with each pipe named after a character, allows a would-be purchaser to identify with a favorite character and acquire THAT pipe. Who would not want Aragorn’s pipe? 😊
  And of course, these ‘Lord of the Ring’ pipes, numbering about 16 different styles with characters attached as names, come in a packaging which helps convince one of the reasonableness of the purchase – I am moving in that direction!
  Resisting the urge to covet more, I turn to the question of the history of the VAUEN name? I look to the History section of the VAUEN website and again, I am impressed with the presentation. Whenever I work on a pipe, and especially when a pipe name is new to me, I enjoy looking at its history to appreciate the pipe more fully now on my worktable. From VAUEN’s website:
 Quality and a wealth of ideas have a long tradition at VAUEN. 160 years of VAUEN: that means 160 years of skilled workmanship and modern technology and 160 years of experience in fulfilling the individual wishes of today’s pipe lovers, and those of tomorrow.
In Nuremberg in 1848, Karl Ellenberger and his partner Carl August Ziener turned an idea into reality: Germany’s first pipe manufacturer produced tobacco pipes for connoisseurs around the world using a selection of the best wood. In an amalgamation with the Gebhard Ott pipe factory, which was founded in 1866 in Nuremberg, the Vereinigten Pfeifenfabriken Nuremberg (United Pipe Factories Nuremberg, or VPFN) was born in 1901. Under the management of Ernst Eckert, a descendent of the founding Ott family, a company was born whose products and services would shape the tobacco and smoking culture in Europe and overseas for the next 160 years and counting.
The question about the name, VAUEN, not being a name of a person and why it is capitalized throughout is explained:
In his search for a name that would be easily remembered by all pipe lovers, Ernst Eckert’s son, Adolf Eckert, coined a new name for the company in 1909: VAUEN – a composition of the first letters V (pronounced vow) of Vereinigte Pfeifenfabriken and N (pronounced en) of Nuremberg. A brand for the future was born.
 Another interesting piece of information regarding the development of VAUEN pipes is the dot on the stem marking its pipes:
In 1911, Adolf Eckert began to mark pipes with extraordinary quality with a white dot on the mouthpiece. Today, the “white dot” is an internationally renowned trademark that guarantees carefully selected materials, attractive grains, and elaborate workmanship. VAUEN pipes made for export are marked with a grey dot.
What the VAUEN website does not reveal but is revealed in the Pipedia article is the legal entanglement with Dunhill VAUEN’s marking of the stem produced:
In the 1920s, VAUEN had taken out a trademark on a white dot on the mouthpiece for Germany and Austria, at the same time that Dunhill had done the same for the international market. The companies ended up in court with the result that Dunhill may use the white dot internationally, whereas VAUEN may use it only in Germany and Austria and has to use a differently-coloured dot for all other markets. They have used light blue and grey dots internationally since then. The white or coloured dot denotes the higher quality pipes of VAUEN; the lower-end pipes are only marked by the VAUEN imprint on the stem.
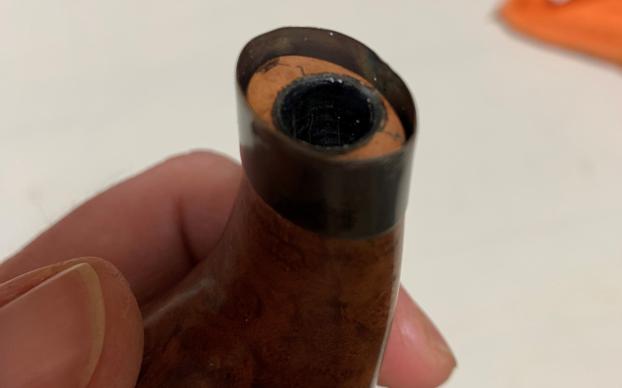
This information about the different dot colors used by VAUEN is of interest because in my initial inspection of the VAUEN on the worktable, I did not know about the dot nor did I see a dot. The pictures taken do not show a dot and since the stem is now soaking in the oxidation remover since I started the process of the restoration before the writing and research, this is something I will be looking for when the stem is finished soaking! From the picture, there is certainly no white dot – perhaps a more subdued blue or grey is dot hiding? Nor do I see ‘VAUEN’ imprinted on the stem denoting a ‘lower end’ pipe. The history on the VAUEN website concludes describing the current leadership structure safeguarding the legacy of the 170-year-old family run business – quite an achievement:
Also in 2018 Julia Eckert, the youngest daughter from Alexander Eckert, joins the business and therefore represents the 6th generation of the family. She takes over the Strategic Marketing department and is from now on responsible for the establishment and extension for all the marketing activities (on- and offline). In 2020 Alexander Eckert hands over the entire management to his successor Martin Ramsauer and retires from the active management after 38 years. He will remain loyal as a partner of the family business and ‘sparring partner’ in general. In this way, it is ensured that pipe history will continue to be written successfully at VAUEN and our passion for enjoyment will be shared with pipe lovers all over the world.
One additional observation about the VAUEN website that was remarkably interesting were video links showing much of the current manufacturing processes of a modern-day pipe factory. Even though they are in German, the videos are fascinating and worth the watch – Pipe manufactory (VAUEN.com).
The question regarding the VAUEN P-lip stem seems at this point to be a possible aging marker for Lina’s VAUEN. I did not look at every listing on the VAUEN website, but I did not see any pipes listed with a P-lip stem. Pipephil.eu has a listing for VAUEN pipes and some examples of pipes. There is also a link describing the VAUEN P-lip with other pipe maker P-lip styles (See: Peterson’s P-Lip and its variants). The VAUEN pictured is part of the Dr. Perl line which bears no resemblance to Lina’s pipe.
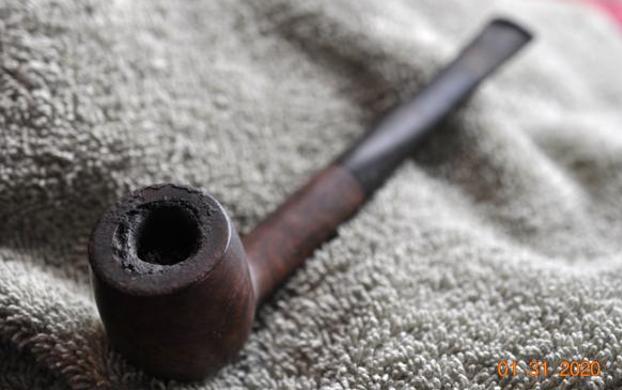
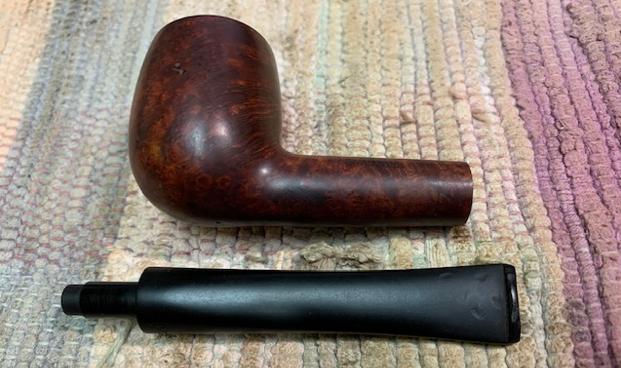
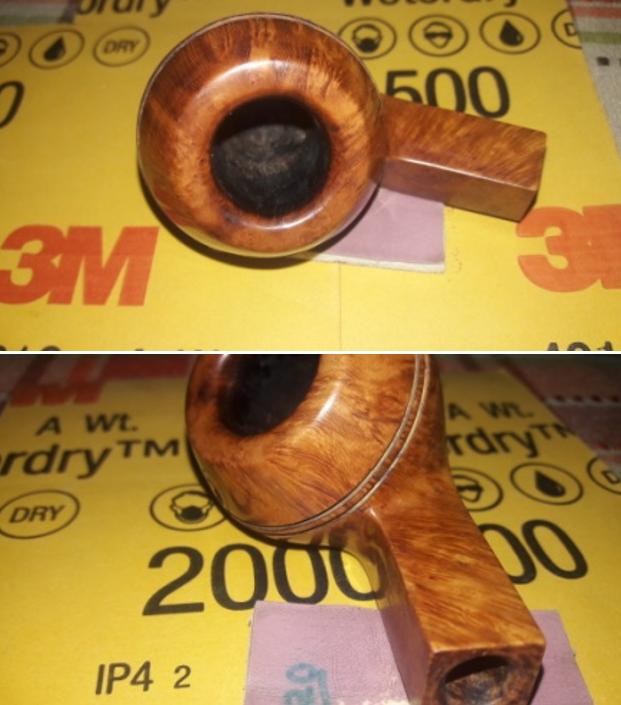
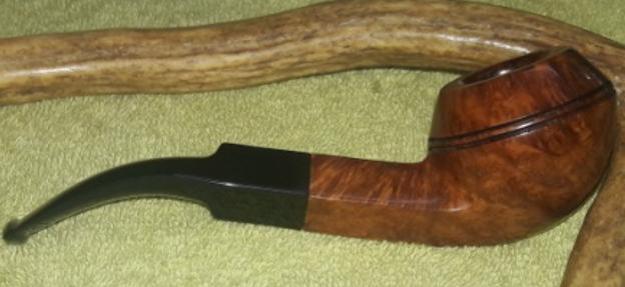
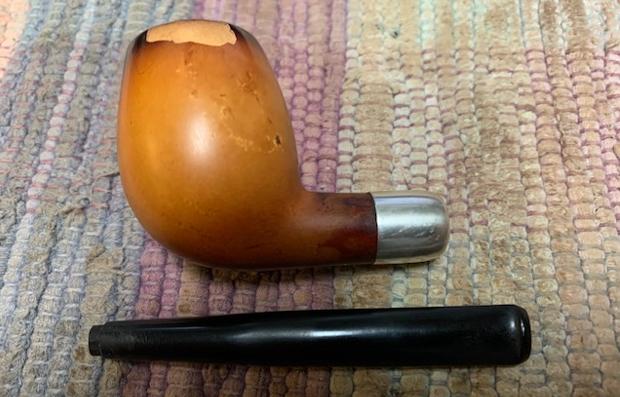
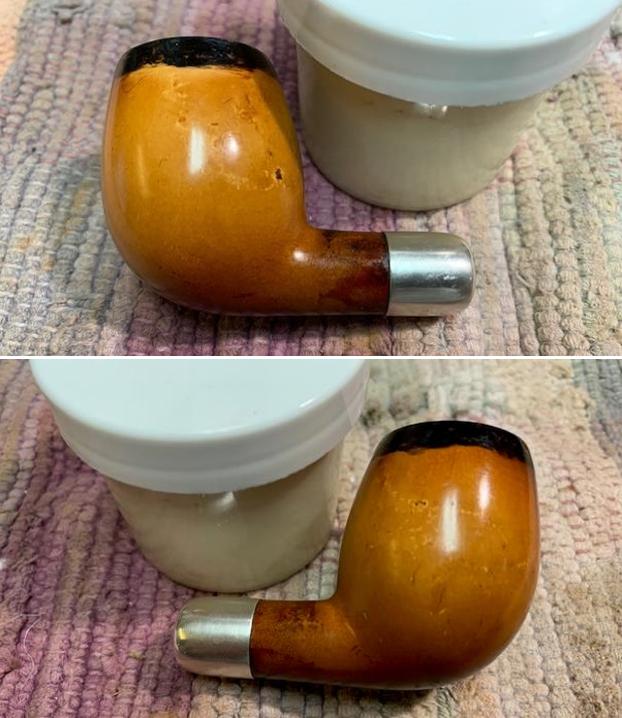
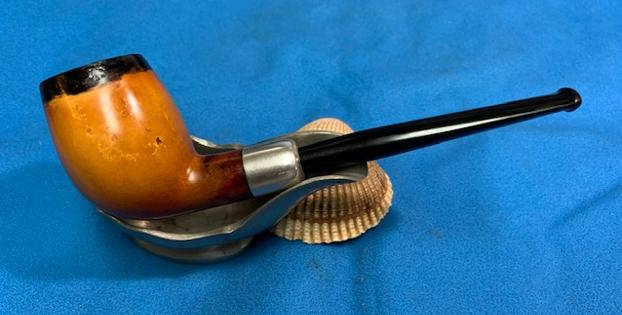
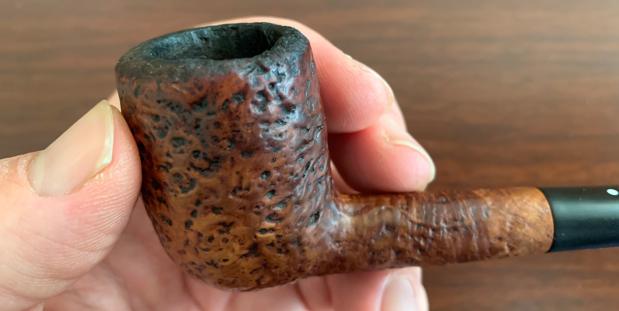
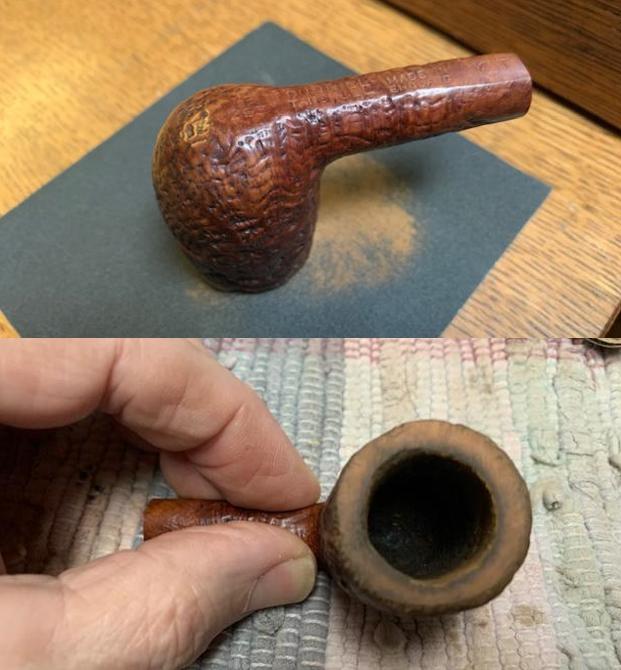
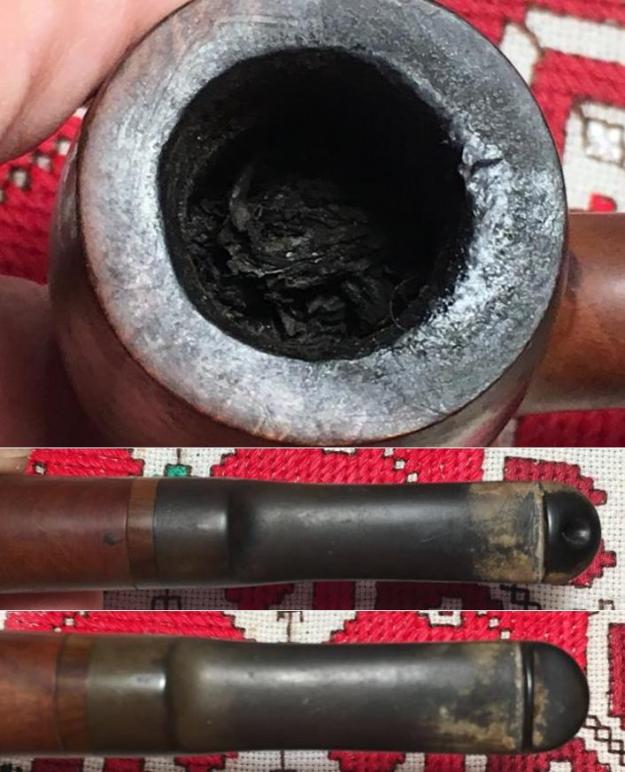
I have found nothing in the research giving a specific identification of the line or dating of the VAUEN on the worktable. Even so, it indeed resembles the VAUEN ‘style’ with the sharp acrylic stem/shank divider or ring. The condition of the pipe looks generally to be solid. The chamber has moderately thick cake and the lava overflow crusting the rim needs attention. The bowl is grimy dulling and obscuring the grain beneath. The P-lip saddle stem has deep oxidation and calcification on the bit. With a greater appreciation for this German made VAUEN Billiard, the restoration begins with the stem.
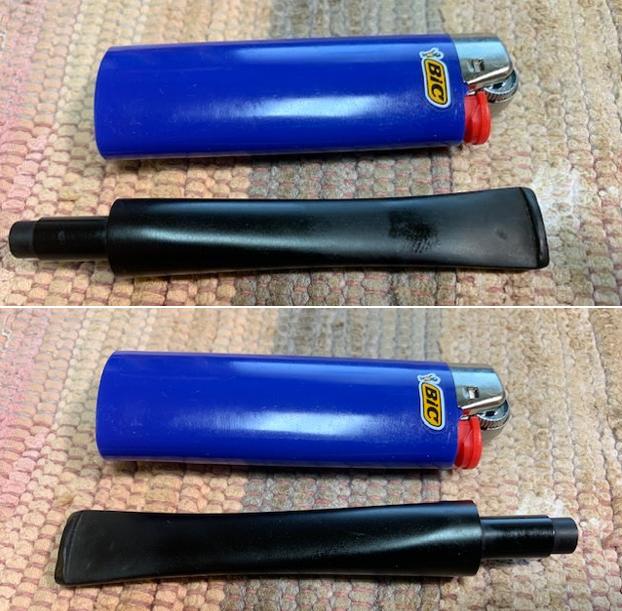
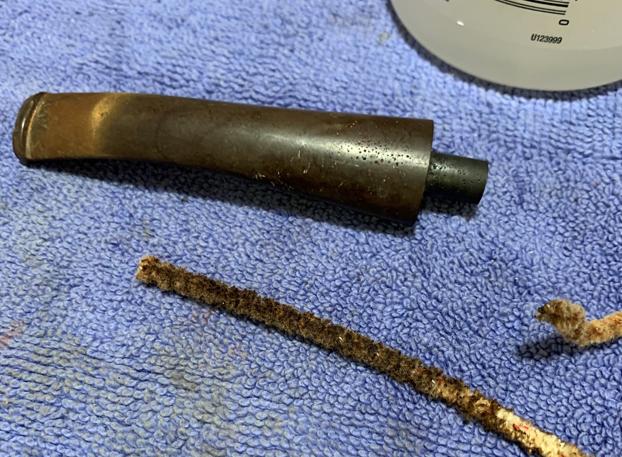
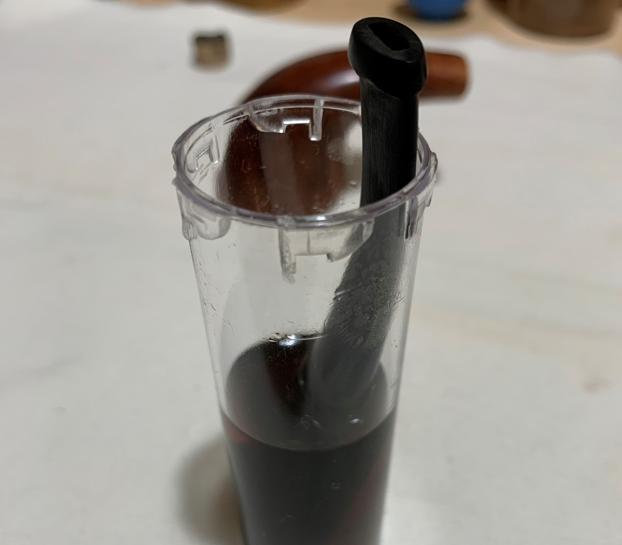
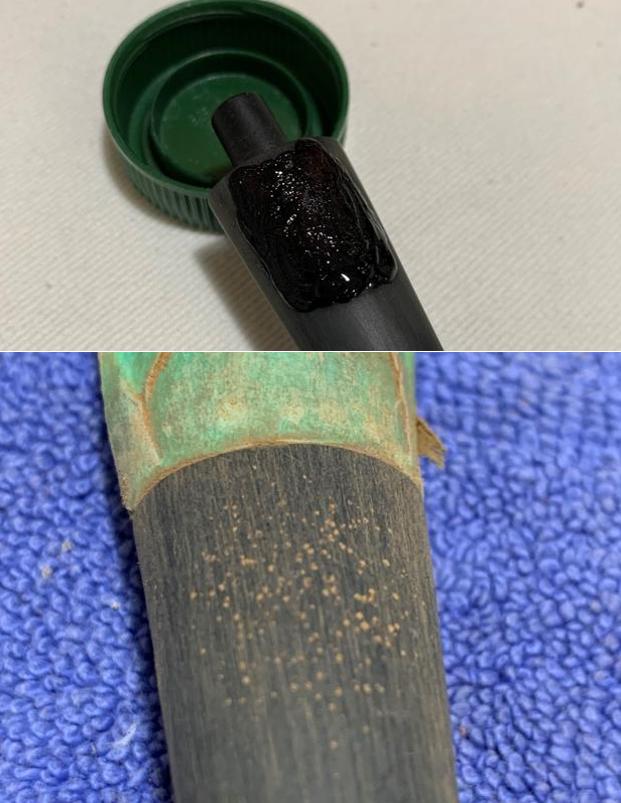
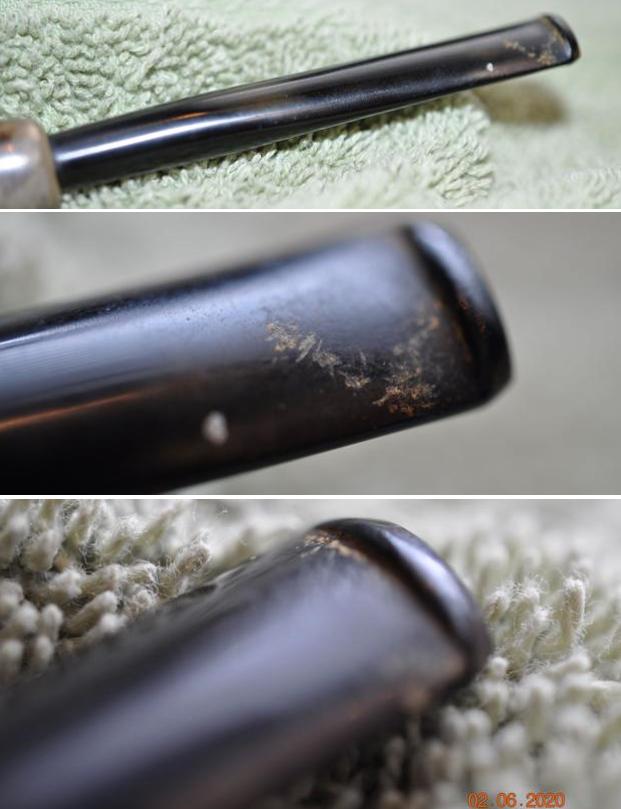
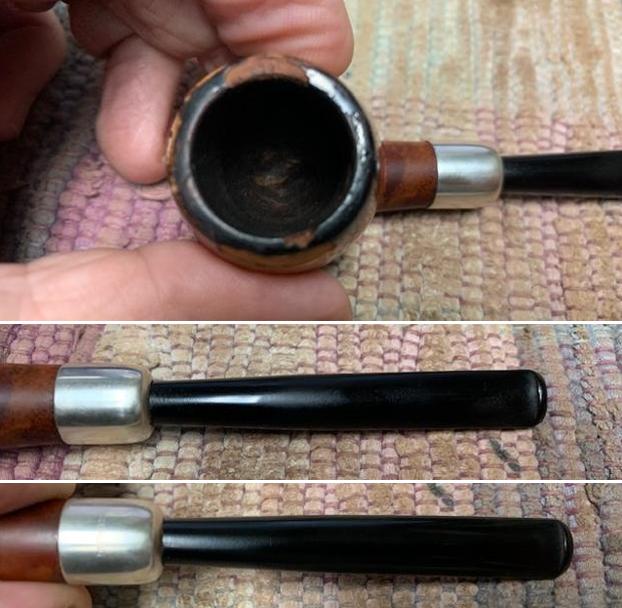
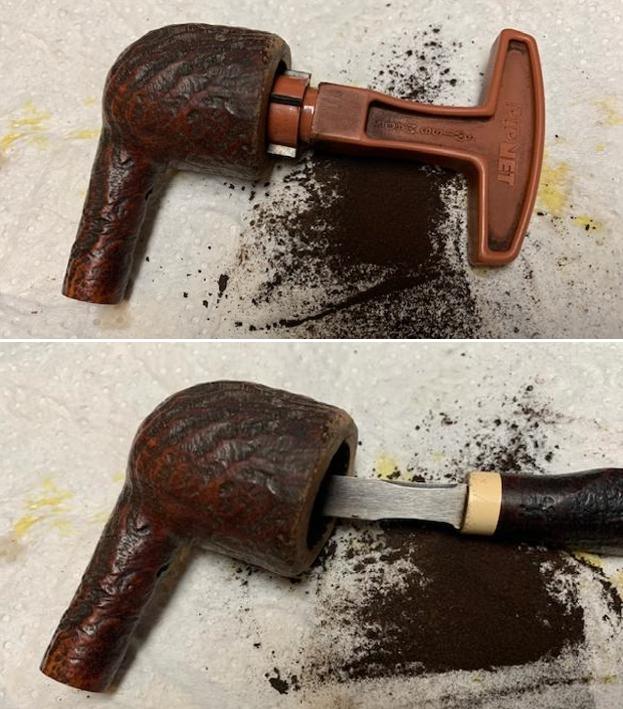
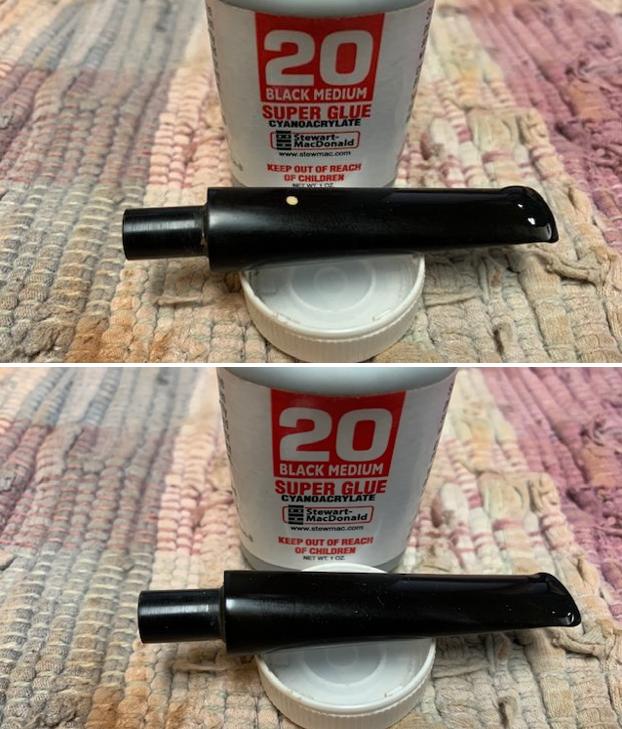
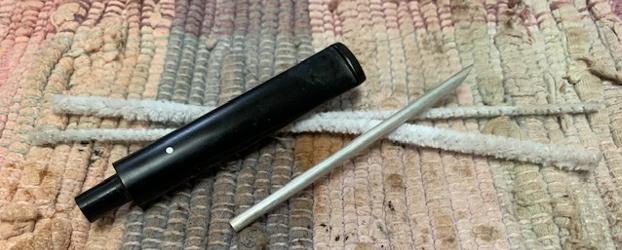
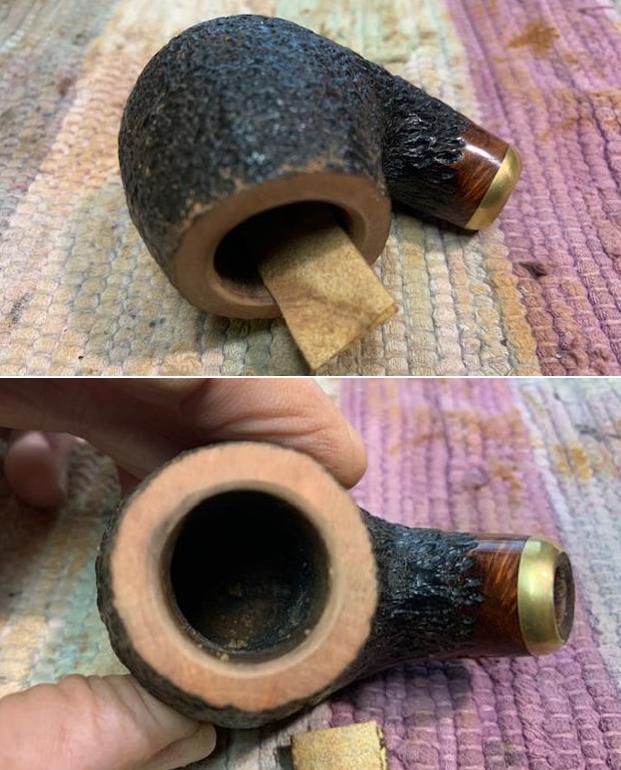
As I mentioned earlier, the work on the stem started earlier. Before putting it into a soak to address the oxidation, many pipe cleaners and cotton buds were used to first clean the airway and the filter cavity. I believe all VAUEN pipes are designed to be fitted with a filter of which VAUEN is also a producer. The 9mm filter compartment is a prime collector of crud and a small dental spoon was also employed to excavate. It takes fierce battling finally to call the airway and filter cavity clean.  Next, the stem was put into a soak of Briarville’s Pipe Stem Oxidation Remover. I left the stem in the soak for a full 24 hours to leverage as much effort to the oxidation removal as possible. I am curious to see if a dot will surface which will be able to indicate the market area this VAUEN was headed toward when new.
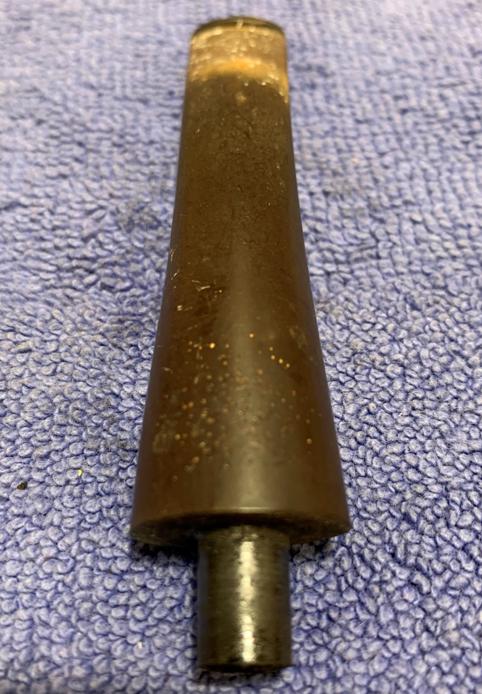
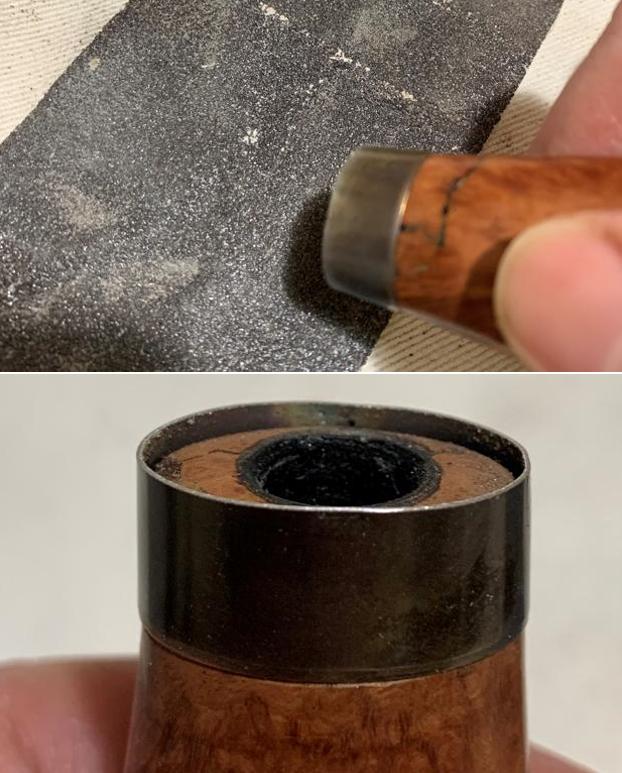
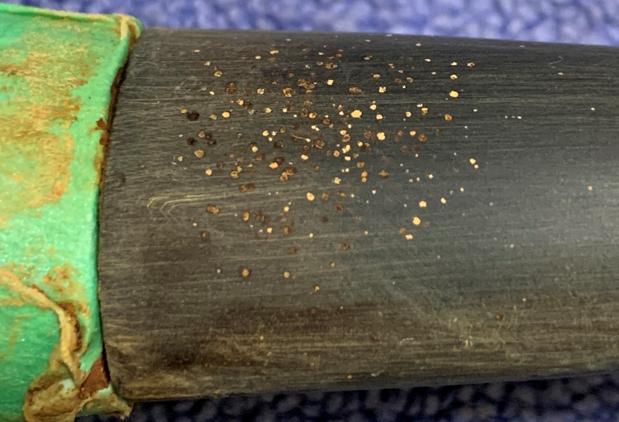
 The stem has been soaking for 24 hours and when I fish it out the raised oxidation is pronounced.
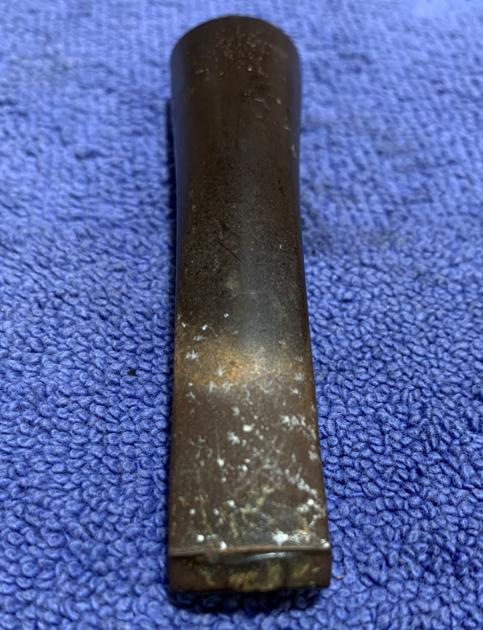
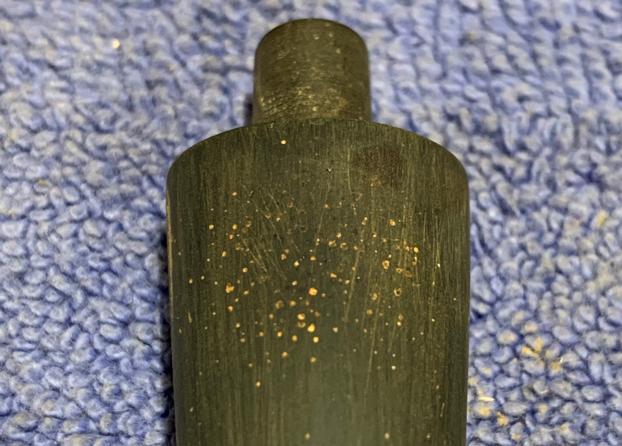
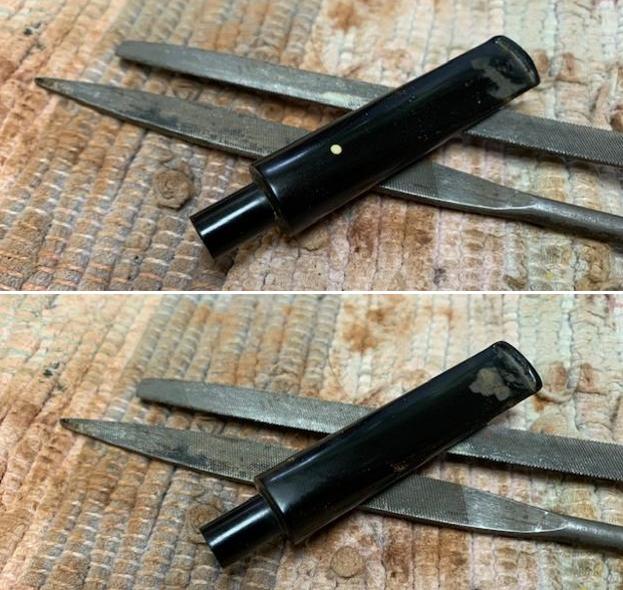
  I first use a cotton pad wetted with alcohol to wipe off the raised oxidation. After the cotton pad, I also apply 0000 grade steel wool to see if I can remove more oxidation. The results seem good regarding the removal of a goodly portion of the oxidation. Another mystery emerges – thoroughly inspecting the top of the saddle looking for a grey or blue dot comes up empty. Perhaps there are exceptions to the VAUEN pipes receiving the dot? I see no other markings on the stem.
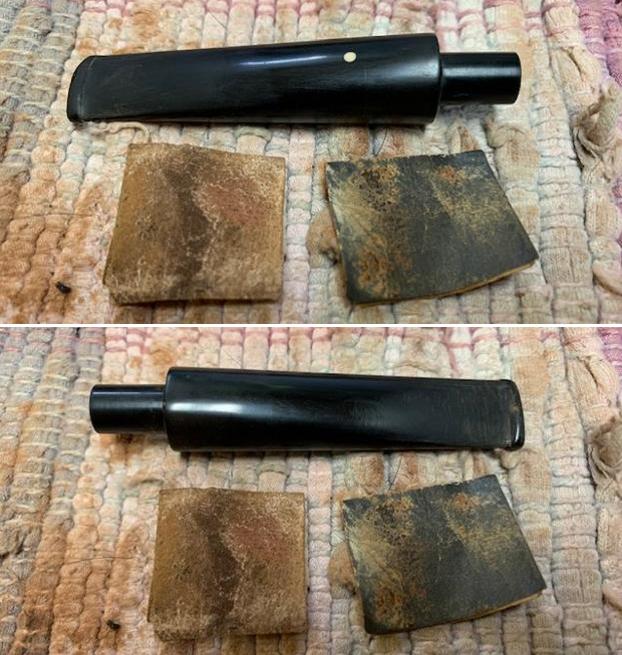
 To condition the vulcanite stem, paraffin oil is then applied to the stem.
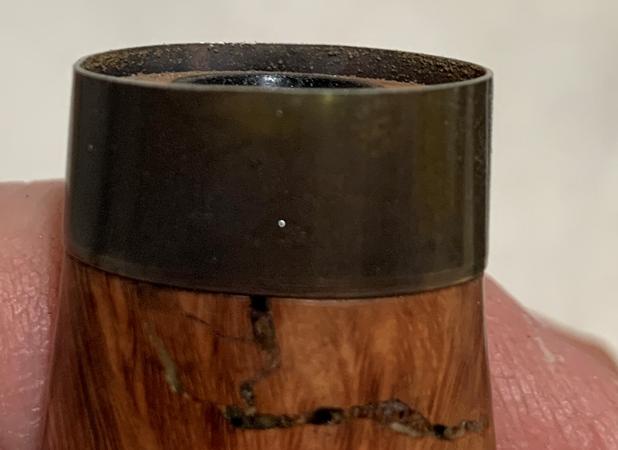
 The process also reveals that the stem ring or extender is not acrylic as I earlier thought. It is most definitely a wooden ring of some sort. It darkened through the process but as it dries and later sanded, it should spruce up nicely giving a nice contrasting transition from stummel to stem.
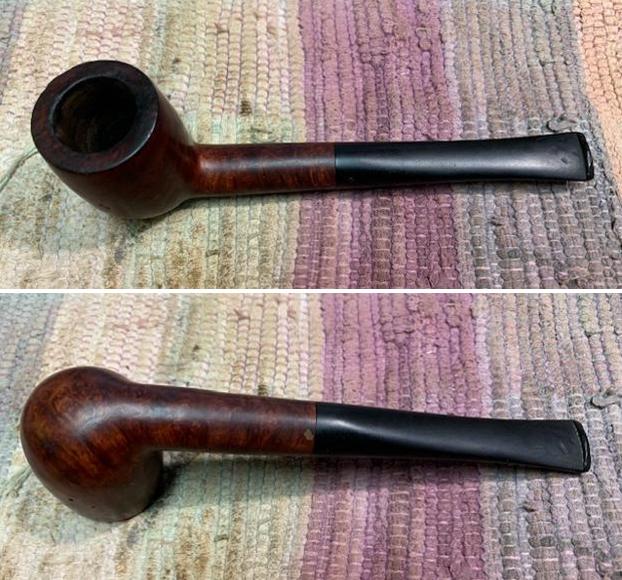
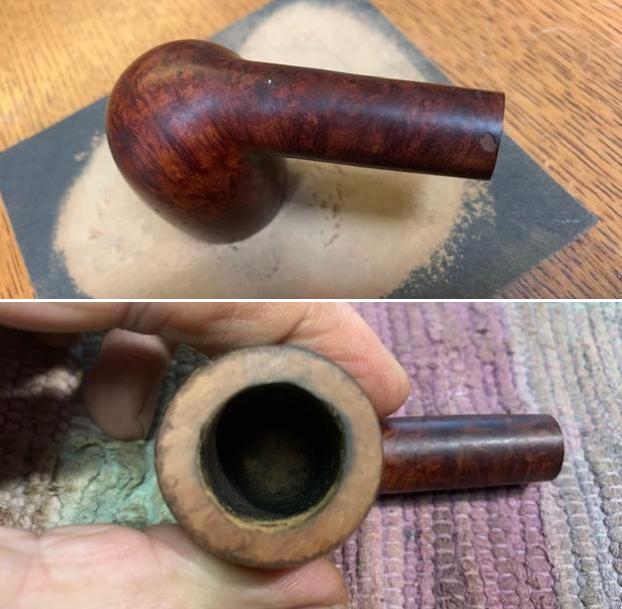
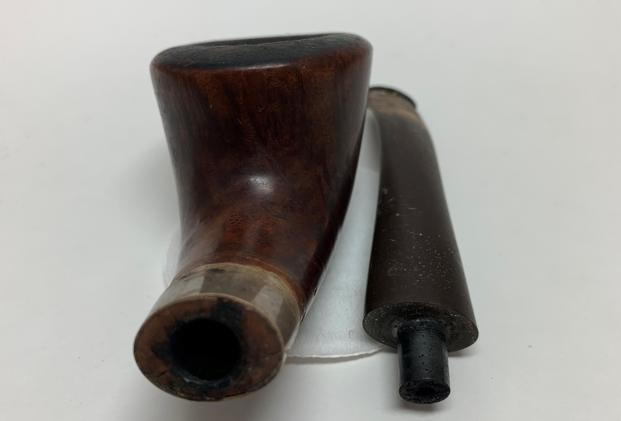
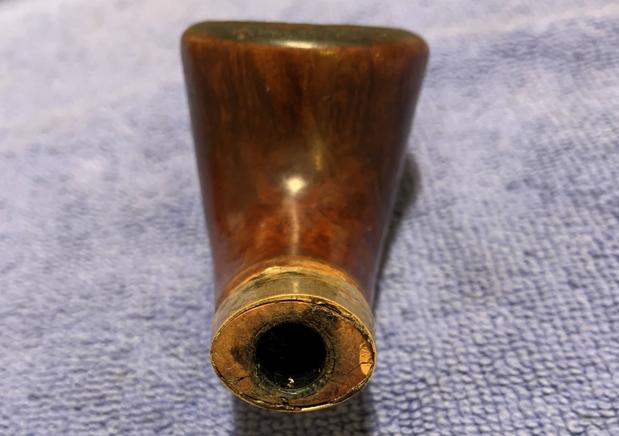
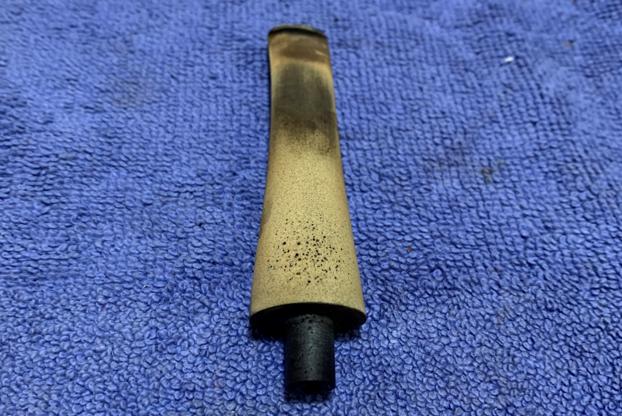
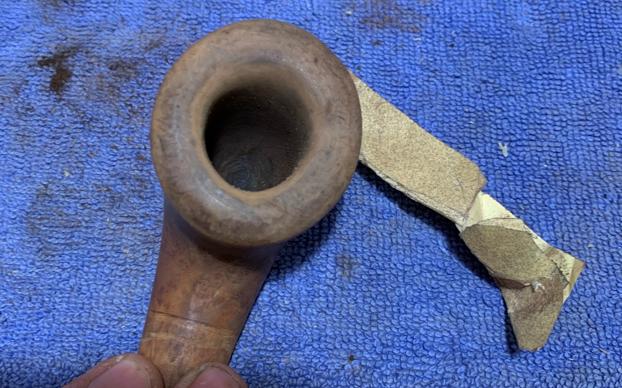
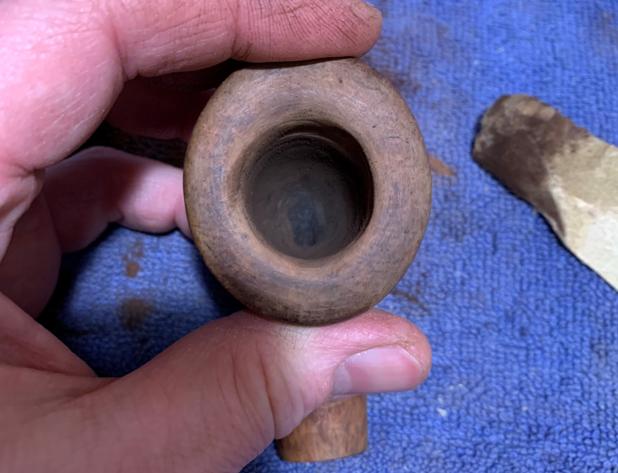
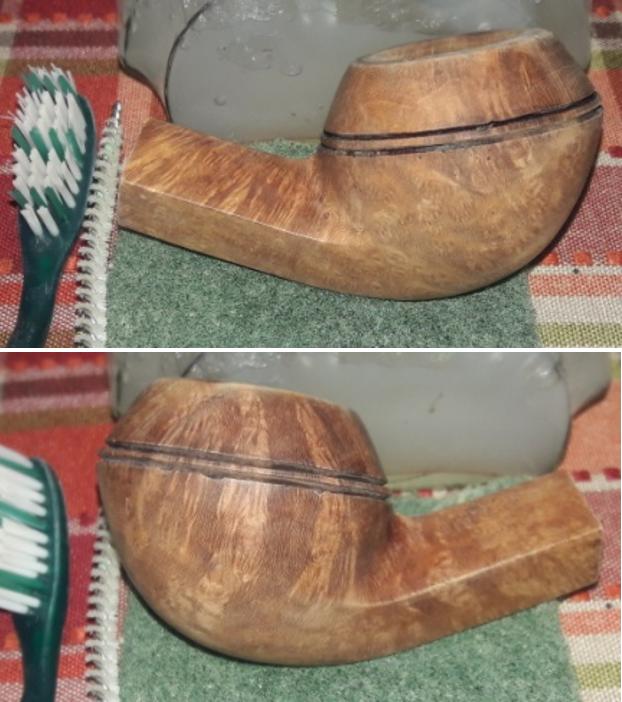
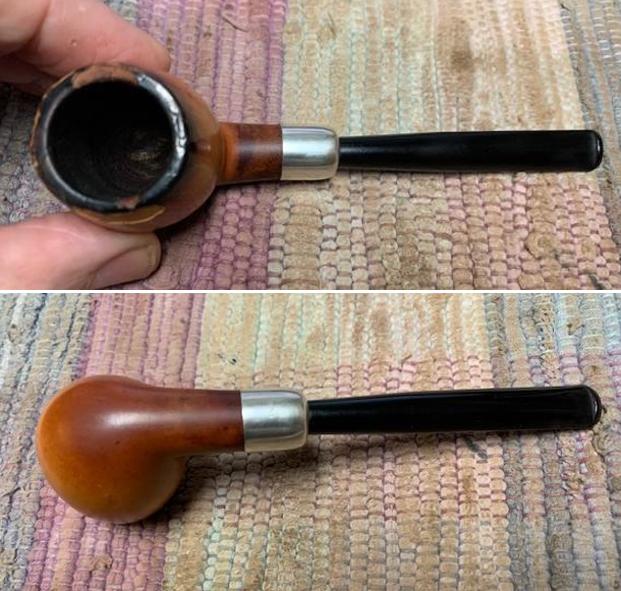
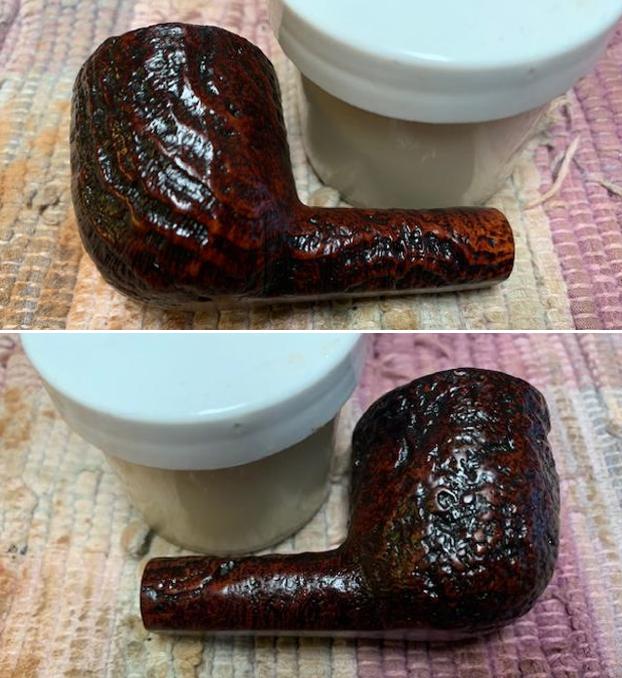
 Putting the stem aside for the time, I look more closely at the VAUEN stummel. The stummel is huge with a chamber width of 1 inch and depth of 1 7/8 inches. First, a fresh picture is taken to show the starting point.
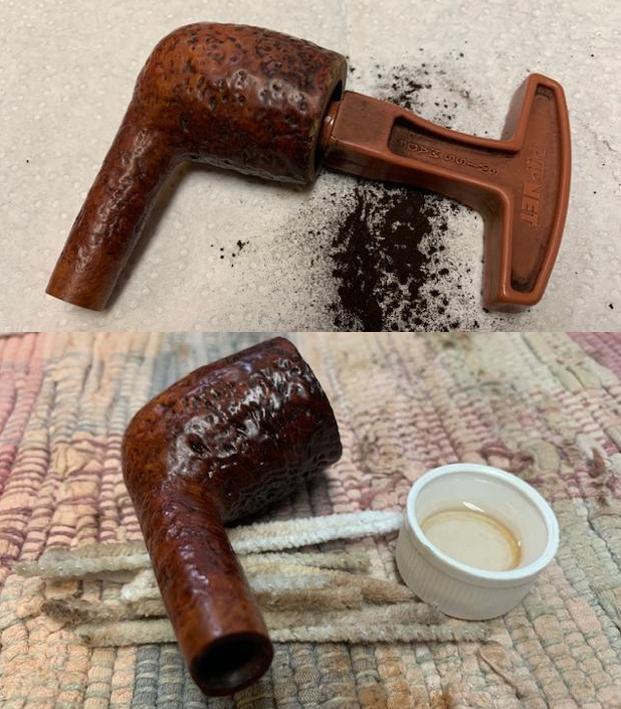
 To clear the carbon cake in the chamber, all 4 of the Pipnet Reaming Tool blade heads are used. The Kleen Reem Pipe Tool was also used to help break up the cake. Following this, the Savinelli Fitsall Tool continues by scraping the chamber walls and then to finish, the chamber is sanded with 240 sanding paper wrapped around a Sharpie Pen.
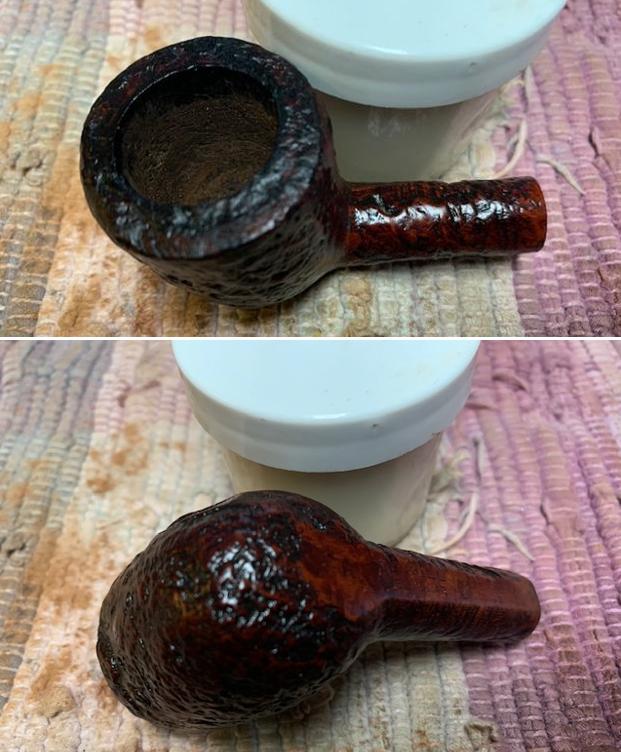
  An inspection of the chamber walls shows small heating veins but no problems with significance.
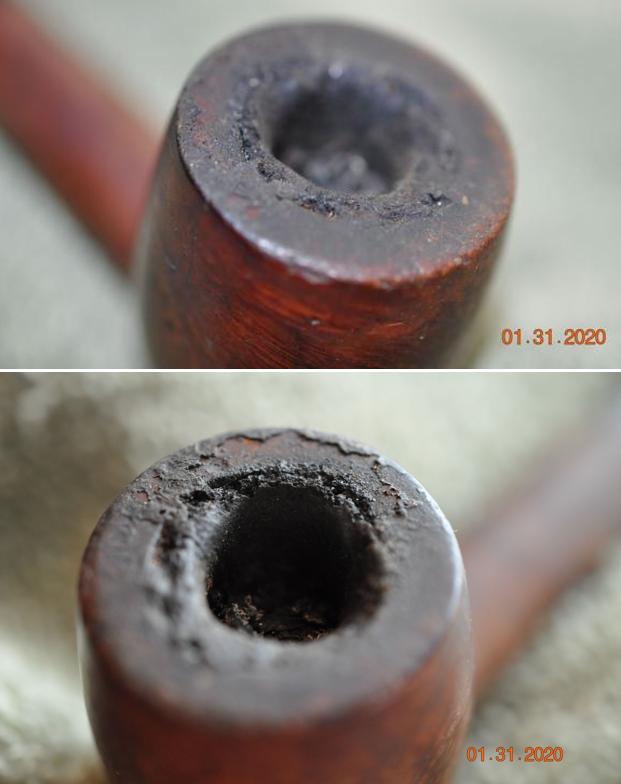
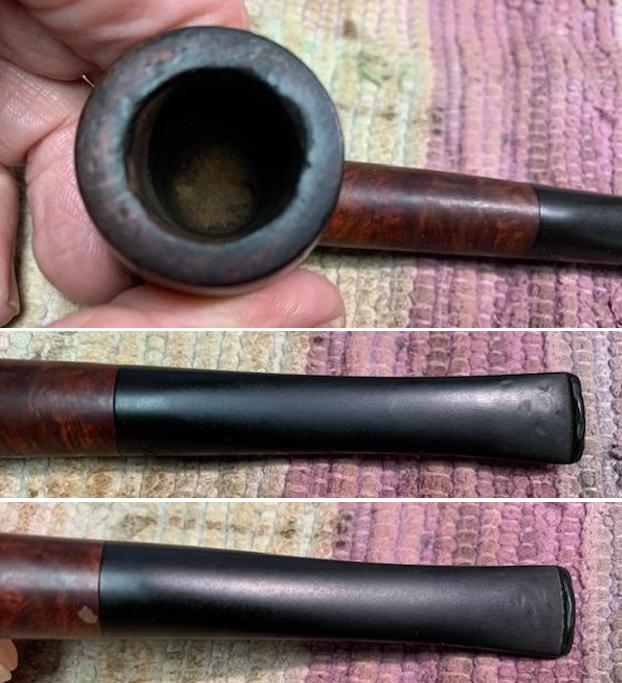
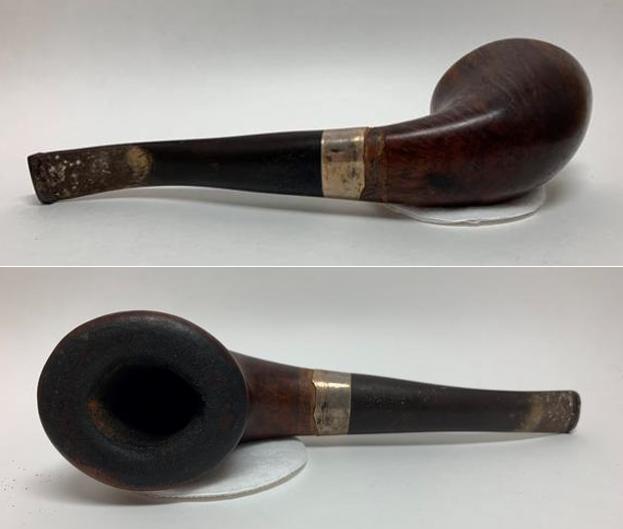
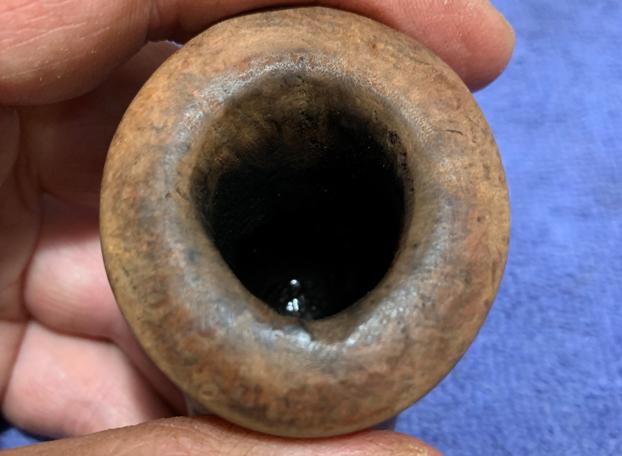
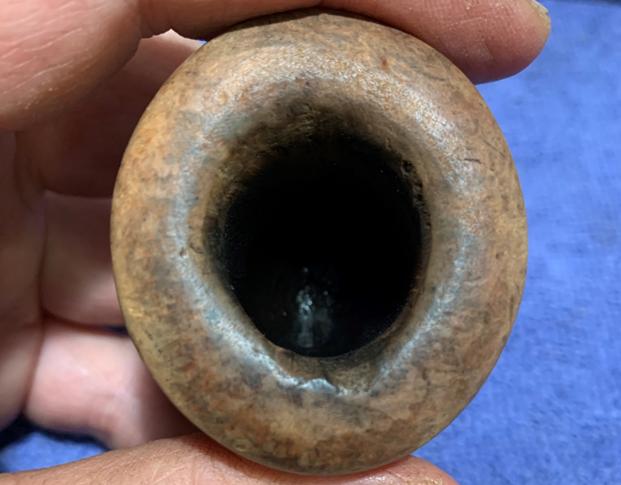
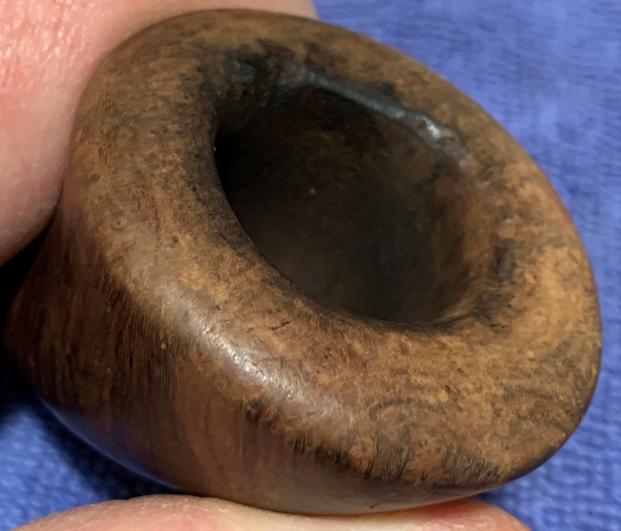
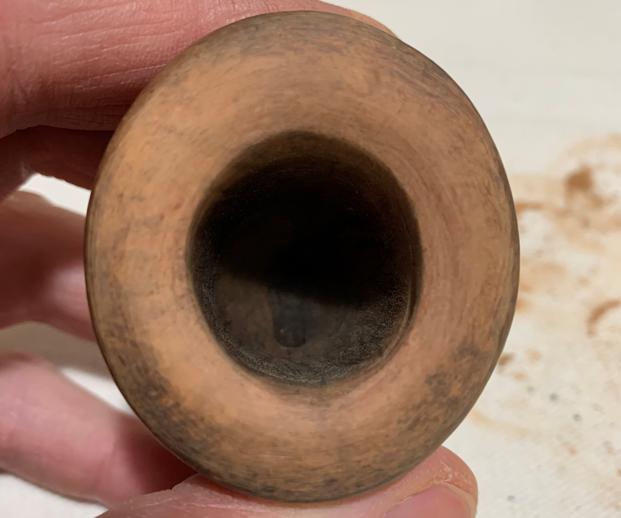
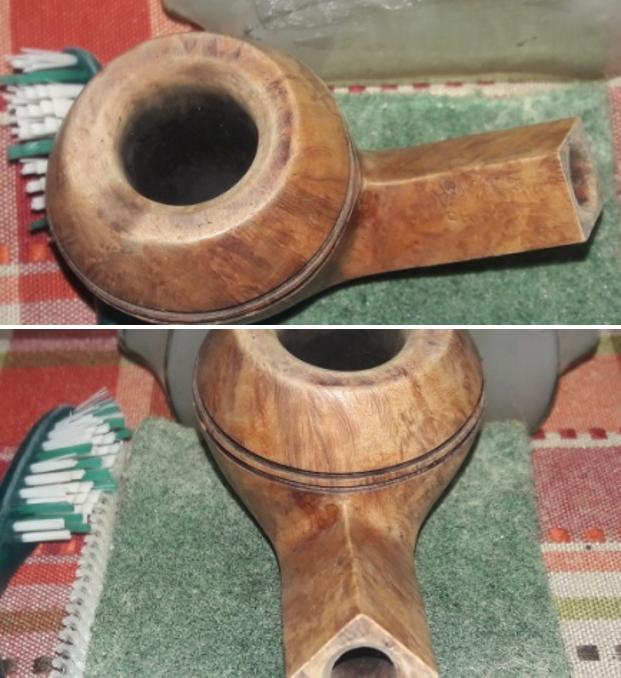
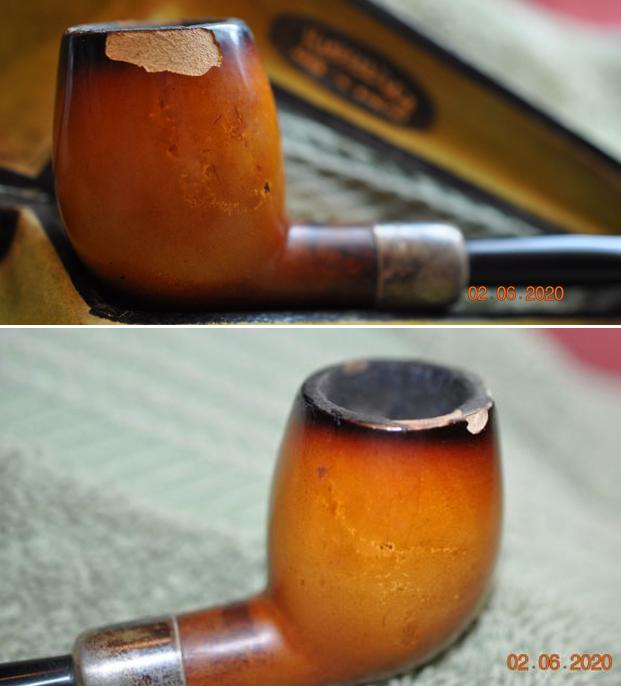
 Next, a few pictures show the crusting lava flow on the rim and the grime spots on the briar surface.
 To start the external surface cleaning, undiluted Murphy’s Oil Soap is used with a cotton pad to scrub. The rim is a bear, and the brass wire brush is used along with the pocketknife to carefully scrape the carbon.
  The stummel is then transferred to the sink to continue the cleaning. Using shank brushes with hot water, anti-oil liquid dishwashing soap is used to scrub the internal mortise. Once the stummel is rinsed thoroughly, it comes back to the table.
 Next, to continue the cleaning of the internals, cotton buds and pipe cleaners wetted with isopropyl 99% are used to scrub. The effort includes a small dental spoon digging and scraping into the mortise walls. After a good amount of time, and with the hour getting close to quitting time, I decide to transition.
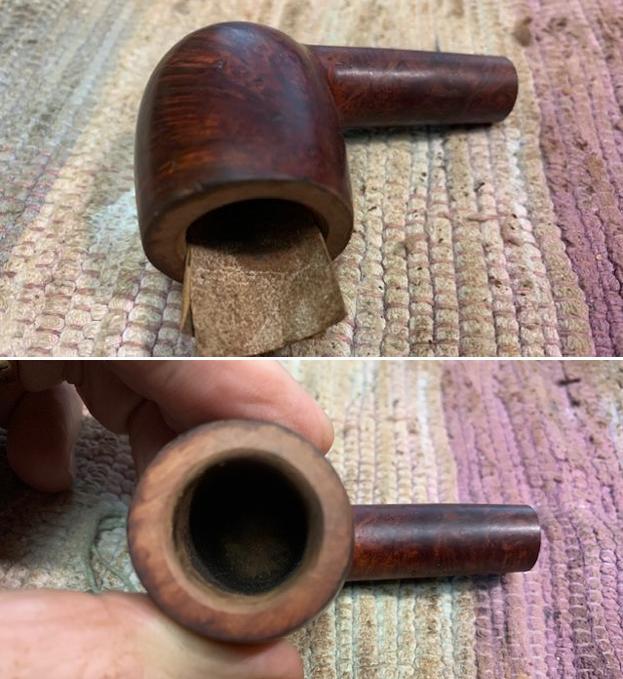
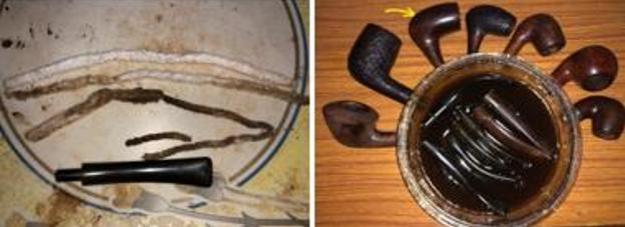
 To continue the cleaning through the night a kosher salt and alcohol soak will be used. This method helps to draw out the tars and oils from the internal briar. First, a cotton ball is pulled and stretched to act as a ‘wick’ to draw out the oils and tars. With the aid of a stiff wire, the wick is guided down the mortise into the airway.
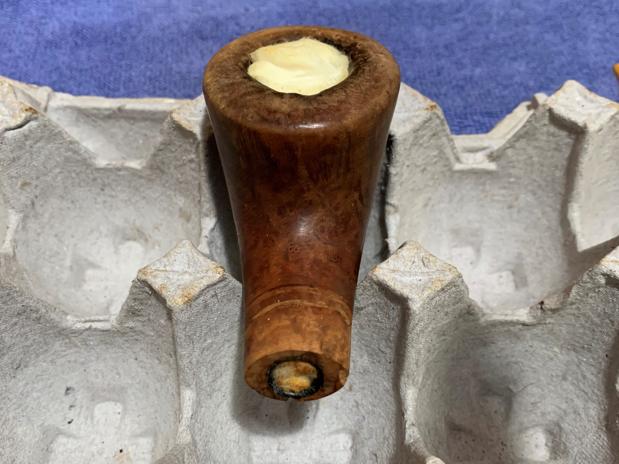
 The bowl is then filled with kosher salt which leaves no aftertaste and set in an egg carton for stability and to angle the stummel so that the rim and mortise opening are roughly level. Isopropyl 99% then fills the bowl with a large eye dropper until it surfaces over the salt.
  After a few minutes, the alcohol is topped off and the lights go off.
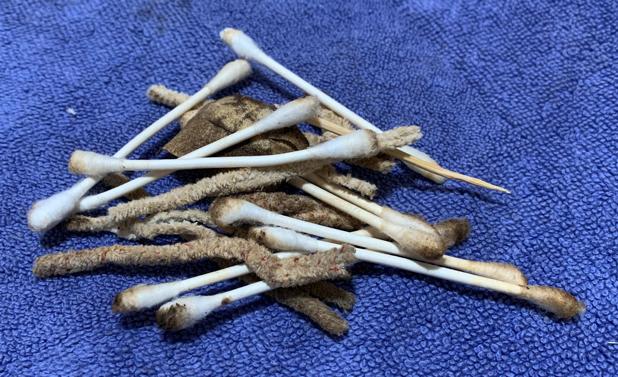
 The next morning, the soiled salt and cotton wick indicate the cleaning processes going on through the night. After tossing the salt into the waste, the chamber is wiped with a paper towel and blowing through the mortise helps to clear any residual salt crystals.
  To continue the internal cleaning, I return to cotton buds and pipe cleaners wetted with isopropyl 99% for the last push which lasts much longer than hoped. With many buds and pipe cleaners expended on the second day of cleaning the internals, I use the small dental spoon again to scrape the walls. Drill bits are also used to excavate crud. With a bit the same size of the airway, after mounting it on a power drill, it is hand turned (NOT powered up!) to move the drill down the airway.
  When the metal bit surfaces through the draft hole, I continue to hand turn the drill the same way and back it out of the airway.
 The dark area on the end of the drill shows the crud pulled out. I repeat this process a few times and I use a larger bit as well that only excavated at the back of the mortise where the airway begins. I discover that the VAUEN drilling for the filter included a ridge at the start of the internal airway that was tapered wider than the deeper airway so it wasn’t being addressed by the narrower drill bit.
 Well, the buds and cleaners finally began to emerge lighter. I call it done and move on.
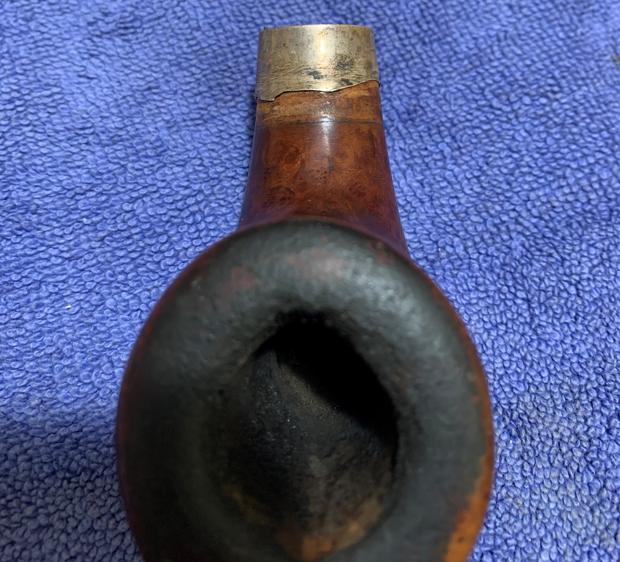
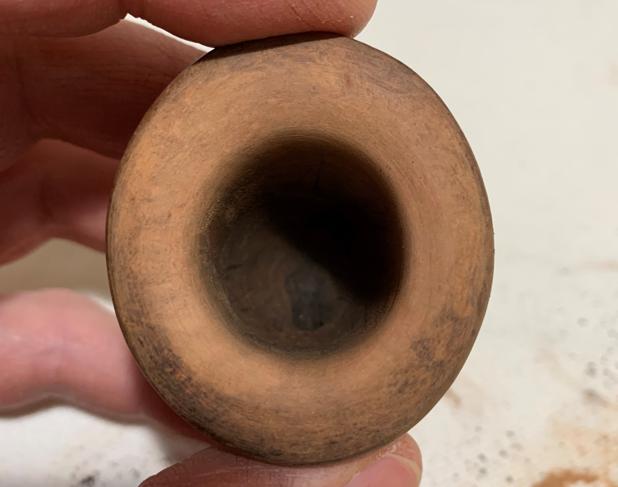
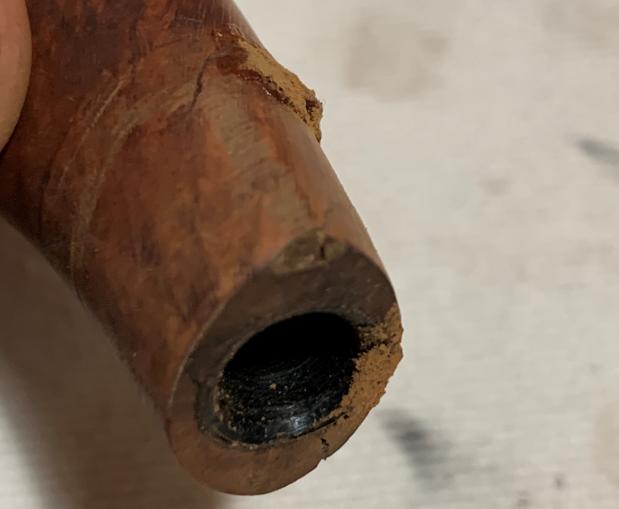
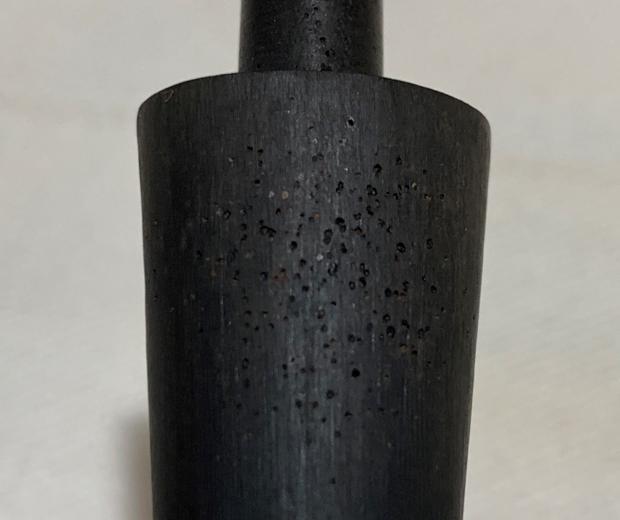
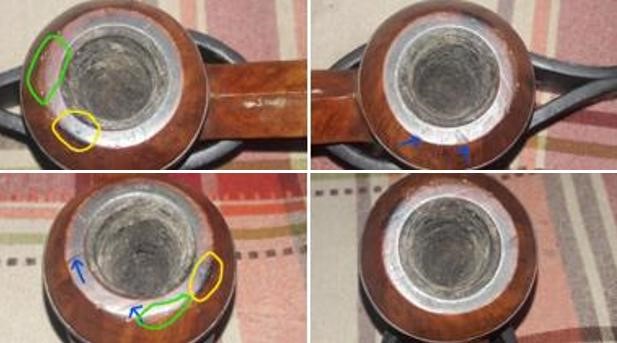
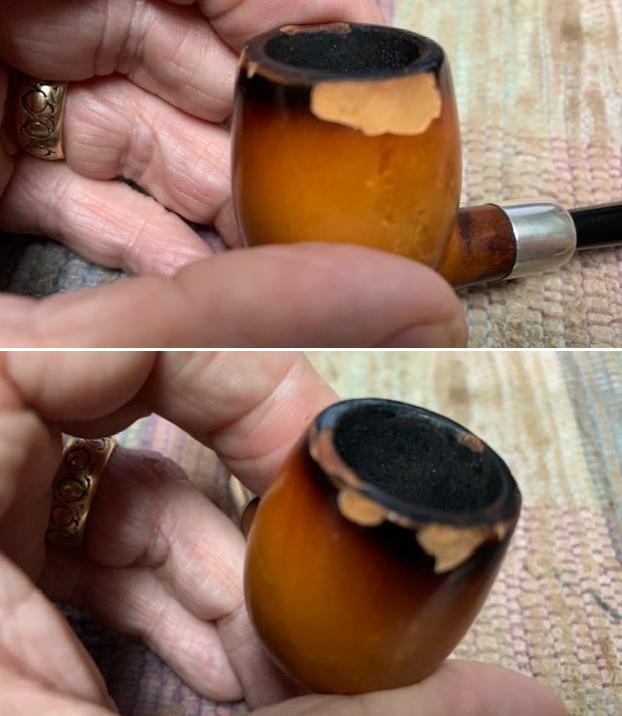
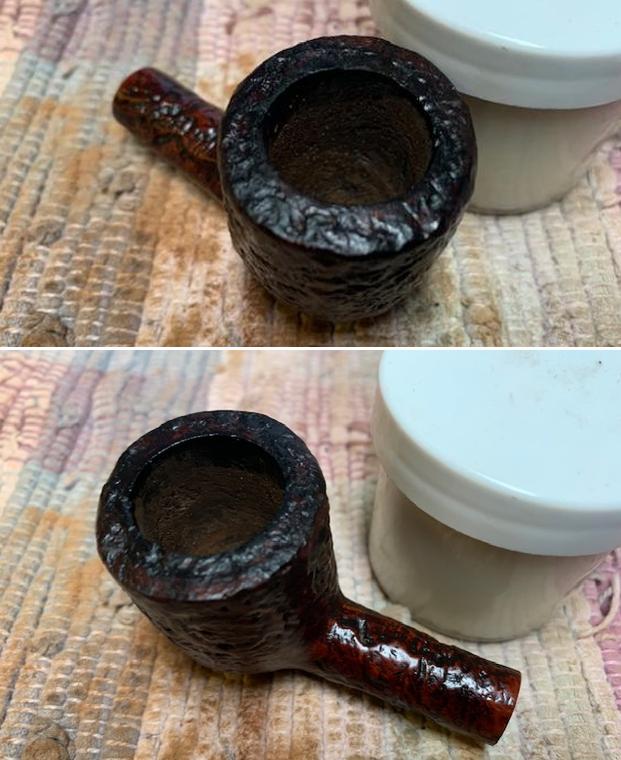
 With the formal cleaning completed, I turn my attention to addressing the issues. The rim is in rough shape from the heavy lava flow and indications of charring. The darkened area on the shank side of the rim shows the place where the former steward drew the flame over the rim in lighting. The inner edge of the rim also reveals the round of the chamber being a bit compromised.
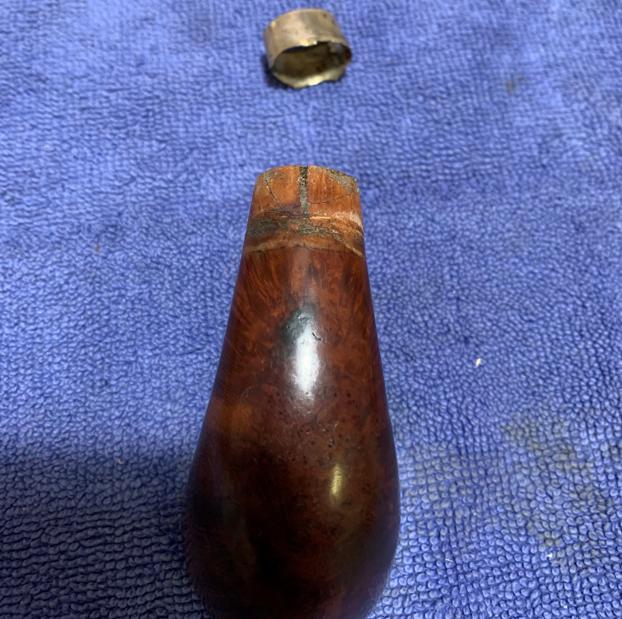
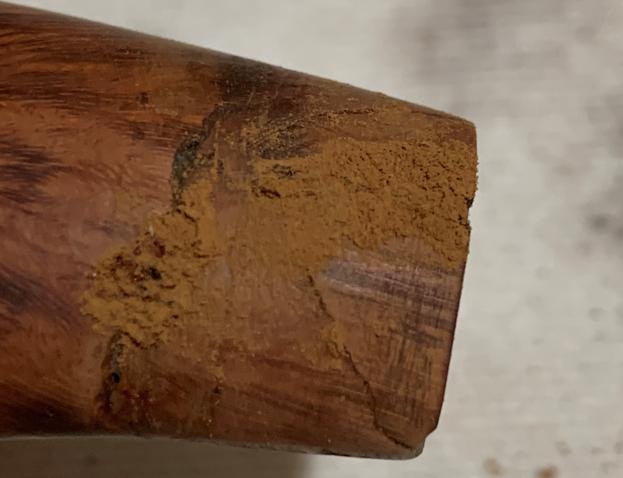
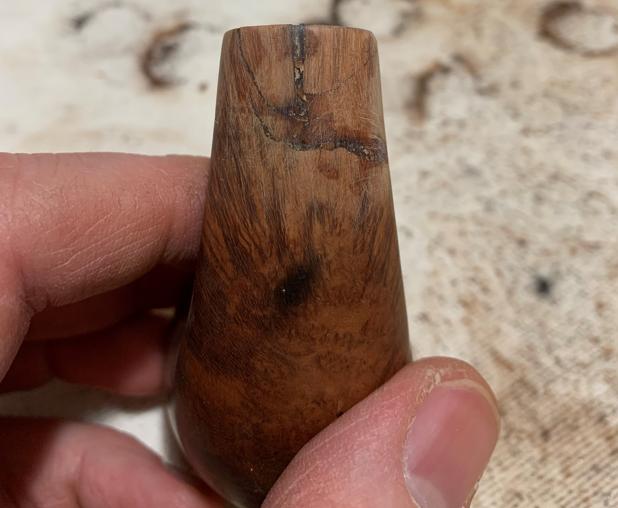
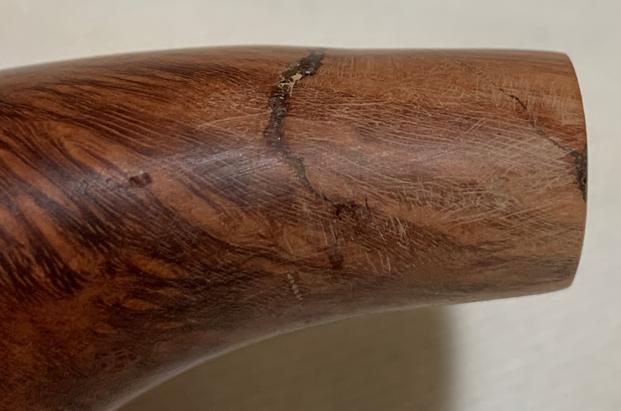
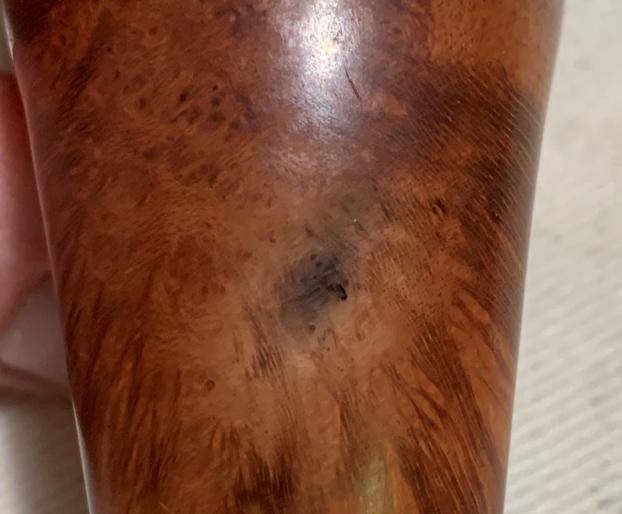
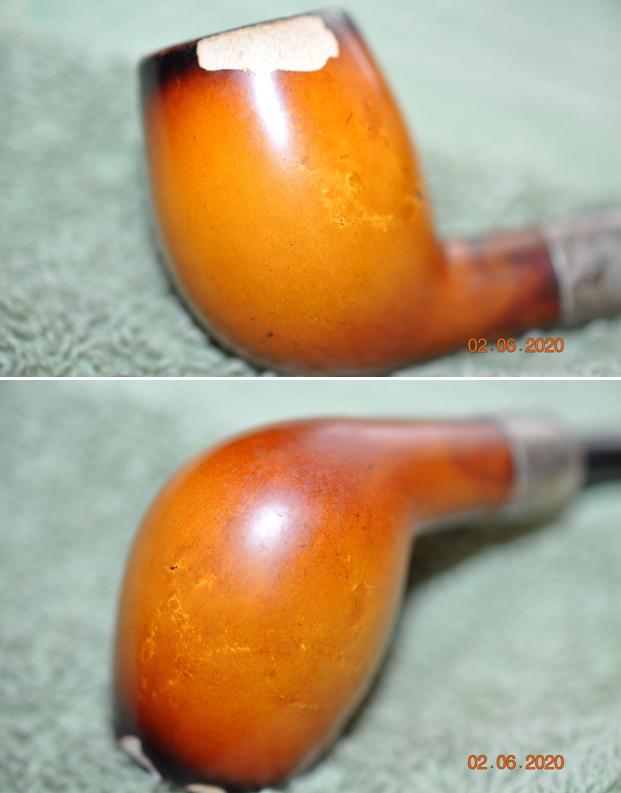
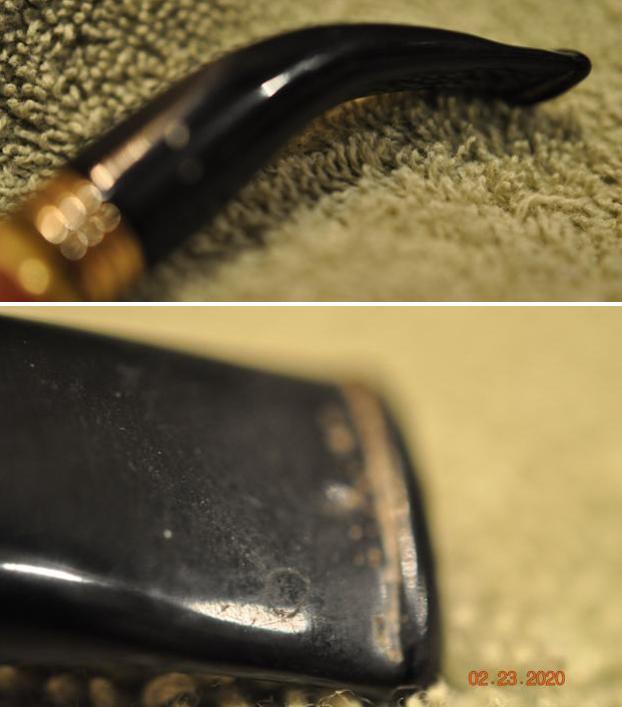
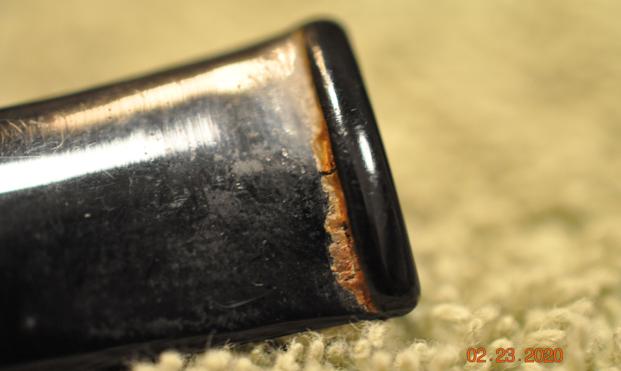
  A few pictures of the bowl and shank edge show a few small dark spots which I believe are old fill patches. They seem solid but are raised – detectable by the touch.
 To address these issues I begin at the top of the stummel and work downward. I begin by topping the stummel to clean the rim. I place 240 sanding paper on the chopping board to serve as my desktop topping board. I take a starting picture to mark the beginning.
 With the stummel inverted, the stummel is rotated over the paper several times. Care is given to keep the stummel level and not to tilt it in any one direction.
 The following pictures show the progression after several rotations and then stopping to check the progress. I do not want to take off more briar than is necessary, but enough of the damaged rim needs to be removed to address the burn damage.
 At this point I stop the process on the 240 paper. I believe enough briar has been removed. The remaining darkened and damaged briar on the inner rim edge should be removed with introducing a bevel on the inner rim edge.
 Several quick rotations are applied on 600 grade paper to smooth the rim further.
 Next, using a hard surface as a backing against the sandpaper, a bevel is cut using 240 then 600 grade papers. The Sharpie Pen wrapped with 240 grade paper is also used to help sand and shape the inner chamber wall to fashion the chamber restoring the round.
 There continues an imbalance in the width of the rim going around the circumference, but there is nothing I can do about that. It looks much improved now.
 Now, moving downwardly, the raised fill spots are sanded with 240 paper and inspected. They still look solid.
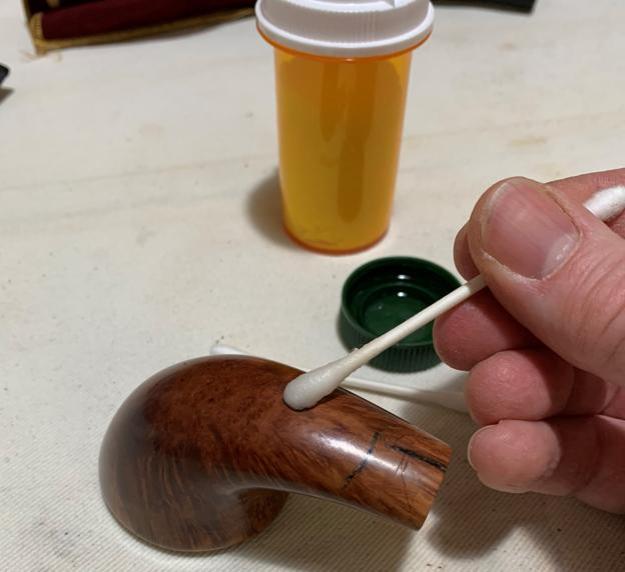
 To protect the VAUEN nomenclature and shape number during sanding, painter’s tape works well.
 Next, I rejoin the stem with the stummel. I do this to protect the wooden stem connector ring from shouldering now that I know that it is wood.
  With the stem and stummel joined, the sanding moves over the junctions without shouldering. Using 240 paper the saddle of the stem is sanded.
 The sanding is then expanded to the entire P-lip stem using 240 sanding paper.
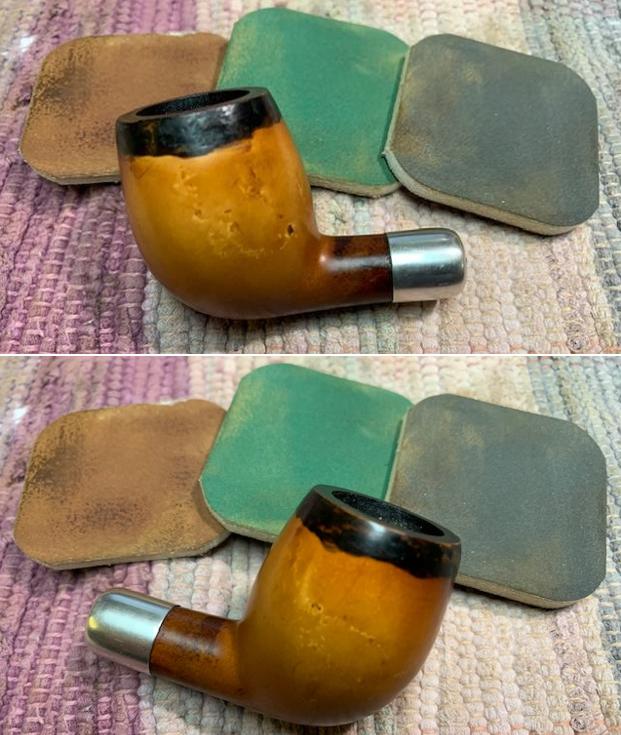
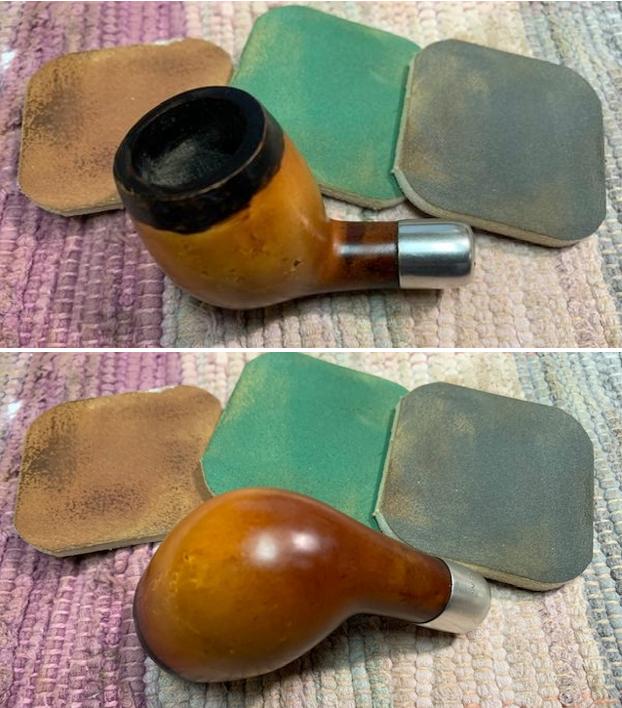
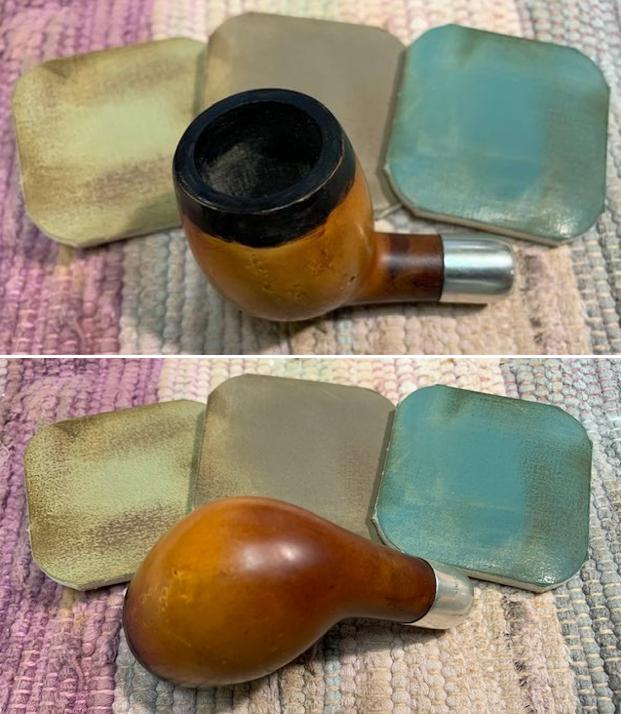
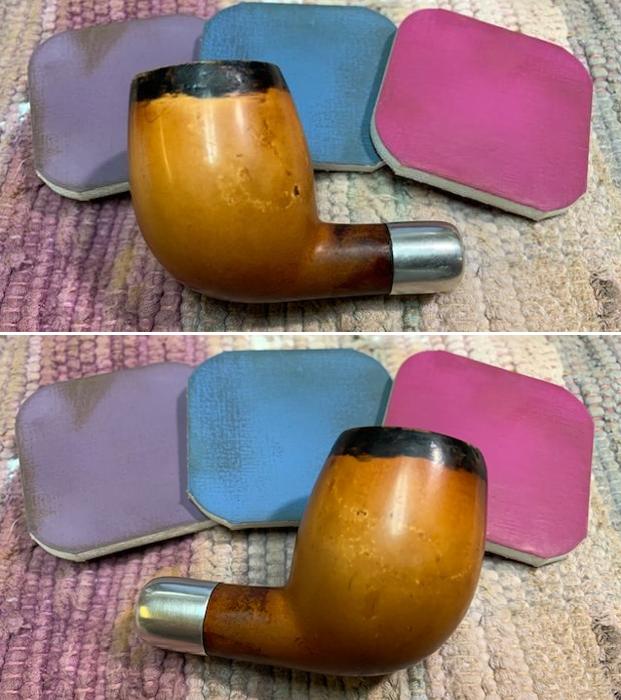
  With the stem and stummel remaining joined, sanding sponges are applied to the stummel to clean it and remove imperfections in the briar. Four sponges are used starting with the coarsest and moving to the fine grades.
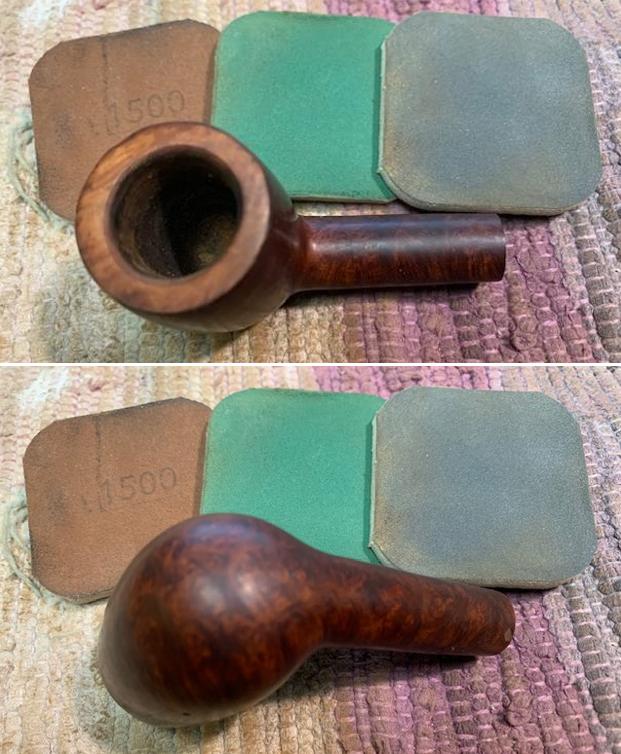
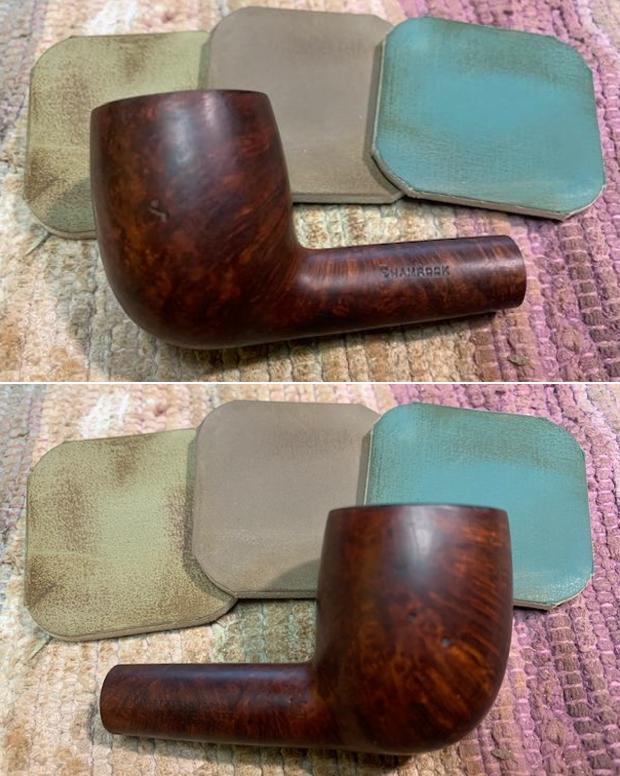
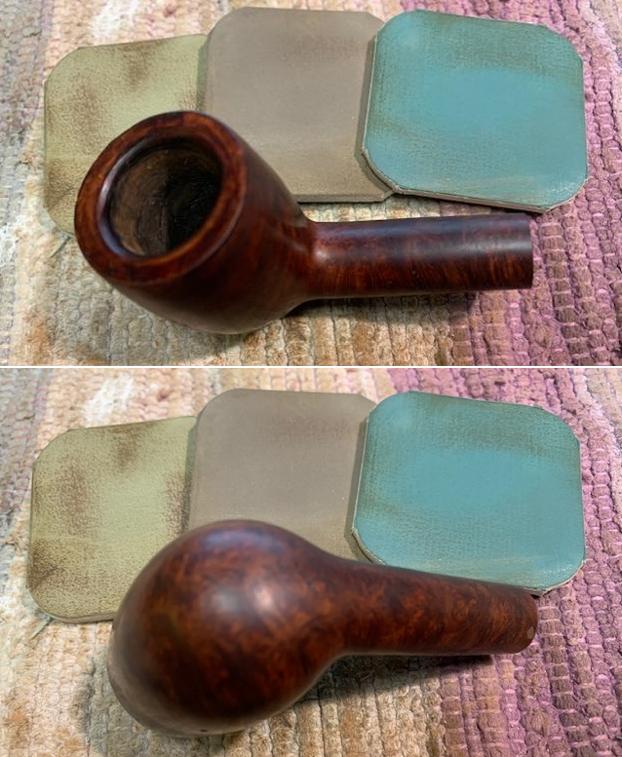
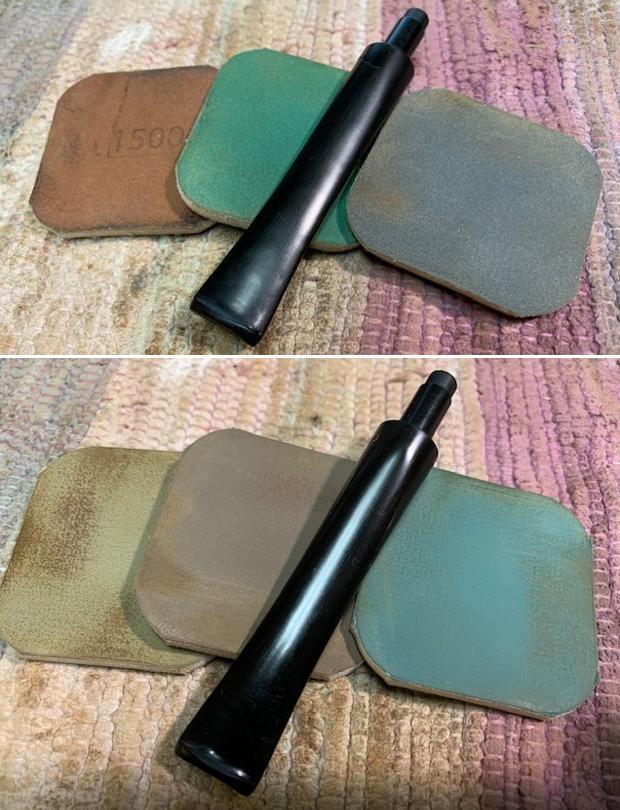
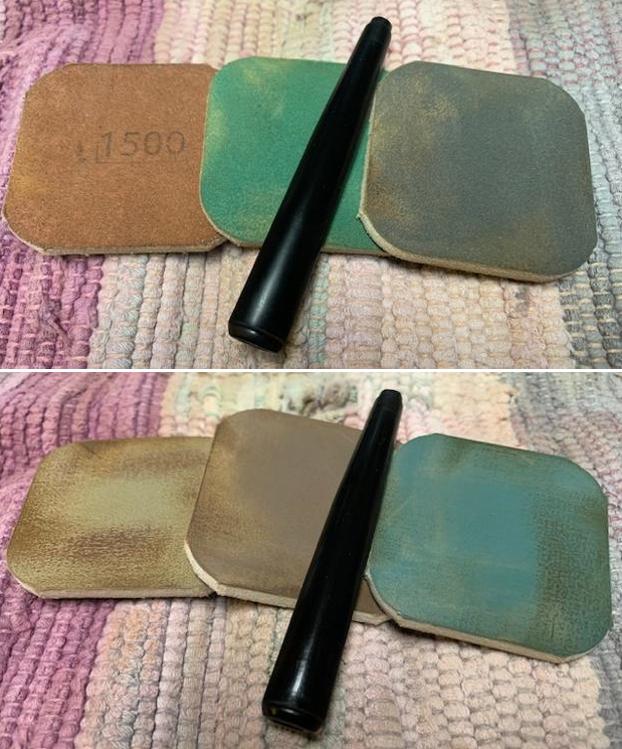
 Next, continuing with the stummel alone, the full regimen of 9 micromesh pads is applied to the stummel. The fine sanding starts by wet sanding with pads 1500 to 2400. This is followed with pads 3200 to 4000 and pads 6000 to 12000. The painter’s tape is removed after the first set of 3.
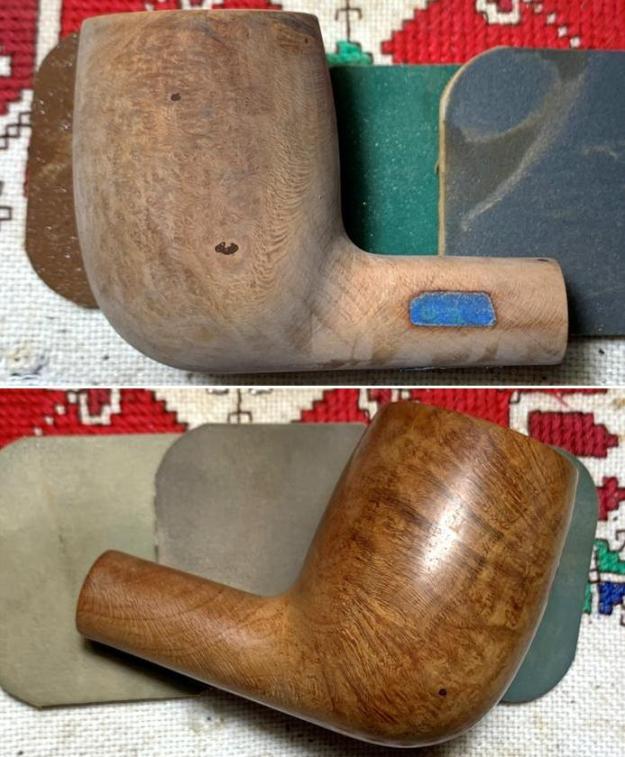
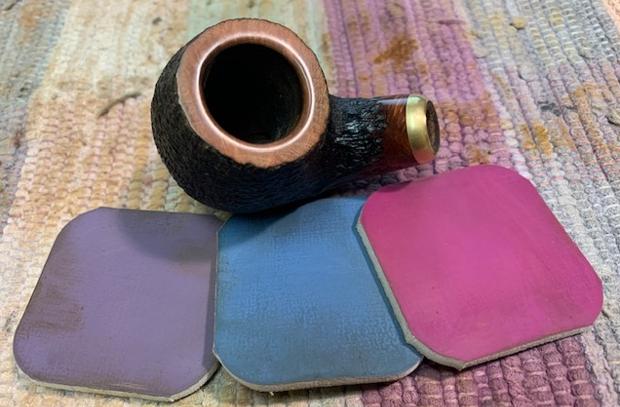
 I am pleased with how the grain has emerged through the micromesh sanding. To mask the dark fills and the darker areas around the stampings, and to bring out the grain with more contrast, I apply dye to the stummel. I decide to apply Fiebing’s Tan Leather Dye leveraging more toward subtle contrasting in the grain. After assembling the components necessary on the work desk, the stummel is warmed with a hot air gun to expand the briar. This helps the grain to be more receptive to the dye pigment.
  Next, using a folded pipe cleaner, the dye is applied in swatches over the stummel surface. With each application of dye, the wet aniline dye is ‘flamed’ using a lit candle. This combusts the alcohol in the dye and leaves the pigment behind in the briar.
  After the dye has been applied over the stummel, the stummel is set aside for several hours for the dye to ‘rest’ and settle into the grain.
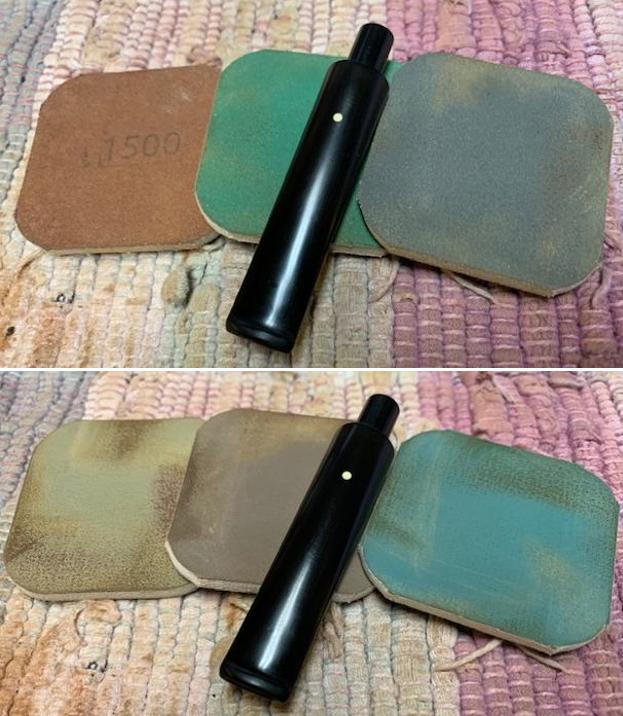
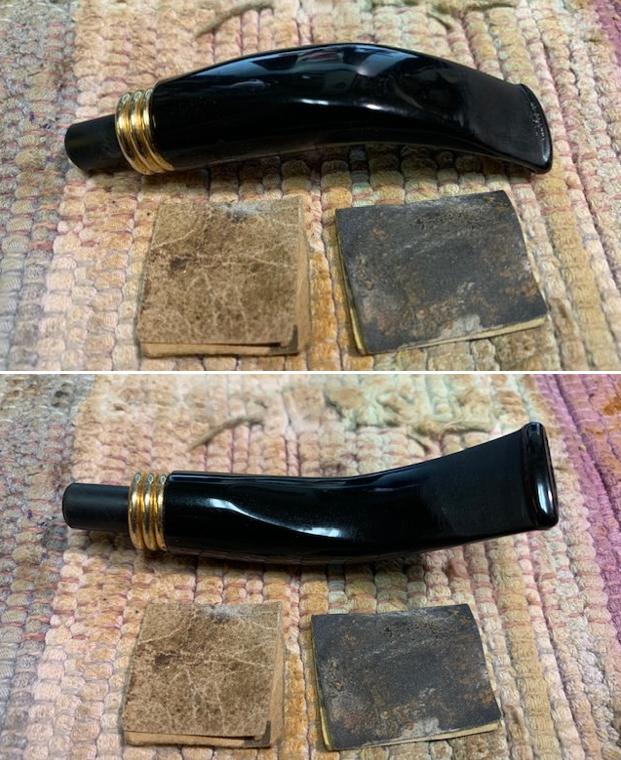
 While the stummel is resting, I turn my attention to the stem. After sanding with 240 paper earlier, next is wet sanding using 600 grade paper. Following the 600 paper, 0000 grade steel wool is applied to the entire stem.
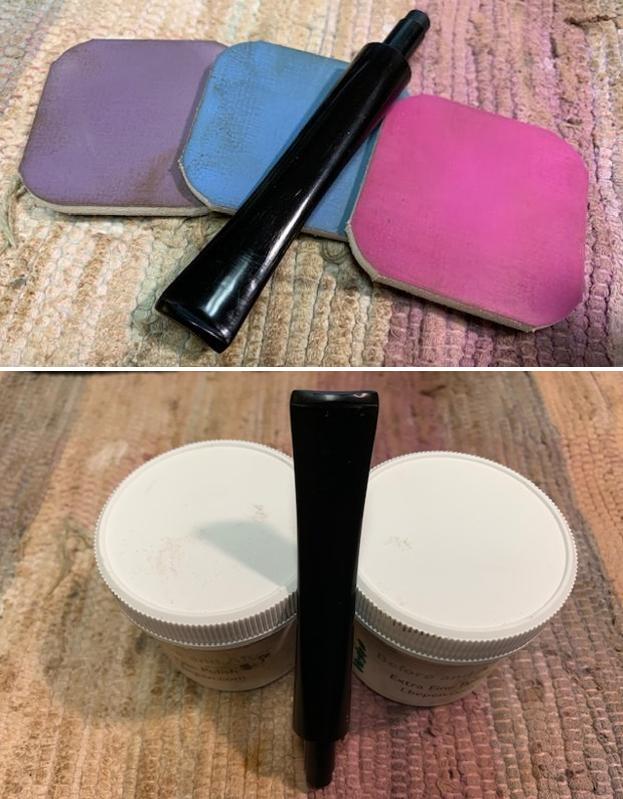
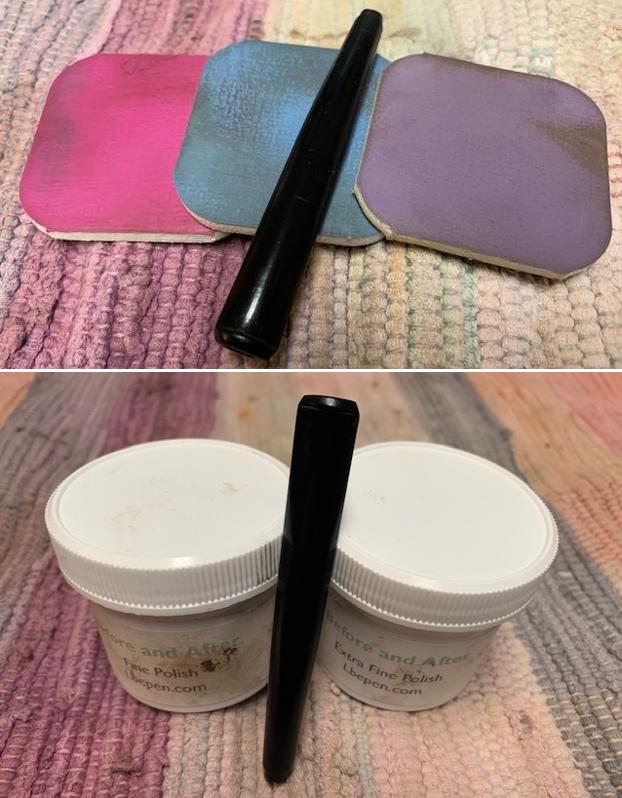
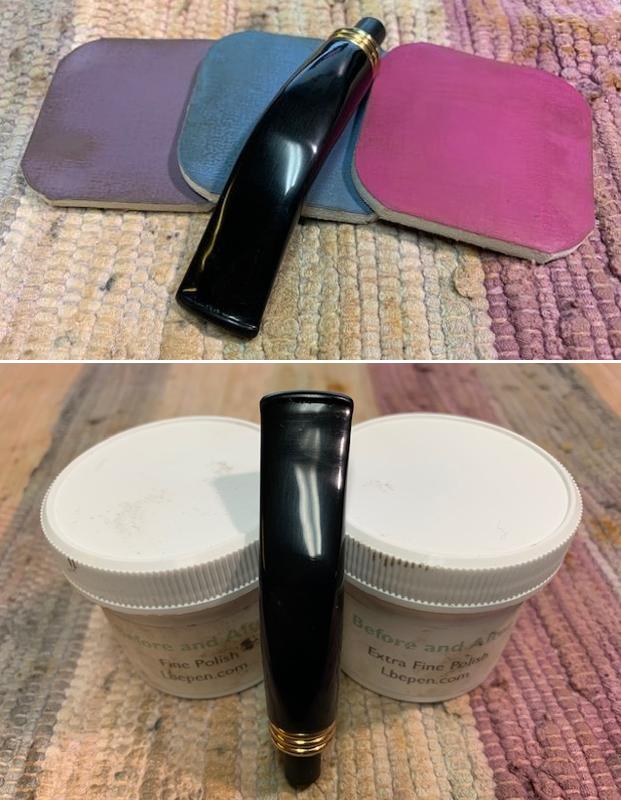
 Following the steel wool, the finer sanding begins with micromesh pads. Starting with wet sanding with pad 1500 to 2400 and then dry sanding with pads 3200 to 4000 and 6000 to 12000. Between each set of 3 pads, Obsidian Oil is applied to condition the stem and guard against oxidation. Wow! I love the pop that develops through the process. The P-lip with the wood stem ring is looking good.
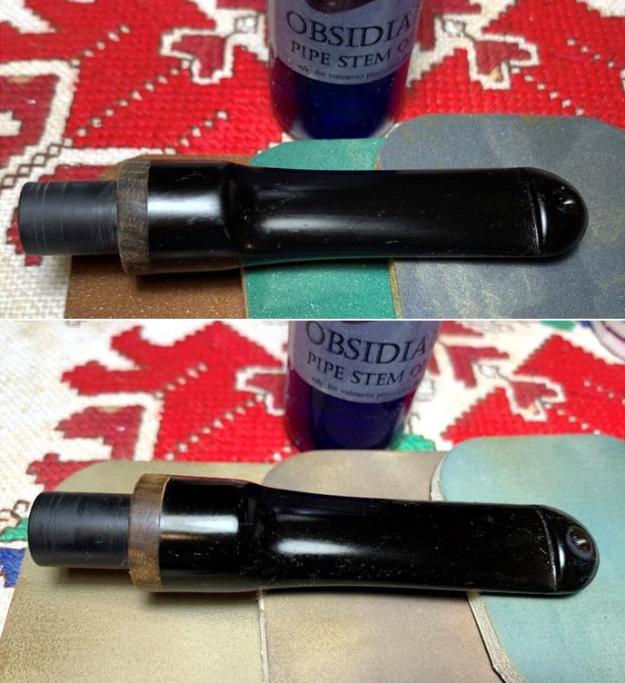
 The newly dyed stummel has been resting for several hours and it is time for one of my favorite parts of restoration. I have applied a Tan hue which I believe will emulate the original VAUEN motif – a lighter and subtler contrasting with the grains. We will see! The rotary tool is mounted with a new felt buffing wheel and the speed is set a bit slower than normal – about 35% full power. I slow it down because using the coarser Tripoli compound and the abrasive felt buffing wheel provide a lot of friction and heating. I do not want to scorch the briar.
  The unwrapping process begins as the felt wheel clears the crusted shell from the flamed dye. The felt wheel is purged often during the process to clean and soften the felt. The picture below shows the gradual process of removing the excess dye to reveal the contrasted grains. I enjoy watching the grain emerge. After completing the heavy lifting with the felt wheel, not shown is the change to the cotton cloth wheel and another round of applying Tripoli with the speed of the rotary tool increased to about 50% full power. This helps to continue sharpening the grain and removing excess dye.
 Following the Tripoli, to blend the new dye and to remove the flamed dye excess debris, the stummel is wiped with a cotton pad wetted with alcohol.
 After reuniting the stem and stummel, another cotton cloth wheel is mounted, and the rotary tool’s speed is set to about 40% full power. The finer and less abrasive Blue Diamond compound is applied to the entire pipe. I decided to order a new Blue Diamond brick – it is becoming a bit tricky loading product onto the wheel!
 After the application of the Blue Diamond, the pipe is buffed with a felt cloth to remove the compound debris before applying the wax. The compound can cake up on the surface and needs a little help to be cleared.
  Well, I guess I forgot to take a picture of transitioning next to another cotton cloth buffing wheel mounted on the rotary tool to apply carnauba wax to the pipe. After application of the wax, the pipe is given a rigorous hand buffing to remove excess wax and to raise the shine.
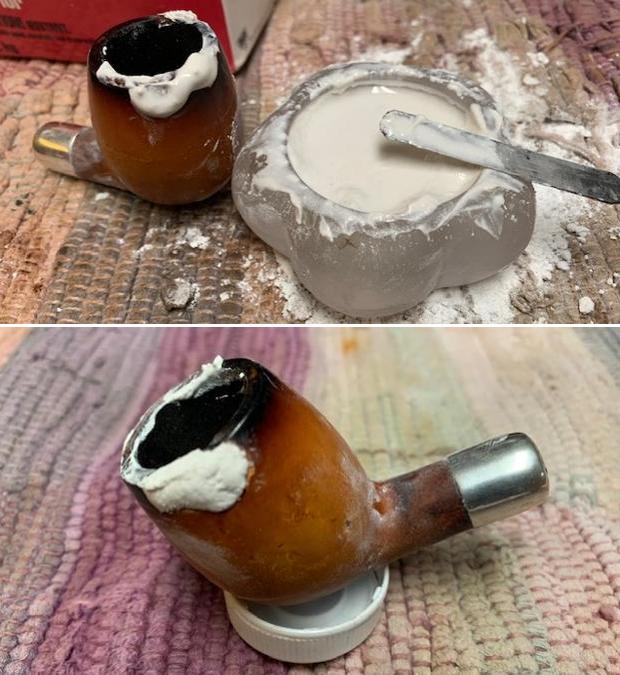
Earlier, after inspecting the chamber after the cake had been cleared, I observed that there were minor heating veins in the chamber wall. This is not a problem, but I decided to provide the chamber a coating of activated charcoal and yogurt to provide a starter for the development of a cake to protect the briar. The width of a healthy cake layer should be maintained at about the width of a dime. Applying the charcoal/yogurt mixture also provides a nice cosmetic upgrade in consideration of the pipe’s destiny as a gift for Lina. The yogurt is regular, non-flavored with whole milk – my wife’s yogurt 😊. A small amount of yogurt is placed in a plastic container.  Charcoal powder is then added to the yogurt and mixed with the pipe nail tool. Charcoal is added gradually until it is thick enough not to drip off the tool – it hangs together. You do not want a runny mixture in the chamber.
 A pipe cleaner is inserted through the draft hole to block any of the mixture from clogging the airway.
 Next, I use the pipe nail carefully to trowel the mixture into the chamber, starting at the floor, and spreading the mixture over the chamber surface. When I get to the top, I can easily remove any stray mixture on the rim and leave a smart, dapper line at the foot of the bevel. It looks good. The stummel is left in an upright position to allow the cake starter to cure through the night. One word to the new steward – do not scrape the chamber with a metal tool after putting it into service for the first several times. Instead, using a folded pipe cleaner ‘brush’ the chamber to clear excess ash.
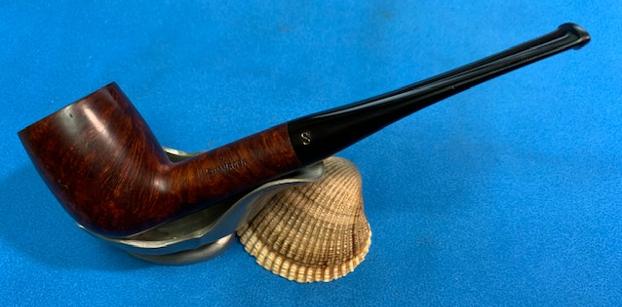
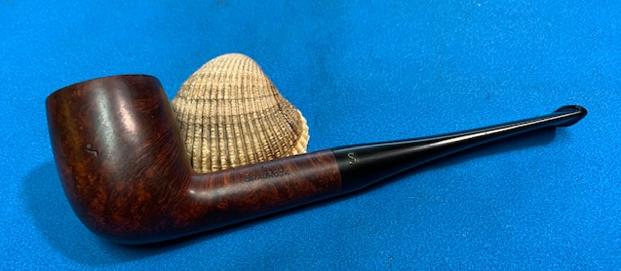
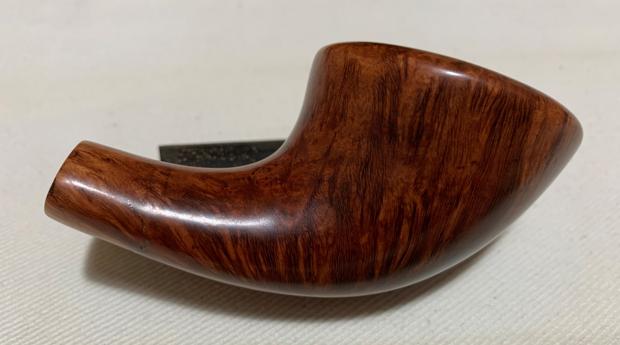
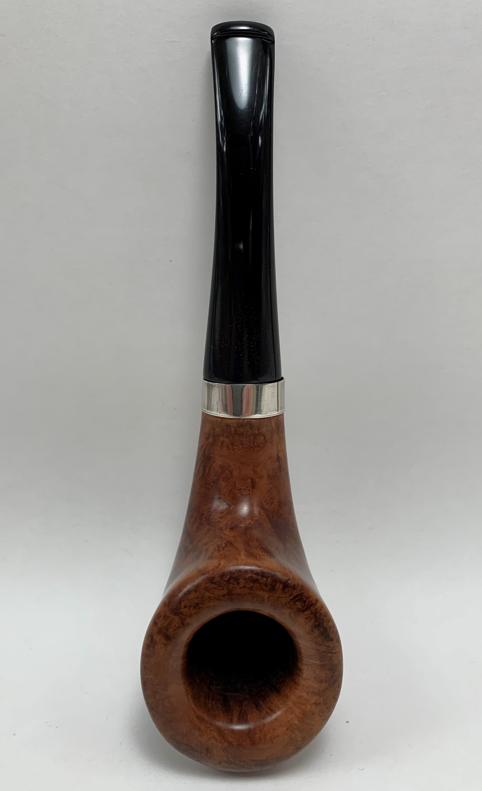
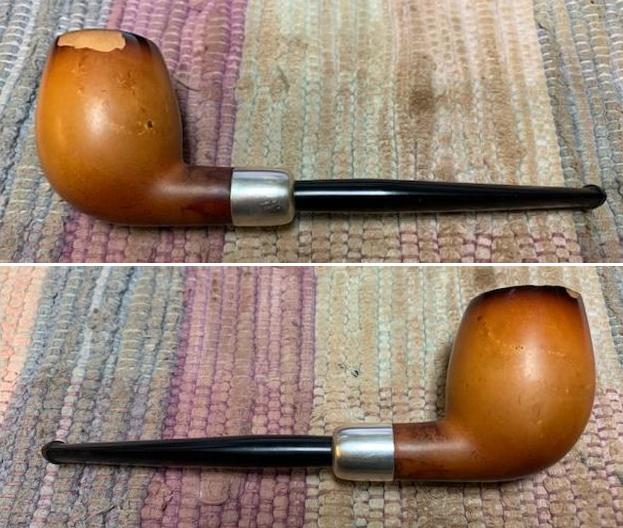
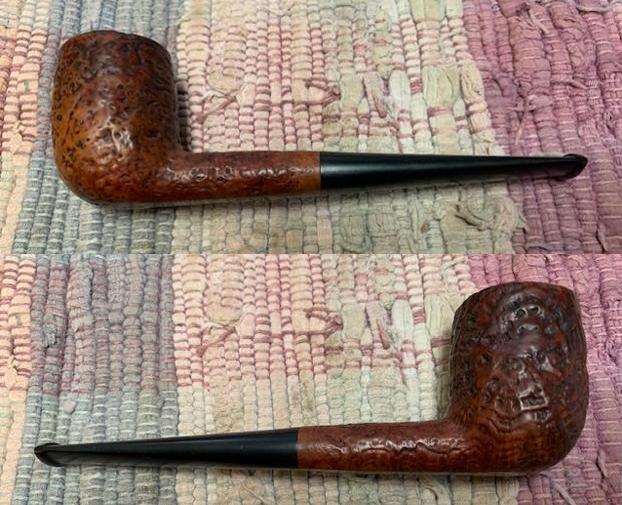
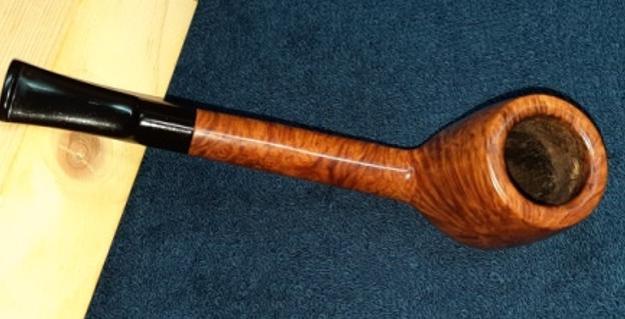
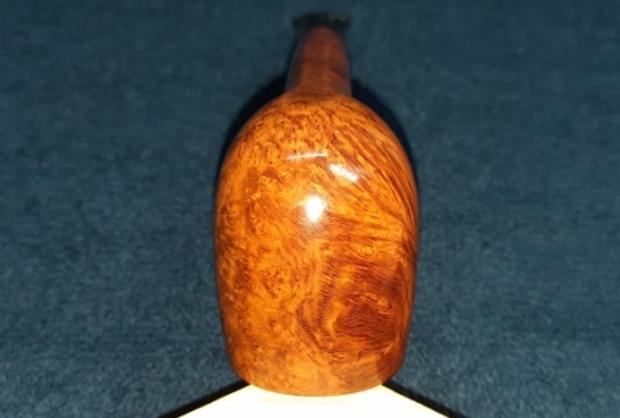
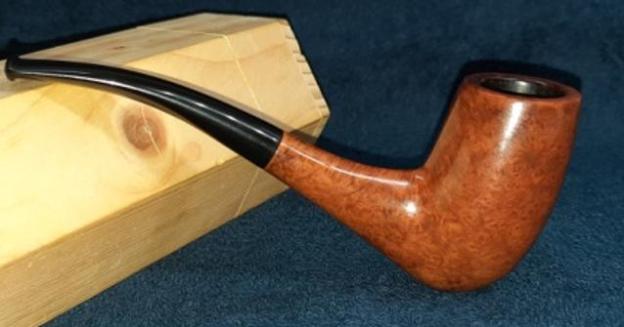
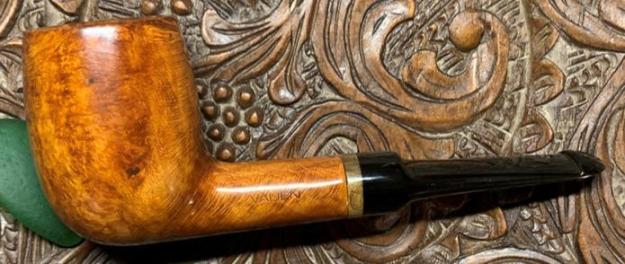
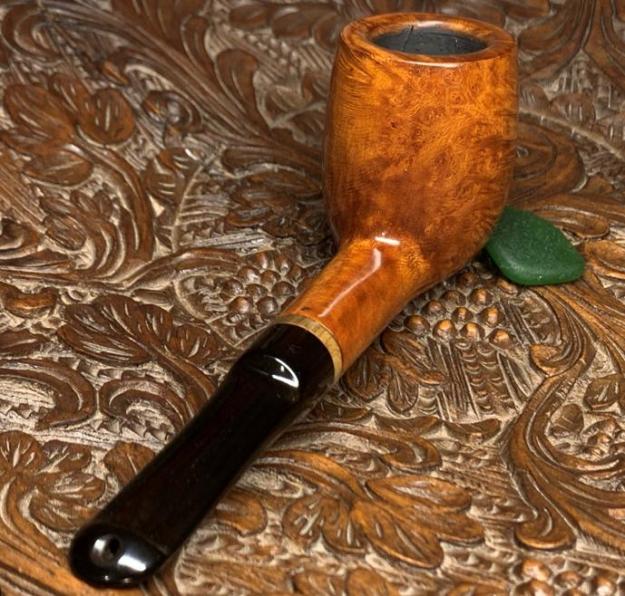
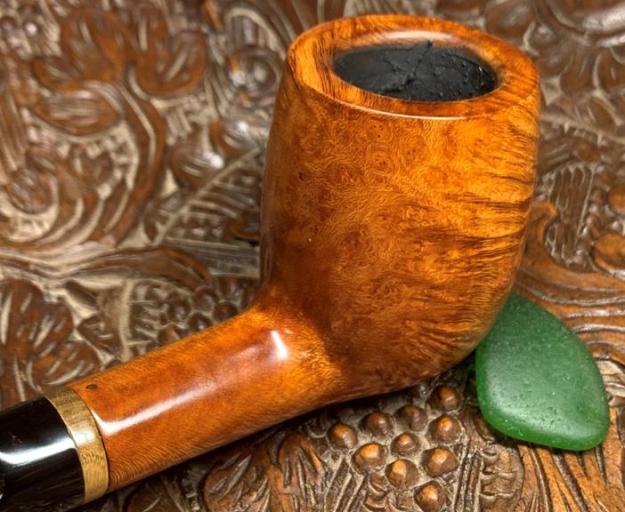
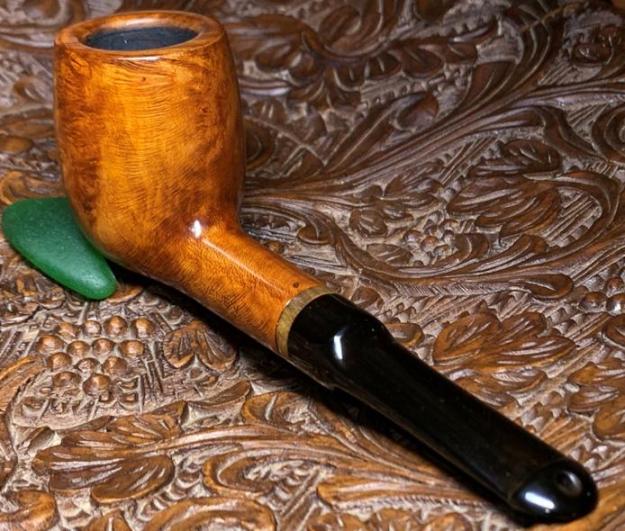
 The next morning, the pipe is given another rigorous hand buffing with a microfiber cloth. The quality and craftsmanship of this German made VAUEN 6294 P-lip Saddle Billiard is remarkable. I am pleased with the amazing resurrection of the grain presentation. Expressive and lively lateral grain flank the sides of the bowl which result in the expected showcase of bird’s eye grain swirls on the fore and aft briar canvas. The stylish ring of wood, very characteristic of the ‘VAUEN’ style, provides an attractive transition from the colossal, handful of a bowl to the classic P-lip Saddle stem. Since Darren commissioned this pipe as a special gift for a special daughter, he has the first opportunity to claim the VAUEN from The Pipe Steward Store benefiting the Daughters of Bulgaria – helping women and girls who have been trafficked and sexually exploited. Thanks for joining me! So that we don’t forget how far we have come:
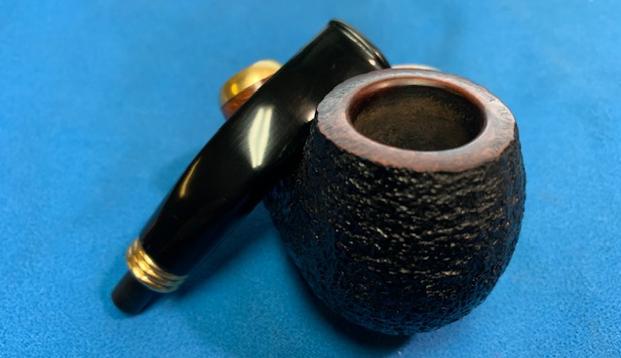
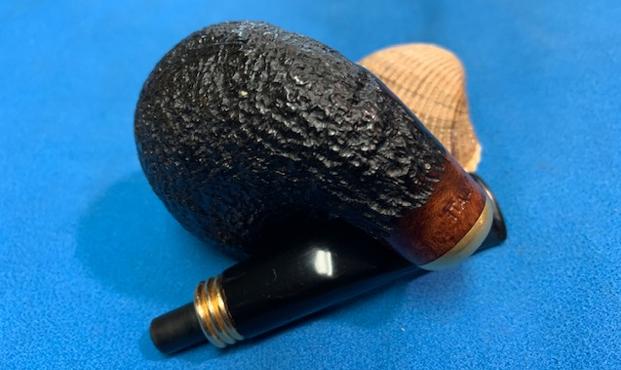
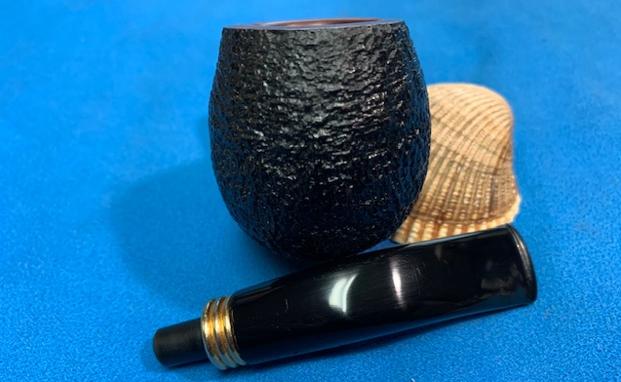
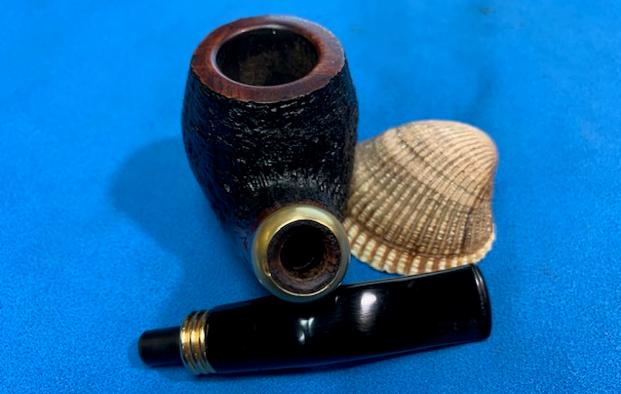
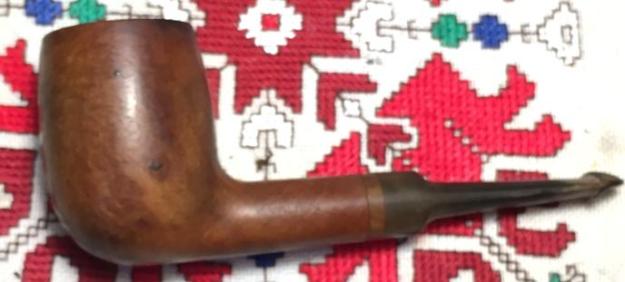

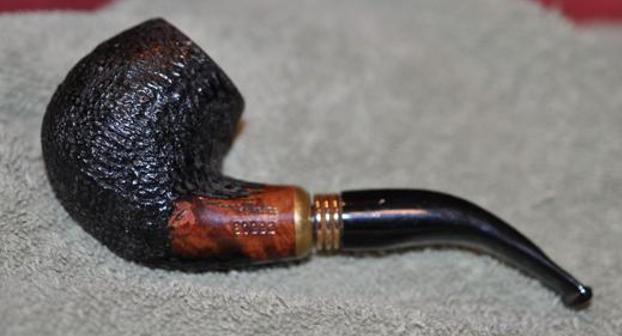
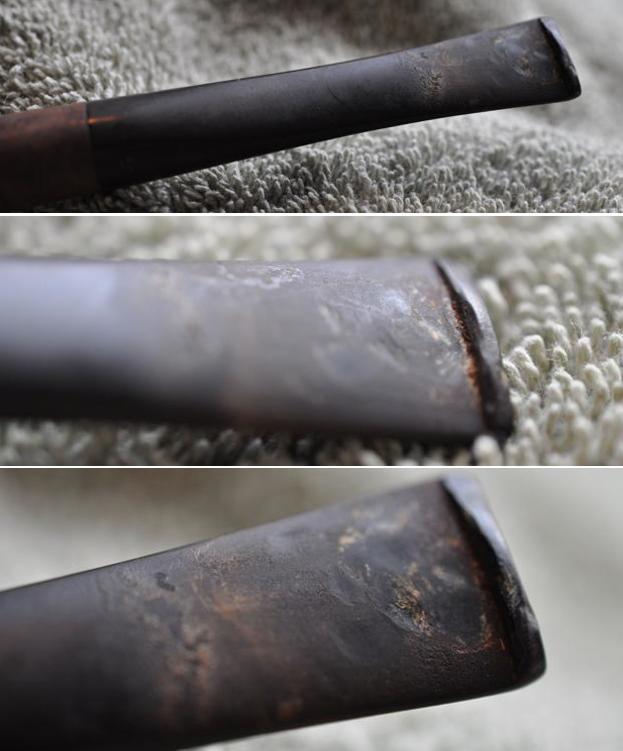
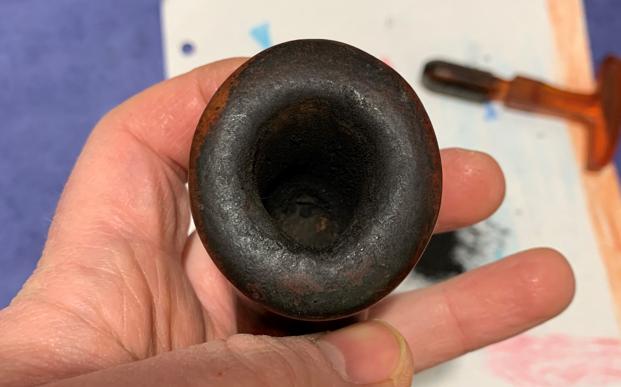
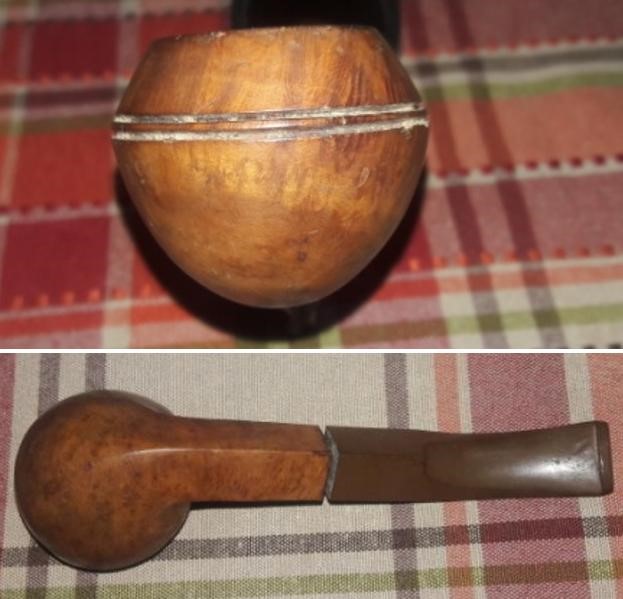
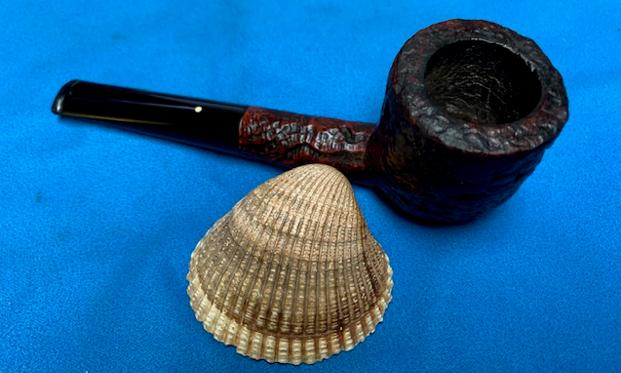
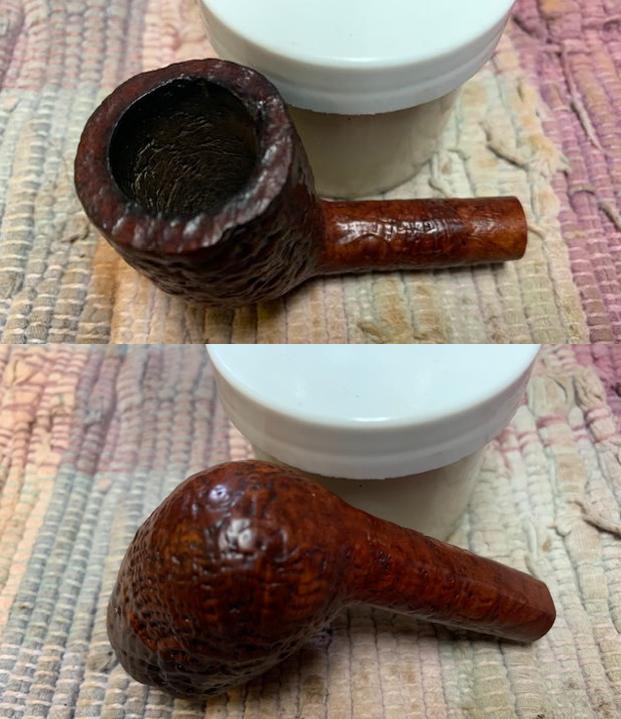
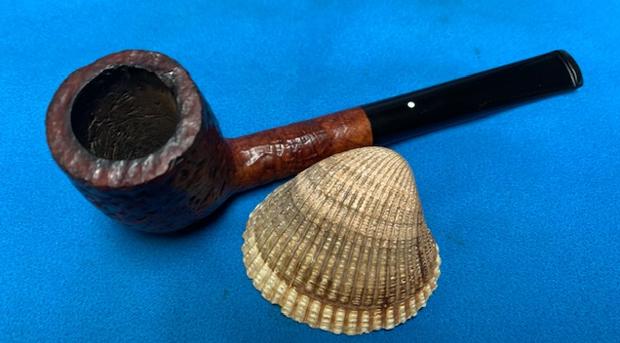
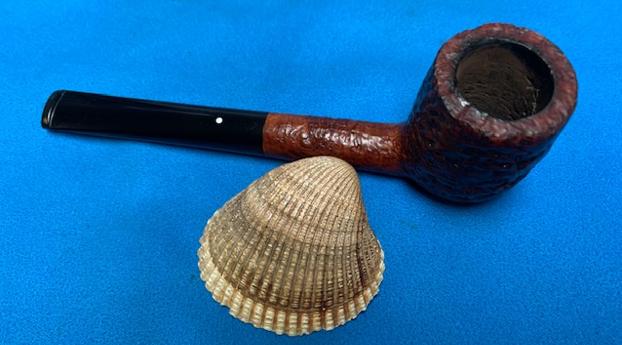
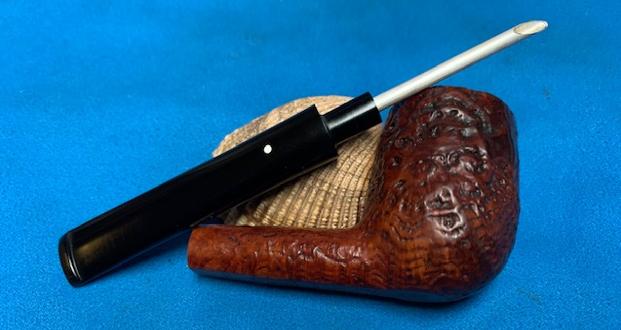
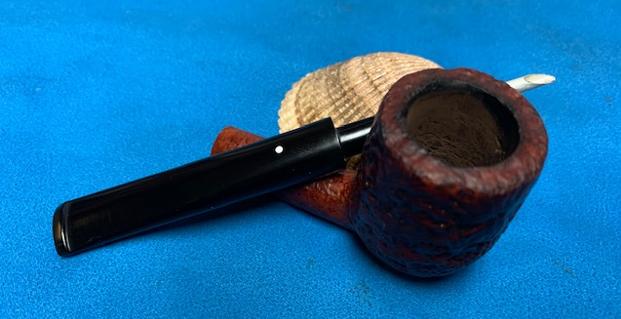
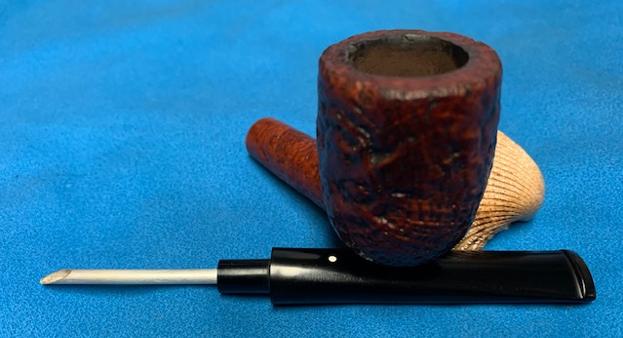
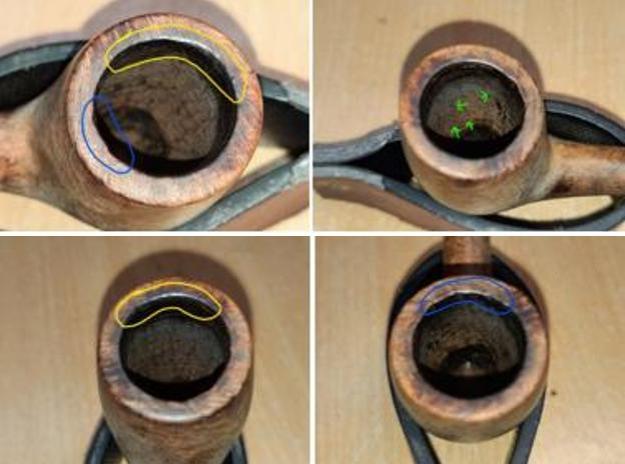
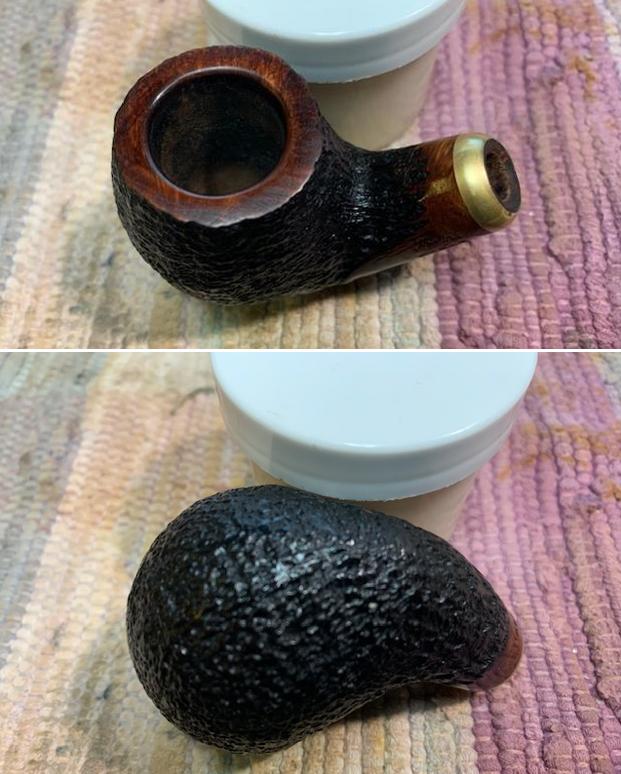
 He took photos of the rim top and bowl to give a clear picture of the thickness of the cake and the lava and dust ground into the finish of the rim top and edges. There is dust and debris stuck to the walls of the bowl clearly visible in the photos. You can also see the damage on the inner edge of the bowl on the front. He also took photos of the top and underside of the stem to show the oxidation, chatter and tooth marks.
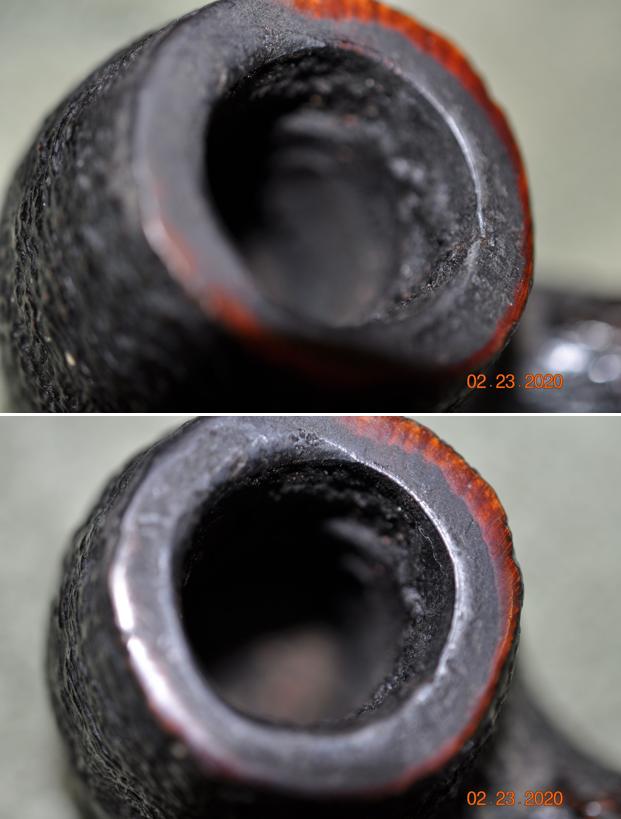
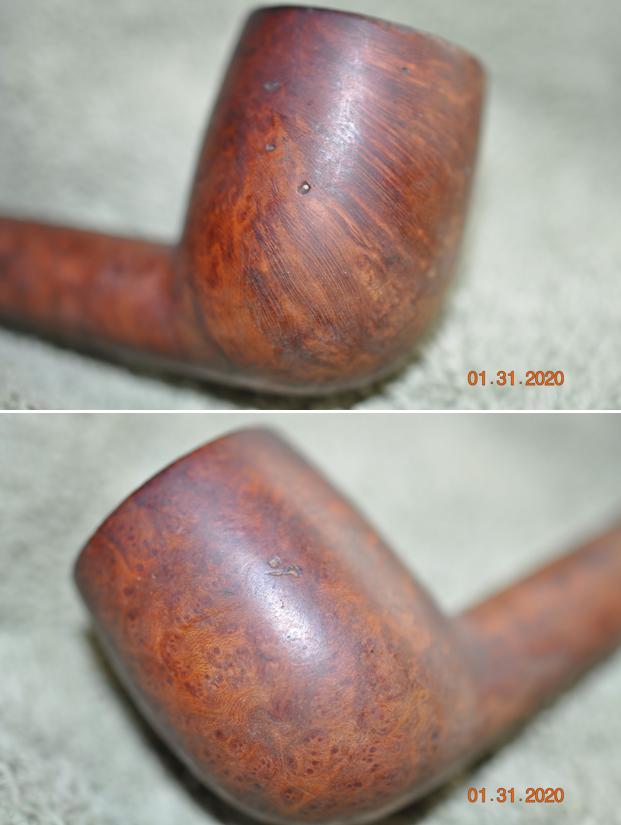
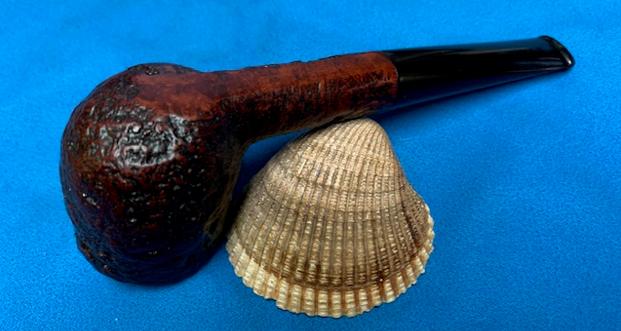
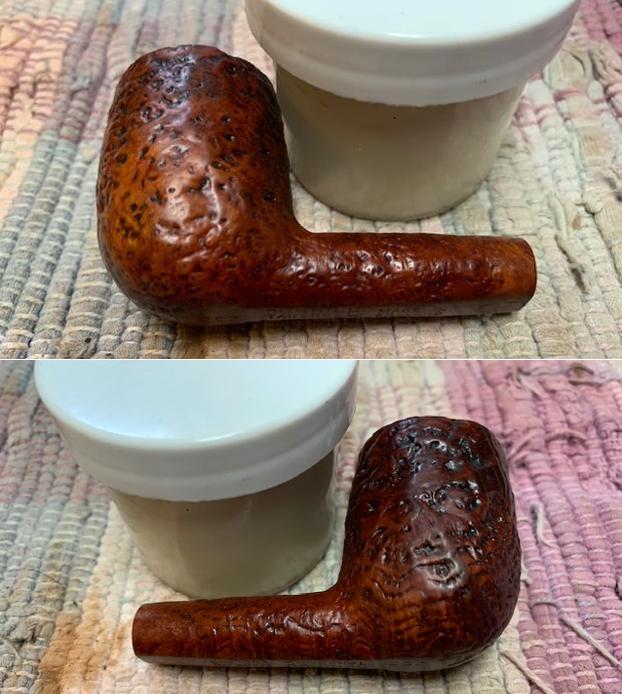
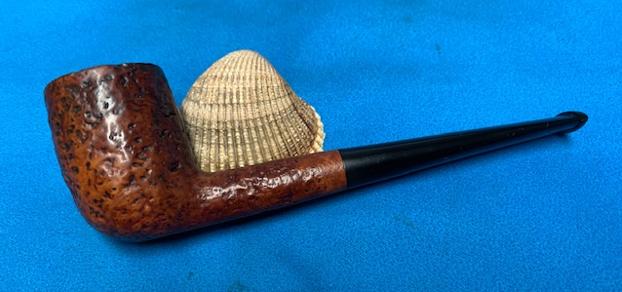
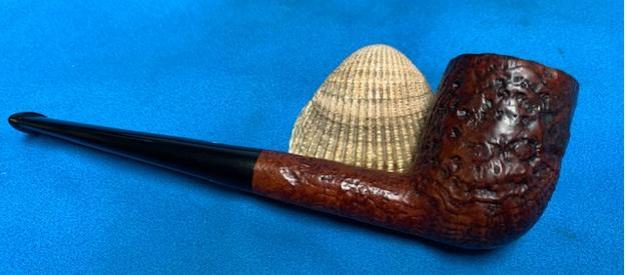
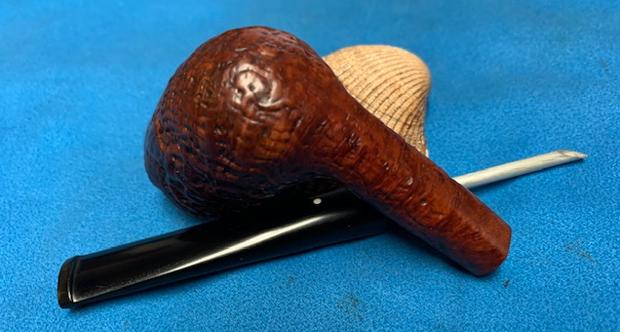
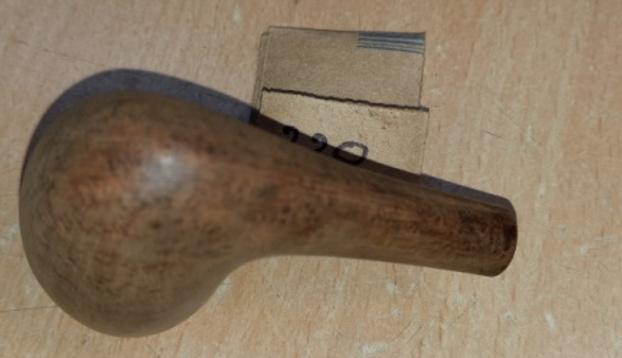
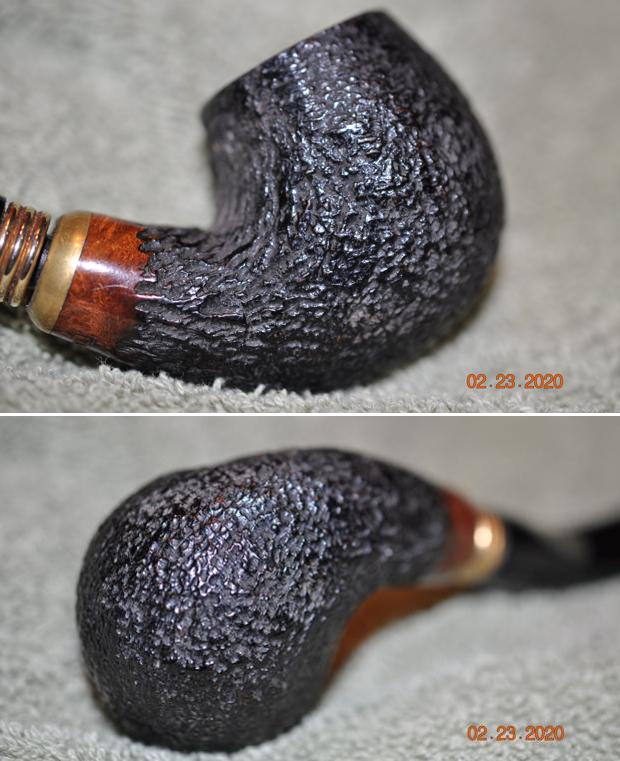
 Jeff took photos of the sides and heel of the bowl to give a picture of what the briar around the pipe looked like. There is an interesting rustication under the grime and thick debris.
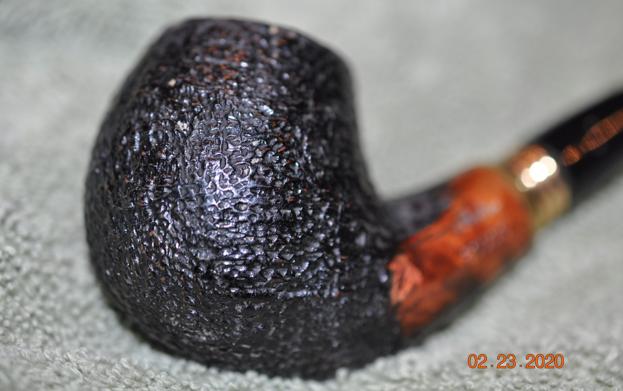
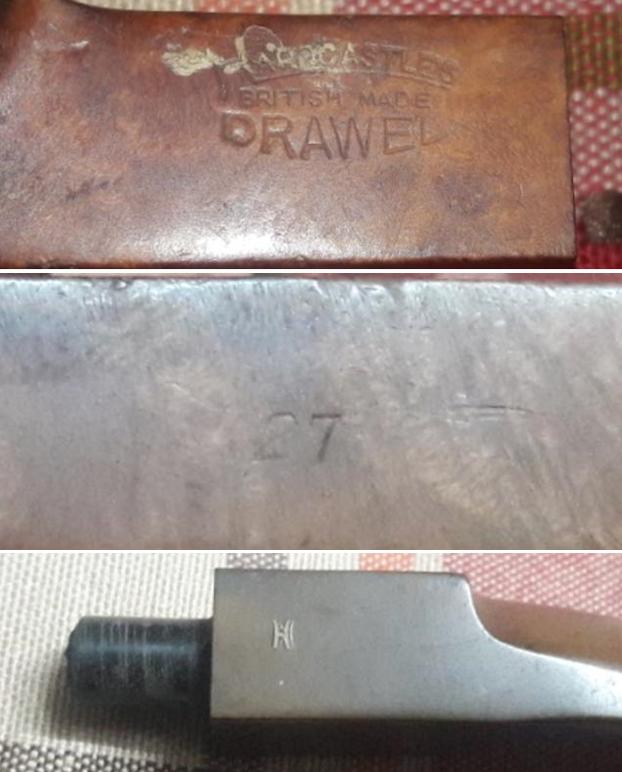
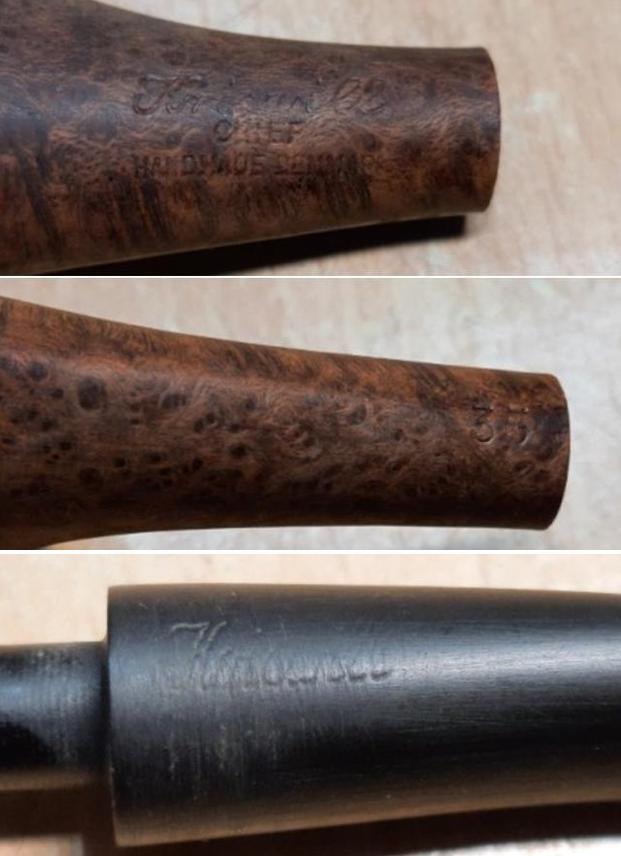
 Jeff took photos of the stamping on the left and underside of the shank. It clearly reads as noted above.
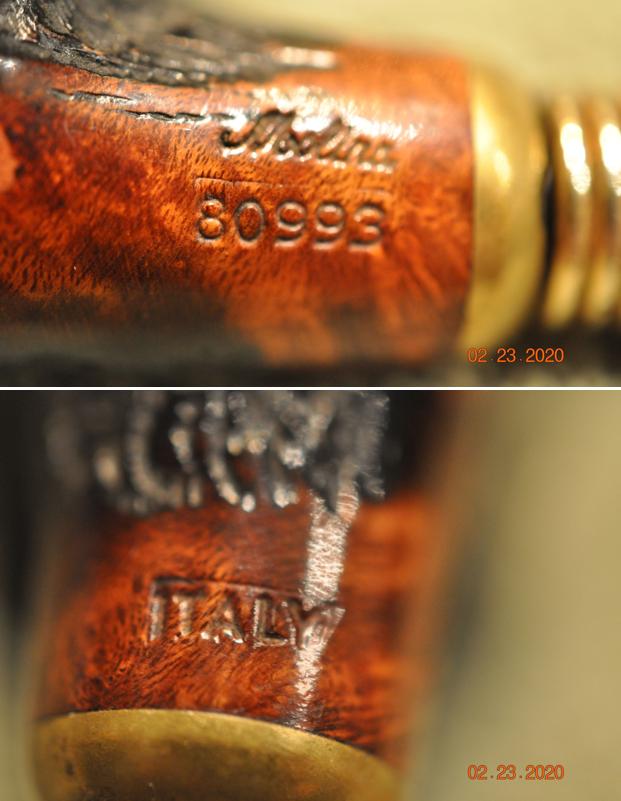 I turned first to Pipephil’s site to get a quick summary of the background of the Molina pipe. (http://pipephil.eu/logos/en/logo-m6.html). I have included a screen capture of the pertinent section on the site.
 In the sidebar it included the following information that I have included below.
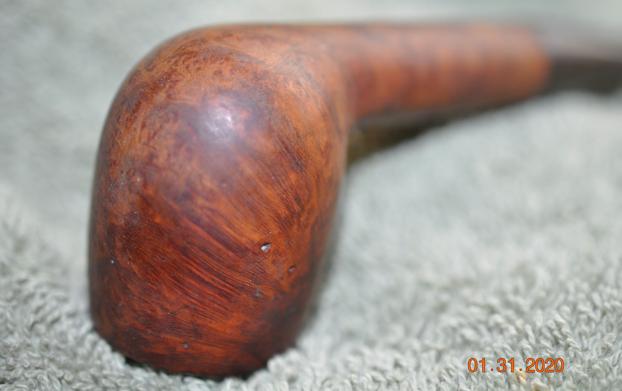
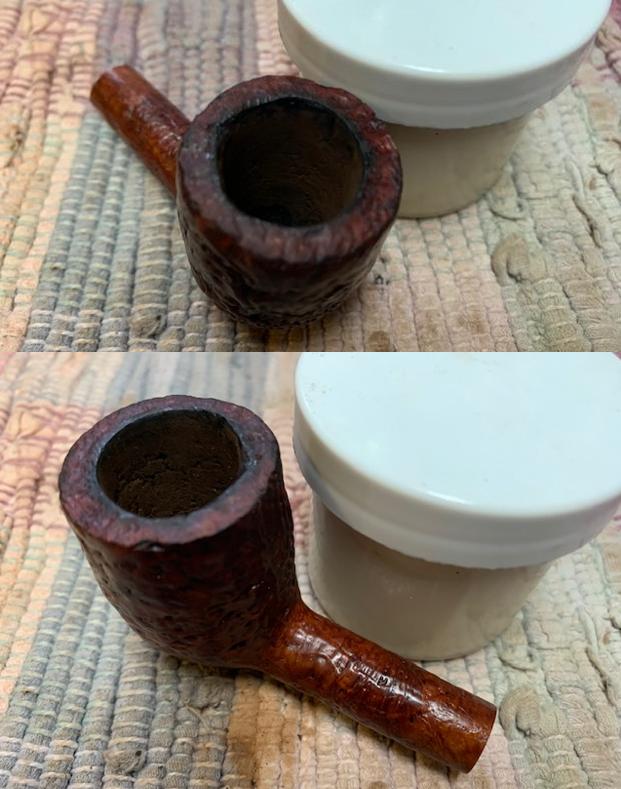
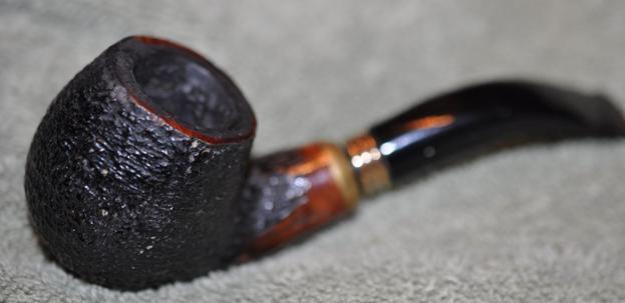
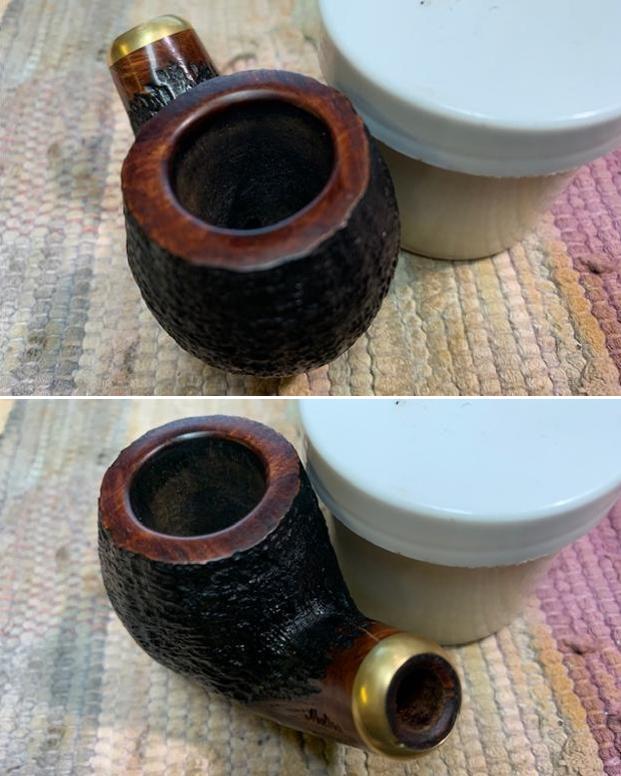
 The rim top and the inner edge had serious burn damage all around but the heaviest damage was on the front of the bowl. It really looked to be the victim of repeated assault by a torch lighter. If you have one keep it away from your pipe. The stem had a few tooth marks and chatter on both sides near the button.
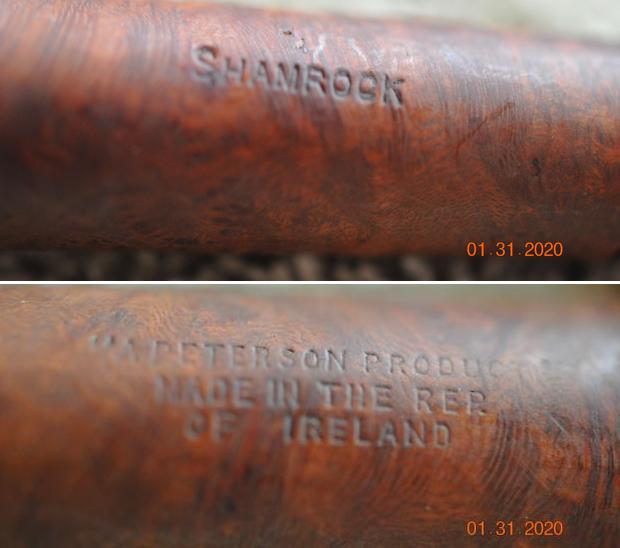
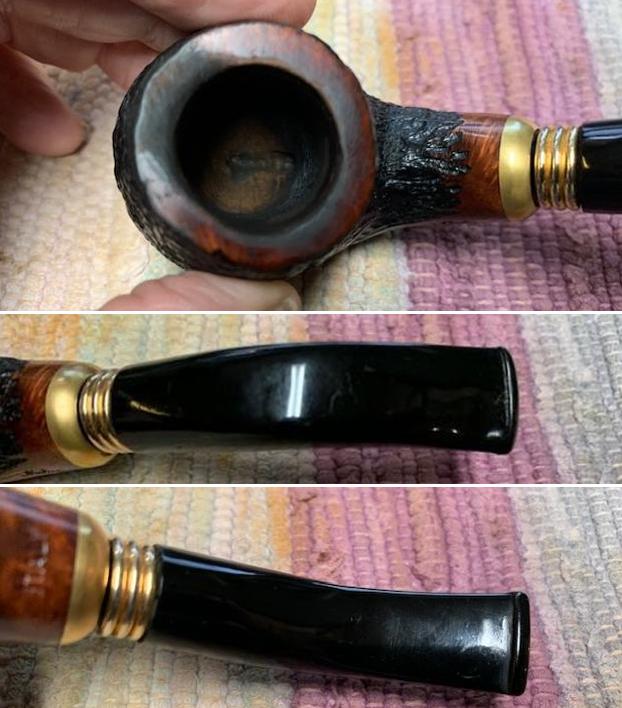 I took photos of the stamping on the sides of the shank. It was clear and read as noted above.
  I removed the stem and took a photo of the pipe to give a sense of the whole. The tenon is Delrin.
 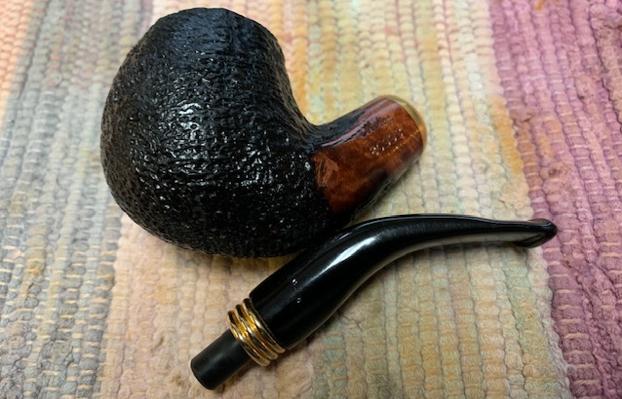 I decided to start my work on this pipe by addressing the damage to the rim top and inner edge of the bowl. I topped the bowl on a board with 180 grit sandpaper. I chose a lower grit sandpaper because the damage was quite deep. Once I had topped the damaged areas and found solid briar I used a folded piece of 220 grit sandpaper to reshape and rework the inner edge of the rim. It took a bit of work but the rim top looked much better.
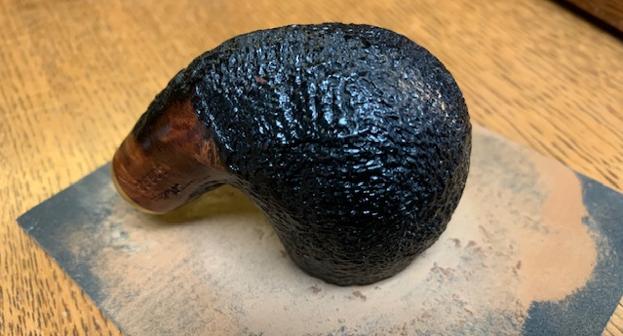
 I polished the rim top and edge with micromesh sanding pads – wet sanding with 1500-12000 grit pads to remove the scratching and polish the smooth briar.
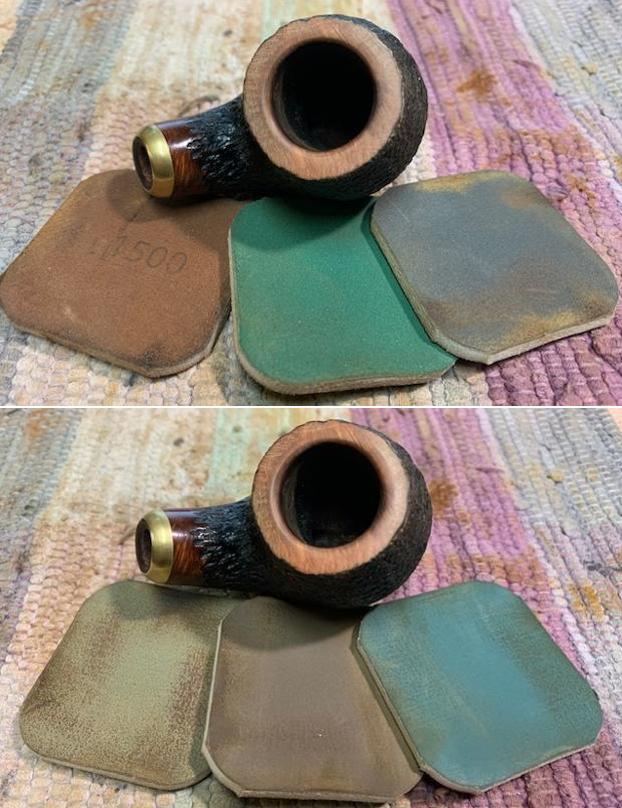
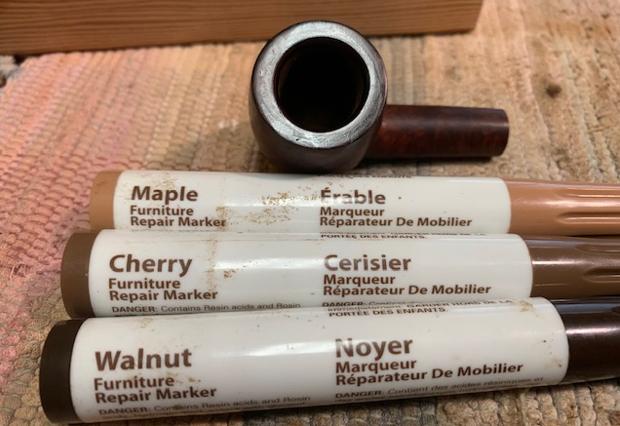
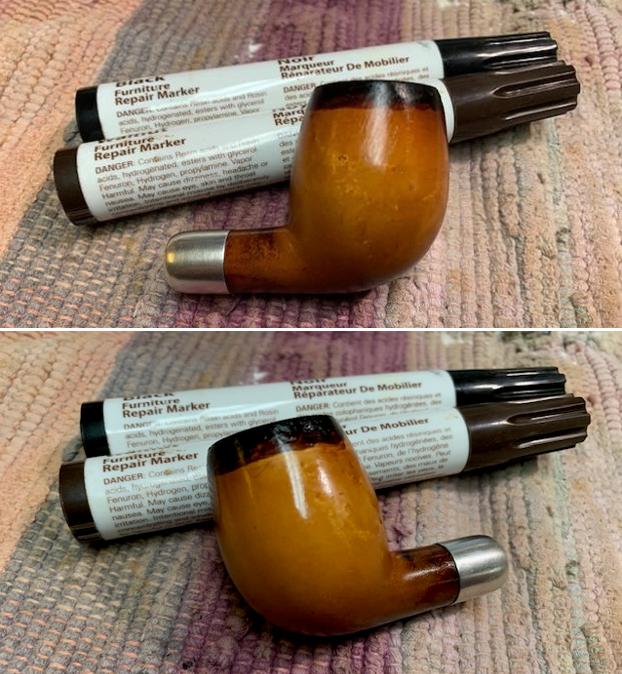
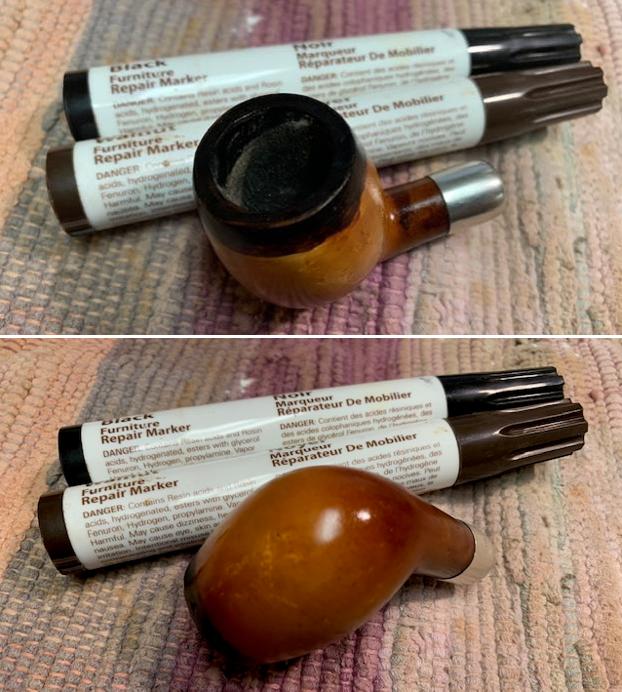
 I restained the rim top and edges with a Walnut stain pen to match the other smooth portions of the bowl and shank.
 I rubbed the bowl and shank down with Before & After Restoration Balm. I worked it into the surface of the bowl sides and shank with my fingertips and a horsehair shoe brush to get into the nooks and crannies of the rustication. The product works to clean, enliven and protect the briar. I let the balm sit for 15 minutes and then buffed with a cotton cloth to raise the shine.
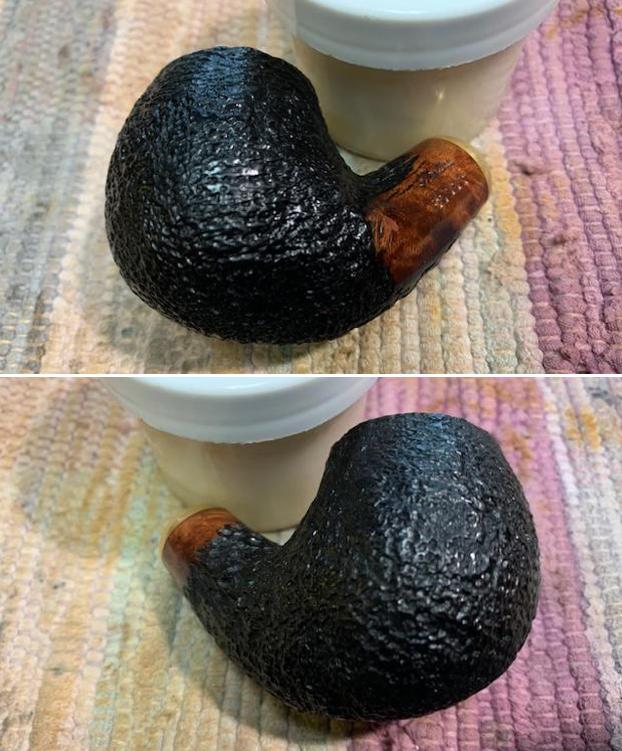
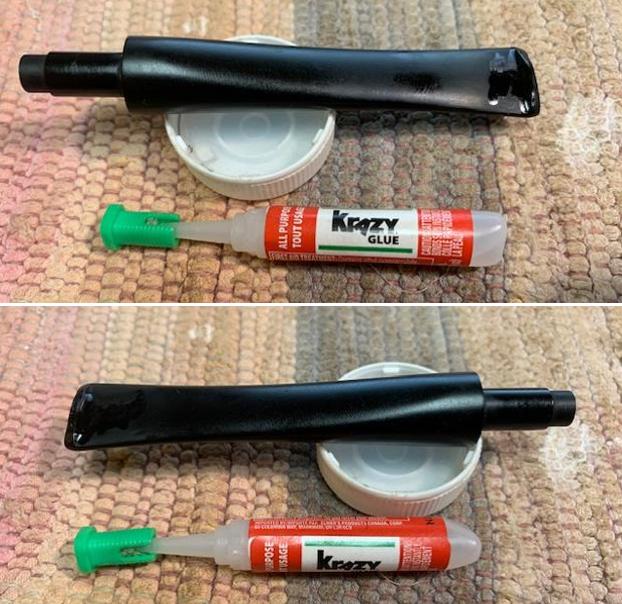
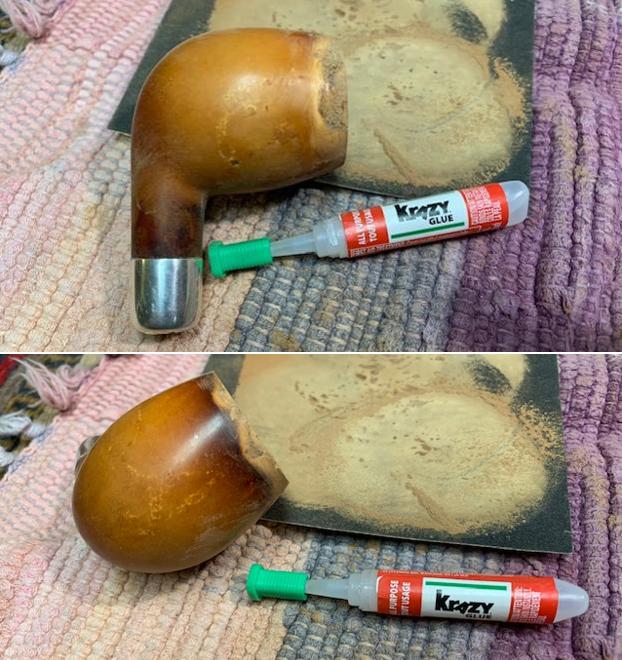
 I set the bowl aside and turned my attention to the stem. I filled in the deep tooth marks on both sides with clear CA glue. Once the repair cured I sanded them smooth with 220 grit sandpaper and started polishing the stem with 400 grit wet dry sandpaper.
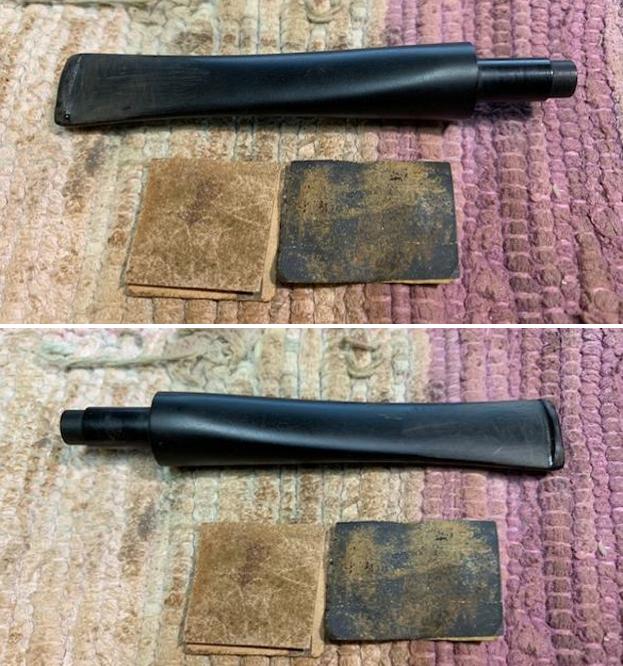
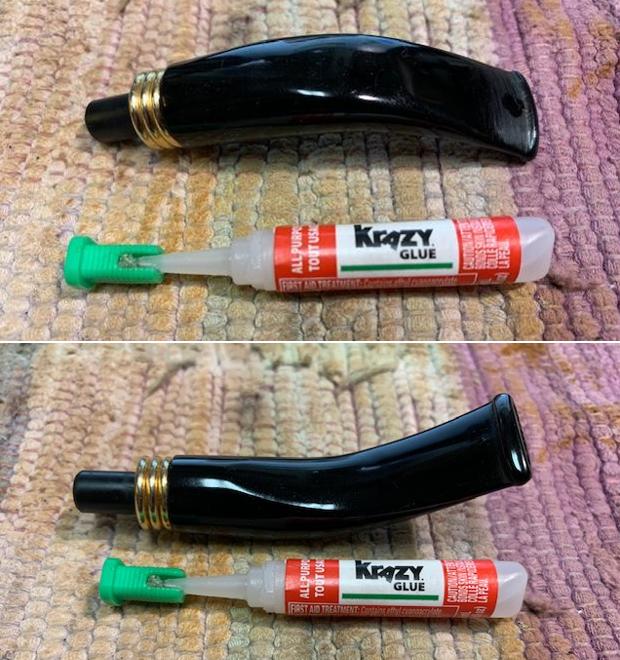
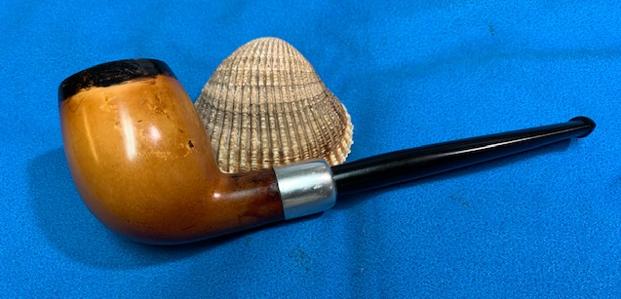
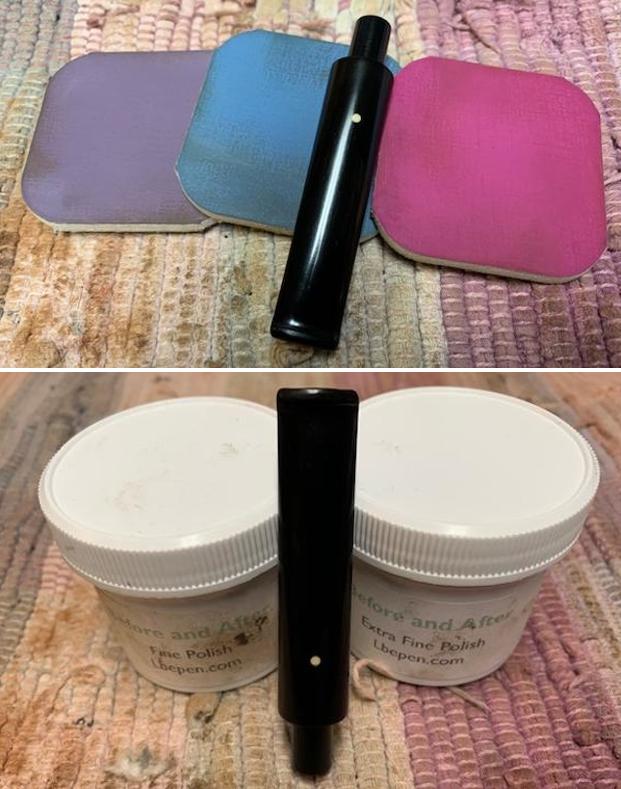
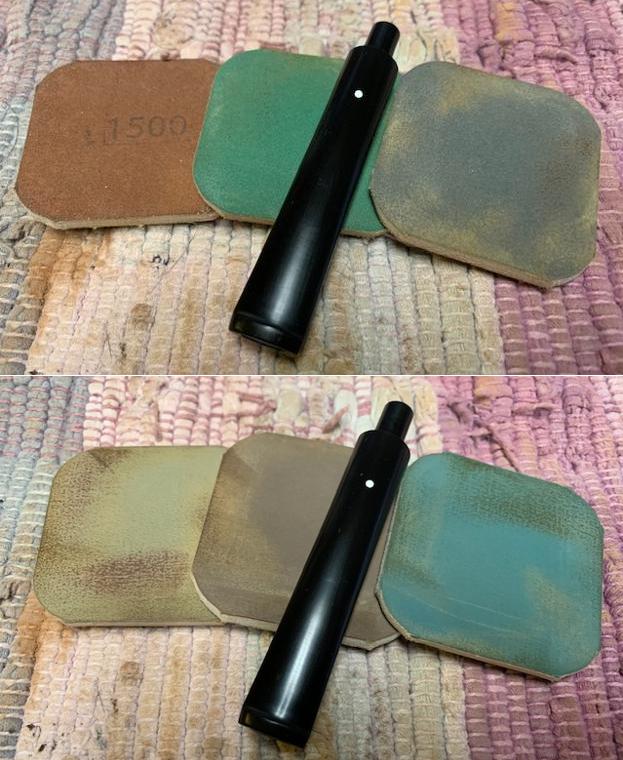
 I polished the stem with micromesh sanding pads – wet sanding with 1500-12000 grit pads. I wiped it down with a damp cloth after each sanding pad. I used Before & After Pipe Polish – both Fine and Extra Fine to further polish the stem.
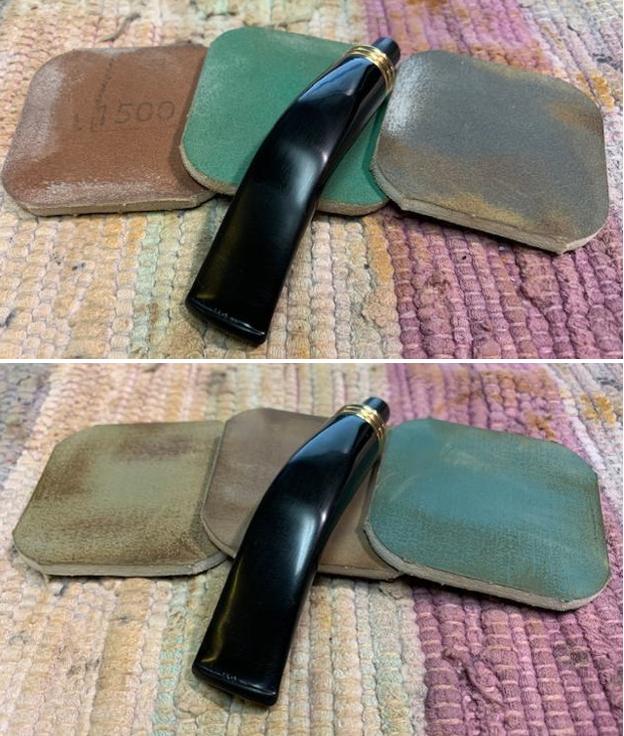
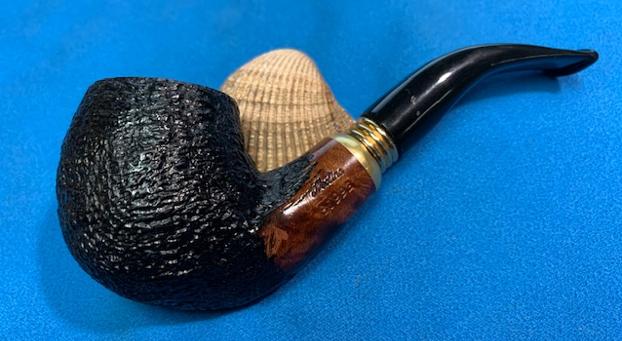
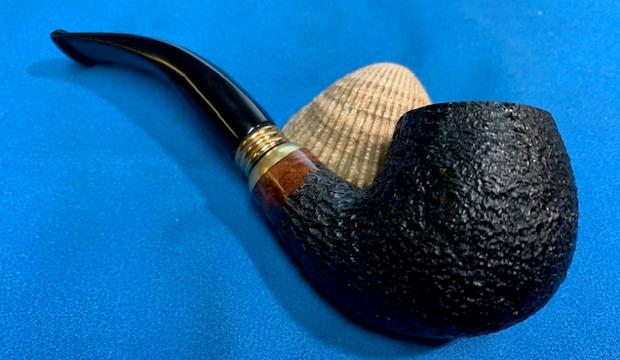
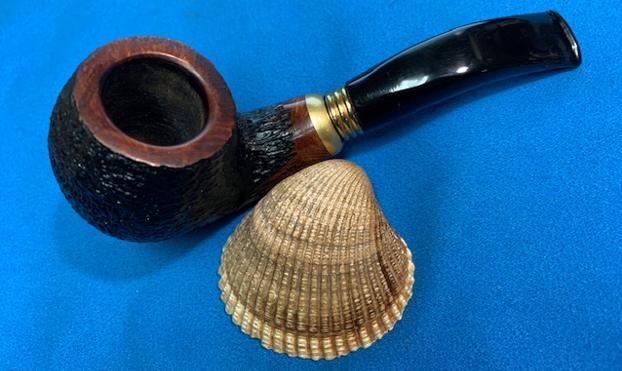
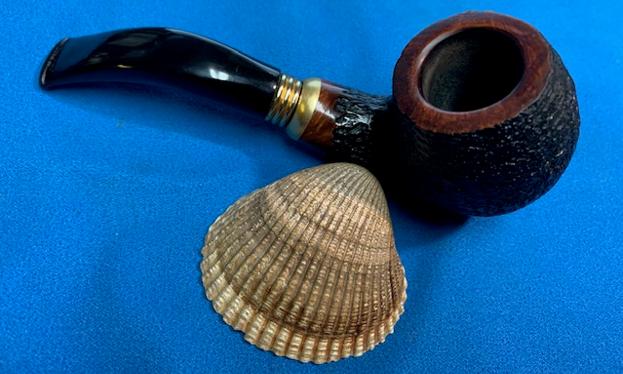
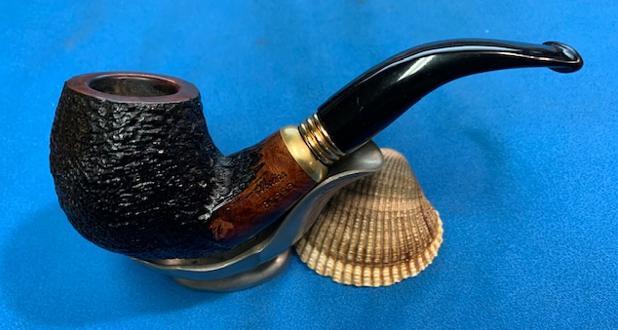
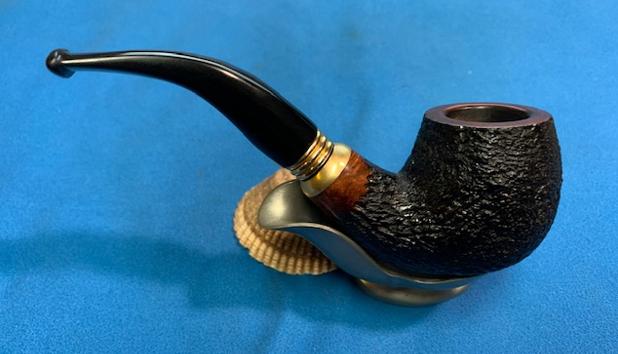
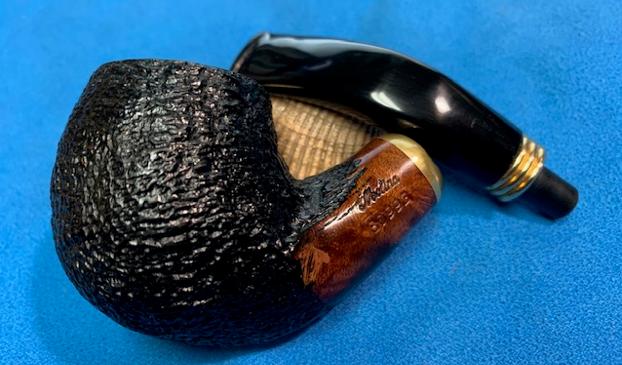
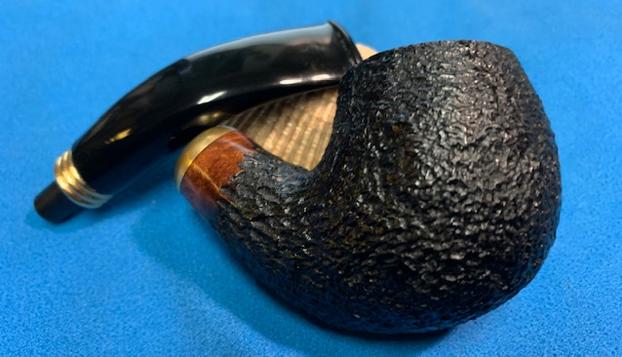
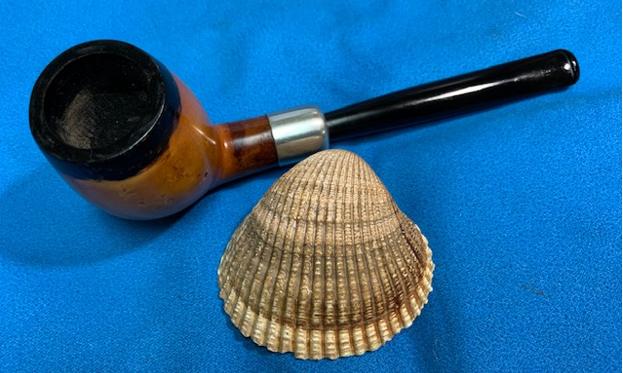
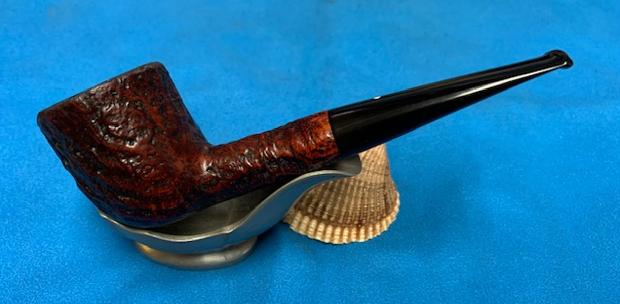
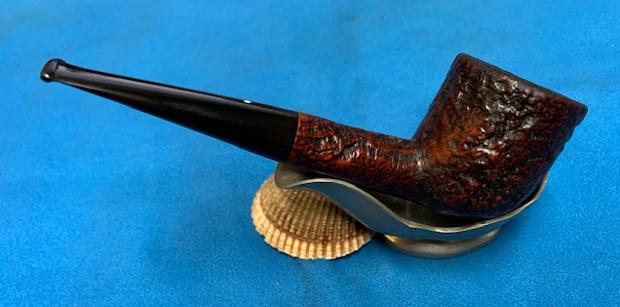
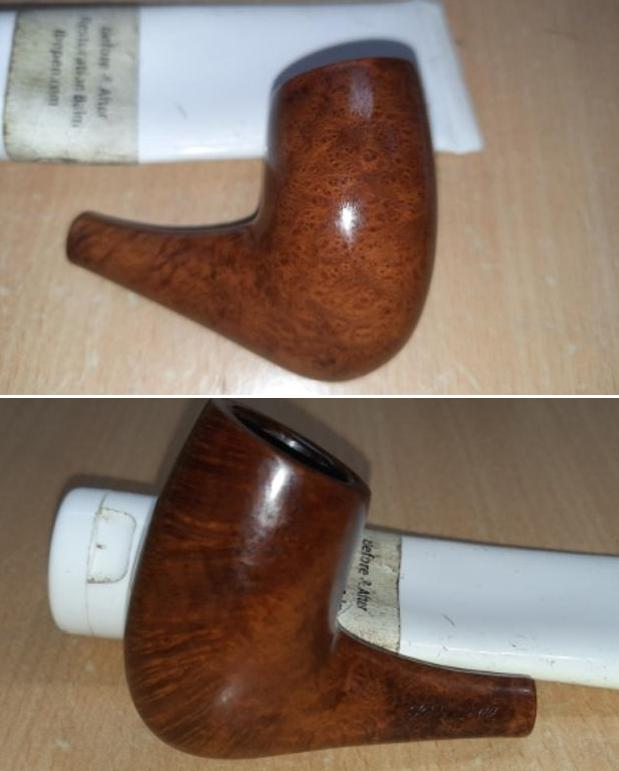
 This beautiful Rusticated Molina 80993 Bent Apple with a taper acrylic stem is a great looking pipe now that it has been restored. I put the stem back on the bowl and carefully buffed the pipe with Blue Diamond on the buffing wheel using a light touch on the briar. I gave the bowl multiple coats of Conservator’s Wax and the stem multiple coats of carnauba wax on the buffing wheel and followed that by buffing the entire pipe with a clean buffing pad. I hand buffed the pipe with a microfiber cloth to deepen the shine. The finished Molina Bent Apple fits nicely in the hand and the tactile finish feels great. Give the finished pipe a look in the photos below. The dimensions of the pipe are Length: 5 inches, Height: 1 ¾ inches, Outside diameter of the bowl: 1 ¼ inches, Chamber diameter: ¾ of an inch. The weight of the pipe is 57grams/2.01oz. I will be adding it to the rebornpipes store shortly in the Italian Pipe Makers Section. Thanks for reading this blog and my reflections on the pipe while I worked on it. There are many more to come!