Blog by Steve Laug
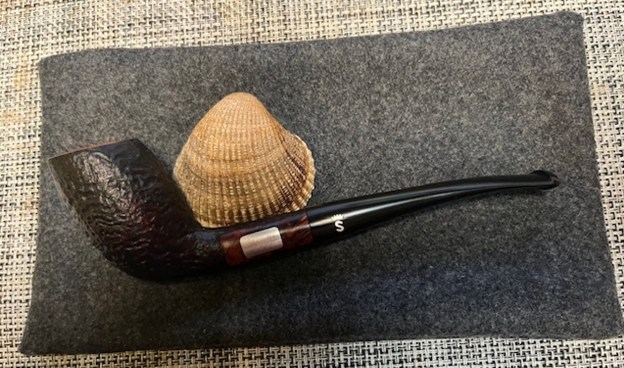
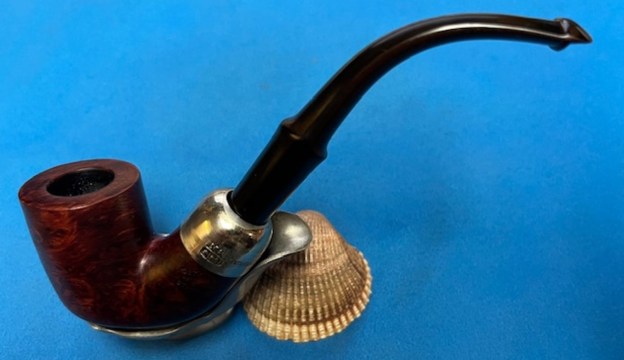
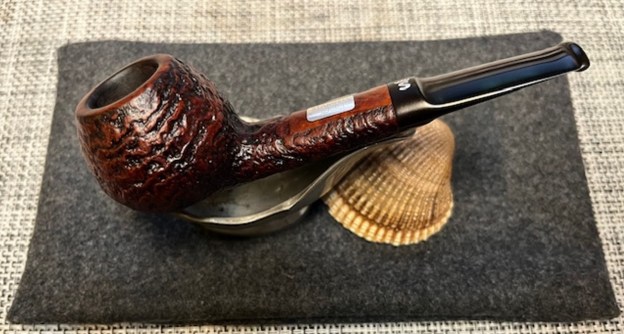
The next pipe I am working on was purchased on 12/13/2022 as part of a group of pipes from a fellow in Copenhagen, Denmark. This was a dirty pipe with a lot of wear and tear and obviously it had been someone’s favourite smoker. The pipe has an identifying plate on the topside of the shank that reads Stanwell [over] 1988. There was no other stamping on the shank and the silver plate confirmed for me that it was a Stanwell Pipe of the Year. The dirty sandblast finish was not able to hide the beauty in the grime. There were tars and oils ground into the surface of the briar. The bowl had a thick cake that flowed over the top of the smooth rim in a thick coat of a lava and it was hard to assess the condition of the inner edge. The stem was a black vulcanite saddle stem with a silver Crown S on the topside of the saddle. It had some tooth marks and chatter on both sides ahead of the button. I had a lot of oxidation and calcification on both sides of the stem. It had a lot of potential. Jeff took photos of the pipes before he started his clean up work.  Jeff took photos of the rim and bowl to show the moderate cake and spotty lava coat covering the rim top. It really was a dirty pipe but still a beauty. He also took photos of the stem surfaces to show its overall condition when it arrived.
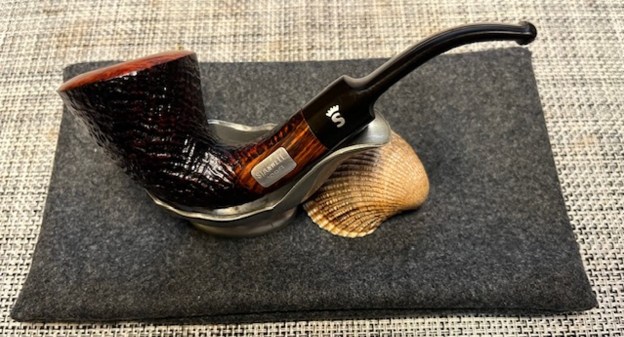
 The photos of the sides and heel of the bowls show beautiful grain around the bowl and shank sides. The sandblast is nicely done and highlights the grain. The brown stain on the briar adds depth finish on the pipe and makes the grain really stand out on the smooth parts. It shows some promise.
 He also took a photo of the stamped silver plate on the topside of the shank. It reads as noted above.
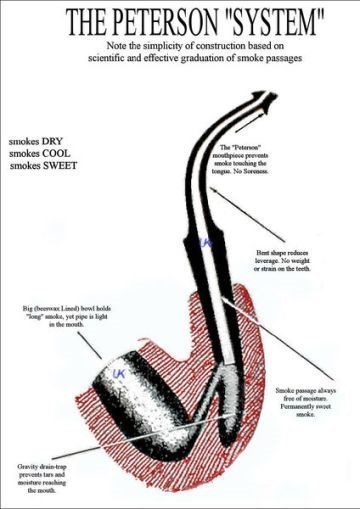
  I turned to the internet to find out information about the Stanwell Pipe of the Year. I came across this interesting article and shape chart on the Blue Room Briars site where they listed a collection of the POYs (https://www.blueroombriars.com/blogs/news/the-stanwell-pipe-of-the-year-collection). I have included the shape chart and part of the article below for the information that it contains.…
 …Recently, Blue Room Briars acquired a complete Stanwell Pipe of the Year (POY) collection spanning from 1980 – 2017. Looking at these pipes in detail reveals some interesting insights into Stanwell’s production, although it should be noted that these findings are not the final say on when a particular pipe was made, but we hope you can use it as a guide when trying to determine the era of manufacture for Stanwell pipes made after 1980.
The first pipe of note is the 1980 POY. This pipe does not come with the engraved silver plaquette. The pipe also sports a traditional vulcanite mouthpiece.
Between 1981 and 1998, the Stanwell pipes from the POY collection have the addition of silver plaquettes denoting the year, a traditional vulcanite mouthpiece, and also have a Teflon lined mortise. This is an interesting feature that creates a very stable connection between the mortise and tenon, as well as allowing the mortise to be swabbed out easily for maintenance. It wouldn’t be unwarranted to believe that other Stanwell pipes with a Teflon sleeved mortise were probably made between the 1980s to late 1990s. This additional, and costly, feature demonstrates Stanwell’s commitment to quality manufacturing even into the last portion of the 20th century.
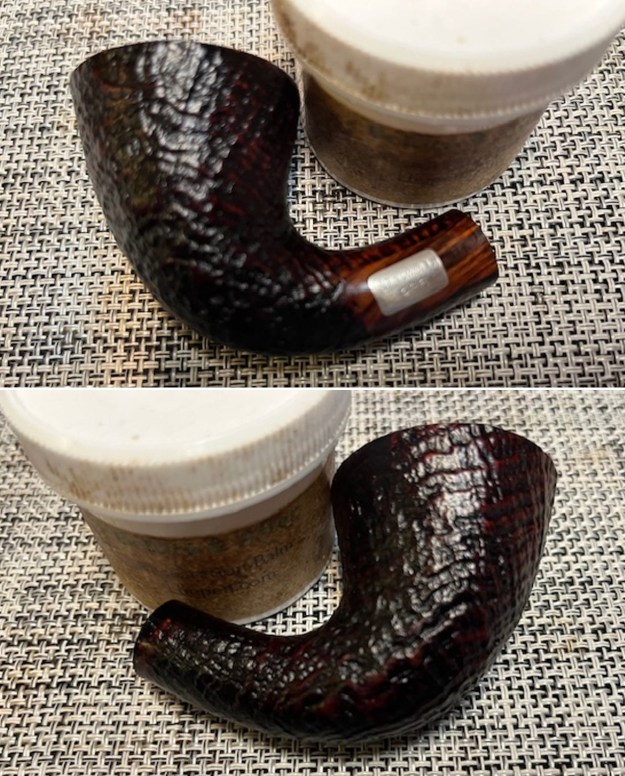
Jeff cleaned up the pipe for me. He reamed the bowl with a PipNet pipe reamer and cleaned it up with a Savinelli Fitsall Pipe Knife. He scrubbed the exterior with Murphy’s Oil Soap and a tooth brush to clean off the grime off the finish and the overflow of lava on the rim top. The cleaning had removed the grime on the rim top. He cleaned up the internals of the shank, mortise and stem with pipe cleaners, cotton swabs and alcohol to remove all of the oils and tars in the pipe. He soaked the stem in Briarvilles Pipe Stem Deoxidizer and was able to remove much of the oxidation, calcification. When it arrived here in Vancouver it was a clean pipe and I knew what I had to work with. I took photos of it before I started my part of the restoration. 
 I took a photo of the rim top and the stem to show their condition once it arrived in Canada. Jeff was able to clean up the cake and the lava overflow that was shown in the rim and bowl photos above. The rim top looked very good but there seemed to be light damage and darkening to the top and inner edge of the bowl. The stem looked better, though there were light tooth marks and chatter on both sides near the button.
  I took a photo of the stamping on the silver plate on the left side of the shank to show that it was readable and undamaged by the cleanup work. I removed the stem from the shank and took a photo of the parts to give a sense of what the pipe looks like.
  I started my work on the inner edge and rim top with a folded piece of 220 grit sandpaper. I was able to remove the damage and the darkening. It looked much better.
 I started polishing the smooth rim top with micromesh sanding pads. I dry sanded it with 1500-12000 grit pads. I wiped the bowl down after each pad with a damp cloth. The smooth rim top began to take on a rich shine and grain was beginning to stand out. I sanded with all of the pads and wiped the bowl down after each pad with a soft cloth.
 I rubbed the bowl and shank down with Before & After Restoration Balm to deep clean the finish on the bowl and shank. The product works to clean, enliven and protect the briar. I worked it in with my fingers to get it into the briar. I used a horsehair shoe brush to work it into the sand blast. I let it sit for 10 minutes then I wiped it off and buffed it with a soft cloth. The briar really began to have a rich shine. I took some photos of the bowl at this point to mark the progress in the restoration. It is a beautiful bowl.

 I polished the silver plaque on the topside of the shank with a jewellers cloth to remove the slight remaining oxidation and to protect and preserve it.
  I set the bowl aside and worked on the stem at this point in the process. I “painted” the stem surface with the flame of a Bic Lighter to lift the tooth marks on both sides. I was able to lift the majority of them. I filled in one mark on each side of the stem ahead of the button. I used a small file to flatten out the repairs. I sanded the stem surface with a folded piece of 220 grit sandpaper.

 I polished the vulcanite stem surface and repairs near the button with a new product I am using. I ordered a set of 2 inch sanding pads for 320-3500 grit sanding pads from Amazon. They work amazingly well and are easy to manage and sand close to the sharp edge of the button.
  I polished light tooth marks and chatter out of the stem with micromesh sanding pads – dry sanding with 1500-12000 grit pads. I wiped the stem down after each sanding pad with Obsidian Oil.
 I polished the stem with Before & After Pipe Stem Polish – both Fine and Extra Fine. I gave it a coat of Obsidian Pipe Stem Oil. It works to protect the stem from oxidizing. I set it aside to dry.
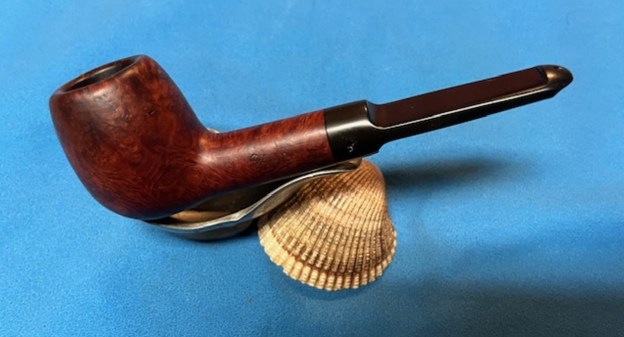
 I put the stem back on the Stanwell Pipe of the Year 19888 Apple pipe and took it to the buffer. I buffed the bowl and stem with Blue Diamond to polish the briar and the vulcanite. Blue Diamond does a great job on the smaller scratches that remain in both. I gave the bowl multiple coats of Conservator’s Wax and the stem several coats of carnauba wax and buffed the pipe with a clean buffing pad to raise the shine. I hand buffed it with a microfiber cloth to deepen the shine. I am amazed at how well it turned out. The finished pipe is shown in the photos below. This is a beautiful Stanwell POY 1988 – the vulcanite saddle stem and smooth rim top and sandblast finish combine to give the pipe a great look. The polished black, vulcanite stem looks really good with the rich browns standing out in the sandblast. The dimensions of the pipe are Length: 5 inches, Height: 1 ½ inches, Outside diameter of the bowl: 1 inch, Chamber diameter: ¾ of an inch. The weight of the pipe is 1.31 ounces/37 grams. This is another pipe that I will be putting on the rebornpipes online store in the Danish Pipe Pipemaking Companies Section shortly, if you are interested in adding it to your collection. Thanks for walking through the restoration with me on this beauty!
As always, I encourage your questions and comments as you read the blog. Thanks to each of you who are reading this blog. Remember we are not pipe owners; we are pipe men and women who hold our pipes in trust until they pass on into the trust of those who follow us.