Tag Archives: stem work

Turbulence: Rusticating a Medico Jet Stream


Blog by Anthony Cook

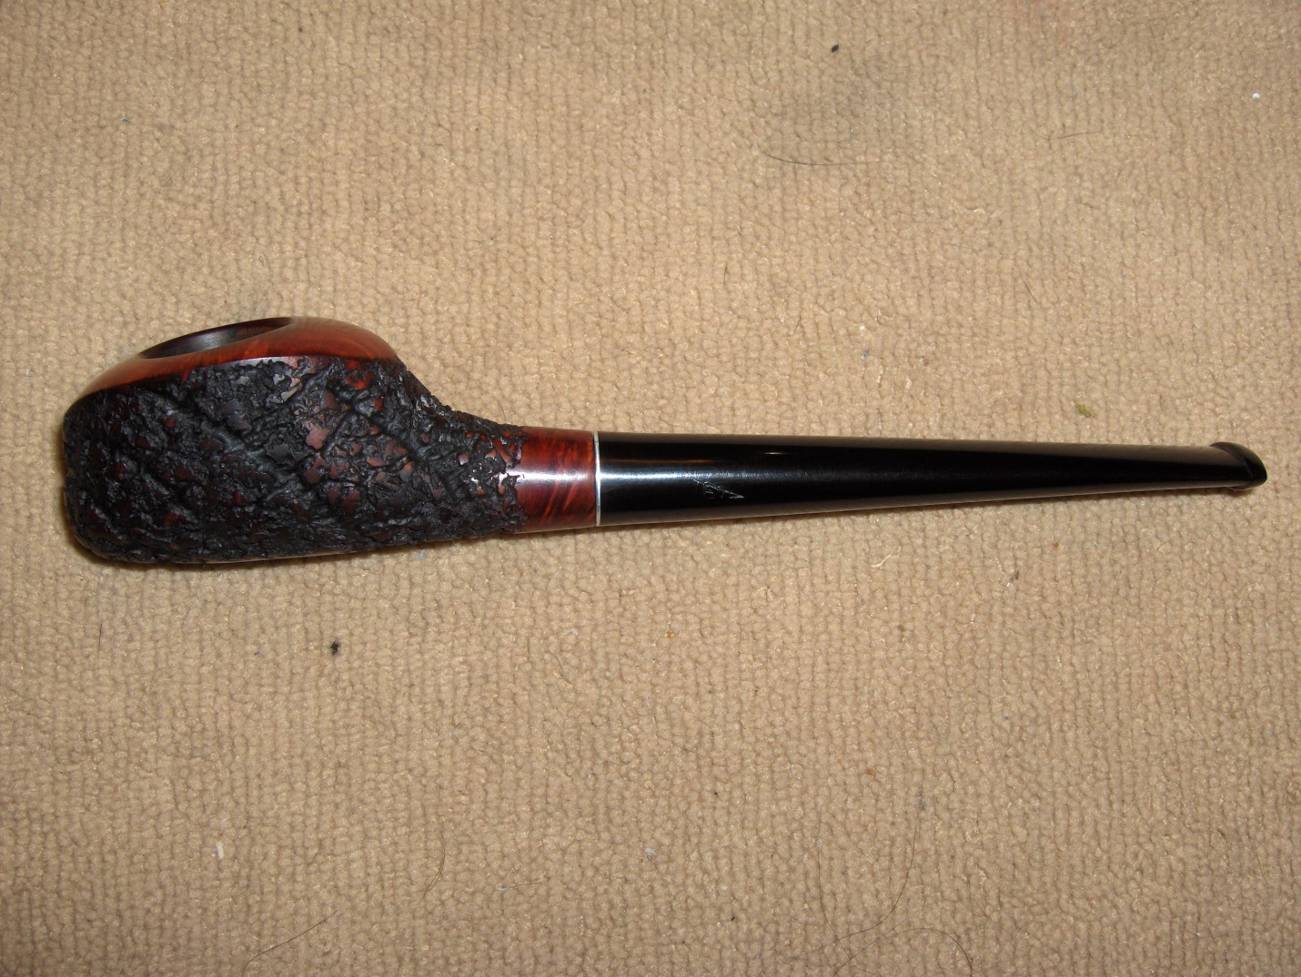
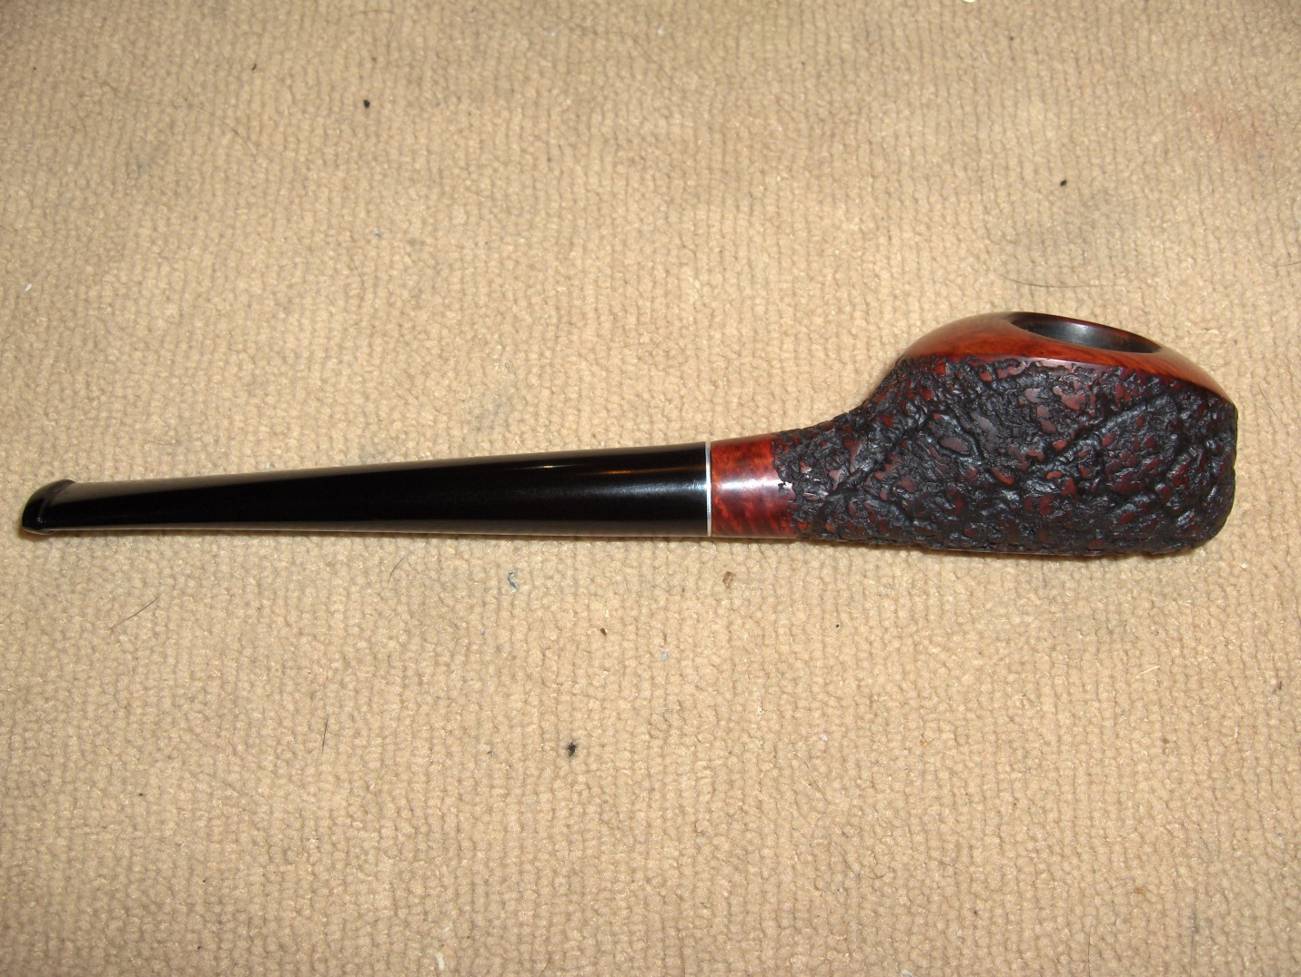
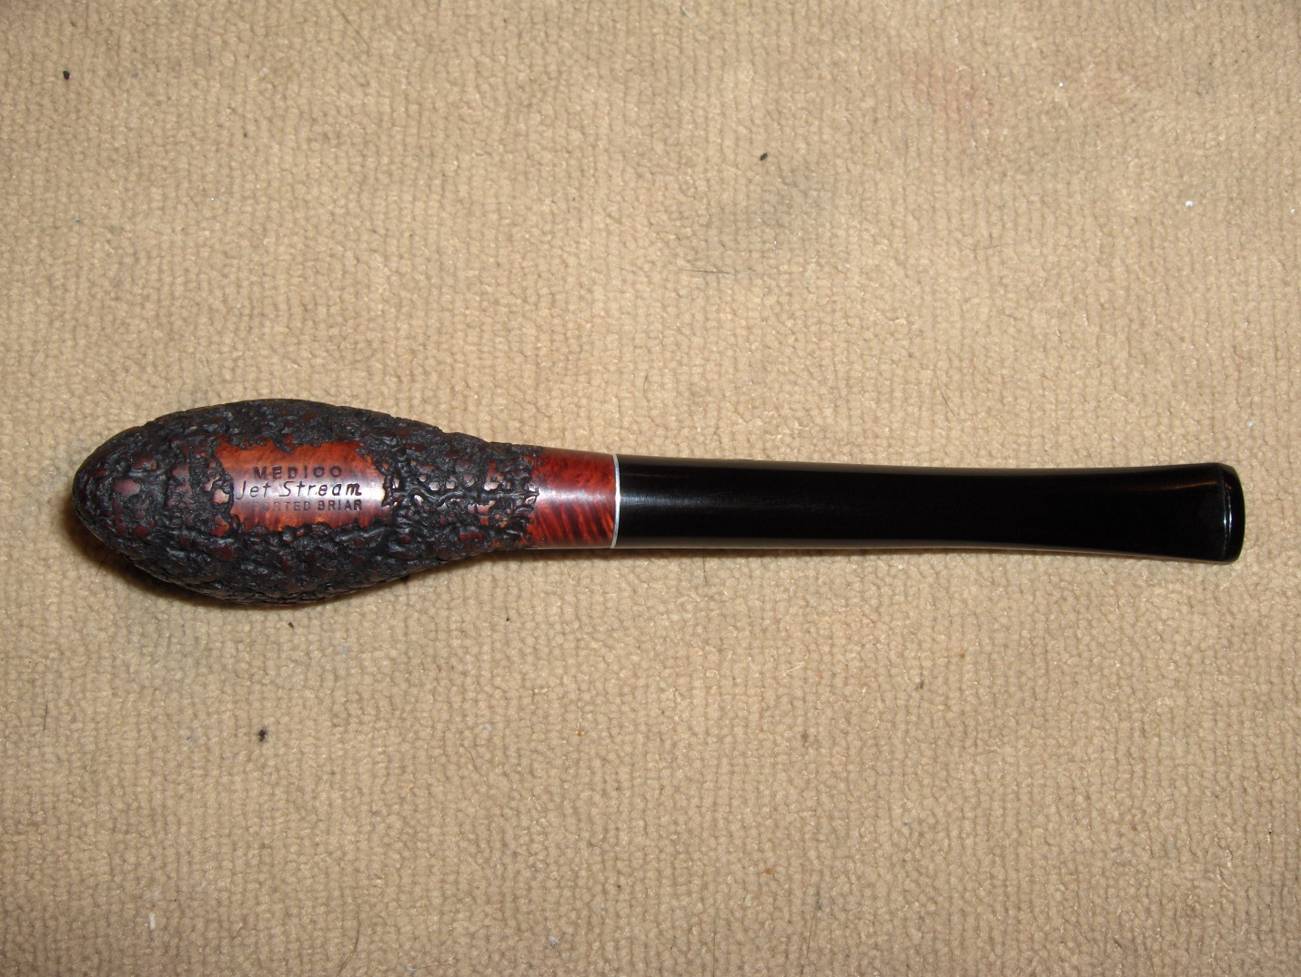
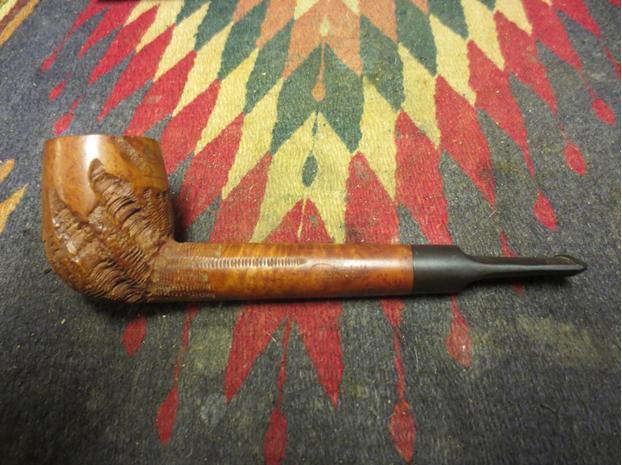
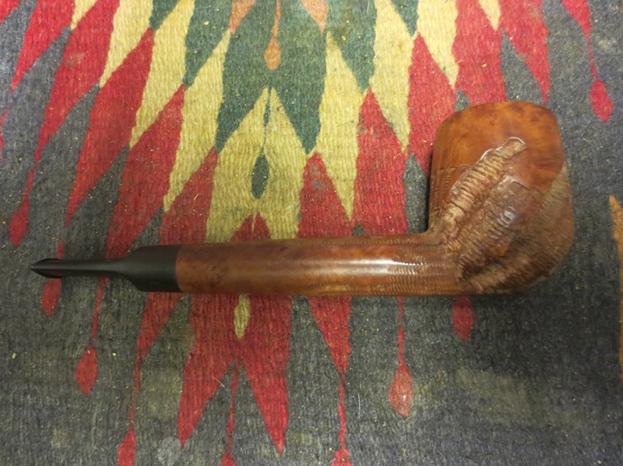
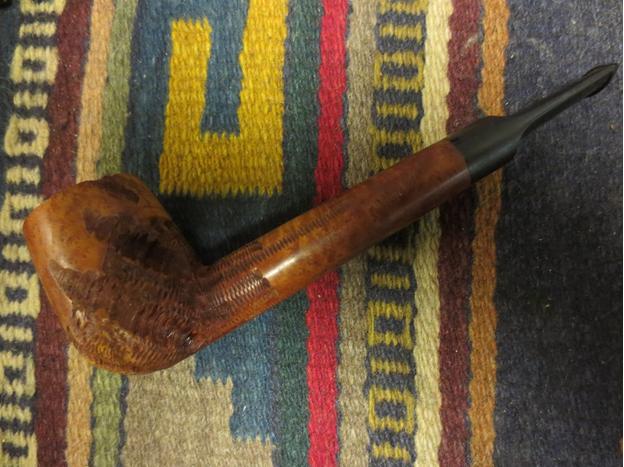
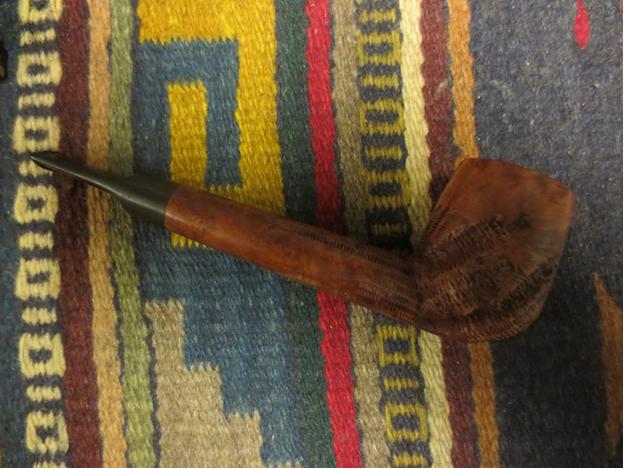
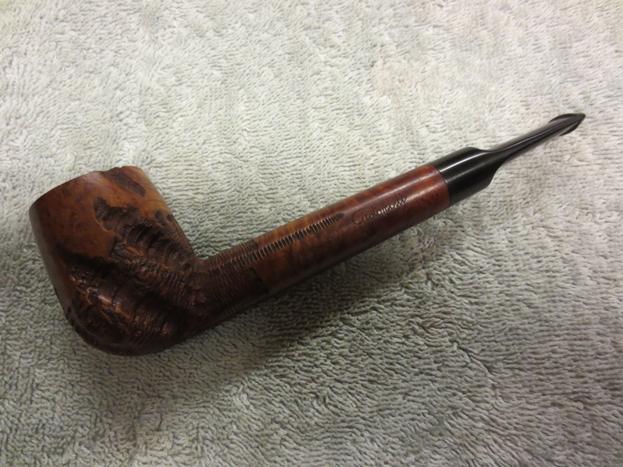
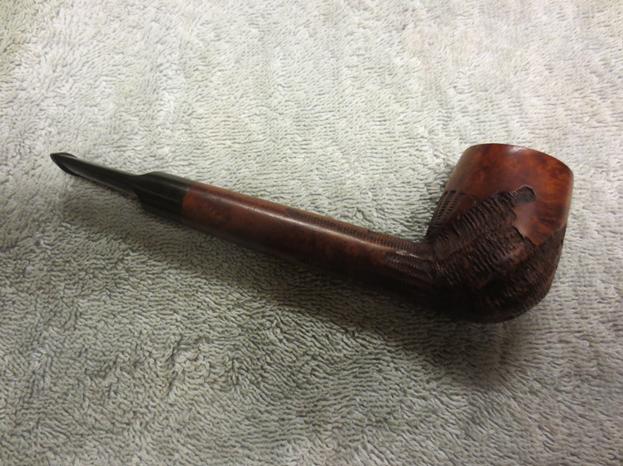
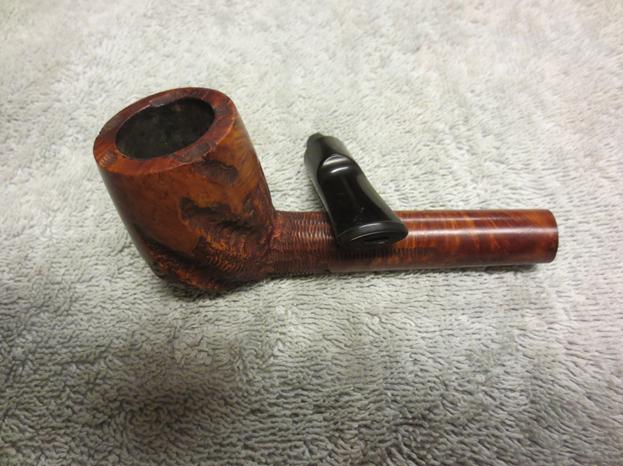
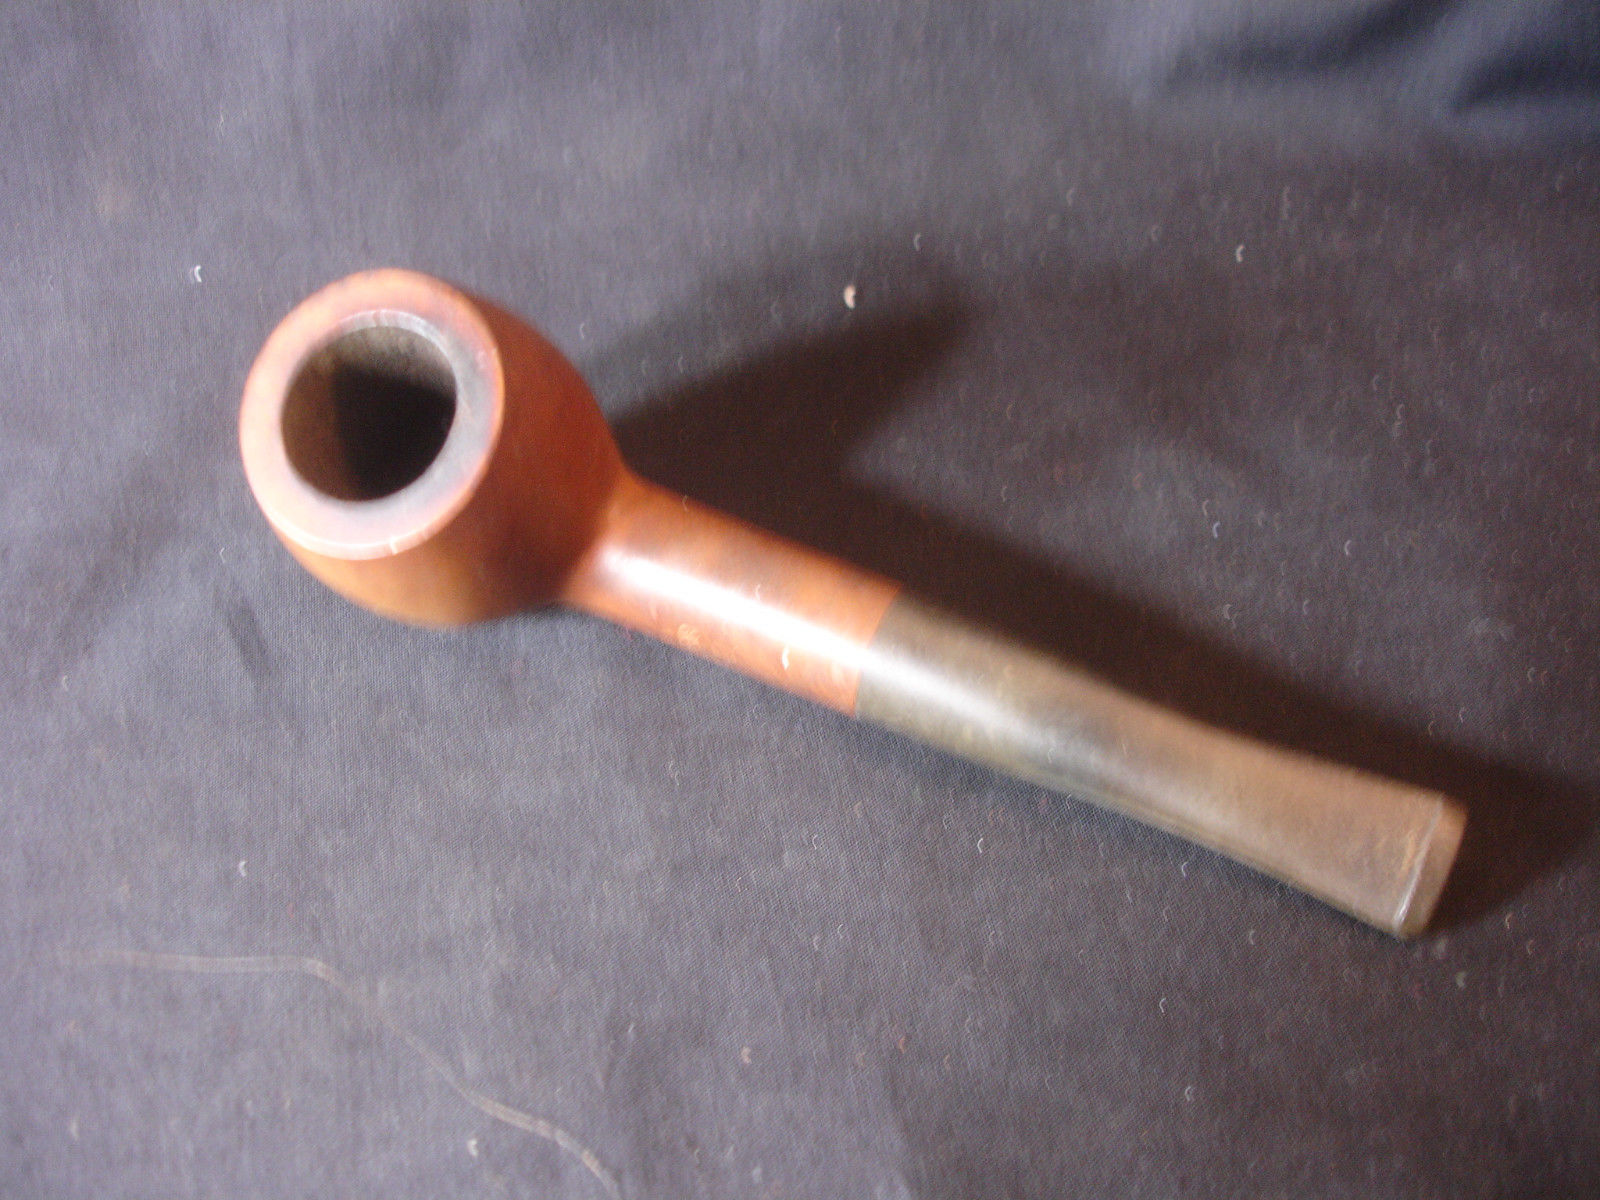
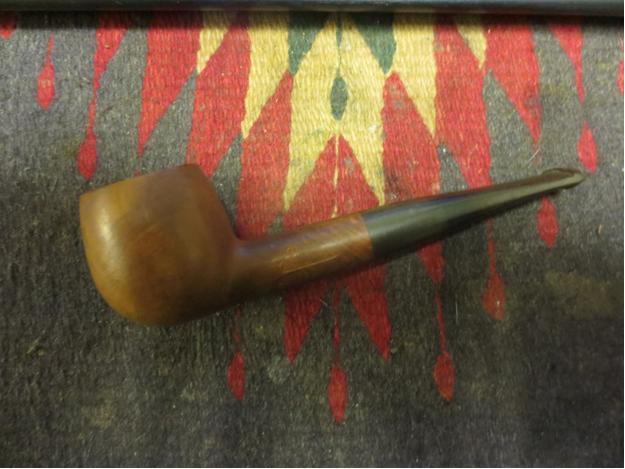
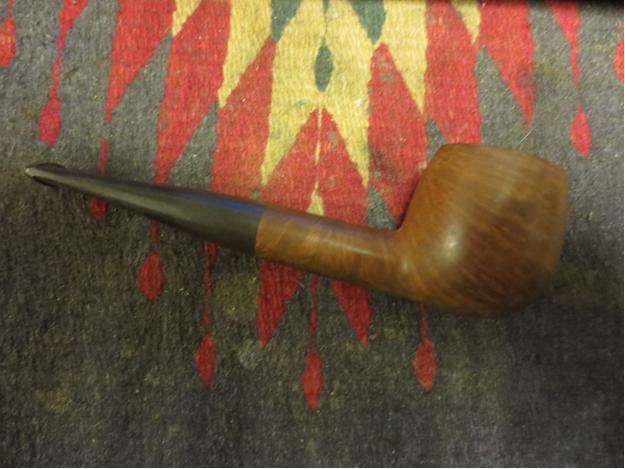
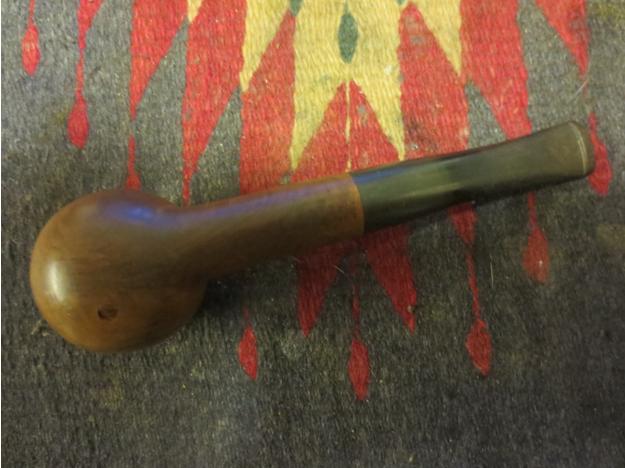
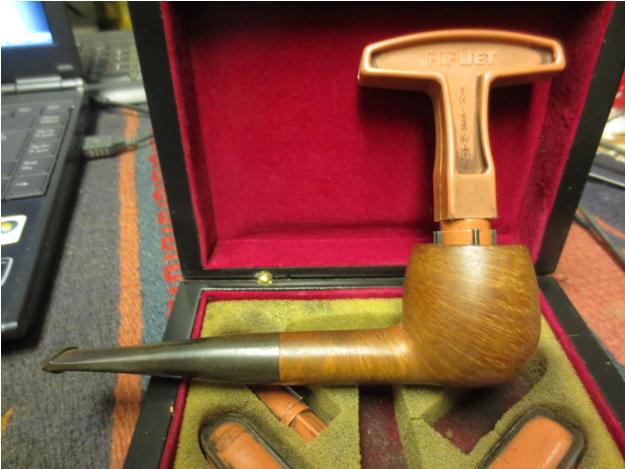
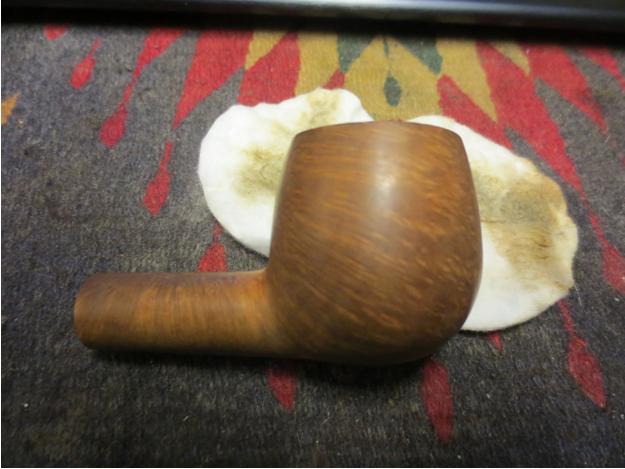
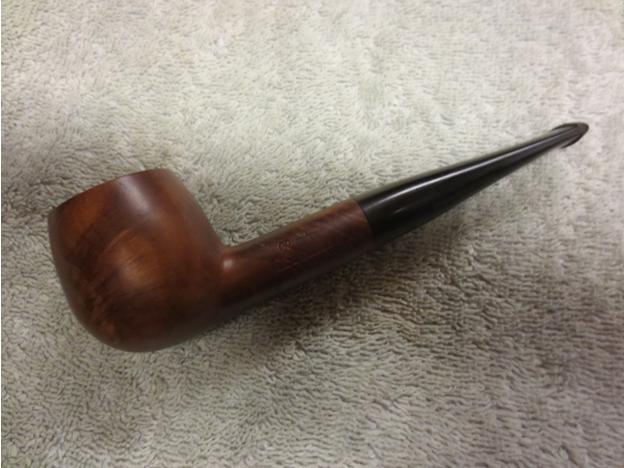
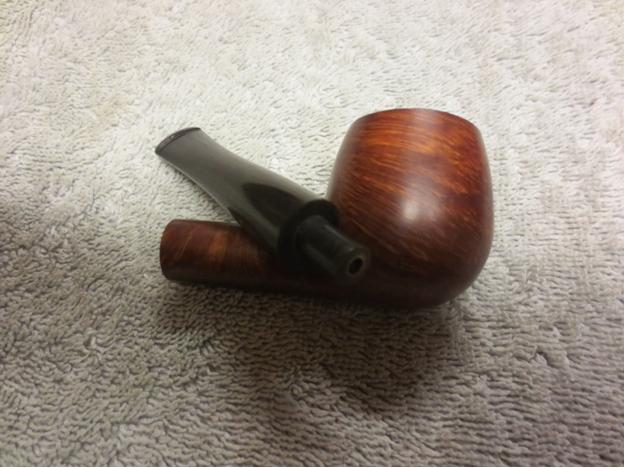
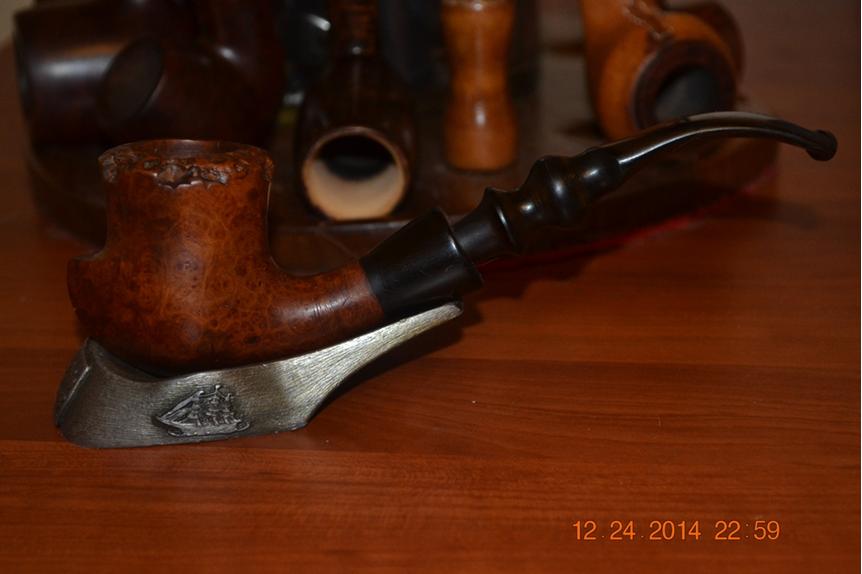
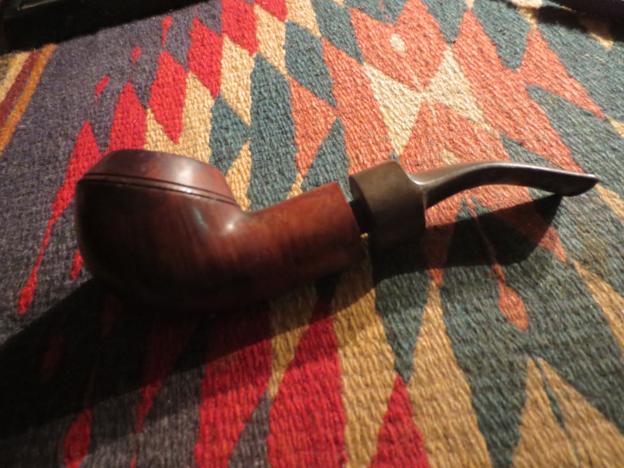
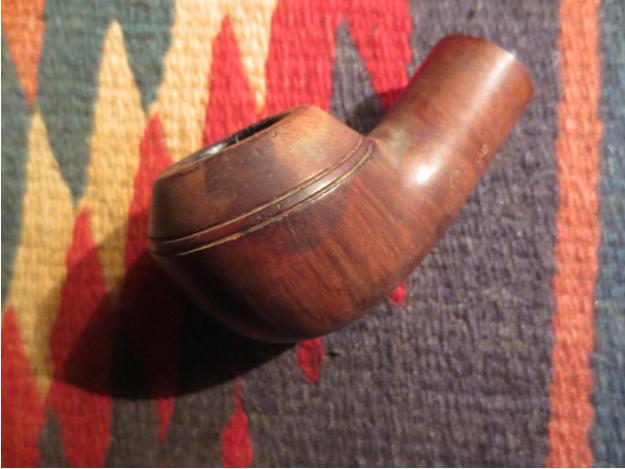
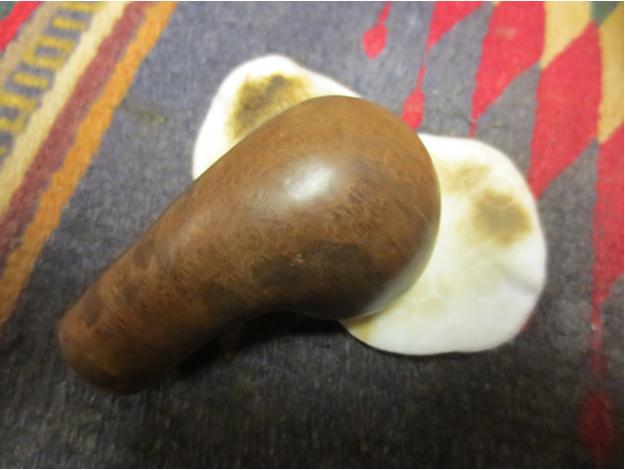
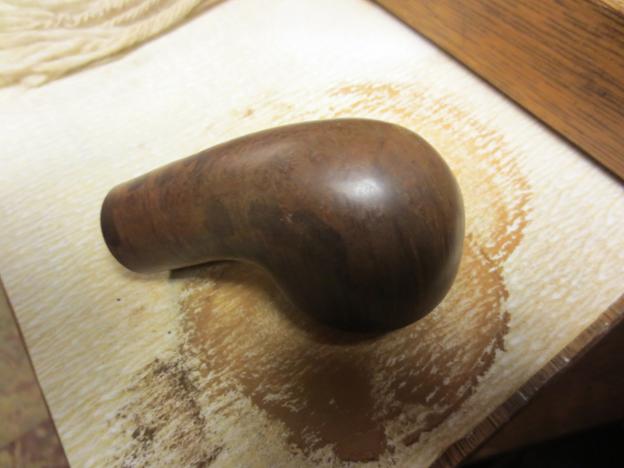
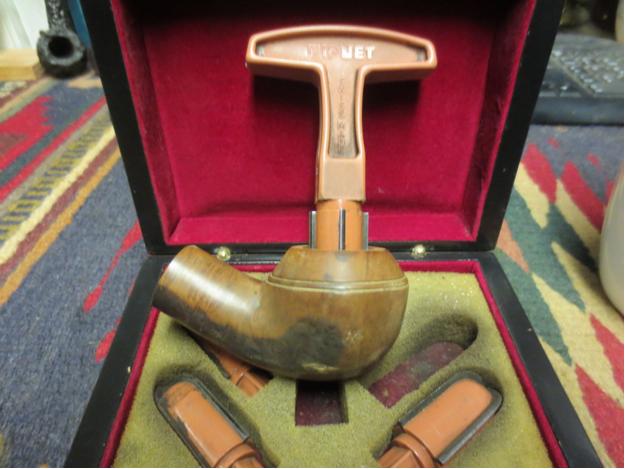
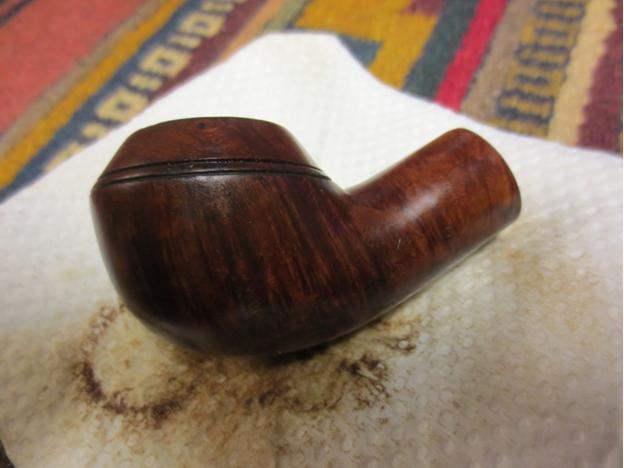
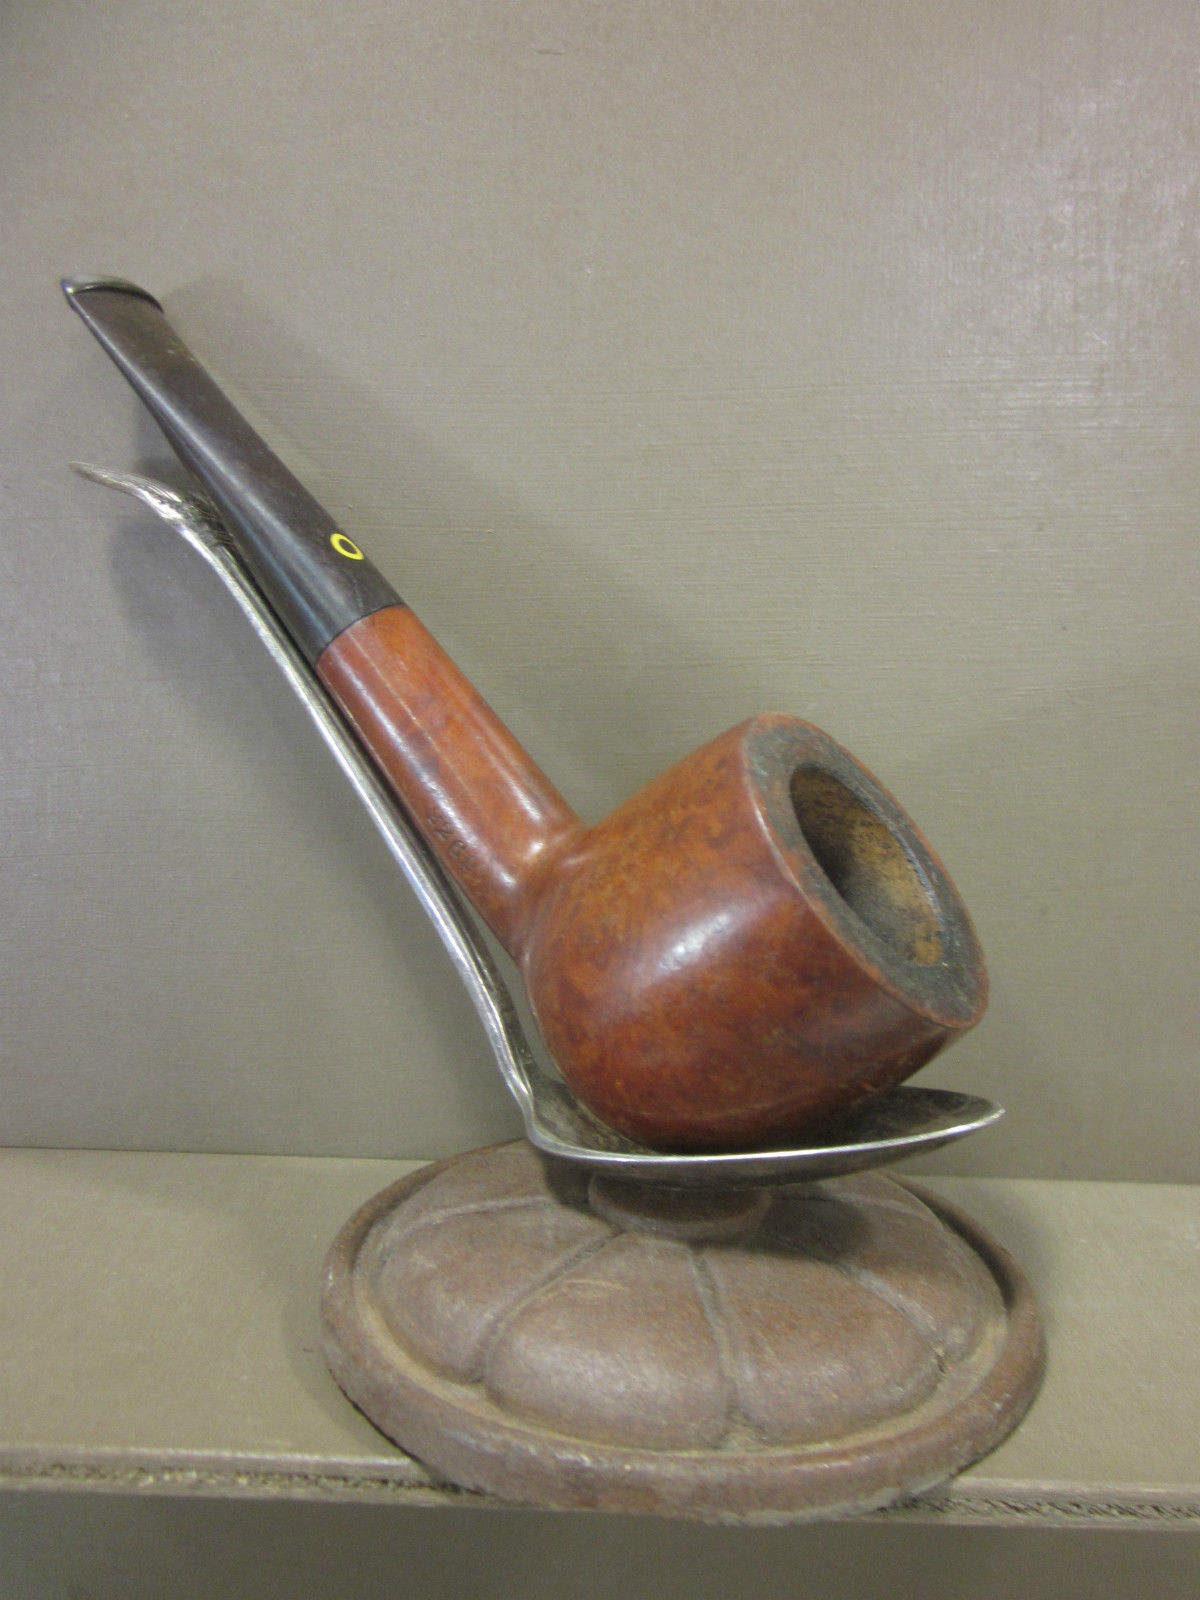
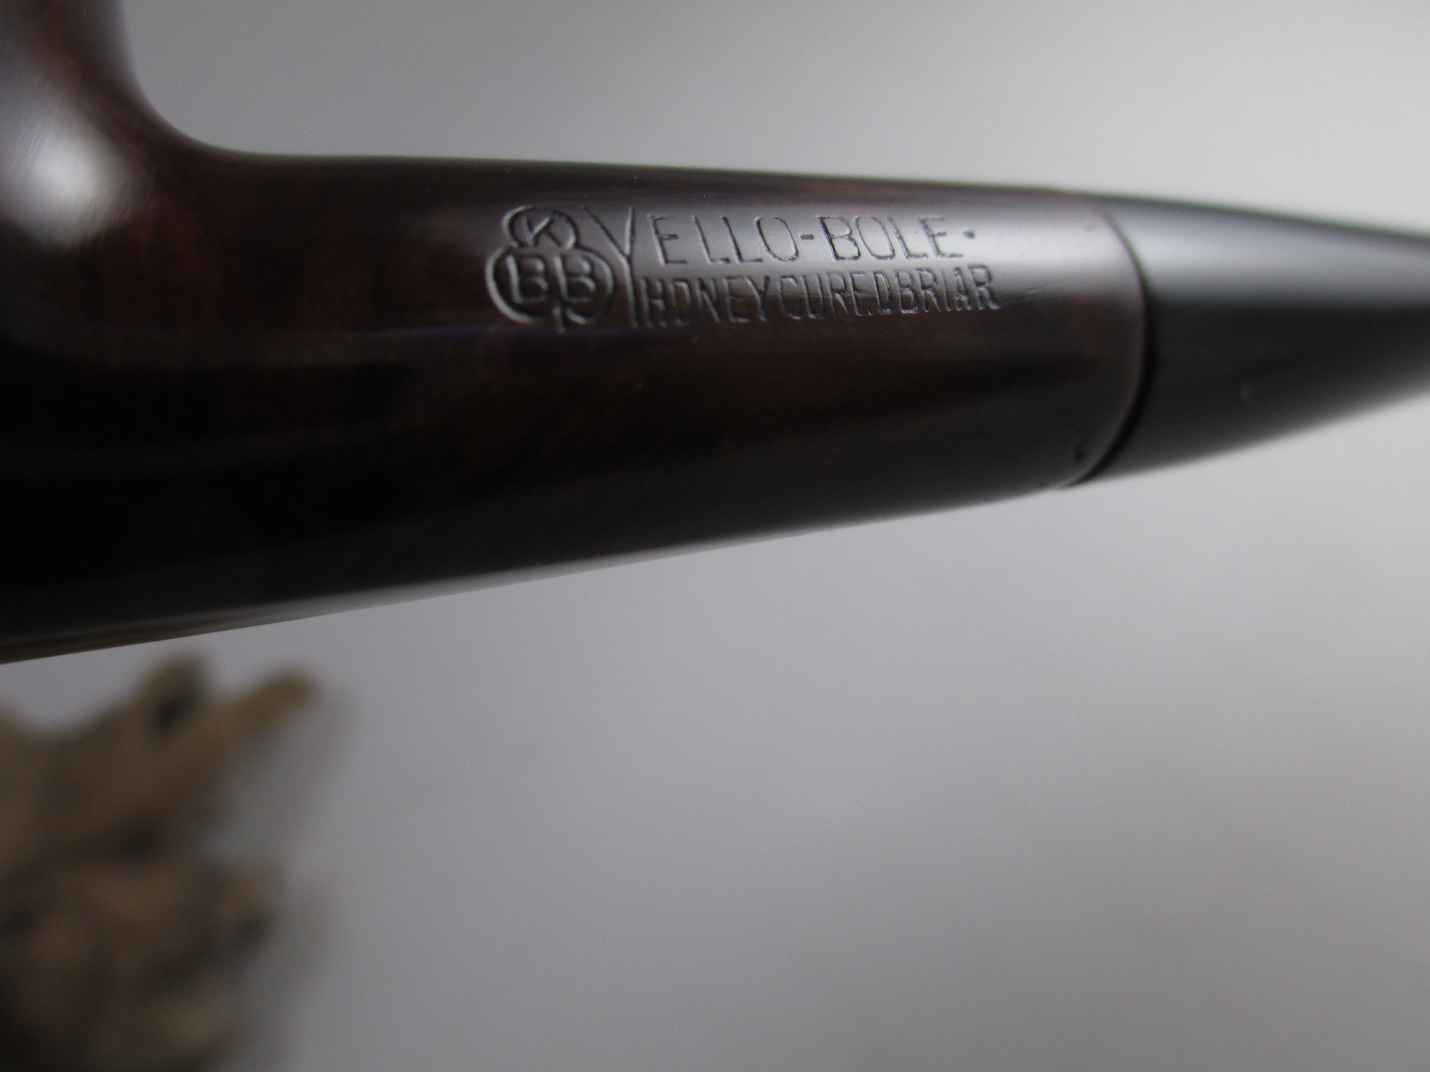
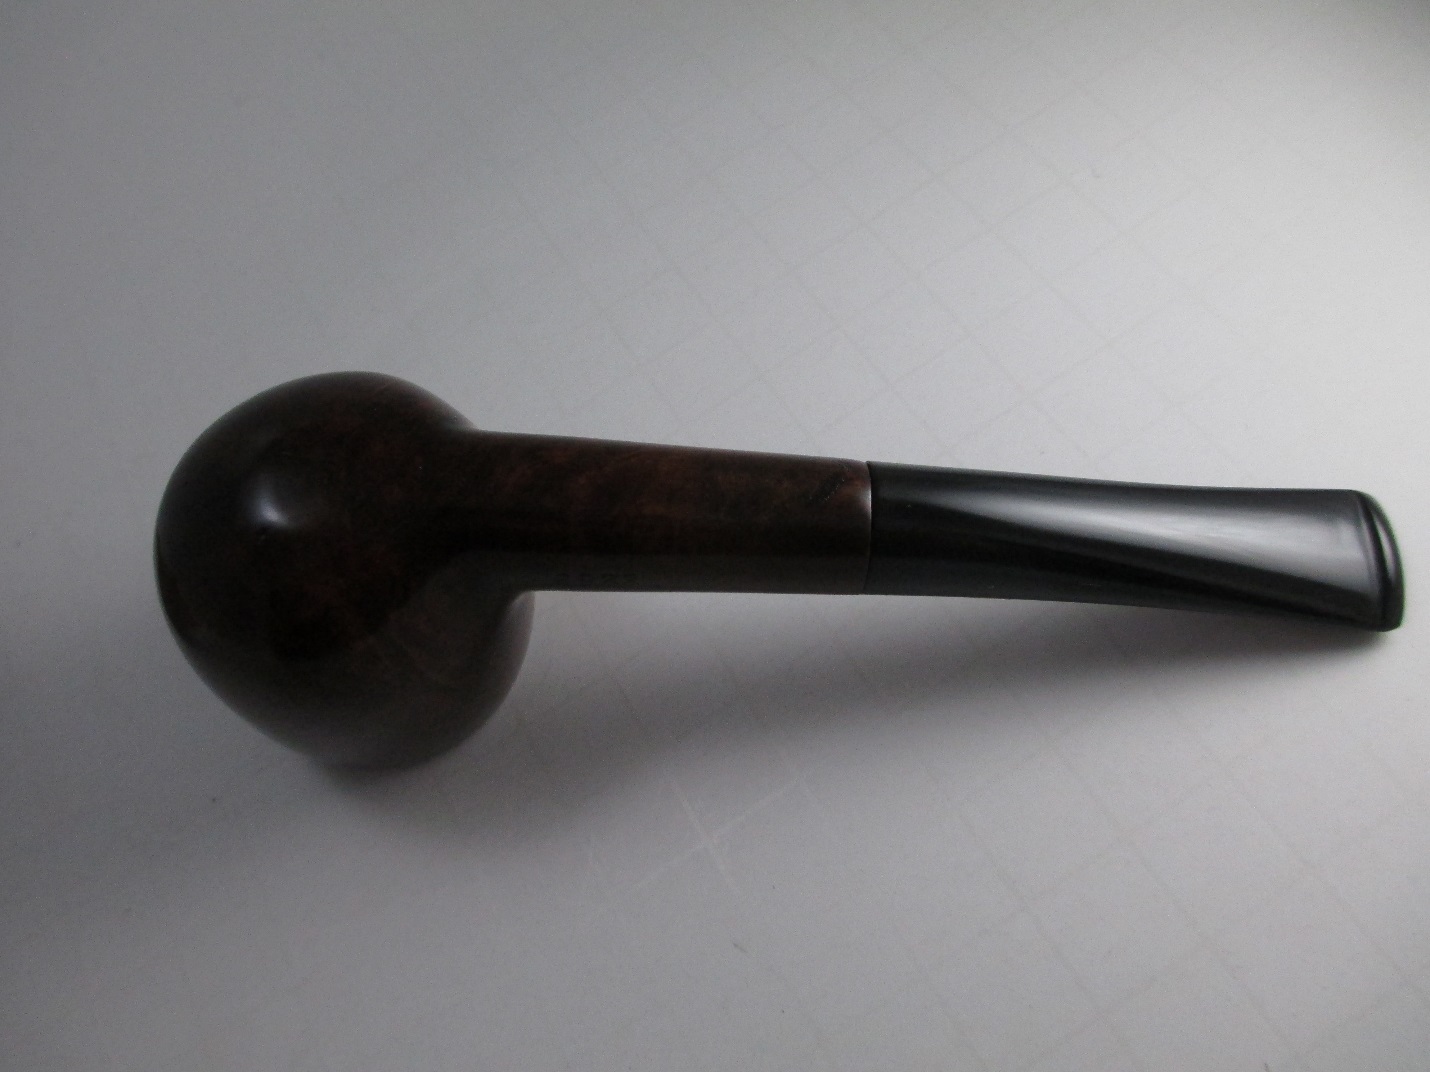
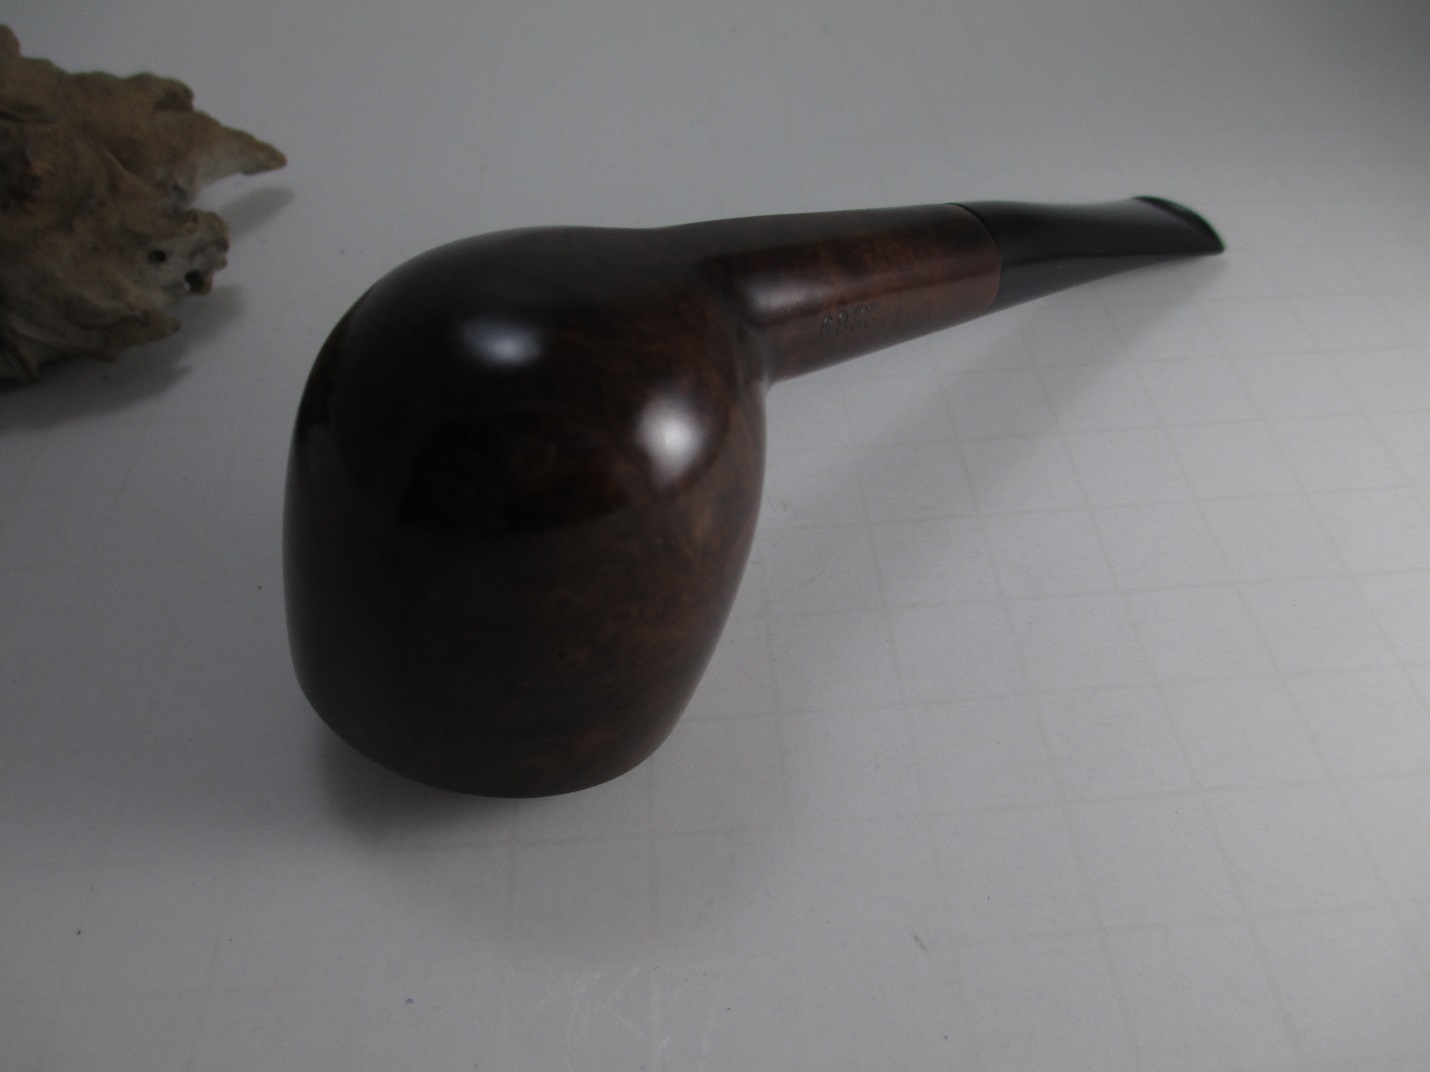
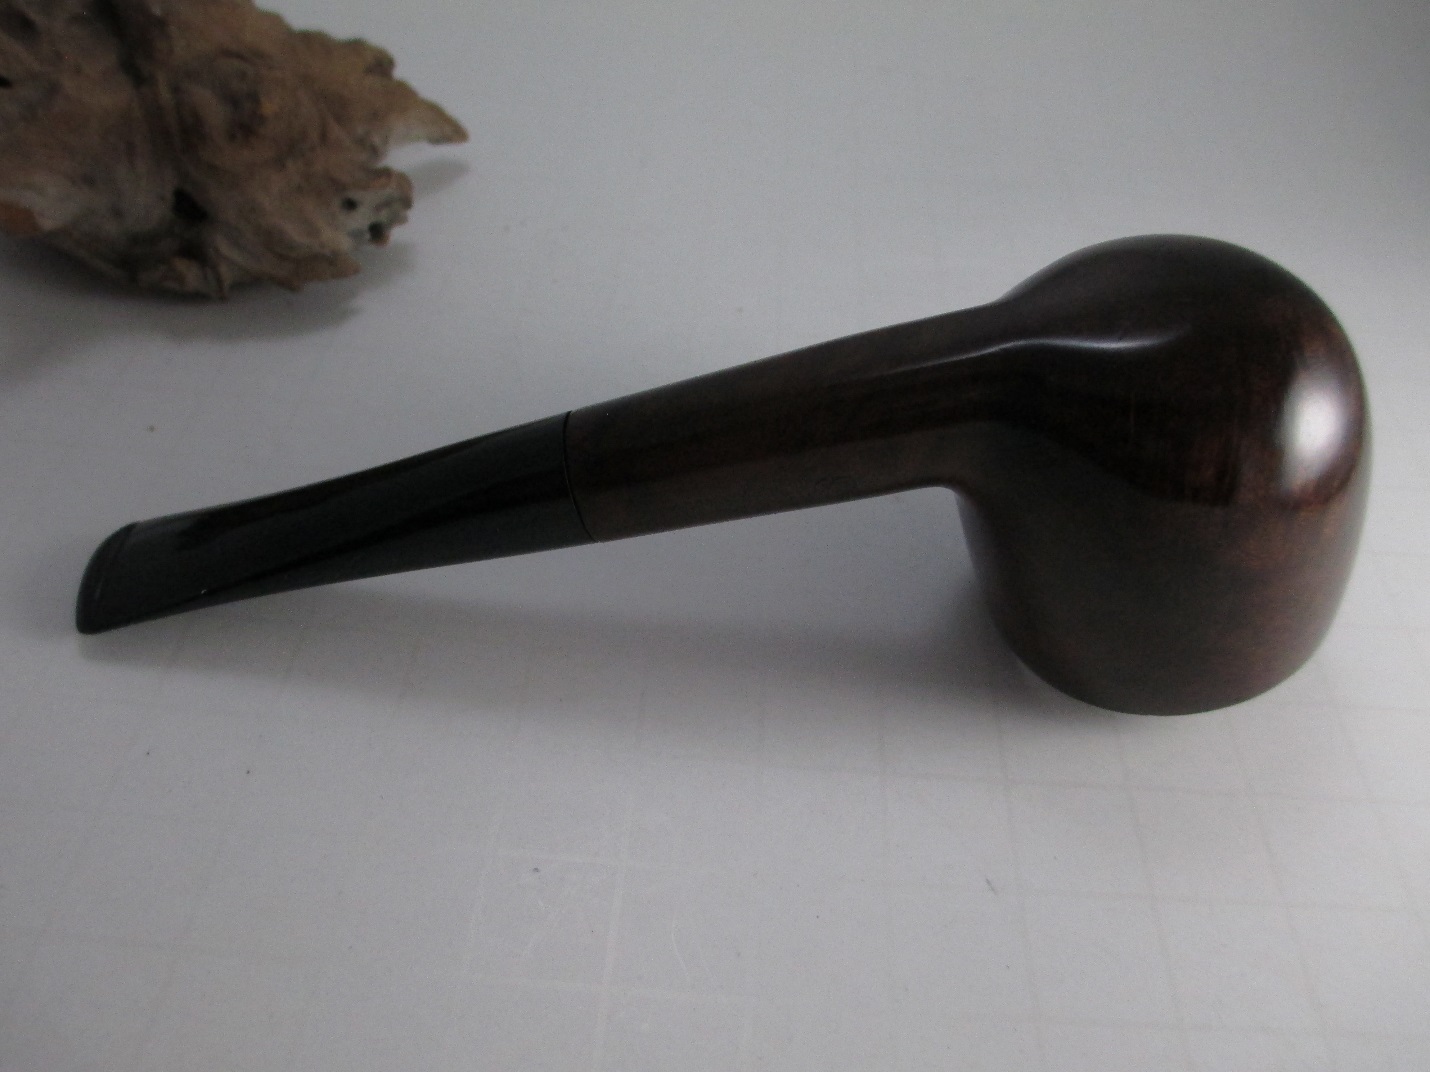
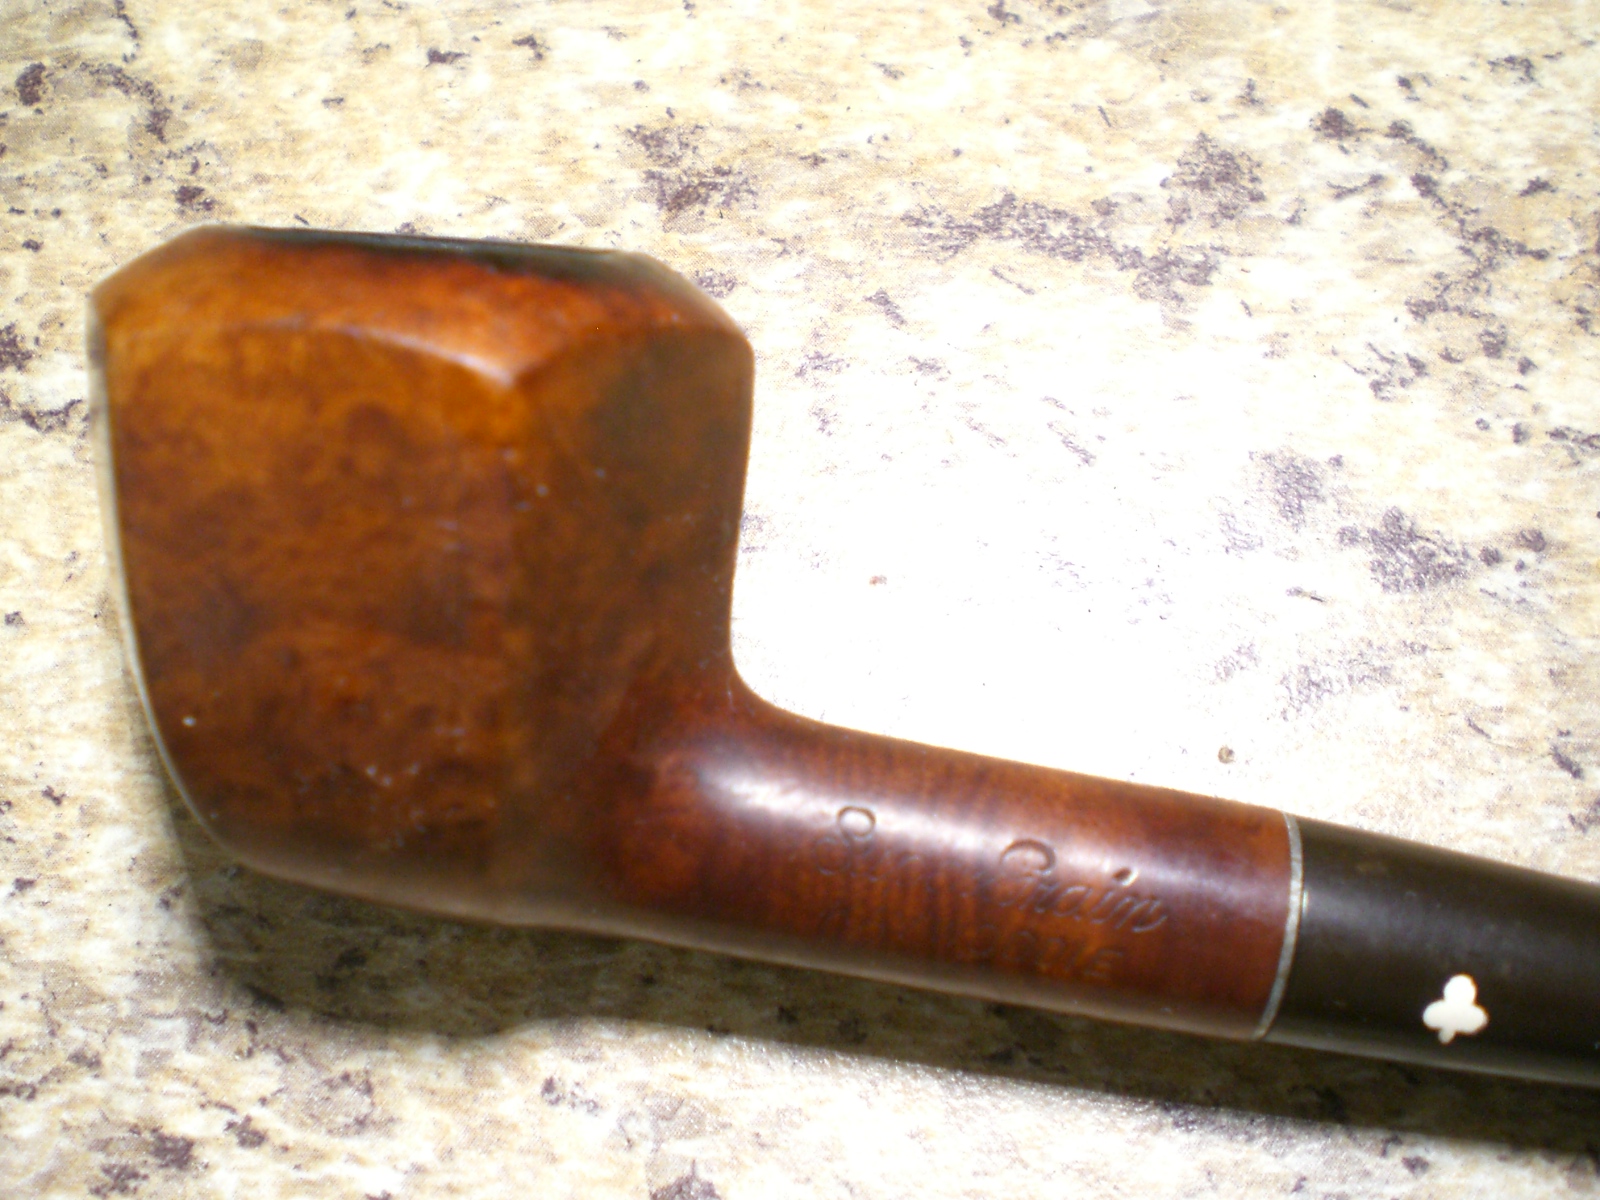
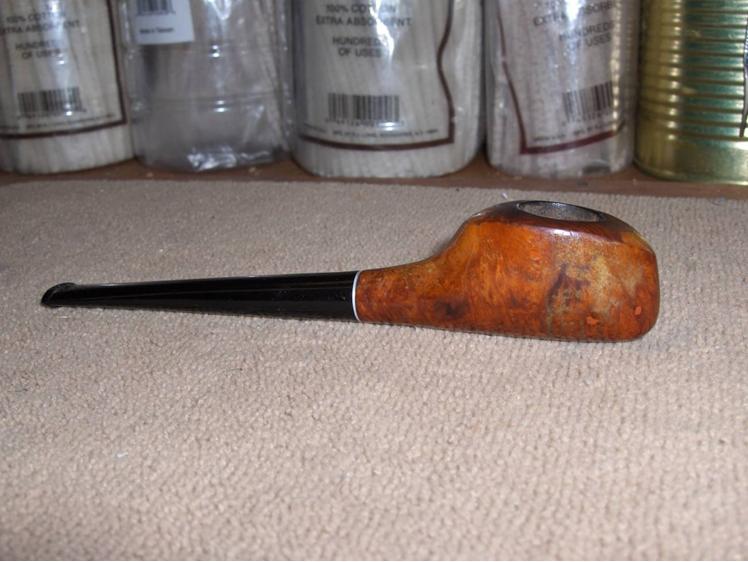
I recently completed work on another pipe in the batch that was sent to me by an online friend. This time, it was a Medico Jet Stream. These were produced by Medico from sometime around 1965 until 1971. There were a couple of shapes in the line and each was quite a departure from the classic forms. This one is by far my favorite. I think it has a nice, streamlined flow to it. The pipe is right at six inches long with a small bowl that is barely more than inch tall. Mechanically it was sound but it was obvious that it had let itself go cosmetically in its 44 years (at minimum) of existence.

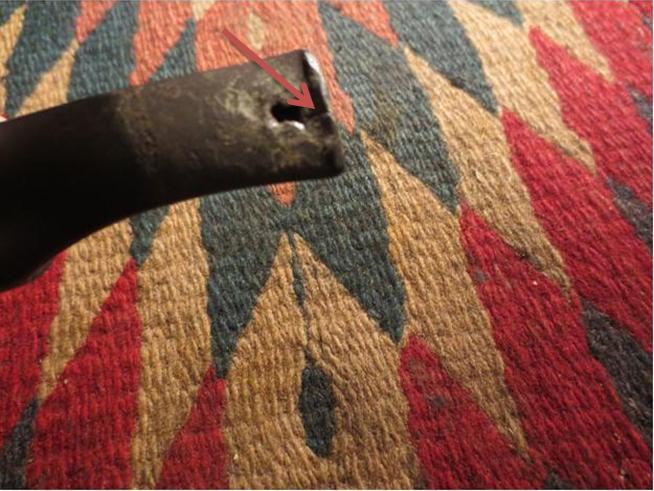
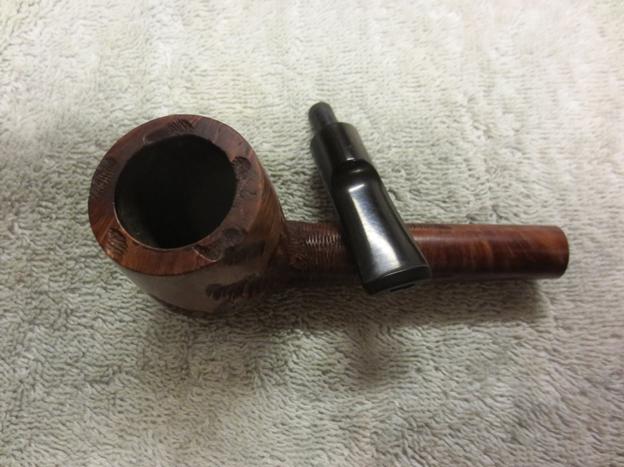
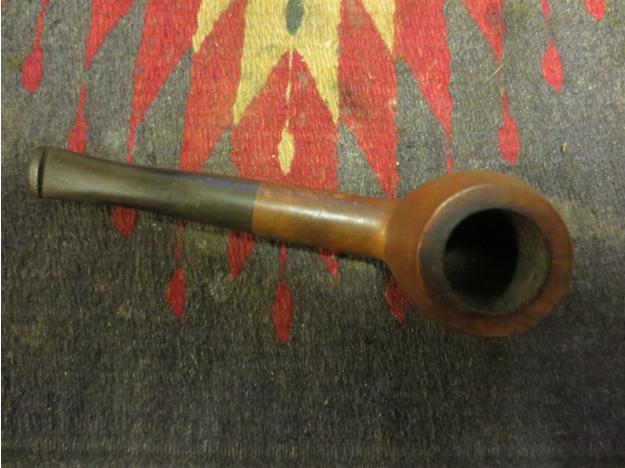
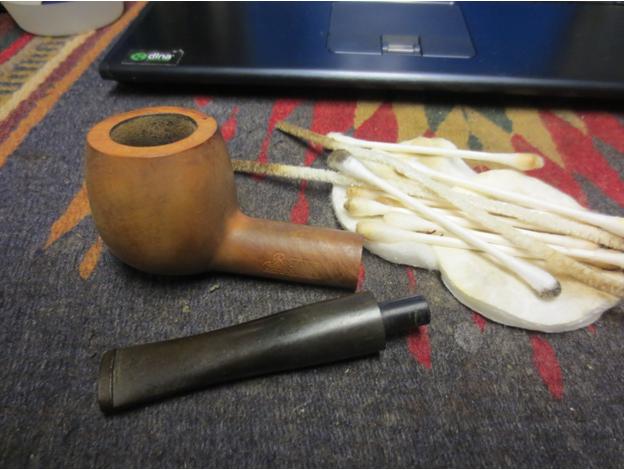
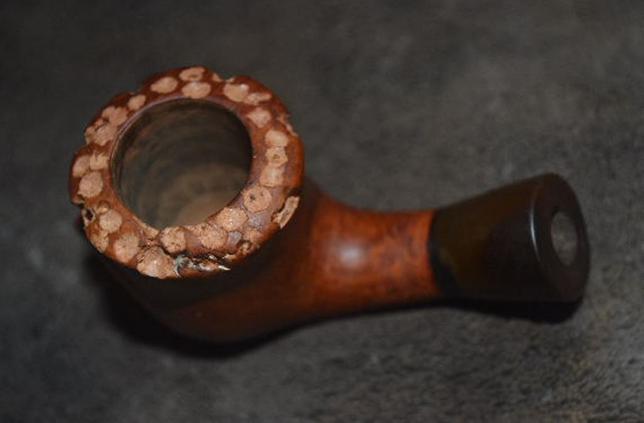
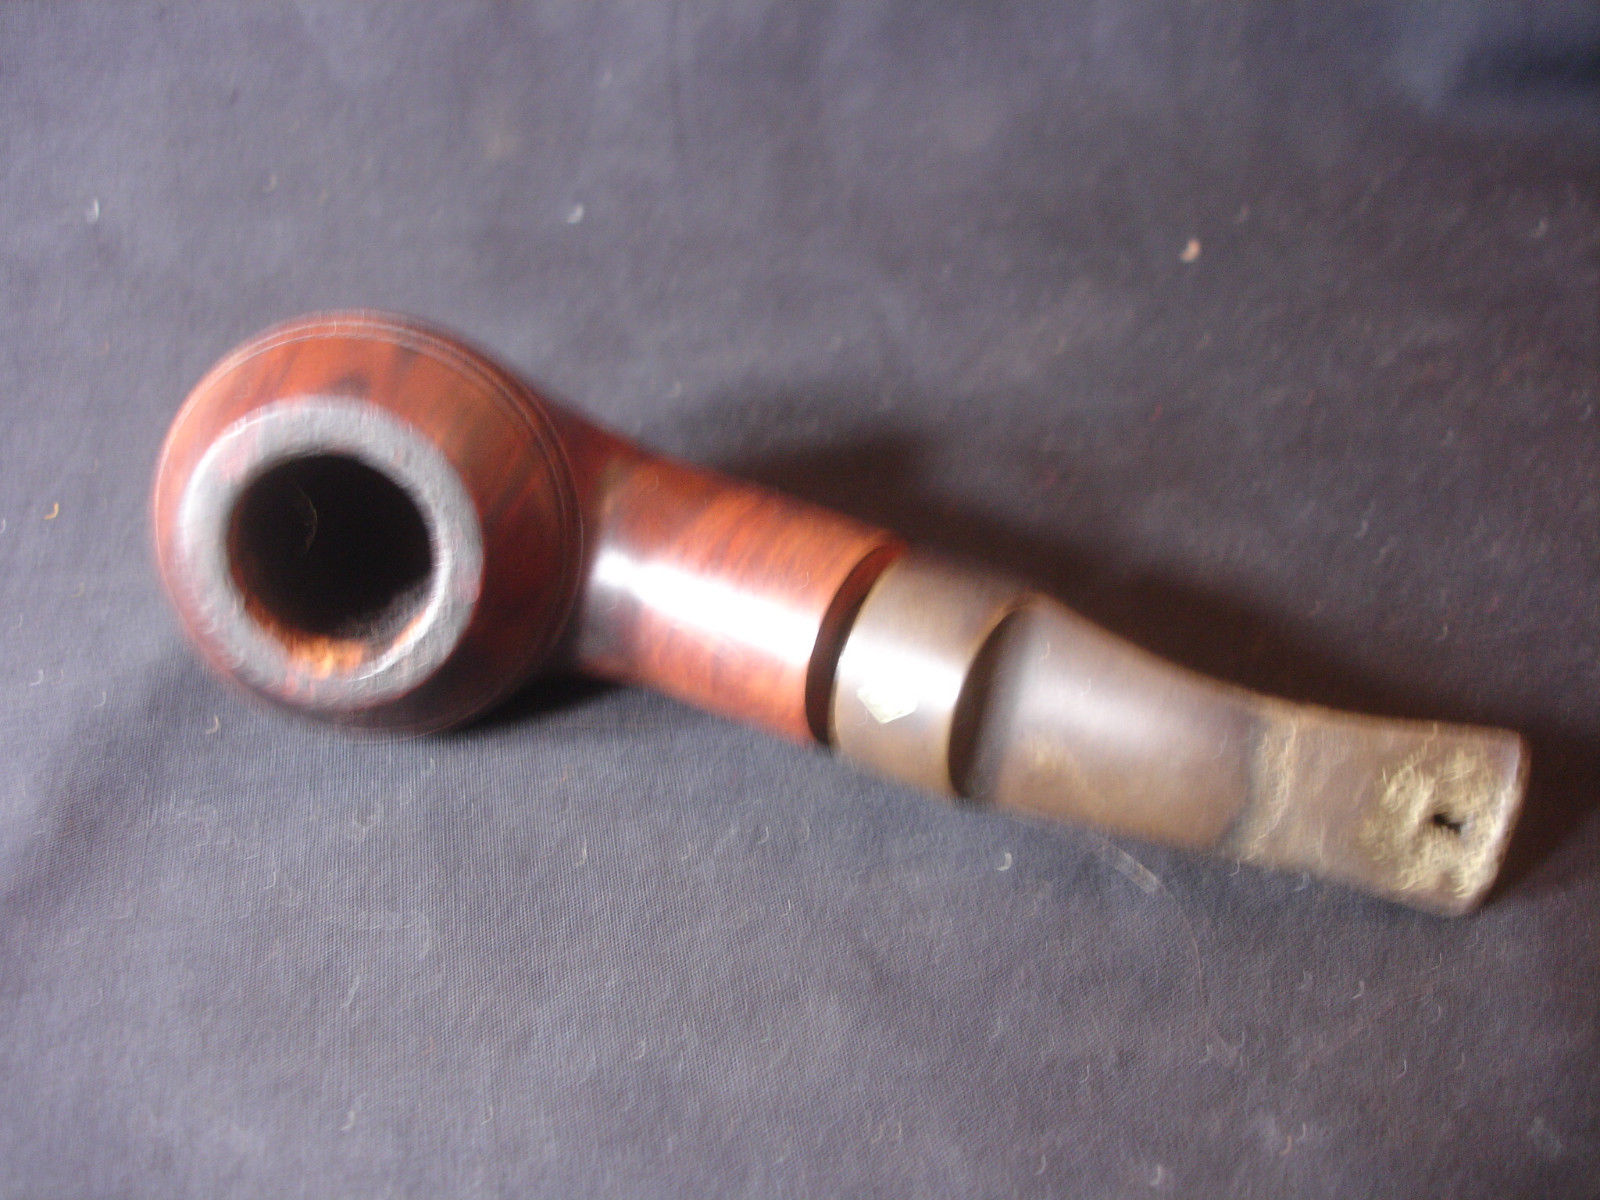
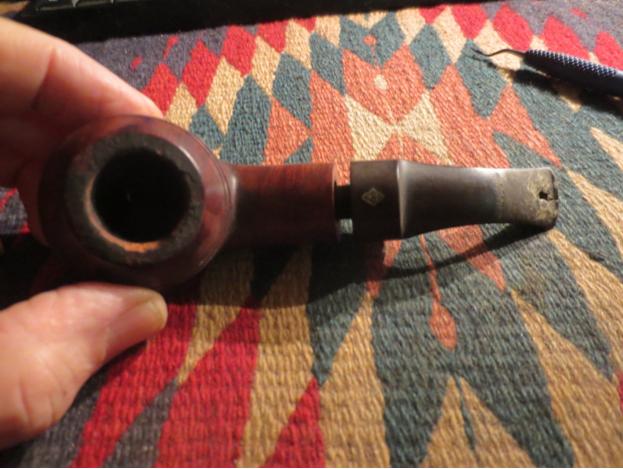
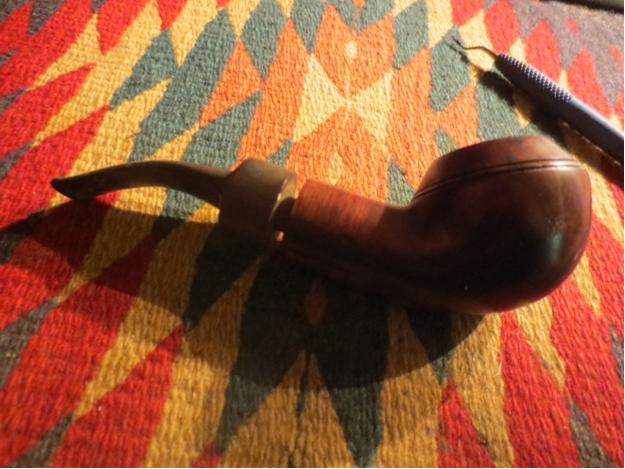
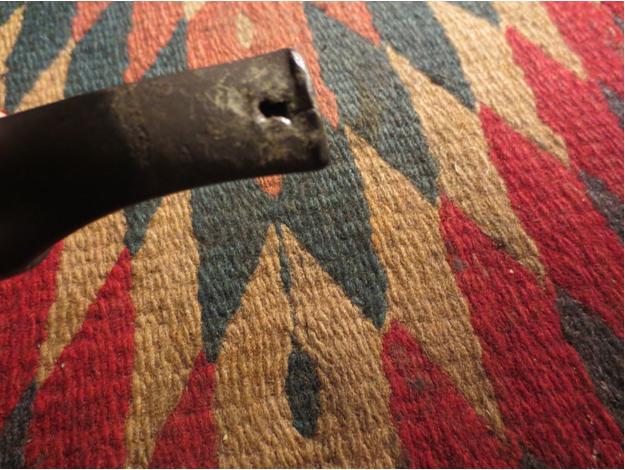
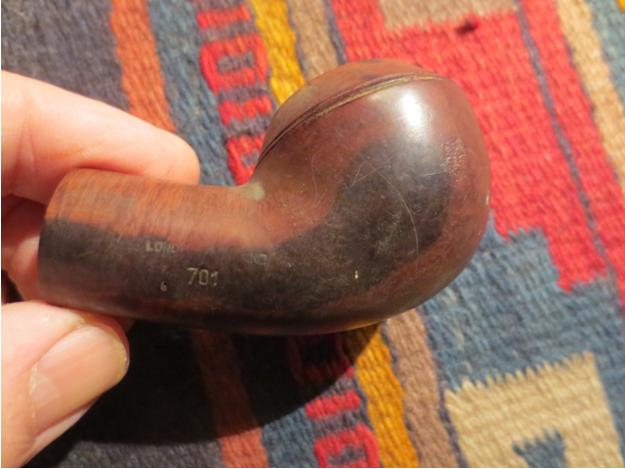
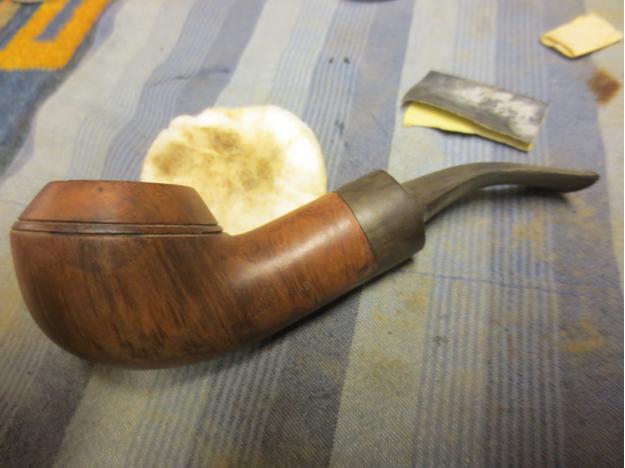
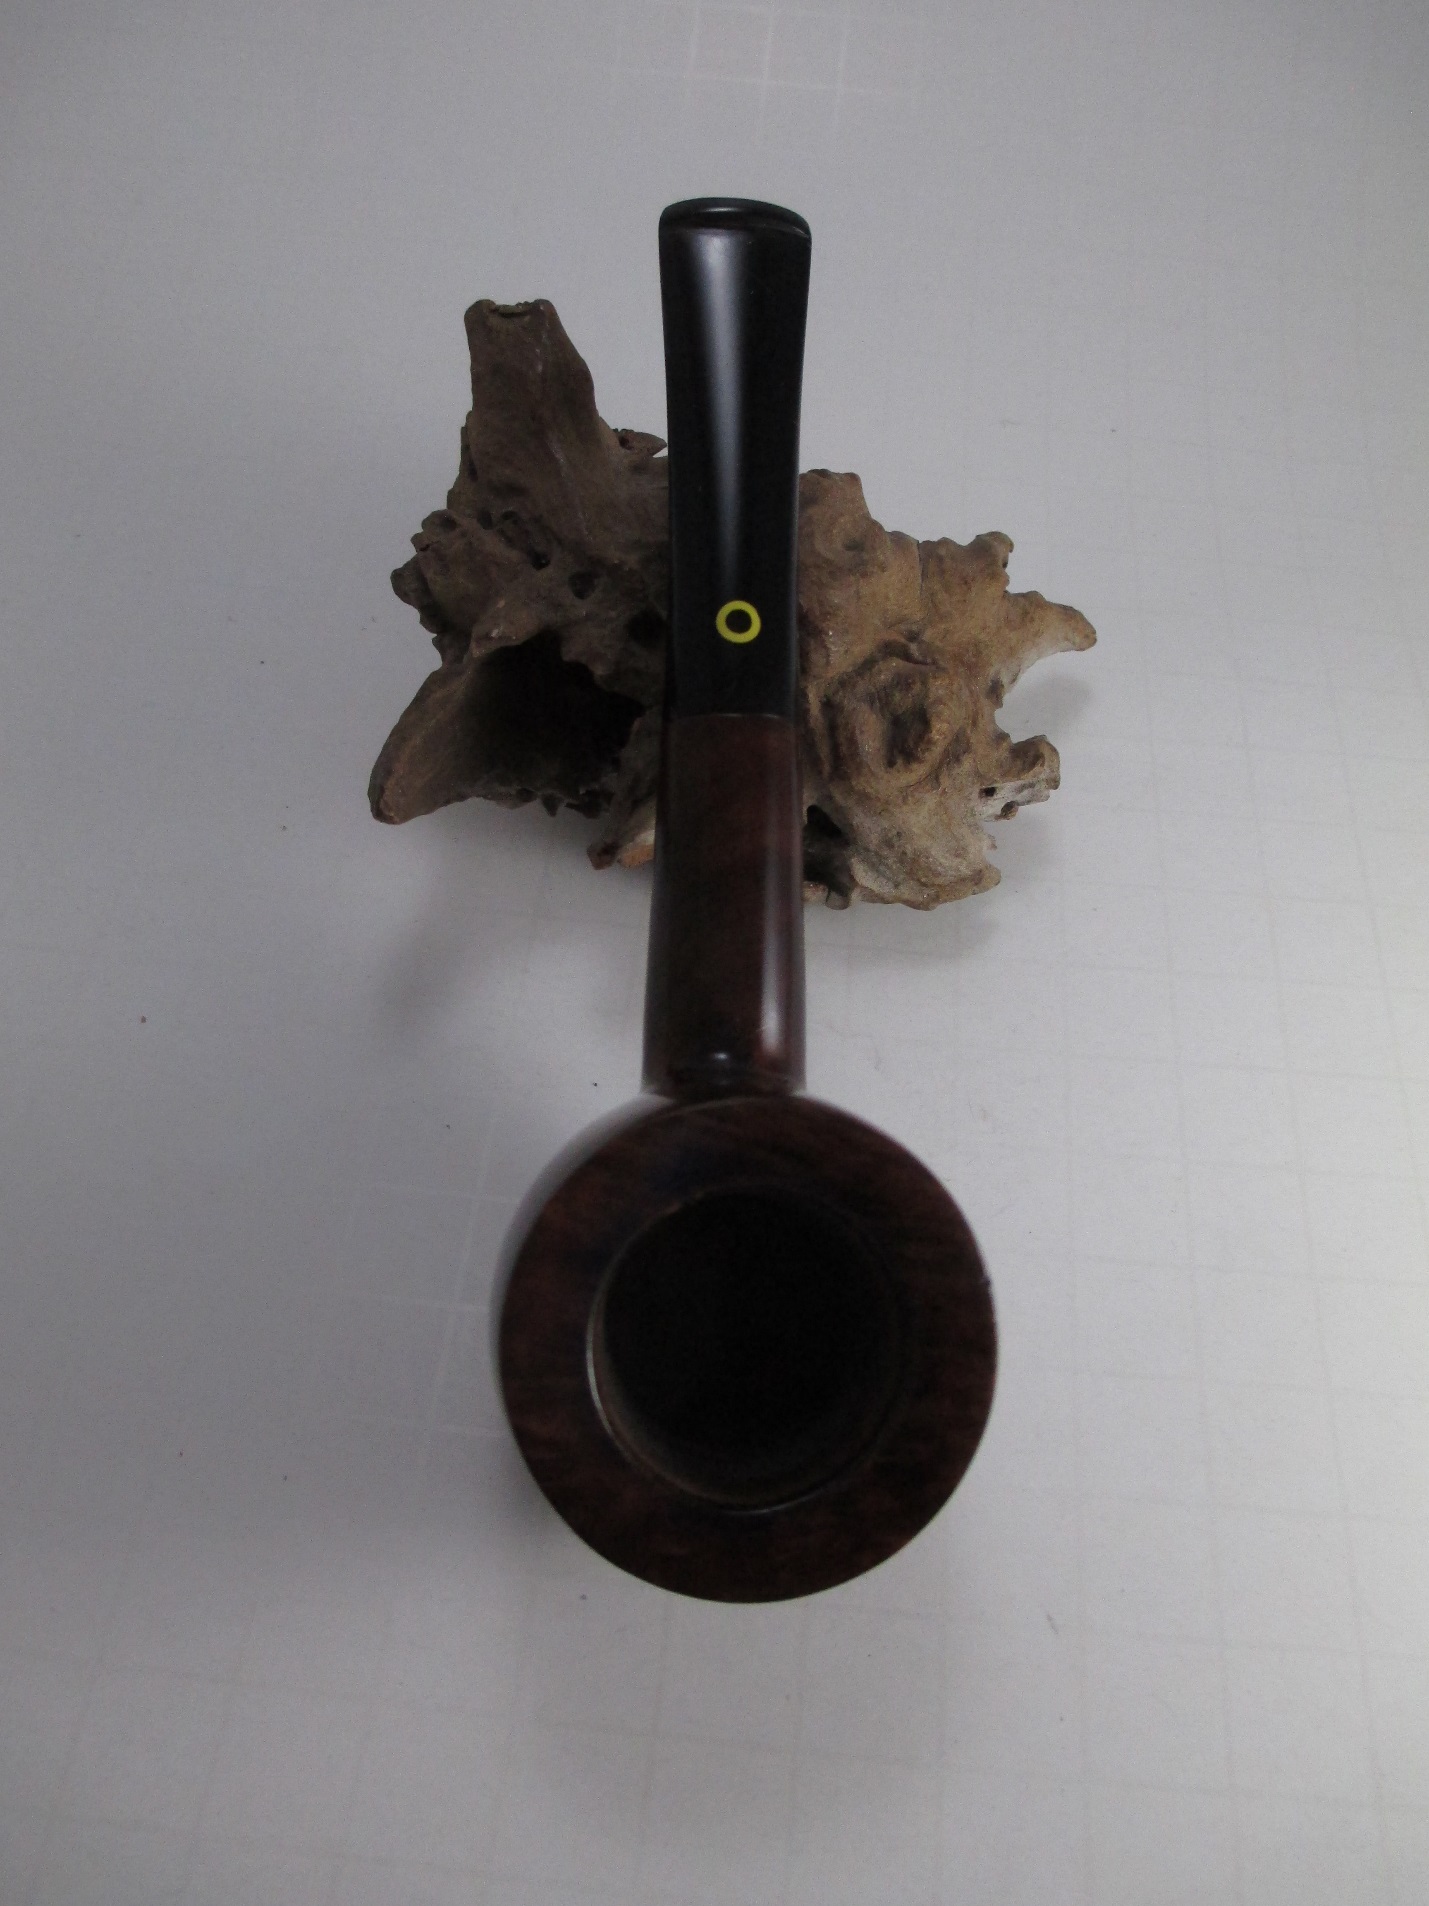
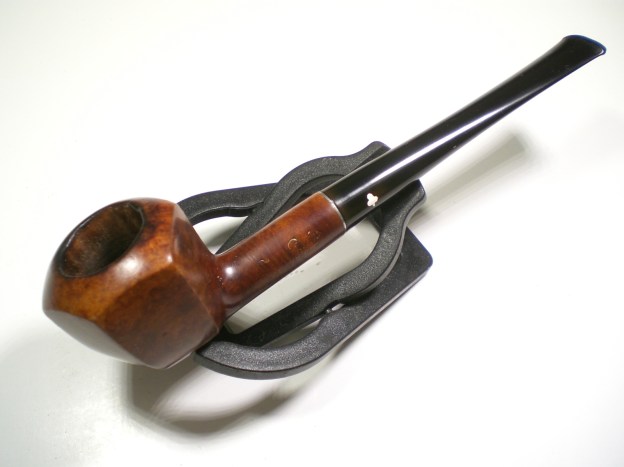
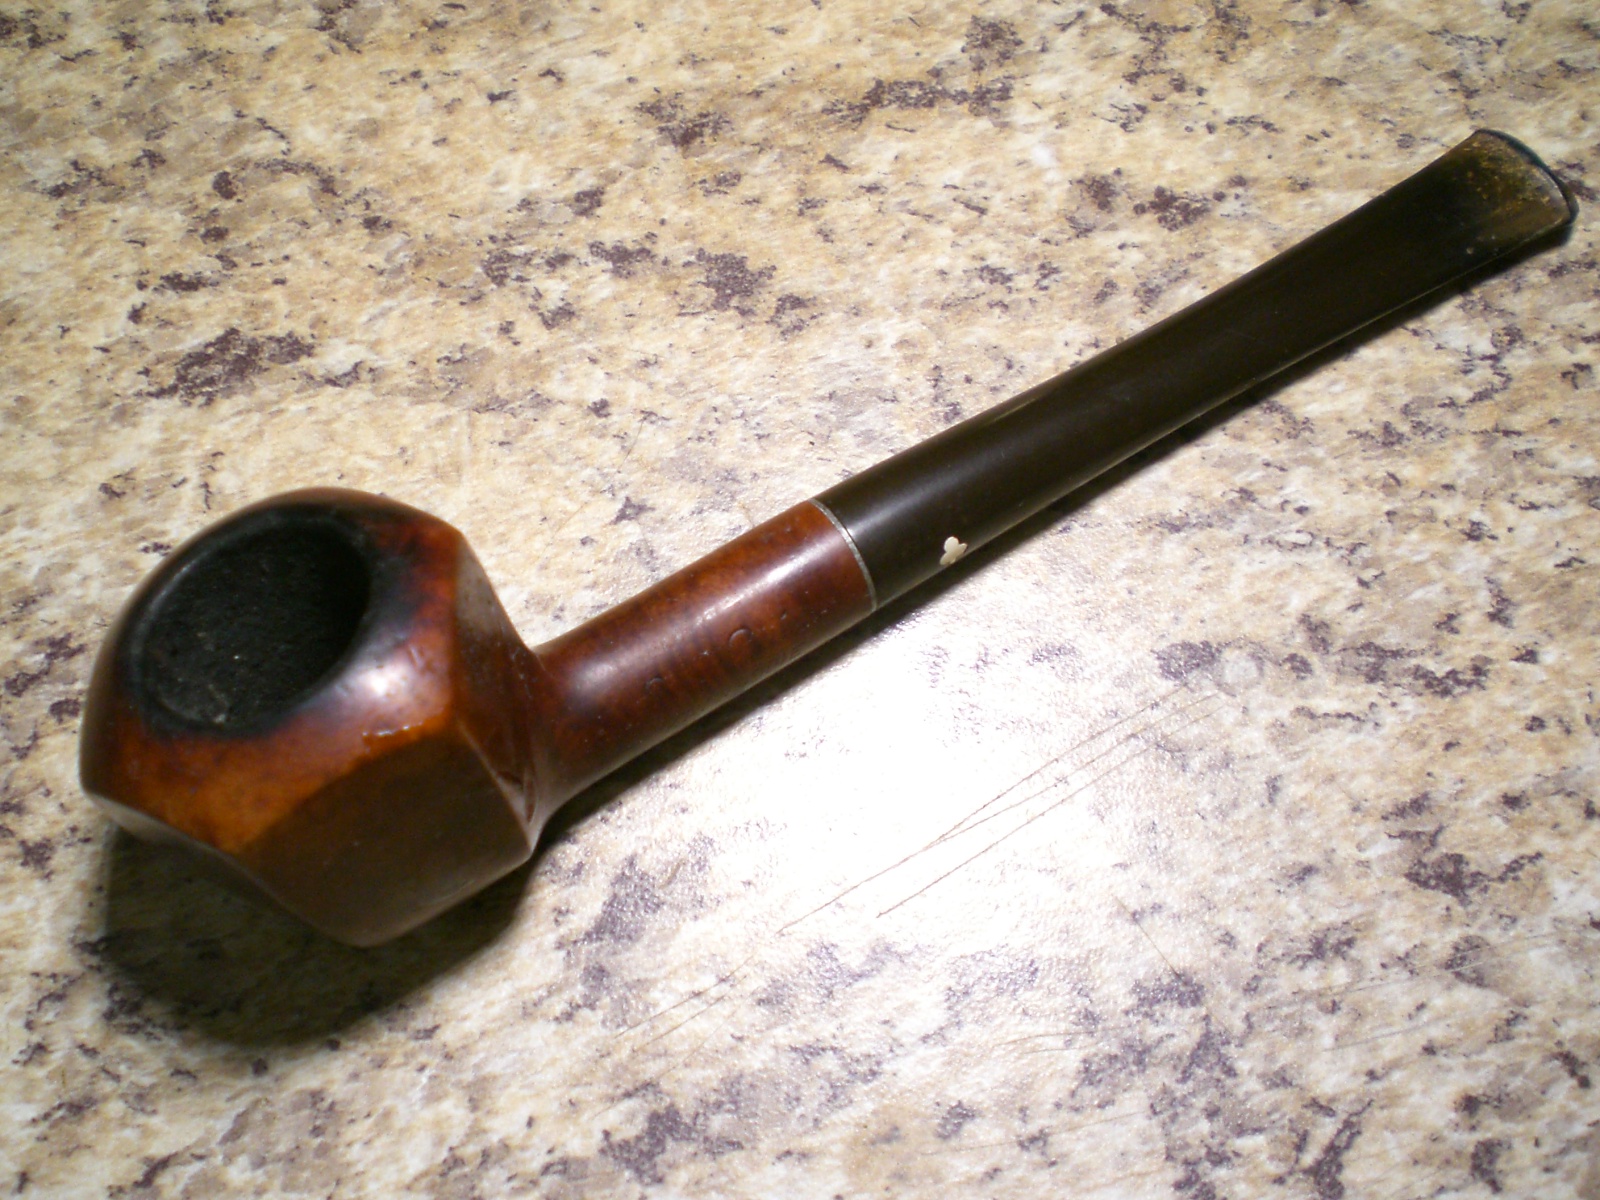
There were no deep dents or scratches in the stummel, but it did have some light charring and a few nicks around the rim. It was coated with a thick layer of deeply tinted lacquer that had been worn to bare wood in spots. It looked like there might be some interesting grain under there, but the fills… Oh, Jeeze! The fills!!! It was so riddled with them that it looked like it had the pox. The nylon stem was in predictable shape for a pipe of this age with jagged chatter and tooth dents on both sides. You can see the condition of the pipe when it arrived in the following photos.Jet1

Jet2

Jet3

Jet4 
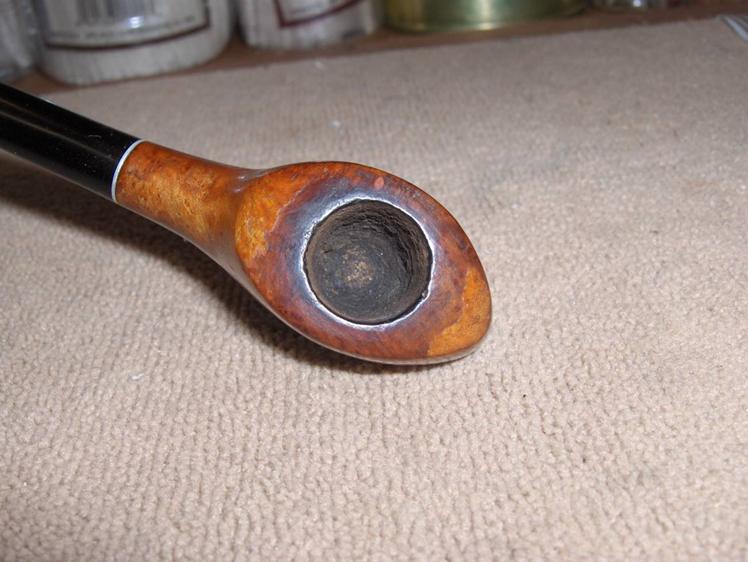
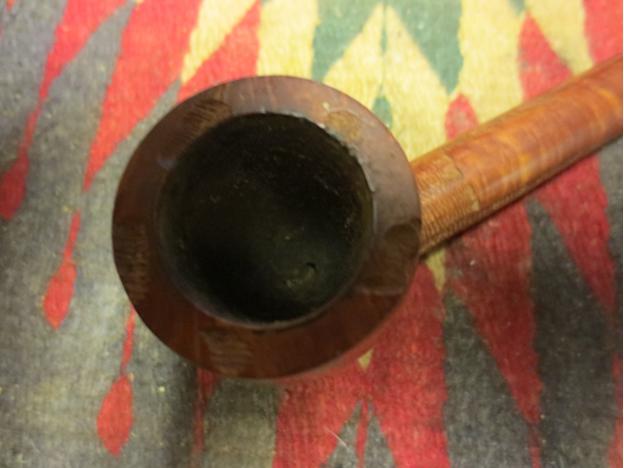
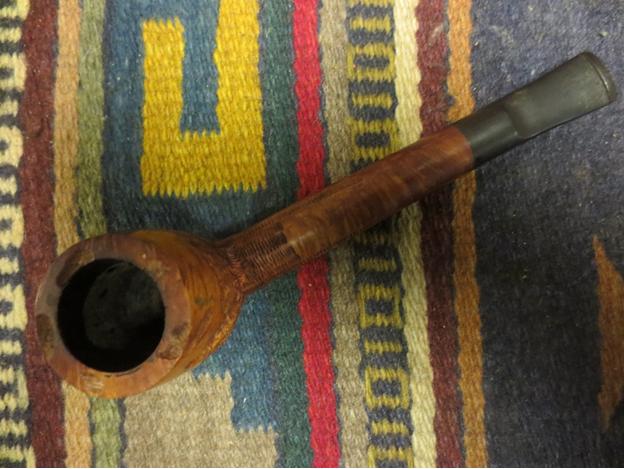
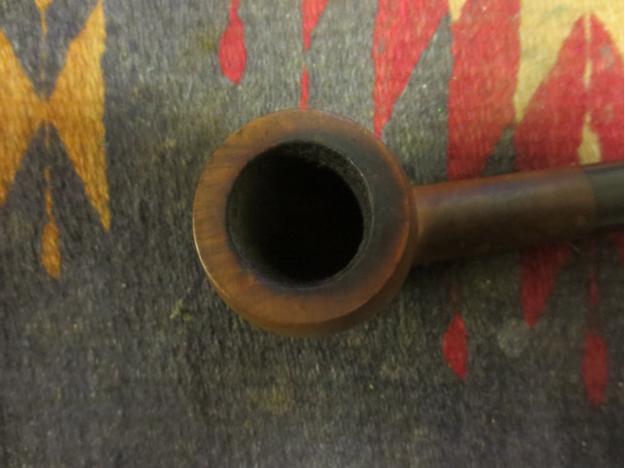
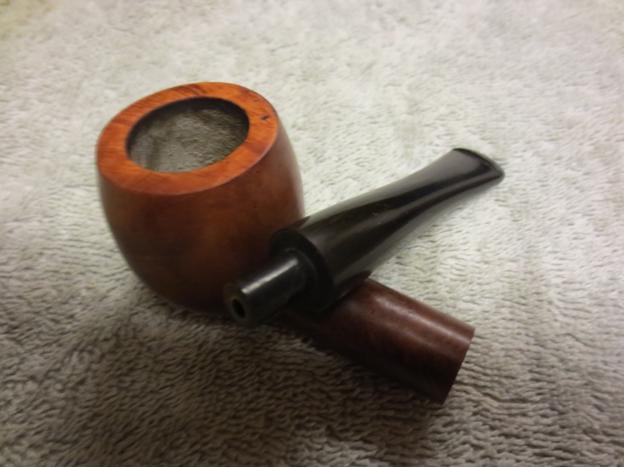
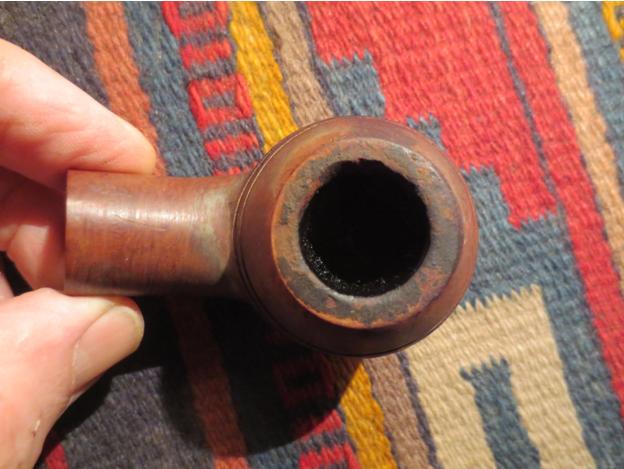
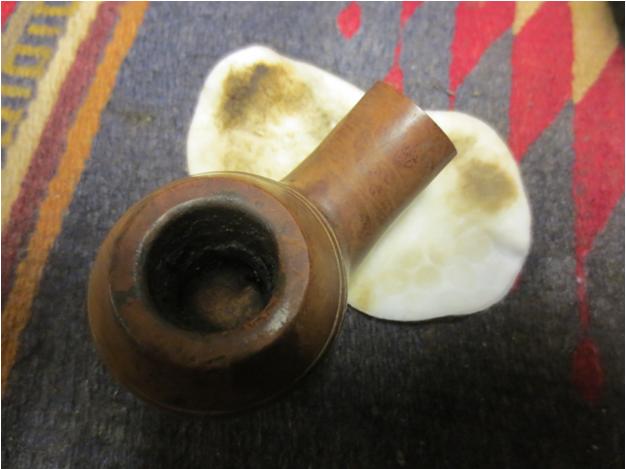
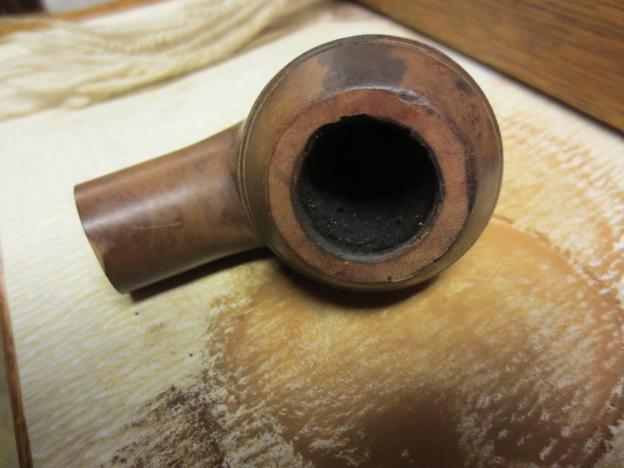
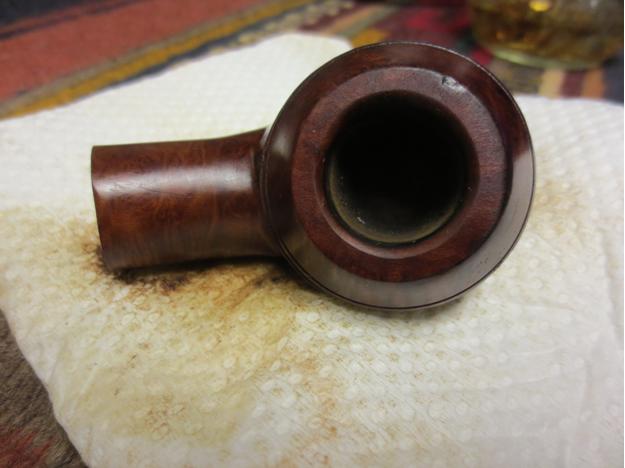
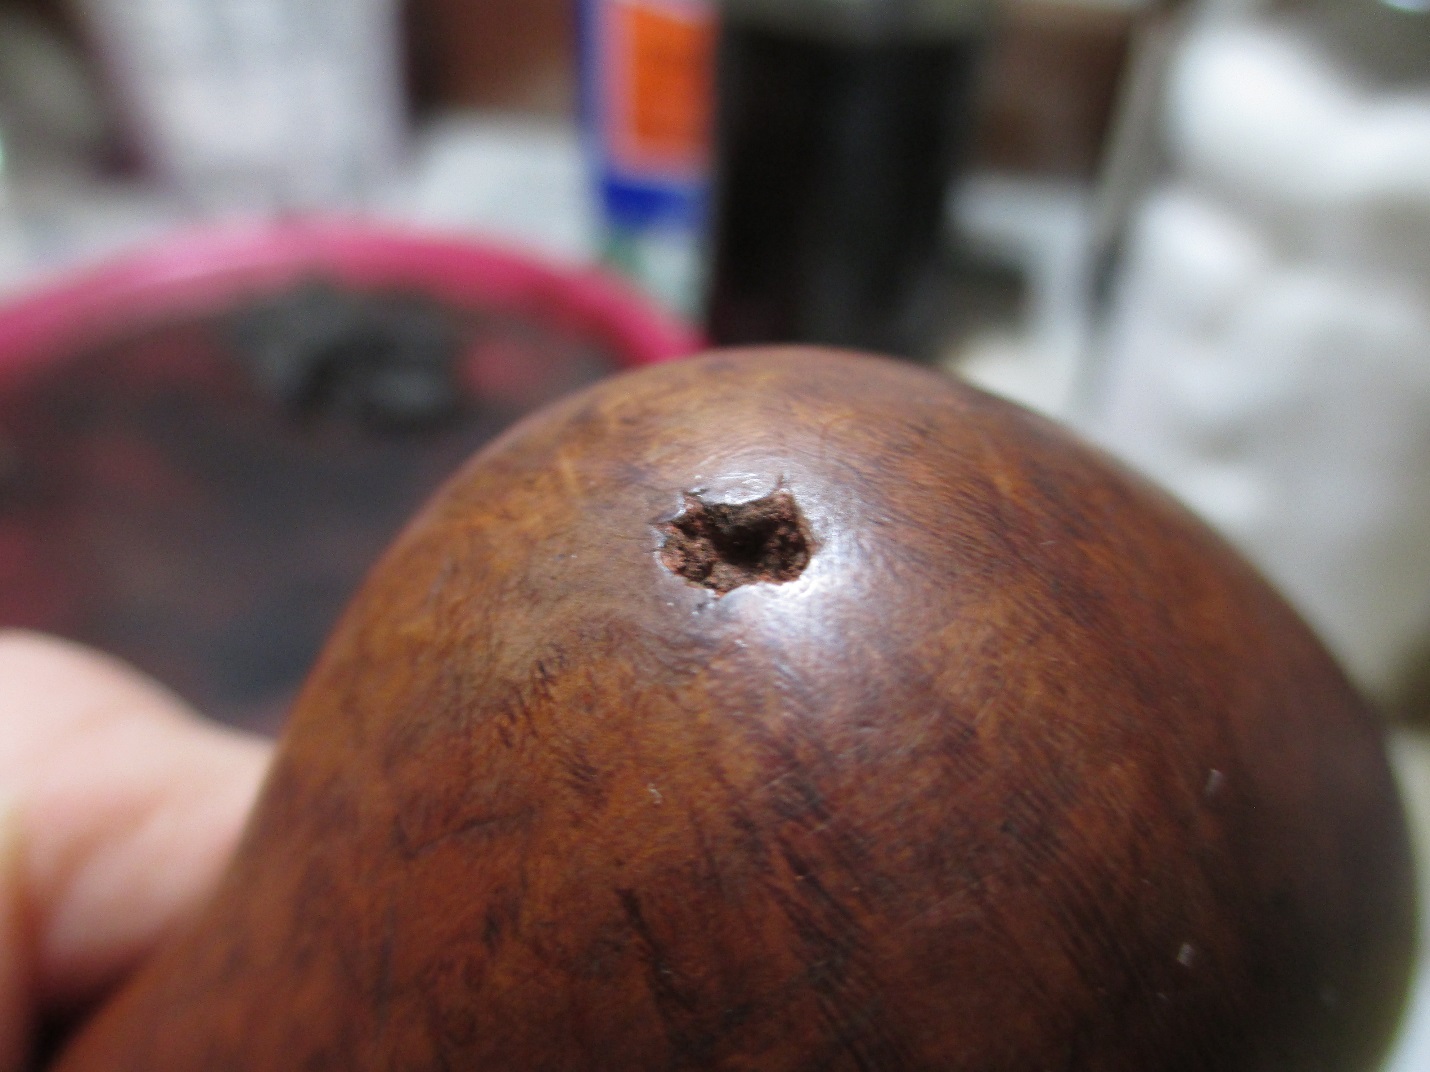
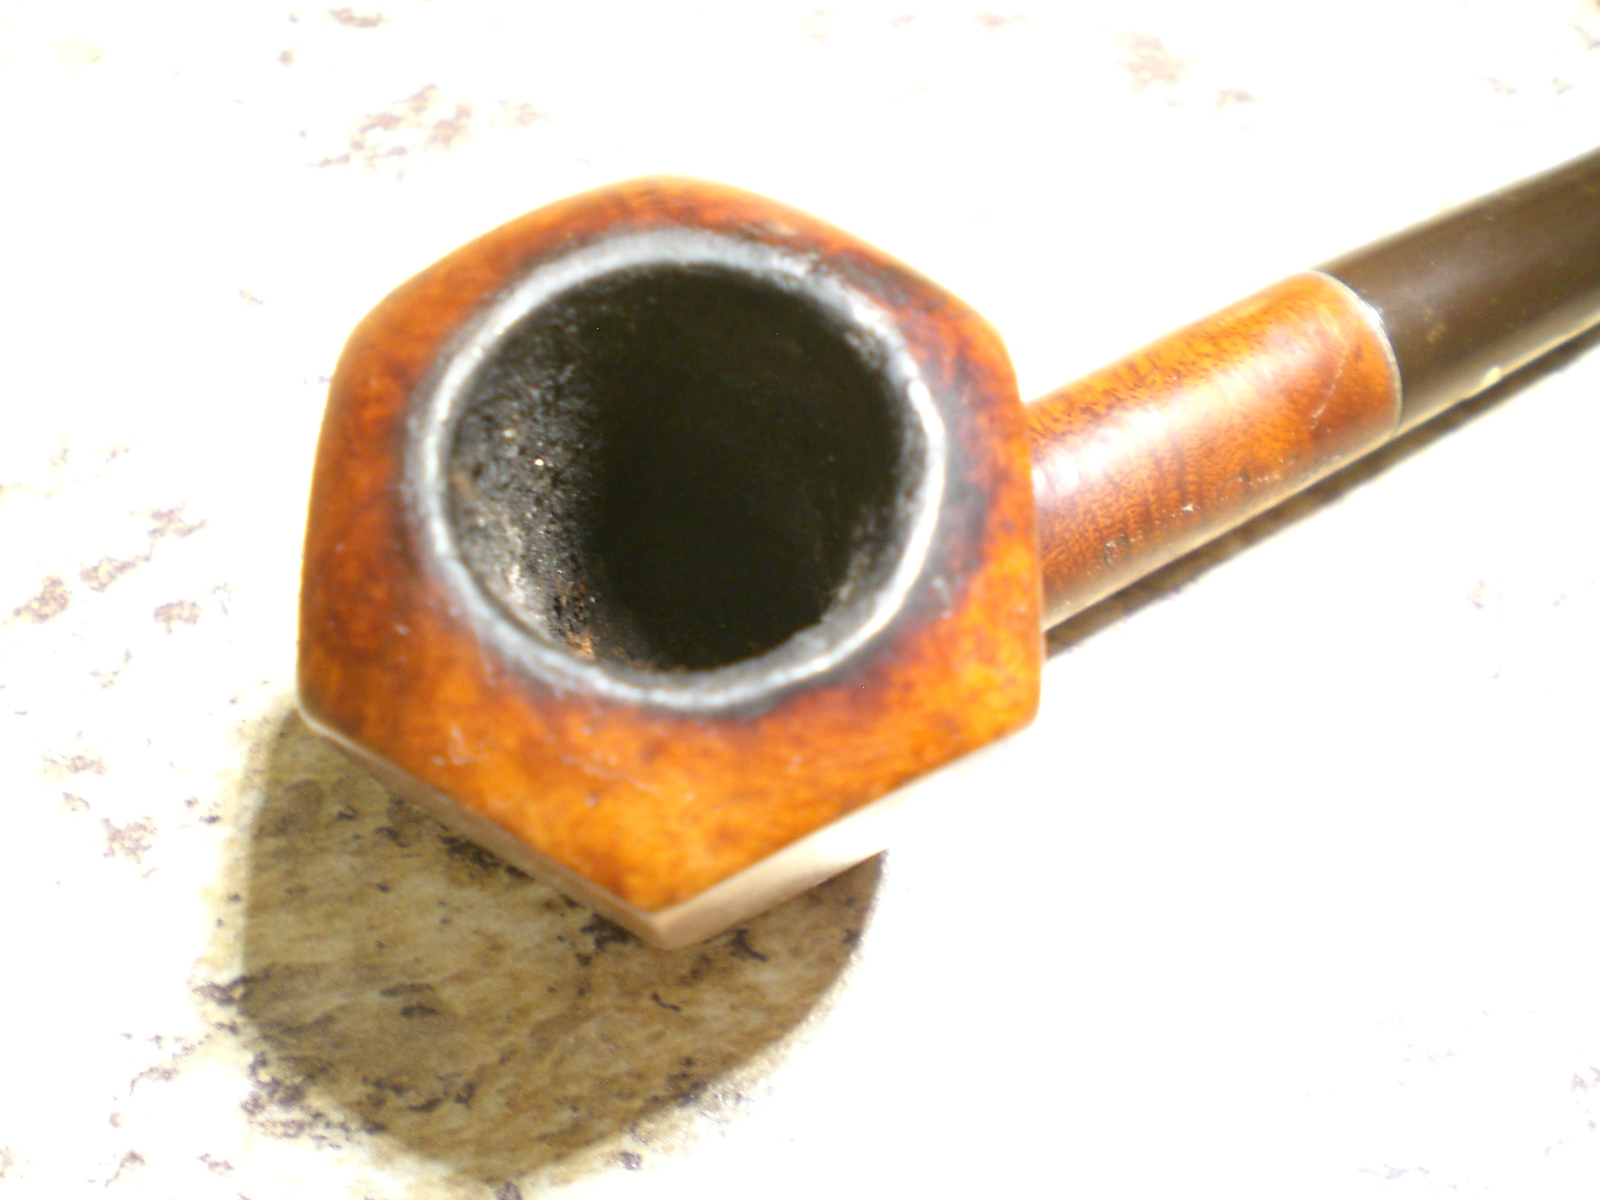
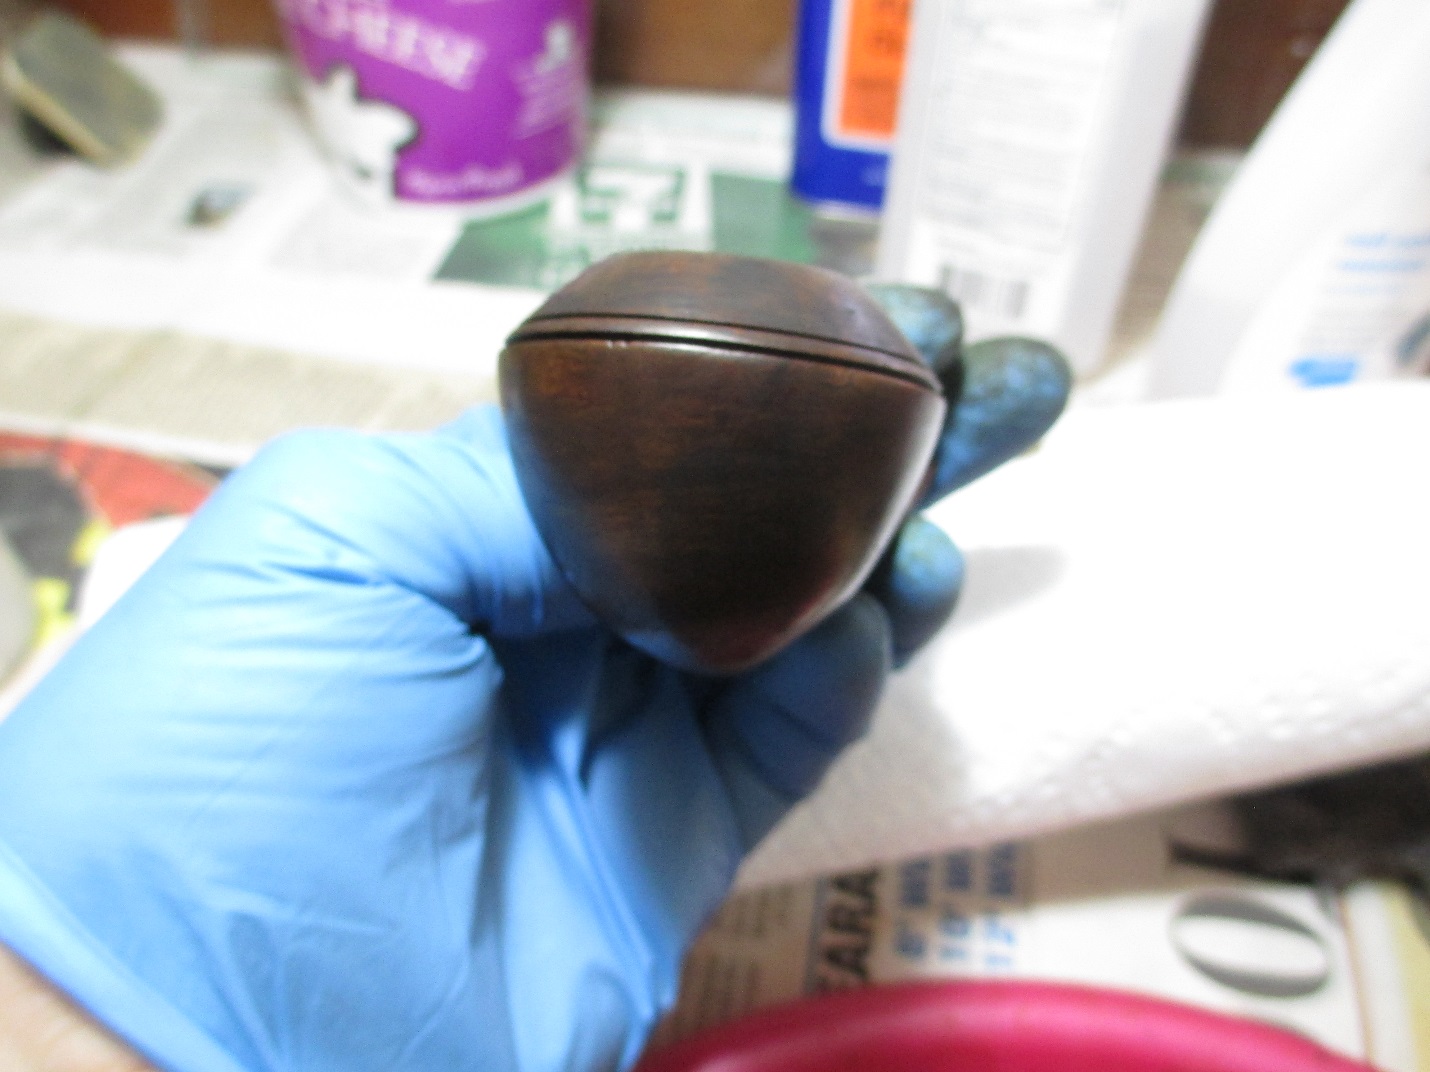
I began by cleaning the internals of the pipe. The cake in the bowl was light and reamed out easily enough. I think removing the old cake really helps to eliminate any ghosting issues that a pipe may have. So, I took it down to bare wood. I made a surprising and disappointing discovery at that point. The fills did not stop on the outside of the bowl. There were at least two fills in the inside of the chamber. Oh, Medico, say it ain’t so!

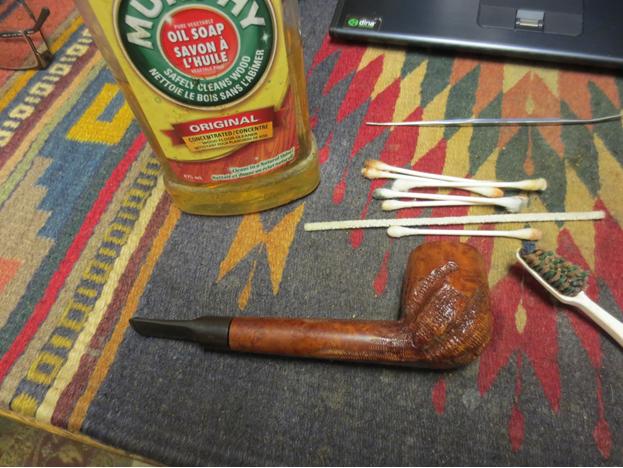
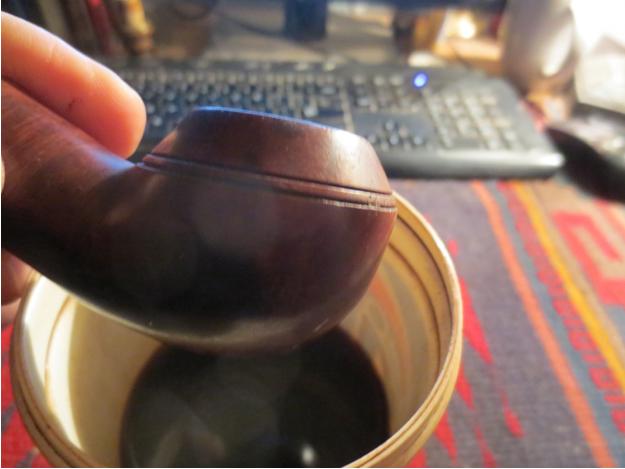
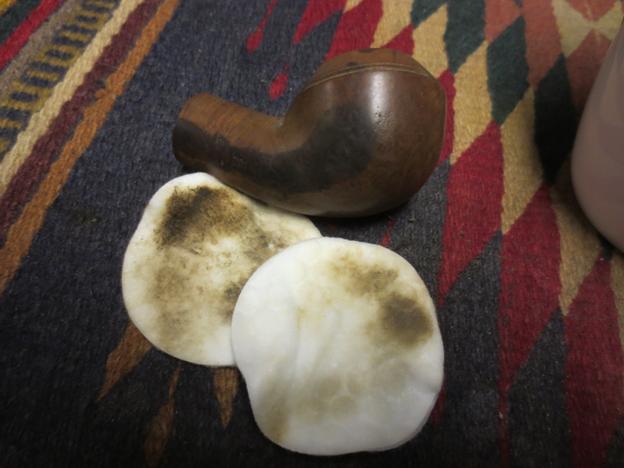
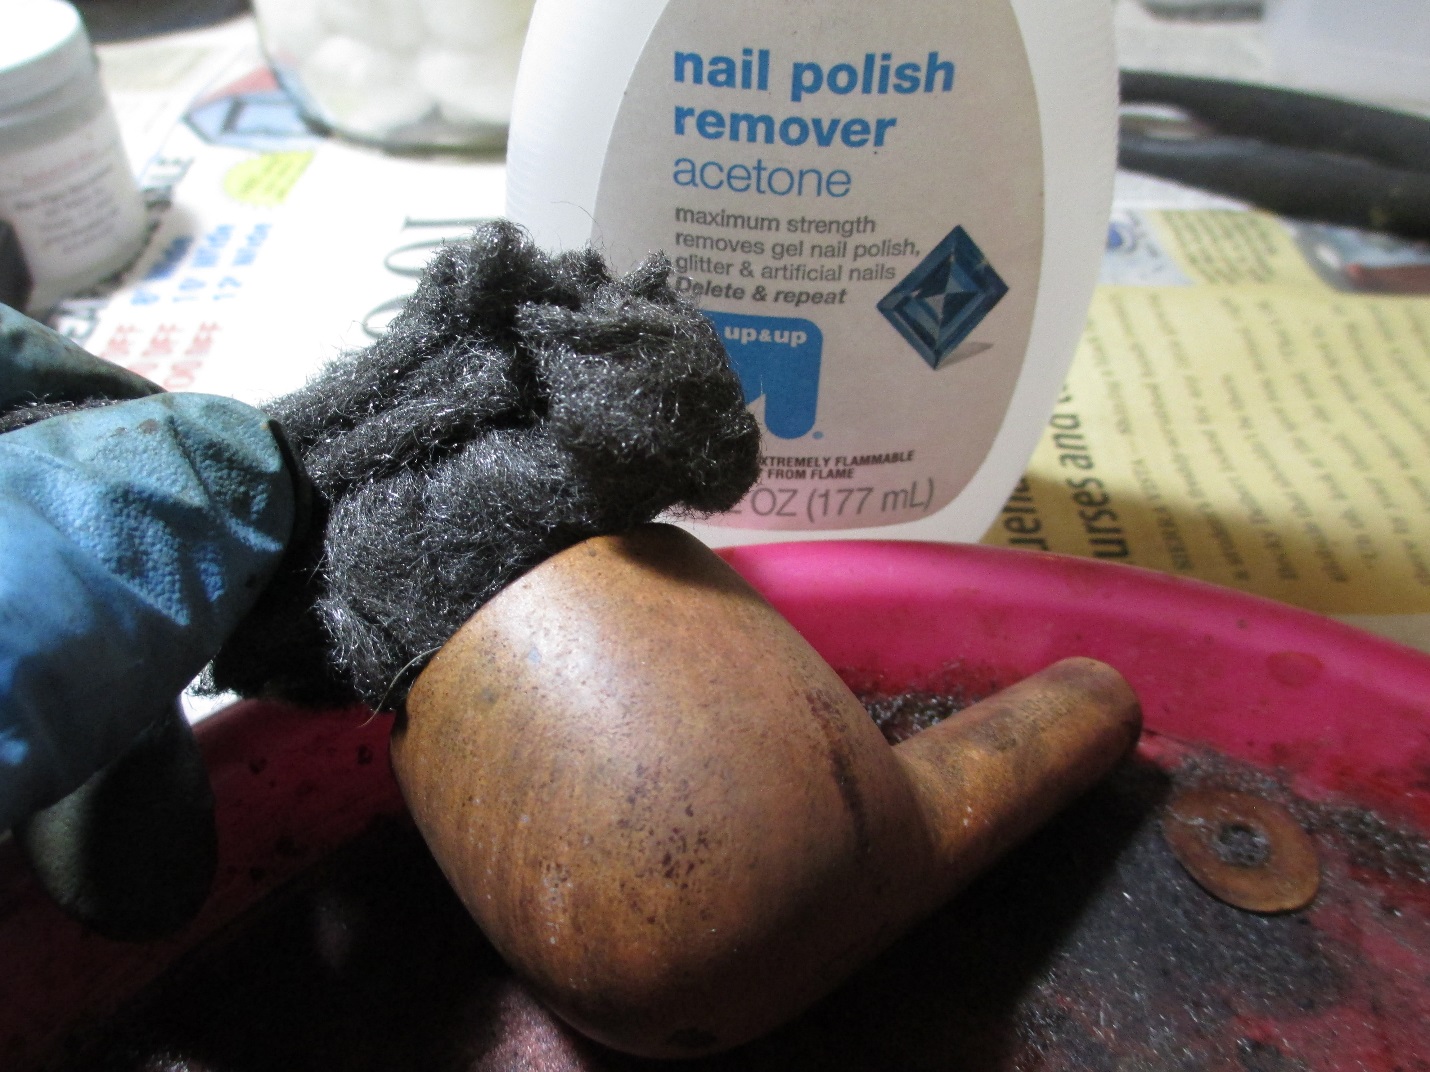
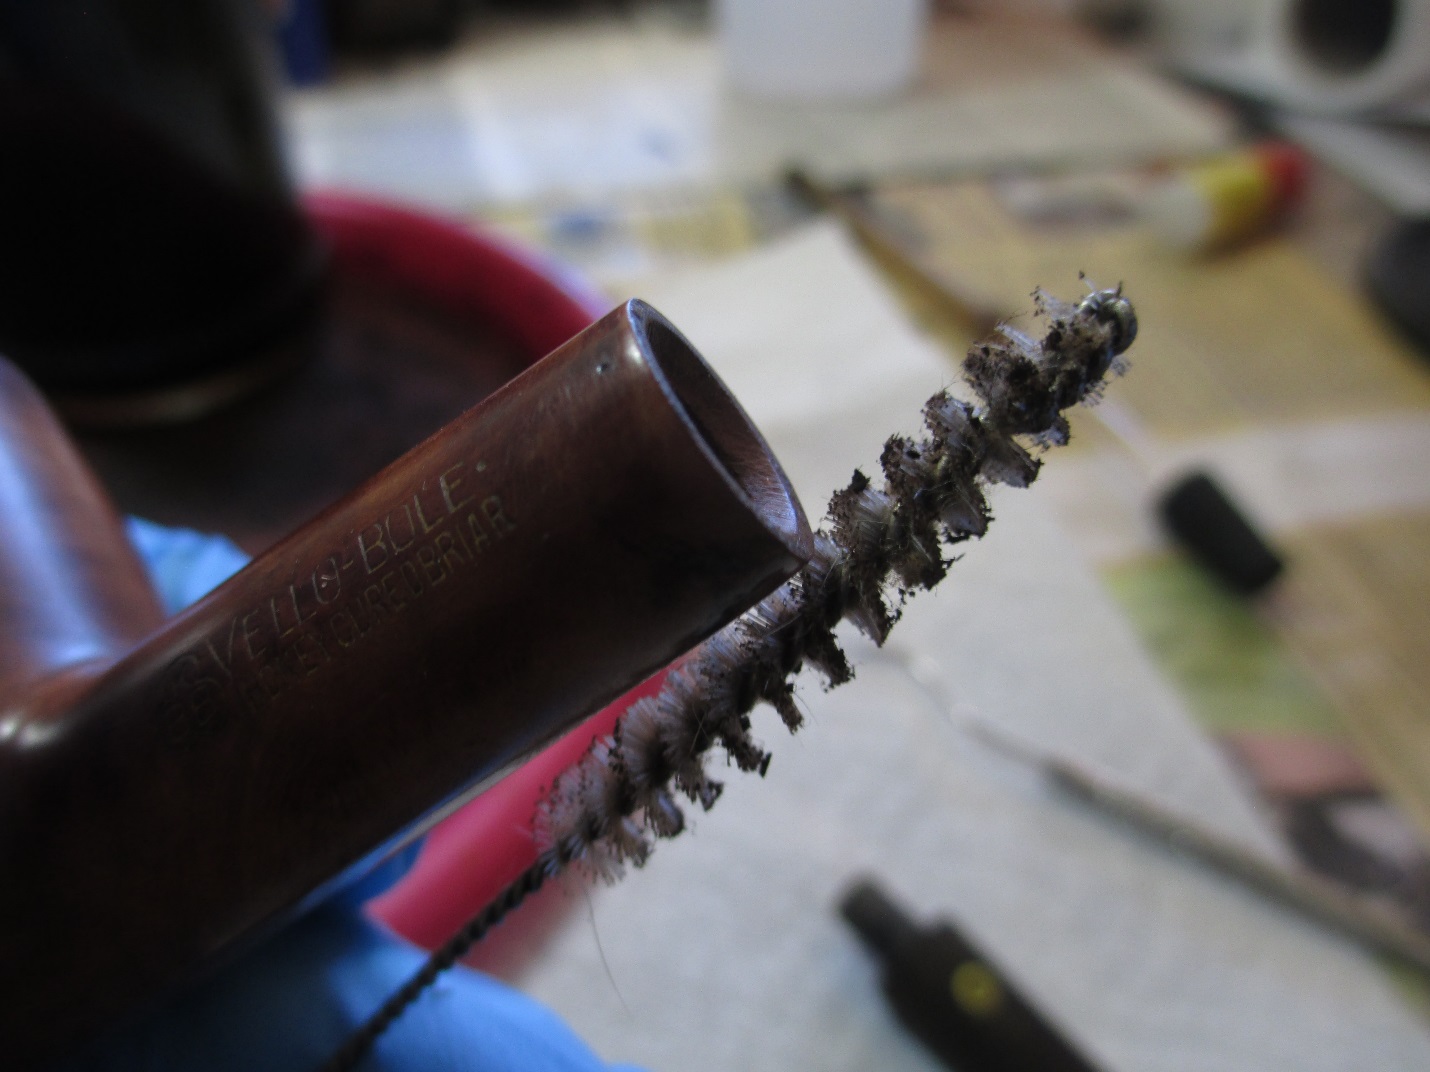
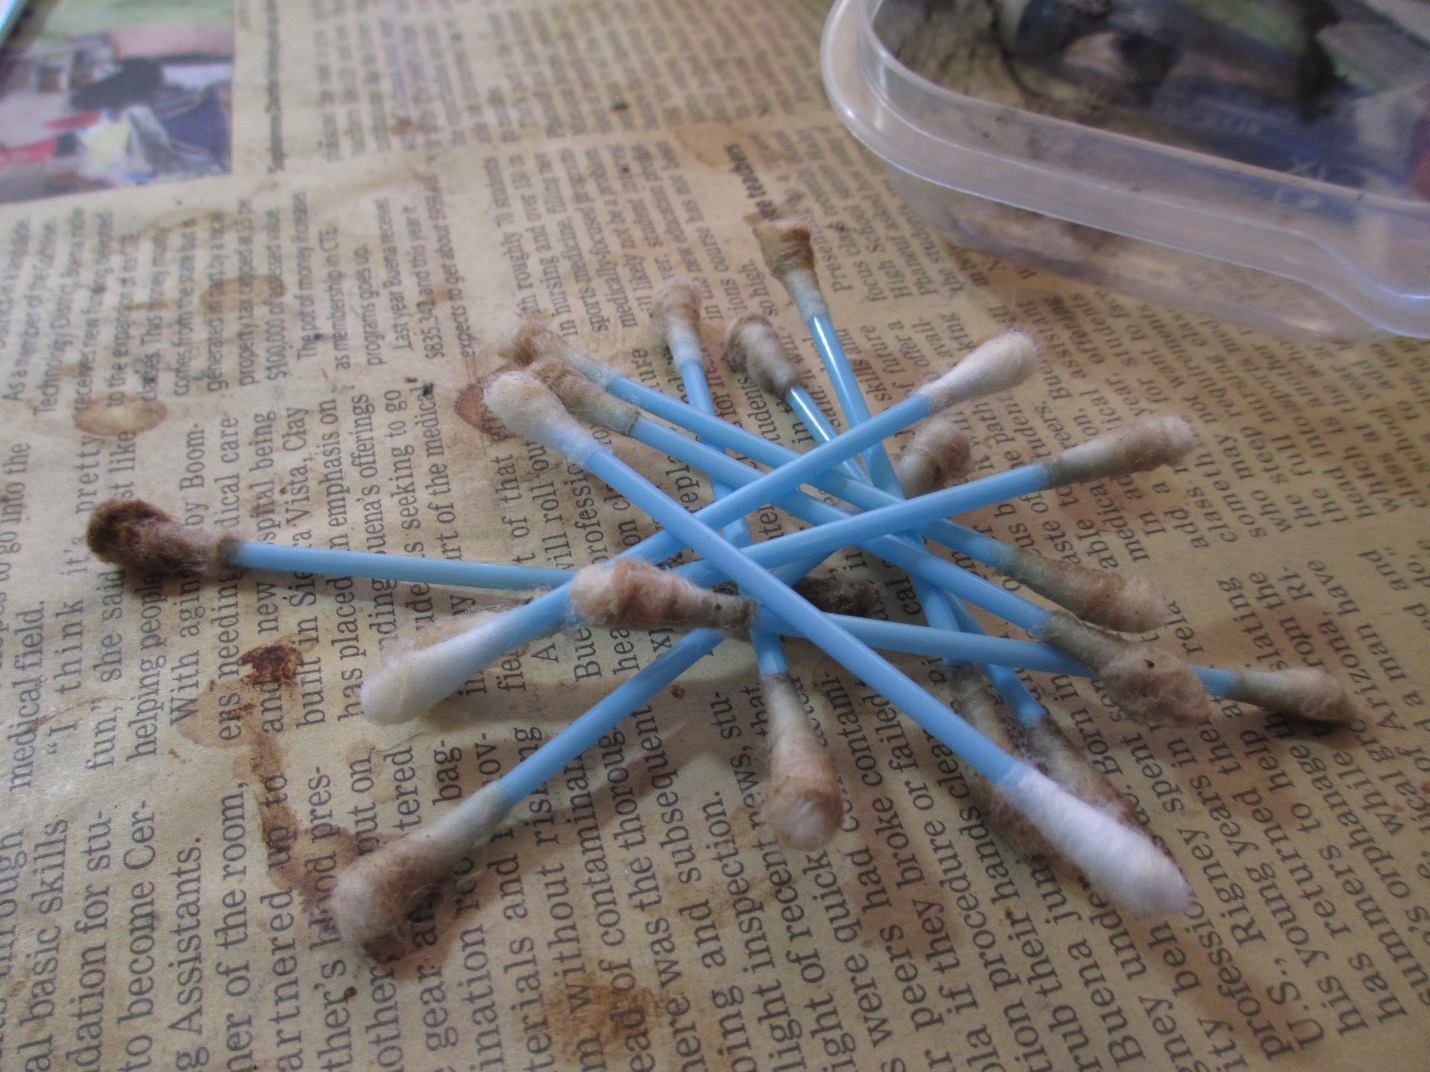
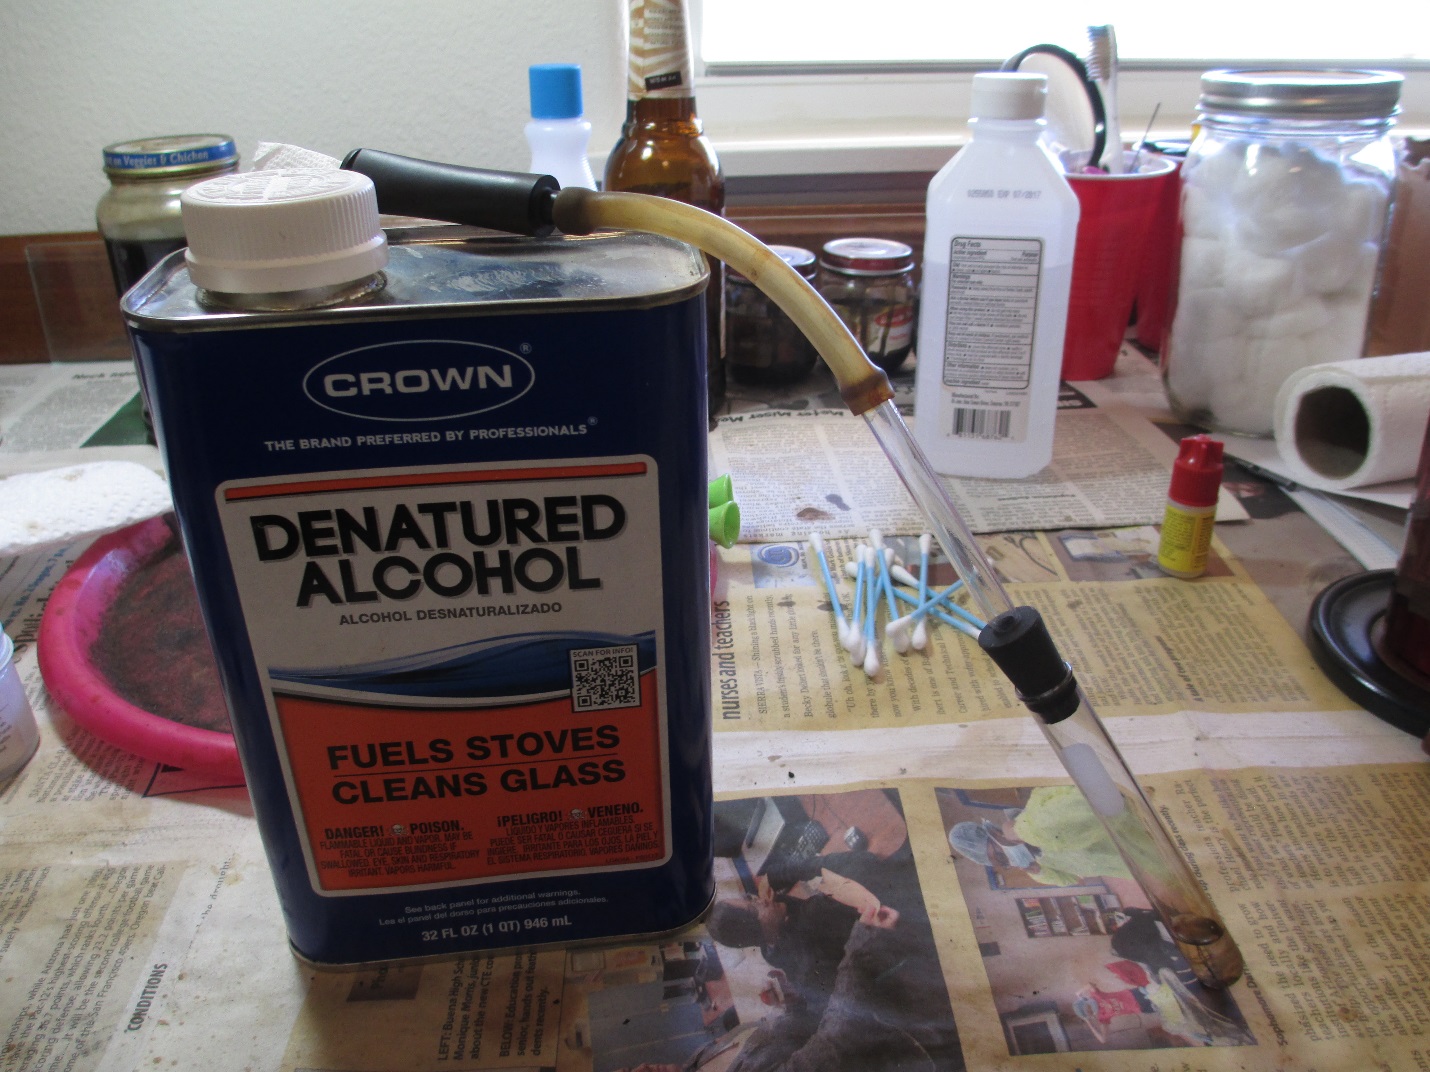
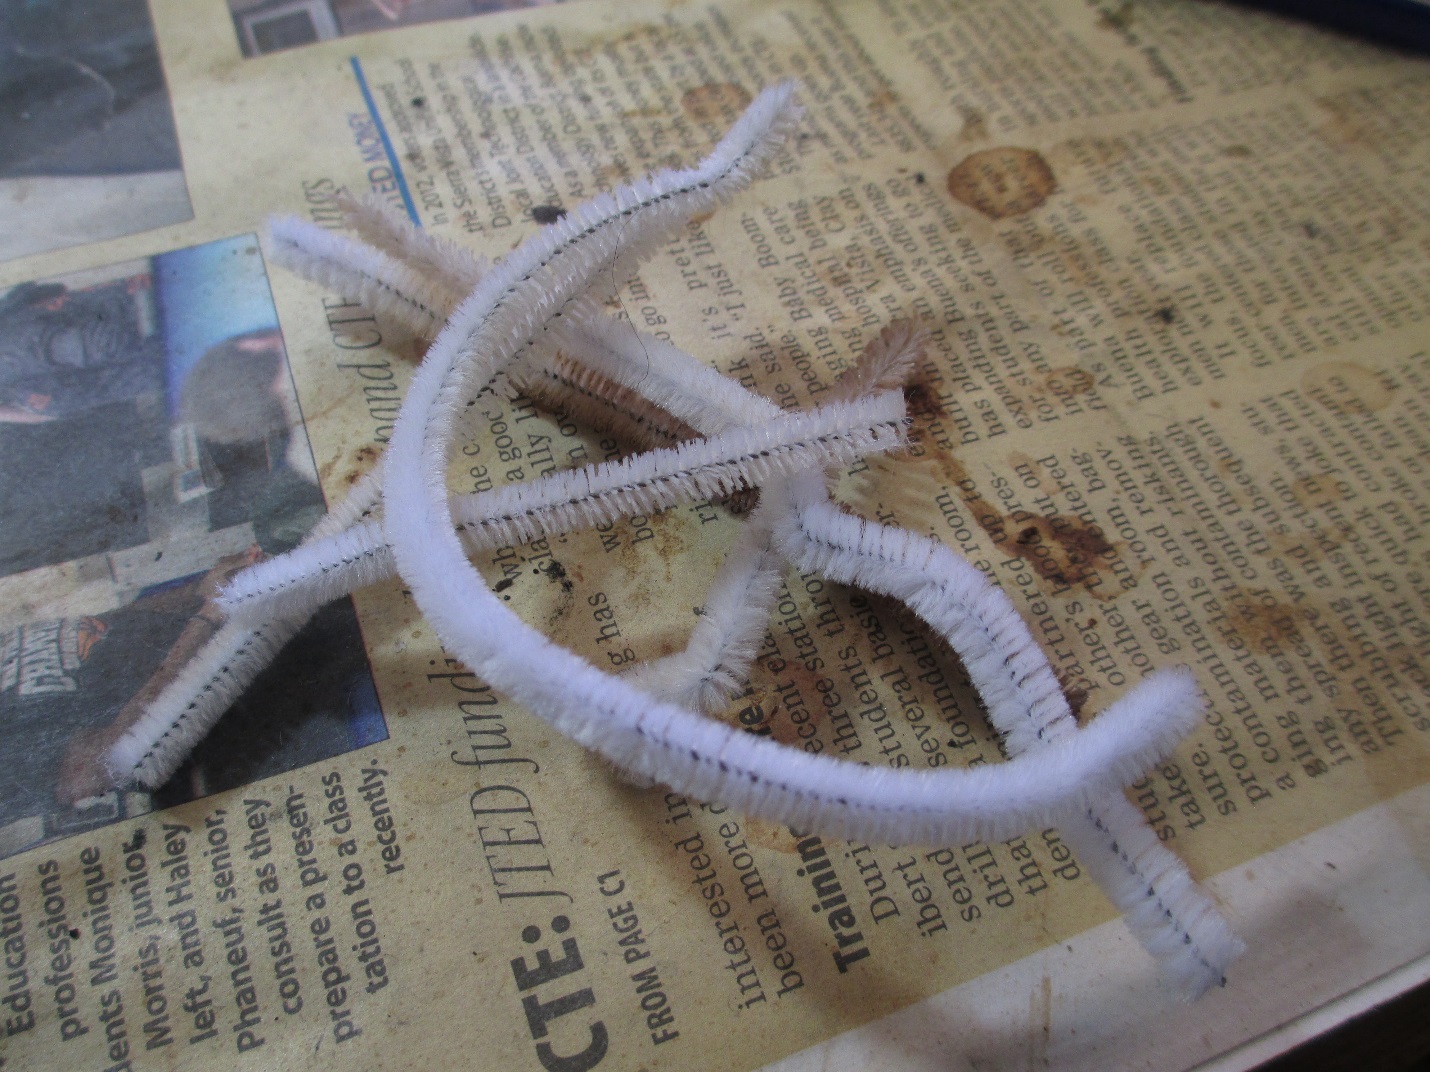
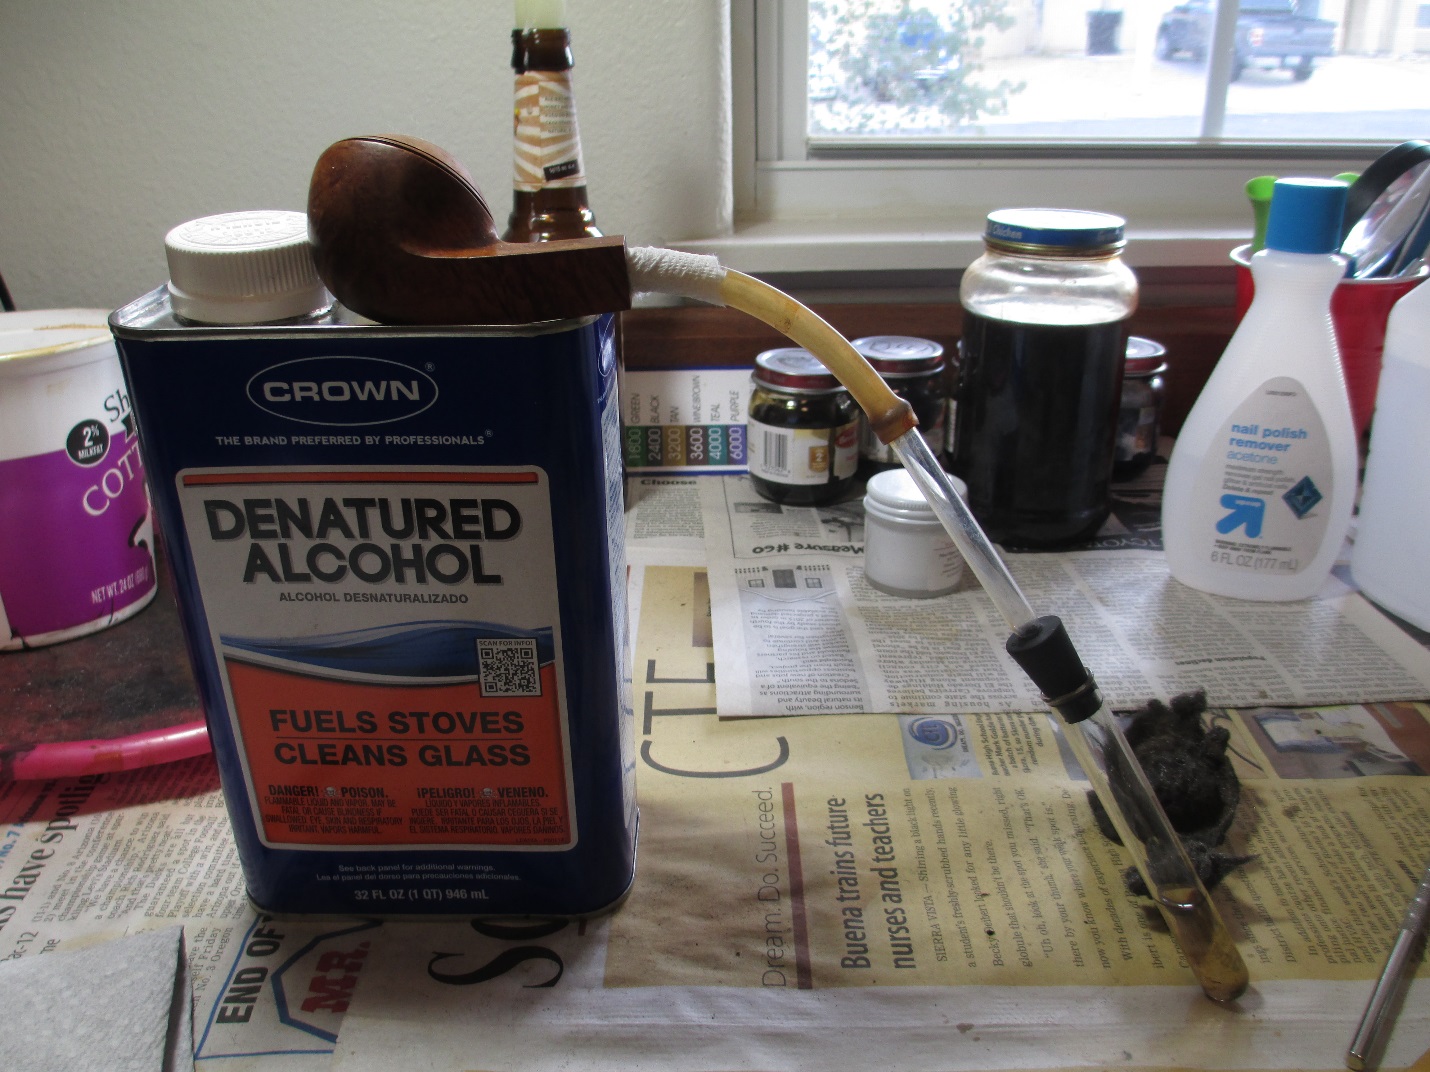
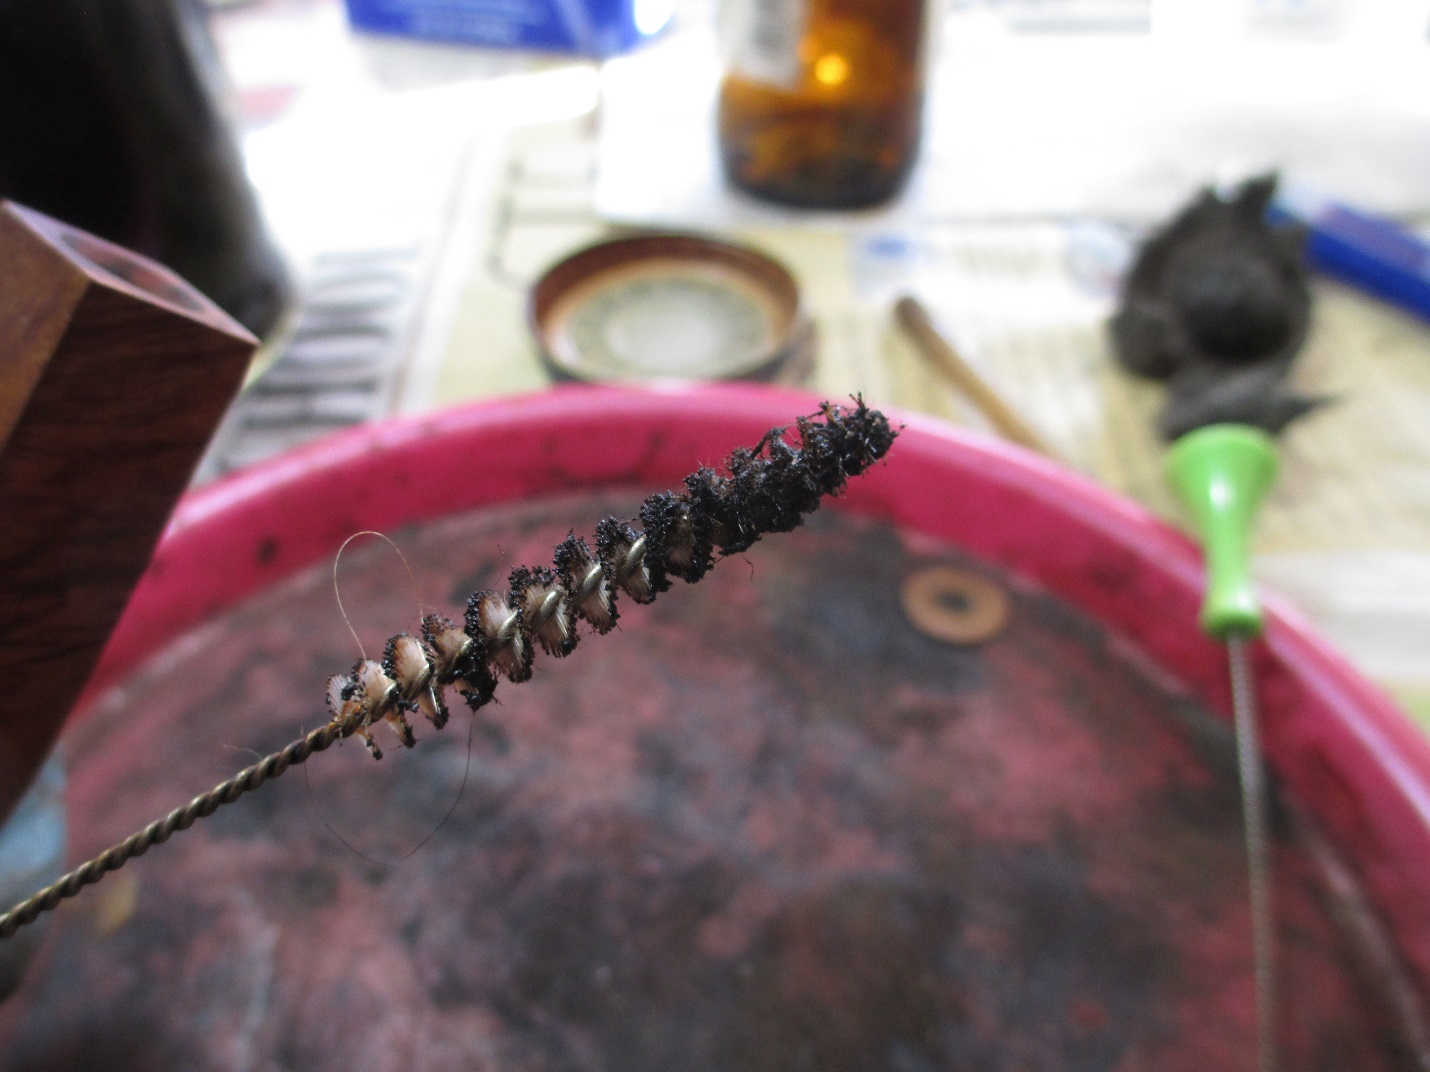
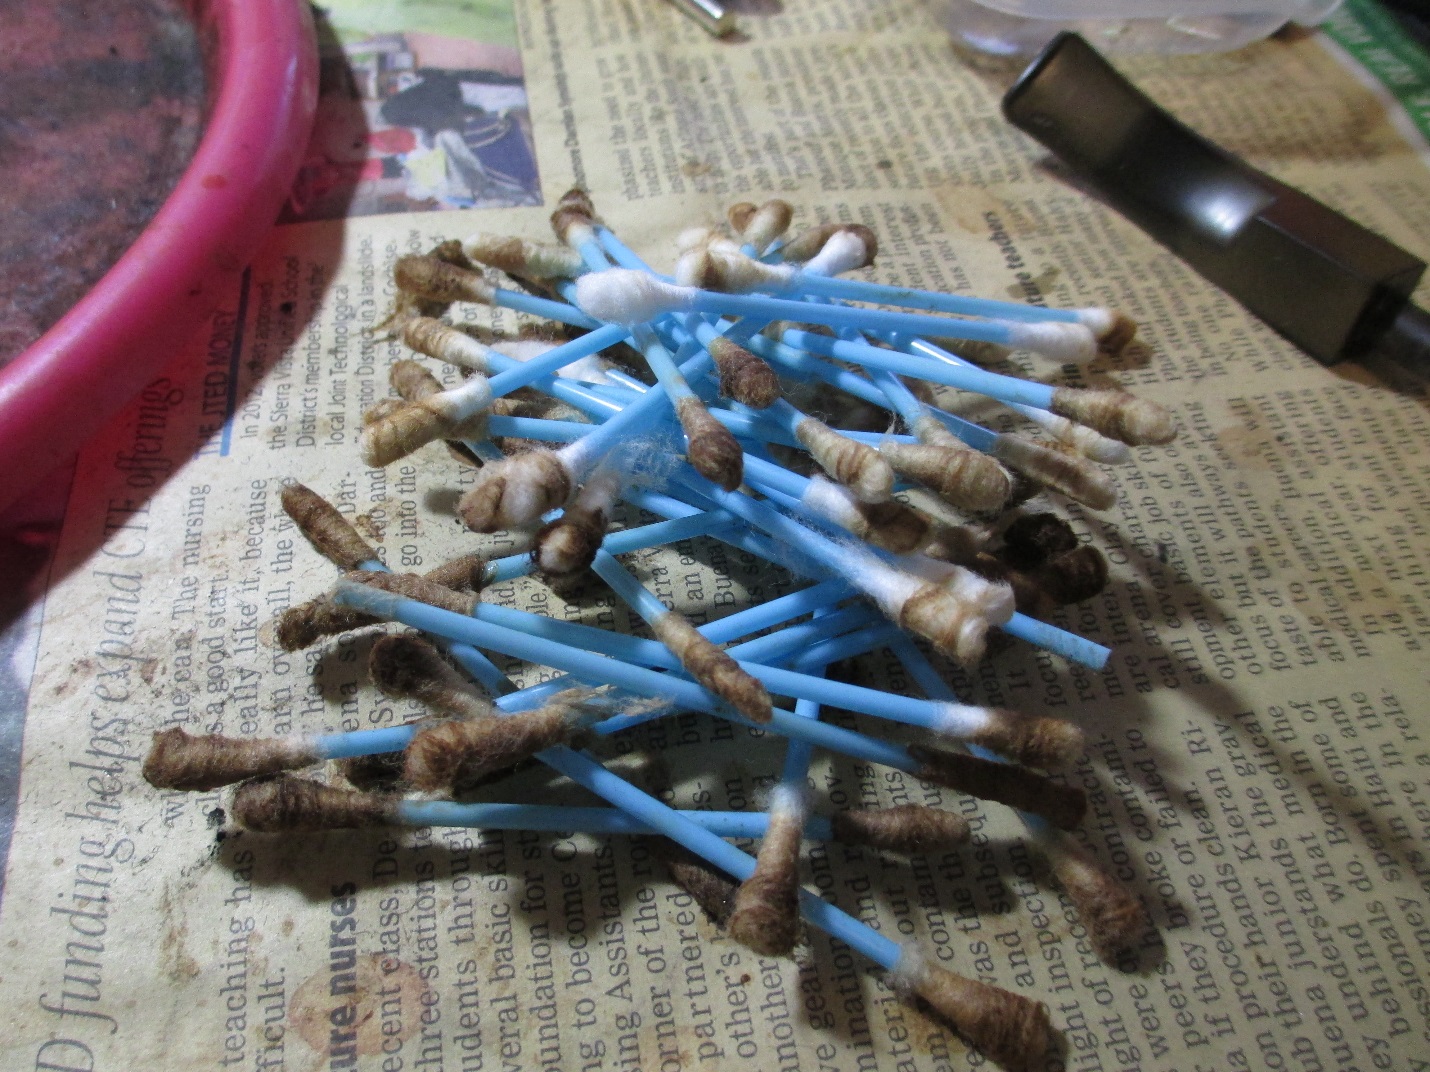
I took the opportunity to sand out a few of the nicks on the inner rim while I was working in the area, and then moved on to the rest of the pipe. There turned out to be quite a bit of residue inside the shank and stem. I took care of that by running a variety of alcohol soaked pipe cleaners, cotton swabs, and shank brushes through until they came out clean.Jet5 When I was satisfied that the internals were clean, I gave the stummel an acetone wipe-down to get rid of the spotty lacquer coat, and then dropped it into an alcohol bath to remove the remaining of the finish. Usually, there’s a satisfying Ker-Plink! when I do this and the stummel goes right to the bottom. Not this time. This one actually floated belly-up like a dead fish. I had to put tweezers in to hold it down to make sure the entire thing was submerged. I’m guessing that it was the fault of the fills, but it’s a good thing that we weren’t in Salem, Massachusetts. If we were, I would have had to get out the pitchfork and call the Witch Finder General.Jet6 
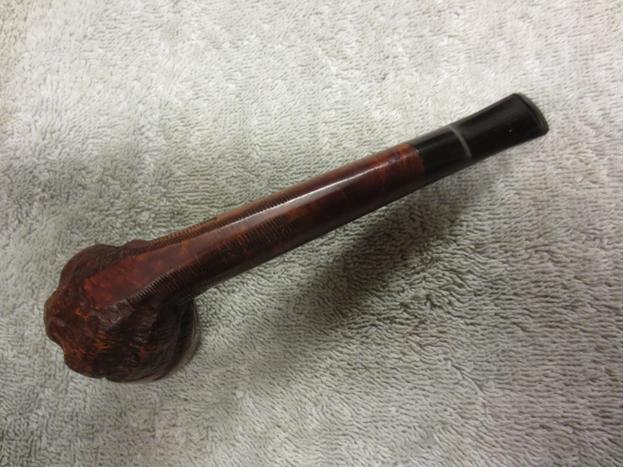
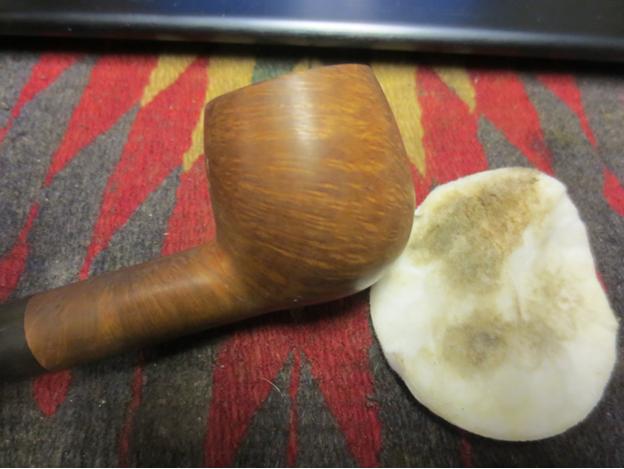
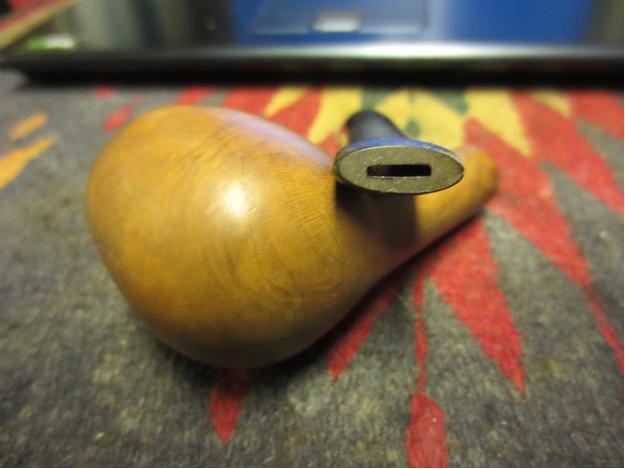
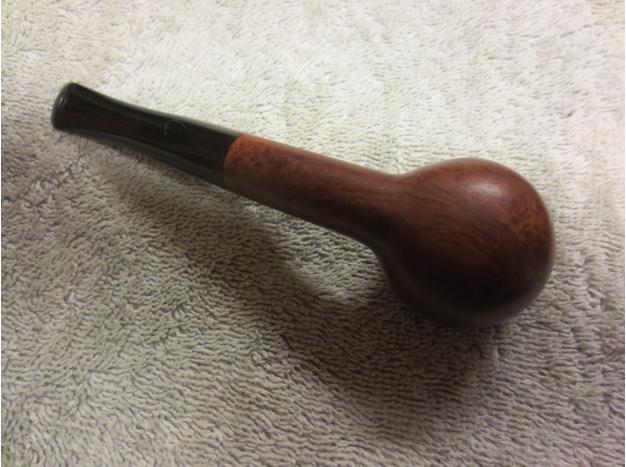
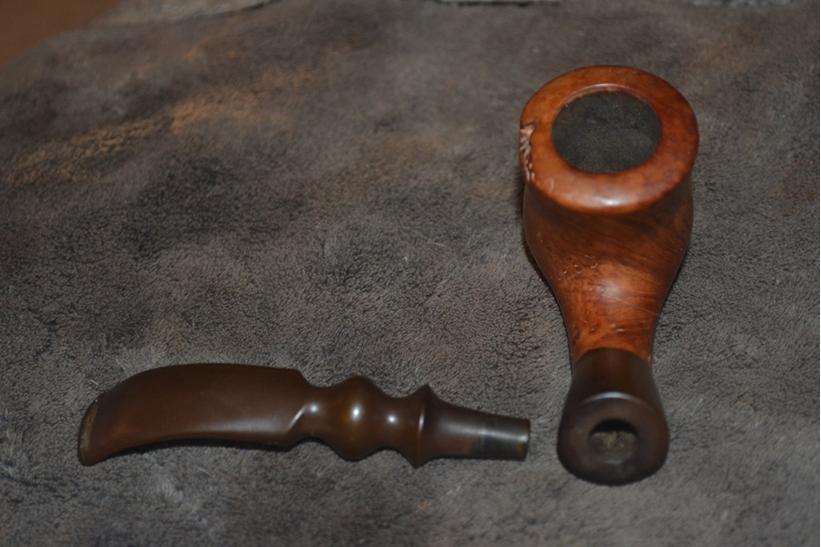
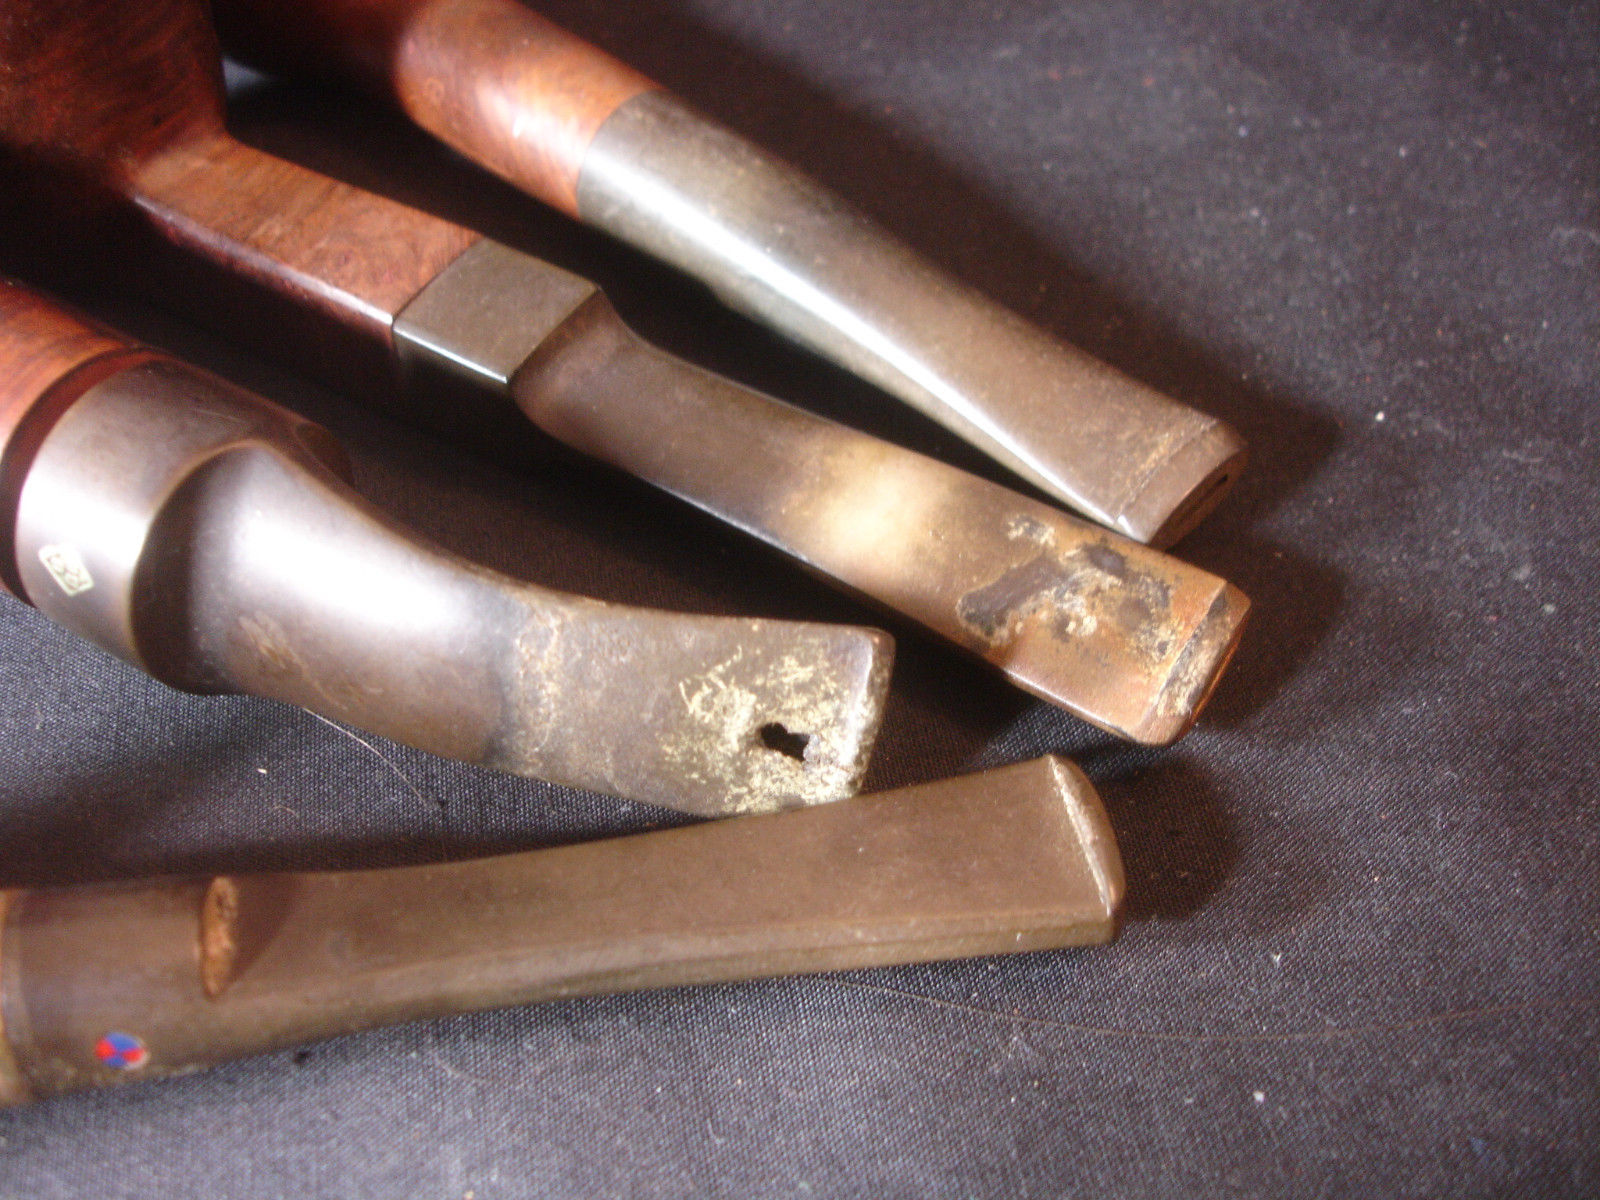
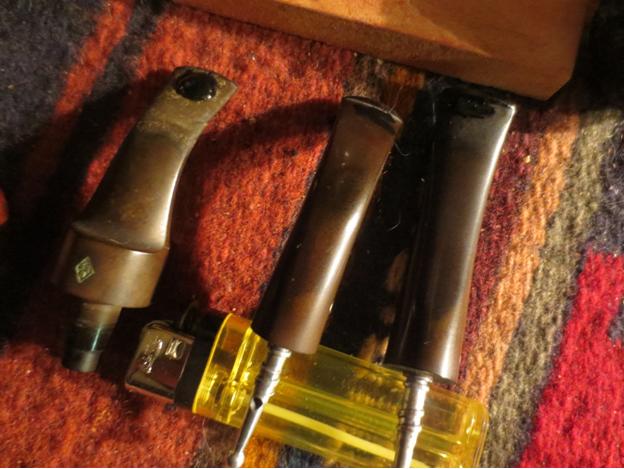
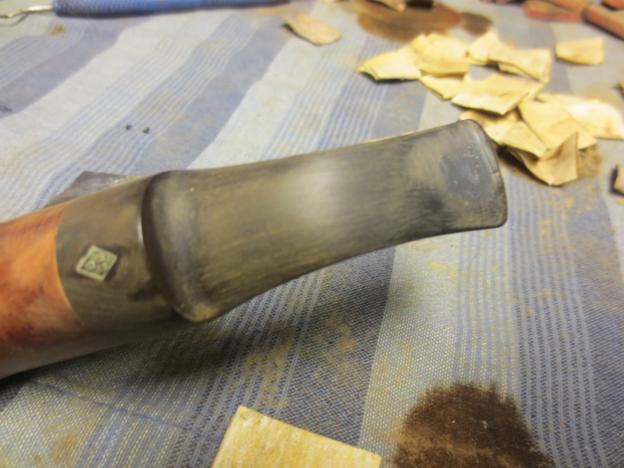
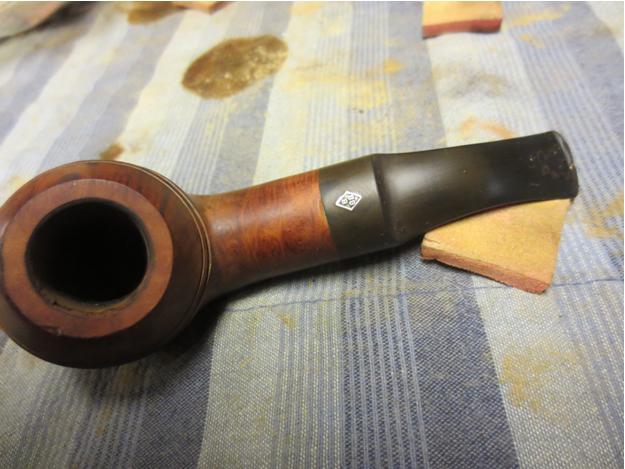
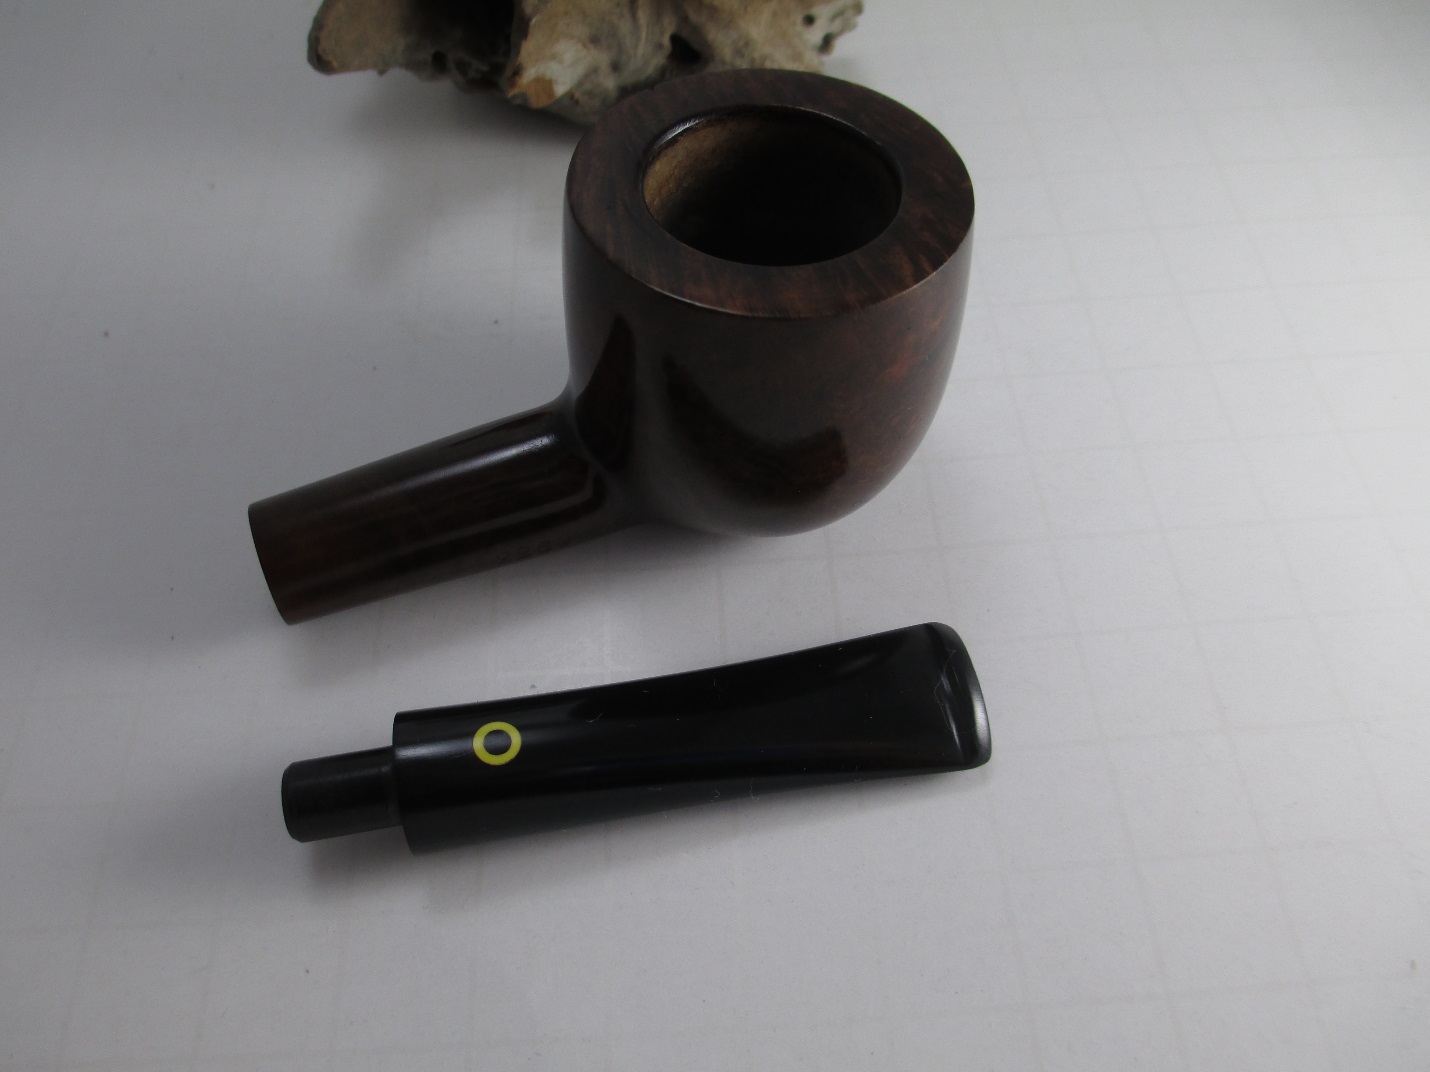
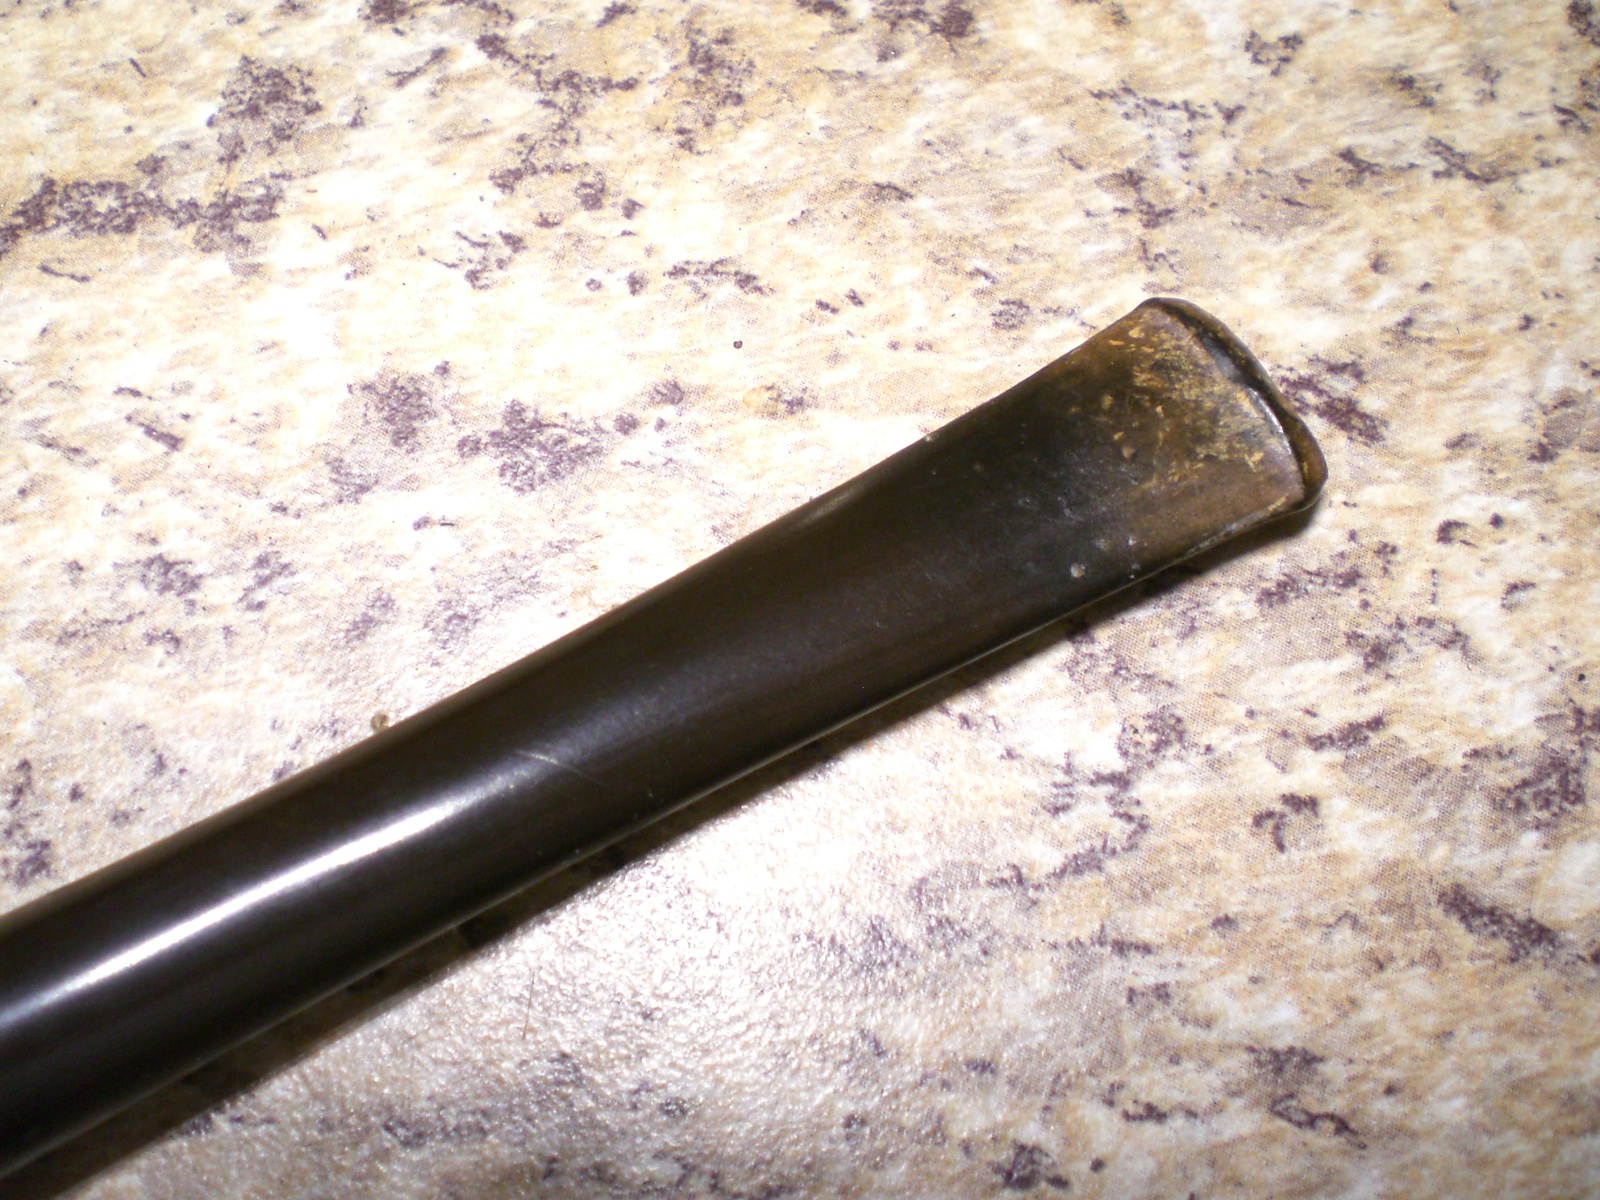
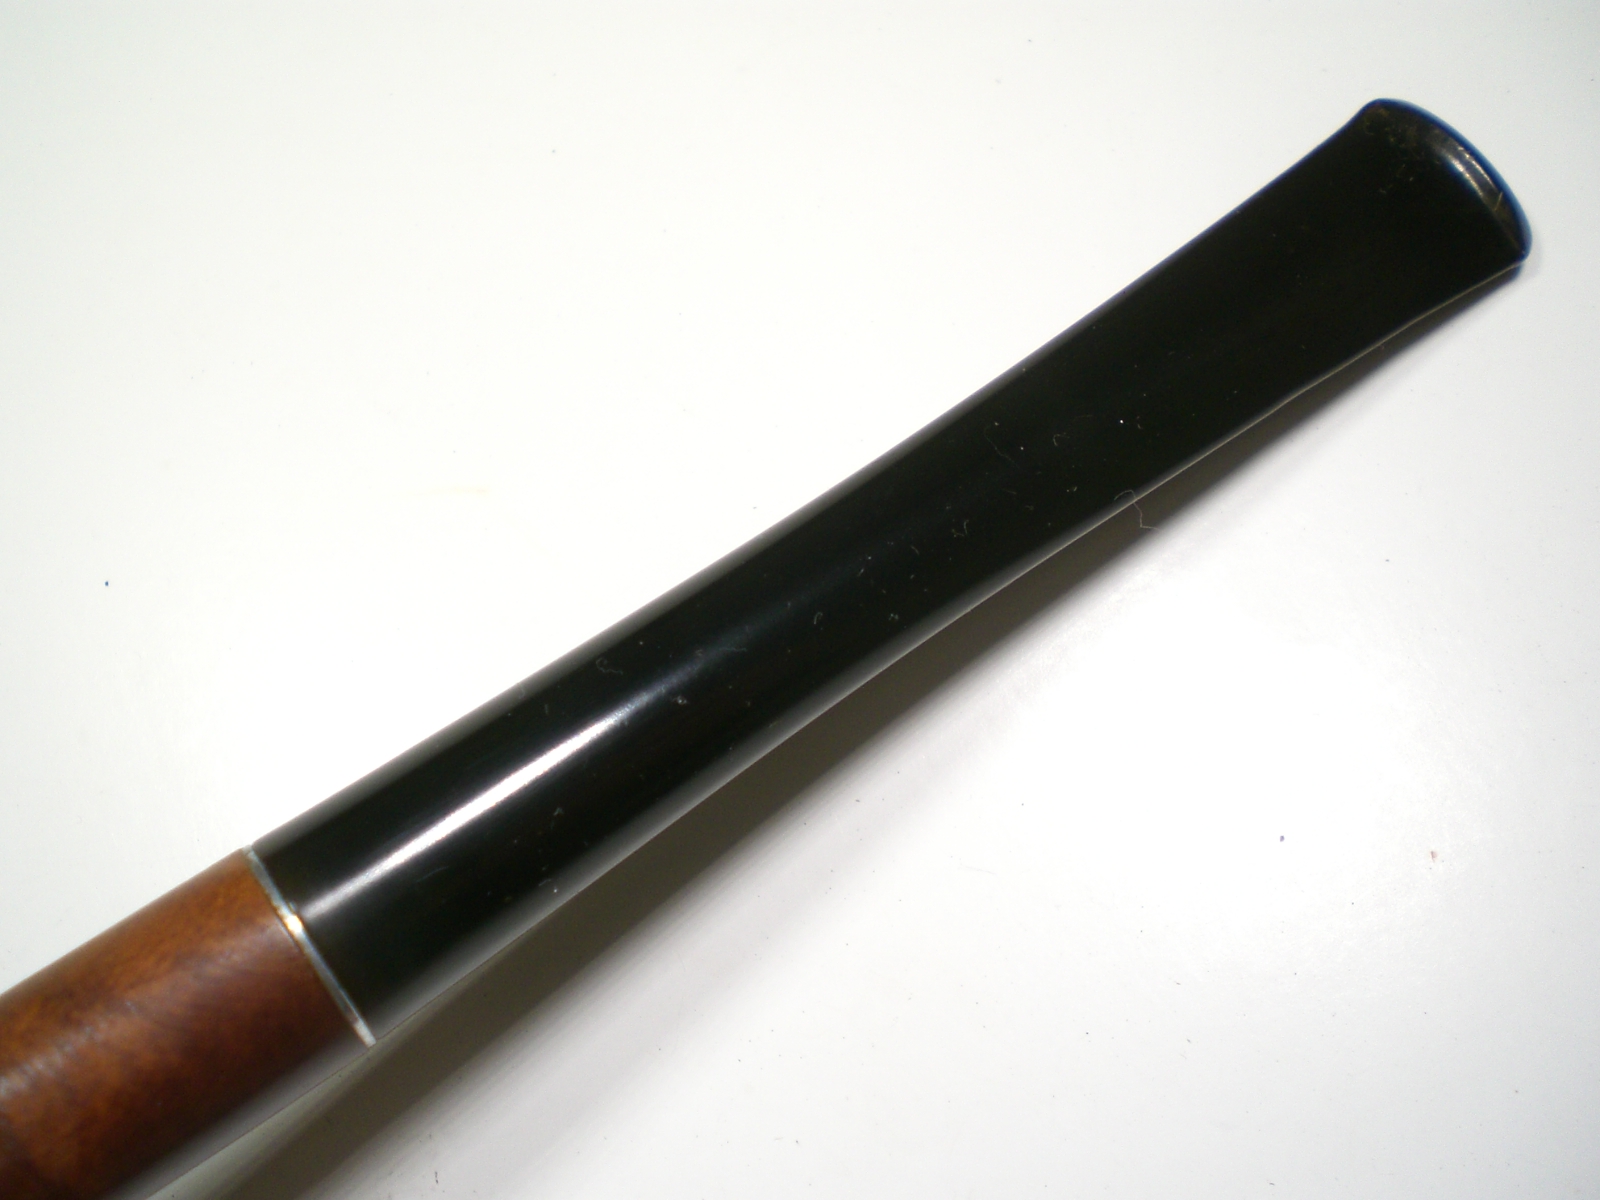
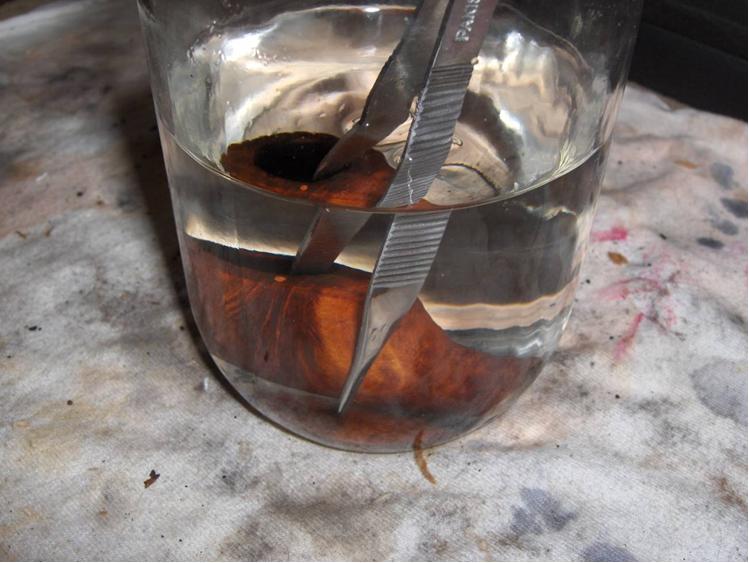
While the stummel enjoyed a pleasant soak, I went to work on the nylon stem. The first step was to clean the surface with citrus cleaner and cubes cut from a Magic Eraser. There really wasn’t very much filth to remove and it cleaned up quickly. The photo below shows the stem after the surface cleaning.Jet7 
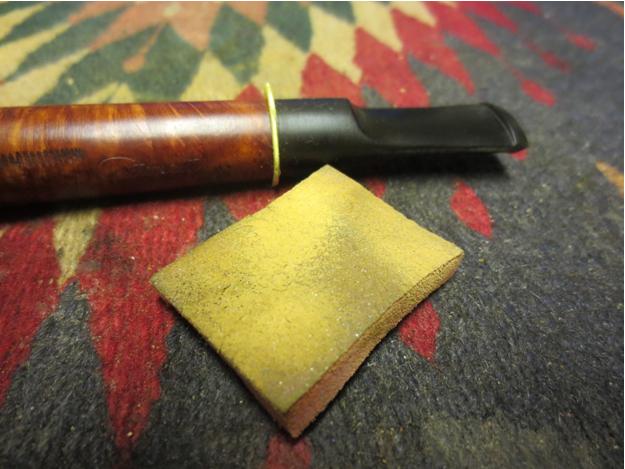
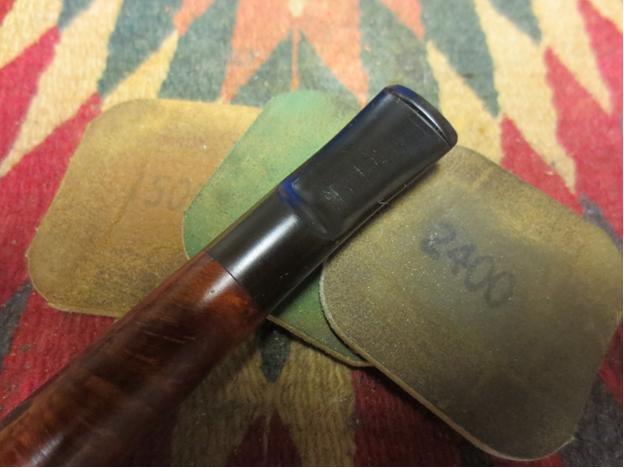
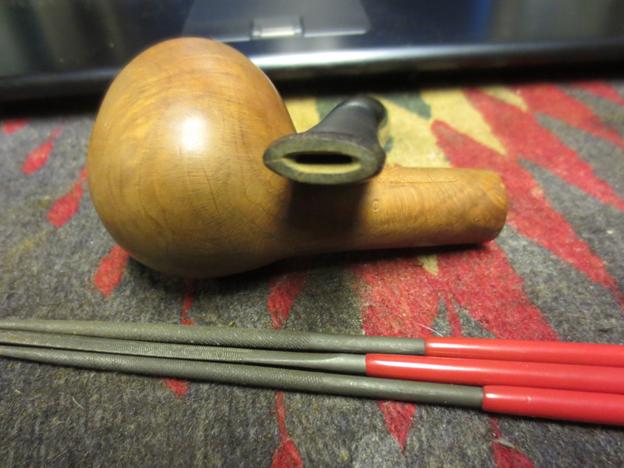
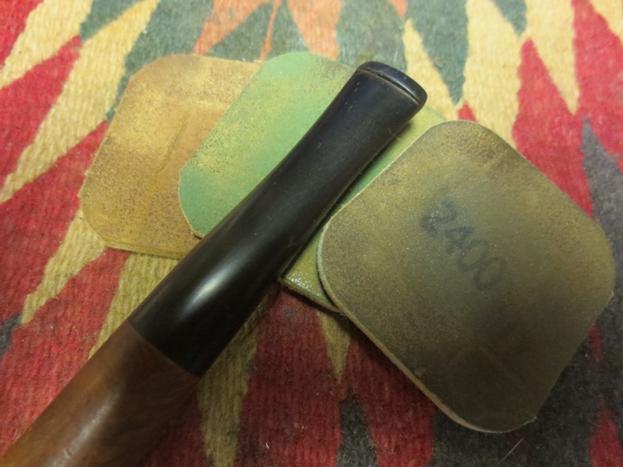
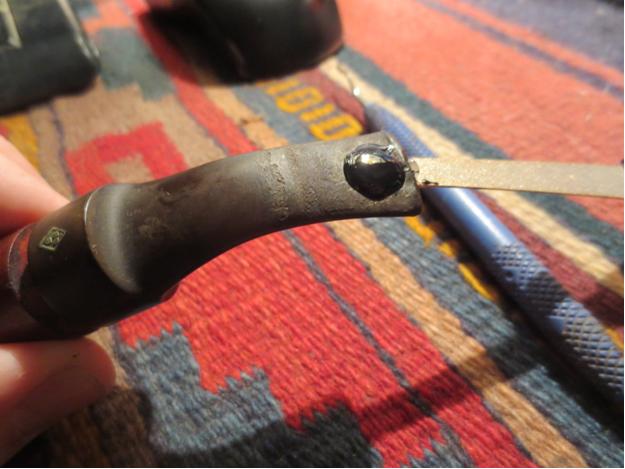
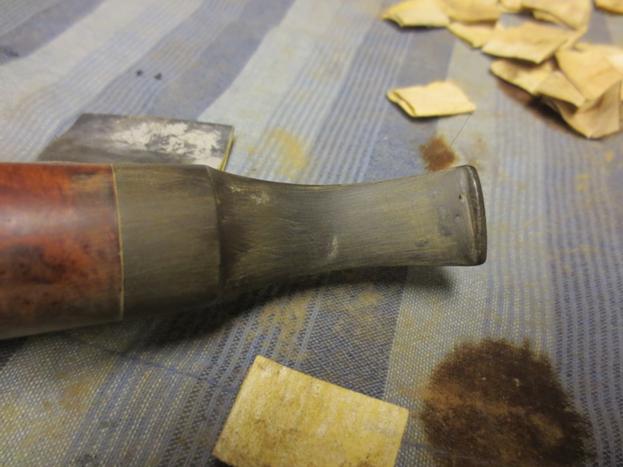
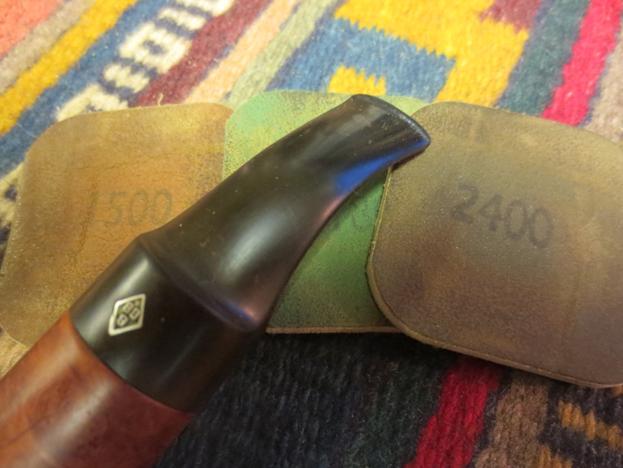
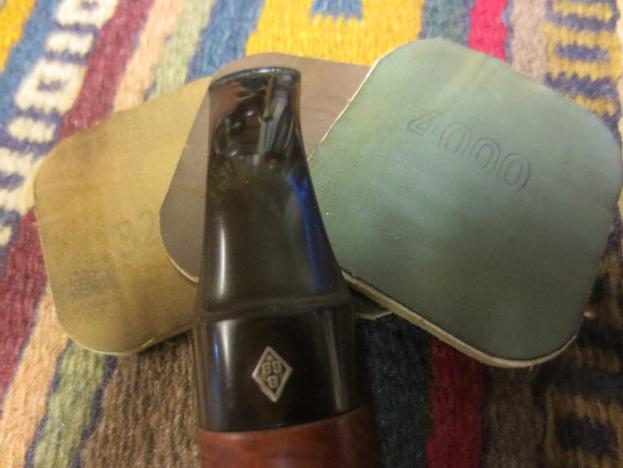
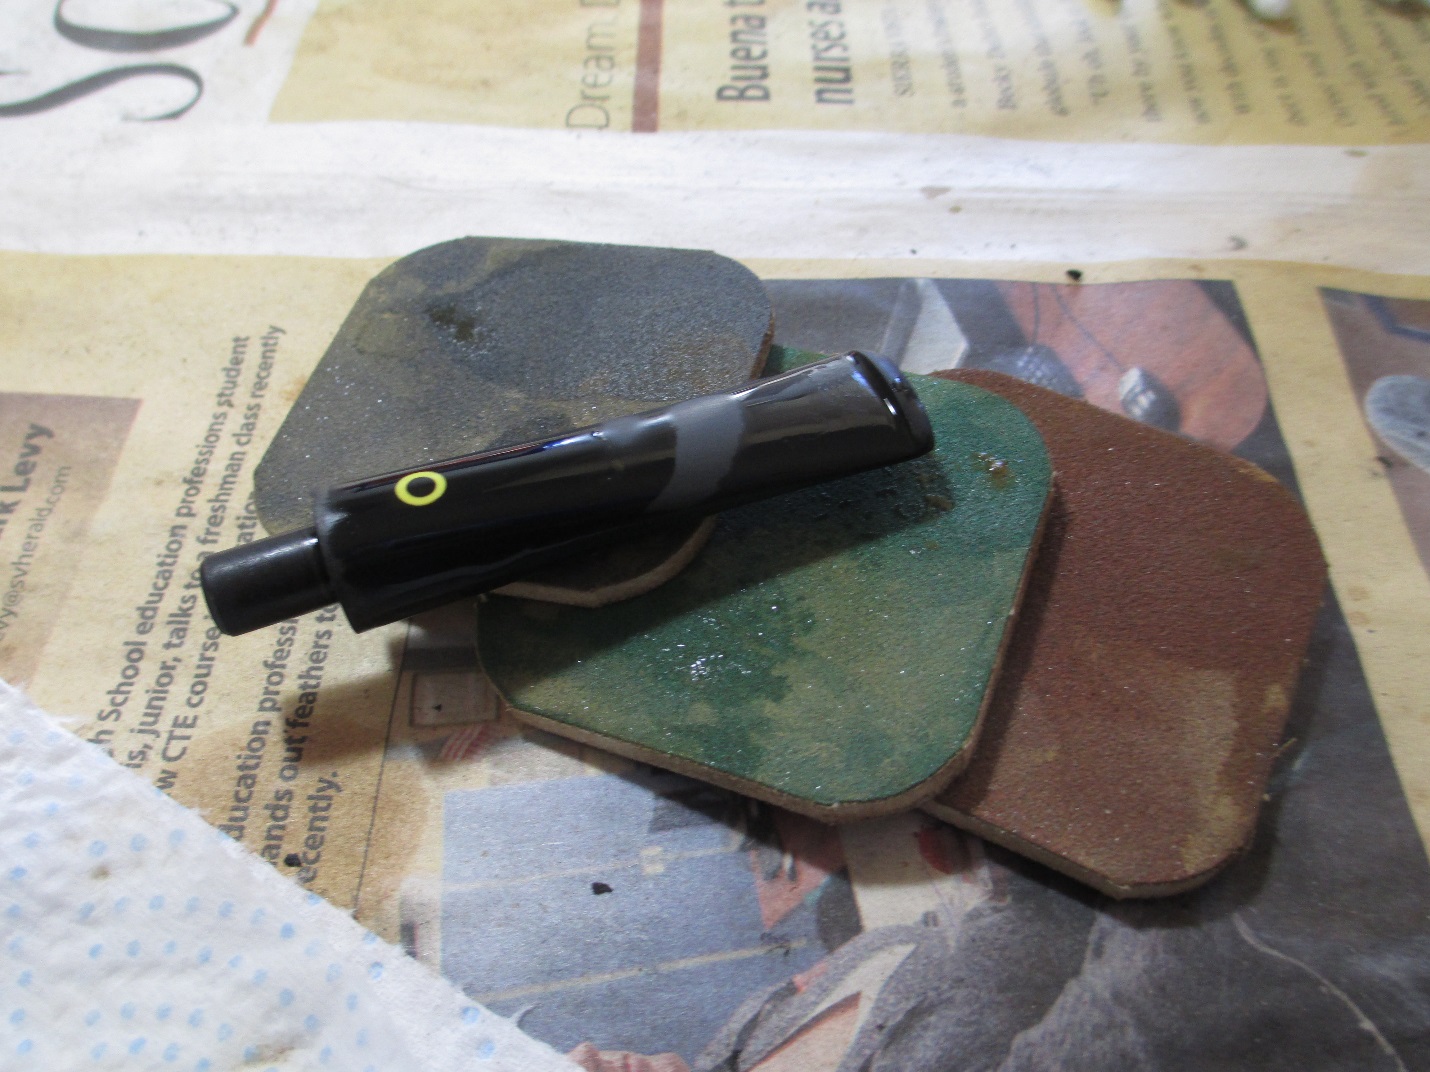
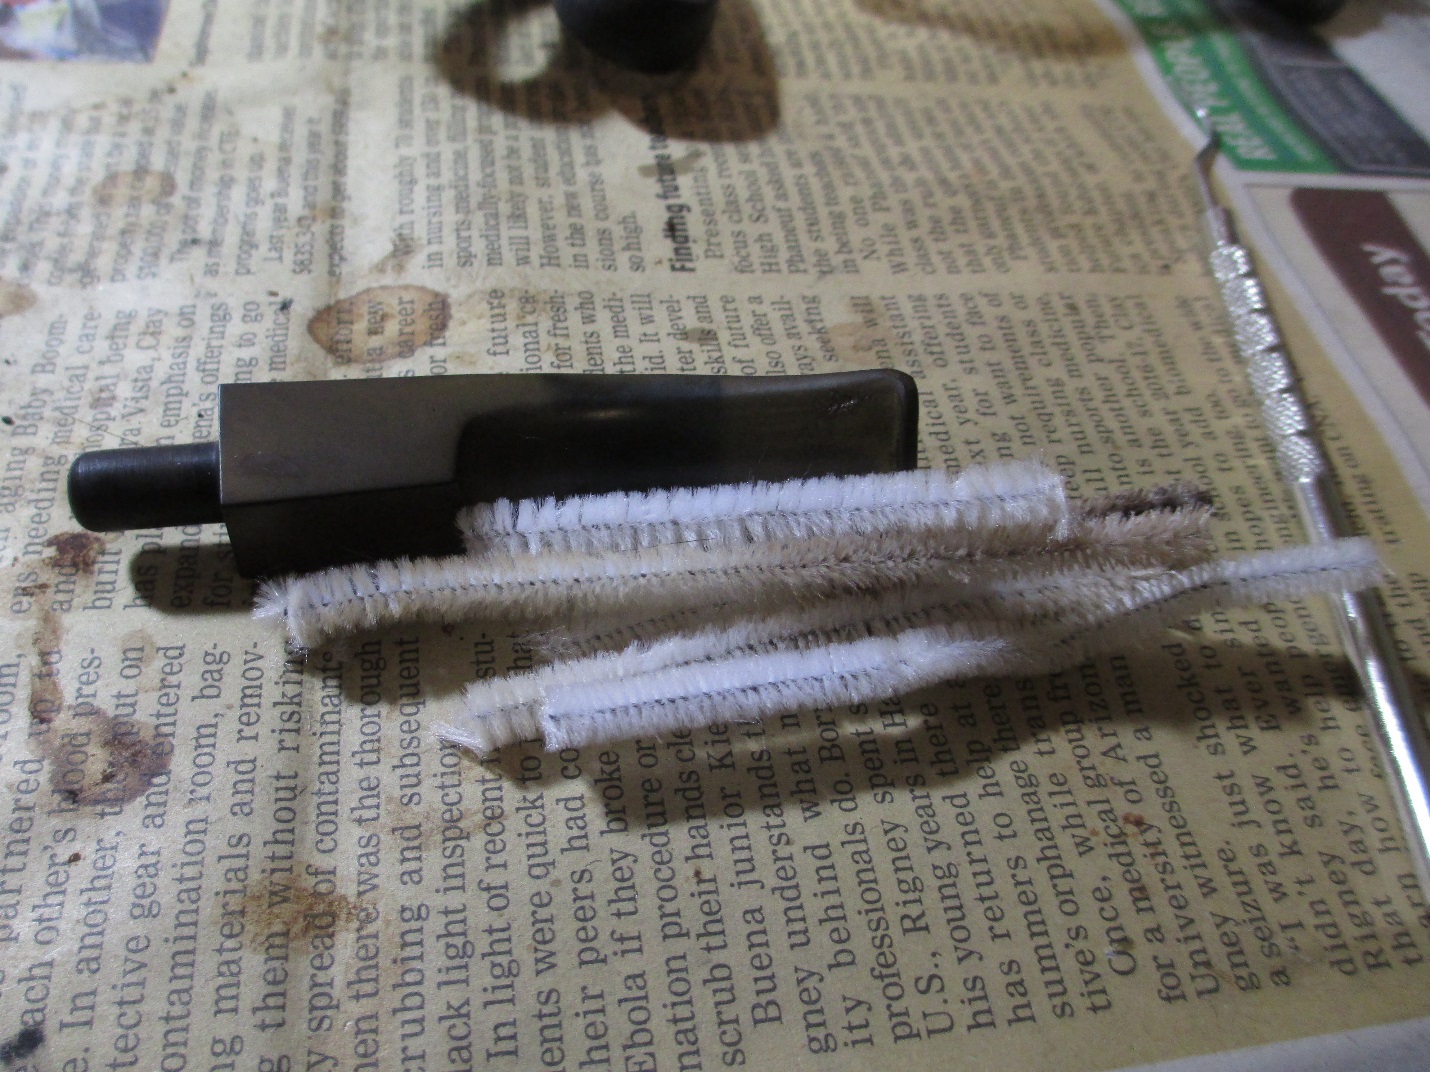
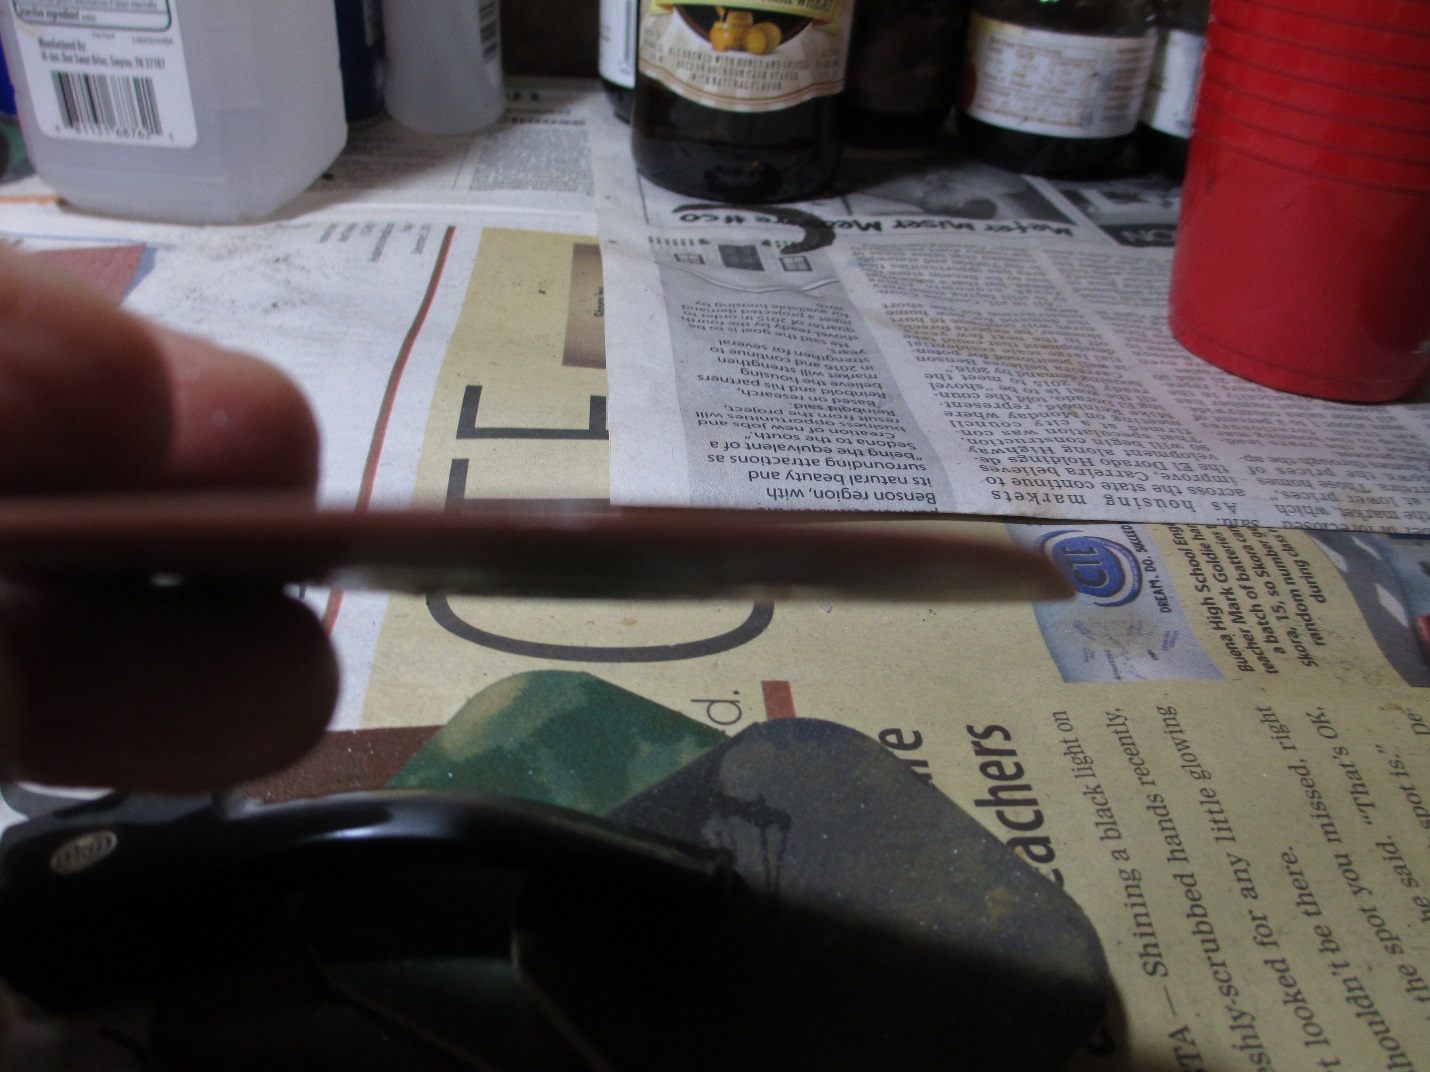
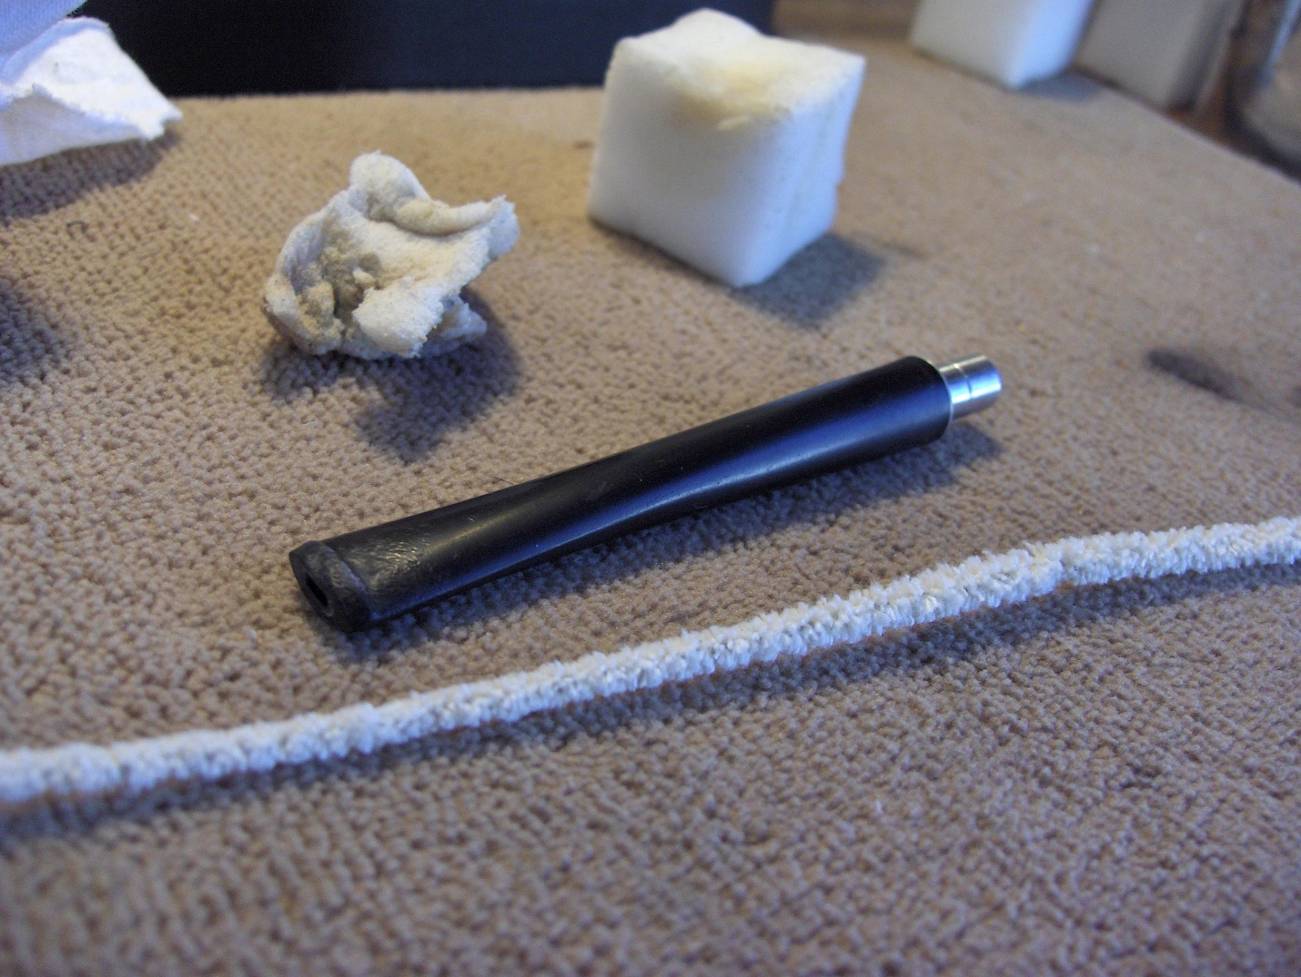
Next, I set out to remove the dents and chatter around the button. I began by roughing up the area around the dent with the point of needle file to give the patch a better surface to cling to, and then filled the dents with a drop of black CA glue (seen in the first picture below). When the glue had dried, I sanded it back with 220-grit paper and refilled the area with glue. I did this on both sides of the stem until the dents were filled and level with the rest of the stem surface. I then sanded out the high spots of the chatter with 320-grit paper (seen in the second picture below) and followed that with 400-grit, then 600-grit to give the area a completely smooth surface.Jet8

Jet9 
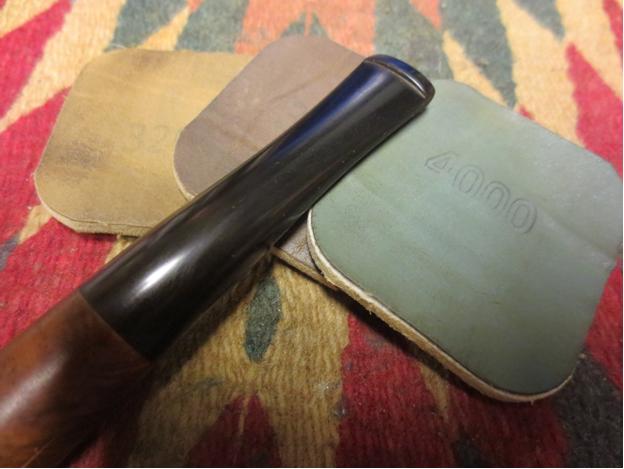
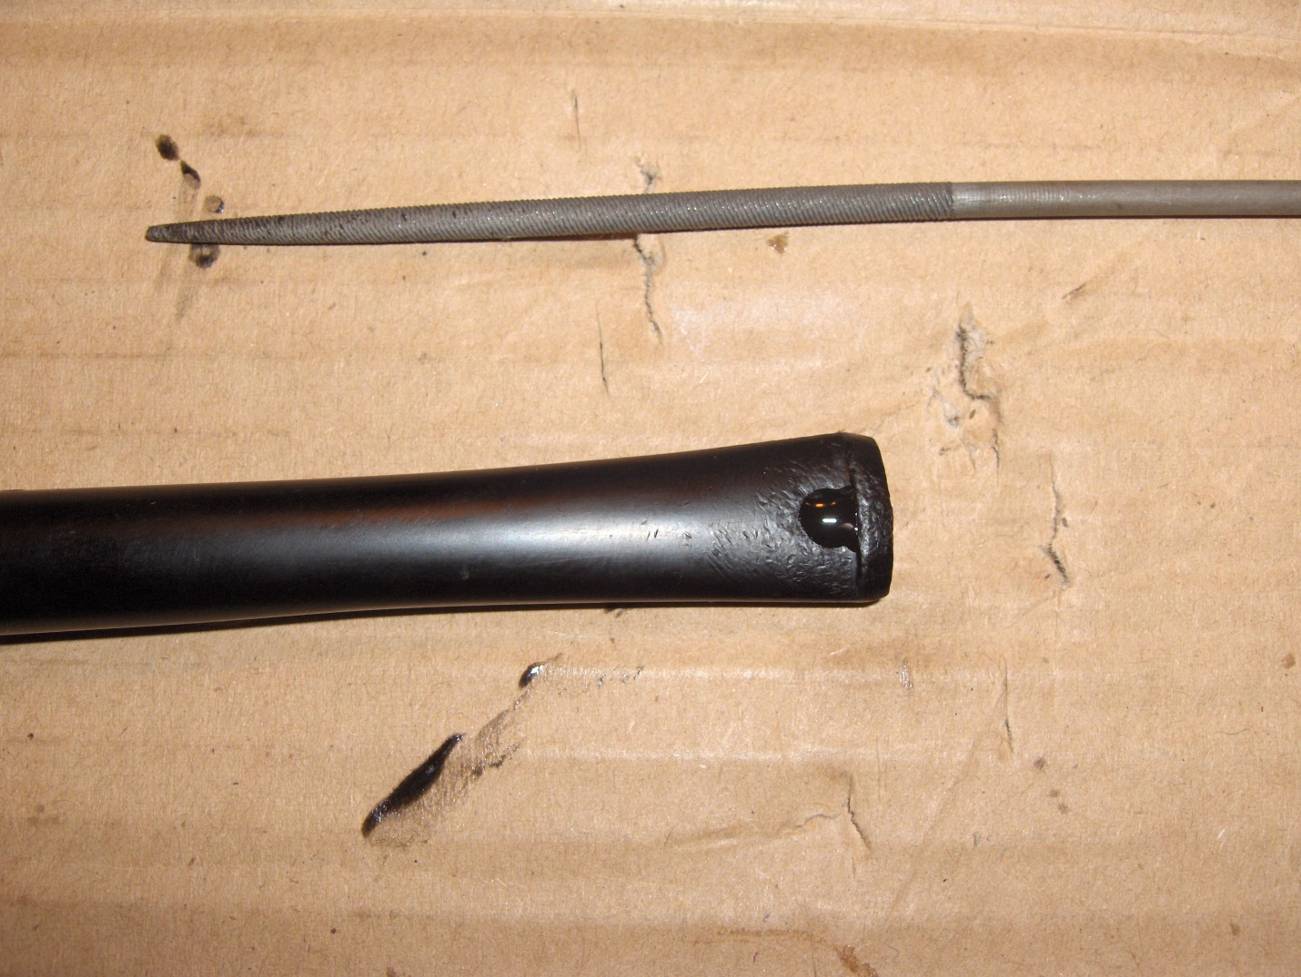
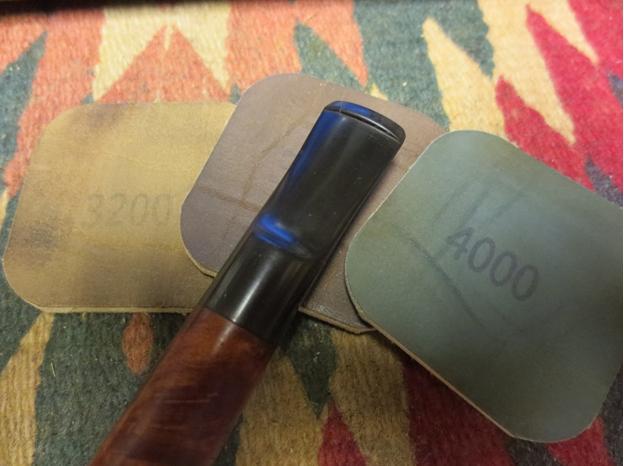
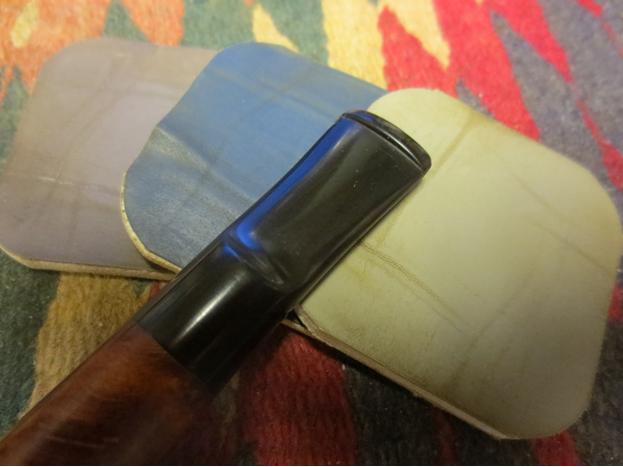
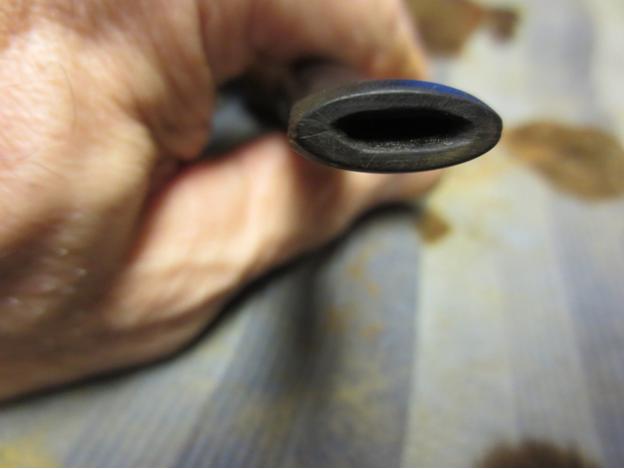
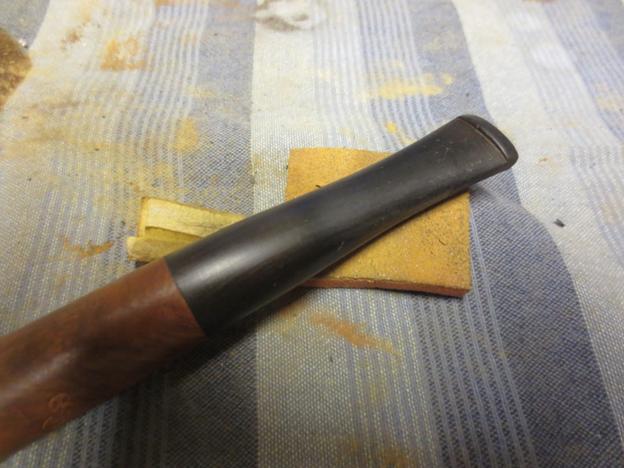
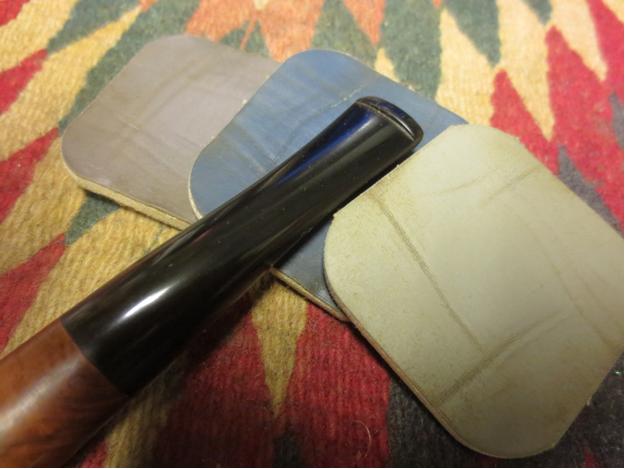
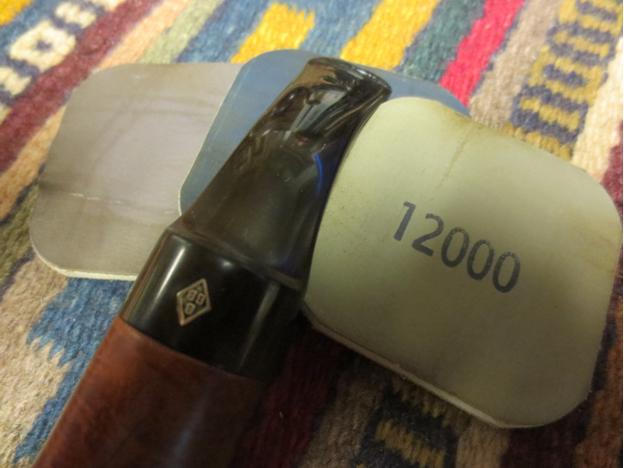
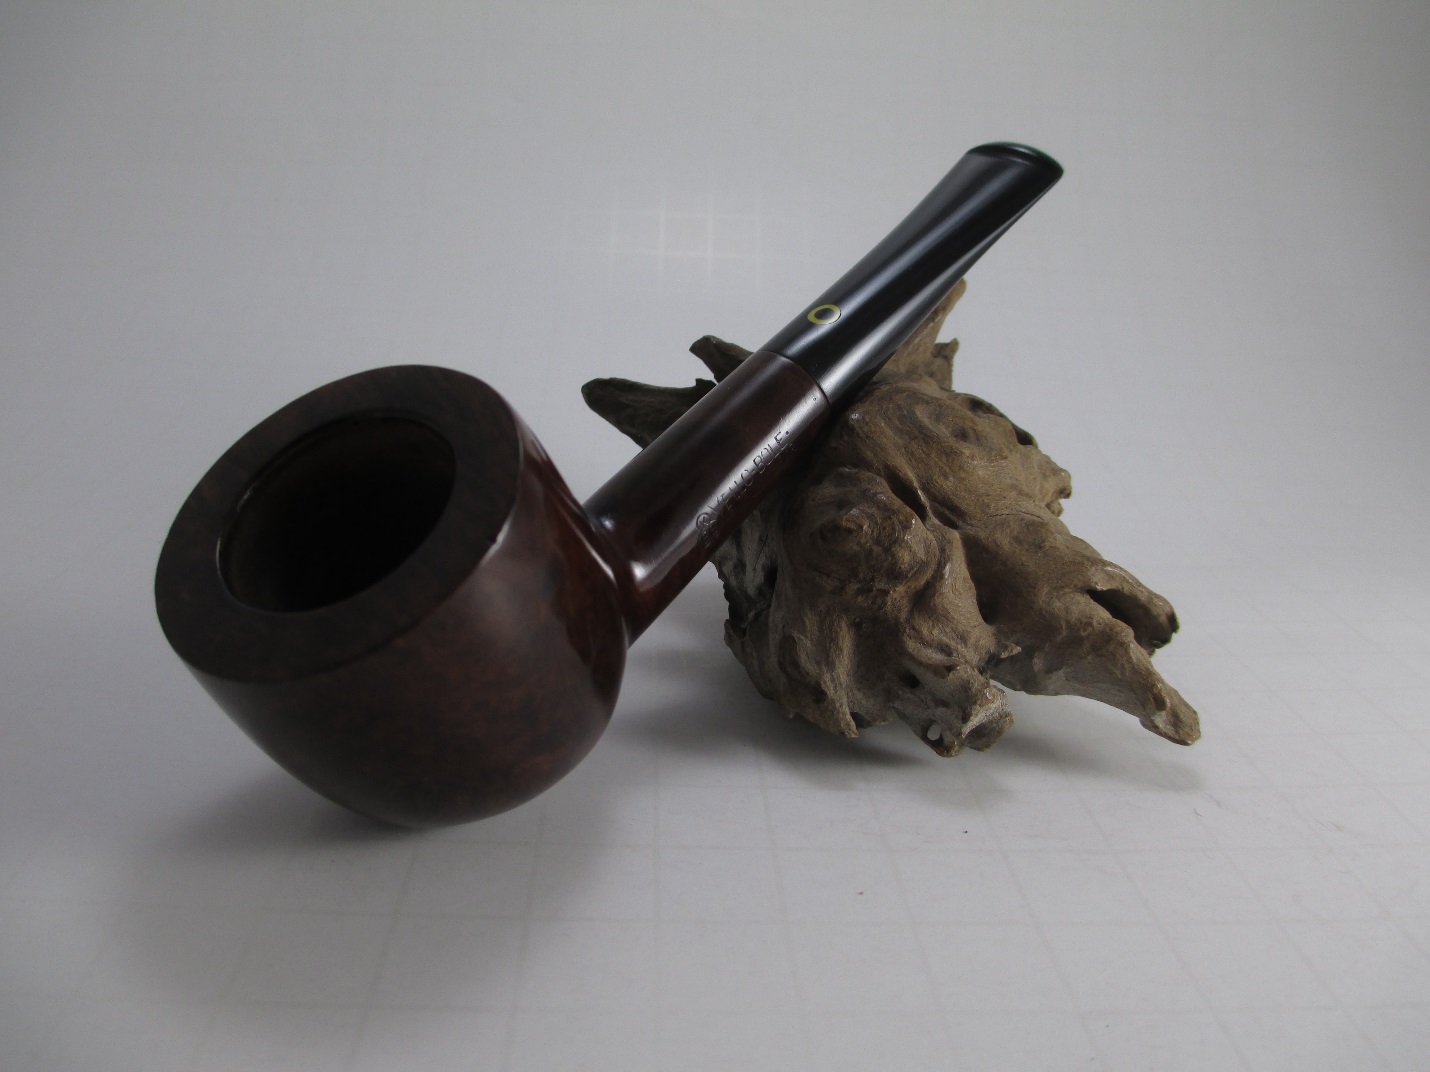
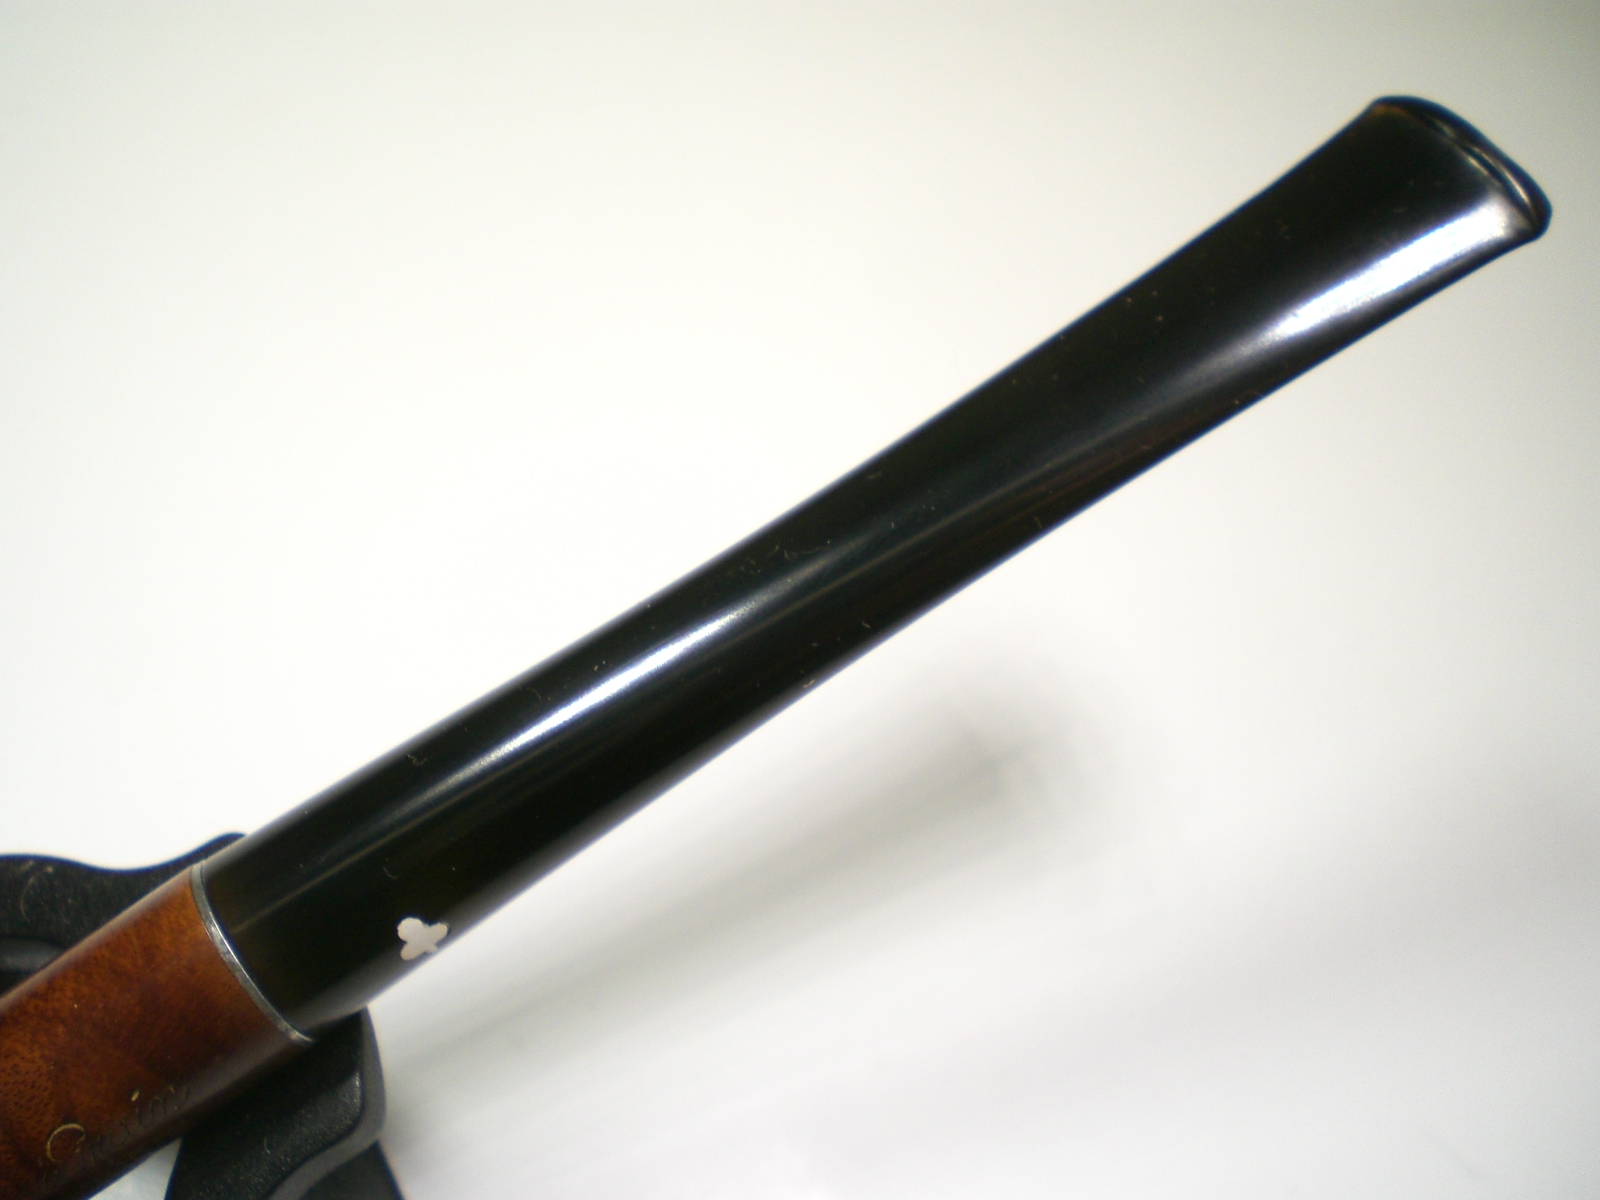
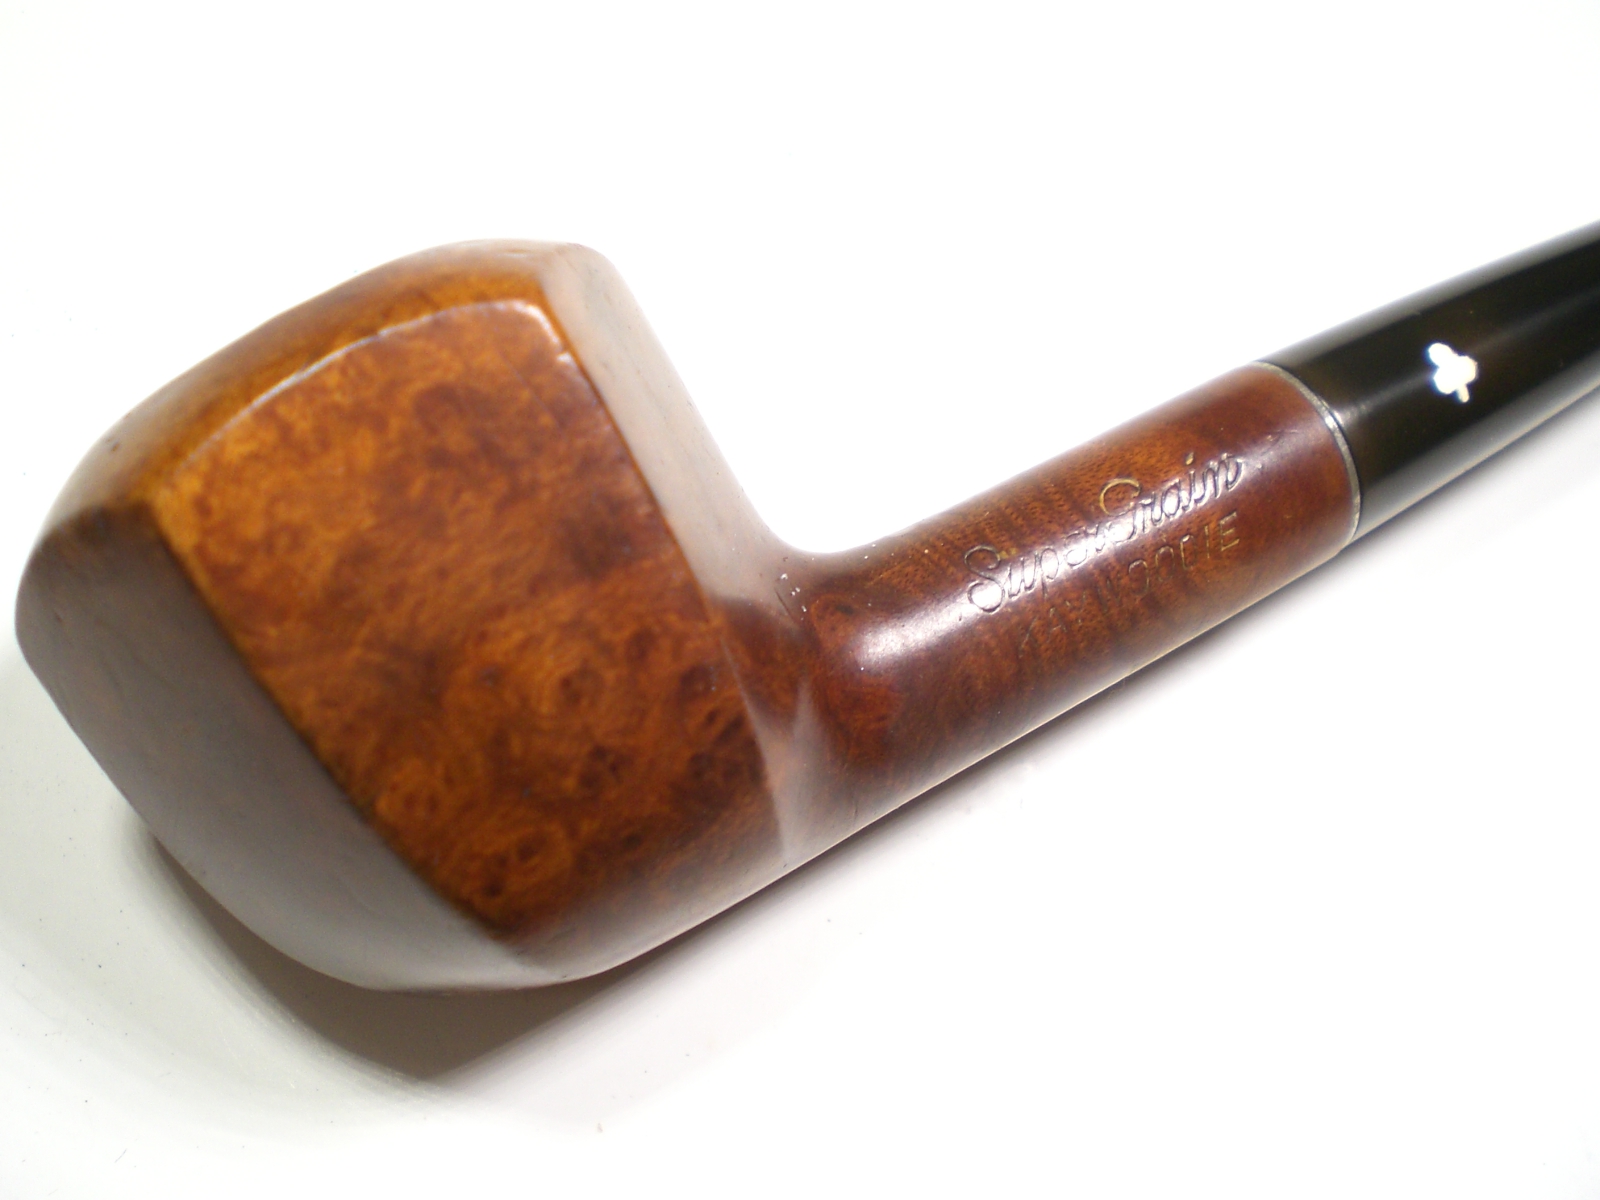
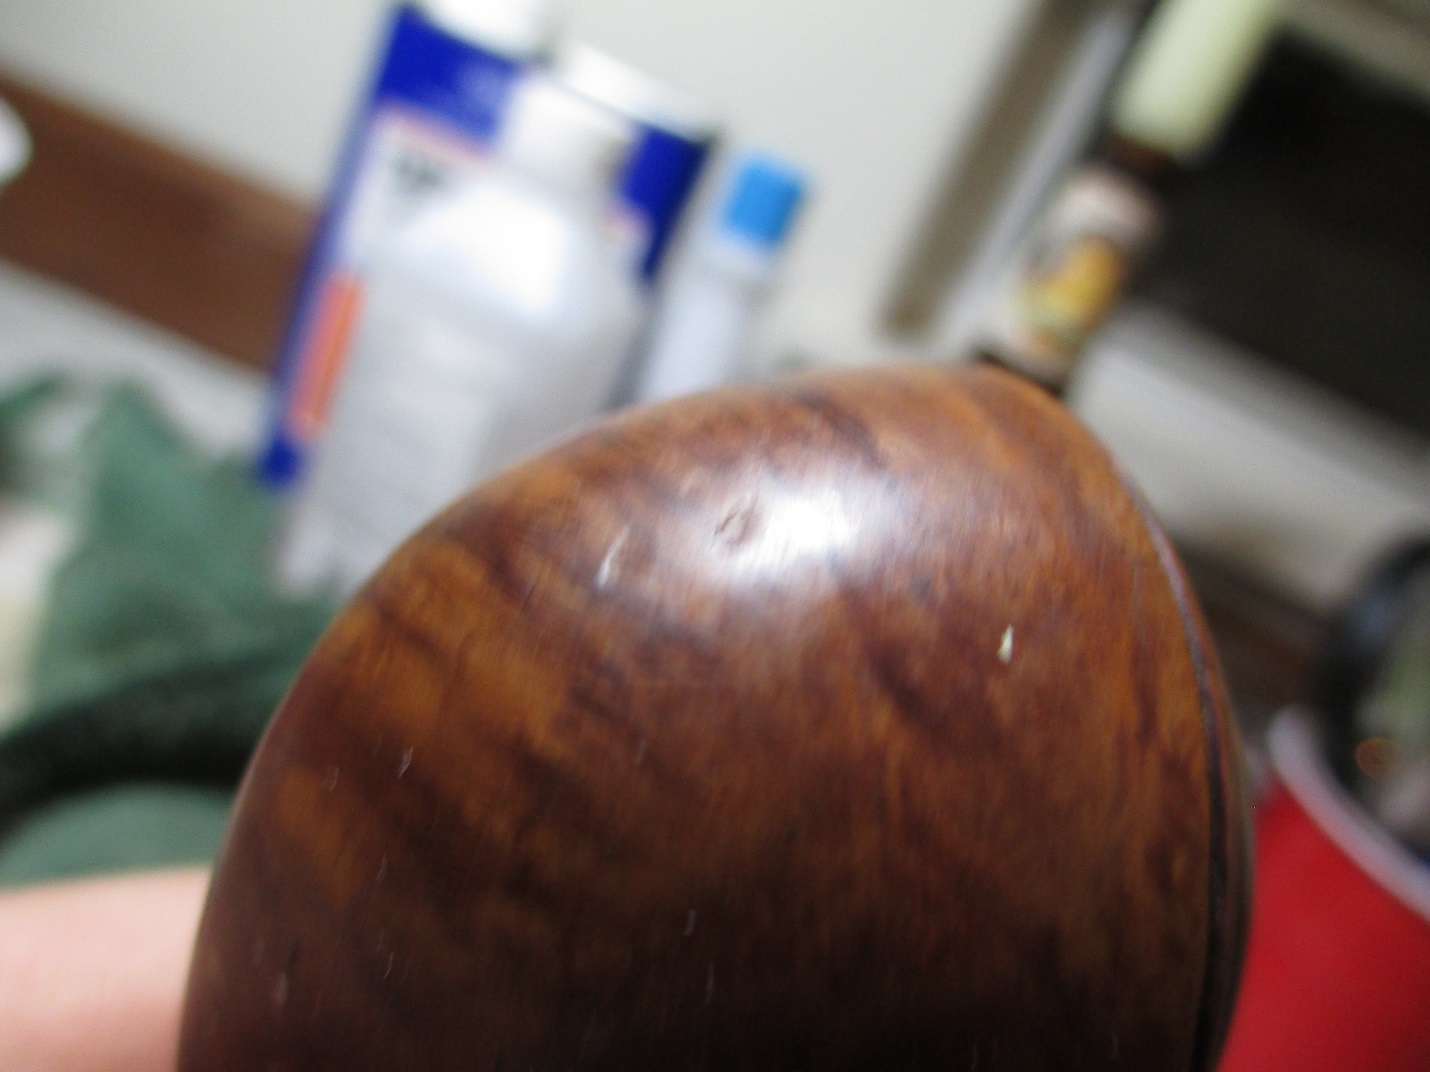
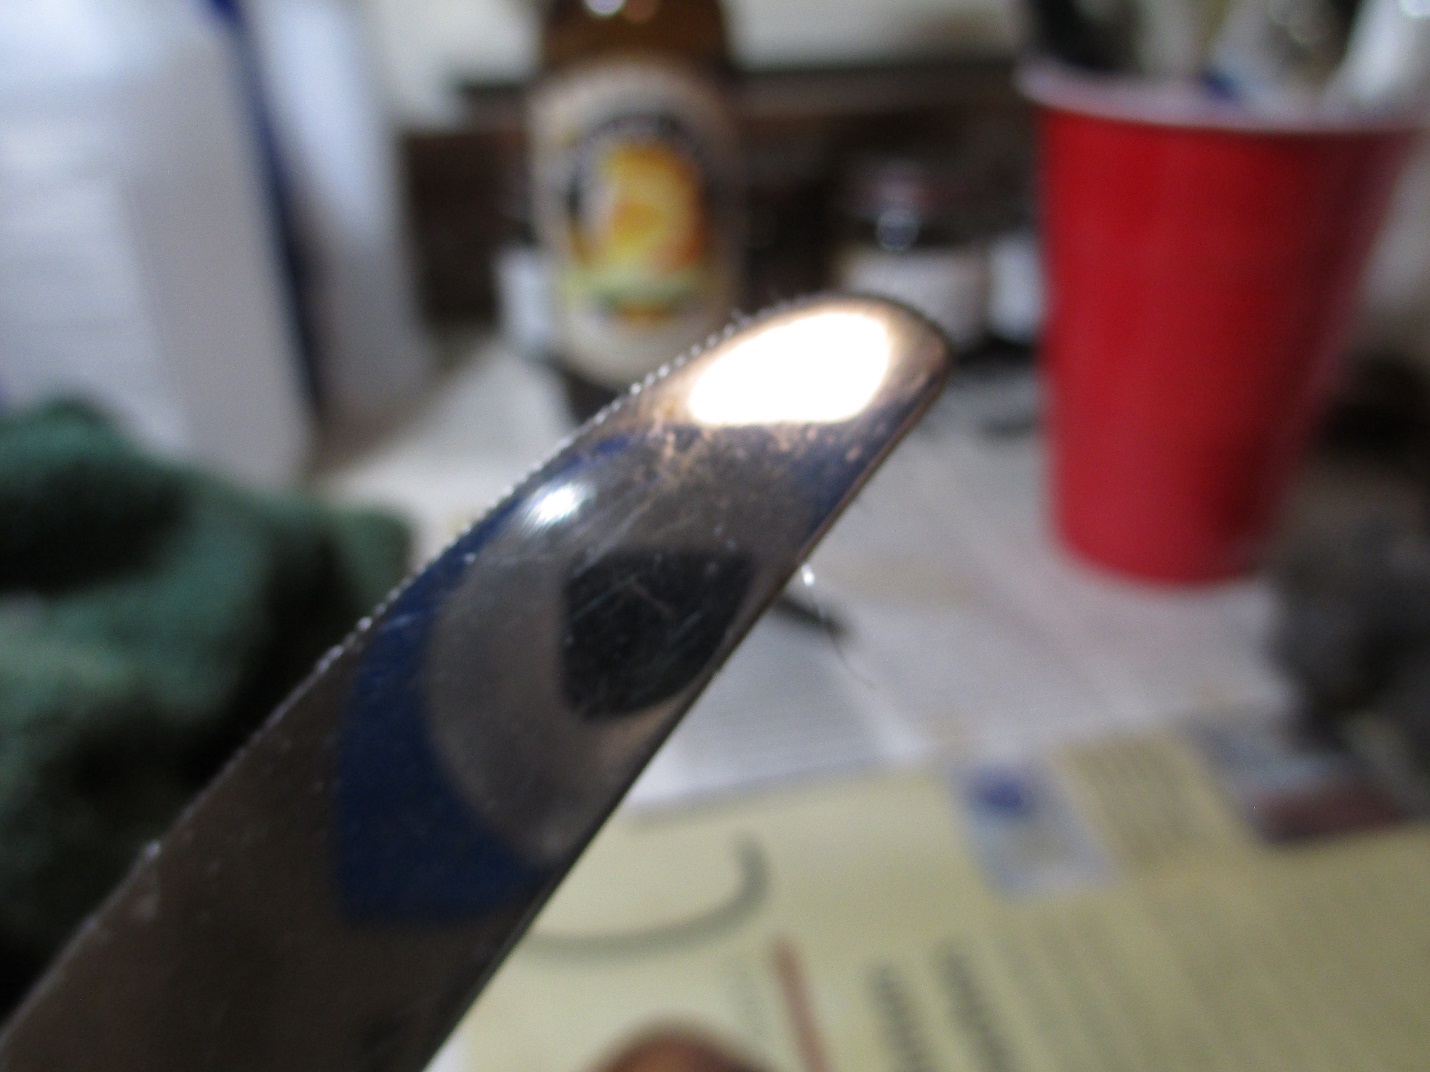
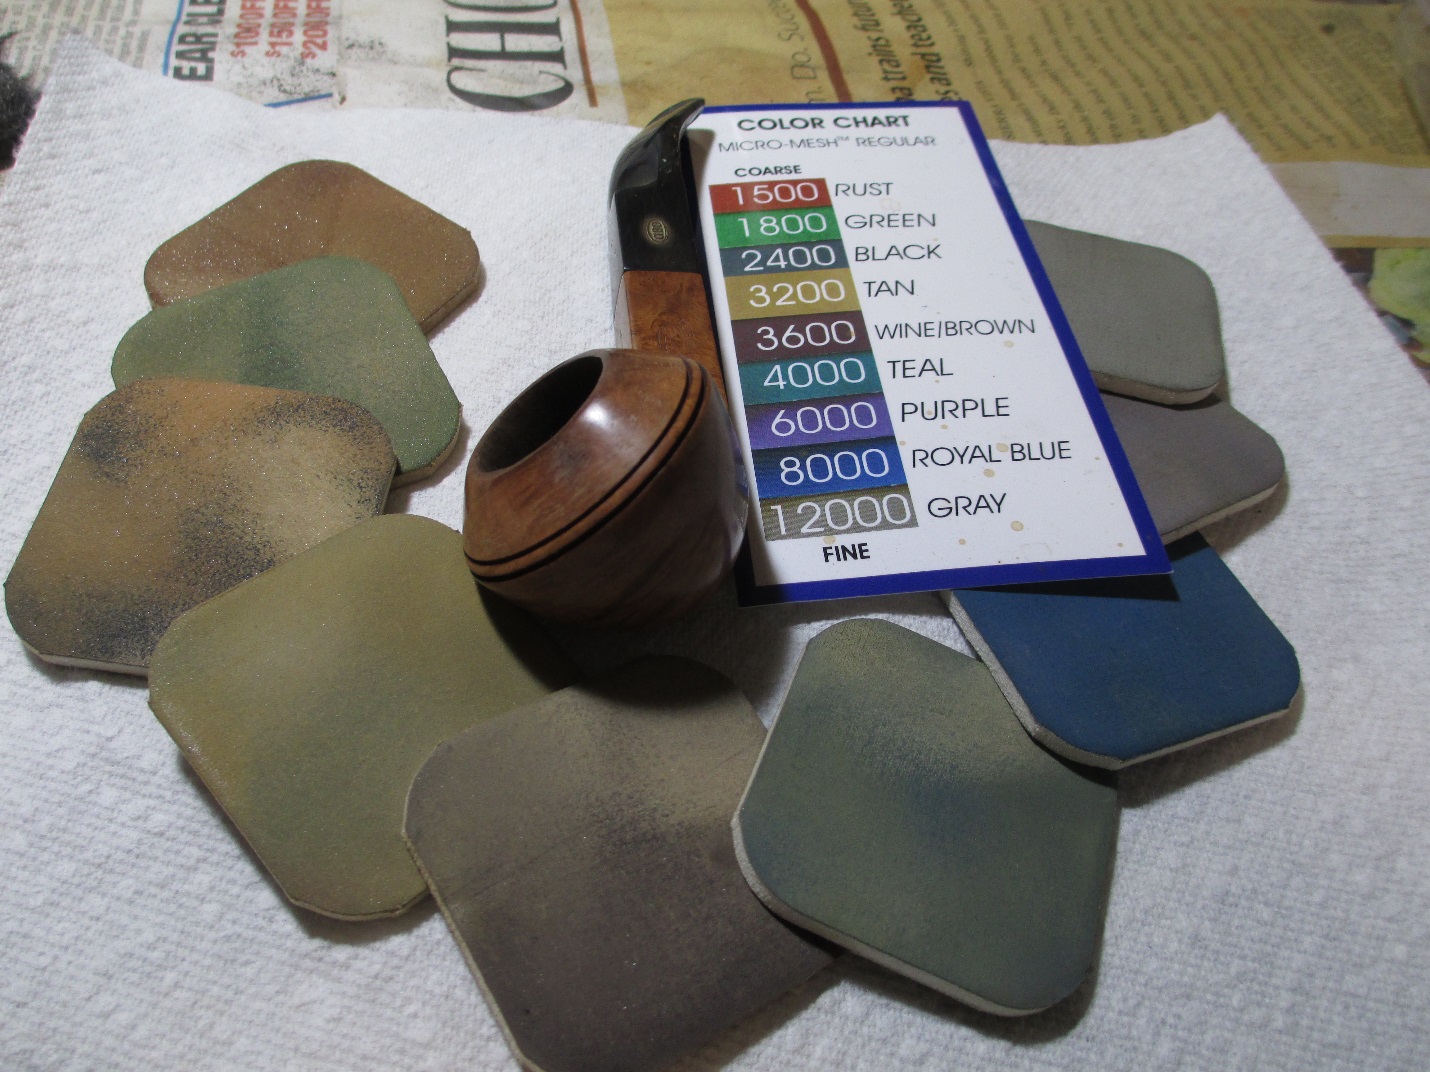
With the dents filled and the chatter removed, I lightly sanded the entire stem with 1200-grit paper to even out the surface. Then, I used the full complement of micromesh sanding pads 1500-12,000 to polish the stem. You can see the results of the finished stem in the photo below.Jet10 
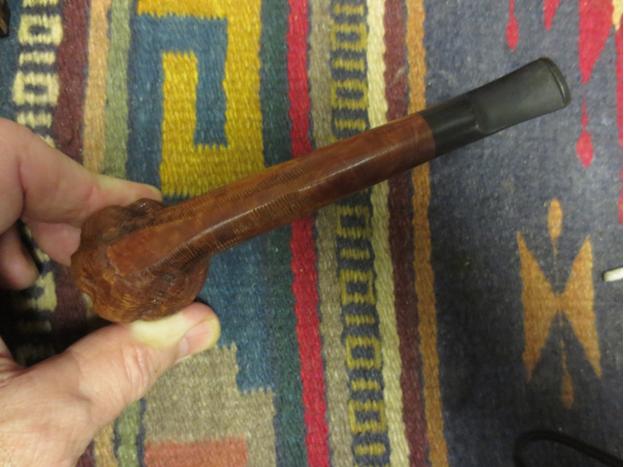
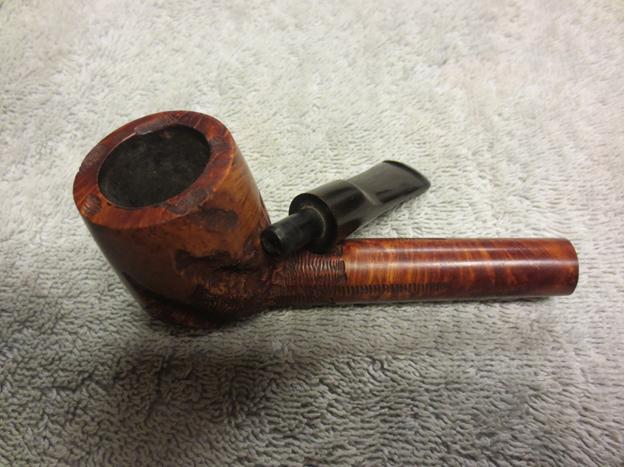
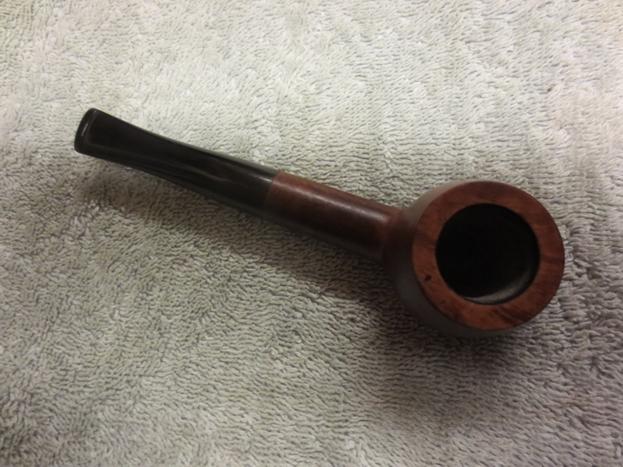
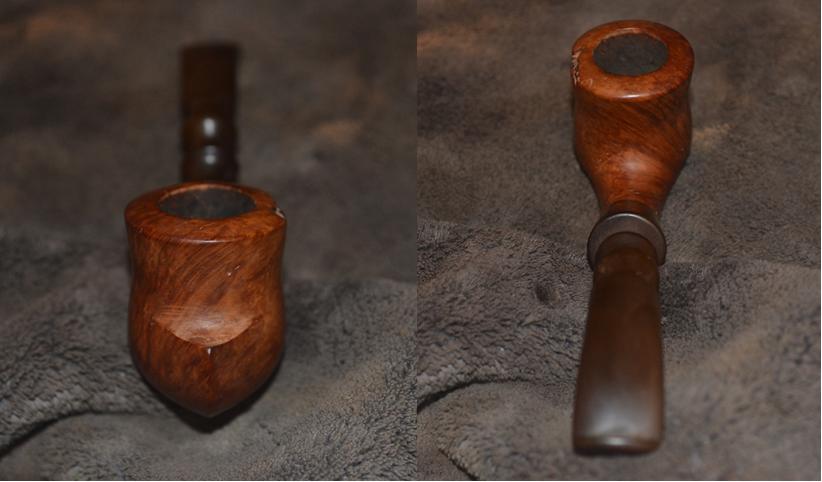
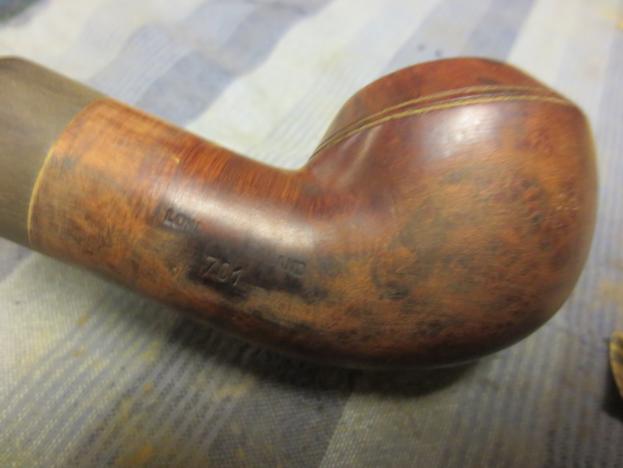
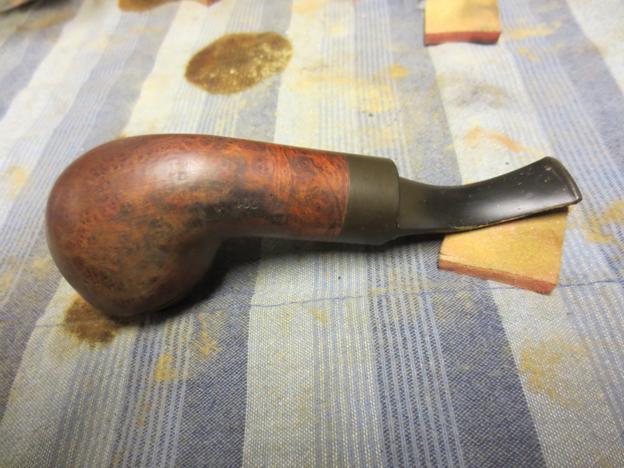
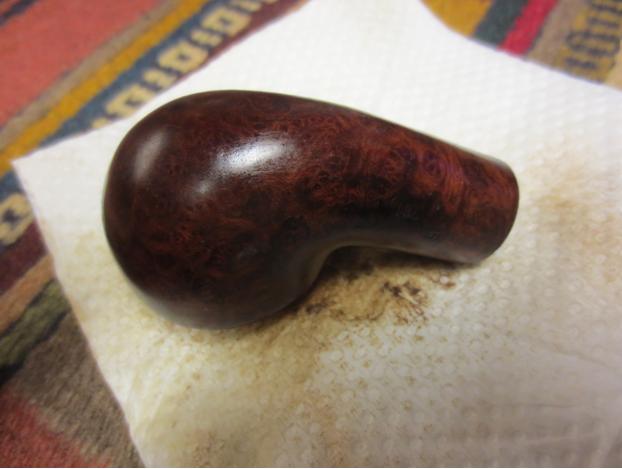
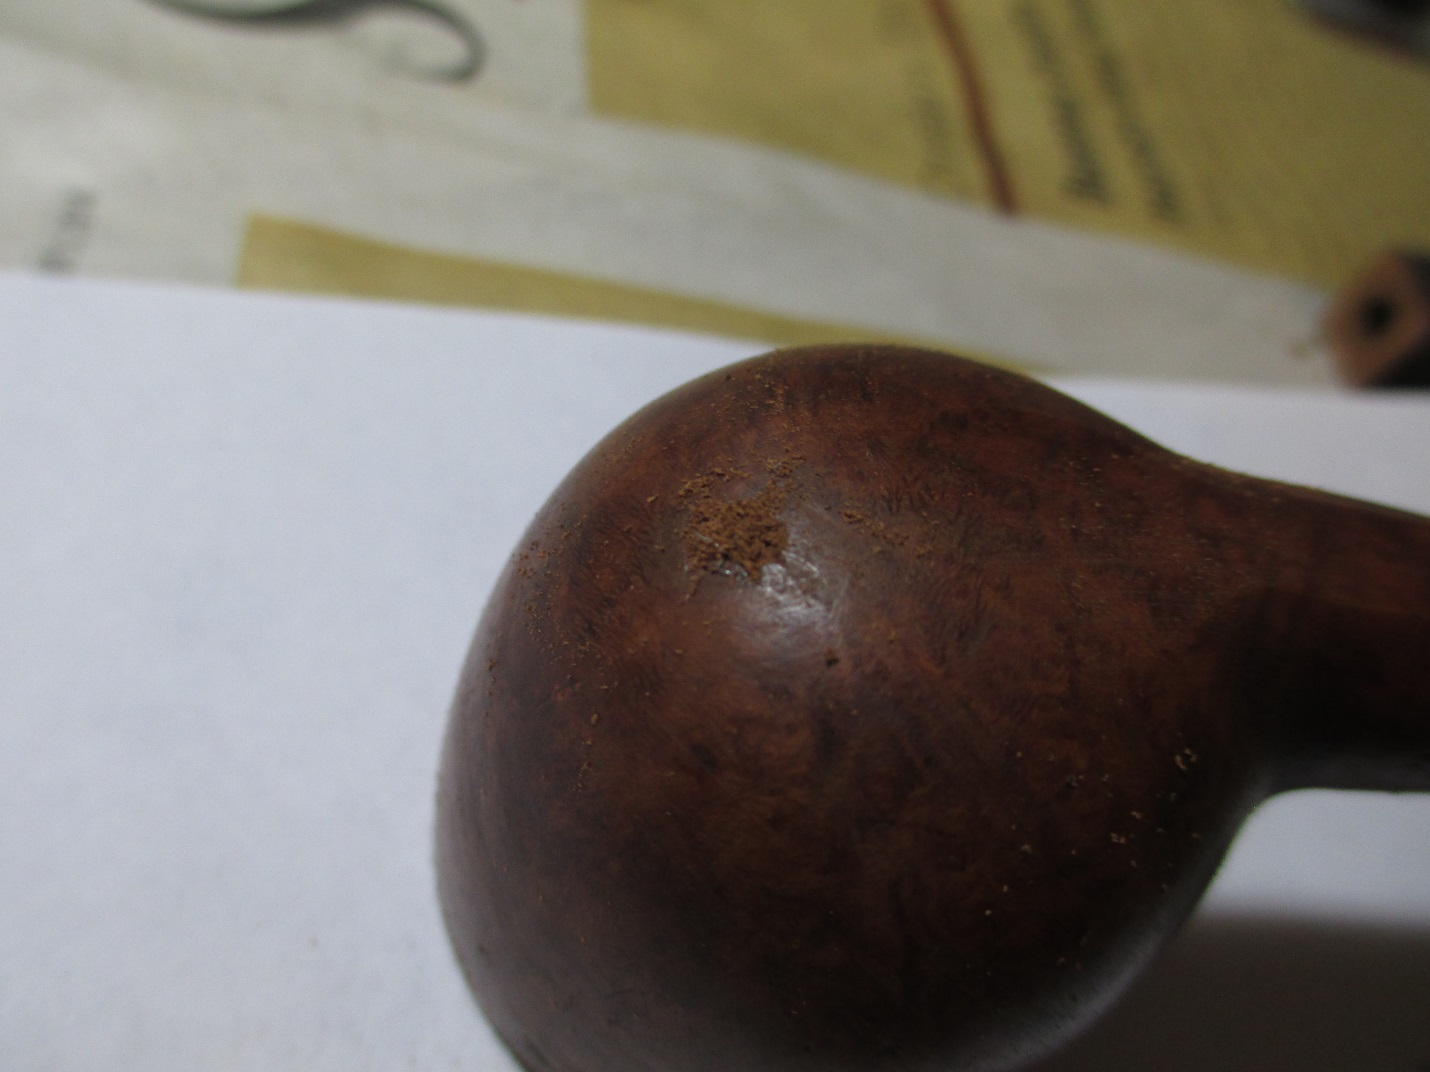
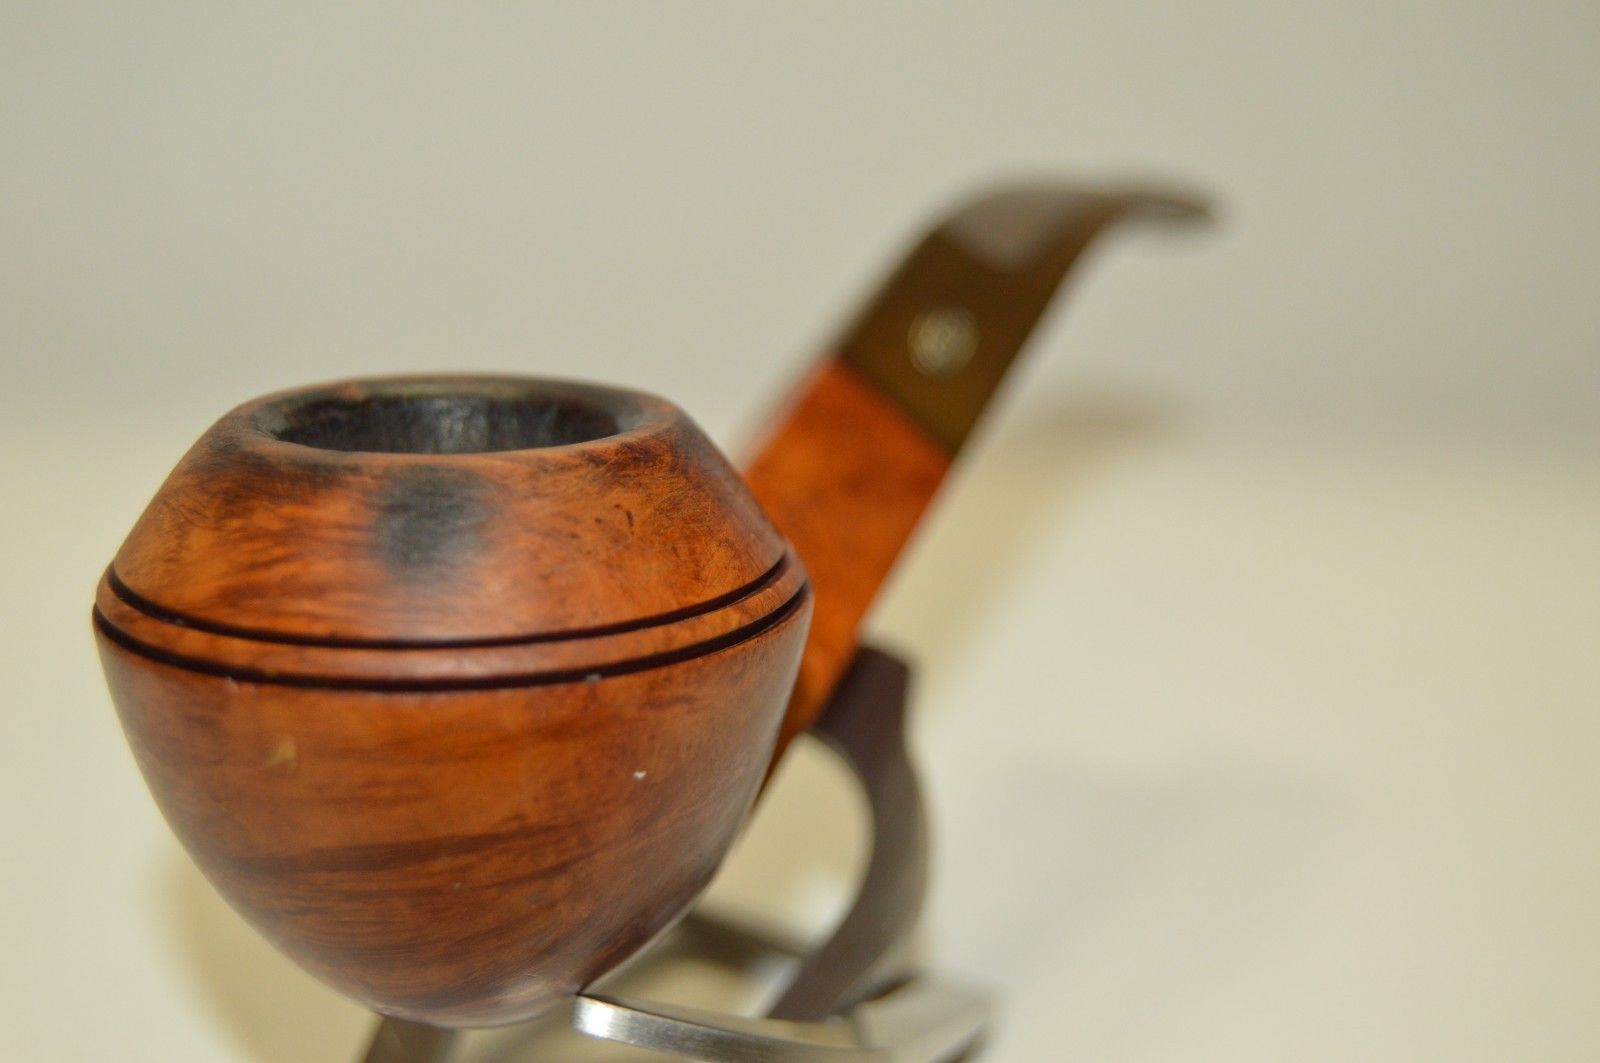
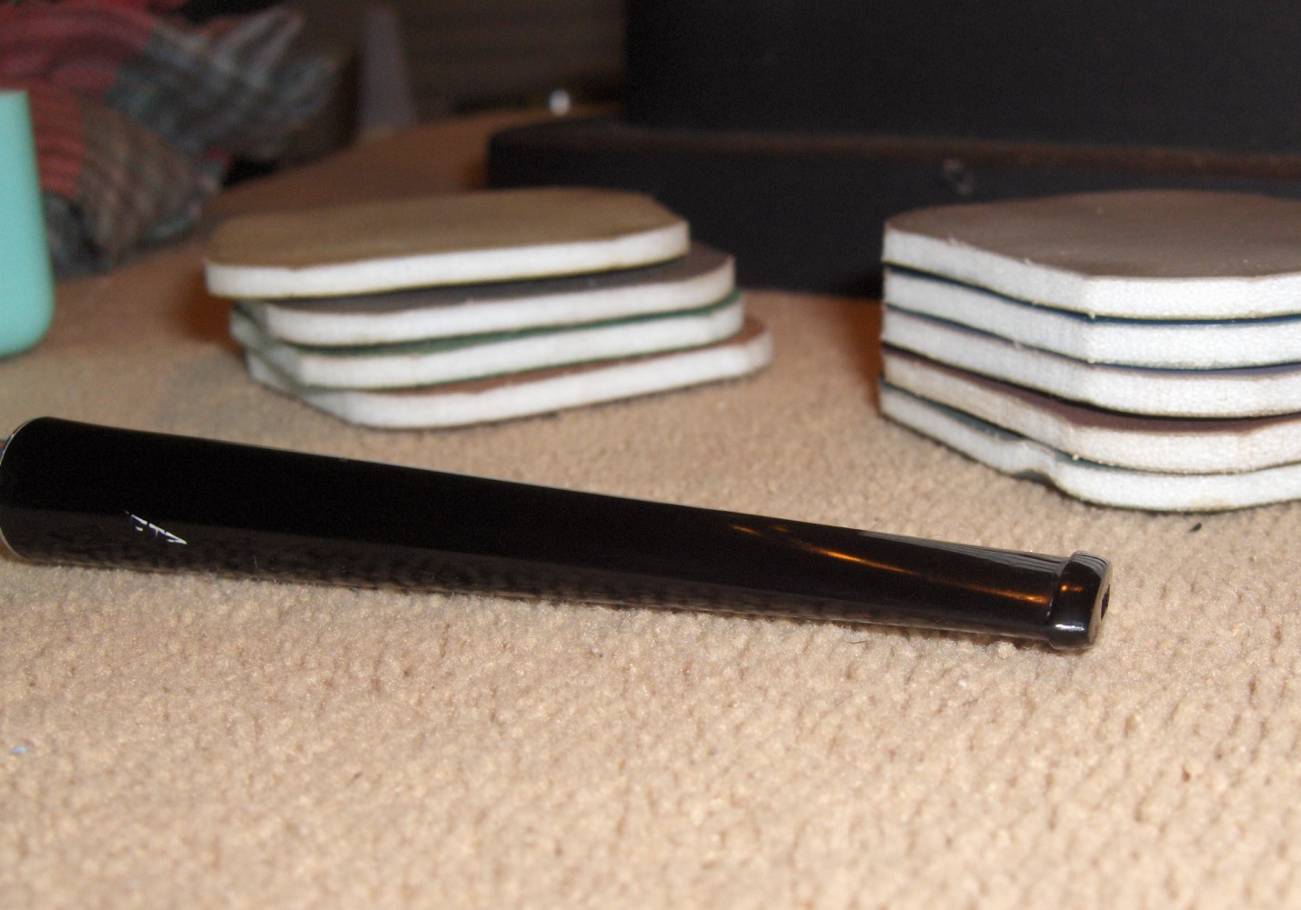
The stem work was all wrapped up. So, I pulled the stummel out of the alcohol bath to see what I had to work with. The bath had done an excellent job of removing the old finish and exposing the briar wood. Unfortunately, it has also done an excellent job of exposing all of the fills. I counted fifteen of them in all and that’s not counting the ones in the chamber.Jet11 
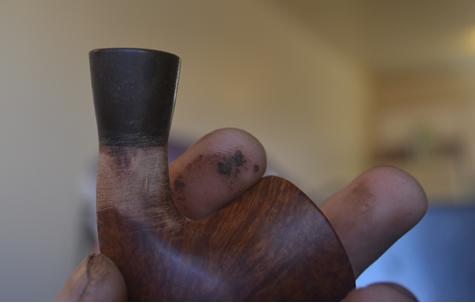
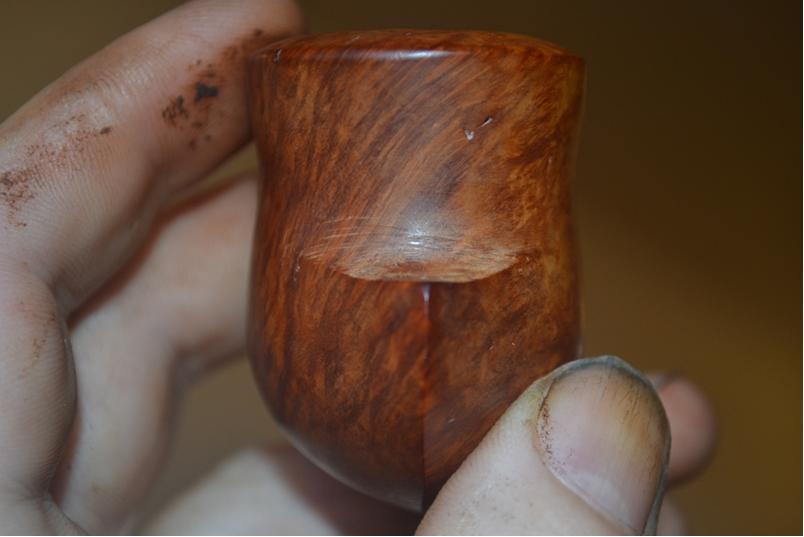
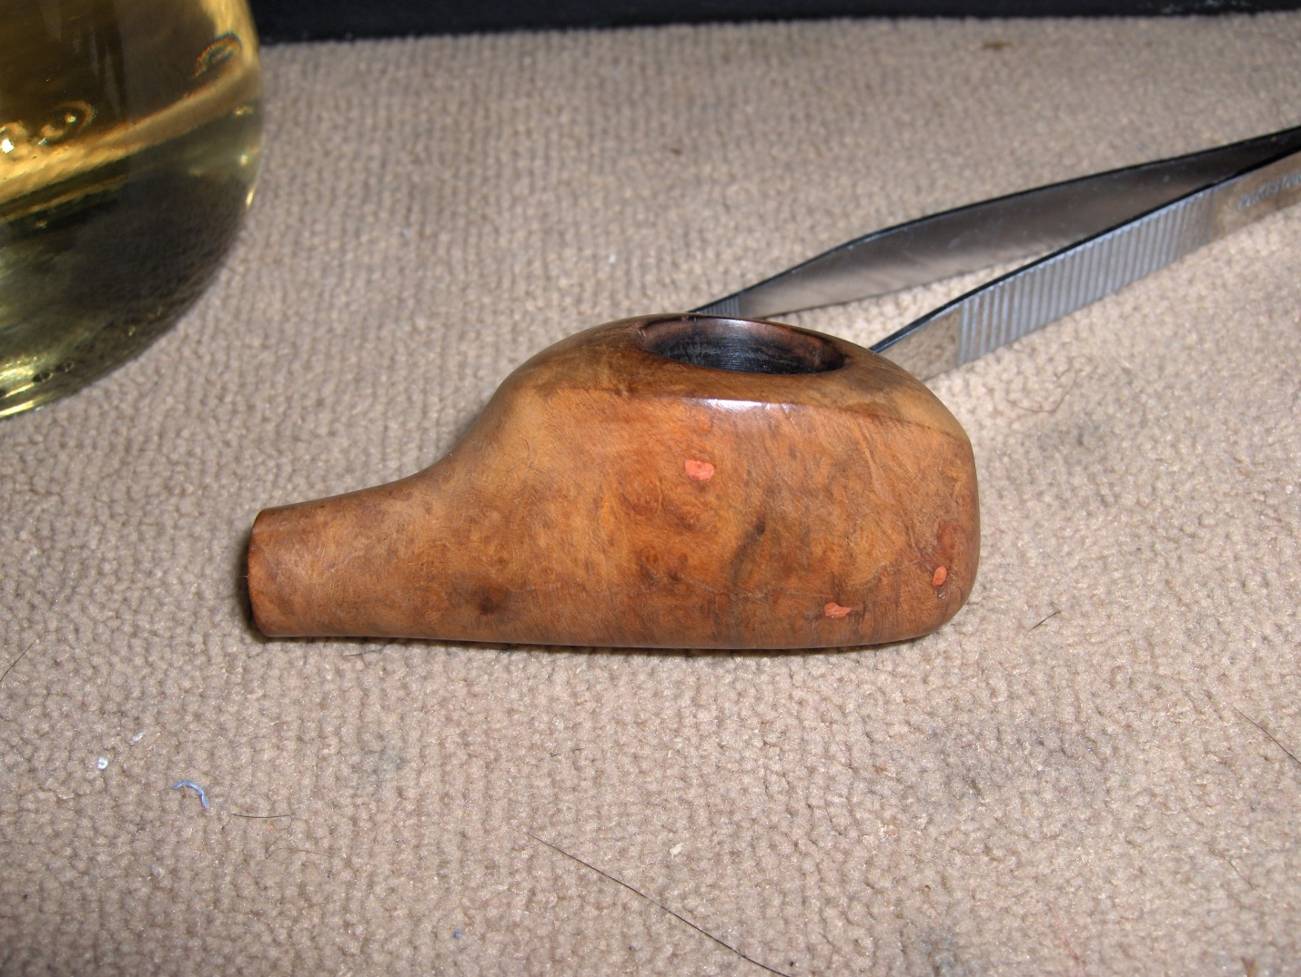
After using a pick set to remove all of the pink fill material on the outside stummel surface, it looked like a block of Swiss cheese. At that point, I had to admit that I didn’t see any way that I could fill all of those pits and hope to have them blend them into the final pipe without the benefit of the tinted lacquer to cover them.Jet12 
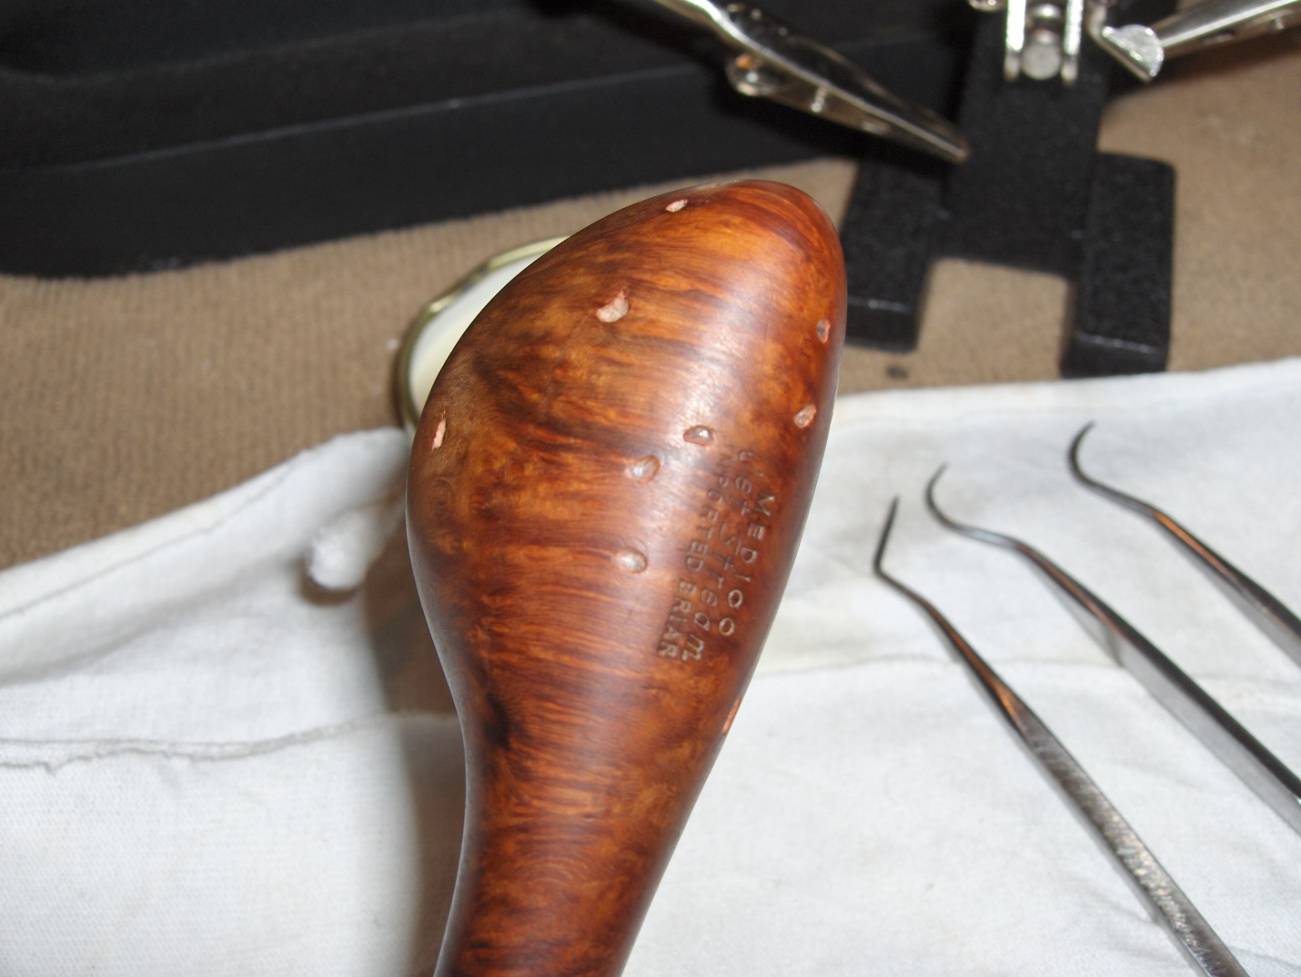
Rustication seemed like my best way forward, but I really didn’t want to go that way. I felt that it would really break up the great flow of the shape and stop the movement. I know when I’m whipped, though, and with all of the pits it appeared to be partially rusticated already.

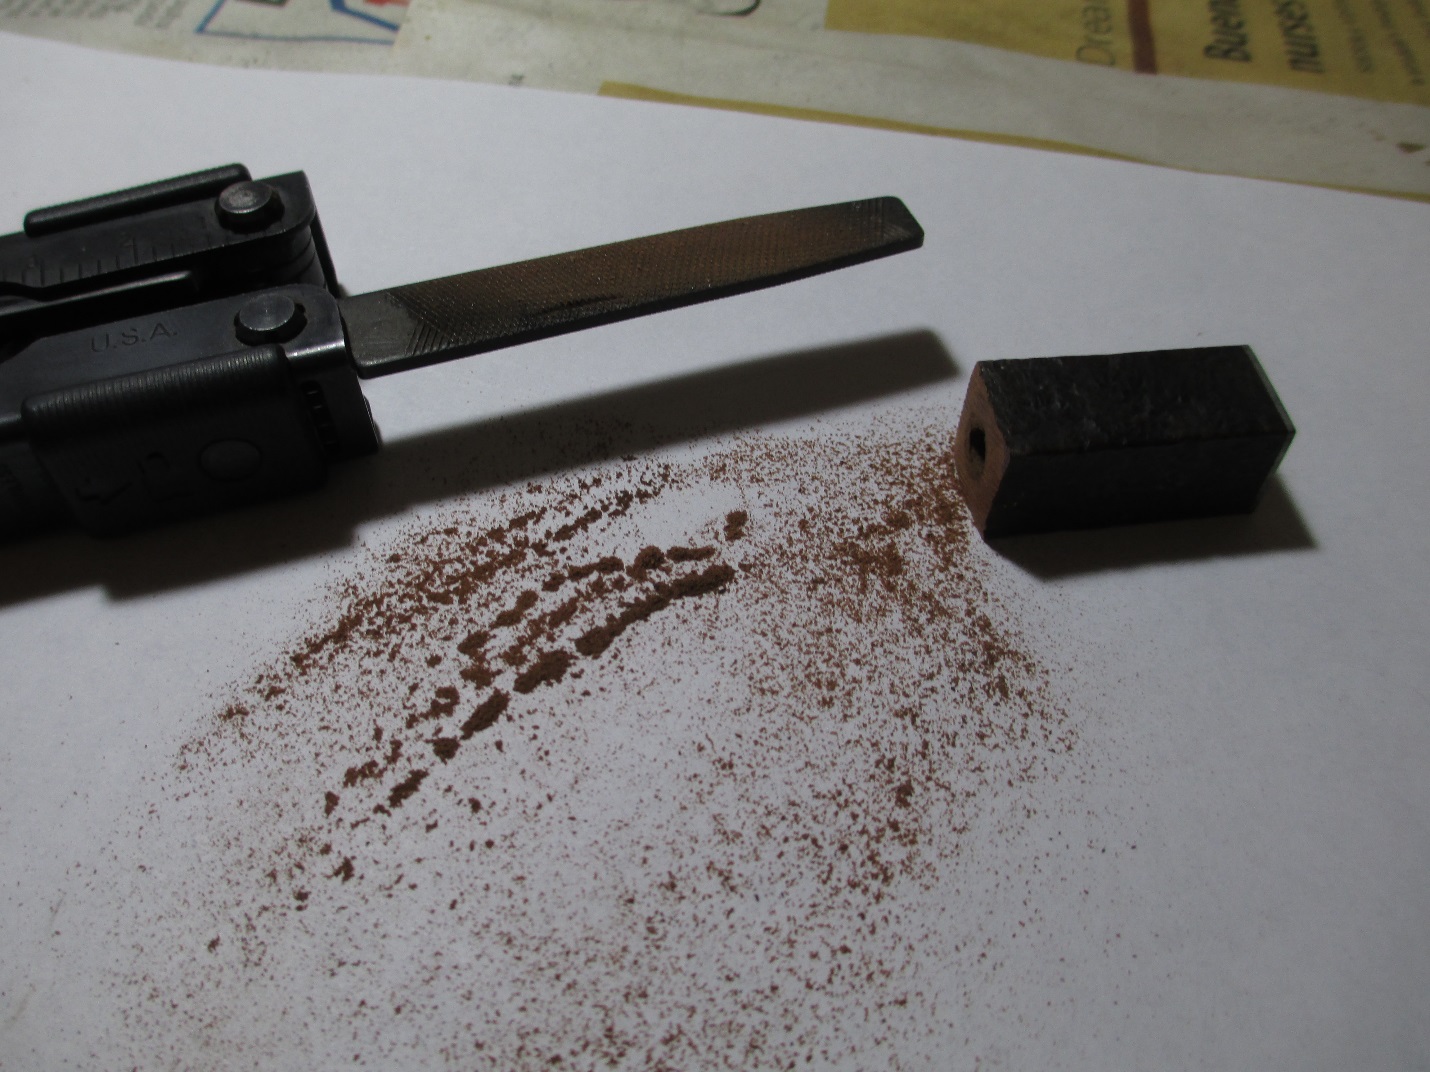
I decided to leave the rim, the shank end, and the area around the stamping smooth. That meant that I would have at least one pit on the rim to fill. I packed it with briar dust that I have gathered from work on other pipes, and then dripped a small dab of clear CA glue into the dust. When the glue was dry, I sanded it level with the surface. With that out of the way, I prepared to rusticate the surface.

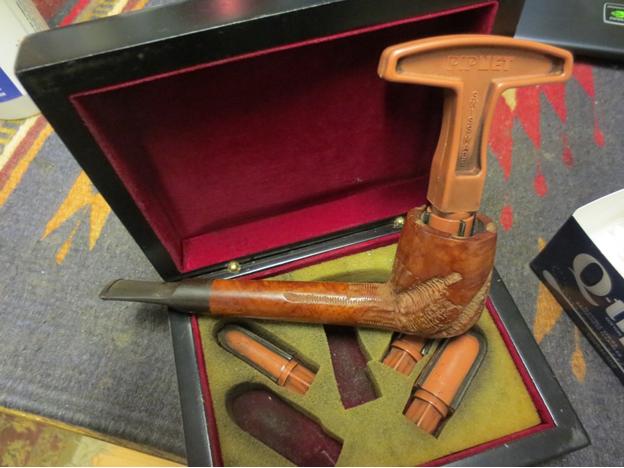
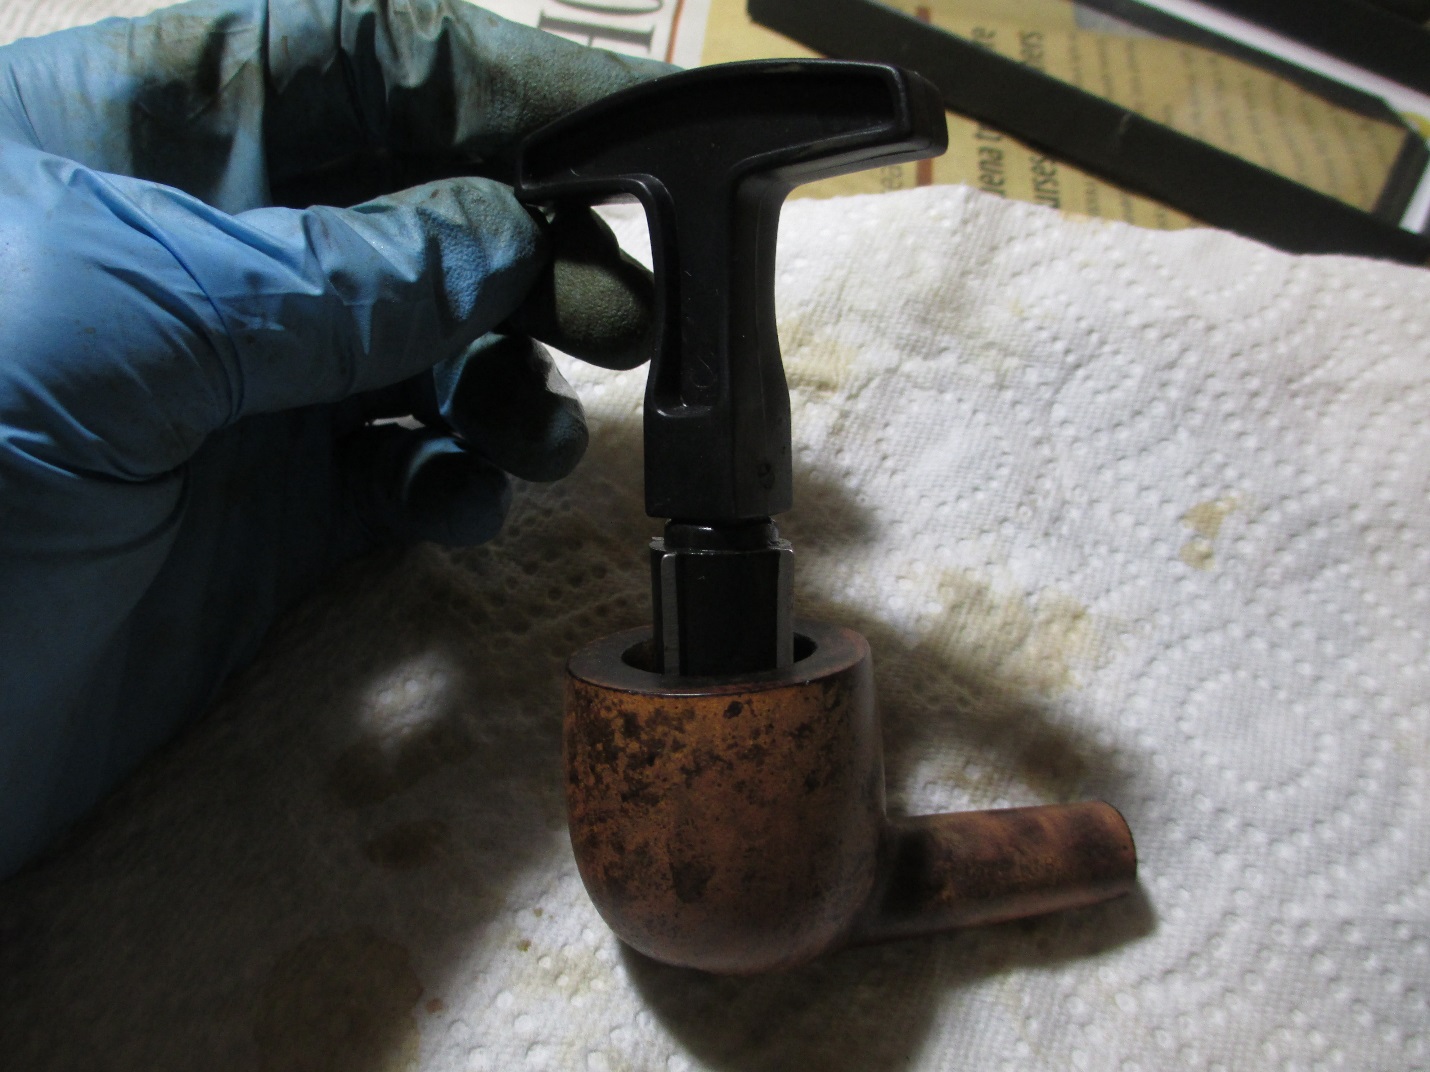
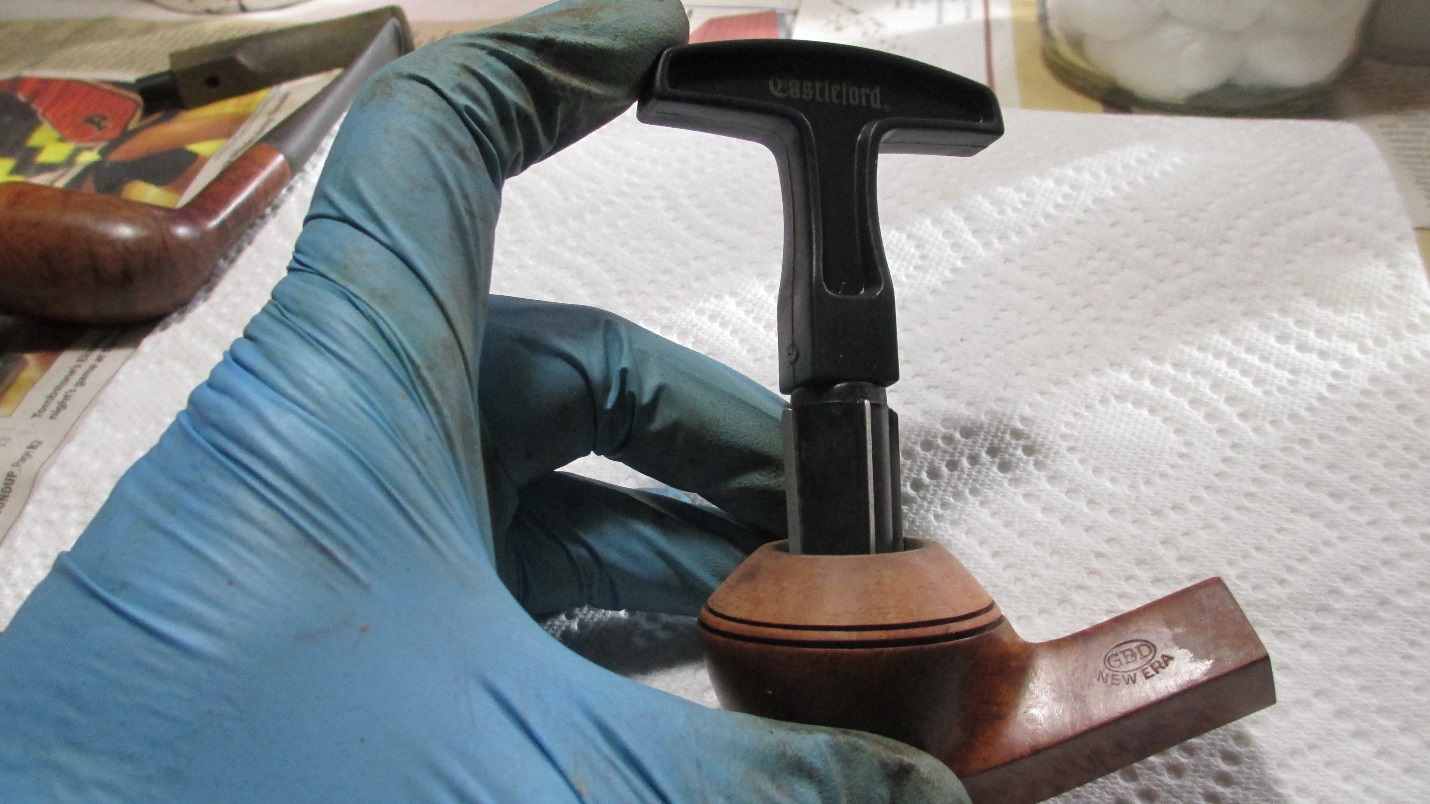
I have a variety of tools that I use to carve into the briar. Some of them are handmade and others are off-the-shelf tools, but my favorite is an old Craftsman T-handle tap wrench. It has a chuck on the end that will accommodate any ¼”–½” bit. It makes it very easy to switch out any of the several bits of various sizes and shapes that I have modified for carving different textures. The chuck provides a tight grip without any of the “wobble” that I’ve encountered when using a bit in a standard driver.

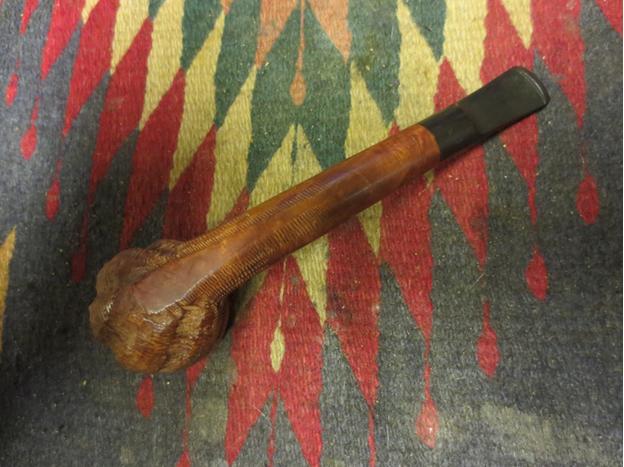
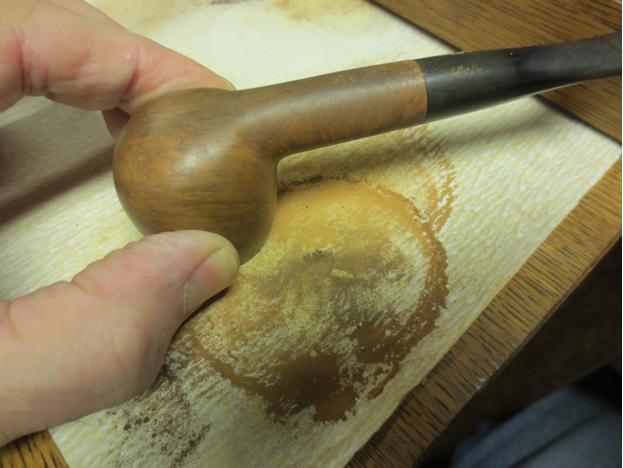
For this project, I began by using modified Phillips bits similar to what Steve has previously detailed here. First, I taped off the end of the shank with painter’s tape to make sure that I didn’t carve into that area. Then, I used a #2 bit to carve around the stummel, twisting and turning as I went. I wanted a deep, craggy texture to give some good contrast with the smooth areas. I switched to a smaller #1 bit for a little more control while I edged up to the smooth areas. The photo below shows the tool and the stummel after I had just started carving.Jet13 
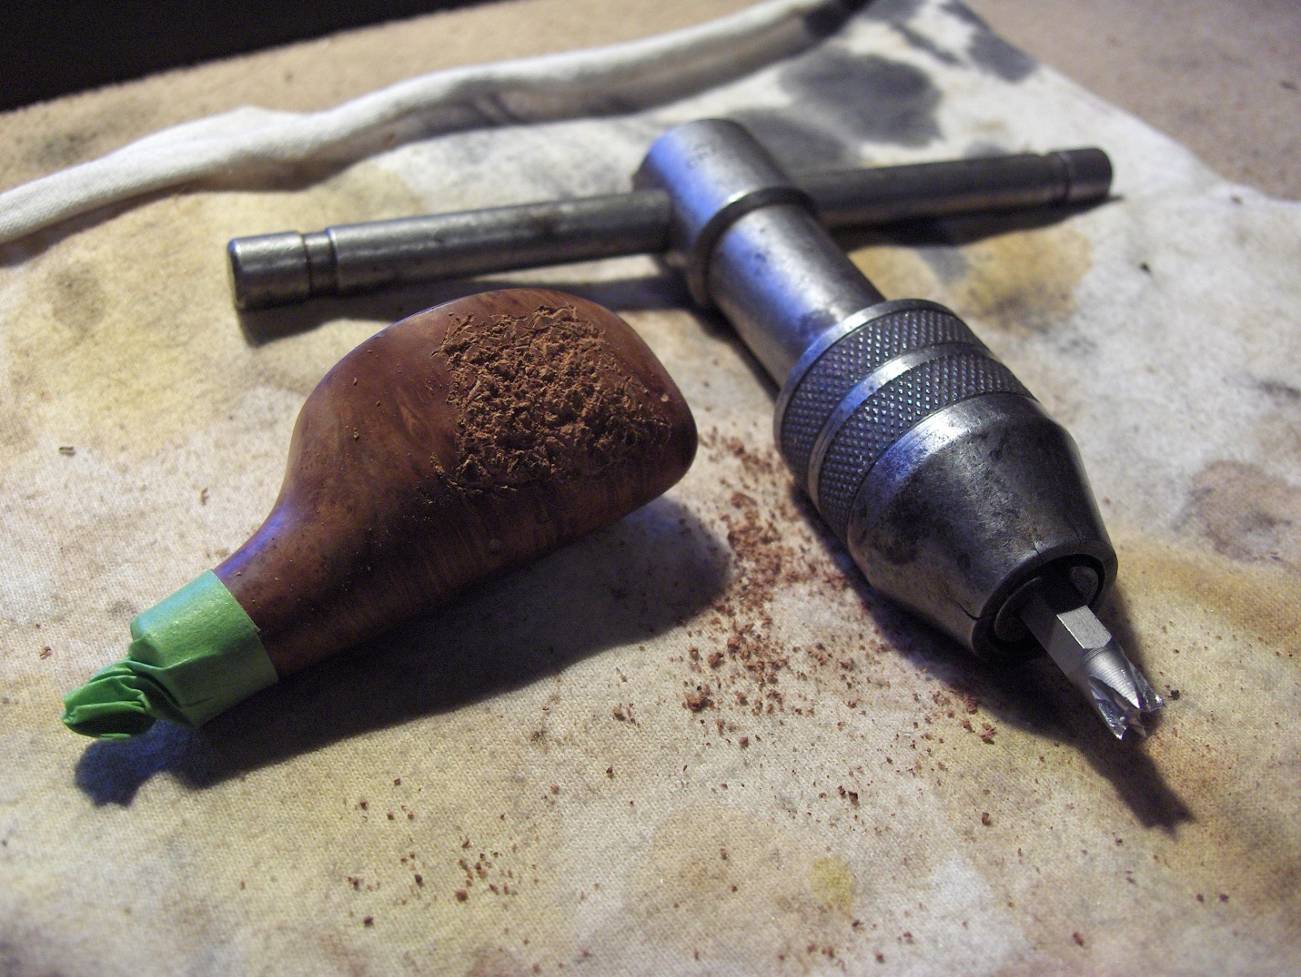
After carving with the bits, I used a wire brush to remove any loose material in the texture. Then, I had the idea that I might be able to restore some of the movement in the shape by carving a few deep “waves” into the rustication. I used a Sharpie pen to sketch some curved lines onto the texture to test out my idea and to give me something to follow should I choose to go that way. I liked it well enough and decided to go ahead. I never pass up an opportunity to break out my trusty Dremel (it really is an addictive tool). So, I fitted it with a #107 engraving bit and etched in the lines that you see in the following photo.Jet14 
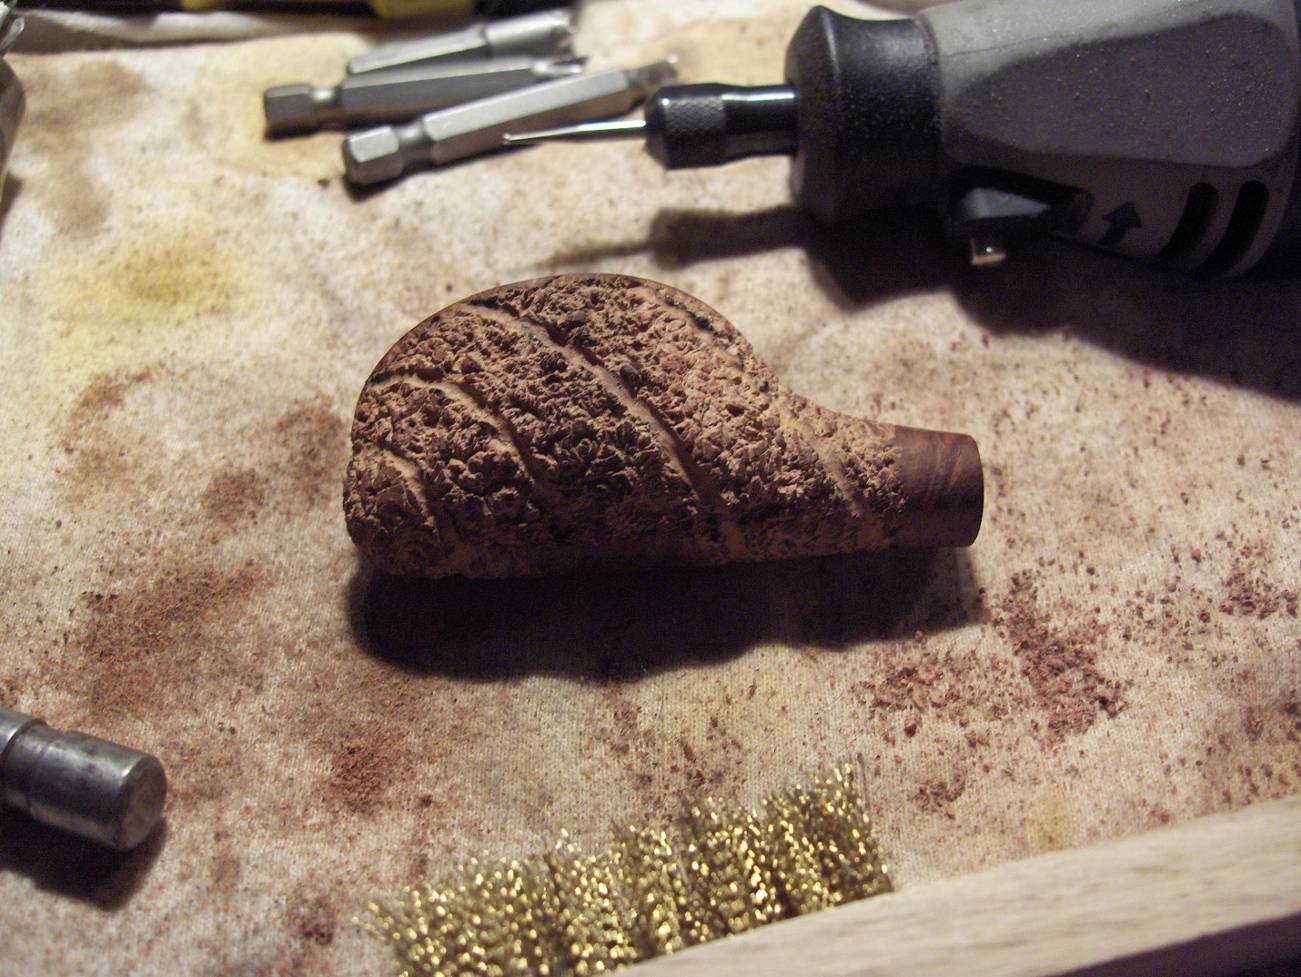
I then used a smaller #108 engraving bit to etch a few divergent “cracks” off of the curved lines. This was followed up with some more work with hand carving tools to give it a more natural, less machined, look. I went over it again with the wire brush, and then used 400-grit paper to slightly smooth the peaks for a better tactile feel. You can see the final rustication texture in the photo below (the dark spots are the remains of my Sharpie lines).Jet15 
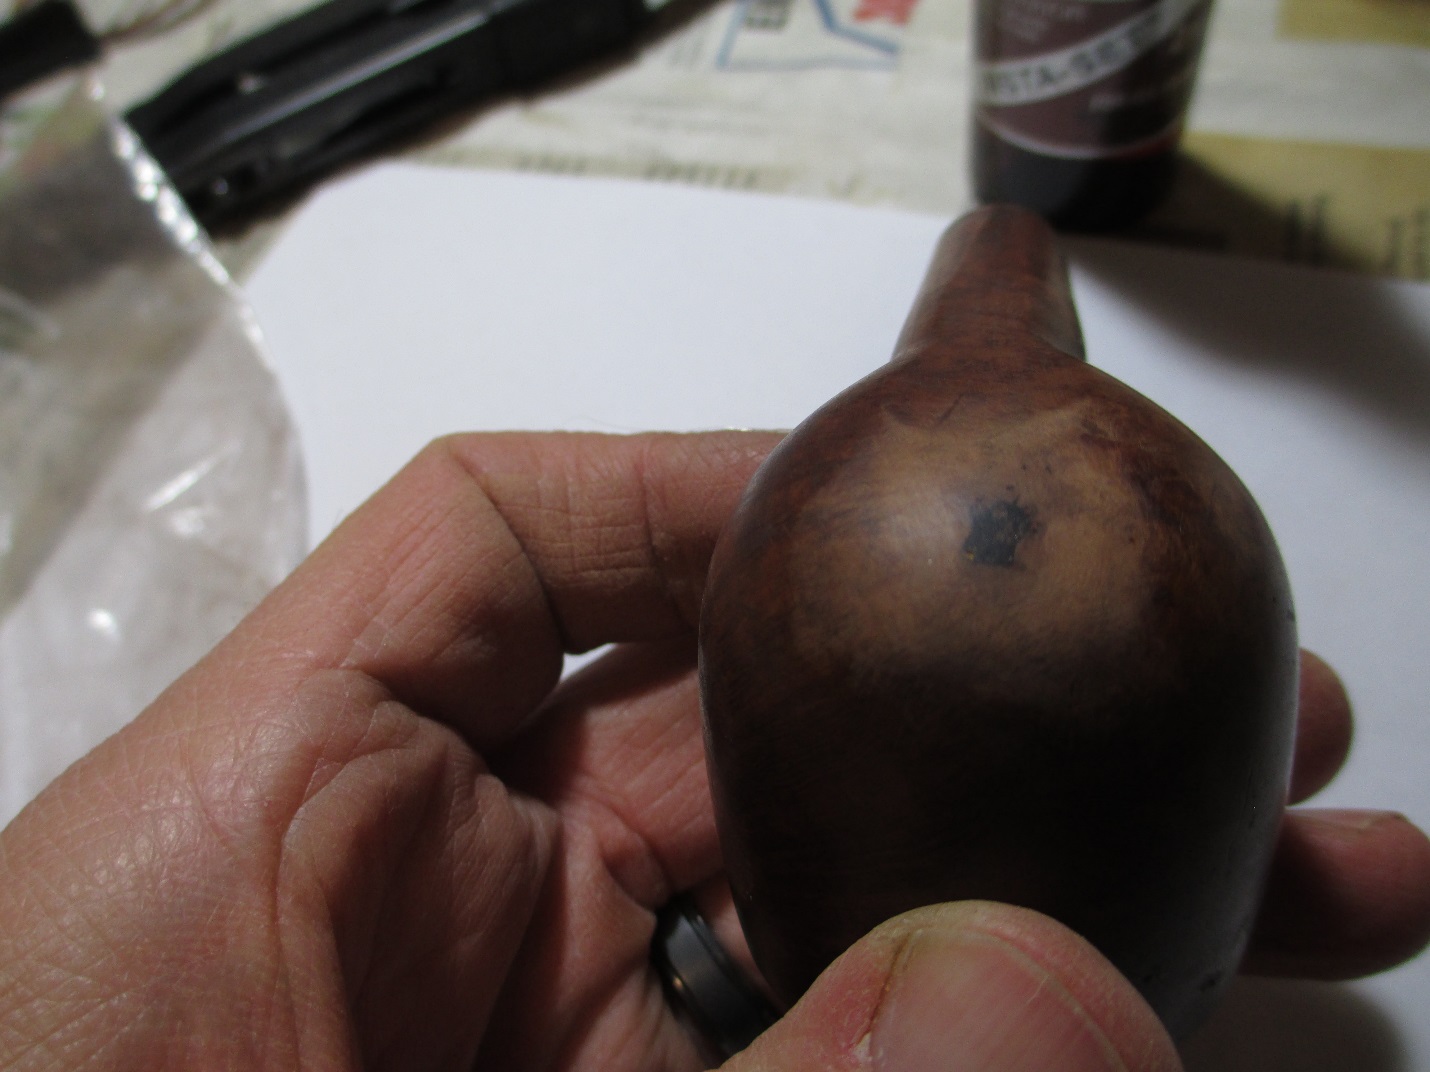
Then it was time to stain. I used isopropyl alcohol to thin some black Fiebing’s leather dye 3 to 1, applied it to rusticated area with a cotton swab, and flamed it. Then, I heated the wood with a heat gun until it was very warm to the touch and used a 20/0 liner brush to paint the dye across the grain in the smooth areas.Jet16 
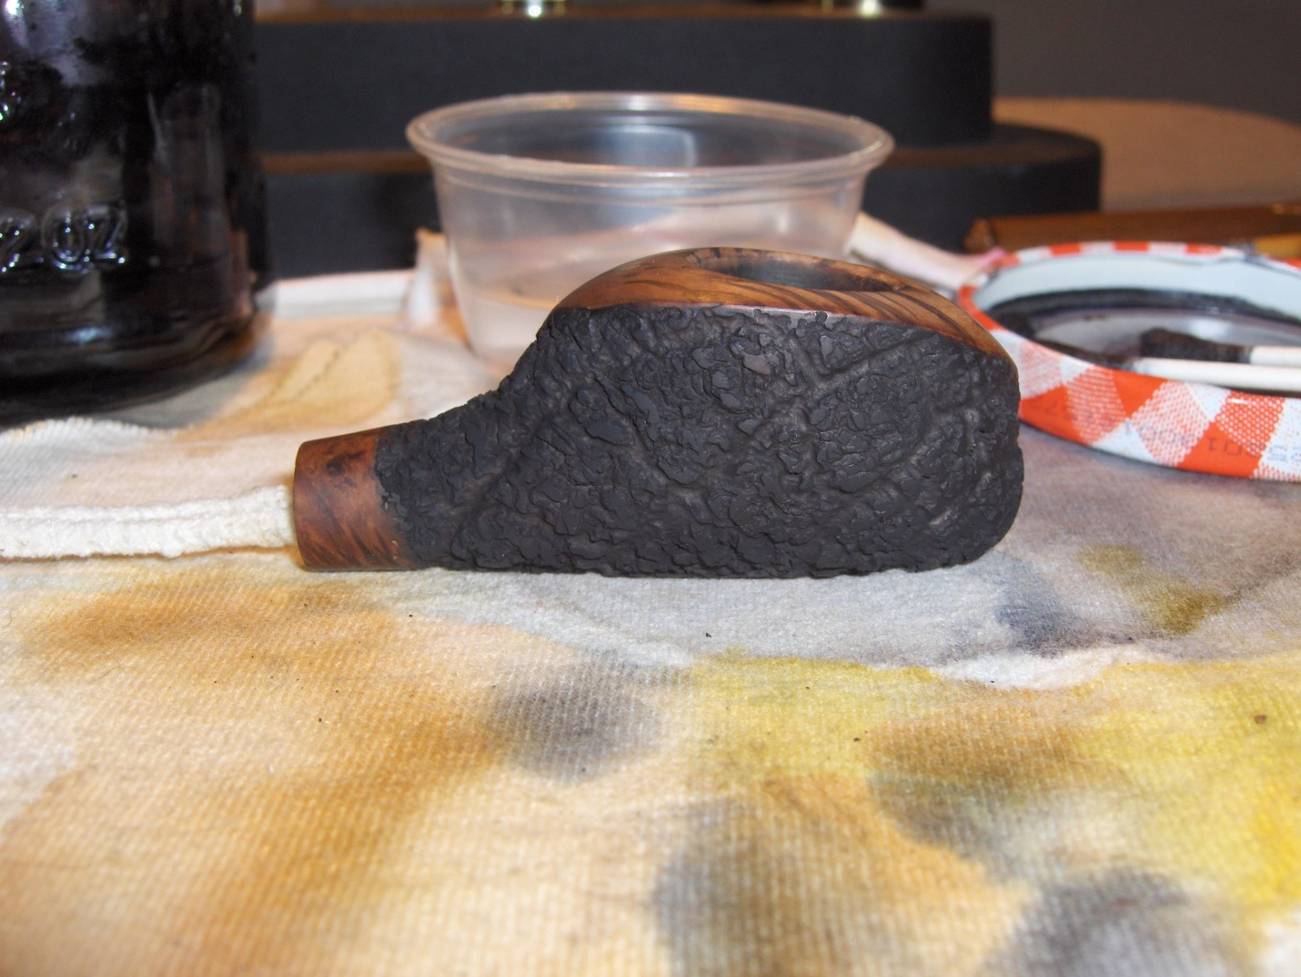
After allowing the stain to set, I lightly sanded the entire stummel with 600-grit paper. This included sanding the surface of the rusticated areas to give it some highlights to accent the darker crevices. I then gave the entire stummel two coats of dark brown stain thinned with alcohol, and flamed it between each one.Jet17 The stummel was hand-buffed with a cotton cloth. The smooth areas were then lightly sanded with 1200-grit. I also lightly and strategically sanded a few of peaks in the rustication around the smooth areas to allow one texture to fade into the other a bit. I then used micromesh pads 1500-2400 in the same manner.

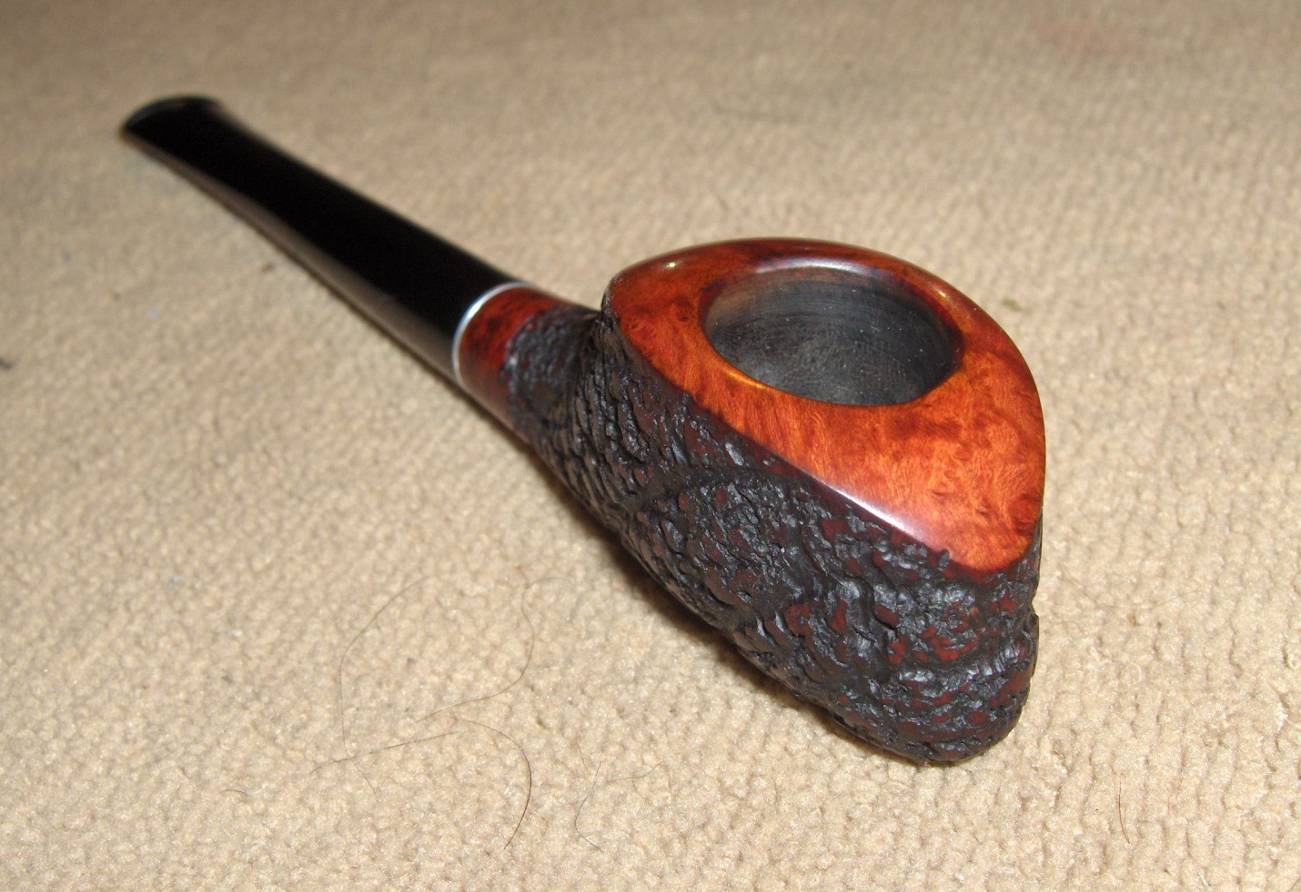
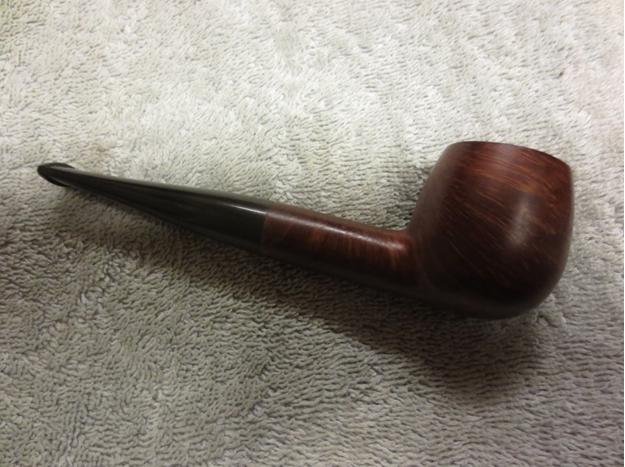
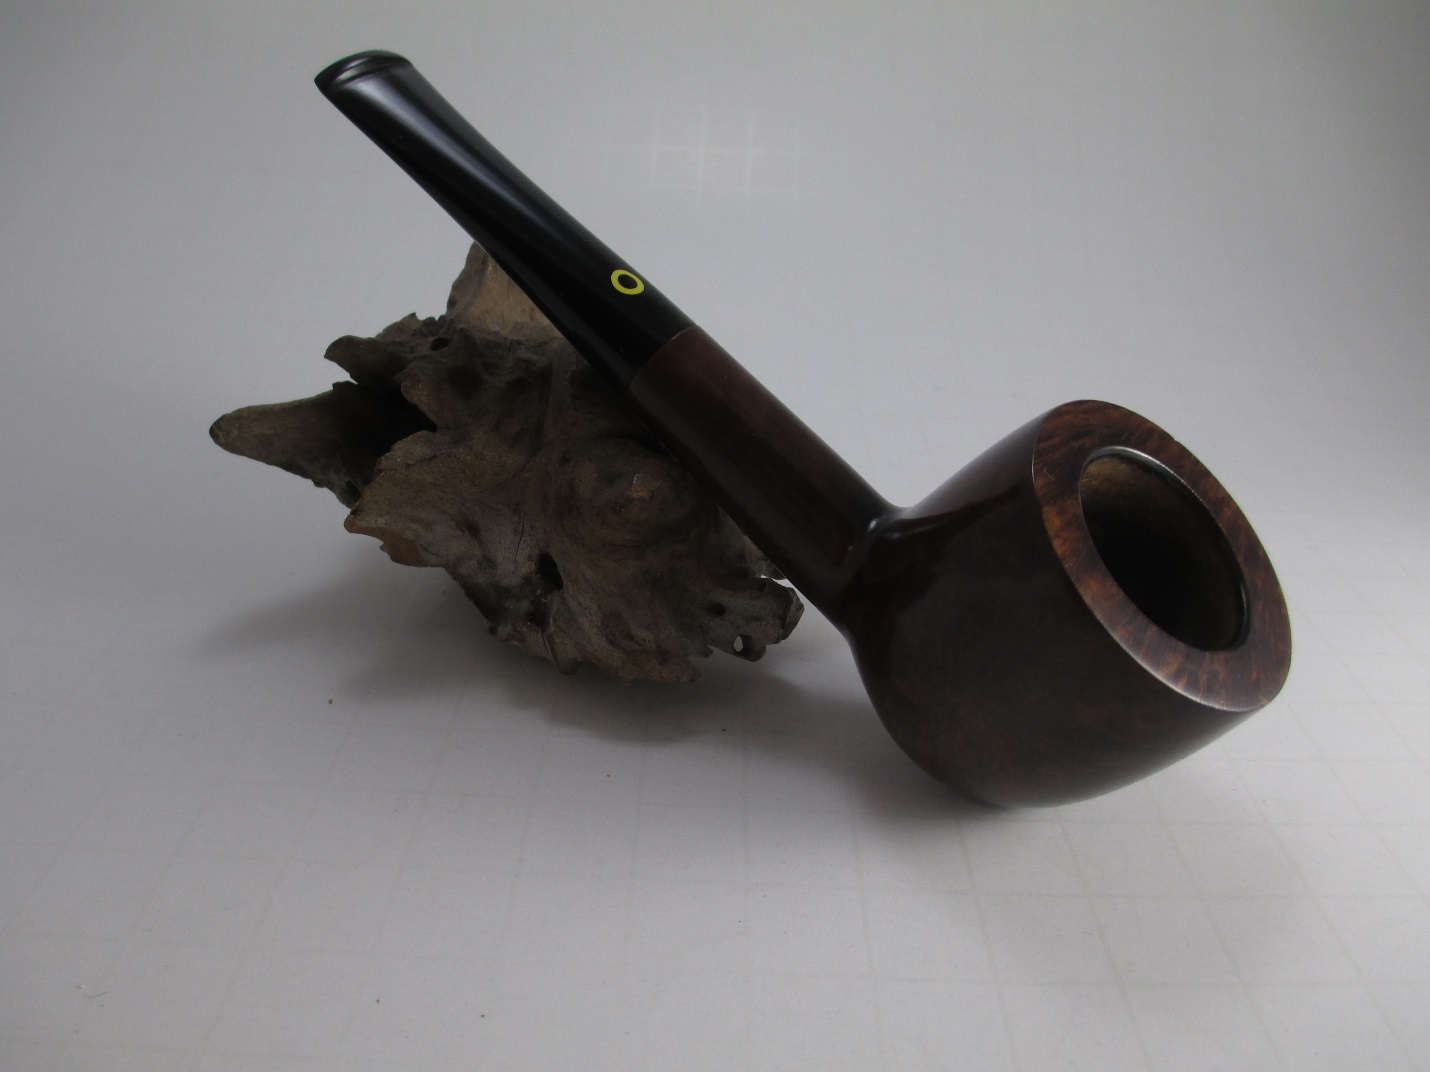
Another couple of stain coats were then applied to the stummel using the same mix and technique that I had used earlier. This time, it was an ox blood stain to add some brightness. Then, I continued with the remaining grits of the micromesh pads. When done with the pads, I gave the stummel a couple of coats of Halcyon wax to wrap up the work.

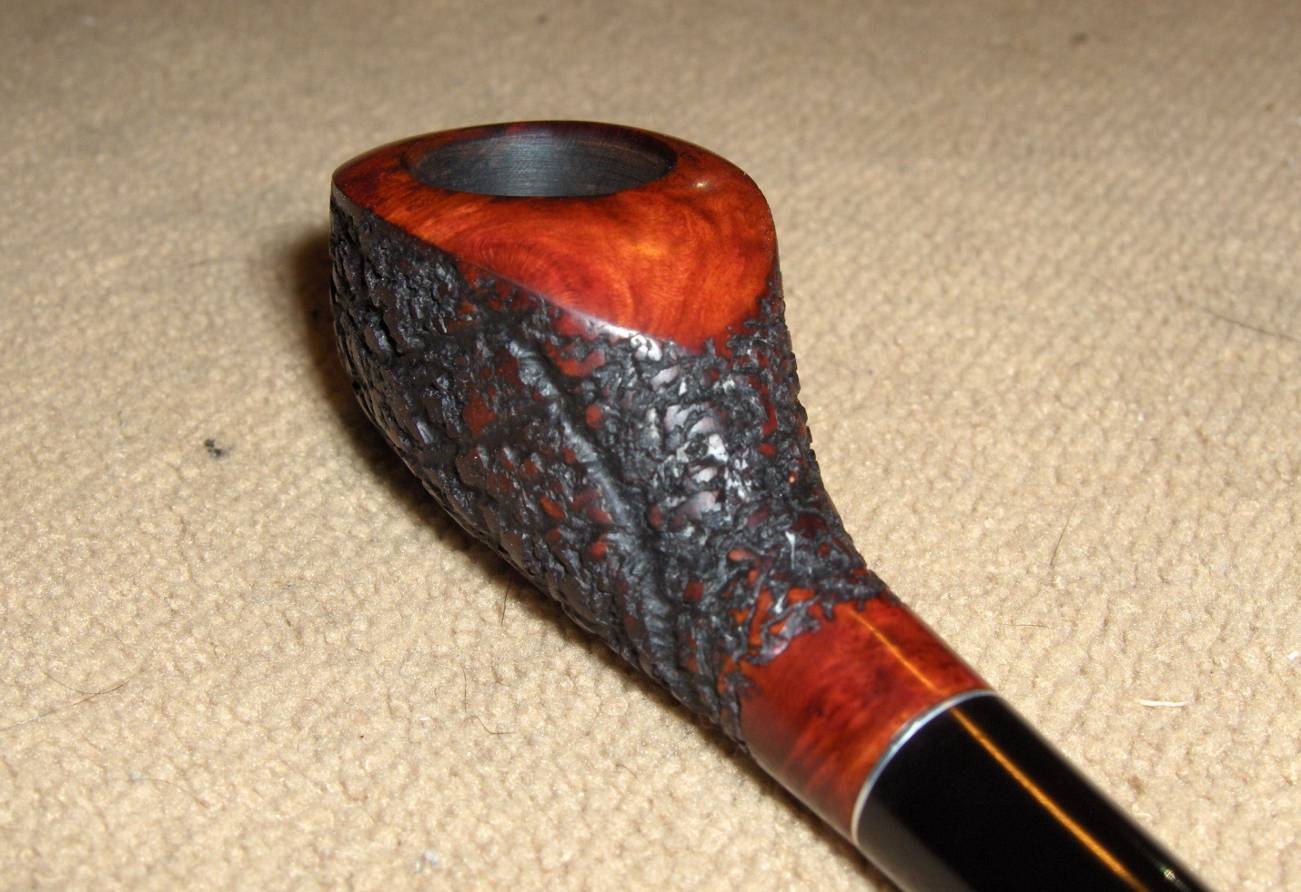
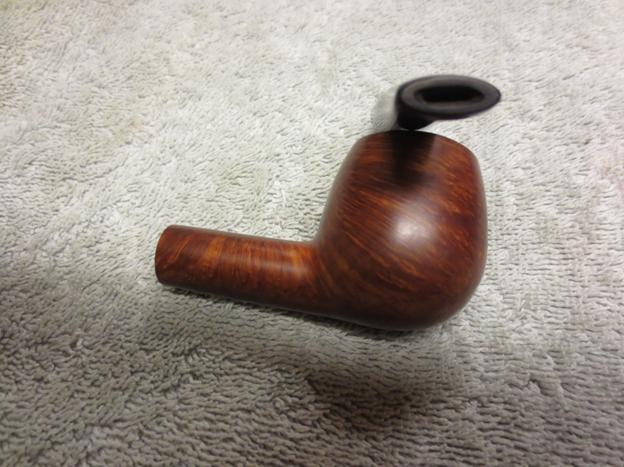
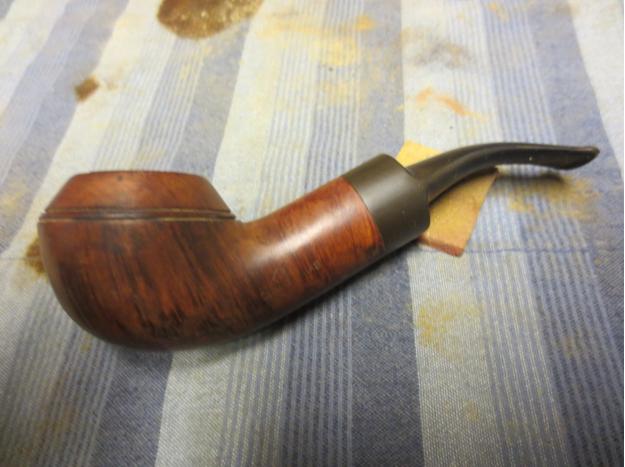
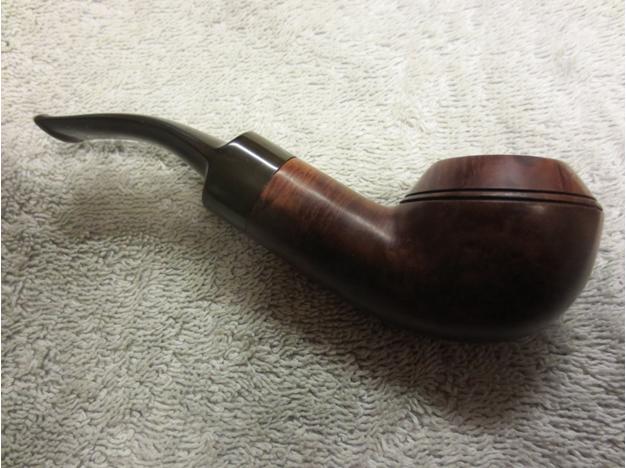
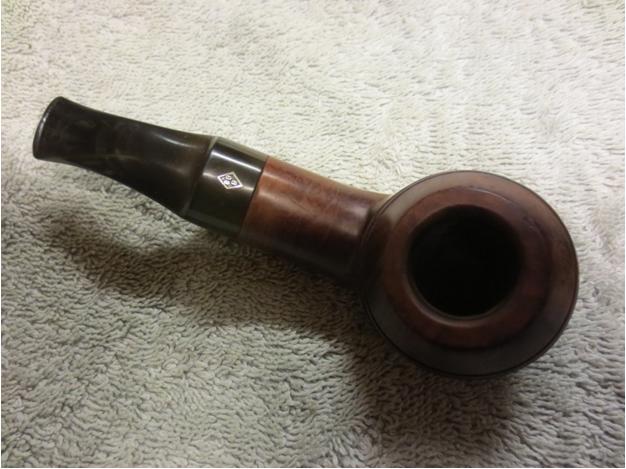
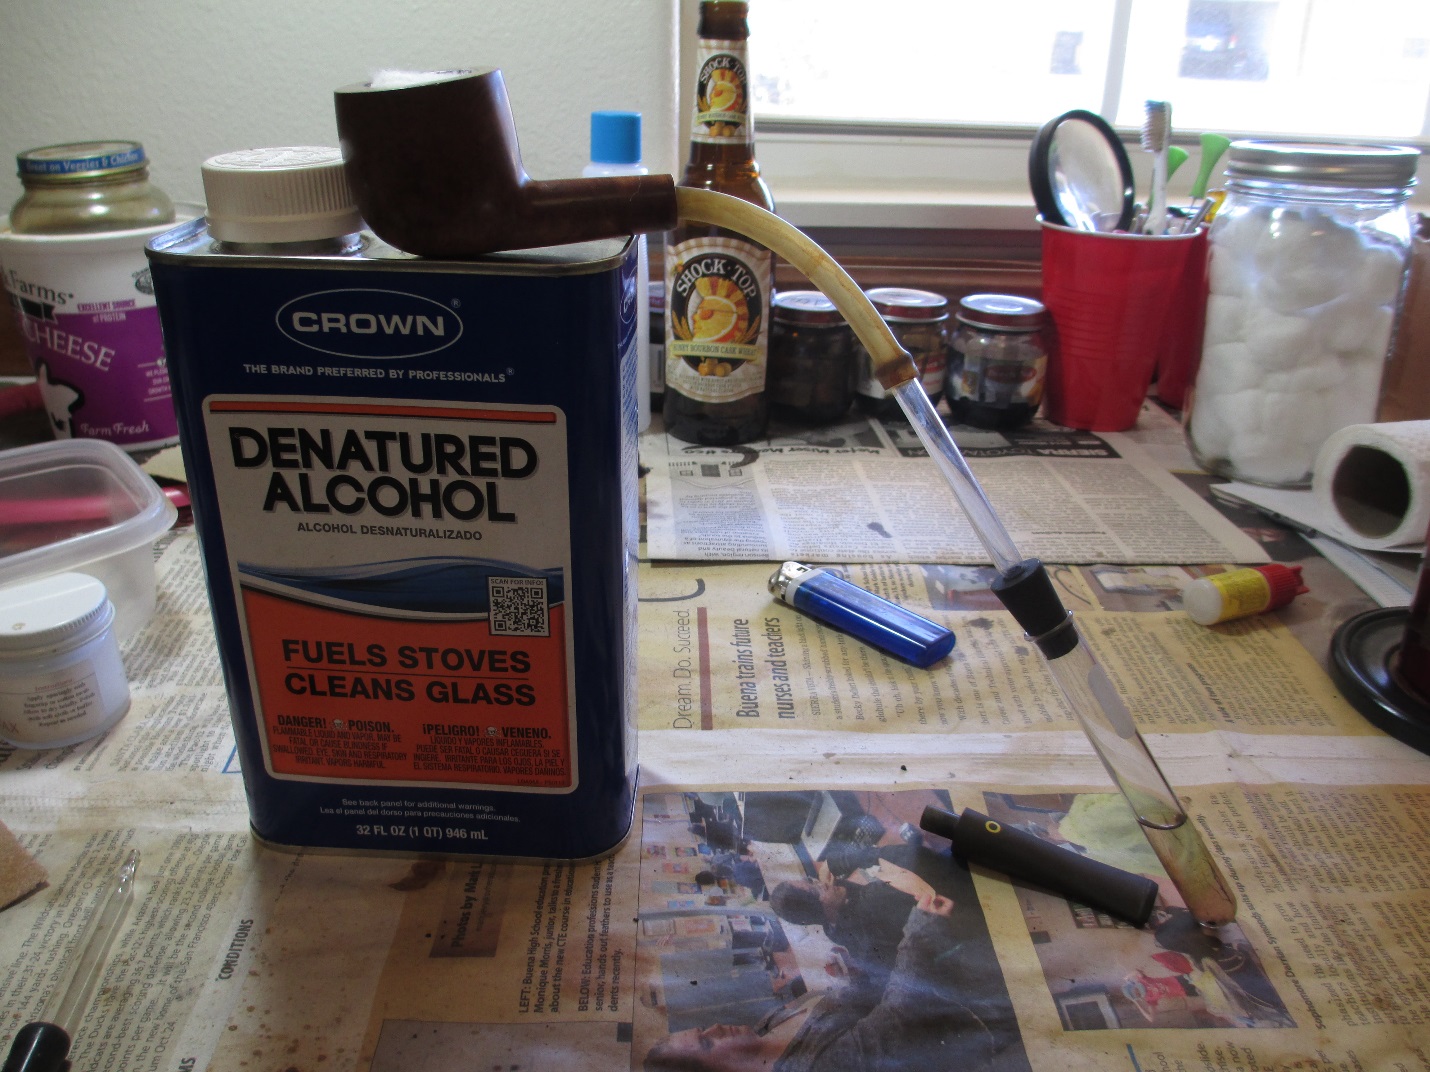
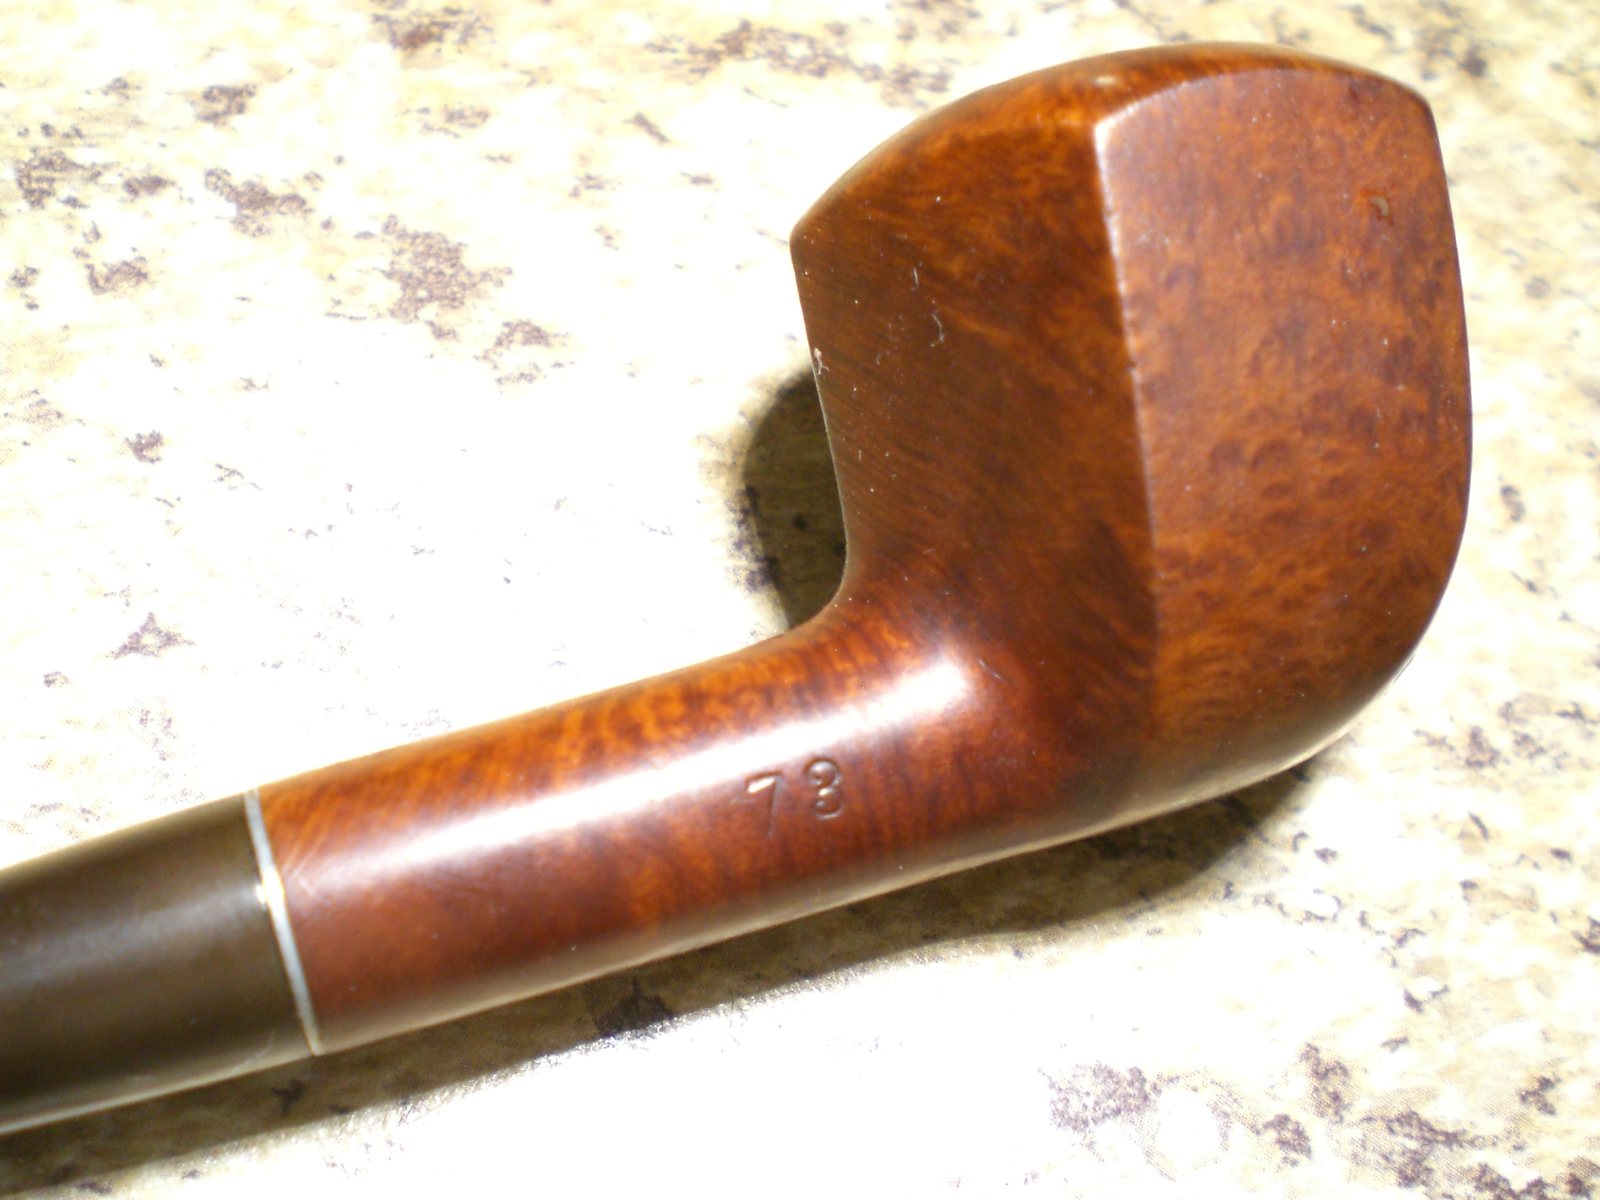
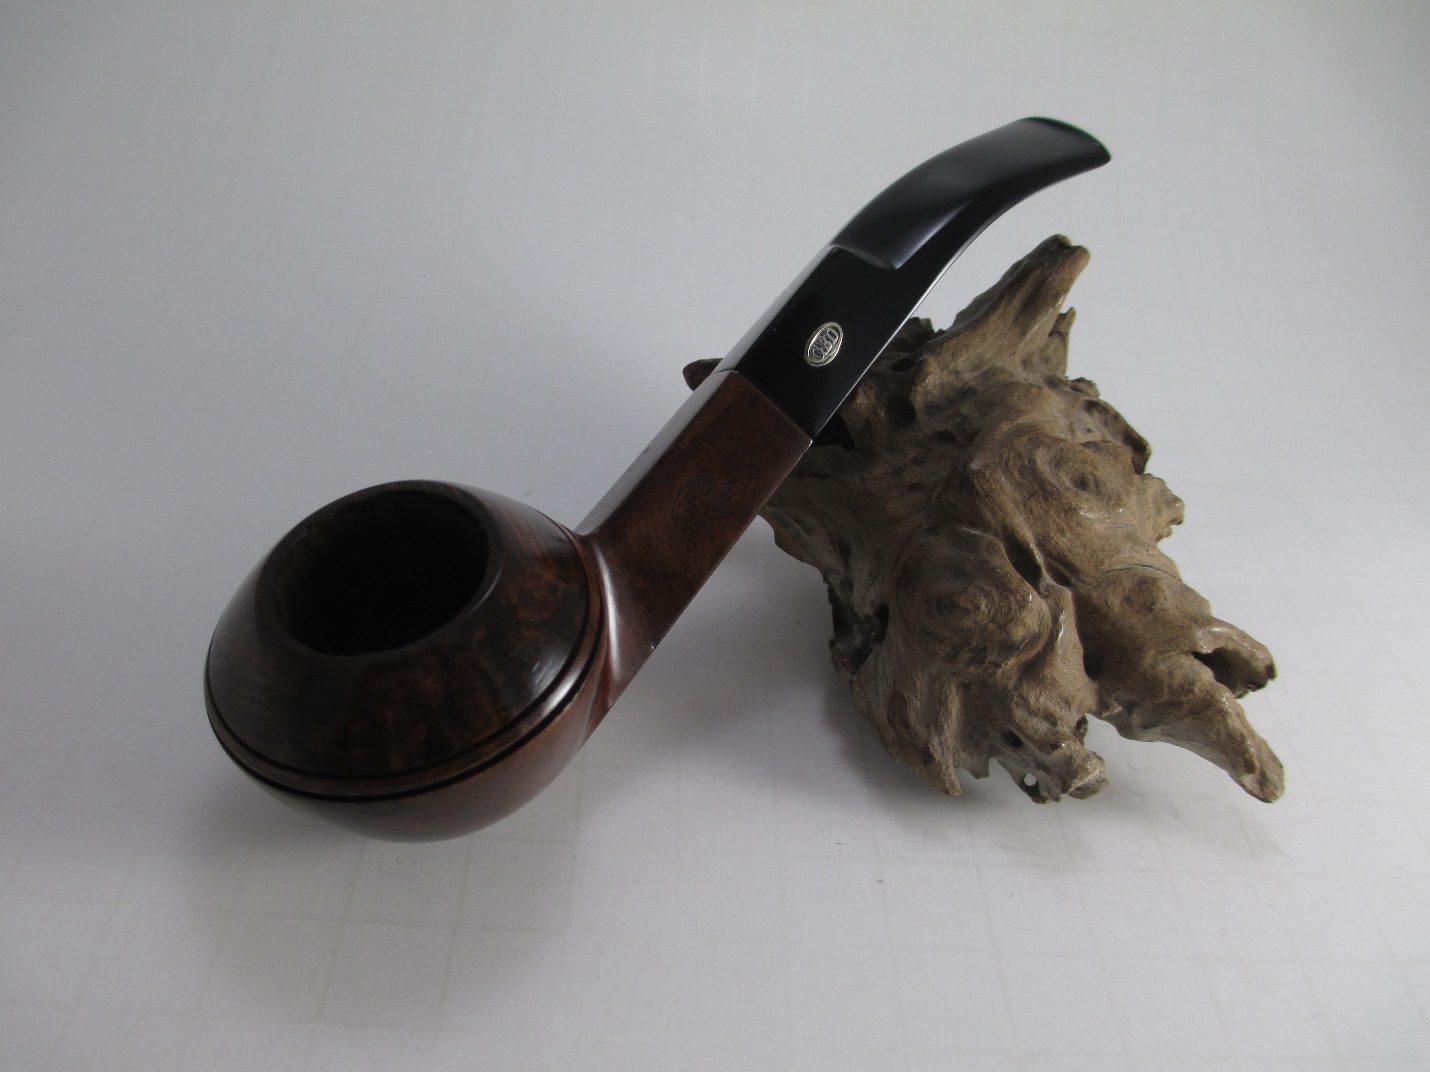
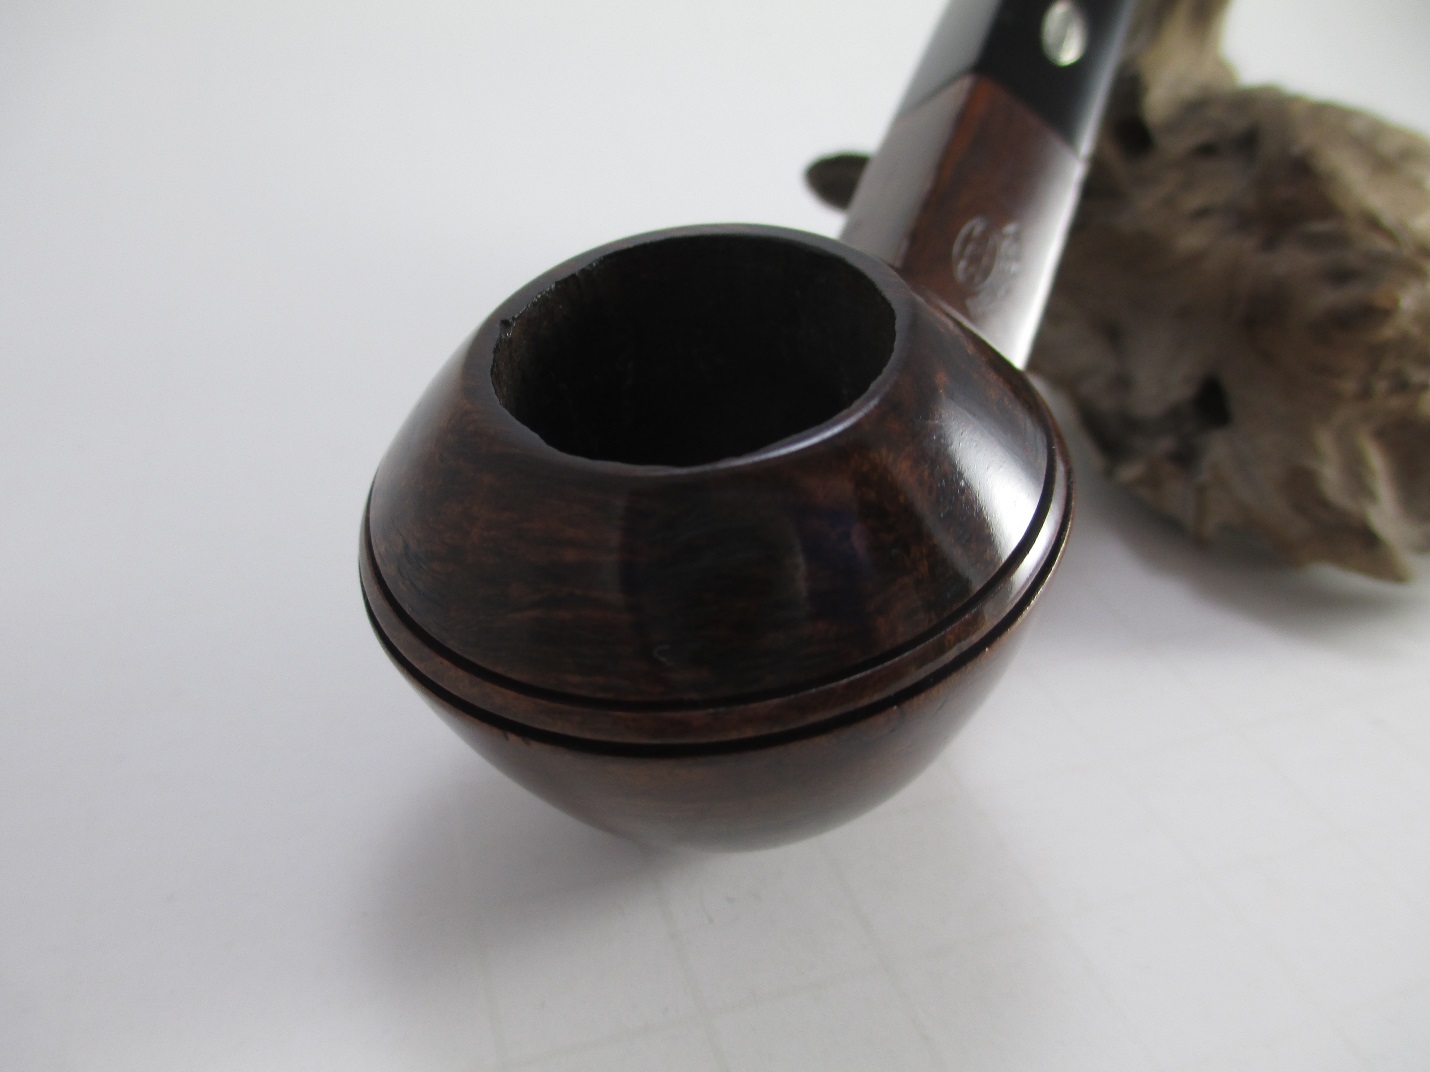
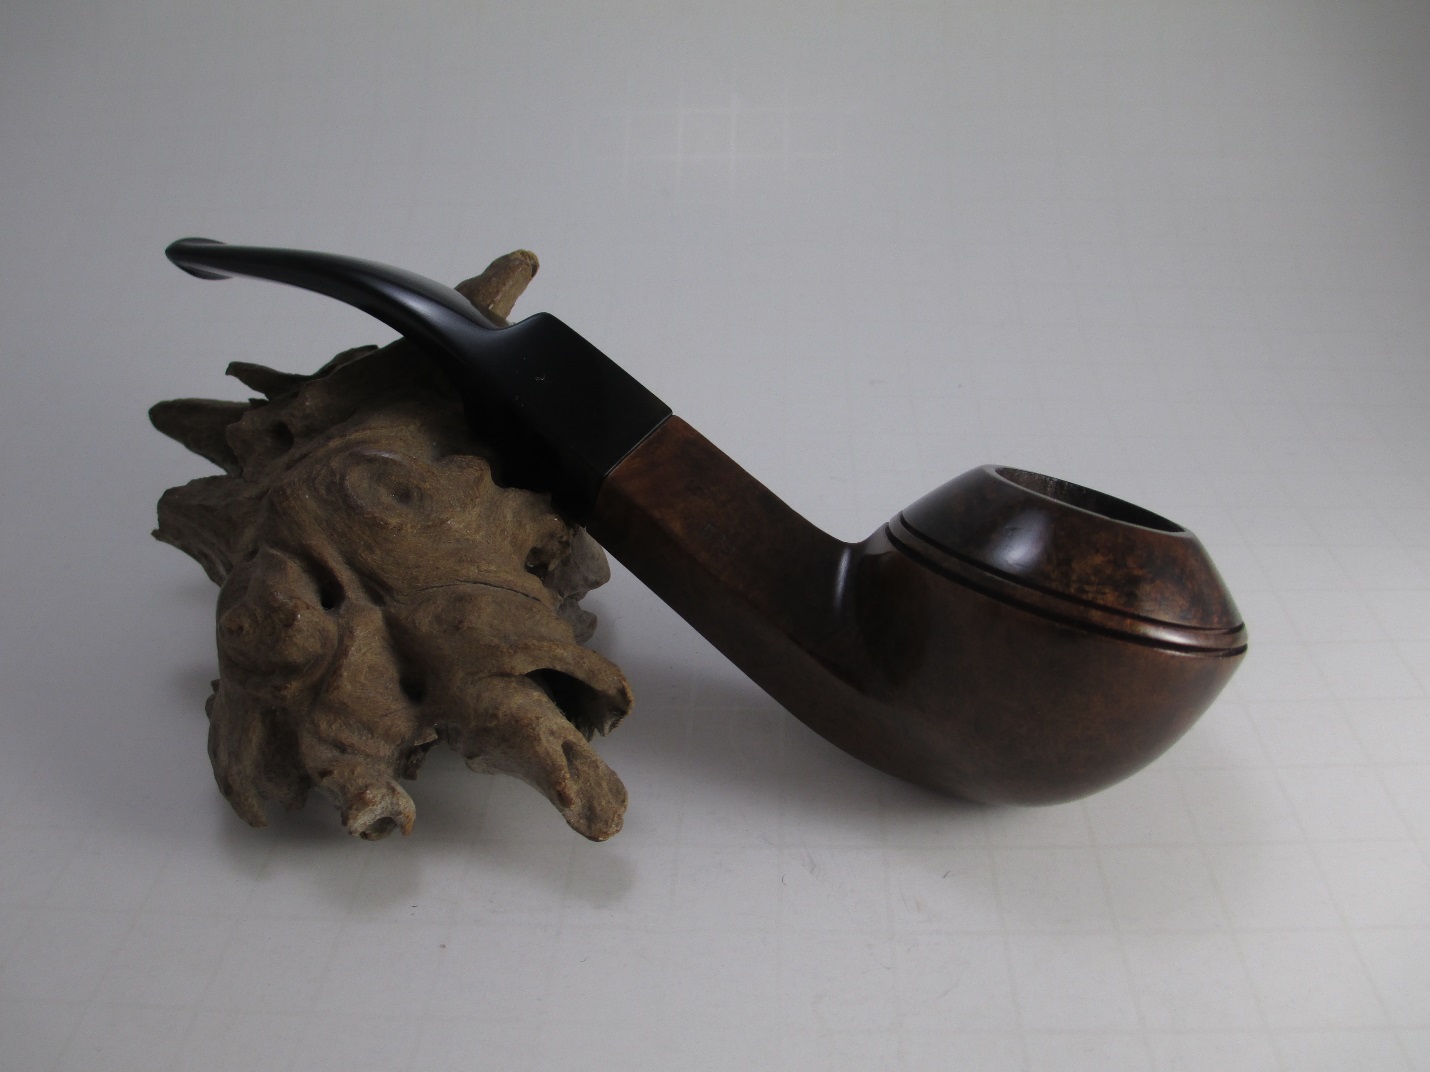
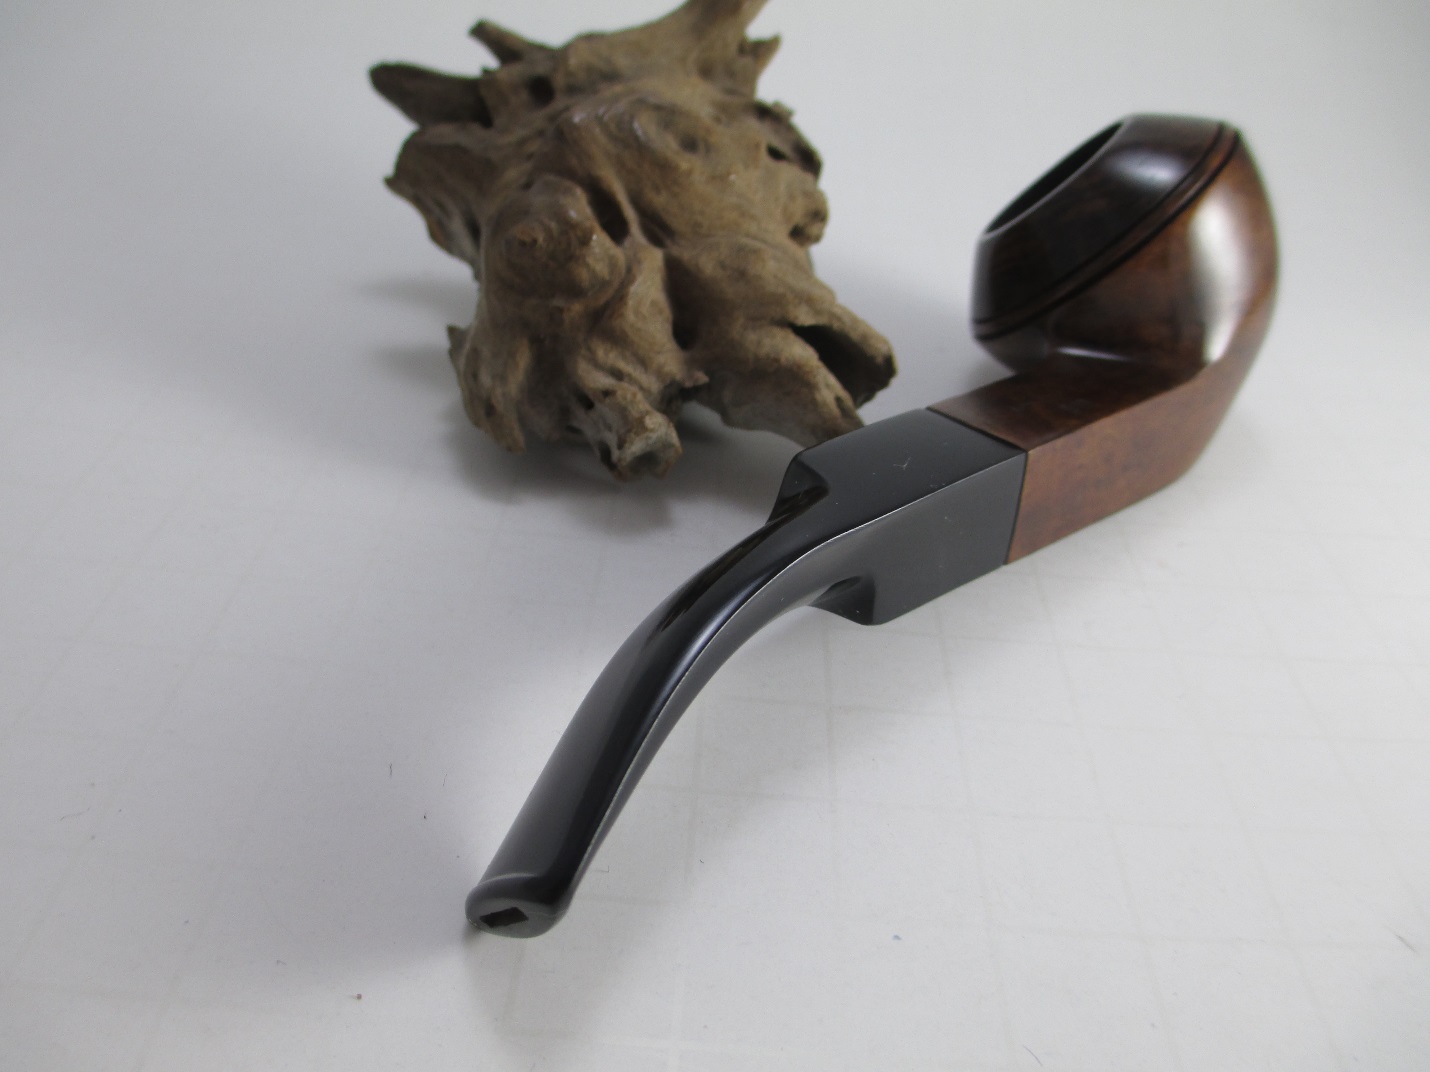
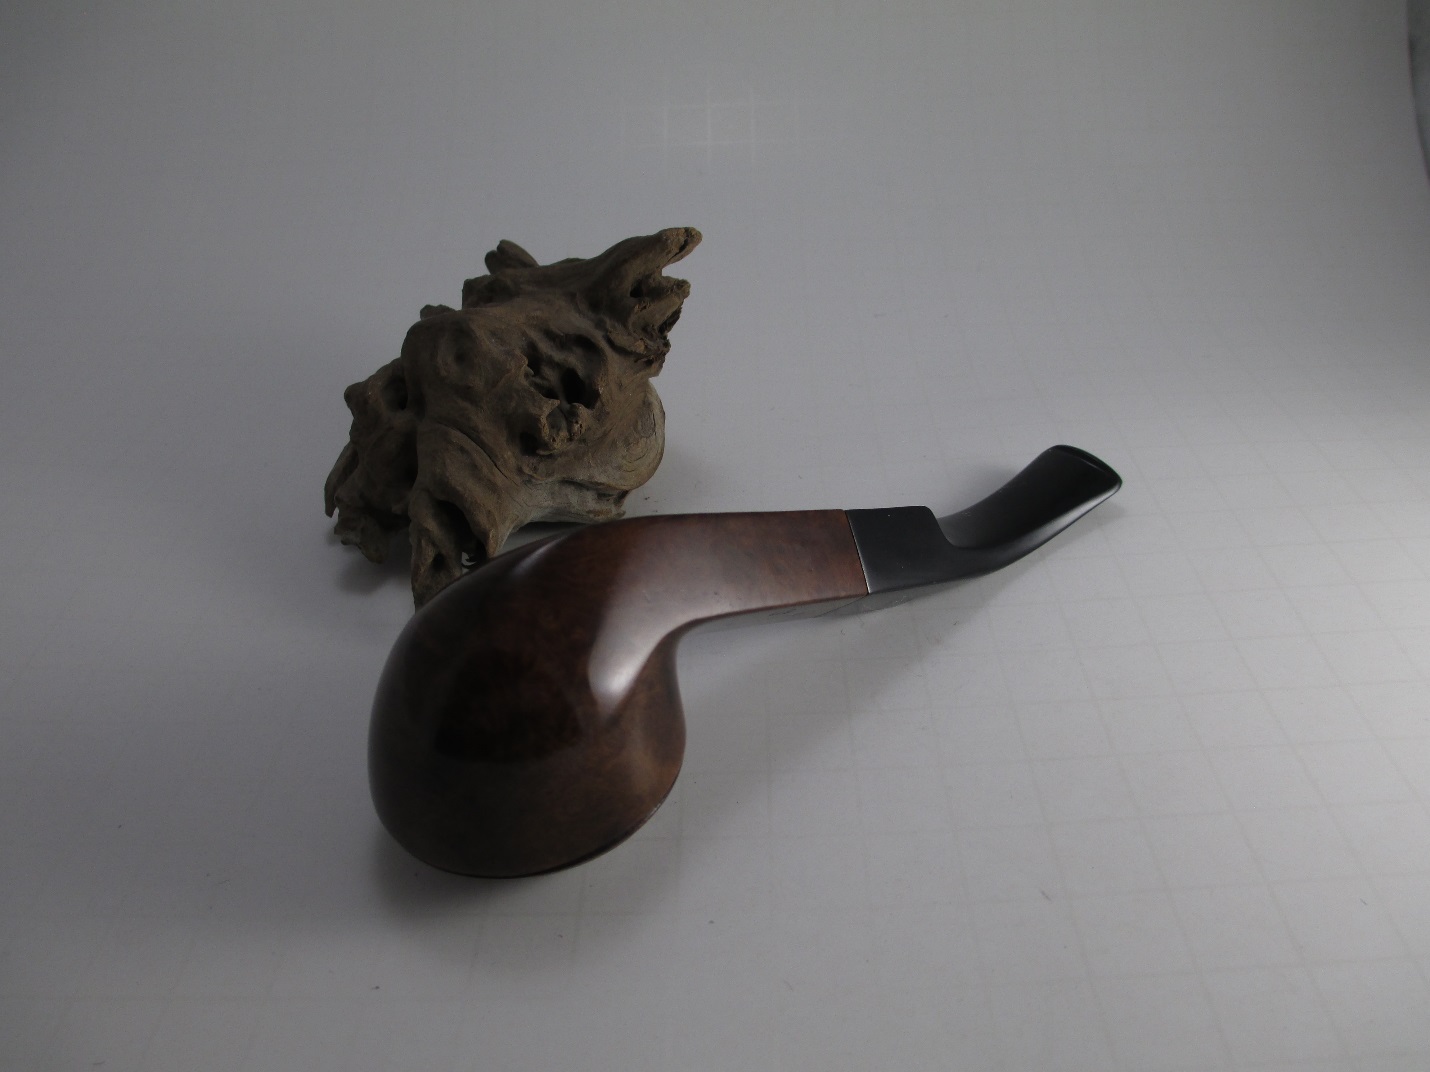
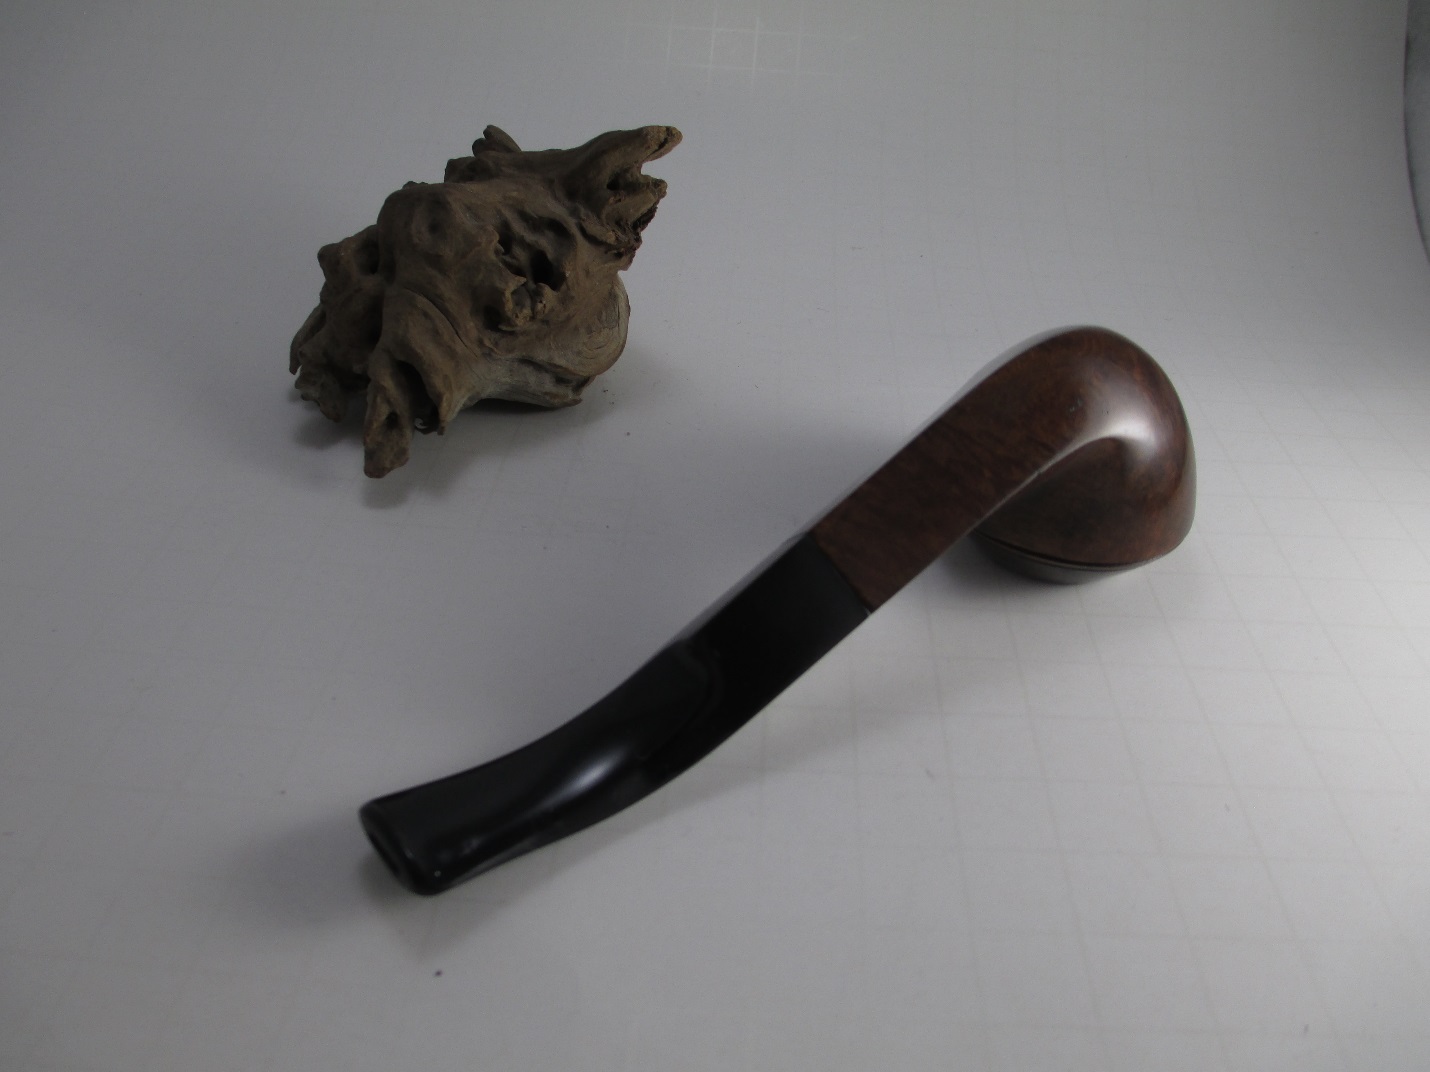
I think the rustication worked out fairly well and it has a great feel in the hand. You can judge for yourself from the photos of the completed pipe below. I’ll always wonder what could have been if I had left it smooth, though. I guess I’m on the hunt for another Jet Stream so that I can find out!Jet18

Jet19

Jet20

Jet21

Jet22

Jet23

Repairing a Bite Through on a Vulcanite Stem with Black Super Glue


Blog by Steve Laug

I recently posted about an old BBB 701 Rhodesian that I restored. It was quite a mess and needed a lot of attention to both the bowl and the stem. In the process I took some photos of the stem repair I did and thought I would write a blog on the process. The first three photos below show the state of the stem when I started. The top and bottom sides of the stem at the button had significant tooth chatter. The top of the stem had the bite through at the button and a much worn edge on the button. The underside of the stem had deep bit marks next to the button and small chatter up the stem about 1 inch. There was oxidation on the stem as well. In the photo there appears to be a crack from the bite through hole into the button and to the edge. That mark is more tooth marks but the stem material is not cracked in that way. The red arrow in the first two photos highlights the apparent crack. In the third photo the arrow points to the tooth marks on the surface of the stem.Stem1

Stem2

Stem3 The first step in preparing to patch the hole in the stem is to clean up the surface and remove any loose or damaged portions of the stem. I use a dental pick to pick at the edges of the hole and the cracks and broken spots on the stem. I also probe other potential thin spots on the top and the bottom of the stem. I particularly probed the tooth marks on the underside to see how thin the vulcanite was in those areas. Once I had picked away the damage I wiped down the areas with a cotton pad and alcohol. The surface needs to be free of wax or dirt before the patch is applied because these will cause the patch to not bind to the surface of the stem.

I have a nail file that I “stole” from my daughters that is a perfect fit in the slot of most pipe stems that I work on. It is tapered and pointed so that it fits deep into the airway underneath the hole in the stem. I want a hard surface under the patch for the glue to puddle against. In order to not glue the file into the stem permanently I apply a thick coat of Vaseline petroleum jelly to the end of the file before I insert it. I only put enough of the jelly on the file that it does not squeeze out of the hole and soil the repair area. This took time to get the hang of. Too much jelly makes a mess of the repair area and too little makes the super glued file the next problem you will need to address in repairing the stem. It takes practice to get it just right – don’t get frustrated and remember too much jelly is better than too little!

With the file inserted in the airway it is time to start the patch. I drip black super glue around the edges of the hole first to solidify the broken edges and provide a live edge to build on when I fill the hole. I let that first coat of glue dry hard to touch before adding the next layer of glue. I have used an accelerator in the past to quick dry the patch. This time I decided to do it the long way and let the patch cure between coats. In the photo below you can see the ring around the bubble of the patch that is that first layer of the repair. The arrow in the picture points to the cured edge of the repair that surrounds the bubble in the centre. I apply several more coats to the edge to build it out toward the middle. The final coat I purposely overfill because as the glue cures it shrinks. It is a bit more work to sand out the excess material but in the end it makes for a thicker and stronger patch. I also filled the tooth marks on the underside of the stem next to the button with the superglue. These took two coats to build it up enough to reshape the button with files and sandpaper. I set the stem aside overnight to give the glue patch time to cure and harden.Stem4 The next morning, when the glue had hardened I sanded the patch with a folded piece of 180 grit sandpaper followed by more sanding with 220 grit sandpaper. I work to blend the edges of the repair into the surface of the stem and feather out the surface of the repair to match the surface of the surrounding stem material. In the photo below the arrow points to the patch. It is a slightly different colour of black to the rest of the stem at this point in the process. More sanding and working on the patch will change that.Stem5 On the underside of the stem I sanded the patches until they were smooth as well. On this particular repair there were two small air bubbles that showed up when I sanded the patch. They are shown by the arrows. I refilled these small holes with a drop of black super glue and let it cure until hard then resanded the patched areas.Stem6 When repairing the surface of the stem I always check the profile of the stem to make sure that I am not creating bulges in the surface of the stem. I want to maintain the flow and lines of the stem and not change the profile. When I sand the repairs I repeatedly look at the profile and often take pictures to make sure the flow and lines are smooth. The photo below shows the smooth profile of the stem after the repairs and initial sanding.Stem7 I sanded the stem with 400 grit wet dry sandpaper with a spot of water on the stem. I sanded to remove the oxidation and to blend the patch into the surface of the stem on both the top and the bottom sides. As can be seen in the photos below the patch on the top side is smooth and blended into the stem. It is still a slightly different black colour but more sanding will remedy that. The patch on the underside is well blended. More work needed to be done with the two air bubble repairs to blend them further.Stem8

Stem9 I sanded the stem further with a medium and a fine grit sanding sponge. 3M makes this product and it is very flexible. I find that it allows me to follow the curves of the stem and the sharp edges of the button with little effort. The top and bottom of the stem are shown after sanding in the next two photos. The patches are now little more than small spots on the stem that will further disappear after sanding with micromesh sanding pads.Stem10

Stem11 I wet sanded the stem with 1500-2400 grit micromesh pads to smooth out the repair and further blend the patches. In the photo below you can see that the patch has all but disappeared on the top side of the stem. The one on the underside looks similar at this point in the process.Stem12 I dry sanded the stem with 3200-12,000 grit pads. The surface of the stem began to shine and have a rich glow in the surface. Each successive grit of pad deepened the shine and the richness of the black stem.Stem13

Stem14 I buffed the stem with White Diamond and gave it multiple coats of carnauba wax. I buffed it with a soft flannel buff to raise the shine. The final two photos show the top and underside of the stem the shine is rich enough that the flash is shown reflected in the surface of the stem. The hole is solidly repaired and the tooth marks on the underside of the stem no longer show. The edge of the button has been sharpened as well to distinguish between the stem surface and the button. The finished stem looks as if it was never damaged though under a bright light the spots are slightly visible if you know what you are looking for. The stem is now ready to be put into service. The proof of the durability of the patch will be seen over time as the pipe is smoked and used. On other stem repairs like this I have never had a problem with durability and I am hoping for the same with this stem.Stem15

Stem16

A Custombilt Lovat Reborn


Blog by Steve Laug

I found this pipe on a recent pipe hunt in the US. It was sitting in a locked cabinet in an antique mall just waiting to be found. It has a long round shank with a saddle stem so it fits the description of a Lovat. It is a large pipe however – approximately 6 inches long. The combination of rustication and smooth is attractive. It has the standard Custombilt rustication but for some reason on this old pipe it looks more refined and less clunky (good scientific term, LOL!) than the other Custombilts and CustomBilts that have passed through my hands.hunt I have several Custom Bilt or Custom-Bilt pipes stamped with a separation or a capital B on bilt. I remembered reading Bill Unger’s book on CustomBilt pipes and knew that the change of stamping reflected a change in the company. I turned to one of my reference sources – Pipedia, to see what they said. Here is the link to the full article by Rich Essermann http://pipedia.org/wiki/Custom-Bilt I quote from that article below:

“In 1946, the name was changed to Custombilt after Mincer began an association with Eugene J. Rich, Inc. There were some big changes in advertising and distribution. The slogan “AS INDIVIDUAL AS A THUMBPRINT” began at this time as well.”

“In the early 1950’s, Tracy Mincer developed severe financial problems that caused him to stop making the Custombilt, and he lost the name. In 1953, Leonard Rodgers bought the company and emphasized tobacco pouches and butane lighters. (However, it appears Mincer was working on his new pipe, the Doodler.) In 1968, Rodgers sold the Company to Consolidated Cigars. In the early 1970s, Wally Frank Co. bought the Custombilt trademark and began to produce their version of the pipe in 1974 or 1975. Hollco Rohr owned the Weber pipe factory, located in New Jersey, and produced the Custombilt pipes there. In 1987, the pipes were made out of the Butz-Choquin factory (France) and then Mexico until the late 1990s. Currently, the Custombilt name is owned by Tobacalera of Spain.”

From the above information it seems that the pipe I have could have been made between 1946 and 1953 if it is one made by Tracy Mincer. Otherwise it could have been made during the 1970’s. In my opinion the more refined less classic Mince CB look of the pipe, the variations on the rustication pattern from the bowl to the shank, the type and look of the stem all lead me to put it in the later era – the 1970s and attribute its manufacture to Wally Frank and Company. I may be wrong but that is my read on this particular Custombilt Lovat.

The pipe I found was in very good shape. The stem was slightly oxidized and had some roughness like it had never been finished well. There was no bite or tooth marks or tooth chatter on the stem. The interior of the stem and shank were also clean. The briar in the shank was unstained and looked new. The bowl had a very light cake. The finish was virgin/natural and originally had probably been oiled or just waxed. There was no stain coat or lacquer/varnish coat. Whew! The stamping on the pipe is simple. On the left side of the shank it is stamped Custombilt over Imported Briar. On the underside of the shank it is stamped with the shape number 12 running horizontally next to the stem/shank union.CB1

CB2

CB3

CB4 The closeup photo below shows the top of the rim with its unique rustication and the state of the bowl. The rim is in great shape and the bowl is fairly clean.CB5 I cleaned out the shank and the stem with pipe cleaners, cotton swabs and isopropyl alcohol to remove the light oils and tars. It took very little effort to clean this pipe.CB6 I gave it a light reaming with the PipNet reamer and took it back to bare wood so that whoever ends up with this pipe can break in and build an even cake of their own.CB7 I scrubbed the rusticated areas on the bowl and shank with a tooth-brush and Murphy’s Oil Soap. The grooves and crevices had a buildup of dust in them that dulled the finish. After scrubbing I rinsed the pipe under running water to remove the soap. I put my thumb over the bowl to keep the interior dry.CB8 The next series of four photos show the bowl after the rinse and dry. The grooves are clean and the pipe is ready for the next step in its cleanup.CB9

CB10

CB11

CB12 I use a plastic washer that I made out of a bread tab between the shank and the stem to allow me to sand up against the shank without damaging the finish and without rounding the shoulders of the stem or shank. It works like a charm and I have several of these that I have punched with a variety of holes to fit different tenon sizes. I sanded the stem with 220 grit sandpaper to smooth out the roughness and followed that with a medium and fine grit sanding sponge.CB13 Once I had smoothed out the roughness of the stem I moved on to sanding with micromesh sanding pads. I followed my usual method of wet sanding with 1500-2400 grit pads and dry sanding with 3200-12,000 grit pads. I rubbed the stem down with Obsidian Oil between each set of three pads.CB14

CB15

CB16 I rubbed the bowl down with a paper towel and a dab of olive oil to bring the natural finish of the bowl back to life before I buffed it. I rubbed it down and let the oil dry overnight. In the morning I buffed the pipe and stem with White Diamond and gave the bowl a light buff of carnauba and then rubbed it down with some Halcyon II Wax. I gave the stem multiple coats of carnauba wax. The finished pipe is shown below.CB17

CB18

CB19

CB20 The final three photos give a close up view of the bowl and stem from various angles. There is something quite attractive about this particular Custombilt. It has a dignity that draws me to it.CB21

CB22

CB23

Reshaping the airway slot in the stem button


Blog by Steve Laug

I use this process repeatedly when I am reworking or restemming a pipe. It is a simple procedure for opening up the airway/slot in the end of the button. In the precast stems the slots are often narrow and it is a fight to get a pipe cleaner through them. They also constrict the airflow and make it less than optimal. In some of the older stems the airway in the slot are also constricted. In both cases the simple procedure below will create a smooth smoking pipe.Bertram11 I start with small flat oval needle file (the centre file in the photo below) and work it along the top and bottom edges of the slot to begin to open the airway. The next photo shows the airway when I have finished with this flattened oval needle file. I still need to work the ends of the slot and open it further but this is the first step.Bertram12 I move to the second file in the set (the top file in the photo above). It is a fatter oval file that I work on the top and bottom edges and also on the ends of the slot. The idea is to begin to slope the edge inward and open the ends of the slot. I want to make the slot more of a Y – wide on the edges sloping inward and also sloping the top and bottom of the slot inward. The photo below shows the stem after I have worked it over with the second file.Bertram13 I finished with the third file (the bottom one in the first photo) which is a round needle file. I use this file to clean and open the slot more and work on the tapers on the sides of the slot and the top and bottom. The airway is wide open at this point and only needs to be cleaned up with sandpaper to remove the marks on the face of the button and the inside of the airway.Bertram14 I folded a piece of 220 grit sandpaper into a strip that I worked inside of the slot smoothing out the file marks in the airway and on the surface of the button. I worked it until the slot was smooth inside and the oval airway was open. At this point a pipe cleaner easily slides in and out of the slot making clean up a breeze. If you want a more open slot you can continue to file the opening and make it larger. Always work the top, bottom and sides of the slot to make it as uniform in shape as you can. I like a nice oval slot that gives a smooth delivery of smoke and also a wide open airway to receive the pipe cleaner.Bertram25

Restoring an Apple from Bertam, the Nation’s Pipemaker


Blog by Steve Laug

The second pipe from the foursome I bought on Ebay was a shapely apple and of all the foursome it was in the best shape. It was dirty and lightly caked but the stem was lightly oxidized and very clean. The shank was quite clean and fresh and took very little to clean out. It is stamped Bertram in script on the shank over Washington DC. It appears to also have a number on the shank to the left of the script. The first number is unreadable but the second is a 0. These numbers on the Bertrams told the price of the pipe and where it fit in the hierarchy of the line.

I have included the following link to give a bit of historical information on the pipe company. It is a well written article that gives a glimpse of the heart of the company. http://www.streetsofwashington.com/2012/01/bertrams-pipe-shop-on-14th-street.html#!
Bertram's, detail fall 1974 2 Steve Strack

6782006459_a454781584_b In the photo below the Bertram is the pipe at the top of the picture. And in the second photo provided by the seller it is out of focus but the shape is clear.Foursome2

Foursome4 The next four photos show the overall state of the pipe when I brought it to the worktable last evening. The stem is lightly oxidized and appears to be high quality vulcanite. Unlike many of the Bertram stem I have had in the past this one does not have clunky sharp edges of a vulcanite blank. They had been sanded down (at the factory) to make the stem more tapered and finished looking. Bertrams did not typically have a stain or finish. They were polished briar in a natural finish. This one was dirty and had some ground in oils on the shank and sides of the bowl. The grain was a nice cross grain on the right side and mixed on the left. The bowl had a cake in the first 1/3 from the top. The rim was dirty with oils and tar and had a few dents and dings from being knocked about. The slot in the button was very tight – as I have found true of my other Bertram pipes and would need to be opened up to facilitate cleaning with a pipe cleaner. In examining the bowl there were several fills but they had been done well – the putty that was used was not the pink or white putty and had coloured along with the briar as the pipe was smoked.Bertram1

Bertram2

Bertram3

Bertram4 The close up photo of the bowl shows the rim and the buildup of cake at the top of the bowl.Bertram5 I reamed the bowl with a PipNet reamer, matching the cutting head to the diameter of the bowl.Bertram6 I wiped down the briar with acetone on a cotton pad to remove the ground in oils and dirt. I scrubbed with the pad and was able to remove most of the dirt and grime.Bertram7 To address the dents and dings on the rim I decided to lightly top the bowl. I would not be staining the pipe so I would not need to try to match the stain from the bowl and rim. I topped it with 220 grit sandpaper on a topping board.Bertram8 I wiped it down a second time using isopropyl alcohol on cotton pads.Bertram9 I cleaned out the shank and stem with pipe cleaners, cotton swabs and isopropyl alcohol. It was not too dirty and cleaned up quickly.Bertram10 I decided to work on the slot so that I could more easily clean out the inside. I used needle files to open the slot. I used three different files – a flat oval, a rounded oval and a round to reshape the slot into an oval.Bertram11

Bertram12

Bertram13

Bertram14 I sanded the stem with 220 grit sandpaper to remove some of the buildup and roughness on surface of the stem. I also sanded the end of the stem and the inside of the newly shaped slot. I followed that up with a medium and a fine grit sanding sponge. I followed that with my usual micromesh sanding pads – wet sanding with 1500-2400 grit pads and dry sanding with 3200-12,000 grit pads. I rubbed it down with Obsidian Oil and let it dry.Bertram15

Bertram16

Bertram17

Bertram18 I rubbed the bowl down with a light coat of olive oil and then buffed the pipe with White Diamond and gave it multiple coats of carnauba wax. The finished pipe is shown in the photos below.Bertram19

Bertram20

Bertram21

Bertram22 The inside of the bowl had some cracking so I mixed up some pipe mud – cigar ash and water – and coated the inside of the bowl with it. I painted it on with a pipe cleaner and covered the cracks. I also used a folded piece of sandpaper to clean up the inner edge of the rim and make it crisper. The last three photos show the stem and the bowl after the complete reworking.Bertram23

Bertram24

Bertram25

Anonimo, or the Modern Westminster Cathedral*


Guest Blog by Robert M. Boughton
Photos © the Author
Member, North American Society of Pipe Collectors
http://www.naspc.org
http://www.roadrunnerpipes.com
http://about.me/boughtonrobert

“…once I falsely hoped to meet the beings who, pardoning my outward form, would love me for the excellent qualities which I was capable of unfolding.”
― Mary Wollstonecraft Shelley (1797-1851), English novelist, in “Frankenstein; or, The Modern Prometheus,” 1818

PREFACE
I was, as my ancestors, a native of Redondo Beach and its environs, and most of my family born in that temperate South Bay region of the California Republic was by any appraisal undistinguished, indeed, a study in dysfunction. Whilst every genealogy has its heritage of eccentricity and neurosis, mine is cursed with a spasmodic line of schizophrenia.

My grandfather, the one shining beacon, remains known the world round for his pioneering and influential photography of the sport that is known as surfing, owing to the vernacular origin peculiar to the American colonies. The good gentleman was a lifelong champion and active participant, with vigor, flair and skill, both in the sport and his avid documentation of its participants, famous and obscure, and the attendant culture. Who knew, in its inception, that his physician’s prescription, ordered in the middle part of the late twentieth century, for a hobby to aid the old man in recovering from a particularly tenacious bout with peptic ulcers, would spawn a latent talent and lead to eternal glory?

Indeed, one beguiled writer at a magazine that showcased most of the great photographers of the previous century – which renowned publication, alas, has now passed almost as thoroughly as my grandfather, remaining for the living and breathing inhabitants of this wayfarer’s station, before the Great Unknown, to appreciate only in the ether realm known as the World Wide Web – was so beside himself with giddiness as to dub the much beloved old man “the godfather of surf photography.”

My mother, being the first offspring of the great man, was the only one of her siblings to pursue a noted career, as a nurse now retired. Together the patriarch and eldest daughter formed the bulwark of the otherwise mostly listless, melancholy clan.

On the subject of my own eclectic interests, I have, since childhood, had a consuming hunger for the study of diverse subjects. This omniology put me on my present path, that is, to understand every facet of human knowledge concerning everything, particularly, in my case, the often seemingly unfathomableness of information relating to the genesis, history, science, study, culture, enjoyment and preservation of smoking pipes. One could call me an omnitabacariusphile, although in my zeal for this inclination, however well-meaning and innocent its beginning, the pursuit lead me to a monster I shudder to recall and doubt in my constitution to do so.

Some months have passed since I set upon the fearsome, God-like determination of restoring life to the creature that this narration shall endeavor to describe in the entirety of its awful nature, the frightful apparition of which you shall observe in its original form as I first perceived it in the mists of the cold, barren, lifeless wasteland that is called the Internet in these peculiar times we are fated to spend our lives. Nothing of that initial sighting, the image of the monster blurred by the swirling incorporation of sundry others similar in basic form yet far fairer in the details of their corporeal makeup, could prepare me for the spectre I beheld when the entire host of them arrived by poste.

Good God! Readers, had you been in my company at the instant when first I disrobed the fiendish animation that was hurled through space and time to alight in my quivering hands, then only would you comprehend truly the horror that consumed my entire humanity. Yet, think not for an instant that the visage I discerned was the genuine inception of my natural sense of loathing. The full nature of my revulsion sprang, as fast as the Trees of Truth and Knowledge, from the immediate and overwhelming understanding of the cruelty that was inflicted by Man upon this poor brute.

FIRST SIGHTING

Now, at last, I have regained enough of my stamina – which, for all of my life prior to the advent of the incident which forms the central theme of this account, was as vigorous as that of any young man who plays cricket almost every day – to reveal the thing as I found it, through the following crude illustrations.Anon1

Anon2

Anon3

Anon4

Anon5

Anon6 I implore you, in the name of all that is Holy, to scrutinize the abominable disfigurements of the beast’s original form. Perceive with more than just your eyes, and especially with pity in your hearts, I further beseech you, the jagged wound inflicted just below its forehead, or rim; the dreadful rending of its skin from the right side of its torso – shank, rather – beside the artificial extension of the same, and lastly, the woeful bleeding of black stain, as blood, from this extension onto the very wood that was to be its natural makeup. At first I took the freak of nature, nay, far worse, the creation of a man, to be the first attempt of a novice at crafting a briar pipe of the freehand variety. Only later was I corrected by one whose opinion and experience in such matters I hold inviolate, my mentor and good friend Chuck Richards, who informed me to my astonishment and dismay that the egregious work was in fact of Italian descent with no name.

Read on at your own peril.

RESTORATION OF LIFE
Seeking no more than to breathe new life into the ruined corpse of a smoking pipe, one I envisioned in my mind’s eye as it could have been, had it been born into the good society so many take for granted, I proceeded with the course of action which I perhaps foolishly believed was pre-determined. Regardless of my motives, I felt a pull that led me inexorably to the conclusion I shall in good time reveal.

Having triaged the wounds to the unknown pipe, I found myself in the gravest sense of urgency whilst I resolved to expunge the haphazard spatter of bloodlike blackness betwixt the briar shank and its extension.Anon7

Anon8 With the utmost surgical care, employing 220-grit paper, I erased the accursed stains.Anon9

Anon10

Anon11 Regarding the ridge of the odd, beak-like figure on the front of the bowl, the un-level aspect of the prominently scabrous feature was positively unnerving to behold. Though a full frontal view is not available before its correction, these left and right images reveal the disparity.Anon12 The cruel hideousness of the misdeed inflicted upon a central feature of the freehand was so ghastly to behold, reminding one of the nose of an old man spotted and mangled by the advanced stages of alcoholism, that its repair was my second priority. With the aid of a flat filing tool, I corrected the flaw whilst also removing a gash above it.Anon13 A cursory smoothing of the abraded surface resulted in the beginning of an almost intoxicating, God-like improvement, though minor work to finish the makeover I had begun was still necessary.Anon14 Scarcely able to control my escalating excitement that was directed with all-consuming mania toward the ultimate re-animation of the pipe, I turned my gaze again to the frightful laceration to the cranium – that is to say, the rim.Anon15 Devoid of even a dash of hope for correcting the near fatal head wound, and directly upon the heels of the greatest battle between my ever-intensifying lust to restore the spark that is life to this wretched pipe versus my thoughts of utter failure and ruin, I could envision no measure short of inflicting a deliberate pattern of the very same gouges round the rim and the immediate area of the bowl beneath it. Toward this remarkably heady end, I embarked upon a slippery path of utter destruction of the rim with naught but prayers that I could complete and then reverse, as it were, the radical procedure. The only implement available being a spring-loaded round hole-puncher with a small but sturdy grip, I commenced the initial task of creating matching and equidistant blemishes round the top of the bowl.Anon16

Anon17

Anon18 And then, with mounting glee at the sheer recklessness of the notion, onto the top of the skull – or rim – I repeated the same process with tighter punches.Anon19 Oh, to formulate in words the wonder and terror that overwhelmed my senses is beyond the power of the greatest poet! In my crazed mind I entertained a vision of beauty like a newborn phoenix rising from the ashes! The mental snapshot was breathtaking in its audacity and execution! I was all but hopelessly mad in the ecstasy of the moment! I daresay some would now postulate that I had already surpassed that precipitant threshold.

Therefore it is without any sense of sin whatsoever that I confess my elation at the removal of the few remaining but festering sores that upon first sight of the beleaguered pipe put me in such a state of apprehension.

I performed a retort for a thorough purging of the accreted waste and other filth that continued to leech the innards of the reanimated Italian pipe with no name, though I retained hope that the poor thing would regain some of its more pleasant previous memories, if indeed it ever possessed any, as its recovery progressed.

Wishing to be done forever with the coarse, disheveled appearance of the still recuperating pipe, I applied a progressive regimen of micromesh from 1500 to 4000 upon the unfinished pocks covering the rusticated dome and the pale, sickly spots at various intervals of the pipe’s wooden body where once had flourished cuts, scrapes and crevasses.

The quick application of a double-coat of medium brown leather stain to the areas of the wood effected by the various degrees of sanding and more aggressive restorative measures, and the immediate removal of the dye’s alcohol by ritual of fire left a meager residue of ash that was banished with ease using the 4000 micromesh pad.

The stem, once oxidized to a uniform sickly green shade, glimmered again in its healthy black condition following a treatment with red and white Tripoli and White Diamond.

The wooden body, cured of every ailment that had at first glance so shocked me to the very core of my being, was ready for the final course of medicine, which included the same wholly natural elixirs and a gentle buff with carnauba.Anon20

Anon21

Anon22

Anon23 CONCLUSION
Though mighty powers of science, craftsmanship and other forces beyond the comprehension of Man indeed coexist on some unseen dual plain of reality, the awesome dynamism behind them must be harnessed by the guardians of restoration before they can be utilized on a regular basis. I count myself among the fortunate to have survived this harrowing ordeal with my body, mind and soul intact.

I entreat all those who read this to consider it with open minds, but as a cautionary tale.

*Reconstruction of Westminster Cathedral, the mother church of English Catholicism, began in 1895, but due to the cost has never been completed – leaving much of the interior unfinished brickwork.

New Life for an Old and Tired BBB Own Make 701 Rhodesian


Blog by Steve Laug

I saw a foursome on Ebay and the one pipe in the lot that caught my eye was of course this older Rhodesian. At first glance I figured it was a GBD 9348. Then I looked more closely at the photos and could see that it was not a GBD at all. It was clearly a BBB with the brass inset on the top of the stem. I bid and won the lot. While the other three pipes are probably fine in terms of additions to the pipes for sale this one was the one I wanted for my collection. It had two things going for it that caught me – it was Rhodesian and it was a BBB. Both fit the one of the focuses of my collection.Foursome2 Needless to say but the one in the roughest shape was the BBB. In the photo below you can see the hole in the stem and the roughening around the inner edge of the rim on the left side of the bowl. It was going to take a bit of work to bring this one back from the brink and keep the original stem.Foursome7

Foursome8 When the package arrived I took out the BBB and unwrapped it from the bubble wrap. The stem was stuck in the shank and the damage to the bowl was quite extensive. The stamping on the left side of the shank read BBB in a Diamond and under that was Own Make. On the right side it read London England in a straight line over the shape number 701. On the right side of the bowl and on several spots on the shank it had dark stains from sitting in water or juice. It had discoloured the briar and damaged the finish. There were also some dents and dings under the dark discolouration from the bowl having been dropped on concrete or something that left the side of the bowl dimpled with dents and marks. The stem was quite gnawed on – the hole on the top was solid around the edges and the button was chewed and worn on the top side. The underside of the stem had bite marks and was worn from clenching.BBB1

BBB2

BBB3

BBB4 I put the pipe in the freezer for 30 minutes and when I took it out I was able to easily remove the stem. I cleaned the edges around the hole in the top of the stem with alcohol and a dental pick to remove the buildup and the detritus that was caught in the edges. The good thing was the edges were solid and not crumbling.BBB5 I put Vaseline on a nail file that I have here and use for more wide repairs on the stem and inserted it into the slot. It provided a solid base for me to drip superglue onto the hole. I built up the edges and worked my way to the centre of the stem bite. You will note that I grossly over filled the hole with the superglue. I have been having trouble with the accelerant that I am using. It tends to dry out the surface of the patch and the centre never sets correctly. I decided to set the stem aside overnight and let the patch cure overnight.BBB6 I dropped the badly stained bowl into my alcohol bath and called it a night. The bowl soaked for over 12 hours and the stem cured while I slept soundly.BBB7 In the morning I took a look at the stem and saw that it was pretty hard. I removed the bowl from the alcohol bath and dried it off. You can see the dark stains on the right side of the bowl and on other spots on the bowl. It was almost black in colour and the alcohol had not lightened it at all.BBB8

BBB9

BBB10 The top view of the bowl below shows the extent of the damage to the bowl. It was out of round and the gouge out of the left inner edge was rough.BBB11 I wiped the bowl down with acetone on cotton pads to remove the finish and see if it would lighten the stains on the bowl. While it indeed lightened them it did not remove them. It was encouraging to see the grain through the stains however, so I knew that sanding the damaged areas would remove much of the darkening.BBB12

BBB13

BBB14

BBB15 I lightly topped the bowl on my topping board to remove some of the damage to the rim surface.BBB16

BBB17 I reamed the bowl with a PipNet reamer and took the cake back to bare wood. I wanted to remove as much as possible and see if I could also clean up the inner edge of the rim.BBB18 I used a retort as has become a habit lately and boiled alcohol through the stem and shank to remove the tars and build up. After the retort I cleaned out the shank and the stem with pipe cleaners, cotton swabs and isopropyl alcohol.

I worked on the stem using needle files to recut the button and clean up the sharp edge. I sanded with 180 grit sandpaper to smooth out the repair to the topside and underside of the stem. I followed that by sanding with 220 grit sandpaper to smooth out some of the scratches left behind by the lower grit paper.BBB19

BBB20

BBB21 While I had the 220 grit sandpaper out I sanded the bowl as well to remove the stains on the sides of the bowl and the cap. I also used a folded piece of sandpaper to work on the inner edge of the rim and give it a slight bevel to minimize the damage there.BBB22 I wiped the bowl down with alcohol and then sanded it with a medium grit and a fine grit sanding sponge followed by 400 grit wet dry sandpaper. In the photos below you can see how it worked to remove the majority of the stain on the bowl. I very carefully sanded around the stamping on the right shank as I did not want to damage the stamping.BBB23

BBB24

BBB25

BBB26 I used a hot knife and wet cloth to steam out the dents on the bowl sides, cap and rim. When I had lifted them as much as possible I sanded the bowl further with the 400 grit wet dry paper and also with the fine grit sanding sponge. I wanted to clean up the damaged areas on the sides and top as well as the stem repairs.BBB27

BBB28

BBB29

BBB30 After the steaming and sanding I spent some more time on the inner edge of the rim. I wanted the bevel to smooth out the damaged side of the rim and also wanted to bring the bowl back into round. It took quite a bit of time to handwork the rim damage but I am happy with the end result. When finished I rubbed the bowl down with a soft paper towel and olive oil. I rubbed the oil into the bowl, paying special attention to the areas that were previously damaged with the stain and the dents. Again, I set the bowl aside for the night to let the oil soak in and be absorbed into the briar.BBB31

BBB32

BBB33

BBB34 The next morning I worked on the stem with fine grit sanding sponges and then with micromesh sanding pads. I wet sanded with 1500-2400 grit pads and dry sanded with 3200-12,000 grit pads. The higher grit pads allowed me to blend in the repair as much as possible and though still visible it looks very good. The patch is hard and solid with no give when pressed on.BBB35

BBB36

BBB37 I rubbed the stem down with Obsidian Oil and when it had dried I buffed it on the wheel with White Diamond. I gave the bowl and stem multiple coats of carnauba wax and then finished by buffing it with a soft flannel buffing pad to raise the shine. The finished pipe is shown below. It is ready for loading up and enjoying a good smoke. It should serve me well for a long time.BBB38

BBB39

BBB40

BBB41

BBB42

BBB43

Bringing a Yello Bole Pot back to Life


Blog by Andrew Selking

Anyone who reads my previous postings know that I have a fondness for early KB&B pipes. Since the briar used in Yello Bole pipes was generally inferior to those used in Kaywoodies, most Yello Bole pipes are smaller. This was a work around for defects found in the briar. I saw this Yello Bole pot and was intrigued. It’s a full size pipe. Here is the seller’s picture.YB1 When the pipe arrived, the stem was nearly perfect with the original stinger intact (not that I planned to leave it there). The bowl looked decent with a minimal amount of tar on the rim and very light cake. I dropped the bowl into the alcohol bath and soaked the stem in Oxyclean.

I noticed the first indication of trouble when I pulled the bowl out for reaming: it had a heavy varnish coating. That’s usually a sign that the pipe maker wanted to hide imperfections in the wood.

YB2

I quickly reamed the bowl then broke out the 0000 steel wool and acetone to remove the varnish.

YB3

I’ve seen some pits in briar before, but this is the first time I’ve encountered a pit so deep that I gave it a name. I named it the pit of despair. Here’s the picture before I removed the pink putty.

YB4

Here’s the pit of despair fully revealed. My dental pick had a good ¼ of an inch of room to explore.

YB5

Even with the pit I still liked the pipe and decided to fix it anyway. I filed a good amount of briar dust from a broken shank onto a piece of paper. The paper makes it easier to collect the briar dust. Or you could do like Steve and just have a big jar of briar dust.YB6 I packed the pit and added super glue followed by accelerator.YB7 After applying the super glue and accelerator, I had to add briar dust two more times. This was the final result.YB8 In addition to the pit of despair, there were three minor pits on the front of the bowl and two deep pits on the bottom of the shank near the juncture of the stem. I finally got the exterior of the pipe sorted out and turned my attention to the insides.
I did my retort on the bowl.YB9 There was some gunk on the brush, but the stinger did a decent job keeping the shank clean.YB10 After a few passes with the brush dipped in alcohol, I moved on to q-tips. Not a terribly dirty pipe.YB11 Next I retorted the stem. I anticipated it would be dirty, since stingers tend to make pipes smoke wet. I retorted it three times to be safe and had an easy time cleaning the remaining tar.YB12

YB13

YB14I next turned my attention to removing the oxidization from the stem. I used 400 wet/dry with water and my sanding wedge, followed by 1500-2400 grit micro mesh pads with water.YB15 I polished both the bowl and stem with a progression of micro mesh pads, 1500-12,000 in preparation for final finish. I used my rotary tool with white diamond, followed by carnauba wax on the stem. I have to say this will be the new standard from now on.YB16 I decided to use Pimo Pipe Supply’s dark walnut stain on the bowl. This would give me a fighting chance to cover the pit repairs while still allowing the grain to show. It turned out better than I expected. I now have a very classy looking short pot. I also had the chance to try extreme pit repair. Even though this pipe had several pits, the briar still had nice grain. This one is a keeper.YB17

YB18

YB19

YB20

YB21

YB22

YB23

YB24

YB25

YB26

Kaywoodie 73 Supergrain Restoration


Blog by Al Jones

This Kaywoodie Supergrain belongs to a Brian, a friend of mine in my local pipe club, based located in Frederick, MD.  I had some brought some restored Kaywoodies to a previous meeting so he asked if I could could tackle this one.  The pipe wasn’t in bad shape.  It had light oxidation and teeth chatter on the stem and some scorching on the rim.    The pipe is a two-digit shape number, but has a “Drinkless” stamped, 4-hole stinger.  I estimate it was made in the early 1950’s as the 4-hole stinger was no longer used after the mid-50’s.

Kaywoodie_73_Supergrain_Before Kaywoodie_73_Supergrain_Before (2) Kaywoodie_73_Supergrain_Before (5) Kaywoodie_73_Supergrain_Before (1) Kaywoodie_73_Supergrain_Before (4)

I used some worn, 8000 grade micromesh to remove the scorching from the top of the bowl.  The briar was then polished with White Diamond and several coats of Carnuba wax.

I polished the stem starting with 800 grit wet paper, moving thru the 1500 and 2000 grades.  Next was 8000 and 12000 grade micromesh sheets followed by a polish with White Diamond on the buffer.

Our pipe club meeting is this week, so Brian will get his Supergrain back.  An relatively easy restoration on an elegant little pipe.

Kaywoodie_73_Supergrain_Finished Kaywoodie_73_Supergrain_Finished (1) Kaywoodie_73_Supergrain_Finished (3) Kaywoodie_73_Supergrain_Finished (4) Kaywoodie_73_Supergrain_Finished (5) Kaywoodie_73_Supergrain_Finished (6)


Rescuing a Scorched GBD New Era 549


Blog by Andrew Selking

After reading Al’s posts about his GBD pipes, I had to have one. I saw this pipe listed on eBay with a low buy it now price, obviously based on the scorch mark on the front of the bowl.GBD1 I’m not sure whether it was a sense of overconfidence in my ability or naivety about the extent of the damage, but I bought the pipe. I realized when it arrived that if I couldn’t fix the scorch mark the pipe probably wouldn’t be worth my time. I nearly despaired when normal procedures failed to even lighten the mark. I put the pipe aside several times before finally deciding to take drastic measures and use a hand sander with 150 grit sand paper. I figured at this point there was nothing to lose and I knew I could still maintain the original shape if I was careful. After spending about a half an hour with the sander, I found myself at about an 80% solution. The mark was still too dark, so I took it to the next level of desperation: the rotary tool (that’s the generic name for a dremel that you buy at Harbor Freight Tools) with a sanding attachment.

I do not recommend the use of either a hand sander or the rotary tool except as a last resort. By this point I had accepted the fact that this pipe was beyond hope for a perfect restoration, so I lowered my expectations to a good restoration.

The sanding on the top portion of the bowl changed the contour of the rim, so I used 400 grit sand paper and a piece of glass to top it.GBD2 Normally I have a set order for restoring a pipe, but dealing with the scorch mark threw it all off. I don’t like to work on a pipe that has a dirty bowl, so I went ahead and reamed it. As you can see from this picture the scorch mark is fairly light.GBD3 Next I retorted the shank.GBD4 She was a dirty girl.GBD5

GBD6 I retorted the stem after that, but did it four times. On a dirty pipe you can either spend time with lots of q-tips and fuzzy sticks, or do the retort multiple times.GBD7 Now that I had the internals of the pipe cleaned, I turned my attention to the removing the oxidation from the stem. This stem was all angles and had some serious oxidation. I’ve felt for a long time that my stem work needed improvement. It’s especially difficult to clean the crease under the button and in the case of this stem the curved area where it meets the diamond portion. I know that when I work with wood I use a sanding block or wrap the sand paper around an object that would fit into the area to be sanded. With that in mind, I “borrowed” a small plastic scraper from the kitchen. You will notice that it has a beveled edge and fits the underside of the button perfectly.GBD8

GBD9 Using the scraper wrapped with 400 grit wet/dry and water, the oxidation was soon gone. I followed with 1500-2400 grit micro mesh pads and water.GBD10 The bowl had a couple of dents so I decided to steam them out.GBD11 One of my essential tools for this type of work is an old butter knife.GBD12 I used my heat gun to get the tip of the knife very hot, then applied it to a wet cloth directly over the dents. Here is what it looked like after several applications of steam.GBD13 The dents still needed some work, so I sanded them smooth with 400 grit sand paper.GBD14 By this point the finish was completely uneven, with bare wood on the rim and side of the bowl, so I used acetone and 0000 steel wool to remove the remaining finish. I find that if I’m careful with the stampings, that grade of steel wool cleans the wood without damaging the stampings.GBD15 This is what the pipe looked like after I took the bowl and stem through a progression of micro mesh pads, 1500-12,000.GBD16 I decided to use a dark walnut stain from Pimo Pipe Supply to help cover the remaining scorch mark. Here is the bowl after the application of stain.GBD17 I used white diamond buffing compound on the buffing wheel to bring out a shine. Let me digress a bit about buffers. There are three things that a buffer loves, angles, stem inserts, and nice pipes. When spinning at 3450 rpm’s the buffer will catch anything with an angle and fling it at a high rate of speed onto the nearest hard surface. Alternately it will catch any type of stem insert and rip it out of the stem. Finally if you have a nice pipe that you’ve invested time in, the buffer has a tendency to shatter it just as you finish. This pipe had all of those elements, so I decided to try something different; my rotary tool.

I took a felt buffing pad and loaded it with white diamond buffing compound. The results were spectacular. The rotary tool gave me more control, I didn’t have to worry about the stem flying out of my hand, and I was able to achieve a more consistent shine in the areas that are hard to get with a buffer. Not bad when you consider that I paid $19.99 for this thing at Harbor Freight Tools.GBD18 I finished the bowl on the buffing wheel and here is the final result.GBD19

GBD20

GBD21

GBD22

GBD23

GBD24

GBD25

GBD26

GBD27