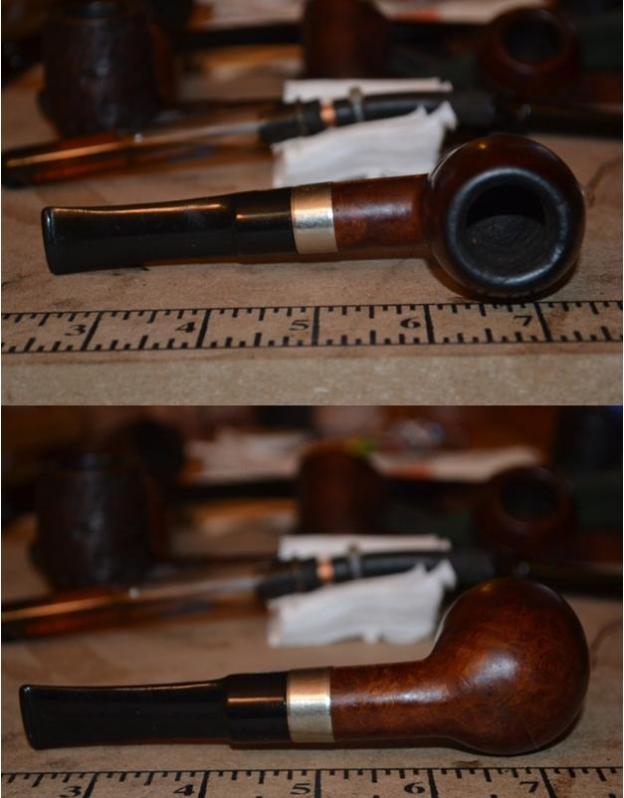
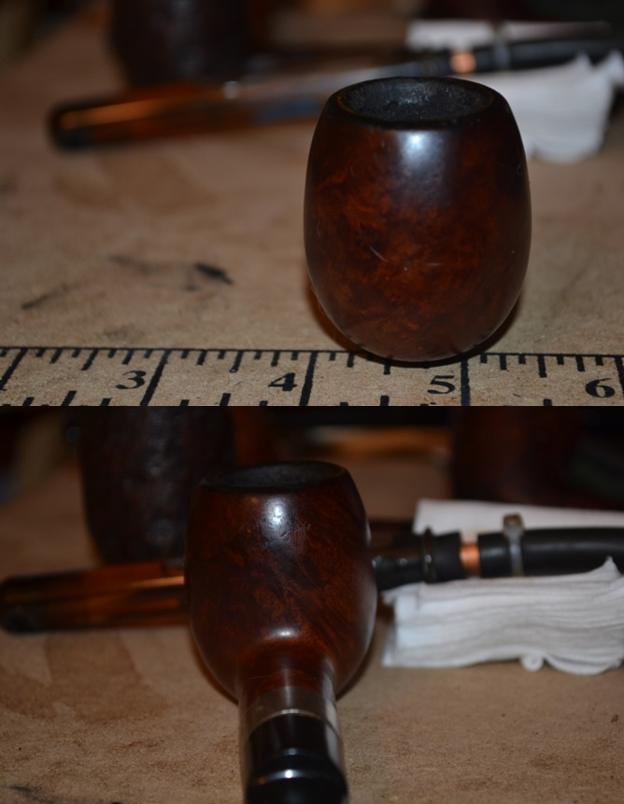
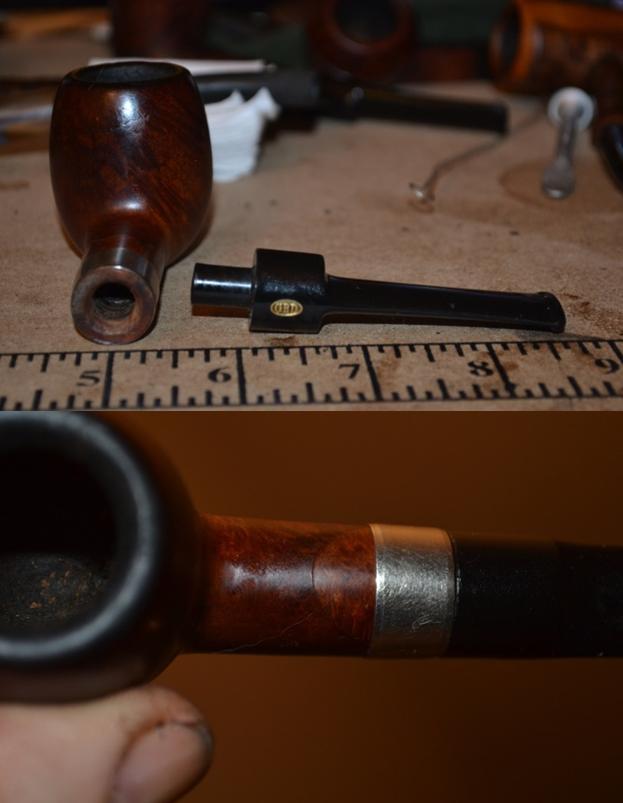
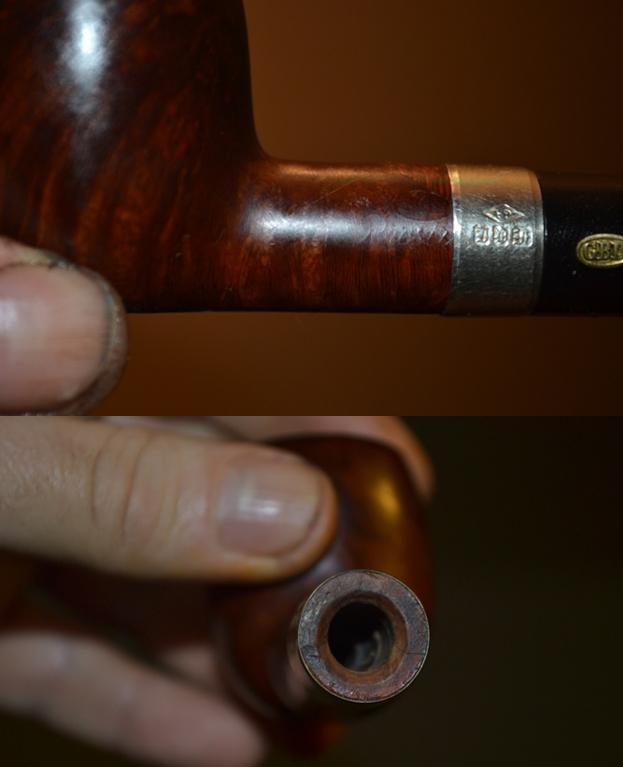
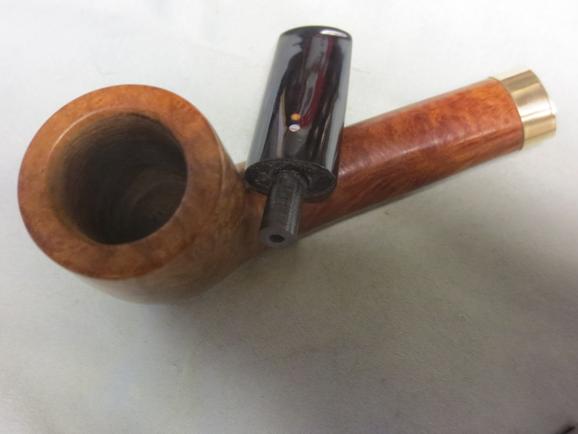
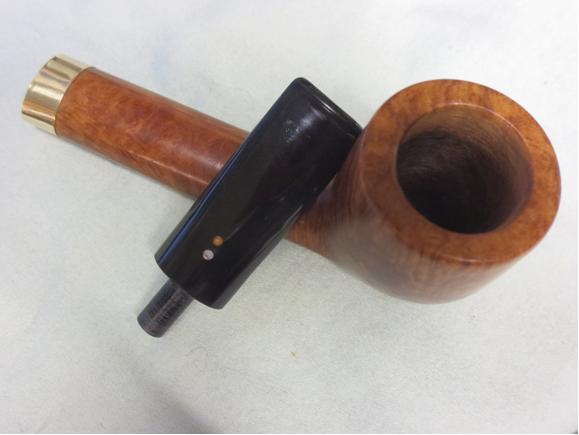
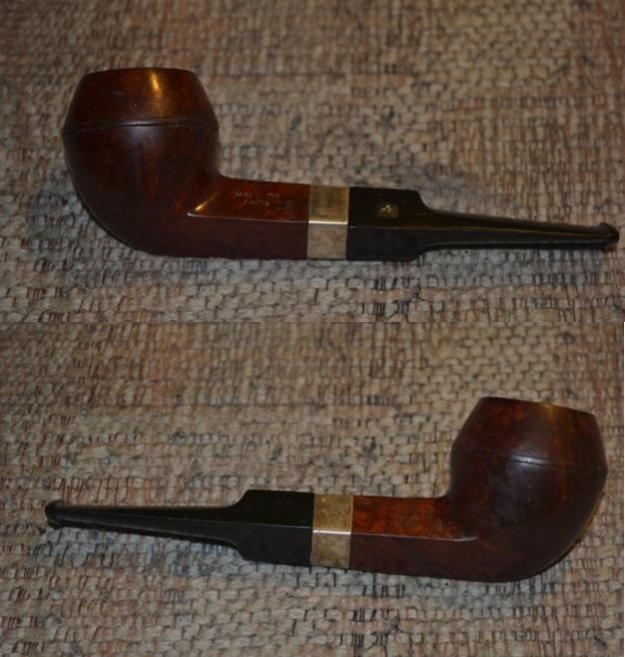
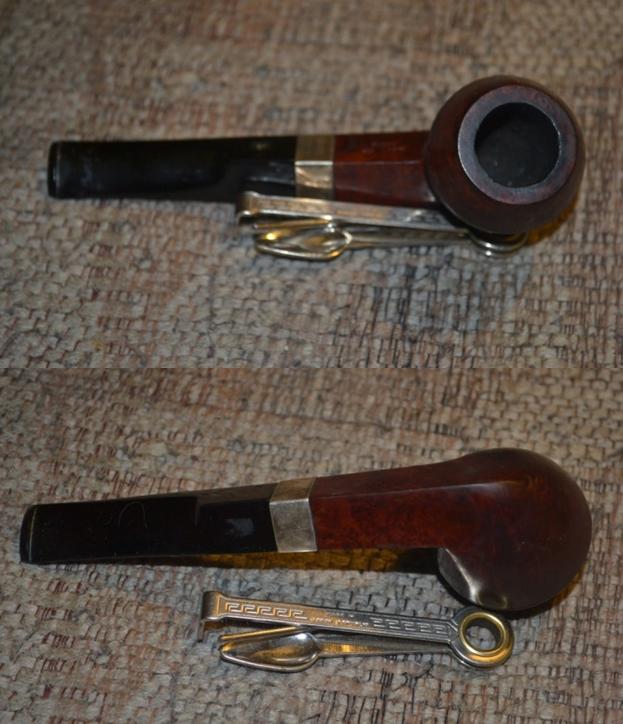
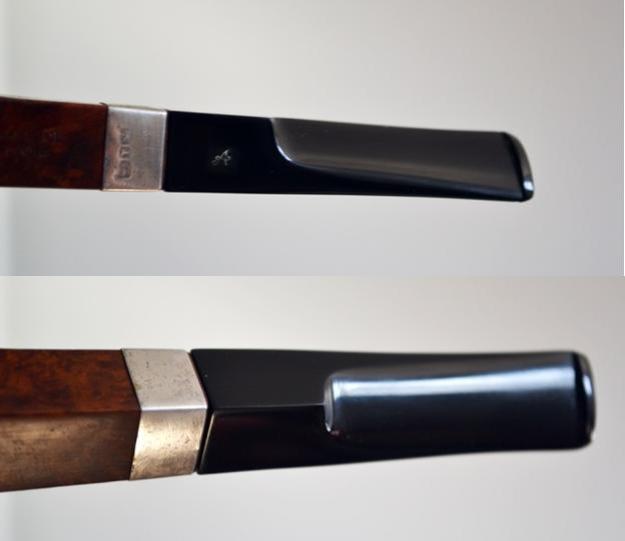
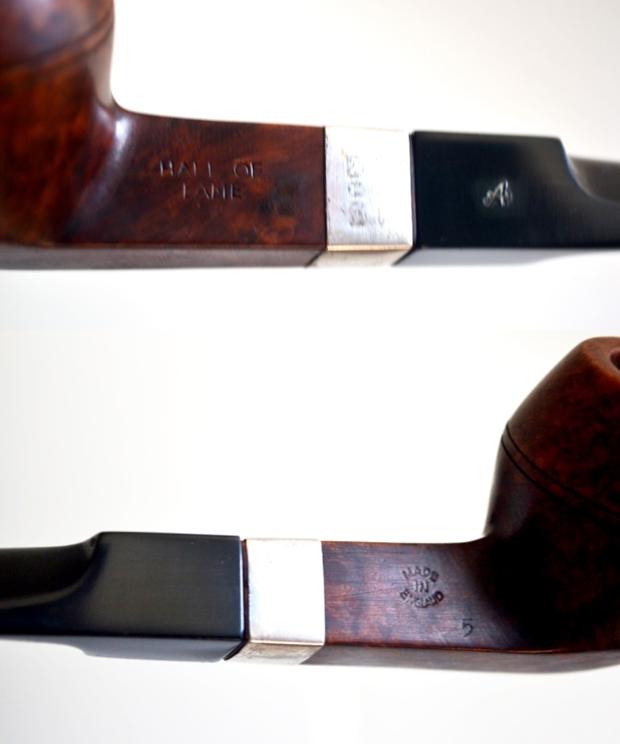
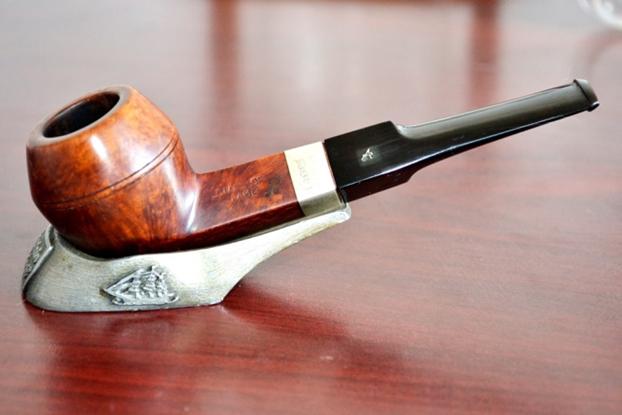
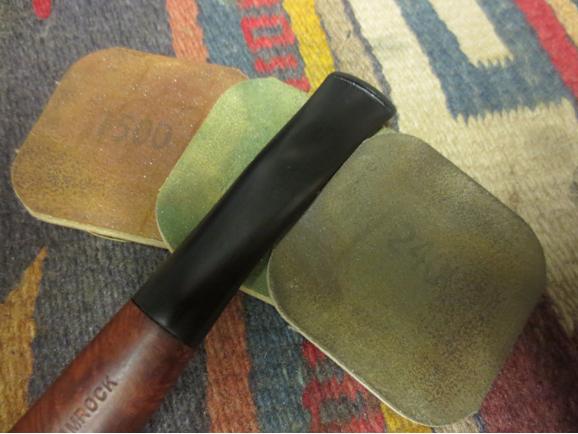
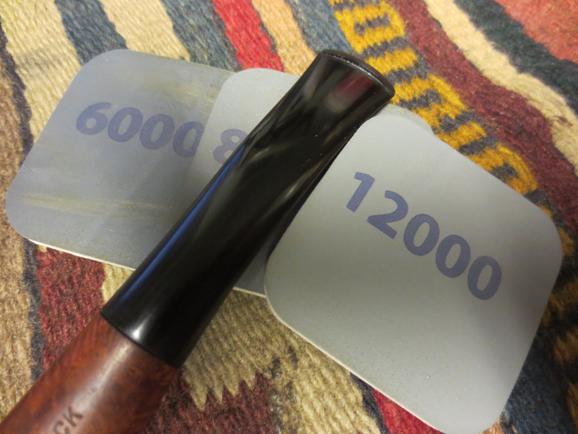
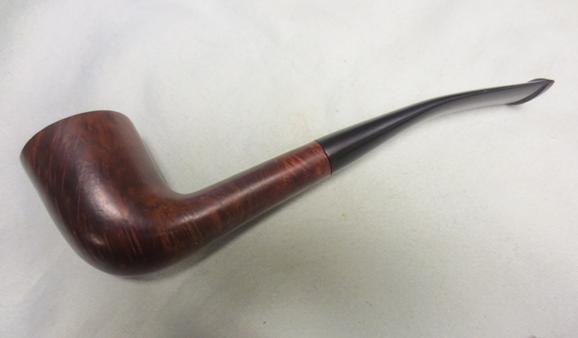
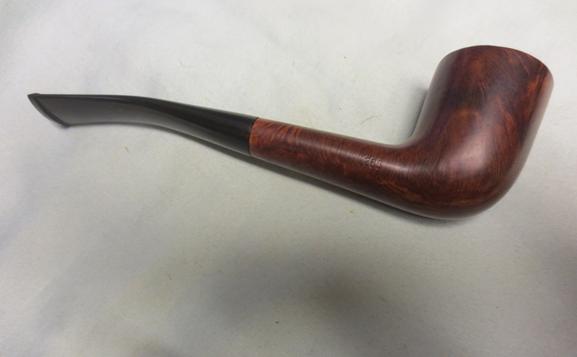
Tag Archives: stem work

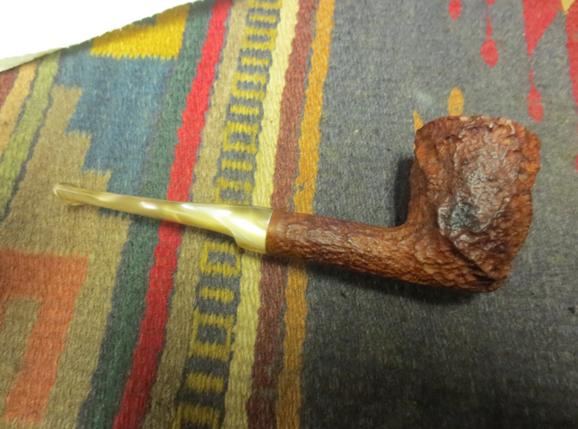
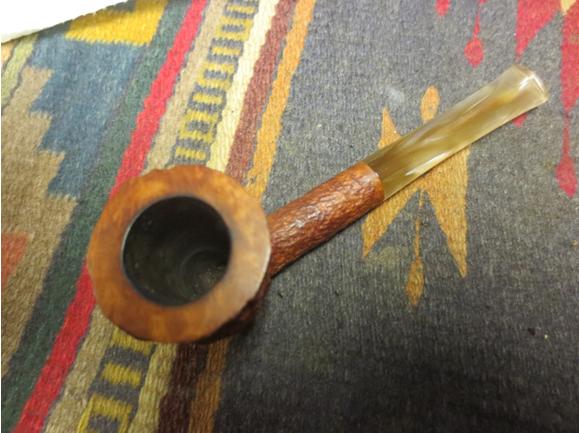
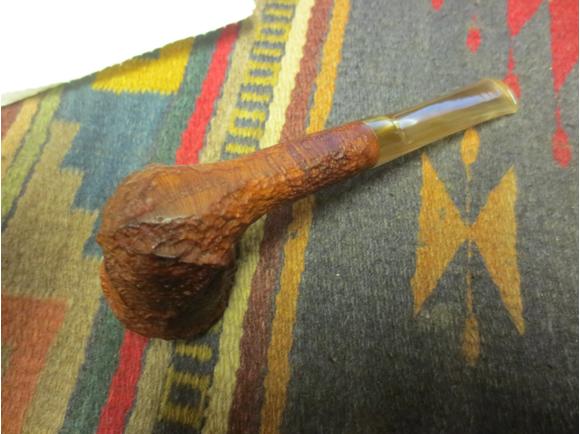
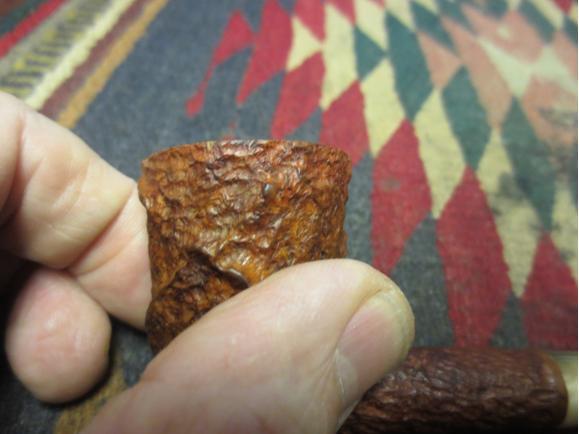
Rough Finish – Reworking Damaged Rim on a Savinelli Estella 412KS Dublin


Blog by Steve Laug

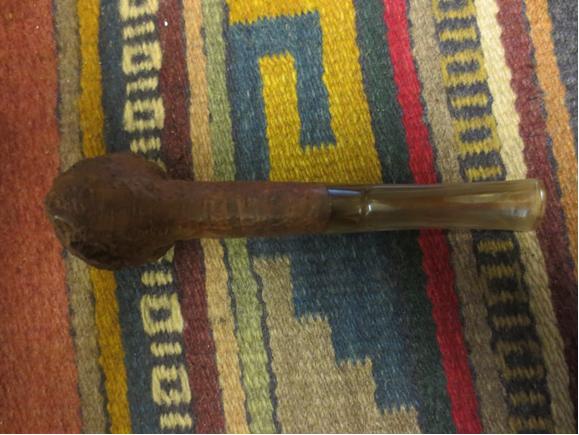
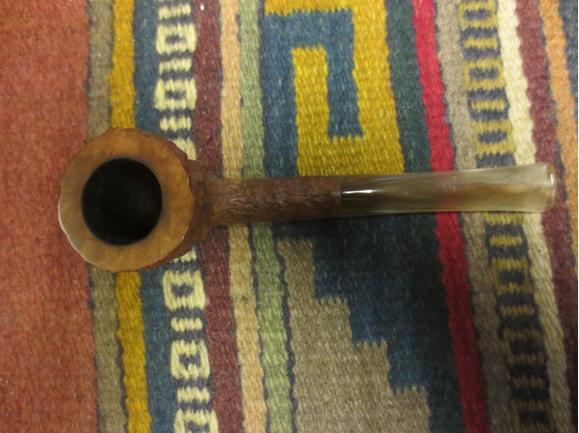
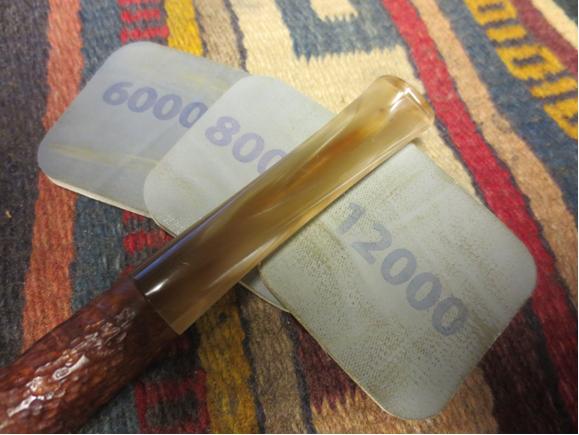
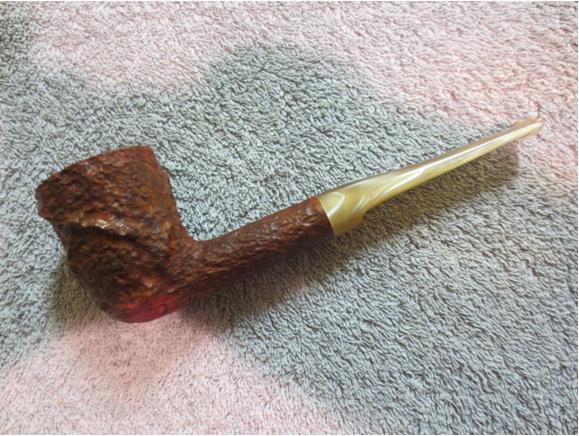
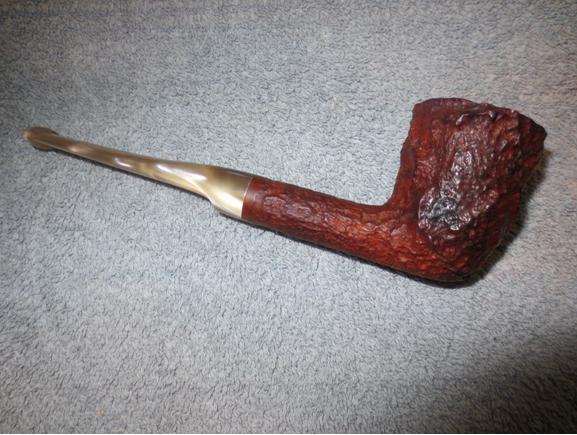
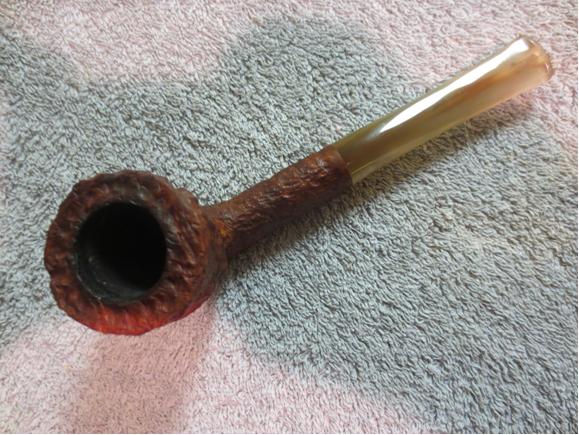
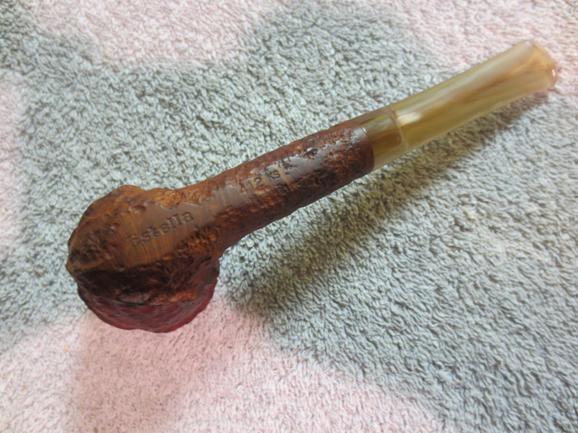
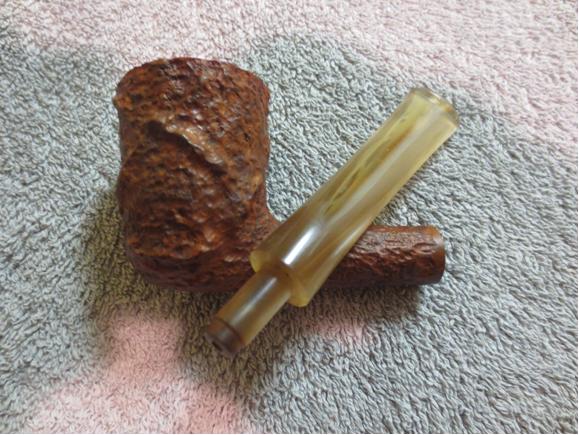
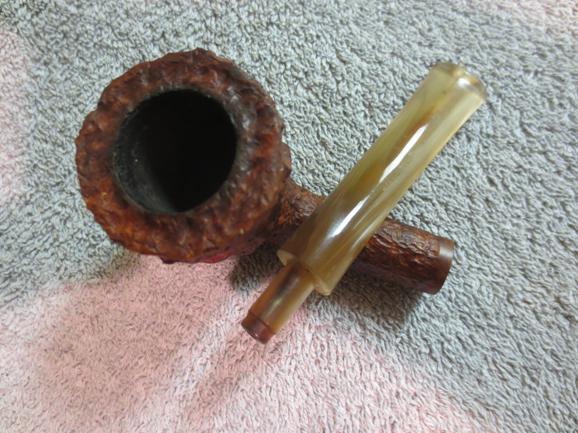
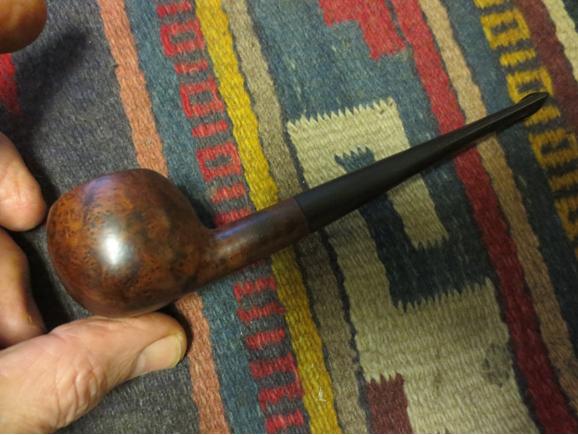
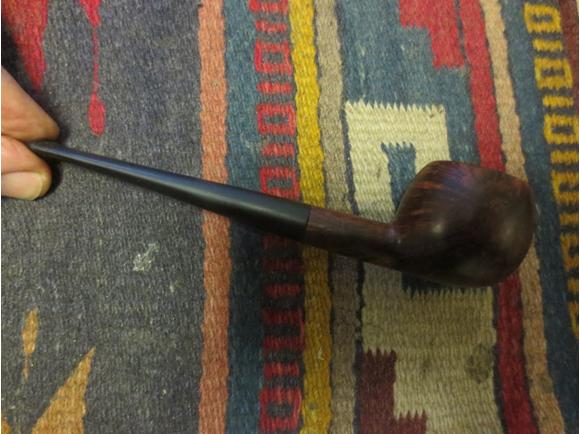
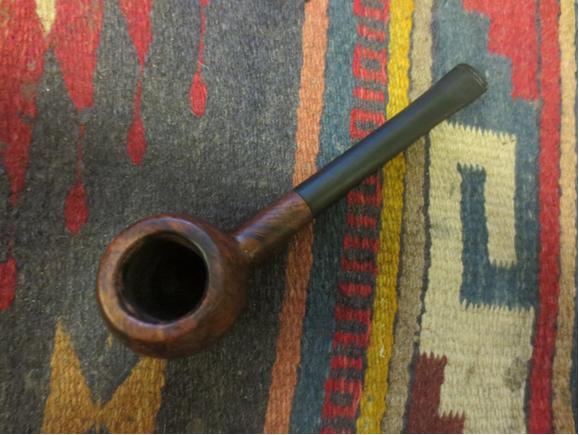
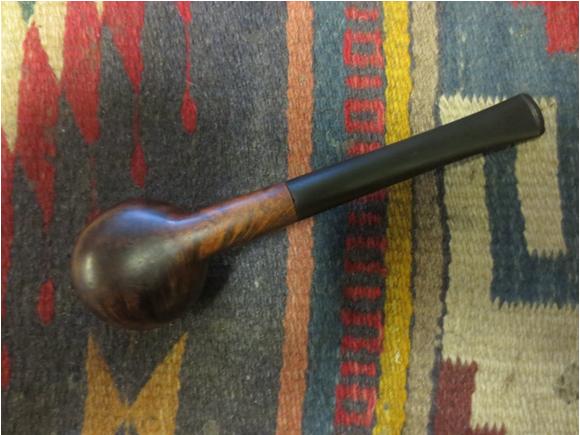
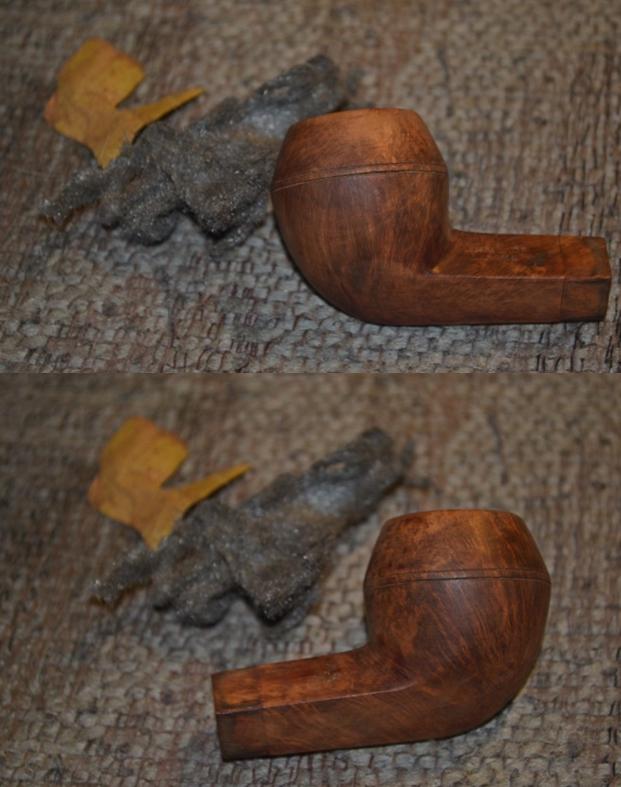
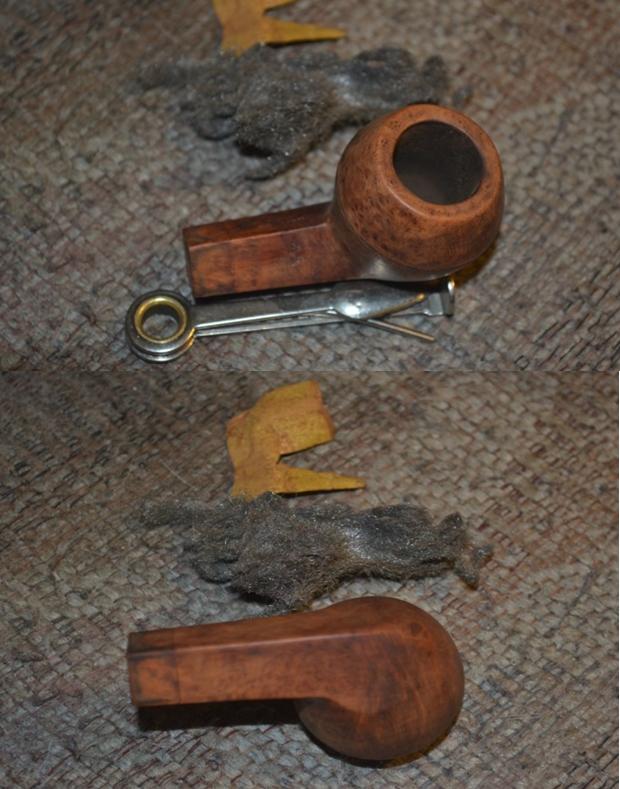
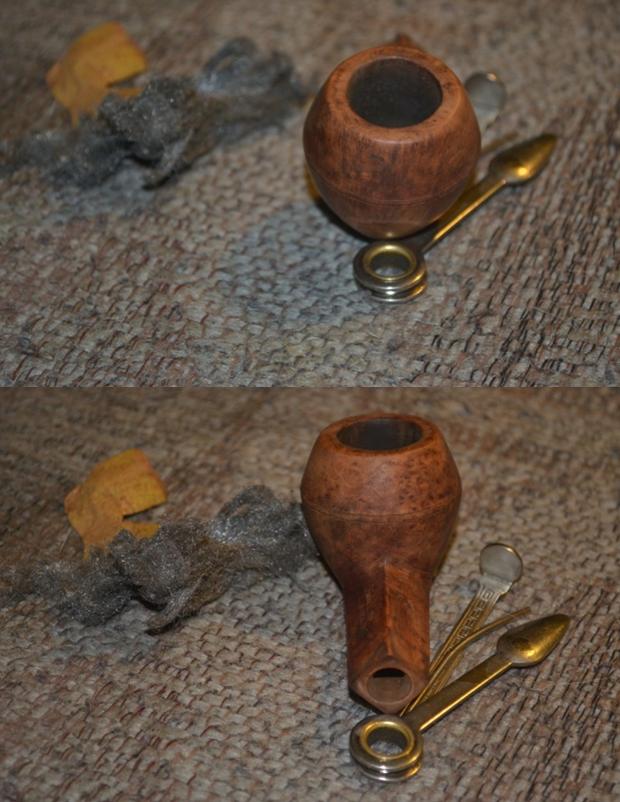
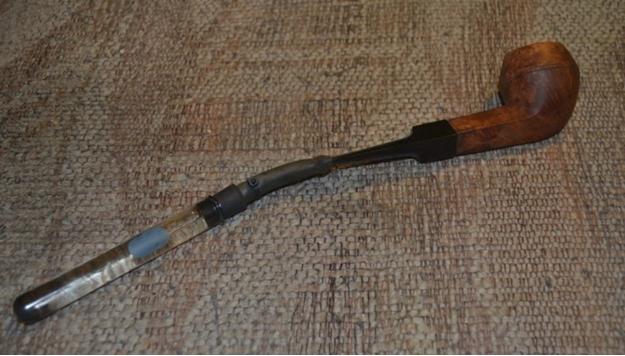
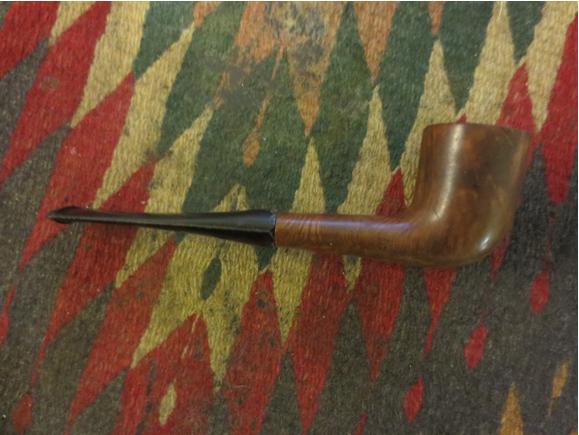
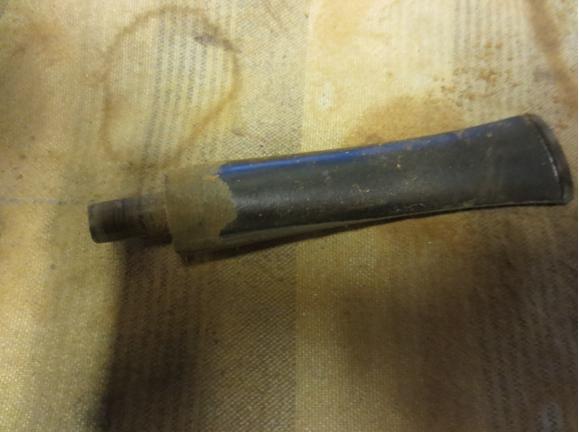
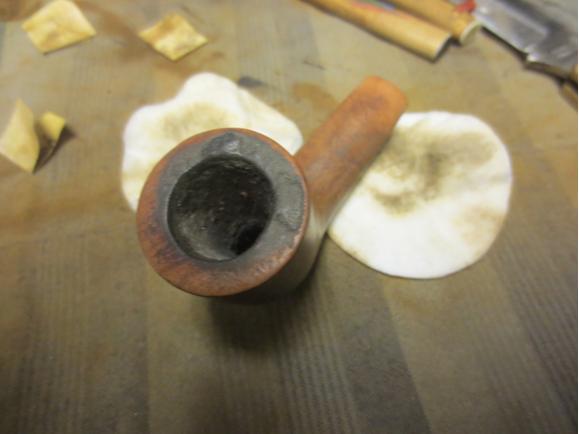
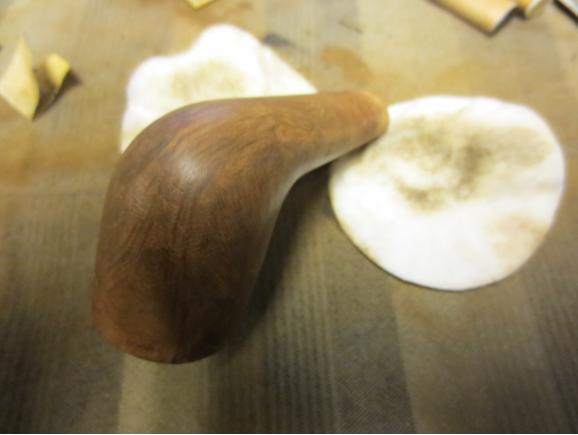
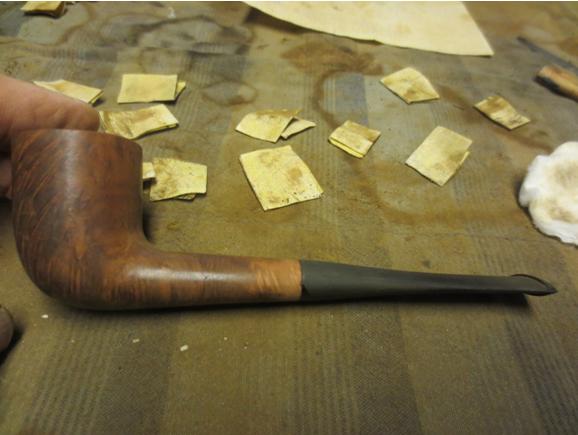
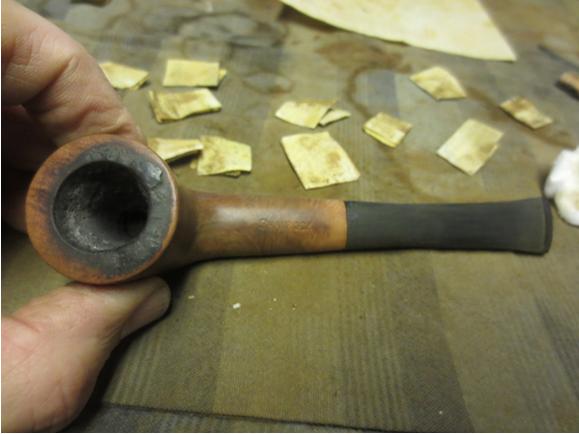
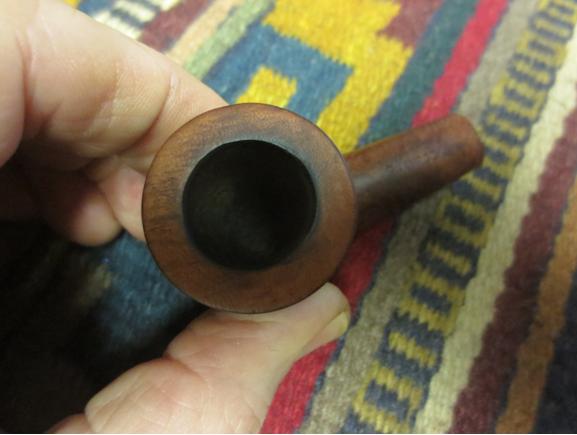
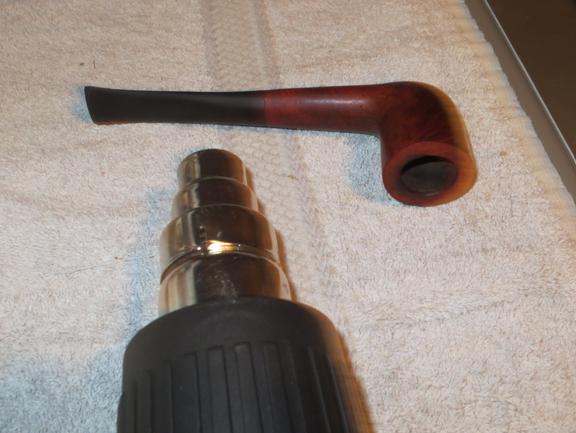
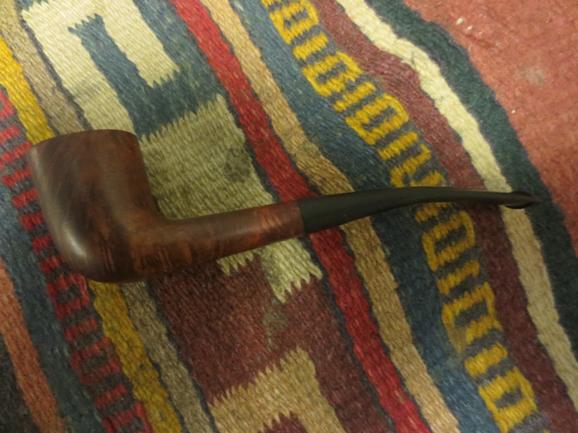
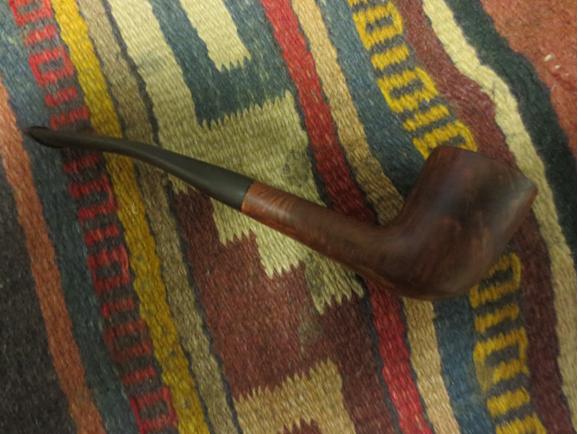
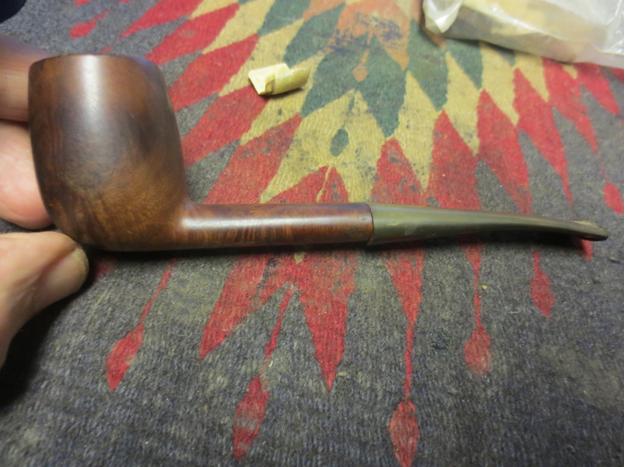
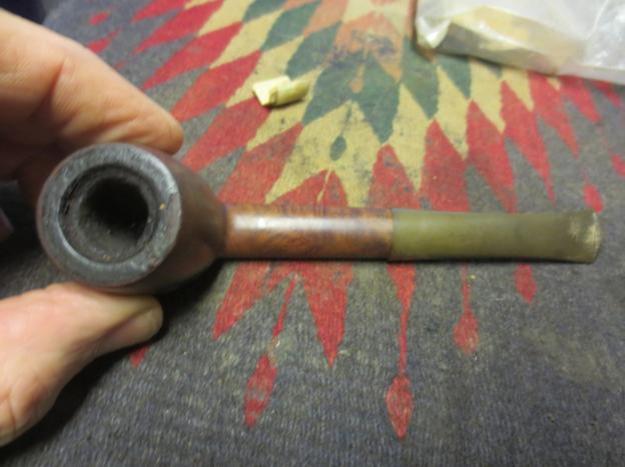
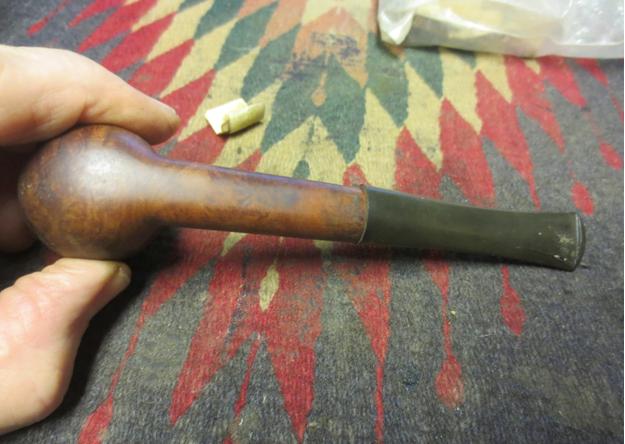
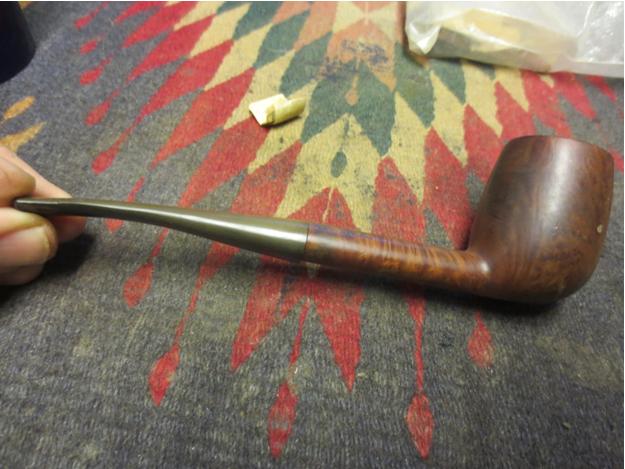
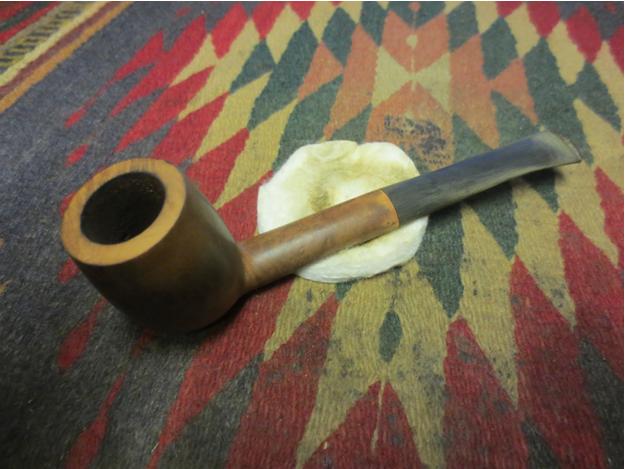
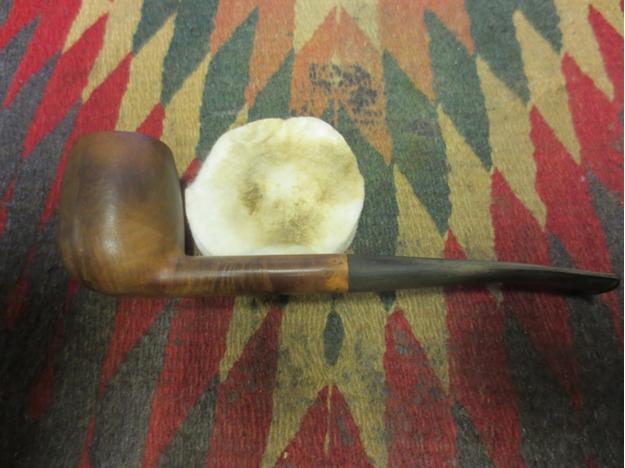
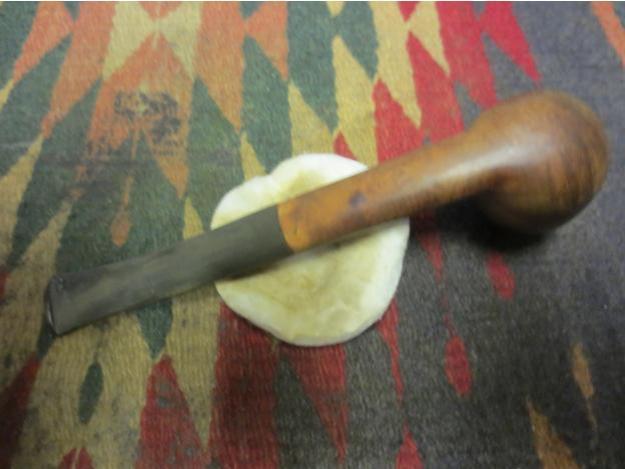
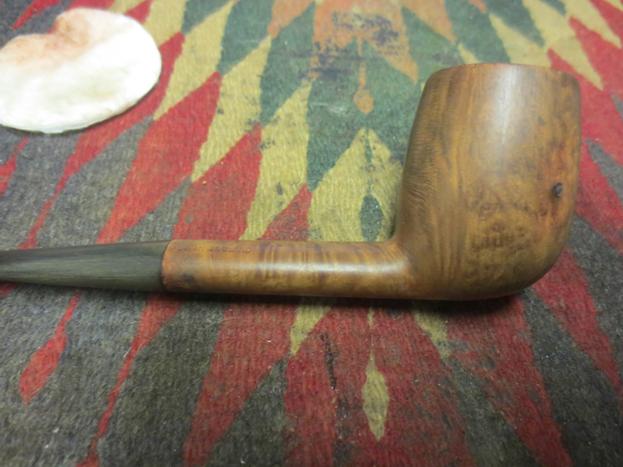
Warren, a Facebook friend, gifted me this Estella Dublin made by Savinelli not too long ago. It came to me in decent shape. Someone had topped the bowl and removed the original rustication and the topping had given the bowl a decided cant to the front and to the left side. The finish was in good shape. There was a dark spot on the lower portion of the bowl on the right side that made me wonder what was going on. The stamping was sharp and read Estella 412KS. The inside of the bowl had been reamed but it showed that it was lightly smoked. The stem was dirty but in decent shape as well. There was minimal tooth chatter on both sides and a faint E stamp on the left near the half saddle. There were also some ripples in the Lucite stem from buffing.Estella1

Estella2

Estella3

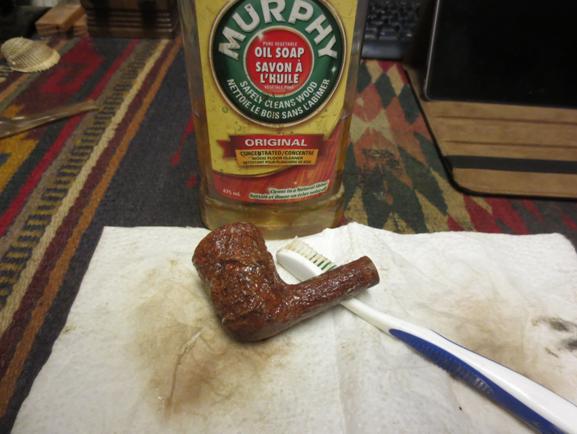
Estella4 I scrubbed the bowl with Murphy’s Oil Soap and a tooth brush to remove the grime and to see what was going on with the dark spot on the right. I could see from the inside of the bowl that there was no internal damage or burn through happening there. It appeared to be darkened only in colour rather than in burning.Estella5 I rinsed the bowl with warm water and dried it off. The photos below show the bowl after it had been scrubbed.Estella6

Estella7

Estella8

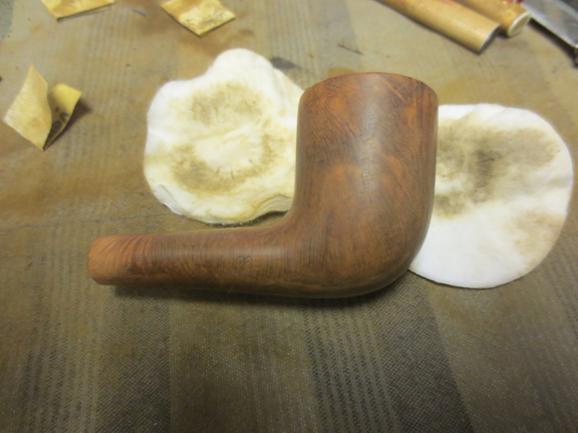
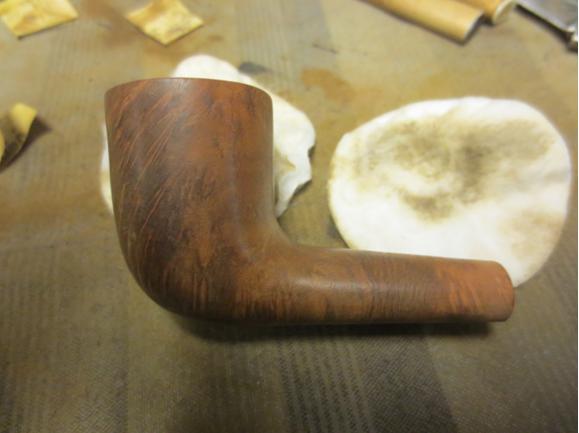
Estella9 The next three photos show the angle on the top of the bowl. From all my research on the brand and shape on the internet I had seen that the top was supposed to be flat and rusticated. I would need to flatten the rim and take care of the cant.Estella10

Estella11

Estella12 When a bowl is this far out of square with a difference of almost ¼ inch in the slope it is a bit tricky to get a flat top. I used 220 grit sandpaper to begin the process and then used the Dremel and sanding drum to bring all sides even to my eye. Once I had the surface close to flattened I used a topping board and sandpaper to finish the job.Estella13

Estella14

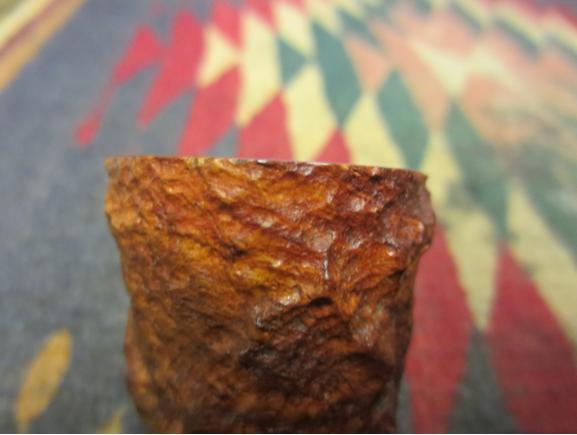
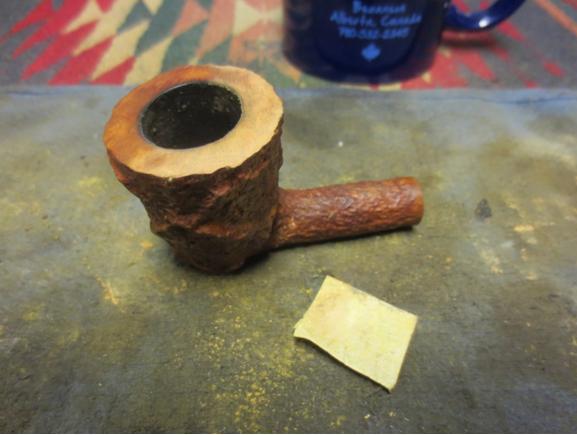
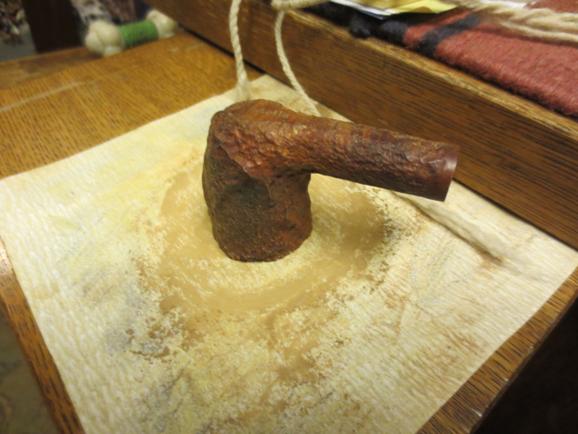
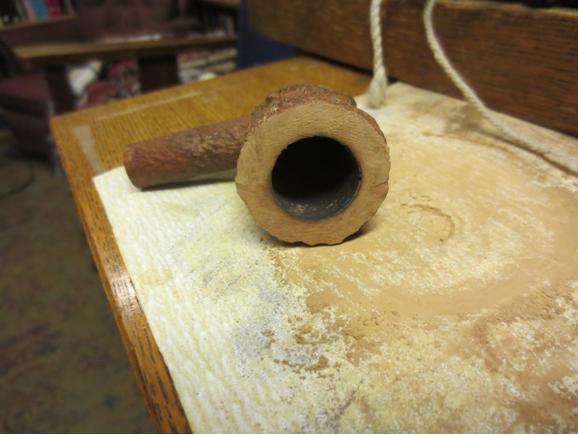
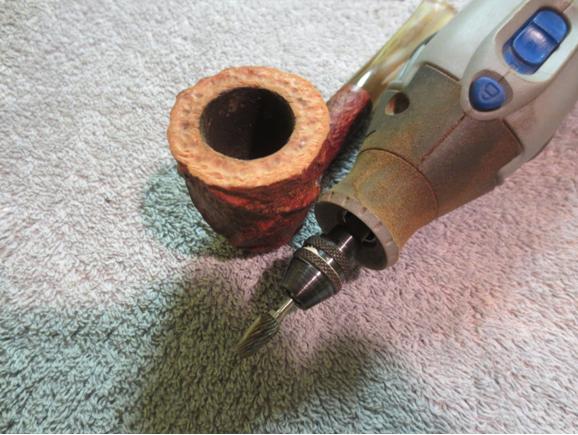
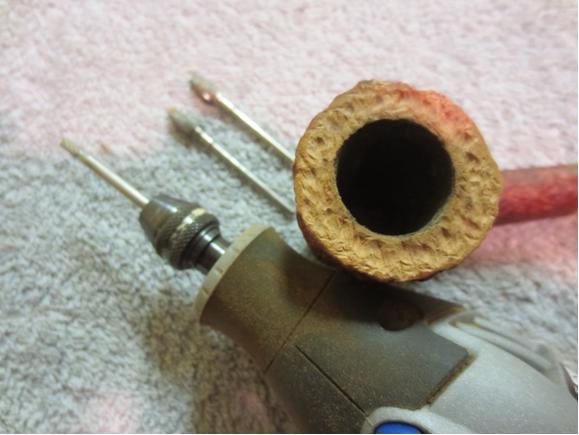
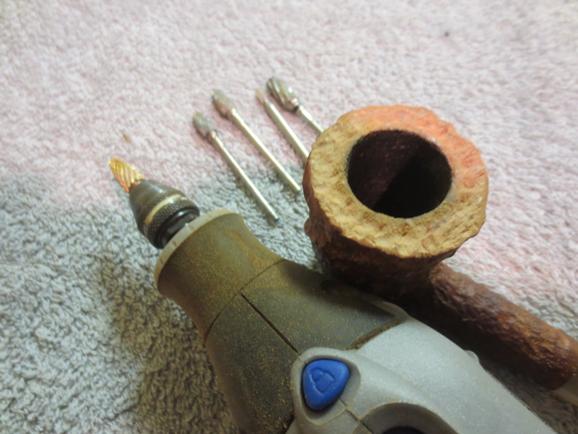
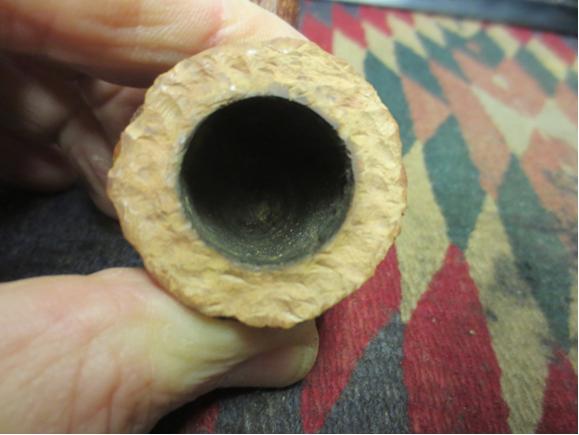
Estella15 I cleaned out the airway in the mortise and the stem with pipe cleaners, cotton swabs and alcohol.Estella16 With the internals clean and the top flattened it was time to work on rusticating it. I wiped down the top with a cloth to have a clean surface to work with. The photo below is the final photo of the flattened smooth top.Estella17 Originally the Estella had a rim top that went with the rustication on the bowl. In all of my research I could not find one that was smooth topped. I wanted to approximate the original finish of the rim so I looked on the internet to find a close-up photo of what the rim on this particular shaped Dublin would have looked like when it left the factory. The photo below, while not of a new pipe, shows the rustication of the original rim.Estella18 I used a Dremel and an assortment of dental burrs to rusticate the rim surface. I started with a Dremel burr to begin with so I could roughen the surface before using the other burrs. Each burr gave a slightly different pattern to the rustication and gave it a more random appearance.Estella19

Estella20

Estella21

Estella22

Estella23 The finished rustication is shown in the photo below.Estella24 I used a light brown stain pen to stain the rim to match the rest of the pipe.Estella25 I scrubbed the rusticated top with a brass tire brush to clean up the look and give it the same kind aged rustication that the bowl had. The brass brush knocked off the high spots and evened out the surface for a more random look.Estella26 I sanded the stem with 220 grit sandpaper to remove the rippled effect on both the top and the bottom of the stem and then used a fine grit sanding sponge to smooth out the scratches. I wet sanded the stem with 1500-2400 grit micromesh sanding pads and then dry sanded with 3200-12000 grit micromesh pads. Estella27

Estella28

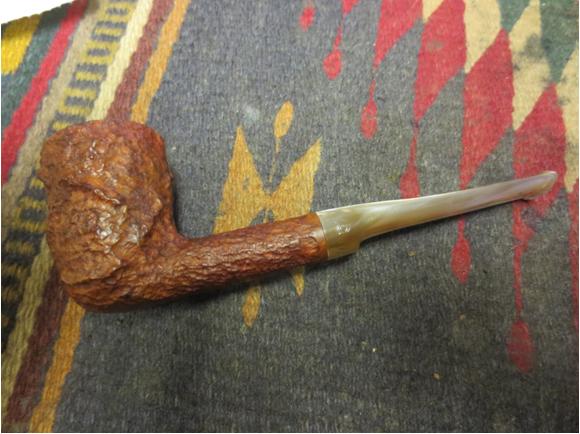
Estella29 I buffed the bowl and stem with Blue Diamond on the buffer and then gave them both several coats of Halcyon II wax and hand buffed it with a shoe brush to raise the shine. The finished pipe is shown in the photos below. I thoroughly enjoy the challenges present by the pipes I work on. This one was no exception. I think the finished look was worth the added effort to rusticate the rim. Once again thank you for taking the time to read and look at the blog.Estella30

Estella31

Estella32

Estella33

Estella34

Estella35

Breathing new life into this Dusky Dulcet Bulldog


Blog by Geoff Carmell

It is a pleasure for me to post this first blog by Geoff Carmell. I have followed his work on Facebook and we have communicated via Messenger and email now for a while. We have common friends in the small pipe community of Calgary. I saw his work on this bulldog and knew it was going to a common friend so I asked him to do a blog on the restoration. Geoff, it is great to have this piece here. You have done some great work on that old pipe. Thanks for sharing it with us all. Welcome to rebornpipes.
Geoff1Hello everyone, this is my first attempt at blogging about one of my pipe refinishing projects.

Before I begin, our host Steve Laug wanted me to give a brief introduction about myself. I am still quite a novice when it comes to the world of pipes but that hasn’t quelled my desire to keep collecting, refinishing and smoking pipes. For me it truly started while going to local antique shops last fall while my parents were visiting. I was hooked when I refinished one of those antique store finds and haven’t looked back since.

I wanted to take a moment and say that refinishing pipes as a hobby has really helped me in more ways than one. I live in Southern Alberta and I am a crane truck operator in the oil and gas industry. Last year was an extremely slow year for me and 2016 isn’t looking any better. As such, I needed an outlet to keep myself from going crazy worrying about all the “what if’s” in life.

This began my journey into the world of pipe refinishing. This nice little bulldog was one of my first eBay purchases and was really in decent shape needing very little work, or so I thought…

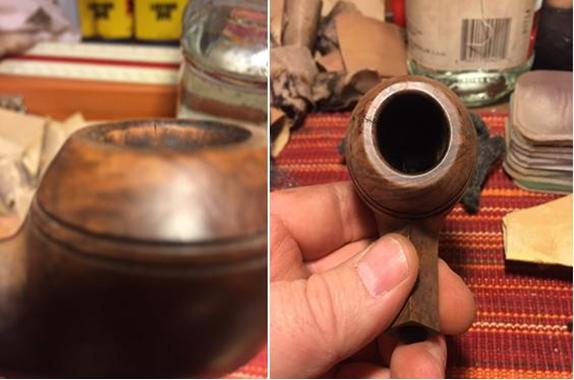
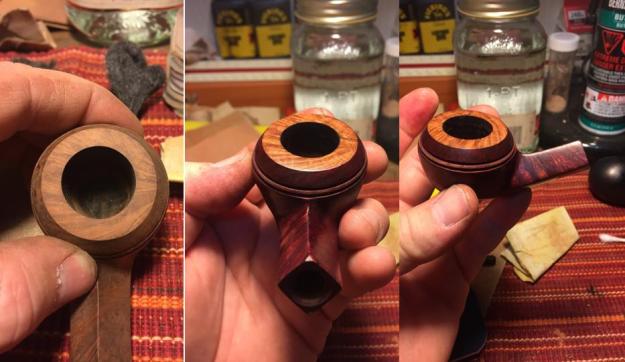
My first step was to thoroughly clean the bowl inside and out. I did my usual salt/alcohol soak to get rid of any “ghosts” in the bowl. Before I did that though, I used Q-tips and pipe cleaners dipped in alcohol to clean the shank. Once the bowl was sanitized I turned my attention to the outside of the bowl by using a lightly dampened patch of “0000” steel wool to clean off the grime. To my dismay, this “cleaning” uncovered a crack in the rim.Geoff2 Not sure of what to do I just began sanding the rim down to the point that the crack was no longer visible. After I finished sanding the rim, I turned my attention to the grooves on the front of the bowl which had all but disappeared due to the wood swelling. After lots of filing with my newly acquired needle files the grooves started to take shape again. With the rim and grooves in good shape again I sanded the bowl with 400 and 600 grit sandpaper. I then proceeded to dye the bowl with Fiebings mahogany leather dye. I set the dye by flaming it and then left that to sit overnight. I turned once again to my steel wool to help strip off the dye to reveal the beautiful grain underneath. The bowl seemed lacking, I decided to sand the rim of the bowl once more if only to reveal the original briar again, although it’s not noticeable in the pictures, I sanded the ridge between the two grooves as well to show some contrast.Geoff3 Once the sanding was complete I used my buffing wheel with brown Tripoli to further bring out the shine and then applied a couple of coats of carnauba wax to protect the finish.

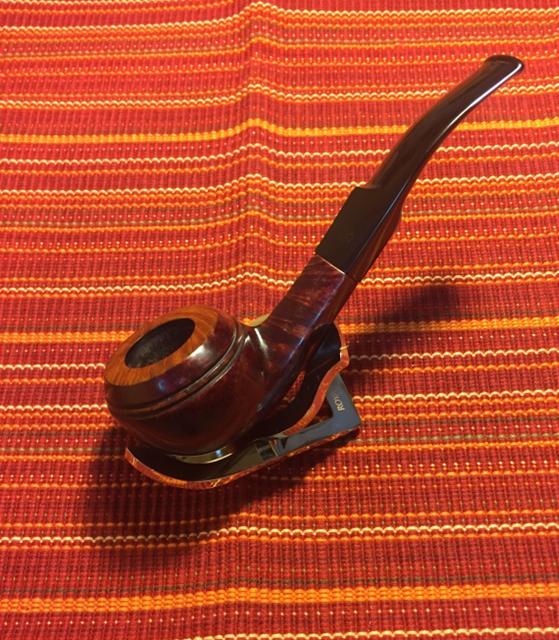
After the bowl was done I used the buffing wheels to put a shine on the stem as well. After all the buffing and waxing is done I like to use a clean microfiber clothe to hand rub the bowl and stem. This really helps to get rid of any wax buildup.Geoff4 After all is said and done I really enjoyed this refinishing project and I was pleased that it turned out to be my first pipe that would go to a great guy in our church.
Thanks for looking.
Best regards,
Geoff

Sometimes things happen – restoring a BB&S Londoner 5386 Prince


Blog by Steve Laug

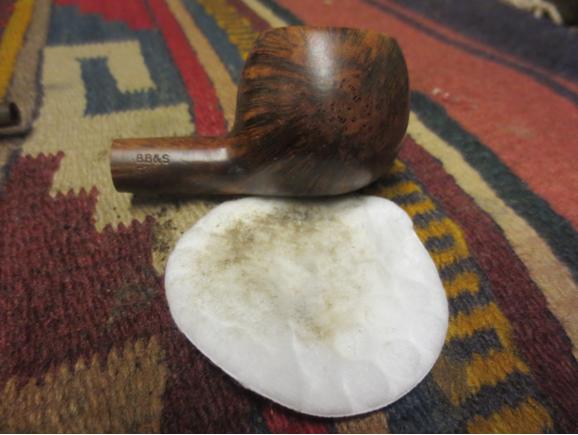
I received this old BB&S Londoner bowl as a gift from a friend. It came without a stem but it was in very good shape. It had a cake on the bottom half of the bowl that was rock hard and needed to be removed. The finish was decent but dirty. The stamping on the left side of the shank reads LONDONER over London England. On the right side it reads BB&S over 5386. The BB&S stamping tells me that this bowl was a Barling – Benjamin Barling and Sons. I looked on the pipephil site (http://www.pipephil.eu/logos/en/logo-l5.html#londoner) and found that I could at least date the pipe as pre-1962. The link told me that once the family had sold the Barling brand (1962) pipes and especially the seconds of the brand were made in France, Italy or in Denmark… Since my pipe was stamped London England it was made before the sale of the brand and still bore the London England stamping. The shank had dents on the top and bottom sides and the bowl had dents all the way around the sides and bottom. Everything about the pipe signaled an easy task of refurbishing.

The general clean up went quickly. I was able to get the bowl ready to restem with no issues whatsoever. The issues with this refurb have nothing to do with the process of the restoration rather they come with regard to operator error with the camera/computer. It is a pain for me to have to admit that I erased the photos from the camera before I had copied them to the computer. I had taken some great photos! They were probably the best I had taken (at least I can say that because I have no proof or disproof that it is true). There were at least a dozen photos of the pipe from the moment I started the process, through reaming the bowl to the steaming of the dents. They showed the reaming process for the hard cake in the bottom half of the bowl. They clearly depicted the visible dents all around the bowl and then showed the process of using steam from a wet cloth and a hot knife blade to raise the dents. Those are the photos that I erased from my camera this morning. I have tried to undelete them to no avail so I apologize for not having any photos from the early stages of work on this pipe bowl.

With the confession out of the way and leaving behind my foolishness at rushing through a cleanup of the memory card in the camera I will move on to the remainder of the restoration and restemming of this little prince. After the missing reaming and steaming of dents I wiped down the finish of the bowl with Murphy’s Oil Soap on cotton pads to remove the grime. I rinsed off the bowl and dried it with towels. The photos below show the cleaned bowl.BBS1

BBS2 Wondering what else would go wrong with this restoration I proceeded carefully with one eye looking over my shoulder. It seems these comedies of error come in sets. Who knows what would come next in the folly of this clean up. I poured out my can of stems and went through them until I found a stem that was close to the diameter of the shank. I drilled the airway in the tenon end to accommodate the centre pin on the PIMO tenon turning tool and then pushed the stem onto it. I slowly and by stages turned the tenon to fit the shank. My normal practice is to turn it as close as possible with the tool and then fine tune it by hand with sandpaper. I saw no need to invite trouble so I followed that process to the letter.BBS3 I used a Dremel and sanding drum to cut back the excess vulcanite of the stem. This is handwork and takes a steady hand so as not to nick the shank of the pipe. Whew! I made it without damaging the briar and making more work for myself. I used a rasp to remove more of the excess diameter on the stem at the shank.BBS4 I worked on it with the rasp until I had the fit close, then I put a plastic washer between the shank and the stem and sanded it with 220 grit sandpaper. I wanted to smooth out the surface and remove the marks left by the Dremel and the rasp at the transition point.BBS5 I don’t know about you but after all of the detailed Dremel, filing and sanding work my hands need a break. I laid aside the stem and did some simple work. I cleaned out the inside of the bowl and shank with pipe cleaners, cotton swabs and alcohol.BBS6 After that my hands were quite rested and it was time to get back to the stem. The fine tuning of the shape of the stem is tedious when it is done by hand. I don’t have a belt sander or power tools to make this go more quickly, so it is just ongoing hand work. I continued to use 220 grit sandpaper to shape and clean up the fit of the stem at the shank.BBS7

BBS8

BBS9

BBS10 With the fit finished and being acceptable I breathed a sigh of relief. There were no more gaffes that happened up to this point. The stem looked acceptable and the pipe was taking shape. Not too much work left to do before I was finished and the drama was over. I sanded the stem with medium and fine grit sanding sponges to remove the scratches and rubbed the stem down with Obsidian Oil. I took photos of the pipe at this point to make up for the lack of photos due to operator error in the earlier part of the process.BBS11

BBS12

BBS13

BBS14 So far no bigger crises than forgetting photos. A few more steps left before I am in the clear on this one. I was moving to the buffer and if something could happen at this point it would be at the buffer. Nothing like getting this far and having the buffer snatch the pipe out of your hand and send it across the room snapping the tenon or cracking the shank. So with fear and trepidation I buffed the bowl and stem with White Diamond before continuing the process of polishing the stem. It worked well and I headed back to the work table. I wet sanded the stem with 1500-2400 micromesh sanding pads and then gave it a coat of Obsidian Oil. I dry sanded with 3200-12000 grit pads and then gave it a final rub down of the oil. I let the oil dry.BBS15

BBS16

BBS17 One more dangerous trip to the buffer to go and I was home free. I buffed the pipe with Blue Diamond on the wheel and then gave the bowl and stem multiple coats of carnauba wax. I buffed it with a clean buff with no drama so I was finished with that part of the work. I gave it final hand buff with a microfibre cloth. The finished pipe is shown below. Not too bad – only problem in the process was the photos. Whew! Now one question remains should I give the stem a slight bend or not. What do you think?BBS18

BBS19

BBS20

BBS21

BBS22

BBS23

Al Jones (upshallfan) commented below regarding what the pipe would look like with a slight bend. I gave it a bend a few moments ago. What do you think? Thanks Al.

BBS24

BBS25

A Sad Lesson from a Botched GBD Repair (by Someone Else) I Tried to Mend


Guest Blog by Robert M. Boughton
Member, International Society of Codgers
Member, North American Society of Pipe Collectors
http://www.naspc.org
http://www.roadrunnerpipesnm.biz
http://about.me/boughtonrobert
Photos © the Author

If it ain’t broke, don’t fix it.
― Thomas Bertram “Bert” Lance (1931-2013), U.S. bank teller to president and Director of the Office of Management and Budget under President Jimmy Carter, in the May 1977 issue of “Nation’s Business” magazine

INTRODUCTION
This is a sad tale for all involved: the eBay seller from whom I purchased the GBD straight apple sitter this blog concerns, for $39.99 in April of last year, which the good lady in England refunded five days later; me, as the buyer who requested the refund after receiving the pipe and finding that the photos posted by the seller did not reveal the hidden nomenclature from a previous silver banding to fix an apparent crack in the shank, and at last, in a very real way, the person or persons unknown responsible for the banding itself that, nine months later, I have only just discovered was unnecessary. At least the last of the concerned parties is/are blithely unaware.

That’s right, you read correctly. Although I was justified in asking for the refund, and intended to pay the high postage required to return it to the seller beforehand, she responded, to my gentle but detailed account of the reasoning, with a message that can only be described as hysterical from an obvious sense of unjustified guilt for having “falsely advertised” the GBD. I never used that phrase in my request.

As I recall – though I can’t locate the exchange of emails between the Englishwoman and me that followed my awaiting the arrival of the GBD, with great expectations that were dashed by its clear flaws upon receipt – she wrote back that I should not bother returning it at all, but instead that she would promptly refund my money and I should “keep it, sell it for whatever you can, or throw it away, I don’t care.”

At that point, I was filled with remorse over the anguish in the tone and content of her message that literally rang in my ears, even without an exclamation point. I nevertheless attempted, in a final, unanswered message, to express my intent merely to let her know, in order to sell this pipe or any other (they are not her specialty), that she only needed to add a brief note of the band work and its effect on the nomenclature, as these are important details to collectors and sellers, and perhaps lower her asking price.

After showing the pipe to Chuck Richards, my good friend and mentor, before the emails described above and allowing him to discover on his own the same flaws I detected, he concluded that if I paid more than $10 for it, I should immediately ask for a refund, as I had bought it for my own estate pipe business with the prospect of a quick clean-up for resale. When I told Chuck the actual amount I had shelled out, he was speechless for a moment before all but insisting I seek the refund.

I have been unable to get the shame-riddled emailed words of the kind seller, who as far as I’m concerned made an honest mistake and acted, throughout the transaction, in absolute good faith, out of my mind ever since. I have entertained various options concerning the ultimate disposition of the pipe’s rightful ownership. Of course, I could (A) keep the still beautiful pipe and restore it as best I could to put in my own collection or sell with appropriate disclaimers; (B) clean it up and return it, like a good gentleman, to the grief-stricken lady, with the emphatic suggestion that she give it to a friend who enjoys pipes and would likely treasure this one, if she still didn’t wish to sell it on eBay with a lower price and notices, or (C) complete the work that could be done to fix the damages wrought on the hapless GBD, keep it or sell it but under no circumstances toss it in the trash as the seller advocated, and write the blog now presented as a full and sincere apology to the lady, with the intent of depositing the refunded money back into her PayPal account and forwarding her the link to the blog.

With great effort, I at last located the transaction numbers and dates of the original purchase and refund, and with them was able to obtain the lady’s name and email address.

I will save my final decision for later in this account of the restoration of the GBD Prestige straight apple sitter, which research has disclosed was made prior to the acquisition of GBD (an abbreviation of the three founders of the brand in 1850 in Paris – Ganneval, Bondier and Donninger) by Cadogan of the Oppenheimer group in the 1970s. The imprint “London England” in a straight line on the right side of the shank, almost half of which was obliterated by the band, narrowed the pipe to the pre-Cadogan era and also signified that it might have been made in France despite the nomenclature. GBD was last taken over in 1981 by Comoy’s.

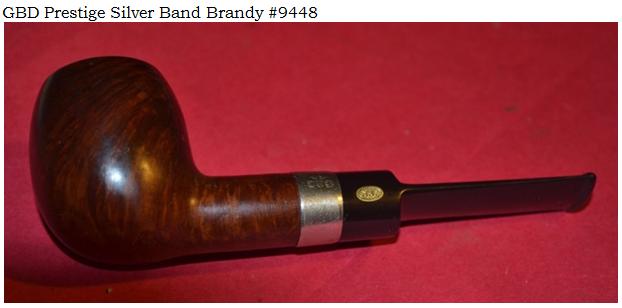
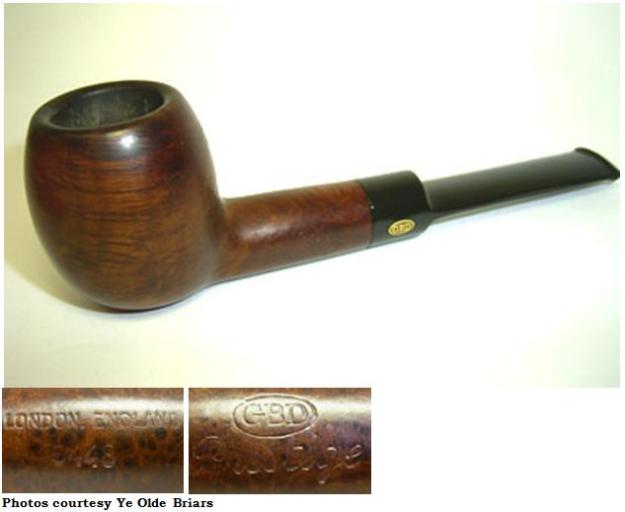
The other nomenclature on the Prestige was critically faint, before I started work on it, and included on the left shank the small letters GBD in an oval, barely visible beside the band, and the model name in cursive that took hours to decipher enough to make out the first uncovered letters, “Prest,” which led the excellent Englishwoman to suspect Presto, but I Googled and found the full correct name. On the right shank, equally as light as the left and below “on England,” were three numbers for the shape, 448, which I understood was 9448. Here is what another version of the pipe looked like.GBD1 The apple of my eyes in this blog is remarkably similar, discounting the nomenclature.
RESTORATION
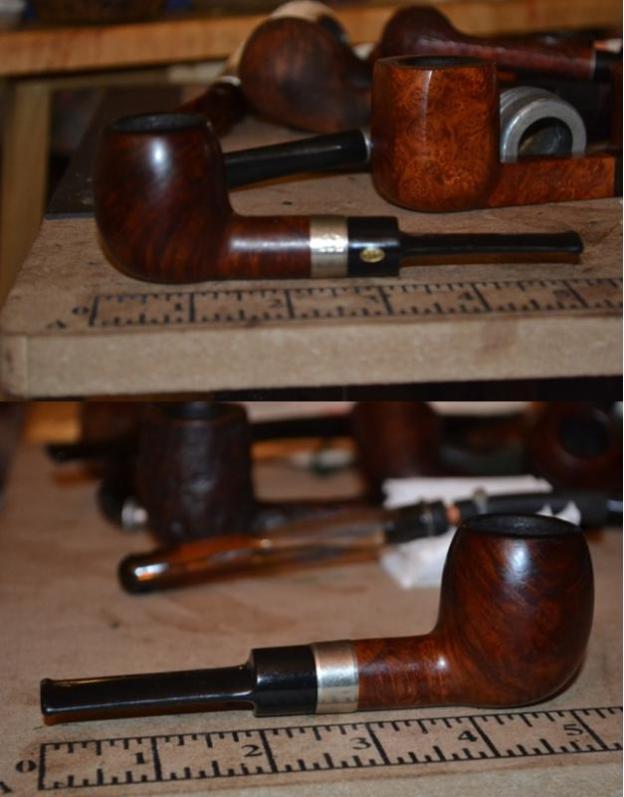
GBD2

GBD3

GBD4

GBD5

GBD6 [Note the unusual, perfect, pale half oval indentation in the top of the shank in the sixth photo above: I have.no rational explanation for the presence of this mark other than the appearance that it is neither a natural aspect of the wood nor any type of damage, such as a crack. I believe the previous restorer attempted to use a self-made metal band, with the idea of reinforcing the top of the shank without covering any of the nomenclature. If this admittedly crazy-sounding guess is correct, the restorer likely intended to do the same on the bottom of the shank but aborted the idea altogether after failing with the top piece. Call me nuts, but this mark is not an accident.]

Already considering re-banding the apple with a shorter sterling variety, I tugged at the one used in the first place, without much hope that it might be loose, and was surprised when it flew off of the shank and onto my lap.GBD7 Now that was fortunate indeed, for, upon closer inspection, I was able to see that the tiny line in the shank’s opening, which ignited some daft restorer’s passion to fix something that wasn’t broken, was a mere blemish that led nowhere and, in fact, disappeared with a few seconds of sanding. I have to add an acknowledgement of my simultaneous relief that the shank was not cracked and disgust with the previous restorer who desecrated the otherwise weathered but fine pipe by ruining so much of the invaluable nomenclature. The only remaining imprints were the indentations left from the hallmarks and sterling silver designation on the once tight band. I scoffed out loud after my brain digested this enormous error in judgment that more or less ended any real value – and prestige, so to say – this GBD might have had.
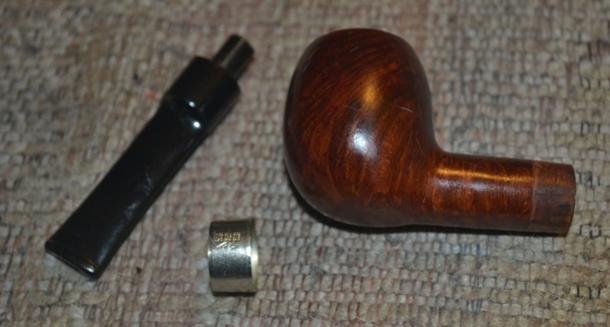
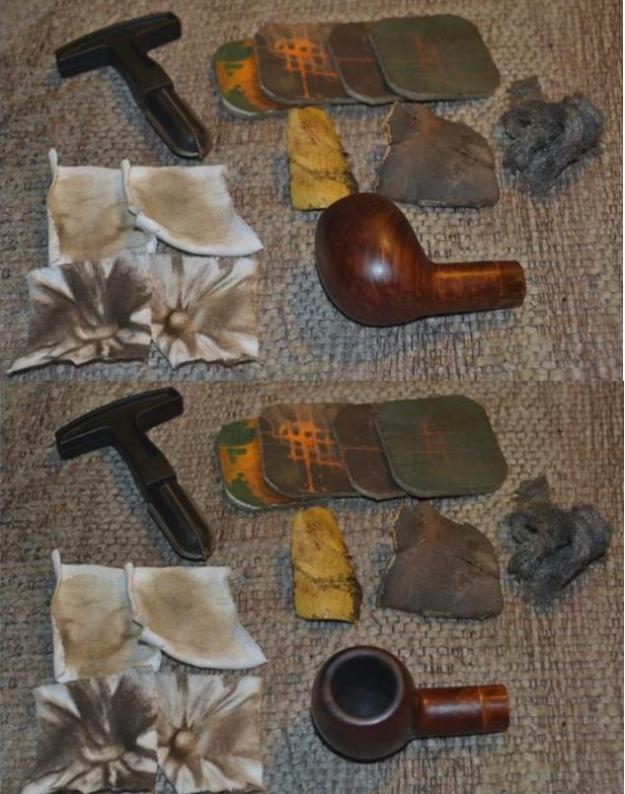
Not yet wanting to deal with the majority of the stummel’s outer area, I decided to start by removing the years of accumulated dirt and whatnot from the wood with small soft white pieces of cotton gun cleaner cloths and much of the rim char with wet micromesh pads and a light touch of superfine steel wool. I followed those tasks by clearing the small amount of excess carbon in the chamber with a 19mm reamer and 200- and 500-grit paper, swabbing with Everclear-soaked cotton cloth pieces, and a retort of the pipe.

The retort turned out to be the hardest part of these preliminary steps, as neither of the two rubber tubes that span the few inches from the boiling Everclear to the lip of the bit would fit the extra wide mouthpiece that was part of the GBD. And so, ad-libbing somewhat, I sought out another bit from my collection with a tenon that fit the GBD and a lip that matched the rubber tube. Of course, the last possible pipe I checked was a match – or closely enough. It was from a favorite Ropp. I had no trouble cleaning the metal inlaid GBD bit with a couple of alcohol-soaked bristly cleaners.GBD8
GBD9

GBD10 The photos above show the surprising cleanliness of the well-worn sitter, and by inference, the degree of care its fortunate owner once accorded the bijou. The later of two test tubes full of Everclear used in the retort was almost clear, with only a few small, solid pieces of flotsam at the bottom.

Here, alas, is where I erred, and will have to accept the consequences, until the day I die, for the heartbreaking lesson they provided. In hindsight, I suppose I might, at this critical stage, have sought the guidance of Chuck or Steve (my second if unofficial mentor in this ever-evolving process of learning). But, as Jesse Eisenberg’s character in “Zombieland,” Columbus (for the city in Ohio where he was born), repeated slowly as a sort of mantra: “Shoulda-coulda-woulda.” Much as Columbus had come up with rules for surviving a zombie apocalypse, so have I adopted a set of guidelines, from my own experiences and those of others, for pipe restoring.

Sometimes I ignore one of these, for the most part with success, and sometimes I have to learn the hard way, on my own. Still, as I type this, I find myself experiencing emotions I prefer to avoid. Recognizing my harshness with the previous restorer, and my own share of fault for the apple’s present condition, I nevertheless tell myself I did my best, alone, to return the splendid pipe to its potential glory. My mistake, although unintentionally made in the pursuit of correcting one more egregious that I believed necessitated my next step, is on me.

To the point, and in spite of a note in my previous blog that I try my best to avoid full stripping of a pipe’s original stain and waxes with an Everclear bath, that is what I did.GBD11
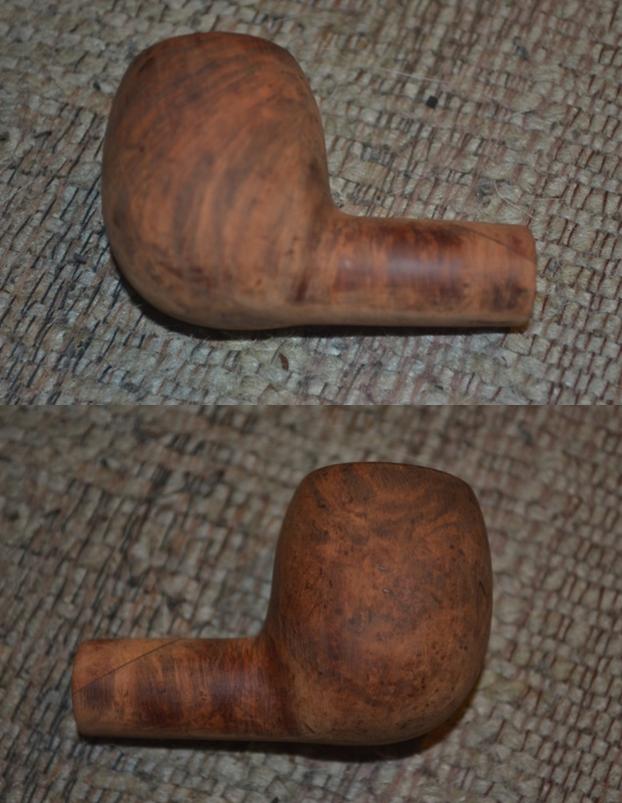
GBD12

GBD13 These photos show two things: the wonderful success in removing the remaining rim char and reducing the wood to its natural smoothness, and, as an unexpected result of the latter, also eliminating almost every vestige of the remaining nomenclature. Anyone who loves pipes with all of his heart, as I do, will comprehend the complete hollowness, in the pit of my stomach and consuming my mind, I experienced upon seeing with my own eyes the gaff I had committed. I sat there on my couch awhile, stunned, until I forced myself to snap out of the melancholy reverie and get on with it.

Flashing on memories of a few pipes restored by Chuck, and which I bought despite the blemishes I detected and wondered why he let them remain, I knew the full answer he omitted, in his enigmatic way, when I asked him. Some flaws, as battles, are better left unfought. Before I reached this conclusion – as my mind was still rampaging with thoughts of how I should have approached the same notion of stripping the original stain and waxes from just the bowl and chamber, or could have accomplished the goal better, or would have saved the fragile markings that could now be visible – I had to suffer the unavoidable fact of my misdeed. Shoulda-coulda-woulda.

Thus I embarked on the only course of action I had left – to re-smooth and finish cleaning the chamber with 150-, 200- and 500-grit papers followed by small cotton cloths soaked with alcohol, and returning the sheen of the wood using superfine steel wool and then 3600-12000 micromesh pads. I then re-stained the briar, first trying Lincoln Medium Brown leather dye and flaming it before buffing with 6000 and 8000 micromesh.GBD14
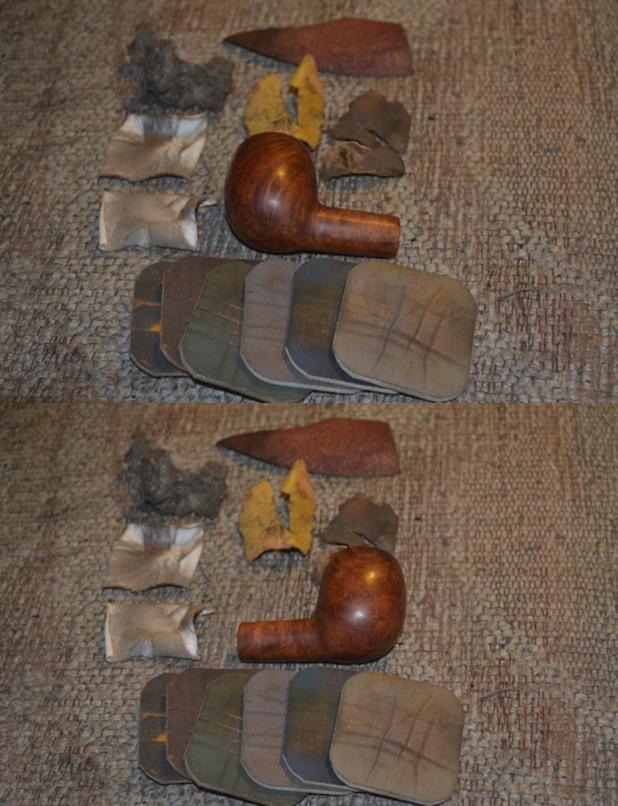
GBD15

GBD16

GBD17

GBD18 I saw that the clear, pale half-oval shape, from the suspected attempt by the previous restorer to use an adornment band to fix the misperceived shank crack, remained stubbornly. And so, having nothing to lose, I sanded the open end of the shank with 150-, 200-, 320- and 500-grit papers before micro-meshing and staining again. I’ll tell you straight out, this was not the end of the struggle to fix the single blemish.GBD19 Of course, I buffed off the char from flaming the end of the shank with 6000 and 8000 micromesh, and reattached the bit to the shank with the band removed, to check the fit. The bit was still a match with the shank!GBD20 Grateful to have something go right, I turned in that direction and went after the bit. The photos below show before, as it arrived in the mail, and after I worked on it with the tools displayed.GBD21
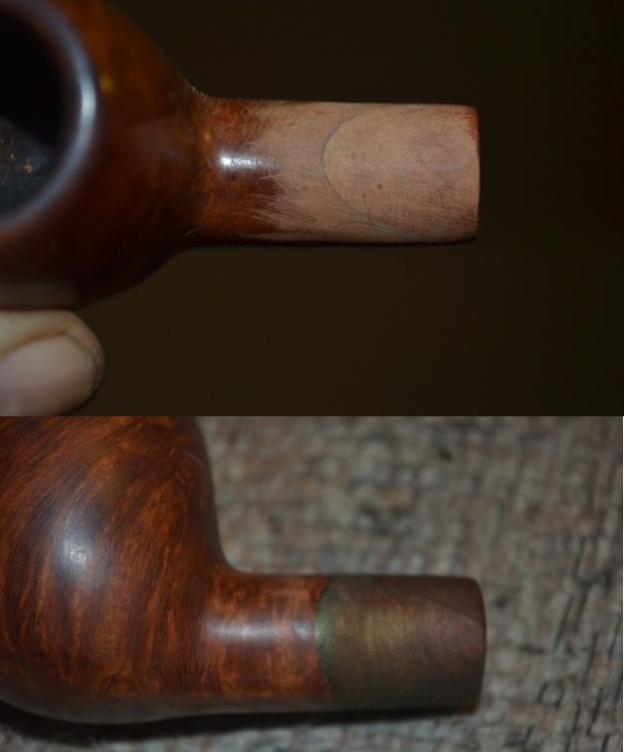
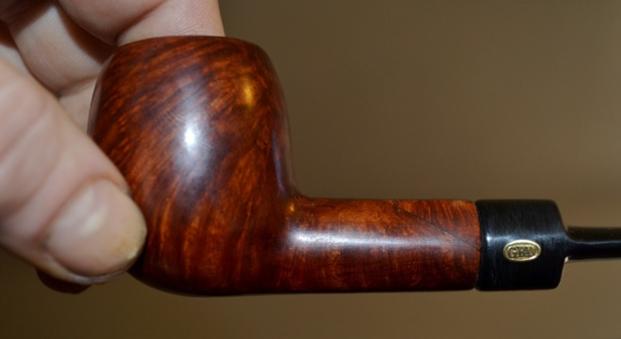
GBD22 This blog is nothing if not a cautionary tale about the horrors of reversing someone else’s mistakes – of which mine, unfortunately, cannot be undone. I return to the battle of the pernicious, aborted oval pipe band, at the very moment I concluded that maybe a darker staining, adding Lincoln’s version of burgundy red to the medium brown I applied earlier, would help me be out, out with the foul spot. I was wrong, but here’s what it looked like after flaming the alcohol out of the stain.GBD23 However, this was, at least, a step in the right direction. I concluded that, despite my deepest desire not to be forced to re-shackle the apple sitter with the excellent but unnecessary sterling band that caused this ruckus in the first place, I had no choice. I Super Glued the band firmly back onto the shank, with the hallmarks on the left side, and it did serve to obscure most of the oval shape. Before I snapped the next photos, I added another spot stain using more of the medium brown, flamed it and buffed with 8000 micromesh. That was pretty much the end of the oval spot!GBD24
GBD25 At long last, I was ready for the final buffing on my electric wheels, which as always involved the clean buffer after each of the waxes. For the bit, I used the regular red and white Tripoli and White Diamond. Having let every other convention fly in the wind, the thought occurred to me to wax the stummel with the red Tripoli as well as white, followed by White Diamond and a slow double-coat of carnauba.GBD26
GBD27

GBD28
CONCLUSION
The foul spot still remains enough for a good eye to catch, if not the camera for once. I’m going to sum this up with the note that I sincerely hope I succeeded in creating a final result that, despite its one glaring disaster, reveals a more beautiful grain than the original darker version. And one more thing: I have decided to return the money the Englishwoman who gave me this fine GBD refunded to me last April, and then forward the link to this explanation. At this point in the whole experience with the cursed and enchanted apple sitter, I am happy to take a loss for once, and will try to sell the pipe for $25. I have no doubt the lady in England is lovely. How could she not be, given her obvious love of pipes that equals mine?

SOURCES
http://www.pipephil.eu/logos/en/logo-gbd.html
http://yeoldebriars.com/gbd013.html
https://www.youtube.com/watch?v=LPIuIfAywvY Zombieland Rules (AC, AL, GL, V)

UPCOMING RESTORES
GBD29

GBD30

GBD31

GBD32

Replacing a Broken Tenon & Repairing a Cracked Shank on a Radice Brown Canadian


Blog by Steve Laug

A friend on Facebook messaged me not long ago with a proposition. I had repaired a pipe for a friend of his before Christmas and now he had one for me. He would send it up with some pipes to add to my refurbishing box. The one he had for me to repair was a Radice Brown Canadian with a gold band. The pipe arrived with the broken tenon stuck in the shank. In looking it over I could also see a small crack coming out from under the band that would need to be addressed. I used my usual tenon pulling method and was able to wiggle it free of the shank. The tenon was Delrin and was threaded so that it screwed into the stem. It had broken off leaving two full threads remaining on the end of the tenon. The second photo below shows the pulled tenon and the broken remainder of the tenon in the stem.Radice1

Radice2 I drilled out the broken tenon using a drill bit slightly smaller than the diameter of the hole in the stem. As I drilled it the broken tenon stuck on the drill bit and I was able to unscrew it from the stem. The photo below shows the freshly drilled stem. There was a lot of clutter left behind by the drill that I would need to clean out. I used a dental pick and pipe cleaners to remove all the debris and open up the airway in the stem. I noticed that there was a ridge on the inside of the bowl toward the bottom from whoever had reamed it before I received it.Radice3 Once I had the tenon out of the shank and the stem drilled and cleaned I examined the pipe carefully. From experience I have seen that when a tenon snaps there can also be collateral damage such as a cracked shank. The band on the pipe was loose so I slid it off and examined the shank. From the end view photo below you can see a crack at about 11 o’clock. It ran up the shank for about ¼ inch and then turned downward along the side of the shank. It extended for almost an inch along the side of the shank. There was a slight crack that split off of it and headed backward toward the end of the shank as well. I used a microdrill bit on the Dremel and drilled a small pin hole at the end of each branch of the crack.Radice4

Radice5 I put a light line of white all purpose glue around the shank and pressed the band in place. I cleaned up the overage of the white glue.Radice6 I used a dental pick to guide super glue drops into the drill holes and along the crack.Radice7

Radice8 I sanded the repair I had made to the cracked shank with 220 grit sandpaper and then with a medium and a fine grit sanding sponge.Radice9 I sanded the repair area with 1500-2400 grit micromesh sanding pads and then stained it with a light coloured stain touch up pen. The colour matched the rest of the bowl and shank and once it was polished blended in well. The two dark spots on the side of the shank were the filled drill holes. They are smooth to touch.Radice10 I used a needle file to smooth out the ridge at the bottom of the bowl and blended it in with the sides of the bowl as much as possible. I cleaned out the shank with pipe cleaners, cotton swabs and alcohol. I used a dental pick to clean out the slot on the stem and then ran pipe cleaners and cotton swabs through it to clean up the threads in the tenon end and the airway throughout the pipe.Radice11 I set the bowl aside and began to work on the stem. I decided to fill the missing dot on the top of the stem before I replaced the tenon. I screwed the broken tenon in to give me something to hold onto while I worked on the stem. I used a knitting needle that was ivory coloured and cut it down with the Dremel until I had a piece that would fit in the hole in the stem. I glued it in place with super glue and then cut off the body of the needle leaving just a small piece in the hole. I sanded it with the sanding drum on the Dremel and brought it as close to flush with the surface of the stem as possible without damaging the stem.Radice12
Radice13

Radice14 I sanded the dot flush with the surface of the stem with sandpaper and then with the sanding sponges and micromesh pads. I removed the broken tenon and prepared to cut a new tenon. For the material I used a small stem that I have been cannibalizing for tenon repairs.Radice15 I cut off a piece of the stem that would give me material to work with using a hacksaw.Radice16 I used the Dremel and sanding drum and two different rasps to reduce the diameter of the end of the newly cut tenon that would insert into the stem. It had to be the same diameter as the threaded end of the old tenon.Radice17 When I had the tenon fit I cut the length back to match the length of the previous tenon. I put some clear super glue on the small end of the tenon and pressed it into the stem. I ran a bead of clear super glue around the insertion point of the new tenon to make an air tight fit. The photo below shows the new tenon in place in the stem sitting next to the broken one.Radice18 I sanded the new tenon with micromesh sanding pads to polish it and readied it for the shank. Once it was clean I pushed the stem into the shank and took a series of photos to show the newly stemmed pipe. I quickly sanded the gold band with 6000-12000 grit micromesh pads to remove the scratching and grooves that had been present when I received the pipe.Radice19

Radice20

Radice21

Radice22

Radice23 I sanded the stem with micromesh sanding pads – wet sanding with 1500-2400 grit pads and wiping down the stem with Obsidian Oil. I dry sanded with 3200-4000 grit pads and then gave it another coat of oil. I finished sanding with 6000-12000 grit pads and then gave it a final coat to wipe off the sanding dust.Radice24

Radice25

Radice25a I buffed the pipe and stem with Blue Diamond on the wheel and then gave it multiple coats of carnauba wax. I buffed it with a clean flannel buff. I hand buffed it with a microfibre cloth and then set it aside for photographs. I hand polished the band with a jeweler’s cloth to give it a shine to match the stem.Radice26

Radice27

Radice28

Radice29

Radice30

Radice31

Radice32

Celebrating the Re-Opening of My Store with a Restoration


Guest Blog by Robert M. Boughton
Member, International Society of Codgers
Member, North American Society of Pipe Collectors
http://www.naspc.org
http://www.roadrunnerpipesnm.biz
http://about.me/boughtonrobert
Photos © the Author

“The people like to be humbugged.”
“Unless a man enters upon the vocation intended for him by nature, and best suited to his peculiar genius, he cannot succeed.”
“Nobody ever lost a dollar by underestimating the taste of the American public.”
“The noblest art is that of making others happy”

― Phineas Taylor Barnum (1810-1891), U.S. showman, businessman, politician, celebrated hoaxer and founder of the Barnum & Bailey Circus

INTRODUCTION
P.T. Barnum was a man of contradictions, as the quotes above suggest, making him an obvious two-time Republican candidate for state legislator in the Connecticut General Assembly, both of which races (at different periods of his eventful life) were successful. Business, however, was always his first love, and by the age of 12, in Bethel, Connecticut, he earned enough money selling snacks and homemade cherry rum to buy his own livestock. By 21, he owned a general store and a newspaper called “The Herald of Freedom,” and ran a small lottery.

The Greatest Showman on Earth, who insisted his customers were willing participants in his obvious pranks and hoaxes, never said the line most attributed to him: “There’s a sucker born every minute.” Hence the first quote above. Barnum’s fame began with the 1835 purchase of a blind slave named Joice Heth, whom he advertised, in one of his greatest hoaxes, as being 161 years old and the one-time nurse of George Washington. During her tour of New York City and New England, throngs of gawkers paid to hear the old woman spin tale of “dear little George.” To heighten the already wild frenzy around Heth, Barnum later spread the rumor that she was, in fact, an automaton manipulated by ventriloquists. At Heth’s autopsy in 1837 – to which Barnum sold tickets – medical examiners determined that she was probably 80 at the oldest.

Despite his purchase of a slave, to whom he no doubt gave far better treatment than her former owners, as a legislator in later years Barnum was a strong advocate of equal rights for African-Americans. And likewise, giving up all liquor, including the cherry rum that started his long run in business, Barnum became a devout supporter of the Temperance Movement and remained committed to it until he died.

Other than Heth, three of Barnum’s best-known “exhibits” were a child dwarf he called General Tom Thumb, who was even granted a royal audience by England’s Queen Victoria; the Fejee Mermaid [see “The X Files,” S2, E20, “Humbug”], or the top half of a dead monkey sewn to the lower part of a fish, and his giant, six-ton African elephant named Jumbo, which was bought under wide protest from the London Zoölogical Society and led to the adjective jumbo, or large.

There are far too many more titillating examples of Barnum’s contradictory exploits and far too little space to go into any of them here, but you get the point. At least I hope you do. In a market-driven economy, advertising, publicity and flair are everything, and they form the unabashed purpose of this blog: to celebrate the grand re-opening of my online pipe restoration and sales business with the latest addition to its stock.

The selection has diminished in size during the past few months that the webstore was down, due both to continuing sales the old-fashioned way – hand-to-hand – and a plethora of personal issues, including moving again and several pressing legal matters in which I am prevailing through appeals despite being up against real attorneys, that have until recently eaten away at the time I prefer to devote to pipe work.

As the Steve Miller Band might have sung had they been writing of my better spent daily life:

This here’s a story about Bobby Mike and his stew,
One young lover with nothin’ better to do
Than sit around the house, smoke his pipes, and watch the tube
And here is what happened when he decided to cut loose….

With no further ado, I am pleased to call out in a booming voice, though it be in written words, “La-dies and gen-tle-men, who are children of all ages, welcome to the greatest, most amazing, daring, thrilling and spectacular show on Earth! The circus known round the world as pipe restoration! And now…in the Center Ring…turn your eyes toward the wonderful and awe-inspiring silver-banded bulldog ! All the way from England, measuring an astonishing six inches in length and a 6/8” x 5-1/4” chamber diameter, and called the Atwood Hall of Fame Natural #5, of the world-renowned Comoy’s family!”

RESTORATION
Rob1

Rob2

Rob3

Rob4

Rob6

Rob7

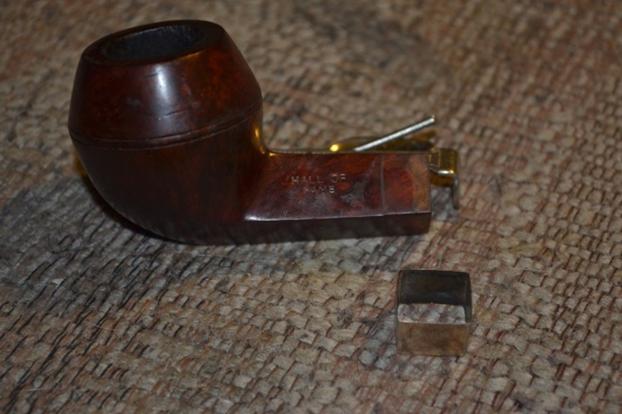
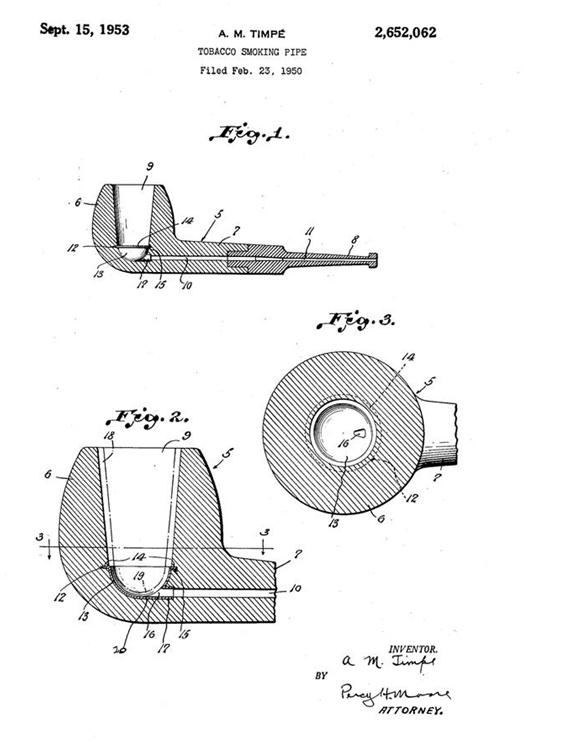
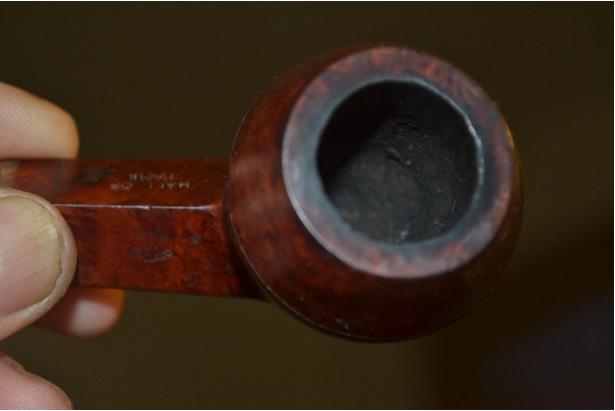
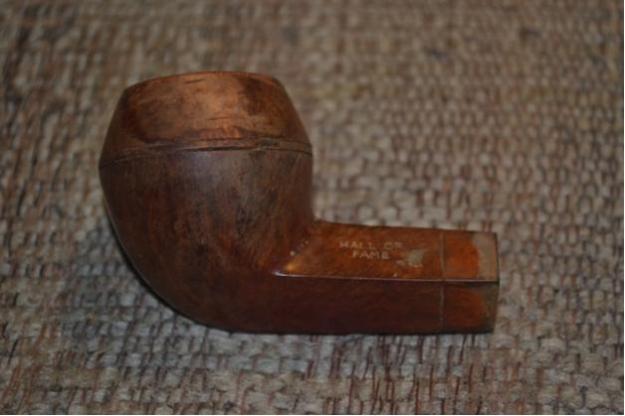
Rob8 Sixty-three years after it was made and, my intuition tells me, loved by a single owner, there are numerous signs of wear and tear. Still, scratches on almost every inch of the stummel and bit, not to mention a few outright dings, are the pith of the blemishes, not counting the almost inevitable loose sterling silver band. These flaws are negligible considering the venerable pipe’s age and obvious regularity of use. Even the band – which, given the thinness of the inherently fragile material itself, invites heavy tarnish, bending and total obliteration of any hallmarks or stampings – was almost pristine, and is once more, still showing showing the single word of its substance, STERLING, and by more careful examination three hallmarks – something I can’t make out following by a T and a 5. Here is the first page of the original (and apparently only) Atwood U.S. Patent, showing the same design of the Hall of Fame 1953 Brandy.

AtwoodAtwood pipes came with “a permanent aluminum cup at the base of the chamber, with a bore hole.” [http://www.pipephil.eu/logos/en/logo-a9.html] The cup and bore hole, after cleaning, indeed are intact.

Although, by virtue of Atwood being a Comoy’s second, I was not over-concerned with the possibility of finding fills in the wood if I were forced to strip the original polish and stain, but I nevertheless took every measure I could conceive to avoid that step. At worst, I was convinced, the reason for the oppressive stain was to hide unfortunate grain. As will be shown, this proved to be the case.

I began by removing almost all of the rim burn with concerted rubbing using 2400 and 3200 micromesh freshly cleaned by a long soak in purified water.Rob9 An unsuccessful but still incomplete attempt to fix the remaining rim burn and scratching led me to an acceptance at that point of the fact that, though I might otherwise rid the rim of the remaining char, the remaining scratches, not just on the rim but everywhere else on the stummel, were sufficient to necessitate a low enough grit of sandpaper to take it down to bare wood. Having learned that sandpapering the entire wooden surface of a pipe can and often does lead to more problems, I chose the more efficient and reparable measure of an Everclear bath.Rob10

Rob11

Rob12

Rob13

Rob14 The Everclear was a complete success in revealing that there were, indeed, no fills, but even finer scratches than even my minute examination of the briar beforehand, using a jeweler’s magnifier headset, had caused me to suspect could exist. And so I tried the superfine 0000 steel wool first, which at least took off the rest of the old artificial color and some of the less pernicious scratches. But 200-grit paper was unavoidable, in careful spot sanding, to banish the rest of the marks and pocks, followed by another soft buffing with the steel wool.Rob15

Rob16

Rob17 The next steps seemed to be an easy crank or two of a 21mm reamer in the chamber followed by 320-grit and 500-grit paper, and a retort.Rob18

Rob19

Rob20 The retort required two test tubes full of Everclear, but only because of the way the first tube-full always seems to remain in the pipe’s inner bowels after a few boils. At any rate, immediately following the retort, I ran a bristly cleaner through the bit’s air hole, which came out remarkably light, and used both ends of a fluffy pipe cleaner on the inner shank to soak up the wet residue of various accretions still in the shank. I removed the cotton ball from the chamber and swabbed it thoroughly with small white cotton gun cleaning cloths. Then I finished the chamber with a final wipe using 500 paper and more thin cotton swabs soaked in Everclear. The chamber was silky smooth.

“This pipe is clean!” I said to myself, out loud in fact, thinking of the tiny lady of “Poltergeist” fame, who sought out and did her best to dispel dead but still malicious souls.Rob21 At last, I turned my attention to the bit. It was in pretty good shape, but notice the bad scratch in the second photo below.Rob22 Every micromesh pad I have, still damp after the soaking from which I removed them some time earlier, was employed to make the bit shine again.Rob23

Rob24 The distinctive A for Atwood was perfectly ingrained and intact. I had made the rounded top of the bulldog bowl lighter than the rest of the stummel on purpose, and as the time for re-staining had come, I chose Fiebing’s Brown leather stain for the top and Lincoln Medium Brown (darker) for the rest.Rob25 Applying the Fiebing’s with care to the top, I flamed it with my Bic, then did the same to the rest of the stummel with the Lincoln.Rob26 After a short sit to cool off (both the wood and me), I gently buffed the whole surface with 3000 and 6000 micromesh.Rob27

Rob28

Rob29

Rob30

Rob31

Rob32 The final step before buffing was re-attaching the band to the shank, mindful of placing the STERLING/SILVER stamp in small letters on the upper left side, where it had been.Rob33 Oh, glorious moment! The time was nigh to retire to my office, wherein rests my electric buffers. Observing the clock on the wall, which told me it was already 2 a.m., I considered the neighbors opposite that side of the apartment and, understanding the way my building is laid out, realized they would hear nothing from their bedroom. I used the customary red and White Tripoli on the bit, with the clean buffer between each, and white Tripoli, White Diamond and carnauba on the stummel, again separating each with the clean buffer. For the band, I used a very fast turn on the clean buffer.Rob34

Rob35

Rob36

Rob37

Rob38

Rob39
SOURCES
http://www.history.com/news/10-things-you-may-not-know-about-p-t-barnum
http://www.azlyrics.com/lyrics/stevemillerband/takethemoneyandrun.html
https://en.wikipedia.org/wiki/Ringmaster_(circus)

UPCOMING RESTORES
Rob40

Rob41

Rob42Rob43Rob44

Reborn S.M. Frank Bakelite Bent Billiard


Blog by Pam Otto

This week’s refurbing adventure comes courtesy of an eBay estate lot, for which the seller accepted my “Best Offer” bid. The transaction occurred on a Sunday and by Wednesday the pipes had arrived. This is the photo that accompanied the listing:Pam1 All of the pipes appeared quite old, with orifice bits, and two of them really jumped out at me: a KB&B Blue Line that would need to be restemmed, but otherwise appeared to be in decent shape, and a C.P.F. Chesterfield that looked to be, and indeed is, positively enormous.

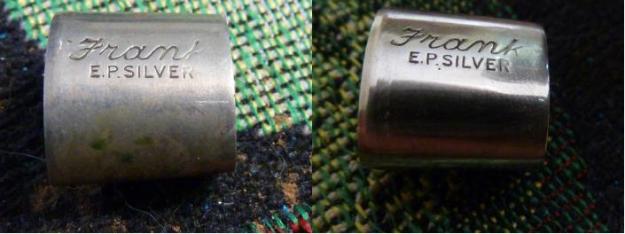
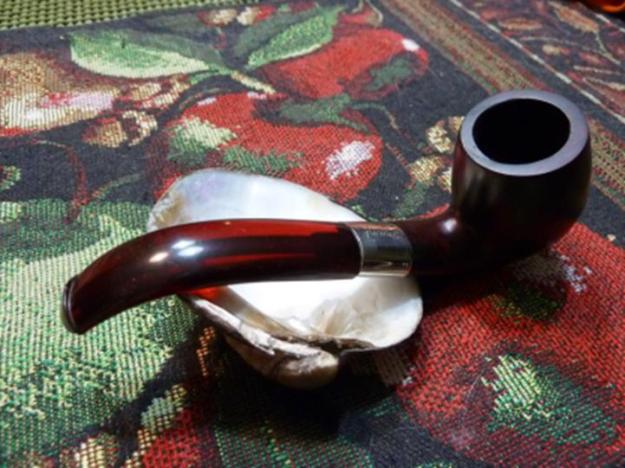
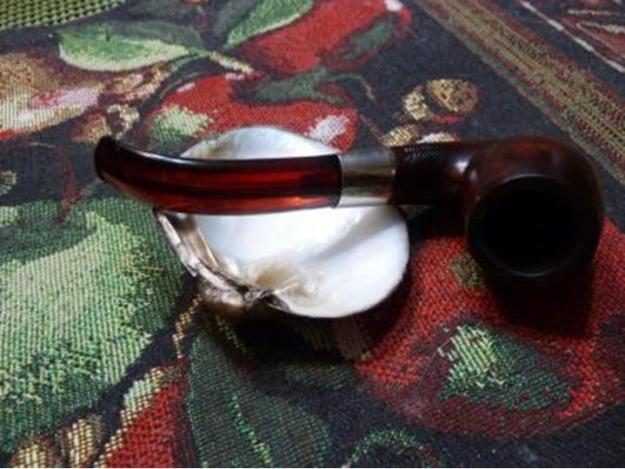
The other two pipes were older S.M. Franks. One is stamped Genuine Amber on the shank but as the stem on it is quite dark I’m going to guess it’s a replacement. The second one is stamped Frank Bakelite on the shank. It has a lovely bent red stem, way overturned, and a metal band stamped EP Silver. A few dings and a couple scratches on the bowl, and no tooth marks on the stem. I’m thinking this one, for whatever reason, was not a favorite.

Even though I’m anxious to get the Blue Line and Chesterfield cleaned up and smokable, the Frank Bakelite, with its simple needs, beckoned. It moved to the front of the queue.

I don’t know old this particular pipe is, but if it dates to the same era as the KB&B Blue Line, it could well be past the century mark. Thoughts, anyone?

At any rate, the stem of this old boy seemed like a logical place to start. I took a couple of pictures of it in its overturned state, then unscrewed it completely to see if an internal problem was to blame. Thankfully, the bone tenon was clean and solid.Pam2

Pam3

Pam4Knowing I’d read how to tackle overturned stems, I looked to Steve’s blog and, sure enough, there it was in clear, easy-to-follow directions. Following the steps he listed, I filled a cup halfway with water, leaned the stem against the side of the cup and put it in the microwave. I used the highest setting and, because the cup was only half full, set the time for 1 minute—plenty of time to get the water boiling.
In those 60 seconds, two things happened that I hadn’t really counted on. One, it worked (not that I had any doubts in the recommendation; it’s just that I rarely get things right the first time). And two, whether because of the vigorous bubbling of the boiling water, or because my microwave is a carousel, or even because the Bakelite was so smooth, the stem fell all the way into the water.
The material itself was fine; in fact, some of the debris from the airway got cleaned out by the bubbling water. However, the heat caused the bent stem to straighten.

Reheating the stem to restore the curve was no big deal; all I had to do next was re-bend it over a rounded object. But as I hadn’t foreseen this step, I didn’t have many options from which to choose. Paper towel tube? Nope, too flimsy. Peanut butter jar? Too big.
Then I saw it, sitting amid the excelsior of a near-empty holiday gift basket: a small summer sausage. It had a slightly narrower diameter than I’d hoped for, but it was a solid cylinder and certainly convenient. I heated the stem in boiling water again, laid it across the curve of the sausage, and applied slow, steady pressure.Pam5
Pam6

Pam7The results weren’t perfect, but they could be worse. Or wurst, har har. The stem feels good in my mouth, and the curvature looks okay. However, it’s not quite as deep as it was originally, and that bothers me just a wee bit. If I can find the rolling pin I know I used to have, I may try re-curving the stem at some point in the future.

To make the tenon fix on the stem permanent I dunked the tenon-stem assembly once again in boiling water—this time holding onto the stem so it couldn’t submerge completely. I twisted it tightly onto the pipe, counting on the slightly swelled tenon to grab hold inside the shank and the slightly softened glue in the stem to let go. I untwisted and, sure enough, the stem came off while the tenon stayed in the shank.

I dried the tenon with a soft pipe cleaner and applied super glue sparingly to the narrow threads, then twisted it back into the stem. Satisfied with the alignment, I put the pipe down to let the glue cure.
The following evening I unscrewed the stem from the bowl and the tenon withdrew from the shank just fine. I screwed it back in to make sure the repair held, then removed it once again and set it aside.
I took the bowl over to the sink and scrubbed the outside with a toothbrush dipped in Murphy’s Oil Soap. I wiped it down, then took it back to the table and rubbed it good with cotton balls soaked in 91% isopropyl alcohol.

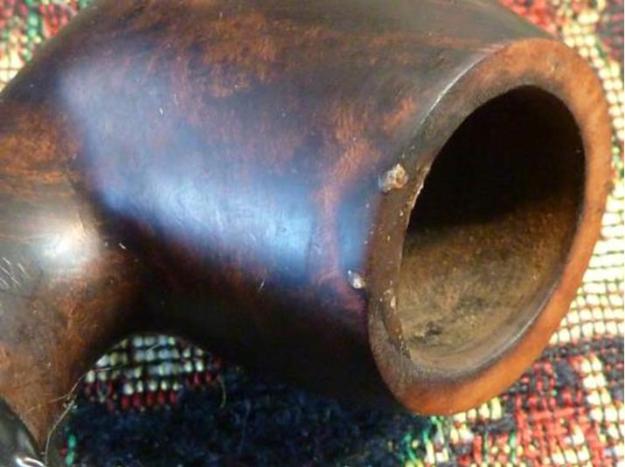
The rim had a pretty good chip—maybe 1mm or so deep–missing at about the 8 o’clock position as you look at the bowl from the shank. While an extreme topping of the bowl would smooth things out, I felt it could also compromise the bowl’s shape. So after sizing it up from all angles, and finding that there really wouldn’t be much chance of tobacco being in contact with that area, I decided to try filling it instead.Pam8

Pam9Before proceeding with the fill, I thought it might be good to first address the inside of the bowl, which had minimal cake but a troubling bit of what looked like fuzzy mold or fungus. I didn’t want any spores getting into the fill, so I wiped everything down with 190 proof alcohol, then wrapped a piece of 220 grit sandpaper around my finger and sanded the interior thoroughly. More alcohol, then the addition of a flame. Take that, moldy fungus! After another heavy swabbing with Everclear I declared the inside done.

Back to the rim patch… I cleaned the area to be filled with alcohol, then scrubbed it with a green Scotch Brite pad to remove any dirt and debris. I was glad I used a wide pad like that because the briar on either side of the chip was loose and came off when I scrubbed.

The fill would need to be a little wider but not any deeper—not a big deal. I packed some briar dust along the rim, then reached for the super glue to drip onto the patch.

I’ve done this many times but am still perfecting the technique. This time I learned an important lesson: Don’t attempt a maneuver like super glue-dripping, which requires a certain degree of precision, with a parrot perched on your shoulder.

(Time out for a side note: I have a large macaw named Tom who is a frequent observer of my pipe renovations. I don’t let him near smoke or fumes but other than that he’s close by pretty much all the time. He normally sits on his stand and looks down on the proceedings, but this particular night he was on my shoulder.)

Anyway, Tom shifted just as I was letting a little drip drop onto the pipe. I totally missed the briar dust and watched as the dribble made its way down the inside of the bowl. Shazbot.

I tried again, Tom shifted again, and I dripped on the outside of the bowl. Arrrr!

Fool me once, fool me twice… I wiped up the outside drip as best I could and put Tom over on his stand. I sat down and, with steadier hands, I dripped the glue a third time—on target—and after sprinkling on a little more briar dust, set the bowl aside to cure overnight.Pam10 The next morning I took a flat needle file to the overfilled fill to jump start the removal of material. After that a thorough sanding with 220 grit sandpaper, first with the paper in my hand and then on my topping board, got the fill flush with the side of the bowl as well as the adjoining rim surfaces.

Follow-up sandings with 400 and 600 grit smoothed things out even more, but also revealed a couple of small holes in the fill. I probably had left some small air pockets in the briar dust; I couldn’t pack it down as tightly as I normally would due to its location on the rim. I refilled the fill using minute amounts of briar dust and applying the superglue with a toothpick.Pam11 While these tiny patches dried, I took on the task of shining up the metal band. I wiped it down with white vinegar, then ran through the sequence of 1500-12000 micromesh pads to make it good and shiny. Using the same pads, I polished the stem as well.Pam12 To give the patches a little more time to cure, I set about cleaning out the shank. Two—count ‘em, TWO—pipe cleaners, one bristle and one regular, dipped in alcohol was all it took.

I don’t know why the former owner didn’t smoke this pipe much, but as I set about sanding the patches I started coming up with scenarios. One, maybe it’s a crappy smoker. Only time will tell on that one. But other situations came to mind too. Maybe the stem was a problem from the get-go. Maybe it overturned after only a few smokes. Maybe the bend didn’t feel right. (Not that that will be problem any more. Ha.) Maybe it gurgled.

Whatever the reason for its nearly new condition, the pipe was rapidly coming back together again. Even with a 20 minute detour to sand off my super glue mistake inside of the bowl, the end was in sight.

I sanded the outside of the bowl and shank with 400 and 600 grit paper and followed up with the 1500 micromesh pad to take care of some slight scratches and dings. Next I got out the aniline stains to even up the color of the briar. Although much of the bowl was still quite dark, it was lighter on either side of the rim patch. I wiped on some oxblood stain, flamed it, wiped on dark brown and flamed again. A little bit of dabbing here and there with the dark brown and the staining was complete.

I slipped the metal band on the shank, screwed on the stem, smiled when it stopped right where it should, and headed over to the buffer.

(New development here at Casa Otto: Aided by a couple of gift cards from my brother, I invested in a Foredom M.BL—a small bench lathe with a variable speed motor that tops out at 7,000 rpm. I haven’t gone over what I estimate is about 1,200 rpm, based on the intervals marked on the speed control, and the results have been outstanding. Not only is it a fabulous machine, but it’s also small and fits nicely on the kitchen counter. It’s a huge improvement over my jerry-rigged drill press buffing station in the garage, and on a day like today when the outside temp is 2°F, a heck of a lot warmer too. Next step: Setting up the buffer in a spare bedroom. Upside to this will be getting counter space back. Downside is that the spare room is quite a distance from where the beer and snacks that fuel all good pipe projects are stored.)

I first buffed the assembled pipe with White Diamond, wiped it down with a flannel rag, then gave it three coats of carnauba, buffing with a clean wheel after each application.

This old pipe didn’t see much action during its go-around. But today, chip-free, moldy fungus-free and with a stem that sits where it should, it stands ready for a new century of service.Pam15Pam14Pam13

A Peterson’s Product 268 Zulu Restemmed and Restored


Blog by Steve Laug

This pipe came to me with the Meerschaum Sultan that I restemmed. It is stamped Shamrock on the top of the shank and “A Peterson’s Product” Made in the Republic of Ireland on the underside. On the right side near the bowl shank union it was stamped 268. I looked the number up and it is the shape number for a Zulu shape. The gentleman in Chile wrote: “I only have the bowl (I’m not acquainted with the minor brand) with an inappropriate mouthpiece which makes it impossible to smoke. I don’t remember how it got into my collection and certainly it’s not a pipe I purchased myself. It has a heavy cake and is a second-hand. If a proper mouthpiece could be made and a proper tune-up, it could make a fine pipe.” He included the following pictures.Shamrock1 When it arrived I took it out of the box to deal with when I had finished repairing the Sultan Meerschaum pipe. It was a nice piece of briar with mixed grain and a worn finish. The stamping on the top of the shank was clear and sharp. The stamping on the underside showed clearly on the left side as you read it but as you got to the right side it was fainter. The rim was dirty and had a flaky coat of lava overflowing from the inside of the bowl and the thick cake there. The inner and outer rim looked good with no dents or chips. The bowl sides, front and back had some light dents in the finish. The stem was a billiard stem that had been stuck in the shank. It fit snugly but absolutely did not match the oval shank.Shamrock2

Shamrock3

Shamrock4

Shamrock5 I took a close up photo of the rim and the bowl to show the thickness of the cake. Toward the bottom of the bowl it got thicker and reduced the size of the bowl at the airway.Shamrock6 I looked at several Peterson shape # 268 Zulus to get an idea of what the stem looked like originally on this pipe. I went through my can of stems and found several that would work on this pipe. The one that was the closest to matching the diameter of the shank of the pipe was a brand new stem blank that still had the castings on the sides and end of the button. The slot was constricted but the length and shape would be easy to match to the shank.Shamrock7 I drilled open the airway to accept the rod of the PIMO tenon tool. And then set up the tenon tool on a cordless drill. The current tenon was too long for the tool to cut all the way to the end of the tenon so I used the Dremel and sanding drum to shorten the tenon. I put it on the tool and adjusted the set screws and took off the first round of material. I did three adjustments to turn the tenon down to a fit in the mortise. I fine tuned the fit with 220 grit sandpaper.Shamrock8

Shamrock9

Shamrock10 The fit in the mortise was snug. The diameter of the new stem was large on the sides and the bottom. The top would take the least adjustment to get the fit correct.Shamrock11

Shamrock12

Shamrock13 I took off the majority of the excess vulcanite with the Dremel and sanding drum. I put it back in the shank and the fit was better. The rest of the work would have to be done by hand sanding.Shamrock14 I hand sanded the stem until it was smooth and the transition between the shank and stem needed some fine tuning then set the stem aside and worked on the bowl. Contrary to my normal pattern I wiped off the outside of the bowl and shank with acetone on cotton pads to remove the finish and the grime that had been ground into the briar. Once it was gone there was some nice grain showing through.Shamrock15

Shamrock16

Shamrock17

Shamrock18 I put the stem in place and took a few photos so that I could see where I stood at this point in the process. The pipe was looking good and with a few tweaks would look even better.Shamrock19

Shamrock20

Shamrock21

Shamrock22 The top of the bowl was caked and the lava was very hard. I tried to scrape it carefully with a pen knife and gave up. I resorted to lightly topping the bowl on the topping board to remove the thick lava build up.Shamrock23

Shamrock24 I reamed the bowl with a PipNet reamer starting with the first cutting head. I finished with the second cutting head which was the same diameter as the inside of the bowl. I cut the cake back to bare briar so I could assess the inner bowl walls. They looked very good with little burn or damage. The cake had protected them.Shamrock25

Shamrock26 I fine tuned the sanding on the stem and shank fit with 220 grit sandpaper and shaped the stem to match the oval of the shank. The flow of the bowl and stem were looking really good at this point in the process.Shamrock27

Shamrock28

Shamrock29

Shamrock30 I cleaned out the inside of the mortise and the airway in the stem and shank with alcohol, cotton swabs and pipe cleaners.Shamrock31 I used the dark brown stain pen to touch up the rim and the end of the shank to match the stain colour on the rest of the pipe. I rubbed it down with a light coat of olive oil to give some life to the dry wood. I gave the bowl a quick buff with Blue Diamond and then gave it one coat of carnauba wax and hand buffed it with a microfibre cloth. The “new” look of the bowl is shown in the photos below.Shamrock32

Shamrock33

Shamrock34

Shamrock35 With the bowl stained and oiled I used a heat gun to bend the stem and get the proper angles that I had found online on the 268 shaped pipes. I heated the stem until it was pliable and then bent it over a round can to get a smooth angle. I took photos of the pipe with a bent stem to give a feel for the finished look.Shamrock36

Shamrock37

Shamrock38 I fine tuned the fit of the stem to the shank by beveling the inner edge of the mortise in the shank and then cleaning the area around the tenon stem joint. I wet sanded the stem with 1500-2400 grit micromesh and then rubbed the stem down with Obsidian Oil. I dry sanded it with 3200-4000 grit micromesh pads and gave it another coat of oil. I finished sanding with 6000-12000 grit micromesh pads and gave it a final coat of Obsidian Oil. I laid the stem aside to dry.Shamrock39

Shamrock40

Shamrock41 I put the stem on the pipe and buffed the entirety with Blue Diamond and then gave it multiple coats of carnauba wax. I buffed it with a clean buffing pad and then by hand with a microfibre cloth. The finished pipe is shown in the photos below. It is ready to go back to Chile. Sometime early this week I will pack the two repaired pipes up and make the trip to FEDEX to send them back. I look forward to hearing what the two of them smoke like for the Chilean pipeman. I like the new looks of both of these pipes and I think he will as well. But I have to tell you I am a sucker for the Zulu shaped Petersons. This one is a beauty!Shamrock42

Shamrock43

Shamrock44

Shamrock45

Shamrock46

Shamrock47

Shamrock48

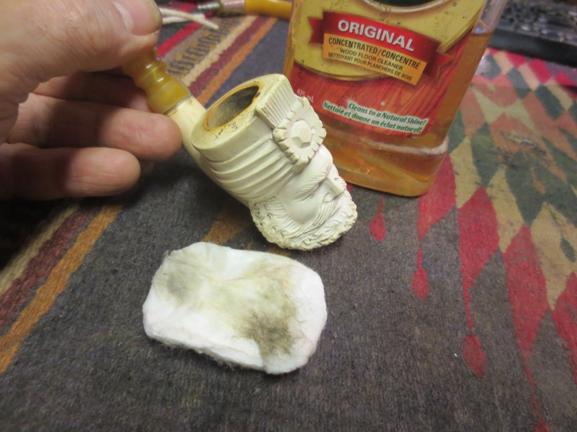
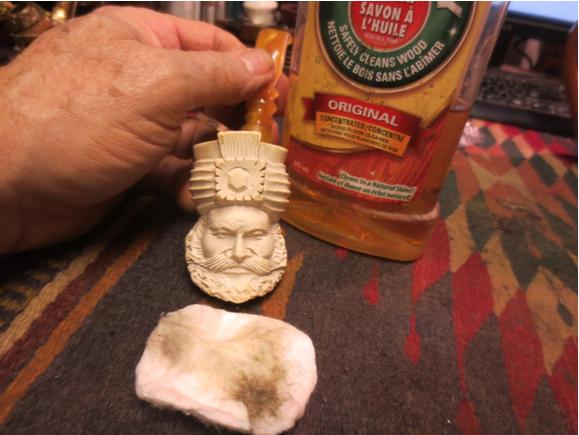
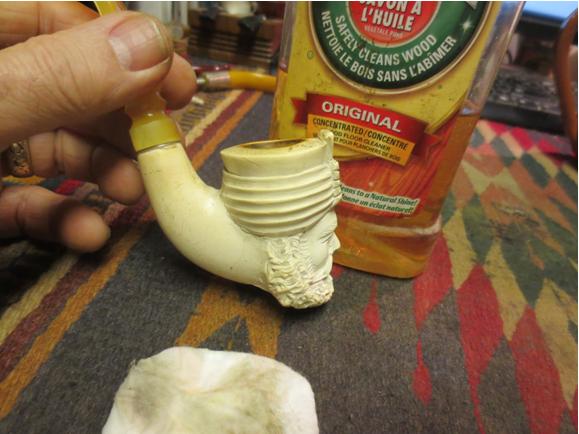
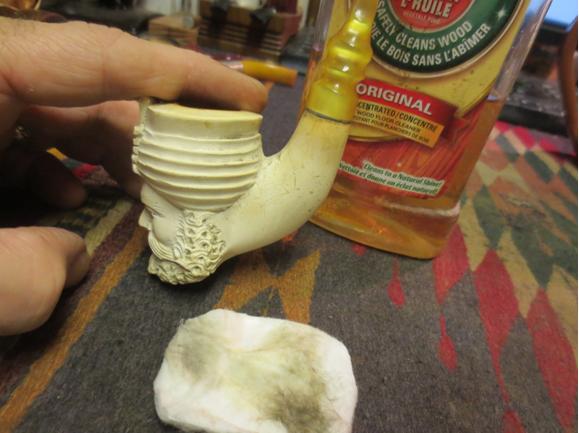
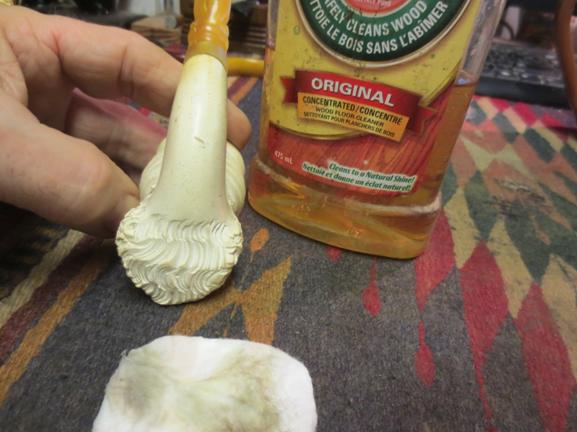
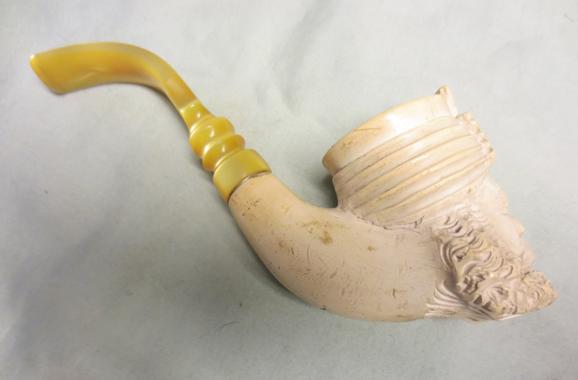
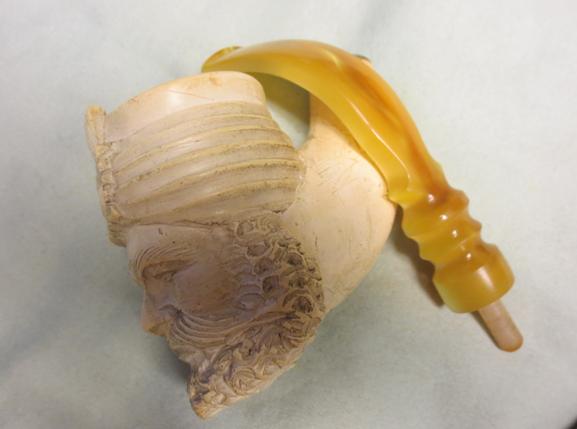
Fixing a Botched Repair on a Bearded Sultan Meerschaum


Blog by Steve Laug

I received and email from a pipe smoker in Chile regarding a meerschaum and a Shamrock pipe that he had that needed repairs and he was wondering if I would be interested in working on them. The Shamrock was straightforward in that all it needed was a cleanup and a new stem. The meerschaum though had some real issues. He wrote me explaining the details of the meerschaum’s problems as follows:

Actually – I now realize – the mouthpiece IS broken at the band. Though the slice seems clean, I realize it is not perfect. The band looks nice though I don’t know if it came that way originally or not. It does cover the slice of the stem. The whole mouthpiece is amber; nothing holds it together except the band. Not glued nor cemented.

The misalignment isn’t only due to the slice but even if I make an effort at aligning the pieces once screwed in, it just won’t be straight.

The pipe needs a new mouthpiece, apart from cleaning. I don’t know if a new beeswax dip is a good idea…It seems dry as marble…no glow… There is a small chip on the rim of the bowl, but the rest seems to be OK.

It’s not your everyday meerschaum but it doesn’t seem unsmokable. I did smoke it once years ago and as I said, it leaks, leaves a mess. I realize why now, but I don’t think it’s only due to the broken stem but also at the screw point.

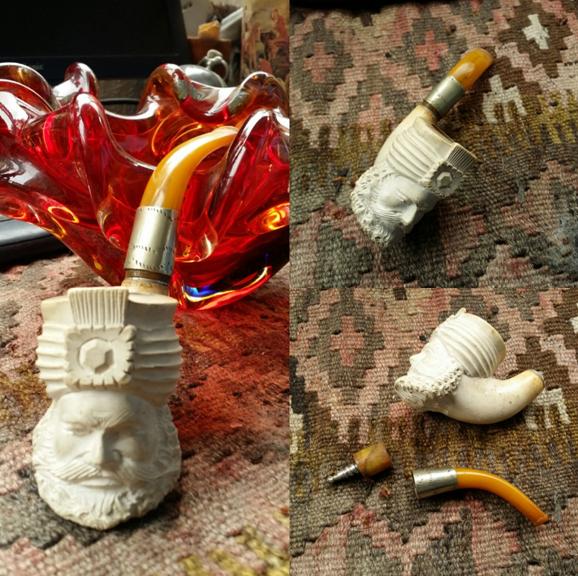
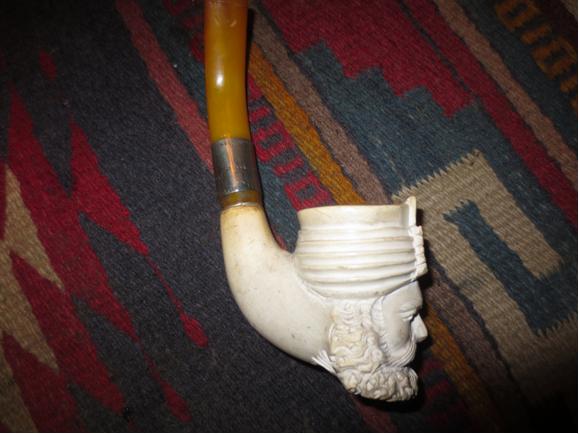
Can you help me? You tell me. He included the next photos.Sultan1 I wrote him back and said I believed I could help.

He sent the package to me by FEDEX and I picked it up this morning. When I opened the package and looked over the meerschaum pipe that was sent repair. I made a list of the issues that I was looking at with this pipe. It was actually far worse and far better than I thought when we corresponded.
1. The stem indeed was broken about one inch up from the shank. It almost looked like it was sliced rather than broken.

2. The broken piece with the metal stinger apparatus obviously had broken into further pieces when the tenon insert was put into it. There were several smaller chips that had come off the broken piece and had been glued on. The smaller cracks still showed.

3. The stem is not amber at all, but appears to be Bakelite or some kind of acrylic material. That explains the clean break on the piece and the rest of the stem.

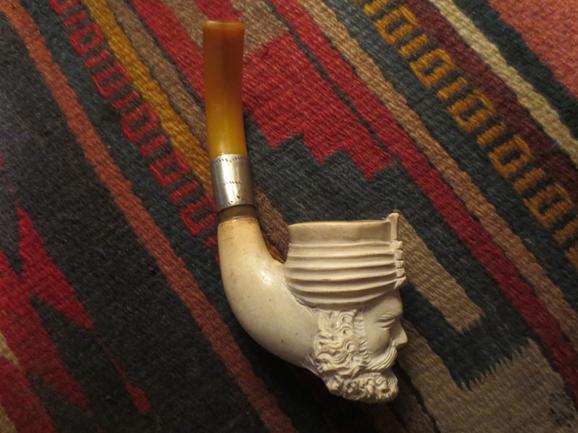
4. The stem that I was looking at was not the original stem. It is actually an oval stem while the shank of the meer is round. Someone fiddled with the stem to make a poor fit.

5. The “silver band” serves two purposes on this stem – first it is cosmetic to cover the broken stem and secondly it hides the fact that the stem is not round.

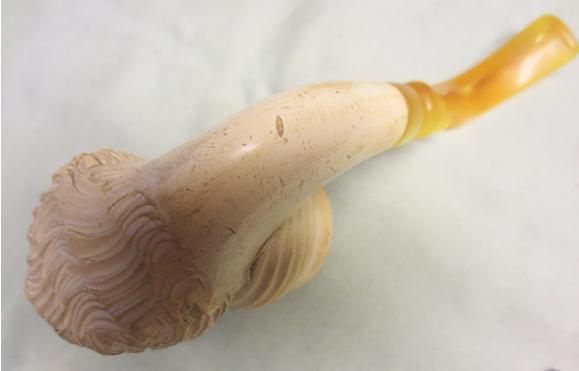
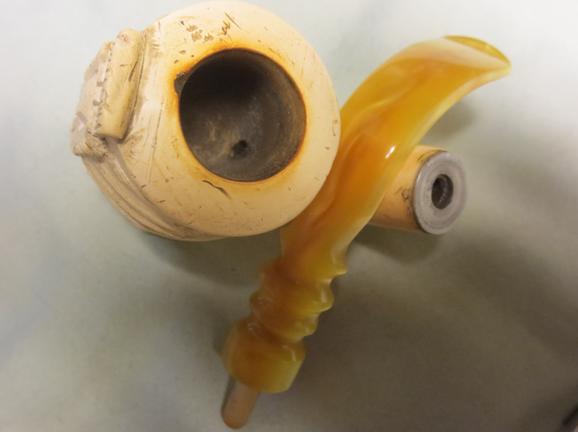
6. The shank had been cut off – probably had cracks in it as there are still several that have been repaired showing. Looking at the end of the shank with a lens shows rough meerschaum.

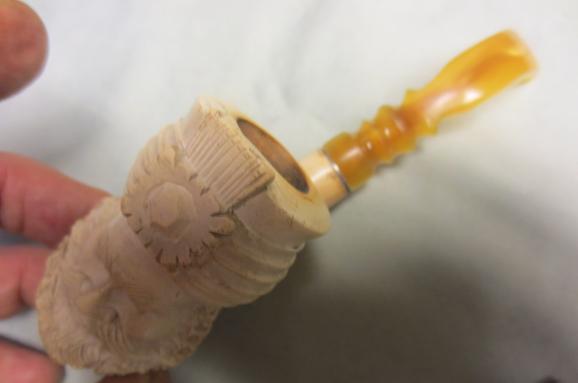
7. Sometime during the lifetime of the pipe someone had threaded a metal mortise into the shank of the pipe. It is like the ones that can be found in Kaywoodie pipes or Willard pipes – those that have a threaded tenon and a metal shank insert. In turning it into the shank the meerschaum had split on one side and slivered on the other. This had been repaired when the insert was glued in place.

8. The threaded tenon apparatus matches the insert in the mortise but is misaligned. It also has been epoxied in place so it is not movable. It is obviously not the correct tenon for this kind of pipe. I am pretty certain that both the mortise insert and tenon are incorrect and were later additions on this pipe. The original would have had either a threaded tenon or I think, more likely in this pipe due to age, a nylon insert and a push tenon. Both were replaced when the original stem was lost.

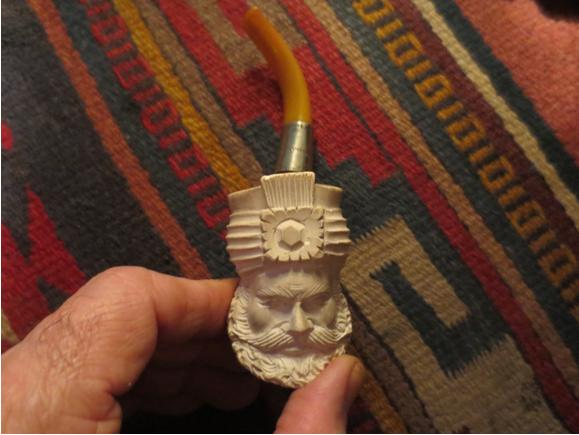
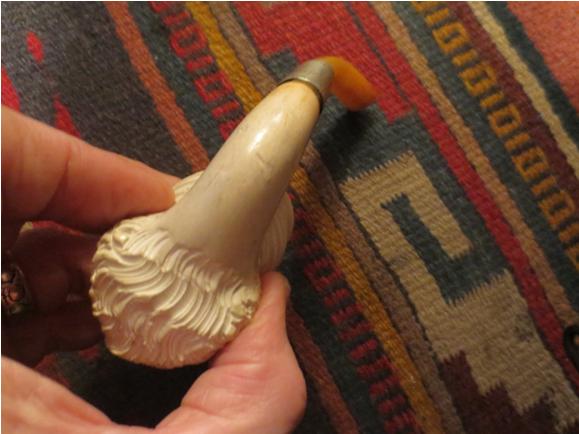
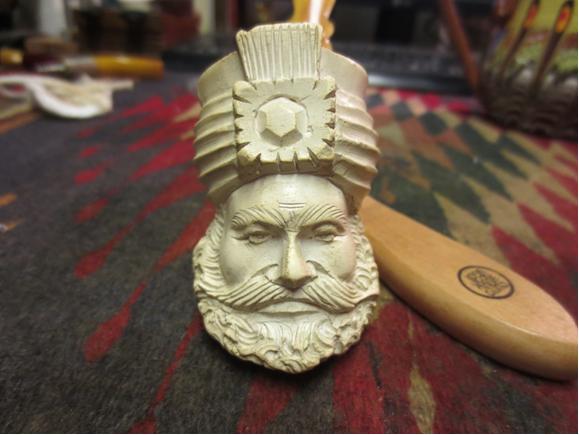
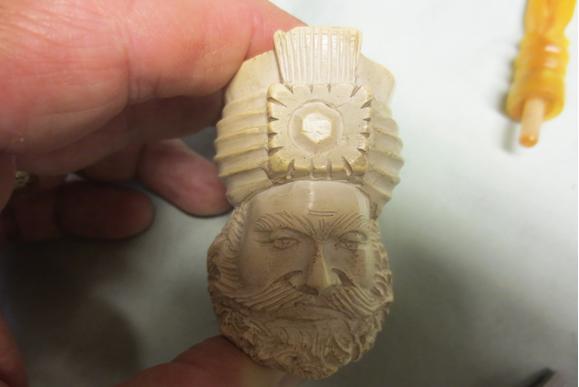
9. The carving on the face was actually quite nice but the sides and smooth portions were not nearly as well done. The back edge of the turban and beard still had carving marks that are usually removed by the better carvers.

10. The bowl had a chip out of the front edge of the rim as noted and had scratches and rim darkening.

11. The meerschaum itself was actually very dirty and dry. There was a fine metallic dust on the grooves of the turban and the beard. It was silver coloured and gave the meerschaum a grey look.

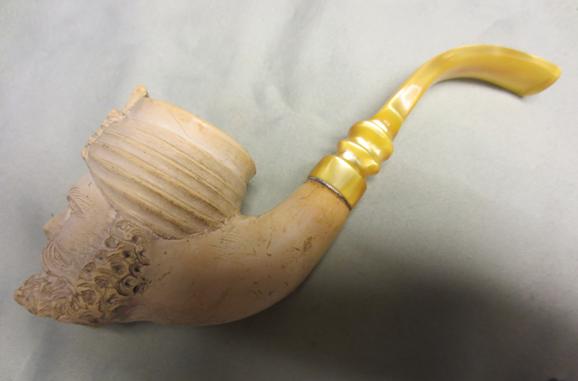
With that long list of issues with the pipe I wrote to the shipper with my suggestion. I concurred with his assessment that it needed to be restemmed. It would be an interesting challenge as I could not remove the metal shank insert without damage to the meerschaum so I would have to figure out some kind of compromise that would work with that mortise. I suggested a stem that I had that came with a meerschaum pipe similar to this one. It is a yellow unique stem with a push tenon. I tried it with the metal mortise insert to see if it would work and it fits really well. The new stem was about an inch longer than the one that arrived with the pipe and looked really good on the pipe.

I took some photos of the pipe with the stem attached so that you could see the state of the fit of the stem when it arrived. You can see that the band is also quite poorly done – all the edges are not even or smooth.Sultan2

Sultan3

Sultan4

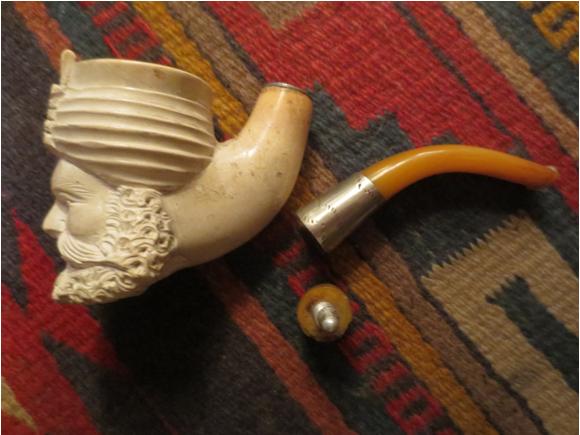
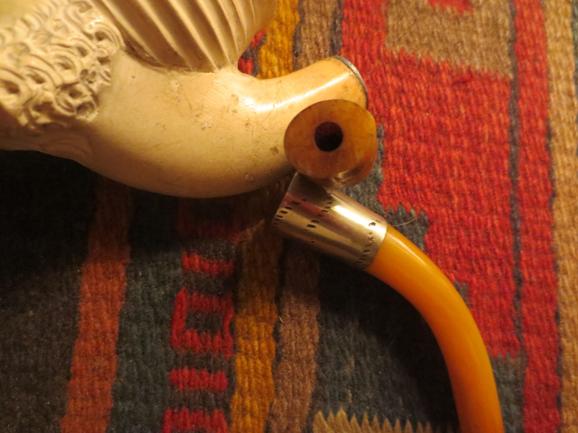
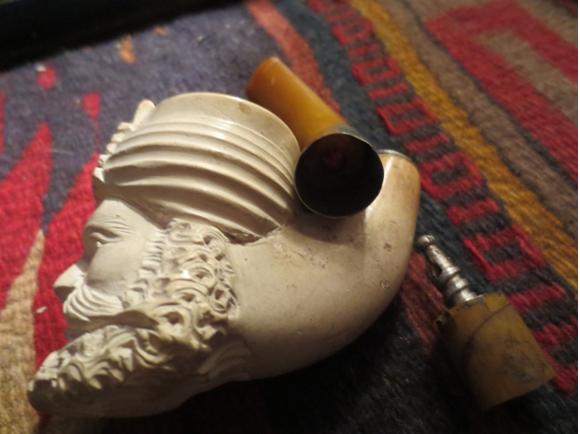
Sultan5 I also removed the stem and took the pieces apart. The stem was indeed broken under the band. It definitely was not amber. You can see the sliced piece and the remainder of the stem as well as the metal mortise edges in the shank in the photo below.Sultan6 I took a photo of the end of the broken piece to show that it was oval while the shank was round. The second photo below shows the cracks and chips that had been repaired on the piece underneath the metal band. Obviously this is not the original stem. The third photo shows the end of the shank – it is round – and the metal threaded mortise insert.Sultan7

Sultan8

Sultan9 I took the next two photos to show the damage to the shank and the poorly done job of adding the threaded mortise insert. The small crack is about a half inch long and can be seen running from the metal insert edge about mid-shank edge on the left side. There are also chips of meerschaum that had been reglued.Sultan10

Sultan11 I went through my can of stems and found a new stem whose length and shape was right for this pipe. The diameter of the stem at the shank was slightly larger than the shank on the right side and top. It would also need to be bent slightly more but I liked the look of the pipe with the new stem.Sultan12

Sultan13 I used a topping board to flatten the metal disk on the top of the mortise insert as it had curled at the edges and would not allow the new stem to seat against it properly. I sanded the sides of the stem on the saddle with 220 grit sandpaper to align it with the diameter of the shank of the pipe. I removed the push tenon from the stem and cleaned out the airway with cotton swabs, pipe cleaners and alcohol to remove all of the tars and staining on the inside. It looked like a dark brown striped up the middle of the stem when I started and when I was finished it looked very clean.Sultan14

Sultan15 I heated the stem with a heat gun until it was flexible and then bent it to match the curve of the shank and allowed the pipe to sit horizontally when in the mouth.Sultan16 I set the bend with cool water and then pushed it into the mortise insert and took the following photo to show the new look of the pipe.Sultan17 I scrubbed the meerschaum with a soft tooth brush and Murphy’s Oil Soap. I rinsed it carefully with cool water to remove the soap and scum. I dried it off with cotton pads and was able to remove more of the grime in the grooves.Sultan18

Sultan19

Sultan20

Sultan21

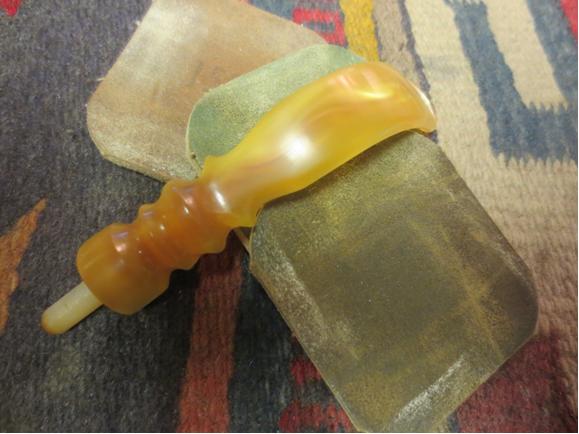
Sultan22 I waxed the meer with white beeswax and hand buffed it with a shoe brush. It has begun to take on the glow that comes to a well waxed meerschaum. I took the full facial photo to show the clean look of the pipe.Sultan23 With the bowl cleaned I turned my attention to the new stem. I had sanded the saddle area with 220 grit sandpaper and needed to polish that portion. I used a medium and a fine grit sanding sponge to remove the scratches. I wet sanded the stem with 1500-2400 grit micromesh and then dry sanded it with 3200-12000 grit pads.Sultan24

Sultan25

Sultan26 I buffed the stem with Blue Diamond and hand buffed the pipe with some beeswax and a shoe brush. I took the photos below of the finished pipe. Considering the many issues of this pipe when I started working on it, the finished pipe looks really good. I left many of the gouges and scratches in the meerschaum as they add character and to remove them would change the shape of the carving. I like the new stem – the bend is perfect for it to hang effortlessly in the mouth when smoking. The draw is wide open and should smoke really well. The push tenon works well with the metal mortise and sits snug against the shank. Soon it will go back to Chile and it owner. He will have the pleasure of finally smoking this old pipe and enjoying it.Sultan27

Sultan28

Sultan29

Sultan30

Sultan31

Sultan32

Sultan33

Restemming and restoring an oval shank billiard with issues


Blog by Steve Laug

I was gifted an oval shank billiard with a broken tenon and no stem by a fellow pipe refurbisher. He knows I like a challenge so he thought that maybe this would be a fun one for me to fiddle with. I looked at it when I unpacked it and spent more time looking at it over the weekend. When I first picked it up I put it in the bin of pipe to be refurbished and pretty much figured it would be one of those that I picked up when I had nothing else to work on. I have a few of those sitting in the bottom of the box. On Sunday I was going through the box trying to decide which pipe I would work on next and picked it up. There was something about it that drew me to work on it next. I can’t tell you what that was; I have no words to describe it. I know though that those of you who refurbish pipes know the feeling and the call of certain pipes. This was one of those. So it came to my work table.

Now that I had made a decision to work on it I took time to look it over and assess it. That is what I always do when I work on a pipe. I look it over and list out what needs to be addressed if I am to bring this pipe back to life. I like to enter into the work with a clear idea of what needs to be done. Doing this keeps me from finding those issues that surprise you in the process – at least most of the time it does. There will always be exceptions to the rule. For this pipe it was pretty straight forward.
Here is a list of the issues:

1. The finish was very rough and the darkening of the briar around the middle of the bowl was worrisome. It was hard to tell if it was potential burnout starting to happen – thus darkening the briar or if it was dirt and grime. I was pretty sure it was just soiled and stained but could not tell for sure until I had reamed the bowl.

2. There were scratches and dents all over the surface of the bowl.

3. There was one large fill on the right side of the bowl, mid-bowl that would need some work. I would either need to pick it out and refill it or repair it.

4. There was a burn mark on the underside of the shank mid-shank.

5. There appeared to be a small crack on the bottom of the shank at the place the stem and shank meet. It extends inward about a quarter inch. It was hard to see as it was hidden in the dings on the bottom of the shank from when the pipe had been dropped and the stem broken.

6. The bowl had a thick cake in it to the point that the tip of my little finger was about all that would fit in the bowl.

7. The rim had nicks and damage to the surface as well as a lava overflow from the cake in the bowl.

8. The stamping was virtually nonexistent. All that remained was a faint stamp on the left top side of the shank near the end – it read Made in London. It would definitely disappear if I banded the pipe to deal with the crack.

9. The airway in the shank and mortise was dirty and clogged. I could push air through it but barely when I blew through the end of the shank.

10. There was a broken tenon stuck in the shank. Generally these are pretty straight forward so I was not too worried about removing it.

11. There was no stem to work from as a model and the oval shank would make matching it a challenge.

Here is what the pipe looked like when I brought it to the work table.Bill1

Bill2

Bill3

Bill4

Bill5 I started the cleanup by pulling the broken tenon. I used the normal drywall screw and had the tools handy. In this case I threaded the screw in gently and was able to pull the tenon out by hand very easily.Bill6

Bill7 I turned to my can of stems for a potential stem. I actually had one that was a decent fit. The tenon was perfect and the fit against the shank end was ideal. The diameter of the stem on the bottom of the oval was too big and would need to be sanded to a correct fit. It happened to be the only oval stem I had at the moment and it was a twin bore bite proof stem. I was careful in fitting the stem because of the small crack in the shank.Bill8

Bill9

Bill10

Bill11 I used the Dremel and sanding drum to take off the excess rubber on the bottom of the stem.Bill12 This may be a funny thing to say but as I examined the stem after I fit it to the shank I noticed it had a small hole near the button. When I turned it over to check it out then I noticed that I was dealing with a bite proof stem – a stem with two airholes coming out of the button from the single airway in the stem. Picture the letter Y and you have a good picture of the stem.Bill13 I inserted a greased pipe cleaner in the airway on left airhole and then repaired the hole in the underside of the stem. I used black super glue to fill it and built it up to give a good base. When it dried I sanded it smooth with 220 grit sandpaper to blend it into the surface of the stem.Bill14

Bill15 Reaming the bowl took some effort and several different reamers. I used the PipNet reamer to start and then worked on the bowl with a KLEENREEM reamer. I finished by using a pen knife to clean out the last remnant of carbon in the bowl. I cleaned out the airway in the shank and the stem with pipe cleaners, cotton swabs and alcohol.Bill16

Bill17 I topped the bowl on my sanding board and lightly sanded the cracked area and damage on the bottom of the shank end.Bill18

Bill19 I sanded the stem with 220 grit sandpaper and then with a medium sanding sponge to smooth out the scratches. I wiped the bowl down with acetone on cotton pads to remove the grime and the remaining finish. The new stem fit really well and I only wished that the shank did not have the small crack that mad banding a necessity.Bill20

Bill21

Bill22

Bill23 I cleaned the area around the fill on the right side and repaired it with super glue. I sanded it smooth and then sanded the bowl with a medium grit sanding sponge.Bill24 I heated the briar with a heat gun and then applied a coat of cherry stain to it. The stain took well and sat deeply in the grain of the bowl.Bill25

Bill26

Bill27 With the stain in place the crack on the underside of the shank was very visible. It was mid shank and extended about ¼ inch. At this point I had to decide how to address this crack. I could do a shank insert and do an internal repair or I could band it. In looking over the shank I realized that the tenon was already quite thin and I would be hard pressed to make it smaller to fit inside of a shank insert. I would need to band the pipe.Bill28 I had a round band that would fit once I flattened it. I opened the crack with a dental pick and filled it with glue to repair the crack and then pressed the band into place on the shank.Bill30

Bill31

Bill32 I lightly sanded the tenon as the band made the fit in the shank too tight. I put the stem in place and took the next photo to get an idea of the new look.Bill33 I set the bowl aside and worked on the stem. I sanded it with micromesh sanding pads. I did my usual routine with the micromesh pads – wet sanding with the 1500-2400 grit and dry sanding with the rest of the pads up to 12000 grit. I used Obsidian Oil as usual.Bill34

Bill35

Bill36 I buffed the nickel band with a jeweller’s cloth and buffed the pipe on the wheel with Blue Diamond polish. I gave the bowl and stem multiple coats of carnauba wax. I buffed it on a clean flannel buffing wheel and then by hand with a microfibre cloth to raise the shine. The finished pipe is shown below. I think that taking the time to recondition and restore this pipe paid off with a beautiful oval shank billiard. Thanks for looking.Bill37

Bill38

Bill39

Bill40

Bill41

Bill42

Bill43