by Kenneth Lieblich
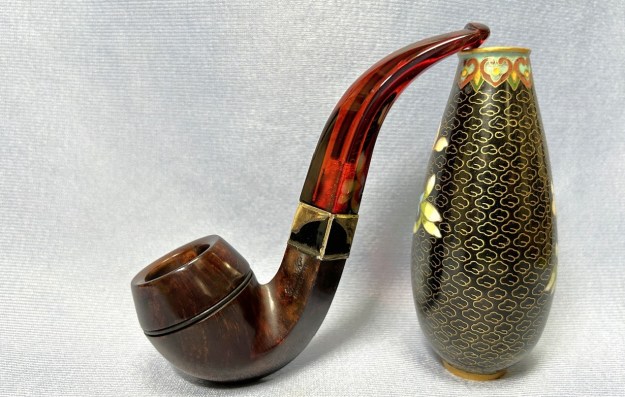
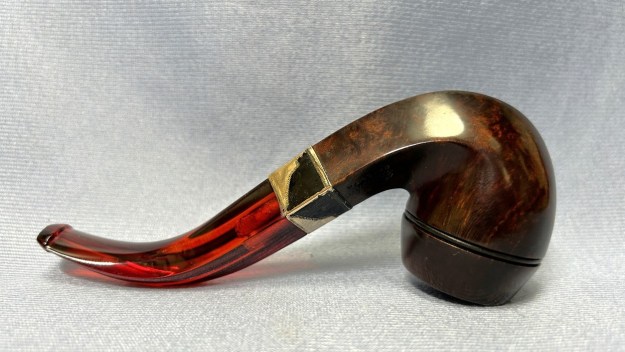
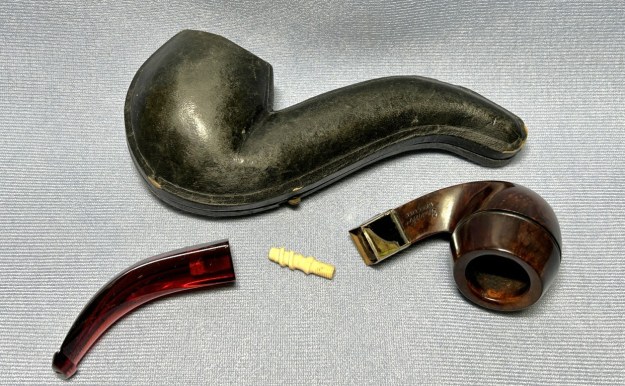
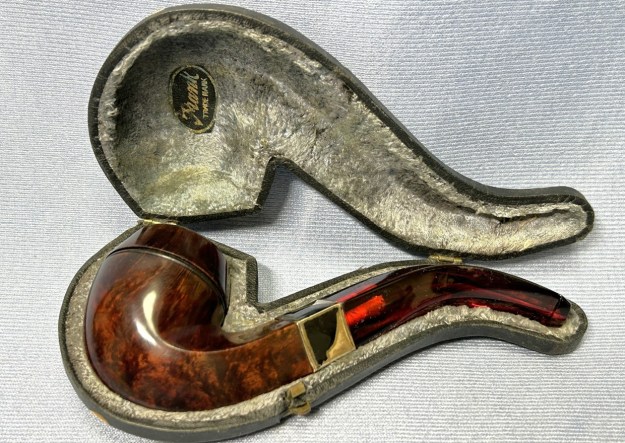
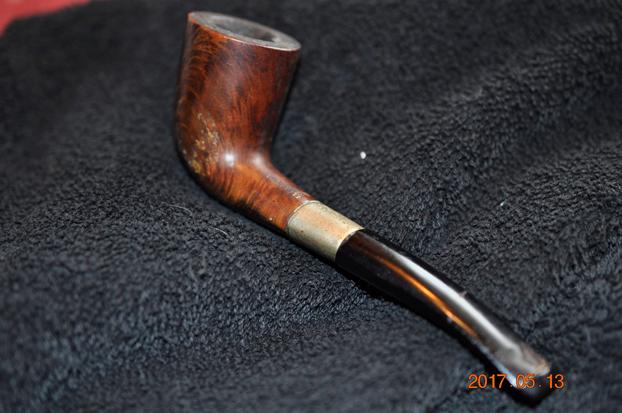
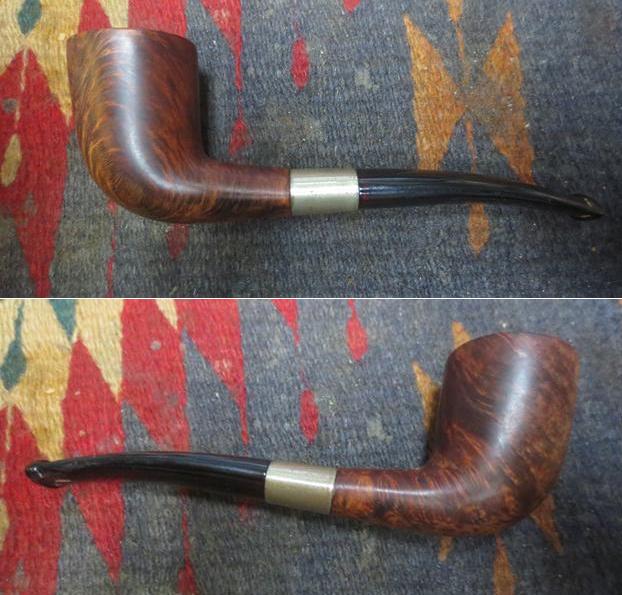
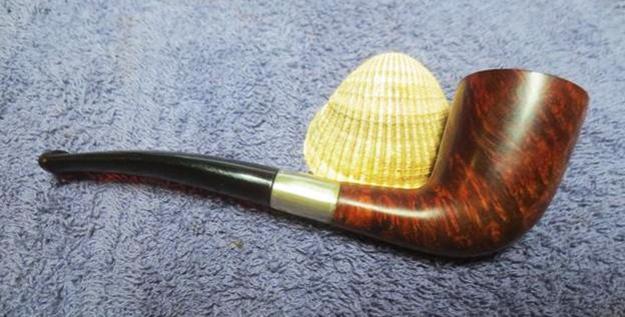
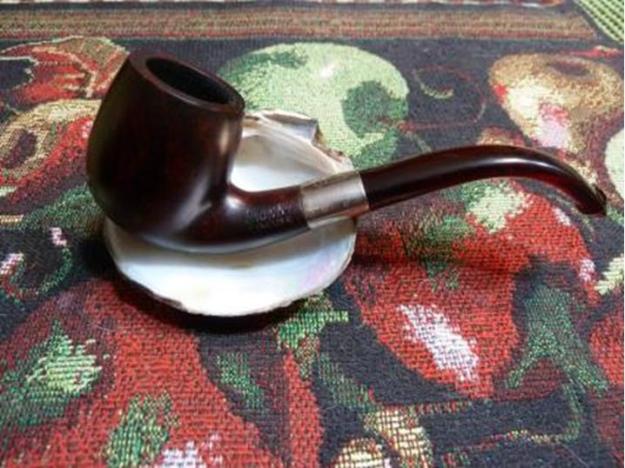
A couple of weeks ago, I restored a Redmanol pipe for a customer and, as good fortune would have it, its Bakelite cousin appeared on my workbench. However, this time the Bakelite pipe is for sale! It’s a real beauty – and quite old. It’s an S.M. Frank Bakelite bent bulldog. It has a lovely old-world feel about it, with a handsome band – and it even has its matching leather case! This pipe has an orific stem and that marks it as being around a century old. To learn more about that particular bit of pipe history, please have a look at Steve’s article on the subject here. Given my recent experience with Redmanol and given its similarity to Bakelite, I thought I’d give it a go. It’s an old timer and it will always carry a few signs of its use and age, but that is definitely part of this pipe’s charm.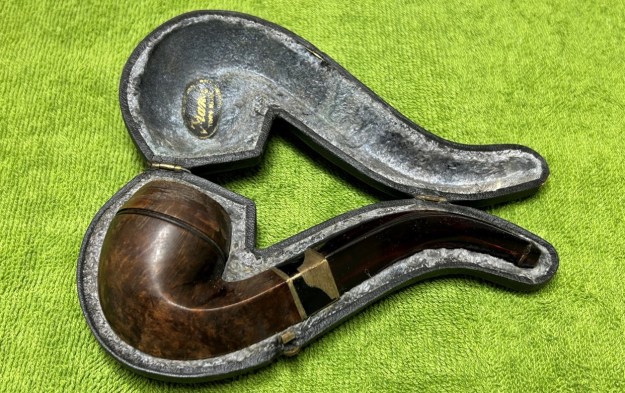
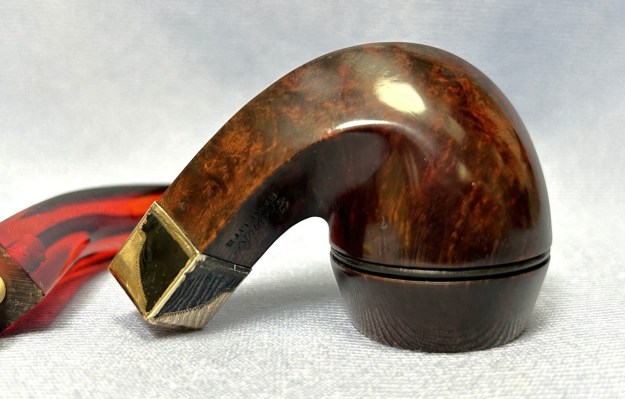
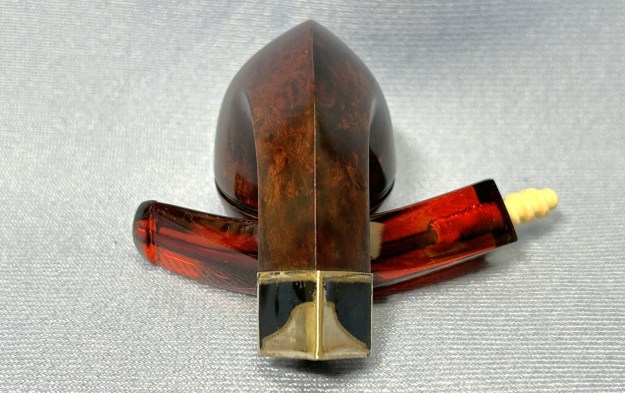
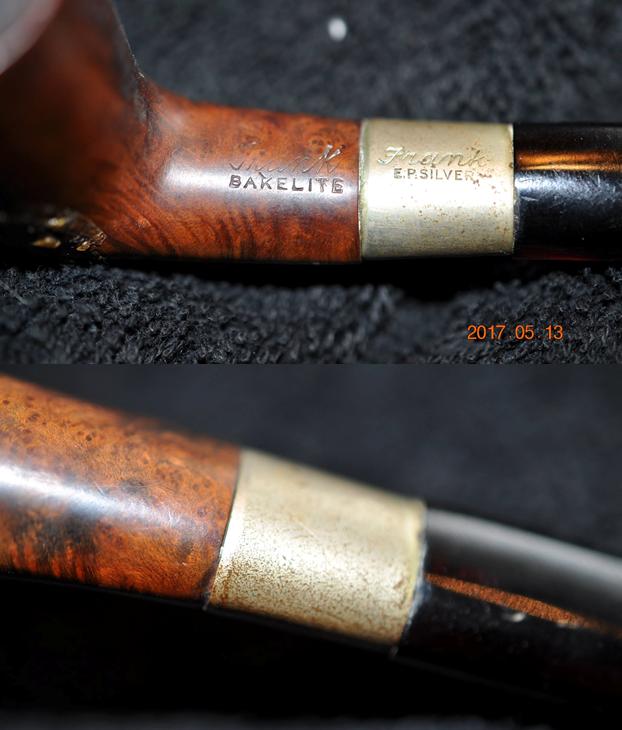
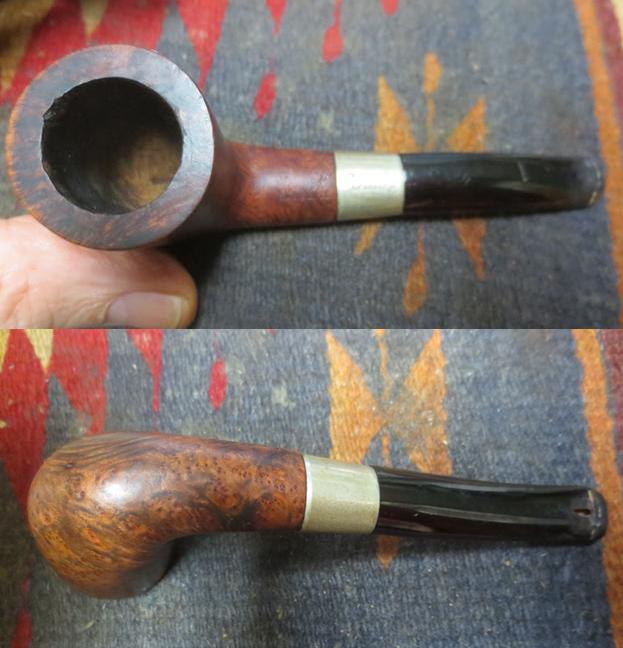
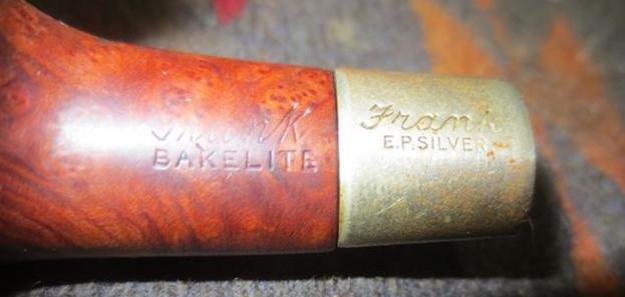
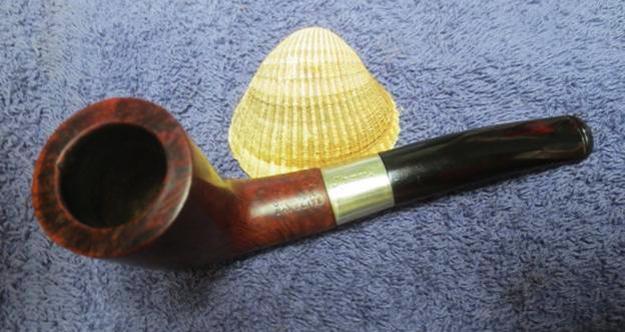
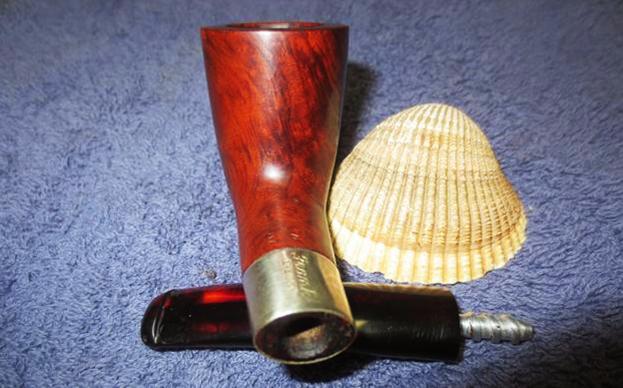
 The marks on the pipe are simple and straightforward. On the left side of the shank, it reads Frank [over] Bakelite. Inside the pipe case, there is a logo which reads Frank [over] Trade Mark.
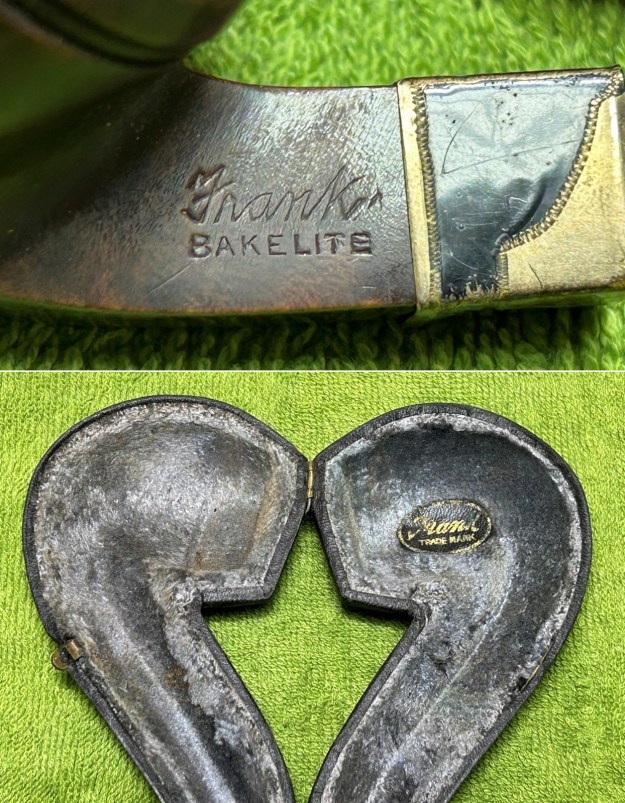 I suspected that the name Frank was referring to the S.M. Frank company, but I went to Pipedia to check. It turns out that the S.M. Frank history is a tangled mess of brambles and twigs. It involves Kaywoodie, KB&B, Reiss, Demuth, and many others. It’s messier than a dog’s breakfast, as one of my schoolteachers liked to say. I don’t have the patience to do it justice here, but I will provide a few tidbits. Here’s a quotation from Pipedia:
In the year 1900 Sam Frank Sr. started his own business, selling pipes and other tobacco items. His original office was located at 20 W. 17th Street, NYC. He was also closely associated with the sales staff of Wm. DeMuth & Co., selling their line of pipes. It was at this time that Mr. Frank first met Ferdinand Feuerbach and formed what would be a lifelong friendship. Mr. Feuerbach started working for the DeMuth company in 1897 and by 1903 had become the production manager. In 1919, when Mr. Frank needed an experienced pipe man to run his pipe factory, located at 168 Southern Blvd., in the Bronx, he persuaded his old friend Ferdinand to join him. Mr. Feuerbach is credited with developing DeMuth’s popular Royal DeMuth and Hesson Guard Milano pipelines. In 1922, when S. M. Frank purchased the Manhattan Briar Pipe Co. the company incorporated. In 1933, the paper Medico filter was introduced along with the Medico brand line of pipes. The Medico filter is the “original” and most absorbent paper filter on the market that is recognized by pipe smokers world-wide. Filtered pipe smoking, a debatable issue among pipe smokers, reduces tars and nicotine in the smoke stream to make a “safer” smoke.
Meanwhile, over in the PipesMagazine forums, there’s a lengthy discussion on the subject from user, jguss. I won’t try to do the article justice in this blog post, but I recommend you read it here. One of the useful things that came out of it, however, is the following org chart. I cannot date this pipe beyond saying that it is about 100 years old. It’s not possible for me to be more precise than that – other than to say that the pipe cannot precede 1907, as that was the year that Bakelite was invented by Leo Hendrik Baekeland. Anecdotally, this pipe looks like similar KB&B (Kaufmann Bros. & Bondy) pipes of the era, so it may come from that genealogical line (so to speak). Let’s move on.
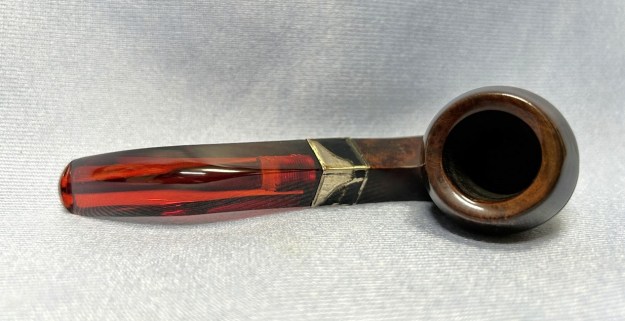
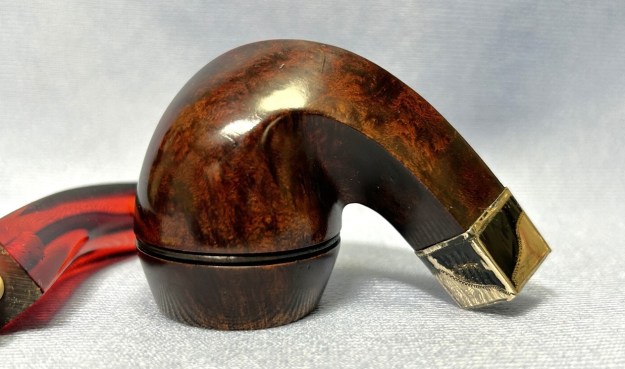
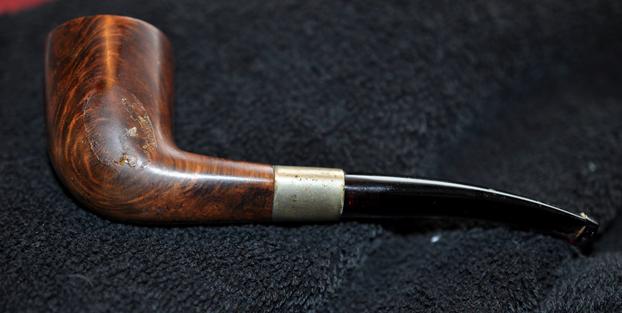
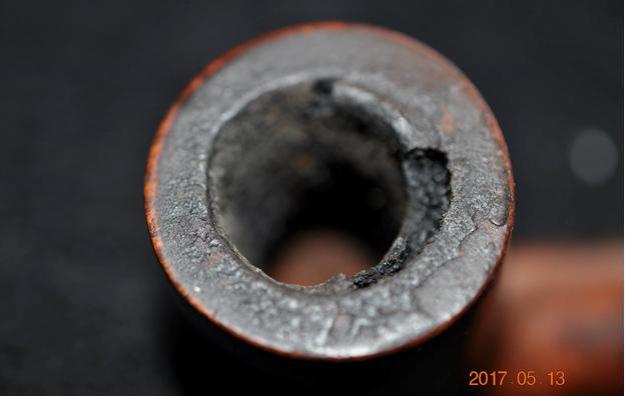
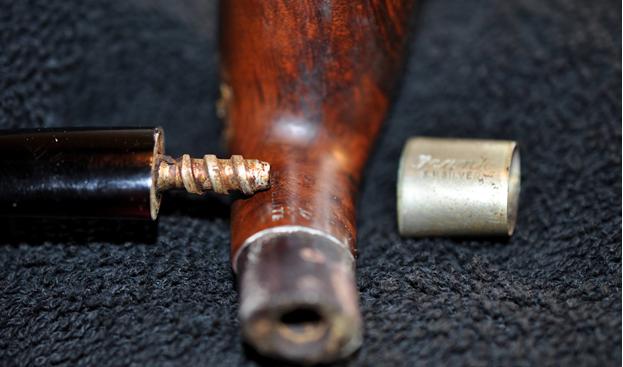
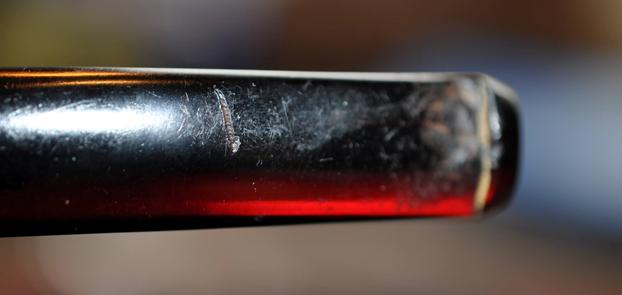
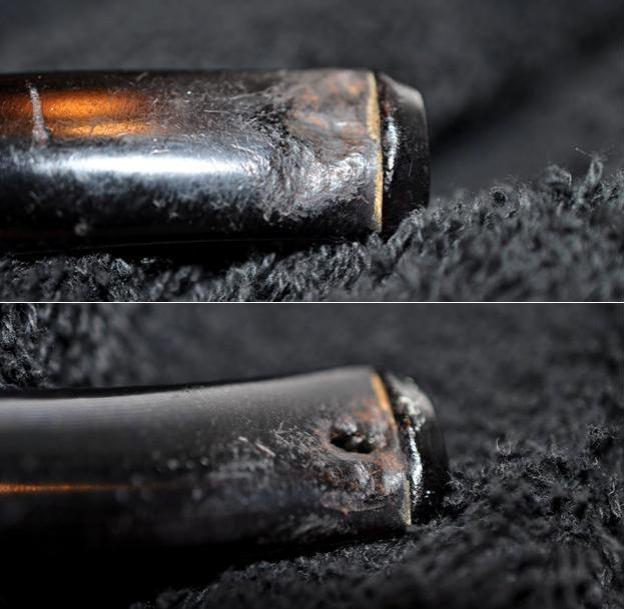
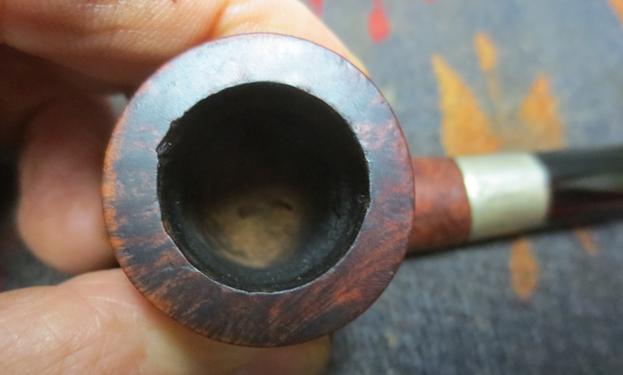
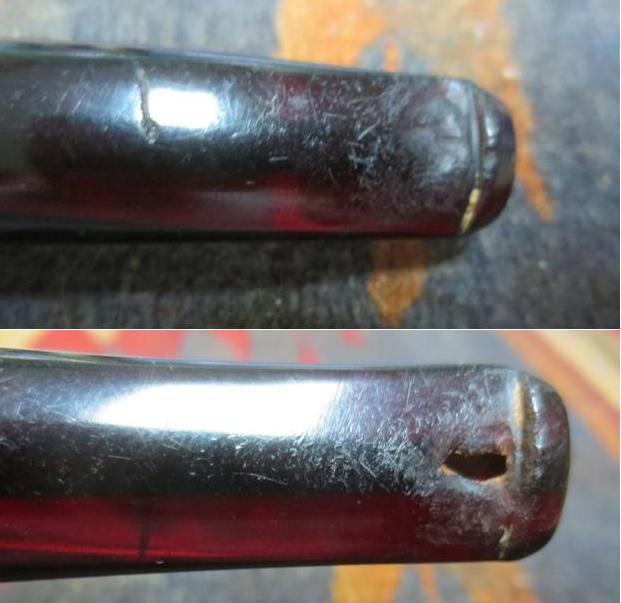
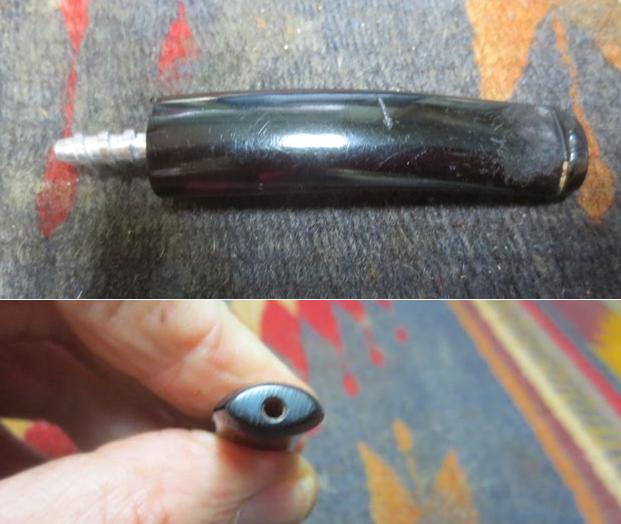
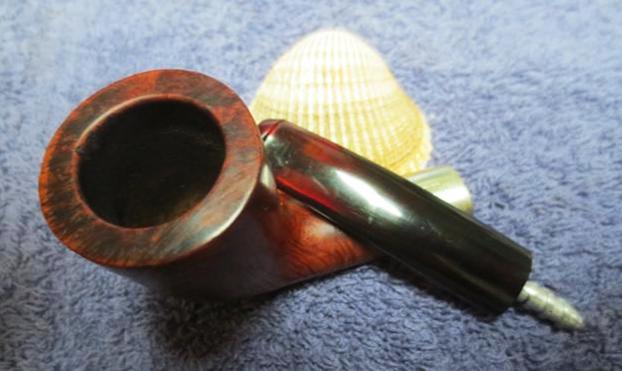
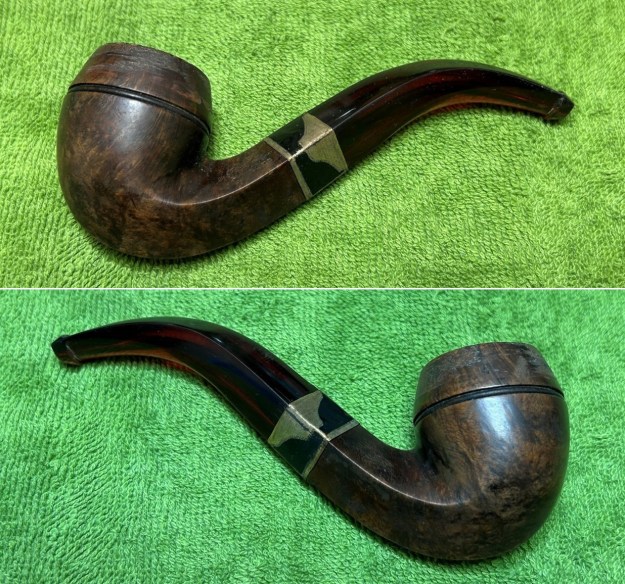
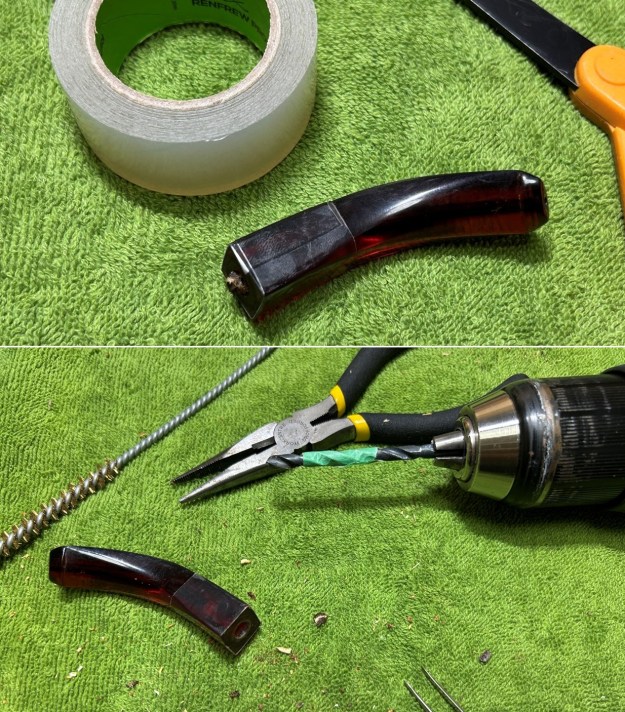
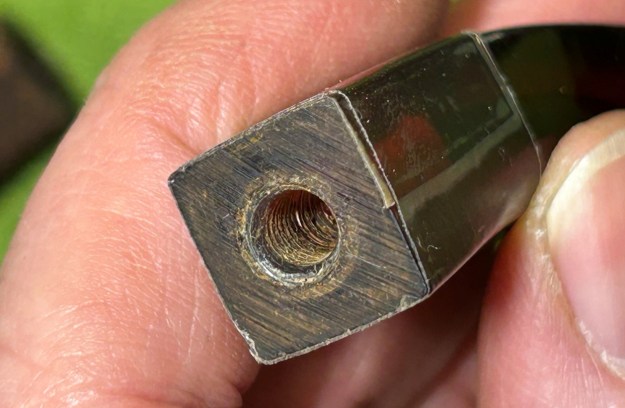
A closer look at the pipe shows a few problems. The stem has some scratches and wear – I will have to handle the Bakelite carefully. The stummel is pretty worn and dirty. It has a few scratches and nicks. Around the top of the bowl, there is some odd ‘stuff’ stuck to the wood. More on that later. Both of the mortises in the shank and stem had matching broken-off halves of a bone tenon. They’re stuck in there. There’s a lot of work ahead!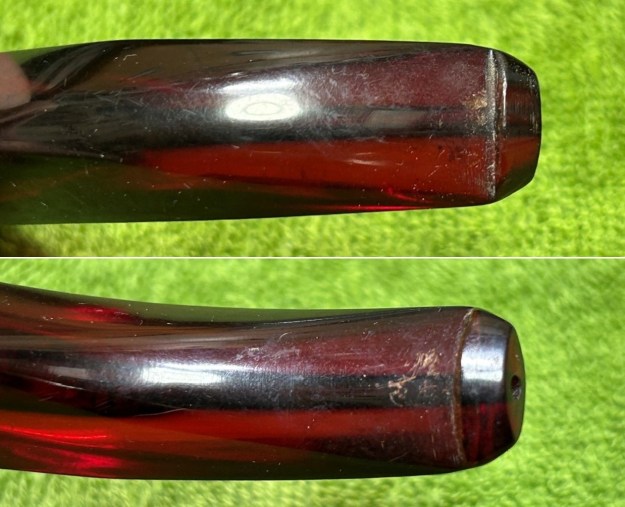
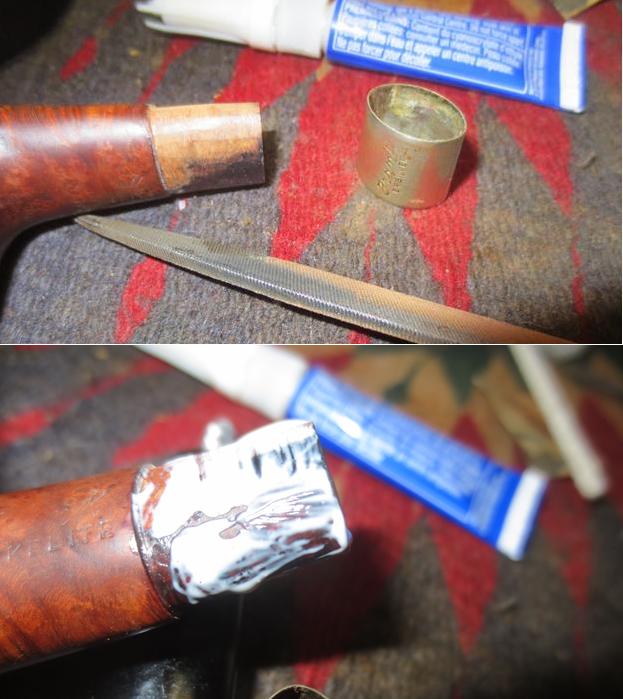
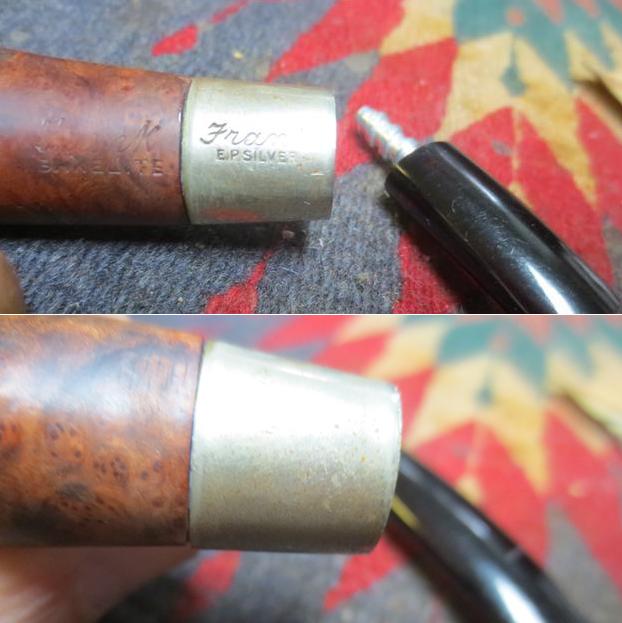
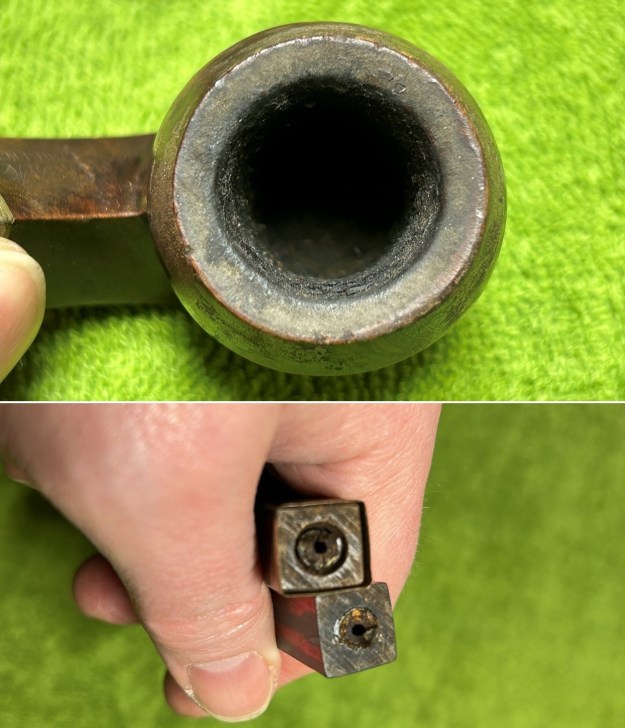 I decided that my first job would be to extract the tenon halves. This was nerve-wracking stuff because I was not at all sure that I could get them out without cracking either the shank or stem (or both). The photos here don’t really tell the whole story. I tried extracting with pliers; I tried extracting with a screw – both unsuccessful. I fiddled for while and decided that I needed to drill the tenon out. It was clearly risky, but the pipe wasn’t useable in its current state anyway. So, I took the stem and stummel and threw them in the freezer for 30 minutes or so. I wanted to (hopefully) make the bone tenon more brittle by freezing it. I also wrapped the end of the stem very tightly with hockey tape in a quixotic hope that that might prevent the Bakelite from cracking. I then took the thinnest drill bit that fit inside the draught hole of the tenon and drilled carefully and slowly. I then increased the size of the drill bit one by one – oh so carefully – until the tenon began to crack. As more and more of it cracked, I was able to pull the debris out. This took a while, as I worked on both halves, but it was a complete success. Deo gratias! I then went searching in my boxes for a replacement bone tenon – I have hundreds! Eventually, I found just the right one.
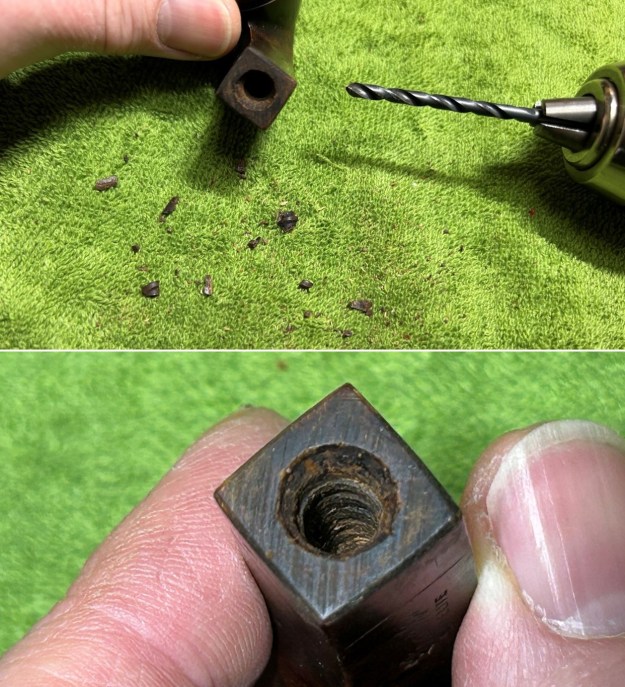
 I was finally able to get on with cleaning. I used oil soap on a few cotton rounds and wiped down the stem to provide an initial cleaning before moving on to the next steps. The primary cleaning came next. I disinfected the inside of the stem with pipe cleaners and cotton swabs dipped in 99% lemon-infused isopropyl alcohol. I scrubbed thoroughly to make sure the interior was very clean.
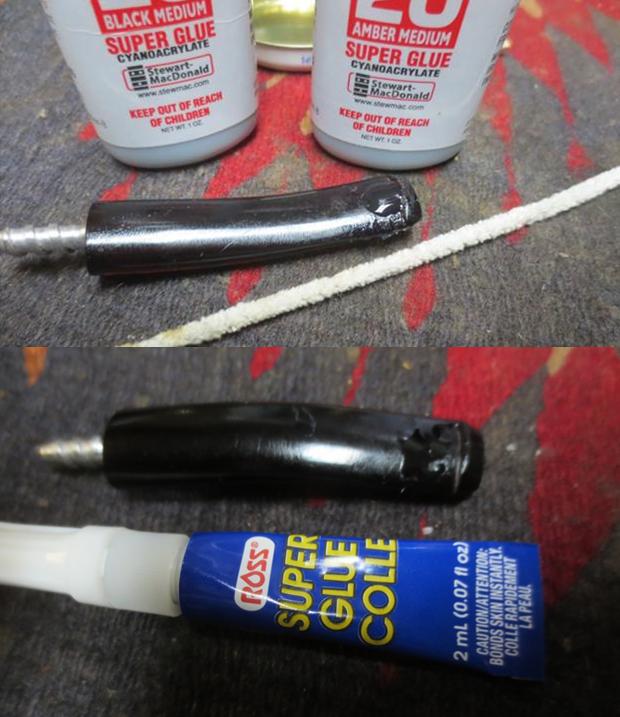
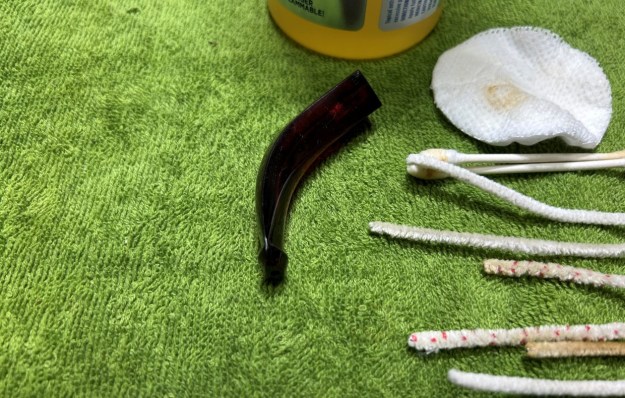 Next, I set about fixing the marks in the Bakelite. This was done by filling those marks with clear cyanoacrylate adhesive. I left this to cure and moved on.
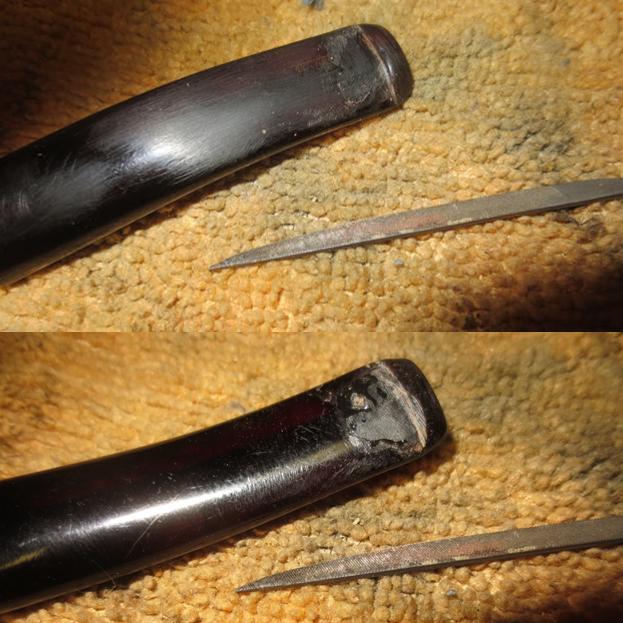
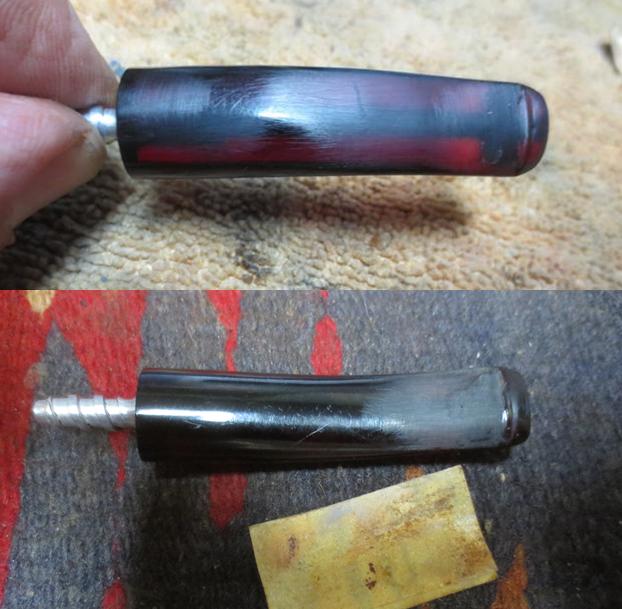
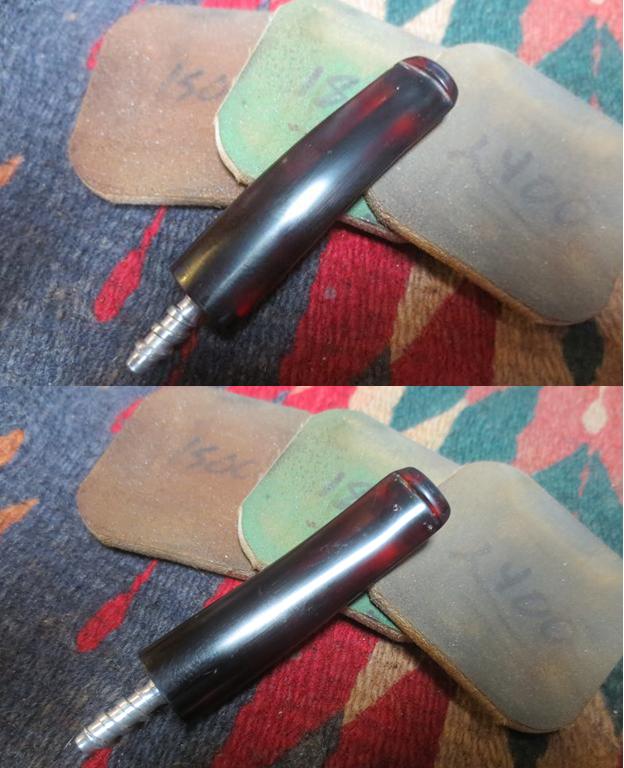
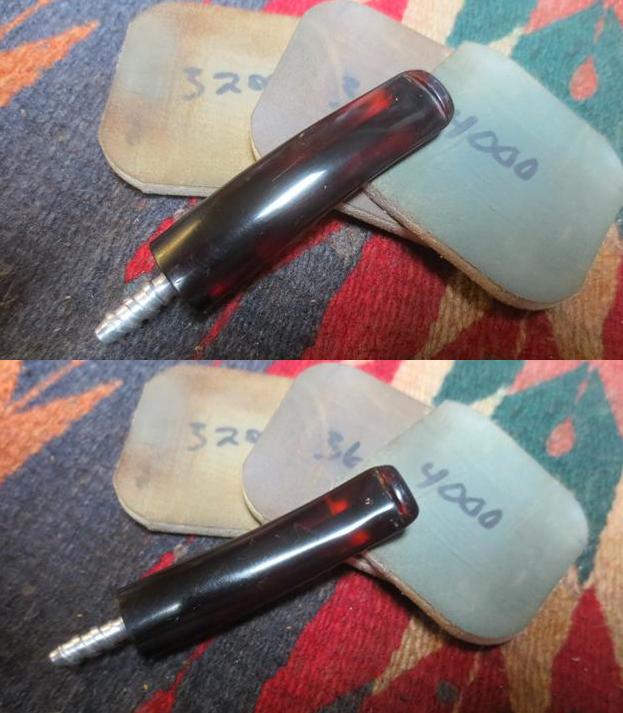
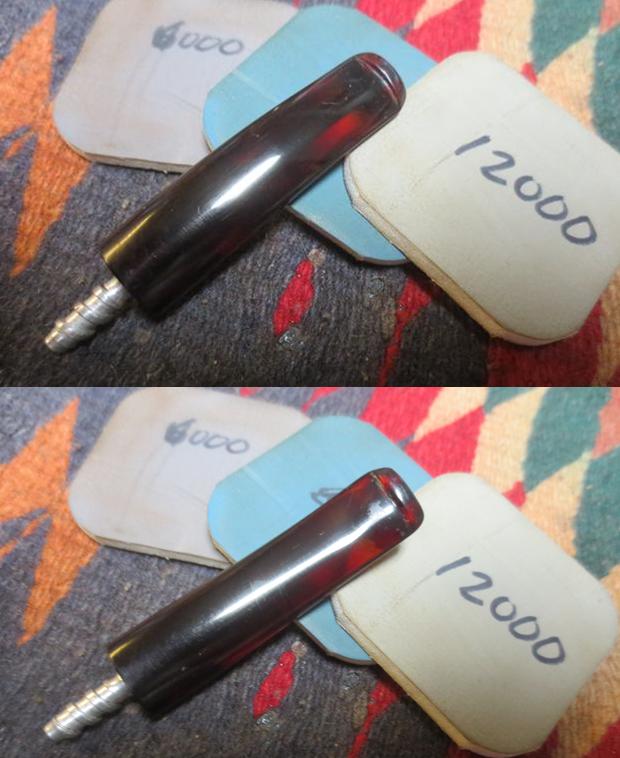
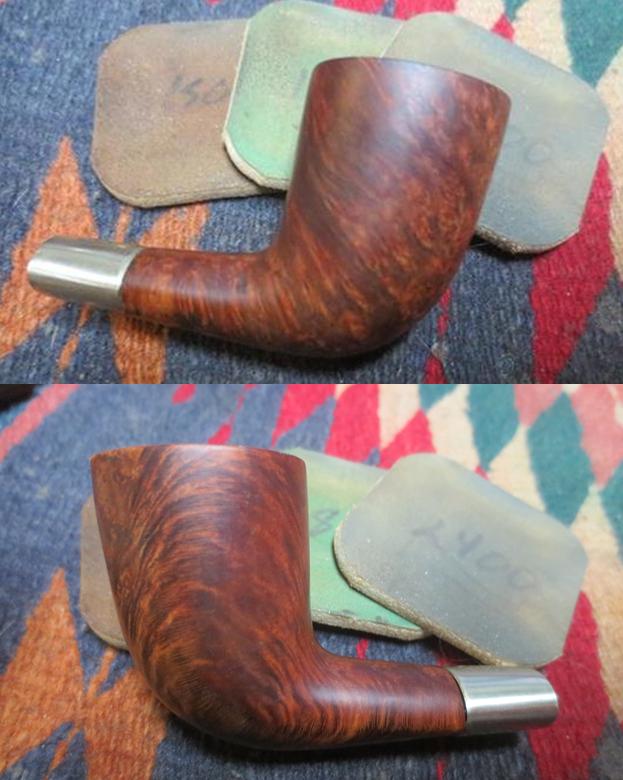
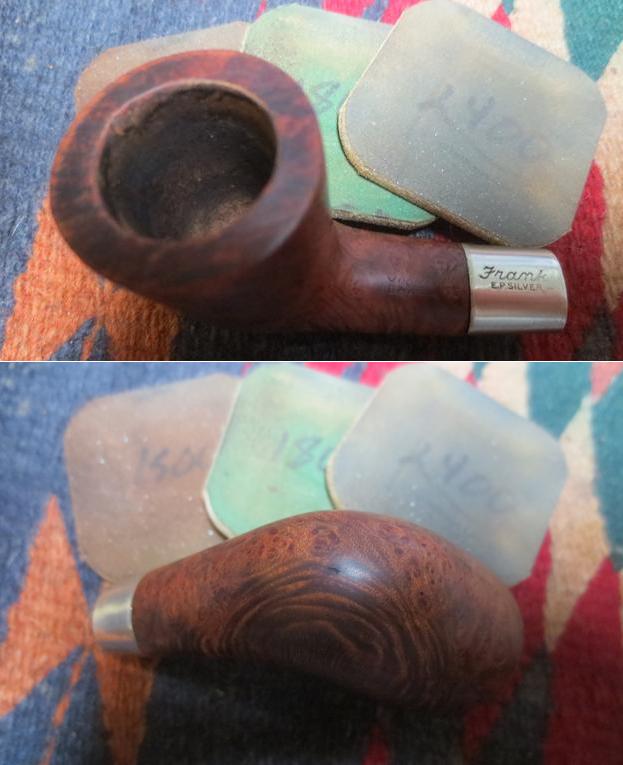
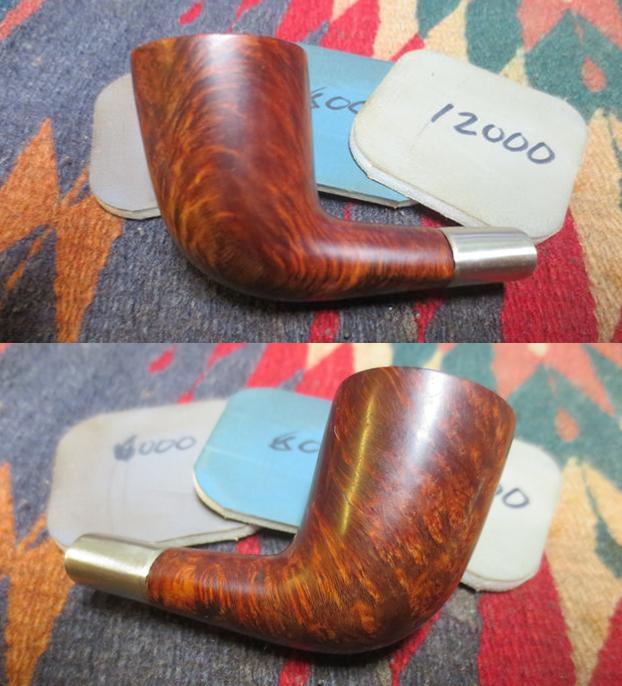
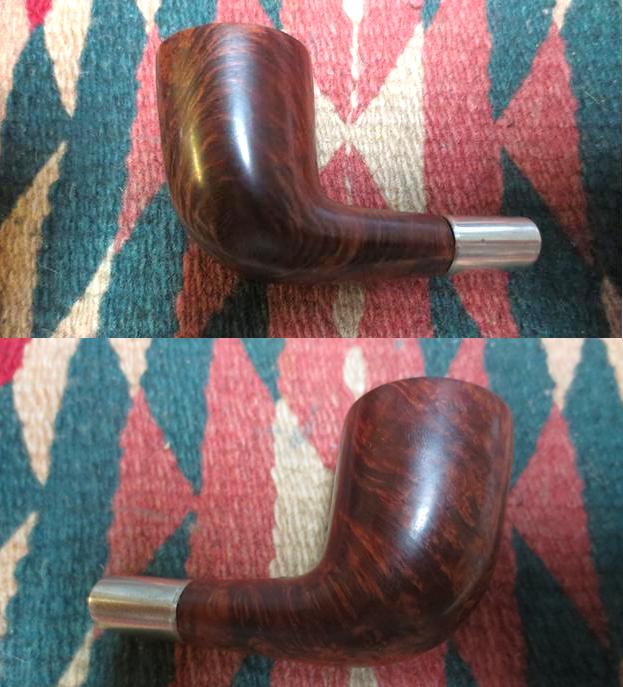
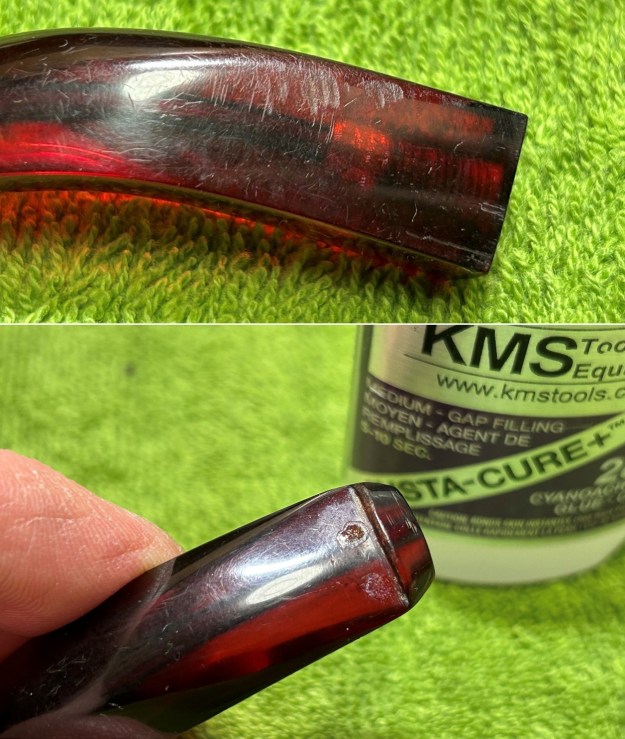 The next step was sanding. First, I reduced the bulk of the cyanoacrylate repairs. I removed the excess adhesive as near to the surface as possible, without cutting into the Bakelite. Following that, I used all nine of the micromesh sanding pads (1,500 through 12,000 grit) to sand out flaws, even out the Bakelite, and provide gentle polishing of the finished surface. I also applied pipe-stem oil while using the last five micromesh pads. There was a wonderful, clear, ruby-like glow to the stem when I was done.
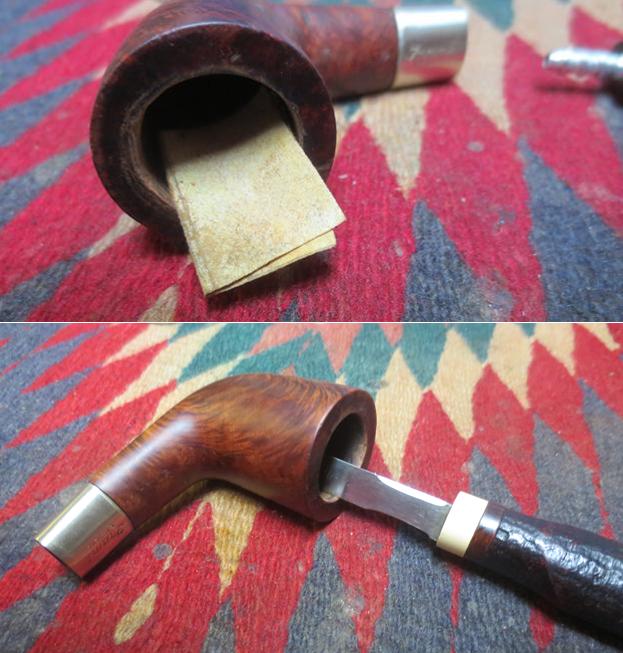
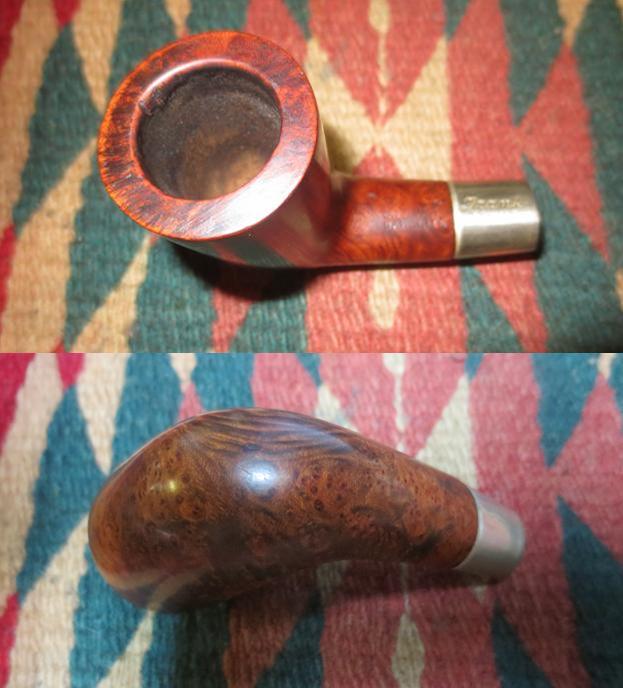
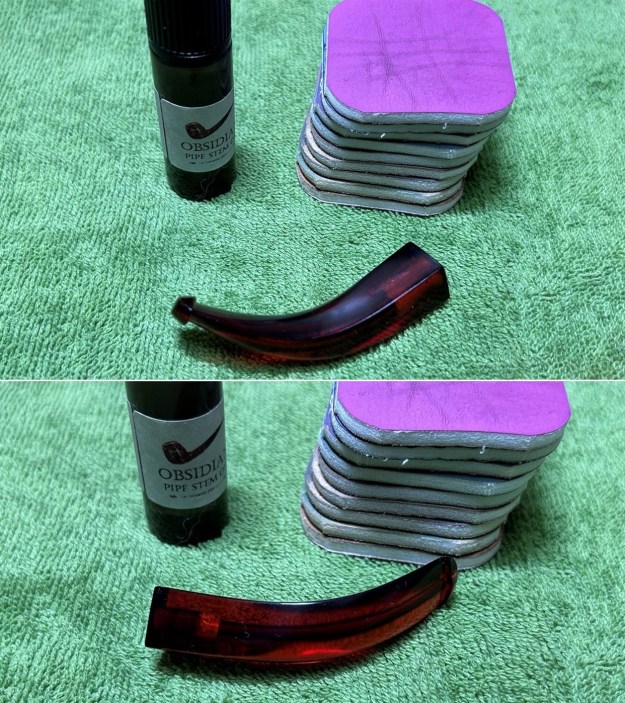 As the stem was (nearly) complete, I moved on to the stummel. The first step was to ream out the bowl – that is to say, remove all the cake inside the bowl. This accomplished a couple of things. First (and most obviously), it cleaned the bowl and provided a refurbished chamber for future smoking. Second, when the old cake was removed, I could inspect the interior walls of the bowl and determine if there was damage or not. I used a reamer, a pipe knife, and a piece of sandpaper taped to a wooden dowel. Collectively, these ensured that all the debris was removed.
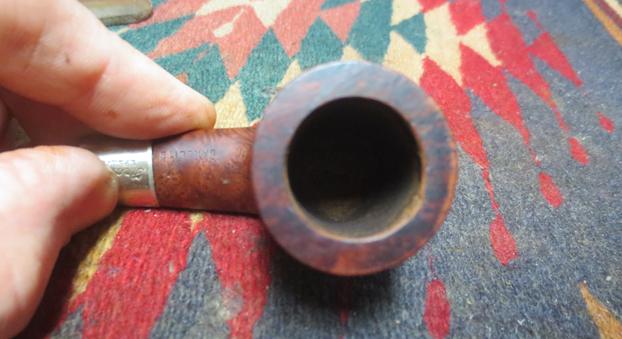
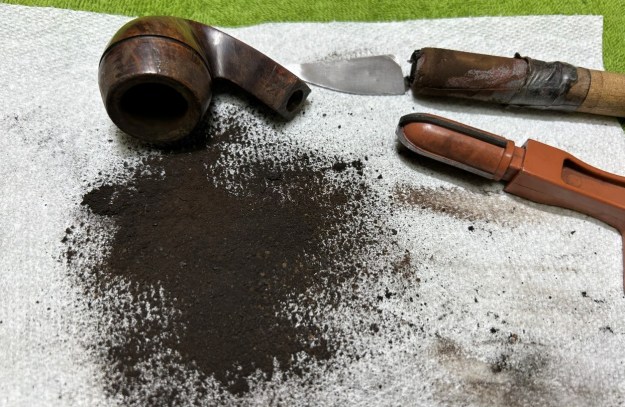 My next step was to remove the lava on the rim. For this, I took a piece of machine steel and gently scraped the lava away. The metal’s edge is sharp enough to remove what I need, but not so sharp that it damages the rim.
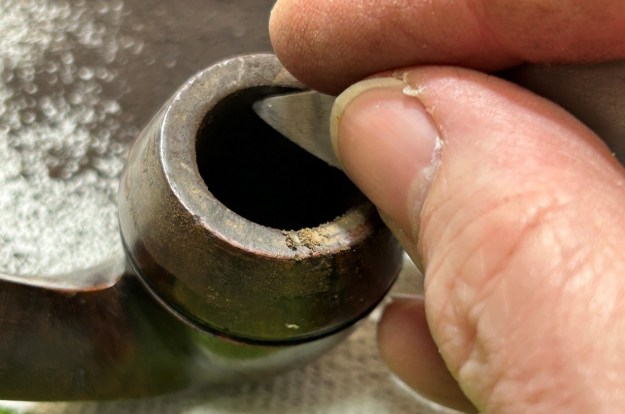 Similar to the stem, I then cleaned the stummel with both pipe cleaners and cotton swabs dipped in lemon-infused 99% isopropyl alcohol. With a pipe this dirty, it took quite a while and much cotton to get clean.
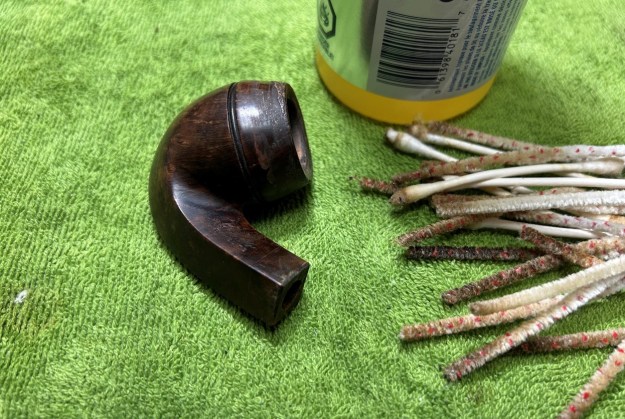 I then decided to ‘de-ghost’ the pipe – that is to say, exorcize the remaining filth from the briar. I filled the bowl and the shank with cotton balls, then saturated them with 99% isopropyl alcohol. I let the stummel sit overnight. This caused the remaining oils, tars and smells to leach out into the cotton.
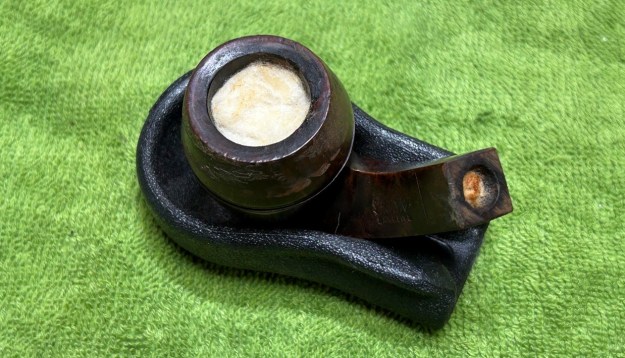 To tidy up the briar, I also wiped down the outside with some oil soap on cotton rounds and used a toothbrush in the crevices. This did a good job of cleaning any latent dirt on the surface of the briar. The last step of the cleaning process was to scour the inside of the stummel with some soap and tube brushes. This was the culmination of a lot of hard work in getting the pipe clean.
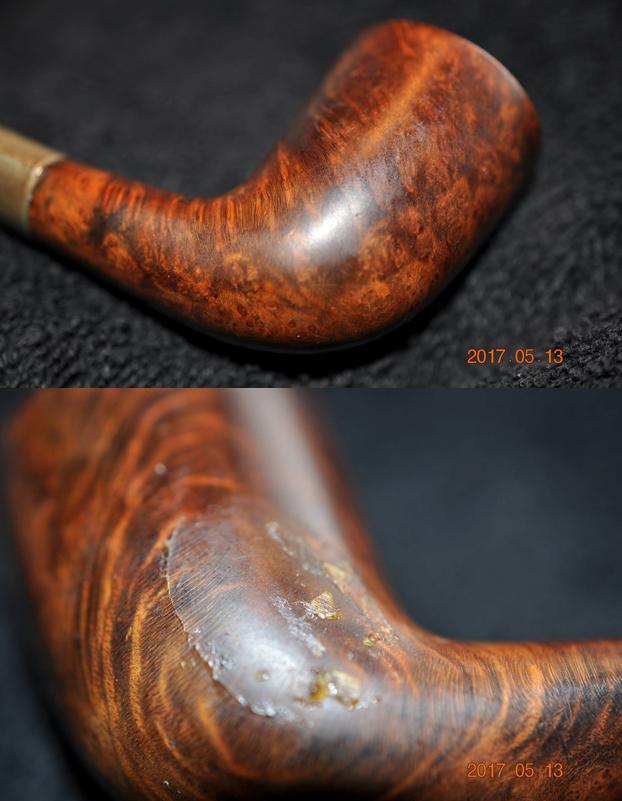
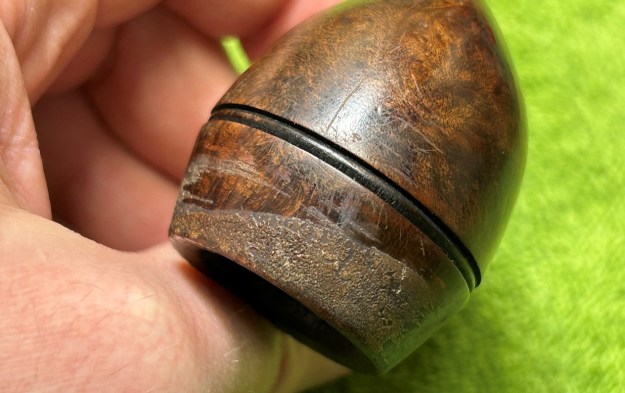
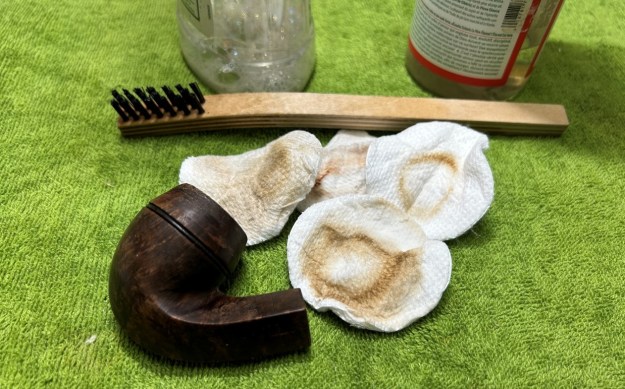 However, what it did not do was remove the weird stuff stuck around the rim. Then I realized that this pipe must have had cap once upon a time. That cap is long lost to the mists of history. I looked in my stores and found several caps, but not that fit this pipe. No problem – this pipe doesn’t need it and would look great (I daresay better) without one.
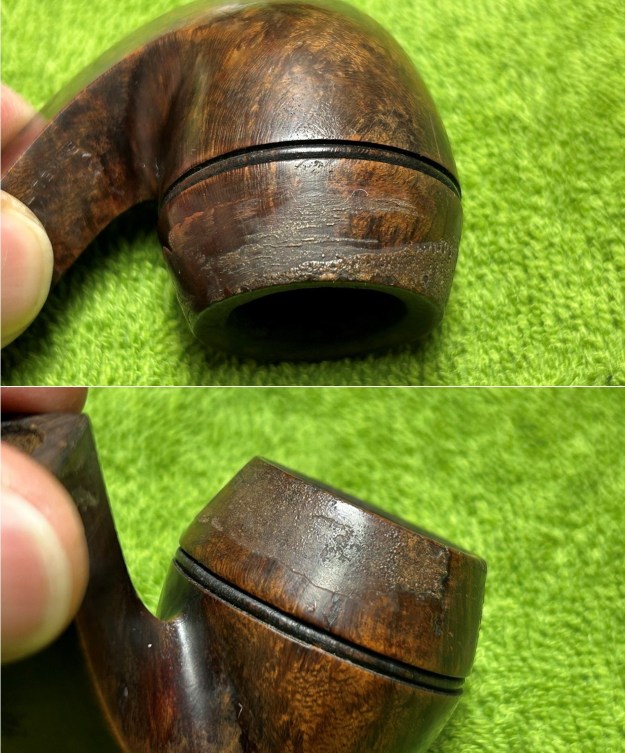
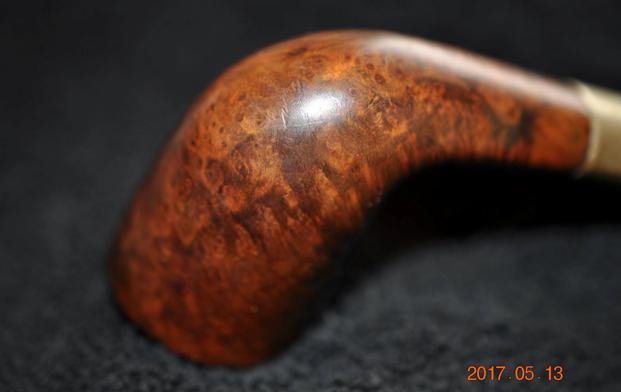
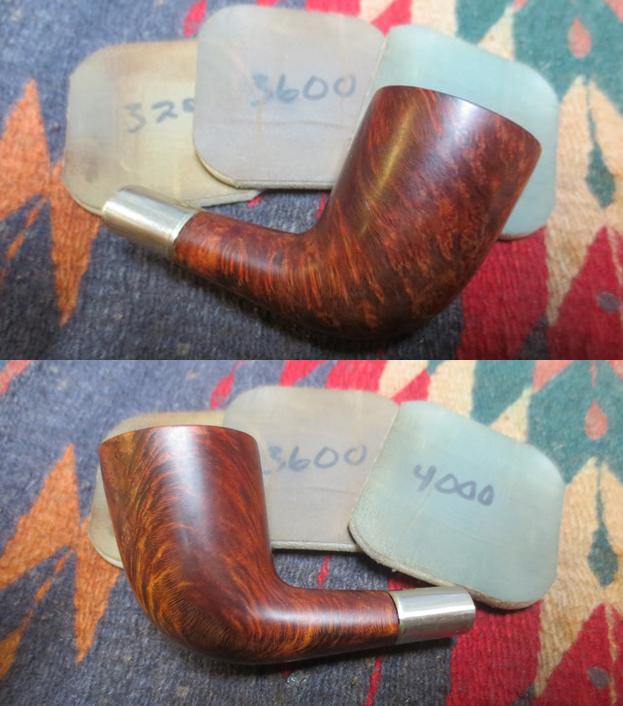
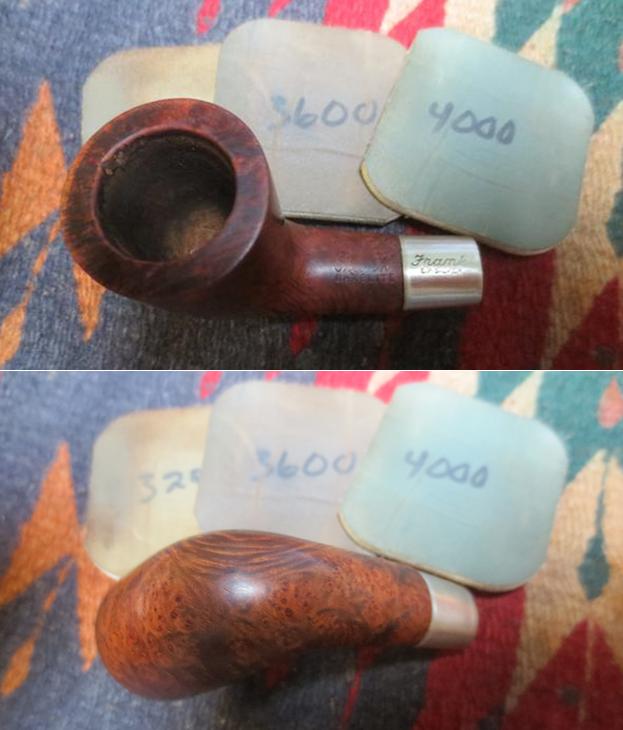
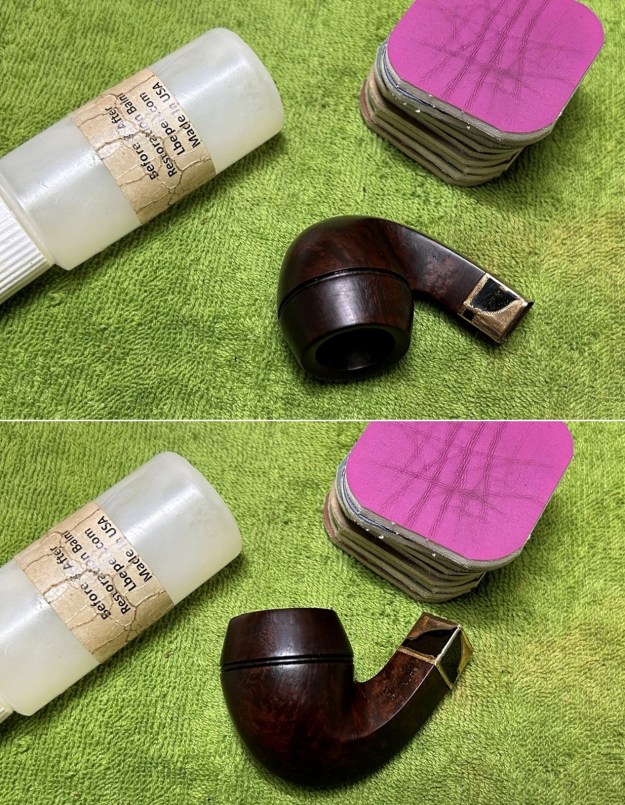
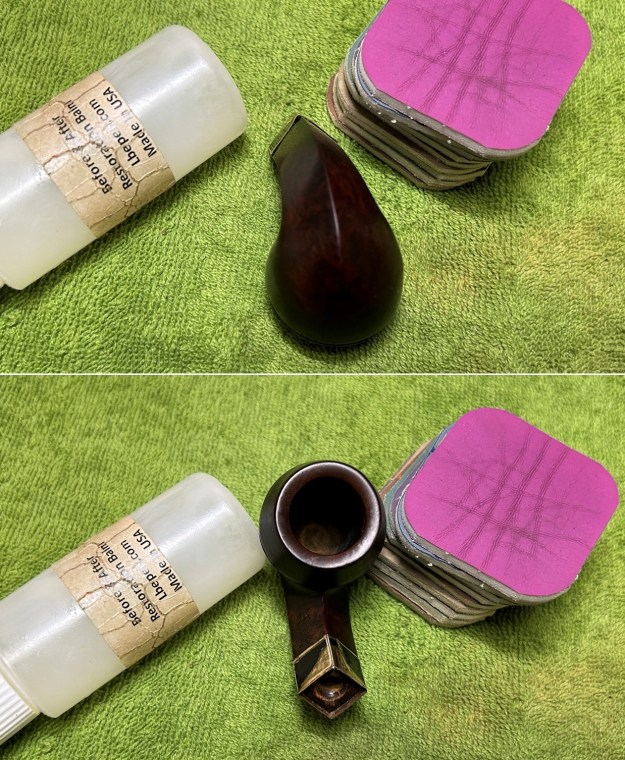
 It took some mighty strong sanding with 220-, 400-, and 600-grit sandpapers to remove all the gunk. I then used all nine micromesh pads (1,500 through 12,000 grit) to sand the outside of the stummel and finish it off. This sanding minimizes flaws in the briar and provides a beautiful smoothness to the wood. I did add some stain to the briar in order to replace what had been lost in the sanding – but forgot the photos. Anyway, I rubbed some LBE Before & After Restoration Balm into the briar and let it sit for 30 minutes or so. The balm moisturizes the wood and gives a beautiful depth to the briar. I then buffed the stummel with a microfibre cloth.
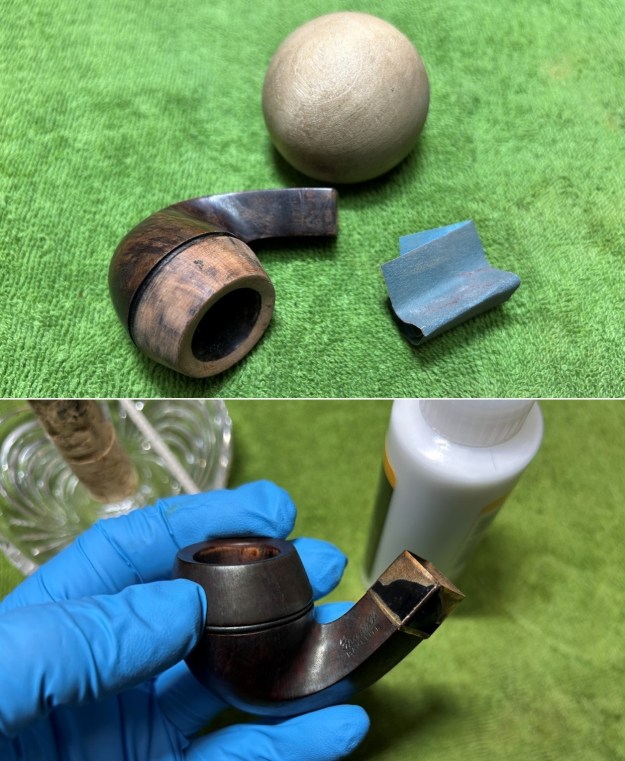
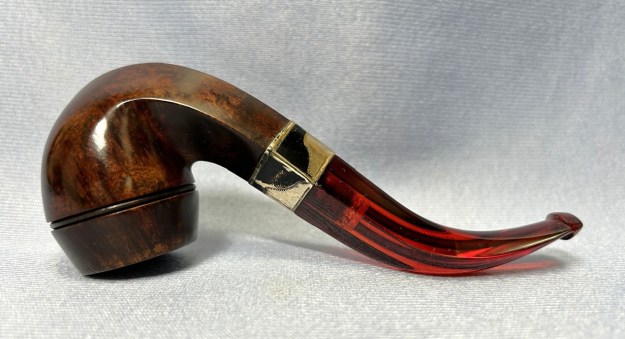
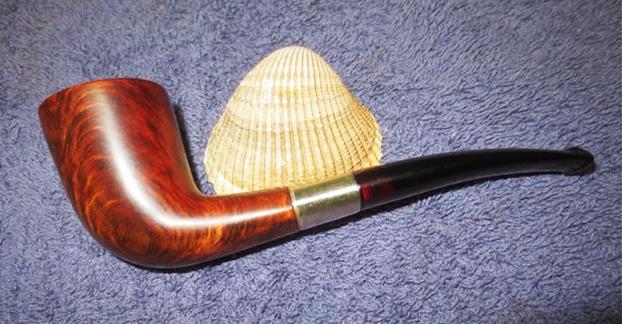
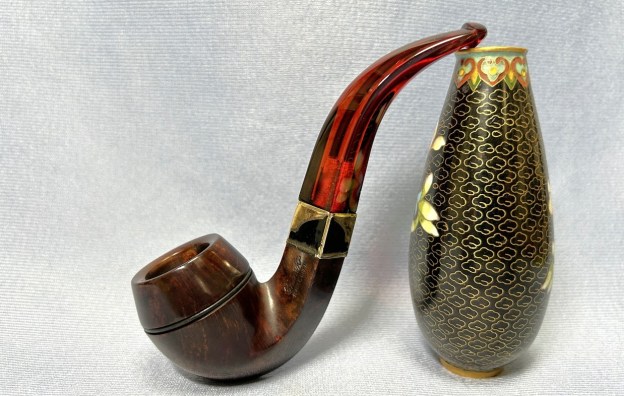
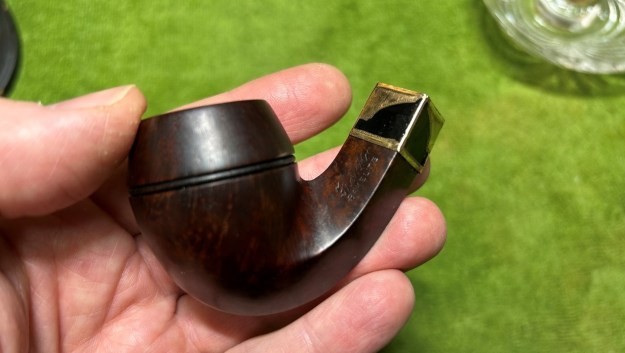 For the final step, I took the pipe to my bench polisher and carefully buffed it – first with a blue diamond compound, then with three coats of carnauba wax. This procedure makes the pipe look its best – the stummel sings and the stem glows.
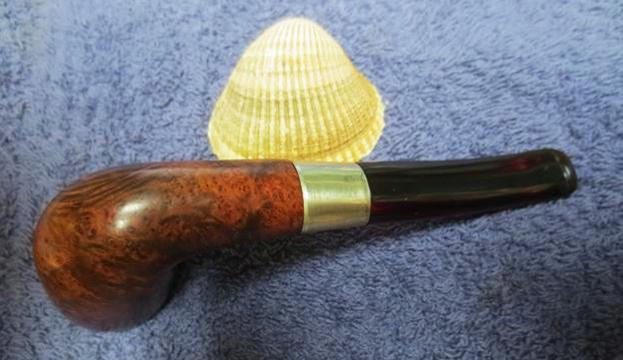
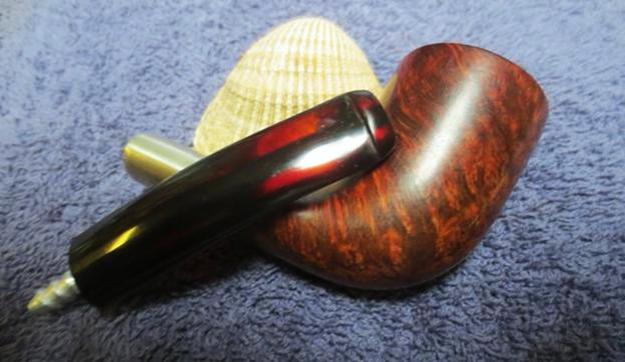
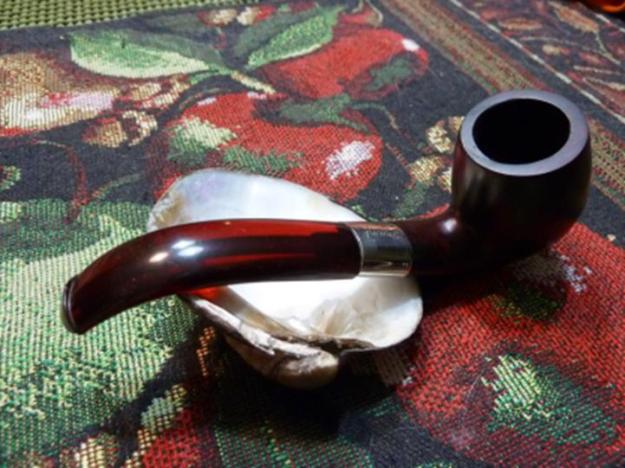
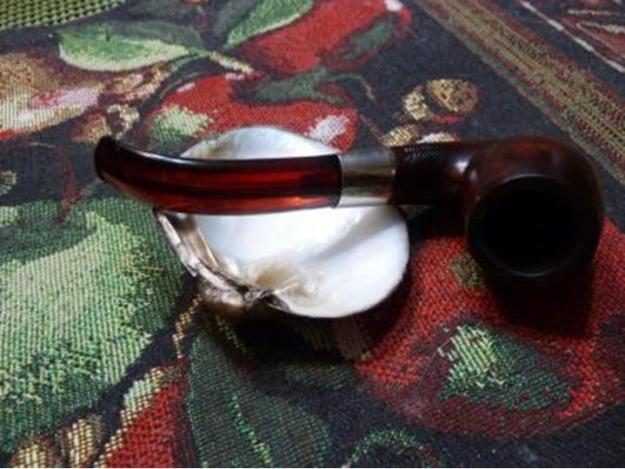
All done! This S.M. Frank Bakelite bent bulldog looks fantastic again and is ready to be enjoyed by its next owner. I am pleased to announce that this pipe is for sale! If you are interested in acquiring it for your collection, please have a look in the ‘American’ section of the store here on Steve’s website. You can also email me directly at kenneth@knightsofthepipe.com. The approximate dimensions of the pipe are as follows: length 5 in. (128 mm); height 1⅞ in. (46 mm); bowl diameter 1⅜ in. (36 mm); chamber diameter ⅞ in. (20 mm). The weight of the pipe is 1¼ oz. (39 g). I hope you enjoyed reading the story of this pipe’s restoration as much as I enjoyed restoring it. If you are interested in more of my work, please follow me here on Steve’s website or send me an email. Thank you very much for reading and, as always, I welcome and encourage your comments.