Blog by Geoff Carmell
It is a pleasure for me to post this first blog by Geoff Carmell. I have followed his work on Facebook and we have communicated via Messenger and email now for a while. We have common friends in the small pipe community of Calgary. I saw his work on this bulldog and knew it was going to a common friend so I asked him to do a blog on the restoration. Geoff, it is great to have this piece here. You have done some great work on that old pipe. Thanks for sharing it with us all. Welcome to rebornpipes.
 Hello everyone, this is my first attempt at blogging about one of my pipe refinishing projects.
Before I begin, our host Steve Laug wanted me to give a brief introduction about myself. I am still quite a novice when it comes to the world of pipes but that hasn’t quelled my desire to keep collecting, refinishing and smoking pipes. For me it truly started while going to local antique shops last fall while my parents were visiting. I was hooked when I refinished one of those antique store finds and haven’t looked back since.
I wanted to take a moment and say that refinishing pipes as a hobby has really helped me in more ways than one. I live in Southern Alberta and I am a crane truck operator in the oil and gas industry. Last year was an extremely slow year for me and 2016 isn’t looking any better. As such, I needed an outlet to keep myself from going crazy worrying about all the “what if’s” in life.
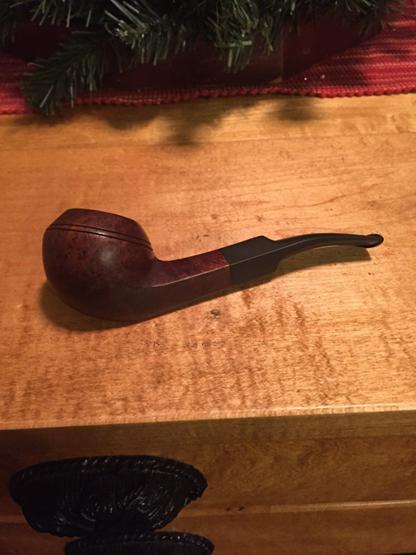
This began my journey into the world of pipe refinishing. This nice little bulldog was one of my first eBay purchases and was really in decent shape needing very little work, or so I thought…
My first step was to thoroughly clean the bowl inside and out. I did my usual salt/alcohol soak to get rid of any “ghosts” in the bowl. Before I did that though, I used Q-tips and pipe cleaners dipped in alcohol to clean the shank. Once the bowl was sanitized I turned my attention to the outside of the bowl by using a lightly dampened patch of “0000” steel wool to clean off the grime. To my dismay, this “cleaning” uncovered a crack in the rim.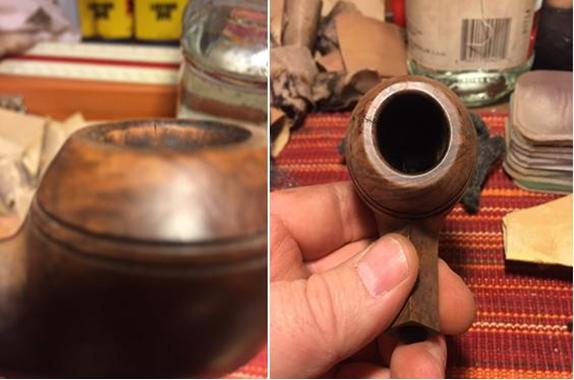 Not sure of what to do I just began sanding the rim down to the point that the crack was no longer visible. After I finished sanding the rim, I turned my attention to the grooves on the front of the bowl which had all but disappeared due to the wood swelling. After lots of filing with my newly acquired needle files the grooves started to take shape again. With the rim and grooves in good shape again I sanded the bowl with 400 and 600 grit sandpaper. I then proceeded to dye the bowl with Fiebings mahogany leather dye. I set the dye by flaming it and then left that to sit overnight. I turned once again to my steel wool to help strip off the dye to reveal the beautiful grain underneath. The bowl seemed lacking, I decided to sand the rim of the bowl once more if only to reveal the original briar again, although it’s not noticeable in the pictures, I sanded the ridge between the two grooves as well to show some contrast.
 Once the sanding was complete I used my buffing wheel with brown Tripoli to further bring out the shine and then applied a couple of coats of carnauba wax to protect the finish.
After the bowl was done I used the buffing wheels to put a shine on the stem as well. After all the buffing and waxing is done I like to use a clean microfiber clothe to hand rub the bowl and stem. This really helps to get rid of any wax buildup.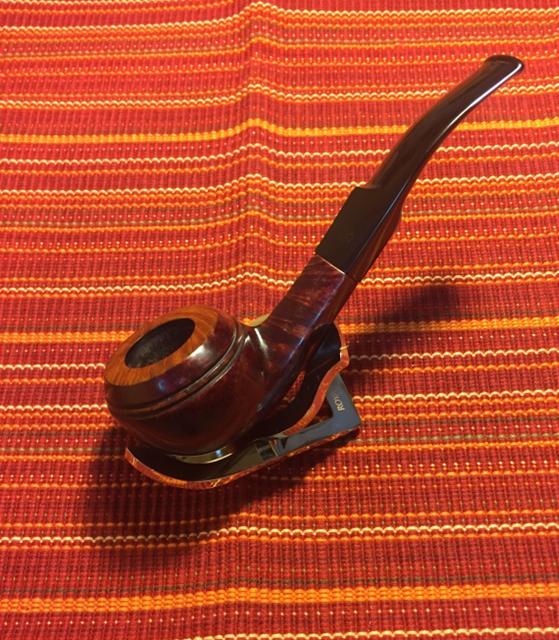 After all is said and done I really enjoyed this refinishing project and I was pleased that it turned out to be my first pipe that would go to a great guy in our church.
Thanks for looking.
Best regards,
Geoff

Nice work and welcome!
LikeLike