Guest Blog by Robert M. Boughton
Member, International Society of Codgers
Member, North American Society of Pipe Collectors
http://www.naspc.org
http://www.roadrunnerpipesnm.biz (Coming Soon)
http://about.me/boughtonrobert
Photos © the Author
The Delta blues is a low-down, dirty shame blues. It’s a sad, big wide sound, something to make you think of people who are dead or the women who left you.
― David “Honeyboy” Edwards (1915-2011), U.S. Delta blues guitarist and singer
INTRODUCTION
I’ve been sitting on these two nice metal pipes, different brands but modeled after the original of their kind, designed by Frederick Kirsten, a U.S. professor of electrical engineering at the University of Washington who was transferred to the aeronautics department and promptly changed the course of aviation history with the creation of the Kirsten Wind Tunnel for subsonic aerodynamic testing. He also upended the tobacco pipe industry and generally rocked the world of pipe enjoyers with his 1936 invention of a sleek aluminum radiator frame with interchangeable bowls. The patented revolution in a box was more or less a way to quit cigarettes by exercising his boundless creativity. He puffed cigars as well.
Maybe I’m just not as daring as the good professor. Whenever I find myself on the edge of pipe restoration territory I haven’t charted, I hesitate. I don’t panic or freeze in terror. I just pause to survey the terrain and get my bearings; to triangulate my coordinates, find my footing, and then one day, as if on an impulse but really because I’m good and ready, I take the next leap, with some faith.
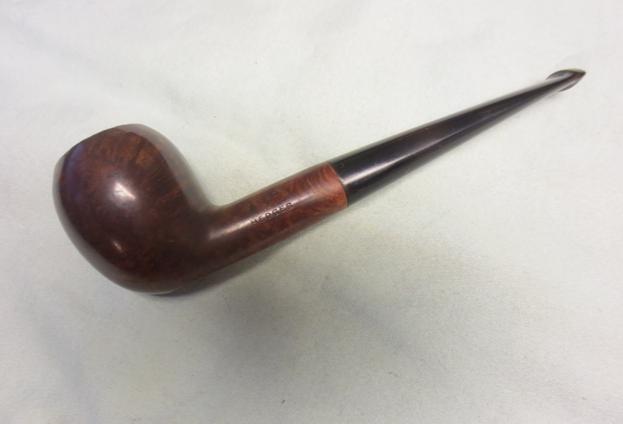
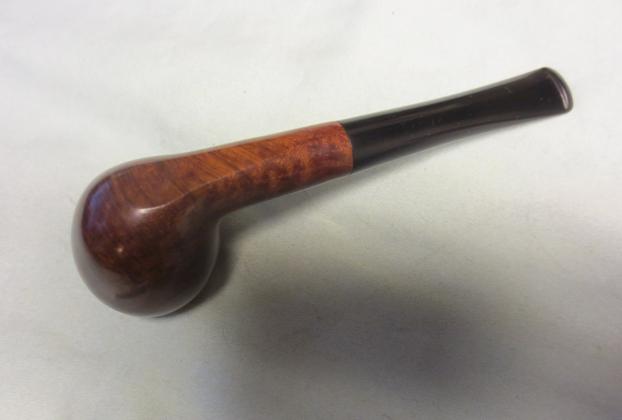
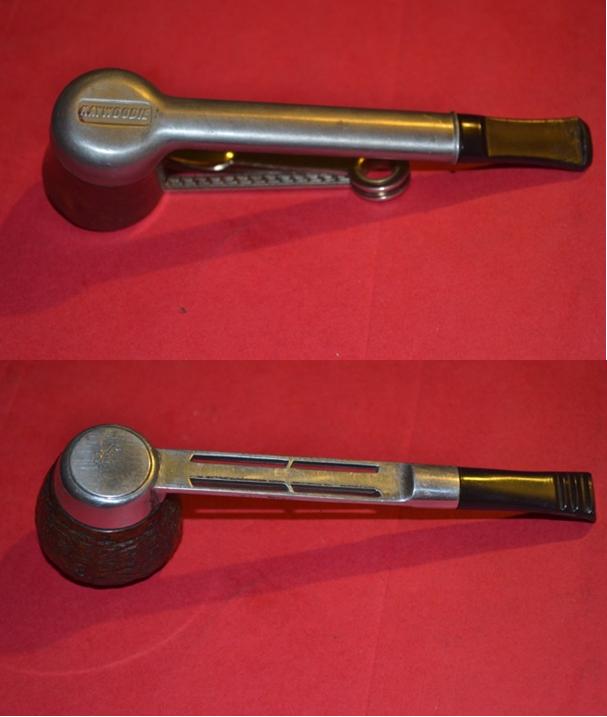
And so it was last night that I looked at the Kaywoodie Smooth Billiard and Duncan Delta Rusticated Brandy with a dental lip – again – and without thinking grabbed them. The next thing I knew, I was looking around for the implements of cleaning and restoring I might need for the combined tasks and remembered another aluminum pipe I fixed up once, an Aristocob, and how I used a solution of white vinegar and baking soda to soak the metal. Although I had bought enough of each for a lifetime when I did the Aristocob, I discovered they were lost in my latest necessarily hasty move. The nearest Walmart would close in about a half-hour, at midnight. All of Sam Walton’s children here used to stay up round the clock, but now there are less than a handful that do, and only one within any kind of reasonable distance. They had too many problems with thievery and other shenanigans, you see, mostly through the dock doors, if you follow me. I armed myself against the natives, threw on a coat, petted my cats as they were curious about the sudden hullabaloo and hurried out the door. I was back before the witching hour.
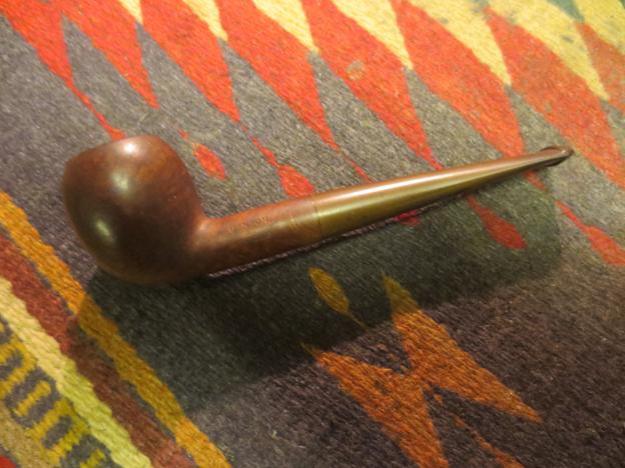
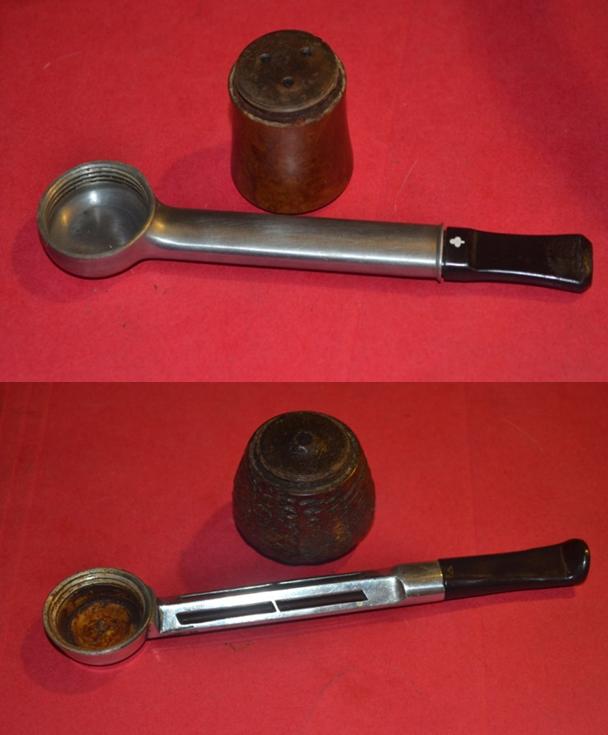
As part of the map checking I did in comforting if only perceived preparation for these restorations, I noted that the Duncan Delta, of the English metal genre, as it were, came with a non-removable bit, as did the two Falcons in my personal collection. At this point I made that greatest of mistakes: I assumed there were no exceptions to the rule.
 To be fair to myself, I showed the Kaywoodie and Duncan Delta to my friend and mentor, Chuck Richards, who is usually infallible, and asked how the bits come off for cleaning. In hindsight and an extended spirit of fairness, I’m not sure he looked all that closely at them.
“They don’t,” he said, with a certain amused grin he has. “You just have to work through them.” Or something to that effect. Taking a seat on the couch with the supplies I would need to proceed, I had no idea what I was in for. I can’t wait to show Chuck the mind-boggling discovery I tripped over, figuratively speaking – about halfway through the restorations. To those in the audience who know the astonishing secret of a certain rare Kaywoodie metal pipe made from 1955-1959, with this particular surprise only included during the first year or so of that period, Shhhh! Don’t spoil the revelation for others when it comes, in good time.
RESTORATIONS


 I had prepared an empty macaroni salad tub, by cleaning it with scalding water and dish soap, for the vinegar-baking soda soak of the aluminum pipe bodies. It was the widest container I had but also deeper than it needed to be. Into the tub I measured about a tablespoon of baking soda, then added the vinegar and watched it fizz madly until the powder dissolved. I placed the two parts in the mix and added more vinegar until they were almost covered. Considering the possible effects on the bits, I spontaneously chose the bolder path and pushed down a little on each one until they were submerged. The bubble action was really something to see – much more active of an interaction than an OxiClean bath – but I had other things to do.
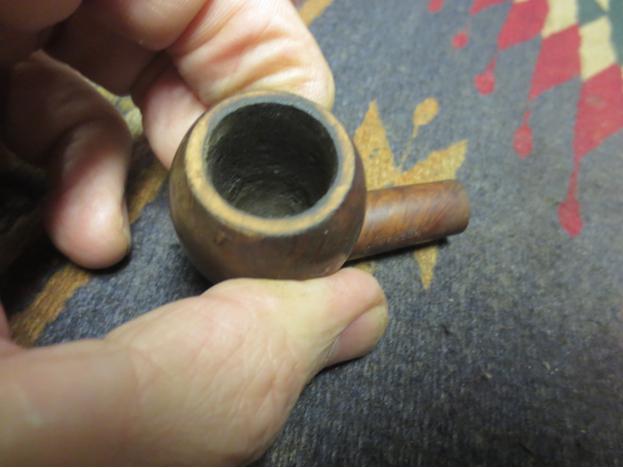
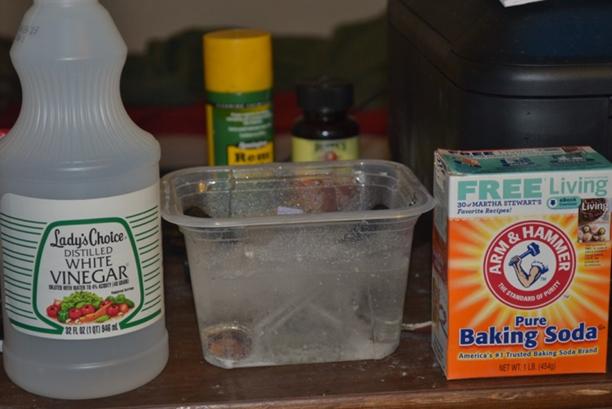 The bowls needed cleaning in the worst way, the bases in particular. The moisture from tobacco creates steam, and Kirsten’s system, which is used in metal pipes still today, traps and cools the steam in the stem. Much of the resulting very sticky, cloying gunk ends up on the bottoms of the bowls and can be cleaned in seconds by anyone who enjoys these pipes. But as Steve put it perfectly in one of his blogs on a particularly messy Generation 1 Kirsten A, I’ll just quote him: “The cleaning in seconds must not have been something that the previous owner of this pipe ever read or understood.” https://rebornpipes.com/tag/kirsten-pipes/
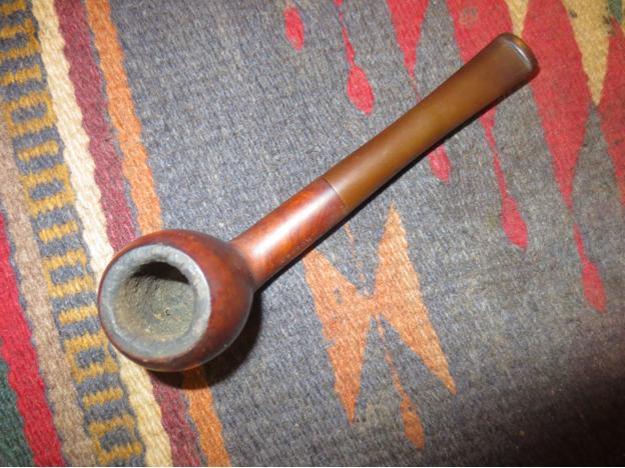
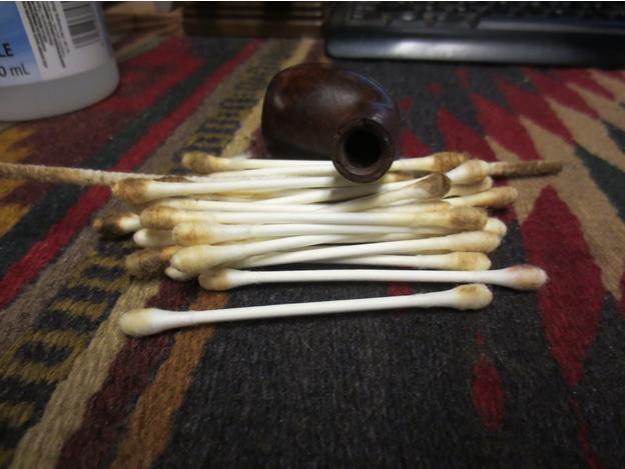
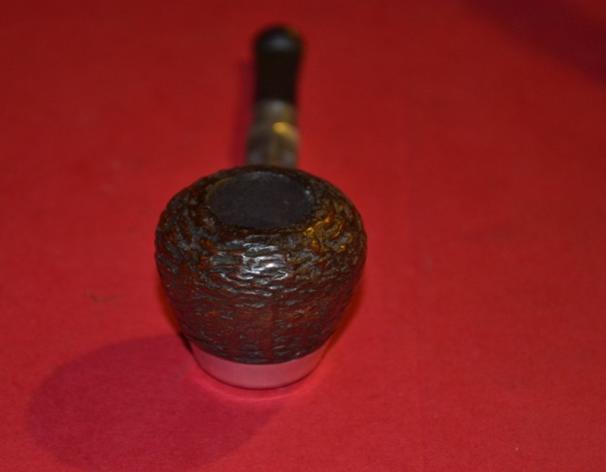
Taking also from this great blog the idea that metal pipes are, for the most part, sturdy things that can outlive generations of a single family of pipe enjoyers, I launched a three-pronged assault on the bottoms of the bowls alone. First I swabbed them and the rest of the bowls’ exteriors with cotton gun cleaning squares soaked with purified water; then the same with Everclear swabs, and next superfine steel wool on the bases and rims. The Delta base, being metal and somewhat pocked with corrosion, needed a little more work with sandpaper before another round of steel wool.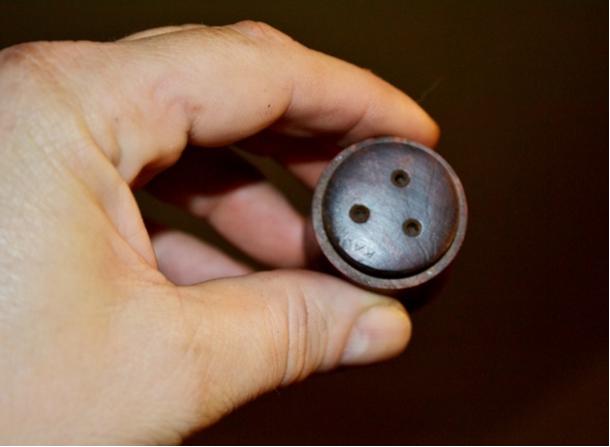
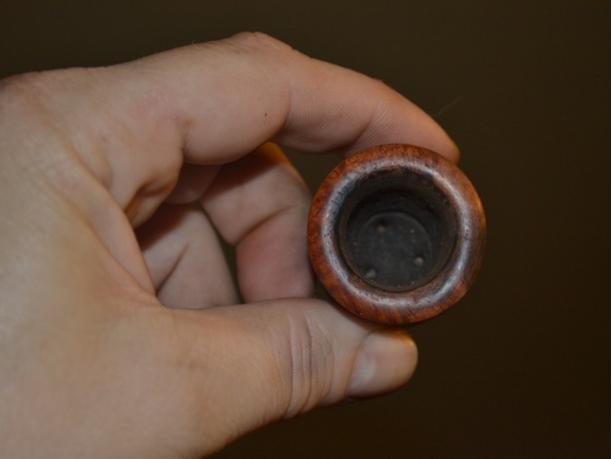
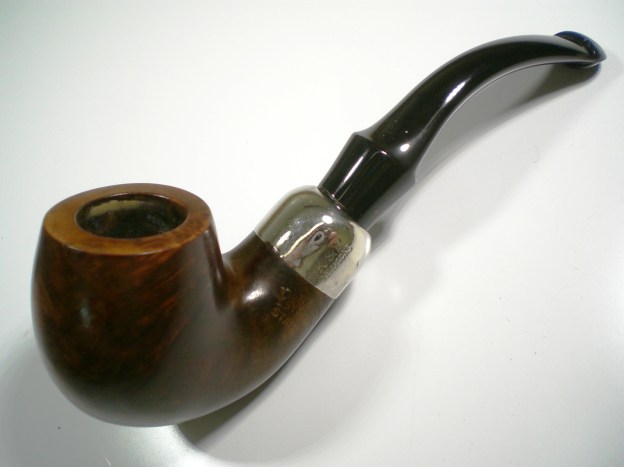
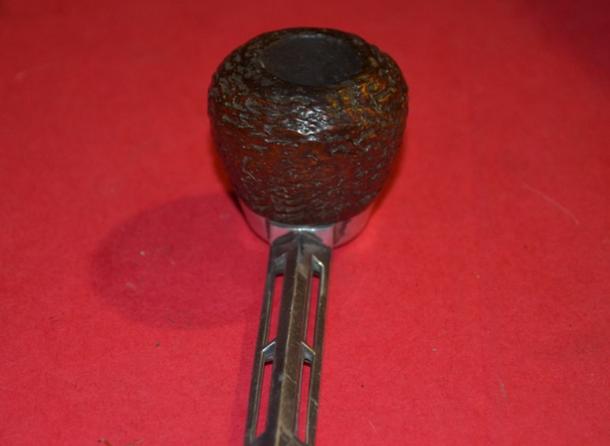
 An odd trick of sight makes the rusticated Duncan bowl, which indeed has a wider outer diameter than the smooth Kaywoodie (about 5” compared to 4-3/8), appear as if it would need a bigger reamer to clean out most of the excess cake. But the Duncan only took a 19mm fixed reamer while the Kaywoodie held a 21mm.
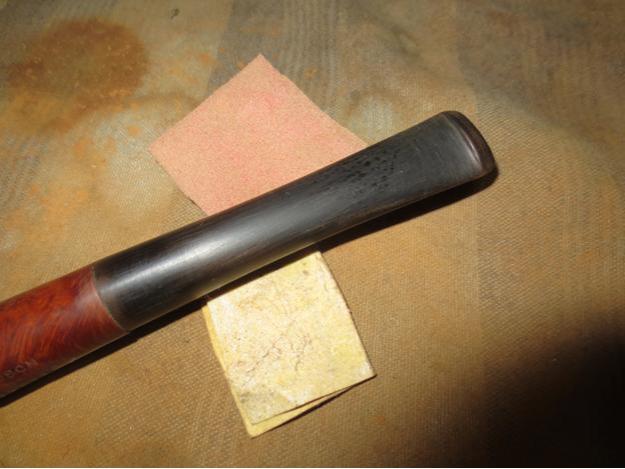
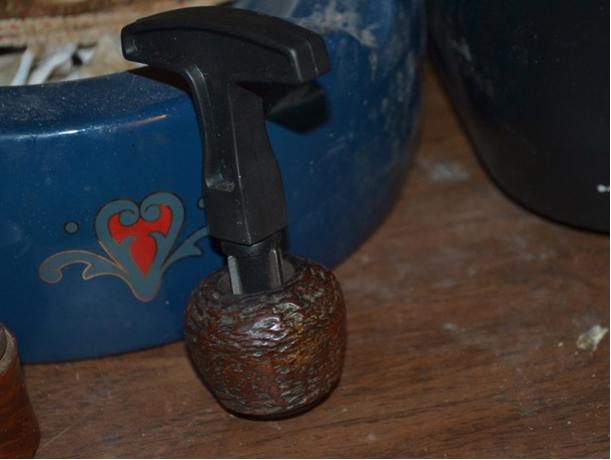 I smoothed the chambers with 320-grit paper followed by 200, followed by long and careful consideration of the next step. While I started restoring pipes with the habit of stripping the old finish completely, I have taken to avoiding that step for the most part on different levels of thinking, primarily two. One, I never know for sure what I’ll find beneath the finish that might have been better left uncovered, and two, I have become more purist in my approach, liking the idea of imitating the original.
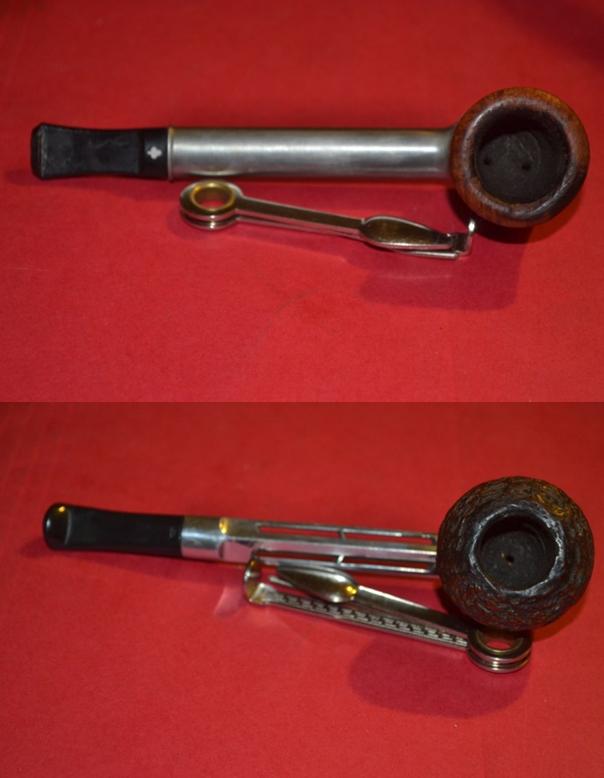
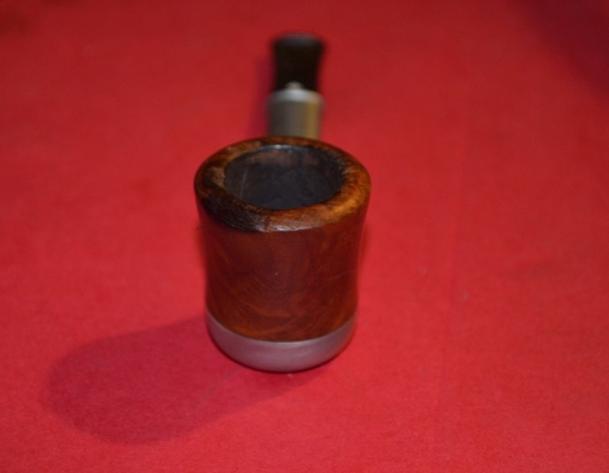
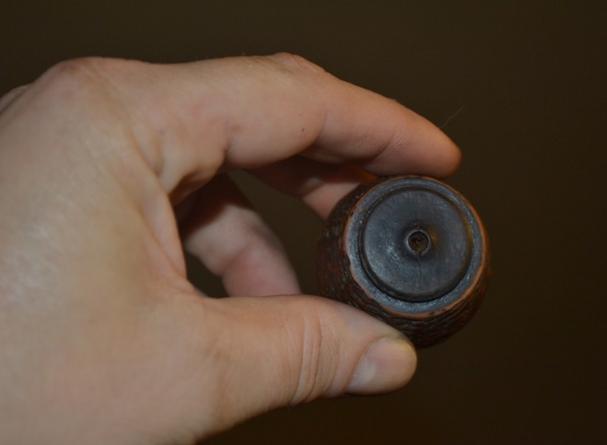
Nevertheless, I concluded I just didn’t care for the light brown shade of the Kaywoodie or the dark brown of the Duncan. As the former was of U.S. origin and the latter of British make, I reasoned, that would make them cousins, as some folks on either side of the Pond refer to each other. But I wanted them to be more like brothers. Therefore, “Off with their stains!” I heard a voice cry in my head, and dunked both bottoms up into an Everclear bath, careful to leave the bases above the alcohol level.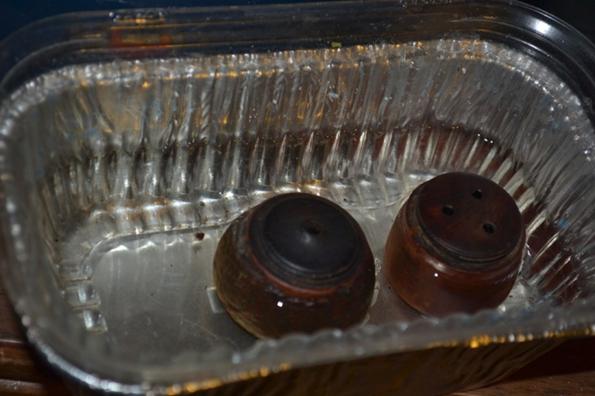 While the 190-proof alcohol changed from clear to something else, I removed the frames from their long vinegar-baking soda soak, rinsed them thoroughly and began to “work through” the Duncan frame with pipe cleaners dipped in more Everclear, still shocked, as always, at the filth that came out. Seriously, how hard is it to run a cleaner through your pipe now and then? Are restorers the only people who do it? Deep breath; exhale. I suppose that’s a rant better left for my upcoming Encyclopedia of Pipe Trips. Still, seven bristly cleaners through the frame later, and three swabs soaked with alcohol to clean out most of the mess in the round bowl connector, not to mention having to use my wire cleaner to dig out the muck in the grooves of said connector, I thought I was finished with that part.
 But now, looking at the photo above, I see it needs a little more work. I’m going to soak the connector in Everclear and scrub it some more. Give me a few minutes to make it shine better, and I’ll be right back with another picture.
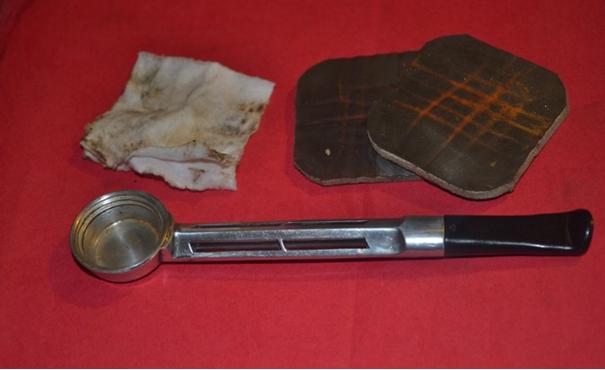 There. That was easy, and I for one feel better. Plus the picture tells the whole story!
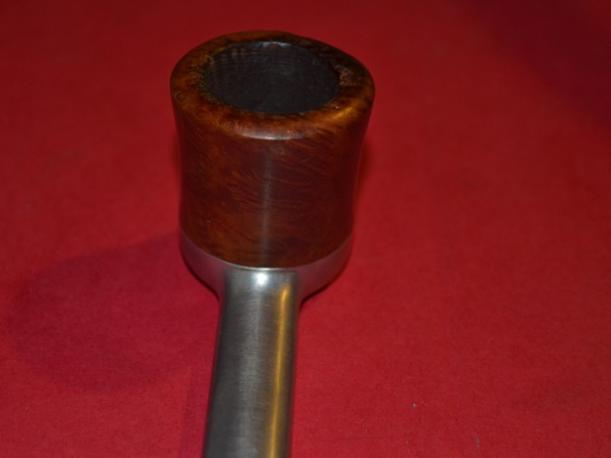
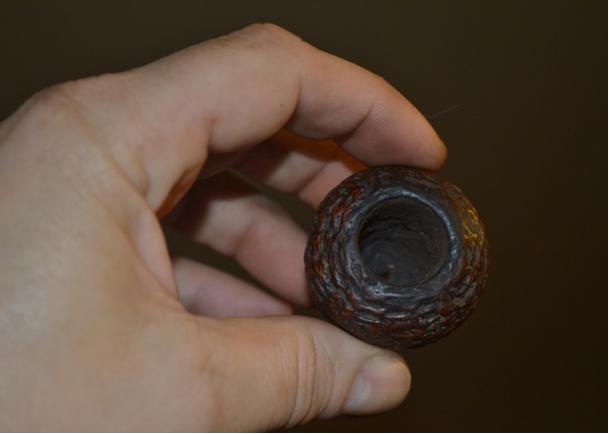
Anyway, enough time had passed to take the bowls out of the Everclear and scrub them cleaner and dry inside-out with more cotton swabs.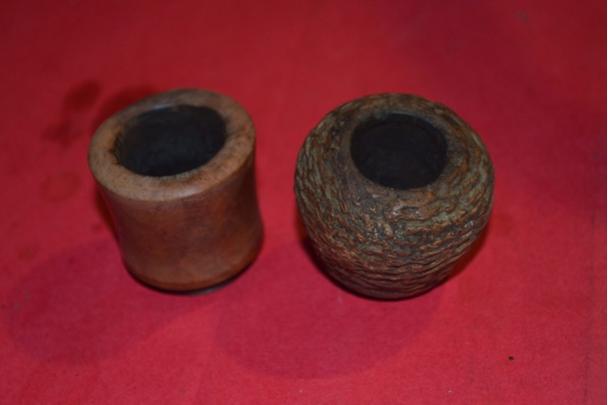 I used the steel wool again on both, lightly on the Kaywoodie to make it shine before heightening the effect with a micromesh progression, and vigorously to take the finish of the rusticated Duncan down still more until it was actually reddish, for which I had hoped.
 Re-staining both with Lincoln Marine Cordovan (Burgundy) boot stain, I flamed them with my Bic and set them aside.
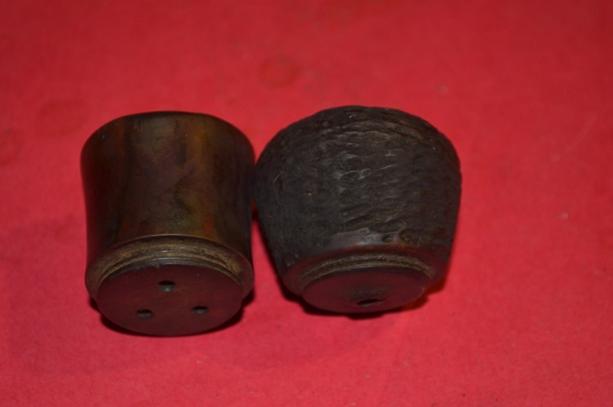 Now, at last, I near the dramatic moment I know you have all been waiting for! Is that the faint fade-in of a drum roll I hear, or an auditory hallucination? Due to my slight deviation from following the restorations of each pipe part by part – starting when I cleaned the Duncan frame and instead of moving on to the Kaywoodie, continued to the bowls – I did not learn the wonderful nature of the Kaywoodie until I attempted to work through it with bristly cleaners as I had the Duncan…
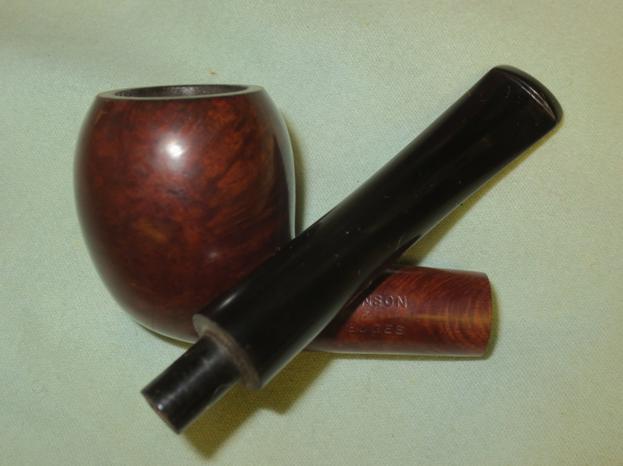
…and the whole thing came apart in my lap! There were the bit that wasn’t supposed to come off and some bizarre, vile, noxious looking thingamabob that looked like a wire brush. I picked it up with distaste and tossed the whole dark, stained mess in the leftover Everclear from stripping the bowls. I knew that would clean it up somewhat, and it did. With the brush out of the Kaywoodie frame, by the way, the metal was quite easy to clean. That should have been a clue, but my first thought was that someone had stuck the brush inside the frame as a makeshift filter. (It is truly scary how close and yet so far from the truth I can be sometimes in my denser moments.)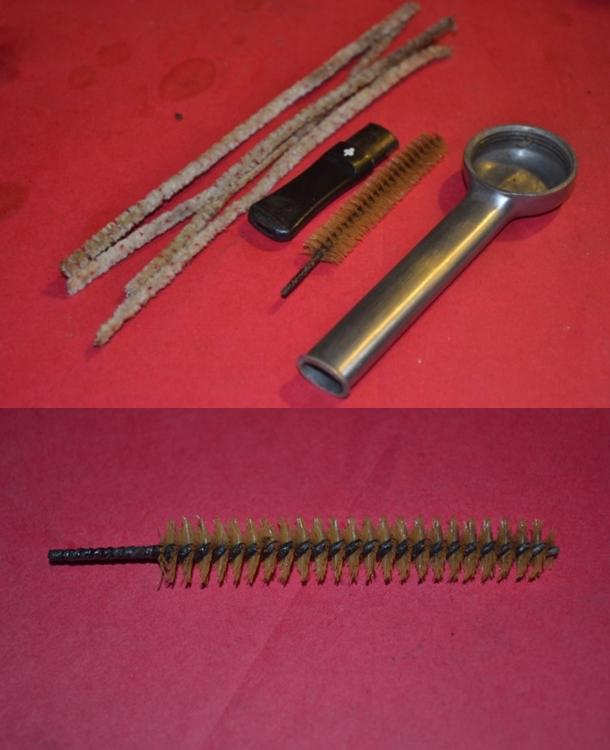 At least I had the sense to recognize that the resulting hole in the frame was gaping wide, and turned to pipephil.eu for help, which I found as I almost always do. It was the second metal “filter” pipe in the Kaywoodie models A-K section, the Filter Plus, made from 1955-1959. A convenient link to Smoking Metal led me to the rest of the story. http://www.smokingmetal.co.uk/pipe.php?page=133
As it turns out, the brush is not a fluke, of course, but an original Kaywoodie nylon brush filter that was only included with the pipe during the first year or so of its four-year run. The filter brush has 5,000 fibers. Now, I want y’all to think on that fer a spell. Finding a pipe with one at all, much less intact, is a miracle. It’s no wonder Bill Feuerbach, president of S.M. Frank & Co. Inc., owner of Kaywoodie, is quoted at the link above as saying of the Filter Plus, “It is one of the most indestructible and durable pipes I have ever run across.”
Check out the advertisement below from the first year the Filter Plus was made. Considering how easy it was to clean the frame of the pipe itself, despite (or because of) the dirty condition of the filter brush, it’s a shame they stopped making them. As the ad shows, the pipe cost $4, or $35.42 in today’s money. http://www.usinflationcalculator.com/. Replacement or additional bowls were $1.50 ($13.28), and two-packs of the filter brushes were 35 cents ($3.10).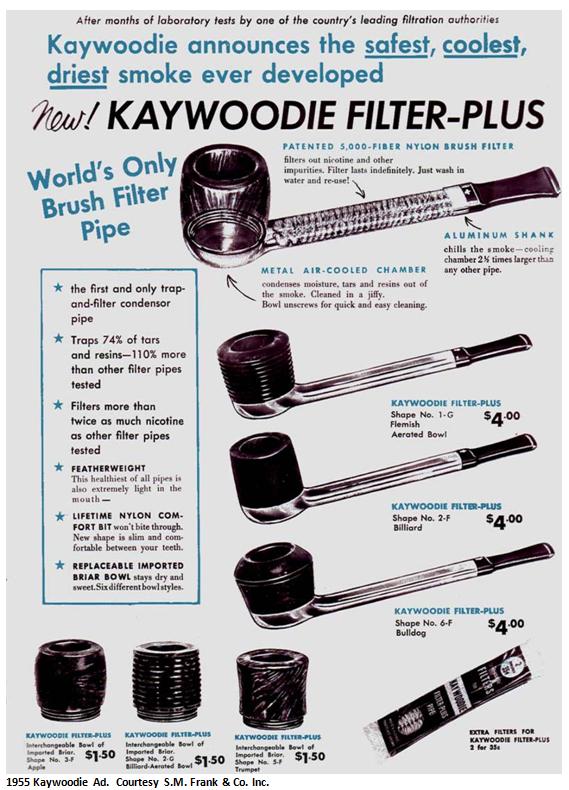 Getting close to the finish line always makes my blood start to race! I buffed the two bowls with 4000 and 6000 micromesh.
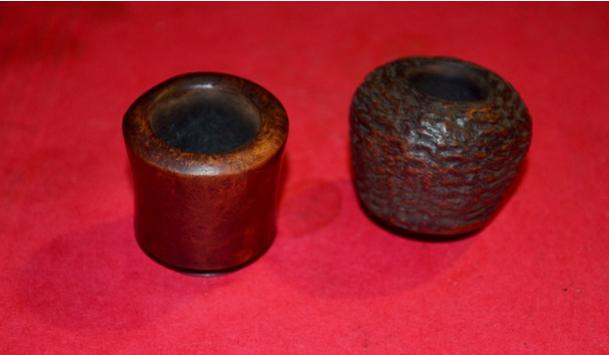 Then there was the Kaywoodie bit, which was looking a little rough.
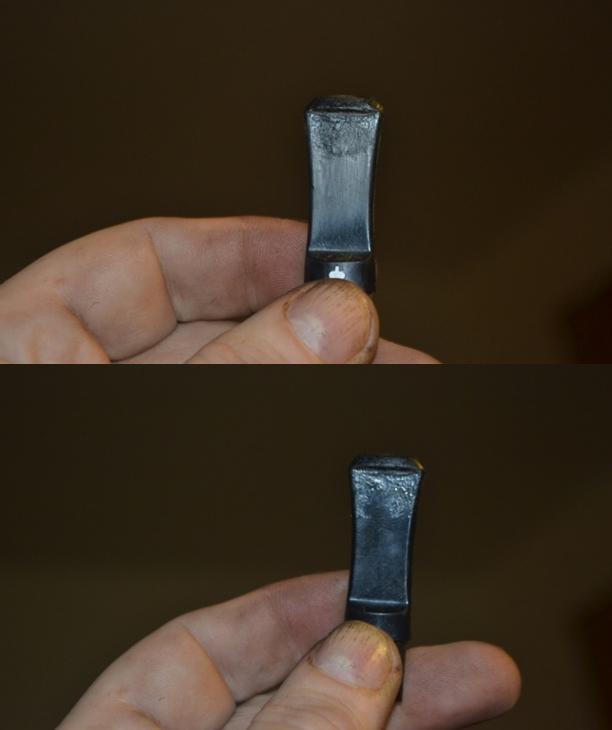 I sanded it with 200- and 320-grit paper before working my way up the micromesh trail, and moved on to putting a little Halcyon II wax on the Duncan. During a few of the 15 minutes or so it set in, I took the Kaywoodie Filter Plus billiard bowl and the bit (which indeed is removable) into my office. I buffed the bit with red and white Tripoli, then White Diamond, using the clean wheel between each; then the bowl with white Tripoli, White Diamond and a good coat of carnauba, again using the clean wheel in between.
Really only ten minutes more passed, at most, as I sat back on my couch, screwing the Kaywoodie bowl in and out of the frame threads and wiping it down, over and over, because it seemed like the minute hand on the clock was stuck there to spite me! Maybe that’s because I kept eyeballing it. But the time did pass, and I carried the Duncan bowl into the office for a quick spin on the clean wheel only. That was my reward for being so patient and all.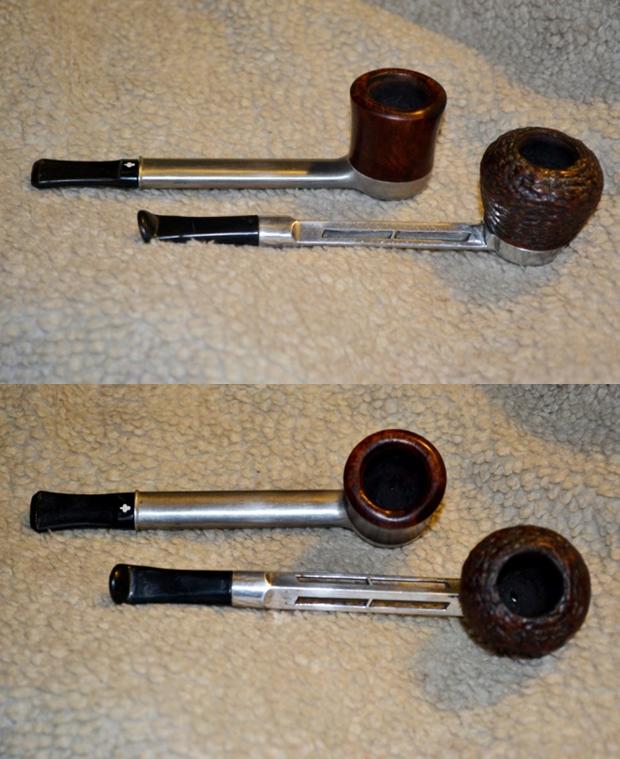

 CONCLUSION
Well. Now that it’s all said and done, all I really have to add is that this pair of restorations was just plain fun. And full of surprises. And I learned a few new things I never imagined, too, and can’t wait to show Chuck!
ADDITIONAL SOURCE
https://www.reddit.com/r/PipeTobacco/comments/3a5hf9/info_on_falcon_pipe_markings/ Info on FD18 stamp