Blog by Paresh Deshpande
The journey of this pipe began way back in the year 1916 when it came out of the workshop as a brand new Blumfeld’s Best Briar pipe in the classical Bulldog shape. Thereafter this pipe traveled with a British piper across the seven seas aboard a steamer from England and reached the shores of India. And during its stay here in India, it served its Steward well and when the British left India for good, it was gifted to my grandfather and thence continued to serve him till he quit enjoying his pipe in 1970s. Whether this pipe was gifted or it was purchased as a brand new by my grandfather cannot be ascertained, but given the economics of that era, the former appears to be most likely.
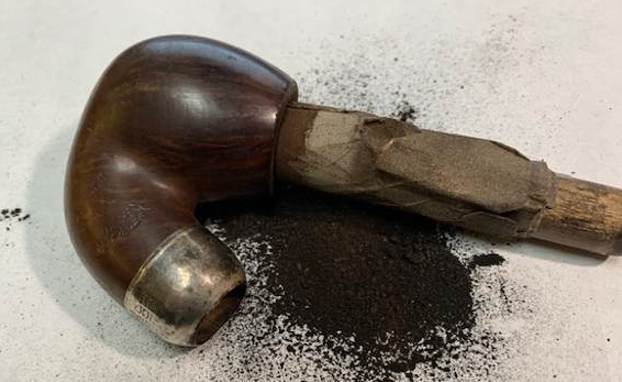
Well, now a 105 years later, this pipe is on my work table, nicely cleaned by Abha way back in 2018. It was in that huge lot of around 50 plus pipes that she had cleaned up and sent me for further restoration when I was away from my family for work. As the pipe sits on my table, I very well know the reason for the delay in working on this pipe.
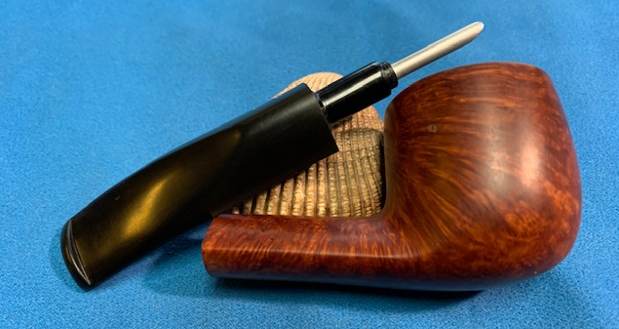
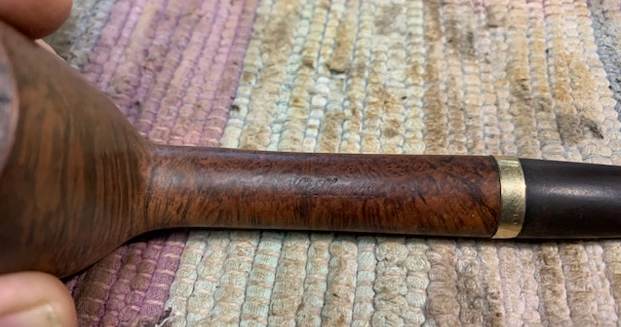
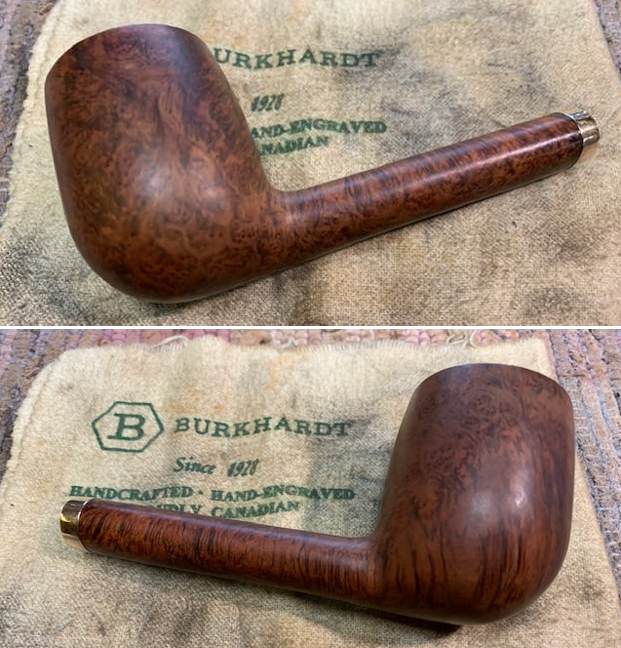
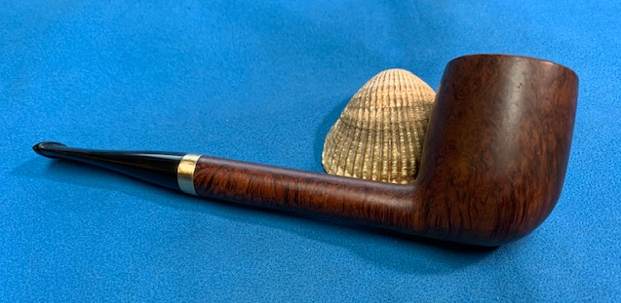
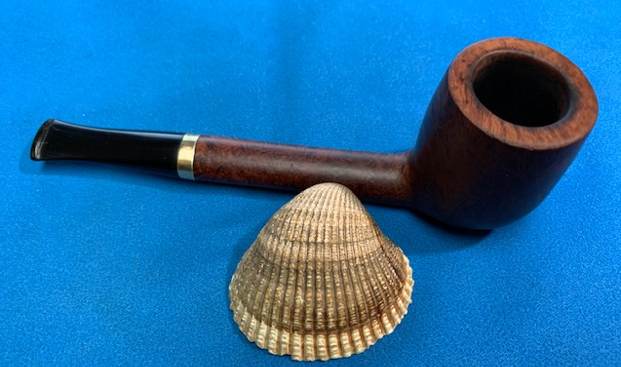
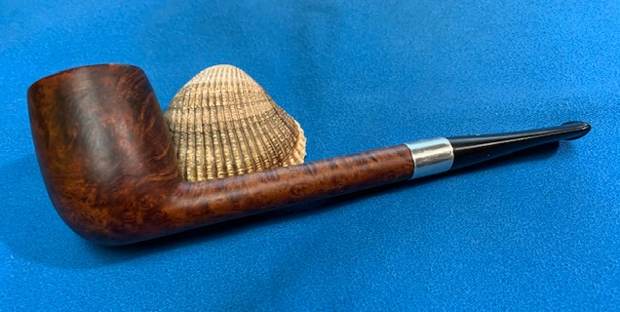
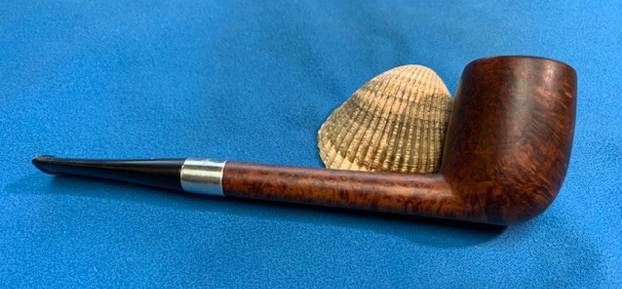
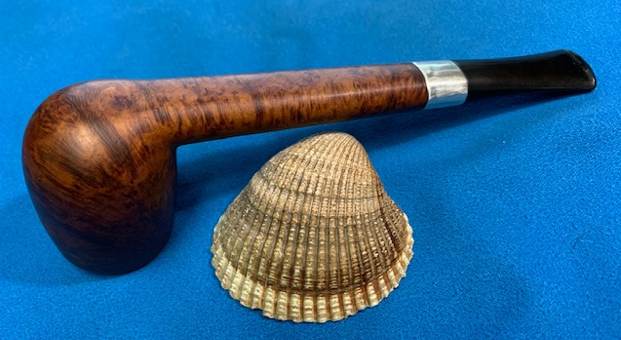
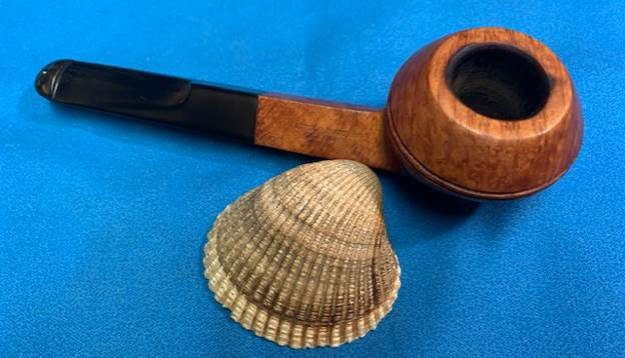
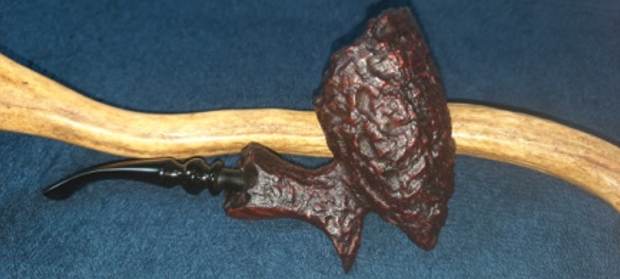
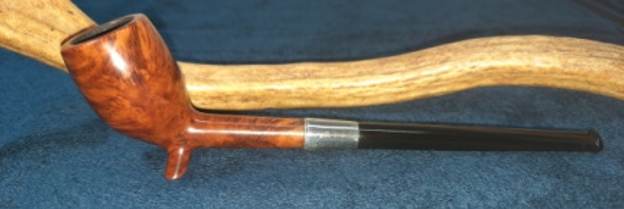
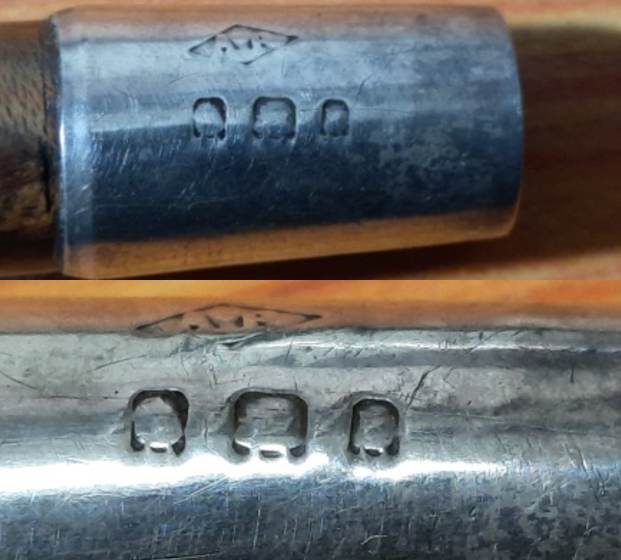
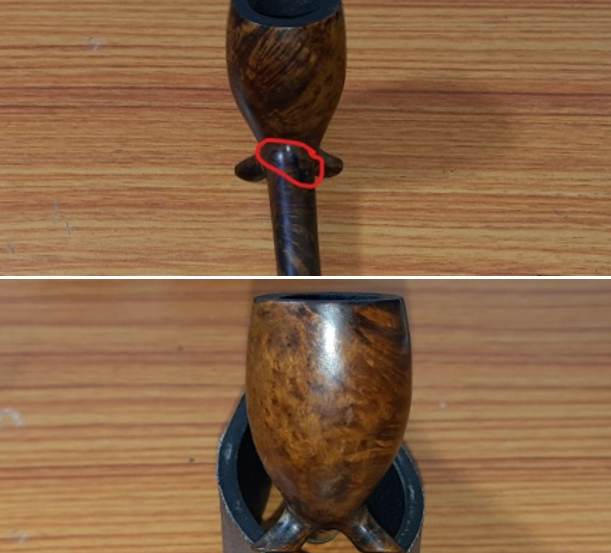
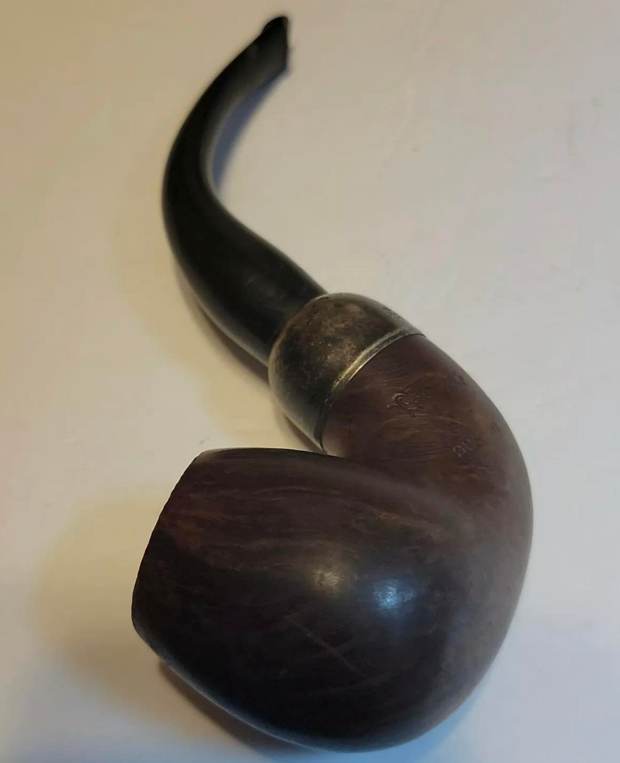
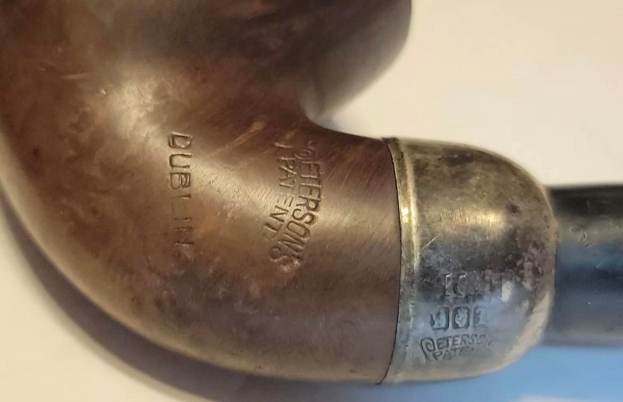
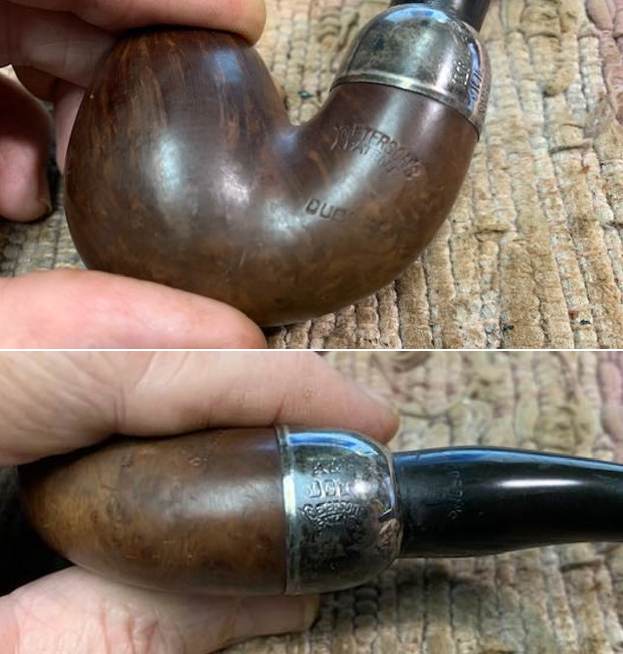
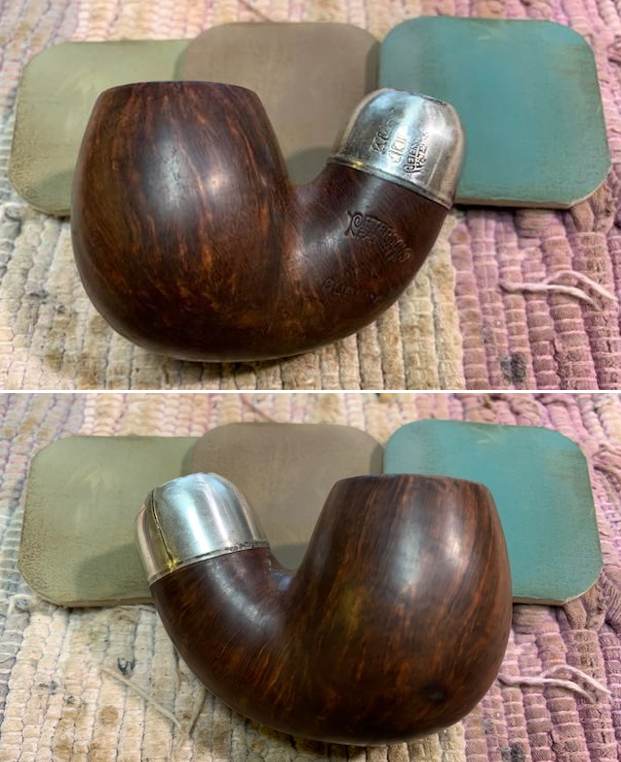
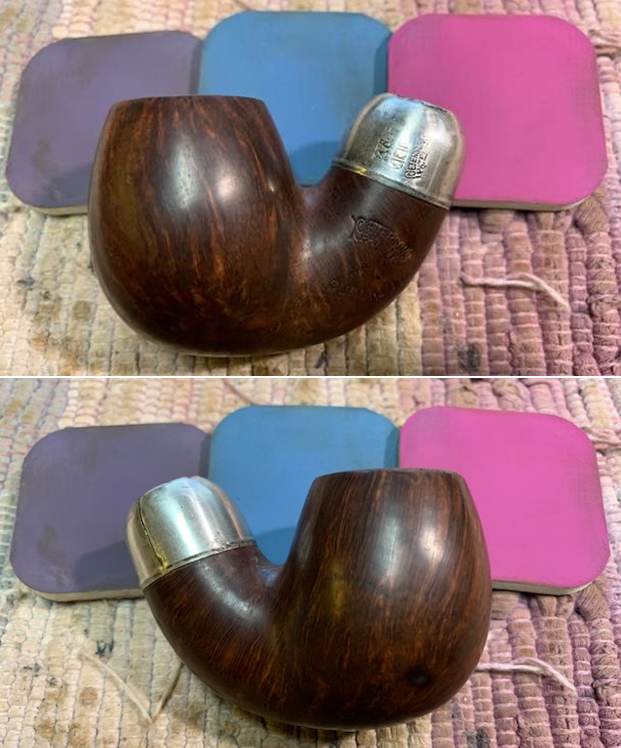
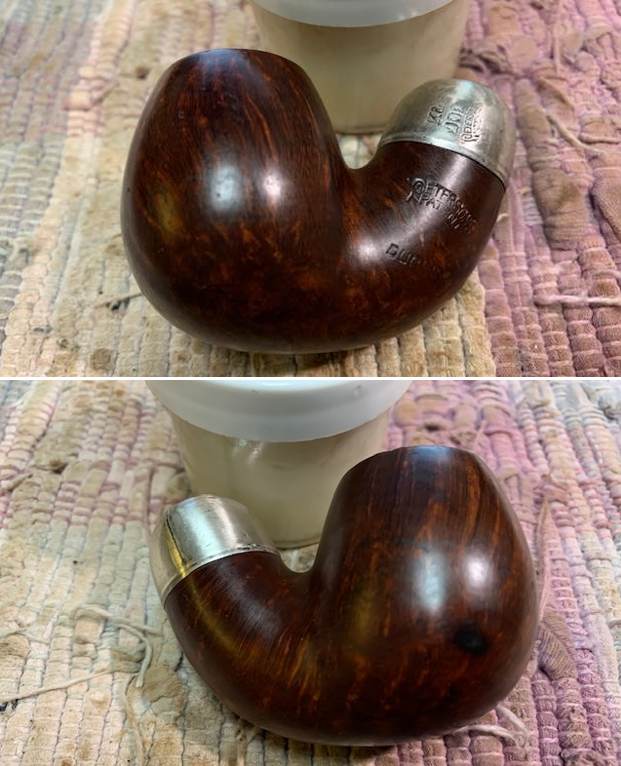
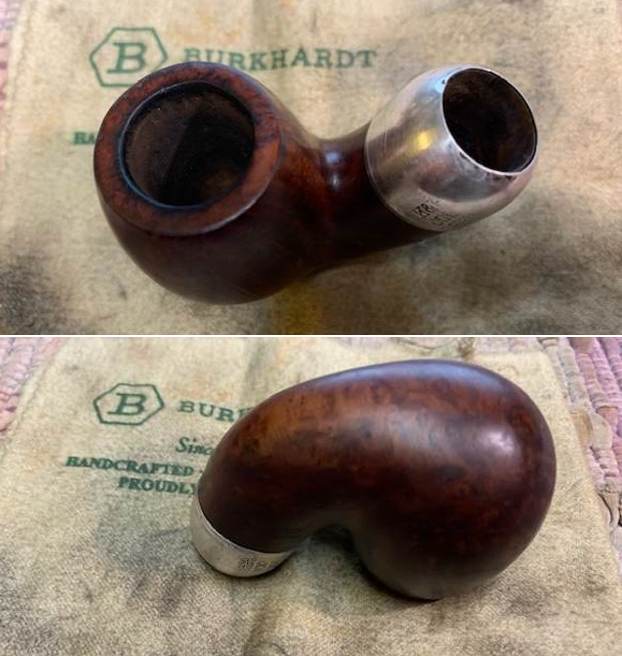
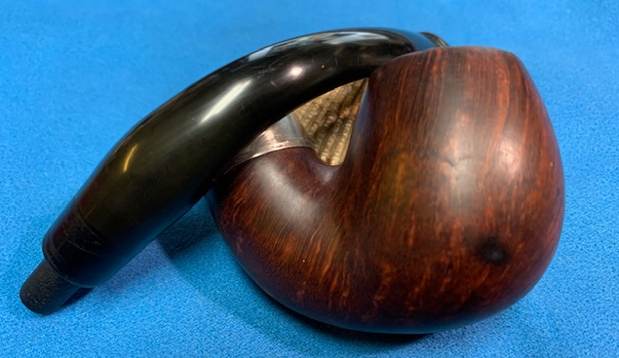
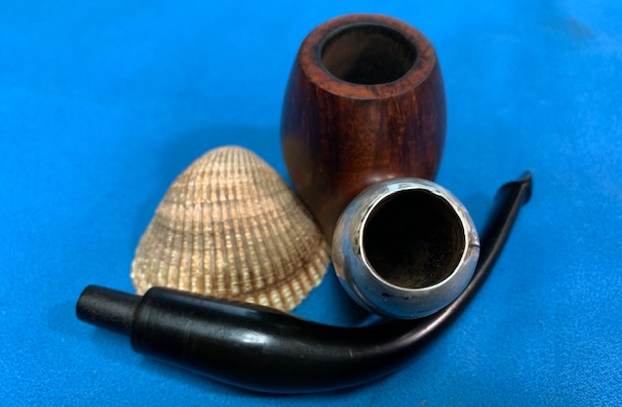
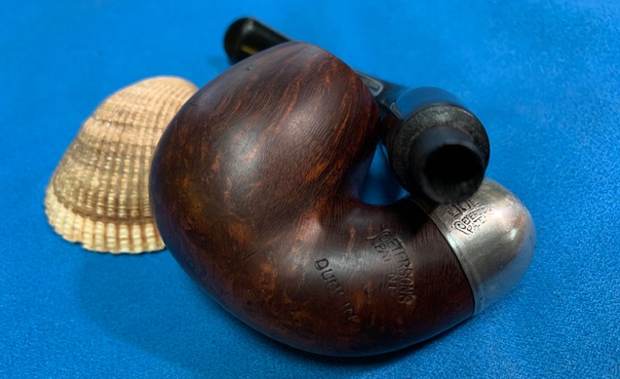
This classic shaped square shank Bulldog has some beautiful mixed grains that can be made out from under the dull and lackluster stummel surface. It is stamped on the left side of the stummel as “BBB” in a rhombus with “OWN” and “MAKE” on either side of the rhombus. The Sterling silver ferrule at the square shank end is stamped as “BBB” in a rhombus over “AF & Co.” in a rectangle over the three cartouche bearing hallmarks. Starting from the left, the first cartouche bears the stamp of an “Anchor” for the Birmingham Assay Office followed by the “Lion Passant” certifying the silver quality and the last cartouche bears the Date letter “r”. The vulcanite saddle stem is devoid of any stem logo. The stampings are clear and easily discernible.

 BBB – Pipedia has detailed information on the origins of the brand and transition to the Cadogan group and would be a good read for those interested. I would like to highlight that, quote “At the beginning, BBB produces two qualities. One, BBB Own Make, became finally BBB Best Make, other pipes being simply estampillées BBB. There are reasons to believe that Own Make in fact were produced in London (Reject pipes cuts year R stamped one them.), whereas the simple BBB were imported, and this, to the paddle of the 20th century. However, if all that is not very clear, it is probable that the lines low-of-range were an import of Saint-Claude” un-quote.
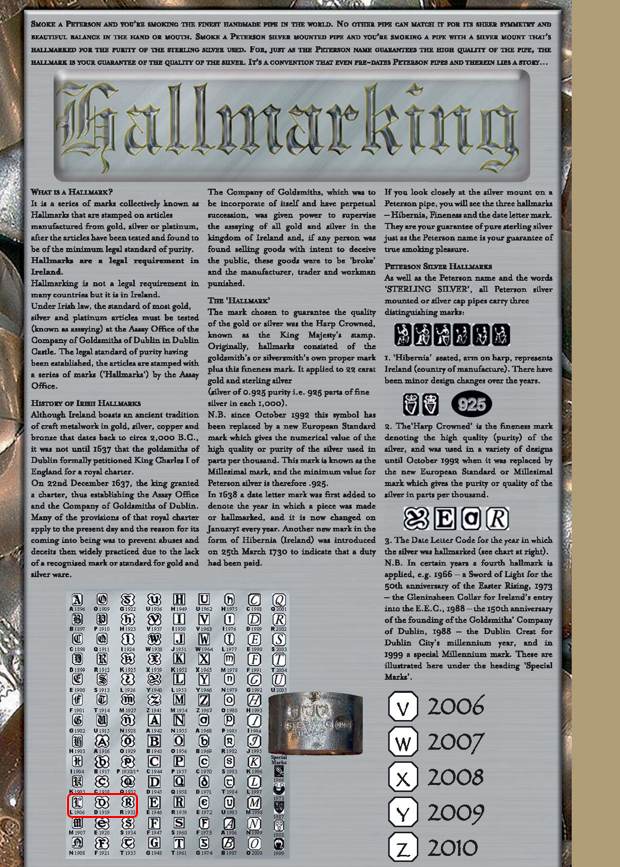
Now coming on to the most interesting and satisfying part of the research on this piece of briar and that is establishing the probable date of manufacture of this pipe. I prefer to follow English silver marks: the guide to hallmarks of London sterling silver (silvercollection.it) while establishing the dates on the basis of the date letter in the hallmarks. The Anchor points to the Birmingham Assaying Office. Thereafter, I followed the link to the dating guide of the Birmingham Assay Office to date this pipe. I have included a hallmark chart for dating the pipe. I have put a red mark around the letter for 1916. It is the same style of “r” and the cartouche that holds the letter stamp, matches the photo as well.
To summarize, this BBB was made in 1916, give or take a year as the ferrules were assayed in bulk and used as required. The stamp of Own Make designates this as the finest quality pipe that was made in London for the local market in a Bulldog shape which was made in limited quantities.
Initial Visual Inspection
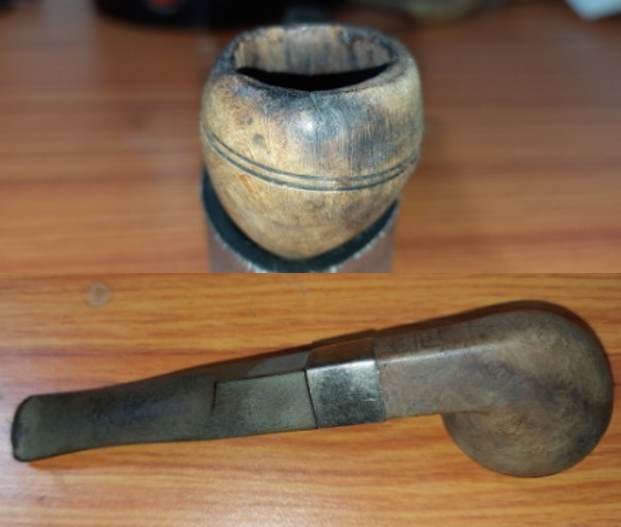
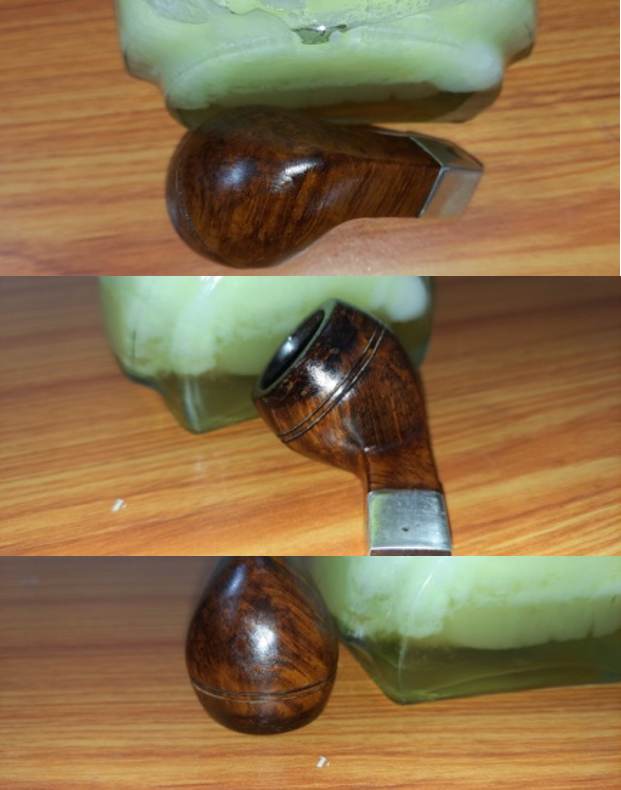
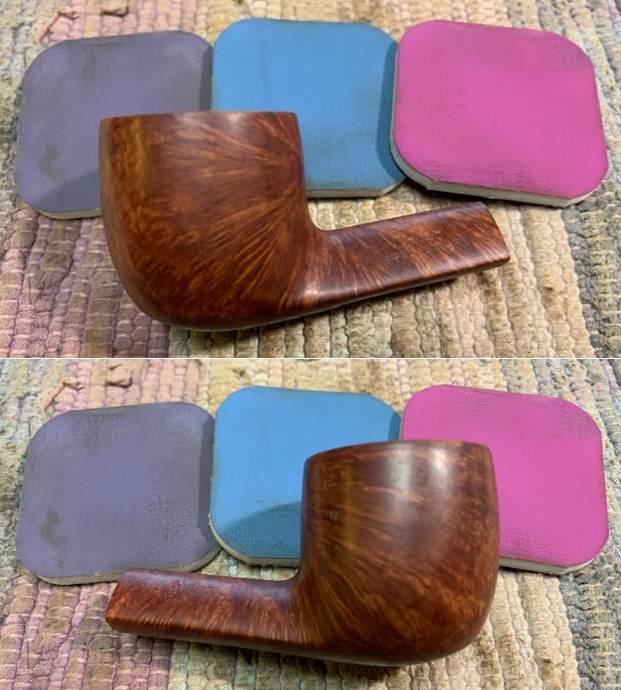
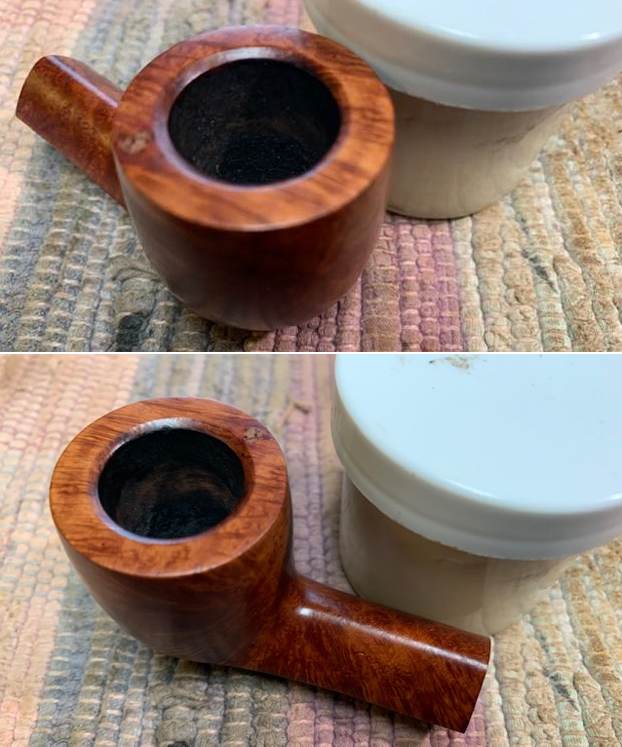
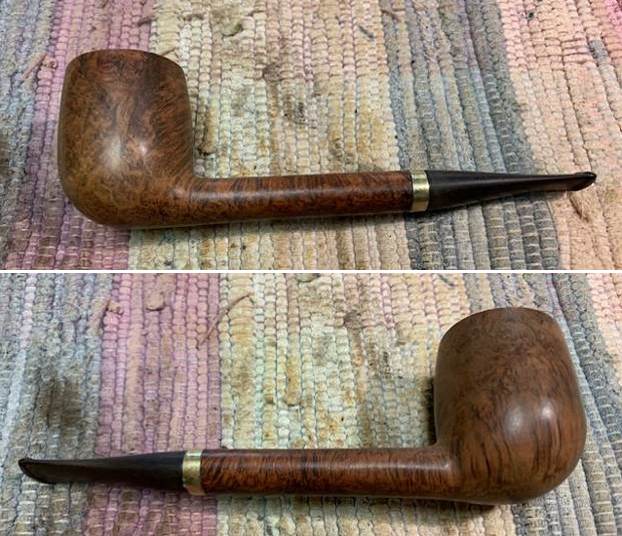
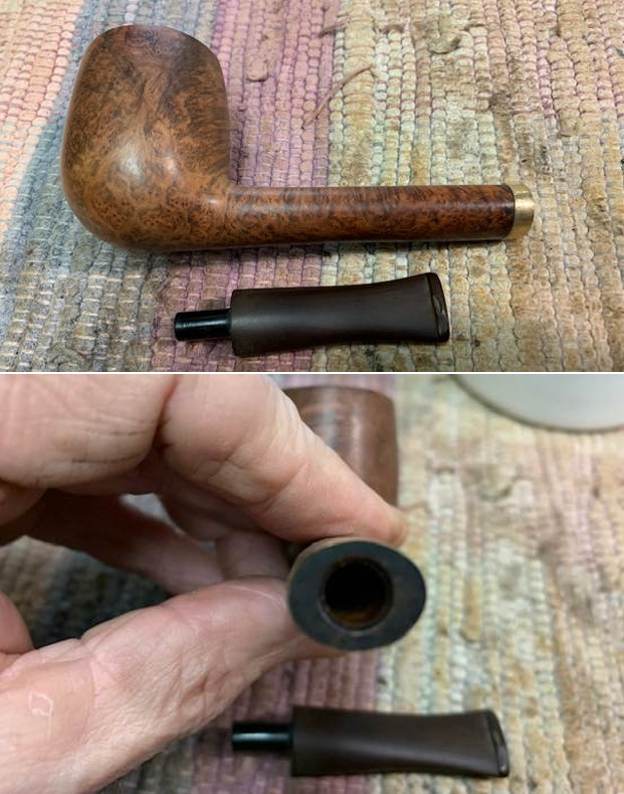
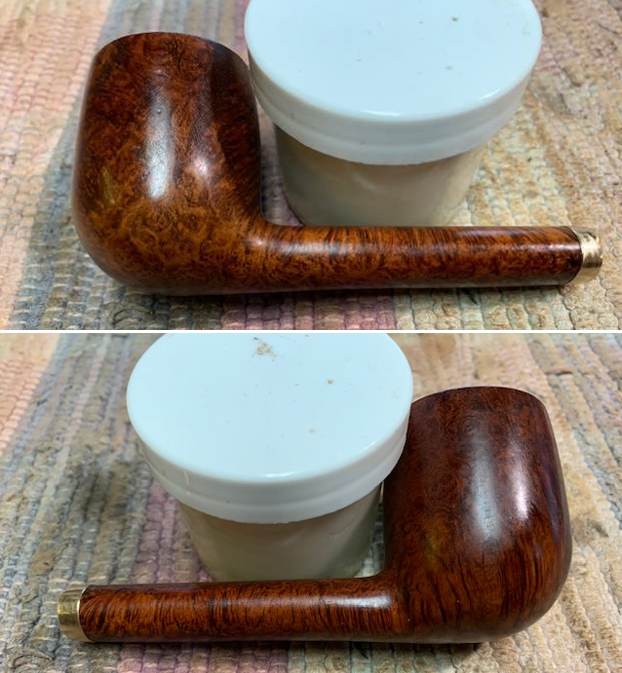
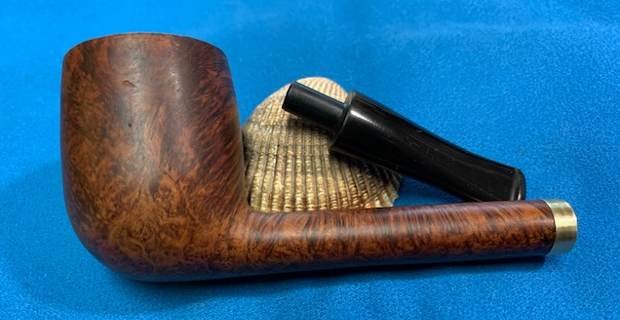
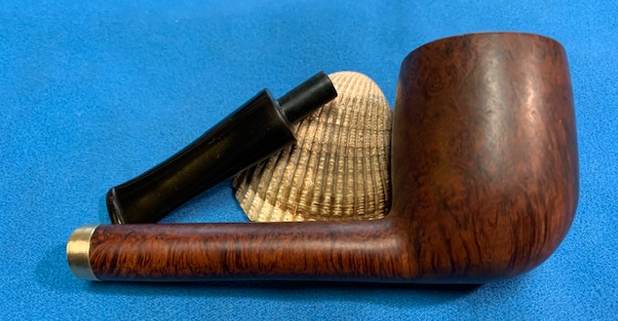
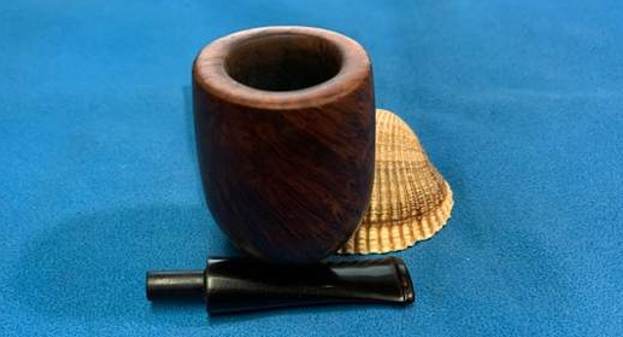
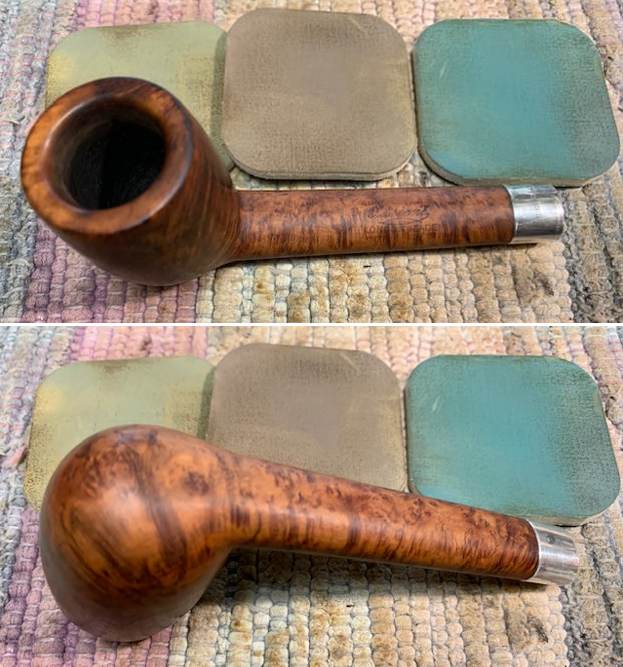
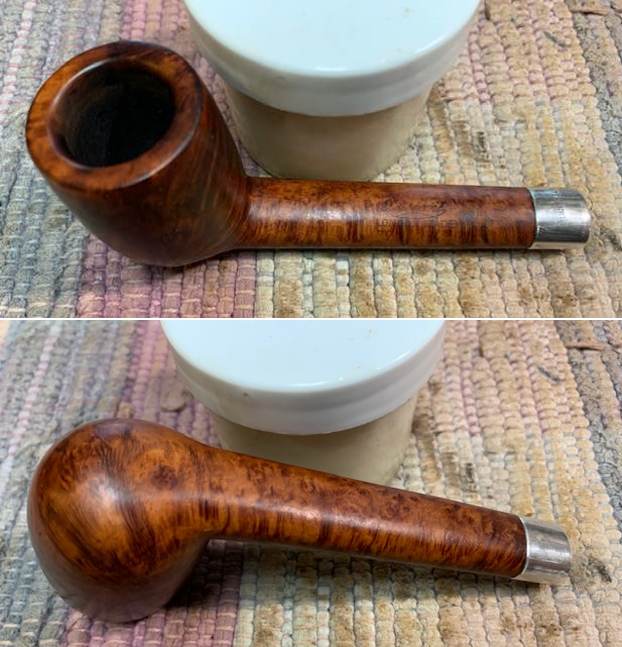
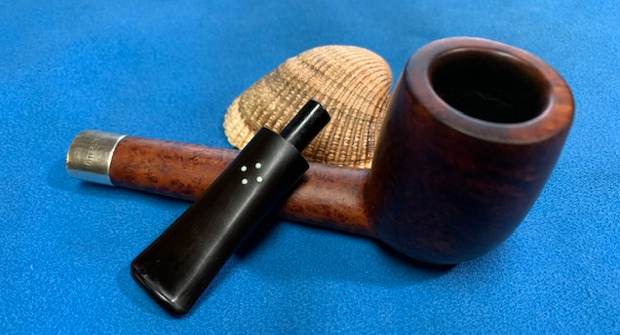
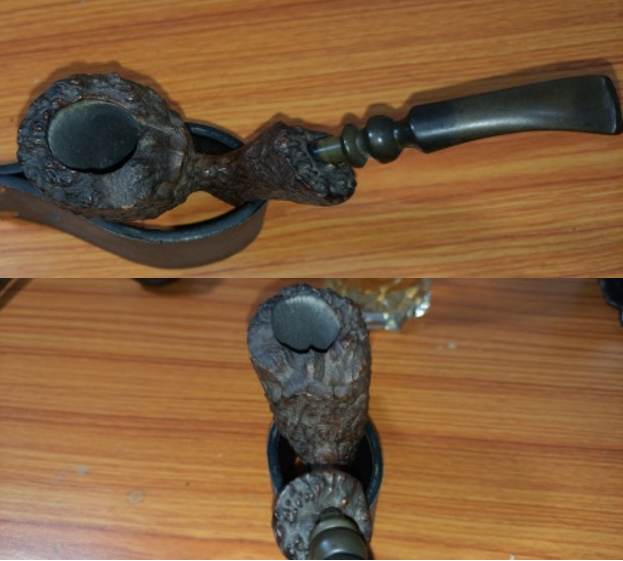
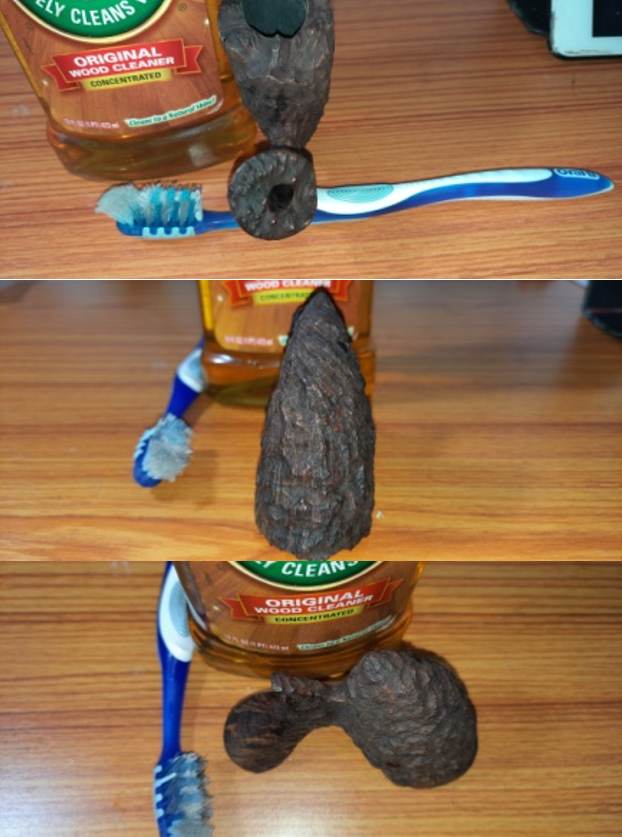
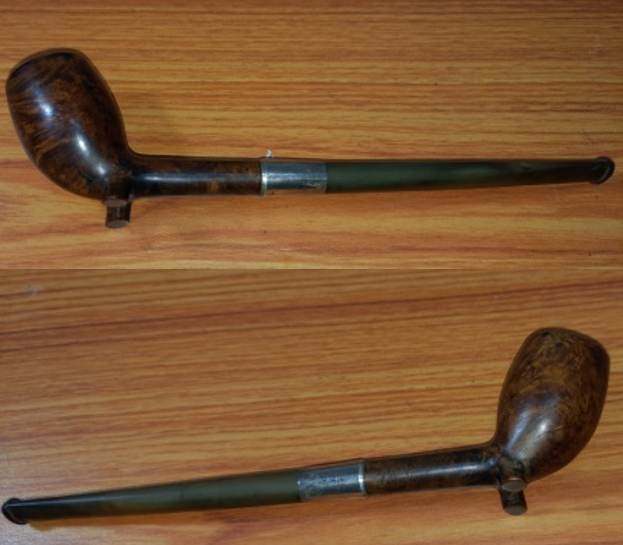
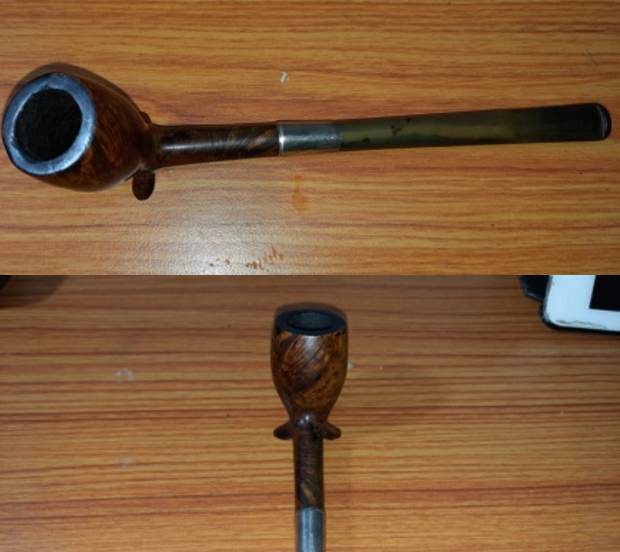
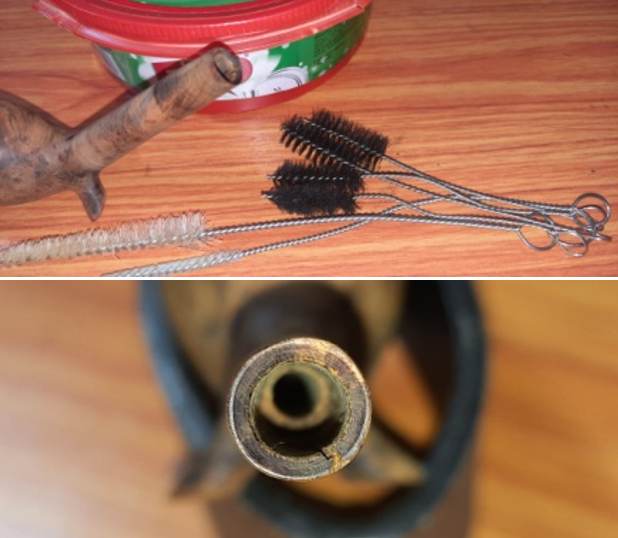
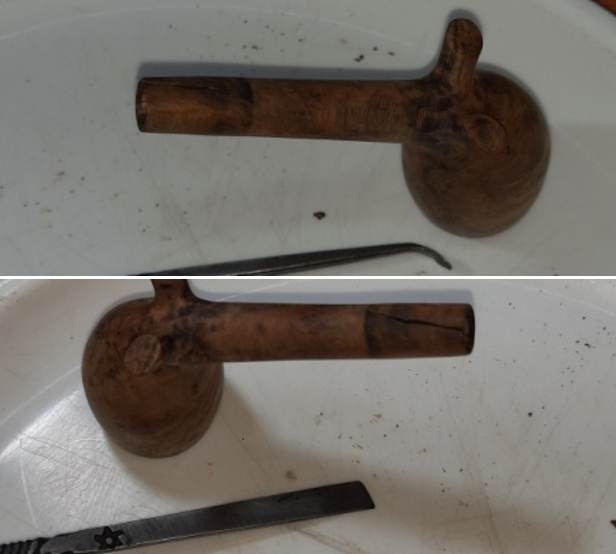
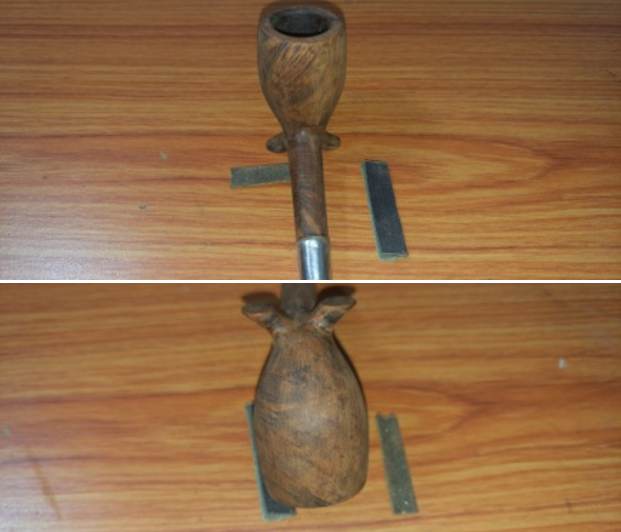
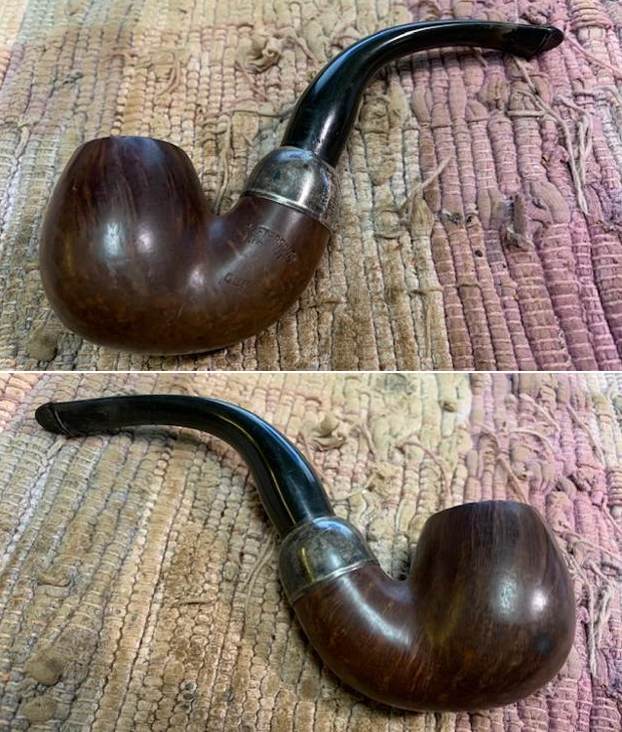
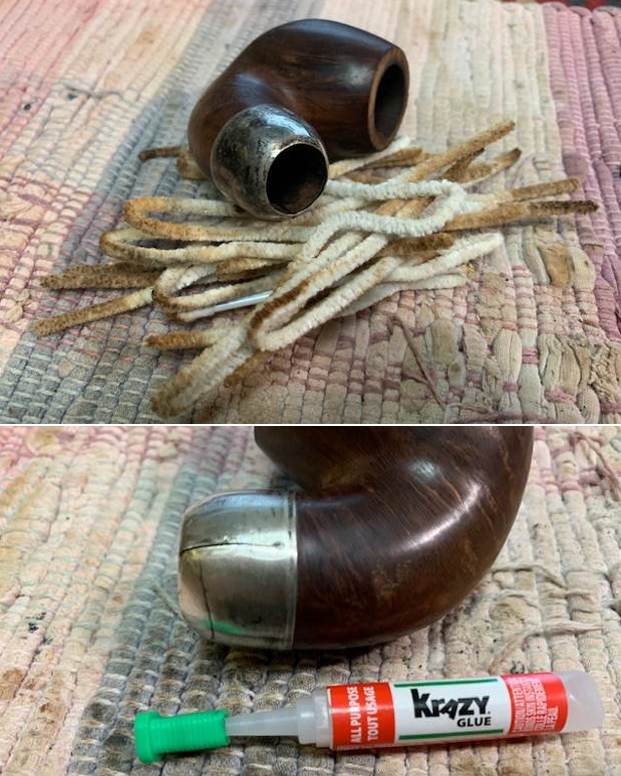
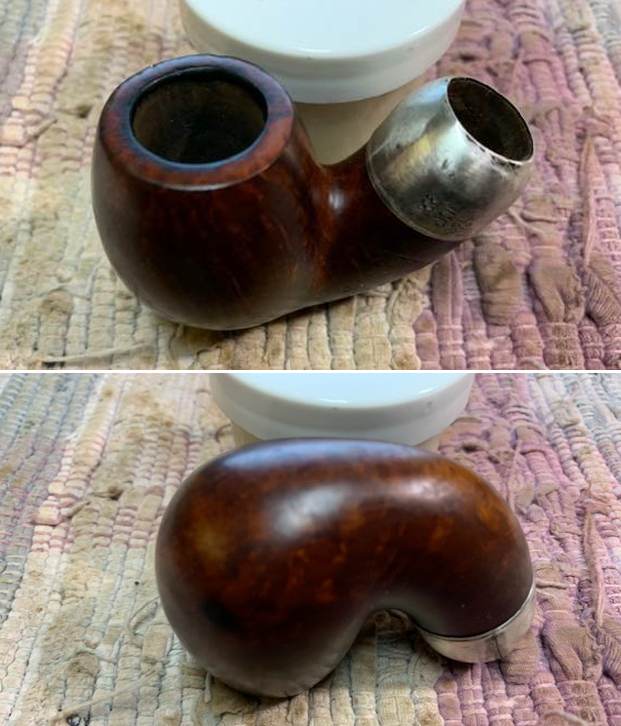
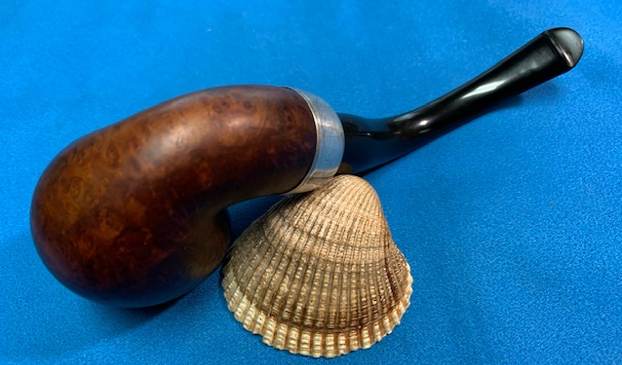
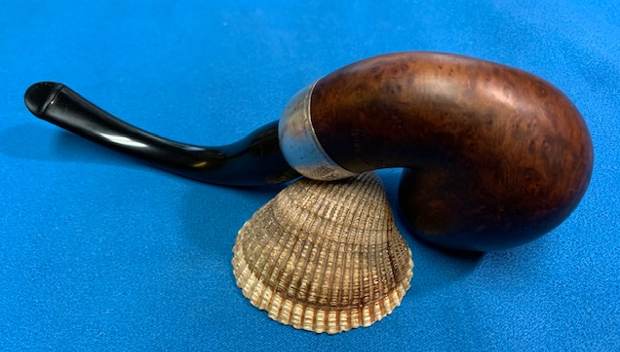
As stated at the beginning of the write up, Abha, my wife who helps with the initial cleaning, had worked on this pipe in 2018 and sent it out to me for further restoration along with 50 odd pipes. She had reamed the chamber down to bare briar, cleaned the internal of the shank and stem followed by external cleaning of the stummel using Murphy’s Oil soap. Unfortunately there are no ‘before’ and ‘during the process’ pictures. The initial condition of the pipe can be gauged from the pictures of the pipe as it sits on my work table.

 Dimensions Of The Pipe
(a) Overall length of the pipe: – 4.5 inches.
(b) Bowl height: – 1.2 inches.
(c) Inner diameter of chamber: – 0.8 inches
(d) Outer diameter of chamber: – 1.2 inches
Detailed Inspection
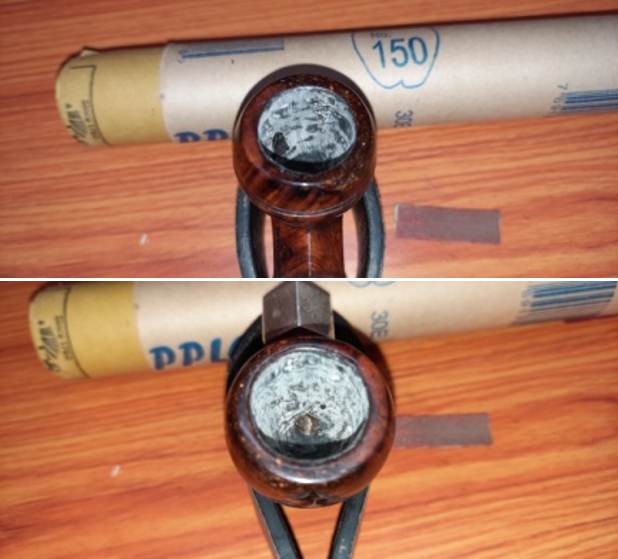
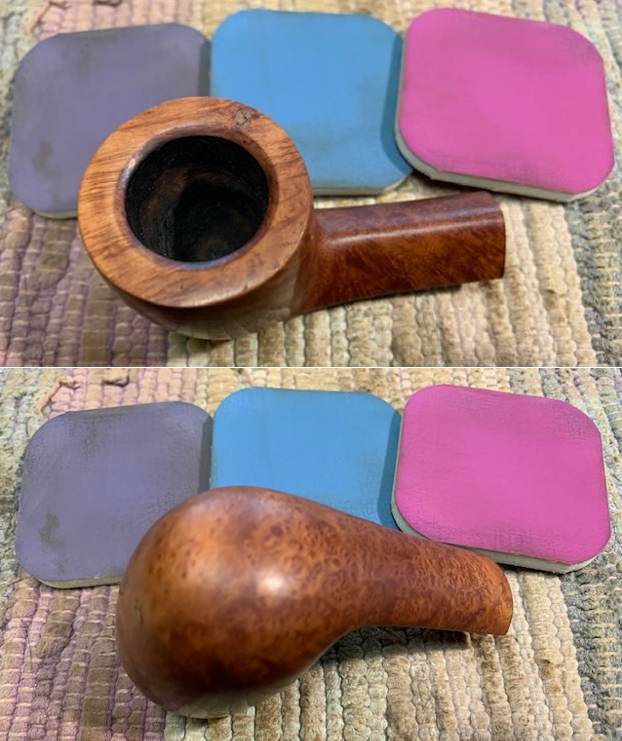
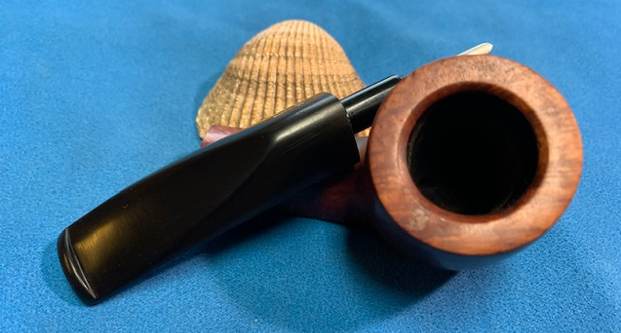
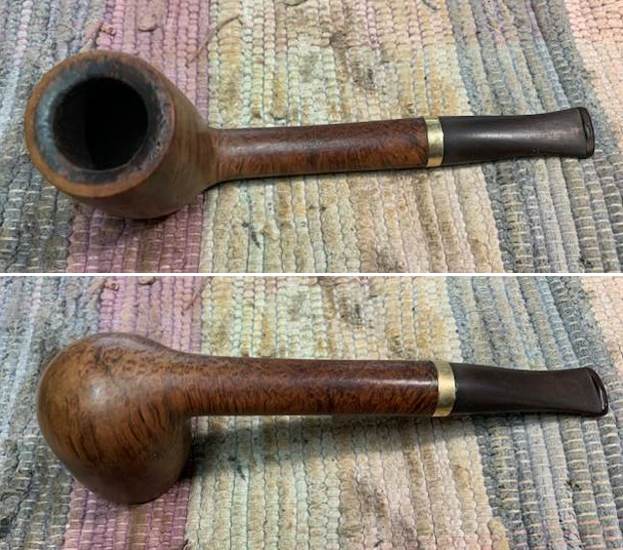
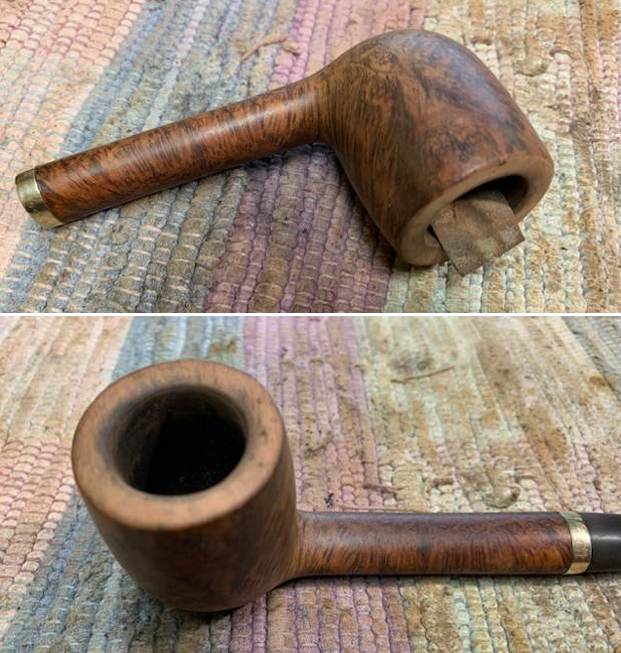
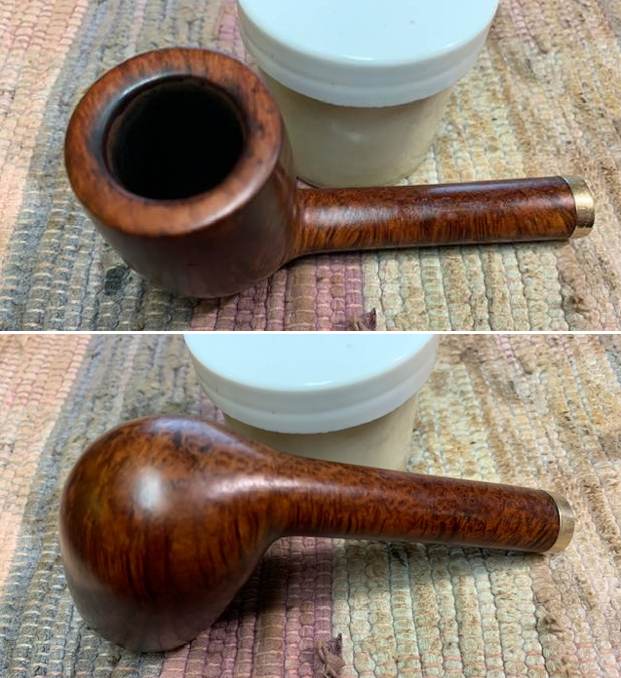
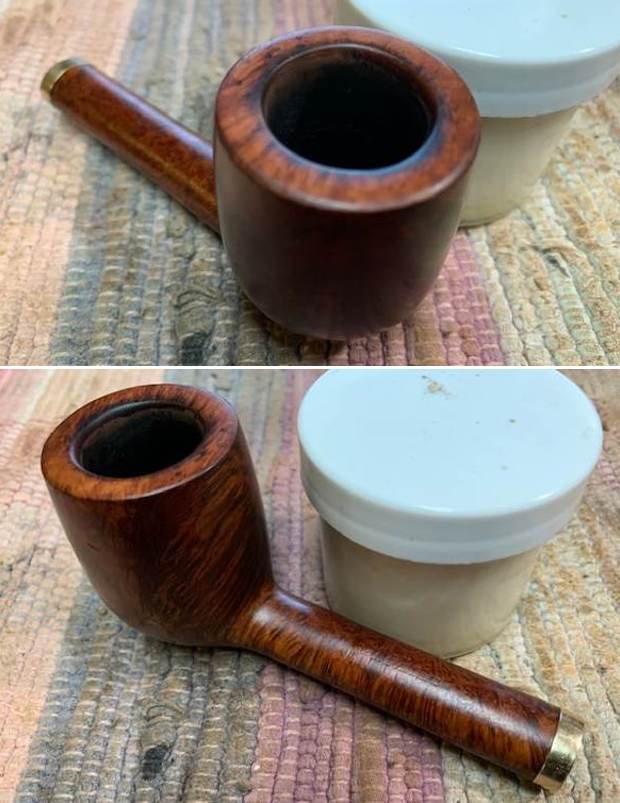
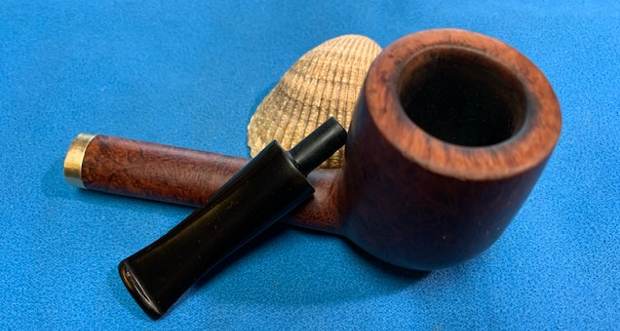
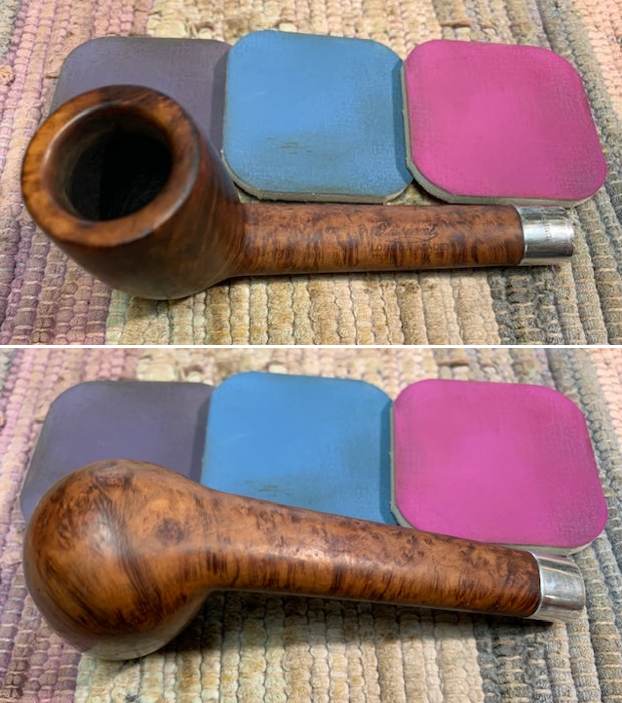
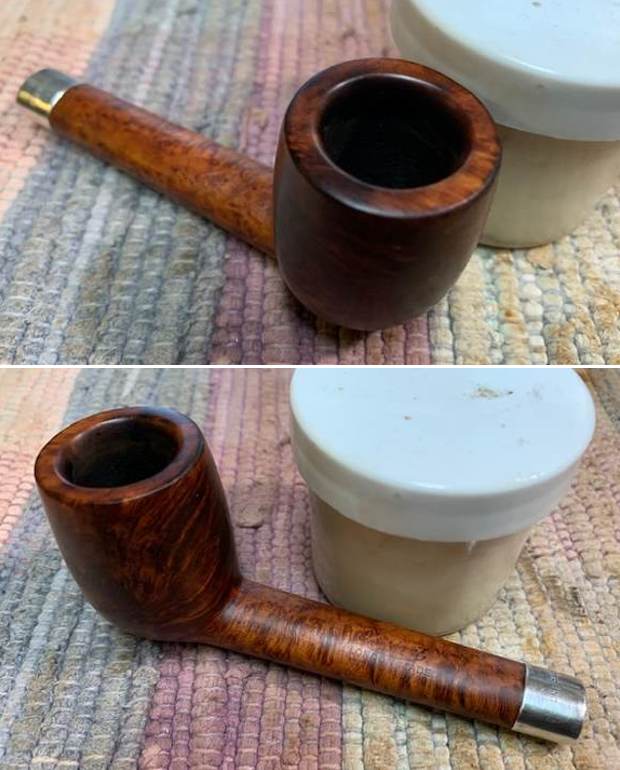
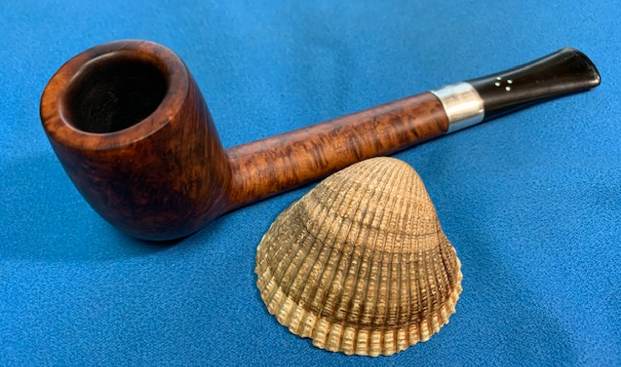
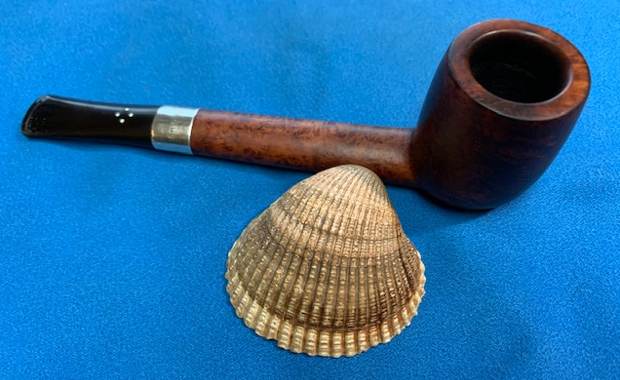
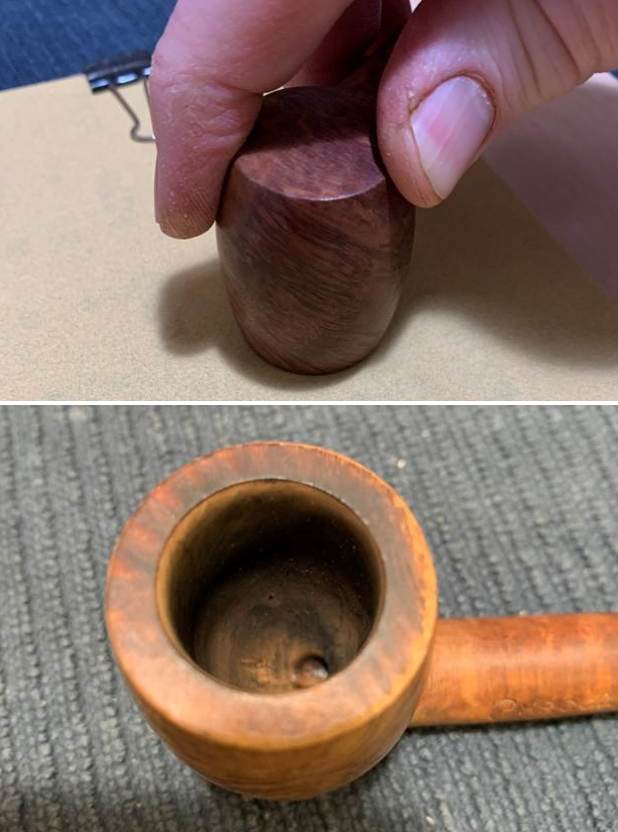
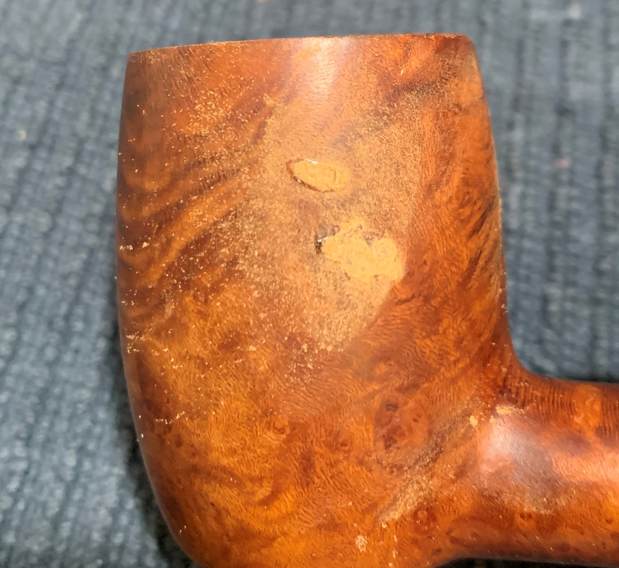
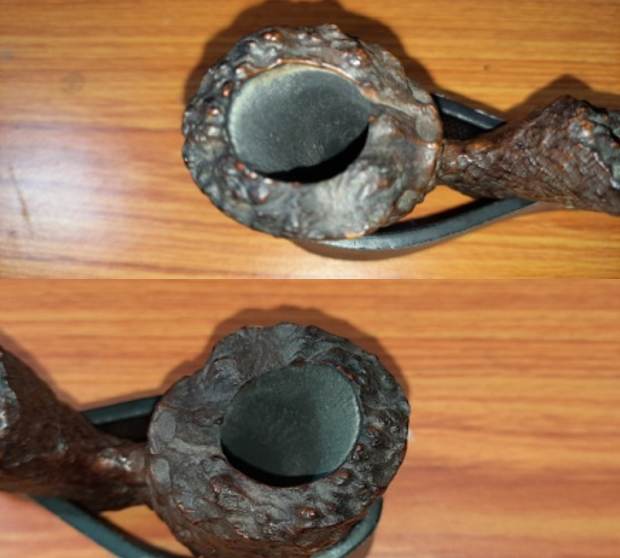
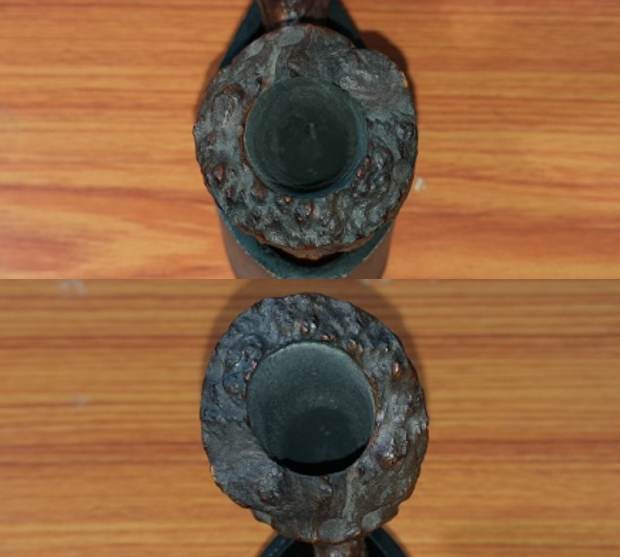
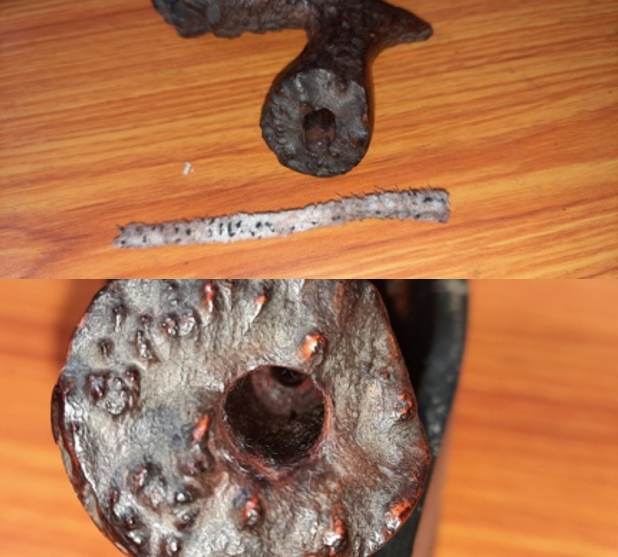
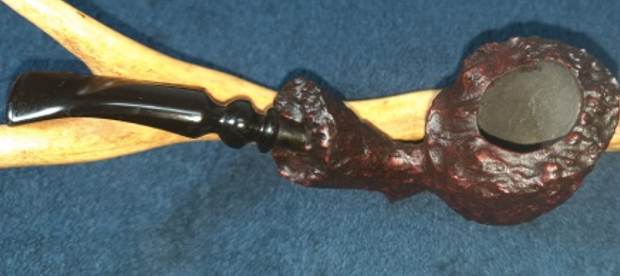
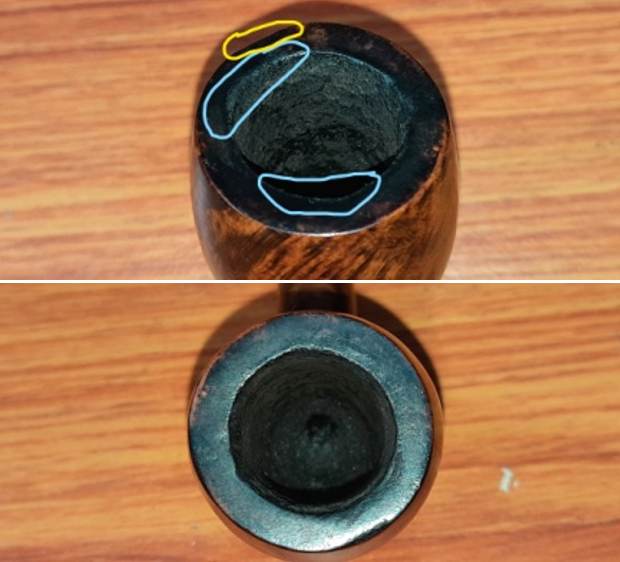
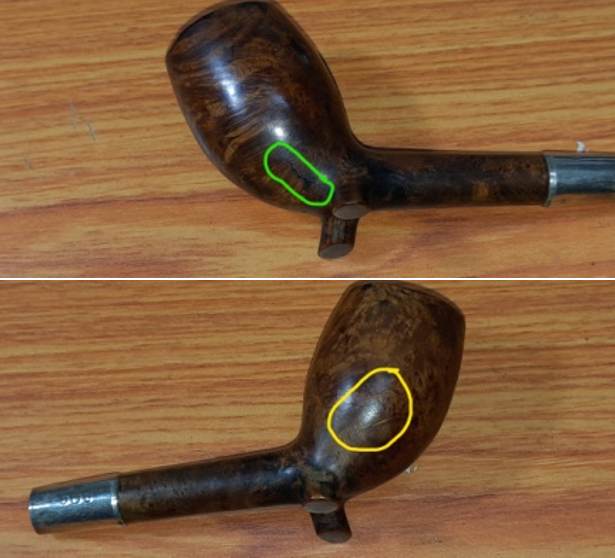
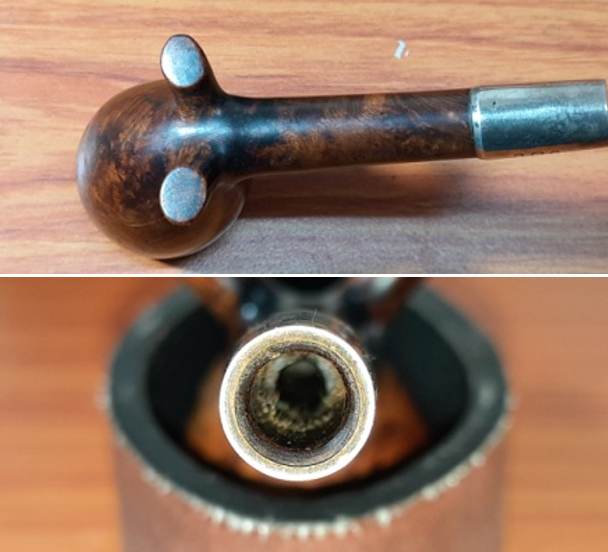
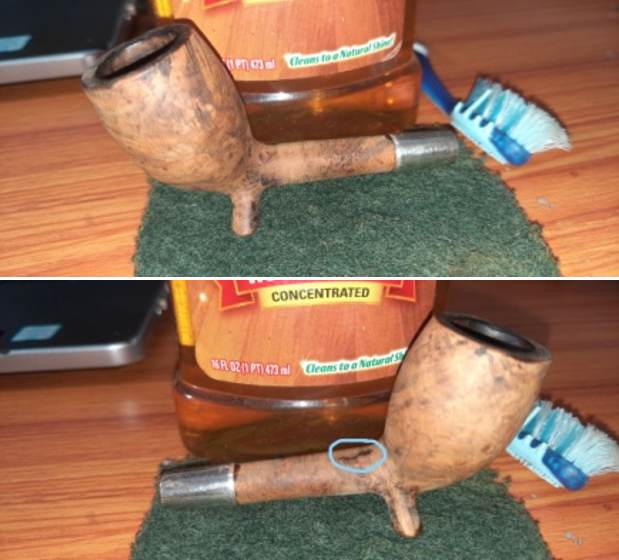
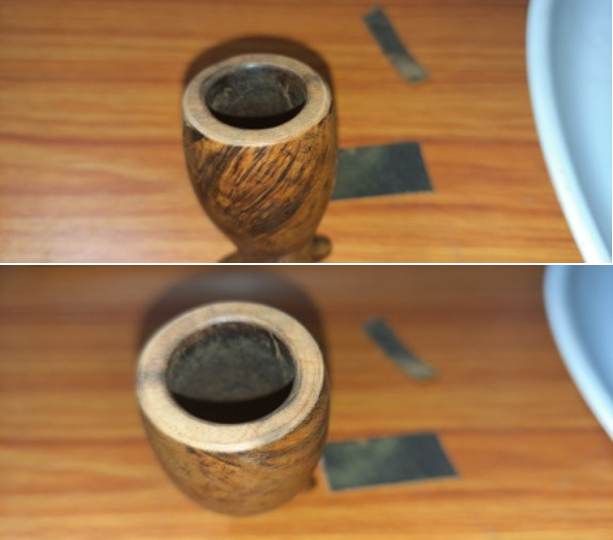
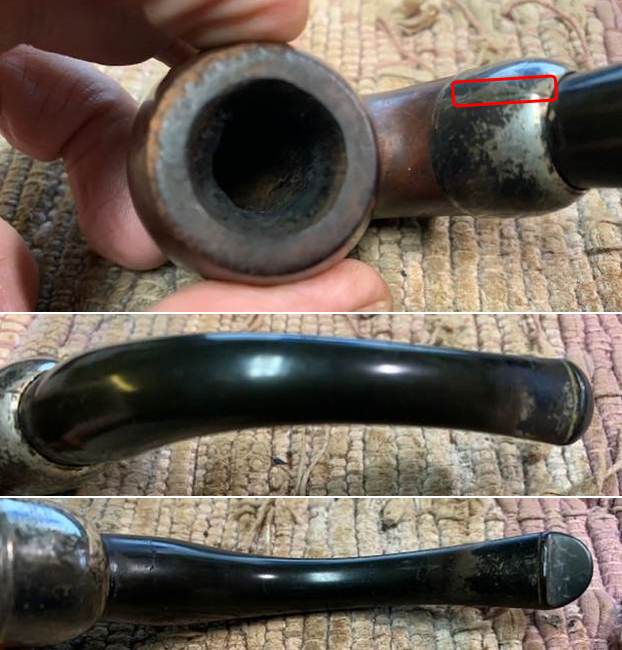
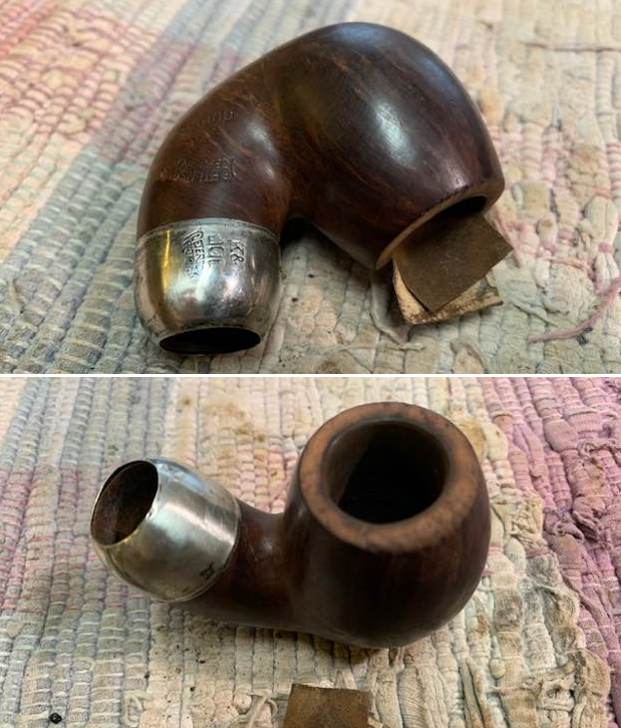
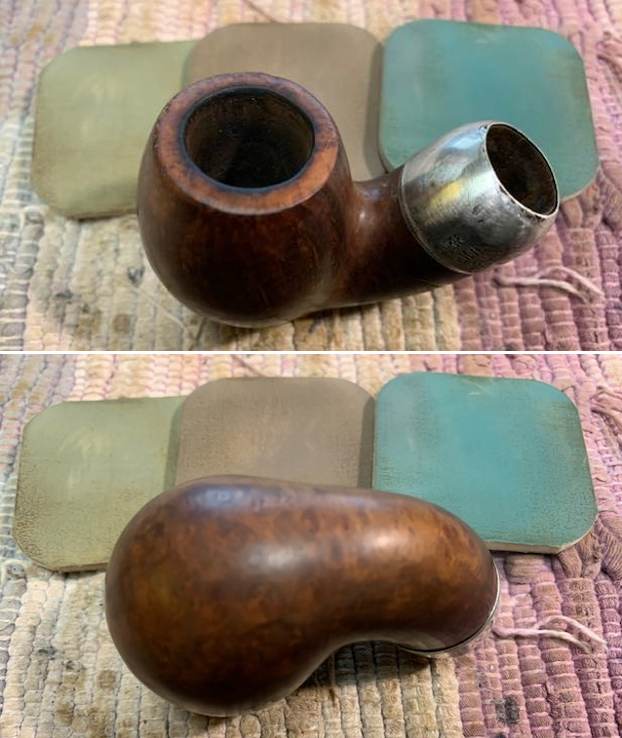
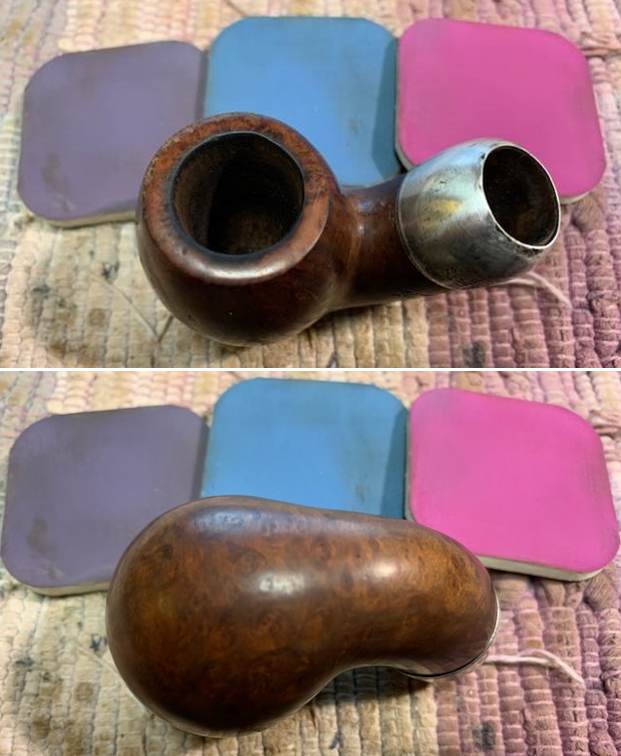
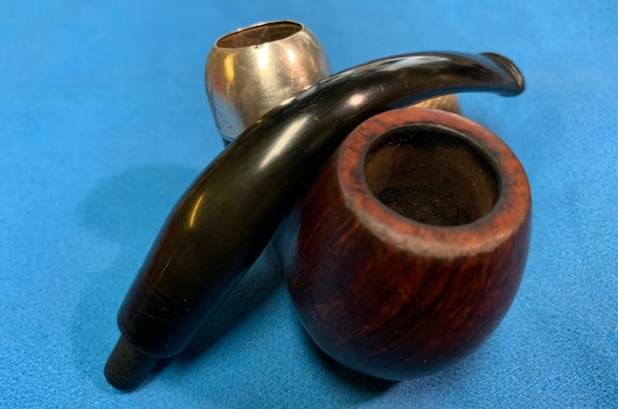
The rim top surface is where the maximum damage is on this pipe. The rim edges have been subjected to a heavy knocking all around but moreover in the 6 and 7 o’clock direction (encircled in green). A small crack is seen extending over the rim surface down towards the twin rings in 12 o’clock direction and is indicated with red arrows. This crack extends inside the chamber and the same is encircled in red. The rim has thinned out considerably towards the front between 12 and 1 o’clock direction (encircled in yellow). There is a chunk of briar that is missing from 3 o’clock direction either due to knocking against a hard edge or could be due to charring or combination of both. This damaged portion of the rim is encircled in pastel blue. The chamber walls show webbing of heat lines/ fissures. These repairs to the rim surface damage will be the most challenging part of the resurrection of this pipe. 
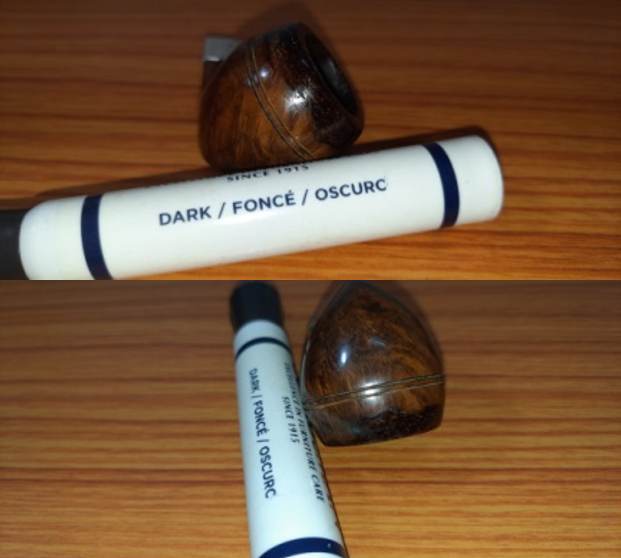
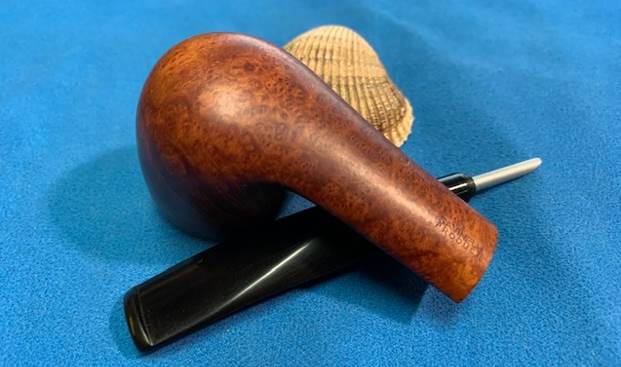
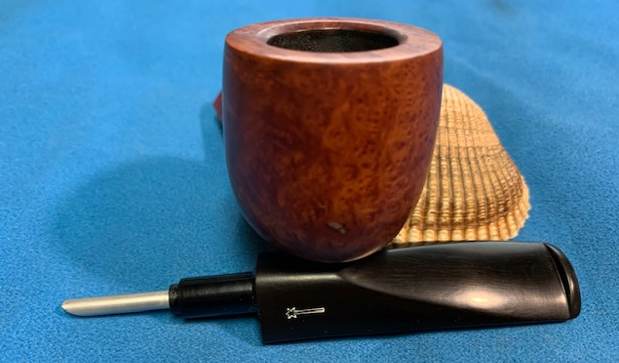
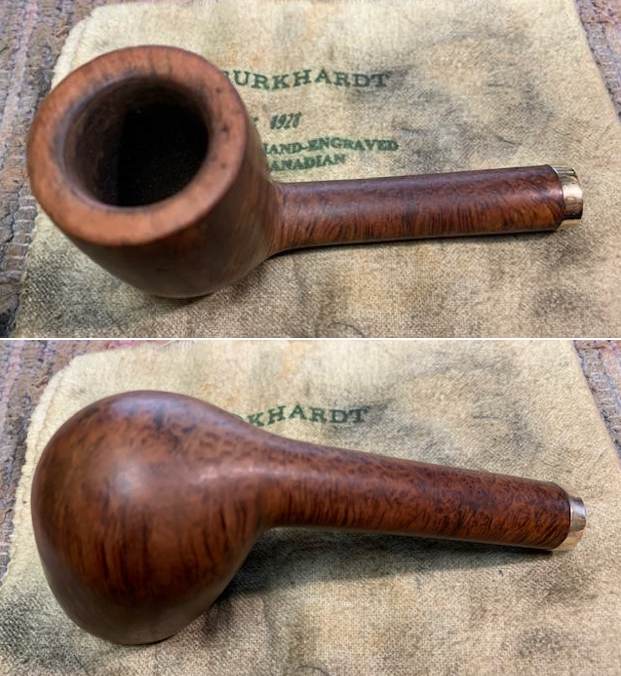
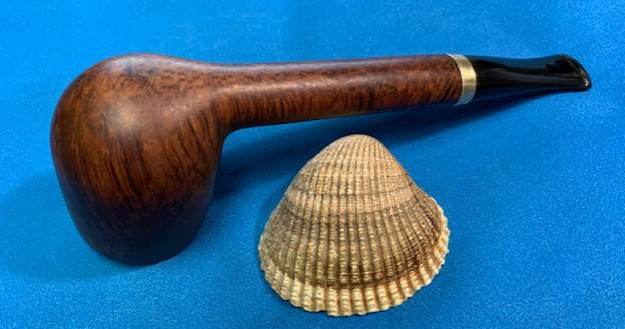
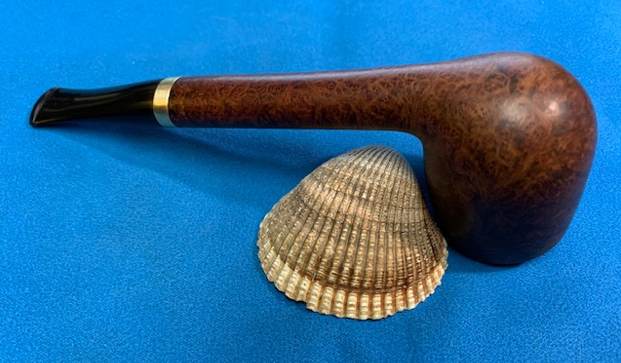
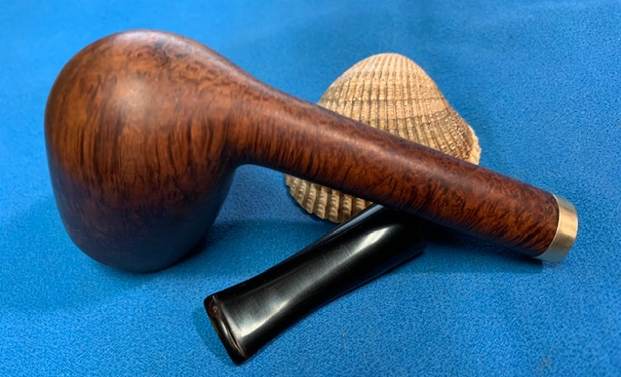
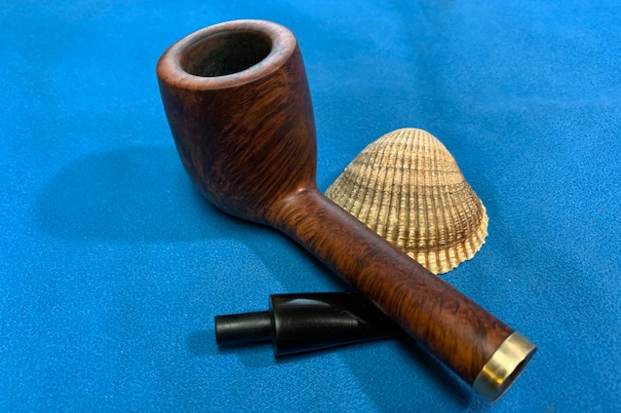
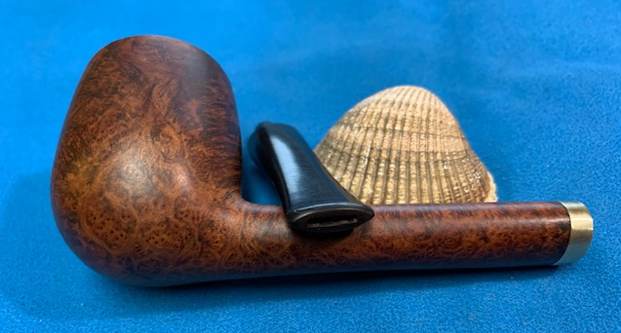
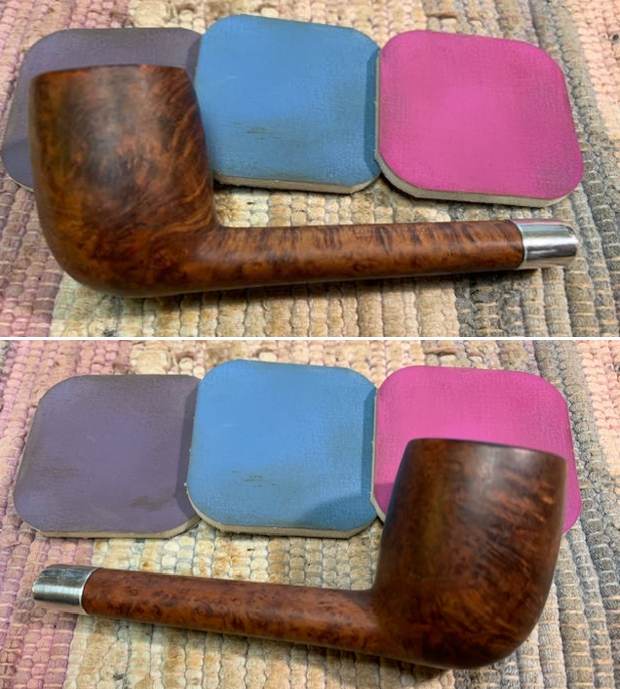
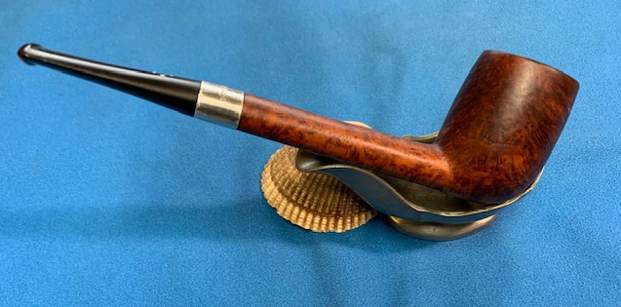
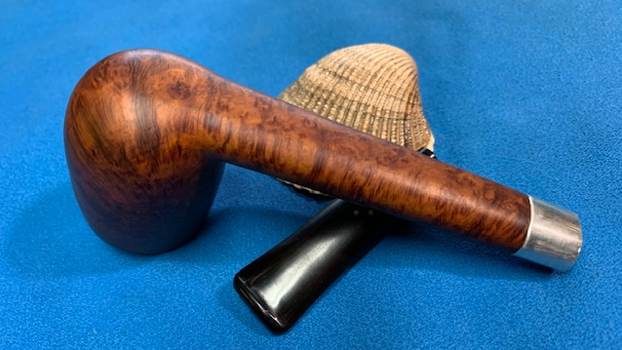
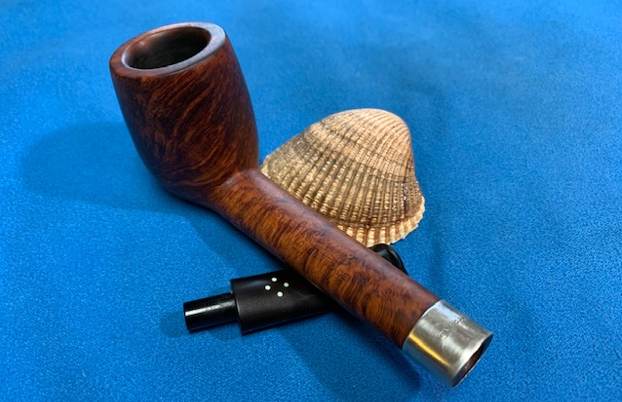
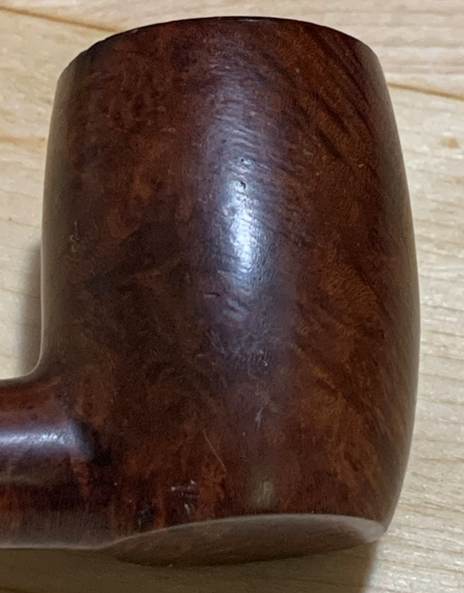
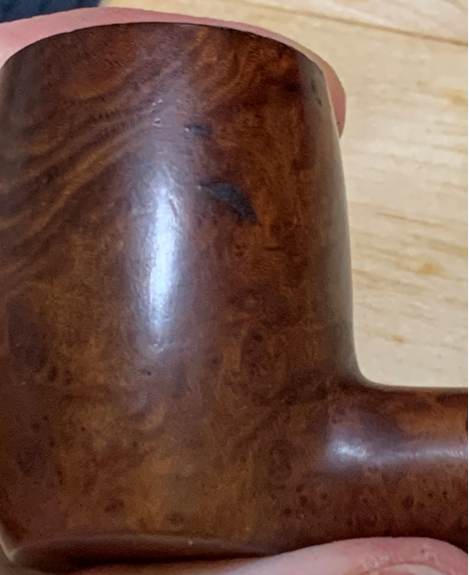
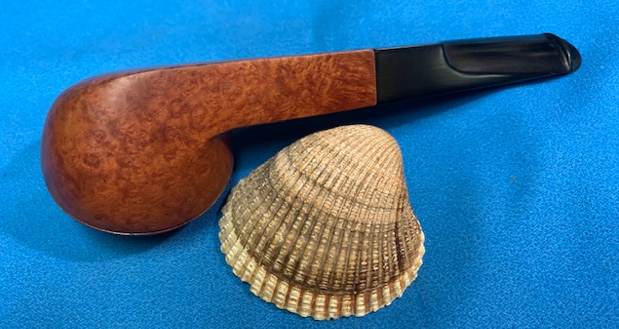
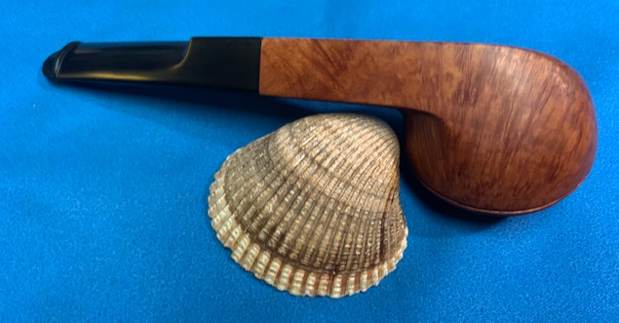
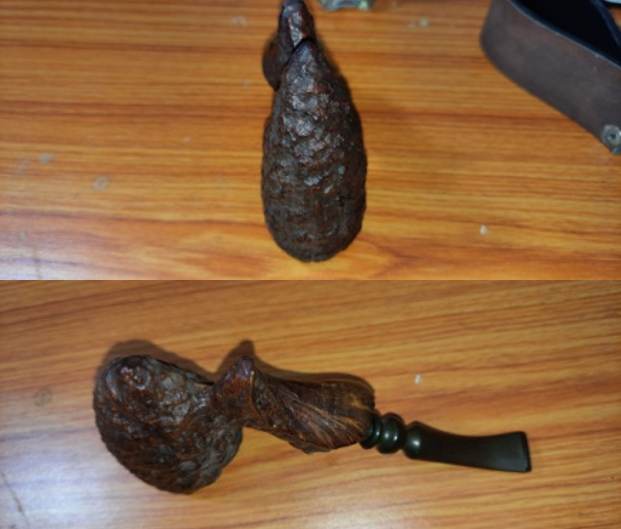
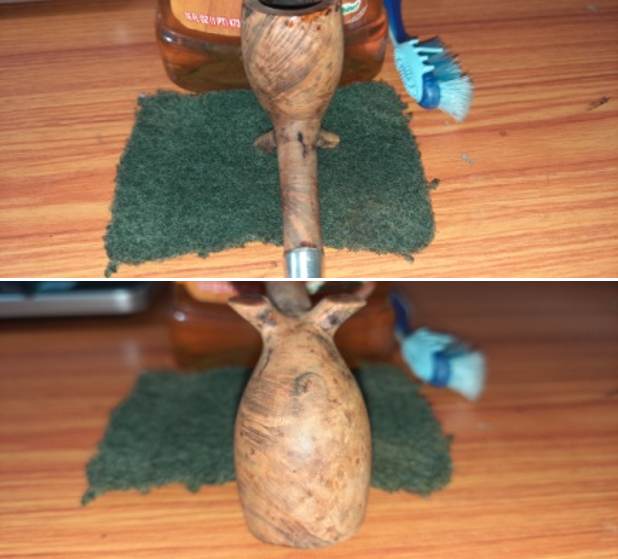
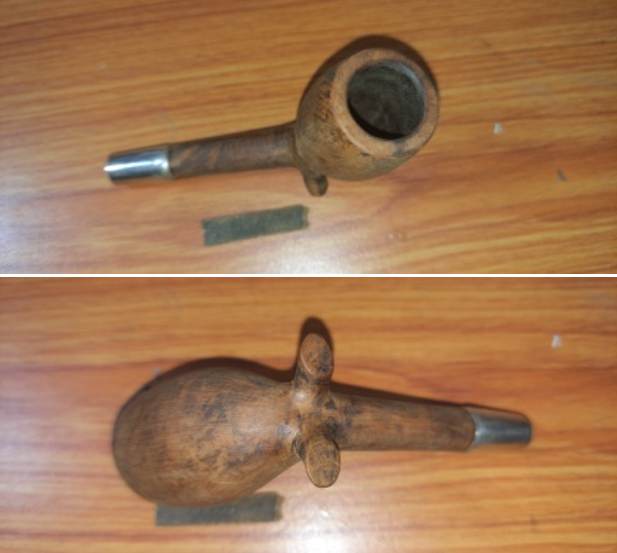
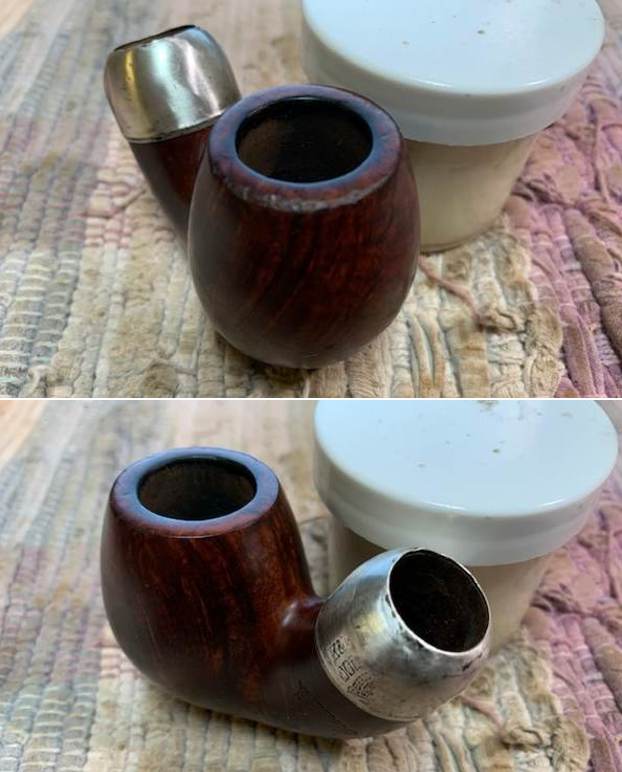
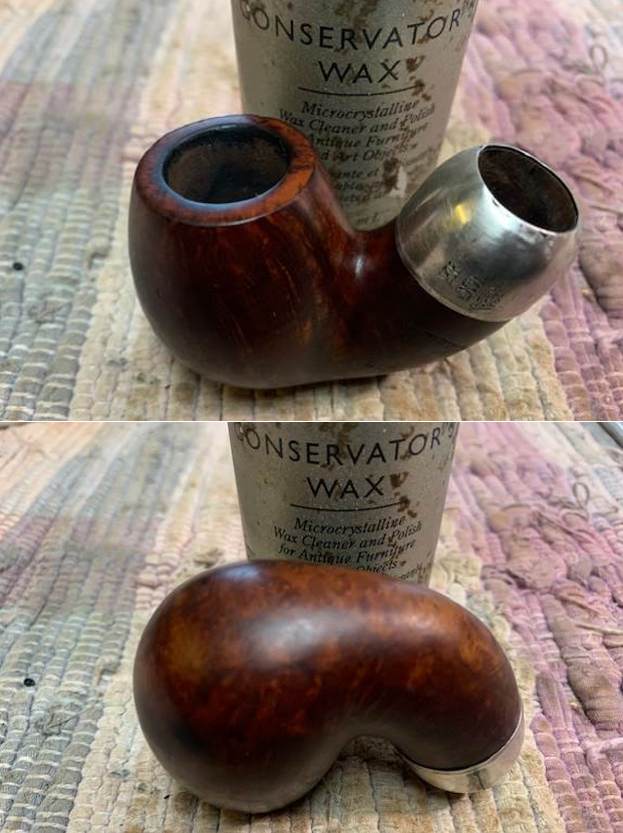
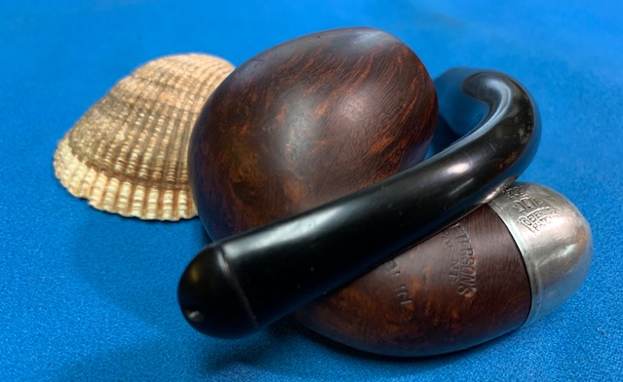
 The stummel surface is dull and lackluster with dirty brownish yellow hues to the briar surface. A few very minor scratches and dings can be seen over the stummel surface. The front and aft of the stummel surface in the crown is darkened. I would need to check if the charring is deep grained or just superficial. The gap between the twin rings separating the crown from the rest of the stummel is uneven, but thankfully, it is unbroken. The beauty and quality of this old pipe lies in the perfectly proportioned shape and the fact that there is not a single fill over the entire briar surface of the stummel. The shank and mortise are nicely cleaned up by Abha.
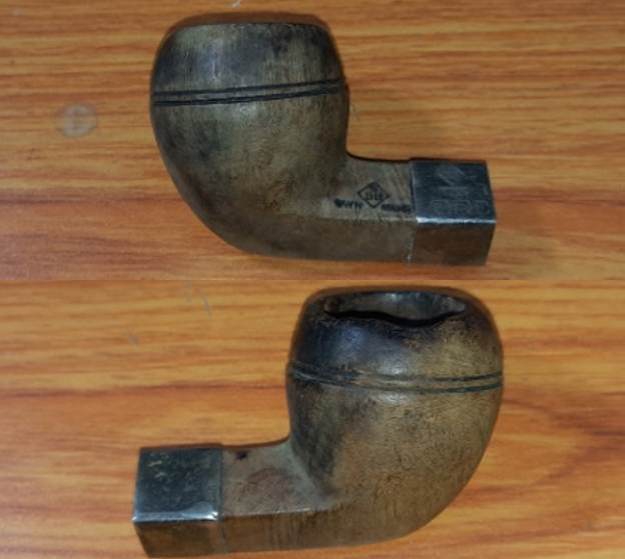

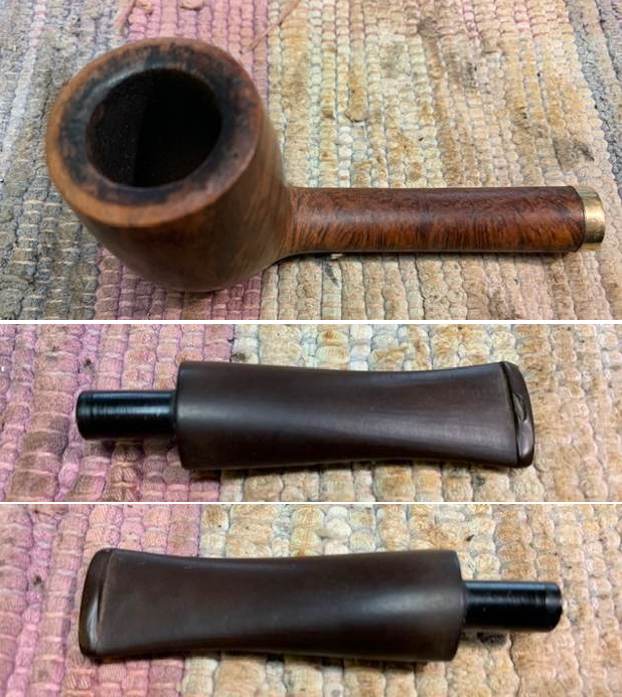
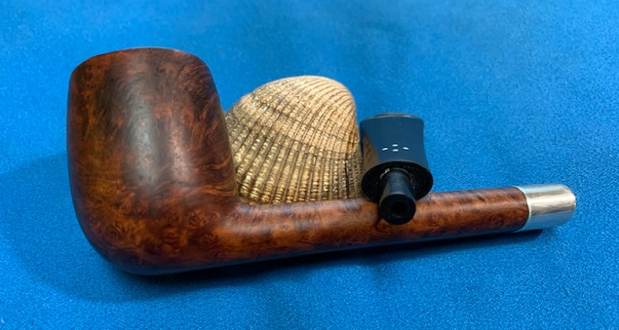
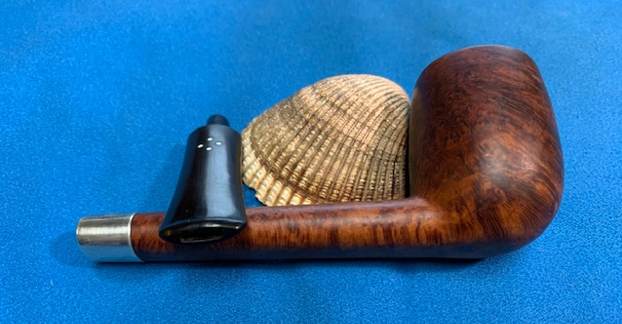
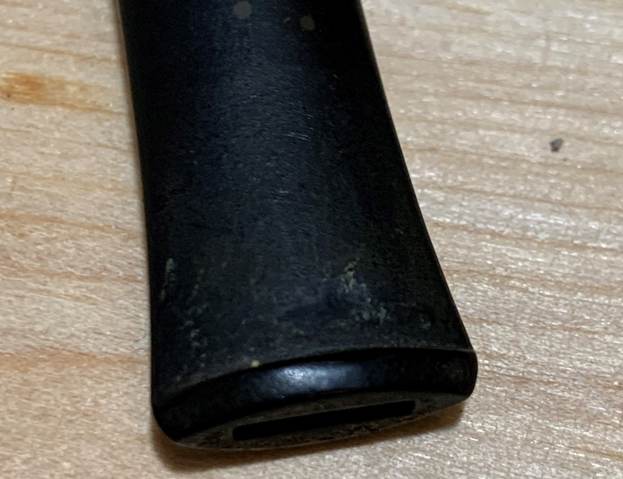
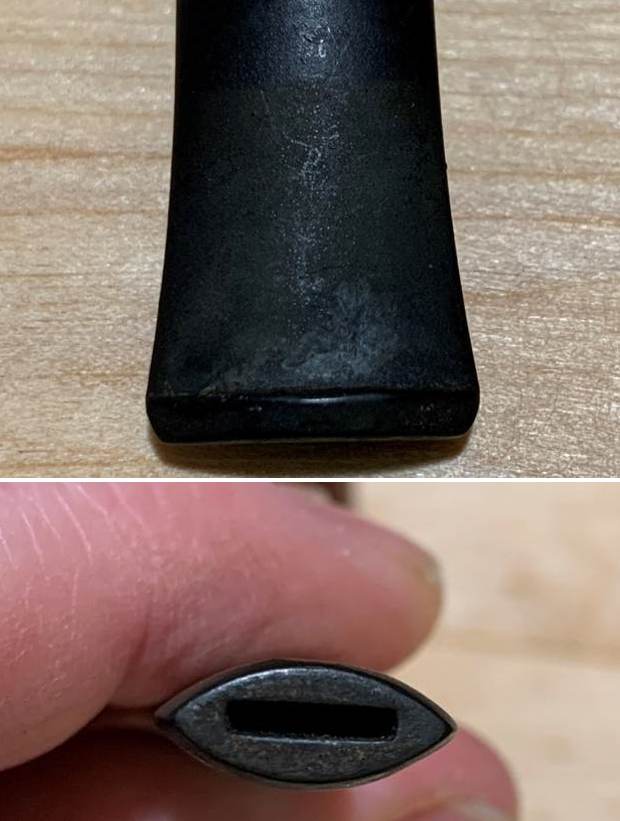
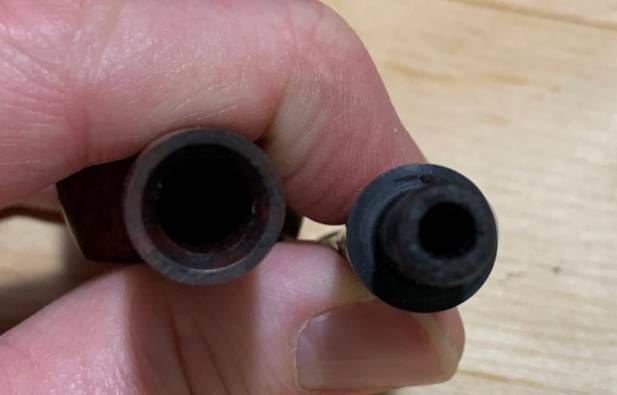
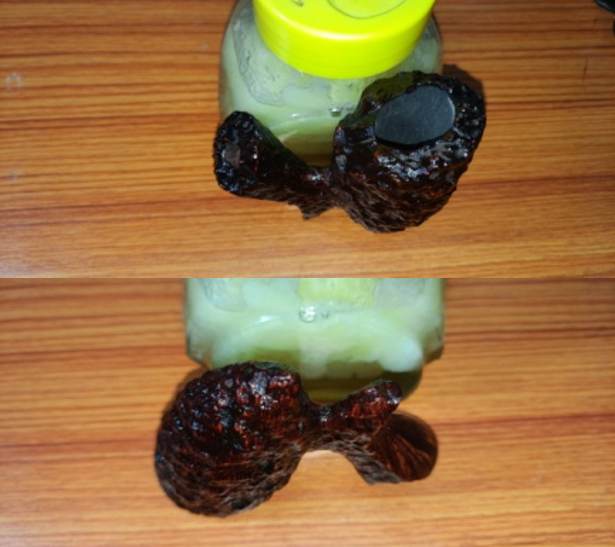
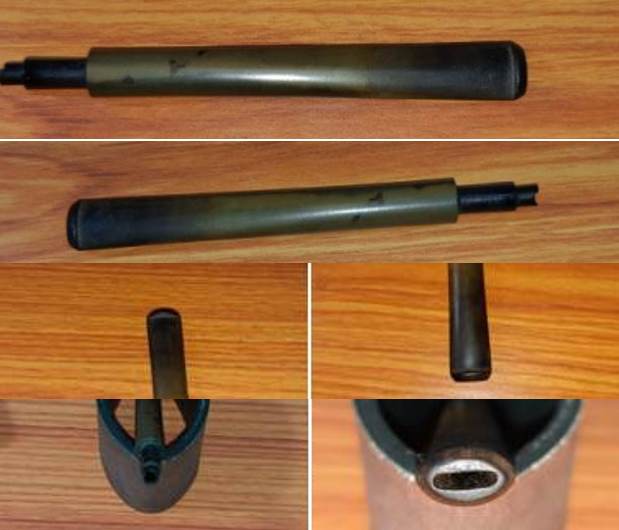
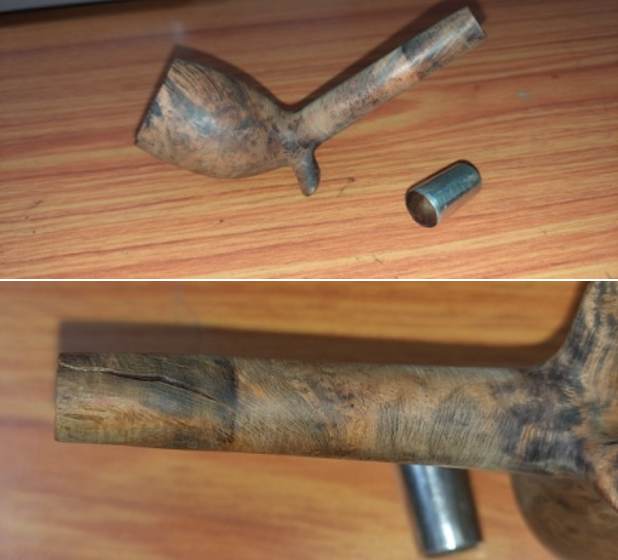
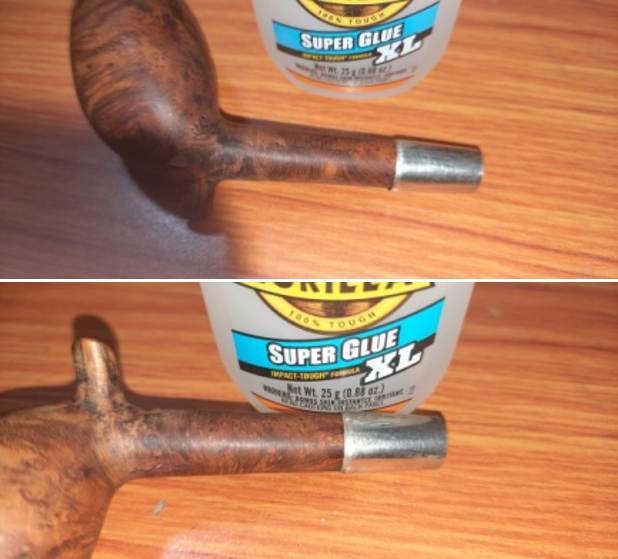
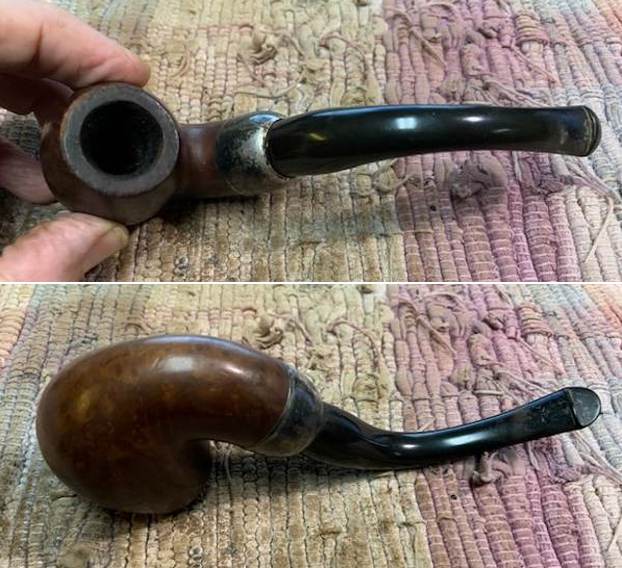
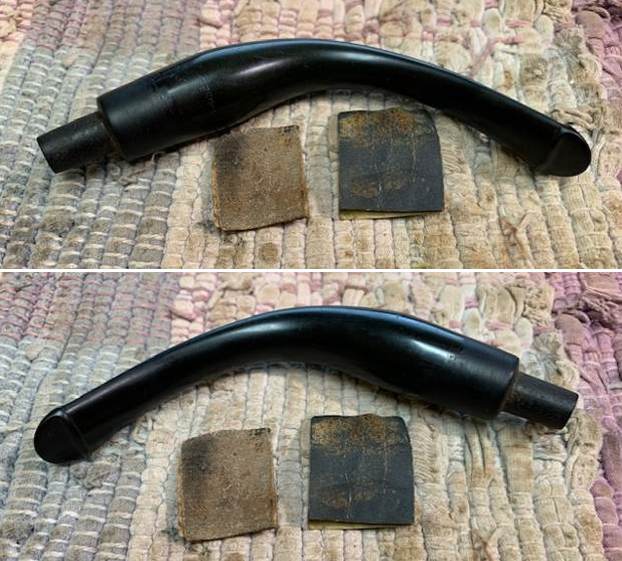
 The diamond shaped vulcanite saddle stem is deeply oxidized. The tenon is missing a portion of the surface and would need to be rebuilt. The bite zone has tooth indentations on either surface. The buttons on either surface is worn down and has deep bite marks at the corner. Abha had already cleaned the stem internals and thus, I can proceed with stem repairs and restoration.
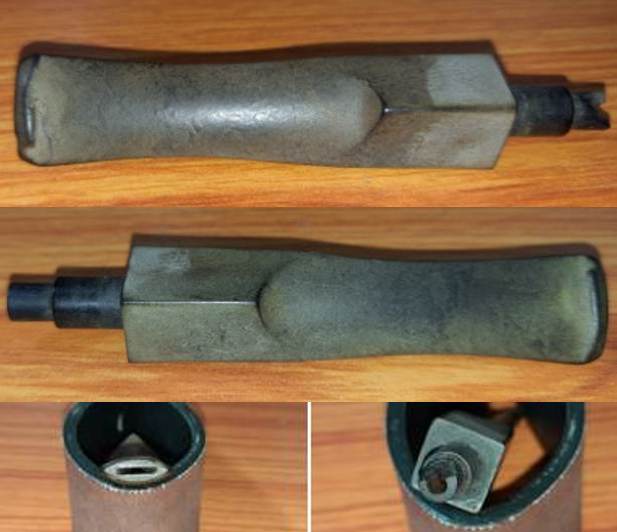 The Process…
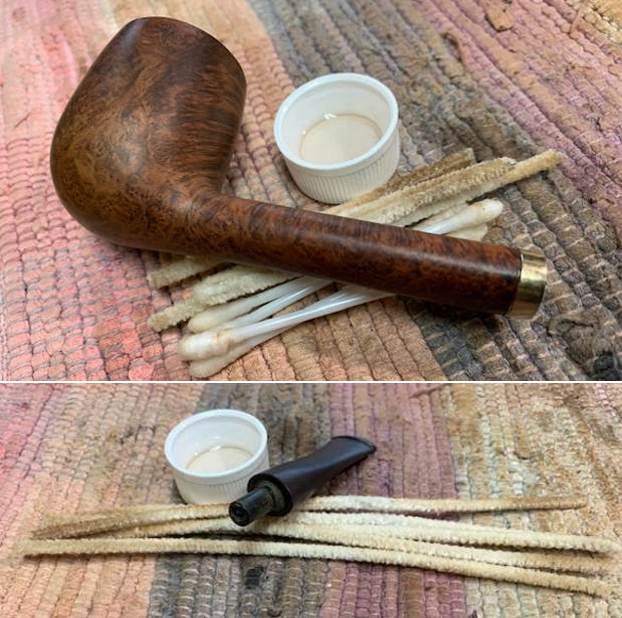
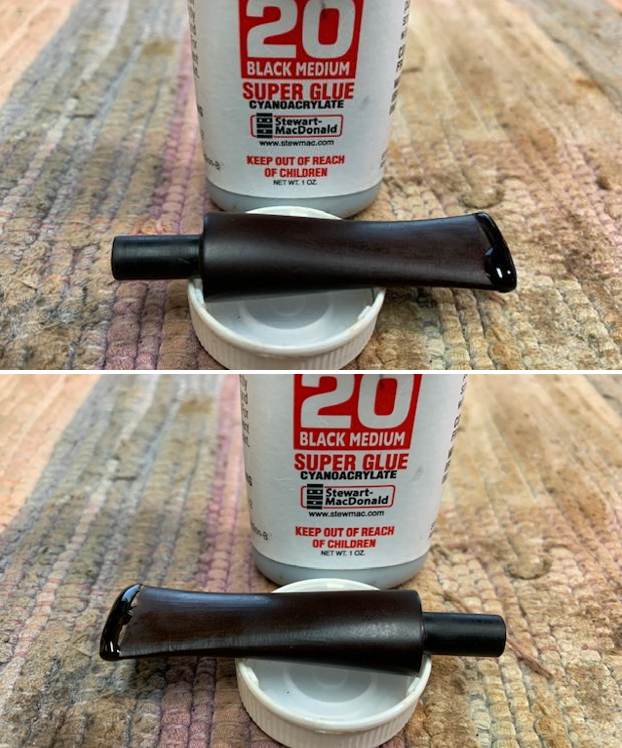
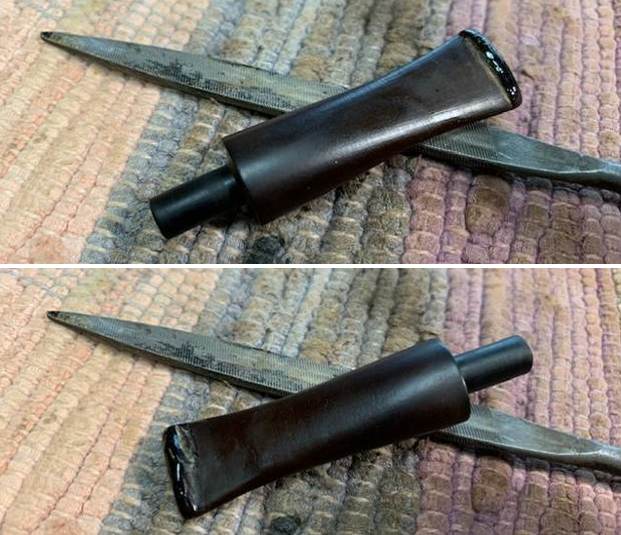
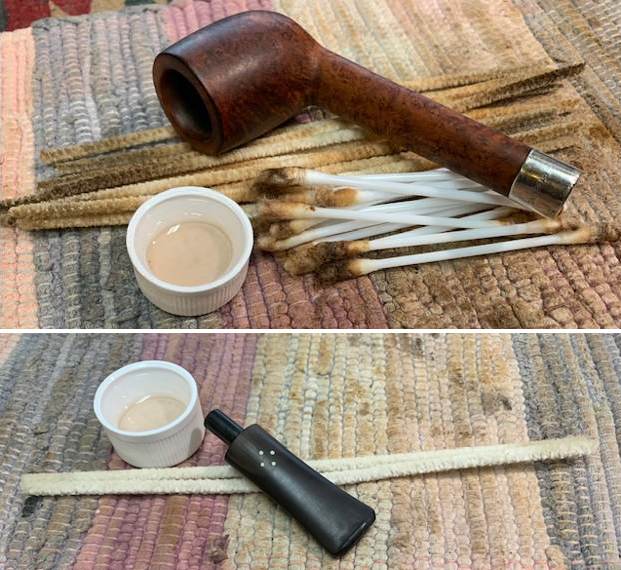
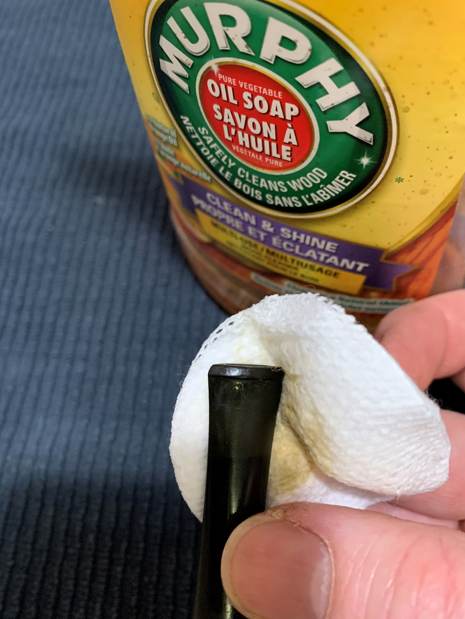
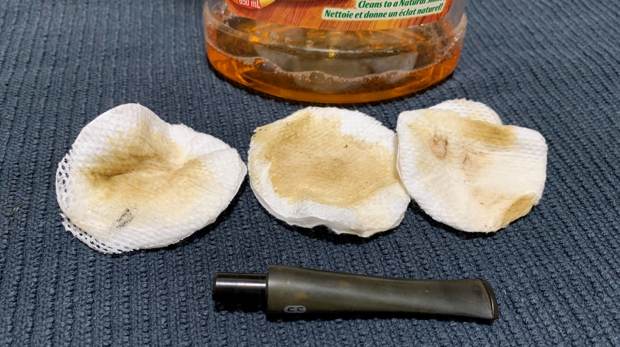
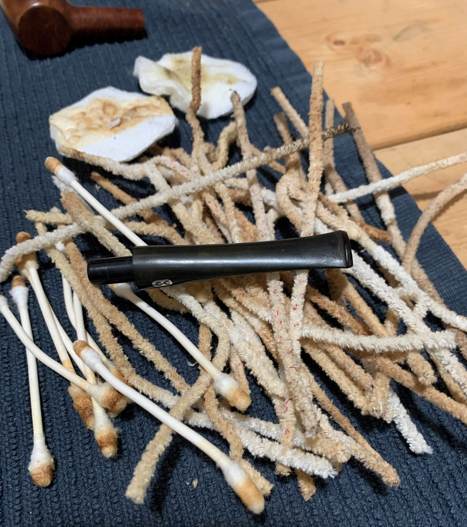
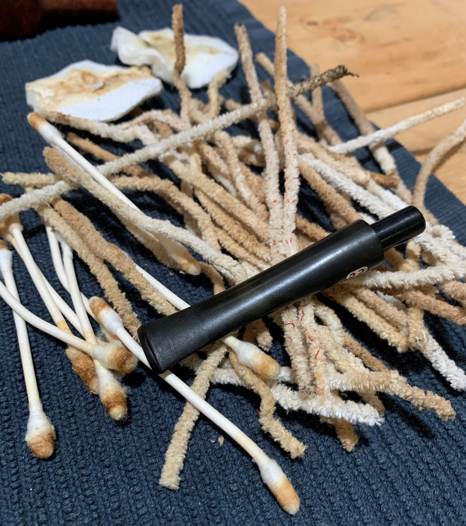
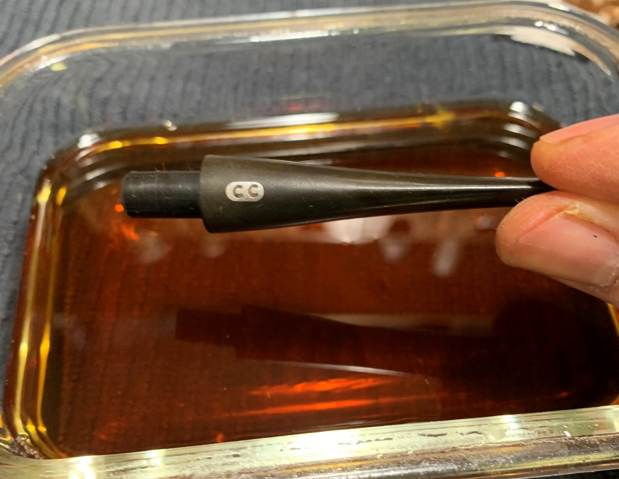
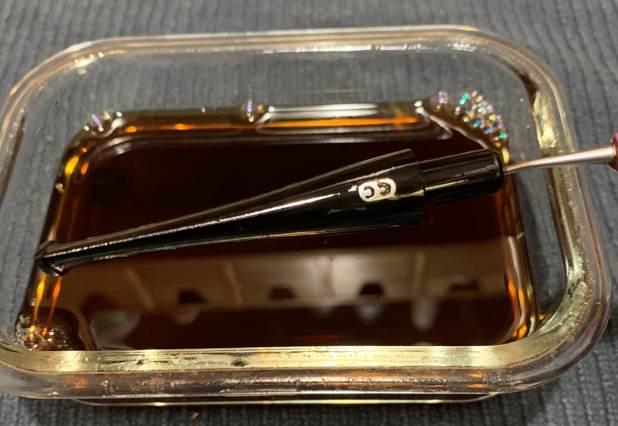
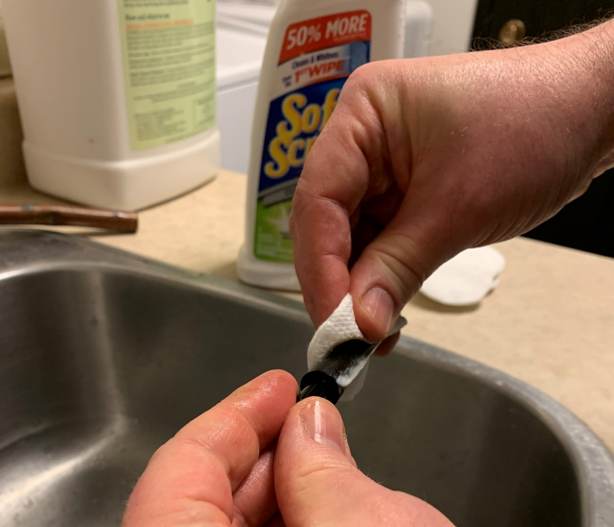
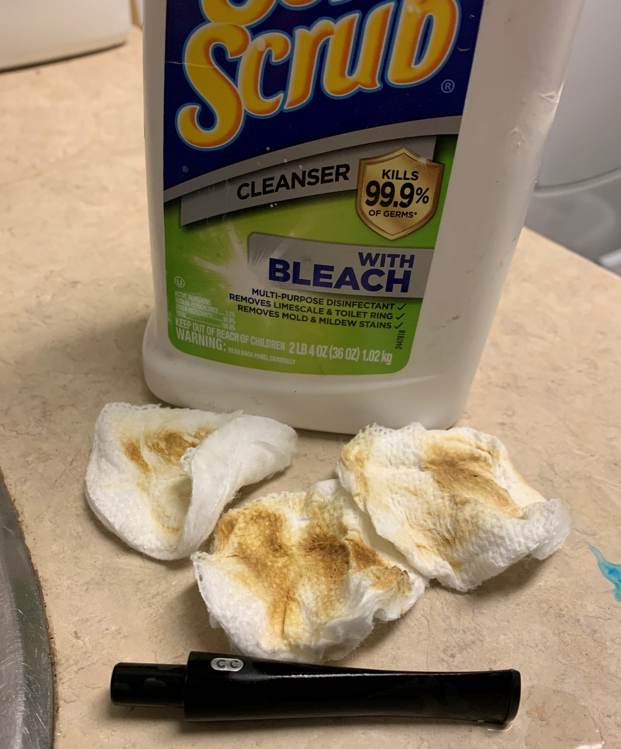
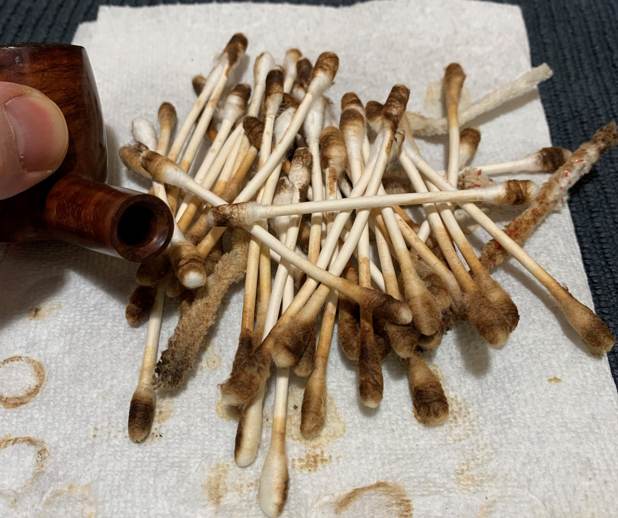
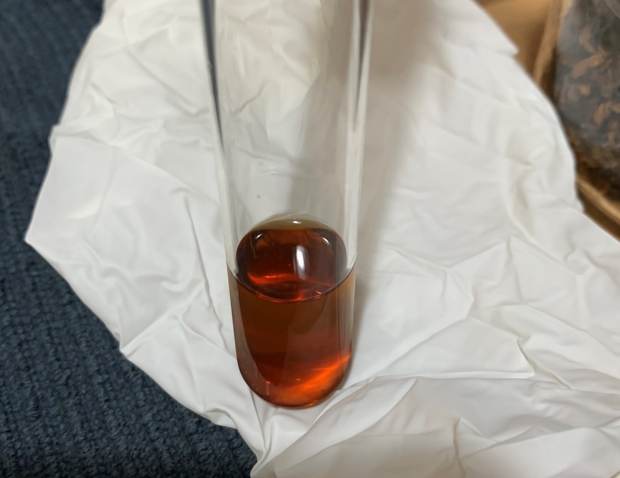
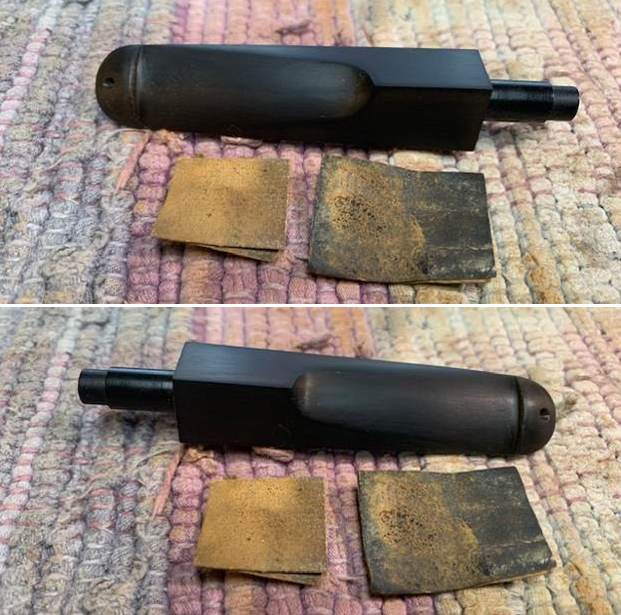
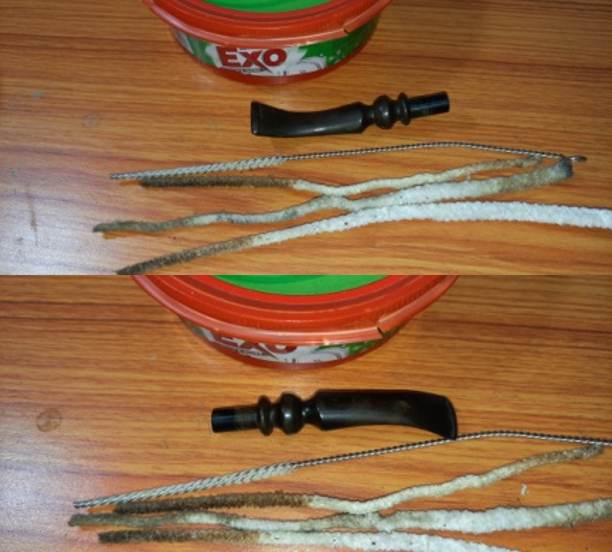
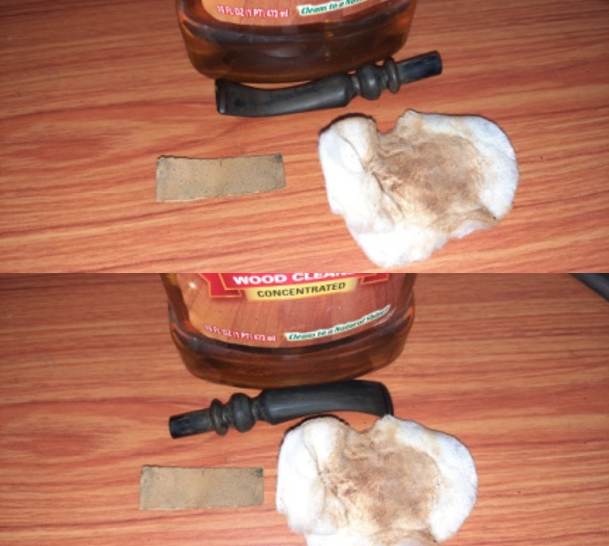
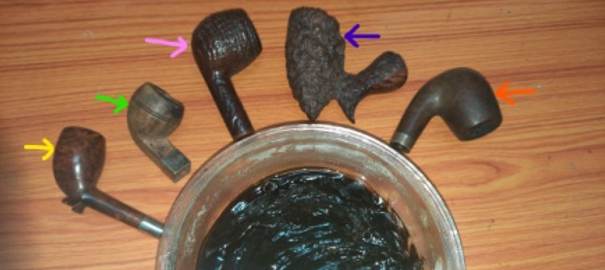
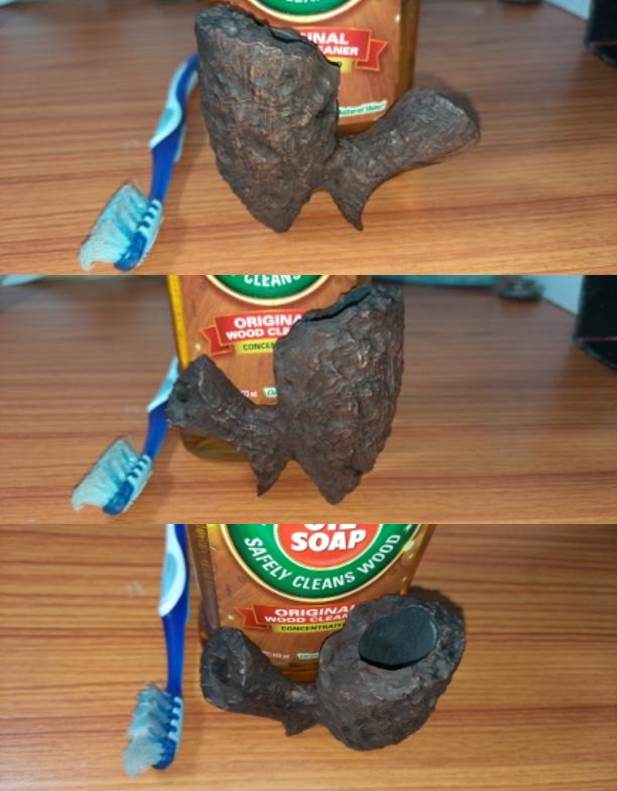
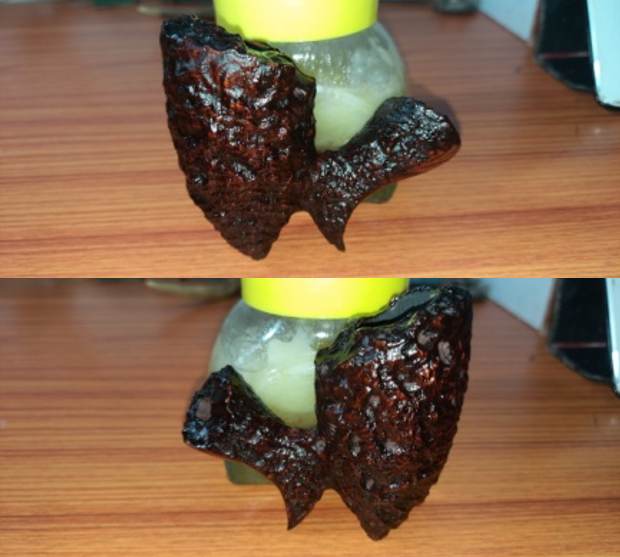
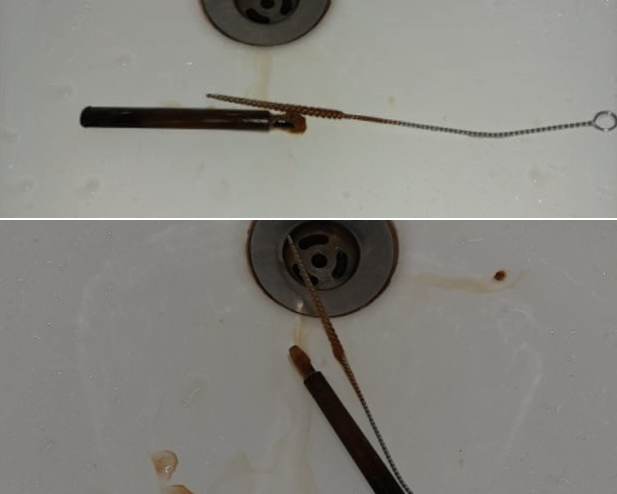
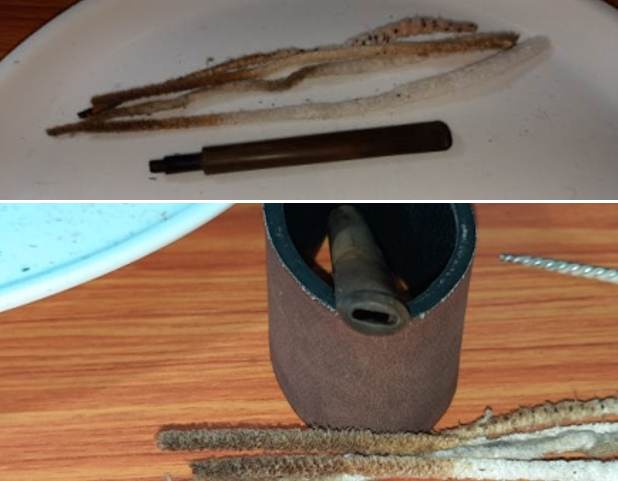
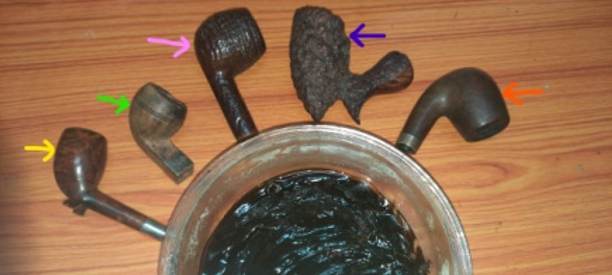
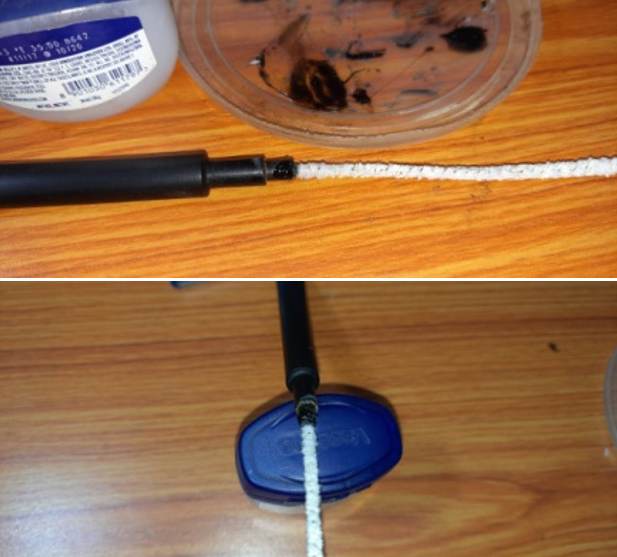
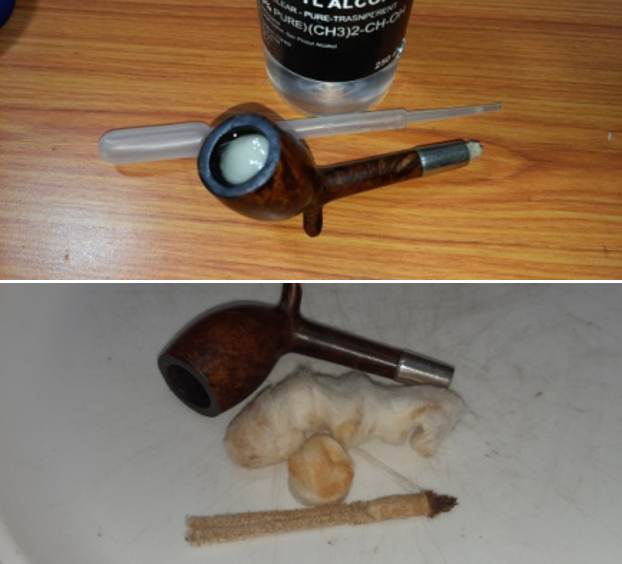
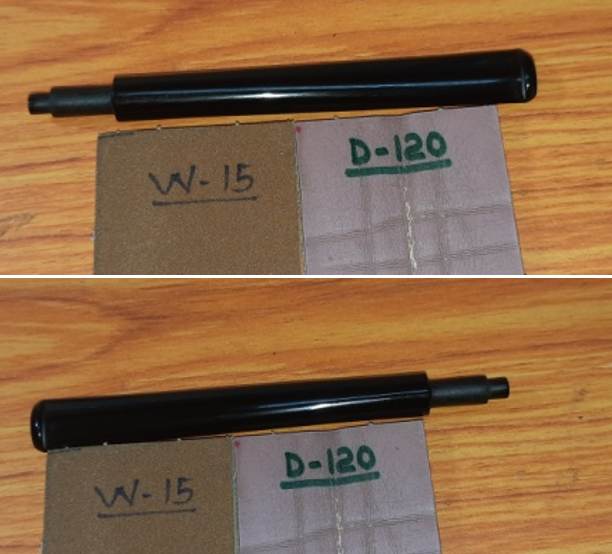
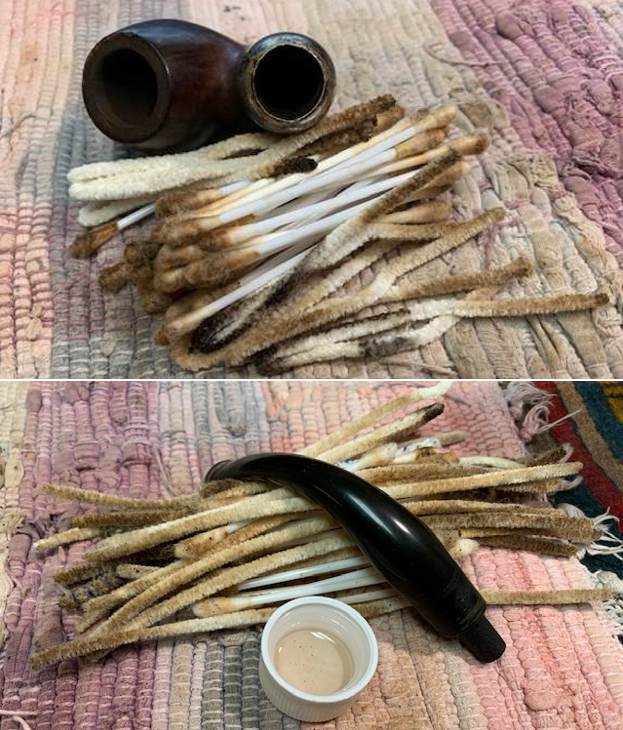
I started the restoration of this old timer by immersing the stem in to the deoxidizer solution from Mark Hoover. Before dunking the stem in to the solution, I ran a couple of pipe cleaners dipped in alcohol through the previously cleaned airway to remove the dust that may have accumulated over the last three years. I scrubbed the stem surface with a piece of 220 grit sandpaper to loosen up the oxidation from the surface and further cleaned it with Murphy’s Oil soap on a cotton swab. Once the surface was cleaned, I dunked the stem in to the deoxidizer solution along with the other pipe stems that are in queue for restoration and indicated with a green arrow. The stem is allowed to soak in the solution overnight giving ample time for the solution to pull much of the oxidation to the surface.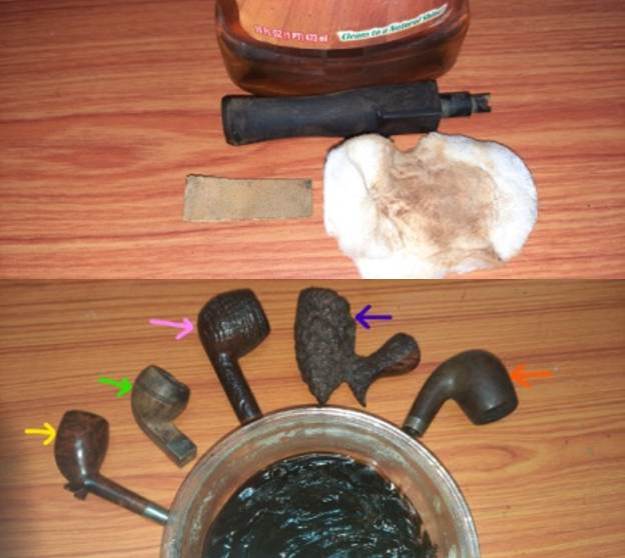 The next morning, Abha removed the stems (stem indicated with pastel green arrow is the one being worked on) that had been soaking in the deoxidizer solution overnight. She cleaned the stem and the stem airway under running warm water and scrubbed the raised oxidation from the stem surface using a Scotch Brite pad and the airway with a thin shank brush. She further removed the oxidation by scrubbing the stem with 0000 grade steel wool and applied a little EVO to rehydrate the stem. This now gives a clearer picture of the extent of damage as can be seen in the pictures below. The lower bite zone including the button edges on either surface have deep tooth indentations and will need to be reconstructed. The tenon end would also need to be rebuilt. Fortunately, there are no traces of deep seated residual oxidation visible over the surface.
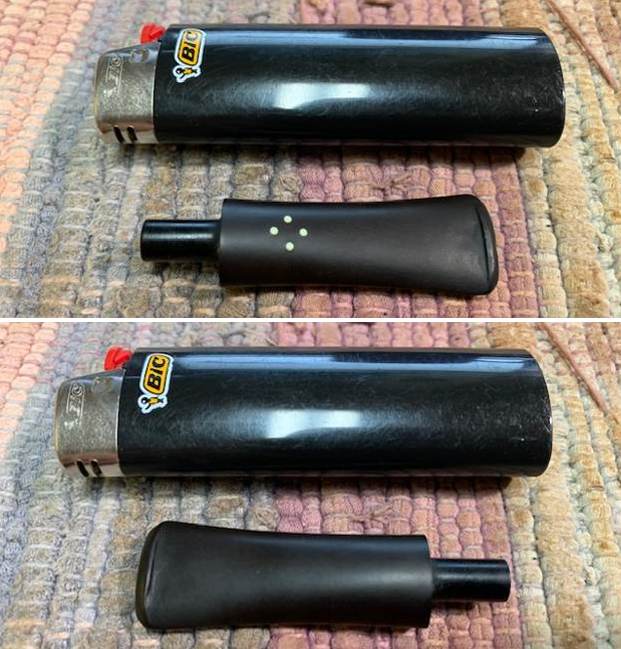
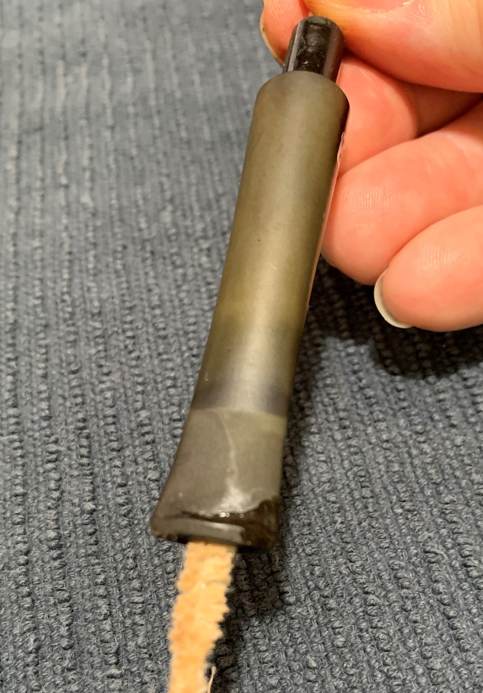
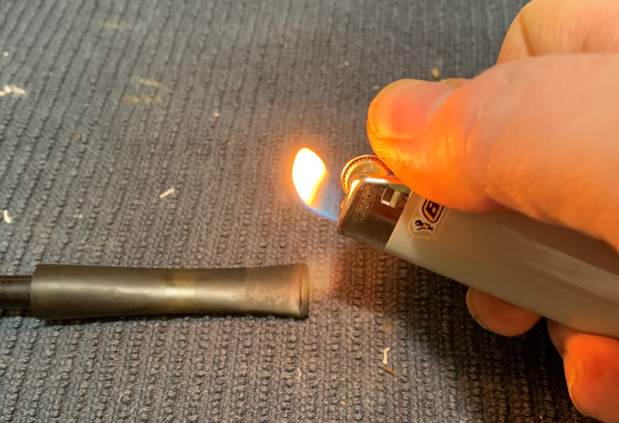
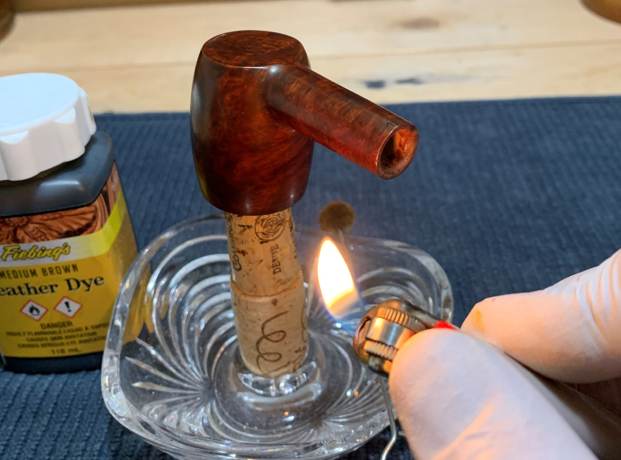
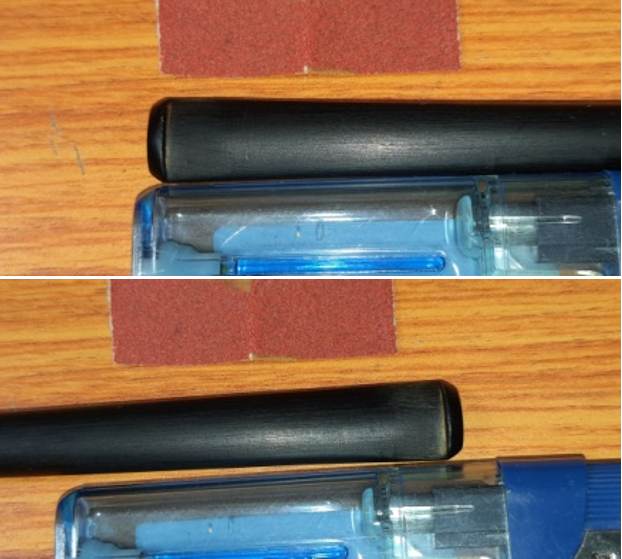
 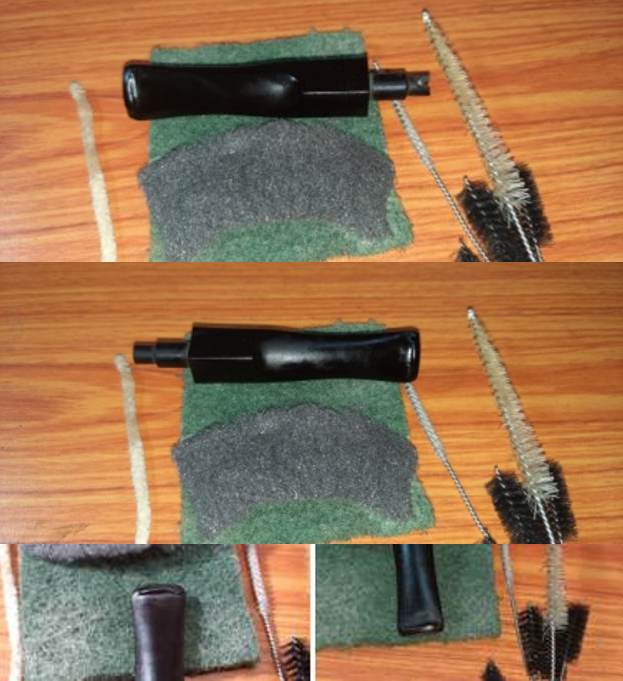 I heated the bite zone of the stem with the flame of a lighter to raise the tooth indentations to the surface by causing the vulcanite to expand. This did raise the bite marks to an extent; however, I would still need to rebuild the buttons and fill the bite marks in the bite zone.
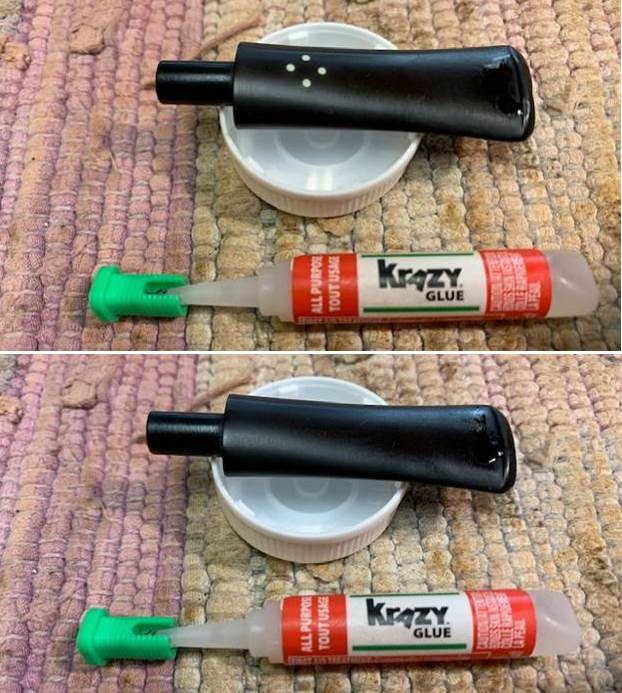
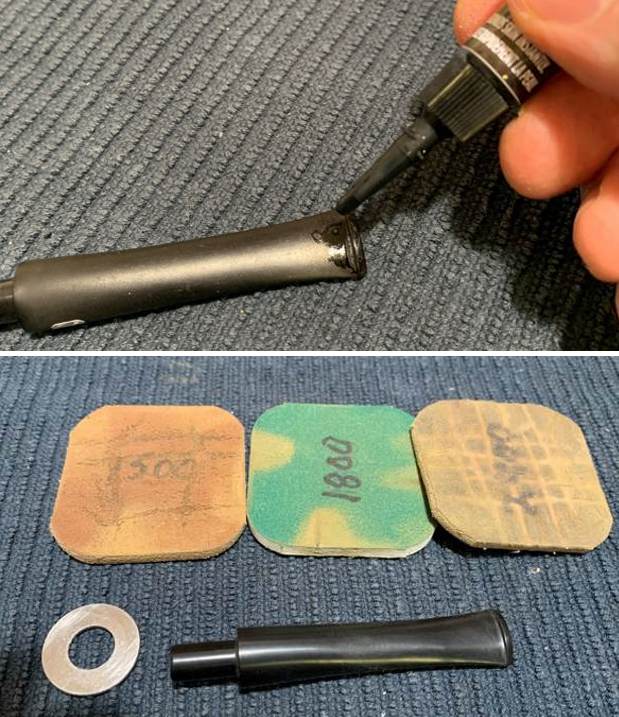
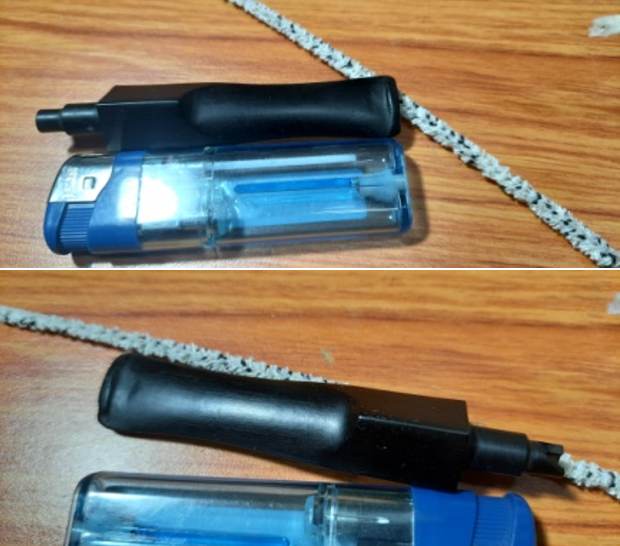 To begin repairs to the stem, I first inserted a pipe cleaner that had been smeared with petroleum jelly (Vaseline) through the tenon end in to the stem air way. This helps prevent the CA superglue and charcoal mix from sticking to the pipe cleaner and prevents the mix from running down in to the air way and clogging it. I generously applied a mix of CA superglue and activated charcoal over the stem areas to be rebuilt. I apply a thick layer of the mix as this provides sufficient patch material to work with during subsequent filing and shaping to match the repairs with the stem surface. Once I had applied the mix, I set it aside to cure overnight.
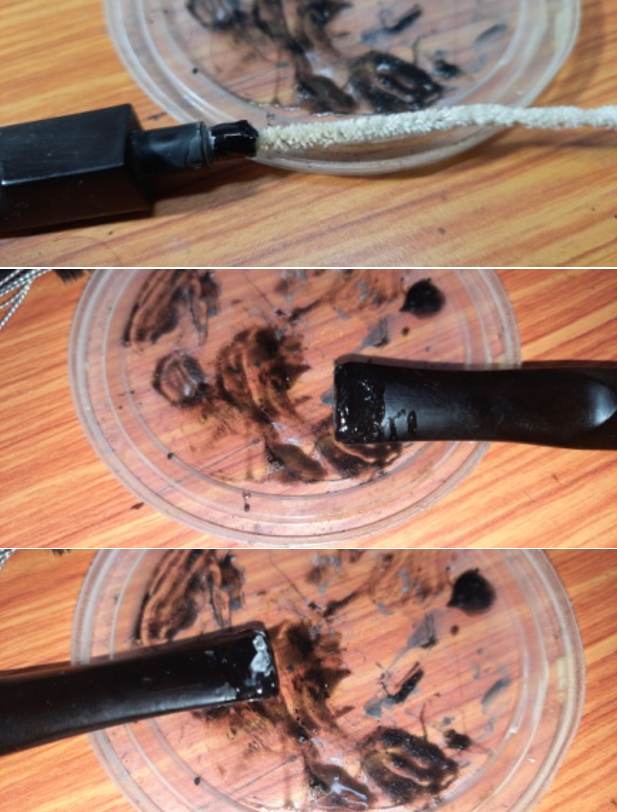 With the stem repairs set aside to cure, I turned my attention to the stummel repairs. The summary of major issues identified during the detailed inspection is given below:-
(a) Crack to the front of stummel that extends to the inside of the chamber.
(b) The large trough to the rim surface and thinning of the rim on the right side of the stummel.
(c) Heat lines/ fissures over the walls of the chamber.
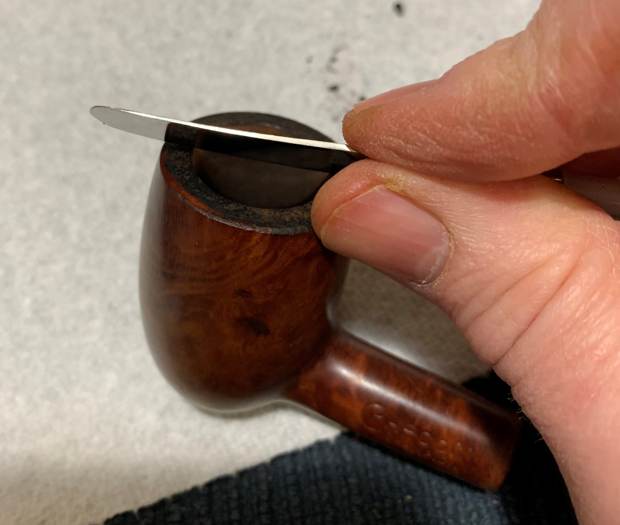
With a flat head needle file, I removed the charred briar from the rim surface till I reached solid briar wood. This now gives a clearer idea as to the exact extent of damage and the repairs required. 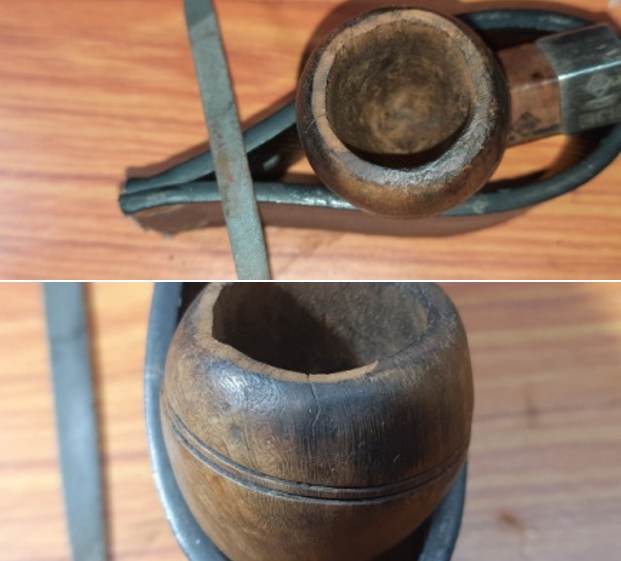 I decided to address the crack to the stummel surface first. I marked the end point of the crack with a sharpie pen under magnification. This helps to identify the end point later with naked eye and also provides start point for the drill bit to bite in. With a 1 mm drill bit mounted on to my hand held rotary machine, I drilled a counter hole at the end of the crack, taking care not to go too deep and end up drilling a through-hole. I had to mark and drill a second counter hole as I later realized that the crack extended slightly below the first one that I had drilled. I ran the sharp dental tool along the crack to remove the dirt and debris that may have been lodged in the crack. This crack and counter holes would get filled with briar dust and CA superglue when I would reconstruct the trough in the rim surface and so I did not proceed to fill the same at this stage.
 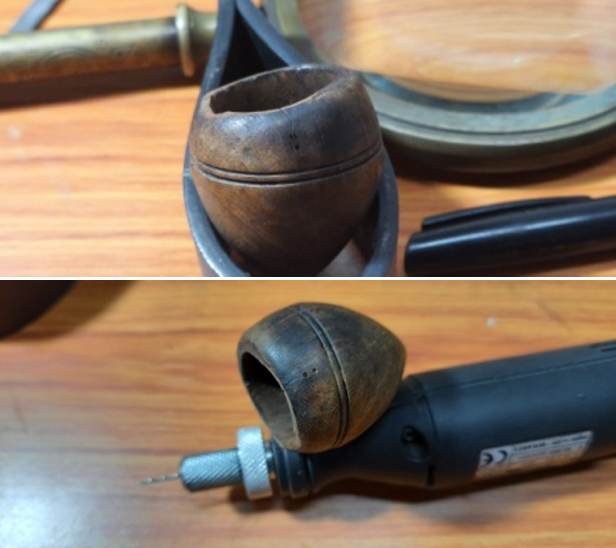 Next, I got around to addressing the rim top damage. The extent of the dip or trough caused due to banging against a hard surface and or charring of the rim edge was deep and would necessitate heavy topping off of the rim surface, and I for one, absolutely wish to avoid any loss of briar. Also topping to the extent that was required to eliminate the deep trough would completely alter the original shape and symmetry of this pipe. So, I planned on first filling up the deep trough on the rim edge using briar dust and superglue to roughly match the surrounding intact rim surface and some more and then topping it to achieve a smooth even surface. Theoretically, this sounds logical.
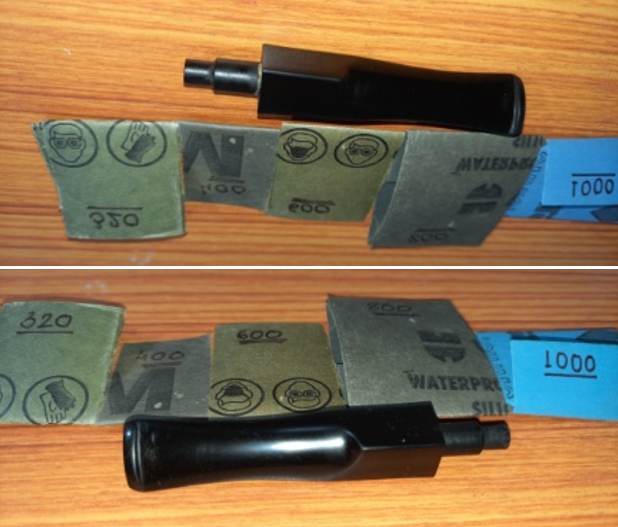
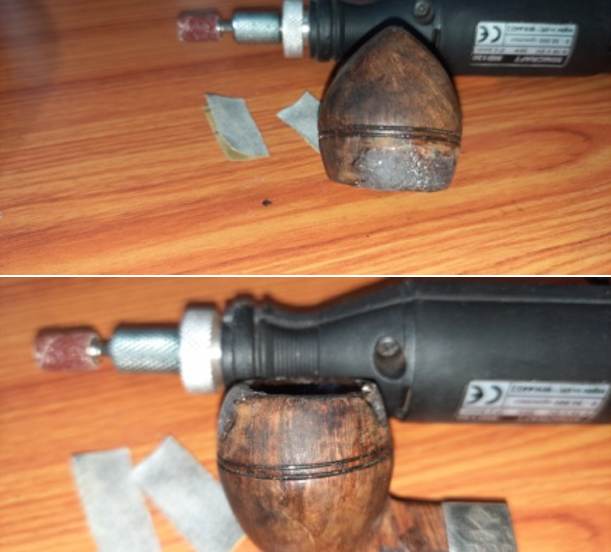
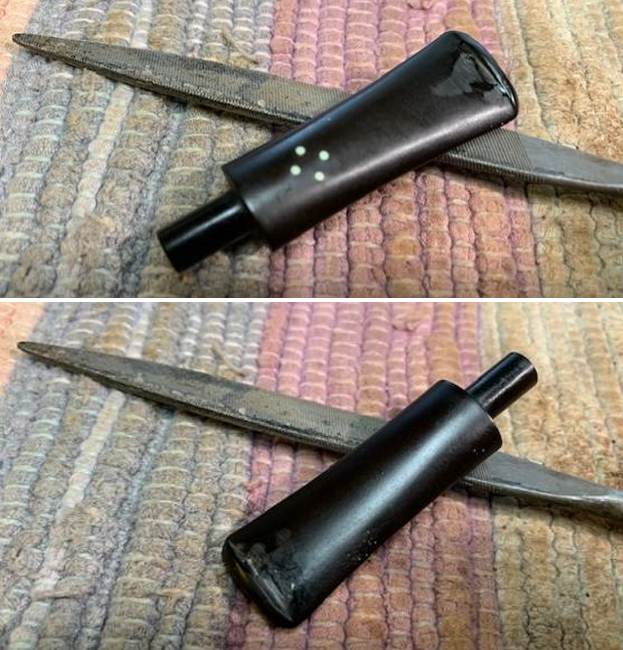
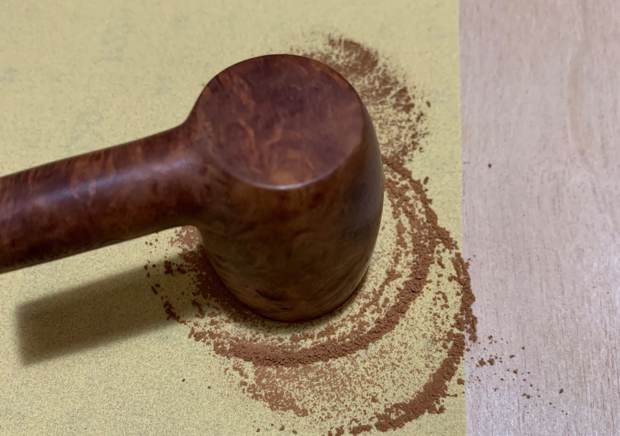
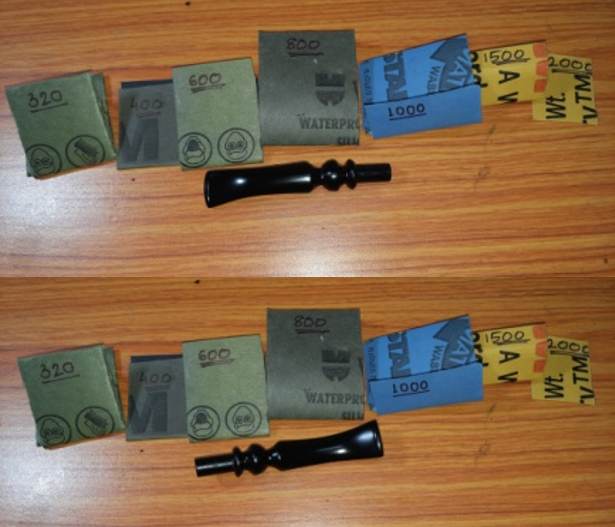
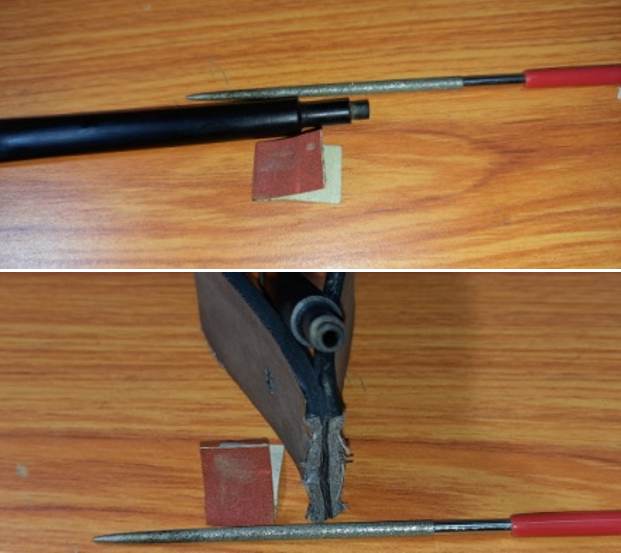
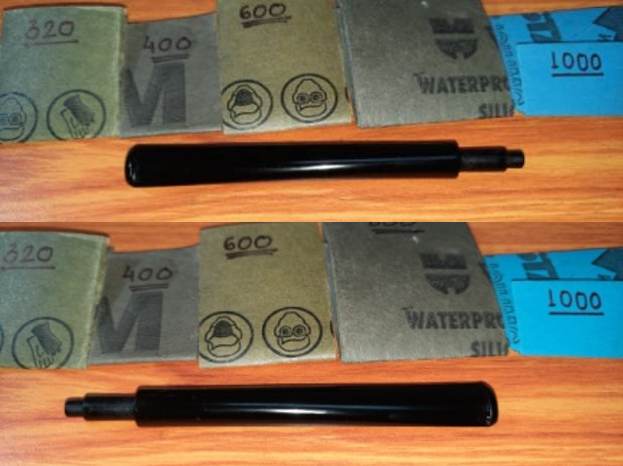
I resorted to the layering method again; first I layered superglue along the damaged surfaces of the rim followed by sprinkling of briar dust, another layer of superglue followed by a final layer of briar dust. This final layer of briar dust reduces the probability of air pockets (or so I thought). In the second picture, you can see that the layering has not been done to the level of the rim surface but above the surrounding intact rim surface as I would be sanding the rim subsequently. Using the same technique, I rebuilt the inner surface to increase the thickness of the rim that was thinned out. I set the stummel aside to cure. 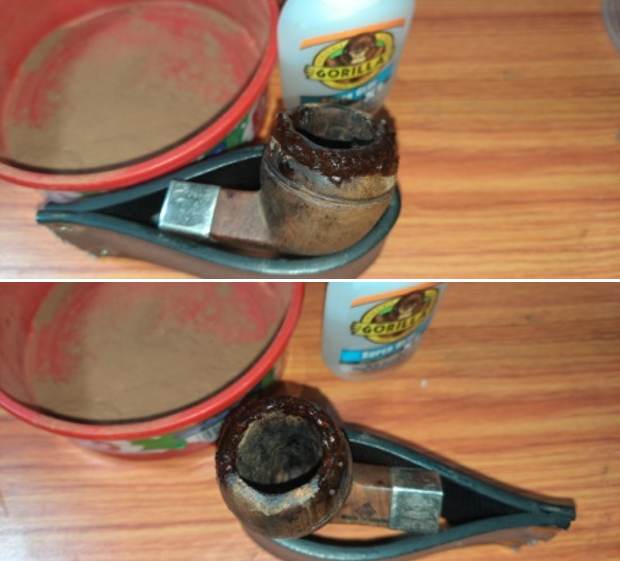 The stem repairs had hardened considerably over the past 18 odd hours. I used a flat head needle file to sand the patch and achieve a rough match with the rest of the stem surface. I further evened out the patch with a folded piece of 220 grit sand paper. Similarly, I shaped the rebuilt tenon for perfect seating into the mortise. For a better blending, I further sanded the entire stem with 320 followed by 400, 600, 800 and 1000 grit sand paper. This helps to reduce the scratch marks left behind by the more abrasive 220 grit paper. I rubbed a small quantity of EVO to rehydrate the stem and set it aside.
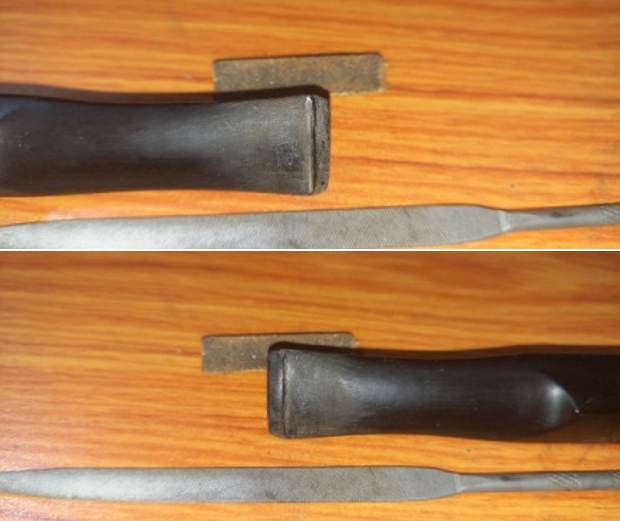
 With the stem set aside, I turned my attention back to the stummel and rim repairs where the fills/ repairs had hardened completely. To speed up the removal of excess mix of briar dust and superglue from the repaired areas, I mounted a sanding drum over my hand held rotary tool and carefully sanded down the excess patch material. I further shaped and matched the repaired area with the rest of the stummel by sanding with a 180 grit sand paper. At this point, I noticed a large number of air pockets in the repaired areas and can be identified in the form of light colored pockets in the surface.
 And so here I was, filling the air pockets with a mix of briar dust and superglue and praying that these pockets are completely filled. Once I was done, I set the stummel aside for the mix to harden.
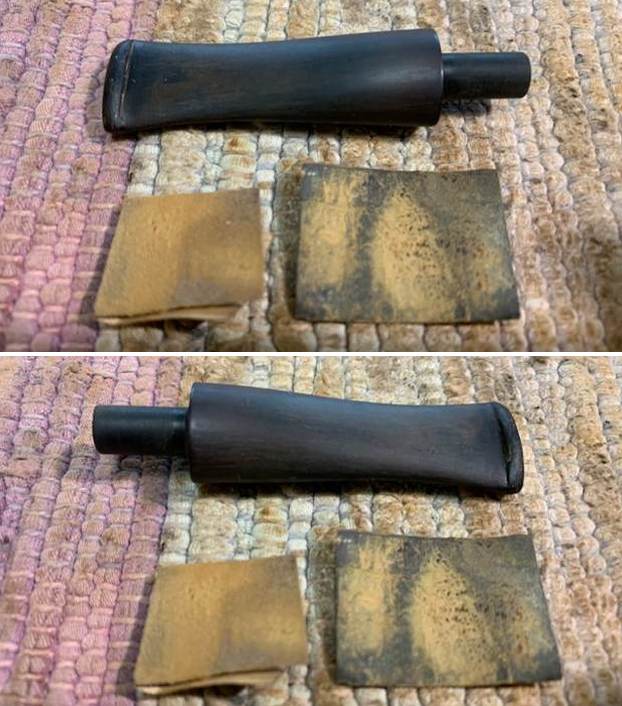
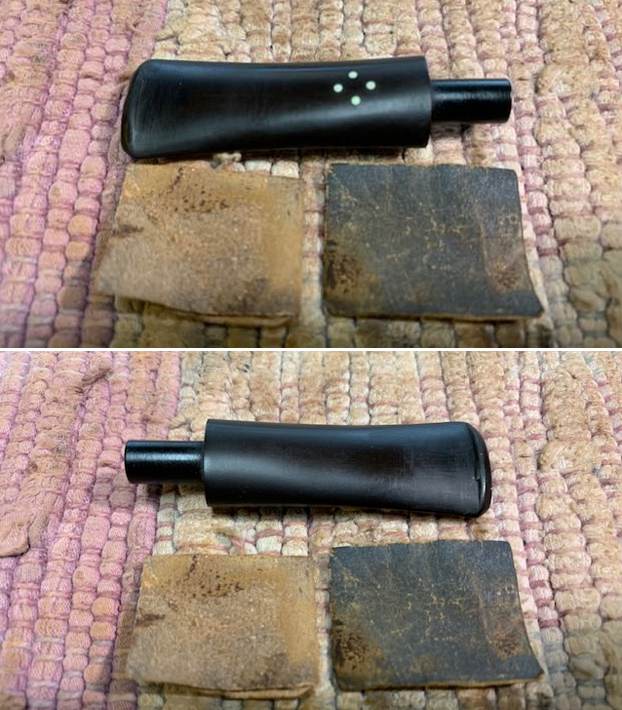
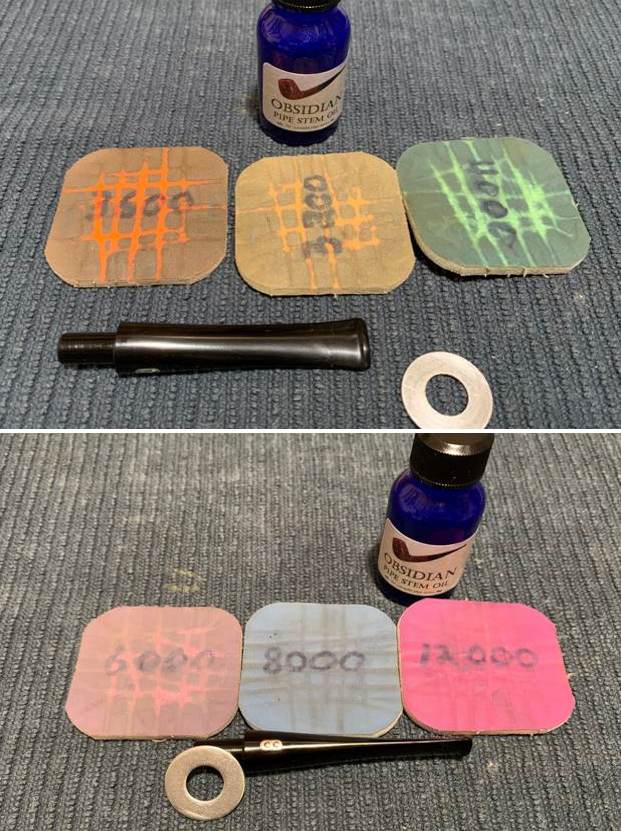
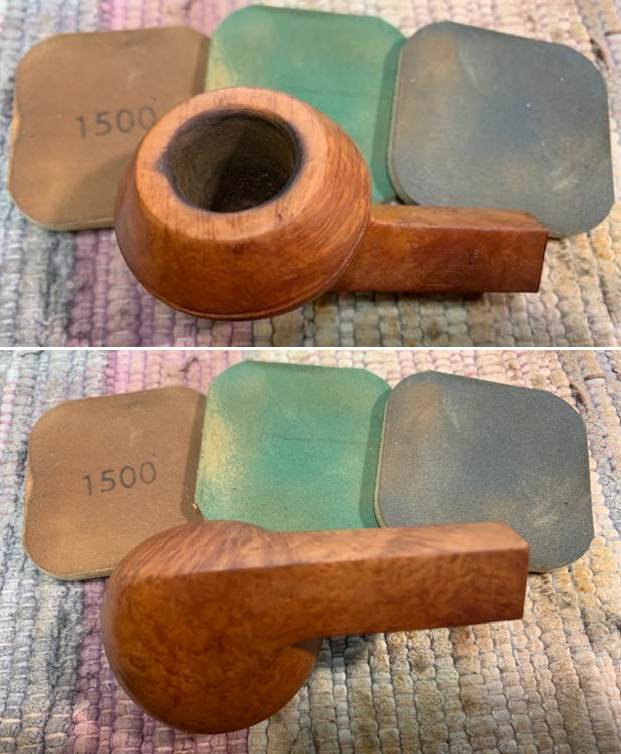
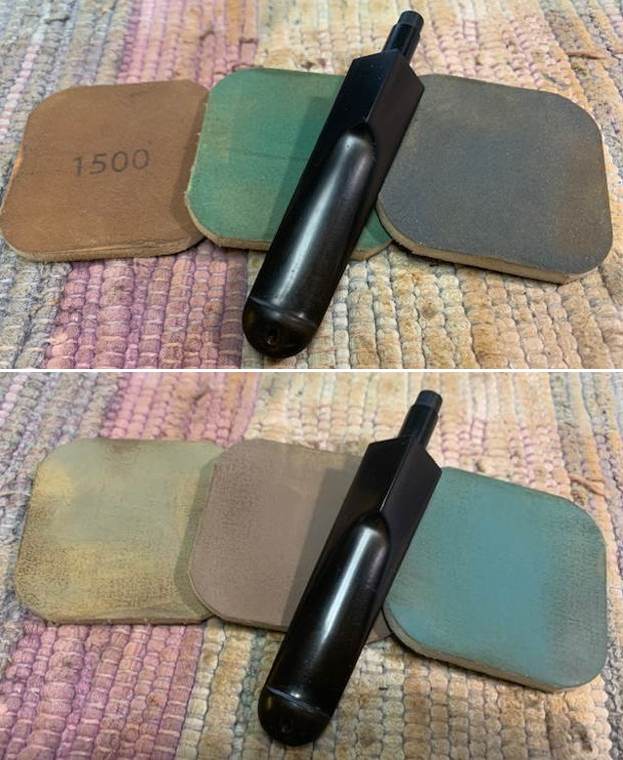
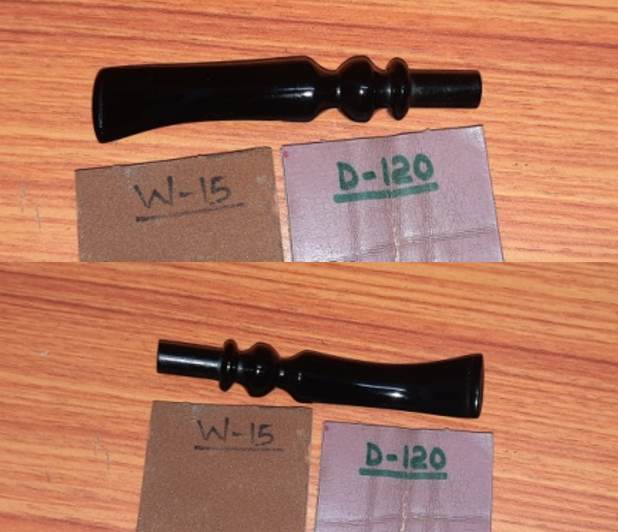
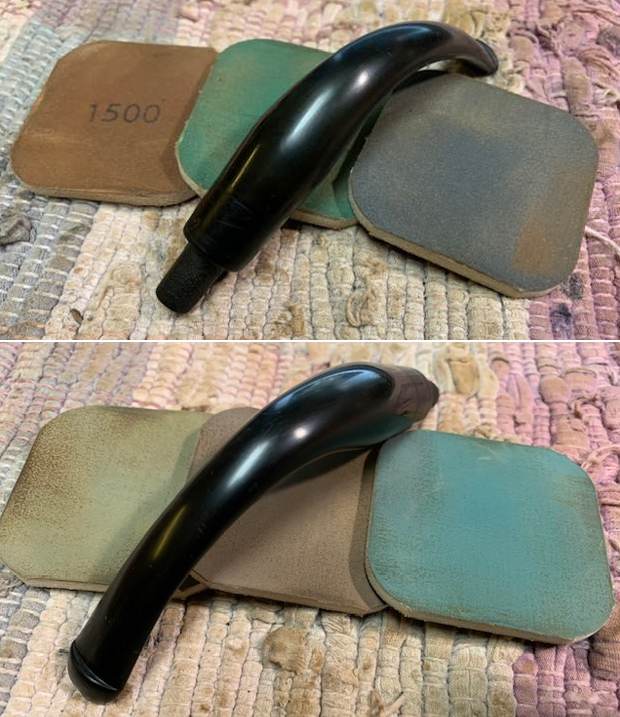
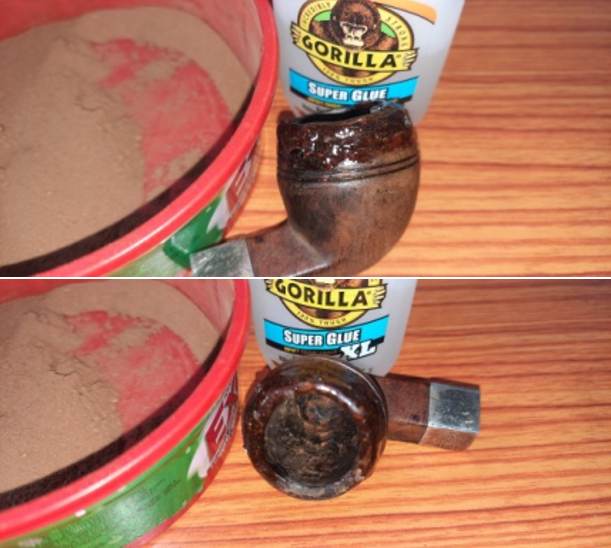 While I was working on the stummel repairs, Abha, my wife was quietly giving finishing touches to the stem. She went through the entire set of micromesh pads, wet sanding with 1500 through to 12000 grit pads. She applied a little quantity of EVO and set the stem aside for final polish with polishing compounds.
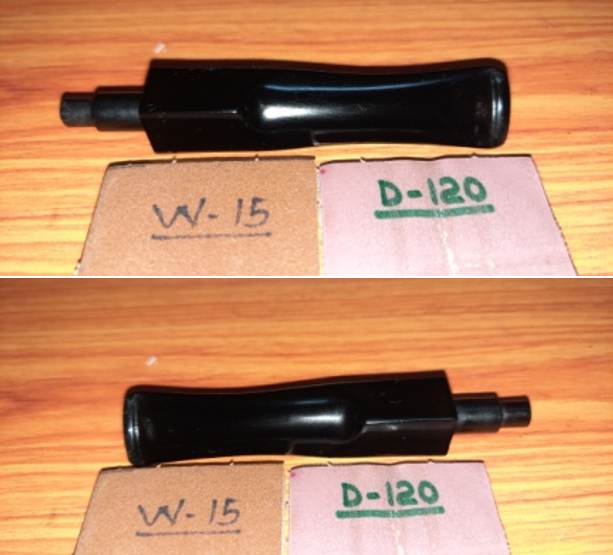 By next afternoon, the repairs to the rim had completely hardened. I set about sanding the repaired surface with a sanding drum mounted on to my rotary tool to match the rest of the surface. With a folded piece of 180 grit sand paper, I fine tuned the match further. At this stage, even though the air pockets have reduced to an extent, but not eliminated. I further realized that the rim top is still thin on the right side and needs to be built up further.
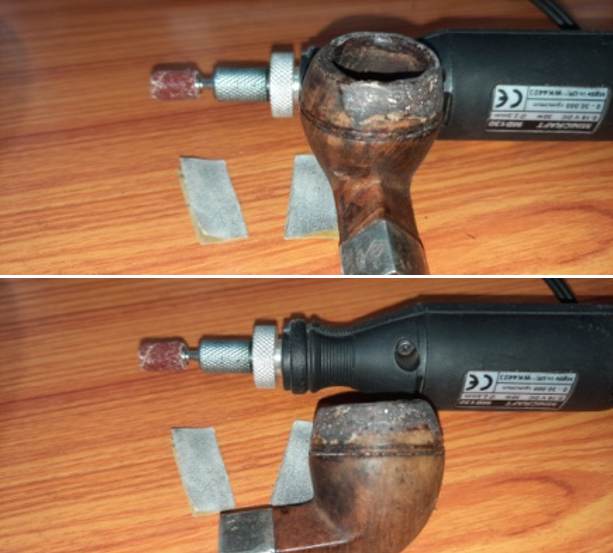
 To get the rim thickness to match the rest of the rim surface, I coated that portion of the inner wall that needed to be built up with a mix of briar dust and superglue. One has to be careful to coat only the required areas as it would mean extra effort and time wasted to remove the unwanted coat at a later stage. I set the stummel aside for the mix to cure.
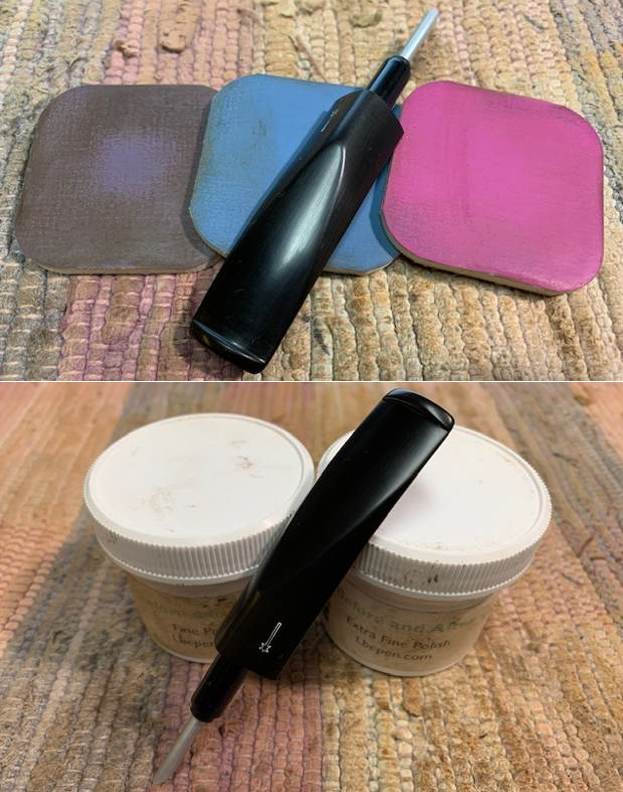
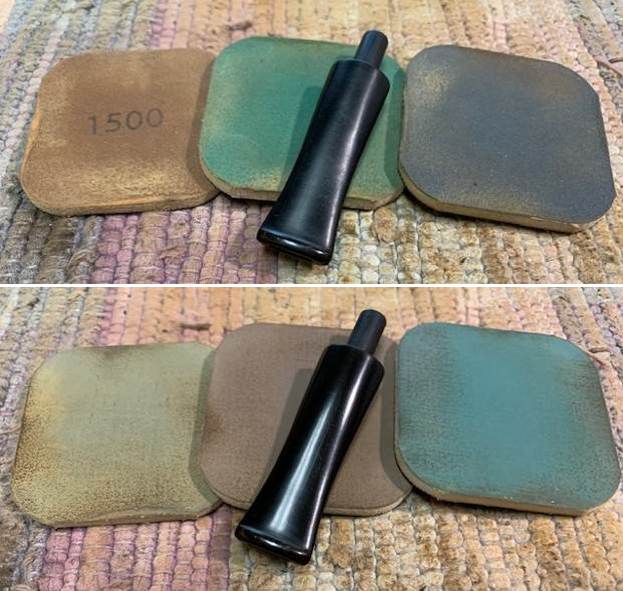
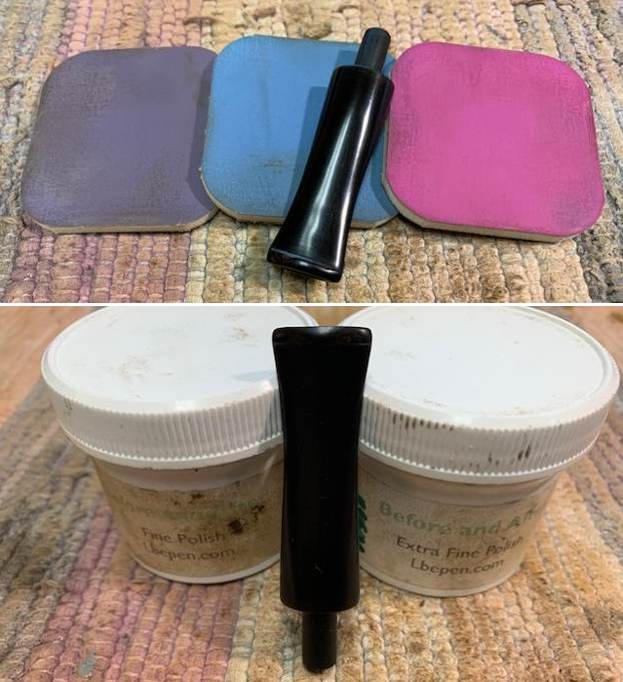
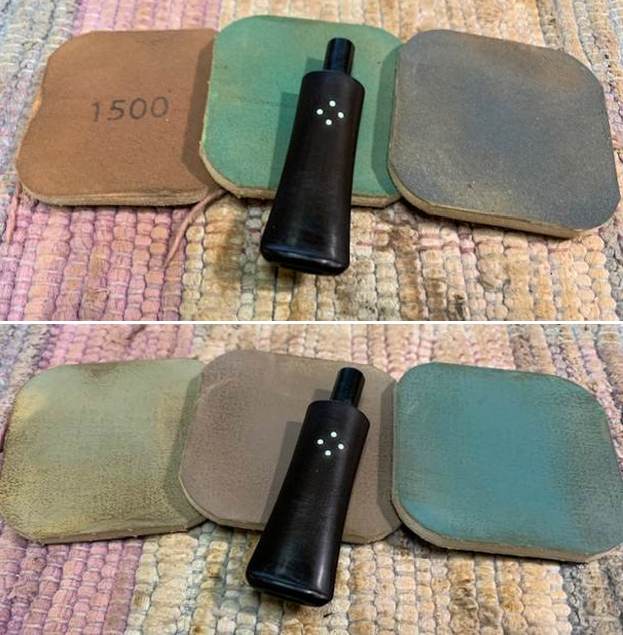
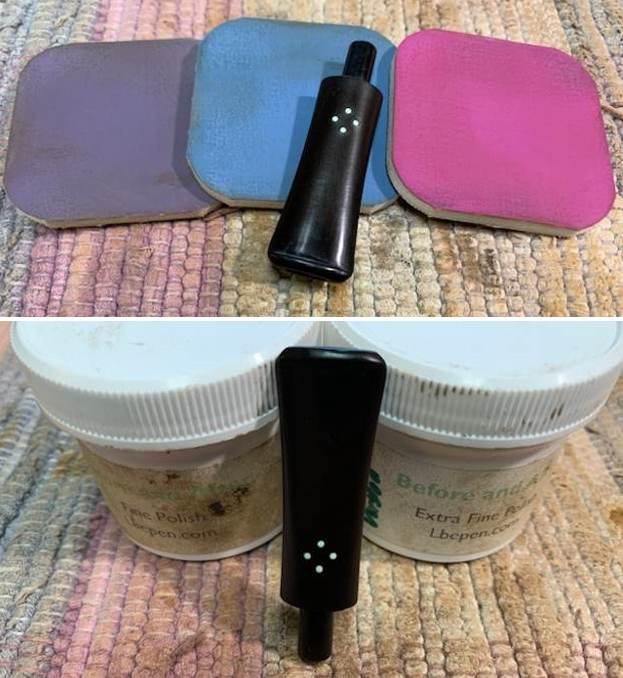
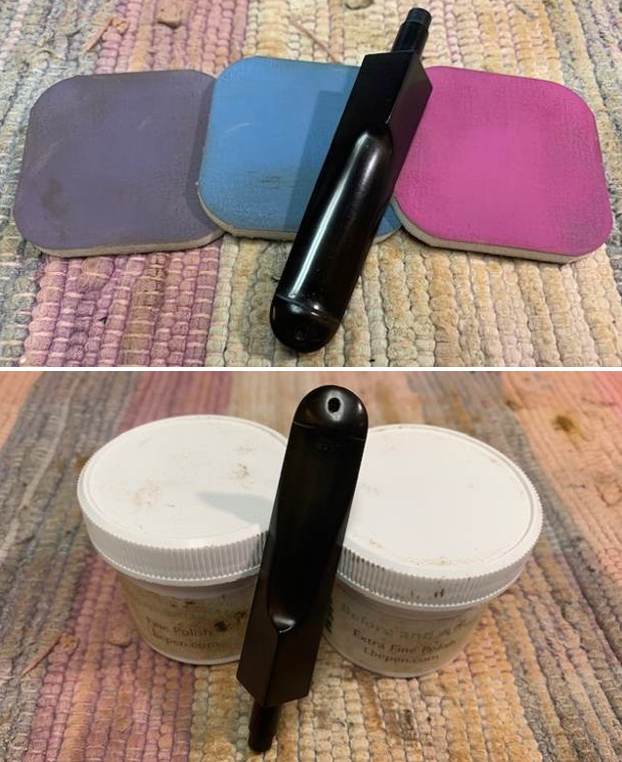
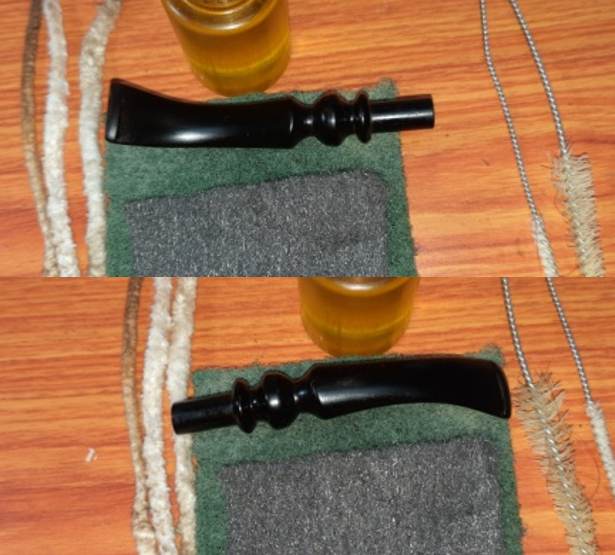
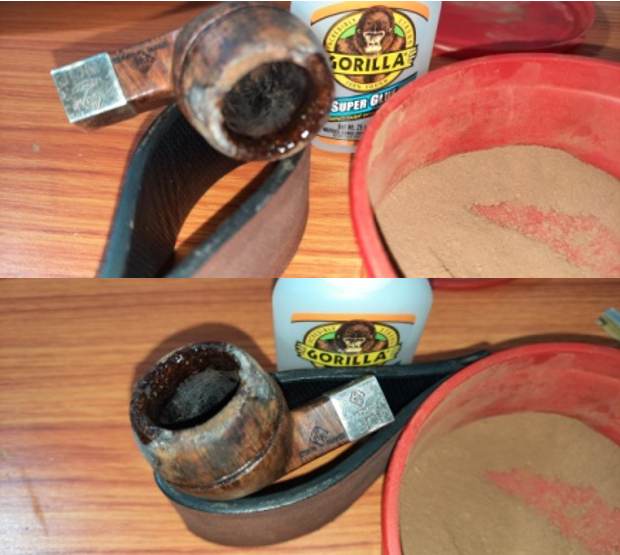 As I was busy with the rim repairs, Abha had polished the stem and had placed it on my work table. She polished the stem with micromesh pads, wet sanding with 1500 to 12000 grit pads. When she was through with the micromesh cycle, she deeply rubbed a small quantity of EVO in to the stem surface to rehydrate it and set it aside for me to give a final polish with blue diamond and carnauba wax. The finished stem looks a nice shining black. It was after I clicked pictures that I noticed that air pockets can be seen in the repairs to the bite zone. Is it the superglue that is at fault or is it me doing something wrong? Well, I shall live with it for now as these air pockets are not easy to discern with naked eye and maybe later someday I shall redo the stem repairs.
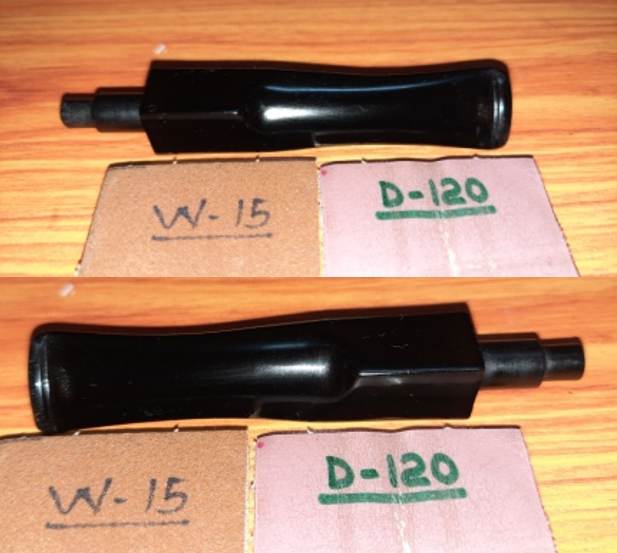 Once the repairs to the rim had cured, I used a sanding drum mounted on to my rotary tool to smooth and even out the fills. I fine tuned the matching of the repairs with the surrounding surface by sanding with a piece of 180 grit sand paper. Now to even out the rim top surface…
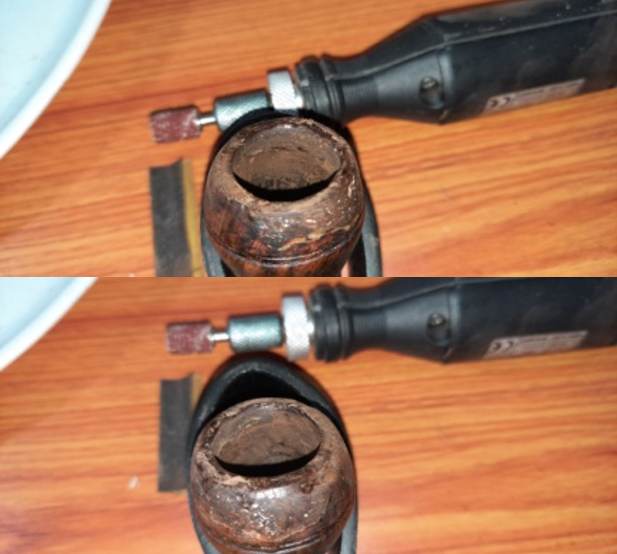 To even out the rim top surface, I topped the rim surface on a piece of 220 grit sandpaper till I had achieved an even a rim surface as was achievable while maintaining the shape and proportions of the stummel. A few light spots are seen where the glue did not mix with the briar dust forming an air pocket which got exposed during the sanding process.
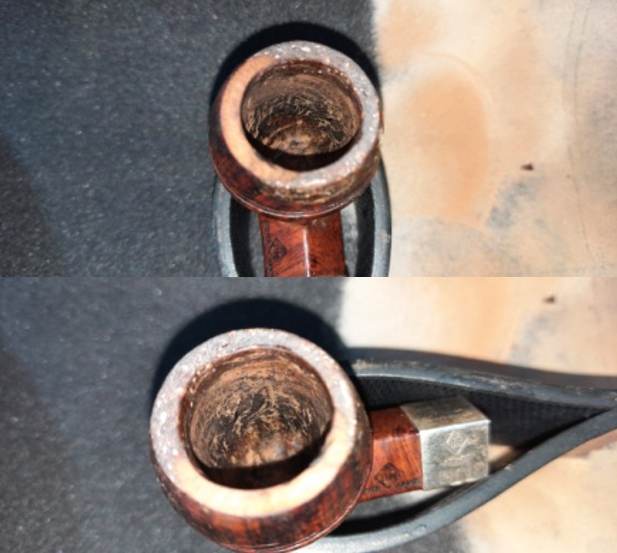 I addressed the issue of these air pockets by spot filling them with superglue using a toothpick. To speed things up, I used an accelerator to hasten the curing of the superglue. Once the glue had hardened, I evened out the fills by sanding with a 220 grit sand paper to a smooth finish. Unfortunately, I lost the pictures of this stage somewhere during transferring of data from mobile phone to my laptop.
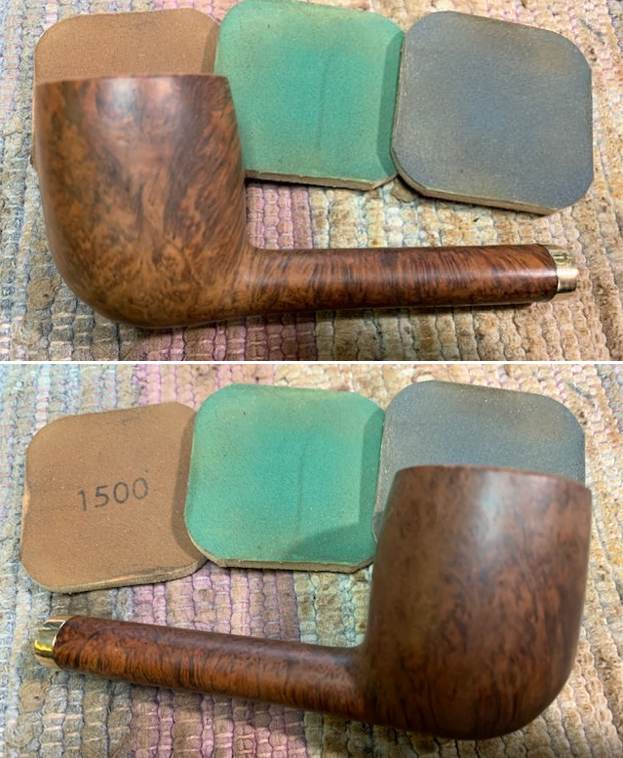
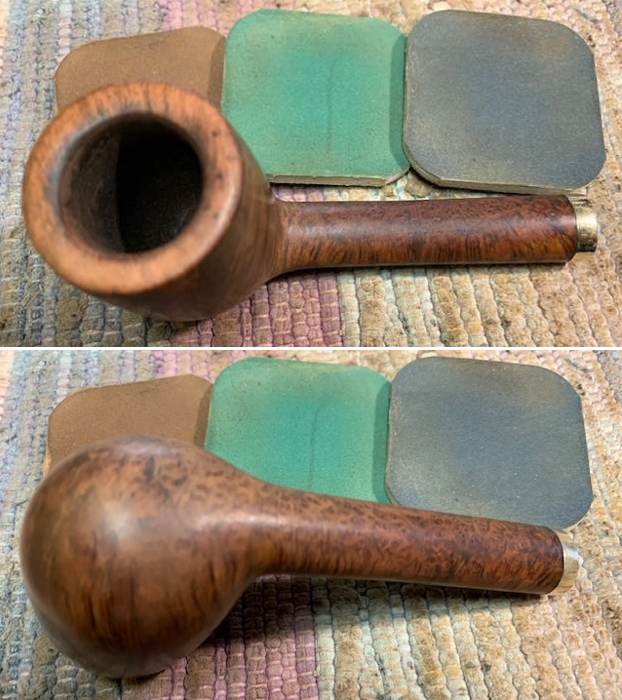
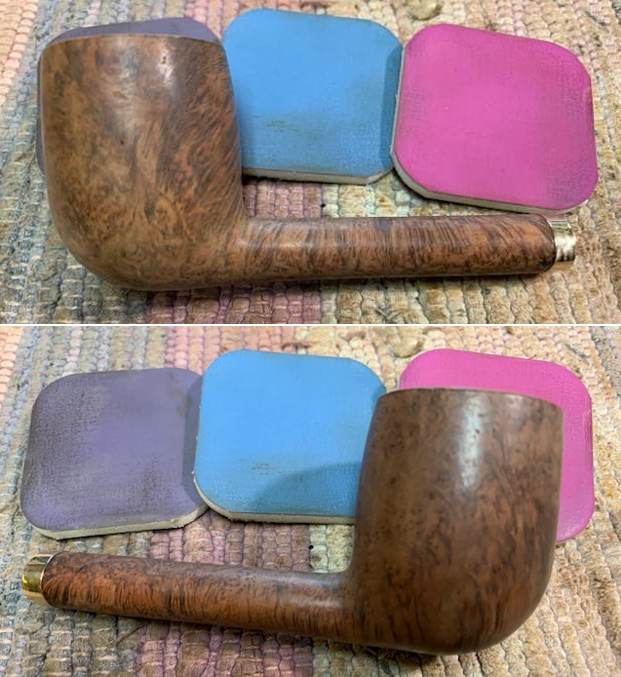
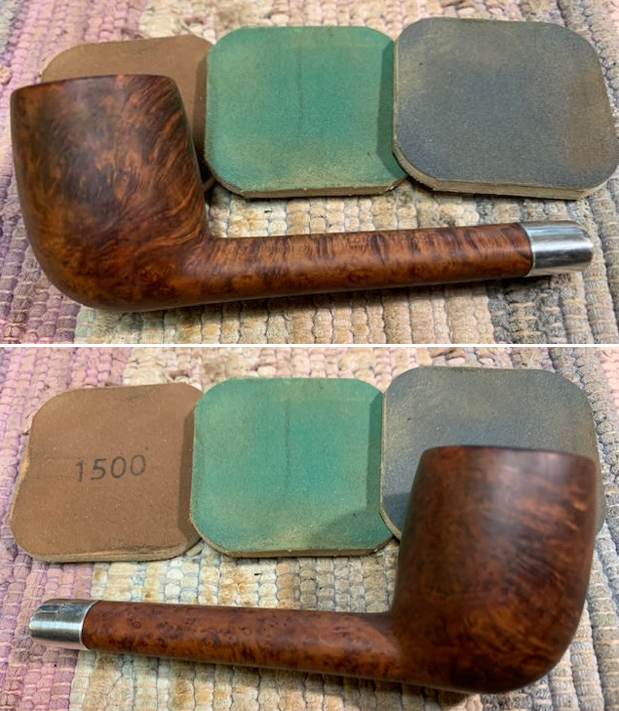
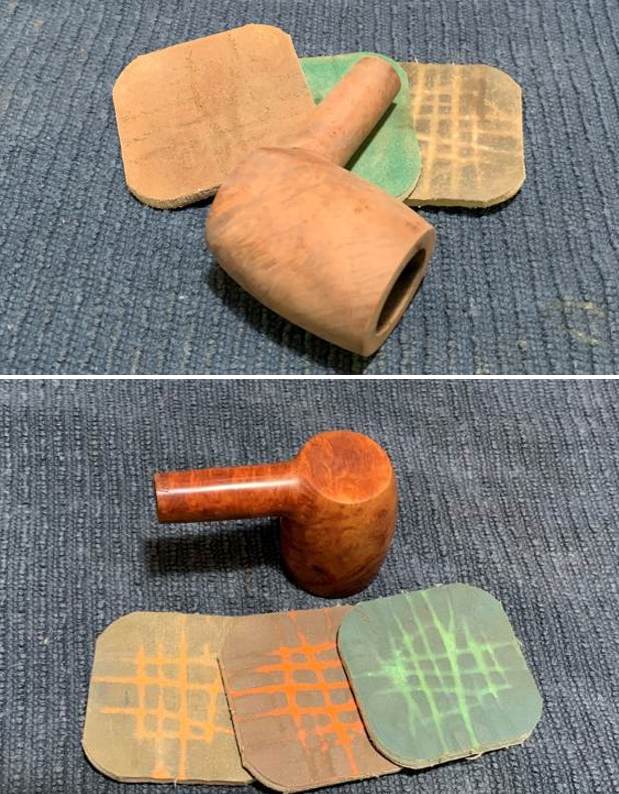
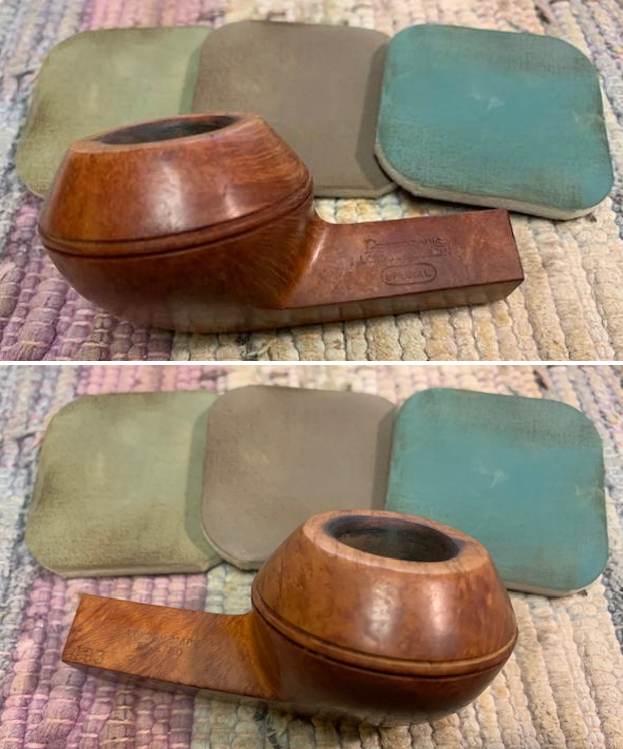
With the rim repairs completed, I sanded the entire stummel progressively using 320, 600 and 800 grit sand papers. This not only addressed the minor scratches and dings over the surface, but also evened out any high spots left behind during the rim repairs. Satisfied with the progress made, I handed over the stummel to Abha for her to weave her magic with the micromesh pads. She polished the stummel, going through the entire set of 9 micromesh pads.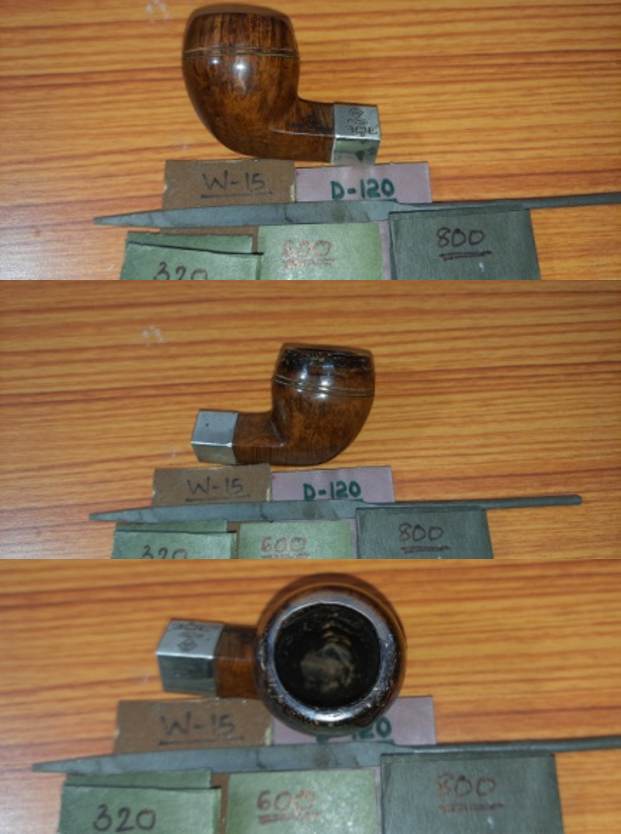
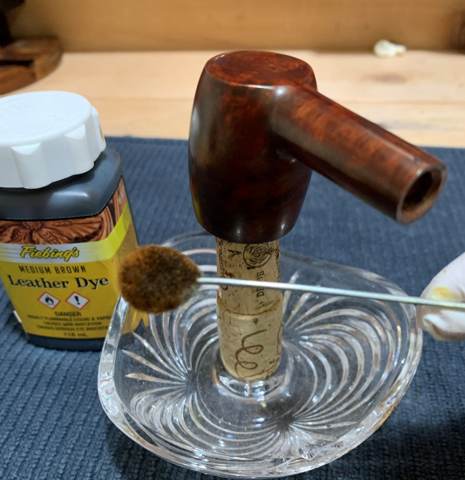
 To further blend the repairs with the surrounding surface, I stained the repaired area with a dark brown stain pen and set the stummel aside overnight for the stain to set.
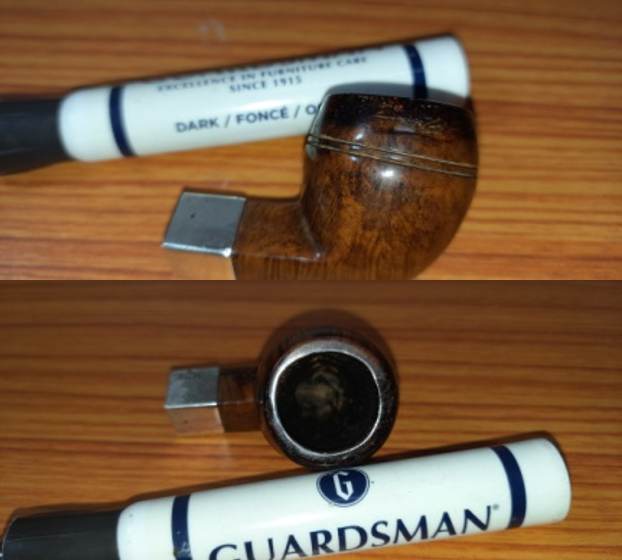
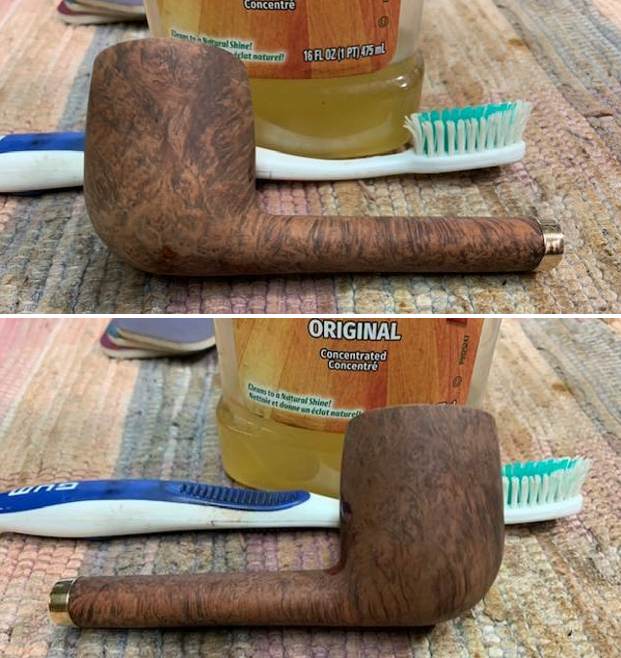
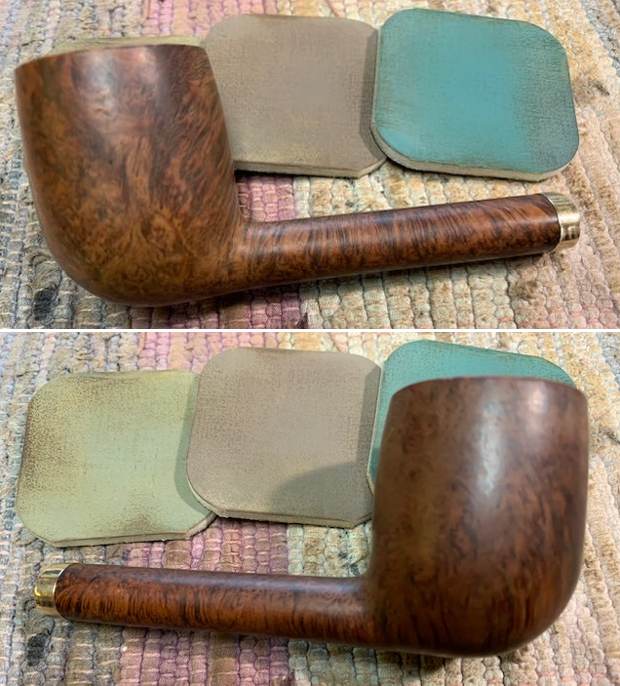
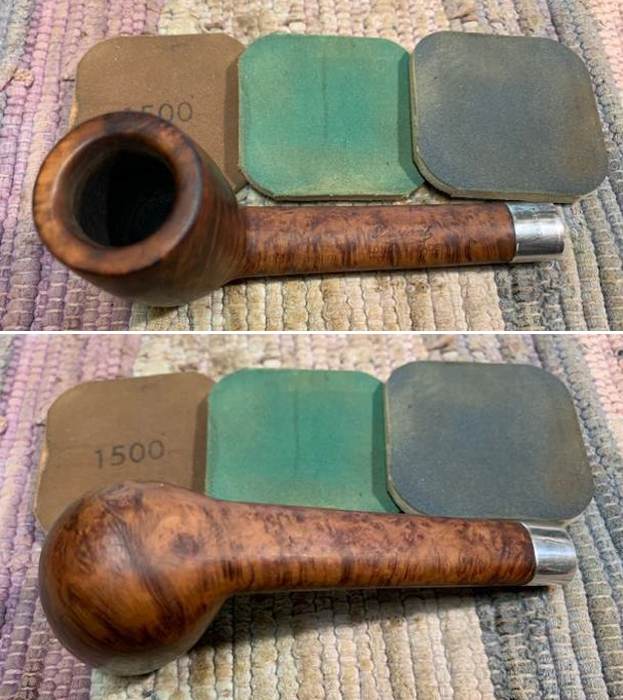
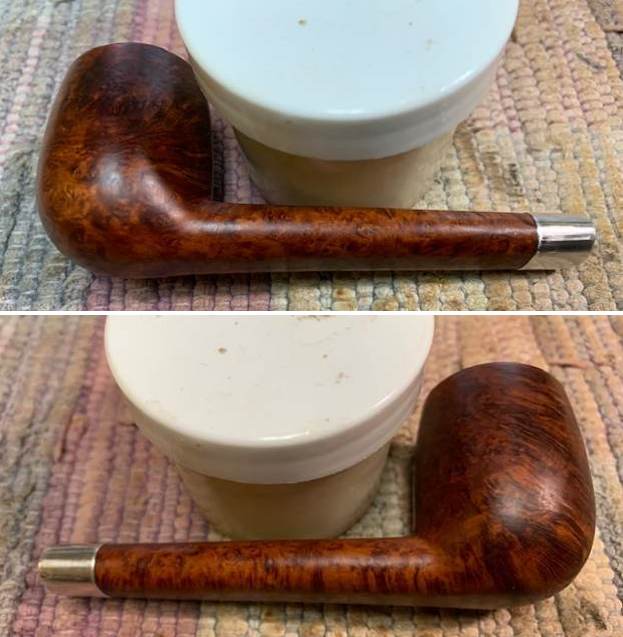
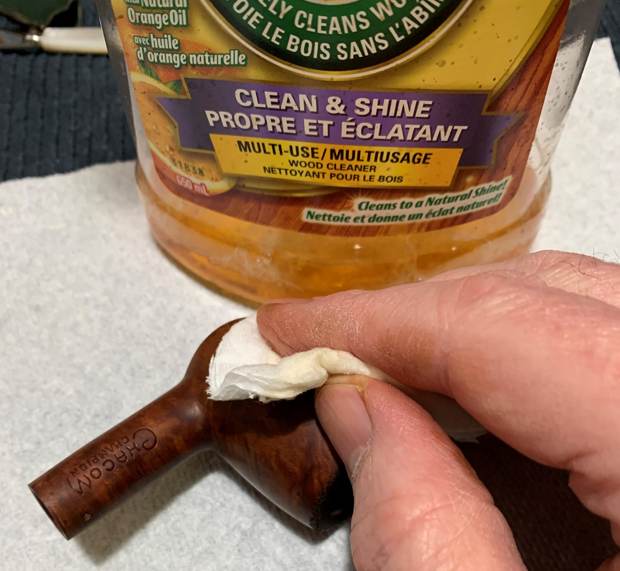
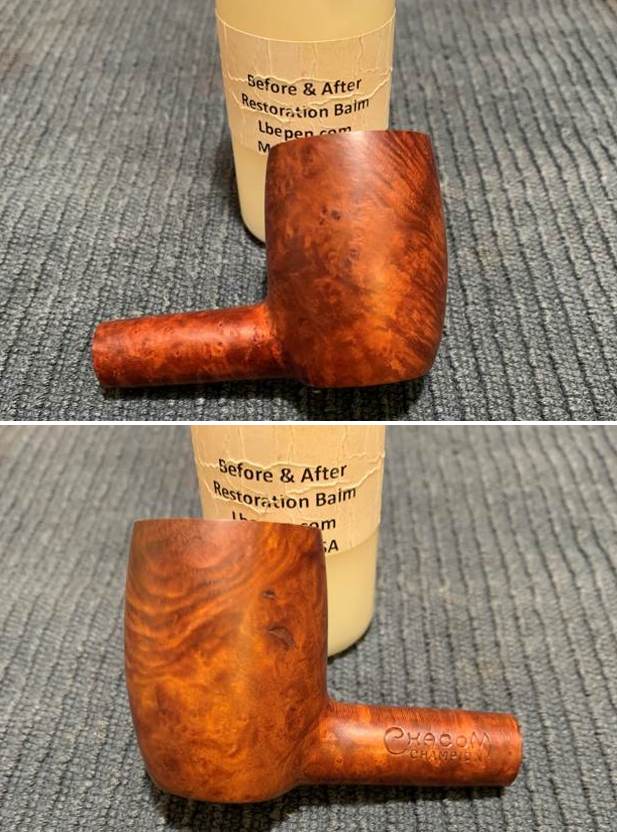
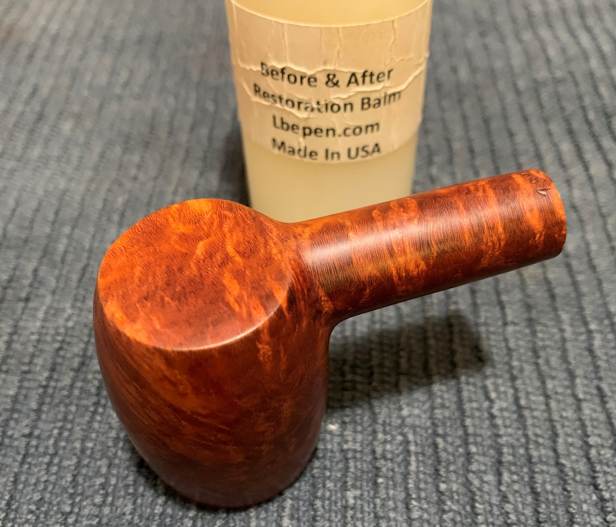
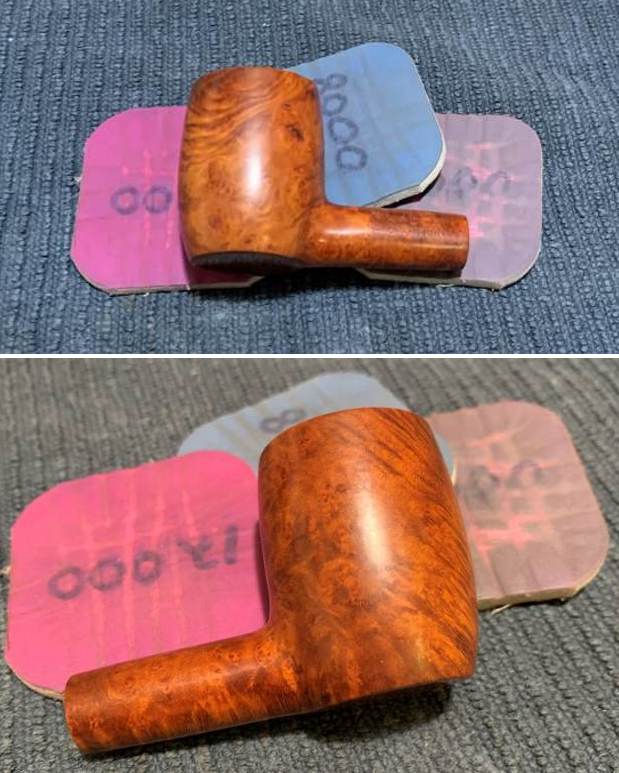
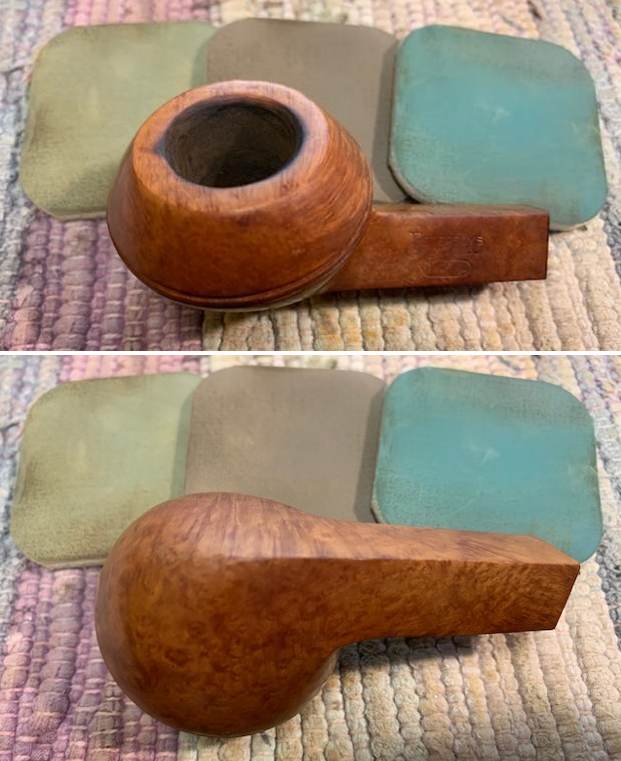
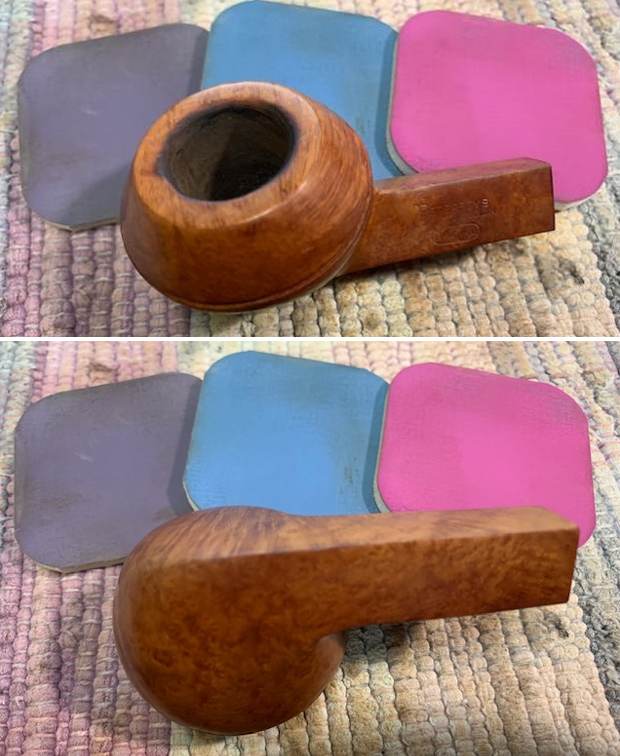
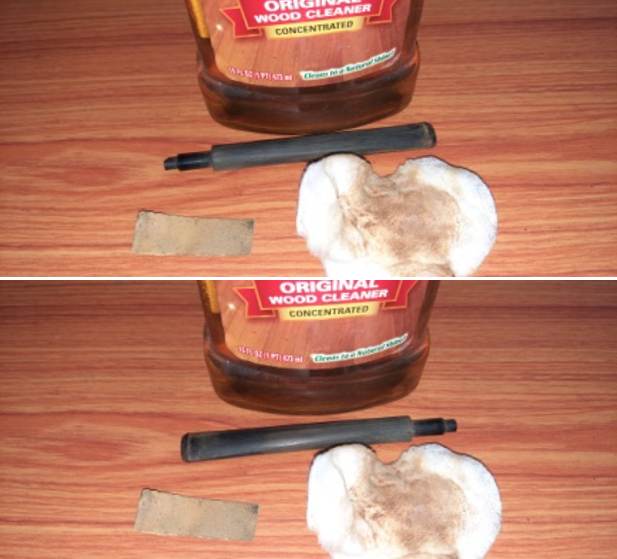
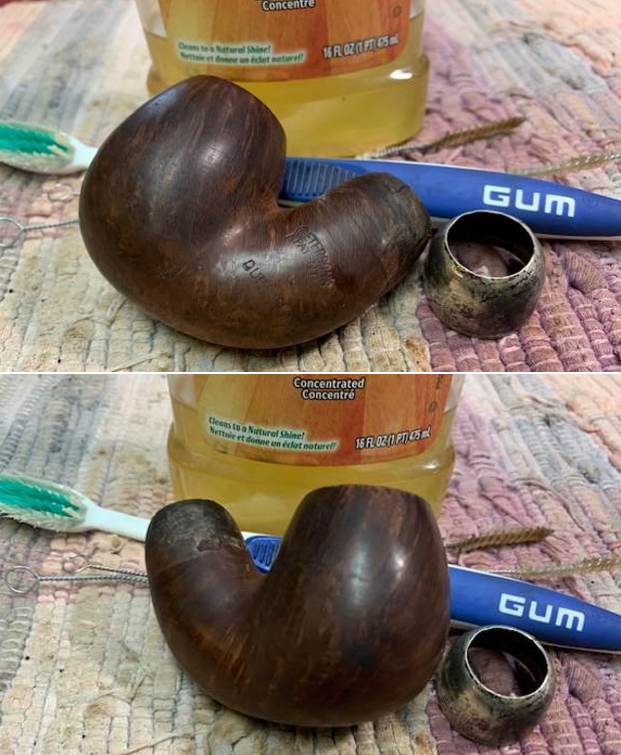
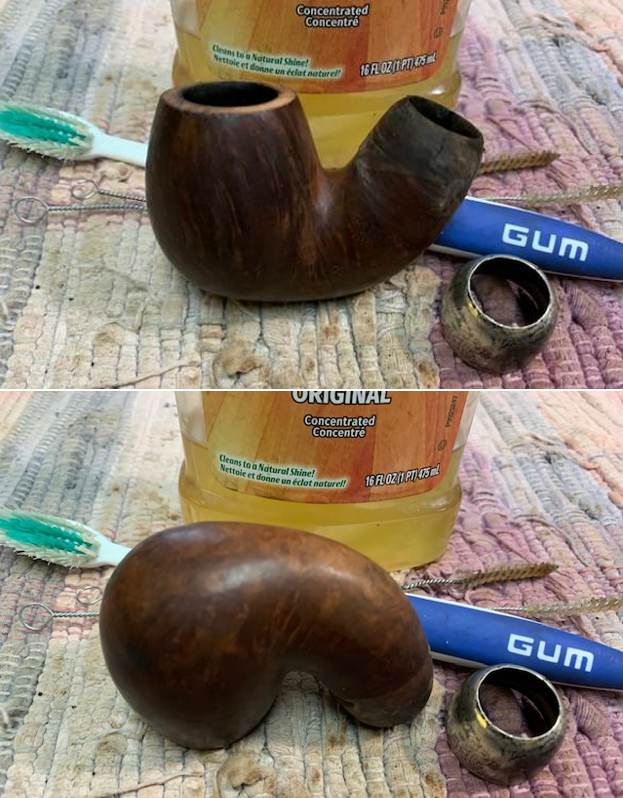
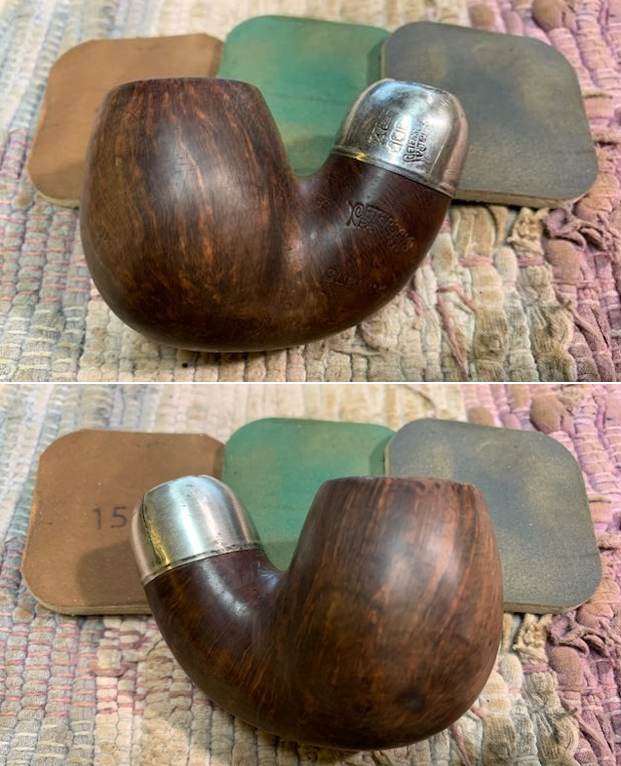
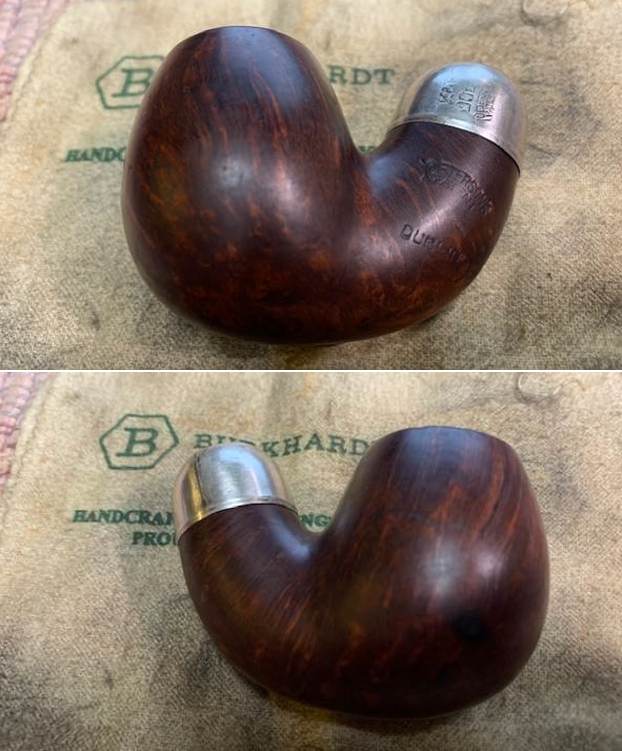
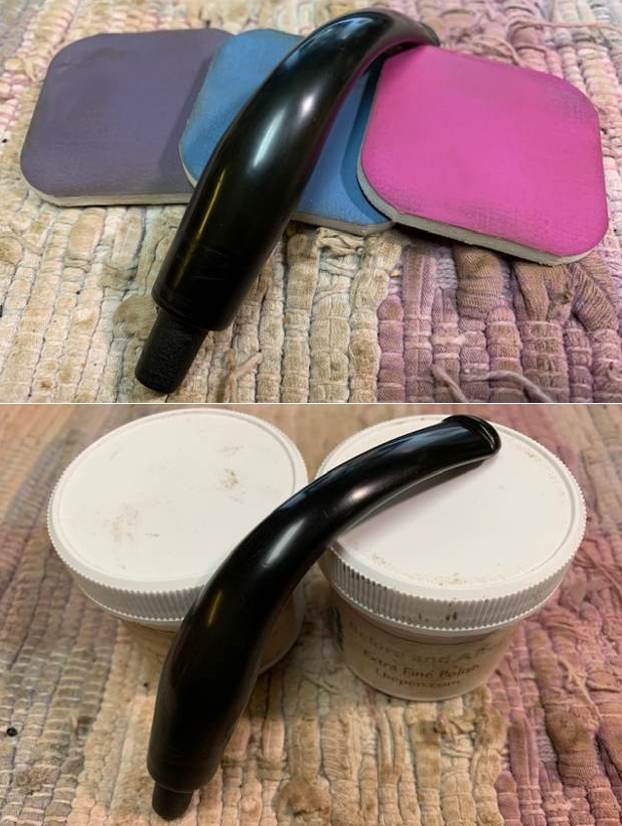
 Once the stain was set, I rubbed a small quantity of “Before and After Restoration Balm”, a product developed by Mark Hoover that helps to rejuvenate and protect the briar. The transformation is almost immediate and the results are outstanding. The repairs, though visible on closer inspection, have blended in beautifully.
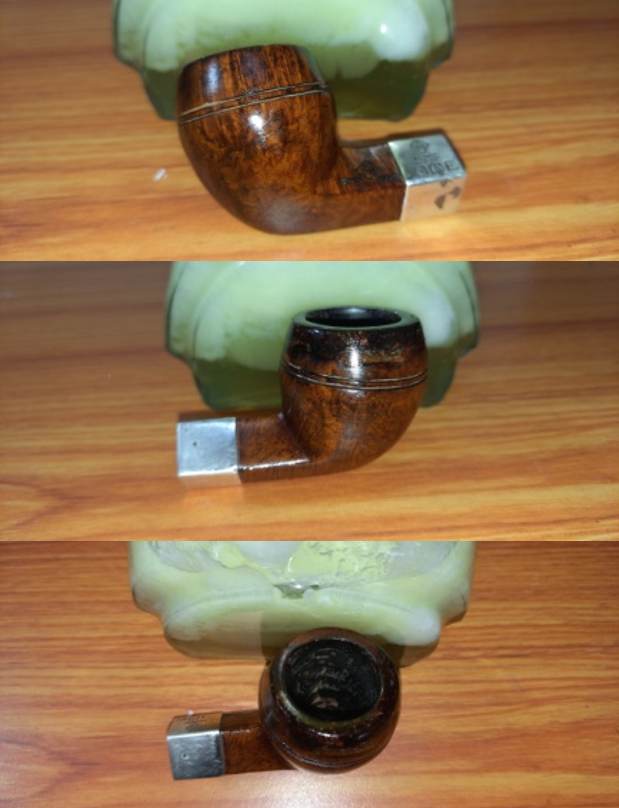
 Save for the final wax polish, the cosmetic aspect of this pipe has been taken care of and with great results! Now to address the functional aspects…
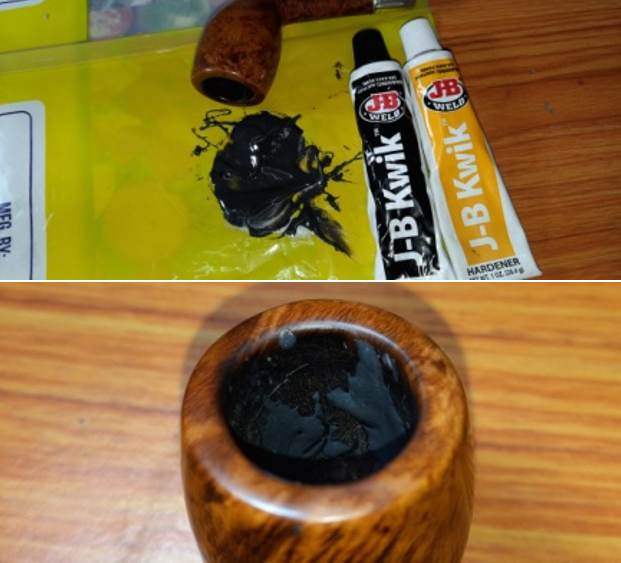
While carrying out the detailed inspection, I had observed and noted heat lines along the inner walls of the chamber. These heat lines are places from where burnouts usually happen if not addressed. Added to this was the rebuilt rim surface using briar dust and superglue. To isolate the heat lines and the rebuilt rim top surface from coming in direct contact with smoldering tobaccos, I decided to give a thin coat of JB Weld to the inner chamber walls and once the weld had hardened, a coat of activated charcoal and yogurt which is organic, neutral tasting and completely safe for humans would be applied over the JB Weld layer. This coat also aids in a faster build up of the cake.
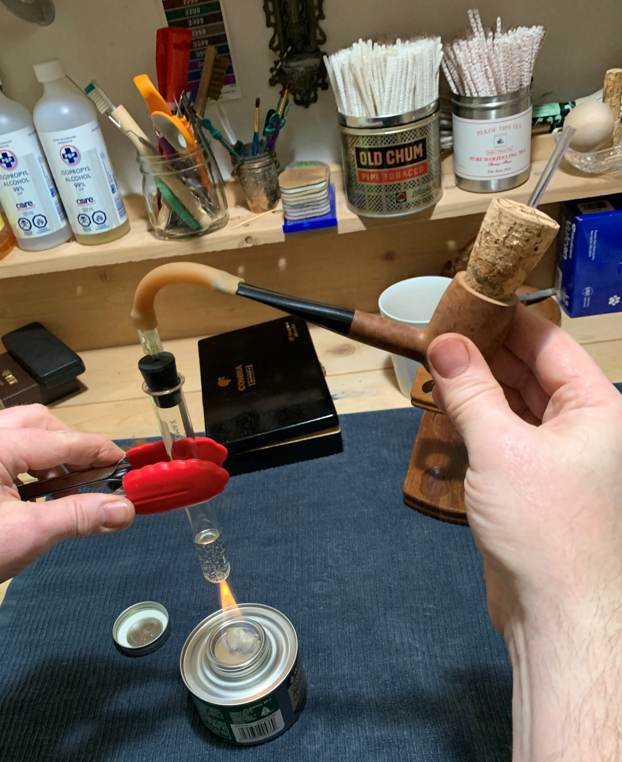
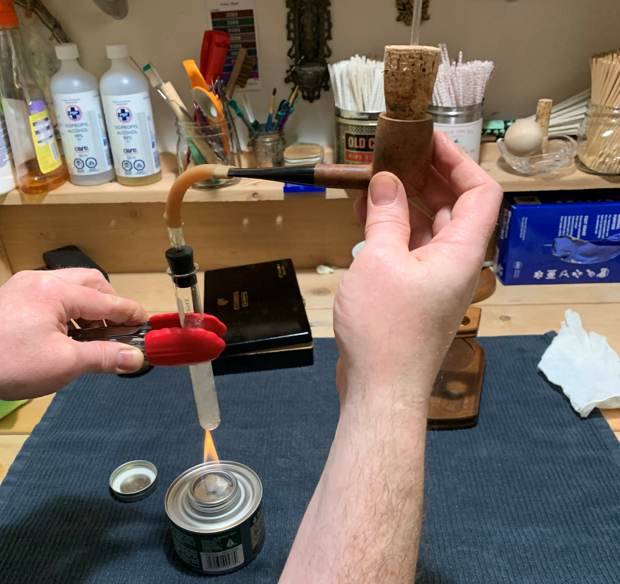
With the PoA ready, I mixed the two part epoxy. J B Weld is a two-part epoxy Cold Weld in two tubes; hardener and steel which are mixed in two equal parts (ratio of 1:1) with hardening time of 5-6 minutes and complete curing time of 6-8 hours. I poured the contents of the two tubes and mixed it well. I inserted a petroleum jelly coated regular pipe cleaner through the draught hole to prevent it from getting blocked due to the J B Weld mix. I applied this mix, as evenly as possible, over the entire chamber wall surface and worked fast to ensure an even coat over the chamber walls before the weld could harden. I set the stummel aside for the application to harden and cure overnight.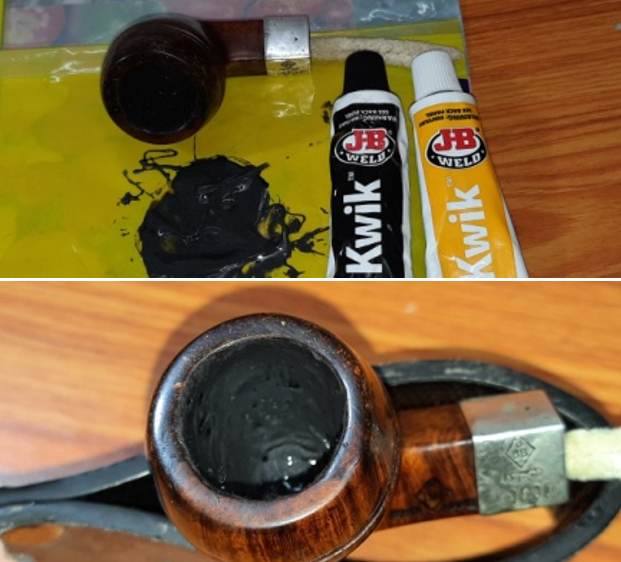
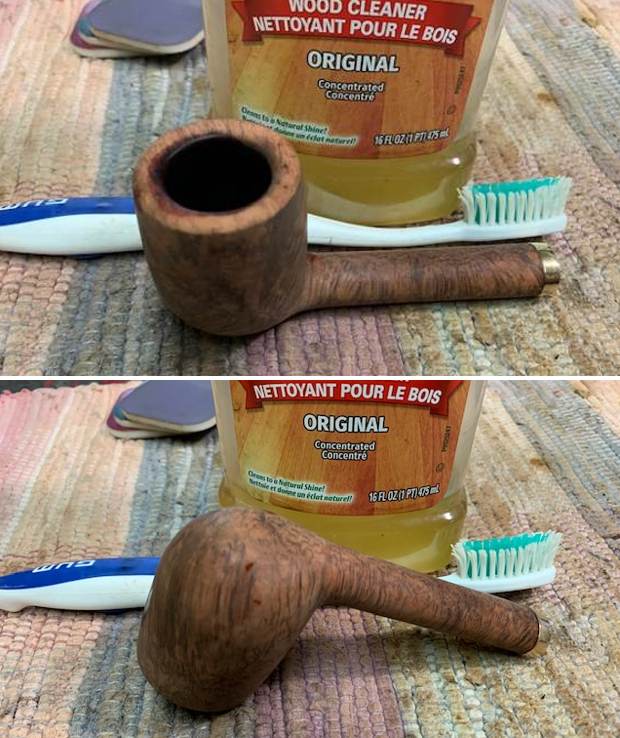
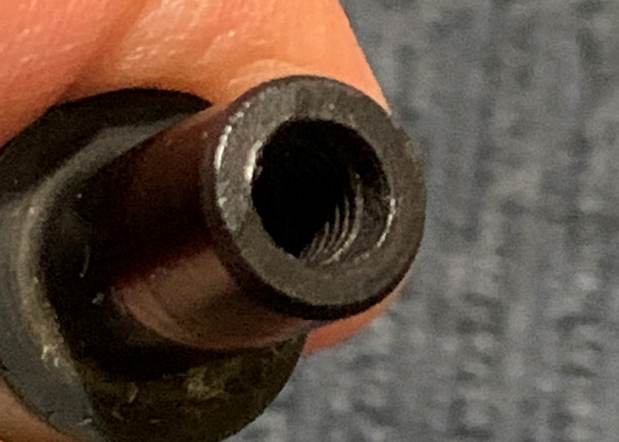
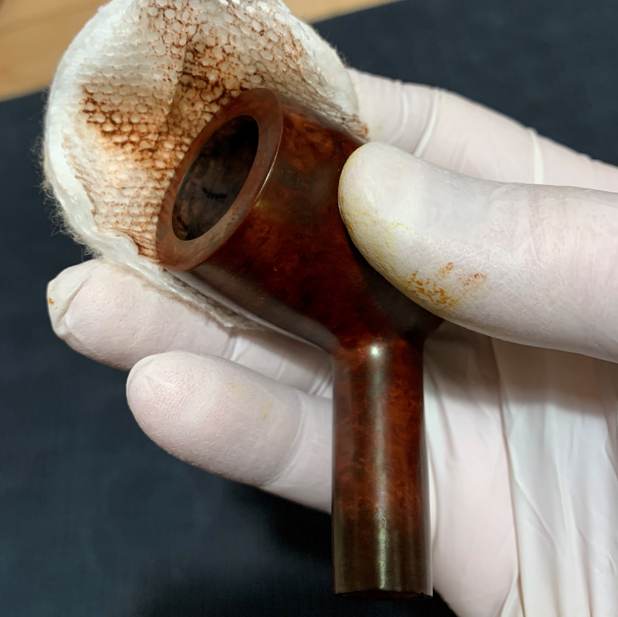
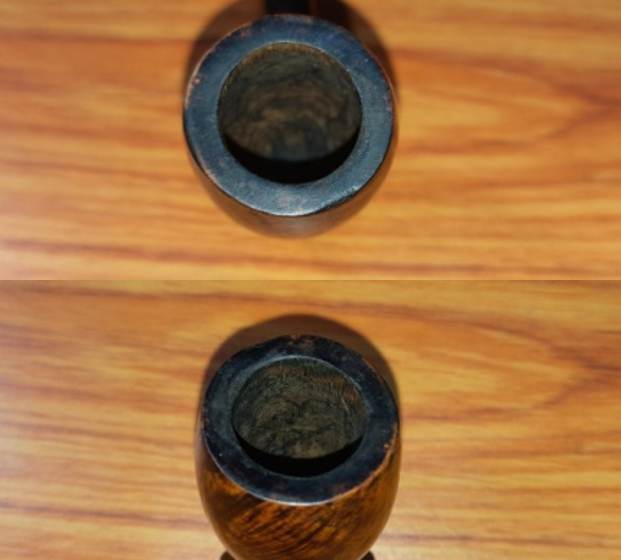
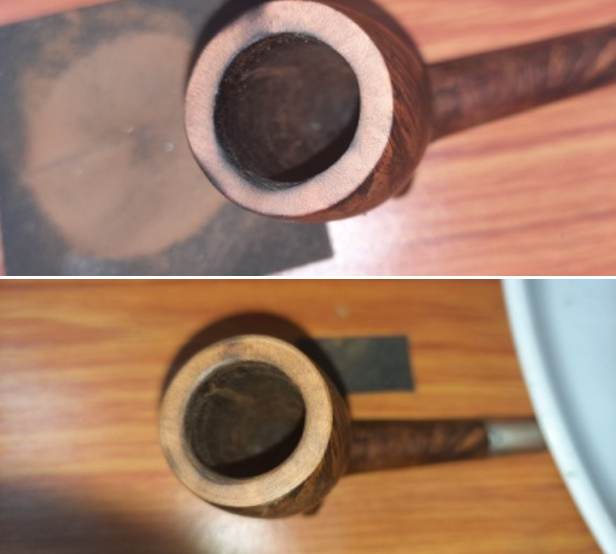
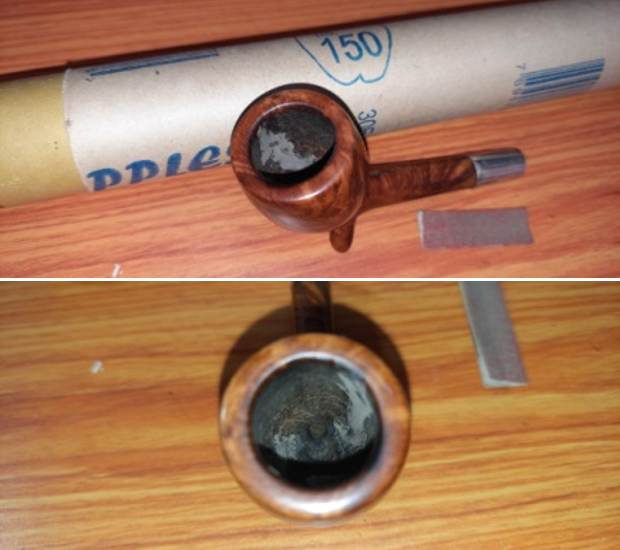
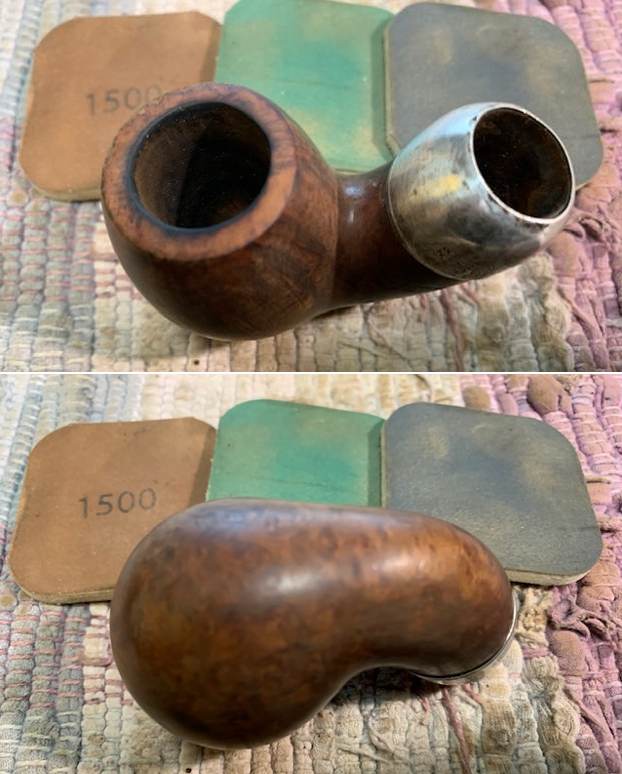
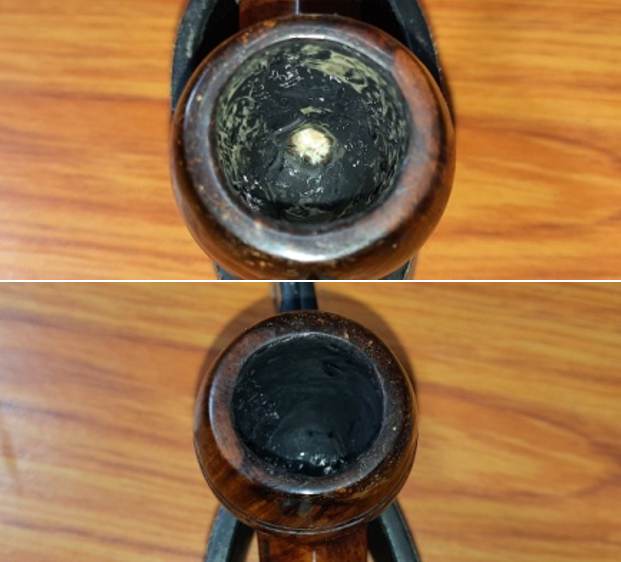 The J B Weld coat had hardened considerably by next day evening when I got around to working on the pipe. I mounted a sanding drum on to my hand held rotary tool and after setting the speed to half of the full RPM, I sanded the excess coat from the chamber walls. To further fine tune and keep the coat to a minimum thickness, I further sanded with a 150 grit sand paper till I had a coat thickness that was just sufficient to protect the briar underneath. Here is how the chamber appeared at this stage.
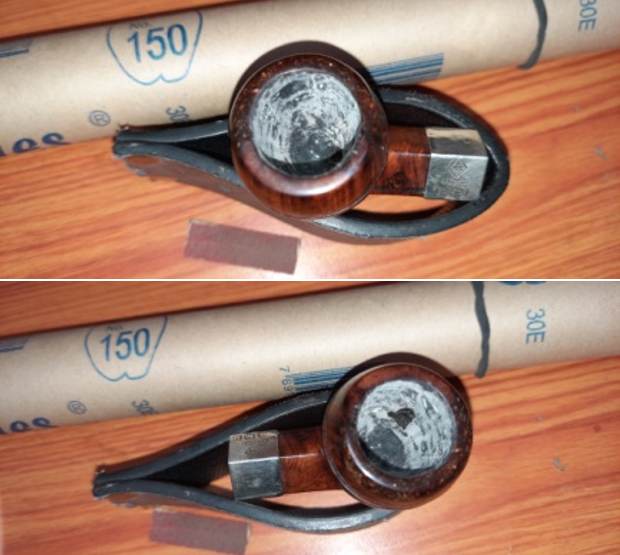
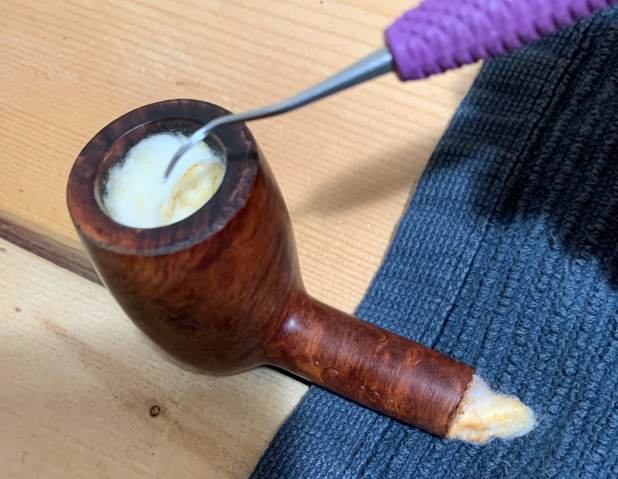
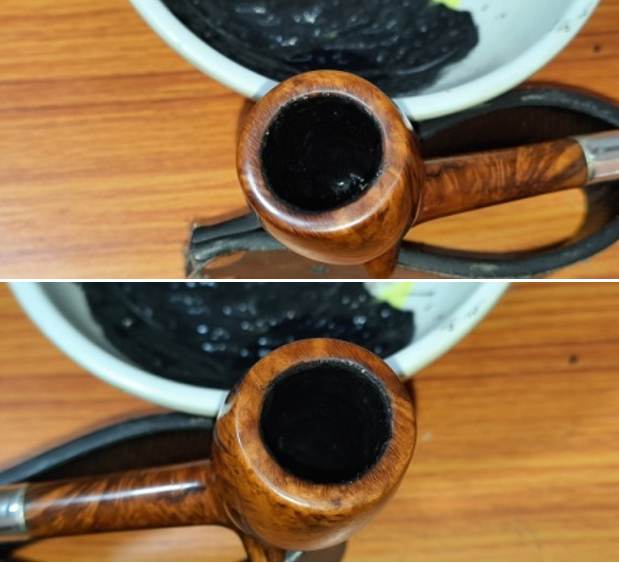
 After I had protected the repaired portion of the rim and the walls of the chamber with a coat of J B Weld, it was necessary to prevent this coat from coming into contact with the burning tobacco. I addressed this by mixing activated charcoal and plain yogurt to a thicker consistency, just enough that it would spread easily and applied it evenly all along the chamber walls after inserting a folded pipe cleaner through the draught hole to keep it open. Once dry and set, this will not only protect the walls but also aid in faster build up of cake.
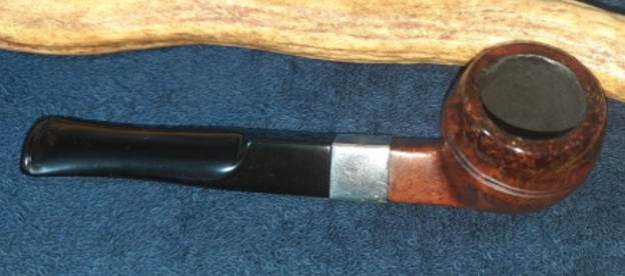
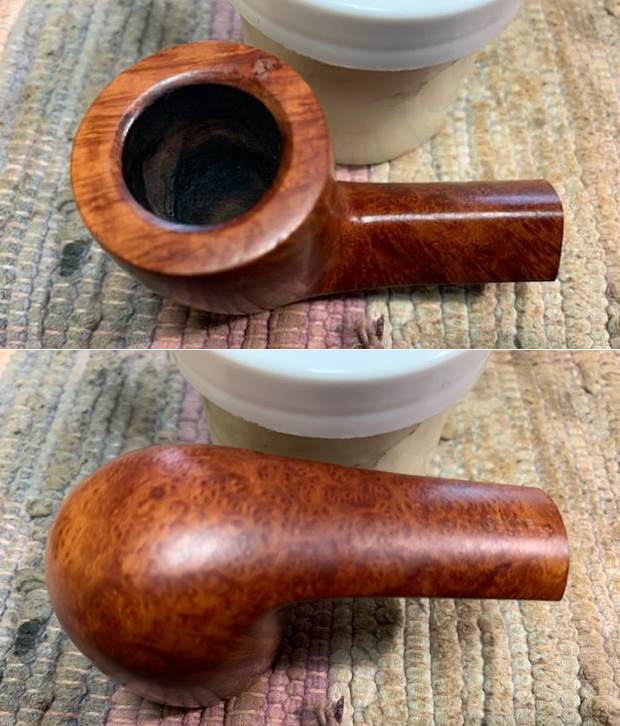
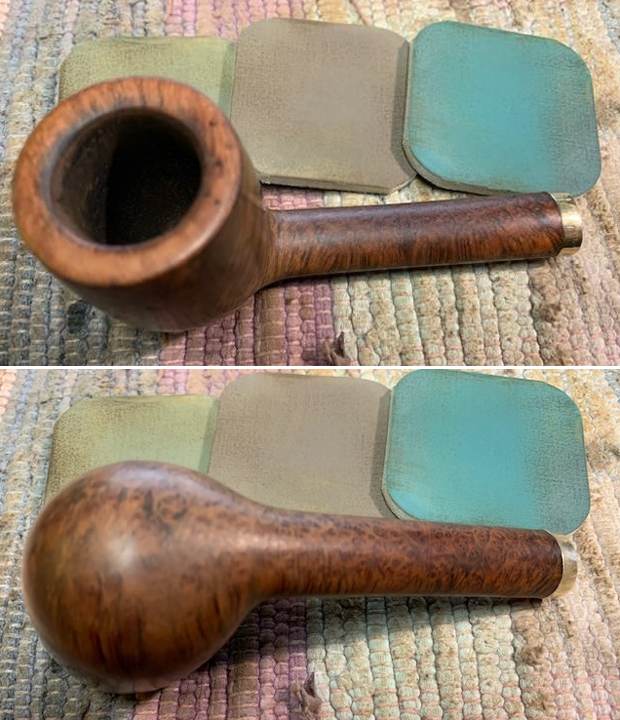
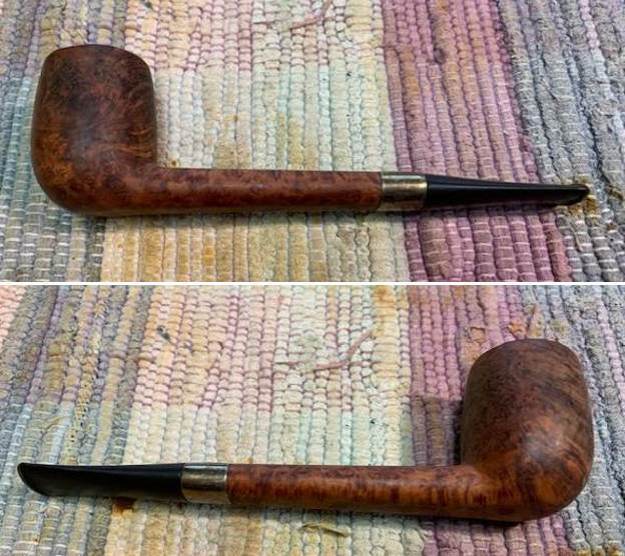
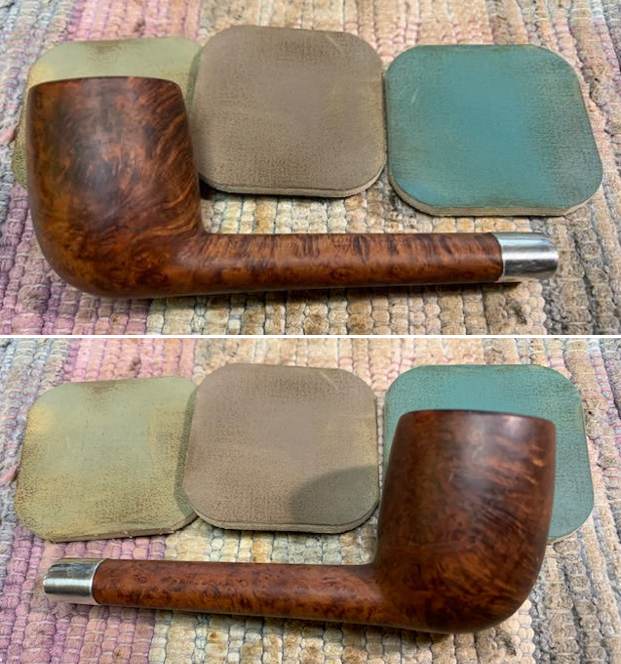
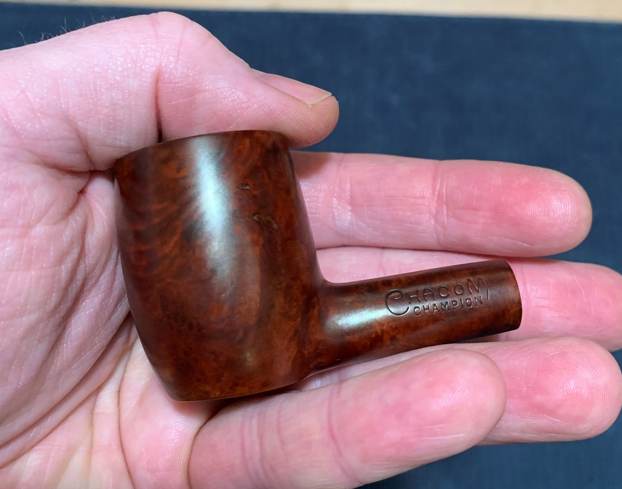
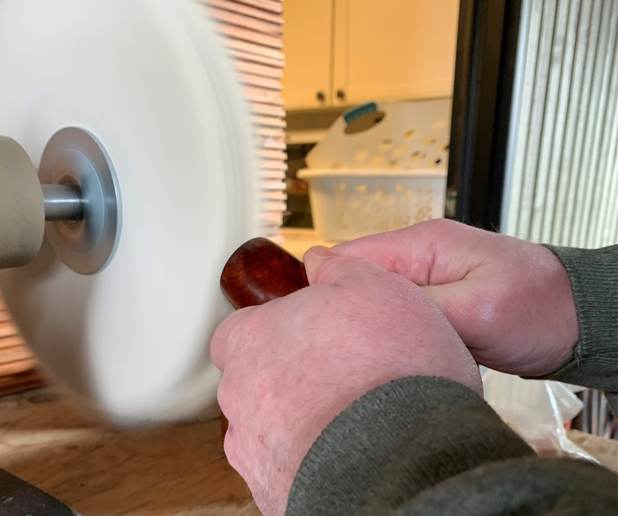
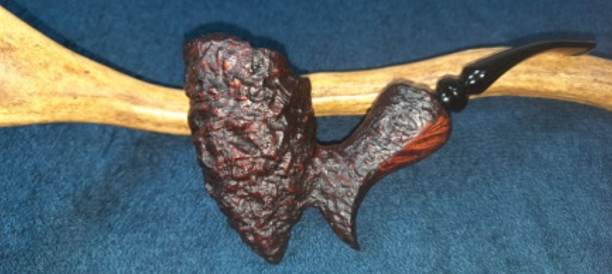
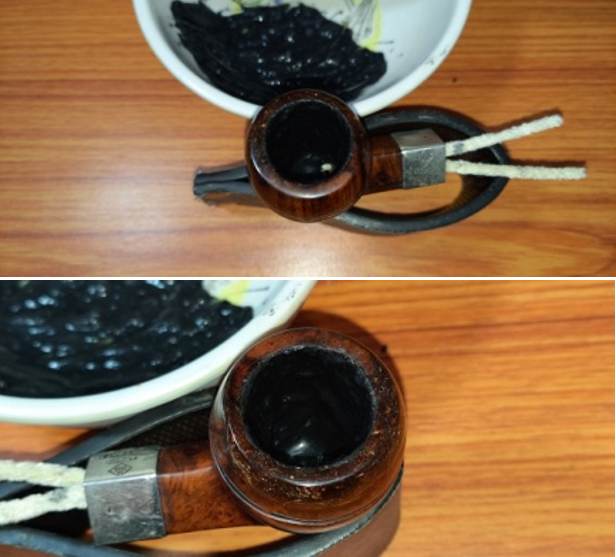 To complete the restoration, I mounted a cotton cloth buffing wheel onto my hand held rotary tool and polished the stummel and stem with Blue Diamond compound. This compound helps to remove the minor scratch marks that remain from the sanding. I mounted another cotton buffing wheel that I have earmarked for carnauba wax and applied several coats of the wax. I finished the restoration by giving the entire pipe a rigorous hand buffing using a microfiber cloth to raise the shine further. The finished pipe looks amazingly beautiful and is ready to join my collection of other BBB pipes that I have inherited. I only wish it could share with me its story of the past years while I enjoy smoking my favorite Virginia blend in it or maybe an English blend or maybe just keep admiring it.
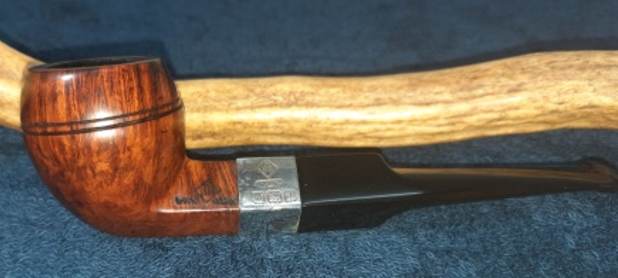


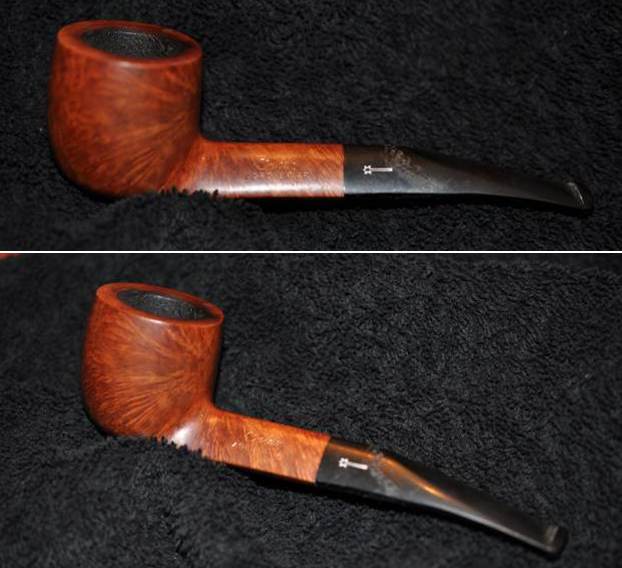
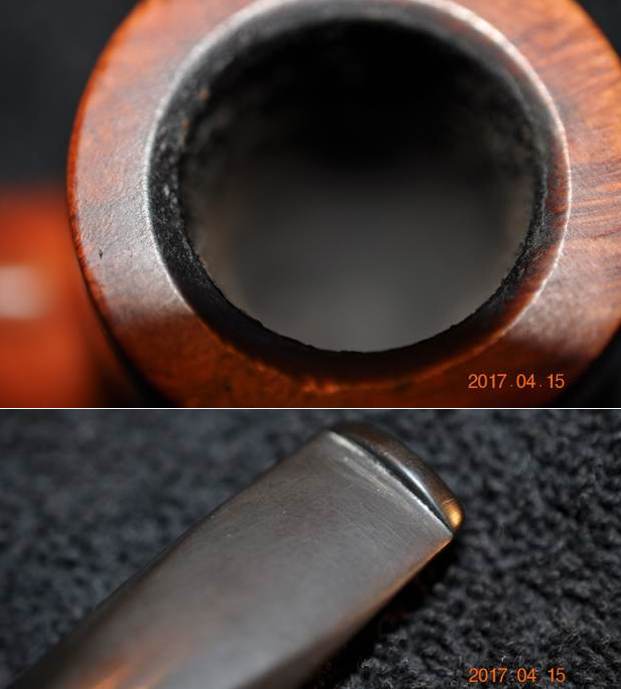
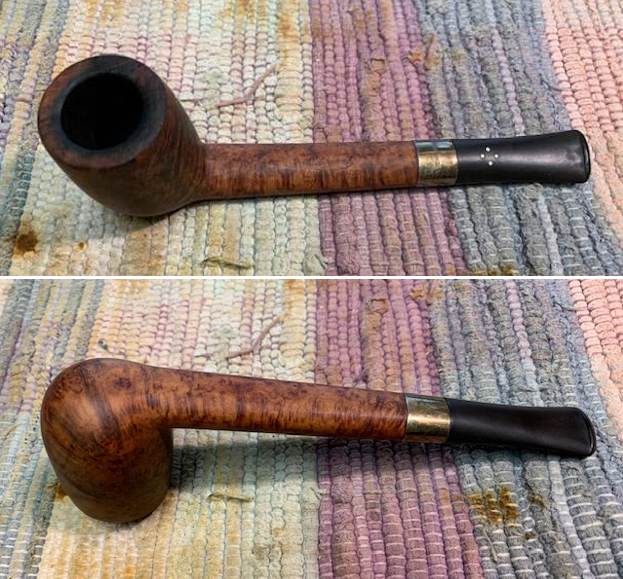
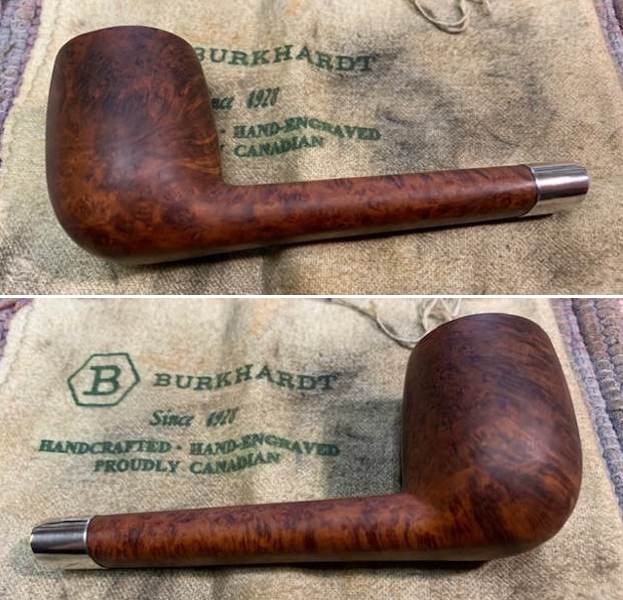
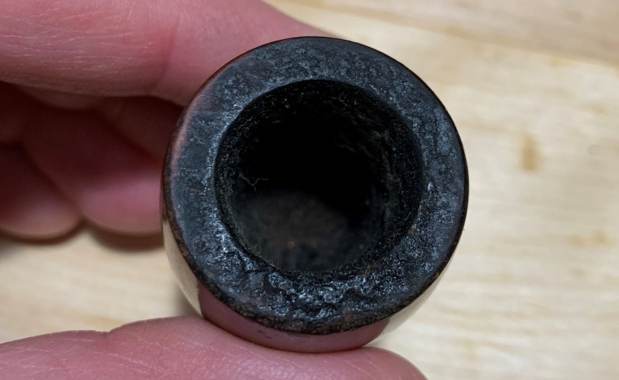
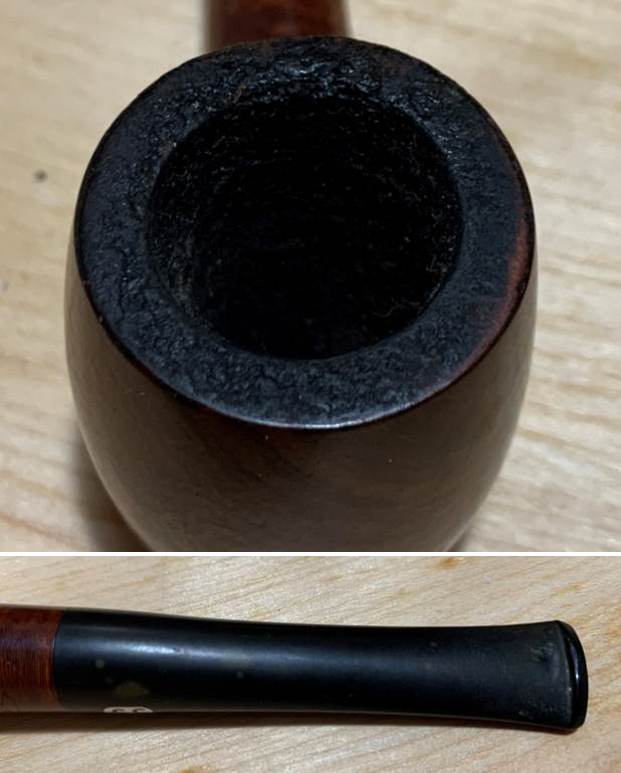
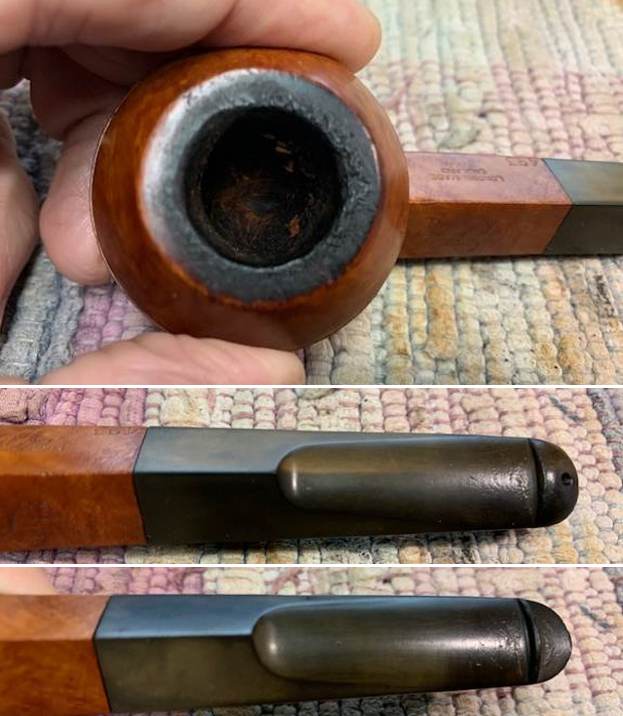
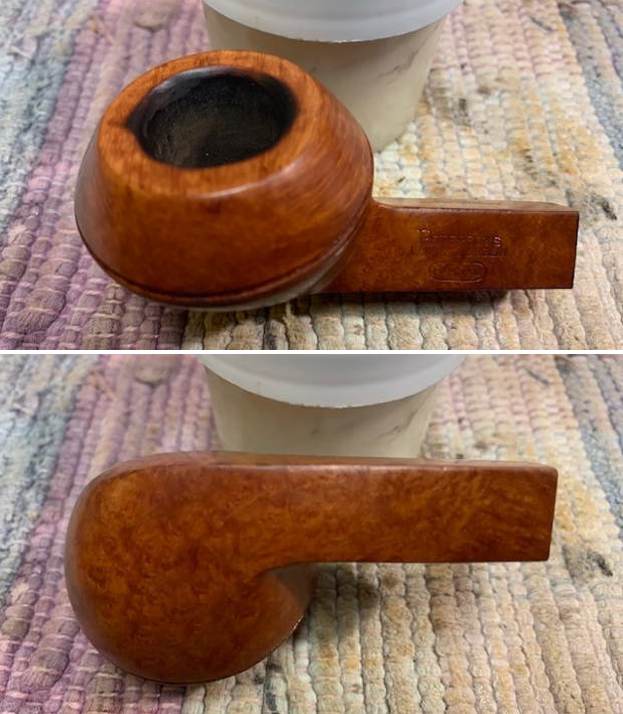
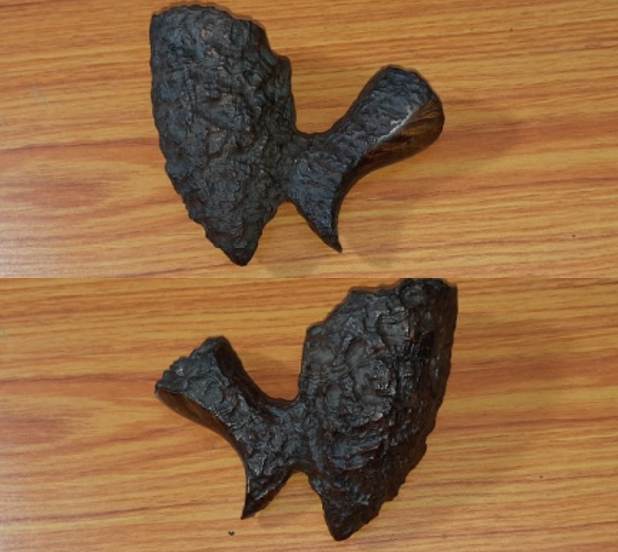
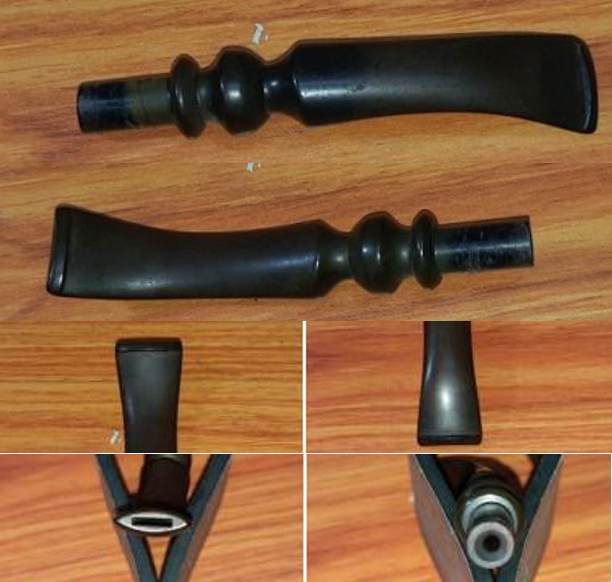
 He took some photos of the rim top to show the condition. You can see the light lava coat on the back side of the bowl top and on the beveled inner edge of the bowl. You can also see the putty fill on the rim top on the lower right side of the photos below. He also took photos of both sides of the stem to show the condition of both.
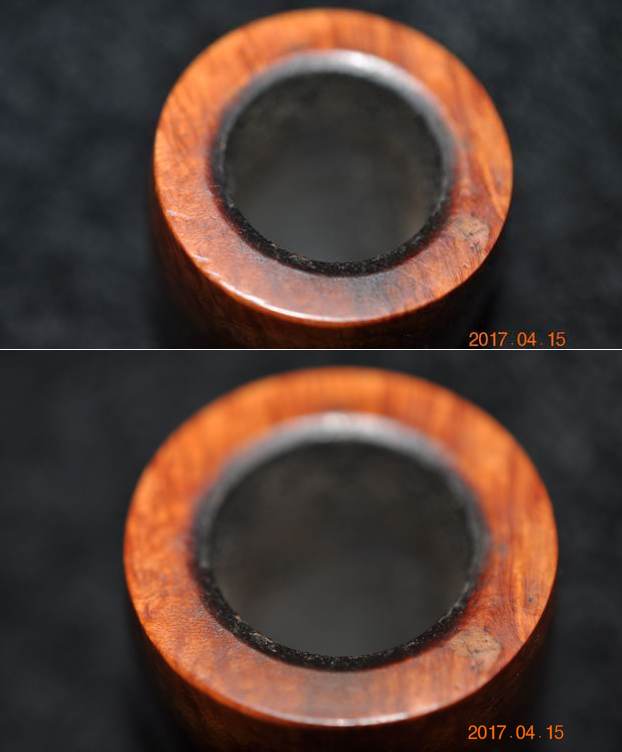
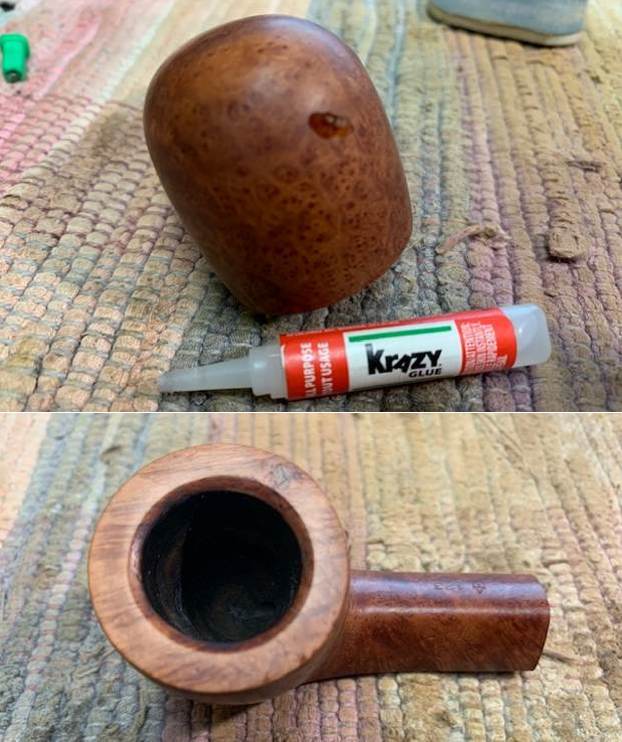
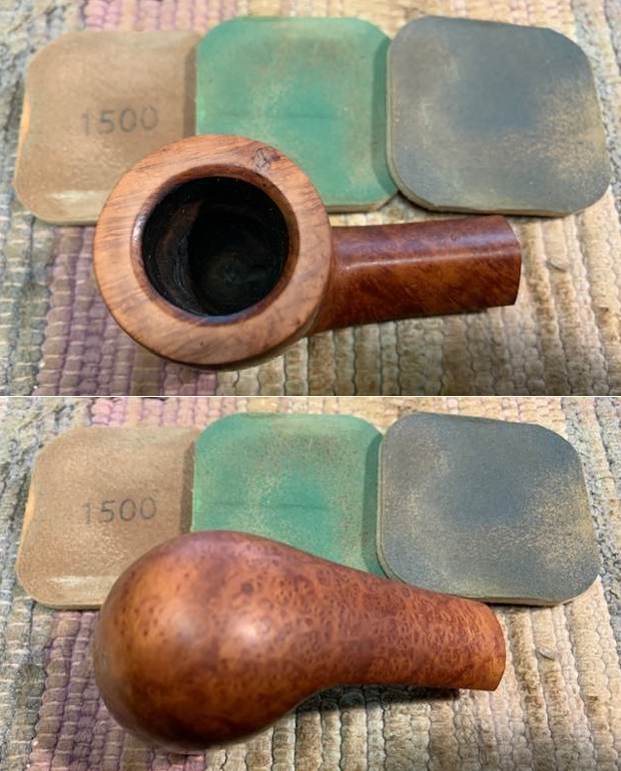
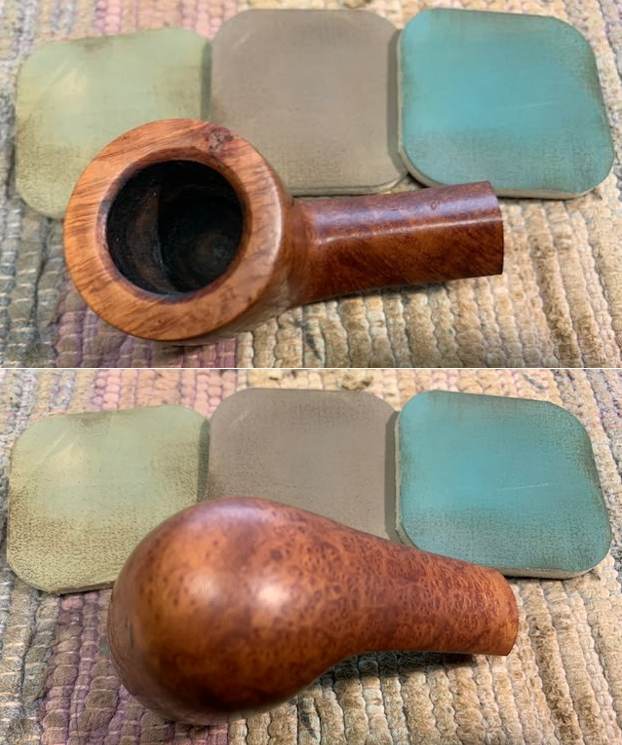
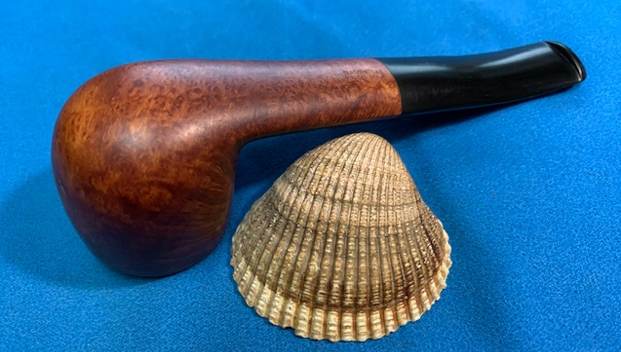
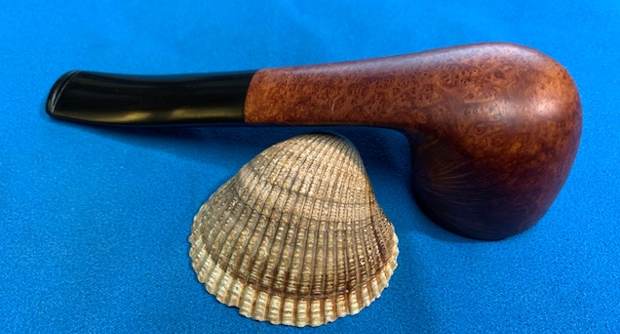
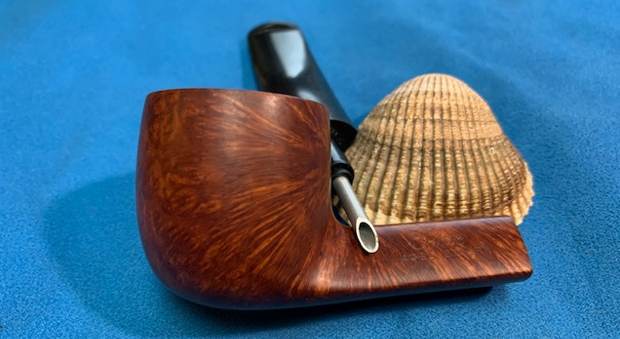
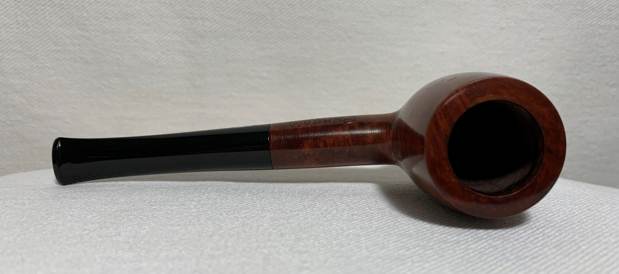
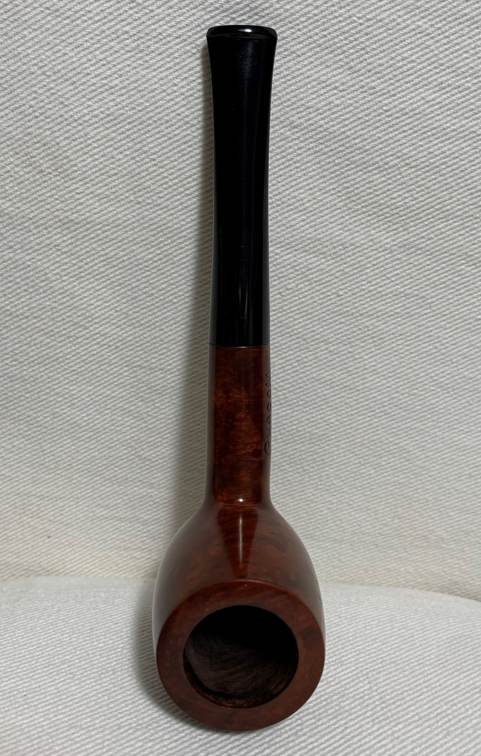
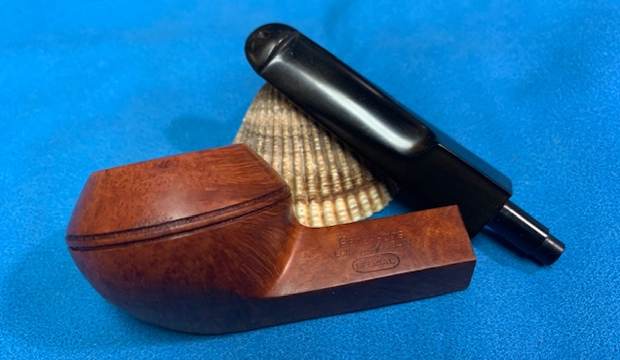
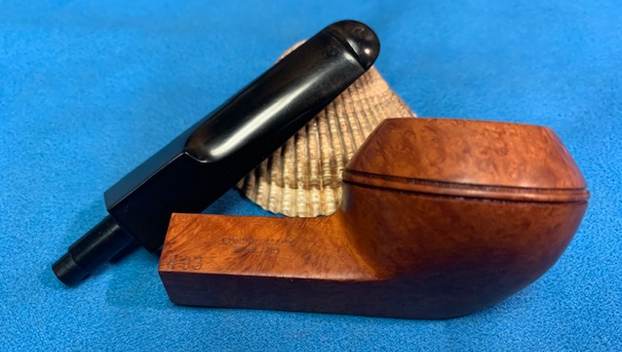
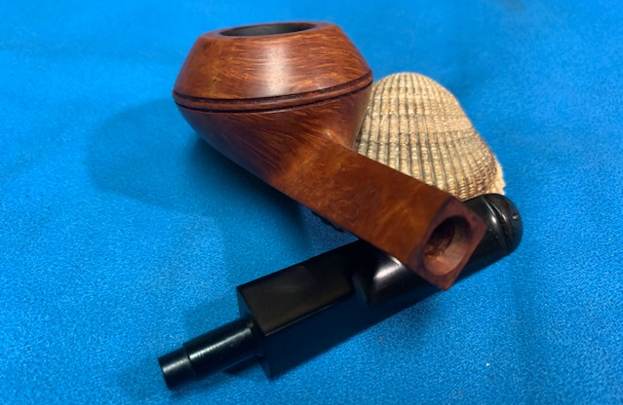
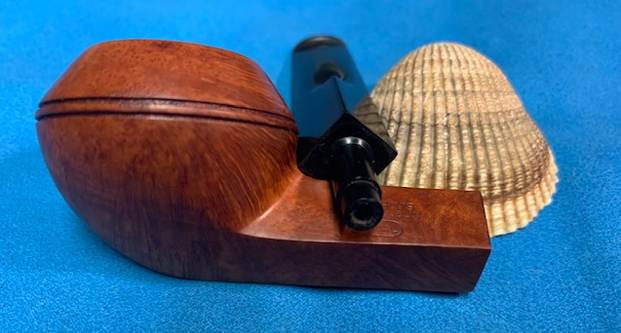
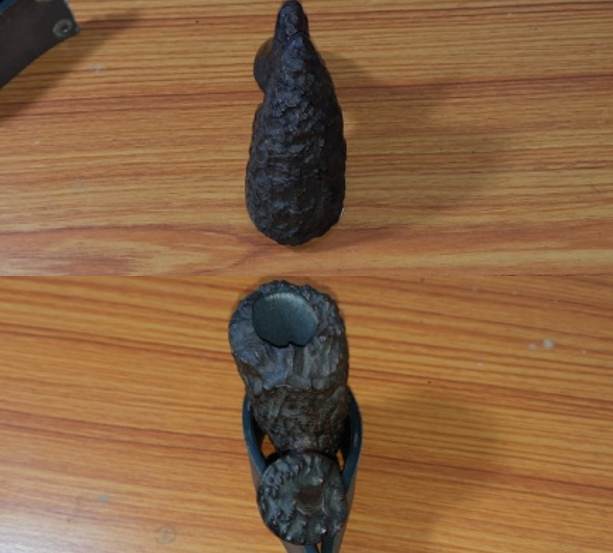
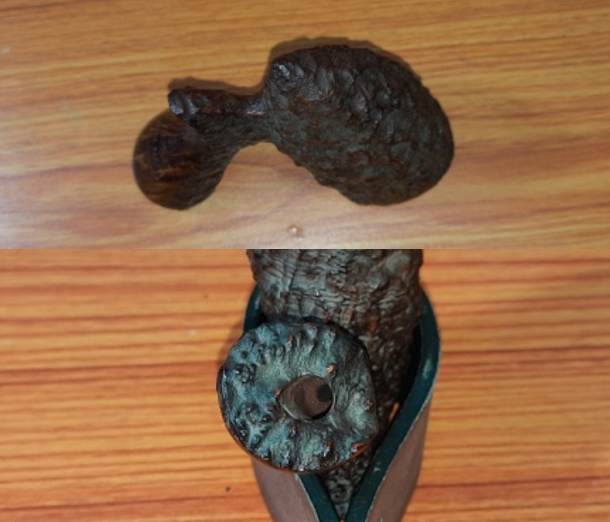
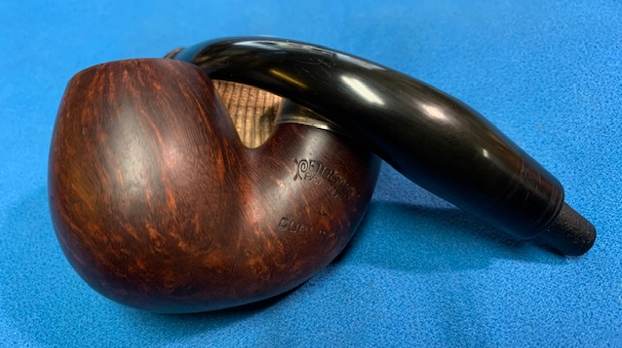
 He also took photos of the heel of the bowl and underside of the shank to show the birdseye grain that is clustered on the bowl. It is quite a stunning pipe. You can also see the small fill on the lower front of the bowl.
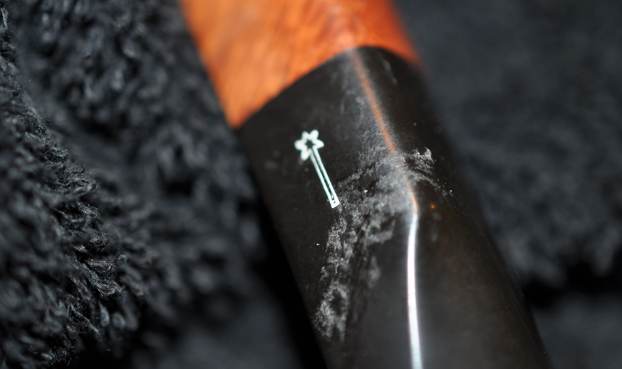
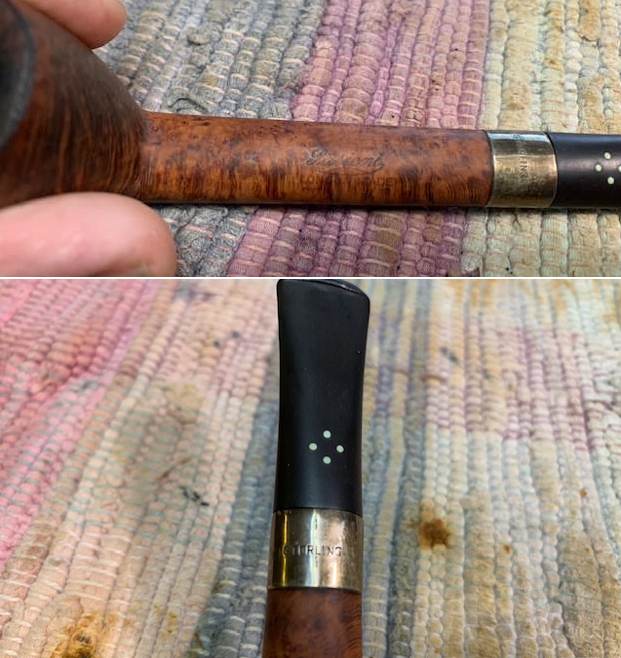
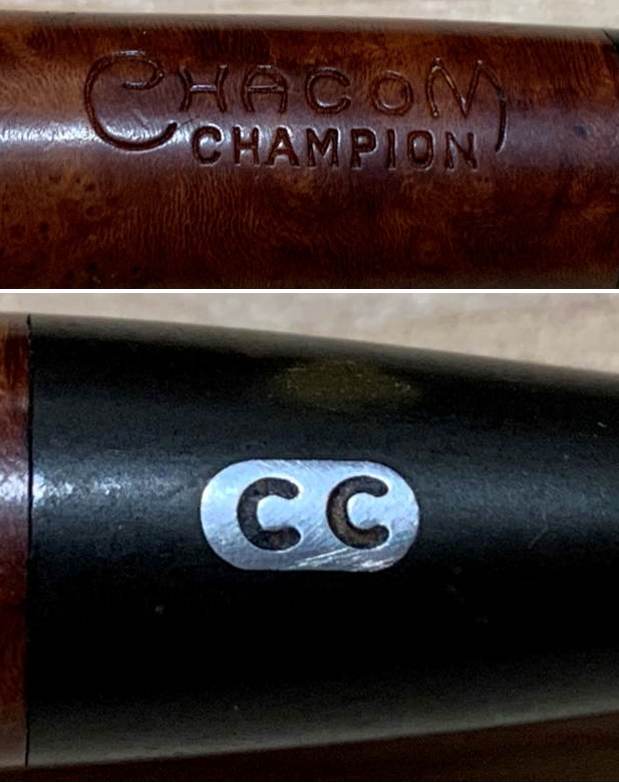
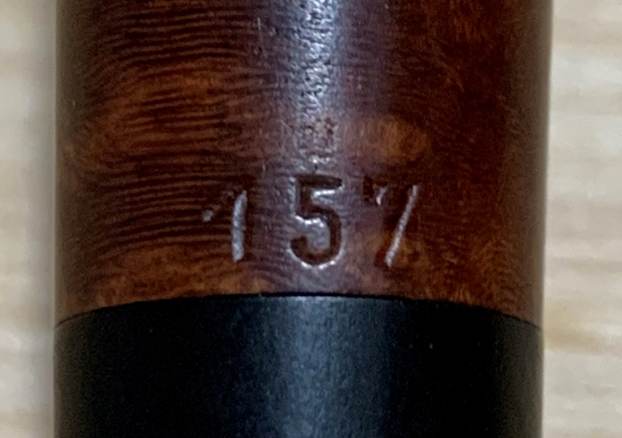
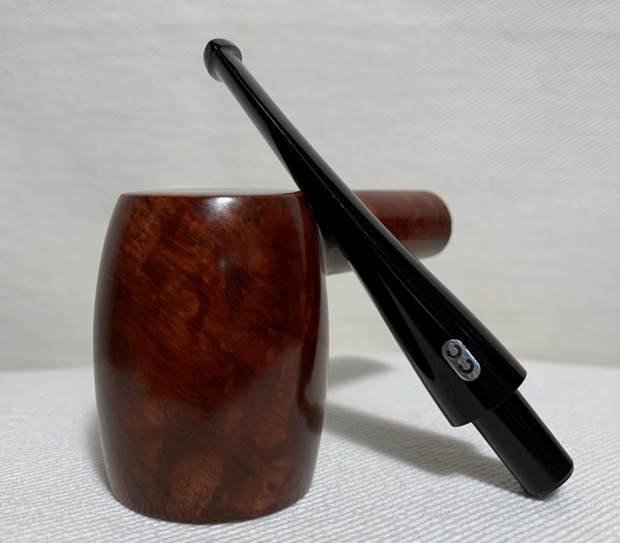
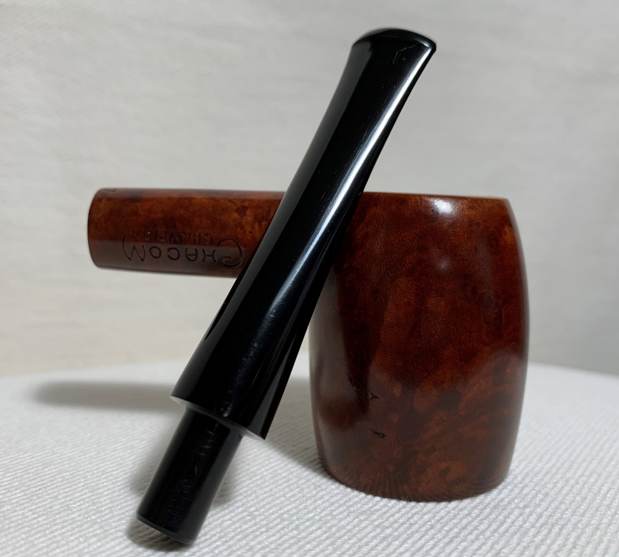
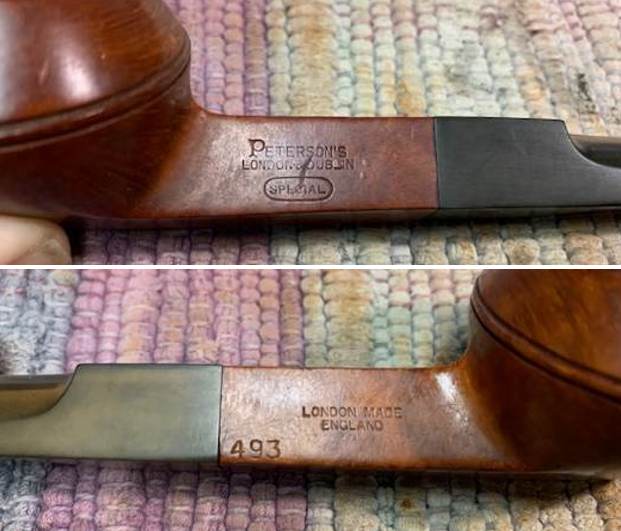
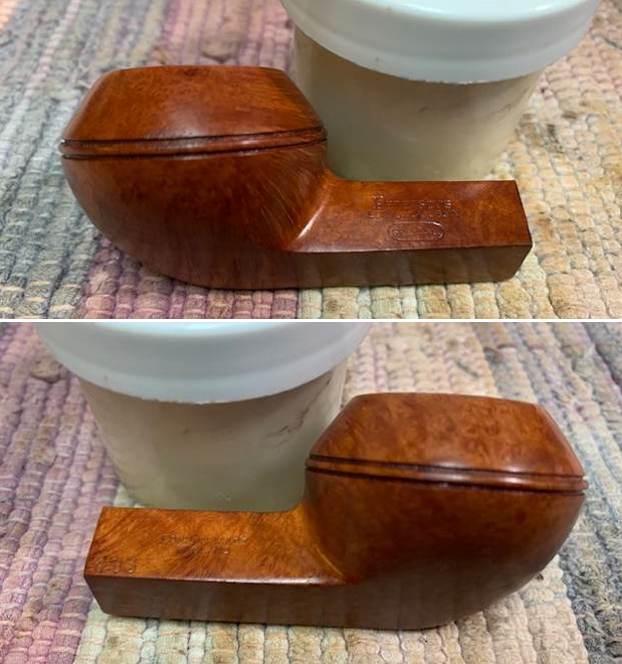
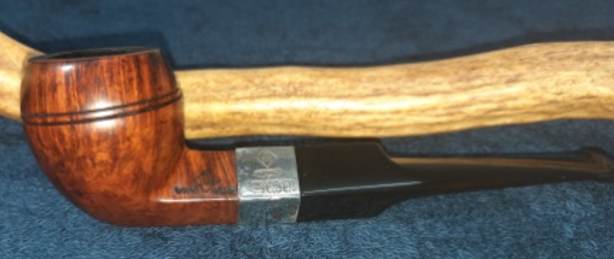
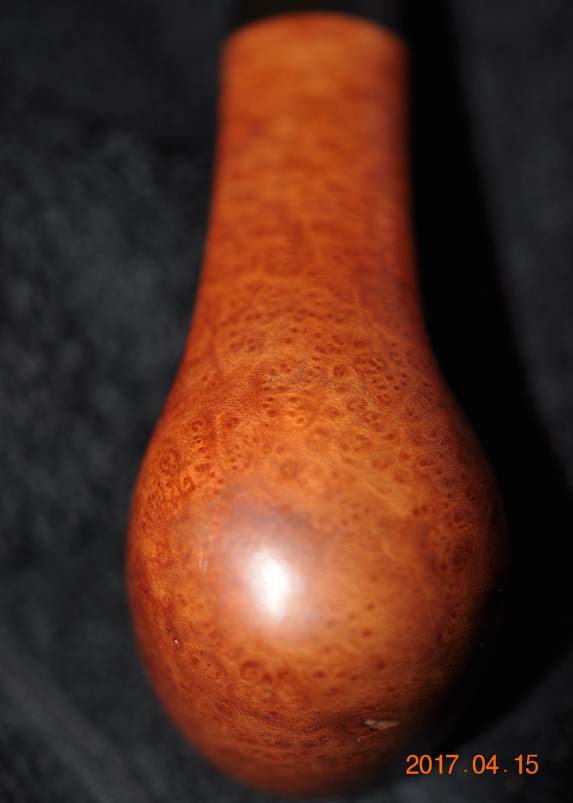 Jeff took photos of the stamping around the shank sides. It is clear and readable as noted above. You can also see the shooting star Oscar logo on the left side of the stem.
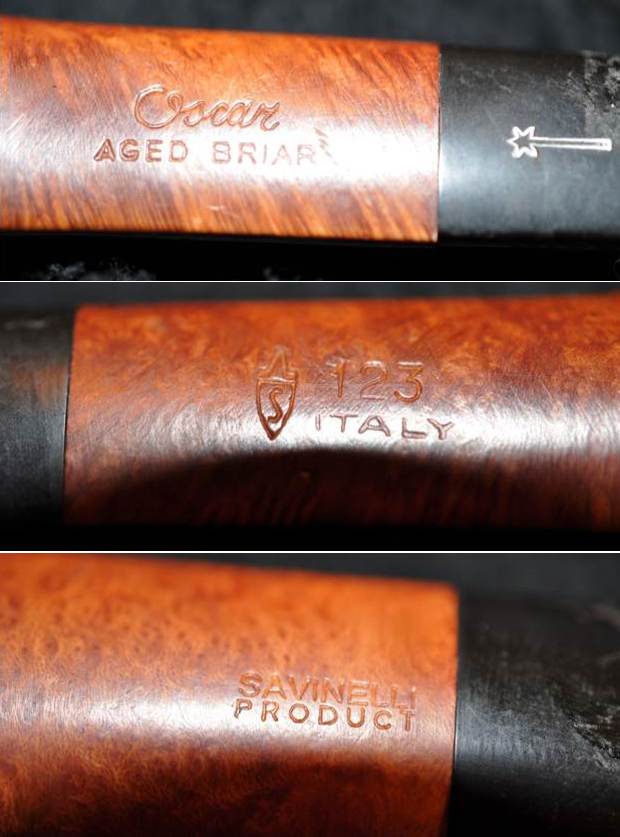
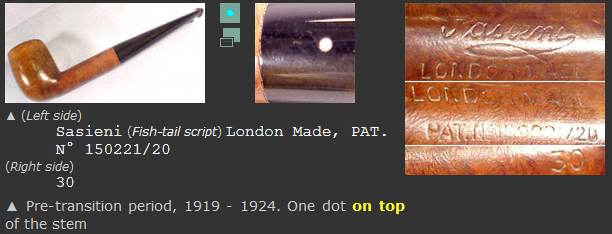
 I turned to Pipephil’s site to learn about the Oscar (http://pipephil.eu/logos/en/logo-savinelli3.html). I did a screen capture of the section and also included the note from the side bar on the site.
  I quote from the side bar: Pipes from the Oscar line are not free from fillings. See also (same star logo): Savinelli Antique Shell, Savinelli Garda, Savinelli Sila.
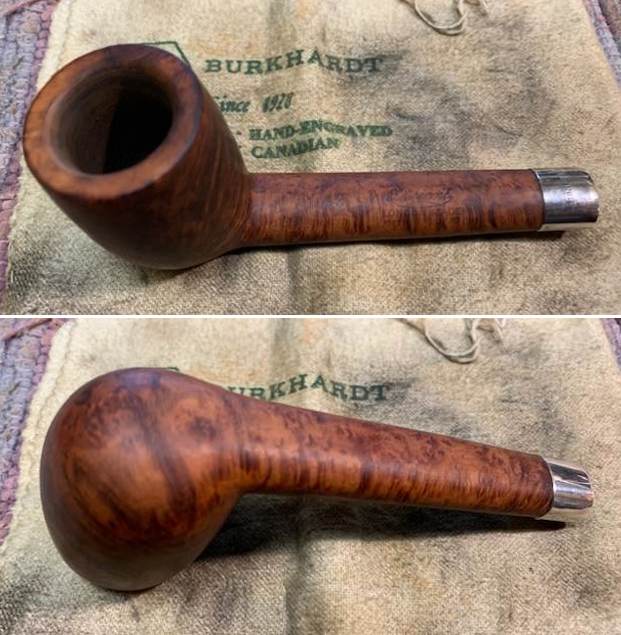
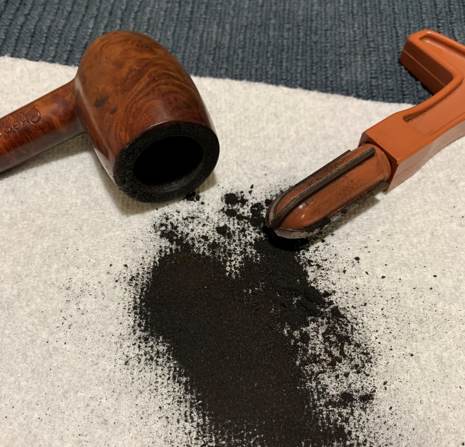
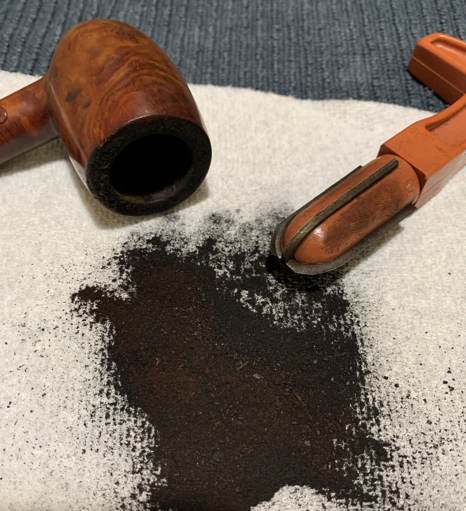
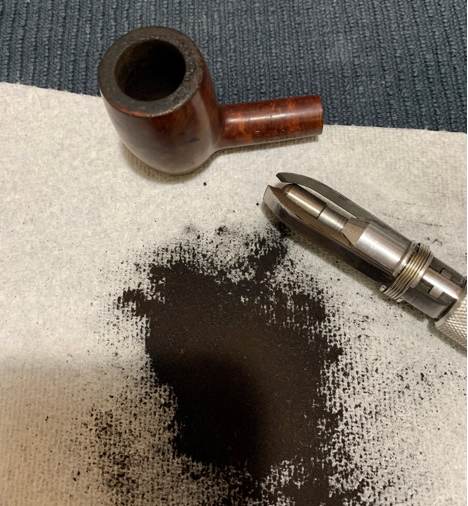
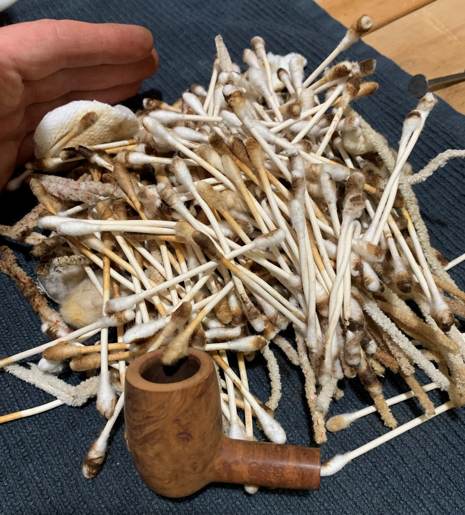
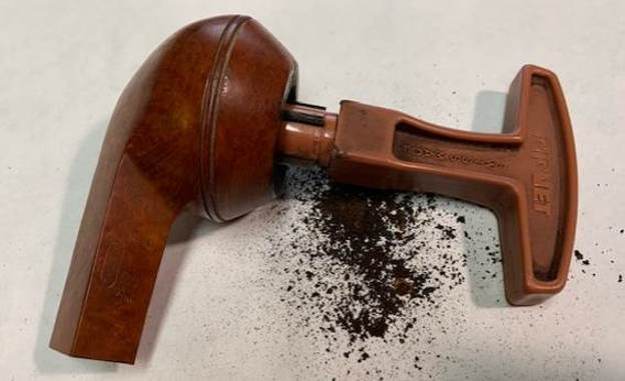
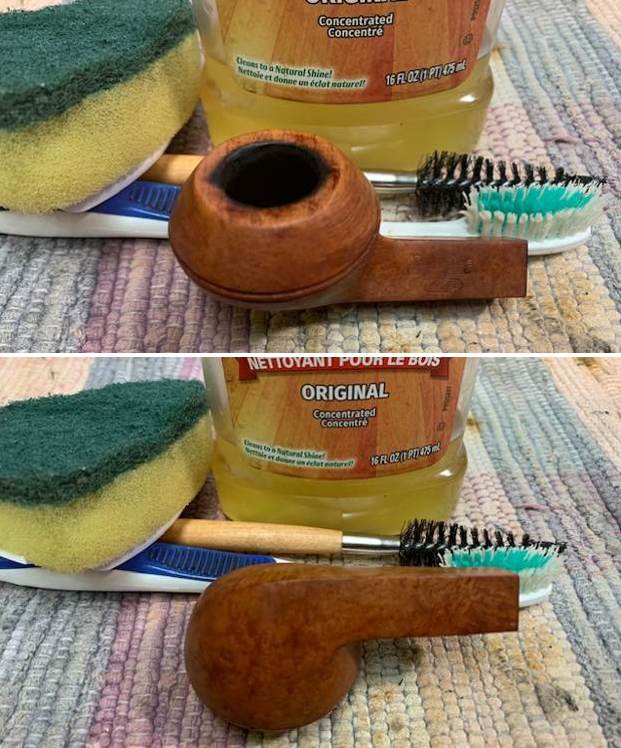
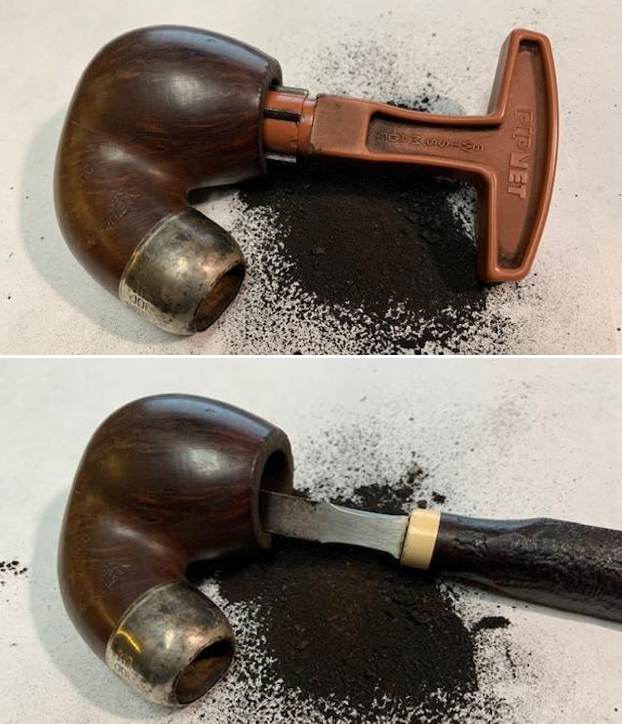
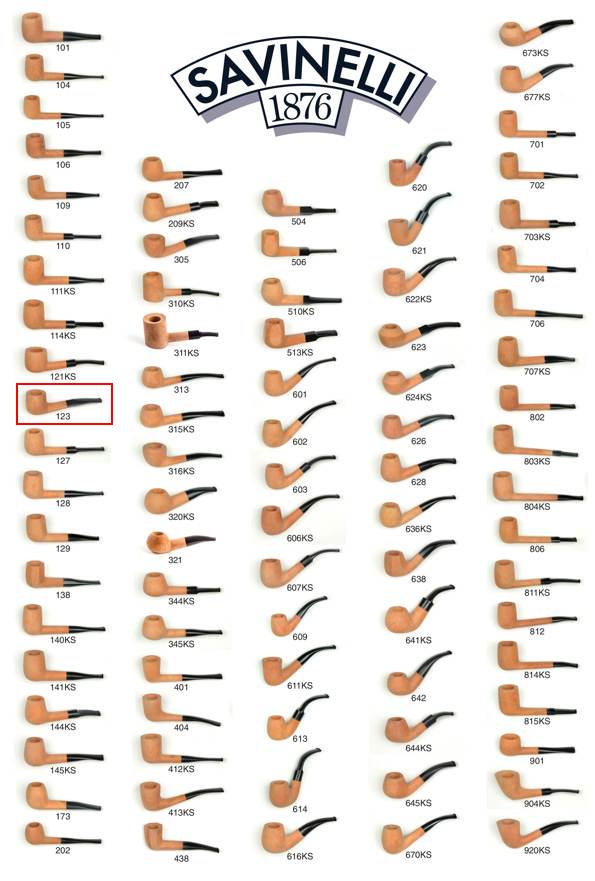 Jeff had reamed the pipe with a PipNet Pipe Reamer and cleaned up the remnants with a Savinelli Fitsall Pipe Knife. He scrubbed the bowl with undiluted Murphy’s Oil Soap with a tooth brush. He rinsed it under running warm water to remove the soap and grime. He cleaned out the inside of the shank and the airway in the stem with alcohol, cotton swabs and pipe cleaners. He soaked the stem in Before & After Deoxidizer and rinsed it off with warm water. I took photos of the pipe once I got around to working on it.
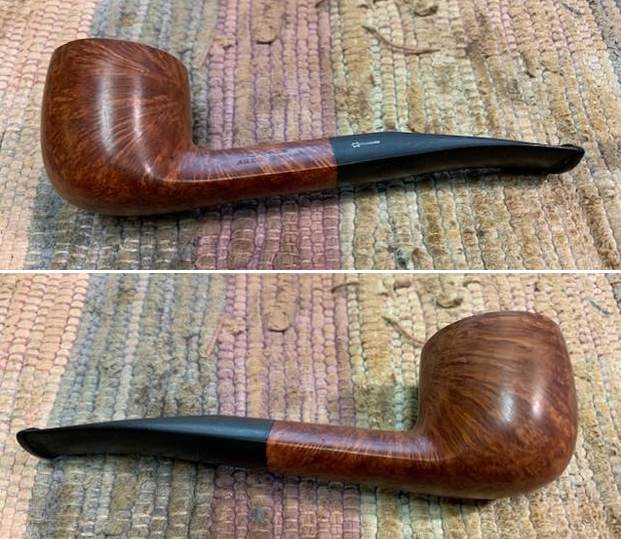
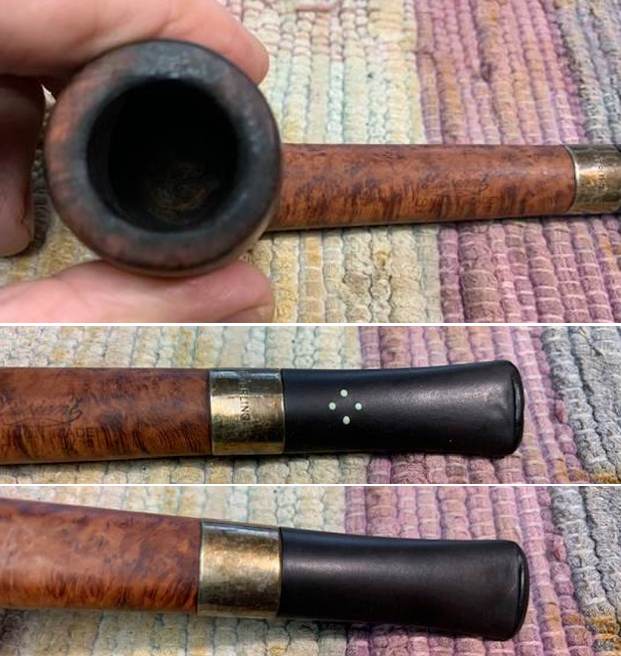
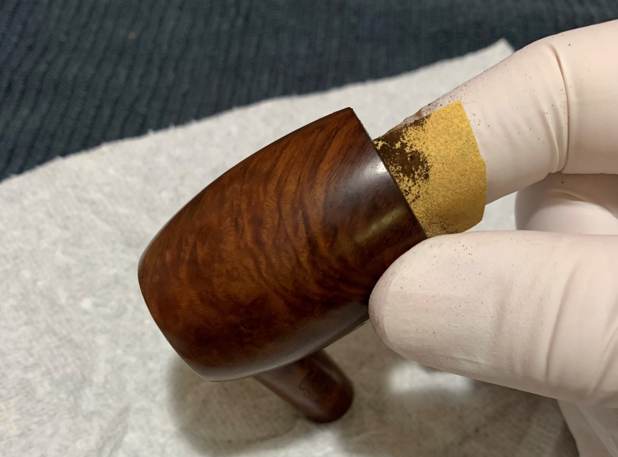
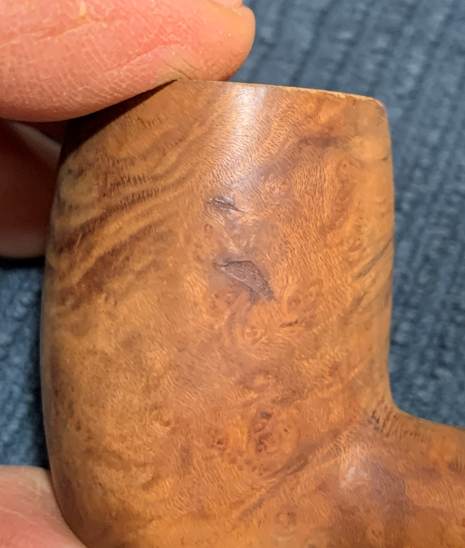
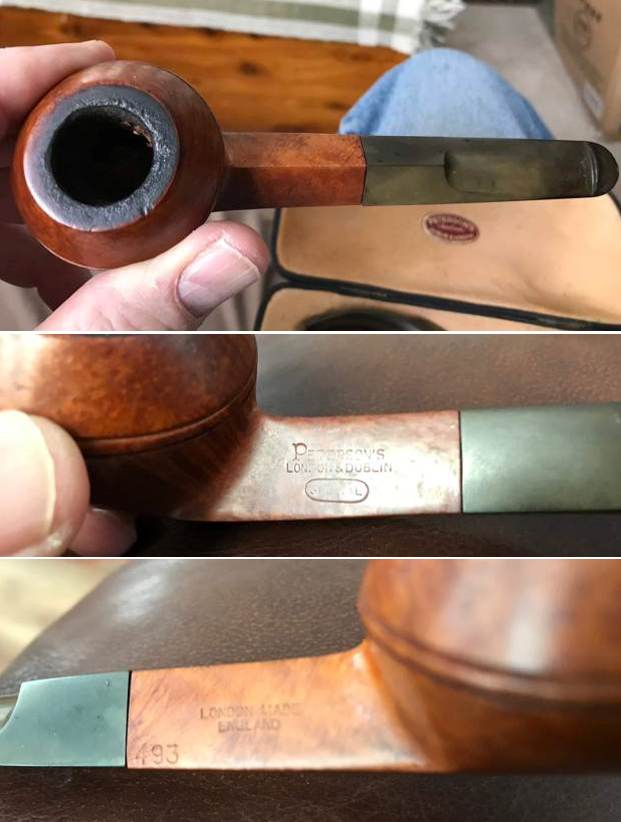
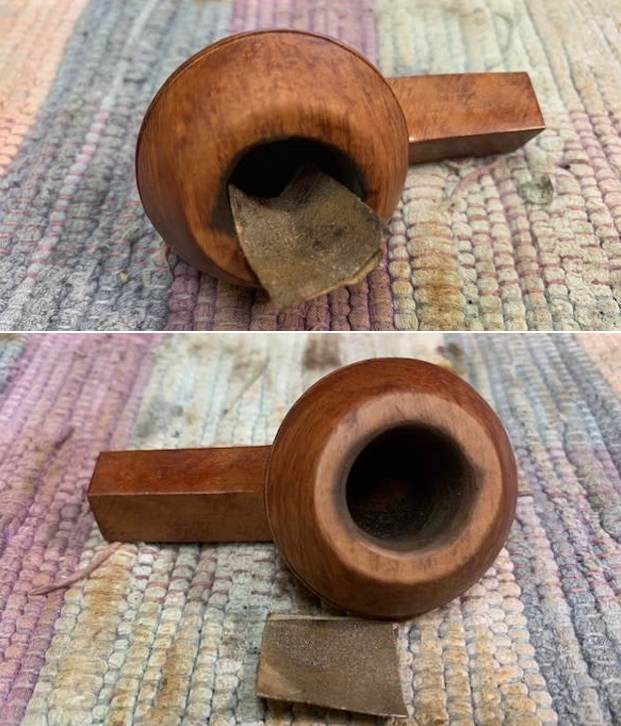
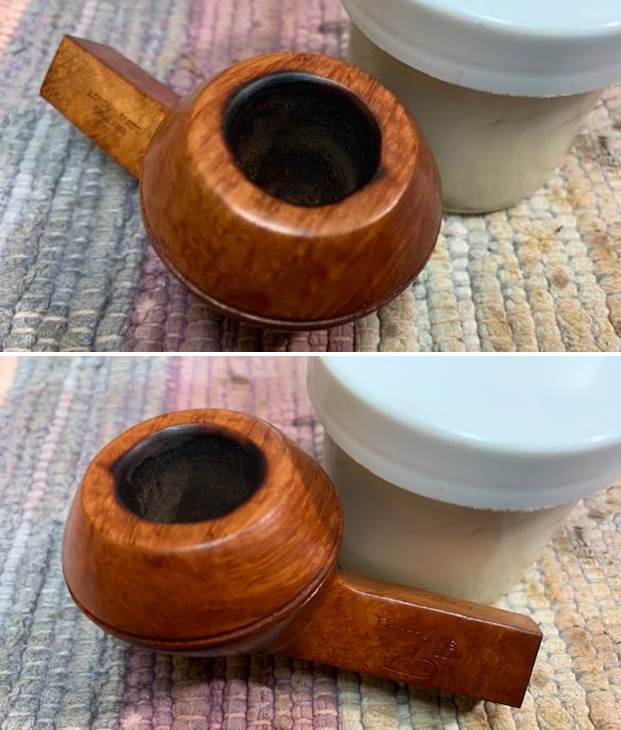
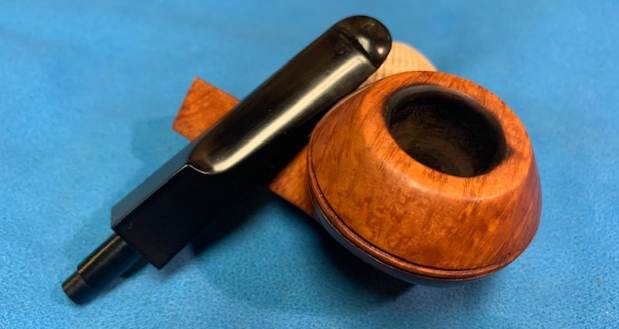
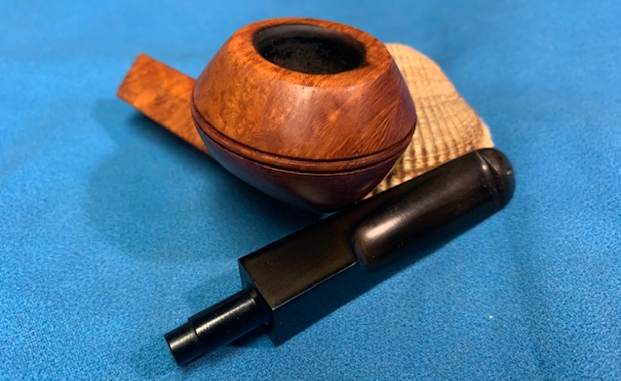
 The rim top looked very good. There were some nicks in the outer left backside of the rim. The beveled rim top was in excellent condition. There was a large putty fill on the rear right top side of the rim that I have circled in the photo below. The stem surface had some light chatter on both sides near the button.
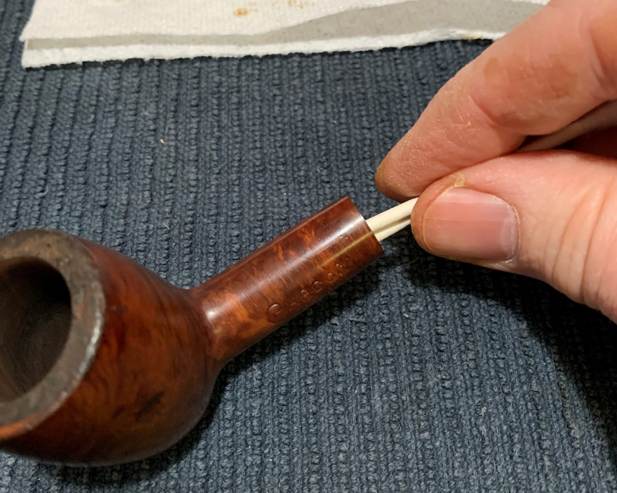
 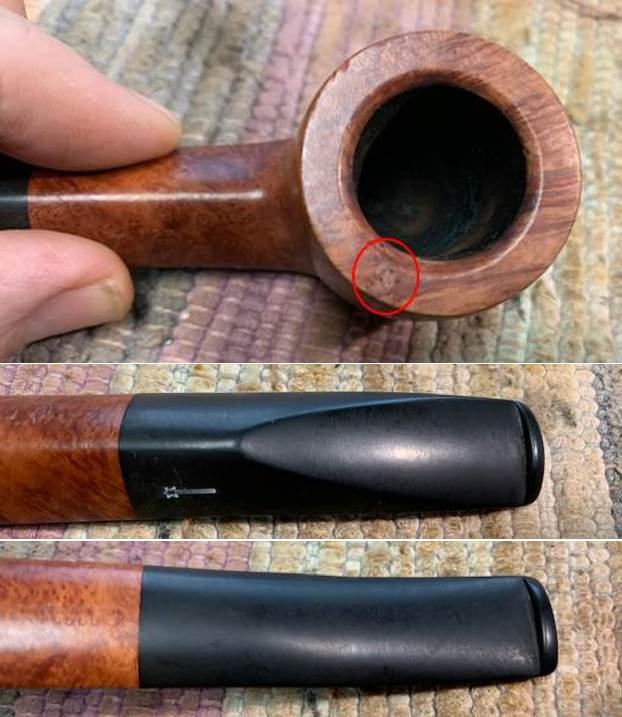 I took photos of the stamping on the shank sides. The stamping is clear and readable as can be seen from the photos. You can also see the shooting star on the left side of the stem.
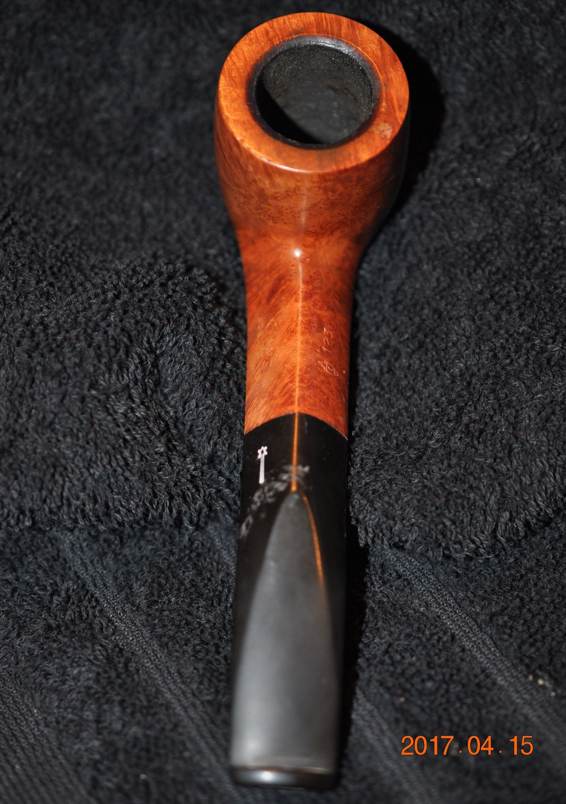
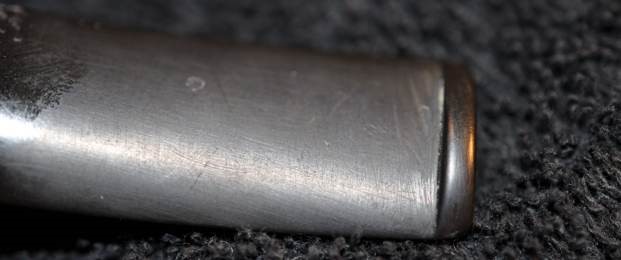
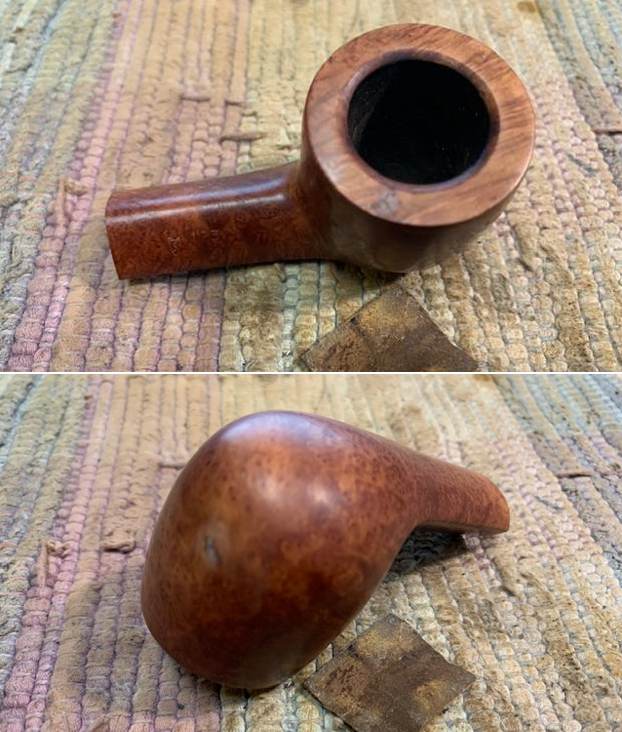
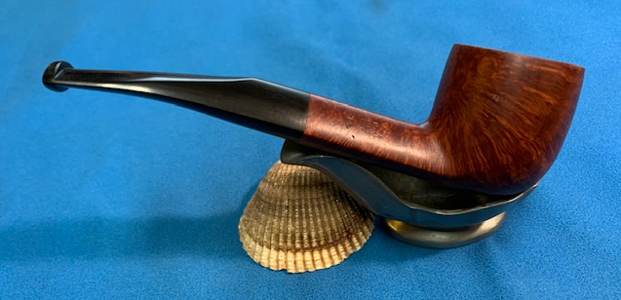
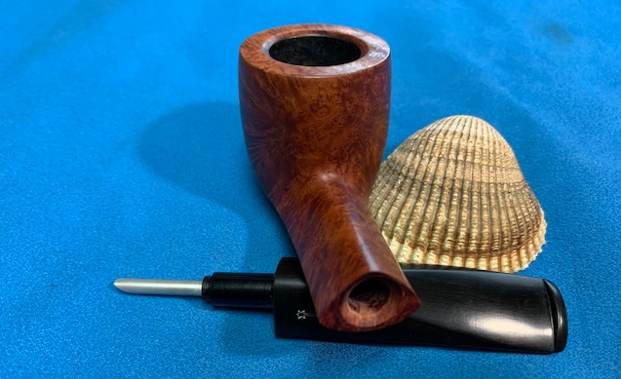
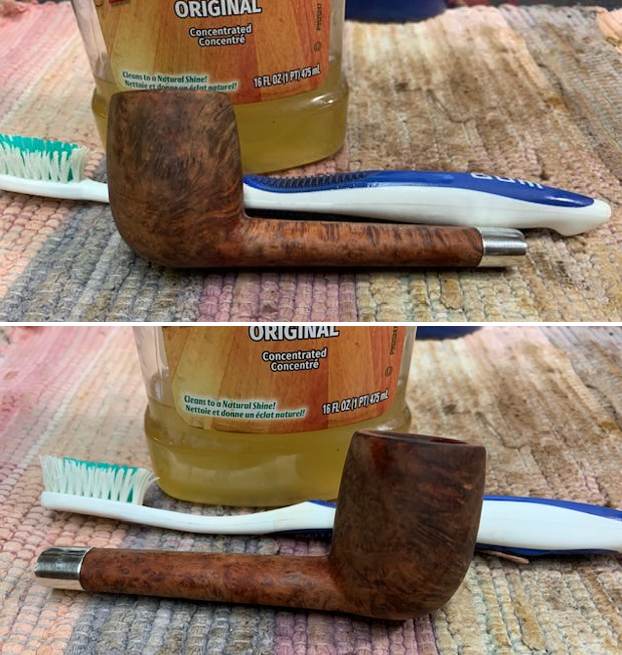
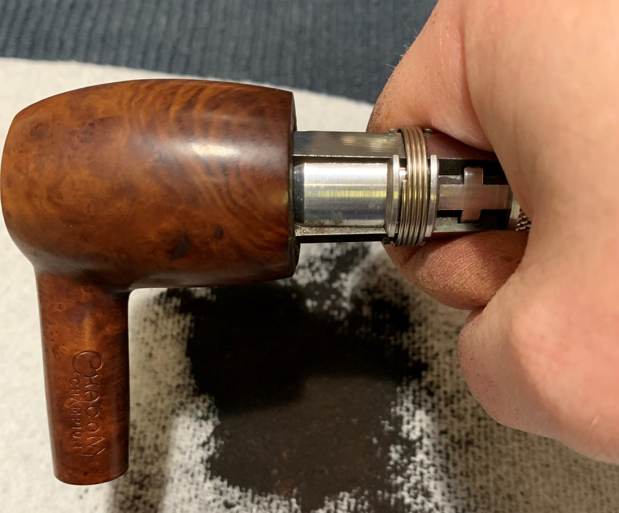
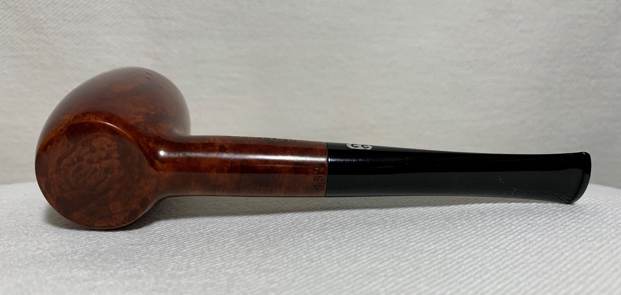
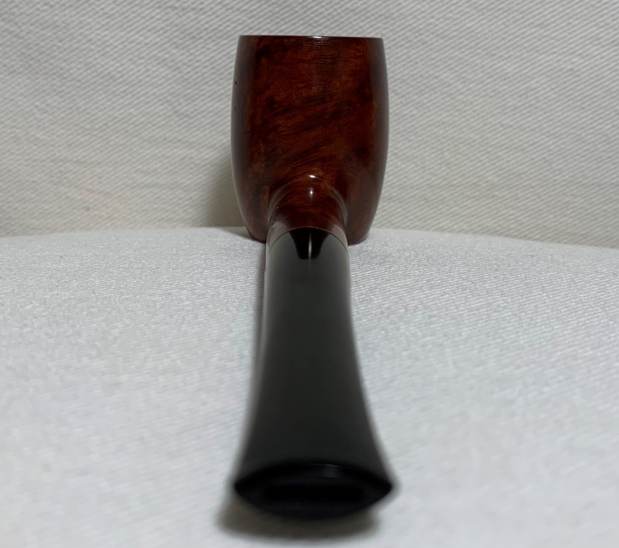
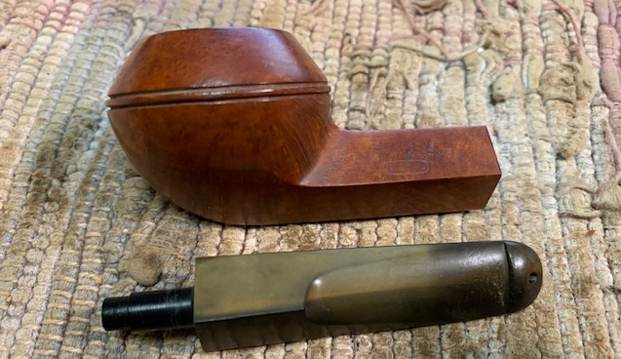
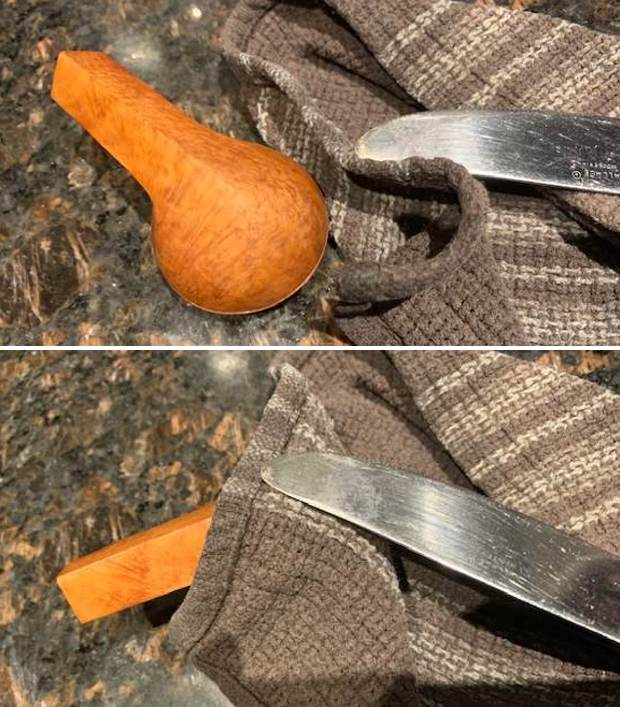
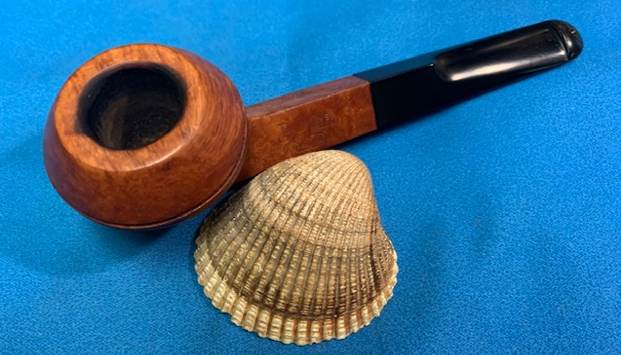
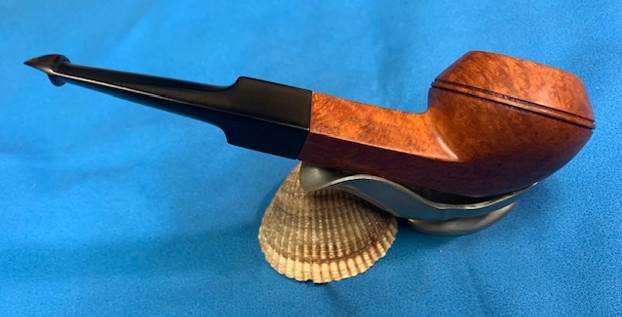
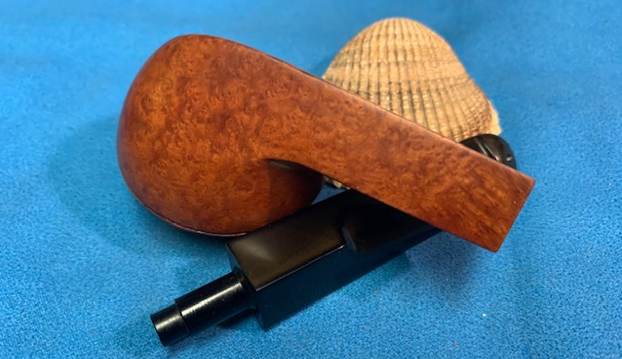
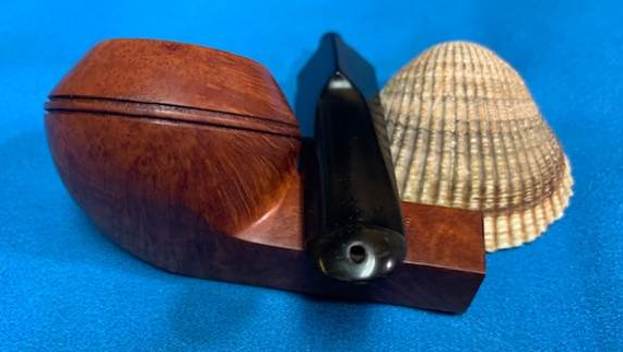
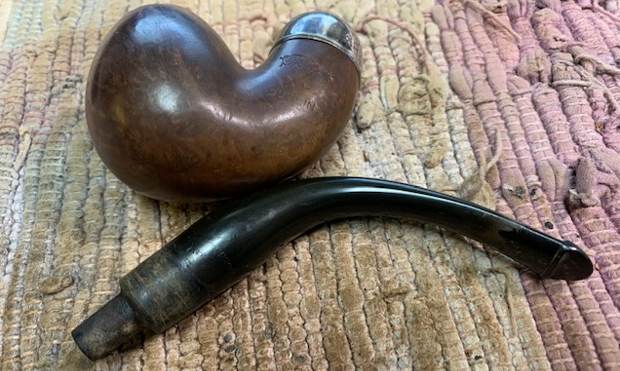
 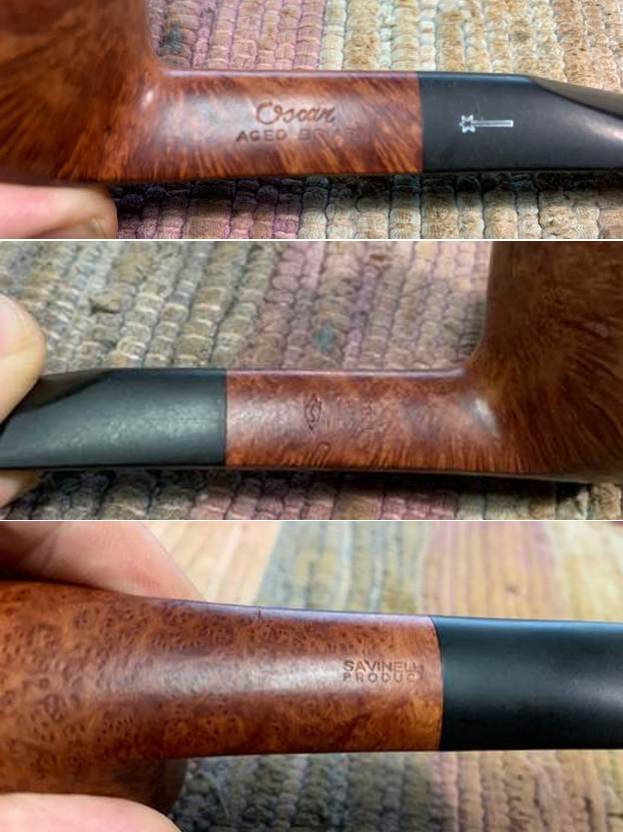 I removed the stem and took a photo to give a sense of the grain and a look of the whole. The photos also show the aluminum inner tube in the end of the tenon. It is anchored and made to stay in place in the stem.
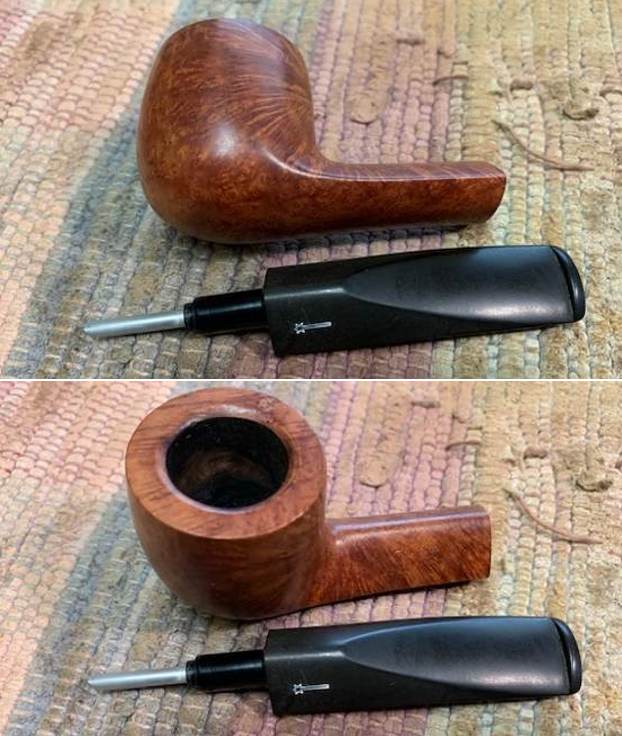 I started my work on the pipe by cleaning up the fill on the rim top. I was able to even out the fill with a spot of super glue. I filled in the fill on the front of the bowl with clear super glue at the same time. Once it cured I sanded it with a folded piece of 220 grit sandpaper to blend it in.
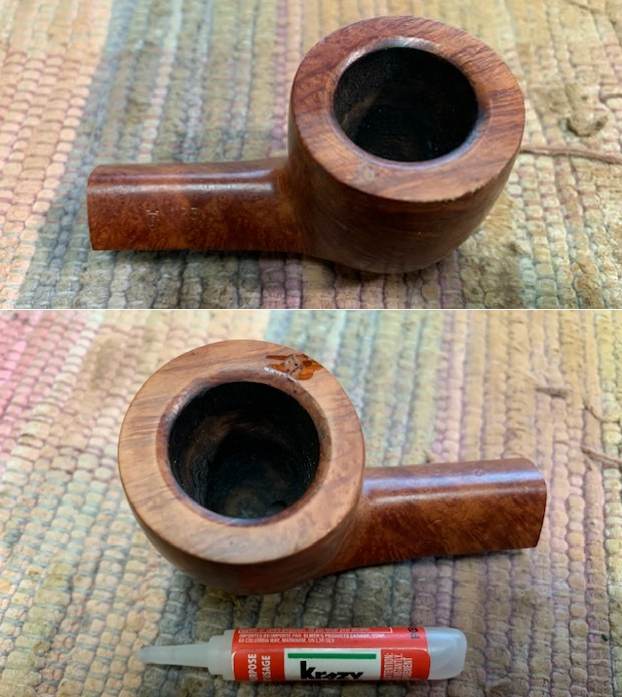
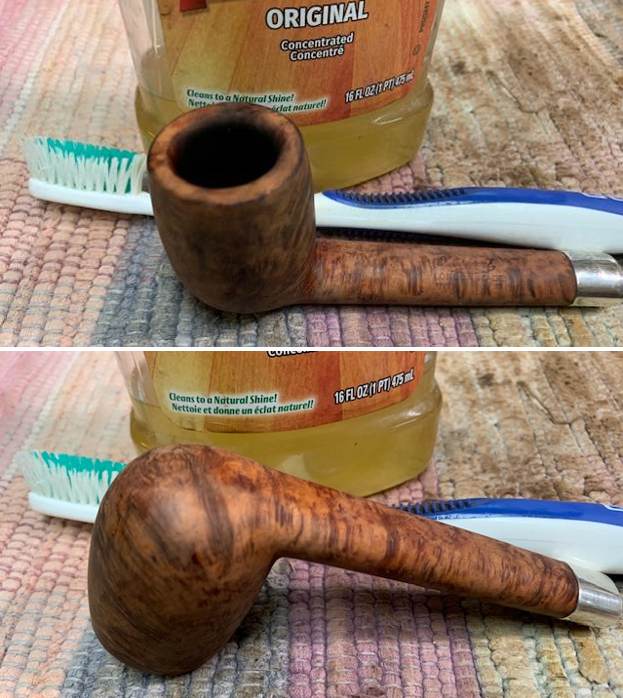
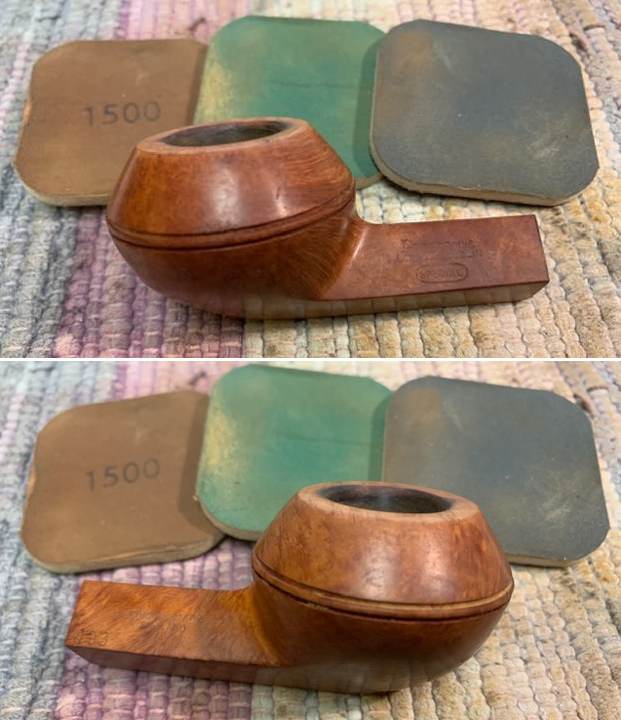
 I polished the bowl and the rim top, sides and shank with micromesh sanding pads – dry sanding with 1500-12000 grit pads and wiping it down after each pad with a damp cloth.
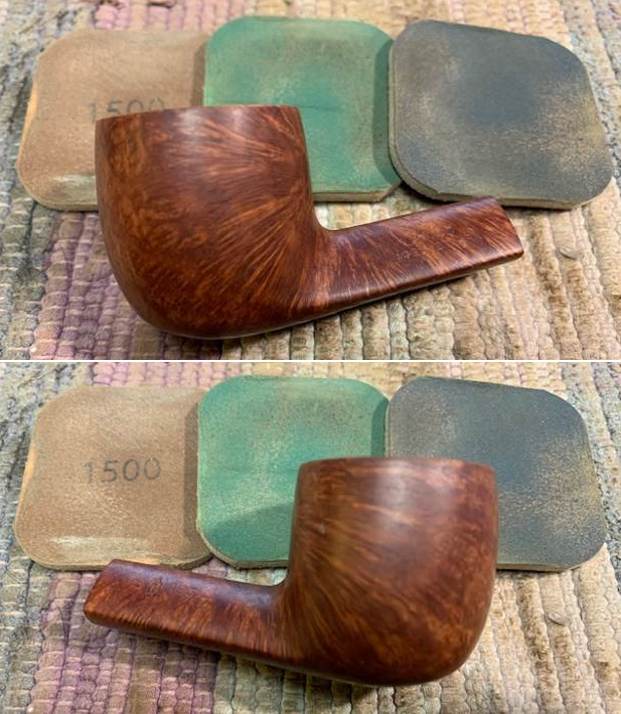
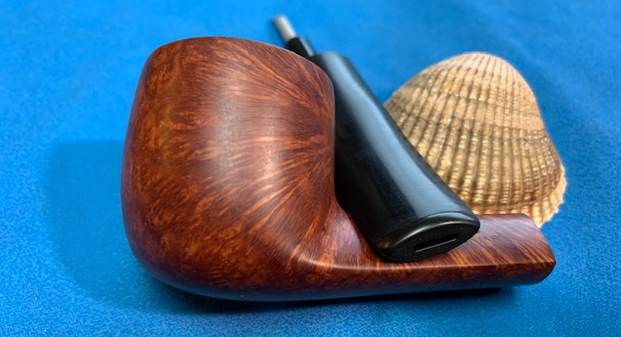
 I rubbed the bowl and shank down with Before & After Restoration Balm. I worked it into the surface of the bowl sides and shank with my fingertips to clean, enliven and protect the briar. I let the balm sit for 15 minutes and then buffed with a cotton cloth to raise the shine.
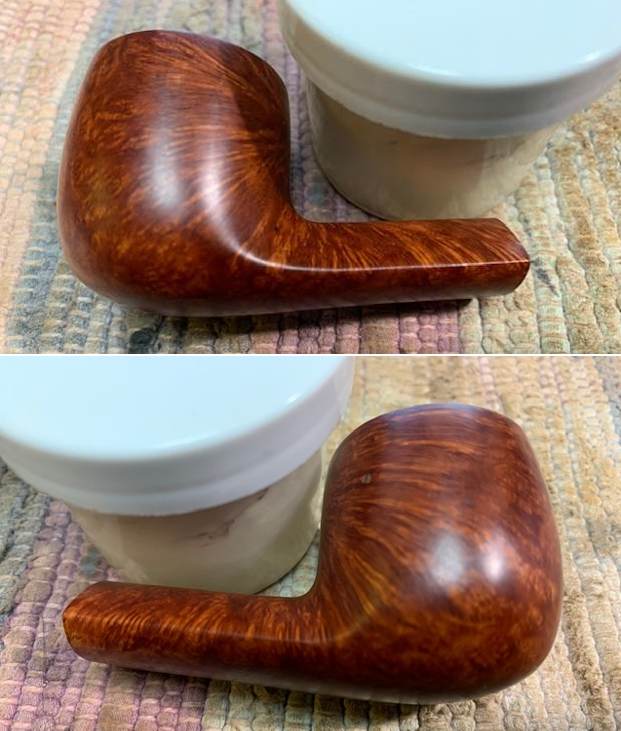
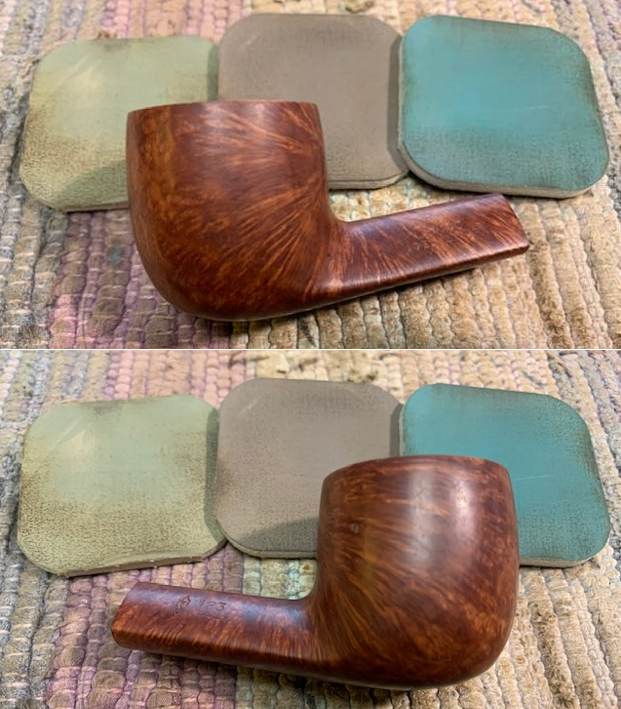
 I set the bowl aside and turned to work on the stem. Since it was in good condition I did not have to sand out tooth marks. I polished the vulcanite stem with micromesh sanding pads – 1500-12000 grit pads. I wiped it down with a damp cloth after each sanding pad. I used Before & After Pipe Polish – both Fine and Extra Fine to further polish the stem. I gave it a final coat of Obsidian Oil and let it dry.
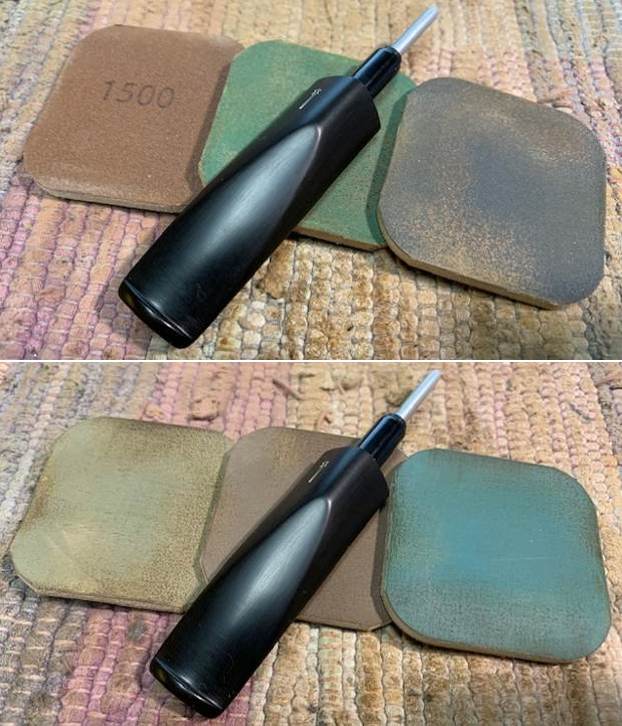
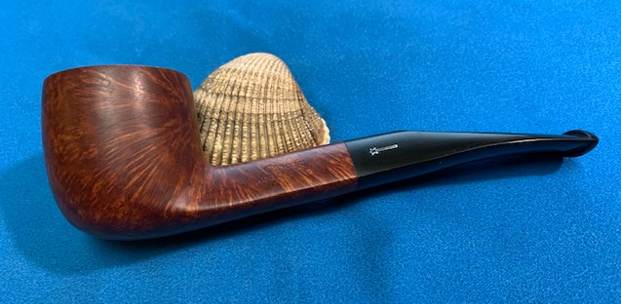
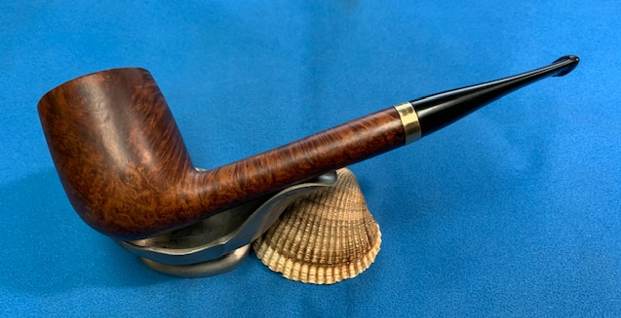
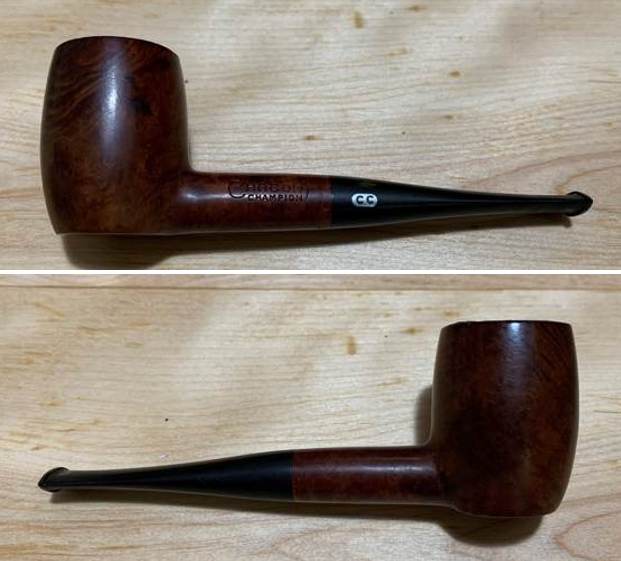
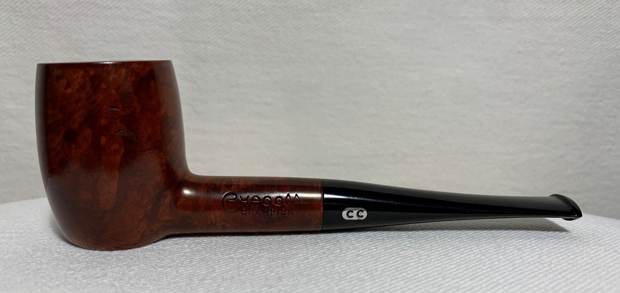
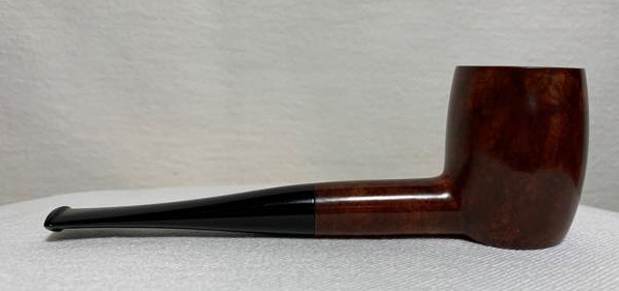
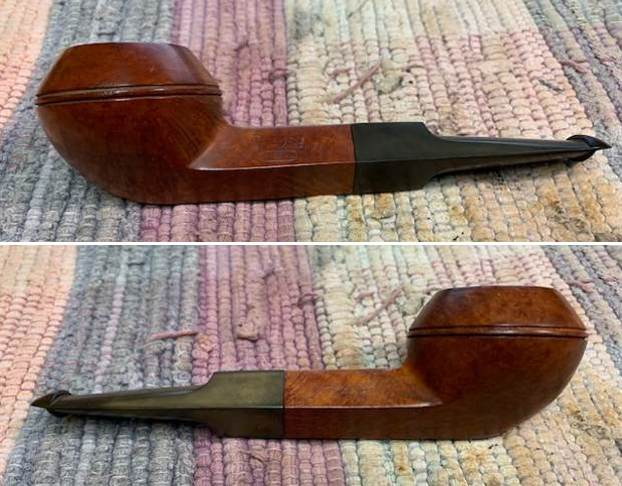
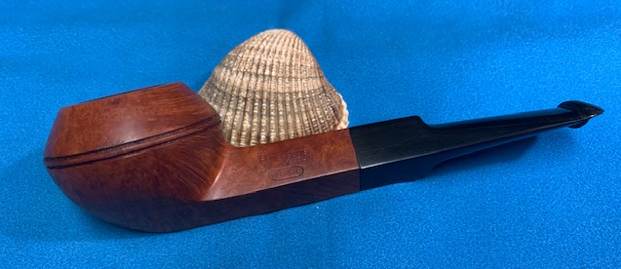
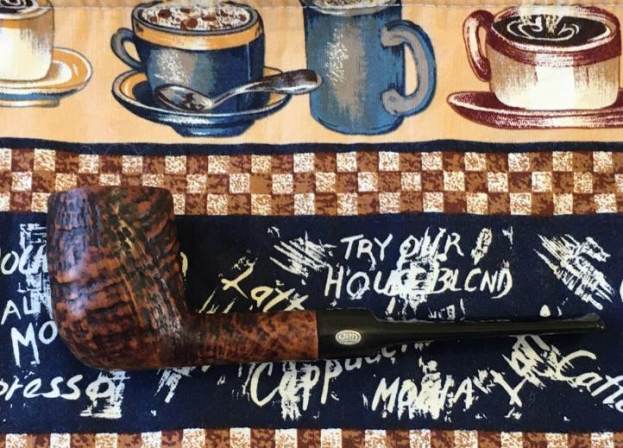
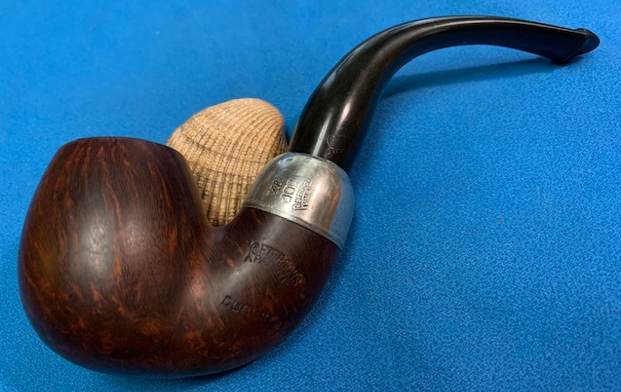
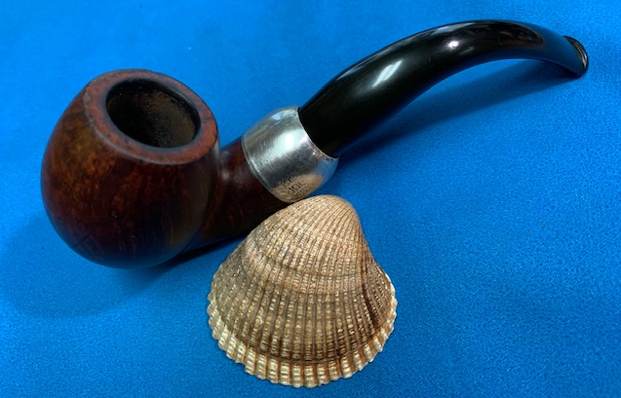
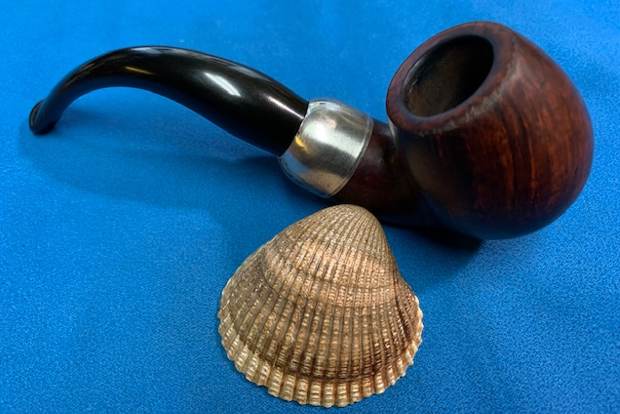
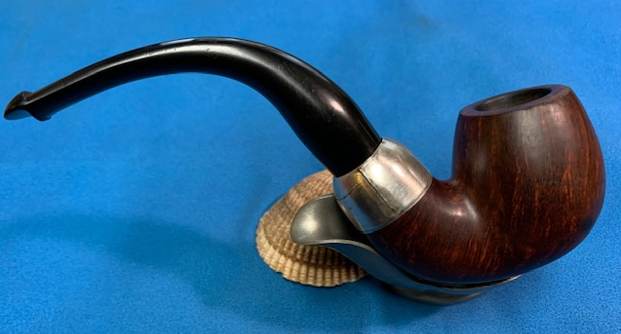
 This Savinelli Product Oscar Aged Briar 123 Triangle Shank Pot with a vulcanite taper stem is a great looking pipe now that it has been restored. I put the stem back on the bowl and carefully buffed the pipe with Blue Diamond on the buffing wheel using a light touch on the briar. I gave the bowl and the stem multiple coats of carnauba wax on the buffing wheel and followed that by buffing the entire pipe with a clean buffing pad. I hand buffed the pipe with a microfiber cloth to deepen the shine. The finished Oscar Aged Briar 123 Pot is another one that is comfortable in the hand and feels great. Give the finished pipe a look in the photos below. The dimensions of the pipe are Length: 5 ½ inches, Height: 1 ½ inches, Outside diameter of the bowl: 1 ½ inches, Chamber diameter: 7/8 of an inch. The weight of this pipe is 40 grams/1.41 ounces. If you are interested in adding this pipe to your collection I will be adding it to the rebornpipes store in the American Pipemakers section. Send me a message or an email. Thanks for reading this blog and my reflections on the pipe while I worked on it. There are many more to come!
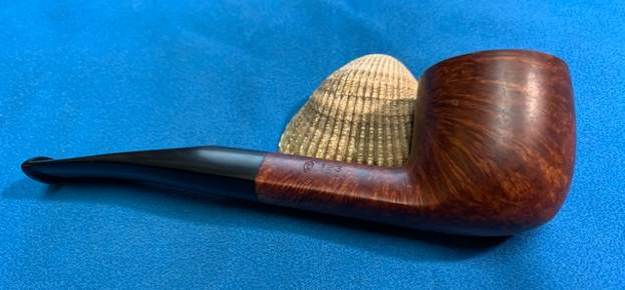


