Blog by Steve Laug
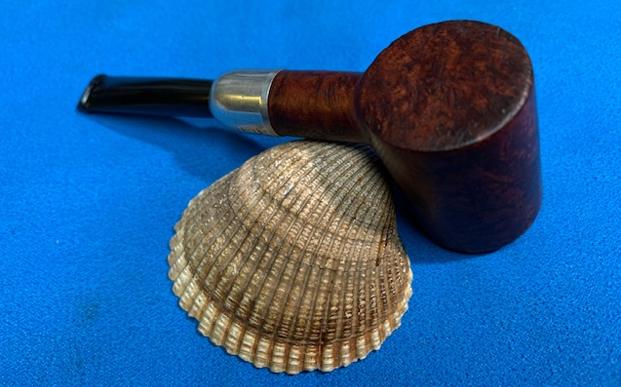
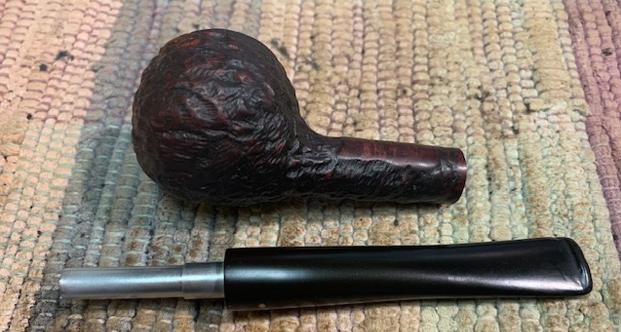
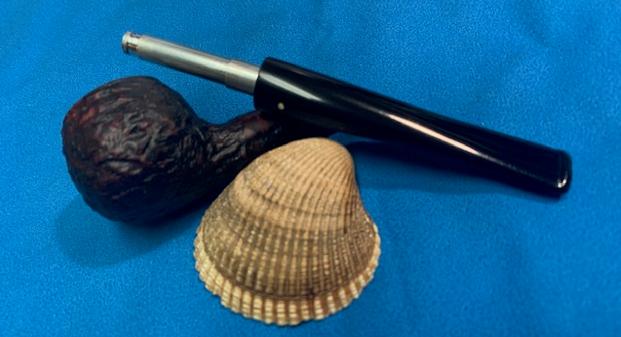
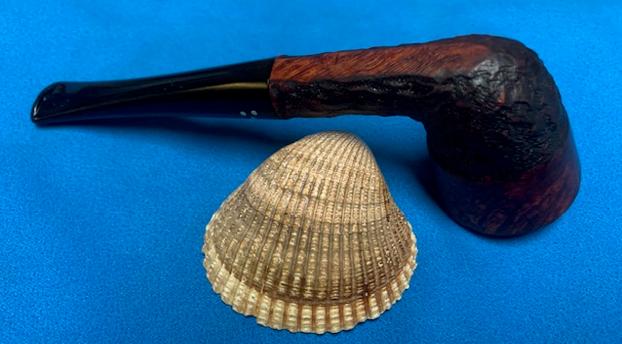
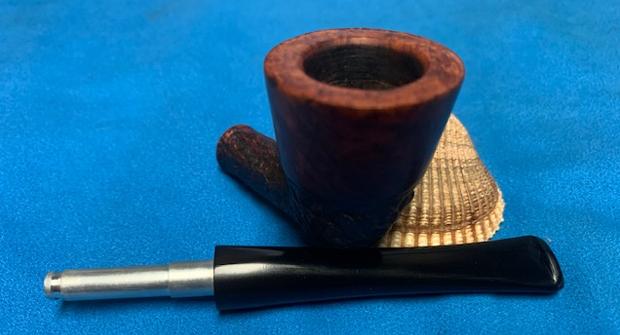
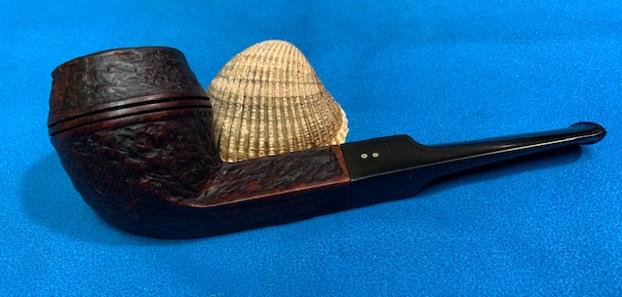
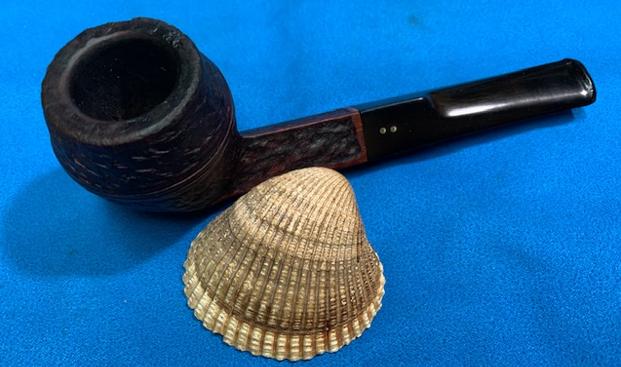
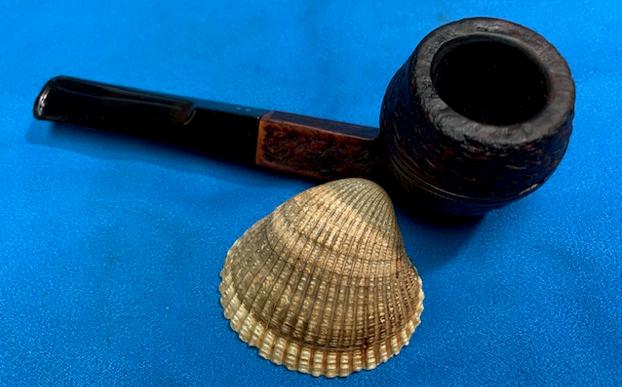
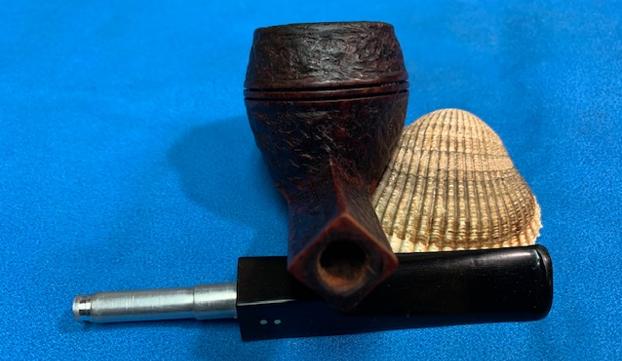
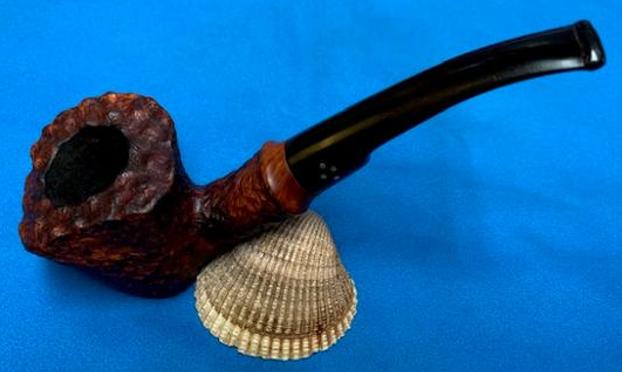
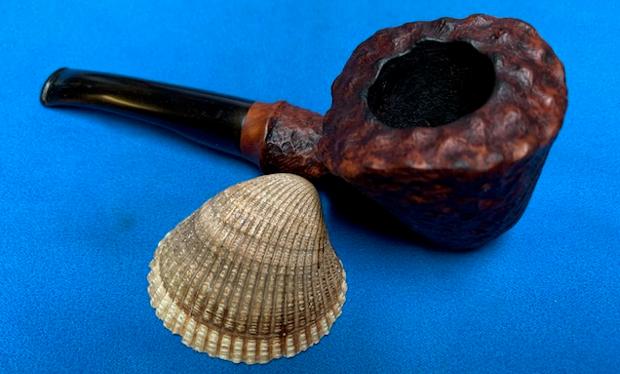
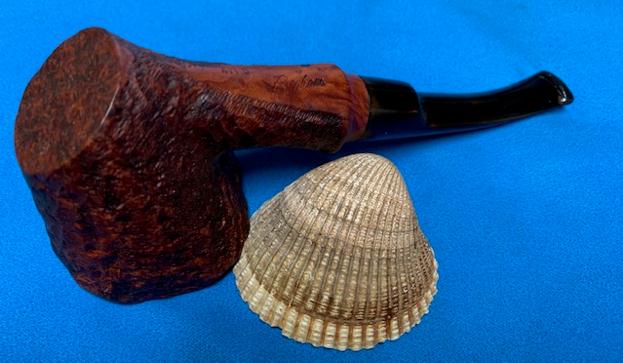
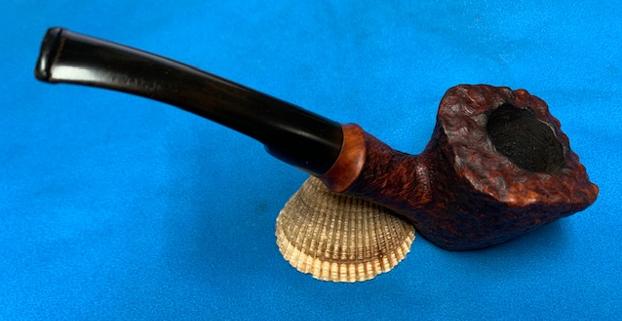
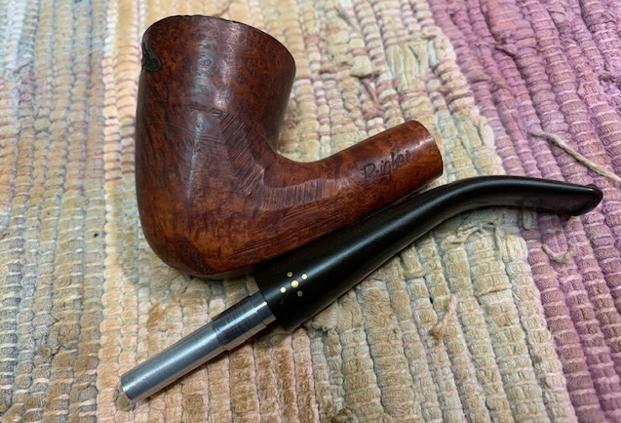
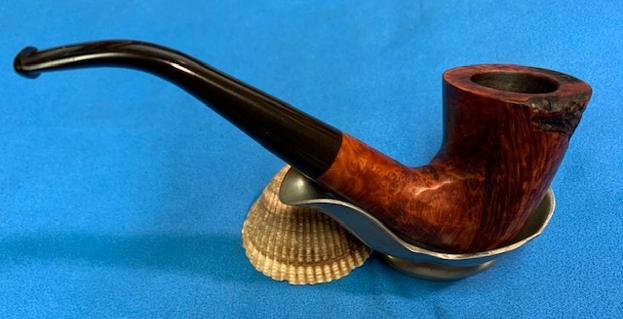
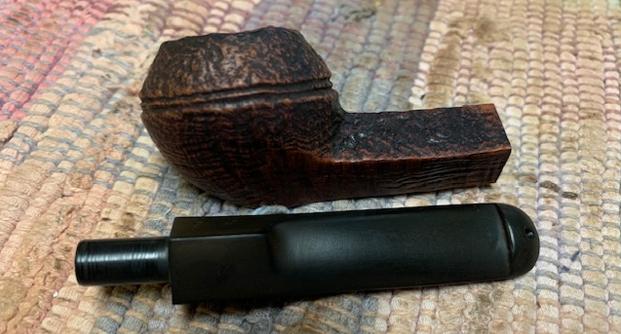
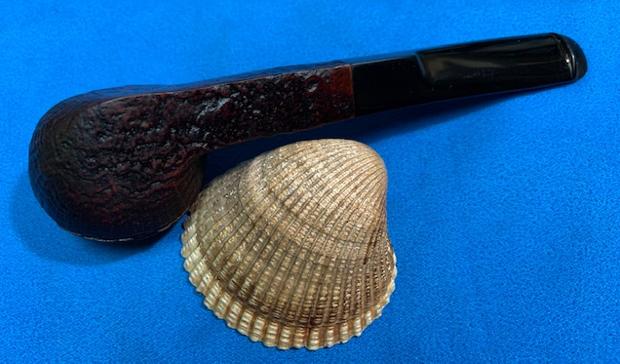
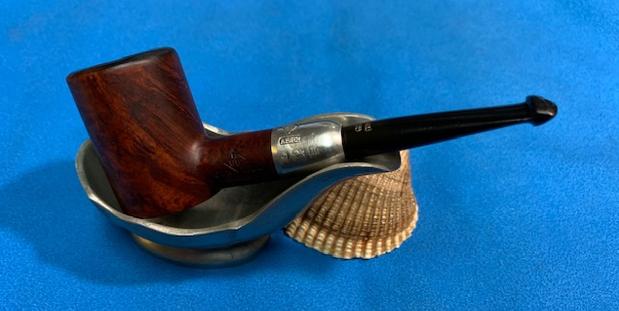
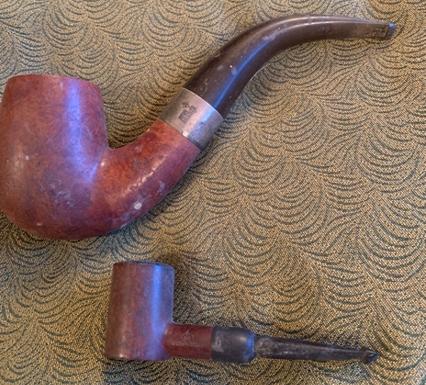 It seems like just a few weeks ago I was contacted by an older gentleman about purchasing his pipe collection. He sent me the photos and I was amazed at what I saw. It had Dunhill pipes, BBB pipes, Orlik pipes, Barclay Rex Pipes, a couple of Meerschaums and a whole lot of other pipes. All I could say as I looked at the pipes was what a collection it was. We negotiated a deal and I think we both walked away quite happy with the exchange. But I have to tell you there was another very interesting pipe caught my interest when I looked at pictures of it. It was a beautiful older BBB Poker/Cherrywood sitter. It was a mess but there was something charming about it. It is shown in the photo to the left. The larger pipe in the photo is also a BBB and from what I can gather it is on the larger side but not to degree it looks in the photo with the poker. This poker is tiny. It is only 4 ¼ inches long and 1 ½ inches tall. The black band on the shank is oxidized/tarnished Sterling Silver. I could not wait to get it in hand and figure out the age of the pipe. From the looks of it I could tell it was older. The stem was also very unique looking so I was looking forward to checking that out.
I have worked on a lot of BBB pipes over the years and never had the opportunity to work on one like this. It would be a great addition to my collection of older BBB pipes. From the photos the pipe appeared to be in good condition from the photo he sent me. He said that the pipe was stamped on the left side of the silver ferrule and read AF & Co over three hallmarks. The hallmarks are as follows: an anchor (Birmingham, England), a rampant lion (the symbol for quality of the silver) and the final one is a lower case “m” (the date stamp). I had him ship it to Jeff for cleanup so it would be a while before I held in hand.
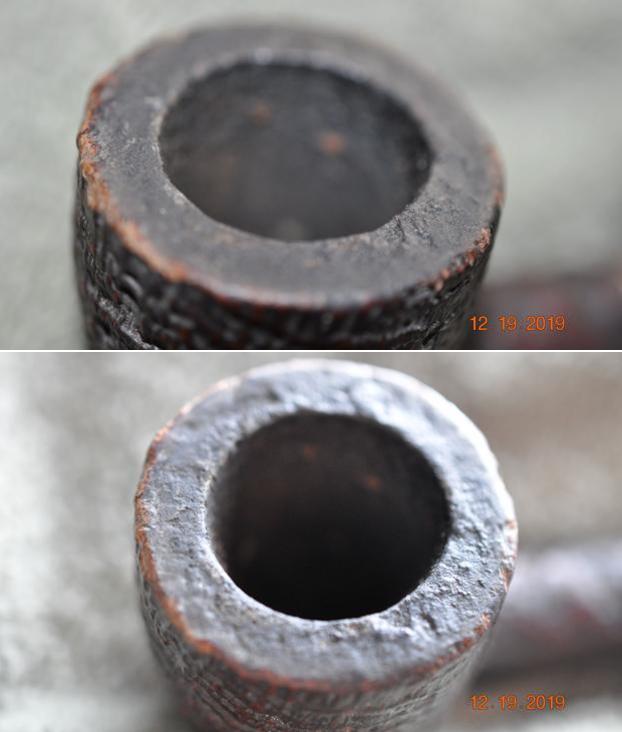
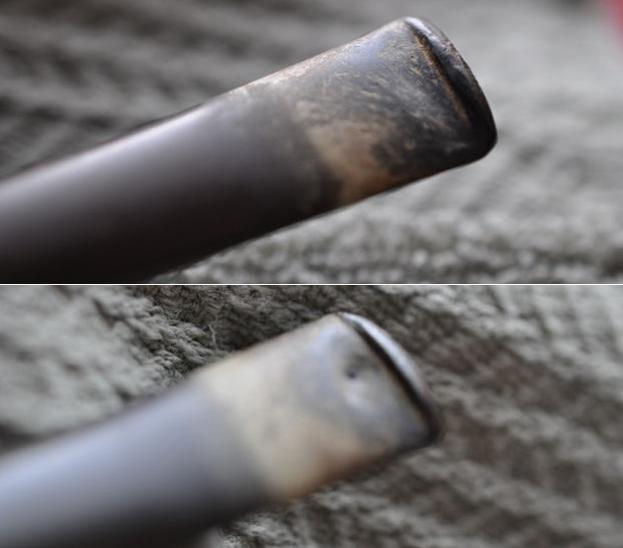
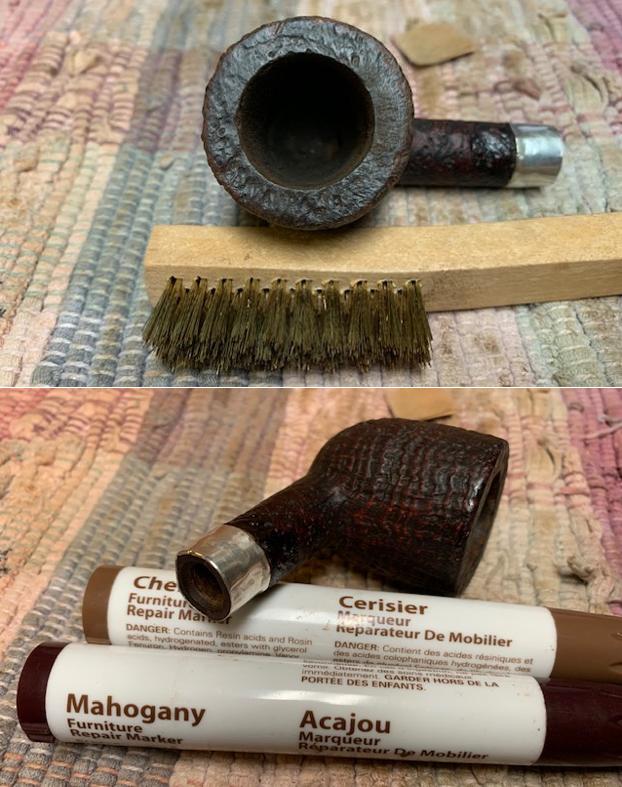
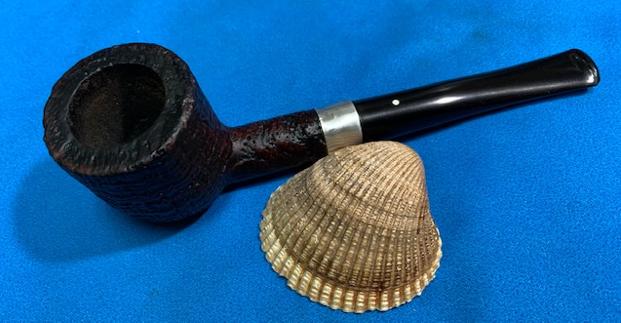
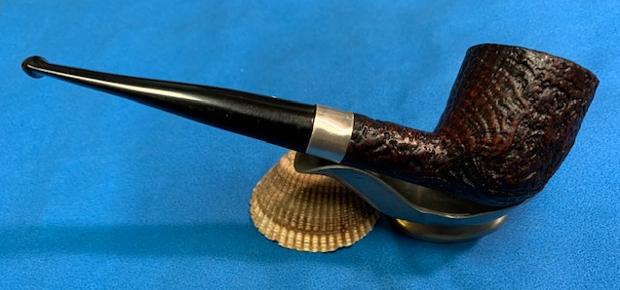
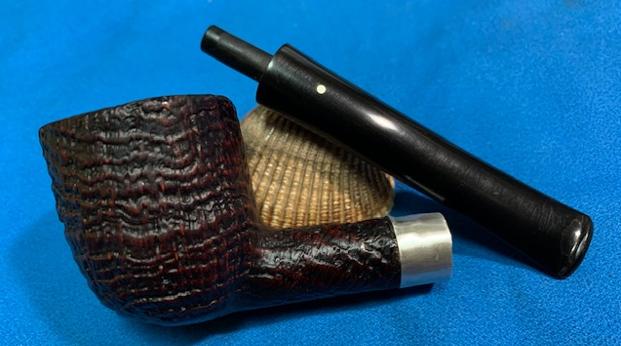
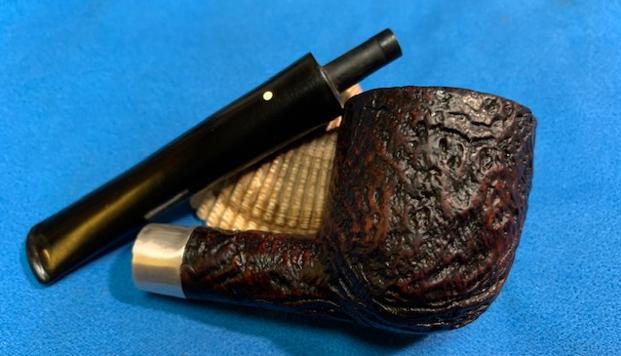
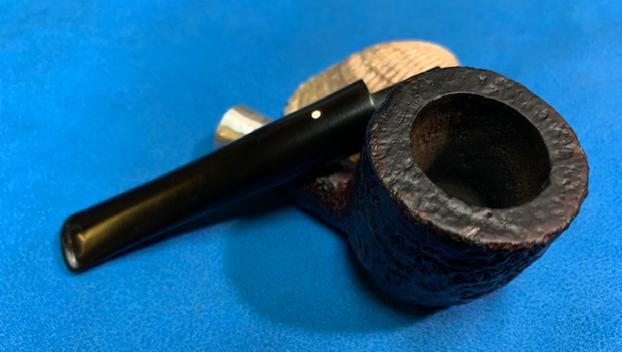
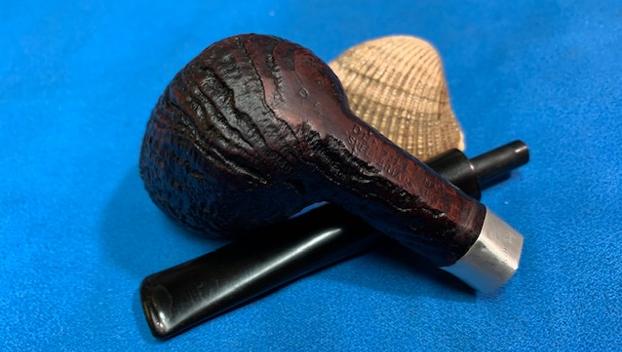
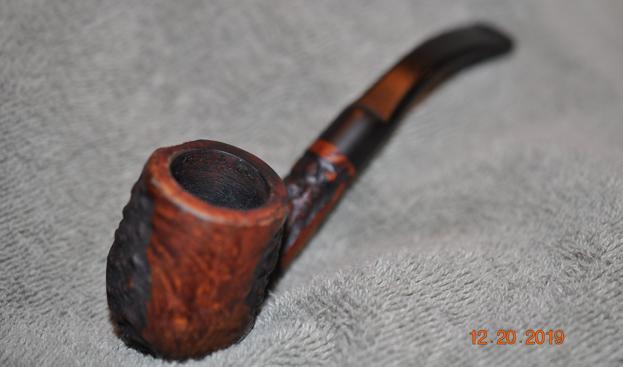
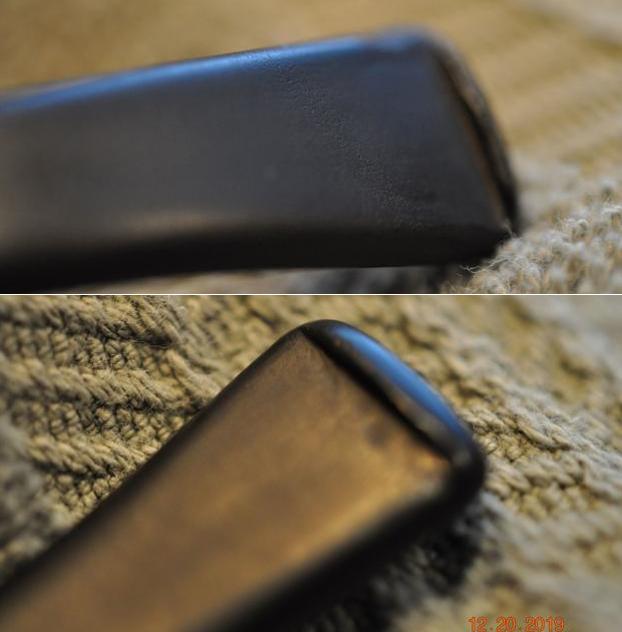
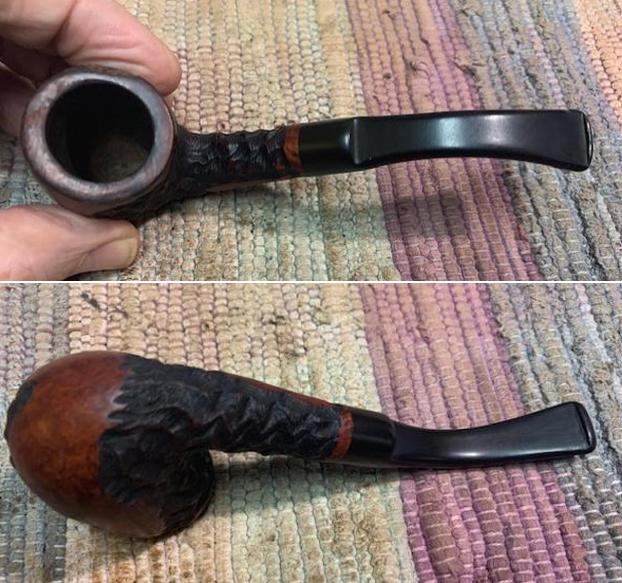
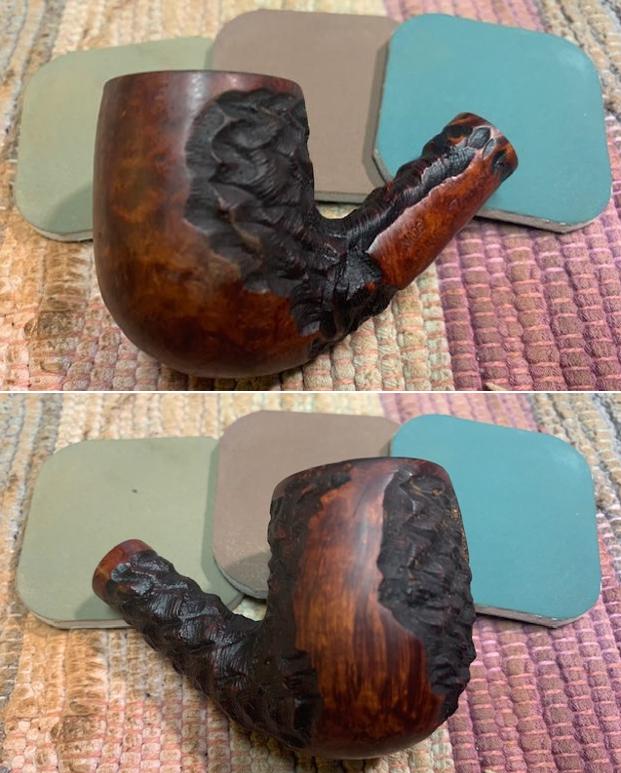
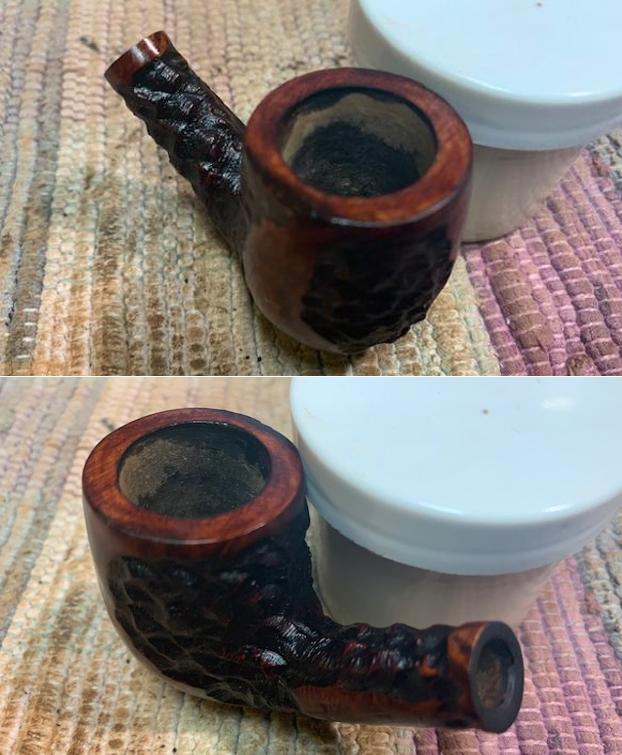
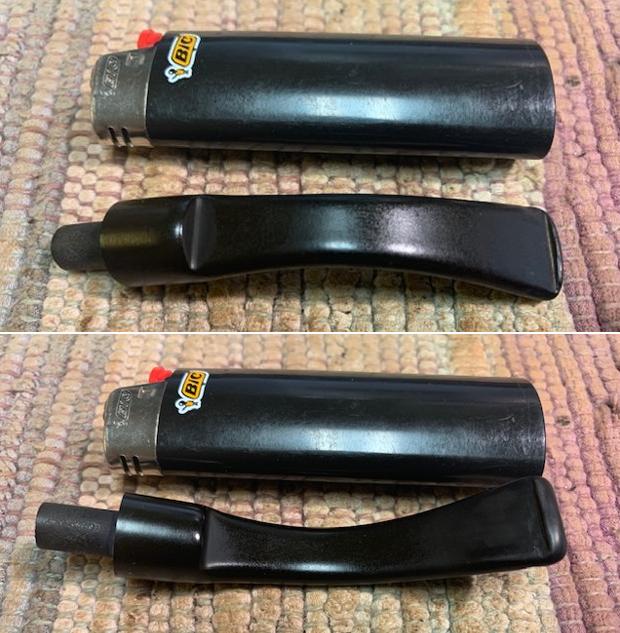
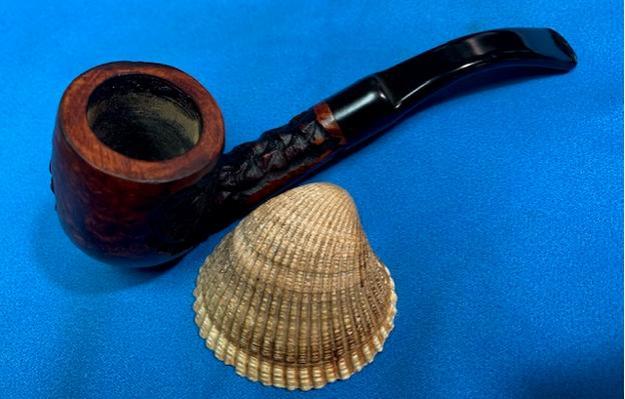
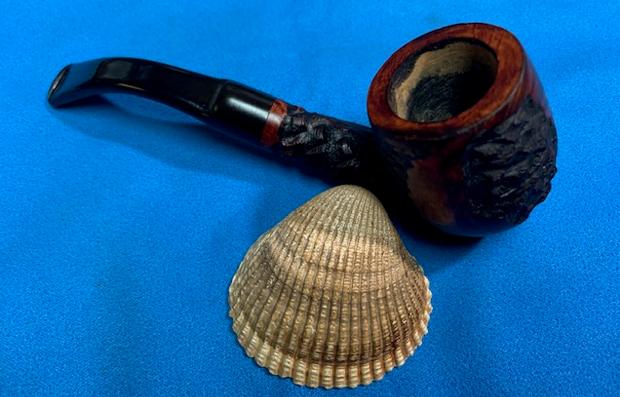
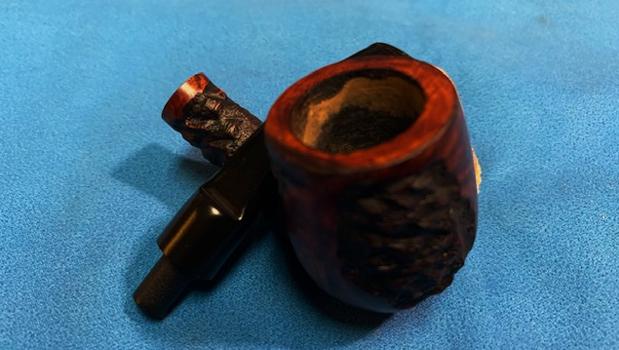
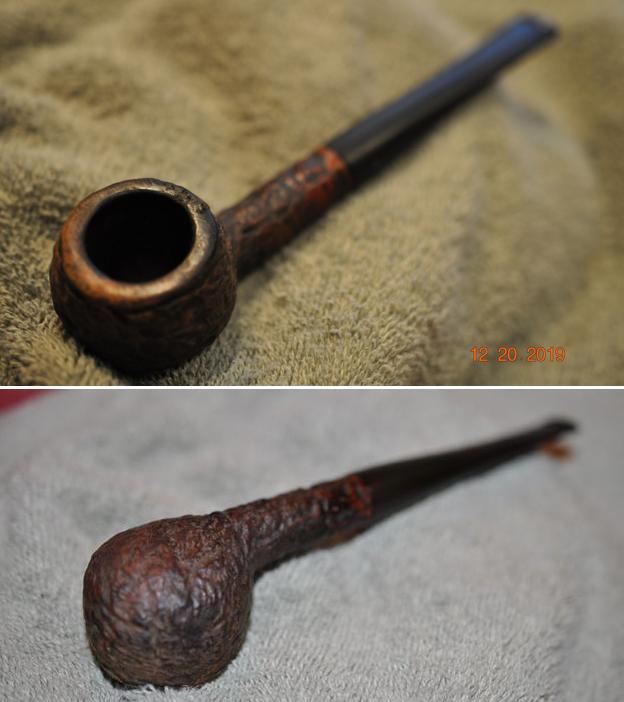
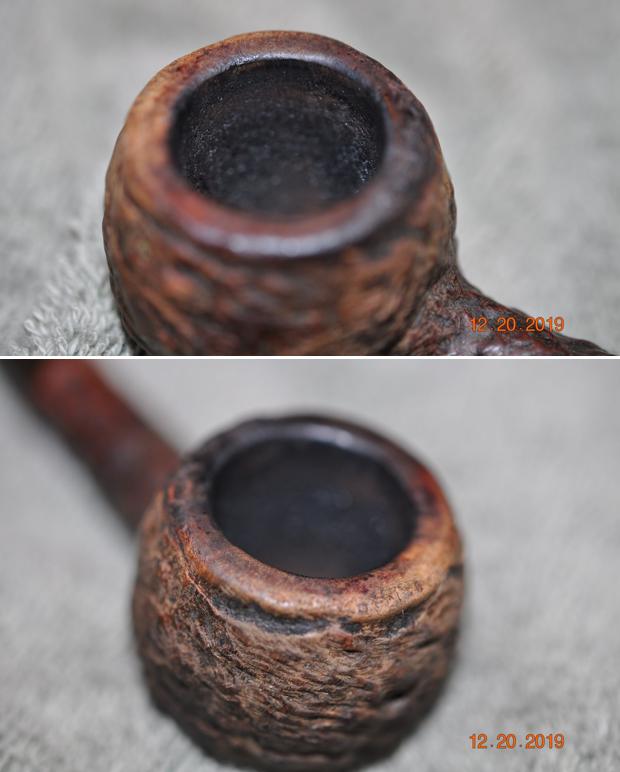
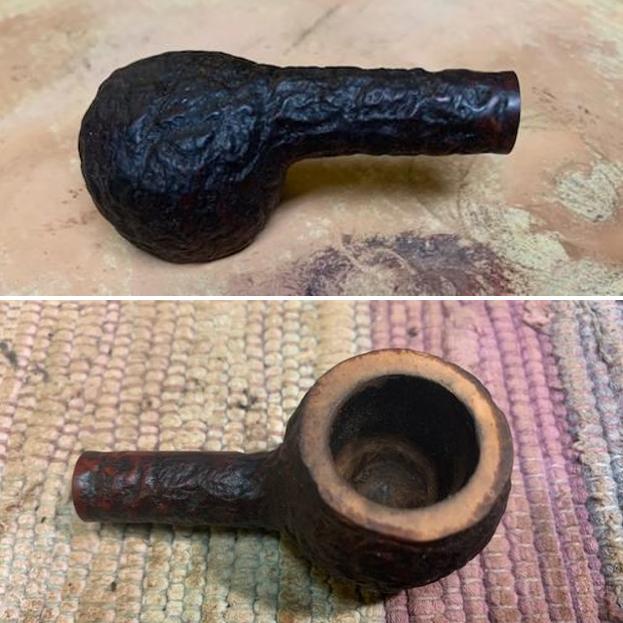
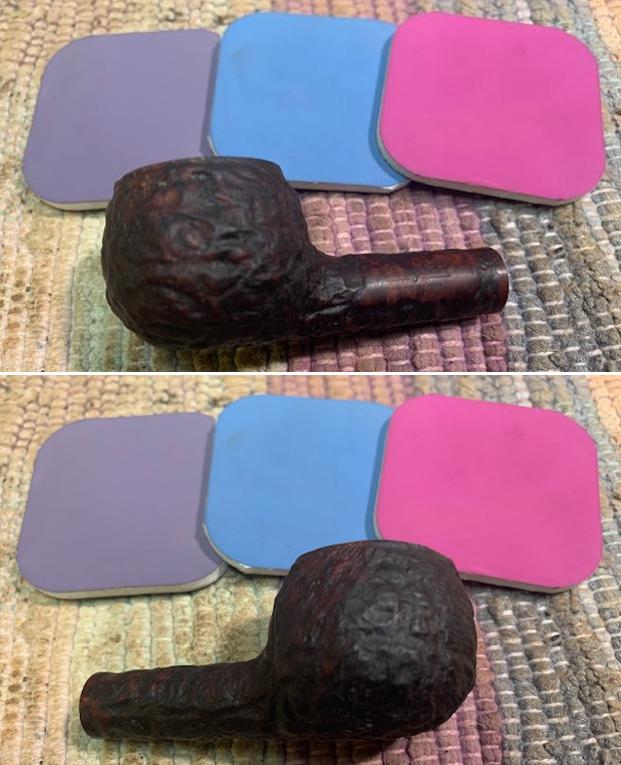
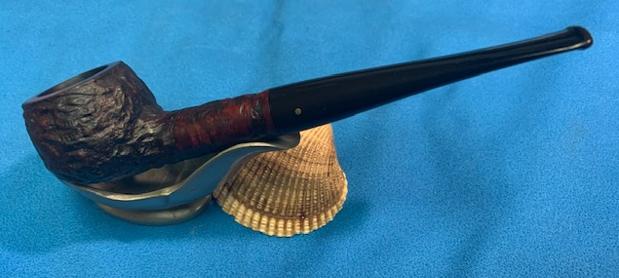
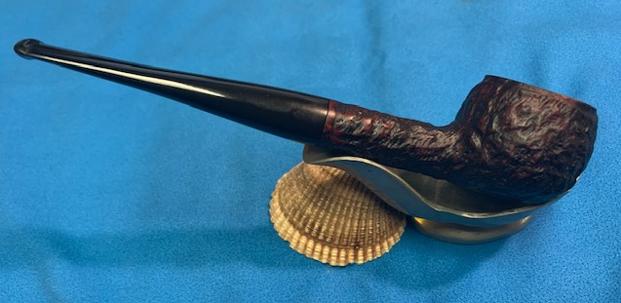
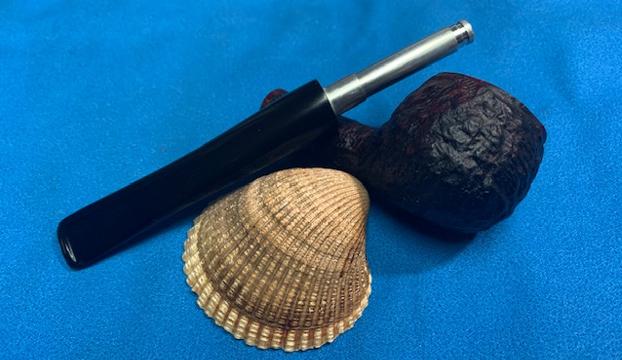
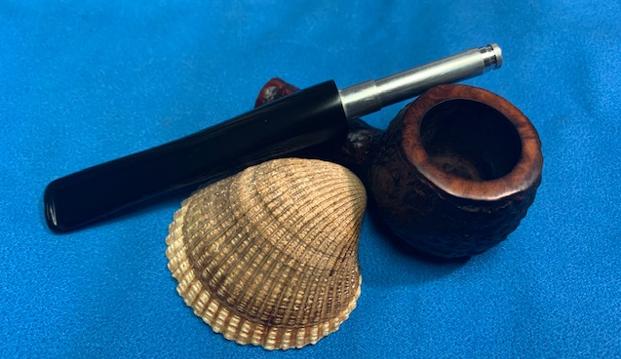
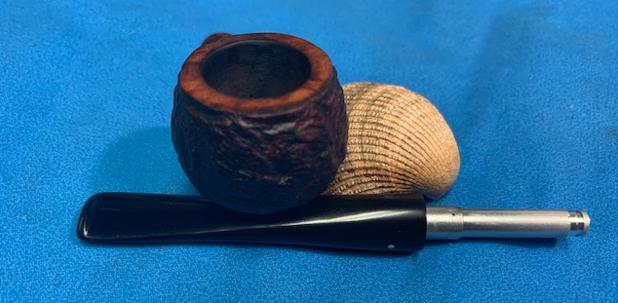
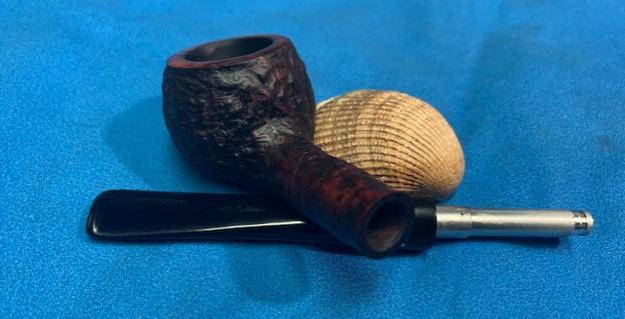
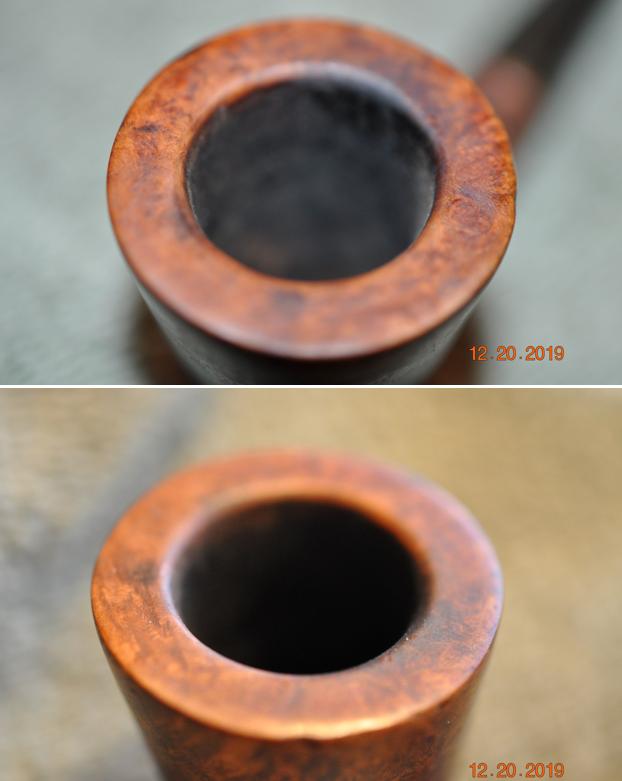
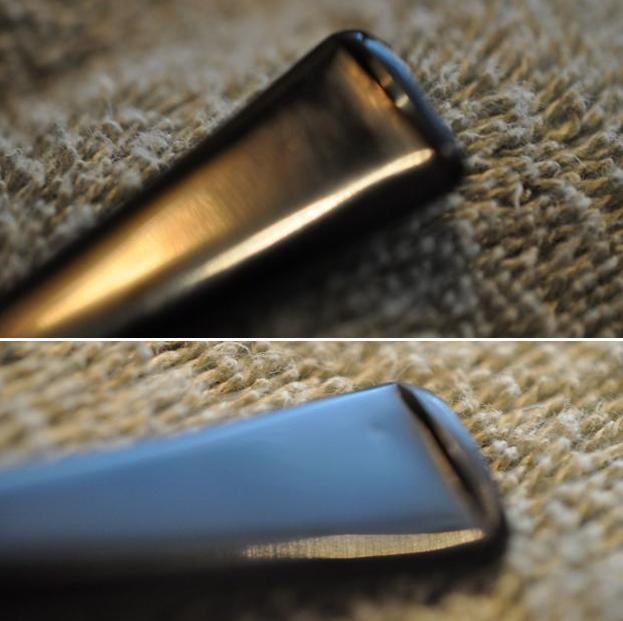
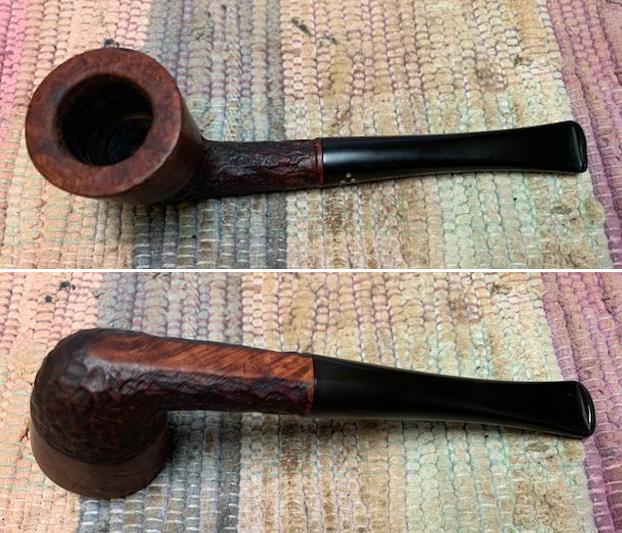
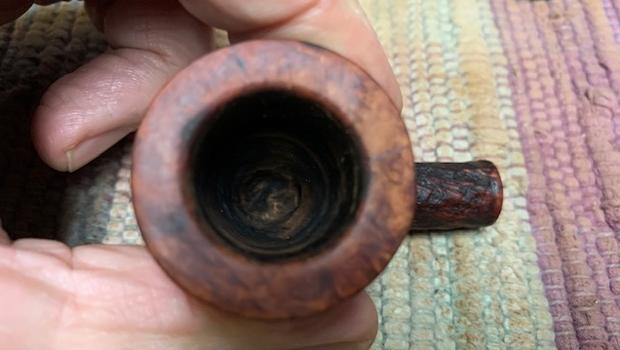
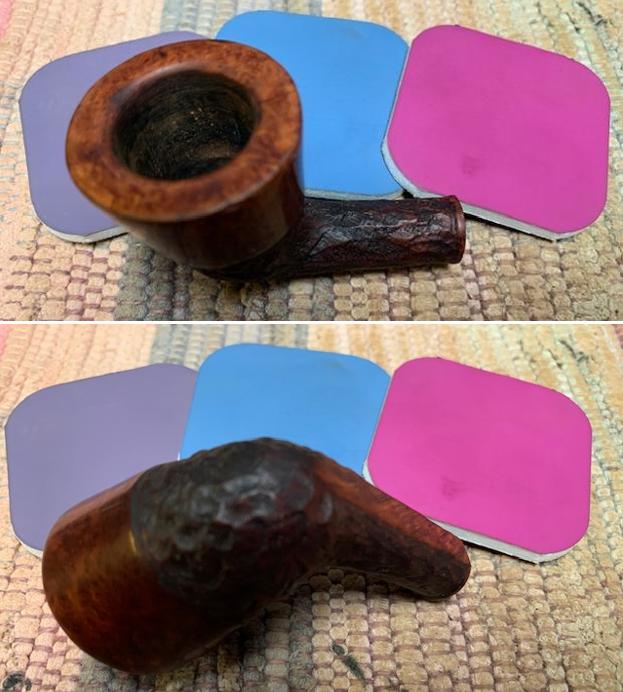
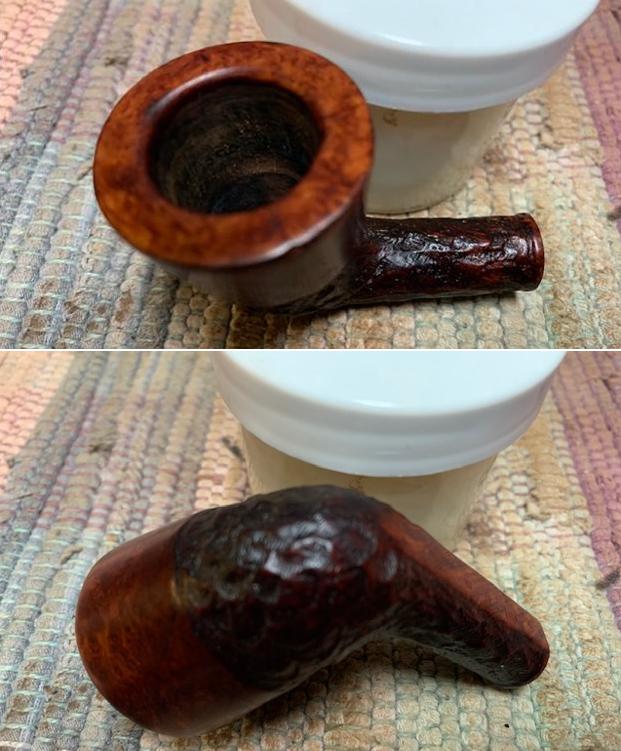
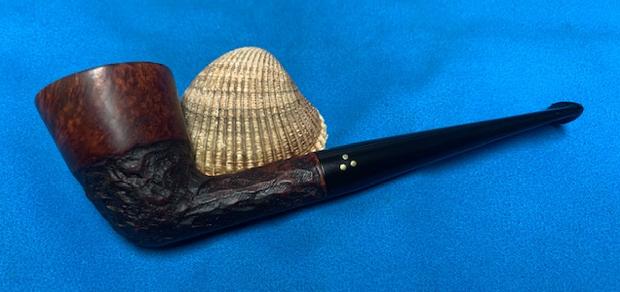
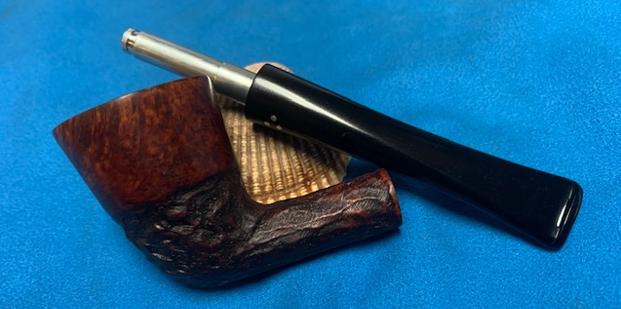
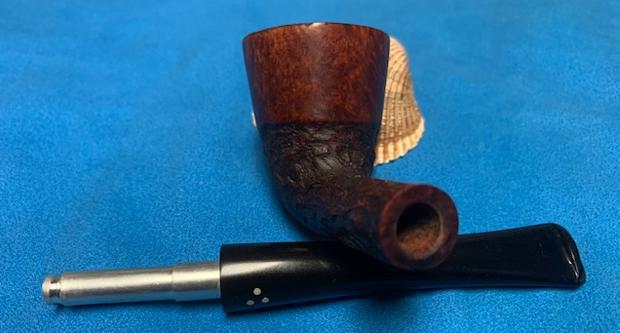
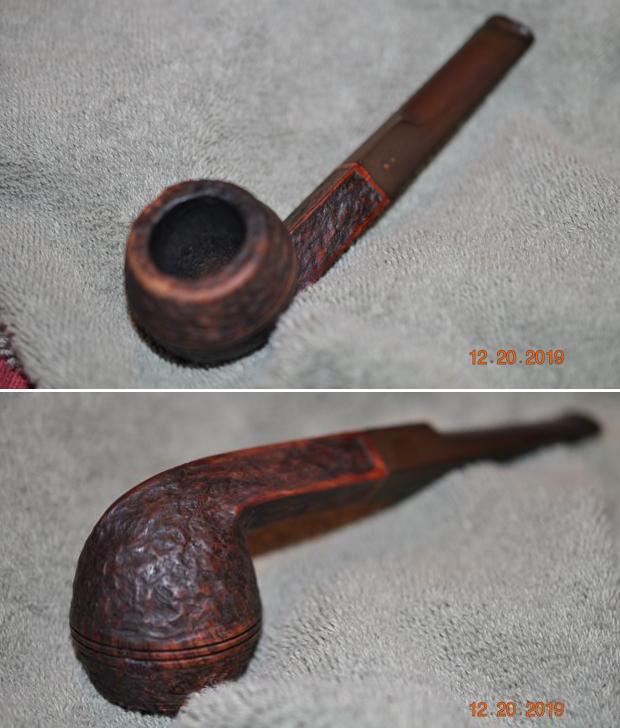
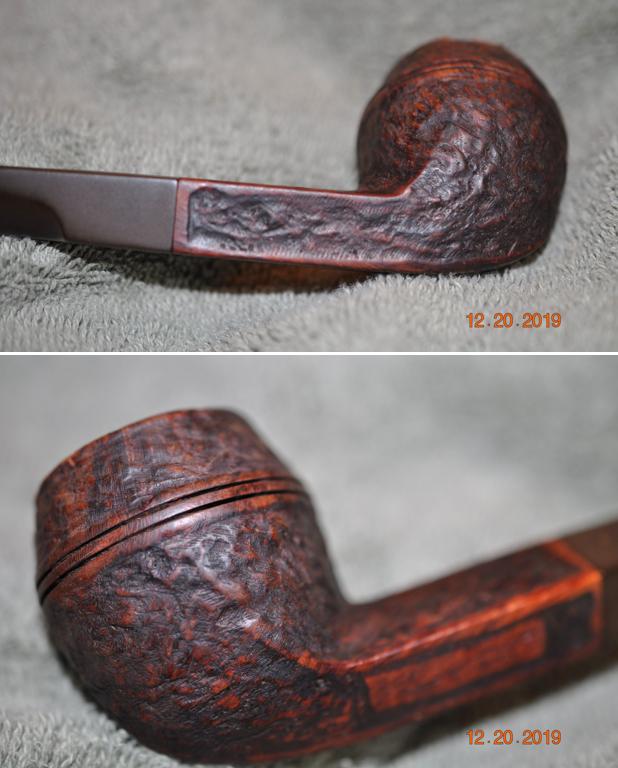
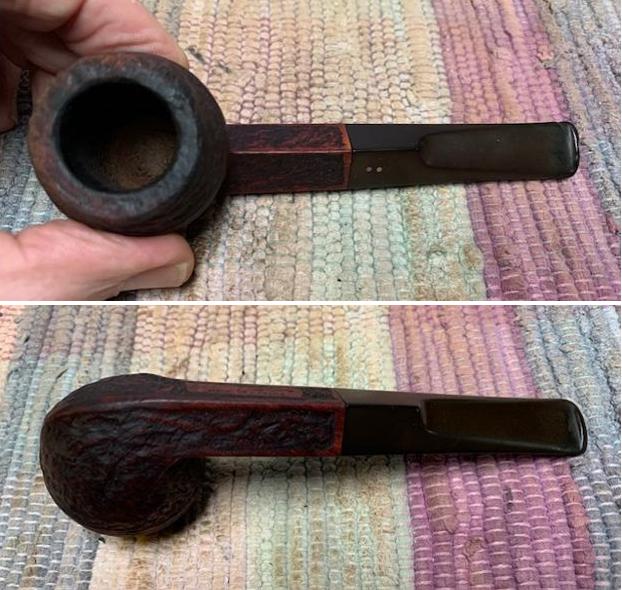
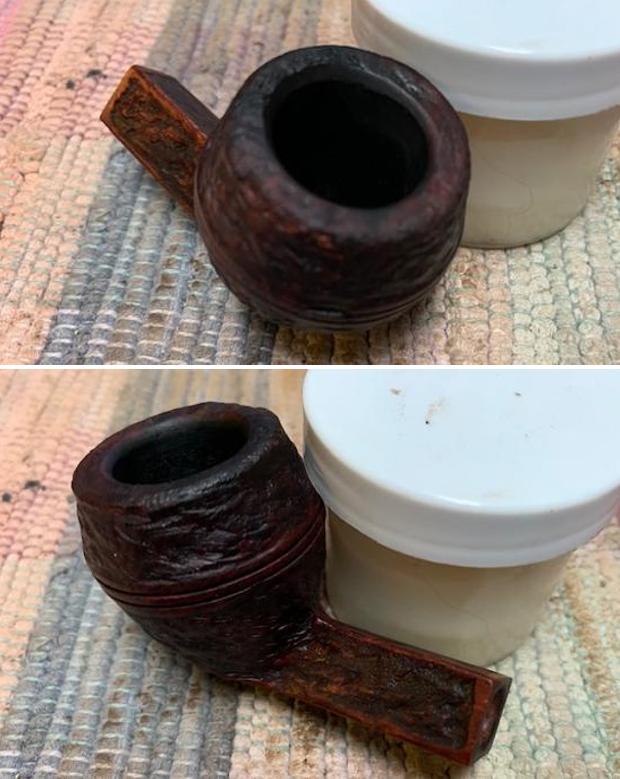
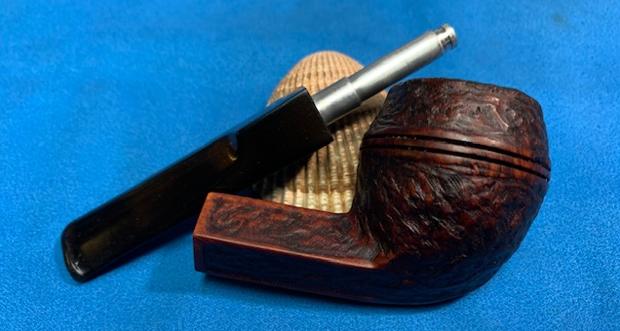
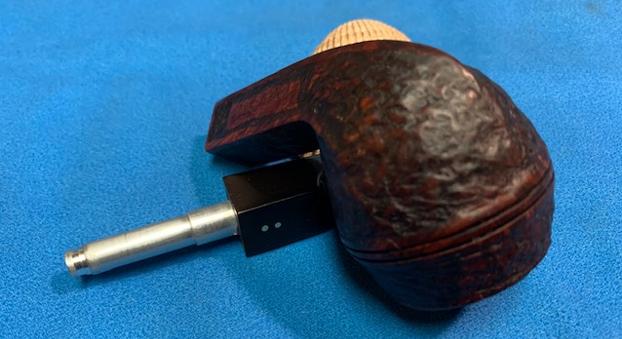
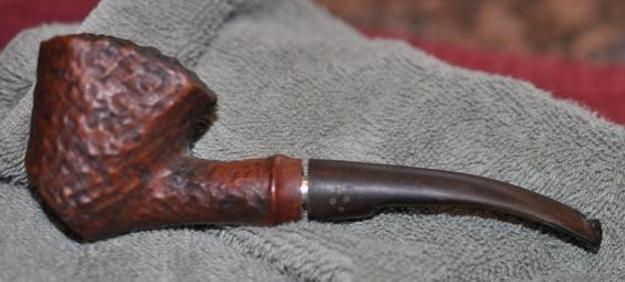
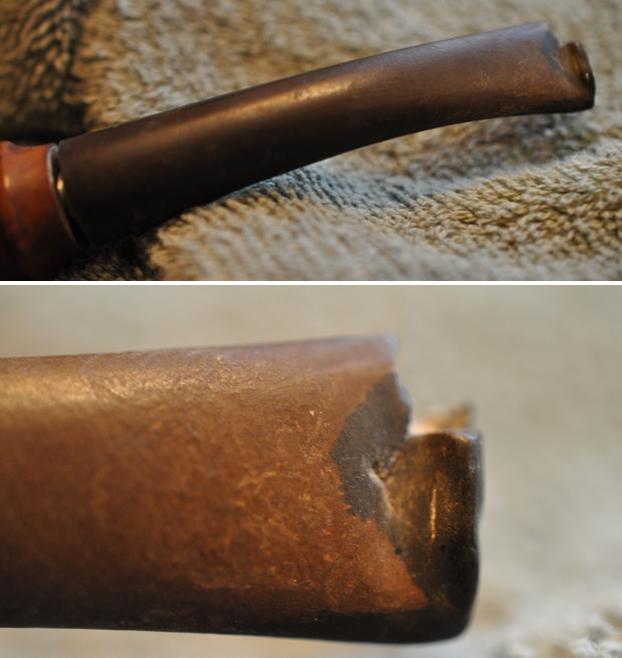
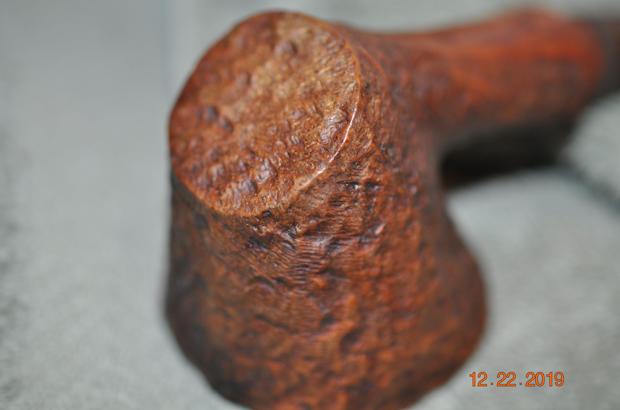
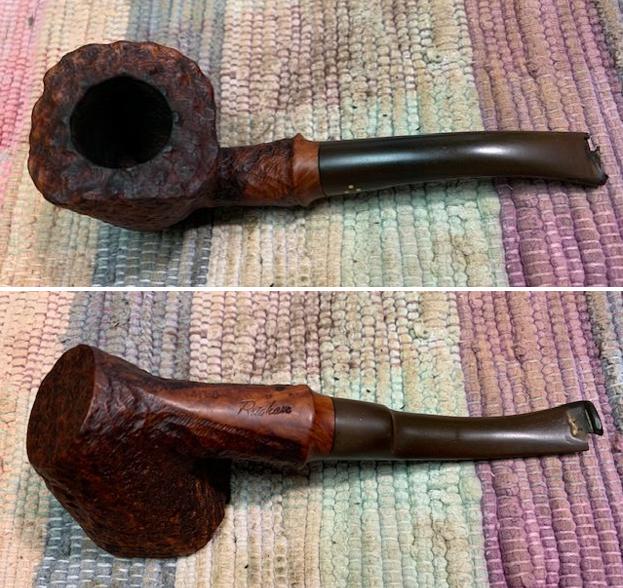
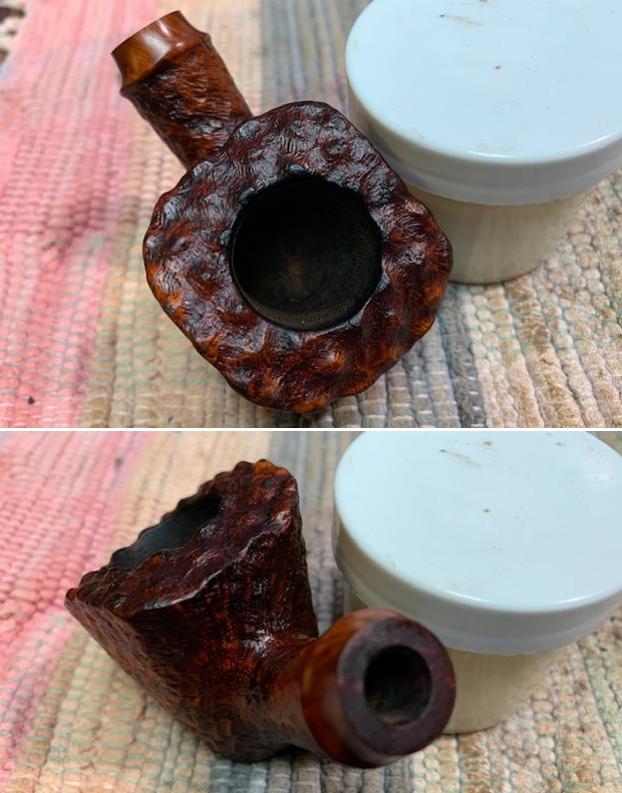
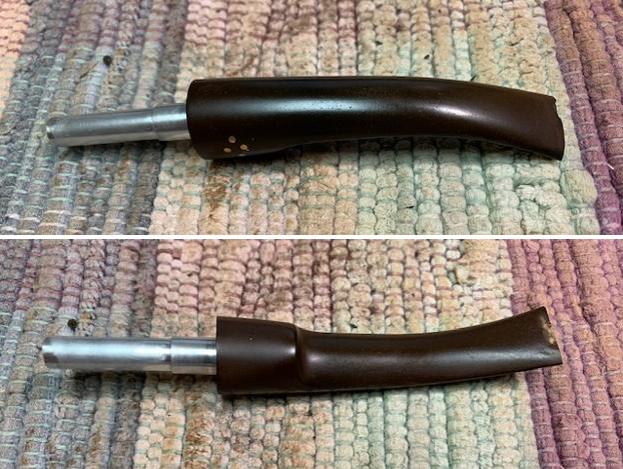
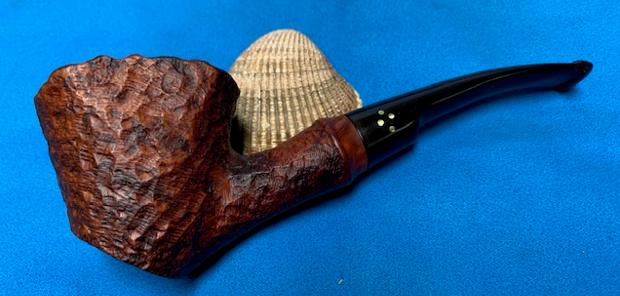
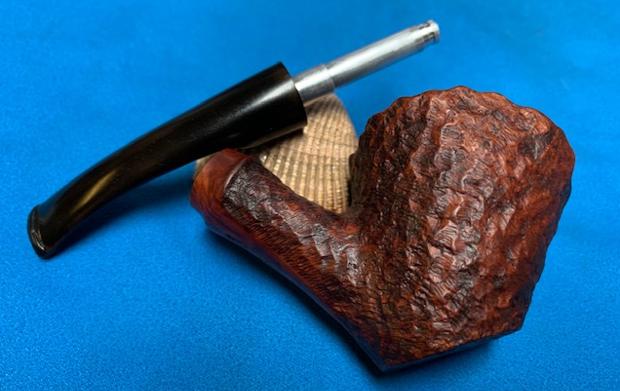
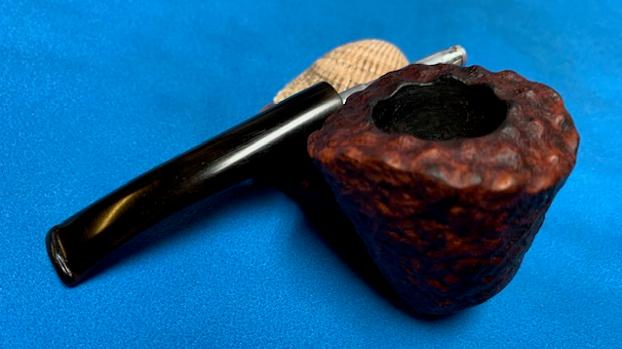
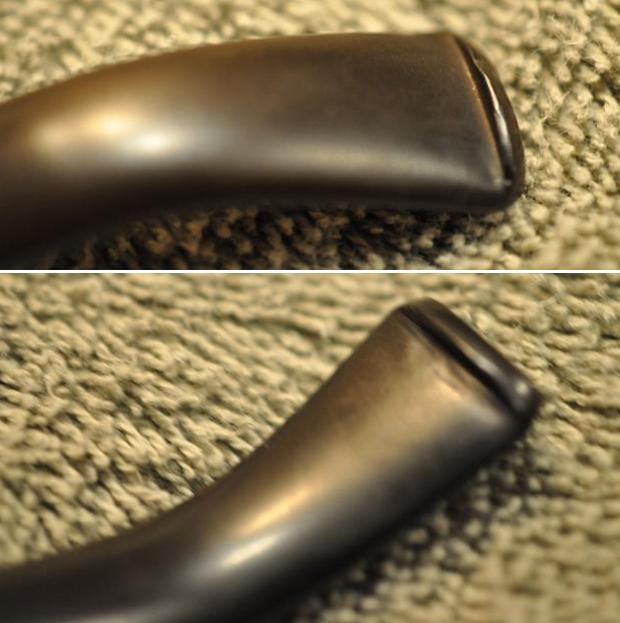
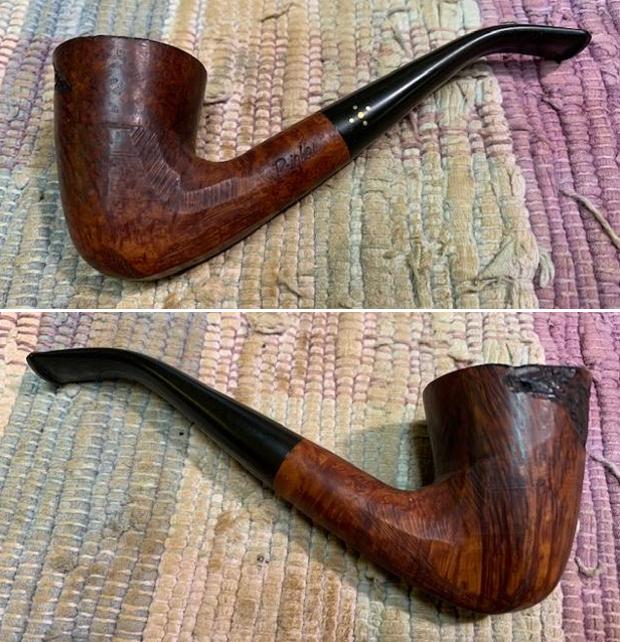
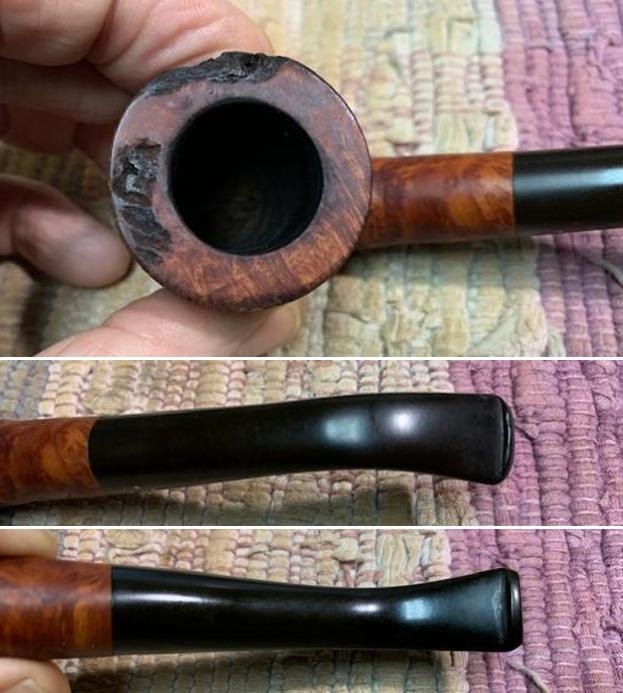
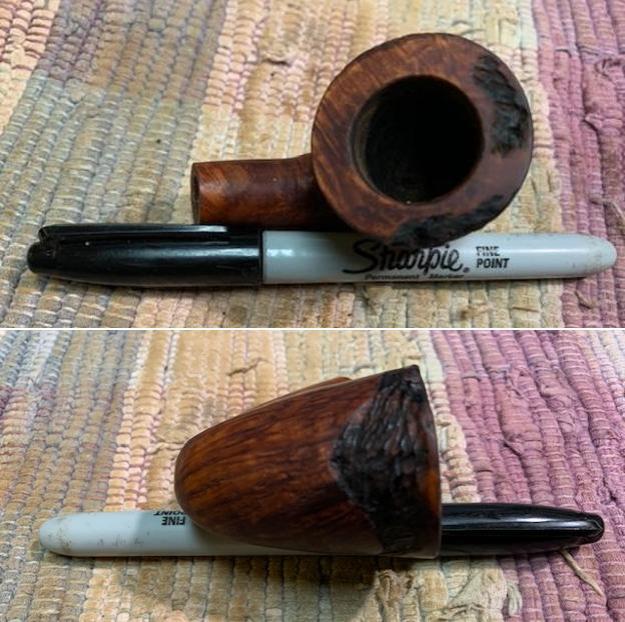
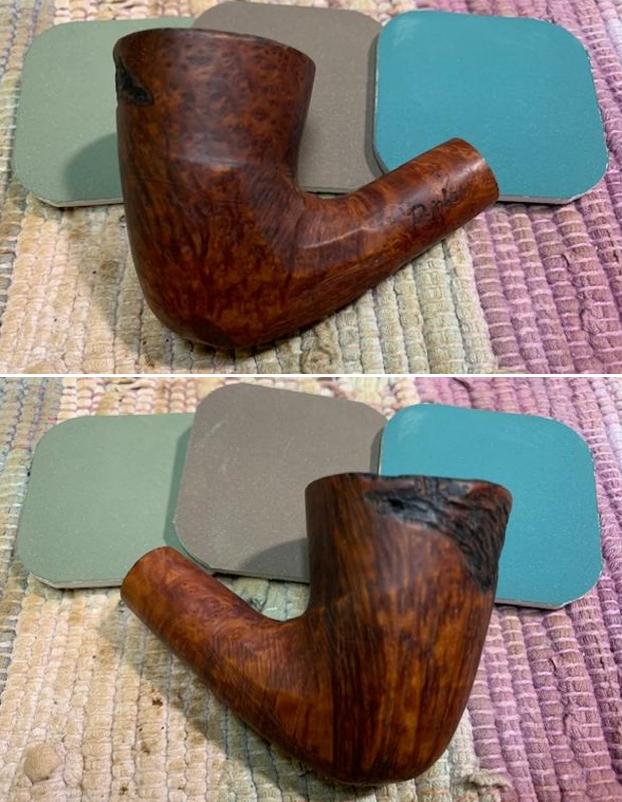
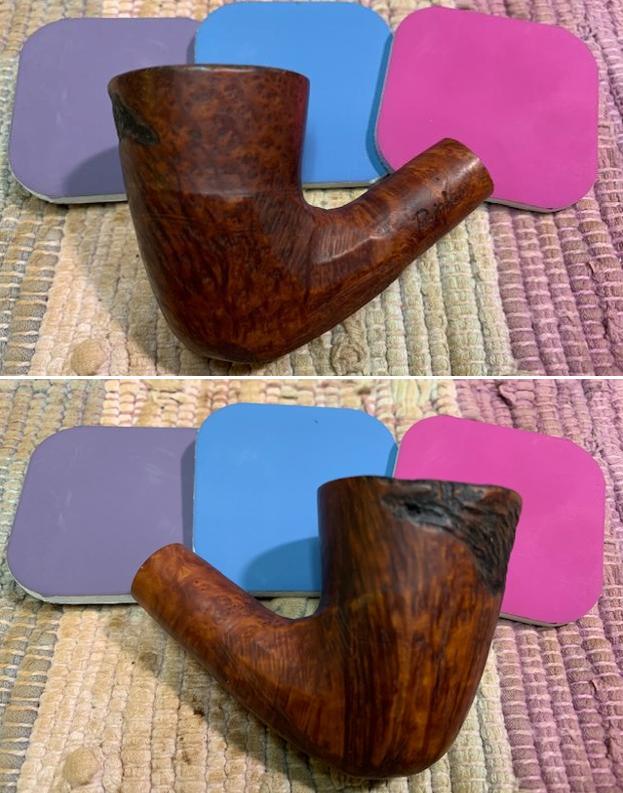
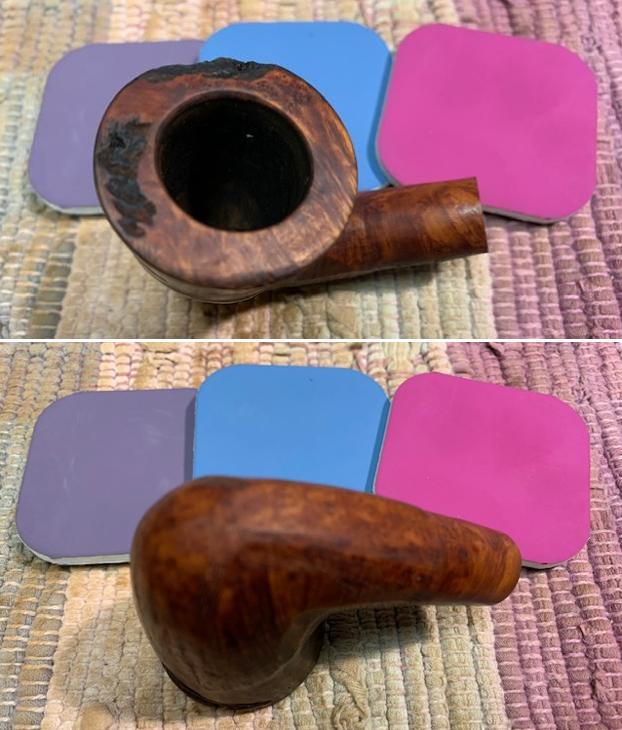
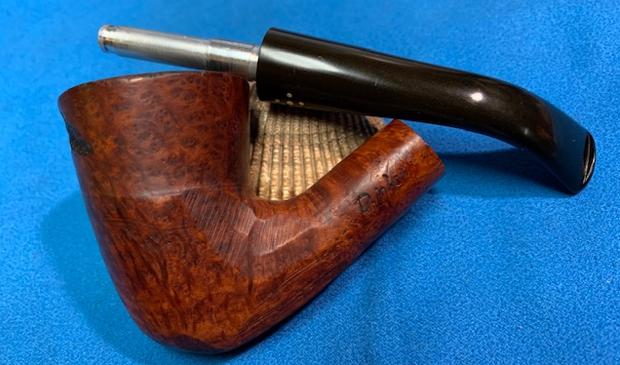
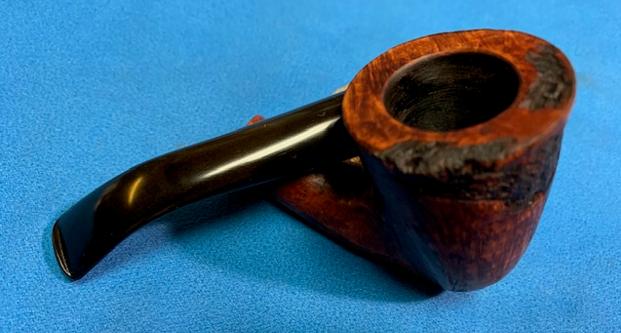
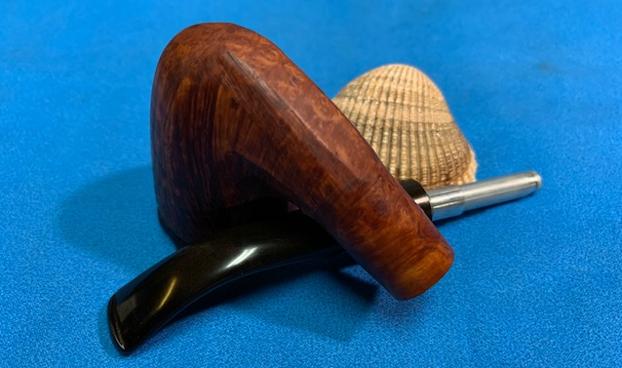
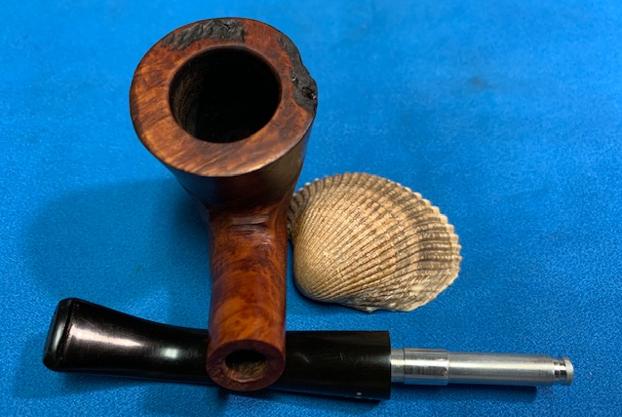
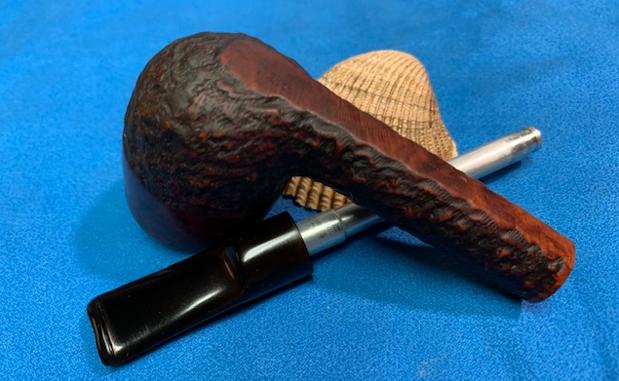
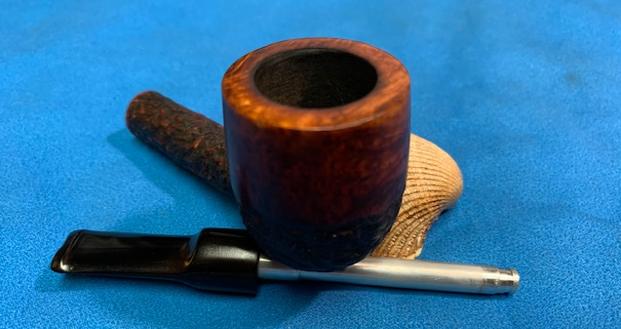
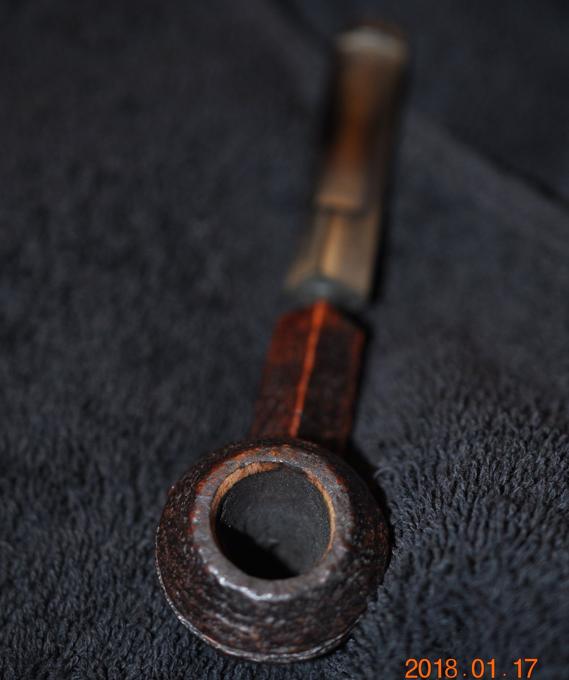
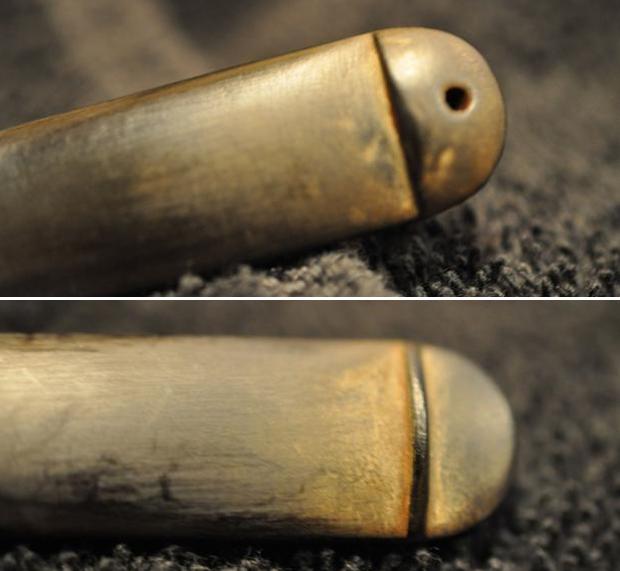
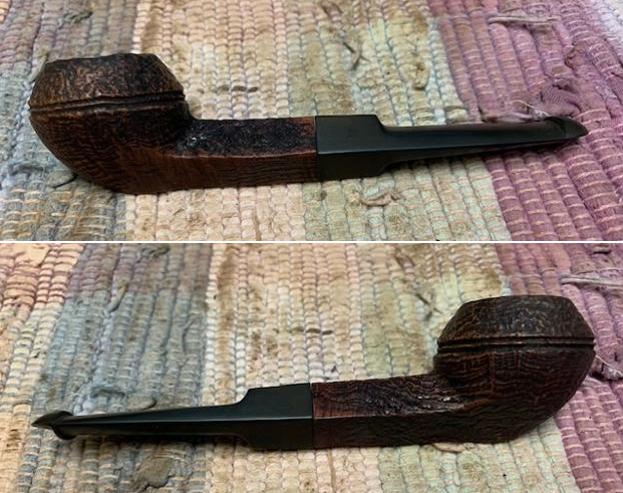
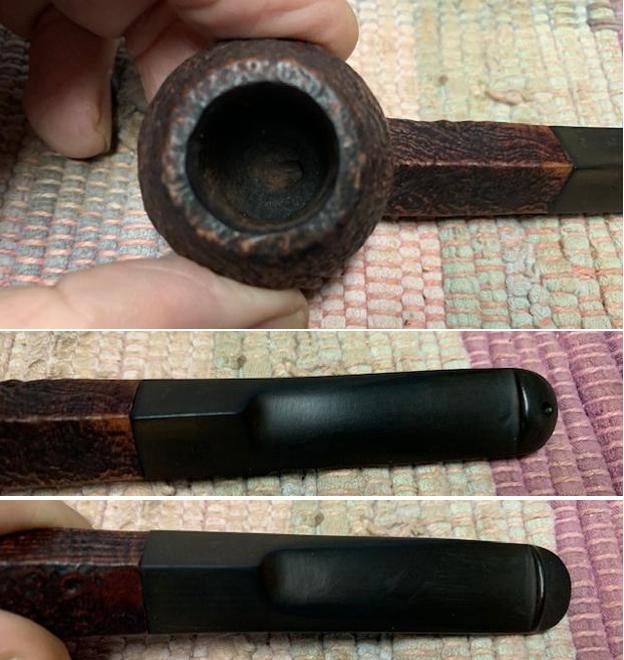
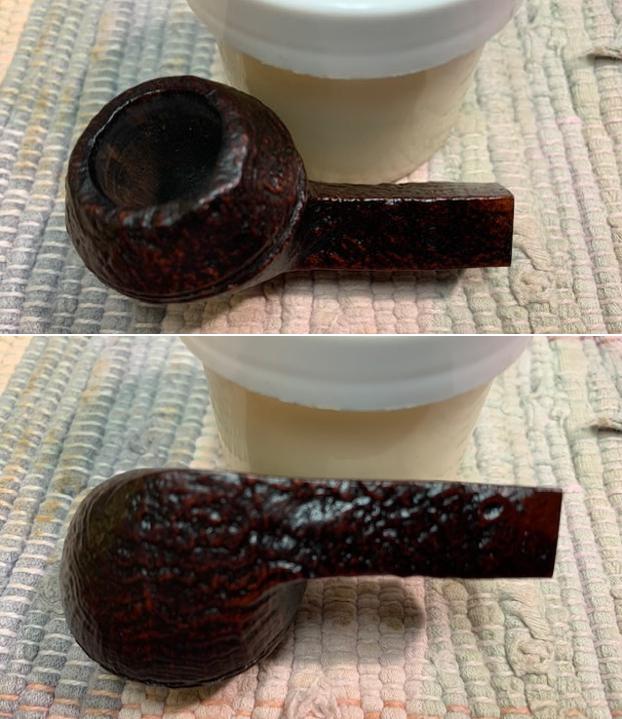
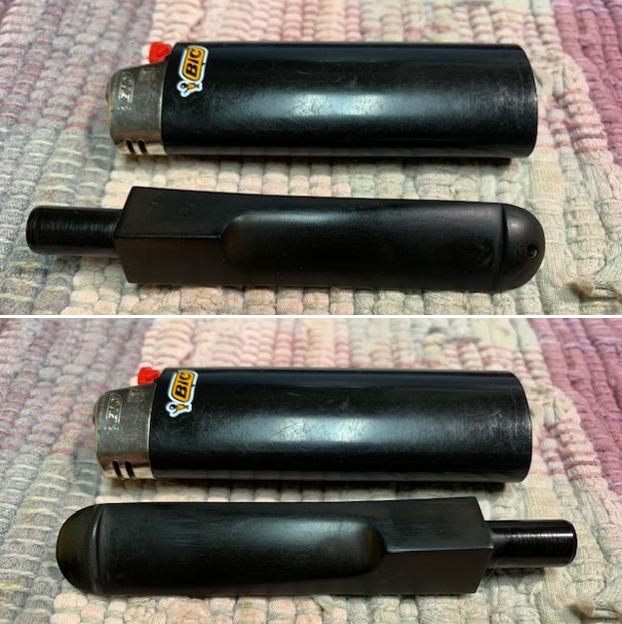
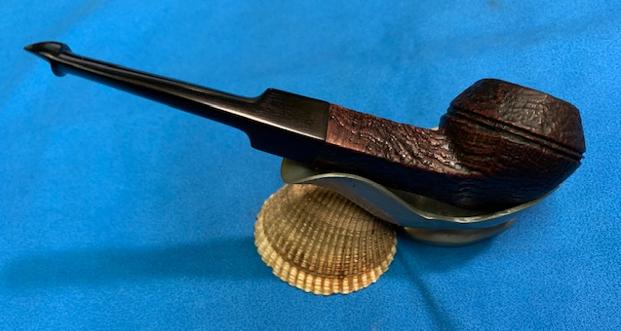
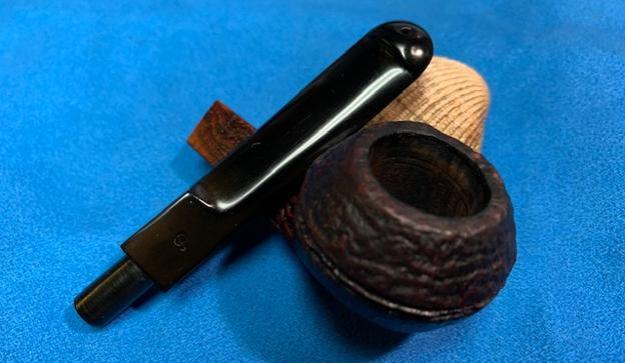
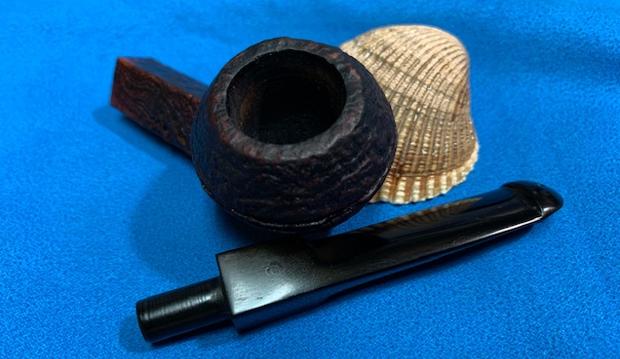
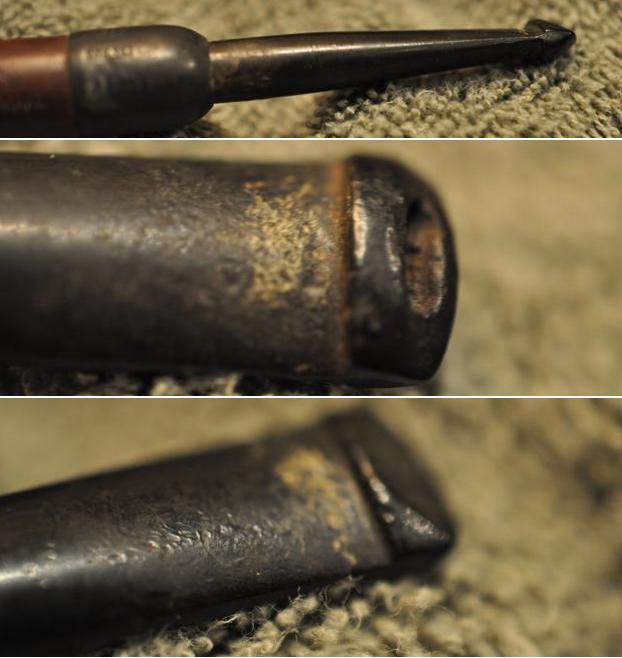
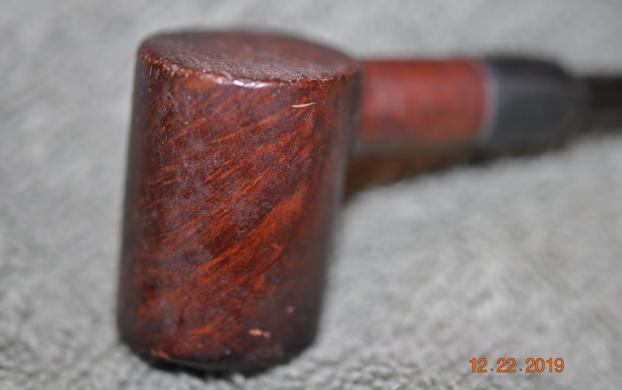
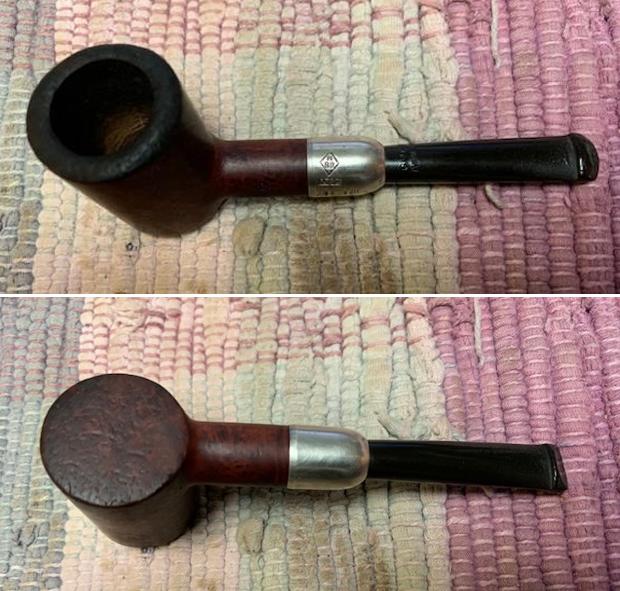
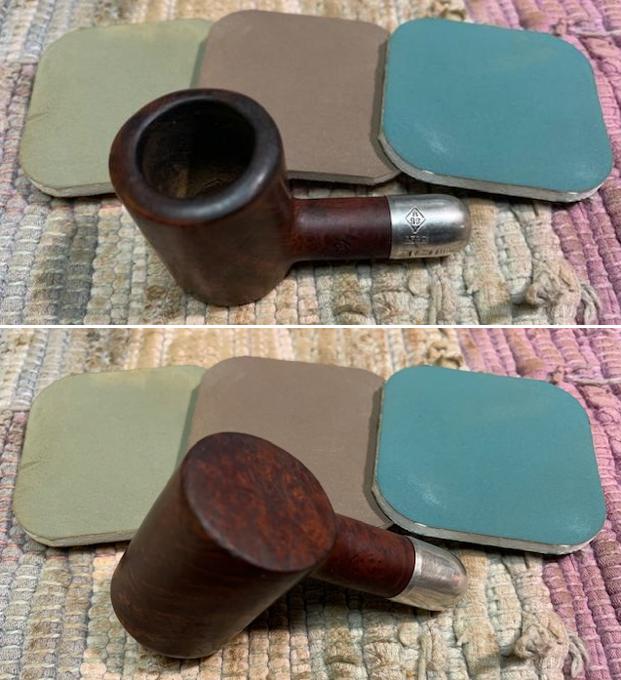
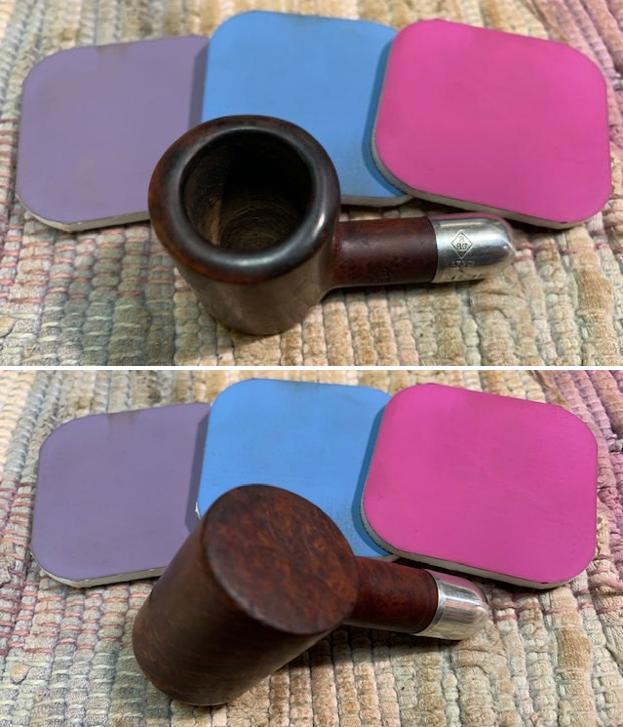
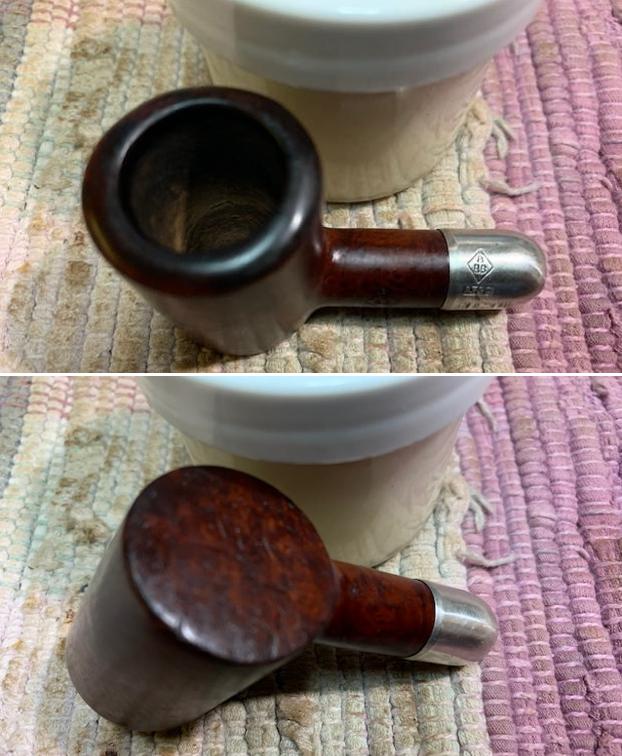
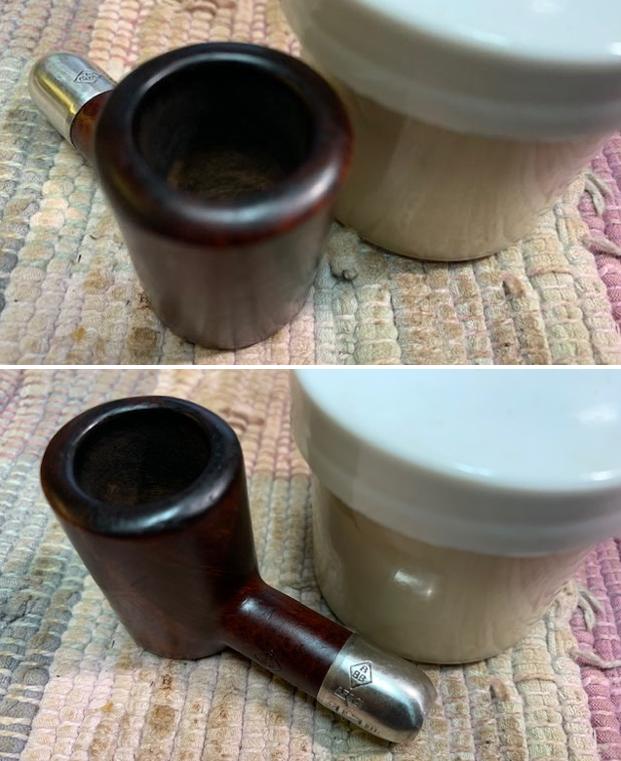
When the package arrived at Jeff’s place in Idaho he waited for me and opened the box with me on Facetime to look at the collection of pipes as he removed them from the box. It is an amazing collection and one that I am going to enjoy working on over the months ahead. Jeff took some photos of the BBB Tiny Poker with a Sterling Silver Ferrule and a Peterson like system stem and internals for me to look at while he worked his magic in cleaning up the pipe. It is a an interesting pipe with a lot of potential and what appears to be some great grain under the grime and debris of the years.  Jeff took photos of the bowl, rim top to show the thickness of the cake in the bowl and the lava on the rim top. It was obviously a great smoking pipe and a favourite. I am hoping that the thick lava coat on the crowned rim top protected things underneath it from damage to the edges and top. Cleaning it would make that clear! He took photos of the top and underside of the stem showing the tooth chatter, scratching and oxidation on the stem surface and wear on the edges of the button. The photos of the stem also show the unique design and shape of the stem. I am looking forward to doing some research on the GLOKAR to figure out all I can about it.
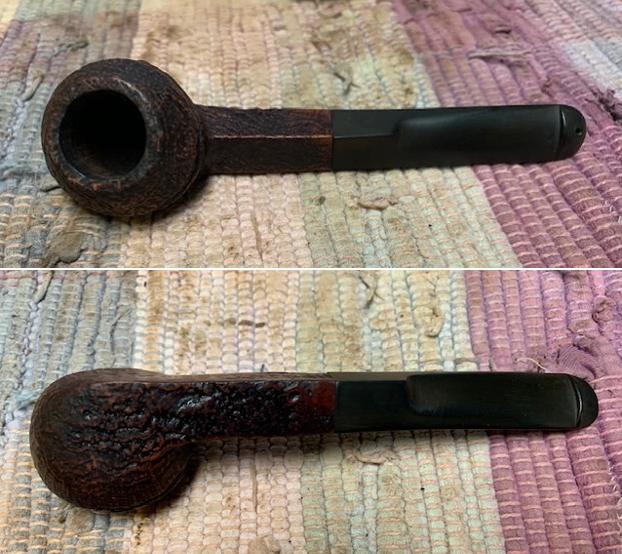
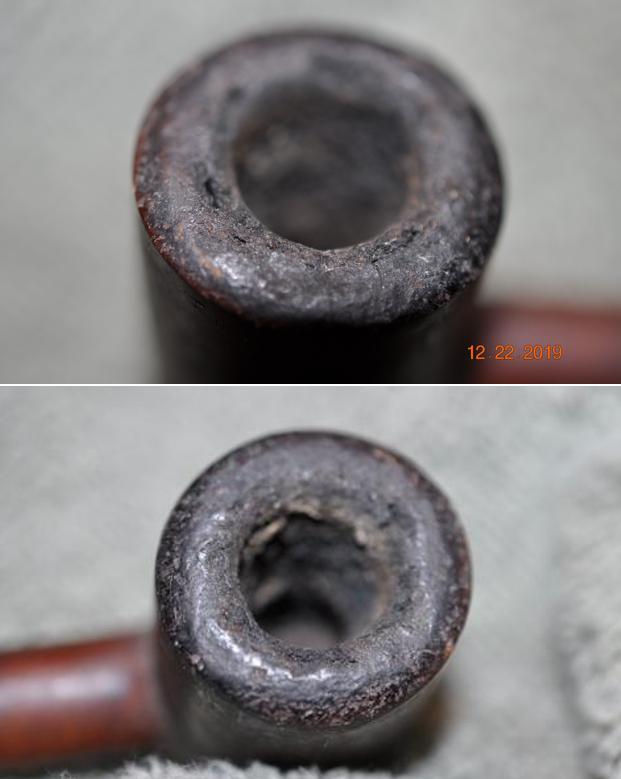
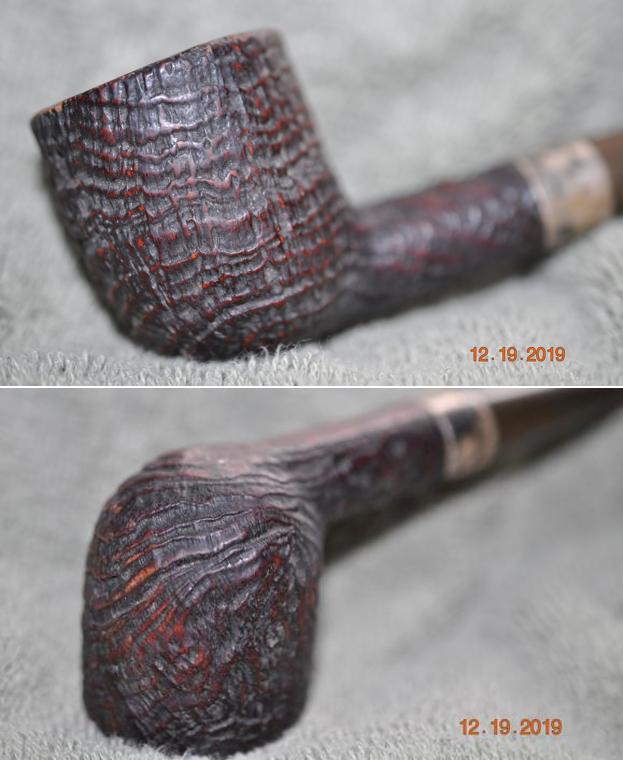
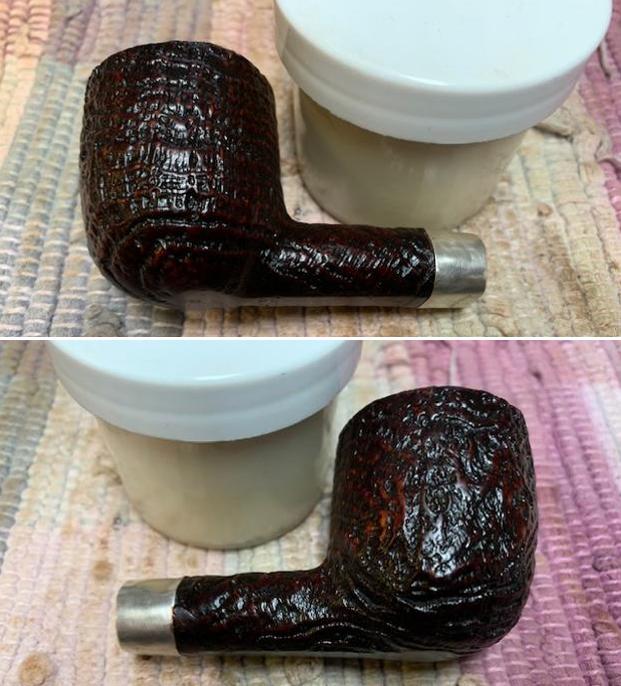
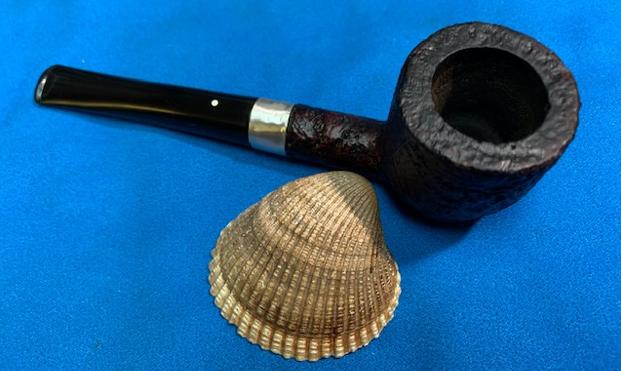
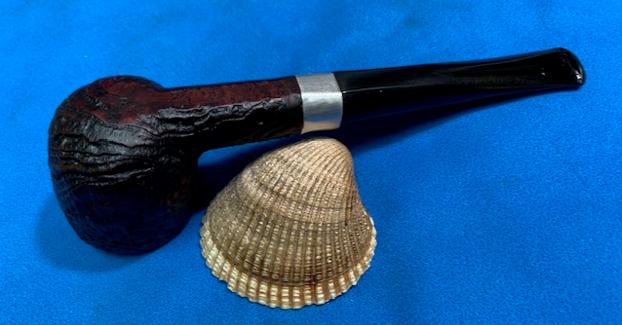
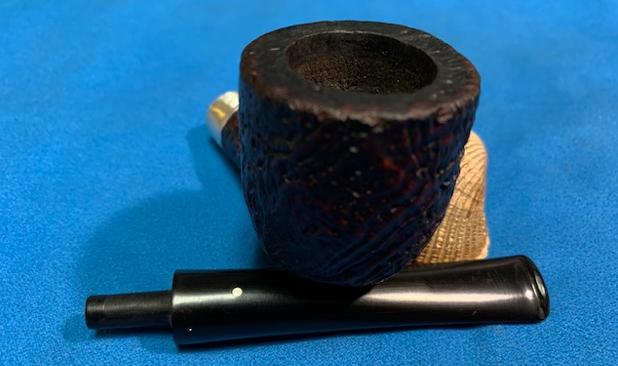
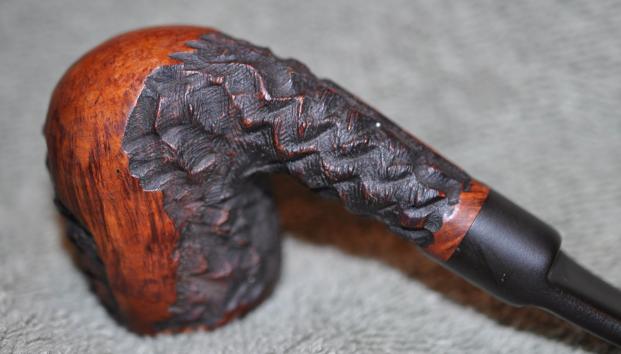
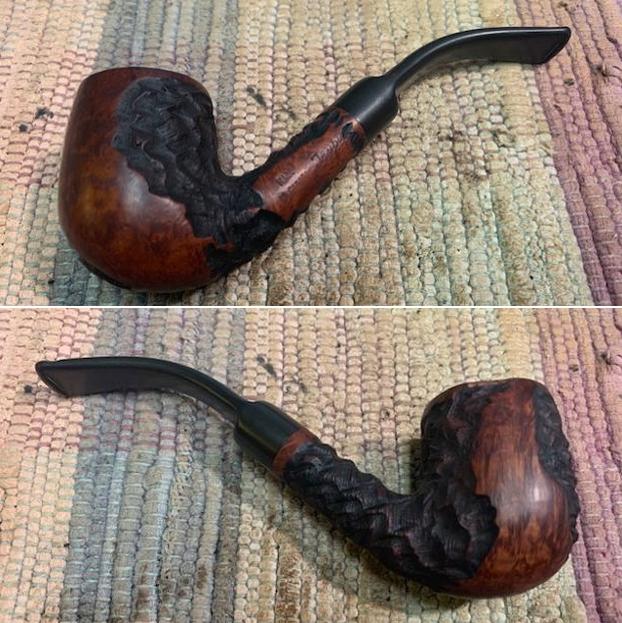
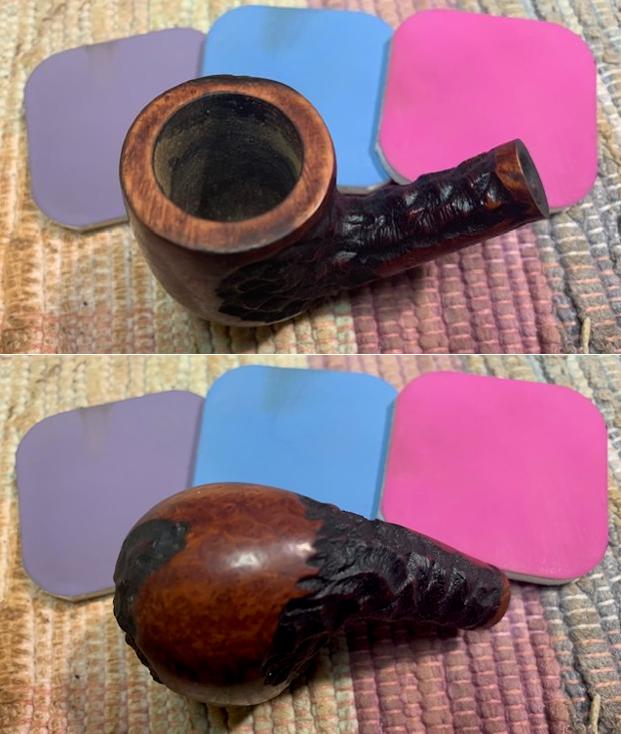
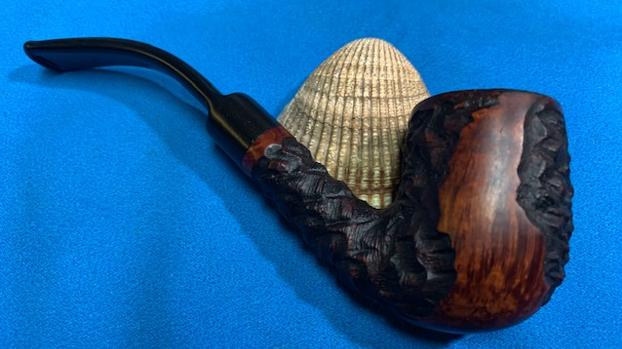
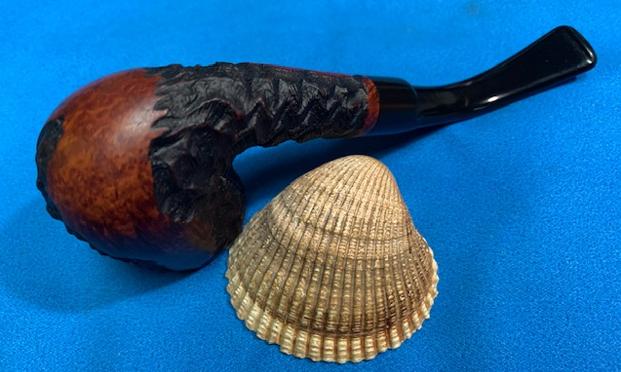
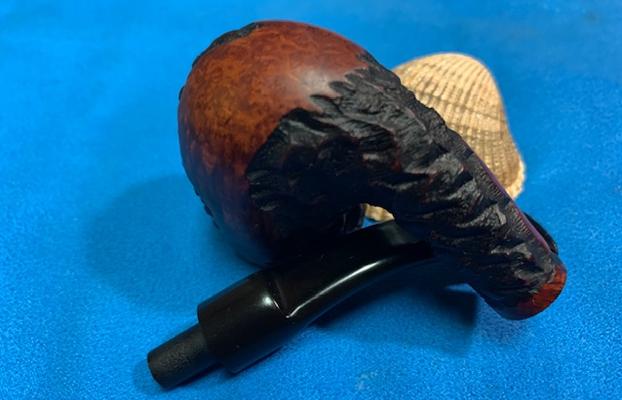
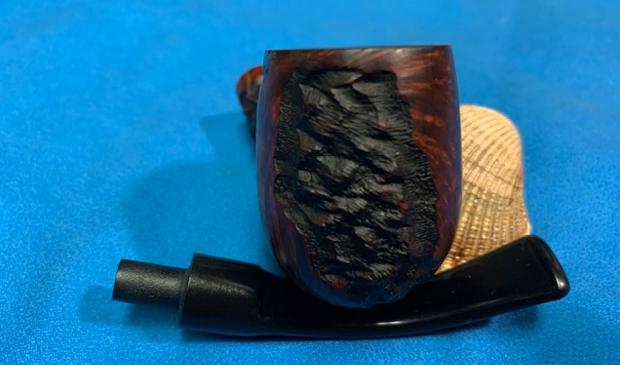
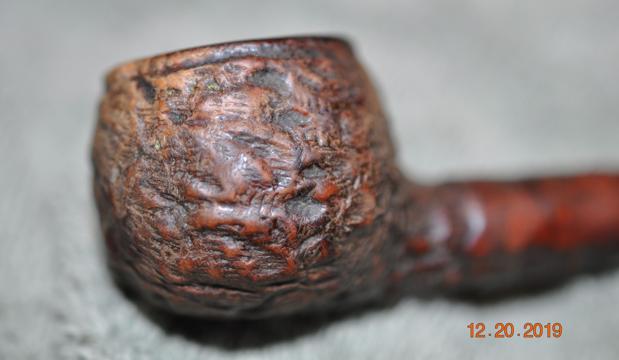
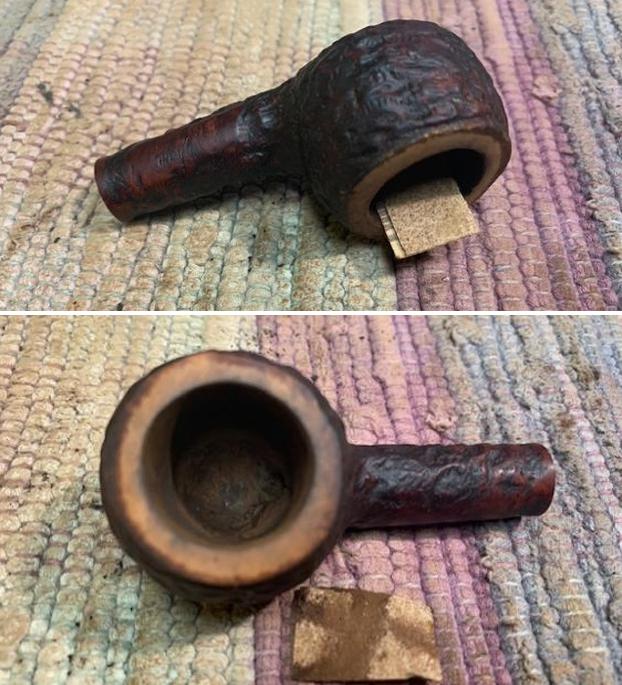
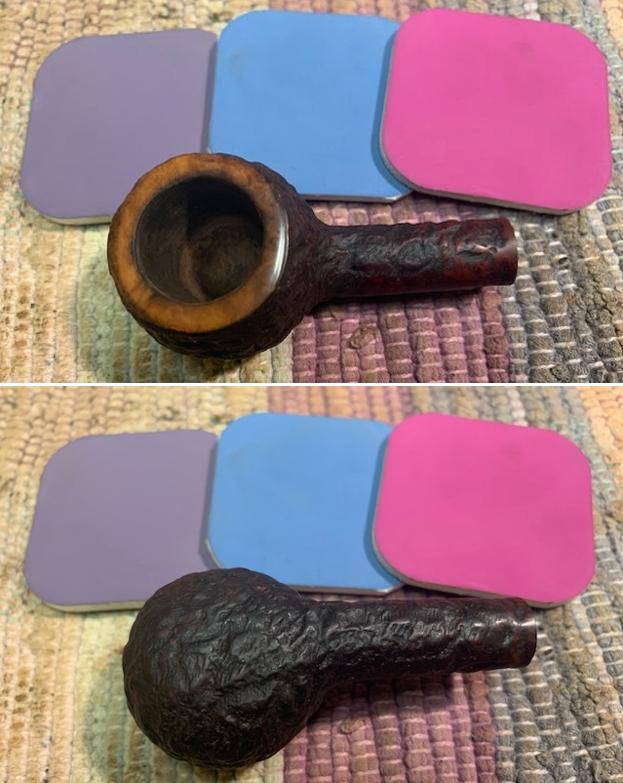
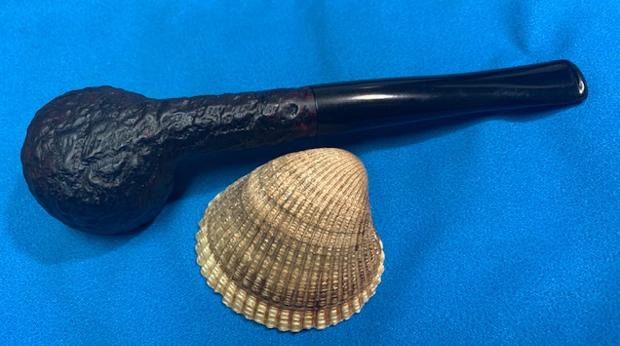
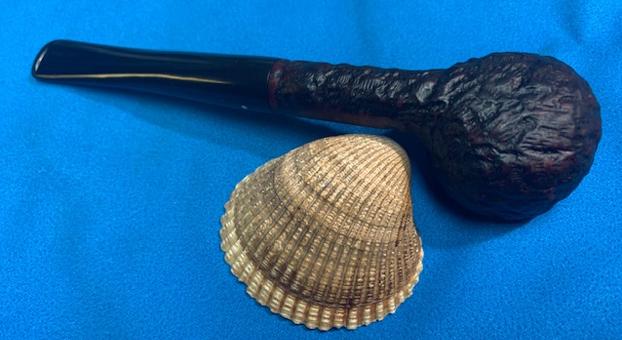
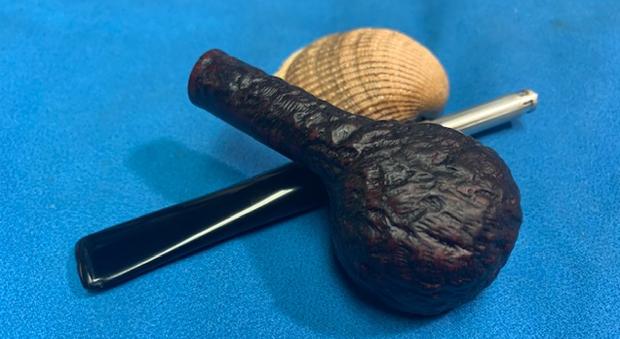
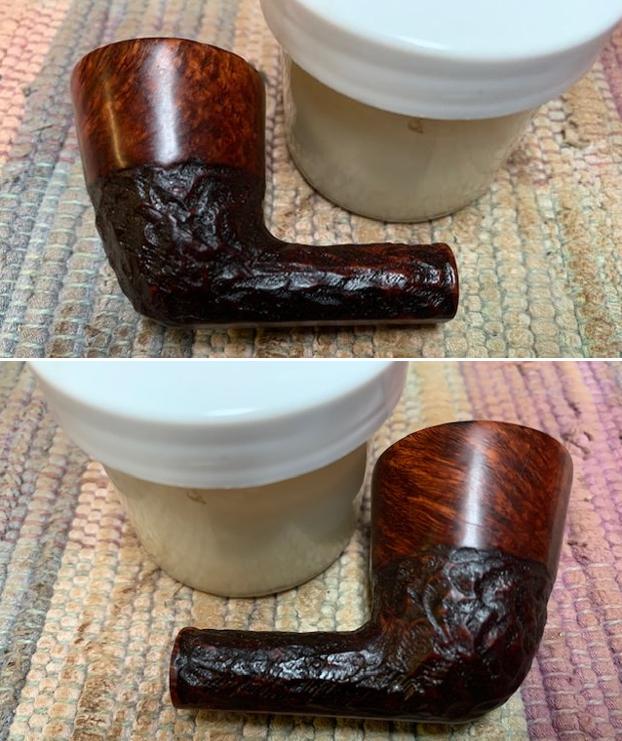
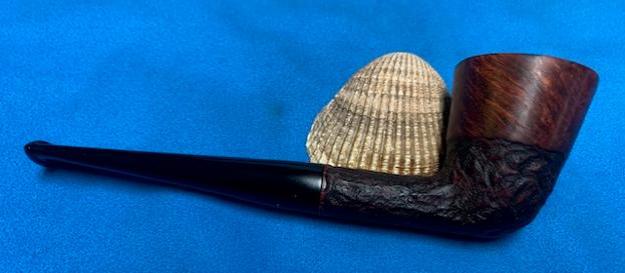
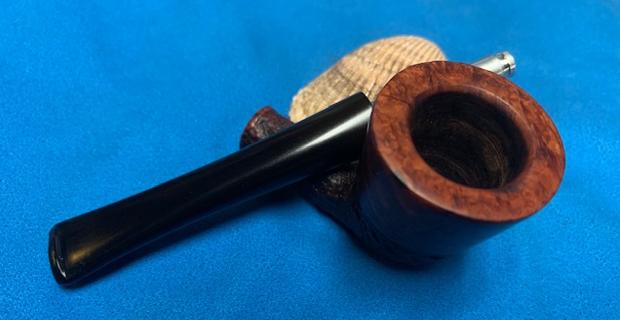
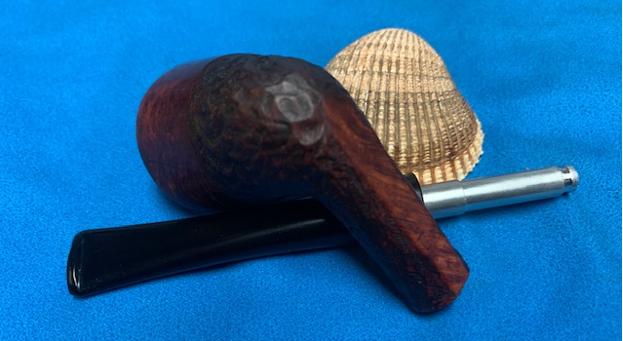
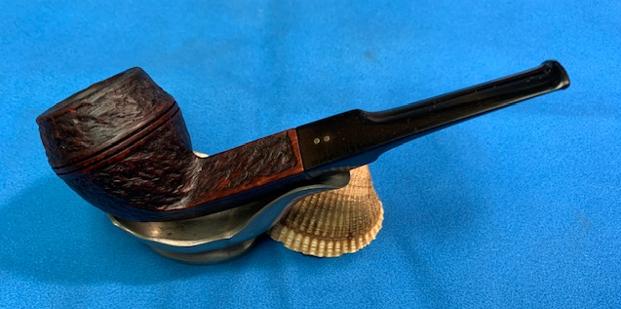
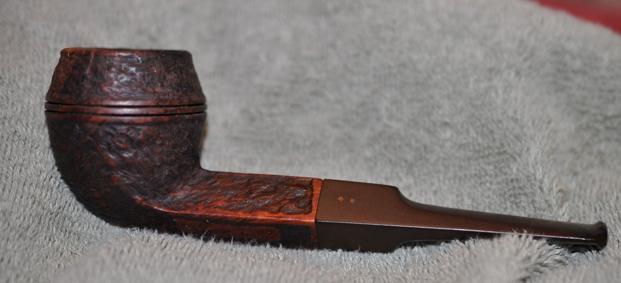
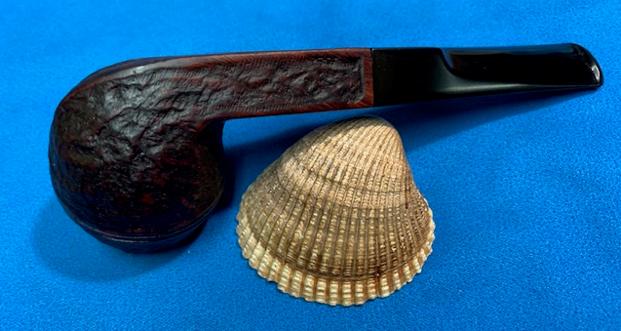
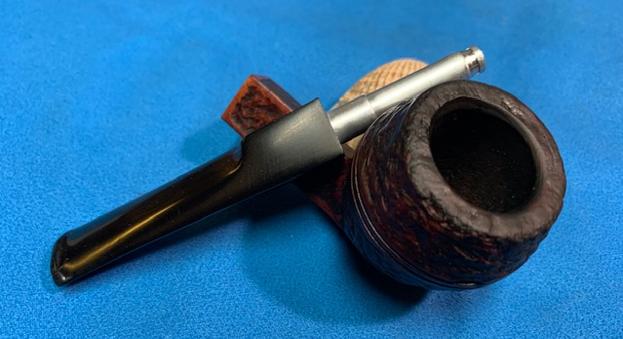
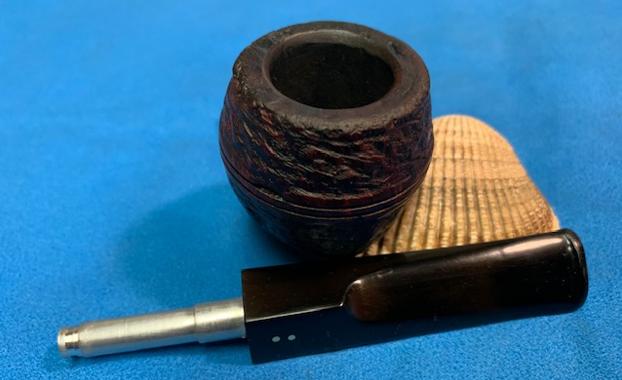
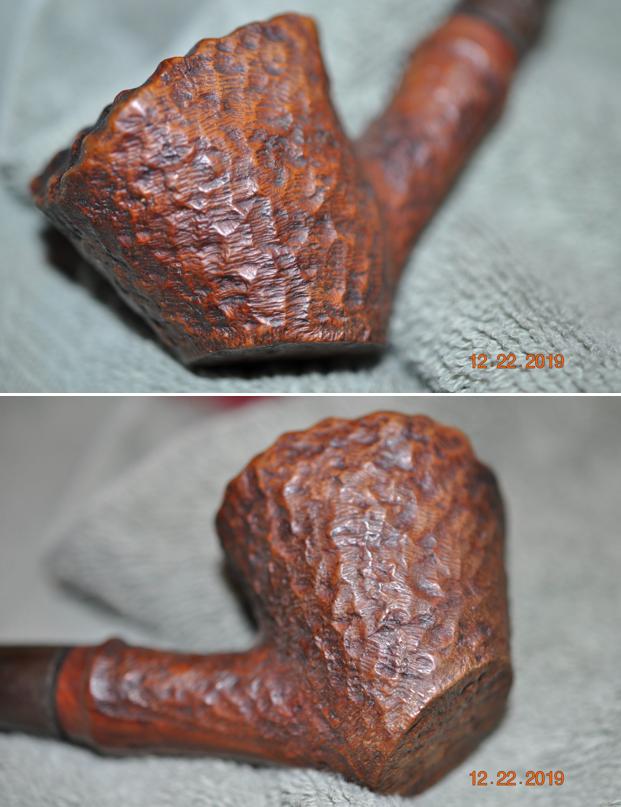
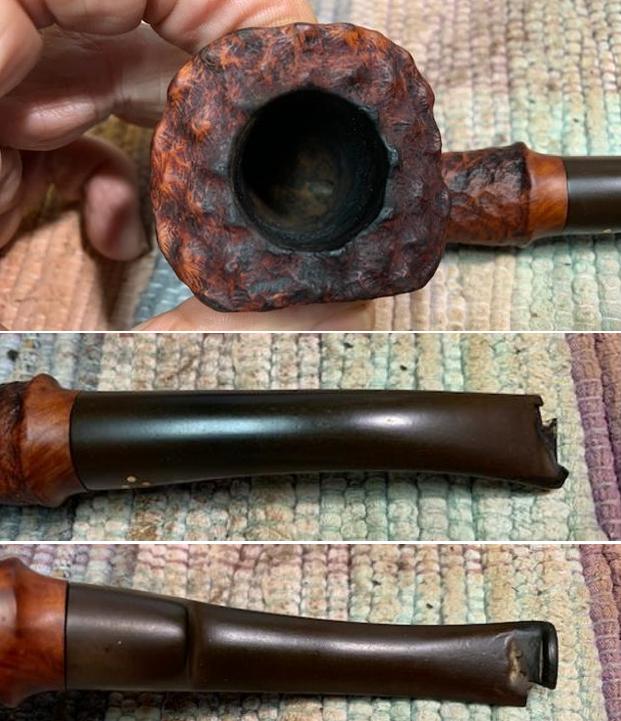
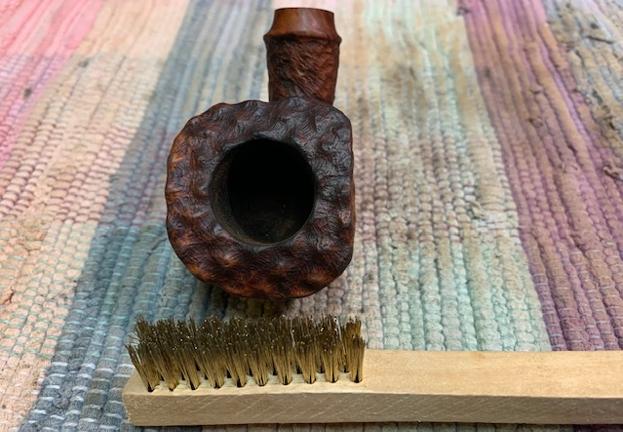
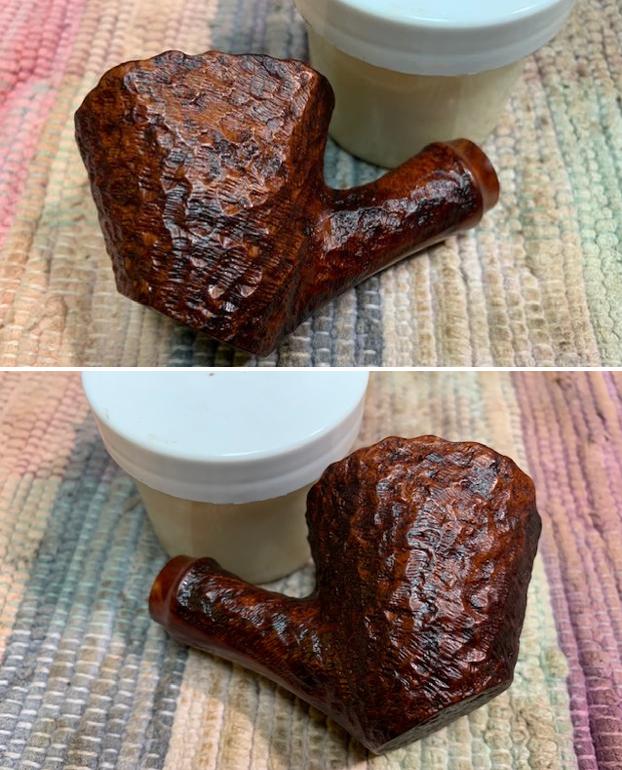
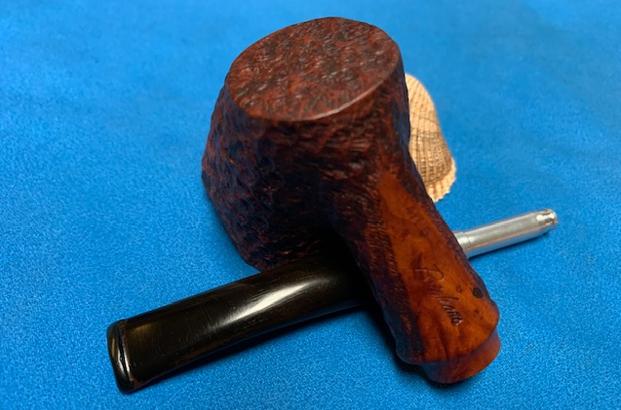
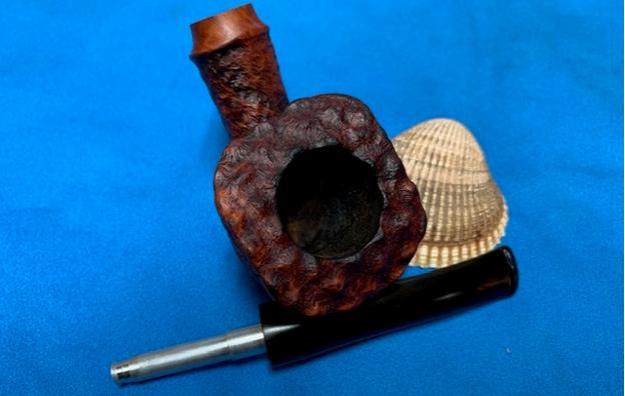
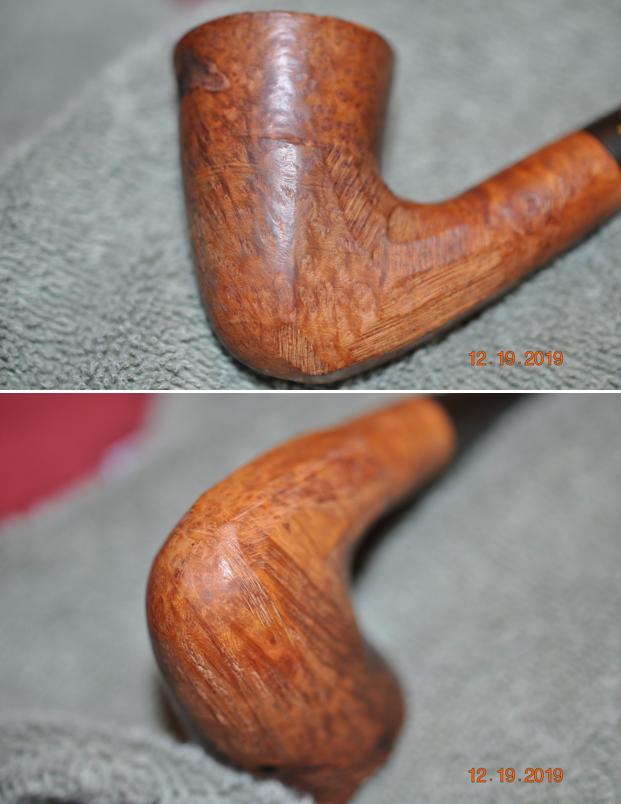
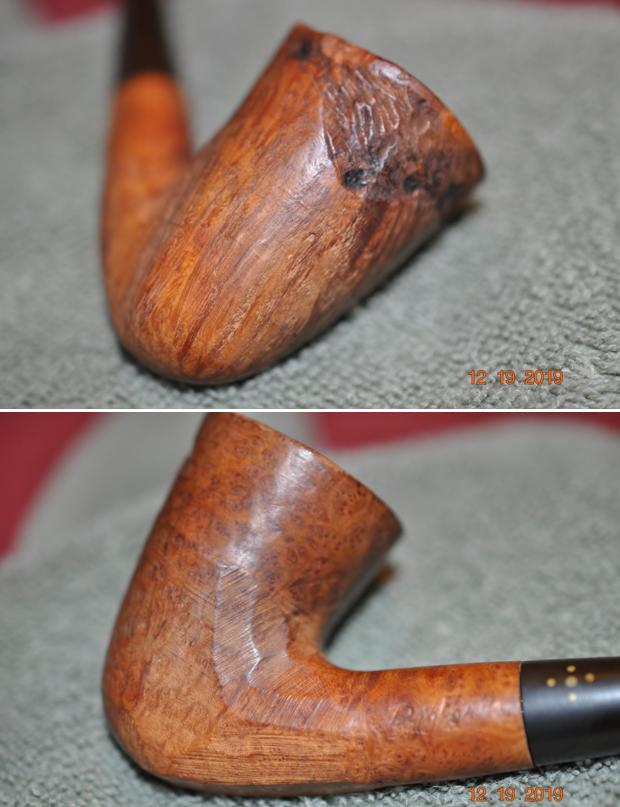
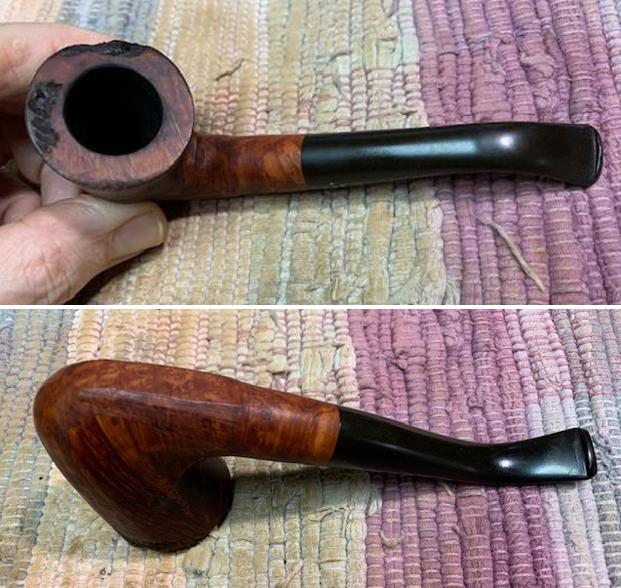
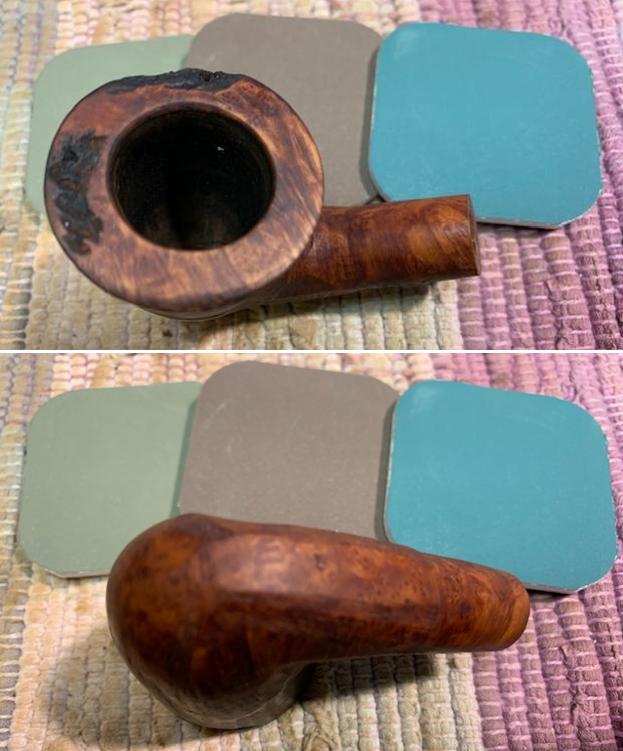
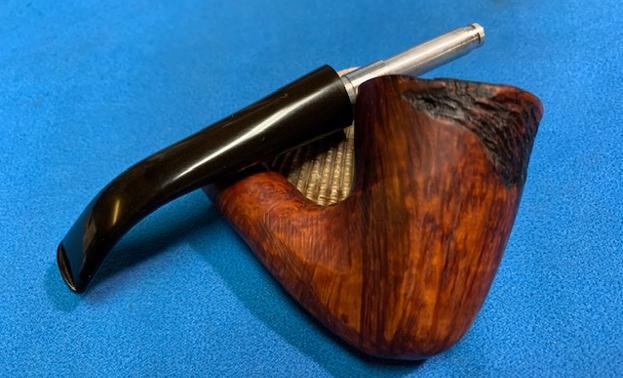
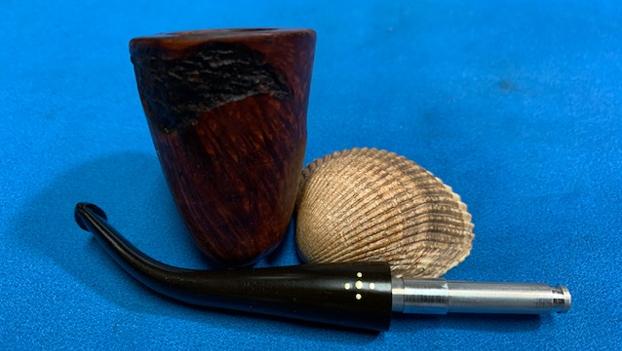
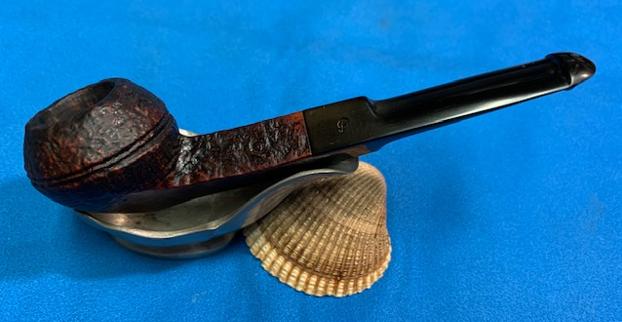
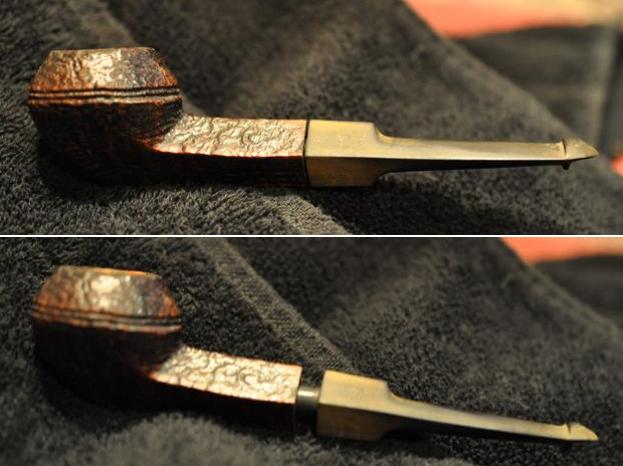
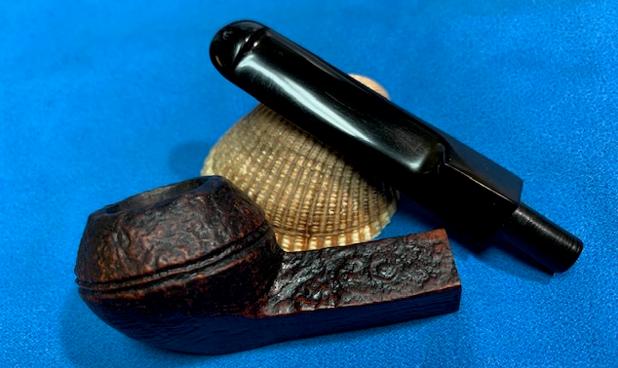
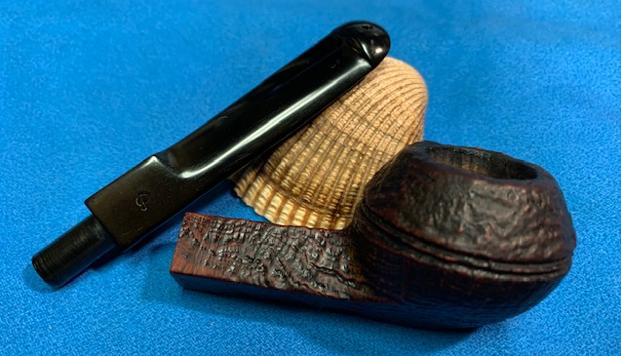
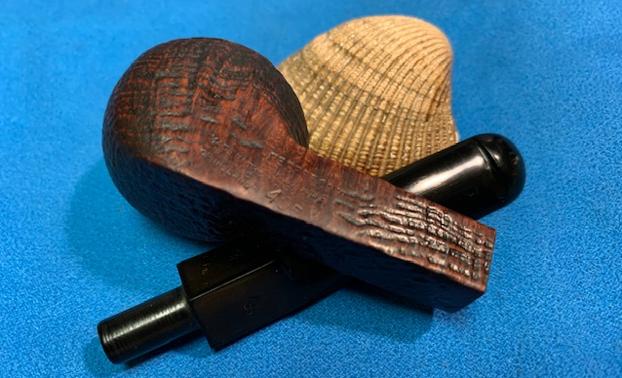
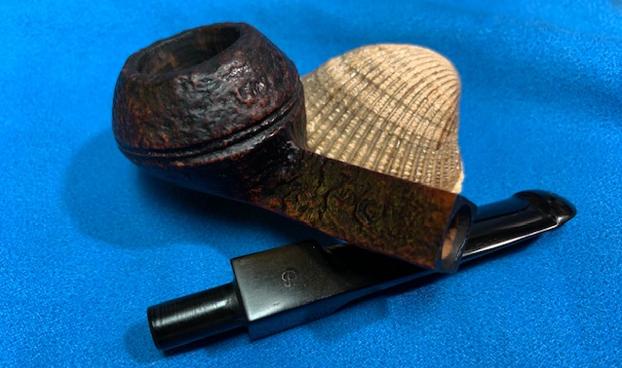
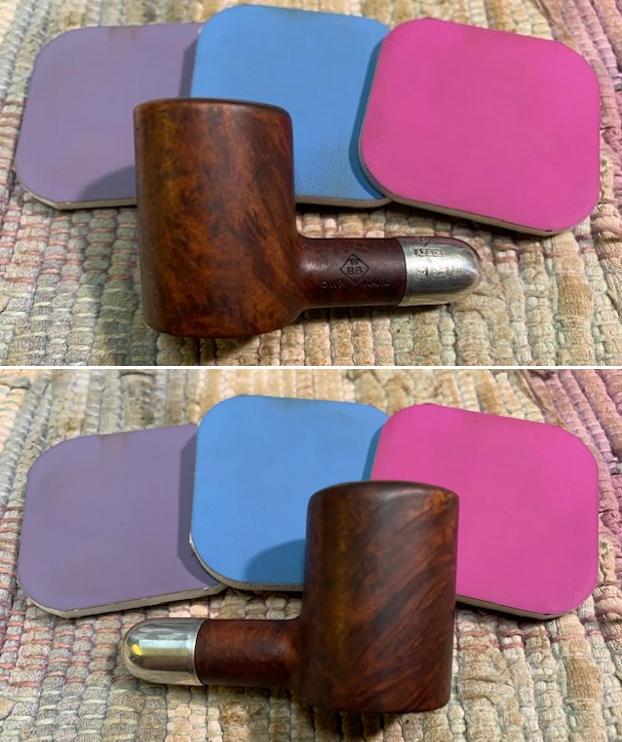
 Jeff took photos of the sides and heel of the bowl to show the condition of the briar. You can see the beautiful shape and the grain on the bowl even through the dirt and debris of 110 years. At this point in the process it certainly looks its age.
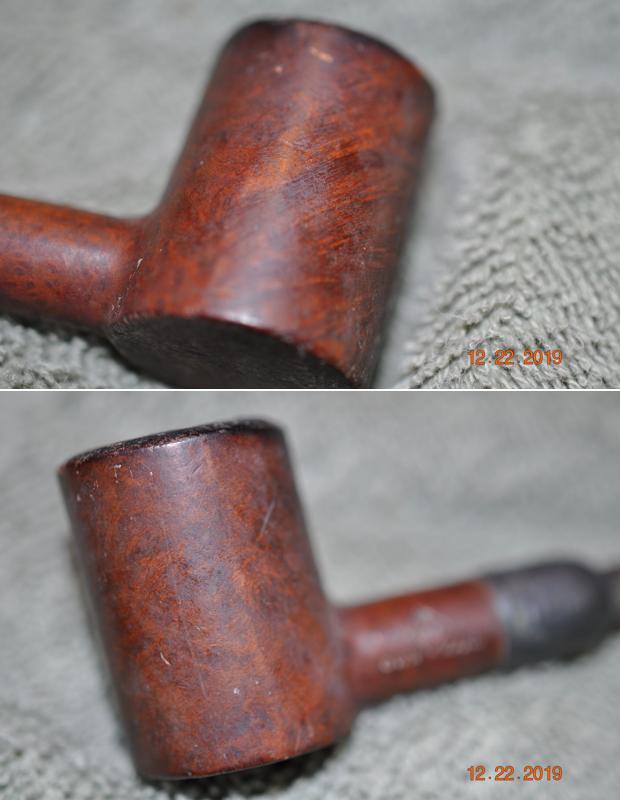
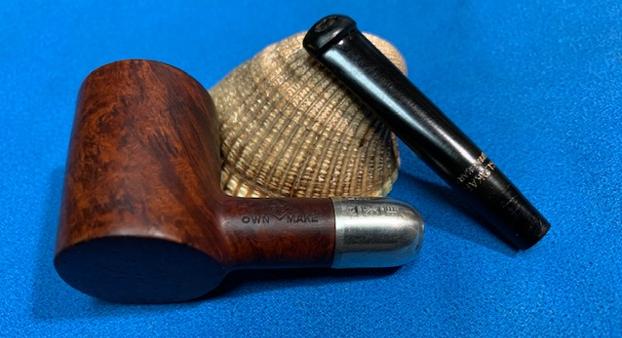
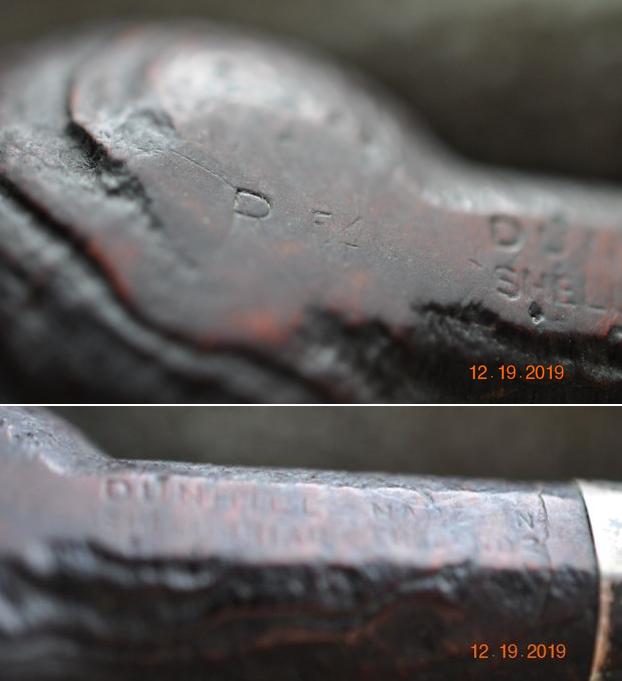
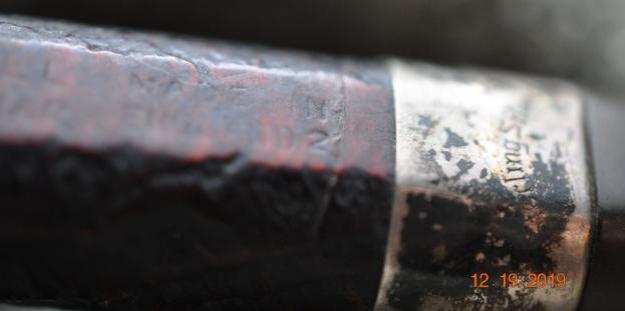
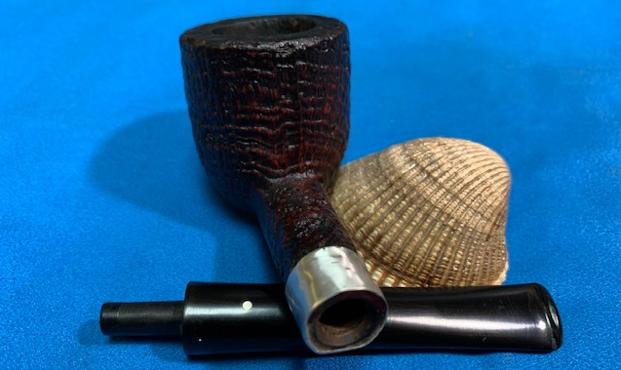
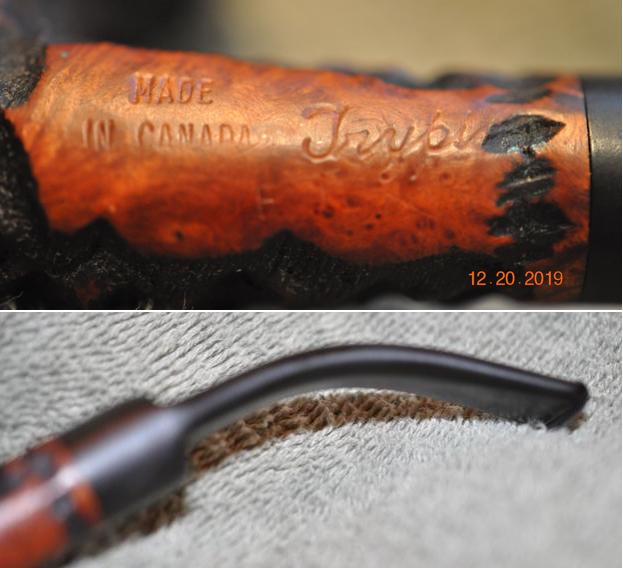
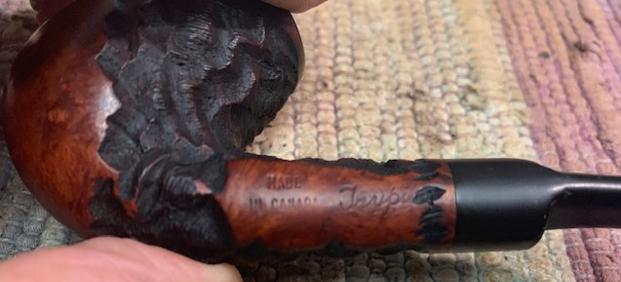
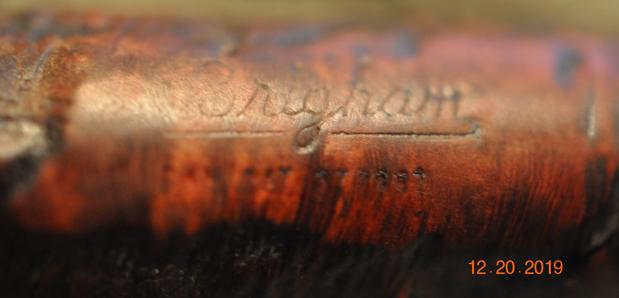
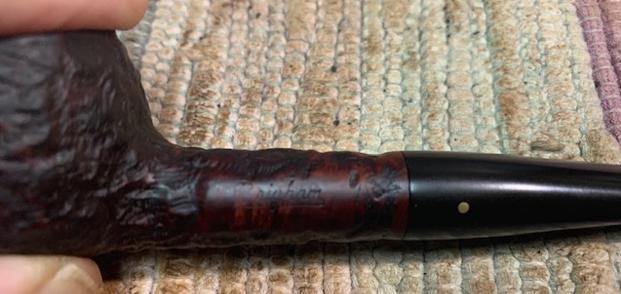
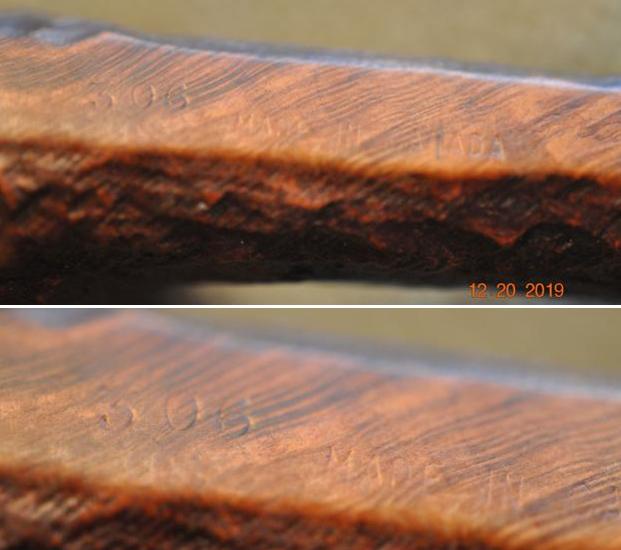
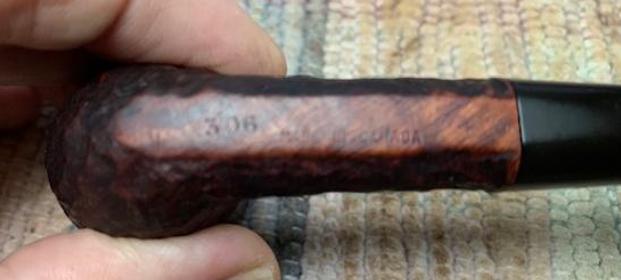
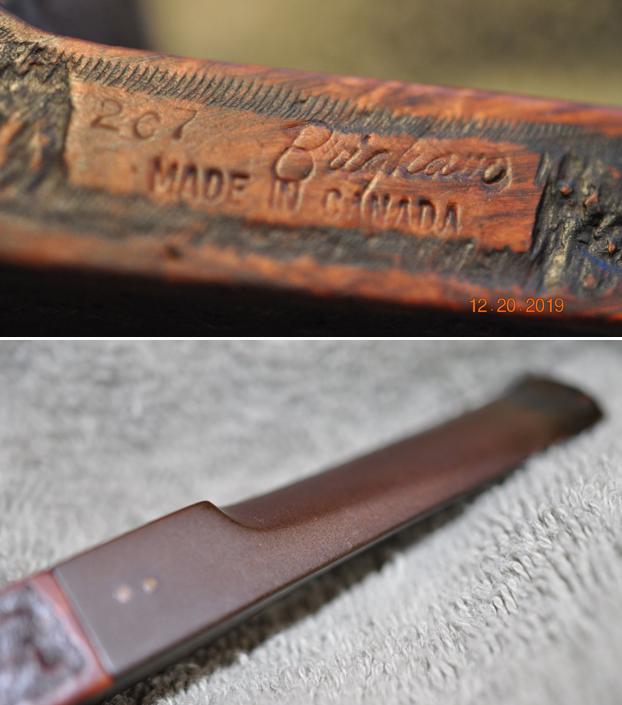
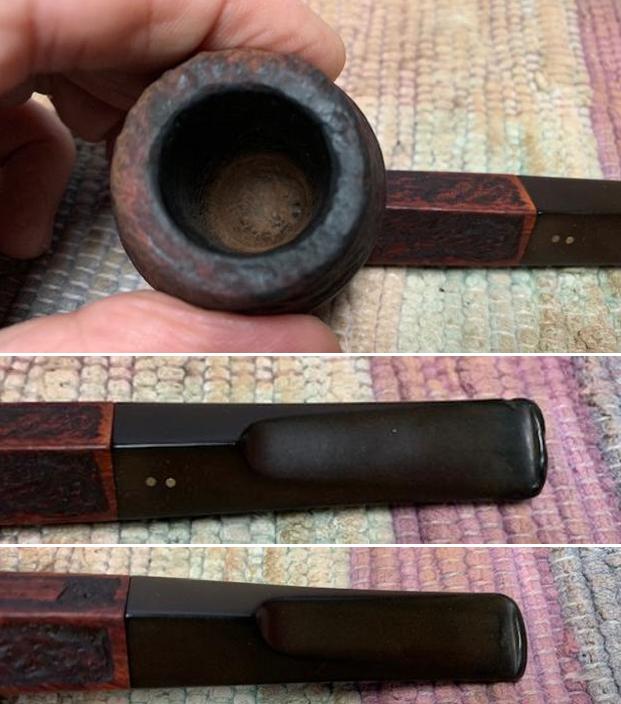
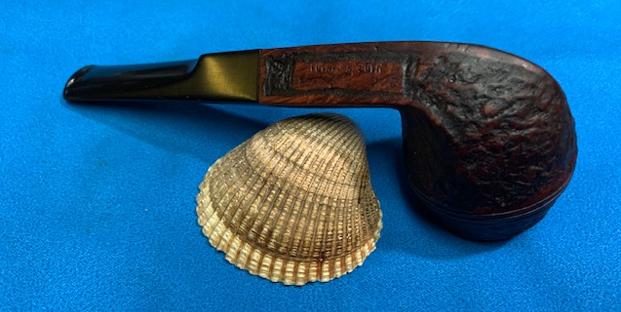
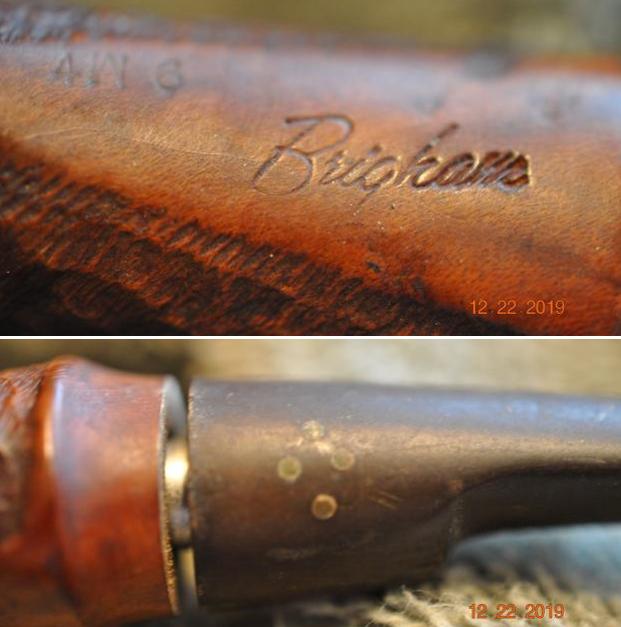
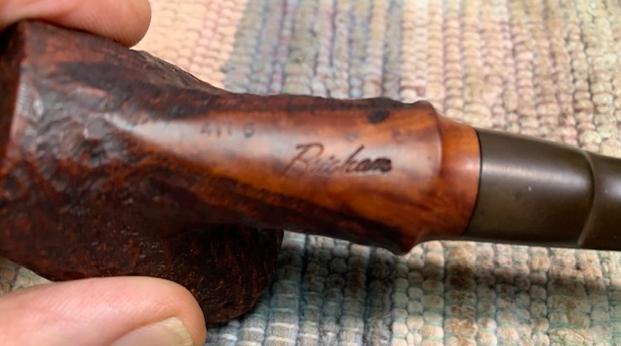
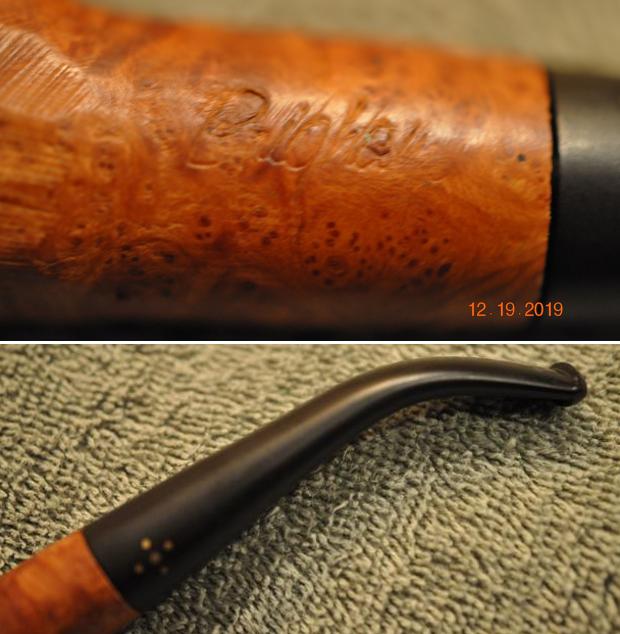
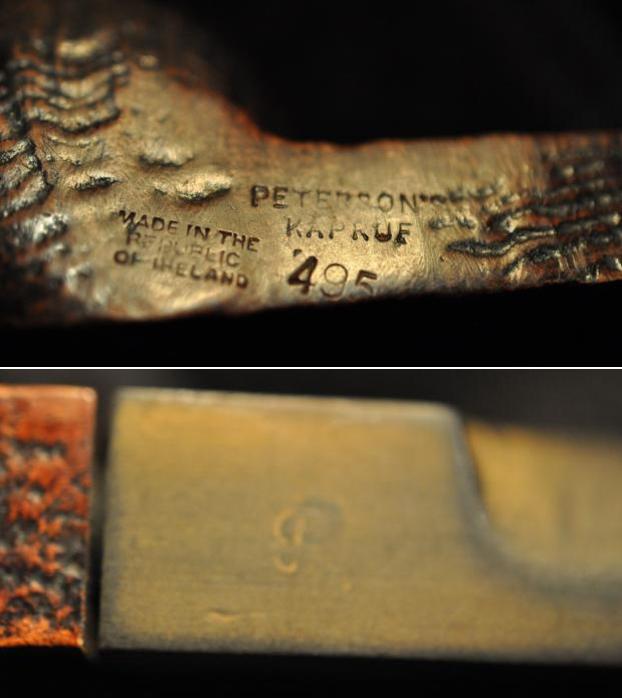
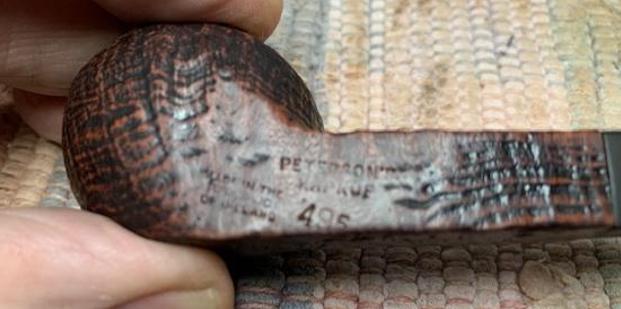
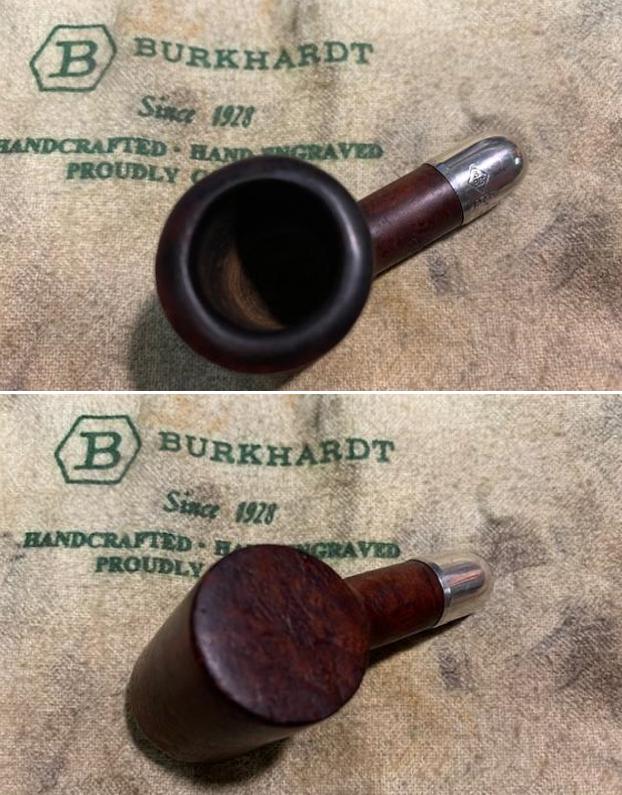
 The stamping on the pipe was on the left side of the shank and read BBB in a diamond separating OWN MAKE on each side of the diamond. There was no other stamping on the shank sides. On the silver ferrule on the shank of the pipe it is stamped top and left side and it has the BBB diamond logo and underneath that is AF&Co (which is the Adolph Frankau & Company logo). After his death, the BBB gradually became known as Britain’s Best Briars. It is one of the oldest, if not the oldest, English trademark in current use and the first pipe ever to have a registered trade mark. Underneath the AF&Co it is stamped with three hallmarks – an anchor, a lion and a lower case “m”. The anchor identifies the city of origin of the silversmith (Birmingham, England), the rampant lion (the symbol for quality of the silver) and the final one is a lower case “m” (the date stamp). The silver is badly oxidized but you can see the hallmarks in the first photo below. The stamping is clear and readable.
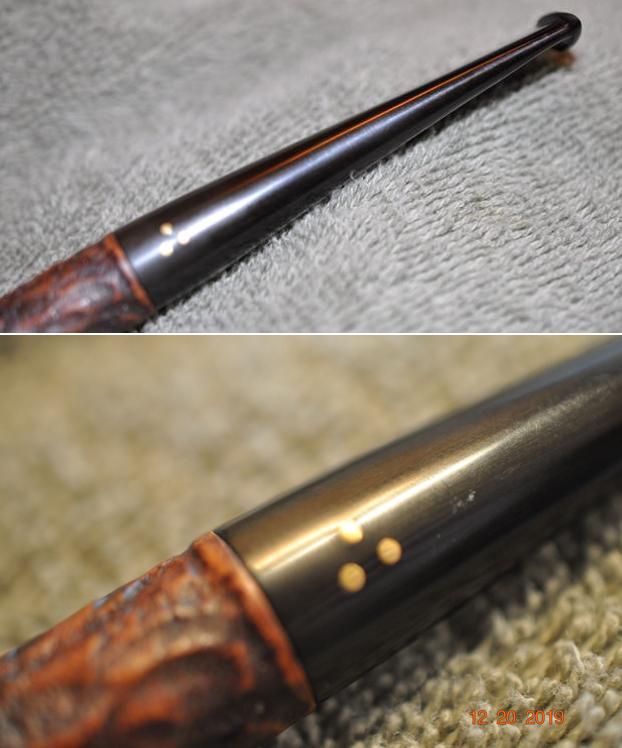
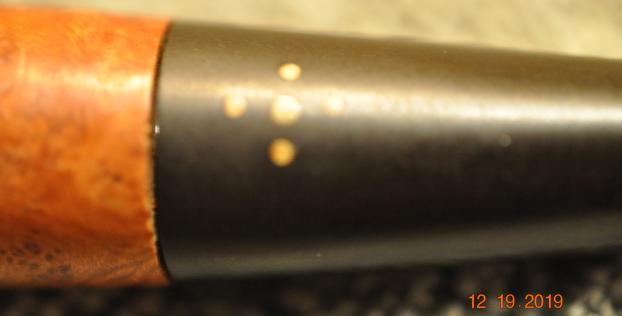
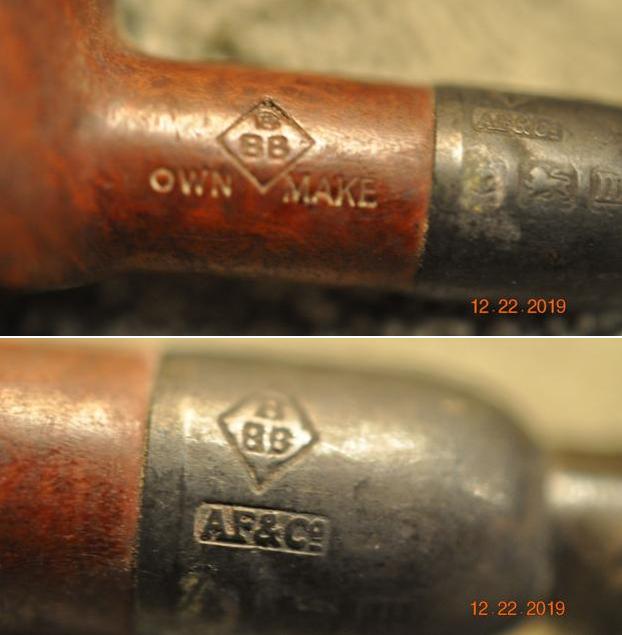 The hard rubber stem is also stamped and reads GLOKAR over TRADE MARK. It is very readable as can be seen in the photo below.
 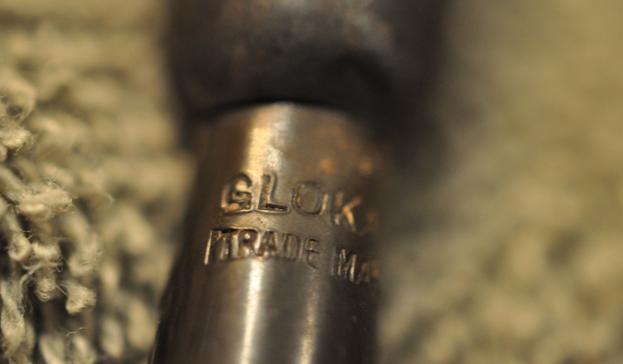 Since the hallmarks were so clear, I turned to one of the numerous silver hallmark charts on line for the city of Birmingham, England to see what I could find out about the “m” date stamp and pin down and age for the pipe (https://www.silvermakersmarks.co.uk/Dates/Birmingham.html). I clicked on the section that applied to the date stamp on this pipe. The first chart below is the chart from 1773-2024.
 I am also including screen capture of the enlarged section on the Birmingham dates for the letter M. This chart covers pipes made in 1778-1986. I have drawn a read box around the hallmark pattern that matches the one on the BBB Silver ferrule. You can see that it dates the pipe to 1911. That means that this little pipe is roughly 110 years old.
With the information from the hallmark site I had a clear date for the manufacture of the pipe. It was definitely an old timer and really was another stellar acquisition.
I wanted know more about the GLOKAR stamp and what it signified. I had an inkling that I was dealing with a BBB system pipe not unlike the Peterson’s System pipes but I wanted to see what I could find out about that. I have a facsimile of a 1912 BBB Catalogue No. 20 that has a section dedicated to the Glokar. On page 107-110 there is information about the pipe and the various versions available. Interestingly it does not include a picture/drawing of my Poker. I quote the description of the Trademarked Glokar below.
The “Glokar” Mouthpiece does away with the great drawback of all ordinary pipes, viz., the unpleasant and possibly injurious, effect of the smoke upon the tongue, as the end of the stem has a smooth, concave surface, which while forming a pleasant rest for the tongue, acts as a barrier between it and the smoke. Instead of pressing through an ordinary round bore, the smoke leaves the mouthpiece through a fan-shaped slot, which is drilled in and upward direction – thus preventing saliva from entering the bore of the pipe.
Advantages:
- The bore, being kept dry, requires less cleaning than that of an ordinary pipe.
- As no saliva can reach the bowl, the tobacco can be consumed to the last particle.
- The shape of the mouthpiece affords the perfection of comfort for the mouth, tongue ad lips.
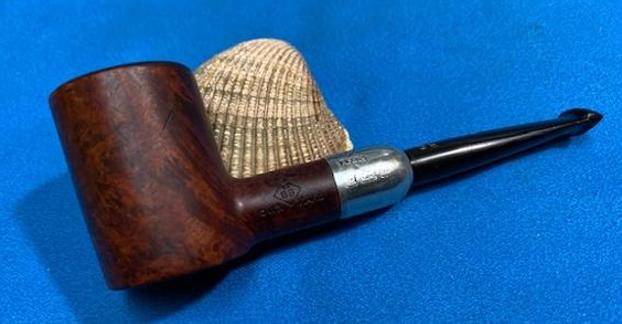
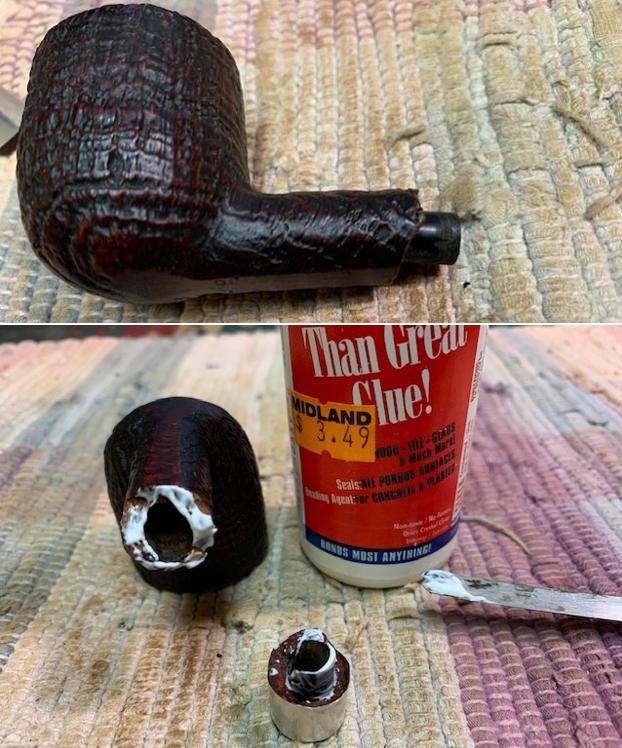
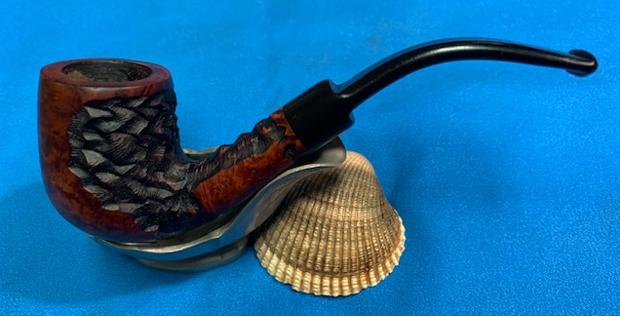
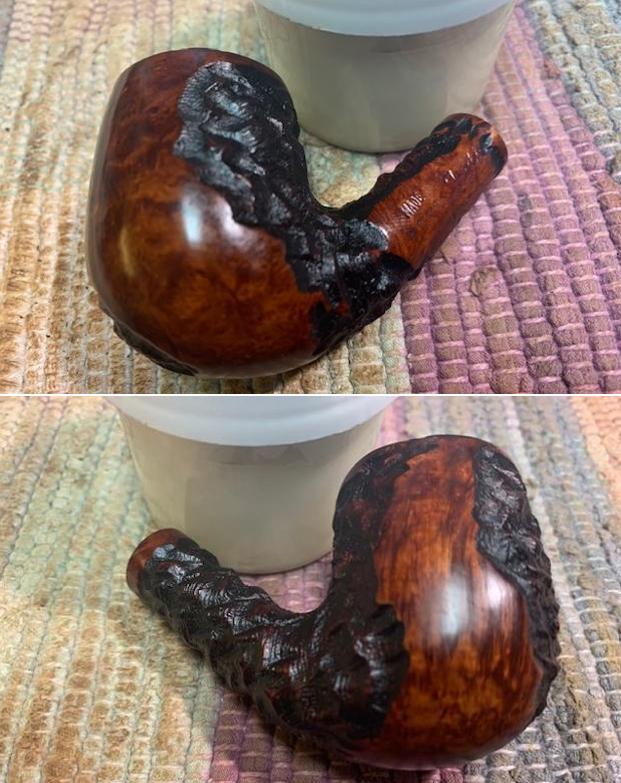
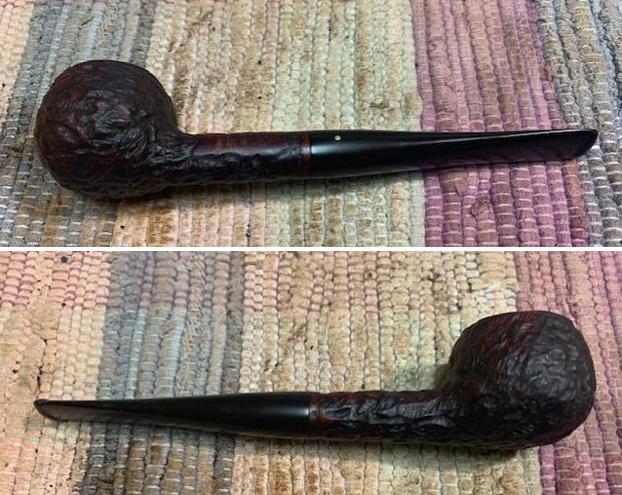
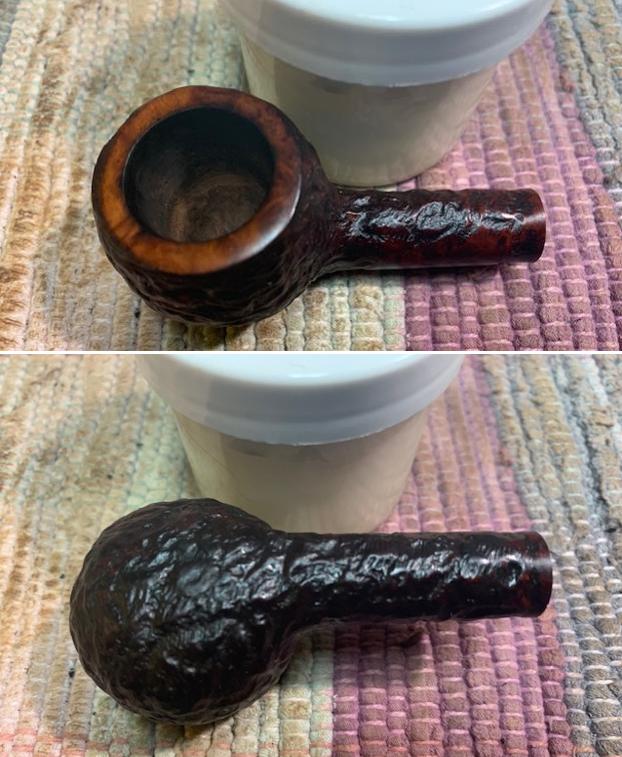
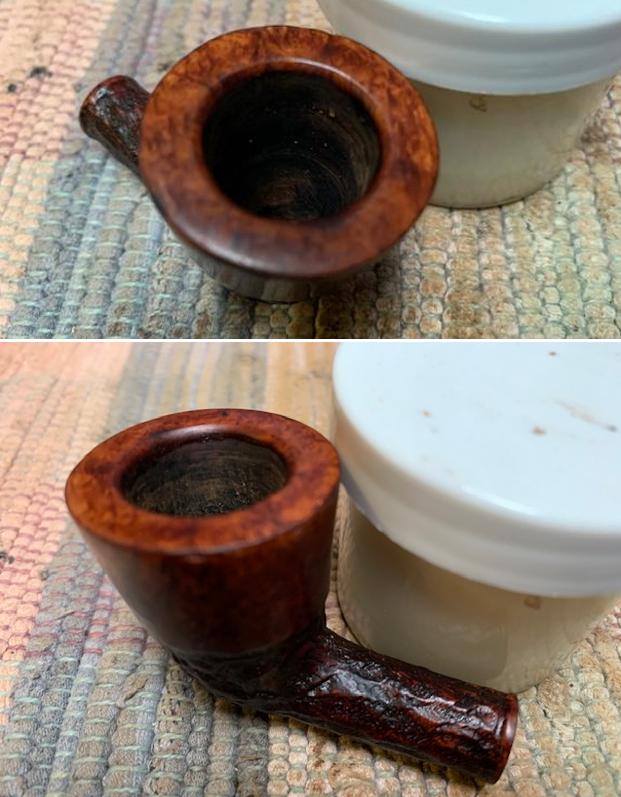
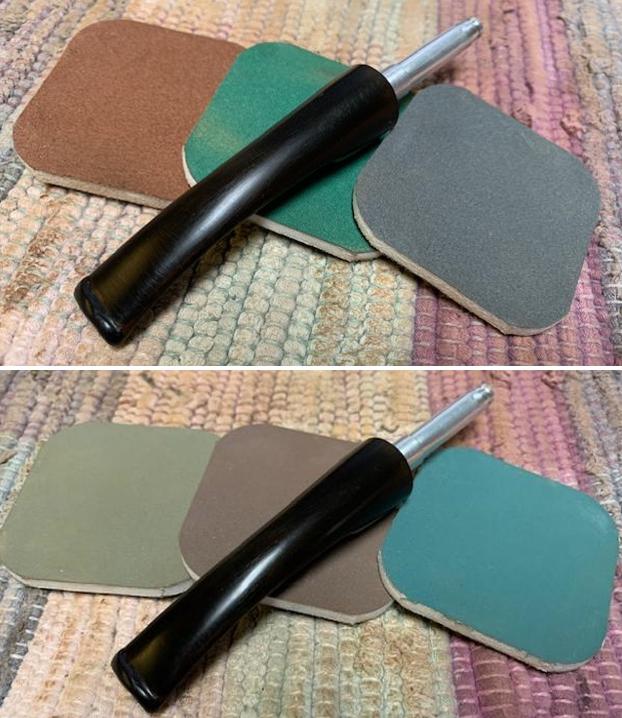
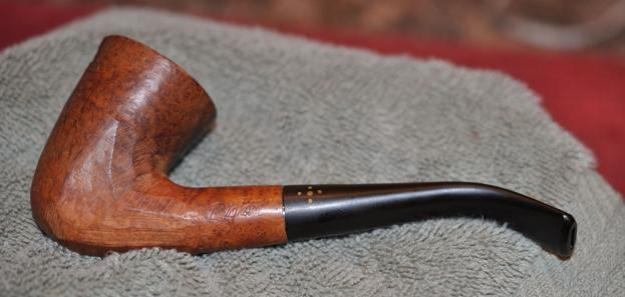
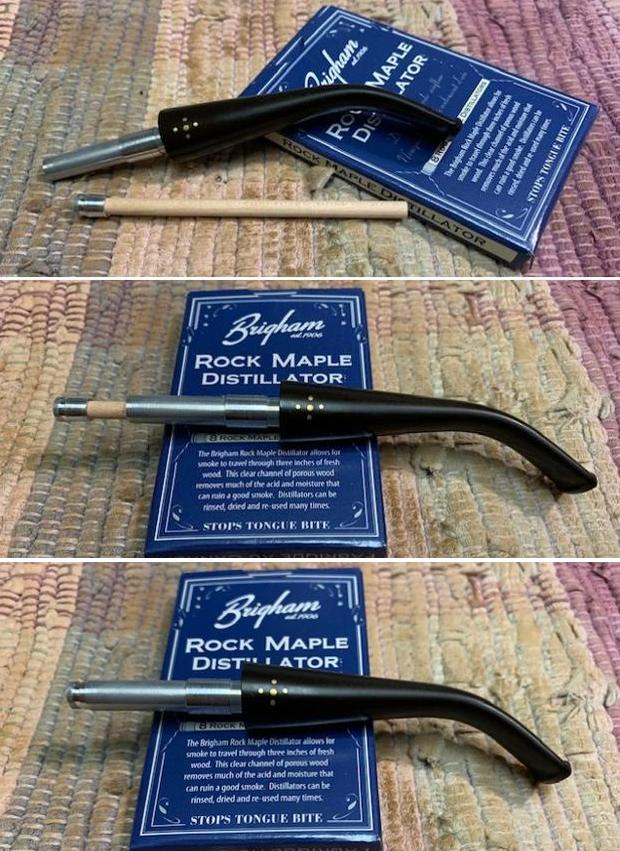
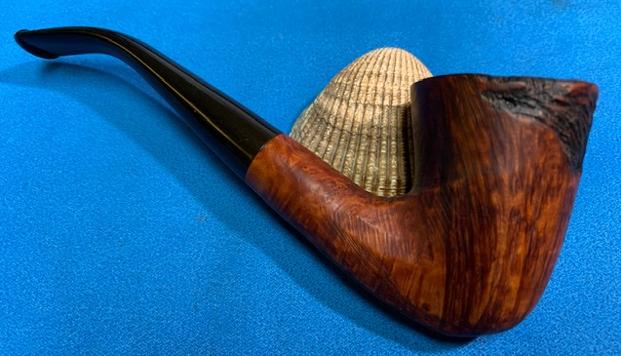
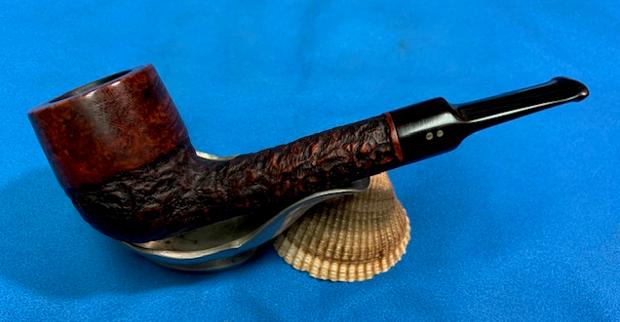
I took a photo of the picture that was included in the catalogue for the “GLOKAR” and have included it below. The cutaway diagram shows the system in the bowl and shank as well a the patented lip design. It is remarkably like a Peterson’s system pipe. One of the differences is the shape of the exit of the air way in the button. This one is a slot rather than a round hole. Now it was time to work on the pipe. Jeff carefully cleaned the pipe from top to stern. He reamed it with a PipNet pipe reamer and then cleaned up the reaming with a Savinelli Fitsall Pipe Knife. He scrubbed out the internals of the shank, stem and shank extension with alcohol, pipe cleaners and cotton swabs until the pipe was clean. He scrubbed the exterior of the bowl with Murphy’s Oil Soap and a tooth brush to remove the grime and grit on the calabash and the tarnish and lava on the rim top. The finish looks much better and has a deep richness in the colour that highlights grain of the briar. The rim top looked good with some darkening on the top and outer edge of the bowl. Jeff soaked the stem in bath of Before & After Deoxidizer to remove the oxidation on the rubber. He worked it over with Soft Scrub All Purpose Cleaner to remove any remnants of oxidation. When the pipe arrived here in Vancouver I was amazed it looked so good. Here are some photos of what I saw.
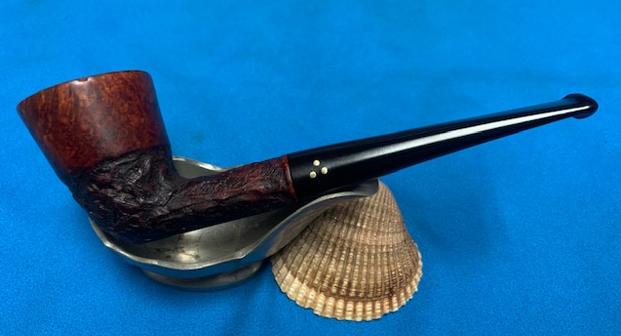
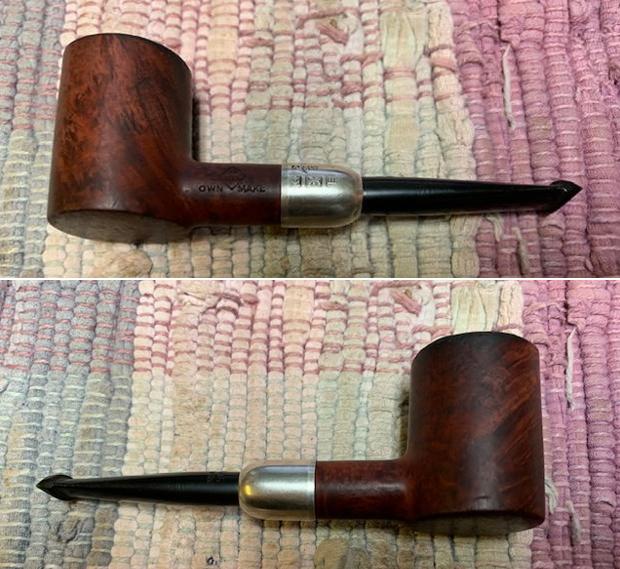
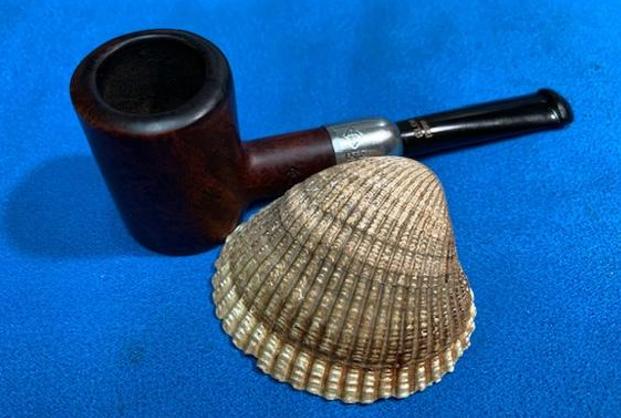
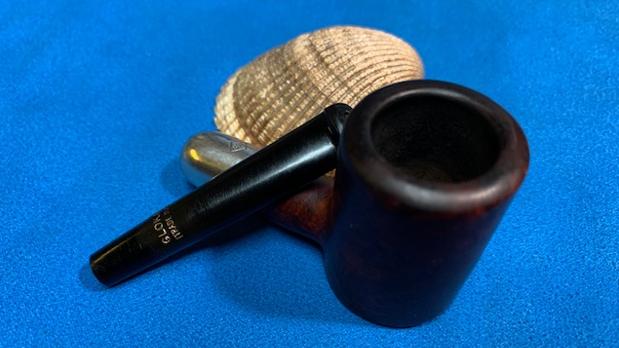
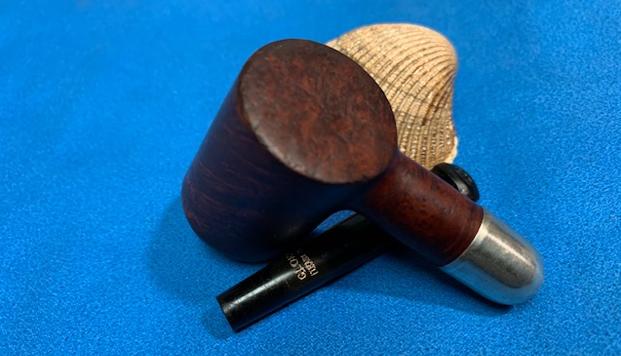
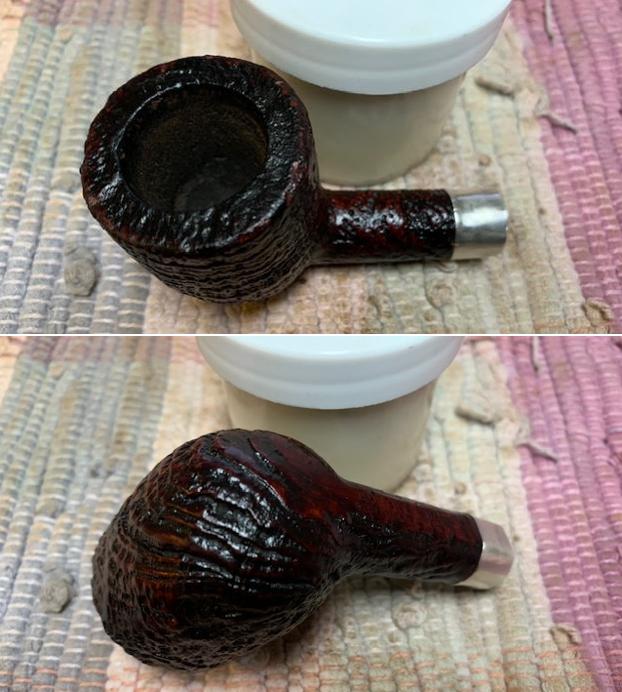
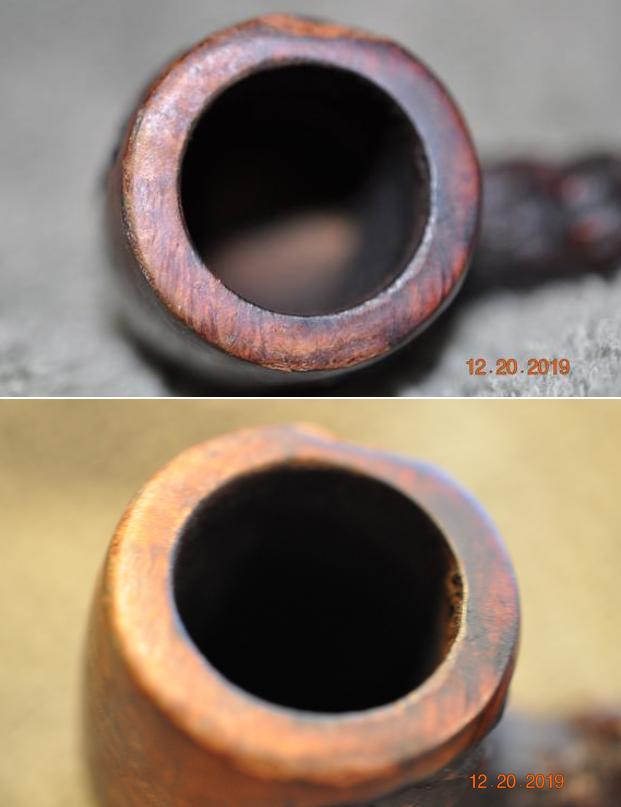
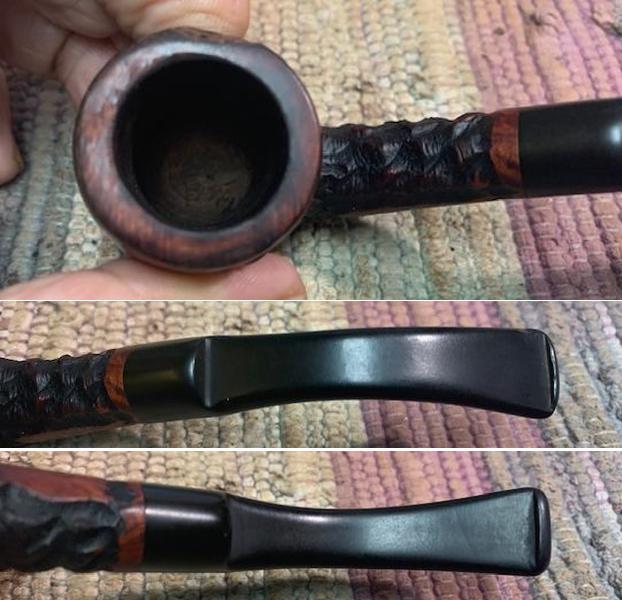
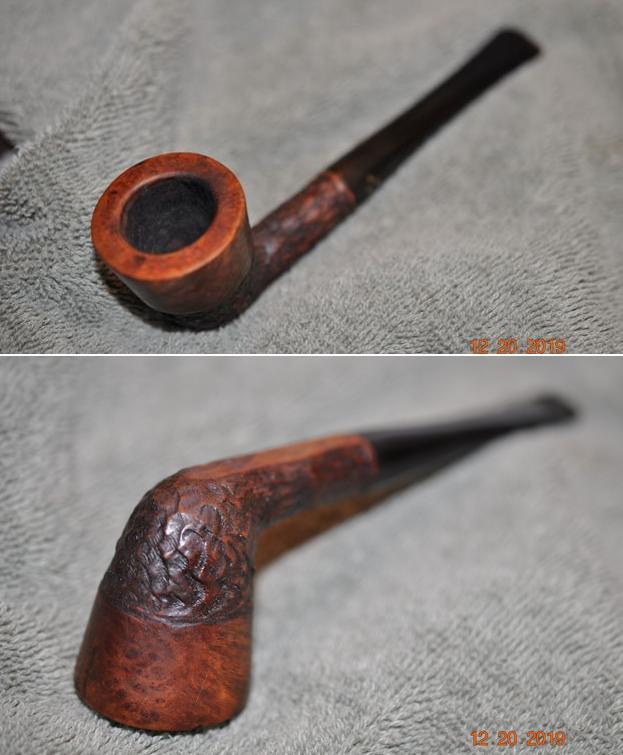
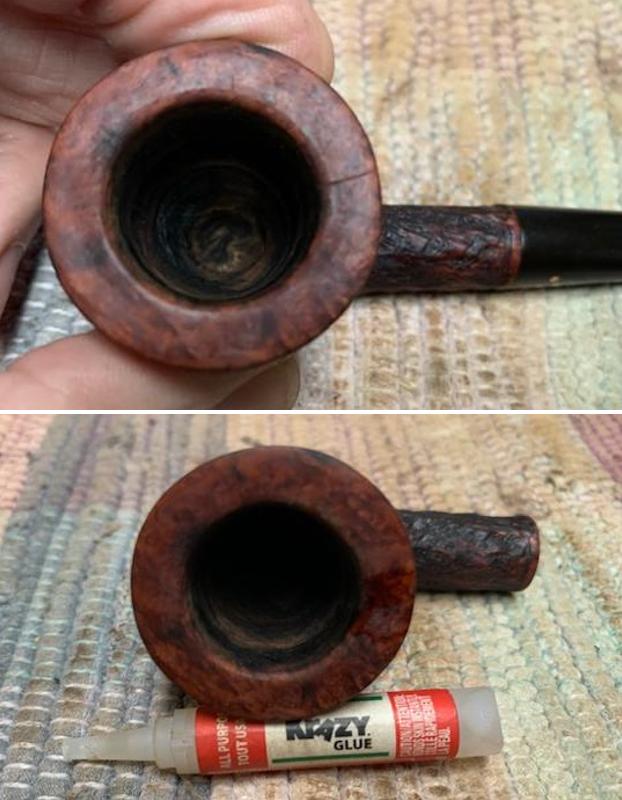
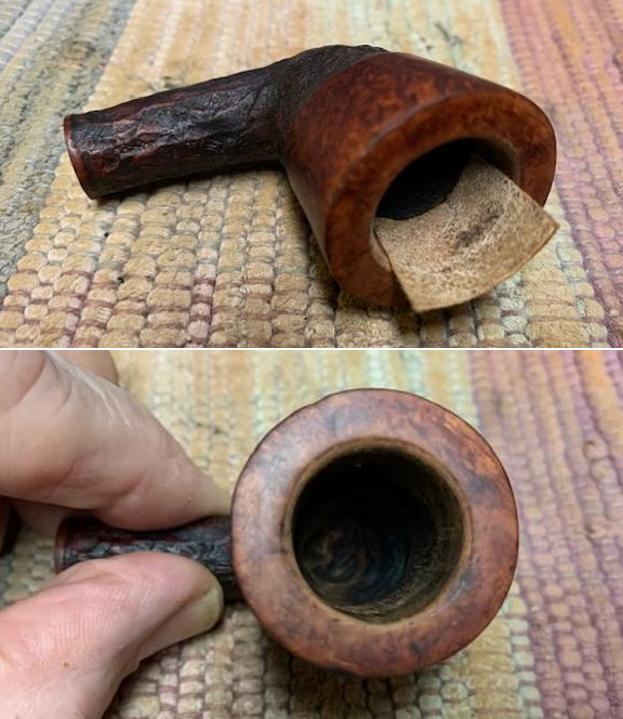
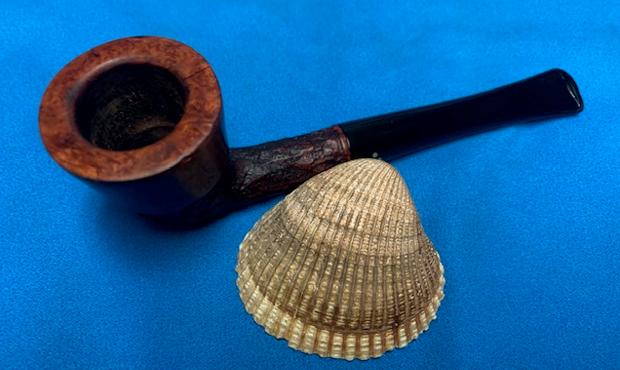
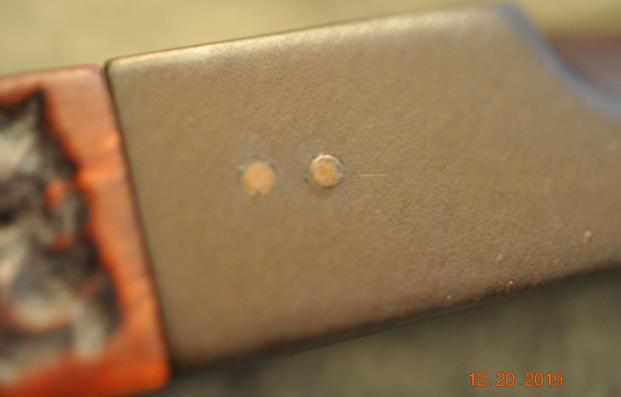
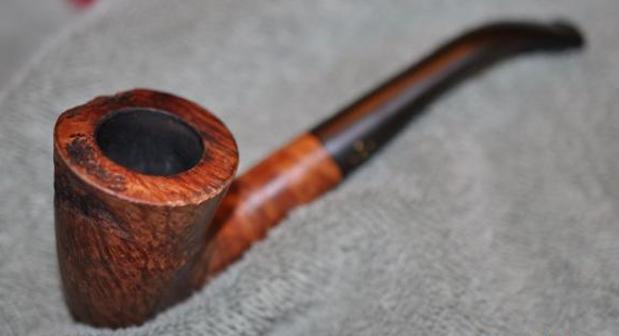
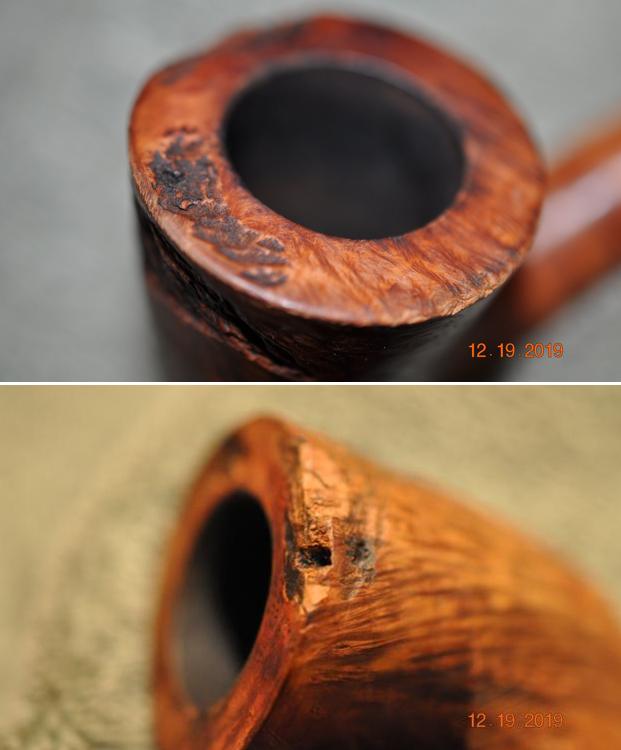
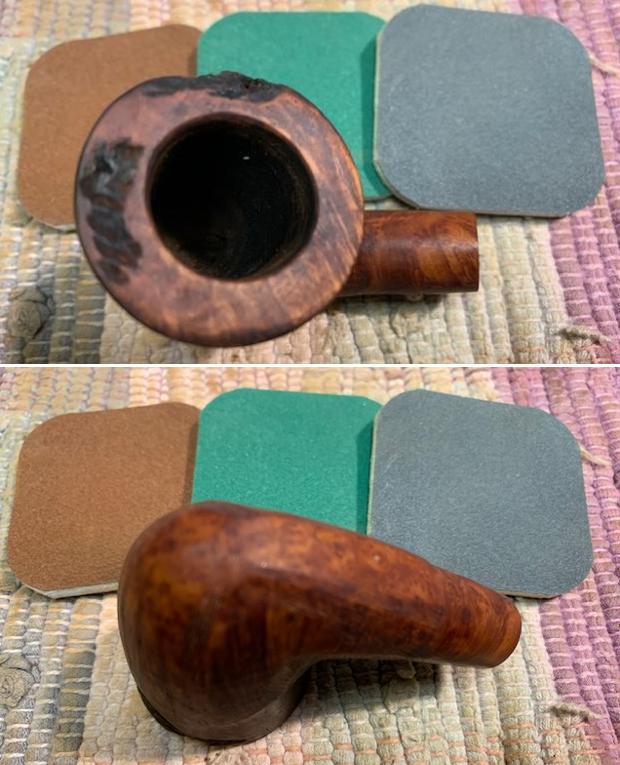
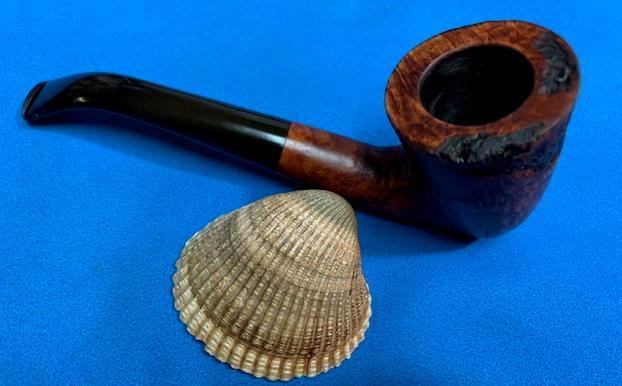
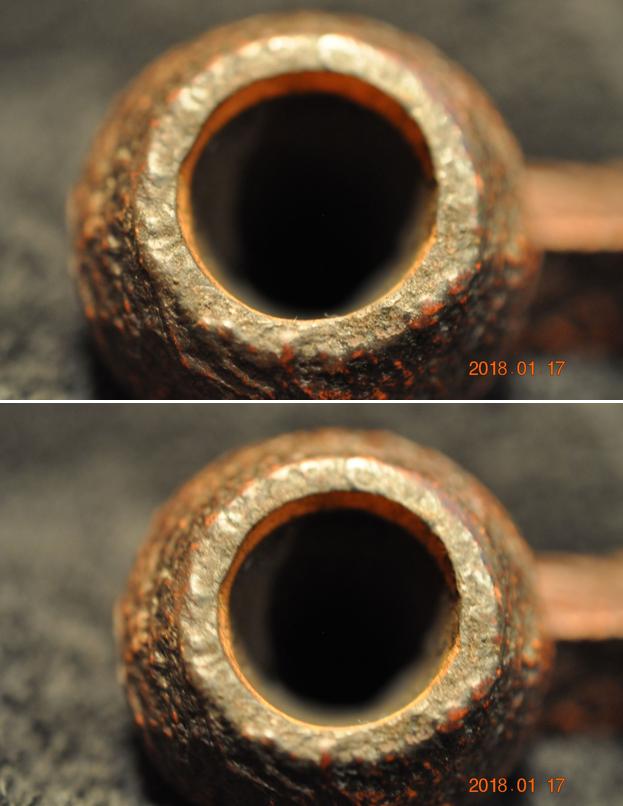
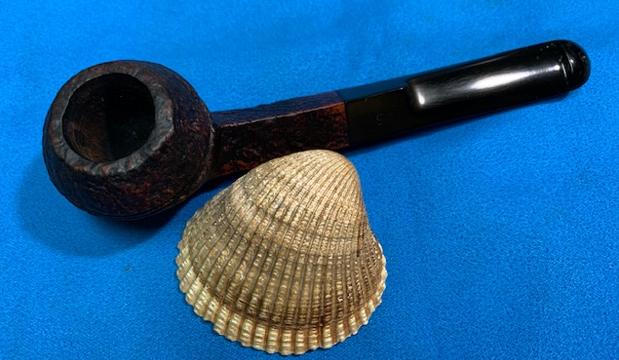
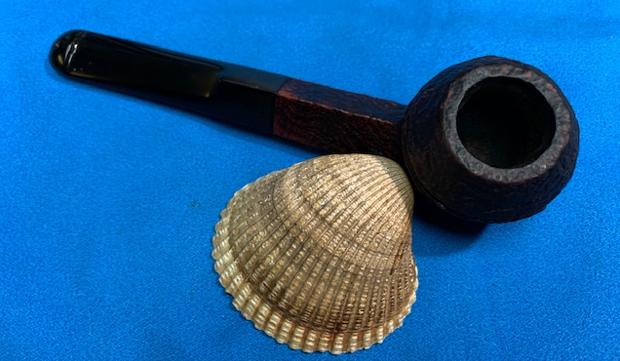
 I took some close up photos of the rim top and the stem surface. The rim top was darkened but did not look otherwise damaged. There was also some darkening around the outer edge of the bowl that would need to be worked on. The silver ferrule was in great condition. I took close up photos of the stem to show the condition of the surface and button.
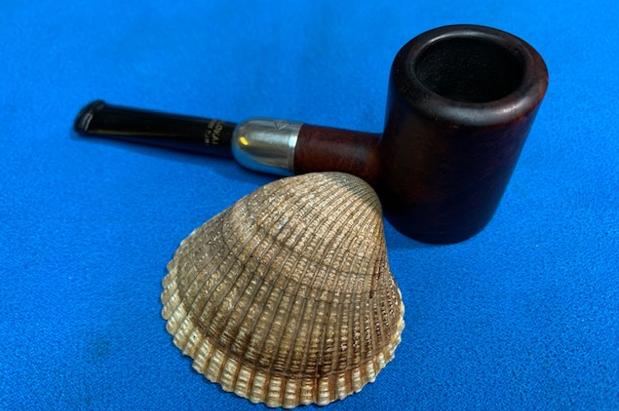
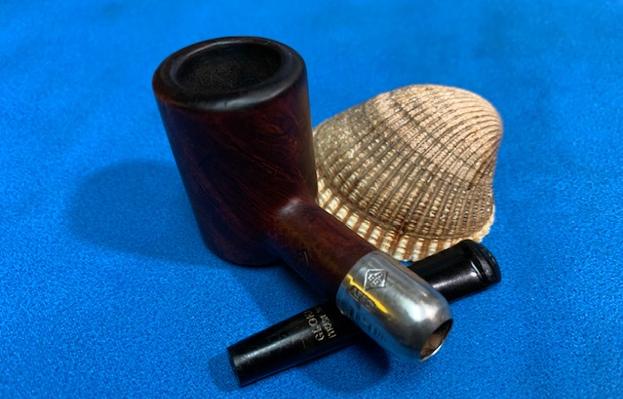
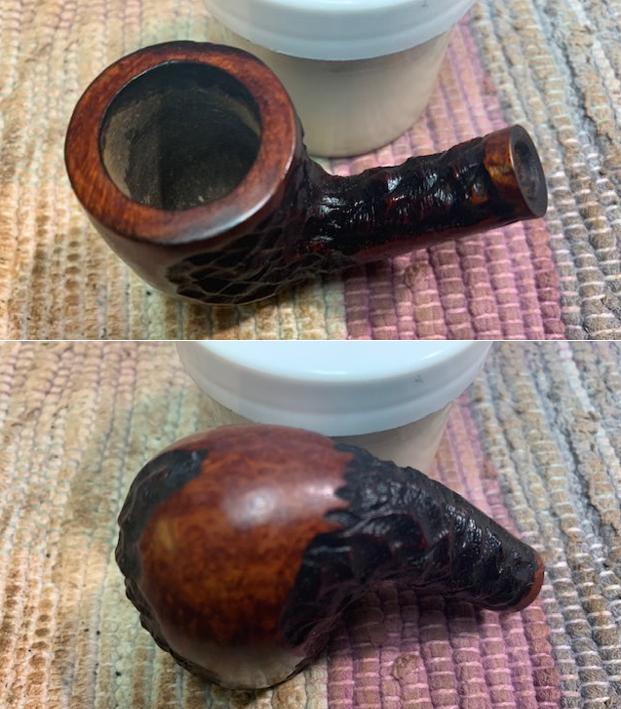
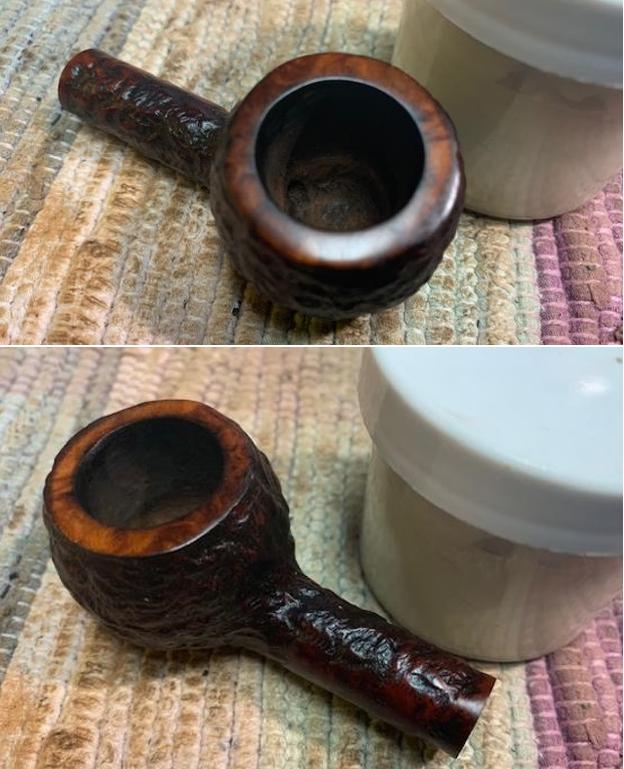
 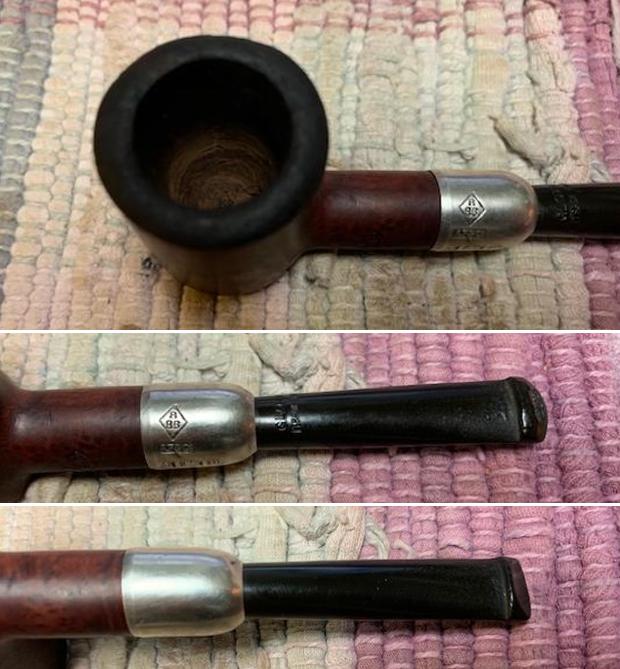 I took a picture of the stamping on the shank. The reflection on the silver did not capture the stamping on the ferrule but it was all clear and readable as noted above.
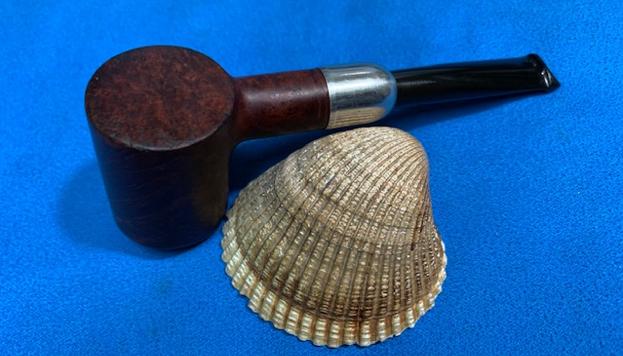
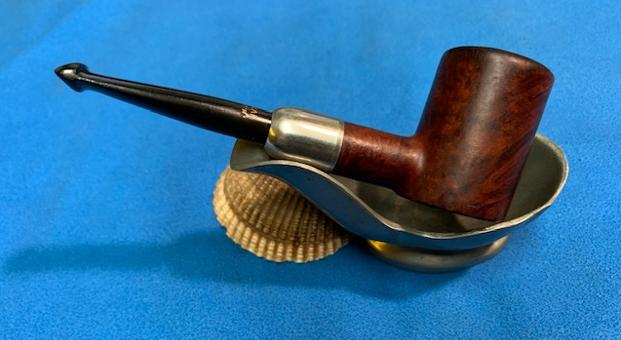
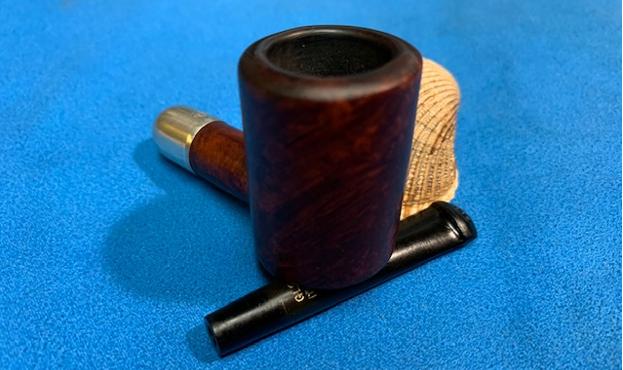
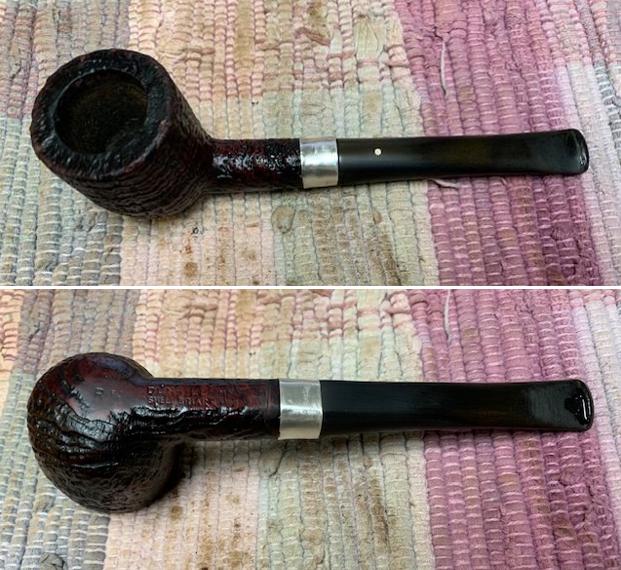
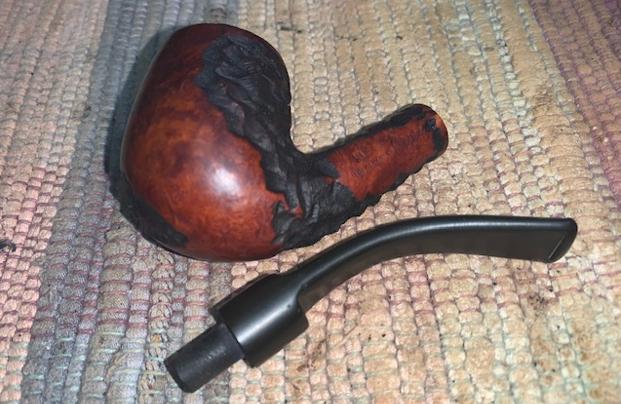
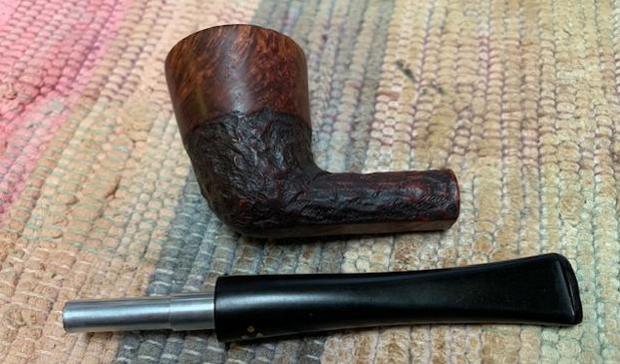
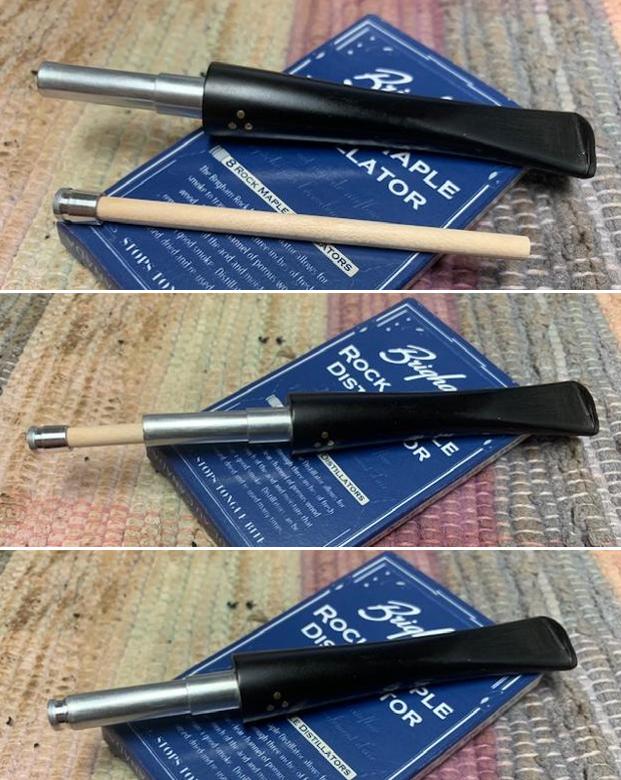
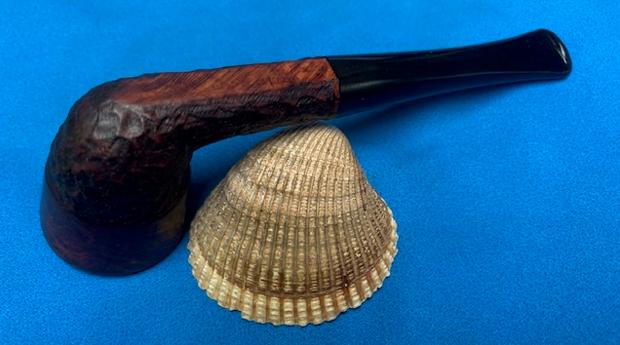
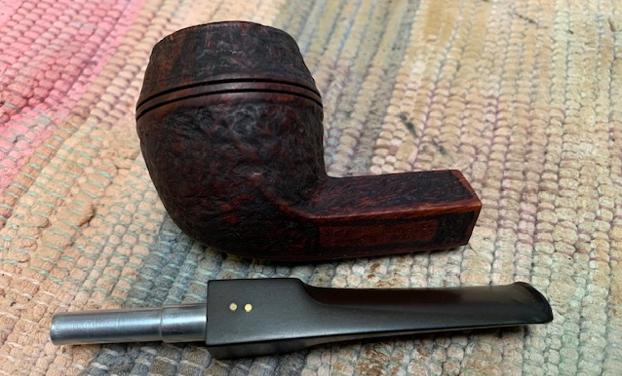
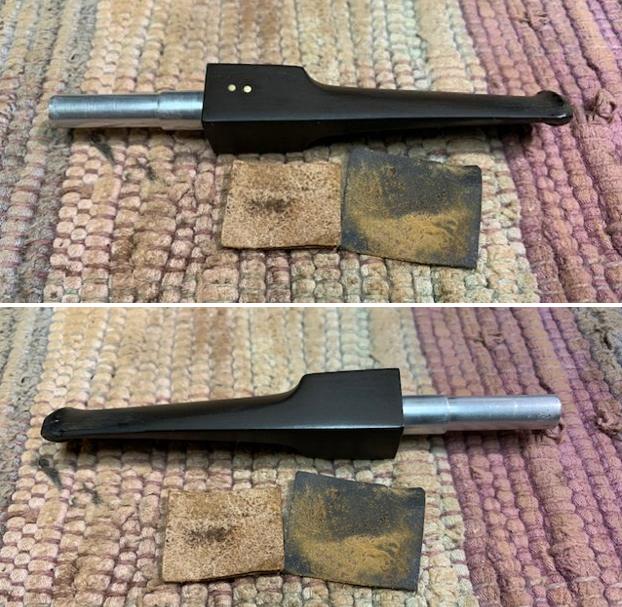
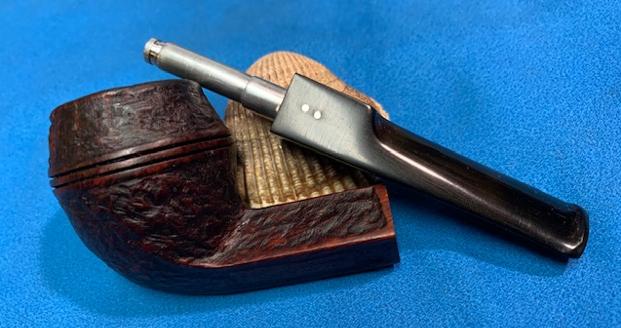
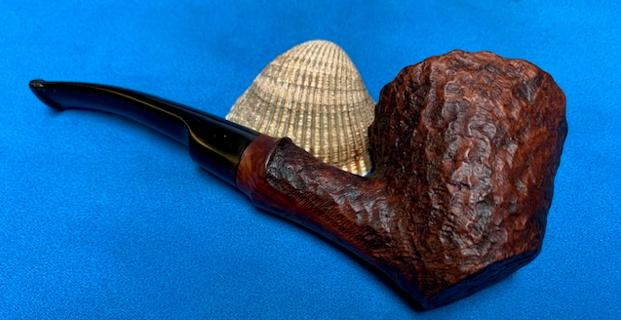
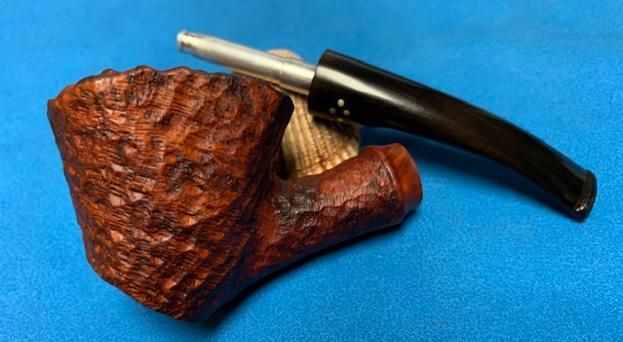
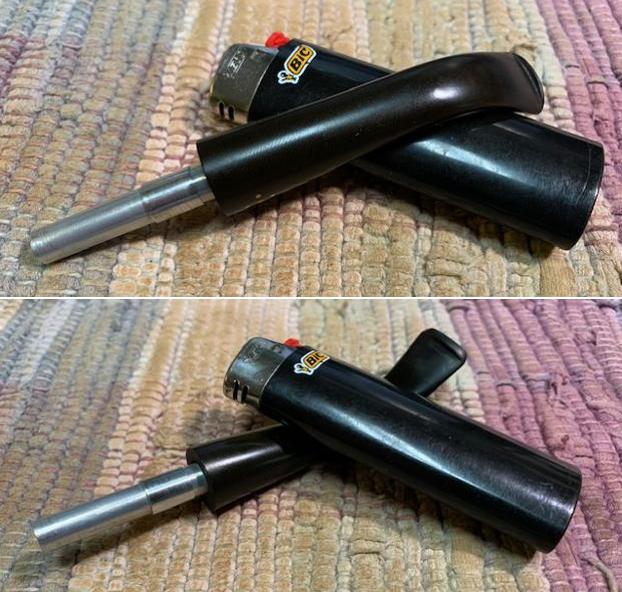
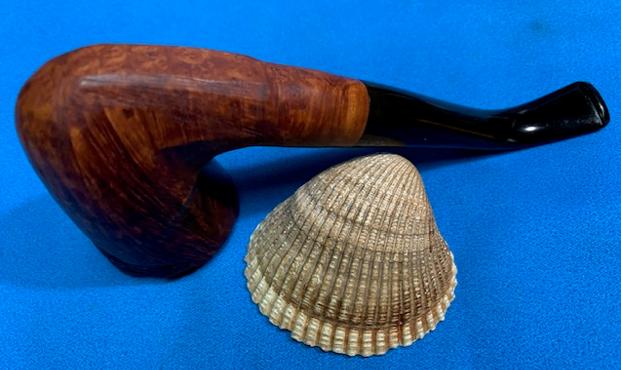
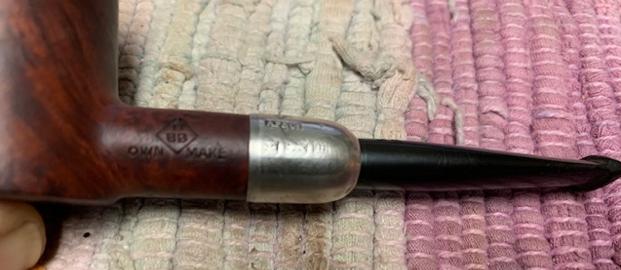 I took the pipe apart and took a photo of the pipe with the short stem. It is a good looking pipe and very unique.
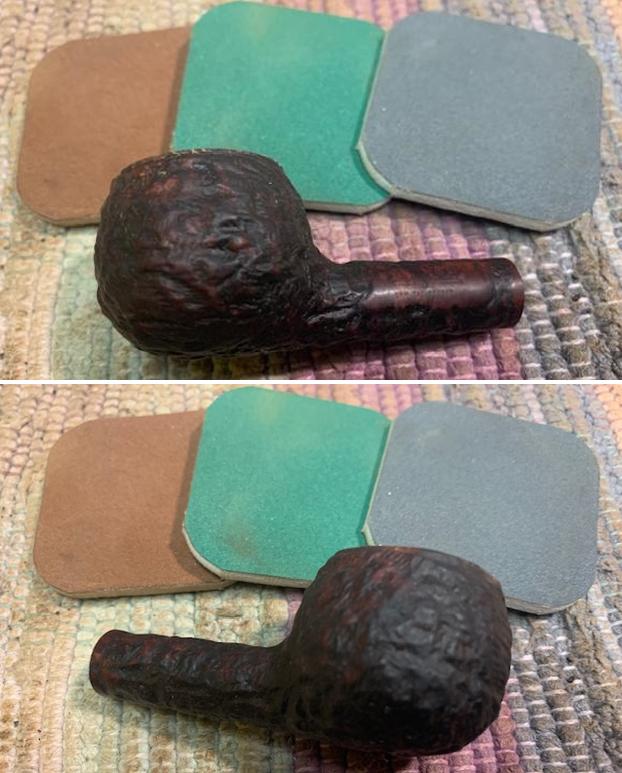
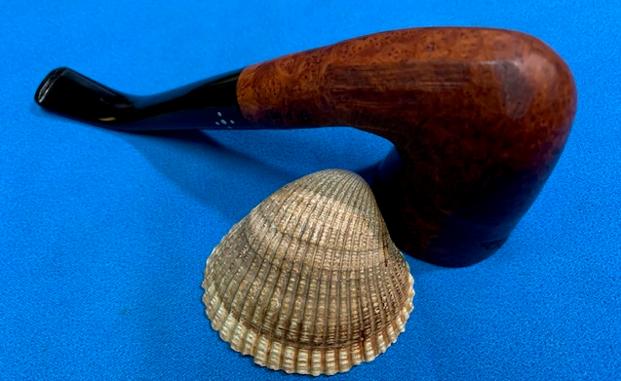
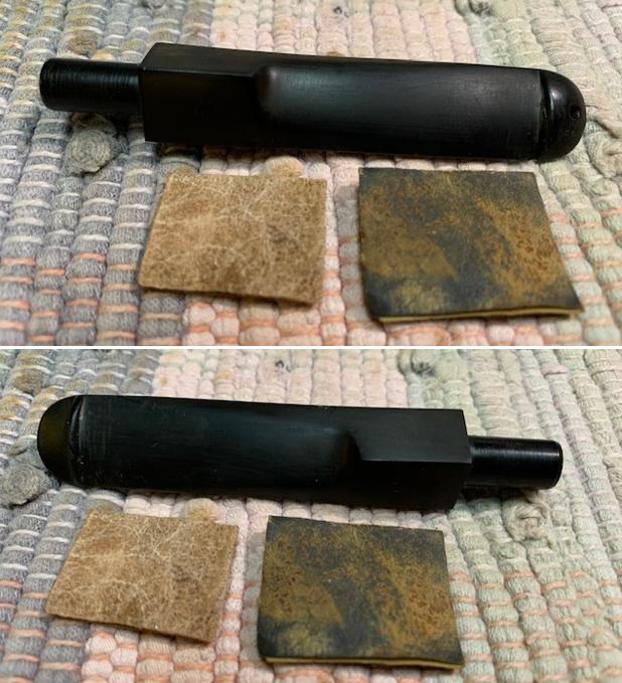
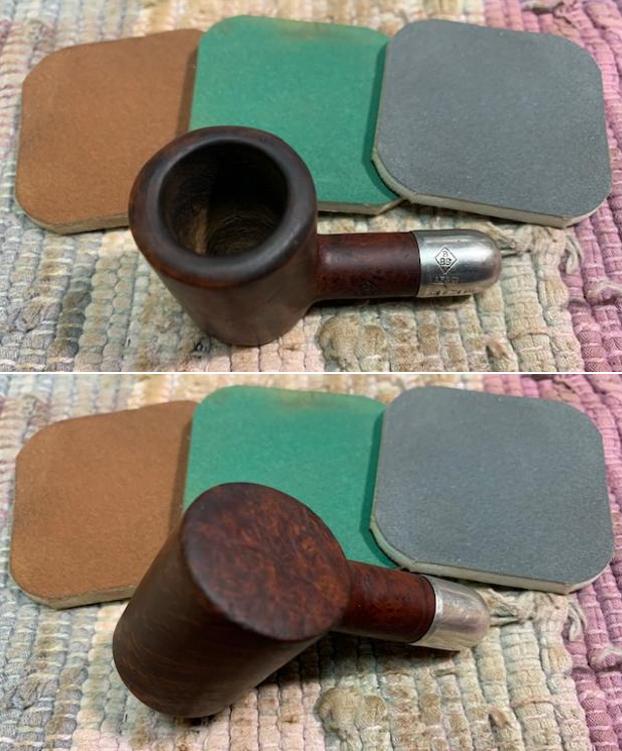
 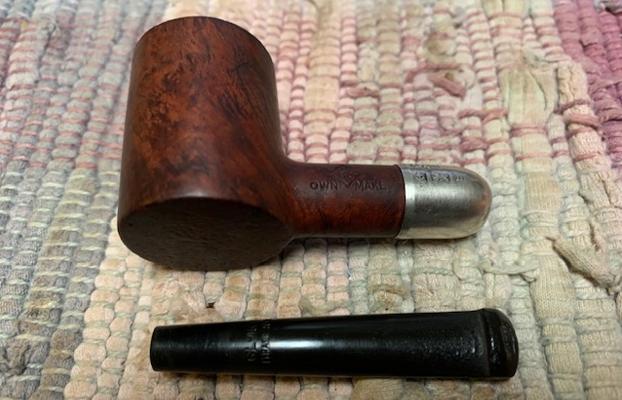 I started my work on the pipe by addressing the darkening on the edges and rim top. I used a folded piece of 220 grit sandpaper to work over the edges (inner and outer) and the crowned rim top to try to minimize the darkening. While not flawless I was happy with the results.
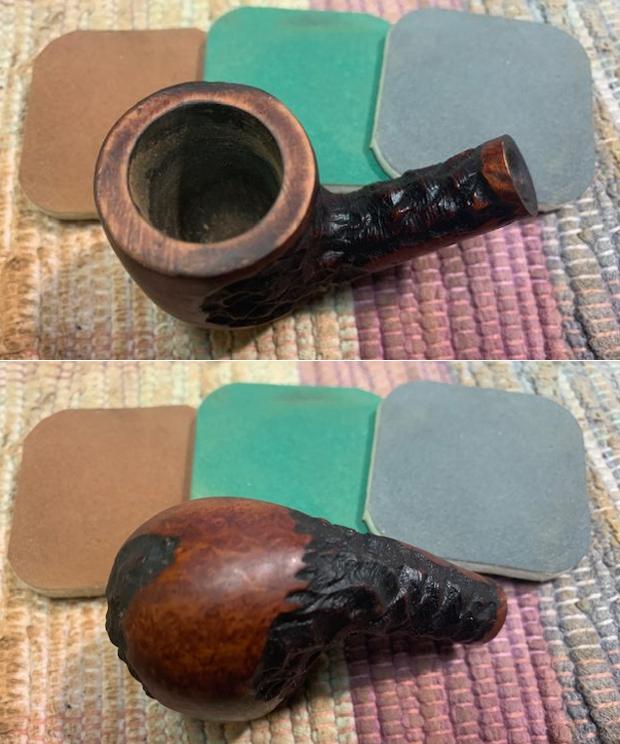
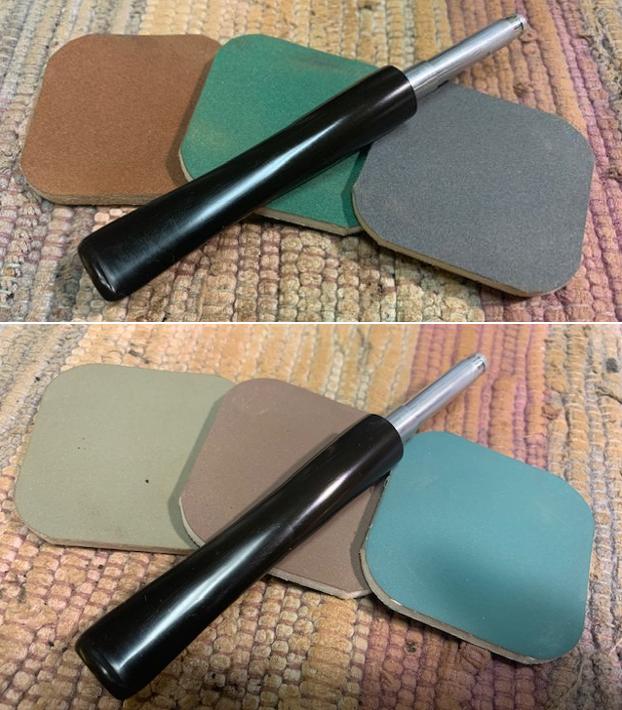
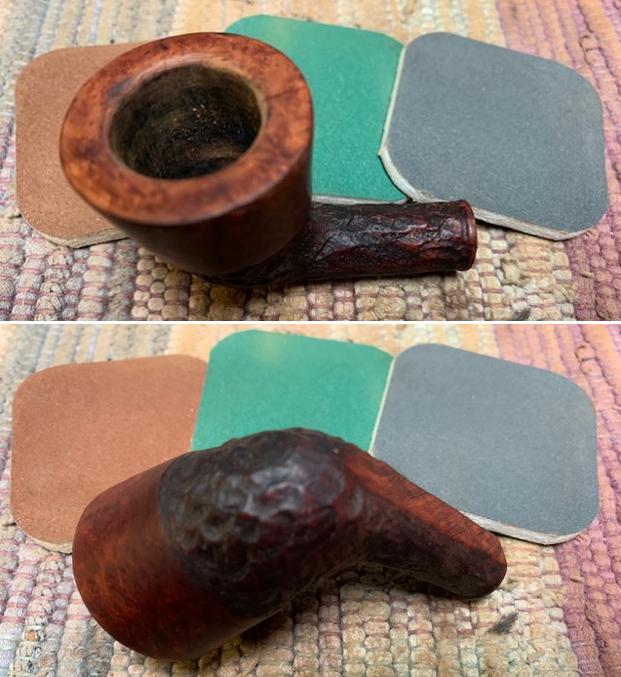
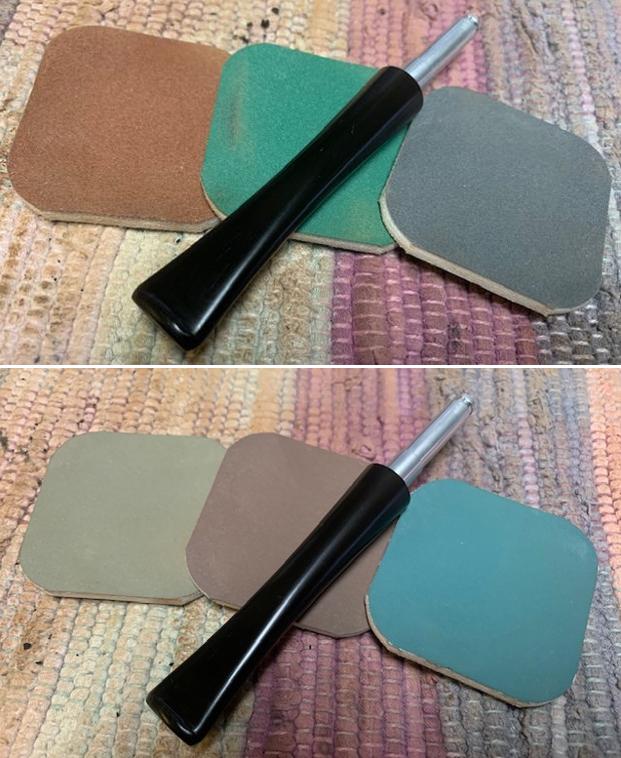
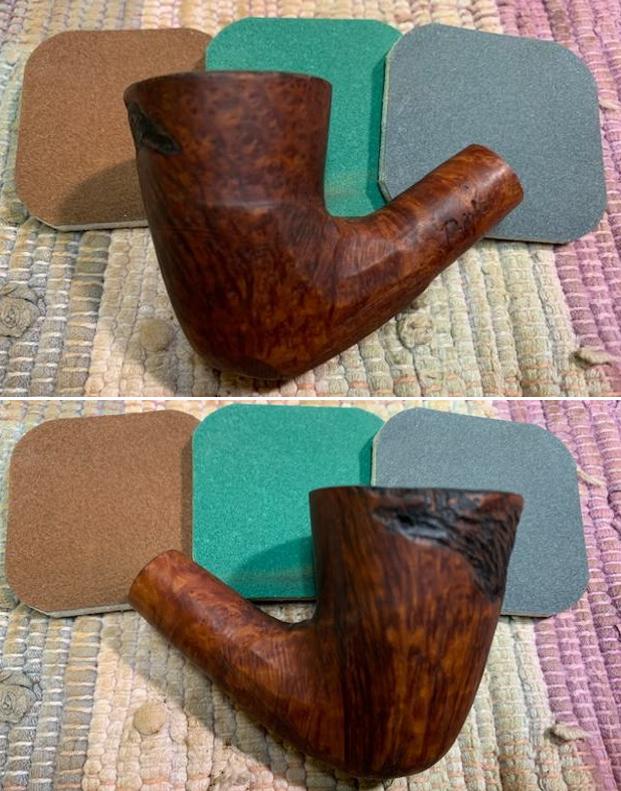
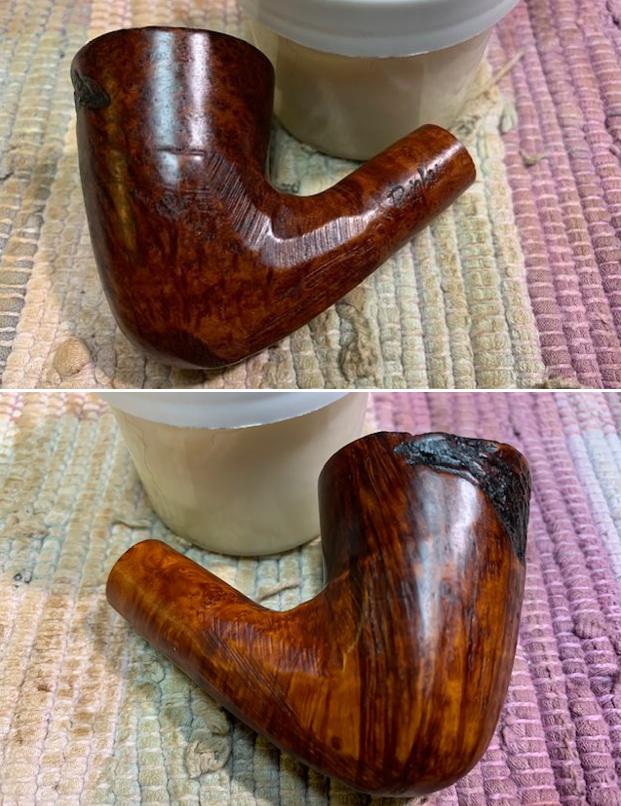
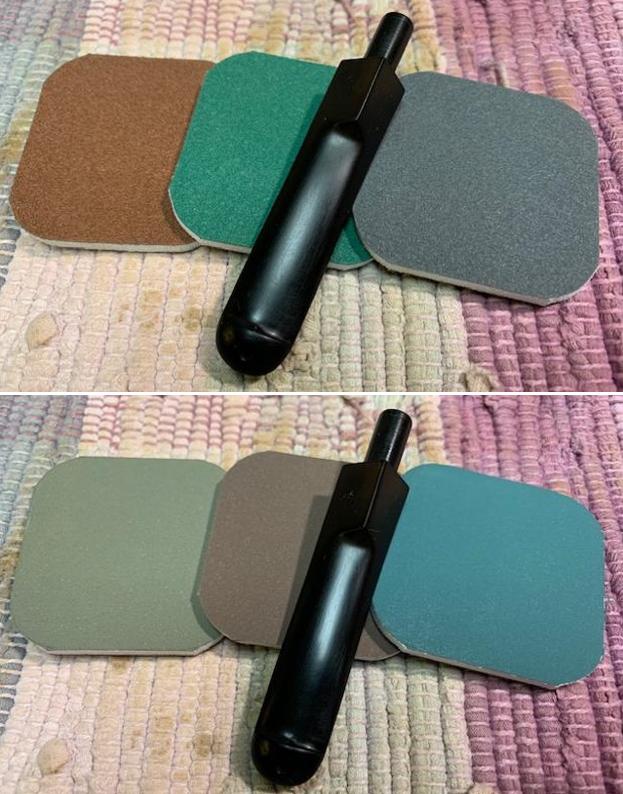
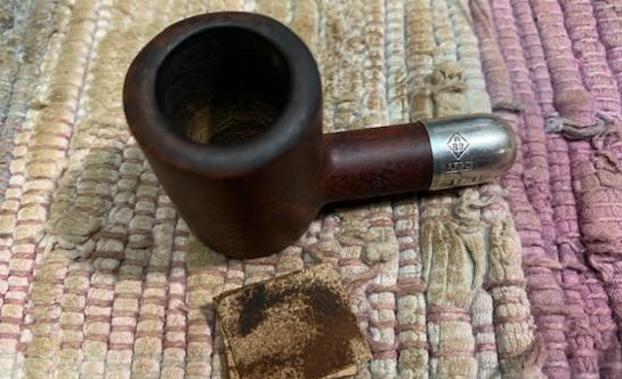 I polished the rim top and the rest of the briar with micromesh sanding pads – dry sanding it with 1500-12000 grit pads. After each pad I wiped the briar down with a damp cloth. I was able to give a shine to the bowl and remove some of the surface scratches in the process.
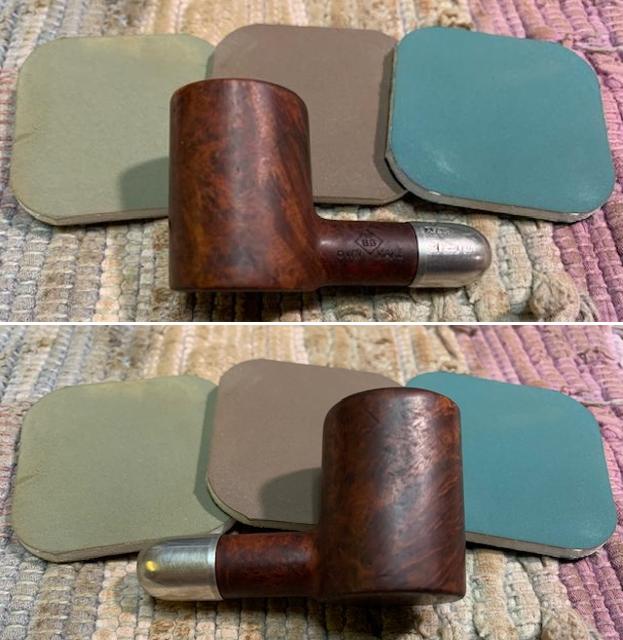
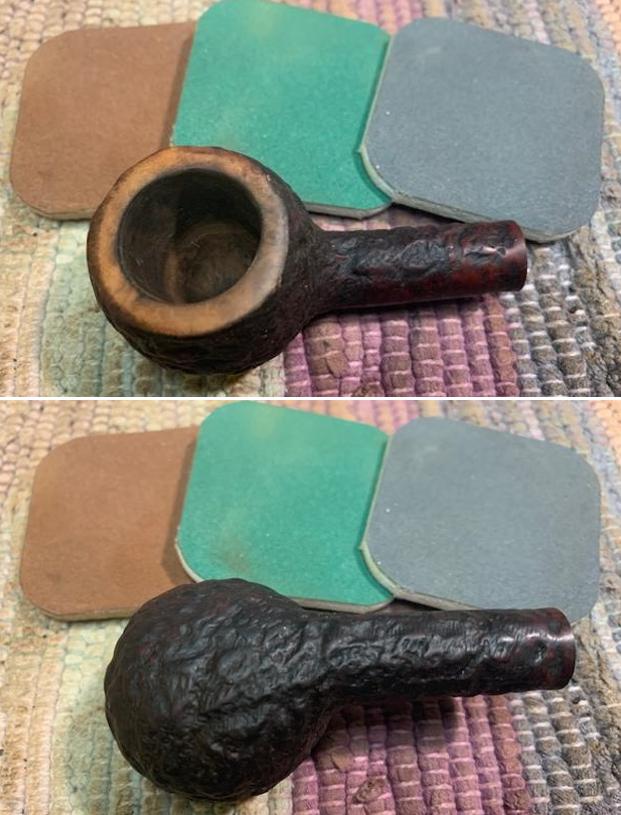
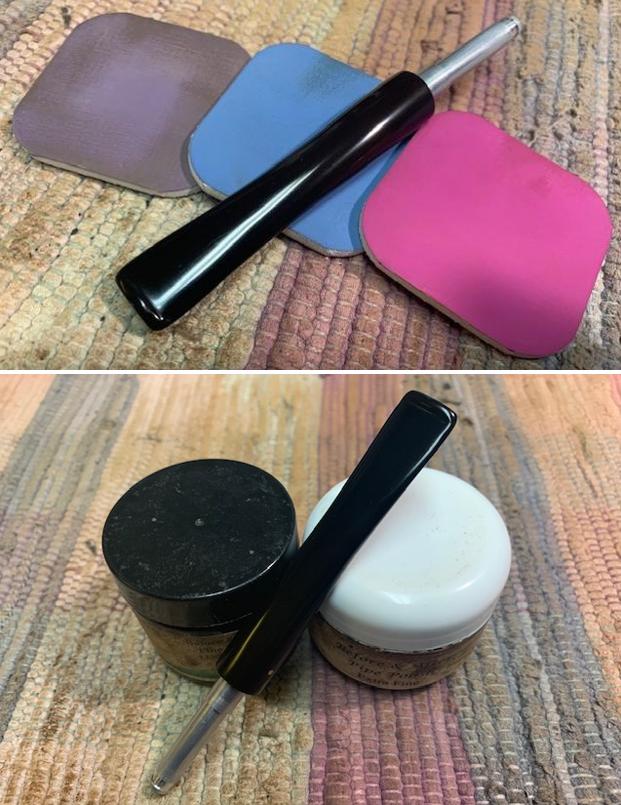
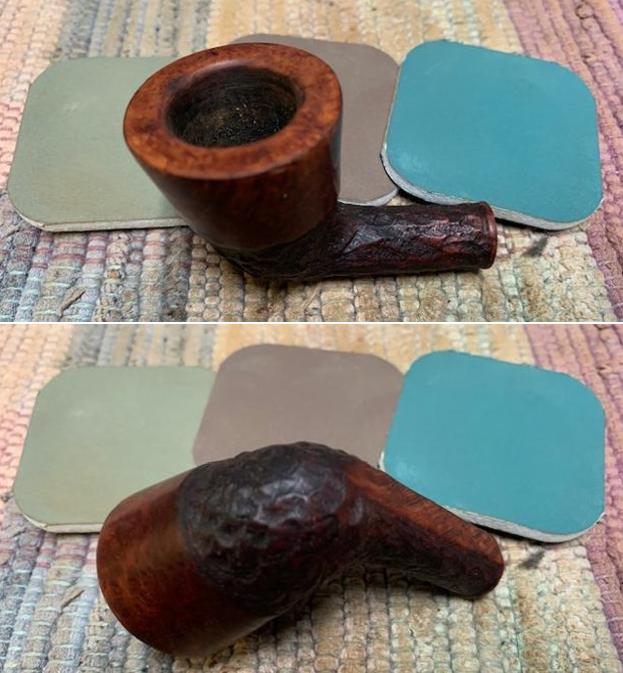
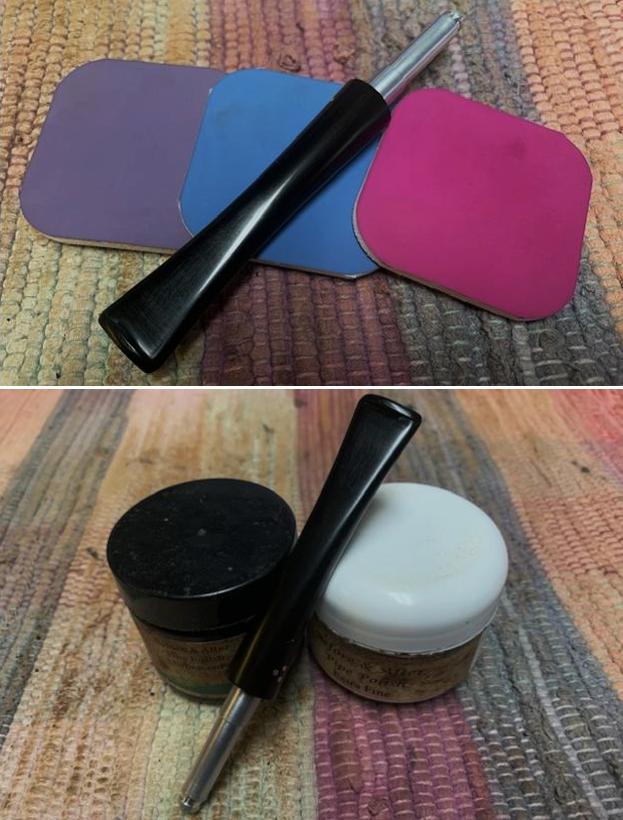
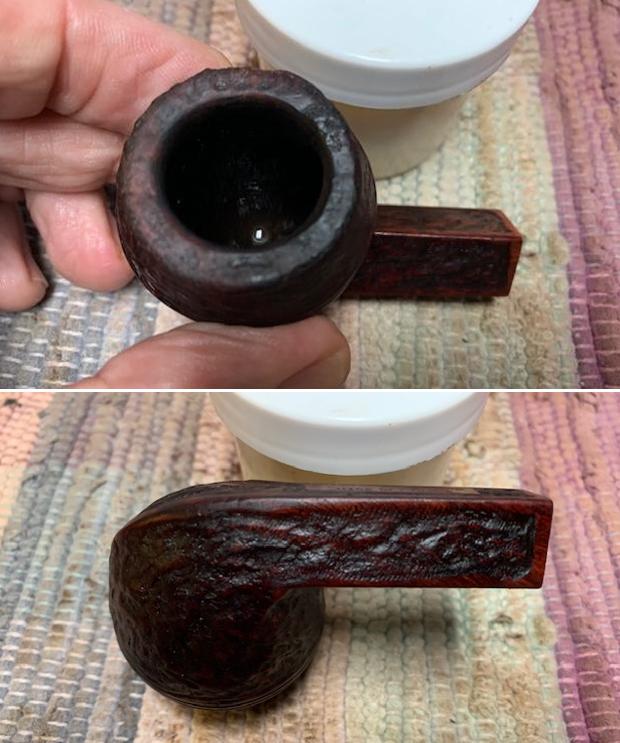
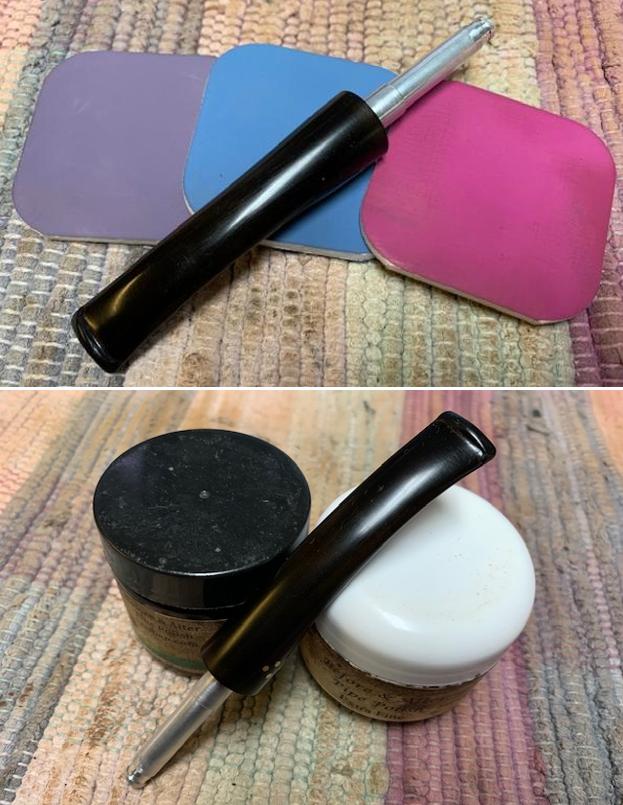
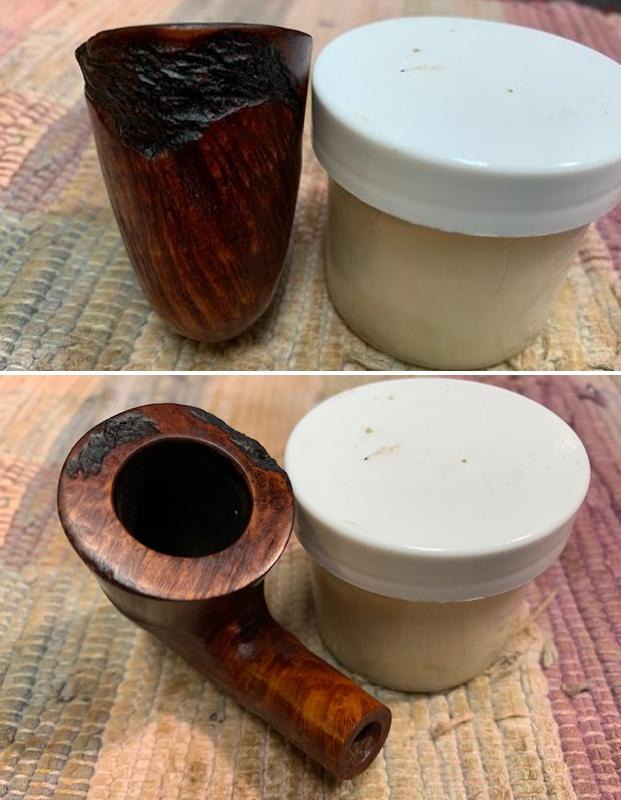
 I worked some Before & After Restoration Balm into the surface of the bowl and shank with my fingertips to clean, enliven and protect the briar. I let the balm sit for 15 minutes and then buffed with a cotton cloth to raise the shine. The photos show the bowl at this point in the restoration process.
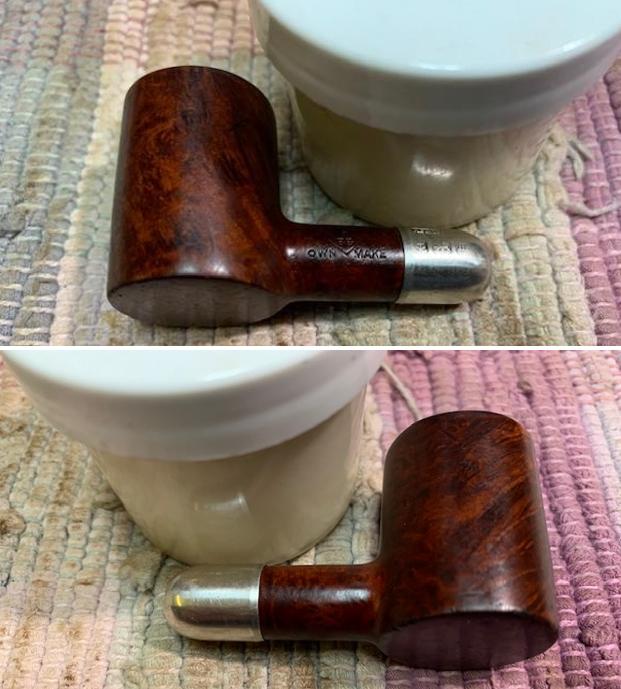
 I polished the silver ferrule with a jewelers cloth to remove any residual tarnish and also to protect it from future tarnish (at least for awhile). With that done the bowl was finished other than the final buffing.
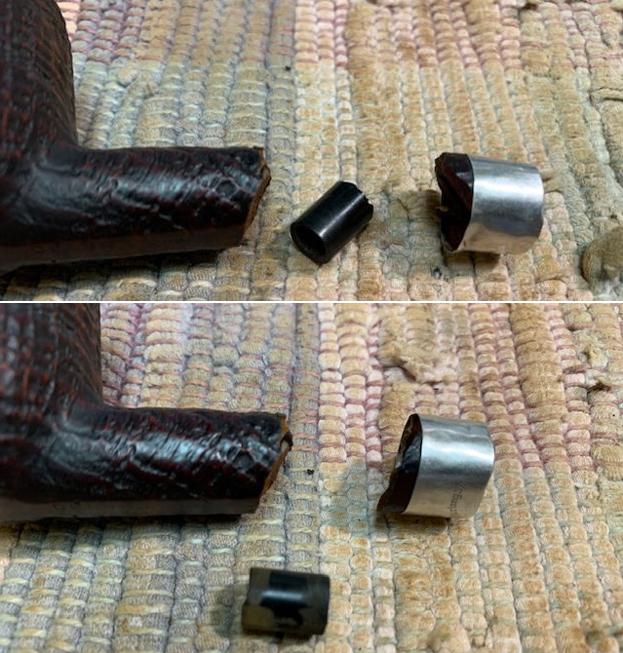
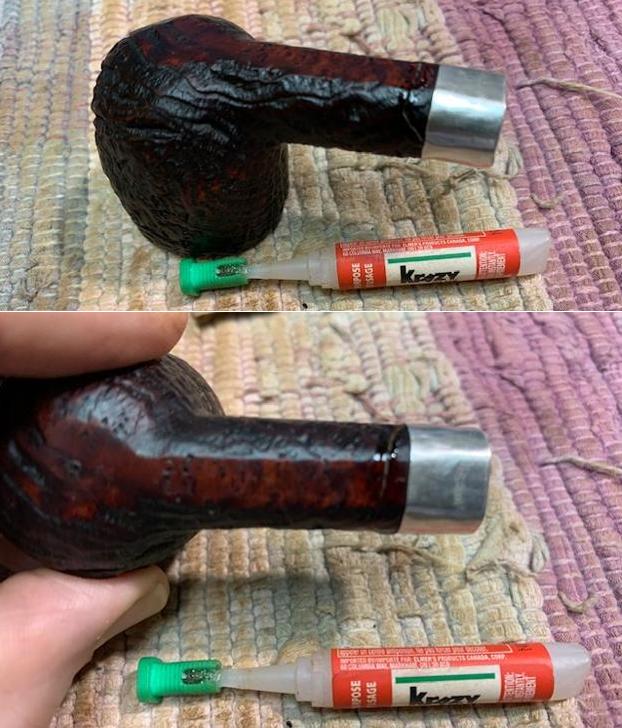
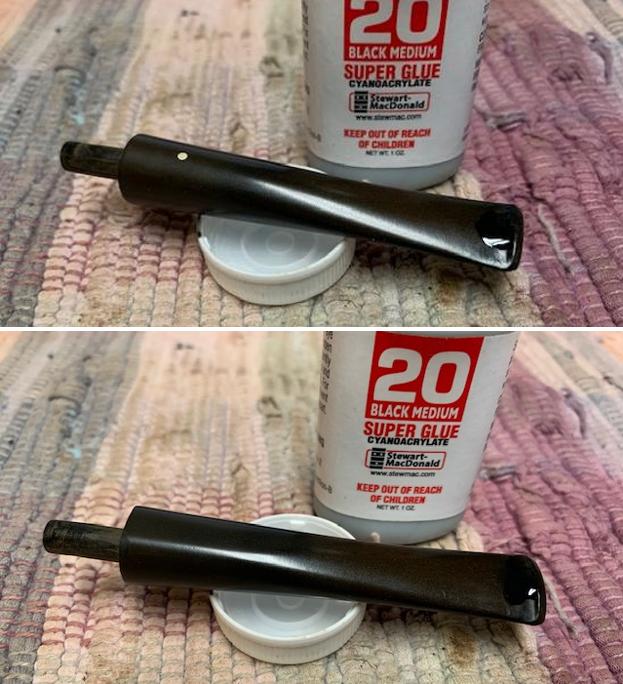
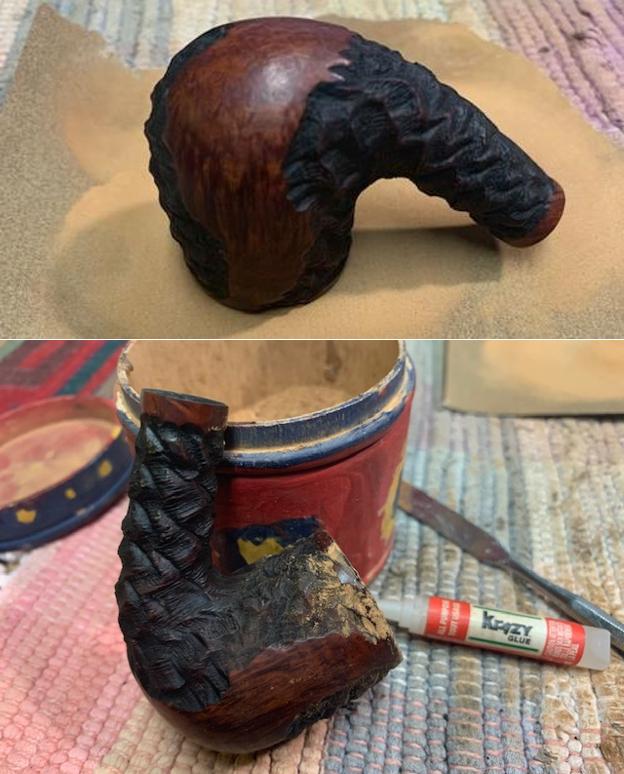
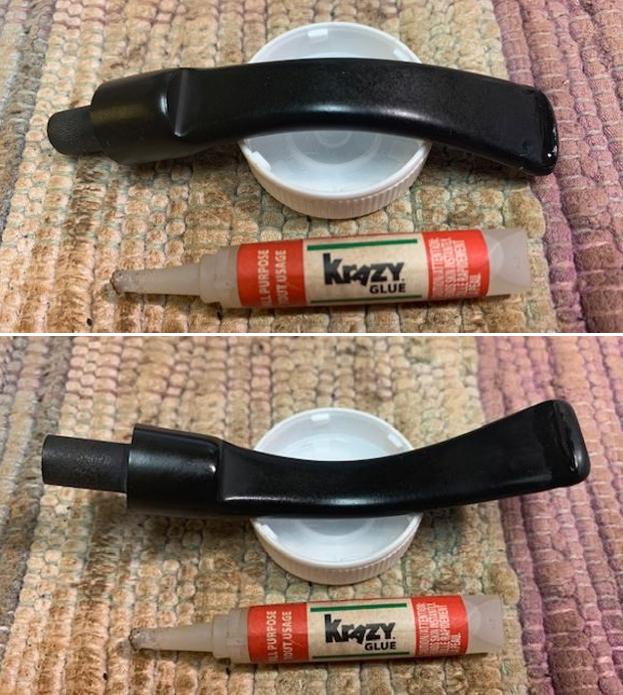
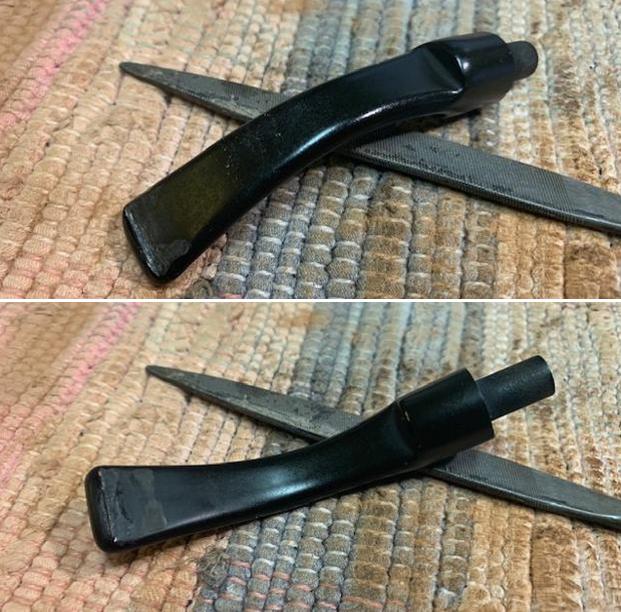
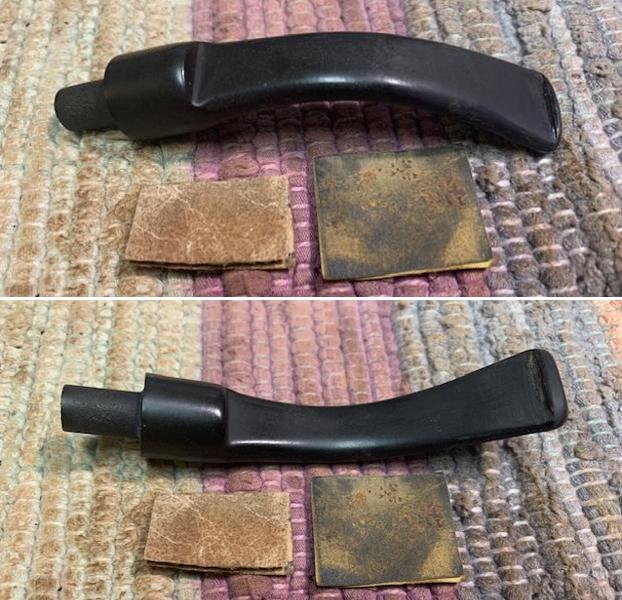
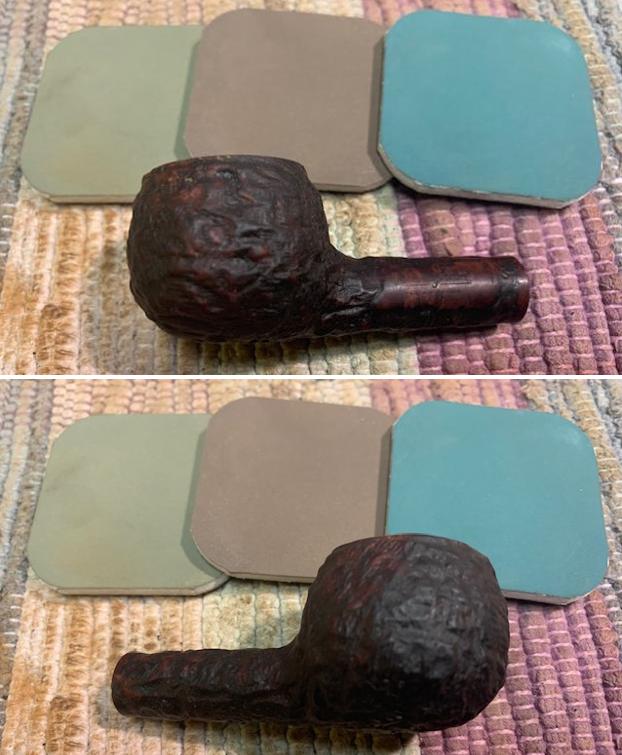
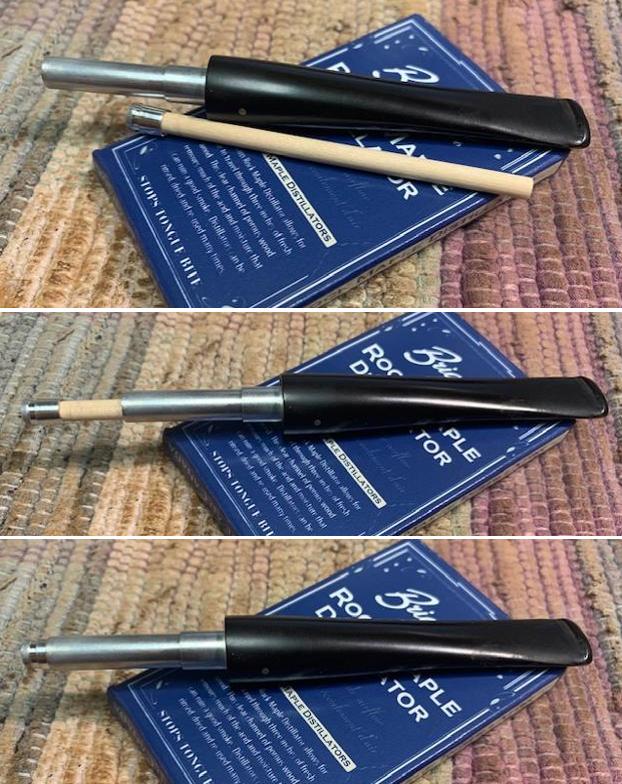
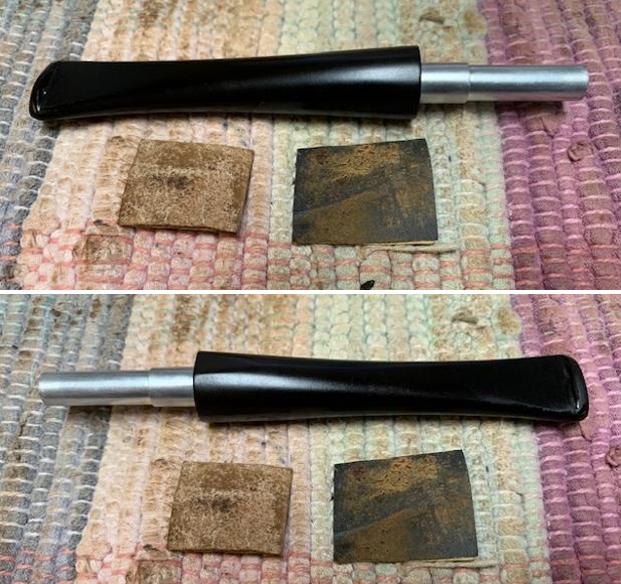
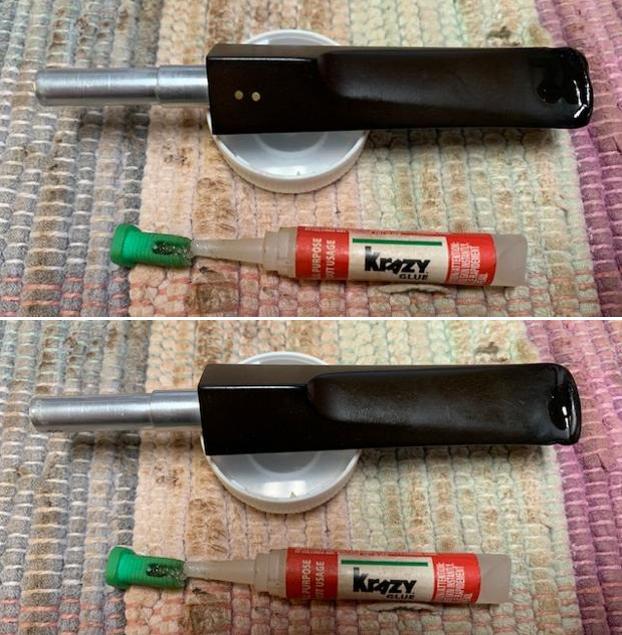
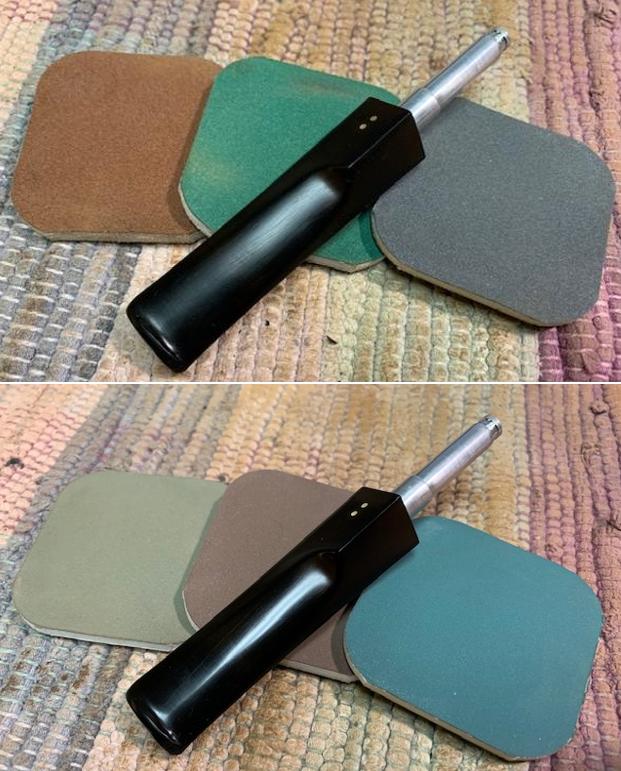
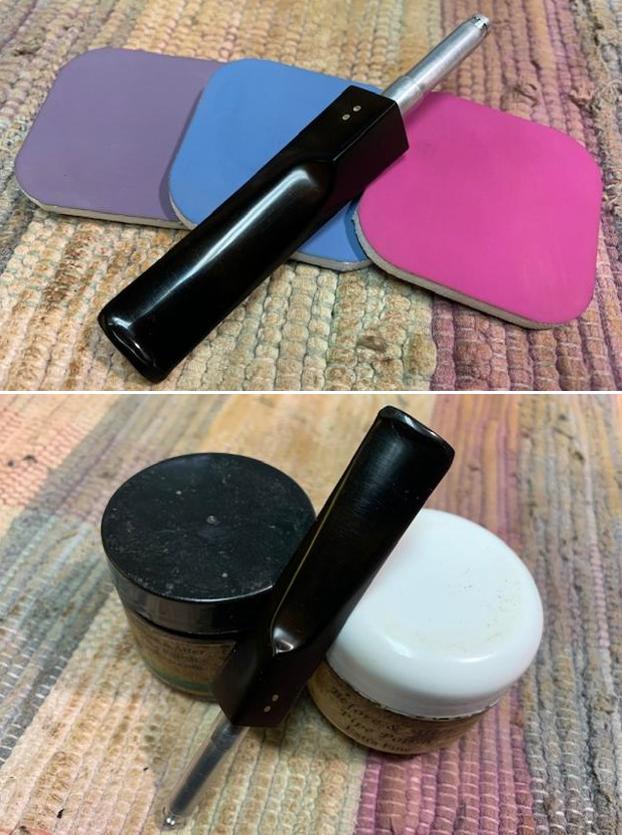
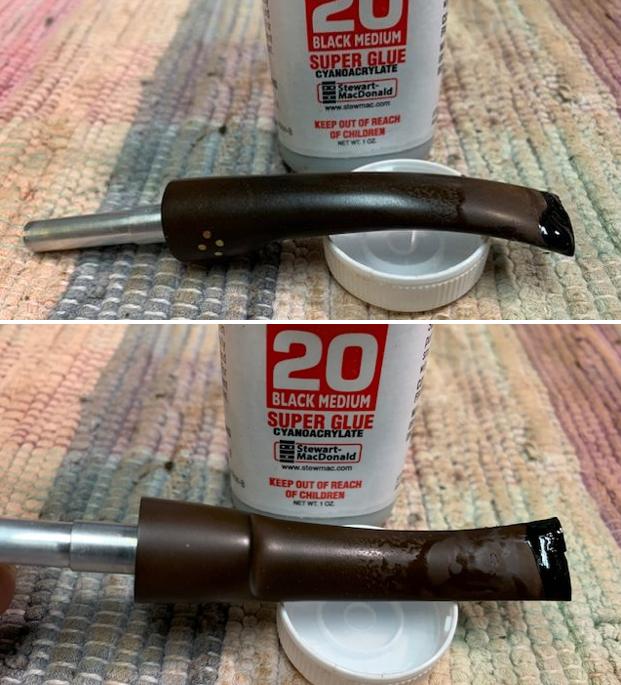
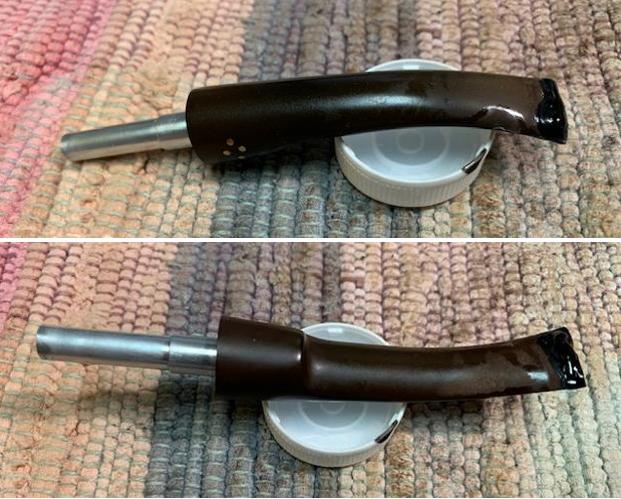
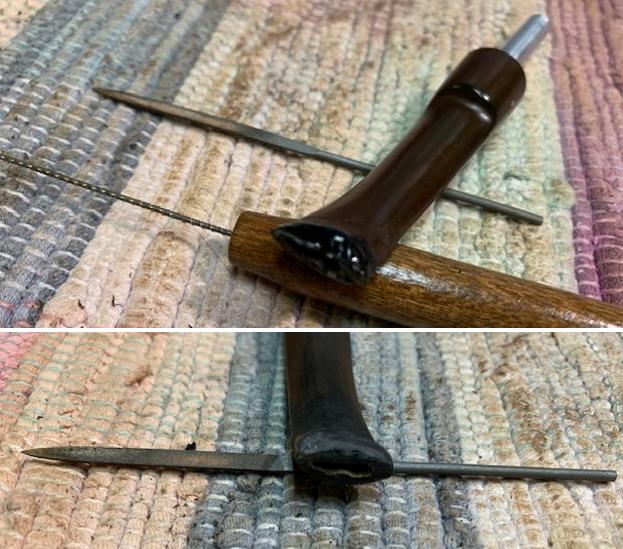
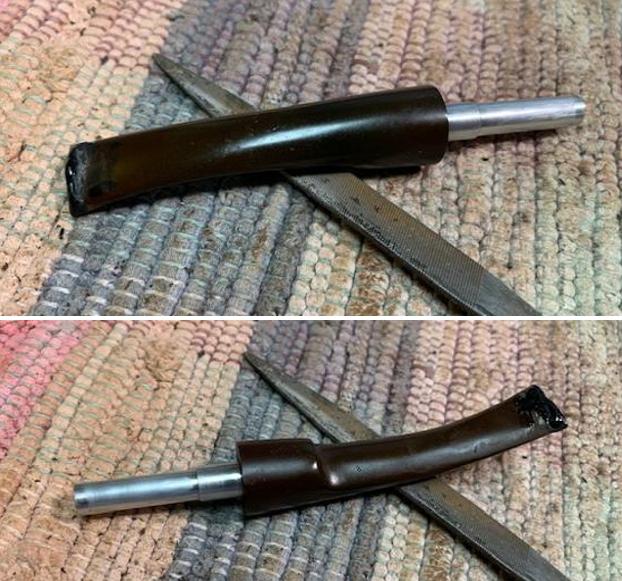
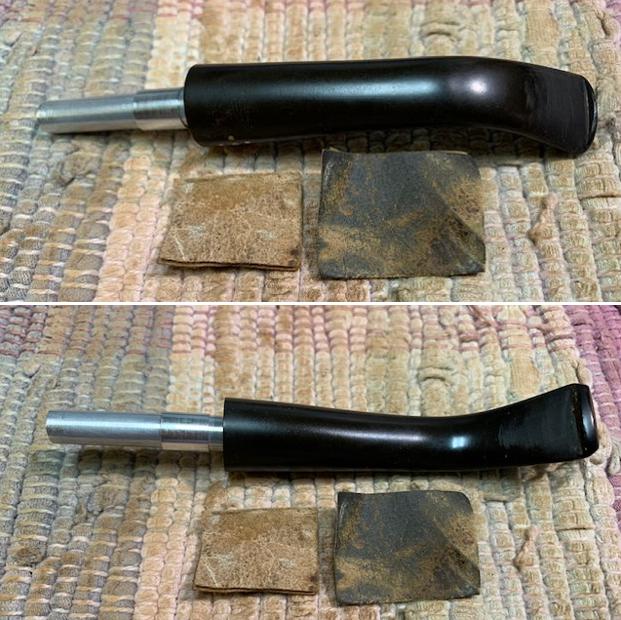
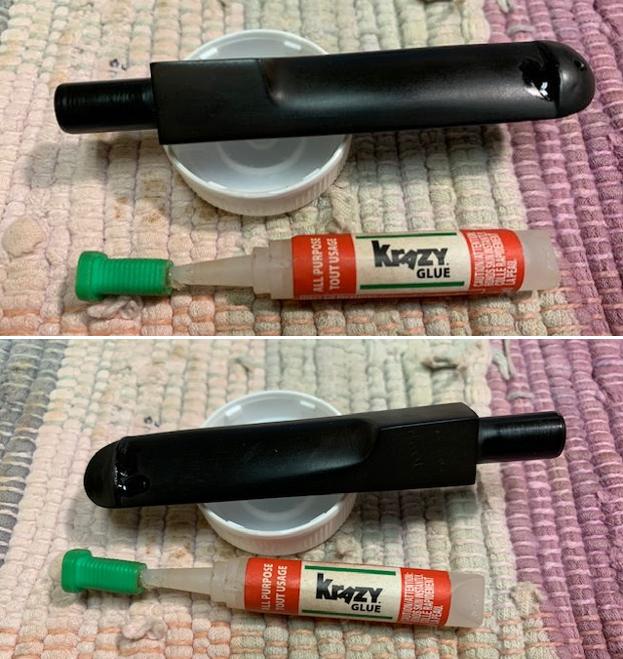
 I set the bowl aside and turned my attention to the stem. I filled in the deep tooth marks against the button edge with clear super glue. Once it cured I sanded out the repairs and the tooth chatter on the stem with 220 grit sandpaper. I started the polishing with 400 grit wet dry sandpaper.
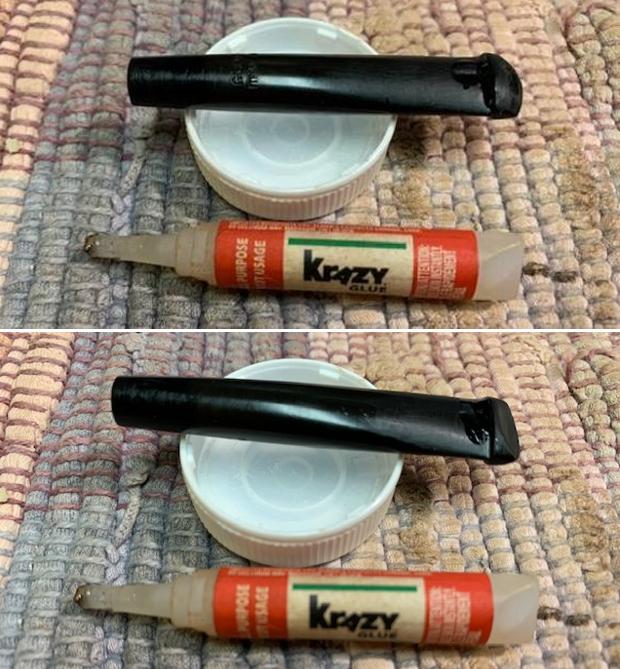
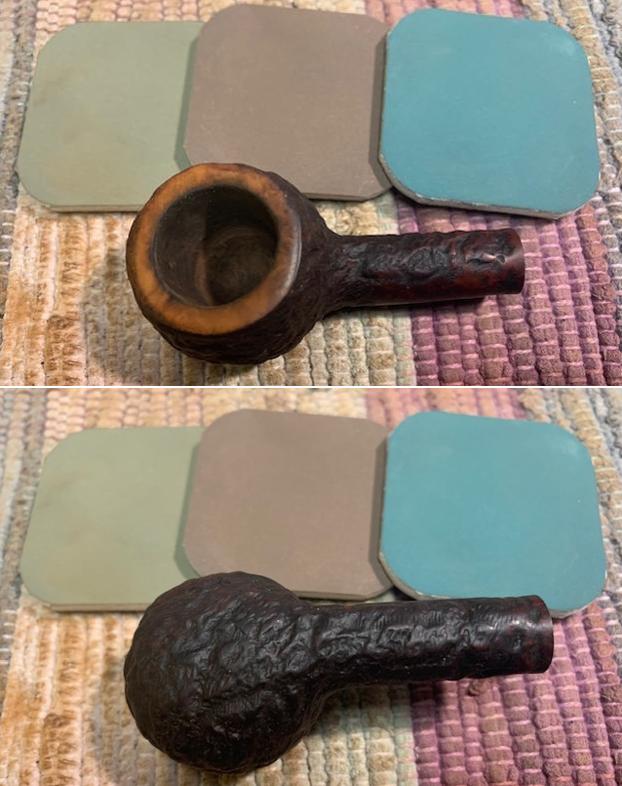
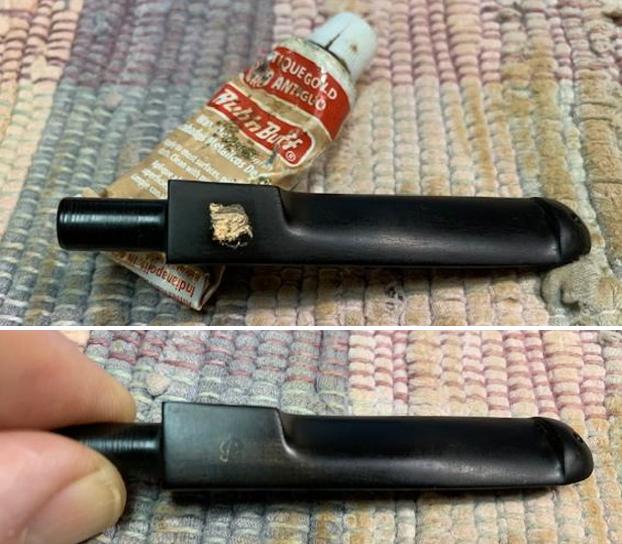
 I filled in the Glokar Trademark stamping on the stem with Rub’n Buff Antique Gold to highlight the stamping. I rubbed it on and worked it into the stamp with a toothpick. I buffed it off with a cotton pad. The stamp looks really good at this point.
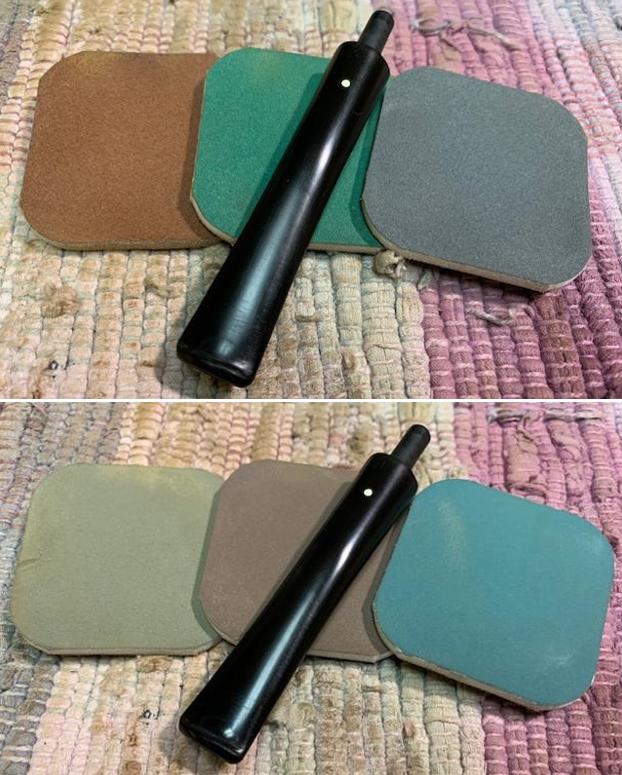
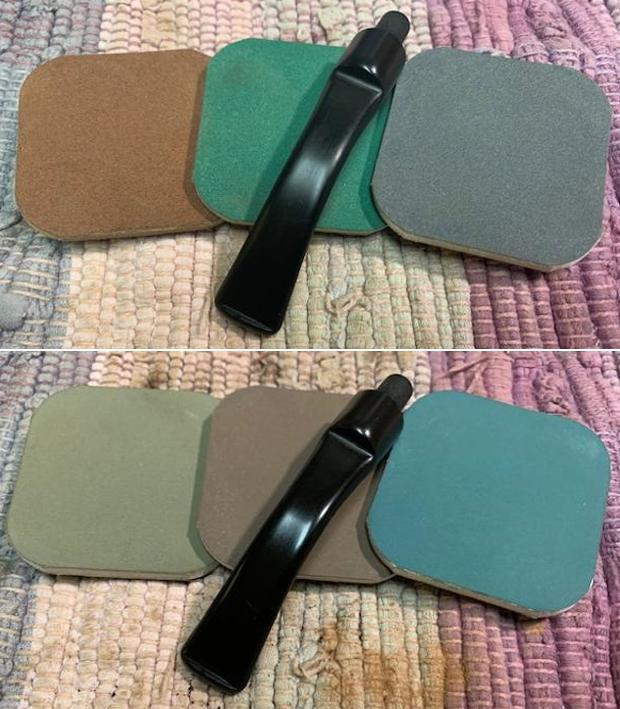
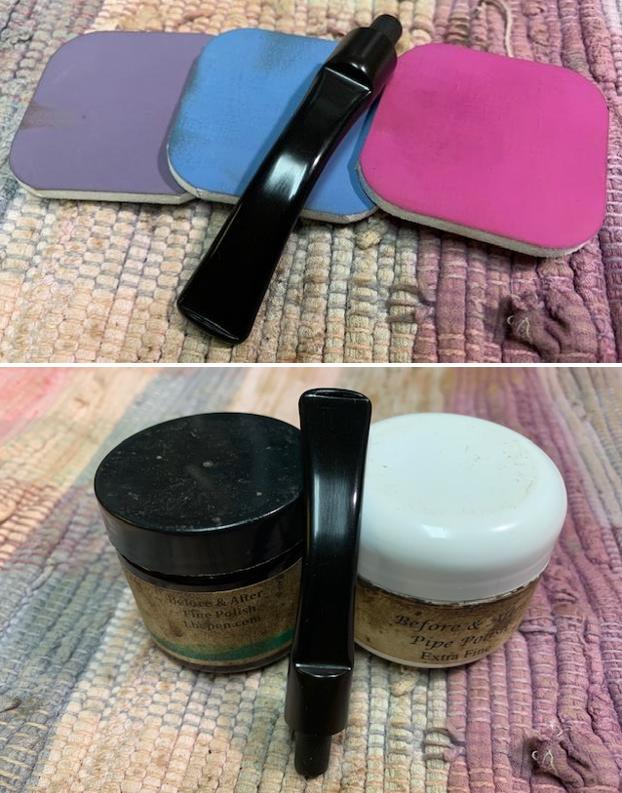
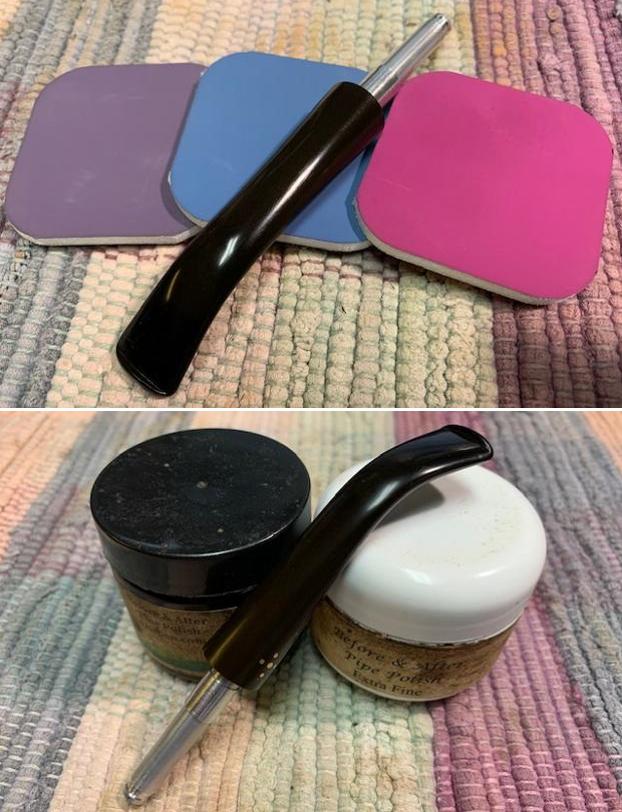
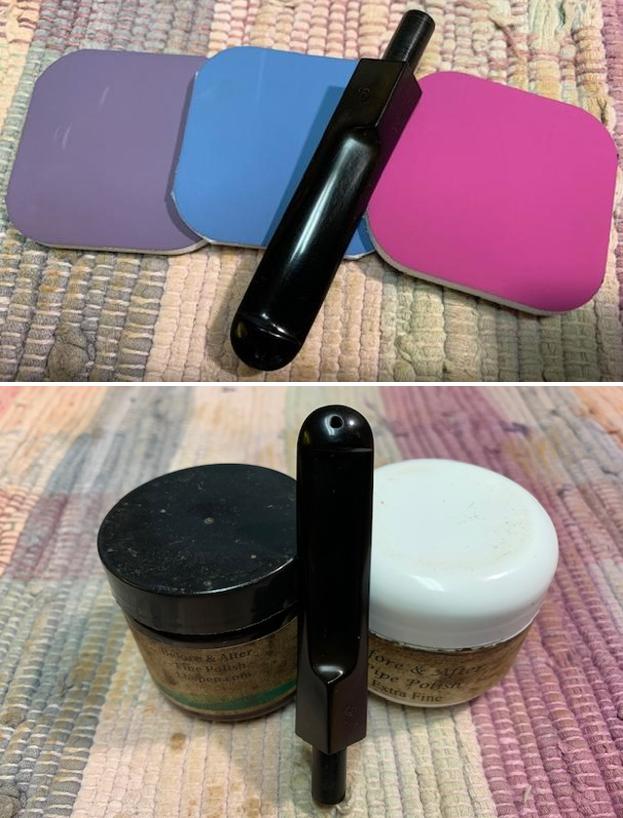
 I polished the stem with micromesh sanding pads – dry sanding with 1500-12000 grit sanding pads. I wiped it down after each sanding pad with Obsidian Oil. I polished it with Before & After Pipe Stem Polish – both Fine and Extra Fine.
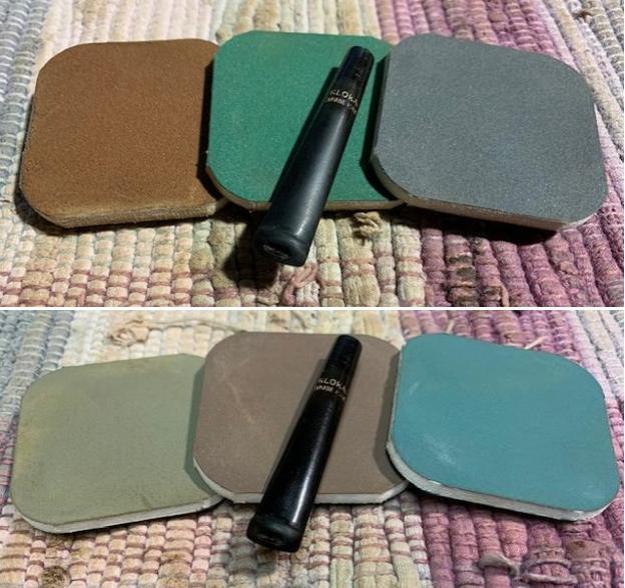
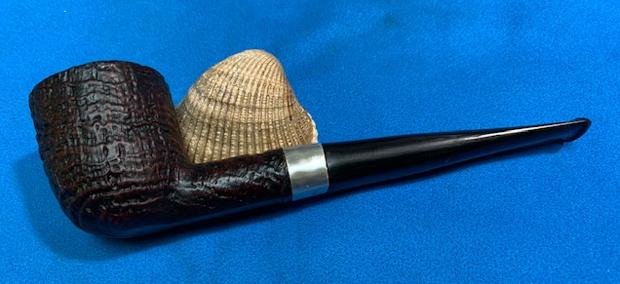
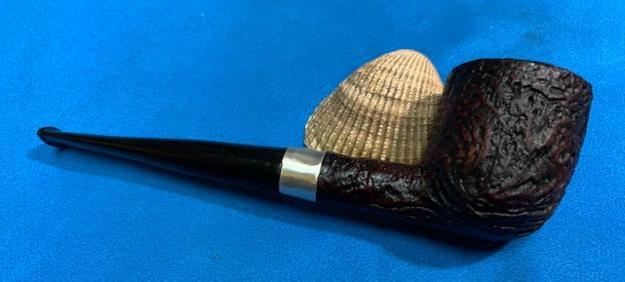
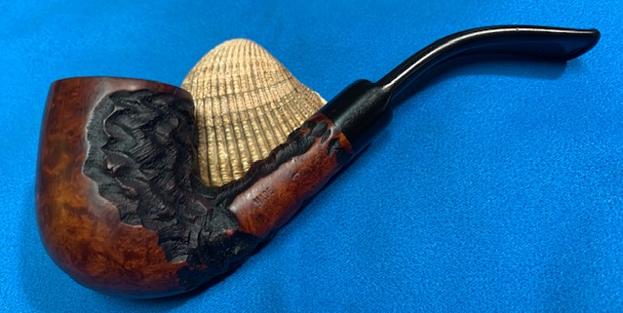
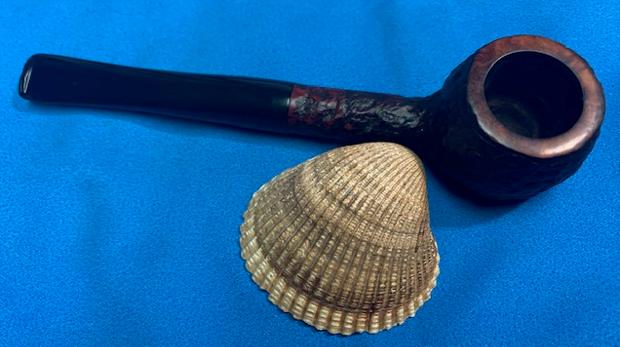
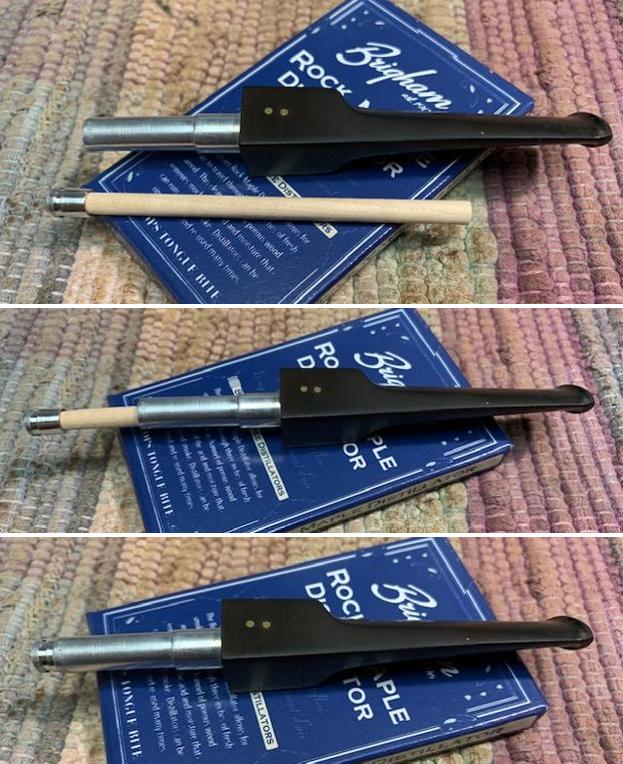
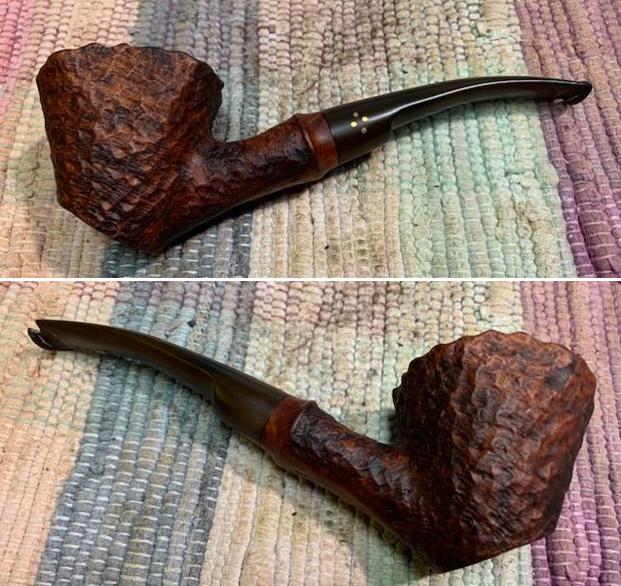
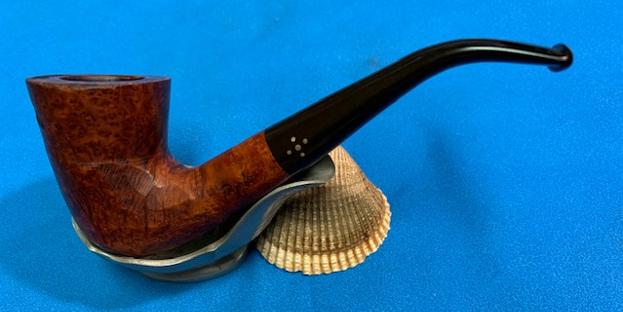
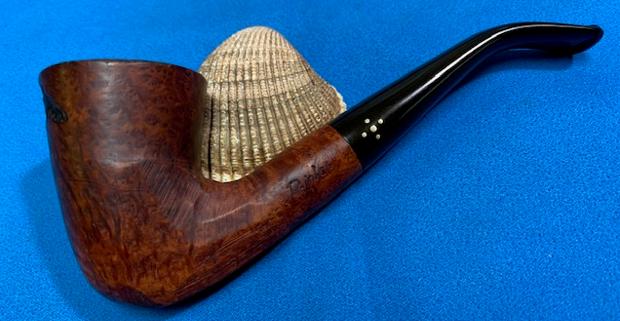
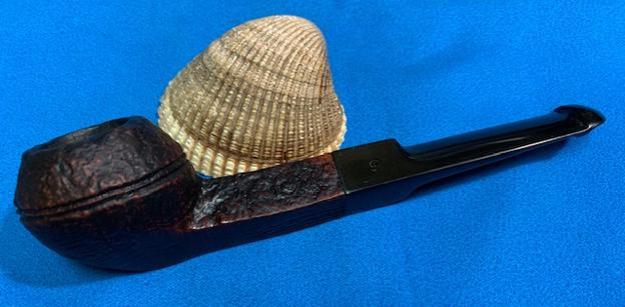
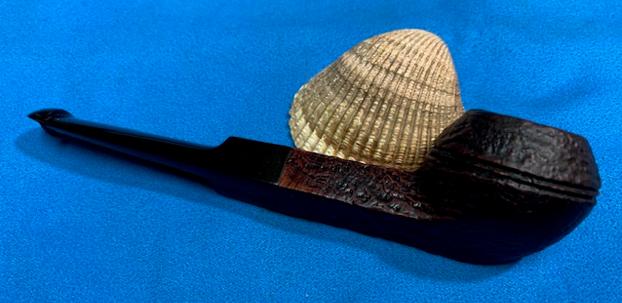
 With the bowl and the stem finished I put the pipe back together and buffed it on the wheel using Blue Diamond to give it a shine. I gave the bowl and stem multiple coats of carnauba wax on the wheel and then buffed it with a clean buffing pad to raise the shine. I hand buffed it with a microfiber cloth to deepen the shine. It really is an amazing little pipe. The dimensions of this part of the pipe are – Length: 4 ¼ inches, Height: 1 ½ inches, Outside diameter of the bowl: 1 inches, Chamber diameter: ¾ of an inch. The weight of this tiny pipe is .71 ounces /20 grams. This unique find – a 1911 BBB Glokar Poker with a silver ferrule is joining the other pipes in my collection of BBB pipes and will hold a place of honour while it is in my trust. This is another pipe that one day soon I will enjoy a special bowl of tobacco in it and be transported to a slower paced time in history where I can enjoy a respite. Thanks for walking through the restoration with me.